The newness of this season makes eating lighter feel more natural and easy, and I think I’m finally onto something in our recent quest to lighten up our meals. Up til now, my first thought for a new meal has been focused on the protein— deciding how to keep it “a smidge healthier,” as my blog pal, Bernadette from New Classic Recipe would say. 😉
It gets exhausting from a decision-making standpoint, though, and then by the end of my workday when I have figured out how to adapt the protein part of a meal, I’m fresh out of ideas for planning the sides. Here’s what happened when I stepped back and redirected my focus onto the vegetables.
This tackled all my flavor cravings. And won!
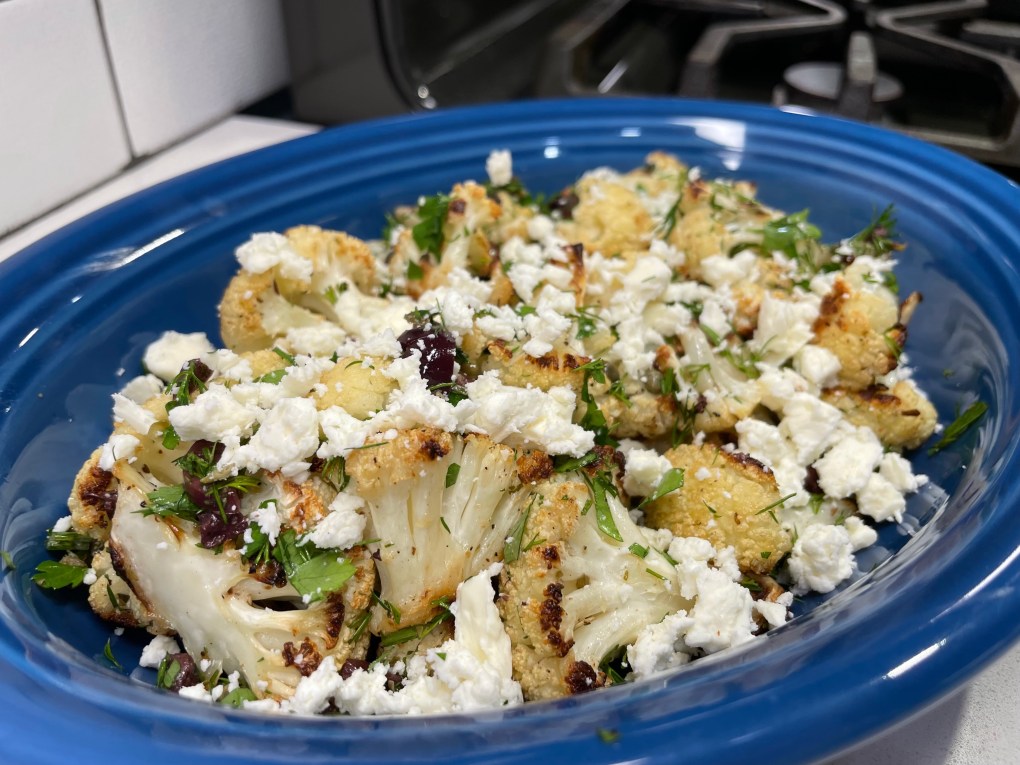
What grabs the eye in this photo isn’t the panko-crusted baked halibut, though it was truly delicious and satisfyingly easy to make. It’s the Greek-inspired roasted cauliflower stealing the show here, and no wonder. It’s embellished with tangy feta, kalamata olives, capers and herbs. Packed with flavor, and still very easy to make.
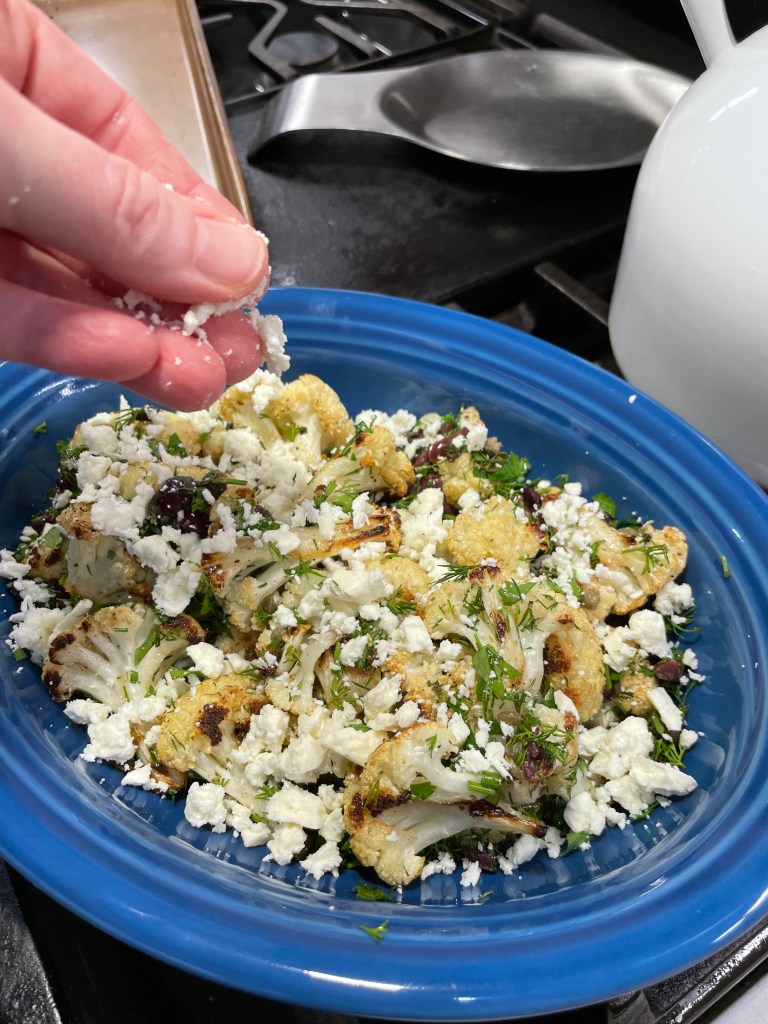
Only an ounce of feta per serving, and it brought more than enough flavor.
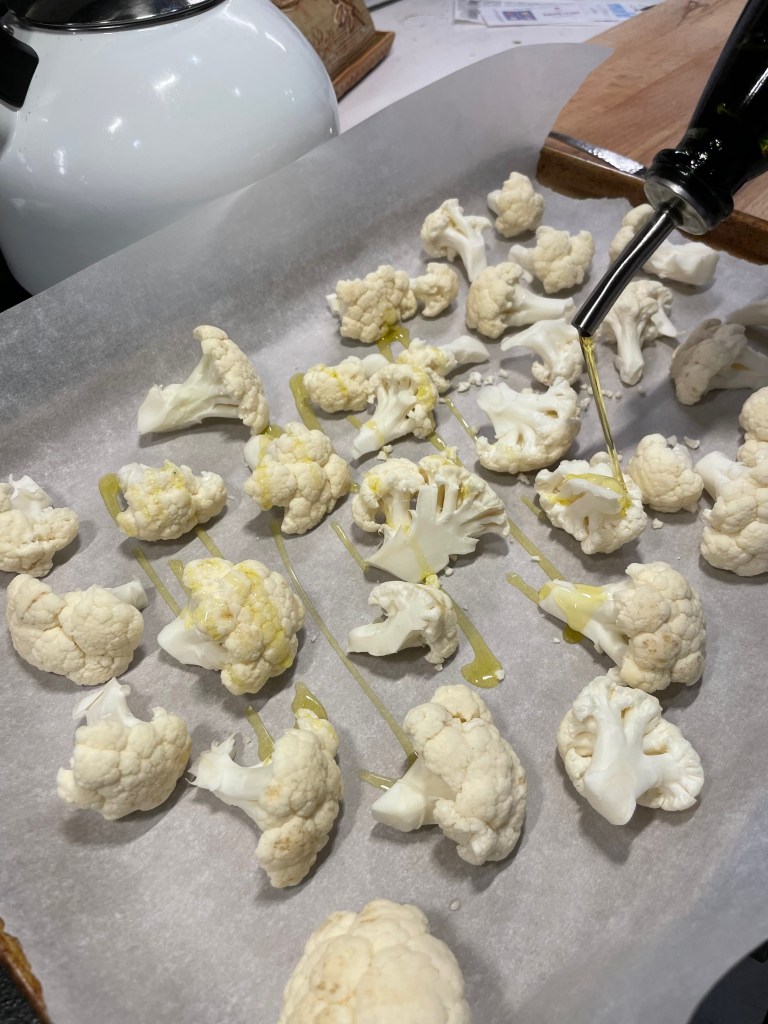
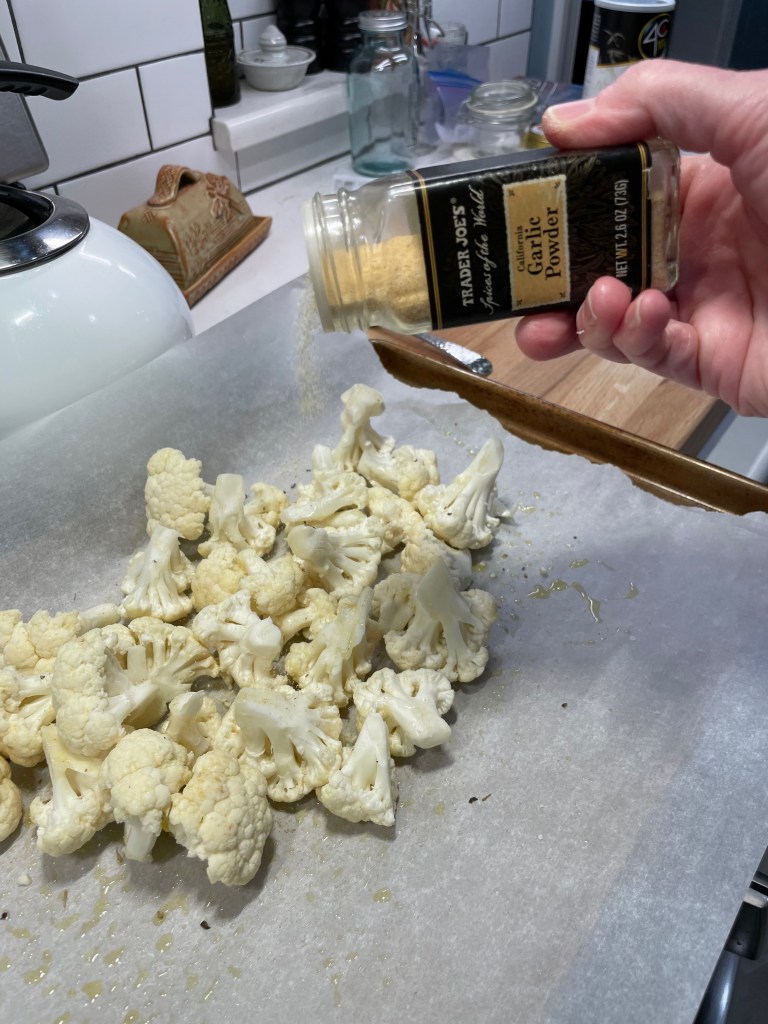
I chose cauliflower to carry these flavors because it is neutral on its own, suitable for just about any seasonings, and I kept the Greek flavors fresh by adding most of them after the cauliflower was roasted. My florets were drizzled with extra virgin olive oil and sprinkled with garlic powder, dried oregano, salt and pepper.
Drizzle extra virgin olive oil over the raw cauliflower, then toss and sprinkle with seasonings.
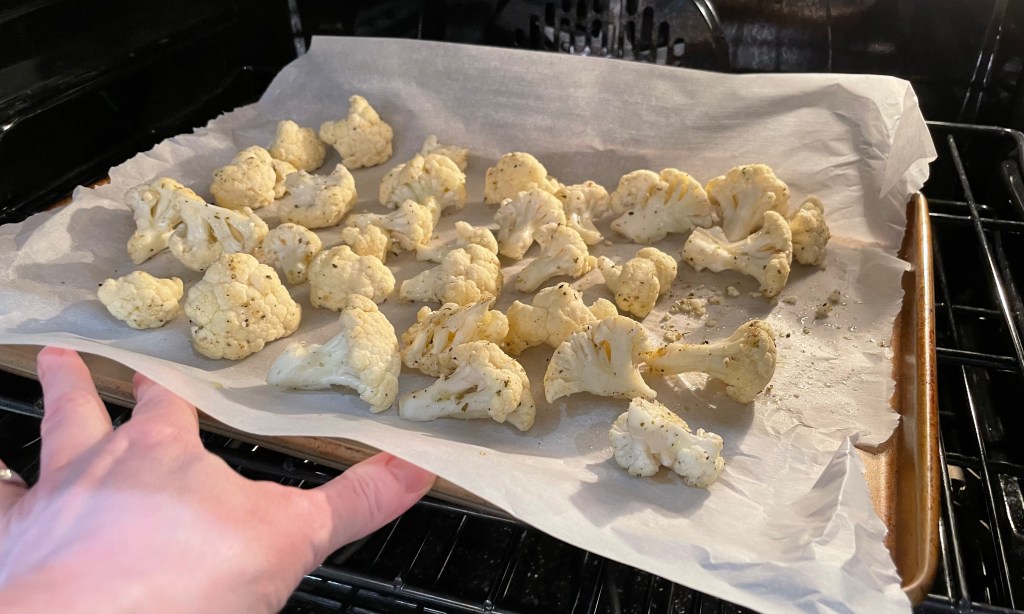
It’s best to roast vegetables at a higher heat, so that you get caramelization on the exterior before they have a chance to turn to mush on the inside. Mine went 25 minutes at 425° F, and the result was perfect for this recipe. The cauliflower held their texture and absorbed the flavors I tossed in at the end.
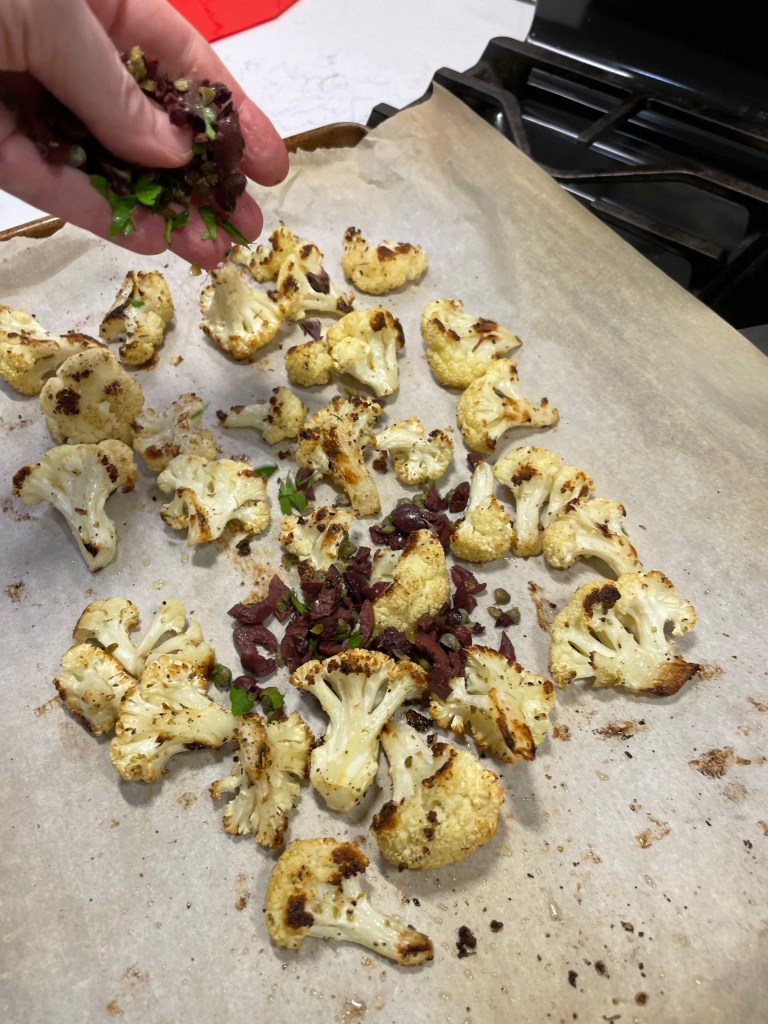
When the cauliflower emerged from the oven, browned on the edges and perfectly al denté, I simply tossed it with the chopped olives, capers and herbs and then gave it a good squeeze of fresh lemon, plus a final drizzle of the extra virgin olive oil. A scattering of crumbled feta finished the dish, and provided a sharp, tangy flavor that was great with my panko crusted halibut. Don’t worry, I’ll have that recipe for you in a few days!
Adding these flavors at the end keeps the colors and flavors bright.
I like this idea of putting the vegetables first, and I made a decision last week that sort of paints me into a corner so that I keep doing it. More on that soon. 😁
This dish features all the lovely flavors of the Mediterranean, and is an easy, impressive side to fish or chicken.
Ingredients
Small head cauliflower, cleaned and broken down into florets
3 Tbsp. extra virgin olive oil (use two for roasting, one for finishing)
Salt and pepper
A few shakes granulated garlic
A few shakes dried mediterranean oregano
3 Tbsp. chopped kalamata olives
1 Tbsp. capers, chopped but not rinsed
2 oz. feta cheese, crumbled
Handful each of fresh parsley and fresh dill, chopped
A squeeze of fresh lemon
Directions
Preheat oven to 425° F, with oven rack in center position. Line a baking sheet with parchment.
Drizzle cauliflower with olive oil and toss with garlic powder, oregano, salt and pepper. Toss to coat evenly, then spread out over parchment-lined sheet, keeping a bit of space between pieces for more even browning. Roast for 25 minutes, or until browned edges are visible on most of the pieces. Taste a piece to be sure it is done to your liking.
Add the olives, capers and fresh herbs to the roasted cauliflower and toss gently to distribute. Give the mix a light drizzle of olive oil and a squeeze of lemon to finish, and then transfer to a bowl and scatter feta over the entire bowl.
Raise your hand if you got a jar of harissa in your Christmas stocking this year. Really, I’m the only one? 😂 Sincerely, I love that my husband sneaks fun foodie surprises into my gifts, because it sets me up for interesting flavor adventures throughout the coming year.
I’m here to tell you, this isn’t that spicy. 😏
Harissa, if you’re not familiar, is a Moroccan concoction made with roasted red peppers— ranging from sweet to hot—along with garlic and what I like to call the “C spices” of cumin, caraway and coriander. It’s a complex blend of flavors that can be used in a marinade or added directly to a meat or vegetable dish to perk up the flavors. It is typically quite aromatic and spicy, so a little usually goes a long way.
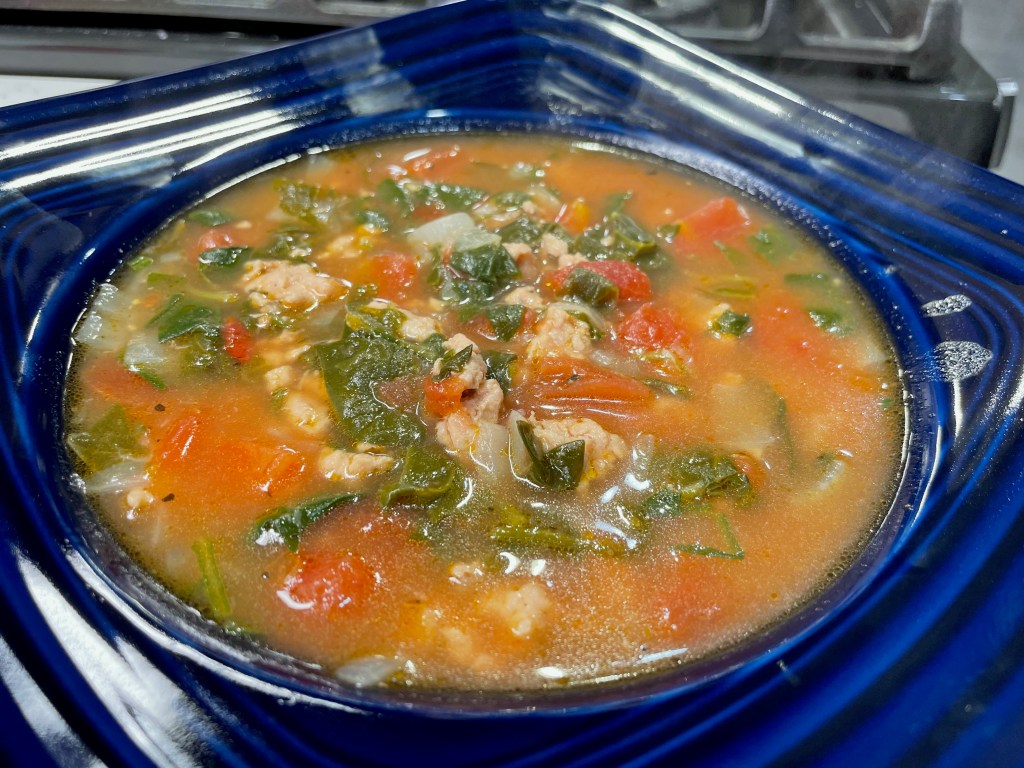
This jar of harissa has already served me well because it transformed what would otherwise have been an ordinary bowl of tomato soup. If you’re bored in the kitchen and tired of making the same things over and over, this post should inspire you to see how easily you can change things up with one ingredient swap or addition. A couple of generous spoonfuls of harissa, along with accompanying spices, elevated this simple, made-from-canned-tomatoes soup to such a degree that Les and I devoured the entire batch in one sitting.
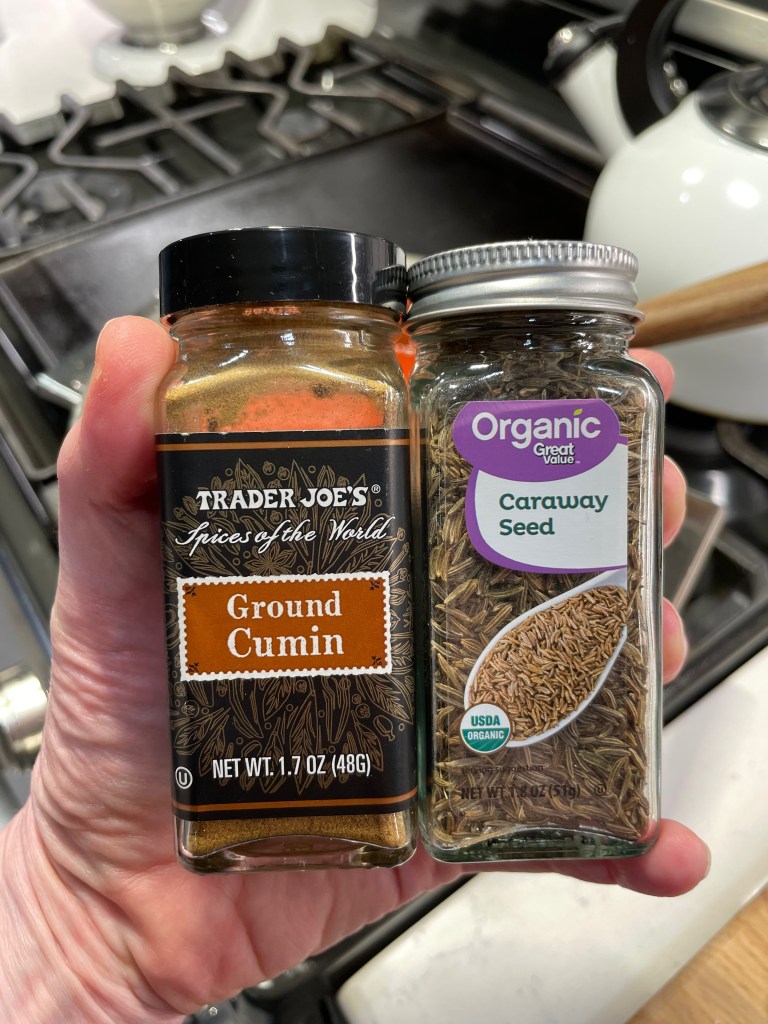
I will confess here that I did not find this particular brand of harissa as flavorful as some others I have tried, including the one carried by Trader Joe’s. My first taste of harissa was during the few years that I worked in a specialty olive oil store. Our harissa-infused extra virgin olive oil was bold, spicy and flavorful, and this jar of harissa paste didn’t quite measure up in the flavor (or heat) department. Still, I found it a good base, which I jazzed up with more of the other flavors I expected— namely hot pepper flakes, cumin and caraway— and this soup did not disappoint!
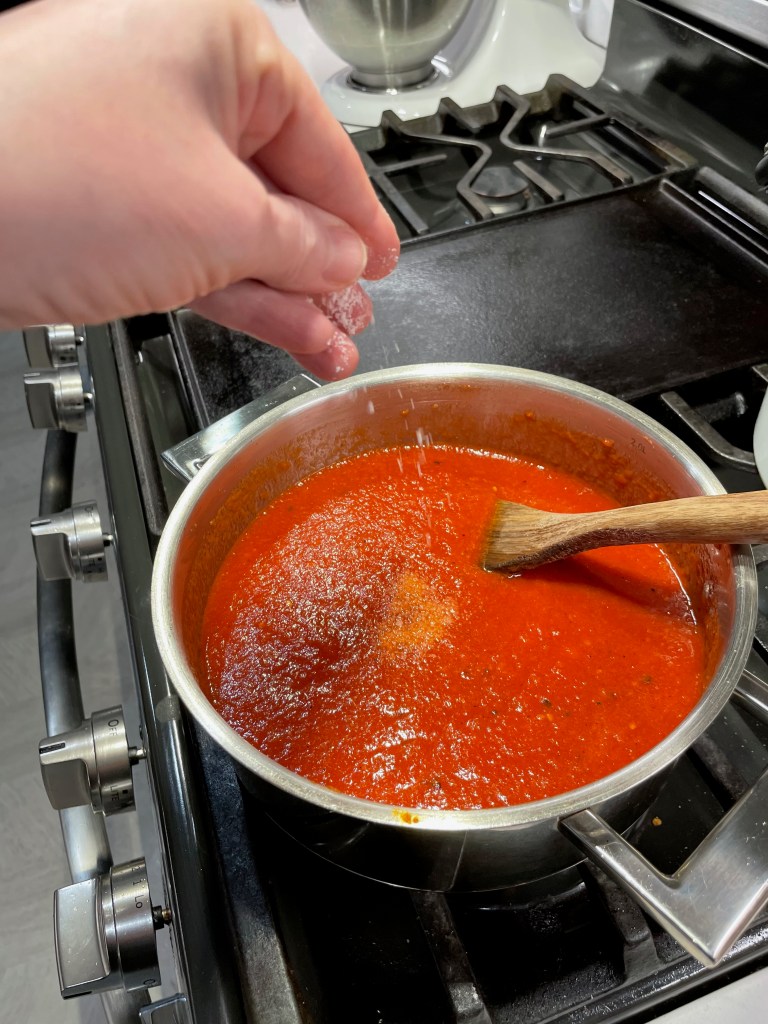
Most harissa I’ve tasted had distinct heat and spice flavors, so I added them myself!
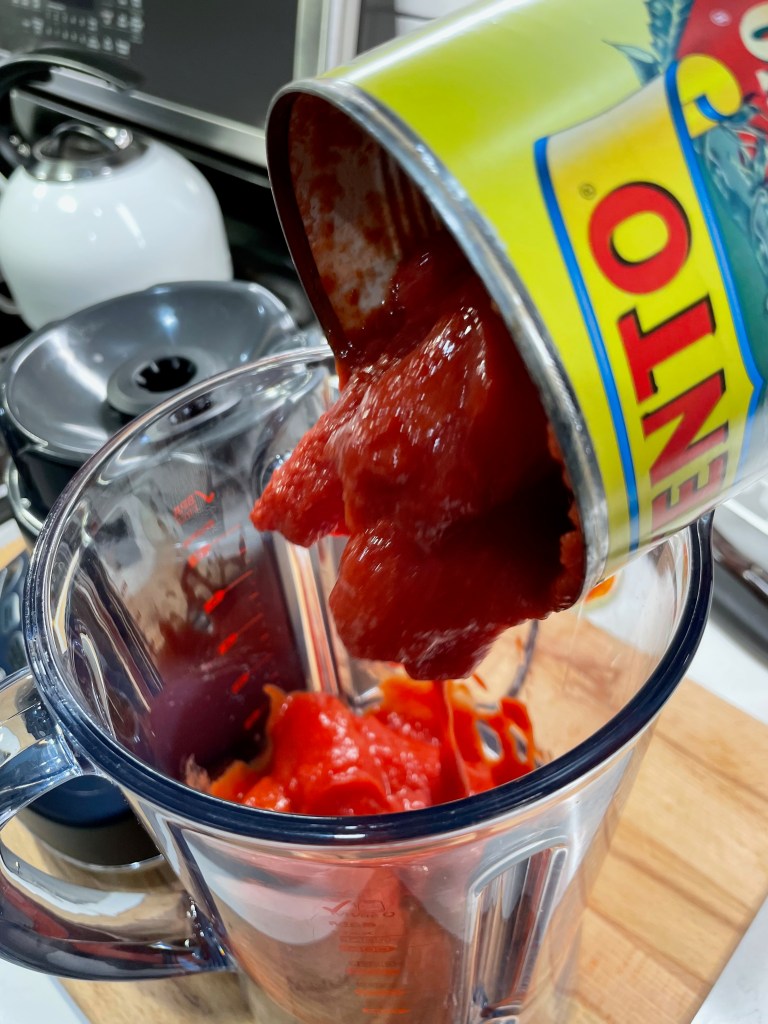
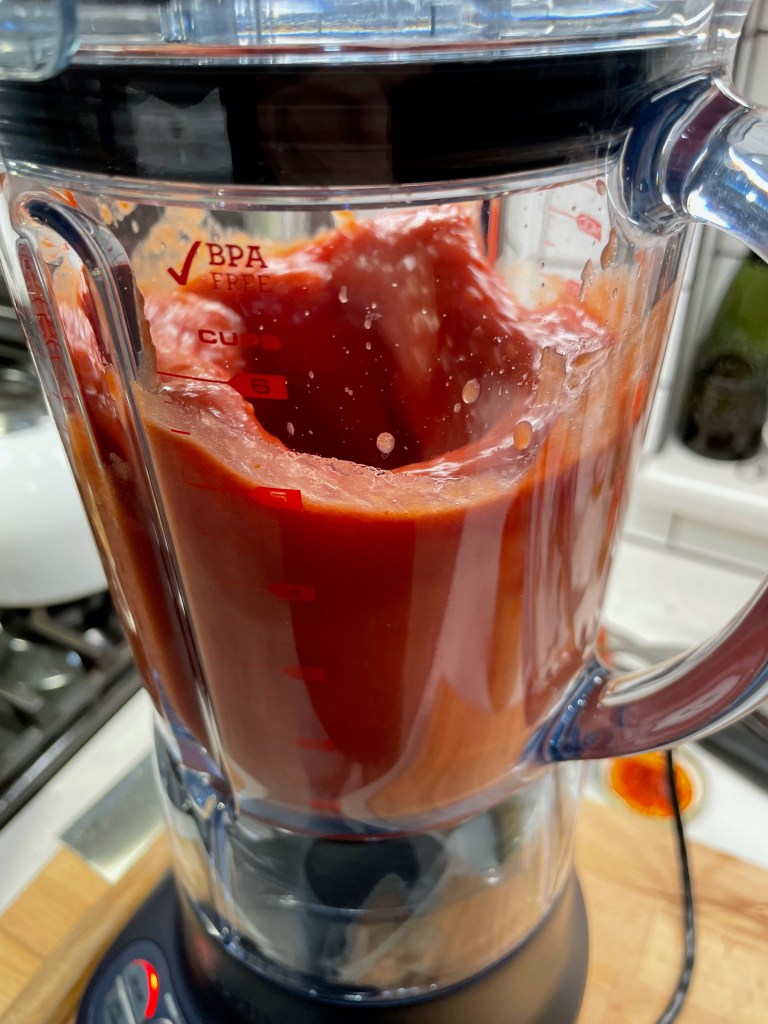
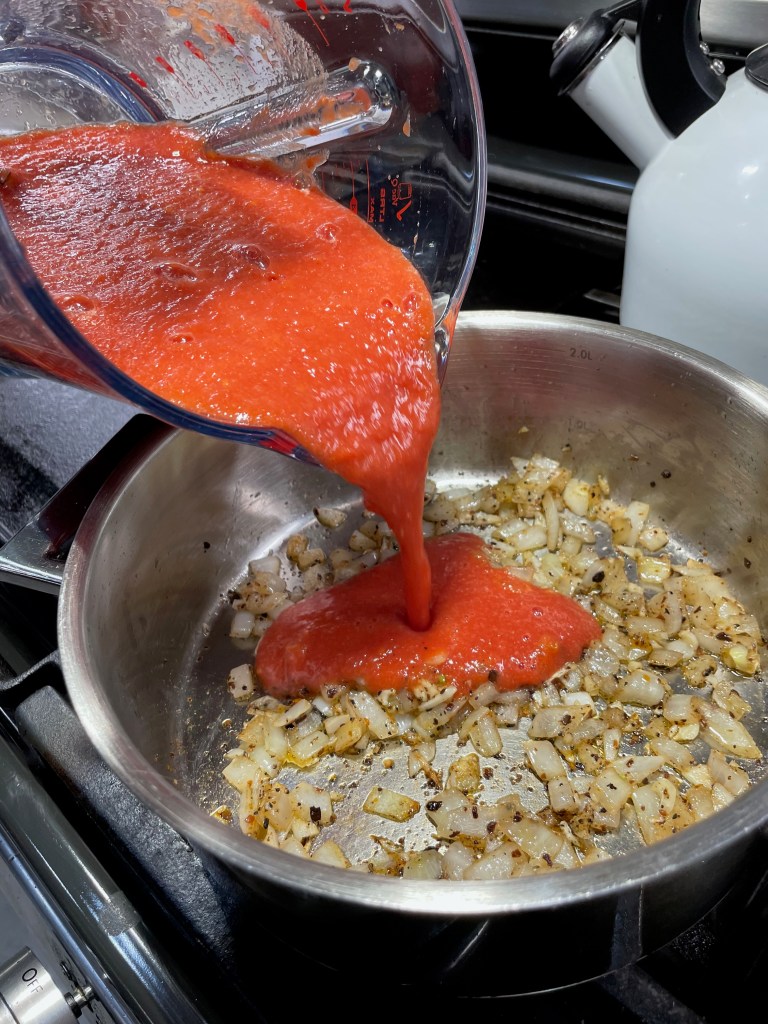
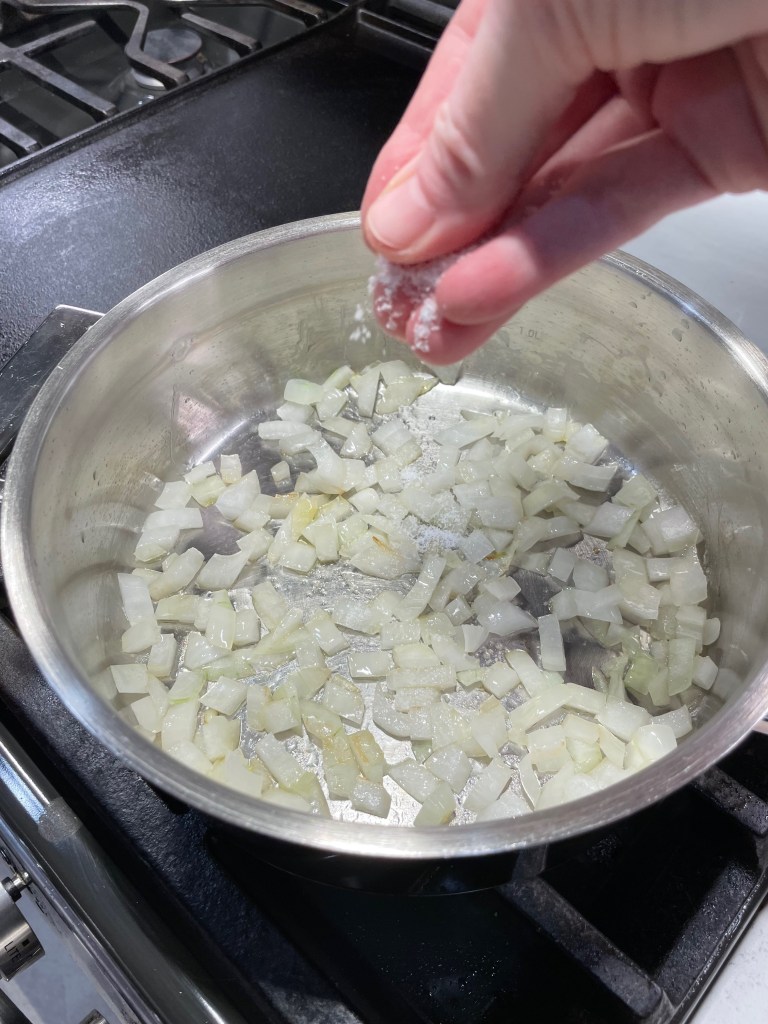
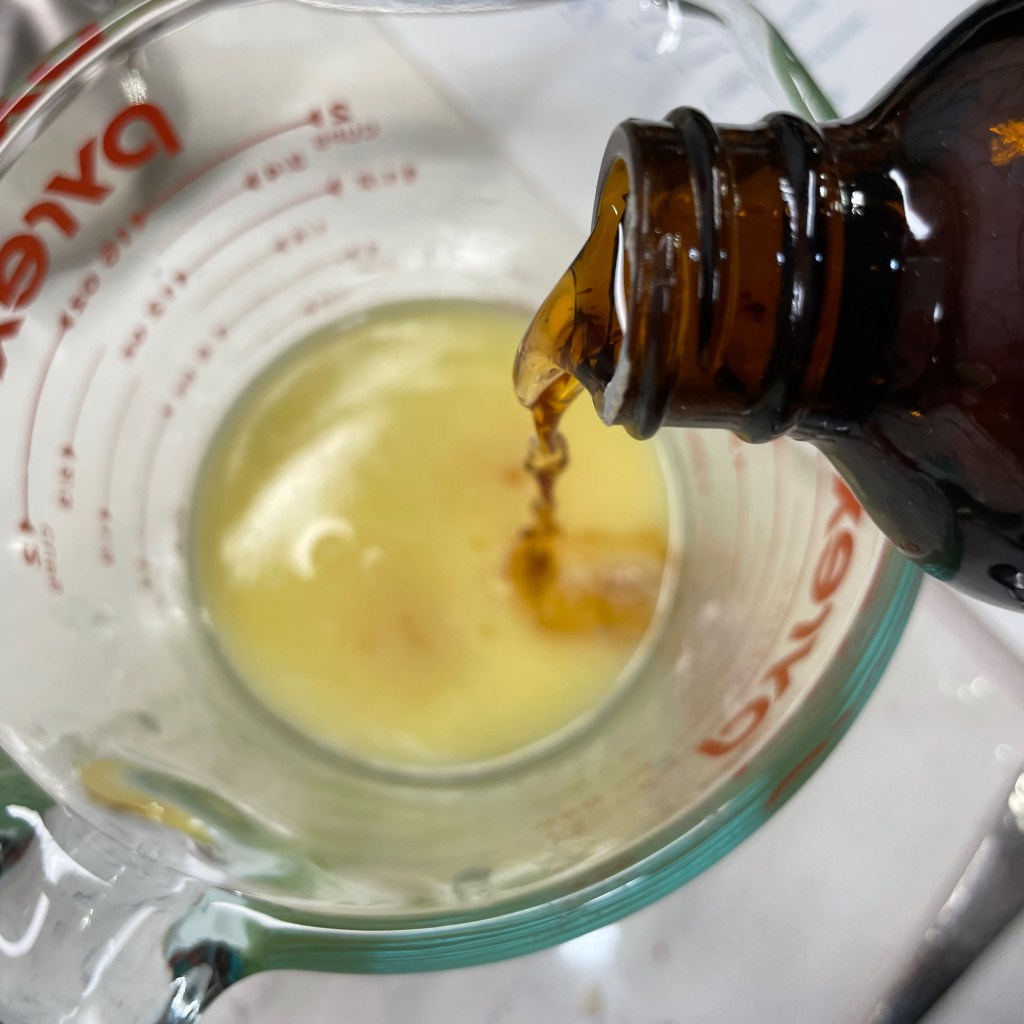
The base of any good tomato soup, of course, is tomatoes! And given that fresh tomato season is still about four months out, I reached for a big can of San Marzanos. I’ve learned the hard way that lesser quality tomatoes don’t have the same depth as real San Marzanos, so choose well. I whizzed these up in my George Clooney blender (so named because it is tall, handsome and versatile), and then I added it to lightly sautéed onions and garlic along with a few tablespoons of the harissa.
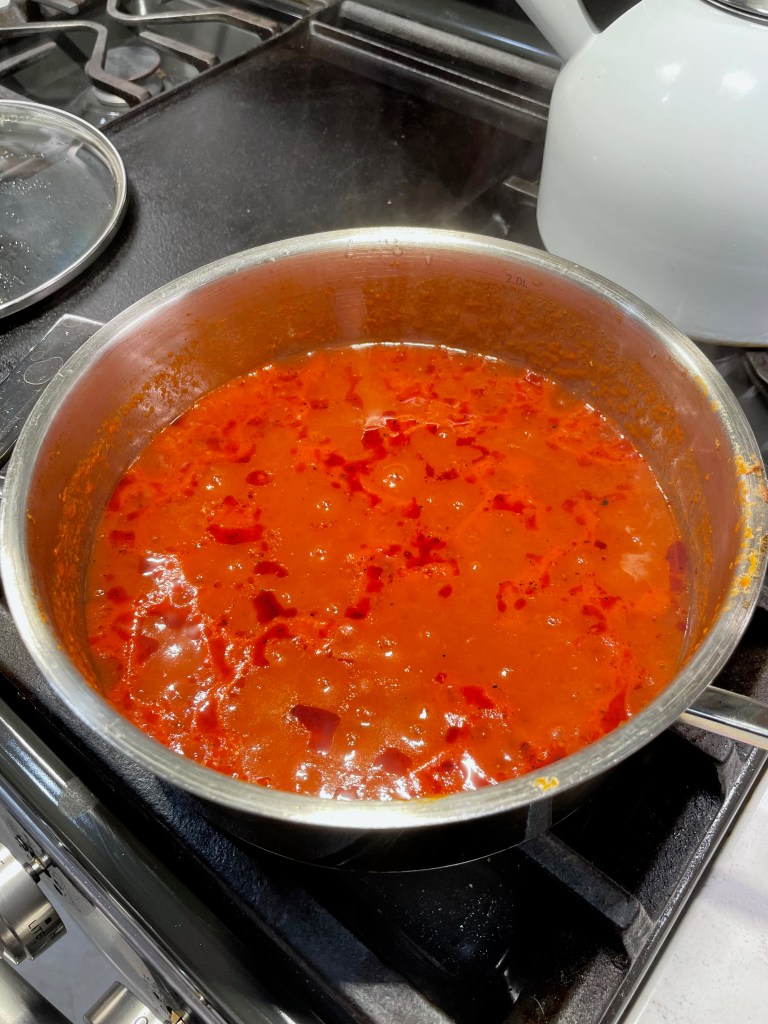
I usually blend my soup after simmering, but blending them first this time kept my soup a vibrant red color!
As with any recipe, I followed the advice of every culinary expert I respect, by seasoning every layer— during sauté of the onions, preparing the tomatoes and building the soup over heat. Salt has more purpose than just flavor, and if you miss seasoning the layers of a recipe, you may end up with a meal that tastes under-seasoned and over-salted at the same time.
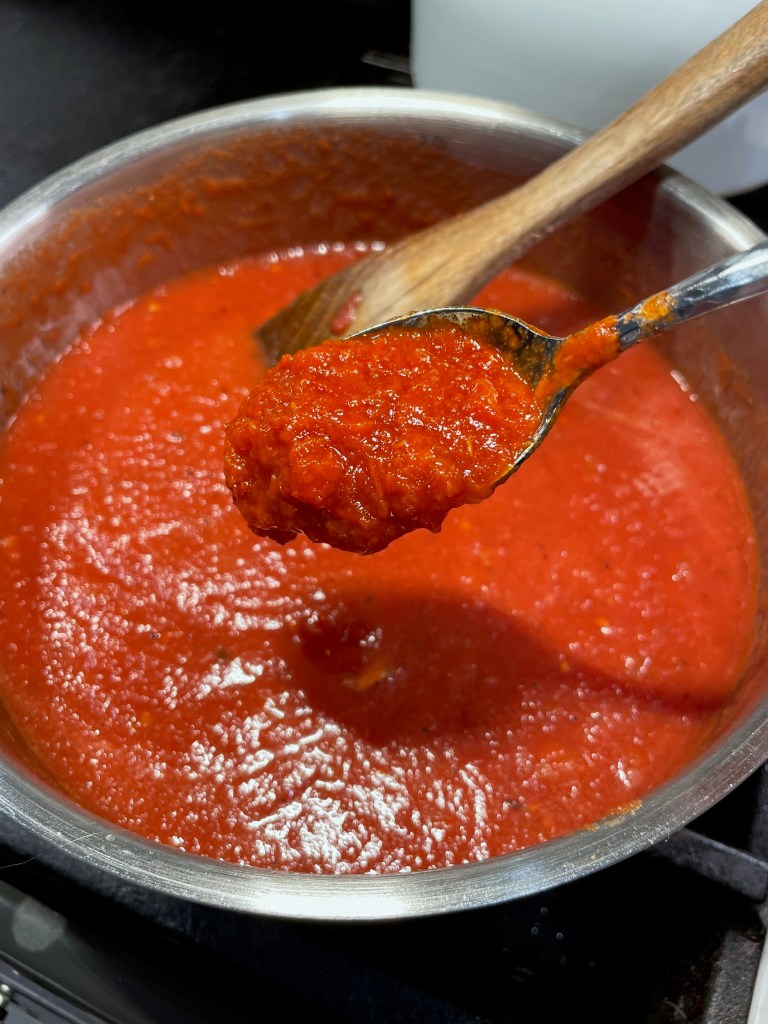
There’s more to salt than flavor. “Season every layer” is one of the most important rules in my kitchen.The spices added a familiar flavor boost to this milder brand of harissa. Simmering helped the flavors meld.
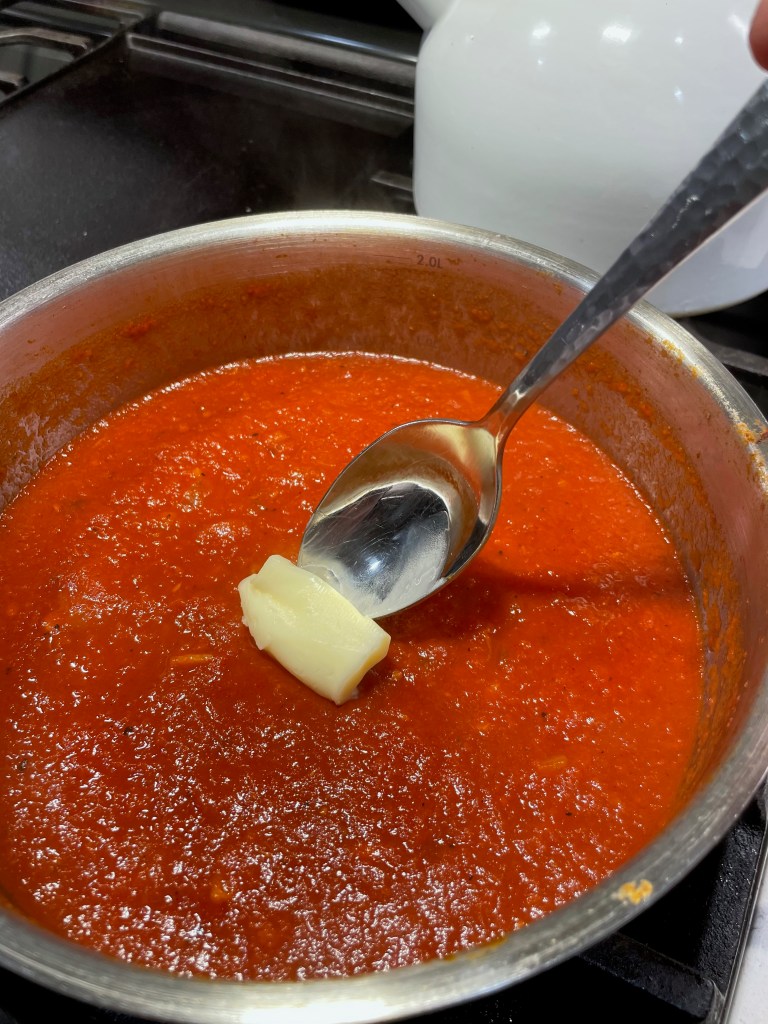
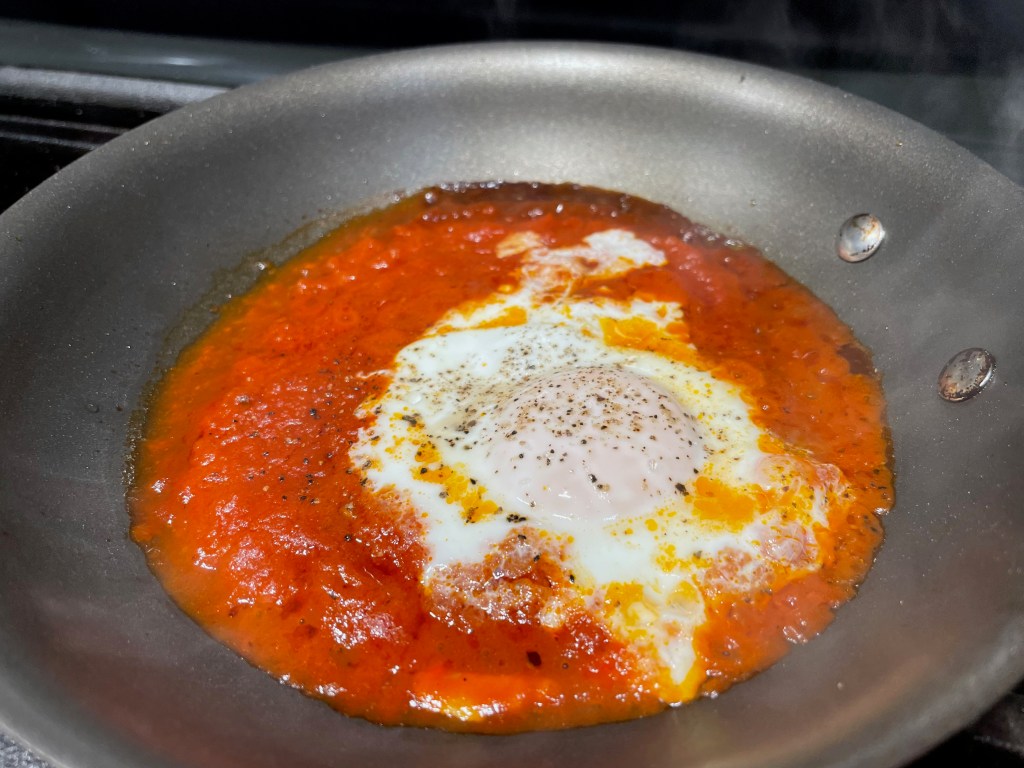
For a rich finishing touch, I melted in about a tablespoon of butter just before serving— borrowing a trick from the playbook of Italian chefs. This may have been the best tomato soup I’ve ever made, and I give credit to the harissa, if only for inspiration. I mentioned earlier that we devoured the whole pot that night. But that’s not quite right. I saved about a quarter cup, which I had in mind for a miniature shakshuka for breakfast the next day, and, no surprise, it was also delicious!
Next time, I’ll make a whole batch of shakshuka with harissa. This was divine!
It's amazing that a few tablespoons of harissa can elevate a classic soup so much, but it really does!
Ingredients
2 Tbsp. extra virgin olive oil
1/2 medium onion, chopped
2 cloves garlic, minced
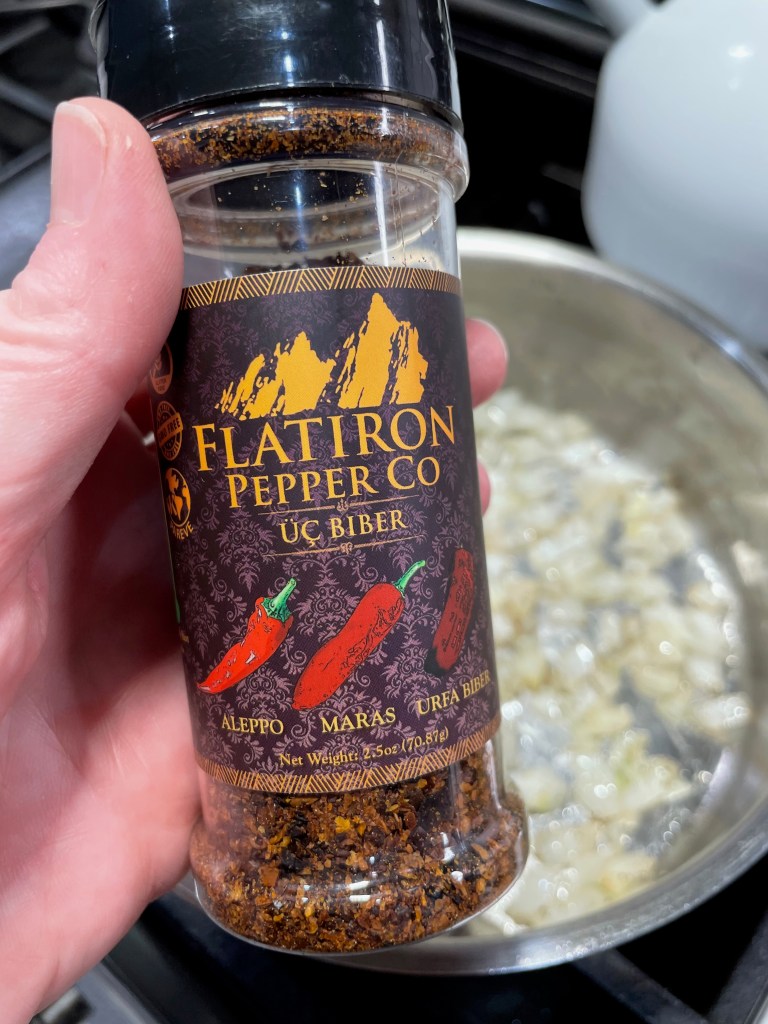
A few shakes red pepper flakes (I used Flatiron Pepper’s Uç Biber variety)
28 oz. can real San Marzano peeled tomatoes, pureed in blender briefly with a pinch of salt
2 Tbsp. Mina brand harissa paste
1/2 tsp. ground cumin
1/2 tsp. ground caraway seed
Salt and pepper for seasoning each layer
1 Tbsp. unsalted butter
My recommendation for adding red pepper flakes, cumin and caraway is based on the mild nature of this particular harissa. If you use another brand with more flavor, adjust additions accordingly.
Directions
Heat a heavy-bottomed pot over medium heat. Swirl in olive oil and sauté onions until slightly softened. Season with salt and pepper to aid in releasing moisture from the onions. Add red pepper flakes and garlic and cook another minute or so.
Pour the puréed tomatoes into the pot with the onions. Add the harissa and stir to combine. Add a pinch of salt and the ground cumin and caraway. Bring the mixture to a low boil, and then reduce heat and simmer for approximately 30 minutes (longer if you have time). Give the soup a taste and adjust seasonings as needed.
The past few weeks have been a struggle for me as my husband and I have committed to making mindful changes to our eating plan. I don’t mind the challenge of eating better, so it isn’t that. My problem has been that I’ve tried too hard to develop original recipes worth sharing here on Comfort du Jour, but so much of what I have done has been with random leftovers that nobody else in their right mind is likely to have on hand. At the end of this post, I’ll show you a glimpse of some of those dishes, and perhaps you’ll draw inspiration for how to repurpose some of your own leftovers with a shift toward healthy.
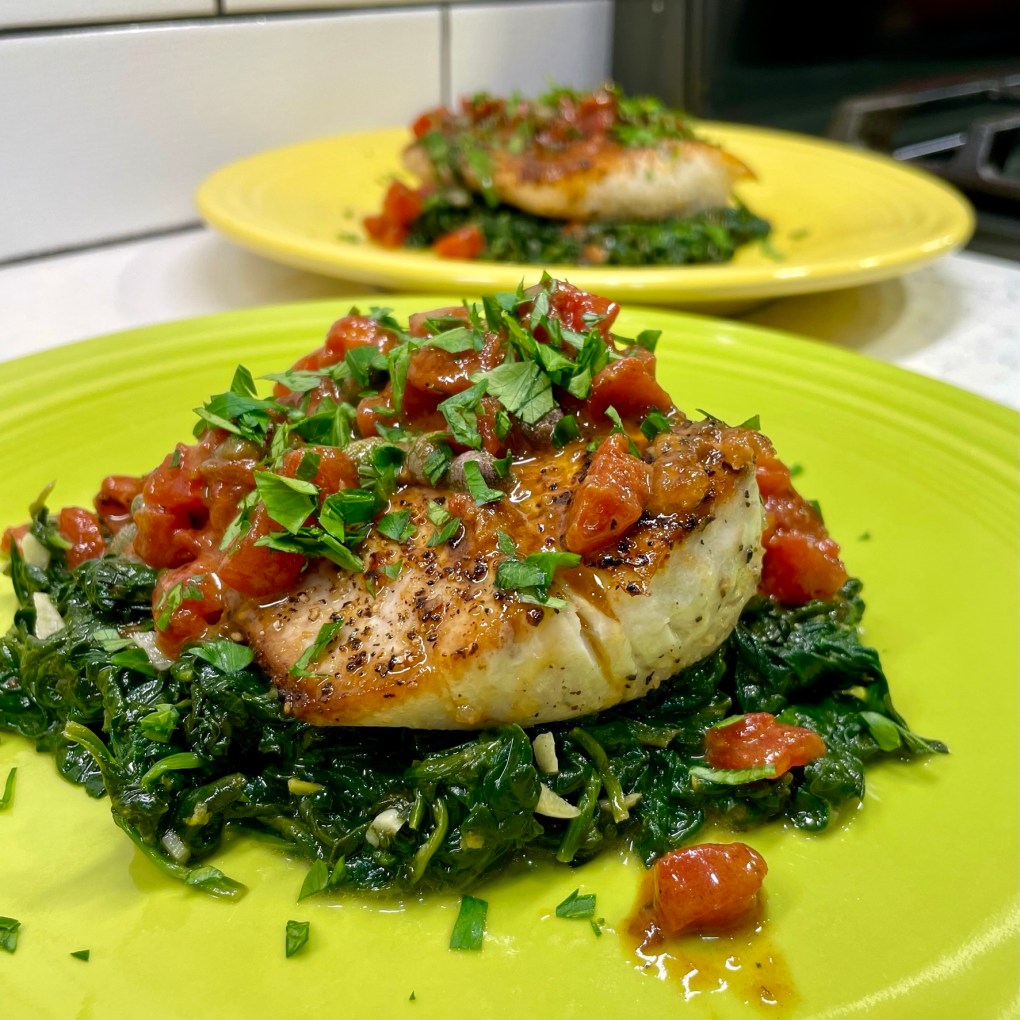
Moving forward, one of the easiest ways I know to eat better is to choose lean meats and seafood and add a lot of vegetables. So in the weeks to come, you’ll likely see a lot more green on my plate, and I mean that quite literally with this dish, featuring a gorgeous, bright green bed of sautéed spinach, my husband’s all-time favorite vegetable.
What’s so great about spinach?
We all remember from the Popeye cartoons of childhood that spinach made Popeye strong— OK, that connection was overstated. But there is a hint of truth in it, as nutrition science shows the natural nitrates found in leafy greens support healthy muscle function. Spinach is also rich in Vitamins A, C and K, as well as iron, potassium and folate, a B vitamin that helps the body generate healthy cells.
Is it better to eat spinach raw or cooked?
There is no health consequence of eating raw spinach; one of my favorite salads is made from it, along with hard-boiled eggs, red onion slices and goat cheese. But we might miss more than we gain by eating it raw. In addition to all its benefits, raw spinach also contains oxalic acid, which is the stuff that makes your teeth feel squeaky. Oddly, the oxalic acid blocks absorption of some of the very nutrients spinach provides. The cooking process breaks that down, though, so a quick sauté or steaming helps you reap the most benefit of this versatile vegetable. I’ll be using spinach again and again in the coming weeks, so all of my leafy green lovers will want to stay tuned. 😀
So what about this dish?
Today’s recipe is a twist on Mahi Hemingway, a dish I posted a few years ago, and my copycat version of a pricey meal I had enjoyed many times at a local restaurant. This time, I’ve plated the fish and sauce atop fresh spinach rather than a pile of carb-y pasta. It’s colorful, easy to prepare and absolutely delicious!
Delicious, and pretty!
To make it, you’ll need a couple fillets of fresh mahi—season them with salt and lemon pepper— plus a fat handful of fresh baby spinach, a little garlic, diced tomato, capers, dry white wine, a squeeze of fresh lemon and a little swirl of butter at the end for a delicate but flavorful sauce. If mahi is unavailable (or not your favorite), try this dish with halibut, grouper or even a mild cut of salmon.
Parsley garnish is optional, but recommended, and you can make two servings of this meal for less than half the cost of a restaurant meal for one. It’s light, delicious, gluten-free and diet-friendly. It’s also easy to make (there’s a click-to-print recipe below), and my Instagram reel will show you in 60 seconds how to put it on your table tonight. Mise en place (having everything in place) is important here, because the dish moves quickly once the pan is hot. Enjoy!
There's plenty of flavor and nutrition in this light and easy seafood dish, and it comes together in under half an hour. Perfect for a busy weeknight!
Ingredients
2 skinless mahi fillets, about 6 ounces each
Several shakes salt-free “lemon pepper” seasoning, such as Mrs. Dash
Kosher salt and freshly ground black pepper
3 Tbsp. extra virgin olive oil, divided (1 for the spinach, 2 for the fish)
2 fat handfuls fresh baby spinach, roughly chopped (this is approximately six ounces)
2 cloves fresh garlic, minced
1/3 cup dry white wine, divided (you’ll use some for the spinach, some for the fish; substitutions in the recipe notes)
Juice and zest of 1/2 large lemon
1/3 cup petite diced tomatoes, drained
1 Tbsp. nonpareil capers, drained but not rinsed
1 Tbsp. cold butter, cut into teaspoon-size pieces, for swirling into sauce at the end
A sprinkle of fresh, chopped parsley to garnish
Notes: This recipe moves quickly, especially once you remove the fish from the skillet. Be sure to have all your ingredients lined up and ready before you begin cooking.
Any firm fish fillet may be substituted for the mahi; I think salmon, grouper, tilapia or halibut would all be terrific in this dish.
Dry vermouth may be used in place of the white wine. If you prefer to avoid alcohol, substitute a quarter cup of low-sodium vegetable broth for the wine and add an extra squeeze of lemon.
Use fresh tomatoes when they’re in season; otherwise, salt-free canned tomatoes work great. If you have trouble with the acidity in tomatoes, try neutralizing it with a pinch of baking soda. Stir the soda into the tomatoes before you begin, and give it a few minutes for any foaminess to subside before proceeding. This will help take the edge off the acid of the tomatoes.
Directions
Pat the mahi fillets dry with a paper towel. Season with salt and pepper, plus a generous few shakes of the lemon pepper seasoning. Set aside to warm to room temp while you prepare the spinach.
Place a non-stick skillet or pot over medium heat. Swirl in about a tablespoon of the olive oil, and then add the spinach a handful at a time. Give it a toss through the oil, then season lightly with salt and pepper. Use an easy touch here, so the spinach isn’t too salty after it wilts down.
Add garlic to the pan and toss until spinach is fully wilted but still bright green. Add a splash of the white wine, plus the zest of the half-lemon. Continue to cook until the wine evaporates. Remove from heat and cover to keep warm.
While the spinach is cooking, heat a second skillet (preferably not non-stick) over medium heat. Add remaining oil when the pan is hot. Place the fish fillets, “pretty” side-down, into the skillet. You should hear them sizzle instantly. Leave the fillets alone until you can see the fish is cooked through about 1/3 of its thickness, about three minutes. Use a metal spatula to carefully turn the fillets to cook the other side, about two additional minutes. They will be a little translucent in the center, but the residual heat will cook them through. Transfer the fillets to a warm plate and set aside while you prepare the sauce.
Add the diced tomatoes and capers into the fish skillet. Add a generous splash of the white wine, and use a whisk or utensil to scrape up all the cooked-on bits in the pan. Turn down the heat to medium-low and cook until wine is reduced by half. Squeeze in the lemon juice and stir until the moisture is reduced by about half; this should happen within about a minute.
Turn off the heat. Carefully swirl the cold butter, a teaspoon at a time, into the pan sauce. This will emulsify and thicken the sauce.
Divide the spinach between serving plates. Place a mahi fillet on top of each and spoon the pan sauce over the fish. Garnish with fresh parsley and serve at once.
Here’s a snapshot of some of the other delicious foods I’ve made since we committed to healthier eating. Some were made from leftovers that you probably don’t have, but others are repeats of favorites, with previous recipes linked for your convenience.
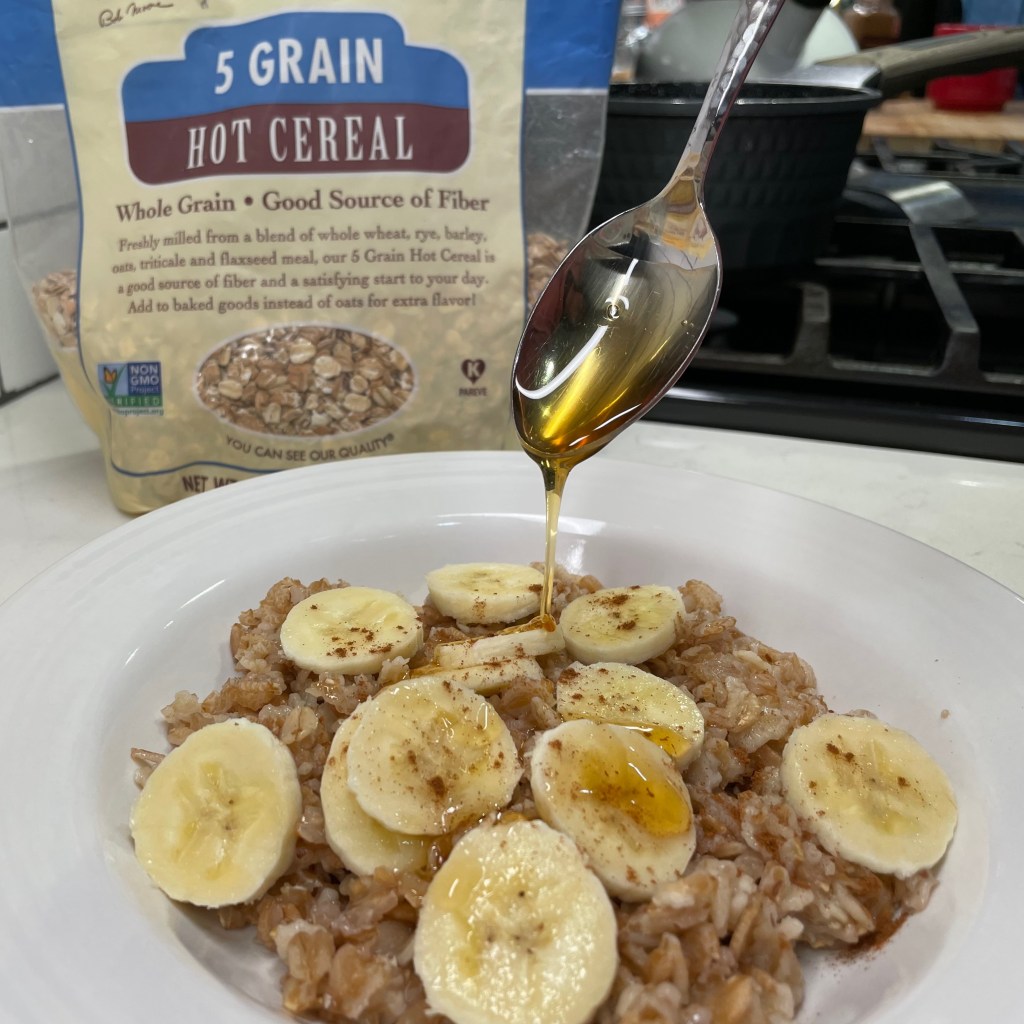
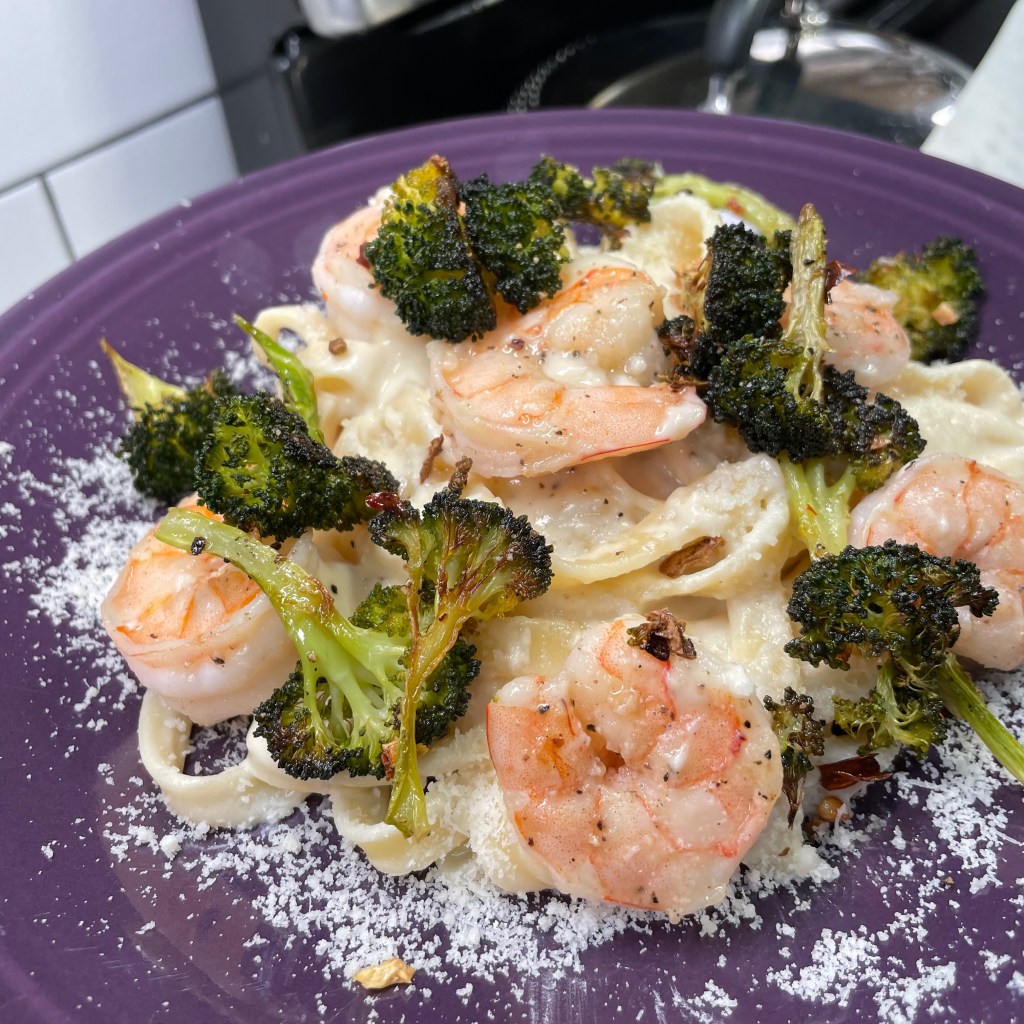
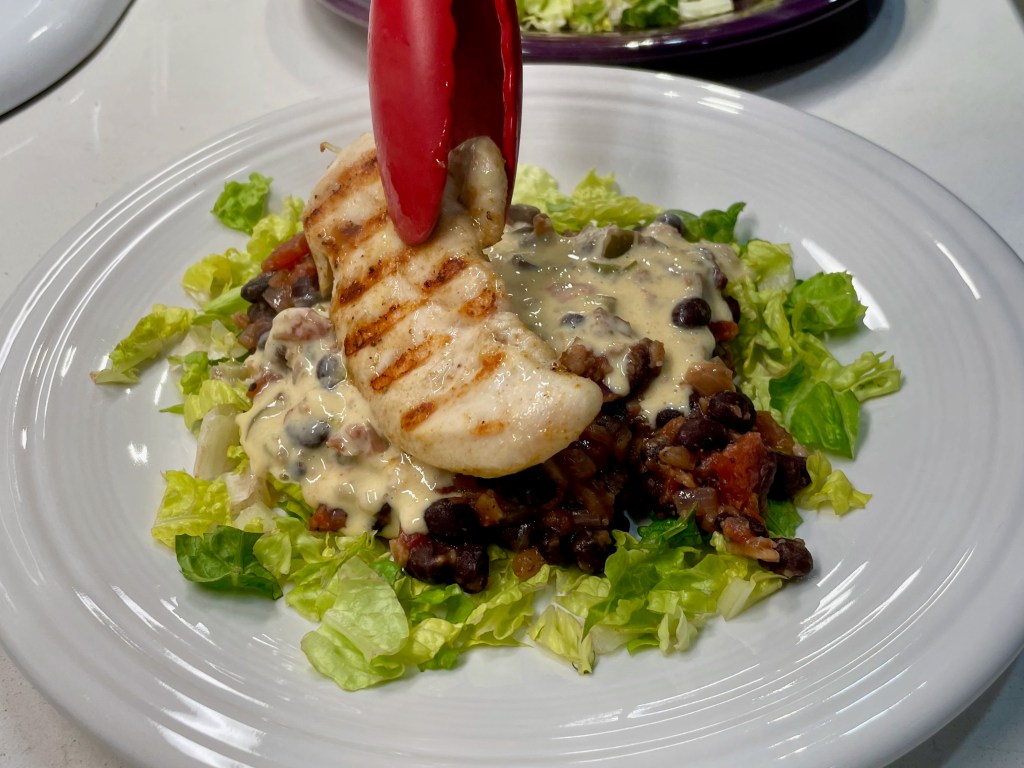
Leaning into whole grains helps me feel full longer. I love Bob’s Red Mill products!Fettuccine with shrimp and roasted broccoli. Link here for my “No-Guilt Alfredo Sauce,” made with loads of cauliflower!A leftover-based version of wedding soup, but I skipped the pasta and didn’t bother turning the ground chicken into meatballs.One of my all-time faves! Link here for the recipe for “Salmon with Fennel & White Beans.”Just a tablespoon of queso dip (leftover from Super Bowl) on this salad, topped with black bean-tomato hash and grilled chicken tenders.Breakfast for dinner always satisfies! Link here for my my “Shiksa-style Shakshuka!”
Easing up on sweets is not a big deal to me, but my hubby loves having dessert and occasional sweet bites. It’s usually a good thing that I like to make such treats at home— we save money and I know exactly what’s going into them— but doing so while we are trying to shed unwanted pounds feels like a no-win situation. Les told me just before Super Bowl that he wanted to buckle down into a better eating plan, to lose weight and get healthier. This was kind of a shock to me, but I know it must have been on his mind for a while before he sprung the news, and I want to support his decision, for my own health as much as his. There’s only two of us at home, and having those treats around is a lot of temptation.
I had been eyeing some overripe bananas on my counter for a few days, thinking how much I had wanted to make banana bread or a snack cake or muffins, and I reluctantly set aside thoughts of it on Wednesday morning as I scurried to pull together my share of the documents Les and I needed for filing our taxes, when an idea hit me like a lightning bolt—
Why not make the sweet treat and give half of it away? Nina, our tax preparer, had told me a few years ago that she loves sweets, so here was my chance! No need to deprive ourselves or do all the math involved in making half a recipe or shuffle to find space in the freezer for leftovers. Giving away half of the treats would keep us from overindulging in a sweet snack that hung around for too many days. Did I mention that Nina also approved this idea? It’s never a bad thing to spiff a hardworking accountant with unexpected homemade goodies, especially during tax season when she barely has time to come up for air. 😁
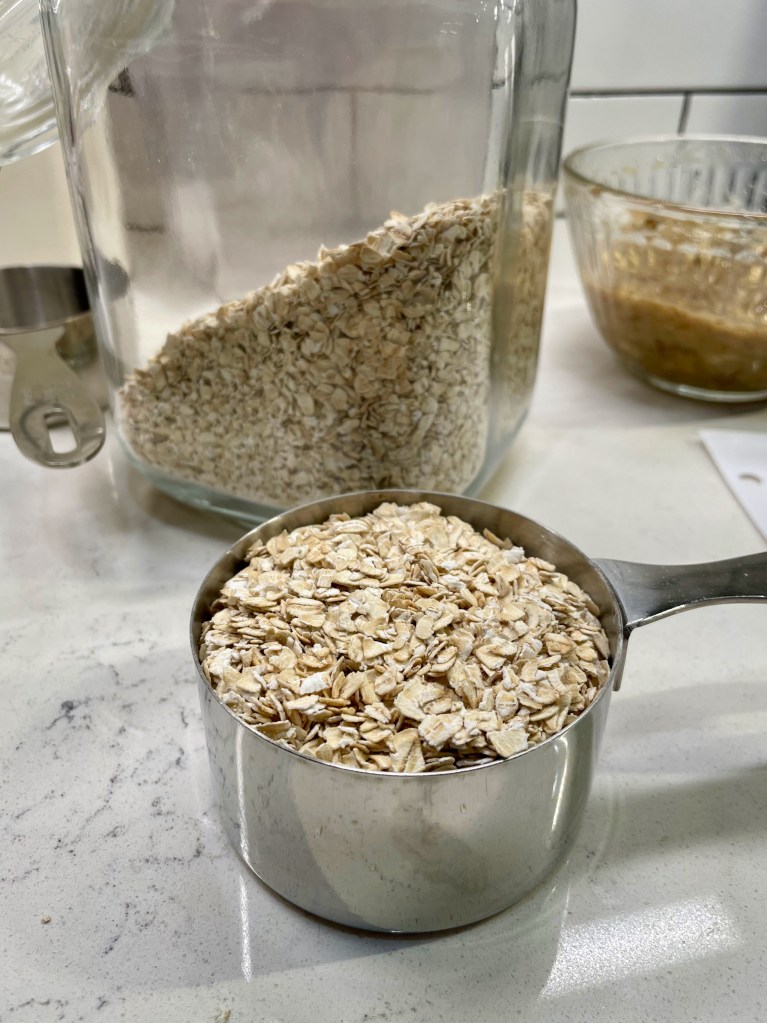
The oats cooked up plump and tender inside these wholesome muffins.
I should emphasize that our effort to cut back on sweets (and calories in general) is not driven by doctor’s orders or any scary test results; it is merely borne of realization that our indulging has gotten a little carried away. It feels good to lighten things up, and making mindful ingredient swaps into the foods we enjoy is an easy first step. My focus here was on making sure these muffins had some redeeming value beyond tasting delicious. With wholesome grains, ripe bananas and reduced sugar, they were a substantial baked treat— sweet enough to satisfy, but not over the top.
Whole grains add fiber and complex carbs to the diet, giving hearty texture and keeping blood sugar in check.Here’s me, baking on the fly. I eyeballed my teaspoon of vanilla, and when I discovered that I was short on my mashed banana, I made up for it with nonfat buttermilk. 😁
For someone on doctor’s orders to avoid specific foods, it might be a different story, and a plant-based butter or even expeller-pressed canola oil would be a good swap for the dairy butter if saturated fat is the bane of your diet. You could probably also use only one egg and increase the banana, or one whole egg plus two egg whites, or skip the eggs entirely in favor of flax “eggs.” If you have issues with gluten, you could try one of the widely available 1:1 gluten-free options out there. The grocery stores today have plenty of easy alternatives to make the recipe work, and I’ll leave you to it.
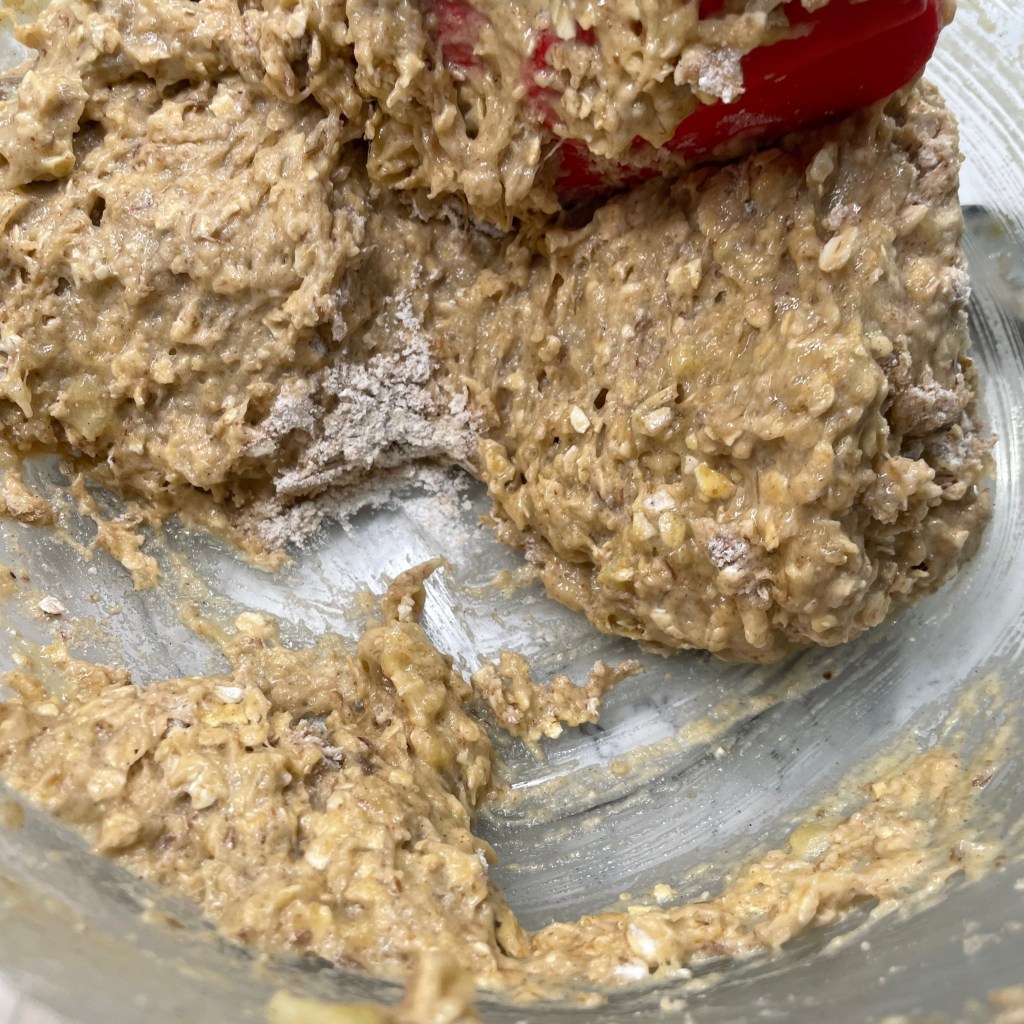
Fold the batter thoroughly to incorporate all the flour. I used a cookie scoop to fill my fancy muffin papers, and topped them with crunchy turbinado sugar.
I won’t claim that these muffins are half the calories of a typical recipe, but I’m certain that my substitutions made them better for us, and still took care of our sweet tooth. I would make these again in a heartbeat, especially after seeing how much Les enjoyed having one for dessert and another with breakfast. Next time, I might experiment with maple syrup in place of brown sugar, and canola oil in place of butter. And I probably won’t wait until next year’s tax season. 😉
Whole grains give these muffins a healthy edge over a typical sweet treat. They are delicious when served warm at breakfast, and they even stand-in nicely as a weeknight dessert.
Ingredients
1 cup all-purpose flour (see notes for measuring tips)
1 cup white whole wheat flour (or whole wheat pastry flour)
1 cup quick-cooking oats
2/3 cup light brown sugar, lightly packed
1 tsp. baking soda
1 tsp. baking powder
1/2 tsp. salt
3/4 tsp. ground cinnamon
1 Tbsp. milled flax seed (see notes)
1 cup mashed very ripe banana
1/4 cup low-fat buttermilk
2 large eggs
1/4 cup unsalted butter, melted and cooled
1 tsp. vanilla extract
3 Tbsp. turbinado or other coarse sugar, for sprinkling on muffins before baking
Notes: For accurate measuring of flour, use the fluff-sprinkle-level method. Use a fork or whisk to fluff up the flour in your bag or container, the sprinkle it from a spoon into your measuring cup until overflowing, and then use the edge of a knife to level it off. Dipping straight into the flour bag will likely result in excess flour and a dry outcome.
The Omega-3 (good) fats in flax seed are only digestible when the seeds are ground. You can purchase flax seed already milled, and it’s best stored in the fridge or freezer this way. I usually purchase the whole seeds, grinding them in a coffee or spice grinder as I need them.
Directions
Preheat oven to 375° F, with oven rack in center position. Line or grease a standard 12-cup muffin tin.
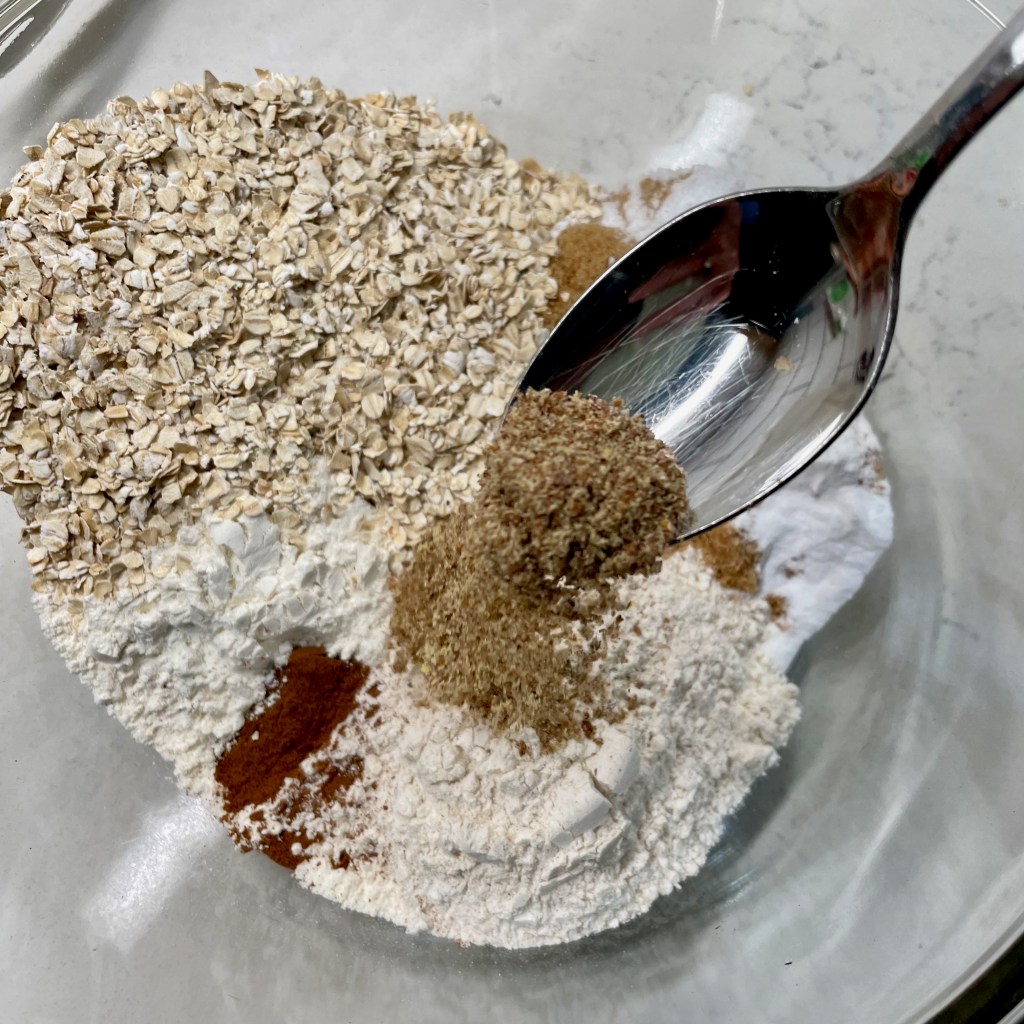
In a medium bowl, stir together the flours, oats, brown sugar, baking powder, soda, salt, cinnamon and flax meal.
In a separate bowl, combine mashed banana, buttermilk, eggs, melted butter and vanilla extract.
Make a well in the center of the dry mixture and add the wet mixture all at once. Use a wooden spoon or rubber spatula to gently fold the ingredients together, taking care not to over-mix. Let the batter rest one minute, as the acidity in the buttermilk will react with the baking soda to create a somewhat bubbly batter.
Divide batter evenly into prepared muffin cups. I found a cookie dough scoop very useful for this. Sprinkle turbinado sugar over all the muffins, with one tablespoon covering each row of four muffins.
Bake for 15 to 20 minutes, depending on your oven, and use the toothpick test to confirm doneness. Allow the muffins to cool in the pan for a few minutes, then transfer to a wire rack and cool completely.
One of my favorite tricks for eating healthier without feeling deprived is switching up the ratio of ingredients or components in a dish. I’m relying on this premise a great deal since my husband, Les, has decided that now is the time to drop a few pounds and eat better. Am I still resentful that he laid this news on me just hours before the Super Bowl, when I was still in the throes of preparing the fat-heavy foods he specifically requested for that day? Perhaps, but I’m distracting myself by getting creative in the kitchen! 😉
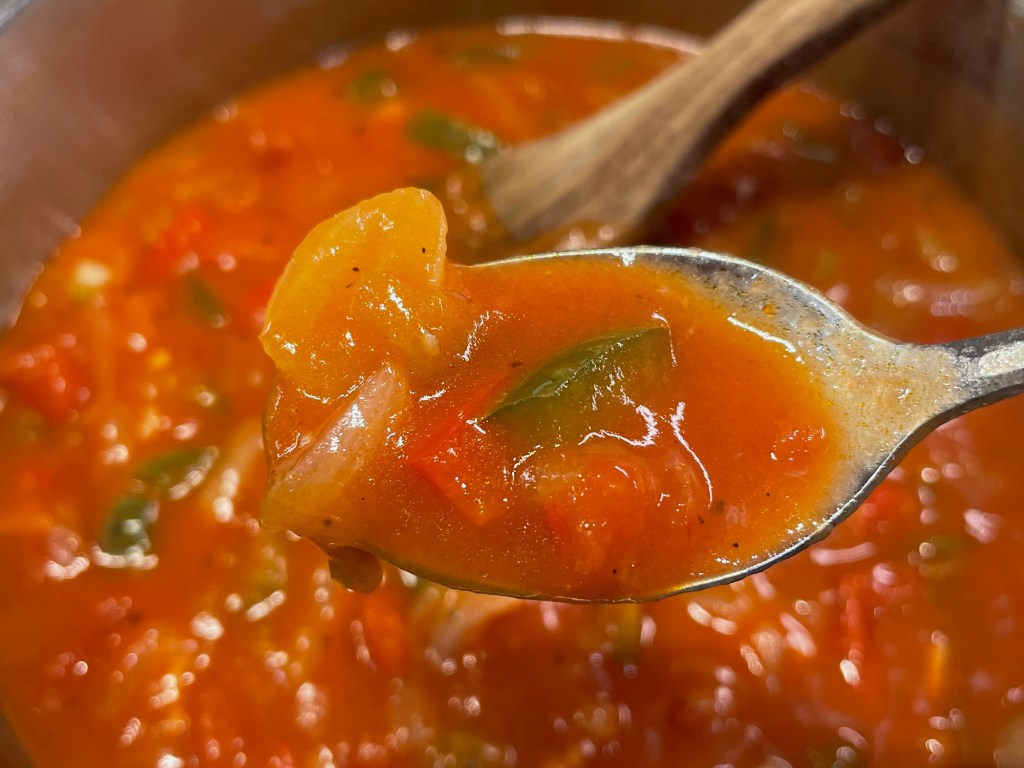
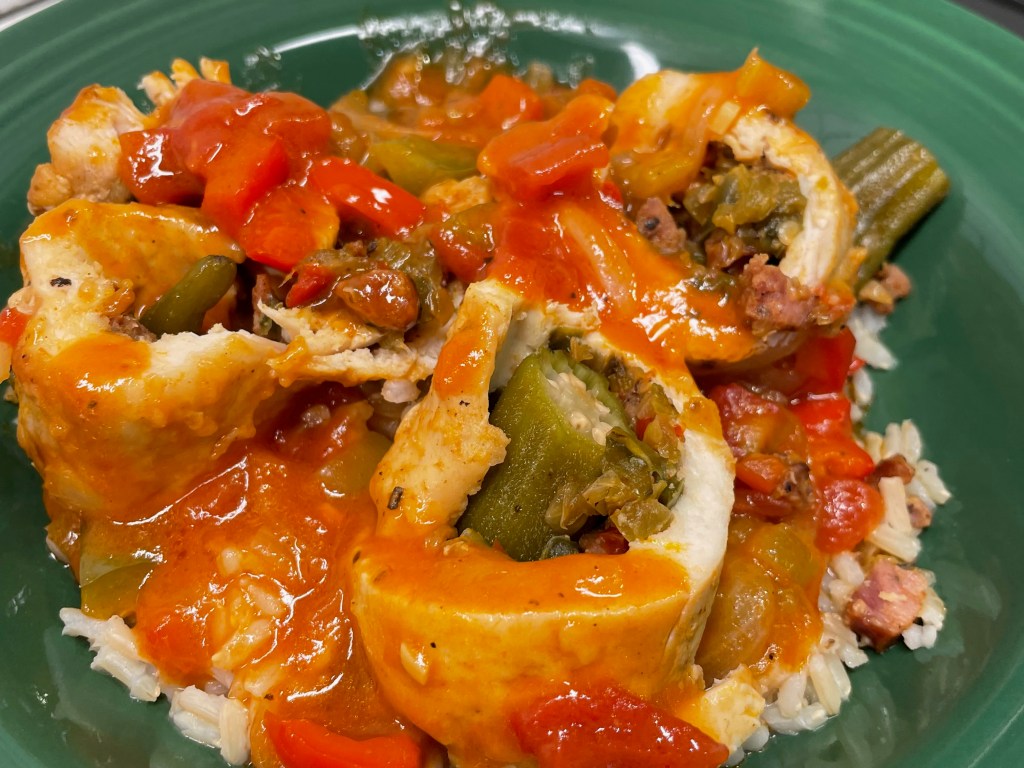
I must have still had Mardi Gras and New Orleans on my mind last weekend when I dreamed up this idea to flip the script on jambalaya, which is usually a one-pot stew, heavy with chicken, sausage and shrimp. I decided to skip the shrimp, wrap the andouille sausage inside a skinless chicken breast with a bunch of Cajun-seasoned veggies, and bake it with a quick and easy Creole-inspired sauce. My little roulades (just a fancy French word for something rolled and stuffed) have the spirit of jambalaya, but with a snazzier presentation and a bit lighter on the components that add fat and calories.
The color of that sauce! 😎
As I was working on this dish, and especially the Creole sauce, an old memory hit me that may explain my fascination with the foods of New Orleans, despite having never had the chance to visit. When I was a teenager living in Colorado with my mother, I bused tables for Sunday breakfast and early lunch at a Best Western dining room. My job, in addition to clearing dirty dishes and resetting the tables with white tablecloths, included running hotel pans of hot food from the kitchen to replenish the buffet. I can still picture how I learned to carry the terribly hot stainless steel pans, balancing two opposite corners on the heels of my hands so that I didn’t get burned. One of the dishes that was served frequently as my shift turned toward lunch was “veal Creole,” and I was mesmerized by the sauce. It was tomato-forward, but decidedly not Italian as most sauces I was familiar with. There was something special about it, and I’m certain that it added color to my imagination about other New Orleans cuisine. For sure, I have to put NOLA on the short list of places to visit soon!
Turning jambalaya inside-out (or outside-in)
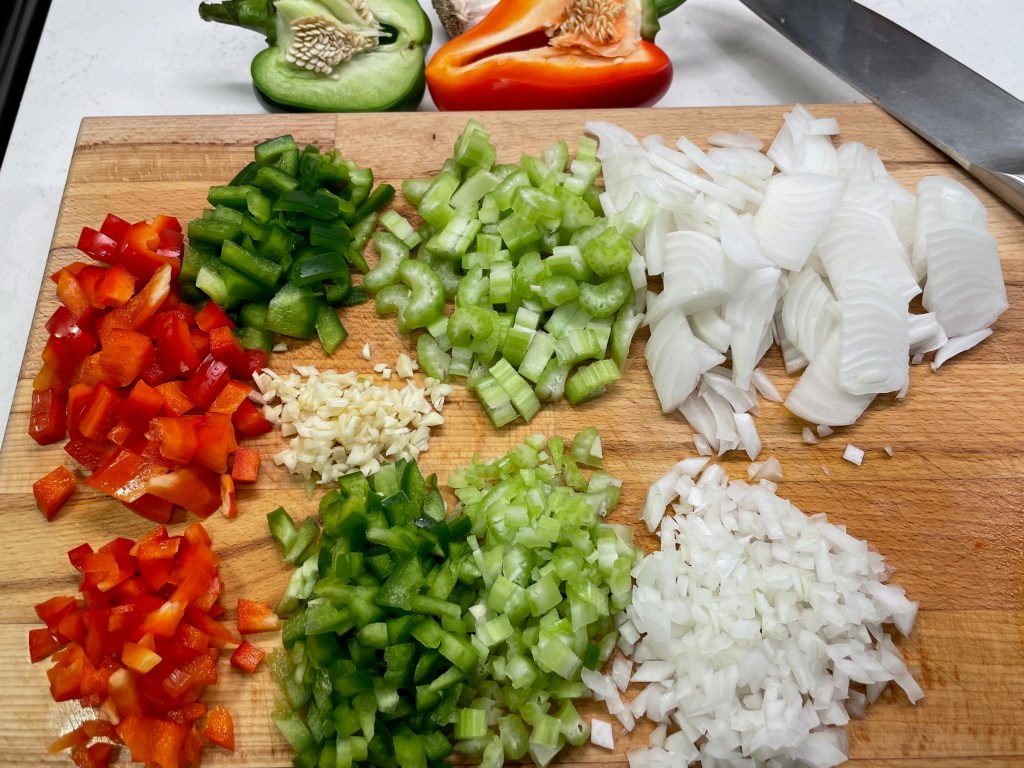
The prep work is my least favorite step of cooking, but it is so important to have things lined up and ready to go. The French call this principle mise en place, and it seems especially apropos to apply here, given that Creole food is drawn from French inspiration. You’ll see that I’ve packed a ton of vegetables into this dish— bell peppers, onions and celery (known in Louisiana kitchens simply as “the holy trinity”), plus a few cloves of minced garlic. The chopped veggie bits will end up in a Creole sauce, and the diced pieces will fortify the andouille filling of my roulades.
A dish with this many veggies must be good for us!
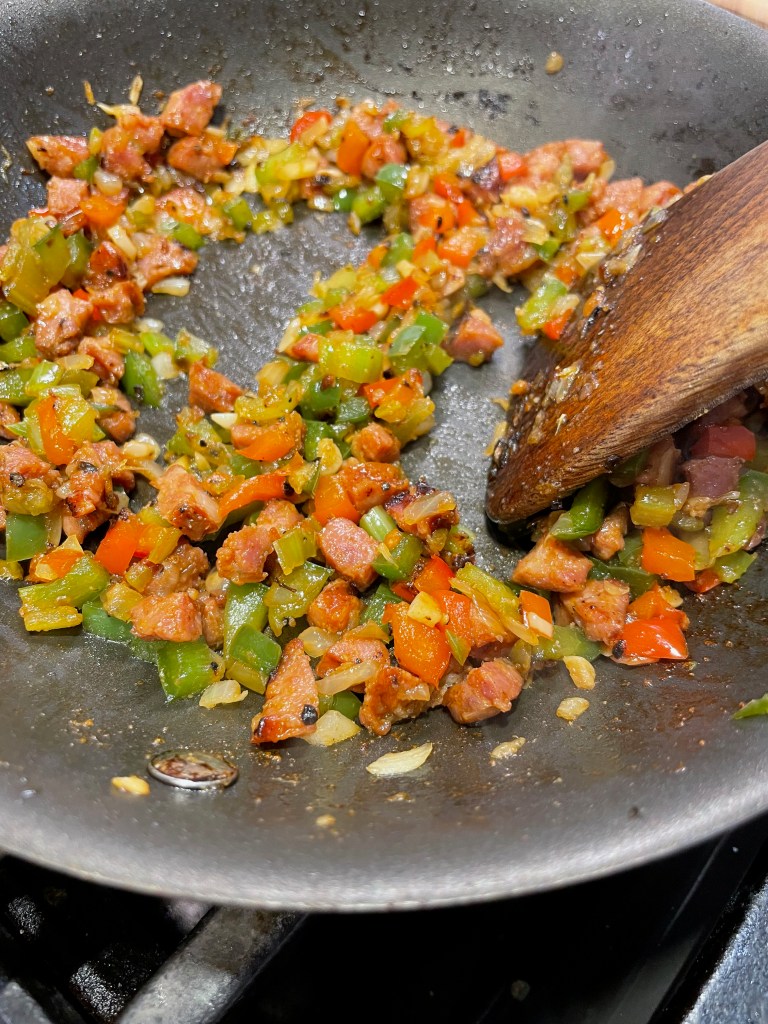
Andouille, a smoked sausage seasoned with garlic, cayenne, onions and wine, is crucial to jambalaya, in my opinion, but it is also pretty high up there on the saturated fats scale because it’s made from pork. In a typical, four-serving batch of jambalaya, I might cut up a full pound of andouille. But here, I’ve cut a single sausage into small cubes, which I crisped up in a pan before adding my aromatic veggies and cooking them until tender. Yes, I cooked the veggies in the rendered sausage fat rather than in oil, and this was intentional to maximize the flavor of my minimal amount of sausage. Had I drained off that grease and used oil to sauté the trinity, we would have missed some of that andouille goodness, and I only would have spared us 1 gram of saturated fat per serving. It was a fair trade.
I’m still going to have that andouille flavor, just not so much fat.
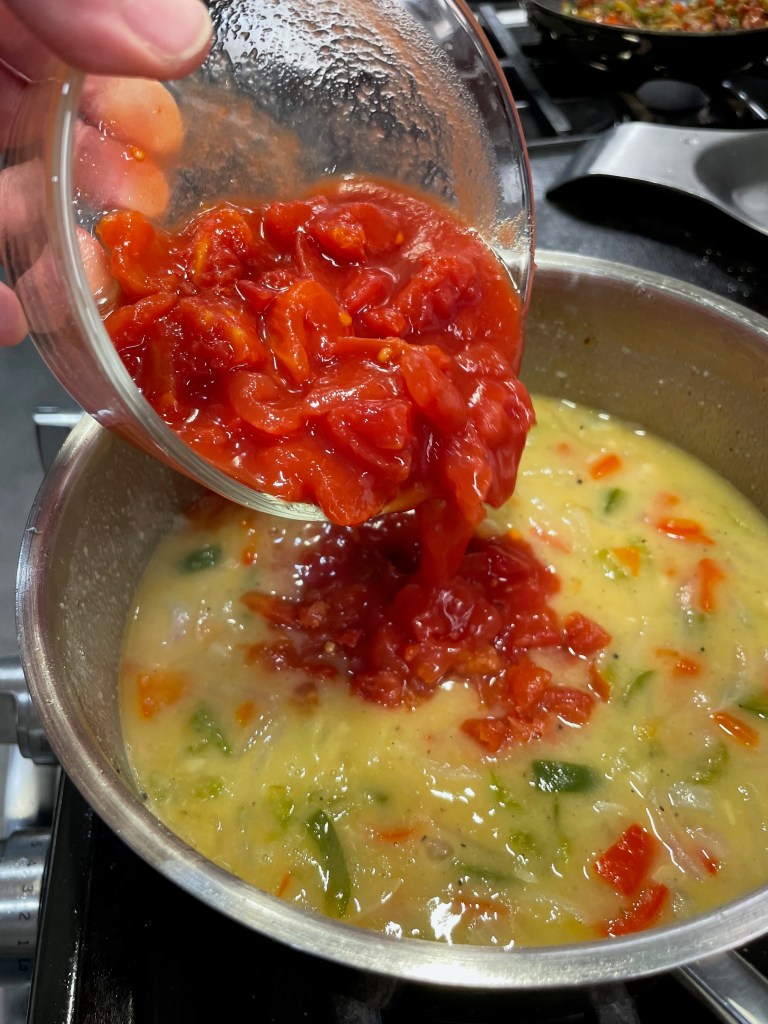
The Creole sauce I made here was spicy and flavorful, thanks to Cajun seasoning and fresh garlic that echo the andouille flavors. Flour thickens up the chicken broth-based sauce, and I was able to use up half a can of spicy Rotel tomatoes (left from the queso dip I made for Super Bowl), half a can of regular diced tomatoes (left from a salmon dish I made earlier in the week) plus tomato paste for added depth. This sauce was flavor on top of flavor, and I knew it would be even better after some simmer time in the oven over the roulades.
This is very close to what I remember from my first taste of Creole sauce.
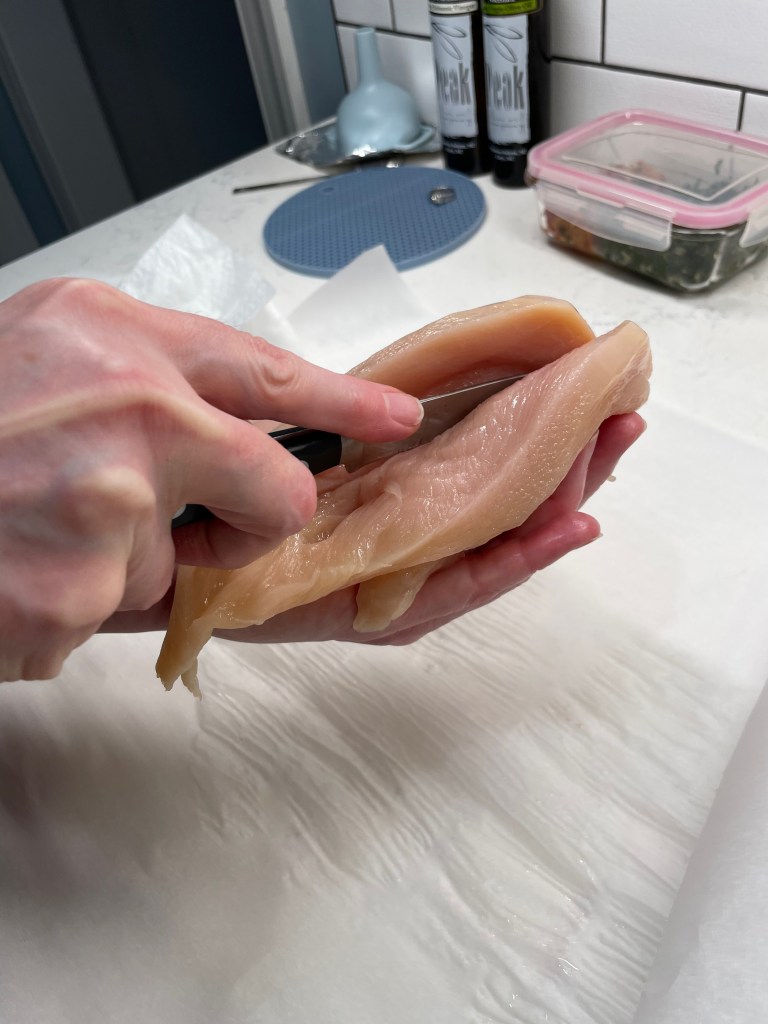
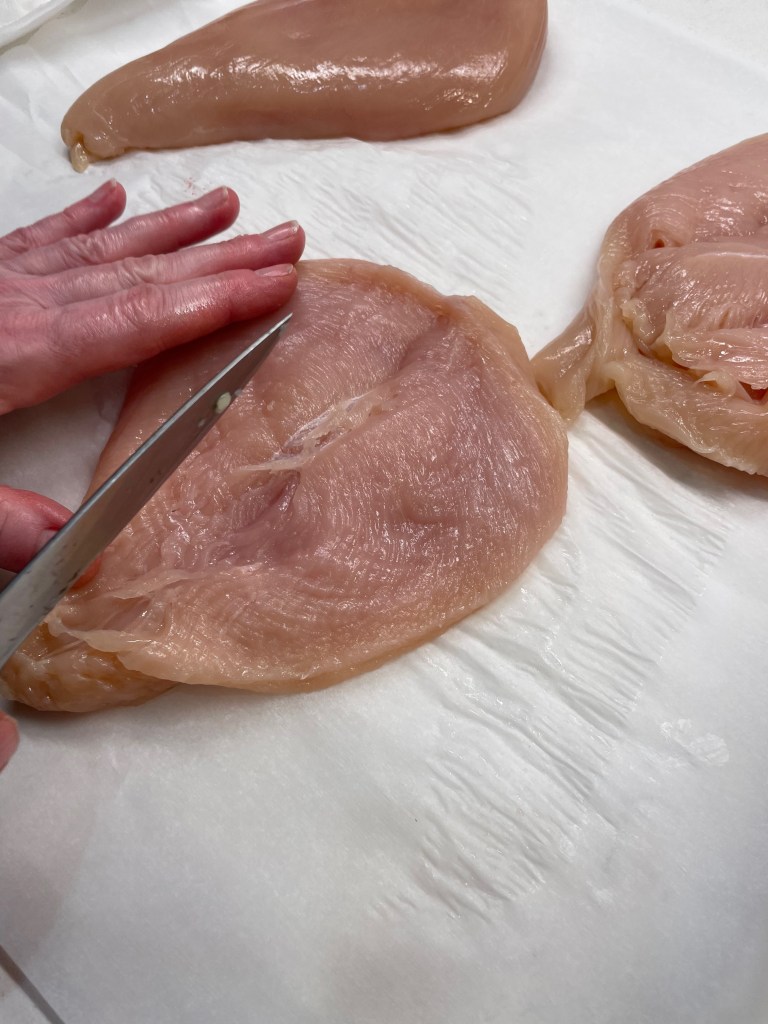
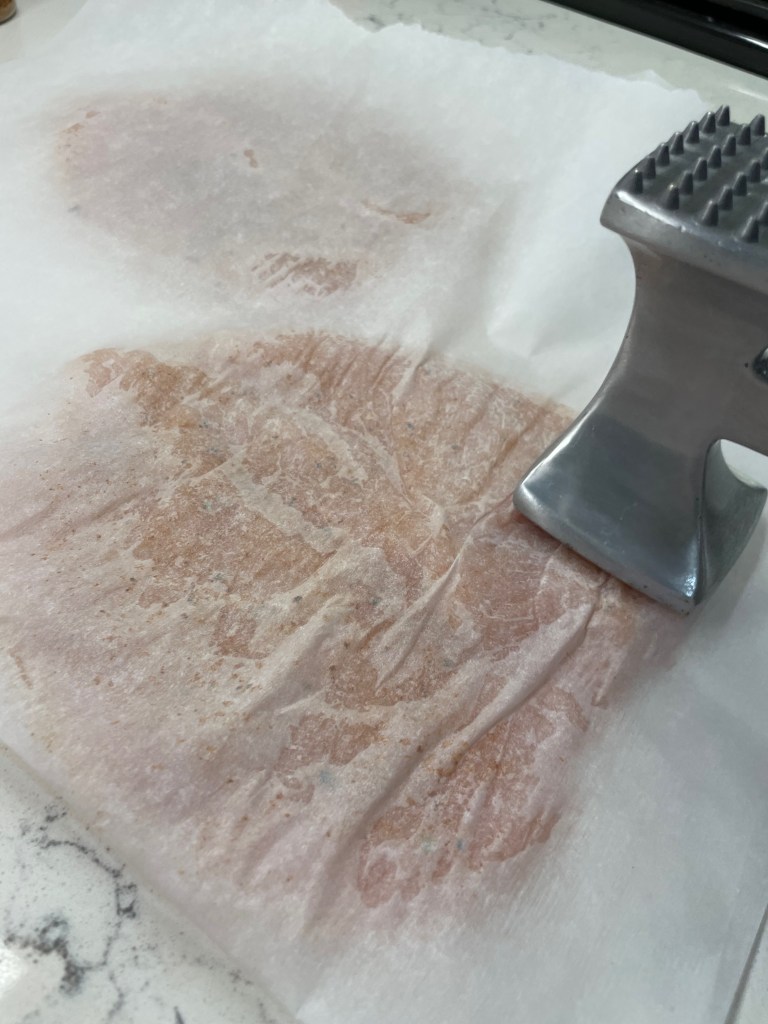
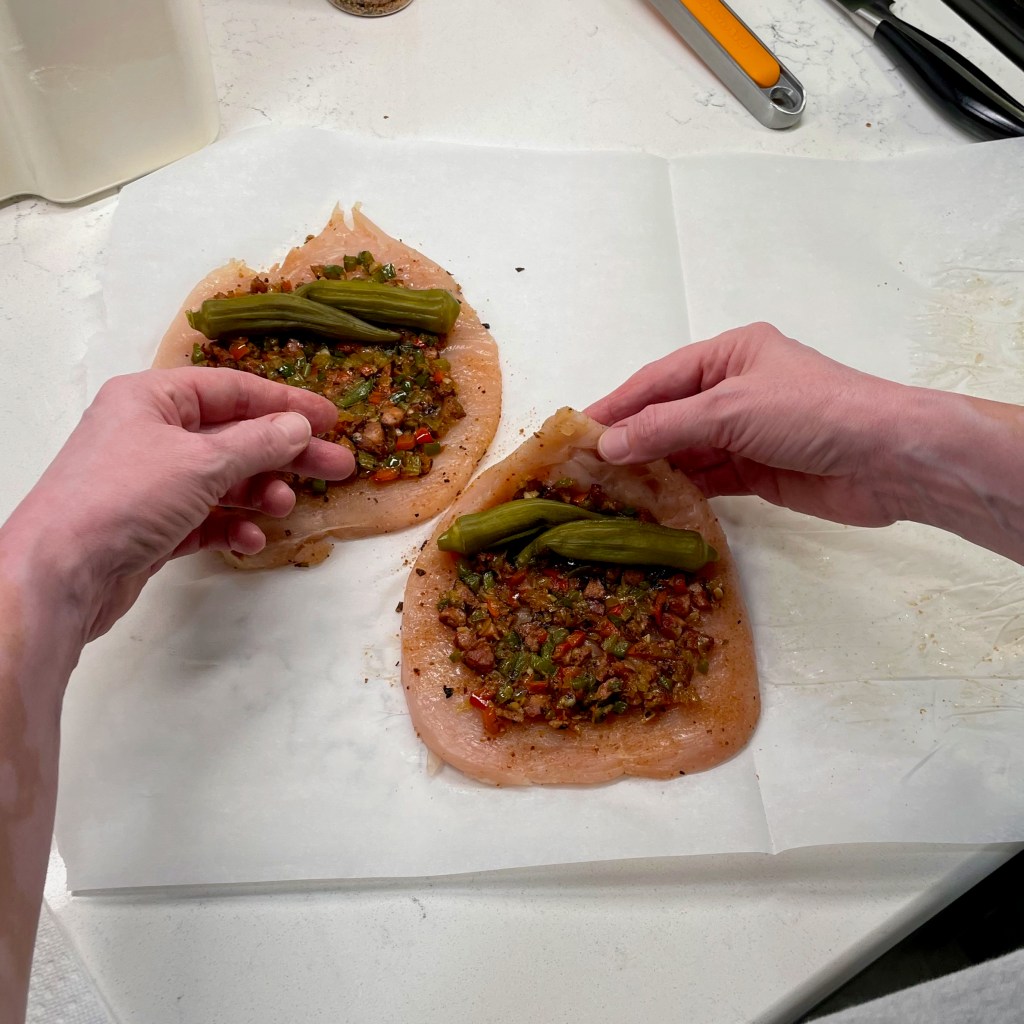
Stuffed chicken breasts are easy to do, but there are a few steps involved for easy rolling. First, you want the chicken to lay flat, so use a sharp paring knife and a slow, gentle touch to gradually open up the long side of the breast like a book. Next, place them between layers of parchment or waxed paper and pound them with the flat side of a meat mallet until the chicken is about 3/8-inch thick. It should look similar to a heart shape.
Easy does it here. Make several passes of shallow cuts until the breast can be laid open.It’s best to take your time and pound gently so that you don’t shred the fresh chicken. Season before or after, your choice.
Letting the good times roll!
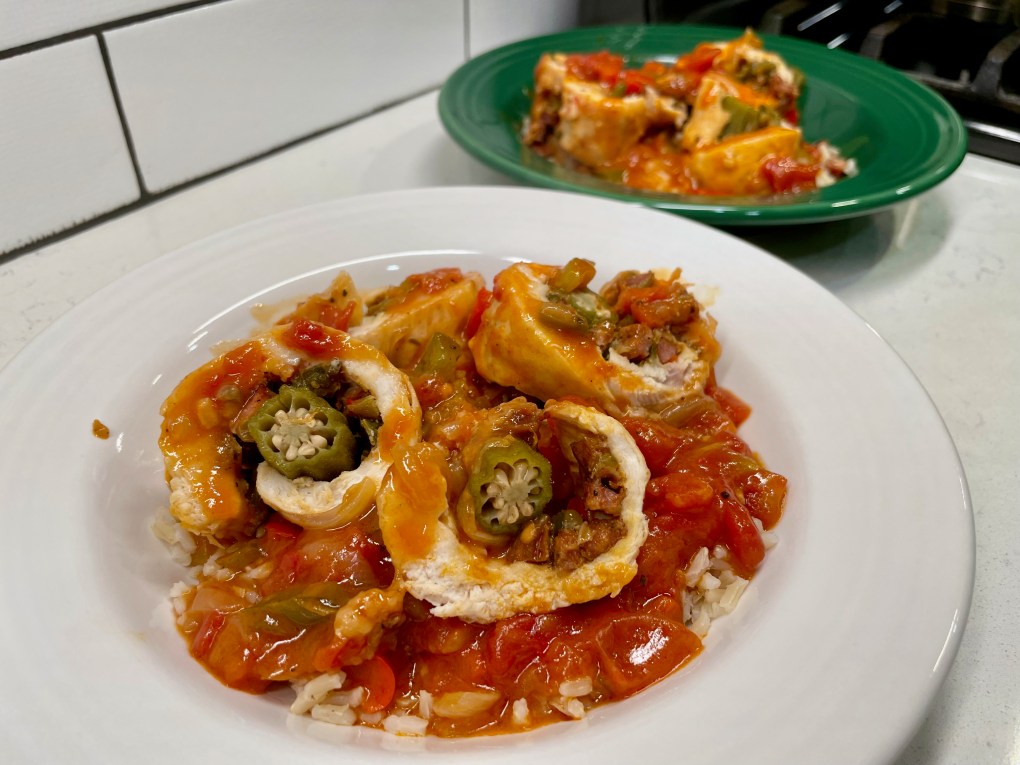
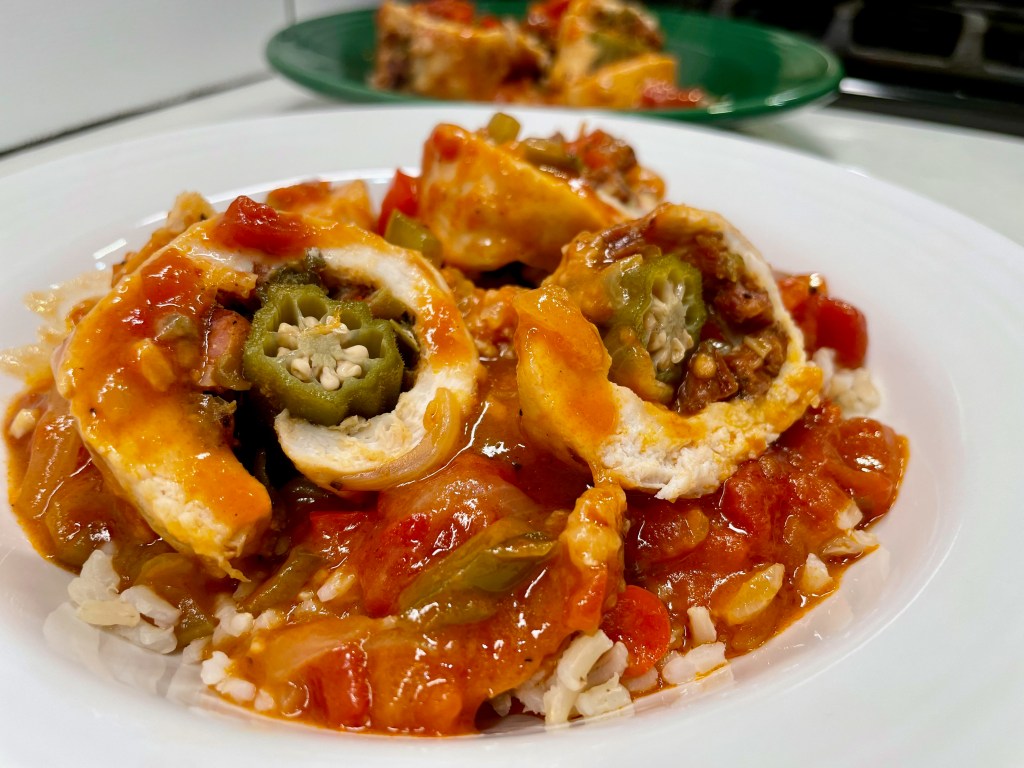
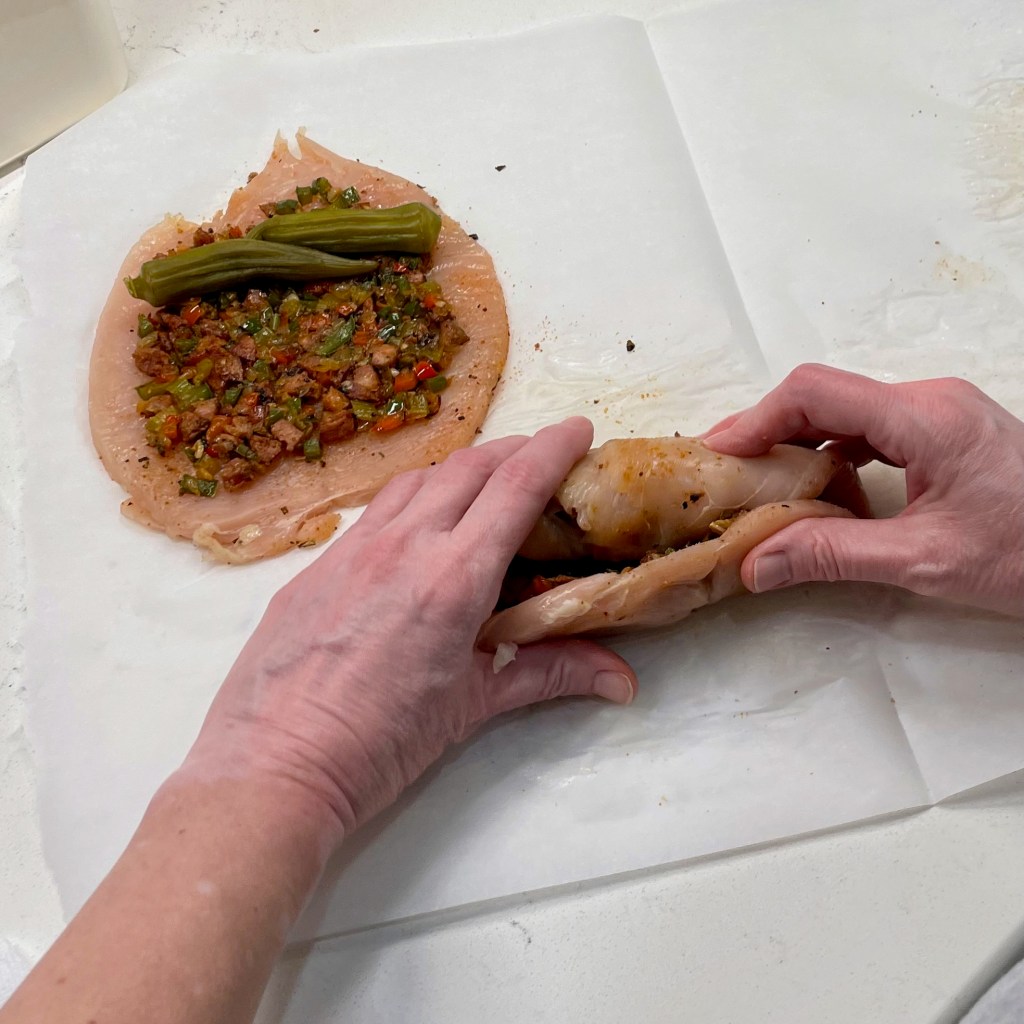
Finally, it was time to assemble and bake my roulades! There was one more flavor element that I wanted in my “rearranged” jambalaya, and that was okra. My husband is not a fan of this much-maligned southern staple vegetable, which can sometimes be slimy when cooked. Here’s how I got around that unpleasant trait— I used spicy pickled okra! The process of pickling keeps the okra firm and sturdy, and the sweet-sour pickling added a nice flavor accent to my roulades. I cut lengthwise slits in each okra pod so that I could release the excess liquid onto paper towels, and then I rolled up my andouille-layered cutlets with the okra inside and tucked in a few toothpicks to hold them together.
Once I had all the components ready, this came together quickly!
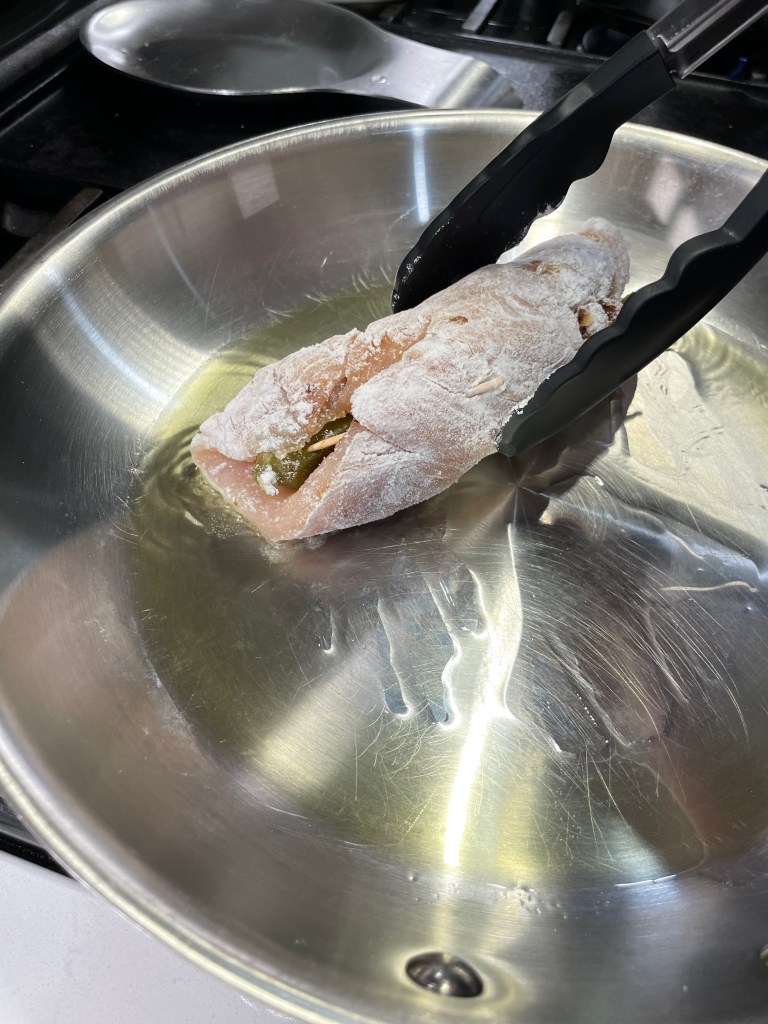
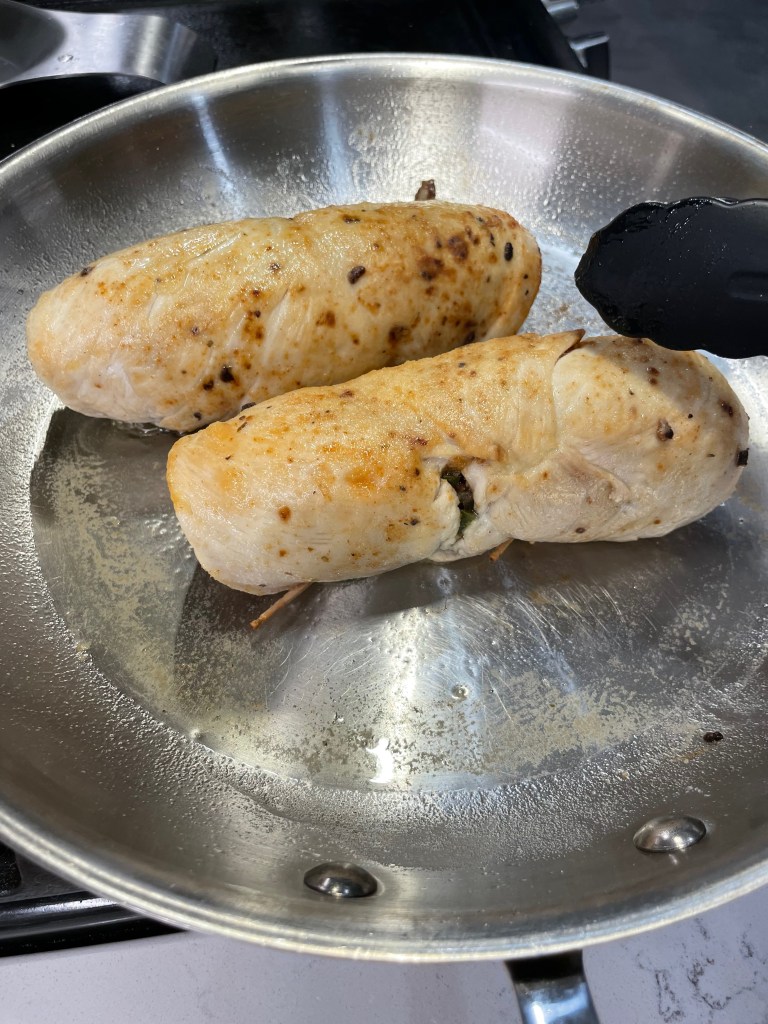
A quick dusting of flour ensured even browning on my roulades, and then I covered and smothered them with the Creole sauce, baking it with a foil cover for about 40 minutes. My kitchen smelled amazing! I carefully lifted the roulades to a cutting board, sliced them up and served on brown rice with the Creole sauce.
Delish!
This little adventure gave us some big, bold flavor, and we didn’t miss the extra andouille or its extra calories. Based on my lookup, by the way, each serving of this meal was roughly 420 calories. Probably a little less, actually, as I had two servings of the Creole sauce left over. I used it up two nights later, with Cajun seared shrimp.
This is a playful reinvention of classic jambalaya, made a bit healthier by reducing the amount of high-fat sausage and emphasizing lean chicken and vegetables.
Ingredients
1 link smoked andouille sausage, diced into small bits
1 medium sweet onion, divided; 2/3 chopped and the rest diced
2 stalks celery, divided; 2/3 chopped and the rest diced
1/2 each red and green bell peppers, divided; 2/3 chopped and the rest diced
3 large cloves garlic, minced
Several shakes Cajun garlic seasoning (use it to season every layer)
2 Tbsp. extra virgin olive oil
2 Tbsp. all-purpose flour
2 cups chicken stock
1 can diced tomatoes (I used a combination of “hot” Rotel and regular diced tomatoes)
2 Tbsp. tomato paste
2 large boneless, skinless chicken breasts, butterflied and pounded to 3/8″ thickness
4 pods pickled okra, slit lengthwise to drain and blotted dry with paper towels
Salt and pepper to taste
Cooked brown rice for serving
Directions
Heat a small skillet over medium heat. Add the diced andouille sausage and cook until the edges are crisped and fat is rendered. Add the diced onions, peppers and celery and sprinkle with Cajun garlic seasoning. Cook until vegetables are tender and reduced, adding half of the garlic in the last couple of minutes. Set aside to cool.
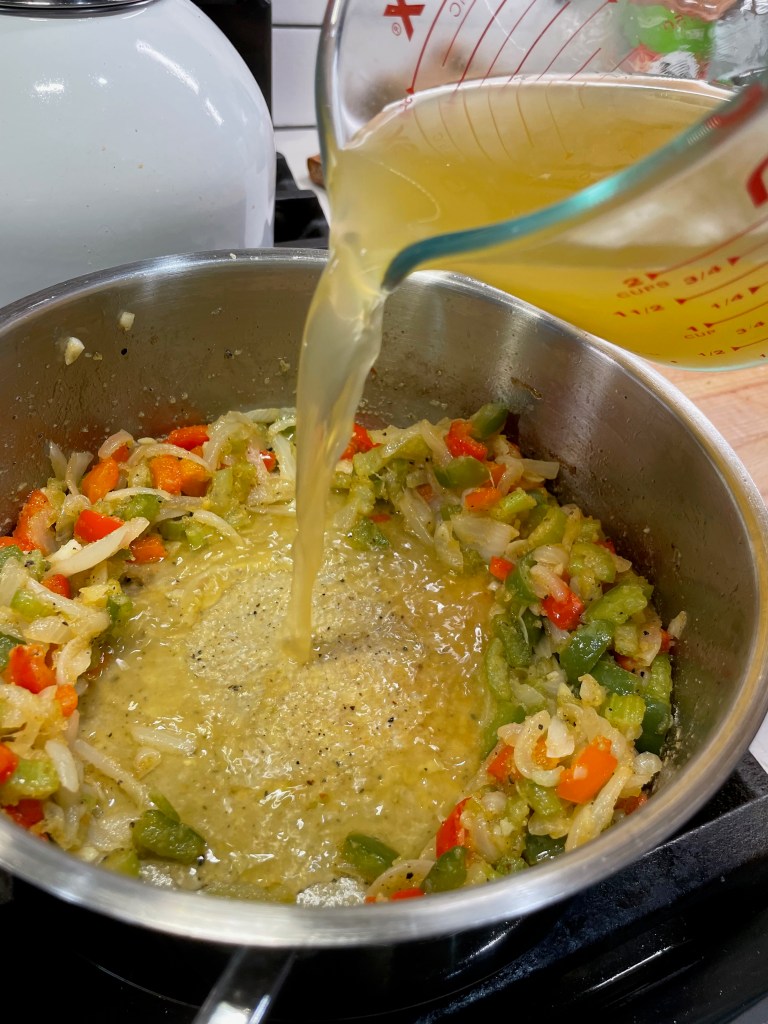
While the diced veggies are cooking, heat a medium sauce pot over medium heat. Add olive oil and chopped vegetables. Season with Cajun garlic seasoning and cook until softened, adding garlic near the end of cooking. Spoon flour over the vegetables and toss to cook until the roux coats and sticks to the pot.
Add chicken stock, whisking to release any browned bits in the pot. Add tomatoes and tomato paste and stir, bringing the pot to a slight boil to thicken sauce. Reduce heat and cook for a few more minutes while you prep the chicken.
Preheat oven to 350° F. Assemble the roulades by dividing the andouille-trinity mixture evenly over the butterflied chicken breasts. Place two okra pods at the narrow tip of the cutlet and roll snugly toward the larger end. Secure the loose ends with toothpicks.
Dust each roulade lightly with flour. Place a skillet over medium heat with a tablespoon of olive oil. Gently brown the roulades on all sides and then transfer to a baking dish. Spoon the creole sauce over the roulades, cover with foil and bake for 35 minutes. Carefully transfer each roulade to a cutting board to slice them into rounds.
Serve roulade slices over brown rice with Creole sauce.
Does it seem odd that the first recipe I post after the announcement of my husband’s “get healthier” initiative is a cocktail? Yes, of course it does. This is one of those awkward food blogging moments where things seem out of order. But Thursday is National Margarita Day, and I’ve been planning this post since before Les saw the light. With tequila being one of the lowest calorie spirits, I figure that a margarita is a reasonable, if only occasional, splurge. Besides, if you’re cutting back on cocktails while implementing a new eating plan, it’s best to make that once-in-a-while drink a good one, and make it at home for Margarita Day or any other day you’re craving refreshment.
I think I can see warmer weather just ahead!
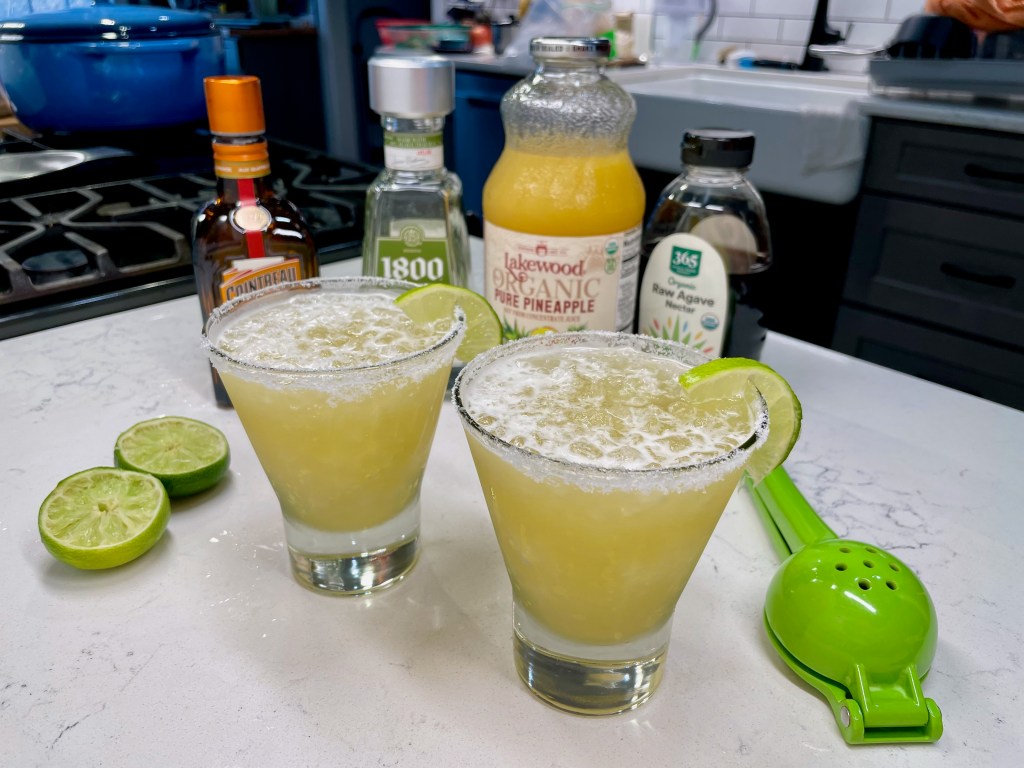
The margarita is one of the easiest drinks to modify with fun, flavorful twists, and this one is working a tropical vibe with pineapple and coconut, without being overly sweet. What makes it a “margarita” (which translates to “daisy” in Spanish) is tequila, orange liqueur, fresh lime and a touch of sweetener. The rest is up for grabs; just don’t go too crazy mixing in other flavors or you’ll have yourself a boozy mess and probably feel terrible in the morning (especially if the add-ins are sweet). If you generally associate margaritas with hangovers, here’s my theory: you probably had too many, made with cheap tequila (it didn’t have a worm, did it?) and a crappy mixer, and possibly in a chain restaurant.
My personal rules for margaritas are simple— use good quality tequila, freshly squeezed citrus (never a bottled mix!) and give it a fresh garnish. We eat and drink with our eyes, and when my husband and I entertain, it seems that the garnish is what always makes guests ooh and aah, so I consider it as crucial as the other ingredients. For this drink, I’m keeping it simple with a lime slice on the edge of the glass.
This is the beginning of a beautiful relationship.
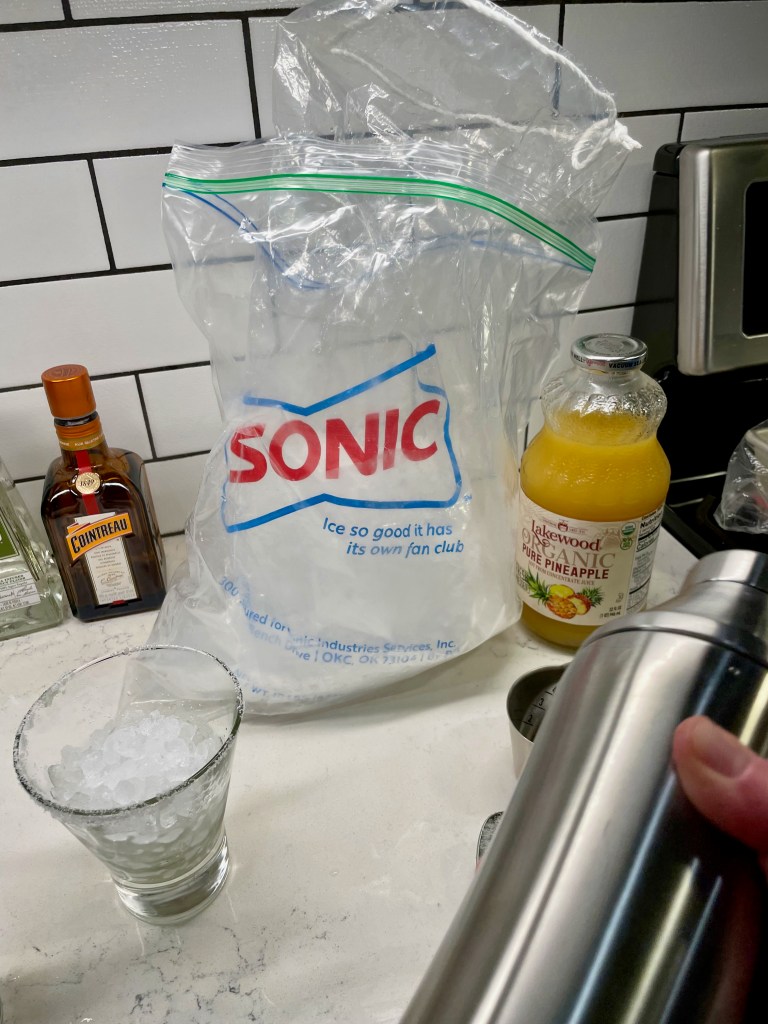
I love this 1800 Coconut, a blanco tequila first recommended to me by my cousin-in-law, Will. The differences between this and some other “flavored” spirits are that the coconut is subtle and natural, it has no added sugars, and— at 70 proof— it still has a nice little kick. It’s mellow enough to sip with just an ice rock (as Will does), but it is also terrific paired with another tropical flavor, especially pineapple.
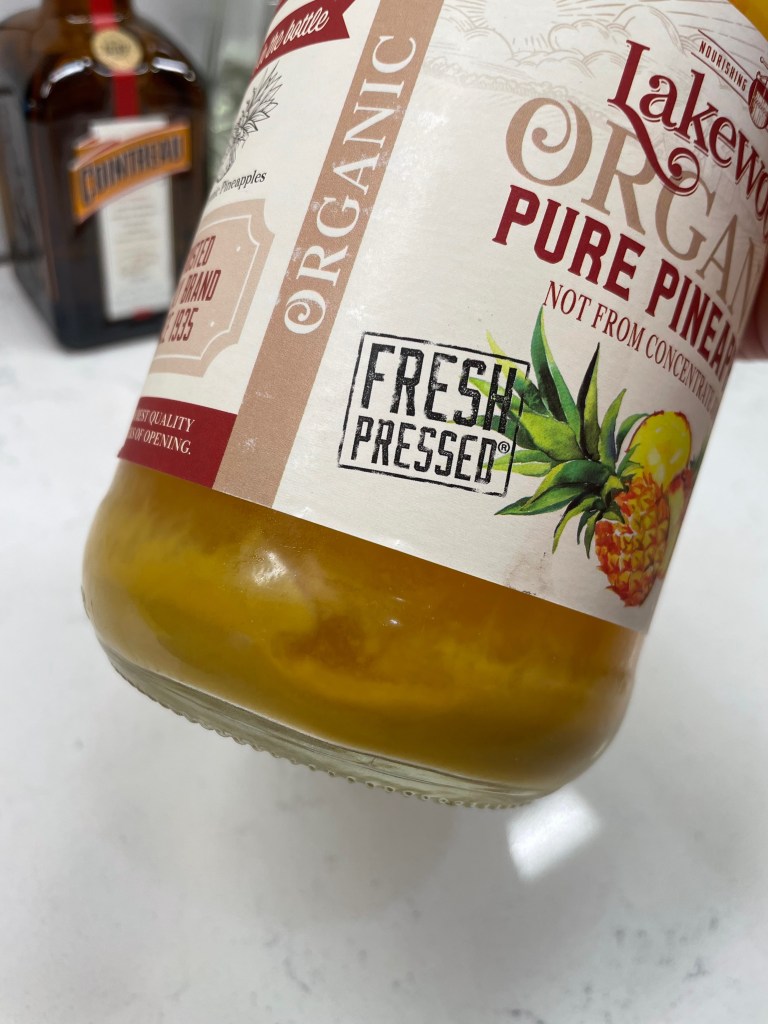
This time of year, bottled pineapple juice is likely to be tastier than any fresh pineapple you’d pick up at the supermarket, and I typically choose a large bottle over the individual cans because my sensitive tastebuds pick up that tinny flavor. Choose a juice with minimal ingredients, and preferably one that is made from fresh-pressed pineapple rather than concentrate. Be sure to give it a good shake, as the heavier pulp of the juice settles to the bottom, and that’s where most of the flavor is.
The pulp solids have settled to the bottom.A quick shake fixes that!
Triple sec is a standard ingredient in a margarita, but I prefer the higher end, more intense orange flavor of Cointreau. Fresh lime is a must (please don’t use the bottled stuff) and to keep the drink lightly sweet, just a quick squeeze of agave syrup— paying respect to the plant that gave us tequila in the first place.
Use equal amounts of these three ingredients.
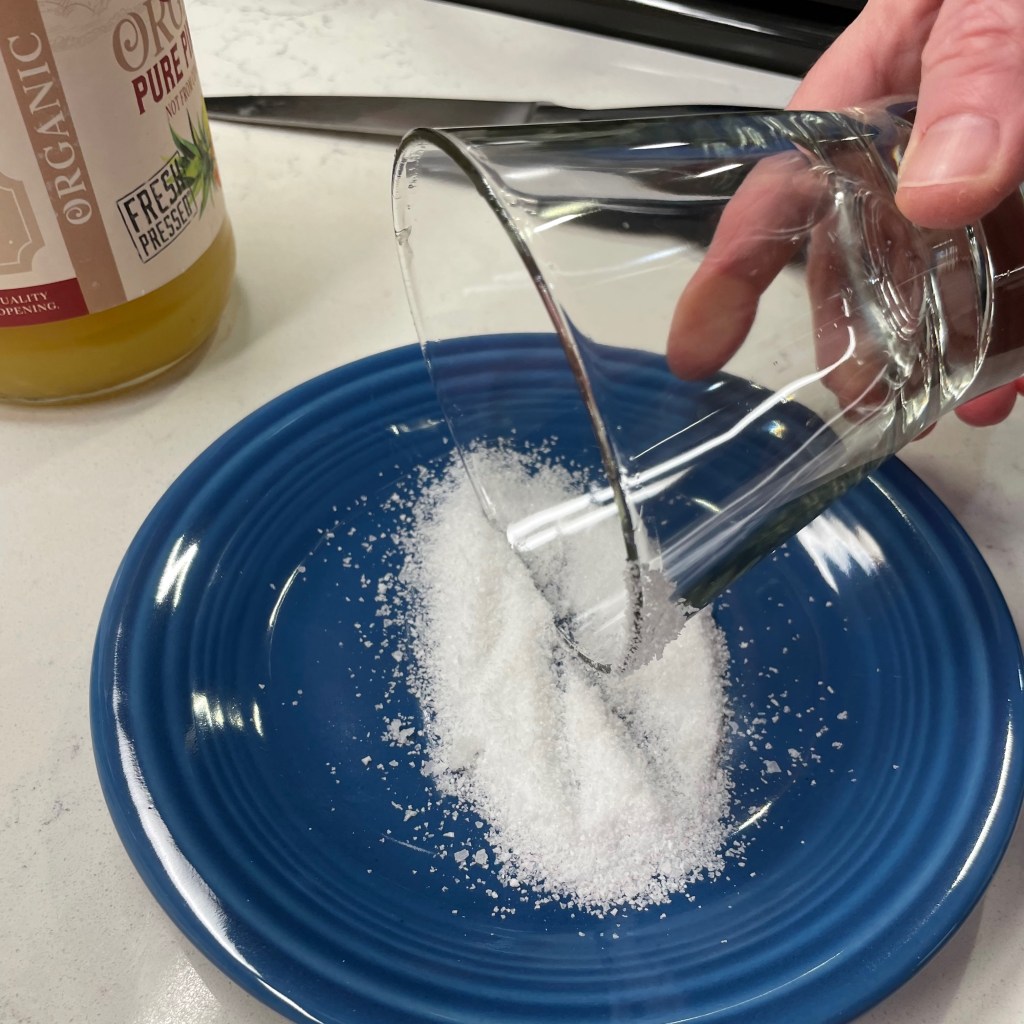
I know that some people have strong feelings about the salt rim, and I’m here to represent those who love it. But I don’t care for the commercial stuff that is “made” for margaritas, because it tends to have a slight chemical flavor and I truly hate when those gigantic chunks of salt fall into my drink. My preference is for a delicate rim of fine sea salt, which is easily adhered only to the outside of the rim after a quick swipe of fresh lime.
It’s great if you have time to do this ahead so the salt has time to set.
Finally, the ice! If you don’t already know that you can purchase a large bag of perfect pellet ice from Sonic, the drive-in fast food joint— well, now you do! This is a far cry from the crushed ice your refrigerator door will give you. Each pellet is a crystal clear chunk of flaky ice, and a scoop of this ice keeps a cocktail cold much longer than you might expect. If you’re only making a couple of drinks, a large cup of Sonic ice will probably cover it; I’ve been buying the 10-pound bags for just $3.50 and have found that it will keep in the freezer (double-bagged) for a few weeks.
The sonic ice will elevate all your tropical cocktails.
So there you have it— a tropical twist for National Margarita Day! Shake it up with plenty of ice, pour it into the icy glass, add more ice to top off the glass, garnish and enjoy. For those on a calorie budget, this tasty cocktail checks in at 211 calories, made exactly as written.
Here's a fun tropical twist on a classic margarita! Use the best ingredients you can find for a memorable cocktail at home.
Ingredients
1 1/2 oz. 1800 Coconut tequila
1 1/2 oz. fresh pineapple juice
1/2 oz. Cointreau
1/2 oz. freshly squeezed lime juice
1/2 oz. agave or simple syrup
Sea salt to rim the glass and a lime slice to garnish
Note: To salt the rim of the glass, swipe a fresh lime slice around the outer edge of the glass, and then roll it on salt poured out onto a plate or paper towel. Do this in advance, if possible, so that the salt has time to set as the lime juice dries.
Directions
Combine tequila, pineapple juice, Cointreau, lime juice and agave in a cocktail shaker. Add plenty of ice and shake for about 20 seconds.
Strain into a prepared cocktail glass. Top off with additional ice, if necessary, and garnish with a lime.
The surprises. That’s one of the things I love most about being married to my husband, Les. Valentine’s Day gave me pause to delve into what makes our life together so interesting and fun, and the common thread is surprises. Les is really good at this.
Sometimes, the surprise is a gift— like our first holiday season together when he purchased a piece of original art that I’d been admiring in one of my favorite wine bars. He conspired with the artist and the wine bar manager, reserving a table for us directly underneath “my” painting, so that when I saw upon arrival that it was sold, I’d notice and lament— though only temporarily, to my delight! I love the piece, and it hangs in our living room today.
He also surprised me in July 2016, when I thought we were just going out to dinner with live music for my birthday, but he had actually commissioned the musician (our friend, Colin Allured) to learn “our” song, and after it played (and we danced), Les put a forever ring on my finger. That was literally a life-changing surprise.
Other times, the surprises have been adventure— at Christmas this year, Les pulled out all the stops and created a version of “Let’s Make a Deal,” offering me a chance to trade in my new, gift-wrapped Rolling Stones Hackney Diamonds CD for any of three secret “doors,” which turned out to be recorded announcements he’d made on his iPhone. I chose wisely and traded up for a trip to see the Stones when they tour later this year. Yes, we’d have made the trip anyway (he already bought the tickets and made hotel reservations), but I absolutely love that he made it so much fun. We’ll celebrate seven years married this April, but he’s still dating me (yes, I know I’m lucky)!
Still rockin, after all these years!
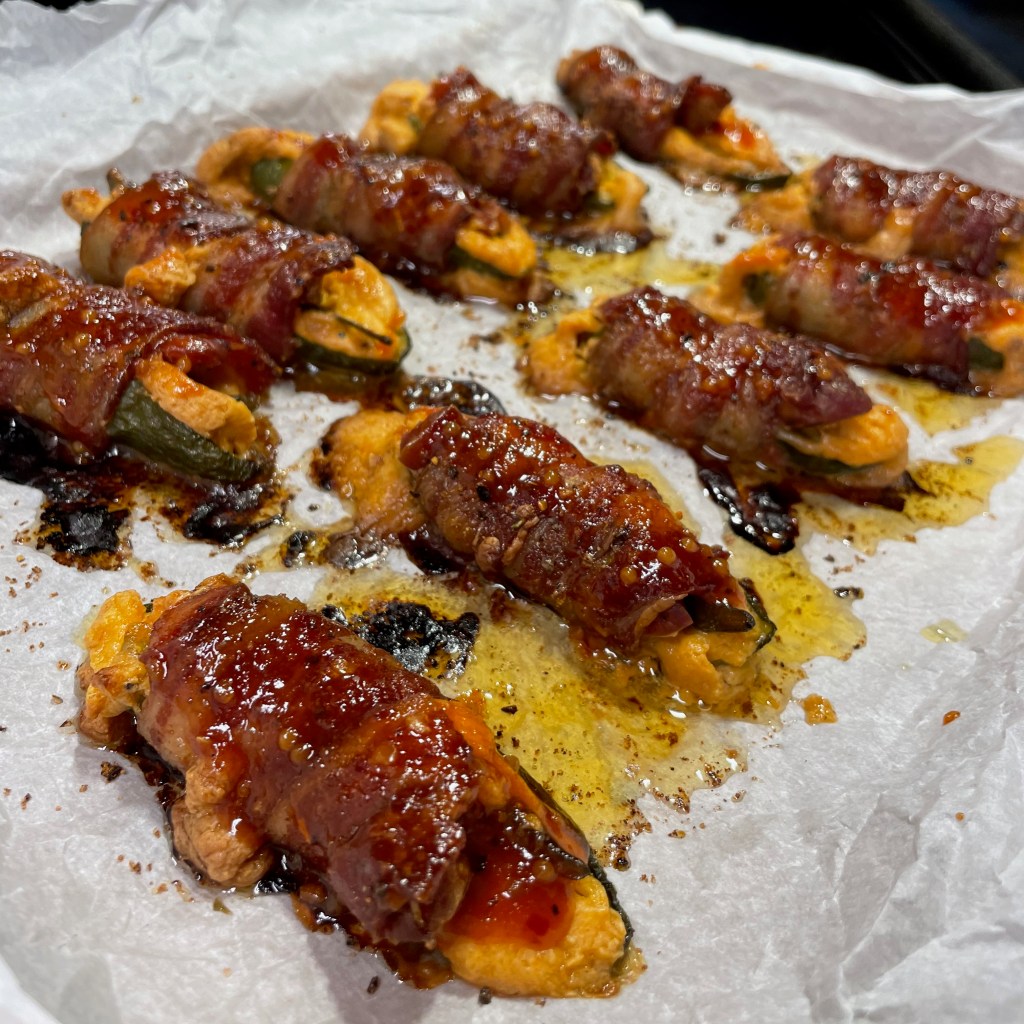
Every once in a while, though, Les presents a surprise that comes out of left field in a way that makes me say, “aw, maaaan, seriously?!” This is exactly what happened the day before Super Bowl, and just two days after I managed to pull off re-creating my beloved Western New York “fish fry.” That’s when he announced to me without fanfare that he was going to get serious about eating healthier, dropping unwanted pounds and getting back into shape— starting immediately after all the deep-fried Buffalo wings and queso dip and jalapeño popper snacks I’d been prepping for the big game. No more ice cream after dinner every night, he said, and no bacon cheeseburgers or deep-fried anything— and oh, by the way, no more alcohol for a while because empty calories were off the table. Big sigh (but don’t worry, I have these indulgent recipes in archive and I will still share them).
Could I have all of this with a side of Lipitor, please?
I was stunned, and truth be told, a little pissed at this zero-notice announcement. But anyone who loves a Virgo knows that once a decision is made, there’s no point arguing. Virgos get things done, hard stop. And when I consider the timing of his resolve, I recognize that it came mere hours after I complained (again) that none of the cute, sexy clothes in my closet fit me or look good on me anymore. From that perspective, his decision is more a response to my own lament.
My lover is right. We need to do better and get healthier, and though I’m disappointed that I won’t be able to immediately practice my new (and highly successful) deep-frying skills, I am at least excited about the challenge of creating more thoughtful meals, and I’m ready to embrace the coming spring with some new outdoor activities. My realistic side knows that I won’t snap back into the same body I had in my 20s or even 30s— and I’m certain that I have never rocked it quite like Sydney Sweeney on that red Mercedes in the video (wow)— but I do know that getting healthier, slimming down and feeling stronger will give me more confidence to wear at least a few of the cute outfits I’ve kept on ice. Maybe in time for the Stones show, I’ll even be able to squeeze my middle-aged butt into those cute flare-legged pants I bought last summer. Regardless, if we stick with it, my husband’s surprise decision will buy us more lifetime together. More time for romance, adventure and other life-changing surprises.
I have mixed feelings about special occasions that fall in the middle of the workweek, and with Valentine’s Day on a Wednesday this year— not to mention in the same week as Super Bowl and Mardi Gras— I’m both frustrated and relieved that it won’t be as big a deal.
I’m not one to go nuts over this “holiday,” which smacks of overdone commercialism and sky-high expectations for everything to be perfect. My husband and I usually stay home and either cook for each other or, as will likely be the case this year, keep it low key and simple. I don’t need roses, wine and chocolate to know that I’m loved.
But this year, the easiest time to make a lovely homemade meal for Valentine’s Day would be this Saturday; unfortunately, it’s getting crowded out at our house by the Super Bowl. I’m reminding myself that I don’t need grand gestures, but the truth is I’m disappointed. My husband will feel loved if the table is loaded with spicy queso dip, Buffalo wings and cold beer, but I will genuinely miss preparing an elegant, more “fancy” meal.
If nothing else, I will find a way to throw a little romance onto the scene this weekend, probably in the form of dessert. And I know exactly what he craves— chocolate and cherries!
I can’t go wrong with this flavor combination!
For Valentine’s Day last year (which was a Tuesday, also not ideal), I re-created our 2020 sweetheart meal of crispy duck breast with cherry-pinot noir sauce, and Les was thrilled. For dessert, it was an encore performance of chocolate and cherry crepes. My iPhone camera did not capture good photos of the dish itself that first time— it was before I began blogging— but I believe you can see the bliss in my lover’s eye as he enjoyed his special dessert.
Even with crappy lighting, it’s easy to see that this dessert made him happy!
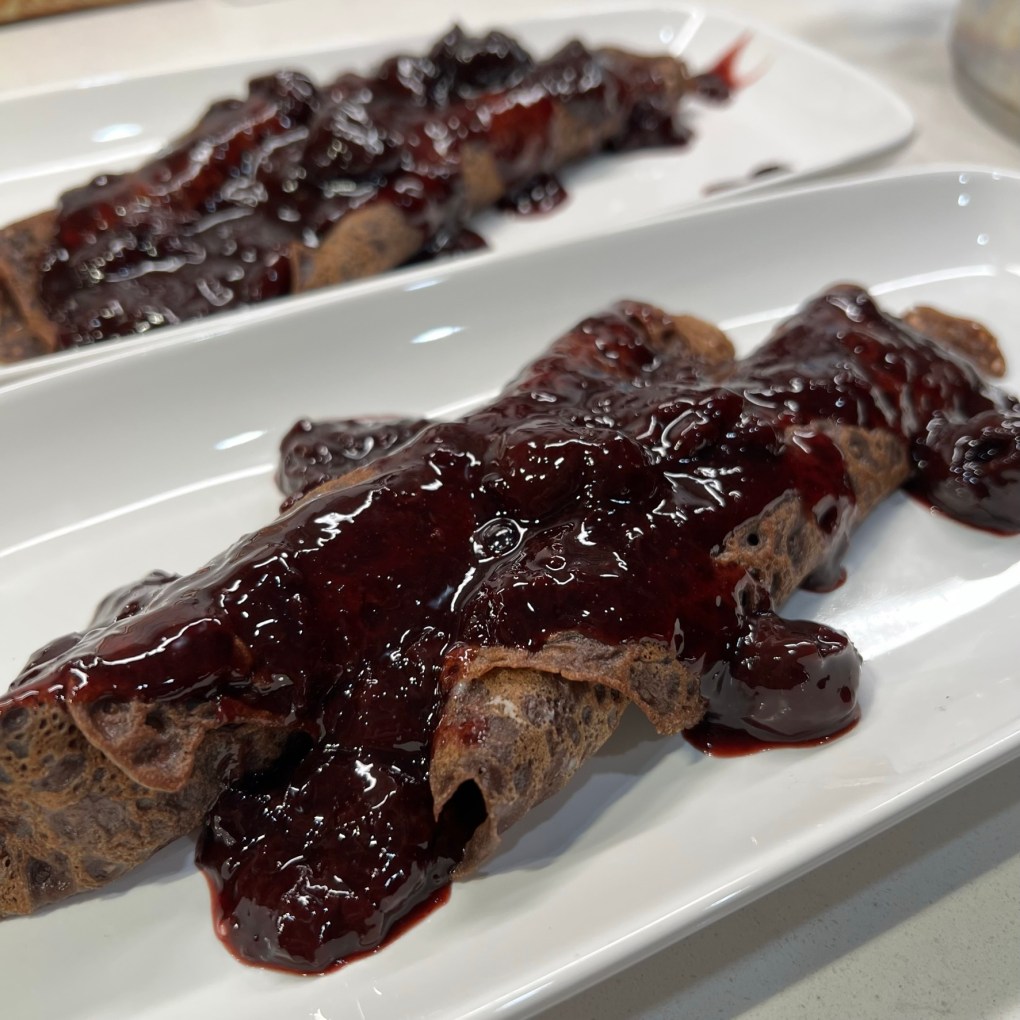
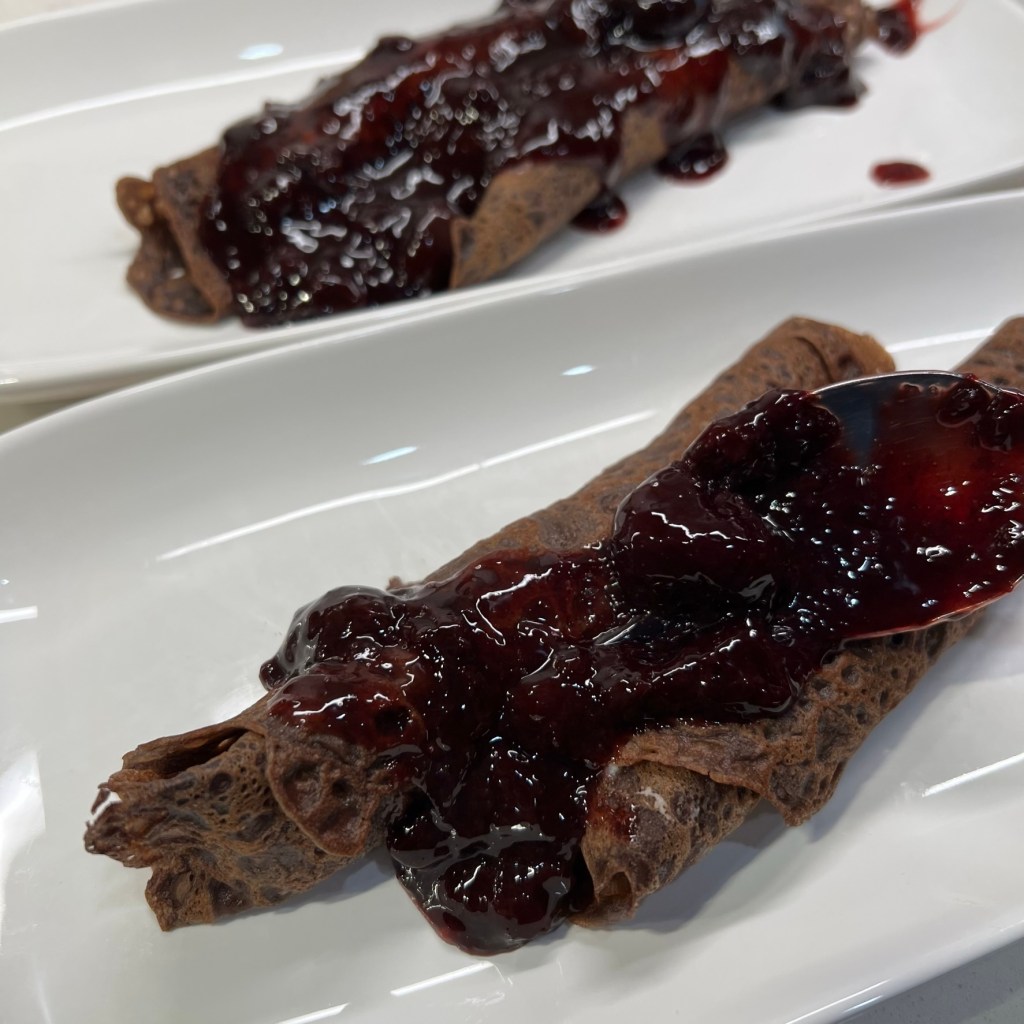
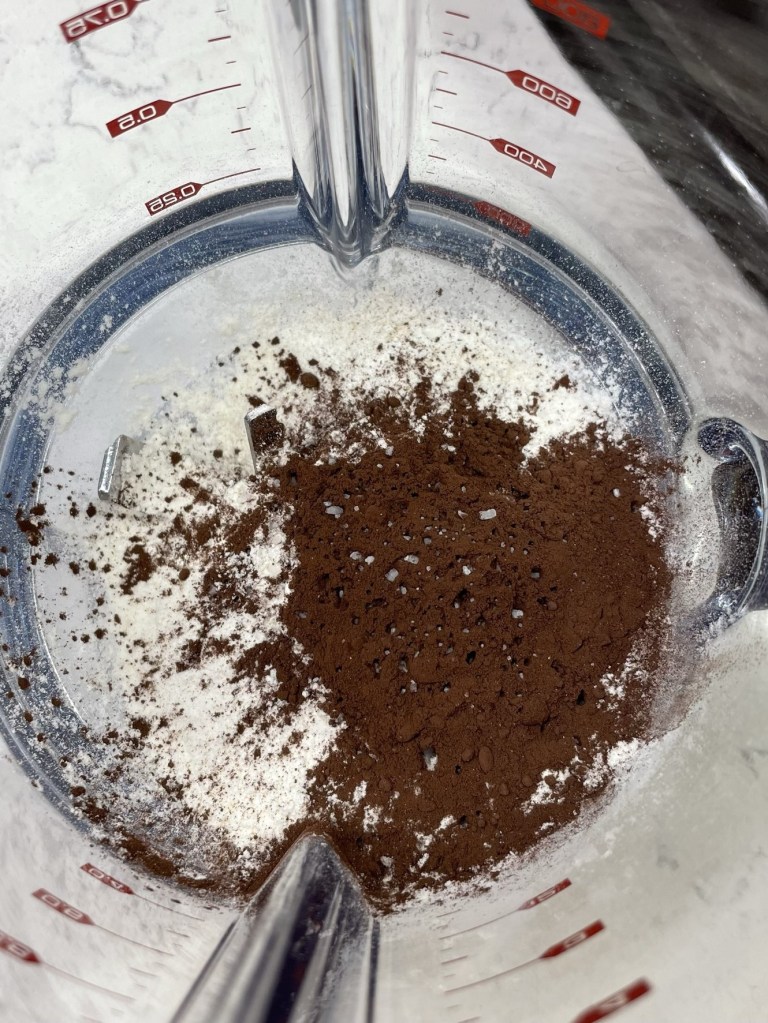
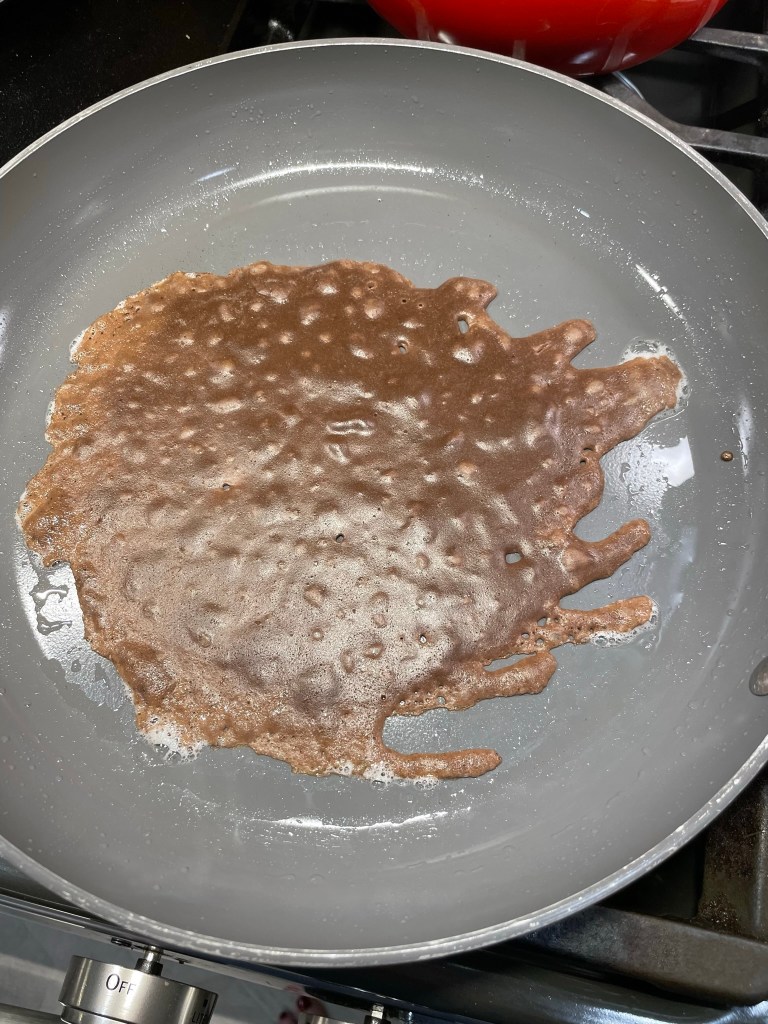
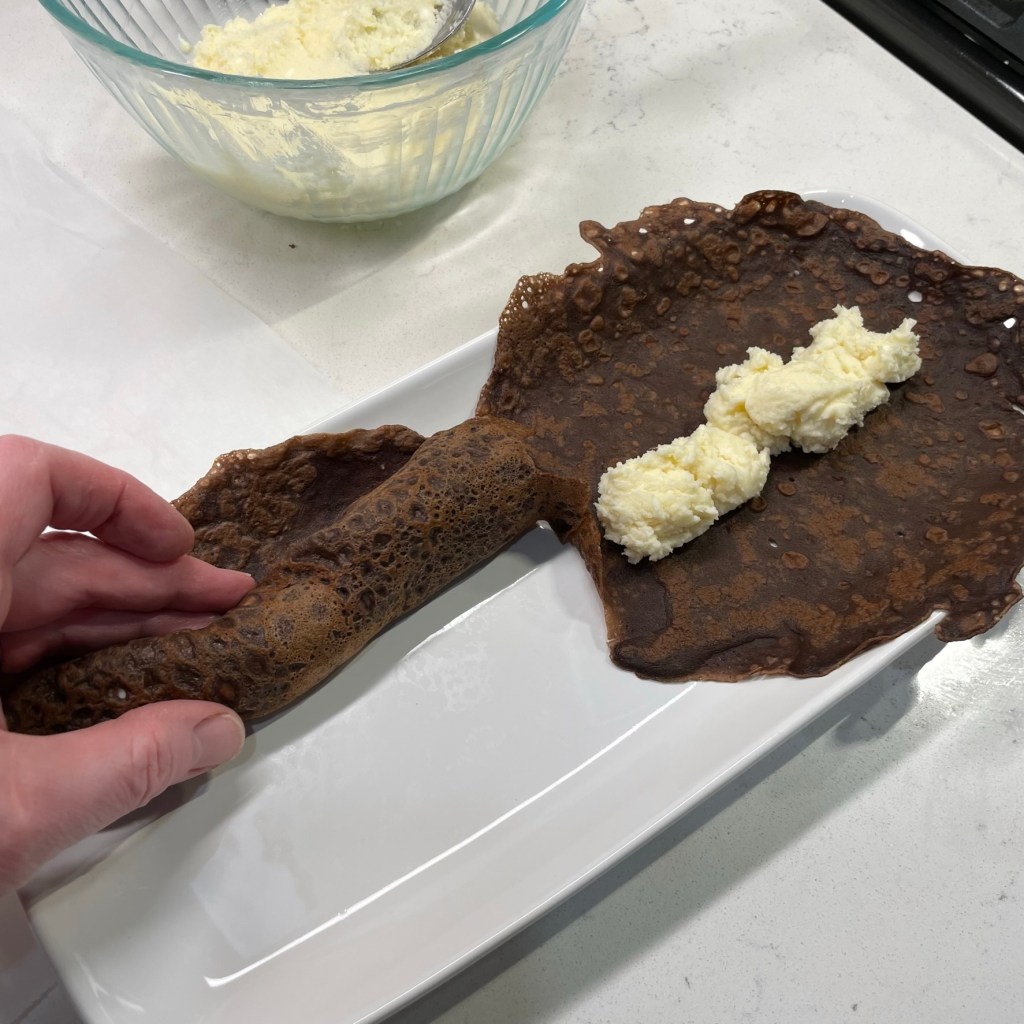
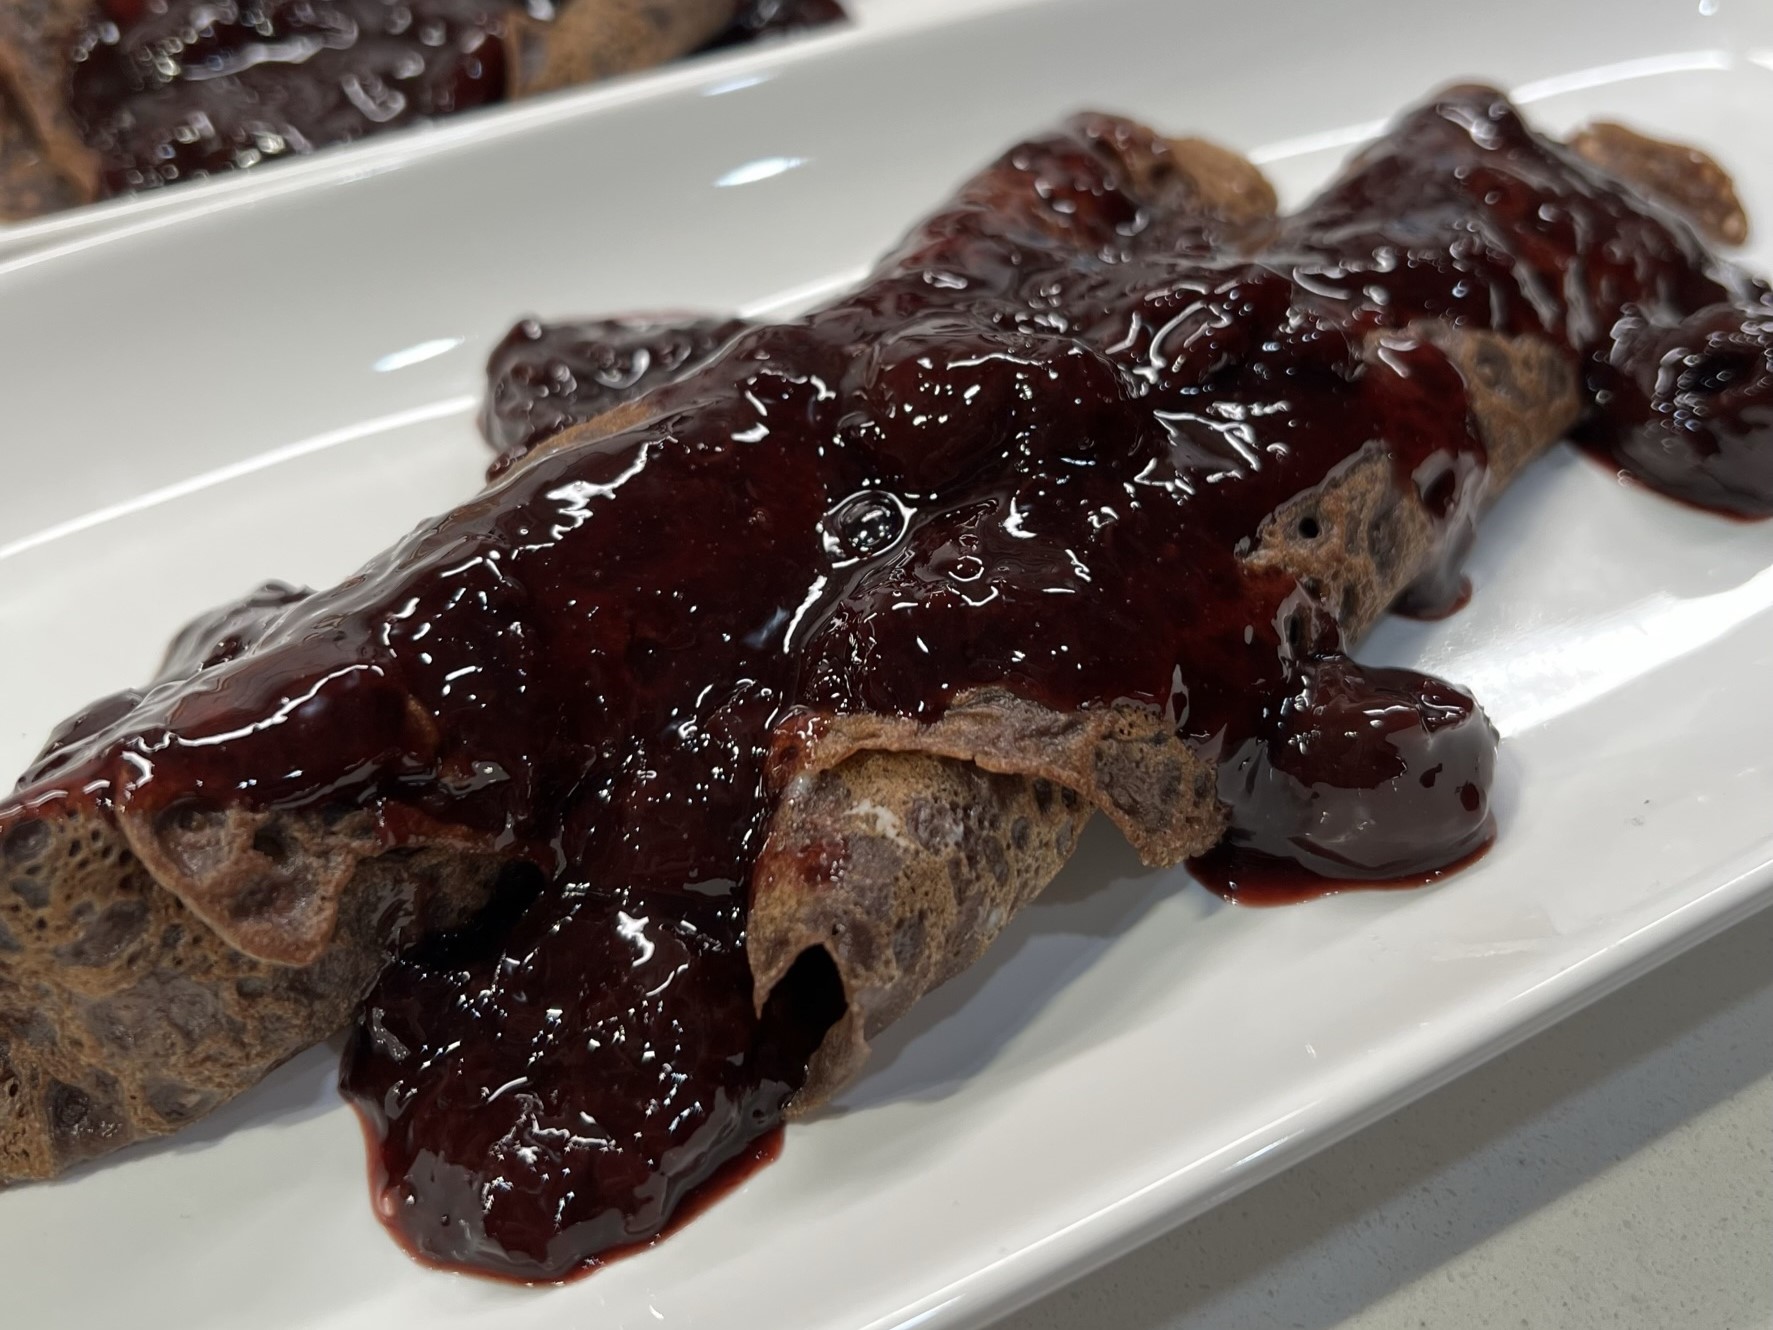
These are homemade chocolate crêpes, created with double dark cocoa powder and rolled up with an almond-kissed, sweetened mascarpone filling, and then topped with a simple-to-make sweet cherry sauce. And though I’m still a novice when it comes to making crêpes (try not to laugh when you see my photos), I can confirm that after you roll them up and bury them in cherry sauce, nobody will notice if they aren’t perfect.
Making the batter and crepes ahead takes the pressure off whatever else you’re cooking for Valentine’s Day.
The best thing about these crêpes— besides the fact that the flavors are divine— is that you can make every part of them in advance and assemble them when you’re ready to sweep your lover off his or her feet. The crêpe batter actually benefits from some fridge time, so you can even make it the day before. One of these days, I’ll get the hang of cooking them pretty, but for now, the advice I’ll offer is to make extra batter (in case your first ones are duds) and cook them ahead of your occasion. The crepes can be layered with parchment or waxed paper and stored in a zip top bag in the fridge until you’re ready to assemble them with the filling and sauce.
I kept thinking my next crepe would be better, but nope. 😂
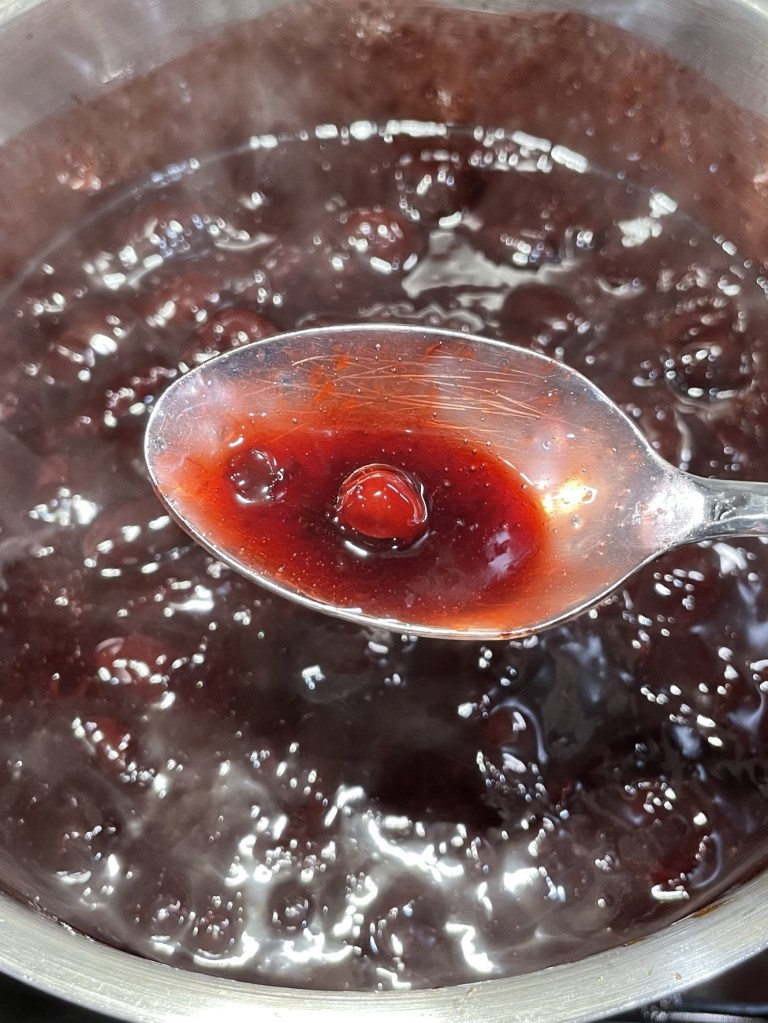
The mascarpone is super simple and the cherry sauce, which is conveniently made with frozen dark cherries, can be made ahead and warmed in time for dessert.
Make extra cherry sauce, because you’ll find yourself eating it straight from the pan!
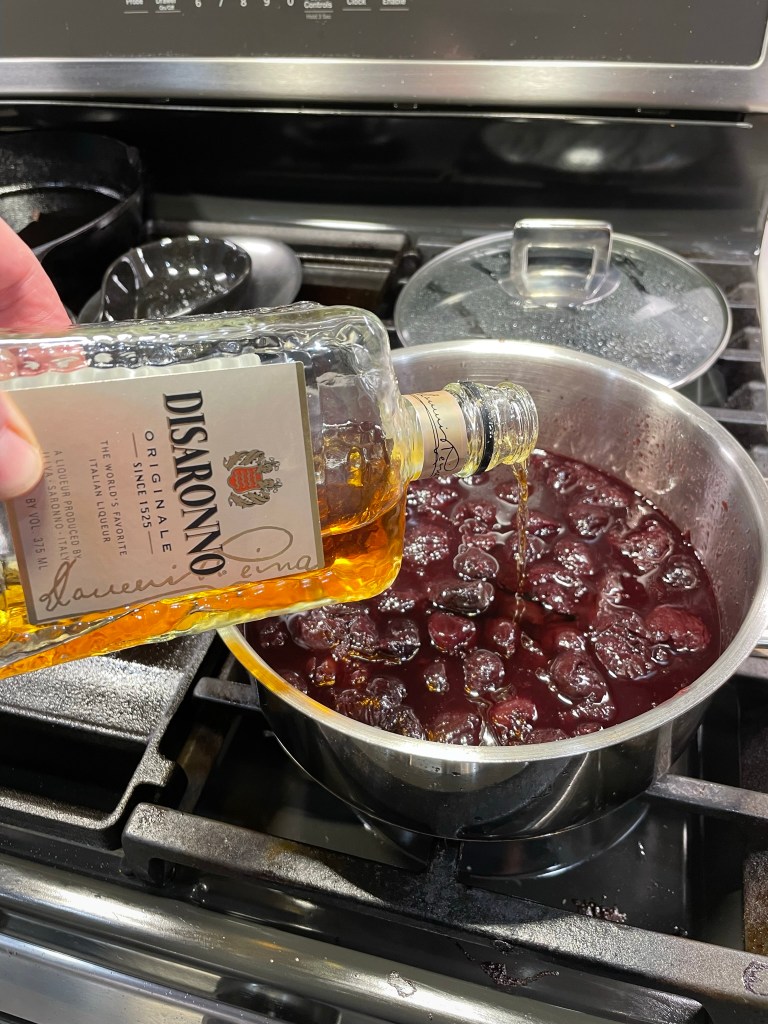
The cherry sauce is so delicious, even if you don’t want to mess with the crêpes, you might find this a perfect topper for ice cream or a brownie or pound cake or anything else you and your Valentine enjoy. I flavored mine up with a splash of amaretto because I love the combination of cherry and almond, but you could skip this or swap in a splash of rum or brandy if you’d like. Assembly of the crêpes is a snap.
Next time, I’ll add a dollop of whipped cream on top!
The best thing about this dessert, besides the marvelous flavor combo, is that you can make every part of it ahead and simply assemble the crêpes at serving time.
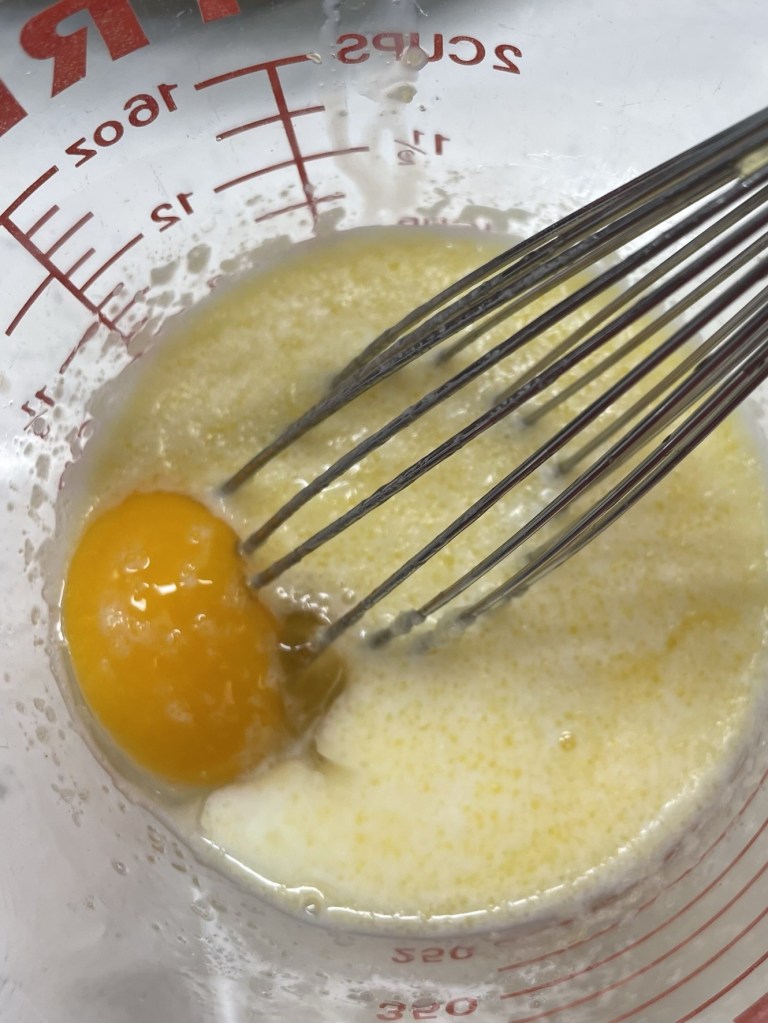
The crêpe batter should be made ahead and left to rest in the refrigerator for several hours, up to a full day. Give it a gentle whisking just before cooking to reincorporate any ingredients that have settled to the bottom of the bowl.
Ingredients
1/2 cup milk
1/4 cup water
1 cup all-purpose flour
1 Tbsp. double dark cocoa
Pinch salt
1 Tbsp. cane sugar
1 egg
2 Tbsp. melted butter
½ tsp. vanilla
Additional butter, used for cooking the crêpes (about 1 tablespoon)
Directions
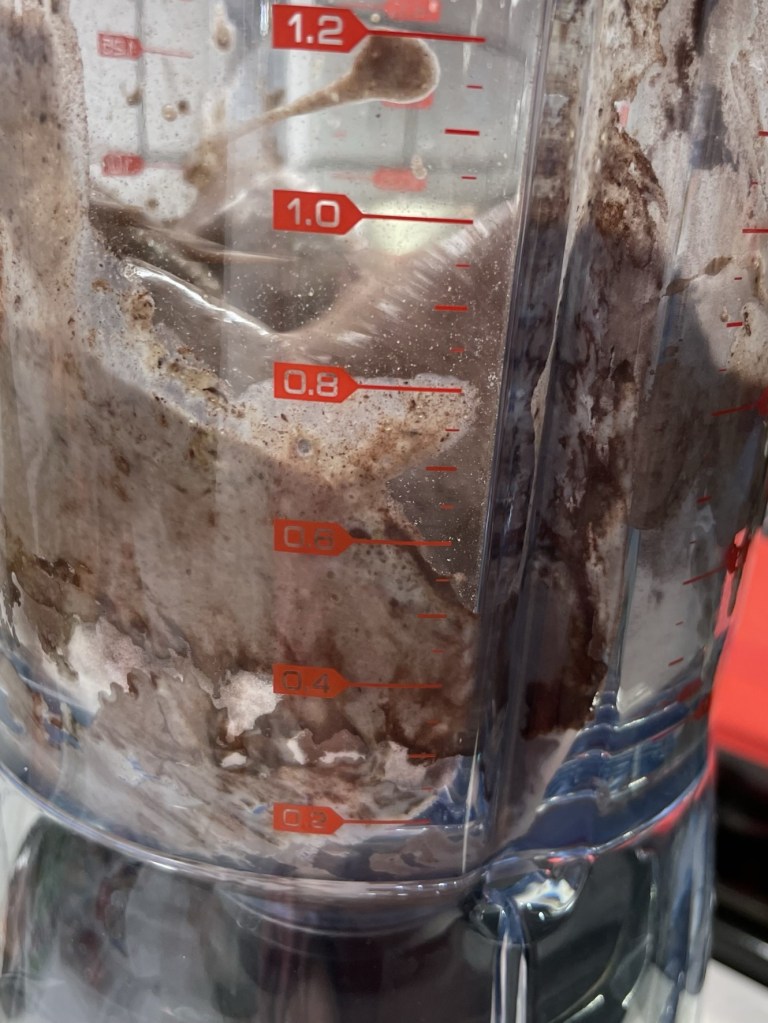
Combine all ingredients in a blender container and blend until completely smooth.
Transfer to a bowl, cover and refrigerate at least an hour or up to one day.
When ready to cook, heat a small pat of butter in a large, non-stick skillet over medium-low heat. When butter begins to brown slightly, ladle 1/4 cup of the crêpe batter into the center of the pan. Swirl the pan gently to spread the batter around into a shape as close to a circle as you can. Cook one minute, then gently turn the crêpe (a silicone spatula is useful here) to cook the other side.
Stack the cooked crêpes between layers of parchment paper and store them in the fridge until you’re ready to assemble.
The mascarpone filling is lightly sweetened and kissed with a touch of vanilla and almond. This is a lovely complement to the dark chocolate crêpes and the sweet cherry topping. Make it ahead and refrigerate until ready to assemble.
Ingredients
8 oz. mascarpone, at room temperature
2 oz. cream cheese (full-fat recommended; this is approximately 1/4 of a standard block)
3 Tbsp. powdered sugar
1/2 tsp. vanilla extract
1/2 tsp. almond extract
Directions
Use a sturdy spoon to blend the mascarpone and cream cheese together in a medium bowl.
Add powdered sugar and extracts. Blend until fully combined and smooth. Refrigerate until ready to assemble the crêpes.
This dark cherry sauce is so easy to make, and provides most of the sweetness in this dessert. It’s delicious when served slightly warm over the crêpes.
Ingredients
3 heaping cups frozen dark sweet cherries
1/4 cup cane sugar
3-inch stick whole cinnamon
Pinch of salt
Juice of 1/2 lemon
1/4 cup cherry juice
2 Tbsp. amaretto
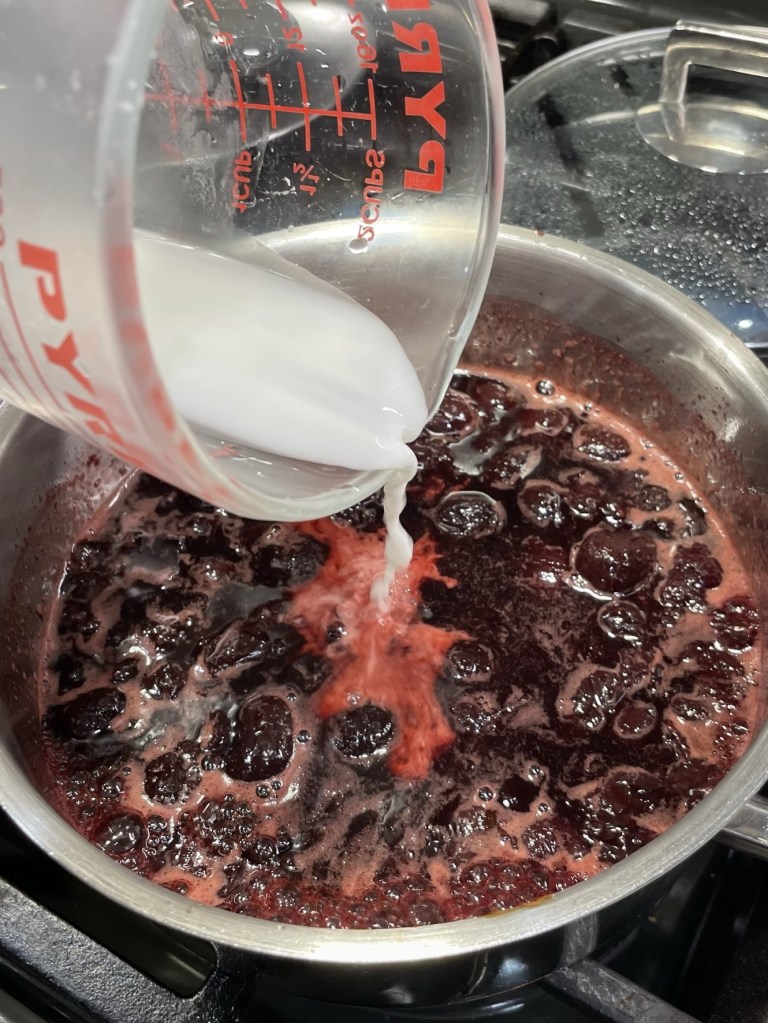
2 Tbsp. corn starch, mixed with 2 Tbsp. cold water (used to thicken sauce)
Directions
Combine cherries, sugar, cinnamon stick, salt, lemon juice and cherry juice in a large sauce pan over medium heat. Bring to a boil, and then reduce heat to a simmer until cherries are completely softened. Remove from heat and cool to room temperature.
Bring cherry mixture back to a simmer and stir in amaretto. Remove cinnamon stick and blend corn starch slurry in to thicken. Let the mixture cool slightly before topping crêpes.
Assemble crêpes: Lay a single crepe on a plate or piece of parchment. Add spoonfuls of the mascarpone mixture across the center. Roll up the crêpe and arrange on a dessert plate. Repeat with a second crêpe for each serving. Spoon the cherry sauce over and prepare to swoon.
One last note: Remember that store-bought frozen cherries are pitted mechanically, and every once in a while, the machines miss one. Inspect the cooked sauce thoroughly, just in case!
As we near the end of this year’s Mardi Gras celebration, which wraps up on Feb.13, I’m presenting a pizza twist on the muffuletta, a sandwich that has its origin in New Orleans. You may recall from some of my previous Mardi Gras posts that my travels have not led me to The Big Easy (yet), though it is certainly on my bucket list of foodie places to visit. Still, I love a theme party, and I have a vivid memory of muffuletta, thanks to a part-time job I had more than two decades ago.
Allow me to back up a bit to explain about muffuletta for those who may not be familiar, and why it ties to New Orleans, which we usually associate with Creole-inspired and French cuisine. One glimpse of the muffuletta ingredients list— cured salami, mortadella, ham, provolone and a chopped giardiniera-olive spread— would make one think of Italian food, and rightly so. The muffuletta is said to have been created by a Sicilian immigrant who settled in New Orleans about the turn of the previous century. It is usually presented with loads of layers on a large, round, focaccia-like bread topped with sesame seeds.
My first experience of muffuletta came during my two-year stint in a catering kitchen in Greensboro, N.C., where a friend had recruited me to be a kitchen helper during busy periods. The kitchen was jamming during wedding season, the winter holidays and the twice-a-year High Point Furniture Market, and I was happy to jump in to help fulfill orders.
At some point in those two years, one of our regular customers must have hosted a Mardi Gras-themed event, because I was charged with making approximately four quarts of the chopped olive and vegetable mix that was to be used for muffuletta sandwiches. Not knowing anything at all about that sandwich, I followed the instructions on the recipe card I’d been given. Green olives, black olives, capers, pickled vegetables, olive oil, vinegar and dried Italian herbs— what in the world was this concoction? And then Rodney, our smart-ass head chef, labeled the giant plastic jar “Muff Stuff.” You can imagine the chaos that ensued over the nickname in our kitchen of mostly immature amateurs.
“Muff stuff” was the briny, pickled relish for muffuletta, and you can easily make this condiment in just a few minutes with a food processor, though my task was to chop up the ingredients by hand. It was delicious on its own, though not very pretty to look at, and it wasn’t until Rodney whipped up a miniature version of muffuletta for the kitchen crew to sample that I understood the importance of what I had made.
It was like an Italian sub on steroids. A salty flavor explosion that is both rich and fatty, and only makes you feel guilty until you go in for another bite. It’s so good! I’ve wanted to put these flavors on a pizza for a long time, and here you go. Mardi Gras is all about indulgence and excess, and this meat-and-cheese lover’s pizza is doing its part, in the spirit of New Orleans!
You could just call it an Italian meat lover’s dream pizza.
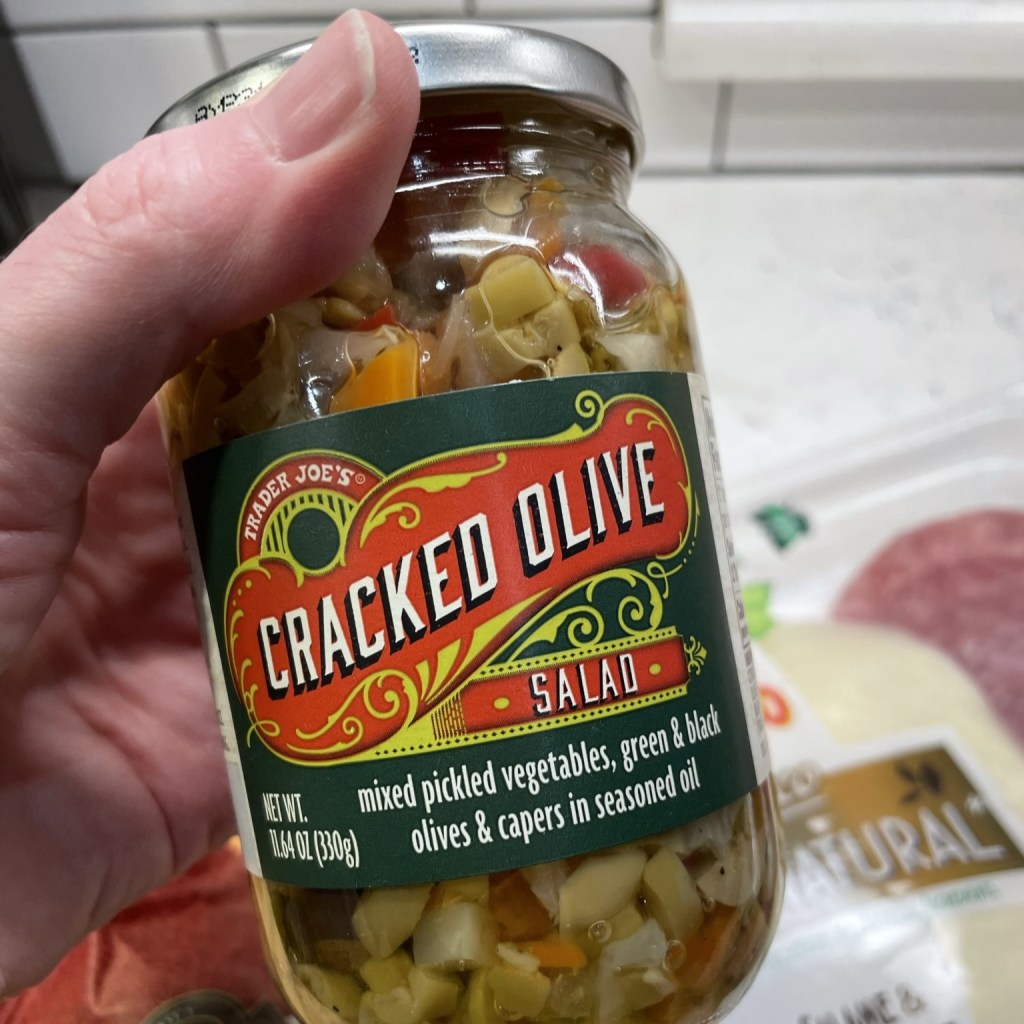
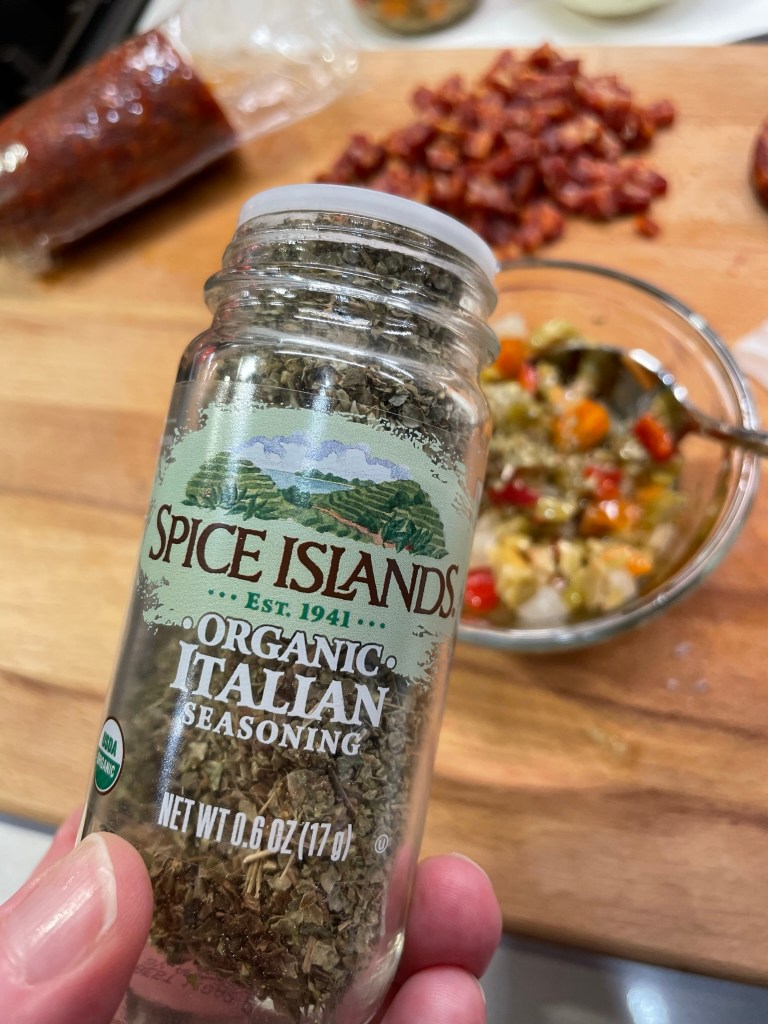
For my muffuletta pizza, I did not delve into making the muff stuff from scratch. Rather, I took advantage of the Trader Joe’s product that pushed me over the finish line to tackle this culinary bucket list item. They call it “cracked olive salad,” and yes, I checked to be sure that TJ’s still sells it, given the store’s tendency to cancel items without notice. Having said that, if you cannot find the cracked olive salad or don’t have a TJ’s nearby, there are similar products in other supermarkets—check the pickle section. If you still can’t find it, check out this recipe on Serious Eats, where my culinary idol Kenji López-Alt will be happy to walk you through making the olive salad, or indeed, the entire muffuletta.
This is essentially giardiniera chopped together with olives.Ham, pepperoni or capicola would also be suitable.
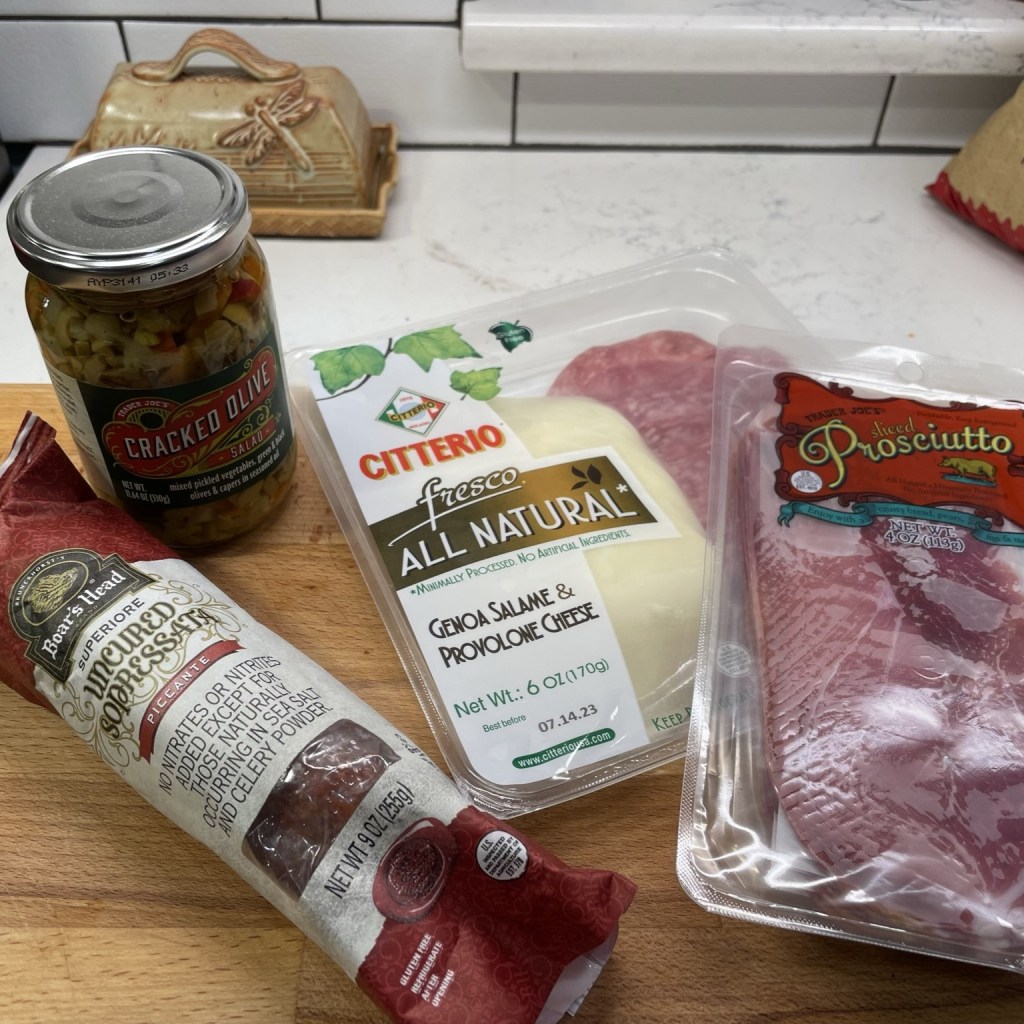
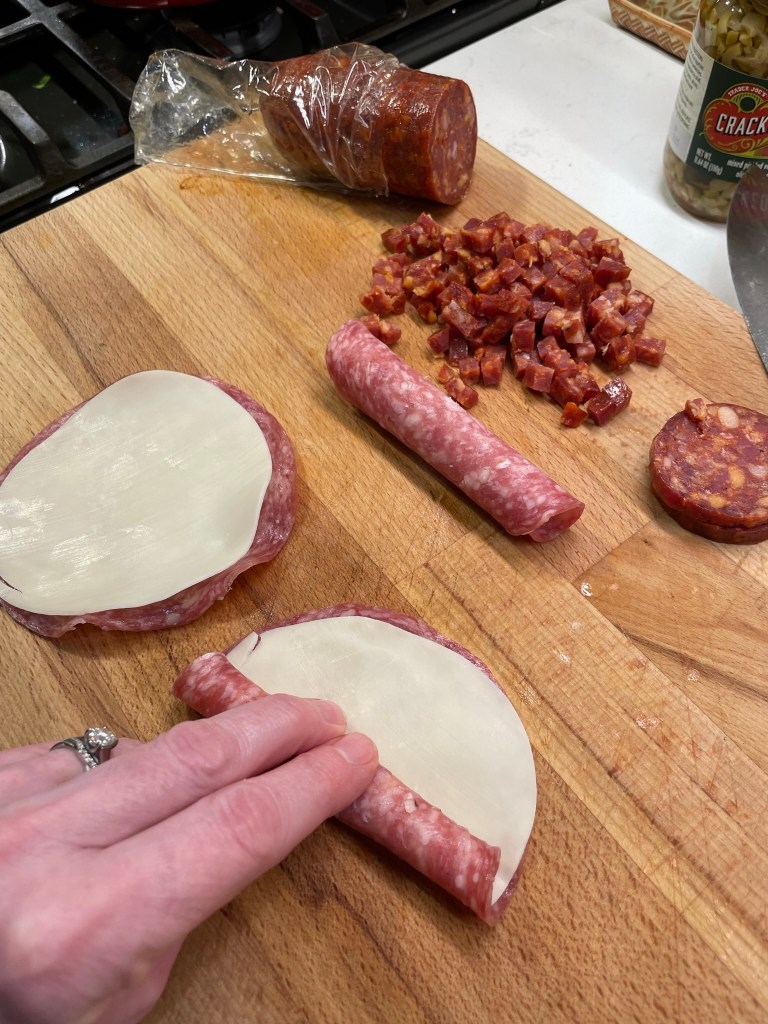
I wanted my muffuletta pizza to have as many authentic flavors as possible, so I considered the three categories of meat recommended by Kenji in the aforementioned article. Mortadella, a fatty, emulsified deli meat, is hard to come by in my city, and bologna was out of the question for me, so I went with three of our favorites from the other two categories— Genoa salami, spicy soppressata and thinly sliced prosciutto. Provolone was in the package alongside the salami, and I rolled them up together for an impression of layers, like on the sandwich. I wrapped the rolls snugly in plastic wrap and stuck them in the freezer for an hour or so to help them keep their spiraled shape after slicing. The soppressata was cut into cubes, and the prosciutto into thin strips, so that my pizza would have plenty of interesting texture. I also bumped up the flavor of the olive salad with a few shakes of dried Italian seasoning.
As with any recipe, the prep is super important.
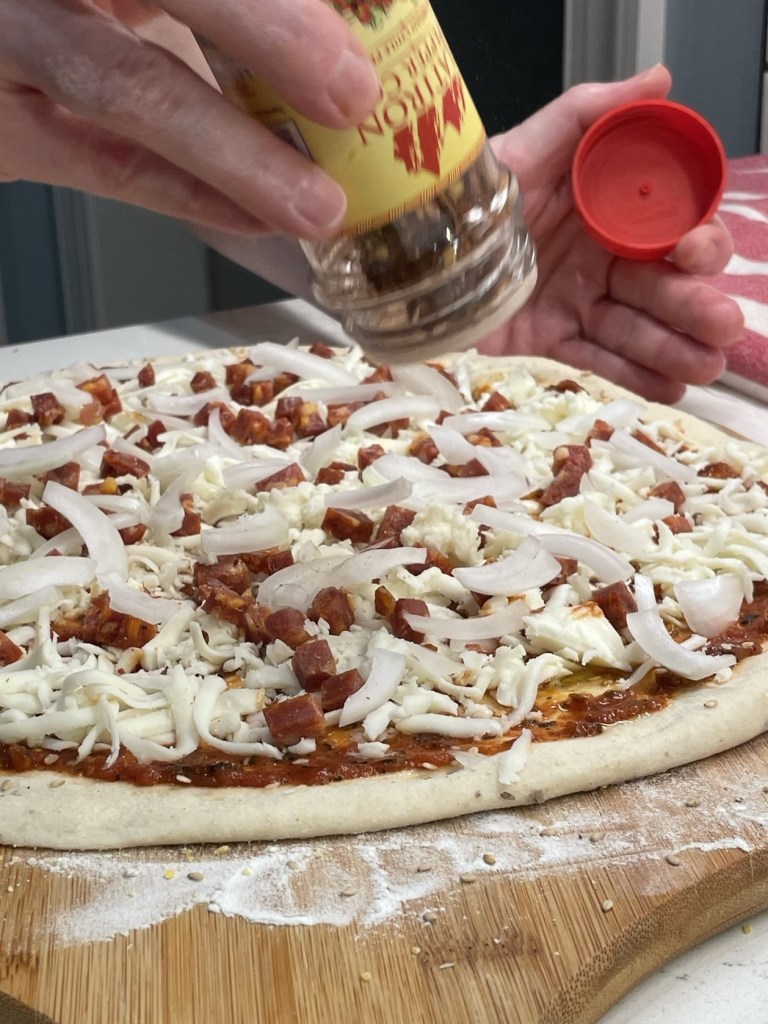
All my pizzas are made with sourdough crust and baked on a screaming hot pizza steel for a brick oven-like finish, but you could replicate the idea of this pizza on any crust you like, perhaps even fresh dough you pick up at the deli. I sprinkled sesame seeds all over the dough, which was more symbolic than anything because we couldn’t detect them on the finished pizza. Sauce went down next, followed by copious amounts of freshly shredded mozzarella, the cubed soppressata, fresh sliced onions and Calabrian chile flakes. Then, the rest of my muffuletta-inspired flavors!
Somebody cue up the zydeco music!
A sprinkle of Parm-Romano blend was a finishing touch, and then into the oven for six minutes— oh, how I love our Dough Joe pizza steel!— and this was possibly one of the most delicious pizzas I’ve ever made. I had some jitters about having “too much meat” on this pizza (my husband would say there’s no such thing), but the flavors worked really well together and the pickled vegetables in the cracked olive salad kept the richness in check.
One of these days, I’m going to get down to New Orleans. Maybe next year. But for now, I’m satisfied to let the good times roll with as many Mardi Gras-inspired foods as I can dream up. What should I make next?
It's an Italian meat lover's dream come true, and with special ties to New Orleans, a fun pizza for Mardi Gras!
Ingredients
3 large slices Genoa salami
3 thin slices smoked provolone
1/3 cup Trader Joe’s “cracked olive salad,” or something similar
A few shakes of dried Italian herb blend
1 pizza dough ball, at room temperature
Extra virgin olive oil, for drizzling
1 Tbsp. sesame seeds (optional, for effect)
1/4 to 1/3 cup favorite pizza sauce (mine was Dei Fratelli fire-roasted)
1 cup freshly shredded, low-moisture mozzarella
1/3 cup cubed spicy soppressata
1/2 sweet or yellow onion, sliced into crescents
A few shakes crushed red pepper, if desired for extra spice
2 slices prosciutto, cut into ribbons
About 1/4 cup grated Parm-Romano blend cheese
Note: All my thin-crust pizzas are made with sourdough and baked quickly on a pizza steel, preheated on the center rack of a 550° F oven for one hour. This is an extreme temperature, and the results are very similar to what you would achieve in a brick oven. If you don’t have a steel, a pizza stone works great; follow manufacturer’s recommendations for temperature and adjust baking time accordingly.
Directions
While the oven preheats, layer each slice of salami with a slice of provolone. Roll up into cigar shapes and wrap tightly together in plastic wrap. Tuck this into the freezer for an hour before slicing, so that the twirls keep their shape on top of the pizza. Add a few shakes of Italian seasoning to the olive salad and set aside.
Shape dough into a 14-inch round and place on a flour and cornmeal-dusted pizza peel for easy transfer into and out of the oven. Drizzle the dough with olive oil and season with salt and pepper. Sprinkle all over with sesame seeds, if desired.
Spread sauce over dough to within one inch of the edges; you should be able to see the dough through it. Layer mozzarella generously over the sauce, then scatter the soppressata cubes and onion slices. Shake on crushed red pepper.
Distribute the olive salad evenly over the pizza toppings, then top with the prosciutto and swirls of salami-provolone. Scatter Parm-Romano lightly over the entire pie and slide it into the oven.
Turn pizza 180° after about four minutes to ensure crust is evenly blistered. Remove from oven and transfer to a pizza tray. Serve immediately.
We are fast approaching a foodie trifecta— Super Bowl, Mardi Gras and Valentine’s Day will all happen in the same week this year, and I’m in a bit of a tizzy about it. My schedule has been so busy lately that I’m struggling to put up even one post a week, let alone three, and with delicious recipes standing by for all of these occasions, I’m feeling the pressure.
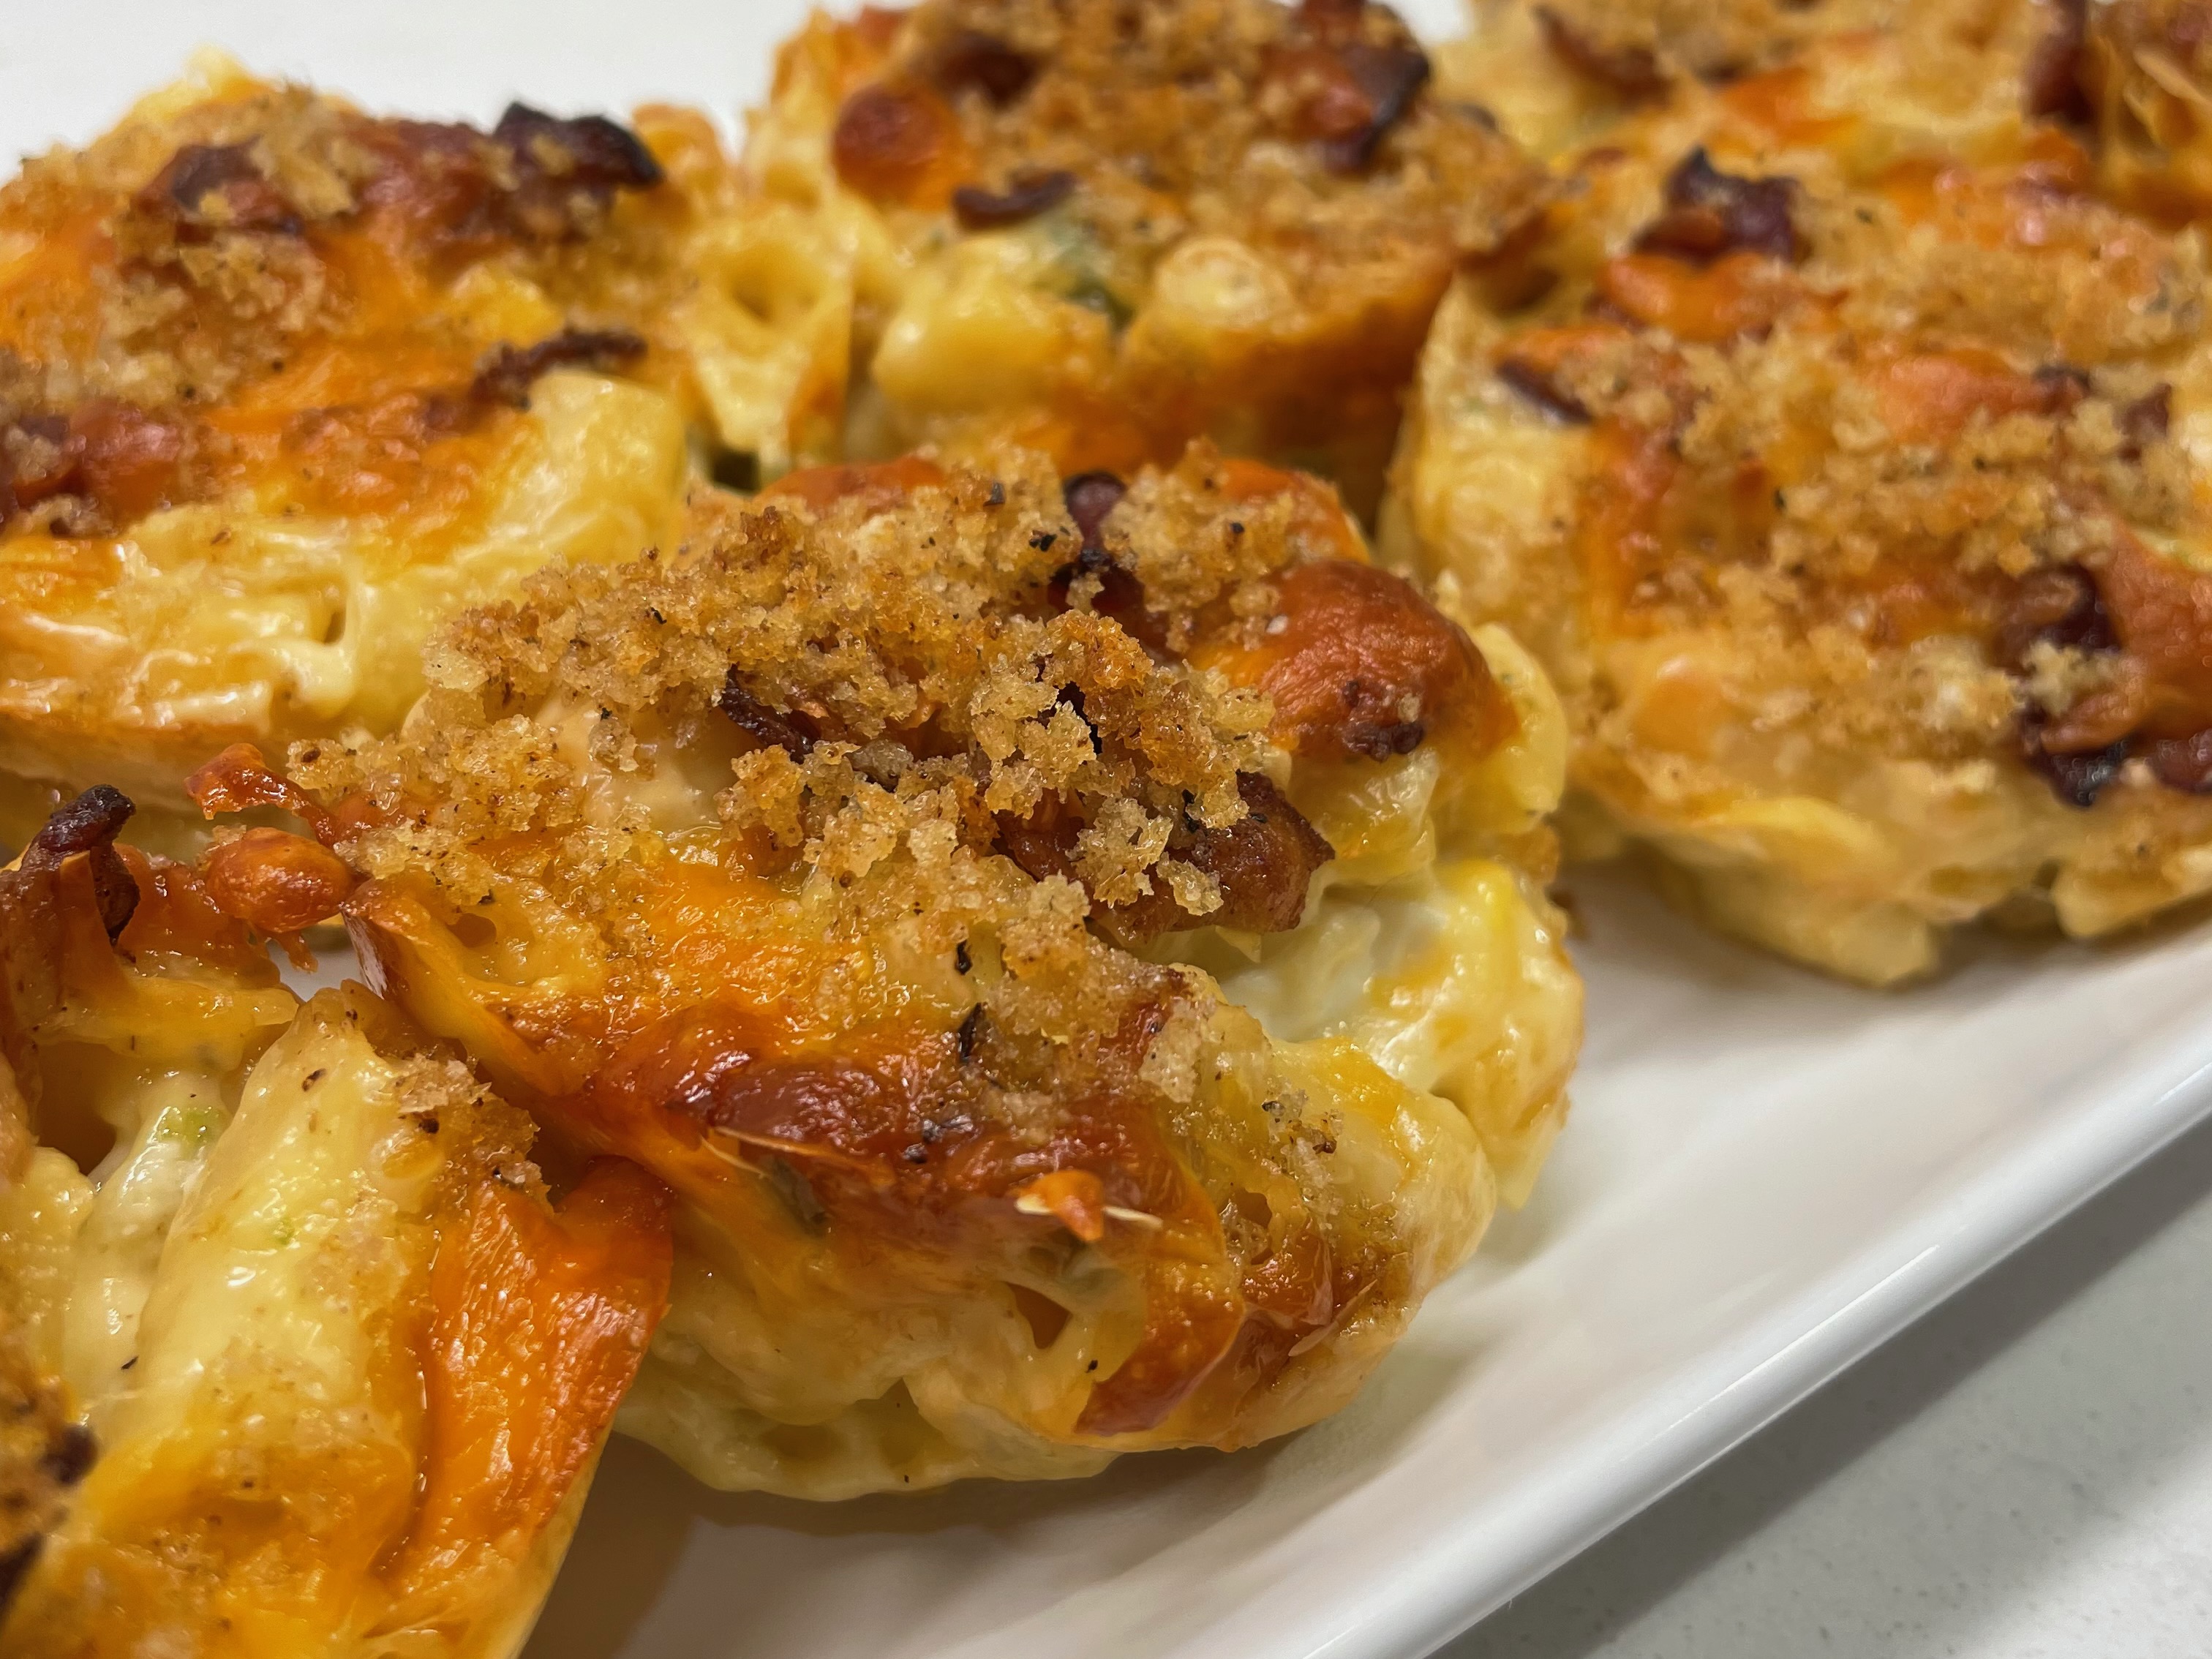
So I’m getting a jump on things with this recipe for mac and cheese bites, which will be every bit as enjoyable for this weekend’s conference championships as it will for the big game on Feb. 11. Heck, you might enjoy them so much, you’ll make them twice!
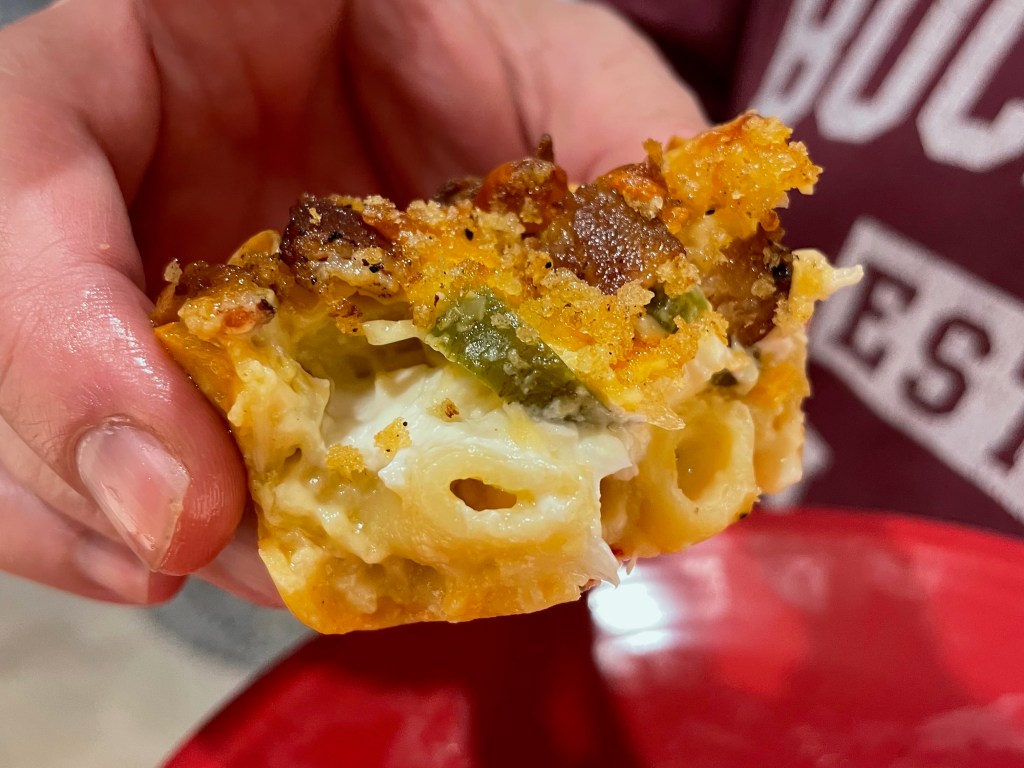
One of my great joys for Comfort du Jour is twisting favorite foods together, and these little handheld bites might be one of my tastiest mashups ever. My husband and I love the spicy, cheesy bite of jalapeño popper appetizers, and who doesn’t love mac and cheese? This was a no brainer. And though my initial plan was to simply make mac and cheese with the popper flavors, I pivoted to my muffin tin to keep the snack in handheld form. For any game day watch party, the less you have to mess with utensils, the better.
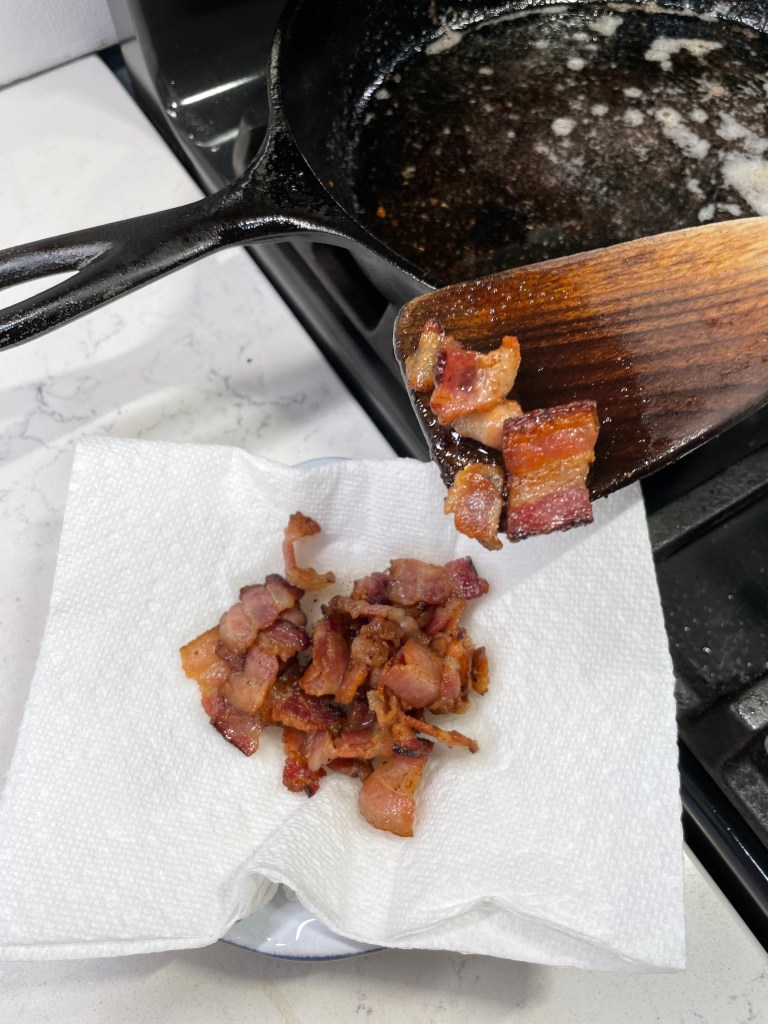
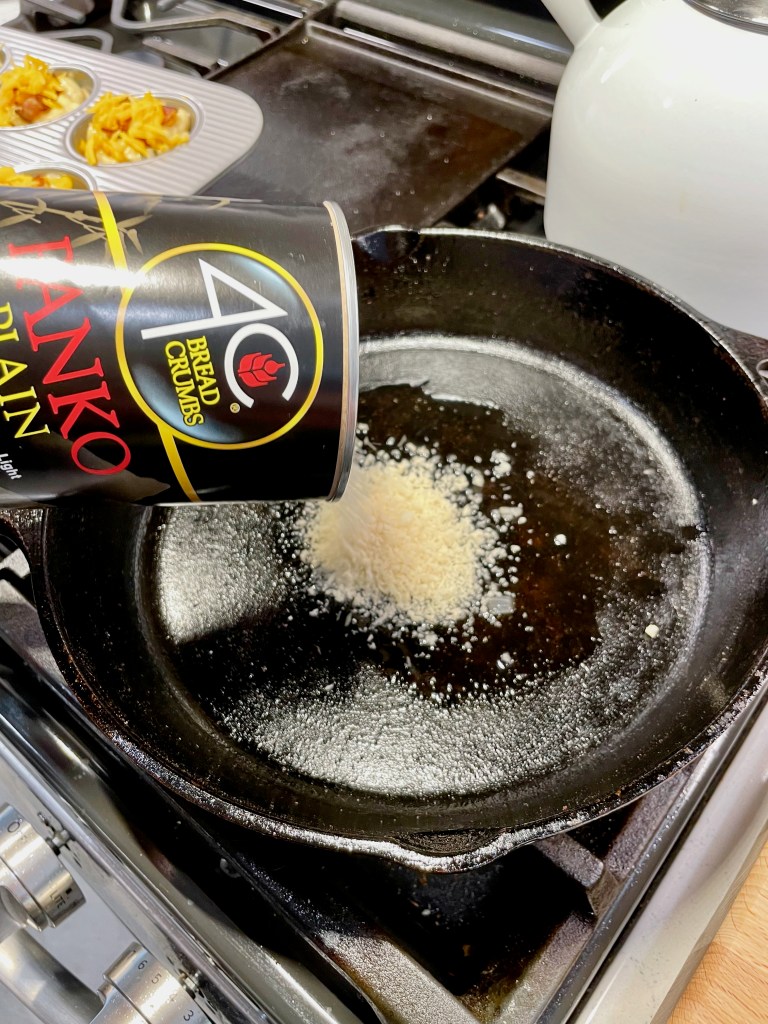
This recipe begins with crisped up bacon, which is reserved for the top. I drained off the excess bacon grease and then tossed panko crumbs into the skillet to soak up the smoky bacon flavor. This would be a topper for my mac and cheese bites, because every game day snack is better with a little crunch.
Of course there’s a lot of fat in these. It’s a game day snack!
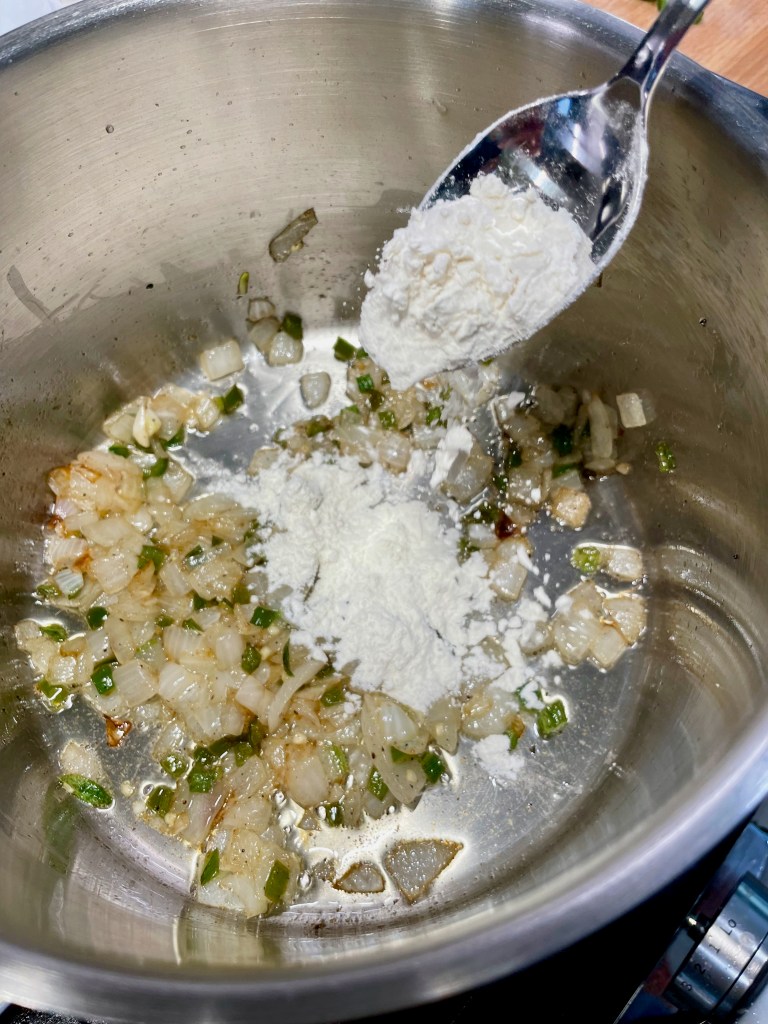
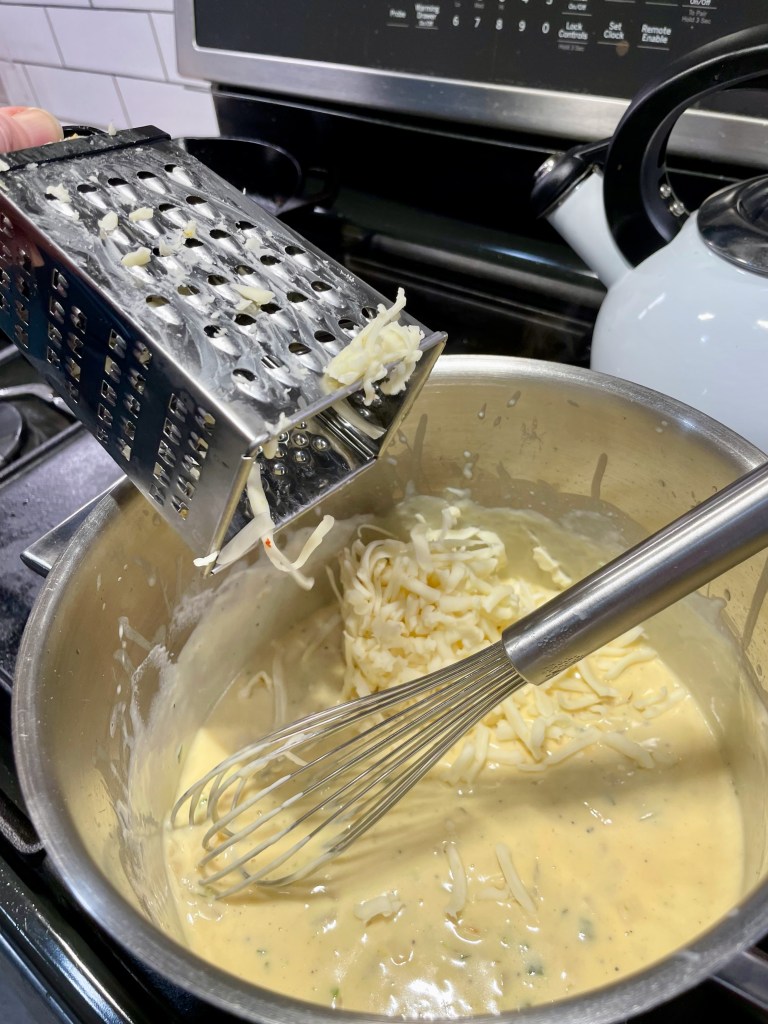
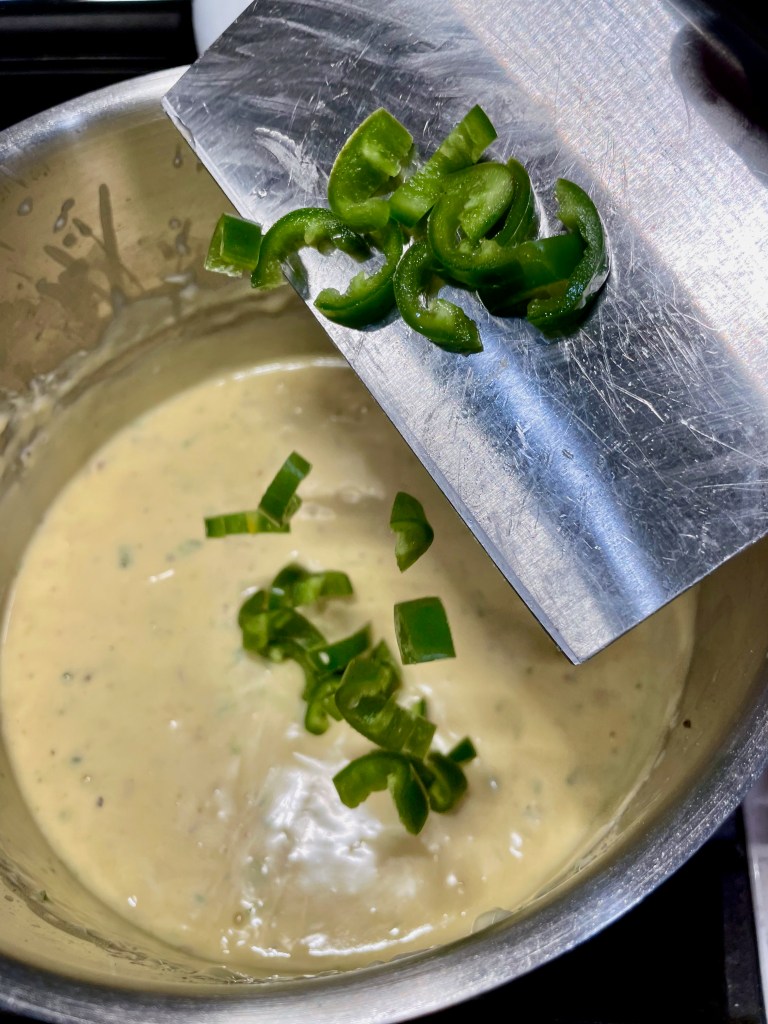
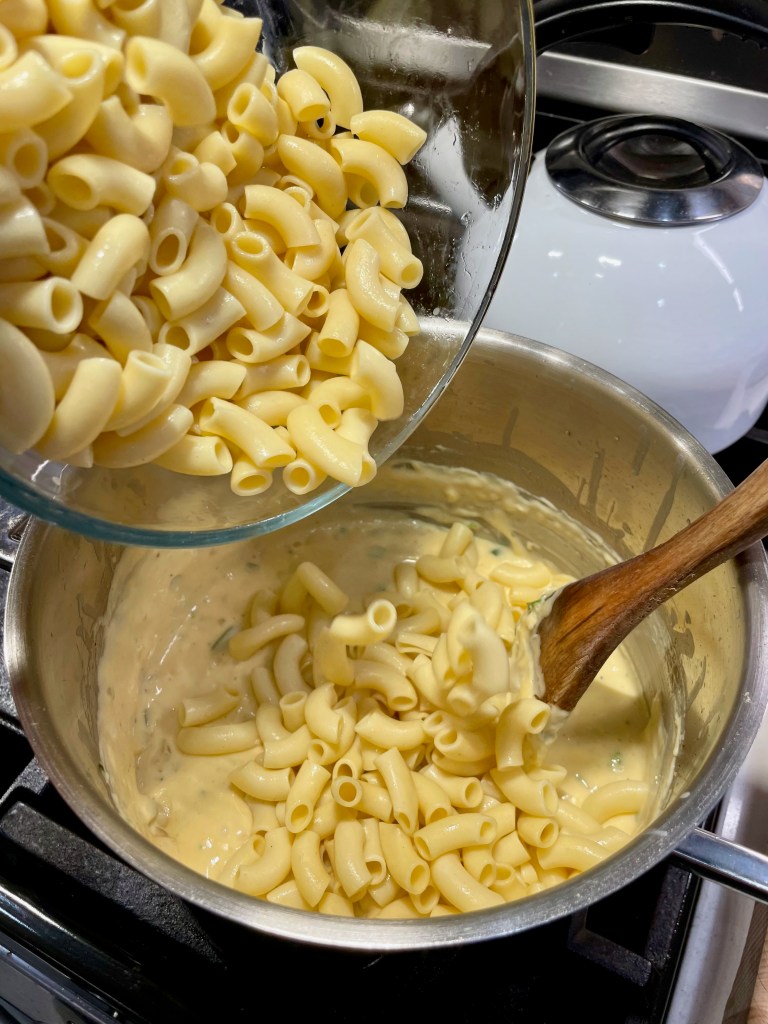
The drained-off bacon grease becomes the backdrop of the jalapeño-studded cheese sauce for the mac and cheese. I followed my usual formula for the sauce: first the roux, then milk for the base, followed by American cheese and shredded cheese (I opted for pepper jack). More fresh jalapeños went into the sauce, and then the cooked elbows.
Of course, this would also be delish baked in a casserole.
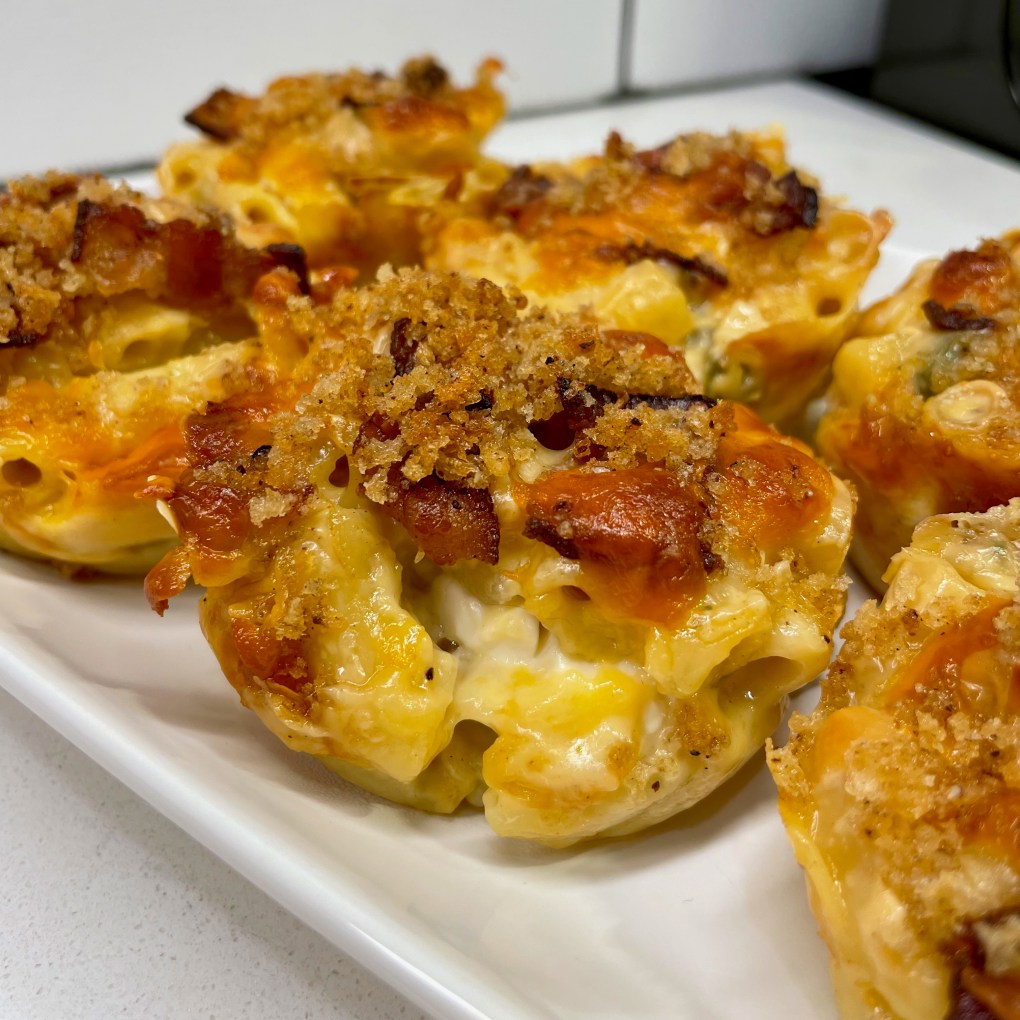
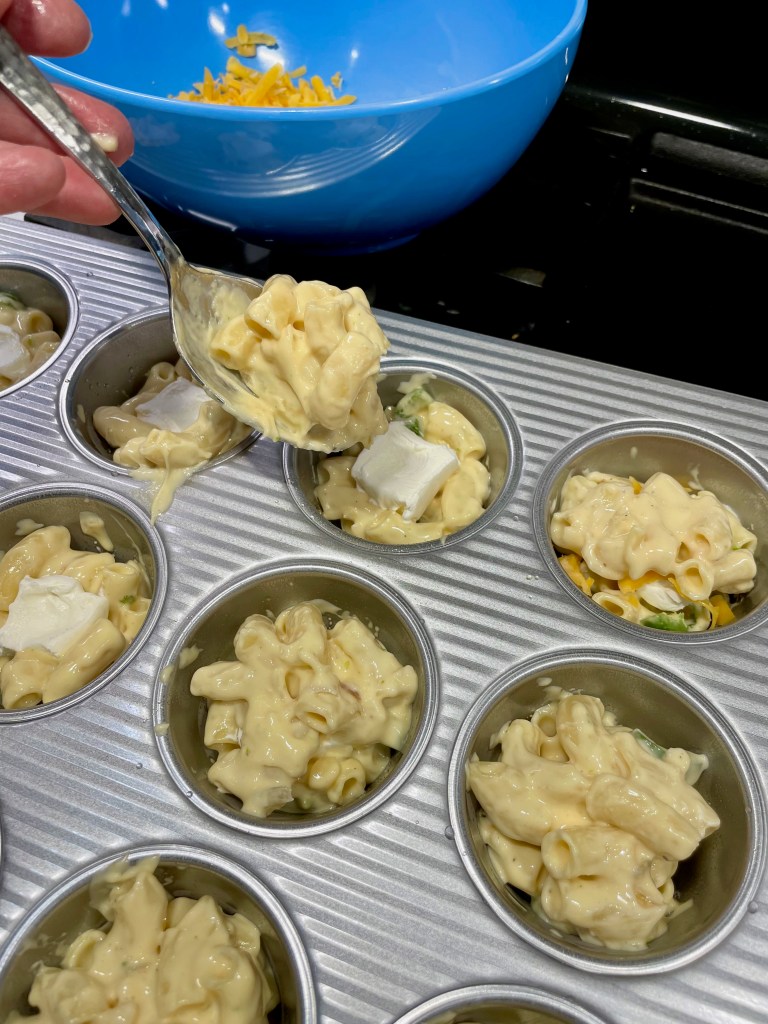
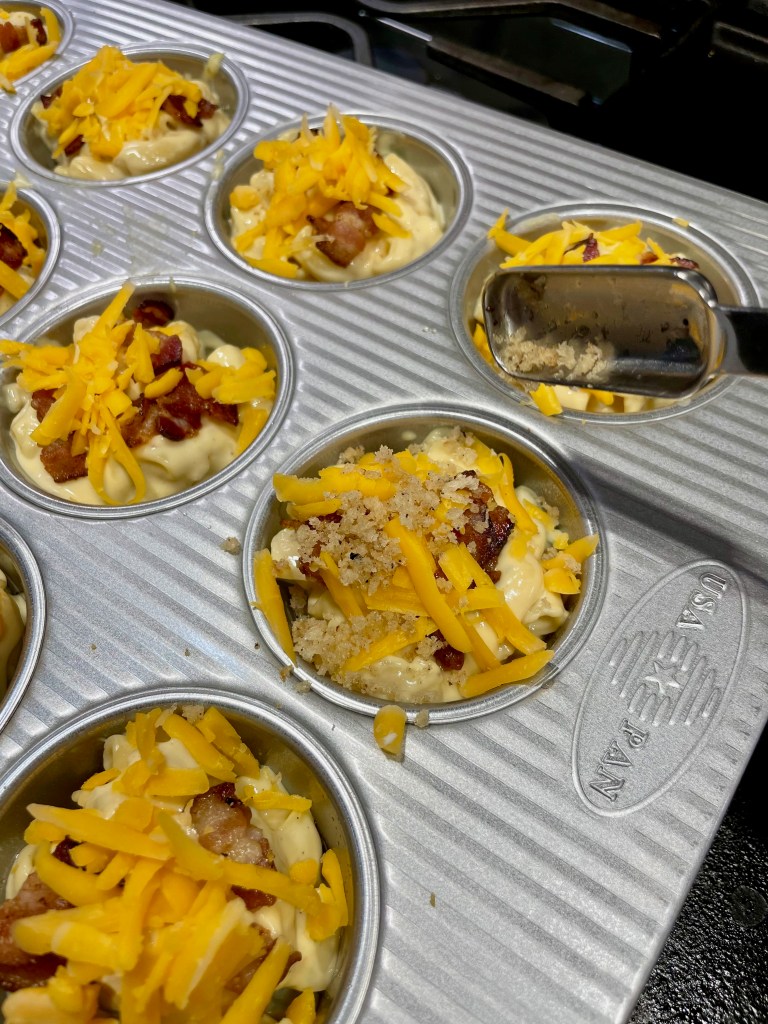
To capture all the components of poppers, I buried a nugget of cream cheese inside layers of the mac and cheese, then topped the “muffin” bites with the crispy bacon, more shredded cheddar and those bacon-scented panko crumbs. The recipe can be made ahead to this point and refrigerated, then baked on game day right before kickoff, but I would recommend adding the toppings just before baking so the bacon and crumbs remain crispy.
Let them cool a few minutes, so the cheese firms up for easy, non-messy removal.
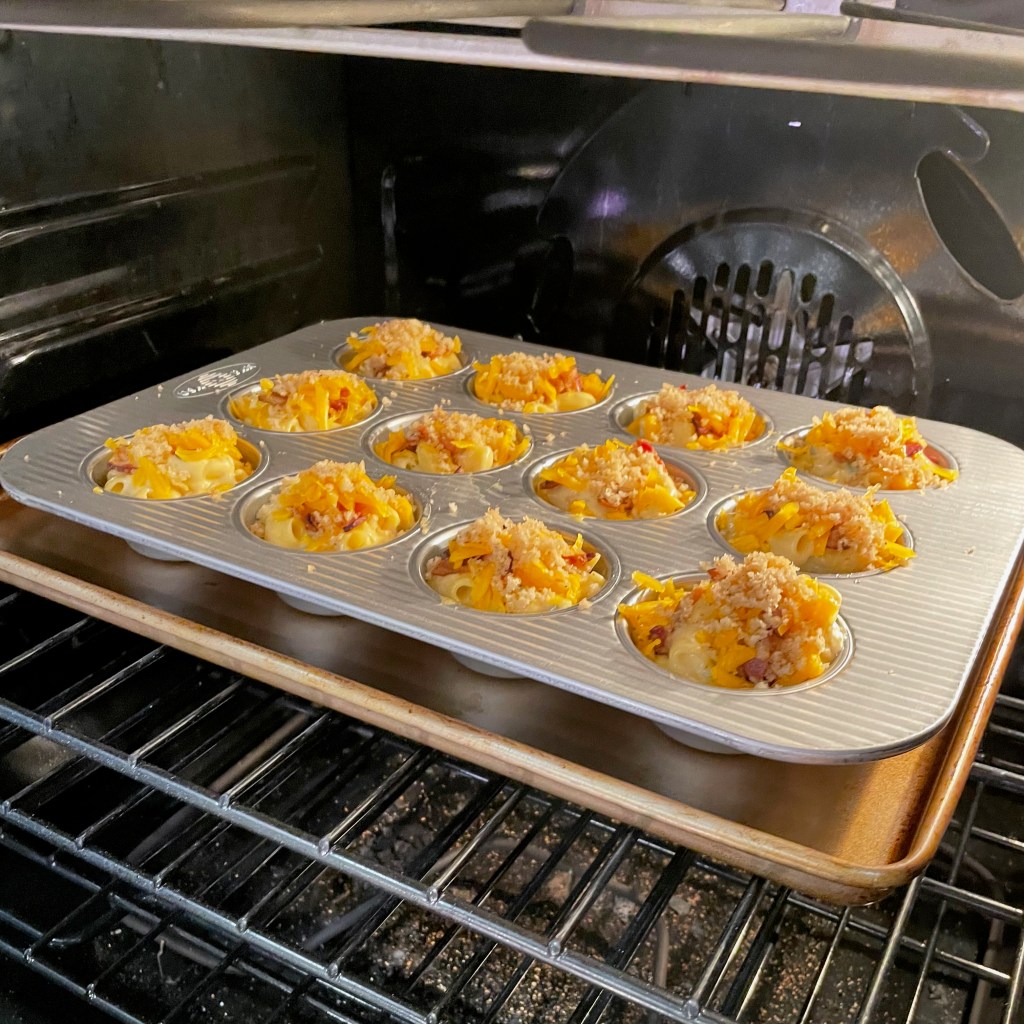
Half an hour at 350° F, and these are ready for the big game or any other snacking occasion coming our way. Next up, Mardi Gras! ⚜️
What better time than Super Bowl for a snack that marries the spicy flavors of a favorite appetizer and the down home comfort of mac and cheese?
Ingredients
4 thin slices uncured smoked bacon, cut into 1-inch pieces
1/2 cup panko crumbs
1/2 sweet or yellow onion, rough chopped
3 jalapeno peppers, divided (dice one, slice the other two)
Salt and pepper
2 Tablespoons all-purpose flour
1 1/2 cups whole milk
5 oz. American cheese, cubed (I usually purchase a chunk from the supermarket deli)
4 oz. pepper jack or Monterey Jack cheese, shredded (fresh is better than the pre-shredded stuff in a bag)
1/2 lb. cooked elbow macaroni
2 oz. cream cheese, divided among cups
2 oz. sharp cheddar, shredded and divided among cups
Note: This game day snack can be made in advance and refrigerated overnight. For best results, add bacon pieces and panko just before baking. Oven time may be extended if the bites are baked cold from the fridge.
Directions
Cook bacon pieces in a cast iron skillet until lightly crispy; reserve 3 tablespoons of bacon fat for making the cheese sauce.
Add the panko crumbs to the warm skillet and toss to soak up the residual bacon grease. Set the crumbs aside for topping the mac and cheese bites.
Heat the reserved bacon fat over medium heat in a good sized pot. Add the onions and diced jalapeño and season with salt and pepper. Sauté the vegetables until softened.
Sprinkle in flour and cook a few minutes until the mixture is bubbly and begins to brown. Add milk all at once and cooking, whisking constantly, until the mixture thickens into a sauce. Add American cheese cubes and then pepper jack shreds, melting completely after each addition.
Add the cooked elbow macaroni and remaining jalapeño slices and stir to coat completely. Allow this to cool several minutes.
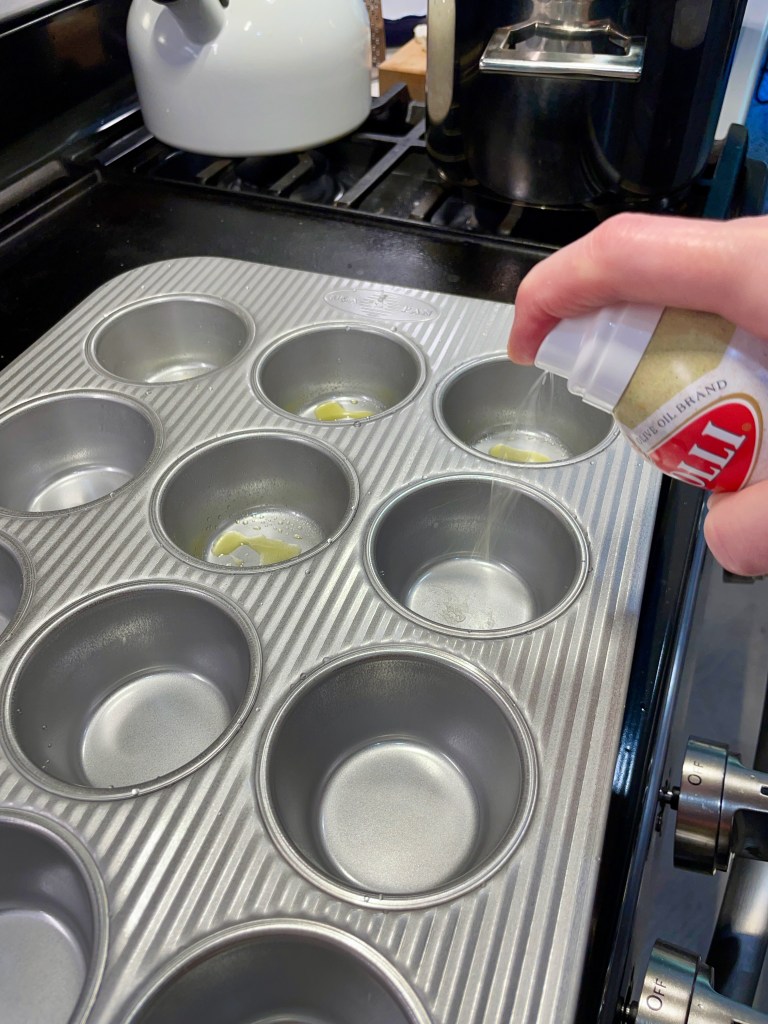
Spray the cups of a 12-cup muffin tin with oil to prevent sticking. Divide half of the mac and cheese among the cups, then place a bit of cream cheese in the center of each cup and cover with the rest of the mac and cheese. Divide the bacon pieces over the top of the cups, and then top each with the shredded cheddar and bacon-moistened panko crumbs.
Bake at 350° F for about 30 minutes, until cheese is bubbly and crumbs are crispy.
Let the mac and cheese bites cool a few minutes to firm up the cheese, then run a knife around the outside of each muffin cup to release the bites from the pan. Transfer to a serving dish and enjoy watching them fly off the plate.