Sometimes, saying your goals out loud is enough to cement them into reality, and this has been true for my quest to have a calmer, more peaceful holiday season. Letting go of expectations for a “perfect” holiday has given me the freedom to enjoy it more, regardless of how things unfold. One thing I really wanted to do this year (for the first time in a long time) was settle in to making Christmas cookies, and I am on a roll—figuratively and literally—with these sweet little rugelach. They are my first cookies of the season and making them satisfies not only my desire for a pretty holiday treat, but also another item on my culinary bucket list.
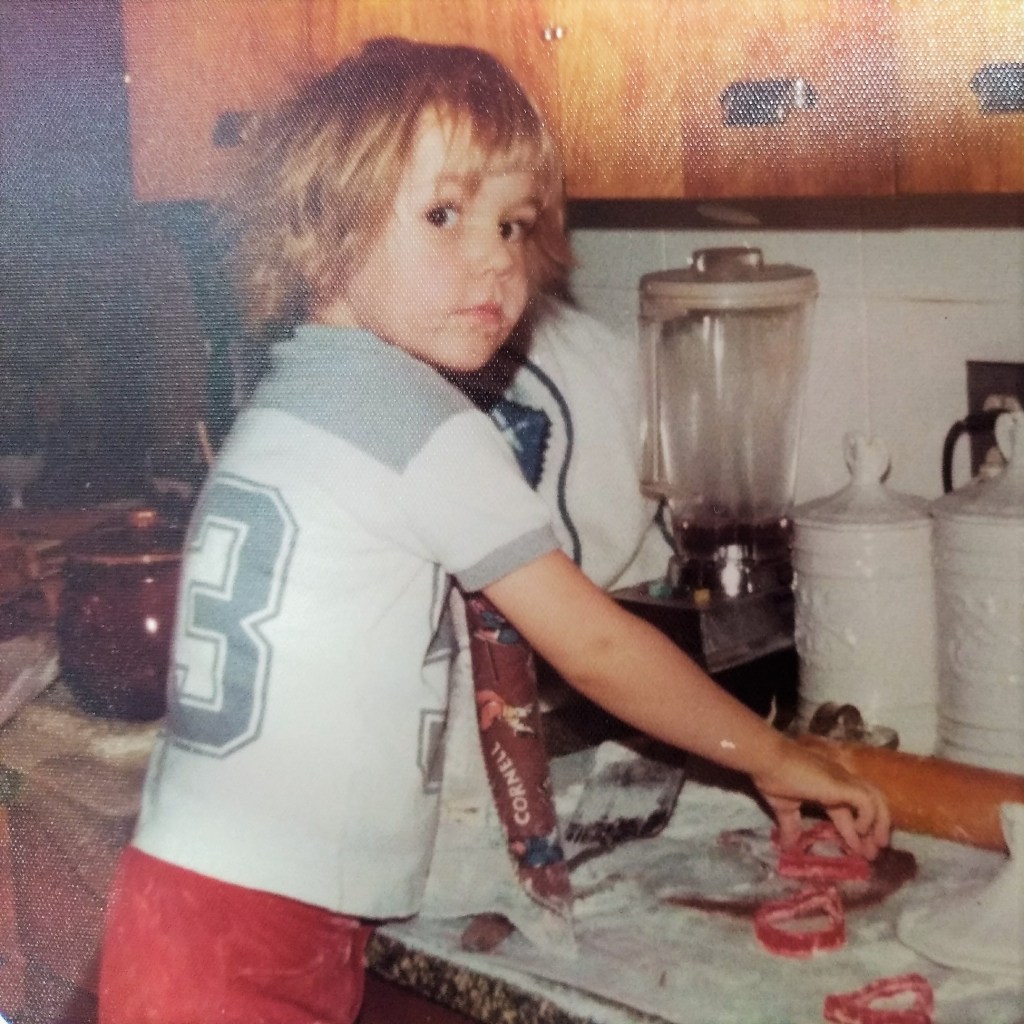
As much as I love to bake bread and rolls, I hardly ever bake sweet things, such as cakes, pies or cookies. I’m not sure why, because I do like them, and I have fond memories of doing that kind of baking in my grandmother’s kitchen. The holidays are a perfect time for baking sweets, and so far, I am loving it.
Rugelach (which is pronounced in such a way that it might seem you are gargling with a feather in your throat) is a treat that originated in Poland and is popular in Jewish culture, and it has been on my bucket list for a couple of years. My husband, Les, remembers them from childhood, not only because he is of Polish-Jewish descent, but also from the bakeries and pastry shops all over New York, where he was raised.
It’s a perfect, little two-bite cookie.
The cookies are tiny, which makes them perfect for gift-giving or tucking into an extra little space on a dessert platter. My rugelach dough is made of butter, cream cheese and flour, with only a slight hint of powdered sugar. The rest of the sweetness comes from the layers of filling and the large crystals of sugar sprinkled on top before baking. Given the variety of flavors I have seen, you can put almost anything in rugelach, and the gears of my mind are already spinning ideas for my next batch. This time, I used a jar of jam we spotted while waiting in line to purchase our fancy Christmas tree stand.
No frogs were harmed in the making of these cookies. 🙂
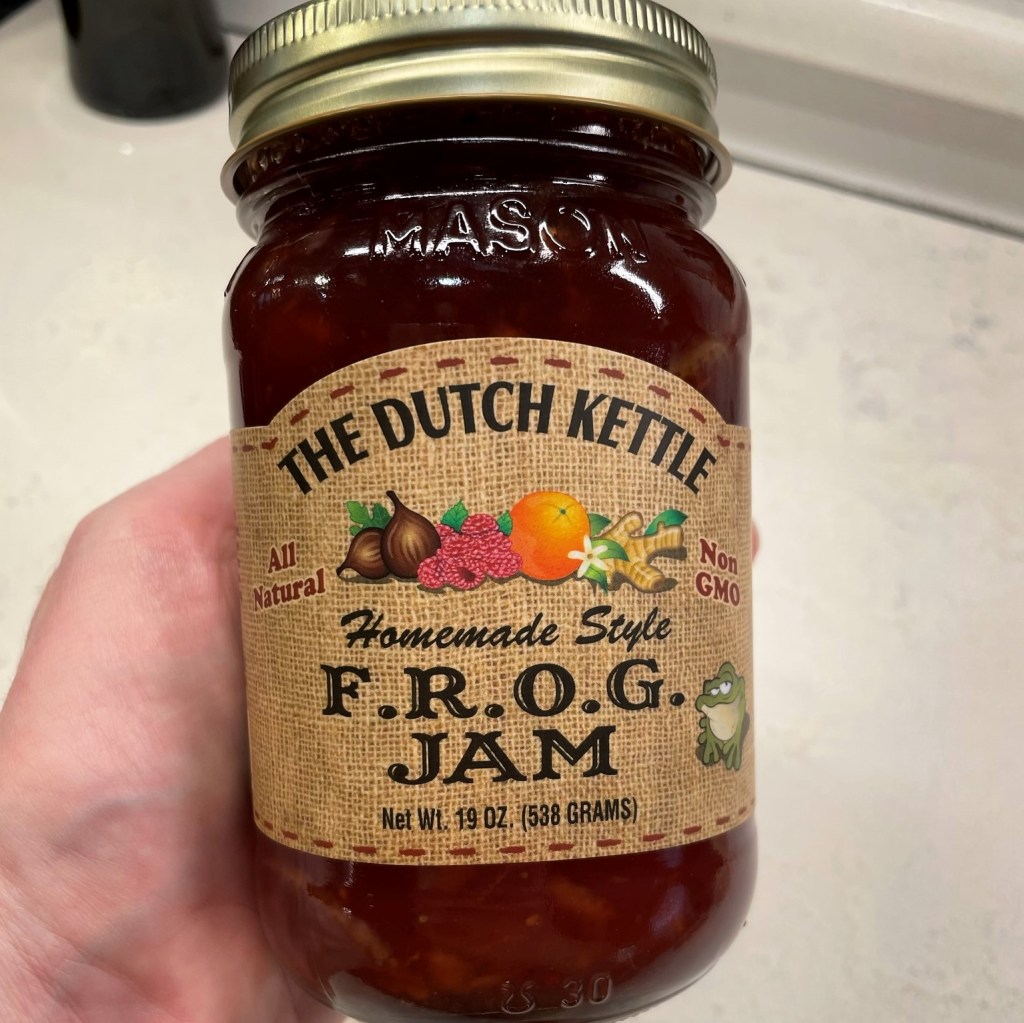
The fruity filling in these bite-sized little rollups is F.R.O.G. jam, with the letters representing the flavors of fig, raspberry, orange peel and ginger. That’s a whole lot of holiday flavor happening in one spoonful, and though Les is not particularly fond of ginger, he likes the other flavors and said my addition of cinnamon sugar and chopped pecans rounded these out nicely for him. The cookies are made in stages, including a significant amount of time chilling the dough, and then the cookies before baking, so plan accordingly.
As always, I learned a few things along the way to making these, and I’ll share those discoveries throughout the instructions below.
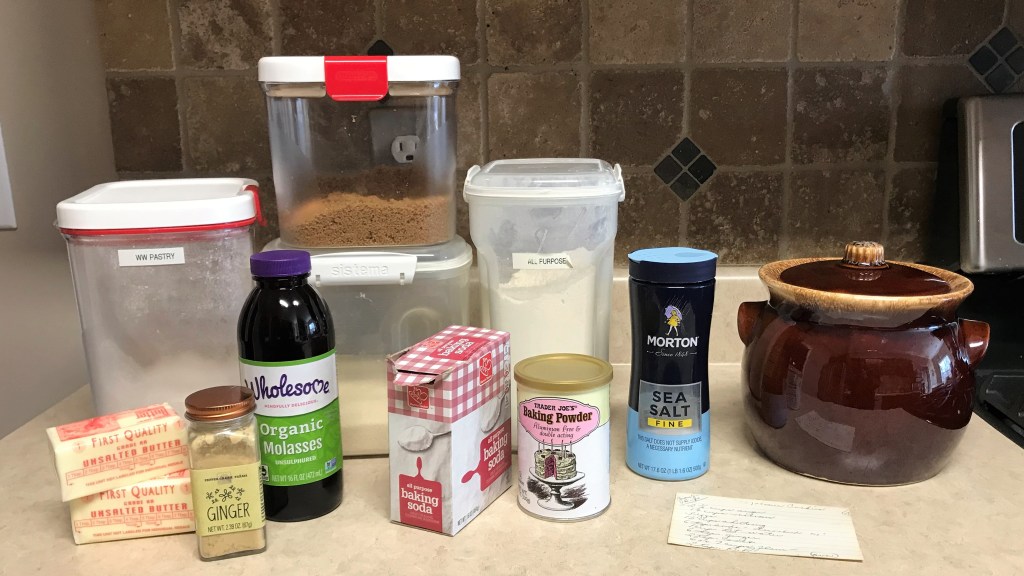
Ingredients
4 oz. full-fat cream cheese (this is half a brick package)
1 stick cold unsalted butter
3/4 cup all-purpose flour* (see notes)
1/4 cup whole wheat pastry flour*
1 Tbsp. powdered sugar
1/4 tsp. kosher salt
2/3 cup jam, preserves or marmalade
2 Tbsp. organic cane sugar
1/2 tsp. ground cinnamon
1/4 cup chopped, toasted pecans
Egg wash and coarse sugar sprinkles, for baking
*Notes
For best results, measure flour using the fluff, sprinkle, level method. If you dunk your scoop directly into the flour bag, you will compact the flour and end up with heavy cookies.
I always sub in a portion of whole grain into everything I bake, but if you do not have whole wheat pastry flour (I like Bob’s Red Mill) or white whole wheat (King Arthur is a great choice), it is fine to use a full cup of all-purpose flour. I personally like the flavor boost of the whole wheat, and it helps me justify eating an extra cookie. 😉
Instructions
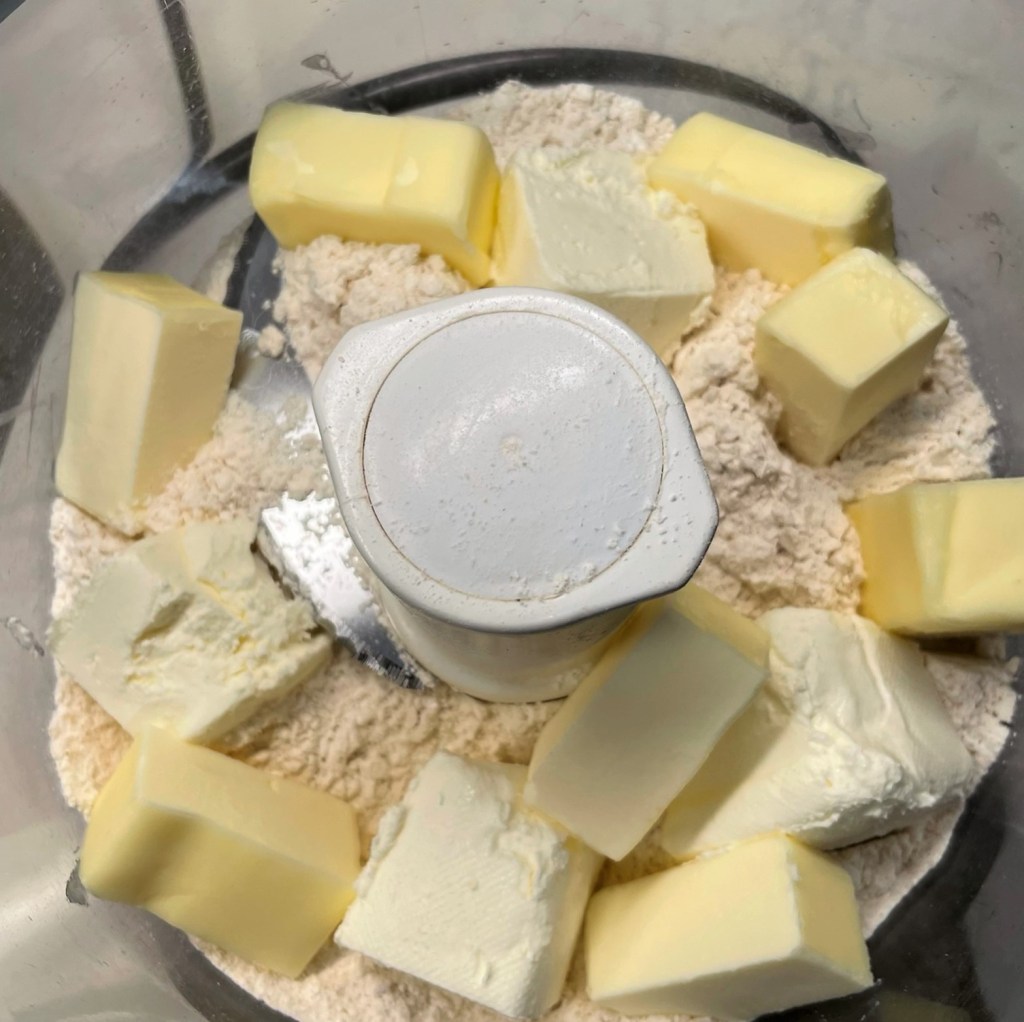
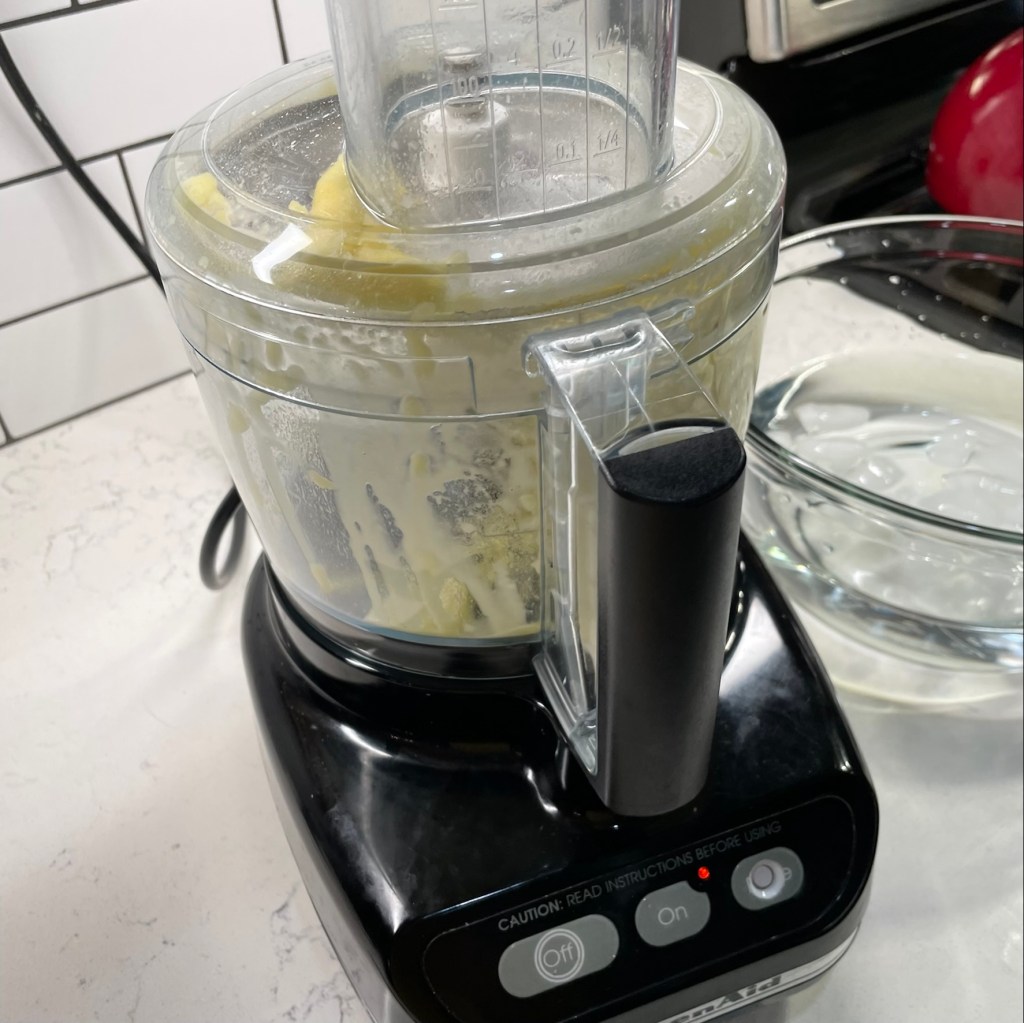
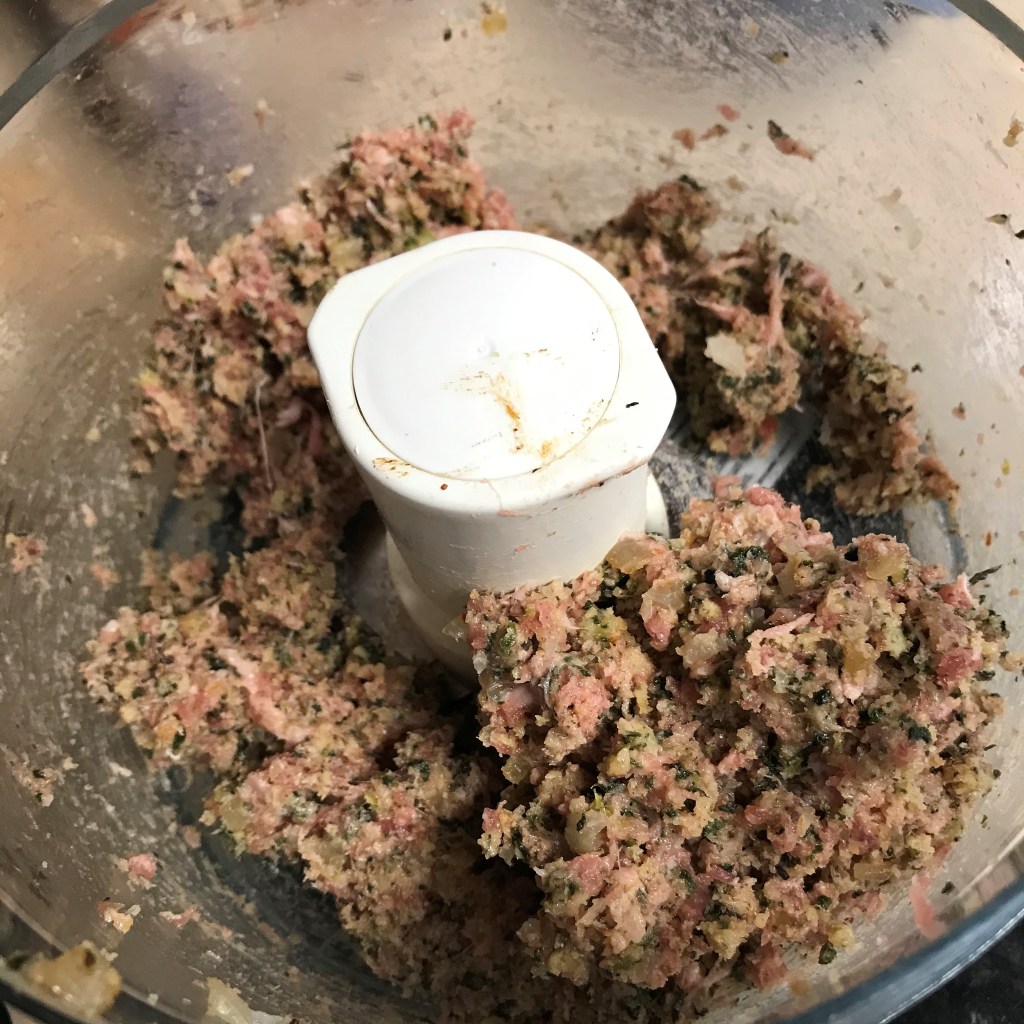
Cut the cold butter and cream cheese into cubes before pulsing into the flour a few times.
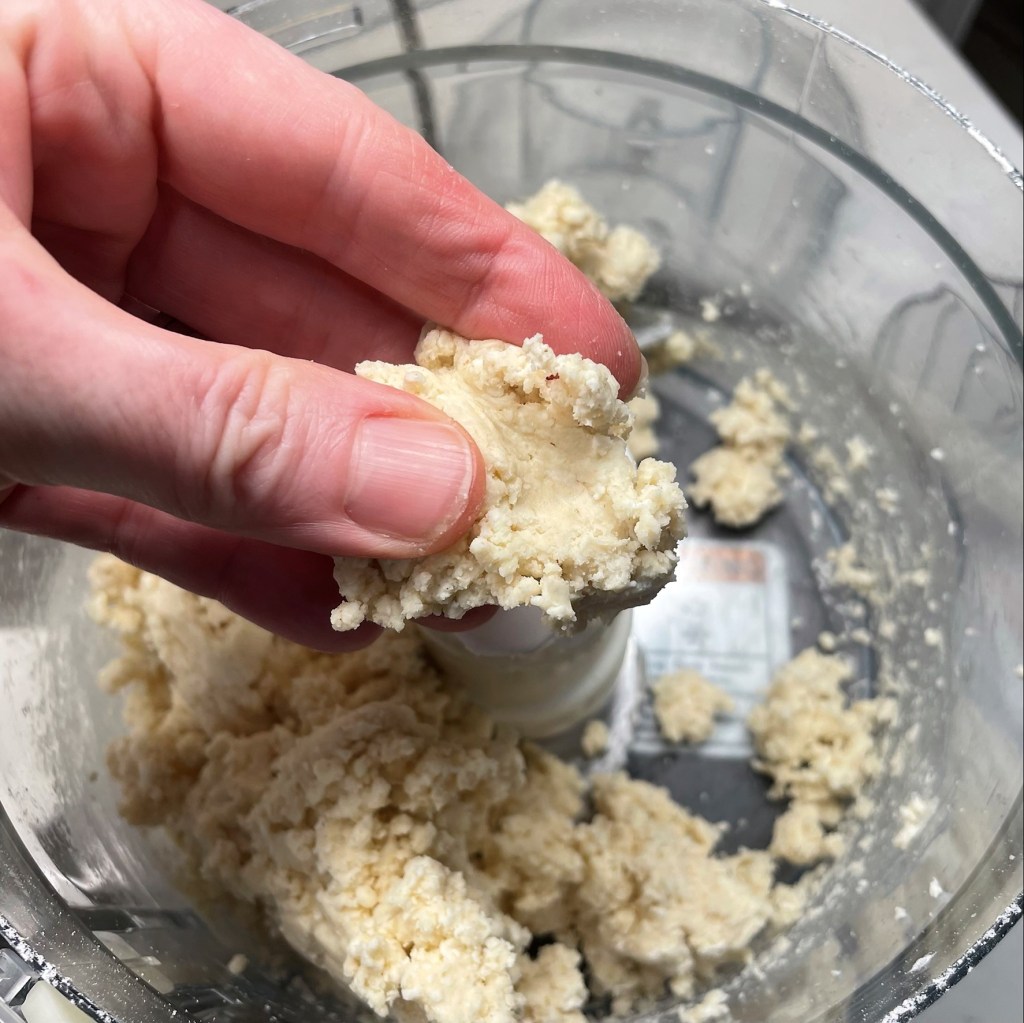
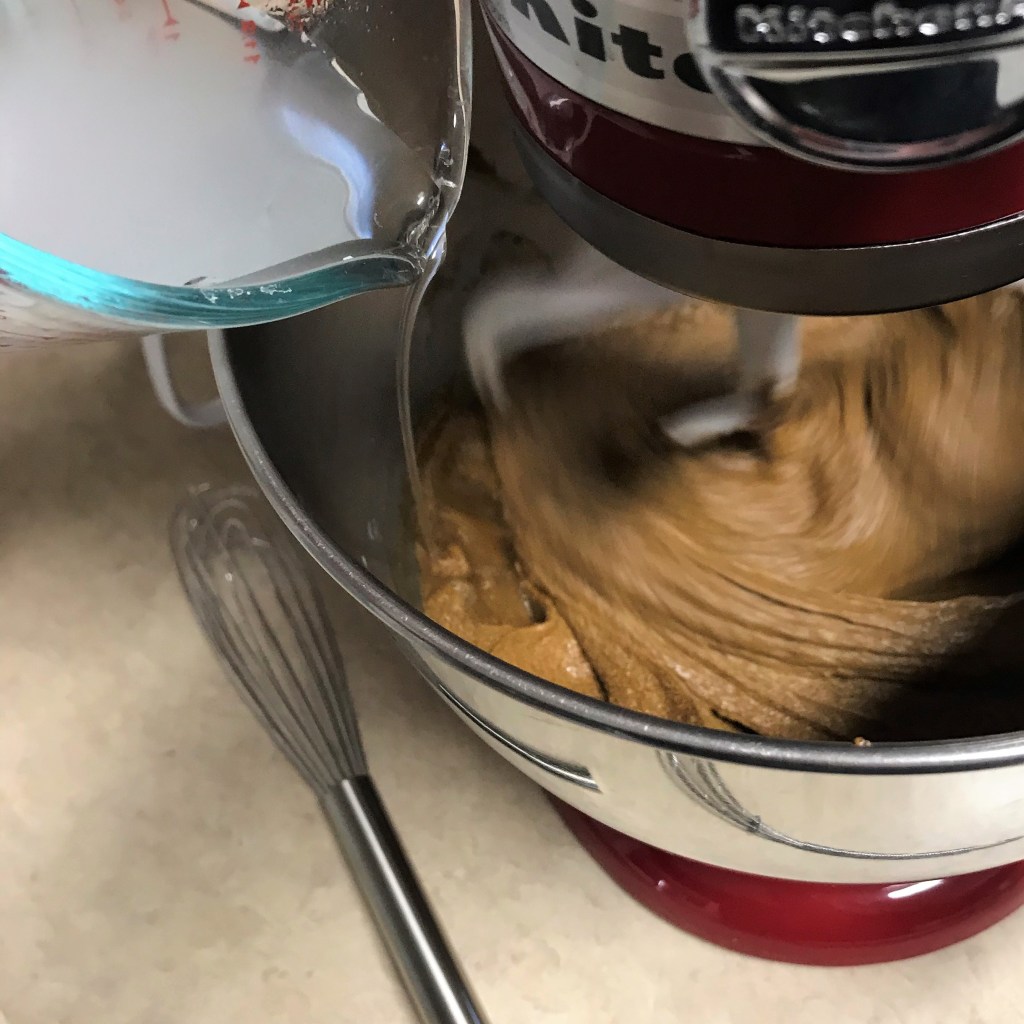
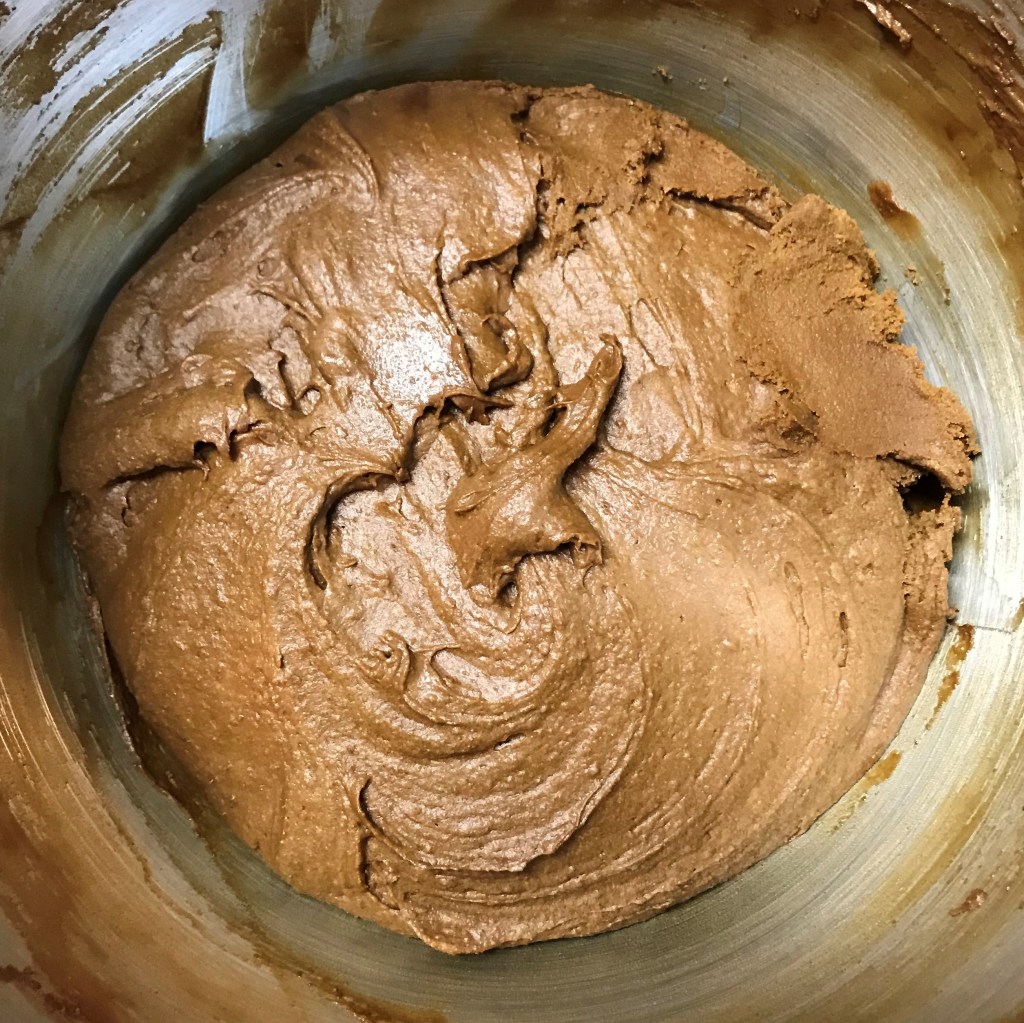
After a few pulses, run the processor continuously, but just until the dough comes together like this.
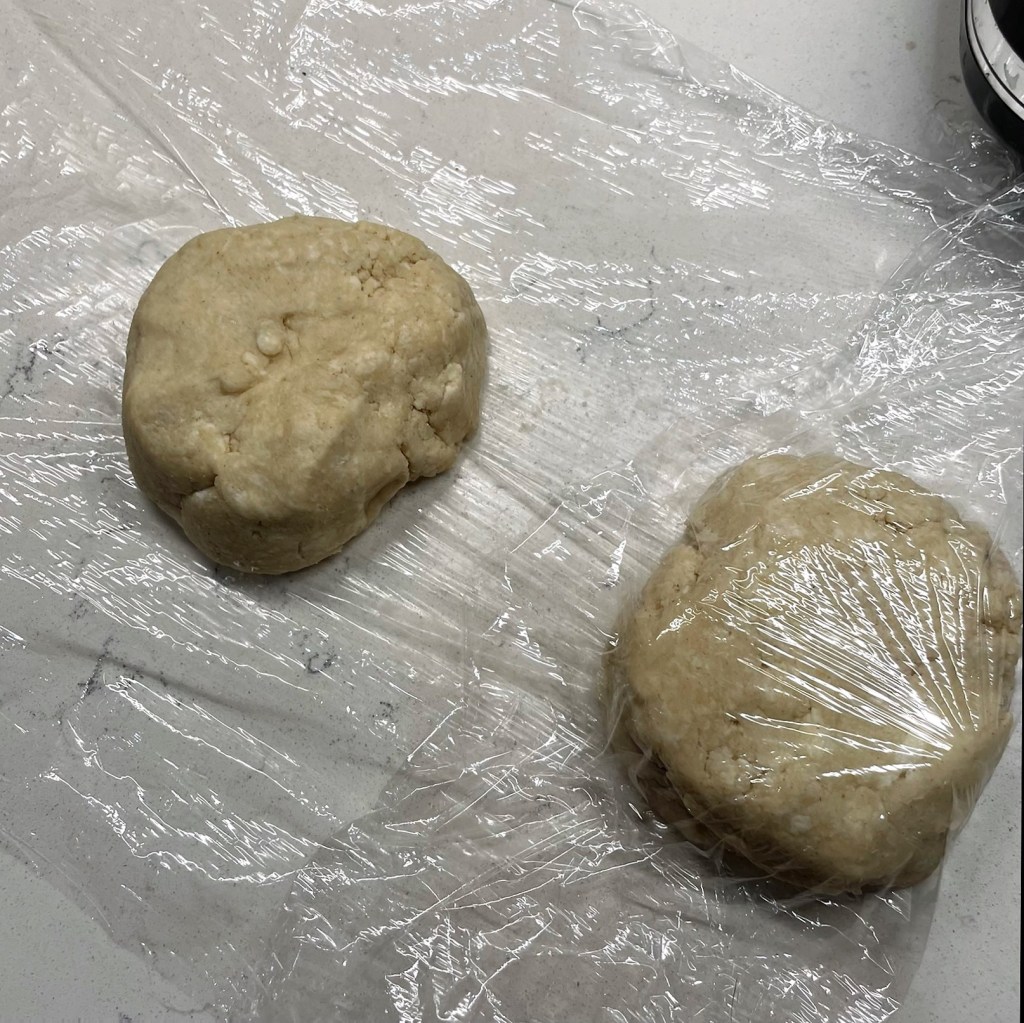
Divide the dough into two disks and wrap them up to chill several hours or overnight.
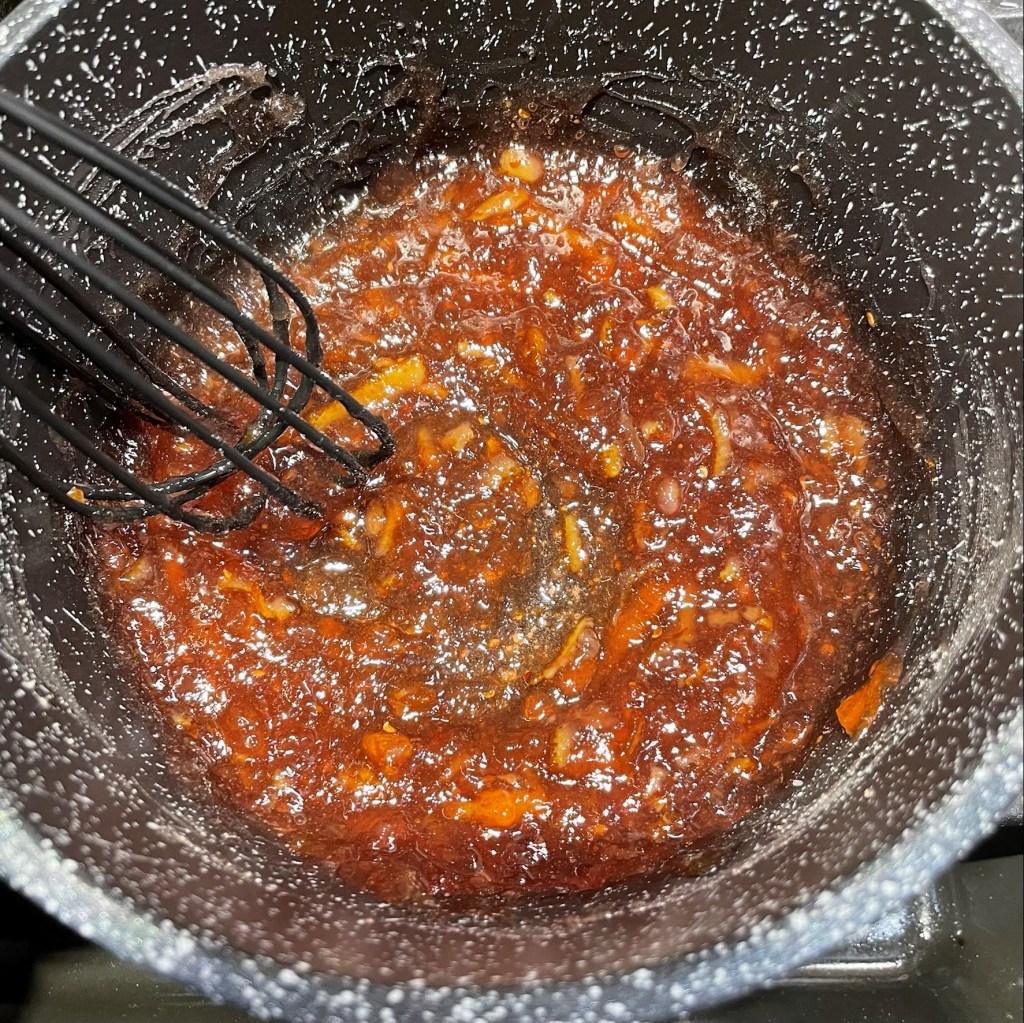
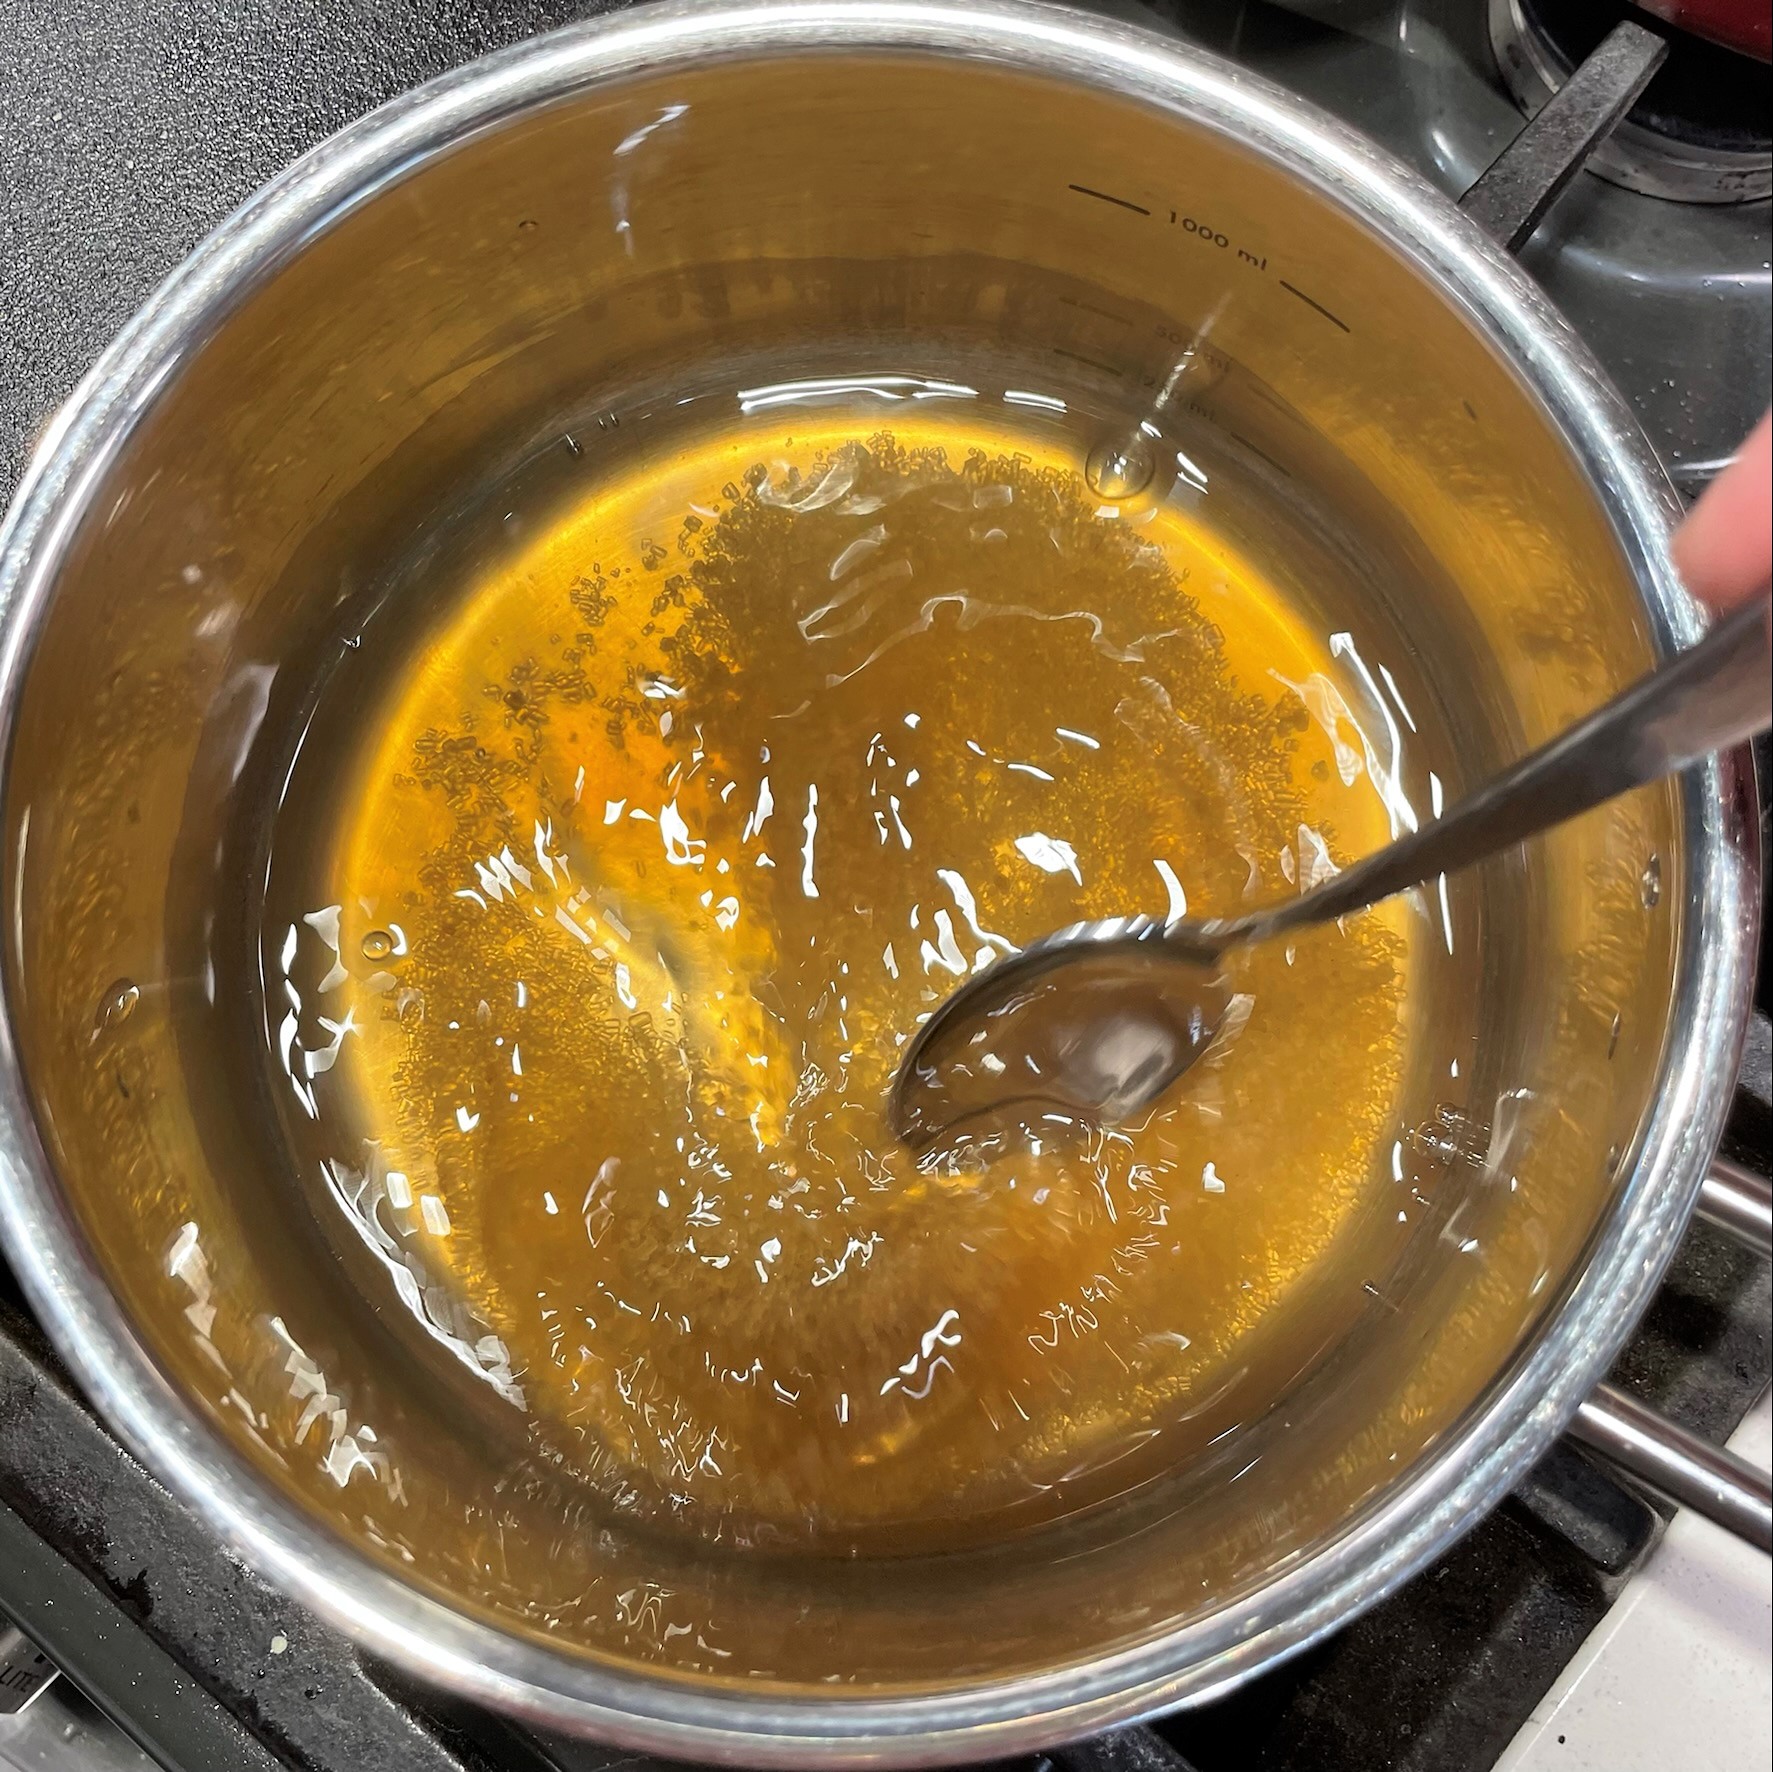
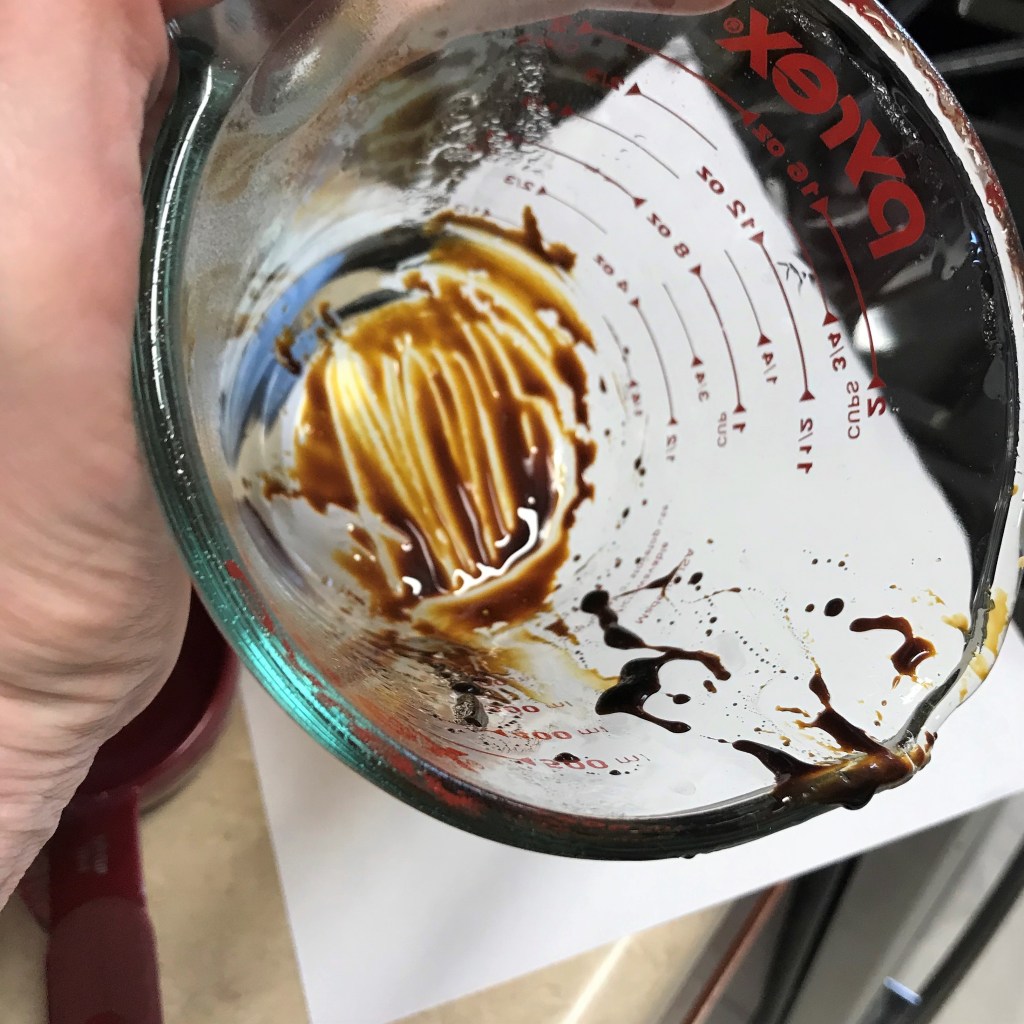
This is tricky, because you want the jam to melt but you don’t want it too warm.
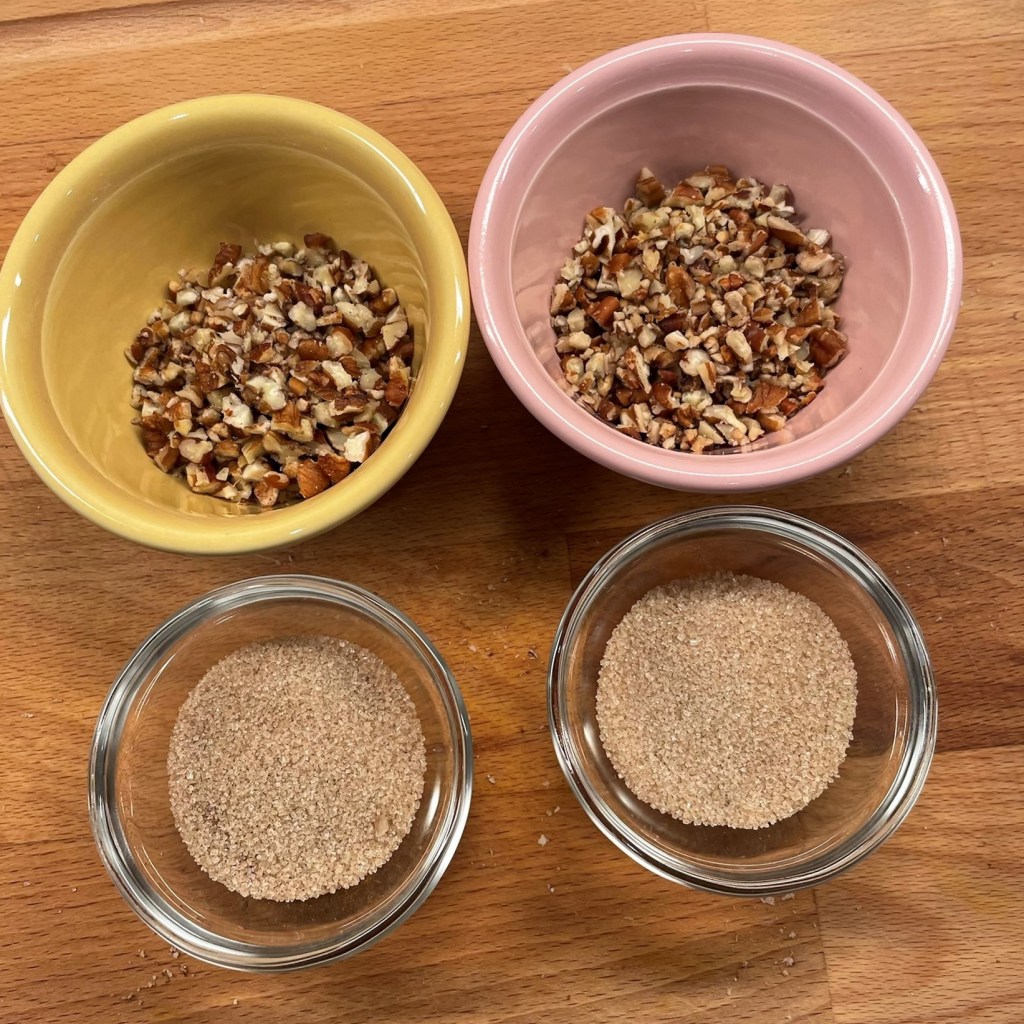
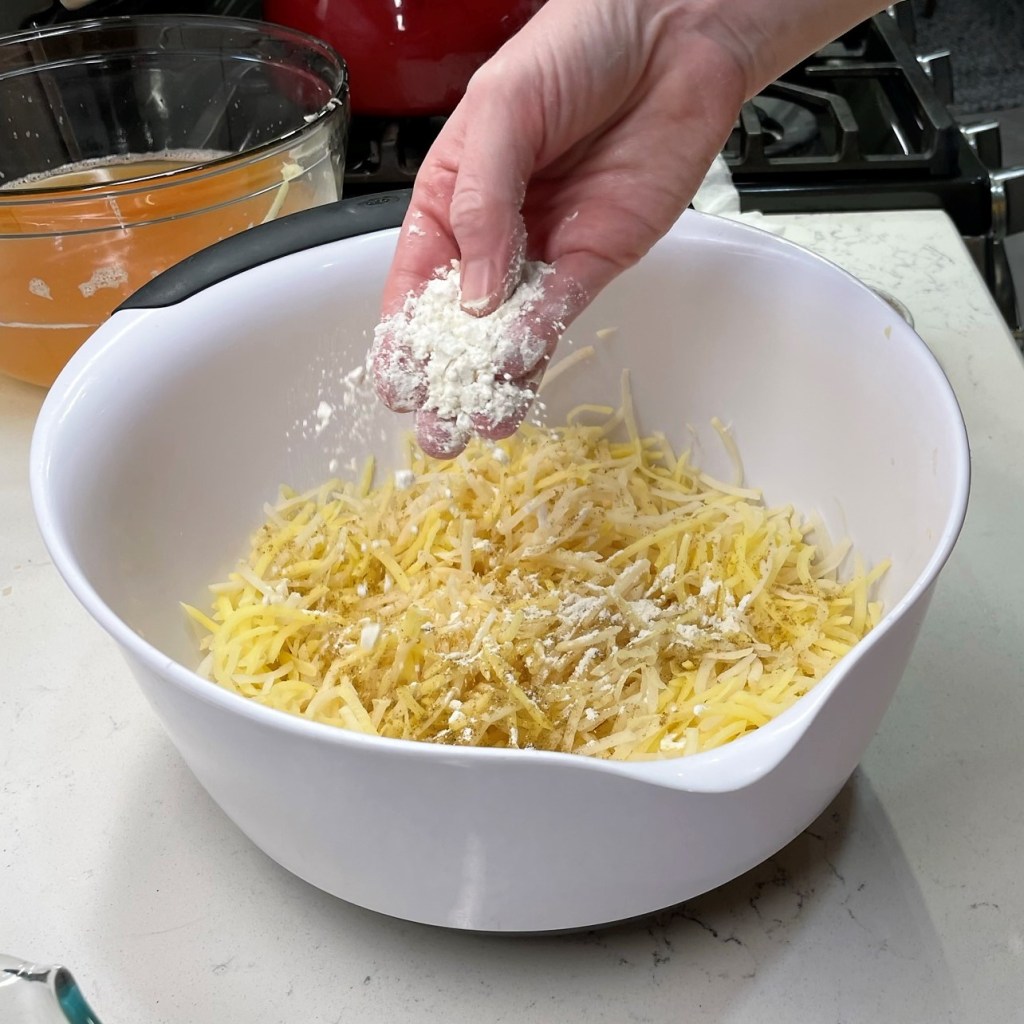
For the sake of consistency, I divided my cinnamon sugar and pecans so that both wheels of rugelach got the correct amounts.
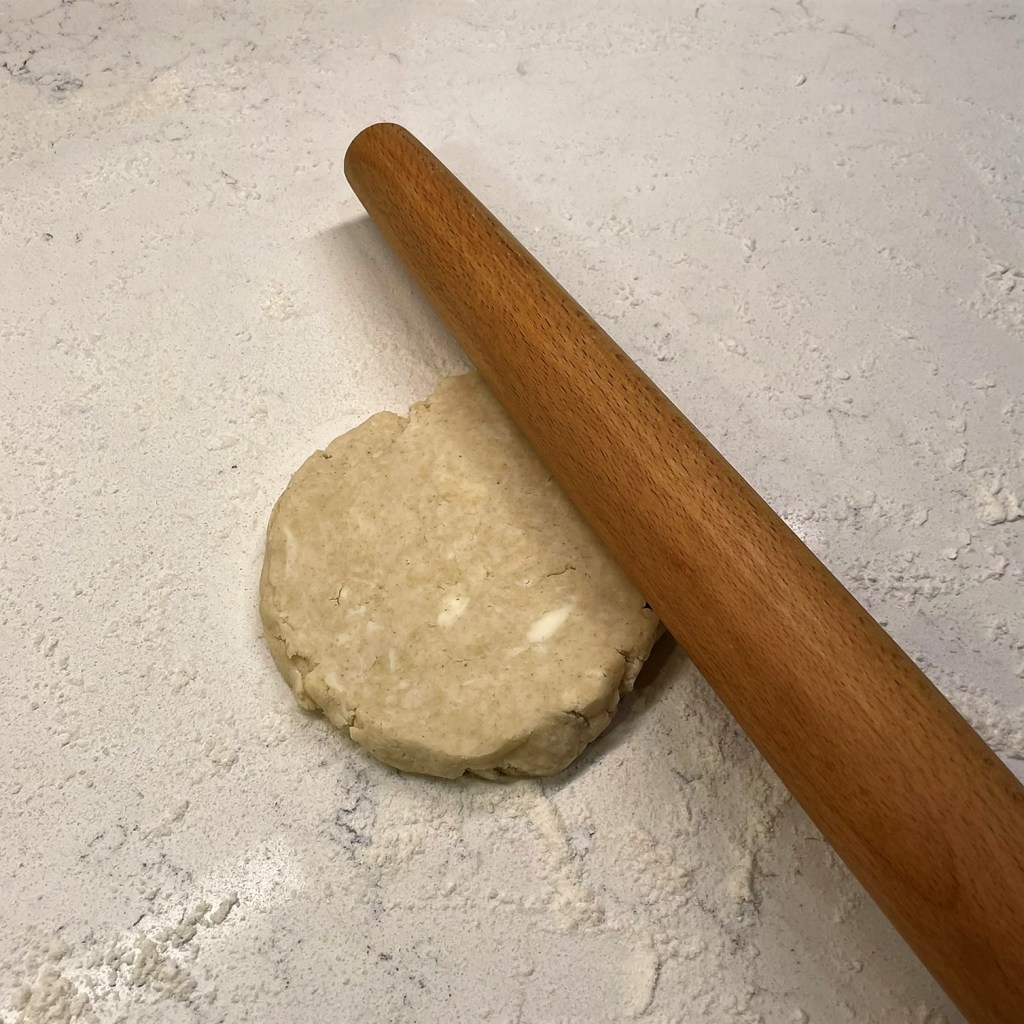
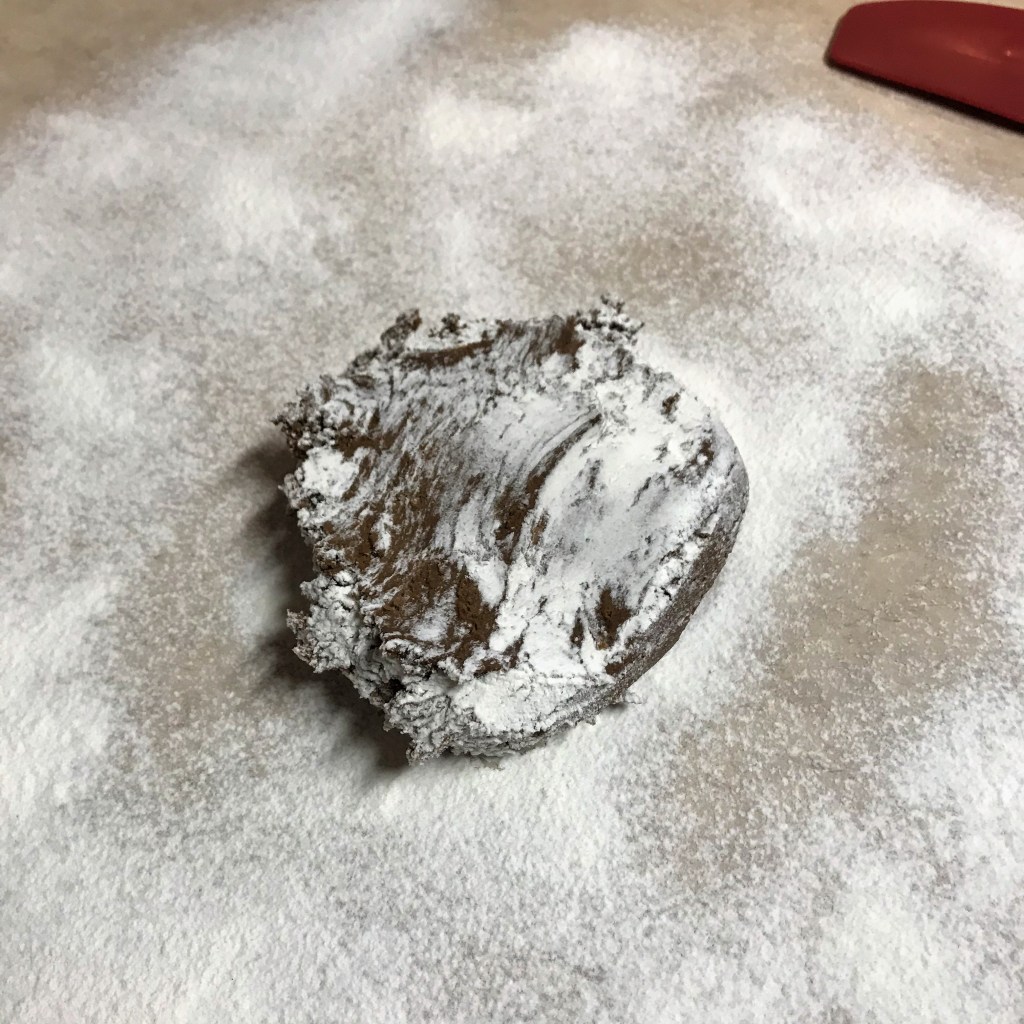
The chilled dough was rock hard, so I gave it a few gentle smacks with my rolling pin before pressing it out into a 12″ circle.
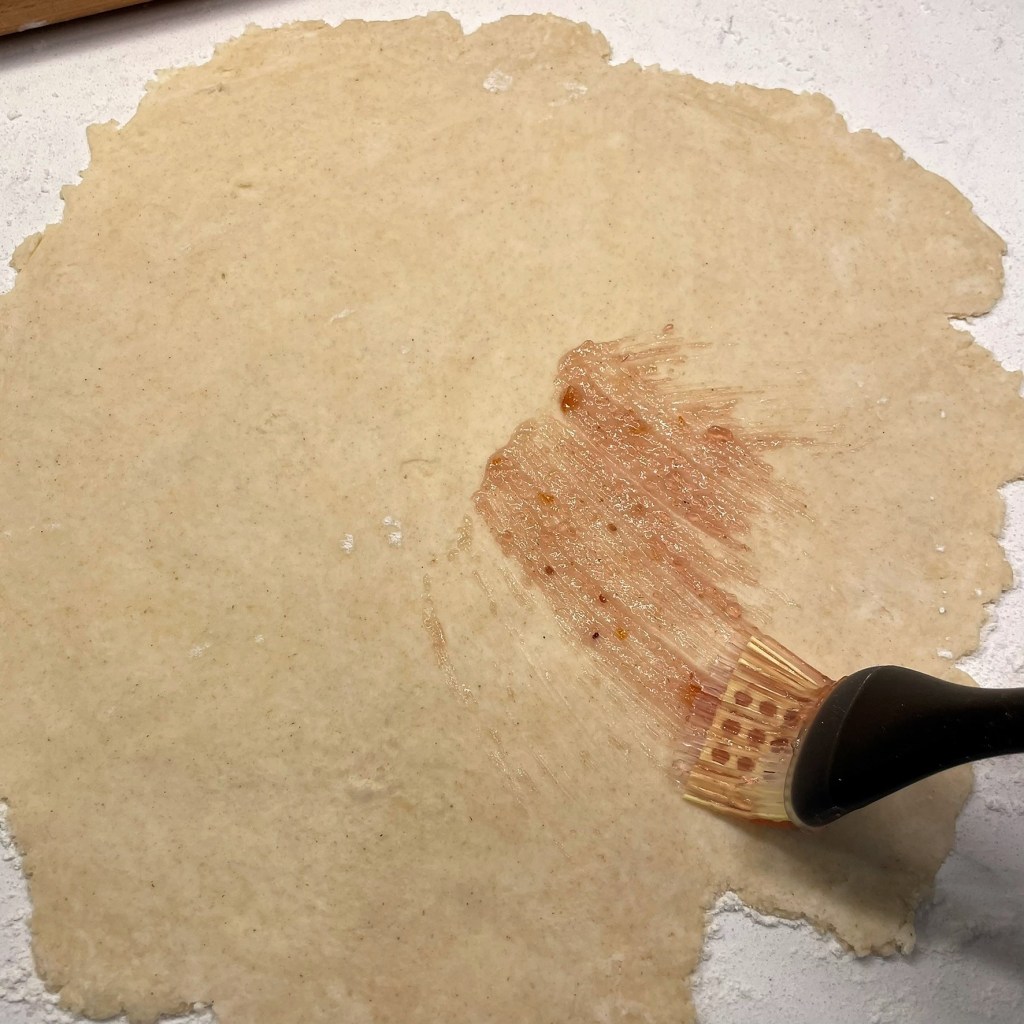
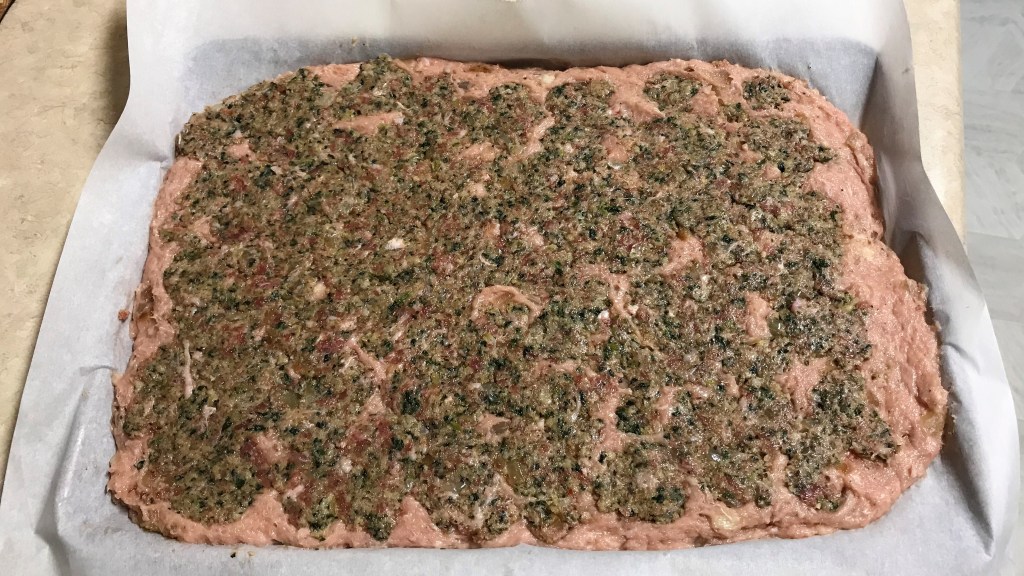
Yes, my edges are wonky, but I figured it would be OK since they’ll be rolled up. Spread the melted jam out thinly over the entire dough.
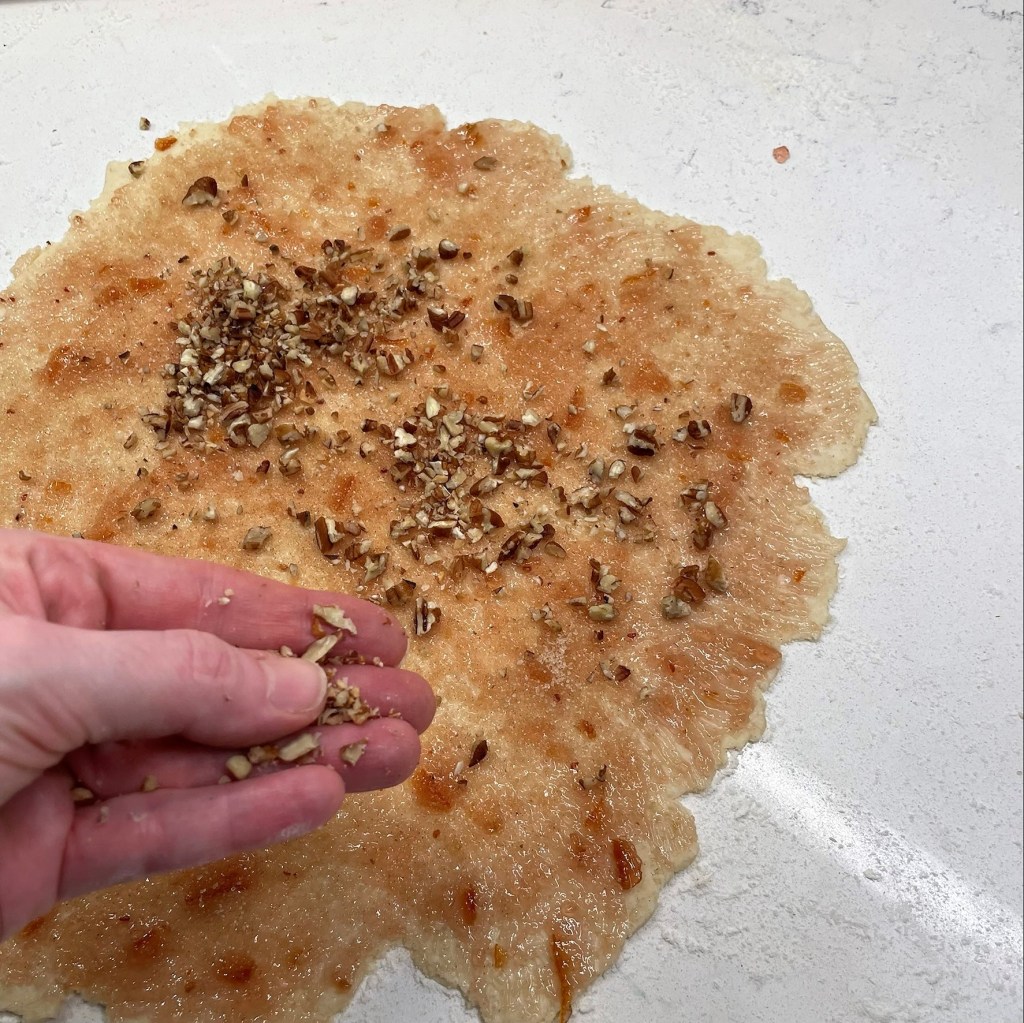
Sprinkle on the cinnamon sugar and scatter the pecan bits. I had to move them around a bit for more even coverage.
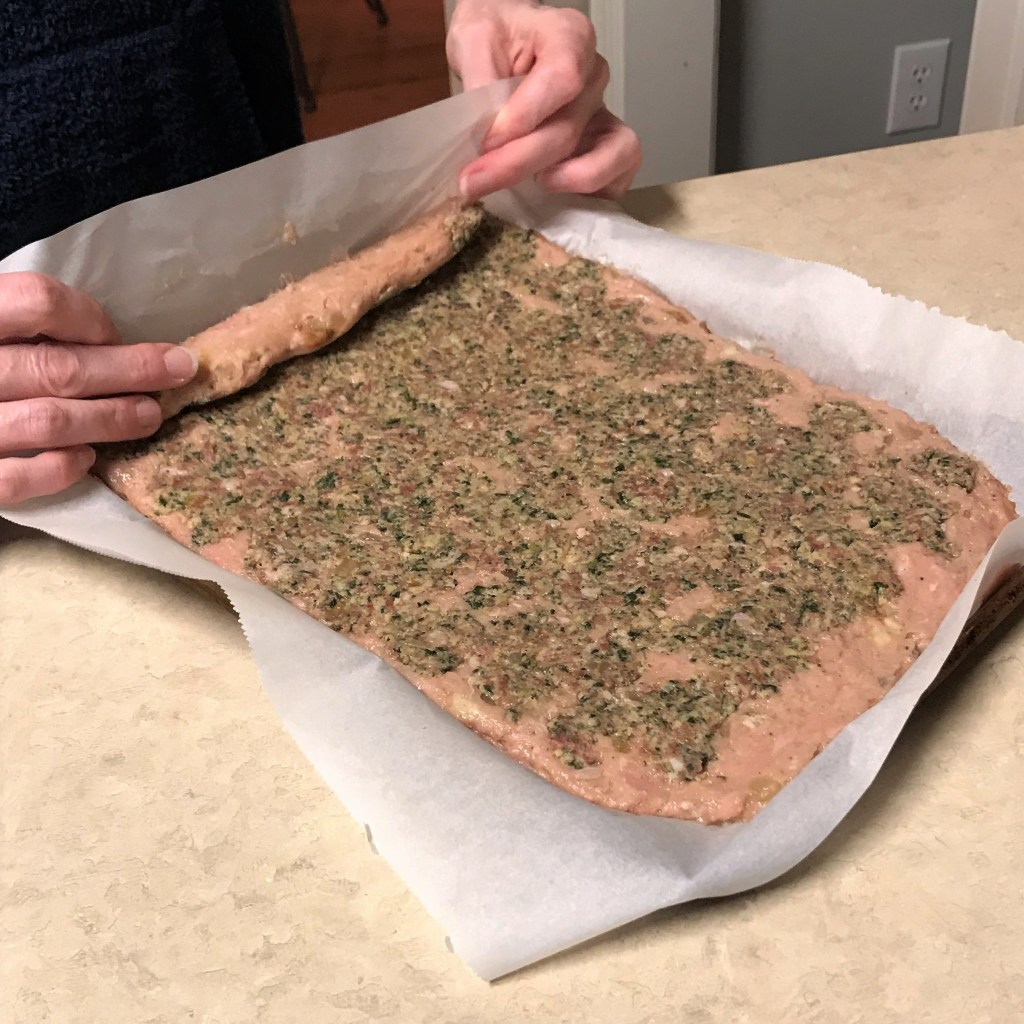
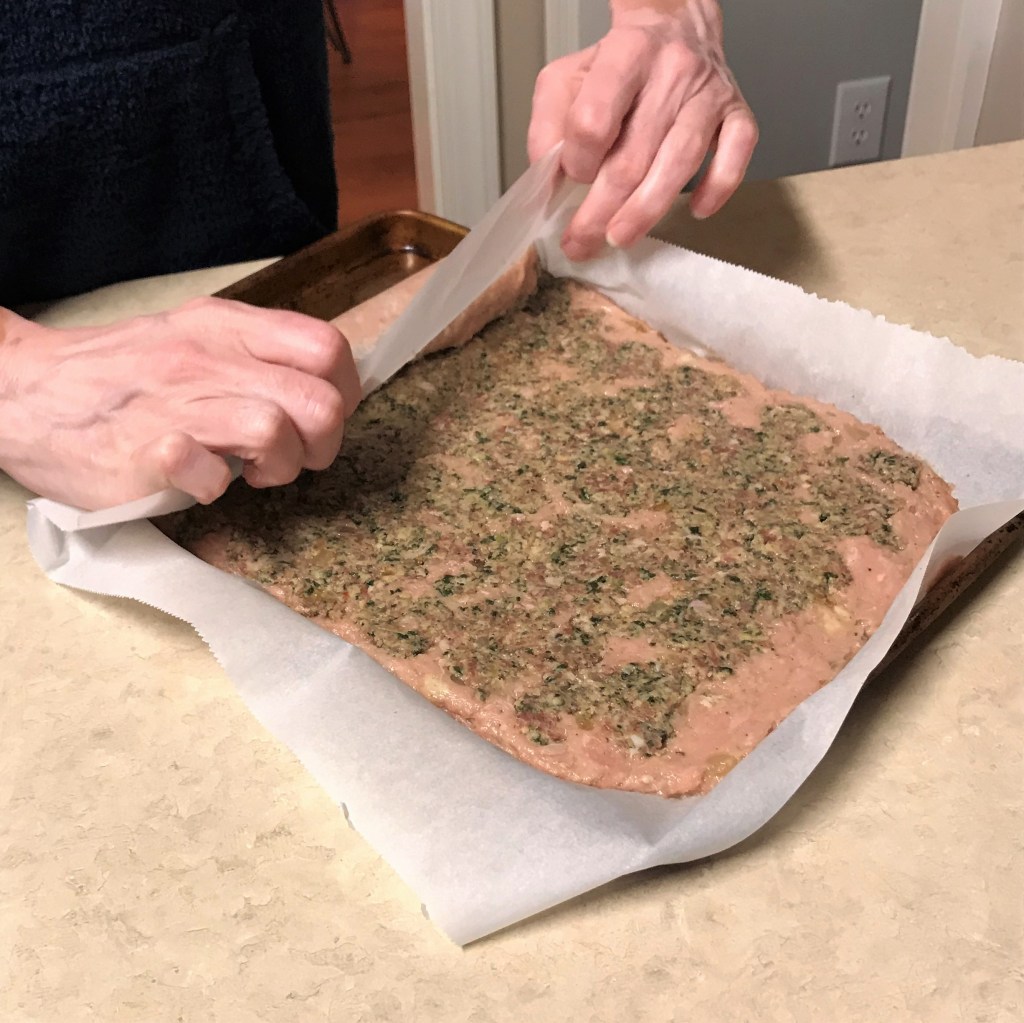
I used my rolling pin to press the parchment paper over the dough to secure the toppings. This turned out to be a mistake…
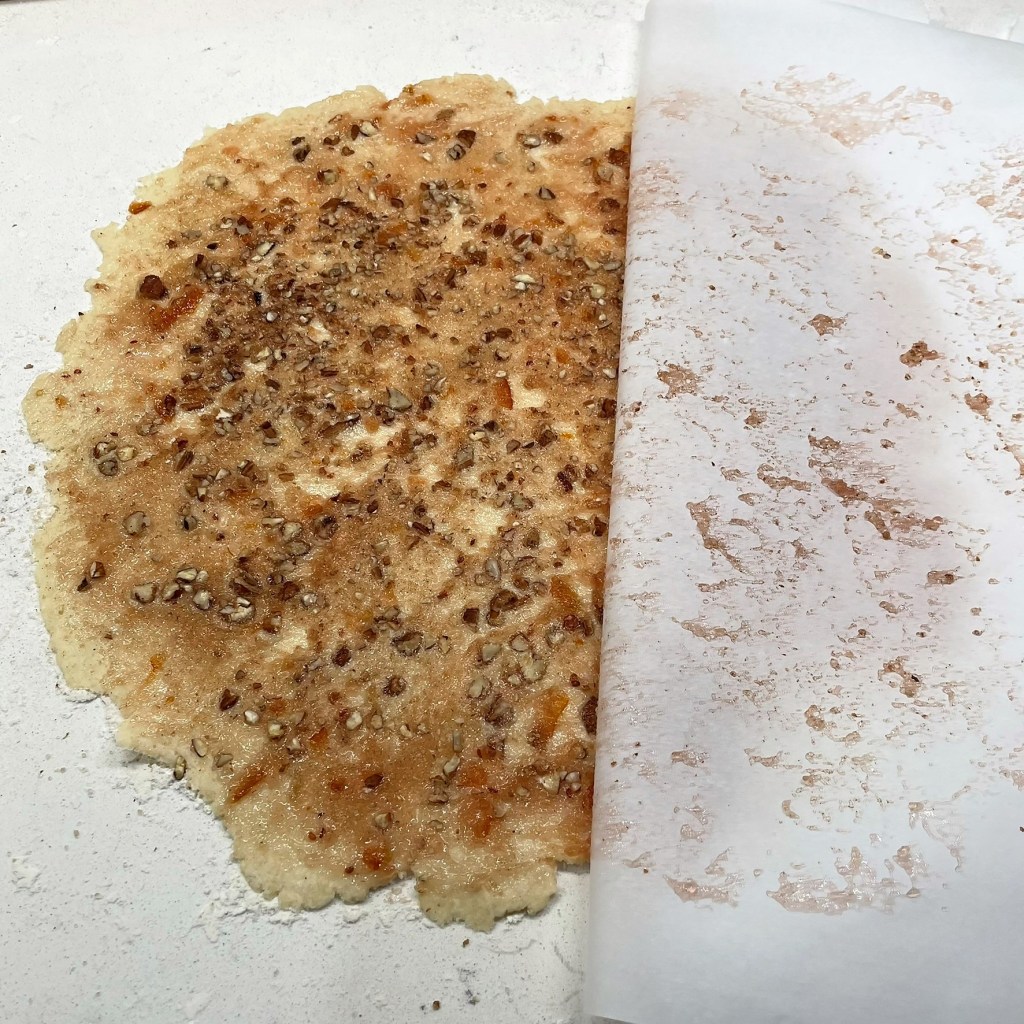
The rolling pin pressed it a little too well, and I had trouble peeling off the parchment. I peeled it back flat, the same as I do when making corn tortillas.
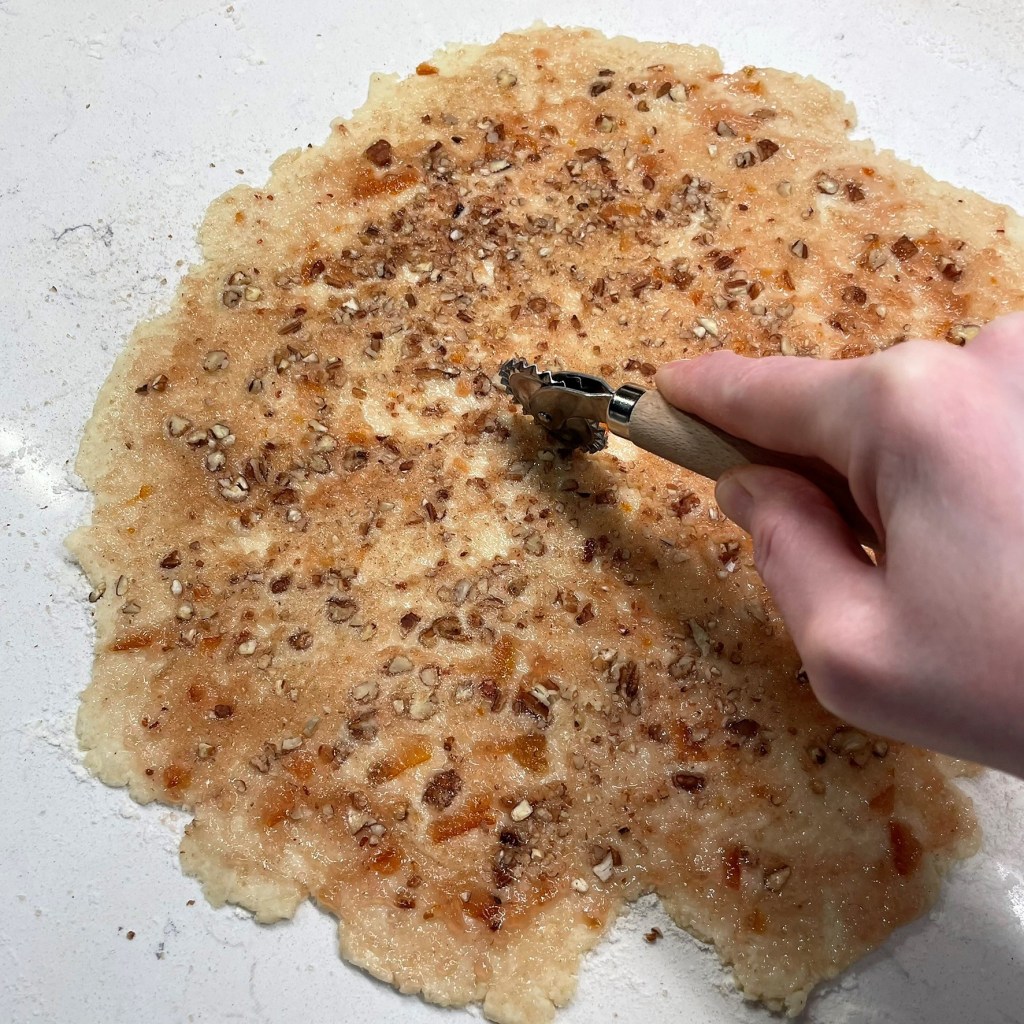
For a prettier cookie, I decided to use my wavy pasta roller to cut it into 16 equal wedges. Also, not the best idea because it made rolling them pretty tricky.
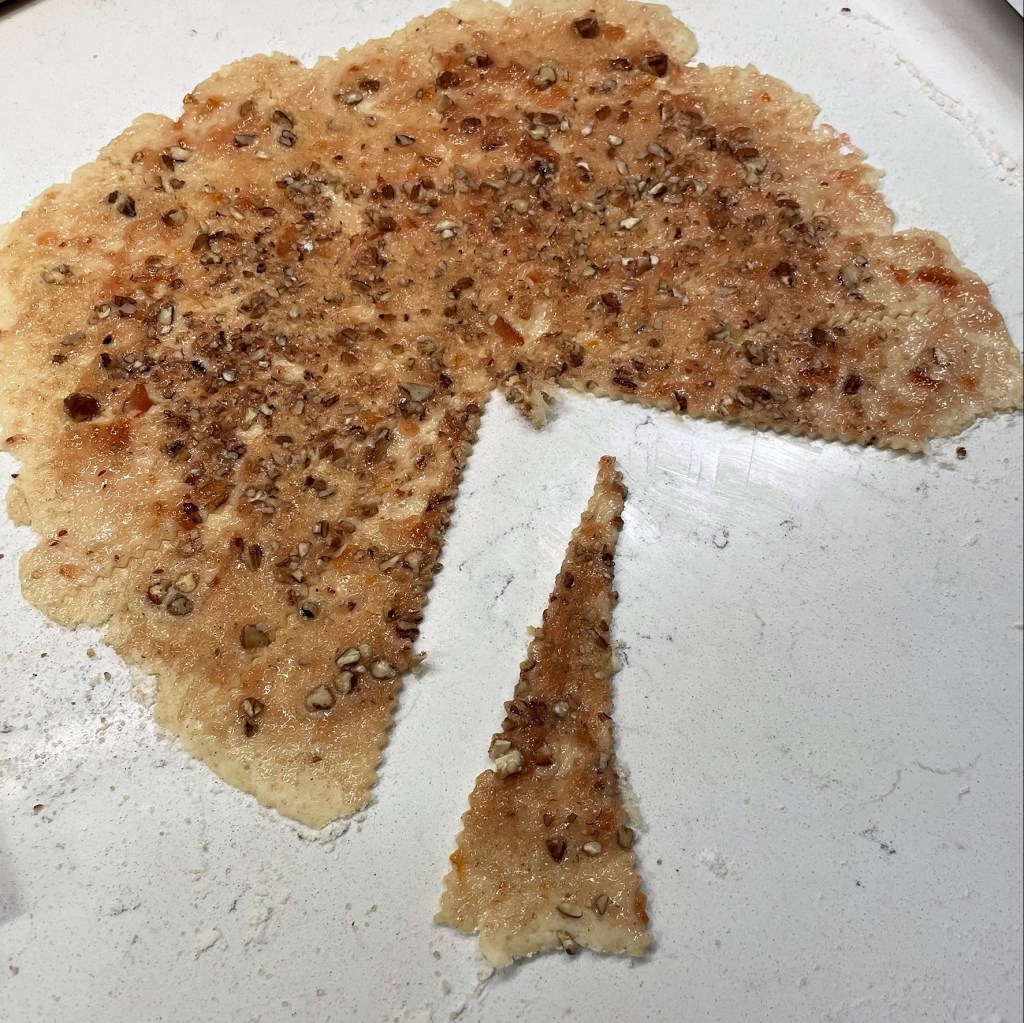
My wavy edges caused the pecan bits to fall off the sides when I rolled, and I had a tough time separating each wedge because the cuts were not clean.
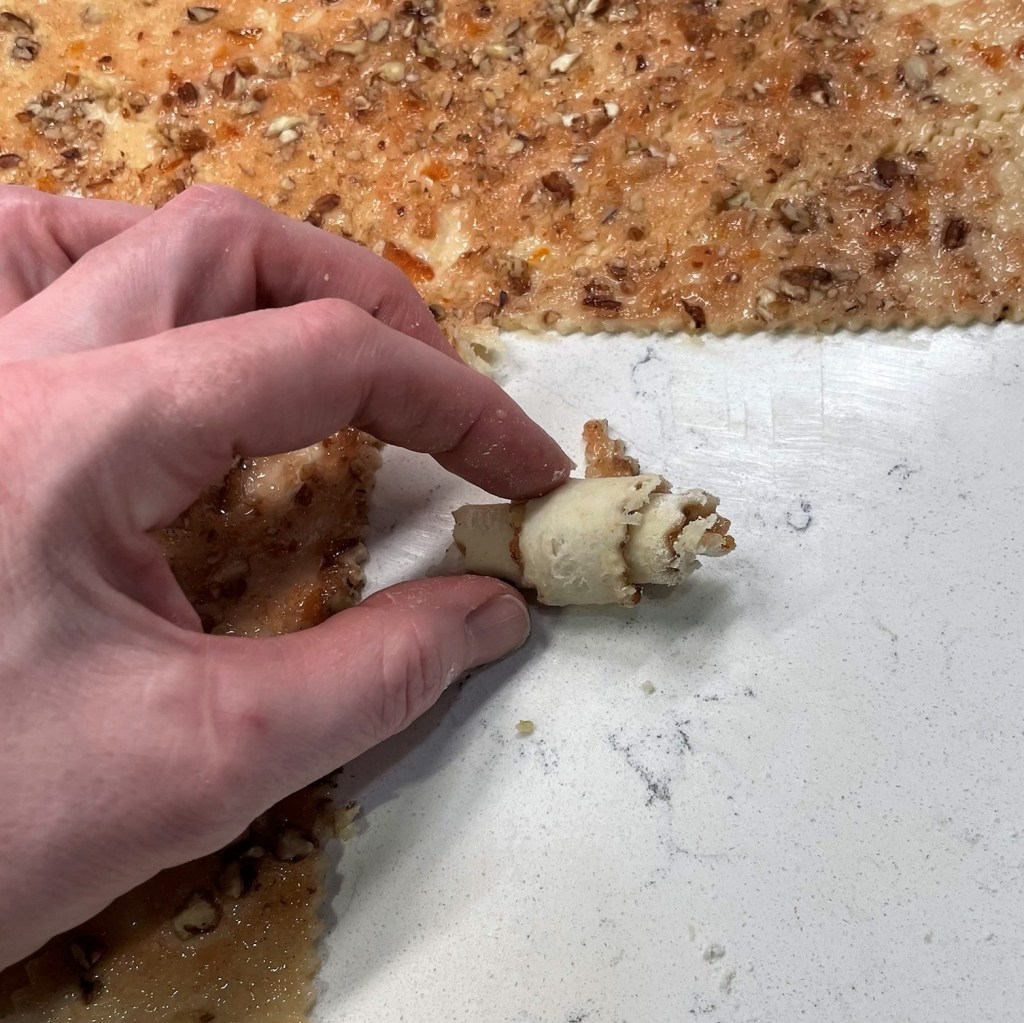
The rolling step is pretty straightforward. Just like a crescent roll, but way tinier!
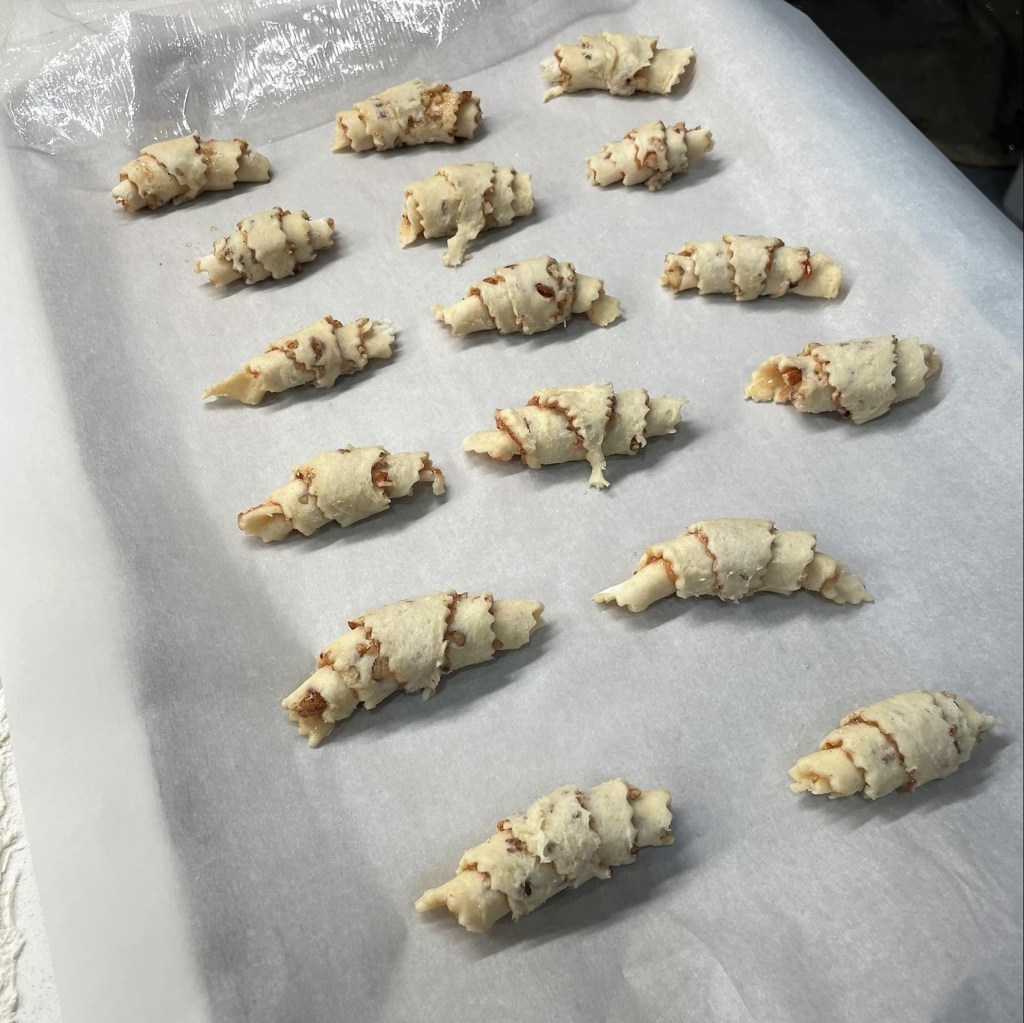
Whew, I got 16 of them onto my baking sheet! Cover with plastic and into the fridge.
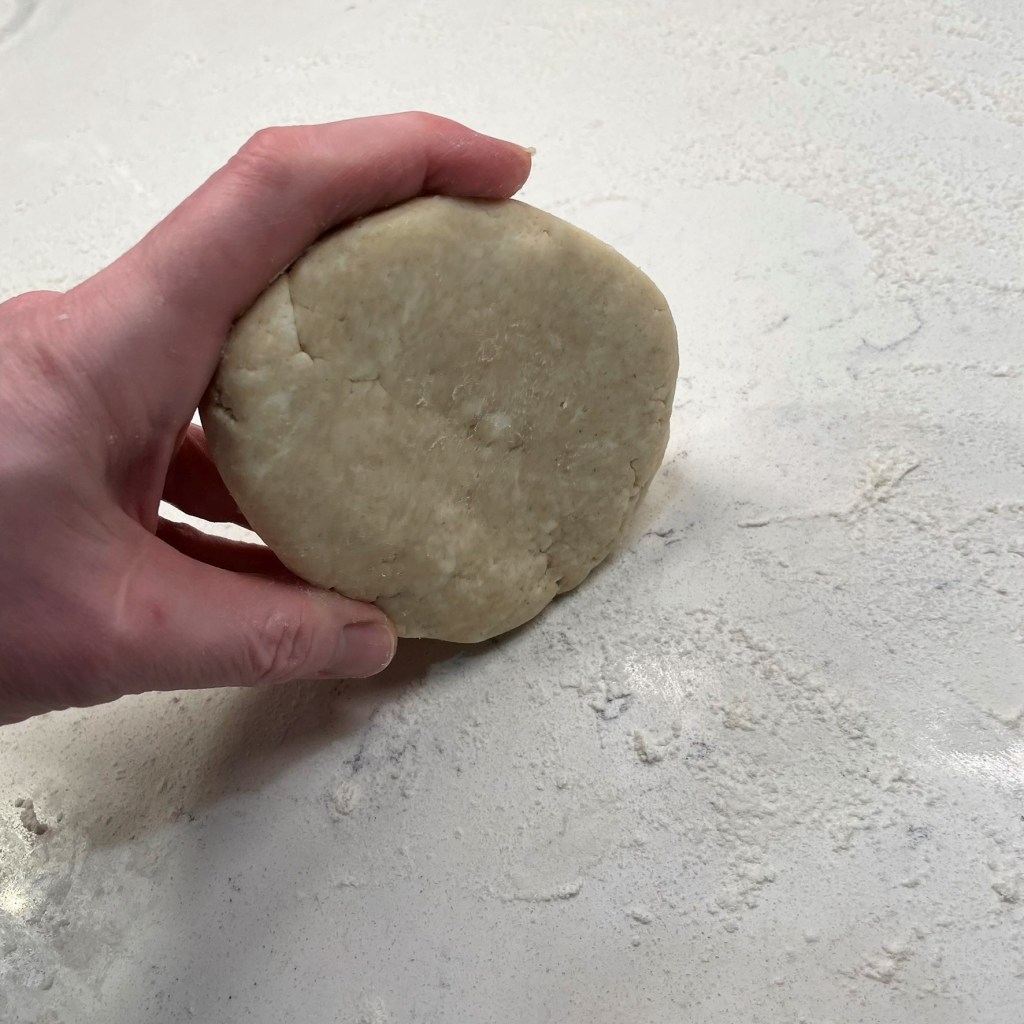
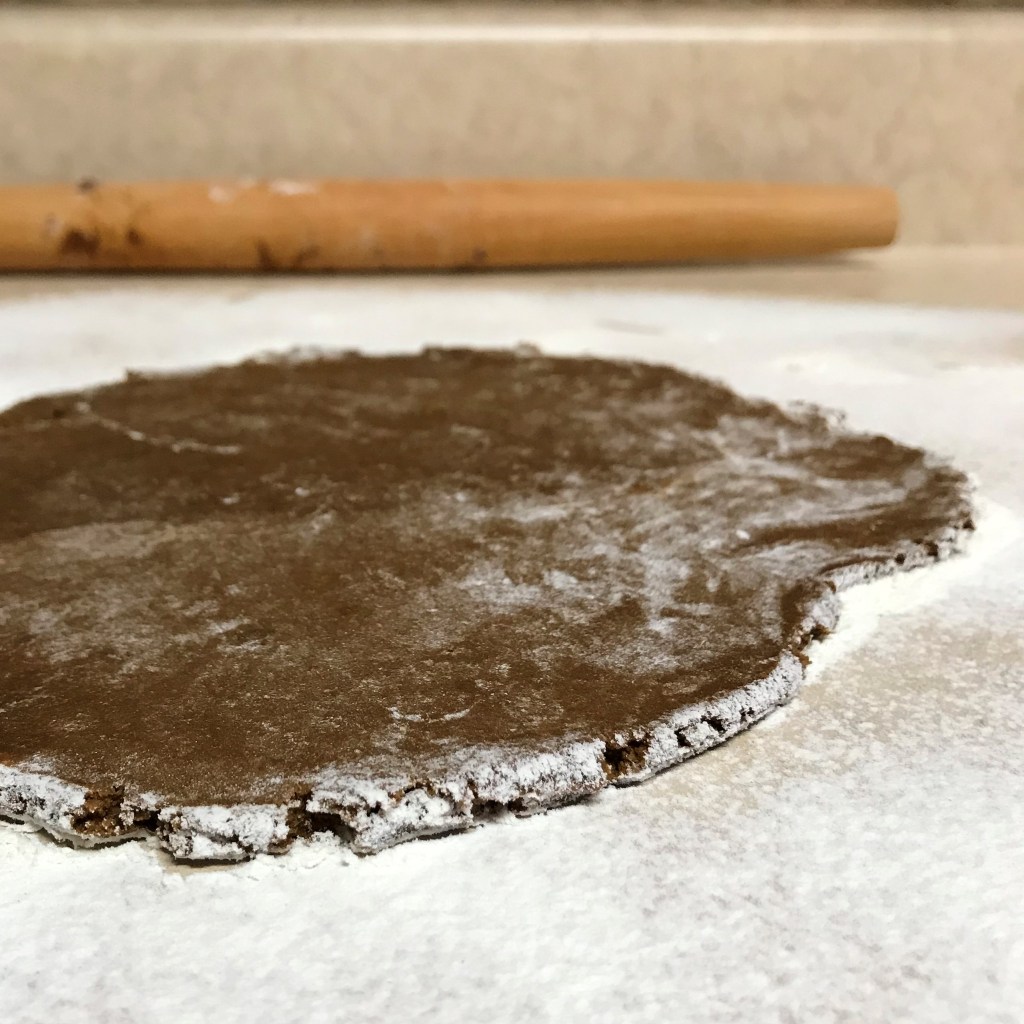
I made three changes for my second disk of dough. First, I rolled the edges flat before I began rolling out the dough. I learned this a long time ago with pie crust.
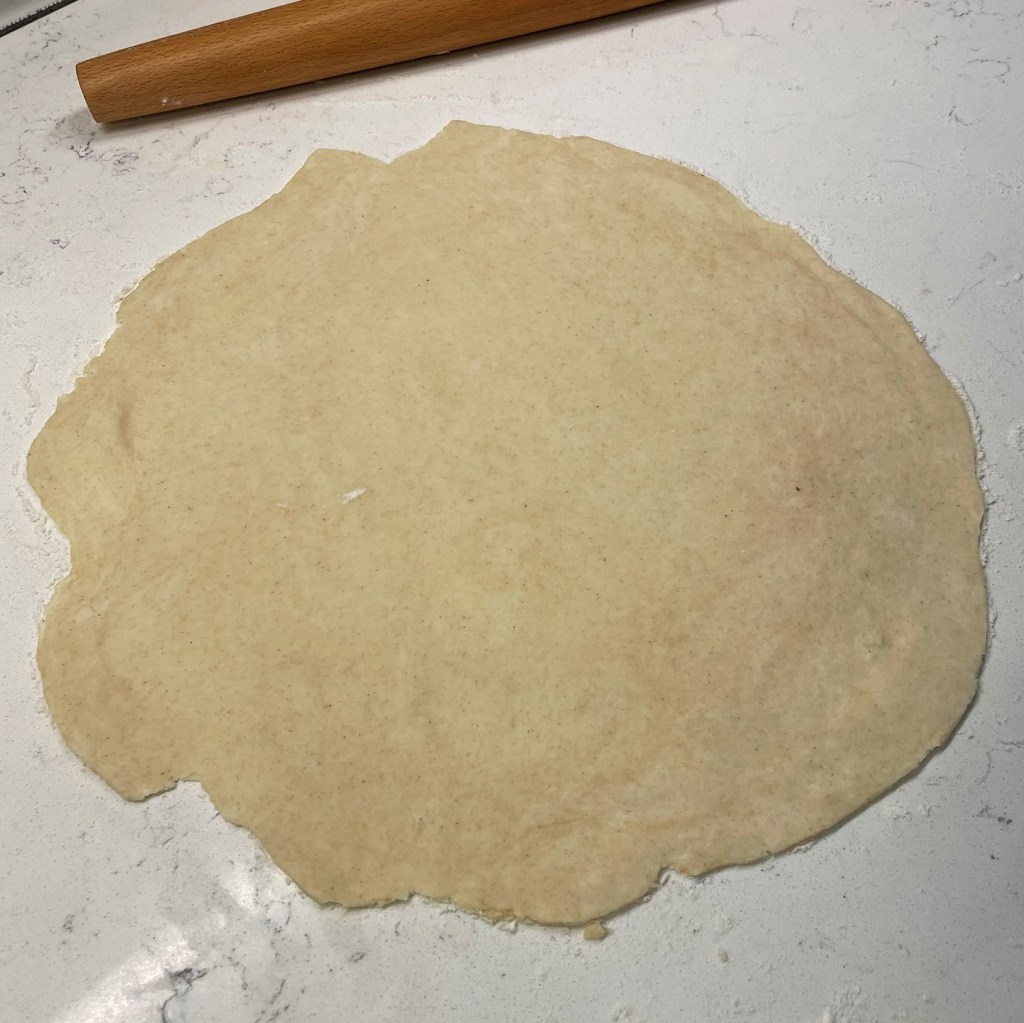
Much better rollout, and without so many shaggy edges!
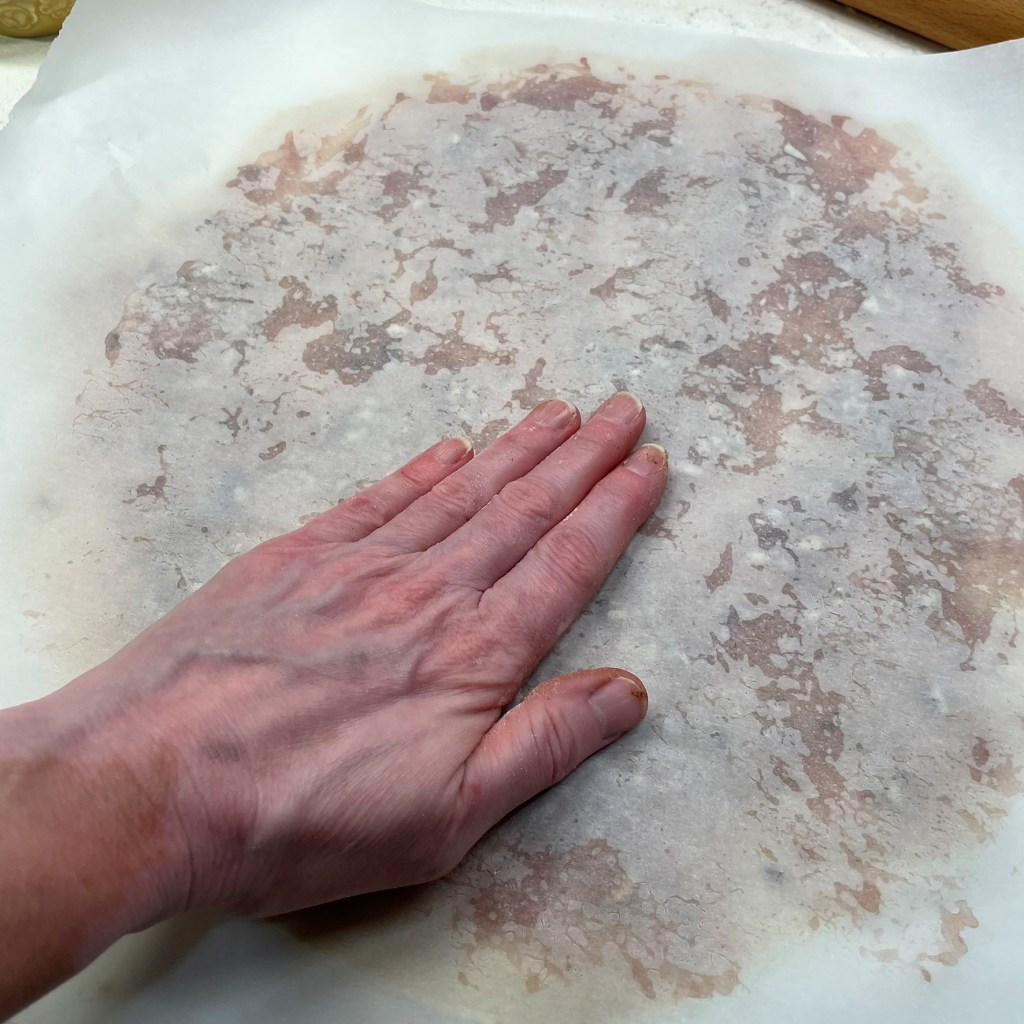
My second change was pressing the pecans into place with my hand rather than the rolling pin. Much easier to remove the parchment!
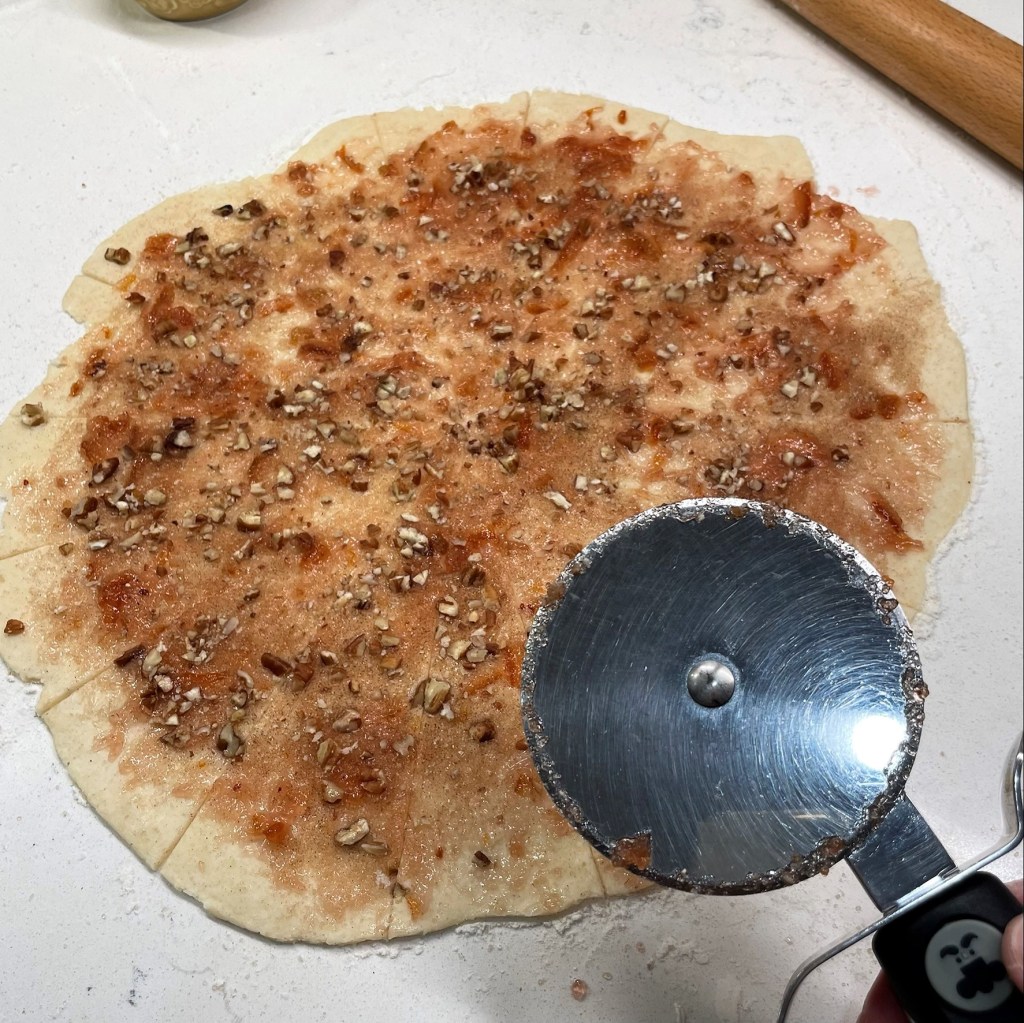
And I used a pizza wheel to cut my wedges, which made the rolling step easier and cleaner. The little things can make a big difference!
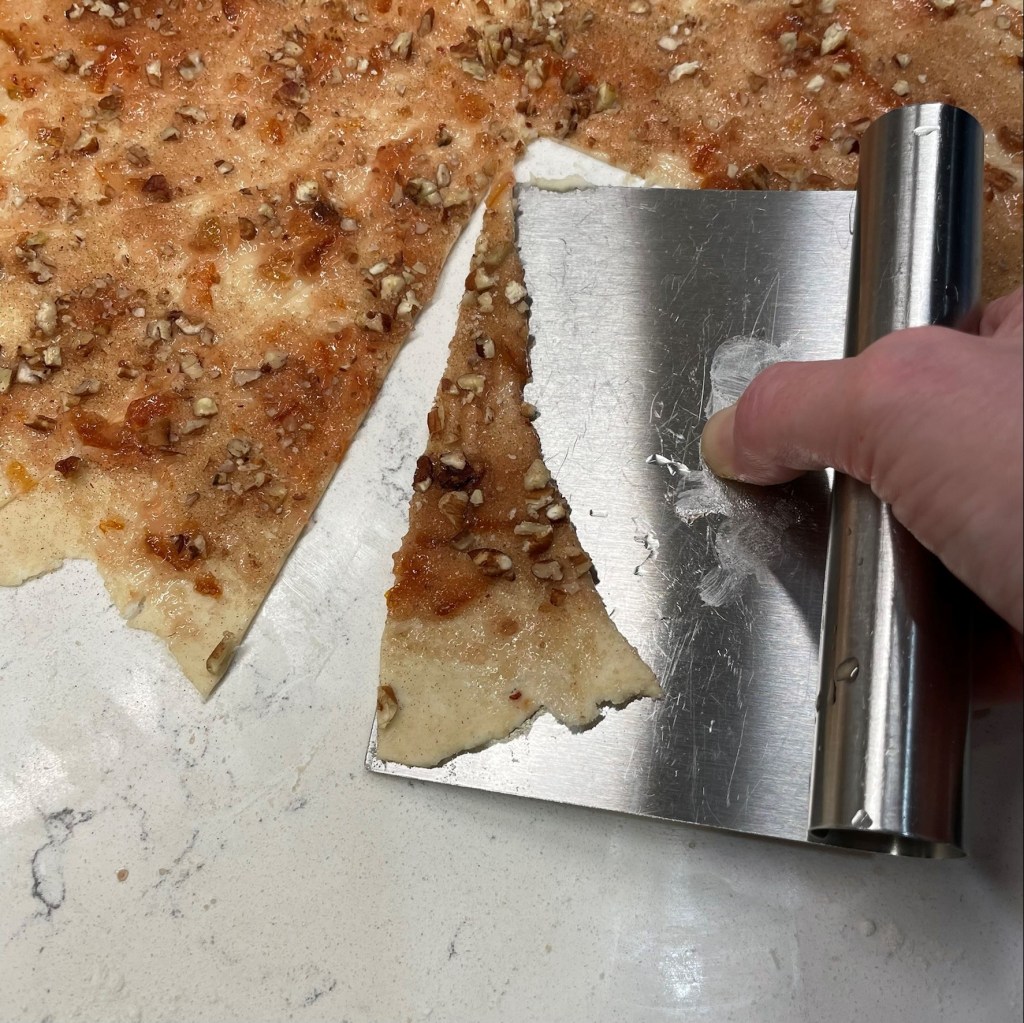
Even with clean cuts on the dough, I found it easier to roll the rugelach by pulling a wedge away from the larger whole.
Time for baking! I brushed on a quick egg wash.
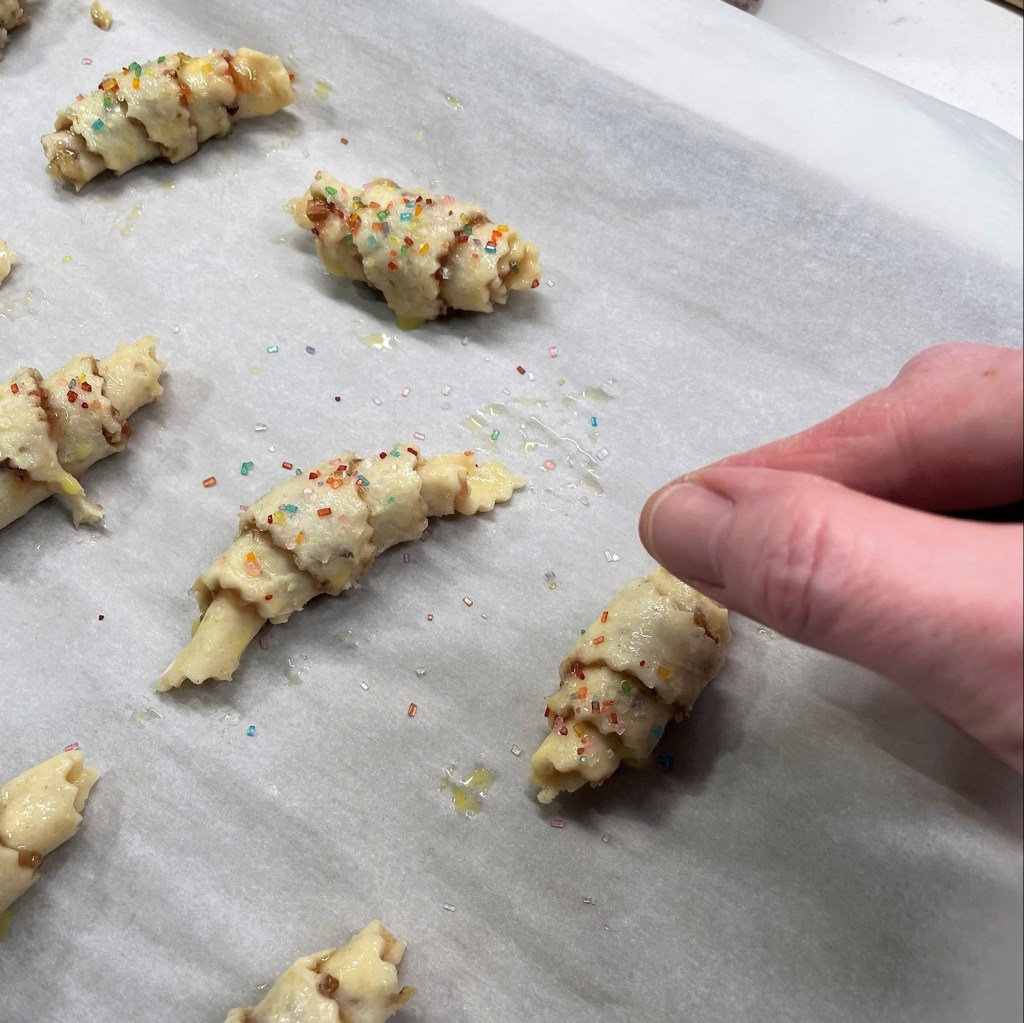
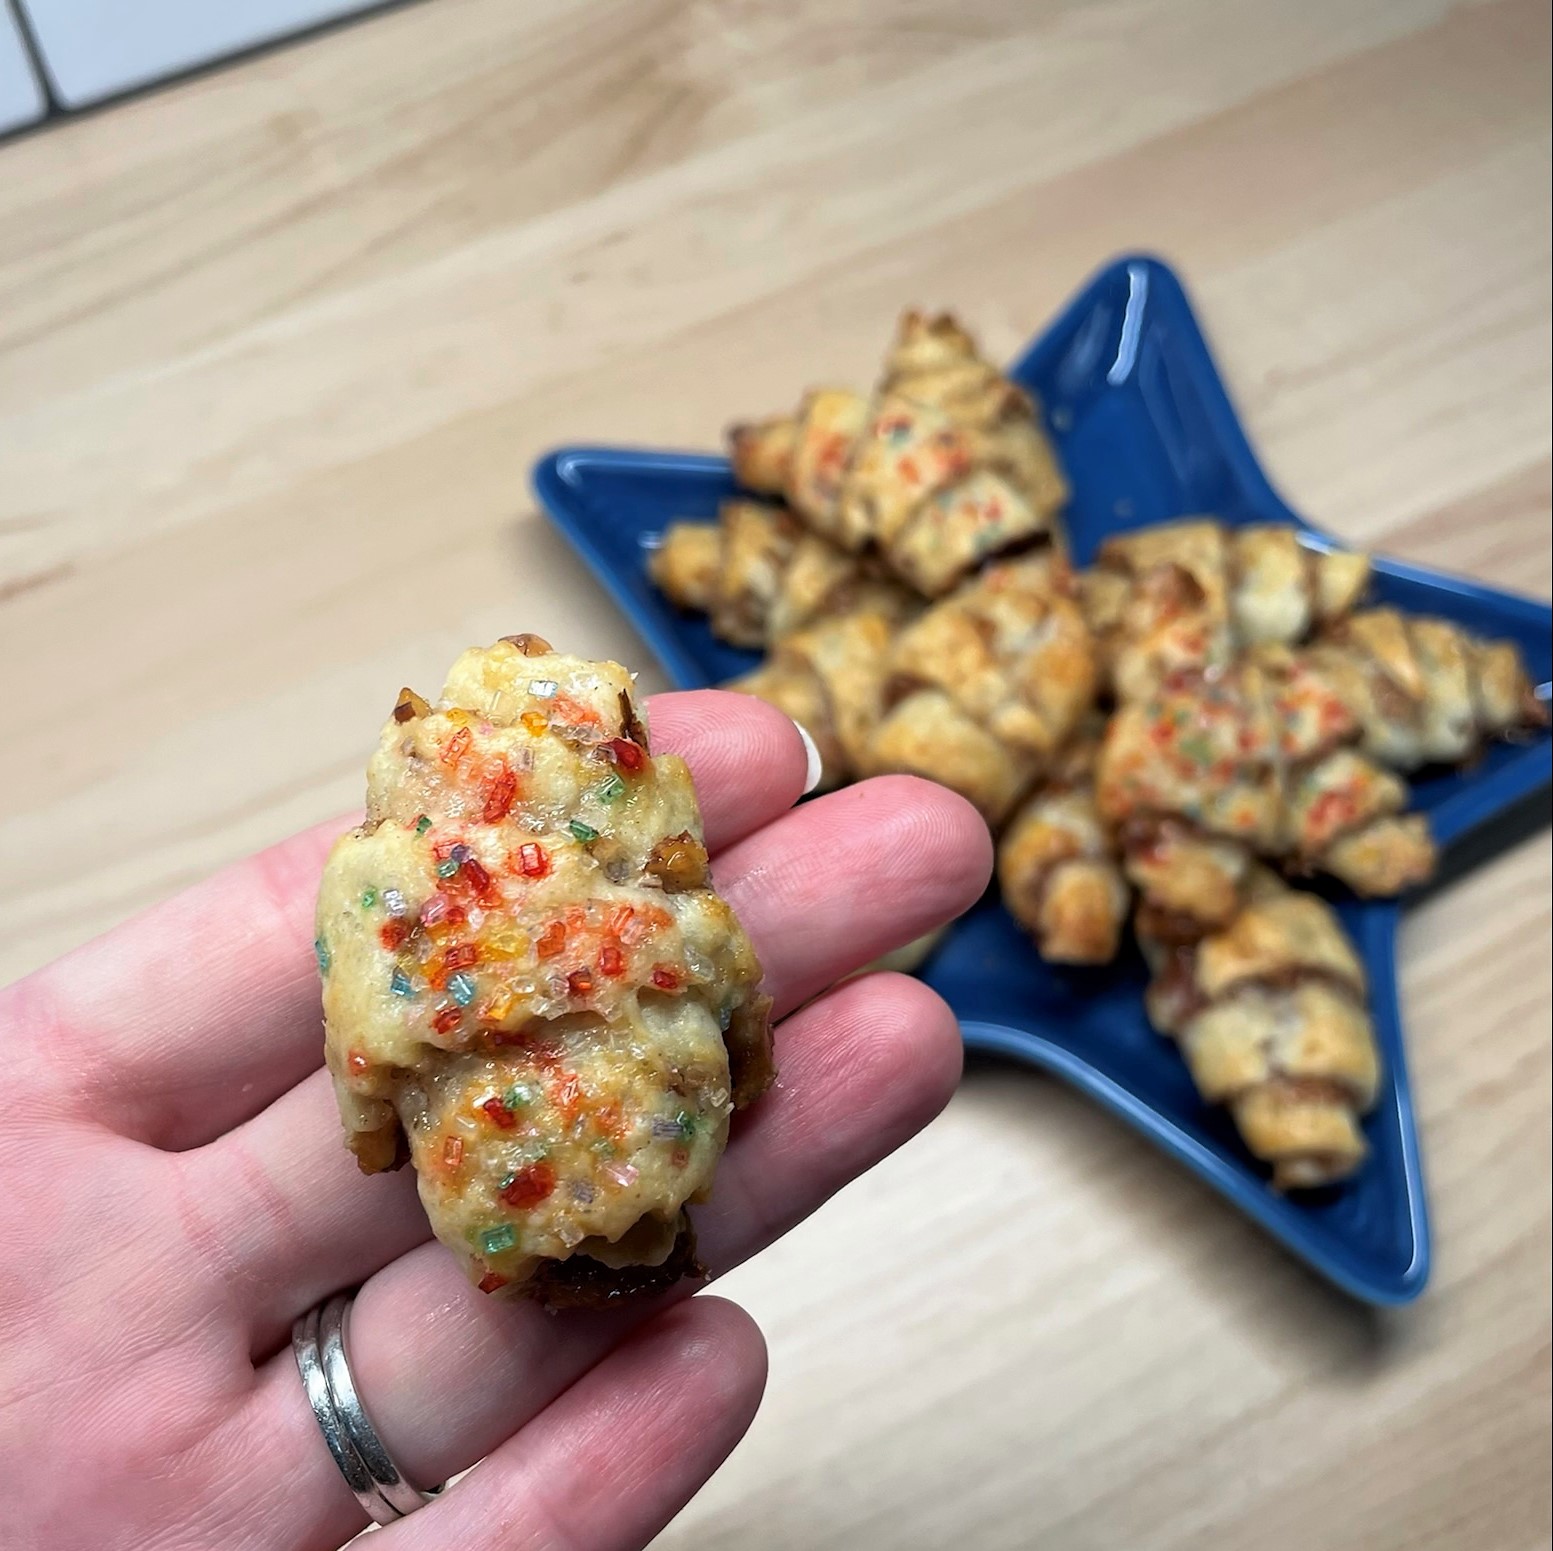
And sprinkled each cookie with coarse sugar. On my first batch, I used colorful sprinkles; on the second, natural turbinado.
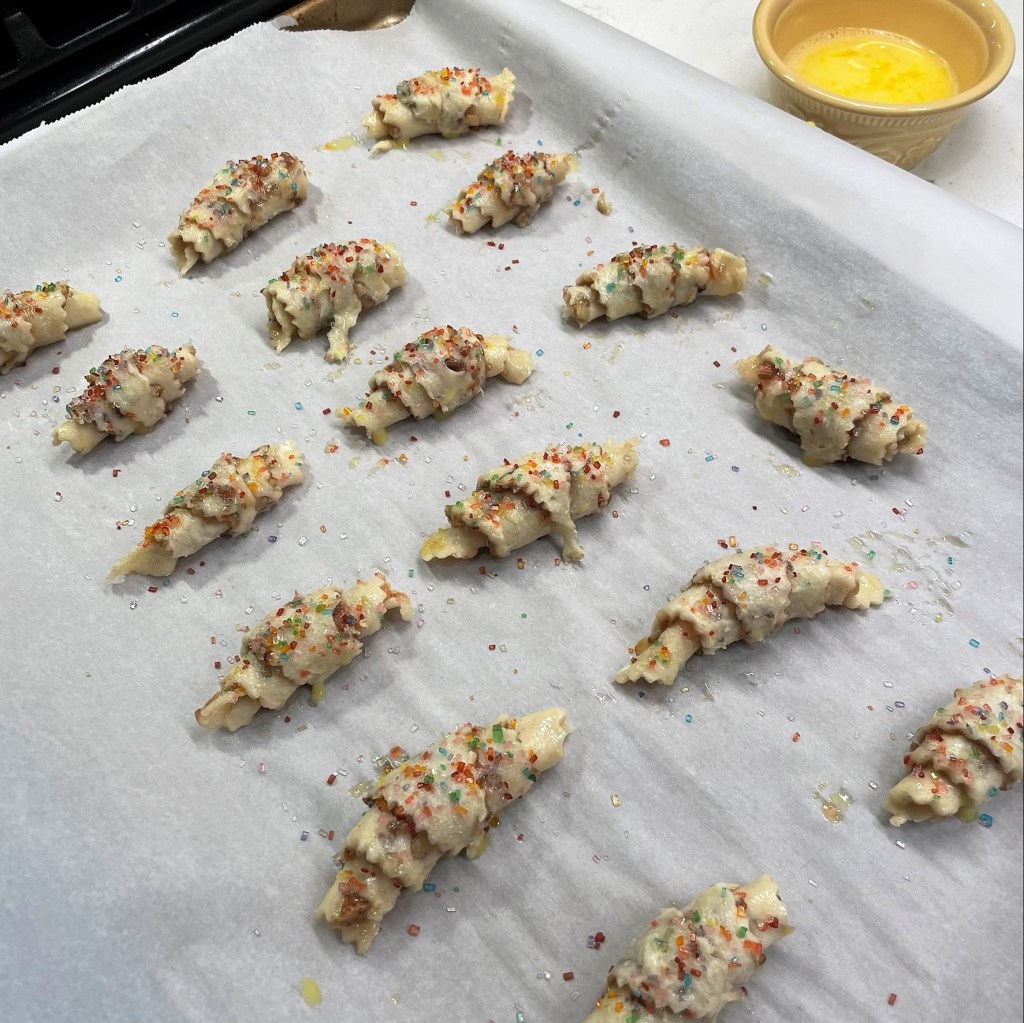
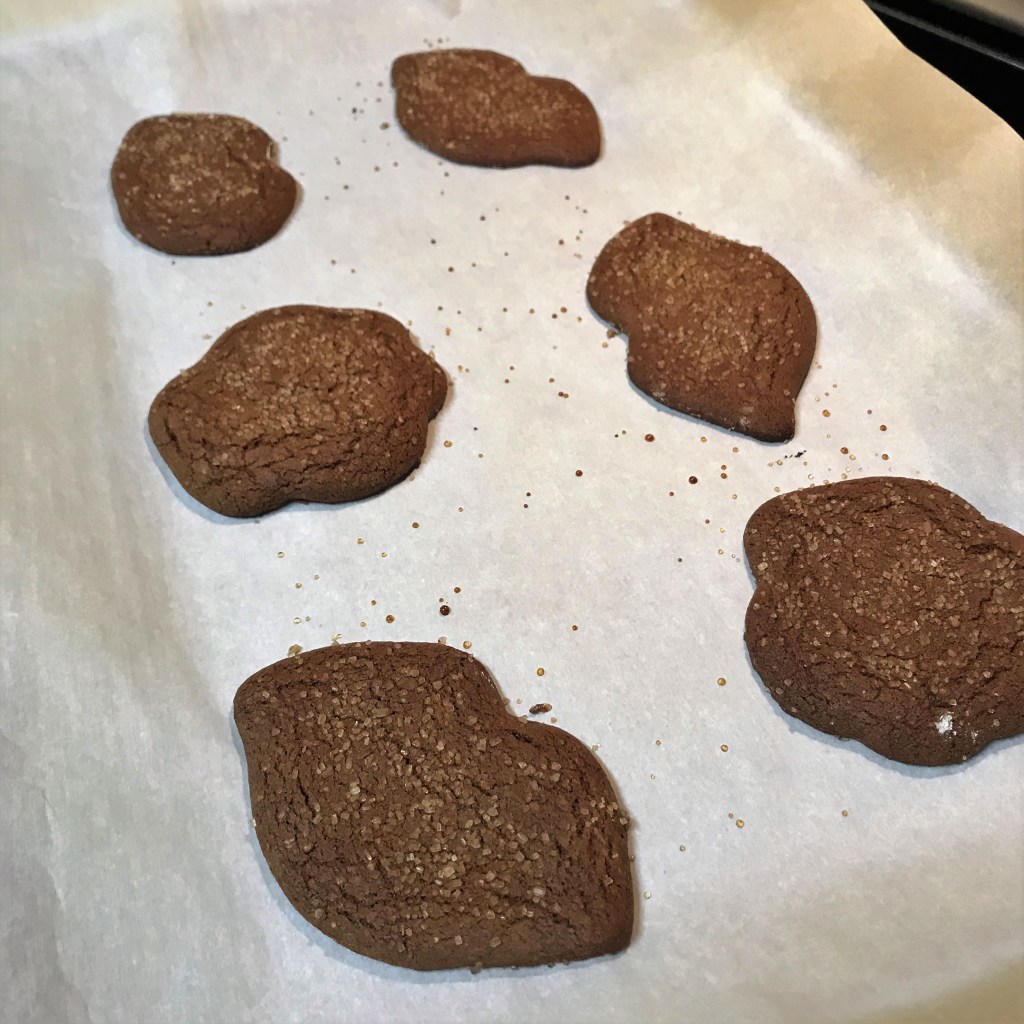
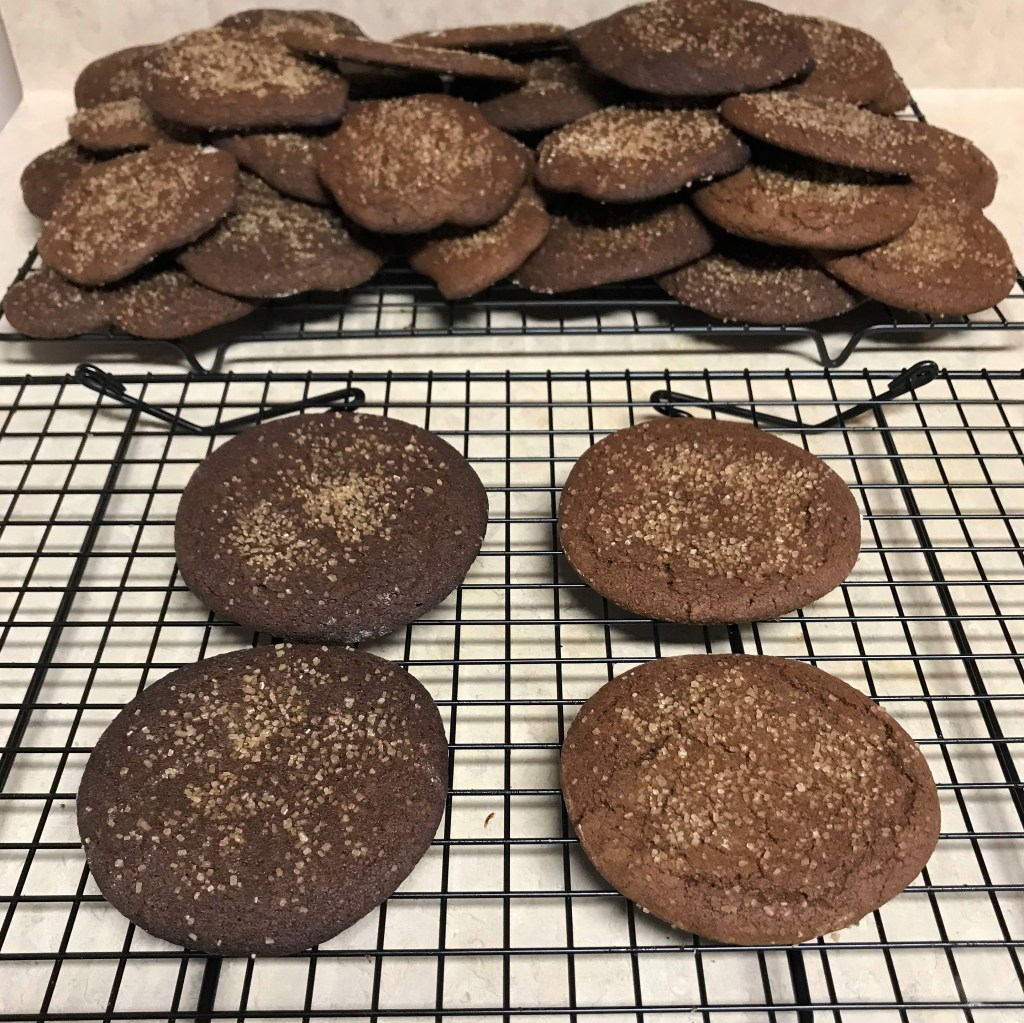
I do like the wavy edges on this batch. Into the oven for 25 minutes, until puffy and golden.
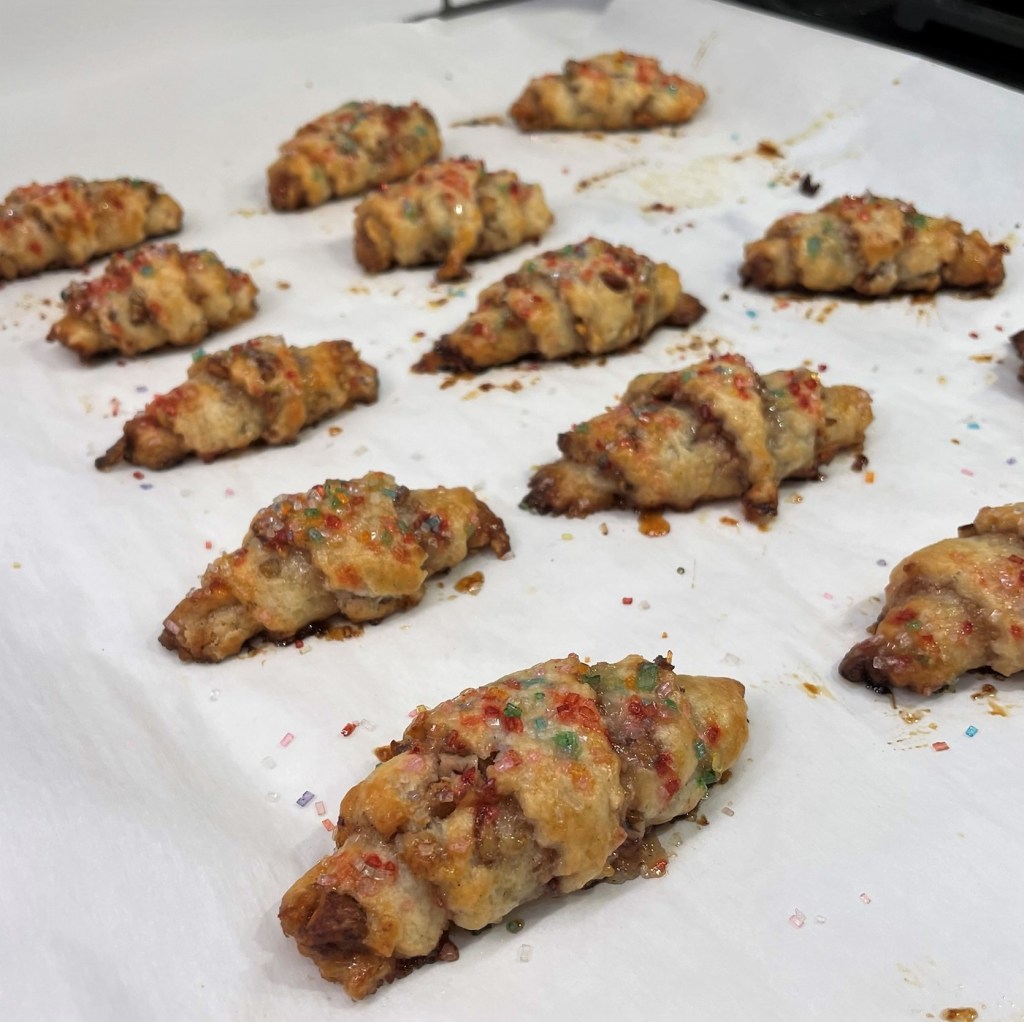
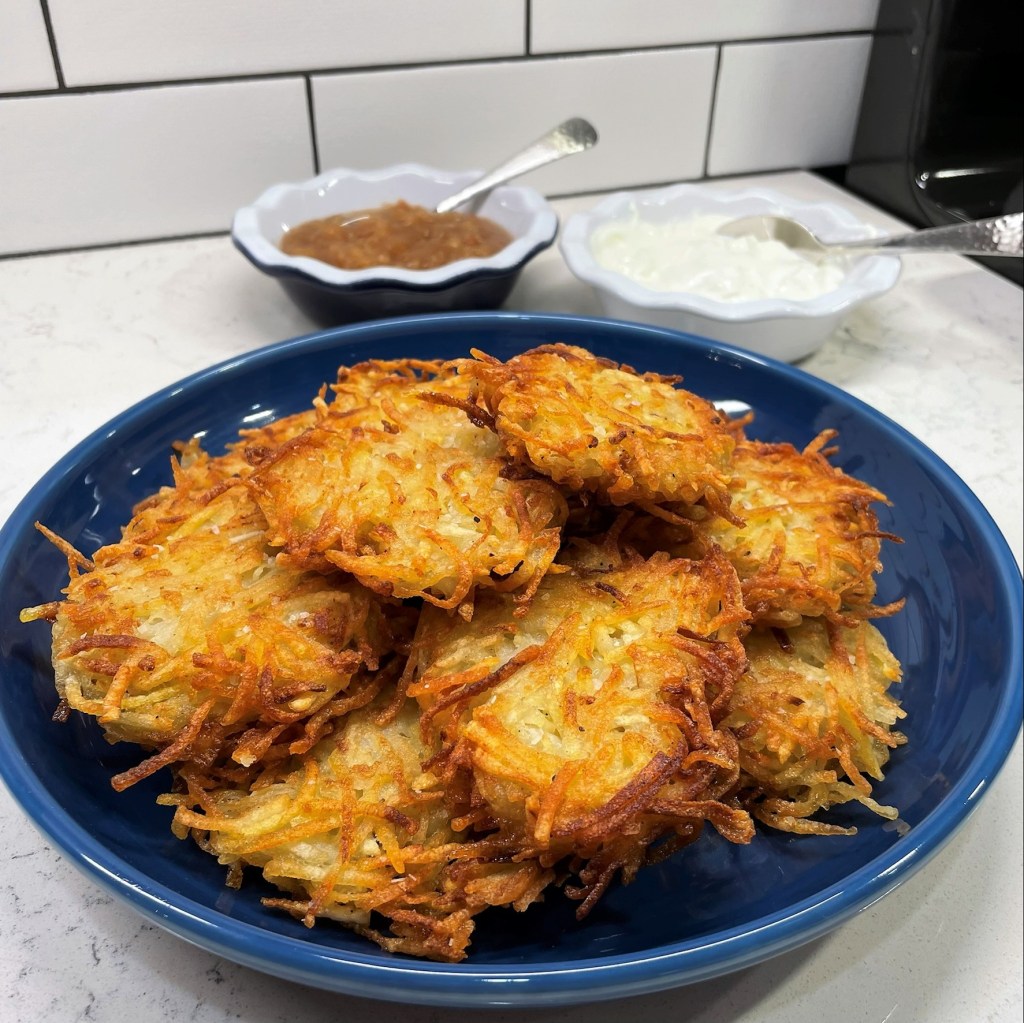
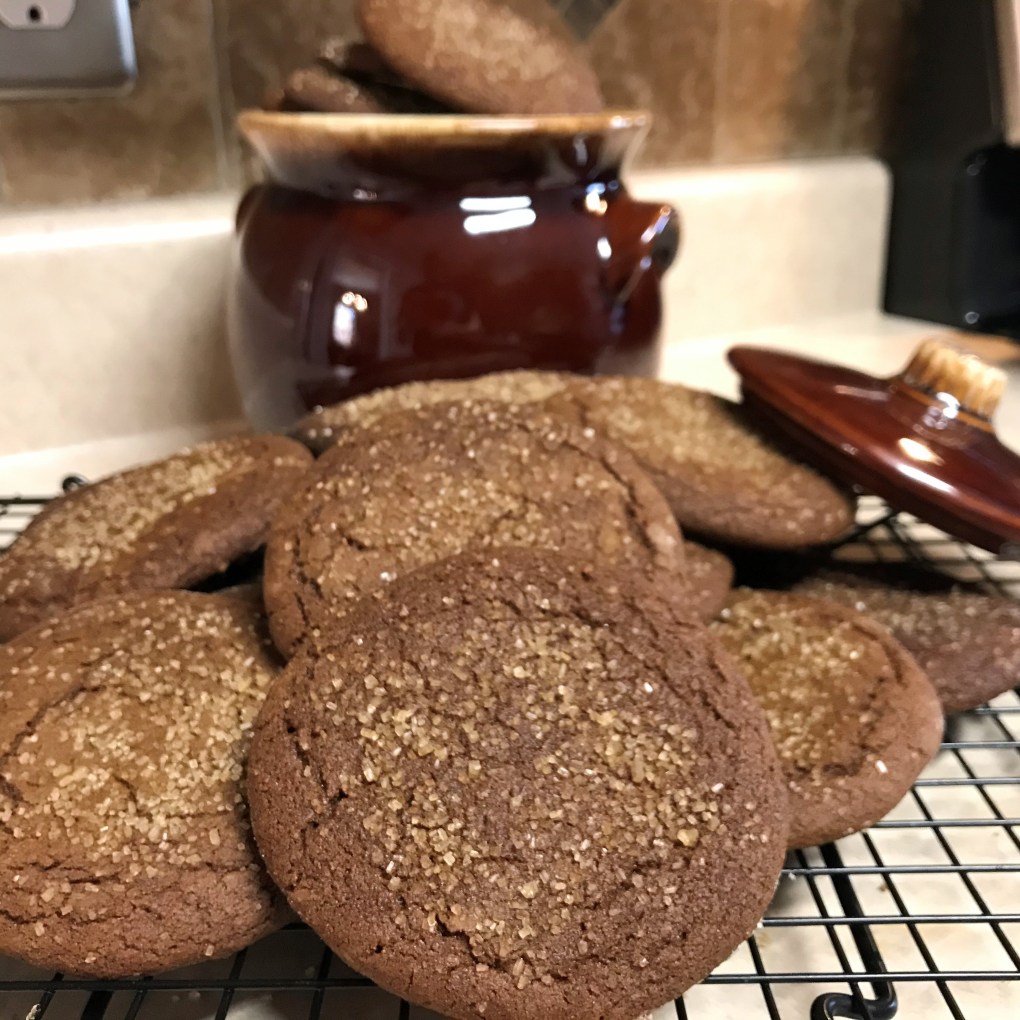
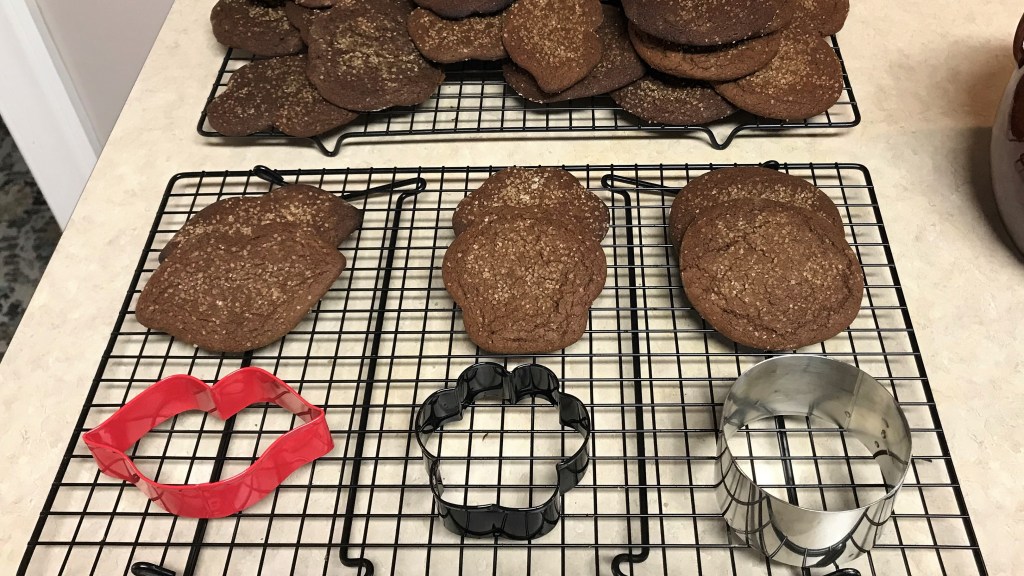
I love how the filling peeks out of the baked rugelach, and these little bite size cookies were delicious!
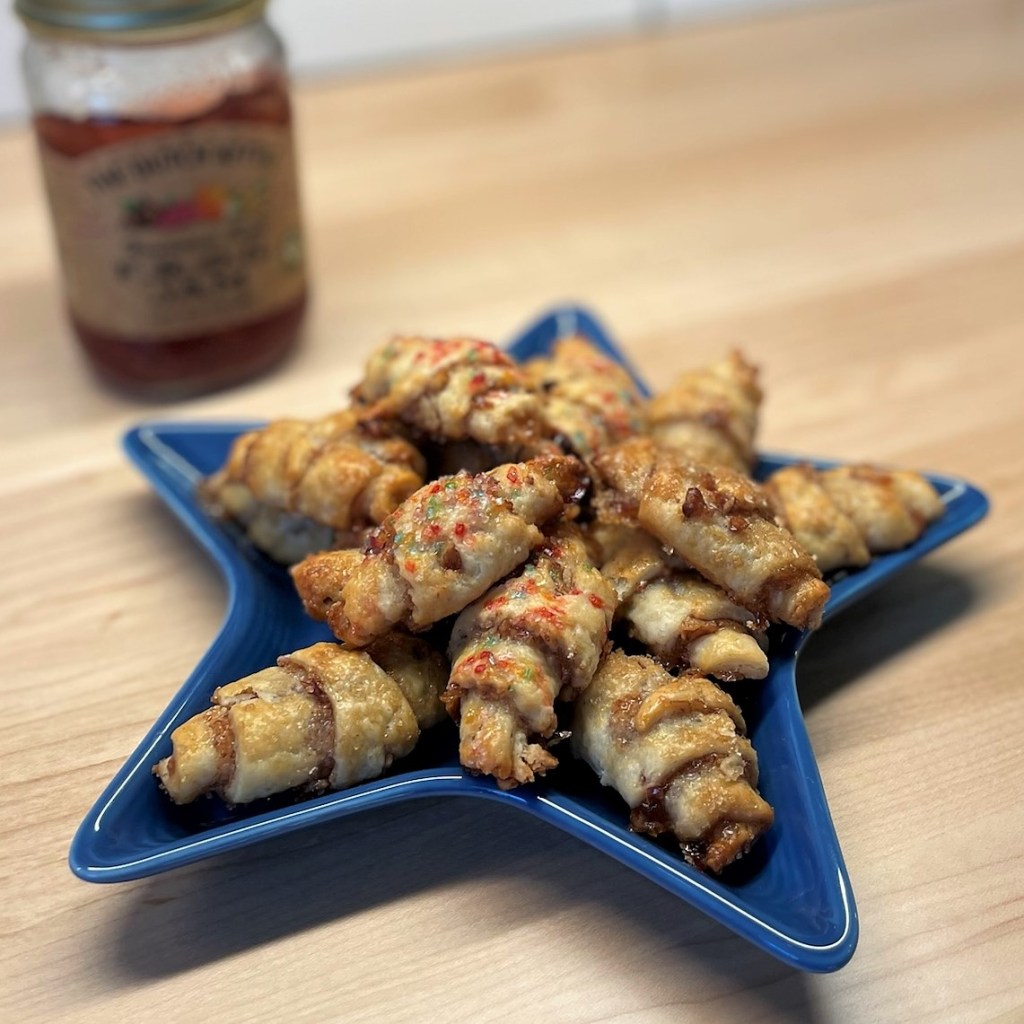
I’m excited to move rugelach to the “done” column of my bucket list. Next time, I want to make them with chocolate and cherry!
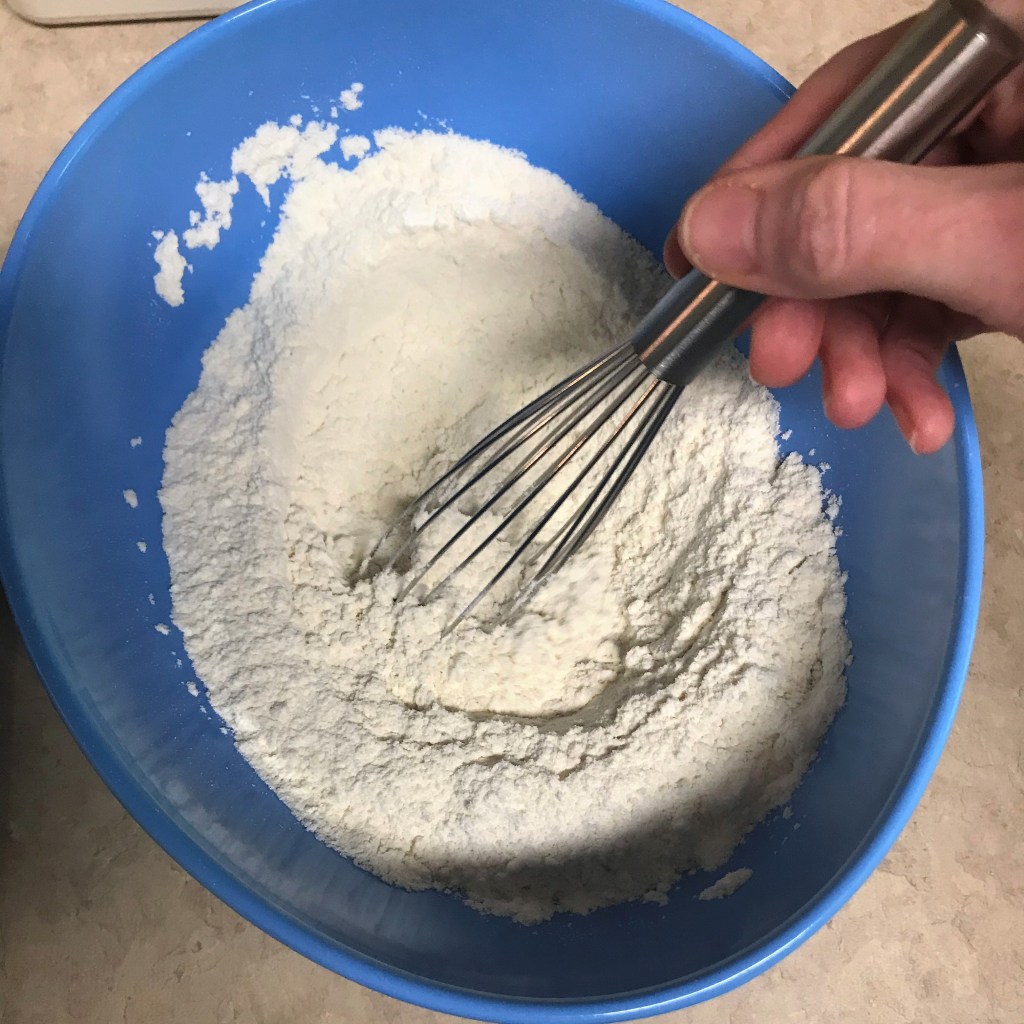
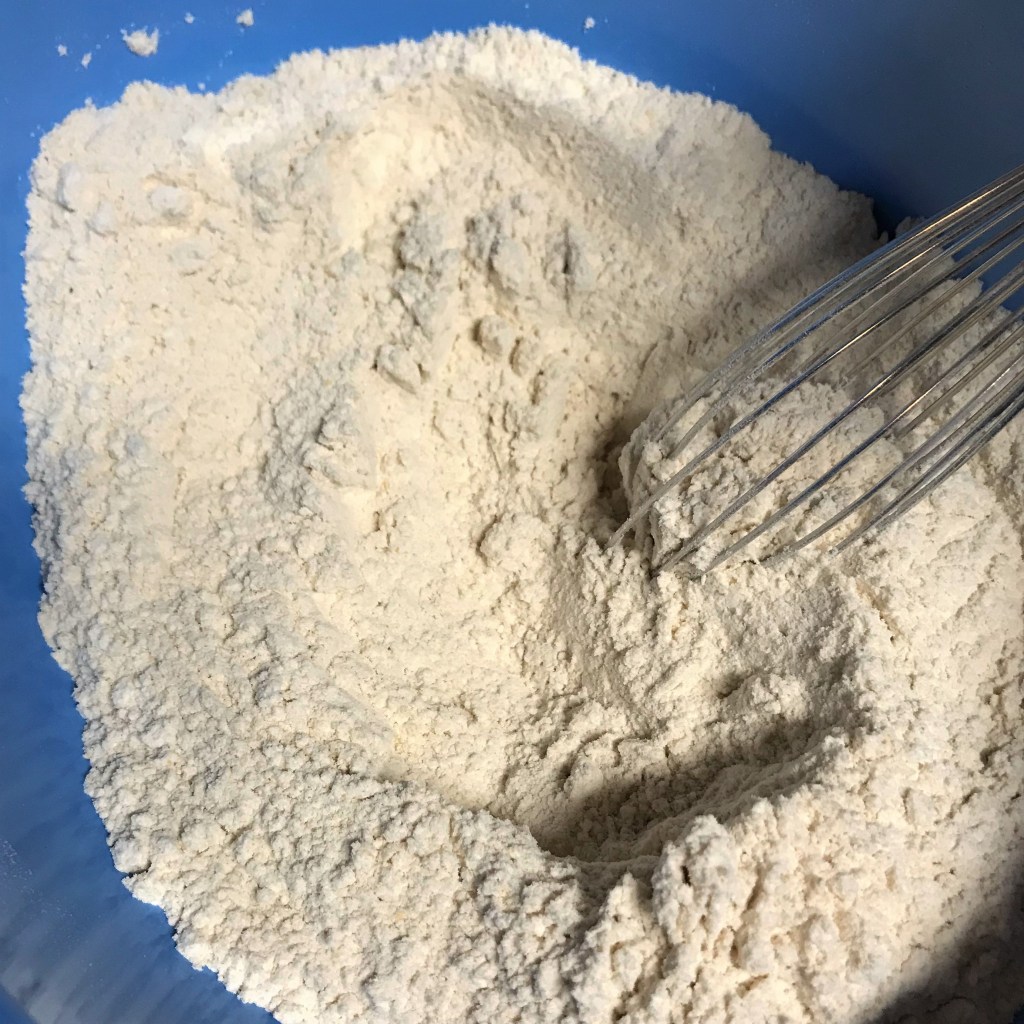
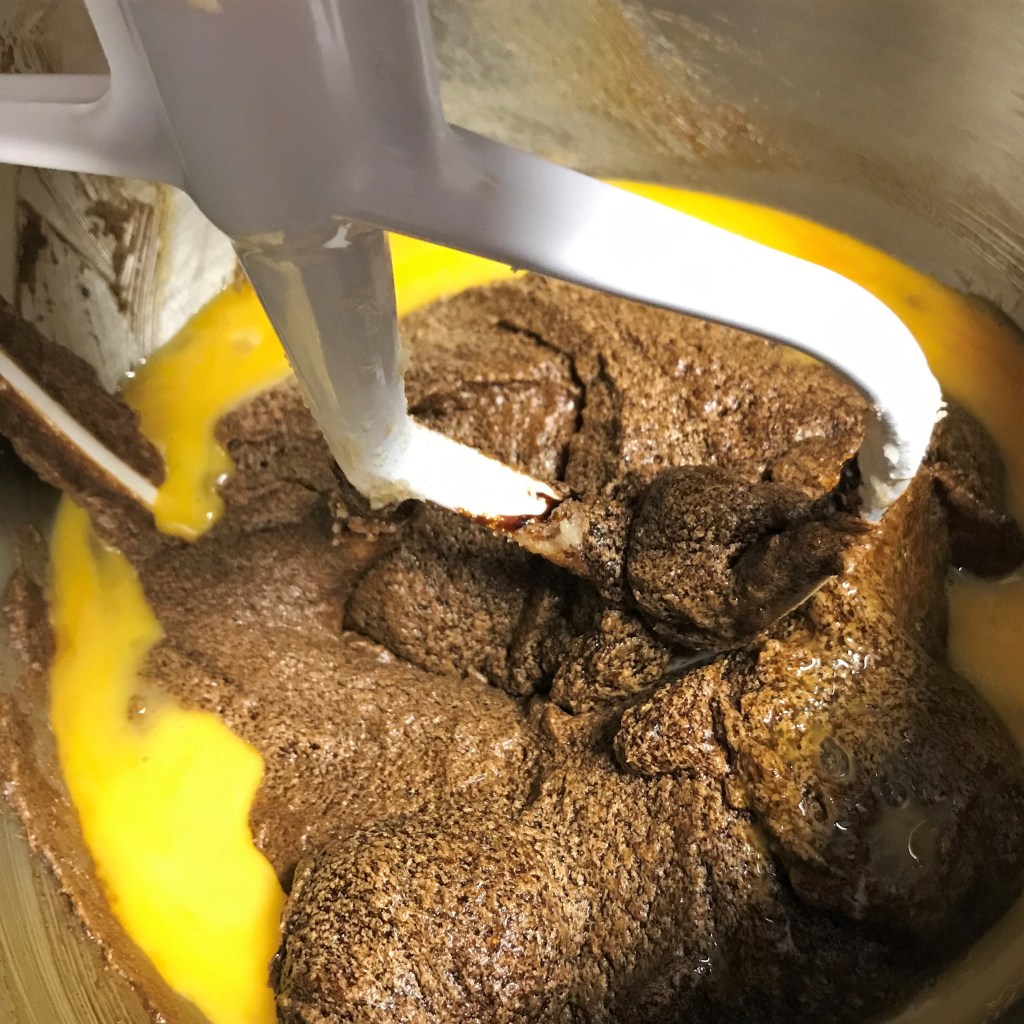
Combine flour, powdered sugar and salt in the bowl of a food processor and pulse a couple of times to blend them evenly. Add cold pieces of butter and cream cheese. Pulse a few times to cut the fats into the dough, then run the processor continuously just barely long enough to see it come together but not long enough for it to clump in a ball around the blades.
Scrape the dough out onto plastic wrap. Divide it into two equal pieces and shape them into disks about the size of hockey pucks. Wrap them tightly in the plastic wrap and refrigerate a few hours to overnight.
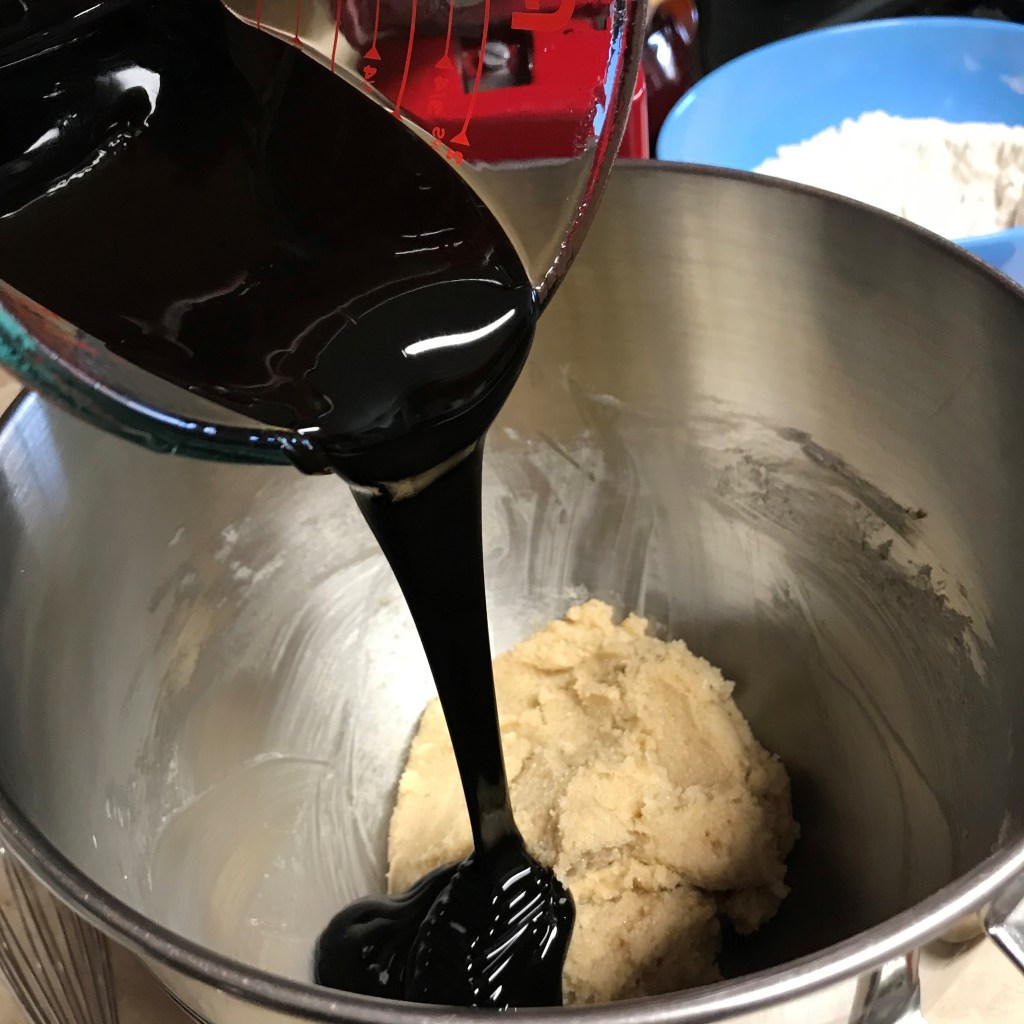
The rolling out and rolling up stage of this recipe moves quickly, so I encourage reading through it completely before beginning. As with any butter-based dough, you want to try to keep it as cold as possible so that it remains flaky during baking. Get all your filling ingredients measured, lined up and ready. Warm the preserves in a small saucepan until they loosen up to spreadable consistency, then remove from heat. Divide the cinnamon sugar and toasted pecans so that you have equal amounts for each dough disk. Set up two baking sheets, lined with parchment, and arrange enough space in the fridge to chill them for an hour or two.
Roll the dough out on a lightly floured countertop, until it is about 1/8” thick and roughly 12” in diameter. Working from the edges inward, brush half of the melted preserves onto the dough round. You should see quite a lot of dough through the preserves and try to keep the glaze light in the center of the dough round, which will ultimately be the tips of each rugelach.
Sprinkle the cinnamon sugar all over the glazed dough, and then scatter the toasted pecan bits evenly over the sugar. Lay a piece of parchment or waxed paper over the dough round and gently press to secure the pecan bits into the dough. Carefully peel the paper away and set it aside for the second batch.
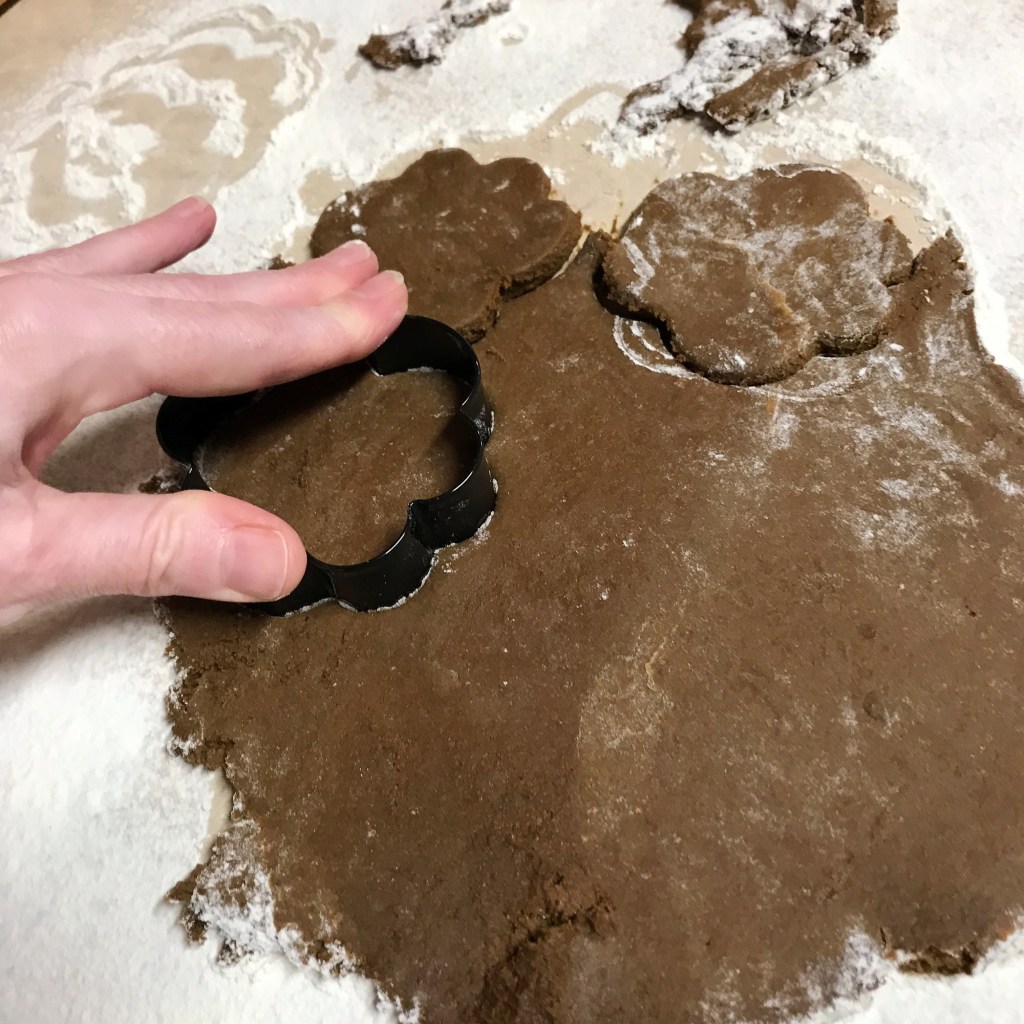
Using a pizza wheel, cut the dough into 16 equal triangles, with tips at the center of the dough round. The easiest way to do this is to cut it into fourths, then cut the fourths into eighths and finally the eighths into sixteenths. This will make sense to you when you begin cutting. Some of the pecan pieces will fall off or come loose; just press them back onto the dough.
Beginning with one of the triangles, start rolling from the outer, wide end toward the center, as if rolling up a crescent roll. Keep it tight as you go and place the cookie on the parchment-lined baking sheet. I found it easier, once I had about three of the triangles rolled, to use my bench scraper to loosen a triangle away from the round before rolling. The far-away side of the dough round was the trickiest, and next time I may try rolling it on parchment paper that can be moved around for the rolling step.
When all 16 cookies have been rolled, cover the baking sheet with plastic wrap and place it in the fridge. Repeat with the second dough disk. Chill the cookies for at least an hour before baking.
Toward the end of chill time, pre-heat the oven to 350° F, with the oven rack in the center position. I baked only one sheet at a time, but if you wish to bake both at once, arrange the racks with enough room for both and plan to rotate the pans halfway through baking time.
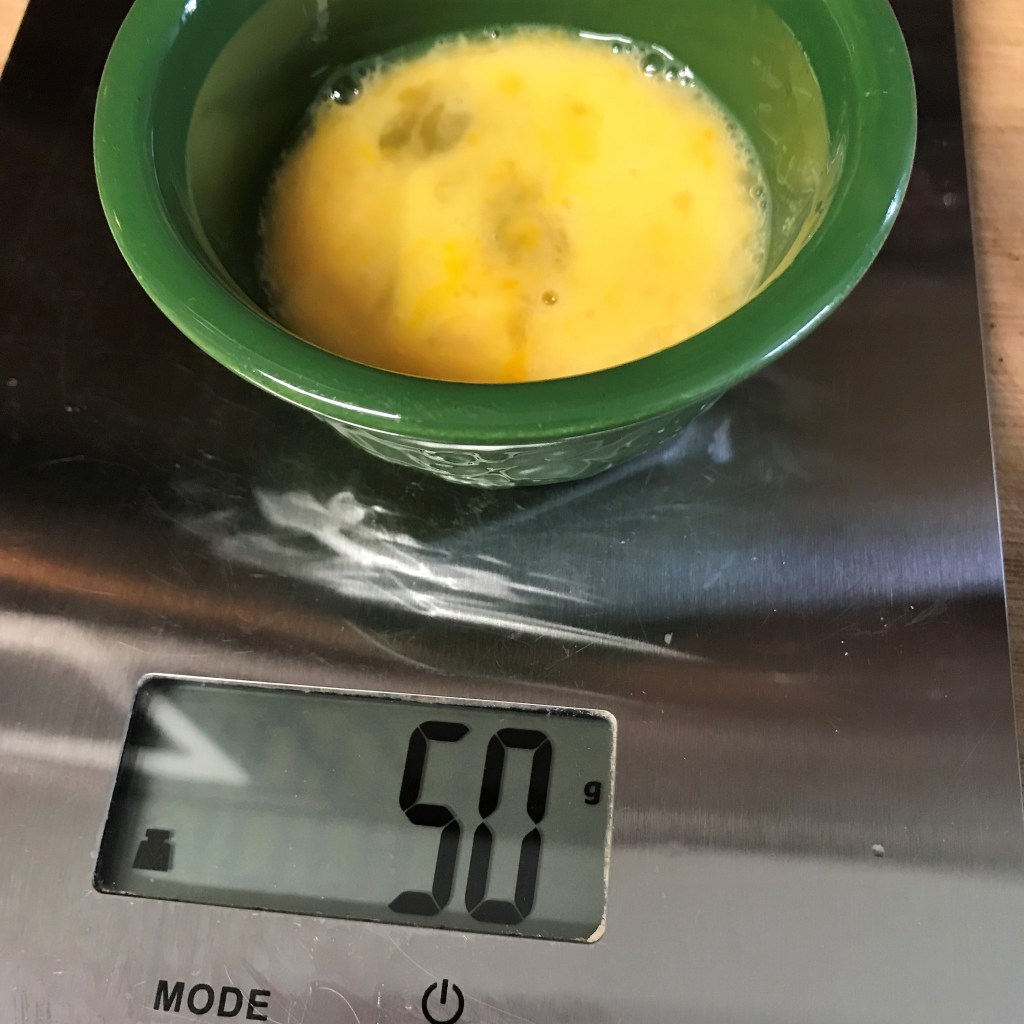
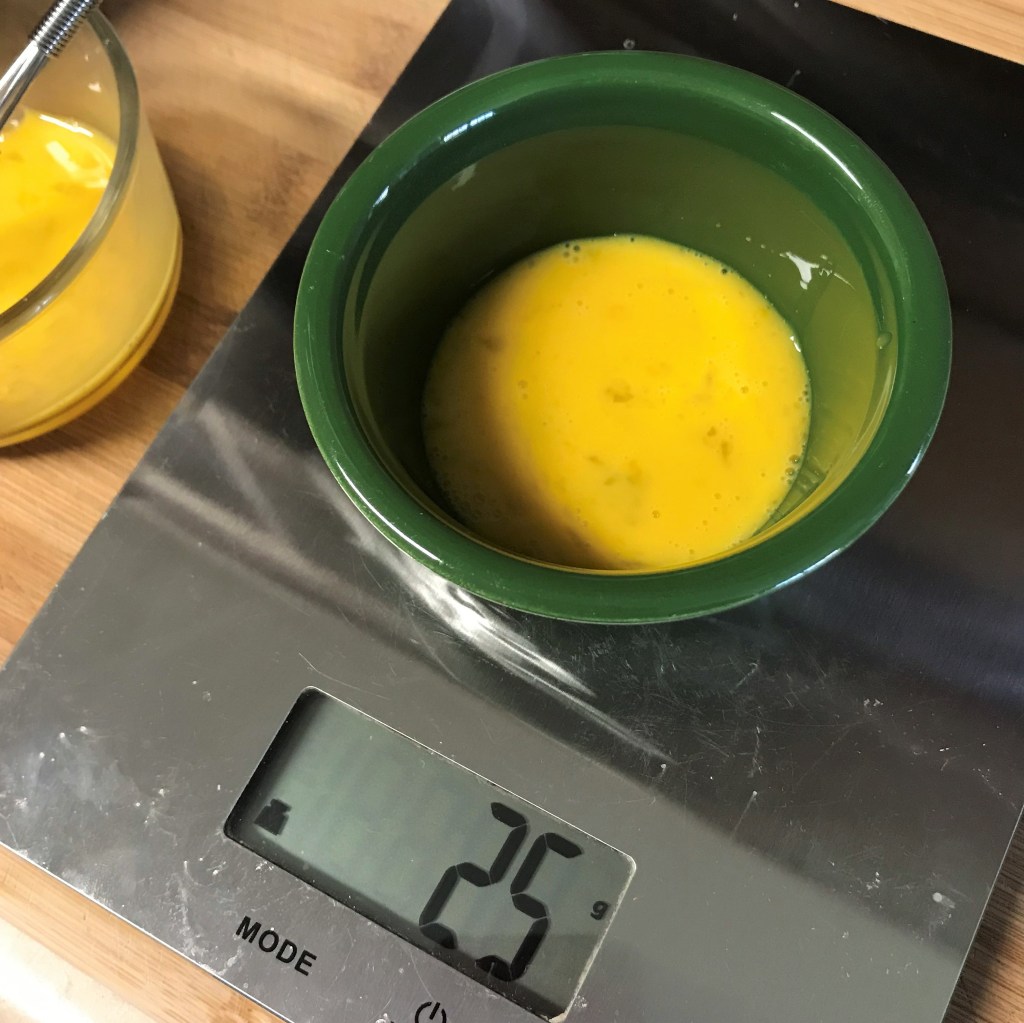
Prepare an egg wash (beaten egg with a teaspoon of cold water) and lightly brush the chilled cookies. Sprinkle them with a pinch of sugar. You can use decorative sugar or (as I did with my second batch) a pinch of natural turbinado sugar.
Bake for about 25 minutes, until cookies are puffed up a bit and golden brown in color. Cool on the pan for about 5 minutes, then use a spatula to transfer them to a cooling rack.
Holiday preparation is fun for me—all the excitement, decorating and special trimmings gives me an exuberant sense of energy. But the extra fussing can also pile on unwanted stress, and having a “signature” cocktail for the holidays relieves some of the pressure when guests will be joining the fun.
Sure, it’s nice to be able to offer up an open bar, and ours is fully stocked with everything our friends and neighbors might ask for (and a few things they probably wouldn’t—I’m looking at you, absinthe). Imagine what that would look like if I related it to other aspects of our entertaining though; say, the decorations or the table settings. Our guests don’t choose those; we decide based on the occasion. Too many drink options can overwhelm a guest and leave them standing there contemplating, when they’d probably rather just enjoy a well-thought-out adult beverage, and I’d rather be back in the kitchen putting the finishing touches on dinner.
Naturally, a few people may request their own favorite (a beer or glass of white wine, perhaps), but most of our friends enjoy the unique tipple that we put together for them, and I do my best to keep the flavors within the season. Not too strong, not too sweet, always with a special ingredient twist.
This year, I agonized over my signature cocktail, not because I fell short of ideas (as if that would ever happen in my crazy brain), but because my best experiments this year felt too similar to the signature drink last year, the Pom-Pom-Hattan. At first glance, this drink may seem almost the same, given that cranberry has a similar tartness to pomegranate and both drinks are made with bourbon. But friends, this is no ordinary bourbon, and it was pleading with me to become part of my signature drink.
Drop what you’re doing and go get a bottle of THIS.
Before I get carried away, I’d like to emphasize that this distiller is not paying endorsement fees for my shameless raving (and if they did, I’d probably just spend it on more bottles). This is just between us bourbon lovers, and it’s what friends do—share the news about great things we find. The maple notes in this bourbon are very smooth, excellent for sipping neat, and I’ve done my share so far this season. The smokiness is subtle, but present, and a little tang of cranberry (spiked with some spices) is a perfect accompaniment for a cocktail that celebrates the warmth of the holidays.
The spiced cranberry syrup takes a few minutes to make, but it’s easy. The smoked maple bourbon and red vermouth definitely give this drink a Manhattan feel.
The ingredients are simple, though one required a bit of advance effort. Rather than use a store-bought cranberry juice (which I didn’t even consider, frankly), I made a simple syrup infused with fresh cranberries, cinnamon for warmth and pink peppercorns for depth. Simple syrup is exactly that—simple. Just equal parts by volume of sugar and water, and for this one, I added the flavor infusers long enough to draw out the color of the cranberry. The rest of the drink is very Manhattan-like; a quality brand of red vermouth and a few shakes of bitters, with a premium cocktail cherry as garnish.
At our house, we enjoyed these on Thanksgiving and again on Saturday night with appetizers before our Ultimate Thanksgiving Leftover Pizza. But just as with last year’s Pom-Pom-Hattan, I have no doubt that this smoky-sweet-tangy cocktail will carry us through all the way to New Year’s.
Cheers!
Ingredients (makes two cocktails)
3 oz. Knob Creek smoked maple bourbon
1.5 oz. red (sweet) vermouth
1.0 oz. spiced cranberry simple syrup
2 dashes ginger bitters
Good quality cocktail cherries, such as Luxardo brand
Instructions
Measure bourbon, vermouth, spiced cranberry syrup and bitters into a mixing glass or shaker. Add one cup of ice and stir well for about 20 seconds. Strain into coupe (or martini) cocktail glasses and garnish each with a cherry.
Repeat as desired.
Spiced Cranberry Simple Syrup
My confession is that my first attempt at the simple syrup was not great. Cranberries contain a lot of pectin, and I let them simmer a bit too long, releasing all that thickener. It did not taste bad, but left an odd, almost sticky residue in my drink (serves me right for multi-tasking). Keep a close watch over it, as I did with the second batch, and it will be delicious!
It doesn’t take long to dissolve the sugar into the water. Give it a few good stirs along the way.
Pink peppercorns have a slight bite to them, and the fruity notes of the pepper put a bit of an edge on the cranberry syrup.
The cranberries take time to soften, and eventually they will burst open, releasing their flavor and pretty color.
Simmer until the syrup has a prominent flavor, then remove from heat and cool before straining.
My first batch of syrup seemed a little pulpy. Cranberries have a ton of pectin in them.
Even after double-straining, my syrup was too thick and pulpy. Lessons learned…
For the second go-round, I had the idea to toss in a stick of cinnamon for even more holiday flavor.
This time, I was careful to remove and strain the berries before they broke down too much. My syrup was perfect.
In a medium saucepan, combine 1 cup sugar and 1 cup water. Heat over medium heat, stirring until sugar is mostly dissolved. Add 1 cup rinsed cranberries, 2 pieces cinnamon stick and 1 rounded teaspoon pink peppercorns. Bring to a slight boil, and then reduce heat to low and allow it to simmer until the cranberries begin to pop and the syrup takes on a pinkish-red color. Remove from heat and let the berries steep for a few minutes before straining into a jar.
Use the cooked cranberries in another recipe if you wish or discard them.
Crispy outside, soft and chewy inside. A hint of onion and just enough salt. That’s what you want in a classic latke, the delightfully simple, traditional food of Hanukkah. Getting them just right takes practice, and what I lack in personal heritage, I hope to make up for in effort. When I started dating my husband in 2015, I found myself intrigued by the foods that are central to the Jewish holidays, and latkes have been on the menu every year since then. Let’s review:
My recipe has evolved, as has my technique. I’m not sure what I was thinking in my first couple of efforts, except that I wasn’t giving enough attention to the oil. And that means I was missing the point, because Hanukkah is all about the oil.
Hanukkah, nicknamed the “festival of lights,” is an eight-day observance of an ancient miracle. The story is multi-layered and, frankly, hard for me to fully understand, let alone explain. But the gist of the story is that God came through for the faithful, and a small jar of oil that was only enough for one night’s lighting of the eternal lamps at the Temple, somehow (miraculously) lasted for eight nights.
In observant Jewish homes, families still mark the occasion by lighting candles on a menorah for eight nights during Hanukkah, and foods are fried in oil in remembrance of the miracle. Traditional fried foods served during this eight-night celebration include jelly-filled doughnuts and, of course, latkes!
Those crispy, golden latkes make me wish Hanukkah lasted for more than eight nights!
The secret is in the starch
The key to crispy latkes is removing the excess liquid from the shredded potatoes, while simultaneously preserving the starches that aid in holding those shreds together. After you shred the potatoes, which you can do either by hand on a box grater or (the easy way) in a food processor, simply soak them in ice water long enough to draw the starch out of the shreds. Next, squeeze as much moisture as possible out of the shredded potatoes, then reunite them with the sticky starch that has settled at the bottom of the soaking bowl. Add in some shredded onions (also squeezed dry), a beaten egg and a few sprinkles of flour, and you’re good to go!
The miracle of the oil
Frying latkes is the traditional way, and I don’t recommend trying to fry them in a thin film of oil as I did those first couple of years. You may get a nice crispness on the outside, but the inside won’t be done. You need about a half-inch of oil in a hot skillet to make a crispy latke, and the type of oil can make a difference as well. As much as I love and rely on unfiltered, extra virgin olive oil for most of my cooking, its smoke point is about the same temperature as you need for frying the latkes, so it is not the best choice. For this kind of frying, I’ve chosen grapeseed oil, which has a higher smoke point and produces a nice crispy exterior with a neutral flavor.
Grapeseed oil is a good bet for frying at high temperature. I’m pretty sure this bottle will last well beyond the eight nights of Hanukkah!
Enjoy latkes your own way
Not all latkes are the crisp-textured, straw-colored wafers that I am sharing today. Some cooks make their latkes with a soft, almost mashed potato-like texture, and those are delicious also. Onions are usually included in the mix for flavor, but I have seen latke recipes that lean toward the sweet side and there are plenty of other vegetables that can be substituted for potatoes, if you don’t mind a less-than-traditional treat.
Not all spuds are created equal
Although it is true that you can use different ingredients to make latkes, it’s important to recognize the strengths and weaknesses of certain potatoes. For best results and crispy latkes, choose a starchy potato, such as russet or Yukon gold. Potatoes that are described as “waxy,” such as red potatoes, are higher in moisture and lower in starch. That isn’t to say you can’t use them, but you would need to give extra attention to the step of moisture reduction and supplement the starch a bit to hold them together. Also, be prepared for a slightly less crispy latke when using waxy potatoes, or any other substitute that doesn’t measure up in the starch department.
Use starchy potatoes for best results, such as russet and Yukon gold. It isn’t necessary to peel them, but I usually do for presentation sake.
What to serve with latkes
Traditionally, latkes are served with applesauce and sour cream, and therefore I asked Les to cook up a batch of his mouthwatering overnight applesauce for Thanksgiving. With Hanukkah falling so close behind this year, I hoped to carry over some of that delicious, chunky applesauce as a side for what has turned out to be one of my best batches of latkes to date.
Ingredients
2 pounds potatoes (I used a combination of russet and Yukon gold)
1 smallish sweet onion
1 egg
2 Tbsp. all-purpose flour
Kosher salt and black pepper
A few shakes ground cumin (if you are not keeping strict kosher)
Grapeseed oil (or other neutral cooking oil with high smoke point, such as canola)
The large shredder blade on my food processor gets this job done quickly, and my knuckles are grateful. Use a box grater if you wish.
However you shred, transfer your potatoes immediately to ice water to help prevent discoloration and to draw out the starch.
I use my processor for the onions too. Sweet, yellow or Spanish are recommended. Red onions are too strong and, well, too red.
Wrap the onion shreds in layers of paper towel and squeeze to remove the excess liquid. Set aside for later.
I’ve used my trusty cast iron skillet in the past, but found this year that my electric skillet offers foolproof temperature control. Heat about 1/2″ oil to 375° F.
Carefully scoop out the potato shreds onto a clean towel. Try not to disturb the starch that has settled to the bottom of the bowl. You’ll need it.
Roll up the towel to absorb the excess moisture. This is a good time to mention that I never use scented detergent or fabric softener. I just haven’t found a scent that works with latkes! Haha
Twist the towel until you think you have all the moisture out.
And then, twist it some more.
Transfer the shreds to a clean bowl. May I recommend that you immediately rinse the towel? Trust me, you don’t want that starch moving through your entire laundry load.
Add the shredded, drained onion to a beaten egg for easy mixing.
I love the flavor of cumin with potatoes. Apparently, there is a concern about whether cumin (and some other spices) meet Kosher standards. Omit it if your conscience requires.
Some recipes suggest using matzo meal in place of flour, but we only have that in the house during Passover. A couple tablespoons of all-purpose flour will aid with binding the latkes.
Use your hands to toss the shreds, fully incorporating the flour. You should also add salt and pepper at this stage.
Exposure to oxygen causes a chemical reaction that makes the potatoes (or in this case, the water) turn pinkish. There’s no harm. Drain carefully to preserve the starch that has settled.
There it is! The magical potato starch that lends stickiness to our latke batter. Do your best to empty the water without losing that beautiful starch.
Add the starch to the bowl of shredded potatoes and toss again to fully mix it into a batter.
Add the egg and onion and toss again.
Shaping the latkes is not complicated, but don’t expect them to hold firmly together. Aim to have a manageable mass of sticky potato. You can shape them further in the frying oil.
Always do a small test latke, as mine on the left there. If the oil does not immediately go crazy with bubbles, it isn’t ready. Gently place the latkes in the oil, but don’t press them.
When you begin to see the bottoms turn golden, use the back of a firm spatula to gently press the tops of the latkes flat.
Yes, Nilla, we see you watching! ❤
Turn the latkes only once, when the edges and bottom are completely golden brown. Use two utensils to keep them stable so you can turn them without splashing hot oil.
Don’t forget to season the latkes, and do this the second they come out of the oil. Place them on a rack over paper towels and rest them in a warm oven while you prepare the rest.
The last dregs of the latke batter is likely to feel wet. Squeeze out as much of that moisture as possible when you shape your final latkes.
Happy Hanukkah!
Peel and rinse the potatoes. Shred them by whatever means is easiest for you and transfer the shreds immediately to a bowl filled with ice water. Allow them to soak for about 45 minutes.
Trim, peel and shred the onion. Use paper towels to wick away the excess moisture from the onions.
Beat the egg lightly in a measuring cup. Add the shredded onion and mix to combine evenly. I have found this easier for even mixing of the onion into the potato mixture.
Pour enough grapeseed oil into a large skillet or electric frying pan to measure about 1/2″ deep. Heat oil to 375° F.
Use your hands to carefully scoop the soaked potatoes from the bowl and onto a clean kitchen towel. Try to avoid stirring up the starch from the bottom of the bowl. Spread the potato shreds out over the towel. Roll up the towel and twist to extract as much moisture as possible from the potatoes. Empty the shreds into a large, new bowl.
Sprinkle the cumin and flour over the shreds and toss with your hands to evenly distribute.
Pour out the water from the soaking bowl, and take it slow enough to keep the powdery white starch in the bottom of the bowl. Scoop the starch into the bowl with the dried potato shreds and toss again with your hands to combine. Finally, add the egg-onion mixture and toss until evenly combined.
Form a clump of potato mixture in the palm of your hand, pressing to shape it as best you can into a flattened ball. Do not try to shape it as a disc at this point. Carefully lay the ball of potato mixture into the hot oil and repeat until you have three or four clumps in the oil. When the edges begin to turn golden, use the back of a small spatula to gently flatten the balls of mixture into more of a disc shape. Turn the latkes after all edges (and the bottom) are golden brown. Fry the second side until golden. Transfer to a rack over layers of paper towel and repeat until all latkes are fried. Season the latkes with kosher salt as soon as they come out of the hot oil.
On Juneteenth, my mind is littered with so many emotions I find it difficult to put my thoughts down. I am thrilled for the modern Black community, for whom Juneteenth has always been woven into the fabric of life. I am embarrassed to realize that the meaning of this occasion escaped me until last year, when the U.S. entered a long-overdue season of racial reckoning after the horrifying death of George Floyd. Most of all, I am disappointed and angry that the significance of Juneteenth was not spelled out in the history books of my small, lily-white upstate N.Y. town. Or anywhere else, for that matter.
Along with so many others in my age group, I grew up learning about the greatness of the men whose tremendous business skills built this great nation, including the forefathers and later the business and industrial magnates—Andrew Carnegie and J.P. Morgan and John D. Rockefeller and Cornelius Vanderbilt—you know, all the rich, white guys. But we did not hear the whole story, and that means we never got the real story. There is so much more to be said and taught about our nation’s history, but a great deal of resistance to teaching it, and I’m flat-out puzzled and pissed off about that.
Truth.
Juneteenth, in case you have completely avoided all news outlets recently, marks a celebration for the last of the slaves being freed following President Abraham Lincoln’s famous Emancipation Proclamation. The news that slavery had become illegal spread throughout the land, but not exactly like wildfire. It was not until 2½ years later, when federal soldiers rode into Galveston, Texas, to read the edict out loud, that the enslaved African-Americans there even realized they were free. I suspect the delay of this information had a lot to do with the fact that the slaveholders had more to gain by keeping the joyous news on the down low.
Fast forward 156 years, and Juneteenth has at last become a federal holiday, under the pen of President Joe Biden, and it’s been a long time coming. We still have a lot of work to do to recognize full equality and taking the first step feels a little intimidating. Rather than assume what kind of celebration is respectful, I have done some research into the significant themes around Juneteenth, and I am responding with this bright red cocktail, created in honor of those for whom respect has been a long time coming.
It’s lively, refreshing and suited to this occasion.
Red drinks have always played a major role in celebration of Juneteenth, as the color symbolizes both the bloodshed of Black peoples’ ancestors and the courage and resilience that brings them to this point in history. Hibiscus, a deeply-hued flower, is a significant ingredient in red drinks for Juneteenth, as it was one of many favored foods that enslaved Africans brought with them to this land. Hibiscus has a delightfully tart flavor and somewhat astringent effect—not particularly sweet on its own, almost like cranberry, but with hints of floral. I first tasted hibiscus as a tea, and that is a very traditional way to enjoy it on Juneteenth, but I wanted to mix it into a cocktail for one specific reason: this whiskey.
You can visit the Uncle Nearest distillery along the Tennessee Whiskey Trail.
As part of my own “first steps” toward racial equity, I have made a personal commitment to seek out and support Black-owned businesses, and Uncle Nearest is one, founded a few years ago by a Black woman named Fawn Weaver. The story behind this new whiskey brand is rich and complex, just like the spirit in the bottle. There is so much to know about it—more than I can say here in this post—but the kicker of this true story is that Nathan “Nearest” Green, an enslaved man in Lynchburg, Tenn., taught Jack Daniel how to make whiskey. Yes, that Jack Daniel. This startling real story began to circulate a few years ago, and I think you’ll find the story linked here a fascinating read. I was elated this week to find that Uncle Nearest whiskey is already available in our local liquor store.
I’ve paired the Uncle Nearest 1856 premium whiskey with a couple of other ingredients that seemed right to me—hibiscus simple syrup, spicy ginger beer and a few drops of aromatic bitters, courtesy of Hella Cocktail Co., another Black-owned business. Finally, a subtle accent of vanilla, a flavor that seems so utterly common today, yet most of us would never have known it without the discovery and effort of an enslaved 12-year-old boy named Edmond Albius. I only learned about him last year when I went searching for the most popular flavors in America.
A cocktail will not fix the problems of racial inequity, but every little bit of awareness leads me into the light, and this is my small way of paying that forward. The drink is somewhat bittersweet—much like the story that inspires it—but refreshing and invigorating, nuanced with spice and freshness. It tastes exactly how I feel, now that I am finally beginning to understand the real story.
I’ve paired the Uncle Nearest whiskey with hibiscus syrup and ginger beer, plus aromatic bitters and a touch of fresh lime.
Ingredients
1.5 oz. Uncle Nearest 1856
0.5 oz. hibiscus-vanilla simple syrup* (see notes)
2 or 3 drops Hella aromatic bitters
Quick squeeze of fresh lime
About 2 oz. spicy ginger beer*
Lime wheel to garnish
*Notes
A simple syrup is made with water and sugar, and in our house, that means fair trade-certified sugar because I learned the real, true story about slave labor in the sugar industry several years ago. Profit-driven exploitation of human beings must stop, and as consumers, we have the power influence companies to do the right thing. Is it more expensive? The answer depends on who you ask.
Here’s how I made the hibiscus-vanilla simple syrup:
Turbinado sugar has a warm, rich, molasses-y flavor. The hibiscus tea adds tartness and deep red color, and the vanilla lends a familiar spice note.Dissolve 1/4 cup turbinado sugar in 1/2 cup water, then add three hibiscus tea bags to infuse the syrup with color and flavor. Steep several minutes, strain and chill.Add a bar spoon (about 3/4 teaspoon) real vanilla paste to the hibiscus syrup.Let the syrup cool, then transfer to a jar or bottle. It will keep in the fridge about 3 weeks.
If spicy is not your thing, any ginger beer or ginger ale will lend a nice little zip to this cocktail. I chose the Q brand “hibiscus ginger beer,” obviously for the hibiscus twist but also because it also includes spices that are celebrated in African-American cuisine. I stumbled onto this ginger beer by accident, and it turned out to be perfect in this drink.
Instructions
Combine Uncle Nearest 1856, simple syrup and bitters in a cocktail mixing glass. Add 1 cup of ice and stir until the outside of the glass becomes frosty. Strain over new ice in a double rocks glass. Squeeze in lime juice and top with ginger beer. Garnish with a lime wheel.
Finding and supporting Black-owned brands is a good start. 🙂
The hibiscus-vanilla syrup adds traditional Juneteenth color and flavors to the whiskey.
I am loving the brilliant red color of this cocktail!
The hibiscus ginger beer continues the “red drink” tradition, but a regular ginger beer would also be delicious.
You may be wondering if I’m a paid endorser for the brands and products I spotlight on Comfort du Jour, and the answer is “no.” I do not receive money or merchandise for my recommendations, and what that means for you is that you can count on me to give an honest opinion. If something changes, I will update my disclosures. Either way, you can still count on me to be honest in my recommendations, as I will only stand behind services and products I believe in. Fair enough? 😀
Everyone knows the classic English carol, “We Wish You a Merry Christmas.” But have you wondered, as I did for so long, what the heck is a figgy pudding? In the traditional carol, the singers on the doorstep become more and more demanding of this figgy pudding, first requesting it (O, bring us some figgy pudding), and then threatening for it (we won’t go until we get some), until finally resorting to justification (we all like our figgy pudding). This must be some good stuff!
I always imagined that a figgy pudding was some kind of smashed up prune-like paste that wobbled and jiggled, but I’ve recently learned (thanks to this recipe by British superchef, Jamie Oliver) that it’s quite different from my Americanized vision of “pudding.” Common in the U.K., where my father’s roots are planted, figgy pudding is actually a sweet, dense fruitcake. Not the artificially colored, sickeningly sweet loaf that could serve as a doorstop and is usually the unwanted prize at an American office party gift exchange. Nope, a traditional British figgy pudding contains chopped dried fruits, nuts, golden syrup, citrus peel and spices. It’s steam-baked in a bowl, then inverted to a platter where it is lavishly bathed in booze (brandy, rum, bourbon—you decide) and set ablaze for a presentation that can only be described as spectacular.
No wonder the carolers demand that figgy pudding be brought “right here!” A boozy, sweet holiday treat—I guess my dad’s people really knew how to party.
My figgy bourbon drink is less dramatic, but still swimming in the warm and festive flavors of Christmas, with spice and fruit and bourbon to spare. The bourbon is lightly sweetened with fig simple syrup, accented with hazelnut liqueur and cardamom bitters, then garnished with a sweet and simple-to-make skewer that includes figs, cranberries, crystallized ginger and a generous twist of fresh citrus peel.
Given that figgy pudding may contain any combination of dried fruits, nuts and spices, the possibilities are very open for a cocktail interpretation. I might just as easily have chosen amaretto rather than hazelnut, or fresh cherries rather than cranberries, or cinnamon sticks rather than cardamom bitters. But this is what my imagination (and my bar inventory) gave me on this particular night.
The fig syrup is central to the drink, and easy to make. Because my dried figs are already sweet, I made a “light” simple syrup, which is 1 cup water to 1/2 cup cane sugar. Heat it to a quick low boil, then stir in several cut-up dried figs and let it steep until cooled. Strain out the fig pieces (reserving them, of course, for garnish purposes) and this syrup will keep in the fridge for a couple of weeks. Going light on the sugar allows the fig to shine more than the sweet. If you prefer a sweeter drink, go with equal parts sugar and water.
Cut the dried figs in half and add them to the syrup about one minute before removing from heat.
The syrup takes on more of the figgy flavor the longer it steeps.
Making the cocktail was easy, beginning with the garnish:
Fresh cranberry and citrus, plus crystallized ginger. And the steeped figs, of course.
A little clever threading on cocktail skewers, and these babies are dressed to impress.
Making the Cocktail (makes two drinks)
3 oz. favorite bourbon (we are currently pouring Elijah Craig Small Batch)
0.5 oz. hazelnut liqueur (or amaretto, if you prefer almond flavor)
1.5 oz. fig simple syrup (as described above)
1.0 oz. freshly squeezed orange juice (or maybe Meyer lemon)
2 drops cardamom spice bitters* (see notes)
2 drops cherry or cherry-cacao bitters*
*Notes
I have found some really interesting bitters online, but Total Wine and well-stocked supermarkets usually carry a good variety, too. My goal for this drink was spice and fruit (in keeping with the flavors of a figgy pudding), so these could probably be replaced with orange, aromatic or Peychaud’s bitters. Be creative, but don’t go overboard as you’ll lose the essence of the fig and bourbon. 🙂
Combine ingredients in a mixing glass (or shaker), add ice and blend vigorously for about 20 seconds.
Pour the drink over the garnish to “wake up” the flavors of the ginger and citrus peel.
We all love our figgy bourbon!
It’s warming and Christmas-y, lovely for sipping by an open fire, with or without chestnuts. Or, as it will be at our house, in front of the gas logs. 🙂
Wishing you a Merry Christmas, and a Happy New Year!
Childhood is one of the greatest examples of selective memory banking ever. I remember the smells and sounds of baking these molasses cookies at my grandma’s house, all the way back to when I needed to stand on a chair to reach the counter and make the cookie shapes. What I don’t remember is working so hard to get the dough right. Perhaps I’m overthinking it and not taking a simple, intuitive approach. Or could it be that these were a cinch for Gram because she made them all the time and I haven’t dared an attempt for 25 years?
As I was rolling out the dough for these—my favorite cookies ever—I found myself missing the metronome-like cadence of the cuckoo clock that hung on the back wall of my grandparents’ family room, and the rising aroma of potatoes simmering on the stove, much less the patient encouragement of Gram saying something like, “That’s it, now change direction and roll it the other way—good job.” What I had last weekend at my house was the sound of Led Zeppelin blasting from the Bose speaker in the next room, me cursing up a storm and vowing to NEVER make these freaking cookies again, and my husband and the dog just staying the heck out of the way. Yes, I’m certain that Gram had this process down to a science, and she probably handled all the hard parts of this exceptional recipe and let us grandkids show up just in time to have all the fun.
This was the first time I’d flown solo on this family heirloom recipe for Molasses Cookies—and yes, I do believe it should be capitalized, same as a classic novel or an epic film, because they’re just that good. For as long as I can remember, visiting my Gram’s house (anytime, but especially at Christmas) meant that I could reach my short, grubby fingers into the brown and tan beanpot she used as a cookie jar, and pull out one of these super-sized, super soft, sugar-crowned molasses cookies. Several years ago, I spotted a similar bean pot in an antique store and bought it without even checking the price tag. Last year, I found another bean pot and sent it to my younger cousin, Brad, who was my sidekick for so many baking adventures at Gram’s house. Just after we lost Gram in the summer of 2019, I found on Etsy a sweet creative soul who helped me turn our family recipe into a tea towel keepsake. Yes, these cookies deserve serious respect.
My cousin, Brad, making molasses cookies at Gram’s house. See the cookie jar behind him? When Brad received his tea towel gift, he said seeing Gram’s handwriting brought back “all the feels.” ❤
Brad and I have been reminiscing a great deal as the holidays approach, and though he was eager to share other memories of Christmas with Gram, he deferred to me the task of recreating her wonderful cookies. I’ll admit that I was terrified.
Mixing the dough was not complicated. It was just a little confusing, without solid direction on which order to add certain ingredients. The recipe card says, in Gram’s distinctive scrawl, “Mix. Chill at least overnight.” A more thorough explanation might have suggested first creaming together the butter and sugar, then adding eggs one at a time, blending completely after each one, and scraping down the sides, etc., but I suppose that knowledge is meant to be in my genes (and apparently it is). I did OK to that point, but lost my confidence when I got to the baking soda. Oh, how I wished I could just call her up and ask, “should the soda be dissolved in boiling water, or just hot tap water? Also, is it alright if I use butter instead of shortening? And the card says 6 or 7 cups of flour, but how do I know when the dough is right? I’m so confused, Gram, and I need you here.”
For these challenges and more, I had a helpful assist from my aunt, who offered her own experiential wisdom, plus a bonus family history lesson that I never knew. It seems that my great-grandmother, original author of this recipe, ran some kind of underground cookie business. These molasses cookies and her famous-to-our-family sugar cookies were her top sellers. Great Gram also saved up her own money to buy laying hens, and had an eggs-for-sale business. She was an entrepreneur long before women were supposed to be! I do remember the old hen house in back of her house, come to think of it. And suddenly, I realized again that these are big family shoes to fill.
I took deep breaths and followed the advice Gram gave me so many times on so many things—she’d say, “try it and see.”
For starters, I halved the recipe, which is a little tricky given that the original calls for 3 eggs, but I’ll explain what I did when we get to the instructions. Gram’s recipe card lists shortening, which was a common ingredient when money was tight (and before research showed how awful the stuff is), so I subbed in real unsalted butter. I never bake anything with only white flour, so I swapped about a third of it with whole wheat pastry flour, which is nice and soft and perfect for cookies, quick breads and pastry dough. Finally, to aid in keeping the dough soft, I used a combination of white and brown sugar, hoping that the latter would help compensate for the softness that would be lessened with the butter swap. Yes, I think Gram was also my first science teacher.
This was it for ingredients, plus the eggs. Be sure your baking powder is fresh for any cake or cookie recipe.
This is at least a two-day recipe (the dough must be thoroughly chilled), and several kitchen tools will be needed on baking day. I recommend review of the entire recipe before committing to the baking step. Once you begin rolling the dough, things move quickly and you’ll want to have your ducks in a row.
The ingredients list reflects my own changes I made to the recipe, and I’m certain my grandma would have approved these choices. 🙂
Ingredients
1 1/2 sticks (3/4 cup) unsalted butter, softened, but not room temperature
3/4 cup cane sugar* (see notes)
1/2 cup brown sugar
1 1/2 large eggs*
1/2 cup plus 2 Tbsp. molasses (unsulphured)
3 tsp. baking soda, dissolved in 1/2 cup hot tap water
2 1/2 cups all-purpose flour* (measure for success; see notes!)
1 cup whole wheat pastry flour*
3 tsp. ground ginger*
1 tsp. baking powder*
1 tsp. salt
Coarse sugar for decorating
*Notes
For all baking and cooking, I prefer organic cane sugar, which is not as processed as common white sugar. The fineness of cane sugar varies by brand, and I’ve found the Florida Crystals brand to be my favorite, as it is closest in texture to typical fine baking sugar. It’s slightly tan in color, compared with pure white sugar that has been heavily refined.
My recipe adaptation is half the original recipe, which called for 3 eggs, meaning I had to get to 1½ eggs. Here’s how to divide one of them to get the proper amount: crack 1 egg into a glass measuring cup, and beat it well to fully blend the white and yolk. Note the total volume of the egg, and pour half of the volume into a separate bowl for another use. Voila!—half an egg. Add a whole egg to it, beat lightly and you’ll be ready to go.
I used my digital scale for this, but you could easily use a measuring glass to eyeball it.
One of my grandma’s golden rules of baking was correct measuring of flour, so listen up. Always begin by sifting or fluffing up the flour before you measure. Spoon the fluffed flour over your measuring cup and fill to overflowing. Then use the back of a knife to scrape off the excess flour. Do not plunge your measuring cup directly into the flour bag or canister, or you will not have successful cookies.
Use a whisk or a pair of forks to “fluff” and aerate the flour before measuring.Sprinkle the flour over the cup until it’s overflowing, THEN level with the back of a knife.
Whole wheat pastry flour is a low-protein variety of flour, and can be substituted 1:1 for all-purpose flour in many recipes. It doesn’t have the strength needed for yeast-risen breads, but it is perfect for cookies, quick breads, pancakes and pastry dough. It also meets one of my primary goals of introducing whole grain into our foods. For this recipe, the whole wheat pastry flour is approximately 1/3 of the total flour in the cookies. If you prefer, combine for a total amount of white, all-purpose flour.
Ginger and baking powder both lose their power after a period of time. Ground ginger should provide a pleasant “zing” to the cookies, and active baking powder is needed for leavening. If you can’t remember buying the containers you have, they are probably too old. This is less a concern for the ginger, as that will only affect flavor. Baking powder that is old will give you poor results, because your cookies won’t rise during baking. I use aluminum-free baking powder with excellent results.
Dough Instructions
Brown sugar is regular sugar plus molasses. I subbed in about 1/4 of the total sugar called for in the recipe.
Whisk together all dry ingredients so the ginger and baking powder are evenly blended with the flour before you make the dough.
Use non-stick spray to prep your measuring cup, and sticky ingredients such as molasses or honey will slide out with minimal mess.
Molasses has such a lovely dark color, and is crazy rich in minerals.
With this addition, it finally started to resemble the molasses cookies Gram used to make.
Add the beaten egg, half at a time, and blend well after each addition. I stopped to scrape down the sides.
My digital scale takes all the guesswork out of baking. I didn’t want to have my face down in front of the measuring cup to get this right.
To avoid curdling the eggs, I decided to stream in the hot soda water, the same as I do with hot milk when making custard-based ice cream.
Before the flour, this mixture was a mess, like molasses quicksand!
As I stirred in the final flour, a thought occurred to me: what if I put this batter in the waffle iron?! Maybe next time.
The dough is firmer after chilling, but still pretty soft. Like chocolate frosting.
Using a stand mixer or handheld electric mixer, cream together the softened butter and both sugars. If you want to go old-school, as my great grandmother would have done, you can do this in a large bowl with a good strong wooden spoon, and it would help you to have biceps like Rosie the Riveter. The mixture should be beaten until it looks uniform and slightly fluffy.
Combine all-purpose and whole wheat pastry flour in a medium bowl. Scoop out a heaping cup of the flour blend to a second bowl, and add the ginger, baking powder and salt, stirring to combine. This ensures the ginger and leavening agent will be evenly mixed into the dough. Set both flour bowls aside.
Add beaten egg mixture, half at a time, to the creamed butter-sugar mixture. Beat until well blended, and stop to scrape down the sides of the bowl after each addition.
Dissolve baking soda in hot water and set aside briefly.
Add molasses to the creamed mixture and beat until fully blended.
With mixer running, slowly pour in the soda water. This mixture looked very unorganized and messy; it reminded me of quicksand.
Add the second bowl of flour (with ginger and baking powder) to the molasses mixture and stir until blended. Stop mixer and scrape down the sides. Stir in remaining flour, a few tablespoons at a time, until all flour is blended. Scrape down the sides. Cover the bowl tightly and refrigerate at least overnight, or preferably a day or two.
On baking day, gather your supplies:
2 or 3 large cookie sheets, lined with parchment paper
Rolling pin (a round wine bottle works nicely in a pinch)
Dough mat (or board, or a really clean countertop)
Cookie cutters (preferably round, or anything not too intricate as the cookies will spread)
Extra flour for dusting (keep it handy, you’ll use this a lot)
Paper towels for wiping your hands
Small, thin spatula to assist with moving cookies to baking sheet
Large spatula for moving baked cookies
Cooling racks (at least two will be helpful)
Coarse-grained sugar for decorating (I used turbinado sugar)
A baking timer
Christmas music for inspiration (I recommend Vince Guaraldi’s “A Charlie Brown Christmas” soundtrack)
A glass of wine (seriously, I found this very helpful when things got ugly)
My aunt on speed-dial (oh wait, that was just for me!)
Best Christmas music, ever!
Baking Instructions
Preheat oven to 450° F (much hotter than most cookie recipes, and they bake fast)
Generously flour your rolling mat or board, and begin with about 1/4 of the chilled dough. Put the rest back in the fridge until you’re ready for the next batch.
Sprinkle the top of the dough with flour. My aunt suggested that I use “a lot of extra flour,” and I think she meant to say, “Make it look like you had a blizzard in the kitchen.” You need a lot of flour to keep this ultra-soft dough from sticking. Roll it gently to about 1/2” thick.
Let the rolling begin! I kept a mesh flour sifter close by for the entire rolling out process. Is this thick enough, Gram? (probably not)
Dip your cutter gently into the cookie dough bowl, then liberally into the extra flour to prevent sticking. Cut as many shapes as you can from the first rolling, and transfer the cookies to the prepared cookie sheet. Aim for only 6 cookies at a time, as they will puff and spread quite a bit during baking. Knead up remaining dough scraps and add them to the next batch.
Generously sprinkle each cookie with turbinado sugar.
I couldn’t find my round cutter, so I used a dog paw cutter. No worries, my Gram had a terrific sense of humor.A quick sprinkle of turbinado sugar to give my cookies a finished look.
Bake for 5 to 8 minutes (depending on your oven) until cookies are soft and puffy but not brown on the edges. Transfer cookies as quickly as possible to a cooling rack. Place the hot cookie sheet somewhere to cool.
I could tell by the edges that this batch was slightly overbaked. It’s such a fine art, getting these cookies just right.Molasses lips, dog paws, and circles. Oh my! 🙂At 450 F, even 30 extra seconds can cause the cookies to burn.
Prepare a second batch of cookies on the extra pan. This whole scene was very stressful for me, and I found myself wondering how my grandma did this with such grace and ease, and with excitable grandchildren “helping.”
Repeat this process until all cookies are baked. You should have flour everywhere (including your hair), about 5 molasses-coated spoons stuck to the counter, a sink full of bowls and random sticky objects, a dining table covered in molasses cookies and an empty wine glass bottle. If you’re crying, well, join the club. If you’re crying and laughing simultaneously at the end of it all, you get bonus points and a commemorative recipe tea towel.
Is it OK for me to share your recipe, Gram?
She would say—no, wait, she would sing, “Oh, ya, sure!”
Each year that we’ve celebrated Thanksgiving together, my husband, Les, and I have enjoyed building traditions with friends and family. One tradition that has gained traction is the unveiling of the signature Thanksgiving cocktail. Even though we will have no guests in 2020, we are keeping this tradition alive, and sharing it here for those celebrating in their own pandemic bubbles. You still have time to pick up the ingredients if you’d like to join us.
As hosts, we find the signature cocktail is a fun way to officially welcome guests as they arrive for an afternoon of conversation, laughter, football and what we always hope will be an unforgettable meal. But the secret side benefit of offering a signature drink is that we aren’t all standing around deciding what to drink while so many last-minute preparations are on the front burner. I need my hands and my counter space free, and making one type of drink simplifies the situation rather than trying to pour wine for one guest, mix a vodka drink for another and deal with the inevitable, awkward dilemma that ensues when someone says, “surprise me.”
Seriously, “surprise me” could mean anything at our house.
I put a good bit of thought into the signature cocktail each year, with attention to how well its flavors will fit the season, the hors d’oeuvres and the preferences of our guests. One year we had a pumpkin pie martini, another a spiced pear martini; there was the bourbon-cider drink of a few years ago, and the smoked maple “new-fashioned” drink we sipped just last year (though it seems like ages ago). We are particularly excited about the cocktail we will enjoy this year. So much, in fact, that we’ve “tested” it numerous times over the past few weeks, and again last night, to be sure we have it just right. All in the name of research and development, people. You’re welcome.
This year’s drink is my festive Comfort du Jour twist on a classic Manhattan cocktail, which would traditionally be a bourbon or rye, red vermouth and bitters—stirred with cocktail ice and then strained into a coupe glass with a brandied cherry garnish. But mine takes a few liberties, naturally. If you happen to follow the link above to what appears to be the “official” Manhattan recipe, you’d notice in the comments section a rather testy exchange among various cocktail snobs who all profess to know the actual truth about what should be in a Manhattan. Here’s what I know: those snobs will never be invited to our house for Thanksgiving! I have no fear in spinning a classic and calling it whatever I want.
“Pom-Pom-Hattan”
The Pom-Pom-Hattan is so named because it resembles a classic Manhattan, glammed up in such an elegant glass. The backbone of our drink is Elijah Craig Small Batch bourbon, which would rattle the chains of some of those purists who insist that only rye is allowed. If you were at our house this year, you would be sipping Elijah Craig, but friends, please use whatever makes you cheer. Celebration is the point—thus, the pom-pom.
Bourbon, pomegranate liqueur and high quality grenadine are the key ingredients. Accent with a tiny splash of either amaretto or Grand Marnier, if desired.
There’s a double dose of pomegranate flavor in the mix here, first in a shot of Pama pomegranate liqueur, which is the stand-in for red vermouth, and again with a sweet little kiss of authentic grenadine syrup. I was thrilled recently to find a brand of grenadine that has all the right stuff for me (including real pomegranate) and none of the wrong (high fructose corn syrup, artificial flavors). This one is made by Luxardo, the same company responsible for maraschino liqueur and real maraschino cocktail cherries. It has a perfectly tart undertone, despite the cane sugar sweetness, and a lovely pomegranate flavor without the painstaking effort of breaking open an actual pomegranate.
Through our various taste-testing sessions (try saying that after couple of nips), we discovered that a tiny splish of amaretto does great things for this drink, and so does a splish of Grand Marnier. In case you’re wondering, a “splish” is approximately 1/3 of a splash; in other words, about a teaspoon. Choose one or the other; we’ve decided we like the amaretto best for its sweet almond-y warmth.
Finally, about the garnish—Les and I recently dialed into a Zoom call that was set up by Elijah Craig and hosted by celebrity chef Richard Blaise. One of his guests was a garnish guru, and I adopted her simple-meets-fancy cinnamon swizzle garnish for my presentation on the pom-pom-hattan. It’s easy to make and I’ll show you how. Raise your glass—it even smells like the holidays, y’all!
A cinnamon stick and orange are the only things you need to make this fancy-ish cocktail garnish.
Wash the orange, then use a zester or paring tool to peel thin strips off the orange.
It looks fancy, but is so easy!
We allowed our cinnamon swizzle to fall into the glass, and every sip tasted like the holidays!
Ingredients
1.5 oz. (one shot glass) Elijah Craig Small Batch bourbon (or your favorite bourbon or rye)
1 oz. (2 Tbsp.) Pama pomegranate liqueur
0.5 oz. (1 Tbsp.) Luxardo grenadine (or a favorite brand, but look for one that has real pomegranate)
1 tsp. amaretto or Grand Marnier (optional)
2 drops orange bitters (optional, in keeping with an “authentic” Manhattan recipe)
Garnish options: cocktail cherry, orange twist or the fancy-ish cinnamon swizzle
Combine bourbon, Pama, grenadine, liqueur accent and bitters in a cocktail mixing glass or shaker. Add about a cup of ice. Shake or stir for 20 seconds, and then strain into a chilled cocktail glass. Garnish as desired. And if you happen to have a real pomegranate, feel free to drop a few of the arils into your glass, too.
I use a digital scale to measure my ingredients directly into the mixing glass. Otherwise, a shotglass and measuring spoons will be helpful.
The grenadine lends a touch of “sweet” to balance the tart flavor of the Pama liqueur.
A tiny splish of accent liqueur, if you wish. Amaretto leans toward sweet, Grand Marnier leans tart and strong.
Add a cup of ice and stir vigorously to chill the drink. If you don’t have a mixing glass, a shaker will work just fine.
Strain into a cocktail glass and garnish as you please.
Already, I know we will enjoy this drink again and again through the Christmas season!
You may be wondering if I’m a paid endorser for the products I spotlight on Comfort du Jour, and the answer is “no.” I do not receive money or products for my recommendations, and what that means for you is that you can count on me to give an honest opinion. If something changes, I will update my disclosures. Either way, you can still count on me to be honest in my recommendations, as I will only stand behind services and products I believe in. Fair enough? 😀
Here I go again, twisting up a classic to put the best flavors of Thanksgiving on the table with minimal stress. If you’re looking for a way to simplify your homemade holiday dinner, but still have your favorite turkey, sausage stuffing and gravy combo, this might be the best thing you read all day.
My ground turkey meatloaf has a swirl of spinach and sausage stuffing, packing all the flavor of Thanksgiving into one easy but impressive main dish. As a bonus, I’m sharing one of our family’s favorite turkey day sides—a rich and tasty mushroom gravy, which happens to be vegan (but don’t let that stop you). You may wonder, “why offer a vegan gravy over turkey meatloaf?” I love having a single gravy on the table that makes everyone happy, whether or not they eat meat, and this one is the stuff. It is as good on any meatloaf with mashed potatoes as it is in the sauce of your favorite green bean casserole or as a savory accompaniment to nearly anything you serve at Thanksgiving.
If you enjoyed my darling husband’s recent guest post for spinach balls, now is the time to make a batch because the sausage stuffing swirl in this meatloaf makes use of leftover spinach balls. If you don’t have time to make the spinach balls in advance, you could create a similar blend with some herb stuffing mix and frozen spinach (I’ll offer suggestions).
This meatloaf exceeded my own expectation, which is really saying something, given that I have made many other “stuffed” versions of meatloaf in the past. We liked it so much it will find its way to our table again as a Sunday Supper later in the winter, you can bet on it. And we’ll serve it up with Les’s amazing garlic mashed potatoes, just like we did with this one. This is teamwork, friends, and it is delicious!
Served with Les’s incredible potatoes and the savory mushroom gravy. I’m in heaven!
Ingredients
1/2 cup dry herb stuffing mix (I used Pepperidge Farm brand)
1/4 cup whole milk
1 lb. all-natural ground turkey* (see notes)
About 1 Tbsp. extra virgin olive oil
1 medium onion, diced (divided between layers)
A few shakes poultry seasoning
1 large egg
2 large leftover spinach balls,* cut into very small dice, measuring almost 1 cup
For turkey meatloaf, I always choose regular ground turkey rather than turkey breast, which tends to be drier. If you choose ground turkey breast, consider adding an extra egg white or an extra tablespoon of olive oil to make up for the lost moisture.
The spinach ball recipe my hubby shared a couple weeks ago gets a lot of attention at our house, especially with Thanksgiving guests. If you don’t have time to make them in advance of this recipe, try this as a substitute:
3/4 cup dry herb stuffing mix 1/4 cup frozen dry spinach (thawed and squeezed dry) 2 Tbsp. parm-romano blend Additional egg white + 2 Tbsp. chicken or vegetable broth
Combine all ingredients in a bowl and allow time for the dry mixture to absorb the liquid ingredients. It should still feel somewhat dry and rather firm; from there, proceed with the recipe.
Instructions
Follow along in my kitchen to see how I made this mouthwatering meatloaf. Written instructions are below, along with a downloadable PDF for your recipe files.
Smash the stuffing mix into the milk to break up large pieces. Give this mixture at least 20 minutes to become saturated and “paste”-like.
Any poultry seasoning will lend a savory touch that we all associate with Thanksgiving.
The stuffing “paste” will add soft texture and Thanksgiving flavor to the turkey meatloaf.
The spinach balls are easy to chop into fine dice when they are cold. I chopped enough to measure about one cup.
Add the remaining onions and roasted garlic. See my notes for substitution ideas for the spinach balls.
I added the sausage in small clumps so that the mixture could pulse together easier.
A few pulses gave me the texture I wanted. Not quite smooth, but fully incorporated and uniform.
Arrange small lumps of the stuffing as evenly as possible over the turkey layer, then go over the layer again to fill in gaps.
Layer the sausage stuffing a bit heavier on one short end of the rectangle, where you will begin the rolling. Leave an inch “naked” on the other end, where you’ll seal the roll. Cover with plastic wrap and refrigerate at least an hour before you try to roll it.
Use the short end of the parchment to assist with rolling the meatloaf. Begin with the end that is heavier on stuffing filling.
Keep tension on the parchment as you go, so the meatloaf will roll up tightly with no gaps.
Some of the mixture will stick to the parchment, but press on. Use a rubber spatula to scrape it from the paper and patch the meatloaf.
I pressed panko crumbs all over the top and sides of the meatloaf to add a “crust” texture during baking. Regular bread crumbs would work also.
Wrap your rolled up meatloaf tightly in plastic wrap, and twist the ends to keep it compact in the fridge overnight. This will help the meatloaf hold its perfect shape in the oven.
To get the crust I wanted on the meatloaf, I spritzed it all over with olive oil spray.
One final quick seasoning of salt, fresh black pepper and a few shakes of dried thyme leaves, then into the oven for an hour.
The only way to know if meatloaf is done is to check internal temperature for at least 165° F. This one is ready! Rest 15 minutes before slicing.
This is exactly how I imagined this would look. Crispy crusted edges, with tender turkey and stuffing.
What favorite vegetable would you add to the open spot on the plate? 🙂
Combine dry stuffing mix and milk in a small bowl and rest at least 20 minutes, allowing time for crumbs to be fully moistened.
Heat a small skillet over medium heat. Swirl in extra virgin olive oil and add the diced onion. Saute until onions are soft and translucent. Sprinkle with salt, pepper and poultry seasoning.
In a medium bowl, combine the ground turkey, half of the sauteed onions, stuffing “paste” and egg. Season the mixture with salt and pepper, then set aside.
In the bowl of a food processor, combine spinach ball bits, remaining sauteed onions, roasted garlic and raw sausage (pulled apart into pieces). Pulse mixture several times until it is uniformly blended.
Line a small baking sheet with a piece of parchment paper. Scatter panko crumbs evenly over the paper. Using a rubber spatula, spread the ground turkey mixture evenly over the crumbs, shaping a rectangle approximately 9 x 13″.
Using your hands, grab up tablespoon-sized lumps of the sausage mixture and place them over the turkey layer. Don’t rush this step because it will be tough to separate the layers if you misjudge the amount as you go. I placed “dots” of the sausage mixture all over (keeping one short end bare for sealing the roll later), then filled in noticeable gaps with the remaining mixture until all was used. Press the sausage mixture firmly to seal it to the turkey layer. Lay a sheet of plastic film on top of the sausage layer and refrigerate the mixture for at least an hour. The chilling time will make it easier to roll up the meatloaf.
To roll up the meatloaf, begin by lifting the parchment and slightly fold the meatloaf onto itself. Continue this motion, keeping the roll tight as you go. Some of the turkey may stick to the parchment, but you can use a rubber scraper to remove it and patch the roll. Full disclosure: this step was pretty messy, but I pressed on to finish the shaping.
Press on any loose bits of panko crumbs, adding more if needed to lightly coat the shaped meatloaf. Wrap the rolled-up meatloaf as tightly as you can in a sheet of plastic film, twisting the ends as with a sausage chub. Tuck the twisted ends underneath, and chill the roll overnight.
Preheat oven to 400° F. Line a baking sheet with parchment paper.
Place the meat roll onto the lined sheet and lightly spray the entire meatloaf with olive oil spray.
Bake at 400° for 15 minutes, then reduce oven temperature to 375° and bake 45 more minutes.
Test internal temperature to be sure it is at least 165° F. Cool 15 minutes before slicing.
This all-purpose sauce is so delicious, and we use it in many ways at Thanksgiving, especially when Les’s vegan daughter has been able to join us. It’s fantastic on mashed potatoes and turkey, in casseroles with green beans or (I’m speculating) perhaps even straight from the pan by the spoonful.
Please don’t assume, if you’re a meat eater, that you’d feel cheated with a vegan gravy recipe. I’m not exaggerating to declare that everyone at our table chooses this gravy over standard turkey gravy, hands down. My friend, Linda, has a special word for it: “faboo!” 😀
I prefer to make this gravy ahead, so that I have it ready when the mood strikes me to add it to another recipe, but if you’re short on time, it can certainly be served immediately after preparing it.
Ingredients (makes about 2 cups)
4 Tbsp. extra virgin olive oil* (see notes below)
1/2 medium onion, finely minced
About 6 large cremini mushrooms, cleaned and diced small
1 tsp. Umami seasoning*
1 bulb roasted garlic
2 Tbsp. all-purpose flour
1 1/2 cups low-sodium vegetable broth*
Salt and freshly cracked black pepper
*Notes
Any good quality olive oil will work here, but I’m somewhat addicted to this one (pictured below), which is infused with the flavors of wild mushroom and sage. You can find it at one of the specialty olive oil stores that have popped up all over the U.S. It’s terrific for roasting butternut squash, too!
The Umami seasoning is a Trader Joe’s item, and it contains mushroom powder, garlic powder, sea salt and red pepper flakes. If you cannot find it, just add a few of the red pepper flakes or a slight sprinkle of ground cayenne for a subtle touch of the same heat. The recipe already has plenty of mushroom and garlic.
Vegetable broth ingredients vary a great deal, and for most of my recipes, I recommend one that does not have tomato in it. I favor this low-sodium version from Costco, which contains carrot, onion, celery and mushroom, but not tomato, which changes the acidity of some recipes. If you are not concerned with the vegan aspect, you could also use chicken broth.
This oil is produced by a company called Veronica Foods, supplier to so many of the boutique olive oil and balsamic vinegar shops around the U.S.I go through a bottle of this stuff during the holidays, especially when I’m creating a vegan dish. Try to choose a vegetable broth with pure, simple ingredients, and low sodium so you have more control of your recipe’s flavor.
Instructions
Add the mushrooms in batches. If the pan is crowded, they will steam rather than brown. Add more oil as needed.
Does it seem excessive to use an entire bulb of roasted garlic in this gravy? Yes, and that’s exactly the point. 🙂
Cook the mixture until the flour is absorbed and it begins to bubble a bit on the edges. Don’t be concerned if it sticks to the pan at this point.
The broth will soften any bits stuck to the pan, and as the gravy simmers, it will thicken up.
Place a heavy-bottomed saucepan over medium heat. Swirl in 2 tablespoons of the olive oil and sauté the onions until soft and translucent.
Add another tablespoon of oil and half of the mushrooms. Sauté until moisture is reduced and mushrooms are soft, then repeat with remaining oil and mushrooms.
Season with salt, pepper and umami seasoning. Add roasted garlic and stir to blend it in.
Sprinkle flour over the mixture and cook one minute until the flour seems absorbed and mixture begins to bubble.
Add broth, a little at a time, and stir or whisk into a smooth and thickened sauce consistency. Simmer on low heat several minutes before serving.
After much hemming and hawing, the verdict is in at our house—we are going big for Thanksgiving. No, I do not mean big in the gathering sense, because that is out of the question during a pandemic. It will only be the two of us, so our “big” means bold, less-than-traditional flavors. This departure from the usual has been my fantasy for several years, but other people get pretty attached to classic, traditional flavors and it almost feels cruel to spring big changes on friends and loved ones who have been building anticipation for the flavors they’ve come to expect at Thanksgiving.
As much as my husband, Les, and I also enjoy our own traditions (including taking turns with the preparation of the turkey—a pact we made when we got engaged), we are changing things up significantly this year, partly because we can do so without disappointing anyone, but also because it feels adventurous and fun in a year that has been pretty hum-drum. It’s Les’s year for the turkey, but rather than his usual brined, stuffed and basted 20-plus pounder, he has decided to do a dry spice rub and prepare our smaller turkey in his new charcoal smoker. And with these bold flavors on the bird, we are planning to keep pace with our sides and accoutrements, including the cranberry sauce.
Most years, we make everyone at the table happy with two different styles of homemade cranberry sauce. Les makes one that is sweetened with both brown and white sugars, simmered in apple cider, and accented with sections of mandarin orange. It’s slightly tangy, but mostly sweet, and more on the “saucy” side. I usually ask him to make extra so we have plenty left over to use as topping on vanilla ice cream. Yum. My version of cranberry sauce leans to the chunky, tart side, usually with spices such as cinnamon, clove and cardamom, and simmered in dry red wine. It is a decidedly “grownup” cranberry sauce, and stands in contrast to so much of the richness happening on the traditional table.
This year, however, we will have only this one cranberry sauce—bearing the bright and bold flavors of orange and jalapeno. Now, you may cringe at the suggestion of jalapeno, worried that it will be too intense, but let me assure you it’s a fantastic twist, a pleasant undertone that stands up to the bright citrus and tart cranberry, but does not overwhelm.
All three flavors are evident in this lively, festive sauce.
If you’ve never made your own cranberry sauce before, please let me show you how simple it is. All you need for this recipe is a large saucepan, a bag of cranberries, a large orange, a large fresh jalapeno and a cup of sugar. You can move this to the “done” column in less than half an hour, and it’ll keep in the fridge for a couple of weeks (that is, if you are disciplined to not eat it straight from the fridge with a spoon). Let’s do this!
Made from scratch doesn’t seem so difficult, right?
Ingredients
12 oz. bag fresh cranberries, rinsed and sorted for “losers”* (see notes)
1 cup real cane sugar (or slightly less if you prefer more tang)
1 large fresh organic orange*, washed
1 large fresh jalapeno pepper, seeds removed and minced*
A stingy pinch of kosher salt
A few twists of freshly ground coarse black pepper
*Notes
Rinse the cranberries in a wide colander that allows you to inspect the quality of the berries. Discard any that are dried up, soft or otherwise questionable. Even with a brand-new bag of cranberries, I usually find about a dozen losers that don’t make the cut.
Organic orange is best here because we will be eating the peel, and pesticides are neither tasty nor safe to ingest. Whether you use organic or conventional, be sure you wash the orange well before stripping the peel.
If you are nervous about handling the raw jalapeno, feel free to slip on some rubber kitchen gloves for this part of the recipe, then carefully peel them off and into the trash once done. I can’t work well with gloves, so here’s my advice: the sooner you clear the irritating jalapeno oils from your skin, the less likely you are to accidentally touch your eyes, nose or lips and get a painful reminder of the intensity of the capsaicin oils. But if you wash with water right away, you risk spreading the oils around rather than breaking them down. Here’s a simple way to stop the burn before it begins—Dawn dish liquid. Yep, the same blue stuff they use in the TV ads to save the baby birds from oil spills. Any good dish liquid would probably do it, but Dawn is what I use. Gently rub the dish soap, full-strength, straight onto your dry hands, covering every part that may have touched the raw pepper, and give it a few seconds to begin dissolving the pepper oils. Be sure to rub the dish liquid under your nails and between your fingers. Then, wash and rinse your hands and the knife you used to cut the pepper.
It may seem odd to add any amount of salt and pepper, but remember that salt is an enhancer that punches up whatever flavors are in your dish. As for the pepper, it’s an easy way to add an extra little “bite” to underscore the surprising flavor of jalapeno. You will not taste black pepper. Trust me, it works.
Berries, sugar, orange, jalapeno and just a few twists of fresh black pepper. This is such an easy thing to make.
Instructions
Real cane sugar is not highly processed, so it has a warmer color than white sugar.
My favorite garnishing tool is very useful for stripping the right part of the citrus zest.
A potato peeler works also, but be sure you only peel the bright orange part. Leave the bitter white pith out of the mix.
So much of jalapeno heat is in the seeds and membranes, but we are removing those, keeping bold flavor without the burn!
Do yourself a favor and wash the hot pepper oils off your hands before you proceed. Dawn liquid is my secret weapon for dissolving the irritating oils. See the notes section for tips.
I could only squeeze so much of the juice by hand.
My citrus reamer helped me extract every last drop of fresh juice!
Ooh, these vibrant colors make me happy! Stir to combine then start cooking.
As the mixture boils, you’ll see some foaming and you’ll hear the berries begin to pop.
The berries should smash easily when pressed with a spoon.
The sauce is thickened after 20 minutes cooking, and will continue to thicken as it cools.
This bright and zesty sauce will hold its own next to our spicy, smoked turkey!
The essence of orange is front and center, giving this cranberry sauce a bright and festive freshness, and the jalapeno is evident but not at all “hot.” It’s going to be a nice complement to the smoky flavors Les will be infusing into our turkey, but I’ll probably sneak into the fridge with my spoon for a few more taste tests (just to be sure) between now and Thanksgiving. And don’t be surprised if I find a way to use the leftovers in a post-holiday appetizer or something. As you all know, I cannot leave well enough alone. 😊
Want to make this recipe?
Follow the steps and images above, or click below to download a printable version for your recipe files.
Thanksgiving will be different for a lot of folks this year. Sure, some percentage will press on with their big gatherings, but between the pandemic, travel restrictions and general upheaval and uncertainty, many more of us (my husband and me included) will have lots of extra space at the table, and the menu will either be smaller, less elaborate or altogether different.
At our house, we have already opted for experimentation and wild cards with our menu. This will be the year we do a bourbon brine, or smoke a turkey breast or whip up a venison sausage dressing. I’ll be taking creative liberty with the side dishes, too, because, well, why not?
Over the next week, I’ll be sharing plenty of recipes—twists as well as classics from our personal recipe playbook. In the midst of the excitement, I’m also having fun creating new ways to enjoy the flavors that are so traditional for Thanksgiving, even if the dishes aren’t. If you missed the savory sausage mac and cheese baked in a pumpkin, you’ll definitely want to go check that out. It’s as tasty as it is pretty!
Today, I’m whipping up a batch of miniature meatloaves that have all the same flavors you’d expect for Thanksgiving. These little minis have a base of seasoned ground turkey, blended with sage stuffing mix and onions, a middle layer of sautéed kale and onions with mushroom seasoning, and a rich and fluffy top layer of Yukon gold and sweet potatoes. They’re conveniently portioned for sharing or freezing, and if you don’t have a mini loaf pan, you can make them instead in a regular or jumbo muffin tin.
Each bite of mini meatloaf delivers the Thanksgiving flavor that I’ve been craving every day since the beginning of November. Best of all, these are a snap to make, and they are ready for the oven in less than an hour.
Every bite has a perfect balance of moist, tender meatloaf, savory hearty greens and soft sweet potato.
Ingredients
1/2 cup Pepperidge Farm herb seasoned dry stuffing mix
1/4 cup whole milk
Extra virgin olive oil
1 medium onion, chopped and divided between layers
2 fat handfuls washed kale leaves, chopped (heavy stems removed)* (see notes)
1 tsp. Umami seasoning (powdered mushroom flavor from Trader Joe’s)*
1 large sweet potato, scrubbed clean and baked*
2 large Yukon gold potatoes, peeled and cut into chunks
I had a big bag of kale already in the fridge, but if you prefer, you could substitute spinach. I think shredded brussels sprouts would also be excellent here.
Can’t get your hands on the umami seasoning? No problem. Chop up a few mushrooms very fine and toss them into the skillet ahead of the kale, to give them time to sweat out their moisture.
I’ve listed the sweet potato as “baked” because I had one leftover. If you prefer, cut up the sweet potato and cook on the stovetop along with the Yukon golds.
If you opt for ground turkey breast, the mixture may be a bit drier than regular ground turkey. Consider adding a drizzle of olive oil to the meat mixture to make up the moisture difference.
Instructions
Give the dry stuffing mix at least 20 minutes to absorb the cold milk. This “paste” mixture will be a binder for the meatloaf, and lend a distinctive Thanksgiving flavor.
An egg white helps the potatoes remain moist during baking. The parm-romano blend adds a savory balance.
I seasoned the onions with a few shakes of poultry seasoning.
This umami blend is so delicious! If you can’t get it, substitute with some finely chopped mushrooms and a little garlic powder.
The turkey mixture is very soft, and mixes easily with a spoon.
The turkey layer should be the thickest. I filled the cups up to the halfway mark.
Divvy up the kale mixture over the turkey, and use a fork to lightly compress the layers.
Evenly layer the Yukon gold-sweet potato mixture on top, and be sure to spread it to the edges of your muffin or loaf cavities.
I used the tines of my fork to make lines on top of the potato, and one last twist of freshly ground pepper before baking.
The egg white in the potatoes contributes to the puffiness on top.
Preheat oven to 350° F.
In a small bowl, combine the dry stuffing mix with the milk and allow it to rest a bit. Stir the mixture occasionally to ensure all liquid gets absorbed and the mixture becomes paste-like.
Place cut-up potatoes in a medium pot and boil gently over medium heat until they are just barely fork tender. Drain and transfer to a bowl. Add butter, egg white, parmesan and freshly ground black pepper. Stir to combine.
While potatoes cook, place a non-stick skillet over medium heat. Add a drizzle of olive oil and sauté half of the chopped onions until softened and somewhat translucent. Season with poultry seasoning, salt and pepper.
Remove half of the cooked onions to a large bowl, along with the raw ground turkey. Add egg, sun-dried tomatoes, stuffing paste, salt and pepper. Stir to combine, then set aside.
To the same onion skillet, add the chopped kale and sauté (use a bit more oil if needed) until kale is wilted and softened. Sprinkle with umami mushroom seasoning and stir to blend.
Time to assemble the mini meatloaves! Spray the cups of your mini pan with olive oil spray, then fill each cavity about halfway with the turkey mixture. Press down with a fork or spoon to ensure the meat is packed thoroughly to the edges. Next, divide the kale mixture over the turkey layer, and press down again. Finally, top the loaves with the mashed potato mixture.
Press the potato mixture with the tines of a fork to leave lines on top.
Bake the meatloaves for 35-45 minutes (depending on the size of your mini pan cavities—for muffin tins, check doneness after 35 minutes. My meatloaf pan had cavities for 8 mini loaves and it took 45 minutes).
Just these, and a little dab of cranberry relish, and you’d have a complete Thanksgiving mini-meal! 🙂
Want to make this recipe?
Follow the steps and pictures above, or click below to download a printable version for your recipe files!