A strange sound emanated from beneath my pillow just ahead of the witching hour on Friday morning. My mind pretended not to hear it, but the muffled insistence of an unfamiliar ringtone persisted until I forced my eyes open, vaguely aware of having set an alarm the night before so that I could witness the rare event of a blood moon— a phenomenon that seems as shrouded in mystery as I was in my comforter in that moment. I purposely chose a ringtone that was different from my usual, so that I would not be tempted to tap the snooze button.
What exactly is “the witching hour?”
During COVID, I had frequent bouts of restlessness that woke me at 3 am, and a Google search about this pattern yielded a myriad of results, from possible liver overload (hey, we were all drinking more in those days) to fluctuating hormones (reasonable, given that Mother Nature tossed me into the menopause bin at the worst time in history), to the most startling and somewhat upsetting reason of all: the “witching hour.” Apparently, there’s a spiritual veil between the realms of life and death, and it is thinnest at 3 am. It felt redeeming that this time, I needed an alarm to rouse me into standing in my jammies in the backyard, staring at the sky.
Drama above, uncertainty below
Scientifically, a blood moon is easy to explain: it’s the alignment of a full moon and the sun, with Earth in the middle. It presents in the night sky with a reddish hue over the familiar craters on the lunar surface. From a mystical standpoint, however, it seems a bit more complex. It was a spectacular sight— more so than my amateur phone camera skills could ever capture.
By the magic of the algorithm, which latches onto one’s slightest hint of curiosity and subsequently serves up a smorgasbord of related information, my Instagram feed was flooded on Thursday night with posts and reels that emphasized, sometimes urgently, that this lunar eclipse was going to be a powerful one. Something to do with the eclipse being in Virgo, and that makes sense to me because I married a man born under that sign, and urgency is his middle name (well, except in the name of this eclipse because when I nudged him if he wanted to join me outside, he made a mostly unintelligible sound that I interpreted as “no”). What is less clear to me is what the eclipse means in terms of the spiritual growth that all the mystics said was straight ahead.
This particular celestial event is said to be a time for “letting go,” but of what? For some reason, a bible verse I once studied has been playing on repeat in my mind. I’m out of practice on such things, but the gist of it was about silver being refined in the fire. It is only under intense heat and pressure that impurities rise to the surface to be skimmed away. I feel this deep in my chest, as if something has been begging to be skimmed out of my current reality.
On reflection, realignment and letting go
Perhaps some of you can relate to having too much on your mind as of late. I can easily conjure a list of things that I need to “let go,” as suggested by the Instagram mystics. In no particular order:
Worrying— about the future of Earth and all its inhabitants, but especially those who have been historically marginalized for no good reason. Using my voice for good is the right thing, but worrying does not help.
Regrets and long-gone ambitions— they only hold me back from being the best version of me that I can be today. That was then, this is now and I am reminded that I am overdue to clean out my closet (figuratively, but also literally).
Trying to figure it all out. Every. Single. Freaking. Thing. I’m exhausted from trying to mentally solve the problems of our country and the world, and most of the time I feel guilty for not having more problems than some other people around me. I am privileged because of my race, which isn’t my fault. It also isn’t fair.
At the break of day
I woke for the second time on Friday at 7:15 am, and I felt extra weary from the sleep I lost staring at the moon. Clarity doesn’t always come quickly, and I suppose that is the point.
The exuberance and joy of Mardi Gras season calls to me, especially since I learned in recent years that it is more than drunken revelry and people throwing beads at women flashing their boobs. Yes, that does happen when tourists descend on Bourbon Street, and of course that’s what we see in the media— which loves a circus, as evidenced by the news of late— but the true season of Mardi Gras is much more interesting (thank goodness). It’s filled with family-friendly cultural celebrations highlighted with parades, colorful costumes and decorations, and, naturally, amazing foods!
Rather than pretend I know all about Mardi Gras, I’ll point you to my blog buddy, Maylee, who shares the inside scoop on her blog, Beyond Gumbo. Over the weekend, Maylee posted a gorgeous “Best-Ever King Cake,” one of the most signature treats of the Mardi Gras season, with its festive green, yellow and purple sugar accents. Have fun exploring Maylee’s blog, with first-person detail on the parades and so many foods that are truly authentic to Cajun country— far “beyond gumbo,” as her blog suggests.
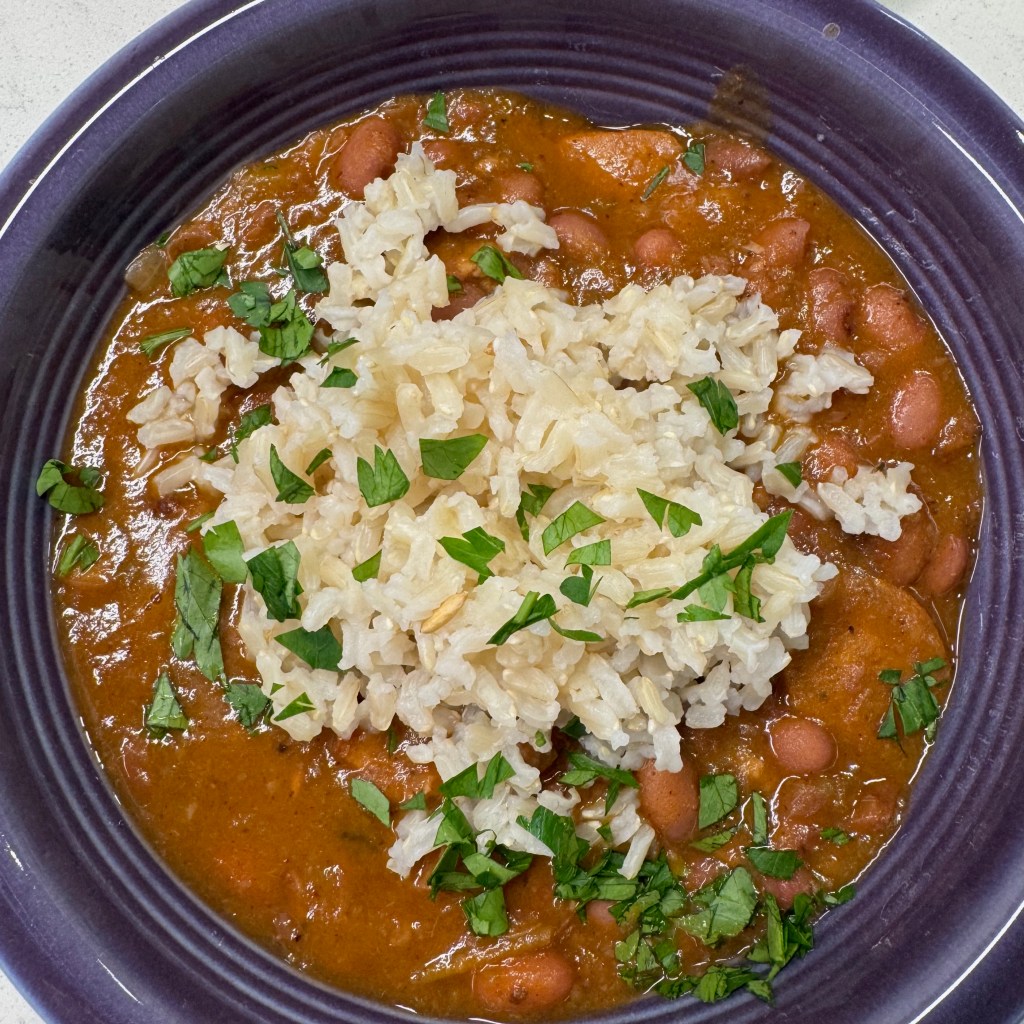
My own love affair with Louisiana foods also extends beyond gumbo (though I do love it!), and today I’m sharing my first-ever attempt at making red beans and rice, a layered-with-flavor Cajun staple that is as tasty and satisfying as it is humble and simple to make. The first time I tried this classic dish, it was from a package mix (I know, and I’m sorry) and it didn’t impress me much. I was only about 24 at the time, and my curiosity about it emerged after my conversation with the one-and-only Bette Midler. This deserves an explanation, but first, the dish!
Worth the trouble to make from scratch!
This meal comes together with pretty simple ingredients— red beans, of course, and I used small red beans, though dark red kidney beans seem popular; andouille sausage (I used a chicken variety to reduce the fat); the holy trinity of onions, celery and bell pepper; plenty of spice in the form of garlic, cayenne, smoked paprika, bay leaves and fresh thyme leaves; chicken stock and a touch of tomato paste (which might make it more Creole than Cajun, but it worked).
How could all of these ingredients not be great together?
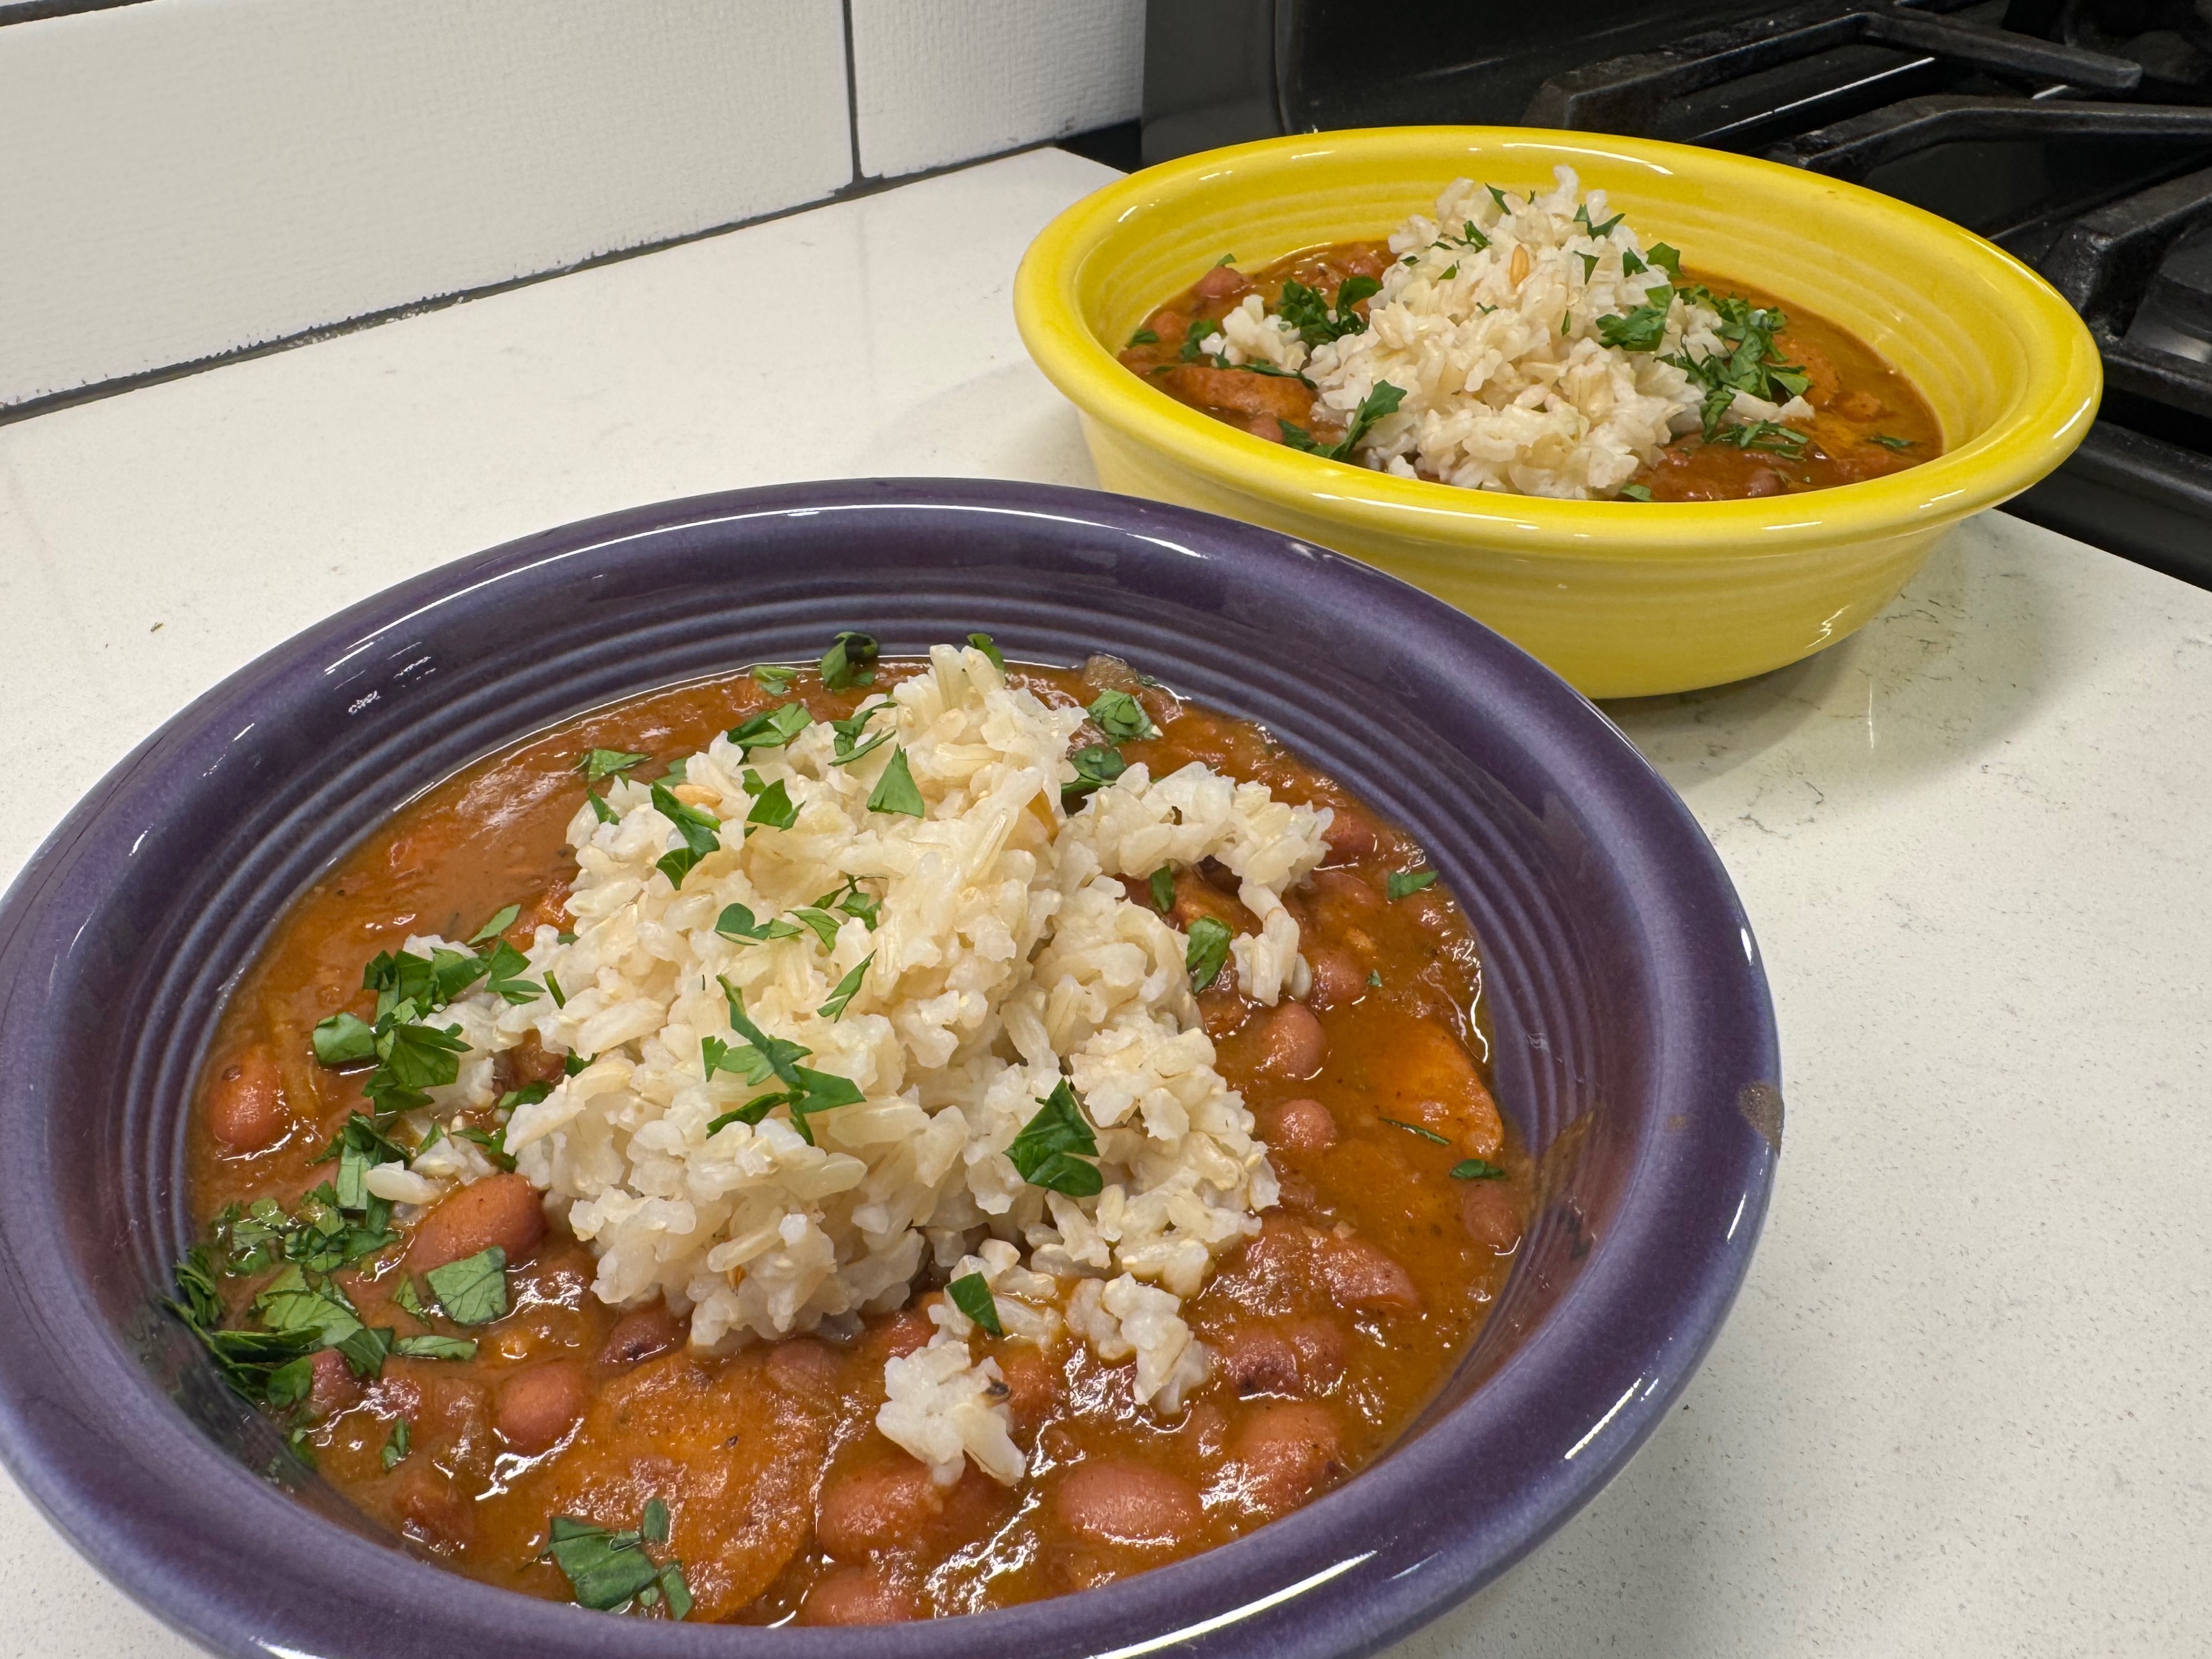
The whole thing is stewed and simmered until the flavors meld, and then it’s served with cooked rice (mine was brown for nutrition and health reasons). Red beans and rice is hearty, incredibly aromatic, comforting and just spicy enough that I’ve been wondering why I waited so long to make it from scratch. This much I know— it won’t be the last time.
If you get really close, you may be able to smell how delicious this is!
An unusual inspiration
Now, if you’re wondering what in the world Bette Midler had to do with anything, let’s rewind to my first full-time radio job, where I frequently had the pleasure of meeting and interviewing artists that I’d otherwise never cross paths with. The Divine Miss M was among them, and I could not have been more awestruck!
Most of my celeb interviews were not in-person, but by telephone, and right around the time that Midler’s hit, “From a Distance,” was charting on Top 40 and Adult Contemporary radio, riding the wave of popularity that followed “Wind Beneath My Wings,” her record label arranged interviews with influential radio personalities across the country. Don’t ask me how I got looped into that, because I was definitely a novice at that stage of my career, barely holding influence over myself on the best of days. I considered myself incredibly fortunate.
What I remember most about the 10-minute interview, which was unusually chaotic because there were multiple radio folks on the call, is not Midler’s answer to my own question when it was my turn to speak. I was nervous, and probably asked her something stupid, like “what was your inspiration for the song?” Had I done even the slightest bit of homework, I’d have known that it was a cover, not her own song, and that Nanci Griffith had recorded it first three years prior though that one didn’t make a dent on the American Billboard chart.
Nope, I was far too green to realize that celebrities— the best of whom usually prefer to be treated as regular people, rather than idols— are most excited to answer questions that relate to ordinary things. Thankfully, a more seasoned radio pro asked her the most meaningful question of the call— “Miss M, what is your favorite food?”
And, of course, it was red beans and rice. I’ll never forget it.
How to make red beans and rice
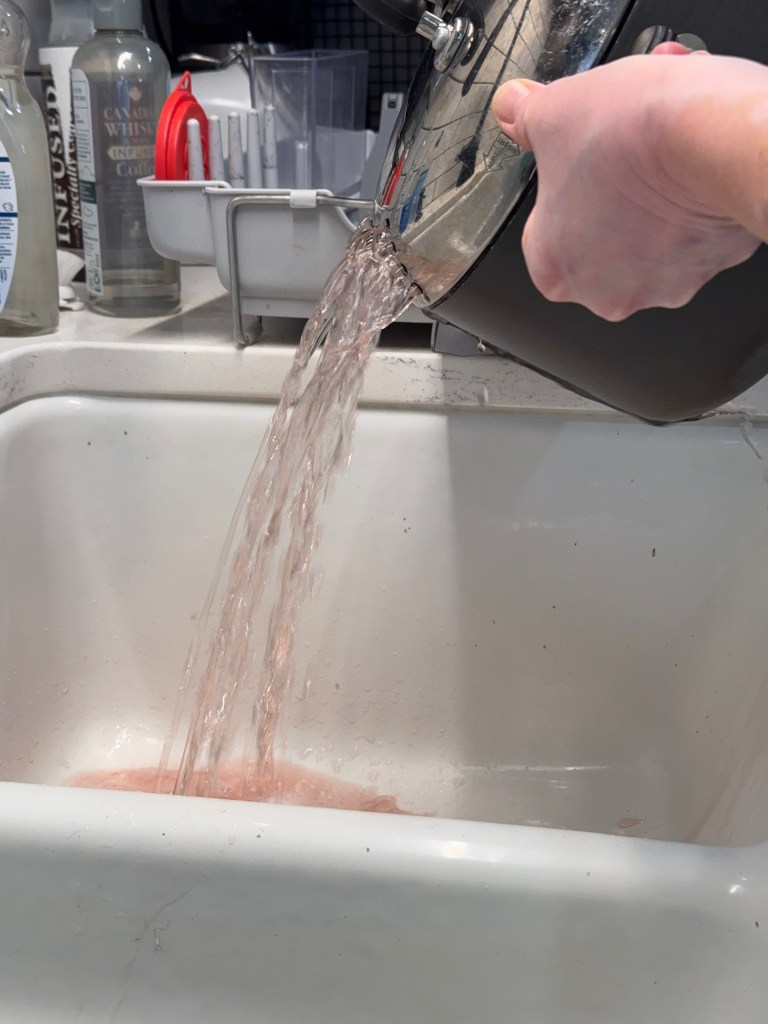
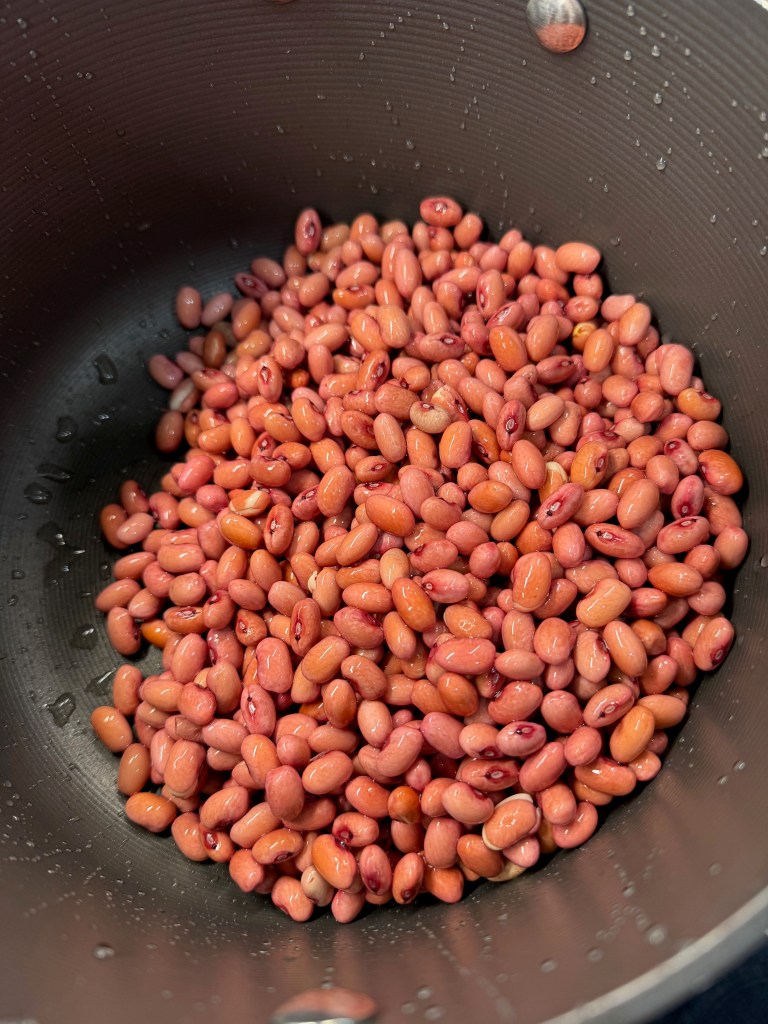
Never one to actually follow a recipe, I set out to learn the techniques that are important for red beans and rice, and there is no shortage of recipes online. My version is a mash-up of various suggestions I considered. As expected, it began with an overnight soak of the red beans. I had seen online that canned beans could be used, but when I have time to take the long route, I’m doing it. Good things happen in a long simmer, and it was no more effort to use dried beans. Be sure to drain and rinse them a couple of times before proceeding.
The beans lost a bit of color in the overnight soak.
Getting the flavor party started
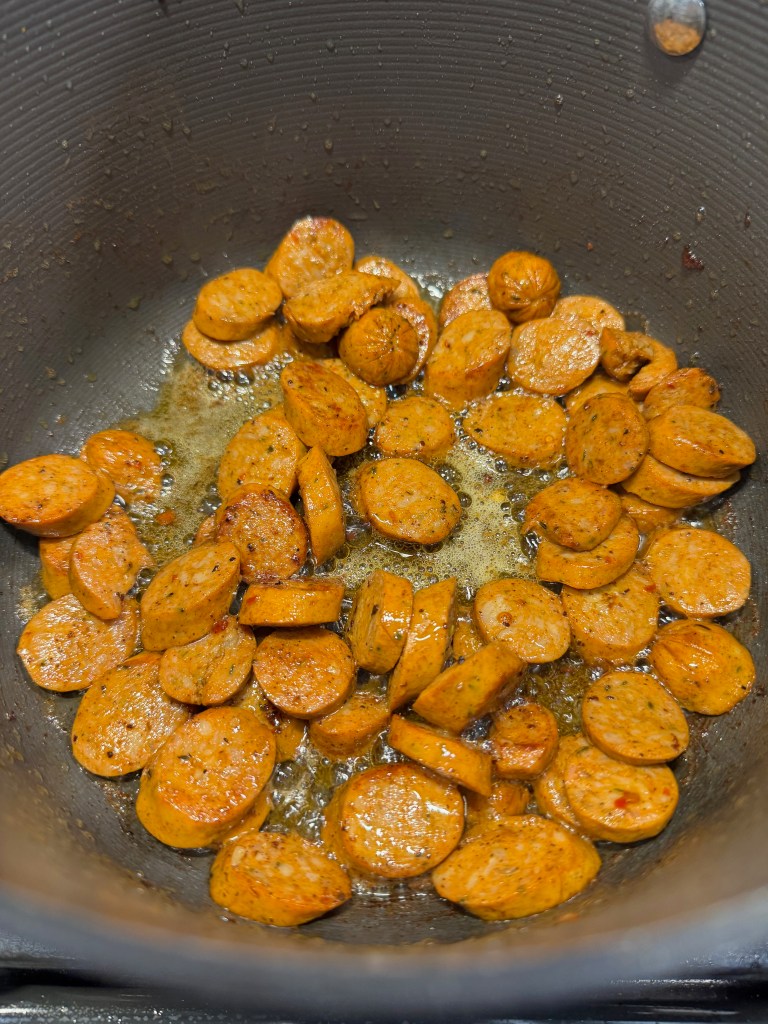
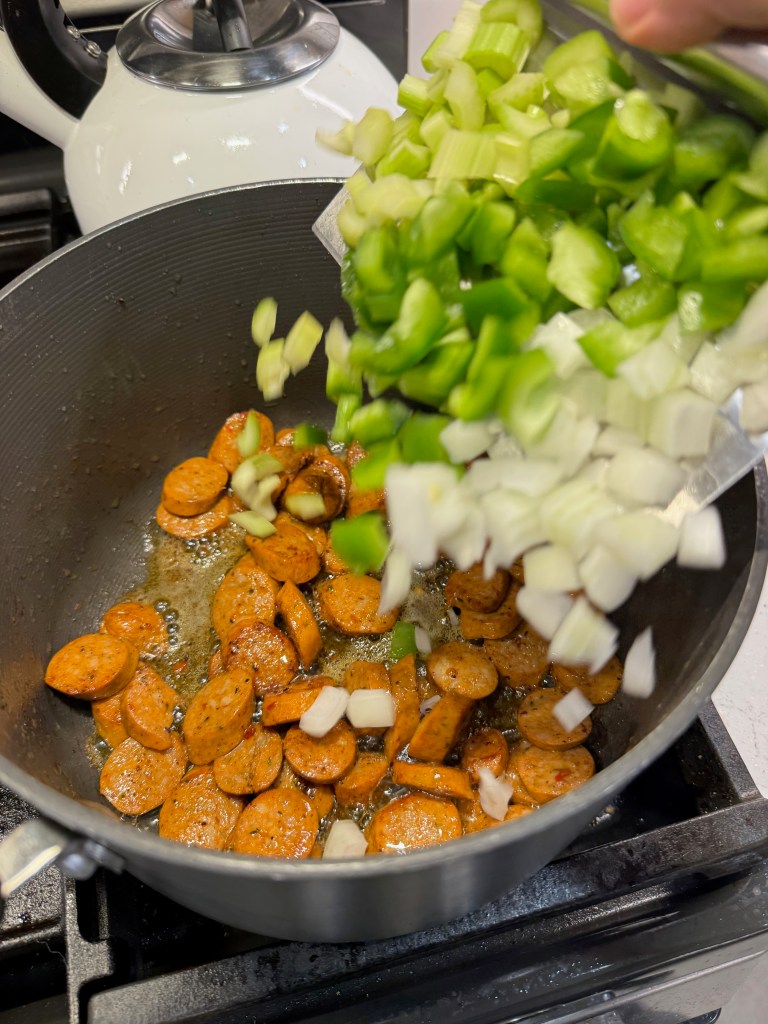
The flavor layering begins when you brown the andouille sausage in hot oil. I browned mine in bacon grease, rendered from a garlic- and onion-seasoned bacon I scored at Publix. This bacon was nothing short of fantastic, and though I don’t think it’s quite the thing for breakfast, it would be terrific on sandwiches and it was great in my red beans and rice.
I had never used either of these meats before, but both were amazing in my red beans and rice.
It’s getting aromatic in here!
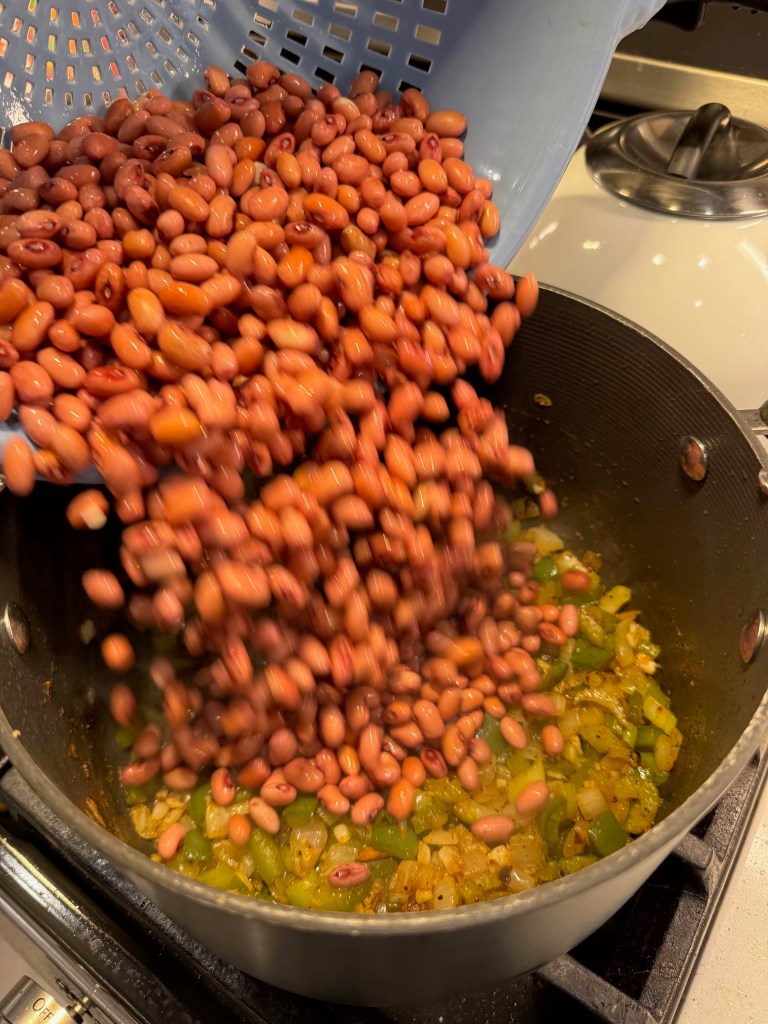
Next came the trinity, which I had diced up small enough that each bite of my finished dish could have a little of each aromatic ingredient. Unfortunately, about that time, I realized that my chicken variety of andouille didn’t have any kind of casing, and I knew that it wouldn’t hold up under simmer for two hours while the beans cooked. So I hit the pause button long enough to fish out every last piece of andouille with a slotted spoon. I do not recommend this approach, but this was my own fault.
With regular andouille, it would probably have been fine to leave the sausage in.
Simmer down, now.
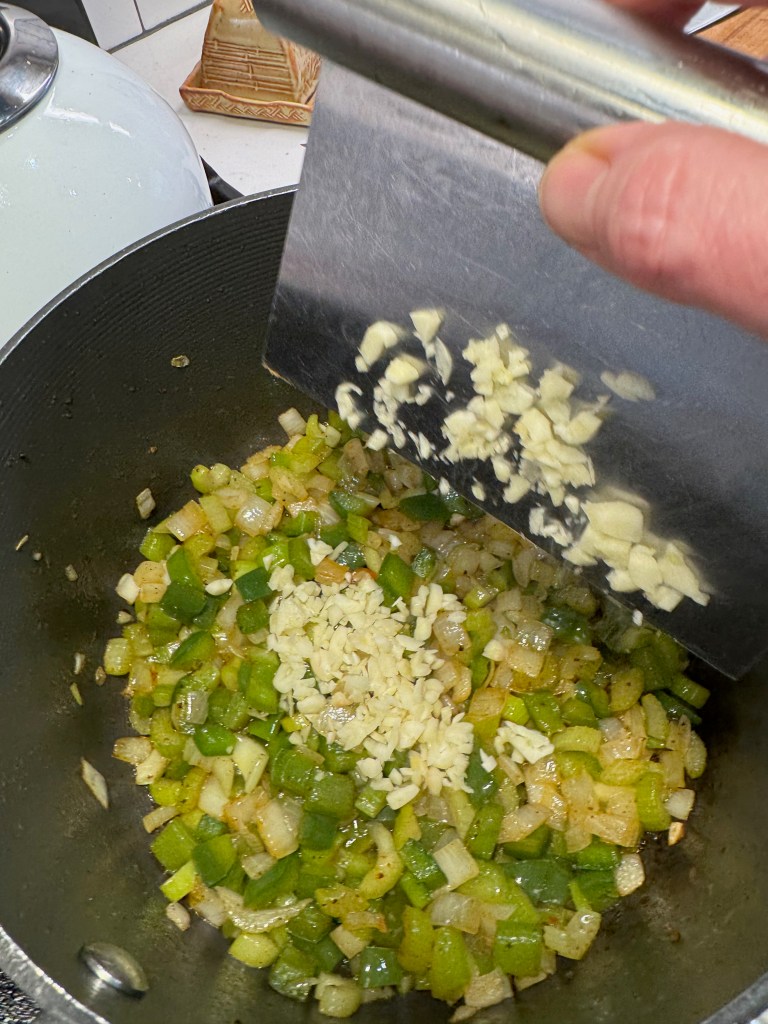
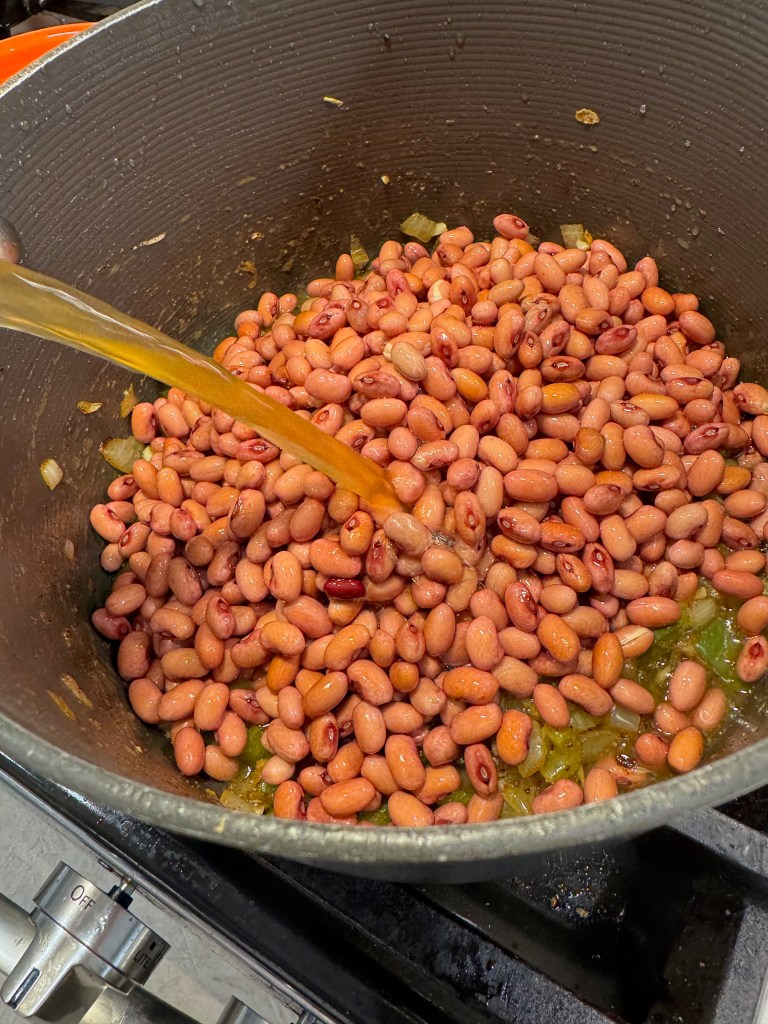
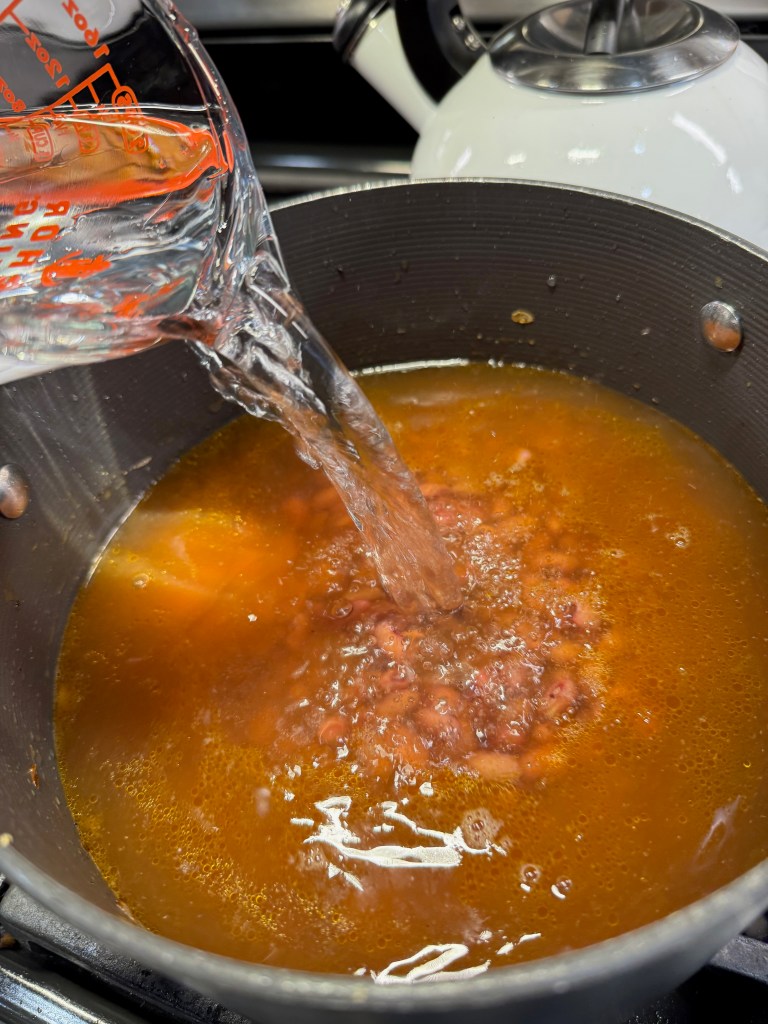
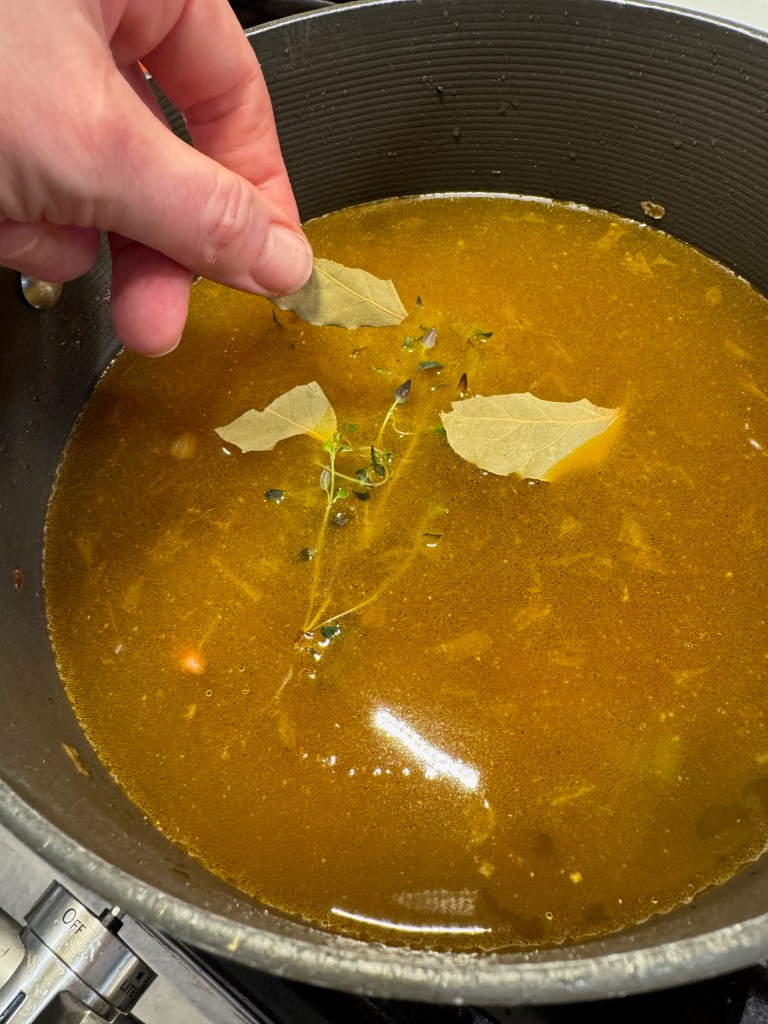
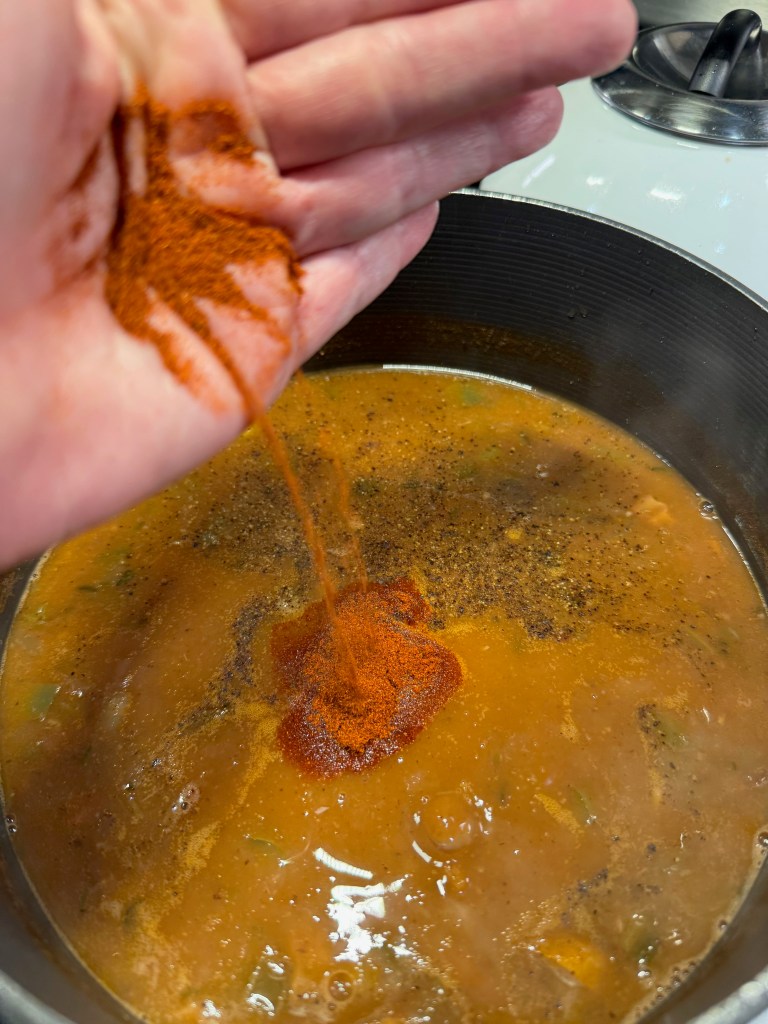
Time for the fresh garlic and dried seasonings. I wasn’t sure how much salt I’d need, given that the bacon and sausage had their own, and my chicken stock was not low sodium. So I played it conservative with salt, but still used black pepper and cayenne powder. I added the drained beans and six cups of liquid— four of chicken stock and two of water, plus a sprig of fresh thyme and couple of broken dried bay leaves— I rarely simmer anything without them. I panicked a bit at this point because the pot seemed so liquid-y, but there was no turning back at this point. I kept the lid off while the pot simmered, and I figured that would help reduce the liquid quite a bit.
I thought I’d made a big mistake with 6 cups of liquid! The pot was very thin.
The final stretch…
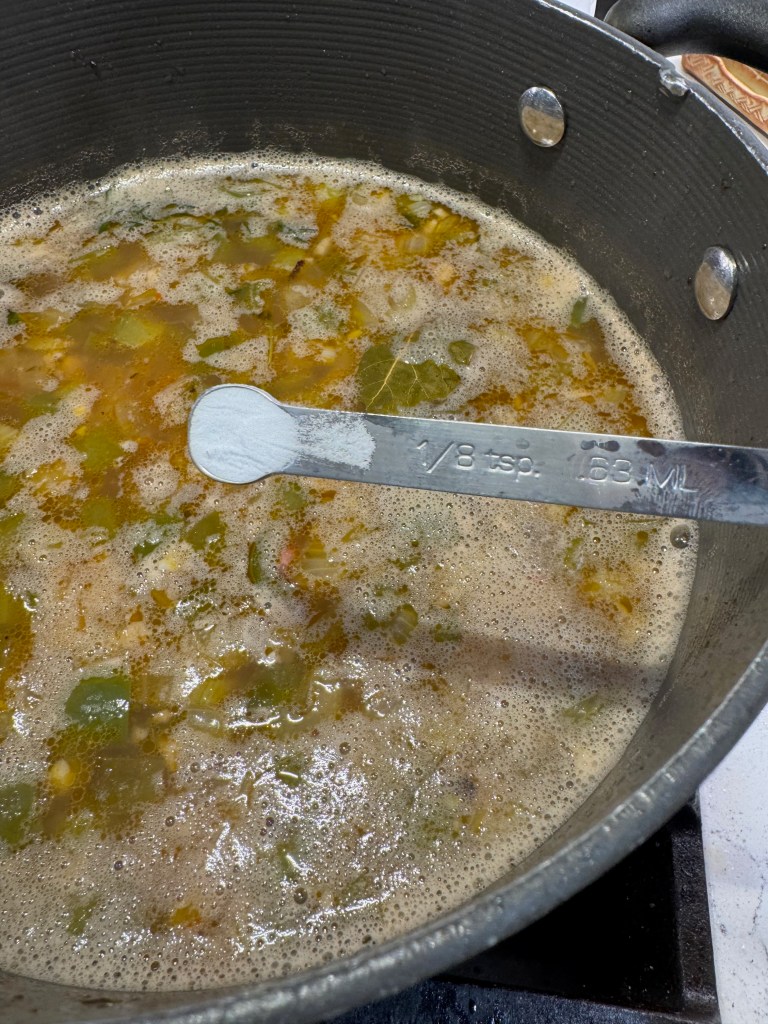
At this point, I also followed my new rule of thumb for cooking dried beans, which is to go ahead and add a skimpy spoon of baking soda to the pot. This alkalinizes the cooking liquid, in turn helping the beans to soften as they simmer. It does not change the flavor of the mixture with such a small amount. I wish I’d had my camera ready after the soda was stirred in, because there was a momentary fizzing that was quite dramatic, and then it settled down.
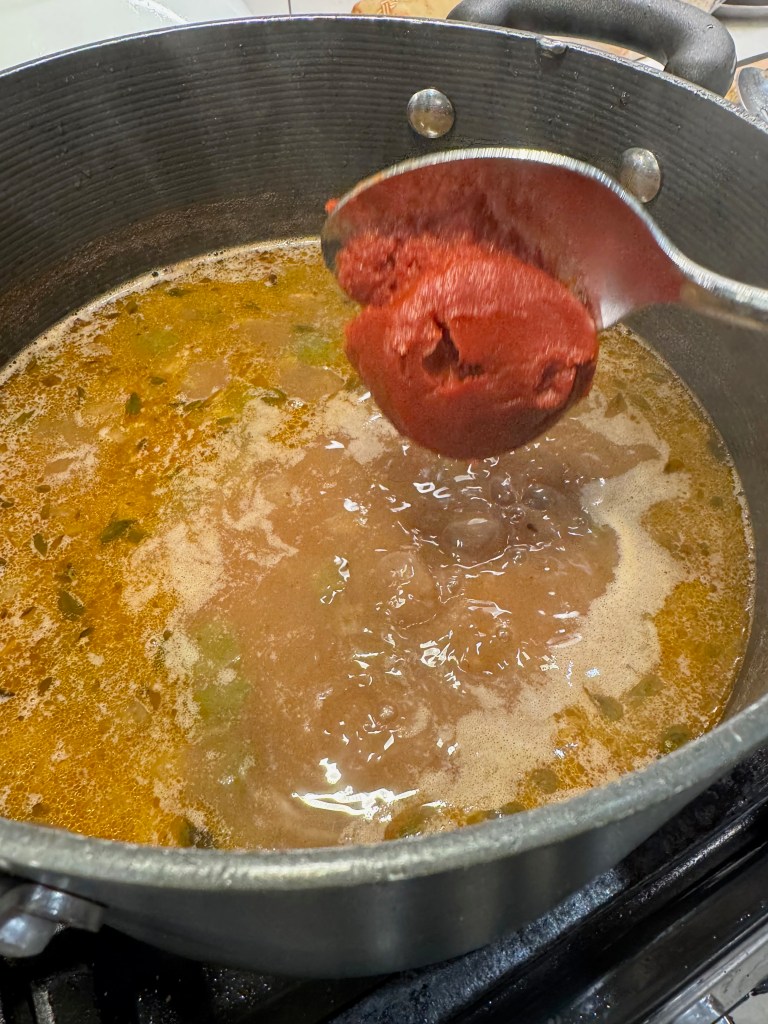
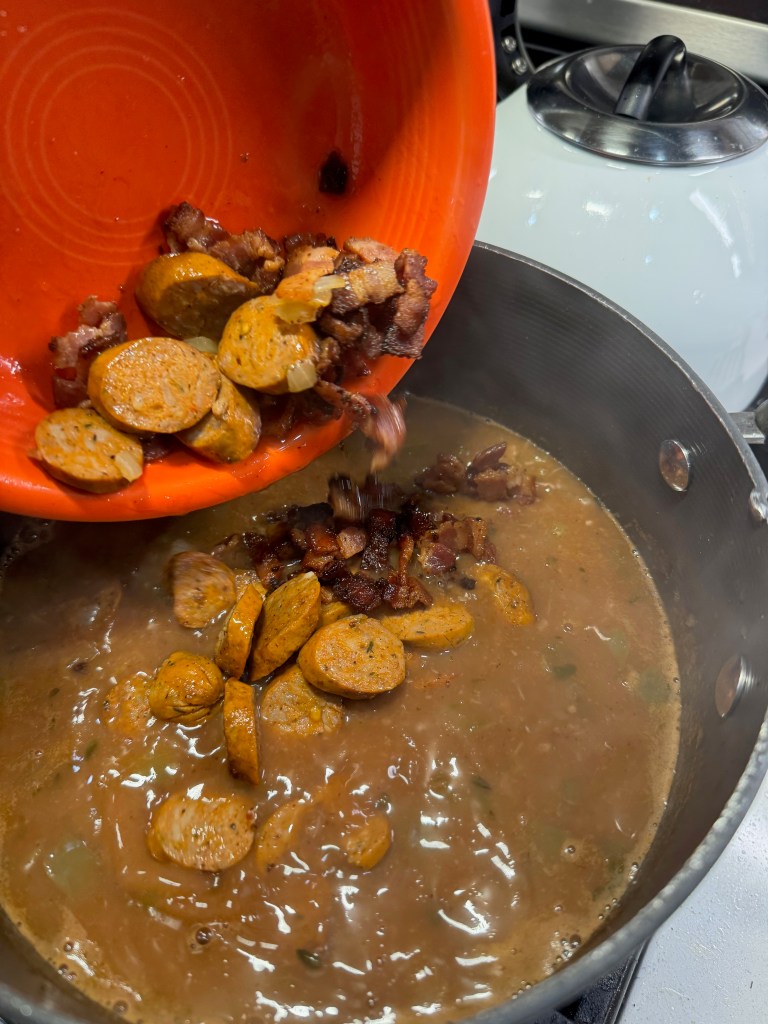
The dish still seemed thin even at this point, but the final simmer made it perfect!
I gave the pot a stir only about twice over the next two hours, and after confirming that the beans were tender, I stirred in two tablespoons of tomato paste. You cannot jump the gun with tomato or anything else acidic when cooking dried beans, or they may never soften. I emptied the cooked andouille and bacon back into the pot, along with a bit fat pinch of smoked paprika, which I probably should have added at the beginning (still learning here). Another 45 minutes of simmering, and my red beans and rice was ready to serve!
This dish definitely should not be reserved for Mardi Gras! It's immensely flavorful, comforting and richly satisfying.
Ingredients
1 lb. dried red beans (I used small red beans, but kidney beans are ok, too)
6 slices good uncured bacon, cut into 1-inch pieces
12 oz. package andouille sausage, sliced into 1/2-inch thick slices (I used a low-fat chicken version, which had no casings; pork variety is more traditional)
1 cup each yellow onion, celery and green bell pepper, chopped into 1/2-inch dice
6 cloves garlic, smashed and minced
1/2 tsp. salt
1 tsp. freshly ground black pepper
1/2 tsp. ground cayenne
1 tsp. smoked Spanish paprika
4 cups chicken broth or stock
2 cups water
1 sprig fresh thyme
2 dried bay leaves
1/8 tsp. baking soda
2 Tbsp. tomato paste (do not add until beans are cooked soft!)
A few shakes Louisiana hot sauce, if desired for heat
cooked rice for serving
chopped fresh parsley for serving
Notes: This recipe uses dried beans, which require a longer cooking time. If substituting canned beans, use 4 standard cans (drained) and reduce simmering time to one hour.
Directions
Sort and rinse beans to rule out any duds. Add beans to a large pot and cover with several inches of water. Soak at least 12 hours, and then drain and rinse twice before proceeding with the recipe.
Heat a heavy-bottomed pot over medium heat. Cook bacon pieces until crisp, then transfer bits by slotted spoon to a separate bowl. Add the andouille sausage pieces to the pot, browning in the bacon fat until crisp on edges. Transfer sausage to the same bowl with bacon and set aside.
Add onions, celery and bell pepper to the pot. Stir and sauté until softened and slightly translucent. Add garlic and stir for one minute. Season with salt, pepper, cayenne and paprika.
Add drained beans to the pot; cover with chicken broth and water. Bring pot to a boil, then reduce heat to a simmer. Add thyme and bay leaves. Stir in baking soda to neutralize any acid in the pot (this is not necessary if using canned beans)
Simmer, uncovered, for 1 1/2 to 2 hours or until beans are tender. Use a potato masher to smash some of the beans for richer, thicker texture. Alternatively, you can smash the beans against the sides of the pot with the back of a large spoon. Stir in tomato paste and a few shakes of hot sauce if you want more heat. Adjust salt and pepper to taste.
Return cooked bacon and sausage to the pot and stir to combine. Continue to simmer for about 45 minutes to thicken beans.
Remove bay leaves and thyme stems. Serve red beans with cooked rice.
Not for lack of things to say, but I haven’t had it in me to blog much recently. The flood of “information” that has been coming out of Washington for the past month has been, frankly, a bit much for me. OK, that’s an understatement. Truth is, I’m working on an exit plan. I’m not sure what it would be like to live in another country, but I’m game to find out. The fact that I love other cultures more than my own helps a lot.
Today is National Margarita Day, which should be a time to only be happy about a fun cocktail, but has somehow (for me, anyway) become but a temporary escape from the living hell before us. Billionaires driving the bus of our nation. Fascists calling the shots. Christian Nationalists pretending they know what Jesus would do.
I’m done. I’ve held my tongue longer than is reasonable for these times, and I feel like I’m about to explode. Enter, tequila. Thank you, Mexico, for everything. Seriously, I’m feeling a little spicy, and I don’t care if it shows.
Right?
Lord, give me the gumption of my grandmother, who lived through the Great Depression, and of my great grandmother, who was the first generation on the female side of my family to earn the right to vote. I need to embody all of their strength today. Oh yes, indeedy-doodee-daddy, I need to remember where I came from— I need to feel it in my bones. I’ve seen on numerous Instagram posts recently that women in the 1930s and ‘40s wore red lipstick as a means to protest fascism and piss off the people in power, so until further notice…
I can’t say quiet.
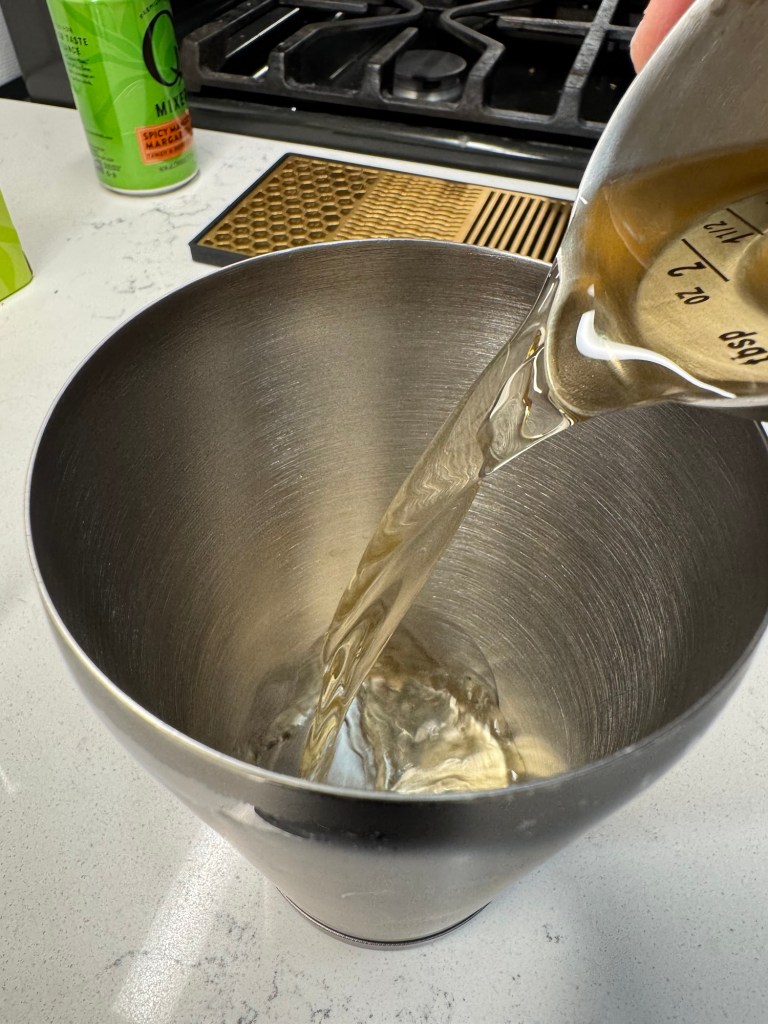
With that off my chest, I present the cocktail that easily found its way into my repertoire this week. The spicy mango-melon margarita. It is a super easy, flavorful cocktail that melts my rebel heart with its spicy-meets-sweet flavor profile, and a spirit that says, “hell, no!!” The recipe is a bit of a shortcut—something I don’t do very often— and it works here, because I’ve been trying so hard to keep everything else between the lines that I haven’t had time to create many things from scratch. But I trust Q brand mixers, and using this one means that the drink is EASY to make at home. Even if you can’t even.
I’m keeping it simple with a tasty, store-bought mixer.
The key ingredients you need are tequila (any would probably work, but reposado is appropriate for the pause I’ve taken in sharing my true feelings), melon liqueur (Midori seems obvious because it is the real deal, not a knock-off) and the Q brand spicy mango margarita mixer, which has all the stuff I love and none of the stuff I don’t. Truth be told, I could probably drink this mixer over ice by itself and feel that I’ve accomplished something. But not today. I’m grateful for the tequila. Here we go, beginning with prepping the glass:
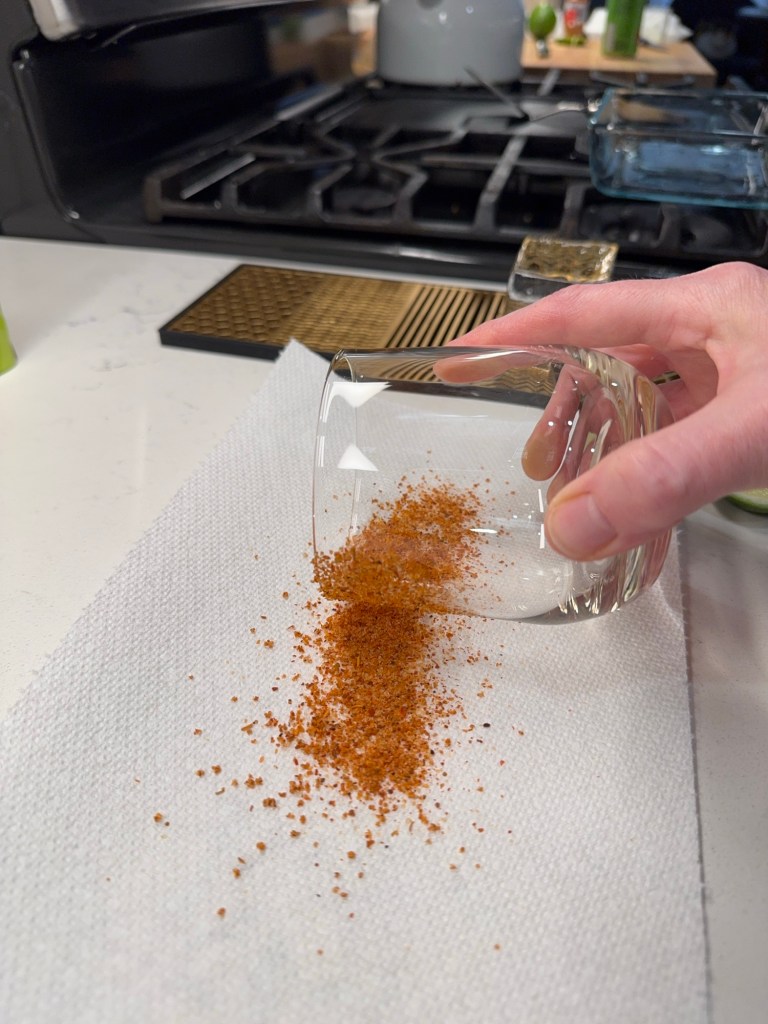
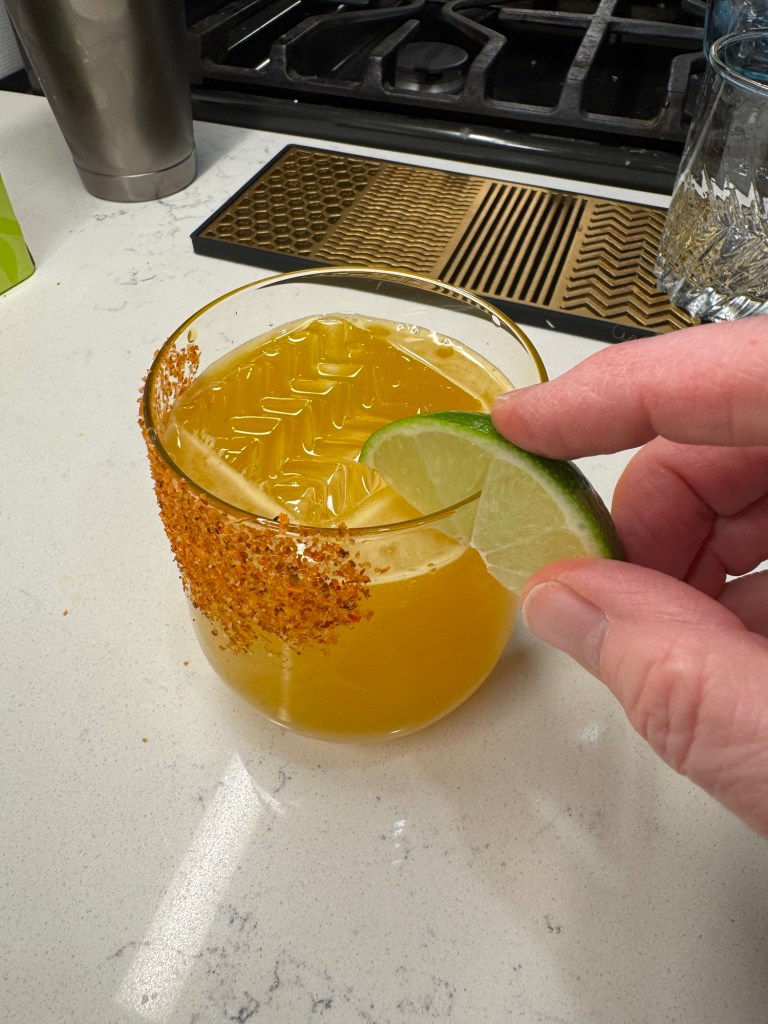
Swipe a fresh lime wedge on the edge of the glass, and then roll the outside in the Tajin spice.Shake with ice, strain over a big rock and garnish with a lime.
This may seem like an opinion piece, and maybe it is— only you can decide what it means to you. But I’m sticking with my red lipstick and my spicy cocktail and my spicy attitude. It’s still a free country, after all. At least, for now.
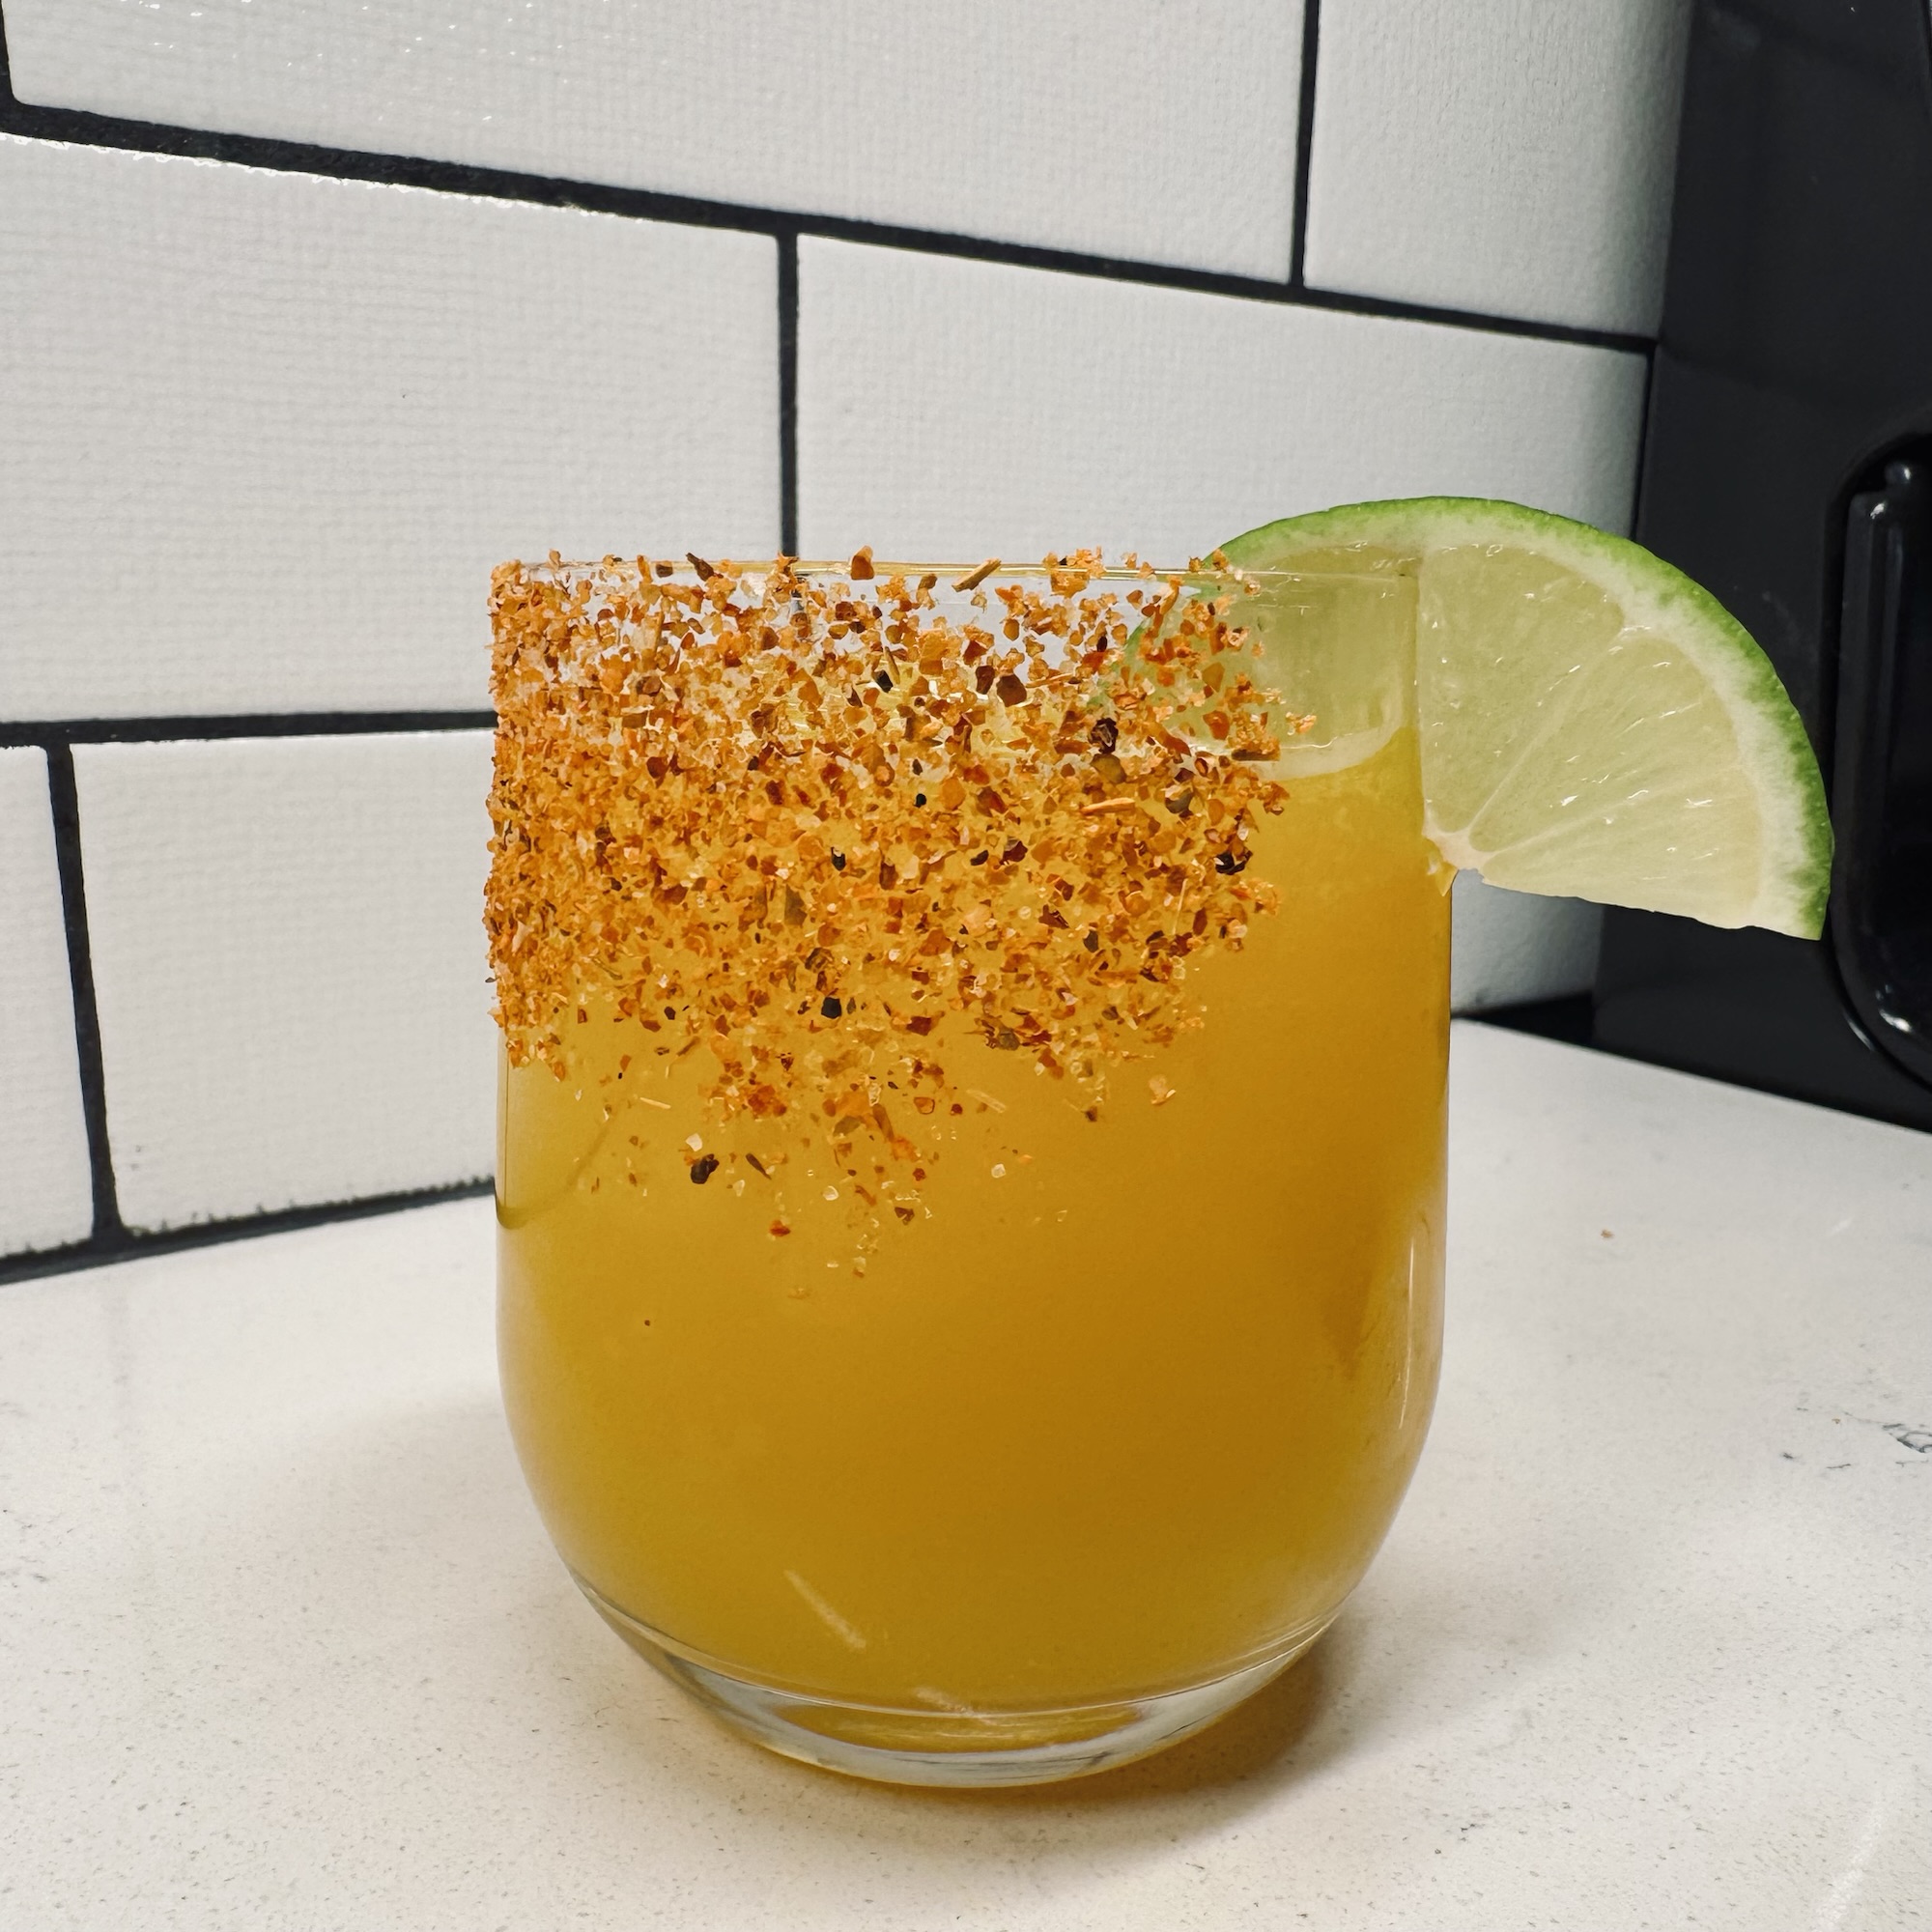
A store-bought shortcut makes this spicy, sassy cocktail super easy, and just in time for National Margarita Day!
Ingredients
2 oz. reposado tequila (recommended 1800)
3/4 oz. Midori melon liqueur
3 to 4 oz. Q brand spicy mango margarita mixer (lesser amount results in a stronger drink)
fresh lime and Tajin spice to decorate glass
Note: I don’t typically use store-bought cocktail mixers, but I’ve made an exception here because the Q mixer brand does not use high fructose corn syrup or fake flavors. I was startled at how much I liked this mixer, even on its own. You can trust it here.
Directions
Use a lime slice to moisten rim of a cocktail glass. Roll outside rim of glass in Tajin spice.
Add tequila, melon liqueur and margarita mixer to a cocktail shaker. Add one cup ice cubes and shake the hell out of it, like you’re pissed off at the state of everyting.
Strain over a fat ice cube into the prepared cocktail glass.
Super Bowl’s coming, and my arteries are feeling clogged just thinking about it. Why do so many game day snacks have to be loaded with saturated fat, sodium and calories? I know— because it’s all about comfort food and they’re delicious, right?! I spent half an hour of quality time last week with my primary care physician, who informed me after my labs that my blood work isn’t exactly a pretty picture. Again. This is the second time in three years that I’ve gotten a bad report on my cholesterol (the year in between, I didn’t ask), and the weight gain that followed menopause hasn’t shown any effort to find its way out, either. As I told my doctor, I have a huge disadvantage in that I never had to fight for the healthy weight I enjoyed in my younger years. I always pretty much ate and drank what I wanted and I stayed in my optimal size. But not anymore. And I loathe the gym, so changing up my diet is pretty much my only option to get back to good. It pisses me off, if you want the truth.
But I wanted to prove to myself that eating better doesn’t have to mean sacrificing every single thing I love. Why couldn’t I tap into my creativity a little bit and see what kind of magic might happen in the kitchen? I’ll go after mac and cheese another day, but with the big game coming up, I figured a practice run at the most Super Bowl-y of all Super Bowl foods might be a good way to ease into things. Chili at its core could be pretty health-conscious— at least until you pile on the cheese, sour cream and chips for dipping in it— so this makeover was mostly about maximizing flavor and minimizing the heaviness.
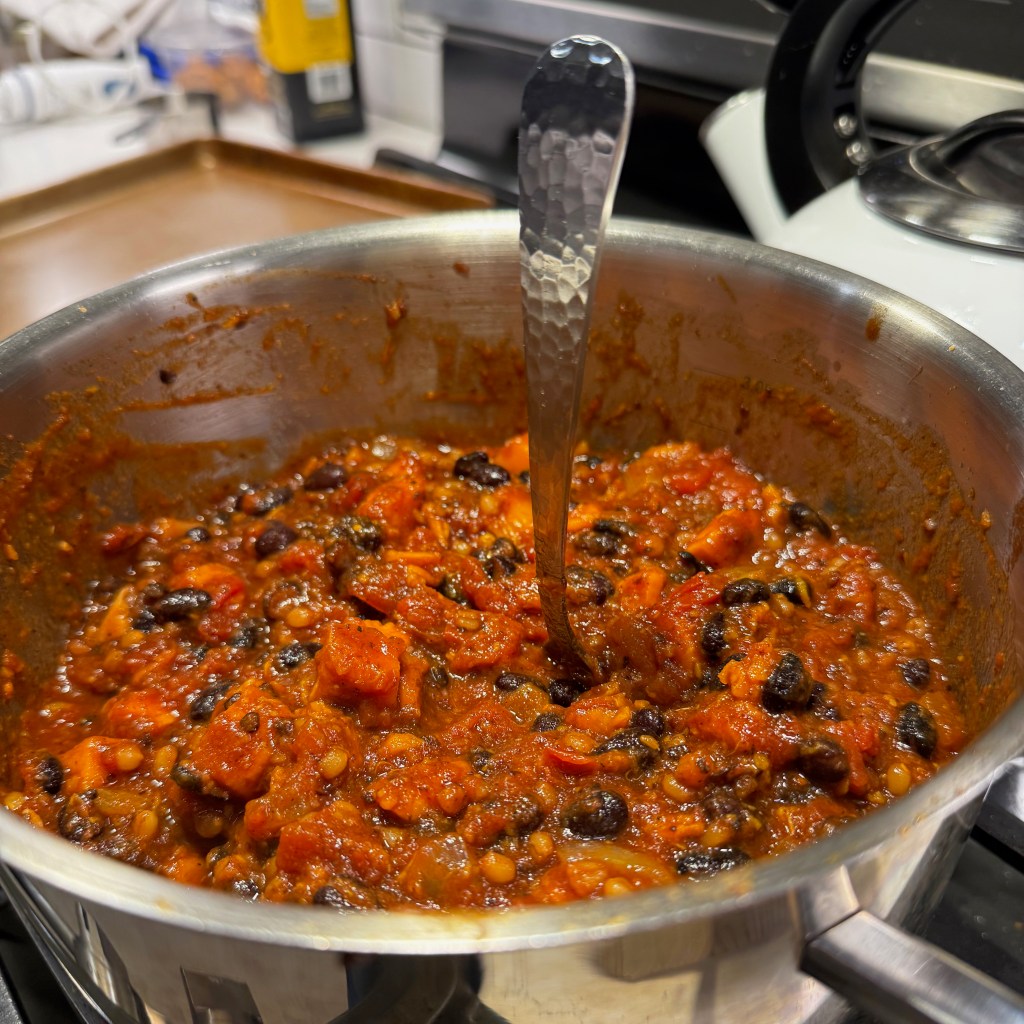
I don’t necessarily need meat in chili, so I set my sights on making a plant-forward version that had plenty of what I do want— big flavor, hearty texture, smokiness and heat. This bowl has all of the above. What it doesn’t have is saturated fat. My ingredients are clean, and I used only extra virgin olive oil for roasting and sautéing the various components.
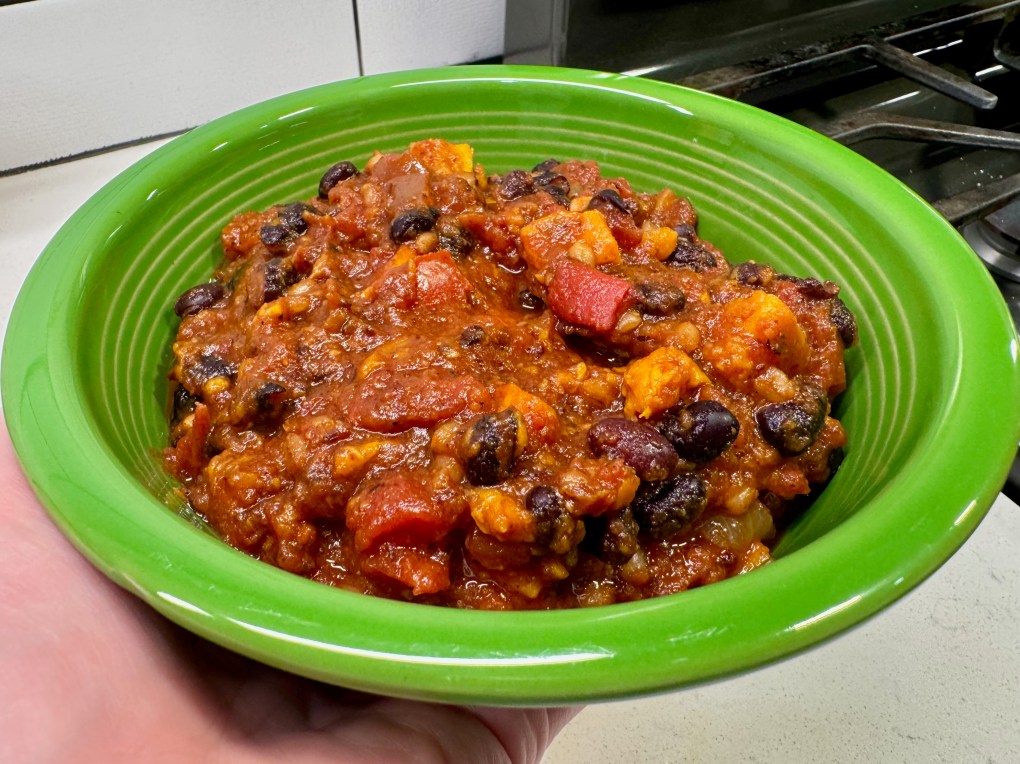
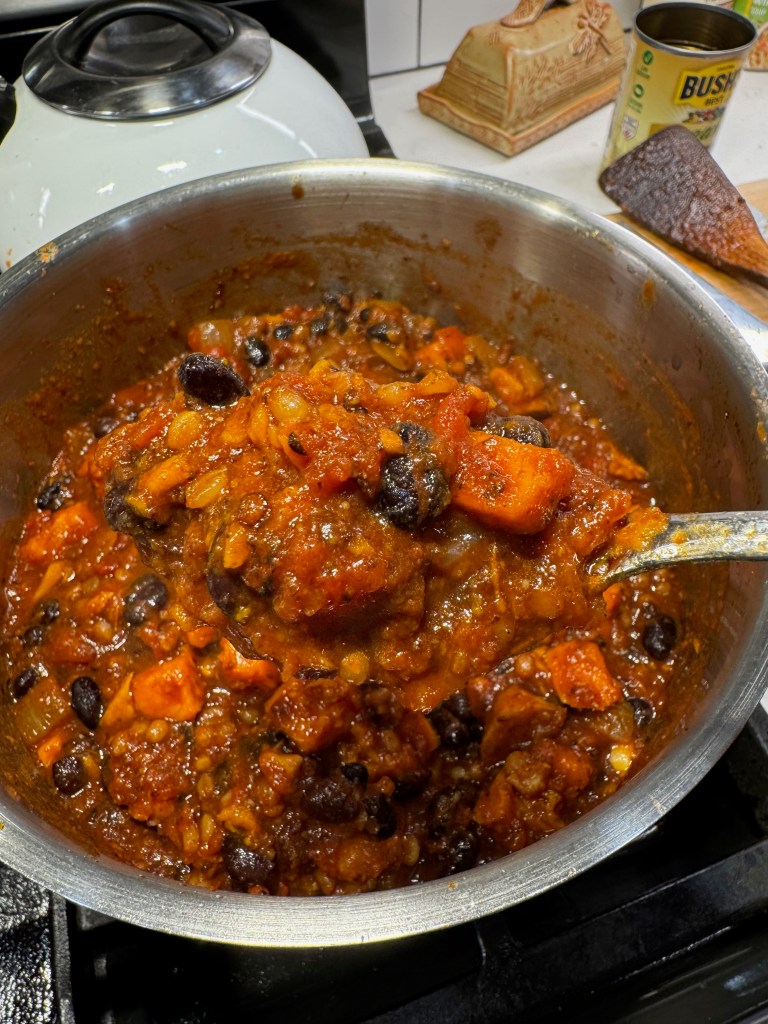
So thick, my spoon stands on end in the chili!
The flavor is smoky and spicy, with a subtle sweetness from the sweet potatoes. Nutrition-wise, this chili is off the charts. Protein, fiber, folate, magnesium, antioxidants, lycopene, potassium— it’s all there. And there’s no broth or juice added to the chili, which makes it thick enough for a spoon to stand straight up in it. Is it the same as the rich and meaty chili that my husband loves to make for Super Bowl? Of course not— there’s no meat inside. But if it satisfies my craving while I’m trying to do better, well, that’s good enough for me.
Let’s get into it!
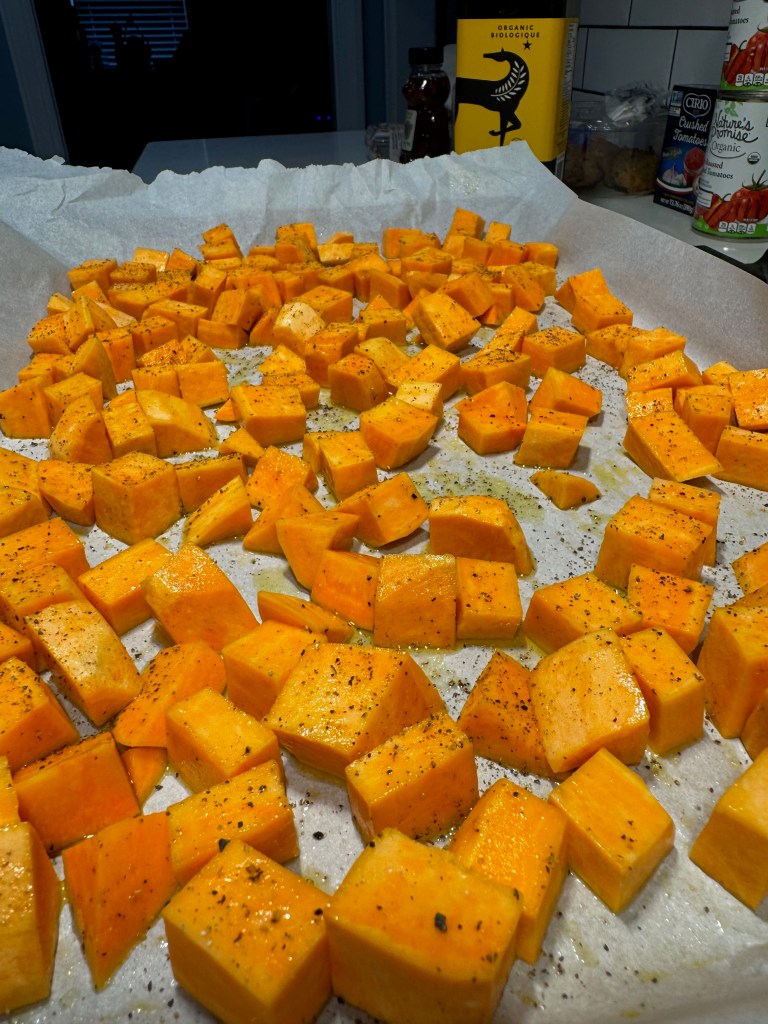
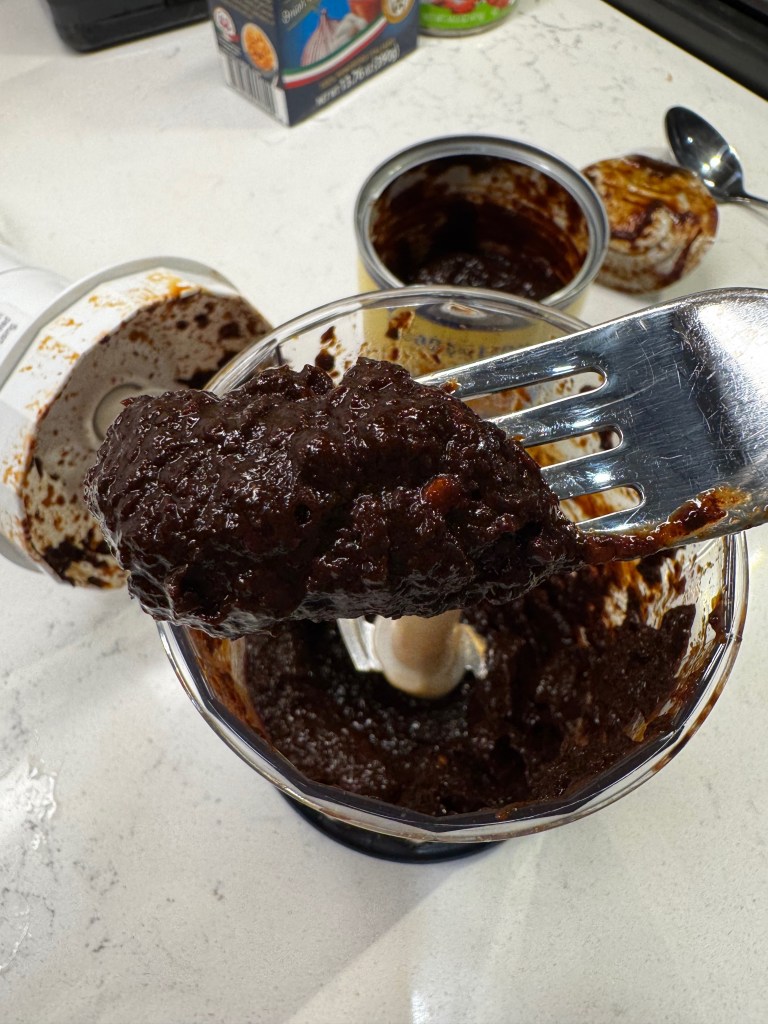
I roasted the sweet potatoes rather than simmering, which deepened the flavor as well as reduced moisture. The seasonings are smoky and aromatic, adding layers of flavor that only get deeper when you stir in the pureed chipotle with adobo sauce. I used about three tablespoons of this dark red paste, but the amount is flexible to match your taste for heat.
As with any good chili, the flavors happen in layers.
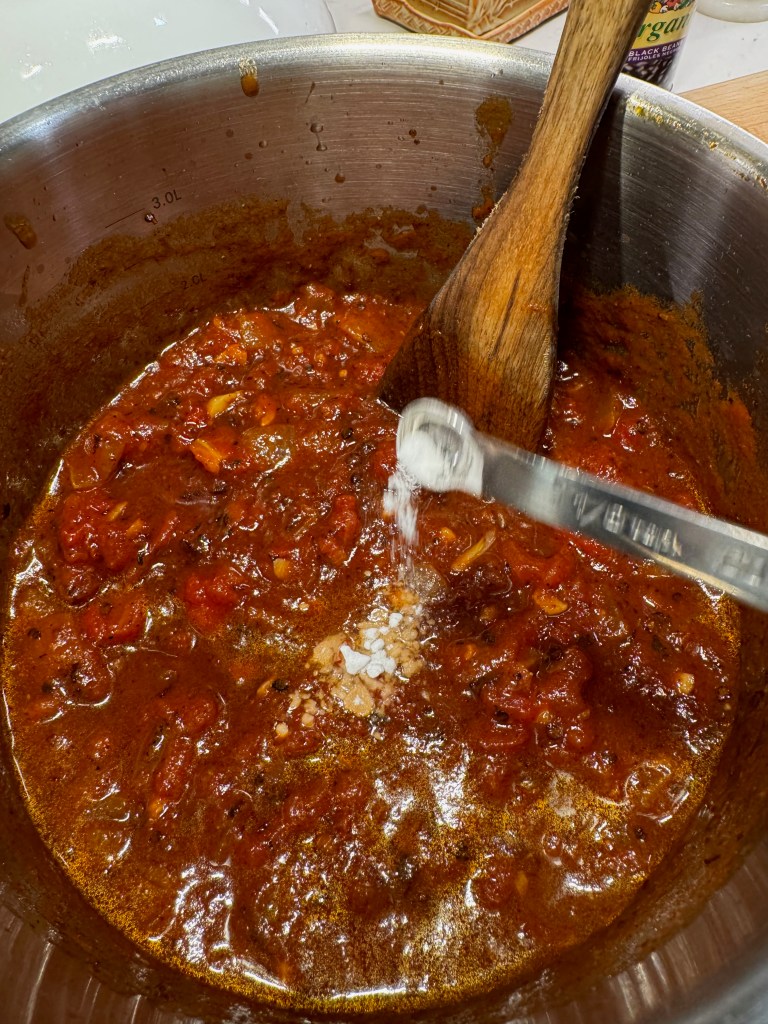
Fire roasted tomatoes added another layer of smokiness, but also a major hit of acid alongside the crushed tomatoes that went in with it. Next, a smidge of baking soda. This may seem like a strange addition to a pot of chili, but its alkaline nature helps soften the too-bright acidity of so many tomatoes. Let it bubble and foam for a minute or so, then carry on with the rest of the recipe.
Fire roasted tomatoes and crushed tomatoes add a lot of acidity. A pinch of baking soda keeps it in check.
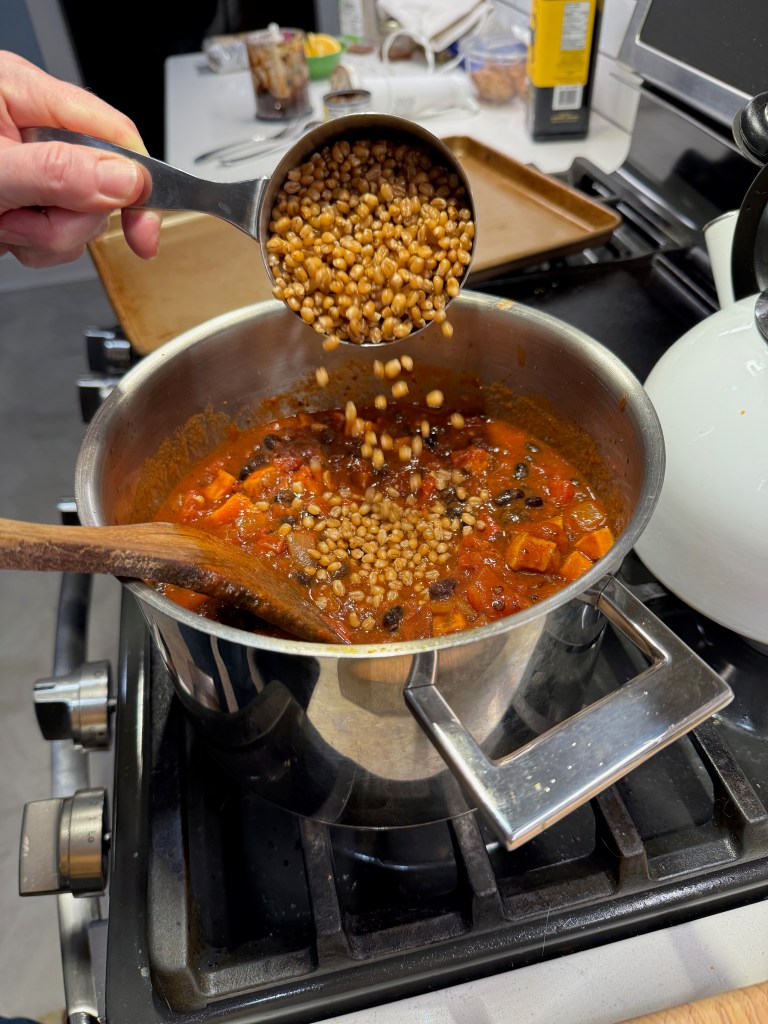
Black beans, the roasted sweet potatoes and cooked wheat berries finished this off, and it was thick, hearty and satisfying— all the things I wanted, none that I don’t. I suppose you could sub in pinto or kidney beans, but I love the earthiness of black beans. If you’re gluten free, you’d have to sub something for the chewy whole grain wheat berries— maybe cooked quinoa or buckwheat groats.
The roasted sweet potatoes hold their shape in the chili, and wheat berries lend a satisfying texture.
Game day food is notoriously heavy and calorie-laden, but this chili is scoring big on flavor and fiber, without saturated fat or excess calories. Did I mention that it's also vegan? Plant-based for the win!
Ingredients
2 large sweet potatoes, peeled and cut into cubes
4 Tbsp. extra virgin olive oil, divided
1 medium-large sweet or yellow onion, chopped
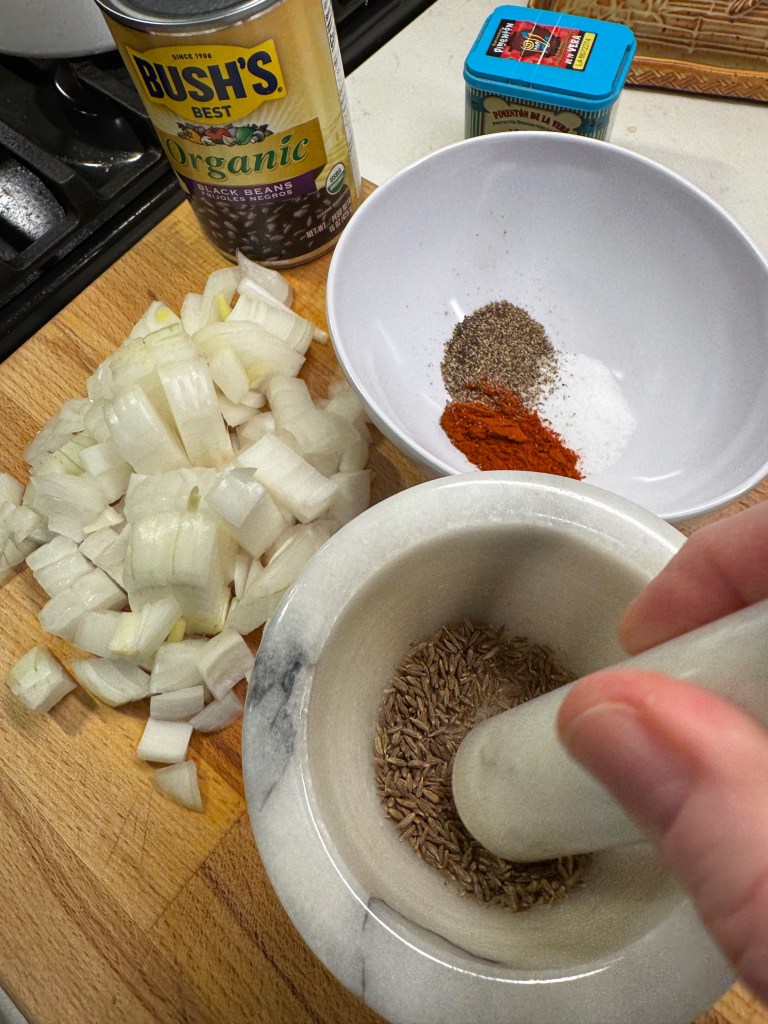
4 cloves garlic, smashed and sliced thin
1 tsp. kosher salt
3/4 tsp. cumin seed, crushed into powder
1 tsp. smoked paprika
3/4 tsp. ancho chile powder
About 14 twists freshly ground black pepper
2 to 4 Tbsp. pureed chipotle with adobo (see notes)
28 oz. canned fire roasted diced tomatoes
14 oz. can or carton crushed tomatoes
1/8 tsp. baking soda (optional, see notes)
2 cans low-sodium black beans, drained
1 cup cooked wheat berries (see notes)
Notes: The chipotle puree is made by dumping an entire can of chipotles in adobo into the small bowl of a food processor and blending until smooth. The flavor is ultra-smoky and deeply hot. You will only need about a third of the total can amount, but the rest can be used in many other southwest-themed dishes.
If the acidity of the tomatoes is too much, add a tiny bit of baking soda to neutralize it. This doesn’t change the flavor of the chili, it only softens the sharp acid notes of the tomatoes.
If not for the wheat berries, this recipe would be gluten free as well as vegan! If you are sensitive to gluten, omit them entirely or consider substituting with al denté cooked brown rice, quinoa or buckwheat groats.
Directions
Preheat oven to 400° F, with oven rack in center position. Line a heavy sheet pan with parchment paper.
Toss sweet potatoes in two tablespoons of olive oil and spread evenly onto parchment-lined sheet pan. Season with kosher salt and pepper. Roast for about 40 minutes, until potatoes can be easily pierced with a knife tip and edges are caramelized.
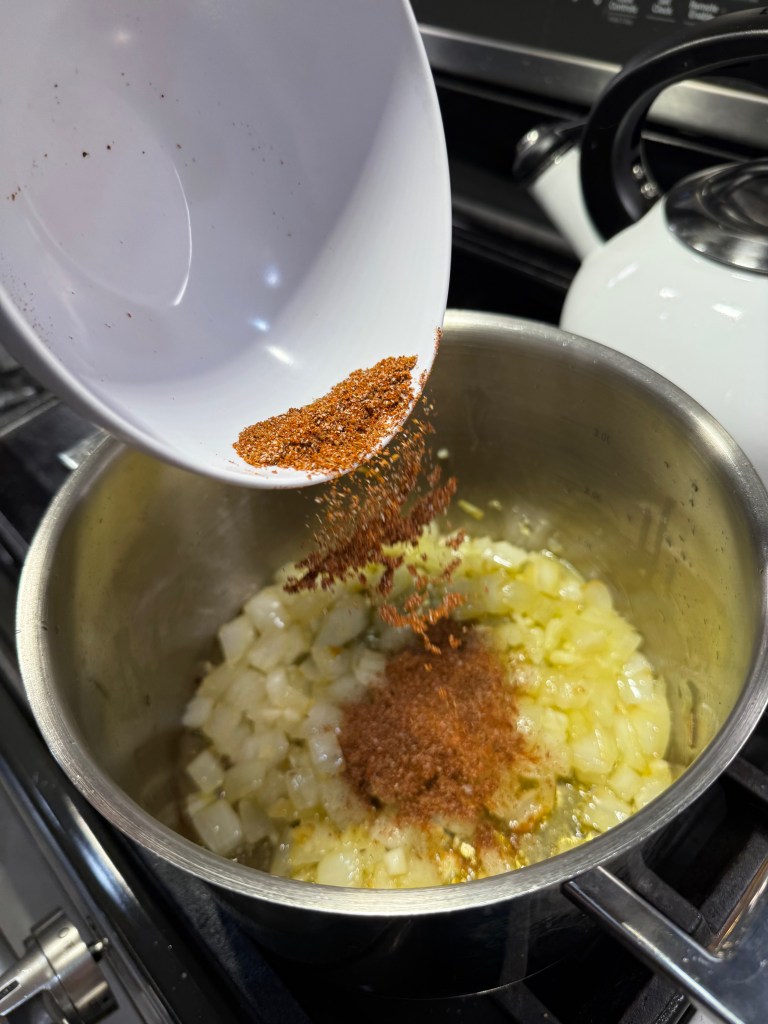
Meanwhile, place a medium, heavy-bottomed pot over medium heat. Swirl in remaining two tablespoons olive oil when pan is hot. Add onions and sauté several minutes, until onions are softened with edges just beginning to brown. Reduce heat, add garlic and stir to heat through.
Combine salt and spices in a small bowl. Sprinkle over sautéed onion mixture and toss to coat. Allow spices to bloom for about two minutes, then stir in chipotle with adobo puree.
Add diced and crushed tomatoes, stirring to combine evenly with seasoned onion mixture. Return heat to medium and bring to a simmer. Stir in baking soda and cook for about one minute.
Add black beans, roasted sweet potatoes and cooked wheat berries. Heat through and serve.
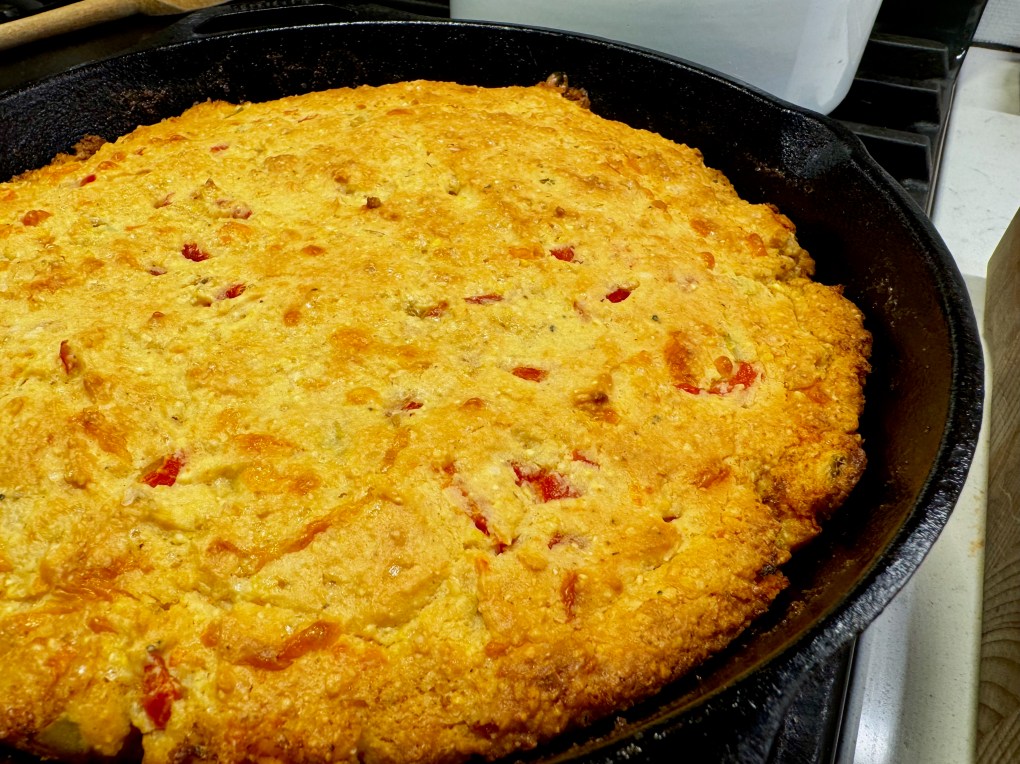
It took me nearly 10 years, but I’ve finally found a way to persuade my husband to appreciate cornbread. I love this humble side for its texture, its subtle sweetness and its perfectly rustic personality alongside a bowl of chili, a hearty Brunswick chicken stew, or even a plate of pulled pork barbecue and baked beans. But the grainy texture of plain cornbread, or maybe its simple flavor, has been a turnoff to Les as long as I’ve known him. As a result, I don’t make cornbread very often because I can’t (or shouldn’t) eat the whole batch myself. But now!
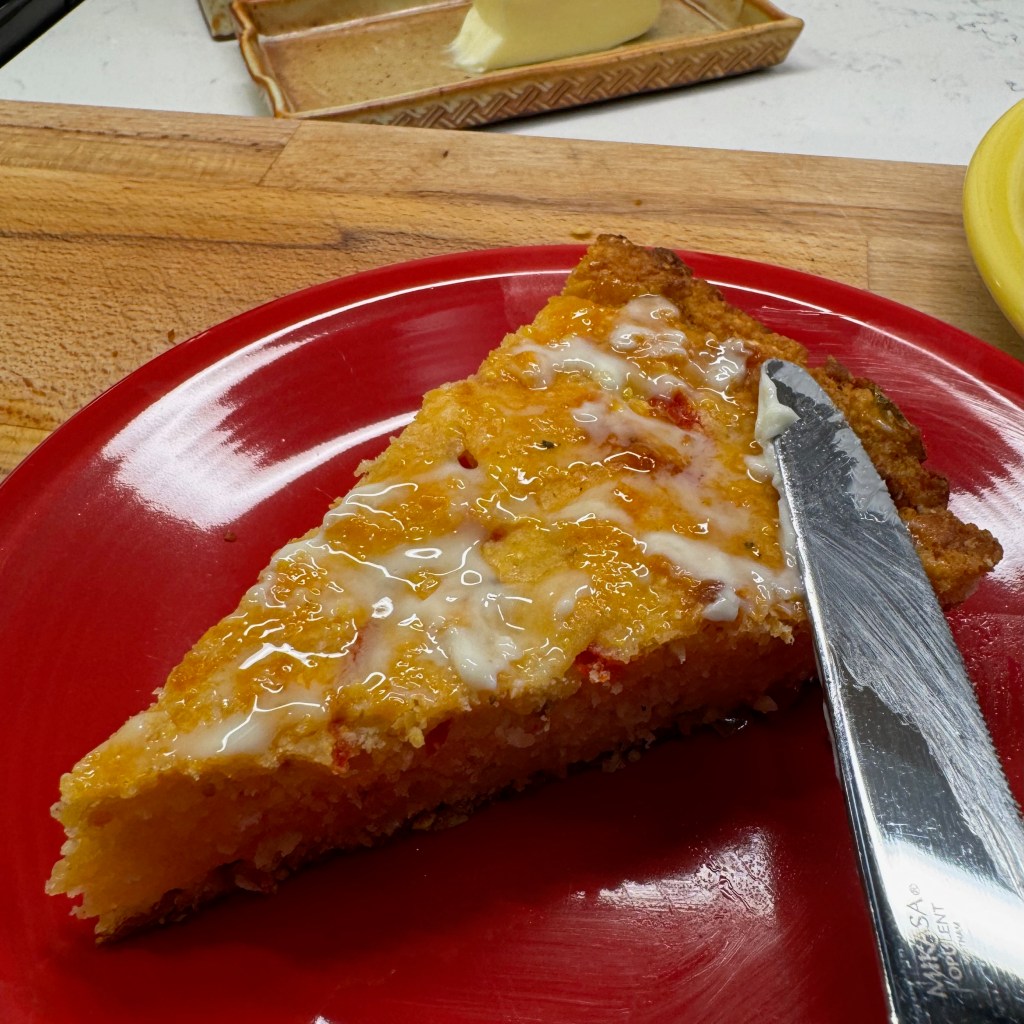
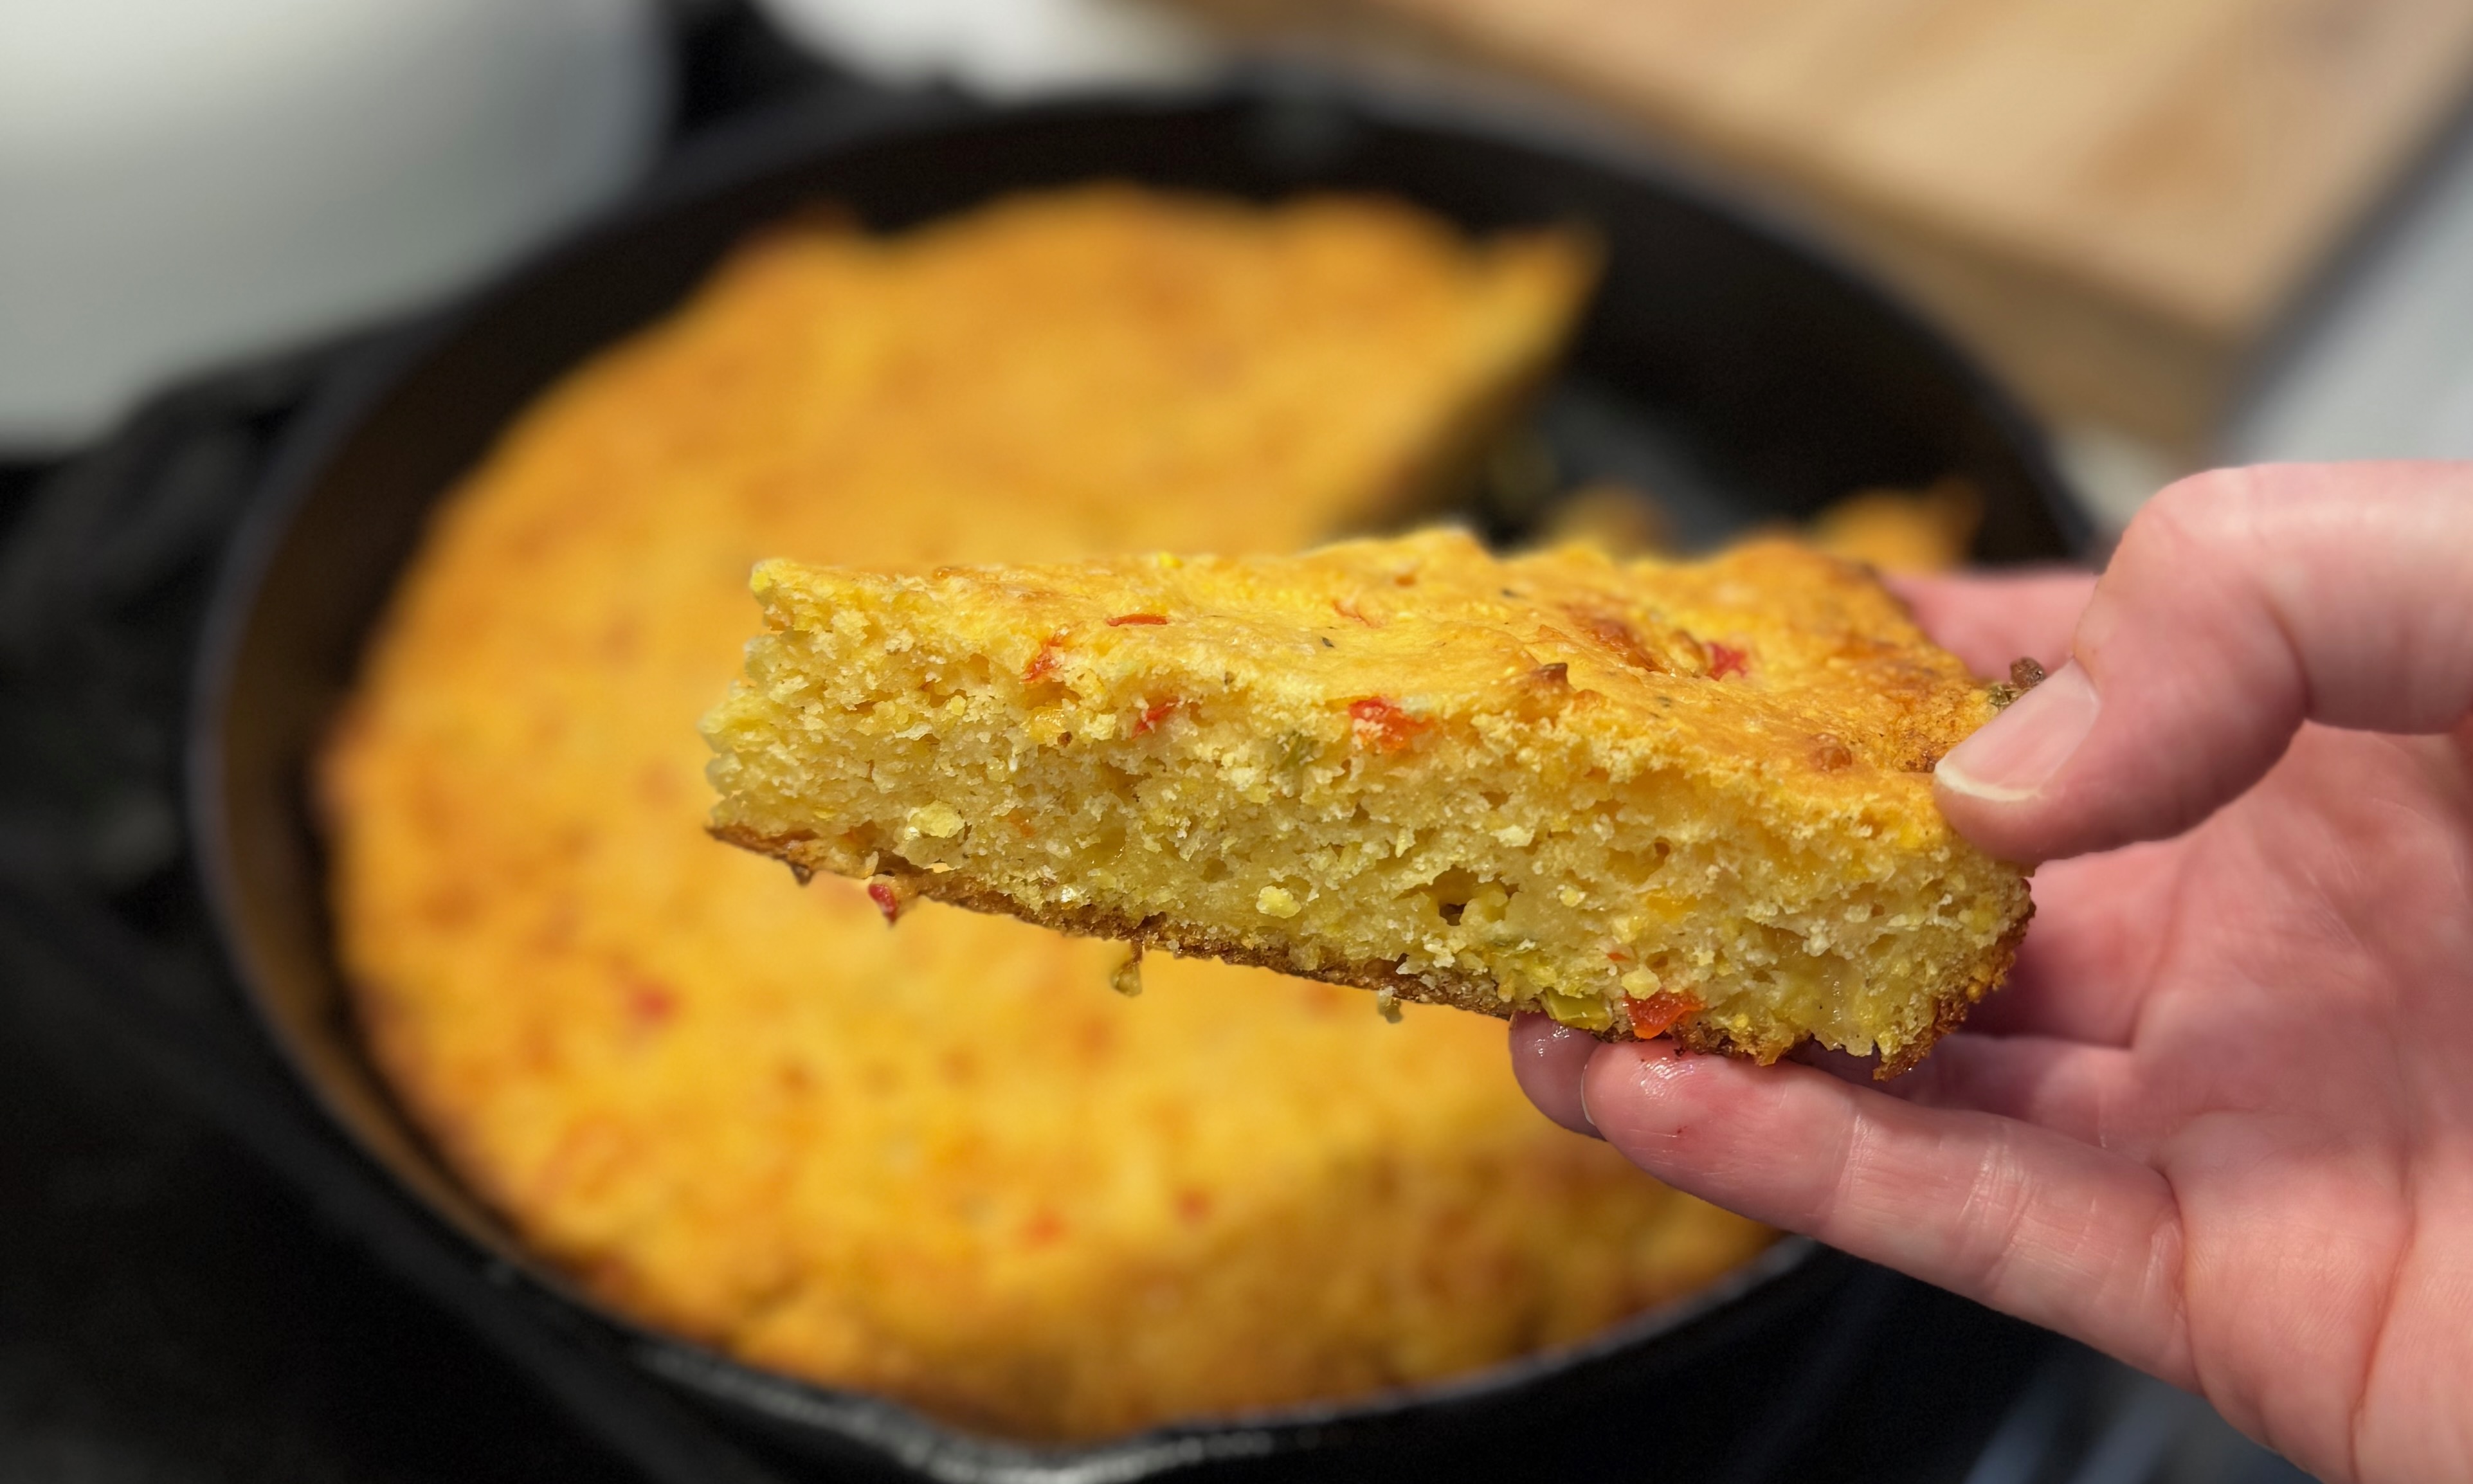
I highly recommend enjoying this warm! 😋
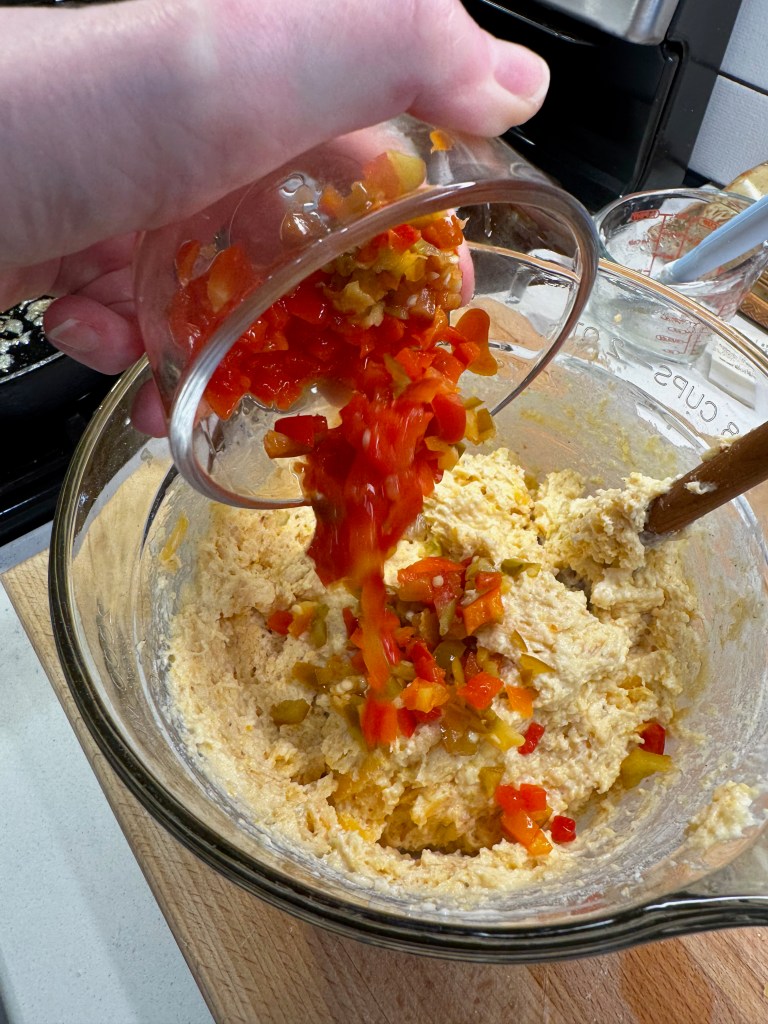
This version, featuring tangy pimentos, hot cherry peppers and a hefty amount of cheddar cheese, has made my husband a believer. He actually liked it! This is my adaptation of a recipe that dropped into my email inbox a few weeks ago from NYT Cooking. The NYT version called for roasted red peppers and feta cheese— flavors I also love, and a light bulb went off in my head, perhaps because Les had made a batch of pimento cheese the weekend before New Year’s, and I just knew that the same pimento cheese flavors would work in a cornbread. Did they ever!
What I changed to make it mine
The substitution of pimentos and cheddar is straightforward, but there were a couple of other things I modified from the NYT recipe to suit our preferences. I cut the suggested sugar in half, as recommended by many people who took time to comment on the NYT recipe. Many southerners do not use sugar in their cornbread at all— weird, given that we put it in literally everything else, but I’ll let the dissenters duke that out in the comments. My version had a quarter cup, and that was plenty.
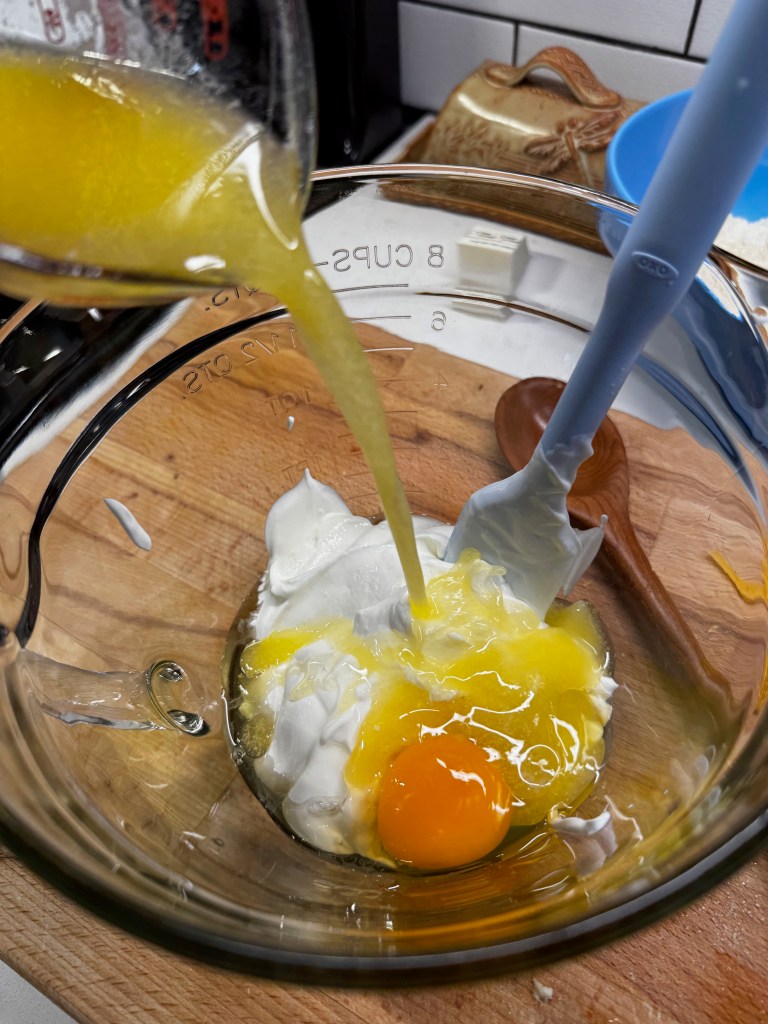
The only ingredients missing in this picture are melted butter and an egg.
Les loves spicy foods, so along with pimentos, I subbed in some hot cherry peppers, which made for a nice flavor kick. I only had a bit of sour cream, so I went halvsies with plain Greek yogurt. I’m grateful that the two are almost always interchangeable, but in this case, I had a very heavy batter so I splashed in a bit of buttermilk, too. It’s good to be able to pivot in the kitchen!
This was a much thicker batter than I’m used to, but it turned out amazing!
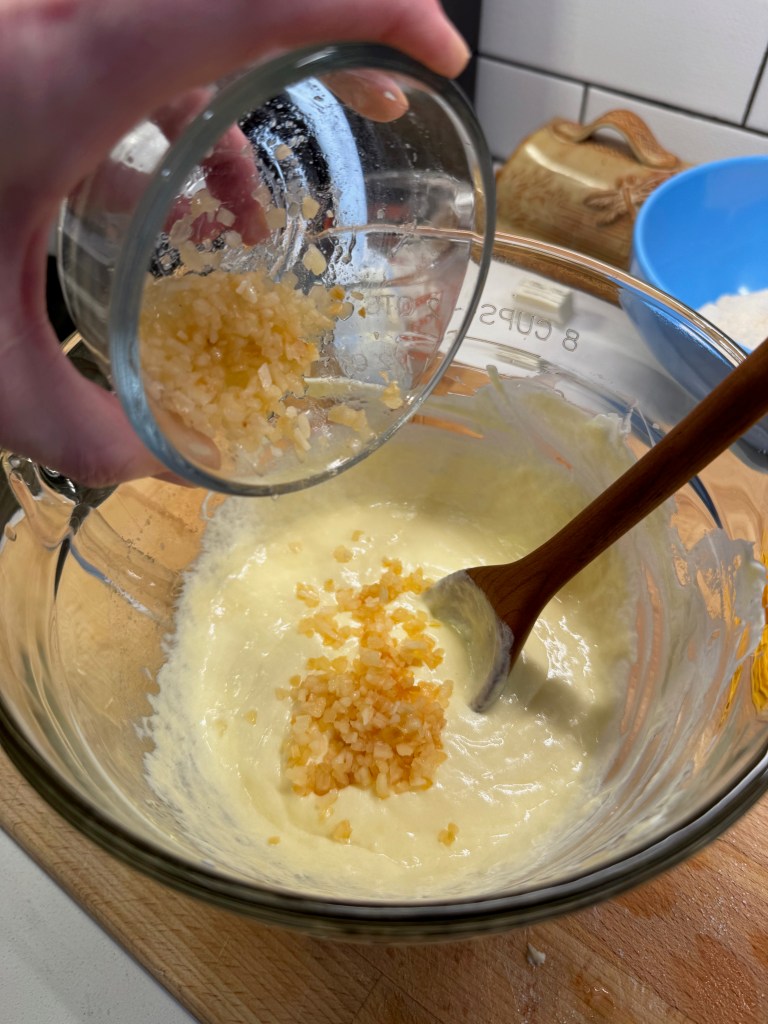
A quick shake of sweet paprika in the dry ingredients lent additional color and a touch of smoke. I didn’t want green flecks in my cornbread, so minced onion stood in for the scallions called for in the NYT Cooking recipe. I rehydrated the onions with hot water so that they wouldn’t steal moisture from the batter. If I’d had a Vidalia onion, that would have been even better— sautéed first, of course.
Bringing it all together
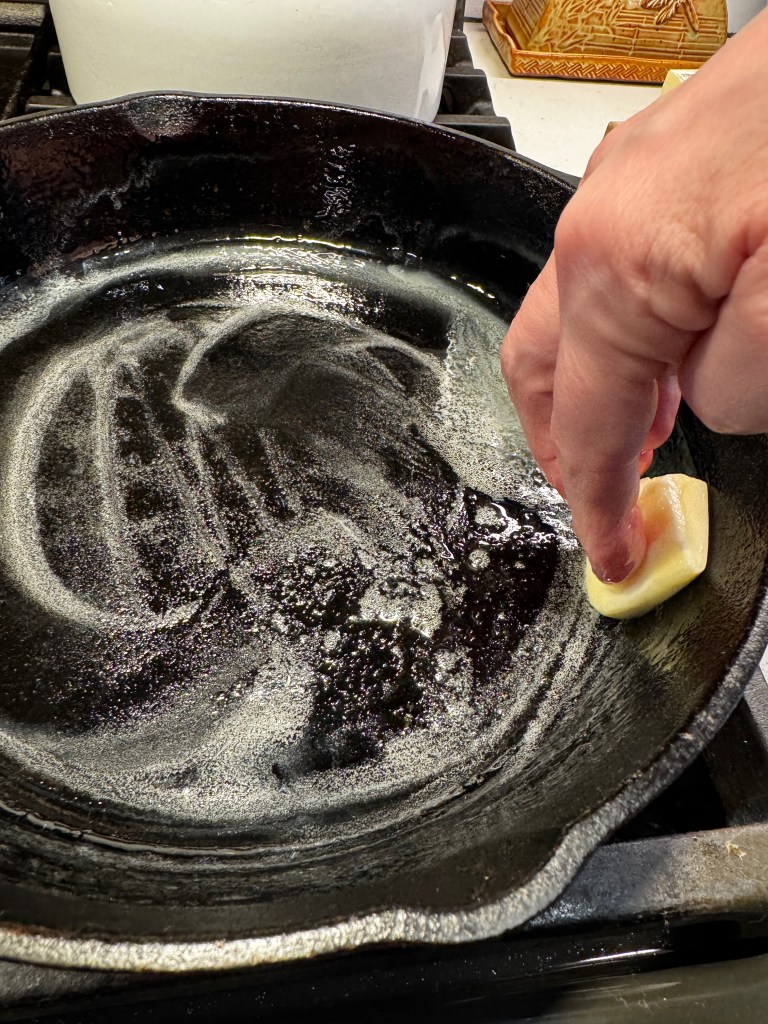
Finally, rather than mess with lining a baking dish with parchment, I chose to bake my cornbread directly in a cast iron skillet. I love the crusty edges achieved this way, and in the South, everything is better in cast iron. To be successful with this, melt two tablespoons of butter in the skillet until it’s bubbly and starting to brown. Then pour the batter into the hot skillet and transfer it to the oven for the recommended baking time, 35 minutes.
The hot skillet makes this extra good, but you could also bake it in a buttered square dish.
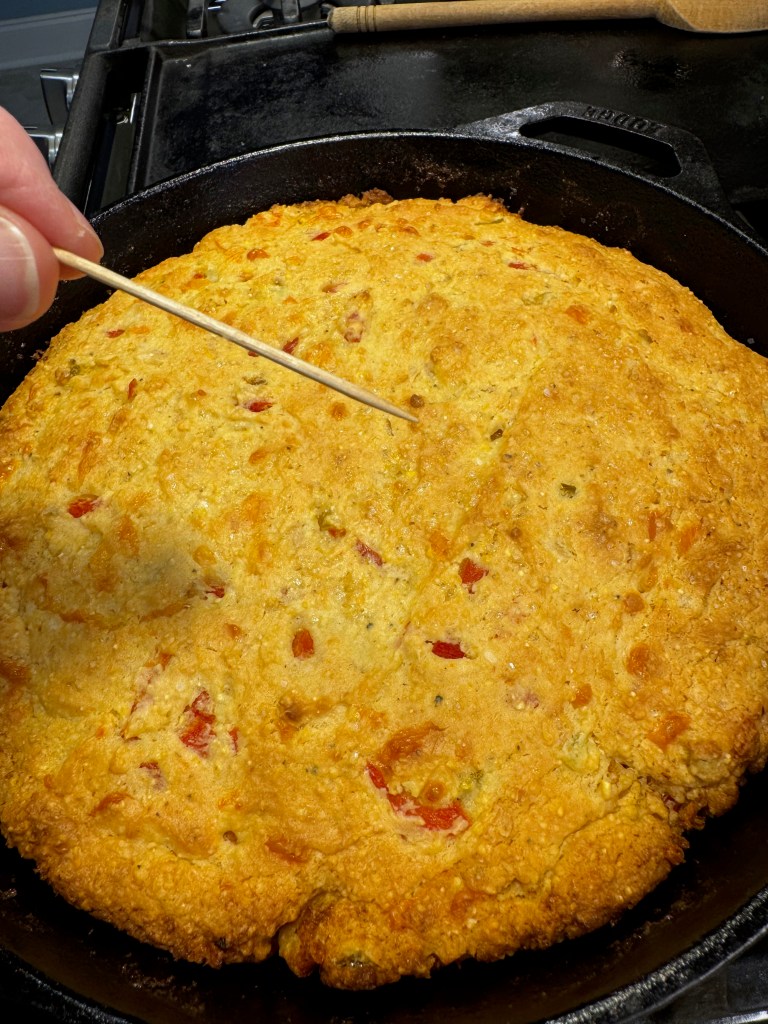
This cornbread smelled amazing when I pulled it from the oven. The cheddar melted throughout, and the pimentos and hot cherry peppers gave the whole thing a “pimento cheese” vibe. The only thing I plan to do differently next time will be trade the melted butter for mayonnaise, which will serve the same purpose and bring it even closer to true pimento cheese.
A traditional “good luck” meal for New Year’s in the U.S. South.
Our pimento cheese cornbread was a perfect side to our New Year’s Day “good luck” meal that also included spicy collard greens and black-eyed pea soup. How would you enjoy it?
Sharp cheddar and diced pimentos have transformed a classic cornbread into something utterly addictive. If you're adventurous, swap in a few hot cherry peppers for even more great flavor.
Ingredients
1 cup all-purpose flour
1 cup medium grind cornmeal
1/4 cup organic cane sugar
1 Tbsp. baking powder
1 tsp. kosher salt
1/4 tsp. sweet paprika
6 Tbsp. butter, melted
1/2 cup sour cream
1/2 cup Greek yogurt
1 large egg
2 tsp. dried minced onion, rehydrated in hot water
1/3 cup pimentos, drained (or mix it up with diced hot cherry peppers)
3/4 freshly shredded extra sharp cheddar
1 tsp. coarse sea salt for sprinkling on batter before baking
2 Tbsp. cold butter, for cast iron skillet
Notes: You may need to adjust the amounts of sour cream or Greek yogurt, given that consistency of these ingredients varies from brand to brand. If your batter is too thick, consider stirring in a couple tablespoons of milk or buttermilk so that the dry ingredients can be fully incorporated.
Directions
Preheat oven to 375° F, with rack in center position. Place a 10-inch cast iron skillet over medium-low heat and add cold butter, rubbing the butter along the side of the skillet to grease it. Keep the skillet on low heat while you prepare the batter.
Whisk together flour, cornmeal, sugar, baking powder, salt, pepper and paprika. Set aside.
In a large mixing bowl or batter bowl, combine sour cream, yogurt, egg and melted butter. Stir in rehydrated onion.
Stir dry ingredients into wet mixture, half at a time, only until flour is fully incorporated. If batter is too thick or dry, don’t hesitate to stir in a splash of milk. Use a silicone spatula to fold in the cheddar cheese and pimento/pepper mixture.
The butter in the skillet should be completely melted and beginning to brown. Transfer batter to the hot skillet and lightly smooth the top with a spatula. Sprinkle coarse salt over the batter and bake 30 to 35 minutes, until edges are crispy and center passes the toothpick test. Serve warm, and then cool leftovers completely before wrapping and storing for up to three days.
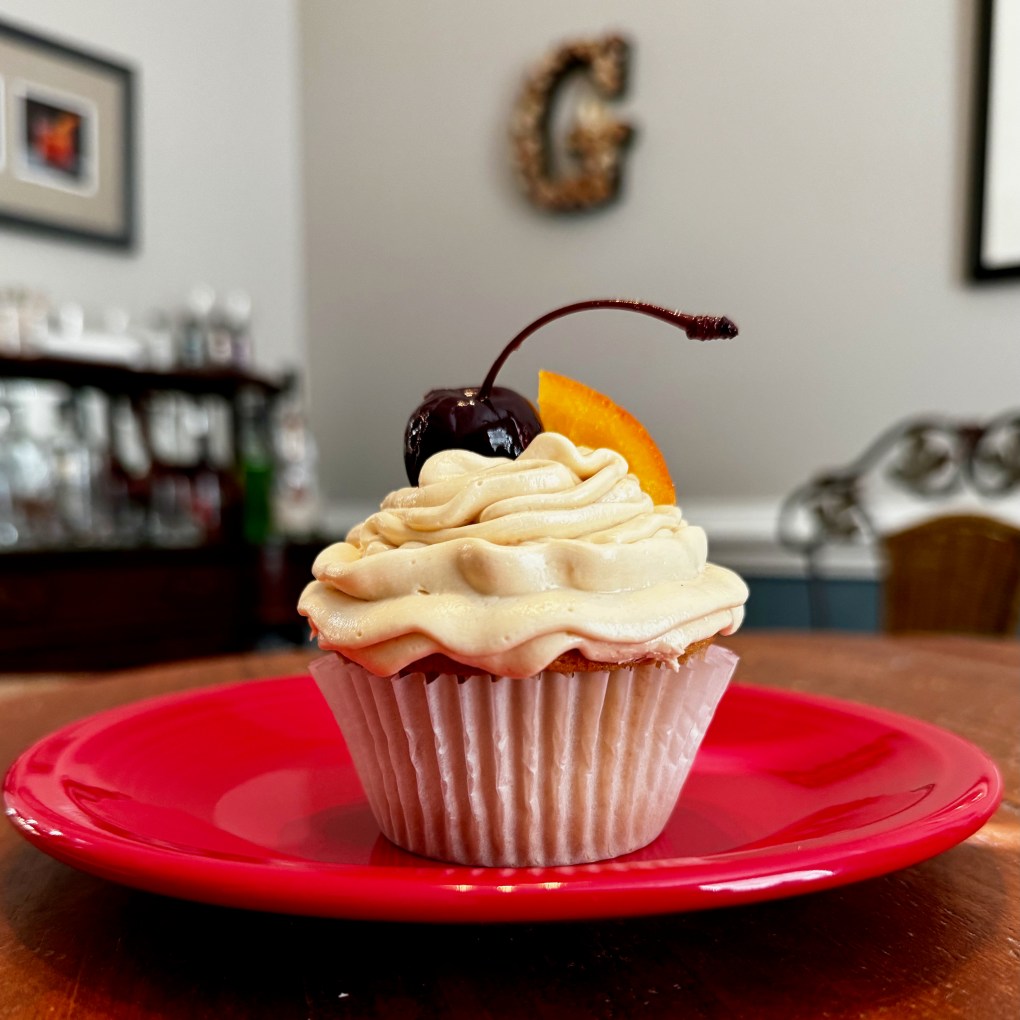
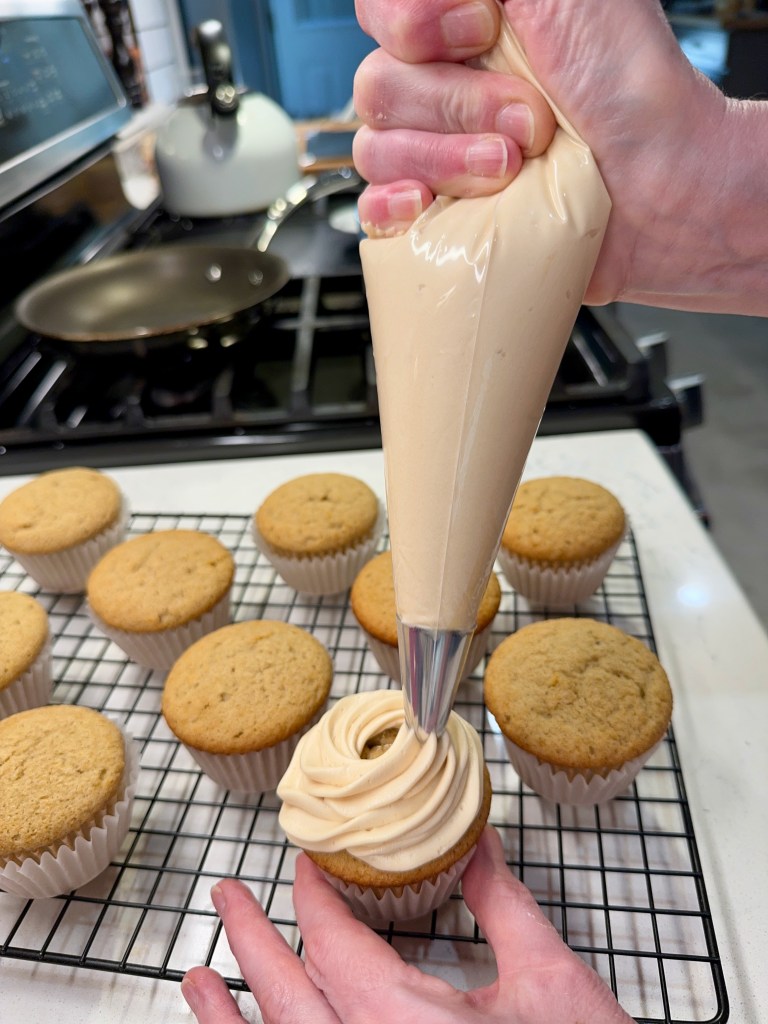
When I say these are old-fashioned cupcakes, I don’t mean old-fashioned like Grandma used to make. Unless Grandma was a whiskey-shooting wild child who liked taking her crazy ideas to the stand mixer so she could have her cake and drink it, too. In which case, yeah, they’re that kind of old fashioned. It’s the kind of grandma I’d want to be.
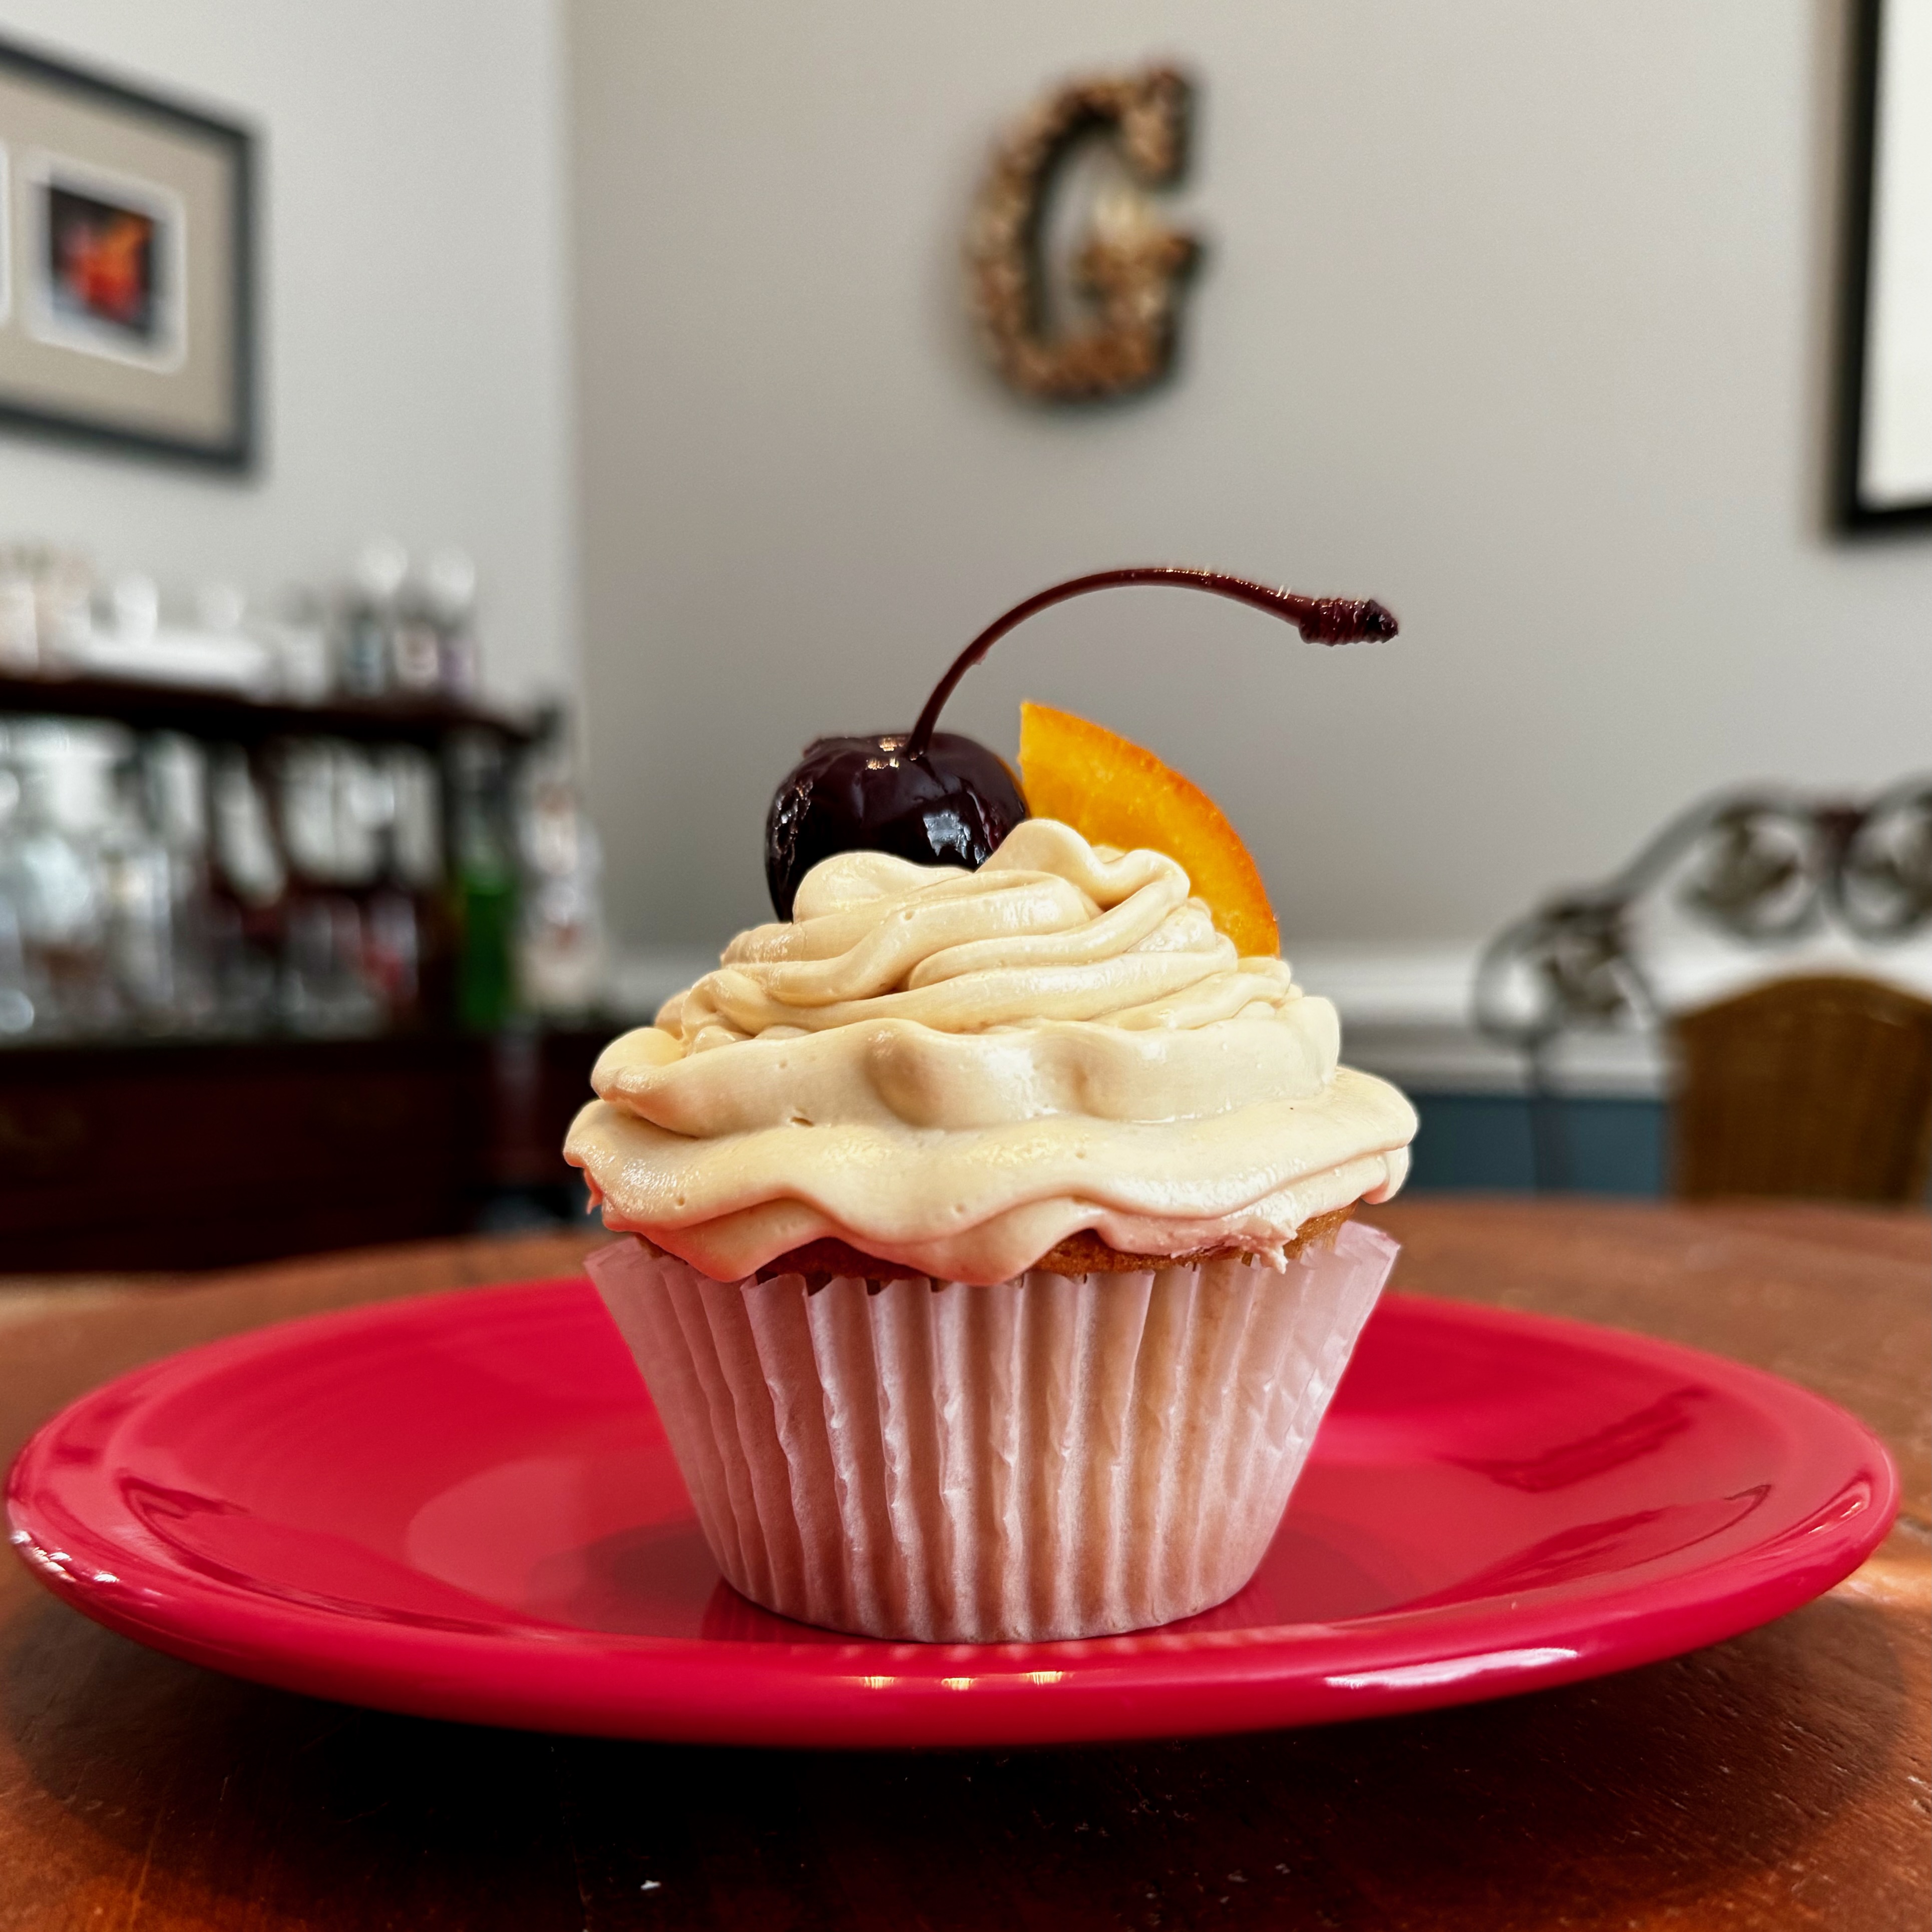
You might want to order another round.
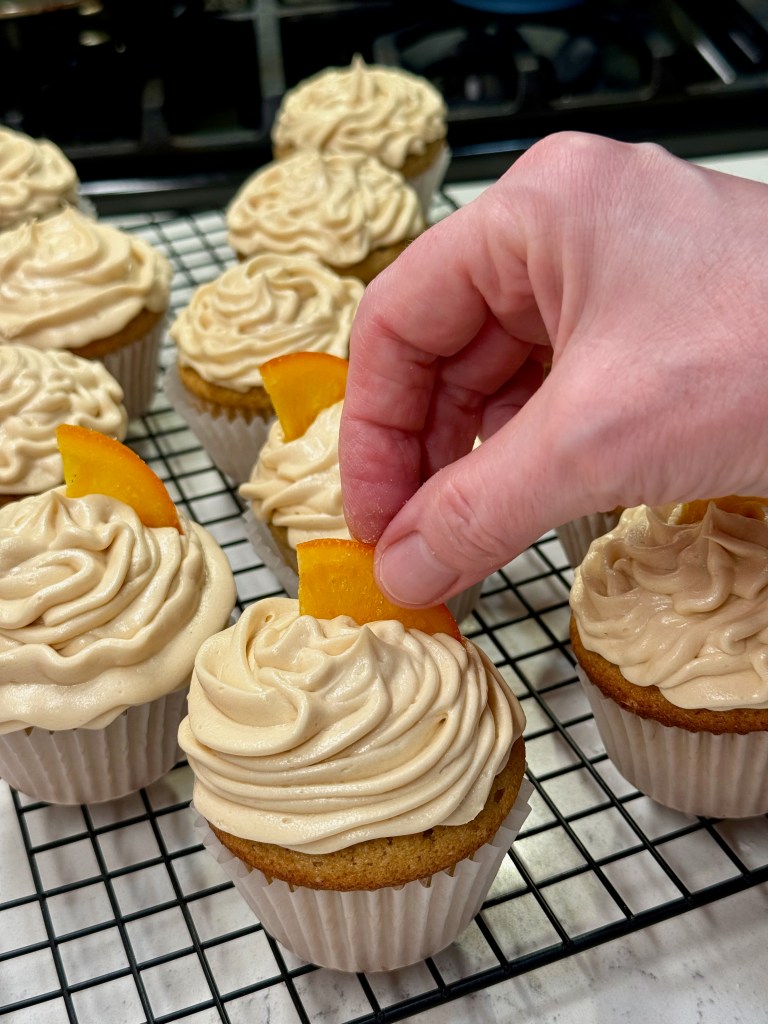
You can bet your booty there’s bourbon in here— or, in this case, Gentleman Jack whiskey (I’ll explain this choice in a moment). And the frosting? Also boozy, with a generous splash of blood orange bitters and a shot of caramel flavor. Garnished with a candied orange wedge and a cocktail cherry, of course.
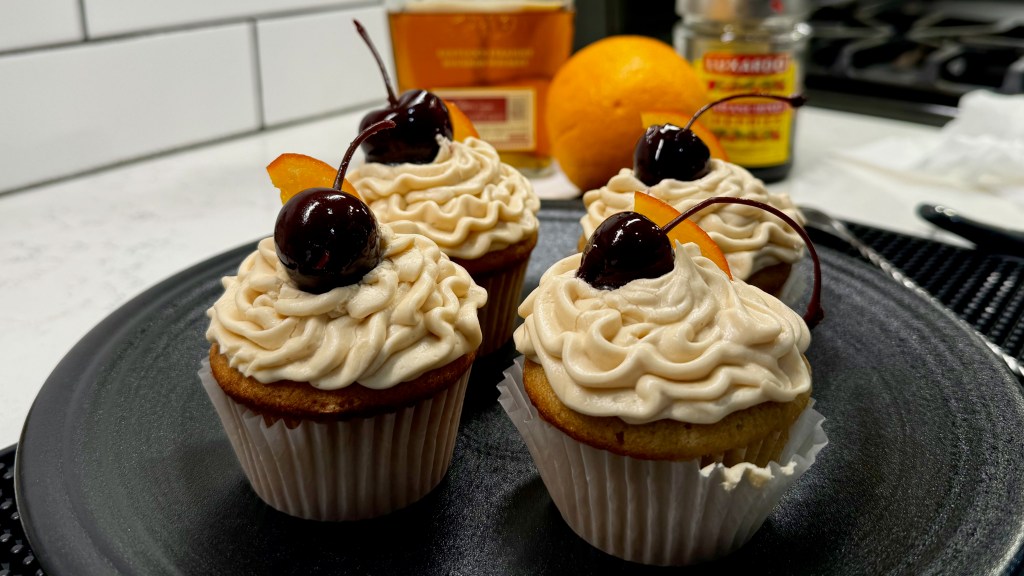
For best results, add the cherries just before serving.
I started thinking about these when I baked this year’s batch of mint julep cupcakes for Kentucky Derby, and I will admit that the result of these old fashioned cupcakes exceeds even what my taste buds imagined. They really do taste like the cocktail! The best thing about them is that, despite the complex flavor arrangement, they are surprisingly easy to make.
What goes into an Old Fashioned cupcake?
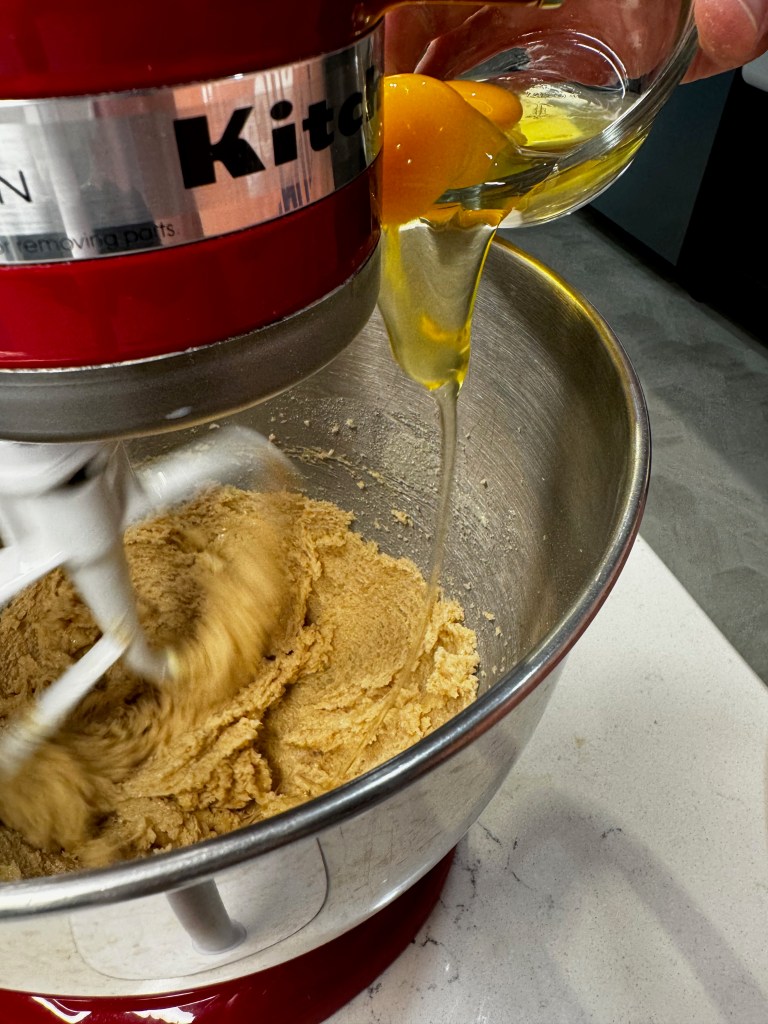
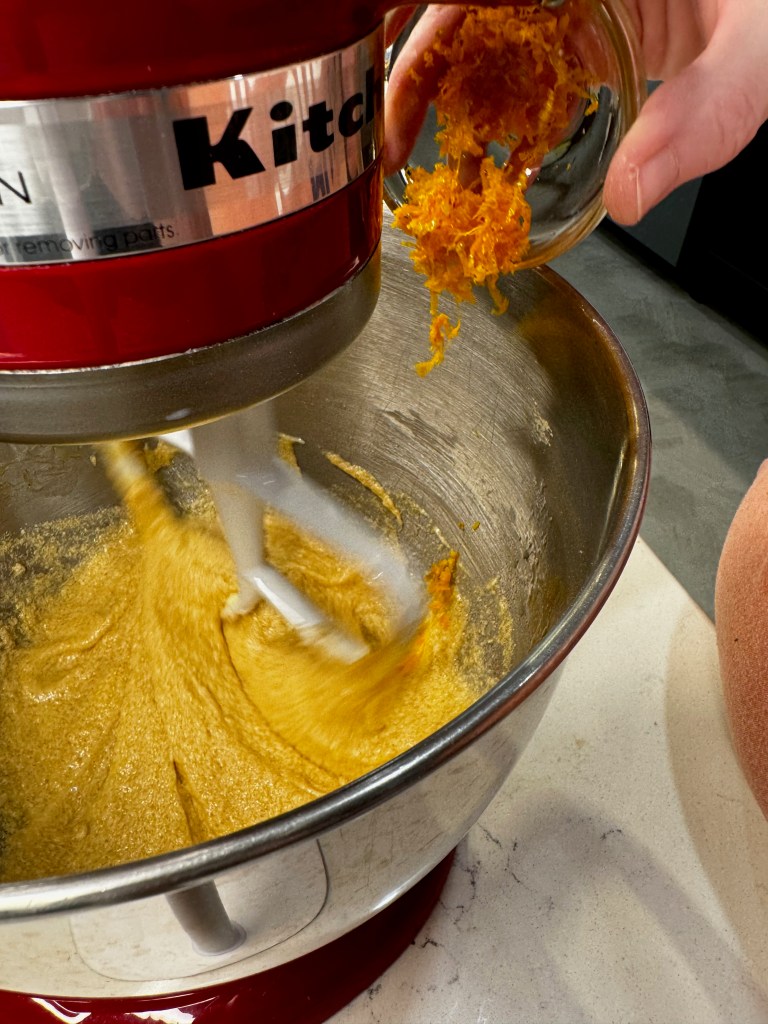
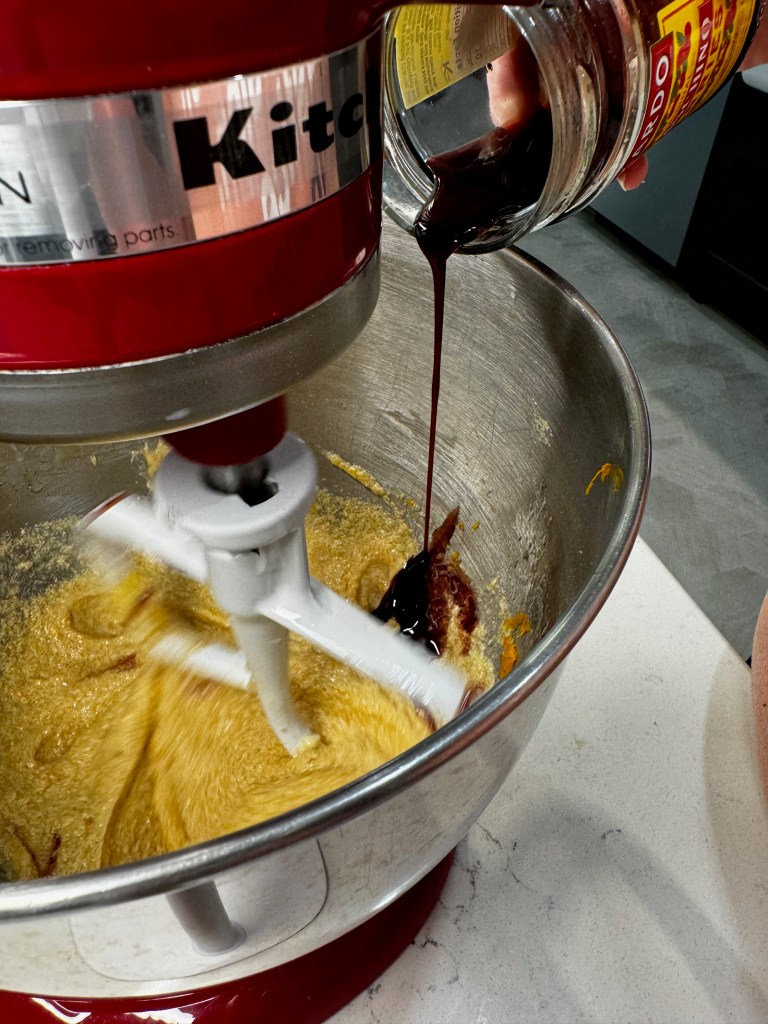
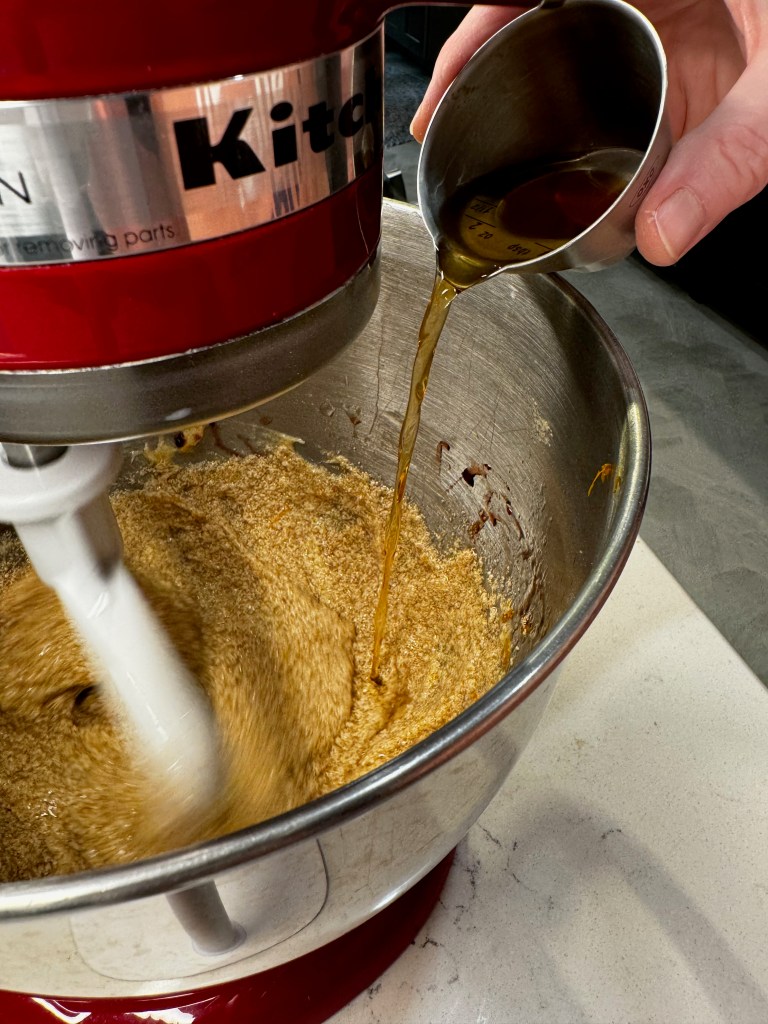
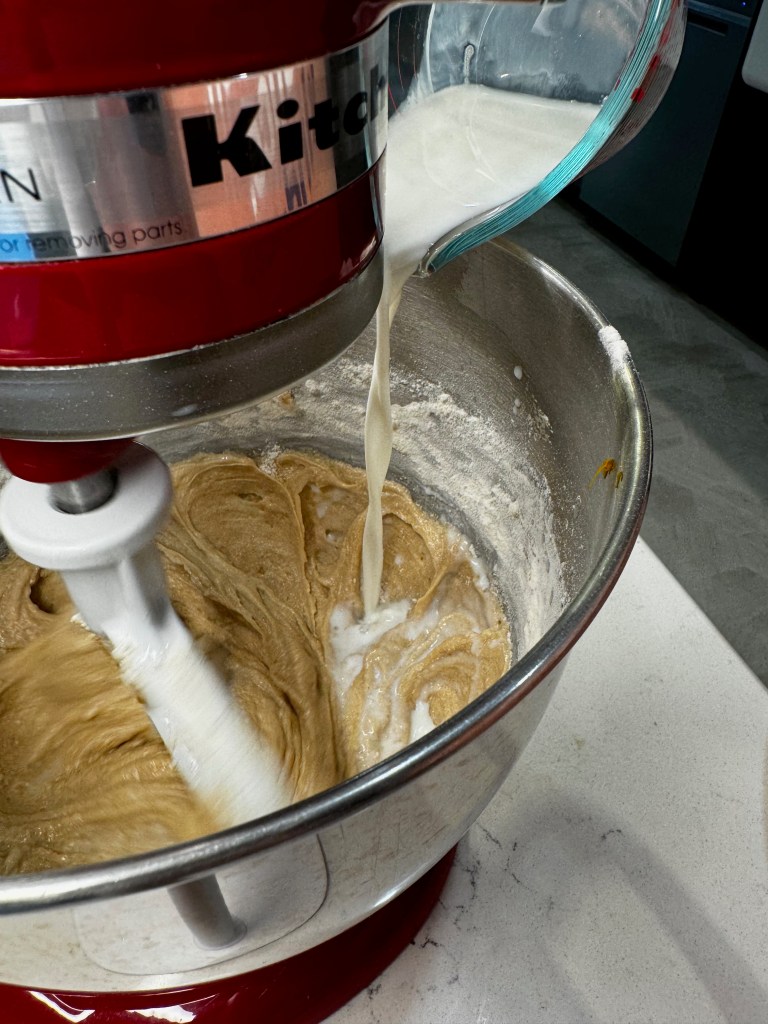
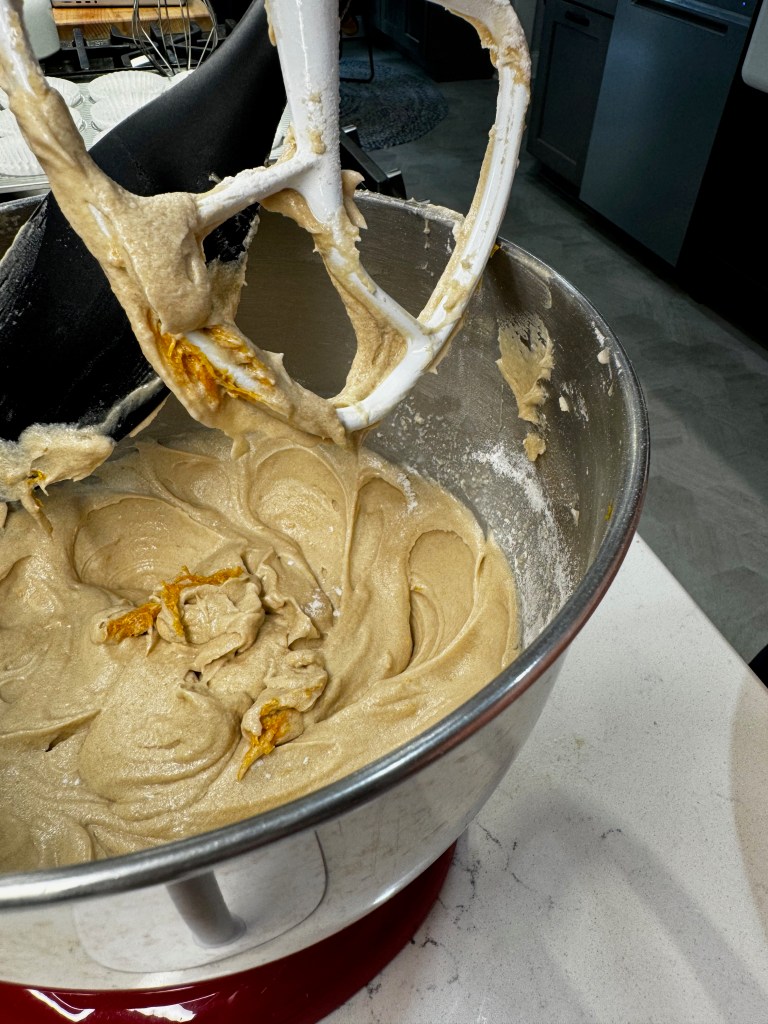
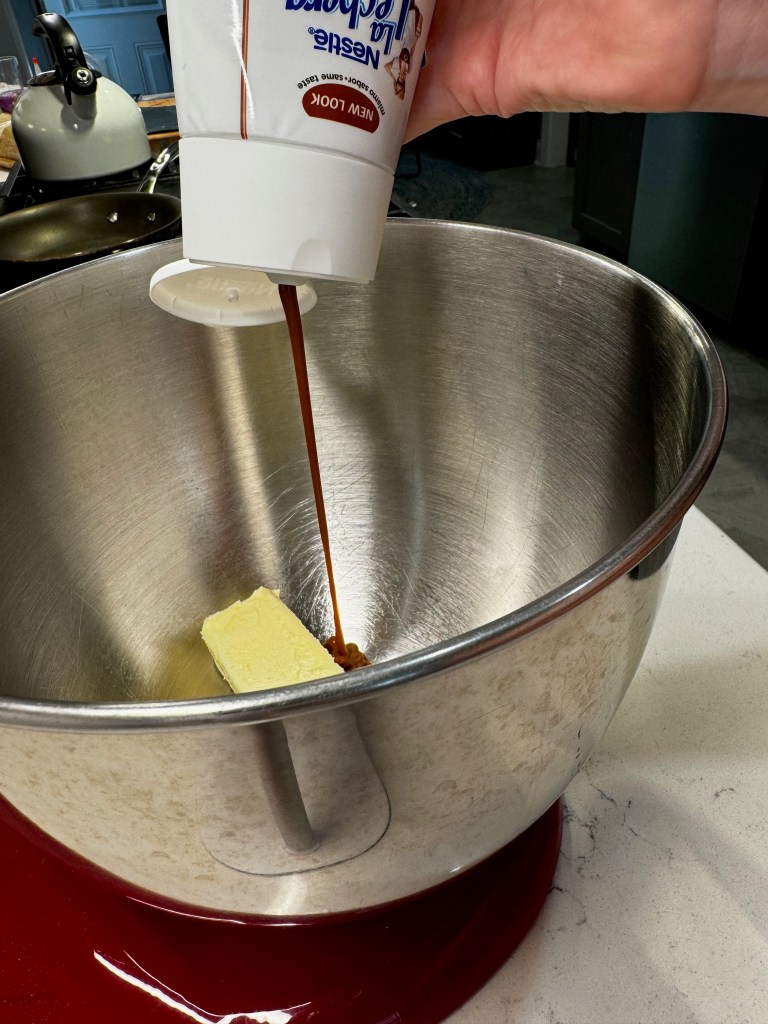
For these grownup-only treats, I followed the formula template of my mint julep cupcakes, but with different flavor enhancers. Butter, brown and white sugars, eggs. And then the old fashioned flavors, in the form of orange zest, cocktail cherry syrup and (obviously) the whiskey. Alternate the addition of dry and wet ingredients, a bit at a time, to ensure even mixing; too much of either at once and you’ll end up overmixing the batter.
This smelled like a cocktail before they even hit the oven.
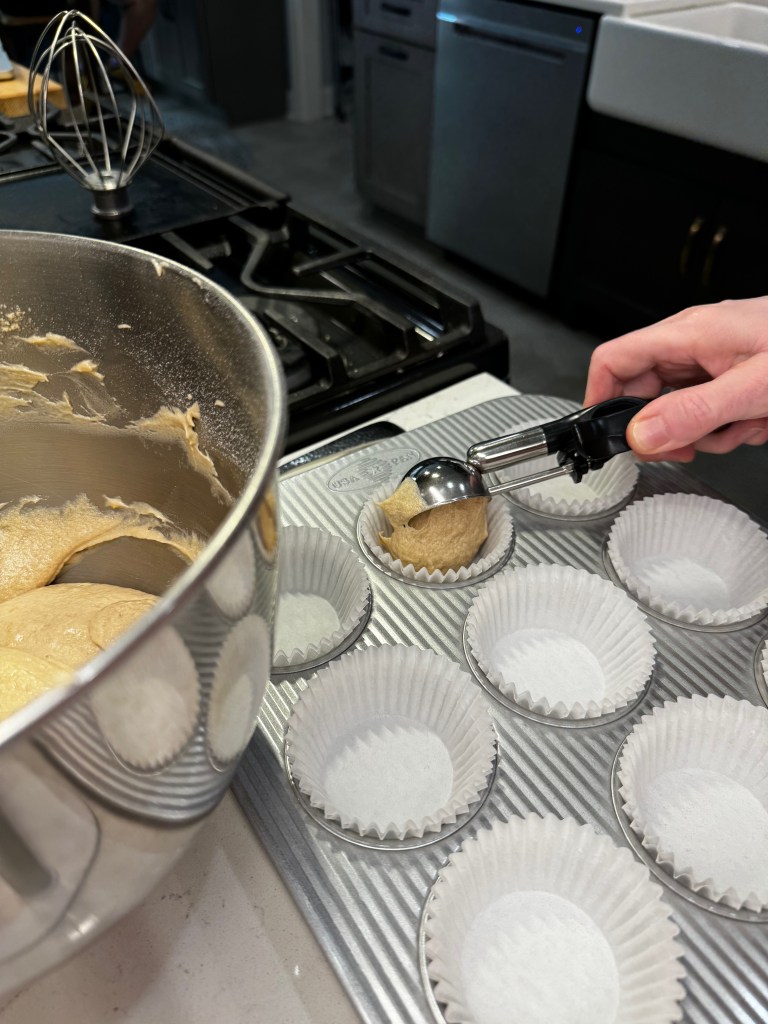
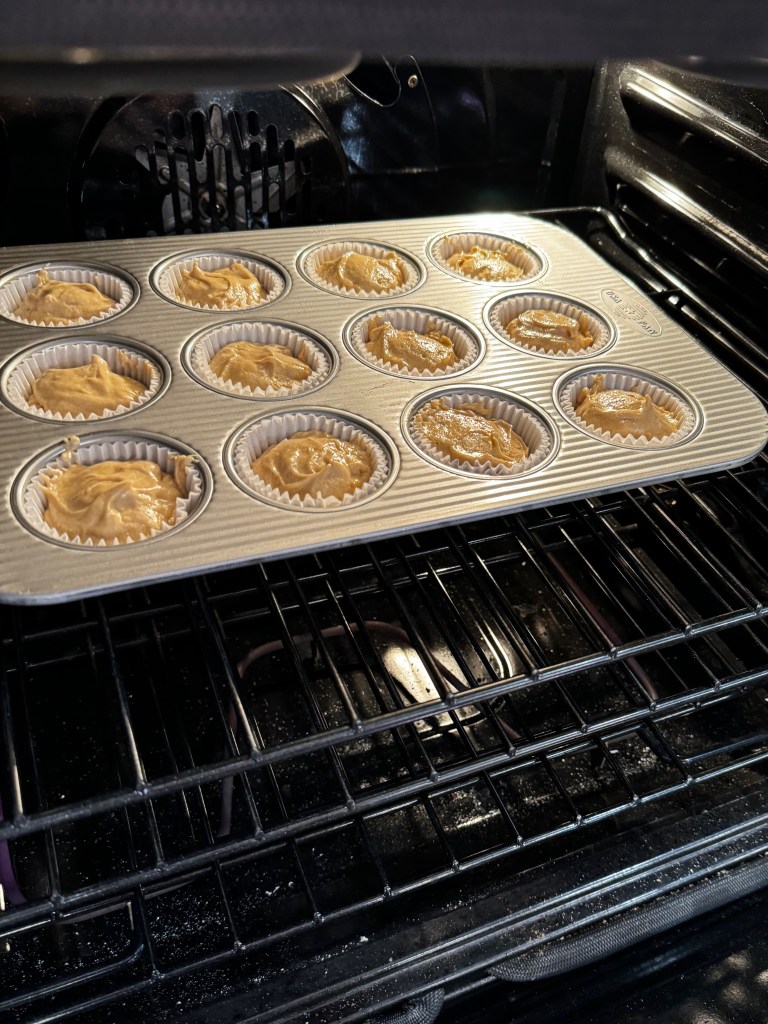
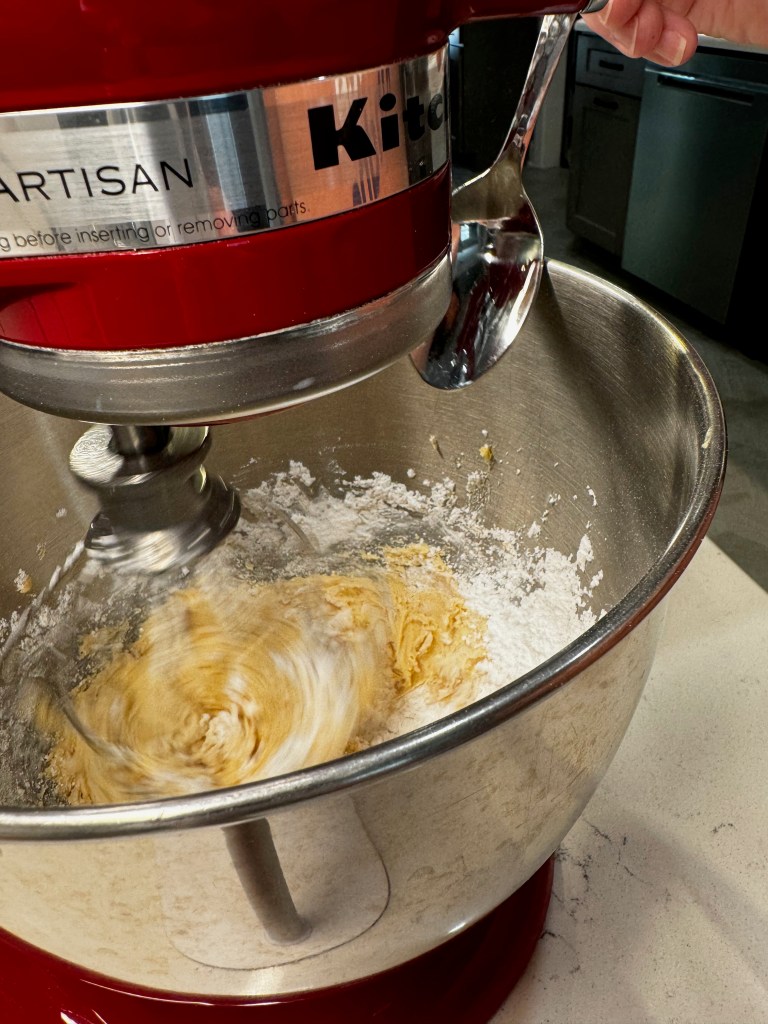
As an aside, do you see what my KitchenAid did with the zest? I guess it’s best to stir that in by hand at the end! Divide the batter evenly among the cupcake liners and bake, then cool for a bit before transferring them to a wire rack.
My cookie scoop made quick, easy work of dividing the batter.
Why whiskey rather than bourbon?
We’ve enjoyed many a cocktail with Gentleman Jack, and I got curious what kept it from being labeled as bourbon. It is, after all, 80% corn and aged in oak barrels, and obviously produced in the U.S., so it certainly qualifies to be called “bourbon,” but the folks at Jack Daniel’s like to point out that their whiskey is charcoal-mellowed, and they consider it to be superior in every way to bourbon.
I don’t necessarily agree, but Gentleman Jack is very easy on the palate, and lower proof (80) than most of the bourbons we usually drink, which makes it lovely with the sweetness of dessert. Boozy, but no harsh bite. Now, let’s talk about the caramel notes in this buttercream!
The icing on the (cup)cake
Buttercream is not as difficult as I once feared—at least, not the kind I make. The butter should be softened at room temperature for about half an hour, so that you can press a fork or finger into it and leave an indent without the butter losing its shape. I use salted butter to accent all the other flavors.
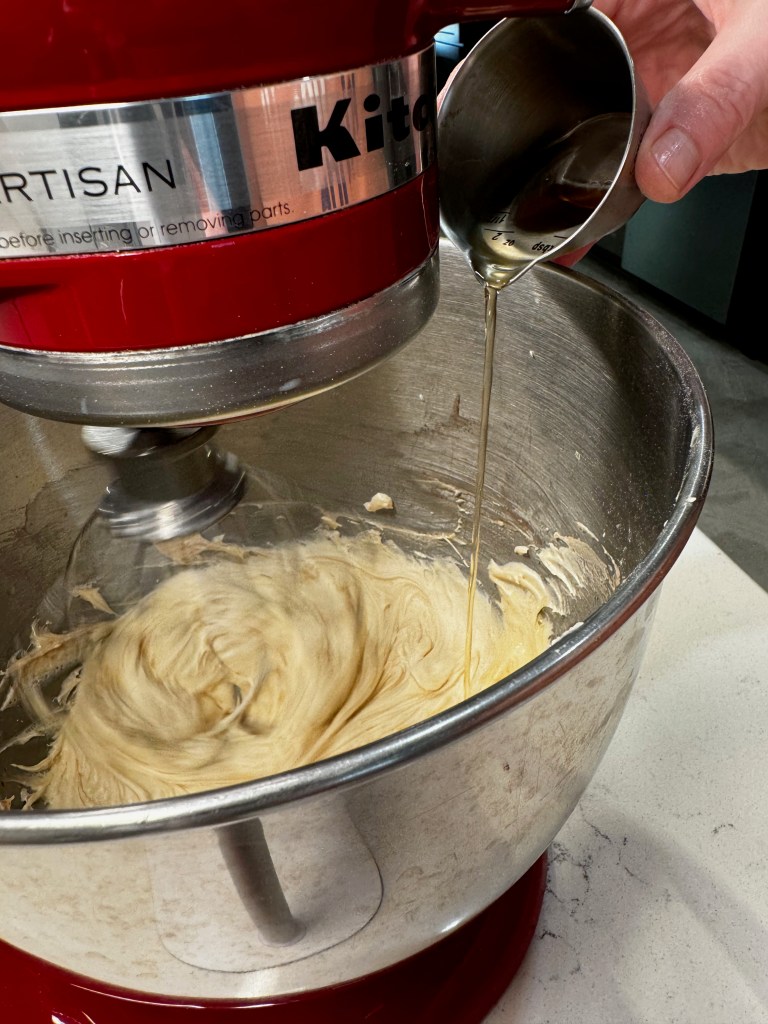
For an “old fashioned” vibe, I spiked the butter with dulce de leche to accentuate the warm caramel flavors of the whiskey. Whip those together with an electric mixer until it is soft and fluffy before adding the sugar. If you go too far with powdered sugar, you can smooth it out again with a few drops of cold heavy cream. You want it swirly, but stable.
Keep a spatula nearby for scraping down the bowl.
The finishing touch for my old fashioned cupcakes was a drizzle of Gentleman Jack and a spoonful of Stirring’s blood orange bitters. These are sold in a larger bottle than typical bitters, and they’re non-alcoholic, which makes them less intense. This is what really gives a “cocktail” flavor to the cupcakes, perhaps even more so than the star ingredient of whiskey. If you can only get regular, alcohol-based bitters, use half as much.
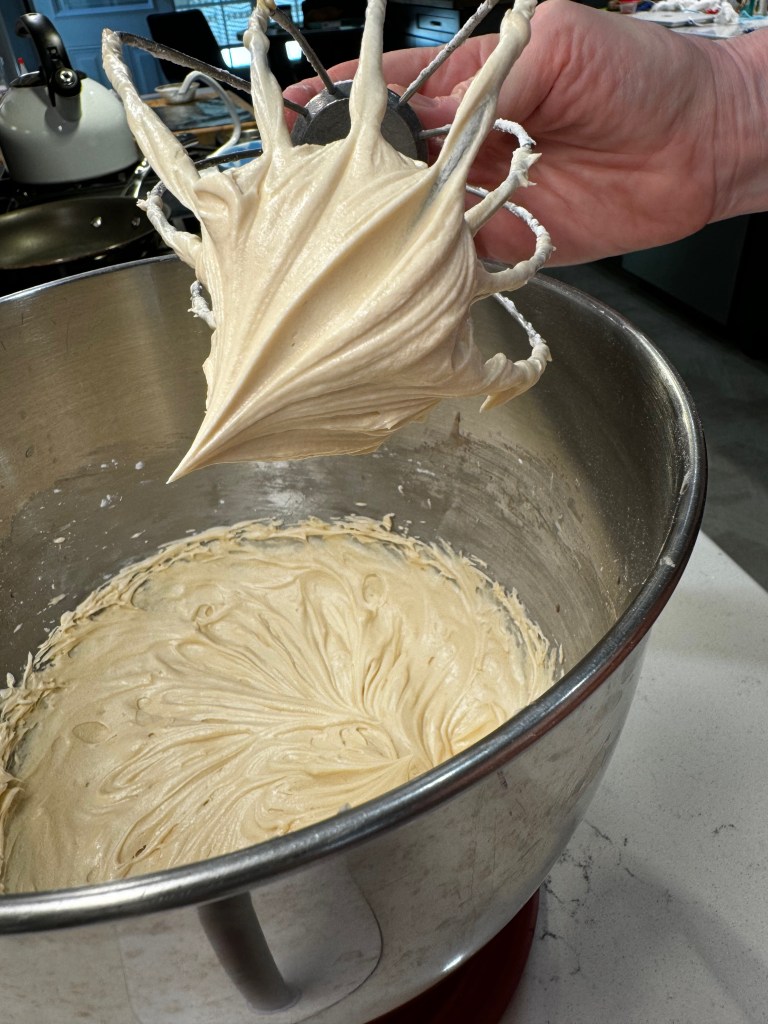
I confess, the buttercream is my favorite part! 😋
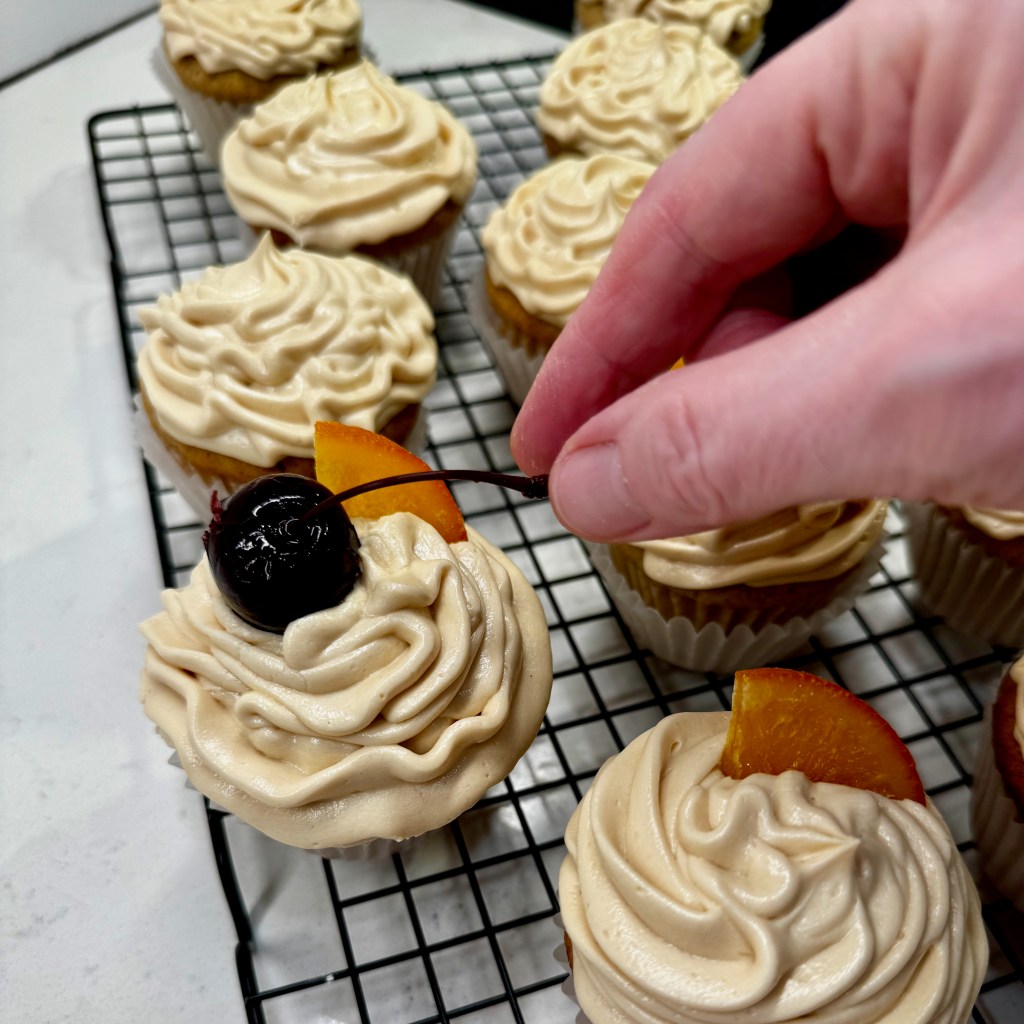
Decorating the cooled cupcakes is easy as well, and if you don’t have a piping bag with a star tip, don’t sweat it. Load up a zip-top bag and snip the corner. Or go old school and swirl a massive amount on with the back of a spoon. Just keep a stack of extra spoons on standby because, no matter how restrained you think you are, you’ll be licking them. Add the candied oranges and cherries when you’re ready to serve. Cheers!
Whiskey, orange zest and cocktail cherries give these easy cupcakes a distinctive, 'old fashioned' flair, complete with orange bitters-accented buttercream and a cherry on top!
Ingredients
1 1/2 cups all-purpose flour
2 tsp. baking powder
2 pinches kosher salt
1/2 cup (1 stick) unsalted butter, softened
1/2 cup sugar
1/2 cup brown sugar
2 eggs, room temperature
1/4 cup Gentleman Jack Tennessee whiskey (or lower proof smooth bourbon)
1 tsp. real vanilla extract
1 Tbsp. Luxardo cocktail cherry syrup (see notes)
1/4 cup whole milk, room temperature
1 Tbsp. finely grated orange zest
1 recipe orange bitters buttercream (below)
4 candied orange slices, quartered (I found these at Trader Joe’s)
12 cocktail cherries, blotted on paper towel
Notes: The cocktail cherry syrup I used is very thick, like pancake syrup. If using thin syrup, reduce amount of whiskey or milk.
Directions
Preheat oven to 350° F, with oven rack in center position. Line 12-muffin tin with double cupcake papers.
Combine flour, baking powder and salt in a medium bowl and whisk to combine. Set aside.
In a stand mixer, or a bowl with hand mixer, cream butter until softened. Add brown and white sugars gradually, beating continually. Stop to scrape down bowl twice. Add eggs, beating after each. Stream in whiskey and cocktail cherry syrup. Scrape down bowl.
Add 1/3 of the flour mixture and beat on low just until incorporated. Beat in half of the milk, then repeat with half of remaining flour, more milk, last of flour. Stop mixer and scrape down bowl, folding in the orange zest at the end.
Divide batter into lined muffin cups. They will be roughly 3/4 full. Bake 18 to 22 minutes; cupcakes are finished when they pass the toothpick test.
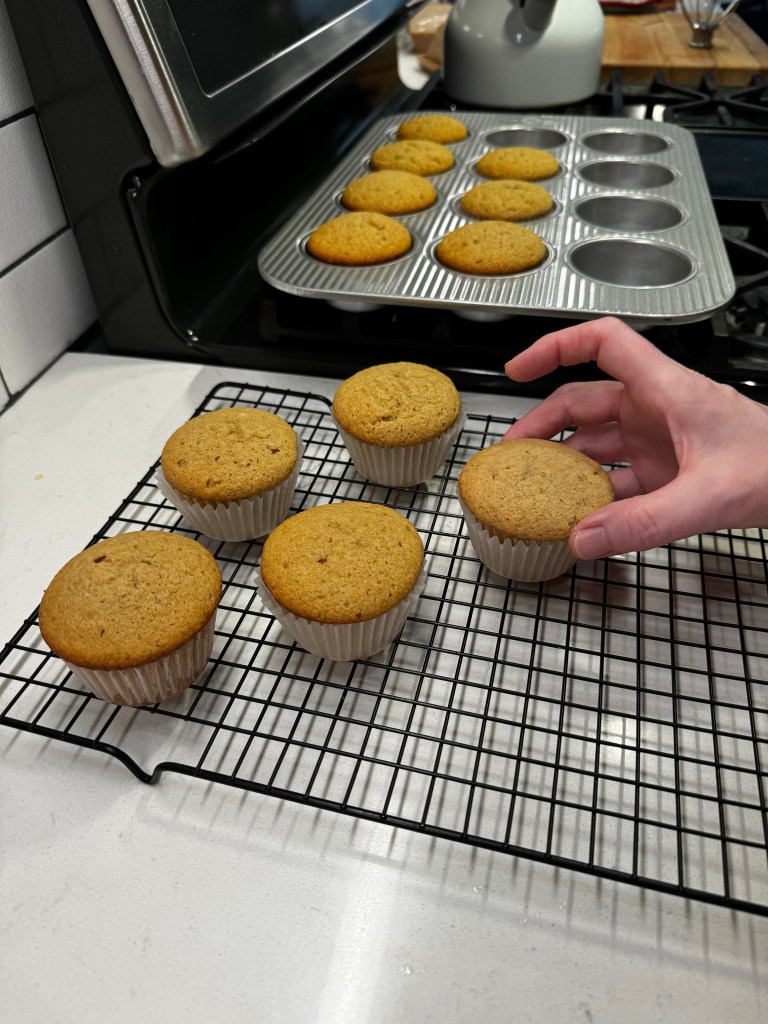
Cool in pan for about 15 minutes before transferring to a wire rack to cool completely.
Ingredients
1/2 cup (1 stick) salted butter, softened at room temperature
2 Tbsp. dulce de leche
About 4 cups confectioner’s sugar (depending on desired consistency)
Heavy cream, if needed to thin icing to desired consistency
Look for dulce de leche in the canned milk aisle, or use a sticky caramel topping as a substitute. You could also omit this if you don’t mind giving up the caramel accent.
Directions
Using the whip attachment of a stand mixer, or whip beaters of a handheld mixer, cream the butter and dulce de leche until soft and fluffy.
Add half of the confectioner’s sugar and beat until incorporated, then stream in whiskey and orange bitters. Add remaining sugar a few spoonfuls at a time until you achieve desired consistency. If you overdo it, whip in a tablespoon or more heavy cream.
Pipe or spoon buttercream onto cupcakes, and garnish them with the candied orange slices and cocktail cherries.
Call me sentimental, but I’ve been digging some of the retro standards lately. Nostalgia hits heavy during the holidays, and my recent tradition of reimagining some old-school favorites on top of a pizza for New Year’s continues with this combination of clams, bacon, pepper, shallots and garlic— it’s a clams casino pizza!
It even has crisp, bacon-y panko crumbs on top!
The literal translation of “casino” from Italian is “big mess,” and I find that more fitting of the dazzling Las Vegas strip than the flavors of the dish that that was first created in 1917 at Narragansett Pier Casino in Rhode Island— or was it 1900 in New York’s Central Park Casino? As usual with recipe history, the details are murky, but with such a delectable combination of flavors, I can understand why people would fight to lay claim to it.
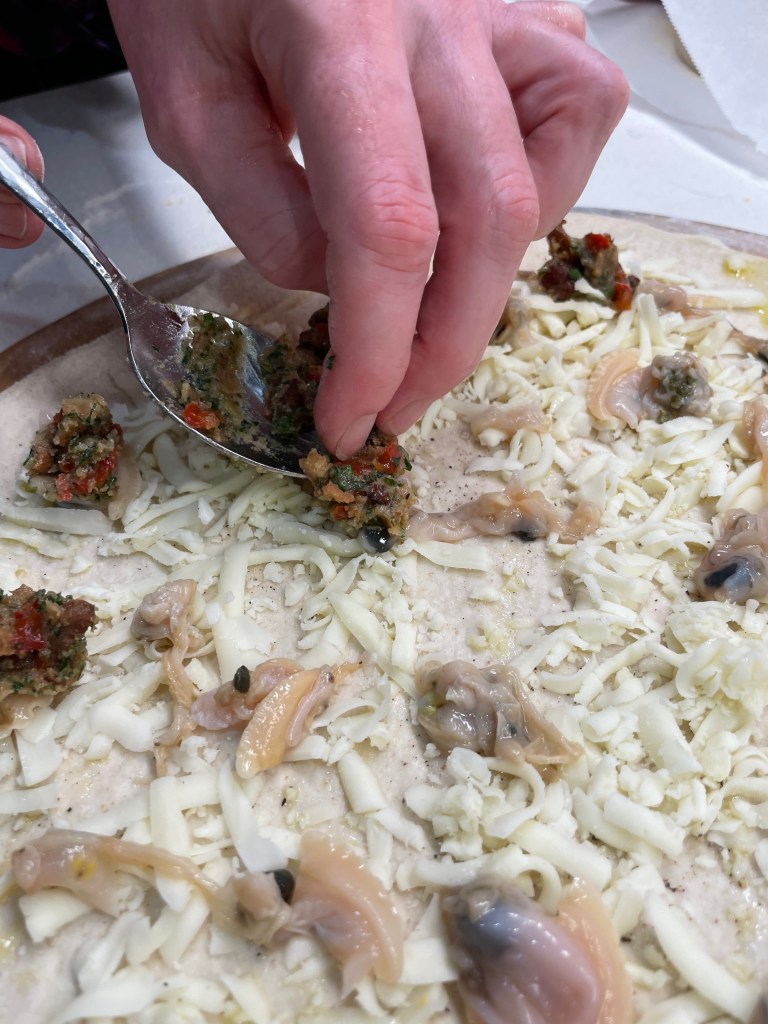
Transforming these flavors onto a pizza was actually pretty simple. As with my other fancy New Year’s Eve pies, there is no red sauce; only cheese as the base layer, followed by freshly shucked littleneck clams and then the casino flavors that go on by the spoonful. How did I pack all that flavor into one delicious pizza topping? Let’s get into it!
I’m always ready to make pizza!
Clam Prep 101
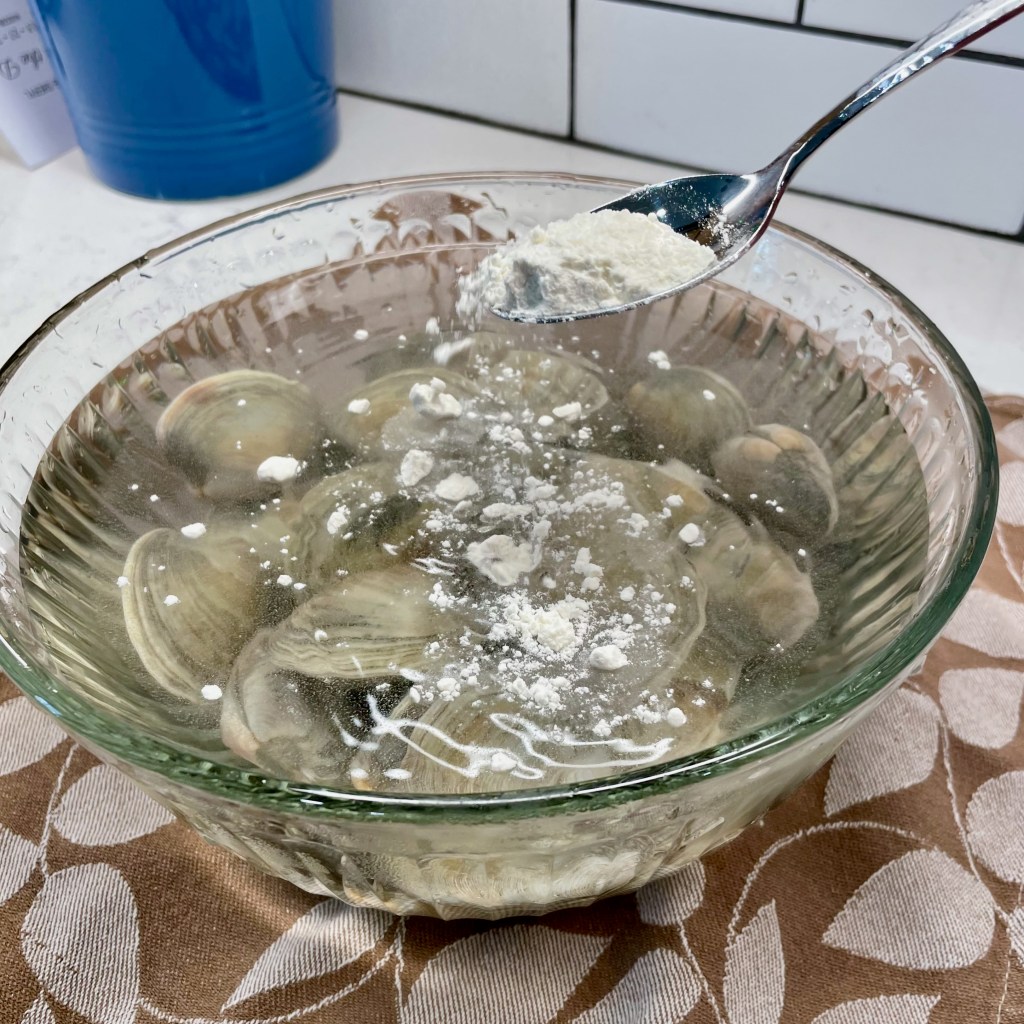
First, you want smallish clams for this recipe; littlenecks are ideal. To prep fresh clams for cooking, you want to clean them, inside and out. Cleaning the outside is straightforward, but how do you check the insides for grit and sand? This is called “purging.”
Place the clams in a bowl with cold water and a teaspoon of salt. Sprinkle a hefty spoonful of flour over the clams, to give them a reason to open and flush out the water they take in. After 30 minutes or so, lift the clams out into a colander and check the bowl for sand and grit. Repeat this process until water appears clear, and then empty the water and give each clam a quick scrub with a stiff-bristled brush, such as a potato brush. Do this purging process right before you plan to cook the clams, and keep them cold throughout.
This process can take more than an hour, so build in some time for this important step.
Clams casino butter
Moment of truth here, this stuff is where the magic happens. I was inspired to make my clams casino pizza when I was scrolling through my search results for “classic seafood appetizers,” and this article by Daniel Gritzer at Serious Eats caught my eye. I have loads of respect for Daniel’s approach to food, and I share his passion for finding better outcomes with less work. The moment I saw that he was making a compound butter for Clams Casino (the appetizer, not a pizza), I knew exactly what to do.
Layers of flavor happening here!
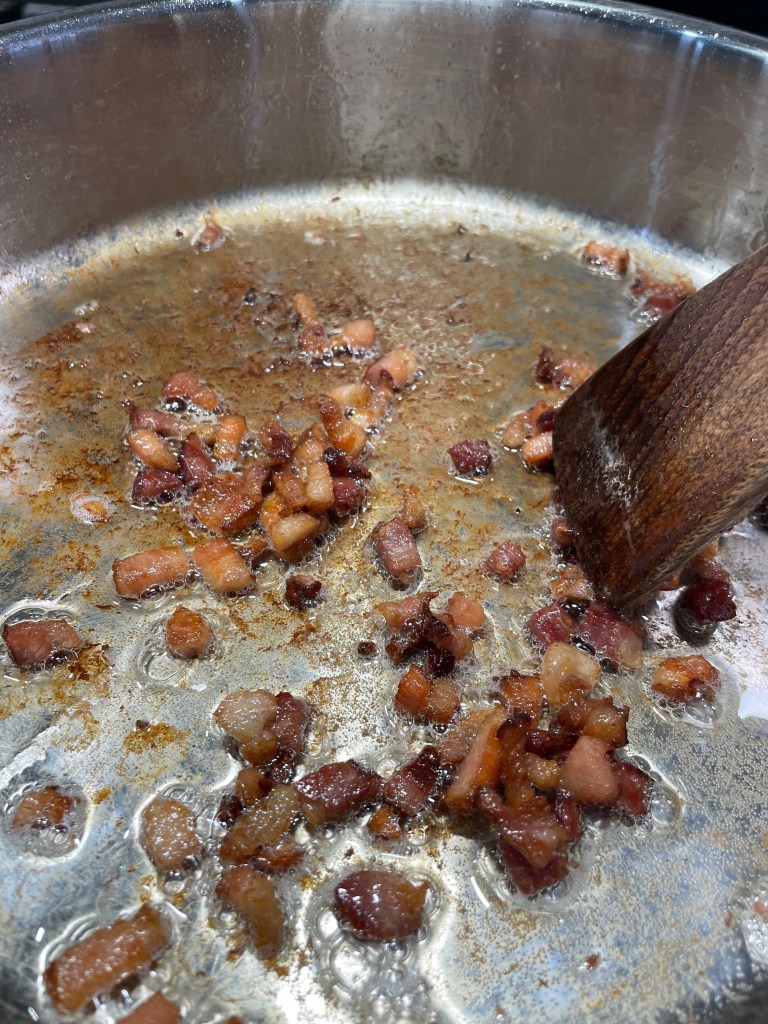
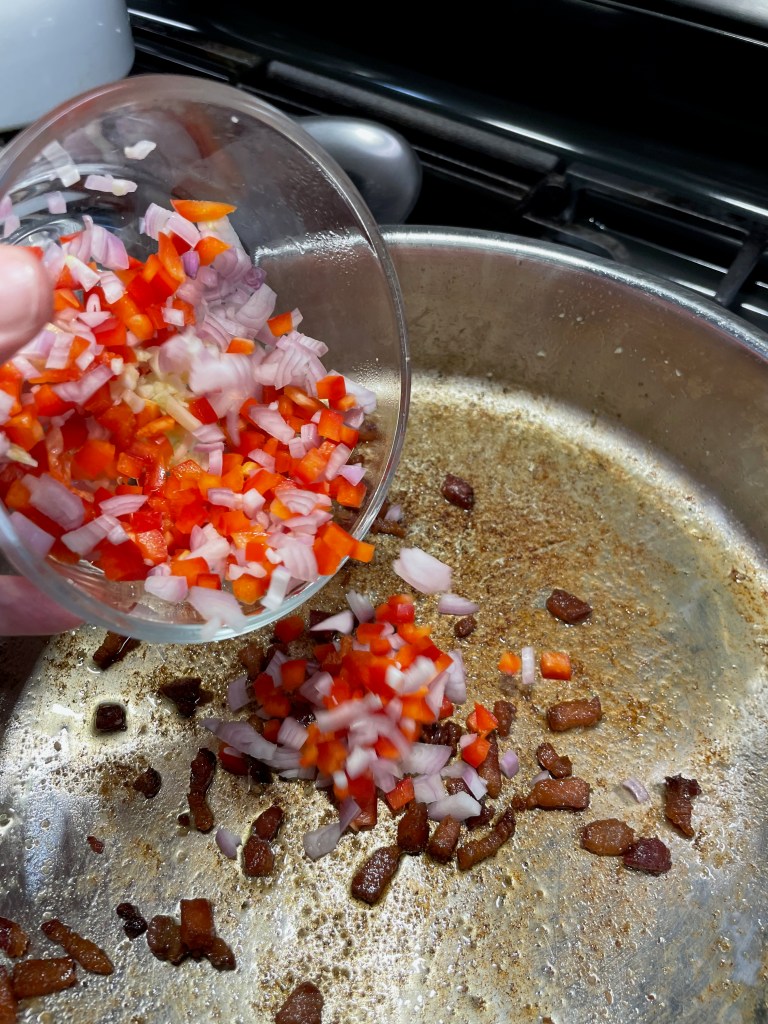
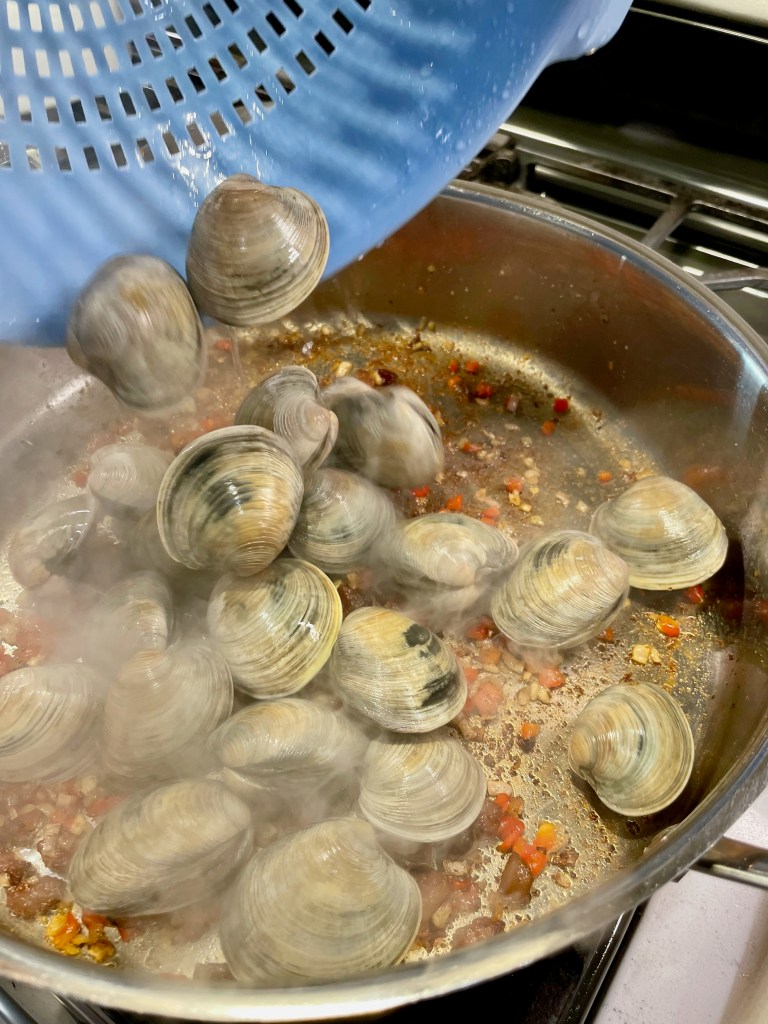
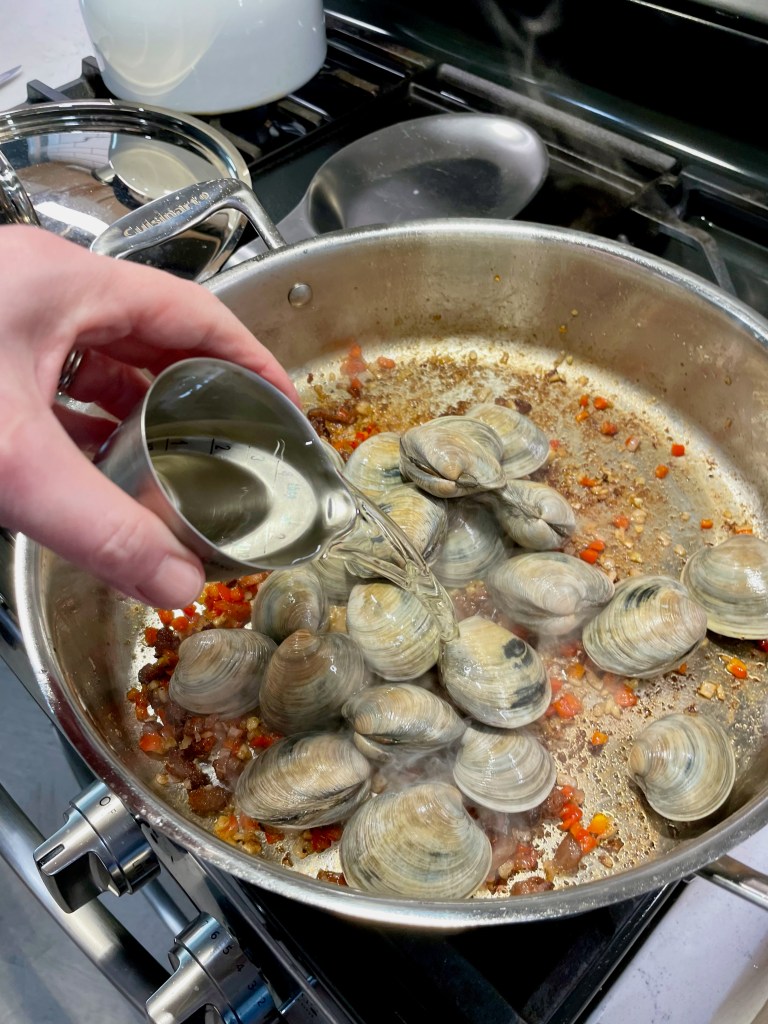
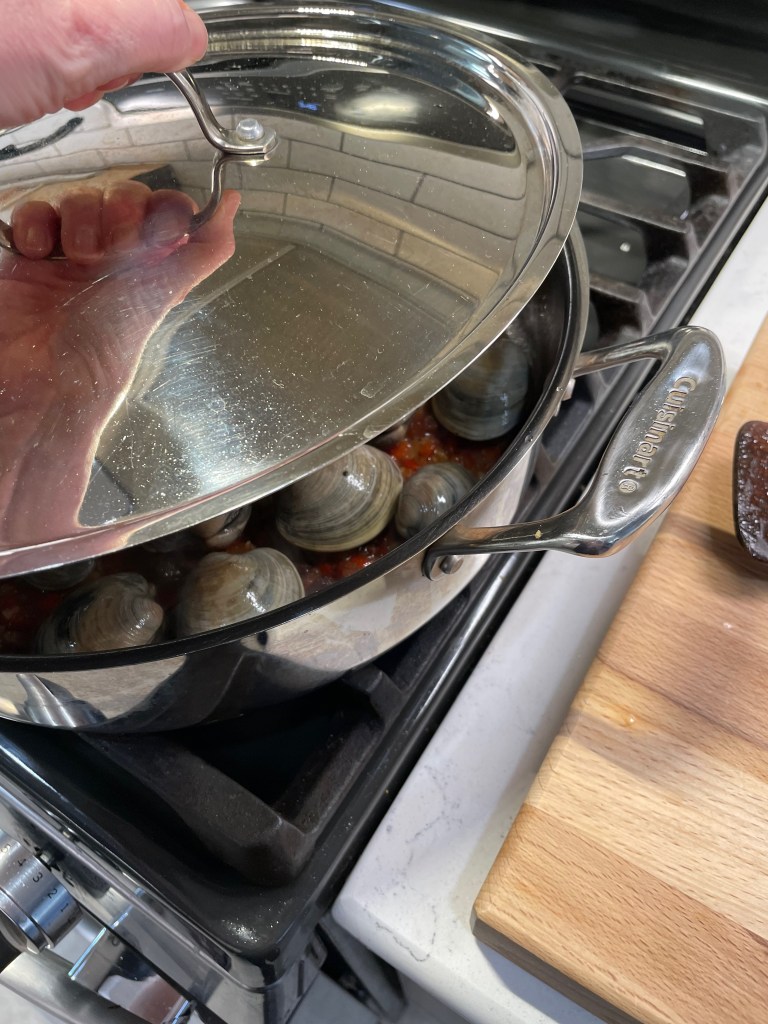
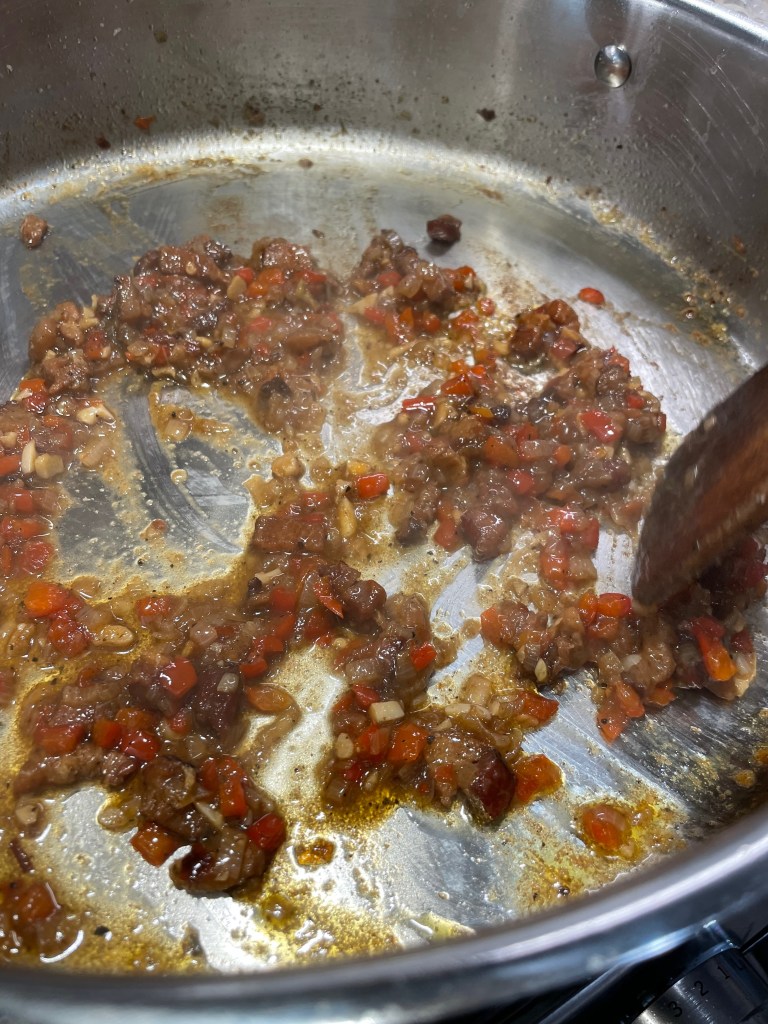
After crisping up some small cubes of really good bacon, I cooked panko crumbs in the grease (they get sprinkled on the pie after baking), and added finely minced red bell pepper, shallots and garlic and cooked them together until the bacon was crispy and the veggies were softened. Next came the clams, and I tossed the lot of them right into the pot with the bacon-veggie mixture and poured in about two ounces (a quarter cup) of dry vermouth— the same thing I use in my martinis. If you wish, you could use pinot grigio or any other dry white wine you like. I just happen to have vermouth open more often than wine, and I love the savory edge it adds when I cook with it.
Between the vermouth and the spilled-out clam liquid, this stuff packs a serious flavor punch!
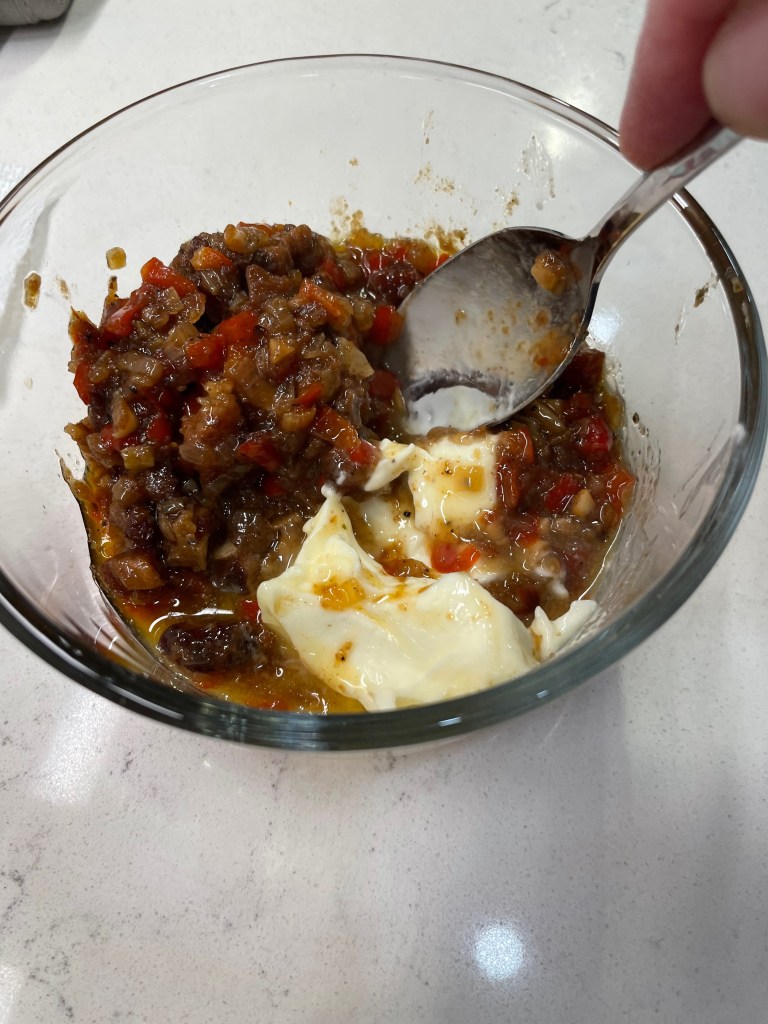
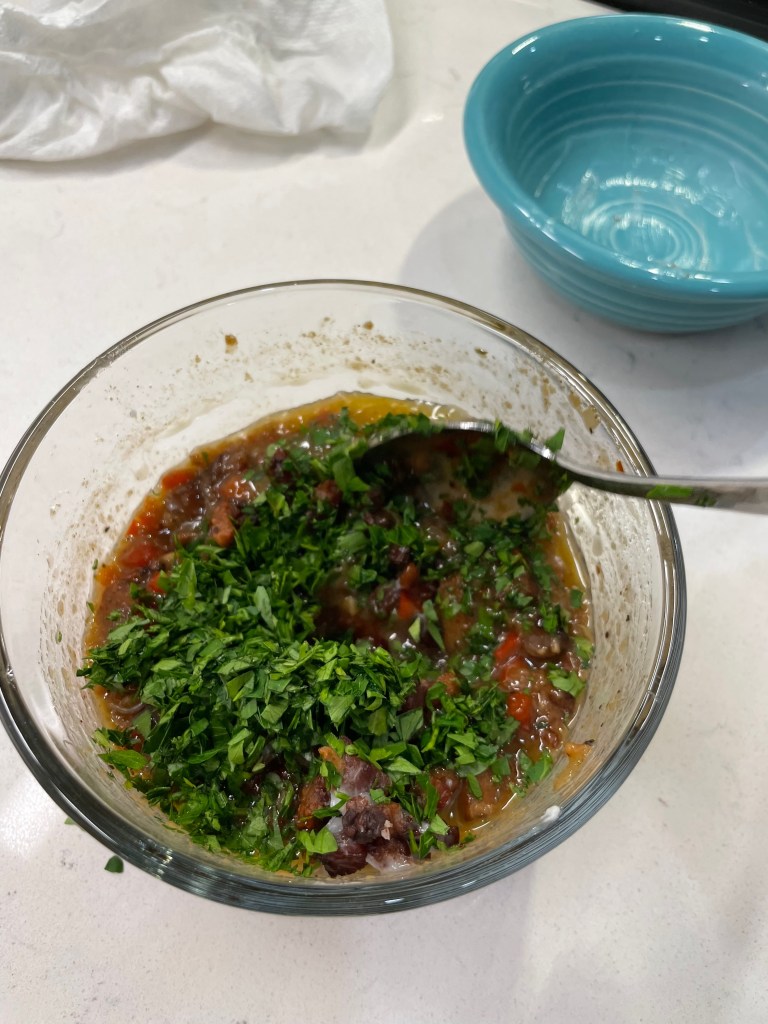
After just a couple minutes of steaming, the clams open up and spill out that glorious, briny liquid. Use tongs to lift them up, and empty that liquid right into the pan. As it reduces with the rest of the pan ingredients, it melds into an intensely flavored mixture that will turn my clams— and my pizza— into something really special. When this mixture cools, I stir in a bit of softened butter and fresh parsley, and chill it until it’s time to build the pizza.
All of the above can be done ahead, but for sure, you want to take care of the clams so that they remain fresh and tasty, so I wouldn’t recommend working ahead more than one day. Get the clam meats removed from their shells and protect them with layers of damp paper towel or parchment paper so that they don’t dry out.
What if you don’t eat bacon?
Substitutions are always possible! The main assets of bacon are the smokiness and the deep umami flavor, so a good understudy would be able to do both, but there’s no harm in making up those flavors with more than one addition. I brainstormed about this with my pal, Dorothy, from New Vintage Kitchen because she is mainly pescatarian and she knows all the tricks. We came up with a short list of suitable step-ins, including soy bacon or turkey bacon (both of which I’m sure have the smoke and umami), smoked paprika (never a bad idea in anything, as far as I’m concerned), or a dash of liquid smoke in the veggies, and some chopped up crisp mushrooms, which you can likely find in the snacks section of a larger supermarket. And I thought of one more, just in the last 10 seconds— one so obvious, I’m embarrassed that I didn’t think of it immediately. Anchovies! Bobby Flay even calls them “bacon of the sea.” They are potent, so use them sparingly, and for sure, include one in the toasted panko crumbs that will finish the pizza.
Time to build the clams casino pizza!
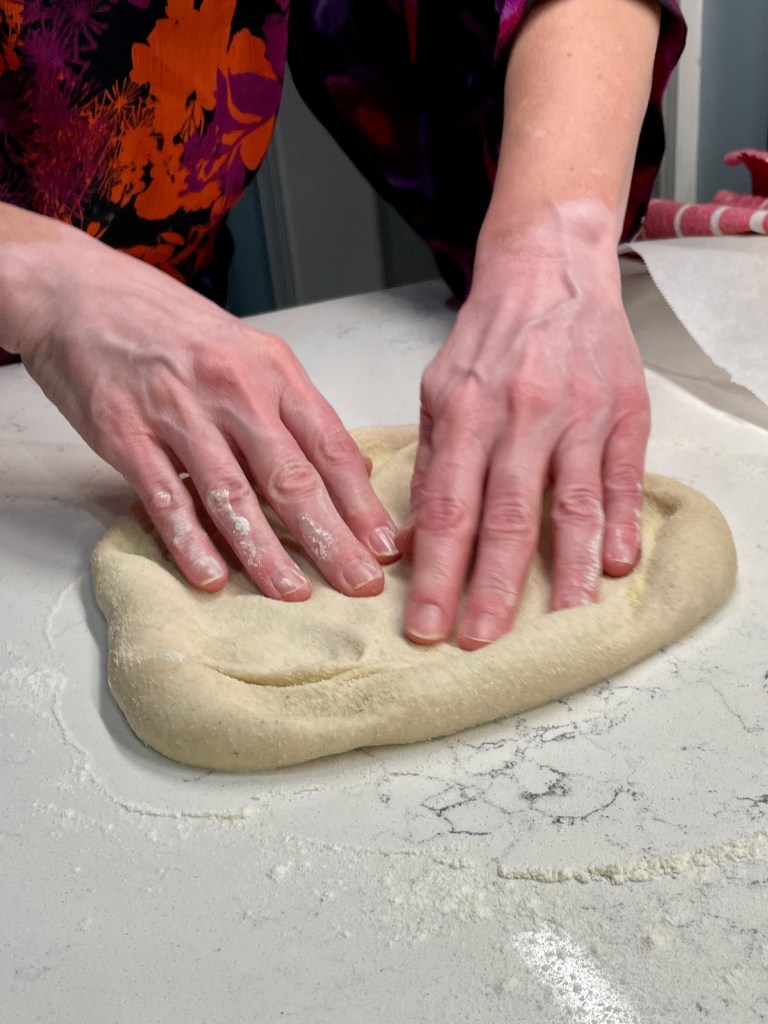
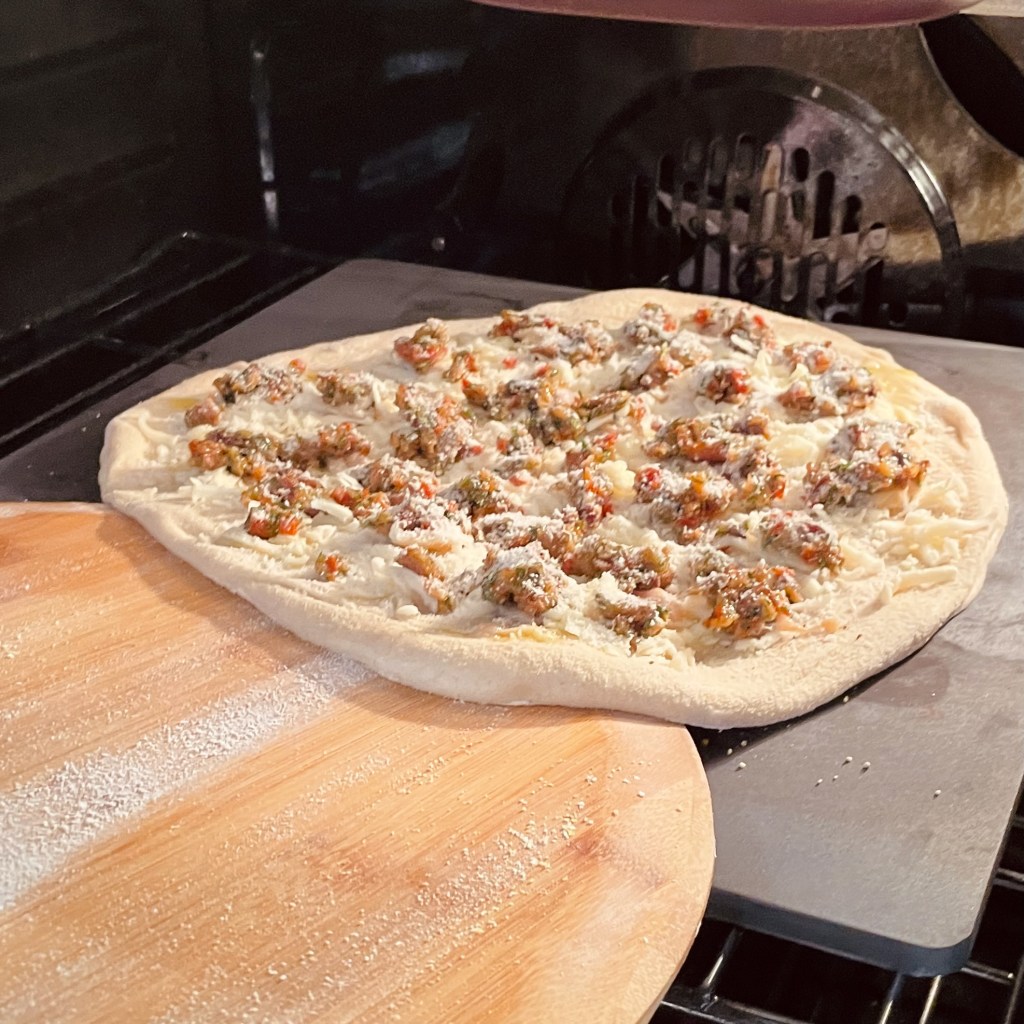
If you’ve followed me for any length of time, you know that I do a long preheat on a baking steel, and all my pizzas all begin with sourdough. The flavor imparted to pizza from the long, cold ferment is amazing, but if you already have a favorite dough recipe, or if you prefer the convenience of buying ready-made dough at your nearby deli or supermarket, have at it. These toppings will work, regardless. If you don’t have a steel, a sturdy baking stone will work, but you may need to dial back the temperature a bit and cook an extra few minutes.
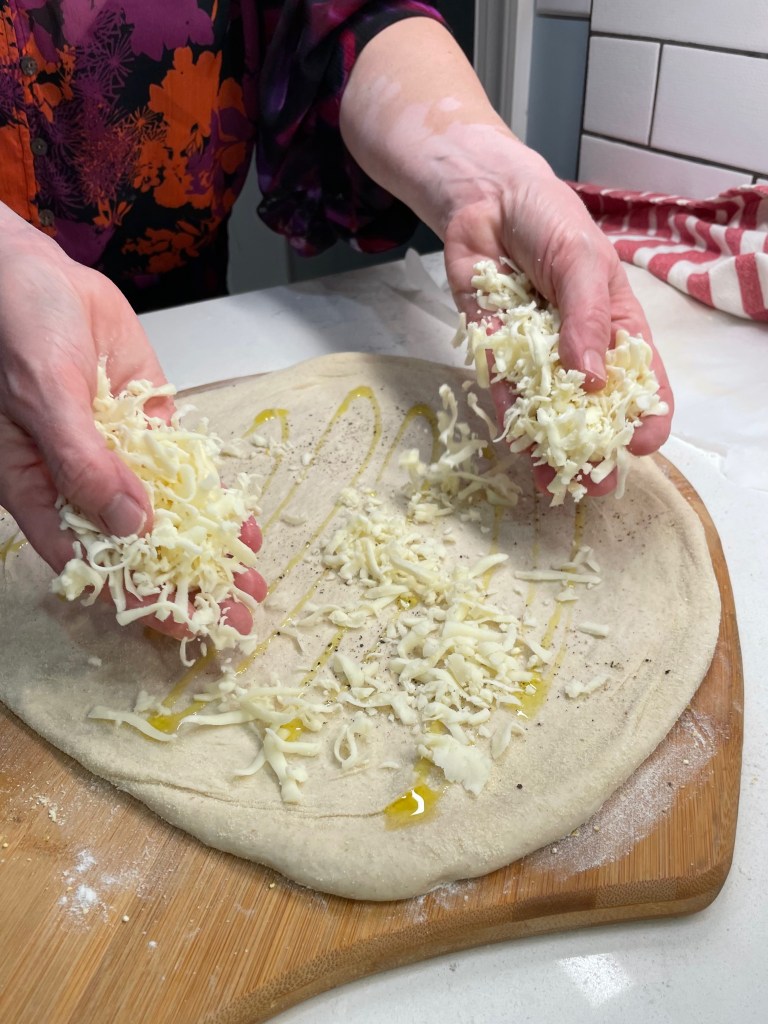
No sauce is necessary here, just go straight to the mozzarella.
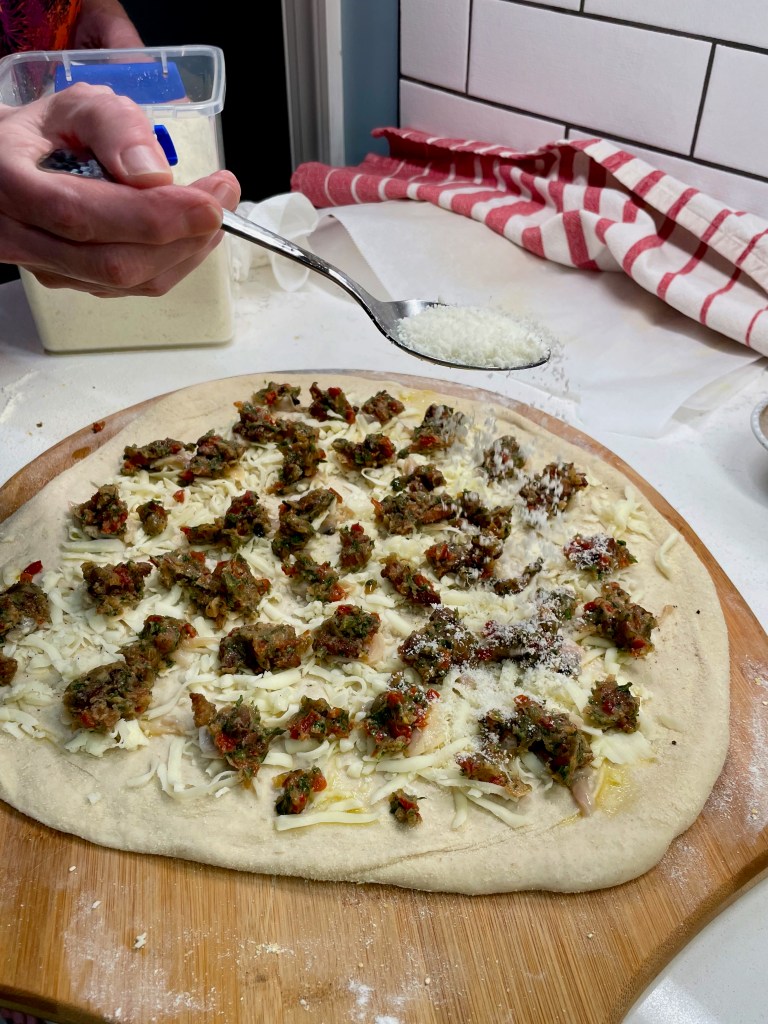
Shape the dough by hand, rather than rolling it out, as this ensures some of the air pockets will remain in the dough for an airy texture after baking. Scatter mozzarella all over the dough, then arrange the clams and top each one with a bit of the clams casino compound butter. Sprinkle a bit of Parm-Romano blend cheese over the top, and slide that gorgeous thing into the oven.
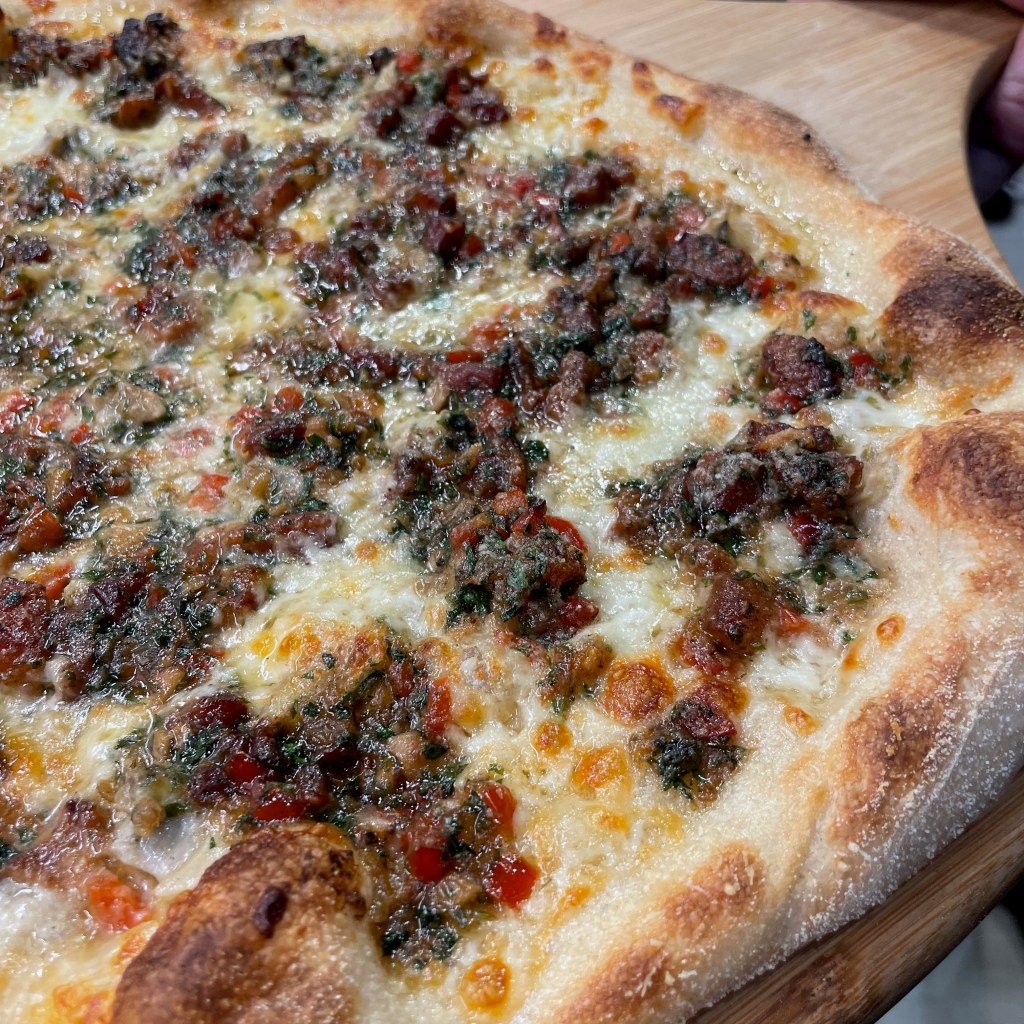
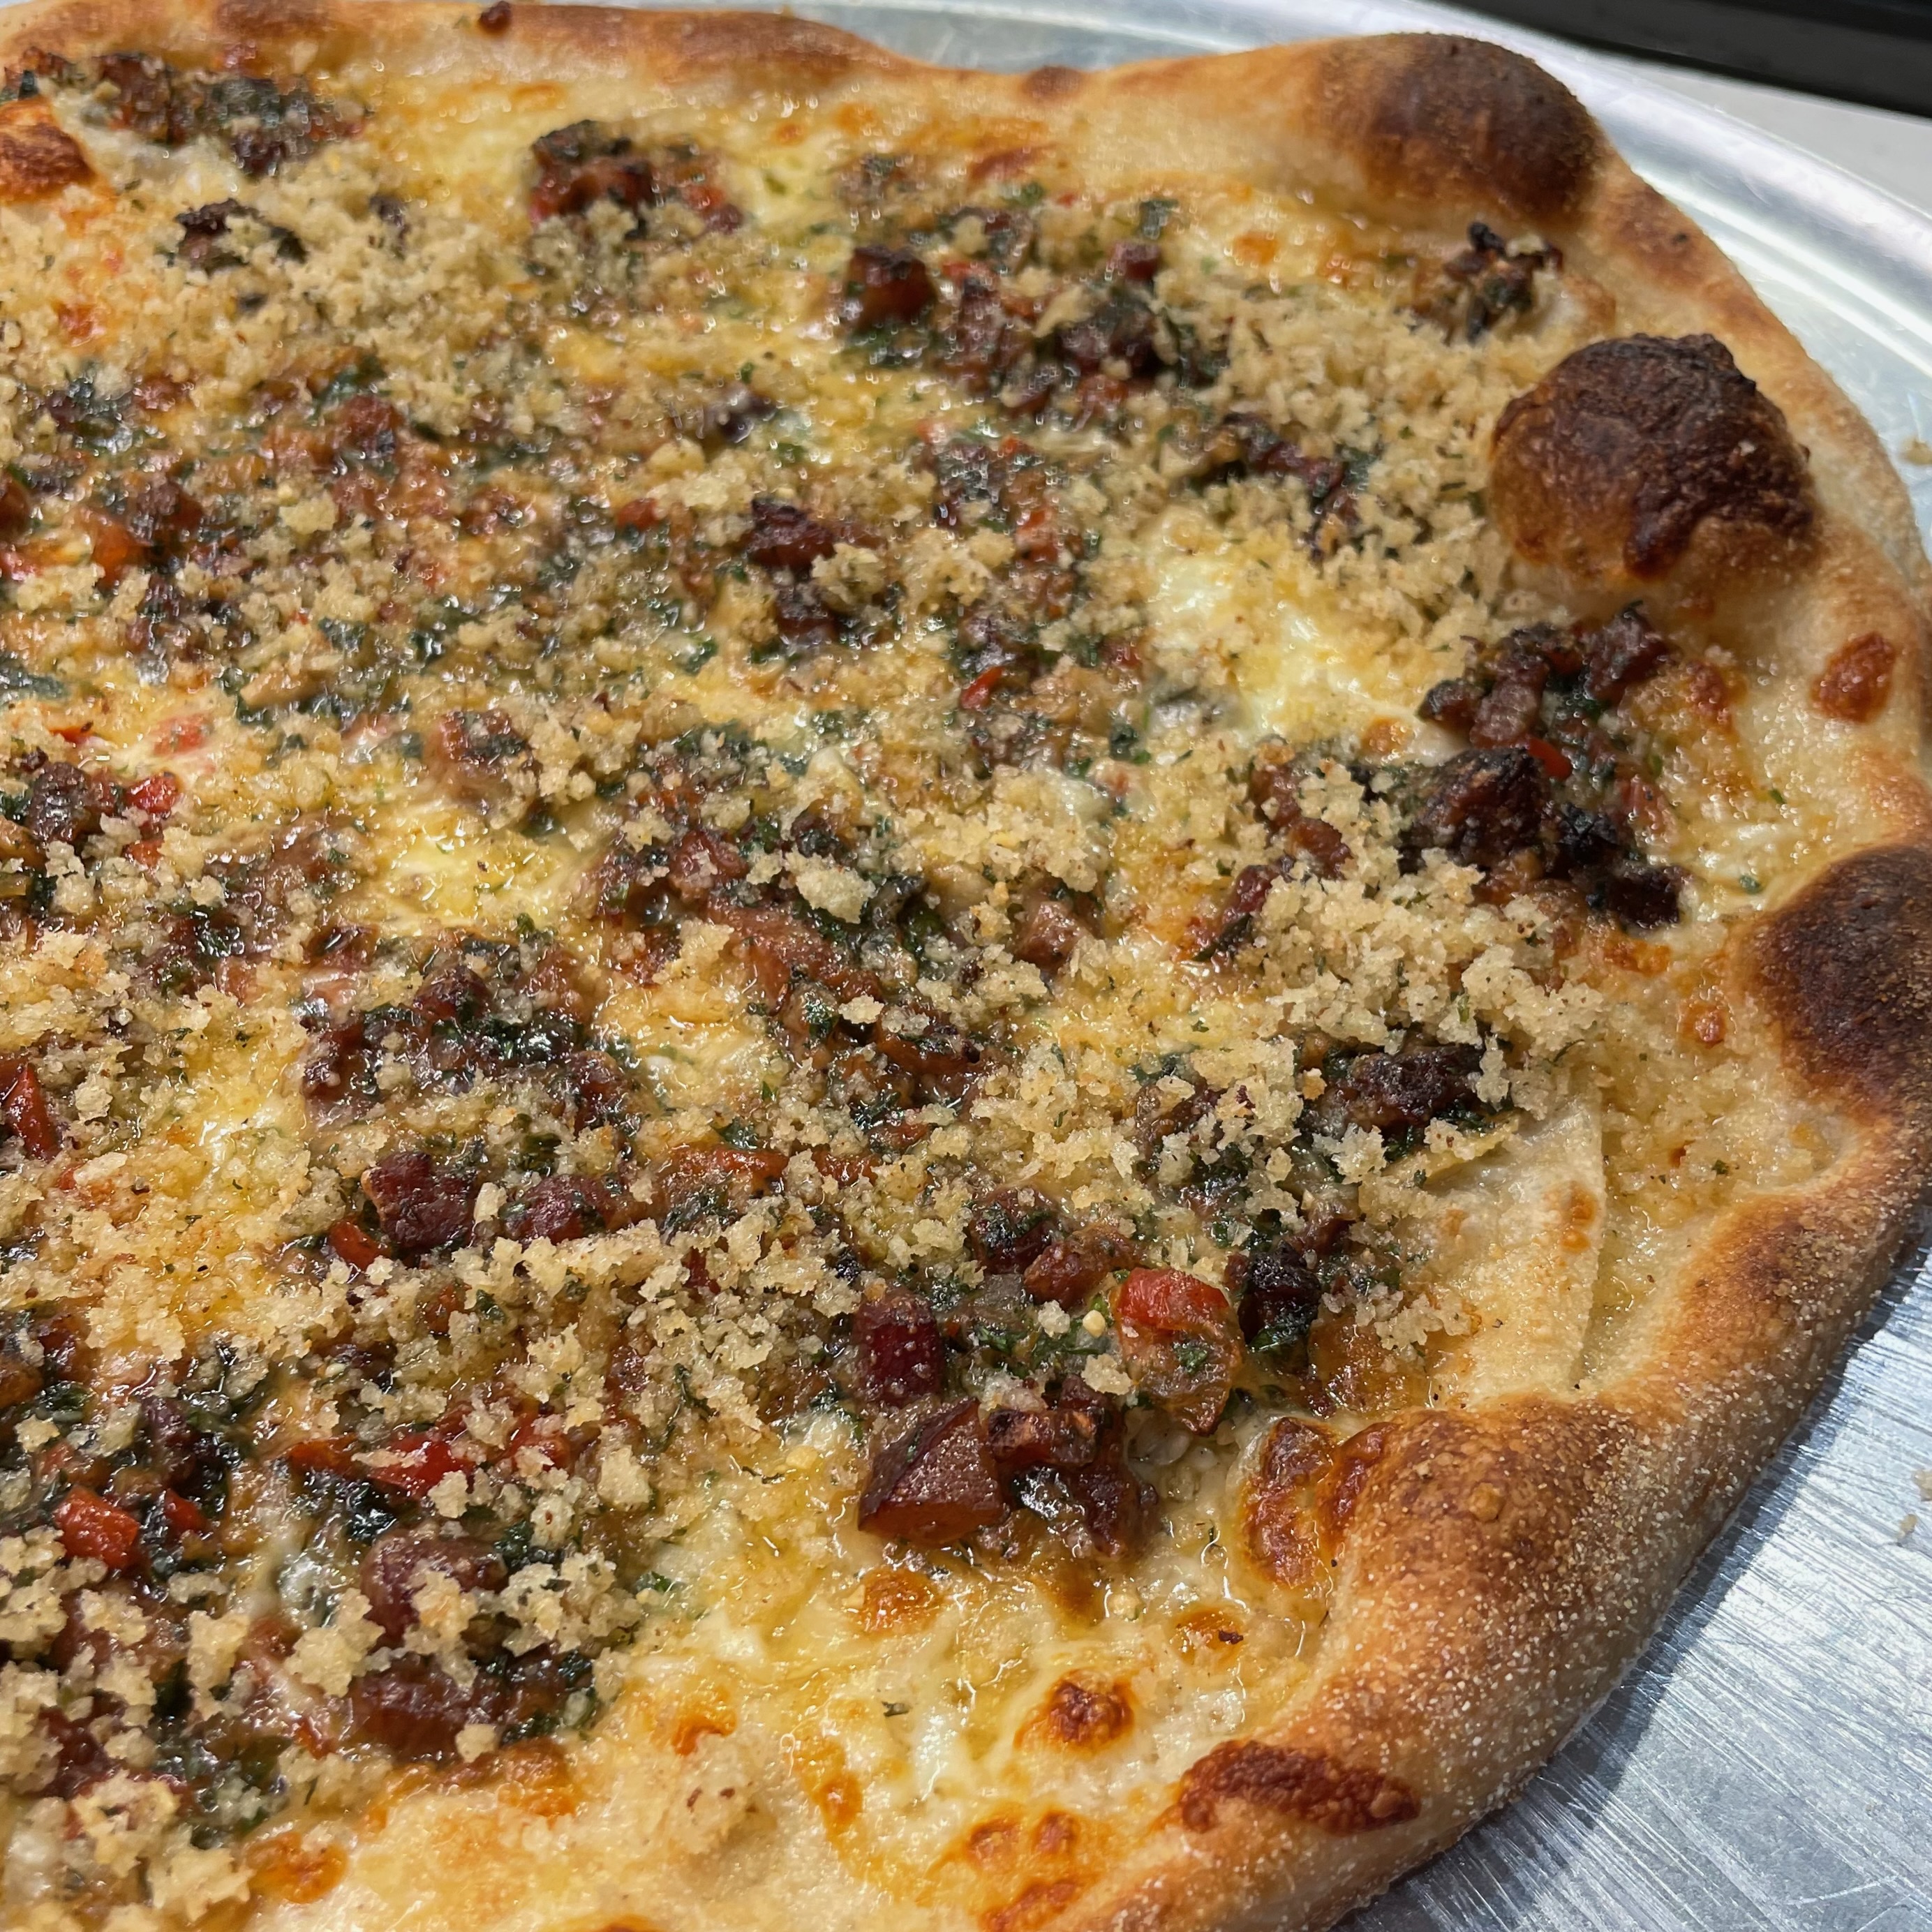
The pizza looked fantastic even before the bacon panko crumbs, but that crunchy accent elevates it, big time.
Six to seven minutes is all it takes on a 550° F preheated steel. When it comes out of the oven, scatter the bacon-scented panko crumbs over the top and serve at once.
An easy compound butter is what makes this classic appetizer-inspired pizza special enough for New Year's Eve. Use the freshest clams you can get, and don't skip the bacon-scented panko crumbs on top!
Prep for this pizza should happen earlier in the day, or perhaps even the day before, so that the clams casino compound butter only needs to be divvied out onto the clams when you build the pizza. Note that parsley appears twice in this list; there are different purposes for each amount. You will want to use a heavy-bottomed pan to cook the compound butter ingredients, preferably one that is more wide than high. This will make it easier to steam the clams in a single layer.
Ingredients
1/2 cup cubed thick-cut smoked bacon
1/3 cup Italian seasoned panko bread crumbs
1 Tbsp. finely chopped Italian parsley (for the panko topping)
1/3 cup minced shallot
1/3 cup minced red bell pepper
2 large cloves garlic, minced (about 1 Tbsp)
A few shakes red pepper flakes
1/4 cup dry vermouth or white wine + 1/4 cup water
24 littleneck clams, purged of sand and grit (see first step of directions)
2 Tbsp. finely chopped Italian parsley (for the compound butter)
2 Tbsp. unsalted butter, halfway softened
Directions
Purge the clams by placing them in a large bowl of salted cold water. Sprinkle a generous spoonful of flour over the clams and swirl gently to mix it in. Allow to rest 30 minutes, and then scoop out the clams to a platter. Empty and rinse the bowl, inspecting the water for grit and/or sand. Repeat as many times as needed, until water is clear.
Cook bacon to render the fat. Remove the crispy bacon bits with slotted spoon, reserving fat in skillet. Toss panko crumbs in bacon fat. Cook until crumbs are golden and crispy. Set aside to top pizza after baking.
Put half of the bacon bits back into the pot, along with shallots, bell peppers and garlic, and sauté until vegetables are translucent and tender. Shake in red pepper flakes.
Add clams to the pot and pour in the vermouth and water. Cover with a lid for about 90 seconds, then remove lid. Use tongs to remove clams as they open, and pour off clam liquid into the pot as you remove them. Set the clams in a bowl filled with crushed ice; this will abruptly stop the cooking so that they don’t get tough during baking.
When all clams have been removed from the pot, simmer until liquid is evaporated and only the soft vegetable-bacon mixture remains. Transfer mixture to a bowl to cool, then blend in the butter and chopped parsley. Refrigerate butter until you’re ready to build the pizza.
Slide a knife under the clam meat to remove them from their shells. Refrigerate clam meats until you’re ready to make the pizza. Discard the shells.
Remove the compound butter and clam meats from the fridge a few minutes ahead so that the butter is manageable and can easily be spooned. I bake my pizzas on a steel, which is preheated for an hour at 550° F. If you are using a stone or regular pizza pan, reduce heat and adjust baking time accordingly.
Ingredients
11 oz. pizza dough ball, at room temperature
Semolina flour for shaping dough
1 Tbsp. extra virgin olive oil
Kosher salt and black pepper
1/2 freshly shredded low-moisture mozzarella
Reserved clams
Clams casino compound butter
2 Tbsp. grated Parm-Romano blend cheese
Reserved panko crumbs
Directions
Shape pizza dough by hand (not by rolling), into a 14-inch round. Transfer round to a flour- and cornmeal-rubbed pizza peel for easy transfer into the oven.
Drizzle olive oil all over dough, then season with salt and pepper. Scatter mozzarella evenly over dough.
Arrange clam meats on dough, and then place a small dollop of the clams casino compound butter over each clam. If you have extra butter, place smaller dollops in between the clams.
Slide onto pizza steel and bake for 6 minutes or until crust is blistered and browned and toppings are bubbly. Sprinkle with bacon panko crumbs and serve immediately.
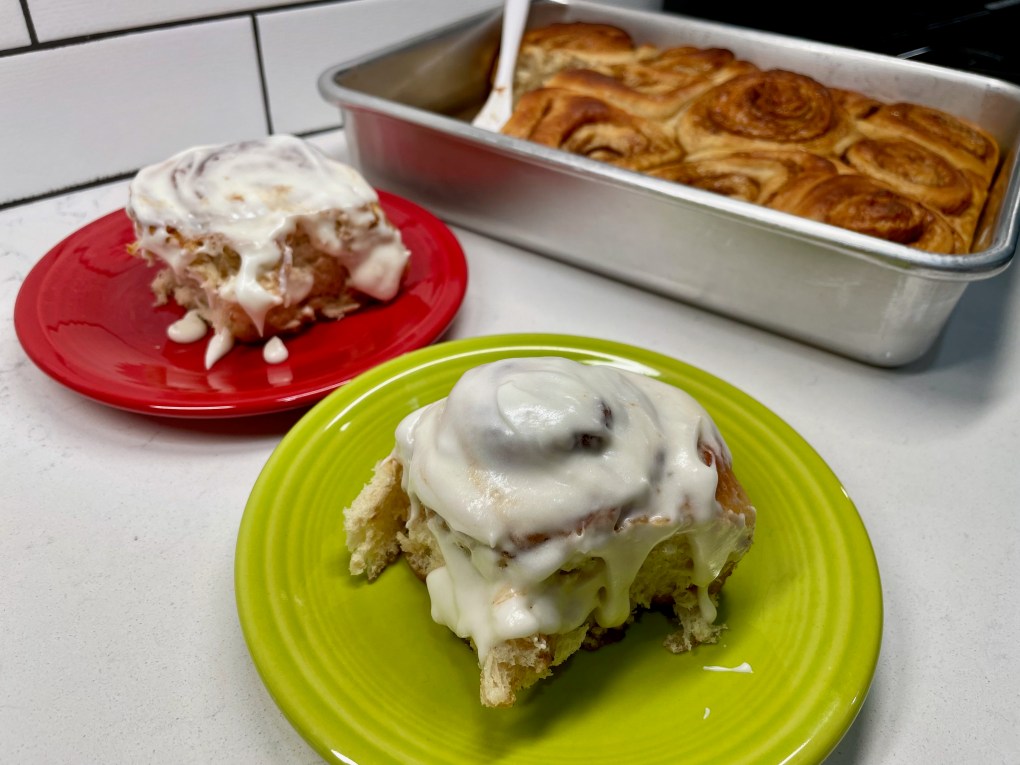
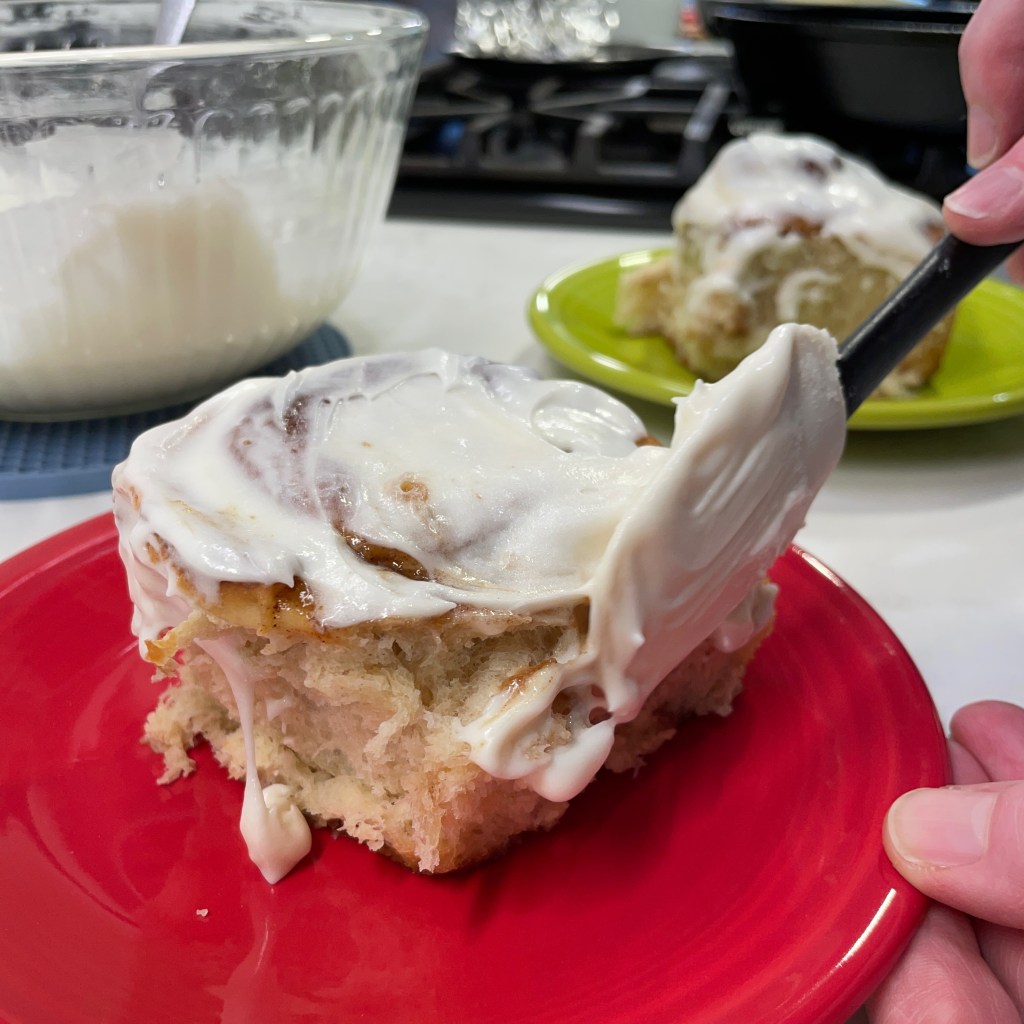
Of all the wonderful things about Christmas morning at our house— the sentimental holiday tunes that will be streaming out of our Bose speaker, the excitement of presenting way too many over-the-top gifts to our spoiled fur babies, the joy of spending time with the love of my life with no obligations to be anywhere else— there’s one thing in particular I’m extra excited about. It’s these soft, fluffy iced cinnamon rolls! I’ve literally had them on my mind since last New Year’s Eve, when my husband and I fought over the final crumbs of the batch I made last Christmas.
The last cinnamon roll was as delicious as the first one!
We’ve had homemade cinnamon rolls on Christmas morning before, but the tweaks I made to my recipe last year made these extra special. They are soft and tender, they hold their shape without being dry, and the almond-scented cream cheese icing is just irresistible.
Almond extract lends an extra holiday flair to the icing. 🤩
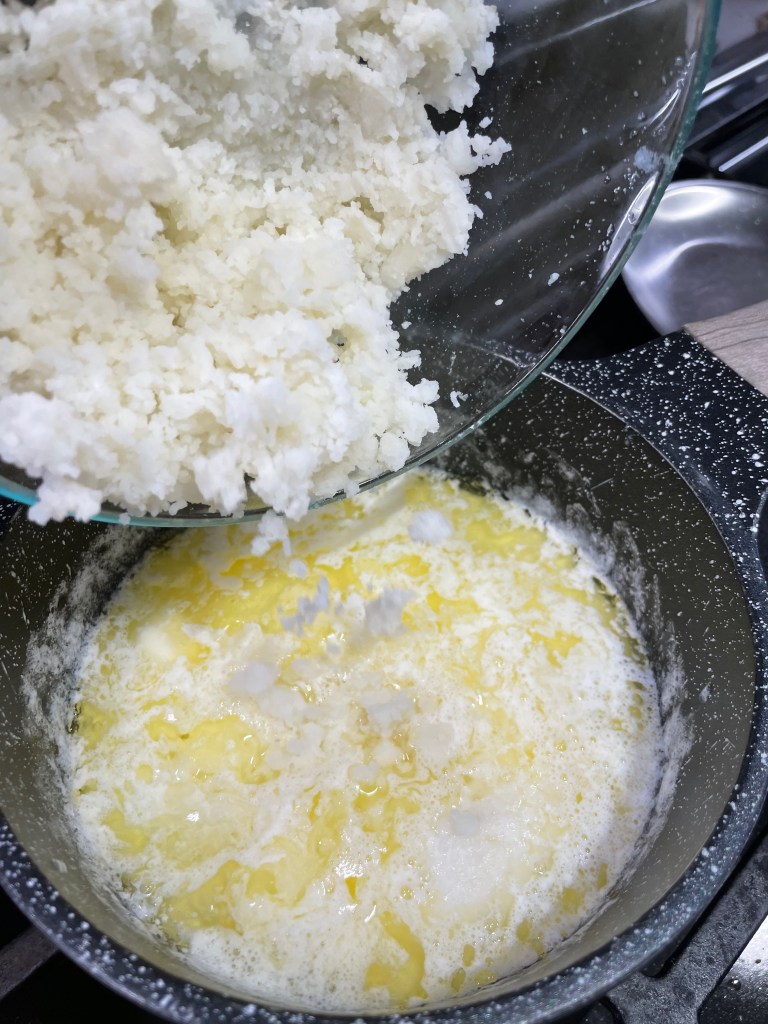
The “secret” ingredient that I used last year to make these rolls so soft and airy is mashed potatoes. Honestly, I don’t know why I didn’t think of it before. The starch in potatoes makes bread softer, and it does wonders for the Moravian sugar cake that is traditional around these parts at Christmas, too.
The mashed potato is the game changer for my cinnamon rolls.
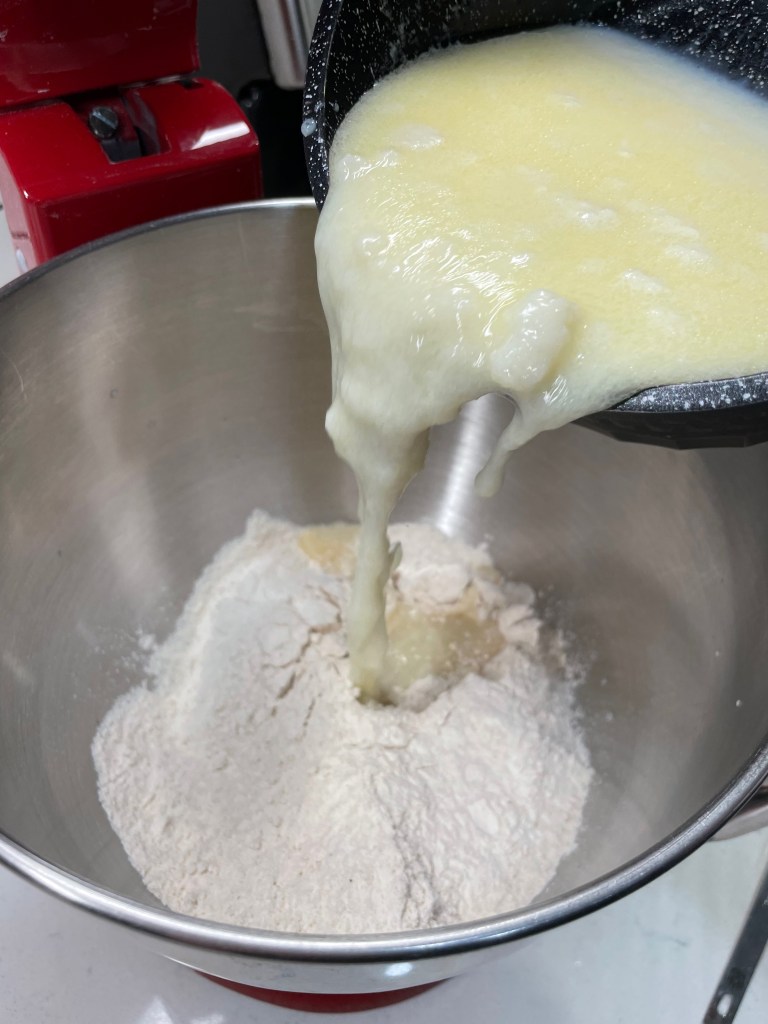
There’s also whole milk, sugar and butter, which add richness and softness to these swirled rolls. And eggs ensure the dough holds its shape after it’s wrapped up around the cinnamon-sugar filling. Oh, wait, did I remember to mention how addictive the filling is?
If you can’t get the Yuletide Cheer spice, sub your favorite pie spice and some orange zest.
You know that I can’t stop at traditional, so there’s more than just cinnamon and brown sugar going on here. I wanted an intoxicating aroma, and I got it with addition of cardamom and a bit of “Yuletide Cheer” spice from my pals at King Arthur Baking. It’s a blend of several spices, including coriander and allspice, and the real magic comes from dried citrus peel. Unfortunately, I discovered today that the blend is sold out for the season on the KA site, but I’m betting you could replicate the effect by adding a spoonful of orange zest to your dough. The citrus makes it smell like Christmas. A pinch of salt is essential, as it emphasizes the flavors of everything else. Don’t skip it.
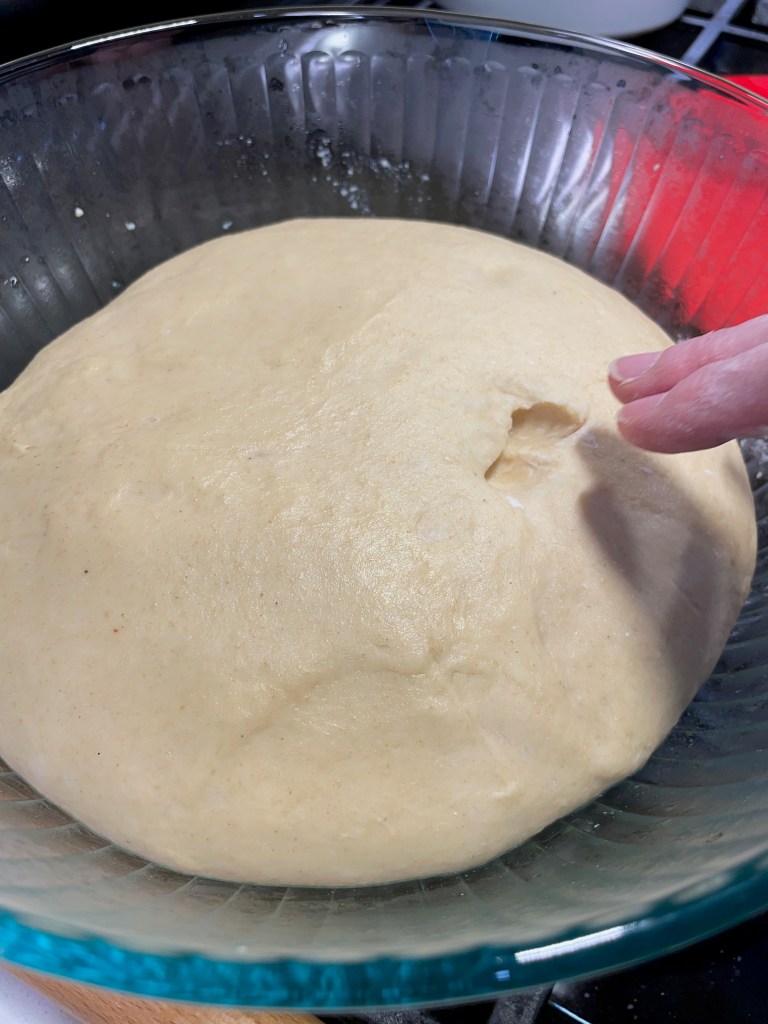
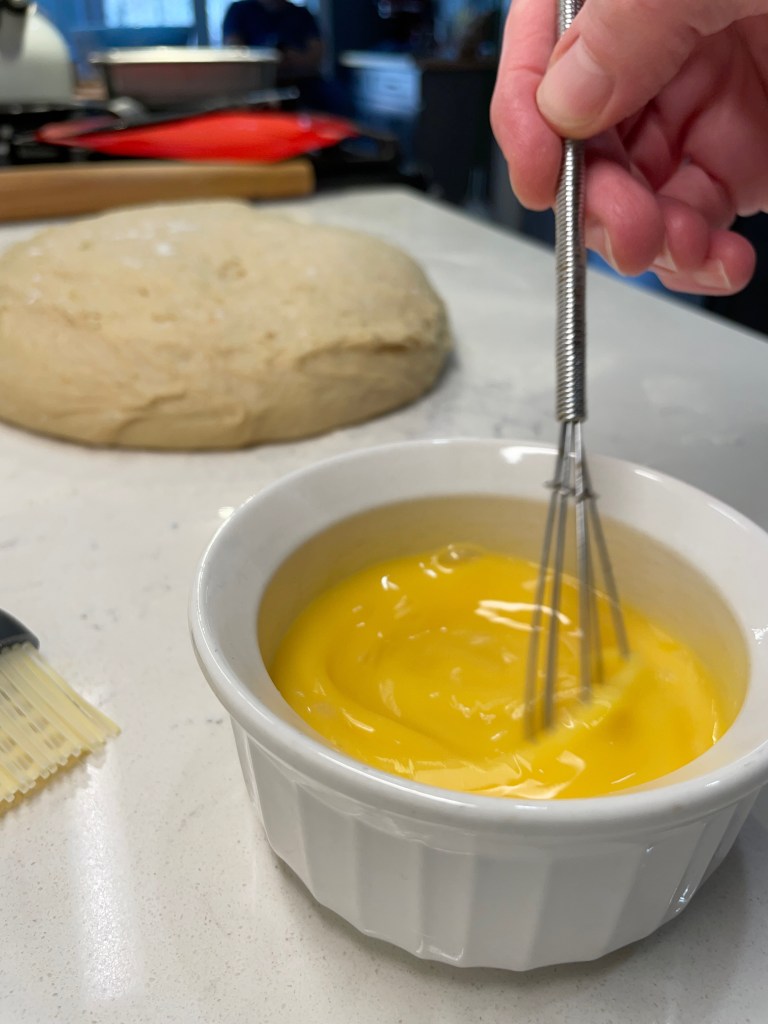
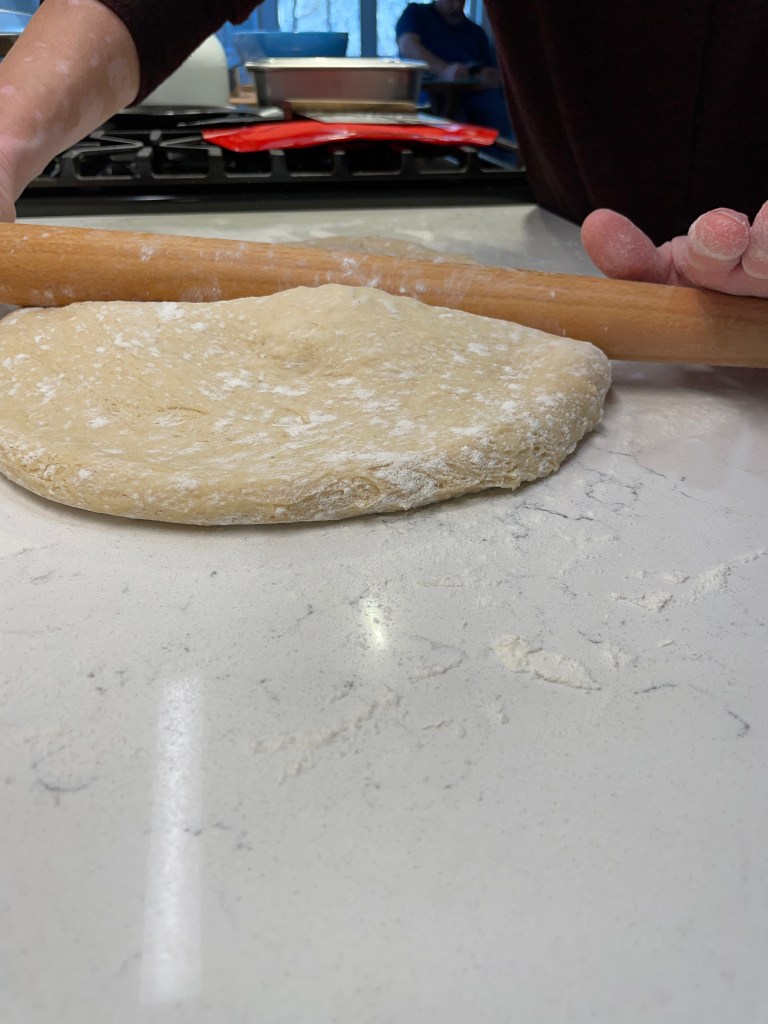
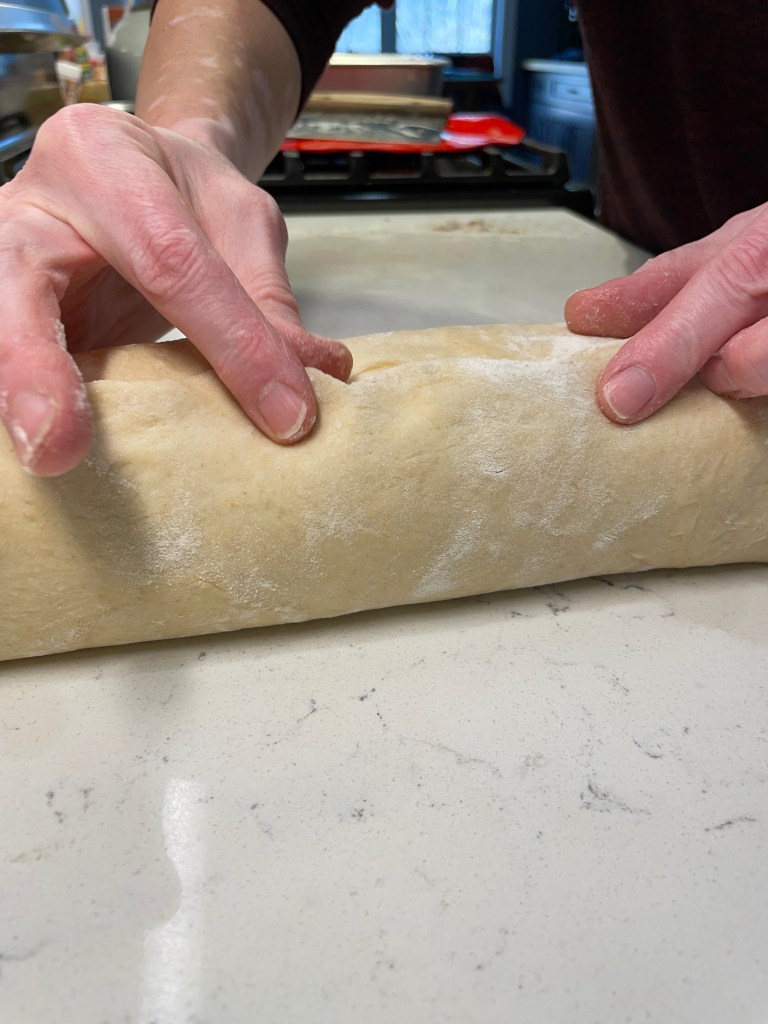
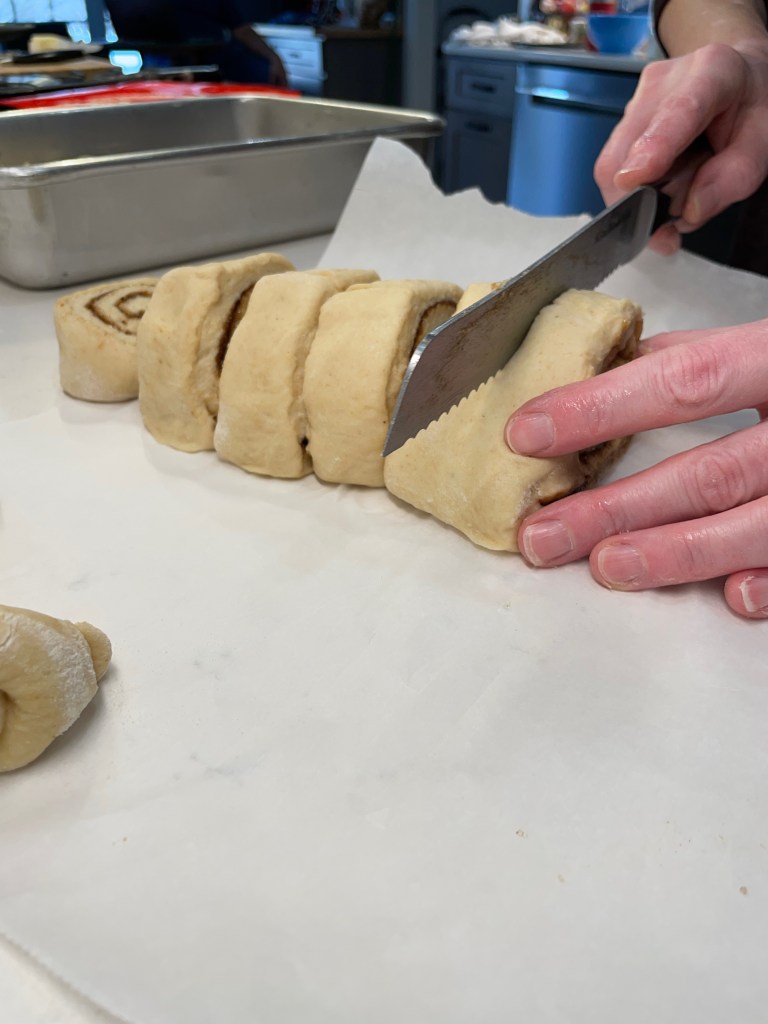
The dough is ready when pressed fingers leave an indent.Egg wash rather than butter helps the filling stay put.Roll out gently on a floured surface.The rolled-out dough should be about 1/4-inch thick.Roll from the short end. Notice that the tail end of dough has no filling.Pinch the seam closed along the edge.A serrated knife makes quick work of slicing into rounds.Cover with plastic wrap and send it to the fridge for a nap!
The thing about these rolls that is almost as good as eating them is the fact that I can make them the day before and pop them into the fridge overnight. Bring them back to room temp when I wake up Christmas morning, and bake them while the fur babies enjoy their new toys. The icing is cream cheese, butter, powdered sugar and a splash of almond extract.
After proofing, the rolls will expand to take up the whole pan.Bake until rolls are golden brown all over.Oh my goodness, this icing!
If you don’t already have a special holiday breakfast tradition, I guarantee you these rolls will become one for you!
After much trial and error, I've found mashed potatoes to be the best ingredient for soft, fluffy, melt-in-your-mouth cinnamon rolls. This recipe is easy to make a day ahead for baking on Christmas morning.
Ingredients
1 1/4 cups white whole wheat flour (see notes)
2 tsp. instant dry yeast
3 cups all-purpose flour
A shake or two of ground cardamom
1 cup whole milk
1 cup mashed potato (russet is ideal)
5 Tbsp. butter
1/3 cup cane sugar
1 tsp. kosher salt
2 eggs at room temperature
1 beaten egg, mixed with a tablespoon of water (to adhere filling)
1/2 cup light brown sugar
1 tsp. ground cinnamon
1 tsp. ground cardamom
1 tsp. “Yuletide Cheer” spice (or pie spice + zest of a small orange)
Pinch of kosher salt
Note: White whole wheat flour is less “earthy” than standard whole wheat, and mine comes from King Arthur Baking Company. They have recently rebranded this product as “golden wheat,” so look for either name in the flour section of your supermarket. If you cannot find it, simply use a total of 4 1/4 cups all-purpose flour.
Directions
Combine flours and a few shakes of ground cardamom in a medium bowl. Measure out 1 1/2 cups of this into the bowl of a stand mixer, and set the remainder aside for now. Add yeast to the mixing bowl.
Combine milk, butter and sugar in a small, heavy-bottomed saucepan over medium heat. Stir until butter is melted and sugar begins to dissolve. Stir in salt and mashed potatoes and remove from heat; cool until lukewarm.
Pour milk mixture into the mixing bowl with the yeasted flour mixture and blend with the beater blade until the mixture is smooth. Add eggs and increase speed to beat for two to three minutes.
Reduce mixer speed and add remaining flour, a large spoonful at a time. After a few spoonfuls, you may need to switch to the kneading hook as the dough becomes more heavy. Knead again for a few minutes; dough will be soft and tacky.
Shape the dough into a round and rest covered on the counter for about one hour, or until the dough has doubled in size and doesn’t bounce back when pressed with fingers.
Transfer dough to a floured board or counter. Use a rolling pin to roll it into a rectangle approximately 12 inches wide and 18 inches long. Combine brown sugar, cinnamon, cardamom, pinch of salt and Yuletide Cheer spice in a small bowl.
Brush entire dough rectangle generously with egg wash, and then distribute the cinnamon-spice mixture evenly over the dough, sparing about one inch at one short end. Roll up dough, beginning at the other short end, keeping the dough evenly compacted.
Pinch the seam to seal the roll. Use a serrated knife or a piece of unflavored dental floss to cut the roll into 12 equal slices. Place slices in a 9×13″ cake pan. Cover tightly with plastic wrap and refrigerate up to 18 hours.
Remove pan from fridge and pre-heat oven to 375° F, with oven rack in center position. Allow cinnamon rolls to come to near-room temperature. They should be very puffy with no space between rolls.
Bake for 25 to 30 minutes, until rolls are golden brown all over. Remove from oven and cool in the pan for at least 30 minutes before serving with icing.
Ingredients
3 oz. cream cheese, softened
2 Tbsp. salted butter, softened
2 cups confectioner’s sugar, sifted if necessary to remove lumps
1/2 tsp. vanilla extract
1 tsp. almond extract
A few tablespoons heavy cream to blend into soft, spreadable icing
Directions
Use a hand mixer or the whisk attachment of a stand mixer to beat cream cheese and butter until soft and lump-free.
Beat in half of the confectioner’s sugar until smooth. Stir in vanilla and almond extracts, and then stir in as much additional sugar as needed to achieve a spreadable consistency.
Special occasion food doesn’t have to be complicated. Sometimes, it’s the simplest flavors that have the most impact, and this is one of many lessons I learned during the few years that I pitched in at a catering kitchen back in the ’90s. But when an occasion calls for something “fancy,” there are a few tricks you can use to elevate your presentation of simple ingredients. Roulades are a great example of this concept, and it’s only a little bit of extra effort, but the impact is always great!
Despite the special appearance of roulades, they’re actually quite easy to make, using whatever fillings sound good to you. This time, mine are bearing festive hues of green and red (just like Christmas), with crowd-pleasing flavors of spinach, feta and sun-dried tomato. The filling is accented with sautéed shallots, garlic and Italian herb blend, and these pretty pinwheels are delicious alongside some roasted garlic mashed potatoes.
Are you ready to get cookin’?
My flavors are Mediterranean, but there are so many possibilities!
Special tools
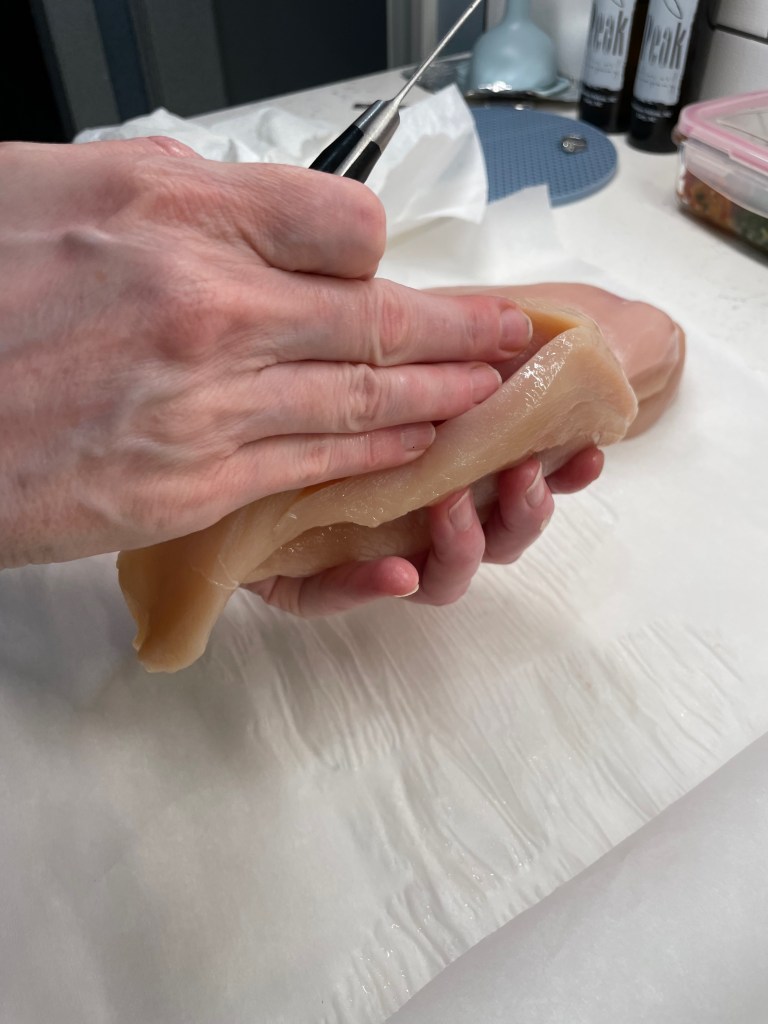
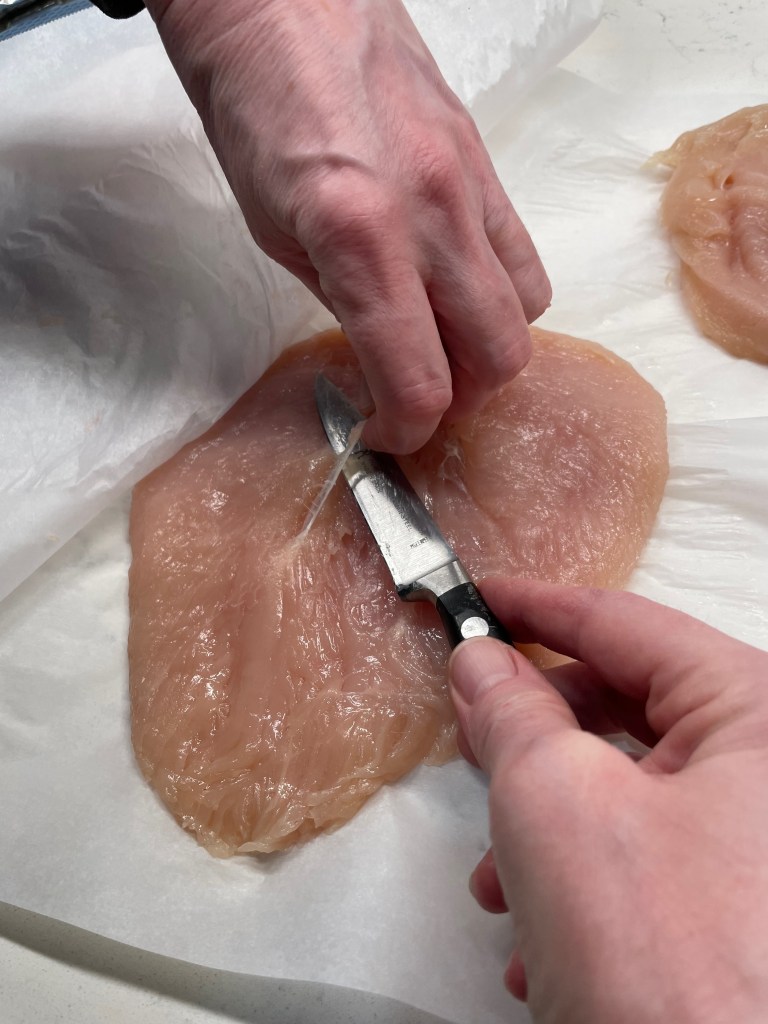
You’ll want to have a few items handy to successfully prep the chicken breasts, and the most important is a sharp, sturdy paring knife that you can use to open up a plump breast into a wider piece that can be pounded flat. A large chef’s knife is not recommended for safety reasons; using a smaller knife allows you to cut with more precision. Begin by holding the thick side of the breast toward you, and make several shallow slits lengthwise, opening the breast as you go, until it lays flat on the parchment. Take your time, and don’t use heavy pressure on the knife. Nobody wants to be at urgent care the week before Christmas.
Make a shallow slit along the thicker side.Open up the breast and continue making shallow cuts, a little at a time.Stop cutting when the breast will lay flat.
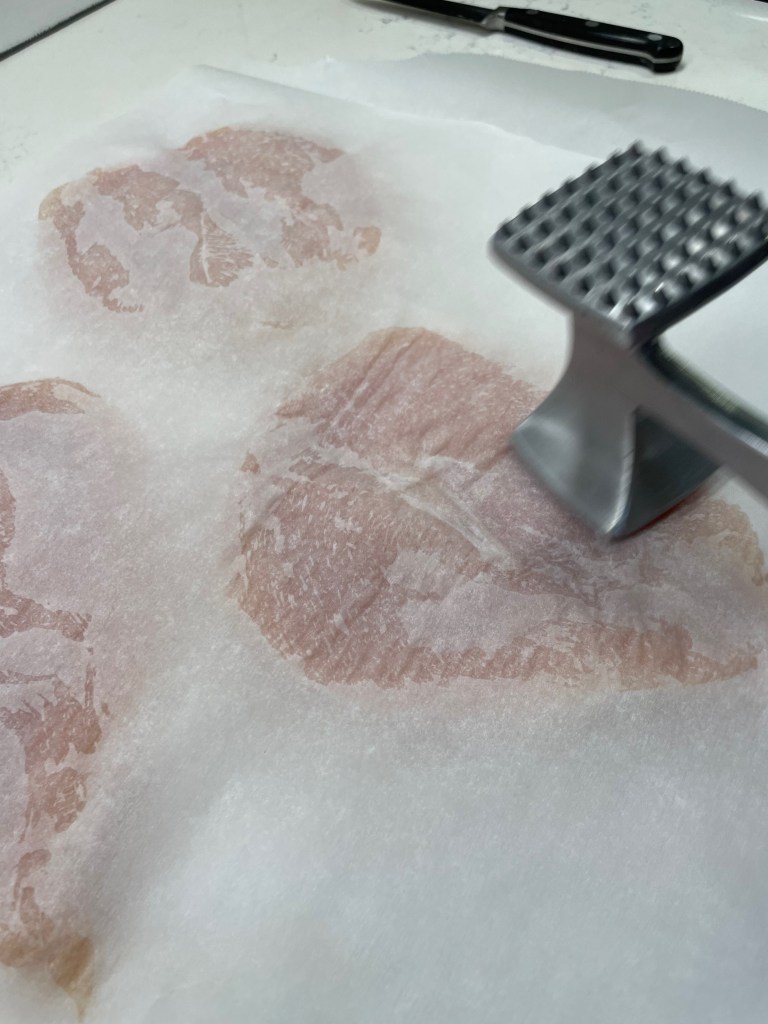
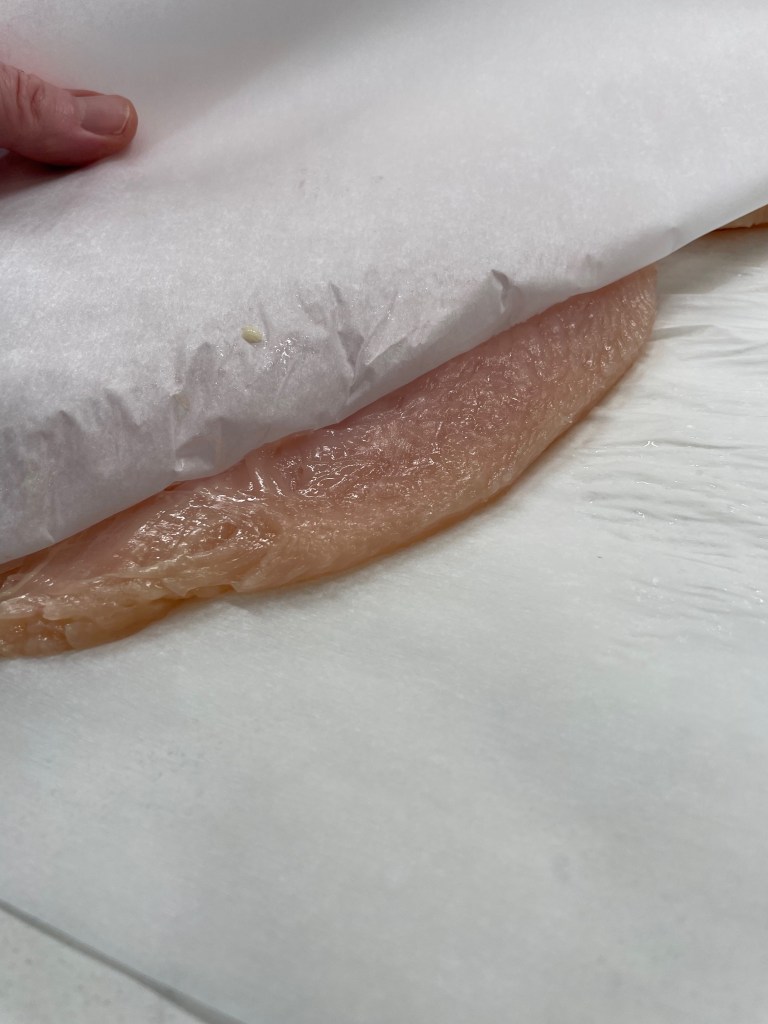
Next, you’ll need parchment or waxed paper and a smooth meat mallet for pounding the chicken. Don’t rush this, and don’t use the textured side of the mallet or you may accidentally split the fibers of the meat. The goal is to gently pound out the breast between layers of paper until it is an even 1/4-inch thickness (or as close to it as you can get). This makes the chicken more flexible for rolling up around your chosen filling ingredients, but don’t go thinner than 1/4-inch, or your chicken will tear apart.
Make a gentle swiping motion from center to edges.Ideal thickness is 1/4 inch.Use the tip of your knife to cut out the tendon.
Filling for the roulades
Just about any ingredients you like can be layered into chicken roulades, though I don’t recommend “melty” cheeses because they will always ooze out and make a mess in the oven. If you want a cheesy accent, stick with small amounts of firm cheeses, such as feta, bleu or Parmesan. Whatever vegetables you choose, chop everything small so that the filling rolls up easily and doesn’t fall out of the roulades when you bake them.
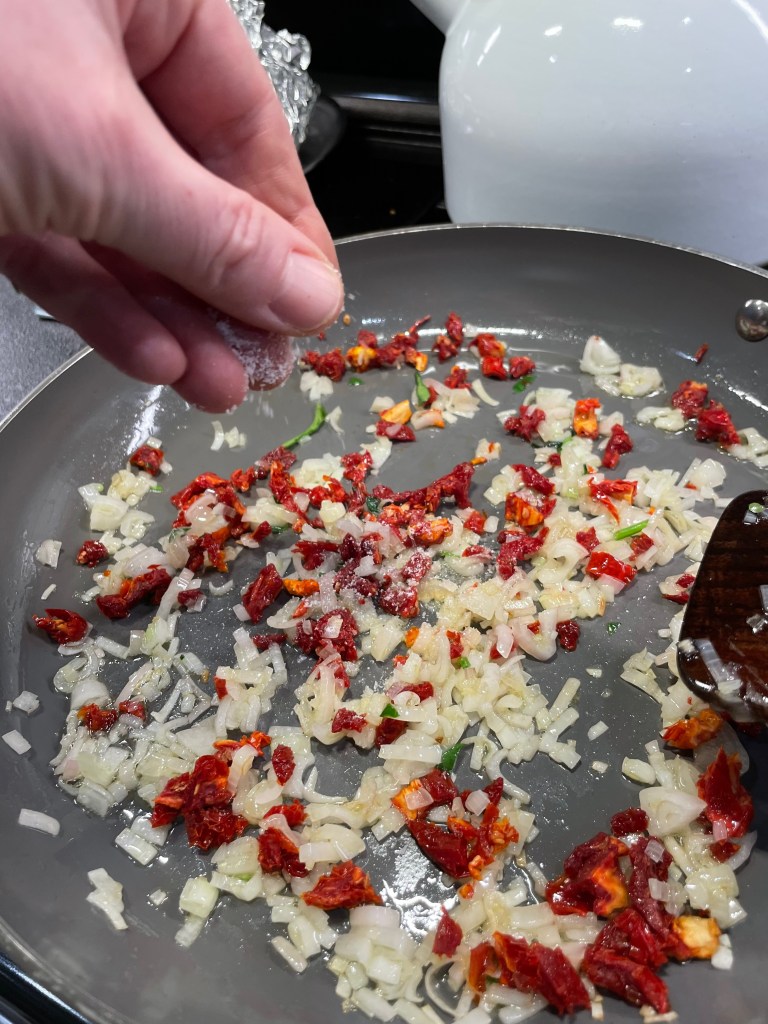
Use olive oil or butter to sauté, and remember to season every layer!
Second, cook any vegetable fillings until they are soft and tender. Raw ingredients rolled up inside the chicken will give off extra moisture and throw off the cooking time, and you’re also likely to have some unpleasant textures. To make the colors of my filling stand out, so I cooked the sun-dried tomatoes and spinach separately, but there would be no harm in cooking it all together to save a little time.
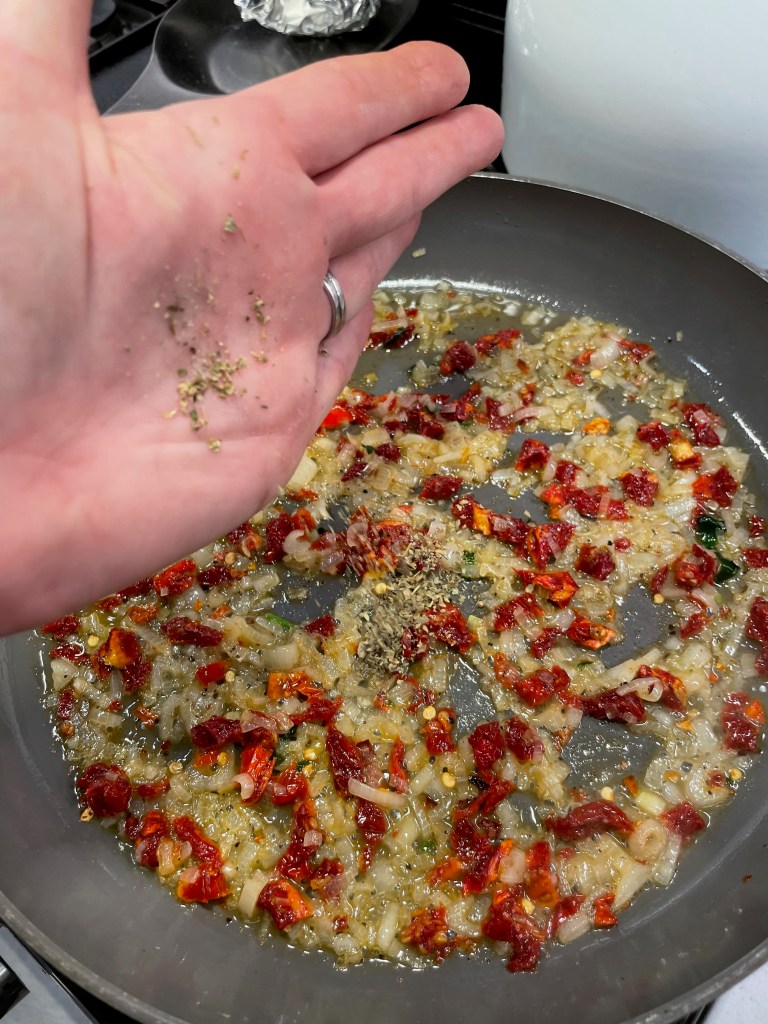
Don’t miss a chance to add flavor!
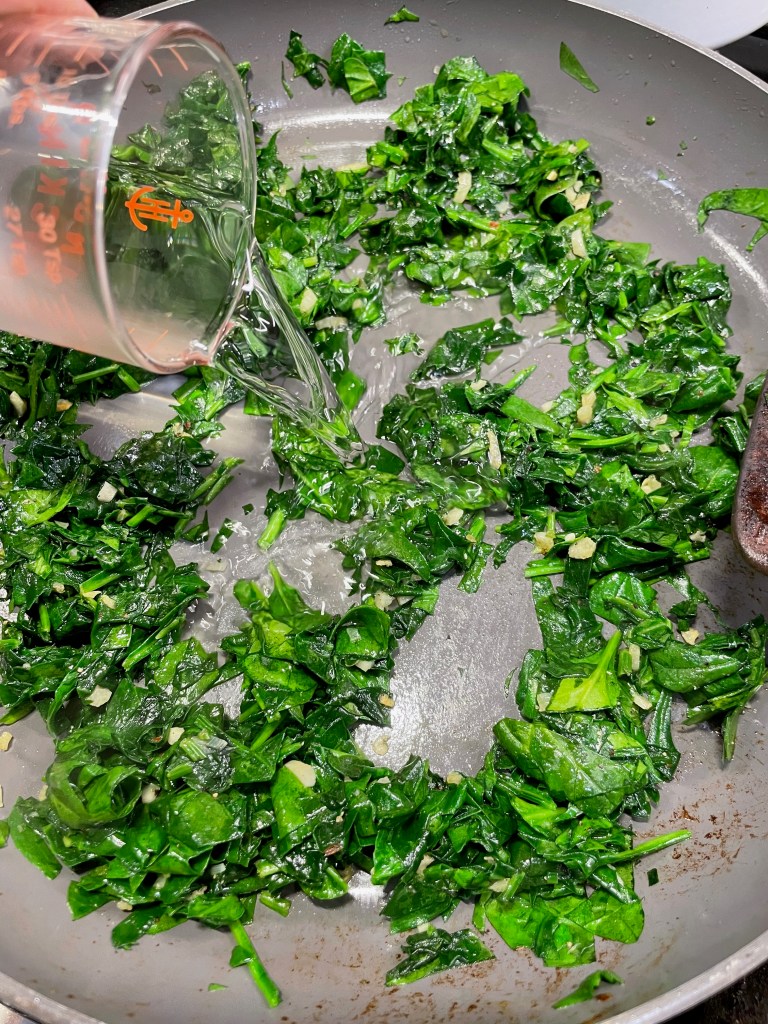
A little Italian herb seasoning and a pinch of Calabrian chile flakes gave my sun-dried tomato mixture some pizazz, and then I simmered with a splash of chicken stock until all the liquid was cooked off. To add depth to the spinach and garlic filling, I braised it in a shot of dry vermouth, again cooking until the excess moisture was evaporated. Dry white wine would be fine here; I just never have one open anymore and the vermouth is more interesting.
Cook off all excess moisture so that your roulades hold their shape in the oven.
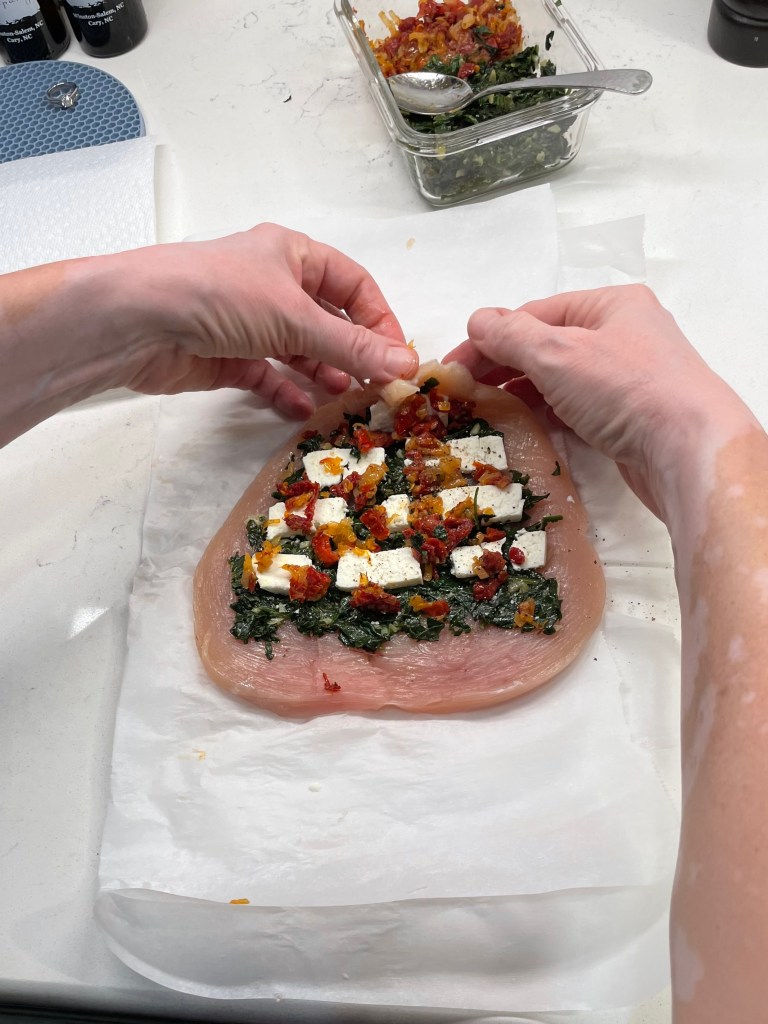
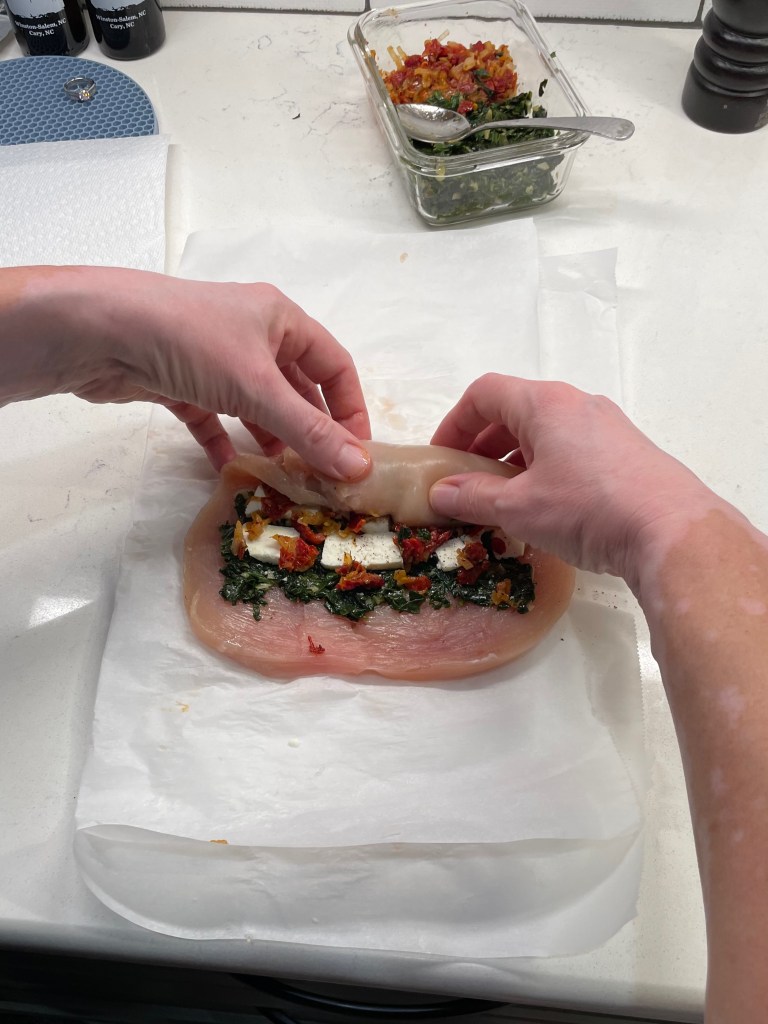
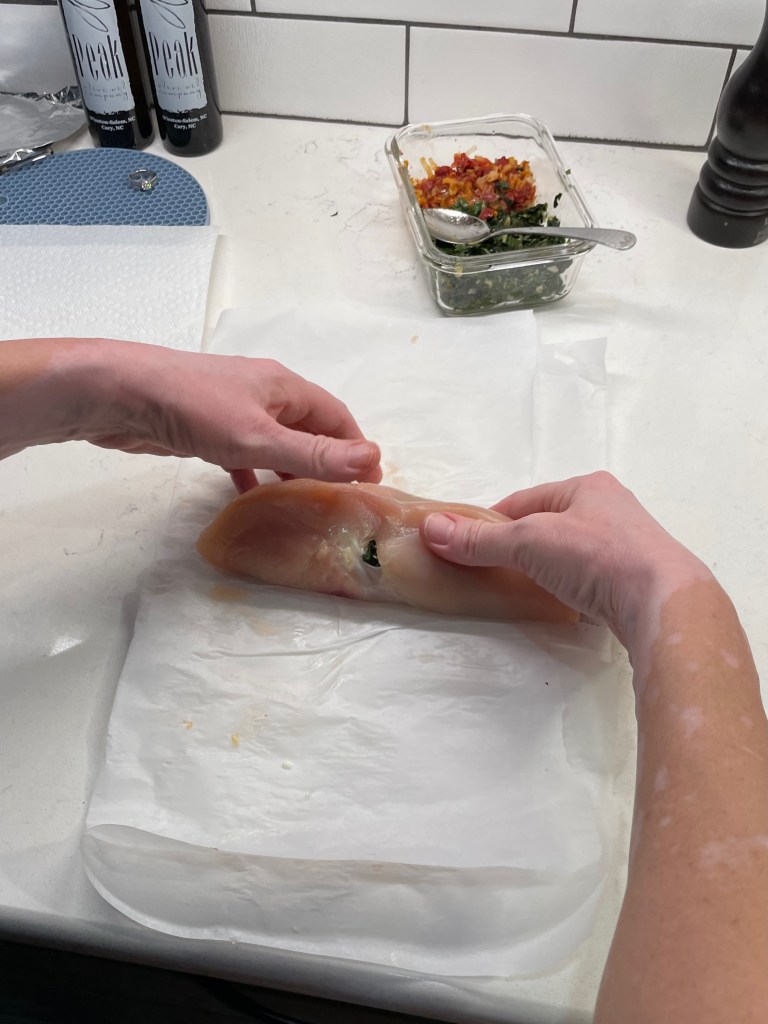
My chicken was layered with the spinach mixture, then thin slices of salty feta, and finally the sun-dried tomato mixture. Begin rolling from the pointed end of each butterflied breast, so that the fillings stay secure inside. The great thing about roulades is that any part of this could be done in advance to save precious time when you’re ready to entertain. You could even roll and refrigerate them in advance and just pull the whole baking sheet out of the fridge an hour before you bake.
My filling arrangement even looks a little bit like a Christmas tree! 😉
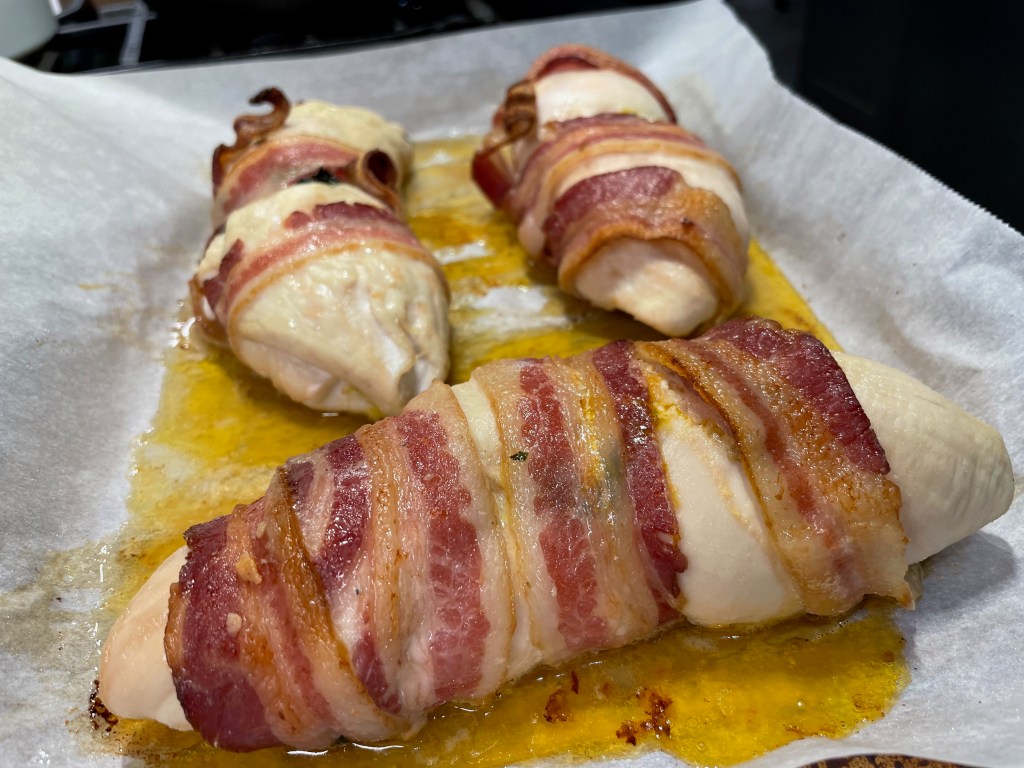
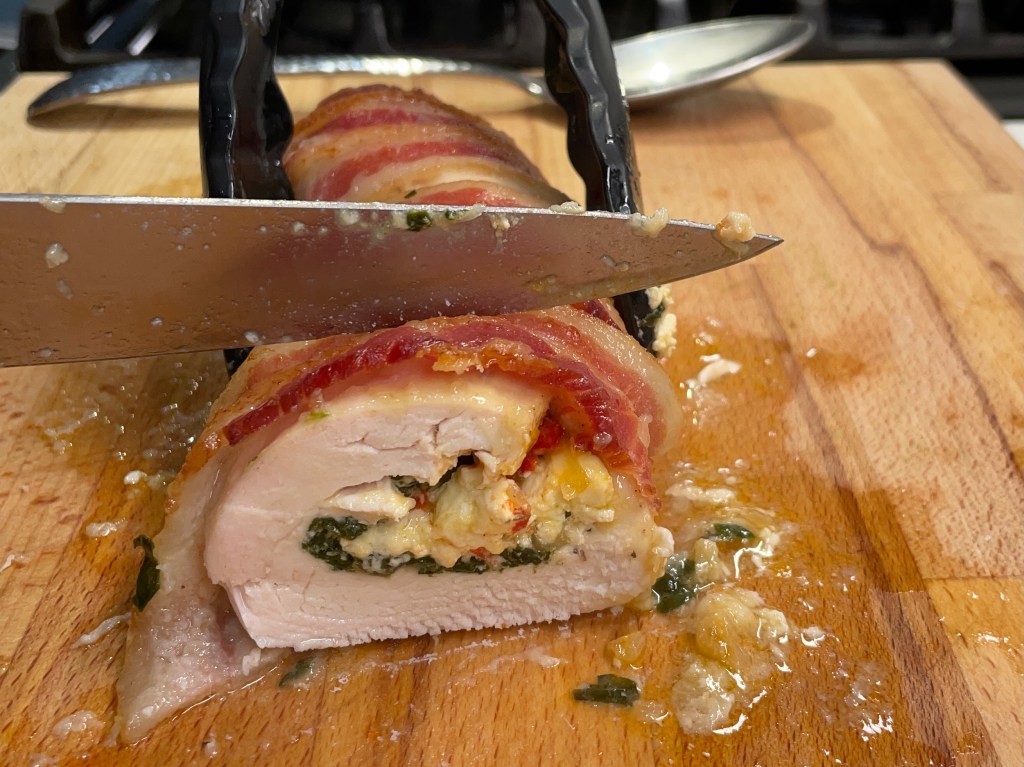
Secure the roulades with toothpicks, or stretch and wrap thin bacon slices all around before placing them (seams or bacon ends down) on a parchment-lined baking sheet. These go straight into the oven— no browning or searing is needed— and they’ll need about 40 minutes at 350° F. Let them cool a few minutes before slicing into one-inch thick rounds. Serve immediately.
The bacon adds flavor, and also works to hold the roulades together.
These festive chicken roulades were moist, tender and so flavorful. It made a delicious entree with Les’s amazing roasted garlic mashed potatoes, but I could also imagine them with polenta or risotto with these Italian-themed ingredients. But there are lots of other flavorful possibilities. Now that you know how to make roulades, drop a note in the comments to let me know what filling flavors you would like to try!
With favorite flavors and a few easy techniques, you can transform simple ingredients into something special for holiday entertaining. These roulades are filled with spinach and sun-dried tomato, but as long as your filling ingredients are chopped small and pre-cooked, the possibilities are endless!
Ingredients
1 1/2 pound package skinless, boneless chicken breasts (see notes)
2 Tbsp. extra virgin olive oil, divided (you’ll use half each for sautéing the spinach and tomato mixtures)
2 fat handfuls baby spinach leaves, chopped
2 cloves garlic, finely minced
2 Tbsp. dry white wine (or vermouth, which is my go-to)
1/4 cup chopped sun-dried tomatoes (see notes)
1 medium shallot, finely diced
1/2 tsp. dried Italian herb blend
A pinch of red pepper flakes
1/4 cup chicken broth or stock
Kosher salt and freshly ground black pepper
4 oz. dry feta, cut into thin slices or crumbled
2 slices thin-cut bacon for each chicken breast used
Notes: The chicken breasts can be any size, and you don’t need to have one breast for each person you’re serving. They will be sliced into rounds, so as long as you have the appropriate weight package, you’ll have enough.
The sun-dried tomatoes I use are soft and pliable, ready straight from the package. If using very dry ones, rehydrate them briefly in hot water or chicken broth and then pat them dry. If using sun-dried tomatoes packed in oil, there’s no need for additional oil for sautéing them with the shallots.
Directions
Preheat oven to 350° F, with rack in center position. Line a baking sheet with parchment paper.
Butterfly the chicken breasts; use a sharp paring knife to cut shallow slits along the fat edge of the breasts, opening as you go until the breasts lay flat on the counter. Place between layers of parchment or waxed paper and pound gently with the smooth side of a meat mallet until they are a uniform, 1/4-inch thickness. Season with salt and pepper and set aside.
Heat one tablespoon of the oil over medium heat. Add the sun-dried tomatoes and shallots and sauté until tender. Season to taste with salt and pepper, plus Italian herb blend and red pepper flakes. Add chicken stock or broth, simmering until the liquid evaporates. Cool completely.
Heat remaining olive oil over medium heat. Add the chopped spinach and garlic and sauté until spinach is fully wilted. Season with salt and pepper, and stir in dry white wine; continue cooking just until the liquid evaporates. Cool completely.
Place the butterflied chicken breasts in front of you, with the pointed ends at the top. Divide spinach mixture evenly over the breasts, then arrange the feta and sun-dried tomato mixture. Roll each chicken breast tightly, starting at the narrow top so that you finish with a long edge. Use toothpicks to secure the edges of the chicken to the roulades, or gently stretch two slices of bacon to wrap around each breast, covering as much as possible.
Bake the roulades (uncovered) 35 to 45 minutes, or until bacon is fully cooked and chicken is opaque but not dry. Internal temp should be ~165° F. Let roulades rest at least five minutes, then slice into one-inch thick rounds and serve immediately.
I know I promised you a cocktail before Thanksgiving, and I should know by now that late November is not the time to make promises I might not be able to keep. 🤷🏻♀️ Better late than never, and it’s all good because what I’m about to share with you could be the holiday miracle your entertaining plans have been waiting for. This drink became an accidental star at our Thanksgiving happy hour, and the great news is that its seasonal flavors and fancy presentation make it perfect for all the holidays coming up.
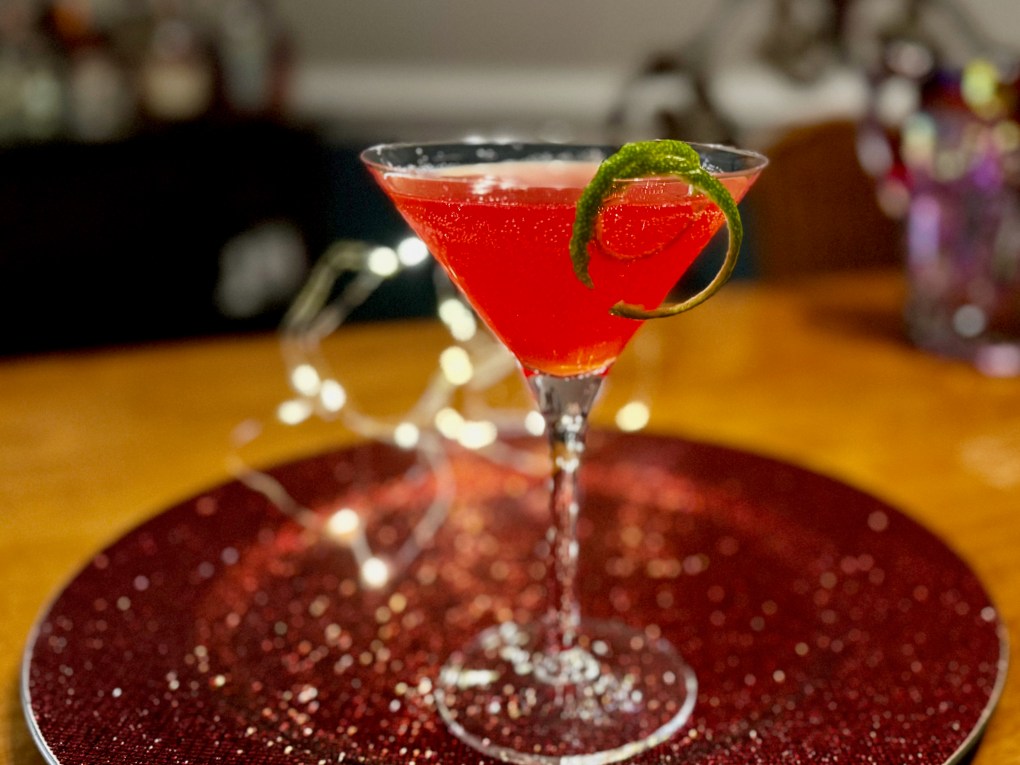
I found this inspiration quite unexpectedly while scrolling Instagram in the wee hours, as I am wont to do. A few days before Thanksgiving, Food Network had posted a slideshow of recipes offered by its celeb chefs. There were variations on casseroles and desserts and—oh, who am I kidding? I have no idea what else was in the photo carousel because the fresh cranberry cosmo stopped me dead in my tracks. The ingredient list was simple, the technique brilliant and the drink divine.
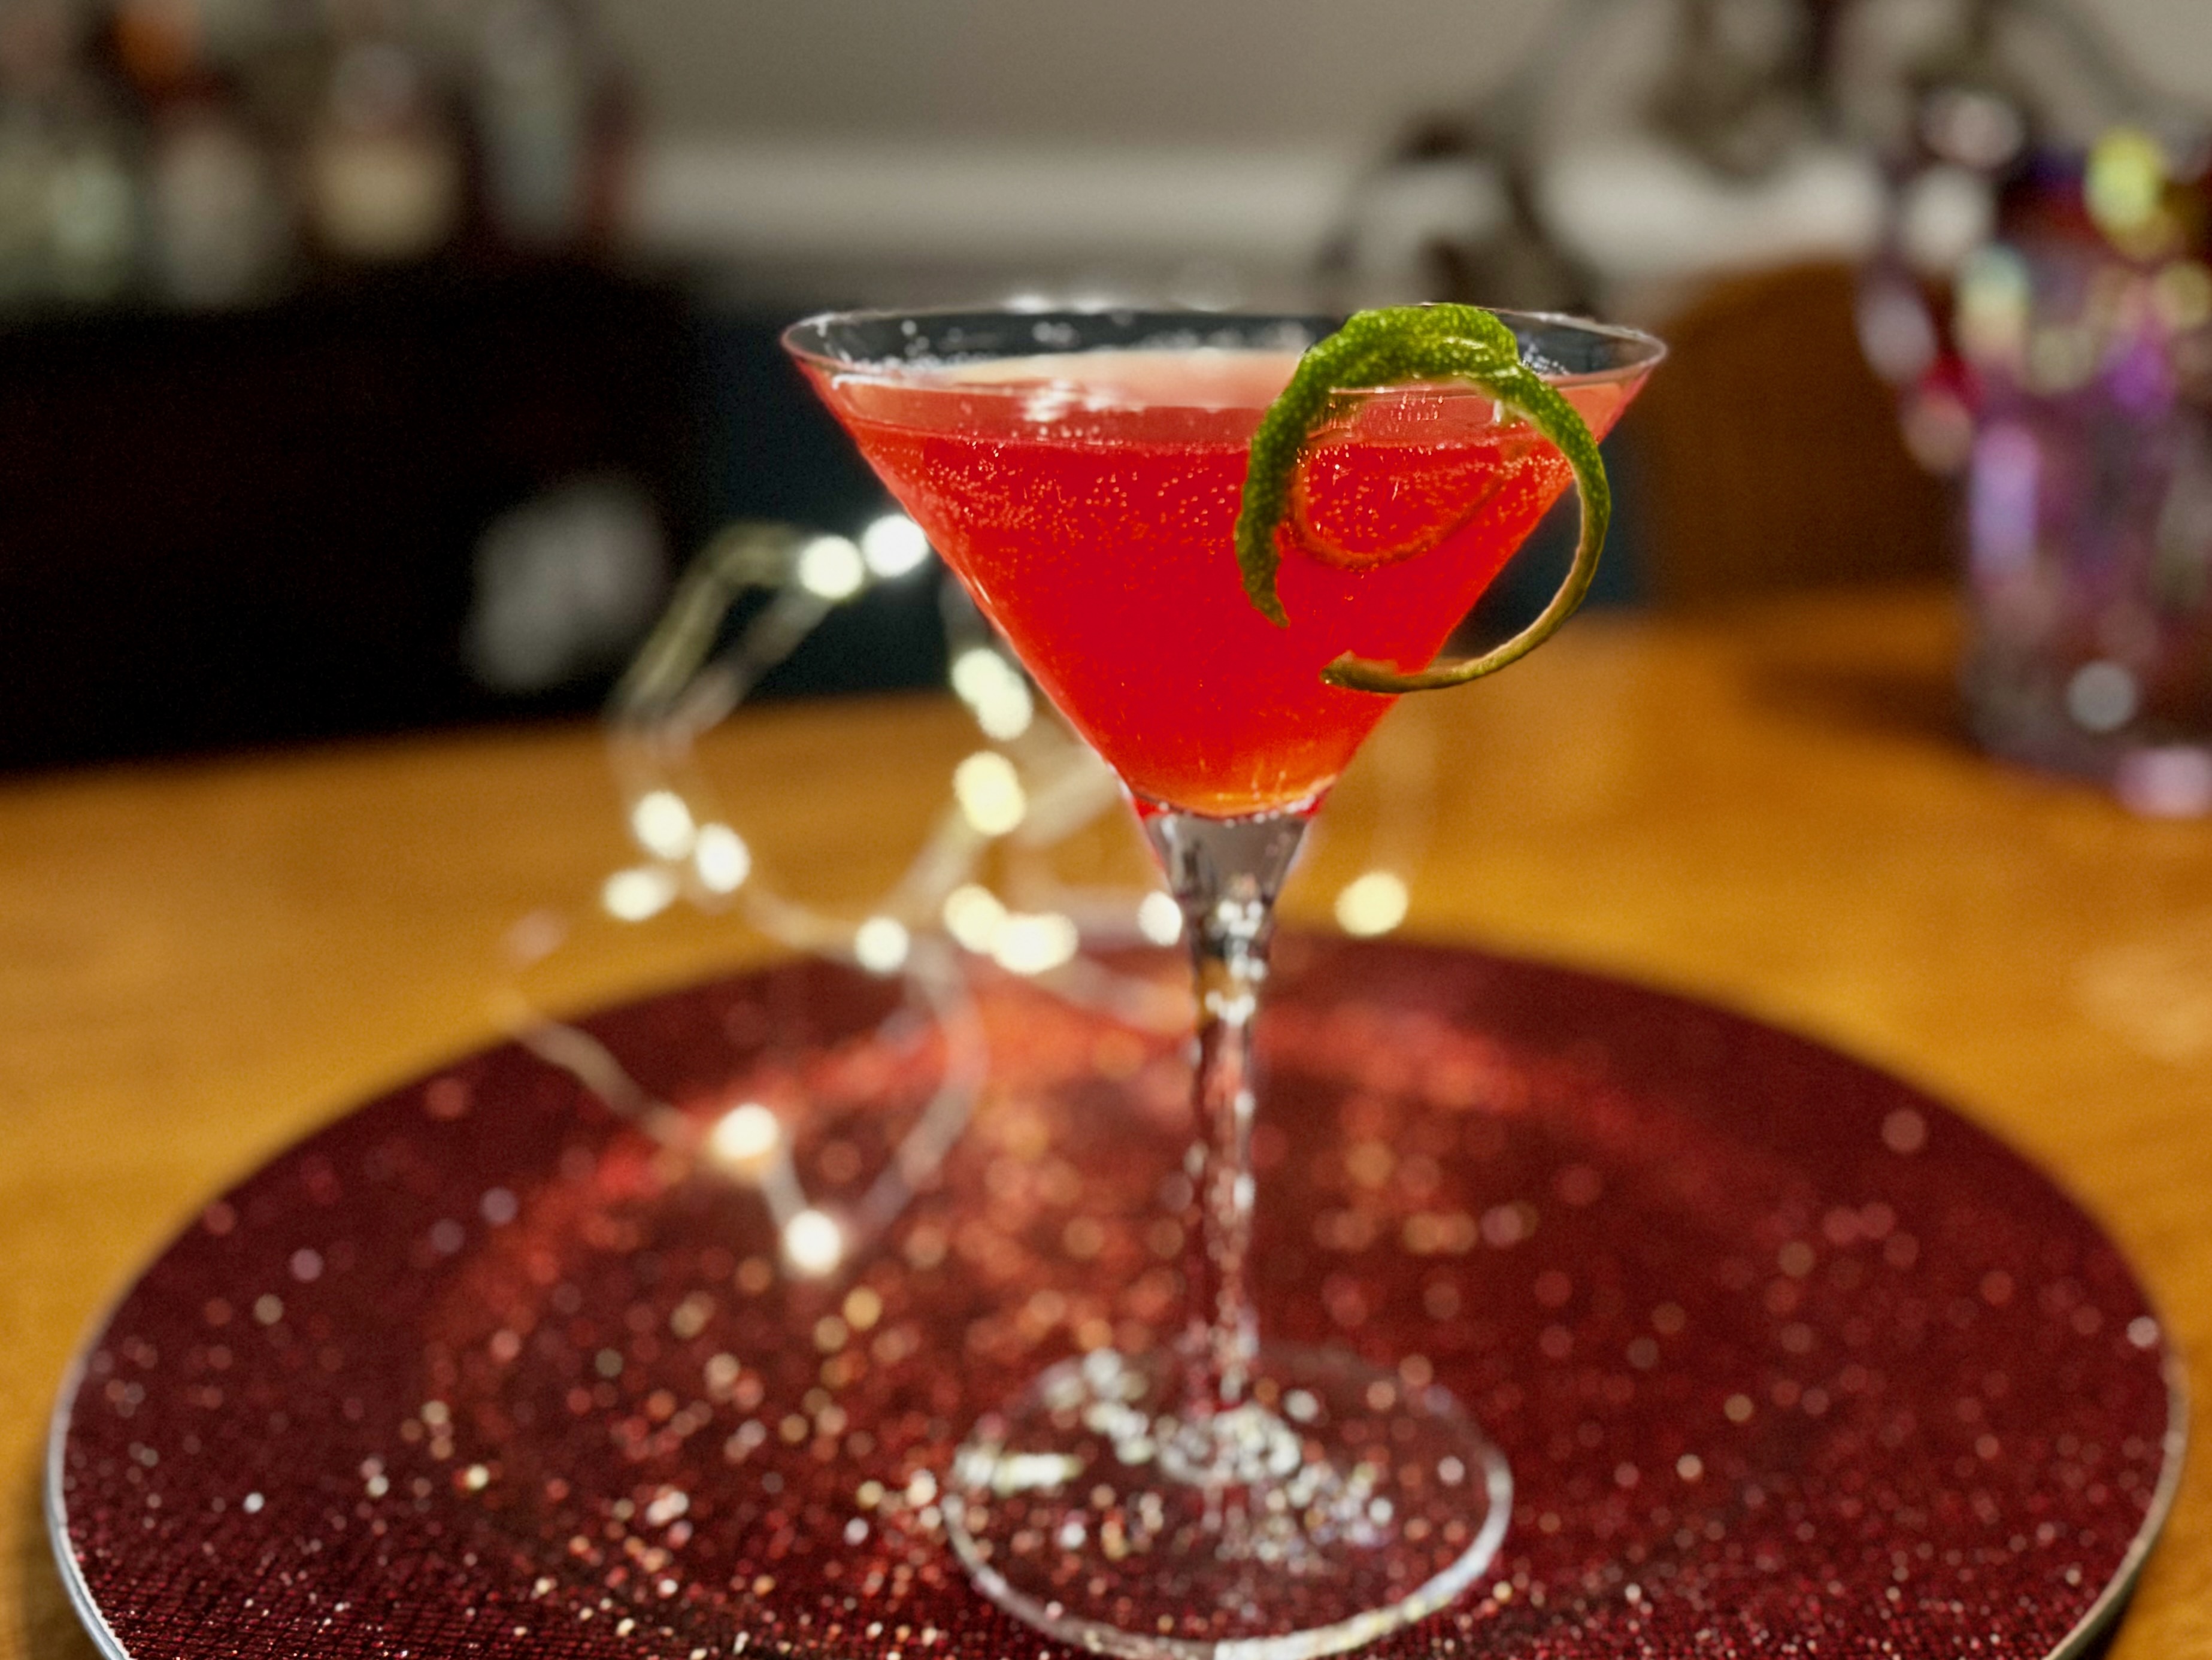
Cheers, Christmas!
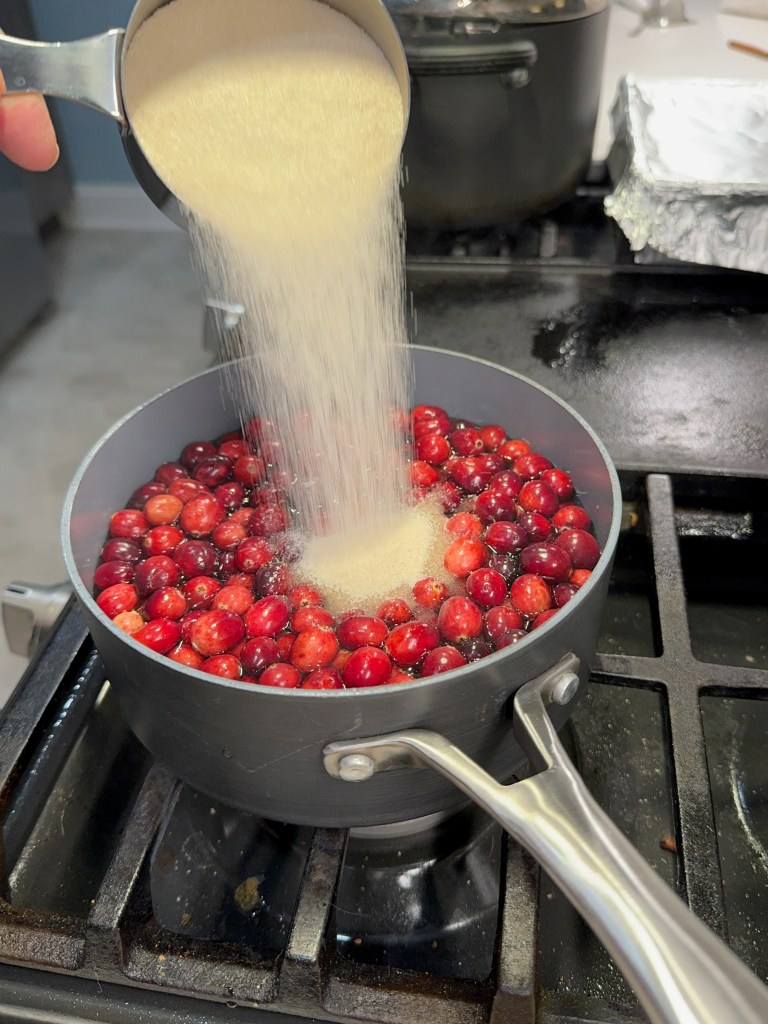
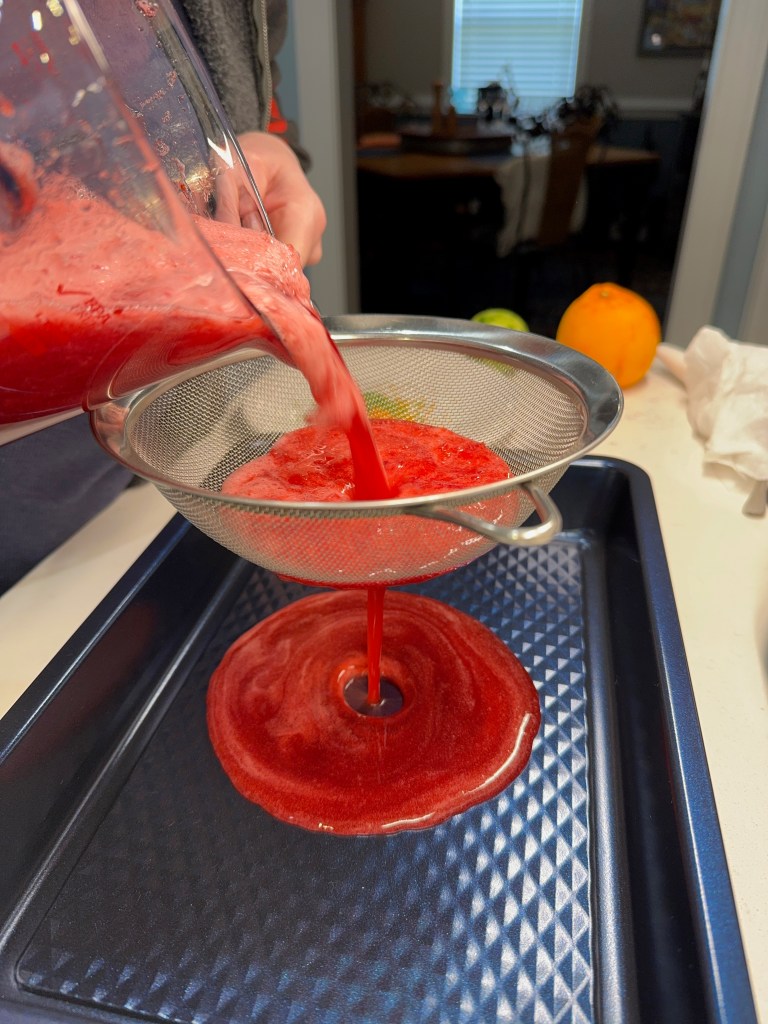
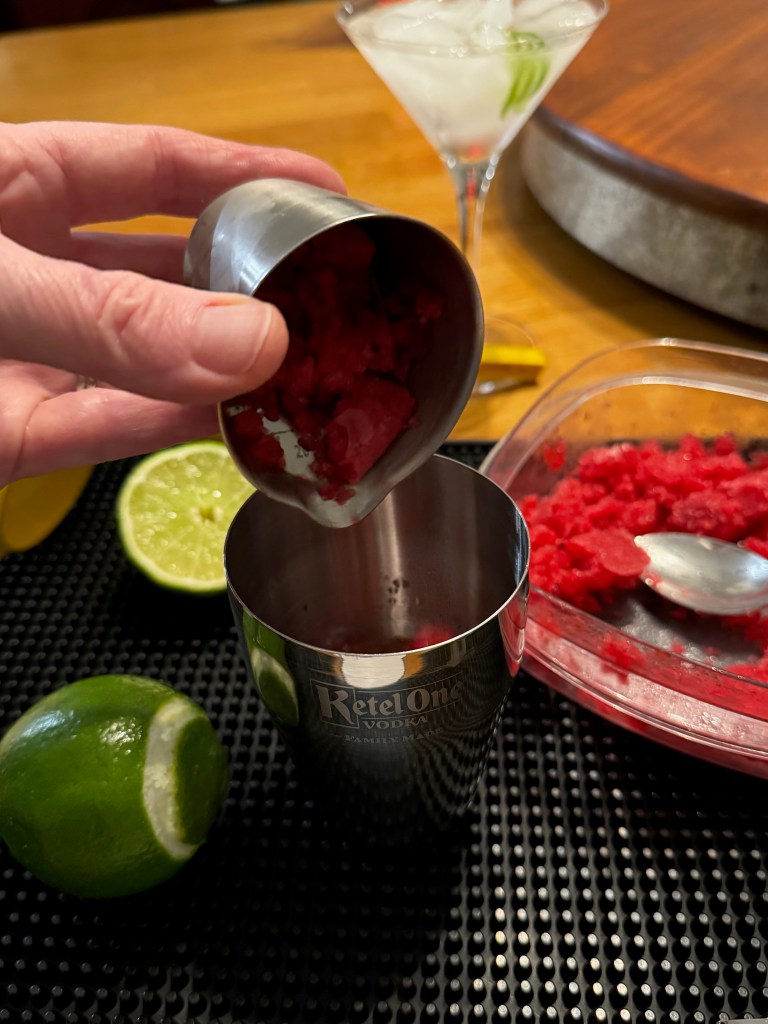
It was star chef Alton Brown who presented the formula for the cranberry granita that is the base of this stunning, neon-colored drink, and the granita itself could be served as a palate cleanser or even a light dessert after a rich holiday meal. His granita was made by simmering fresh cranberries, sugar and lime zest in a fair amount of water, and then blending, straining and freezing. Later, he used a fork to shred the icy mixture into a substance not unlike a snow-cone. That granita mixture is then shaken with vodka and fresh lime juice— no additional ice necessary— and strained into a martini glass for the brightest, freshest seasonal cocktail I’ve ever enjoyed.
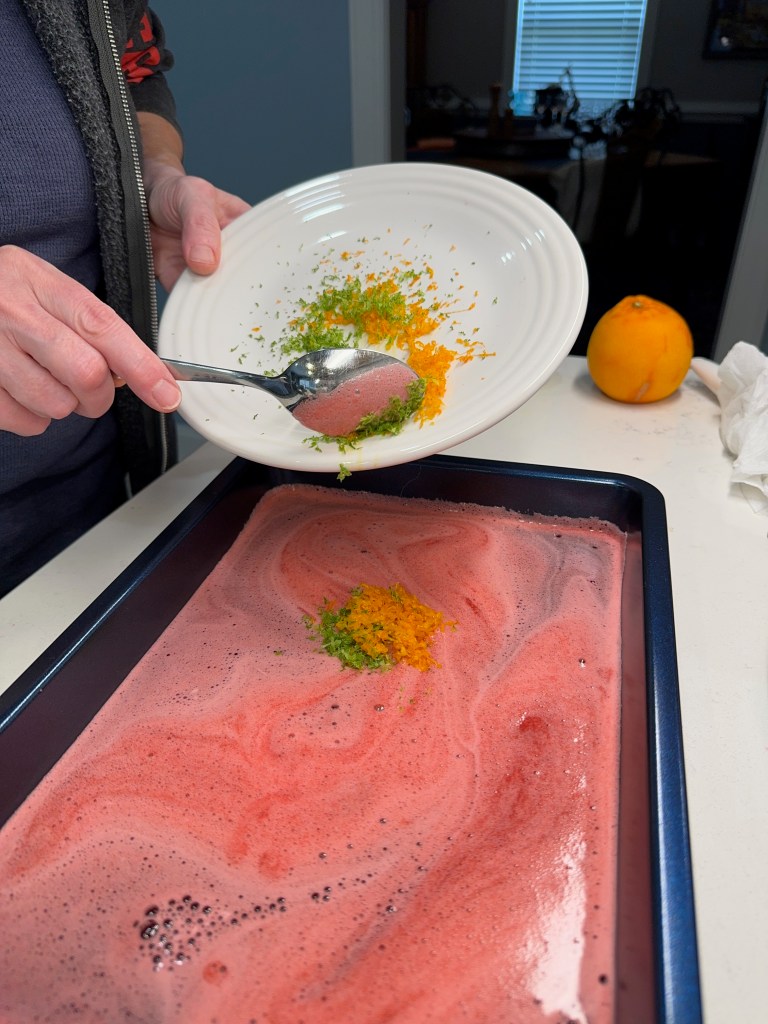
Of course, I couldn’t leave it at that (do ya know me?), and Alton himself is partly to blame for my tendency to twist a classic. During the early aughts, I hardly missed an episode of his “Good Eats” program on Food Network, and that was unquestionably when I became fascinated with the science of food and drink, inspiring me to push the culinary boundaries in my own kitchen. So, Alton, I’ll see your cranberry granita and I’ll raise you some crystallized ginger and orange zest. Because, Christmas. 🎁
Cranberry, ginger, citrus. It even smells like the holidays!
You don’t want to know how many spoons I used tasting this stuff along the way, nor how many sample cosmos I made for myself, just to be sure I wasn’t imagining how good it was. The cranberry-ginger granita is equally tart and sweet, and my mind is still racing with possibilities for drinks beyond this festive cosmo. Imagine swapping the vodka for blanco tequila— instant Christmas margarita! Or substitute white rum for a cranberry-ginger daiquiri. Seriously, can anyone give me one reason not to mix it with gin and lemon and top it with champagne for a cranberry-ginger French 75? Could this be the little black dress of the holiday cocktail season?
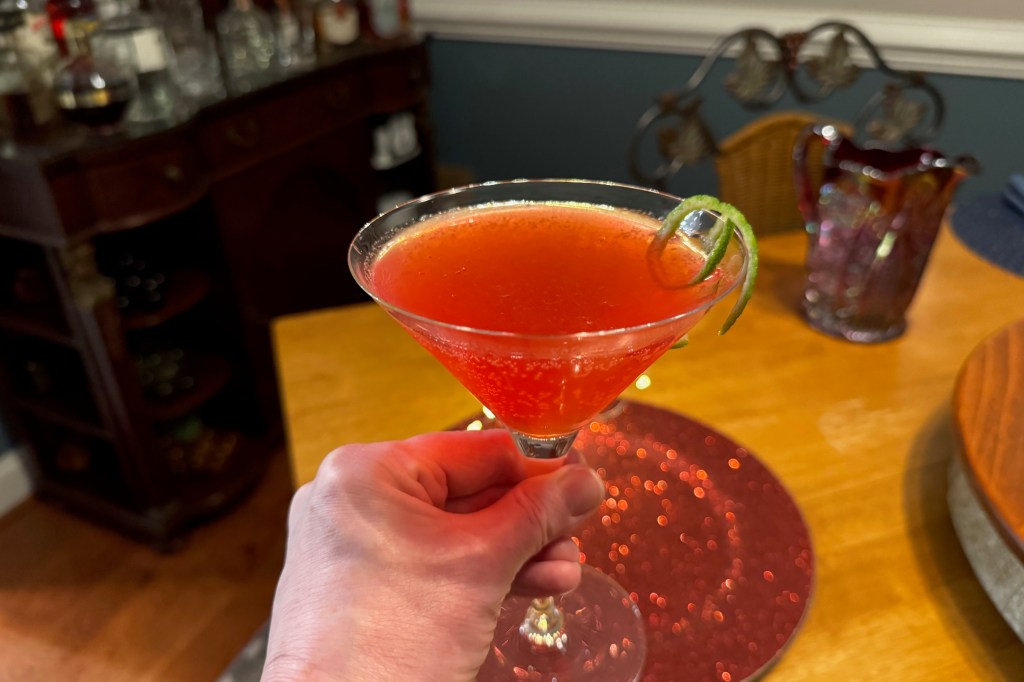
For that matter, I should also be able to sub something non-alcoholic for a tasty mocktail to delight non-drinkers at my party, right? I did that for one of our Thanksgiving guests, and I guarantee you can’t tell which of these glasses held the zero-proof drink. She said it was delicious.
I’ll give you a hint: it wasn’t mine. 😂
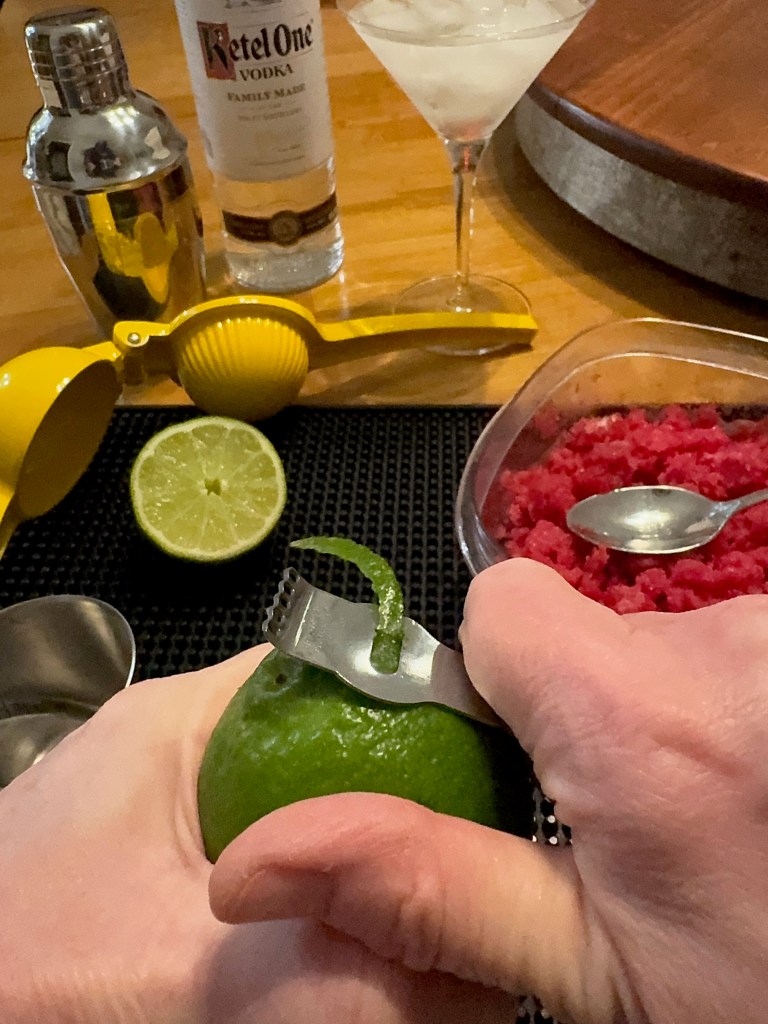
Making this sparkling fresh cranberry-ginger cosmo couldn’t be easier, and I’ll also share my tips for the mocktail in the click-to-print recipe card you’ll find at the bottom of the post. Start by making the granita a few days before you plan to entertain, and wash up several fresh limes so they are ready for happy hour. Plan on one lime for every two drinks; you’ll use the juice in the drinks and a strip of zest for garnish. And for a little extra holiday pizzazz, pick up a four-pack of blood orange ginger beer to top off your cocktails with a sparkly finish. Chill your cocktail glasses while you mix, and use a fine mesh strainer if you don’t want little bits of zest floating in your glass.
A channel knife is great for making a zest strip. Otherwise, use a potato peeler and trim with a sharp knife.
This gorgeous holiday drink uses a make-ahead cranberry-ginger granita that is so delicious, you'll want to use it in other drinks, too!
Ingredients
1 1/2 oz. Ketel One (or other premium) vodka
2 1/2 oz. cranberry-ginger granita (recipe follows)
1/2 oz. freshly squeezed lime juice
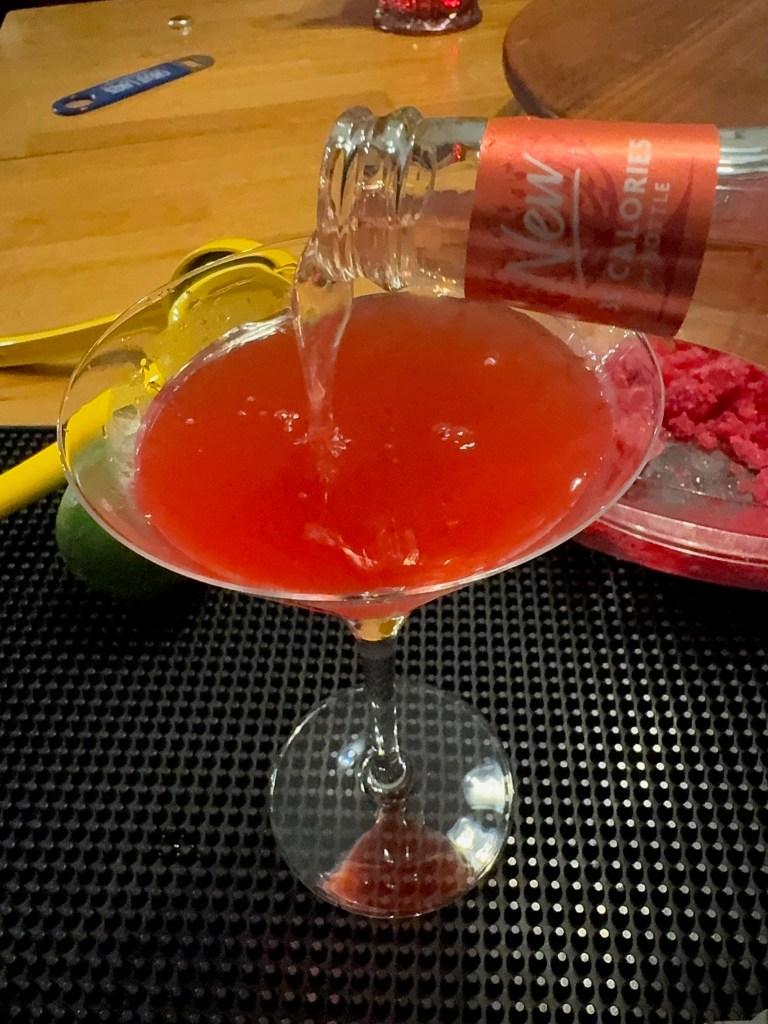
1 oz. Fever Tree blood orange ginger beer (or regular ginger beer, if desired)
lime zest twist to garnish
Notes: Make the cranberry-ginger granita ahead of time, and transfer to airtight containers in your freezer for safekeeping. I recommend using a fine-mesh strainer when pouring the drink into the glass, unless you’re OK with having the zest bits floating in the drink.
For an easy mocktail, swap in Simply Lemonade for the vodka, use 1/4 oz. lime juice and increase the ginger beer a bit. When making both alcohol and non-alcohol drinks for party guests, consider using two separate shakers to avoid mixups and in-between cleanings.
Directions
Chill cocktail glass with ice water, or place in freezer 20 minutes before mixing the drinks.
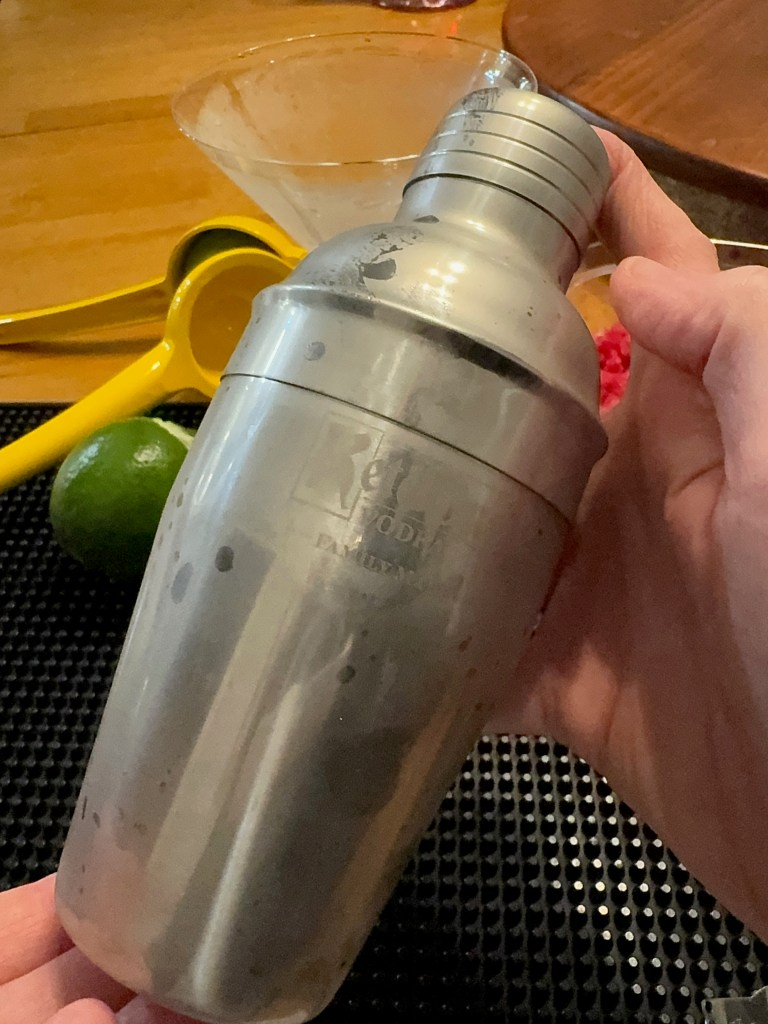
Measure vodka, granita and lime juice into a shaker. Cover and shake the shake out of it until the thing is too frosty to hold comfortably. The granita will melt with the other ingredients, so no ice is required for this step.
Strain into the glass, top off with ginger beer and garnish with the lime strip.
Notes: The cranberry-ginger granita will be enough for about 20 cocktails. Make it ahead and keep it in the freezer so it’s ready for all the holidays.
Ingredients
3 cups water
2 1/4 cups fresh whole cranberries
1 cup plus 2 tablespoons organic cane sugar
2 tablespoons minced crystallized ginger
Zest of one lime and half an orange (organic is best and washed thoroughly)
Directions
1. Combine water, cranberries, sugar and ginger in a medium saucepan over medium-high heat. Bring to a boil and then simmer for several minutes until the berries soften and split. Remove from heat and cool for a few minutes.
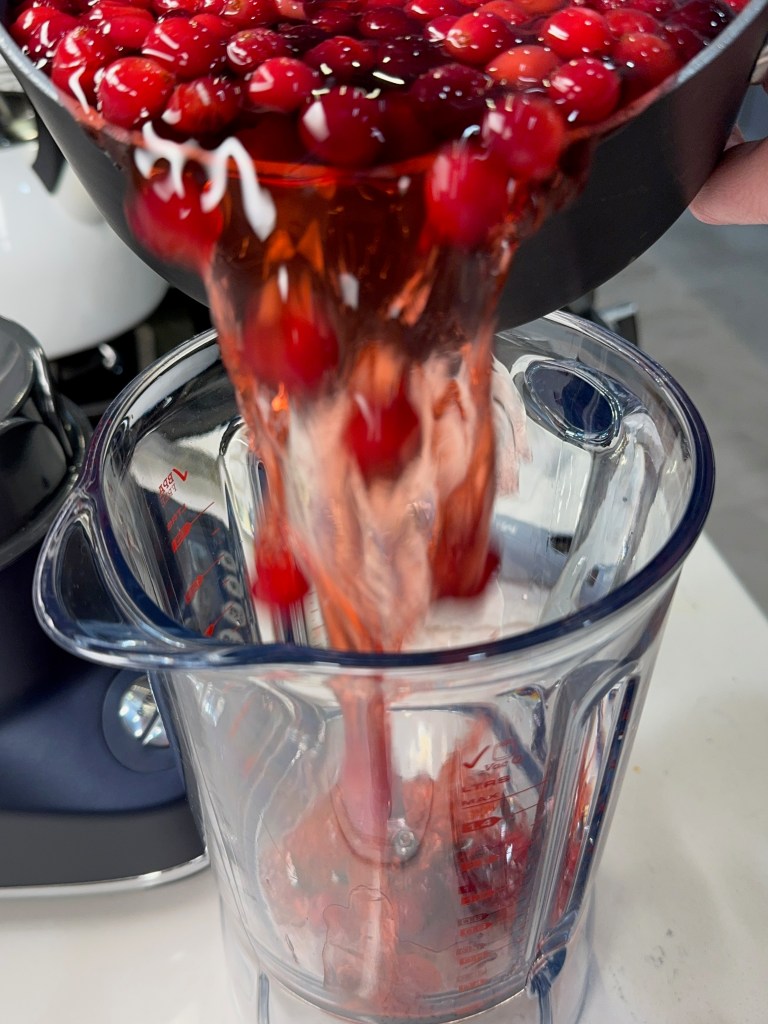
2. Transfer cranberry mixture to a blender (remove vent cover) or use an immersion blender to puree the mixture into a slurry. Pour through a mesh strainer into an oblong, shallow pan. I used a silicone scraper to gently move the puree back and forth on the strainer surface, as the pectin from the berries was quite heavy.
3. Stir in the citrus zest. Cover with plastic wrap and place the pan flat in the freezer for several hours until solid (overnight is fine).
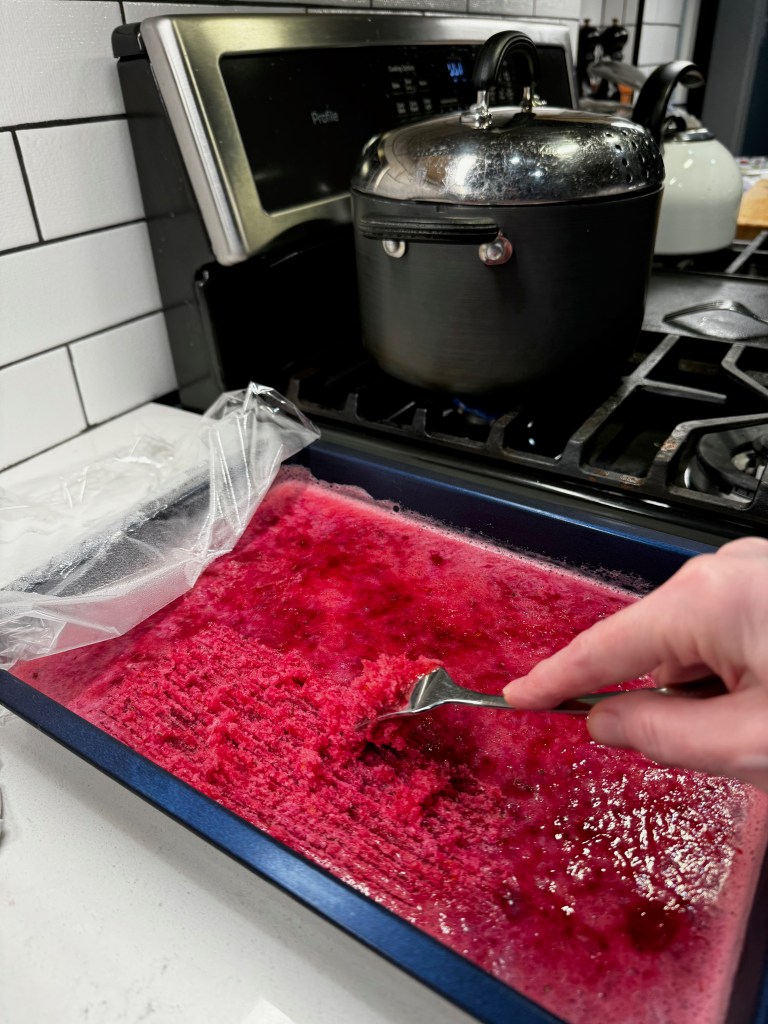
4. Use a fork to scrape the surface of the mixture until you have multiple layers of icy granita. Note that the mixture will likely clump as it refreezes. If you want it to be uniform consistency for cocktail hour, transfer it to a food processor and pulse a few times.