Festive Chicken Roulades

Special occasion food doesn’t have to be complicated. Sometimes, it’s the simplest flavors that have the most impact, and this is one of many lessons I learned during the few years that I pitched in at a catering kitchen back in the ’90s. But when an occasion calls for something “fancy,” there are a few tricks you can use to elevate your presentation of simple ingredients. Roulades are a great example of this concept, and it’s only a little bit of extra effort, but the impact is always great!

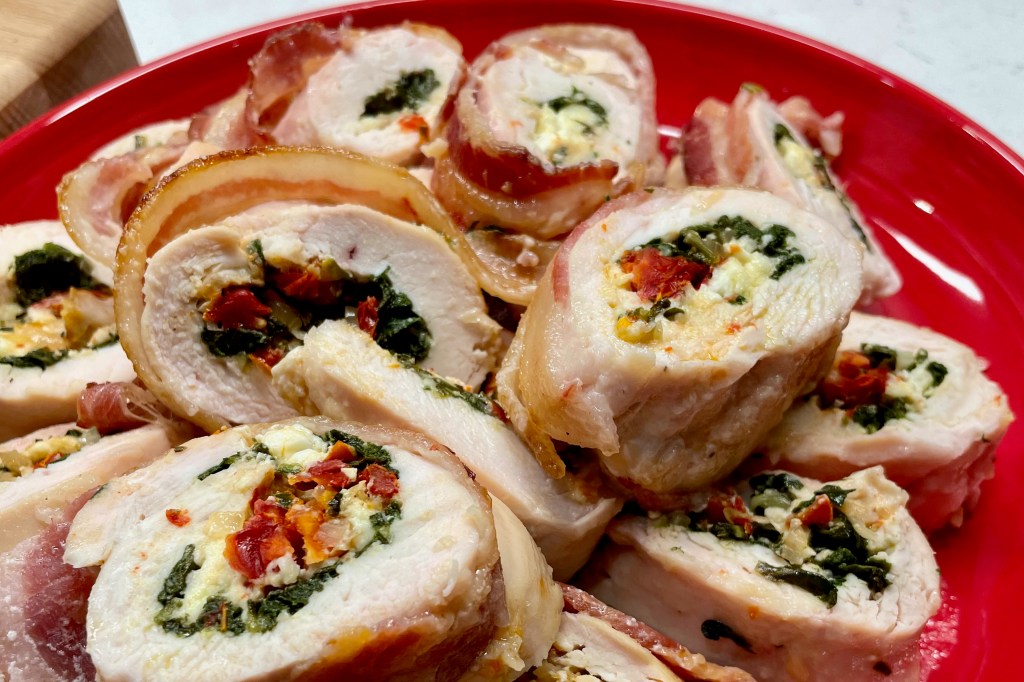
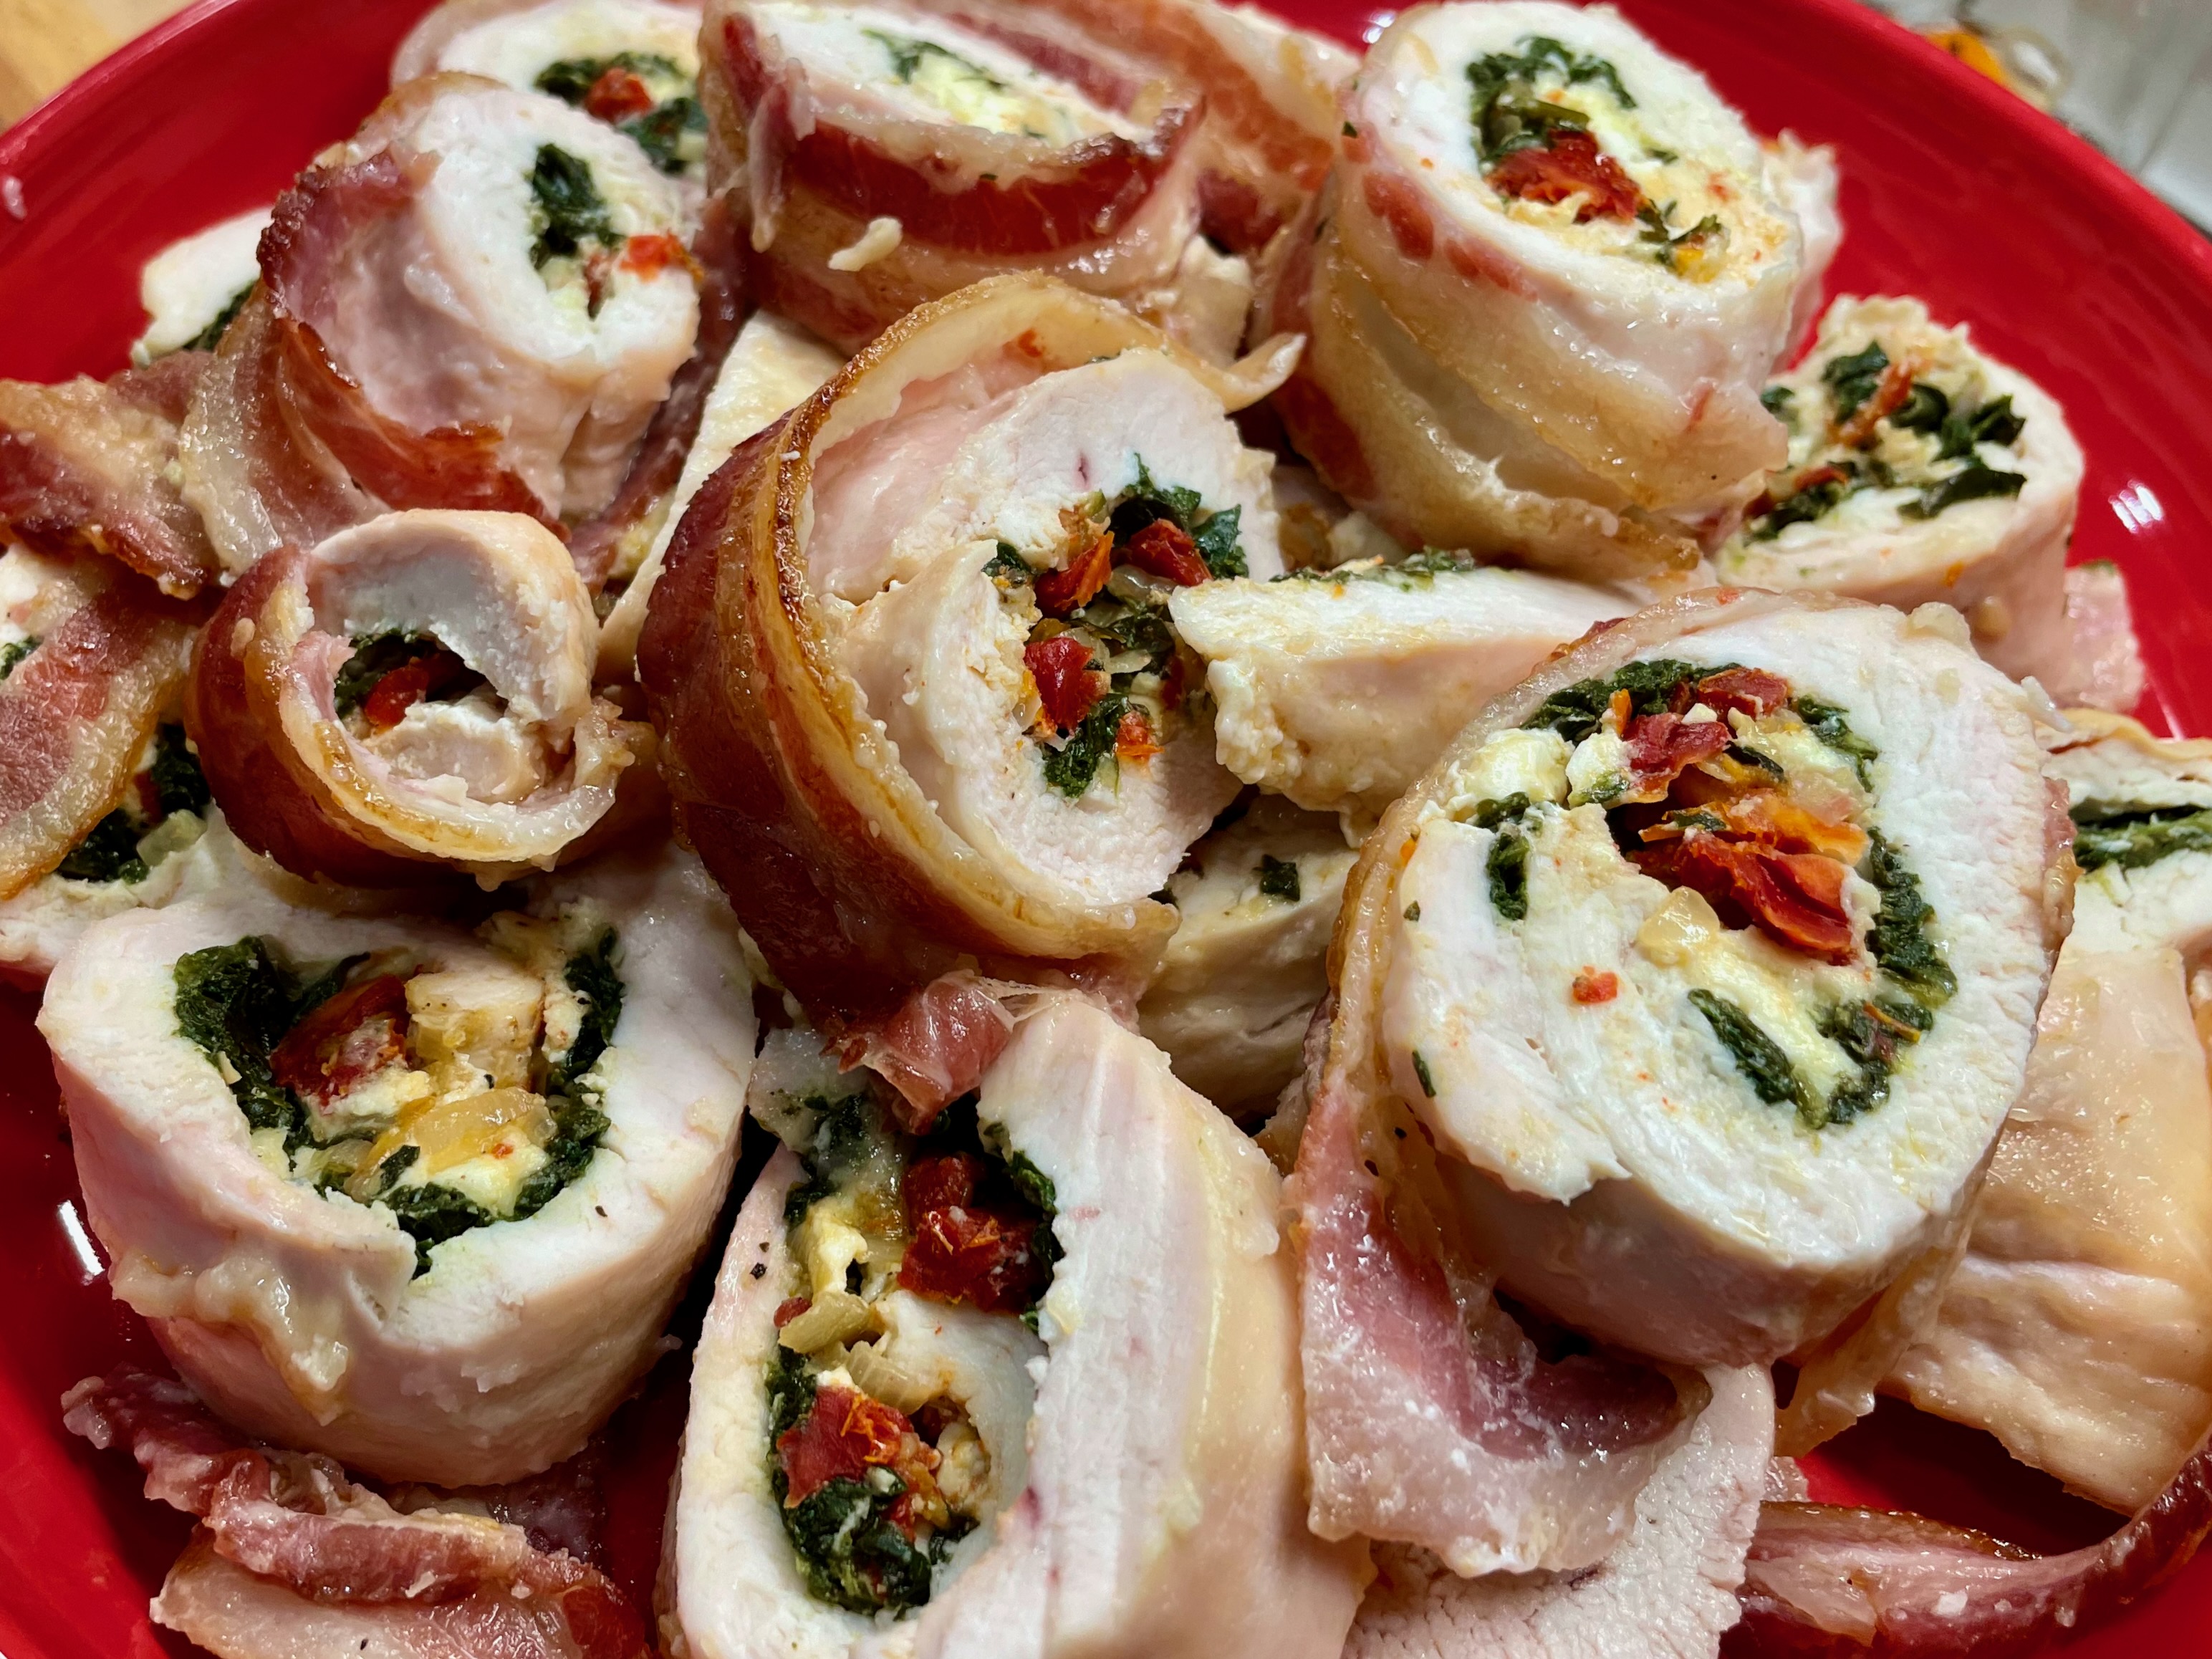
Despite the special appearance of roulades, they’re actually quite easy to make, using whatever fillings sound good to you. This time, mine are bearing festive hues of green and red (just like Christmas), with crowd-pleasing flavors of spinach, feta and sun-dried tomato. The filling is accented with sautéed shallots, garlic and Italian herb blend, and these pretty pinwheels are delicious alongside some roasted garlic mashed potatoes

Are you ready to get cookin’?

My flavors are Mediterranean, but there are so many possibilities!

Special tools

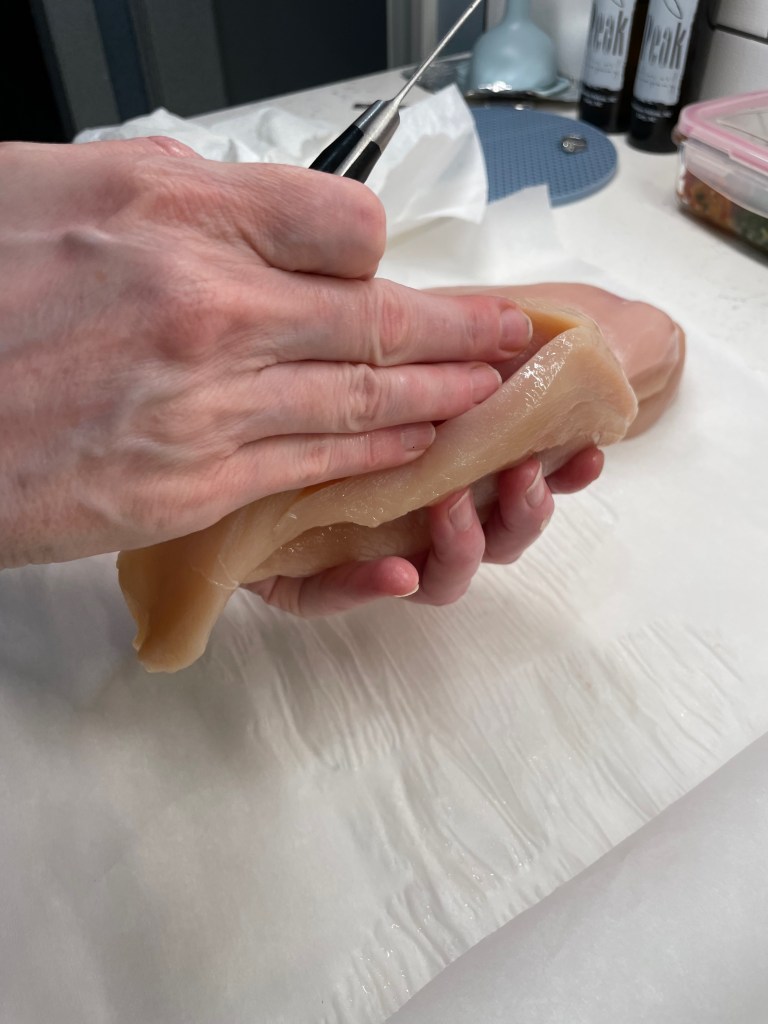
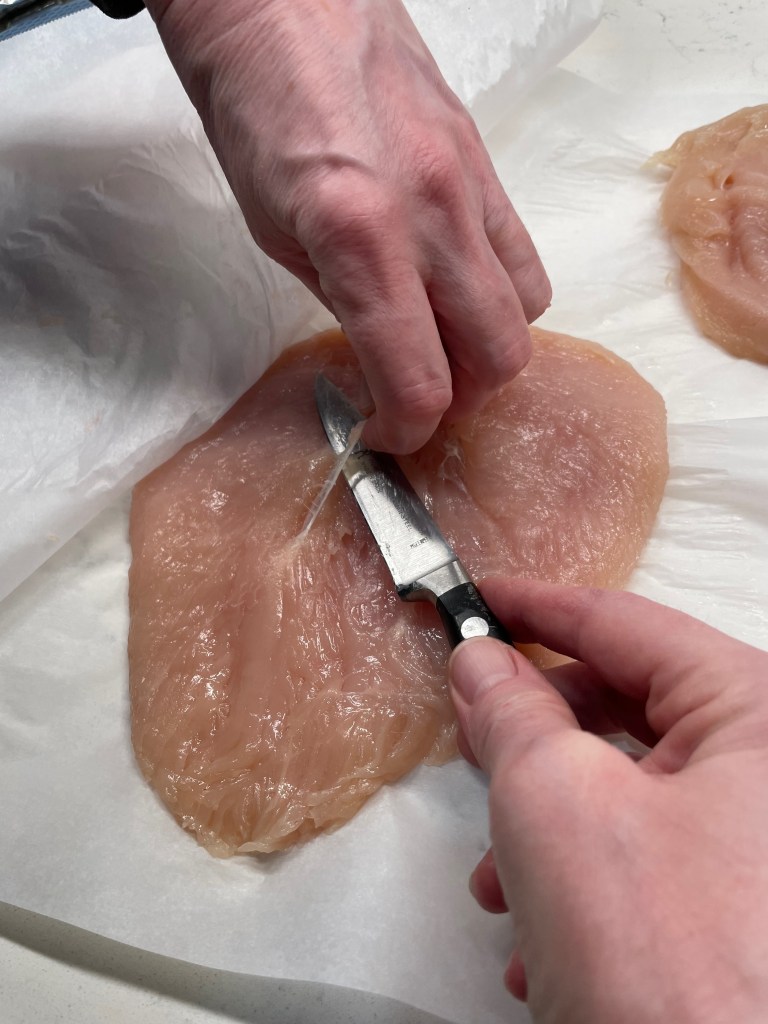
You’ll want to have a few items handy to successfully prep the chicken breasts, and the most important is a sharp, sturdy paring knife that you can use to open up a plump breast into a wider piece that can be pounded flat. A large chef’s knife is not recommended for safety reasons; using a smaller knife allows you to cut with more precision. Begin by holding the thick side of the breast toward you, and make several shallow slits lengthwise, opening the breast as you go, until it lays flat on the parchment. Take your time, and don’t use heavy pressure on the knife. Nobody wants to be at urgent care the week before Christmas.


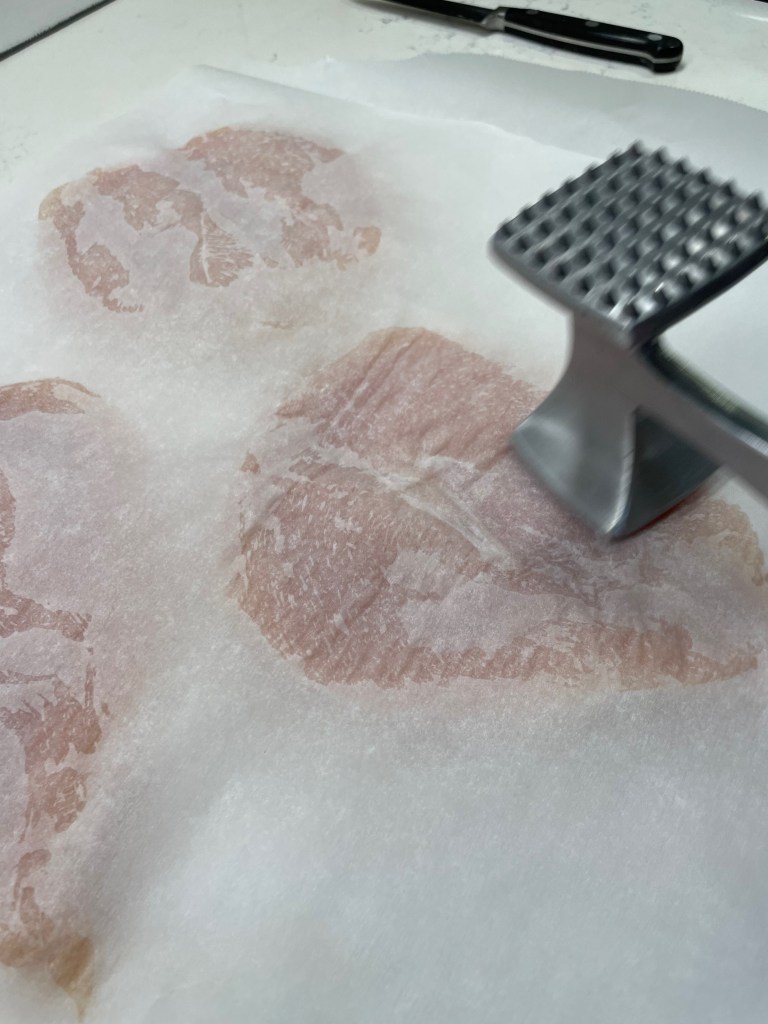
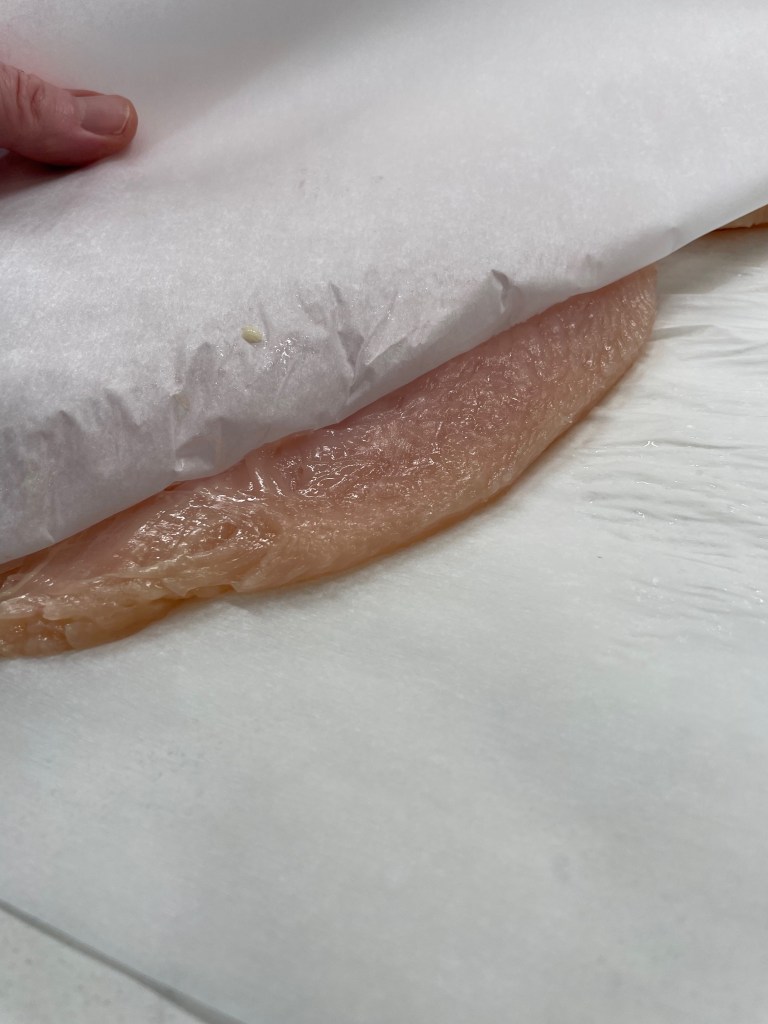
Next, you’ll need parchment or waxed paper and a smooth meat mallet for pounding the chicken. Don’t rush this, and don’t use the textured side of the mallet or you may accidentally split the fibers of the meat. The goal is to gently pound out the breast between layers of paper until it is an even 1/4-inch thickness (or as close to it as you can get). This makes the chicken more flexible for rolling up around your chosen filling ingredients, but don’t go thinner than 1/4-inch, or your chicken will tear apart.


Filling for the roulades

Just about any ingredients you like can be layered into chicken roulades, though I don’t recommend “melty” cheeses because they will always ooze out and make a mess in the oven. If you want a cheesy accent, stick with small amounts of firm cheeses, such as feta, bleu or Parmesan. Whatever vegetables you choose, chop everything small so that the filling rolls up easily and doesn’t fall out of the roulades when you bake them.


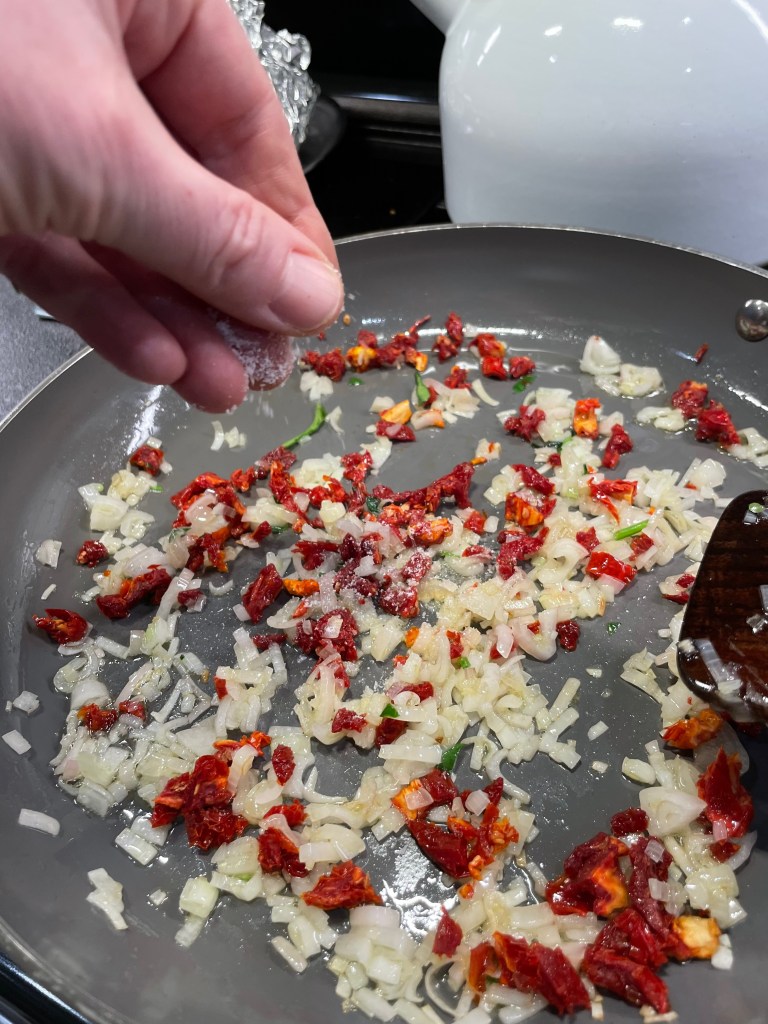
Second, cook any vegetable fillings until they are soft and tender. Raw ingredients rolled up inside the chicken will give off extra moisture and throw off the cooking time, and you’re also likely to have some unpleasant textures. To make the colors of my filling stand out, so I cooked the sun-dried tomatoes and spinach separately, but there would be no harm in cooking it all together to save a little time.

Don’t miss a chance to add flavor!

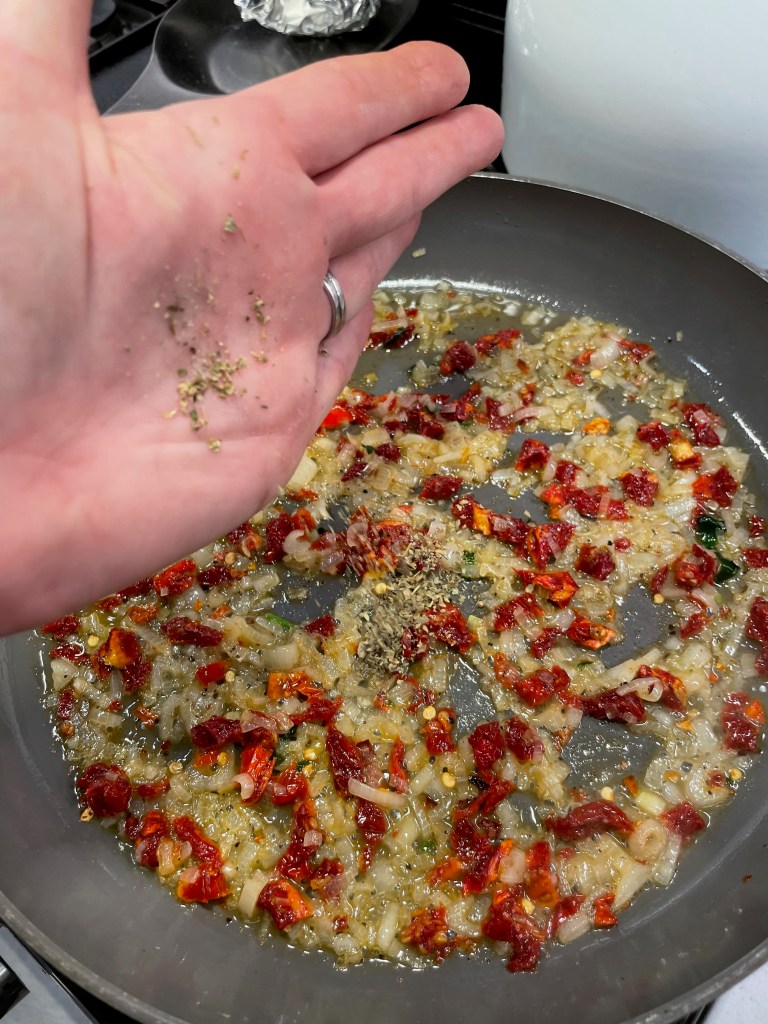
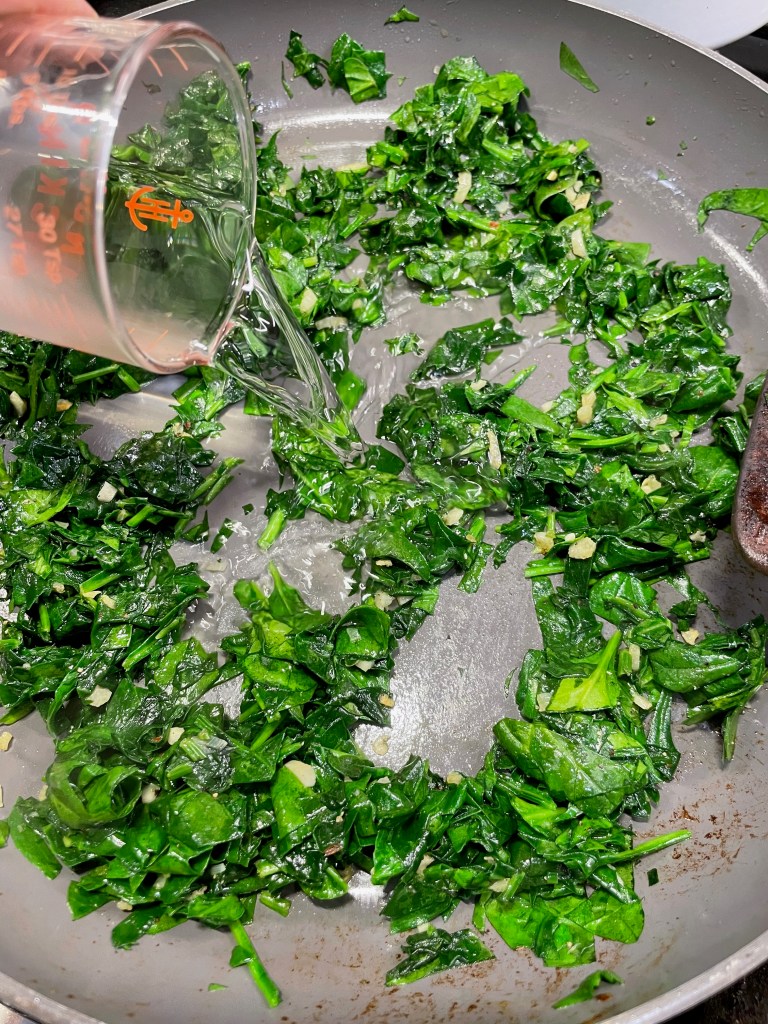
A little Italian herb seasoning and a pinch of Calabrian chile flakes gave my sun-dried tomato mixture some pizazz, and then I simmered with a splash of chicken stock until all the liquid was cooked off. To add depth to the spinach and garlic filling, I braised it in a shot of dry vermouth, again cooking until the excess moisture was evaporated. Dry white wine would be fine here; I just never have one open anymore and the vermouth is more interesting.


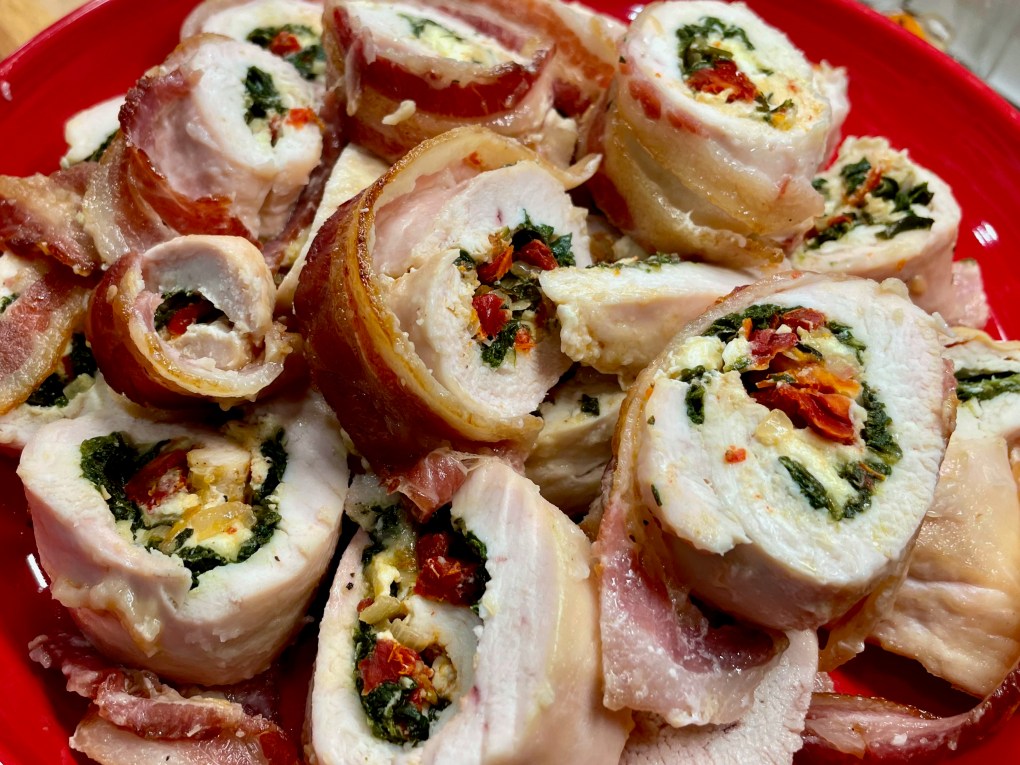
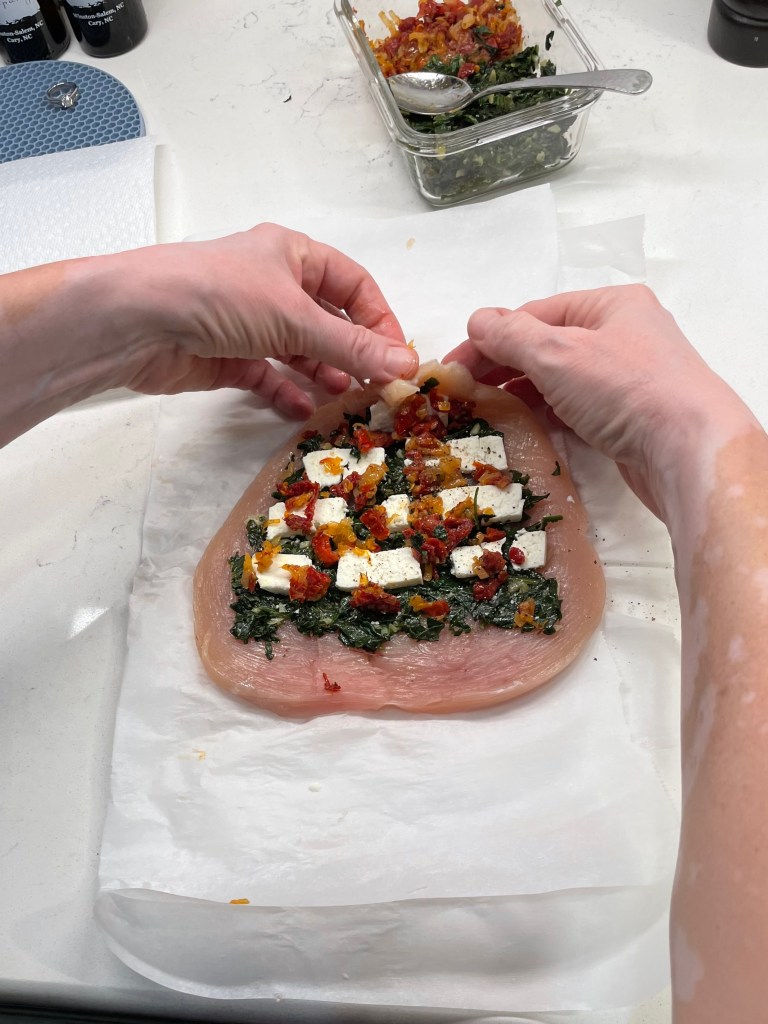
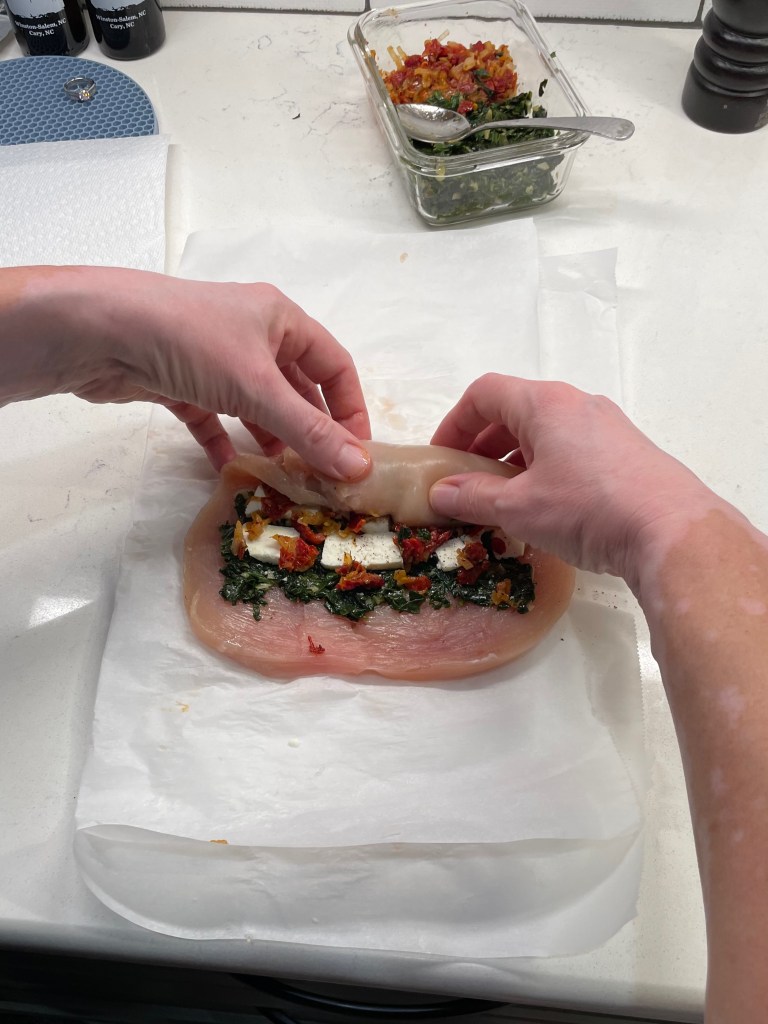
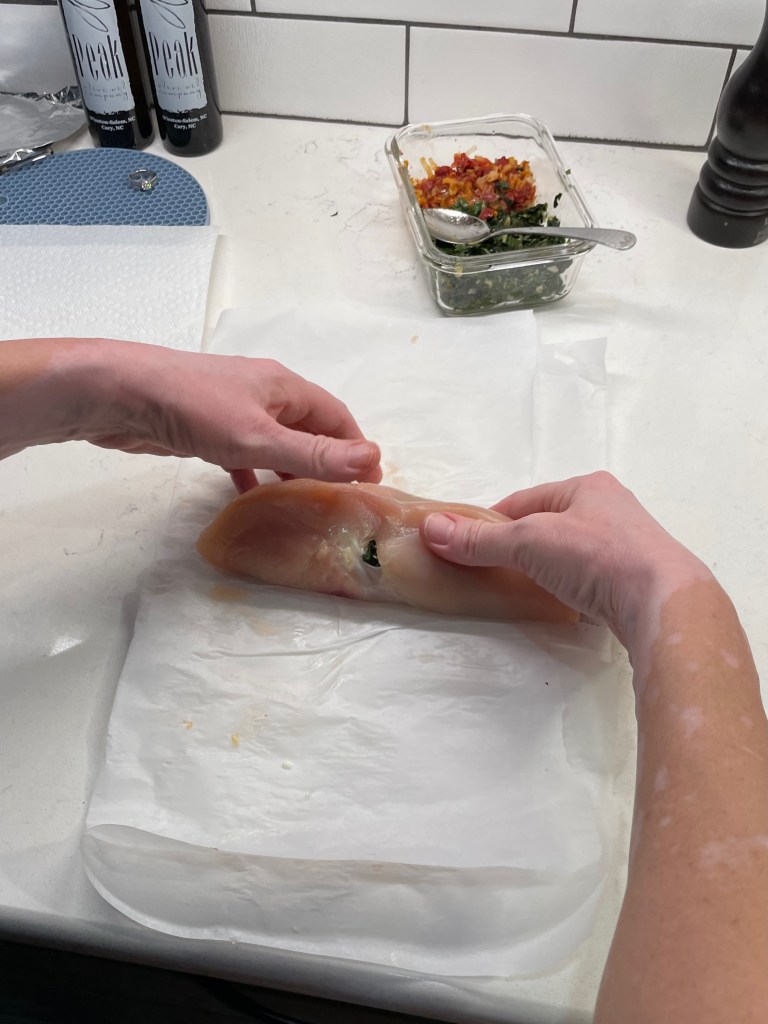
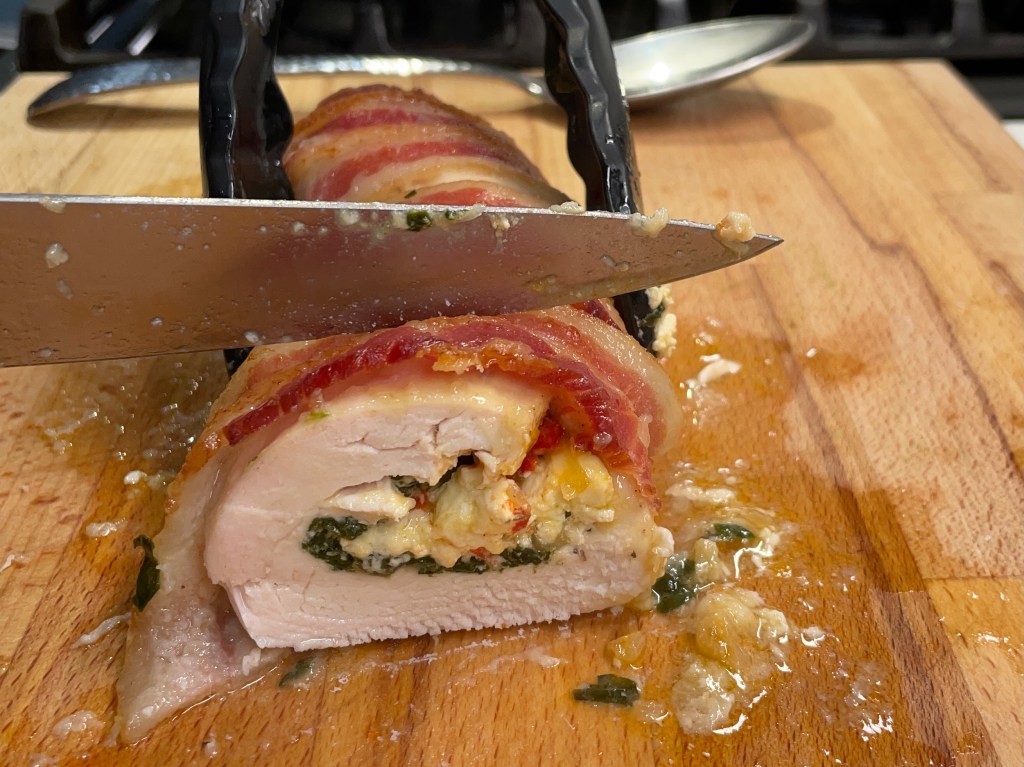
My chicken was layered with the spinach mixture, then thin slices of salty feta, and finally the sun-dried tomato mixture. Begin rolling from the pointed end of each butterflied breast, so that the fillings stay secure inside. The great thing about roulades is that any part of this could be done in advance to save precious time when you’re ready to entertain. You could even roll and refrigerate them in advance and just pull the whole baking sheet out of the fridge an hour before you bake.


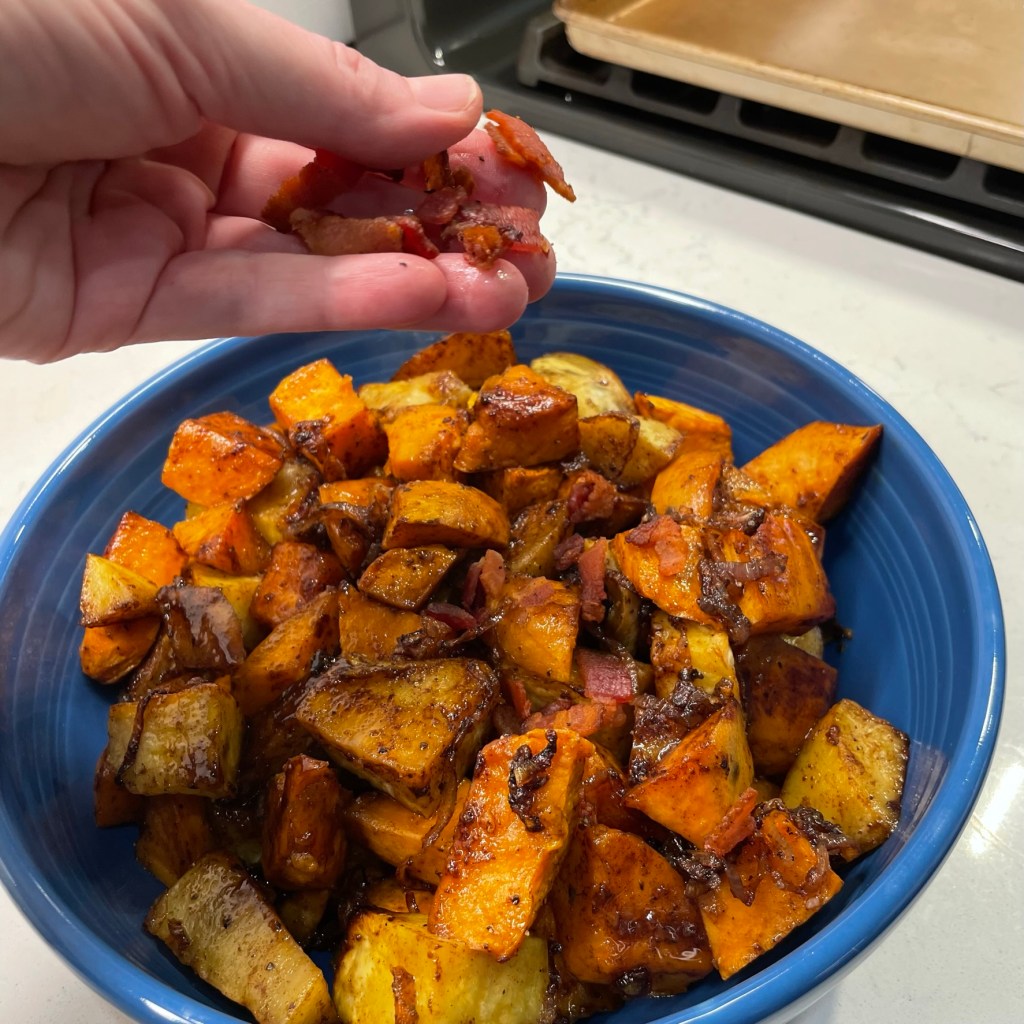
Secure the roulades with toothpicks, or stretch and wrap thin bacon slices all around before placing them (seams or bacon ends down) on a parchment-lined baking sheet. These go straight into the oven— no browning or searing is needed— and they’ll need about 40 minutes at 350° F. Let them cool a few minutes before slicing into one-inch thick rounds. Serve immediately.


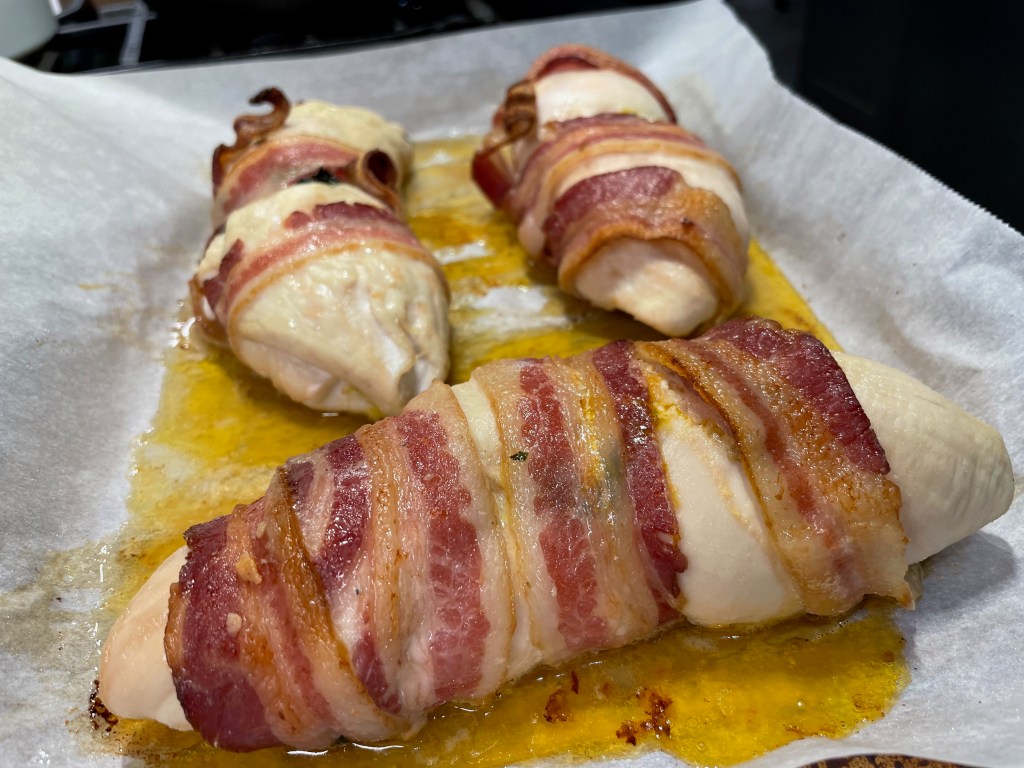
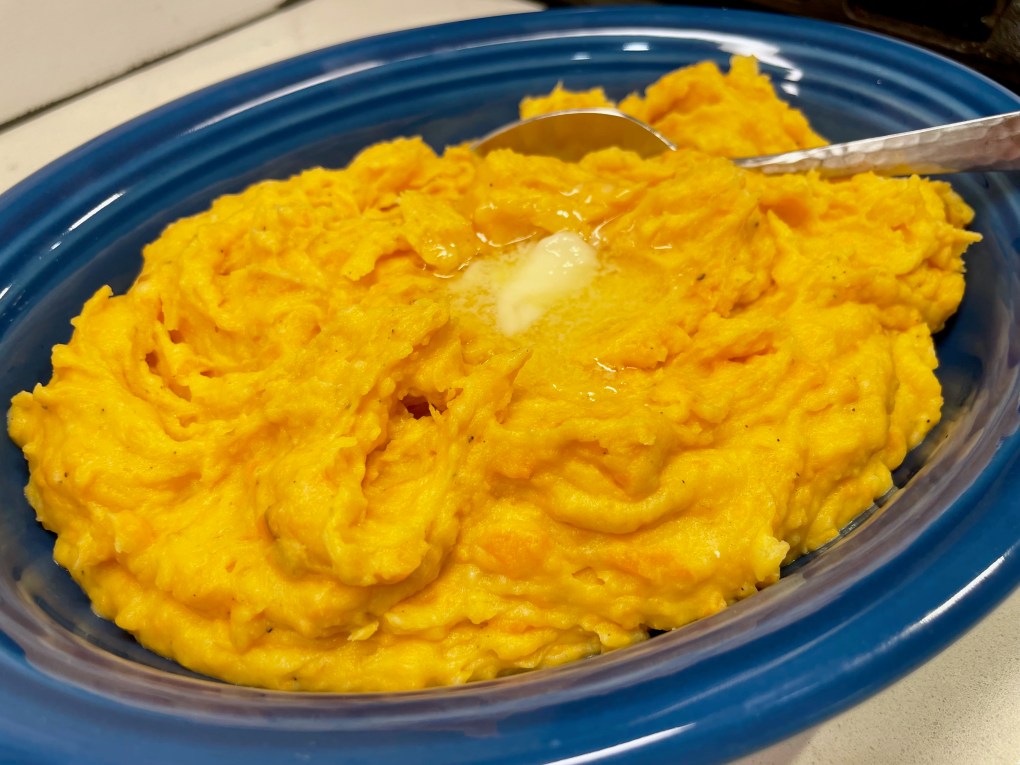
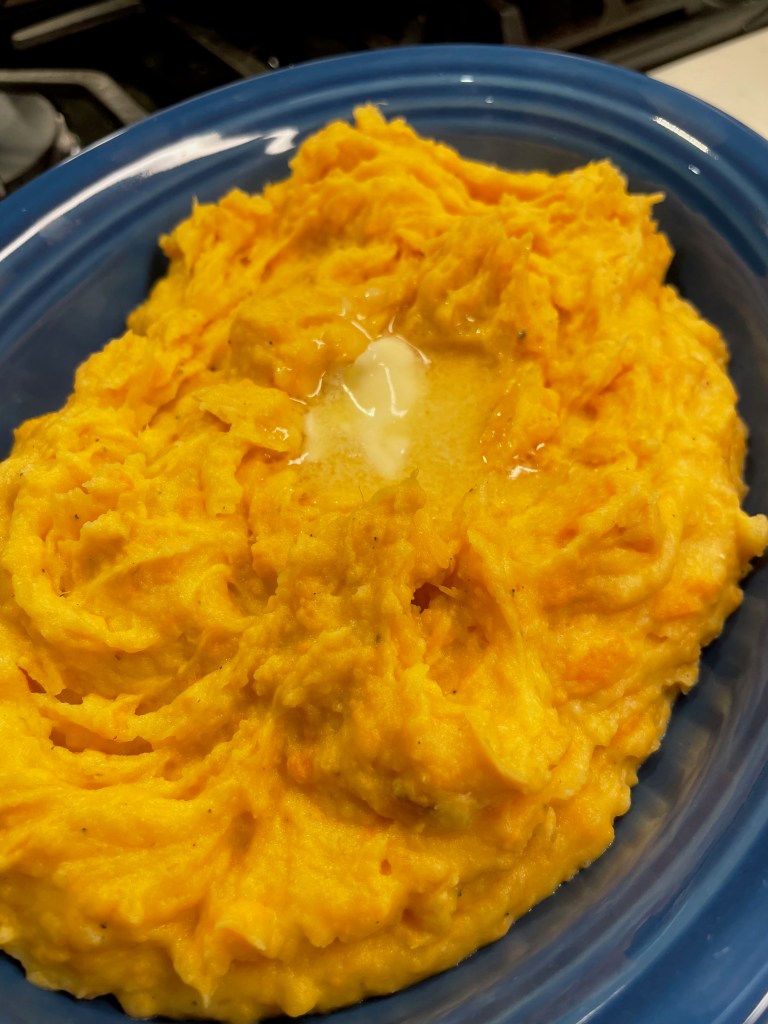
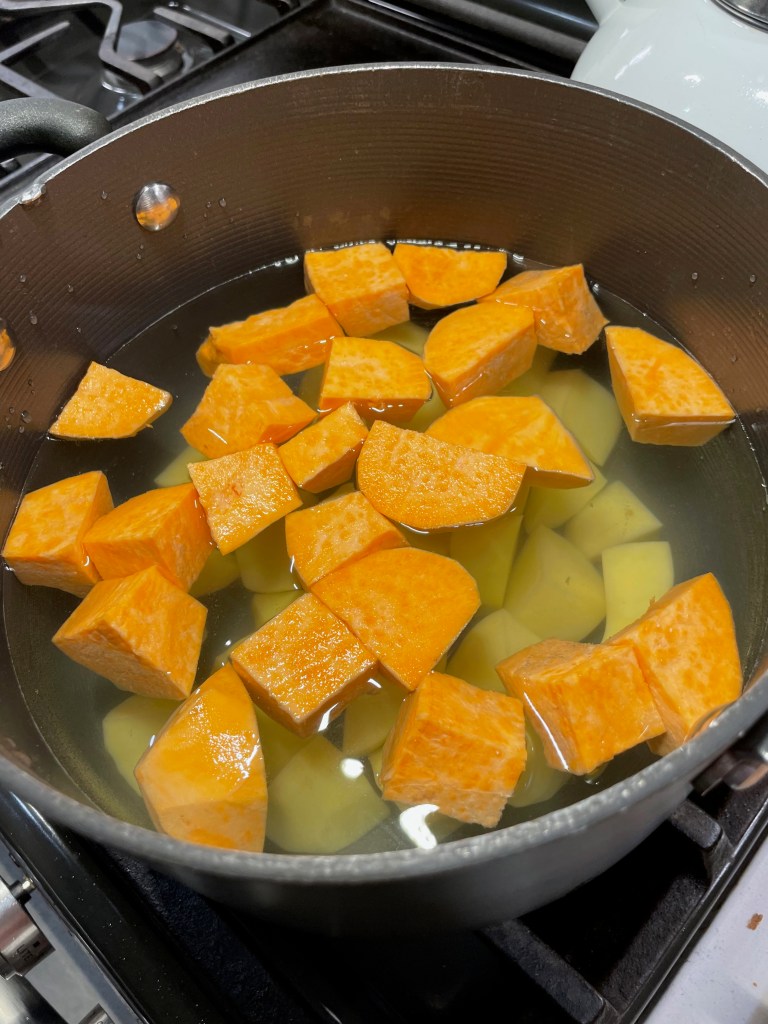
These festive chicken roulades were moist, tender and so flavorful. It made a delicious entree with Les’s amazing roasted garlic mashed potatoes, but I could also imagine them with polenta or risotto with these Italian-themed ingredients. But there are lots of other flavorful possibilities. Now that you know how to make roulades, drop a note in the comments to let me know what filling flavors you would like to try!


Festive Chicken Roulades

  • Servings: 4 generous portions
  • Difficulty: Average
  • Print

With favorite flavors and a few easy techniques, you can transform simple ingredients into something special for holiday entertaining. These roulades are filled with spinach and sun-dried tomato, but as long as your filling ingredients are chopped small and pre-cooked, the possibilities are endless!


Ingredients

  • 1 1/2 pound package skinless, boneless chicken breasts (see notes)
  • 2 Tbsp. extra virgin olive oil, divided (you’ll use half each for sautéing the spinach and tomato mixtures)
  • 2 fat handfuls baby spinach leaves, chopped
  • 2 cloves garlic, finely minced
  • 2 Tbsp. dry white wine (or vermouth, which is my go-to)
  • 1/4 cup chopped sun-dried tomatoes (see notes)
  • 1 medium shallot, finely diced
  • 1/2 tsp. dried Italian herb blend
  • A pinch of red pepper flakes
  • 1/4 cup chicken broth or stock
  • Kosher salt and freshly ground black pepper
  • 4 oz. dry feta, cut into thin slices or crumbled
  • 2 slices thin-cut bacon for each chicken breast used

Notes: The chicken breasts can be any size, and you don’t need to have one breast for each person you’re serving. They will be sliced into rounds, so as long as you have the appropriate weight package, you’ll have enough.

The sun-dried tomatoes I use are soft and pliable, ready straight from the package. If using very dry ones, rehydrate them briefly in hot water or chicken broth and then pat them dry. If using sun-dried tomatoes packed in oil, there’s no need for additional oil for sautéing them with the shallots.

Directions

  1. Preheat oven to 350° F, with rack in center position. Line a baking sheet with parchment paper.
  2. Butterfly the chicken breasts; use a sharp paring knife to cut shallow slits along the fat edge of the breasts, opening as you go until the breasts lay flat on the counter. Place between layers of parchment or waxed paper and pound gently with the smooth side of a meat mallet until they are a uniform, 1/4-inch thickness. Season with salt and pepper and set aside.
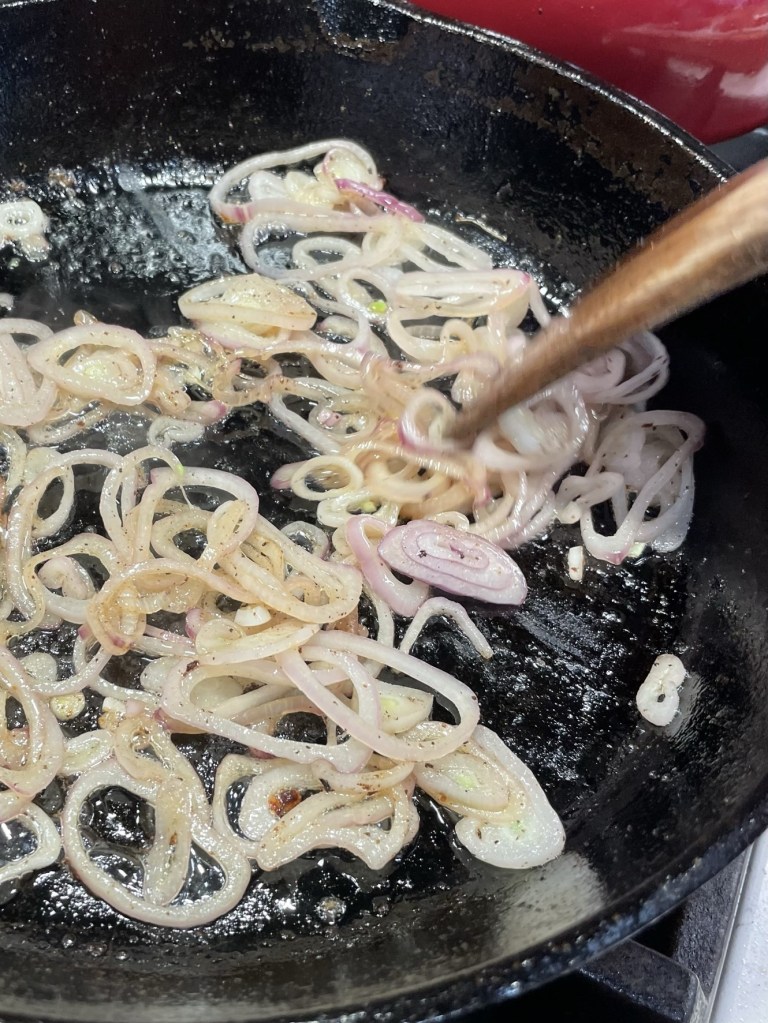
  3. Heat one tablespoon of the oil over medium heat. Add the sun-dried tomatoes and shallots and sauté until tender. Season to taste with salt and pepper, plus Italian herb blend and red pepper flakes. Add chicken stock or broth, simmering until the liquid evaporates. Cool completely.
  4. Heat remaining olive oil over medium heat. Add the chopped spinach and garlic and sauté until spinach is fully wilted. Season with salt and pepper, and stir in dry white wine; continue cooking just until the liquid evaporates. Cool completely.
  5. Place the butterflied chicken breasts in front of you, with the pointed ends at the top. Divide spinach mixture evenly over the breasts, then arrange the feta and sun-dried tomato mixture. Roll each chicken breast tightly, starting at the narrow top so that you finish with a long edge. Use toothpicks to secure the edges of the chicken to the roulades, or gently stretch two slices of bacon to wrap around each breast, covering as much as possible.
  6. Bake the roulades (uncovered) 35 to 45 minutes, or until bacon is fully cooked and chicken is opaque but not dry. Internal temp should be ~165° F. Let roulades rest at least five minutes, then slice into one-inch thick rounds and serve immediately.


Sparkling Fresh Cranberry-Ginger Cosmo

I know I promised you a cocktail before Thanksgiving, and I should know by now that late November is not the time to make promises I might not be able to keep. 🤷🏻‍♀️ Better late than never, and it’s all good because what I’m about to share with you could be the holiday miracle your entertaining plans have been waiting for. This drink became an accidental star at our Thanksgiving happy hour, and the great news is that its seasonal flavors and fancy presentation make it perfect for all the holidays coming up. 

I found this inspiration quite unexpectedly while scrolling Instagram in the wee hours, as I am wont to do. A few days before Thanksgiving, Food Network had posted a slideshow of recipes offered by its celeb chefs. There were variations on casseroles and desserts and—oh, who am I kidding? I have no idea what else was in the photo carousel because the fresh cranberry cosmo stopped me dead in my tracks. The ingredient list was simple, the technique brilliant and the drink divine.

Cheers, Christmas!

It was star chef Alton Brown who presented the formula for the cranberry granita that is the base of this stunning, neon-colored drink, and the granita itself could be served as a palate cleanser or even a light dessert after a rich holiday meal. His granita was made by simmering fresh cranberries, sugar and lime zest in a fair amount of water, and then blending, straining and freezing. Later, he used a fork to shred the icy mixture into a substance not unlike a snow-cone. That granita mixture is then shaken with vodka and fresh lime juice— no additional ice necessary— and strained into a martini glass for the brightest, freshest seasonal cocktail I’ve ever enjoyed. 

Of course, I couldn’t leave it at that (do ya know me?), and Alton himself is partly to blame for my tendency to twist a classic. During the early aughts, I hardly missed an episode of his “Good Eats” program on Food Network, and that was unquestionably when I became fascinated with the science of food and drink, inspiring me to push the culinary boundaries in my own kitchen. So, Alton, I’ll see your cranberry granita and I’ll raise you some crystallized ginger and orange zest. Because, Christmas. 🎁


You don’t want to know how many spoons I used tasting this stuff along the way, nor how many sample cosmos I made for myself, just to be sure I wasn’t imagining how good it was. The cranberry-ginger granita is equally tart and sweet, and my mind is still racing with possibilities for drinks beyond this festive cosmo. Imagine swapping the vodka for blanco tequila— instant Christmas margarita! Or substitute white rum for a cranberry-ginger daiquiri. Seriously, can anyone give me one reason not to mix it with gin and lemon and top it with champagne for a cranberry-ginger French 75? Could this be the little black dress of the holiday cocktail season?

For that matter, I should also be able to sub something non-alcoholic for a tasty mocktail to delight non-drinkers at my party, right? I did that for one of our Thanksgiving guests, and I guarantee you can’t tell which of these glasses held the zero-proof drink. She said it was delicious.

I’ll give you a hint: it wasn’t mine. 😂

Making this sparkling fresh cranberry-ginger cosmo couldn’t be easier, and I’ll also share my tips for the mocktail in the click-to-print recipe card you’ll find at the bottom of the post. Start by making the granita a few days before you plan to entertain, and wash up several fresh limes so they are ready for happy hour. Plan on one lime for every two drinks; you’ll use the juice in the drinks and a strip of zest for garnish. And for a little extra holiday pizzazz, pick up a four-pack of blood orange ginger beer to top off your cocktails with a sparkly finish. Chill your cocktail glasses while you mix, and use a fine mesh strainer if you don’t want little bits of zest floating in your glass.


Sparkling Fresh Cranberry Cosmo

  • Servings: 1 cocktail
  • Difficulty: Easy
  • Print

This gorgeous holiday drink uses a make-ahead cranberry-ginger granita that is so delicious, you'll want to use it in other drinks, too!


Ingredients

  • 1 1/2 oz. Ketel One (or other premium) vodka
  • 2 1/2 oz. cranberry-ginger granita (recipe follows)
  • 1/2 oz. freshly squeezed lime juice
  • 1 oz. Fever Tree blood orange ginger beer (or regular ginger beer, if desired)
  • lime zest twist to garnish

Notes: Make the cranberry-ginger granita ahead of time, and transfer to airtight containers in your freezer for safekeeping. I recommend using a fine-mesh strainer when pouring the drink into the glass, unless you’re OK with having the zest bits floating in the drink.

For an easy mocktail, swap in Simply Lemonade for the vodka, use 1/4 oz. lime juice and increase the ginger beer a bit. When making both alcohol and non-alcohol drinks for party guests, consider using two separate shakers to avoid mixups and in-between cleanings.

Directions

  1. Chill cocktail glass with ice water, or place in freezer 20 minutes before mixing the drinks.
  2. Measure vodka, granita and lime juice into a shaker. Cover and shake the shake out of it until the thing is too frosty to hold comfortably. The granita will melt with the other ingredients, so no ice is required for this step.
  3. Strain into the glass, top off with ginger beer and garnish with the lime strip.

Notes: The cranberry-ginger granita will be enough for about 20 cocktails. Make it ahead and keep it in the freezer so it’s ready for all the holidays.

Ingredients

  • 3 cups water
  • 2 1/4 cups fresh whole cranberries
  • 1 cup plus 2 tablespoons organic cane sugar
  • 2 tablespoons minced crystallized ginger
  • Zest of one lime and half an orange (organic is best and washed thoroughly)

Directions


1. Combine water, cranberries, sugar and ginger in a medium saucepan over medium-high heat. Bring to a boil and then simmer for several minutes until the berries soften and split. Remove from heat and cool for a few minutes.
2. Transfer cranberry mixture to a blender (remove vent cover) or use an immersion blender to puree the mixture into a slurry. Pour through a mesh strainer into an oblong, shallow pan. I used a silicone scraper to gently move the puree back and forth on the strainer surface, as the pectin from the berries was quite heavy.
3. Stir in the citrus zest. Cover with plastic wrap and place the pan flat in the freezer for several hours until solid (overnight is fine).
4. Use a fork to scrape the surface of the mixture until you have multiple layers of icy granita. Note that the mixture will likely clump as it refreezes. If you want it to be uniform consistency for cocktail hour, transfer it to a food processor and pulse a few times.

Directions


Half-Sweet Mashed Potatoes

Can you make room on the table for one more Thanksgiving side dish? This is an easy one, and we’ve had it at our house for autumn meals other than Thanksgiving even more than on the holiday itself. Combining the fluffiness of Yukon gold potatoes and the sweetness of seasonal sweet potatoes satisfies two cravings at once, and there’s so much flavor and creamy texture between them that minimal extra ingredients are needed. Let’s get into this!

Who can resist a big bowl of mashed potatoes?

The first time I made these half-sweet mashed potatoes was just ahead of Thanksgiving, 2020, when my husband, Les, and I realized it would be just the two of us for the holiday (thanks for nothing, Covid). My food blog was still on training wheels, and I had fun sharing new food ideas with the homebound, given that we were all in the same boat of scaled-back Thanksgivings. I whipped up a batch of these potatoes to use as a topper for my Thanksgiving mini meatloaf recipe, and the sweet-and-gold combo of potatoes was so good, we made them again and again— with or without a holiday.

When I looked back at that mini meatloaf post, I cringed seeing the lousy lighting, crappy counters and sketchy photography skills that were the norm for me back in those days. My blog and my kitchen have come a long way since then, but I still remember the excitement I felt in trying new things and distracting myself from the news of the day (a feeling that is familiar once again). As I perused that first recipe, there was one standout thing about the potatoes I made for those mini meatloaf bites that I don’t recommend if you’re serving them on the side— I had whisked in some egg white to help the potatoes hold their shape on the mini loaves. This is completely unnecessary when making them for a side dish, but I wouldn’t blame you if you wanted to add a few sprinkles of Parm-Romano cheese blend, as I did for that post. Les would proclaim that Parm-Romano never ruined any dish! And he’s right, of course.

Let’s get cooking!

This recipe is geared toward smaller occasions, but it’s easy to double, triple or even quadruple if you’re cooking for a larger crowd. I began with a pound and a half each of Yukon golds and sweet potatoes, peeled and cut into manageable size chunks.

Use equal amounts, give or take.

While your large chunks of potatoes mingle in salted cooking water, get ready with a two-ounce bit of cream cheese. It’s helpful to have this at near-room temperature, though you’ll have a chance to warm it up while the potatoes drain. Place the cooking pot back over medium-low heat to melt the cream cheese with a thick pat of butter, a splash of milk and, of course, salt. The beauty of using these kinds of potatoes is that they don’t suck up as much liquid or butter as russets, so you can have good results with less of those high-fat add-ins.


This part of the recipe technique is one of several “poTAYto-poTAHto” moments that Les and I squabble over every Thanksgiving. If you want to add cold-from-the-fridge milk and butter straight into the hot potatoes (the way my husband does), you go right ahead— it’s your kitchen after all. But if you want to do it the right way (you see what I did there?), then for goodness sake, warm those ingredients in the pot first and then add the hot potatoes! In my thinking, it helps keep the overall dish warm, and also ensures that you don’t shock the starches with cold milk and change their texture. Besides, they’ll be ready to serve sooner. (I can’t wait ’til he reads this. 🤭)


Mash them to your liking with a handheld masher. No need to get fancy here with a ricer or any other kitchen gadget. There’s something nostalgic or even comforting about finding a lump or two in there. Give the dish a final seasoning to taste and— OK, Les wanted to toss in some Parm-Romano, so we did that, too. See? Despite our occasional differences in technique, we are still a team. ☺️

And there you have it— one of the easiest Thanksgiving sides ever— one that tastes great, looks good on the table and settles the question of whether to make sweet potatoes or mashed. The best of both, win-win. Your guests will enjoy them, and they can be made ahead for easy reheating, too. Do you realize we are less than a week from Thanksgiving?

Coming next week, a signature cocktail. Until then, cheers!

Half-Sweet Mashed Potatoes

  • Servings: About 6
  • Difficulty: So stinkin' easy
  • Print

This recipe for half-sweet mashed potatoes combines Yukon gold and sweet potatoes, offering a flavorful Thanksgiving side dish. Minimal ingredients enhance both taste and creaminess. The dish is easy to prepare, suitable for any gathering, and can be made ahead for convenience. A perfect solution for sweet and savory cravings.


Ingredients

  • 1 1/2 pounds russet potatoes, peeled and cut into large chunks
  • 1 1/2 pounds sweet potatoes, peeled and cut into large chunks
  • A hefty pinch of kosher salt for seasoning the cooking water
  • 2 ounces (about 1/4 standard package) cream cheese
  • 2 Tbsp. salted butter
  • 1/4 cup whole or 2% milk, or half and half (depending how rich you like them)
  • Salt (and pepper, if you wish) to taste
  • A few spoons freshly grated Parm-Romano blend cheese, if you feel like it

Notes: Cut yourself some slack on the weight of the potatoes. They don’t have to be absolutely equal amounts, by any means. If they weigh about three pounds together, you’re golden. Or sweet, whichever.

Directions

  1. Place a heavy-bottomed pot filled with cold water over medium heat. Add both kinds of potatoes to the pot and bring to a light boil, then reduce heat and simmer until potatoes are good and tender, approximately 20 minutes.
  2. Drain the potatoes in a colander and immediately return the pot to the stove over medium heat. Add cream cheese, butter and milk to the pot, along with a good pinch of salt, and stir or whisk until smooth and evenly combined. Do not boil this mixture.
  3. Add the drained, hot potatoes back to the pot with the cream cheese mixture. Mash with a hand masher until creamy. Don’t mind a few lumps here or there. Give it a final salt adjustment, and add grated Parm-Romano cheese, if desired, stirring in just before serving.


Smoky Chipotle-Maple Roasted Sweet Potatoes

There’s an old piece of culinary wisdom out there, and it goes like this— “Don’t mess with Thanksgiving!” If you’re a traditionalist when it comes to what goes on the table at everyone’s favorite food holiday, then you probably want to look away, keep scrolling, move along. Because what I’m about to share may seem blasphemous.

But if you like to shake things up from time to time, and if you can handle a little heat, then you may have just stumbled upon a new favorite sweet potato recipe. These roasted chunks are caramelized and crispy on the outside, tender and creamy on the inside and spicy-sweet all the way through. It’s a far cry from the usual sweet potato sides, but you know that other old piece of wisdom— “Variety of the spice of life!”

The crispy bacon is optional but delicious.

How spicy are we talking here?

This spice list is short— ground chipotle, smoked black pepper and a hint of cinnamon. And for the sweet counterpart to those spices, maple sugar. I love pairing maple with heat, and when fall rolls around, I pretty much try to put a little bit of maple into everything. If you don’t like the heat of chipotle, you could substitute smoked paprika. If you like the heat but don’t care for the smoky notes, try subbing a lesser amount of cayenne pepper. As with any recipe I share, you are always welcome to make it your own.

Maple sugar is a nice seasonal touch, but light brown sugar would work in a pinch.

Prepping sweet potatoes for roasting

To keep things visually interesting, I picked up three different varieties of sweet potato, and you can see that they each had a unique color after peeling. The texture was the same on all three, so I expected they would roast evenly. I cut them into big chunks and laid them out onto a parchment-lined baking sheet, where they were drizzled with oil and tossed with the maple sugar and spice blend. My quick method for tossing them involves grabbing up two corners of the parchment into each hand like a hammock and quickly “swaying” it left and right. Do this first with just the oil, and again after you add the spices.


The pan slides into a hot oven for about half an hour, with a quick toss-around of the potatoes about halfway through. They will emerge fork-tender, with browned corners and a deeply smoky flavor and just enough sweet to balance the heat. 

While they roast, cook up a couple slices of cut-up bacon to play up the smoke flavor even more. I go through phases where I put bacon in everything, but these sweet potatoes would be just fine without it. Do not, however, miss out on the caramelized onions. A sweet onion would be ideal here, but on the day that I made this recipe, I didn’t have one, so I sliced a shallot into rings and cooked them up in the bacon drippings until they were golden brown. 


That unnecessary bacon goes on top at serving time, if you so choose. As with all roasted vegetables, these will have their best texture when they are fresh out of the oven, but they can also be done in advance and warmed at dinner time. Just hold the bacon til the end for best contrast of texture.

Smoky Chipotle-Maple Roasted Sweet Potatoes

  • Servings: About 6
  • Difficulty: Average
  • Print

This combination of smoky chipotle and not-too-sweet maple shakes things up for this side, which is a bold one for Thanksgiving or any cold-weather weeknight dinner.


Ingredients

  • 3 extra large sweet potatoes (any color), cut into large chunks
  • 2 Tbsp. extra virgin olive oil
  • 2 Tbsp. brown sugar
  • 2 Tbsp. maple sugar (or additional brown sugar if not available)
  • 1 tsp. kosher salt (less if regular table salt)
  • 1/2 tsp. ground chipotle powder (see notes for substitution ideas)
  • 1/4 tsp. ground cinnamon
  • 1/2 tsp. freshly ground black pepper (smoked, if you can find it)
  • 4 slices uncured bacon, cut into one-inch pieces
  • 1 large shallot, sliced into rings (or 1/2 cup chopped sweet onion)

Notes: There are several substitutes for chipotle powder, depending on preference. Paprika is good if like the smoky flavor but not the heat. Cayenne would provide heat without smoke. Ancho chile powder is slightly hot with brighter, fruity pepper notes. Choose what works for you.

Omit the bacon, if you wish, and sauté the shallots instead in a teaspoon or two of olive oil.

Directions

  1. Preheat oven to 375° F, with rack in center position. Line a baking sheet with parchment paper.
  2. Combine brown and maple sugars in a small bowl with the other dry seasonings and mix to blend evenly.
  3. Drizzle olive oil over sweet potato chunks on parchment, and then sprinkle the seasonings all over them. Gather up both short ends of the parchment to make a “pouch” and gently shake it side-to-side to coat the chunks with the seasonings.
  4. Roast potatoes 30 to 35 minutes, until they are fork-tender.
  5. While potatoes roast, cut bacon into bite sized pieces and cook in a cast iron skillet until crispy. Transfer the bacon to a paper towel to drain, but keep the drippings in the skillet. Add the shallots to the skillet and season them with salt and pepper. Cook over medium heat, tossing frequently, until the onions are as caramelized or crispy as you like them.
  6. Scatter onions all over the roasted potatoes (while they are still on the parchment sheet pan), and then transfer the mix to a serving bowl. Sprinkle bacon bits over the potatoes and serve.


Roasted Brussels Sprouts with Delicata

Smaller holiday gatherings can still be special without the heavy lift of making a huge spread of food or having a bazillion dishes on the table. During the Covid years, my husband and I learned that combining favorite Thanksgiving foods into fewer dishes was a good way to satisfy all our cravings for tradition when it was only the two of us at the table.

I got the idea for this dish only a couple of years ago, and it features two of our favorite veggies, Brussels sprouts and winter squash. There’s a scatter of crispy bacon in there, too, and a luscious cranberry-maple dressing that makes it super addictive. For me, one of the requirements for Thanksgiving food is visual appeal, and this tasty side certainly has that covered, too.

This is making me hungry!

There’s nothing difficult about this autumn recipe, but it is best served immediately after cooking, so get ahead of the game by making the dressing and prepping the veggies early so that putting it together at dinner time is a snap. Here we go!

The basics of roasting Brussels sprouts

Choose Brussels sprouts that are large, if possible, as they shrink considerably during roasting. They should have a fresh appearance, with tightly formed leaves. Ideally, the sprouts should all be about the same size so that they roast evenly.

These sprouts were about the size of a ping pong ball, just right!

We follow two key principles for perfectly roasted Brussels sprouts, and the first is removing all excess moisture. You’ll rinse them, of course, and then trim off the brown ends and halve them top to bottom. Spread the sprouts out onto a clean kitchen towel, and then roll it up and place it in a large bowl in the fridge for a couple of hours or up to one day, and bring them back to room temperature before proceeding with the roasting stage. 


The second principle for roasting any vegetable, including Brussels sprouts, is to toss them lightly with olive oil—I like to do this in a large zip-top bag— and then roast them at a high temperature so that good caramelization can take place before the veggies have a chance to turn soft or soggy. An ideal temperature is 425° F, so crank up the oven right after you take the turkey out. 


And now, the rest of the recipe

The rest of this dish is easy peasy, with sautéed onions and bacon and roasted slices of tender delicata squash. This variety of winter squash is so easy and doesn’t require peeling, because the skin is soft and edible after cooking. Go ahead and prep the squash ahead, as with the sprouts, and let them rest at room temp for a bit before you toss them in oil for roasting.


You will roast the squash at the same time as the sprouts, but not together on the same pan. They each need some breathing room for proper roasting, and then the two are layered and and drizzled with the cranberry-maple dressing when you’re ready to serve.

Ooh, this autumn dressing! 😋

This tart and sweet dressing would be delicious on any roasted autumn vegetable or even a green salad, and if you make vinaigrettes at home, you already know how easy it is to whisk a few simple ingredients together to create an emulsion. If you prefer, you could choose any store bought vinaigrette with flavors that say“autumn” to you. Avoid oil-free dressings, as their moisture content would wreck the crispy edges of the roasted sprouts.


As with most roasted vegetables, this dish is best served right away, so make it one of the last things you do while the turkey is resting under foil. If you choose to make the entire thing ahead, it will still have terrific flavor, but it will lose the satisfying crispy texture after reheating.

Just one more thing. If you omit the bacon, this dish is entirely vegan. 😊 Enjoy!


Roasted Brussels Sprouts with Delicata & Cranberry-Maple Dressing

  • Servings: About 8
  • Difficulty: Average
  • Print

Ingredients

  • 1 1/2 pounds Brussels sprouts, trimmed and halved
  • 1 medium delicata squash, seeded and cut into 1/2-inch slices
  • 2 Tbsp. extra virgin olive oil, divided (you’ll use some to roast each vegetable)
  • Salt and pepper to taste
  • 2 slices bacon, cut into 1-inch pieces
  • 1/2 medium onion, cut lengthwise into crescents
  • Cranberry-maple vinaigrette (recipe below)

Notes: All components of this dish may be done one day in advance, but for best texture and flavor, suspend roasting the vegetables and assembling the dish until just before dinner.

Directions

  1. Rinse and gently toss fresh Brussels sprouts in a colander under running water. Trim off brown ends and cut the sprouts in half lengthwise, discarding any damaged or discolored leaves. Spread the sprouts out onto a clean kitchen towel, and then roll it up and place it in a large bowl in the fridge for a couple of hours or up to one day. Let them sit a room temperature for an hour or so before roasting.
  2. Heat a heavy skillet over medium heat. Cook bacon and onions together until bacon is just crispy and onions are somewhat tender and browned. Remove from heat and set aside.
  3. Preheat oven to 425° F, with one rack just above center and the other just below. Line two baking sheets with parchment paper.
  4. Transfer the sprouts to a large bowl or zip-top bag and drizzle with a tablespoon of olive oil. Toss to coat, and arrange them, cut side down, on one of the baking sheets. Sprinkle with kosher salt and give them a few twists of freshly ground pepper.
  5. Toss squash slices in another tablespoon of oil and arrange slices on the other baking sheet. Resist the temptation to roast the squash and sprouts together, as they both need a little breathing room so that they don’t trap steam and turn mushy.
  6. Slide both baking sheets into the oven to roast for about 20 minutes, with sprouts on the top rack and squash on the lower one. At the halfway mark, turn squash pieces over and swap the pan positions.
  7. When you see plenty of roasted edges on the sprouts, remove both pans from the oven. Turn over all the sprouts to prevent steam getting trapped between the leaves. Arrange the squash slices over the sprouts and scatter the bacon and onions over the whole thing. Drizzle with the vinaigrette, but be careful not to drown them. You will have some dressing left over. Transfer to a serving bowl and enjoy!


This cranberry-maple dressing is a winner all by itself! Note that this recipe makes more dressing than you will need for the Brussels sprouts and delicata dish; enjoy the rest on a mixed greens salad with apples and candied pecans!

Ingredients

  • 2 Tbsp. white wine vinegar
  • 2 Tbsp. real maple syrup
  • 1 Tbsp. cranberry juice
  • 1 tsp. Dijon mustard
  • Kosher salt and freshly ground black pepper to taste
  • 4 Tbsp. extra virgin olive oil

Directions


Whisk together vinegar, syrup, cranberry juice and Dijon mustard. Season with salt and pepper to taste. Drizzle in olive oil, whisking constantly to create an emulsion.


Cider-braised Collards with Sweet Potatoes

The race is on toward the biggest food holiday of the year, and I couldn’t be more ready! It’s an even-numbered year and at our house, that means my husband, Les, will take the reins on the Thanksgiving turkey. This agreement to alternate years for the bird was literally written into our wedding vows because we both enjoy it so much, and on “his” years, I have more time to turn attention to the sides. All this month, I’ll be sharing a few new ways to enjoy some classic Thanksgiving side dishes. 

This first one is dedicated to my readers in the South, where collard greens reign supreme— on Thanksgiving or any other family meal. When I first learned to cook collards about five years ago, I didn’t imagine that there could be so many variations, but it seems that every time I try a new addition or different braising liquid, I find another favorite. This is the first time I’ve considered putting a seasonal spin on collards, and I’m so glad I did.

These are as flavorful as they look!

These collard greens have a touch of sweetness going on in the cubed sweet potatoes, and the smoky sausage makes each bite super satisfying. Did I mention that they’re braised this time in hard apple cider? So good!

Get to know collard greens

These sturdy leafy greens are similar to Lacinato kale (which is sometimes called dinosaur kale) in that they are huge, earthy and leathery. To cook collard greens, you must either boil and boil and boil them, or do as I do and fry them up in some kind of oil before braising a shorter time in liquid. The amount of liquid can vary, depending on how tender you’d like the collards to be. If you like them bright green and hefty— first of all, you clearly ain’t from the South— then you’ll use minimal liquid and cook them a shorter time. If you want them to be fall-apart tender, almost like sautéed spinach, then get that pot a’boilin’ from breakfast onward.

Either way, you have to prep the greens. Let’s get to it!

How to prep collard greens for cooking

In my earlier collard cooking days, I purchased the queen pillow-sized bags of chopped and pre-washed collards, believing that it would be a shortcut. But I spent so much time picking through the chopped pieces to remove all the tough stems that are as big around as a #2 pencil, I quickly realized that this “shortcut” wasn’t worth the trouble.


The easier way is to do them fresh, and it involves two quick tricks. After rinsing the collard greens really well, hold a stem firmly with one hand, keeping the other hand at the base of the stem and give the stem a good pull, zipping the leaf right off. Next, wrap the collard leaves in a clean kitchen towel to blot away excess moisture. 

Now, here comes the second trick, and it’s a fun knife technique called chiffonade that you might use when garnishing with fresh basil. Stack the collard leaves together as neatly as possible, and then tightly roll the stack up lengthwise so it looks like a big cigar. Make cross cuts with a sharp knife, and then cut through those pinwheel slices. Voilà, a quick and easy pile of chopped collards (and no bulky stems).


Let’s get cooking!

Most of my collard recipes involve bacon, but Les had brought in a successful haul from the smoker on the day that I made these, and I had a hunch that smoked sausage would be a terrific substitute. When I reached for a sweet onion in my countertop basket, I noticed a lone sweet potato in there and couldn’t help throwing some cubes of that in there, too.


The only remaining decision was a braising liquid, and that’s when I spotted a bottle of Angry Orchard hard cider in the back of the fridge. I’m not suggesting that regular apple cider wouldn’t have worked (though I expect it would have leaned very sweet), but I know from past adventures that a splash of booze helps tenderize the greens better than other liquids, so I went for it. I also appreciated that the hard cider had a tartness to balance the smoky sausage and sweet potatoes. My lucky day!


This autumn spin on collard greens would make a great addition to the Thanksgiving table, especially in the South, or serve them up with meatloaf, fried chicken or mac and cheese for any Sunday supper!

Cider-braised Collards with Sweet Potatoes and Smoked Sausage

  • Servings: About 8
  • Difficulty: Average
  • Print

There's so much autumn flavor going on in these collards, they'd be perfect as a side to your Thanksgiving meal!


Ingredients

  • 1 large bunch fresh collards, cleaned and chopped
  • 1 small Vidalia or other sweet onion, chopped
  • 2 Tbsp. extra virgin olive oil
  • Salt and pepper to taste
  • 1 link smoked sausage, halved lengthwise and then sliced
  • 1 medium sweet potato, peeled and cubed
  • 1/2 bottle Angry Orchard (or other brand) hard apple cider

Notes: The smoked sausage I used was a local butcher product, and it was seasoned with autumn spices. Any smoked sausage would work here, including kielbasa, Andouille or even hot links. Consider the sodium content of the sausage so that you may adjust additional salt accordingly.

Directions

  1. Heat a heavy-bottomed wide pot over medium heat. Swirl in olive oil and sauté onions briefly until just barely tender. Add collards, a handful at a time, until all are in the pot. Season with salt and pepper, and toss until all collard leaves are wilted.
  2. Add sweet potato cubes and smoked sausage and toss until the contents of the pot are heated through.
  3. Pour in hard cider, give it a stir, and then cover the pot and reduce heat to a simmer. Cook the collards for 20 to 45 minutes, until collards are tender to your liking. If you like collards extremely tender, consider delaying addition of the sweet potatoes until about a half hour before the finish.


Caramel Apple Blondies

What is it about Autumn that everyone finds so appealing? It is easy to imagine that I’m among the majority when it comes to fall being my favorite season. Everyone I know seems to mention that it’s theirs also, so I did a little investigating to see if this is just confirmation bias or a birds-of-a-feather situation. Let’s see what the data says.

A survey reported by CBS says as many as 45% of Americans favor fall over the other three seasons combined. And another poll by Morning Consult—a business intelligence company that specializes in survey data— breaks it down into deeper demographics to reveal that Autumn is the clear favorite, especially among women, especially Gen Xers, and especially in the South. That’s me, on all three counts!

No wonder I get so excited about cooler temperatures, boots, sweaters and pumpkin spice. Indeed, this is my favorite time of year, and I’ve put a new spin on one of my own recipes to highlight one of the season’s best flavors, apple. And, in honor of all the state and county fairs that are happening this time of year, I thought it fitting to wrap a little caramel around the apple for even more nostalgia.

My caramel apple blondies are a deliciously sweet, caramel apple-y treat that’s perfect for a Halloween party, a gift for a favorite teacher or new neighbor, or just tucked into your grandkid’s lunch box.

It took great restraint not to cut into them straight from the oven!

What ingredients are in caramel apple blondies?

A blondie is essentially a cookie bar, with a dense, chewy texture and often includes some kind of fun mix-in, such as chocolate chips or nuts. Similar to a brownie, but without chocolate, a blondie is made from a dough that resembles the base of a chocolate chip cookie, with plenty of butter, brown sugar, egg, vanilla, flour and leavening, such as baking powder.

For this recipe, I’ve leveraged the same technique as in last year’s pumpkin chai blondies, using a concentrated paste of cooked down apples this time— otherwise known as apple butter— to give a distinct apple flavor without the high amount of moisture that would have been in fresh chopped apples. The caramel element is an easy grocery store item, the same stuff you pick up in the produce department for dipping apple slices. 


To keep these blondies a bit “healthy-ish,” I subbed in a half amount of whole wheat pastry flour. And in case you wonder why the melted butter is soooo dark in the pan in my ingredients photo, it’s because I tried a new (and very flavorful) trick when I made my browned butter.

Check out that very browned butter!

How to make browned butter even better

If you spend any time at all on social media or the internet, you may have seen this new trend of adding powdered milk to the butter as it browns. Given that it’s the milk solids that actually brown, it stands to reason that increasing the milk solids will amp up the flavor. And holy moly, it sure did! I used salted butter, by the way, though most baking recipes call for unsalted. Why? Because salt in desserts does the same thing as salt in savory dishes— it shoves the most important flavors to the forefront.


How do you make caramel apple blondies?

The rest of the recipe is very simple. Mix together the melted butter and brown sugar, then add the egg, apple butter and vanilla. Add the dry ingredients, half at a time, mixing only until all the flour is incorporated. 


Spread the batter evenly into a buttered, parchment-lined pan, then spoon and swirl a bit of warmed caramel dip over the top. Scatter a few tablespoons of Heath candy bits on top and bake until the blondies test done with a clean toothpick.


Cool the blondies completely before cutting them, and if you really want to push them over the top, serve them with a scoop of my easy cinnamon ice cream. We enjoyed them this way, and I got so excited, I completely forgot to take a picture. But you can imagine, right? 😉

Caramel Apple Blondies

  • Servings: 12 or 16
  • Difficulty: Average
  • Print

Caramel and apples reminds me of the treats I used to look forward to at the county fair. These blondies are just one of many reasons I'm excited about fall.


Ingredients

  • 2 sticks salted butter
  • 2 Tbsp. nonfat dry milk powder
  • 3/4 cup light brown sugar, packed
  • 1 large egg (room temperature)
  • 1 cup apple butter (homemade or store bought)
  • 2 tsp. real vanilla extract
  • 1 1/4 cups all-purpose flour (see notes for measure instructions)
  • 1 cup whole wheat pastry flour (or sub in regular all-purpose flour if desired)
  • 3/4 tsp. ground cinnamon
  • 1/2 tsp. kosher salt
  • 3/4 tsp. baking powder
  • 1/4 cup caramel dip (find in the produce section, near the apples)
  • 1/4 cup Heath candy bits (optional, sub chopped pecans if desired)

Notes: Unsalted butter can be used, if that’s what you have on hand; double the kosher salt if you go this route.

When measuring flour, use the “fluff, sprinkle, level” method rather than scooping directly into the bag or container.

Directions

  1. Place the butter in a heavy-bottomed sauce pan over medium heat. Stir frequently, and when melted butter begins to brown, add the dry milk powder. Stir constantly, as the browning will happen quickly at that point. Remove from heat as soon as the butter reaches a copper color. Transfer to a measuring cup to cool.
  2. Preheat oven to 350° F, with oven rack in center position. Prepare a 9 x 13″ baking pan with a buttered parchment liner, leaving flaps on the long sides for easy lifting of baked blondies.
  3. In a large mixing bowl (or the bowl of a stand mixer fitted with paddle), stir together browned butter and brown sugar until evenly blended. Add apple butter and egg. Beat until combined and somewhat fluffy.
  4. In a medium bowl, whisk together flours with cinnamon, baking powder and salt. Add half the flour mixture to the apple mixture, folding just until all the dry ingredients are incorporated. Repeat with remaining flour blend. The batter will be very thick and dense.
  5. Spread batter evenly over parchment. Warm the caramel dip slightly in the microwave for easier swirling. Pipe or spoon caramel dip over batter and swirl with a chopstick or spoon handle. Sprinkle on Heath candy bits.
  6. Bake for 25 minutes, or until blondies are set but not overly dry. Remember that they will continue to cook for a few minutes after removal. As with brownies, the type of pan may affect the outcome. For a glass pan, add a few extra minutes to the baking time.
  7. Cool for at least 30 minutes before using parchment flaps to lift blondies from the pan. Cut into squares for serving. Keep leftover blondies wrapped or in a sealed container at room temperature for up to three days.


Crub – My Norwegian Family Tradition

There are some recipes that look almost too good to eat. Friends, this ain’t one of them. 😏

I have spent a lot of time sharing other people’s traditions here on Comfort du Jour, but today I’m paying tribute to my dear grandmother, whose hands made this recipe, just as her mother’s hands before her, and her grandmother’s, and so on. As I tried to describe to my foodie friend, Dorothy, what crub, my family’s favorite food tradition looked like, it became crystal clear that this is a dish I love not for its splendor, but for the family history it represents.

“Imagine a gray, lumpy, salt pork-filled potato and oatmeal dumpling blob,” I said, further noting that the lumps are boiled in salted water for two hours until they are done through. Dorothy replied coyly that she was salivating at the very thought of it. 😂 There’s no denying, crub does not have instant appeal. My cousin, Dave, rightly proclaims that crub is, at best, an “acquired taste.” In our case, though, as fourth-generation descendants of Norwegian immigrants, we are naturally prone to like it, just as Italian descendants are born to love pasta.

From my earliest memories, a visit to my maternal great-grandparents’ home in rural Upstate New York would have sometimes meant being greeted at the door by the aroma of these gray, lumpy blobs simmering on the stove. Despite its appearance, crub is hearty, filling and deeply satisfying. I don’t expect oohs and aahs in the comments section, but I will say that anyone who has ever waxed nostalgic over family tradition can appreciate the place that this humble food has in the hearts (and bellies) of my people.

This makes me miss my grandmother so much.

It’s a family thing

I had special reason to enjoy making crub recently, as I spent a few days with my Aunt Joy at her home in Montana. In the days ahead of my first visit in 13 years, our anticipation for this familiar meal became stronger, and rolling up our sleeves to make crub together proved to be a wonderful way to share happy (also sad, and sometimes funny) memories of our loved ones. We pulled out various spatter-stained recipe cards and attempted to decipher all the “helpful” notes in parentheses, knowing that we would ultimately have to channel the wisdom and experience of our ancestors to get it right. There are specific rules that must be followed, as I painfully learned a few years ago when I tried to make this on my own. That first effort resulted in a sticky mess and very dense, gummy crub.  


What are the ingredients for crub?

“Use old potatoes,” suggested one of Aunt Joy’s recipe cards, and this is likely for the starch content in older potatoes vs. new ones. Also, it has to be russet potatoes— waxy ones just won’t do. Quick oats work much better than old-fashioned rolled oats, as their smaller size and pre-cooked form allows them to more easily take up the recipe’s liquid. Your baking powder must be fresh, of course. Finally, the amount of evaporated milk must be sufficient for moistening the dry ingredients without overdoing it, and this was a tough point, even for Aunt Joy, because the amount on the recipe card was in “cans.” But did that mean the 5-ounce can or the 12-ounce can? We imagined that my great-grandmother was there with us, coaching us to “add enough to make it look right,” and we figured out the larger can is the standard. Salt pork is ideal, both for stuffing inside the crub dumplings and also for adding flavor to the cooking water.


As with many traditional family recipes, crub is a bit of an ordeal to make (which helps explain why it was not an “every Sunday” kind of meal). It requires multiple bowls, large cooking pots and several square feet of counter space. It takes as long as two hours to prep and two more to cook. And don’t expect cleanup to be a breeze, either. The recipe involves peeling, grating and blending lots of potatoes, which inevitably turn pink from oxidation no matter how quickly you work.


It helped a lot to have our tools and ingredients mise en place, and this was especially important for not making a mess of everything with our very sticky hands! A couple of sheets of waxed paper did the trick for keeping the flour where we needed it.


Aunt Joy broke out her big ice cream scoop to measure out the crub dough into equal lumps, and then, with floured hands, we pressed to make an indent in each for a piece of salt pork. Shaping the crub into balls was easy to do with plenty of flour, and we lined them up until the pots were at a good, steady boil. 


The first few crub clung for dear life to the long-handled wooden spoon we used to transfer them into the boiling pot, but eventually the spoon developed a slippery layer of cooked dough and the remaining crub slid right off with almost no effort. After every few crub, we gently nudged the ones that had settled onto the bottom of the pot, loosening them to float up into the water. We made a double batch and ended up using three very large pots.


The dumplings simmer for as long as two hours, until a cross cut reveals that they are cooked all the way through. If they seem dense and very firm inside, they need additional simmer time. Once done, enjoy them with butter, salt and pepper.

Worth the work and the wait! ♥️

Transfer leftovers to a large covered bowl and refrigerate, or load them into a gallon size zip top freezer bag and freeze for later. 


Reheat by cutting crub into chunks or slices. It’s best simmered in a bit of milk and then served with butter, salt and pepper. If you’re feeling ambitious, you can bring a pot of water to boil and simmer them again until they are warmed through. Or, if you’re in a hurry for crub, place cut-up pieces on a plate and microwave until warmed through. 

Norwegian Crub

  • Servings: 12 regular people, or 6 Norwegians
  • Difficulty: Intermediate
  • Print

This is one of the truly traditional recipes that my maternal family has made for years. Why, you might ask, would we spend all day for these gray-beige lumps? Easy, because they taste like home.


Ingredients

  • 5 cups peeled and finely grated russet potatoes (this will be about 3 pounds)
  • 12 oz. evaporated milk, or equivalent amount of plant milk (oat milk would be just right)
  • 5 cups all-purpose flour (scooped directly from bag)
  • 4 cups quick-cooking oats
  • 2 Tbsp. baking powder
  • 2 Tbsp. table salt
  • 1/2 pound salt pork, cubed (optional for stuffing inside crub)
  • About one cup additional flour, for rolling and shaping
  • Additional salt, for seasoning the cooking water

Notes: Be sure that you have plenty of time before you begin this recipe. Prepping and cooking both take a long time.

Do not substitute rolled or old fashioned oats, as their hearty texture does not absorb the liquids well enough for even doneness.

Line up all your other ingredients before you shred and process the potatoes, to minimize the oxidation that turns them pink.

Directions

  1. Bring one or two very large pots of water to boil on the stove while you prep the crub. When the water comes to boil, salt it generously and add a few pieces of the salt pork or even a pork bone if you have one.
  2. Combine flour, baking powder and salt in a large bowl and whisk to distribute the leavening ingredients. Measure the oats out into another bowl, so that the proper amount is ready to be added all at once to the potatoes.
  3. Process the shredded potatoes by pulsing in a blender or food processor. You don’t want a puree, but a coarse, wet mixture of finely ground potatoes.
  4. IMPORTANT: Measure the ground potatoes (with liquid) into a very large mixing bowl. You need five cups, no more and no less. If you have potatoes leftover, consider adding them to a chowder or soup. Add evaporated milk to the measured potatoes and stir to blend.
  5. Add oats and flour mixture to the potato bowl all at once and stir, fold or mix by hand until the dough is evenly mixed with no unincorporated flour. Use an ice cream scoop to measure out evenly sized dumplings onto a heavily floured counter or board. Each crub should be approximately two and a half inches across.
  6. As you go, press a shallow hole into the center of each dough ball and add a piece or two of salt pork inside. Use floured hands to shape the dough ball around the pork, forming the balls into tight, meatball-shaped dumplings. Line them up on waxed paper until all dumplings are formed.
  7. Use a long-handled wooden spoon to gently transfer the dumplings into the seasoned boiling water. Work quickly until all dumplings are in the water. After every few dumplings, gently nudge any that remain stuck near the bottom of the pot. They should begin to float fairly soon after introduction to the water.
  8. Bring the pot(s) to a full boil, then reduce heat and simmer at a gentle boil for about two hours. Sample a crub when you think they may be cooked all the way through. It should be somewhat dense but not heavy or sticky.
  9. Crub can be served immediately, but it also keeps very well in the refrigerator or freezer. Leftovers can be warmed in a number of ways; dip them into simmering water to revive them, cut them up and simmer in milk or (as a last resort) place cut up crub on a plate and warm in the microwave until heated through.


Pumpkin Spice Espresso Martini

Well, now I’ve gone and done it, haven’t I? I’m fully confessing to a moment of weakness during a recent visit to Trader Joe’s, but I’m not apologizing. The whole pumpkin spice thing was just too much for me to ignore this year, and I’m not saying that I was on the wagon against pumpkin spice, but if I had been on the wagon— well, this martini would sure as hell knock me off.

The only actual pumpkin here is the biscotti garnish.

For those of you cringing at the idea of a pumpkin spice espresso martini, here’s a reality check. No pumpkins were harmed in the making of this martini, because the “pumpkin spice” cold brew concentrate from Trader Joe’s has exactly ZERO percent pumpkin; it’s only spices that one might use with pumpkin pie— cinnamon, ginger, clove, nutmeg and orange peel— and it turns out they are fine companions to arabica coffee, with or without the other things that make this a cocktail.

So, would you feel better if we called this an autumn spice espresso martini? 

My new favorite fall lineup!

I mentioned when I shared my favorite new Negroni cocktail that Mr. Black cold brew liqueur was going to show up here again soon, and though I don’t usually share two cocktails so close to each other, I didn’t want to wait because we all know that Trader Joe’s has a short attention span with their limited season items. If you’re thinking about making some of these, leave right now to get your cold brew concentrate. I’ll wait. And while you’re at it, pick up the miniature pumpkin biscotti; they’re delicious with your morning coffee and equally good for garnishing this cocktail.

Should an espresso martini be sweet?

This is strictly a matter of opinion, and for this black coffee drinker, the answer is no. The difference between Mr. Black and other coffee liqueurs I’ve tried— Kahlua, Tia Maria and a Kentucky-made liqueur called Grind— is the level of sweetness. If you have a sweet tooth, these other options are probably right up your alley, especially if you take sugar in your morning coffee. But for me, an espresso martini with those options is essentially just a Black Russian in a different glass. I want the deep, dark, roasty flavor, and I’m happy to report that Mr. Black brings it!

Should an espresso martini be creamy?

People who take cream in their coffee probably also expect the creamy touch that Bailey’s liqueur or half-and-half bring to an espresso martini, but not me. Too many bars I’ve visited have turned this on-trend cocktail into something akin to a mudslide, even so far as drizzling chocolate syrup drizzled inside the glass. I can’t even. As with coffee, all of this is personal preference.

My perfect espresso martini

One of the things that held me back for a while from trying this drink at home is that I don’t have an espresso machine, and cold coffee just isn’t the same. But I have found that cold brew concentrate is a fantastic substitute because it is dark and robust, and it contains enough of the natural coffee oils that can be frothed for that beautiful coffee foam on top of the drink. The cold brew concentrate has caffeine, obviously, but each drink only uses two tablespoons, so it isn’t going to keep me up all night— unless I have three of them. 😂


Combine a quality vodka (I like Ketel One), Mr. Black, a shot of cold brew concentrate and a smidgeon of simple syrup— or if you want to go crazy, try smoked maple syrup (OMG). For extra pizzazz, I’m loving a couple of dashes of chicory and pecan bitters, the same product I used last year in my sweet potato casserole old fashioned. The bitters are not necessary because the coffee already carries the bitter flavor, and you could either omit them or substitute chocolate or even orange bitters, if you’d like. I like the warmth and extra roast flavor that the El Guapo bitters add. 

Finally, add one cup of ice and shake the dickens out of it. The more you shake, the better chance you have of frothing up that cold brew concentrate. But if you really love the rich, foamy layer on top of your martini, I have a simple trick for that, too. You will need one of these little gadgets.

It’s sold as a “milk frother,” but I call it the espresso martini magic maker!

I bought this simple little device last year for Les’s Christmukkah stocking, thinking that it would elevate his hot chocolate, but it found its way into my cocktail tool kit. Here, I added a bit of the cold brew concentrate plus a splash of simple syrup to a separate glass and used the frother to whip it up into a foamy topping for my espresso martini. Surprisingly, you don’t have to pour this on top of the cocktail; you can actually pour it right into the glass and then pour the shaken drink over it. Because the foam is whipped full of air, it will remain on top of the drink either way.

Cheers. 😎

A word to the wise

As simple and innocent as this drink might seem, it goes down extra easy. Not only does the alcohol sneak up on you; too many will keep you up all night. So, if you’re making these at home, you’ll probably want to keep score.

Pumpkin Spice Espresso Martini

  • Servings: One cocktail
  • Difficulty: Average
  • Print

My version of espresso martini forgoes the sweetness and cream in favor of a deep coffee flavor. The spice blend (which doesn't have a bit of pumpkin) is not only fun but really delicious. If you cannot get the Trader Joe's flavored cold brew concentrate, check Starbucks for their version.


Ingredients

  • 1 1/2 oz. Ketel One vodka
  • 1 1/2 oz. Mr. Black cold brew liqueur
  • 1/2 oz. Trader Joe’s pumpkin spice cold brew concentrate
  • 1/4 to 1/2 oz. simple syrup (depending on your sweet tooth)
  • 2 dashes El Guapo Pecan Chicory bitters (see notes)
  • For the foam: 1/2 oz. cold brew concentrate and 1/4 oz. simple syrup
  • Just for fun, a pumpkin spice biscotti for garnish

Notes: If the spices aren’t your thing, you could easily substitute a regular cold brew concentrate here and still enjoy a wonderful drink. The chicory bitters can be purchased online and they add another layer of roasty flavor to this drink. If you can’t find them, omit them or sub in another type of bitters, especially chocolate or orange.

Directions

  1. Chill a coupe or martini glass with ice and a splash of water.
  2. Measure vodka, Mr. Black, cold brew concentrate, simple syrup and bitters into a cocktail shaker. Add one cup ice and shake vigorously to blend and dilute the drink.
  3. In a separate glass, measure the additional cold brew concentrate and simple syrup. Use the milk frother to whip this into a foamy mixture.
  4. Dump out the ice chilling your glass. Pour the foam directly into the glass, and then pour the espresso martini over the foam. If you prefer, pour the cocktail first and the foam on top; either way, the foam will stay on top.
  5. Garnish with a pumpkin spice biscotti, if desired.


Hatteras-style Clam Chowder

There are days that I go looking for a good inspiration recipe, and then there are days when they pop up out of nowhere while I’m looking for something else. This recipe, I suppose, was somewhere in between. 

I’ve been wanting to make a clam chowder with the fresh chopped clams that always tempt me from the case at my local seafood shop, but I didn’t want either of the classic chowder options that you always hear about. New England style, of course, is the creamy, white version that uses potatoes, clams, onions and loads of heavy cream. It’s luxurious and comforting, but high on the saturated fat scale. And then there’s Manhattan style, with its light tomato broth, onions, big chunks of potato and chewy clams. It’s a lovely light bite, but some people (my New York-born-and-raised husband included) don’t find brothy soups as satisfying. 

A perfect in-between

As I pondered how to find a happy medium between the lighter, tomato brothy chowder I craved and the creamy but bland version my husband favored, I got to thinking maybe it would fun to create something altogether new— a chowder with more texture and maybe some autumn ingredients. That’s when my search for “autumn clam chowder” turned up a terrific inspiration recipe on the Southern Living website— they called it Hatteras Chowder.

How in the world this dish escaped my eye after the 37+ years I’ve lived in North Carolina is beyond me, and I am taking it as my sign that I need to finally visit the Outer Banks, where Hatteras Island graces the Atlantic coastline with the tallest brick lighthouse in the United States. 

Hatteras Lightstation
Photo by Shalom Shore on Pexels.com

It was lucky that I stumbled on this inspiration, because I had been wrestling with what to make to honor my state on North Carolina Day. I’ll share my own version of this recipe in a moment, but first, I want to brag on my state a little bit. After all, I have called it home for nearly four decades! 

I love living in North Carolina. I drove into town in my little white Pontiac (that had no A/C), with my cat, my clothes, a big stereo system and $800 in my pocket. This place gave me hope for achieving my dream, and I found more than I had imagined, personally and career-wise. We have the coast just a few hours east and the mountains two hours west. We get to enjoy all four seasons, though we haven’t seen much snow in recent winters in my neck of the woods.

The city of Winston-Salem, where Les and I met and live, boasts a vibrant arts and innovation culture— a big step up from the days when Winston-Salem was only about tobacco. We have terrific indoor and outdoor venues nearby for live music, great food and drink, and our city is proud of the diversity of its citizens. Yes, we have our share of unfortunate political embarrassments (you’ve probably read about one of them even this week, but we will take care of that in November), and our coastline frequently bears the brunt of tropical storms and hurricanes, but the good in North Carolina truly outweighs the bad or we wouldn’t still be here!


Our state is also well known for many foods, including pulled pork bbq, collard greens and pimento cheese, but this Hatteras chowder that I’ve just learned about is made with fresh-from-the-Atlantic clams, red potatoes, bacon, onion, celery, carrot, white wine, herbs and clam juice. As written, the recipe sounds delicious. But you know me, I have to make it my own.

Twisting up a classic

I didn’t have carrots on hand, but butternut squash stood in nicely. A jalapeño in the produce drawer promised to add a subtle layer of heat, which Les would never argue against. I sautéed those in the fat rendered from the bacon. To add a little extra body to the chowder, I cooked in a bit of flour just before deglazing the pot with white vermouth (because I never have wine on hand anymore).


Believe it or not, I did have two bottles of clam juice in the pantry, because I’ve been jonesing to make chowder for over a year. The recipe called for three, but I didn’t mind keeping this on the thicker side. To bring a tiny bit of “Manhattan” into it, I tossed in a can of Rotel tomatoes which also brought another layer of heat, and that touch of acidity was perfect for balancing the flavors. Finally, my sliced Yukon gold potatoes (I didn’t have red), fresh thyme sprigs and dried bay leaves, and then it was time to simmer this hearty, chock-full-of-flavor autumn soup.


Here comes the big shortcut I took with this recipe. The Southern Living article said that only fresh whole clams were appropriate for this chowder—not chopped— and it included steps for purging the grit and then cooking the clams separately. I’m sure that canned chopped clams would come up short here, but the fresh chopped clams from my favorite local seafood chop were sweet, slightly chewy and so fresh; I’d put them up against the fussy whole-clam process any day of the week. These sweet little gems and their liquid get stirred in just at the end, along with the crisped-up bacon that started this whole thing.


This chowder was satisfying in every way— it had the hearty, chunky texture that Les wanted without the heavy cream that I didn’t want. The jalapeño and Rotel put a slight south-of-the-border spin on it, and I’ll add that this chowder reheated as leftovers very well. The only thing I’d do differently next time is make a double batch. 


So this is a new “North Carolina” recipe that I will most definitely add to my repertoire, and it was a perfect way to celebrate all things Tar Heel on North Carolina Day. Click to print recipe is below; I hope you enjoy it.

For a fun little sendoff today, I’ve also prepared a Spotify playlist of artists that call North Carolina home. Some of these names will be instantly familiar; others will be new. I hope you find something fun among them. 

Cheers, y’all!


Hatteras-style Clam Chowder

  • Servings: About 6
  • Difficulty: Average
  • Print

Somehow, I've missed this delicious coastal North Carolina dish, despite having lived in the state more than 30 years. My version swaps in winter squash for carrots and adds jalapeño and spicy tomatoes for a little extra pizzazz.


Ingredients

  • 4 slices thick bacon, chopped
  • 1 medium onion, chopped
  • 3 ribs celery, strings removed and sliced
  • 1 cup butternut squash cubes
  • Kosher salt and black pepper
  • 1/4 cup all-purpose flour
  • 1/2 cup dry white wine (I used dry vermouth)
  • 1/2 cup water
  • 1/2 can original Rotel
  • 2 bottles clam juice
  • 2 cups Yukon gold potatoes, scrubbed and diced
  • 2 dried bay leaves and 3 sprigs fresh thyme
  • 1 lb. fresh chopped clam meat (with liquor)

I found this chowder recipe very versatile to accept substitutions, based on what you like or have on hand. I’m sure that you could swap in shrimp or whitefish for the clams, and seafood or veggie broth in place of the clam juice. My inspiration recipe used carrots rather than butternut squash and it did not include flour for thickening. The tomatoes and jalapeño were my additions, and a fun twist!

Directions

  1. In a heavy-bottomed pot, cook bacon over medium heat until crispy and then remove to a separate bowl.
  2. Add onion, celery, butternut squash and jalapeños (season with salt and pepper)and sauté until softened. Add flour and stir until foamy. Add wine (or vermouth) and water, Rotel and clam juice. Add potatoes, bay leaves and thyme and reduce heat to low. Simmer for about 30 minutes.
  3. Gently stir clams (including liquid) into the pot. Add bacon and heat through. Serve right away with hot sauce and saltine or butter crackers.