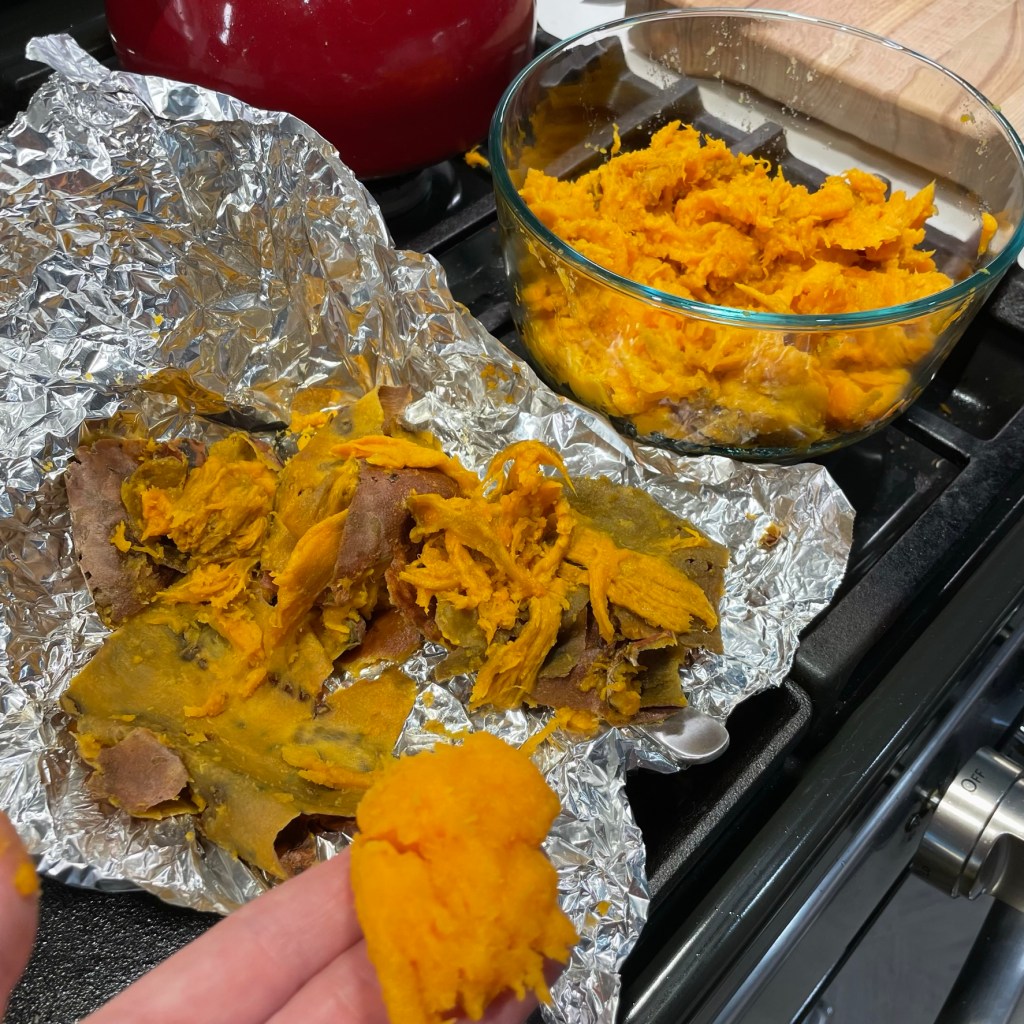
If there’s one aspect of Thanksgiving dinner that is a conundrum for me, it’s dessert. As much as I love to cook and entertain and shake up interesting cocktails, I have an irrational fear around making pastry dough. And wouldn’t you know it? All the classic Thanksgiving desserts are pies.
My personal preference for dessert leans toward the fruity, nutty crumble or cobbler kinds of things or lighter, citrusy things, such as key lime pie, with a crumb crust that doesn’t require rolling out a flaky dough.
But certain flavors and textures are expected on Thanksgiving, so when I bumped into this sweet potato cheesecake recipe last year, I found it to be a perfect mashup of holiday tradition and ease of preparation. It was pretty darn delicious, too.
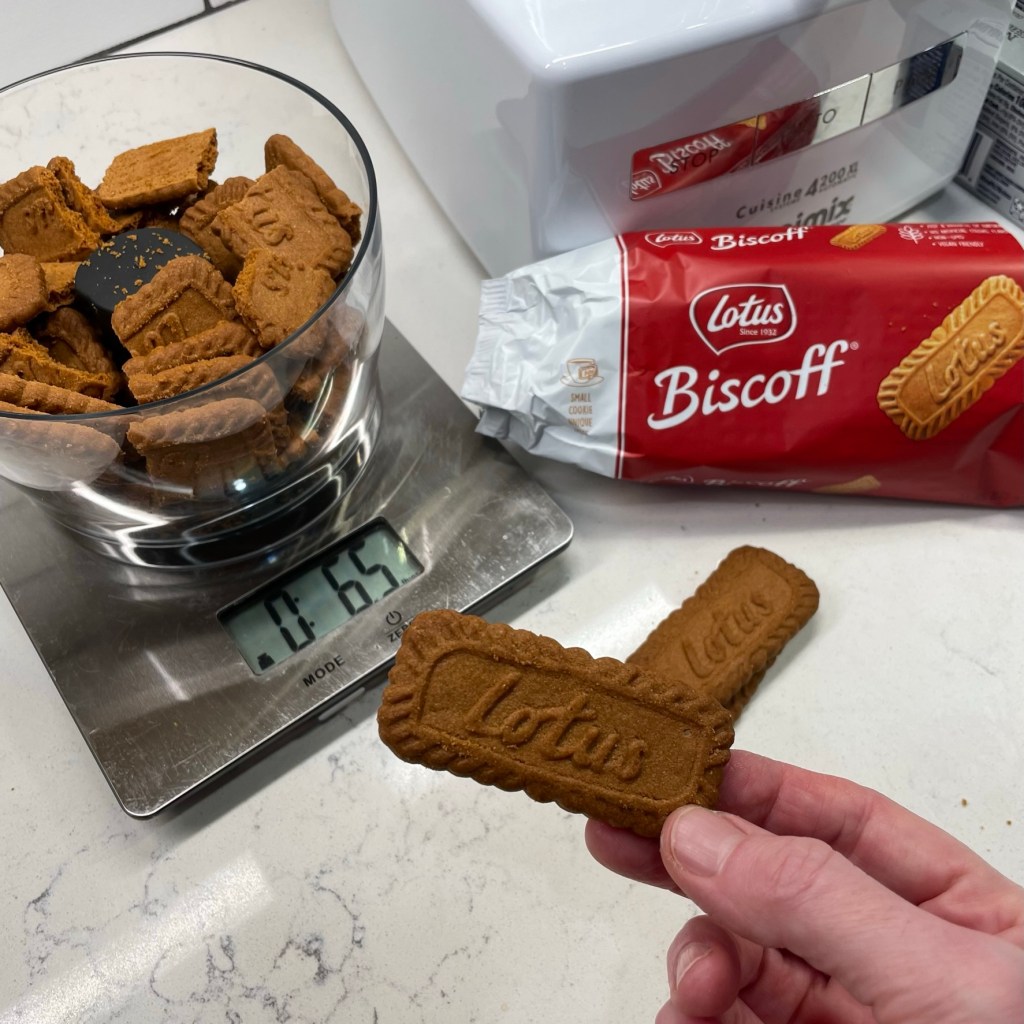
Rather than graham crackers in the base, I used Biscoff cookies— you know, the ones they give you on the airplane? They are crispy, buttery (though there’s no butter in them) and very cinnamon-y, a nice backdrop to the creamy sweet potato filling in the cheesecake. The cookies were sweet enough that I also reduced the sugar called for in the crust, and I skipped the extra cinnamon altogether.
You know what else would be great here? Ginger snaps!
Another favorite seasonal flavor
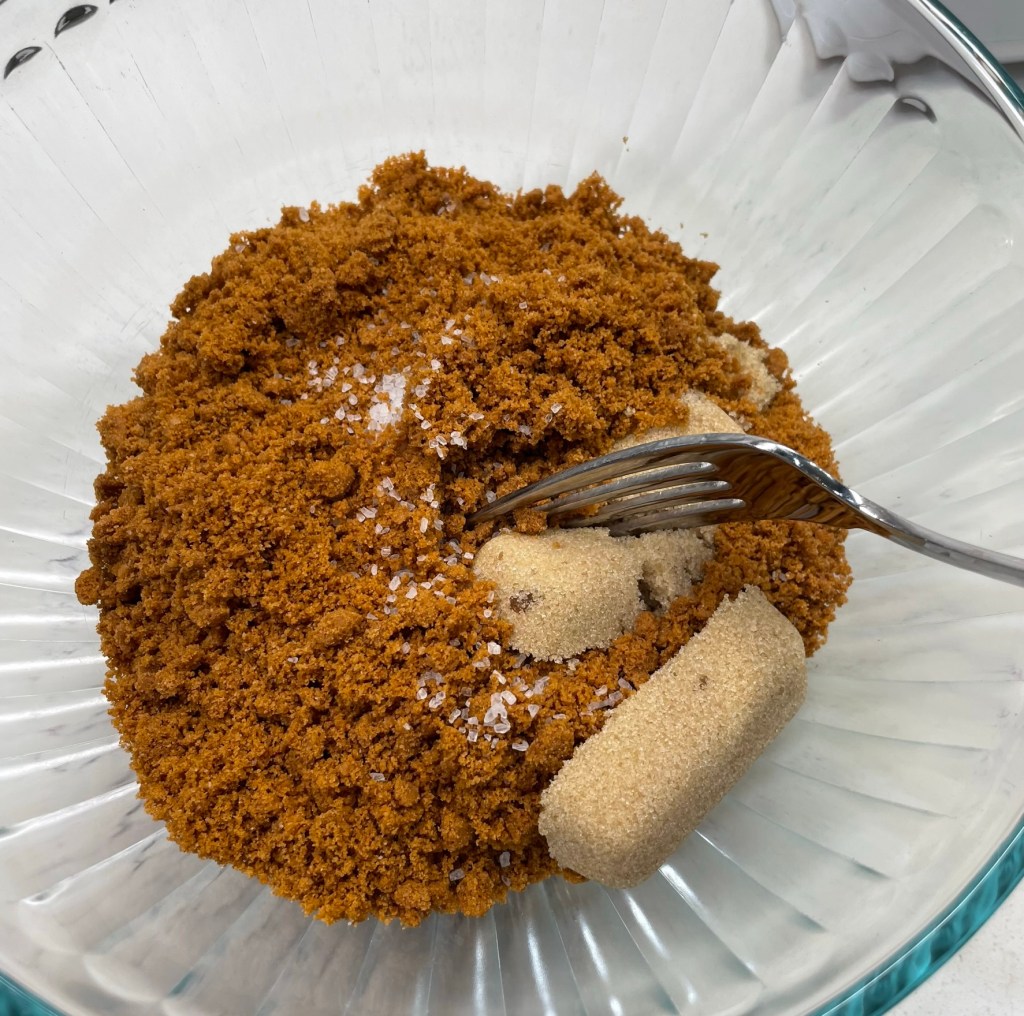
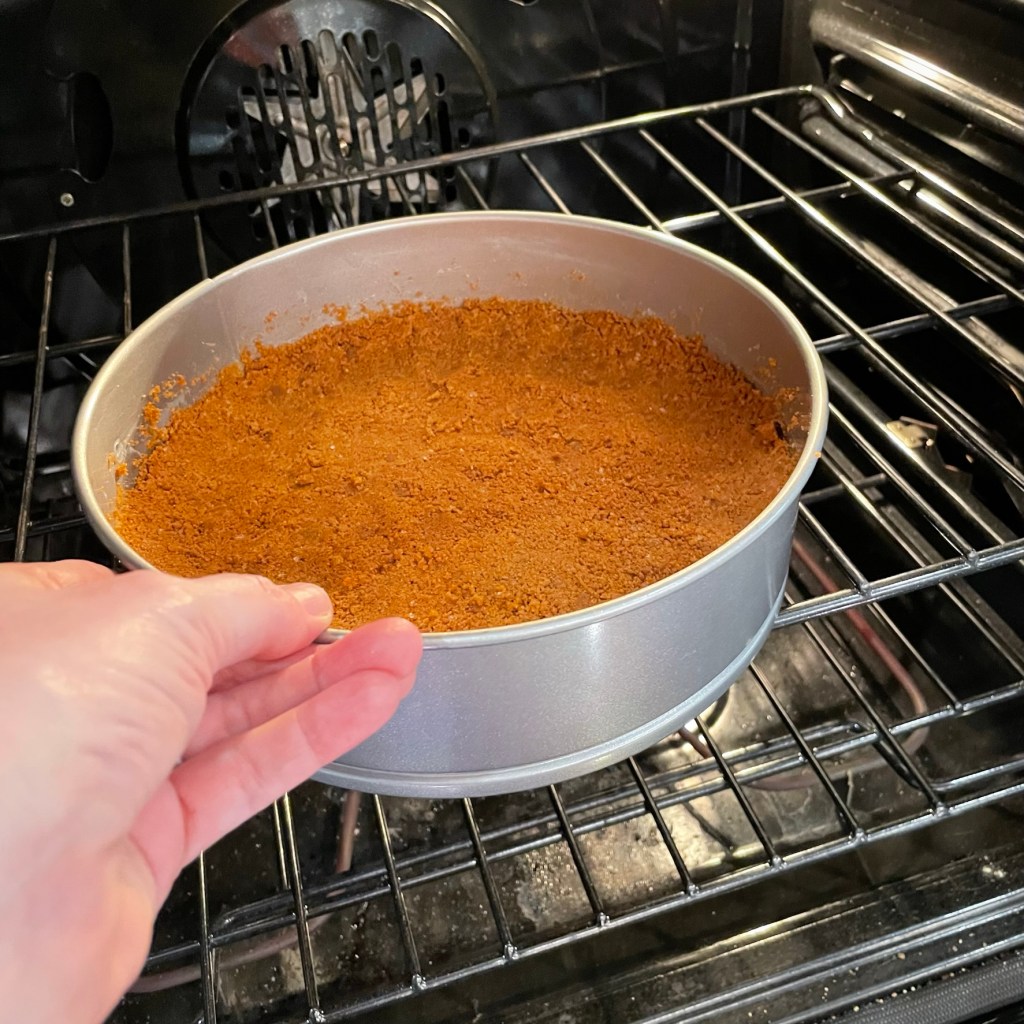
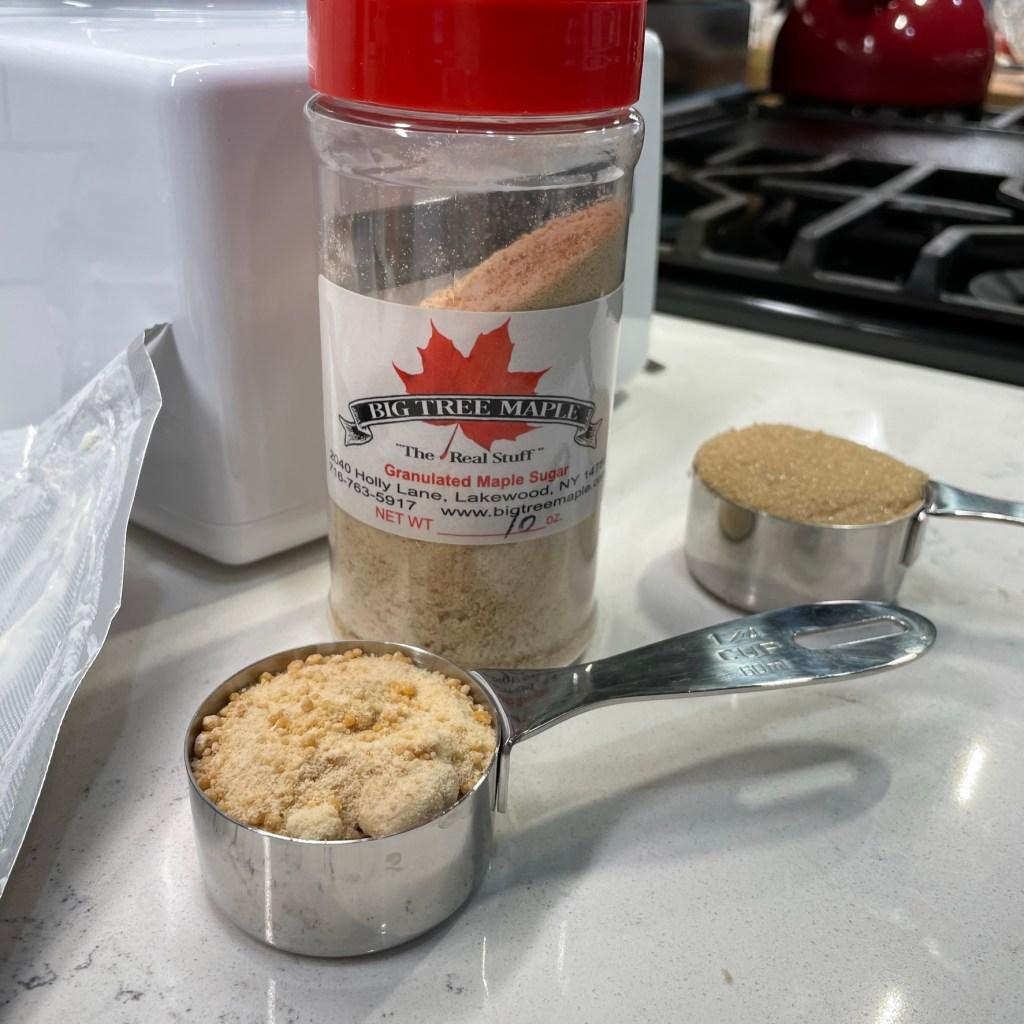
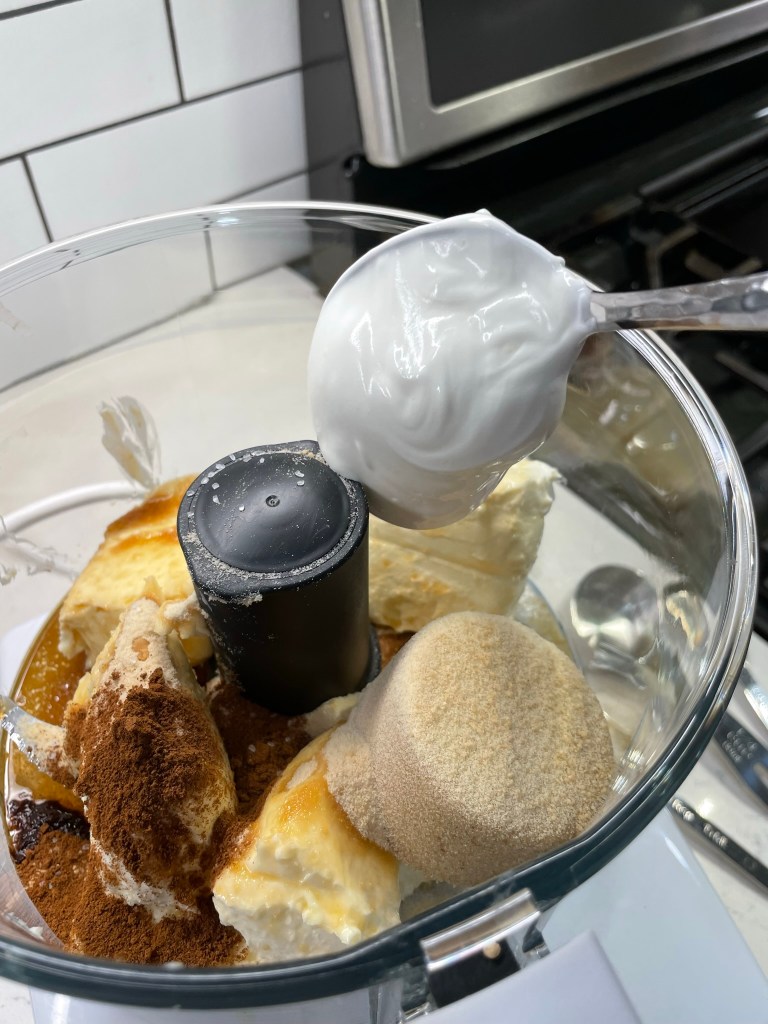
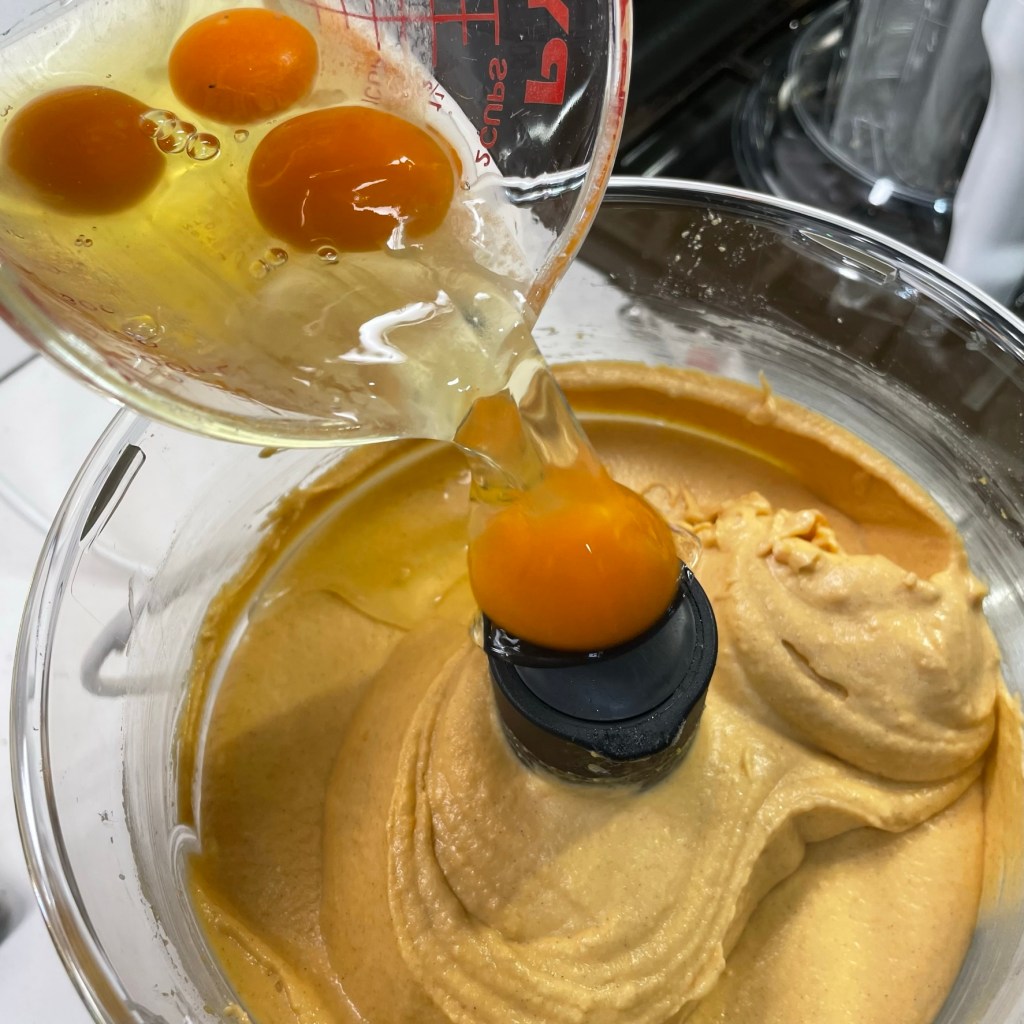
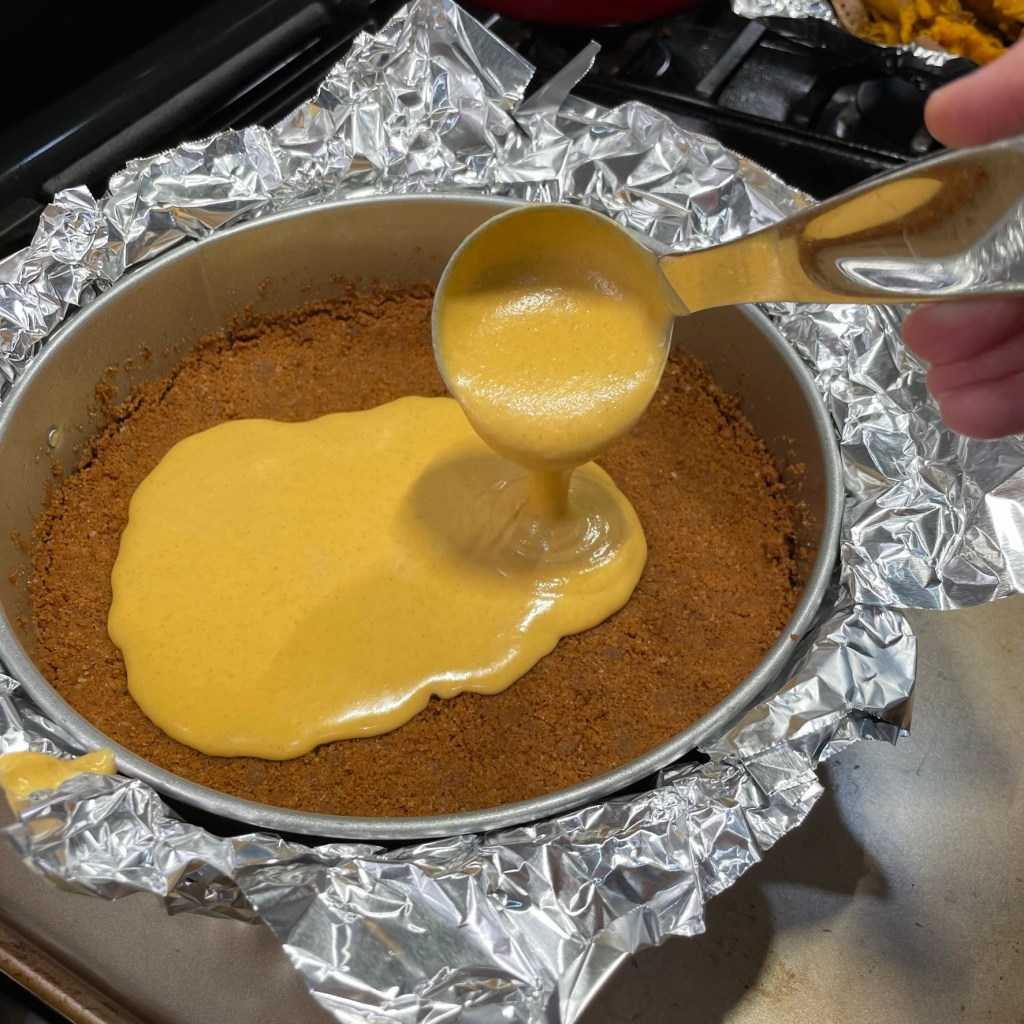
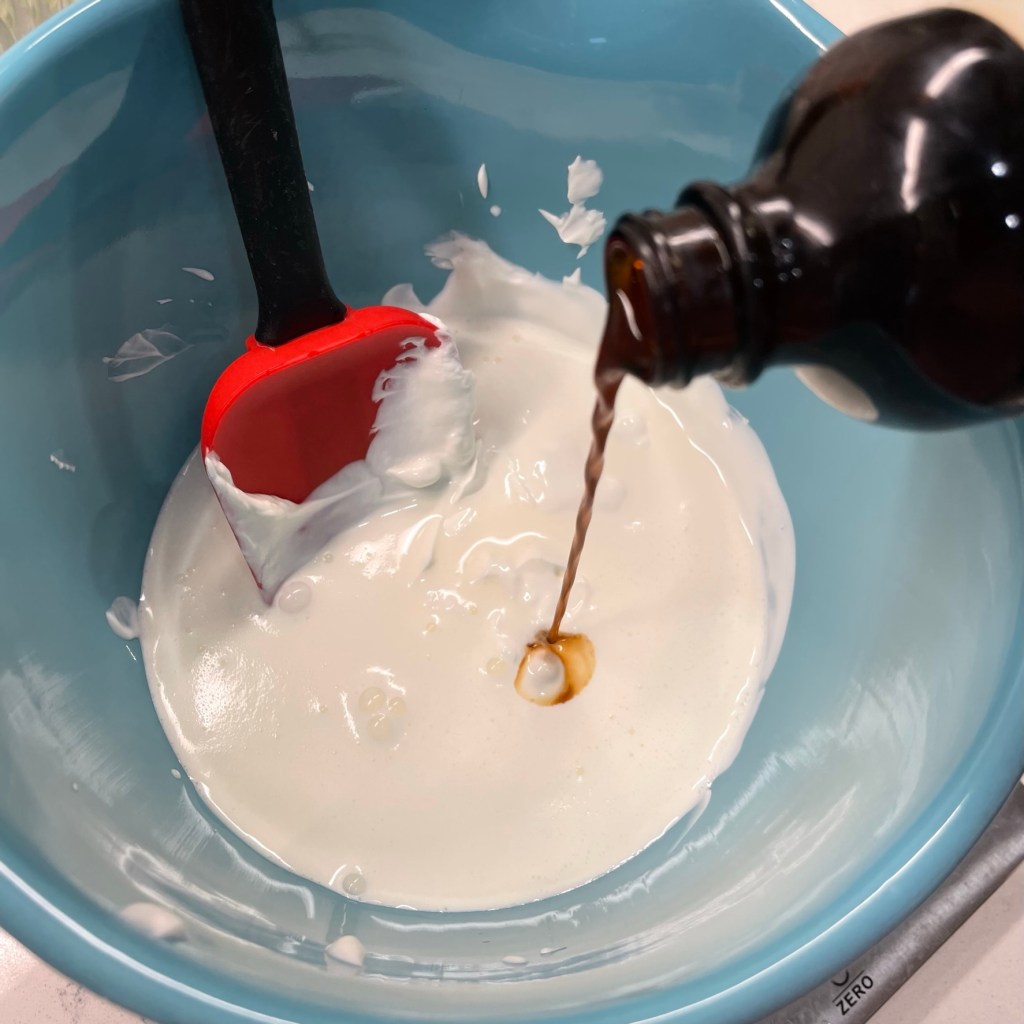
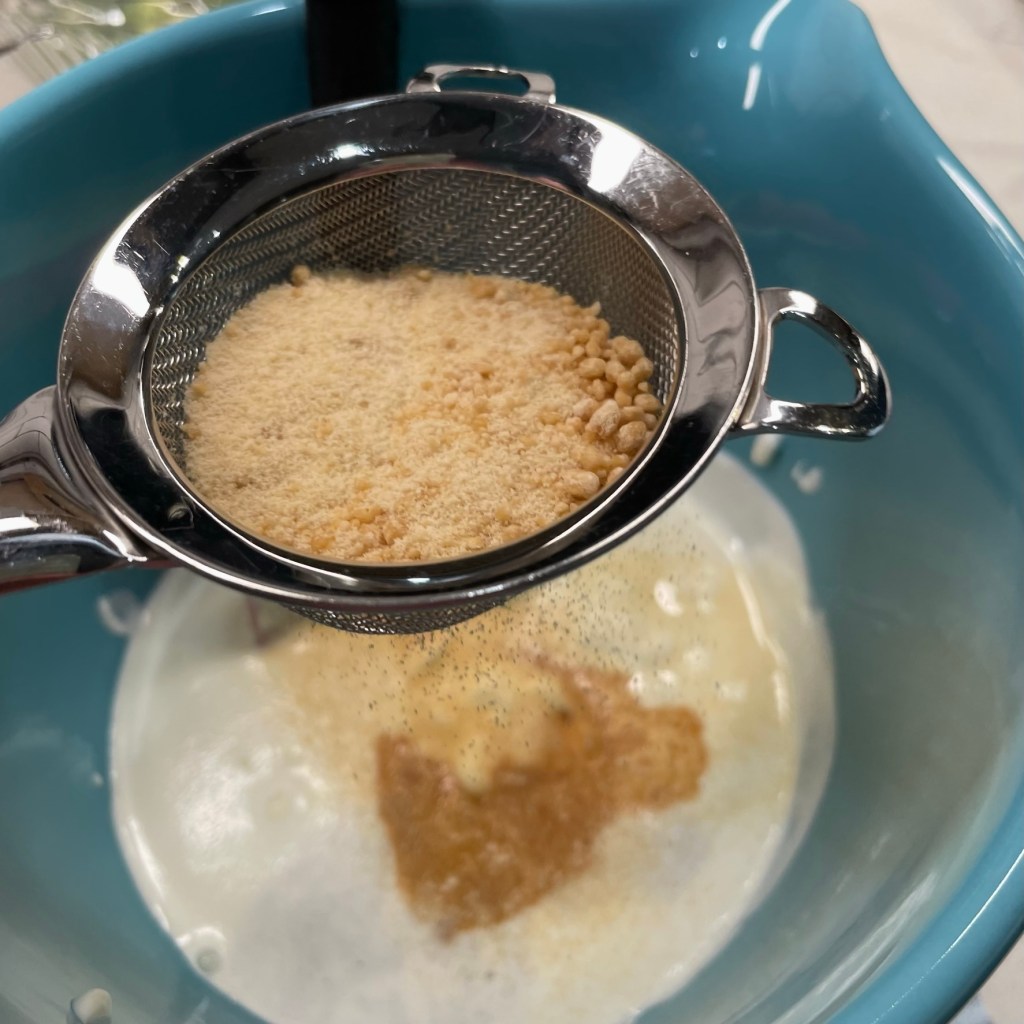
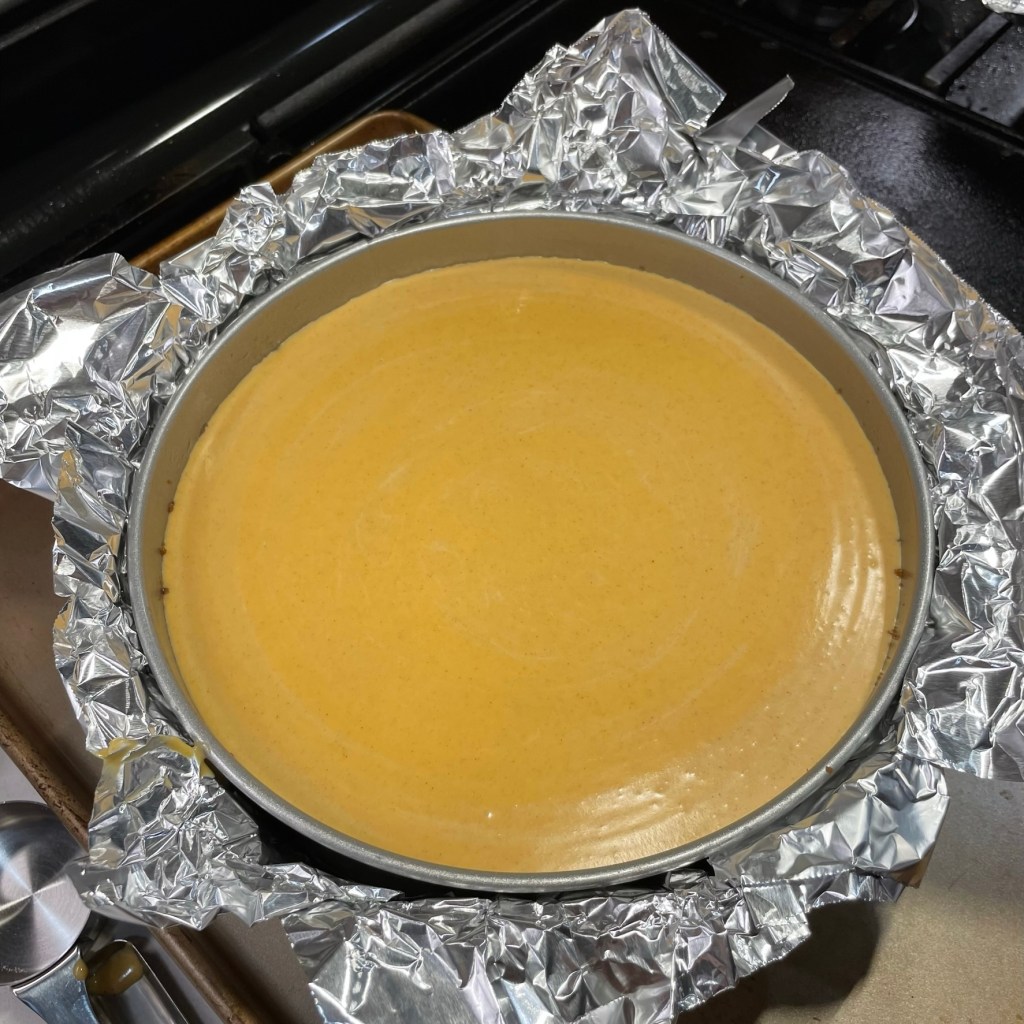
I also substituted real maple sugar in place of the regular sugar called for in the recipe, in keeping with the season and also because I happen to love the maple flavor. Everything else about the recipe was the same— roasted sweet potato, cream cheese, sour cream, vanilla and warm spices. Then free-range eggs, one at a time, and into the pre-baked crust— gently, of course, so as to not disturb the no-fuss crust.
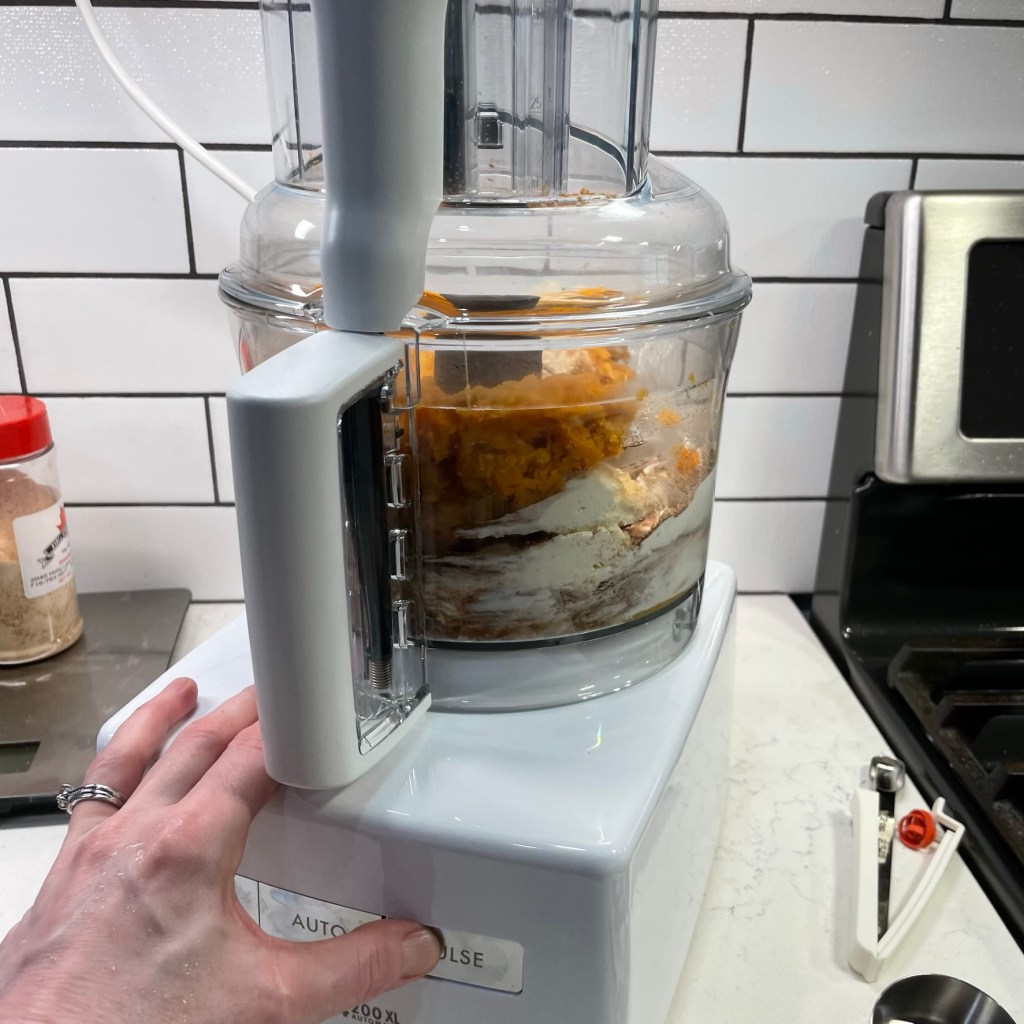
A food processor makes the filling a breeze!
Topping on the side, please
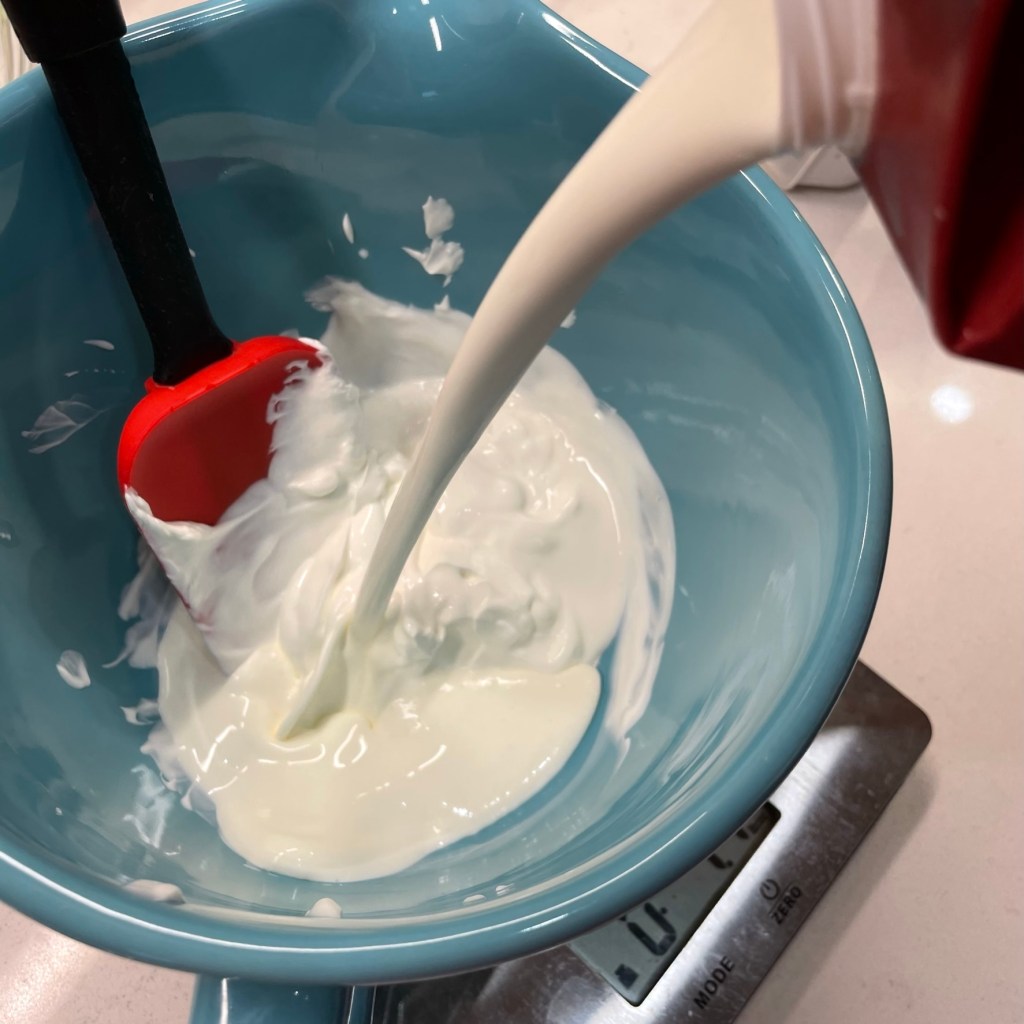
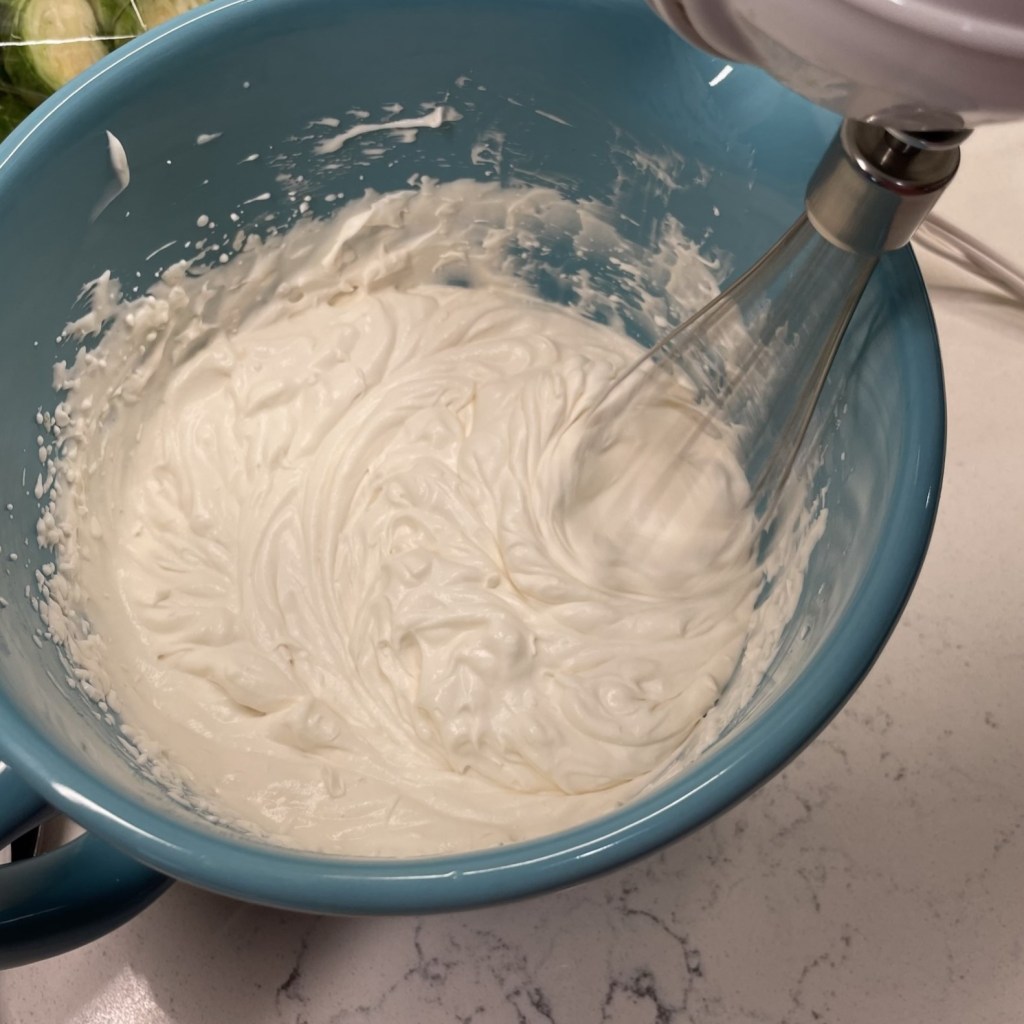
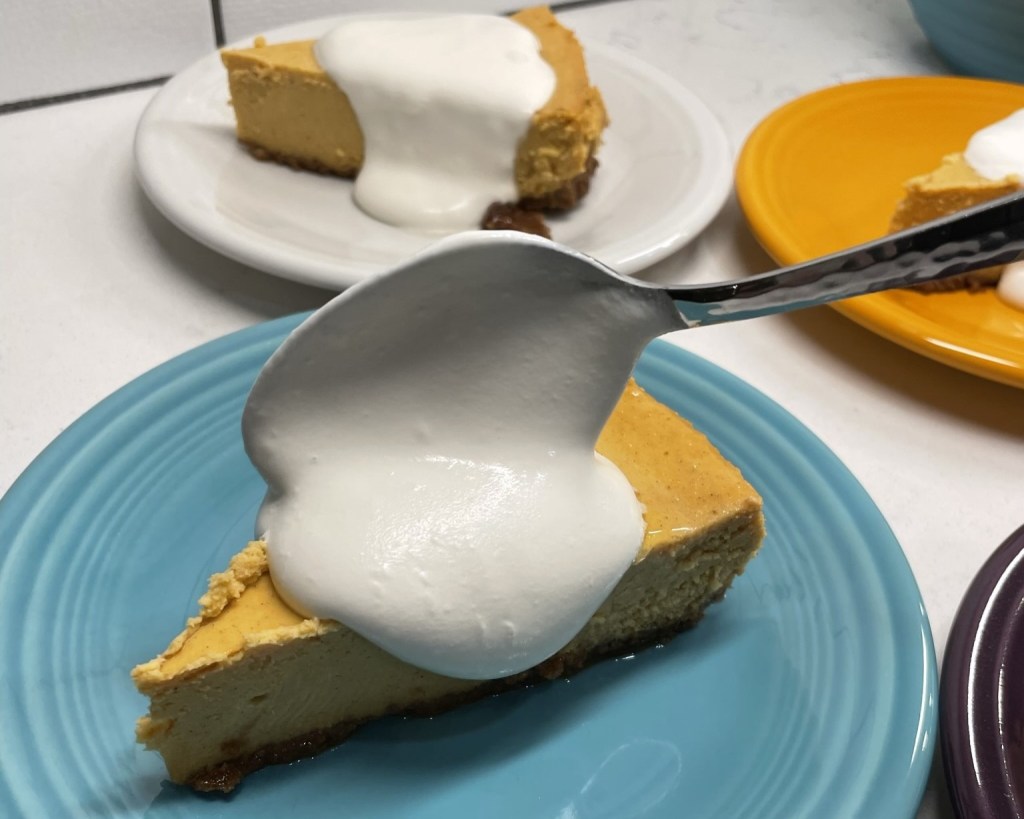
Next, I did not spread the sweetened sour cream topping over the entire cake before serving. The Kitchn version of this cheesecake was gorgeous, but we had a small gathering and I knew we would need to store the leftovers in the fridge. I made the topping— also with maple sugar— and saved it to dollop onto the individual pieces at serving time.
Sour cream keeps the topping from being too sweet, and it holds its shape beautifully in the fridge until serving time!
The dreaded water bath!
Finally, and this was the big one for me, I found a way around the usual “water bath” that is recommended for baking cheesecake. The process of wrapping up a springform pan with layers and layers of aluminum foil so that it can be surrounded with two to three inches of hot water in the oven is nothing but a big fat hassle. If even a small tear happens in that foil, water gets in and ruins the whole expensive thing. I wonder why, after so many years of springform pan baking, hasn’t someone developed a leak-proof version? Can we bring in the engineers who figured out the walk-in bathtub? That’s the technology we need here.
If they can do this, WHY can’t they make a leak-proof springform pan?
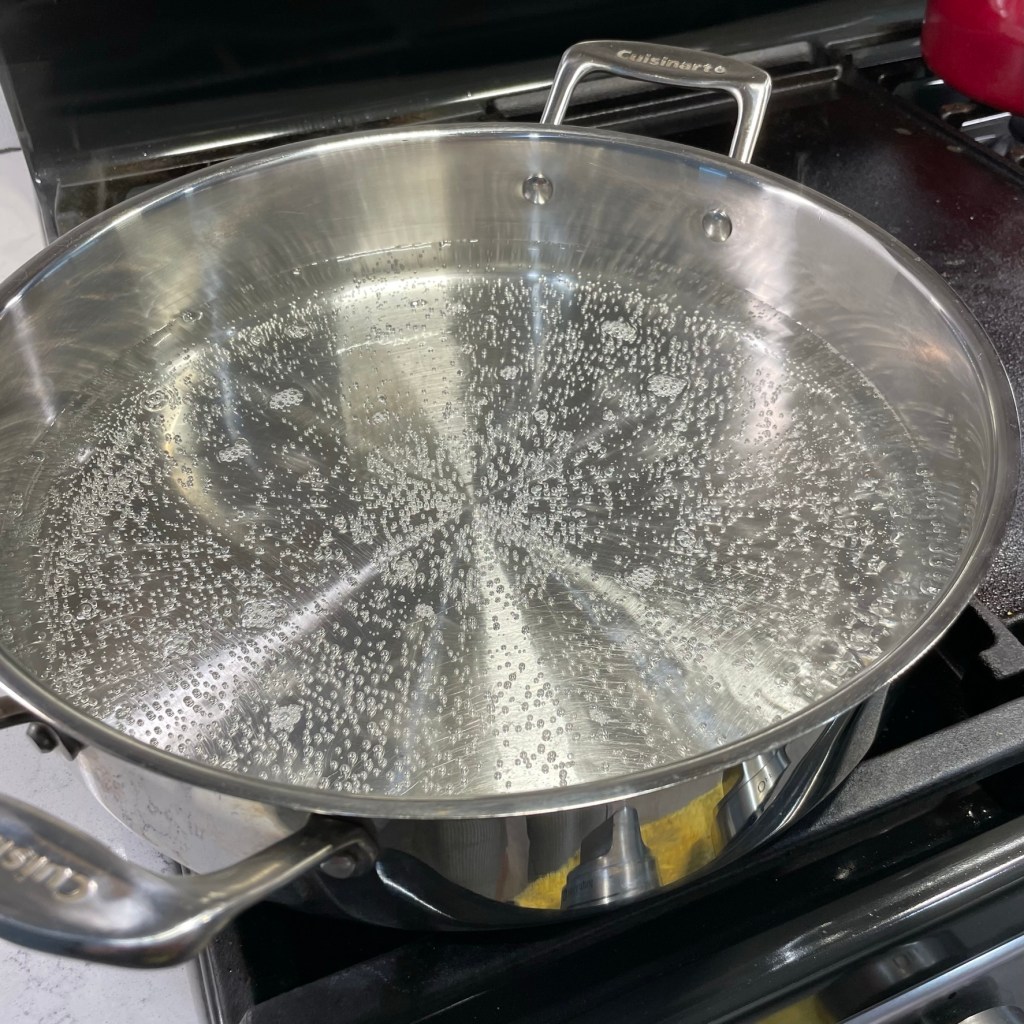
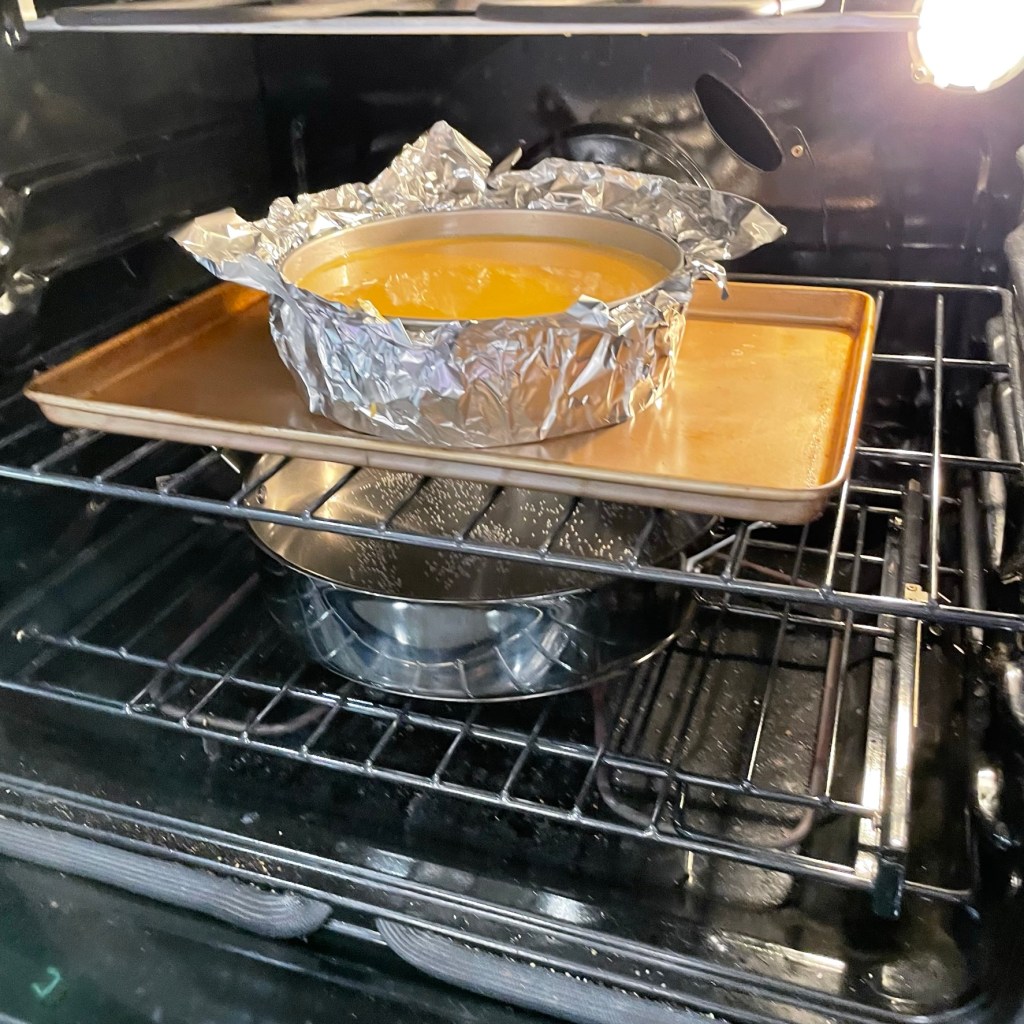
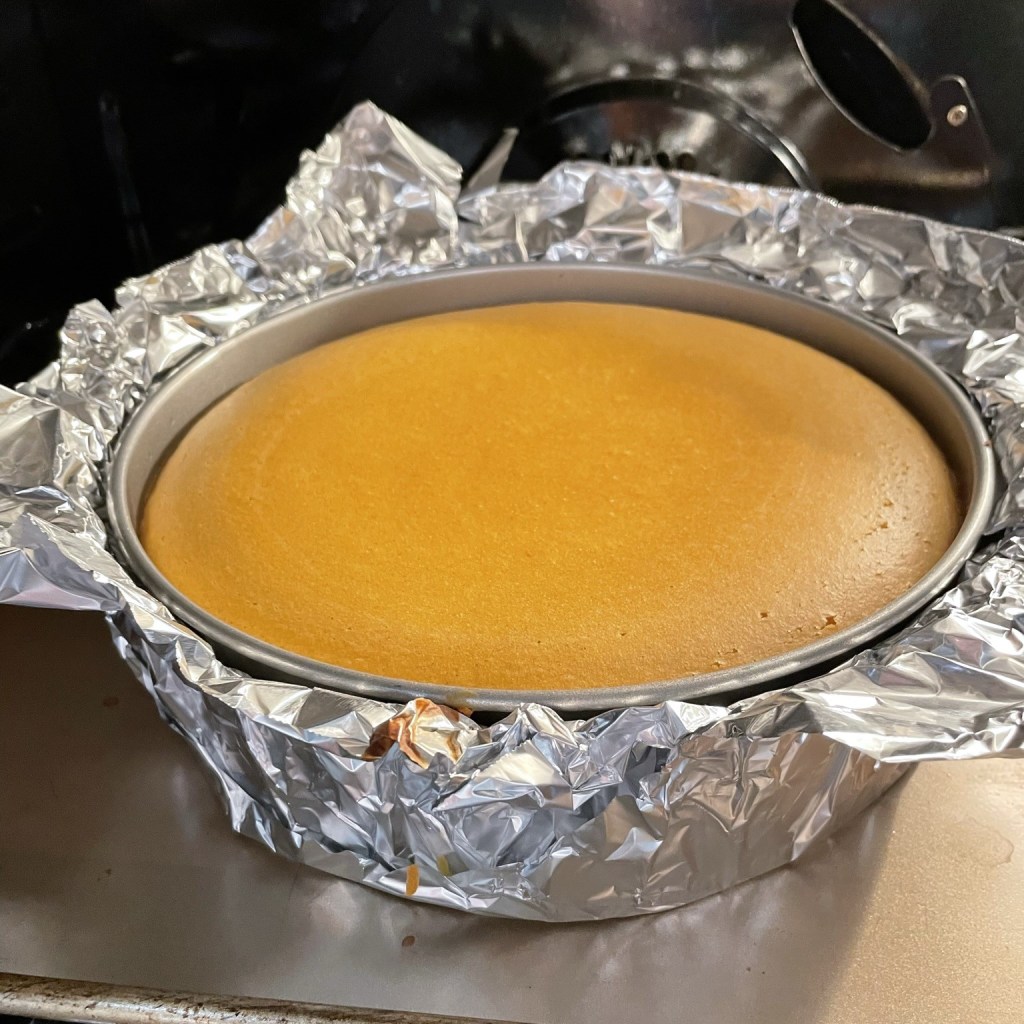
So, in my frustration, I did some research on the water bath method for cheesecakes and here’s what I learned: it isn’t the hot water that keeps the cheesecake from splitting or overbaking, it’s the steam! The cheesecake needs a very humid environment for slow and gentle cooking, but the cheesecake doesn’t need to actually be in the water for the steam to work. Though I had already wrapped my pan in foil, I went rogue at the last minute with a gigantic steam pan underneath my cheesecake, and watch what happened.
I was thrilled with the results of my last-minute decision!
My cheesecake was perfect! As with any cheesecake recipe, the instructions said to bake it until the filling was set but the center was “still slightly wobbly,” and I cooled it in the oven for about an hour before taking the thing out. There was no water in my cake, no drama trying to lift it from the water bath, and no cracks on top.
All in all for me? A Thanksgiving dessert that was, dare I say, a piece of (cheese)cake.
Where’s the recipe?
This is where you’d usually find a click-to-print recipe on my blog, but today I’m comfortable redirecting you to the original source. My adjustments, though meaningful to me, were slight, and I found the tips and instructions on The Kitchn to be clear and helpful. If you’re feeling inspired, go get it!
Happy Thanksgiving to my friends, followers and visitors!
I’ll bet I know what you’re thinking. She did what?! 😂
The matter of a signature cocktail for Thanksgiving is always a priority for me. I want guests at our table to immediately feel welcome and for the signature drink to set the mood for the occasion. And though I don’t especially like the old-school sweet potato casserole— you know the one, topped with sticky browned marshmallows— when the idea rose of putting those nostalgic flavors into a cocktail? Well, that’s quite a different story!
This discussion of a sweet potato casserole cocktail came about several months ago, as my blog buddy, Maylee over at Beyond Gumbo, and I were e-chatting about a New Orleans-based company that makes cocktail ingredients. El Guapo is the brand, and I had recently purchased a bottle of its chicory pecan bitters. I’m always on lookout for unusual cocktail ingredients, and this one struck my fancy for making holiday themed drinks.
Chicory has a slight bitter flavor that is reminiscent of roast coffee.
As so often happens, though, the bitters sat on my bar for a while as I pondered how to build a drink that would benefit from the interesting combination of flavors. I’ve used it to make a pecan pie old-fashioned, and then it got left behind until recently, when Maylee posted a wonderful recipe for a homemade pumpkin spice latte that sounds way better than anything I could buy at Starbucks. For her latte, she made a pumpkin spice syrup and she reminded me in the comments section about the sweet potato cocktail we’d discussed months earlier. Thank goodness she remembered!
And here we are! My friend’s pumpkin spice syrup inspired me to try my own version of sweet potato syrup, which was not only simple to make, but literally makes this bourbon drink taste like a tipsy liquid version of a retro sweet potato casserole. This is one of the things I love most about food blogging, the way my online friends and I are always inspiring one another to try and succeed at new things, and we keep going until we all run out of ideas.
I hope that’s a very long time. Cheers! 😁
What you’ll need
If you want to try this yourself, take a moment right now to purchase the chicory pecan bitters, as they are essential to the drink. You can buy them directly from El Guapo’s site or take advantage of speedy shipping from Amazon. Don’t worry about how to use the rest of the bottle, as I’ll be experimenting and sharing other recipes as I develop or discover them.
The other ingredients you’ll need are bourbon (a sweet one, such as Maker’s Mark or Elijah Craig), a good-sized sweet potato, a bit of turbinado or brown sugar and a cinnamon stick, plus the mini marshmallows to garnish the drink, vintage style.
Once the syrup is ready, the rest of the drink is easy peasy!
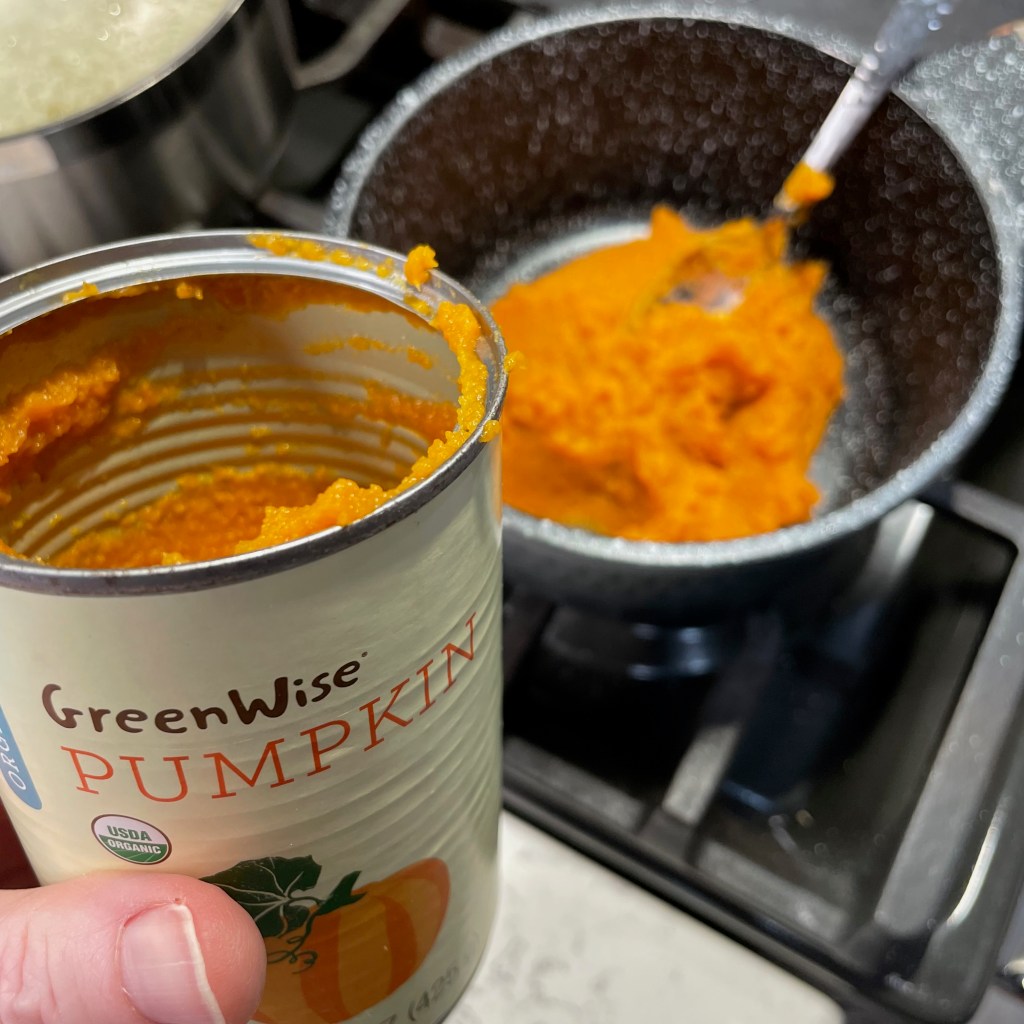
Make-ahead sweet potato syrup
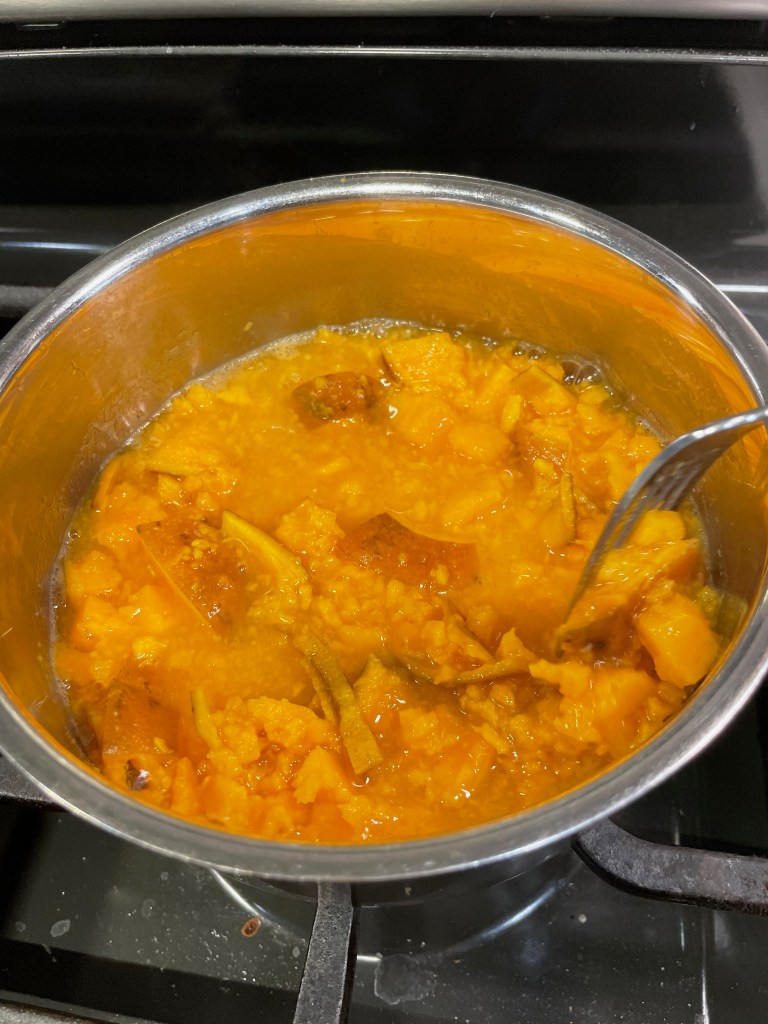
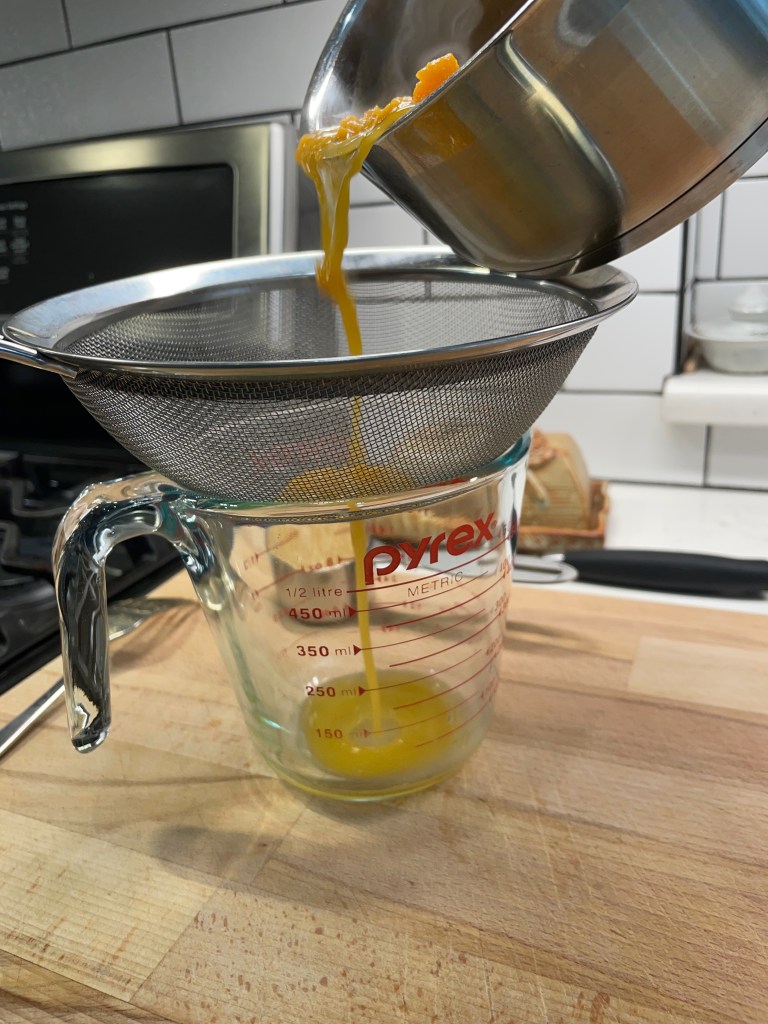
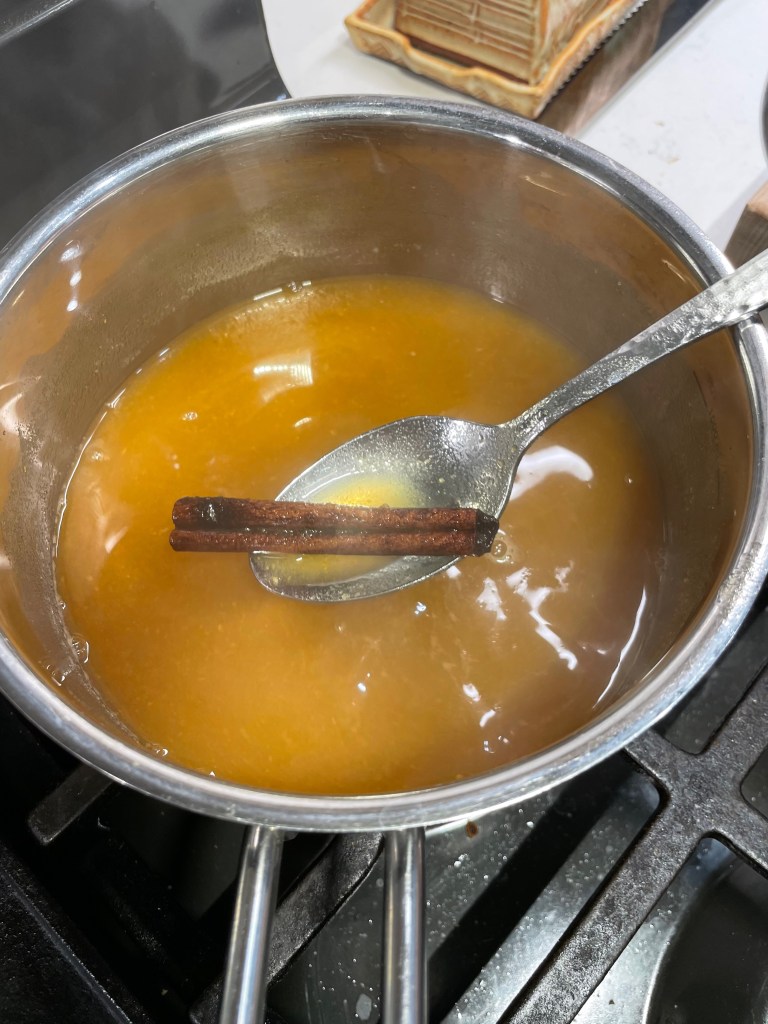
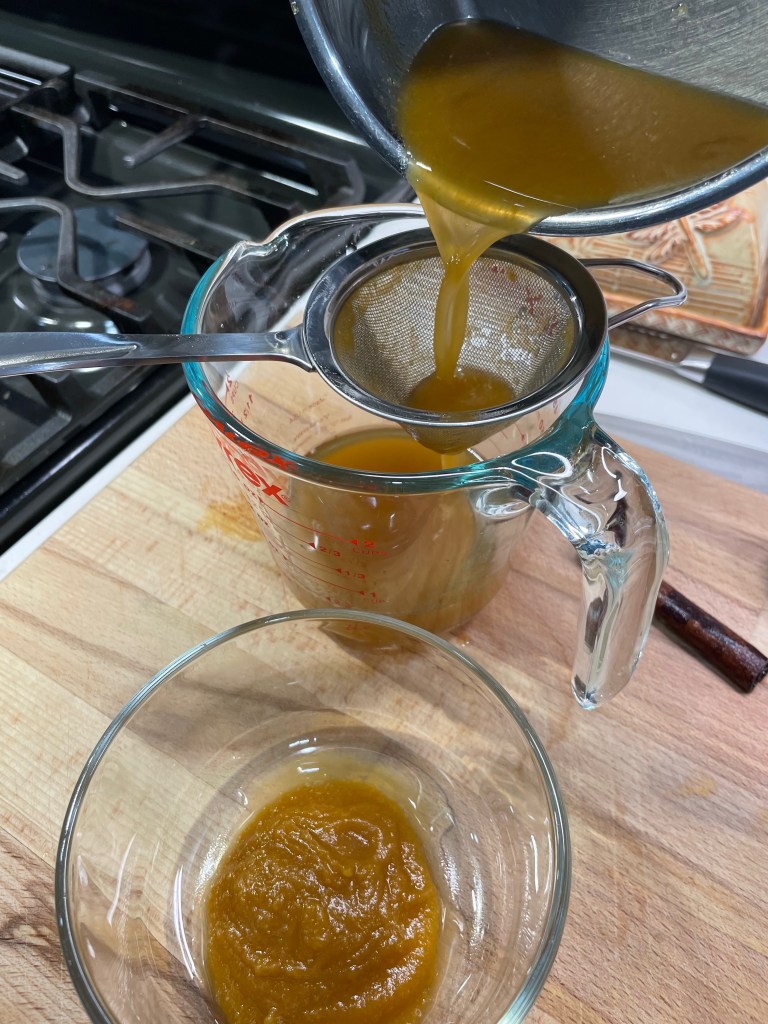
The sweet potato syrup is easy to make ahead, and I’d recommend doing it this weekend so you’ll be ready when guests arrive next Thursday. Simmer the sweet potato chunks until tender, then gently mash and strain the liquid into a measuring glass. Add enough water to total 1 1/4 cups. Pour the strained liquid back into the pan with the sugar and cinnamon stick. Bring to a slight boil, then simmer for about 15 minutes. Cool to room temperature, and then strain again— this time through a very fine mesh strainer to filter the solids as much as possible. Transfer it to a bottle and chill until you’re ready for cocktails.
When my syrup was finished, it measured 3/4 cup, exactly enough for 8 cocktails. If you’ll be making more drinks, my click-to-print recipe below is easy enough to double.
Time for a cocktail!
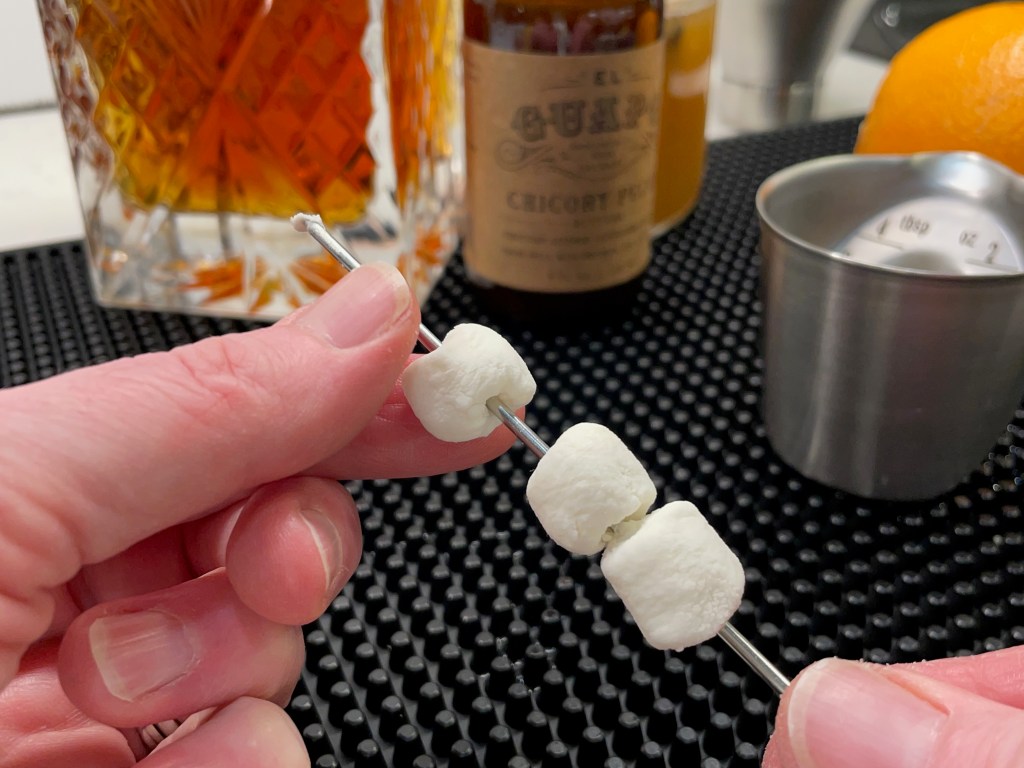
When the bell rings for happy hour, get your cocktail tools and ingredients ready to go. You’ll need a shaker (this is best when mixing ingredients of different viscosity), a measuring tool for the ingredients, ice for shaking, heatproof cocktail picks and a culinary torch or lighter to toast the marshmallows.
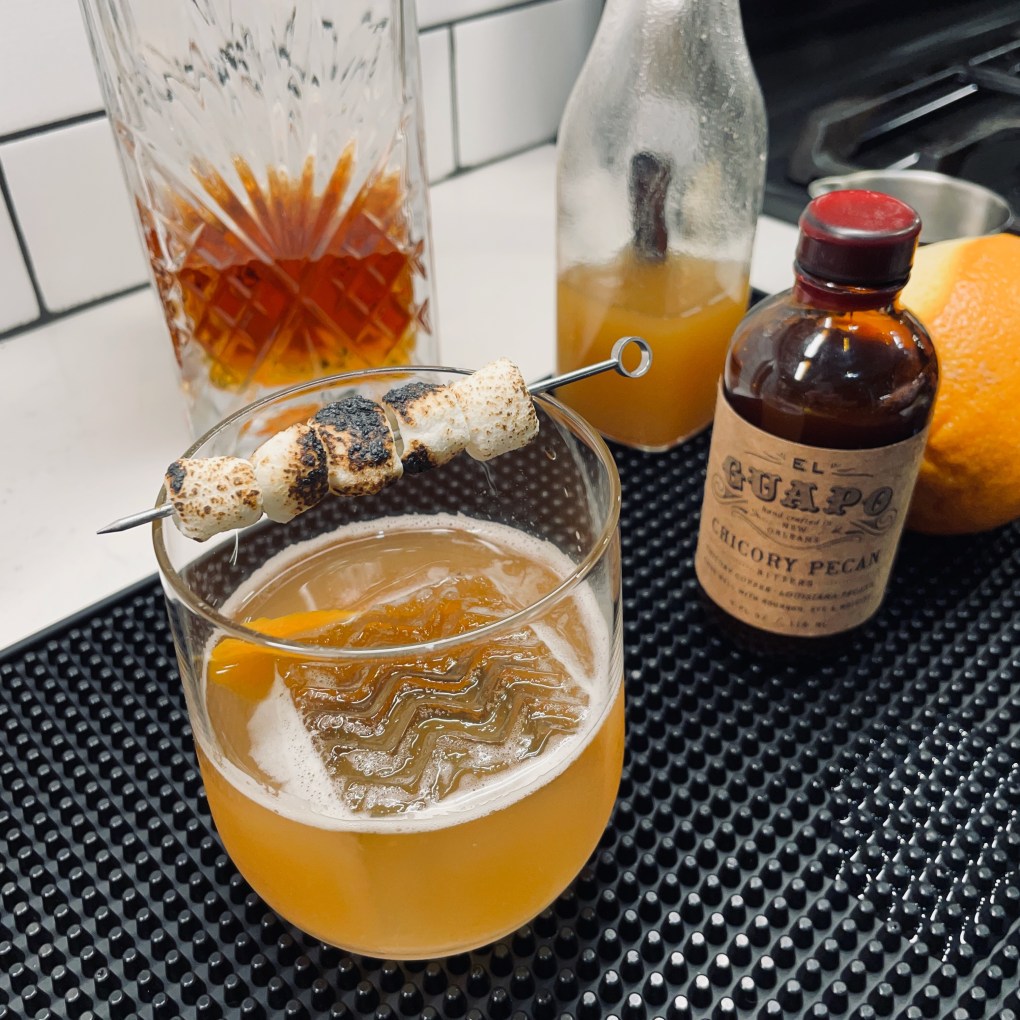
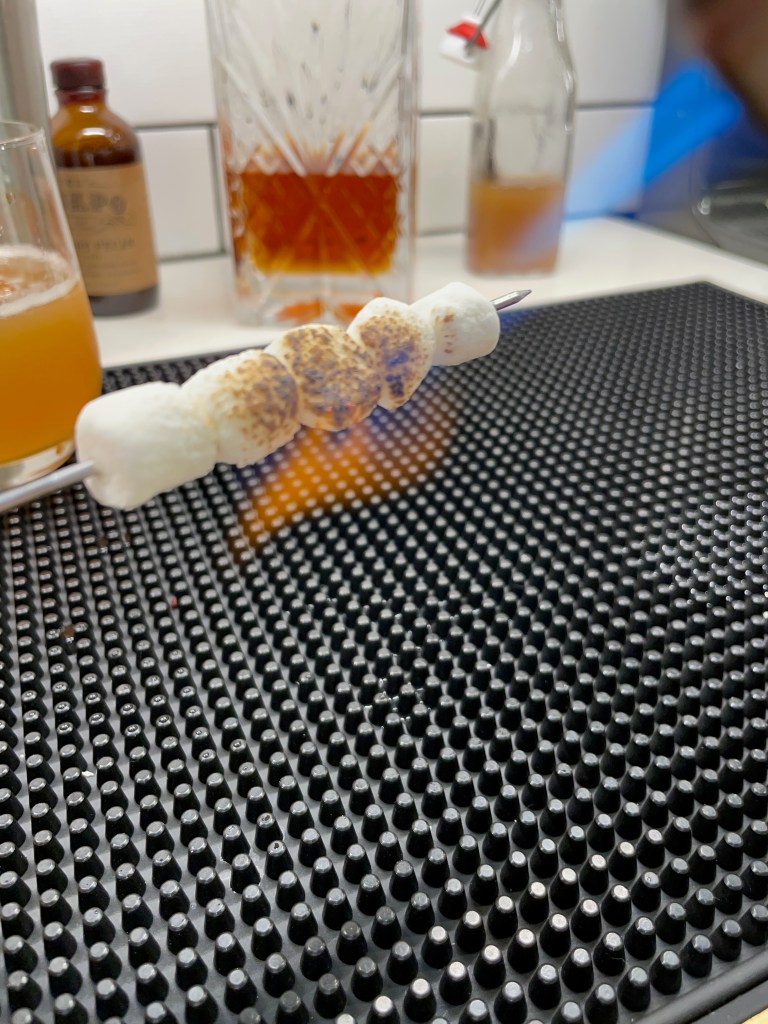
The toasted marshmallows are a whimsical nod to the sweet potato casserole of my childhood!
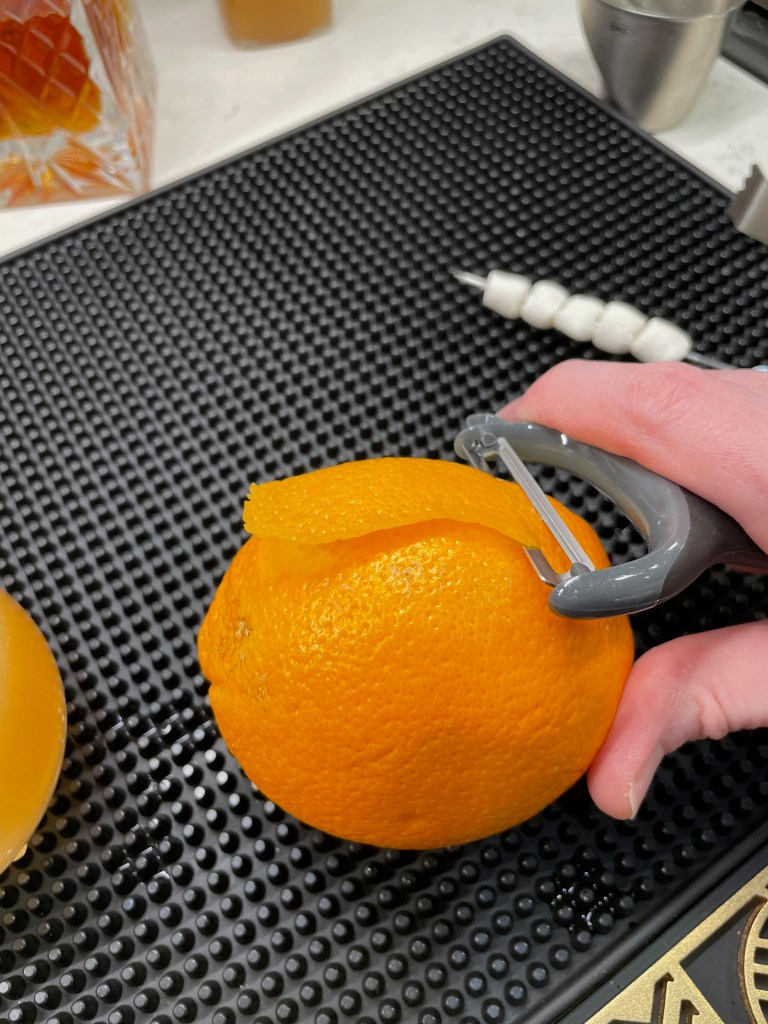
I recommend threading the marshmallows onto the cocktail pick first so you can get straight to enjoying this delicious drink as soon as it’s poured. To reduce the stickiness, I smeared the cocktail picks with a bit of butter before adding the marshmallows. I like a little orange peel expressed over my drink, so this is good time to strip that off a washed orange, too.
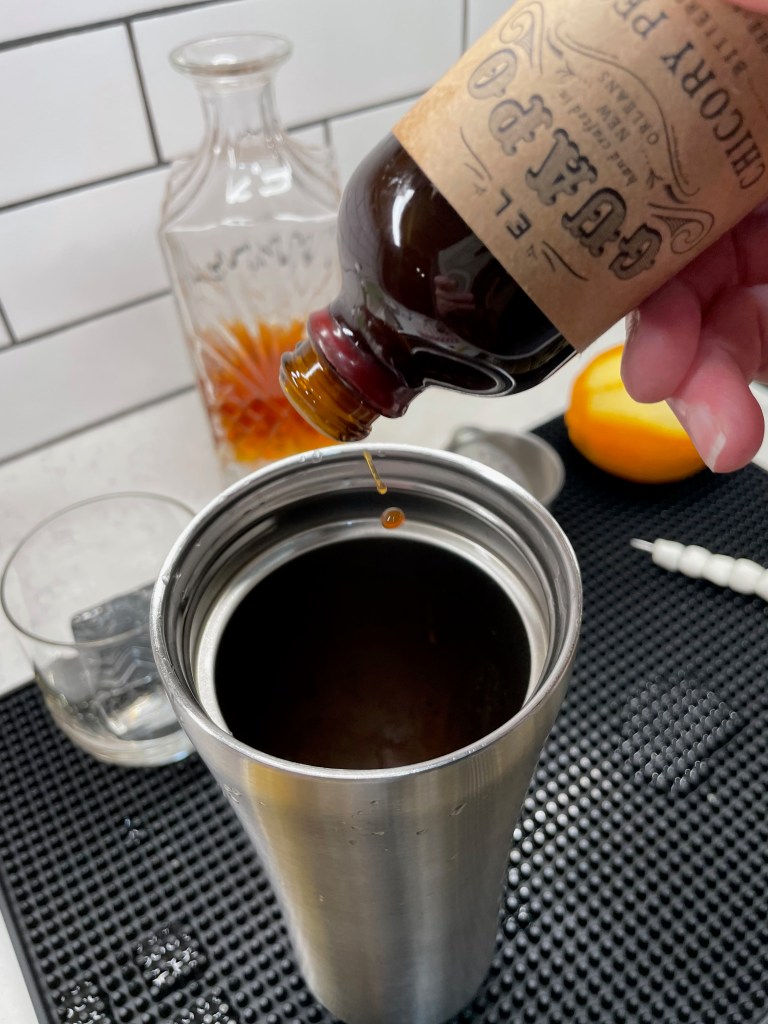
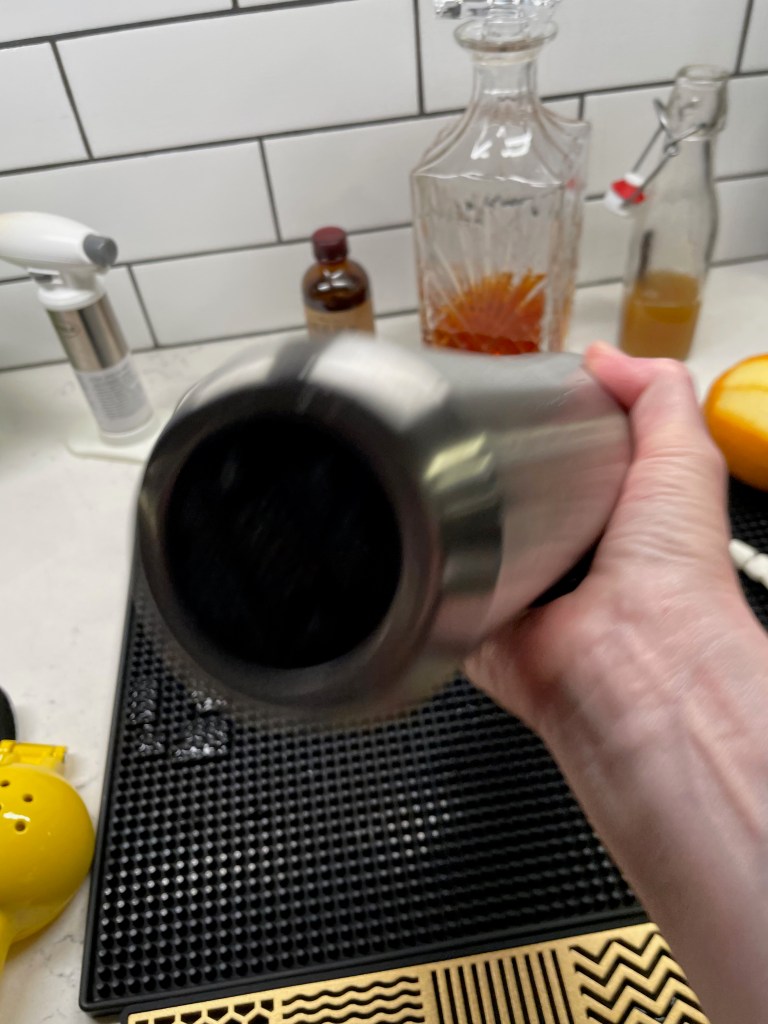
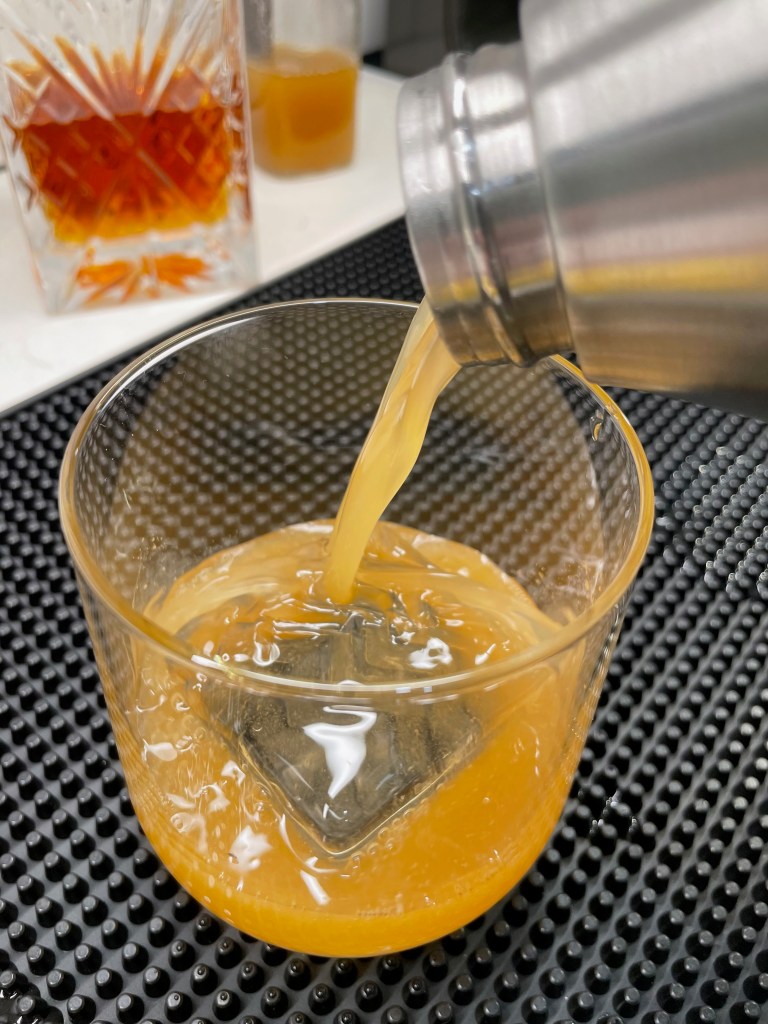
Here comes the mixing! Combine the bourbon, syrup and chicory pecan bitters in a shaker with about a cup of ice. Shake for 20 seconds, or until the outside of the shaker is cold and frosty. Strain over new ice. Express the orange peel (if using) over the drink and toast the marshmallows to garnish the glass.
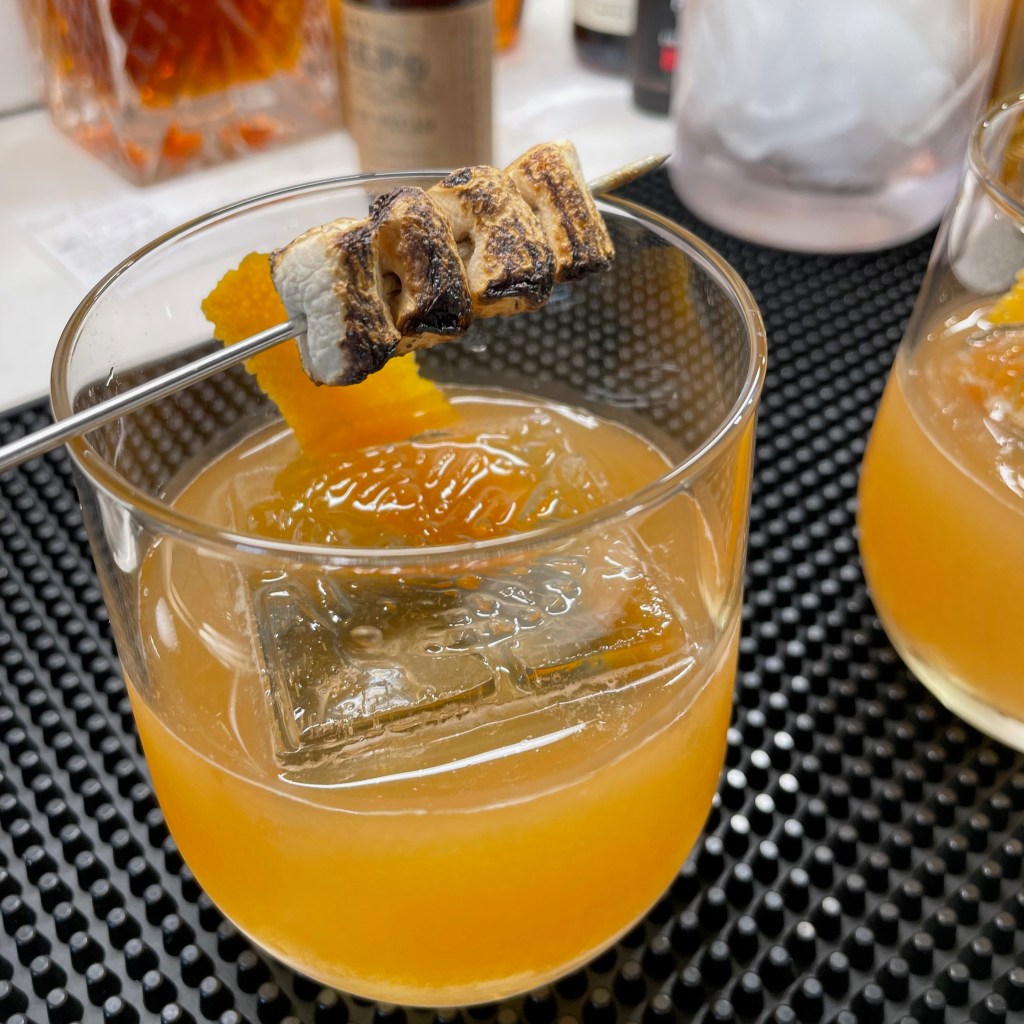
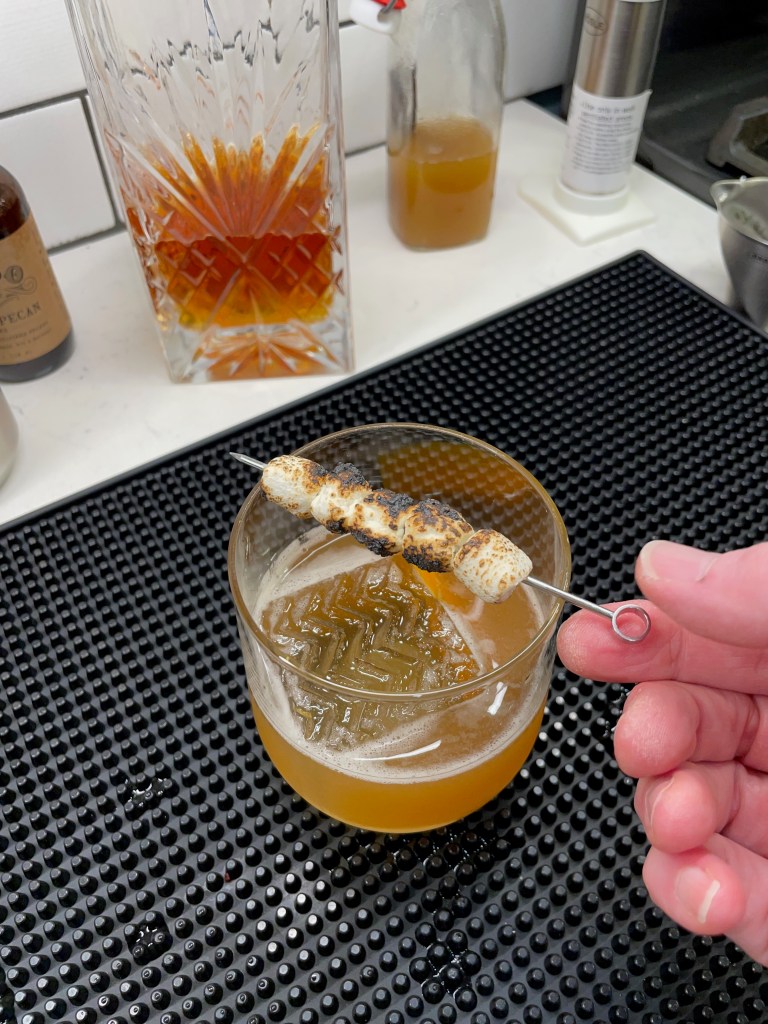
Yes, this fun recipe is exactly what you imagine; the flavors of a classic Thanksgiving side, transformed into a delicious holiday cocktail.
Ingredients
1 1/2 ounces bourbon (a sweet one, such as Maker’s Mark or Elijah Craig)
3/4 ounce sweet potato syrup (recipe and directions below)
3 shakes El Guapo chicory pecan bitters
miniature marshmallows, threaded onto a heatproof cocktail pick
3-inch strip of orange peel, optional for expressing over cocktail
Directions
Combine bourbon, sweet potato syrup and chicory pecan bitters in a cocktail shaker with a cup of ice. Shake for 20 seconds, or until shaker is frosty.
Strain over a large ice cube in a double rocks glass. Espresso orange peel over drink, if desired. Toast marshmallows and garnish the cocktail.
Cheers!
The only fussy element of this drink is the sweet potato syrup. Plan to make this ahead, and keep it in the fridge for up to two weeks. The recipe below makes enough syrup for 8 cocktails.
Ingredients
1 large sweet potato, peeled and cut into chunks
1/3 cup turbinado or brown sugar
4-inch piece of cinnamon stick
Directions
Cover sweet potato chunks with cold water in a medium saucepan. Cook over medium heat until potatoes are fork-tender, about 35 minutes. Gently mash the potatoes, still in the water, with the back of the fork. Strain through a wire mesh strainer into a glass measuring cup. Add enough water if needed to total 1 1/4 cups. Rinse any solids out of the pan.
Pour sweet potato liquid back into the saucepan. Add sugar and cinnamon stick and simmer over medium-low heat for about 10 minutes until sugar is fully dissolved and mixture takes on a syrupy consistency. Remove from heat and cool to room temperature.
Strain again, this time through a fine mesh strainer or coffee filter. Finished syrup should measure approximately 3/4 cup. Transfer syrup to a jar or sealable bottle and refrigerate for up to two weeks.
Elevate it even further!
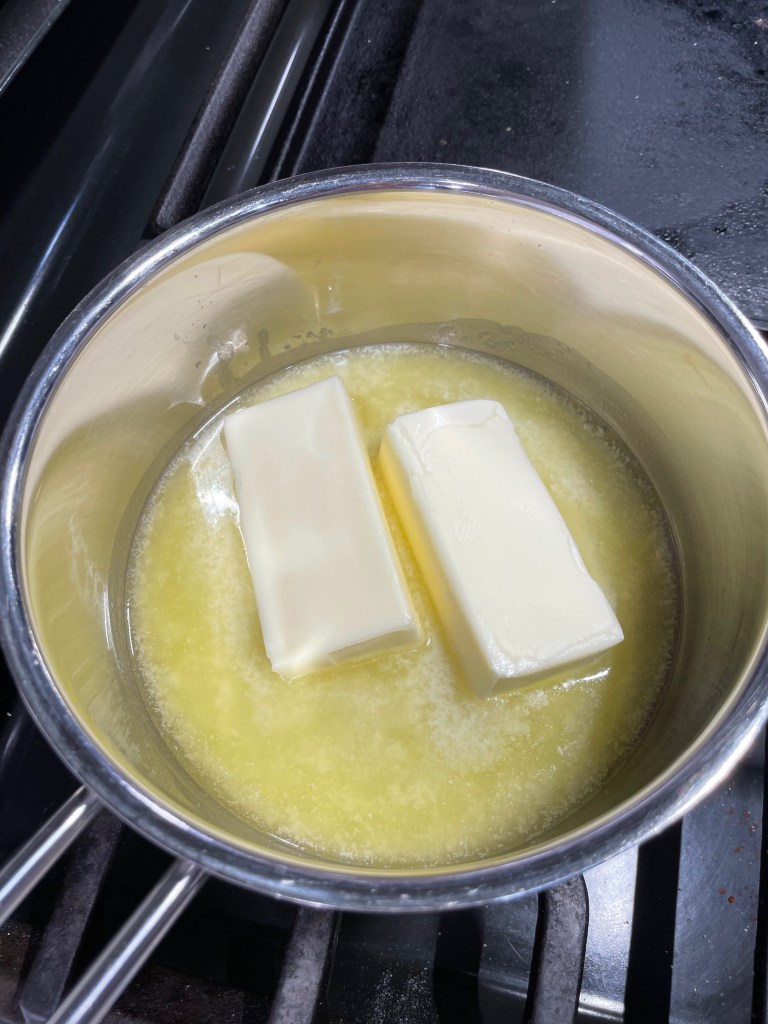
Want to take this drink a flavor step further in the direction of a sweet potato casserole? Try this trick of “fat-washing” your bourbon with browned, unsalted butter. It’s easy to do, and as a bonus, you’ll have a small bowlful of bourbon-infused butter left over to flavor something else on the table. The actual sweet potato casserole, perhaps? 😉
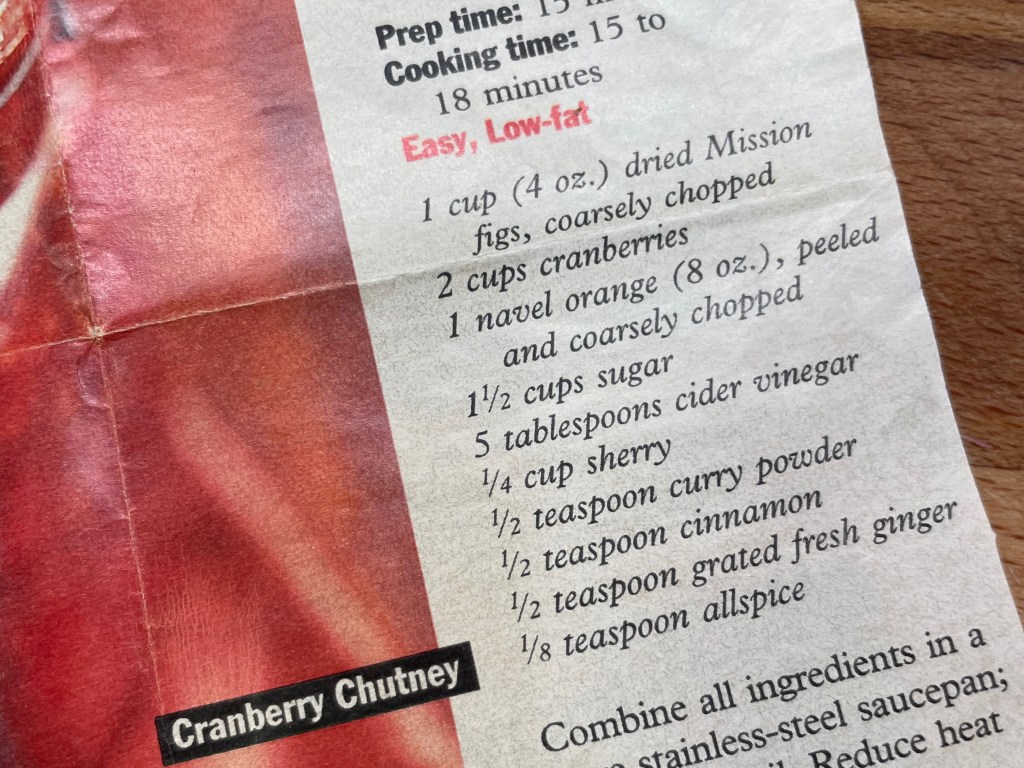
A few weeks ago, as I was rummaging through my little black recipe box, I ran across a yellowed snippet I cut out years ago from one of those old-school women’s magazines perched at the grocery store checkout. This is a long-time habit of mine— hoarding recipes— and I’m only slightly embarrassed to admit that I frequently don’t get around to making the things that intrigue me enough to impulse-buy a magazine or cookbook. Or if I do make one of these recipes, I change it up so much that it barely resembles the thing that caught my eye in the first place. Blogging has changed me for the better, though, and I’ve been revisiting my box full of clippings, even creating a culinary bucket list of things to try.
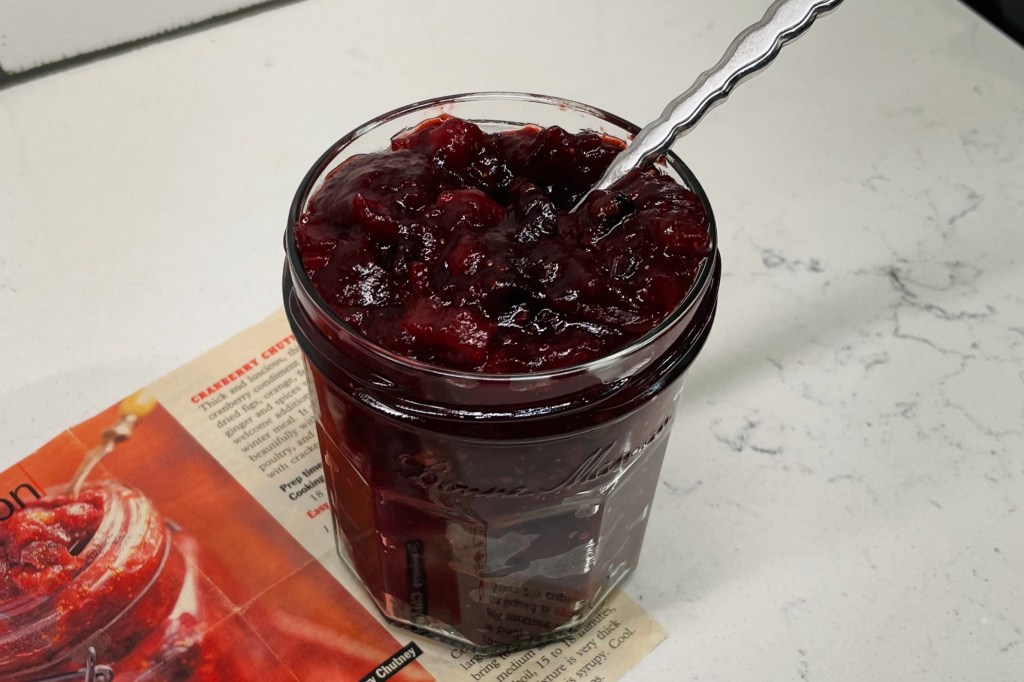
I have finally gotten around to this cranberry chutney, and for the life of me, I don’t know why I waited so long. It’s absolutely delicious! With a few adjustments (of course).
Chutney is a condiment that I only experienced in my adult years, and I appreciate it for many reasons. In addition to the warm spice flavors of India and competing notes of sweet and tart, there’s a texture element to chutney that I find most addictive. It certainly doesn’t hurt that chutney is a lovely complement to meat and vegetable dishes, and with cranberry in the spotlight, this one feels perfect for all the food holidays barreling down on us. I’m always on the lookout for an interesting twist on classic foods, and I can promise you this ruby-colored condiment will be on our Thanksgiving table, but it was also really dang good last week on my second go-round of Thanksgiving burgers.
Let’s go ahead and talk about the adjustments I made to the magazine recipe (I can’t help myself), and if you enjoy chutney as I do, I bet you’ll agree that these were necessary.
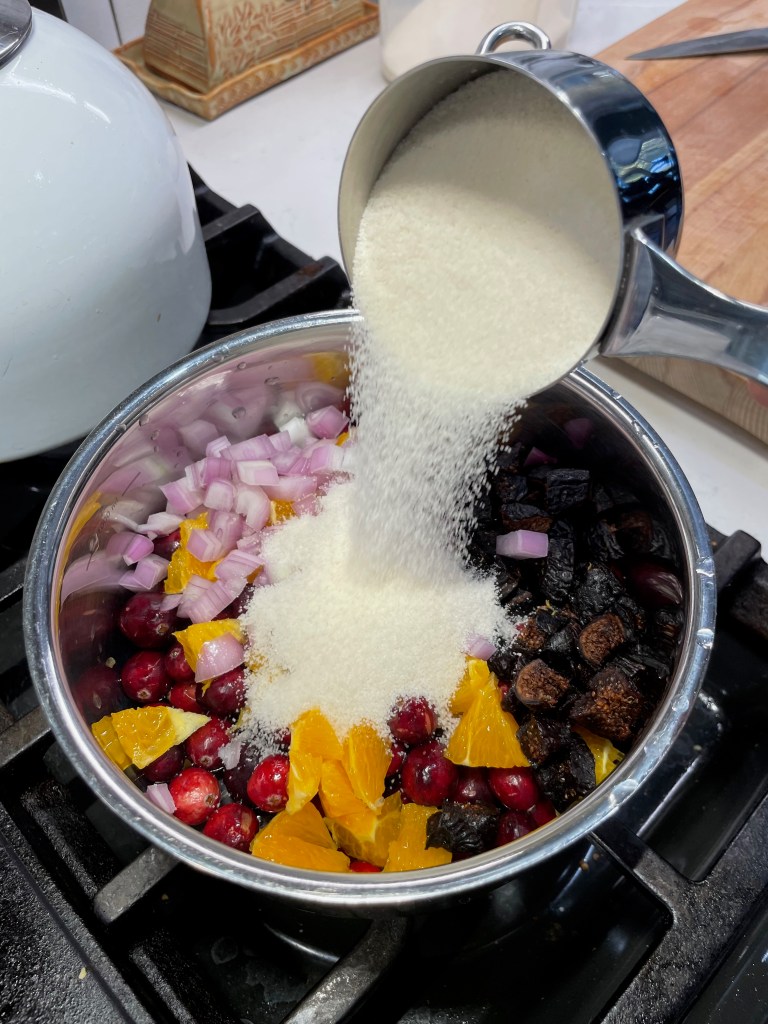
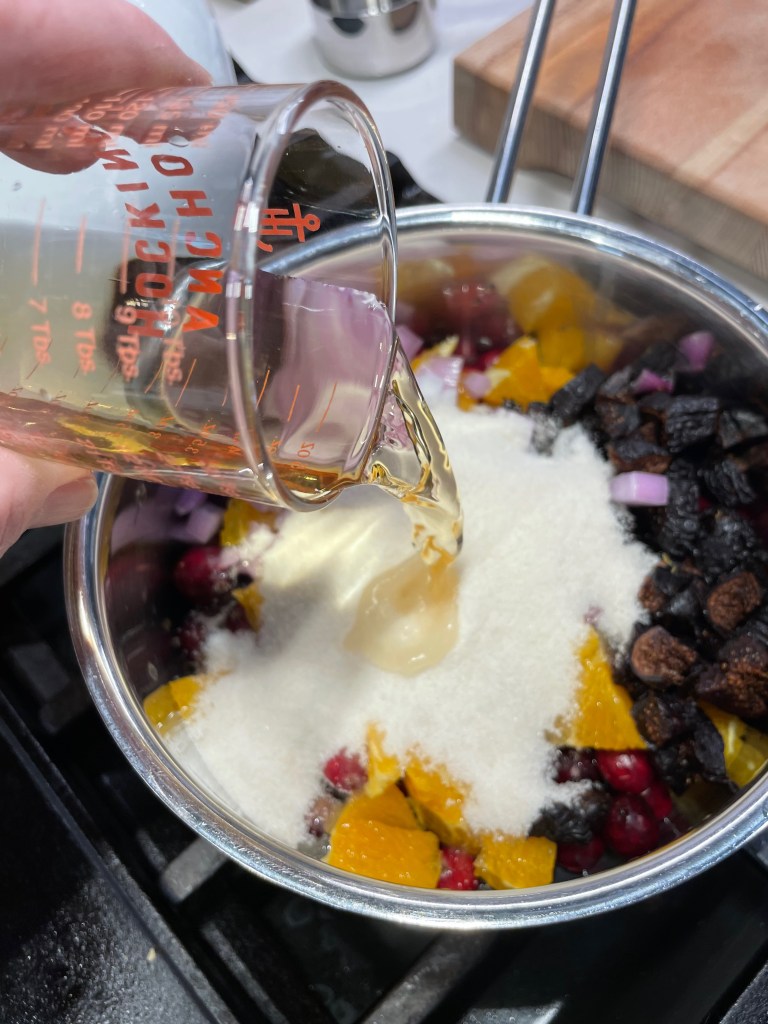
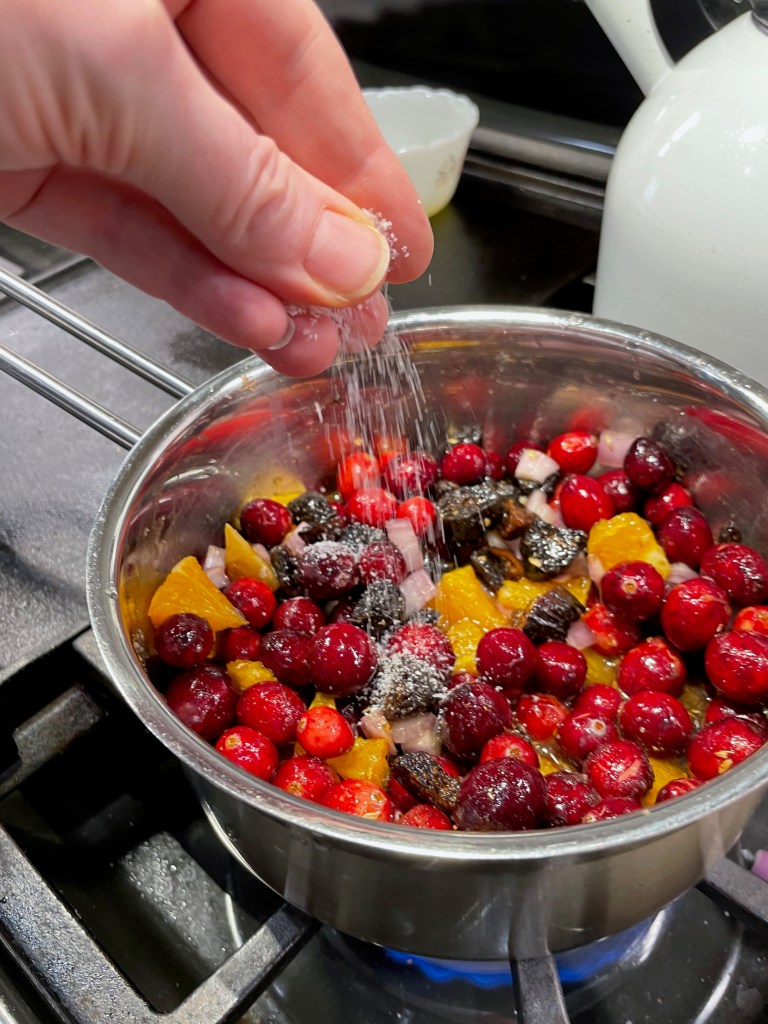
First, I knew straightaway that I would add onions to my version of this chutney, because I love the little crunch next to the tender cooked fruit and I wanted a gentle push-pull of sweet and savory in one bite. Every chutney I’ve ever loved had onions, and though sweet or even red onion would have worked fine, I chopped up a medium shallot for this. The magazine recipe had plenty of sweetness with dried figs and chopped oranges plus sugar. The fresh cranberries contributed a tart contrast, and cider vinegar gave it a slightly “pickled” flavor. The recipe called for sherry, and since I do not buy “cooking wines,” I used a generous splash of a high quality Spanish drinking sherry. It’s the holidays, why not?
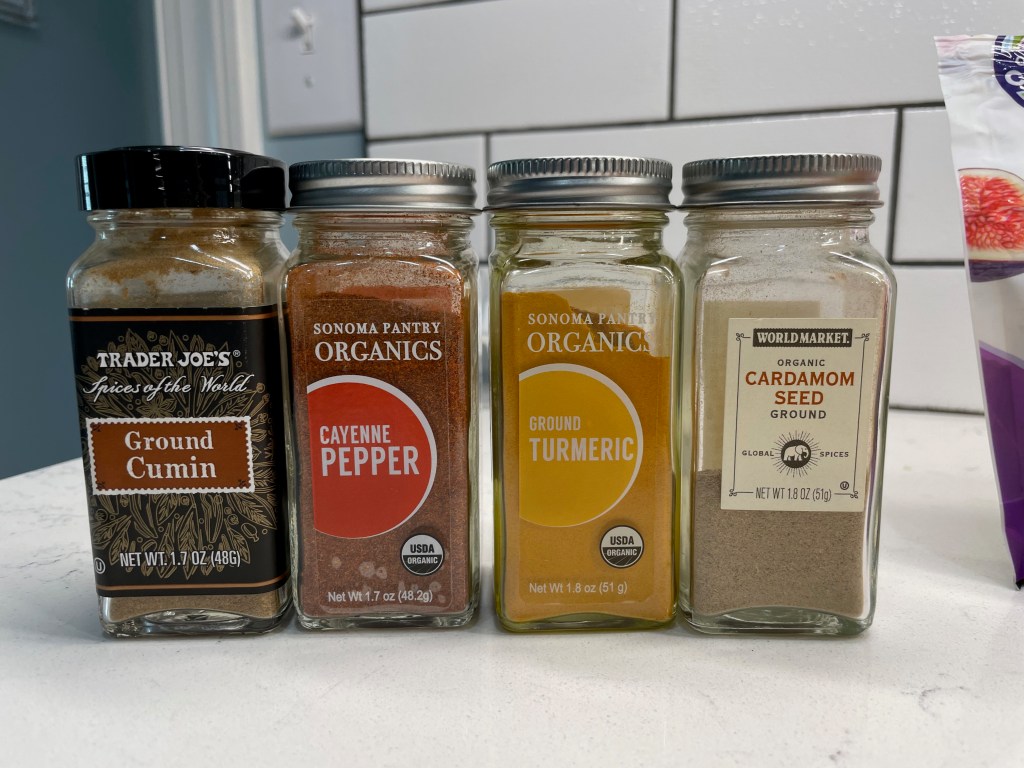
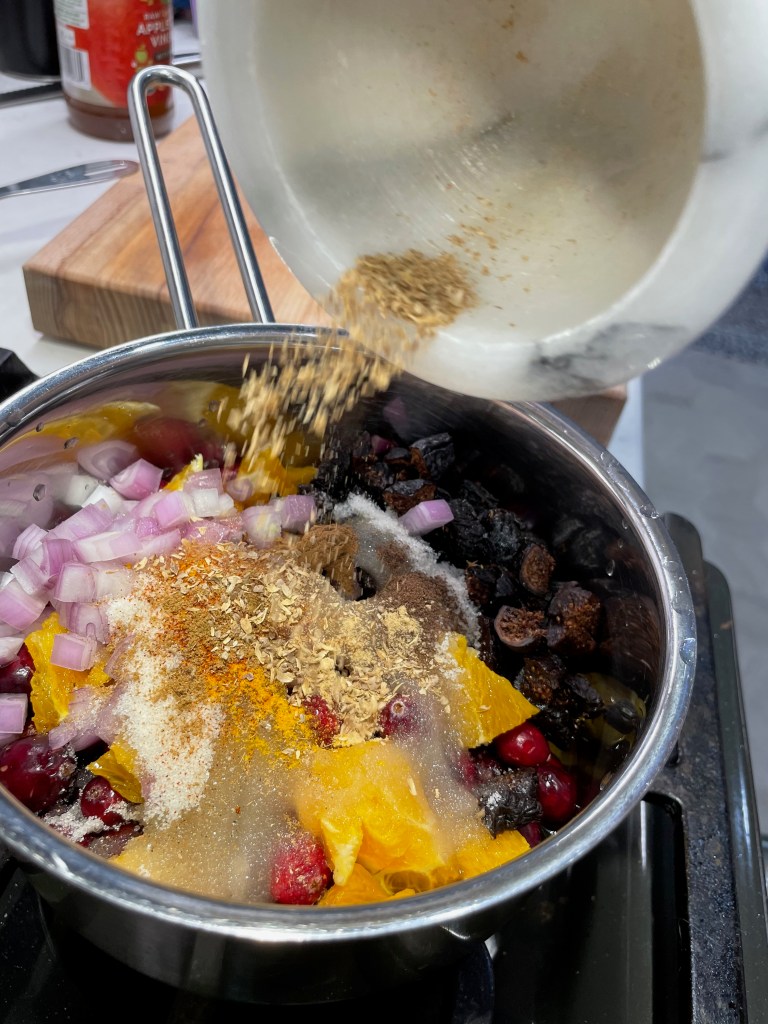
Then came the spices, and I had to improvise a bit here because I also don’t buy curry powder. It’s one of those blends that is different from one brand to the next, but I know enough about Indian flavors to estimate which ones belonged in this recipe. So I made up my own “curry” blend on the spot, with a few shakes each of cumin, turmeric, cardamom and cayenne, plus some freshly crushed coriander seed for a citrusy complexity. The recipe also suggested cinnamon and allspice, and those were easy. Ground ginger also stepped up in place of fresh, which I never seem to have when I need it.
The aroma of this concoction was instantly intoxicating, and as I began to stir, it hit me that I didn’t notice on the magazine recipe one very important ingredient. I had to look again to be sure— do you see what’s missing?
Salt, of course! Now, this may have been an oversight, or perhaps the author assumed that the reader would know to include it. This is one of the things I griped about in my post about the problem with recipes, and why I insisted that one still must know how to cook even when following a recipe. Even if this was meant to be just a “sweet” chutney, it should still have at least a pinch of salt to highlight the amazing flavors of the other ingredients. So, salt it I did.
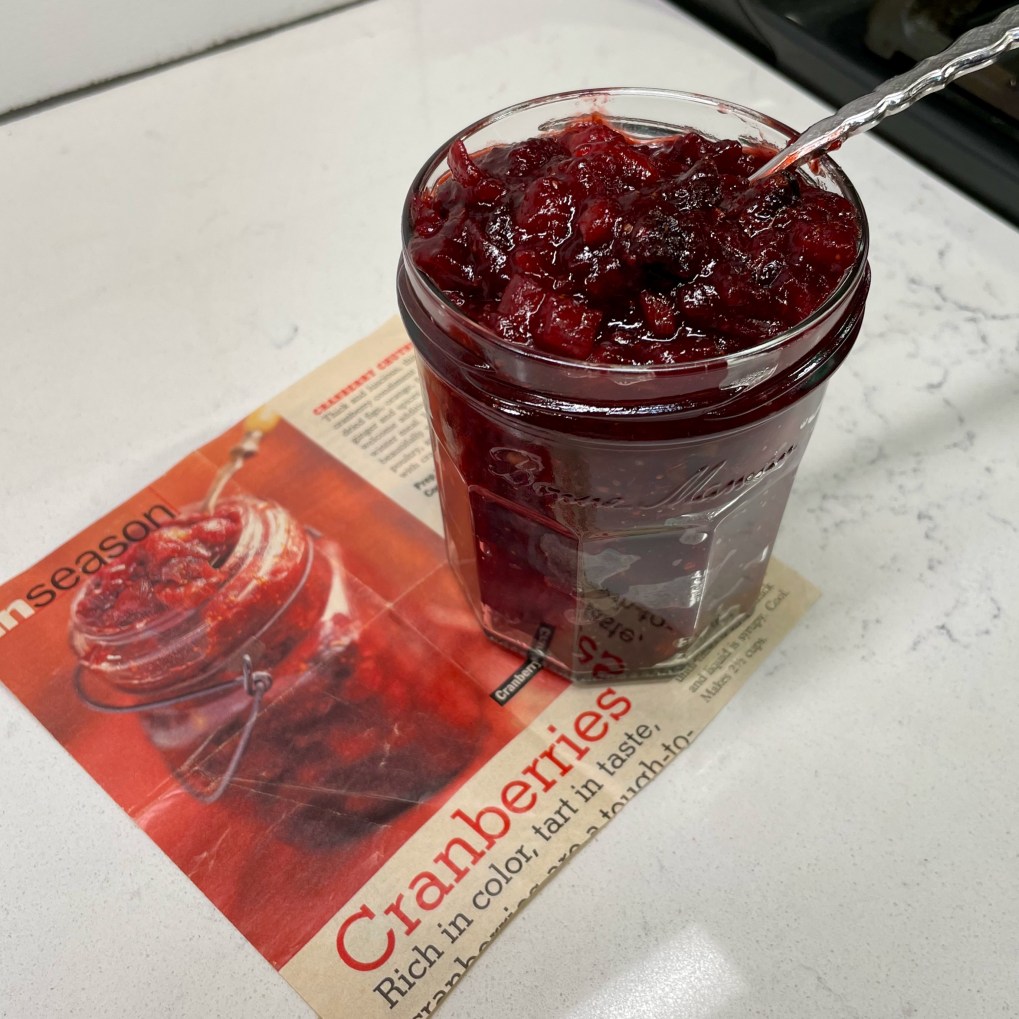
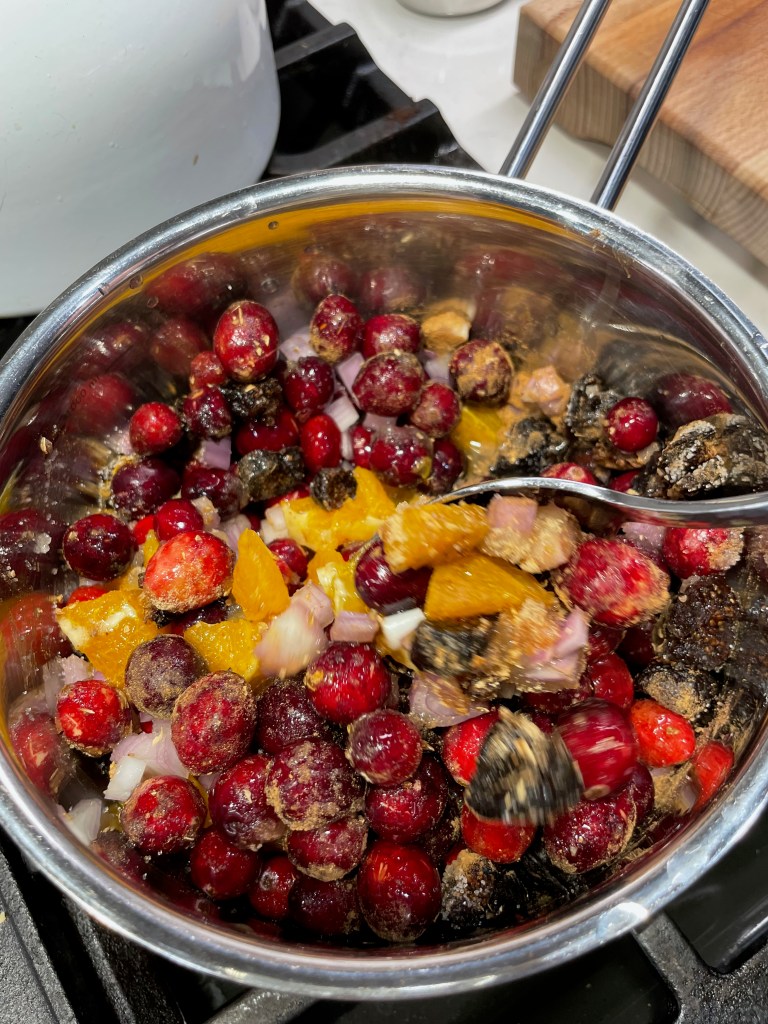
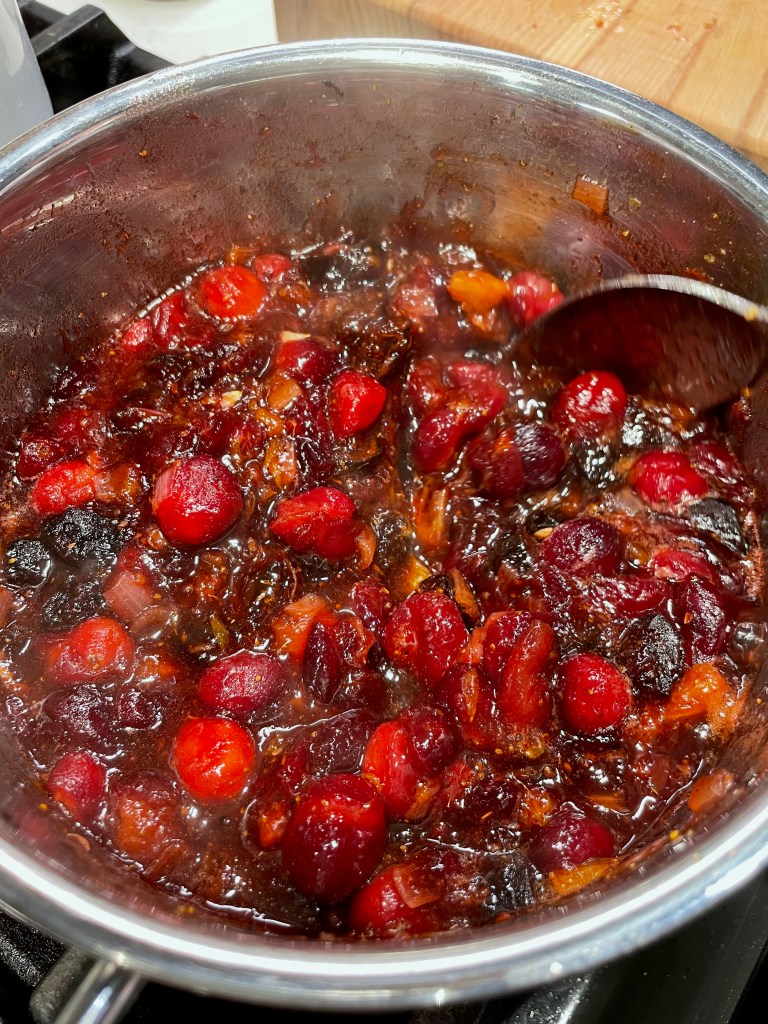
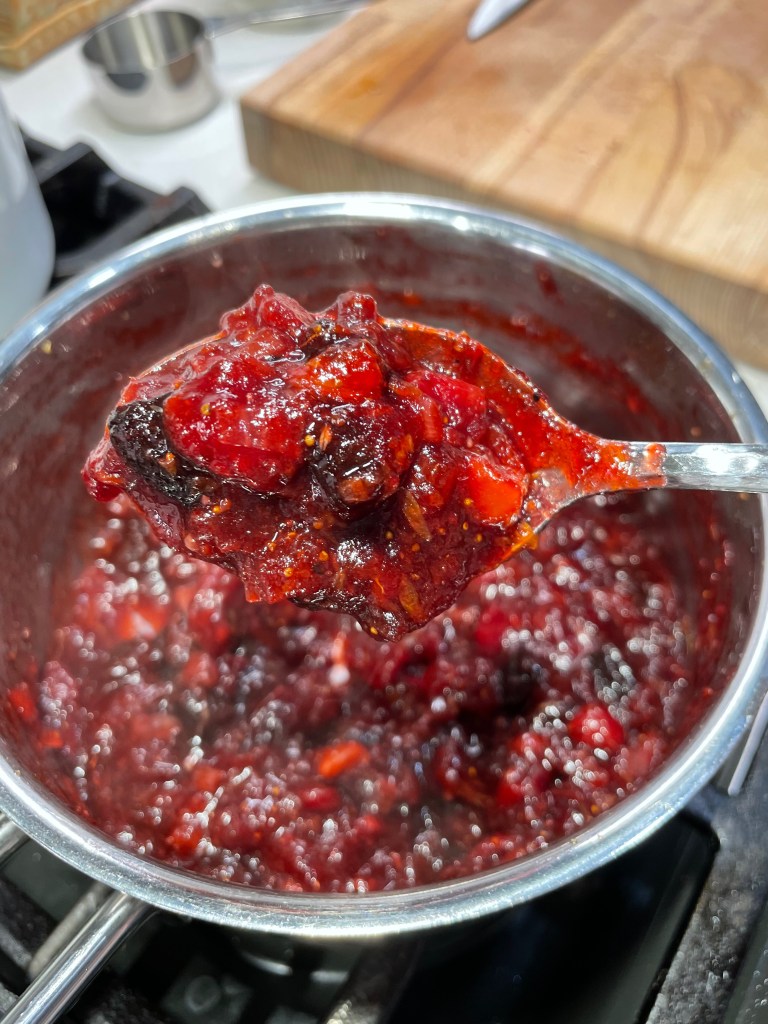
Twenty minutes later, I had this gorgeous, sweet and savory cranberry chutney. The oranges cooked down and took on the red color of the cranberries. The shallots were still a bit crunchy, the figs were delicate and chewy, and the spice aroma was just perfect.
I’m glad I didn’t put this one off another year. It’ll be great with my roast turkey, and my taste buds want it with pork chops, salmon and chicken, too. Will you be throwing a twist onto any Thanksgiving classics this year? Let’s hear about it in the comments, just below the click-to-print recipe card. As always, feel free to adjust to taste. 😉
This mouthwatering chutney brings a Thanksgiving classic together with warm Indian spices and crunchy bits of onion, making it a fantastic sidekick to pork, chicken, fish and (of course) roasted turkey!
Ingredients
1 cup fresh cranberries, rinsed and picked over for duds
1/2 cup dried mission figs, stems removed and coarsely chopped
1/2 fresh navel orange, peeled and chopped
1 medium shallot, minced
2/3 cup granulated sugar
2 1/2 Tablespoons cider vinegar
2 Tablespoons sherry (optional)
1/4 teaspoon ground cinnamon (mine was smoked)
1/4 teaspoon ground ginger
1/8 teaspoon ground coriander (a similar amount of crushed seeds)
two shakes each ground cumin, cardamom, turmeric and cayenne* (see recipe notes)
two or three shakes ground allspice
a generous pinch of kosher salt
Notes: If you have a curry powder blend, 1/4 teaspoon of it will suffice in place of the cumin, cardamom, turmeric and cayenne listed above.
This was my first time making this wonderful chutney, so my ingredients represent a half-batch, which was enough to fill a jelly jar. Next time, you can bet I’ll make a whole batch!
Directions
Combine cranberries, oranges, figs and shallots in a small saucepan.
Add sugar, vinegar, sherry and spices (plus salt) and toss to distribute the spices. Cook over medium heat until the mixture comes to a boil, then reduce heat and simmer for about 20 minutes. As the cranberries soften, use the back of your mixing spoon to gently smash them.
Allow chutney to cool to room temperature (it will thicken as it cools), and then transfer it to a clean jar to store in the refrigerator.
Now and then, my smartphone surprises me with an unsolicited trip down memory lane, in the form of a fully animated slide show recapping a theme, an occasion or a season from my past. The most recent of these was a reminder of “Thanksgiving through the years,” and the images from 2020 and 2021 struck me because those years were so different when we were all sidelined by the Covid-19 pandemic.
As the past-years’ photos scrolled to an indiscernible soundtrack, I noticed that in addition to the more adventurous dishes my husband and I created in 2020 (we figured a dinner without guests was a good time to experiment), I also created some meals that were scaled way back from the usual spread, in a way that might ease the expectation of a full-blown Thanksgiving but still satisfy the yearning for its traditional flavors. These two were delicious enough to make again one day.
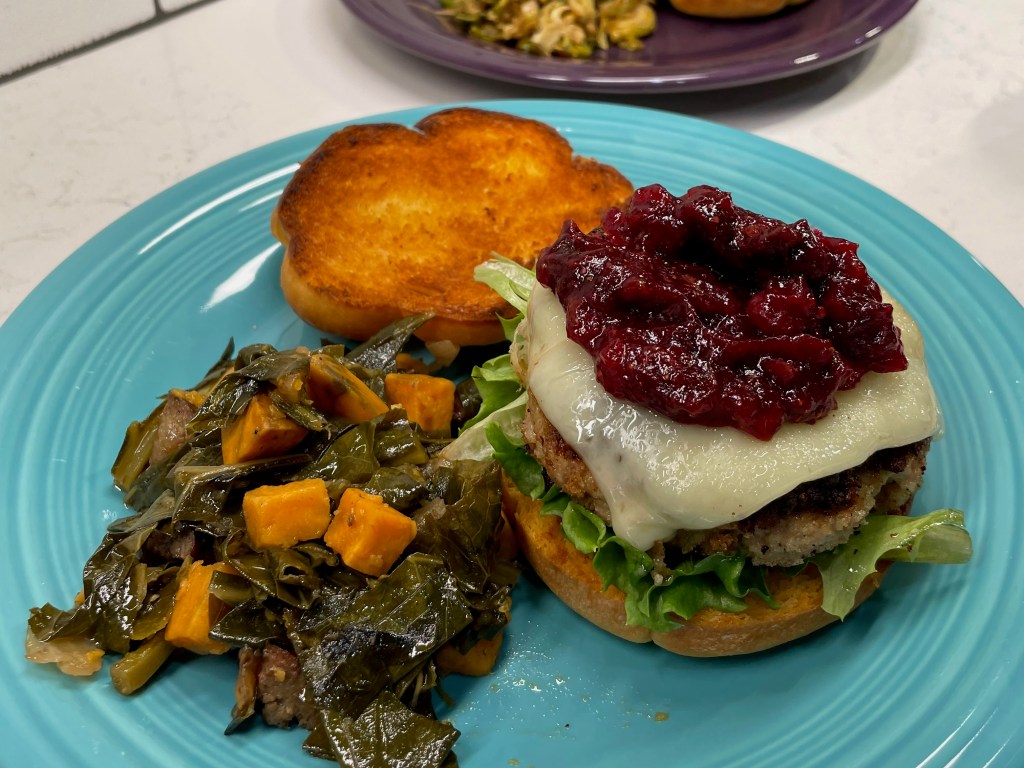
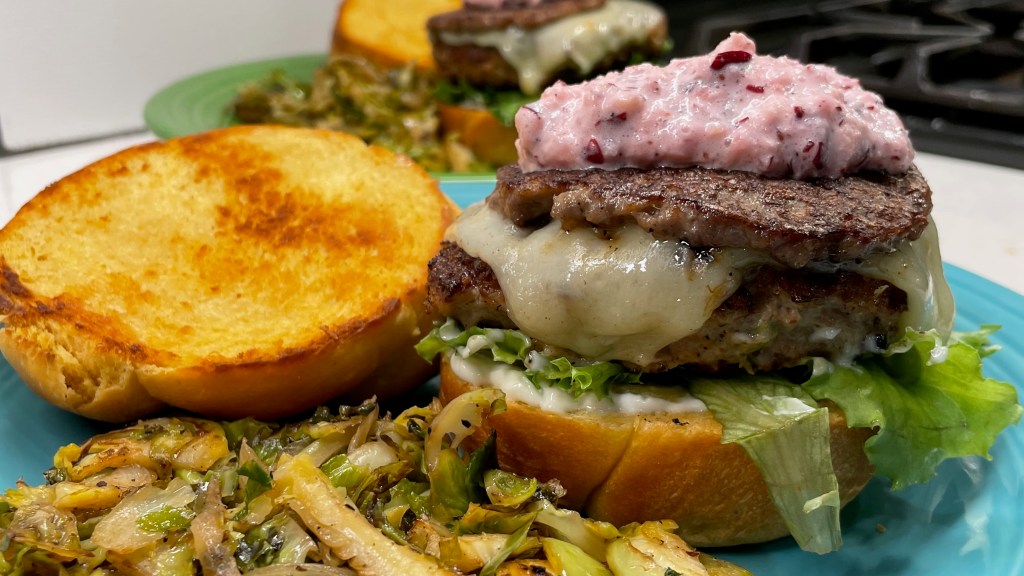
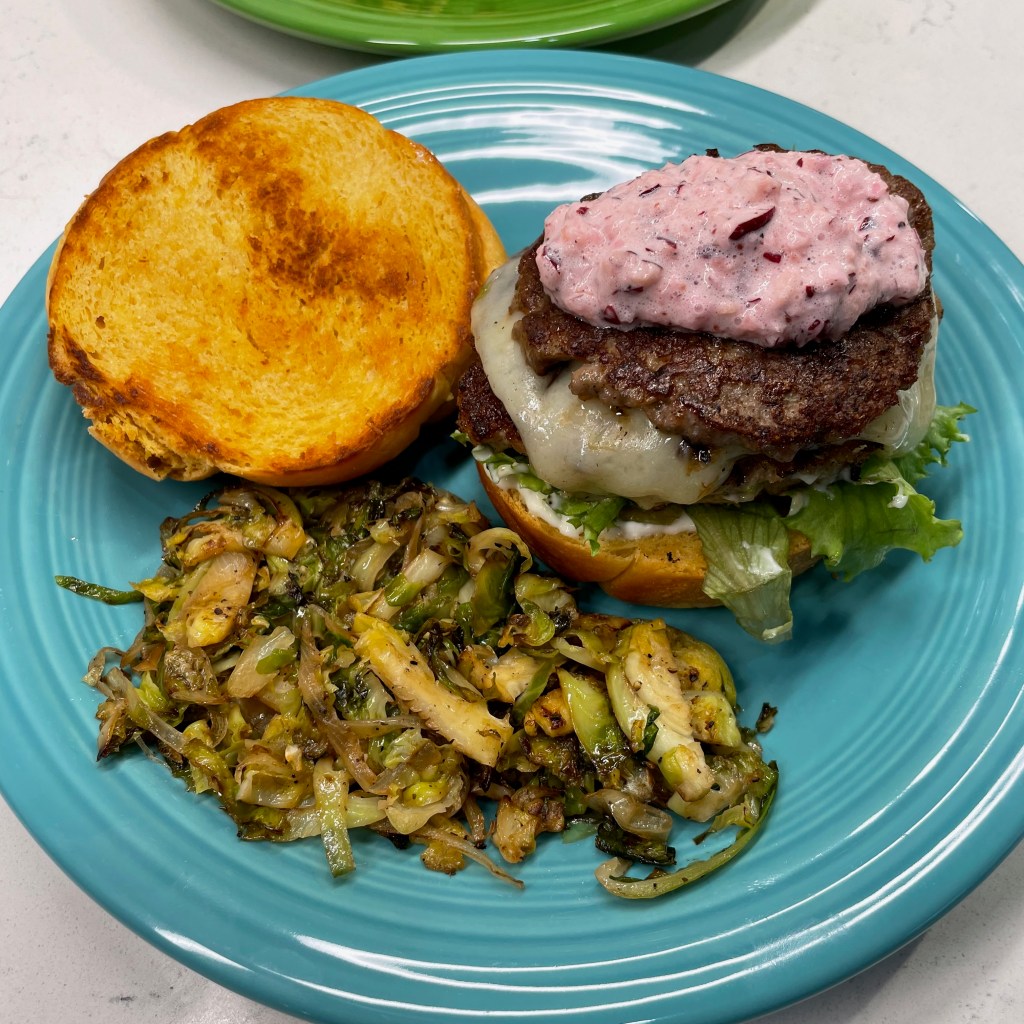
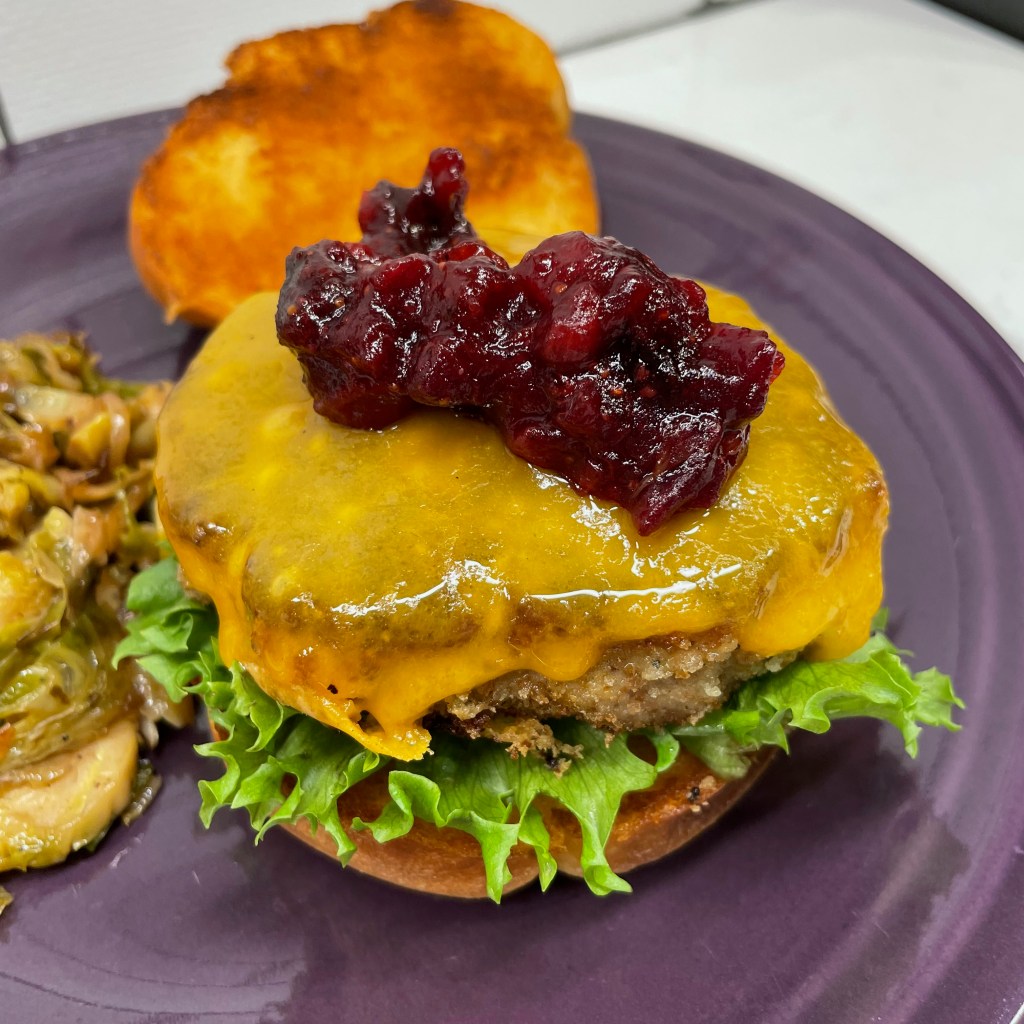
Thankfully, Covid has evolved to become more a nuisance than cause for panic (for most of us), and gathering with loved ones is fun again. At our house, we are counting the days until Thanksgiving (14 to go)! But some people still have neither the time nor inclination to produce an entire spread for Thanksgiving, and that has me thinking again about ways to capture the essence of the occasion in a single, simple bite. This is my first— but not last— attempt at making a Thanksgiving burger.
Pretty, isn’t it? 🙂
The Plan
I started this recipe with the bun, and though I considered a store-bought potato bun, I went instead with a recipe I found on King Arthur Baking website for sweet potato sandwich rolls They were very easy to make, and I followed the KA recipe to the letter. The recipe is linked, if you’d like to try them.
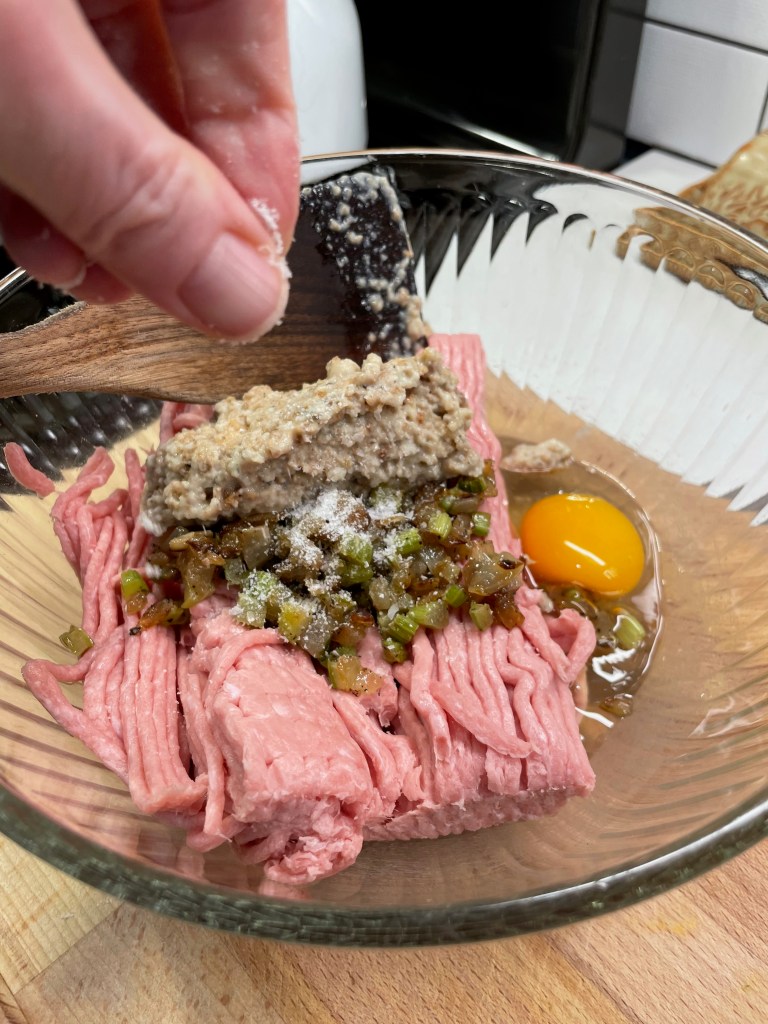
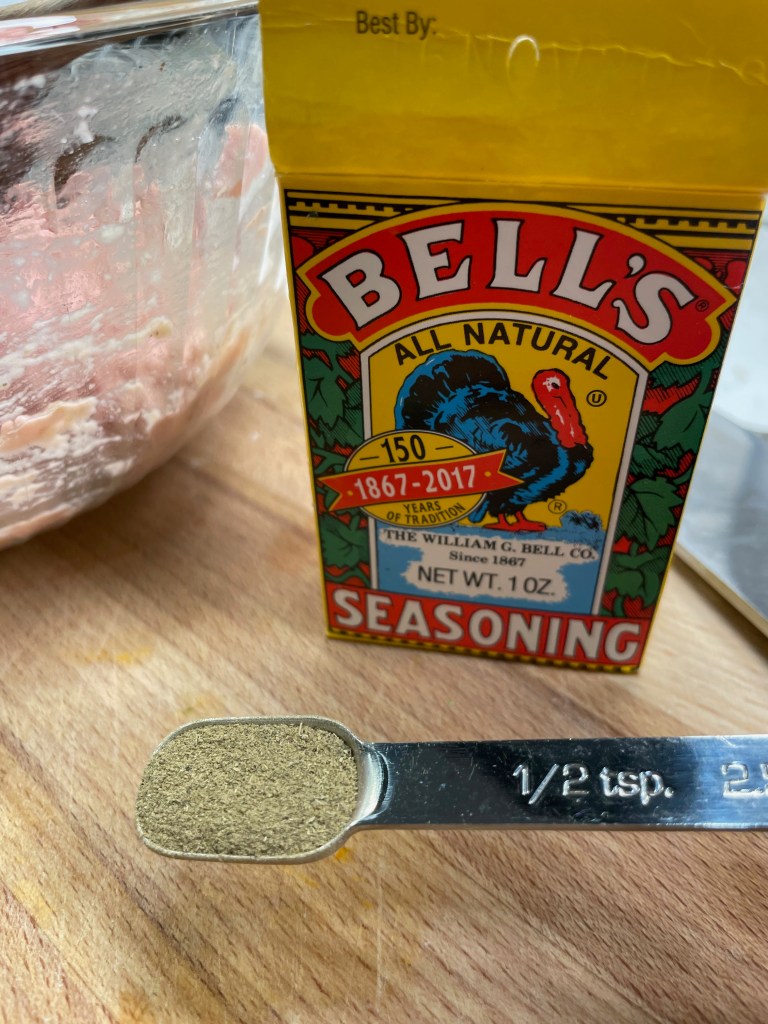
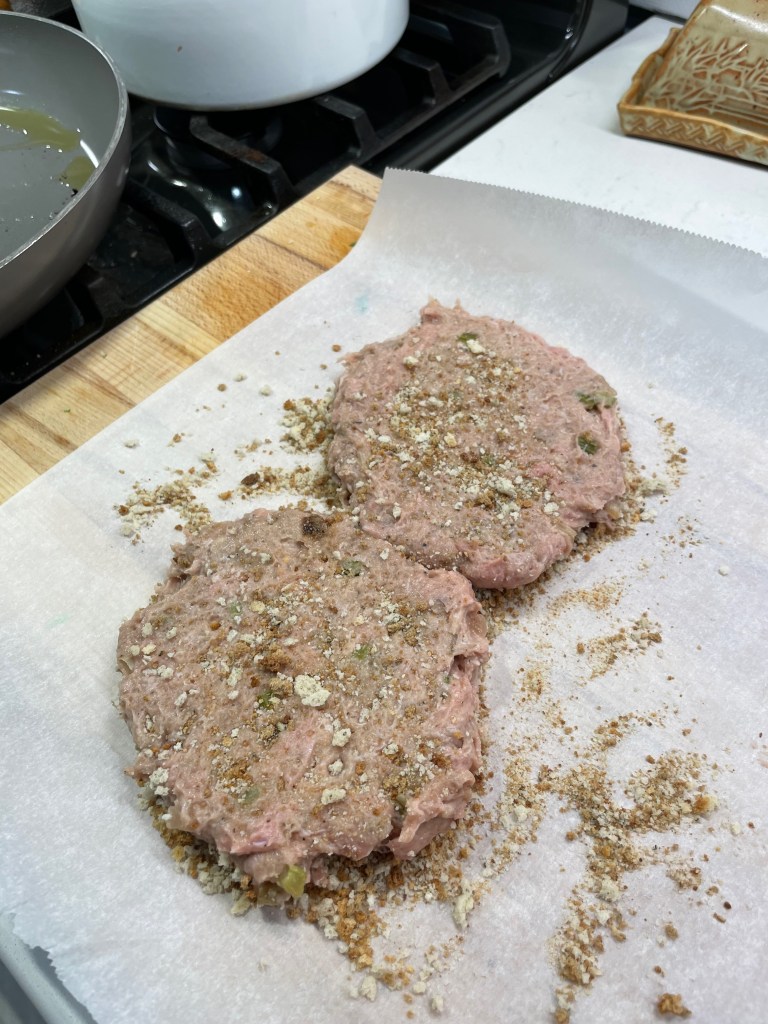
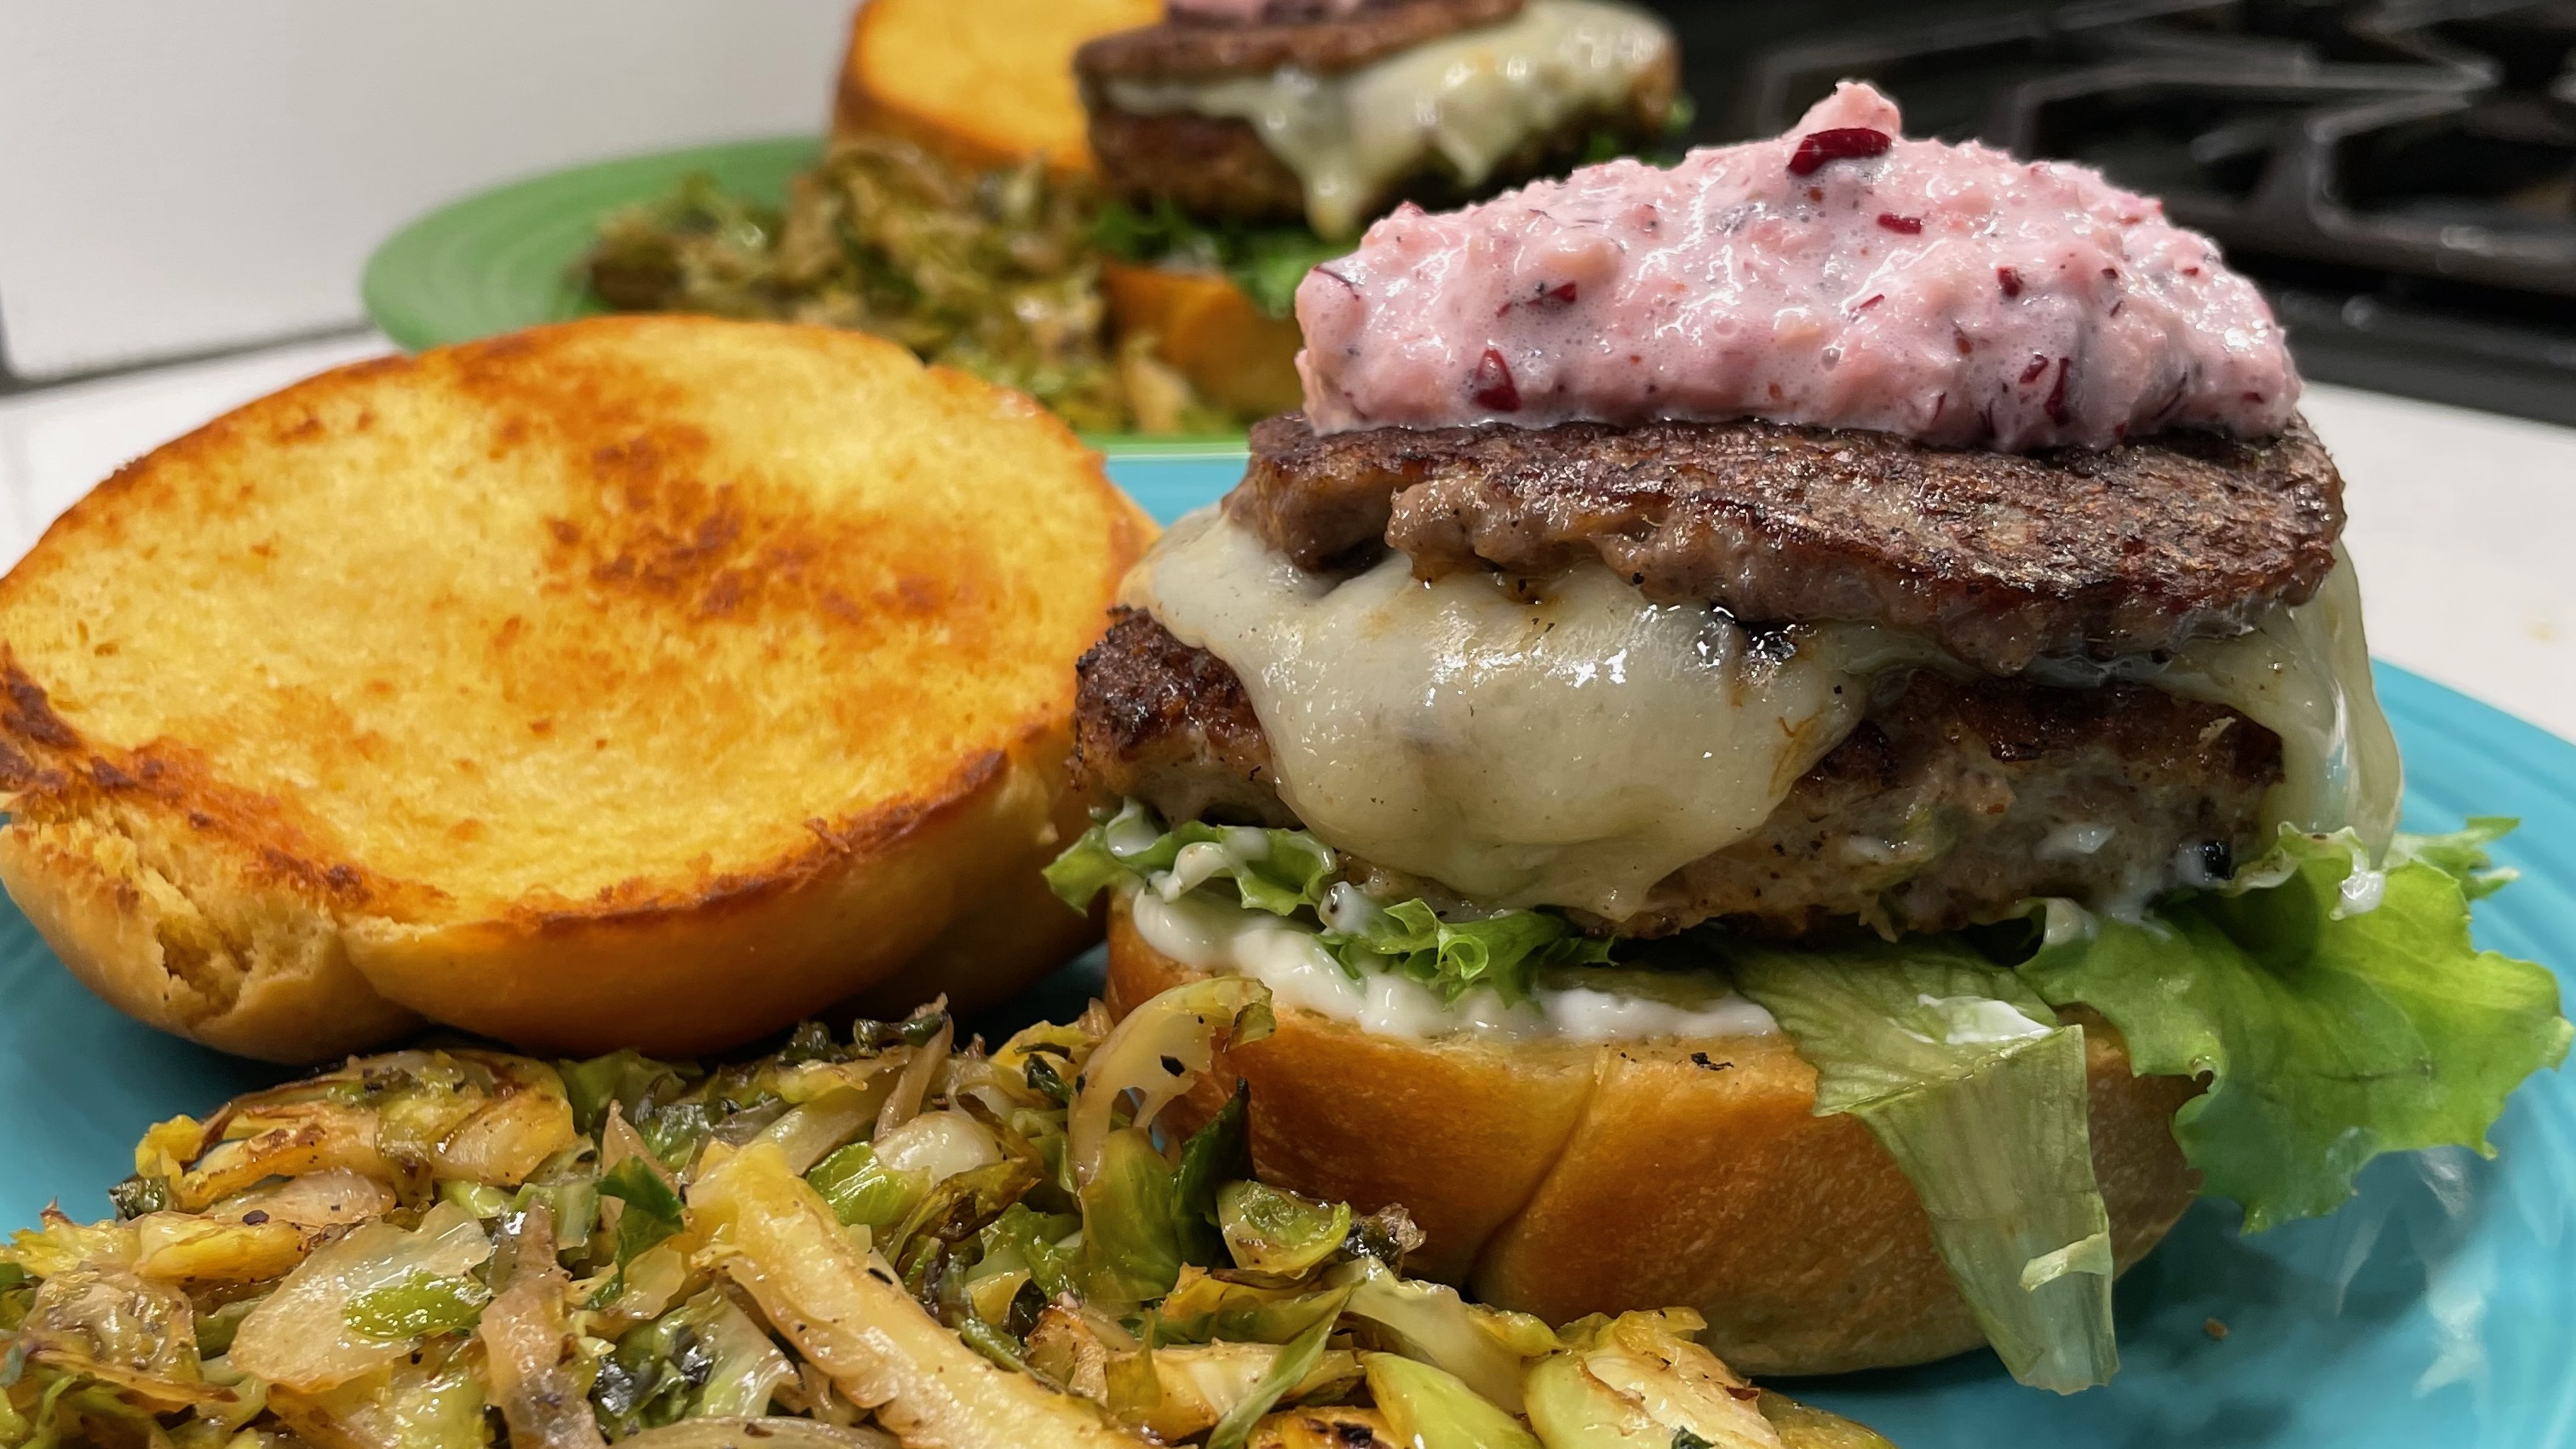
My burger is made from ground turkey, with sautéed celery and onions, plus an egg and a panade of herb stuffing mix blended in for structure and traditional flavor. The “burgers,” which were really more like meatloaf patties, were embellished with a spoonful of poultry seasoning to amplify the familiar Thanksgiving flavor.
I made a basic turkey meatloaf recipe, with herb stuffing mix in the binder and Bell’s poultry seasoning for Thanksgiving flavor.
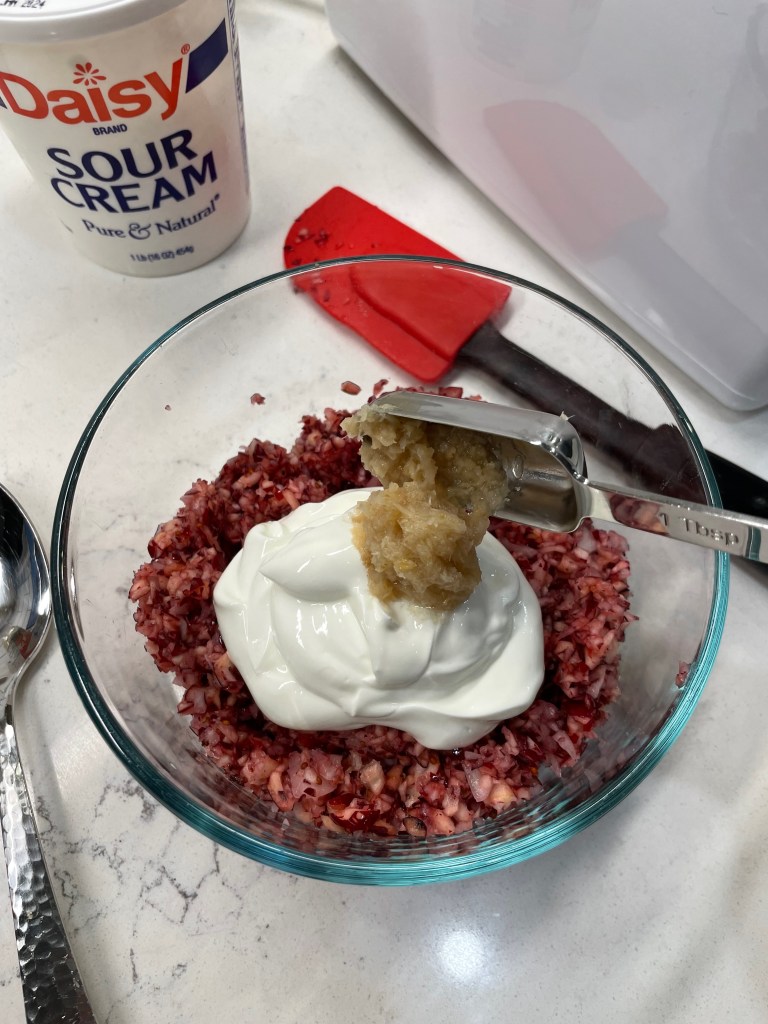
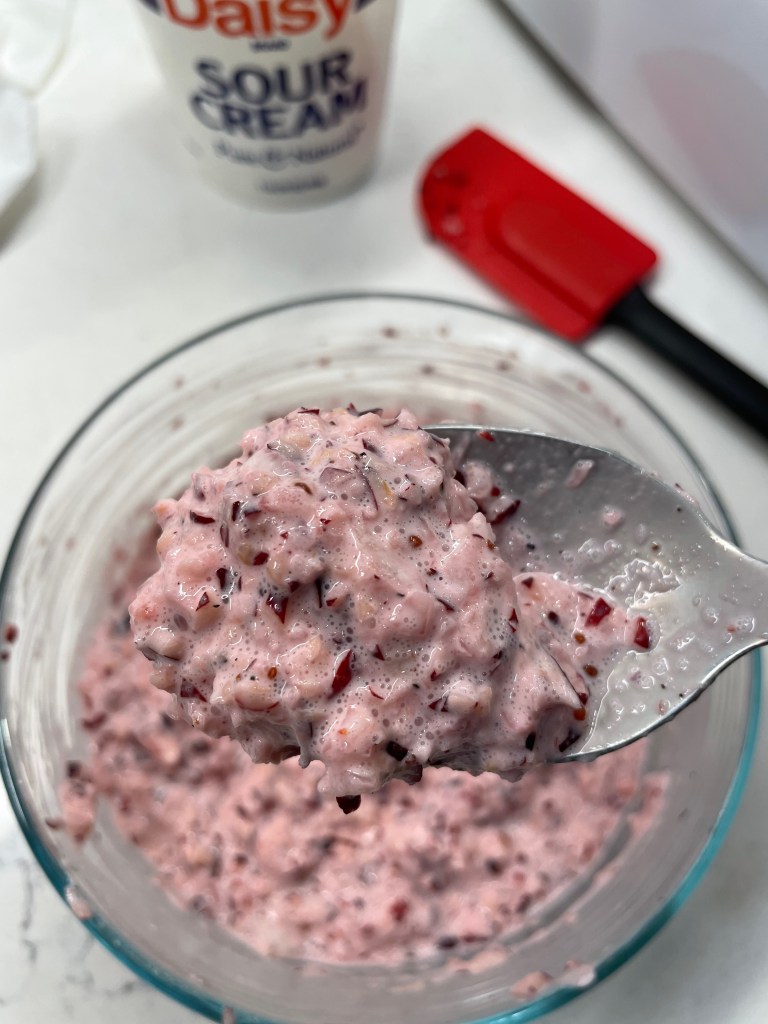
I thought, for a change of pace, this would be a good time to try the famous “NPR cranberry relish” that I’ve read about over the years. It uses fresh cranberries, sour cream and horseradish, if you can believe it. I made an only a half batch because Les tolerates horseradish but doesn’t love it as much as I do. More on this in a moment.
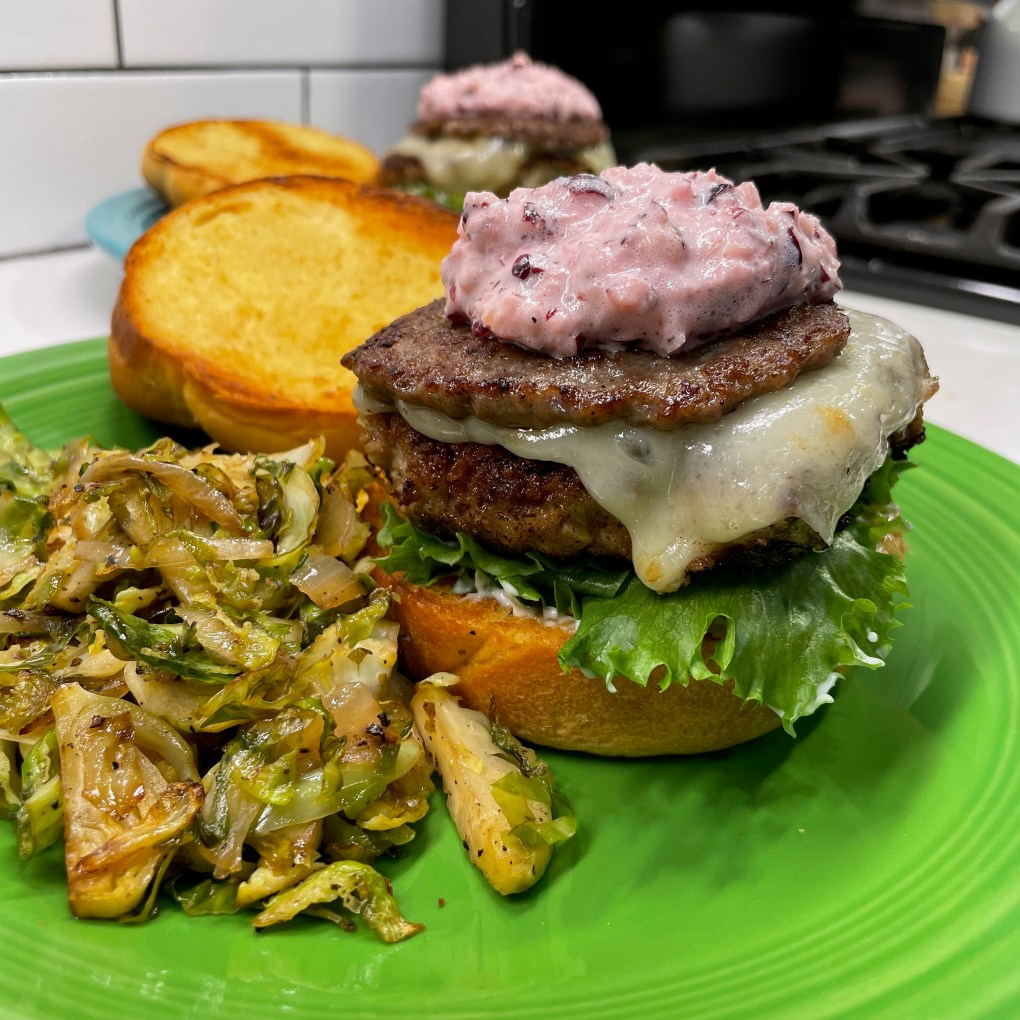
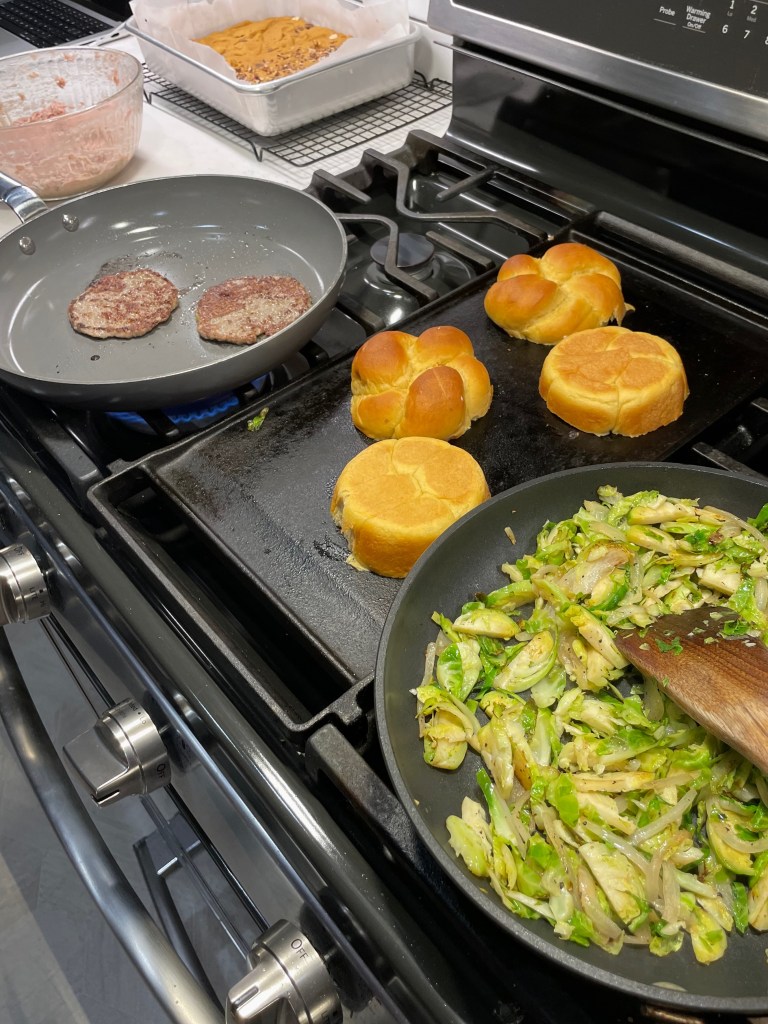
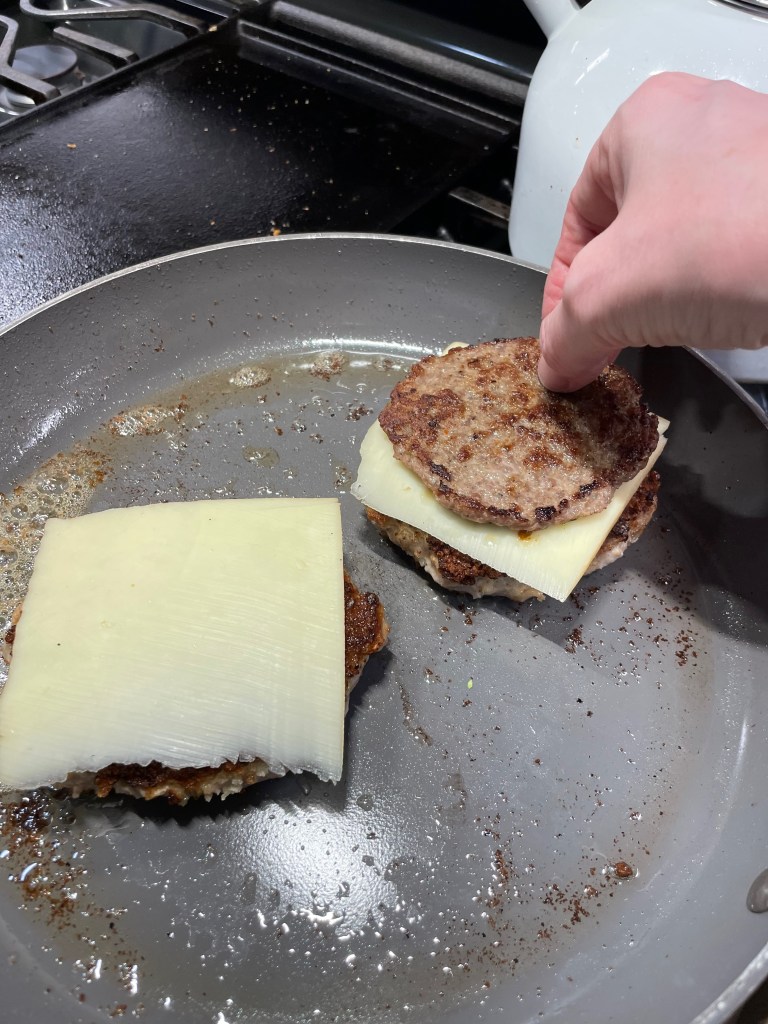
Sausage is a core ingredient of my usual holiday dressing, so I flattened some maple sausage patties and cooked them up to layer with my burgers. I buttered and griddled the sweet potato rolls, melted a slice of apple-smoked gruyère over the burgers, topped them with the thin sausage patties and loaded them onto the buns with some baby romaine for freshness.
The extra stuffing mix coating the patties was key to getting the crunchy surface I wanted on the burgers.
My first Thanksgiving burger, with a side of shaved Brussels sprouts, sautéed with onions, salt and pepper.
The Verdict
I had covered all the flavor bases with my plan— sweet potato, turkey, stuffing and cranberry— and overall it was a very tasty burger, but it didn’t exactly scream “Thanksgiving” to me and my husband, and so there will be other efforts. The sweet potato rolls (which I made exactly as written on the KA site) were wonderful, but very subtle in sweet potato flavor and too tall for this sandwich, and that made taking a bite a little tricky (and messy). The herb-seasoned turkey patties were moist and tasty and their crunchy exterior was spot-on. They could have carried a bit more of the savory herb flavor, but otherwise they were excellent and I’ll make them again, for sure.
What about that unusual cranberry relish? This “famous” recipe was the biggest surprise for me, and not in a good way. As someone who really loves the zing of horseradish, I found this stuff—which has oodles of rave reviews online, by the way— to be rather plain, runny and uninteresting, even with the extra hot horseradish. My husband thought the sandwich would be better with a more traditional cooked cranberry topping, and I agreed.
As luck and leftovers would have it, I did have a chance to try again with a few changes! On my second run, I skipped the sausage altogether, and I tried a different cranberry concoction that was so delicious, I will be super excited to share it with you in a post of its own later this week!
Les also requested cheddar rather than the fancy schmancy gruyère. 😉
What about next time?
There’s still room for improvement on this idea and I’m keeping it in the “in-progress” column of my bucket list until I get it right. I’ll share below the recipe I created for the turkey patties because that part of the recipe was great, Thanksgiving or not. But I’d really like to hear from you, too, so that I might incorporate your ideas into a future iteration of the burger. How would you bring your favorite traditional flavors into this “Thanksgiving-in-a-bite challenge?” Please share your ideas in the comments section, and let’s see what we can come up with together!
The rest of the burger is a work in progress, but this recipe for Thanksgiving-flavored turkey burger patties is a keeper!
Ingredients
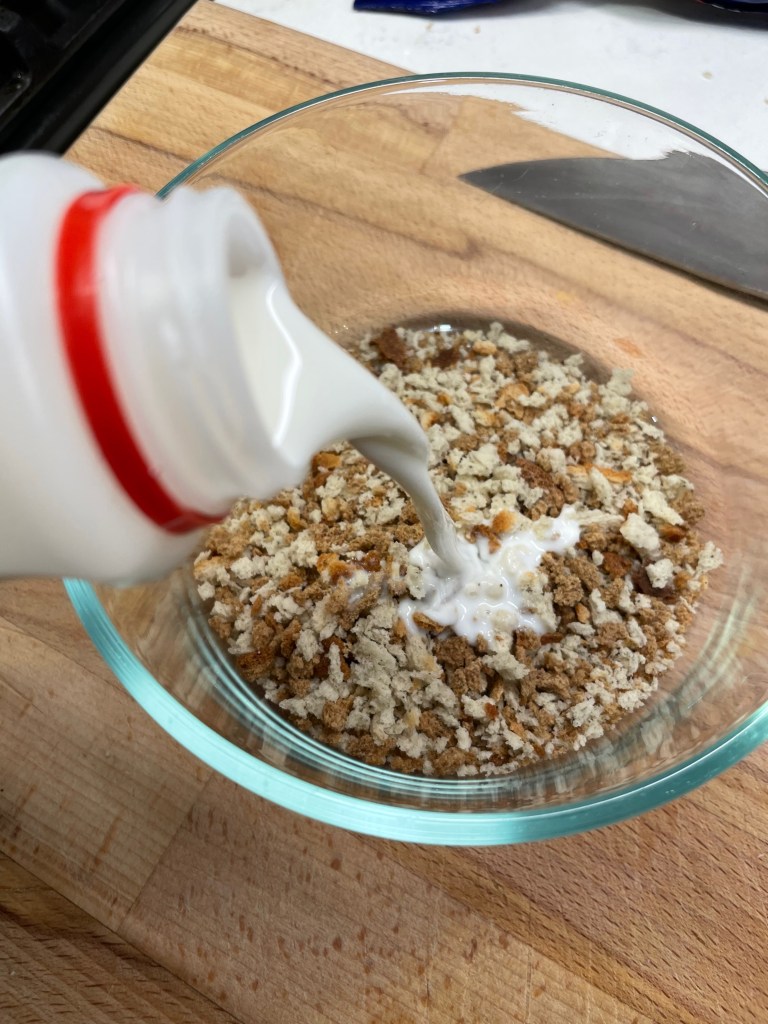
1/2 cup Pepperidge Farm herb seasoned stuffing mix, crushed
1/3 cup milk, to moisten the stuffing mix
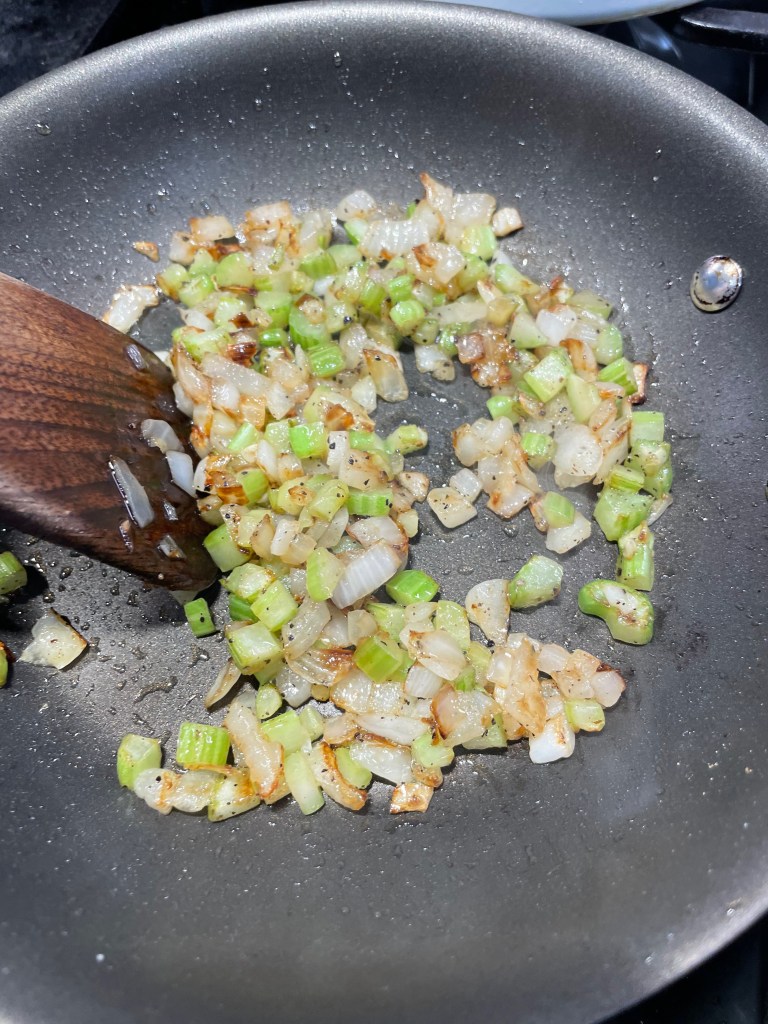
1/2 sweet onion, minced
1 rib celery heart, strings removed and minced
1 Tbsp. extra virgin olive oil
Salt and pepper
1 pound ground turkey (I used 90% lean, but turkey breast would be great, too)
1 large egg
1 teaspoon ground poultry seasoning (I used Bell’s brand)
Additional 1/2 cup herb stuffing mix, crushed for coating the burgers before frying
Olive oil for frying
This ground turkey mixture is much leaner and softer than a typical burger mixture. For easy shaping of the patties, spoon dollops of the meat mixture onto a sheet of parchment paper that is sprinkled with the additional herb stuffing crumbs. Scatter more crumbs on top of the meat dollops and fold the parchment over them to flatten with your palm or a spatula. Be gentle with them, and keep them on the parchment until the skillet is ready.
Directions
Combine herb stuffing crumbs and milk in a small bowl and let rest for at least 15 minutes to soften into a panade. This mixture will help bind together the other ingredients into patties.
Heat a small skillet over medium heat. Add first measure of olive oil and sauté onions and celery until softened. Season with salt and pepper.
In a medium mixing bowl, combine ground turkey, panade, sautéed vegetables, egg and poultry seasoning. Season with salt and pepper. Use a heavy wooden spoon or your hands to fully blend the burger ingredients. Cover bowl and refrigerate a few hours so that the mixture will firm up.
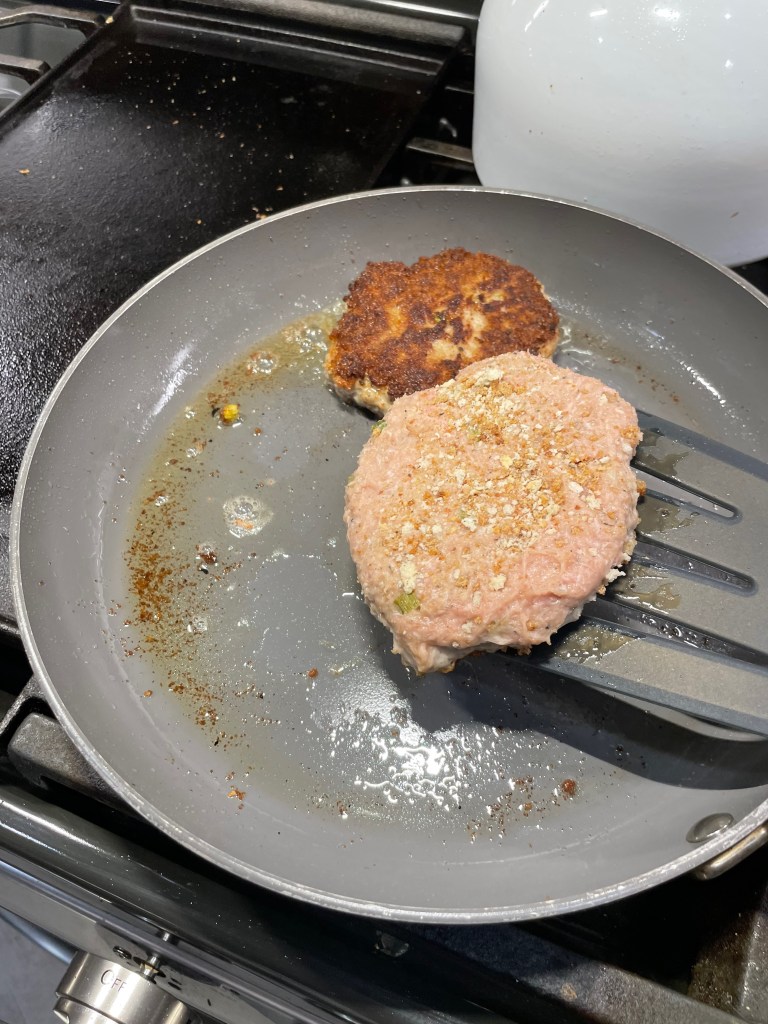
When ready to cook, heat a large, non-stick skillet over medium heat with 2 tablespoons of olive oil. Shape the meat mixture into patties and coat them on both sides with the second measure of crushed stuffing mix.
Carefully arrange burger patties into the skillet, keeping enough room between them for easy turning. Leave them undisturbed for 5 minutes, or until the first side is nicely crusted. Turn the patties to cook the other side. If using cheese on your Thanksgiving burgers, lay the slices over the burgers immediately after turning so that it will melt.
To say that I love a bargain is an understatement. I’ve never fawned over the vanilla-scented gourmet kitchen stores at the mall— the ones that sell the high-dollar pan sets, expensive crystal, and pre-made mixes for quick breads and specialty gravy bases. Those stores are filled with lovely things, don’t get me wrong. But you’re more likely to find me pacing the aisles at T.J. Maxx, Home Goods and Big Lots, where I’ve found many a bargain. I’m not talking about low prices for cheap items, but the way. It’s quality at a better price that I want, and I’m willing to take my chances with the unpredictability of these bargain stores’ inventories.
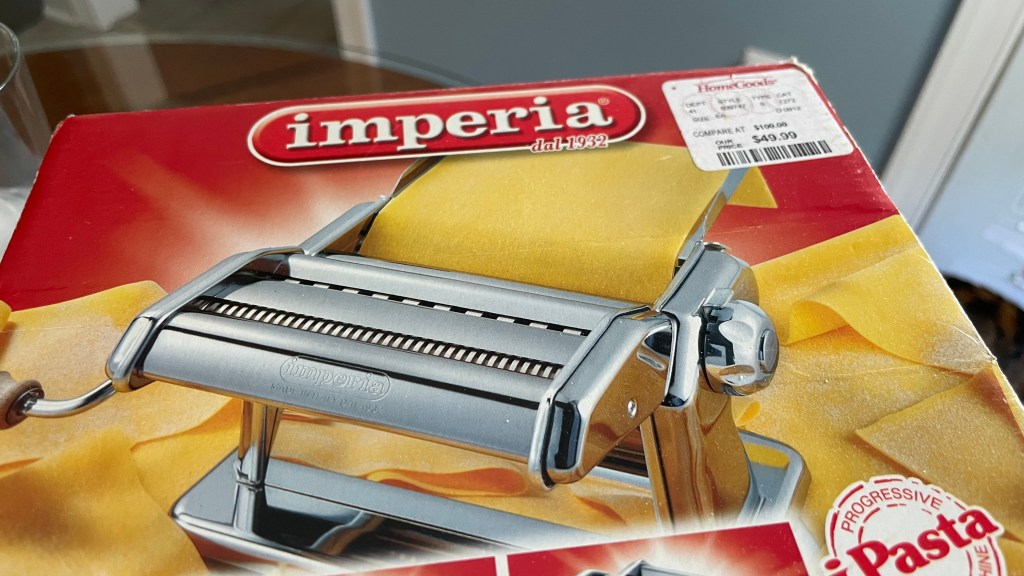
For example, my Italian-made pasta rolling machine that had been on my wish list for at least two Christmases (if not for the $100+ price tag), jumped into my cart unexpectedly about 12 years ago for the low, low price of— well, zoom in on the picture below and see for yourself. The exact item sells today at the vanilla-scented store for $149.95. I’d rather apply that hundred-dollar savings to the food I will make with the thing and just sniff my own bottle of vanilla at home as I delight in my good fortune.
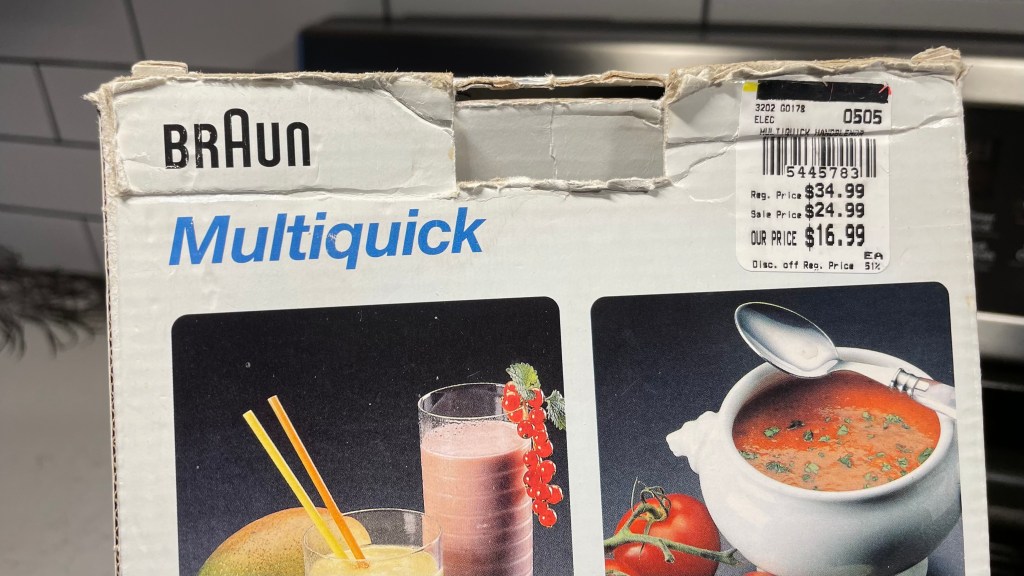
Likewise, my Braun immersion blender, which is still going strong after pureeing hundreds of soups and cheese sauces for the past 15 years, only set me back $17. Could we please have a moment of silence for Tuesday Morning? Thank you. Oh, how I miss that store.
Another super find that has served me well is my Cuisinart Pure Indulgence 2-quart ice cream maker, and this was a major scoop at only $49, but wait, it gets better! I bought this when Big Lots was still doing its old rewards program of 20% off an item after 10 purchases of $20 or more. In other words, I only spent $39 for an ice cream machine that retailed for more than double that price. The purchases I made to get that discount were staple items that I would have bought anyway— mostly Bob’s Red Mill products and cleaning supplies.
It’s the thrill of the hunt that I love, but I also enjoy having these quality items in my cabinets because they make it easier for me to produce delicious foods for myself and my loved ones. Plus, I can count on them to last a long time.
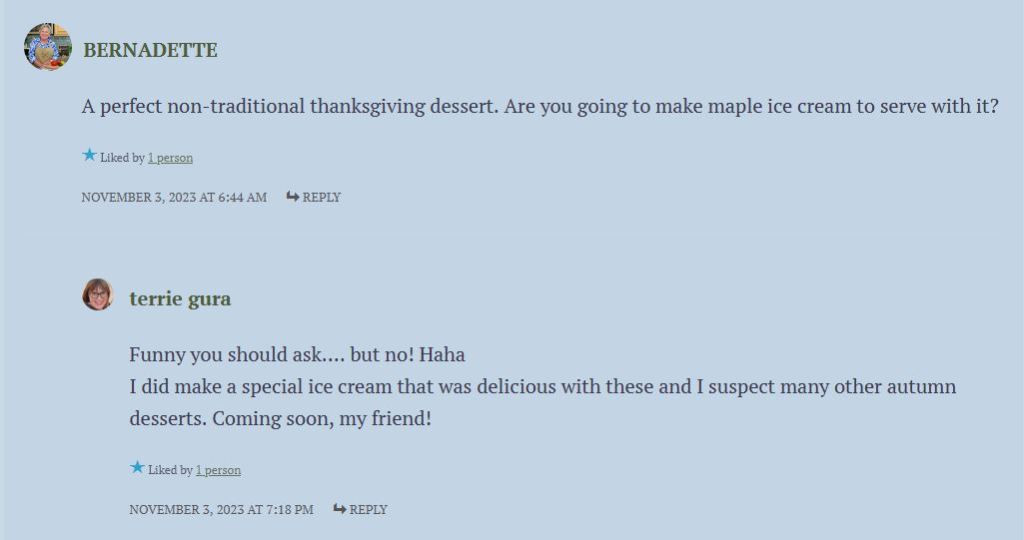
This past week, I made my latest ice cream— using my Cuisinart machine, of course— and though I don’t usually post two desserts in a row, I decided to share this right away for a couple of reasons. First, it’s super easy and might take some pressure off my foodie friends as we all plan the various holiday meals on the horizon. Second, it’s a natural follow-up to a question posed by my New Jersey blog buddy, Bernadette, in the comments section of my pumpkin chai blondies post a few days ago. I’m keeping good on my promise. 😁
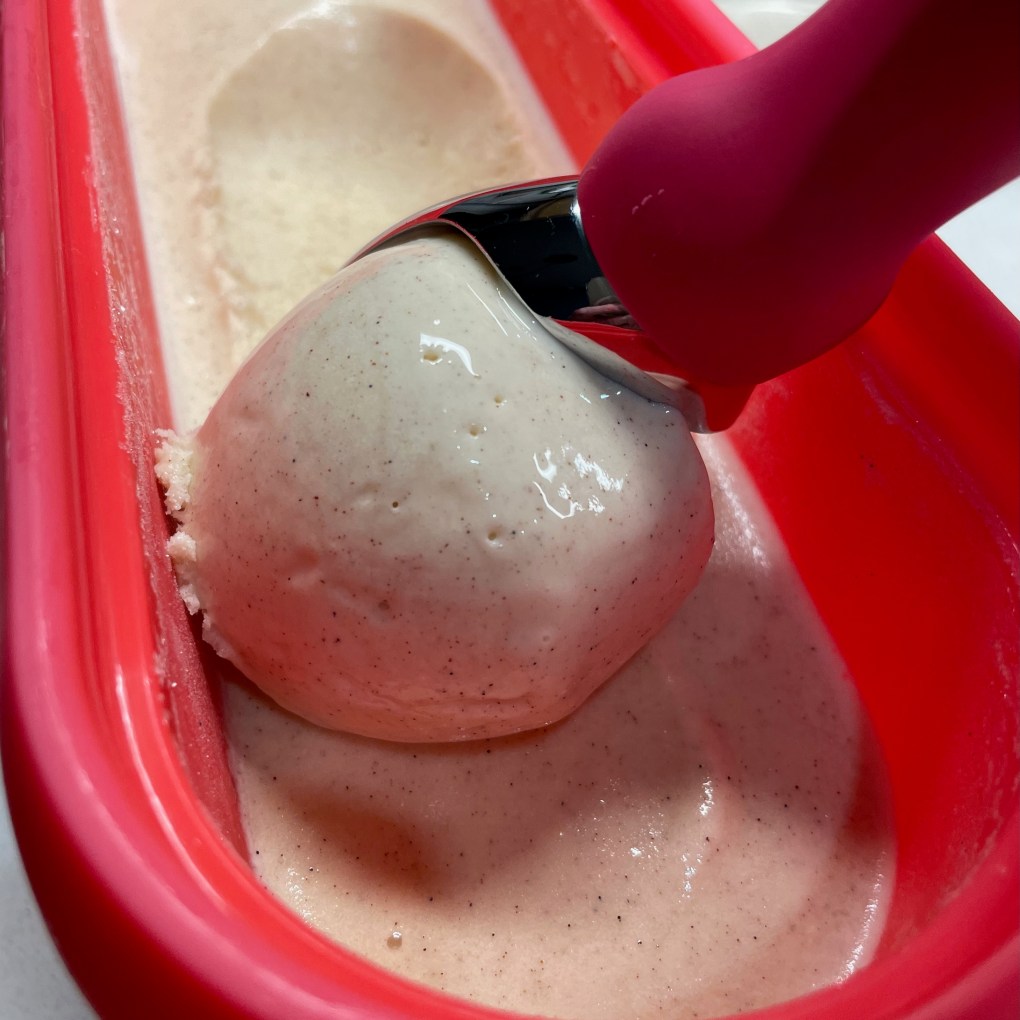
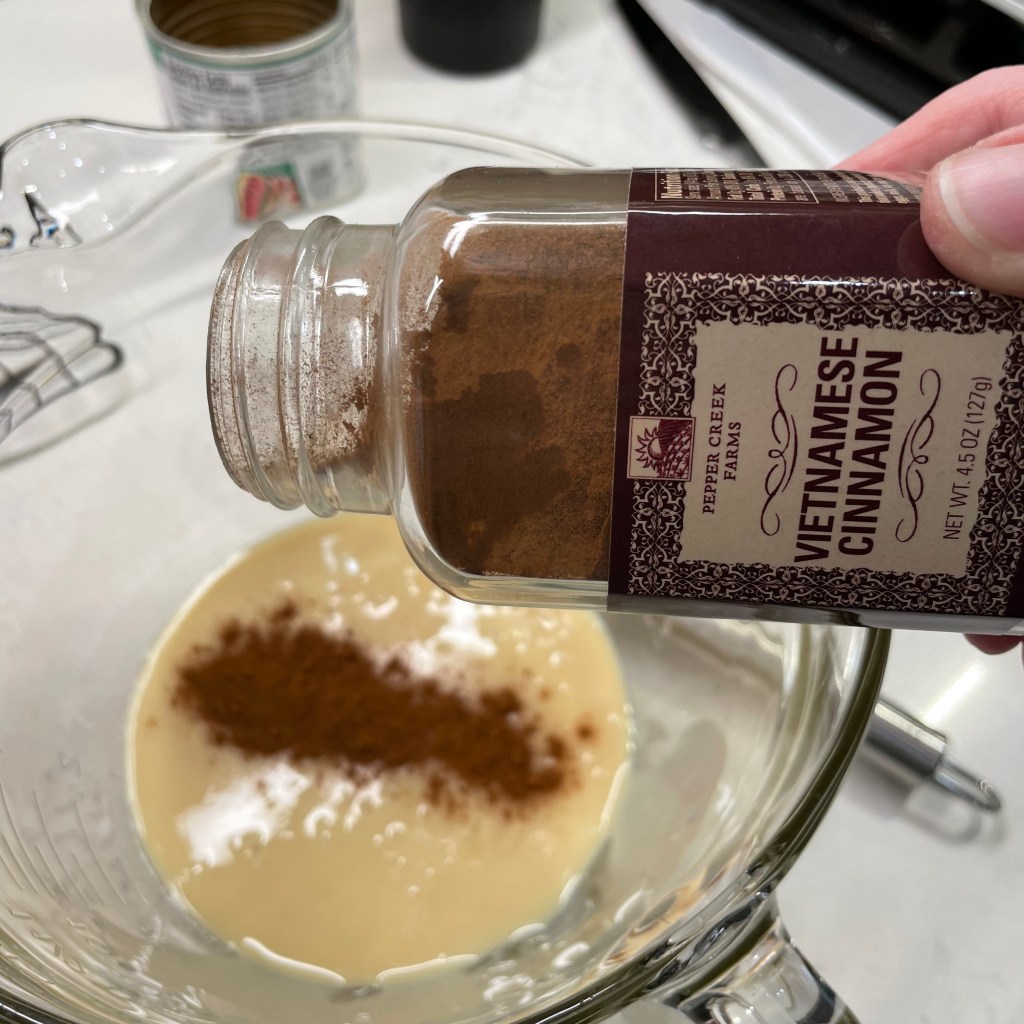
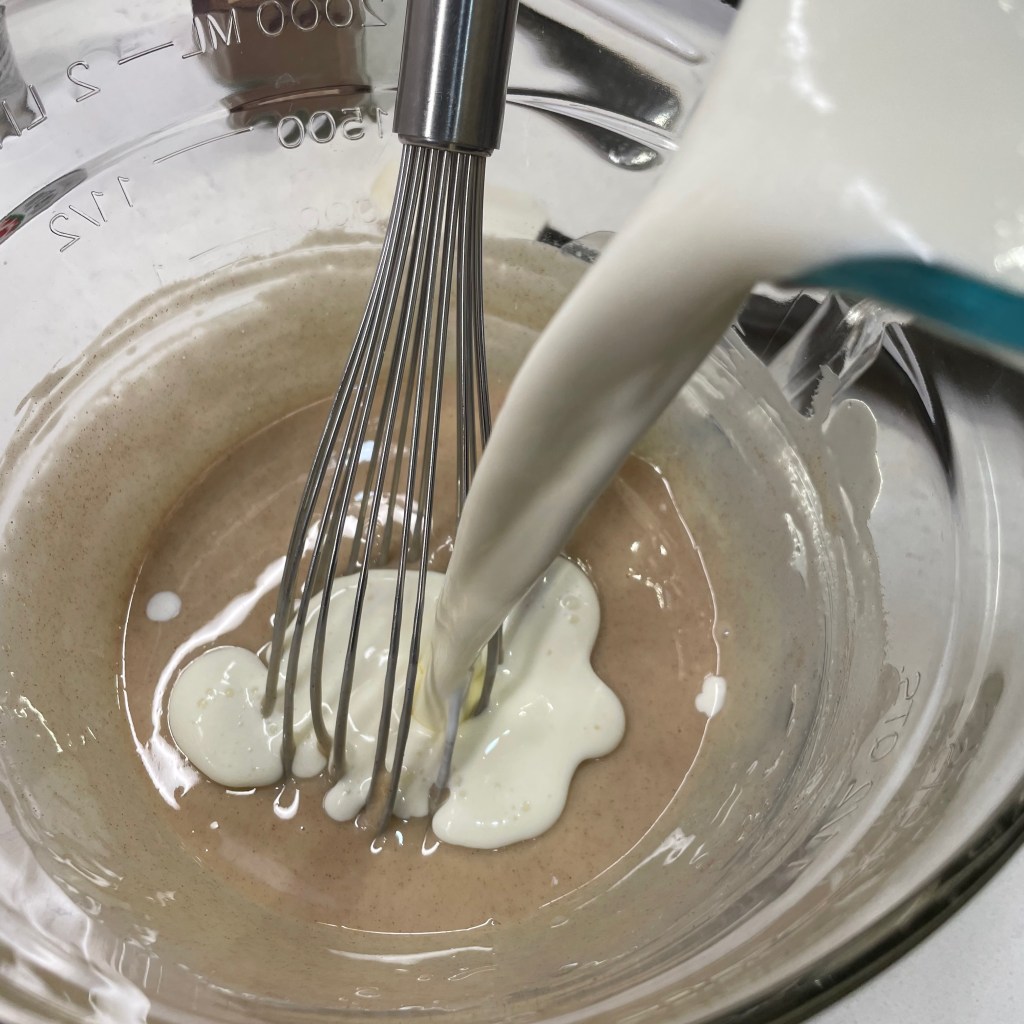
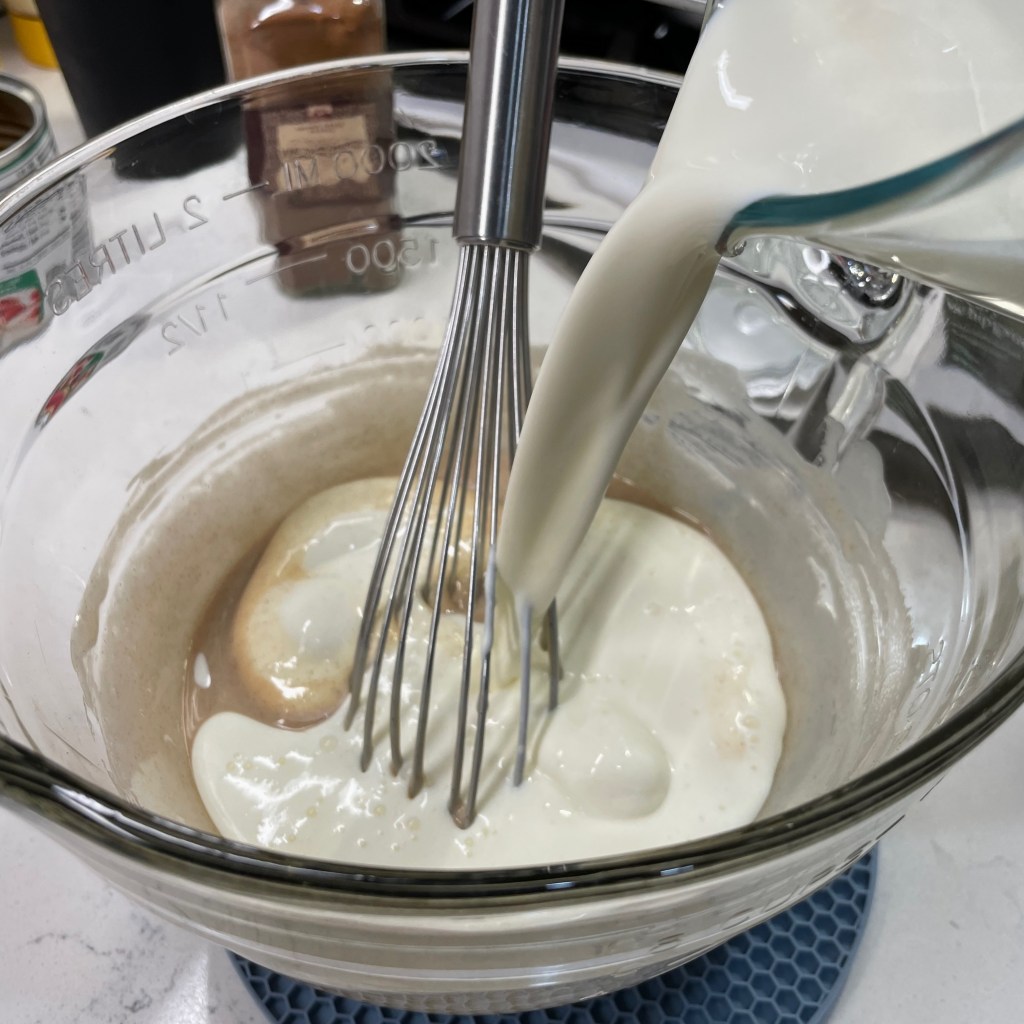
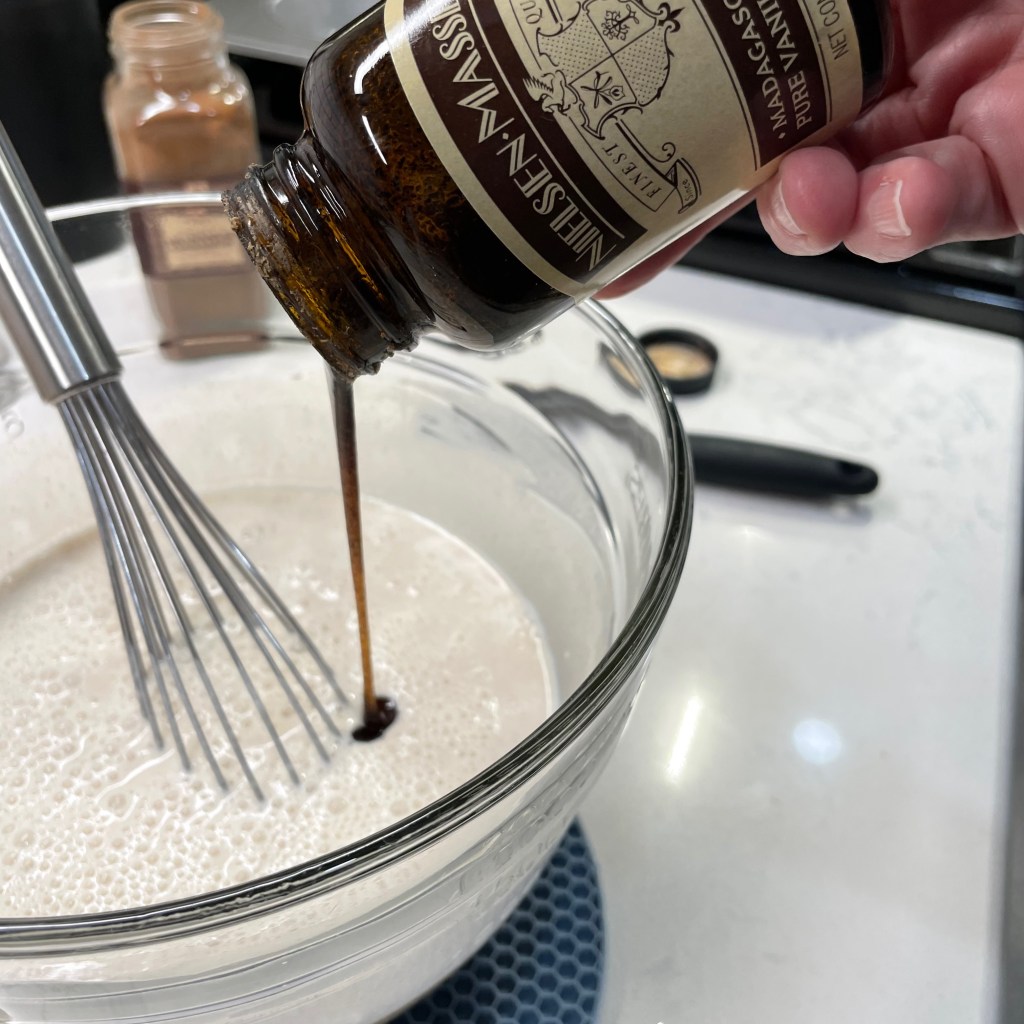
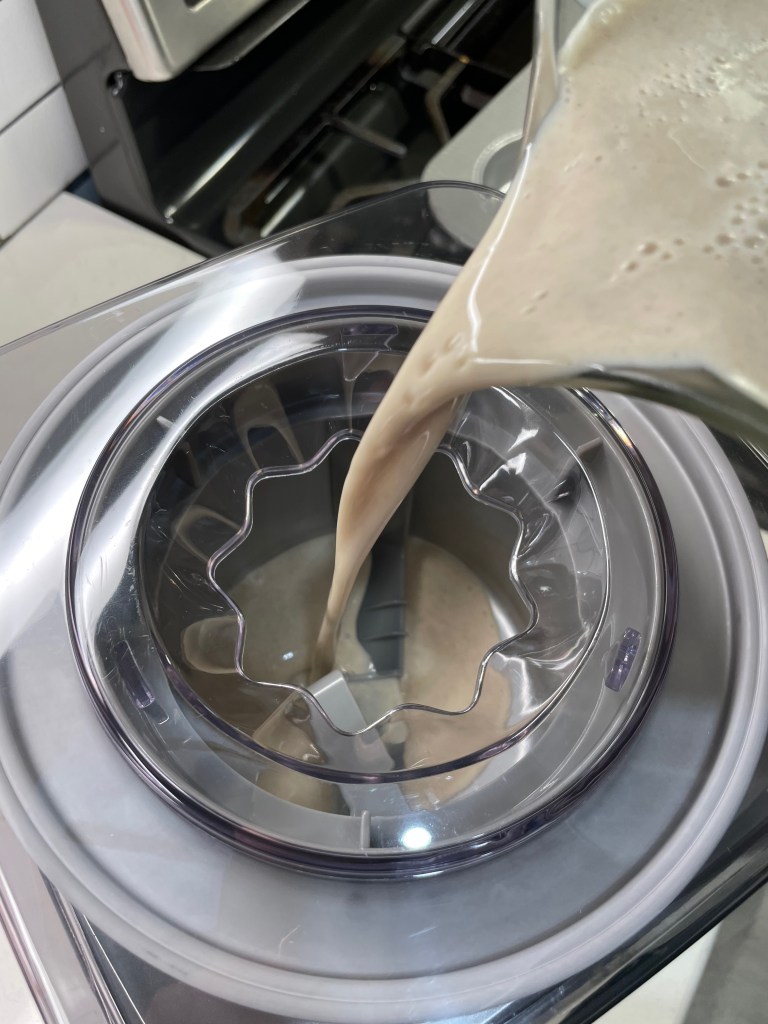
Here it is, Bern— not maple, but cinnamon, and I think you’re gonna love it! The base takes mere minutes to make, and the ingredient list is short: just cinnamon stirred into sweetened condensed milk (fat-free is totally fine here), then milk and heavy cream, plus a little splash of vanilla (or vanilla bean paste, if you’re me).
It’s worth mentioning that the cinnamon and vanilla bean paste were purchased at Home Goods, in the gourmet foods section. 🙂
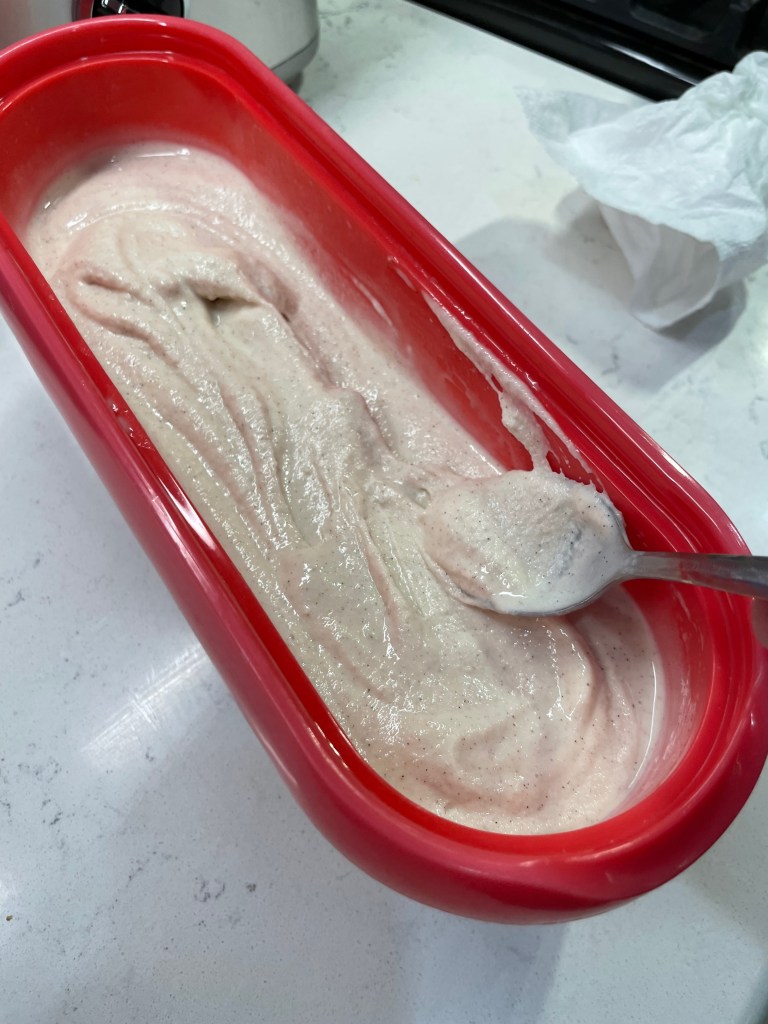
I chilled the base thoroughly in the fridge for a few hours, and then my Cuisinart churned it into silky ice cream in about 25 minutes. Into the freezer for overnight ripening, and it was done.
This cinnamon ice cream is the little black dress of the holiday dessert table— versatile and perfect for any type of occasion. It was a great complement to the pumpkin chai blondies, but it would also be a stunning sidekick to my pal Christine’s mile high apple pie, or the festive fig butter cranberry apple galette that I made last fall. How about chocolate cake or pecan pie or— well, what desserts are you making this holiday season that would be good with a sweet scoop of cinnamon ice cream?
This easy-to-make ice cream is creamy, delicious on its own, and pairs nicely with nearly any autumn or holiday dessert.
Ingredients
14 oz. can sweetened condensed milk (regular or fat-free, see recipe notes)
1 teaspoon ground cinnamon
1 cup whole milk
1 cup heavy cream
2 teaspoons vanilla extract or 1 Tablespoon vanilla bean paste
1 Tablespoon vodka (optional, added in the final minute for improved texture)
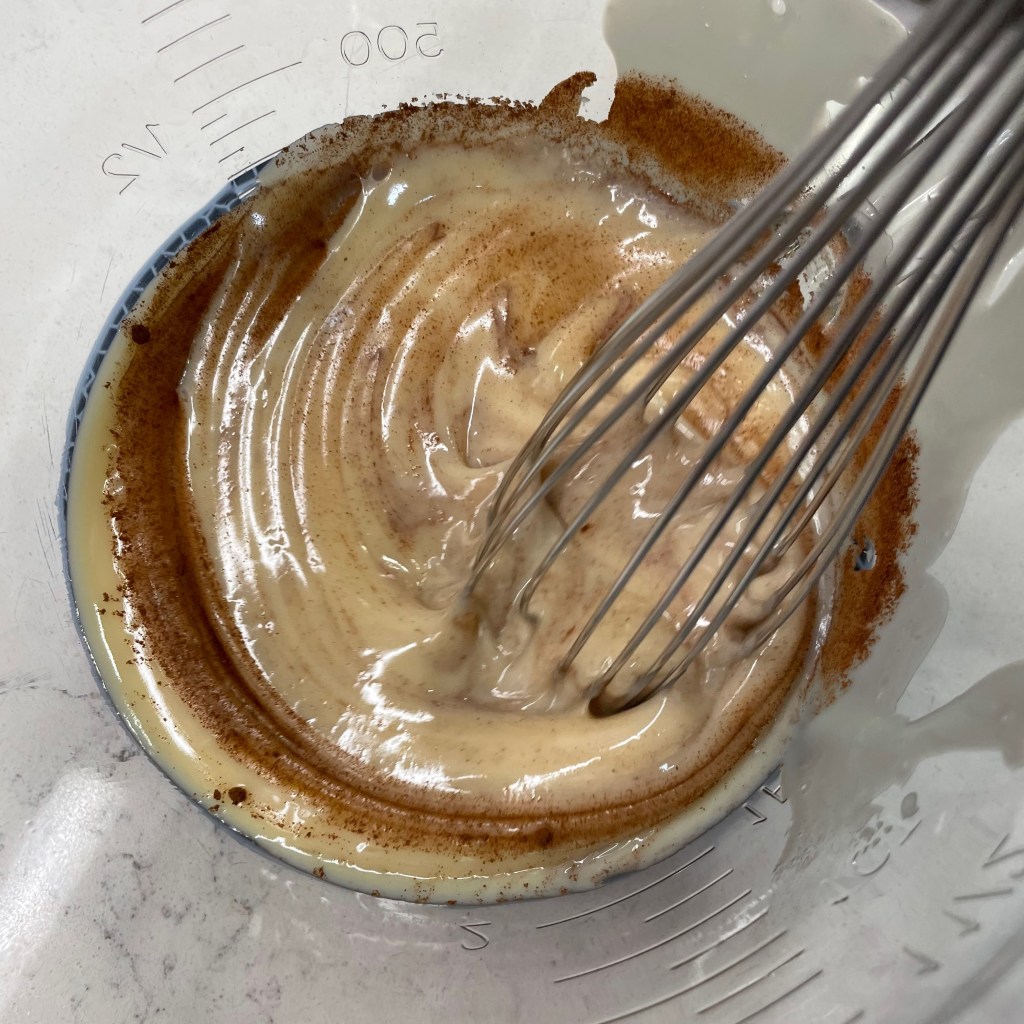
Notes: When you mix the ice cream base, add the cinnamon to the sweetened condensed milk first. Ground spices tend to “float” on liquids, so this helps to incorporate it into the mix before the thinner liquids are added.
I’ve found the fat-free version of condensed milk perfectly acceptable for making ice cream, with only one caveat: plan to use the ice cream within a couple of days of making it, or the texture may become more icy than creamy.
Directions
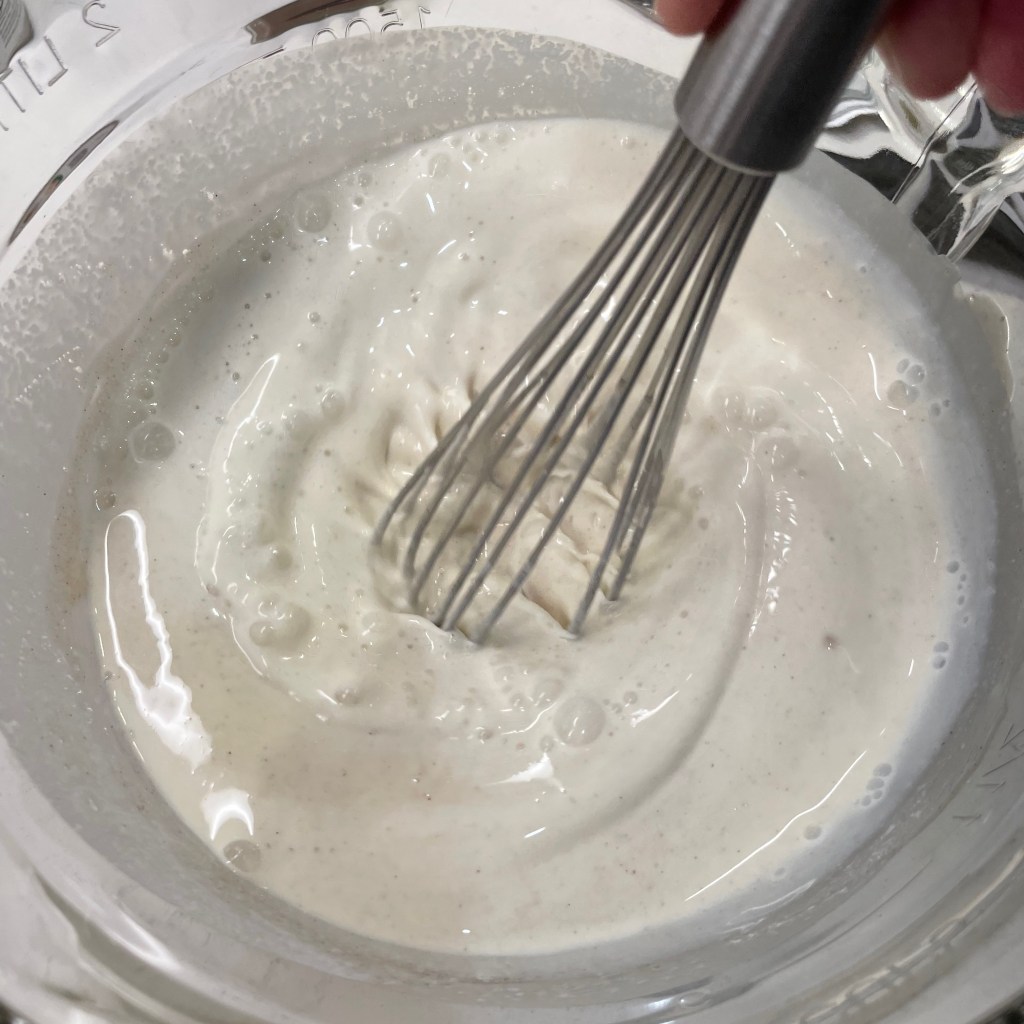
Combine sweetened condensed milk and cinnamon in a large bowl and whisk to thoroughly incorporate the cinnamon. Whisk in milk, cream and vanilla. Cover the bowl and refrigerate until the mixture is thoroughly chilled, at least a couple of hours.
Set up your ice cream machine. Gently whisk the ice cream base to re-blend any ingredients that may have settled during chilling. Pour the ice cream base into the machine and churn according to manufacturer’s instructions. My Cuisinart gets this done in about 25 minutes. Add vodka during the final minute of churning to make the ice cream easier to scoop directly from the freezer (omit this step if the ice cream will be served to children or other non-drinkers).
Transfer the ice cream to an insulated freezer container and freeze at least eight hours, preferably 24 hours, to ripen.
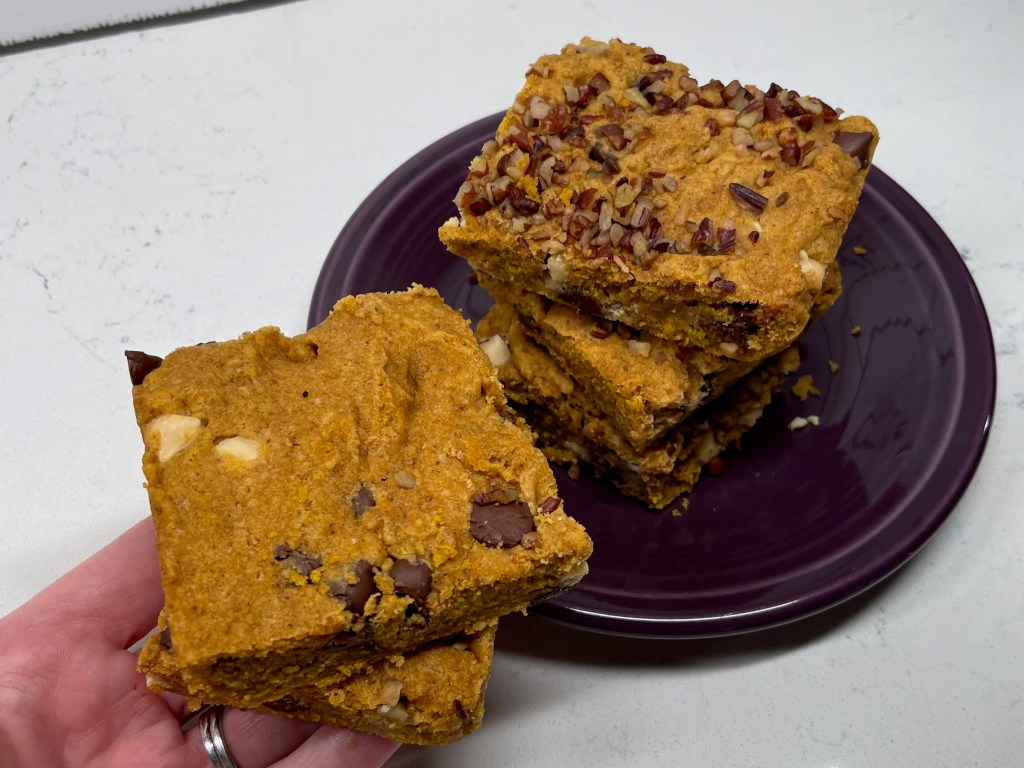
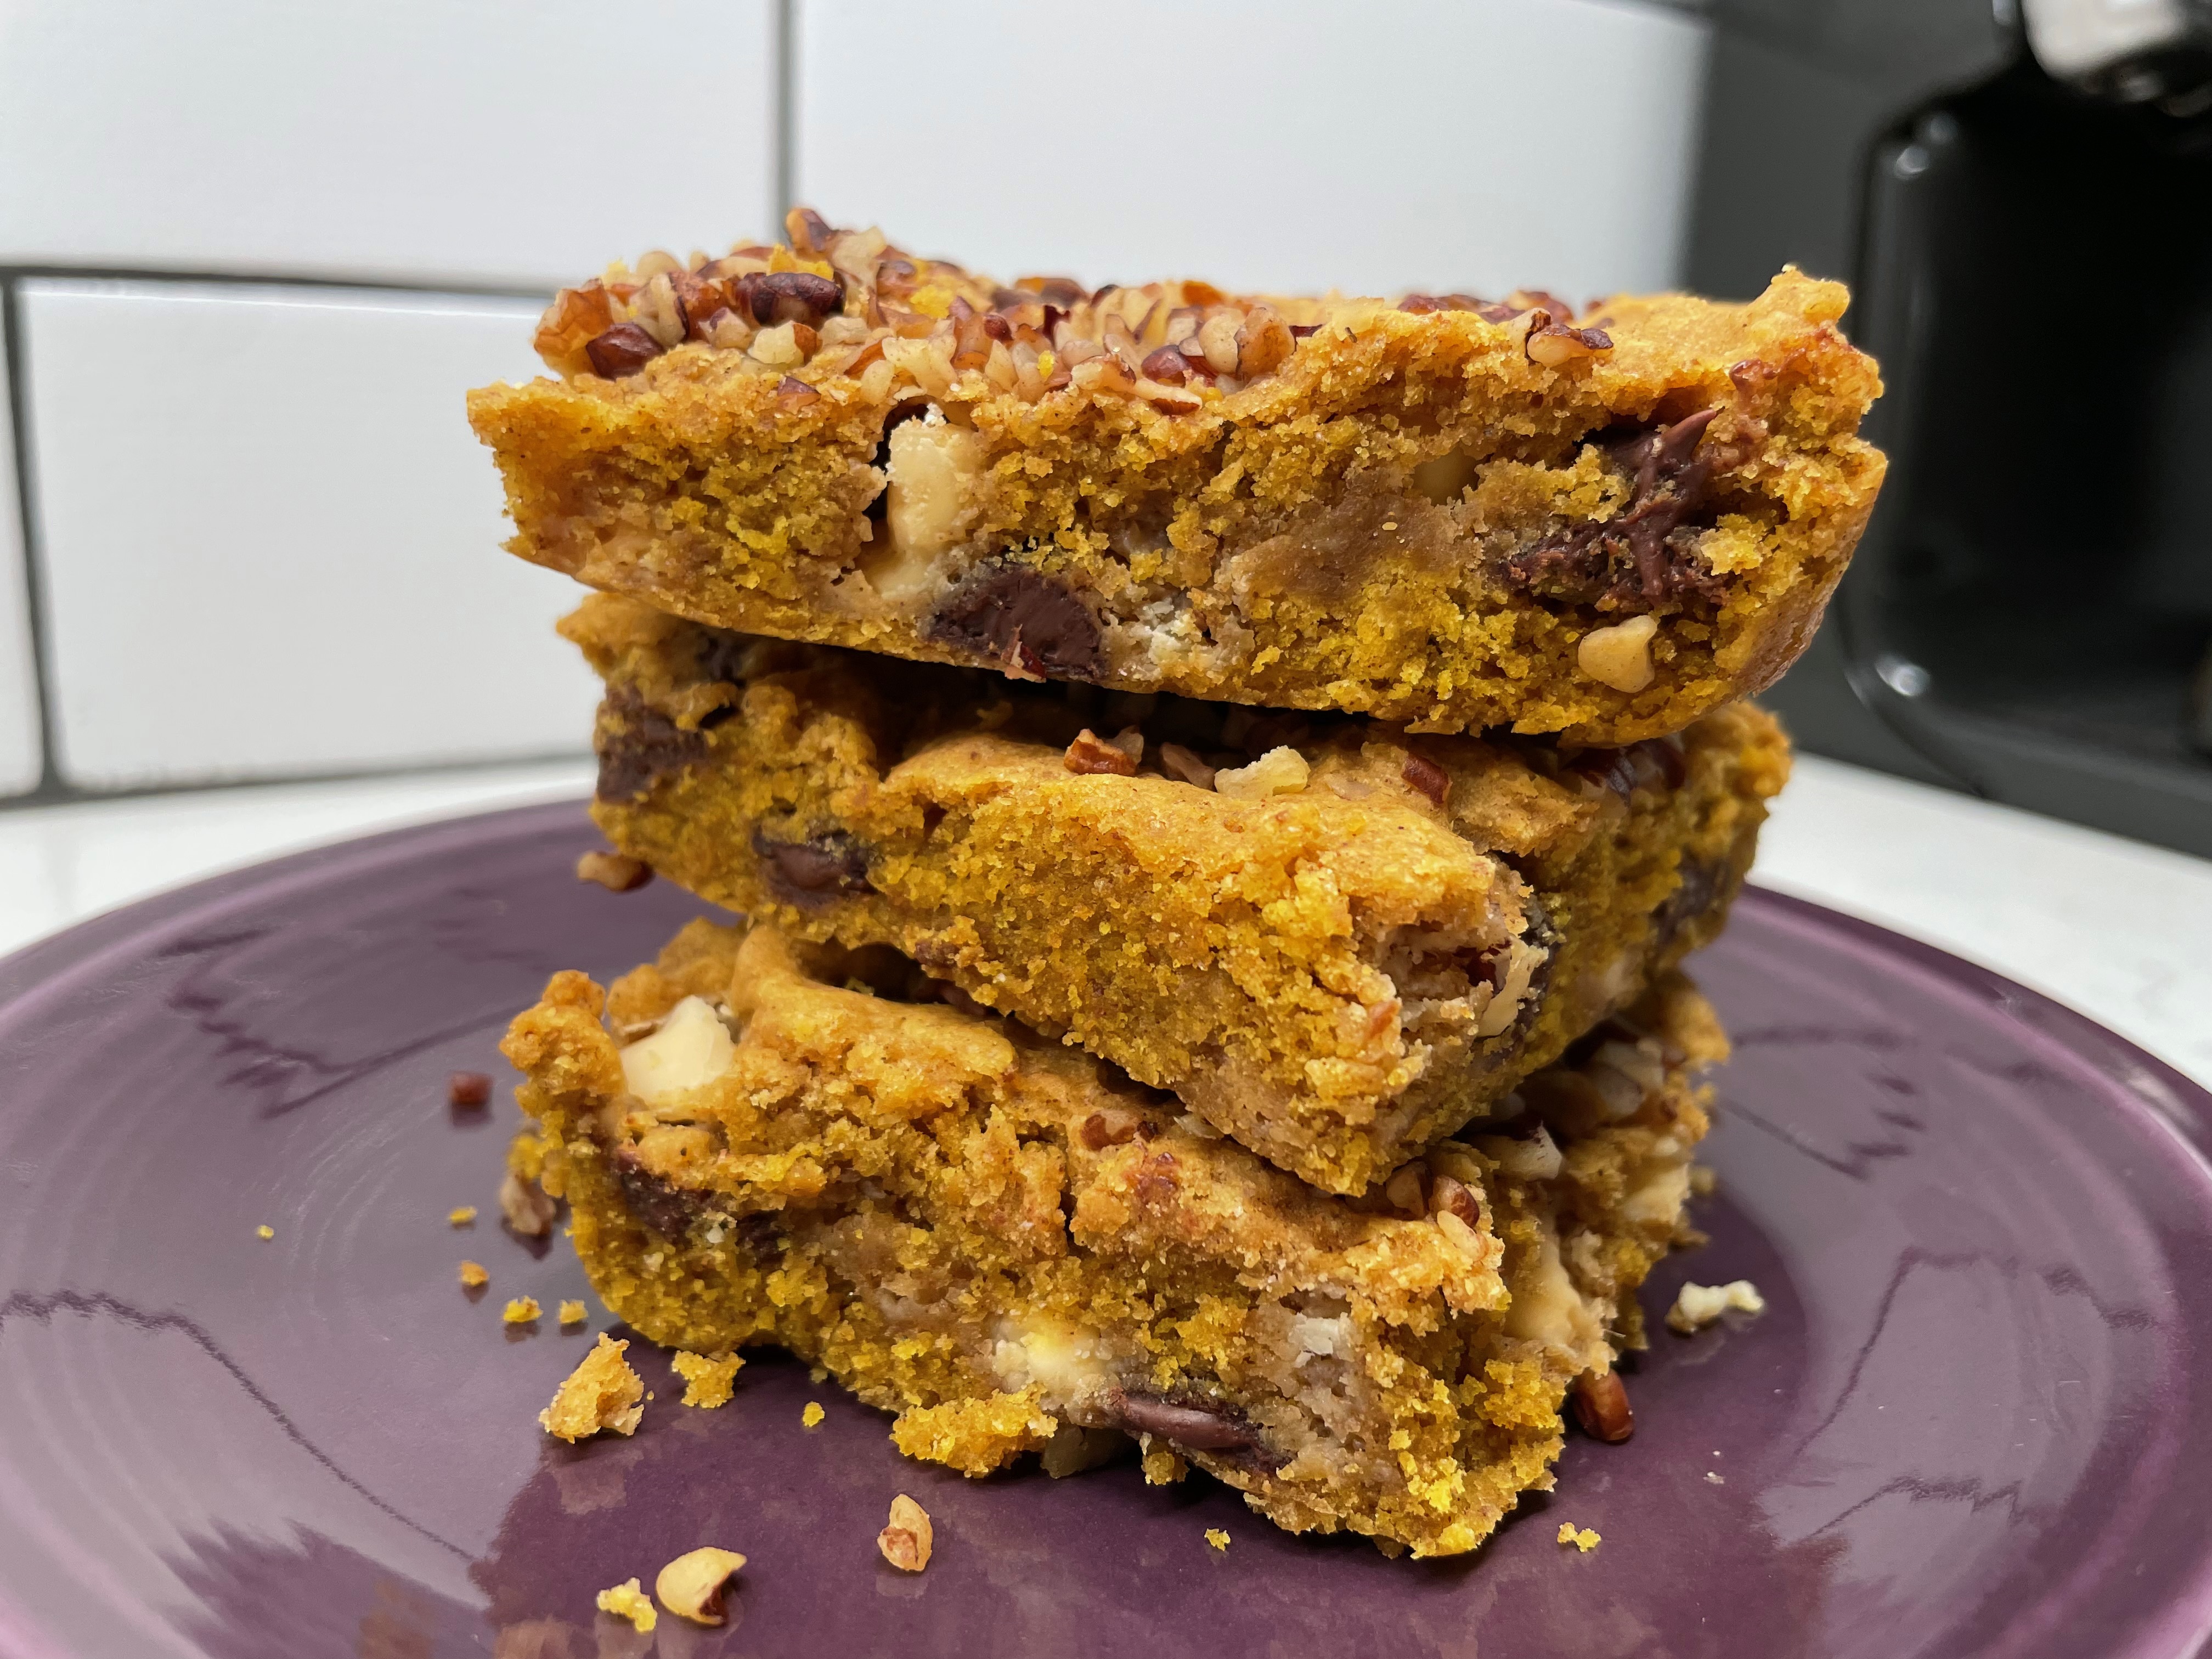
Is it fair to call these autumn-hued bar cookies “blondies?” Unlike classic blondies, which have a light golden color and are basically just chocolate chip bar cookies, these stunningly brilliant treats practically scream fall, with a deep orange color born from half a can of pumpkin puree. What else shall we call them— russets? Auburns?
They are still in essence a “blondie,” which is meant to have all the delightfully chewy texture of brownies, just without the cocoa. But these have a lot more going on, with add-ins of white and dark chocolate chips and crunchy pecan bits on top (well, half of it, anyway). There’s a lot to love here, and I have no doubt there are many other add-ins that would be great.
What do you think— maybe dried cranberries or butterscotch chips?
Let’s start with the fact that they satisfy any craving for pumpkin and spice— though this recipe does incorporate a more assertive spice blend than most “pumpkin spice” foods. To kick these up a few notches, I used equal parts Vietnamese cinnamon and chai spice, an Indian-inspired blend of cinnamon, ginger, cardamom, anise and black pepper (yes, really). The bold spices gave these blondies an edge over some of the too-sweet, ordinary desserts you find in a supermarket bakery, and the flavor is still familiar but with a little special something.
I’ve been looking for ways to sneak pumpkin into so many things.
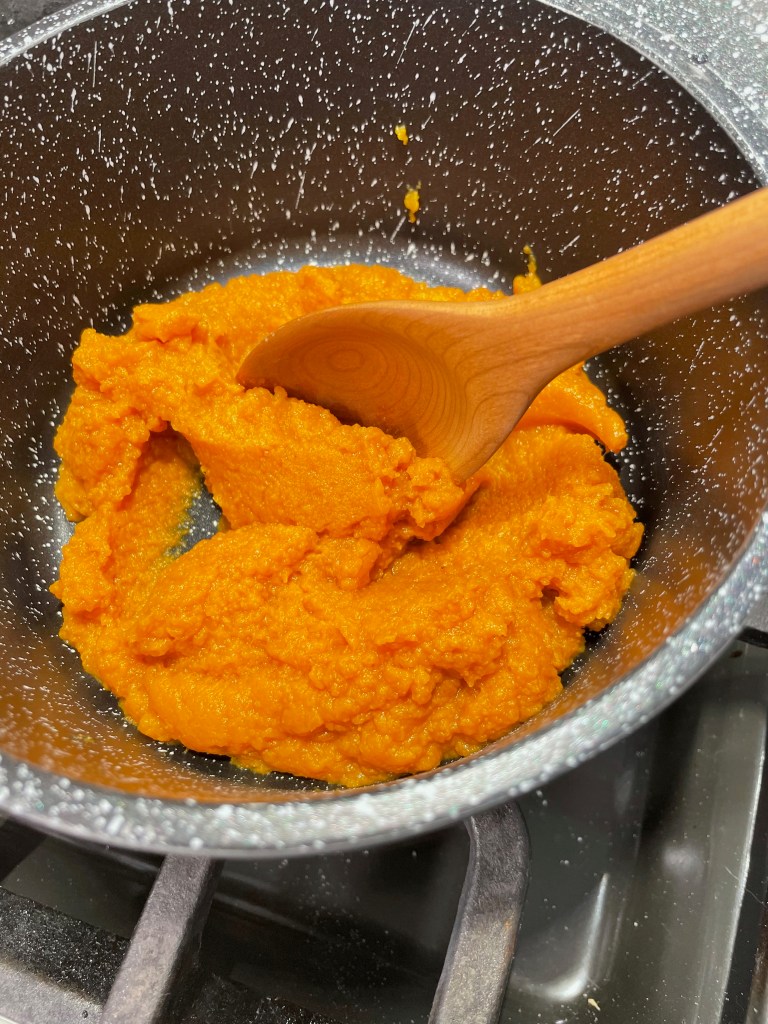
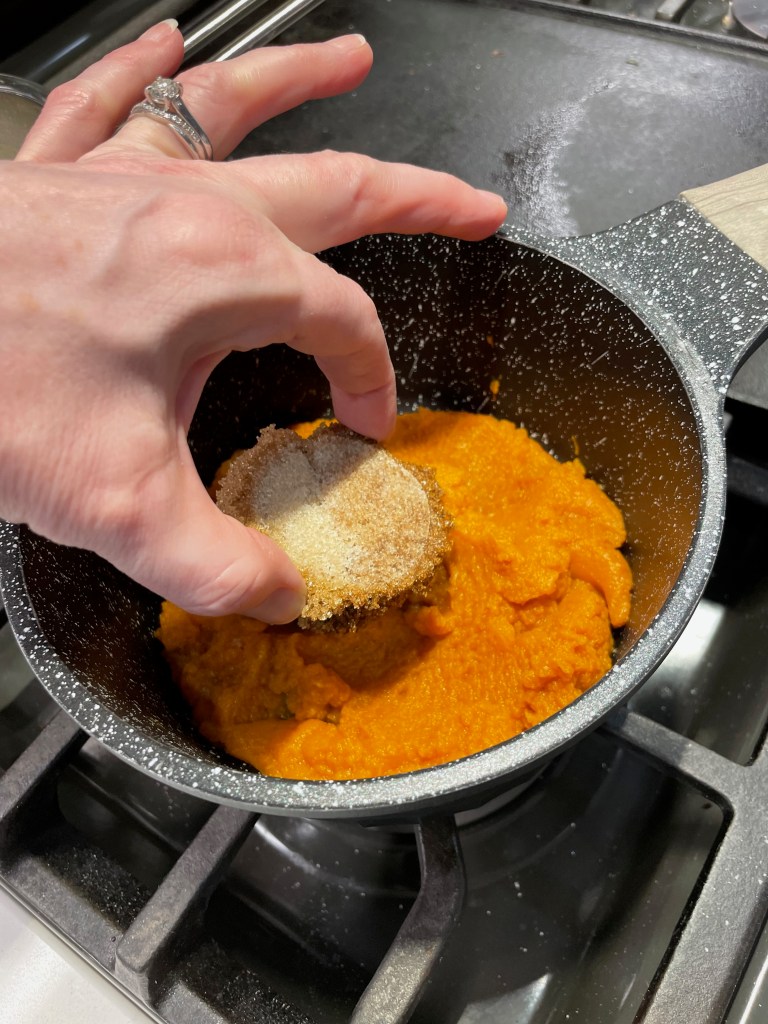
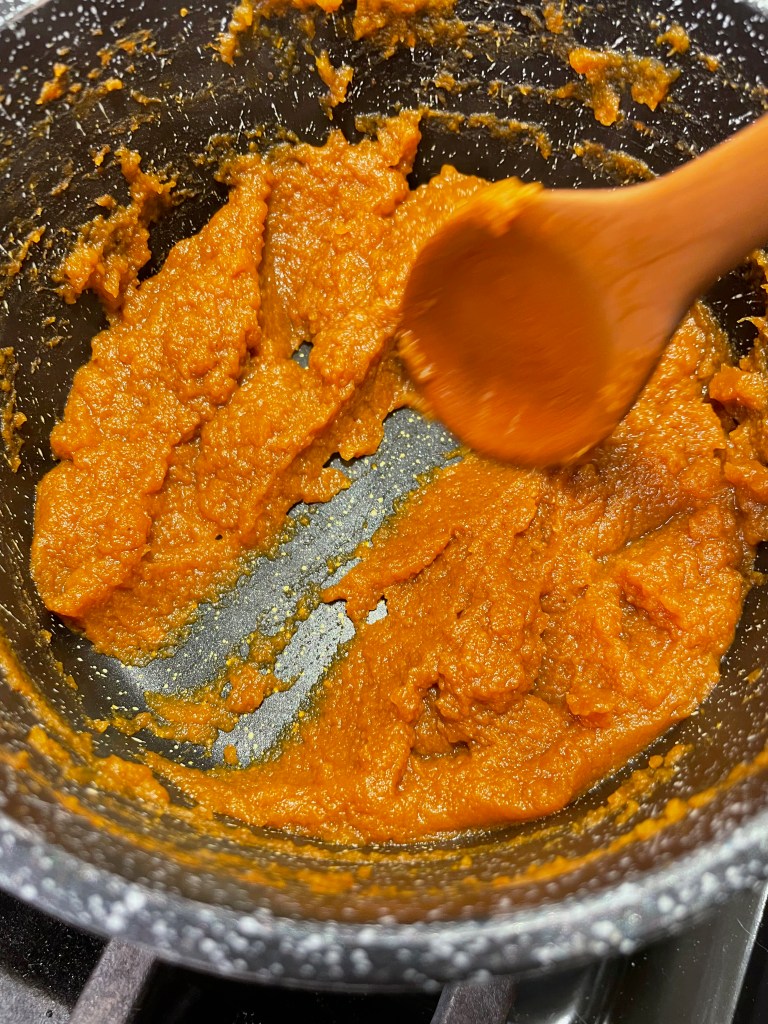
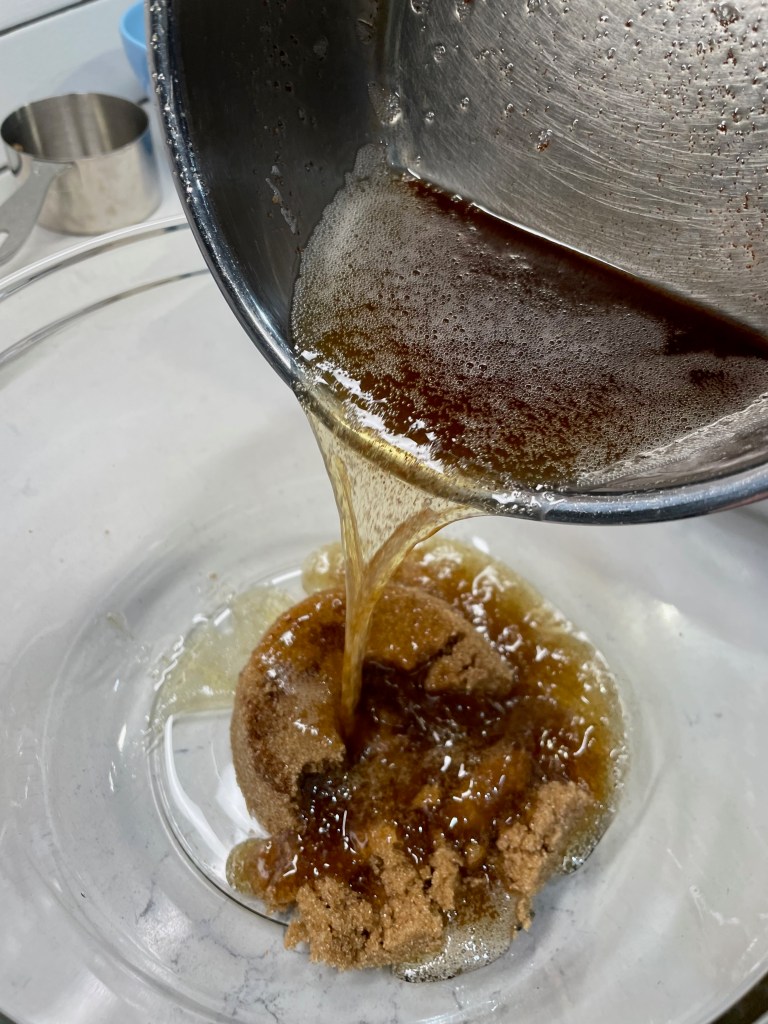
The downside of baking with pumpkin puree is that most recipes I’ve tried tend to be more cake-like than chewy— which is great when you want a cupcake, but not so much if you crave a cookie or blondie— and this is because of the high moisture content of the canned pumpkin. To counter this, I pulled a trick from the King Arthur Baking playbook, which is to cook the pumpkin puree until it is somewhat caramelized. The result is a thicker, more concentrated pumpkin flavor and a denser, more fudge-like texture of the finished auburns— er, blondies. I cooked mine with a bit of the brown sugar from the recipe, and the result was almost like pumpkin butter. So good!
I had a weird clump in my brown sugar container, so I dissolved it by cooking it with the pumpkin.
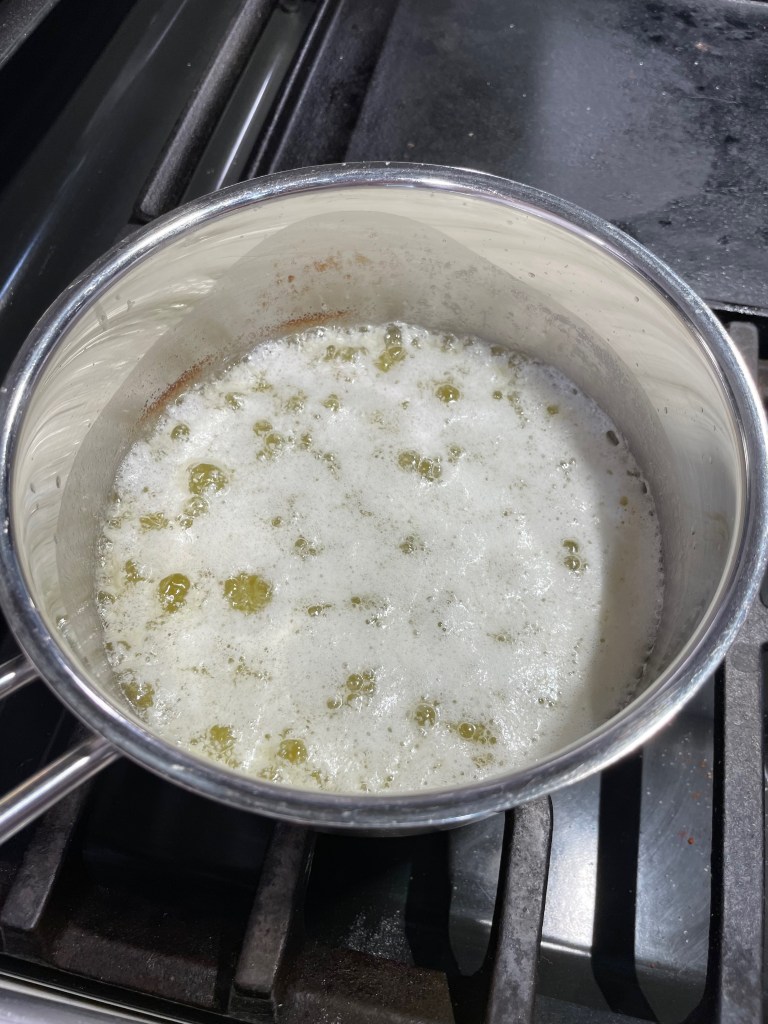
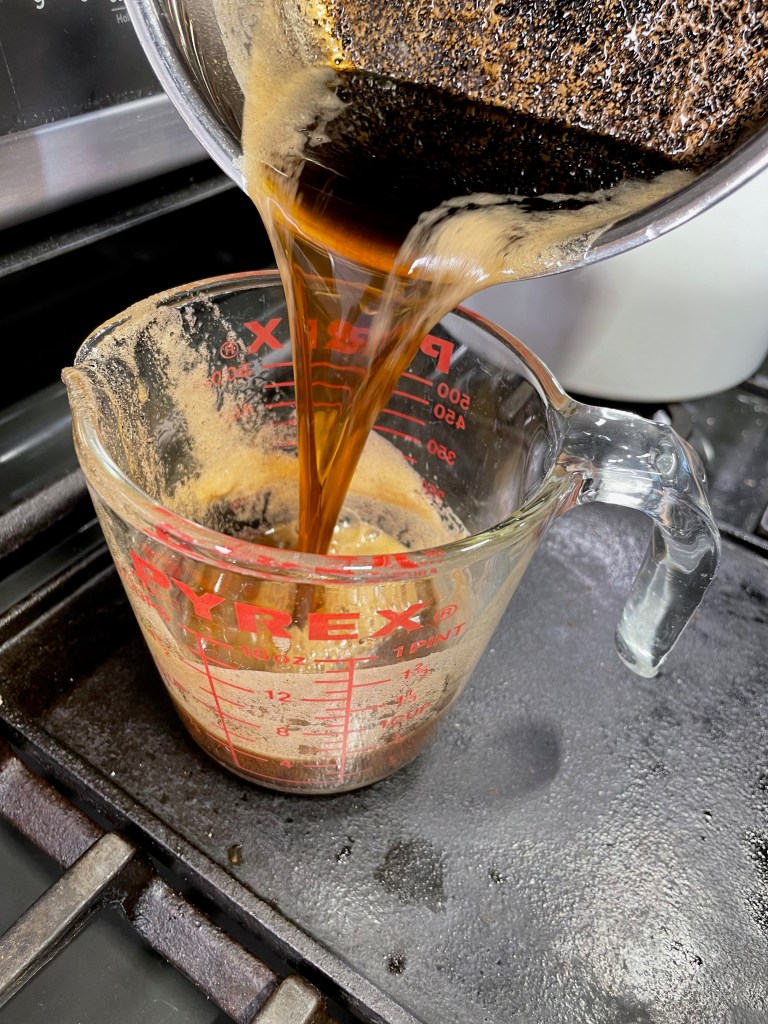
For additional autumn-inspired flavor, this recipe leans on browned butter, which is very easy to make though I don’t recommend trying to do it while multitasking the other components of the recipe. Browning butter takes very little effort but quite a bit of attention. Look away long enough to measure out your flour or caramelize your pumpkin, for example, and you may just find that the butter has turned to a charred, blackish liquid. I guess you can tell that I’m speaking from experience! 🤷🏻♀️
My butter was off to a good start, but it went too far. Oops!
My second attempt went much better!
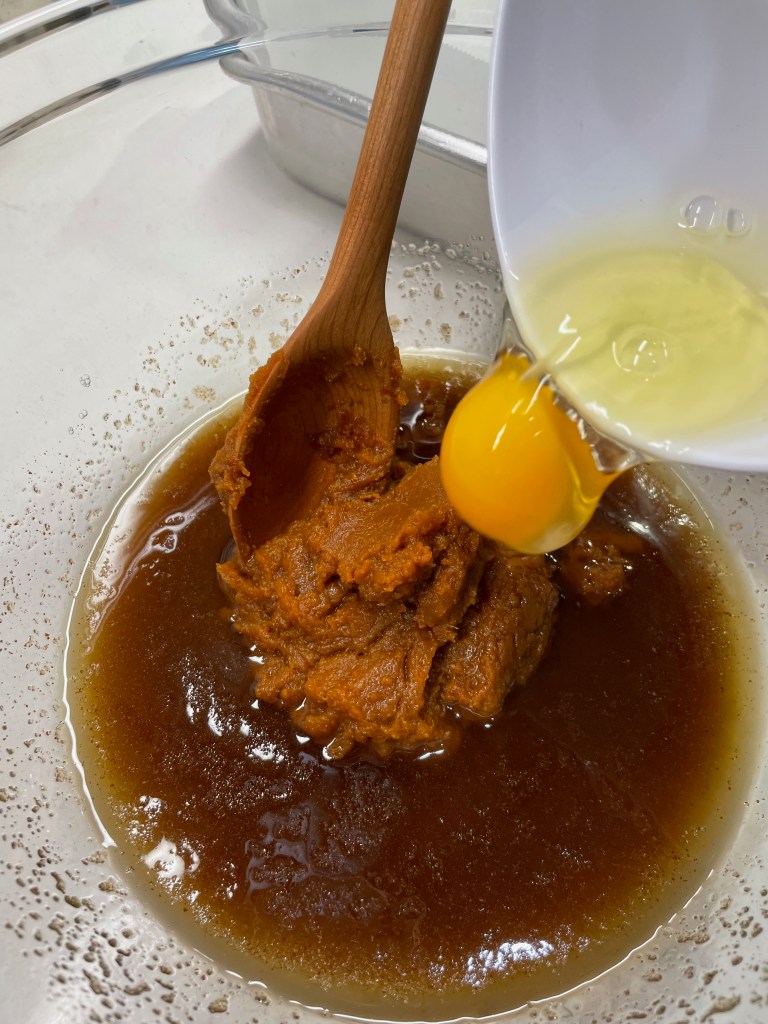
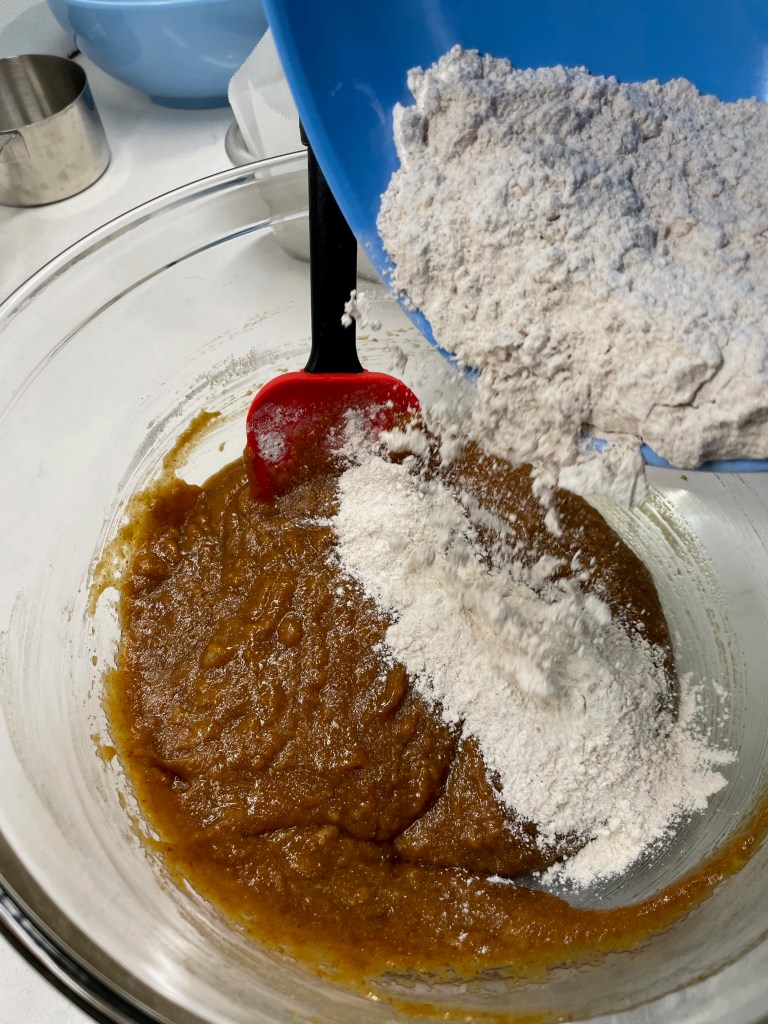
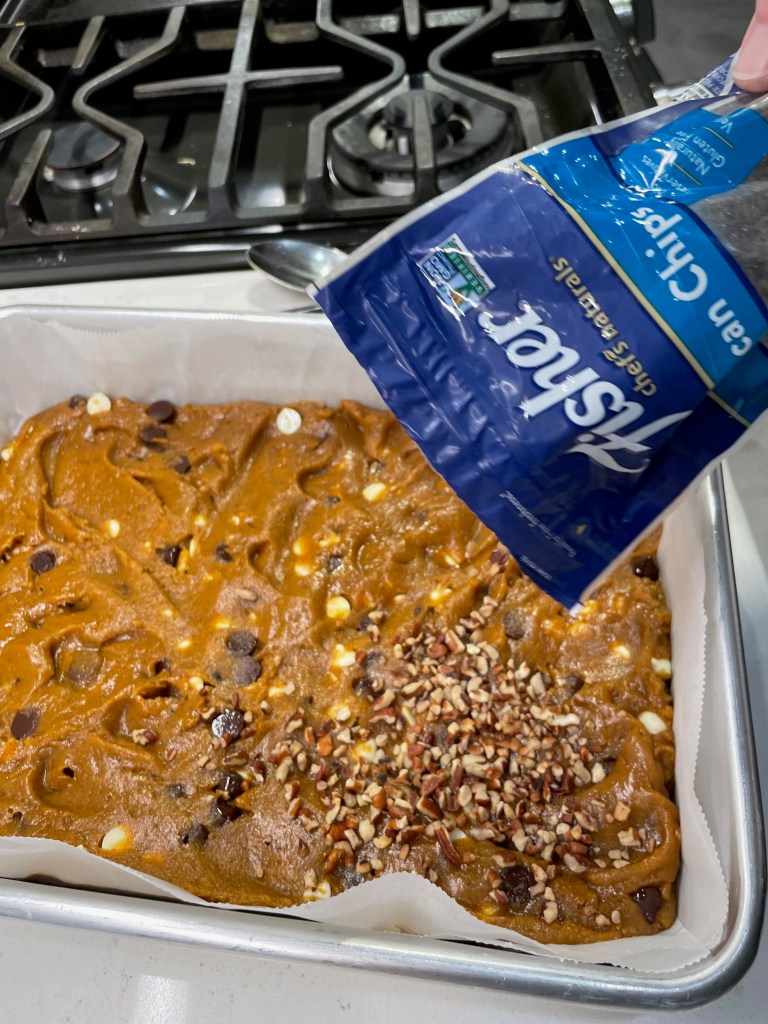
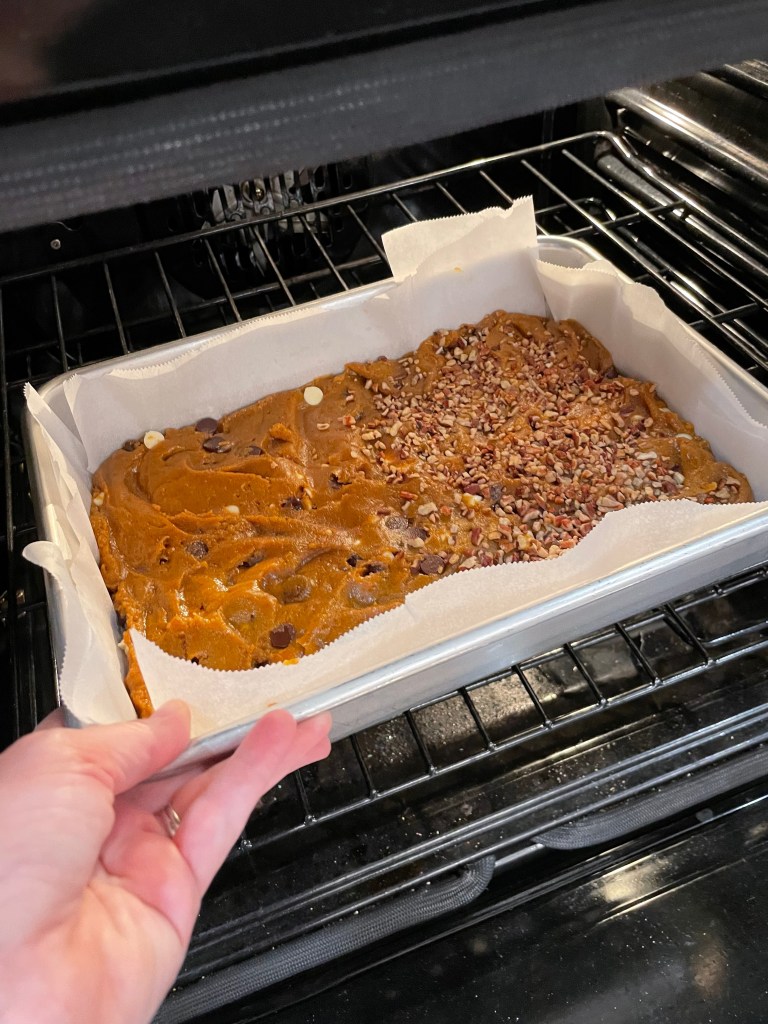
Other than that, it’s a typical dessert recipe— flour (I used part whole wheat), baking powder, egg, sugar (light brown, in this case), splash of vanilla and some white and dark chocolate chips just for fun. For a little extra something, I also scattered pecan bits over half of the blondies after spreading it out into the baking pan. This is optional, and if you have any guests who cannot digest nuts, follow my lead and sprinkle the nuts on half. Everyone wins!
These came together really easily.
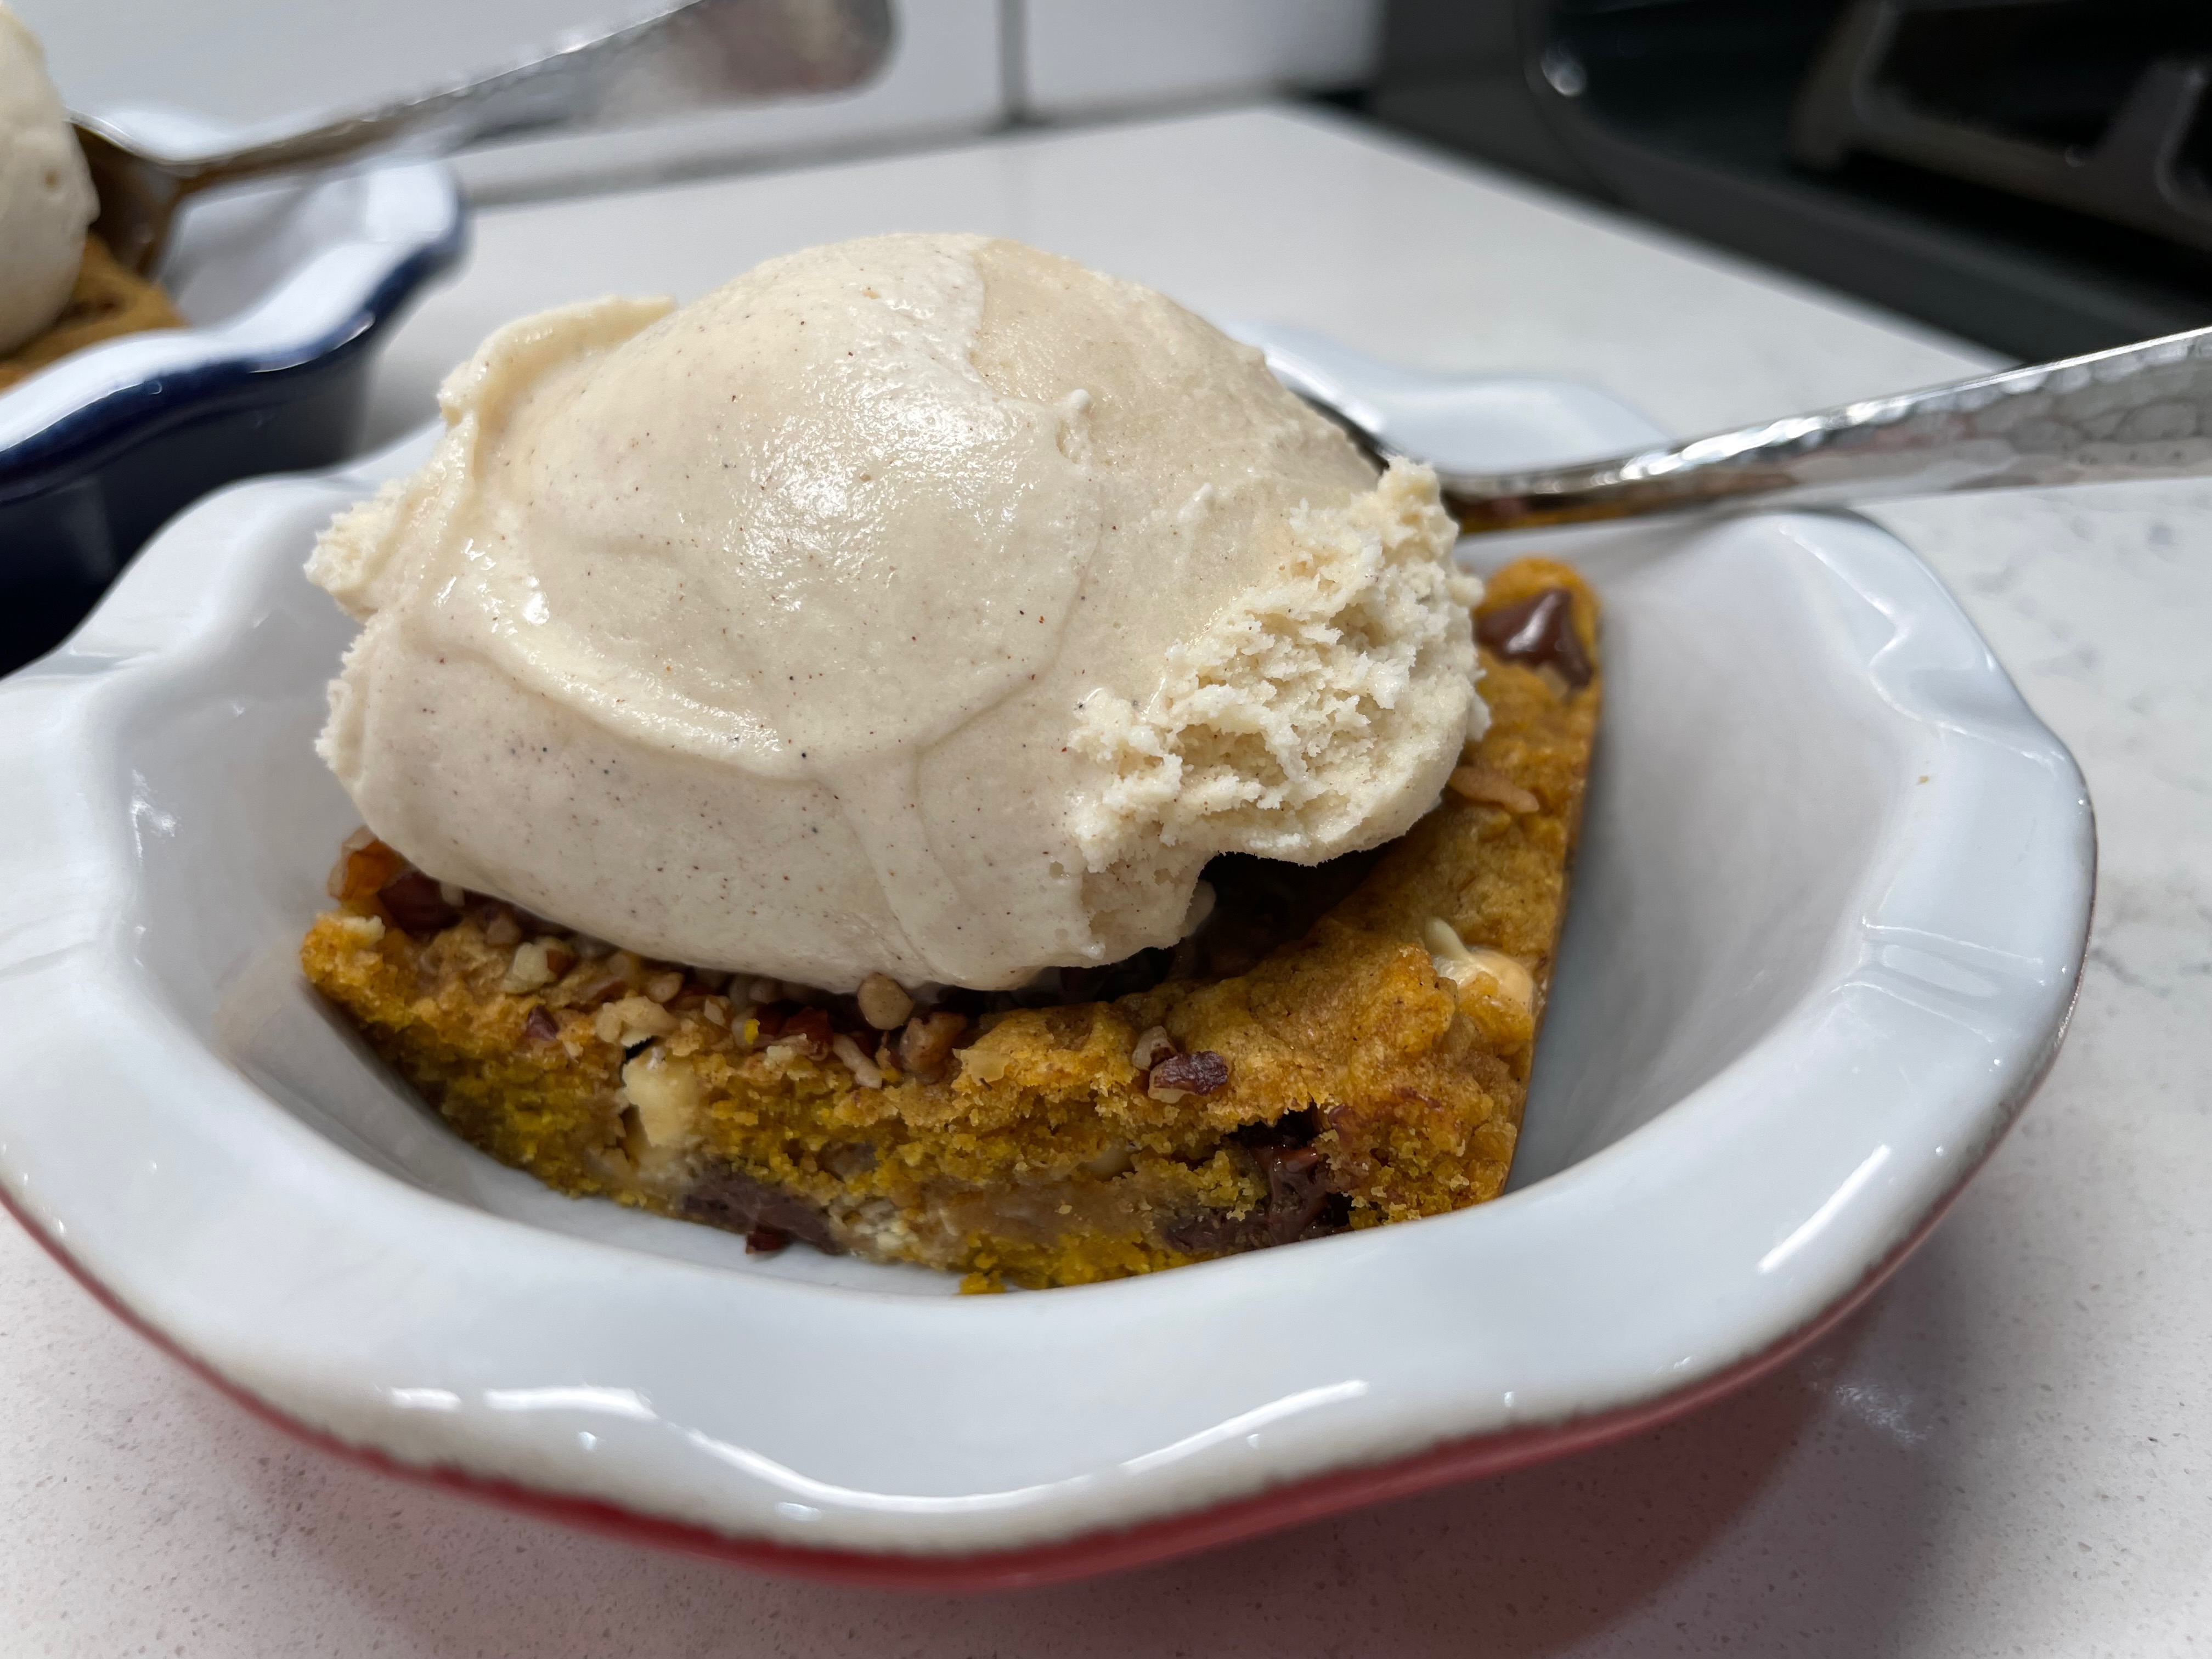
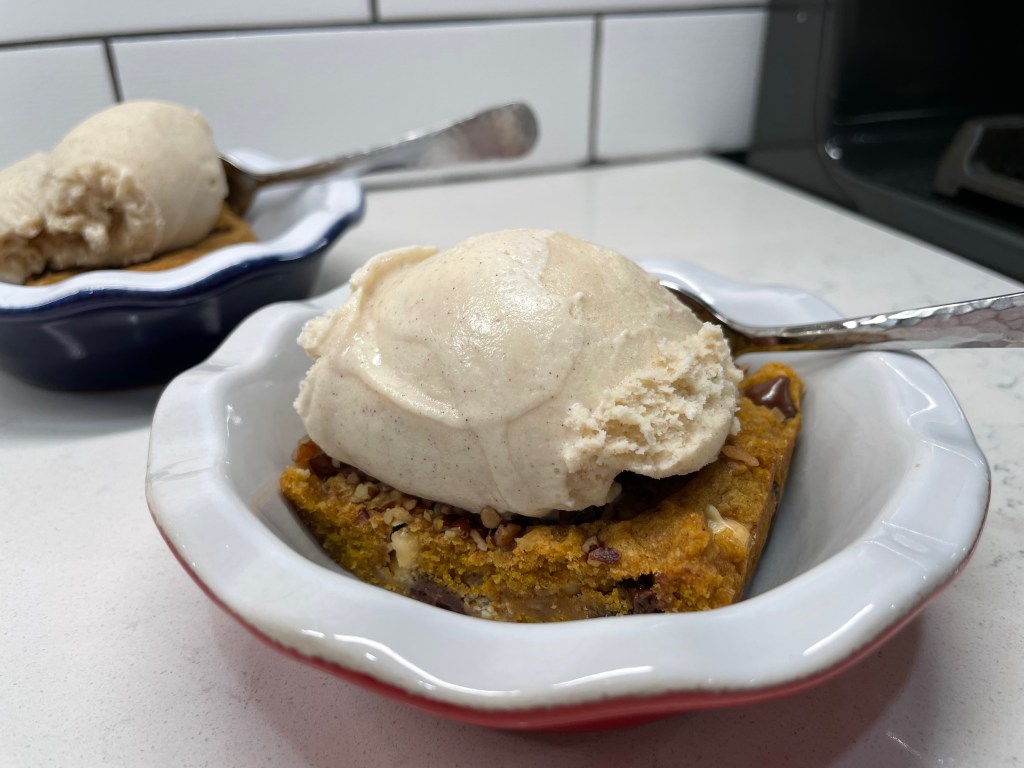
This was a fun fall dessert that would be nice for a casual Thanksgiving meal, the kids’ table, a brunch with friends, a treat for a special teacher or perhaps a snack for visiting grandkids that’s a bit healthier without them knowing it! As for us, we enjoyed it warmed 30 seconds in the microwave with a small scoop of ice cream. Delish!
Cooking the pumpkin puree before mixing the batter keeps this autumn-hued blondies nice and chewy, and the flavor will make you wish for fall to linger a little longer.
Ingredients
2 sticks unsalted butter
1 cup pumpkin puree
1 cup light brown sugar, packed
1 large egg, room temperature
2 teaspoons vanilla extract
1 1/4 cup all-purpose flour
1 cup white whole wheat flour
1 tsp. ground cinnamon
1 tsp. ground chai spice blend
1 tsp. kosher salt (I used Diamond crystals)
3/4 tsp. baking powder
1 cup white chocolate chips
1 cup dark chocolate chips
1/2 cup pecan bits (optional, or 1/4 cup for half the blondies)
Directions
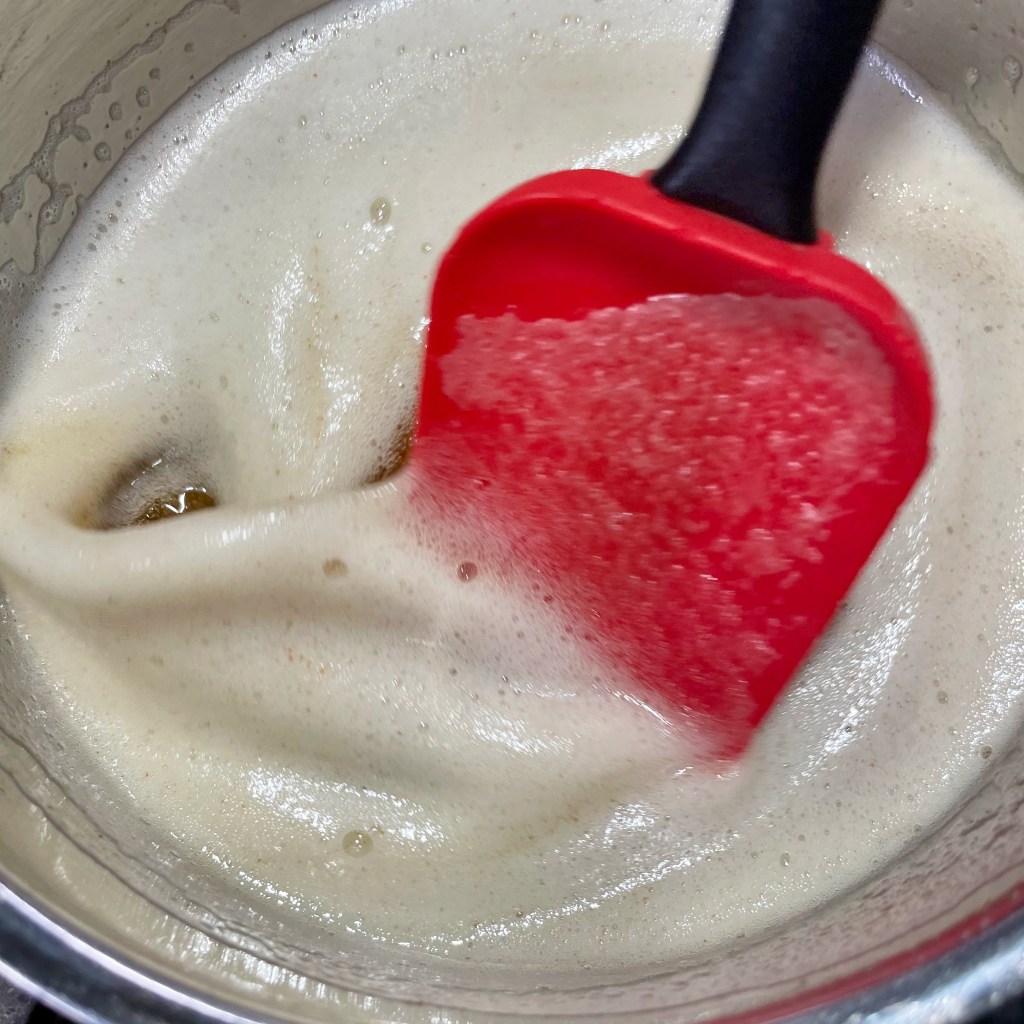
Melt the butter in a saucepan, swirling frequently and watching carefully to prevent burning. Cook melted butter until it takes on a deep golden color and has a nutty aroma. Allow it to cool for about half an hour.
Meanwhile, add pumpkin puree and a few tablespoons of the brown sugar to a second saucepan. Cook over medium heat, stirring almost constantly, until sugar is dissolved and pumpkin puree has reduced slightly. Cool completely before proceeding.
Preheat oven to 350° F, with oven rack in center position. Line a 9 x 13 baking pan with parchment paper, keeping a little extra to overhang for easy lifting of the blondies from the pan after baking.
In a large mixing bowl (or the bowl of a stand mixer fitted with paddle), stir together browned butter and remaining brown sugar until evenly combined. Add reduced pumpkin puree and egg. Beat until combined.
In a medium bowl, whisk together flours with spices, baking powder and salt. Add half the flour mixture to the butter mixture, folding just until all the dry ingredients are incorporated. Repeat with remaining flour blend. Gently fold in chocolate chips. The batter will be very thick and dense.
Spread batter evenly over parchment-lined baking pan. Sprinkle pecan chips over all or half the blondies, if desired. Bake for 30 minutes, or until blondies are set but not overly dry. Remember that they will continue to cook for a few minutes after removal. As with brownies, the type of pan may affect the outcome. For a glass pan, add a few extra minutes to the baking time.
Cool for about 30 minutes before using parchment to lift blondies from the pan. Cut into squares for serving. Keep leftover blondies wrapped or in a sealed container, at room temperature for up to three days.
These warm up beautifully in the microwave (give them 30 to 45 seconds on high), and they are delicious served with a scoop of ice cream.
Here’s an easy, kid-friendly main dish that brings back a lot of memories from my childhood. There were just a few foods that my mother made on repeat, including some of the Mexican-themed meals I’ve shared here. Ground beef tacos were in hot rotation, as was tuna noodle casserole, green chili burritos and something she called “Swiss steak.” Once in a while, she also whipped up a pot of good old American goulash, but not quite the way I’ve prepared this batch. My single mom was all about shortcuts in the kitchen, so her version of goulash usually involved a jar of store-bought spaghetti sauce, probably Ragú, given that there weren’t many other brands available in the 1970s when I lived with her.
In the traditional sense, goulash— which has its roots in Hungarian cuisine— would not have the Italian flavors found in spaghetti sauce, and I’ve come around to making it my own way in my adult years. I do use ground beef, as my mom did, and this is a distinct Americanization of goulash, which would traditionally be made with stewed cuts of meat, plus vegetables and probably potatoes.
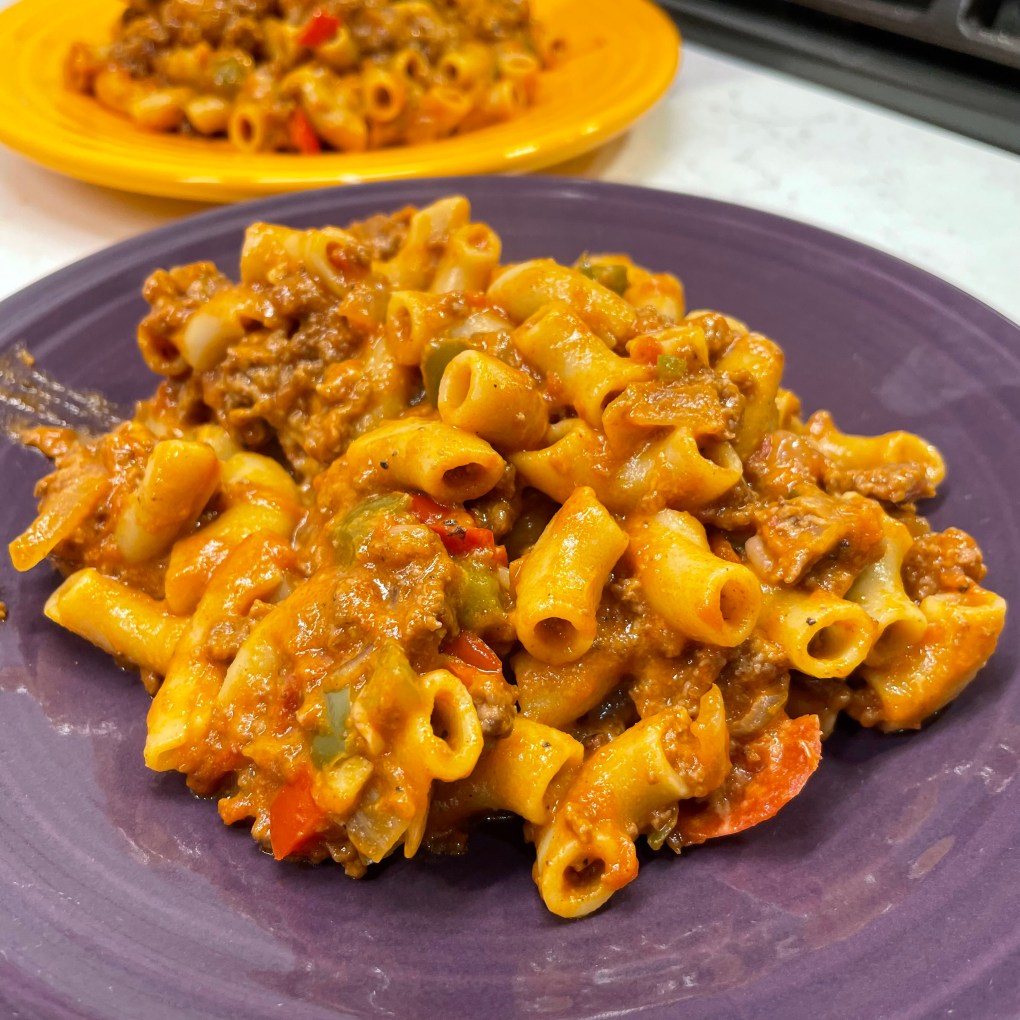
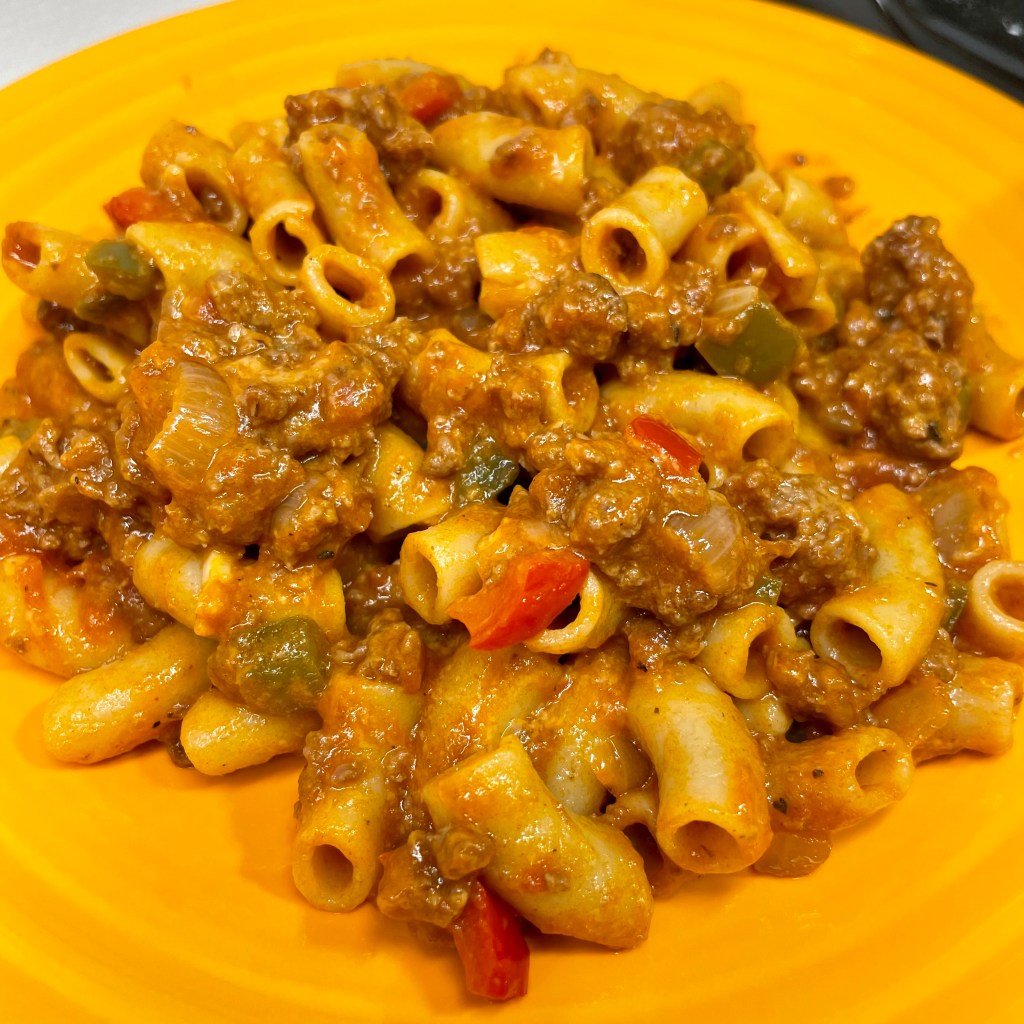
Not a Hungarian goulash, but so delish! And look at that brilliant Halloween color.
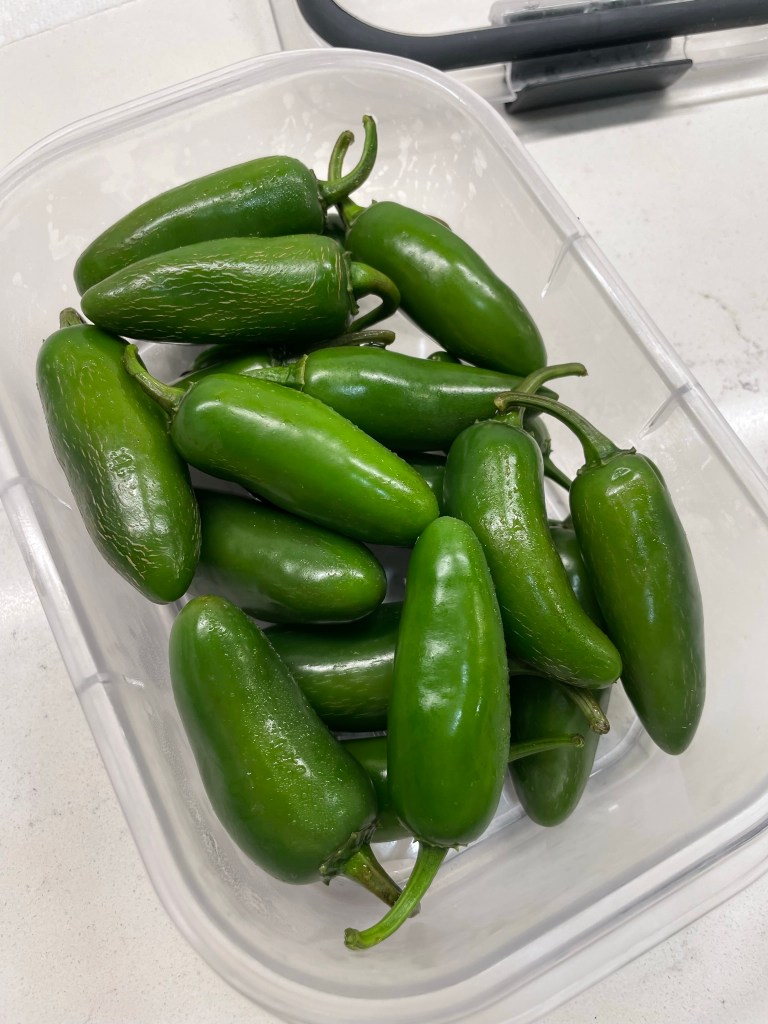
My version brings back some of the traditional goulash flavor, seasoned with plenty of smoked paprika, canned whole tomatoes, bell peppers, onions and garlic. In the devilish spirit of Halloween, I have also taken the liberty of adding some fiery heat in the form of a fresh jalapeño, chopped up with seeds and all. Even when I was a kid, I loved spicy flavors, and that was my mother’s influence, especially during the years we lived in southern Colorado.
If you’re not feeling it for the fire, or if you’re feeding little goblins whose taste buds aren’t quite there yet, feel free to omit the jalapeño, and maybe pull back on the smoked paprika a bit, too. Cooked pasta is another “American” twist on goulash, and I like large elbows for this because the shape is open to grab up plenty of that flavorful sauce, and it’s also easy to pick up with your fork, along with the tasty bits of meat, onion and pepper.
One last thing, and this is also a departure from my mom’s old standby recipe but is very popular in my house today. Just before serving, I stir in a half cup or so of shredded sharp cheddar. It’s a tangy little twist that makes this an even heartier meal, or perhaps even a graveyard smash. 👻
This is my adaptation of a dish I had countless times during my childhood. It makes good use of simple pantry ingredients and it is economical, using ground meat of your choice. I prefer it served from the stovetop, but it easy to adapt to a baked dish if you prefer to make it ahead.
Ingredients
Extra virgin olive oil
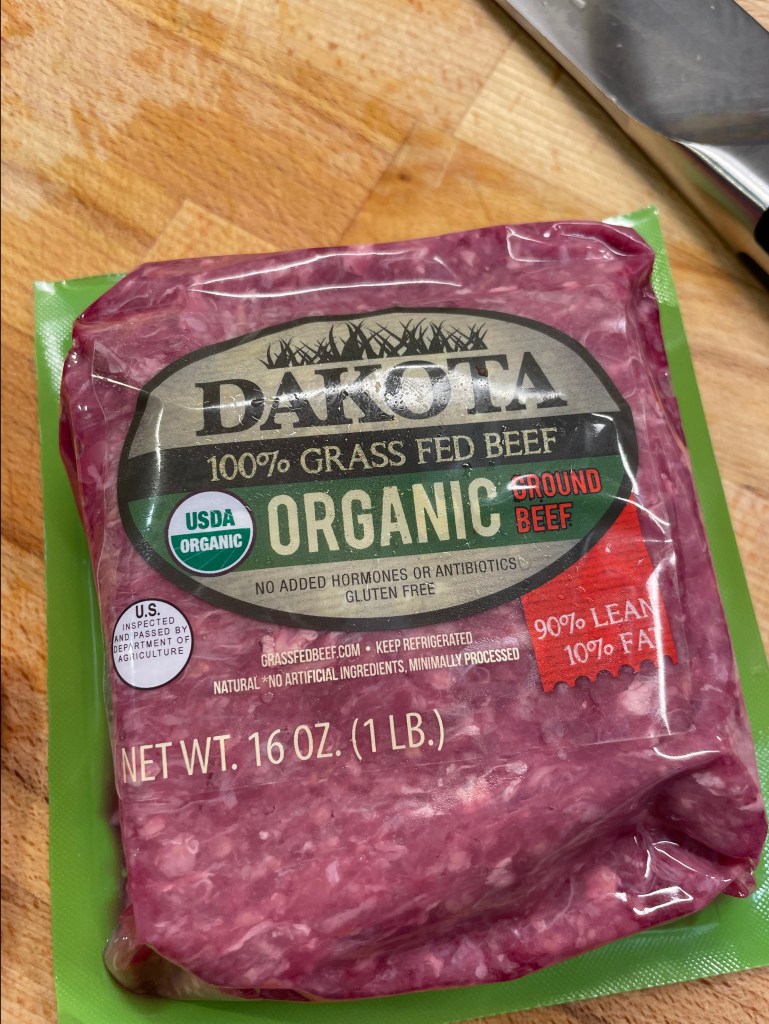
1 pound lean ground meat (beef, bison or turkey work well)
1/2 sweet or yellow onion, chopped
1 bell pepper, chopped (use green, red or a combination)
2 cloves garlic, minced
1 fresh jalapeño (optional), minced with or without seeds
Salt and pepper
1 teaspoon smoked paprika (Hungarian is traditional, but Spanish works nicely)
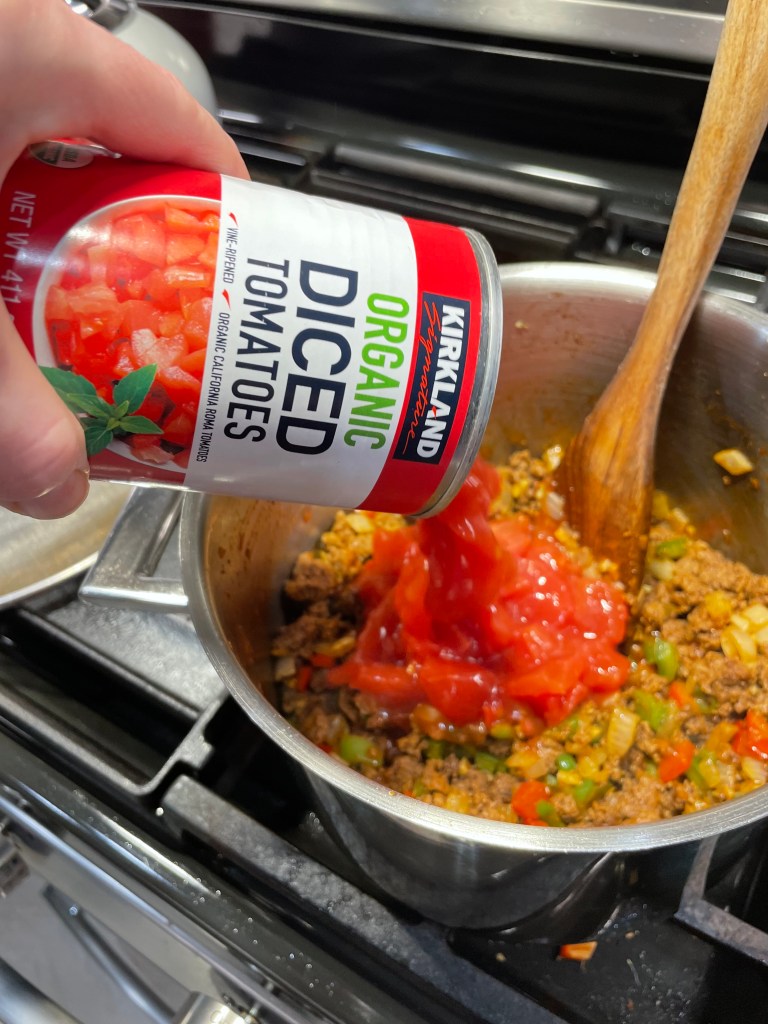
15 oz. can diced tomatoes, including juice
8 oz. can low-sodium tomato sauce
1/2 pound large elbow macaroni
About 1/2 cup shredded sharp or medium cheddar cheese
You can adjust the smoke and spice of this dish to your liking. For less heat, discard the seeds and membranes of the jalapeño or omit it entirely. For extra “smoke,” use two teaspoons of the paprika. For less smoke, substitute sweet paprika.
Directions
Bring a pot of salted water to boil for cooking the pasta. Heat a medium size, heavy-bottomed pot over medium heat. Swirl in a tablespoon or so of olive oil and add the ground meat, a little bit at a time, cooking until most of the pink color is gone.
Add chopped and minced vegetables and season with salt and pepper. Cook and stir until vegetables are softened and onions are slightly translucent.
Stir in paprika and then add tomatoes and tomato sauce. Reduce heat and cook at low temperature, stirring occasionally to prevent burning.
While the goulash mixture simmers, cook the pasta to al dente or desired doneness for serving from the stovetop. If you intend to bake the dish after mixing, undercook the pasta slightly as it will continue to absorb moisture and cook during baking.
Add cooked pasta and a few tablespoons of the pasta water to the meat mixture. Gently fold to combine. Stir in shredded cheddar and serve. If baking, transfer the mixture to a casserole dish and bake at 350° F for about 40 minutes. Consider topping the casserole with extra cheese before baking.
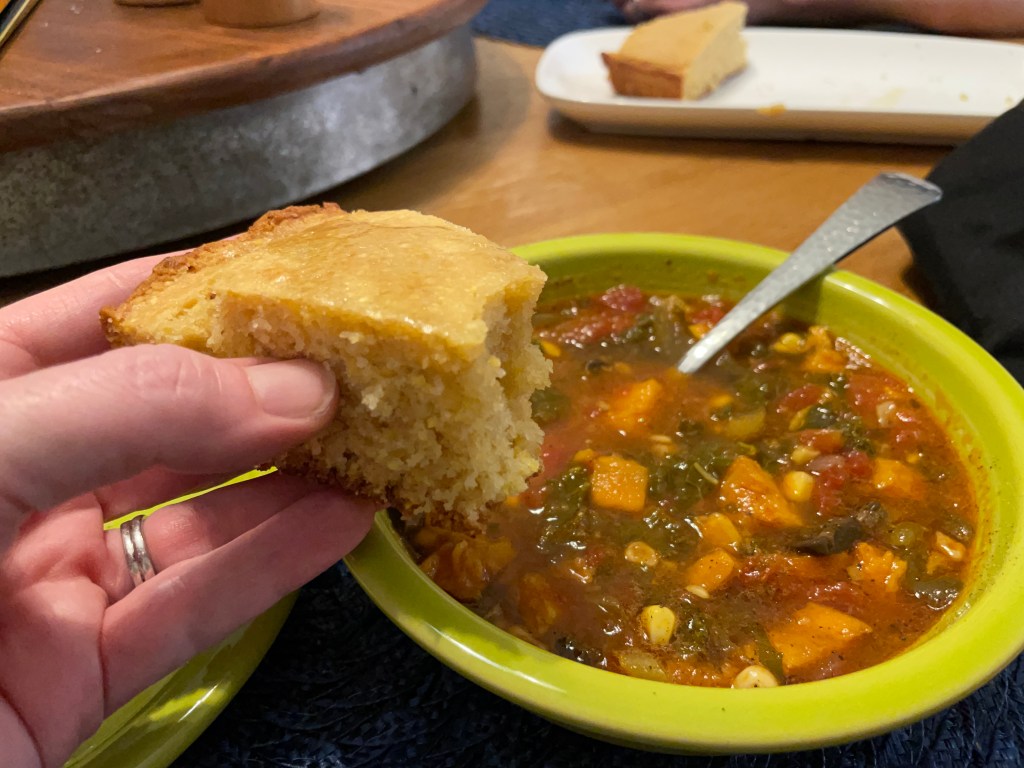
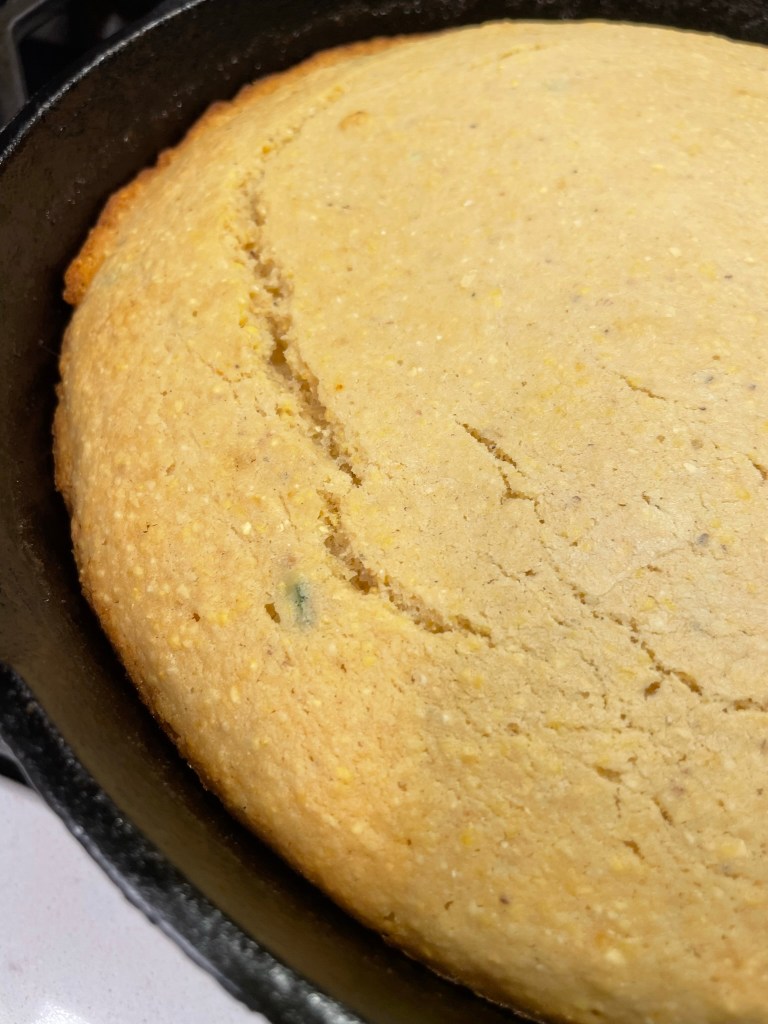
A shrug. That’s pretty much all I get from my husband when I mention that I might whip up a batch of cornbread. As a born-and-raised New York City guy, he’s more into bagels and dinner rolls than grainy, dense cornbread.
But that was before I decided to put jalapeño and honey into it. 😉
We are counting the days until we tear out what’s left of our “well, we tried” summer garden, and the jalapeños are making a valiant effort to compensate for the disappointment of everything else I attempted to grow this year. With four jalapeño plants, and plenty of post-summer full sun, I’m pretty much sneaking these spicy peppers into everything I can. That works out great for my heat-loving husband, and I found it easy to substitute honey for the usual sugar in my favorite cornbread recipe.
And that brings me to an important point— you don’t have to use my recipe to enjoy jalapeño-honey cornbread. If you have a favorite recipe already, a few simple adjustments might just make this a favorite at your house, too.
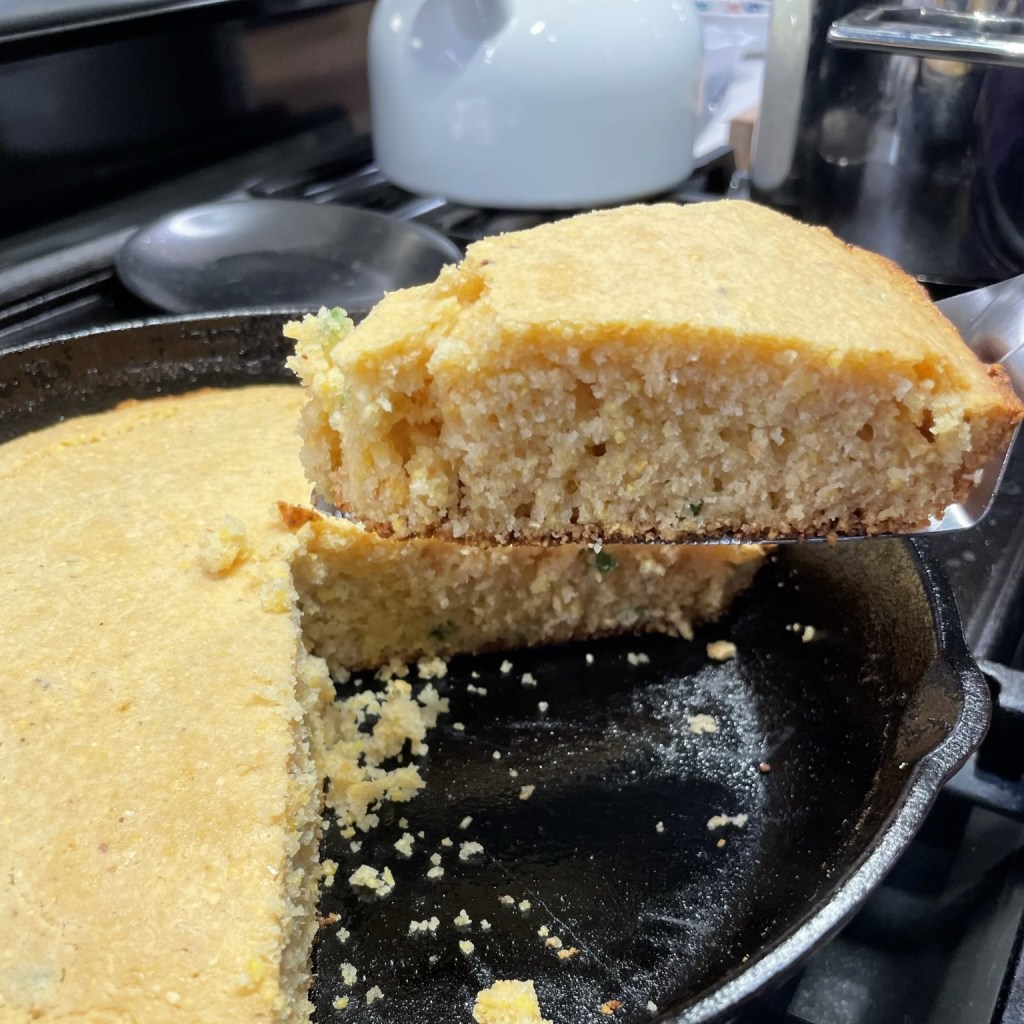
This was so good with leftover autumn minestrone! Imagine it with a bowl of chili or black bean soup. Mmm.
A couple of quick notes— jalapeño can range in Scoville units (the heat factor), but you can take charge of the overall intensity with a simple decision of keeping or removing the seeds and membranes. The other note is about the honey. I used a local wildflower honey, and because honey is sweeter than cane sugar, you can get away with using a little less than the amount of sugar called for in the recipe.
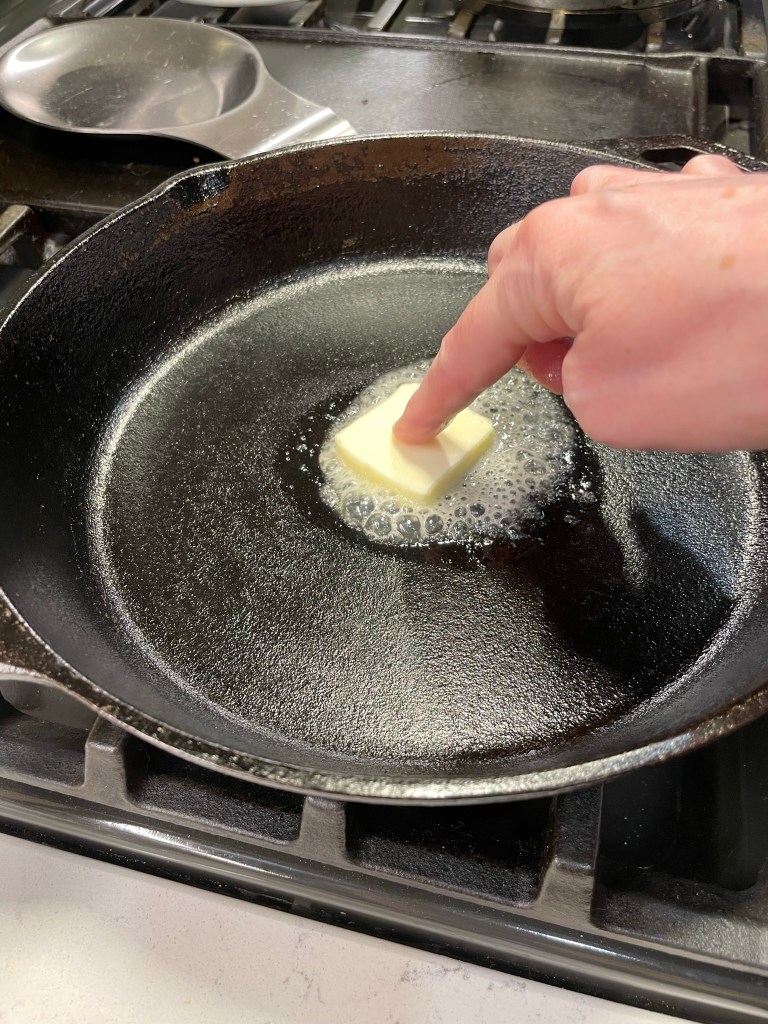
If you’d like to bake your cornbread in a cast-iron skillet, I recommend melting a tablespoon or so of butter in the skillet over medium heat before adding the batter and moving it to the oven. This extra butter will ensure clean, even wedges straight from the pan and almost no cleanup!
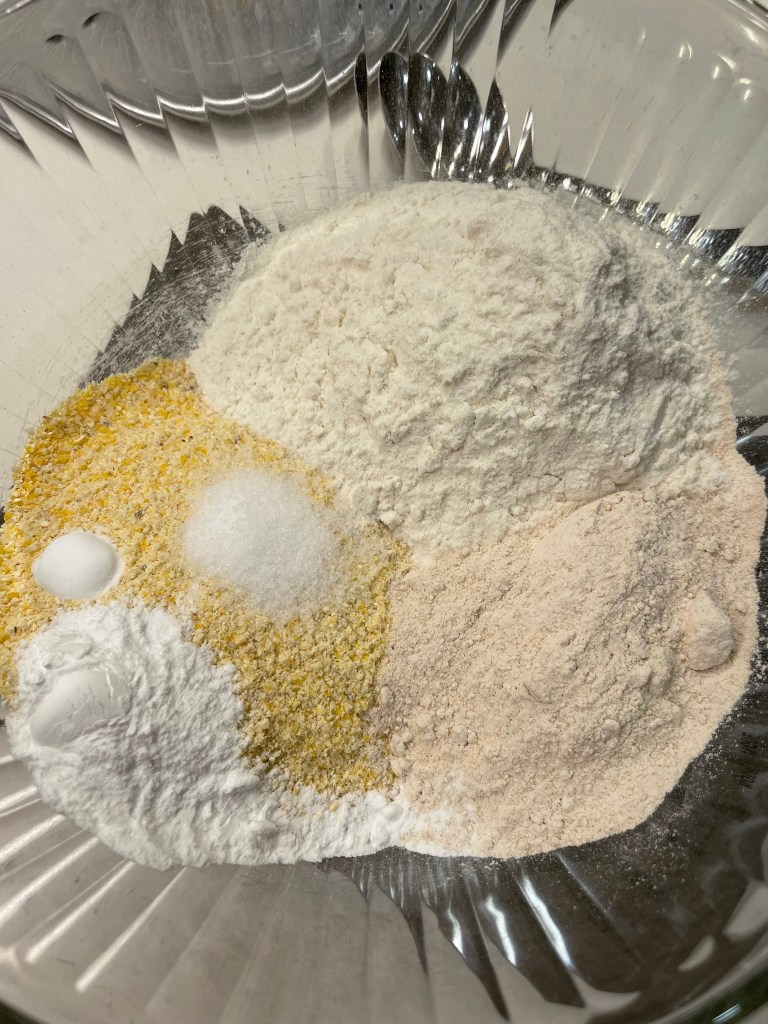
My inspiration recipe, as expected, comes from my favorite flour company, King Arthur Baking. I made a few modifications, including swapping honey for sugar and subbing in a portion of white whole wheat for nutrition and flavor. Plus, of course, the jalapeños! I also whipped up a small batch of honey butter for drizzling at serving time. 😋
Just two ingredient swaps are throwing a big flavor twist onto a classic cornbread. This will be great with almost any rustic soup you make this fall and winter!
Ingredients
1 cup all-purpose flour
3/4 cup white whole wheat flour
1 cup cornmeal
2 tsp. baking powder
1/4 tsp. baking soda
3/4 tsp. fine sea salt
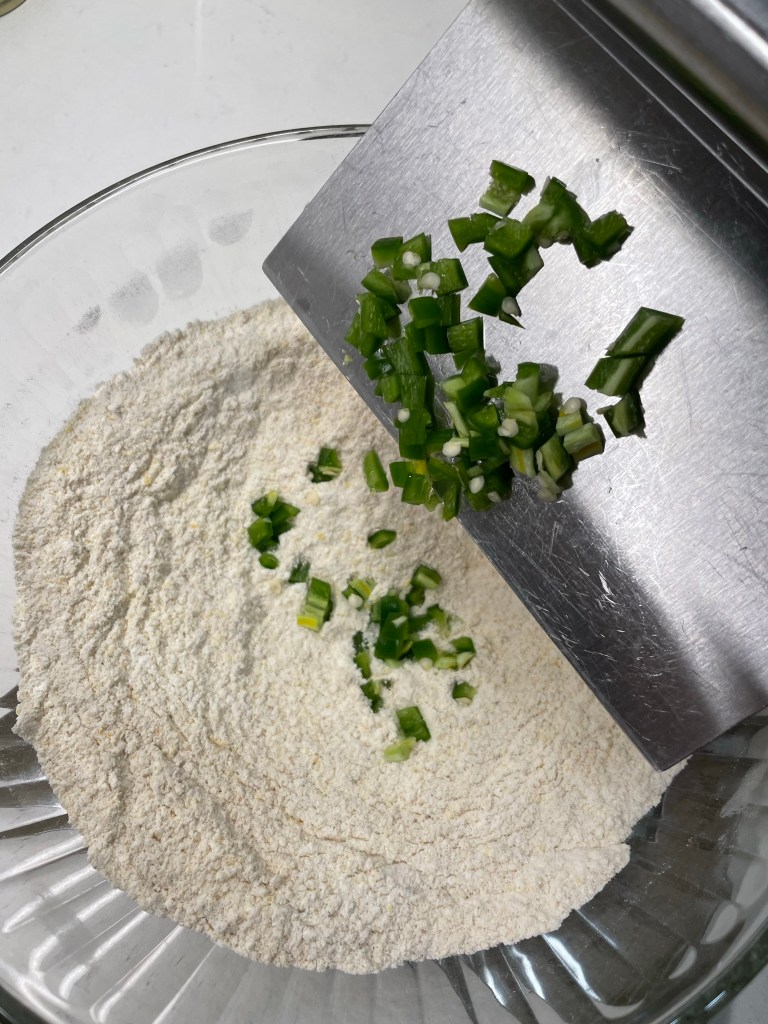
1 large jalapeño, diced (seeds or no seeds, depending on your heat tolerance)
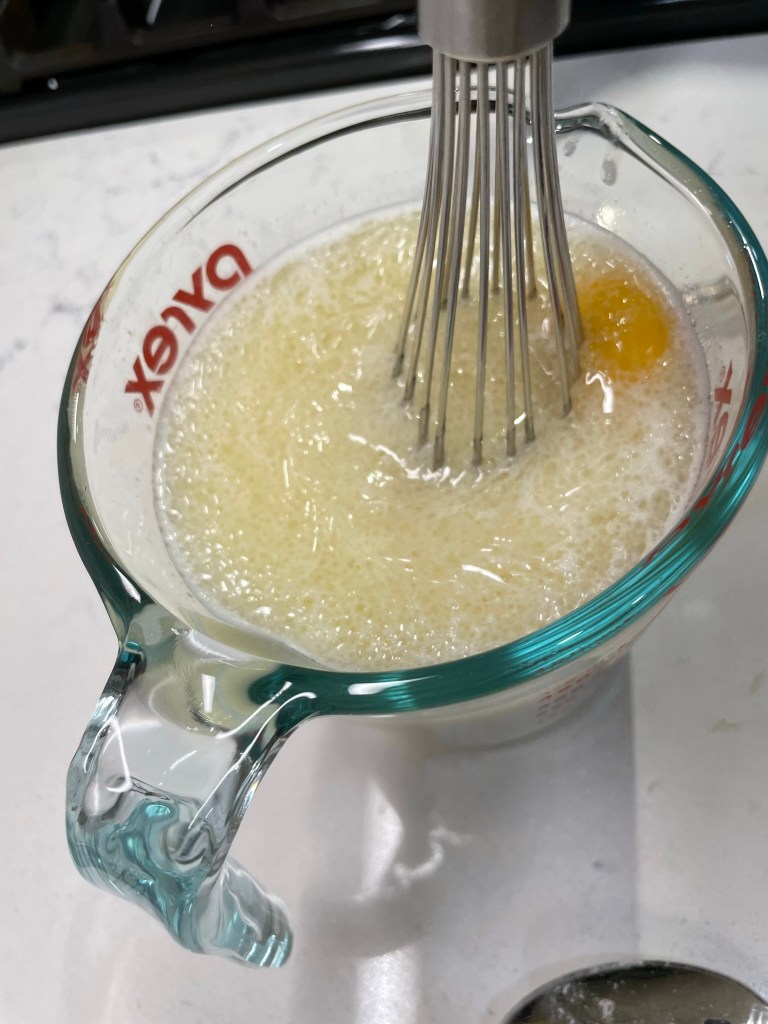
1 1/4 cups milk, warmed (I used whole milk, but 2%, skim or plant milk would be fine)
3 Tbsp. local wildflower honey
1 large egg, room temperature
1/4 cup expeller-pressed canola oil
1/2 stick butter, melted (plant butter would be fine)
1 additional tablespoon butter for melting in the skillet (or buttering a baking dish)
This is delicious drizzled with honey butter. To make some, stir honey into softened, salted butter until smooth. At room temperature, it will drizzle nicely over the warm cornbread. If chilled, it will be more firm but still spreadable. Store leftover cornbread wrapped tightly in foil, or freeze for later.
Directions
Preheat oven to 350°F, with rack in center position. Place a cast iron skillet over medium heat and melt the extra tablespoon of butter into it.
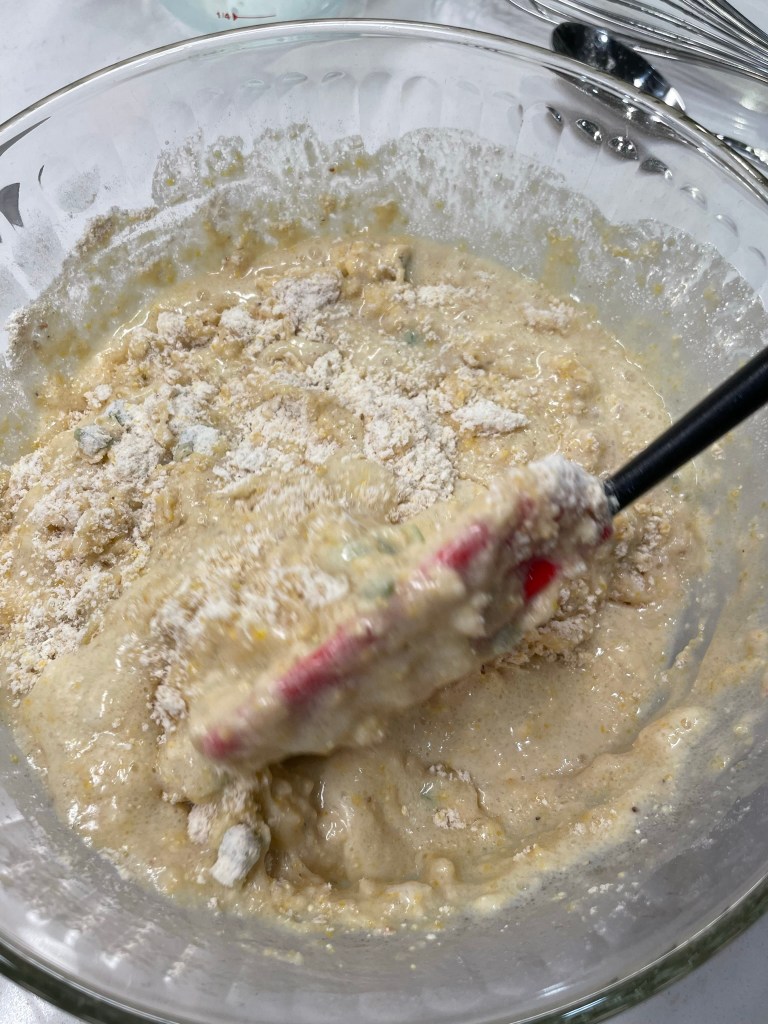
Measure out and whisk together the dry ingredients in a large batter bowl. Toss the jalapeños into that mixture as well.
Combine the wet ingredients, blending well to completely mix in the honey.
Pour the wet mixture into the bowl with the dry ingredients and fold gently several times until dry ingredients are fully incorporated.
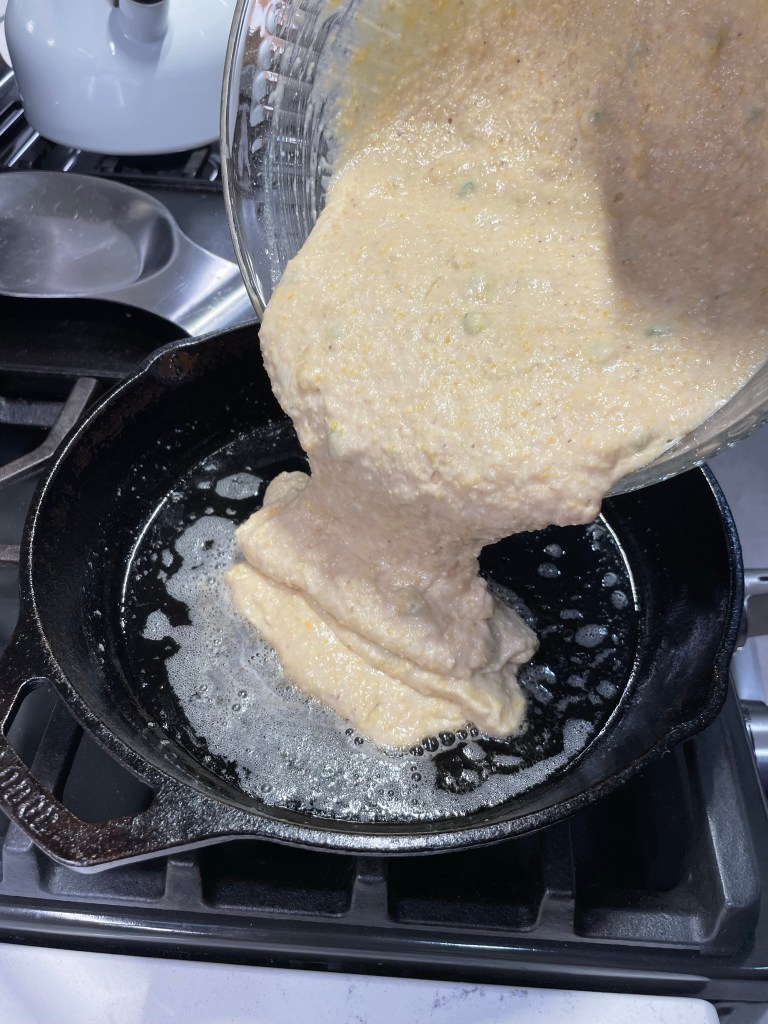
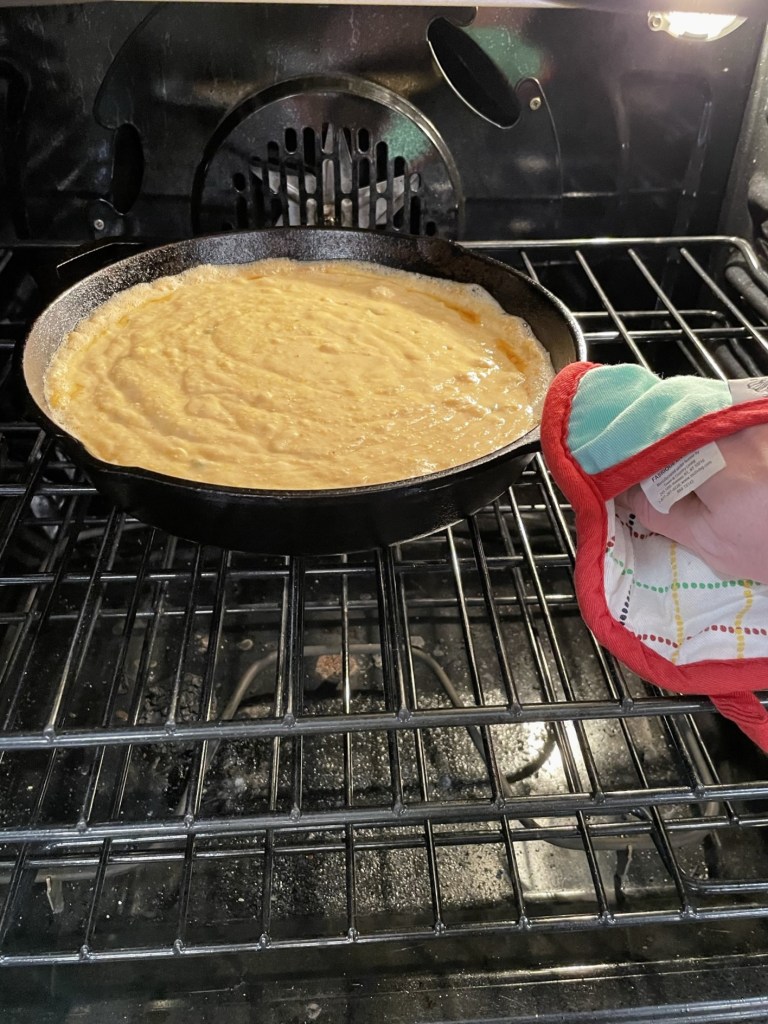
Pour the batter into the hot, buttered skillet and slide the pan into the oven to bake for about 20 minutes. Cool for a few minutes, then cut into wedges and enjoy!
I woke up this morning, fully aware of Autumn. I did not need the calendar to tell me that it has officially begun; the weather spells it out quite clearly— gentle rain from the mid-season tropical system moving up our coast a few hours away, cooler temperatures and a stillness that I haven’t witnessed since I’m not sure when. Even the cicadas, which North Carolina sees and hears every summer, have gone about their business.
This is my favorite time of year, and the gears in my mind are churning out visions of stews and soups and homemade breads and all-day roasts. I tolerate the blistering heat of these southern summers only for the joy of autumn, and it should come as no surprise that the foods are my favorite thing. This is the start of Sunday Supper season!
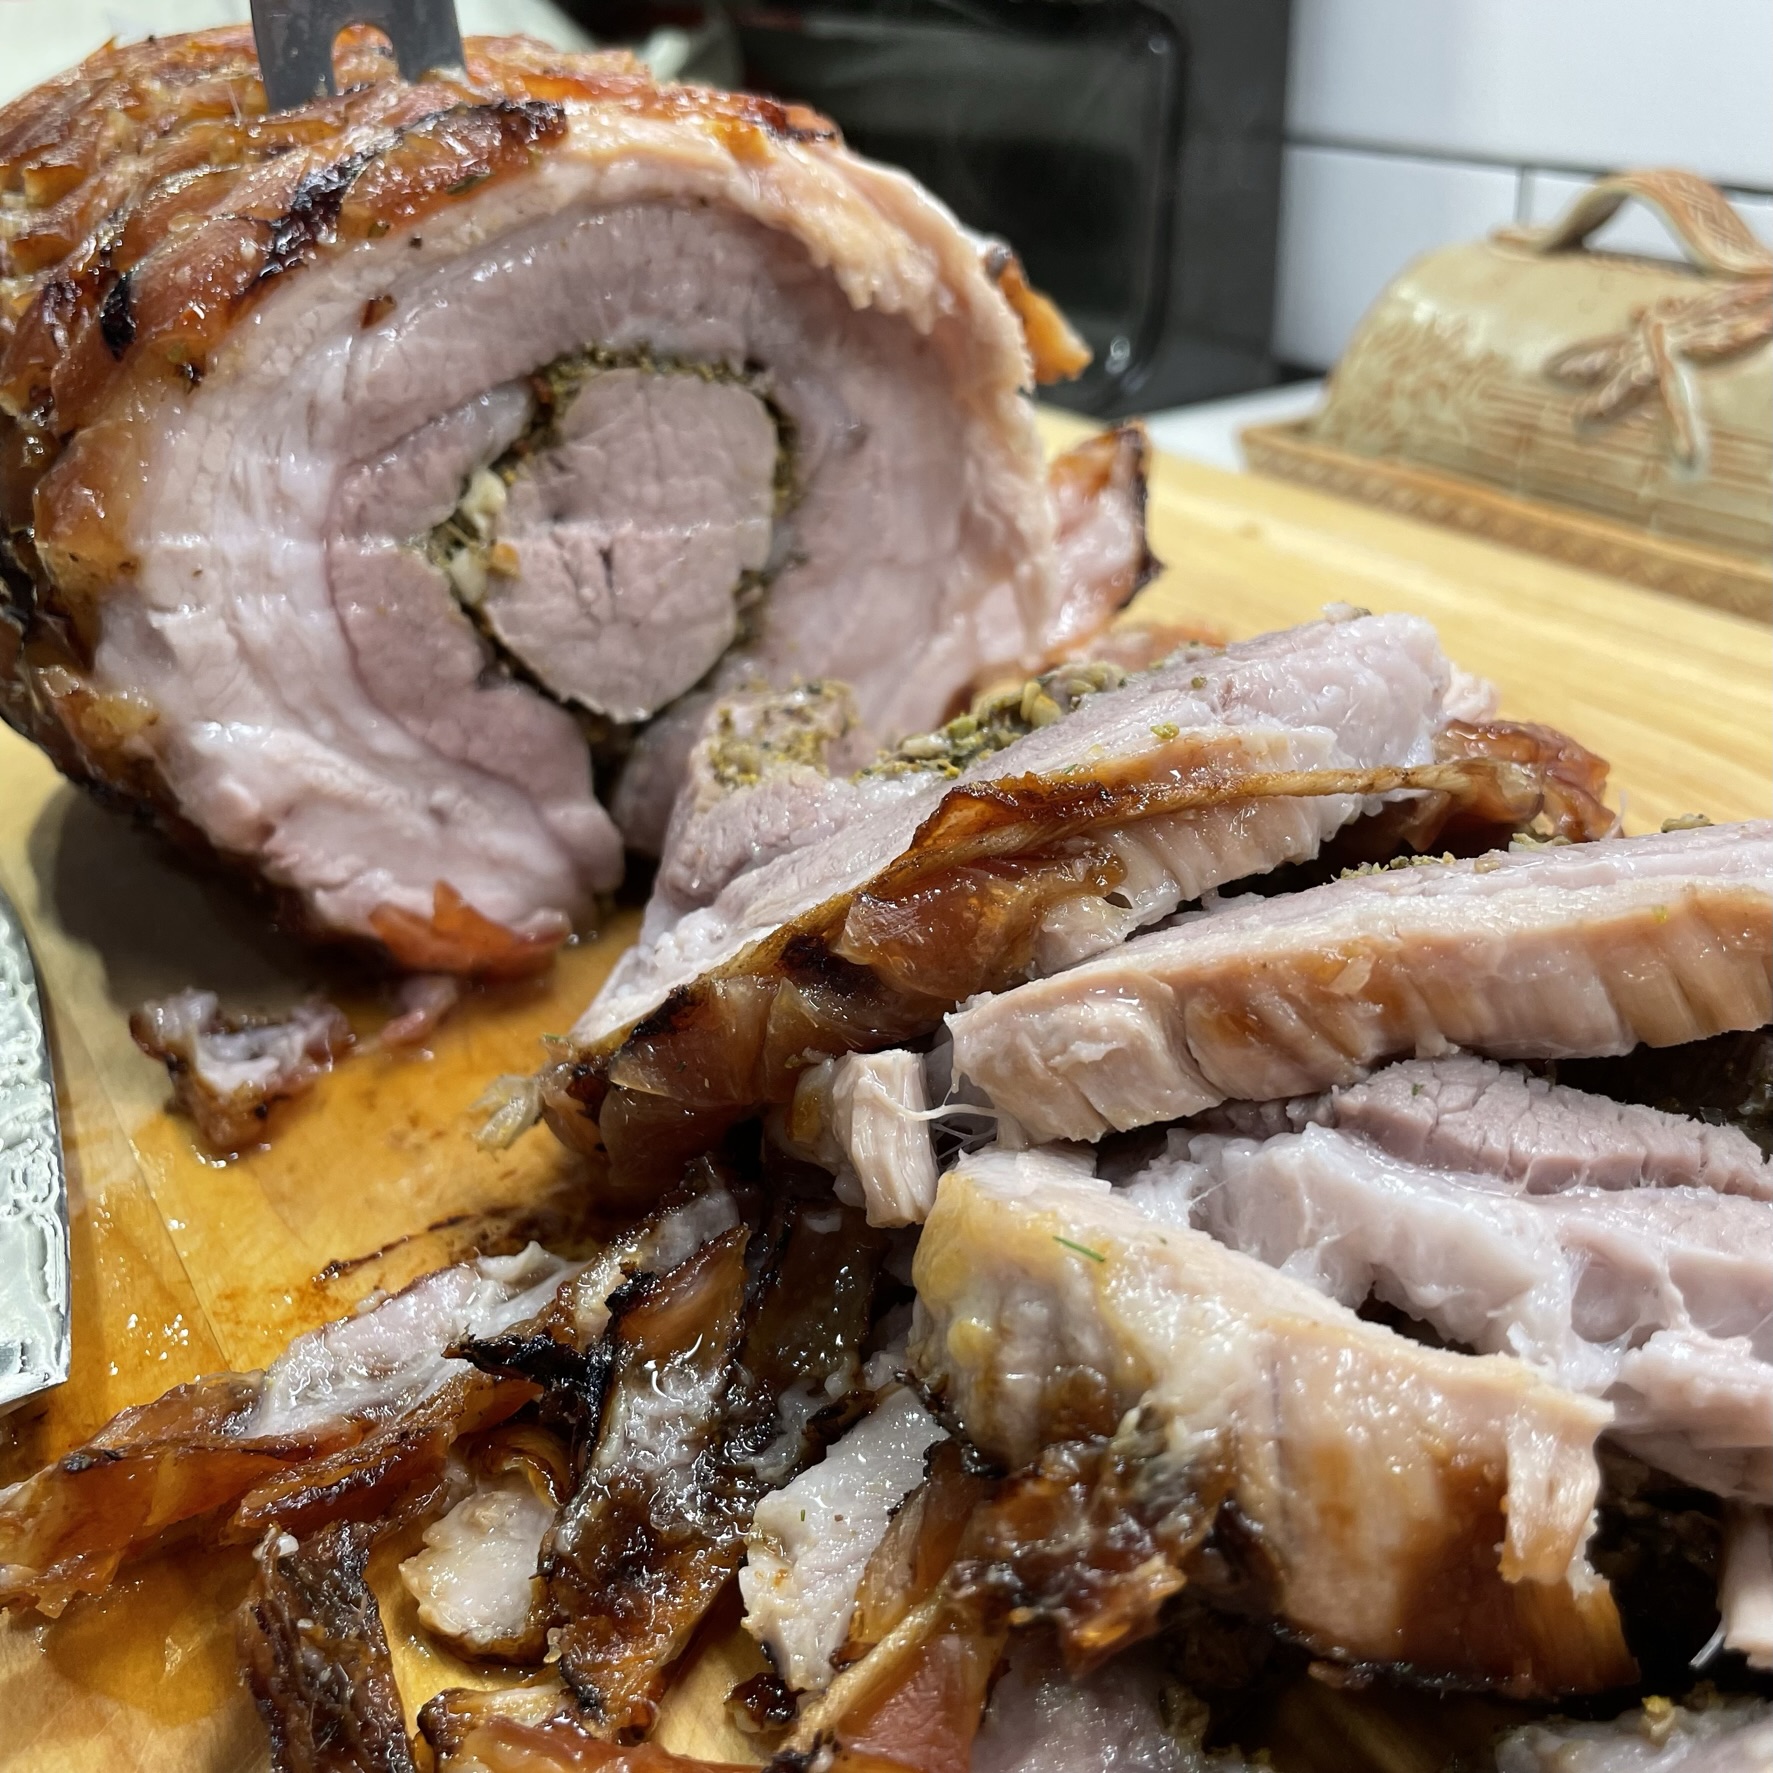
Porchetta— a recipe of central Italian origin— had been on my culinary bucket list since before I started this blog, and for the life of me, I don’t know why I imagined it to be complicated. As roasts go, it was probably one of the simplest I’ve ever made. Perhaps it is because I have looked it up so many times over the years that I already had a sense of how to make it. Or maybe it really is just easy. I’ll let you review my process and decide.
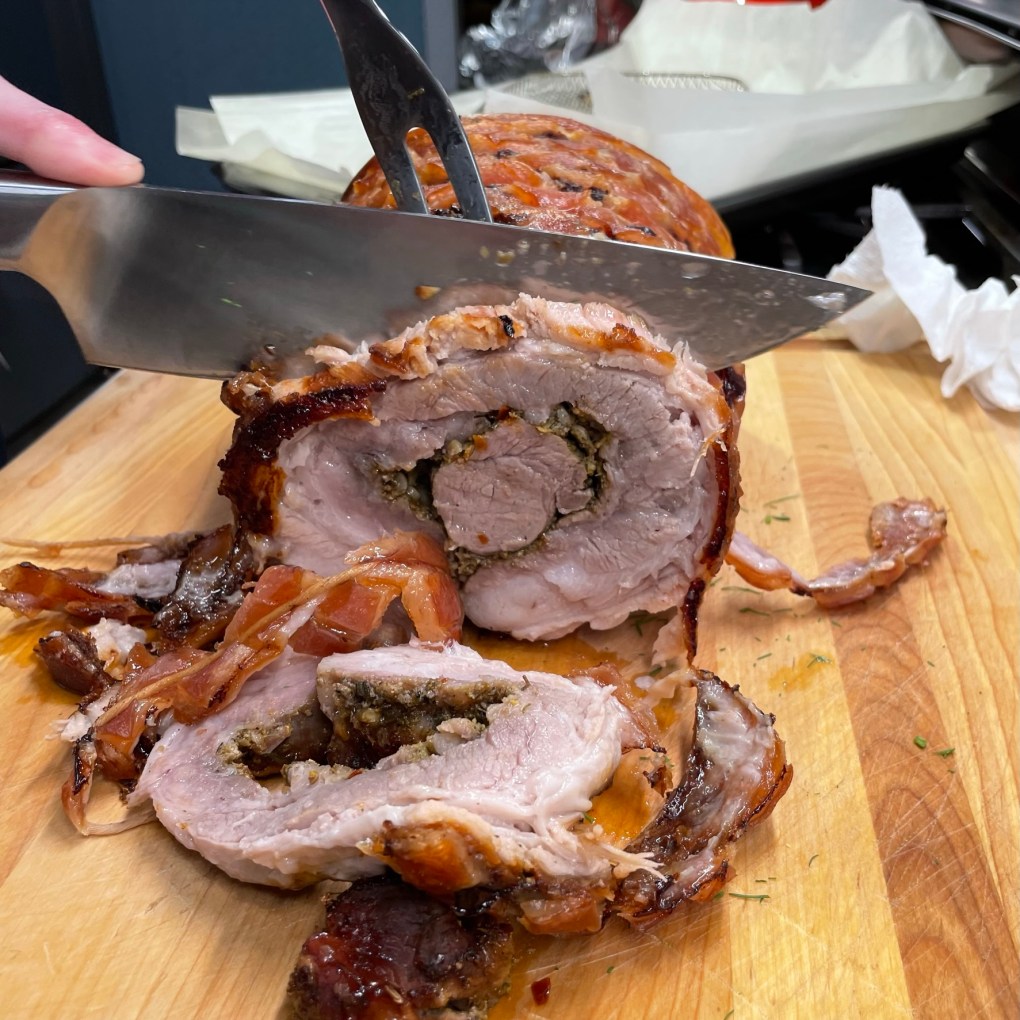
There are many, many recipes for porchetta on the internet. Opinions vary (of course) about what makes it truly authentic, and this argument seems to be regional. In some parts of Italy, it might be an entire suckling pig that is stuffed with herbs (or not) and roasted. In others, it would be only the pork belly, rolled upon itself with a filling of the pig’s entrails (yuck). Still others have you wrapping the belly around a pork loin or (as is the case with mine) tenderloin.
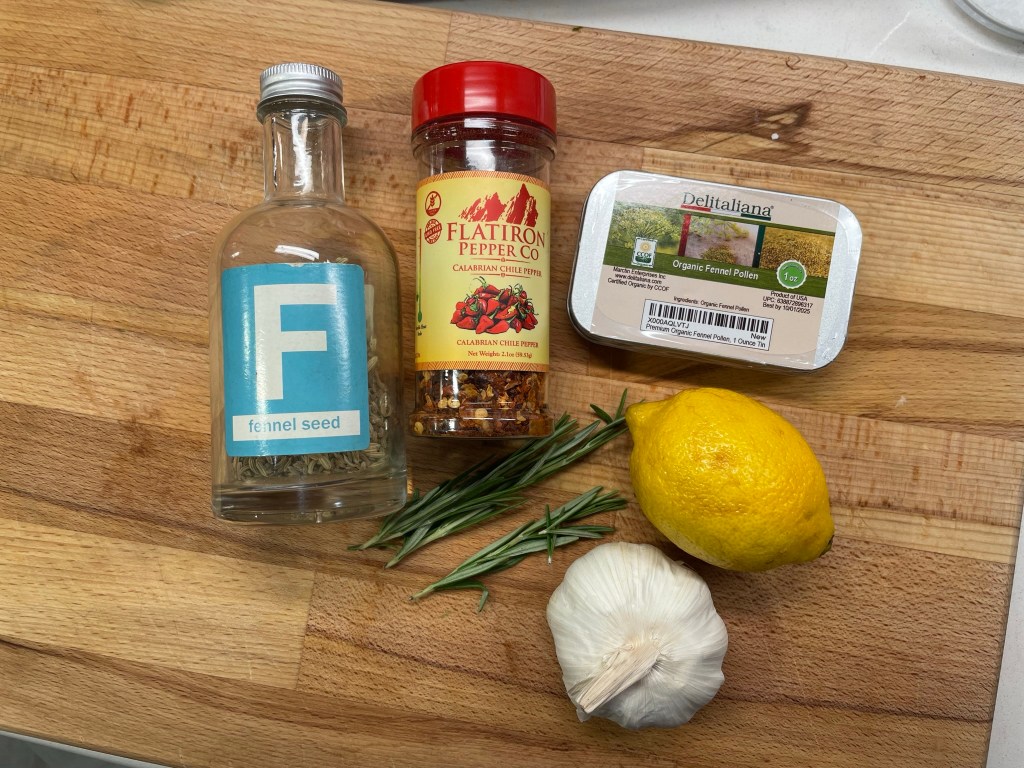
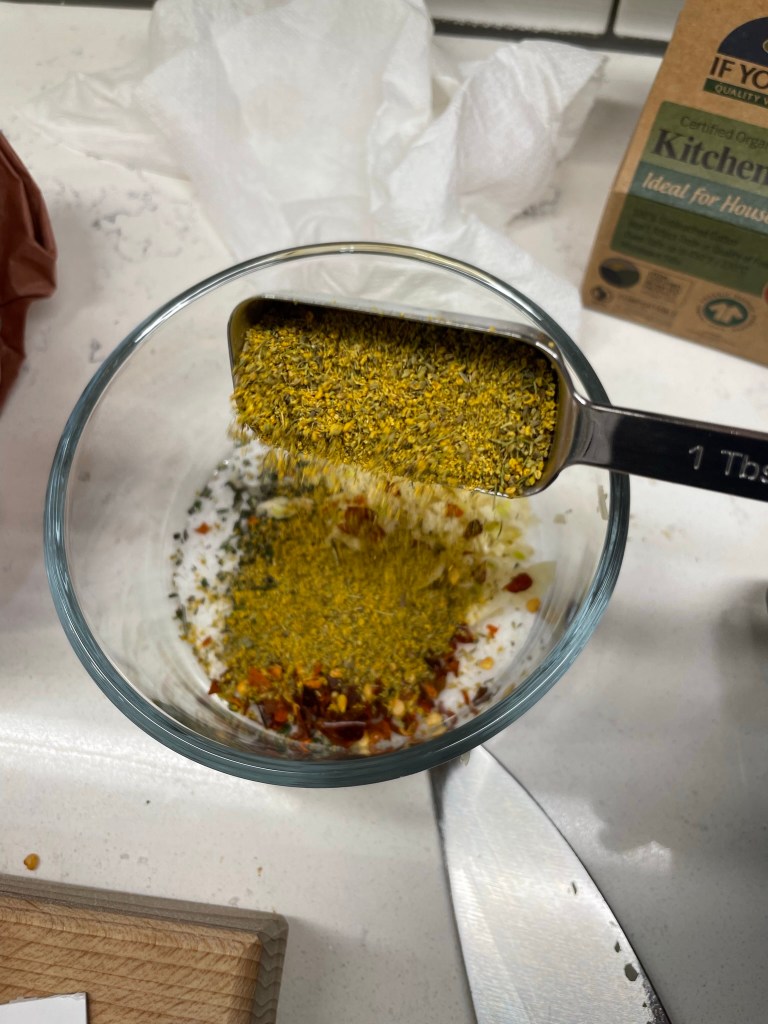
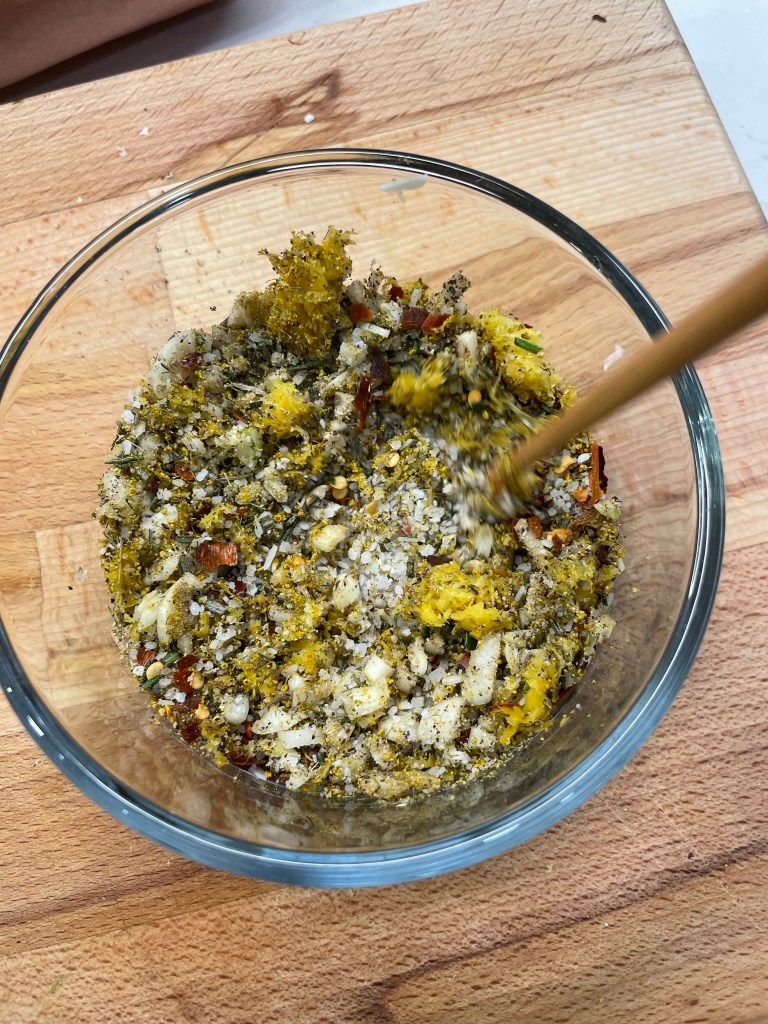
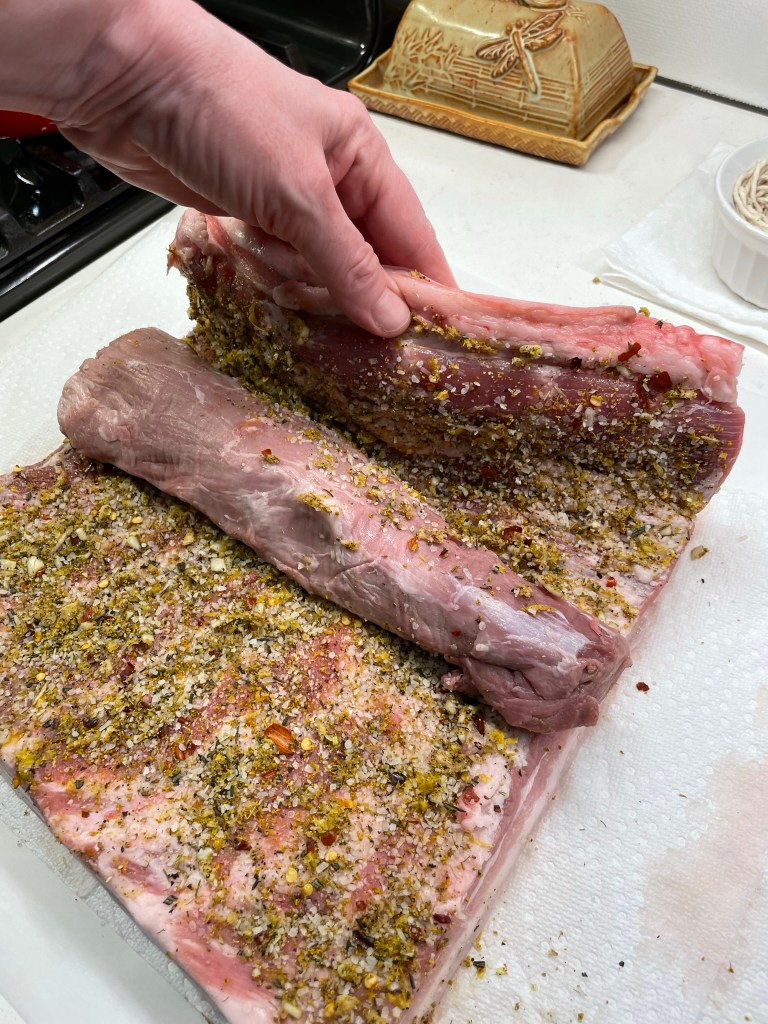
My kitchen is not located in any region of Italy, so I took a few liberties, based on what sounded like the most flavorful “authentic” option. My filling was very fragrant and herbal, with garlic, fennel and rosemary, plus a generous spoonful of lemon zest and a few shakes of dried Calabrian chile flakes. I want to make another batch of this just as aromatherapy when I’m having a bad day.
In my research, I learned that there is a difference between fennel seed and fennel pollen, the latter of which I had to purchase online because no stores around here carry it. Perhaps where you are, an Italian market could set you up with some. The fennel pollen is very delicate and fragrant and is distinctly brighter and lighter than fennel seed. The small tin, which is roughly half the size of an Altoid tin, set me back about $18, but I only used one-quarter of it.
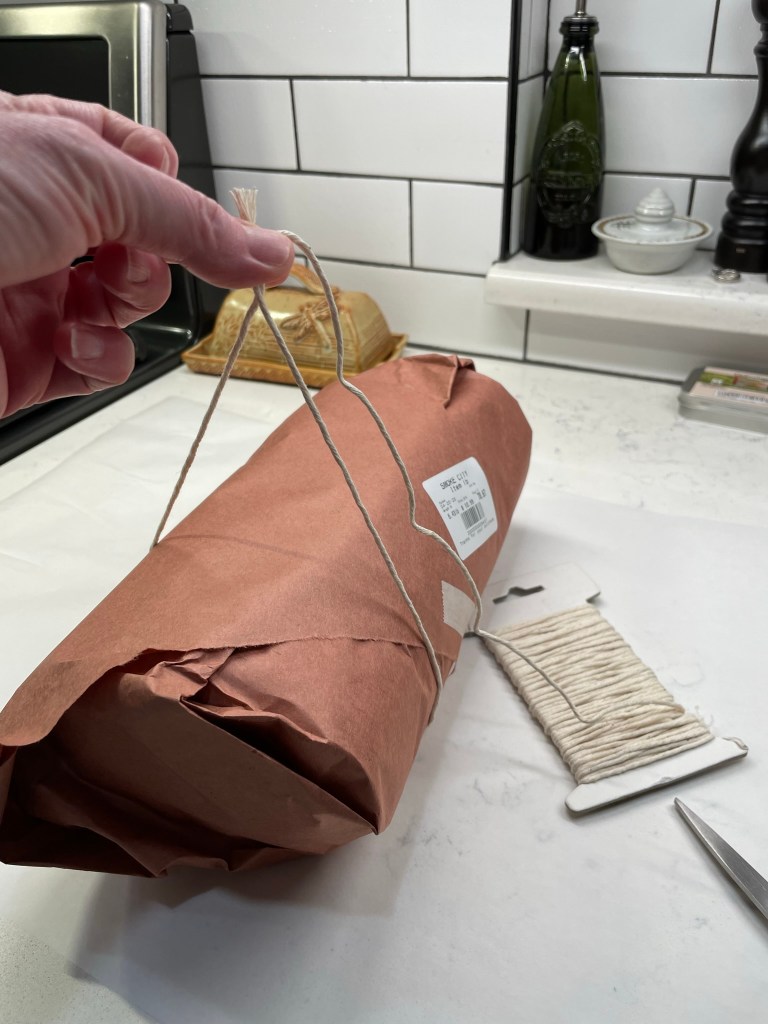
Putting the roast together was so easy. I began by measuring a piece of kitchen twine around the package of pork, and then I cut several pieces to that length and soaked them in cold water, for tying up my porchetta. My local butcher had cut the belly piece to match the length of the tenderloin, and even took time to show me the right steps for success, as the belly must be rolled in a certain direction for easy slicing and perfect tenderness.
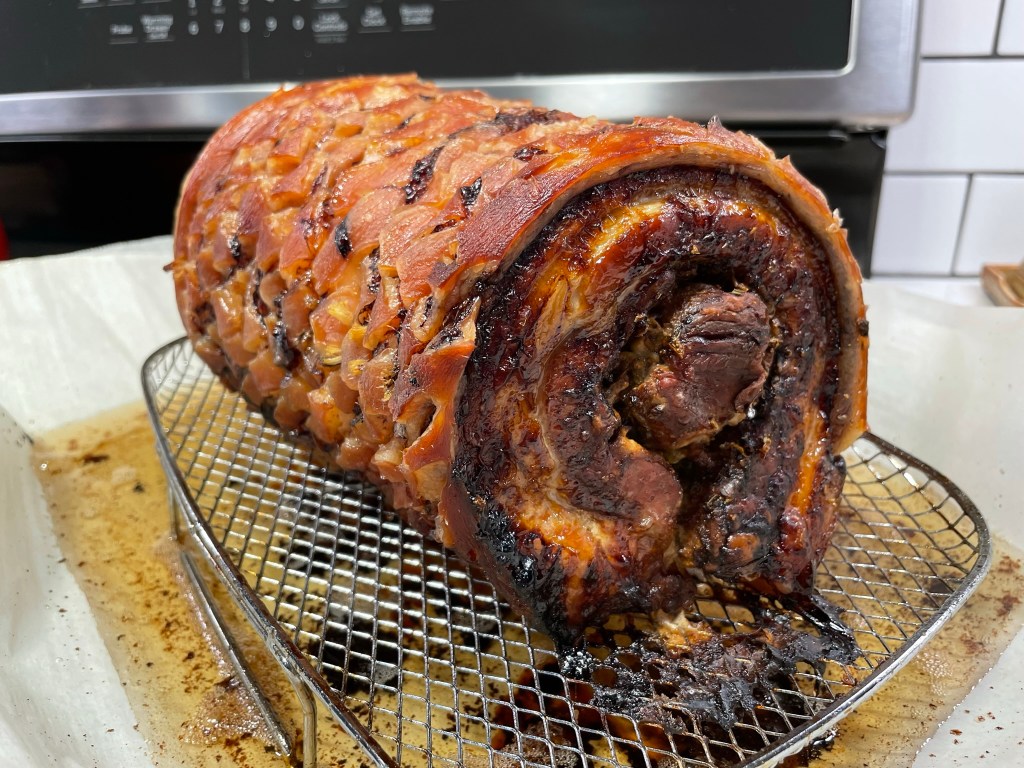
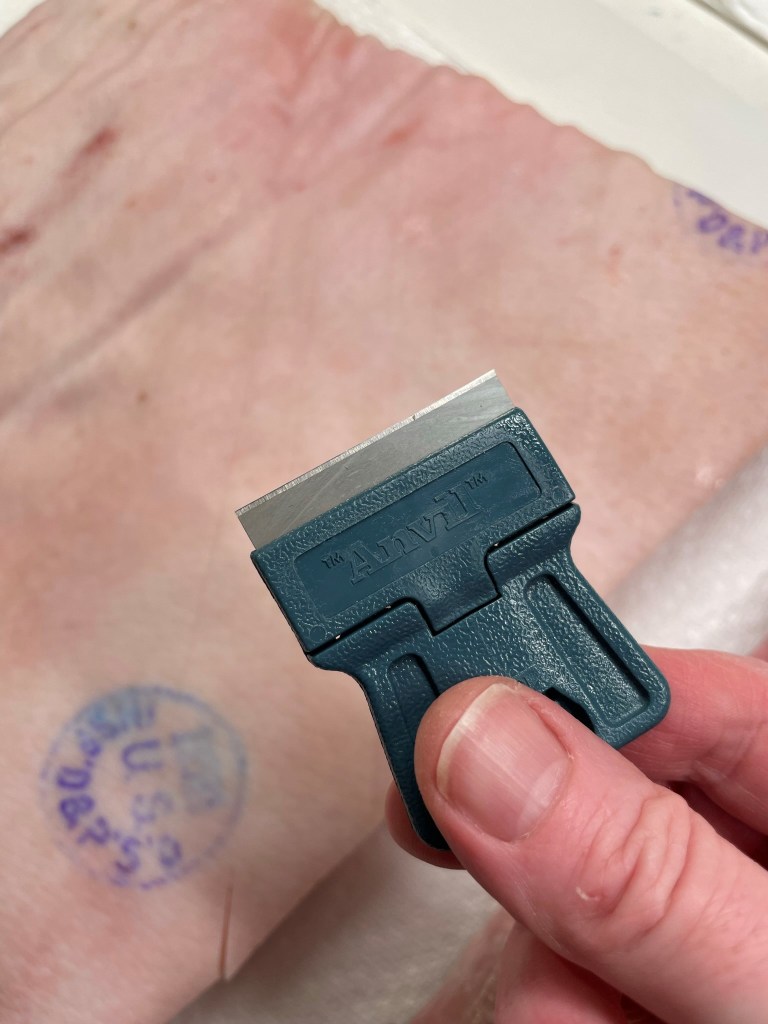
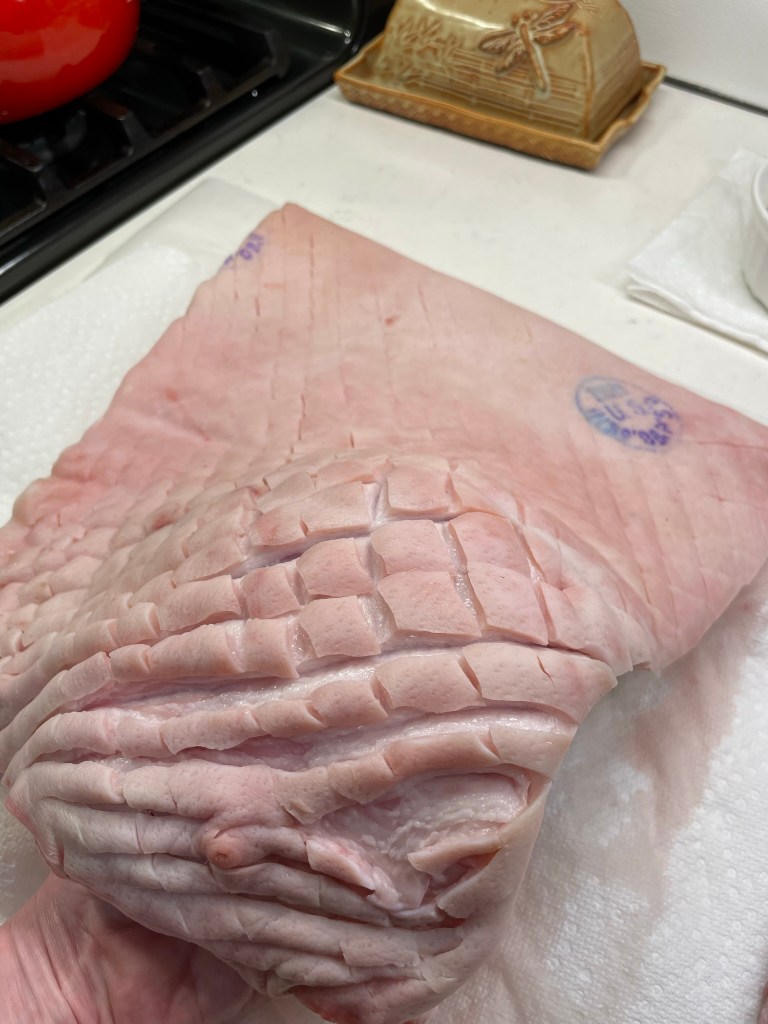
He had also echoed what I had seen in every recipe, which is that the roasted skin should be golden brown and “crackling” crisp. To achieve this, I scored the skin side of the belly in a crosshatch pattern, which would ease the rendering of the thick layer of fat. This process is simple to do, but you need to use something very sharp to cut through the heavy skin. I opted for a razor blade scraper— yep, the same kind of tool you’d use to scrape paint off a window pane. It may sound odd, but it was perfect because it was easy to control the cuts and nearly impossible to go too deep. Scoring the skin this way also made it more flexible for wrapping around the tenderloin.
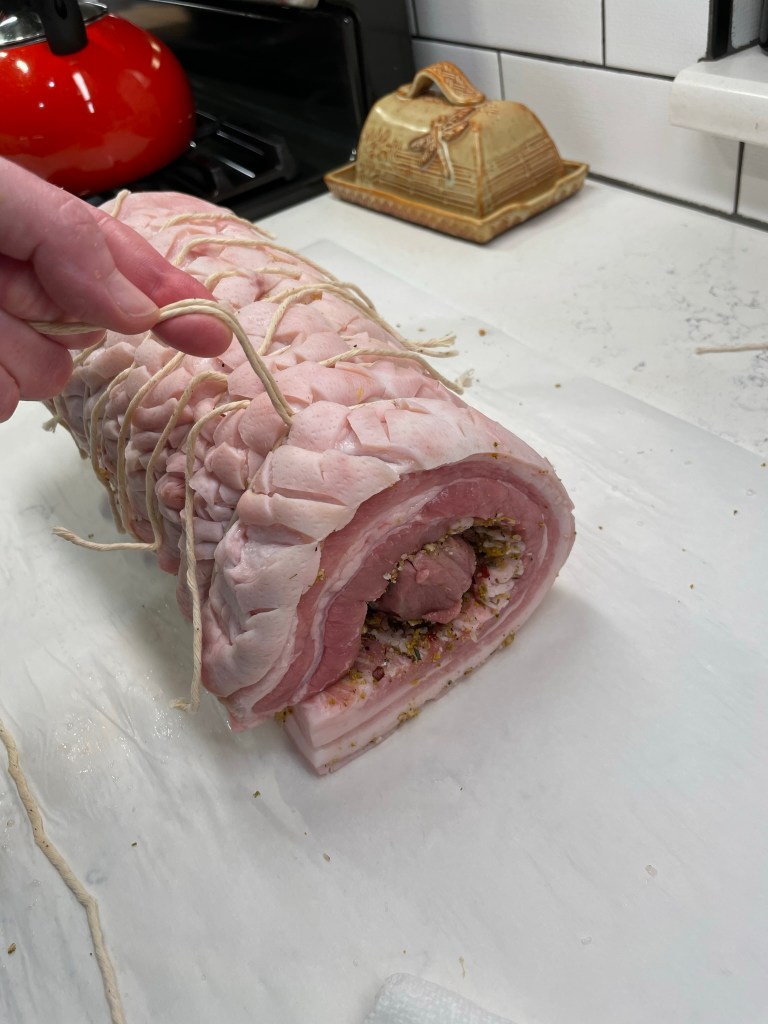
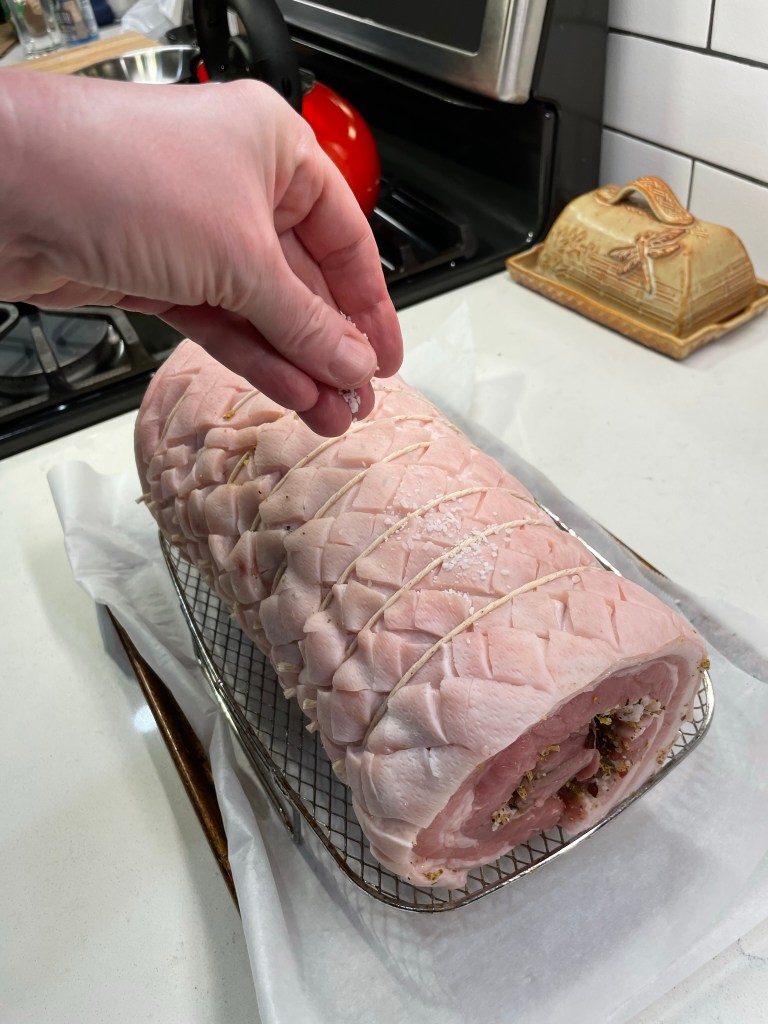
I spread that aromatic filling evenly over the inside of the pork belly, all the way to the edges, and rolled it up around the tenderloin and then laid it across my soaked twine pieces. I tied it up, sprinkled it all over with kosher salt and laid it on a rack to dry out overnight in the fridge. If it seems counterintuitive that drying out the meat before roasting leads to a juicier finish, believe me, I feel you. This was a huge mental hurdle for me when I first read about dry brining, but I have such incredible results that I will never look back.
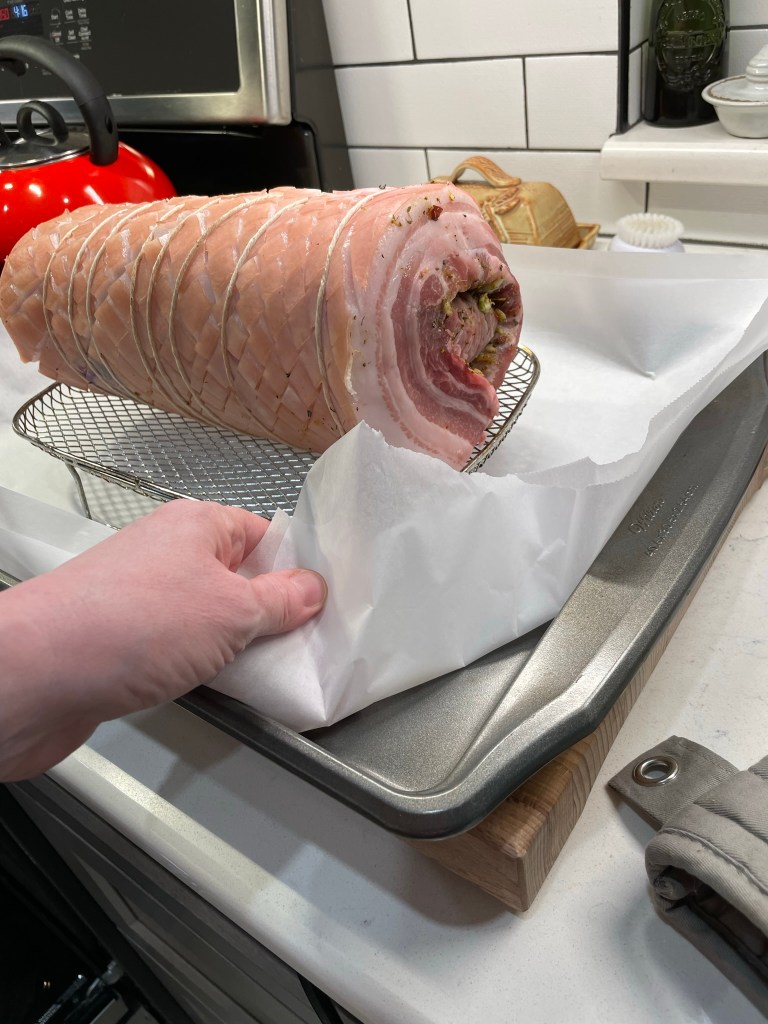
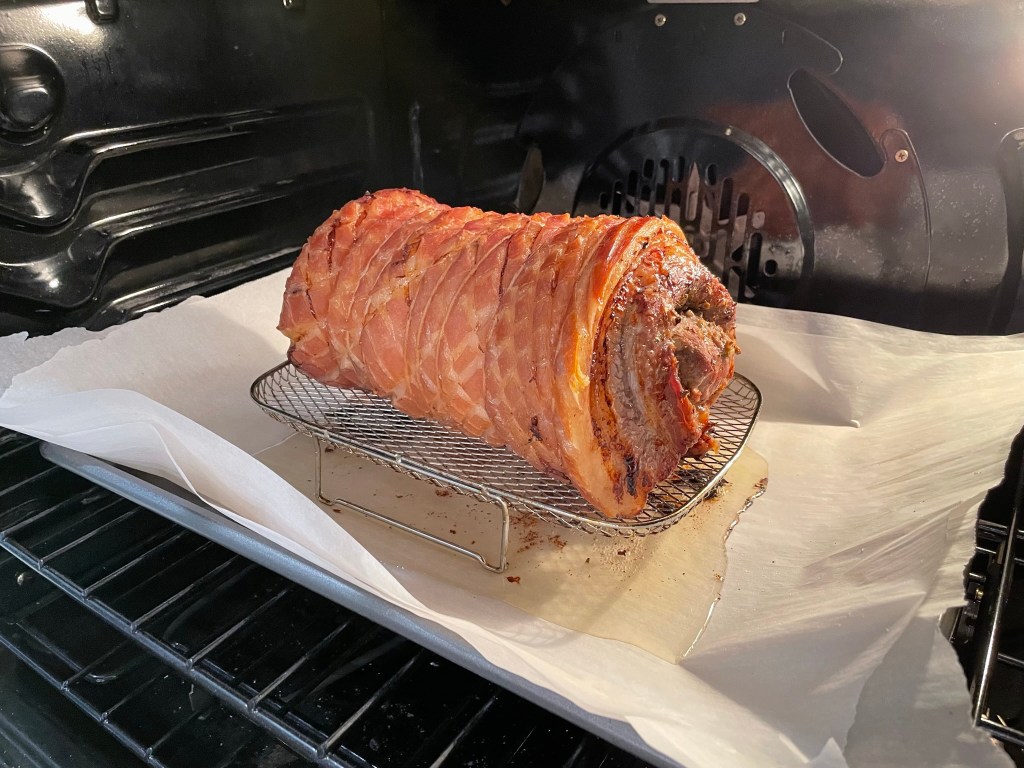
Eighteen hours later, when I was ready to roast my porchetta, I pulled it from the fridge and gave it some time to rest at room temperature while I preheated the oven to 350° F. There was nothing left but to roast it!
Sometimes the simplest dishes intimidate me, and I attribute this to unfamiliarity. I don’t have an ounce of Italian heritage, so nobody in my family has ever made porchetta. The only way to overcome insecurity in the kitchen is to muster up the courage to try that new thing. I’m thrilled to move porchetta into the done column on my bucket list!
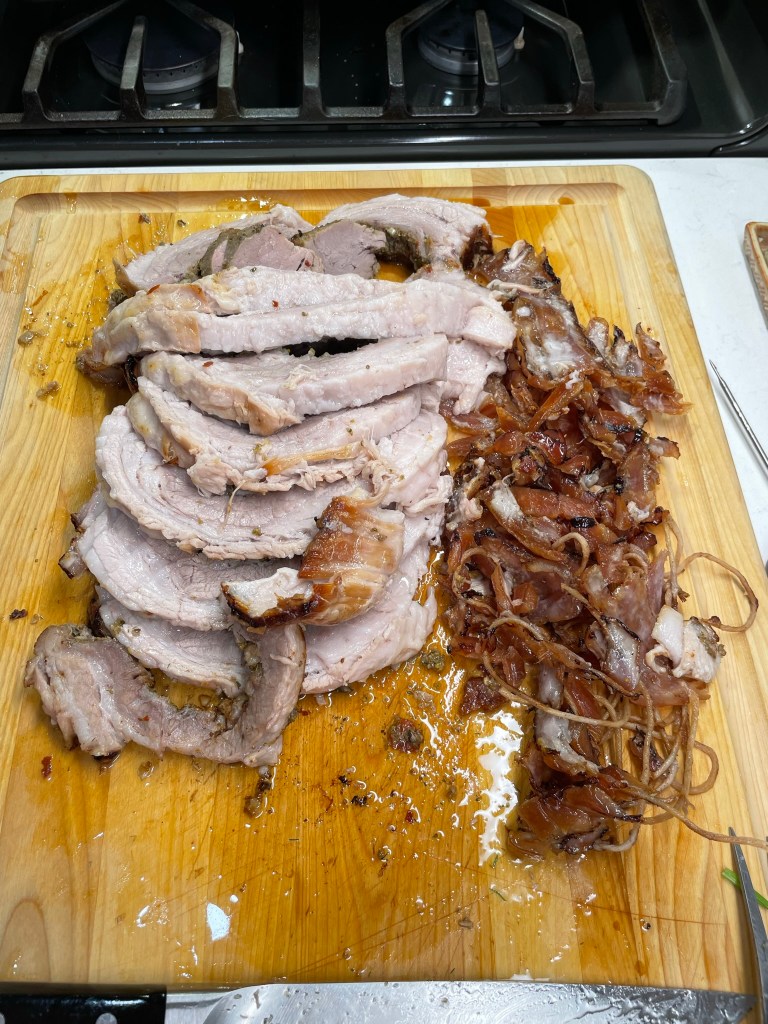
It may surprise you to know that porchetta is likely a one-and-done for me, but not for any bad reason. The roast was off-the-chart delicious, easy to make, and it produced fantastic leftovers.
My hesitation for a repeat begins with the cost. Sure, a grocery store pork belly and tenderloin would be cheaper than the $70 I spent at my local butcher. But we don’t buy a lot of grocery store meat because we object to most conventional production methods. Our local butcher sources its meats from area farmers who follow sustainability practices such as regenerative farming. This is better for the environment and the animals, and also a vast improvement in terms of flavor.
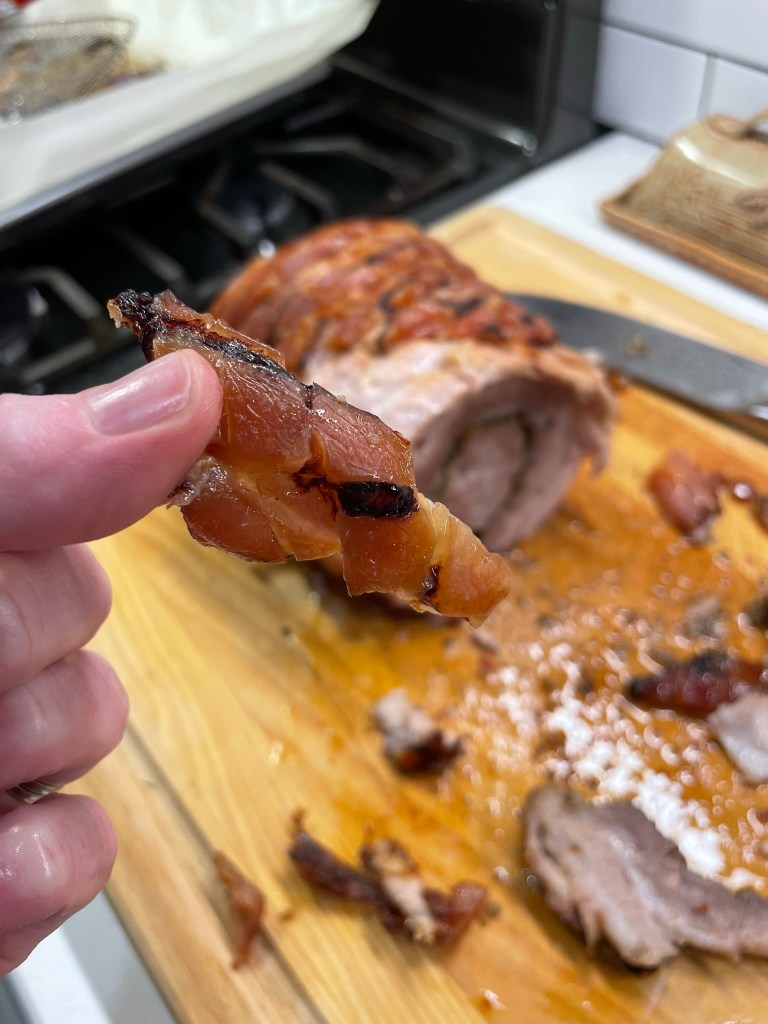
Porchetta is not the kind of thing you can make in small quantity for a party of two, though, which is how we usually cook and eat. I might consider making it again for a special occasion meal with guests, but many of our friends steer clear of fatty meat, and that is another point of contention for us. A single slice of porchetta includes the equivalent of three to four pieces of bacon, and that’s a lot of fat to consume in one meal, no matter how delicious (and boy, oh boy, it is). With more practice, I could probably figure out how to tie up and roast the porchetta for more even fat rendering, so that we didn’t end up with a lot of bulky fat that was not suitable to eat.
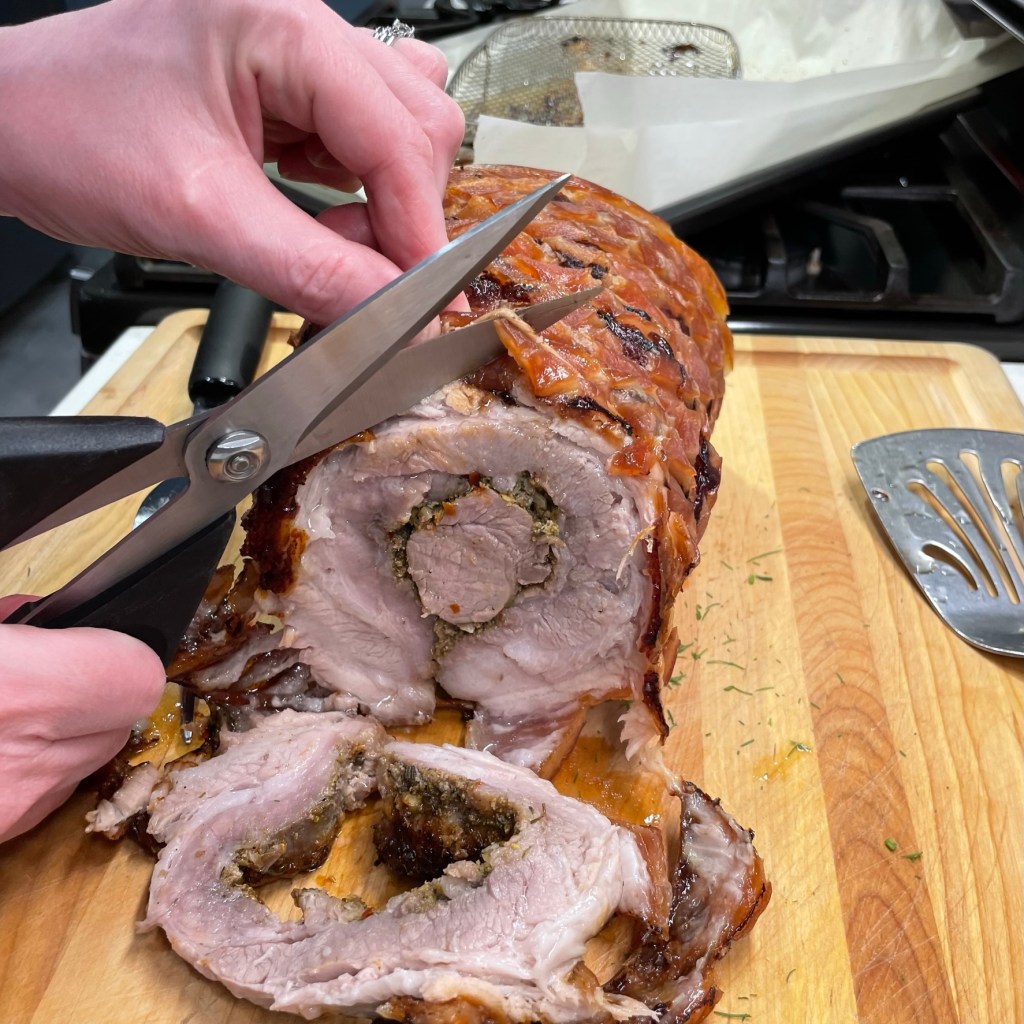
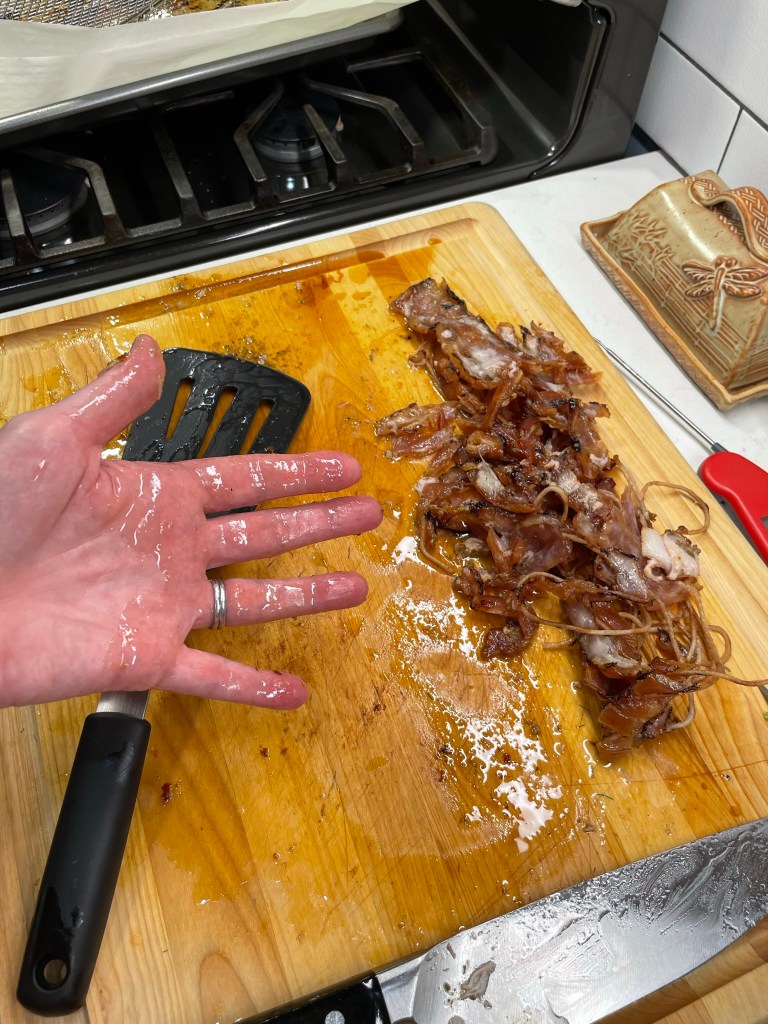
Finally, there’s the skin, which— for all the ruckus and raving about the crackling crispness— did not impress me much. Our porchetta did get very crackly, but that “perfect” skin simply is not edible. It was like biting into a Lego. And the hardness of the crackled skin also made slicing the porchetta quite challenging. If I ever do make this again, I’d probably score the skin in straight squares rather than on a diagonal, so that I can use the score lines as a guide for slicing. But it’s still kind of a waste because you can’t eat that beautiful skin.
Here’s what I’m thinking: the best things about this porchetta were its tenderness and the incredible aroma and flavor of the filling. So why couldn’t I apply the fennel pollen mixture to some other cut of marbled pork? Maybe a boneless, butterflied shoulder, which I could roll up with the herb filling and slow roast (or smoke— wouldn’t that be something)? I’m even imagining that incorporating the fennel pollen filling ingredients into a homemade sausage isn’t a terrible idea, so don’t be surprised if that shows up here in the near future.
If you have been jonesing to try porchetta yourself, it’s definitely worth the effort, and maybe you’ll find something useful for your own experience in my click-to-print recipe below. Please slip a note in the comments if you have tips that might make it worth a second run for me, and do let me know what autumn meal you’re most looking forward to!
There's so much incredible flavor in this Italian-born pork roast, and the leftovers are even tastier!
Ingredients
fresh pork tenderloin
fresh pork belly, cut to length of tenderloin
kosher salt, weighing 1.5% of total meat weight
2 Tbsp. fresh minced garlic (this was about 5 cloves)
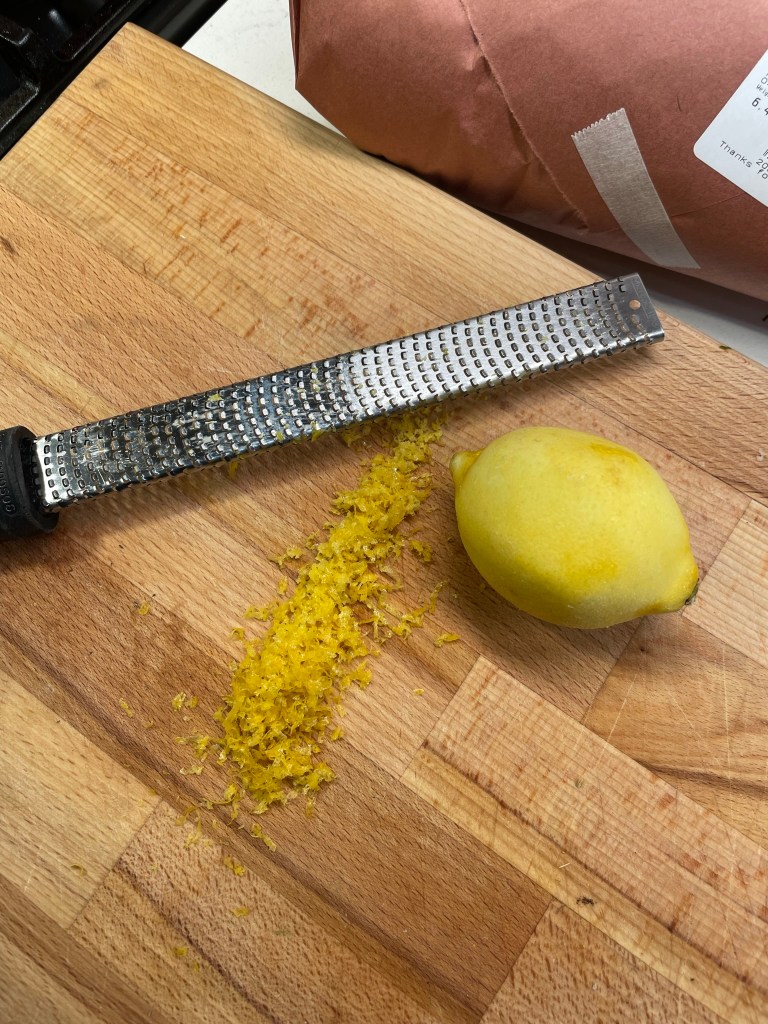
1 Tbsp. fresh lemon zest (organic is best)
1 Tbsp. fennel pollen (tricky to find; check Italian market or online)
1 tsp. red pepper flakes (I love the Calabrian chiles from Flatiron Pepper Co.)
1 tsp. fresh rosemary, chopped (I would have used more of this if my hubby was a fan)
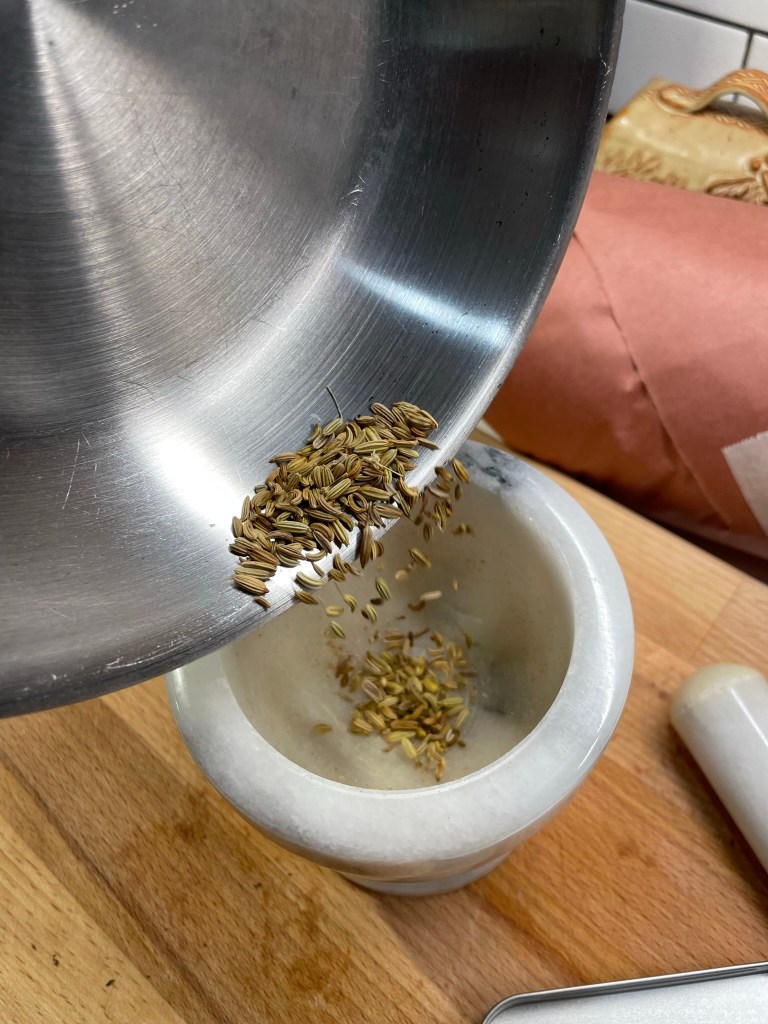
1 tsp. fennel seed, toasted until fragrant and then crushed to nearly a powder
About 30 twists of freshly ground black peppercorn
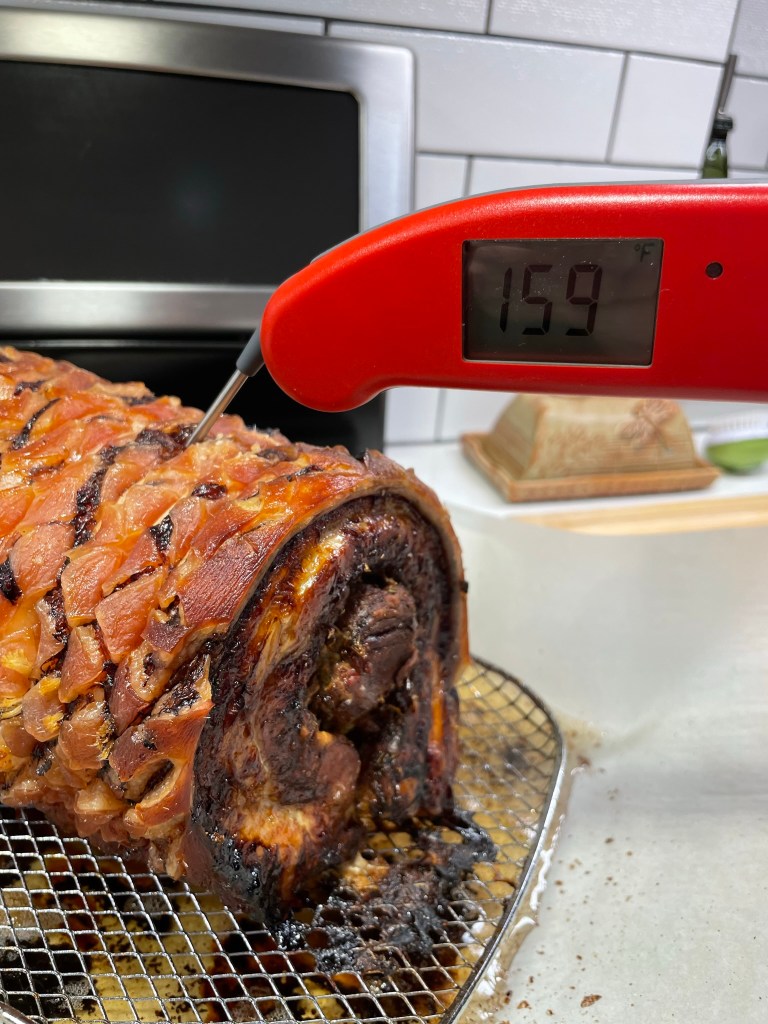
Notes: You will need a few things for success with this recipe. First, kitchen twine for tying up the roast. Plan for at least 5 feet, and soak it in cold water while you prep the roast. Also, a roasting rack to keep the porchetta above the pan during overnight fridge rest and roasting. Finally, a good meat thermometer to help you track the internal temperature.
Directions
Score skin side of the pork belly with very sharp knife or razor blade. This will help render the fat better during cooking, plus it will deliver a crackling skin. Scoring also makes the belly a bit more flexible for easier wrapping around the tenderloin.
Cut several pieces of unbleached butcher’s twine, long enough to wrap and tie around rolled up belly. I used the packaged meat to help me determine how long I needed the pieces to be. Soak the twine lengths in cold water until ready to wrap.
Mix the herb filling, including salt that equals 1.5% of the meat weight.
Line a sheet pan with parchment or foil and place a small roasting rack on it to hold the porchetta roast.
Spread the herbal filling over the meat side of the pork belly, all the way to the edges. Place the tenderloin on the belly, perpendicular to the lines on the cut sides of the belly. The sides of the belly resemble the lines of bacon.
Roll up the roast, but not so tightly that you lose the filling. Check the open ends; the tenderloin should look as if surrounded by a ring of bacon.
Place the rolled roast across several soaked pieces of twine and tie it up, securing each twine with a knot. Sprinkle the porchetta all over with about 1 teaspoon kosher salt and place the sheet pan (uncovered) in the refrigerator overnight, up to 24 hours.
Remove roast from the fridge and bring to room temperature while preheating oven to 350° F. Oven rack should be slightly lower than center.
Roast uncovered for about 4 hours, until skin is crackled all over and internal temperature is 160° F. Cover loosely with foil and rest for about 15 minutes before slicing.
Autumn begins this Saturday. Finally. What a summer it has been, with record-shattering heat waves and treacherous weather conditions reported from every corner of the globe. I think we all need the break, and as much as I am usually ready for fall, this year I feel almost desperate for it.
Leaves are falling all around time I was on my way Thanks to you, I’m much obliged such a pleasant stay But now it’s time for me to go the autumn moon lights my way For now I smell the rain and with it pain and it’s headed my way
“Ramble On” ~ Robert Plant & Jimmy Page
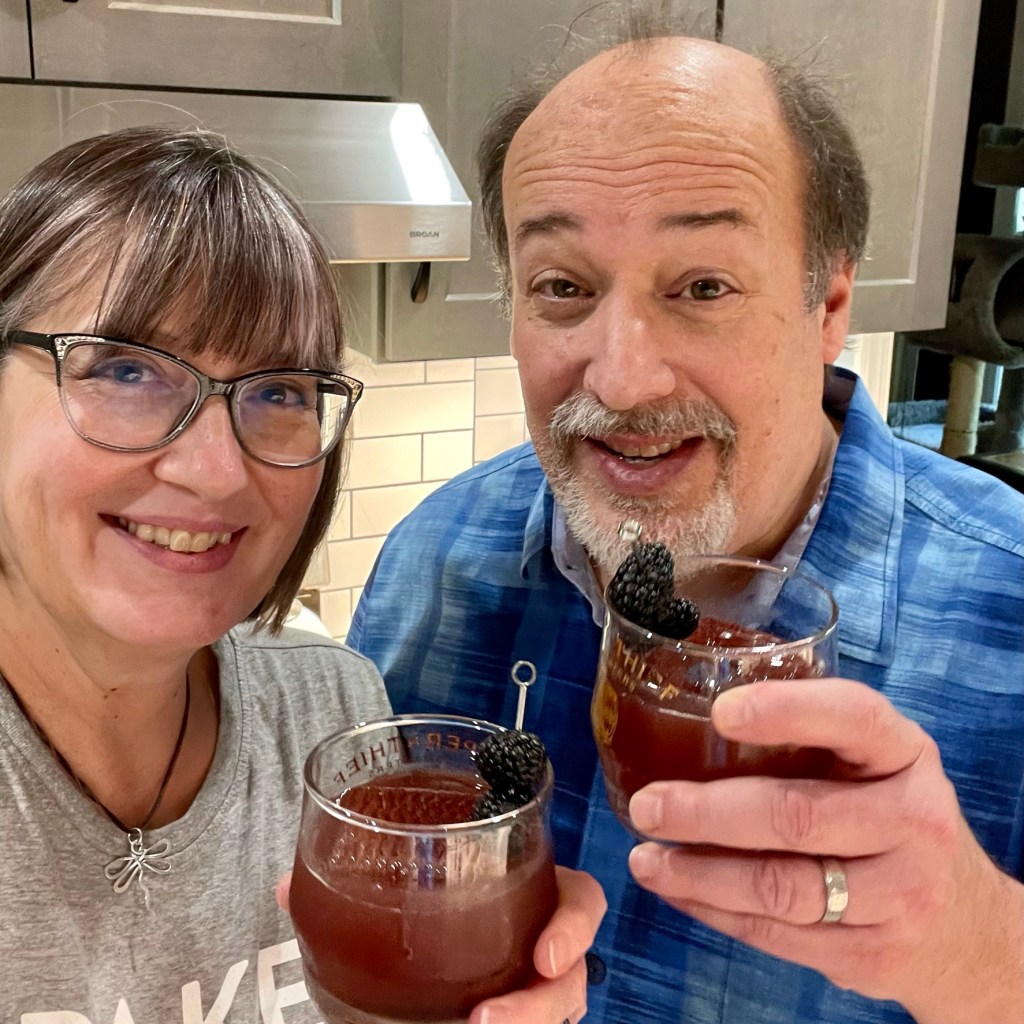
With the autumn moon just ahead, and fresh, late-summer blackberries singing their swan song, I figured it was finally time I shared my home bar version of this refreshing, not-too-sweet bourbon cocktail that I enjoyed earlier this summer during my visit to Vermont.
I had the pleasure of dining with my blog pal, Dorothy, and her husband at a quaint, farm-to-table restaurant called Starry Night Cafe on the last night of my visit there, and it wasn’t only the food that was amazing. The drink menu also was very impressive, and one cocktail in particular caught my attention— they called it Bramble On. It was fresh, local blackberries with bourbon, lime, ginger liqueur and a berry-mint garnish. It was fabulously refreshing and I knew at first sip that I would want it again in the fall.
It doesn’t hurt at all that the drink’s name was a play on the title of an amazing Led Zeppelin tune, “Ramble On.” I’ve been a Led Zeppelin fan for as long as I can remember, and this song, which was released from the group’s second album when I was but 4 years old, is one of my all-time favorites. Not only does it reference a place and character from one of my favorite stories, TheLord of the Rings (listen for it about two-thirds through), but it features exquisitely emotional guitar solos by Jimmy Page and, of course, there’s Robert Plant’s distinctive voice. I just love everything about it it.
“Ramble On” tells a bittersweet tale through the eyes of a restless lover who has enjoyed the company of a woman for a season, but must keep moving to find the queen of all his dreams. It’s how I feel about summer— I enjoyed it for what it was— the thrills and trials and adventures— but I’m really, really ready for autumn. I need autumn and I need it now.
Cheers, summer. Now, go on, would ya?
This cocktail feels like a perfect transition from summer into fall. A traditional “bramble” would involve muddling blackberries with gin, but this version with bourbon tickles my fancy more. It’s sweeter, cozier and lingers on the palate longer than the gin version.
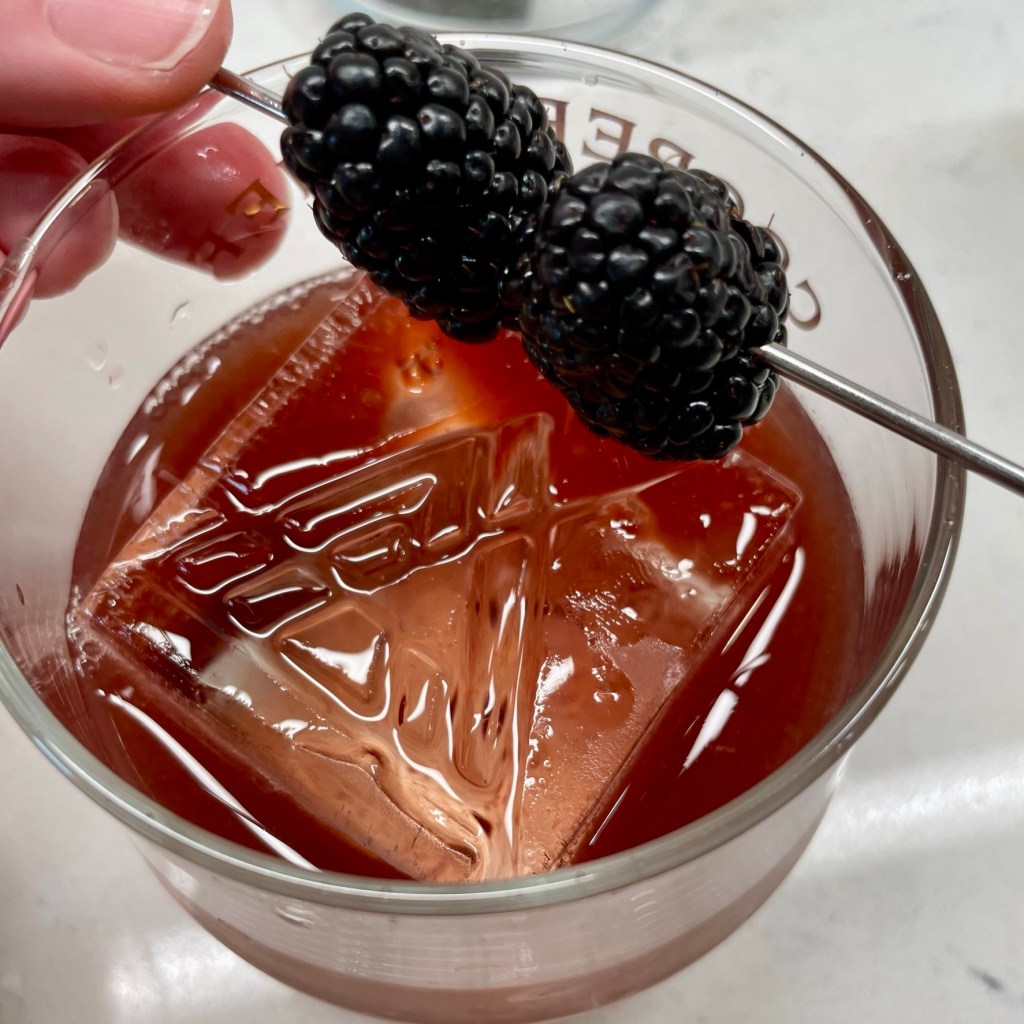
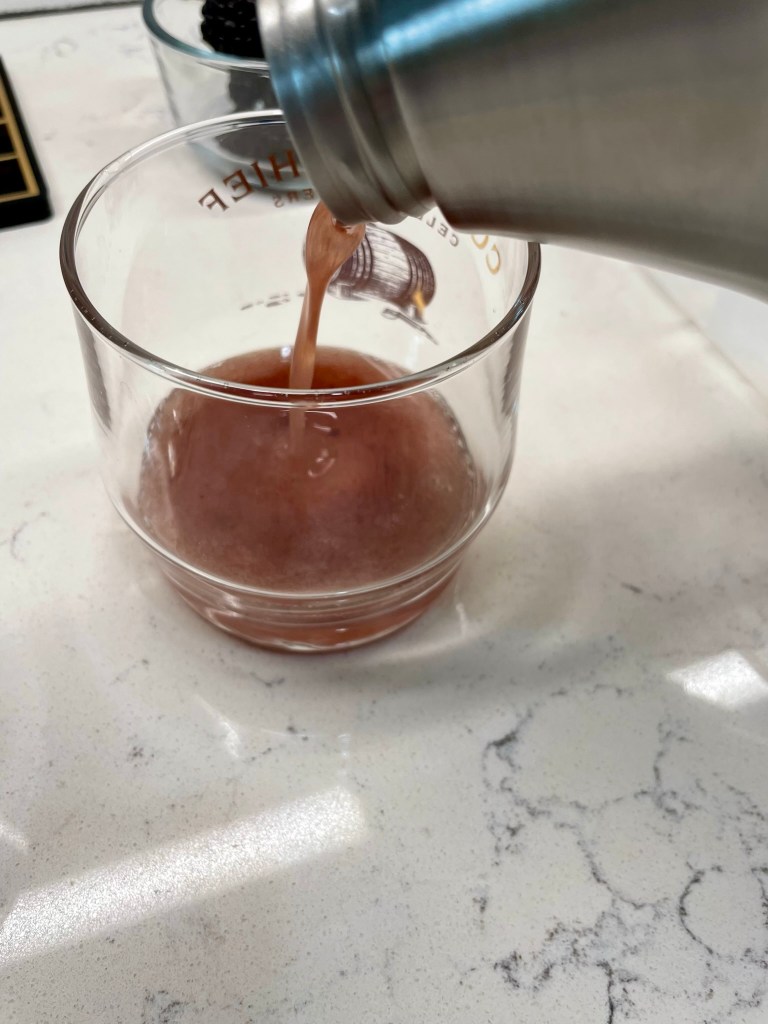
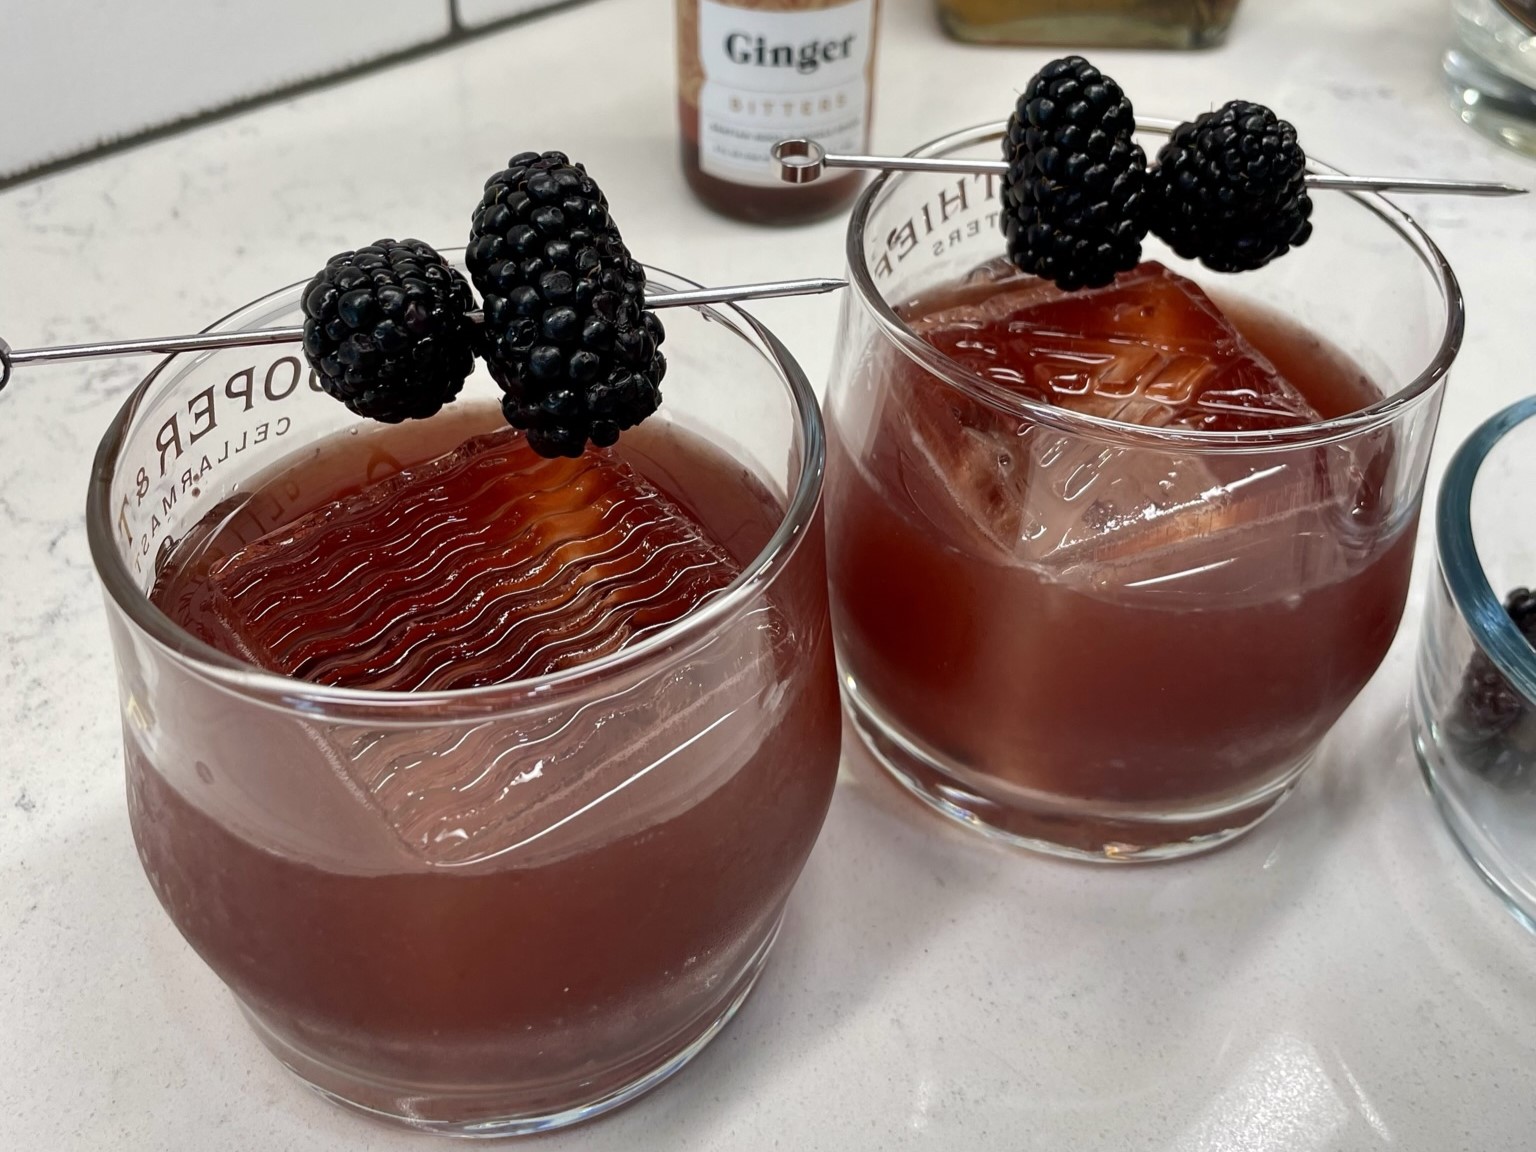
I’ve taken a few liberties with the ingredients in my version of this cocktail, compared to the one I enjoyed in Vermont. But the end result is similar, with blackberries front and center. Given that fresh local blackberries have already bid adieu in many growing zones, I’ve swapped in blackberry preserves, which also provide the sweetness that the ginger liqueur brought to the Starry Night drink. Ginger bitters provide the right spicy zing to complement the berry sweetness, and a quick squeeze of lemon balances out the drink and keeps it fresh.
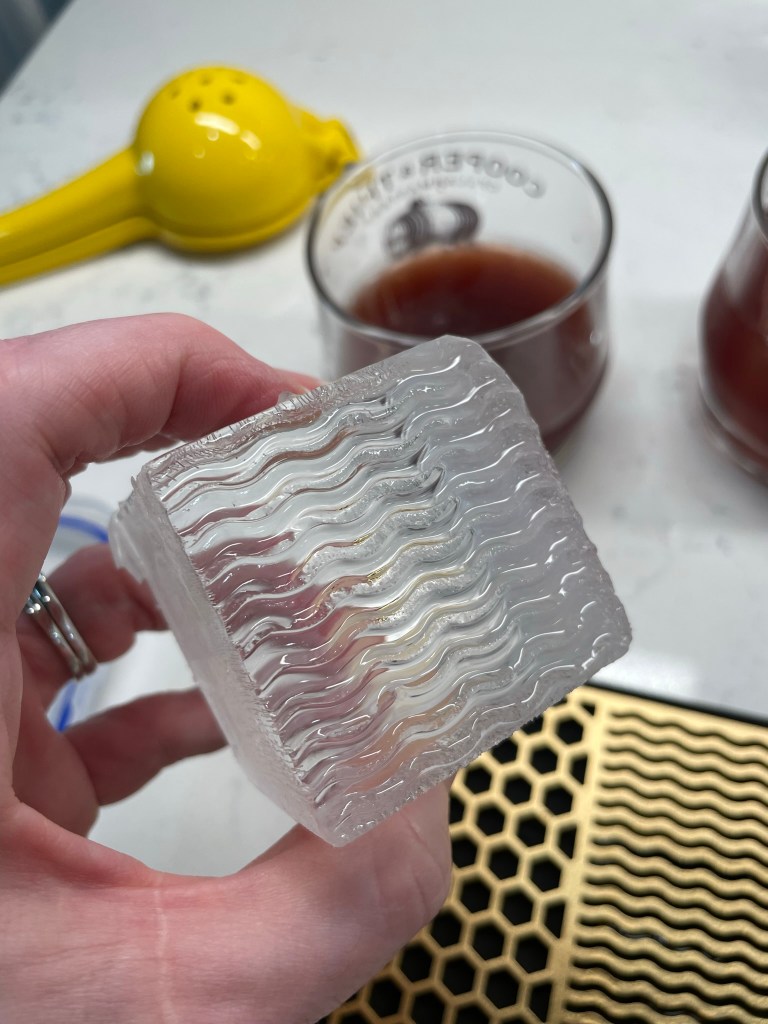
Shake with ice and then strain into a glass with new ice. If you prefer, double strain through a conical mesh strainer.I’ve been having a lot of fun with my new ice design mold. It takes only seconds to imprint a design on my clear ice cubes!
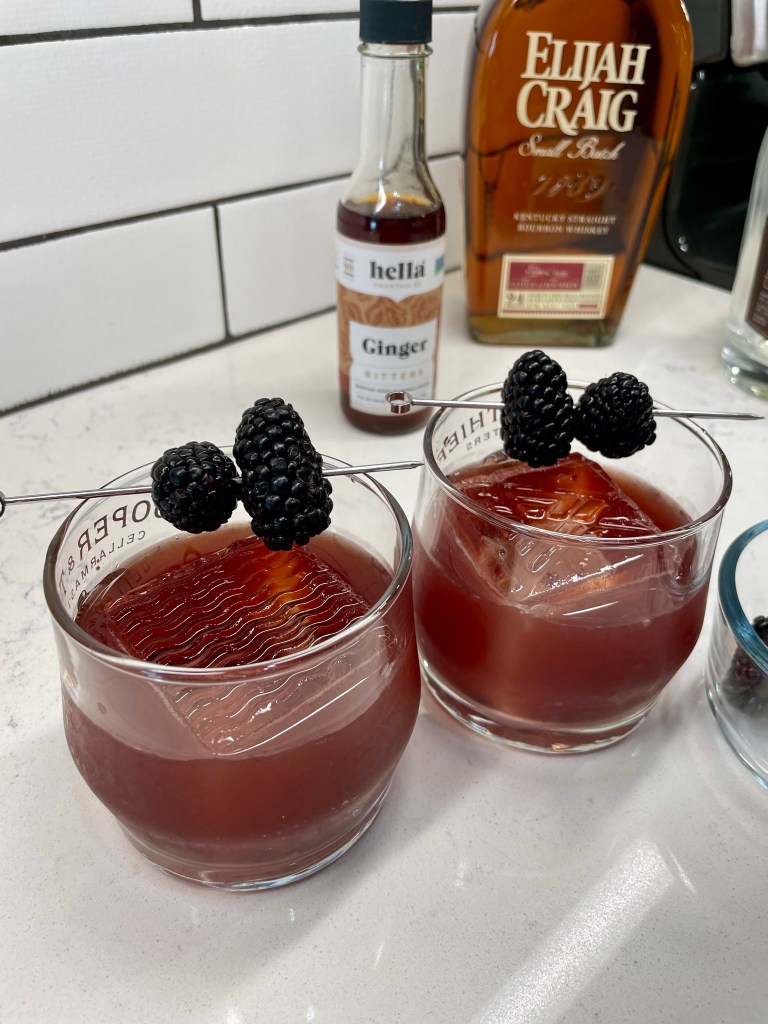
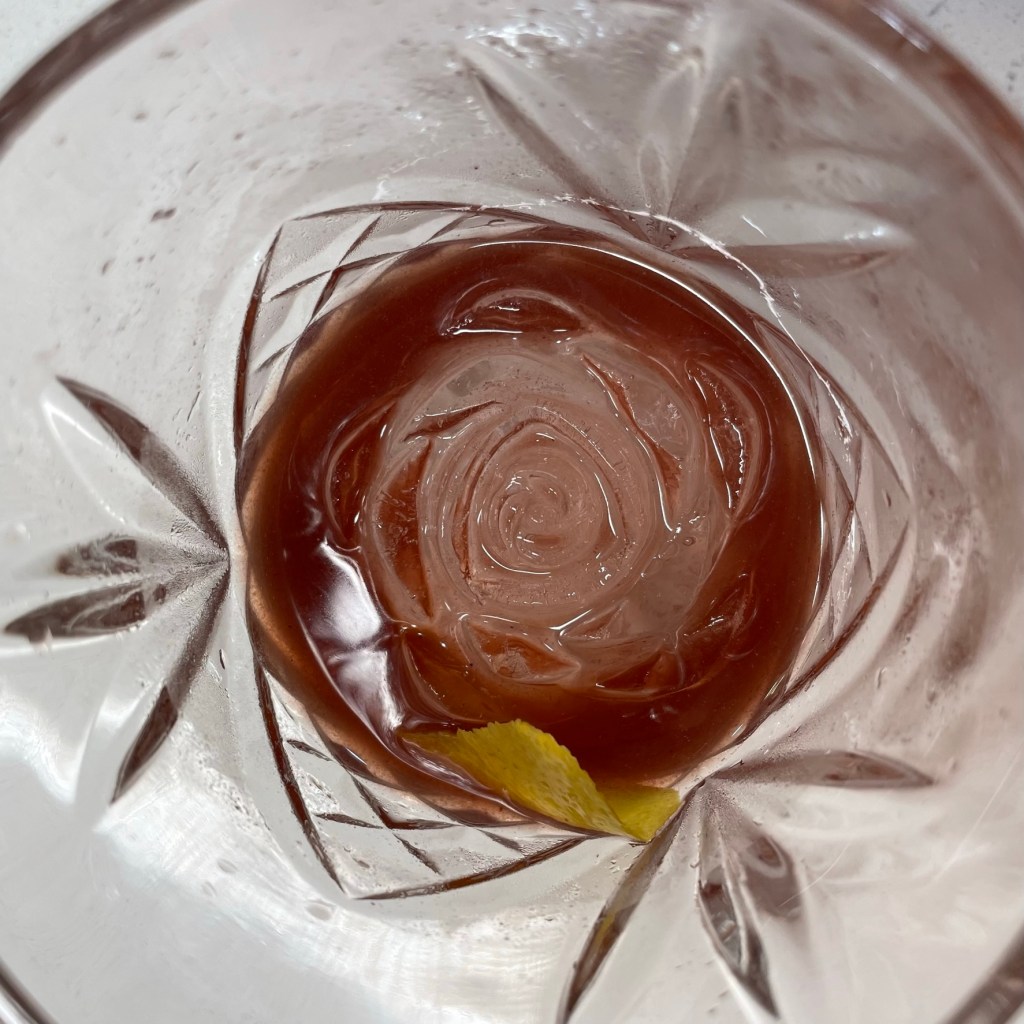
I skipped the mint garnish in favor of skewered fresh blackberries. But I have also served it with just an expressed lemon peel garnish when I ran out of berries. Either way, it’s delish!
This drink is a delightfully pleasant way to bridge the seasons.
This cocktail feels like a perfect transition from summer into fall. A little bit sweet, with warm spices and a touch of lemon freshness. Enjoy!
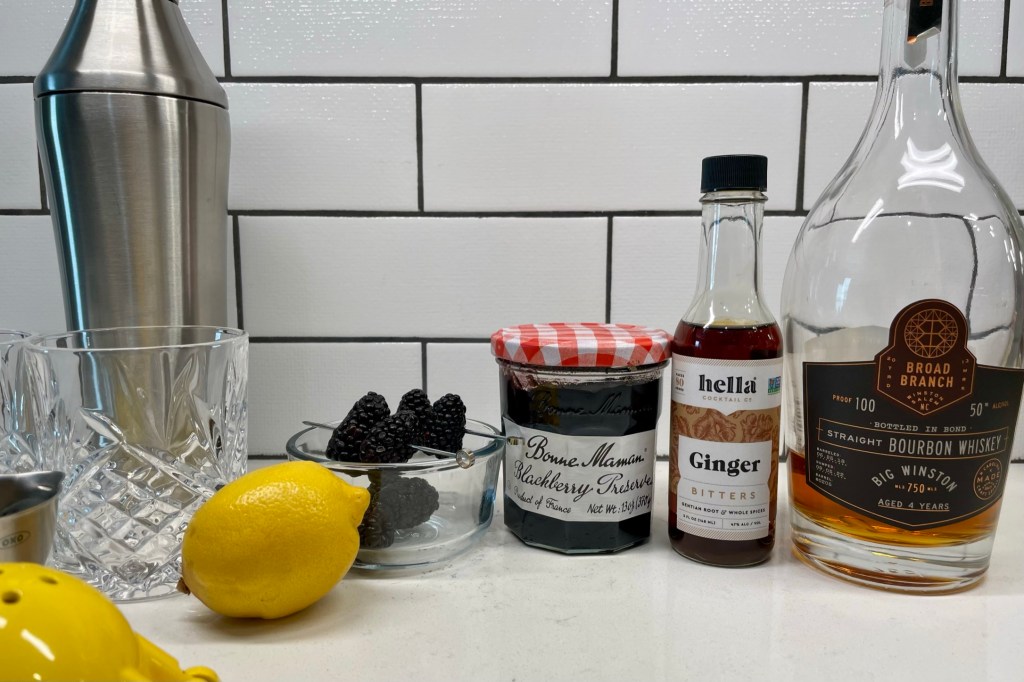
Ingredients
4 oz. favorite bourbon (we used a locally distilled, bottled-in-bond, but Elijah Craig small batch or Bulleit would be great)
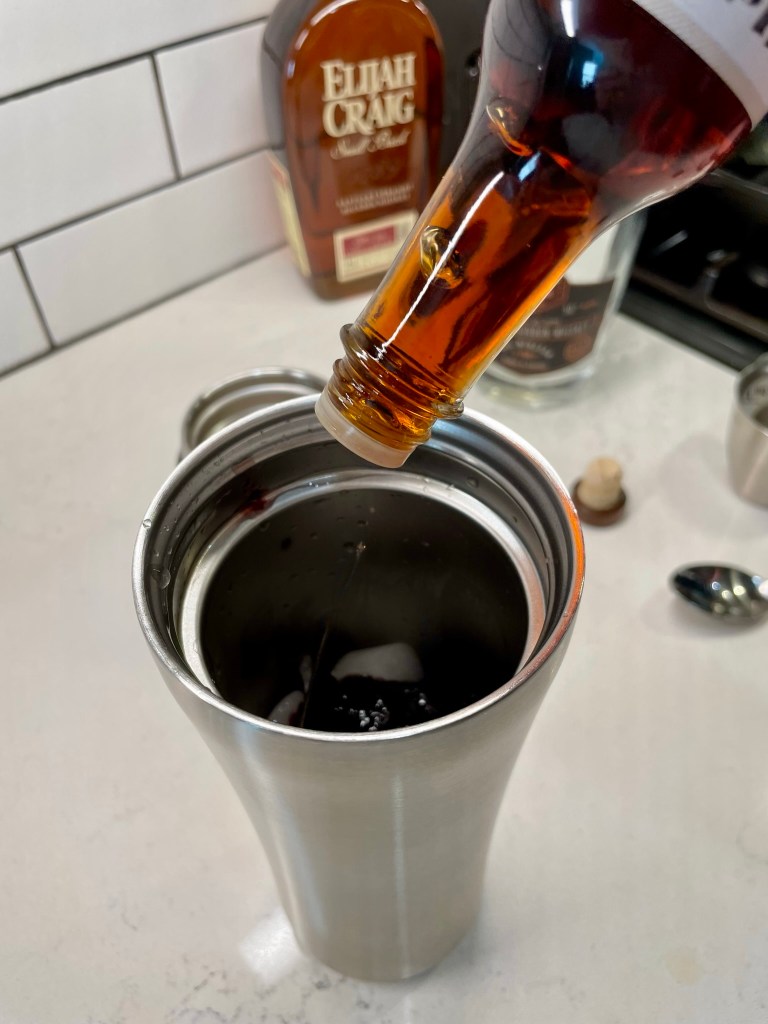
1 Tbsp. good quality blackberry preserves (we like Bonne Maman, but homemade would be perfect here)
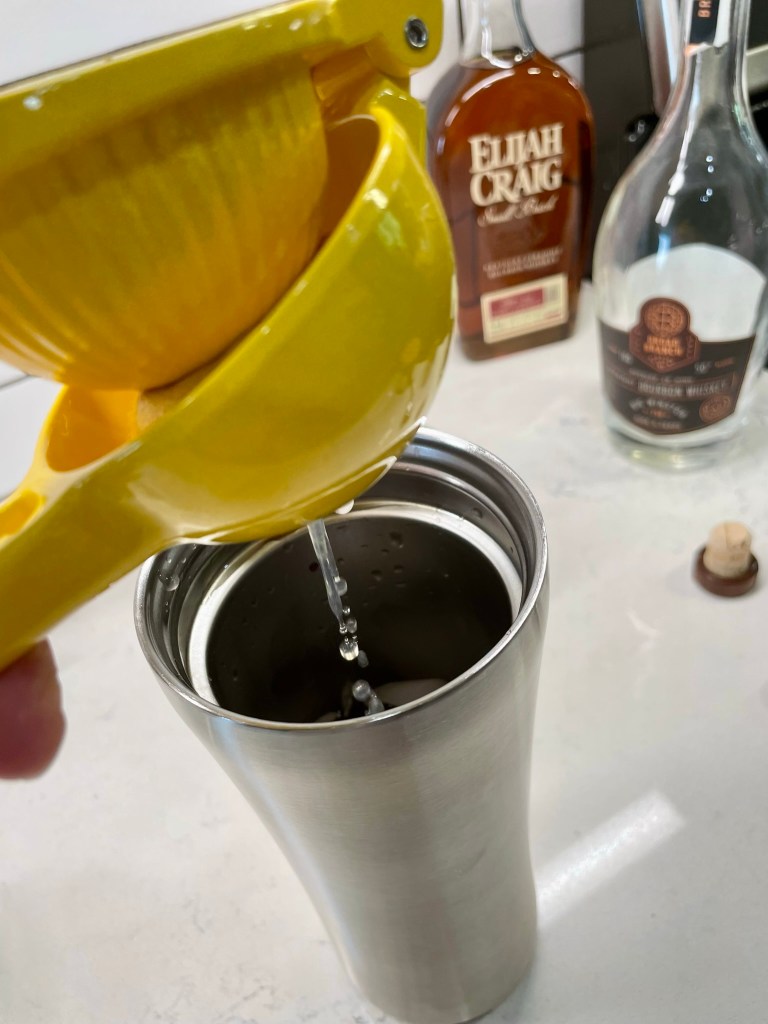
juice of 1/2 small lemon
4 quick shakes ginger bitters (we like Hella brand)
fresh blackberries or lemon peel to garnish
If you prefer to muddle fresh blackberries into the drink rather than using preserves, consider adding a tablespoon of simple syrup to amp up the sweetness a bit. If you don’t like the seeds in the preserves, double strain through a mesh strainer into the glass.
Directions
Add bourbon, preserves, lemon juice and bitters to a cocktail shaker filled halfway with ice.
Shake 20 seconds to combine and dilute, then strain into two double rocks glasses with new ice.
Garnish with skewered fresh berries or lemon twist.