Smashed Cucumber Salad

Over the past few months, I’ve seen numerous recipes for something called smashed cucumber salad and wondered, what’s so special about that? Sure, I love cucumbers and the way they freshen up a salad with an extra level of cool and crunch. But why not just, you know, slice them? Of course, that was before I tried one, and I may never be the same.

I enjoyed my first-ever smashed cucumber salad last month, when I joined my blog buddy, Dorothy, and her husband at one of their favorite restaurants, Starry Night Cafe in Ferrisburgh, Vermont. That salad had a rustic Italian flair with Calabrian chili flakes, anchovy, parmesan and ripe heirloom tomatoes. It was a masterful arrangement of fresh, seasonal food just doing its thing.


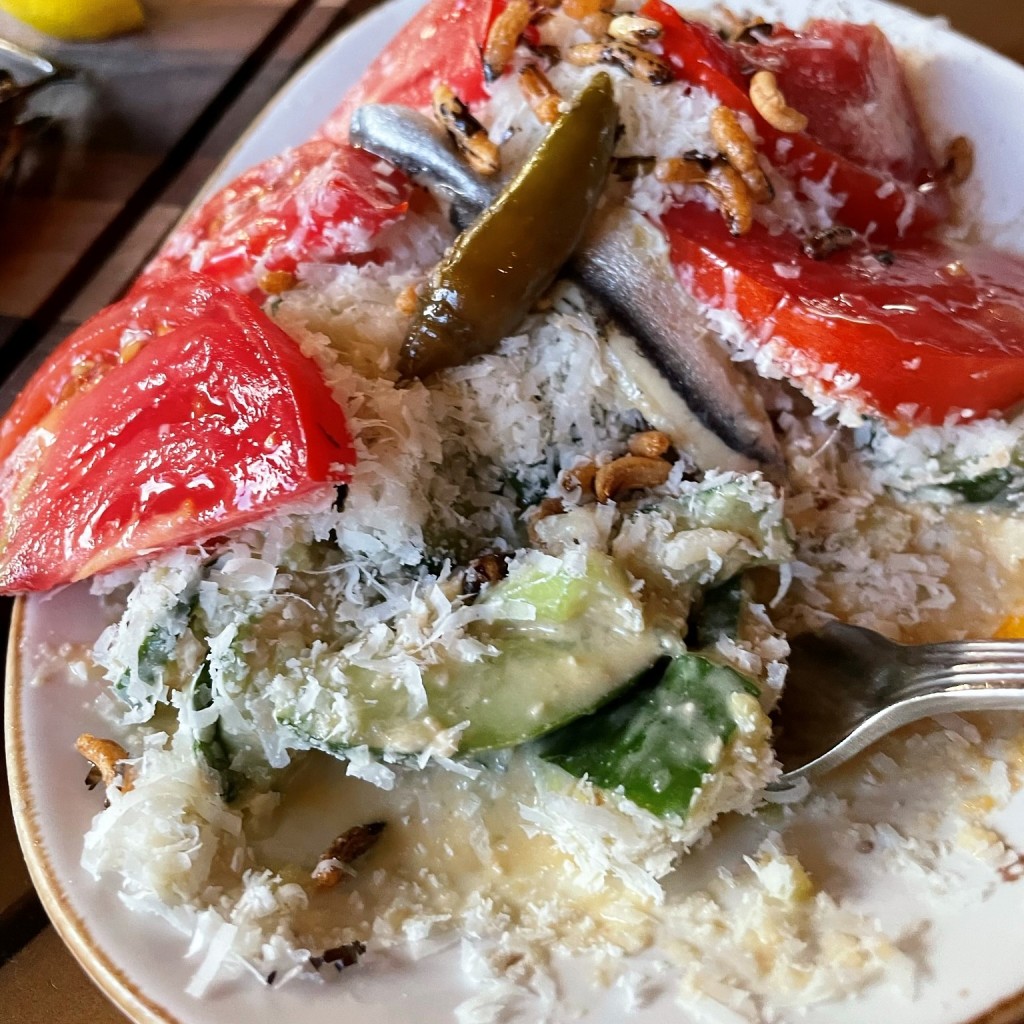
Every flavor complemented the next, but what struck me most about “smashed” cucumber salad was the texture— the open, craggy edges held onto the dressing, and the big chunks made it sooo crunchy and satisfying. And that was only the opener of our incredible meal.

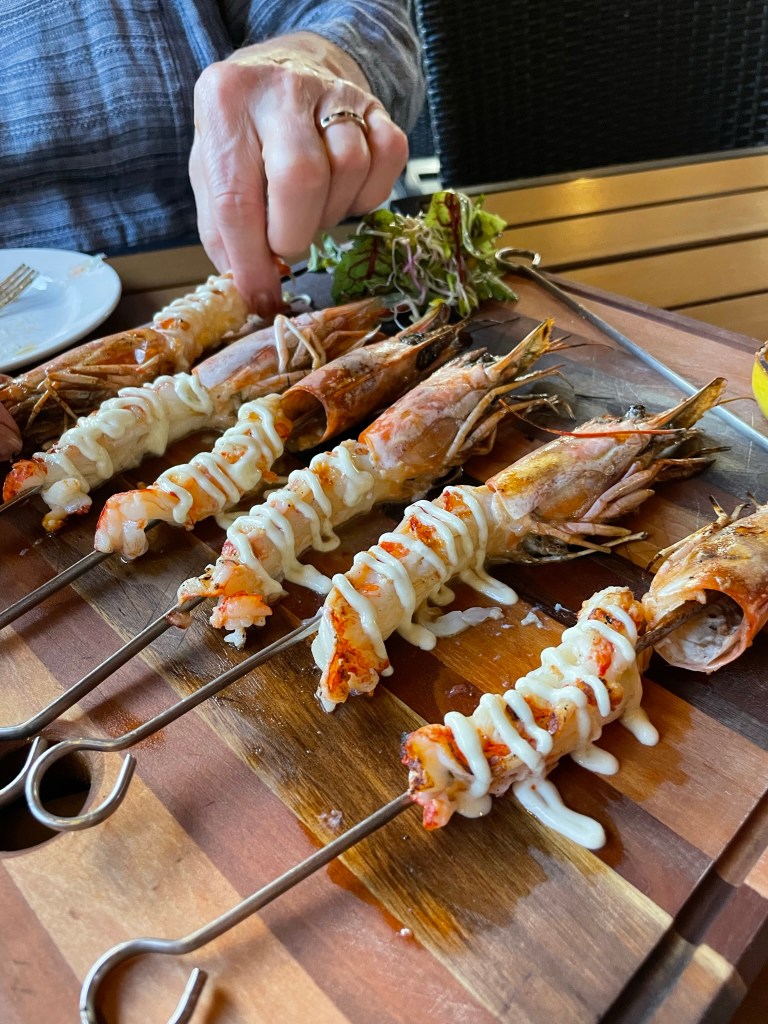
Starry Night Cafe demonstrated its commitment to partnering with local farmers and producers in every single thing brought to our table. From the specialty cocktail (don’t you worry, I’ll share it soon) to the coal-roasted oysters and grilled shrimp spiedini all the way to the stunning main course of wild halibut, I found myself wishing we lived closer!


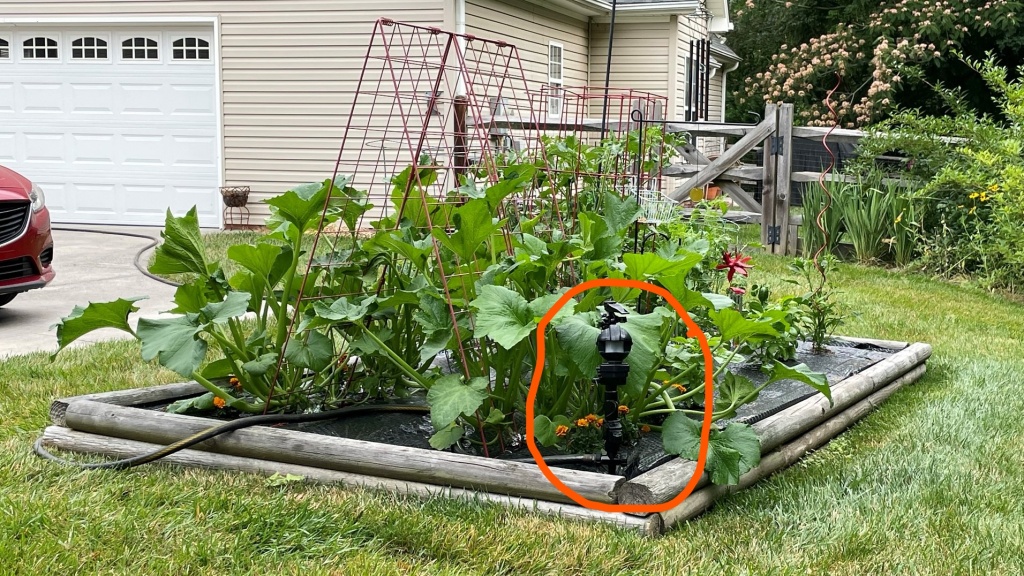
Food really does taste better when it’s fresh and seasonal, grown without pesticides or chemical fertilizers and picked at peak ripeness. My entire visit through Vermont reignited my excitement for local food, and our Starry Night experience was the icing on the cake— er, salad. I started imagining what other flavors would play nice with the versatile cucumber, and I think I came up with a winner in this pretty plate.


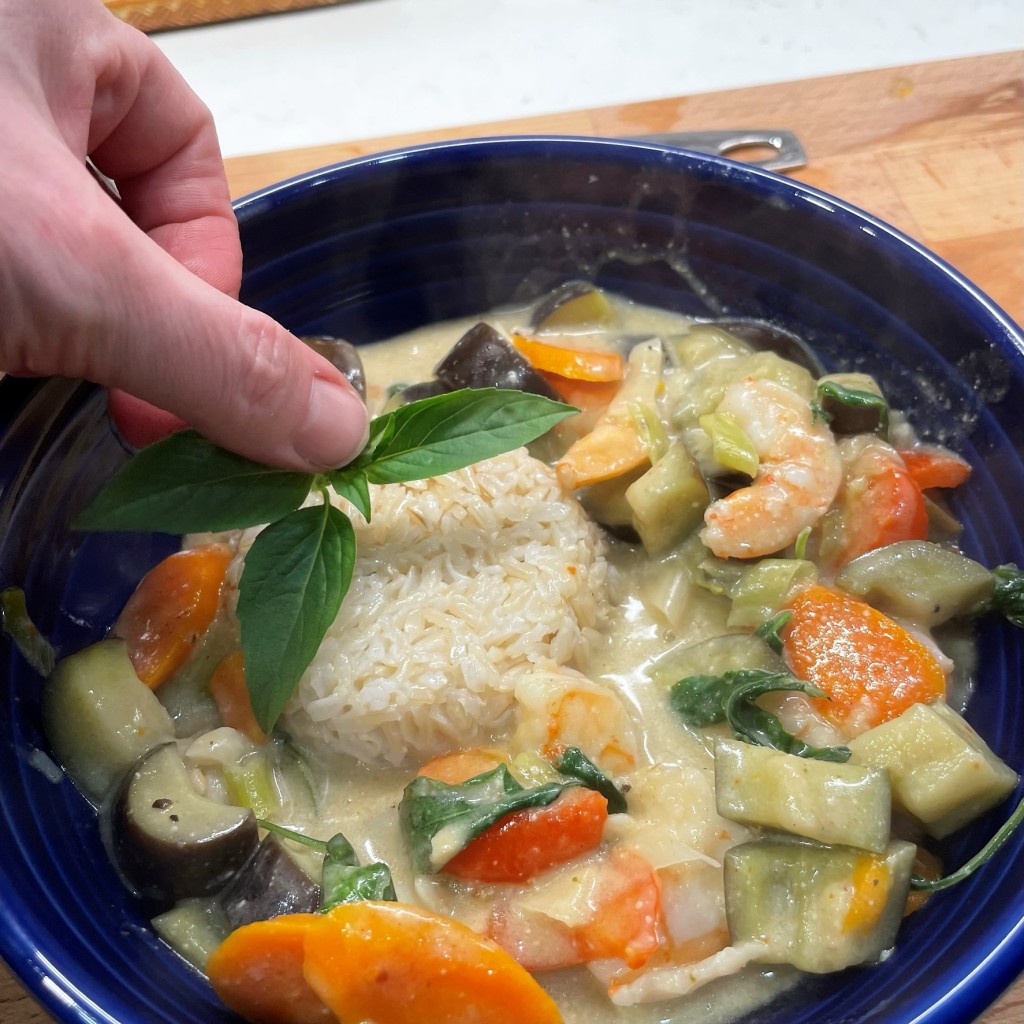
My smashed cucumber salad is not a remake of the Italian-ish salad we shared at Starry Night Cafe, but an Asian-inspired interpretation, built on some fun ingredients I found when Les and I visited our own farmers’ market here in Winston-Salem. I wanted a dressing that was savory, sweet and tangy. Creamy but without cream. And with a touch of heat to accent all of the above. So I poked around on the internet for a bit and found a lemon-miso dressing on a blog called A Nourishing Plate


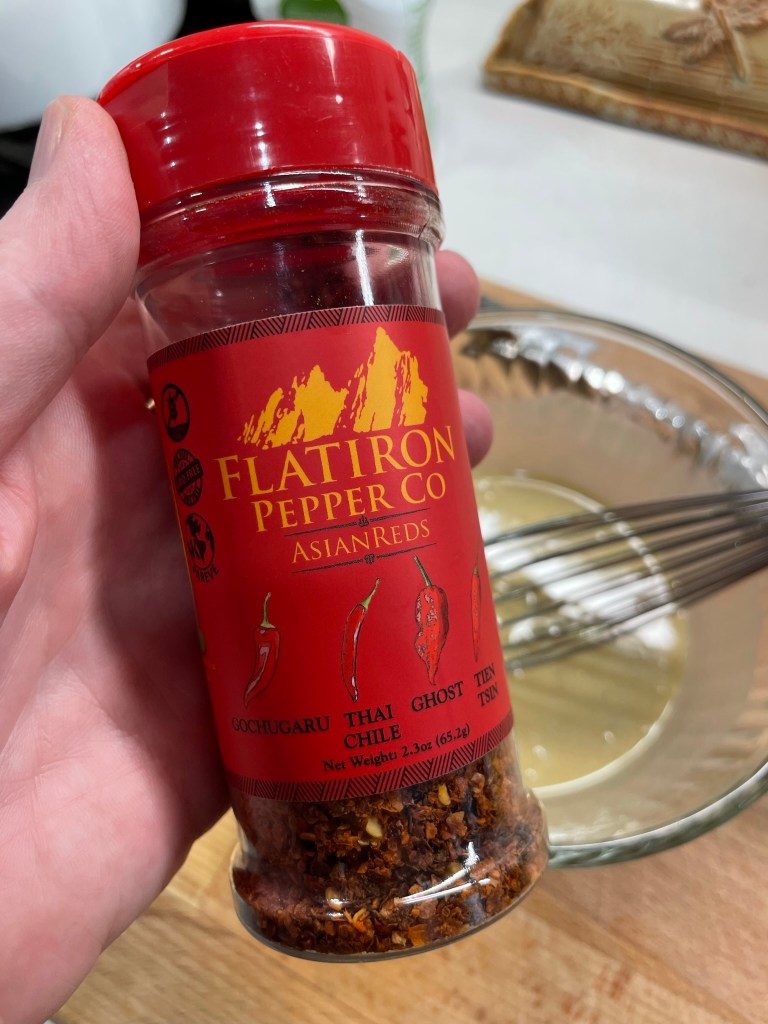
The author’s recipe satisfied most of my wish list, and I followed it mostly as written, subbing tahini in place of cashew butter because I always have a jar of tahini in the fridge. I used slightly less sugar and oil, and for a pop of heat, I added a few shakes of Asian Reds hot chile flakes from Flatiron Pepper Company. This is different from generic “red pepper flake,” as the chiles are specific to various parts of Asia. The dressing is so good, and easily adjusted for sweet and heat. I love the contrast it provided this cooling cucumber salad, and I can imagine it would also be good as a roast vegetable topper. The dressing thickens up a bit in the fridge, so I’d recommend making it ahead.

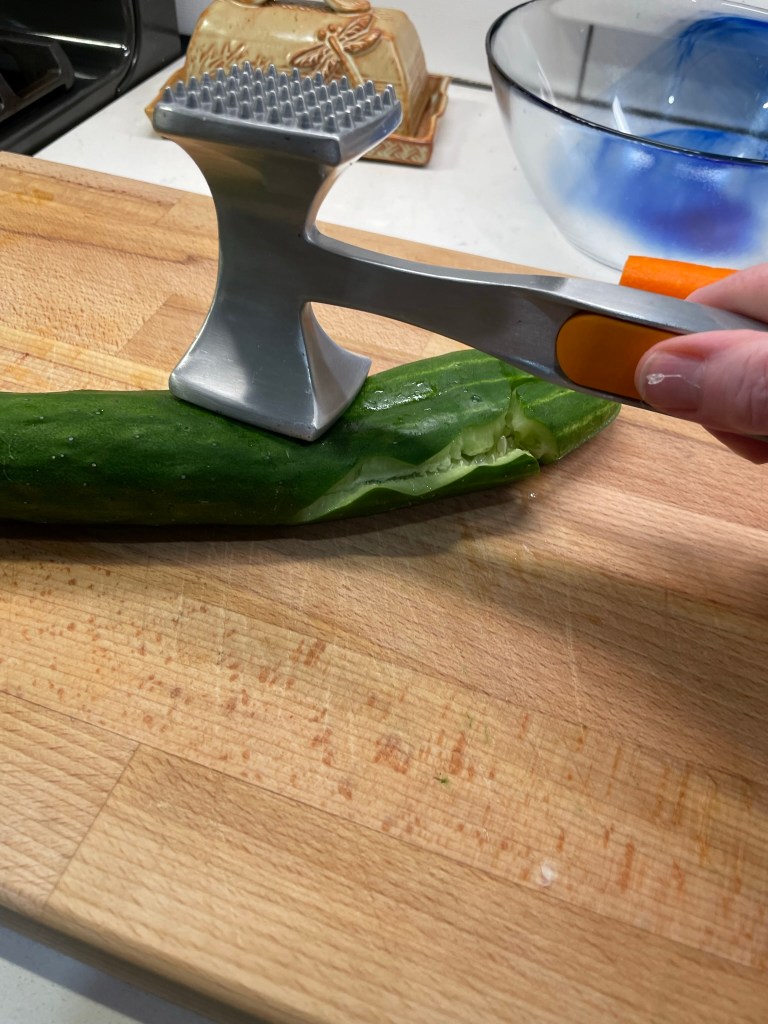
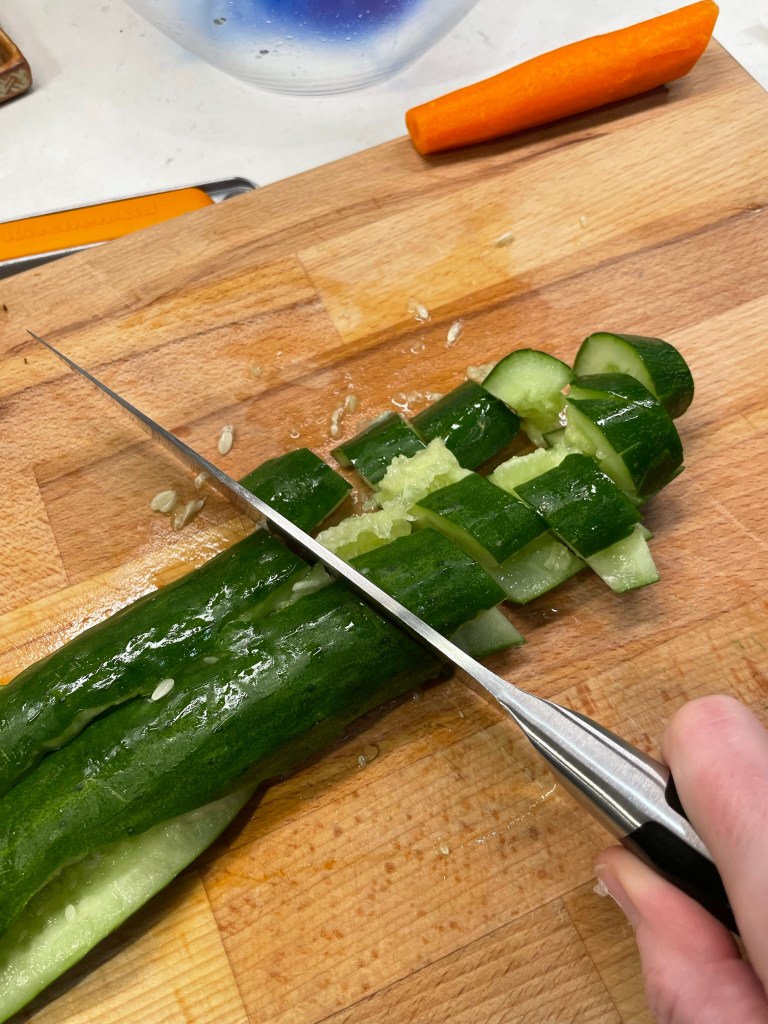
English cucumber is ideal for this type of salad, for its smaller seeds and thinner skin. My grocery stores all sell this type of cucumber, but usually they have a waxy coating to keep them fresh during transport from God-knows-where (yet another reason to choose local). You can use anything you have on hand for smashing it— the flat side of a chef’s knife, bottom of a skillet, whatever— but don’t use a heavy hand unless you want cucumber juice all over yourself and the kitchen. Just enough to crack it open is good, and then use a knife to cut the smashed cucumber into generous chunks. Season it, and toss with the other ingredients. Could it be more simple?


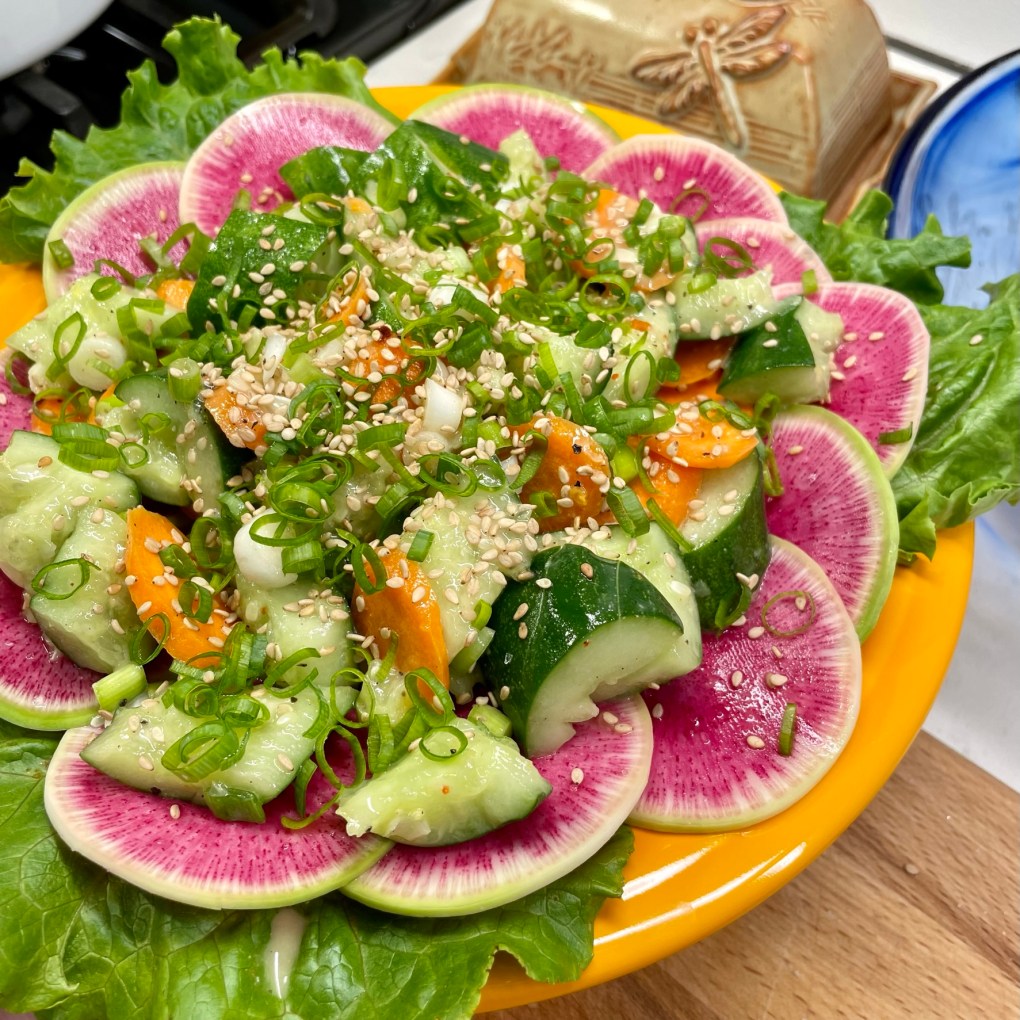
The most brilliant element of this dish— and I mean brilliant in the sense of “wow, look at that shocking pink color!”— is the watermelon radish. That neon pink color seems to be everywhere right now, thanks to the Barbie movie, and though I’ve seen these radishes in food magazines and cooking shows, I have never run across one in the supermarket.


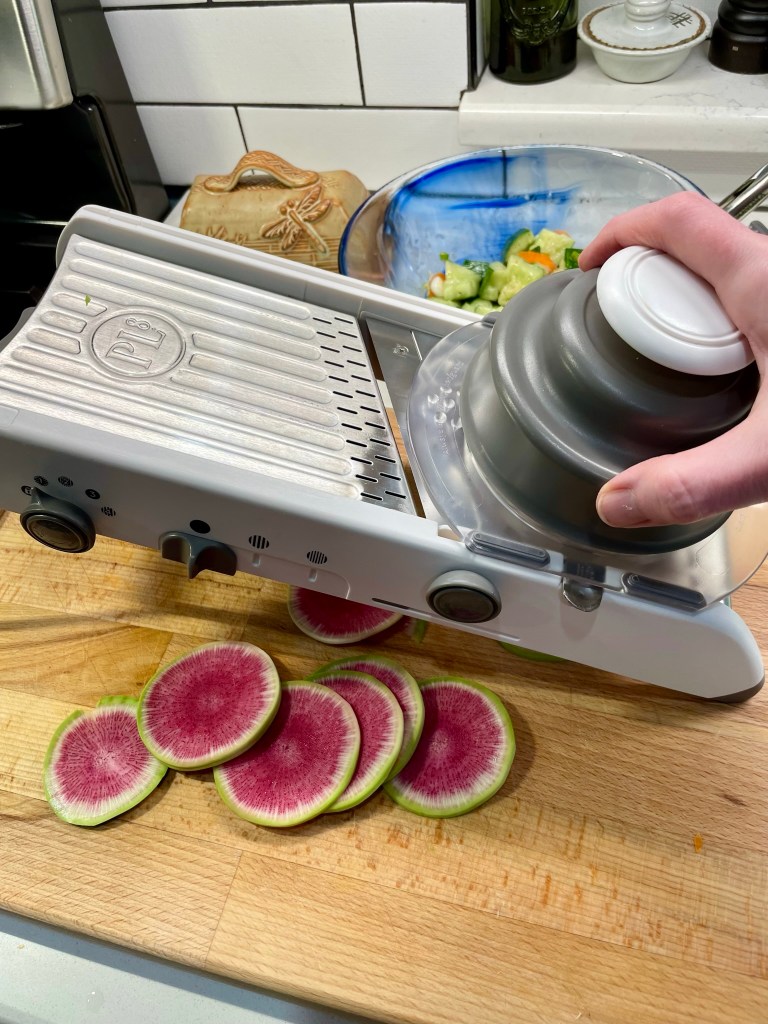
Turns out the farmers’ market is also the place to score Barbie-colored vegetables, and I couldn’t resist slicing one up to complement my smashed cucumber salad. It made a lovely border, don’t you think? And it carries the same pungent, spicy flavor as a typical radish— just larger and way prettier. I’m still deciding what to do with the other watermelon radish (stay tuned).

I love trying new foods! What ingredients are you curious to try, and will you scout them out this weekend at the farmers’ market in your neck of the woods? I hope so!


Smashed Cucumber Salad

  • Servings: 4
  • Difficulty: Average
  • Print

An Asian-inspired dressing puts a flavorful jacket on this super-refreshing and oh-so-fresh cucumber salad. Don't skip the smashing part, as it contributes to the amazing texture of this new summer favorite.


Ingredients

  • 1 large organic English cucumber, cleaned and dried
  • 1 large carrot, peeled and sliced thin
  • 3 scallions, washed and sliced thin (green parts reserved for garnish)
  • 1 medium watermelon radish, peeled and sliced thin
  • Spicy lemon-miso dressing (see below)
  • Lettuce leaves for plating, optional
  • A few shakes toasted sesame seeds (for garnish)

Directions

  1. Prepare the spicy lemon-miso dressing and refrigerate until you’re ready to make and serve the salad. If using the red pepper flake, remember that the flavor will become more intense after the flakes rehydrate.
  2. Lightly smash the cucumber, just enough to split it open. Cut into chunks and add them to a large bowl with the carrots and the white parts of the scallions. Sprinkle with kosher salt and gently toss to distribute the seasoning.
  3. Spoon about half of the dressing over the salad and toss to coat.
  4. Arrange lettuce leaves and watermelon radish on a serving platter. Spoon the smashed cucumber salad onto the plate and garnish with reserved scallion tops and sesame seeds.

Notes: Make the lemon-miso dressing ahead; the flavors mingle nicely in the refrigerator, and the red pepper flakes will rehydrate for maximum punch. You will only need about half of the dressing recipe for this smashed cucumber salad. Save the rest for another salad or to drizzle on grilled vegetables.

Ingredients

  • 2 Tablespoons white miso paste
  • 1 Tablespoon rice vinegar
  • 1 Tablespoon tahini paste
  • 2 teaspoons organic cane sugar
  • Juice and zest of one large lemon
  • Kosher salt and black pepper
  • A few shakes of red pepper flake, optional but wow!
  • 3 Tablespoons extra virgin olive oil

Directions

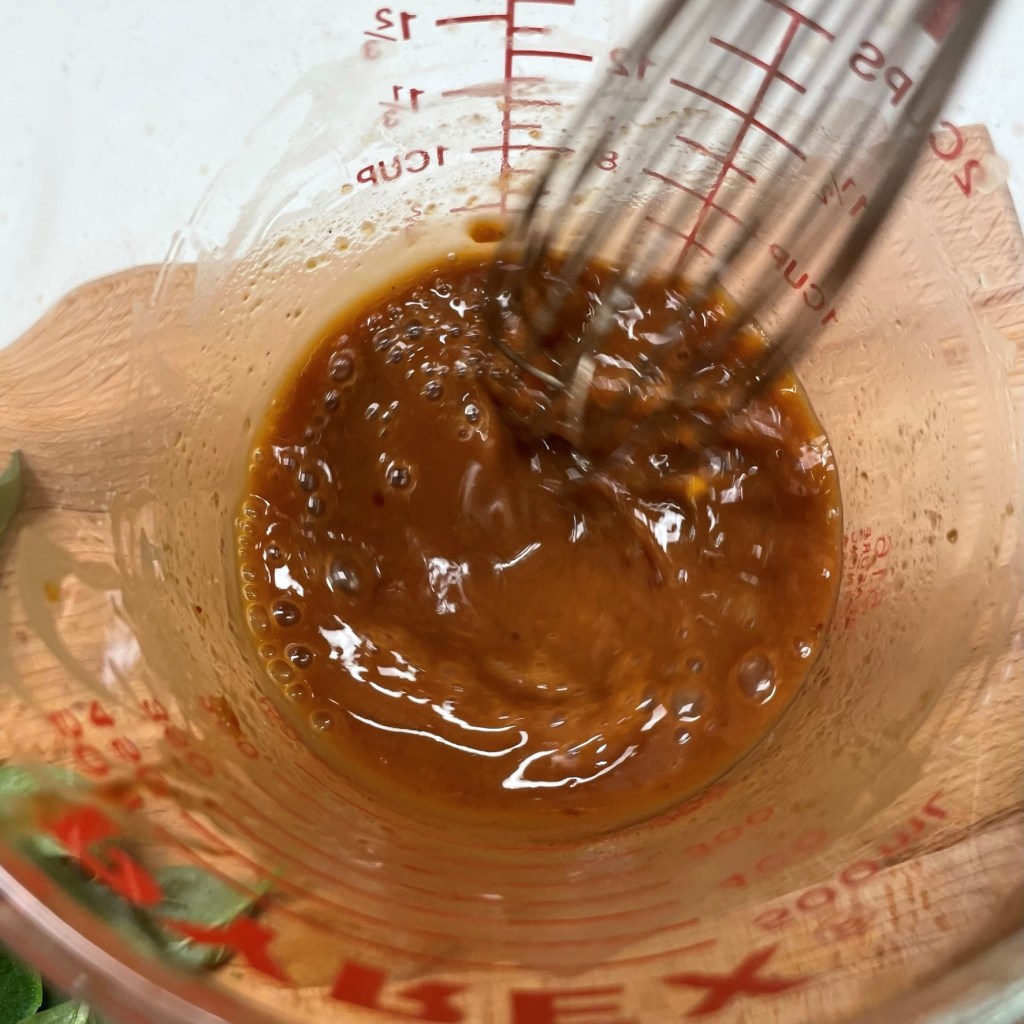
  1. In a small bowl, combine miso, vinegar, tahini, sugar and lemon juice plus zest. Season to taste with salt and pepper. Add a few shakes of red pepper flake if you want a bit of heat. I like Flatiron Pepper Company’s Asian Reds here.
  2. Slowly drizzle oil into the dressing, whisking constantly to create an emulsion. Adjust seasoning to taste and refrigerate. Dressing will thicken slightly in the fridge.


Green Curry Shrimp

It has been an interesting week at our house, between the saga of our bathroom remodel, which included some high drama that nearly wrecked me (more on that another day), and an unfortunate, middle-of-the-night accident that occurred in the rear corner of our raised bed garden. It’s been going gangbusters, thanks to the vigilant security provided by this little fella:

The Yard Defender!!!

The “Yard Defender” has restored my hope for a vegetable garden, after several (literally) fruitless years of battle against the herd of deer that resides in the woods behind our cul-de-sac. We’ve tried all the home remedy stuff—Irish Spring soap, garlic hung on strings that spanned the tomato cages, human hair, commercial potions with a nasty rotten egg odor, ALL of it—and last year, well, I didn’t even bother. But with grocery prices soaring, I wanted to try again and so I splurged on this motion sensor device, advertised with the slogan, “don’t hurt ‘em, just squirt ‘em!”

The thing has peripheral vision to spot deer (or other critters, or unsuspecting neighbors) when they approach the garden, and launches a hearty spray of water to chase them off. My garden looks better than ever! Yesterday morning, though, our neighbor texted to tell me that “something had happened” to one of my zucchini plants, and when I went out to investigate, I discovered what appears to be a hit-and-run.

YIKES!

First of all, this trellis is heavy duty, so this was a serious accident. I was trying to train my zucchini to grow upward on both sides of it, to make more space in the garden and encourage more fruit. It was looking so healthy and I’ve just begun to see blossoms forming. My assumption is that a good-sized deer was already standing in the garden when the sensor detected its movement, and the precious thing got so spooked by the abrupt noise and spray, it panicked and fell onto the trellis. I have since moved the Yard Defender to the rear of the garden, where the tomatoes grow (it’s what they are after anyway), and hopefully we can avoid another dangerous incident. For sure, at least one of my zucchini plants is doomed (it was crushed, along with the trellis), but I hope that the other three endure so I can join the chorus of those who are sick to death of zucchini recipes, come August. Until then, I will continue to harvest what is growing out of control on the inside of my house, in the Aerogarden.

Here we go again, with the Thai basil!


I’ve been scrambling to come up with interesting ways to work this herb into “the rotation,” which is an inside joke for me and my husband, who swears we have not eaten the same thing twice since 2016. This is his fault, I say, for marrying a woman who loves to experiment in the kitchen. But using what is local and plentiful is part of what I do, and it doesn’t get more “local” than the dining room. I have in mind to substitute it for mint in a Mojito this weekend, and I’ll let you know how that goes. For now, let’s talk about what went into this bowlful of goodness.


Some of the vegetables in this recipe were the same as in the Thai Basil Chicken I shared last week, but there were plenty of swaps that make this dish different. I used carrots and red bell pepper again, swapped in scallions for regular onions, and cut up the first fruit of my 2022 garden, a wonky eggplant!


Shrimp was my protein and I shifted the sauce to a green curry-coconut vibe. Green curry is a vibrant blend of warm spices mixed with lemongrass, kaffir lime, green Thai chile and galangal, a rhizome that looks like ginger but tastes more herbal. It would be quite complex to make green curry from scratch, but a store-bought paste makes this recipe very simple. The aroma of the paste is pleasantly intoxicating, especially when it first hits the oil in your pan. Coconut milk is a natural companion for the flavor of any curry, and for this recipe, I used a “light” version to reduce the overall fat, but a full-fat coconut milk is fine and would lend more of the coconut flavor.


My first taste of green curry (circa 2005) was a pleasant surprise, and I was introduced to it by an unexpected culinary expert—my then-quite-young stepdaughter. She became a foodie at an early age, in part by my influence, but also that of her mother, who introduced her to Thai food when she was still in elementary school. Yes, when other kiddos were clamoring for fried chicken fingers at chain restaurants, our global flavor-savvy girl was scouting out the nearest sushi joint or Indian restaurant. When I had mentioned to her on a family dinner out in a Thai restaurant that I didn’t care for curry, she asked, incredulously, “not even green curry?” She offered me a taste of her favorite green curry chicken, and I was hooked. I’ve made it at home a few times in recent years, but this was my first time with shrimp. Delicious!


There is a bit of heat in my rendition of this dish, not only from the green curry paste, which leans spicier than red and yellow curries, but amped up by a few shakes of another fun ingredient in my pantry—Asian Reds hot chile blend, available online from the Flatiron Pepper Co. website. To be clear, I don’t get paid to brag about them, but I probably should, given that we own a bottle of darn-near every variety they make. What sets this company apart from others is that it offers region-specific blends of peppers that are otherwise hard to find. The Asian Reds includes Thai chile and ghost pepper, both of which are damn hot. I heartily recommend it for adding heat to any Asian-inspired dish, but a quick shake of the red pepper flakes you probably already have will work in a pinch for this recipe, or you could mince up half of a red jalapeno into the veggie mix for similar heat effect.

You won’t find these varieties of peppers just anywhere. Use it sparingly because it is HOT.

My advice for making this dish is the same as most every Asian-inspired recipe, and that is to get all your ingredients lined up and ready before you begin because things move quickly once the oil hits the pan. That means chop up your vegetables, clean and de-vein your shrimp and get your rice cooking (you’ll want that, for soaking up every last drop of the flavorful green curry sauce). Place a heavy bottomed pan over medium-high heat and add a couple of tablespoons of high-heat oil, such as canola, peanut or coconut. Give a quick stir-fry to the carrots and peppers first, because they take longer to cook. Then, add the scallions and garlic and toss long enough for the initial steam to dissipate. Move the vegetables to the outer edges the pan, drop another tablespoon of oil to the center and plop the green curry paste onto it. Prepare to be entranced by the aroma!


When the oil sizzles around the green curry paste, use a utensil to break it up and toss it with all the vegetable ingredients, so that everything is covered in a light film of the curry paste. The eggplant should go in last, given its tendency to instantly absorb oil. Toss everything just enough to coat the pieces, then add the entire can of coconut milk and stir to blend. Sprinkle in hot pepper flakes (if you want the extra heat), reduce the heat to low and cover the pan to simmer for 3 minutes. This gives the vegetables time to soften, and allows the green curry flavor to permeate everything.


Add the shrimp to the pan and stir to submerge them beneath the simmering liquid. Depending on the size of your shrimp, it should only take 3 to 5 minutes for them to lose their pink color, so watch them closely. Add a handful of Thai basil and stir to wilt it into the dish. Serve immediately with a portion of jasmine rice.

Garnish with a pretty Thai basil leaf if you want to be fancy. 😉


Green Curry Shrimp

  • Servings: 2, plus leftovers for one lunch
  • Difficulty: average
  • Print

This recipe comes together quickly and with ease, thanks to a store-bought paste that captures all the important flavors of Thai green curry. Substitute chicken or tofu if you wish. If you don’t have Thai basil, you could substitute regular basil or omit it altogether.

Ingredients

  • 3 Tbsp. high-heat cooking oil, such as canola, peanut or coconut (you will divide this for cooking the vegetables and blooming the curry paste)
  • 1 red bell pepper, sliced and halved
  • 2 medium carrots, peeled and cut on a bias
  • 3 scallions, cut on bias (white and green parts)
  • 3 cloves garlic, chopped
  • 1 medium Japanese eggplant, cut into bite sized chunks
  • 2 Tbsp. prepared green curry paste
  • 1 can light coconut milk (this is the culinary variety, not cartons for drinking)
  • a few shakes hot red pepper flakes, for extra heat
  • 1/2 pound fresh shrimp, peeled and deveined
  • a handful of fresh Thai basil leaves (optional but delicious); substitute regular basil if desired
  • hot cooked jasmine rice, for serving (I used brown jasmine rice for extra flavor and nutrition)

Directions

  1. Heat a large, heavy-bottomed pot over medium-high heat. Add 2 tablespoons of oil and stir-fry the carrots and red peppers for about two minutes to give them a head start. Season with salt and pepper to taste. Add scallions and garlic and toss to coat and wilt the scallions.
  2. Move the vegetables to the outer edge of the pot. Add 1 tablespoon of oil to the center and spoon the green curry paste onto the oil. This will “bloom” all the flavors of the paste. Break it up a bit with your cooking utensil, then stir it together with the cooked vegetables. Add the eggplant and toss to coat.
  3. Pour the entire can of light coconut milk into the pot and gently stir to blend. Sprinkle on hot pepper flakes (if using) and adjust salt and pepper to taste. Reduce heat to low and cover the pot, simmering for about three minutes, or until the mixture reaches a slight boil.
  4. Add the shrimp pieces. tossing lightly to submerge them beneath the simmering liquid. Keep a close eye on them, as they will cook in as few as 3 minutes, depending on their size and original temperature.
  5. Stir in Thai basil leaves until wilted. Serve immediately with hot cooked jasmine rice.


Thai Basil Chicken

To say that I’ve been under stress lately would be a gross understatement. I know that many of you feel the same angst related to the stories that plague our newsfeeds, and that alone is enough to make anyone shaky. On top of the stressors of life, things at home have been a little, um, hectic.

Besides the uncharacteristically high pressure of late in my day job (which is usually quiet in June), and beyond the fact that we are now past the 90-day mark since the start of our master bath remodel (with issues still happening every day), I had an unwelcome bit of news this week at my first primary care visit in nearly a decade. It’s nothing serious—at least, not yet—but I am considering the results of my blood workup to be an important wake-up call.

At the risk of TMI, I’ll summarize to say that several key markers are out of whack, and I need to get my act together quickly as it relates to my diet and my overall health. As luck would have it, going through menopause, starting a food blog, and signing up for not one, but two major home renovations during a world pandemic did not have positive effect on my body. I should have seen it coming.

For the first time in my life, a doctor told me that I must make changes, and that was a little scary. There’s plenty of time to turn things around, and I am truly thankful for that, but it means healthier options will be my first choice and decadence is on the bench for a while. I need to embrace regular exercise, too, but that’s another post entirely. Today, I’m focusing on healthier eating. It does not mean that we can’t have pizza or ice cream or some of the other fun things my husband and I love; rather, it only means that I must be more mindful of what goes into those dishes in the first place. Luckily, I do love experimenting!

For me, what makes a meal truly satisfying is variety of texture, big flavor and interesting spices. I’m not suddenly turning vegan or entirely giving up any food groups—I have never been one for a total elimination diet. I can move toward better health with a few lightened-up favorites, more meatless dishes and plenty of vegetables, and that’s what I intend to do. Truth be told, part of the reason I’m telling y’all this is that it builds in an extra level of accountability. Now that you know, I’ve painted myself into a bit of a corner. So here comes the first of several fresh and healthy meals served up at our house recently.

It smells even more delicious than it looks!

Thai basil chicken meets all the criteria I mentioned for a satisfying meal. The texture is amazing and packed with crunchy vegetables, including carrots, broccoli and red bell pepper. The flavor is phenomenal, with a complex blend of spicy ingredients in the Thai-inspired sauce that gently coats the vegetables and lean ground chicken. The signature flavor that gives this dish a little extra “zhuzh” is Thai basil, a fresh herb in the mint family that is similar to the Genovese basil you’d recognize in Italian food, but with a spicy undernote and a hint of anise or licorice. I’ve had an abundance of this ingredient lately, since my husband and I reinstated the Aerogarden that he gave me for Christmas a couple of years ago. This gorgeous herb has taken over the whole dining room, even visible from outside the window because it’s growing through the blinds (which, I suspect, is causing the neighbors to whisper). I prune the plants every couple of days, which only makes them grow faster, and so I needed a dish that uses a lot of Thai basil at once. This recipe is perfect for it!


The prep for Thai basil chicken is easy; it’s just a bit of chopping and slicing of fresh vegetables that have plenty of texture, color and nutrition. The other essential prep is making the sauce. My recipe includes chili-garlic paste for heat, soy sauce and coconut aminos for an umami burst, oyster and fish sauces for a little funky depth, rice vinegar for a slight acidity and a touch of coconut sugar to round it all out. There’s also a bit of corn starch in the mix to keep it silky. If you like Asian flavors even a little bit, you won’t regret having these ingredients in the door of your fridge, and in no time at all, you’ll be mixing and matching them to come up with your own amazing recipes. One final note on the point of these Asian sauces, and this is not a joke. There is an imminent shortage of both sriracha sauce and chili-garlic paste, so you may want to grab a jar of each now to avoid the drought that’s coming on these ingredients. Now, let’s get cooking on this dish!


I used carrots, red bell pepper, onions and broccoli in my recipe, but there are other veggies that would feel right at home here, including scallions, cauliflower, celery, crunchy green beans or snow peas. Sliced fennel would also be terrific, and if you can only find Genovese basil, having fresh fennel in the mix would help fill the gap of the licorice flavor that Thai basil offers. Basically, aim for lots of color and texture and you’ll have a winning dish. The only vegetable I wouldn’t recommend is tomato, which is too soft, and hardly ever used in Asian cuisine.

Cooking the dish is simple, beginning with a little bit of oil in a large, fairly deep skillet or wok. Because this recipe is cooked over medium-high heat, you need an oil with a high smoke point, such as peanut, coconut or canola oil, but you won’t need more than a few tablespoons. Extra-virgin olive oil is not best for this kind of cooking because it overheats easily and turns bitter.


You’ll cook the veggies first, only a few minutes until they begin to soften, then move them to the outside edges of the pan and cook the ground chicken, half at a time. You could use cut-up pieces of chicken breast, also, but I find that ground chicken cooks more quickly and evenly. I normally use a wok when I make this dish, but that is one of the few tools that didn’t earn prime kitchen real estate after our remodel, and the overflow of stuff in the garage is a bit of a nightmare right now. If you have a wok, of course it would be the best vessel for cooking, but any large, sturdy skillet or pan with deep sides will work fine.


After the chicken has lost its pink color, whisk the sauce to mix it up again, and pour it all at once over the pan ingredients. Toss a few times to coat, and you should see the sauce thicken quickly, thanks to the cornstarch in the mix. Add the Thai basil at the very end, and when it wilts down and turns darker green (which takes no more than 30 seconds), this meal is ready to serve!

I’ll be looking for other fun ways to use my Thai basil, and I’m already planning to do something with the shrimp we have in the freezer—maybe a drunken noodle kind of thing? Oh, aaand, I don’t think I have mentioned that I planted a vegetable garden this year, and we have found a new weapon against deer invasion. More on that next time. 🙂

Fingers crossed, we will have fresh zucchini, tomatoes, peppers and eggplant soon. Stay tuned!


Thai Basil Chicken

  • Servings: 4
  • Difficulty: average
  • Print

This recipe moves quickly, so it’s best to have your fresh ingredients and sauce ready before you begin. If you have a favorite store-bought, spicy Thai sauce, you could substitute that, using about 2/3 cup. If you cannot find fresh Thai basil, a regular Italian basil can be substituted but the flavor will not be quite as authentic. As long as we are talking substitutions, the chicken could also be swapped out for shrimp or even extra firm tofu cubes. Go on, make it yours!

Ingredients

  • 1 pound ground chicken
  • 1 small onion, halved and cut into slivers
  • 1 large broccoli crown, trimmed and cut into florets
  • 1/2 large red bell pepper, cut into strips
  • 3 small carrots, peeled and cut on bias into thin slices
  • a fat handful fresh Thai basil leaves
  • 3-4 Tbsp. high-heat oil, such as coconut, peanut or canola (you will divide this to cook the vegetables and the chicken)
  • Spicy Thai basil sauce (ingredients listed below)
  • Cooked jasmine rice, for serving

Whisk the sauce ingredients together in a glass measuring cup or other bowl that is suitable for pouring. Have it ready before you begin cooking.

Ingredients

  • 2 Tbsp. garlic chili paste
  • 1 Tbsp. oyster sauce
  • 1 Tbsp. low-sodium soy sauce
  • 1 Tbsp. coconut aminos
  • 2 Tbsp. rice vinegar (not seasoned)
  • 1 Tbsp. coconut sugar
  • 1 tsp. fish sauce
  • 1 Tbsp. corn starch
  • 2 Tbsp. COLD water

Directions

  1. Place a large, high-side pan over medium-high heat. Add half of the oil, and when it shimmers, add all vegetables to the pan. Sprinkle with a slight pinch of salt (not too much, because the sauce has plenty), and toss in the pan until they begin to soften, or about 7 minutes.
  2. Push the vegetables toward the outside edge of the pan. Add half of the remaining oil in the center of the pan, and add half the ground chicken, tossing to cook just until it’s no longer pink. Repeat with the remaining chicken.
  3. Whisk the sauce to reincorporate ingredients that have settled. Pour the sauce all over the pan mixture and stir or toss to coat. The sauce should begin to thicken very quickly.
  4. Add the Thai basil to the skillet all at once and toss to wilt it into the recipe. This will happen very quickly.
  5. Spoon the Thai basil chicken over portions of hot cooked rice, and enjoy it while it’s hot!


Scallion-Sriracha Salmon Cakes

Most every night for the past few months, I have awakened around 3 a.m., for no apparent reason. My insomnia usually lasts at least an hour and a half, during which time I ponder all of the good and evil in the world, or play mindless word games on my smartphone, or venture into the dark corners of our house to find and snuggle our sleeping pets. I’d like to make one suggestion for others who have experienced this phenomenon of waking at 3 a.m.—do not pick up your phone and begin Googling possible causes for said awakenings. The search results are grim, and in a matter of moments, you will begin to question everything from your diet (am I eating sugar too close to bedtime?) to your spiritual condition (what do you mean, exactly, by ‘witching hour?’). My therapist believes I am probably flummoxed over a combination of things, related mostly to work-from-home stress and general pandemic fatigue. Whatever the case, I’m exhausted. Every once in a while though, these sleep interruptions result in something good, and this recipe is a fine example of that.

Out of the blue two weeks ago, I awakened with a start and asked myself why I had never made fish cakes with sriracha and scallions. You might be thinking this is a bizarre question to ask oneself so urgently at 3 in the freakin’ morning, and you’d be correct, but this is my life now. Once I go down that rabbit hole, it isn’t long before I begin dreaming up ideas of just how such a dream dish should be completed, right down to the garnish. Sometimes I pick up my phone and make record of my ideas—and that’s a smart thing, because if I don’t jot it down, my next successful 40 winks may wipe it clean out of my brain. From this particular wide-awake culinary epiphany, I made these exact notes, because I didn’t want to forget what sounded like a great recipe.

I mean, isn’t this the kind of thing that wakes everyone up at 3 a.m.??

It took me a few days to round up my ingredients, and when I got down to it last week, with a few tweaks to my original plan, the result was delicious! These scallion-sriracha salmon cakes were light and fresh, low calorie and easy as could be to make, with just enough heat to make your tongue tingle. I modeled the ratio of ingredients after my favorite crab cake recipe, using only enough mayonnaise and panko crumbs to hold the flaky salmon together with the finely minced garlic and red bell pepper. A little extra panko on the outside before pan frying gave the cakes a terrific crispiness to offset the moist and tender interior.

And the flavor was exactly as I dreamed.

Crispy coating, tender inside, spicy and delicious; these turned out just as I imagined!

Ingredients
Makes 2 servings

6 oz. fresh salmon portion (skinless)

1/3 cup mayonnaise

1 Tbsp. sriracha

1/2 tsp. fish sauce* (see notes)

2 Tbsp. minced red bell pepper

2 scallions, thinly sliced (divided)

1 clove garlic, minced

1/2 beaten egg

A few shakes Asian Reds hot pepper flakes*

1/4 cup panko crumbs, plus extra for shaping cakes

2 Tbsp. peanut oil

*Notes

Fish sauce is a pungent, fermented condiment found in the Asian section of most supermarkets. If you cannot find it, substitute with soy sauce.

The Asian Reds hot pepper flakes are a specialty item that popped up a while back in my hubby’s Facebook feed, and we could not resist ordering a variety of products from this company, though we have no financial incentive from doing so. I like this pepper seasoning because it includes the hard-to-find varieties of pepper that play so well with other Asian flavors, including the sriracha in this recipe. If you don’t want to spring for them, substitute any crushed red pepper flakes, or omit them for less heat.

We are loving these Asian Reds pepper flakes. They offer a different variety of hot pepper flavors that is a perfect highlight with other Asian ingredients.

Instructions

Here we go with pictures, and keep scrolling for written steps and a downloadable copy for your recipe files!

  1. Heat a small, non-stick skillet over medium heat. Pan steam or lightly sauté salmon fillet until just flaky (better slightly underdone than overdone). Cool then refrigerate several hours or overnight.
  2. Combine mayo with sriracha and fish sauce; measure out about 3 Tbsp. for finishing the cakes at serving. I put the reserved portion into a zip-top snack bag (sort of a makeshift piping bag).
  3. Add half of the chopped scallions, red pepper, garlic and spicy Asian Reds seasoning to remaining mayo mixture. Fold in beaten egg and panko crumbs.
  4. Flake fish into large-ish pieces and gently fold into mayo mixture, taking care not to break up the fish pieces too much. Sprinkle additional panko crumbs into your hand and shape mixture into four patties, about the size of hockey pucks, with a light coating of panko on both sides. Place each fish cake onto a parchment lined plate or small baking sheet.
  5. Cover the fish cakes with plastic wrap and chill at least two hours. This gives the mixture time to firm up, and the panko will absorb some of the moisture to better bind the cakes.
  6. Heat peanut oil in a medium, non-stick skillet over medium heat. Cook salmon cakes 3 or 4 minutes per side, until browned and crisp. Serve over rice with your favorite vegetables, top salmon cakes with reserved sriracha mayo drizzle and reserved scallion slices.

If you can dream it, you can make it. 😀

Want to make this recipe?