Cider-braised Collards with Sweet Potatoes

The race is on toward the biggest food holiday of the year, and I couldn’t be more ready! It’s an even-numbered year and at our house, that means my husband, Les, will take the reins on the Thanksgiving turkey. This agreement to alternate years for the bird was literally written into our wedding vows because we both enjoy it so much, and on “his” years, I have more time to turn attention to the sides. All this month, I’ll be sharing a few new ways to enjoy some classic Thanksgiving side dishes. 

This first one is dedicated to my readers in the South, where collard greens reign supreme— on Thanksgiving or any other family meal. When I first learned to cook collards about five years ago, I didn’t imagine that there could be so many variations, but it seems that every time I try a new addition or different braising liquid, I find another favorite. This is the first time I’ve considered putting a seasonal spin on collards, and I’m so glad I did.

These are as flavorful as they look!

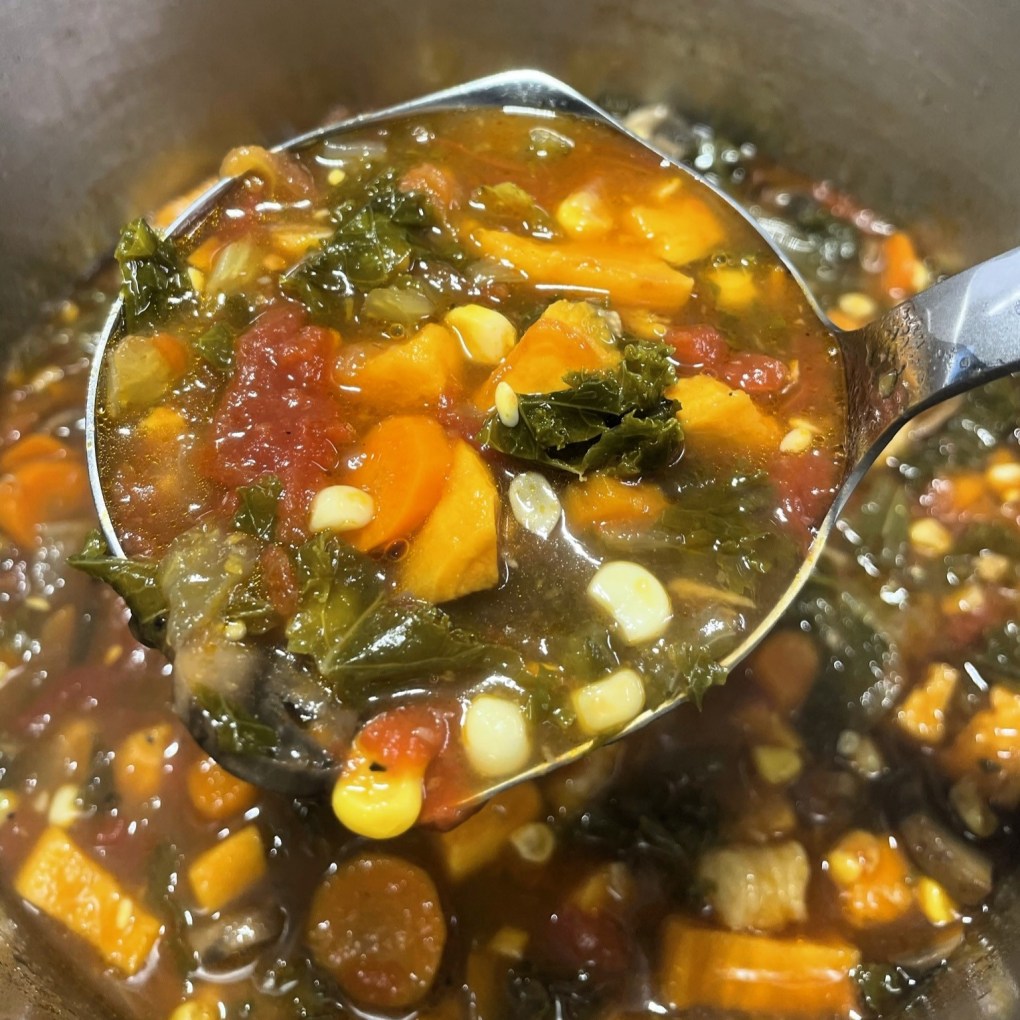
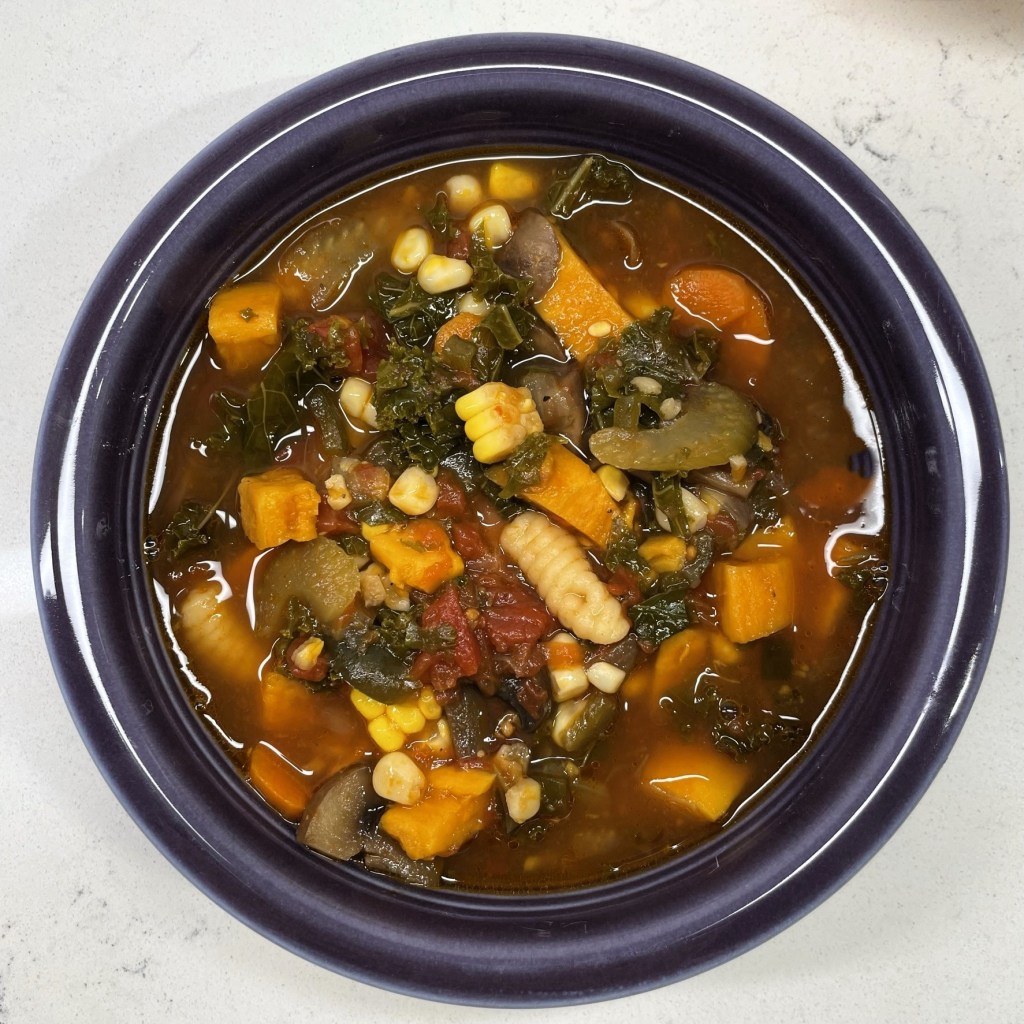
These collard greens have a touch of sweetness going on in the cubed sweet potatoes, and the smoky sausage makes each bite super satisfying. Did I mention that they’re braised this time in hard apple cider? So good!

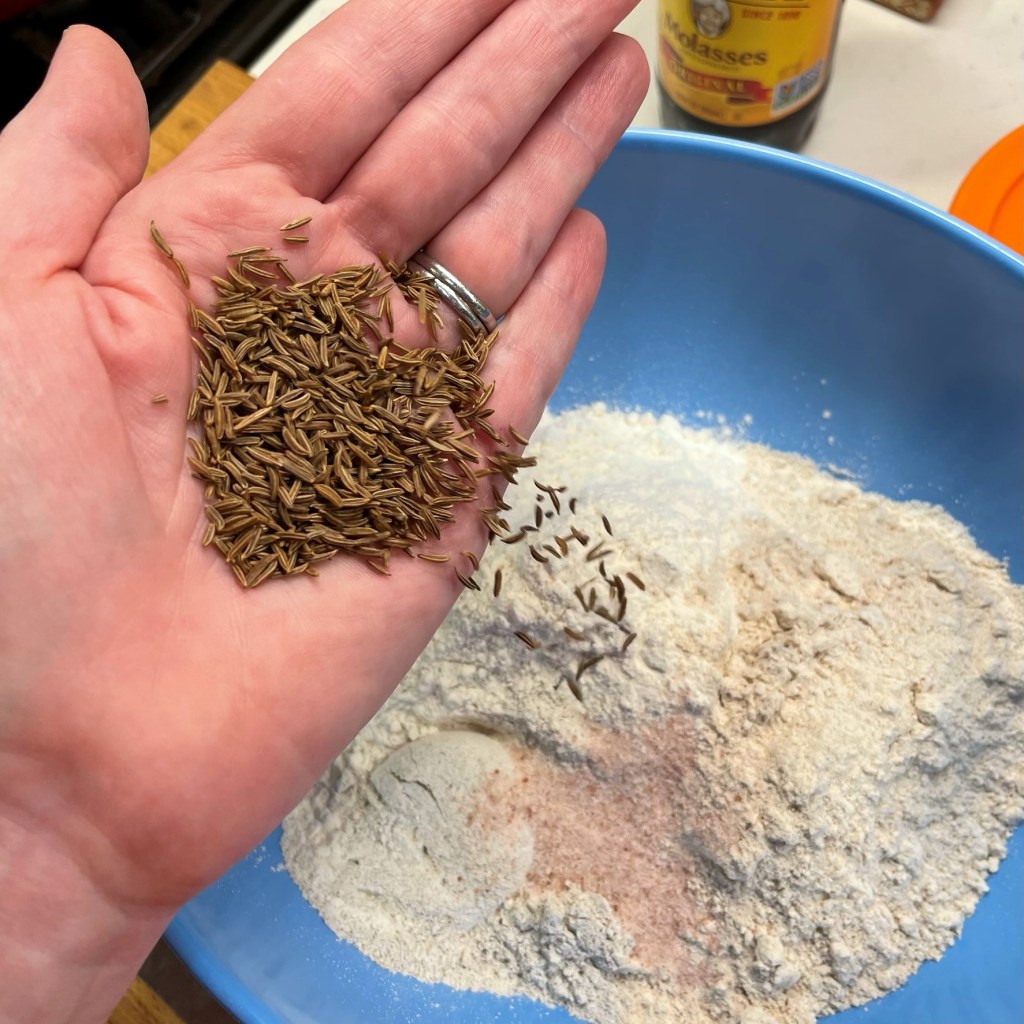
Get to know collard greens

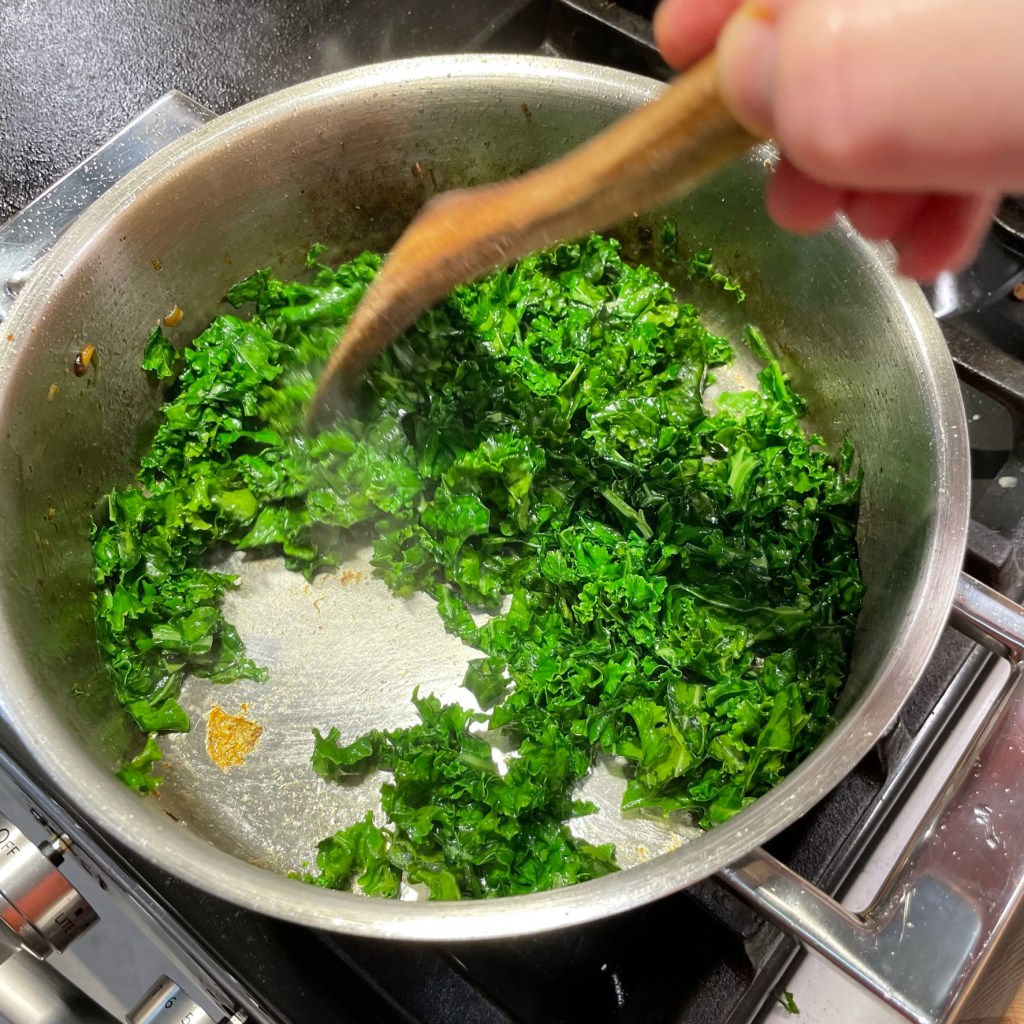
These sturdy leafy greens are similar to Lacinato kale (which is sometimes called dinosaur kale) in that they are huge, earthy and leathery. To cook collard greens, you must either boil and boil and boil them, or do as I do and fry them up in some kind of oil before braising a shorter time in liquid. The amount of liquid can vary, depending on how tender you’d like the collards to be. If you like them bright green and hefty— first of all, you clearly ain’t from the South— then you’ll use minimal liquid and cook them a shorter time. If you want them to be fall-apart tender, almost like sautéed spinach, then get that pot a’boilin’ from breakfast onward.

Either way, you have to prep the greens. Let’s get to it!

How to prep collard greens for cooking

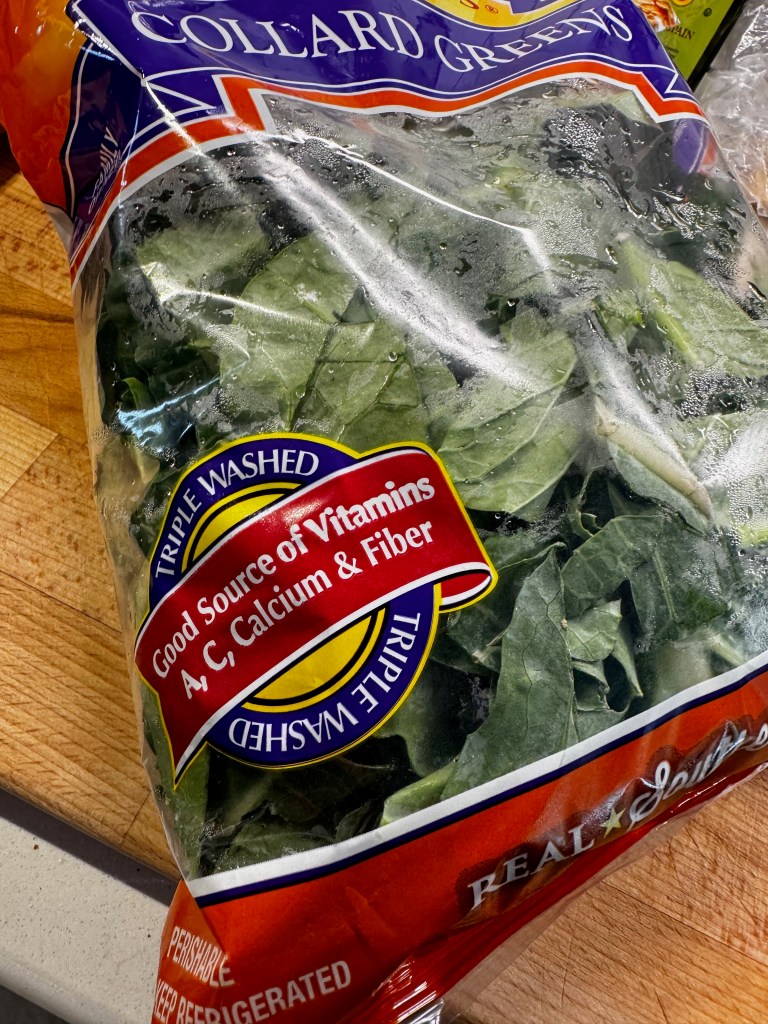
In my earlier collard cooking days, I purchased the queen pillow-sized bags of chopped and pre-washed collards, believing that it would be a shortcut. But I spent so much time picking through the chopped pieces to remove all the tough stems that are as big around as a #2 pencil, I quickly realized that this “shortcut” wasn’t worth the trouble.


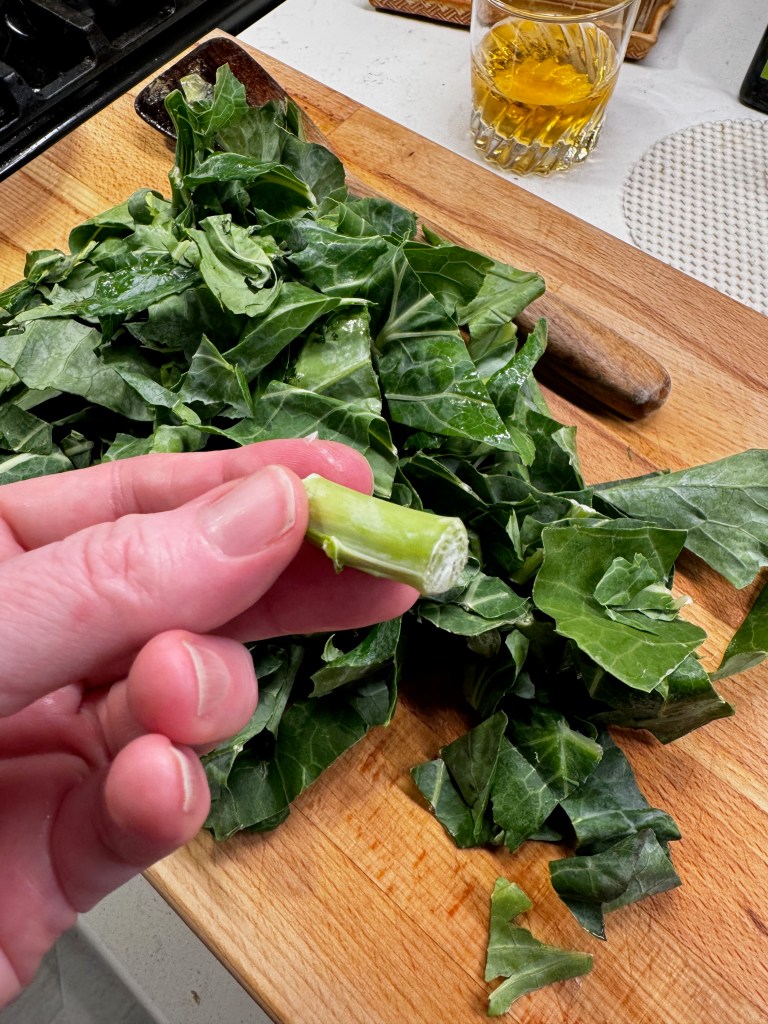
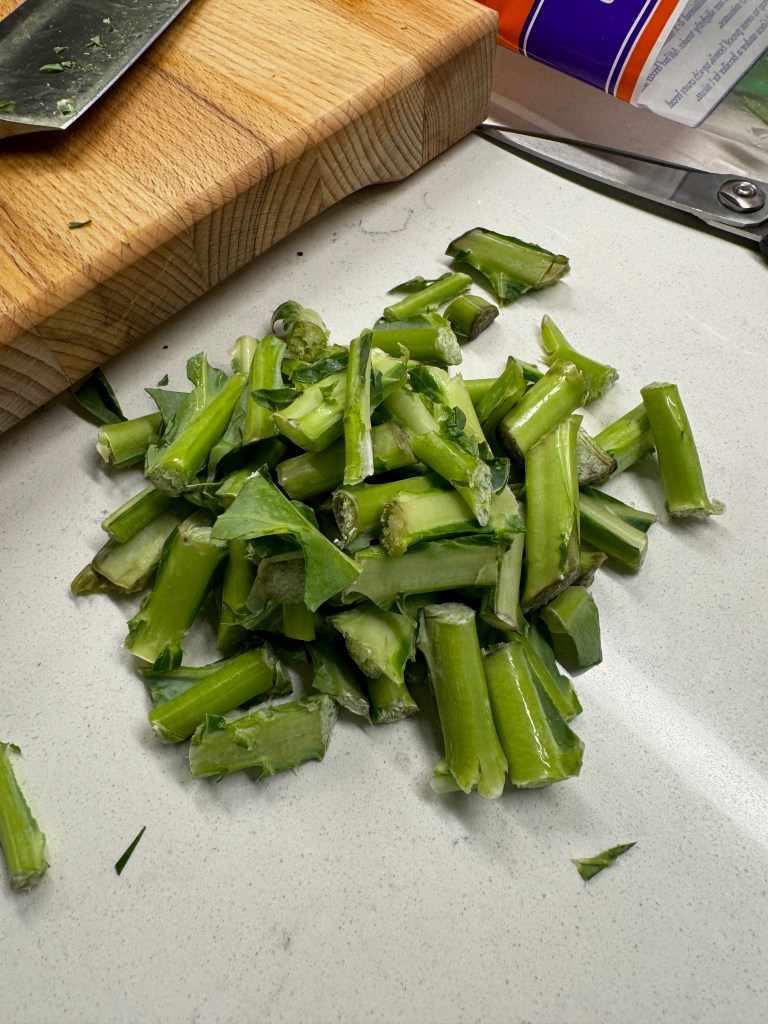
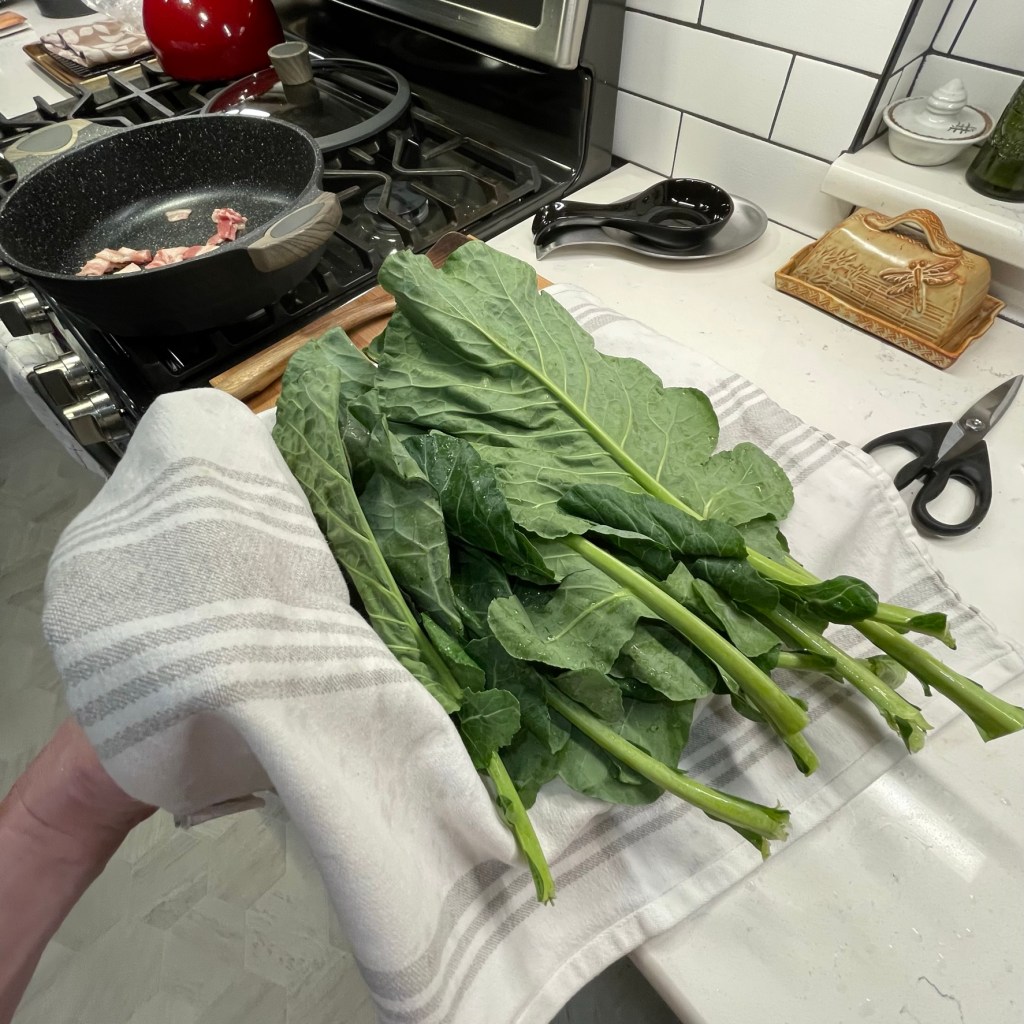
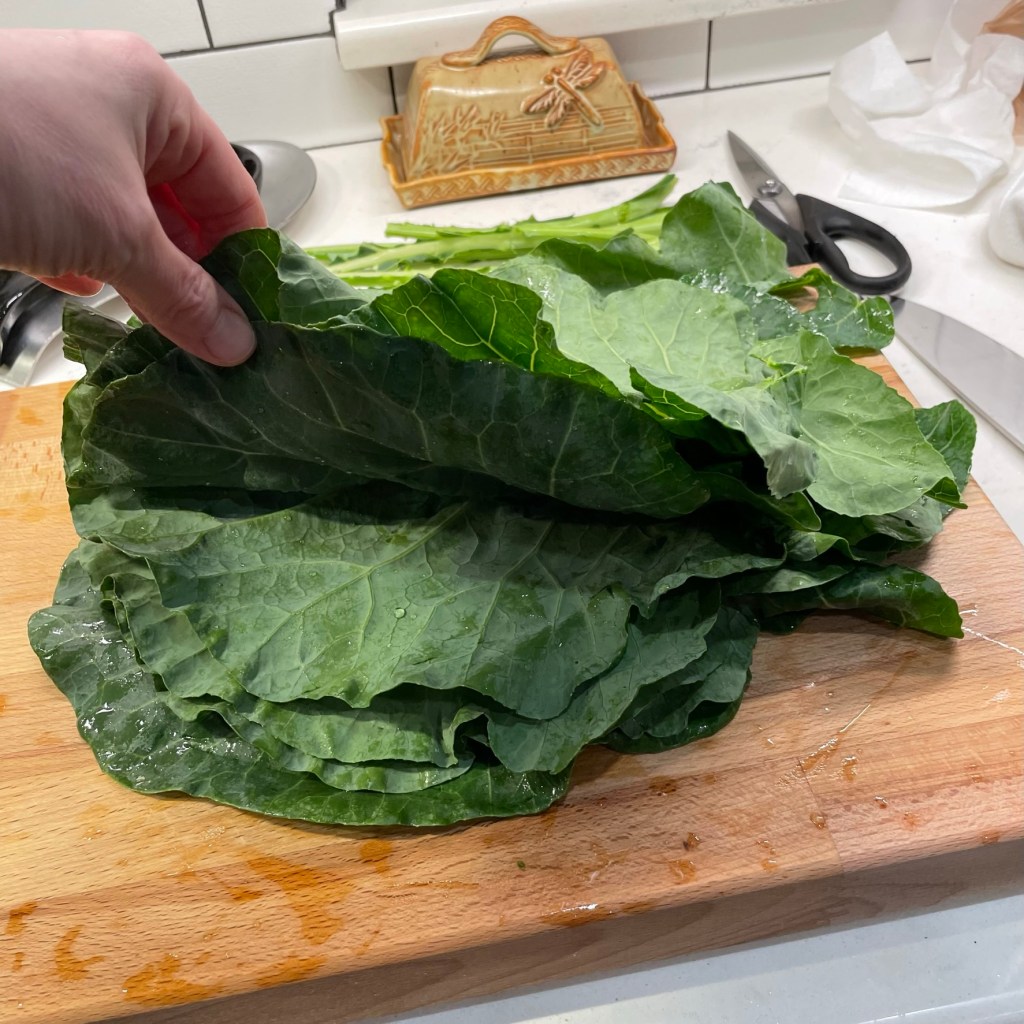
The easier way is to do them fresh, and it involves two quick tricks. After rinsing the collard greens really well, hold a stem firmly with one hand, keeping the other hand at the base of the stem and give the stem a good pull, zipping the leaf right off. Next, wrap the collard leaves in a clean kitchen towel to blot away excess moisture. 

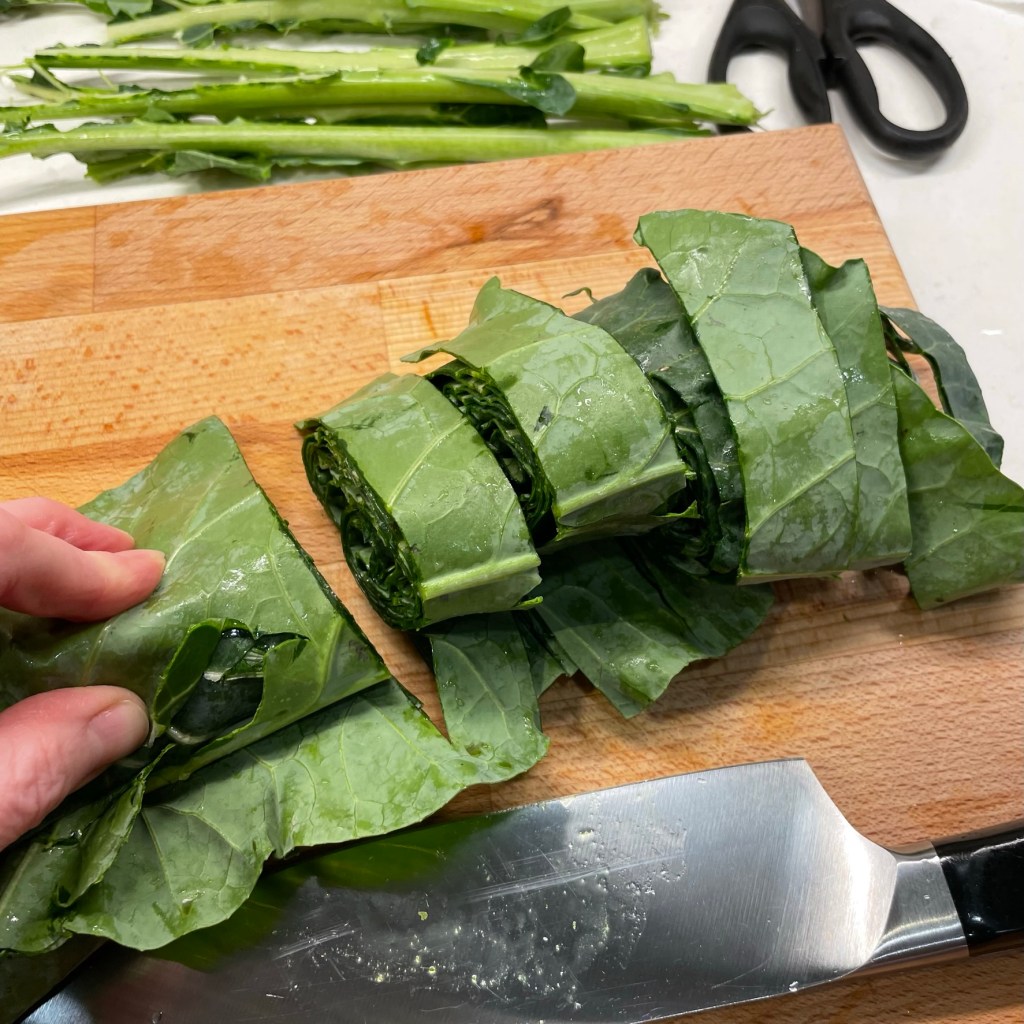
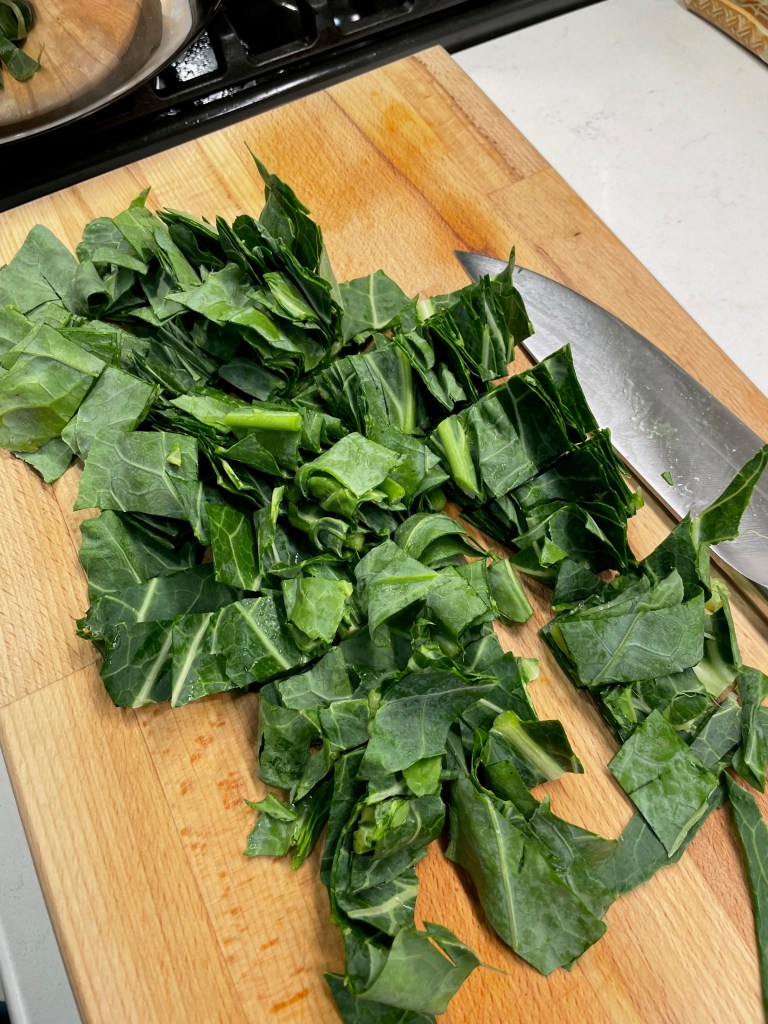
Now, here comes the second trick, and it’s a fun knife technique called chiffonade that you might use when garnishing with fresh basil. Stack the collard leaves together as neatly as possible, and then tightly roll the stack up lengthwise so it looks like a big cigar. Make cross cuts with a sharp knife, and then cut through those pinwheel slices. Voilà, a quick and easy pile of chopped collards (and no bulky stems).


Let’s get cooking!

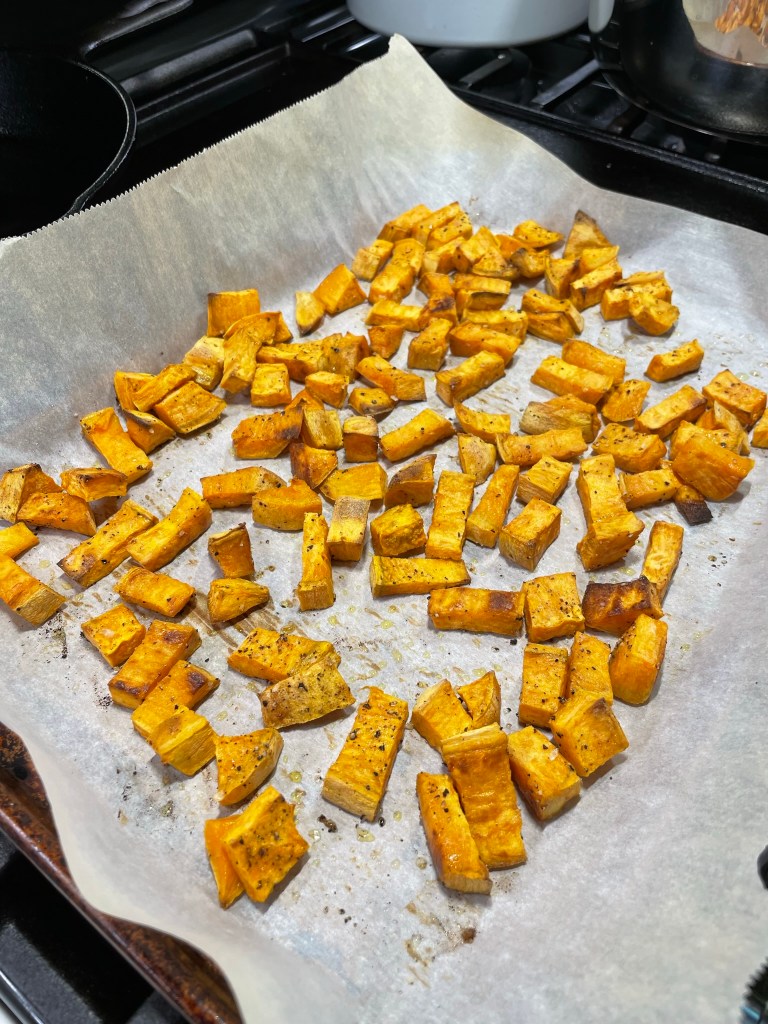
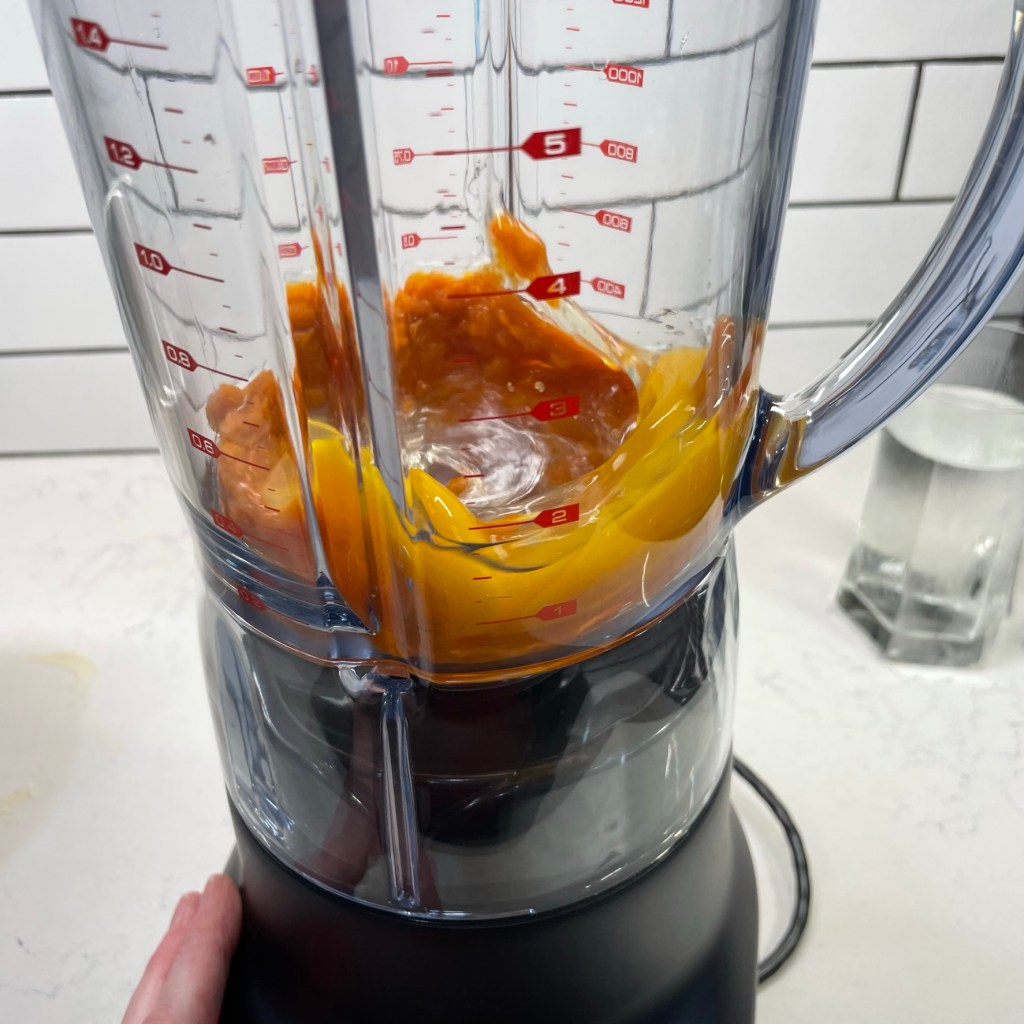
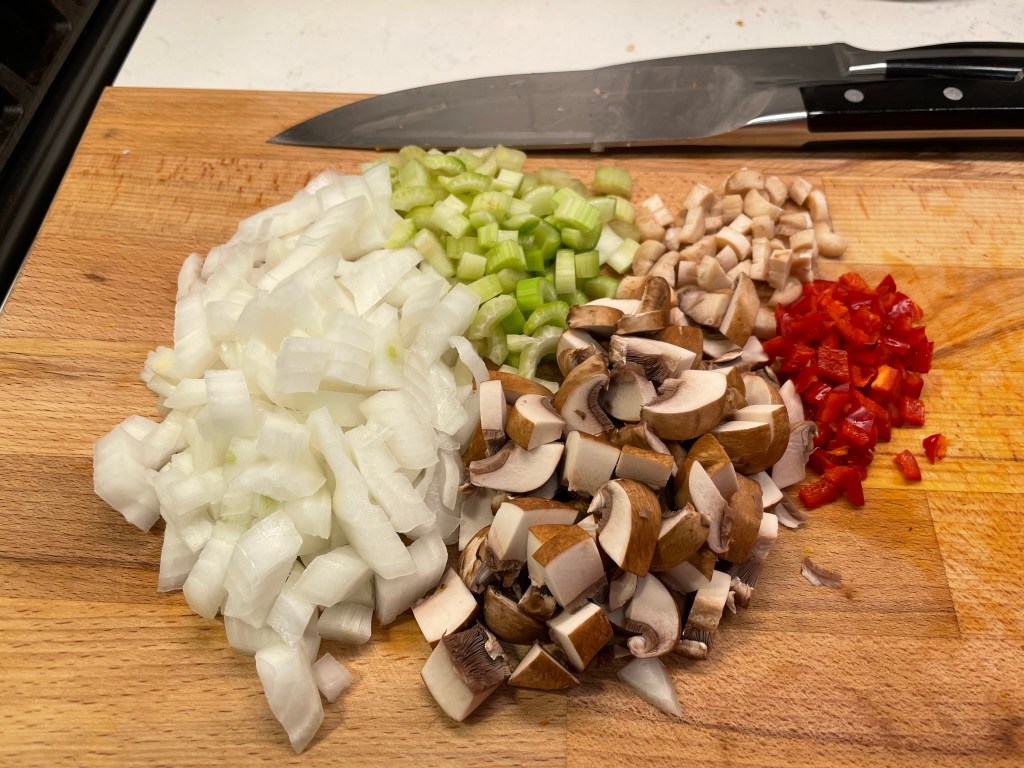
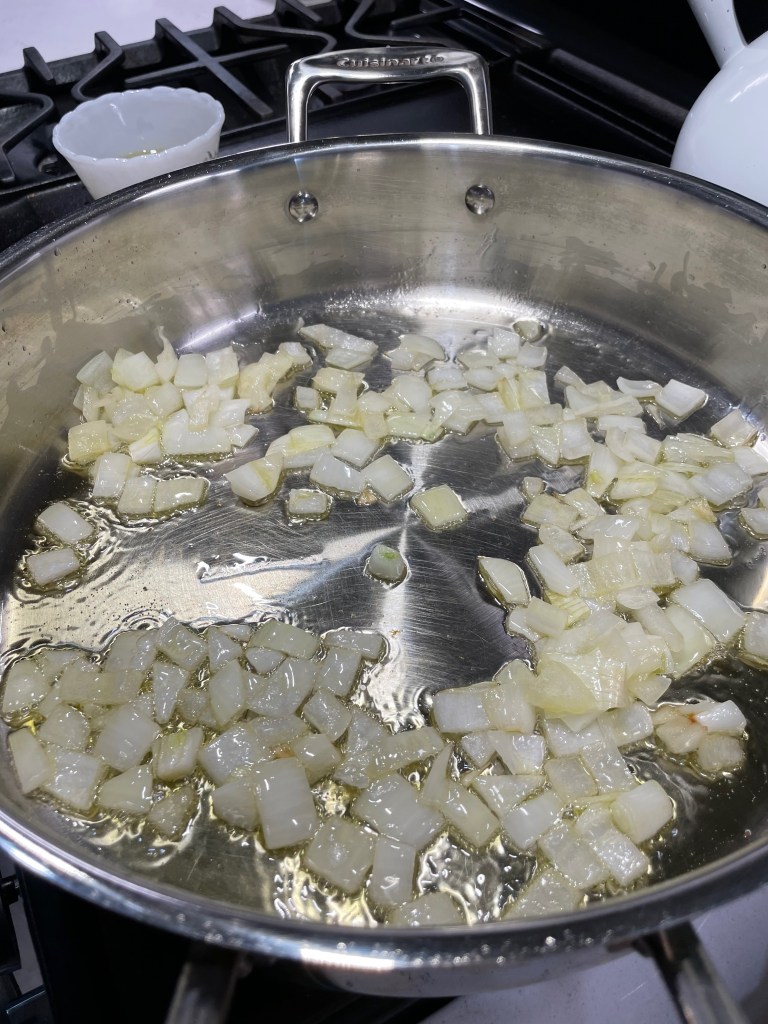
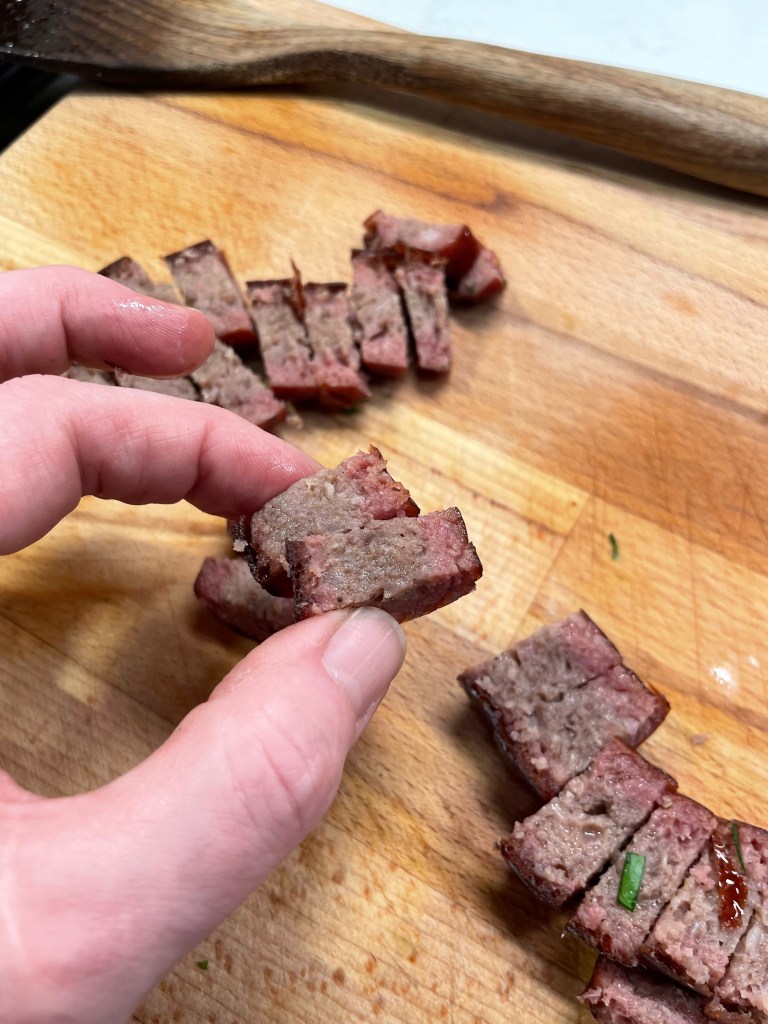
Most of my collard recipes involve bacon, but Les had brought in a successful haul from the smoker on the day that I made these, and I had a hunch that smoked sausage would be a terrific substitute. When I reached for a sweet onion in my countertop basket, I noticed a lone sweet potato in there and couldn’t help throwing some cubes of that in there, too.


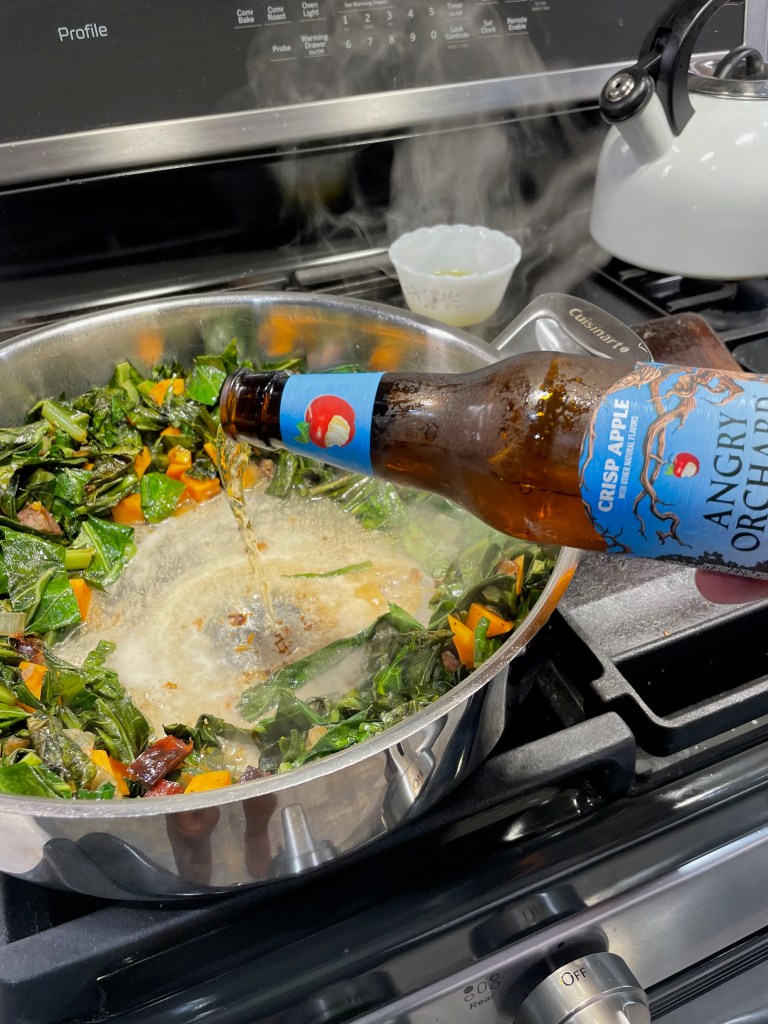
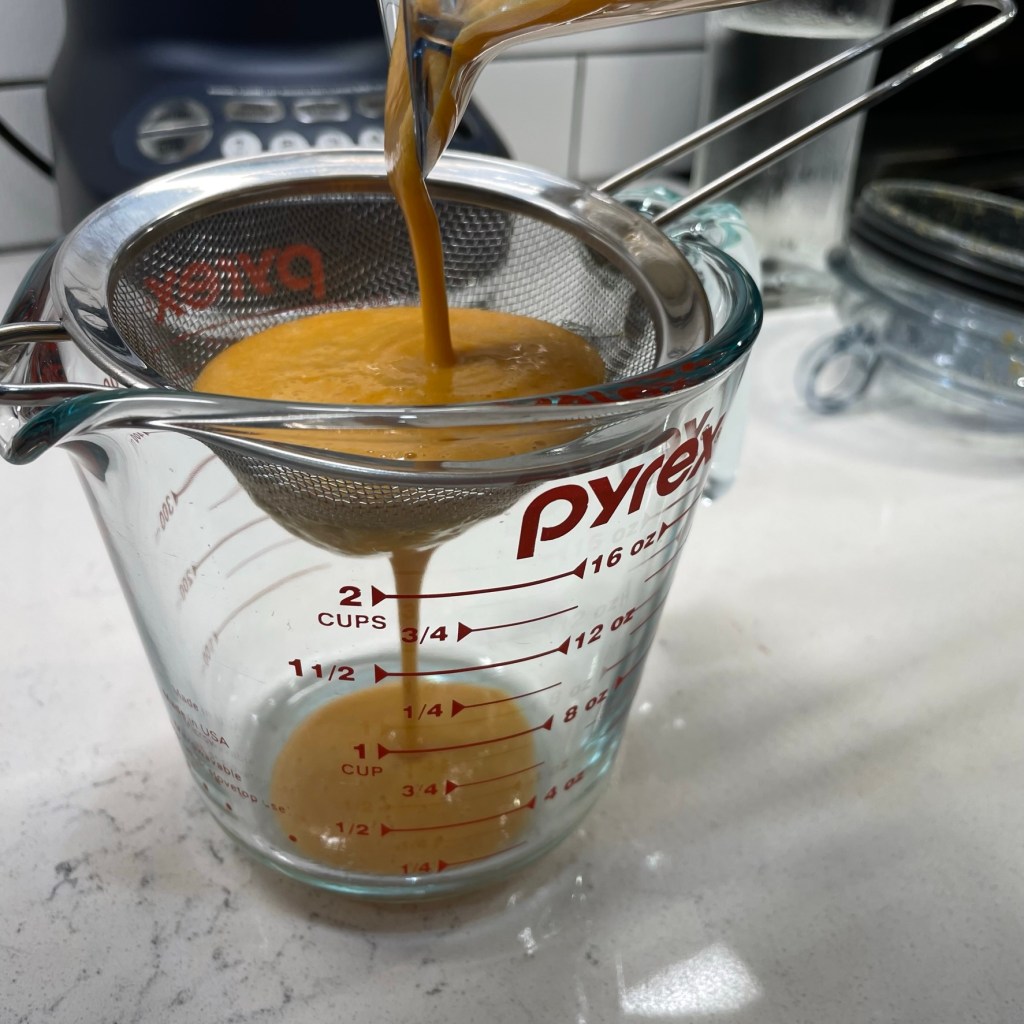
The only remaining decision was a braising liquid, and that’s when I spotted a bottle of Angry Orchard hard cider in the back of the fridge. I’m not suggesting that regular apple cider wouldn’t have worked (though I expect it would have leaned very sweet), but I know from past adventures that a splash of booze helps tenderize the greens better than other liquids, so I went for it. I also appreciated that the hard cider had a tartness to balance the smoky sausage and sweet potatoes. My lucky day!


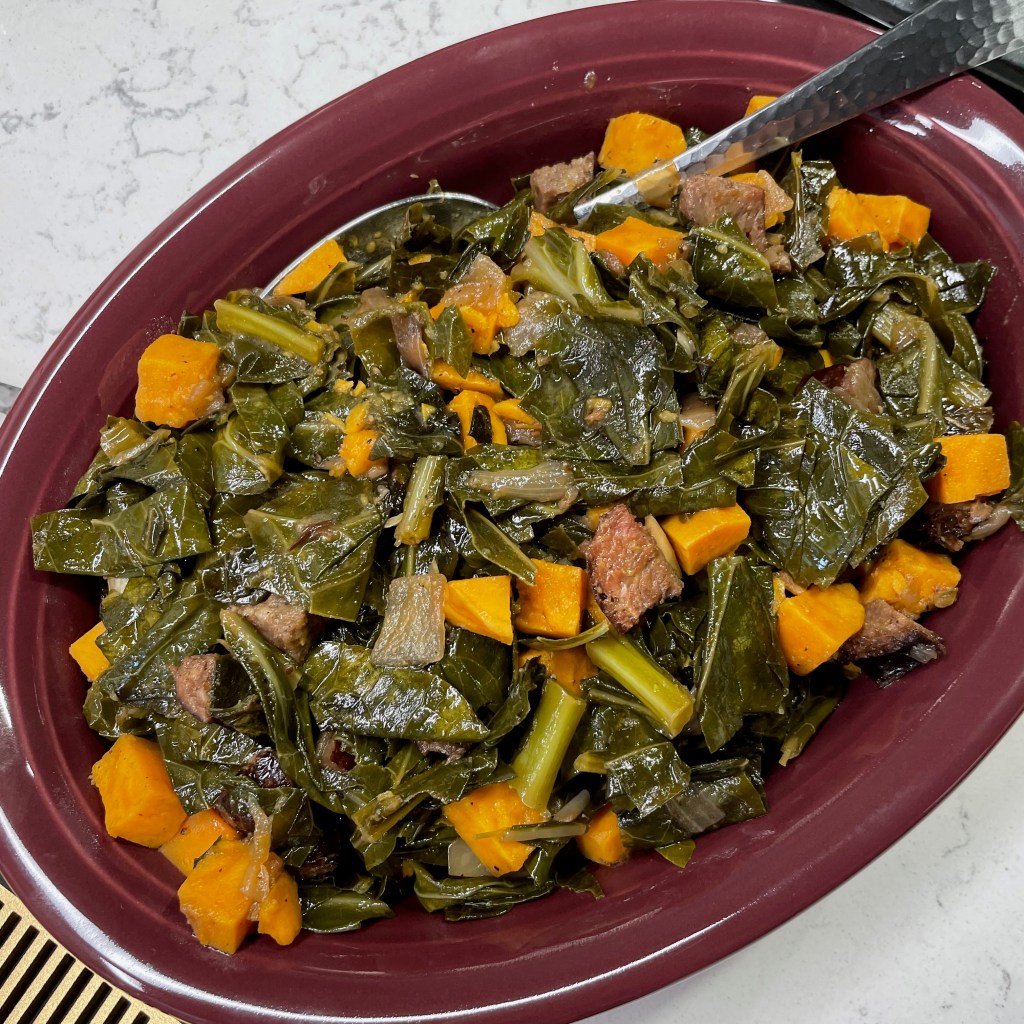
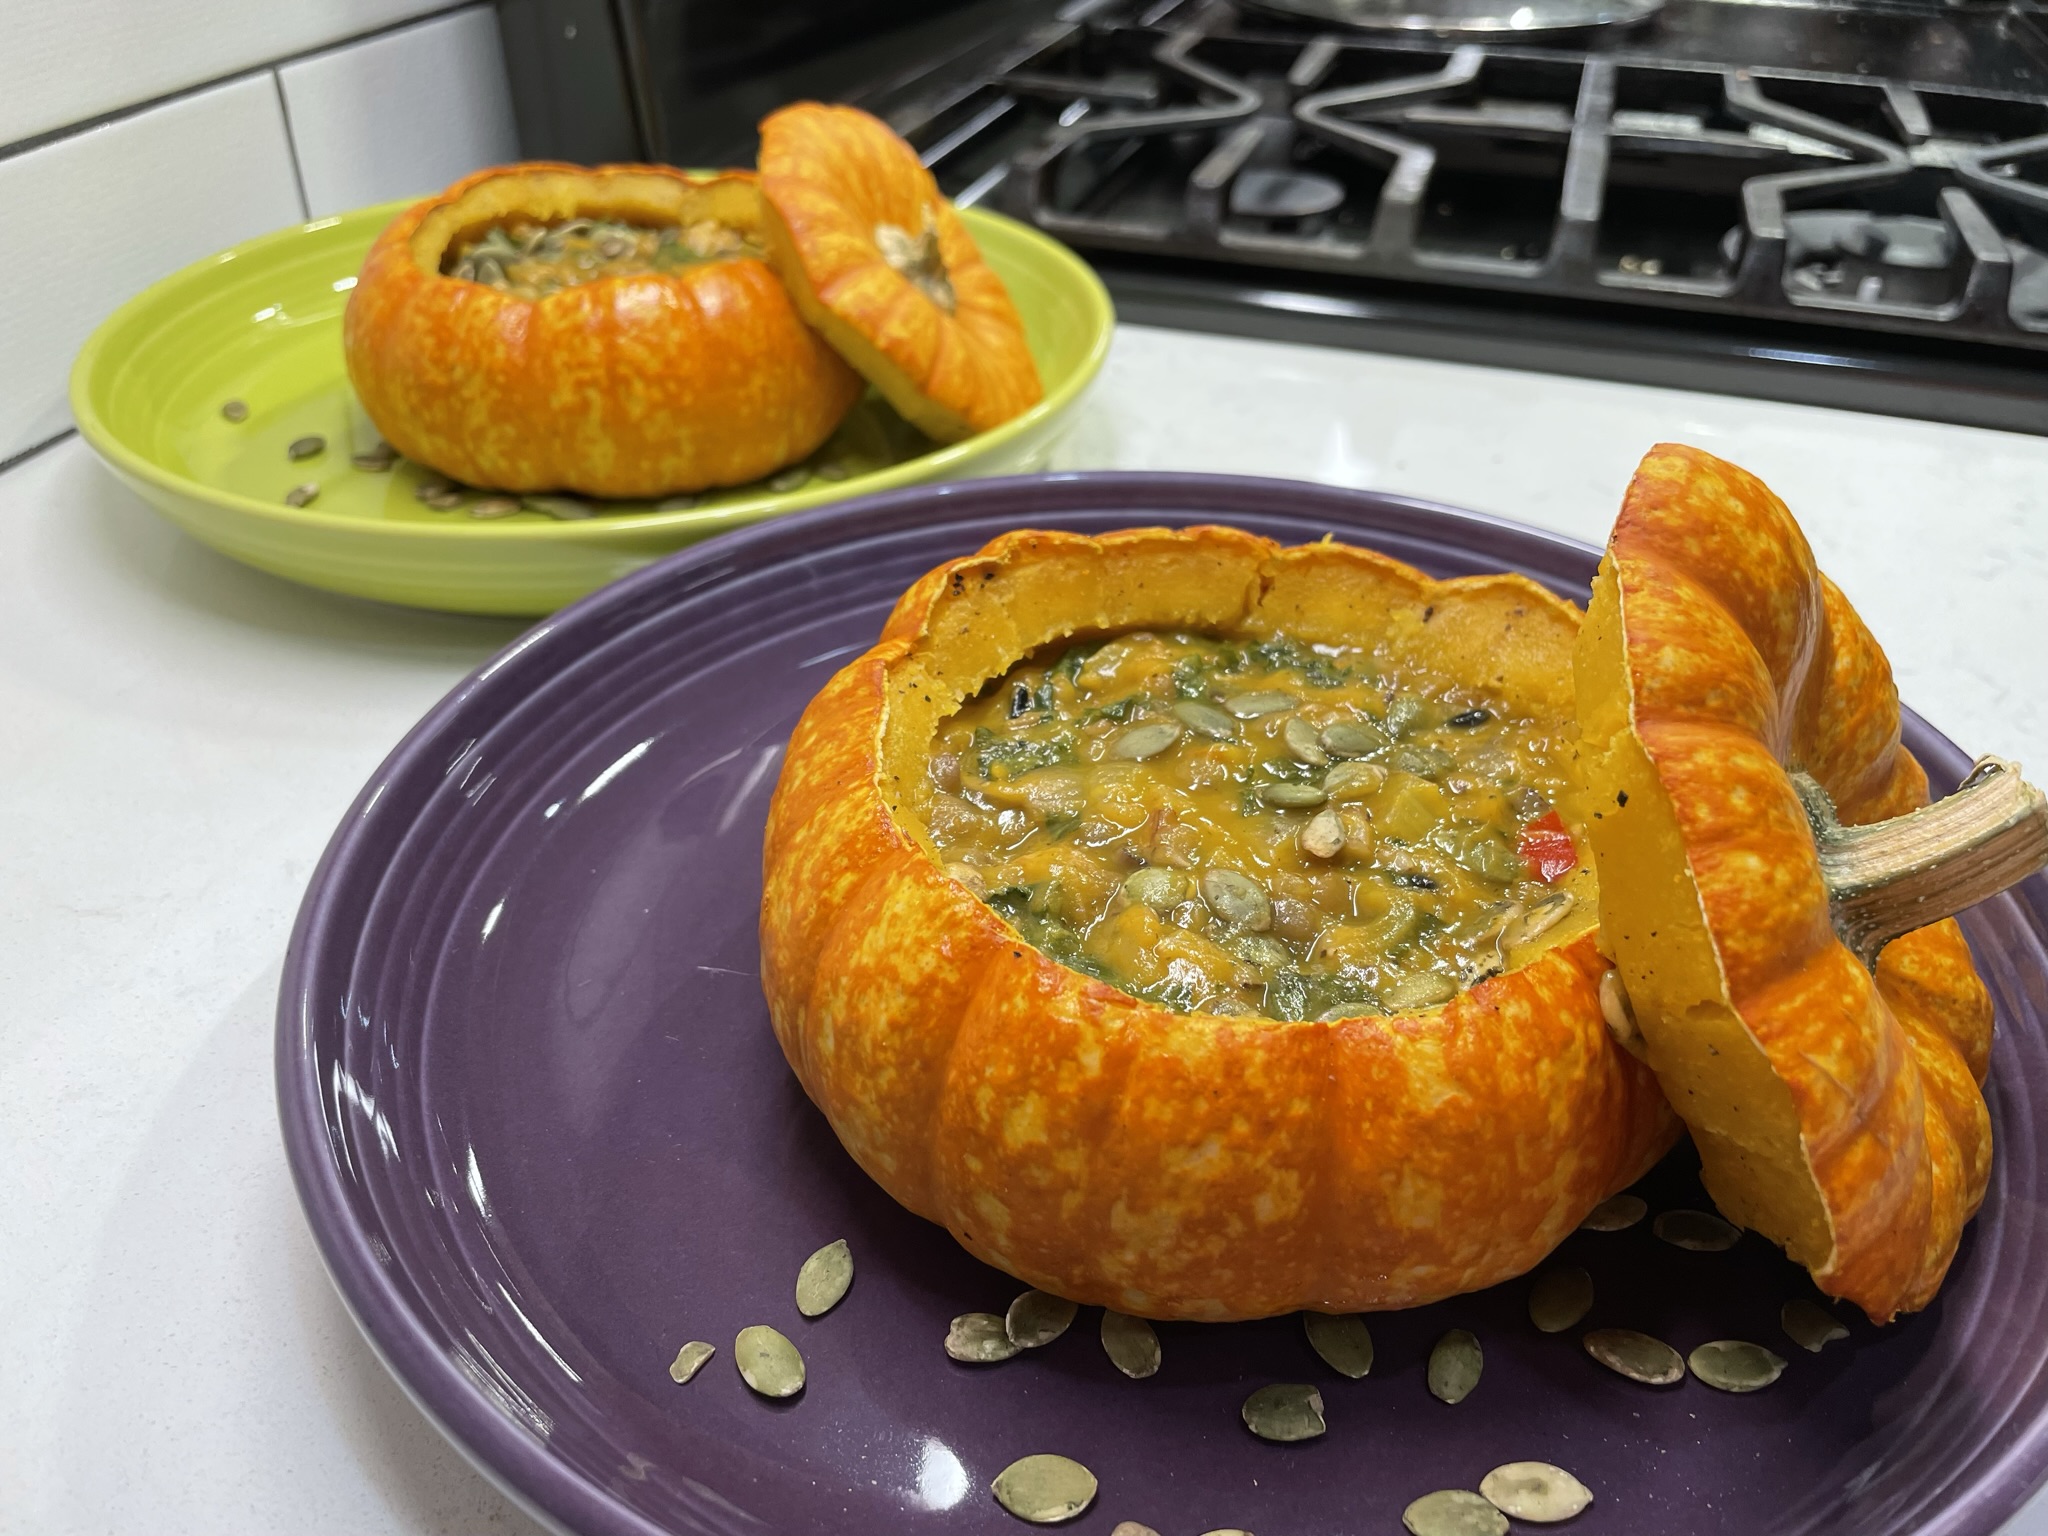
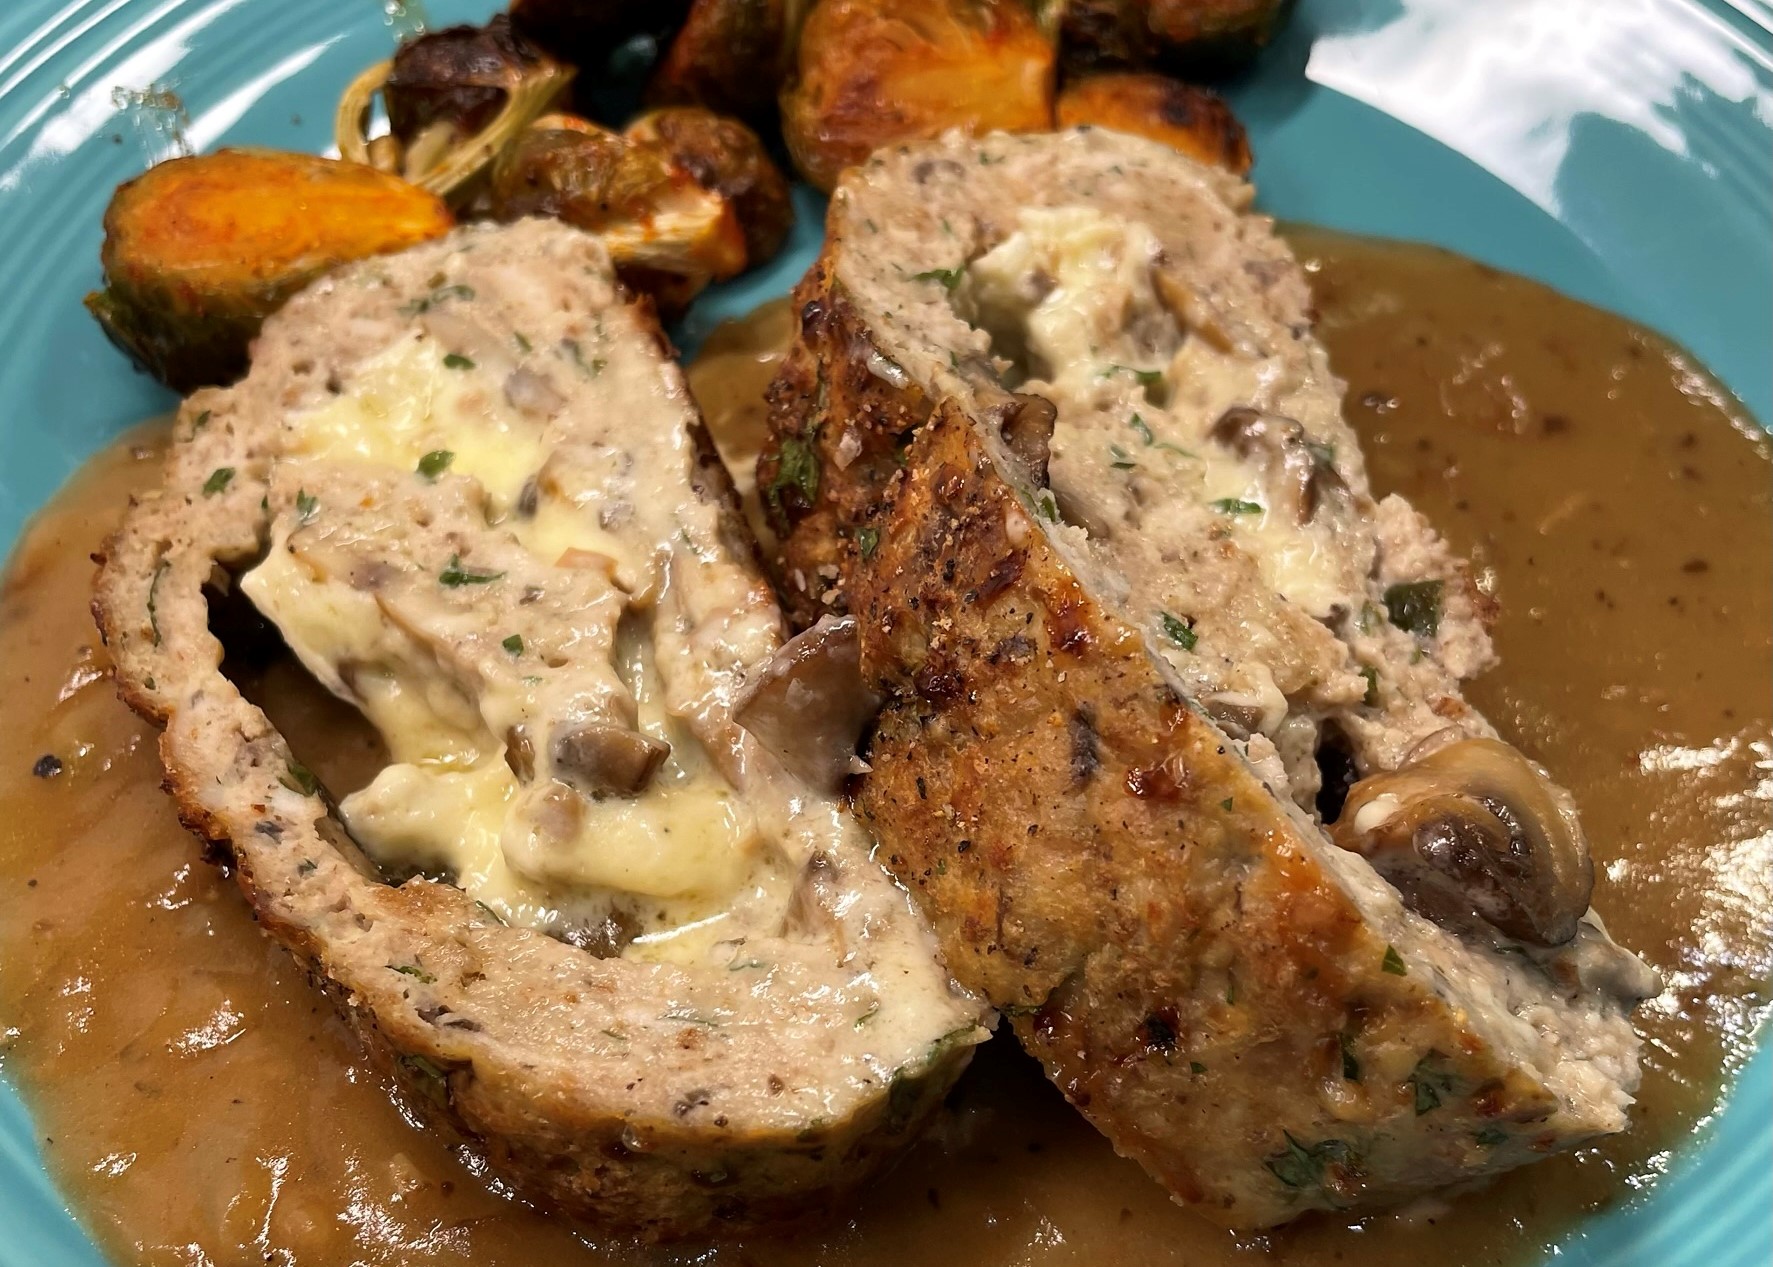
This autumn spin on collard greens would make a great addition to the Thanksgiving table, especially in the South, or serve them up with meatloaf, fried chicken or mac and cheese for any Sunday supper!

Cider-braised Collards with Sweet Potatoes and Smoked Sausage

  • Servings: About 8
  • Difficulty: Average
  • Print

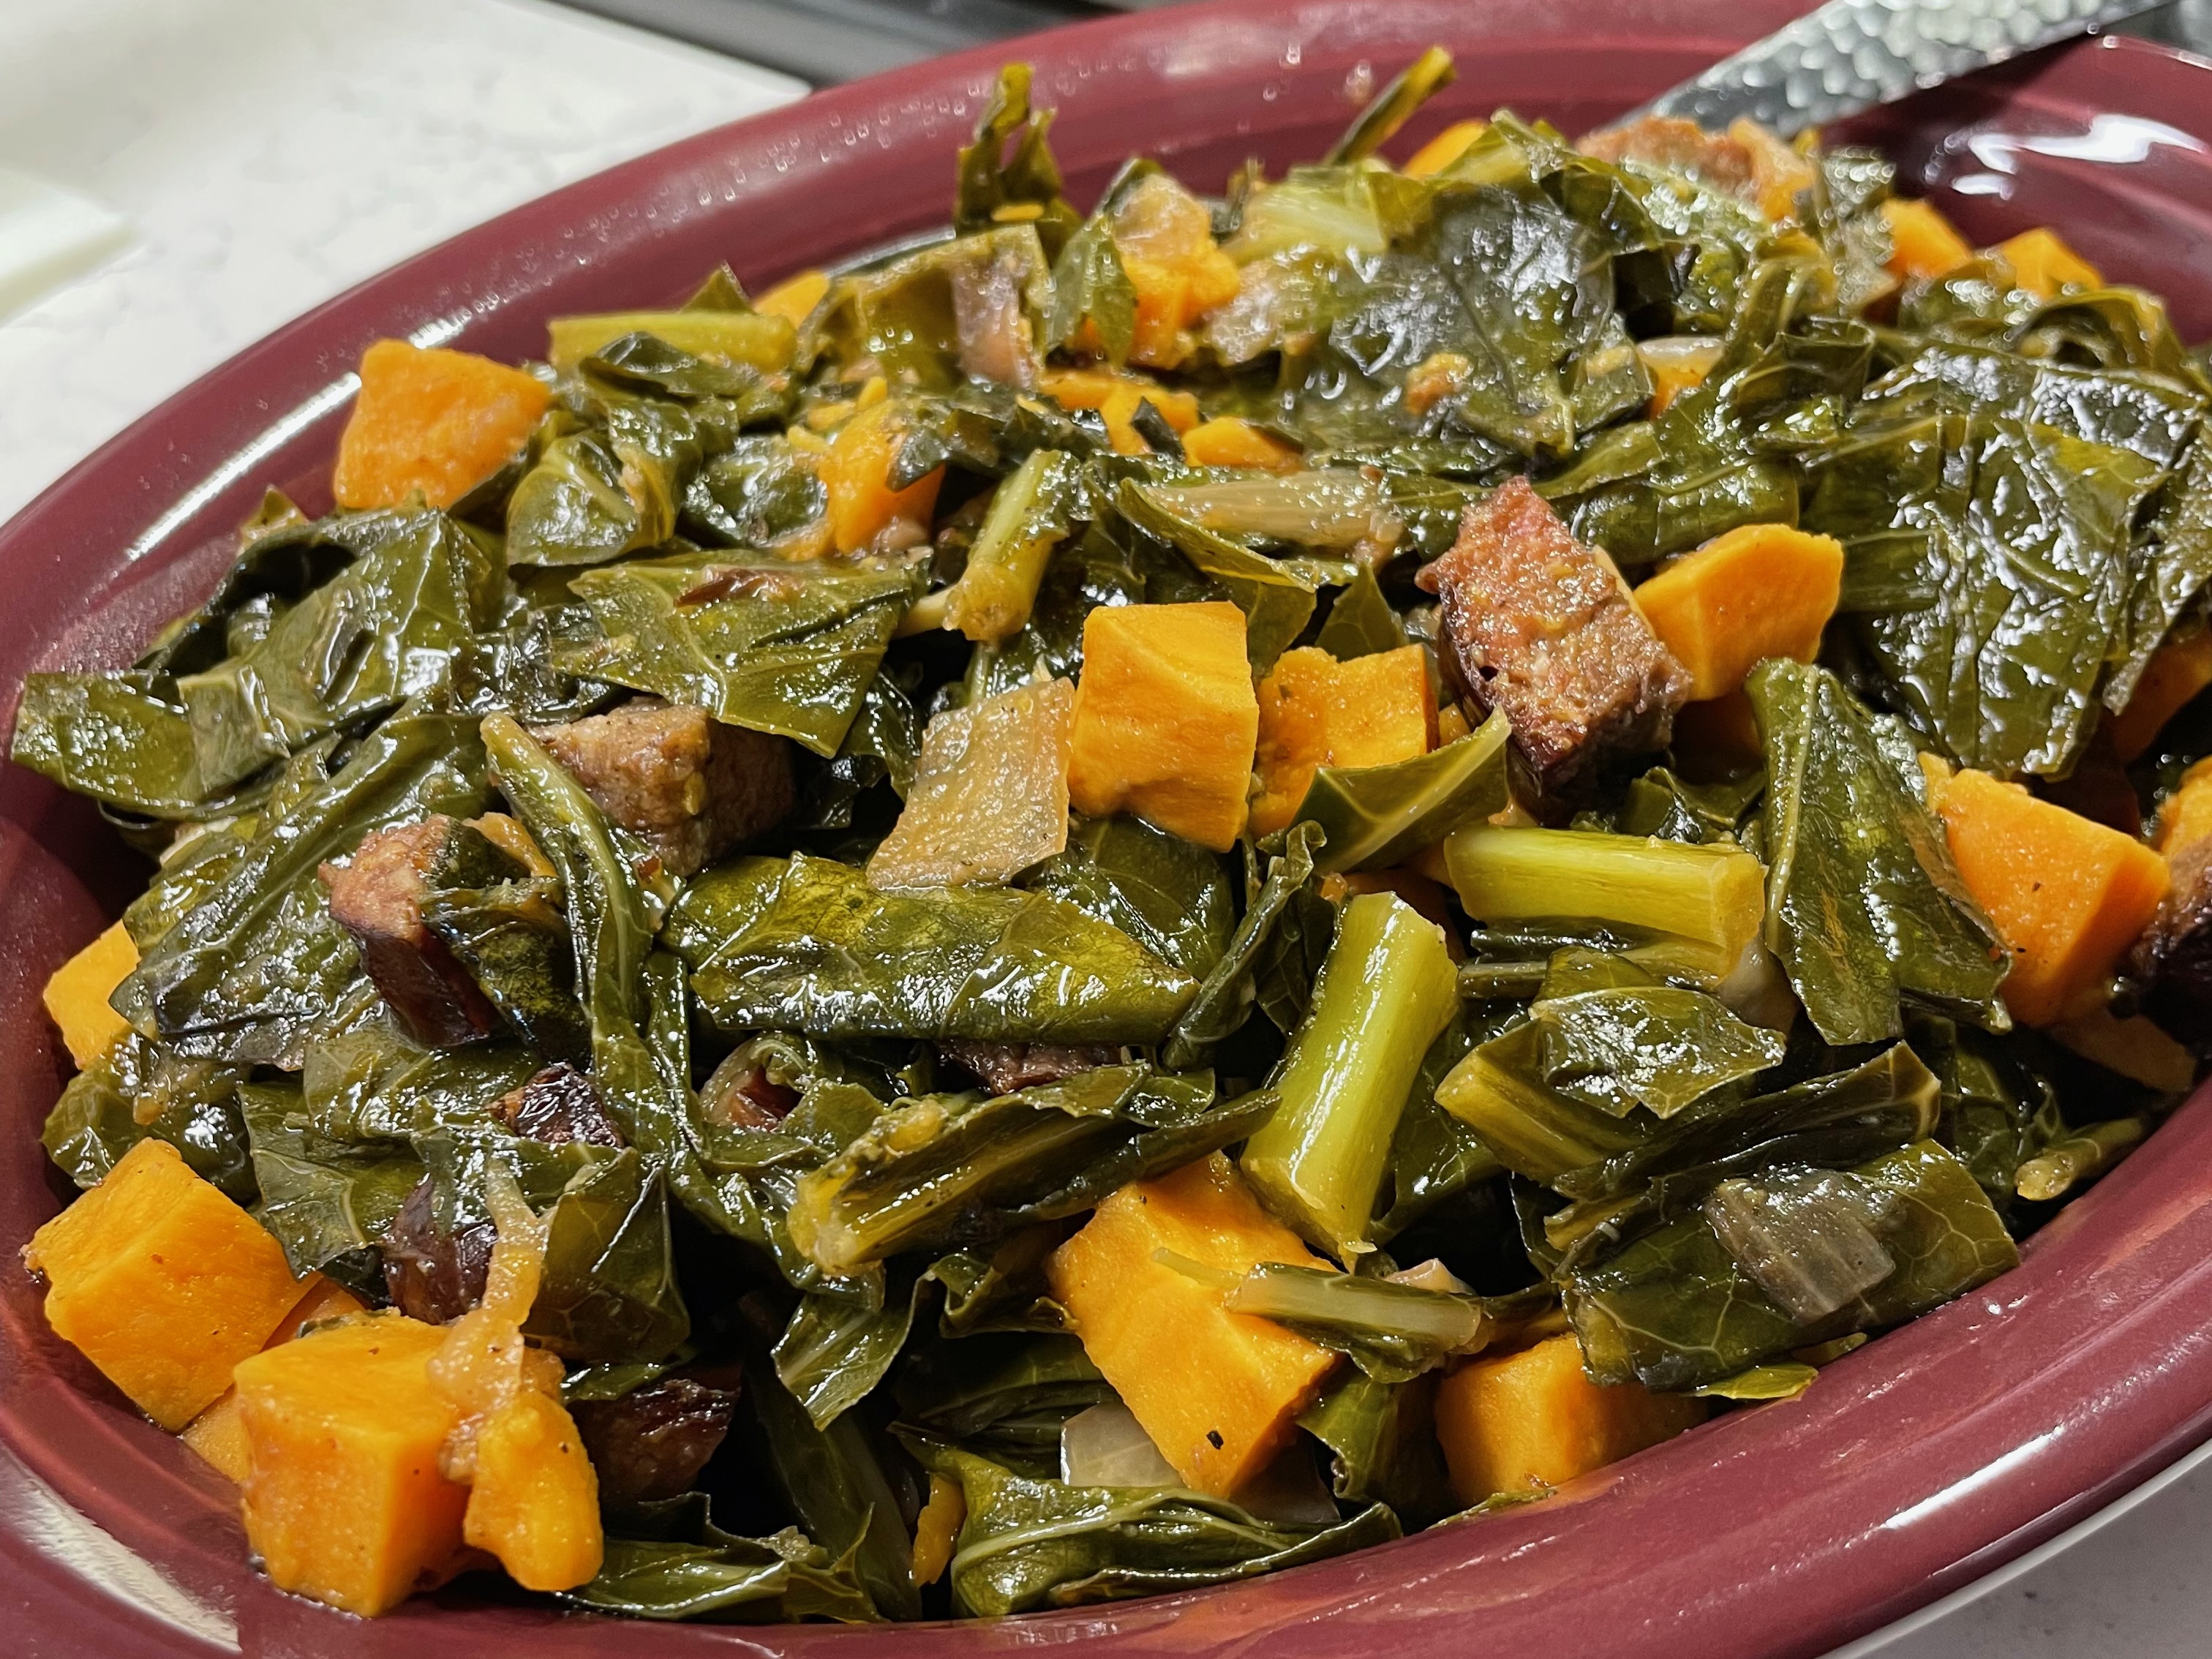
There's so much autumn flavor going on in these collards, they'd be perfect as a side to your Thanksgiving meal!


Ingredients

  • 1 large bunch fresh collards, cleaned and chopped
  • 1 small Vidalia or other sweet onion, chopped
  • 2 Tbsp. extra virgin olive oil
  • Salt and pepper to taste
  • 1 link smoked sausage, halved lengthwise and then sliced
  • 1 medium sweet potato, peeled and cubed
  • 1/2 bottle Angry Orchard (or other brand) hard apple cider

Notes: The smoked sausage I used was a local butcher product, and it was seasoned with autumn spices. Any smoked sausage would work here, including kielbasa, Andouille or even hot links. Consider the sodium content of the sausage so that you may adjust additional salt accordingly.

Directions

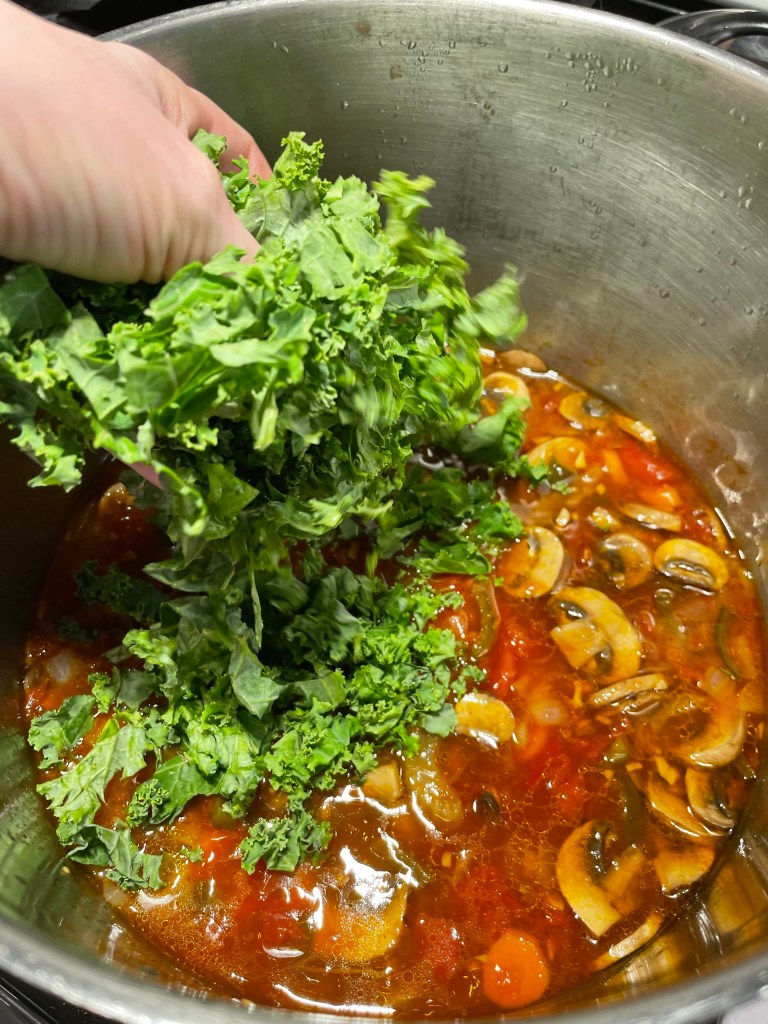
  1. Heat a heavy-bottomed wide pot over medium heat. Swirl in olive oil and sauté onions briefly until just barely tender. Add collards, a handful at a time, until all are in the pot. Season with salt and pepper, and toss until all collard leaves are wilted.
  2. Add sweet potato cubes and smoked sausage and toss until the contents of the pot are heated through.
  3. Pour in hard cider, give it a stir, and then cover the pot and reduce heat to a simmer. Cook the collards for 20 to 45 minutes, until collards are tender to your liking. If you like collards extremely tender, consider delaying addition of the sweet potatoes until about a half hour before the finish.


Caramel Apple Blondies

What is it about Autumn that everyone finds so appealing? It is easy to imagine that I’m among the majority when it comes to fall being my favorite season. Everyone I know seems to mention that it’s theirs also, so I did a little investigating to see if this is just confirmation bias or a birds-of-a-feather situation. Let’s see what the data says.

A survey reported by CBS says as many as 45% of Americans favor fall over the other three seasons combined. And another poll by Morning Consult—a business intelligence company that specializes in survey data— breaks it down into deeper demographics to reveal that Autumn is the clear favorite, especially among women, especially Gen Xers, and especially in the South. That’s me, on all three counts!

No wonder I get so excited about cooler temperatures, boots, sweaters and pumpkin spice. Indeed, this is my favorite time of year, and I’ve put a new spin on one of my own recipes to highlight one of the season’s best flavors, apple. And, in honor of all the state and county fairs that are happening this time of year, I thought it fitting to wrap a little caramel around the apple for even more nostalgia.

My caramel apple blondies are a deliciously sweet, caramel apple-y treat that’s perfect for a Halloween party, a gift for a favorite teacher or new neighbor, or just tucked into your grandkid’s lunch box.

It took great restraint not to cut into them straight from the oven!

What ingredients are in caramel apple blondies?

A blondie is essentially a cookie bar, with a dense, chewy texture and often includes some kind of fun mix-in, such as chocolate chips or nuts. Similar to a brownie, but without chocolate, a blondie is made from a dough that resembles the base of a chocolate chip cookie, with plenty of butter, brown sugar, egg, vanilla, flour and leavening, such as baking powder.

For this recipe, I’ve leveraged the same technique as in last year’s pumpkin chai blondies, using a concentrated paste of cooked down apples this time— otherwise known as apple butter— to give a distinct apple flavor without the high amount of moisture that would have been in fresh chopped apples. The caramel element is an easy grocery store item, the same stuff you pick up in the produce department for dipping apple slices. 


To keep these blondies a bit “healthy-ish,” I subbed in a half amount of whole wheat pastry flour. And in case you wonder why the melted butter is soooo dark in the pan in my ingredients photo, it’s because I tried a new (and very flavorful) trick when I made my browned butter.

Check out that very browned butter!

How to make browned butter even better

If you spend any time at all on social media or the internet, you may have seen this new trend of adding powdered milk to the butter as it browns. Given that it’s the milk solids that actually brown, it stands to reason that increasing the milk solids will amp up the flavor. And holy moly, it sure did! I used salted butter, by the way, though most baking recipes call for unsalted. Why? Because salt in desserts does the same thing as salt in savory dishes— it shoves the most important flavors to the forefront.


How do you make caramel apple blondies?

The rest of the recipe is very simple. Mix together the melted butter and brown sugar, then add the egg, apple butter and vanilla. Add the dry ingredients, half at a time, mixing only until all the flour is incorporated. 


Spread the batter evenly into a buttered, parchment-lined pan, then spoon and swirl a bit of warmed caramel dip over the top. Scatter a few tablespoons of Heath candy bits on top and bake until the blondies test done with a clean toothpick.


Cool the blondies completely before cutting them, and if you really want to push them over the top, serve them with a scoop of my easy cinnamon ice cream. We enjoyed them this way, and I got so excited, I completely forgot to take a picture. But you can imagine, right? 😉

Caramel Apple Blondies

  • Servings: 12 or 16
  • Difficulty: Average
  • Print

Caramel and apples reminds me of the treats I used to look forward to at the county fair. These blondies are just one of many reasons I'm excited about fall.


Ingredients

  • 2 sticks salted butter
  • 2 Tbsp. nonfat dry milk powder
  • 3/4 cup light brown sugar, packed
  • 1 large egg (room temperature)
  • 1 cup apple butter (homemade or store bought)
  • 2 tsp. real vanilla extract
  • 1 1/4 cups all-purpose flour (see notes for measure instructions)
  • 1 cup whole wheat pastry flour (or sub in regular all-purpose flour if desired)
  • 3/4 tsp. ground cinnamon
  • 1/2 tsp. kosher salt
  • 3/4 tsp. baking powder
  • 1/4 cup caramel dip (find in the produce section, near the apples)
  • 1/4 cup Heath candy bits (optional, sub chopped pecans if desired)

Notes: Unsalted butter can be used, if that’s what you have on hand; double the kosher salt if you go this route.

When measuring flour, use the “fluff, sprinkle, level” method rather than scooping directly into the bag or container.

Directions

  1. Place the butter in a heavy-bottomed sauce pan over medium heat. Stir frequently, and when melted butter begins to brown, add the dry milk powder. Stir constantly, as the browning will happen quickly at that point. Remove from heat as soon as the butter reaches a copper color. Transfer to a measuring cup to cool.
  2. Preheat oven to 350° F, with oven rack in center position. Prepare a 9 x 13″ baking pan with a buttered parchment liner, leaving flaps on the long sides for easy lifting of baked blondies.
  3. In a large mixing bowl (or the bowl of a stand mixer fitted with paddle), stir together browned butter and brown sugar until evenly blended. Add apple butter and egg. Beat until combined and somewhat fluffy.
  4. In a medium bowl, whisk together flours with cinnamon, baking powder and salt. Add half the flour mixture to the apple mixture, folding just until all the dry ingredients are incorporated. Repeat with remaining flour blend. The batter will be very thick and dense.
  5. Spread batter evenly over parchment. Warm the caramel dip slightly in the microwave for easier swirling. Pipe or spoon caramel dip over batter and swirl with a chopstick or spoon handle. Sprinkle on Heath candy bits.
  6. Bake for 25 minutes, or until blondies are set but not overly dry. Remember that they will continue to cook for a few minutes after removal. As with brownies, the type of pan may affect the outcome. For a glass pan, add a few extra minutes to the baking time.
  7. Cool for at least 30 minutes before using parchment flaps to lift blondies from the pan. Cut into squares for serving. Keep leftover blondies wrapped or in a sealed container at room temperature for up to three days.


Sourdough Pumpkin & Sage English Muffins

It’s always a comical scene at Trader Joe’s this time of year, as every aisle, endcap and special display is loaded up with pumpkin spice goodies. Eager customers load up their carts with all the pumpkin spice cookies, donuts, oat milk, cold brew concentrate (guilty) and even candles and dog biscuits flavored with pumpkin spice. It’s a fall frenzy! Love it or hate it, this trend isn’t going away anytime soon. 

And though I personally love the pumpkin and sweet spice combination, I also love the savory side of pumpkin, which doesn’t get nearly enough attention when fall rolls around. Pumpkin on its own is not sweet at all— it’s a variety of winter squash, you know— but we have become so conditioned to think of it as a pie filling or latté enhancer that we sometimes miss the opportunity to let those savory aspects shine. 

Autumn Benedicts, anyone?

But today, these barely sweet, griddle-baked goodies are getting all the praise. I’ve made a few easy swaps from my go-to sourdough English muffin recipe, working in pure pumpkin and a swap of molasses, plus a hint of onion and some fresh chopped sage leaves. 


The dough is easy to work, and there’s no need to even turn on the oven because these babies bake on a griddle or in a hot cast iron pan. Let them bring some seasonal pizzazz to your breakfast sandwiches and autumn brunches. Also perfect just toasted with butter. 

I want one of these every day until Spring!

Welcome, fall. We are so glad you’re here!


Sourdough Pumpkin & Sage English Muffins

  • Servings: 12 muffins
  • Difficulty: Average
  • Print

This easy recipe gives pumpkin a chance to show off its savory side. With onion, sage and a touch of molasses, these griddle-baked muffins are ready to elevate your autumn breakfasts. They also work great for turkey sandwiches!


Ingredients

  • 106 g pumpkin puree
  • 170 g warm water
  • 28 g olive oil
  • 113 g ripe sourdough starter
  • 15 g molasses
  • 1 Tbsp fresh sage leaves, chopped
  • 1 tsp onion powder
  • 100 g white whole wheat
  • 320 g all-purpose
  • 22 g dry milk powder
  • 1 1/2 tsp salt
  • 1 tsp instant dry yeast, optional for quicker rise
  • cornmeal for dusting muffins before baking

Note: These english muffins will freeze beautifully. Fork-split them all the way through, and pop them into a zip top freezer bag. Press out as much excess air as possible before sealing. When you are ready to serve, either defrost them for an hour or two, or pop them into the toaster on the defrost setting for a few minutes before toasting.

Directions

  1. Combine pumpkin, water, olive oil and molasses in a measuring cup with a spout. Warm in the microwave for 30 seconds if the pumpkin is cold.
  2. Mix together the starter and pumpkin mixture in the bowl of a stand mixer, fitted with the paddle blade. Blend until smooth.
  3. Whisk together dry ingredients, plus sage, in a separate bowl. 
  4. With mixer running on lowest speed, add dry ingredients by the spoonful, just enough to reduce the “splash” of the wet mixture. Stop the mixer and add remaining dry ingredients, then mix on low speed until all the flour is incorporated. Scrape down off the paddle and cover the bowl to rest the dough for about 20 minutes. 
  5. Switch to the dough hook and knead for about 6 minutes until dough is smooth and shiny. Transfer dough to a large bowl, sprayed lightly with oil. Cover and ferment in a warm spot of the kitchen until dough is quite puffy, which could be 2 to 3 hours (or less, if using the yeast).
  6. Transfer dough to a lightly floured countertop and cut into 12 equal pieces. Shape the pieces into balls and flatten each ball with your fingertips onto a piece of parchment paper, sprinkled lightly with corn meal. They should measure about 3 1/4” across. Sprinkle the tops with additional corn meal. Cover loosely with oil-sprayed plastic wrap and a kitchen towel. Rest until the dough balls pass the “poke” test. 
  7. Heat a griddle to medium-low heat (about 325° F). Gently flatten each dough ball, and place them on the griddle, a few inches apart for easy turning. Place a dry cookie sheet on top of the muffins once the griddle is loaded; this helps give the muffins a nice flat second side.
  8. After 6 or 7 minutes, the bottoms of the muffins should be a golden brown color. Give them a little longer if needed. Gently turn the muffins to “bake” the other side. Don’t be concerned if the sides of the muffins still seem soft. The dough will cook from the radiant heat. If the muffins feel spongy or wet, but the sides are done, transfer them to a baking sheet and put them in a 350° oven for a few minutes to finish them off.
  9. Cool the muffins on a wire rack, and when completely cool, use a fork to gently “split” the sides of each muffin for easy slicing when you are ready to serve them.


In case you’re wondering…

Yes! You can freeze them for later. These English muffins freeze beautifully, and they can go straight to the toaster without thawing, too. Simply fork-split them, separating the halves, and load them into a zip-top freezer bag. Be sure to squeeze out excess air. Enjoy!


Pumpkin Chai Blondies

Is it fair to call these autumn-hued bar cookies “blondies?” Unlike classic blondies, which have a light golden color and are basically just chocolate chip bar cookies, these stunningly brilliant treats practically scream fall, with a deep orange color born from half a can of pumpkin puree. What else shall we call them— russets? Auburns? 

They are still in essence a “blondie,” which is meant to have all the delightfully chewy texture of brownies, just without the cocoa. But these have a lot more going on, with add-ins of white and dark chocolate chips and crunchy pecan bits on top (well, half of it, anyway). There’s a lot to love here, and I have no doubt there are many other add-ins that would be great.

What do you think— maybe dried cranberries or butterscotch chips?

Let’s start with the fact that they satisfy any craving for pumpkin and spice— though this recipe does incorporate a more assertive spice blend than most “pumpkin spice” foods. To kick these up a few notches, I used equal parts Vietnamese cinnamon and chai spice, an Indian-inspired blend of cinnamon, ginger, cardamom, anise and black pepper (yes, really). The bold spices gave these blondies an edge over some of the too-sweet, ordinary desserts you find in a supermarket bakery, and the flavor is still familiar but with a little special something.

I’ve been looking for ways to sneak pumpkin into so many things.

The downside of baking with pumpkin puree is that most recipes I’ve tried tend to be more cake-like than chewy— which is great when you want a cupcake, but not so much if you crave a cookie or blondie— and this is because of the high moisture content of the canned pumpkin. To counter this, I pulled a trick from the King Arthur Baking playbook, which is to cook the pumpkin puree until it is somewhat caramelized. The result is a thicker, more concentrated pumpkin flavor and a denser, more fudge-like texture of the finished auburns— er, blondies. I cooked mine with a bit of the brown sugar from the recipe, and the result was almost like pumpkin butter. So good! 


For additional autumn-inspired flavor, this recipe leans on browned butter, which is very easy to make though I don’t recommend trying to do it while multitasking the other components of the recipe. Browning butter takes very little effort but quite a bit of attention. Look away long enough to measure out your flour or caramelize your pumpkin, for example, and you may just find that the butter has turned to a charred, blackish liquid. I guess you can tell that I’m speaking from experience! 🤷🏻‍♀️


My second attempt went much better!

Other than that, it’s a typical dessert recipe— flour (I used part whole wheat), baking powder, egg, sugar (light brown, in this case), splash of vanilla and some white and dark chocolate chips just for fun. For a little extra something, I also scattered pecan bits over half of the blondies after spreading it out into the baking pan. This is optional, and if you have any guests who cannot digest nuts, follow my lead and sprinkle the nuts on half. Everyone wins!


This was a fun fall dessert that would be nice for a casual Thanksgiving meal, the kids’ table, a brunch with friends, a treat for a special teacher or perhaps a snack for visiting grandkids that’s a bit healthier without them knowing it! As for us, we enjoyed it warmed 30 seconds in the microwave with a small scoop of ice cream. Delish!

It’s one more reason to love autumn!

Pumpkin Chai Blondies

  • Servings: 12
  • Difficulty: Average
  • Print

Cooking the pumpkin puree before mixing the batter keeps this autumn-hued blondies nice and chewy, and the flavor will make you wish for fall to linger a little longer.


Ingredients

  • 2 sticks unsalted butter
  • 1 cup pumpkin puree
  • 1 cup light brown sugar, packed
  • 1 large egg, room temperature
  • 2 teaspoons vanilla extract
  • 1 1/4 cup all-purpose flour
  • 1 cup white whole wheat flour
  • 1 tsp. ground cinnamon
  • 1 tsp. ground chai spice blend
  • 1 tsp. kosher salt (I used Diamond crystals)
  • 3/4 tsp. baking powder
  • 1 cup white chocolate chips
  • 1 cup dark chocolate chips
  • 1/2 cup pecan bits (optional, or 1/4 cup for half the blondies)


Directions

  1. Melt the butter in a saucepan, swirling frequently and watching carefully to prevent burning. Cook melted butter until it takes on a deep golden color and has a nutty aroma. Allow it to cool for about half an hour.
  2. Meanwhile, add pumpkin puree and a few tablespoons of the brown sugar to a second saucepan. Cook over medium heat, stirring almost constantly, until sugar is dissolved and pumpkin puree has reduced slightly. Cool completely before proceeding.
  3. Preheat oven to 350° F, with oven rack in center position. Line a 9 x 13 baking pan with parchment paper, keeping a little extra to overhang for easy lifting of the blondies from the pan after baking.
  4. In a large mixing bowl (or the bowl of a stand mixer fitted with paddle), stir together browned butter and remaining brown sugar until evenly combined. Add reduced pumpkin puree and egg. Beat until combined.
  5. In a medium bowl, whisk together flours with spices, baking powder and salt. Add half the flour mixture to the butter mixture, folding just until all the dry ingredients are incorporated. Repeat with remaining flour blend. Gently fold in chocolate chips. The batter will be very thick and dense.
  6. Spread batter evenly over parchment-lined baking pan. Sprinkle pecan chips over all or half the blondies, if desired. Bake for 30 minutes, or until blondies are set but not overly dry. Remember that they will continue to cook for a few minutes after removal. As with brownies, the type of pan may affect the outcome. For a glass pan, add a few extra minutes to the baking time.
  7. Cool for about 30 minutes before using parchment to lift blondies from the pan. Cut into squares for serving. Keep leftover blondies wrapped or in a sealed container, at room temperature for up to three days.
  8. These warm up beautifully in the microwave (give them 30 to 45 seconds on high), and they are delicious served with a scoop of ice cream.


Autumn Minestrone

This post is kind of a recipe within a recipe, and my inspiration for the soup was born from my effort to make pasta using sourdough discard. I know— who would imagine such a thing, right? When Les and I traveled to Nashville, Tenn. recently, we met some friends for dinner and got to talking about gluten issues that each of them suffer. Our friend, Dick, said he had found real sourdough bread more digestible and that a few gluten-free breads were helpful to satisfy his carb cravings, but that pasta had been another story; it always left him feeling bloated and uncomfortable, and he didn’t enjoy the texture of the gluten-free options on the market. He knew about my food blog, and he said, “if you could make a real pasta that I could eat and enjoy…”

And over here was me— just hating the thought of someone missing out on a favorite food. There has to be a way, and I’m on a mission to find a way to ease the uncomfortable symptoms that gluten brings to people with mild or moderate sensitivities. If I can figure this out, and then advance to making an egg-free version that is suitable to dry, I will send some to Dick for feedback. My version is not gluten-free, obviously (I use wheat flour), but the fermentation process changes the gluten structure and exhausts the anti-nutrients that mess with non-celiac individuals, and that just might be enough for Dick. We’ll see.


I’ll let you know how things progress with the sourdough pasta quest, but my immediate challenge was finding a good way to use my test batch. I used a combination of all-purpose, white whole wheat and semolina flours, plus sourdough discard and eggs, to make my pasta dough. It had been chilling in the fridge for a day, and I rolled it into ropes and shaped it into little gnocchi-meets-shell-shaped things. The first thing that came to mind for these little bites was soup, and here we are!

Mmmm, so good!

This soup brings together the best of two things for me— a whole bunch of terrific early fall ingredients and an all-day simmered vegetable soup. Sweet potatoes are abundant already this season, so I cut up a large one and roasted it with a touch of olive oil, salt and pepper. I could have put the cubes right into the soup, but I knew this would be a long simmer and I didn’t want them to turn to mush. Besides, roasting sweet potatoes caramelizes them and intensifies their autumn flavor. This turned out to be worth the extra step, for sure.


The corn season runs long around here, so I had Les grill up a couple extra ears when we had it for dinner recently. I stripped the kernels and set them aside while I prepared to build the soup base with carrots, celery and onion (otherwise known as mirepoix), plus poblano pepper and garlic. Whole canned tomatoes went in next, then mushrooms and veggie broth. 


The only seasoning I added to this soup— other than the usual kosher salt and black pepper— was a couple of bay leaves. Anytime I make a simmered soup, stew or roast, bay leaf is like a magic ingredient that is not only flavorful but highly aromatic.

After a nice, long simmer—about an hour— I removed the bay leaves, added two “fat handfuls” of chopped kale, more broth and my homemade sourdough pasta (which went in straight from the freezer), and brought it up to a gentle simmer to cook the pasta through.


Finally, my soup was ready for the roasted add-ins I had prepared earlier, and dinner was served!

My friends, this autumn minestrone was far and away more delicious than any other vegetable soup I’ve ever made! All those flavors melded together wonderfully, and between the roasted, grilled and simmered vegetables, there was plenty of interesting texture, too.


The pasta cooked up like pudgy, tender dumplings and the tangy earthiness of the sourdough was a really nice complement to some of the sweeter flavors in the soup. If I had not been experimenting with the homemade sourdough pasta, any box pasta with hefty texture would have been a good choice (think rotini, trumpets or those cute little wagon wheels). Using box pasta would also have kept my soup vegan; the eggs in the pasta dough disqualified it from that category.

Oh, this soup hit the spot on a dreary, rainy early autumn day. But you can bet I won’t wait for another one to make this soup again!

Autumn Minestrone

  • Servings: 8 to 10
  • Difficulty: Average
  • Print

This soup brings together the best of two things for me— a whole bunch of terrific early fall ingredients and an all-day simmered vegetable soup.


Ingredients

  • 1 large sweet potato, peeled and cubed (about
  • 1/4 cup extra virgin olive oil, divided (you’ll use a tablespoon to roast the sweet potato and the rest to sauté vegetables in the pot)
  • Kosher salt and freshly ground black pepper
  • 1 sweet onion, chopped
  • 2 medium carrots, peeled and thinly sliced
  • 2 ribs celery, strings removed and sliced
  • 2 cloves garlic, finely minced
  • 1 poblano pepper, chopped
  • 28 oz. can whole peeled tomatoes, drained (reserve liquid for another recipe)
  • 6 cups low-sodium vegetable broth, divided (see directions for breakdown)
  • 2 bay leaves
  • 8 oz. carton cremini mushrooms, cleaned and sliced
  • 2 fat handfuls kale, washed and rough chopped
  • 1/2 pound pasta shapes (homemade or otherwise)
  • 2 ears roasted corn, kernels cut from cob

Notes: I roasted the sweet potatoes first so that their flavor could be concentrated, and to keep them from turning mushy in the soup. Butternut squash would be a great substitute. I used a fresh homemade pasta that was shaped like baby gnocchi. My pasta contained eggs and I added to the soup straight from the freezer. Dry pasta such as elbows or rotini would be a great substitute.

Directions

  1. Preheat oven to 350° F, with rack in center position. Line a sheet pan with parchment and arrange sweet potato cubes in a single layer. Drizzle with olive oil and season with salt and pepper. Roast about 45 minutes, until sweet potatoes are reduced in size and golden on all the edges. Set aside.
  2. While the sweet potatoes are roasting, place a deep, heavy-bottomed pot over medium heat. Swirl in remaining olive oil and sauté the onions, carrots, celery and poblano peppers. Season with salt and pepper and cook until translucent. Add the garlic and continue to cook until vegetables are very soft.
  3. Use your hands to squeeze the whole tomatoes into the pot. Add 4 cups of the vegetable broth and bring to a slight boil. Adjust salt to taste. Reduce heat to simmer.
  4. Add sliced mushrooms and bay leaves and simmer for about an hour. Stir in chopped kale leaves until wilted. Add remaining vegetable broth and bring to a gentle boil.
  5. Add pasta straight from the box or freezer and cook it in the minestrone until tender.
  6. Finally, stir in corn kernels and roasted sweet potatoes. Make a final adjustment to salt and pepper, and then cook on low until heated through.


Pumpkin Pappardelle

It is very rewarding to be able to strike an item off my culinary bucket list, and I’ve done it with this handmade pasta, speckled with the gorgeous autumn-orange color of pureed pumpkin.

I love this warm color and the tiny flecks of earthy rye flour.

Pappardelle is a long, flat pasta and is usually served with a low-and-slow, braised meat sauce, perfect for a Sunday supper. I excel in rule-breaking, though, so I topped my handmade pumpkin pappardelle with roasted shrimp, onions and mushrooms in a chili crisp sauce and served it up on a weeknight. It was scrumptious!

Pumpkin pappardelle with chili crunch-roasted shrimp and mushrooms.

When I first started making pasta sometime around 2012, I stuck mostly to script, using the basic flour and egg recipe. But my imagination quickly took over and led me to try adding flavor and color to fresh pasta. My first experiment was a lovely lemon zest and pepper fettuccine, and I’ve hardly looked back since that time, infusing my dough with everything from fresh herbs to roasted garlic to pureed vegetables. And of course, I have also begun to experiment with different types of flour, and I almost always incorporate some amount of whole grain for the flavor and nutrition value it offers.


Last Spring, I was excited to order a copy of the book, Pasta, Pretty Please by Linda Miller Nicholson. Linda started her brand, Salty Seattle, after discovering that colorful pasta would get her kid to eat vegetables— you know, necessity being the mother of invention and all— and she was recently recognized on Oprah’s 2022 list of favorite things for her “crocchi,” a colorful, croissant-shaped pasta. In her recent email newsletter, Linda described life as a whirlwind, and I suppose that’s what happens when you put your whole heart and soul into doing what makes you happy!

If you enjoy making handmade pasta, I highly recommend Linda’s book for its recipes and just for the artistry of it, and you can also follow her on social media for visual instruction on some of the more intricate pasta shapes (I am mesmerized by her work). As with most “recipe” books I own, I have drawn inspiration from Pasta, Pretty Please more than I have followed any recipes. Interestingly, of all the brilliant pasta colors in her book, Linda does not seem to use pumpkin in any of them!

So many colors, so little time.

But Linda does offer a simple flour-to-liquid formula, and that’s what helped me achieve this bucket list victory. I followed her rule of 3/4 cup liquid to 2-1/4 cups flour, beginning with a portion of pumpkin puree plus room temperature eggs. I whizzed those together in my blender and strained out the solids through a mesh strainer. The blend measured almost exactly 3/4 cup, but there was a layer of tiny bubbles on top, so I figured (correctly) that I’d need to add some amount of water to get the dough just right. How much? It was too soon to tell.


For the flour ingredients, I went with my usual “00” white flour and durum blend, but also subbed in some rye flour because I liked it so much with the pumpkin in my recent sourdough pumpkin rye sandwich bread. After mixing the flours with a touch of onion powder and a pinch of salt, I measured out 1/4 cup to be used for adjustment and rolling the dough. I only needed it for the latter, but every kitchen is its own environment. Humidity, temperature and even the age of your flour are all variables for successful pasta.


My stand mixer did most of the work making the dough, and I used the kneading hook to mimic the action of mixing it by hand— at least, until I realized how much more water would be needed. To that point, the dough was very crumbly and unorganized but a couple tablespoons of water made it better and a couple more got it done. I recommend trying a recipe like this if you are already adept at making regular pasta because it helps to know how the dough should feel and look at every stage.


About 10 minutes of hand-kneading later, my dough was ready for a nap in the fridge, and then I proceeded with my usual rolling process to produce the pappardelle strands. Now, I will assume that if you intend to make this pasta, you already have some experience making basic fresh pasta. If you’re still getting started, check out my previous post for handmade lemon-herb pasta for more in-depth instruction and tips. Rather than describing every step again, I’ll focus here on the points that are relevant for this pumpkin pappardelle.

First, keep that reserved 1/4 cup of flour on hand in case you need it during the lamination steps and roll-out of your sheets, because the pumpkin does make the dough a bit more sticky than usual and so does the rye. Second, have some coarse-grind semolina nearby, for folding up the long sheets when you’re ready to trim the dough into wide strips. I have found that the coarse semolina does a better job of preventing sticking. Finally, if you will use a drying rack as I did, get that set up in advance. If you don’t have a drying rack, you can give the cut pappardelle an extra dusting in the coarse semolina and wind the strips into loose little “nests” for drying. Here’s a few images of how it went in my kitchen:


For the freshest outcome, I like to cook the pasta the same day I make it, but it does seem to do best when it has dried for at least an hour. Any remaining pasta can be dried further and then tucked into a zip-top freezer bag for longer term storage.


Time for dinner! 

The roasted shrimp topping on my pappardelle was very easy to make, and I borrowed a page from Ina Garten’s playbook to get this done. The Barefoot Contessa’s method of roasting shrimp rather than boiling it ensures perfect doneness without having to watch it like a hawk. The onions and mushrooms needed more time, so I started with those, roasting with a drizzle of olive oil and a drizzle of the oil on top of the chili onion crunch from Trader Joe’s. If you don’t have a TJ’s near you, check your supermarket for the new Heinz version of this, or seek out a recipe for “chili crisp” online.


When my pappardelle was just right (al dente stage), I tossed it in a bowl with a generous amount of Parm-Romano blend and black pepper— a makeshift cacio e pepe treatment, if you will— and topped it with the roasted shrimp and mushrooms, plus an extra drizzle of the chili onion crunch. 


This was so, so good. The pumpkin flavor was subtle but the pasta definitely had an autumn vibe. Next time, I’ll increase the pumpkin and reduce to one egg when I make my pumpkin pasta dough and I’ll turn it into a ravioli or tortellini. Tell me, dear friends, what flavors should I put in the filling when I do it? 🙂


Handmade Pumpkin Pappardelle

  • Servings: 4 to 6, depending on final recipe
  • Difficulty: Intermediate
  • Print

An infusion of real pumpkin puree and a portion of rye flour give this handmade pasta a rustic, substantial feel and flavor.


Ingredients

  • 1/3 cup pumpkin puree (NOT pie filling)
  • 2 large eggs, room temperature
  • 2 to 4 Tbsp. water, room temperature (use only as needed)
  • 1 cup “00” or all-purpose flour (see ingredient notes for measuring tips)
  • 3/4 cup fine durum (semolina) flour
  • 1/2 cup whole rye flour
  • 1/2 tsp. onion powder (optional)
  • 2 pinches kosher salt
  • Coarse-grind semolina, for dusting during roll-out of pasta

For best results, sift flour before measuring by volume, or fluff it with a whisk before spooning it into the measuring cup and then leveling it off. If you dip your measuring cup into the flour, it will be too dense and produce a dry, tough pasta.

Directions

  1. Combine the pumpkin and eggs in a blender container and pulse a few times, followed by constant blending, until the mixture is even and smooth.
  2. Pour the pumpkin mixture through a fine mesh strainer to remove any lingering solids. Add enough water to produce 3/4 cup liquid ingredients.
  3. In the bowl of a stand mixer, whisk together all flours with the onion powder and salt, and then measure out about 1/4 cup to have on reserve. This makes for easier adjustment of the dough and can also be used during the rolling stage of the pasta dough.
  4. Make a well in the flour and pour the liquid mixture into it all at once. Use the kneading hook attachment to mix the flour and liquids together until most of the flour is incorporated. If the dough seems too dry or crumbly, add one tablespoon of water and mix again, repeating until the dough is soft and pulls cleanly away from the sides of the bowl.
  5. Turn dough out onto a lightly floured counter and knead by hand for about 10 minutes, or until it has a smooth, even surface without stickiness.
  6. Wrap the dough tightly in plastic wrap and refrigerate for at least an hour to fully hydrate the dough and to relax the gluten structure a bit.
  7. Remove dough from fridge about 30 minutes before rolling, and then roll as usual by hand or with a pasta machine. Roll it into sheets approximately 16 inches in length. Dust generously with coarse semolina flour and fold the sheet over several times to a width of about 4 inches. Use a very sharp knife or pizza wheel to cut the pasta dough into evenly spaced strips. Immediately unfold each strip and place it on a drying rack, or twirl it into a small nest to dry for an hour before cooking.

Pumpkin Pappardelle with Chili Crisp-roasted Shrimp & Mushrooms

  • Servings: 2 entree portions
  • Difficulty: Average
  • Print

Most of this meal happens on a sheet pan, which is a great time saver after spending an afternoon making handmade pasta.


Ingredients

  • 1/2 batch pumpkin pappardelle (see recipe above)
  • 2/3 pound large shrimp, peeled and deveined
  • 1/2 sweet onion, trimmed and sliced into crescent shapes
  • 4 oz. cremini mushrooms, cleaned and halved or quartered into bite sized pieces
  • About 2 tsp. chili crisp with oil* (see ingredient note)
  • 2 Tbsp. extra virgin olive oil
  • 1/4 cup finely shredded Parm-Romano blend (or Parmesan; preferably fresh rather than canned)
  • 1/2 tsp. freshly ground black pepper

*Ingredient note: The “chili crisp” I used is the Trader Joe’s Crunchy Chili Onion, which used to be labeled “Chili Onion Crunch.” If you don’t have a TJ’s near you, check your supermarket for a similar product made by Heinz, or search online for a “chili crisp” recipe. The product is a spicy blend of dried red chiles, onions and garlic in oil. It’s fantastic!

Directions

  1. Bring a pot of water to boil for cooking the pappardelle. Preheat oven to 400 F, with rack in center position. Line a rimmed cookie sheet with parchment paper, and drizzle it with chili crisp oil and olive oil.
  2. Scatter the onions and mushrooms on the sheet and roast for about 13 to 15 minutes, until onions are slightly soft and mushrooms have reduced in size. Arrange the shrimp on the sheet, drizzle with a bit more oil and return to the oven for 6 to 8 minutes, depending on the size and initial temperature of the shrimp. You want to remove the pan as soon as the shrimp are opaque. Drizzle a little more chili crisp with oil all over the shrimp and mushroom mixture, tossing to coat.
  3. Cook the pappardelle while the shrimp are roasting. Fresh pasta should only take about 4 to 5 minutes to reach al dente stage. Drain promptly and toss it into a large bowl with Parm-Romano and black pepper. Toss gently to coat.
  4. Plate the pappardelle and top with the chili crisp-coated shrimp and mushrooms. Serve immediately.


Pumpkin-Lentil Stew

For me, the scariest thing about learning to cook plant-based food was accepting that it’s more than ingredient swaps, it’s a new process. Learning vegan cooking forced me out of my comfort zone of using what I call “crutch” foods—the easy things we were all taught to reach for—like cheese, eggs, cream and chicken broth. The only way to overcome this hurdle of making foods in new ways is to practice, and if you have vegetarians or vegans coming for Thanksgiving, the time to practice is now. There are plenty of plant-based convenience foods out there today, but they aren’t always an even swap and it’s important to also know how to cook real, whole foods without needing those processed substitutes.

A couple of years ago, when Comfort du Jour was new, I went over the top with a Savory Sausage Mac & Cheese (baked in a pumpkin). It was fun to serve and tasted as good as you’d imagine. This year, I decided to do something visually similar but with all plant-based ingredients, and this is that dish.

Loaded with nutrients, satisfying and perfectly festive for fall!

Unlike my earlier creation, which was stuffed with rich, decadent cheese, heavy carbs and calorie-laden pork sausage, today’s recipe is entirely plant-based. It also happens to be free of gluten and nuts, so it’s suitable for people with those dietary restrictions, too. I start thinking about dishes like this around mid-October, because my husband’s daughter is a committed vegan, and as I see it, we can dread cooking for loved ones with dietary restrictions (and believe me, they will feel it at the table), or we can adjust in a way that is as fun as it is nutritious.

Who needs a bread bowl when you can have a pumpkin bowl?

This effort was also a reminder that a meal doesn’t have to be heavy to be satisfying; after we finished our pretty pumpkin supper, both my bacon cheeseburger-loving husband and I acknowledged that we were “stuffed” (in a good way). We didn’t miss what wasn’t in it, and no wonder, because what was in it was hearty and full of texture.  

There are three main components of this dish: roasted pumpkin (which did double duty as a serving vessel), creamy pumpkin bisque (without actual cream, to keep it vegan) and a mixture of cooked lentils and rice with sautéed mushrooms and aromatics.


If you prefer, you could swap in another sturdy winter squash, such as buttercup or acorn. If you wish to serve the stew inside the roasted squash, be sure to choose one that will sit flat on a plate. Or you could simply serve the soup in a bowl and save time by using canned pumpkin. I found it comforting to roast the pumpkin. My mini pumpkins were small—about six inches across—and I roasted them at 350° F for 45 minutes, then scraped out some of the soft pumpkin pulp when they were cool enough to handle. I was careful to keep enough pulp in the bottom of the gourd to prevent my soup from leaking, and enough along the top cut edge to keep the carved top from falling inside


The pumpkin bisque was the simplest part of this, made with the scooped-out roasted pumpkin, enough vegetable broth to blend smoothly, and a couple of other ingredients to punch up the flavor a bit. Roasted garlic adds a depth of flavor. The carrot-turmeric juice is something I bought for smoothies, and it worked great here for spice and color. And the smoked maple syrup is a fall/winter staple in my smoked maple old fashioned cocktails, and I liked it here for a slight touch of sweetness but mostly the smoke. I might have added some plant-based creamer here as well, but I never have it on hand unless I have a vegan guest coming. Honestly, the soup was great without it. If you have some almond milk, go for it!


Finally, a mixture of cooked lentils, kale, sautéed mushrooms and aromatics gave my dish all the texture and fiber it needed to satisfy our hungry bellies. I also added a portion of wild rice blend to my stew, but next time I would sub roasted Yukon potatoes for extra chunkiness. If gluten isn’t a concern, I think cooked wheat berries would also be great in this, for a little snappy texture.

This was a time-consuming project, partly because I was multi-tasking and making it up as I went along. Next time, it’ll be a breeze, especially since I’ve made a click-to-print recipe card below to guide me (yes, I make those for sharing, but I also use them myself)! Please, don’t be intimidated. Cooking is as fun as you make it. By the way, every part of this dish can be prepared in advance. Simply warm the stew and pumpkins before assembling and serving.

We scooped a little pumpkin flesh with each bite of the stew.

A word to the wise, though—if you decide to make this for a vegan guest at Thanksgiving, you might want to make enough for everyone. This is exactly the kind of dish to make the meat eaters jealous. 😉

Pumpkin-Lentil Stew

  • Servings: 4
  • Difficulty: Intermediate
  • Print

This is a satisfying, autumn-themed dish that also happens to be vegan, gluten-free and nut-free. It would make an excellent main course for a vegan Thanksgiving.


Ingredients

  • 4 mini pumpkins, tops removed and cleaned (see ingredient notes below)
  • 1 bulb roasted garlic
  • About 1-1/2 cups cooked lentils (see notes)
  • 1 cup cooked wild rice blend (substitute cooked wheat berries or cubed and roasted Yukon potatoes, if you wish)
  • 4 Tbsp. extra virgin olive oil, divided (you’ll use a little for each thing you saute)
  • 1 medium sweet onion, chopped
  • 8 oz. carton cremini mushrooms, cleaned and cut into chunks
  • 1 rib celery, strings removed and chopped
  • 1 jalapeno pepper, seeded and minced (I used a red one for color)
  • Kosher salt and black pepper
  • A fat handful of kale (substitute with double the amount of spinach, if you prefer)
  • 1/2 cup vegetable broth
  • 1/4 cup carrot-turmeric juice (or substitute more broth)
  • 1 Tbsp. smoked maple syrup (substitute with regular maple syrup or omit)
  • Roasted, shelled pumpkin seeds for garnish

Ingredient notes: The pumpkins I used were about 6-inches across and more squatty than round, primarily because I intended to use them as serving dishes. If you only find pie pumpkins, you may want to cut the tops a little deeper so it isn’t awkward to reach a spoon down into it at serving time. If you prefer to serve in bowls, any roasted pumpkin or winter squash will be fine, and you’ll need about 2-1/2 cups of pumpkin pulp. You could even use canned pumpkin puree, and one standard can should cover it.

I used dried brown lentils for this dish, and cooked them in veggie broth for extra flavor. To save time, purchase lentils already cooked, such as canned, or those sold by Trader Joe’s.

Directions

  1. If using canned pumpkin puree, skip to Step 3. If roasting the pumpkins, pre-heat oven to 375° F, with rack in center position. Spray or brush a small amount of olive oil inside the pumpkins and sprinkle the flesh with salt and pepper. Replace the tops, capping the stems with a piece of foil to prevent burning them.
  2. Roast pumpkins for 45 minutes, until flesh can easily be scraped with a fork. Let them rest until cool enough to handle, and then use a small spoon to gently scrape out some of the flesh, keeping about 1/2-inch intact on the bottom and sides of the pumpkins’ interiors so they hold their shape. Transfer the scooped flesh to a blender container, and set the roasted pumpkin bowls aside at room temperature.
  3. Combine pumpkin with roasted garlic (squeezed from it’s paper shell) in the blender container. Add veggie broth, carrot juice (if using) and maple syrup. Pulse a few times to combine, then puree until completely smooth. Transfer to a bowl and set it aside.
  4. Place a skillet or wide pot over medium heat and swirl in a tablespoon or more olive oil. When the oil shimmers, add onions, celery and jalapeno. Season with salt and pepper, and saute until slightly softened. Push the vegetables to one side of the pan. Swirl in another tablespoon of oil and cook the mushrooms until they become soft and give off most of their moisture. Transfer the vegetables to a bowl and set it aside. Add a final tablespoon of oil to the pot and saute the chopped kale until it has wilted and softened. Adjust salt to taste. Transfer the kale to the same bowl with the other vegetables. Add lentils to the vegetable bowl and fold gently to combine.
  5. Transfer the pureed pumpkin base to the same pot used for cooking the vegetables, and place it over medium-low heat. Gently stir in about half of the lentil-vegetable mixture, then add more until the stew seems balanced to you. Add more vegetable broth if you wish, and adjust salt and pepper to taste.
  6. If the pumpkin bowls have cooled completely, slide them into a warm oven on a cookie sheet for about 15 minutes. Ladle the pumpkin-lentil stew into the bowls, sprinkle with roasted pepitas and serve.


Sourdough Pumpkin Rye Sandwich Loaf

With the cool, crispness of fall in the air, I have been giving my stove and oven a serious workout. Many of my recipes have been reruns of things I’ve already posted, but I have made a few exciting new things, too.

Last week, I opened a can of pureed pumpkin for another recipe (I can’t remember what), and I had just a little bit leftover—at exactly the same time I needed to feed my sourdough starter to make a new loaf of bread for my husband’s lunchtime sandwiches. Why not add the pumpkin to a bread dough? My first inclination was to make a cinnamon roll-type thing, but I remembered how delicious pumpkin is without the spice and sugar, so I took it in this savory direction instead, using my favorite sourdough sandwich bread recipe as a template.

It even looks like autumn!

The go-to recipe I modified came from Maurizio Leo, a pro baker whose passion for naturally leavened bread shines on such sites as Food 52 and King Arthur Baking Company. He understands and explains all the science of breadmaking (which I love) and though I keep saying I want to make some of the other Insta-worthy recipes on his blog, The Perfect Loaf, I keep coming back to this one. It relies on an unusual method of pre-cooking a portion of the flour—a technique which locks in much more liquid than you’d otherwise get into a sandwich loaf—and this initial step ensures a super-soft, tender bread with a perfectly chewy edge on every slice.

I’ve experimented many times with Maurizio’s original recipe, first to split it in half because we can’t finish two loaves that quickly, partly out of necessity on days that I didn’t have honey or whole milk, but also out of curiosity to see how far I could push it in the direction of more whole grain. This time, I wanted to see how the loaf would fare with a half cup of fiber-rich pumpkin puree, and as you can see, it turned out quite good.

My big test for any new loaf is toast, and this one was divine!

I love toast so much.

To make my pumpkin sandwich bread even more rustic and autumn-like, I swapped out a good amount of my usual white whole wheat flour in favor of whole dark rye and played up that rye infusion with a spoonful of caraway seed. I swapped in molasses for honey because I love the deep, earthy flavor of molasses with rye. It all worked beautifully, and the aroma of this loaf as it emerged from the oven was nothing short of fantastic. Sometimes it pays to experiment.

Let’s get baking!

Inspired by Sourdough Sandwich Bread with Pre-cooked Flour | The Perfect Loaf

Fair warning, my recipe is written in metric measurement because that’s the way I bake. Scaling a recipe by volume measurements is a near-impossible task, and I will say honestly that my cheap digital kitchen scale is one of the items I would never go without today.

This loaf depends on a portion of ripe sourdough starter. “Ripe” means it has been refreshed within the past 8 to 12 hours, so it is fully fermented, active and ready to use. If you don’t have a sourdough starter, you could try a swap-in of canned pumpkin for about half of the water called for in your favorite yeast-based recipe, and then add about 2 tablespoons of extra water. It would be best to experiment with a recipe that you are very familiar with, so you have a better sense of when the dough looks and feels “right.”

Here’s how it went down in my kitchen, beginning with the flour and milk paste, which are whisked together and cooked over medium heat until it looks like a roux. This stage needs constant attention, so don’t look away even for a moment, and be ready to switch from whisk to spoon when it starts to get thickened so you don’t get it all caught up in the whisk.


Next, combine the pumpkin and warm water, whisk in the molasses and olive oil, and then combine it with the sourdough starter and the cooled roux paste in the bowl of a stand mixer. Use the beater blade for this and blend it for several minutes, until it’s smooth and evenly mixed.


Whisk the flours together—here I used a combination of dark rye, white whole wheat and bread flour, which is high in gluten for a strong rise—and stir in the salt and caraway seed. Add a spoonful of these dry ingredients at a time to the mixing bowl while it’s running, until the dough begins to look like batter. Then turn off the mixer and add the rest of the flour ingredients all at once. This is not an essential step for the recipe, but my technique for reducing the splash that usually happens when I start my mixer with wet and dry ingredients in the bowl. I hate the mess, and this really helps!


Continue mixing until all the dry ingredients are completely incorporated. Stop the mixer and scrape the dough off the beater blade into the bowl. Cover the bowl and let the dough rest for at least 20 minutes, up to an hour. This is a departure from Maurizio’s recipe; it’s my own trick for making the dough more workable, as the rest time gives the grain time to fully hydrate. Fit the mixer with the dough hook and knead the dough until it’s smooth, soft and shiny. Resist the temptation to add more flour—yes, the dough will seem too soft, but the next step of stretching and folding will increase its strength. Trust the process. Transfer the soft dough to a large, lightly oiled bowl. Cover it and stay nearby for the next step.


I was working alone in the kitchen on this day, so the stretch and fold pictures I’m sharing below are borrowed from an earlier post for a different bread (notice the ugly old counters?), but the process is exactly the same. Do this at least twice (three is better), about 30 minutes apart during the first part of the ferment time. This may not seem like much, but this step builds a great deal of strength in the dough so it rises big in the oven.


After about three hours, the dough will be puffy and stretchy. Turn it out onto a lightly floured countertop and gently press and stretch it into a long rectangle. Beginning on the short end nearest you, roll it up tightly into a cylinder shape, tucking in the sides as you go. Pinch the ends of the roll closed and seal the long edge. Place the loaf, seam side-down, into a greased (or non-stick) bread pan. Cover with plastic wrap and place the pan in a draft-free zone in your kitchen—tucked into the microwave is a good bet—until the dough rises to one inch above the rim of the pan.


Preheat the oven to 400° F with rack in center position and another rack in the lowest part of the oven, which you’ll use for a steam pan. Fill a second, shallow baking pan with hot water and place the pan on the lowest rack while the oven preheats.

Bake 22 minutes with steam, then remove the steam pan and rotate the bread to bake more evenly. If the loaf is already brown on top, place a loose foil tent over it to prevent burning. Bake 22 minutes more, until bread is golden brown all over and internal temperature is around 205° F.


Turn the finished bread out onto a cooling rack immediately and cool at least four hours—preferably longer—before cutting into it. That is, if you can stand the wait. 😊

Sourdough Pumpkin Rye Sandwich Loaf

  • Servings: 16 slices
  • Difficulty: Intermediate
  • Print

This bread is rich with the rustic flavors of fall, and well worth the wait!


Ingredients

  • 148 g whole milk
  • 37 g whole dark rye flour
  • 106 g sourdough starter, recently refreshed
  • 100 g pureed pumpkin (NOT pie filling)
  • 85 g filtered water, heated 30 seconds in the microwave
  • 18 g unsulphured molasses
  • 30 g extra virgin olive oil
  • 285 g bread flour
  • 60 g white whole wheat flour
  • 28 g whole dark rye flour
  • 2 tsp. caraway seed (optional)
  • 1 1/4 tsp. salt

Directions

  1. Combine milk and first amount of rye flour together in a small saucepan. Whisk them together over medium-low heat until flour is thickened into a paste-like texture. This will take about 10 minutes. Let the mixture cool to room temperature.
  2. In a measuring cup with a pour spout, combine pumpkin, water, molasses and oil. Whisk until smooth. Combine this mixture with the sourdough starter and rye-milk paste, using the beater blade, until the mixture is evenly blended.
  3. Whisk remaining flour ingredients together with salt and caraway seed. Add flour ingredients and continue mixing with beater blade just until the mixture comes together and pulls away from the sides of the bowl. Scrape dough from blade, cover the bowl and let it rest at least 20 minutes, up to one hour.
  4. Attach the dough hook to the mixer and knead on medium-low speed for about 8 minutes, until dough is smooth and shiny. Transfer dough to a large, lightly oiled bowl. Cover and rest for up to three hours. Perform a few stretch-and-folds during the first hour and a half. These folds will help build strength in the dough.
  5. When the dough has puffed considerably, shape it into a loaf and place it in a greased pan, seam side down. Cover and let rise for about two hours, until dough has risen about one inch above the rim of the pan.
  6. During the end of the rising time, preheat oven to 400 F with rack in center position and another rack near the bottom of the oven. Prepare a shallow pan with hot water and place it on the lower shelf during preheating time. This will provide steam for the first half of baking.
  7. Bake 22 minutes with steam, then carefully remove the steam pan. Rotate the bread pan and cover with a loose foil tent to prevent over browning. Continue to bake 22 more minutes, until bread is deep golden brown and internal temperature is in the 200-205 F range.
  8. Turn bread out immediately onto a cooling rack and cool completely before wrapping.


Brie & Mushroom-stuffed Meatloaf

To say that I’m excited for fall is a bit of an understatement. After stiflingly humid North Carolina summers, I am always eager for the relief that comes in mid-September. I can finally open the windows each morning to let the cool, fresh air permeate our space (at least until afternoon, when the temps rise back into the 90s), and my soul starts longing for all the culinary comforts of the fall and winter seasons—warm herbal teas in the evening, soups and stews that nourish us from the inside out, and the return of what I like to call the Sunday Supper.

This meatloaf is one of my very favorites, though calling it a meatloaf may not do justice to the elegance of the meal, especially if you go the extra mile to make the French Onion Gravy recipe that accompanies it on my plate.

No mashed potatoes necessary.

My first inspiration for this recipe came many years ago when I spotted a wedge of creamy, mushroom-studded brie in the specialty cheese section at Trader Joe’s. It was begging to be part of something special and so I incorporated it into my usual, plain-Jane turkey meatloaf and I never looked back. I have since seen the cheese branded by other companies as well, and I actually bought this one from another supermarket. If you cannot find brie with mushrooms, substitute any other brie, and preferably one that is sold in large wedges, as it is easier to slice evenly for the rollup.


There will be plenty of mushroom in the mix anyway, as I slice and brown nearly a whole package of “baby bellas” to layer with the brie. Oh, and sauteed mushrooms and onions also get chopped and blended right into the meat mixture as well. Yes, this is definitely a mushroom-lover’s meatloaf!


I like using a combination of ground turkey (93% lean) and ground turkey breast (99% lean) for this, because the turkey breast on its own tends to go dry during baking, and the other on its own is almost too soft to shape properly. I suppose this meatloaf could also be made with lean ground beef, but I love it with ground turkey, which has a lighter flavor and leaner calorie load—though I’m sure the brie filling that oozes out into every bite probably cancels out that second part.


To give this meatloaf a hint of Thanksgiving (we are already counting down at our house), I have used dry stuffing mix (which I crushed into crumbs) in the panade, and it forms a glue to hold it all together. Feel free to substitute your favorite bread crumbs. Use less milk for this one than you normally would in a panade, because the turkey meat mixture is fairly loose and it benefits from the sturdier, almost crumbly panade.

The richness of the brie demands a little balance as well, so don’t omit the fresh parsley. Putting this meatloaf together is not as complicated as it might seem. At the end of the post is a click-to-print recipe, but I’ll walk you through it so you can see how easy it really is.


Parchment paper is my best friend for the task of shaping the meatloaf, but waxed paper would work in a pinch. Take your time, be sure the long edge and ends are sealed, and bake it on a cookie sheet rather than in a pan, for a beautiful crust. Give it 45 minutes at 400° F, and let it rest for at least 10 minutes before slicing.


Look at that gorgeous crust!

As for the gravy, well, I probably had you at “French onion.” It’s simple enough to make, but it does call for a special ingredient in the Herbes de Provence, which is a blend of herbs well known in the south of France. If you don’t have or can’t find it, substitute a blend of thyme, rosemary, marjoram and lemon peel. It won’t be quite the same, but these flavors will help to highlight and complement the onions. Use sweet or yellow onions and your choice of chicken or vegetable broth.


Serve the meal by ladling a portion of gravy directly onto the plate, and top with thick slices of the brie and mushroom-stuffed meatloaf. This entree does not need mashed potatoes, but if you crave them, may I suggest my hubby’s fantastic Garlic Mashed? You won’t regret it. 🙂

Brie & Mushroom-stuffed Meatloaf

  • Servings: About 8 slices
  • Difficulty: intermediate
  • Print

Don't let the fancy swirl pattern in these meatloaf slices intimidate you! With a little patience and a sheet of parchment paper, you can make this delicious turkey meatloaf that literally oozes with comfort!


Ingredients

  • 3/4 cup dry herb stuffing mix (such as Pepperidge Farm), crushed into small crumbs
  • 1/2 cup milk
  • 3 Tbsp. extra virgin olive oil, divided (note directions for when to use)
  • 1/2 sweet onion, minced
  • 12 oz. carton cremini mushrooms, divided
  • 1 lb. ground turkey (93% lean)
  • 1/2 lb. ground turkey breast (99% lean)
  • 1 large egg
  • Kosher salt and freshly ground black pepper
  • Small handful chopped, fresh parsley
  • 6 oz. brie (with mushrooms, if possible)

Directions

  1. Make a panade, combining the dry stuffing mix with milk. You should have just barely enough milk to cover the stuffing mix. Let this rest while you prepare the rest of the meatloaf mixture.
  2. Clean and trim all the mushrooms and divide them, chopping enough into small pieces to measure about 1/2 cup. Slice the remaining mushrooms into thin slices and set aside.
  3. Place a non-stick skillet over medium heat with a tablespoon of olive oil. Sauté the minced onion until translucent. Season with Herbs de Provence, salt and pepper. Add the chopped mushrooms and sauté together until the mushrooms are soft and most of their moisture has evaporated. Cool this mixture and then process (or chop) into smaller bits.
  4. Add another tablespoon of olive oil to the skillet and brown half of the sliced mushrooms until they are golden on both sides. Repeat with the remaining oil and mushrooms. Don’t be tempted to cook the mushrooms all at once, unless your pan is very large. If they are crowded in the pan, they will cook by steaming rather than browning, and you’ll lose the texture of the mushrooms. Transfer the browned mushroom slices into a bowl to cool.
  5. In a large mixing bowl, combine the ground turkey (both), egg, panade, mushroom-onion mixture and parsley. Toss in a generous pinch of salt and a few twists of black pepper. Use your hands to evenly combine these ingredients until they are uniform, but try not to overwork the mixture.
  6. Line a baking sheet with parchment paper. Transfer the meatloaf mixture onto the parchment, using oiled hands to pat it into a rectangle about 9 by 12 inches, and about 3/4-inch thick. Layer the browned mushrooms evenly over the surface, leaving a 1-inch border around all edges. Cover with plastic wrap and refrigerate about 30 minutes to firm up. Use this time to preheat the oven to 400° F and to prepare the French onion gravy.
  7. Slice the brie cheese wedge into uniform thickness pieces, about 1/4-inch thick. Arrange the slices in a single layer all over the chilled meatloaf, keeping a 1-inch border along both sides, and at least 2 inches from the far, short end. This will help prevent the brie from melting out of the meatloaf during baking.
  8. Use the parchment paper to assist rolling the meatloaf, beginning with the short end near you. Bend the brie, if needed, so that it will roll easier. Keep the roll snug as you go, and pinch to seal all edges, finishing with the end seal on top of the roll. Sprinkle the surface of the meatloaf lightly with kosher salt and bake for 45 minutes, until the meatloaf is browned with a slight crust all over; internal temperature will be about 160° F. Remove it from the oven and allow it to rest about 10 minutes before slicing. The residual heat will continue to cook the meatloaf during this time.
  9. Serve with French Onion Pan Gravy.


French Onion Pan Gravy

  • Servings: 3 cups
  • Difficulty: average
  • Print

Ingredients

  • 1 large sweet onion, thinly sliced into crescent shapes
  • 2 Tbsp. extra virgin olive oil
  • 1/2 tsp. Herbs de Provence seasoning
  • Kosher salt and freshly ground black pepper
  • 2 Tbsp. butter
  • 2 Tbsp. all-purpose flour
  • 2 Tbsp. dry vermouth (or dry white wine)
  • 3 1/2 cups low-sodium vegetable broth
  • 1 tsp. bouillon paste (optional, for richer flavor)

Directions

  1. Heat a large skillet or shallow sauce pot over medium heat. Swirl in olive oil and saute the onion crescents until translucent. Season with Herbs de Provence, salt and pepper and continue cooking until onions begin to caramelize.
  2. Sprinkle flour over the onions and add the butter, stirring to melt the butter and evenly coat the onions in roux. Cook until the onions no longer appear dry from the flour, about 5 minutes.
  3. Add dry vermouth to the skillet and stir to deglaze any browned bits. The liquid will probably dissipate rather quickly. Add broth, about half at a time, stirring to distribute evenly. When sauce begins to bubble and thicken, reduce heat to low and cover the skillet. Let it simmer while meatloaf is in the oven.
  4. Just before serving, taste and adjust seasonings. For additional richness, swirl in a heaping teaspoon of bouillon paste.
  5. Plate a ladle-ful of gravy, and top it with slices of the brie and mushroom-stuffed meatloaf.


Pumpkin Spice Tiramisu

If I told you that you could serve up a pumpkin spice dessert for Thanksgiving that was creamy, indulgent, no-bake, no-cook and easy to prepare ahead with no special tools—well, you’d probably think I was lying or, at least, overpromising, right? But the proof is right there in the picture, and this tiramisu achieves all of that and then some.

As I surmised when I made the chocolate-cherry tiramisu at Valentine’s Day this year, the classic Italian dessert is basically a dressed-up version of an ice-box cake. Layers of sweetened mascarpone cream and espresso-soaked delicate ladyfingers are accented with a hint of rum or brandy, and dusted with pure cocoa for a chocolate-y finish. I am a huge fan of tiramisu, and I enjoyed it most recently in its traditional Italian style when my friend, Peg, and I traveled up to West Virginia and Ohio for the Fiesta Factory tent sale.

But I came home thinking, “why couldn’t I give this scrumptious dessert a little Thanksgiving twist?” And so I did. Note that I have made several substitutions from a typical tiramisu recipe:


The recipe is made with raw egg yolks, so if you have health concerns about that, I’d encourage you to seek out an eggless or cooked egg recipe, or perhaps consider using pasteurized eggs. Also, planning ahead is more of a requirement than a convenience, as tiramisu improves after a 24-hour setup time. If you’re going to try the recipe for Thanksgiving, you might want to make it a couple of evenings ahead.


Ingredients (6 generous servings)

3 egg yolks, room temperature*

2 Tbsp. maple sugar (or use superfine if you can’t find maple)

8 oz. tub mascarpone, room temperature

5 Tbsp. Trader Joe’s pumpkin butter*

1 tsp. real vanilla extract

4 Tbsp. Pumking whiskey, divided* (see notes)

1 1/2 cups brewed light roast cacao with cinnamon*

7 oz. package ladyfingers (this might be labeled as biscotti savoiardi)

2 Tbsp. maple sugar, mixed with 1/4 tsp. ground cinnamon and 1/4 tsp. pumpkin pie spice


*Notes

The egg yolks should be room temperature for this recipe, but it is easier to separate the eggs when they are cold from the fridge. Save the whites for your weekend omelet.

If you don’t have access to a Trader Joe’s store, any other brand of pumpkin butter will work just fine. Homemade would be even better!

I found the Pumking Whiskey completely by chance when my husband and I traveled through New Jersey and Connecticut at the end of summer, and it’s a real treat. Distribution from this craft distillery is limited, but readers in the northeast U.S. should have little trouble finding it. Otherwise, go with spiced light rum, or perhaps even Frangelico.

My first impressions of the Crio Bru brewed cacao were only so-so, but I’ve grown to really enjoy this as an occasional alternative to coffee. Since the time I first discovered the company, it has added an array of new seasonal flavors, and the cinnamon is one of my favorites. It’s a limited edition that is currently only available in a sample pack, but the company just added another flavor—you guessed it, pumpkin spice!

I made this in a Pyrex dish that measures 8 ½ x 7” inches, but I’m sure you could also make this recipe work in an 8 x 8” dish. Or double the recipe and use a 9 x 13.

It helps to have an electric mixer (either stand or handheld) to make this dessert, but it can also be done with a whisk and a good strong arm. 🙂


Instructions


  1. In a mixing bowl or the bowl of a stand mixer, whip eggs until they are smooth. Gradually add maple sugar and continue whipping until all sugar is dissolved into the yolks.
  2. Add mascarpone into the bowl and blend on low speed until the mixture is evenly mixed, smooth and glossy. Fold in 2 Tbsp. of the Pumking whiskey, plus the pumpkin butter and vanilla extract.
  3. Using a mesh sifter, sprinkle about half of the maple-spice mixture into the baking dish.
  4. Combine brewed cacao and remaining Pumking whiskey in a flat bowl. Carefully dip the ladyfingers, one at a time, into the liquid. Turn only twice before arranging the cookies in the dessert dish. I have learned that it is very easy to make the ladyfingers soggy, so err on the conservative side. Repeat until you have a complete single layer of ladyfingers in the dish.
  5. Carefully spread half of the pumpkin-mascarpone mixture over the ladyfingers, smoothing it all the way to the edges of the dish.
  6. Repeat with the next layer of ladyfingers, top with the remaining mascarpone mixture, and sprinkle the top with the remaining maple-spice mixture. Cover tightly and refrigerate at least 24 hours before serving.

Delicious, even on a Chinet plate!