Sourdough Bagels!

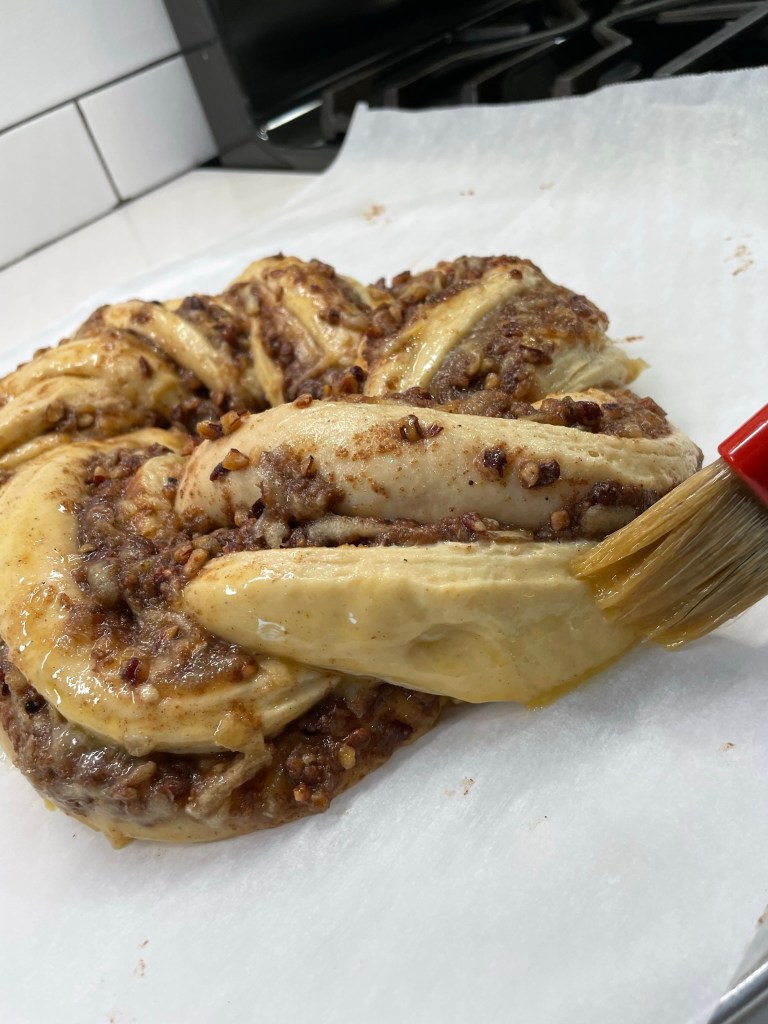
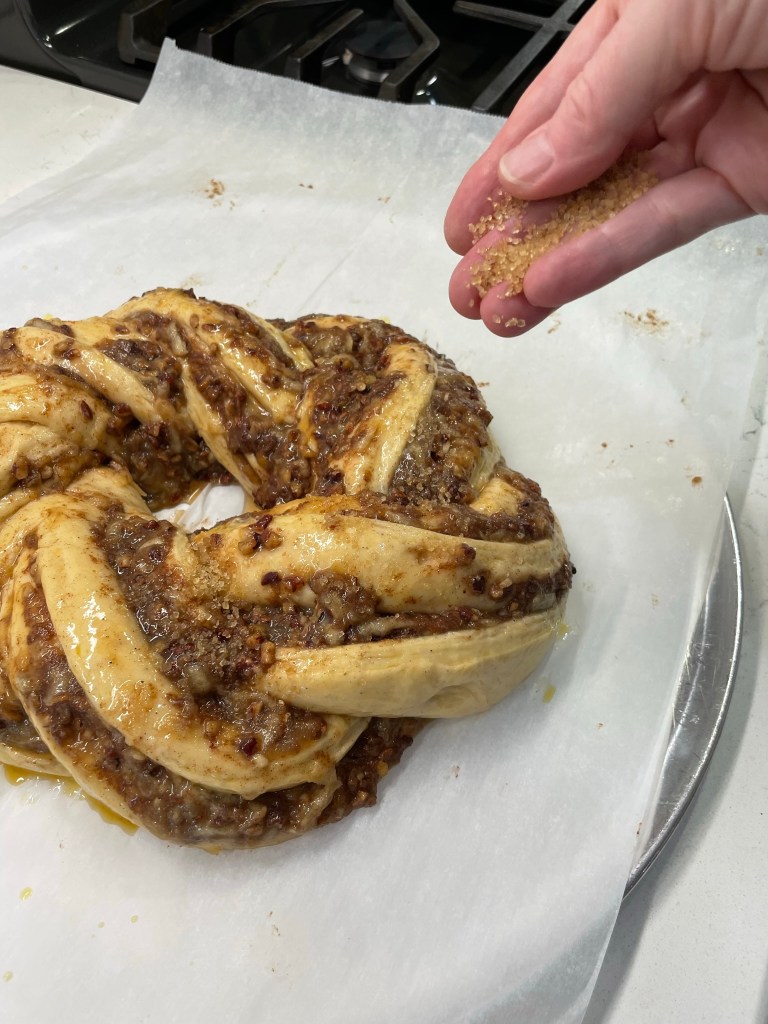
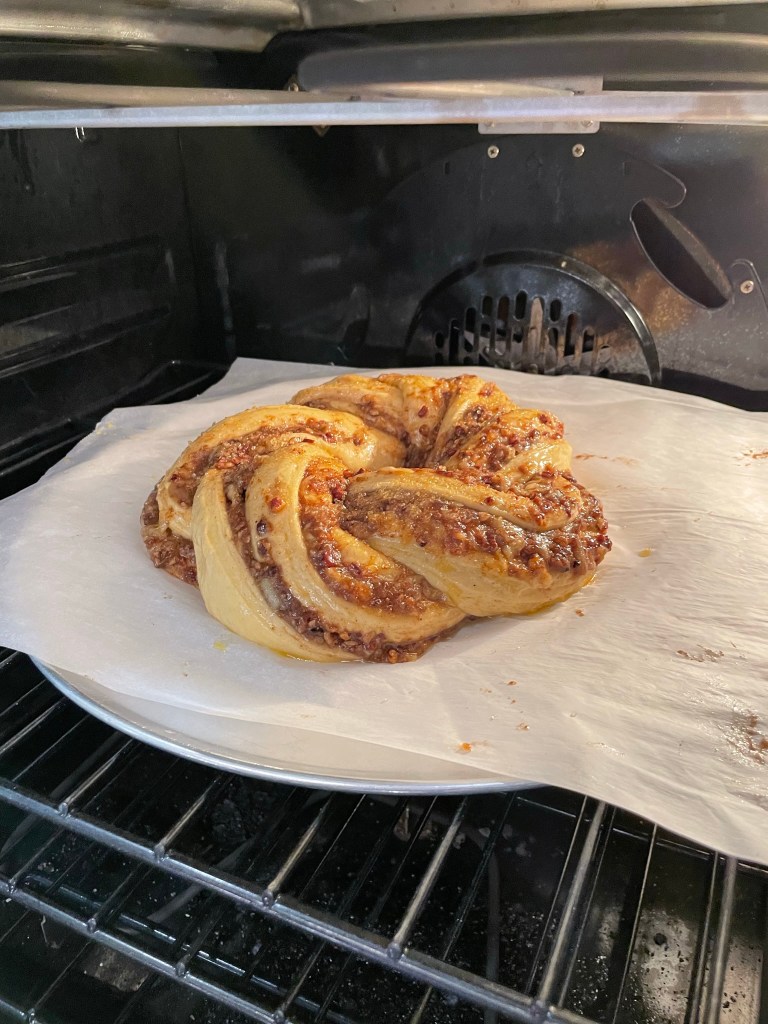
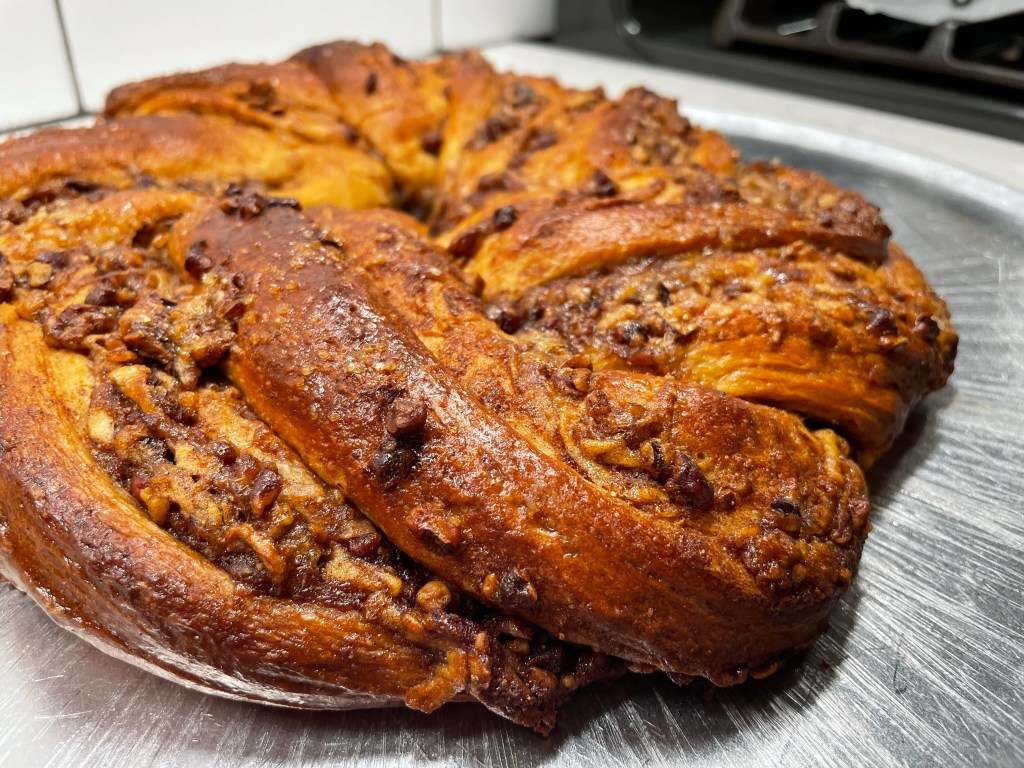
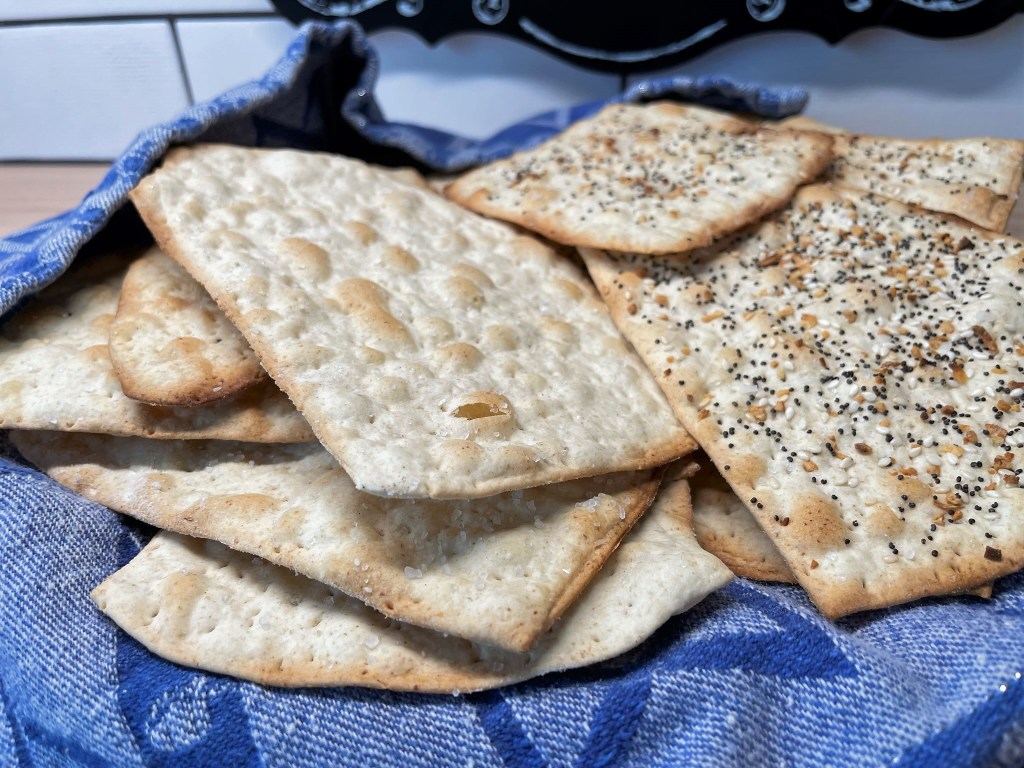
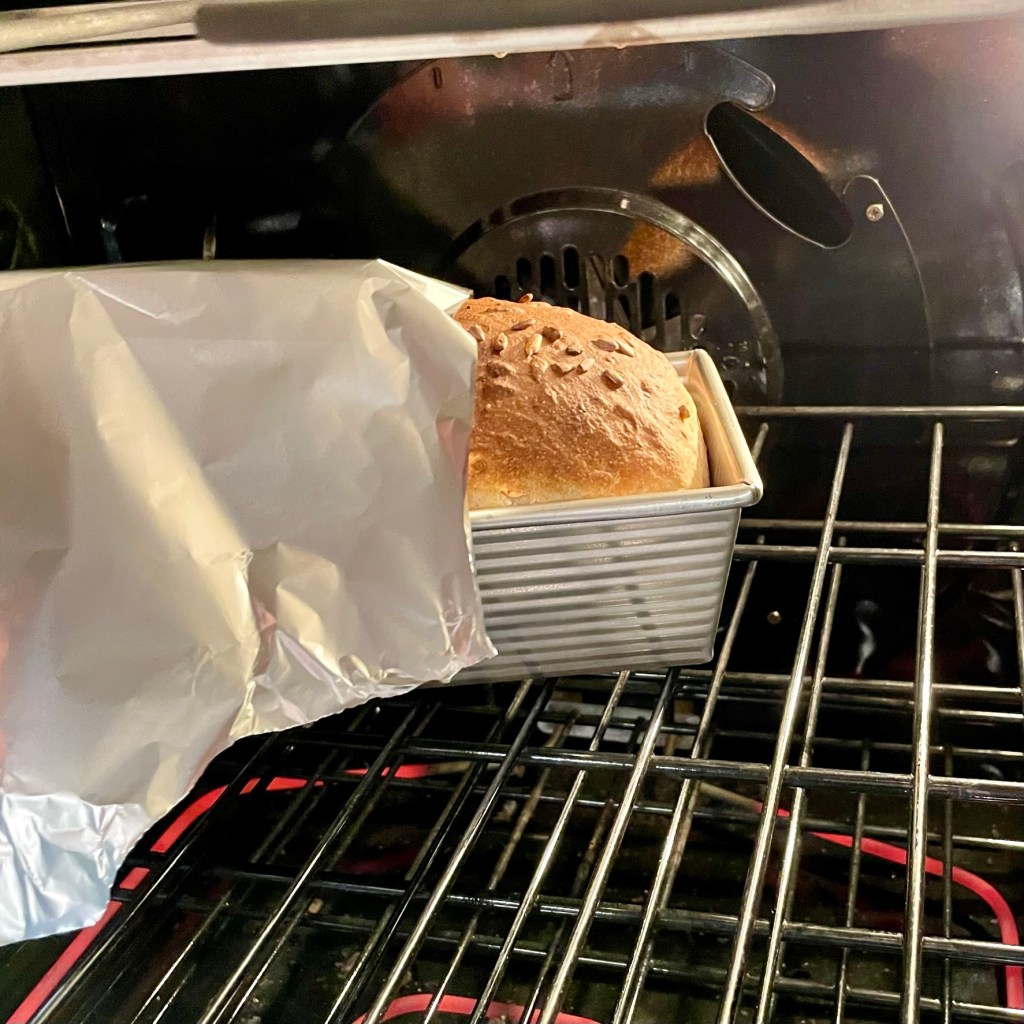
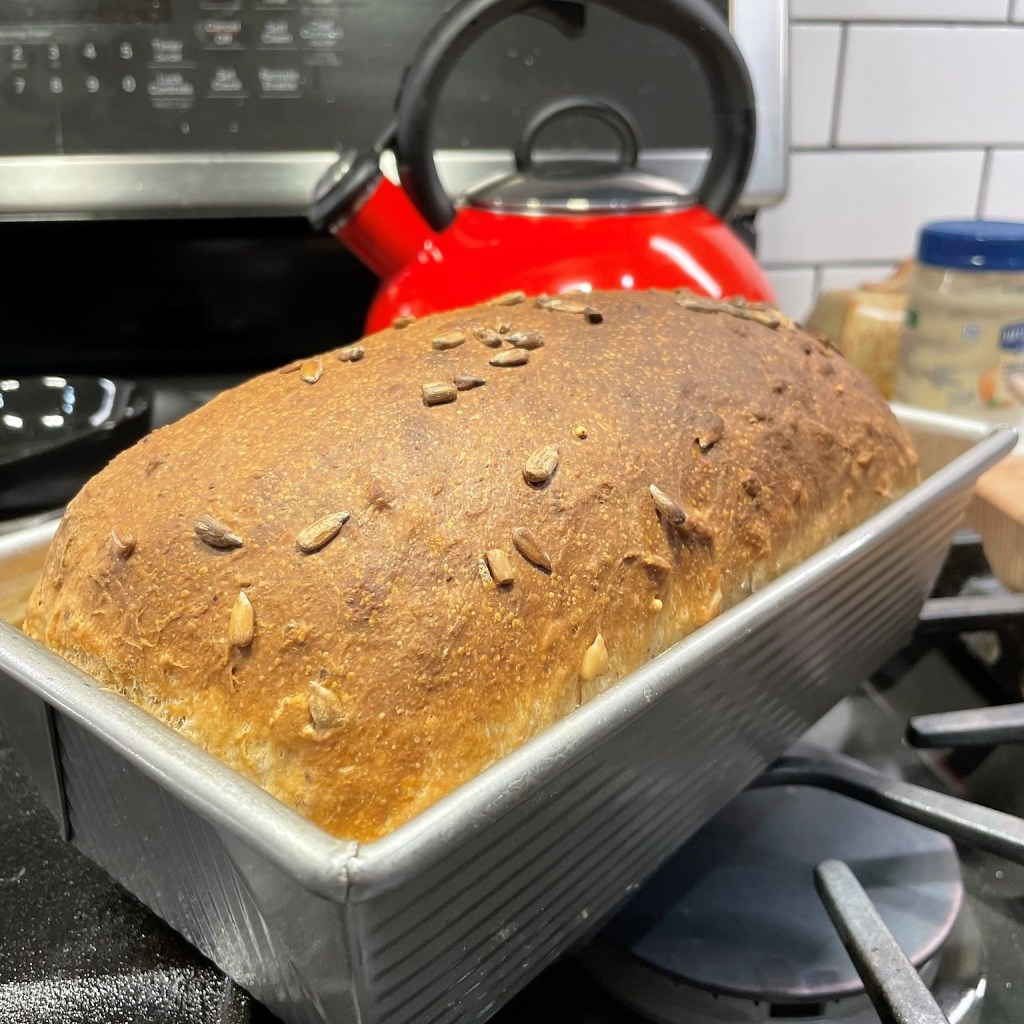
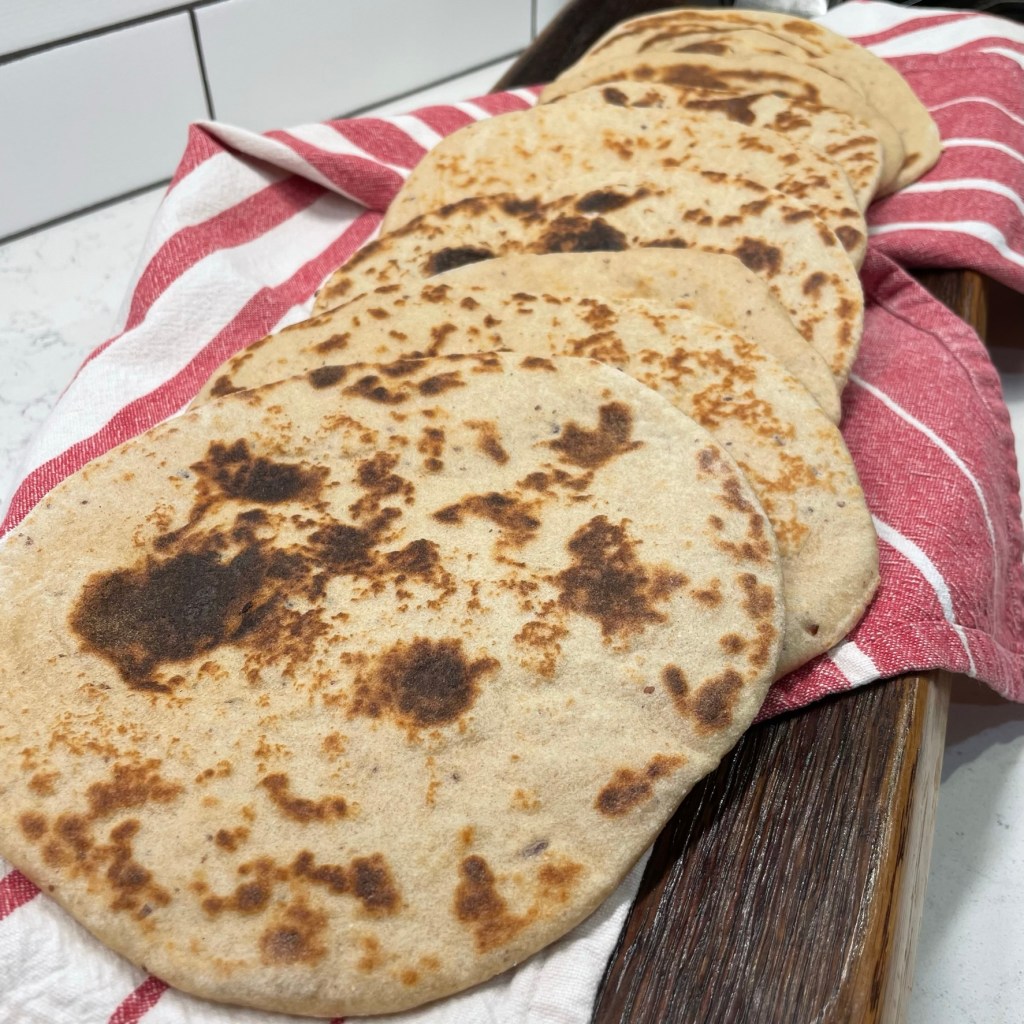
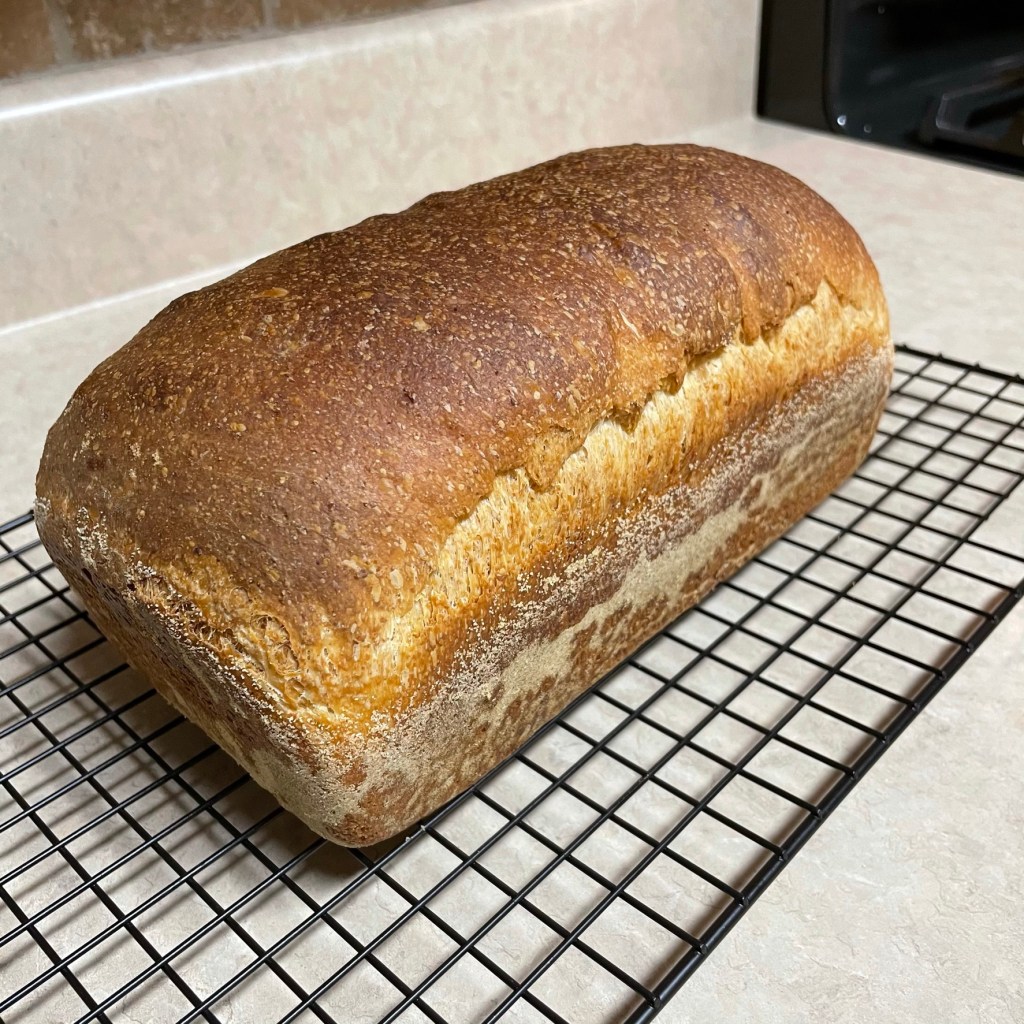
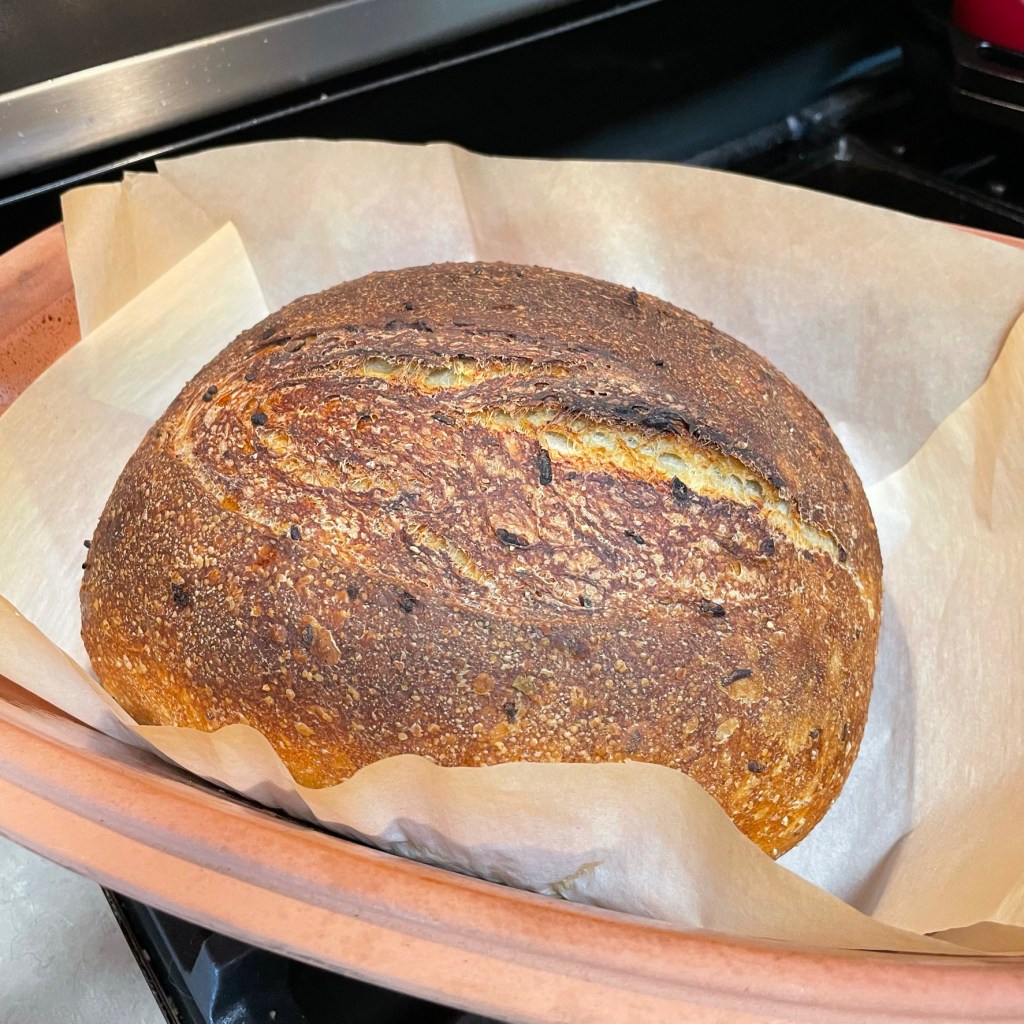
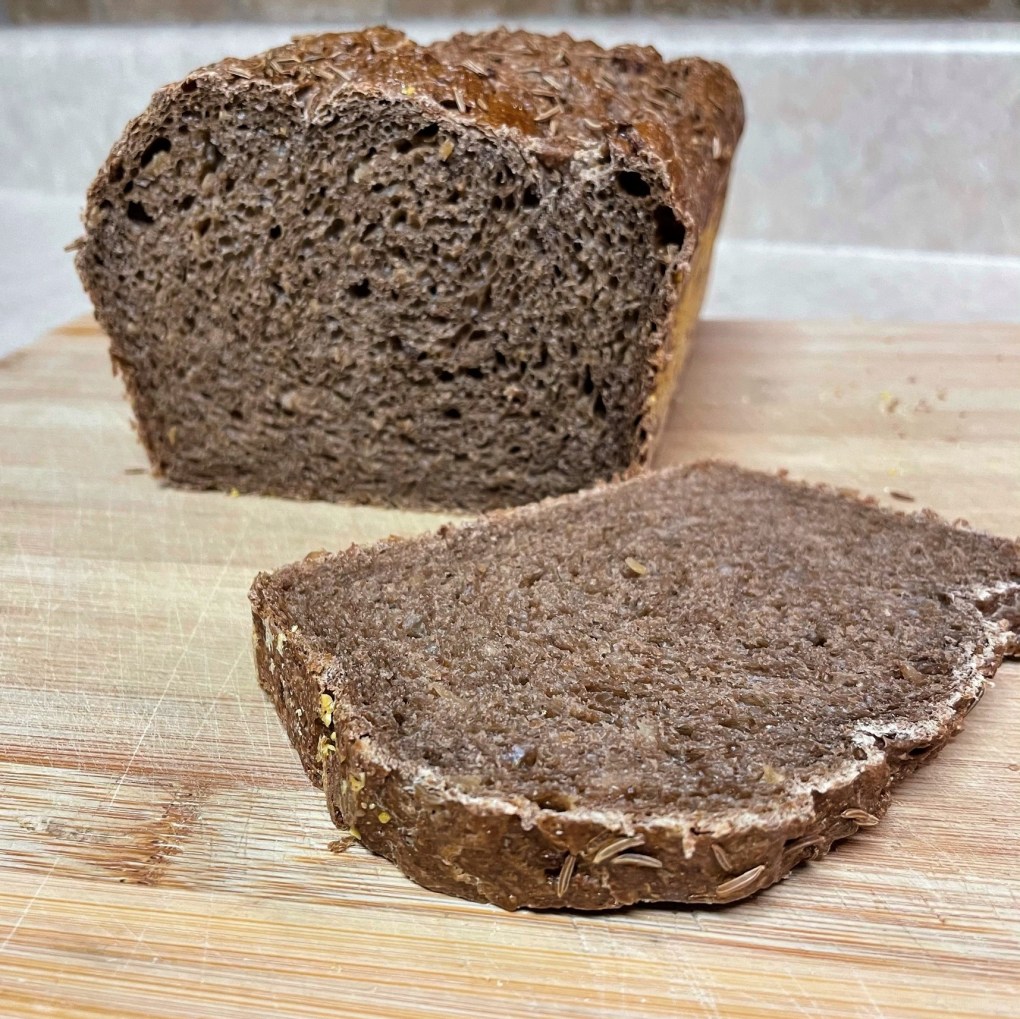
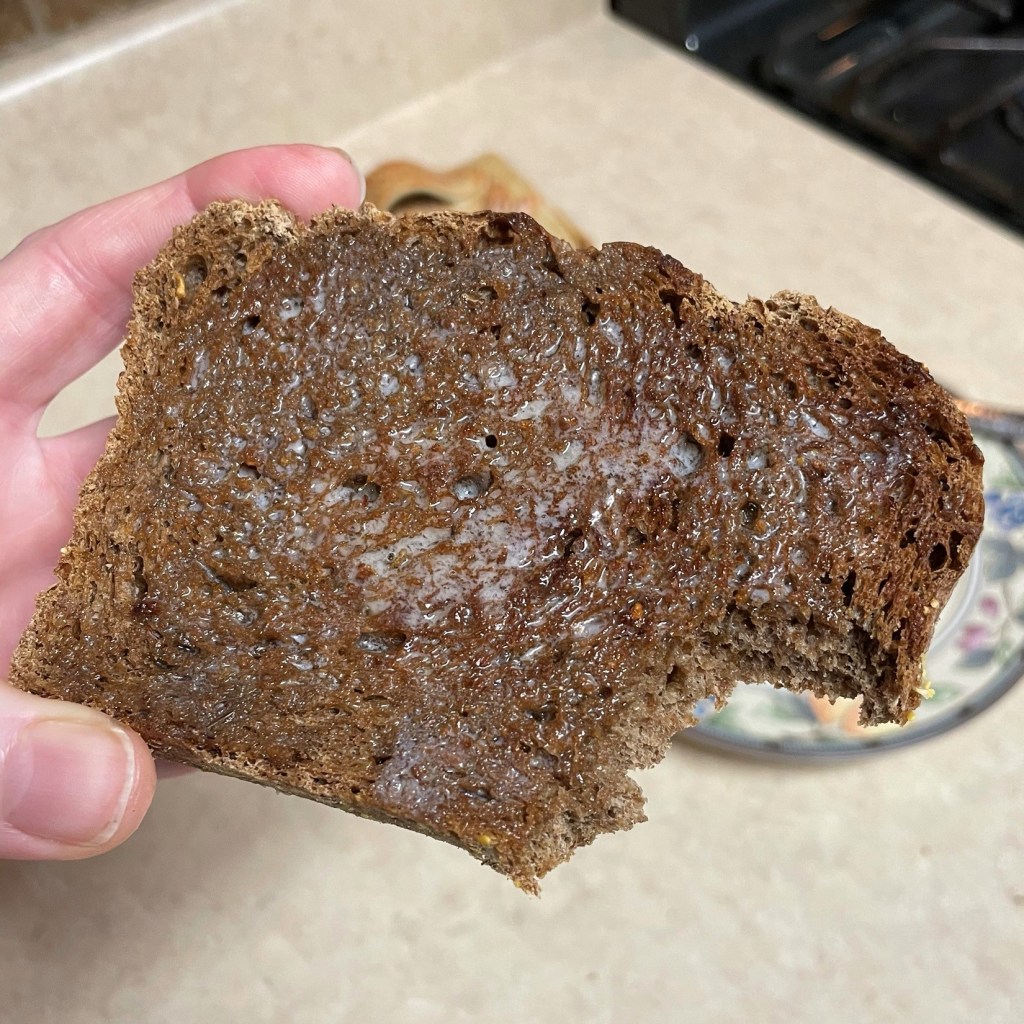
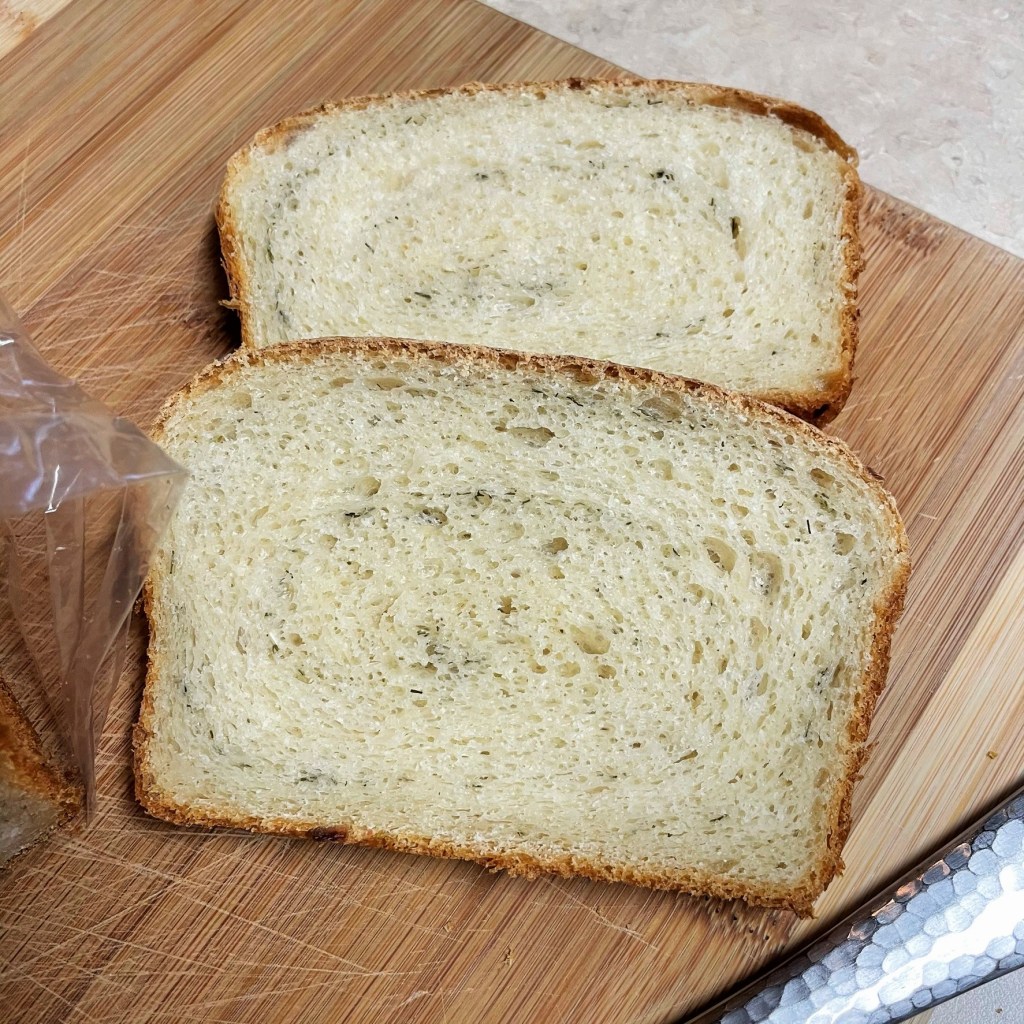
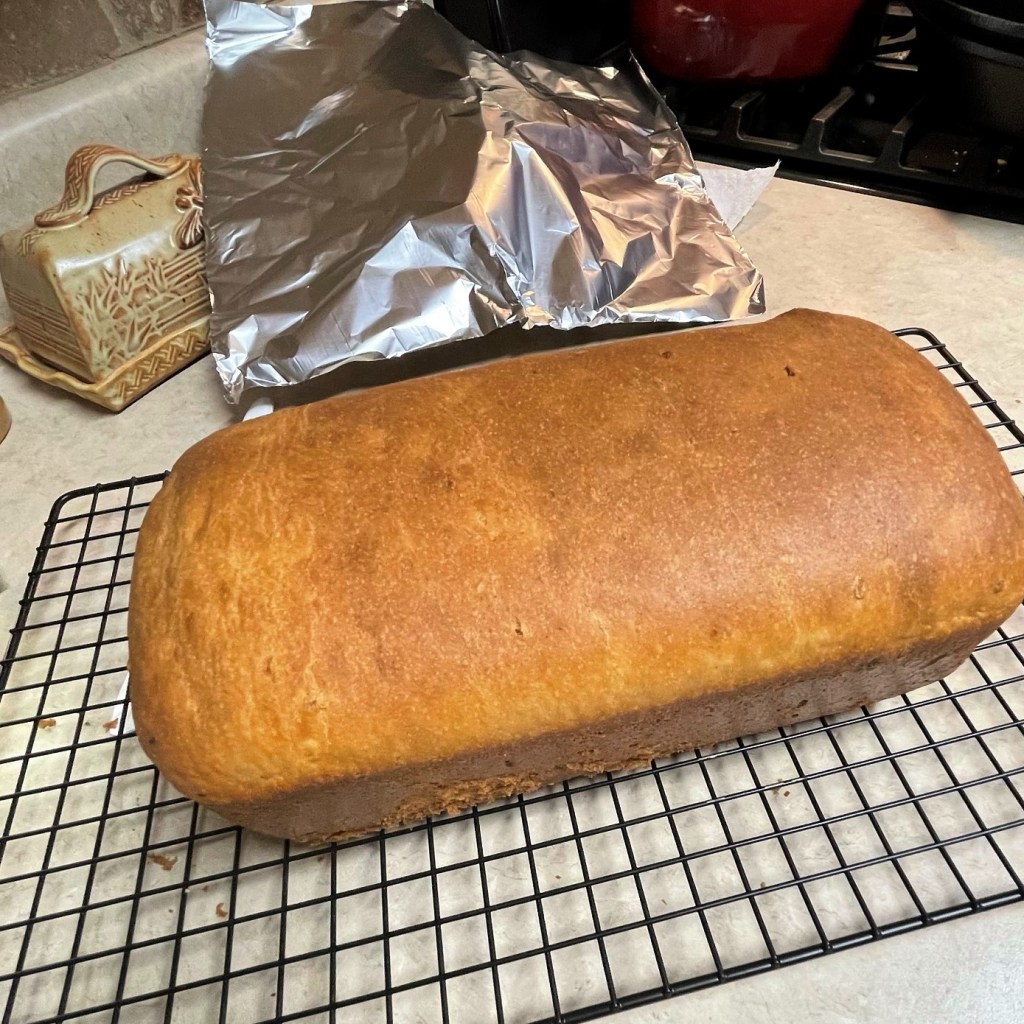
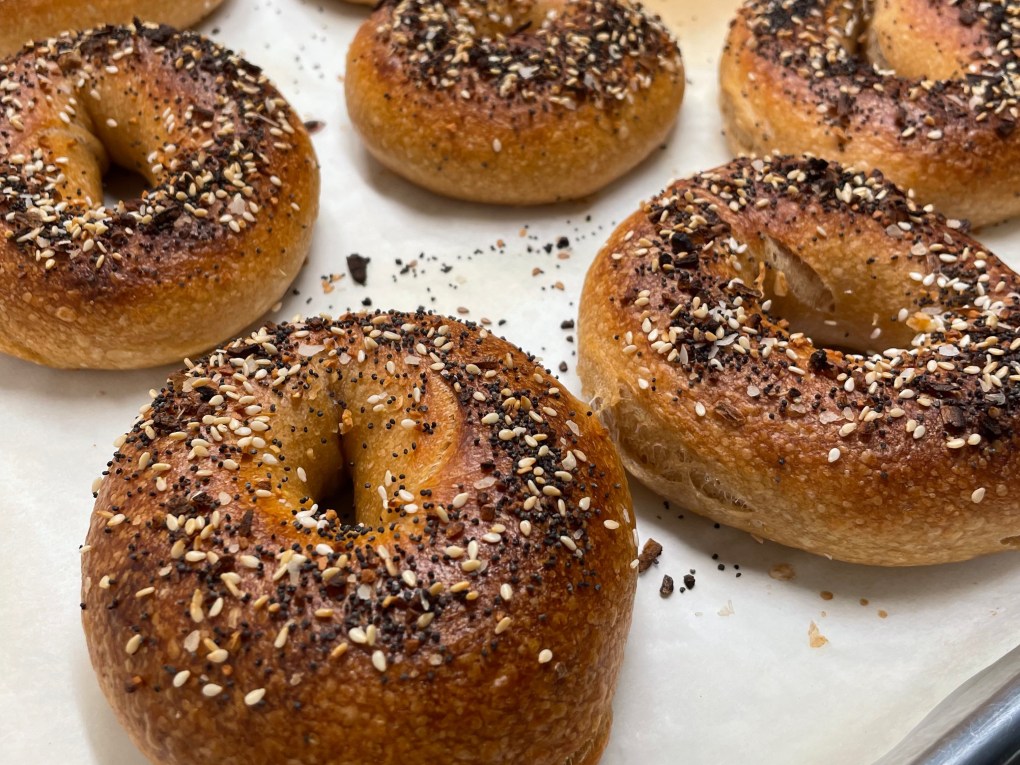
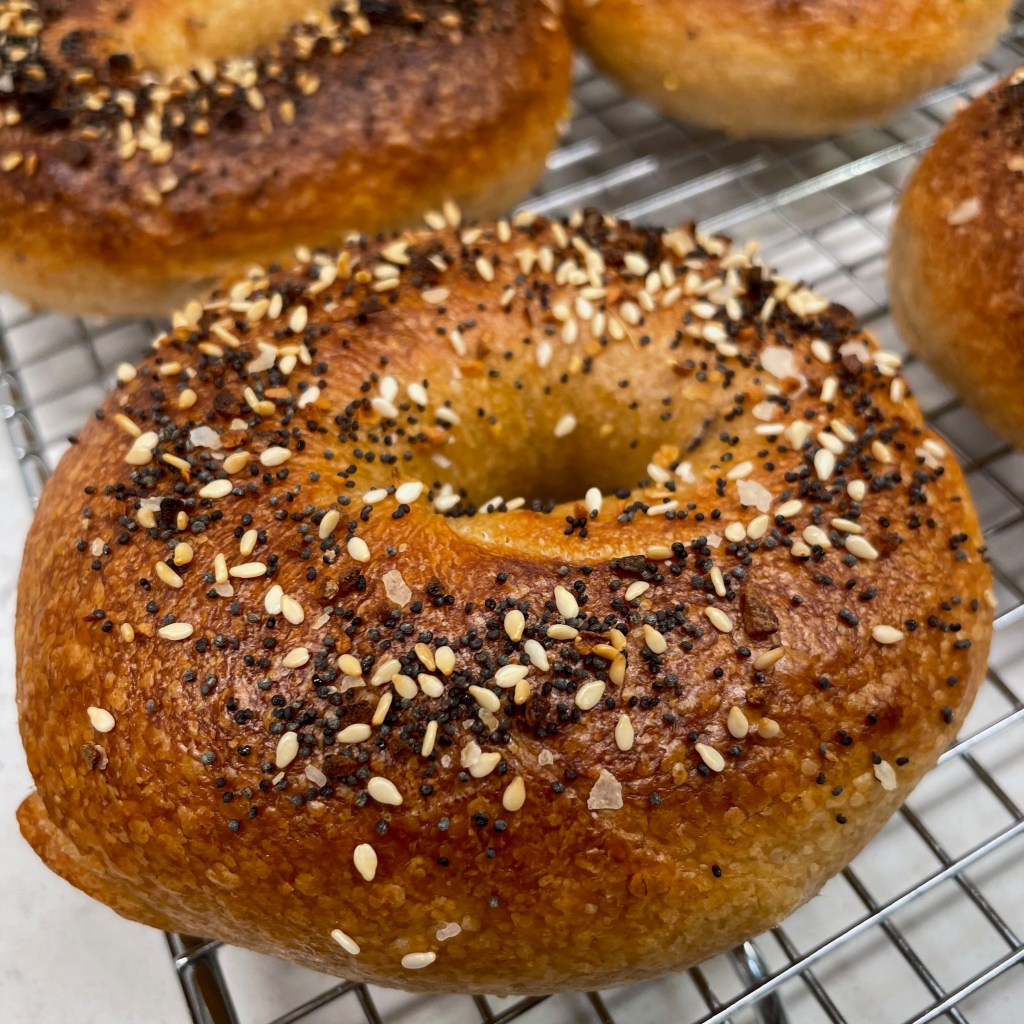
If someone had asked me how I spent last weekend, this would be my answer. It is not that making these bagels took the whole weekend, but that I spent most of the weekend thinking about them and anticipating the crispy crust, chewy interior and the sheer satisfaction of having them turn out so well.

The adventure I had making sourdough bagels is much more than a recipe, though I’ll be happy to share where my recipe came from. Here you go:  https://www.theperfectloaf.com/sourdough-bagel/

Maurizio Leo’s creations have been intimidating, er, fascinating me for a few years now, since I first discovered one of his recipes on the King Arthur Baking site, where Maurizio had been an occasional contributor. This guy is one of my culinary idols, and his expertise with sourdough is astounding. One of the things that used to scare me about his recipes was his attention to the science, and especially his guidelines for the temperature of the dough at various stages. But my worries were eased when I remembered something I learned in my King Arthur Baking class last summer: concern about temperature is more crucial in a production environment, where you have to be ready for baking on a schedule, than in a home kitchen. Once I recalled that fact, I’ve been able to relax and just appreciate the outcome with less worrying along the way. Baking is supposed to be enjoyable, right?

It does help to remember two simple tips about temperature: yeast dough (including sourdough) rises more quickly in a warmer environment, and dough develops more flavor in a cooler environment. Both of these principles come into play with this bagel recipe.

When I got the itch to make bagels for the first time in ages, it was Maurizio’s blog that I turned to for the best recipe and expert advice. He did not let me down.


This renewed interest in making bagels came about in early November, after my husband, Les, and I had participated in a trivia night at the temple in our city. We were assigned to a team and challenged in a variety of categories— from movies, sports and music to Jewish culture and history. Thanks to the diverse interests of our team, we did very well in round after round, and then came a food question that left us, shall we say, farblonjet (a Yiddish word that loosely translates to “we don’t know what the heck”). The trivia clue went something like this: 

What staple Jewish food was said to have originated when Polish King Jan Sobieski saved Austria during the Ottoman Empire?  

I’m paraphrasing because I don’t remember the exact details of the question; I only remember that we had a lot of discussion at our table and we still got it wrong. One teammate said knishes, which we thought might have had ties to Poland but we weren’t sure. I thought perhaps bialys, which I was certain were Polish but that’s all I knew about them. And a third person on the team said bagels because it seemed the most obvious. I chimed in that maybe it was too obvious, and then we agonized until time was up and we went with “knishes.”

The answer was, of course, bagels! And then a whole conversation ensued across the entire room, about what makes a bagel great— from the New York City water to the best toppings— and I haven’t stopped thinking about them since.


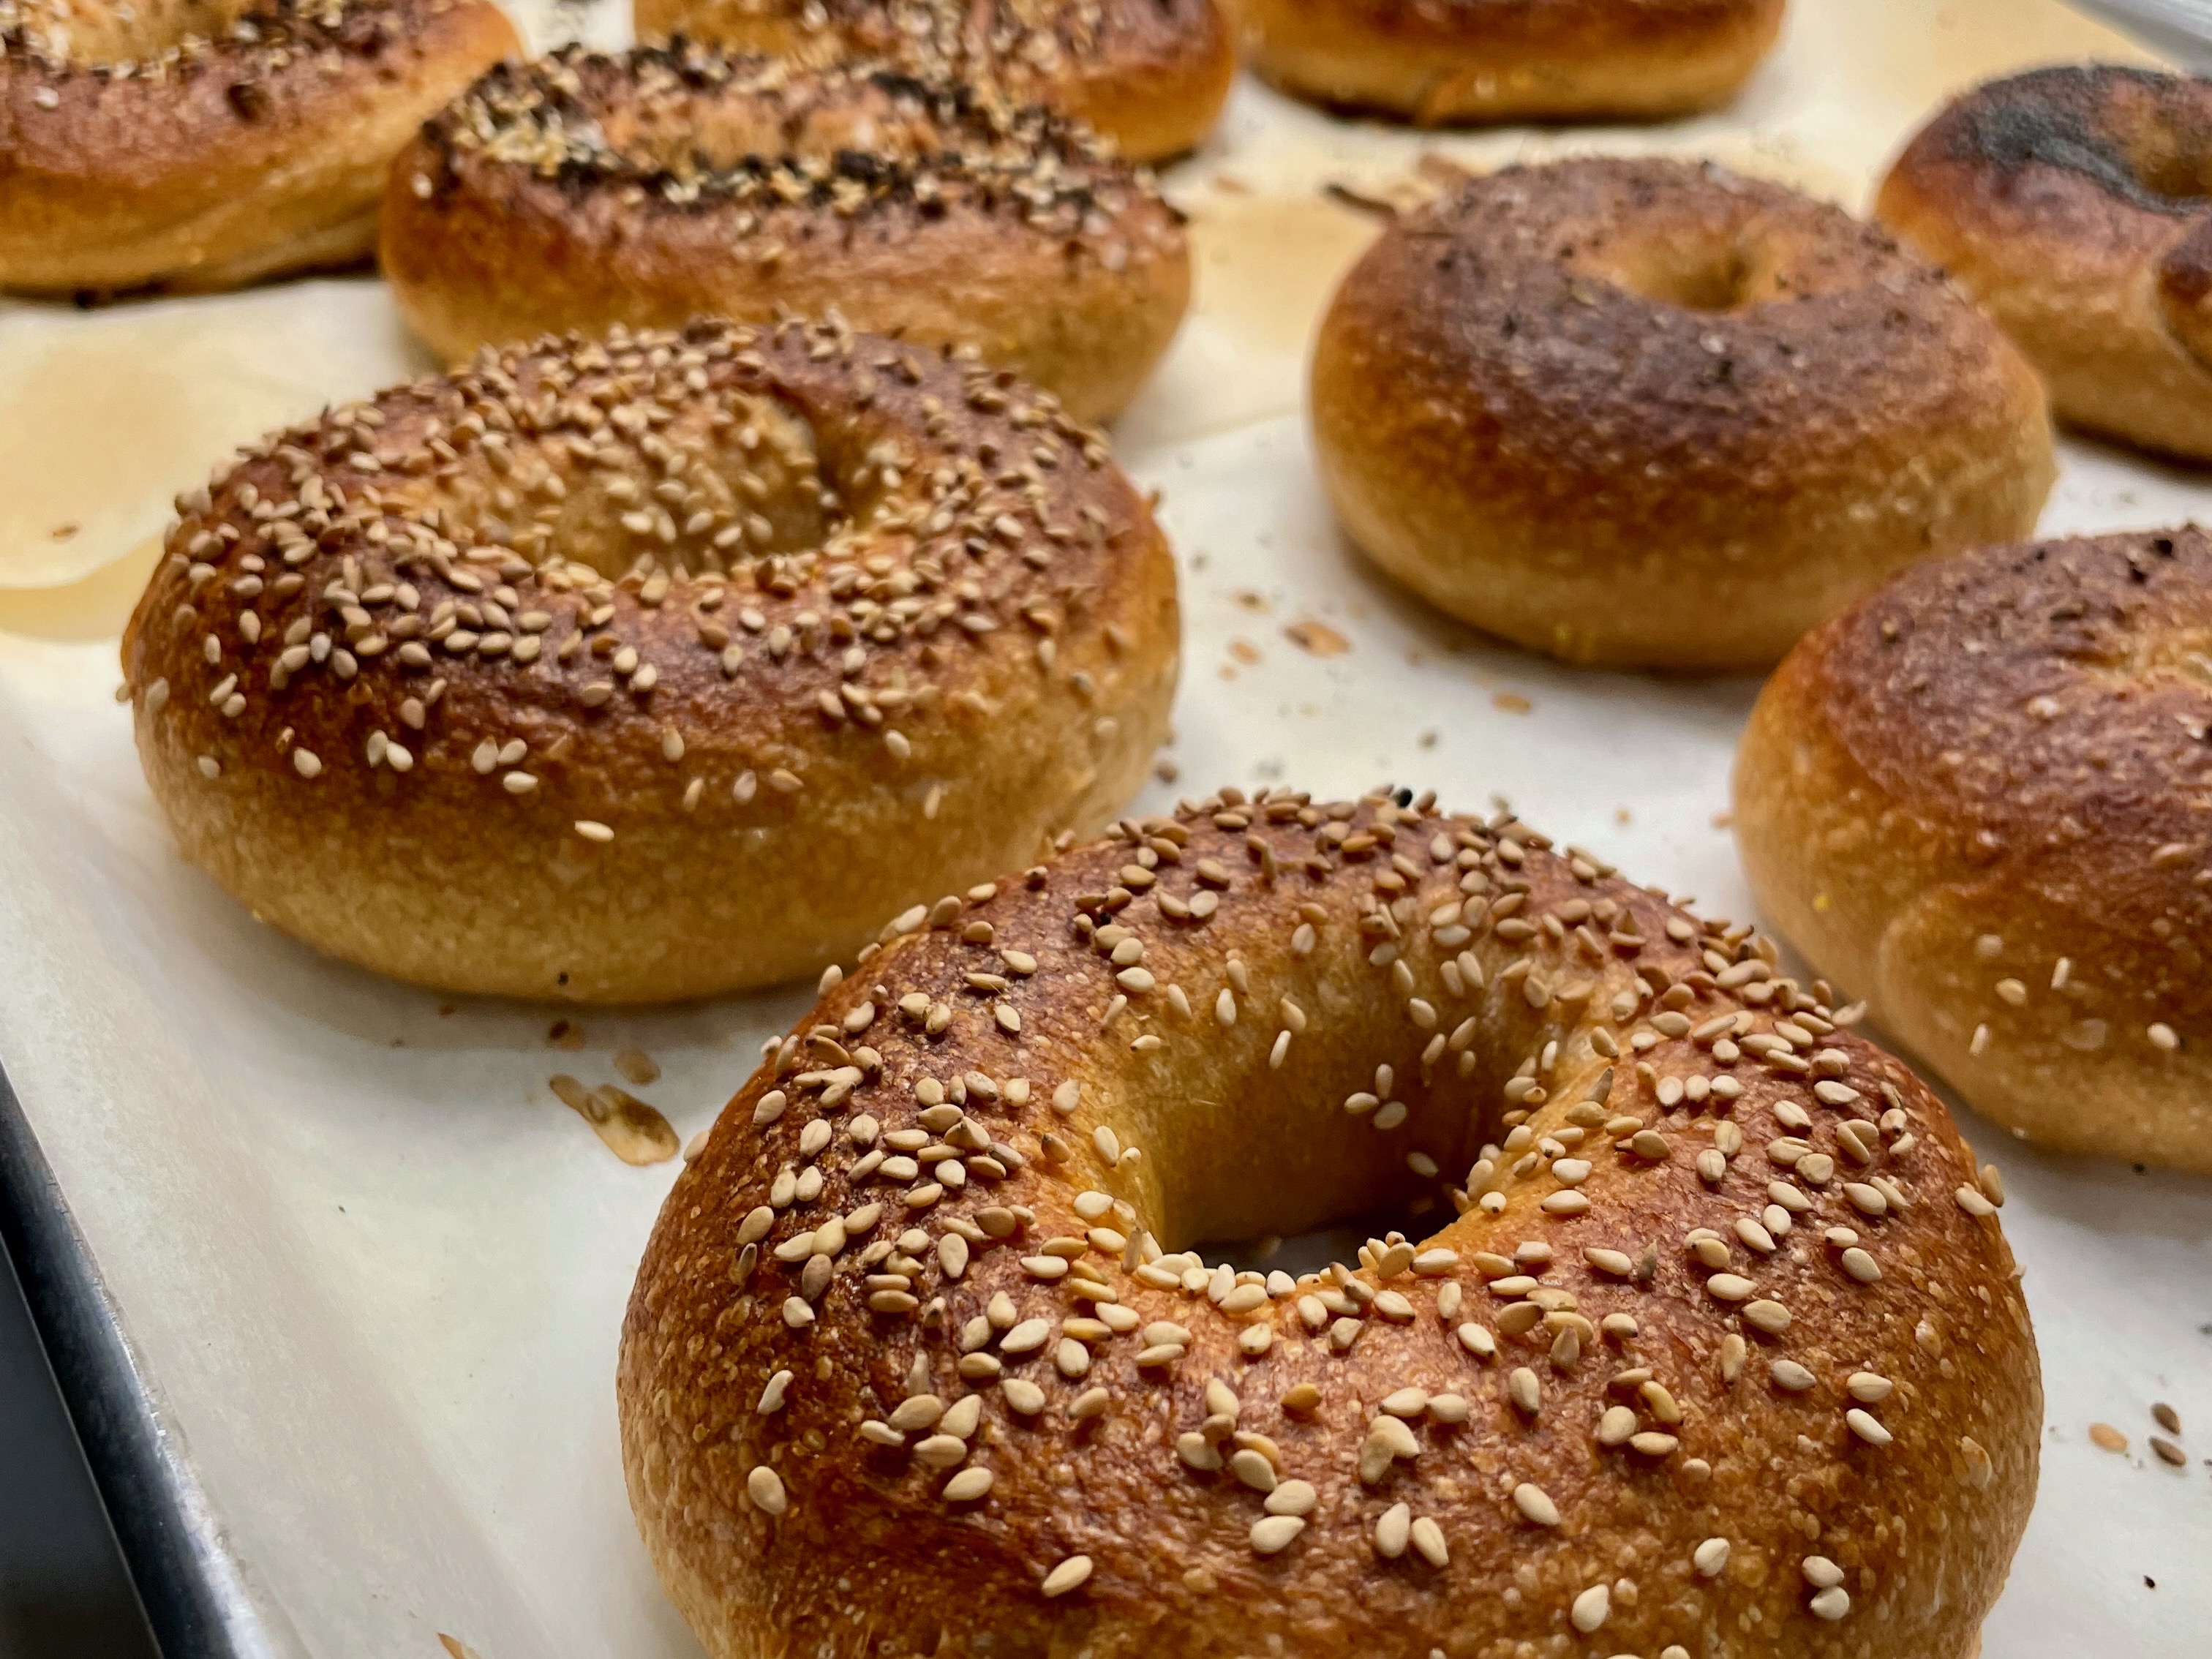
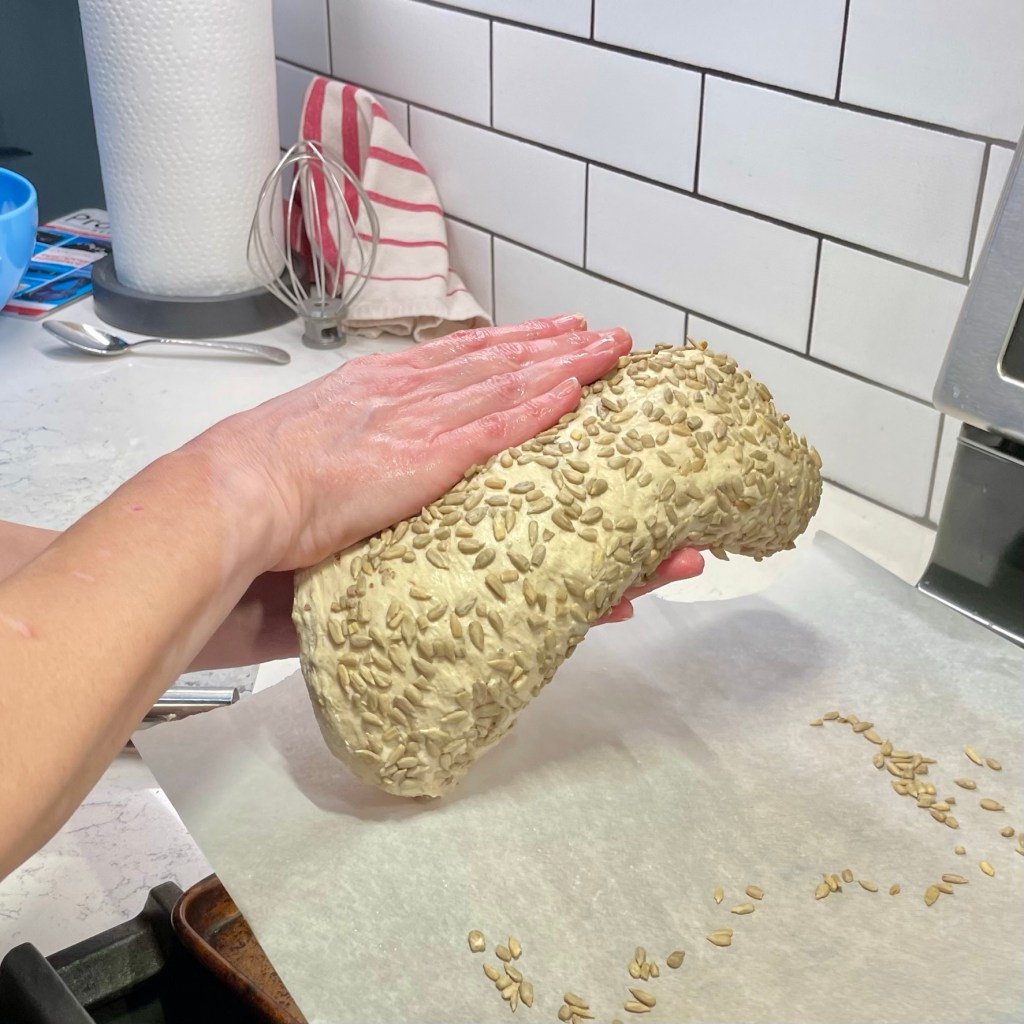
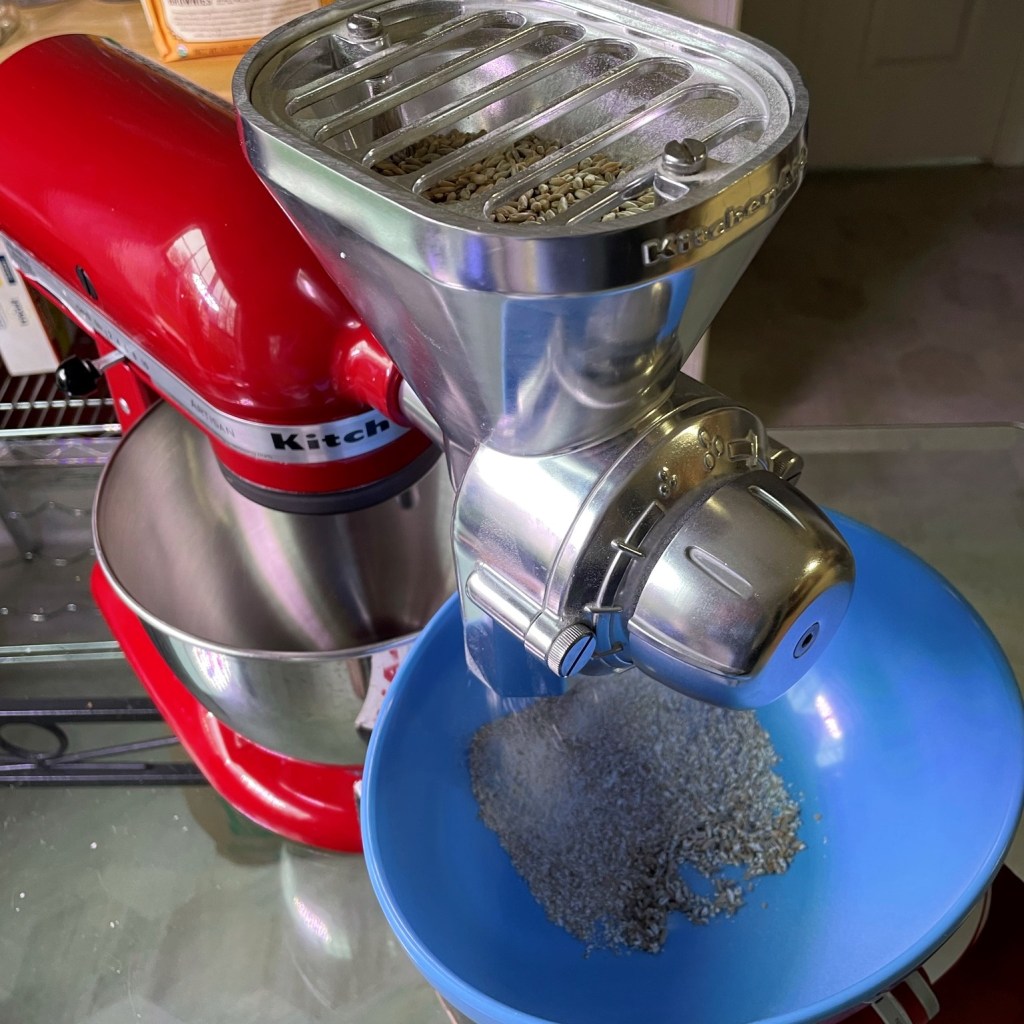
We are lucky to have a very good local bagel store in Winston-Salem (conveniently located practically next door to the temple), and we are perfectly content with their bagels most of the time. But when I found myself with a little free time last weekend, I decided to go for it. Making bagels requires a fair amount of planning and a few weird ingredients, which I happened to have on hand because, despite my lack of knowledge about the history of bagels, I’m still a bread nerd. This has been a long time coming!


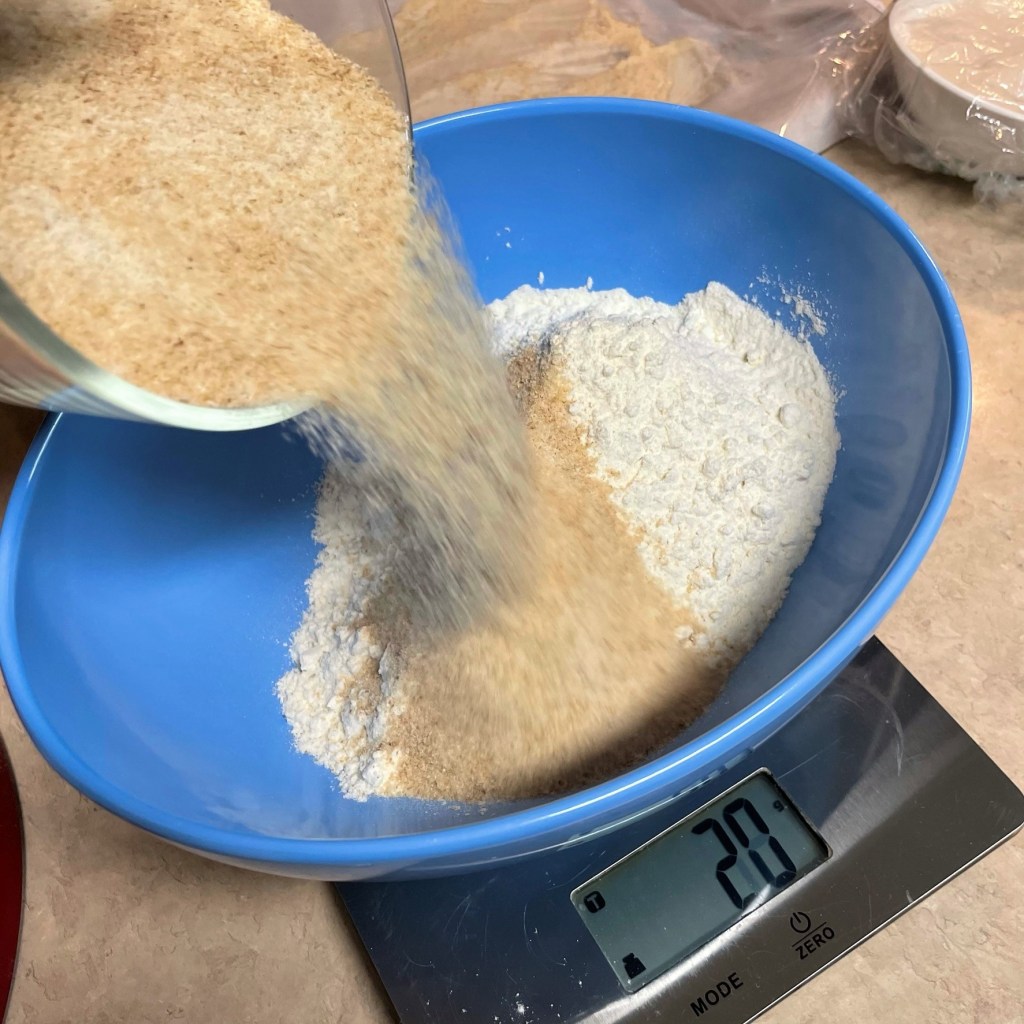
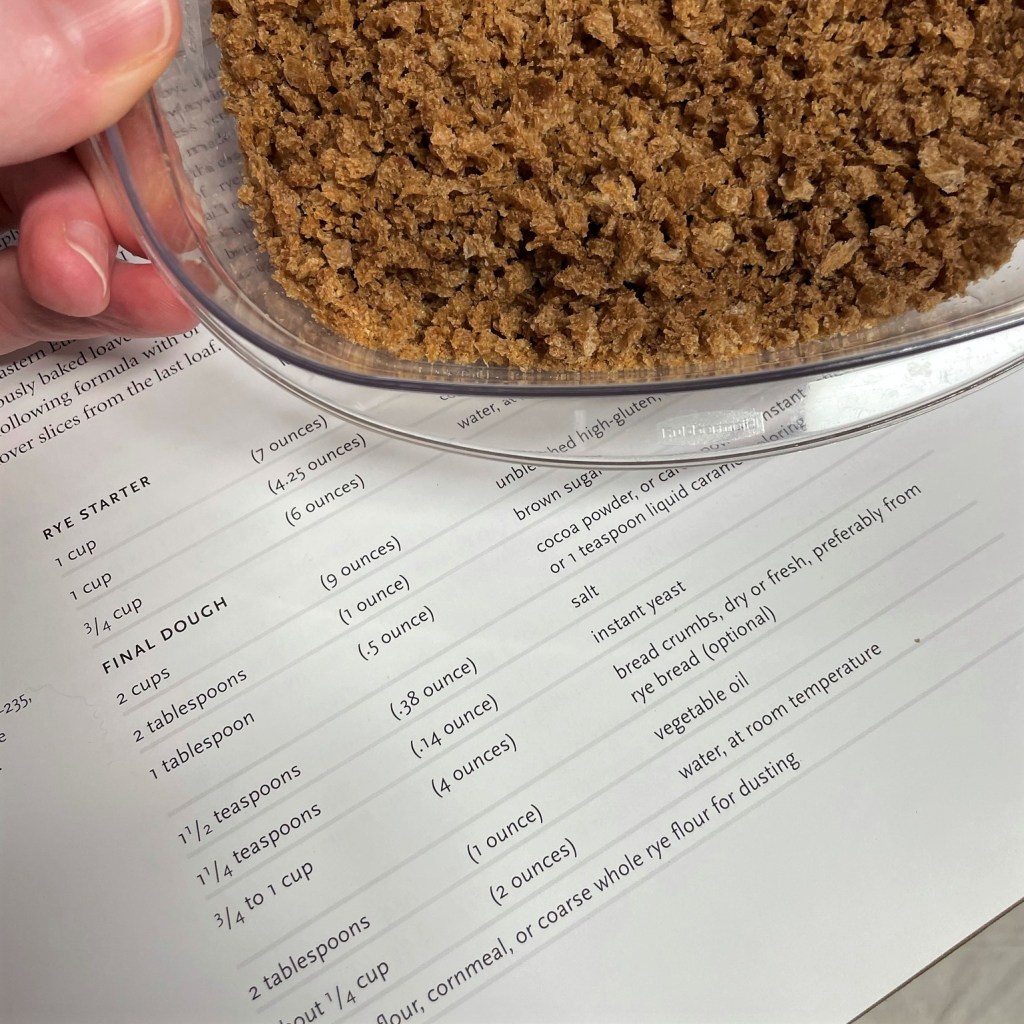
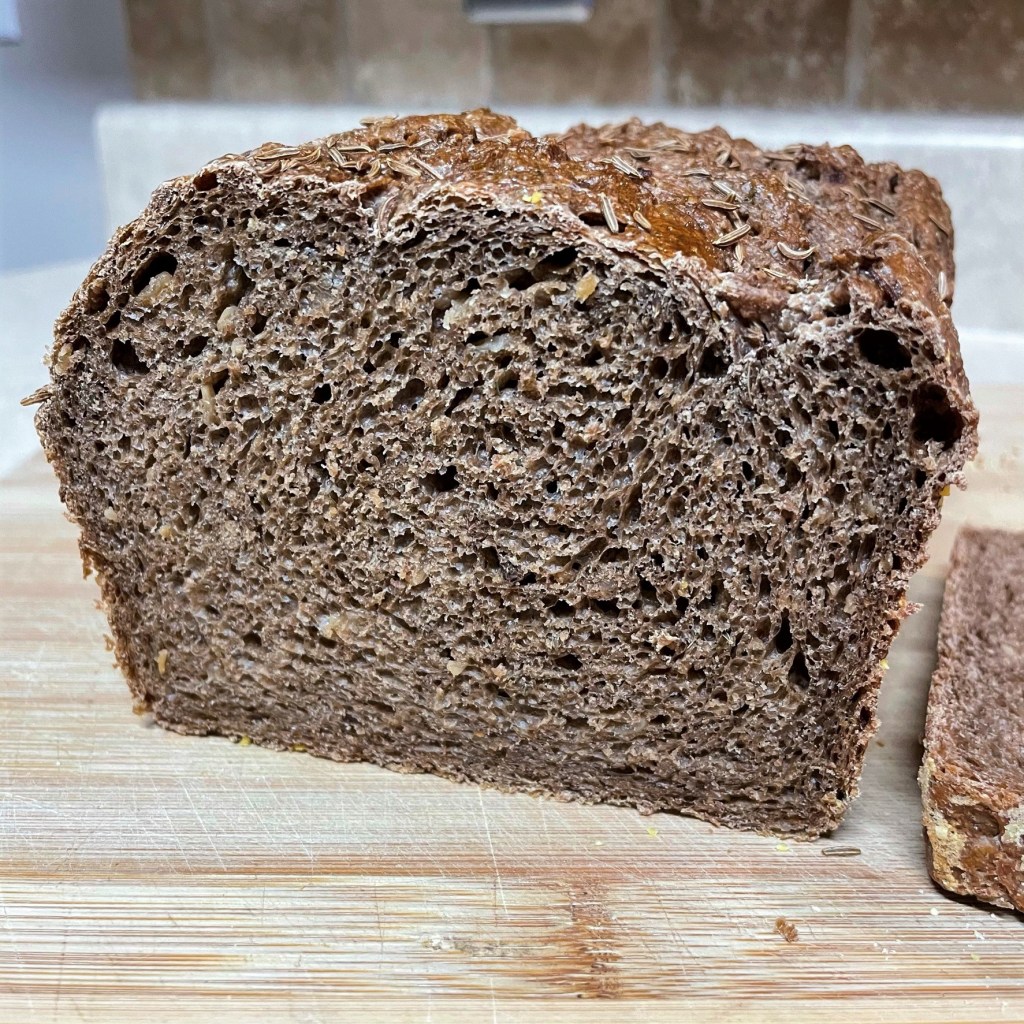
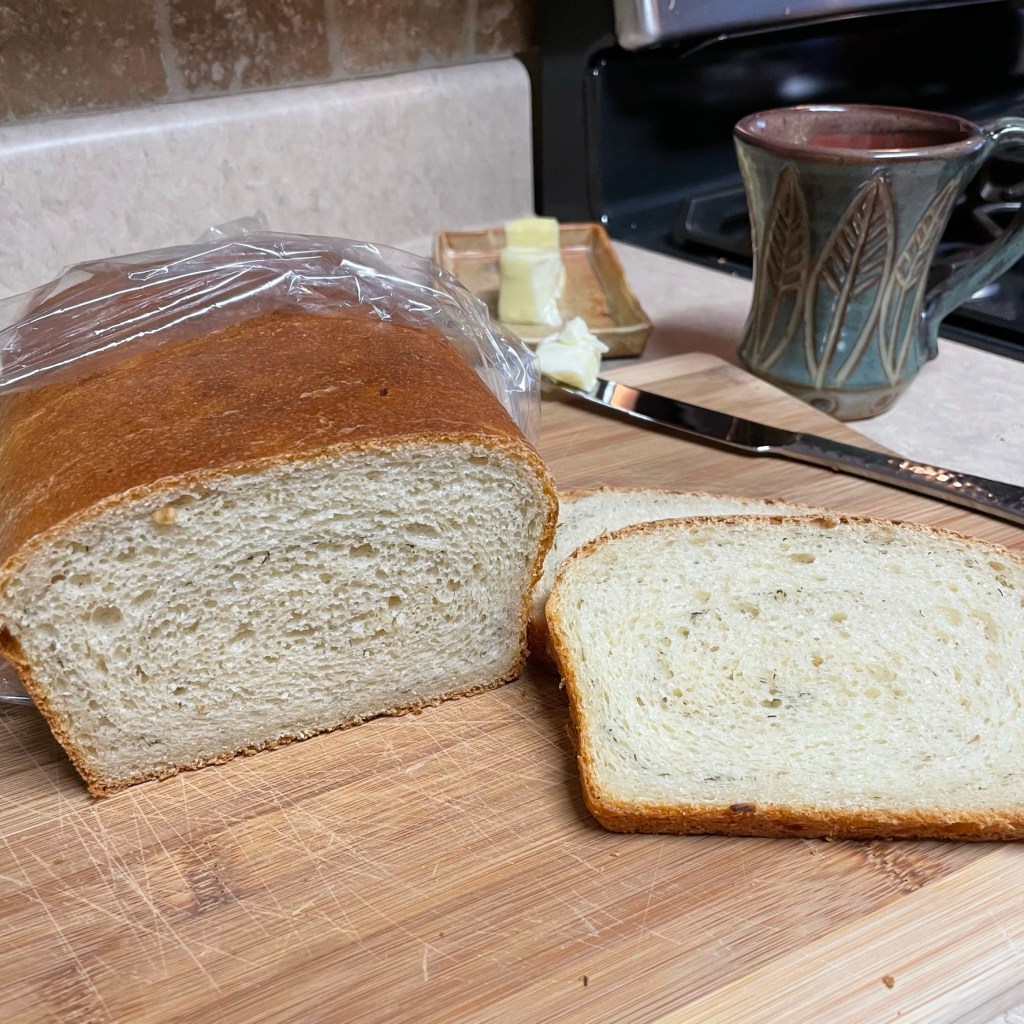
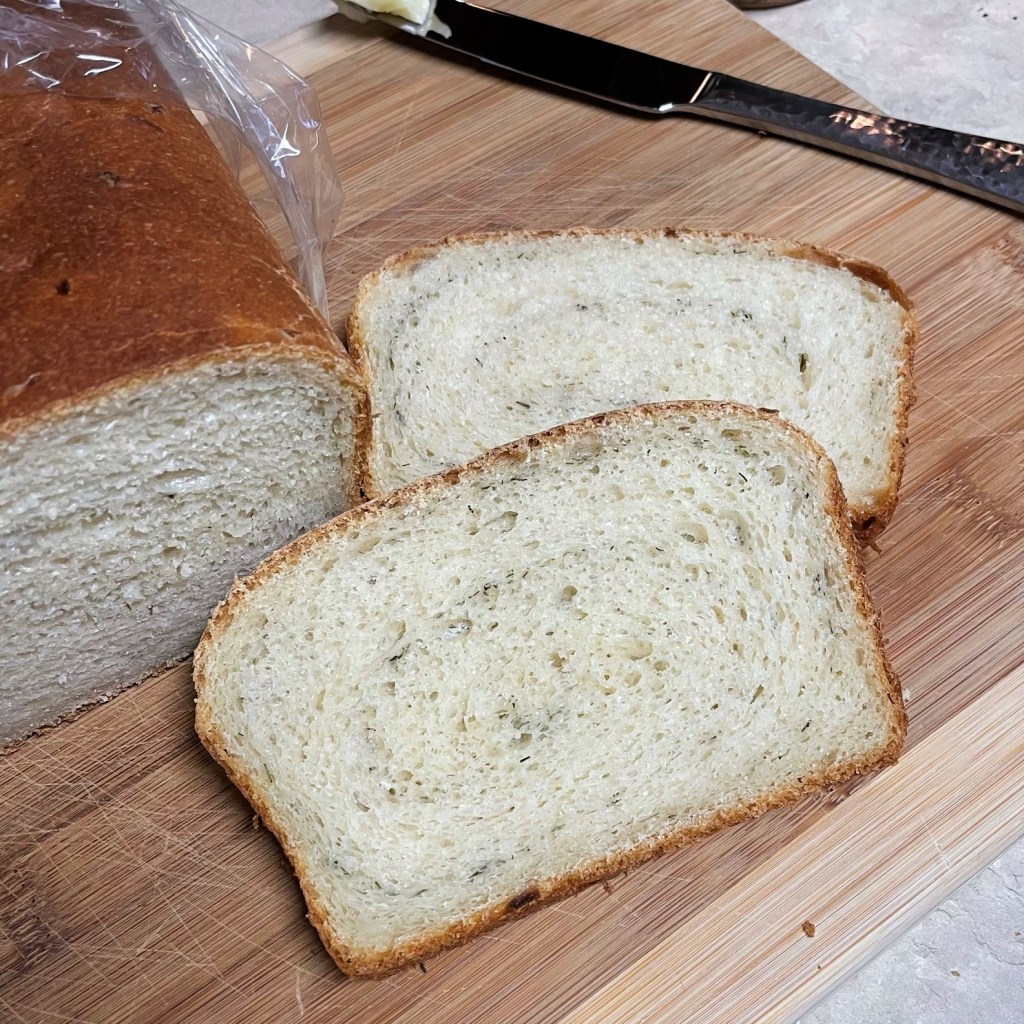
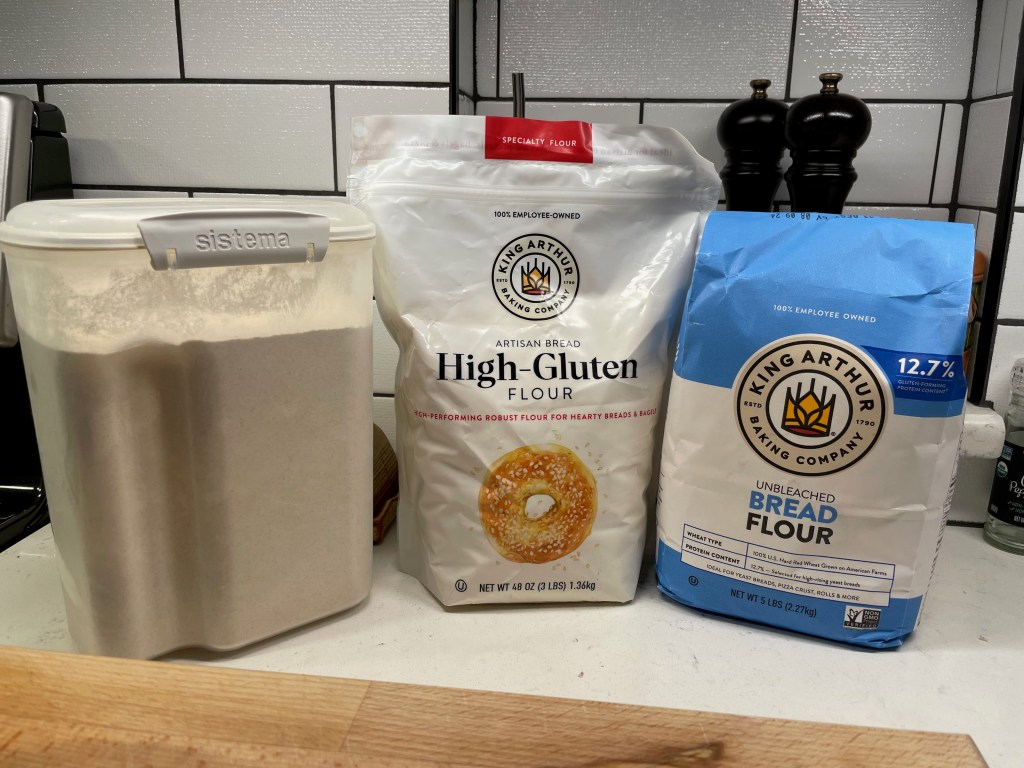
I made only two changes to Maurizio Leo’s recipe, and I’ll describe them in case you want to follow my variations. The first was a flour swap— rather than the full amount of bread flour suggested in his recipe, I used half bread flour and the other half was a split of high-gluten flour and white whole wheat flour. Both of these substitutes are thirstier than bread flour so I also increased the water somewhat (though perhaps not enough) to ensure hydration. Still learning here!


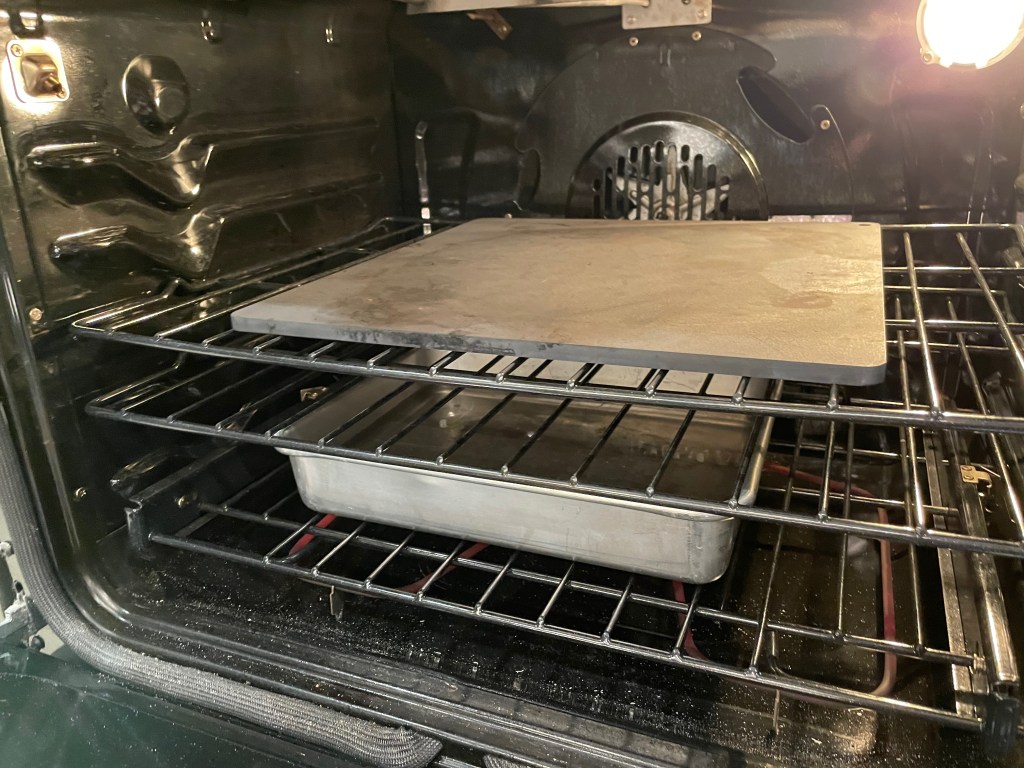
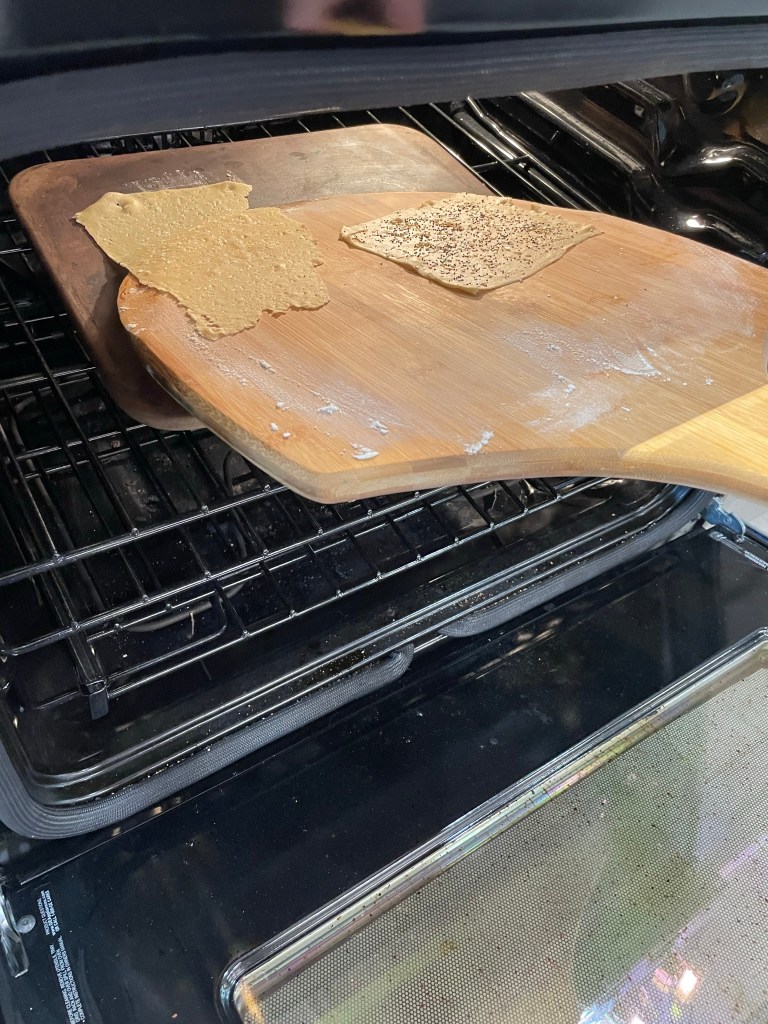
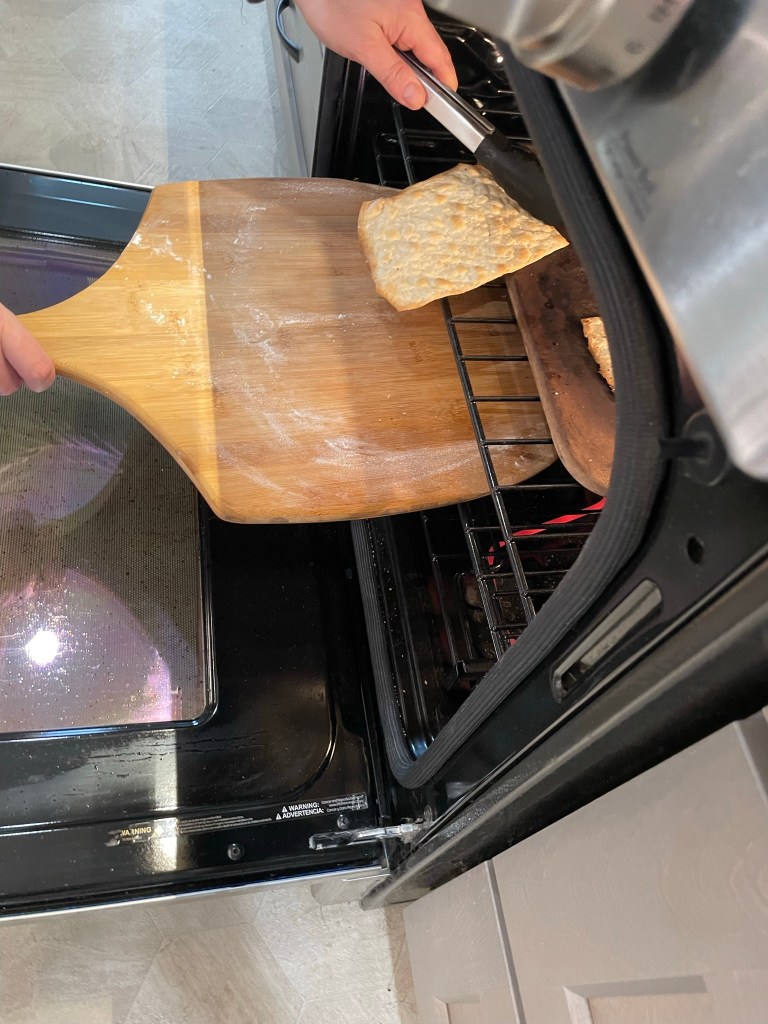
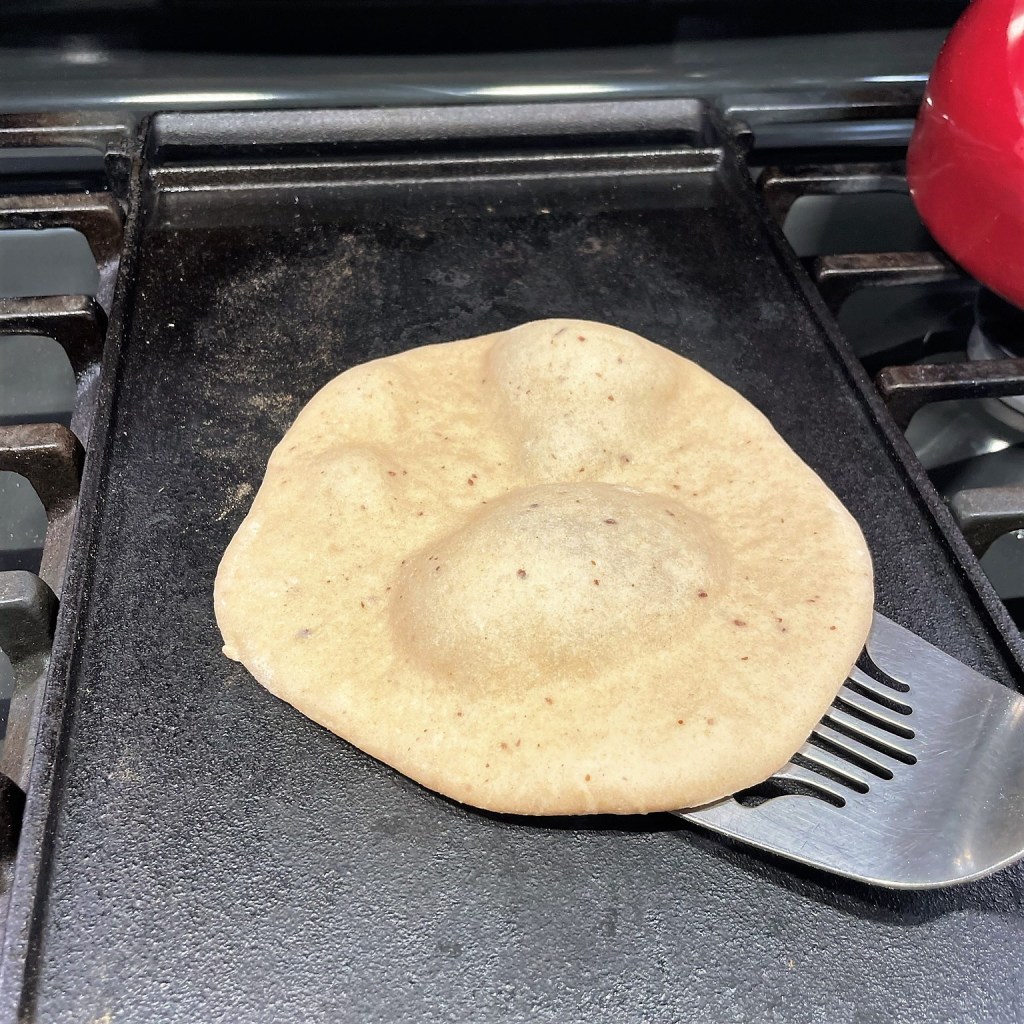
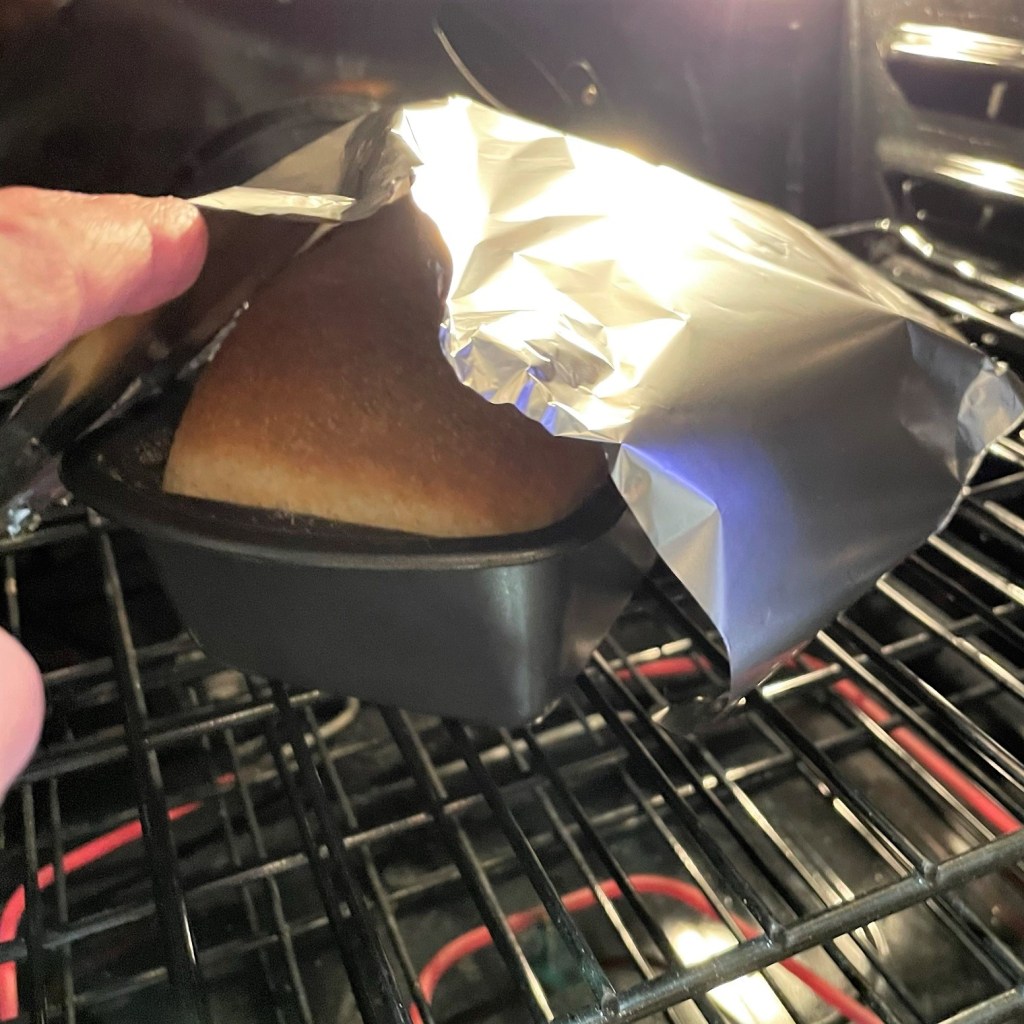
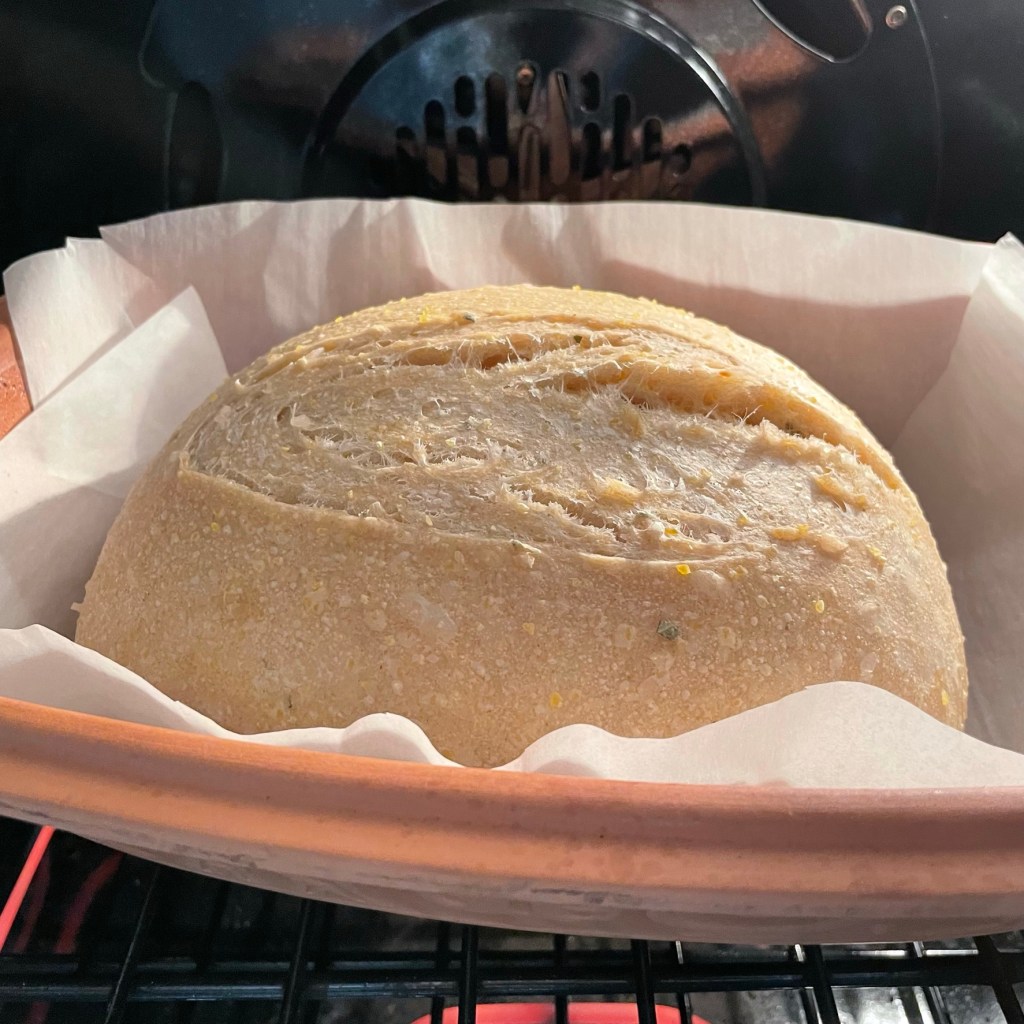
The other change was a technical one— I used my own version of a steam bake, which is simply an oblong baking pan filled halfway with hot water that preheats with the oven. Maurizio’s suggestion (a roasting pan filled with preheated lava rock, onto which you’ll toss ice cubes) is a good one if your oven has room for the setup he describes. But I’ve been leery of using ice in the oven ever since 2016, when an unfortunate accident resulted in shattering the oven light in my rental apartment. After that, I read on another baking blog that when you’re baking with steam, it does not need to be dramatic; you just need to have a very humid environment in the oven. I’ve never had trouble with my method of steam baking, and the result with my bagels was terrific.

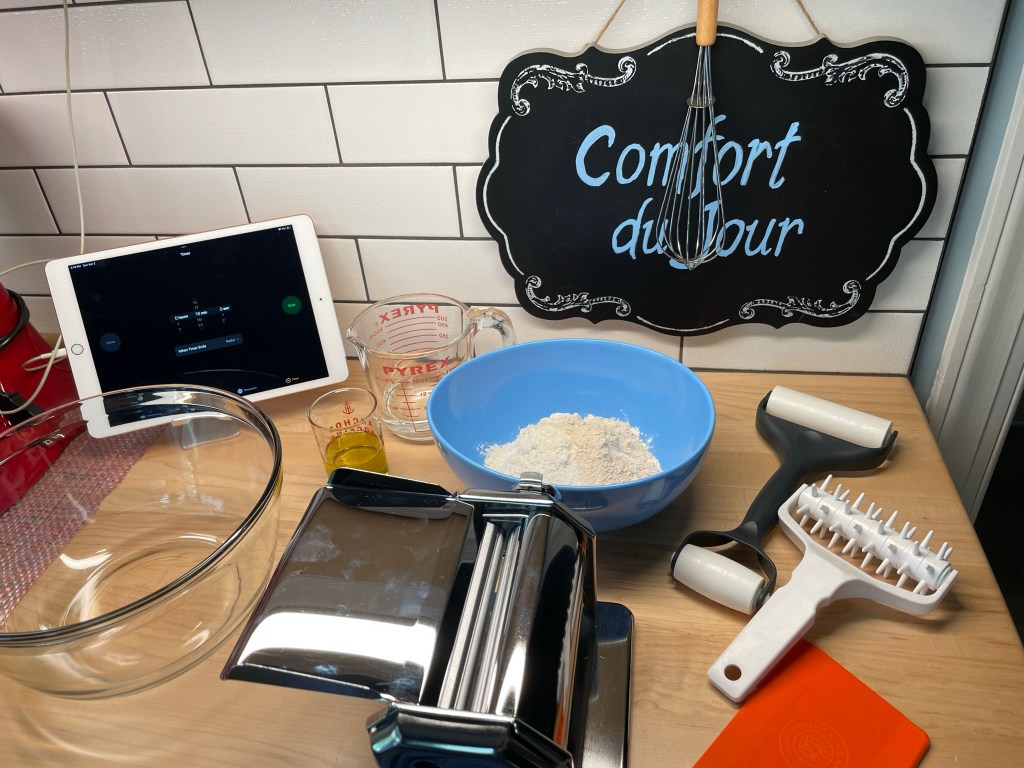
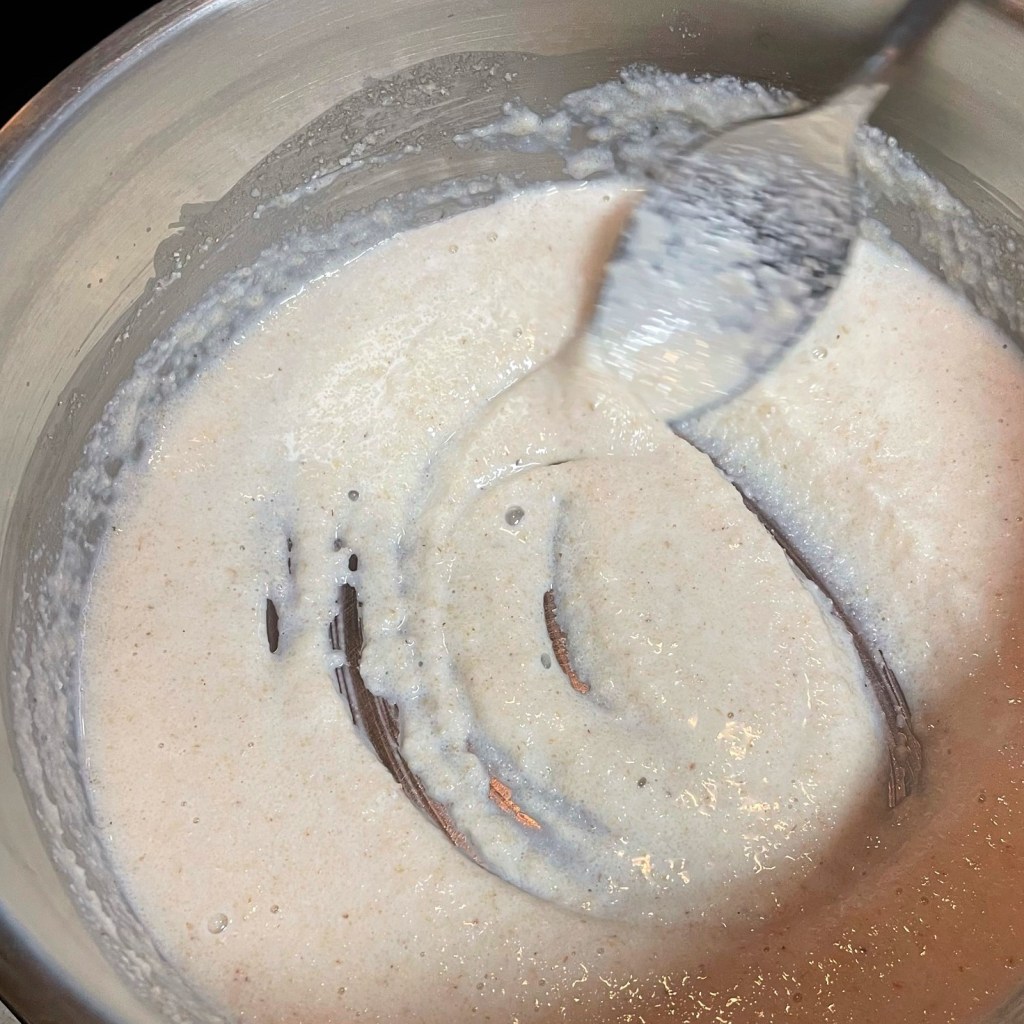
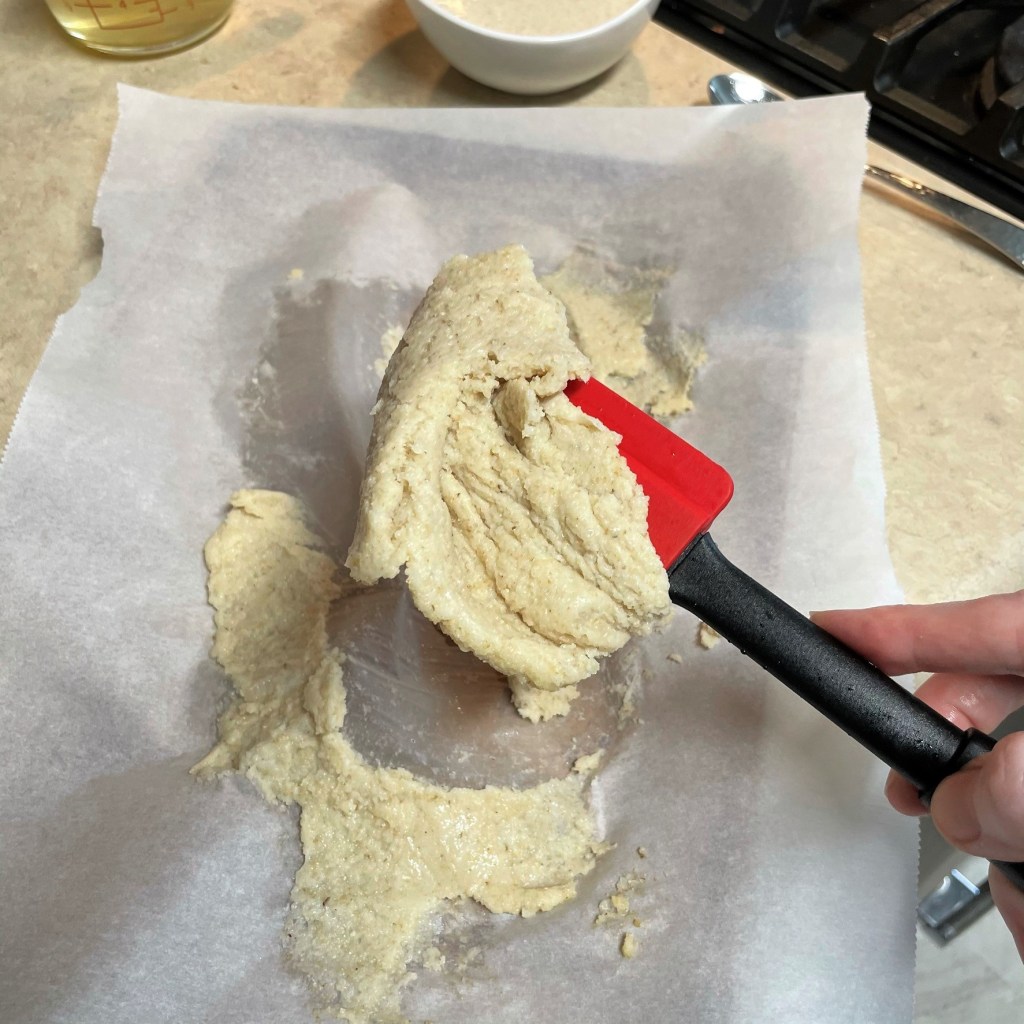
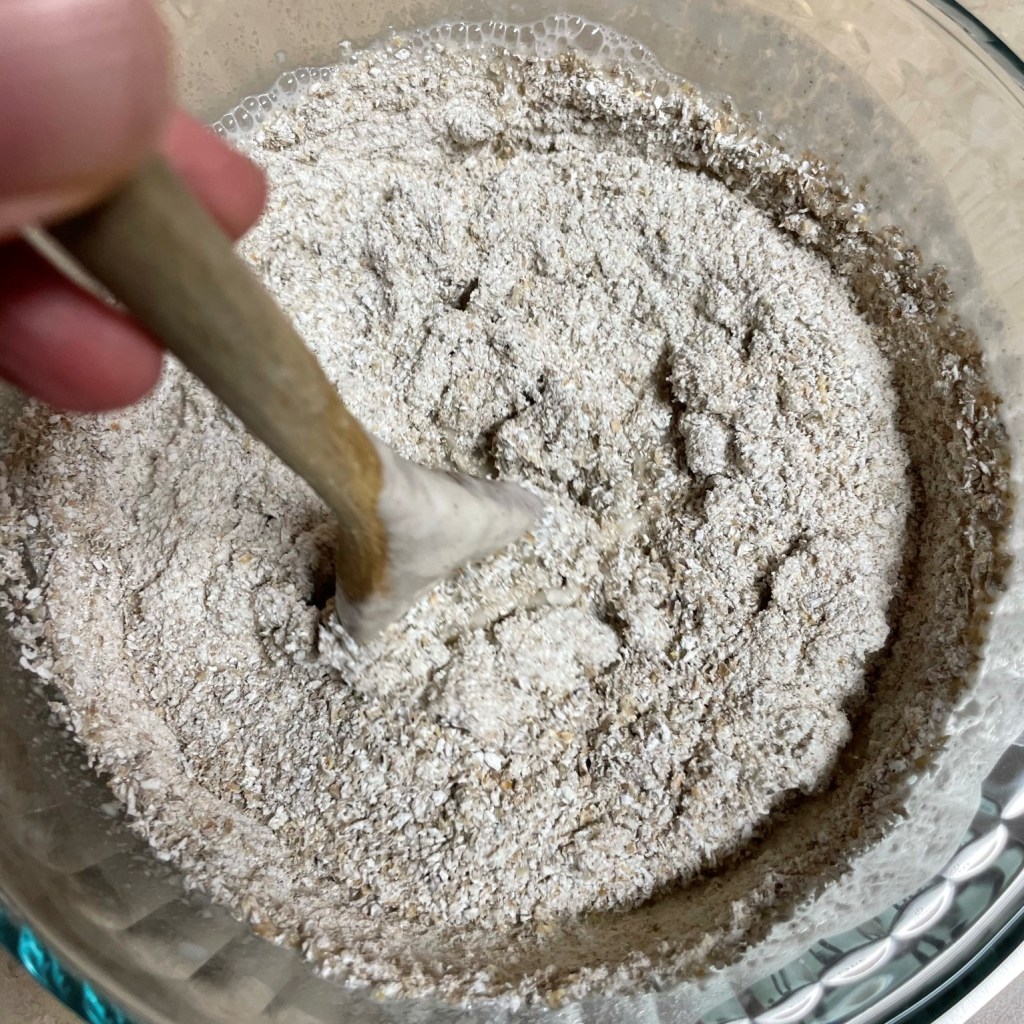
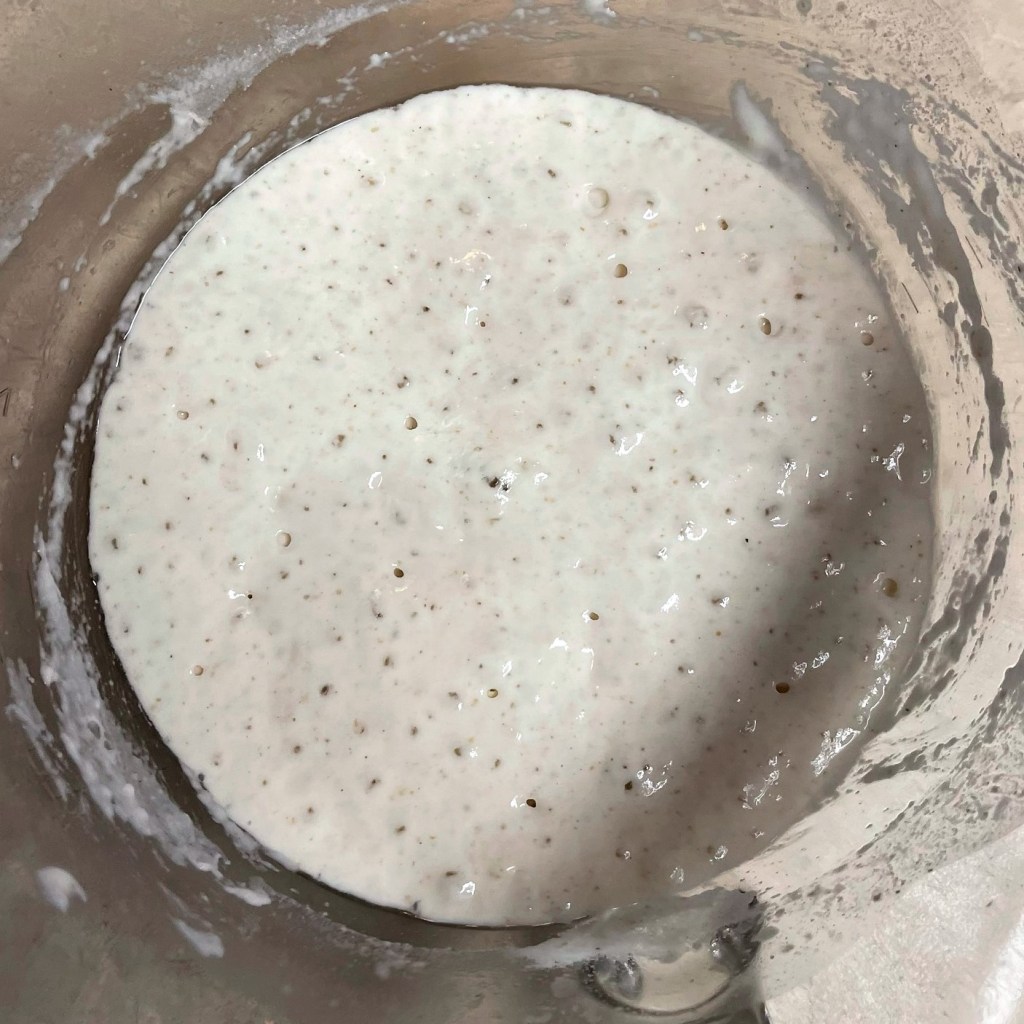
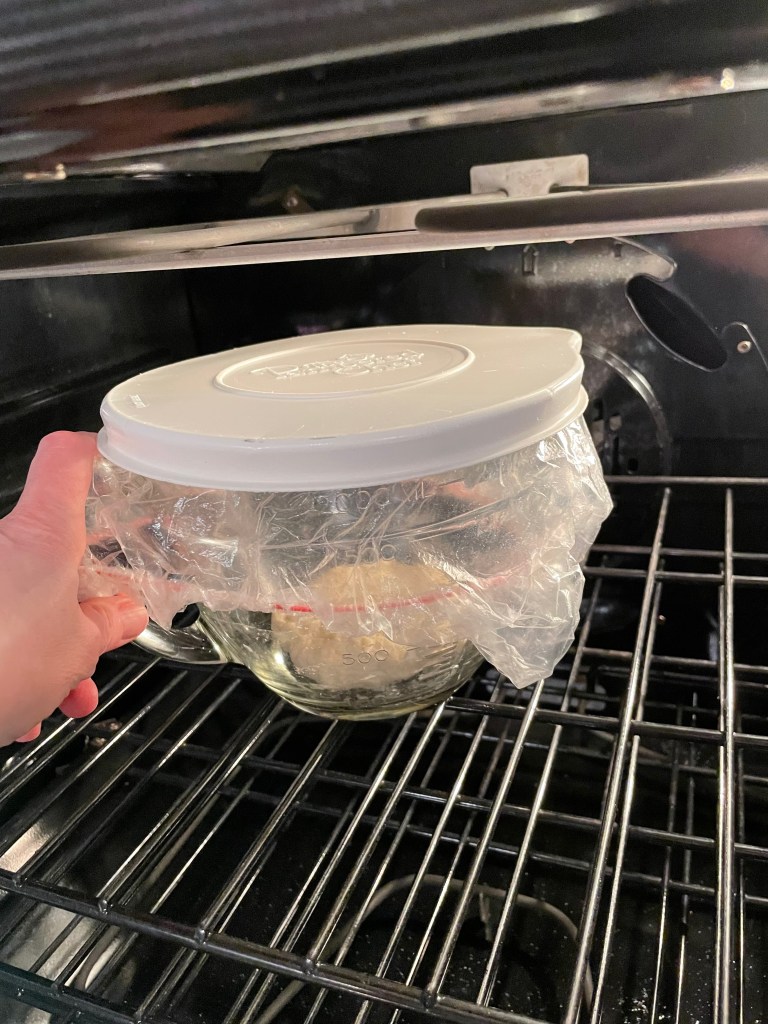
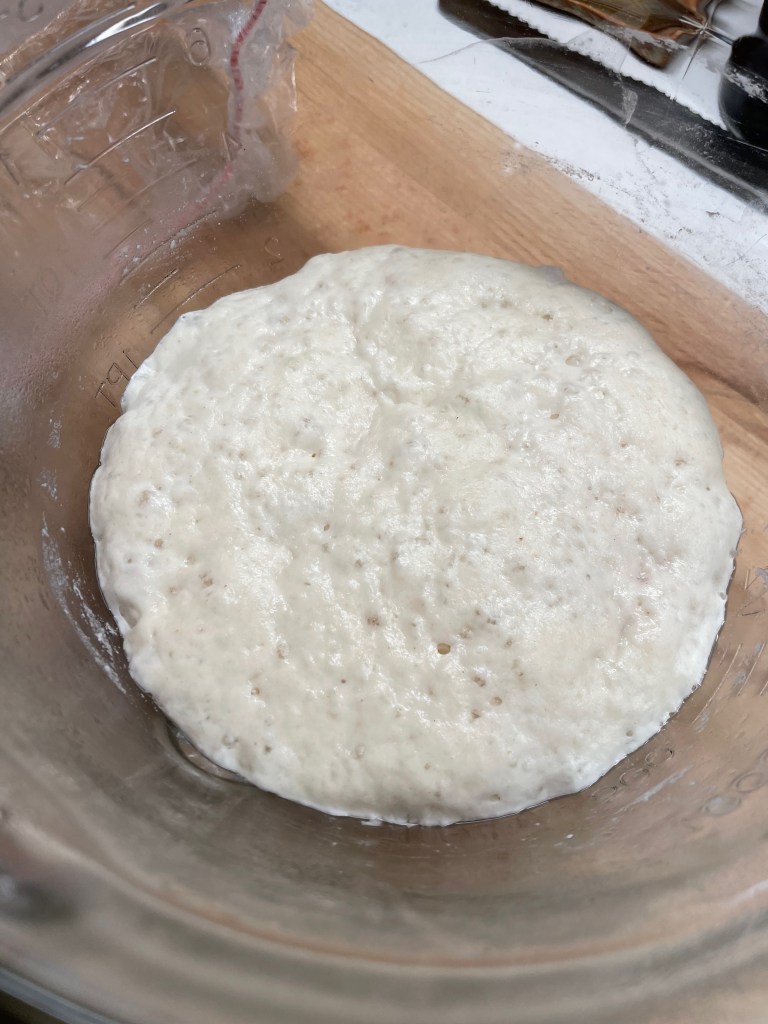
The recipe begins two nights before you plan to bake, with an intermediate feeding of a tiny bit of ripe sourdough starter to create a dough called levain, an intermediate starter that will be worked into the final dough. This levain is a very firm, tight dough, and after mixing it, I let it rise overnight in the oven with the light on. This kept it warm and cozy for its 12-hour ferment, and it’s the first of the two principles I mentioned earlier about temperature.


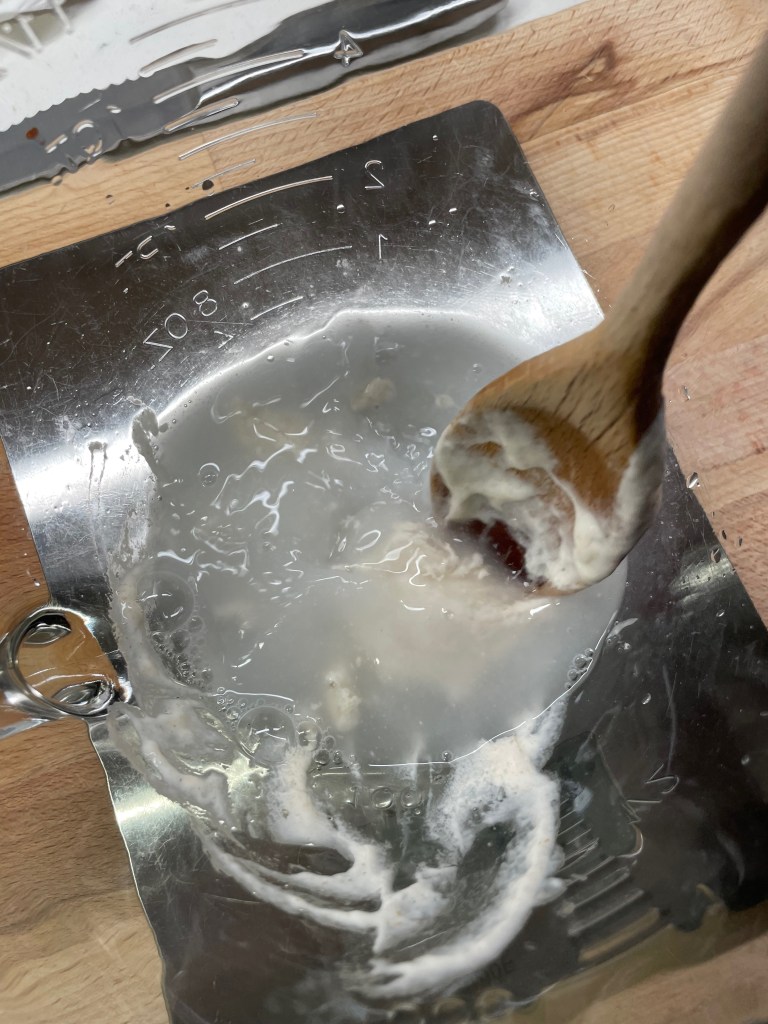
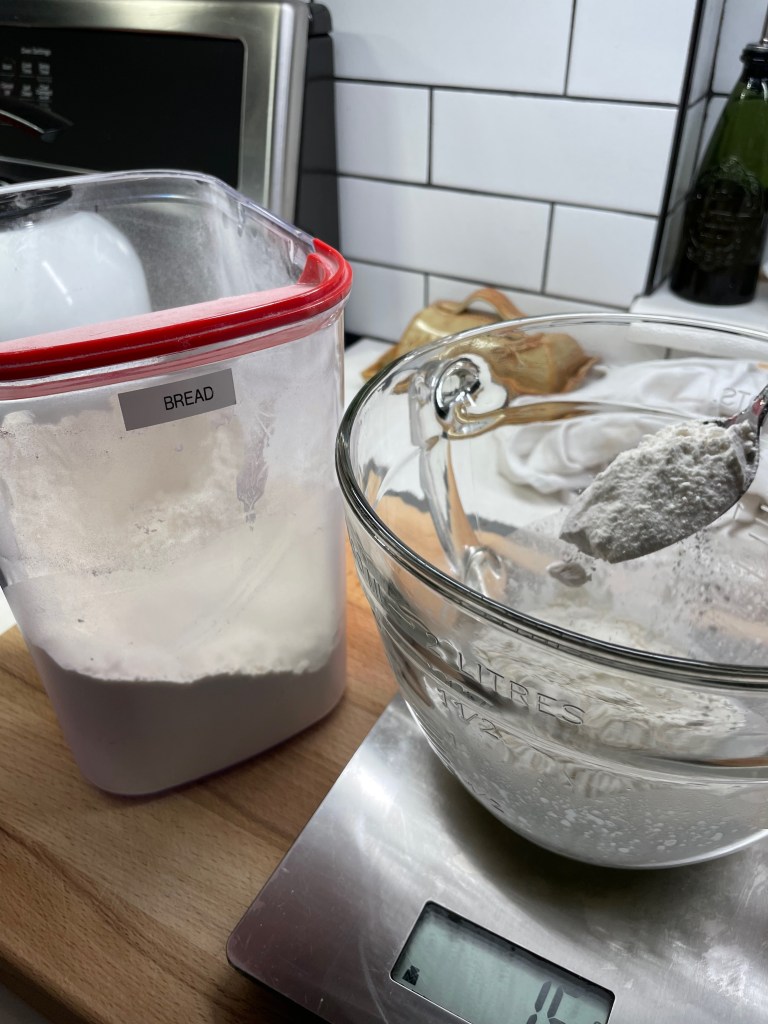
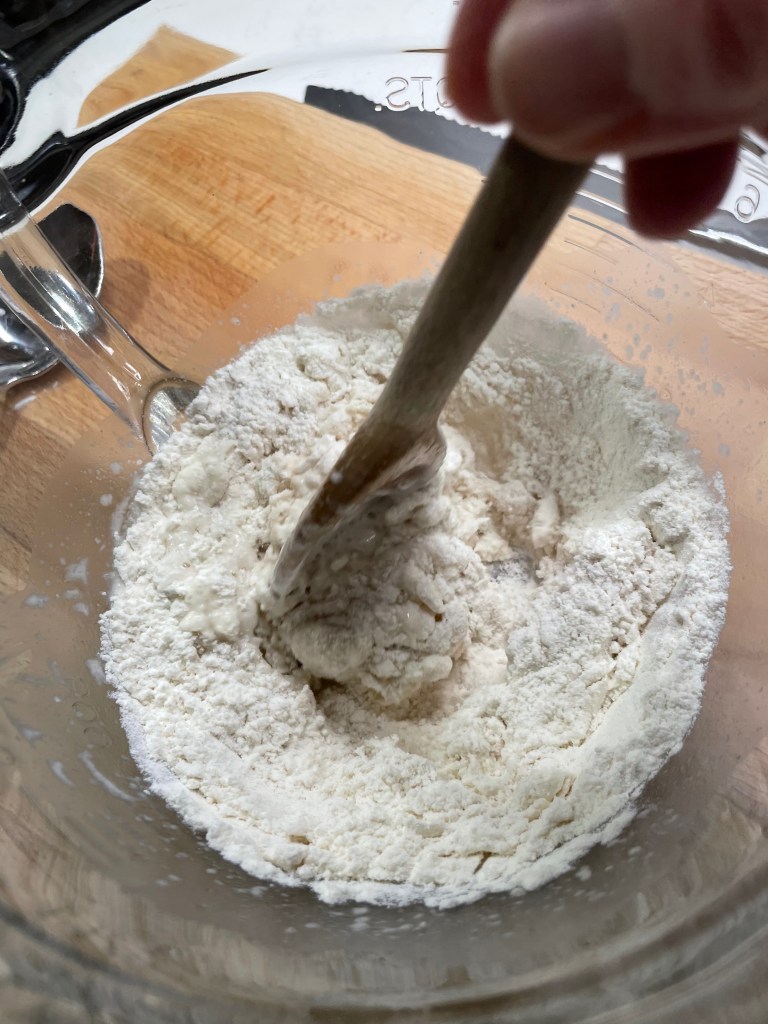
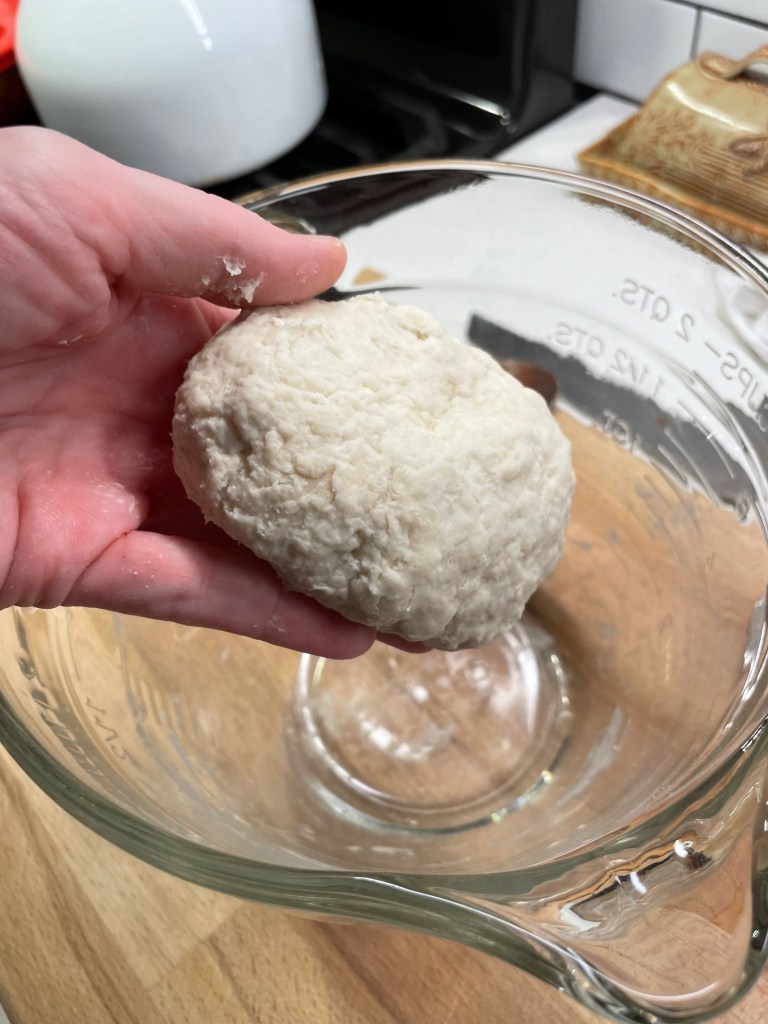
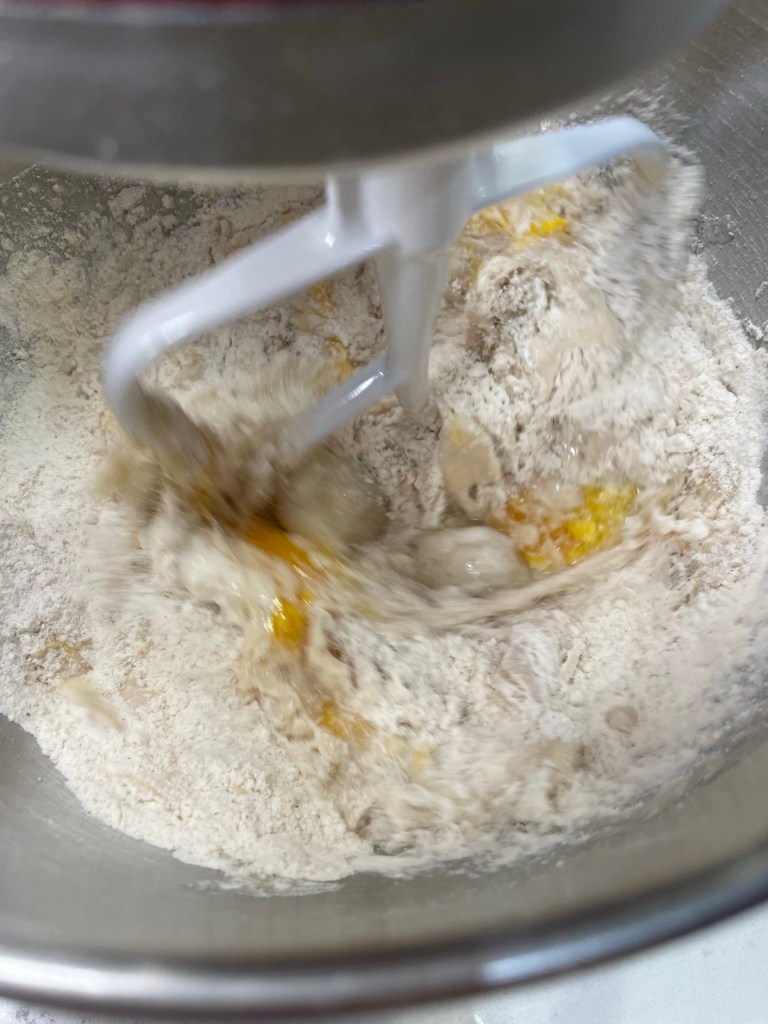
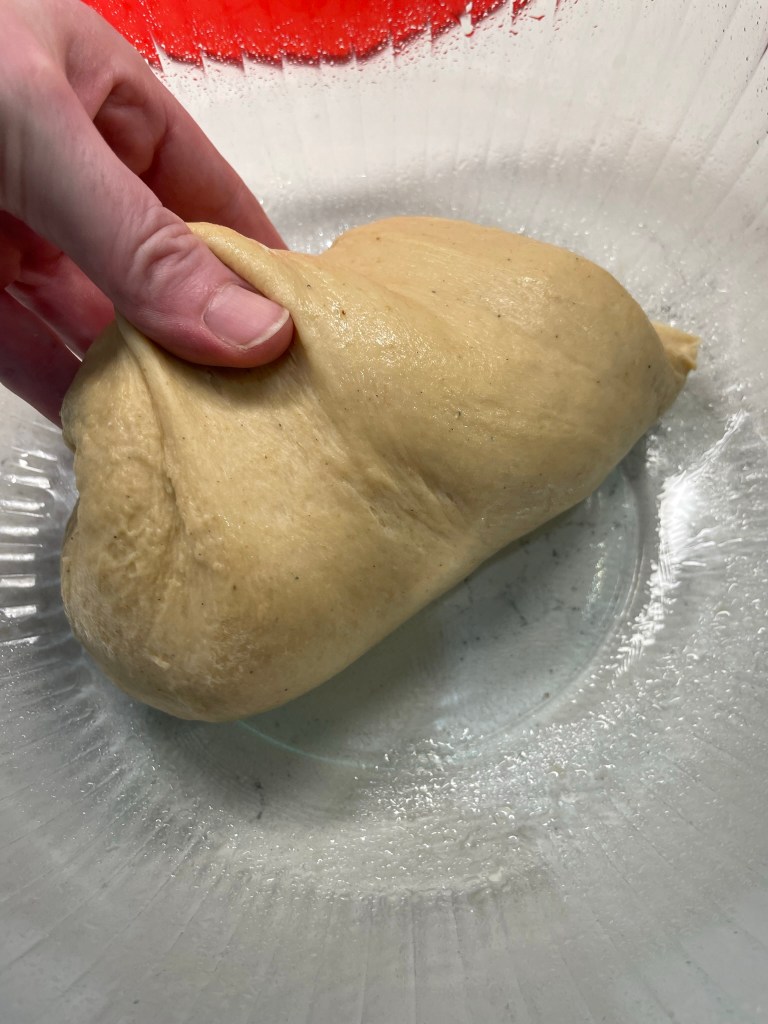
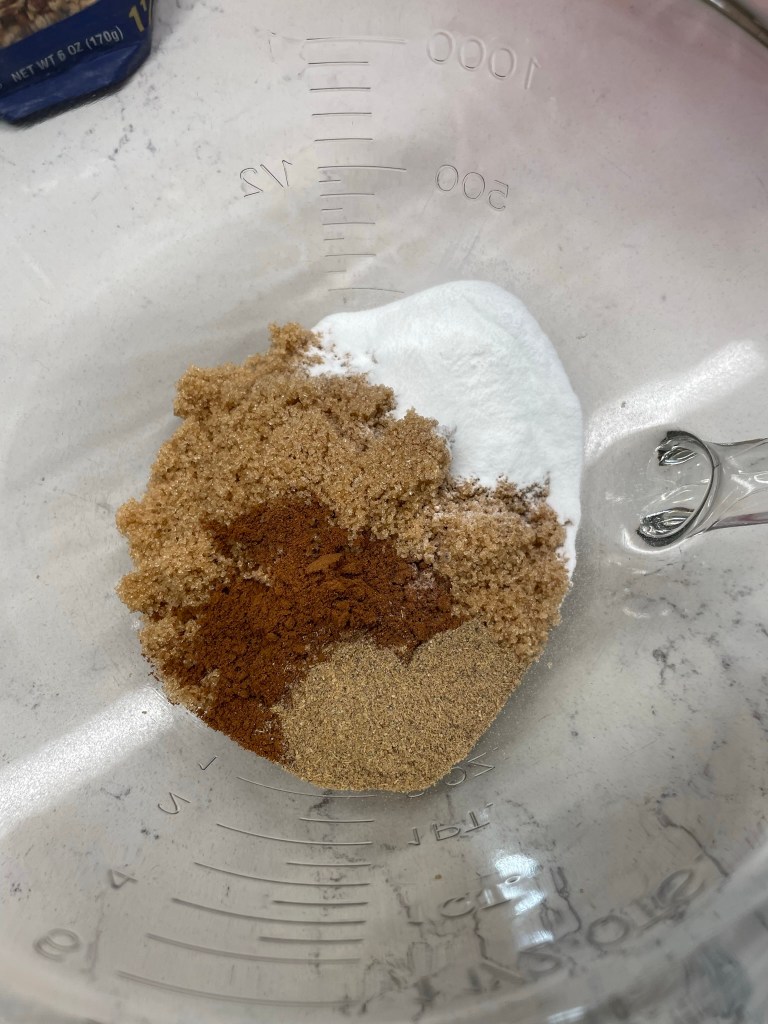
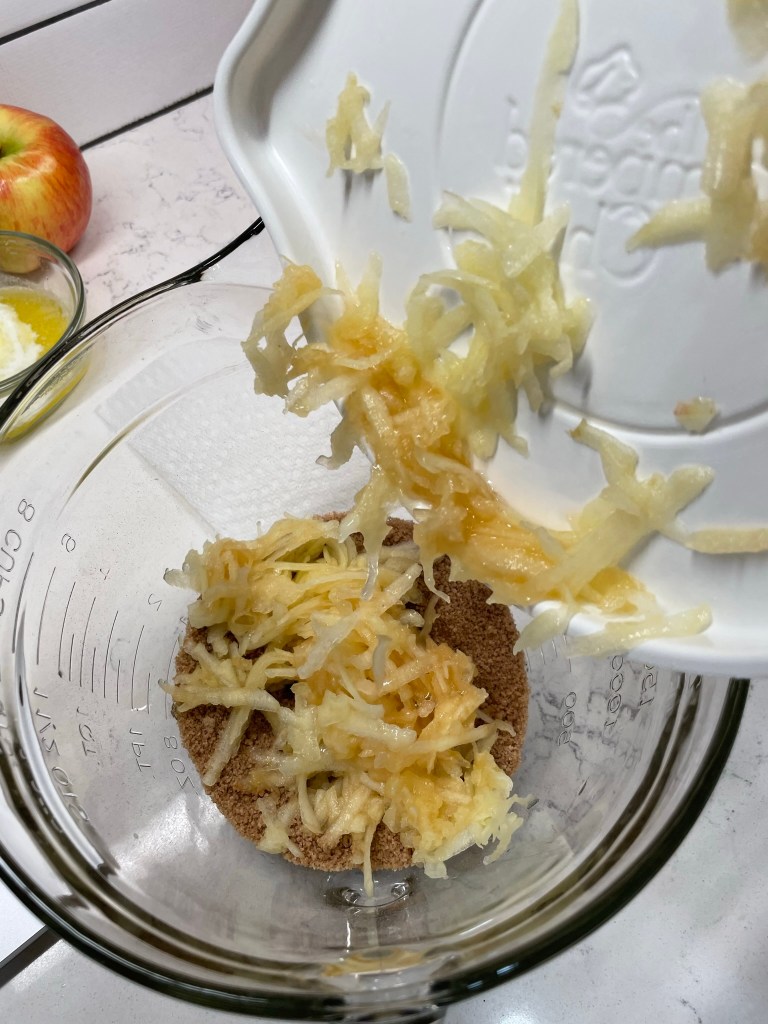
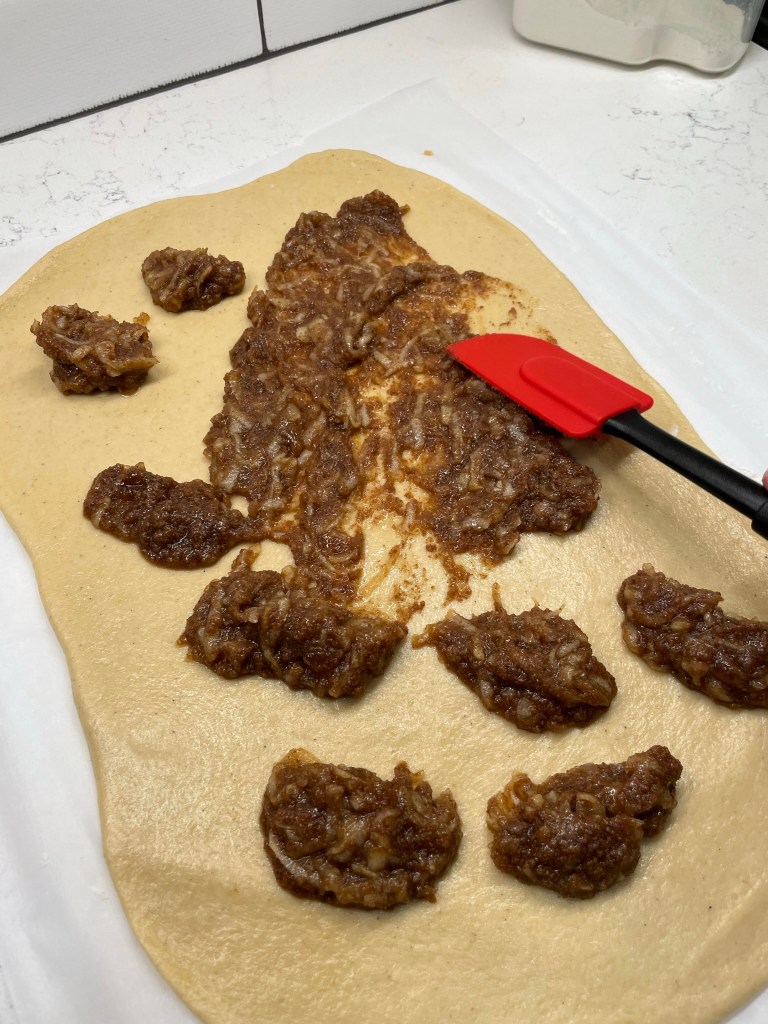
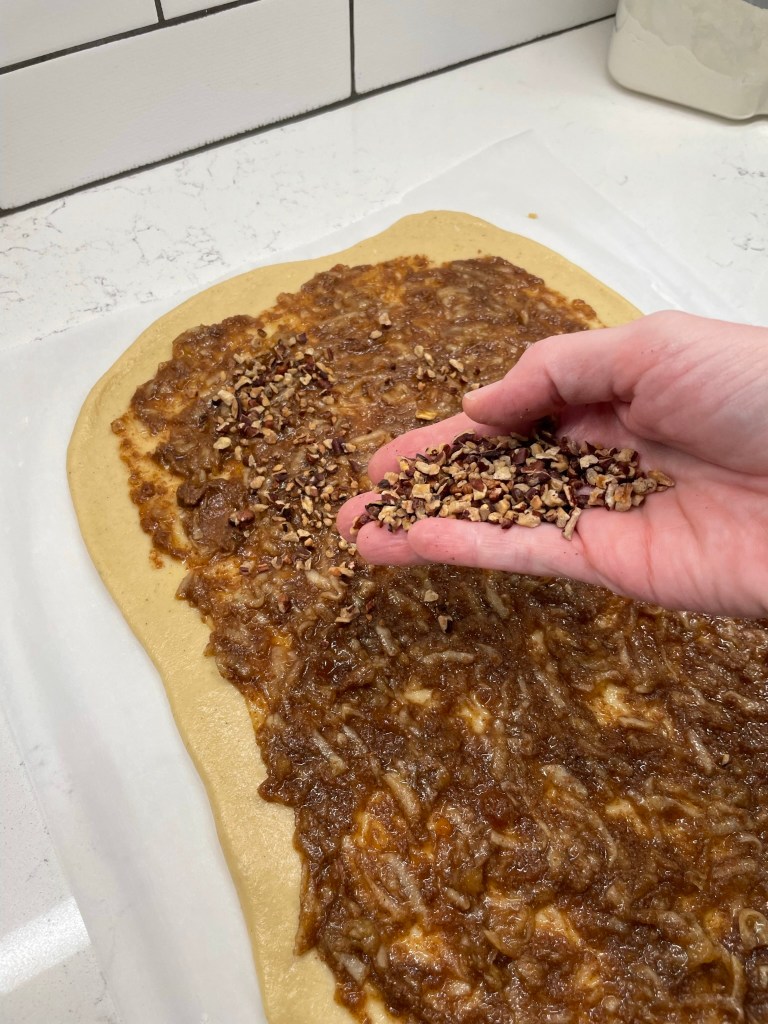
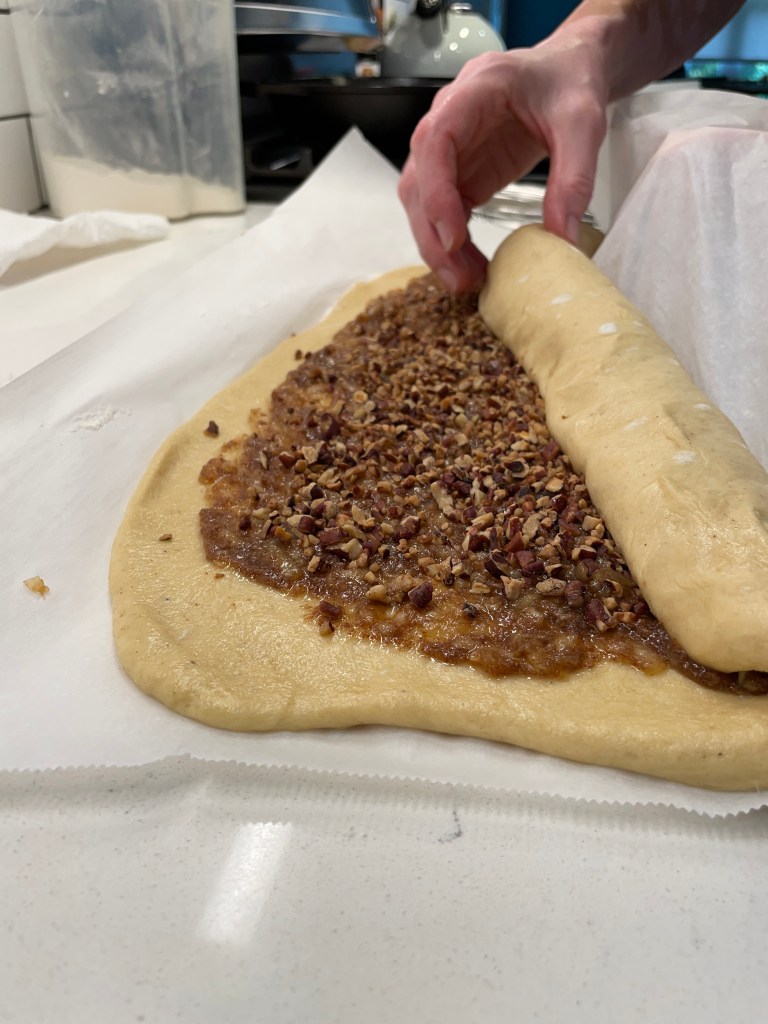
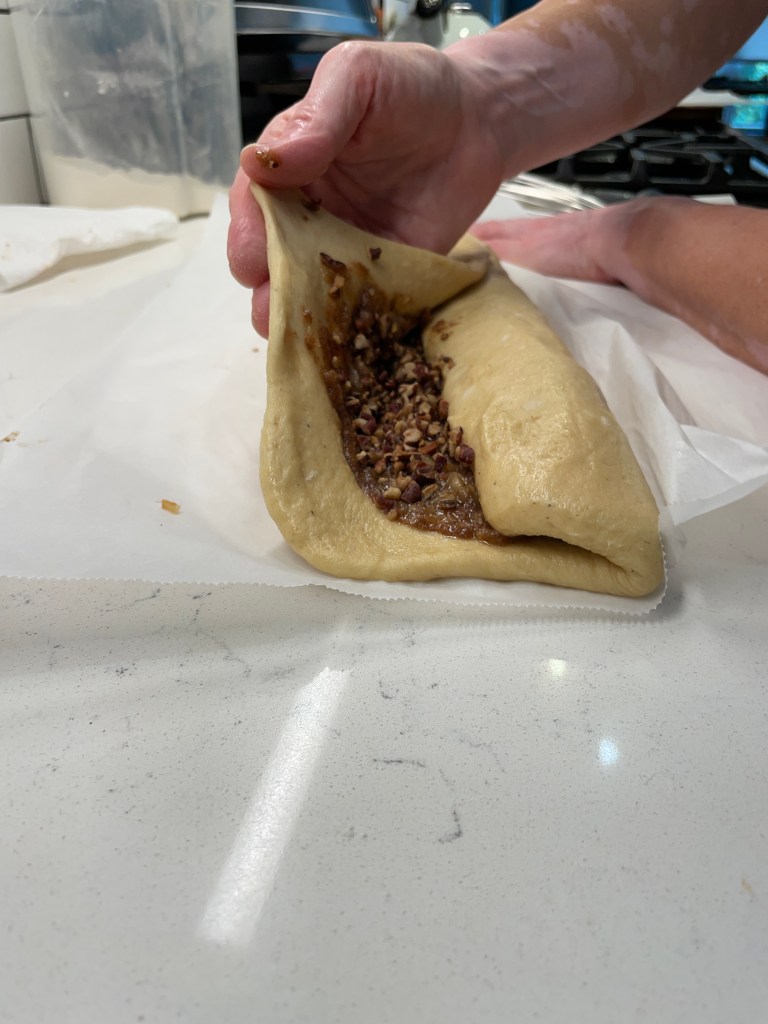
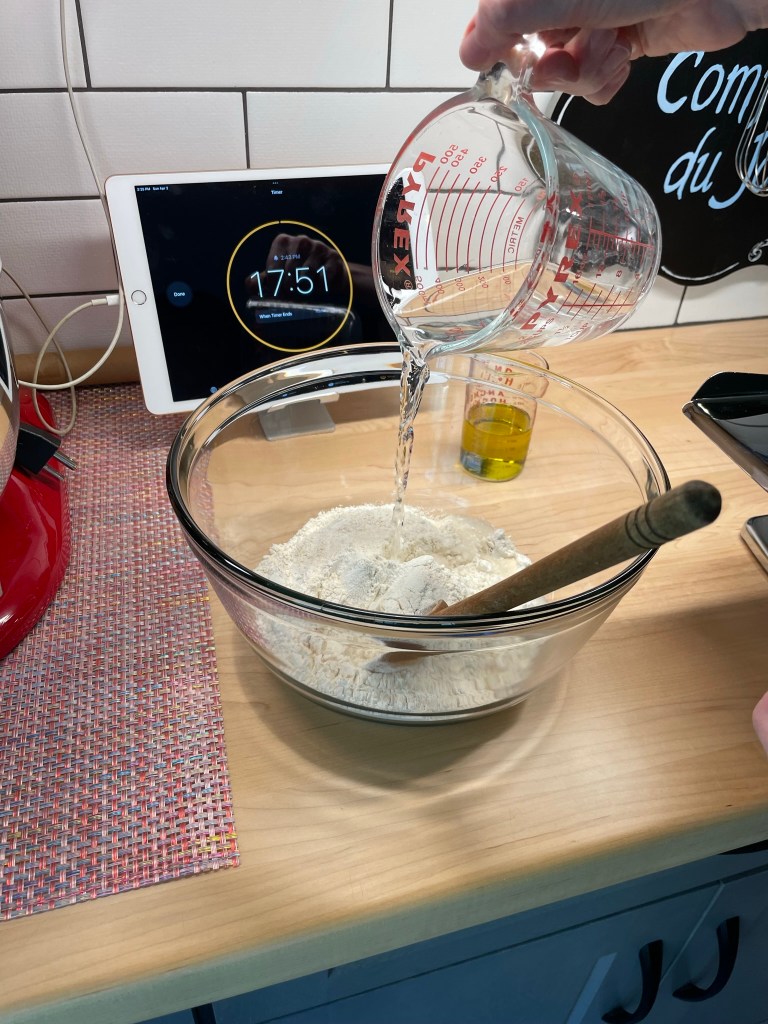
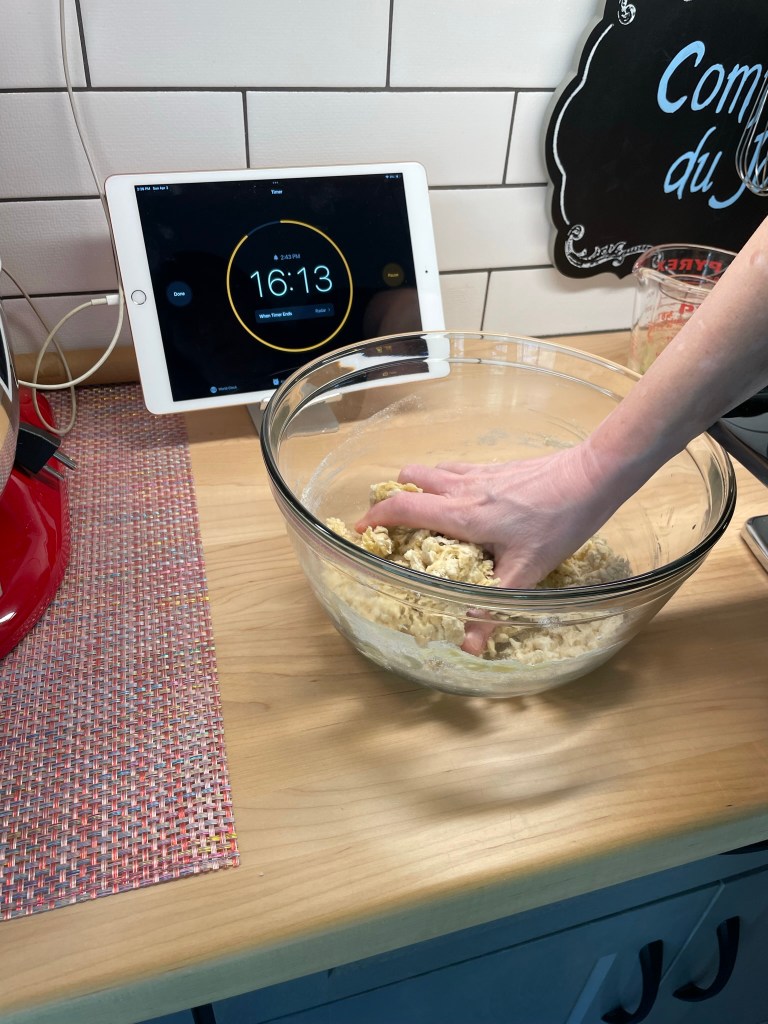
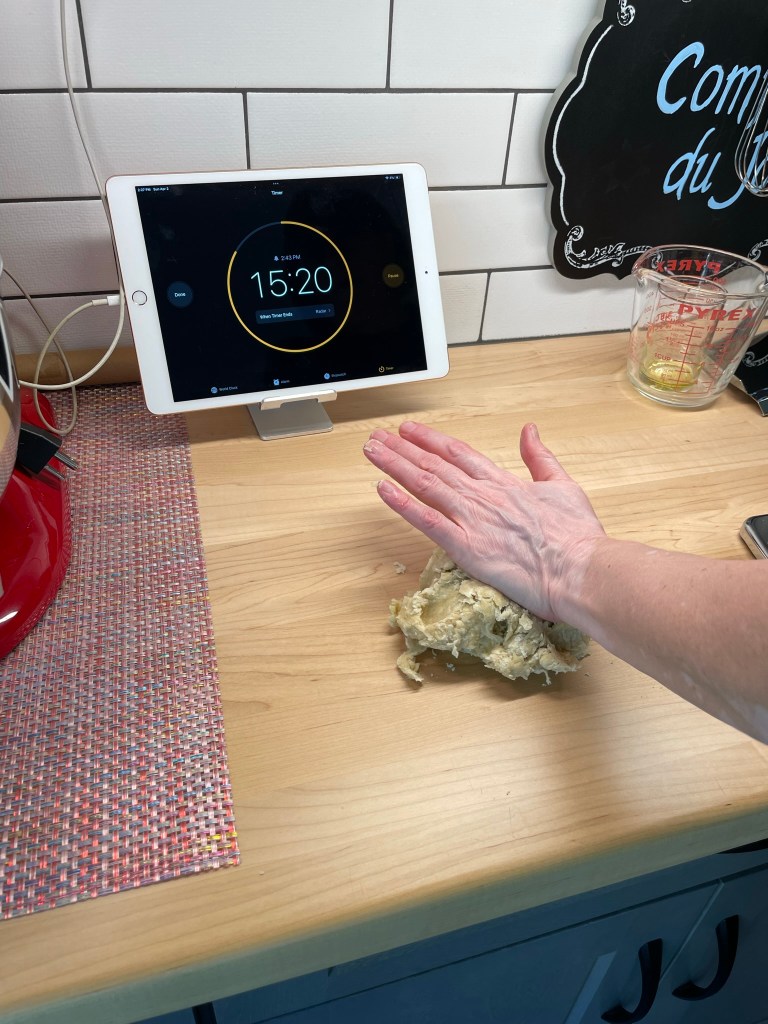
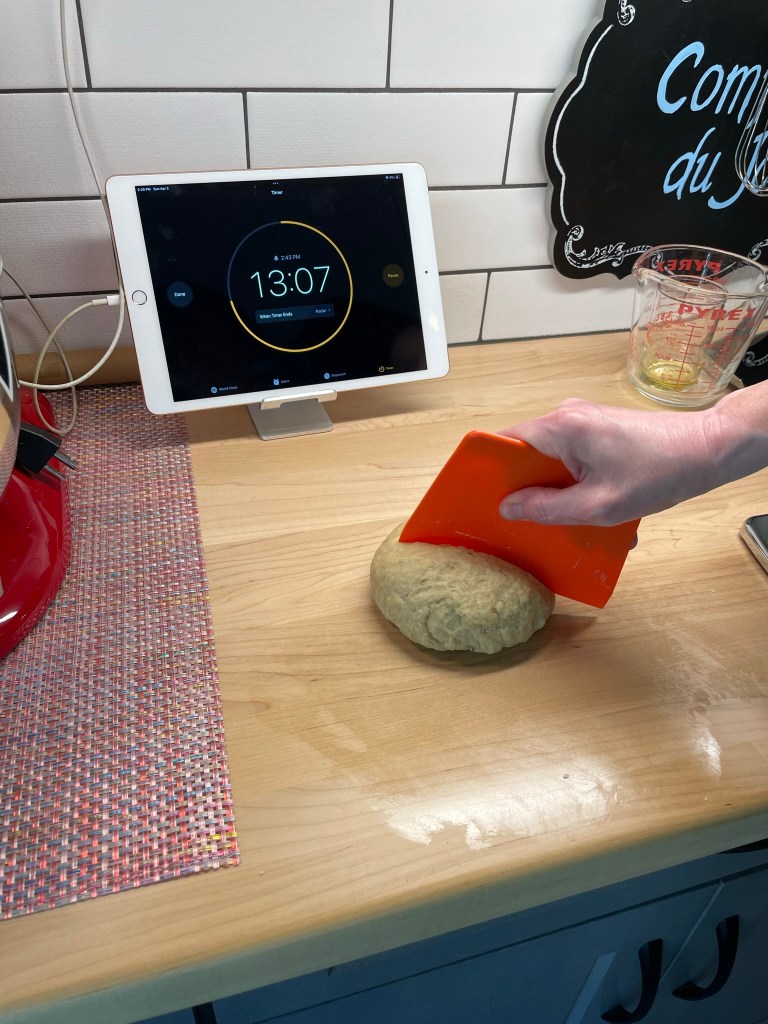
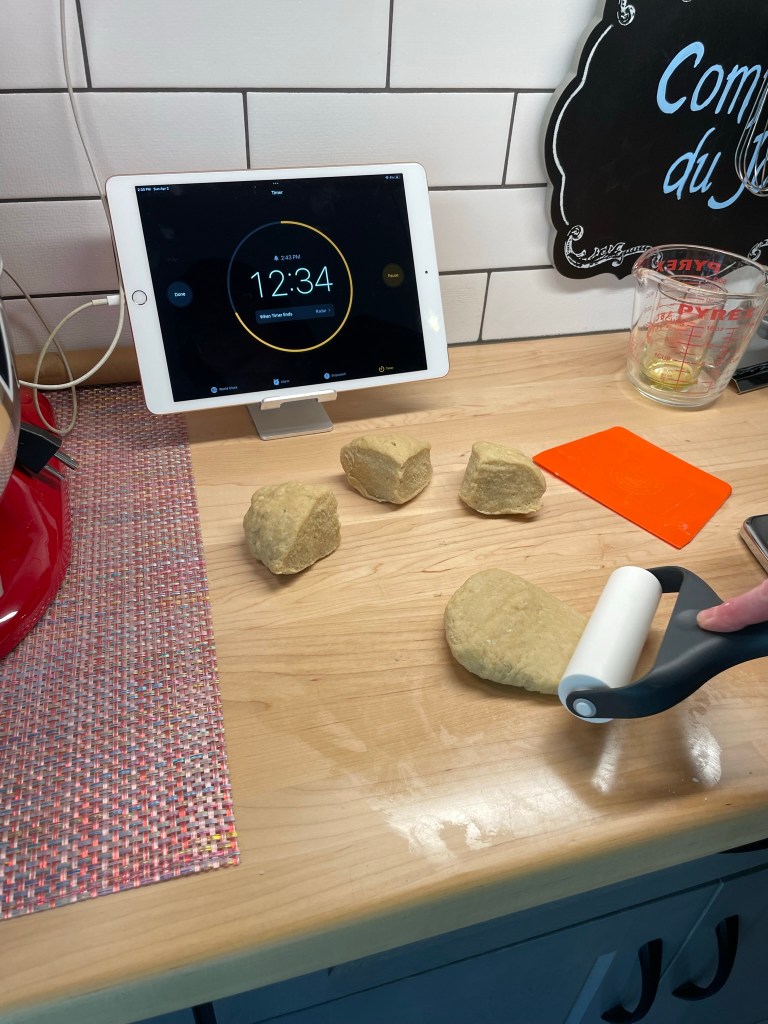
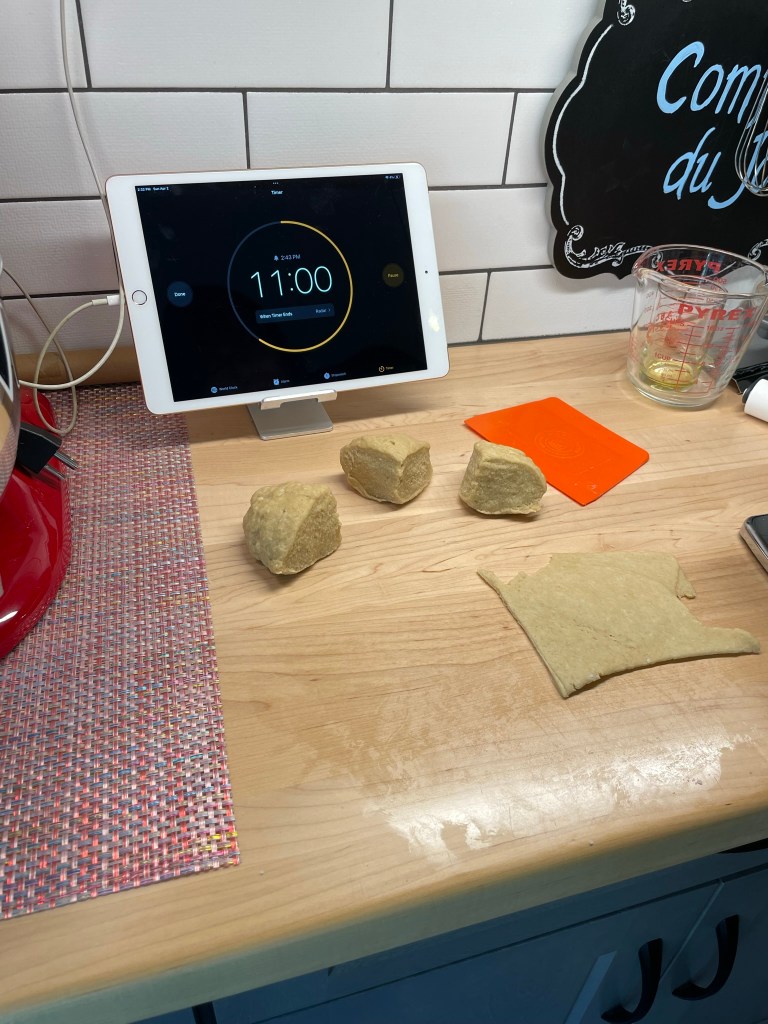
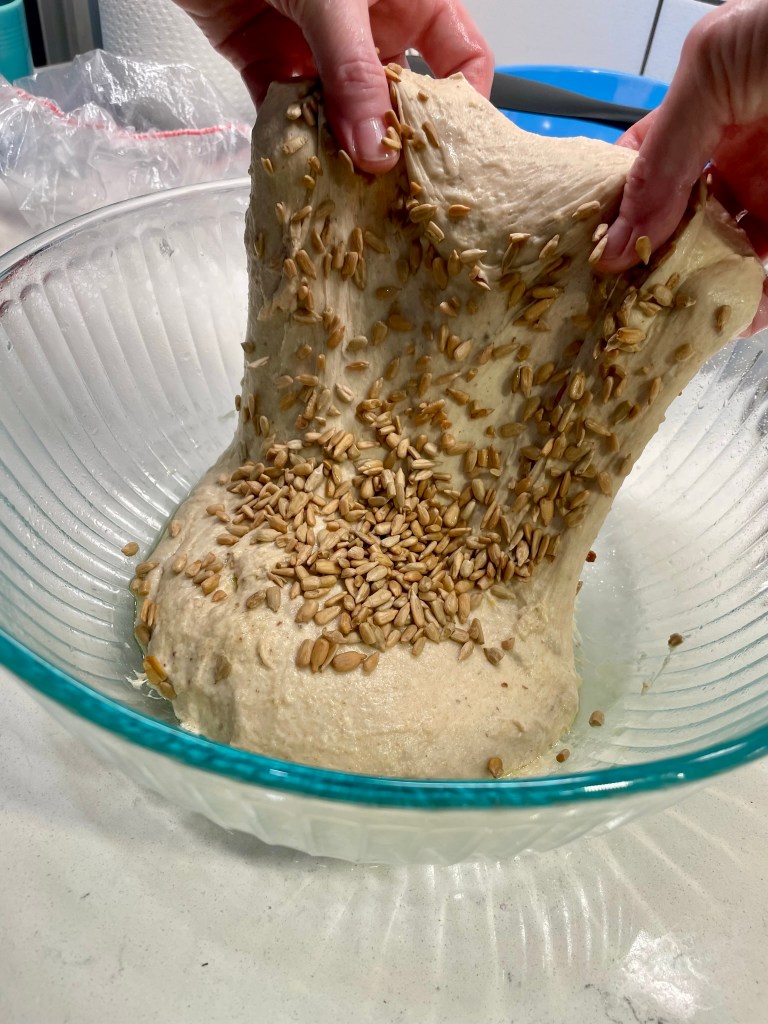
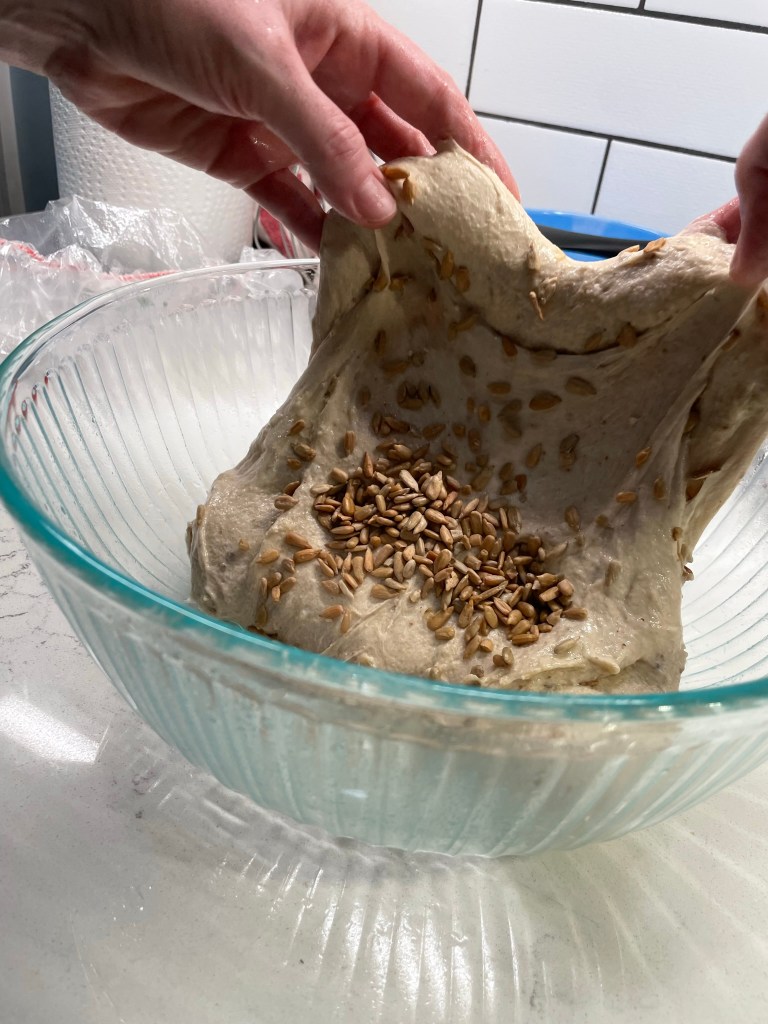
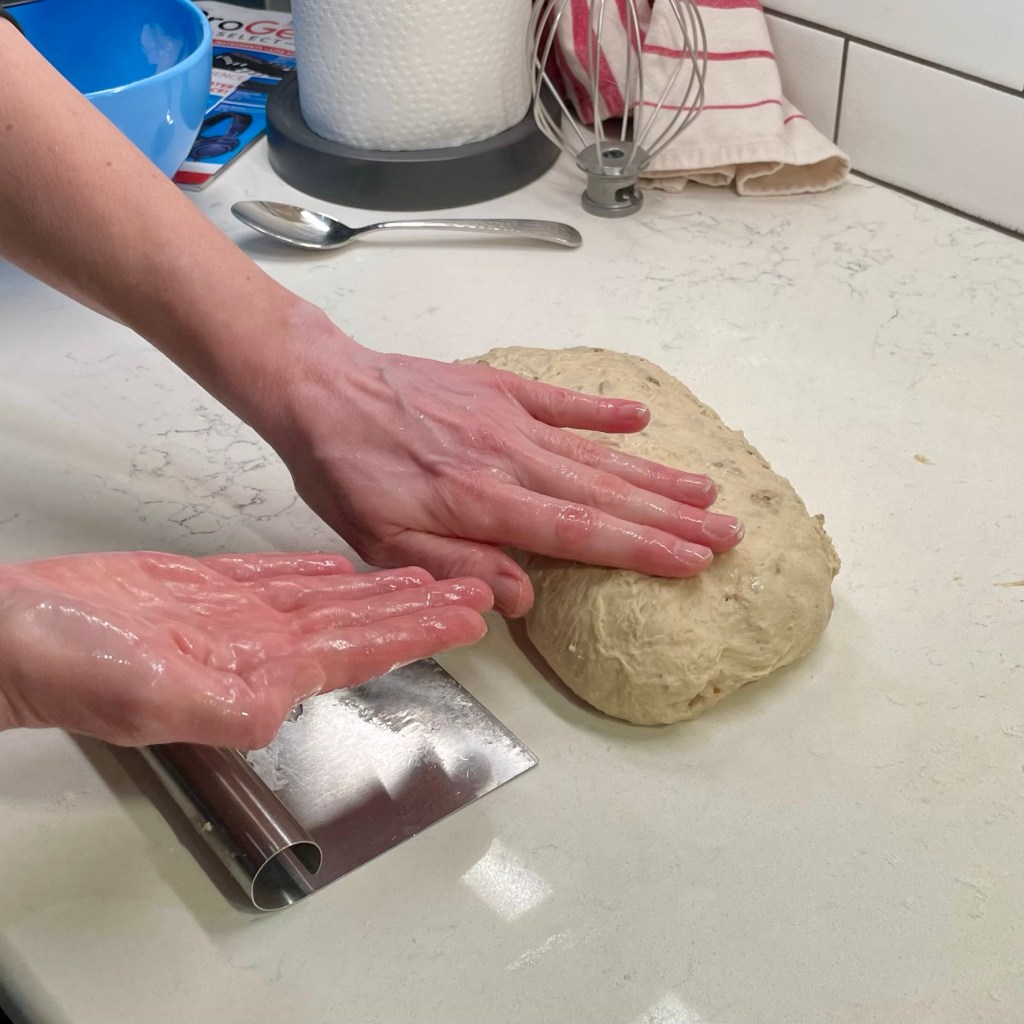
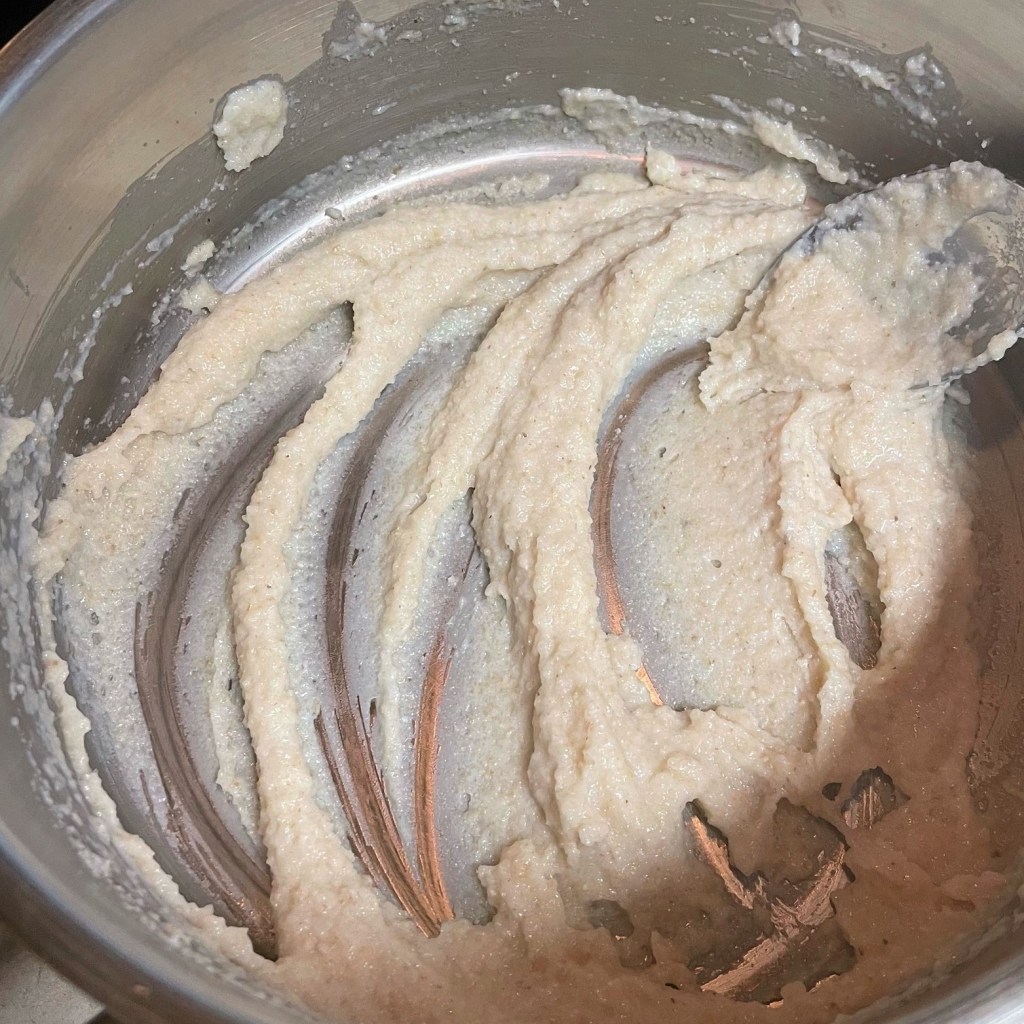
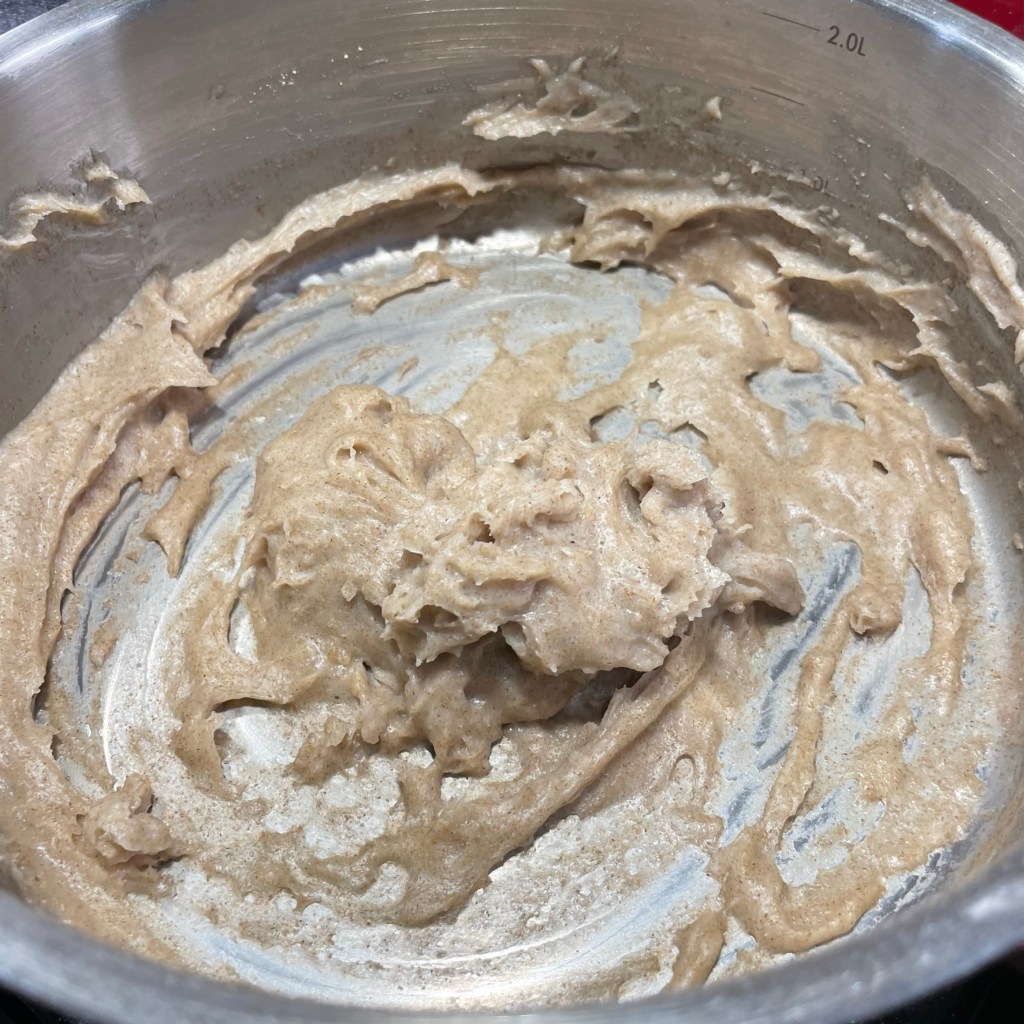
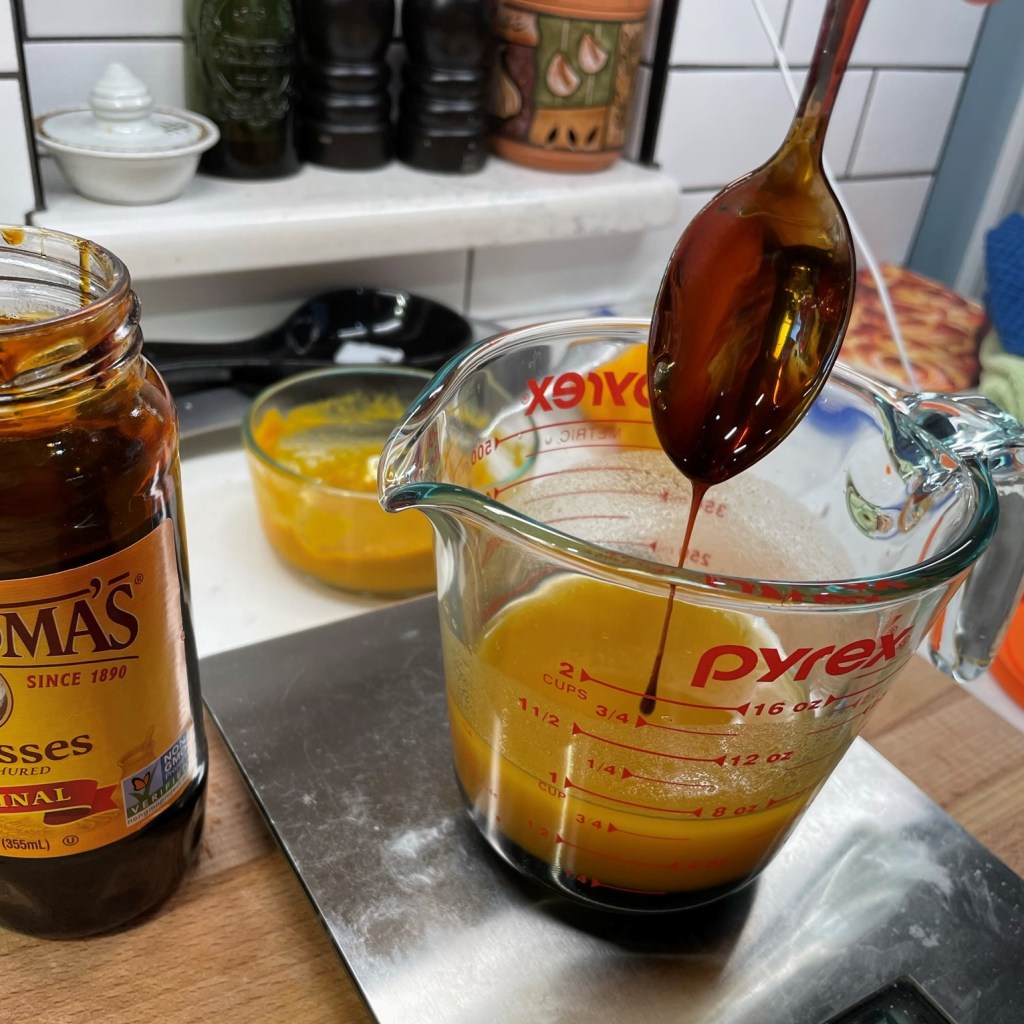
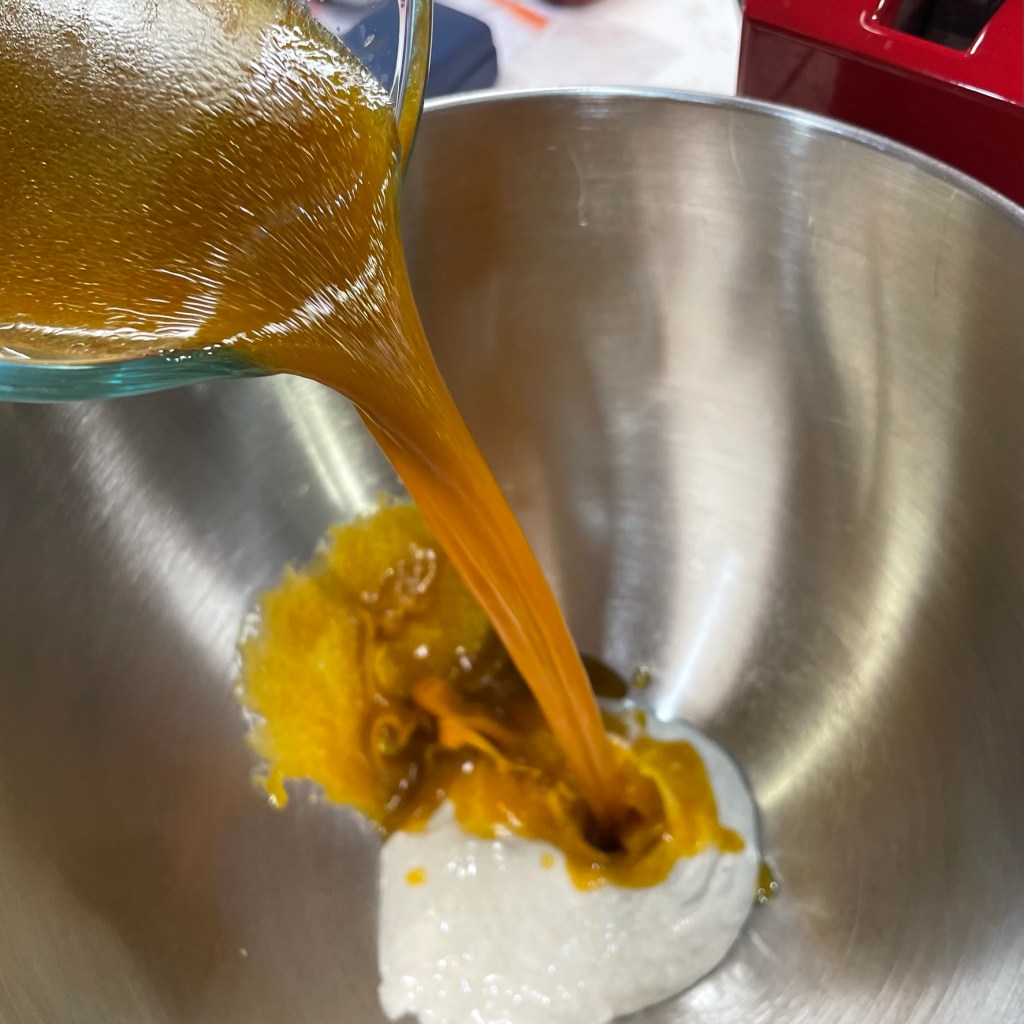
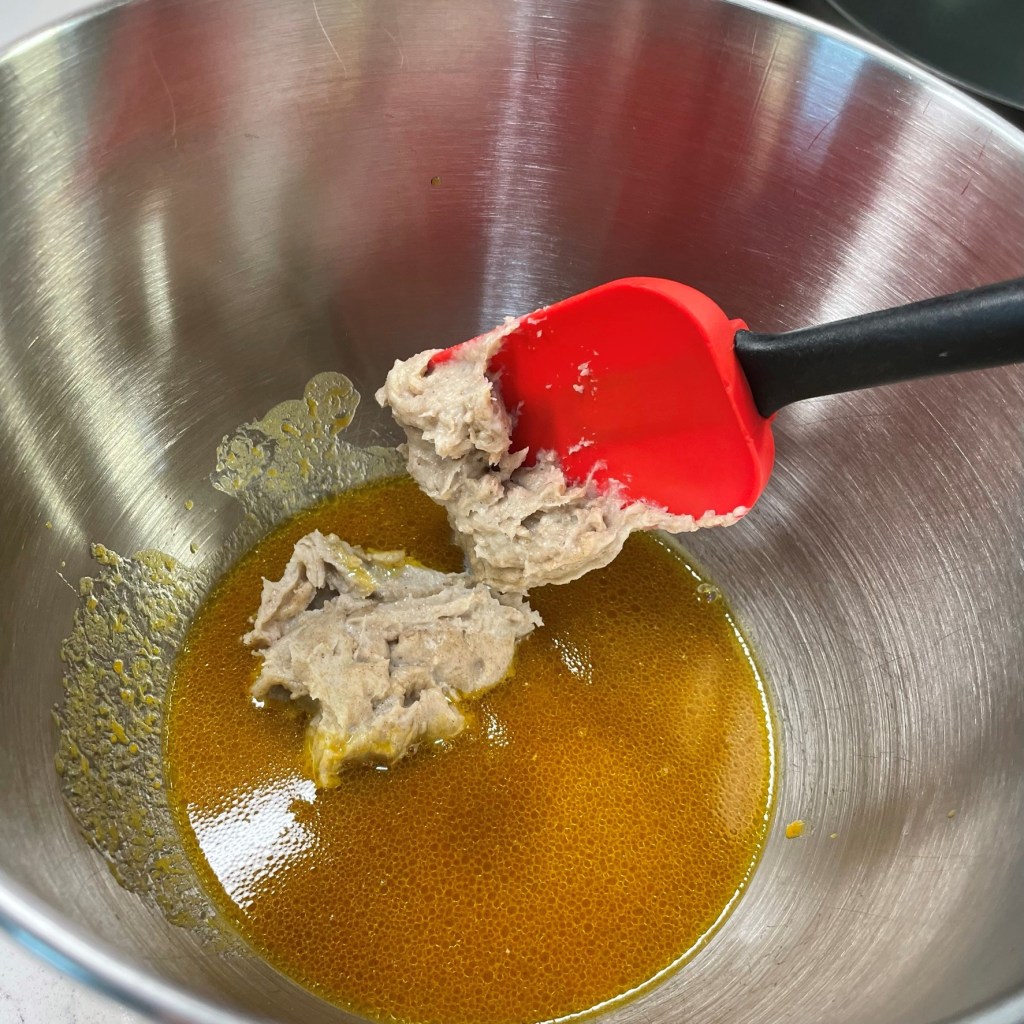
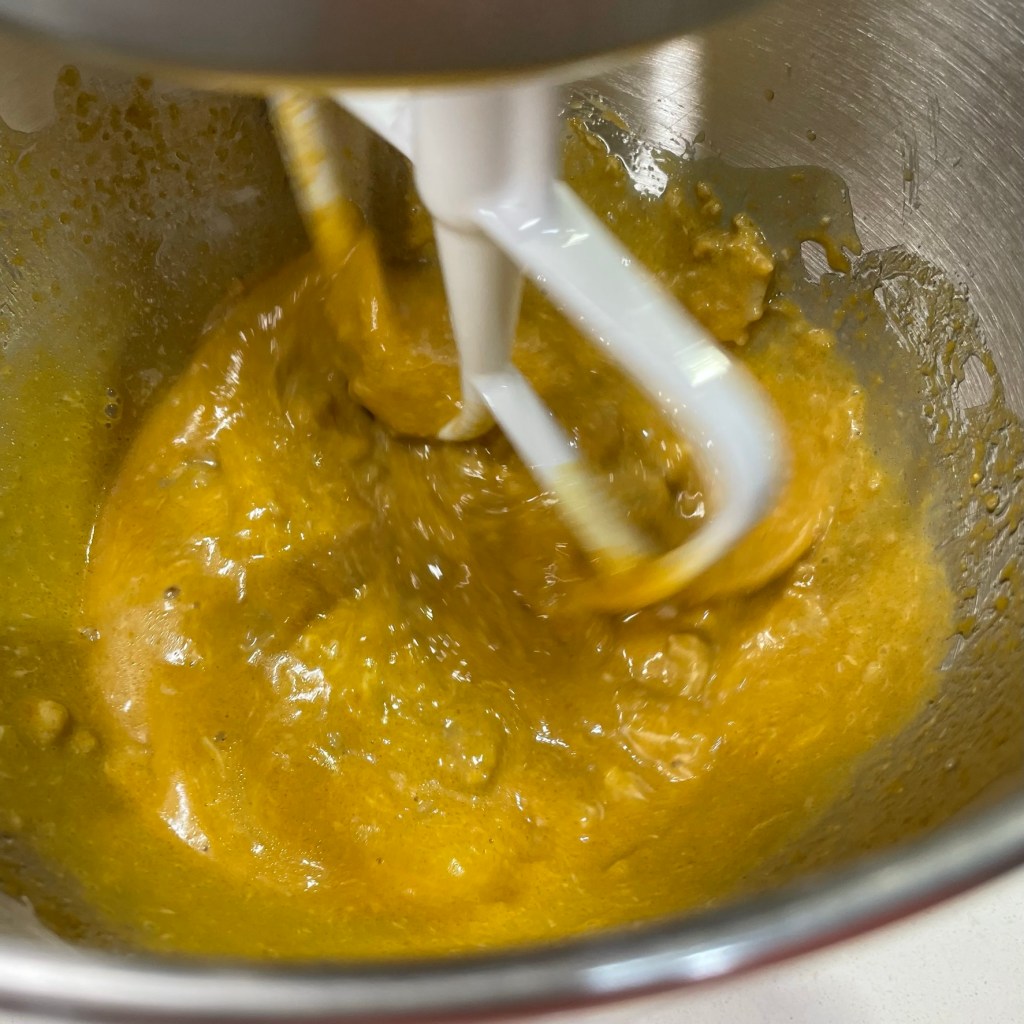
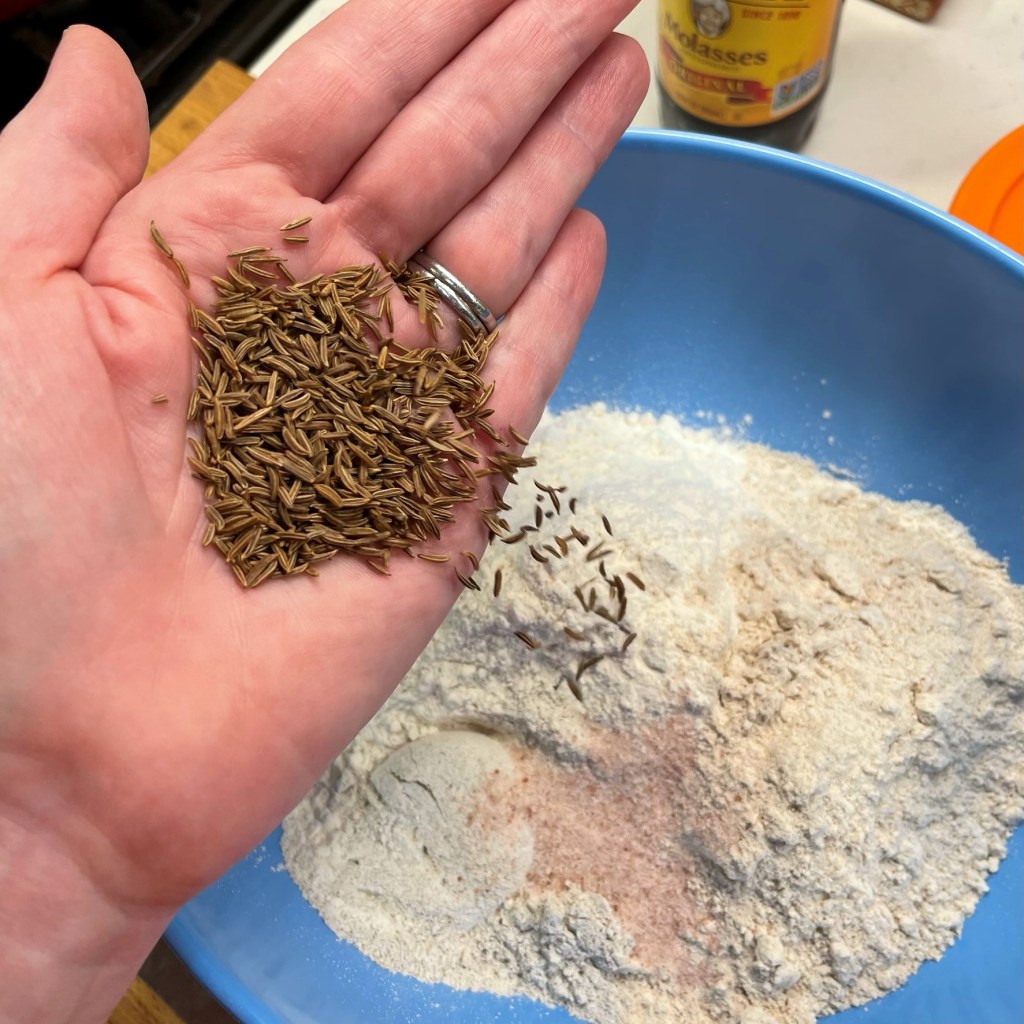
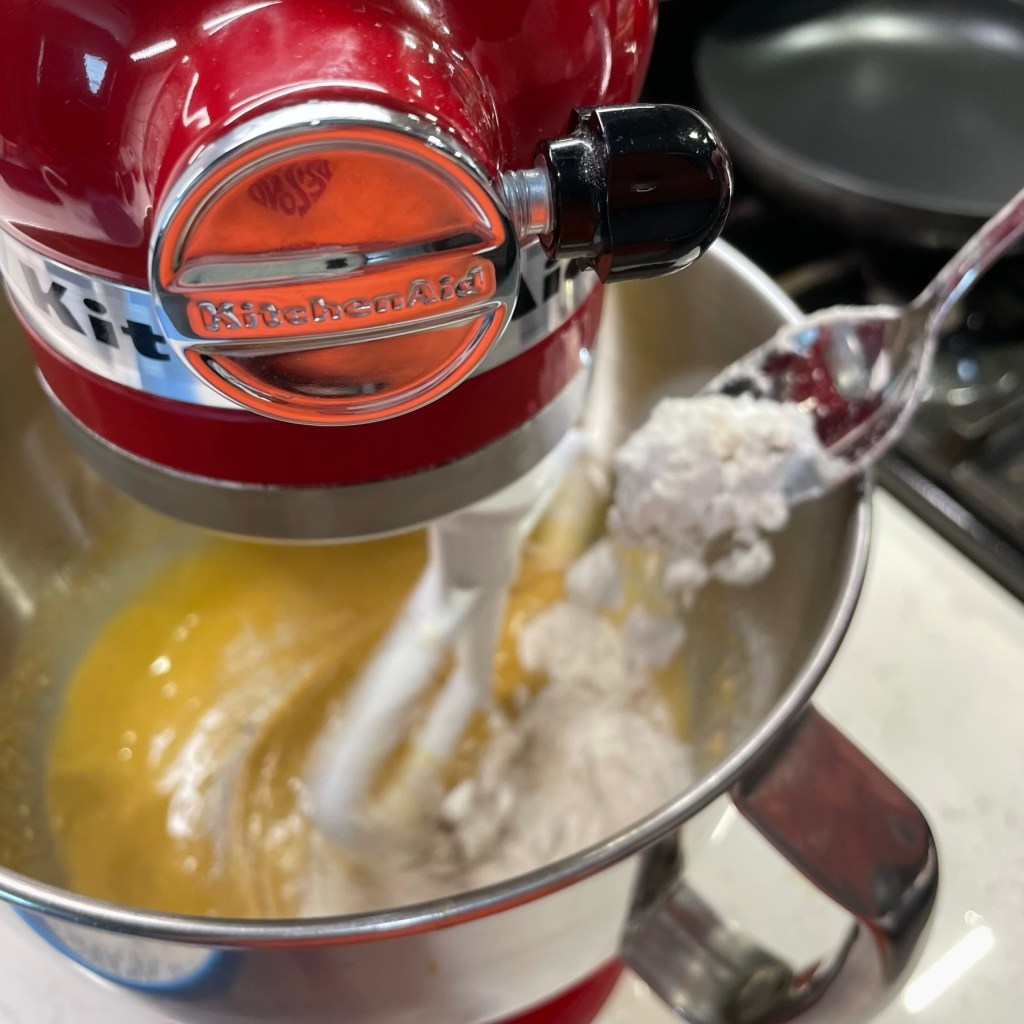
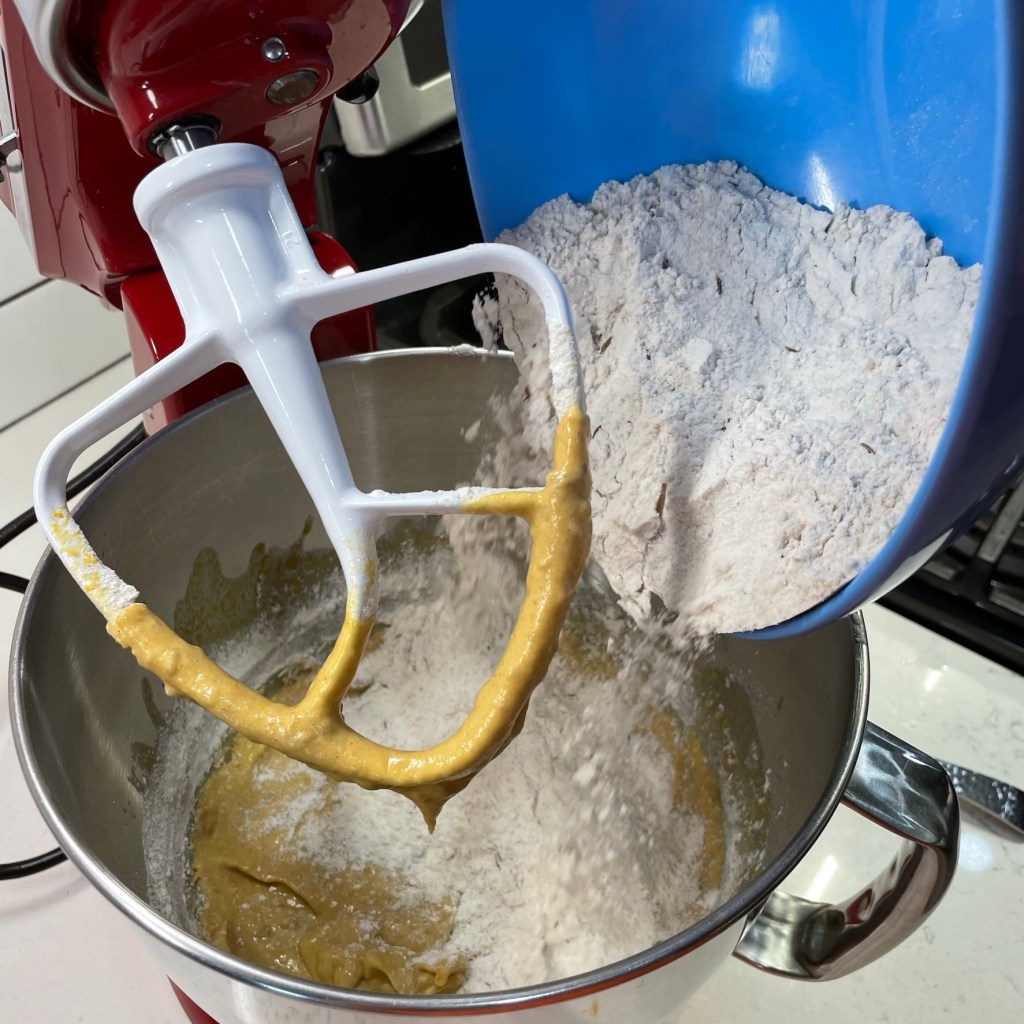
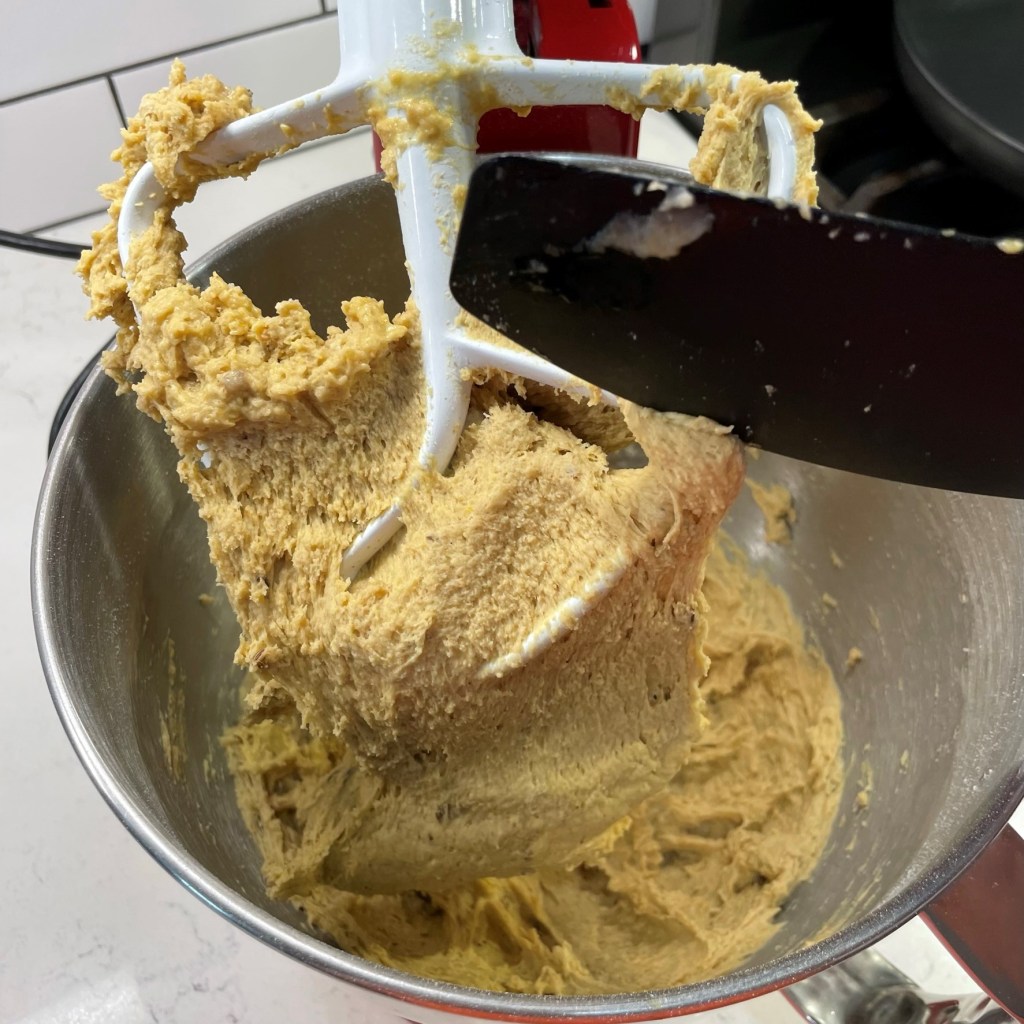
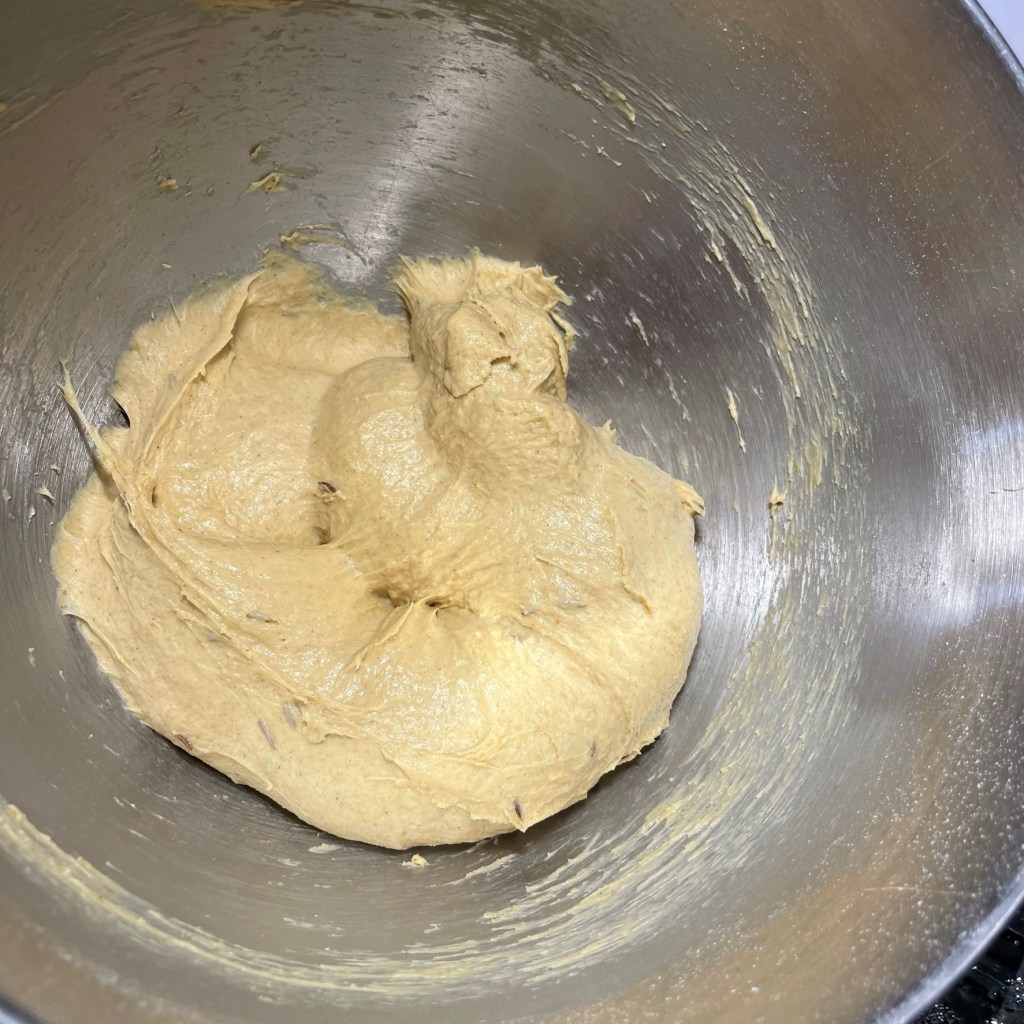
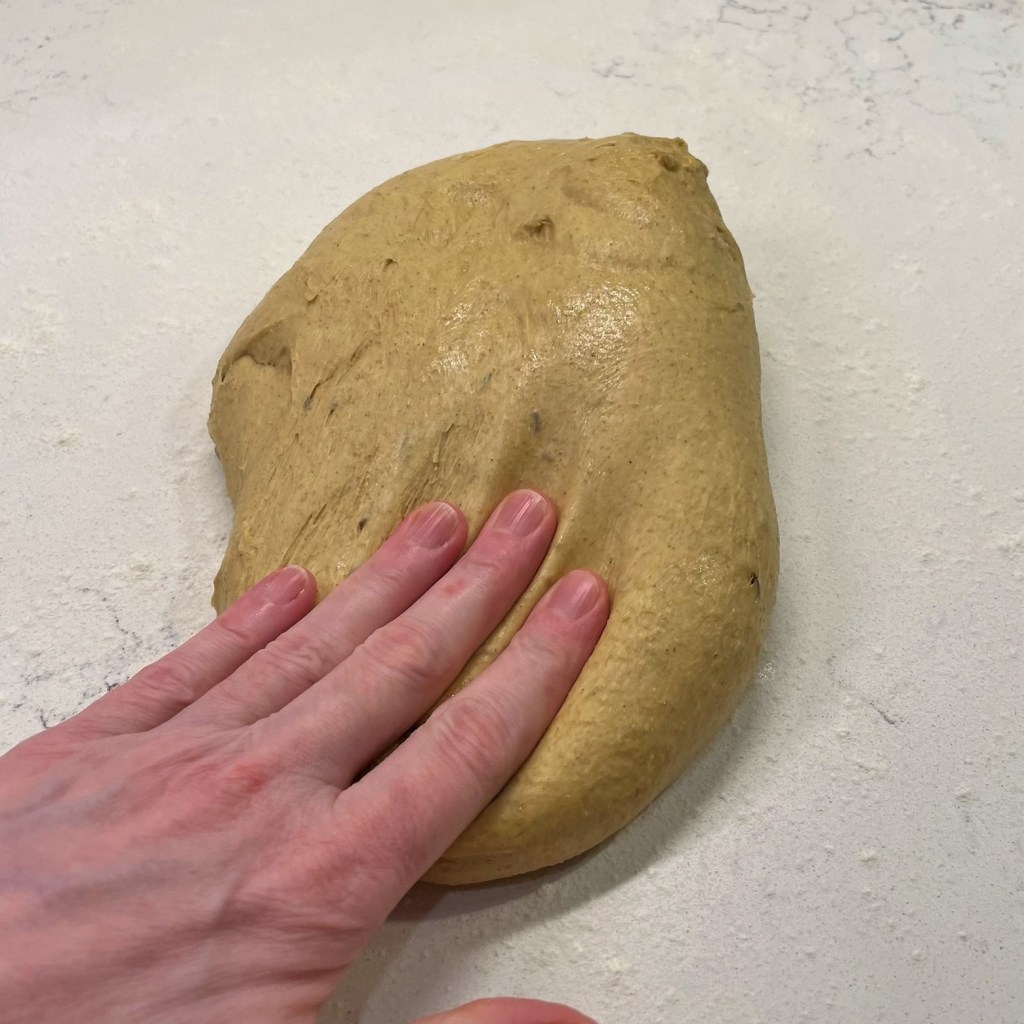
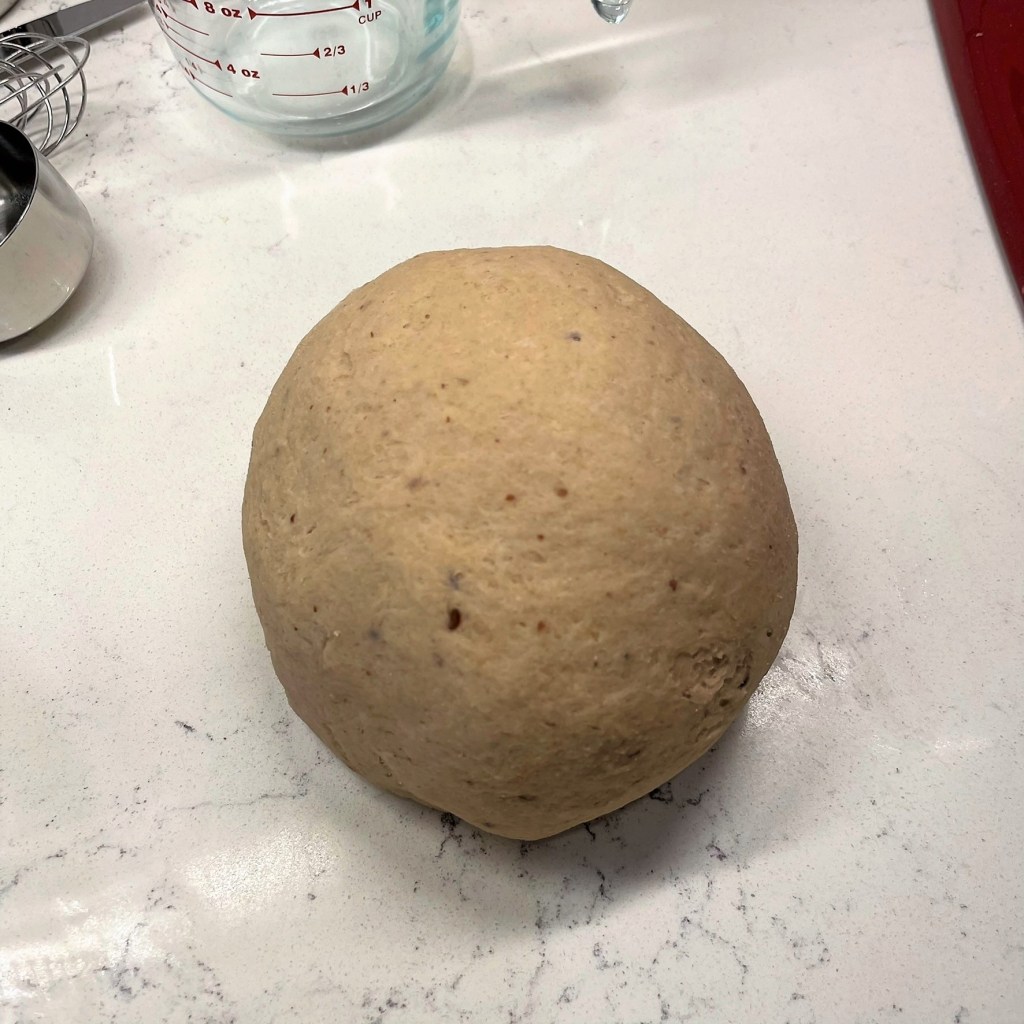
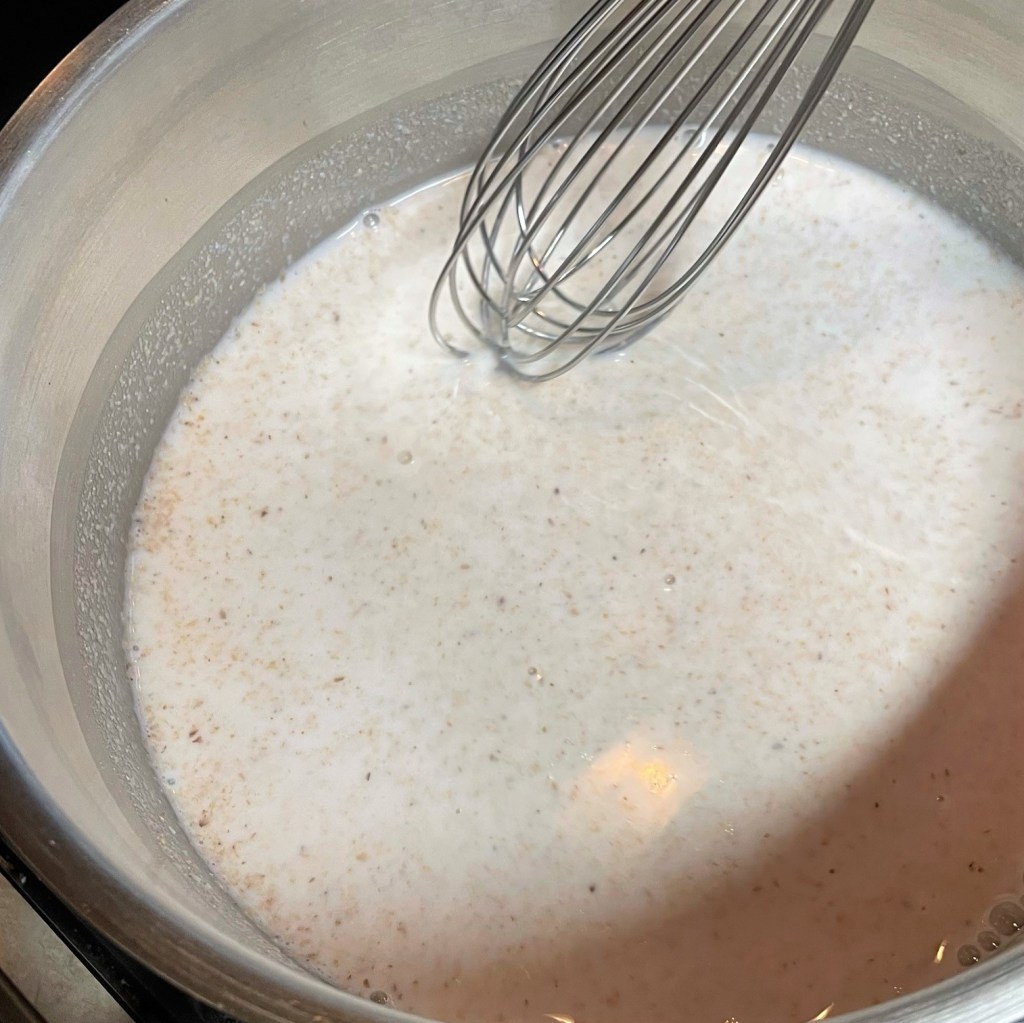
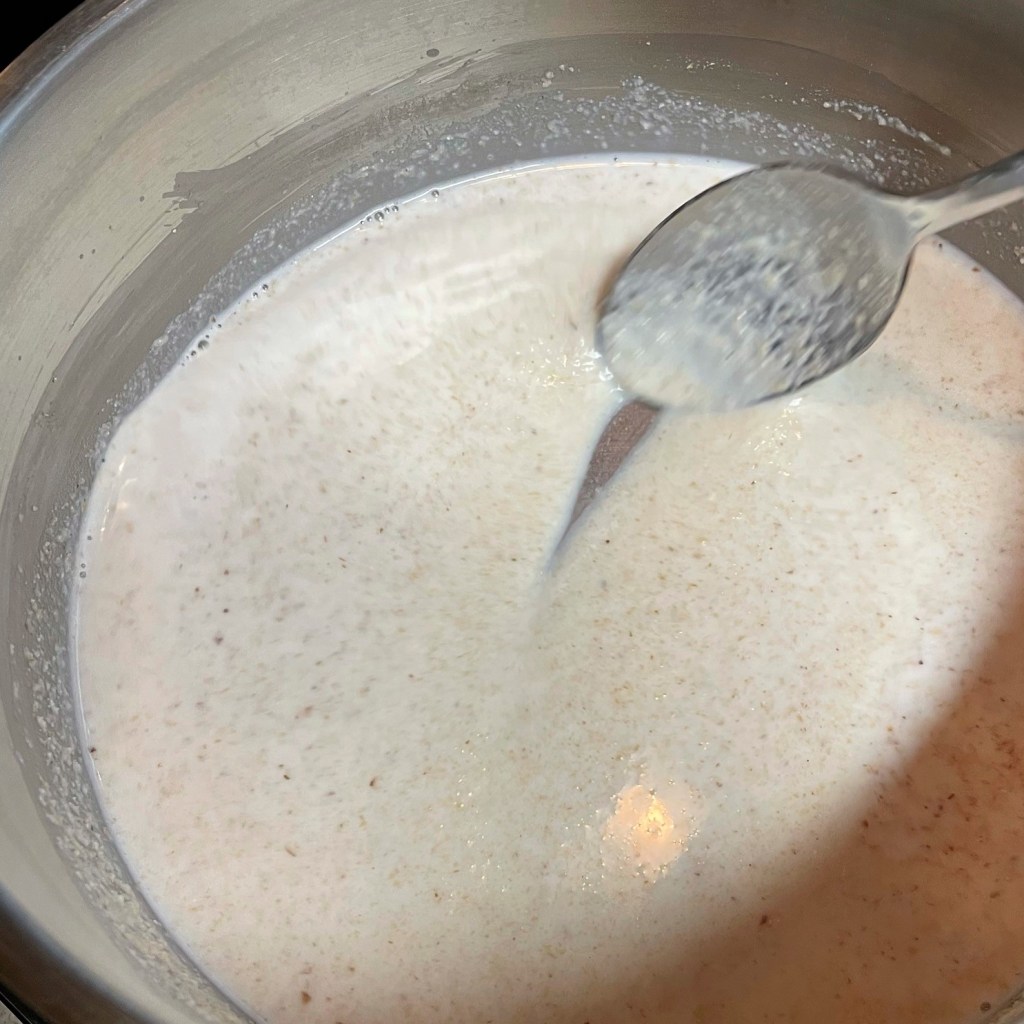
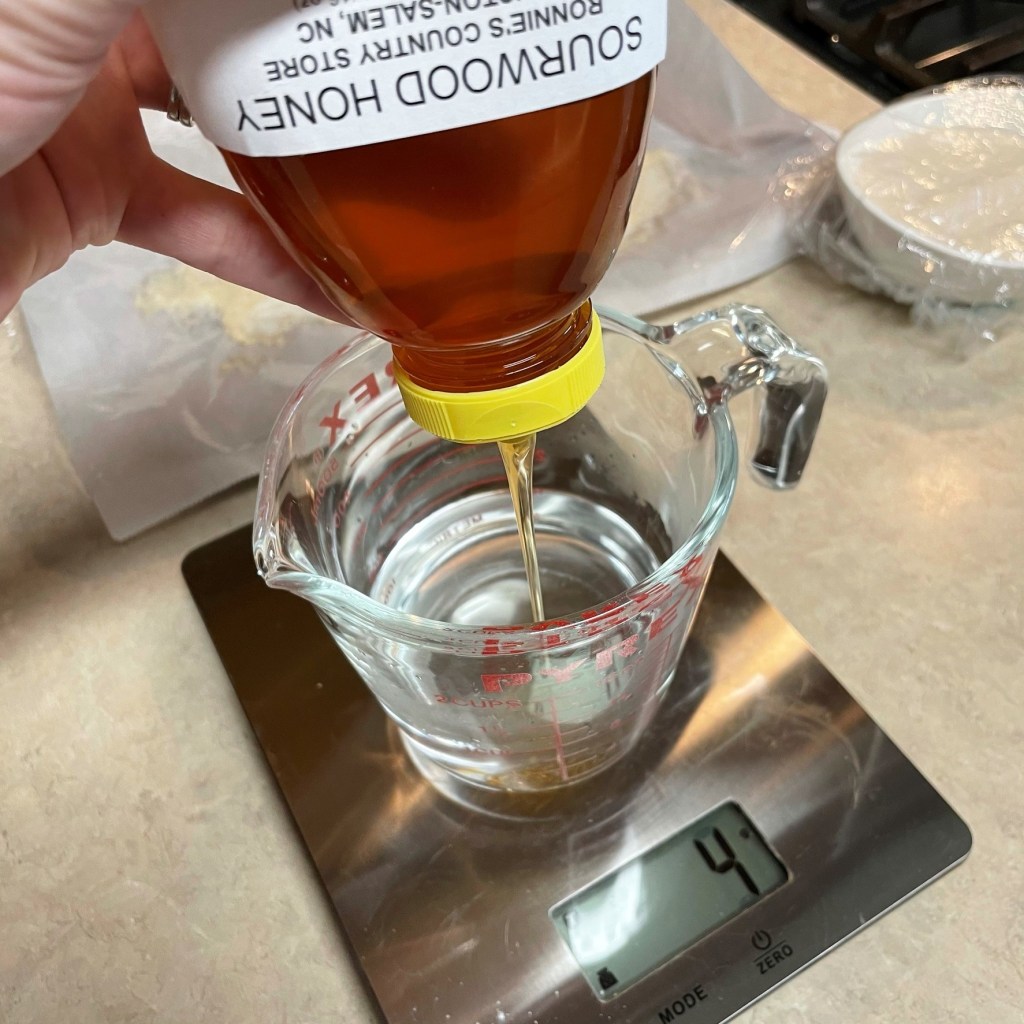
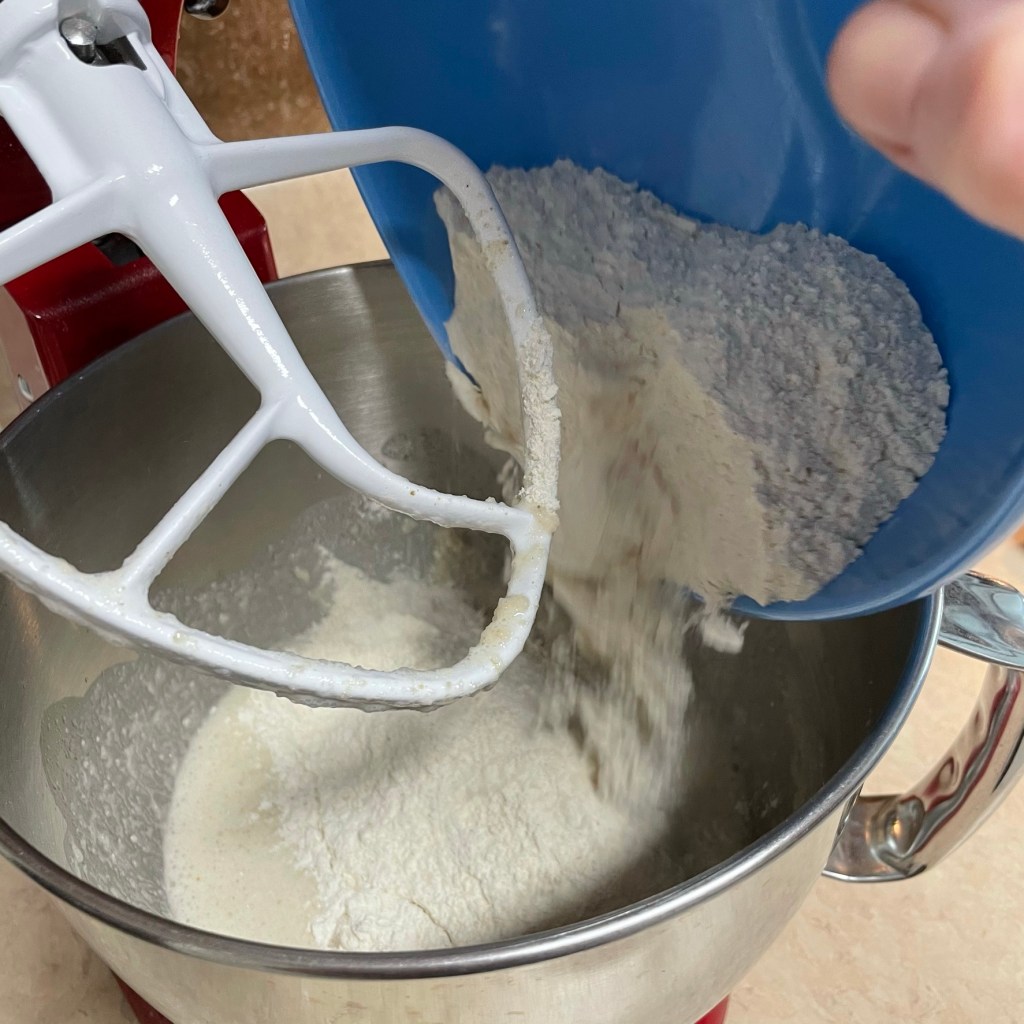
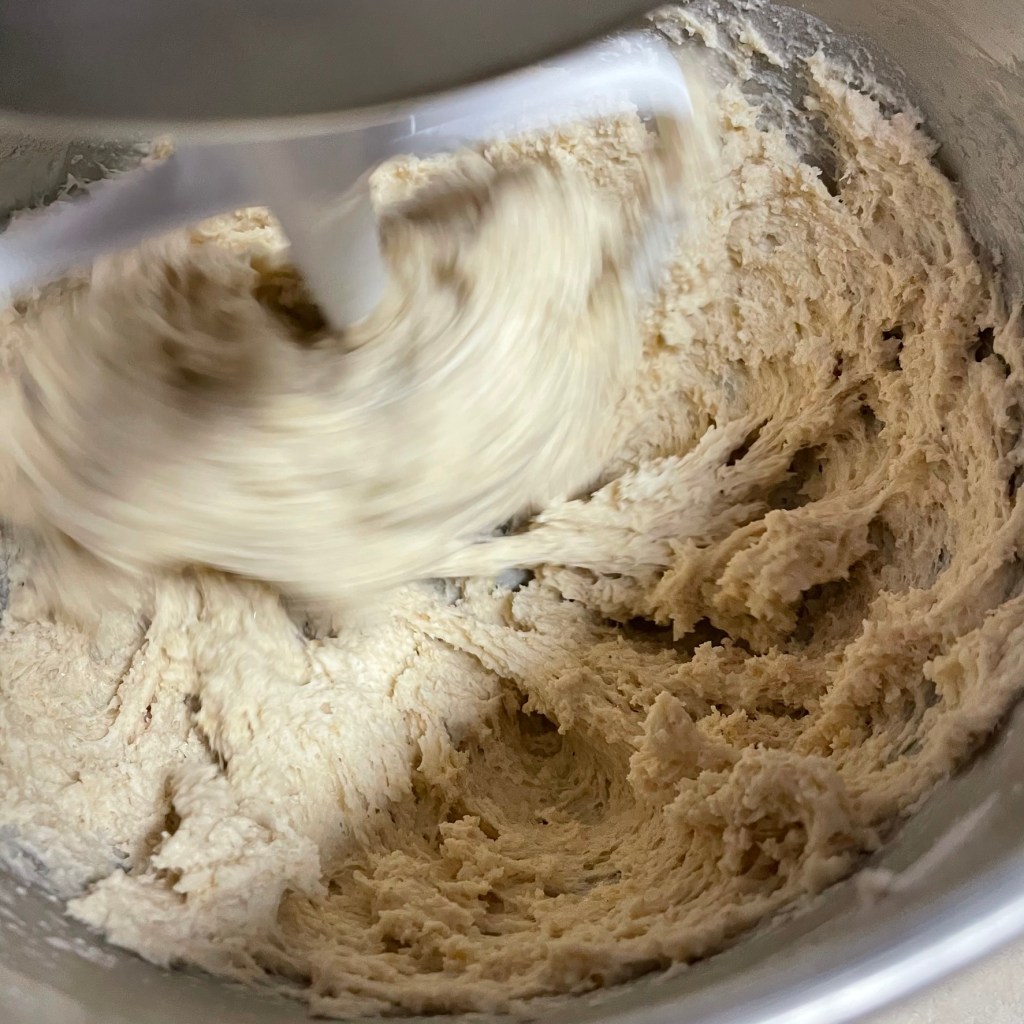
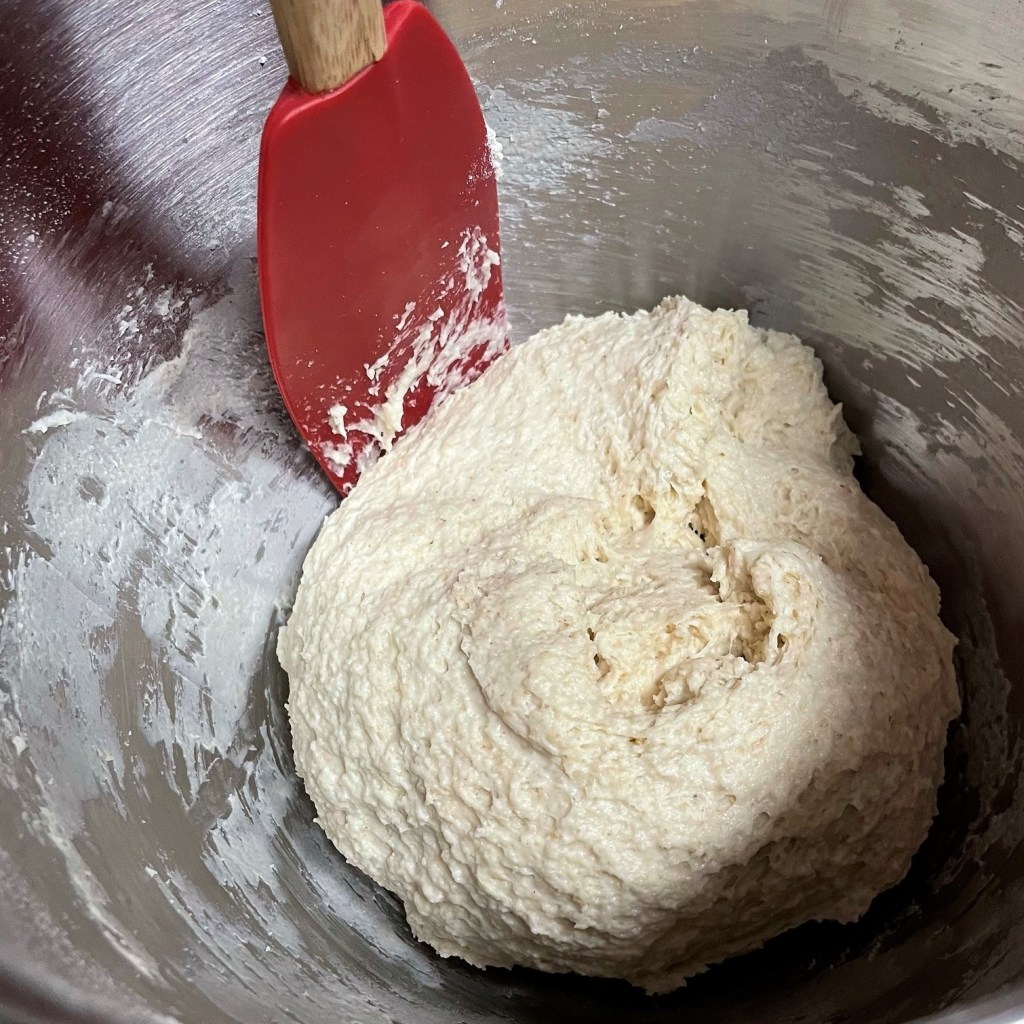
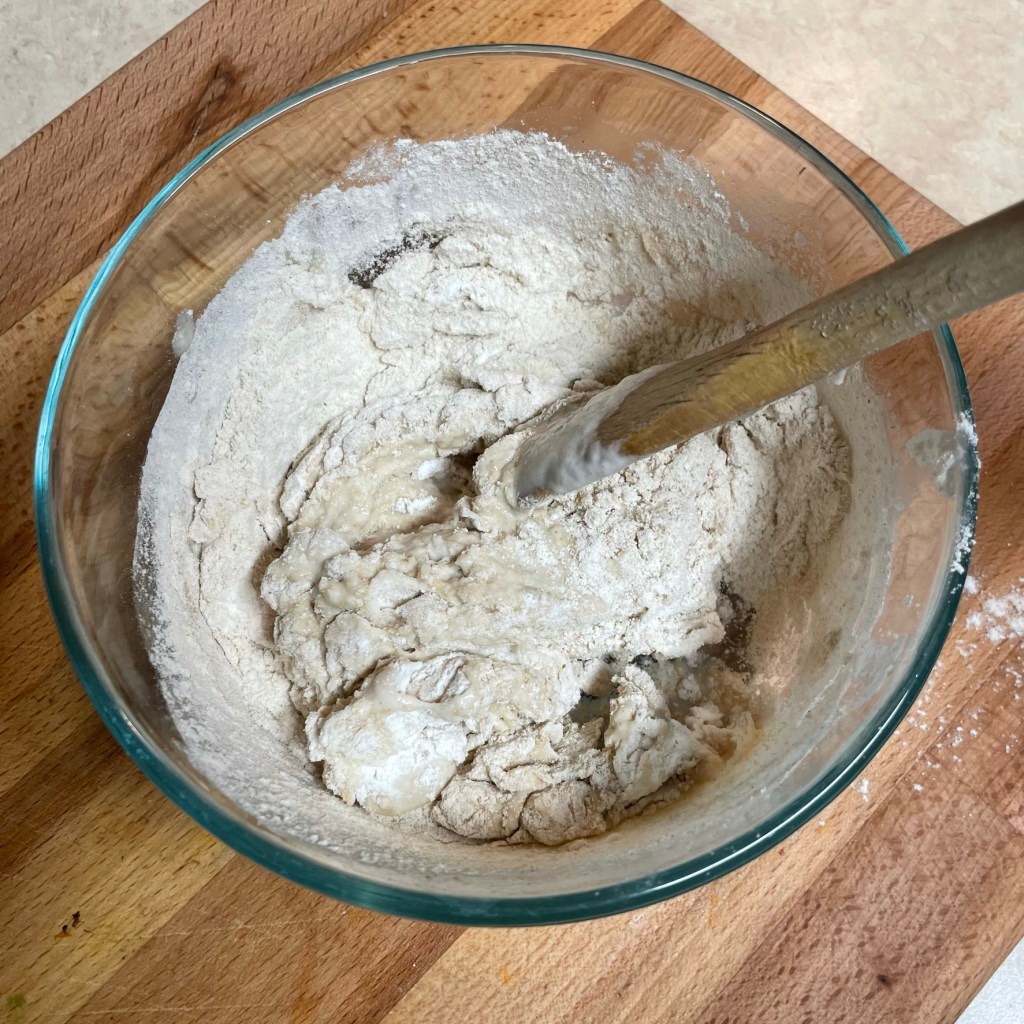
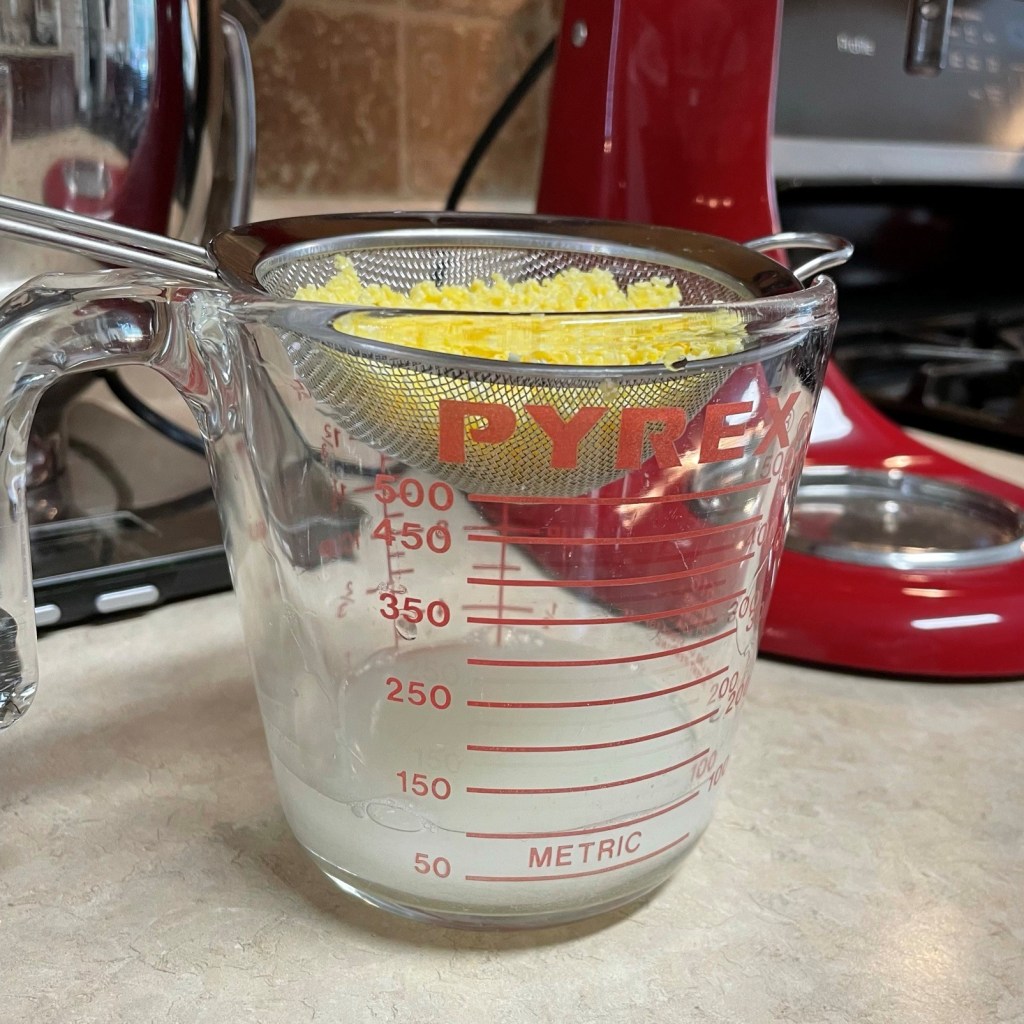
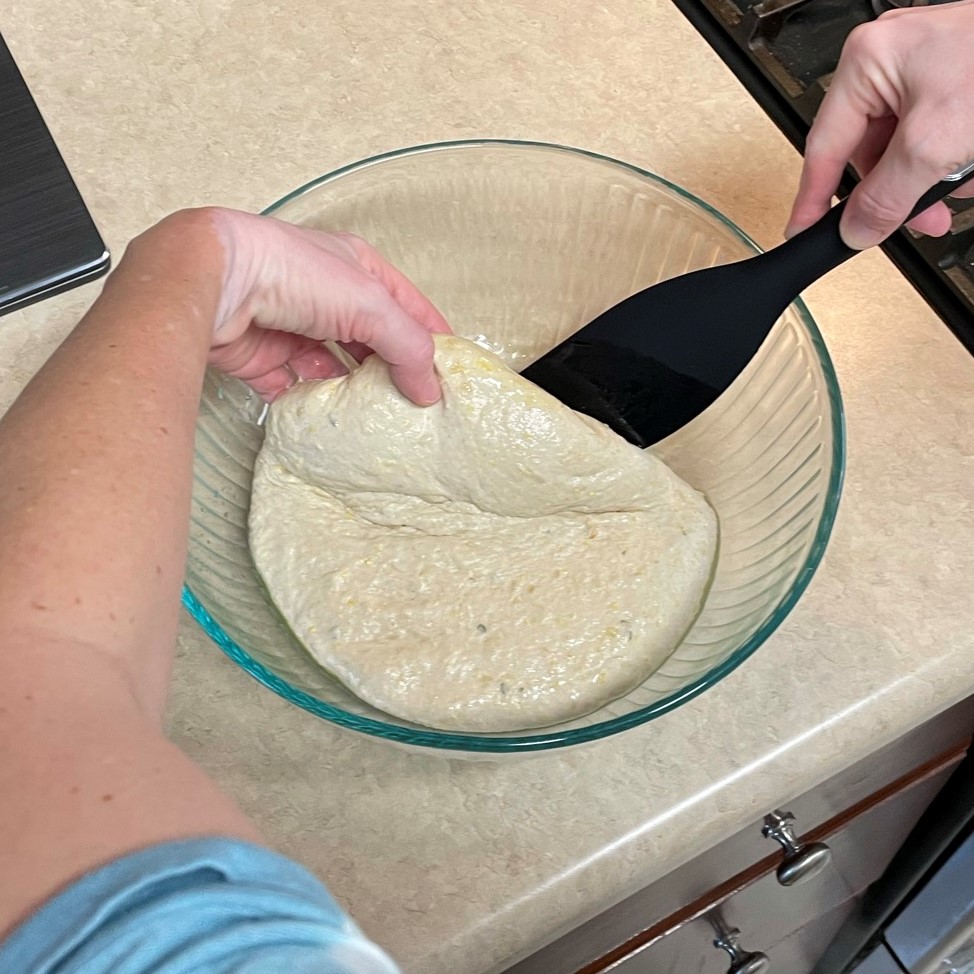
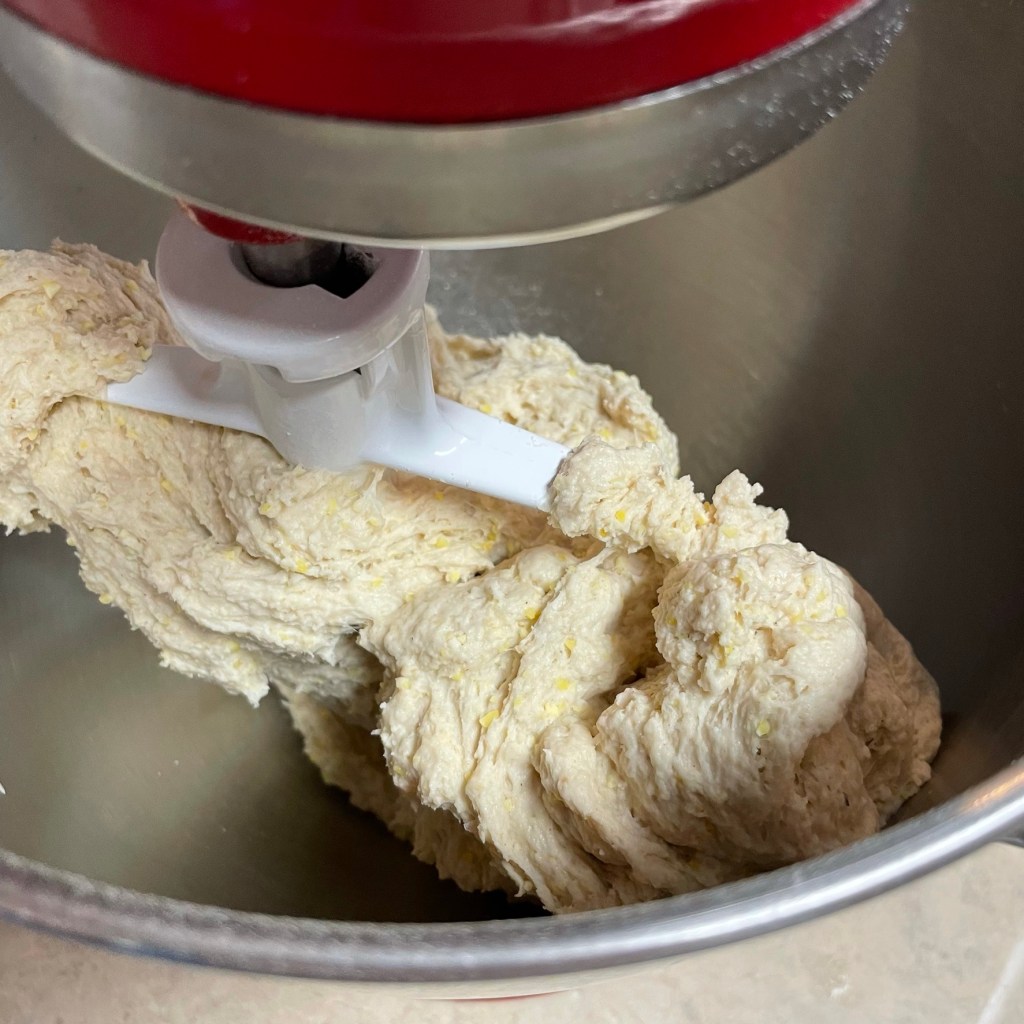
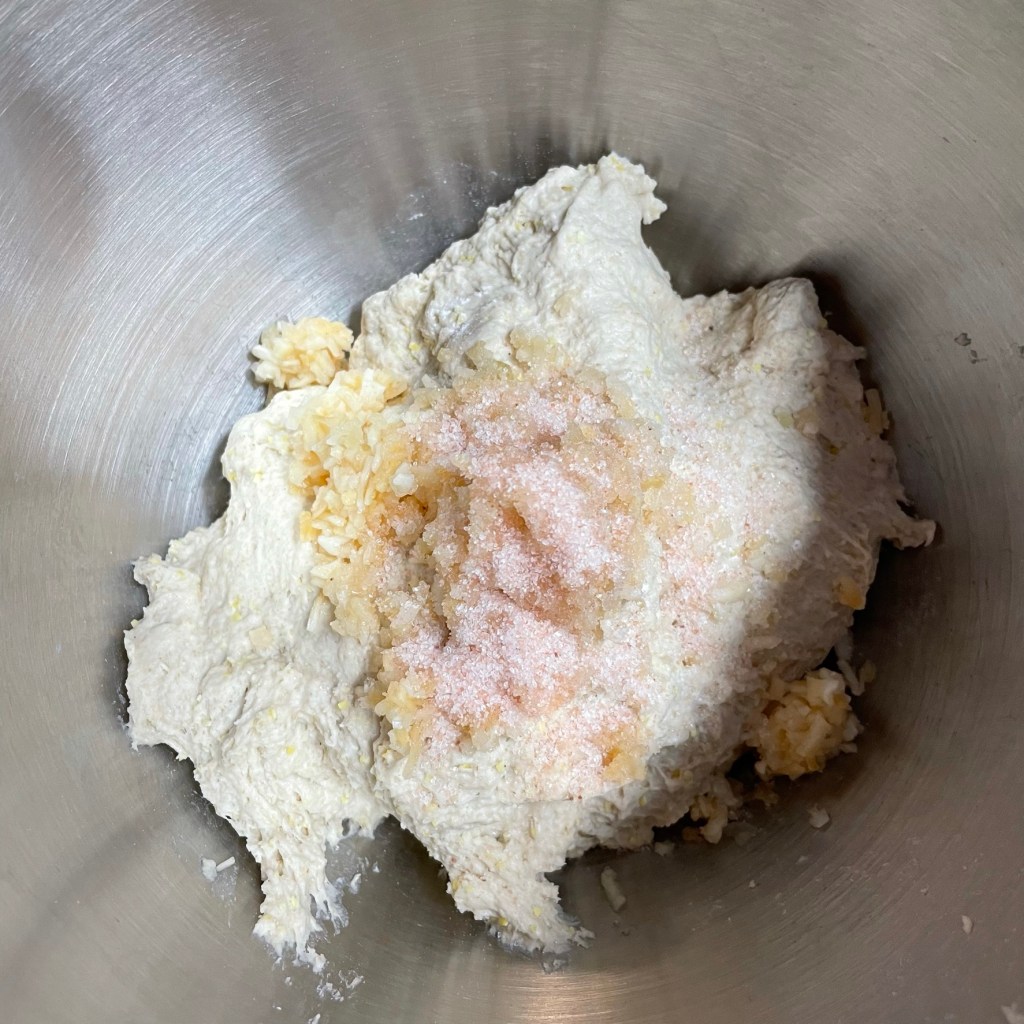
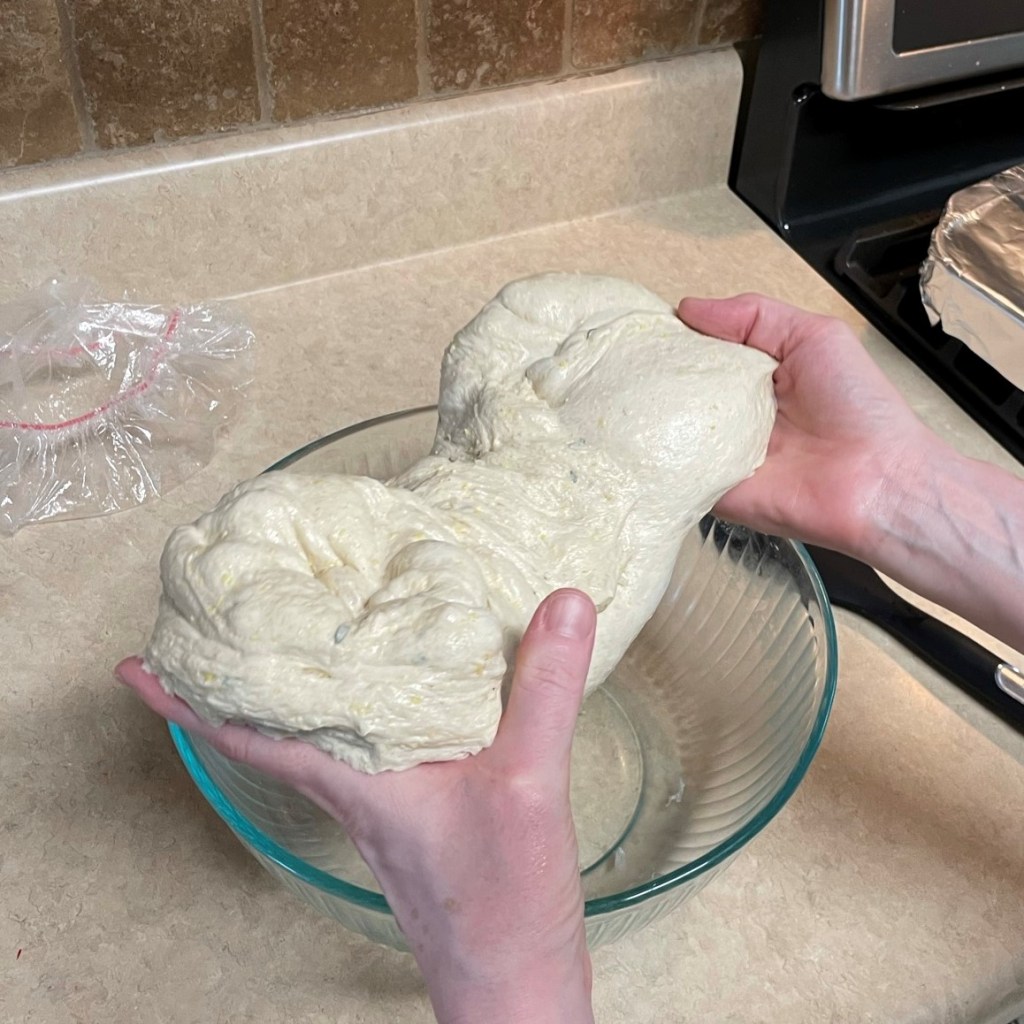
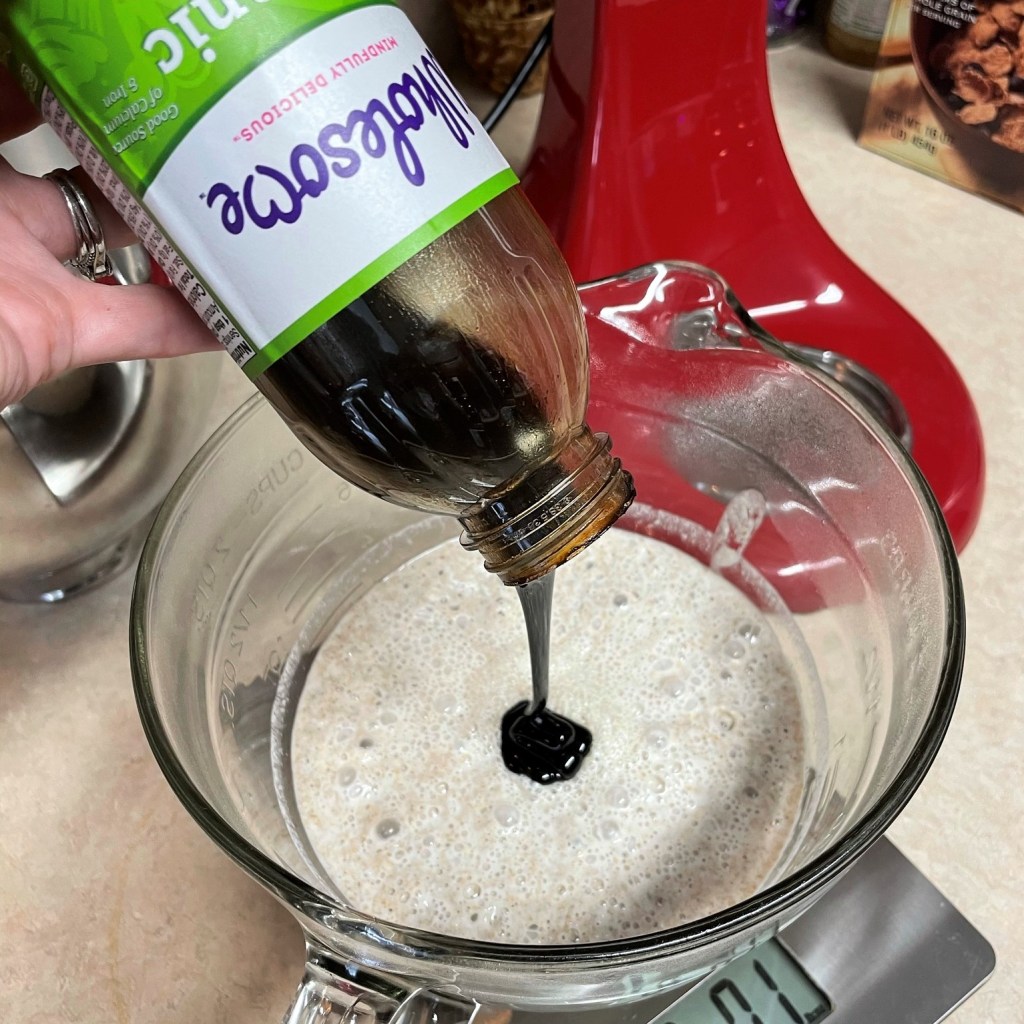
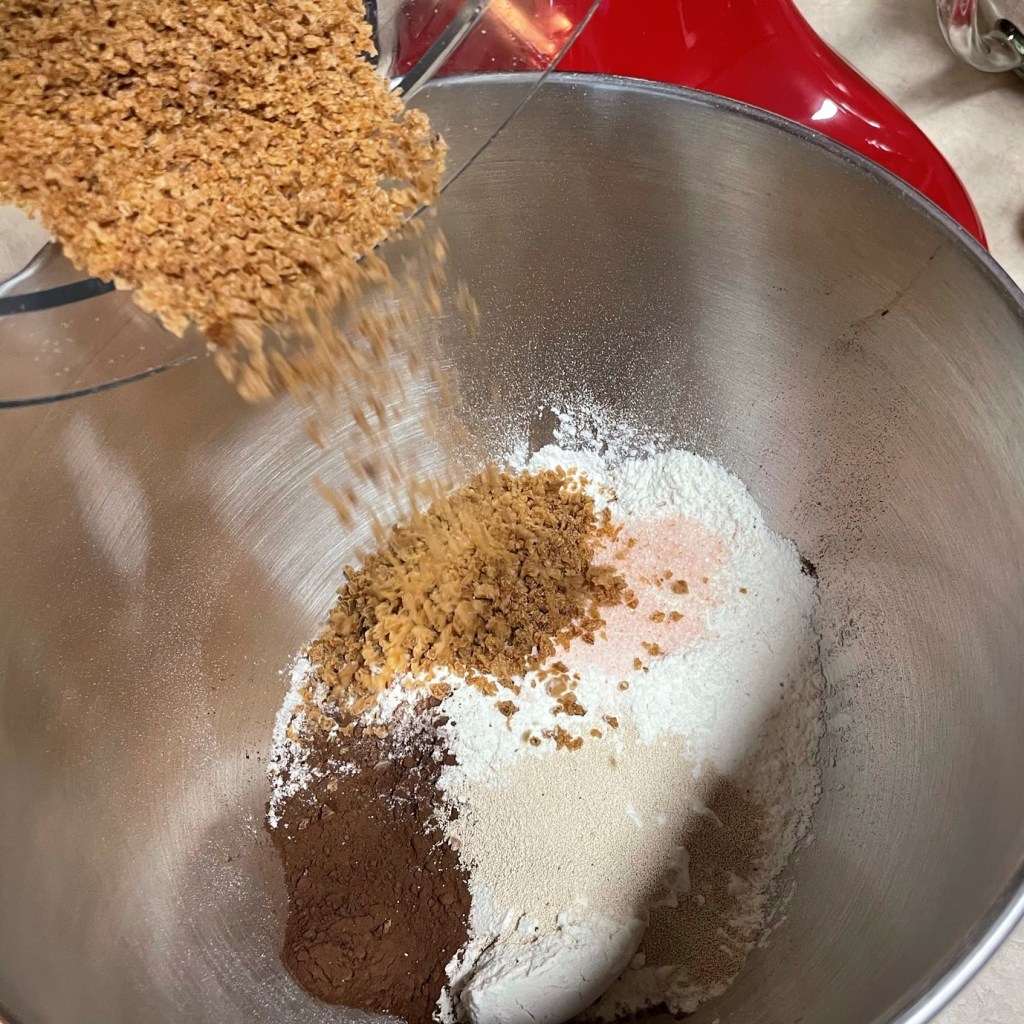
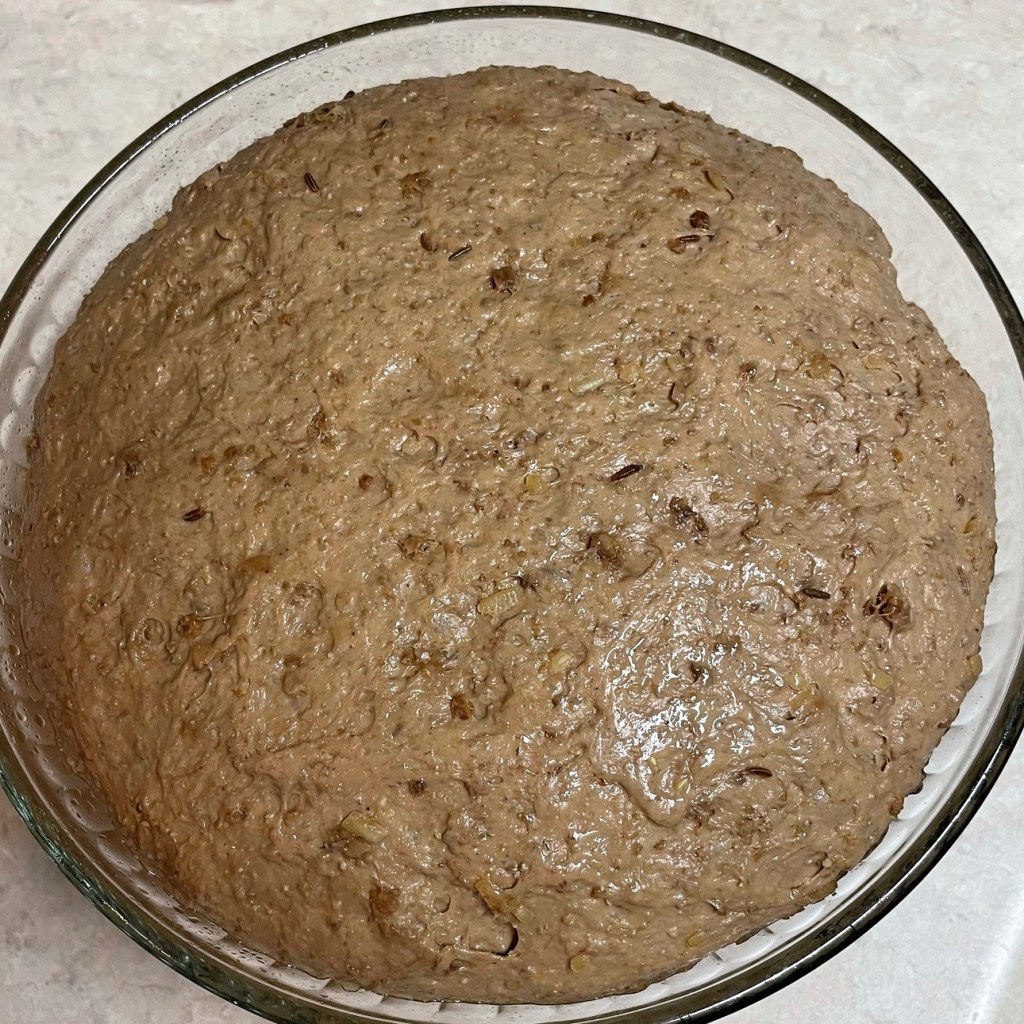
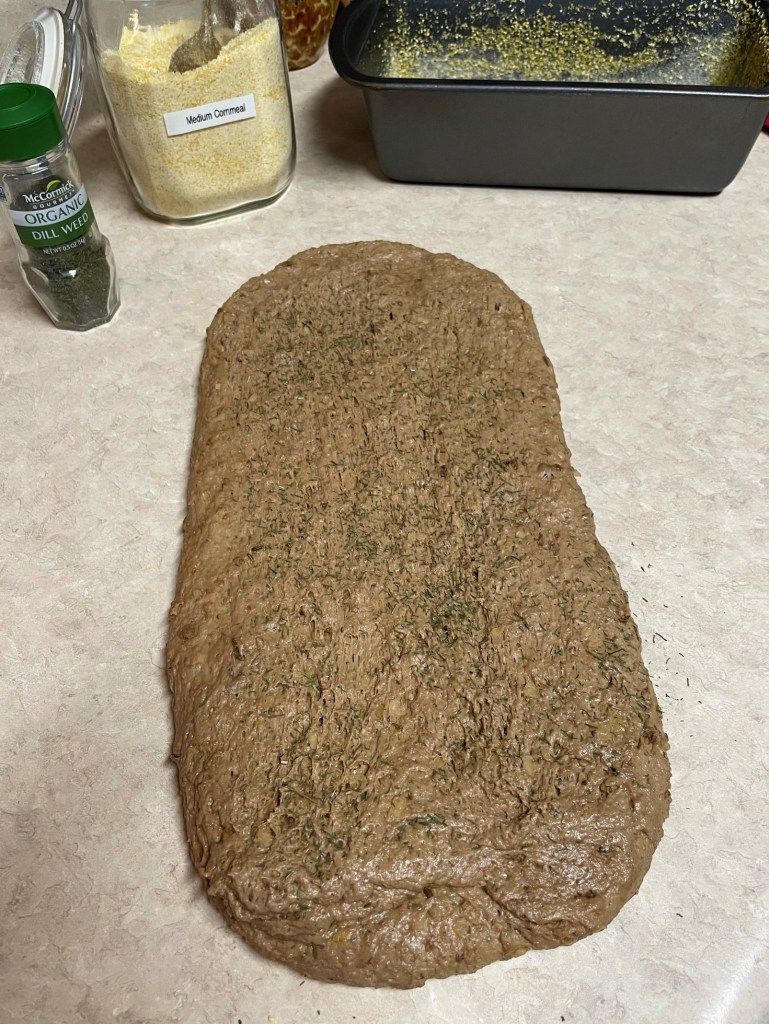
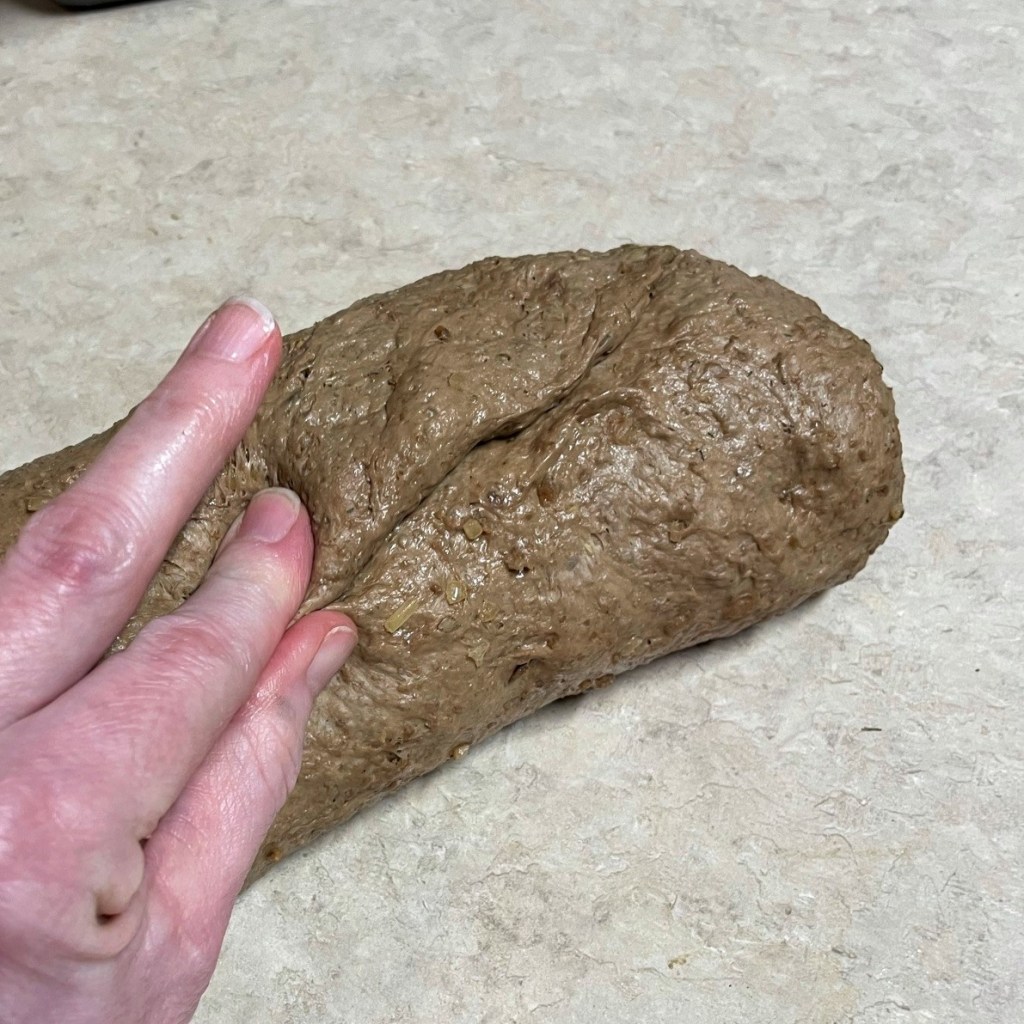
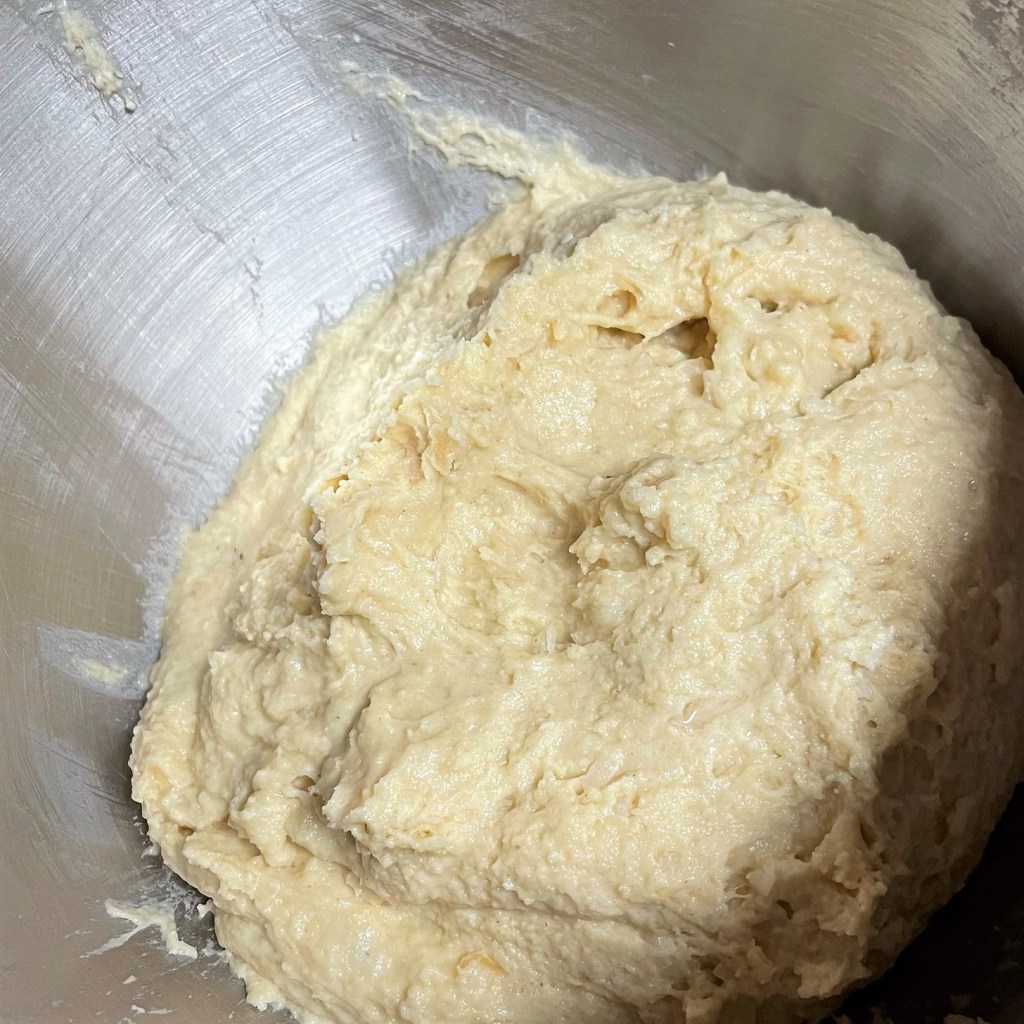
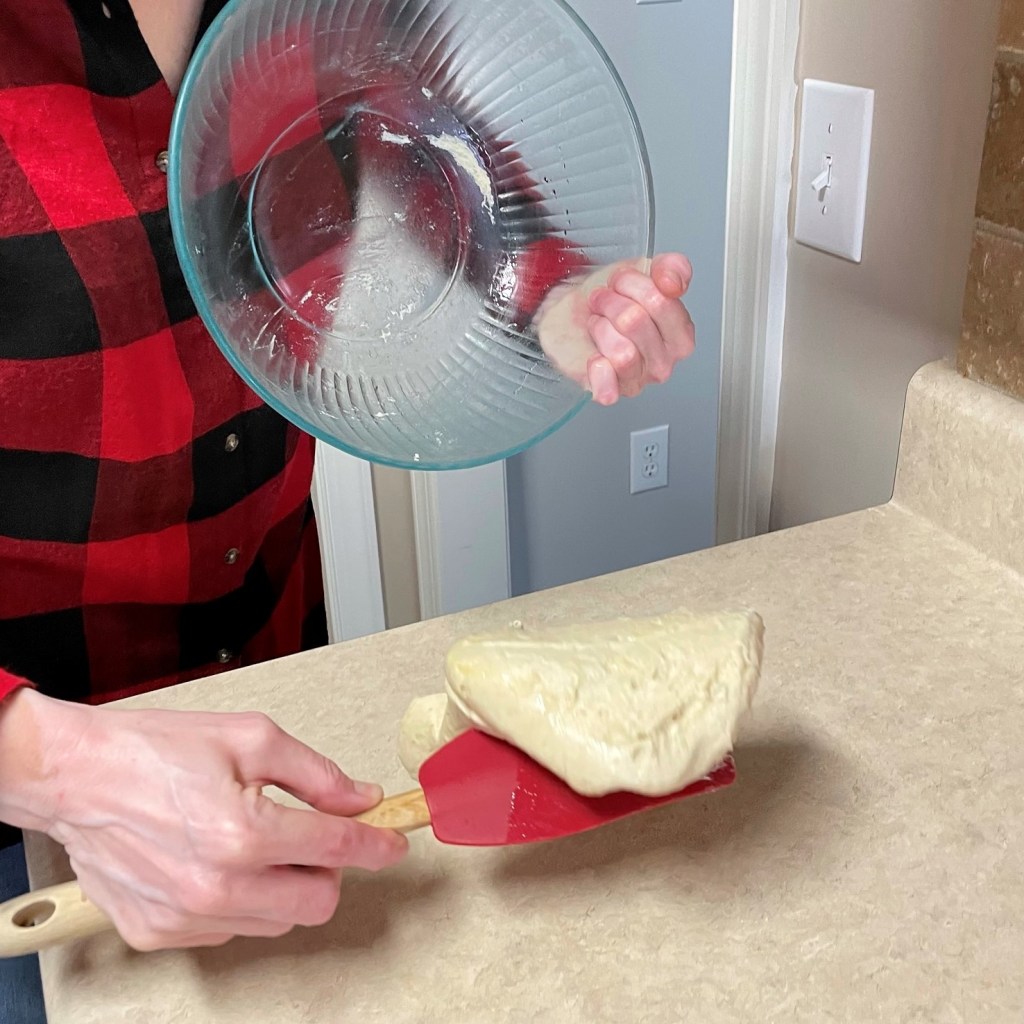
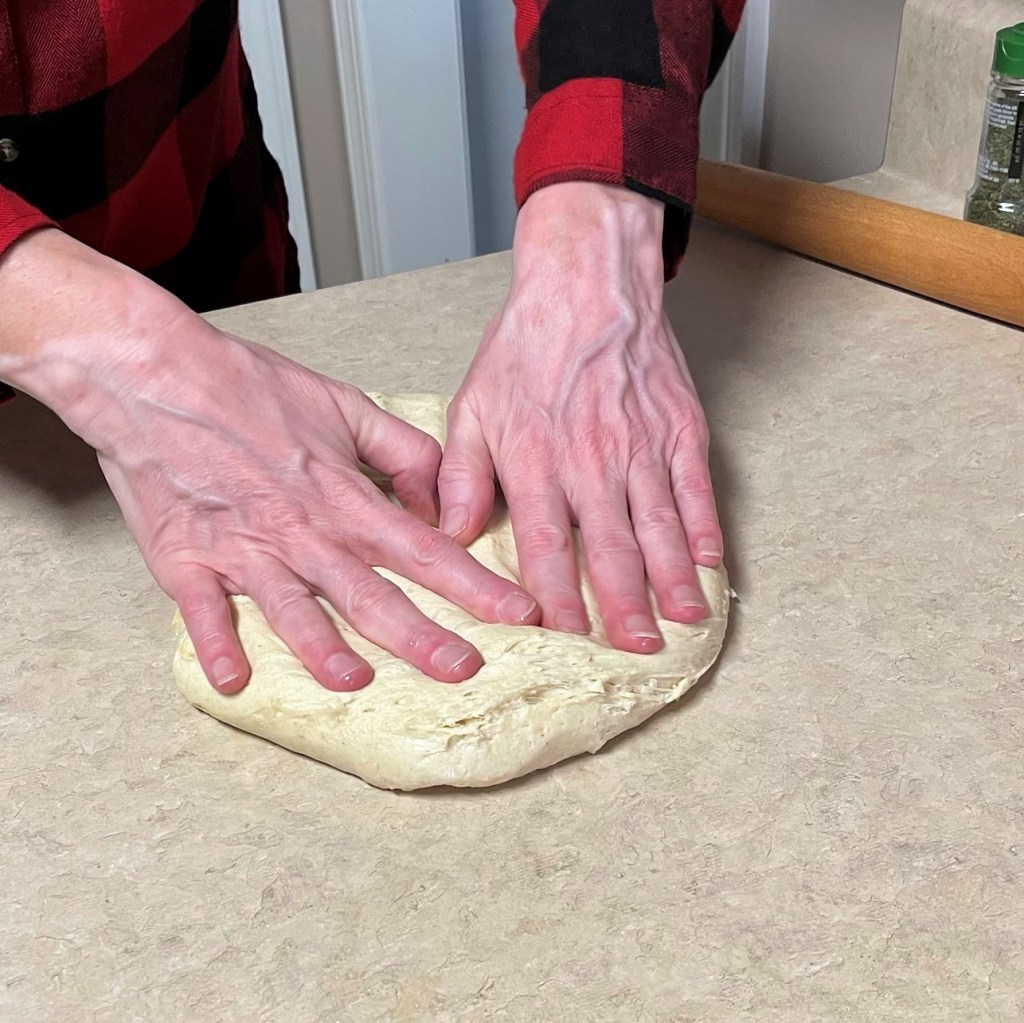
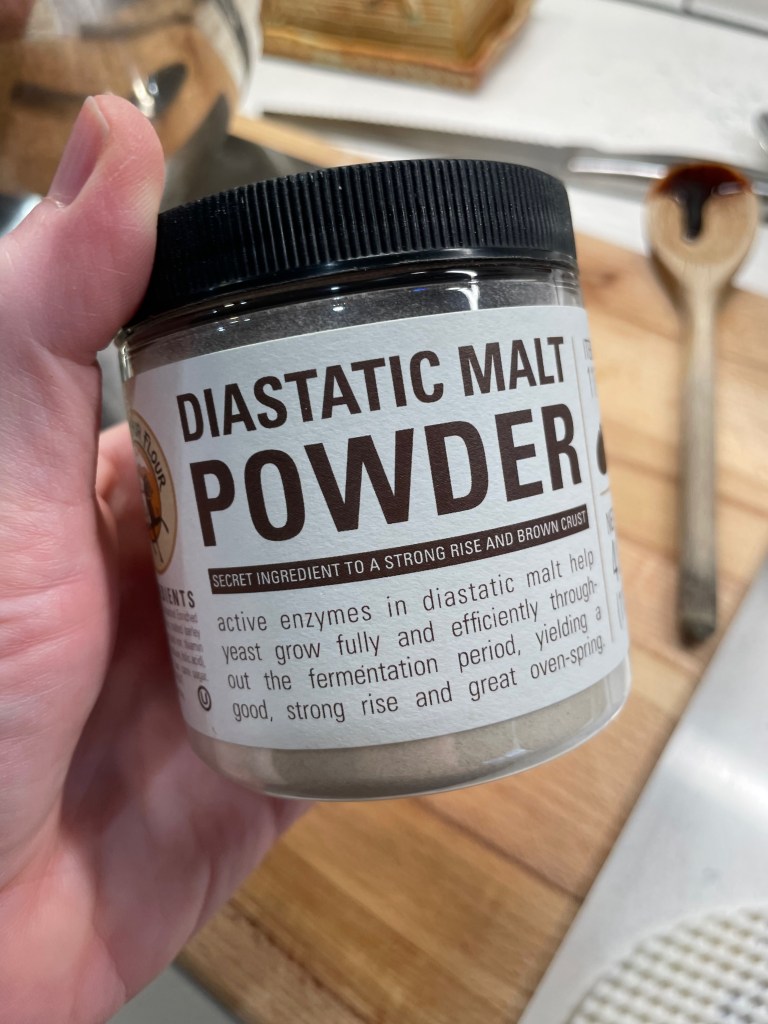
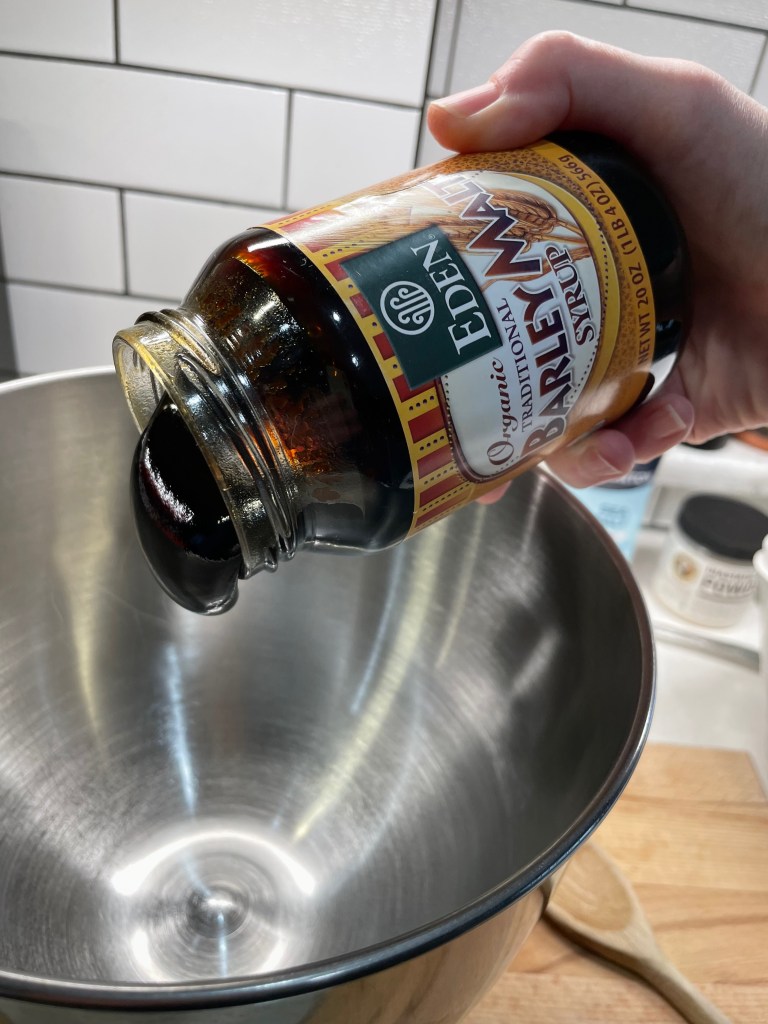
The final dough is made the next day, beginning with a slurry of the barley malt syrup, some cane sugar, salt and a splash of the warm mixing water. This is the simplest way to thoroughly blend in an ingredient as sticky as the malt syrup. The slurry was blended with all of the overnight levain, the rest of the water and my flour blend. If I could back up to change any part of my process, it would have been this point— my increase of water may not have been enough, given the swaps I made to the flour.It can be risky to add more water to an already-formed dough, so I pressed on with this very firm dough. But next time, I’ll adjust the water further or hold back some of the flour toward the end to be sure the dough can handle it.


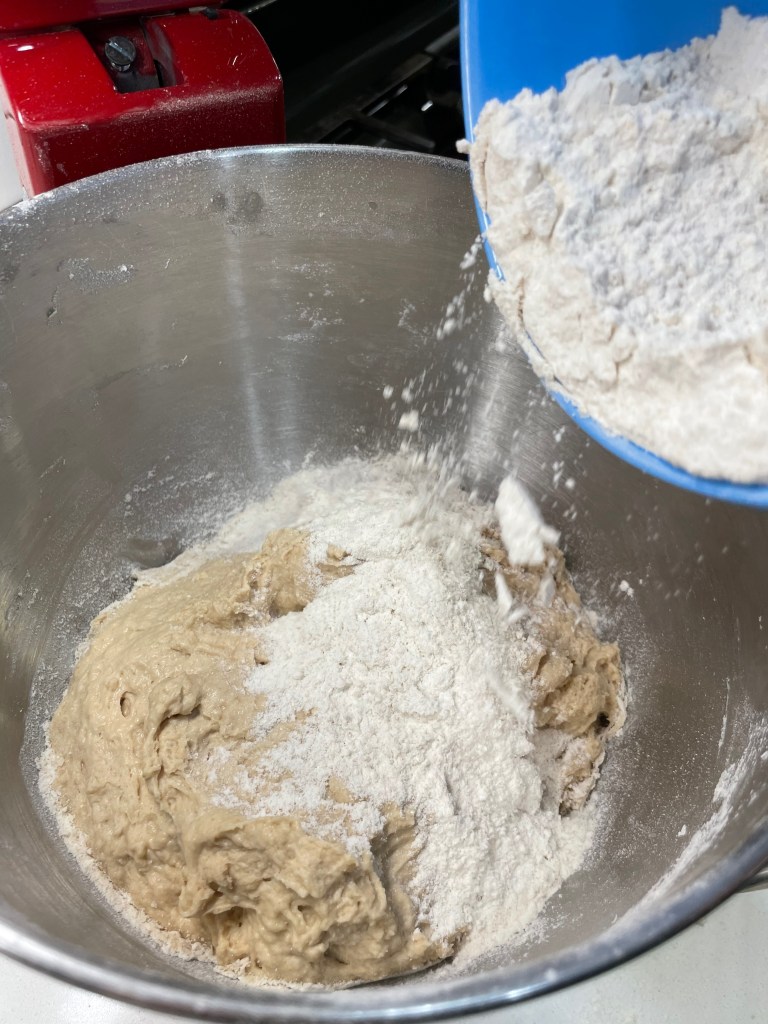
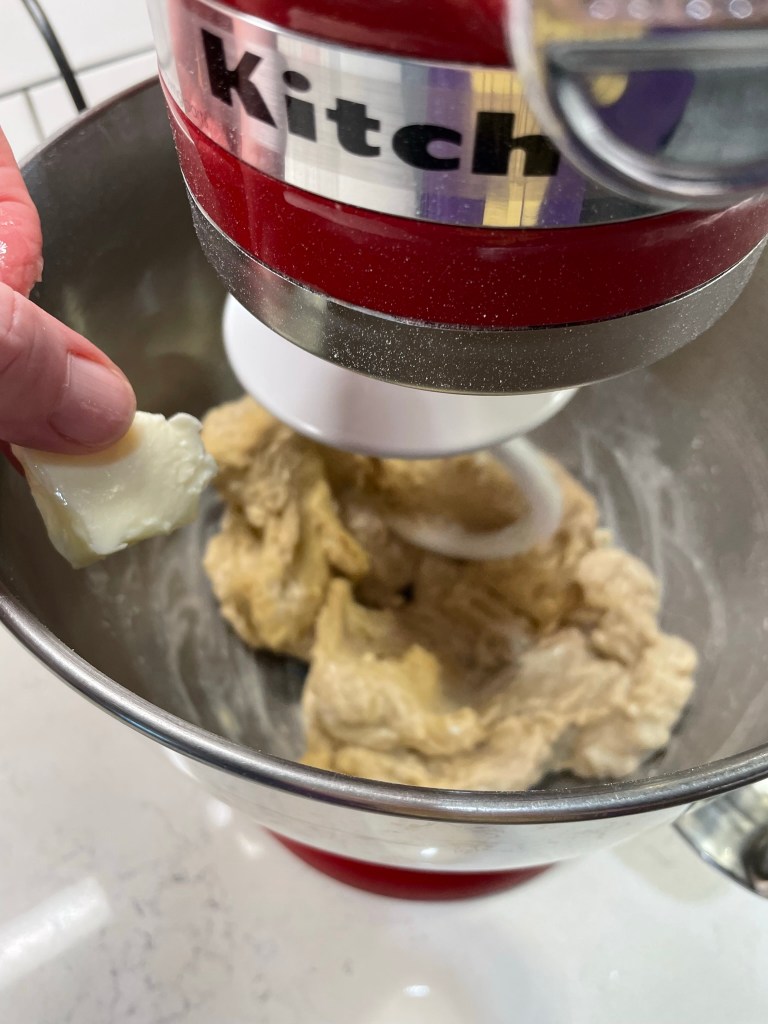
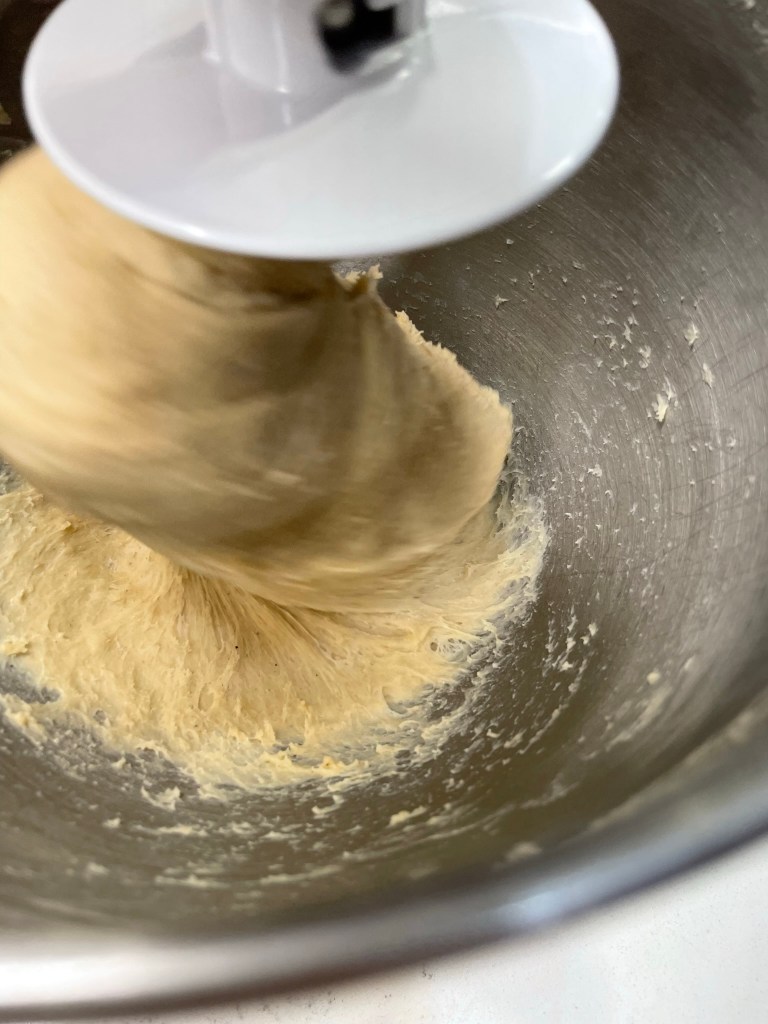
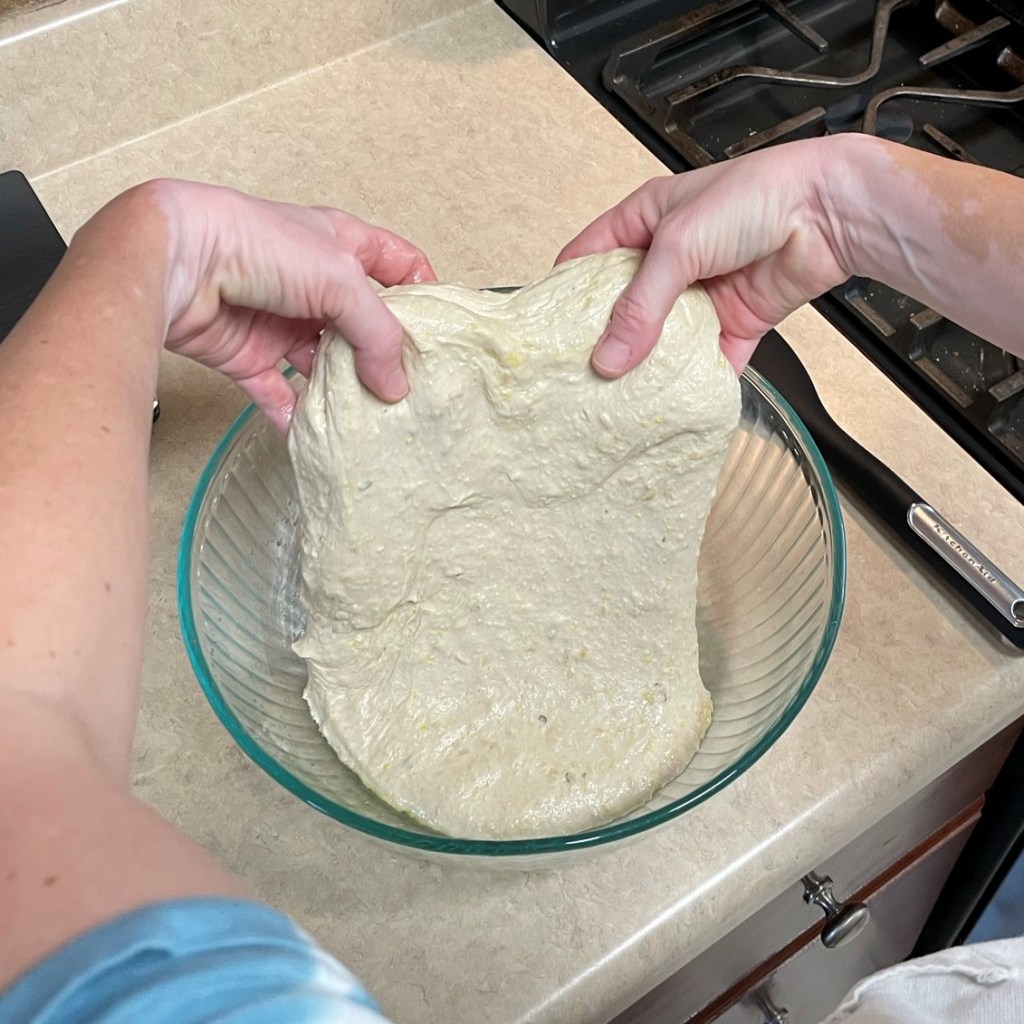
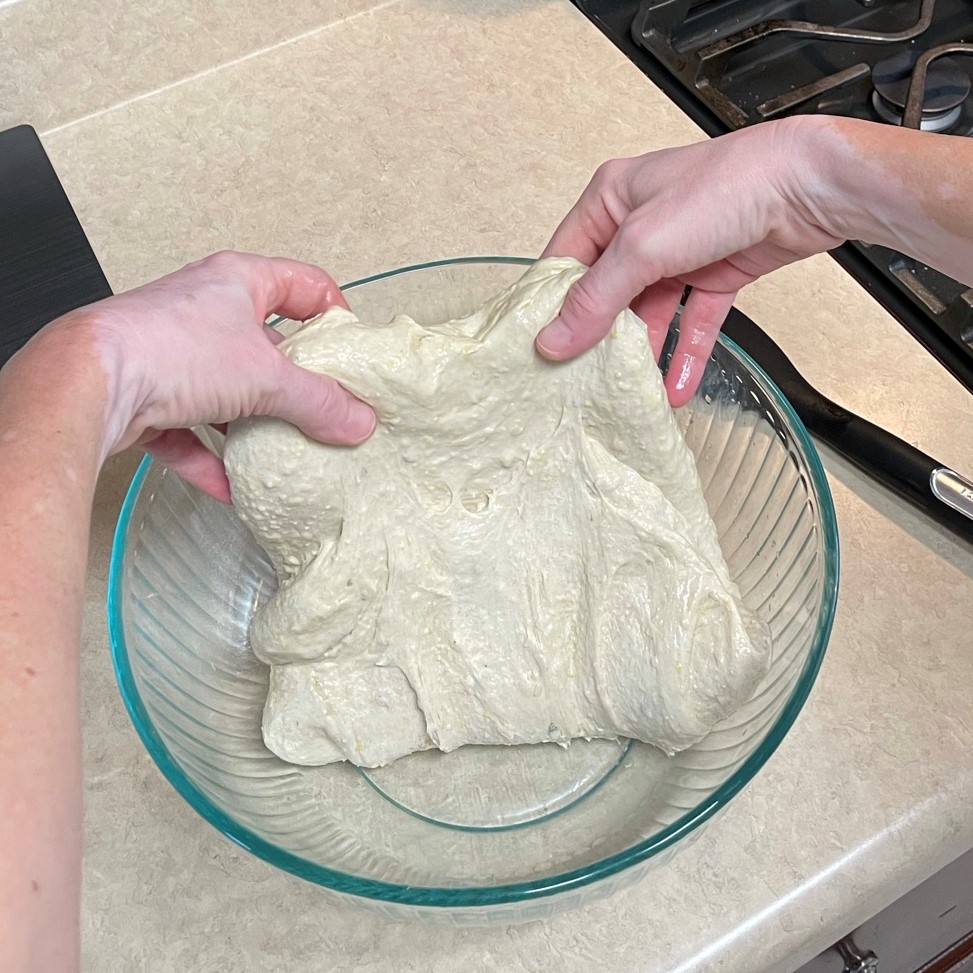
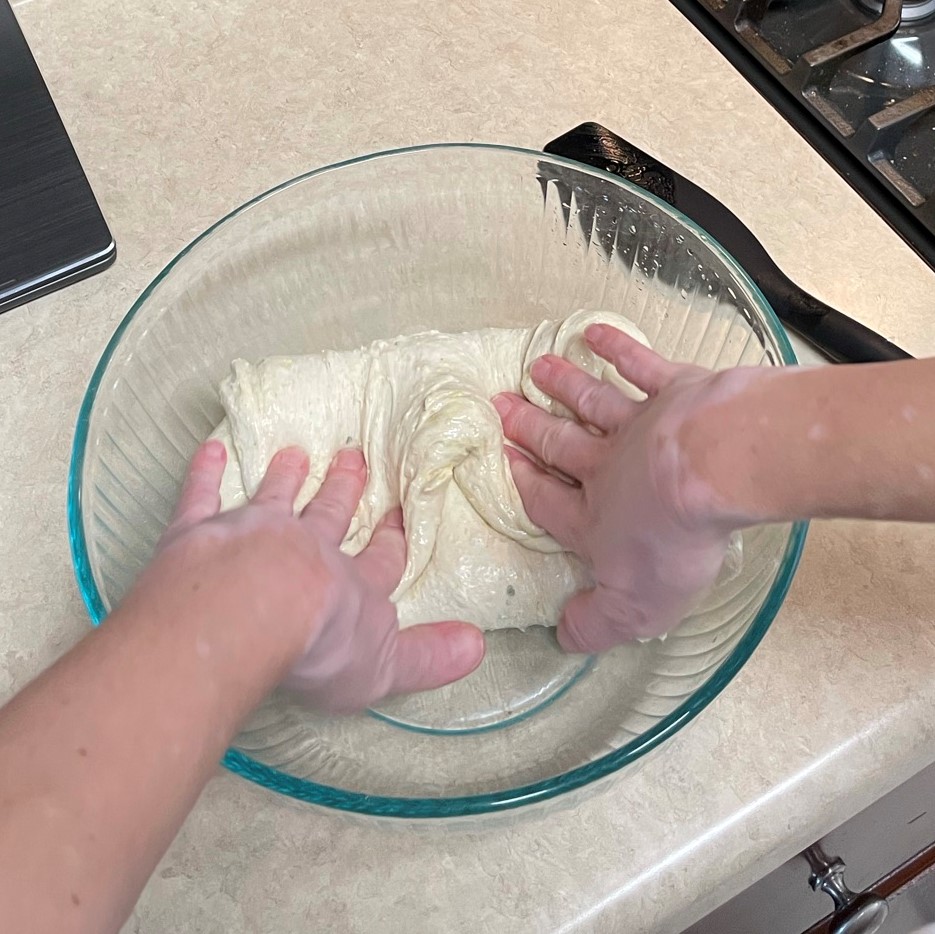
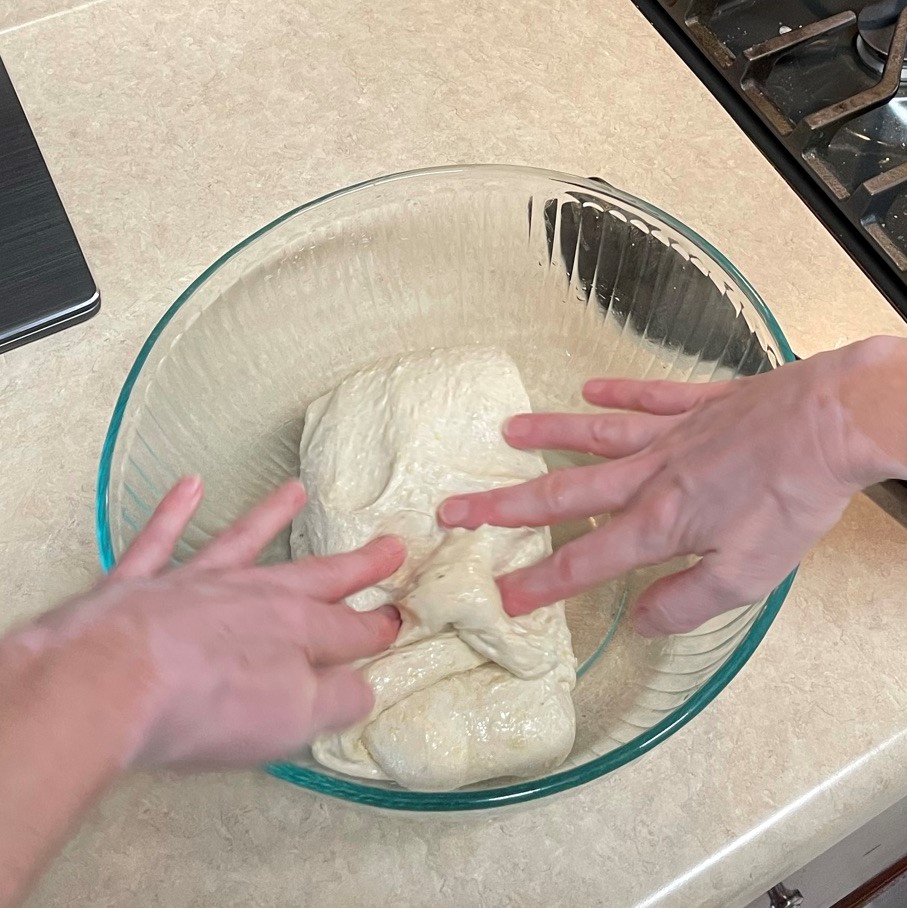
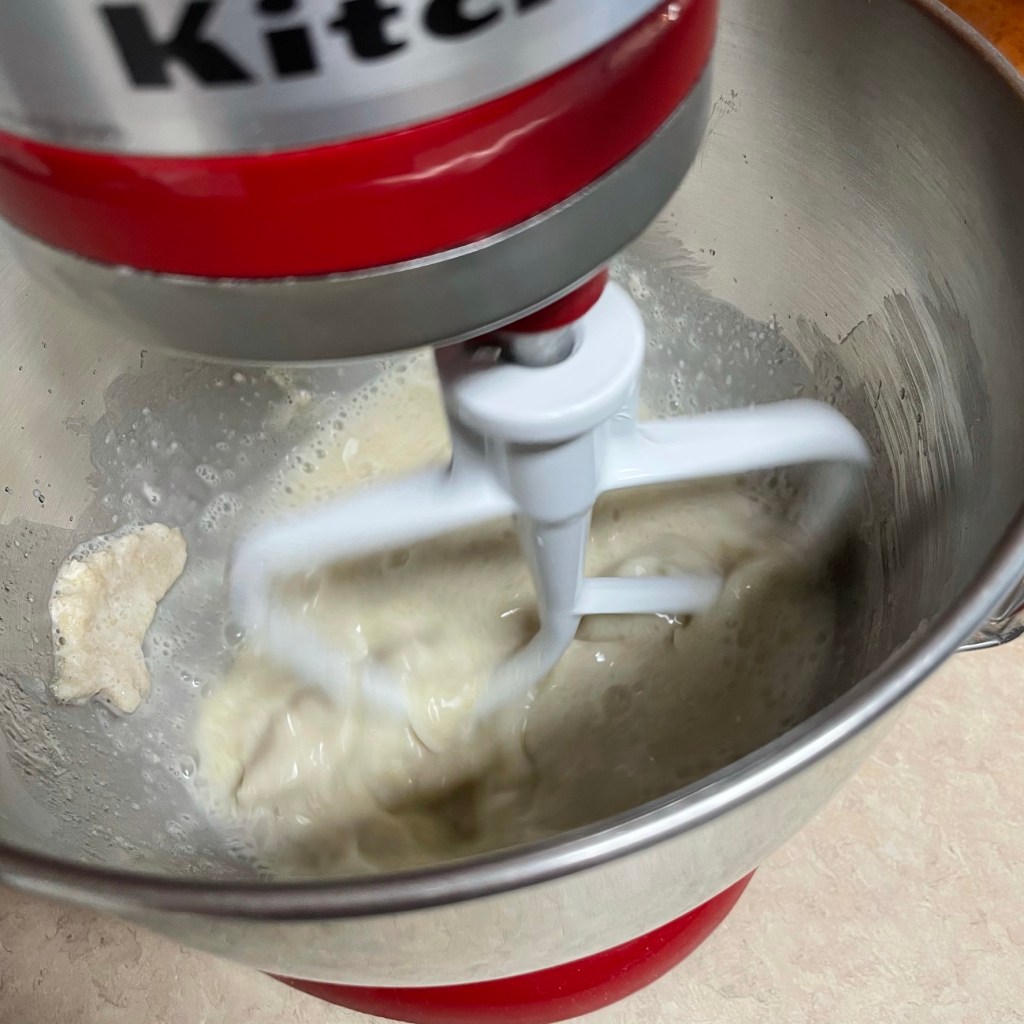
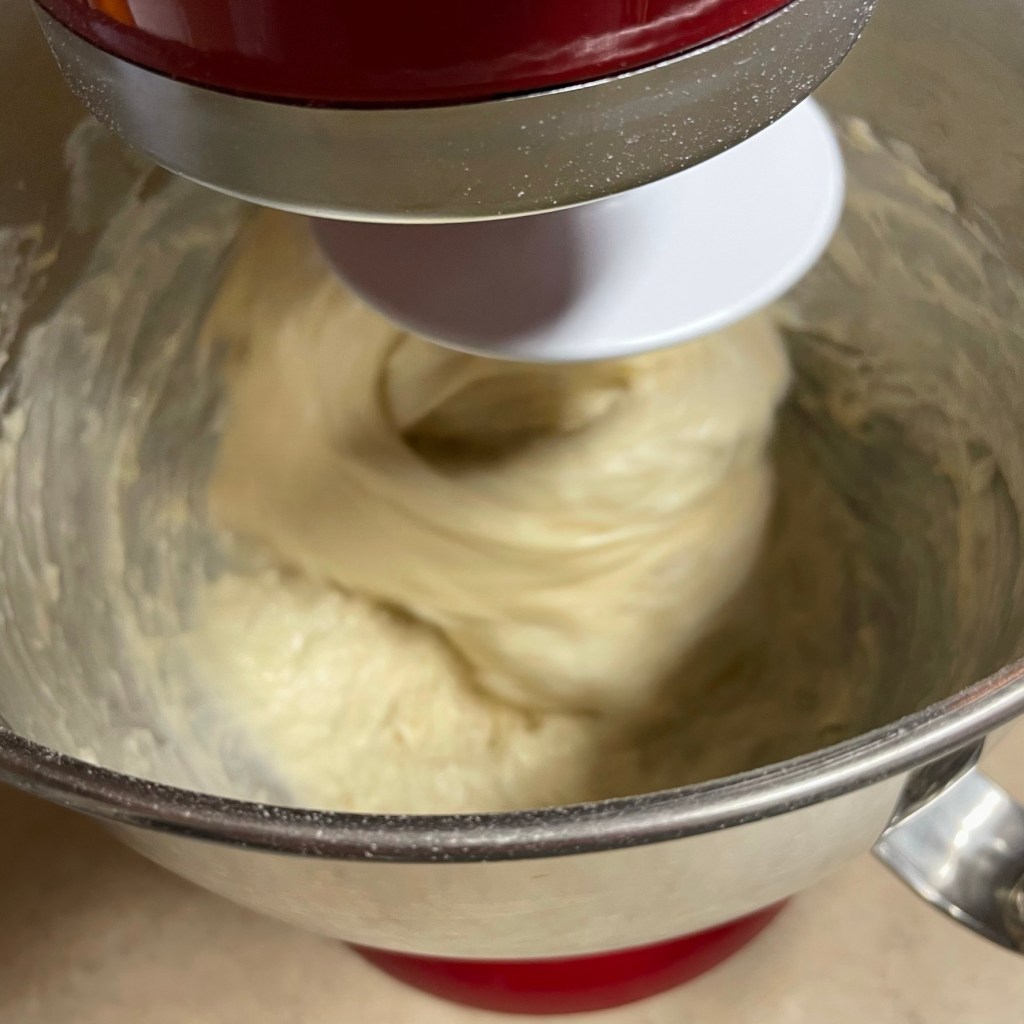
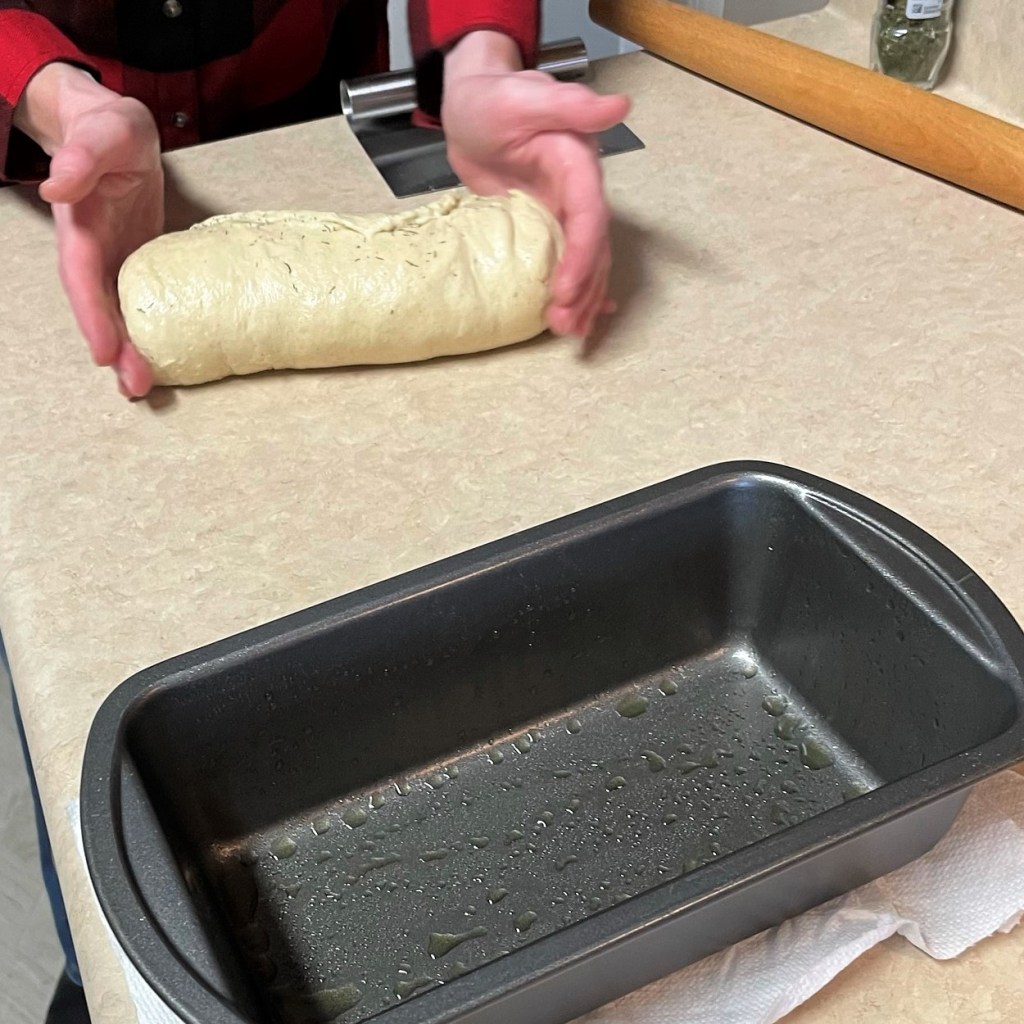
This was such a large volume of dough that I could not mix it completely in my KitchenAid, and that’s part of the reason it took me so long to pursue making bagels. Things get messy with a big batch of dough, and though I used my mixer’s splash guard (for the first time ever), I still needed to roll up my sleeves to finish the kneading by hand. Once I got into the rhythm, I found it almost therapeutic.


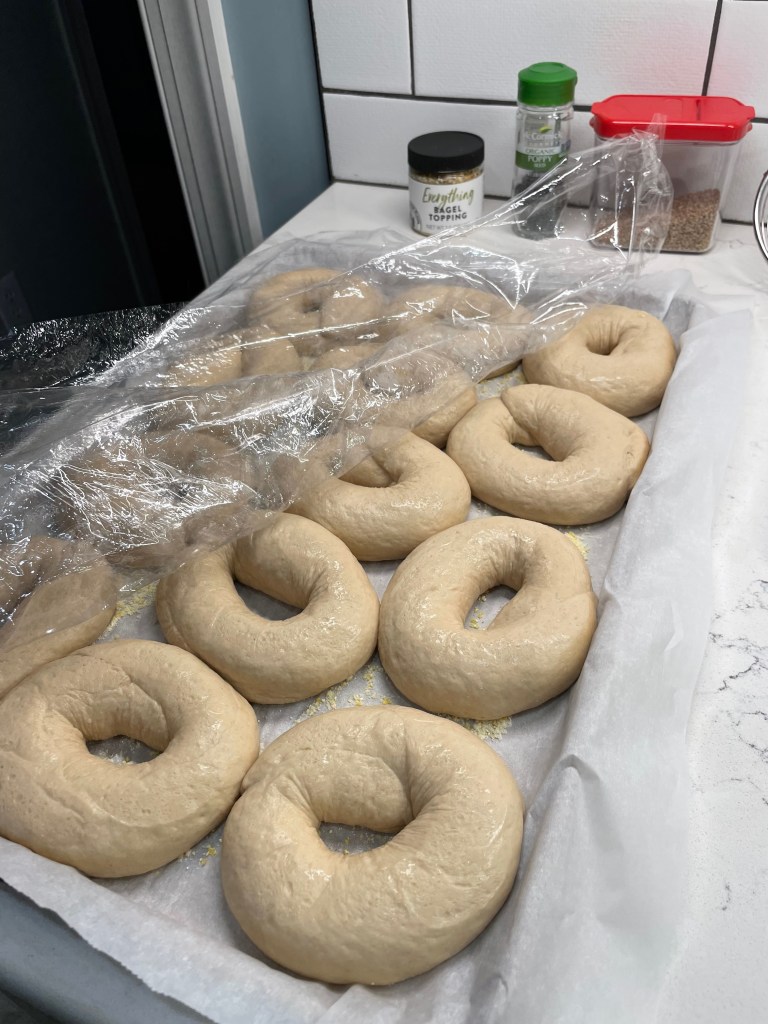
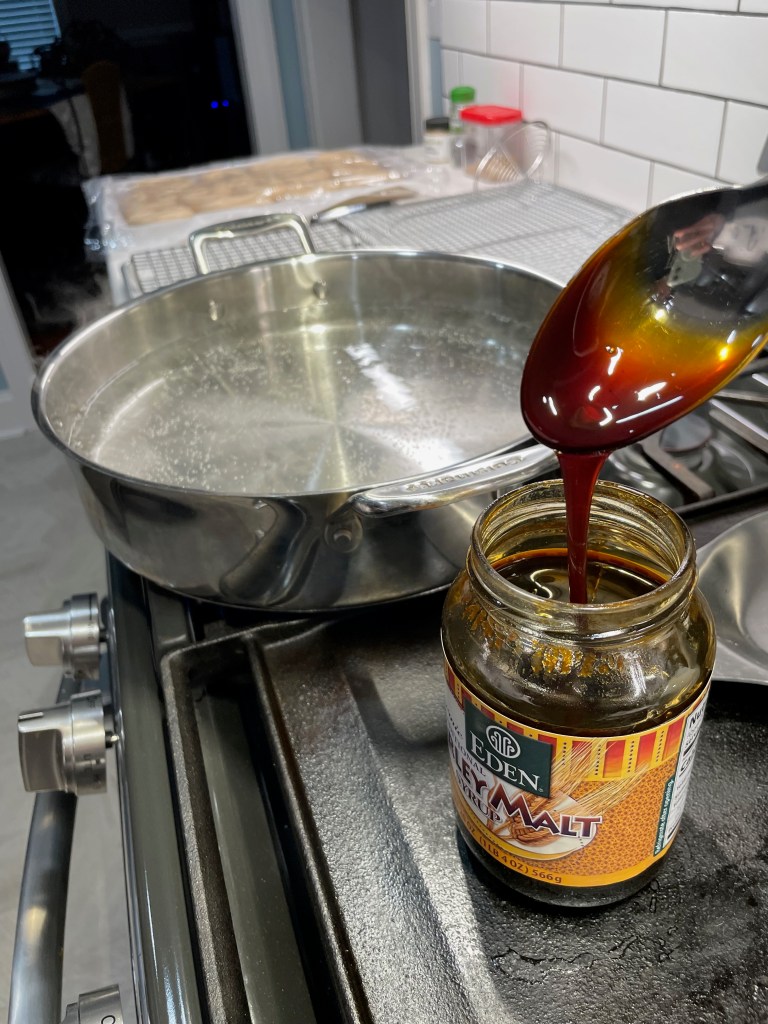
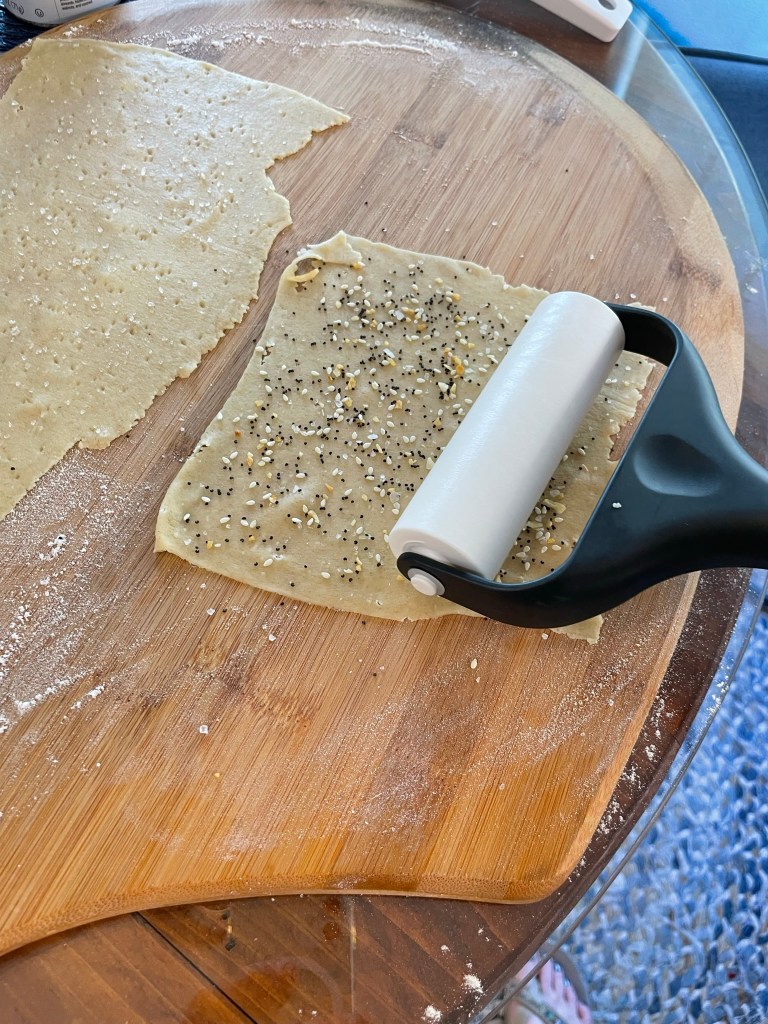
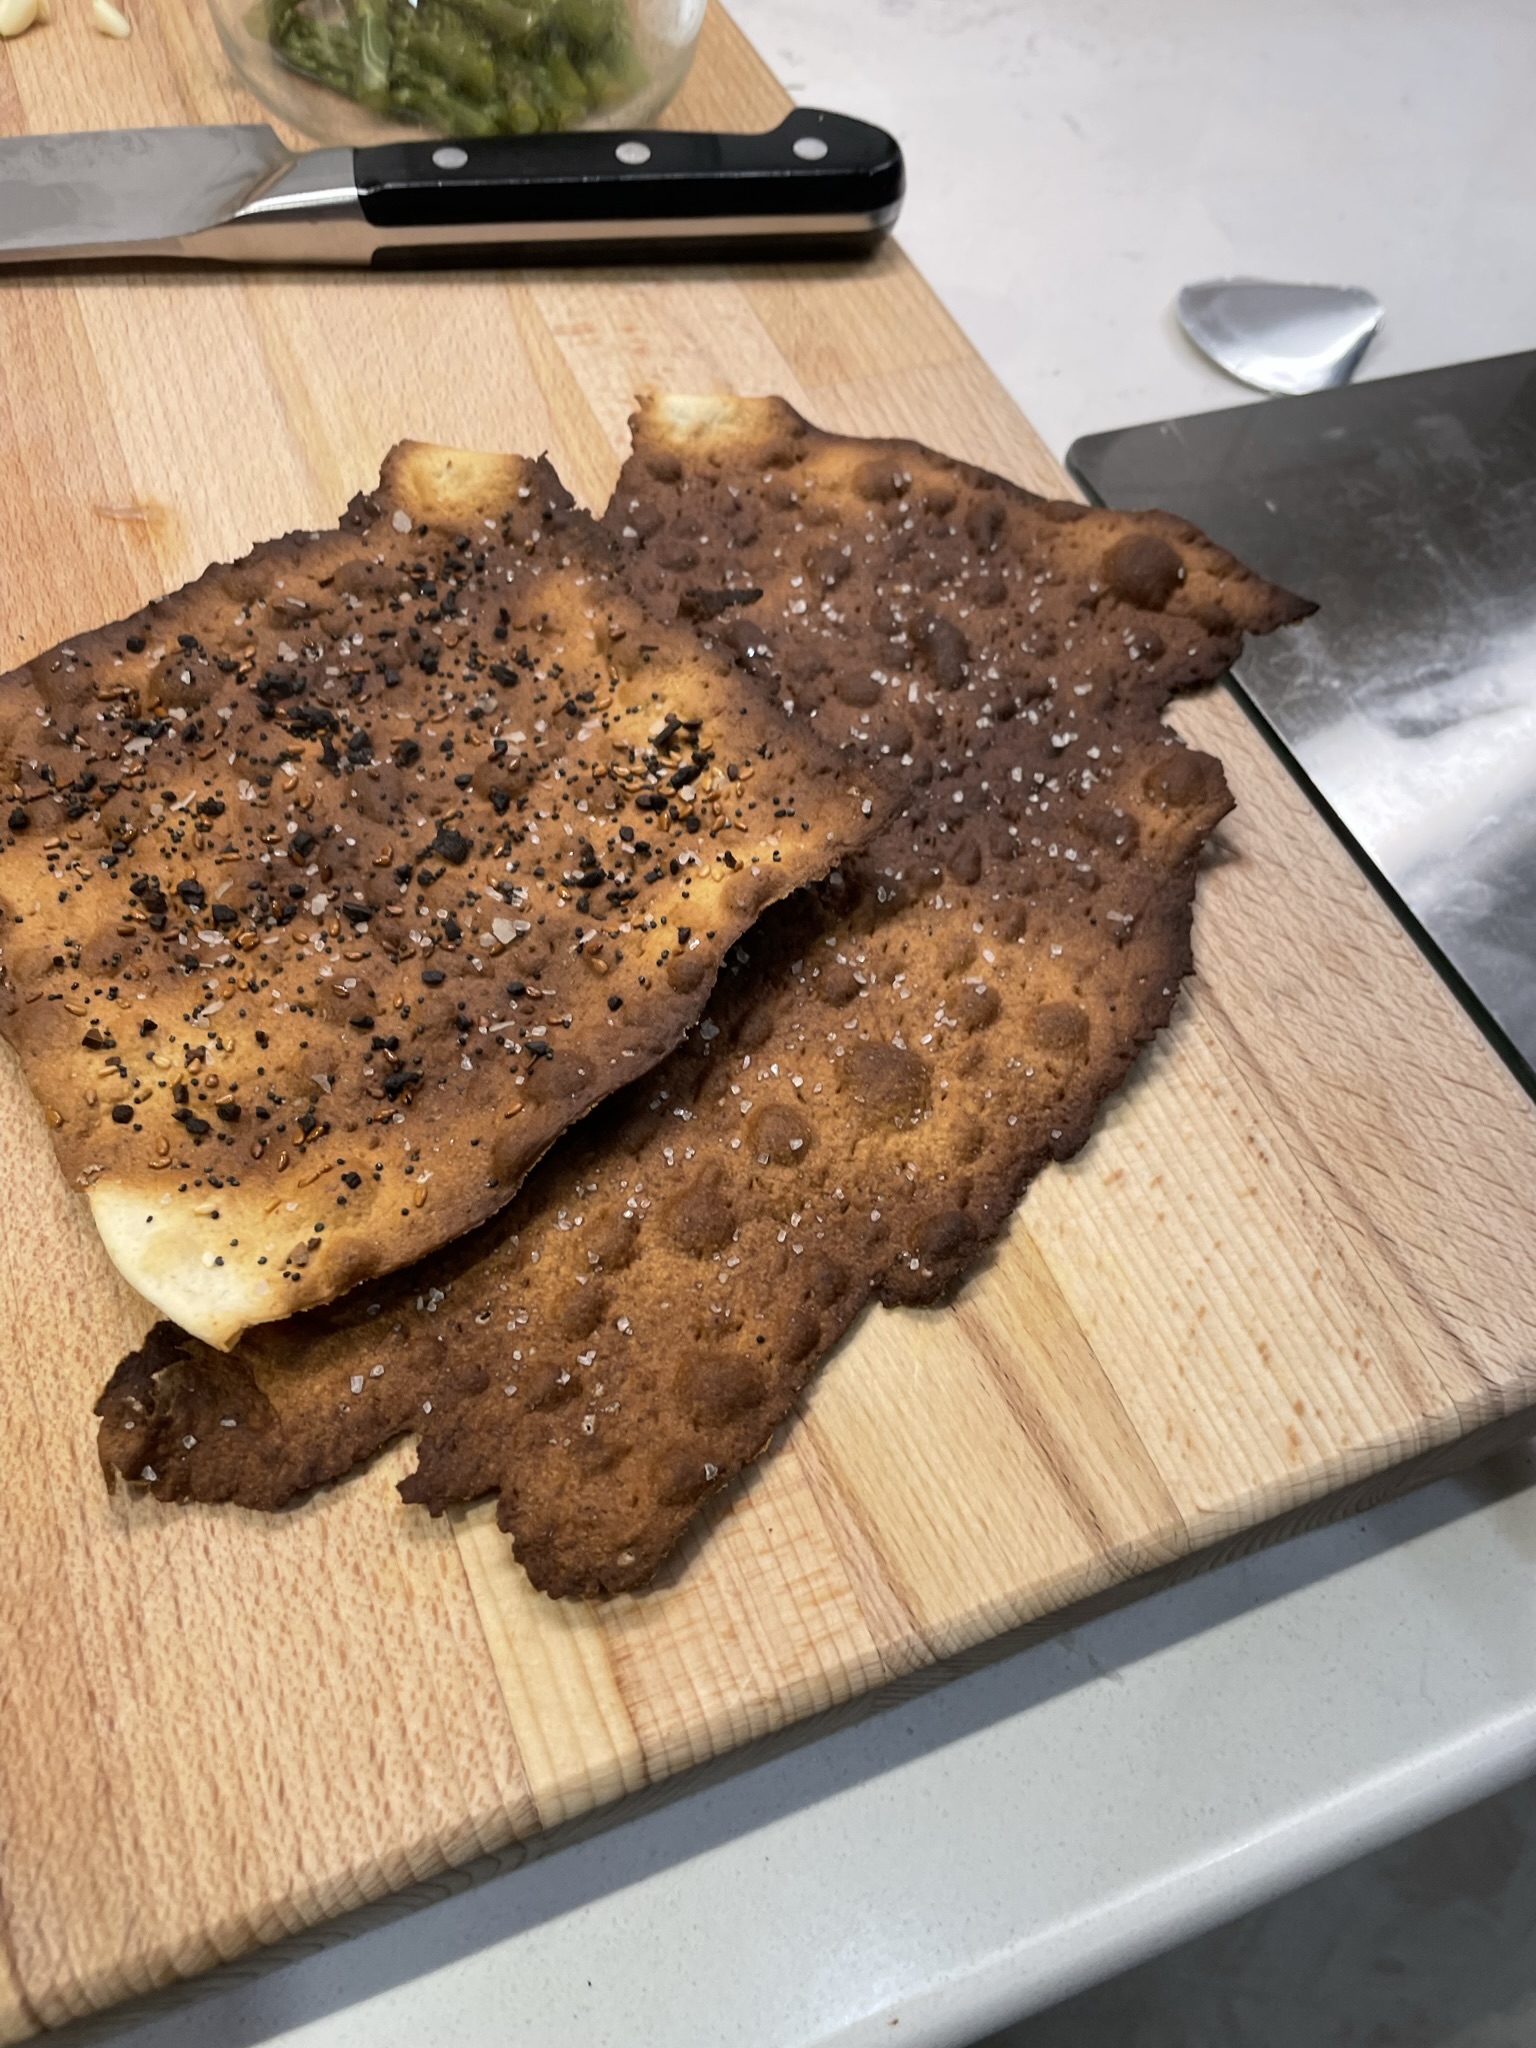
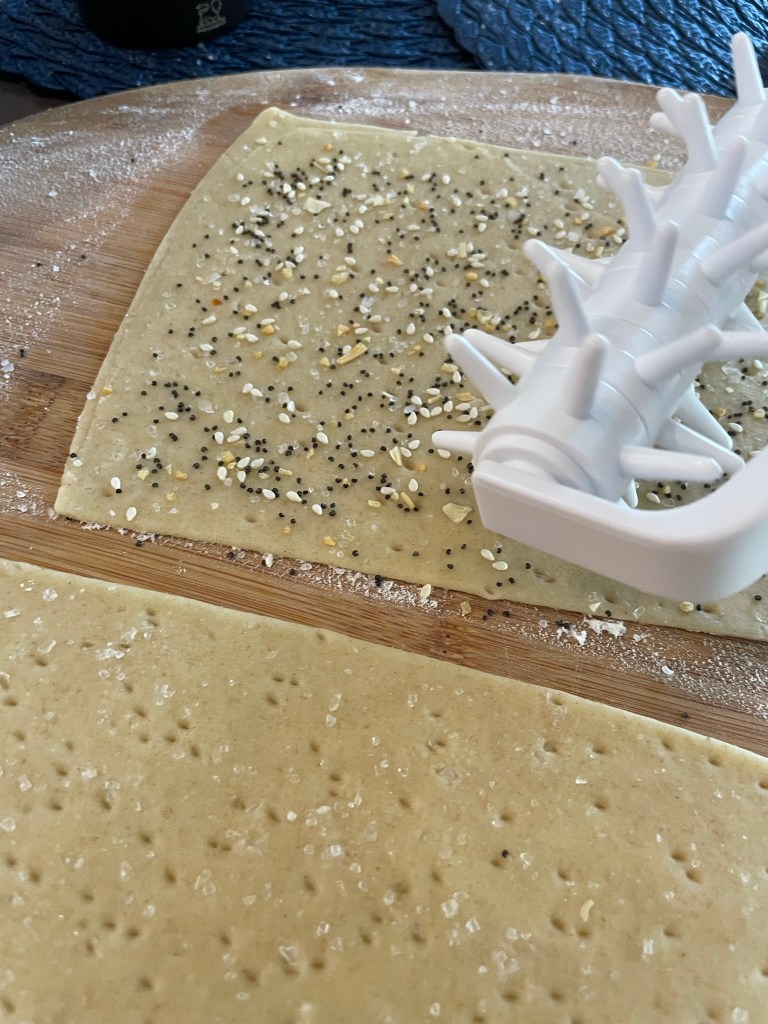
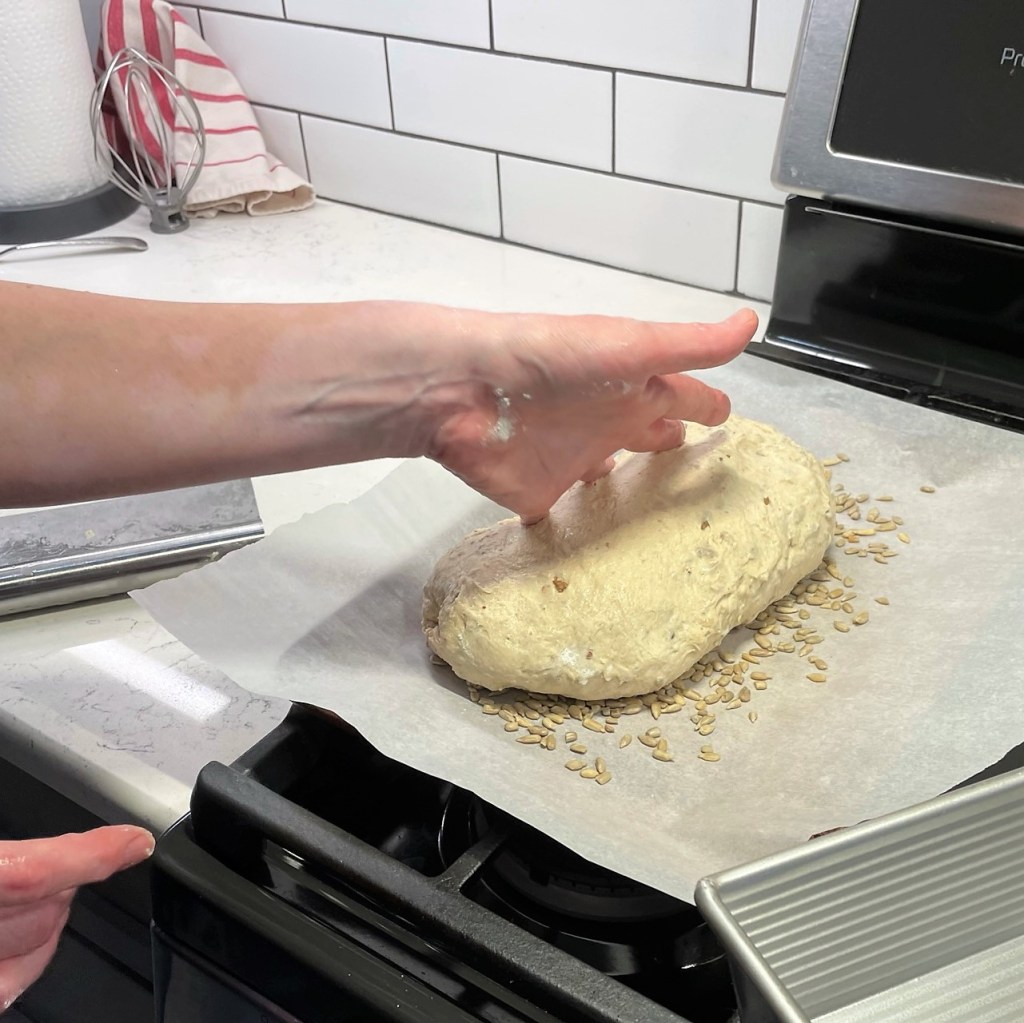
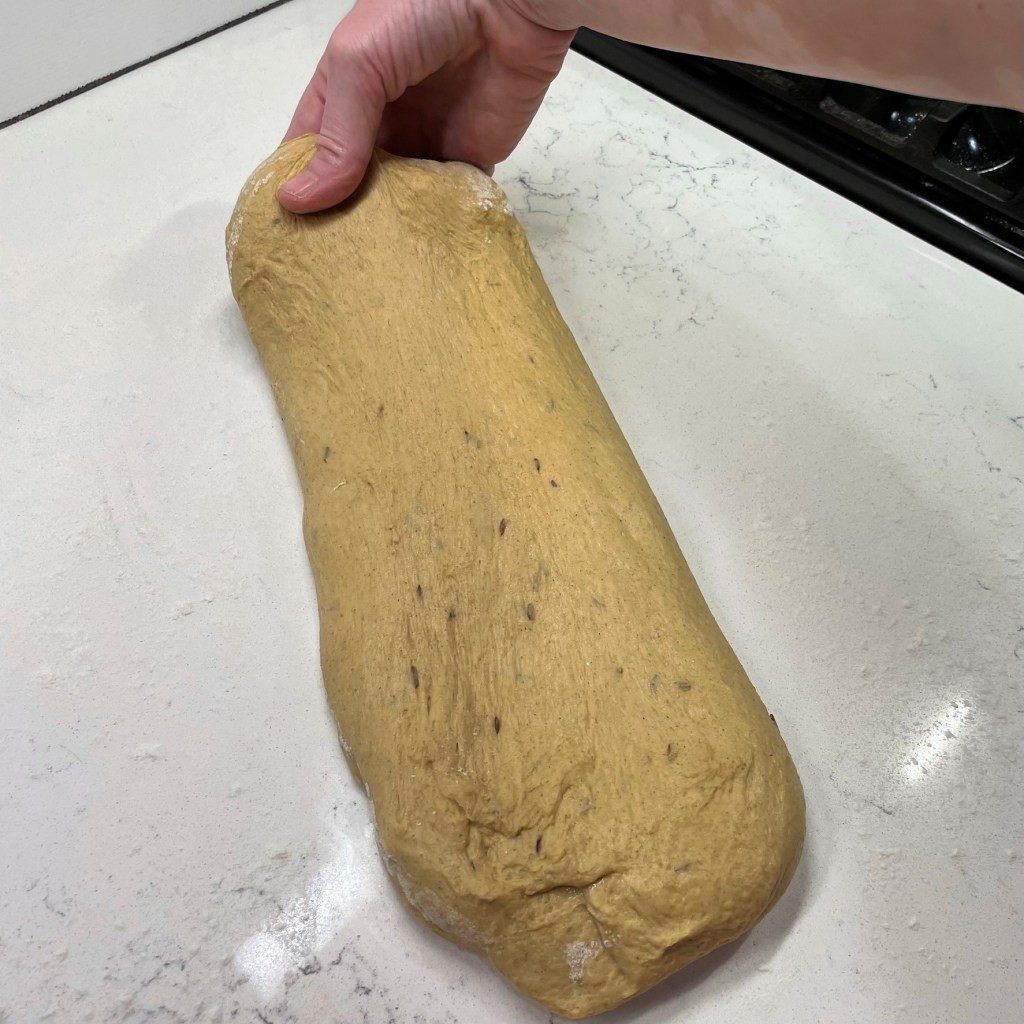
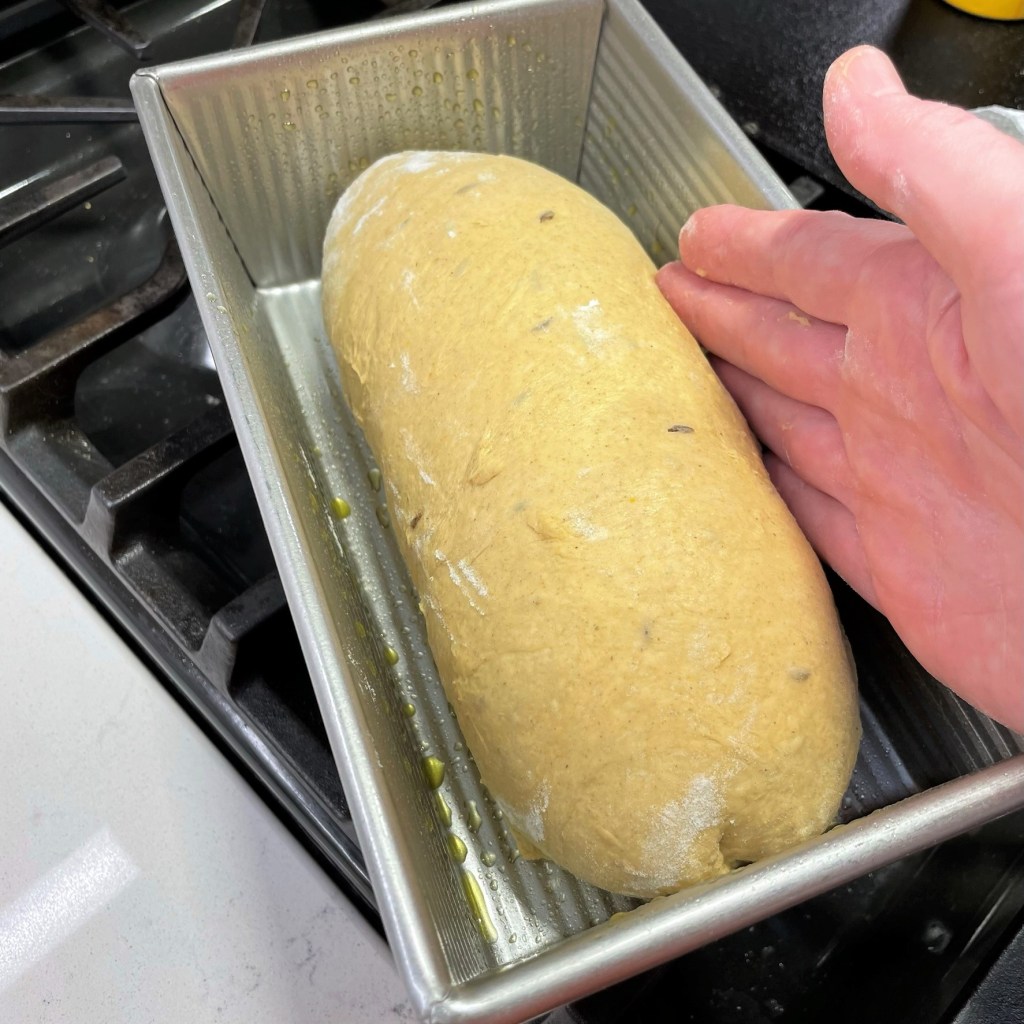
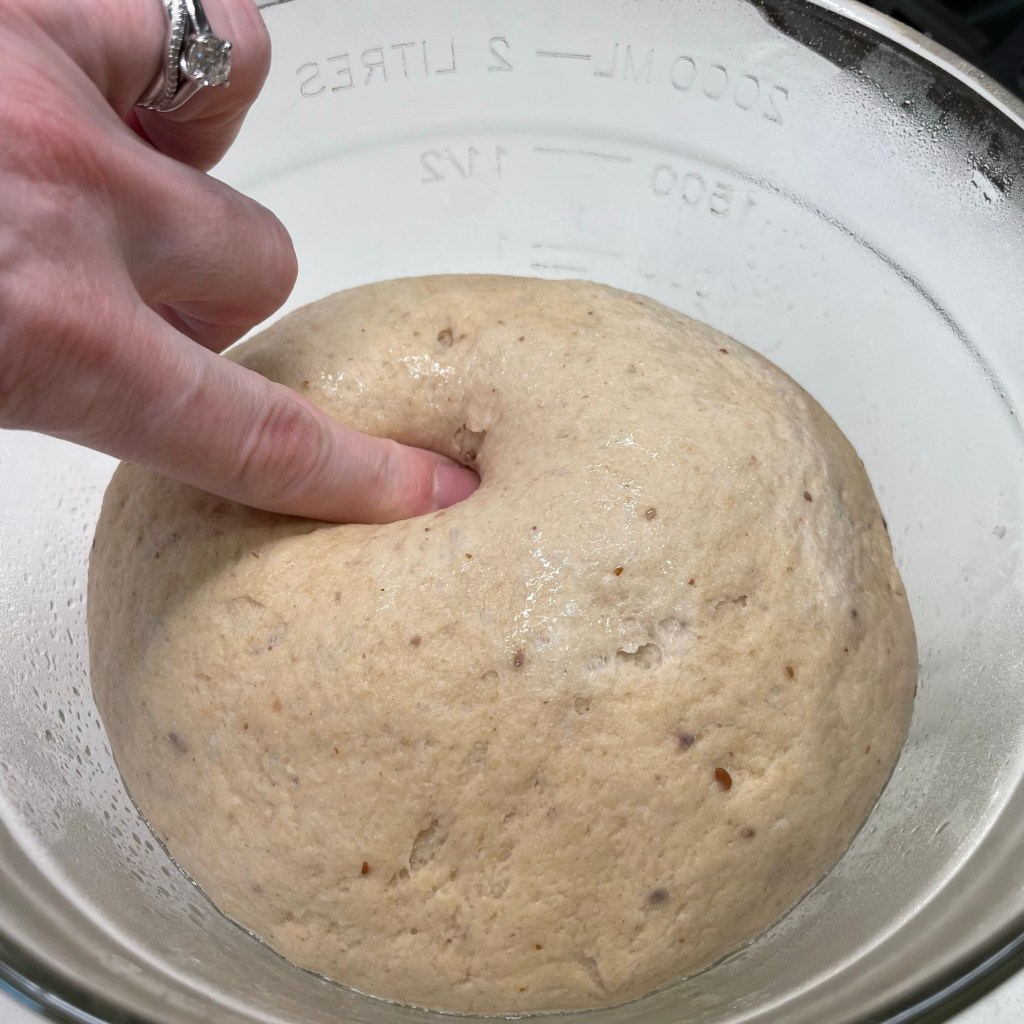
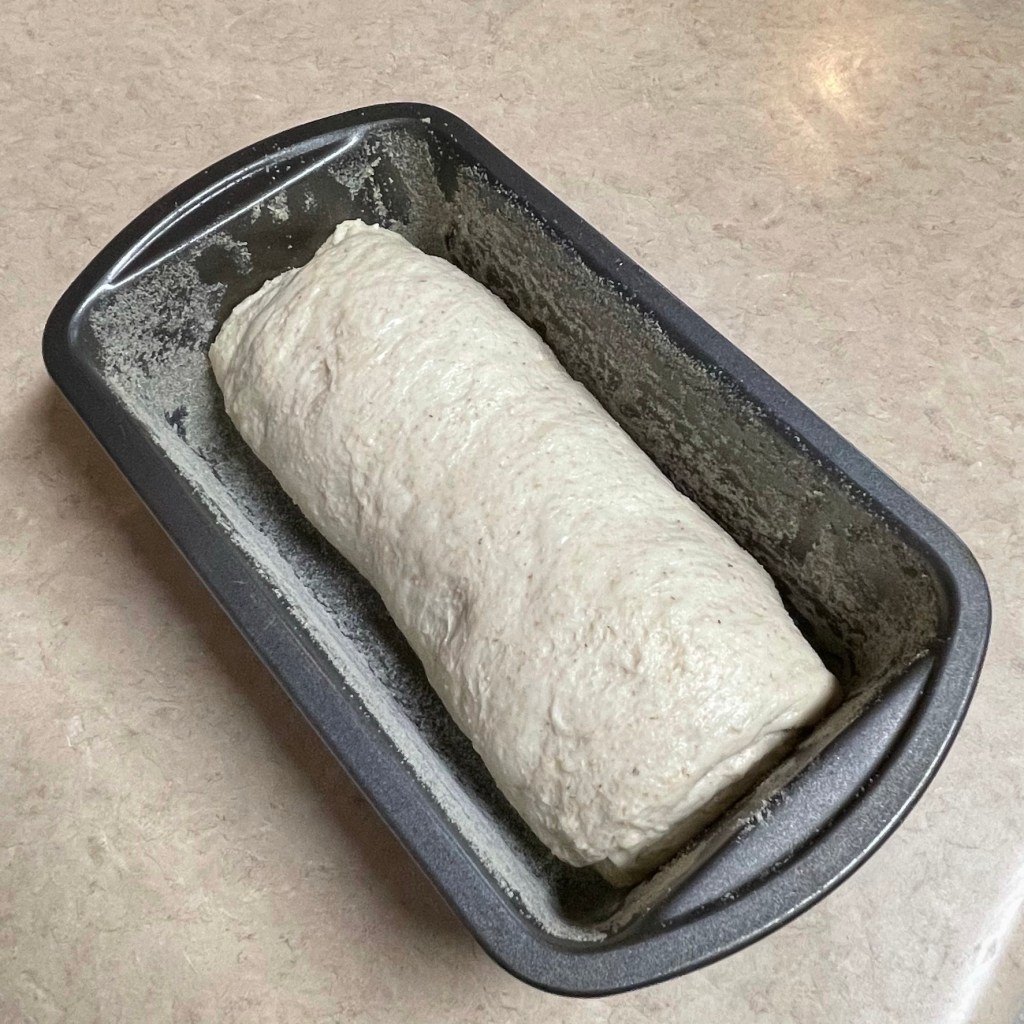
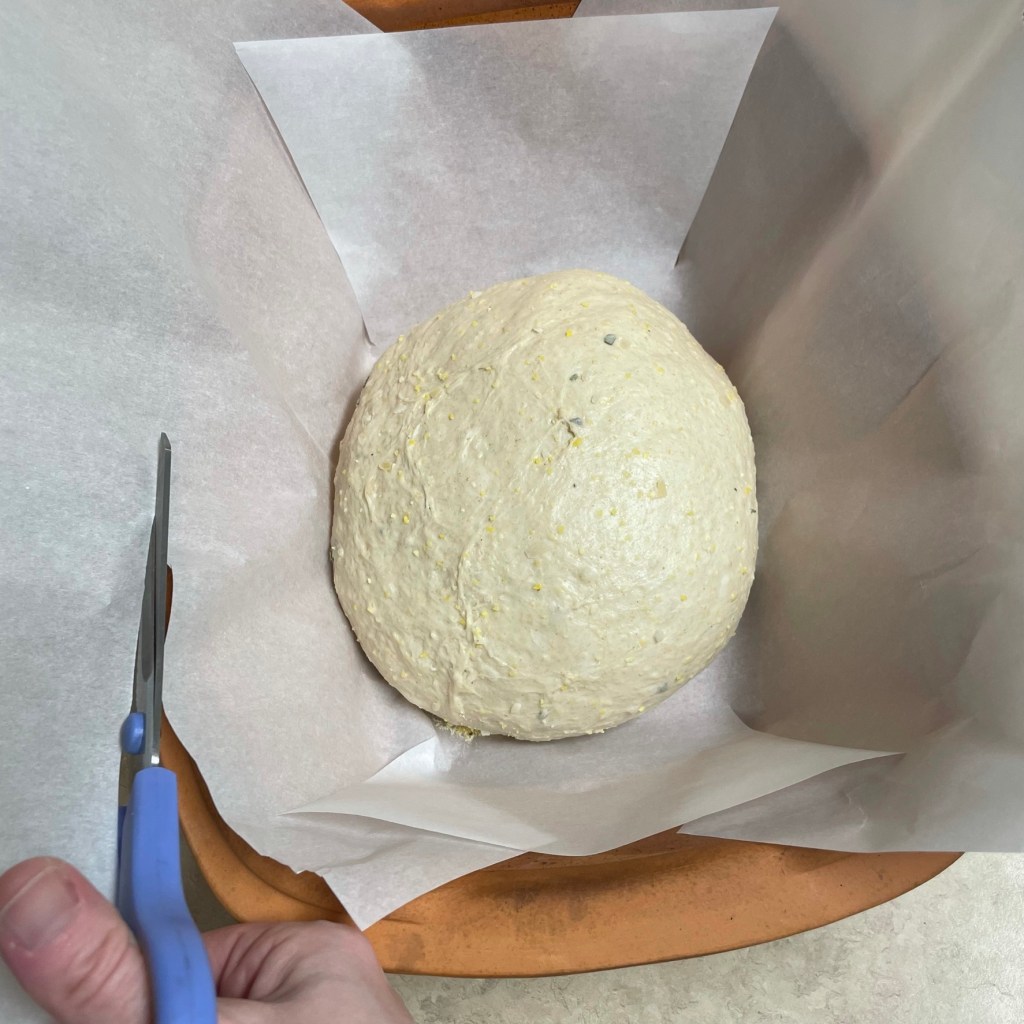
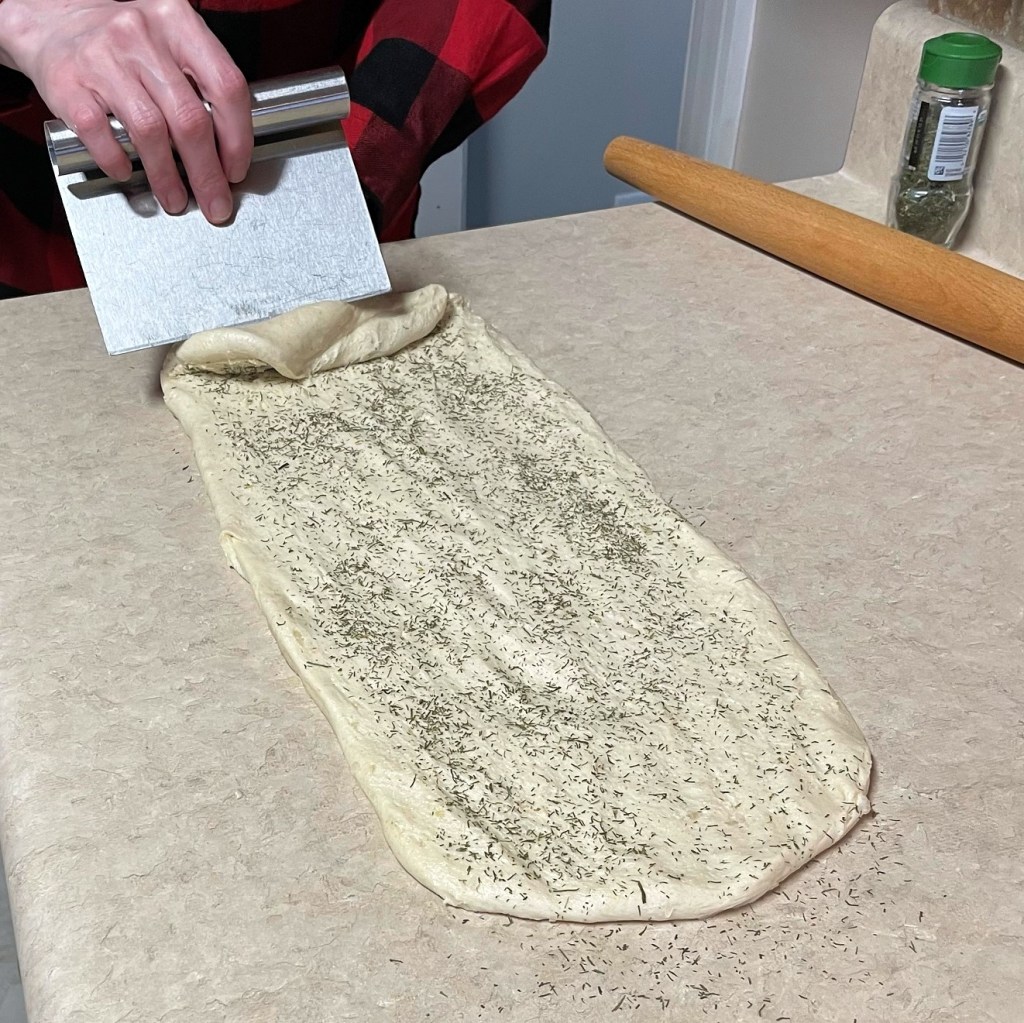
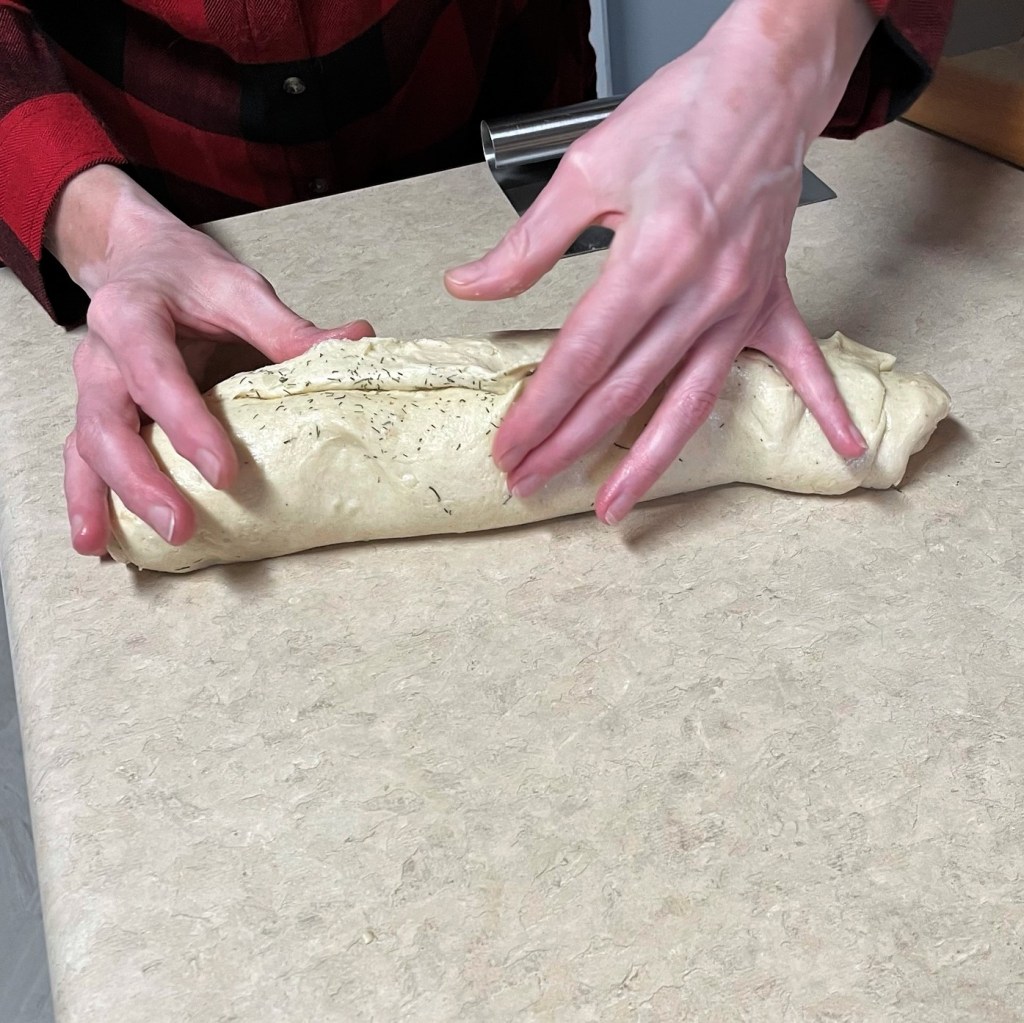
The second principle about temperature applies to the bagel dough after it’s shaped into rings. The bagels rest at room temperature for a couple of hours and then in the refrigerator overnight. That chilling time ensures the best and most flavor in the finished product. There is one other change I made from Maurizio’s recipe, and that was to add a little of the barley malt syrup to the boiling water. It isn’t necessary, but I love the aroma and besides, what else am I going to do with a huge jar of that sticky stuff? Unless I make pretzels. Hmm…

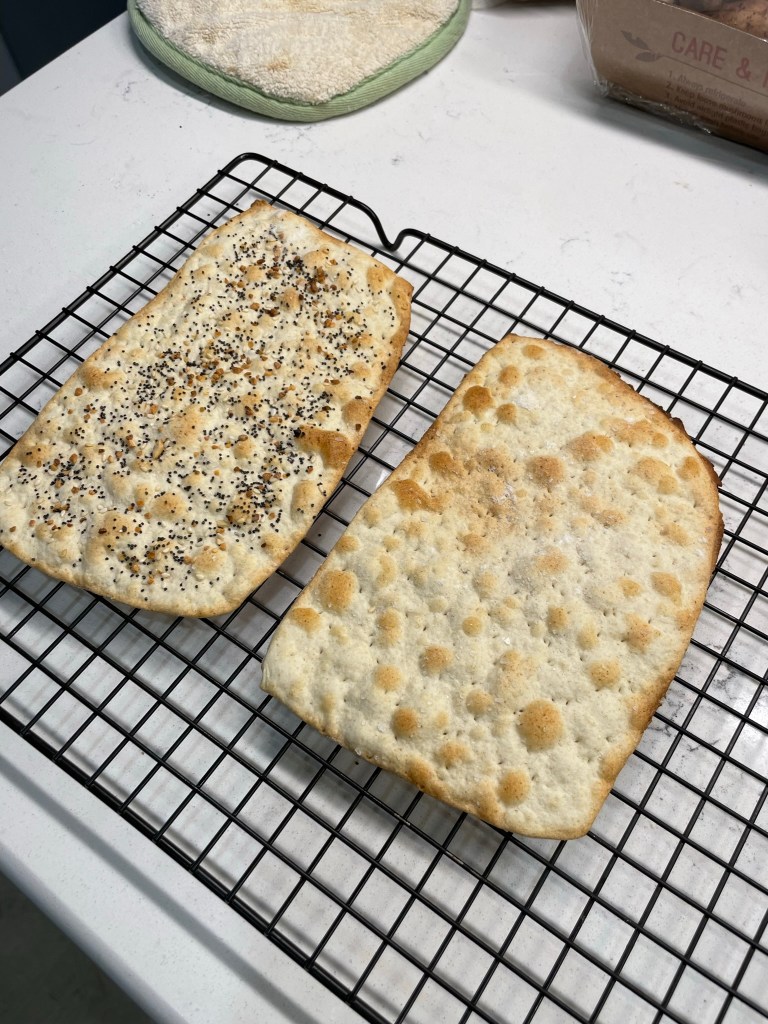
Here’s how the rest of my bagel adventure went, and boy, was it worth the trouble!


Before I forget to mention, our team took first place that night at the temple trivia event! It was a fun time that inspired me to aim for bagel greatness, and Maurizio Leo helped me get there. I may have missed the mark on their history, but for sure, I’ll make room for more of these homemade sourdough bagels in our future!

Way to go, Table 3!

Wanna give it a go? If you’re a sourdough baker, you’re gonna love these. Thanks, Maurizio! 😁


Apple & Honey Babka

Each fall since I began dating my husband, I’ve made a concerted effort to celebrate the season of Rosh Hashanah— the Jewish New Year— by baking a special bread. That first year, Les had visited a local apple festival and brought back a bagful of gorgeous Jonagold apples, which were lovely in a coiled-into-a-round challah. I was so proud of my bread that I took a picture of it— way before I began blogging— and I even took time to leave a review on the King Arthur website to report my great results. 

Not a bad effort in 2015! But my iPhone 5 camera…

The round shape is significant to Rosh Hashanah because it represents the idea of coming full circle into a new year. The apples were a nice touch, because apples and honey make an appearance on everyone’s holiday table— symbolizing the wishes for a sweet year ahead. Most years since that first one, I’ve worked on my challah braiding skills, specifically the four-strand loaf that is woven like a basket. Here are a few examples of those breads, using my sourdough starter.


This year, however, I decided to tackle another item on my culinary bucket list, and I’ve made a babka! This is another traditional Jewish bread, and I’ve wanted to make one for years but never got around to it until now. Most babka recipes I have seen involve a chocolate filling, which is most dramatic looking in the typical swirly pattern. I pondered, what about a babka that had apples and honey? That would be perfect for Rosh Hashanah, and a double win in that it finally moves babka to the “done” column. 

I didn’t have to look very far for an inspiration recipe, because the first place I looked was King Arthur Baking. Of course!

The layers of apple, spices and pecan make this extra special!

I’ve been a big fan of King Arthur products for years (and no, they never have paid me to say so), and my devotion to them is stronger than ever since my trip to their Vermont baking school, where I am proud to have completed their four-day “Principles & Practice” baking course. I learned a good many things during my time there, and made friends with several of my classmates. Among the takeaway lessons was the importance of using high-quality ingredients (i.e., theirs) and having them organized and properly measured before you begin mixing. That’s how I set up for this recipe, and I swapped in honey for the sugar, following the same helpful tips I used last month when I made my s’mores cupcakes.

Baking is much easier when I’m organized!

My main dry ingredients were measured by weight, which is something I was already doing before my King Arthur class, and all of our instructors during the four days emphasized the benefit of this. I cannot remember the last time I measured by volume, but there is a sensible way to do it for consistent results. They call it the fluff, sprinkle, level method, and it helps ensure that you don’t have dense results in your baked goods. If you are reluctant to get a kitchen scale, I highly recommend following that three-step method; otherwise, you may find your baked goods dense from being flour-heavy. 

The process of the apple babka recipe was straightforward. I introduced the wet ingredients to the dry ones, then switched to the kneading hook and worked in the softened butter. This recipe would not be suitable for a meal that also includes meat— kosher rules require that meat and dairy not be served together— but it would be wonderful served with breakfast or dessert on another occasion. The dough rested about two hours until it was doubled and puffy.


The filling was easy as well— brown sugar, cinnamon, cardamom and grated apple. Honeycrisp seemed appropriate for the occasion of Rosh Hashanah. Next came the rolling up and cutting, and I think this part would have been easier if this dough had been chilled, as the filling was very wet and loose. It was not difficult, but very messy, and not as pretty as I wanted it to be. I shaped the braided babka into a round, like a wreath, and covered it to proof for baking.


One of the other lessons in the King Arthur class was the simple way to determine whether your dough has proofed sufficiently for baking. If you poke the dough with a floured fingertip and the indent remains, it’s ready. If it bounces back, it needs more time. This one was ready!


Time for an egg wash and bake, and we are ready for Rosh Hashanah! Of course, you don’t have to be Jewish to enjoy the lovely flavors. The apple, honey and spices make it perfectly appropriate through the rest of the year.

Shana Tova!

Link here for the inspiration recipe: https://www.kingarthurbaking.com/recipes/apple-pie-babka-recipe

I made a few slight adjustments:

  • subbed in a portion of white whole wheat for all-purpose flour
  • replaced dough sugar with honey, but 2/3 as much as honey is sweeter
  • slight reduction of water, about 2 tablespoons (because honey is also liquid)
  • replaced boiled cider with apple balsamic (but I could have omitted it)
  • replaced instant clear gel with a pie filling thickener (but all-purpose flour would have worked, too)
  • allowed a few extra minutes on the bake to ensure the dough in the center of the wreath was done


Homemade Matzo

First things first, this matzo is not kosher for Passover, and honestly not even kosher at all. I know this because, for starters, I am not Jewish and I don’t keep a kosher kitchen. After that, there are probably at least a dozen other reasons that my matzo is not kosher, but none of that is important right now because I have big news.

Passover starts on Wednesday, and I have finally done my DIY matzo challenge, moving it to the done column of my culinary bucket list. To me, this is worth celebrating!

Matzo!

When I first met my now-husband, Les, I had a lot of questions about his Jewish heritage and especially the foods. Though Les has never kept the dietary kosher rules, he does avoid leavened bread during the eight days of Passover. That first year we were together, he shared some of his matzo with me and, well, what can I say— blah. The standard boxed matzo— unleavened bread— is like the worst, most bland, boring cracker you can imagine. But, you know, tradition!


The Jewish tradition around matzo is a remembrance of the enslaved Hebrew people, who had a moment’s notice to pack for the Promised Land when Moses was called to lead them out of Egypt. They didn’t have time to make their usual bread, so they mixed the flour and water, rolled it out and baked it on the spot without fermentation or leavening. By kosher rules, it all has to happen in under 18 minutes, start to finish. No wonder it tastes so bland— and does such a negative number on the digestive system (it ain’t pretty).

But Les chokes down this dry stuff every Passover, subbing it in for his usual morning half bagel, using it as a canvas for his tuna salad, and sometimes just laying a schmear of butter on it as a snack. Anything to use up the box! I’ve been threatening for at least five years to make matzo from scratch, and between the internet and my Jewish recipe books, I had done a lot of research. I was confident about getting it done, so I set up my matzo-making station with all my ingredients, tools and even my iPad to keep me on track for the 18-minute limit. How hard could it be? Turns out, I still had a lot to learn, and no “Bubbie” (Jewish grandmother) to walk me through it.

I had things set up and ready, hoping to beat the 18-minute buzzer!

Making matzo is a full 180 from my usual sourdough bread baking, which relies on long, slow fermentations and higher hydration doughs. My breads bake up light and airy, not flat and dry. Matzo is nothing but flour and water in its most traditional state (in other words, boring). But we have already established that my version would not be kosher, and I wanted to bend the rules a little further, adding a sprinkle of sea salt and maybe even some everything bagel seasoning to jazz it up a bit.

I found a recipe on NYT Cooking that included salt for flavor, olive oil to make the dough more workable and a swap-in of some whole wheat flour, so I was on board for the ingredients, but I ditched the rest of the recipe. It called for rolling out the matzo dough with a rolling pin (a challenge with such a hard dough) and would have produced four dense, tortilla-like flatbreads— nothing like the thin sheets of matzo we usually pick up from the store. I set up my trusty pasta machine to roll the dough out thin, like the matzo we are used to, and kept a close eye on the oven because they baked quickly on my preheated baking stone— so quickly, in fact, that my first batch was burnt to a crisp. I was not deterred!


Oy vey, that didn’t go well!

Moving forward, I rolled the dough a little bit thicker and called out to Les to find out which Yiddish word for “crazy” was appropriate for my situation (it’s meshuggeneh). I put him in charge of the oven, and the subsequent batches turned out great. We ended up with enough matzo to fill a large Rubbermaid container, and, of course, we still have a box of the grocery store matzo, just in case. 🙂


My matzo challenge is complete, and I will probably change things up a bit next time— less salt on top for sure, and I might play around with different types of flour.

Eighteen minutes is a tough time goal, though, and probably best accomplished in a kosher kitchen full of Jewish bubbies who actually know what they’re doing. I gave up on beating the buzzer when I was pulling the burnt ones from the oven.


Homemade Matzo

  • Servings: About 15 pieces
  • Difficulty: Intermediate
  • Print

With Passover right around the corner, I'm finally able to move homemade matzo into the 'done' column of my culinary bucket list!


Ingredients

  • 1 3/4 cups (about 235 g) unbleached, all-purpose flour
  • 1/2 cup (about 50 g) white whole wheat flour
  • 3/4 tsp. kosher salt
  • 1/2 cup (113g) lukewarm water
  • 1/4 cup (60 ml) extra virgin olive oil
  • Flaky sea salt and everything bagel seasoning, optional

This dough is very stiff and requires a heavy hand for rolling. If you have one, set up a pasta rolling machine, as it makes the process much quicker. I rolled my dough to the thinness of the second-to-thinnest setting, and baking time was 4 minutes. For thicker dough, adjust baking time accordingly.

Directions

  1. Preheat oven and baking stone at 500F for at least 30 minutes from the time it reaches temperature. Prepare a pizza peel or back of a baking sheet by dusting lightly wtih flour. This will be an aid for easy transfer of the matzo dough into and out of the oven.
  2. Combine flours and salt in a large bowl. Add warm water and olive oil all at once and stir with a wooden spoon until the mixture resembles a shaggy dough.
  3. Turn dough out on to a counter and knead by hand for a few minutes until all dry ingredients are incorporated. Use a knife or bench scraper to divide dough into four equal quarters. Use plastic wrap to cover three of the dough sections.
  4. Use your hand or a rolling pin to flatten the first dough section into a disc. Cut the disc into two pieces and flatten each into an even thinner disc. Run the dough through a pasta roller, reducing the thickness after each pass until you get to the second-to-last notch on the machine. You will need to cut the dough in half at some point, as smaller pieces are easier to work with.
  5. Arrange two pieces of matzo dough on the pizza peel or reversed cookie sheet. Sprinkle each with sea salt or everything bagel seasoning and lightly roll with a rolling pin to adhere the seasonings. Prick each piece of dough all over with a fork.
  6. Slide matzo onto the preheated baking stone and bake for 3 to 4 minutes (watch the clock closely). Matzo is ready when it has air bubbles and is lightly golden brown all over. Use tongs to pull the baked matzo from the oven. Cool on a baking rack. Repeat with remaining dough.

When matzo is completely cooled, stack the sheets in a sealable container or zip-top bag and store on the counter for up to a week (if it lasts that long).


Sunflower & Honey Sandwich Bread 🌻

My heart has ached this week, at the approach of today’s one-year anniversary of Russia’s unprovoked attack on Ukraine. The people of that nation have stunned the world with their incredible resilience and dedication to their country. Many brave men, women and families have refused to leave in the wake of hostile invasion and are living under constant threat amid air raid sirens, bombings and widespread power outages. They are truly an inspiration.

The older I get, the more grateful I am to have never experienced true hardship or food insecurity, and when stories like the ones emerging from Ukraine are presented, I want to do something, anything, to help. It isn’t possible, of course, for me to make a huge meal to help people on the other side of the world, but I am proud to support an organization that puts itself on the front line to do exactly that.

In a few days, my husband and I will be in attendance for a lecture by Chef José Andrés, the founder of World Central Kitchen, a non-profit organization that has spent the last year bringing much needed food and comfort to war-torn Ukraine, as well as other regions stricken by climate disaster and other catastrophic situations— usually, it even juggles multiple relief efforts at once (see a sampling of their current work here). That’s how strong they are!

The decision to support a relief organization is personal, and if you’re like me, you do some homework to be sure your money is being used responsibly. I am extremely impressed by the integrity of World Central Kitchen, which has earned an A+ rating from charitywatch.org, and meets or exceeds all its requirements for governance and transparency. The organization is powered by thousands of volunteers, professional and amateur, and they are able to activate and mobilize very quickly when a crisis occurs. Yesterday, I also registered to be a volunteer; if a crisis occurs near me, I’m already signed up and ready to go. Giving and volunteering is easy to do on the WCK website.

I cannot make enough bread in my kitchen to feed the people of Ukraine, but I have great confidence in knowing that my tax-deductible contributions to World Central Kitchen are used wisely and effectively to care for the people whose hardships weigh heavily on me. If you also wish you could do something to help, I hope you’ll consider partnering with this exceptional effort. 


If I could make enough bread to make a difference, I’d make a million loaves of this one, mostly because it’s a hearty and nutritious whole grain loaf, but also because it is sweetened with honey and embellished inside and out with sunflower seeds. The beautiful sunflower is the national flower of Ukraine, and also happens to be a favorite of honeybees. To me, a bread like this is a reminder that we are all connected on this big blue ball we call home.


This bread is an adaptation of my favorite sourdough sandwich bread, and the substitutions I made were easy. 

Rather than repeat all the instruction I’ve already given for my basic bread, I’ll point to what I did differently for this one, and trust you’ll find your way back to my earlier post if you need more visual information. This bread, like the other, depends on a portion of fed, ripe sourdough starter. It uses a special technique of pre-cooking a portion of the flour in milk, then cooling it before adding to the recipe. 

I swapped in a generous amount of white whole wheat flour as well as a portion of an ancient grains blend flour from King Arthur, called Super 10. This super-nutritious flour includes quinoa,  buckwheat, amaranth and millet, among others. It gives my bread a flavor and texture boost without making it dense or heavy. I nearly doubled the amount of honey from my base recipe, and used the stretch-and-fold phase of the fermentation to fold in about a half cup of toasted sunflower seeds. This dough is very sticky, thanks to the ancient grains and high hydration, so use wet hands to complete the stretches. This is a gentle but effective way to knead the dough and incorporate the extra ingredient of seeds.


When the dough was ready for shaping, I used wet hands again to form a loaf, and then moistened the underside and rolled it lightly in additional sunflower seeds before placing it in my baking pan. Then, I baked the loaf as directed in my original post. Use a steam pan for the first 20 minutes, and a tent foil for the remainder of the baking time.


We love a good sandwich bread at our house. My husband filled two slices of this one with tuna salad for lunch, and I’ve already enjoyed it toasted with breakfast. Without a doubt, this bread will become a regular item in our rotation, and with every loaf I pull from the oven, I’ll hold the mighty people of Ukraine in my heart. 💙💛


Sourdough Pumpkin Rye Sandwich Loaf

With the cool, crispness of fall in the air, I have been giving my stove and oven a serious workout. Many of my recipes have been reruns of things I’ve already posted, but I have made a few exciting new things, too.

Last week, I opened a can of pureed pumpkin for another recipe (I can’t remember what), and I had just a little bit leftover—at exactly the same time I needed to feed my sourdough starter to make a new loaf of bread for my husband’s lunchtime sandwiches. Why not add the pumpkin to a bread dough? My first inclination was to make a cinnamon roll-type thing, but I remembered how delicious pumpkin is without the spice and sugar, so I took it in this savory direction instead, using my favorite sourdough sandwich bread recipe as a template.

It even looks like autumn!

The go-to recipe I modified came from Maurizio Leo, a pro baker whose passion for naturally leavened bread shines on such sites as Food 52 and King Arthur Baking Company. He understands and explains all the science of breadmaking (which I love) and though I keep saying I want to make some of the other Insta-worthy recipes on his blog, The Perfect Loaf, I keep coming back to this one. It relies on an unusual method of pre-cooking a portion of the flour—a technique which locks in much more liquid than you’d otherwise get into a sandwich loaf—and this initial step ensures a super-soft, tender bread with a perfectly chewy edge on every slice.

I’ve experimented many times with Maurizio’s original recipe, first to split it in half because we can’t finish two loaves that quickly, partly out of necessity on days that I didn’t have honey or whole milk, but also out of curiosity to see how far I could push it in the direction of more whole grain. This time, I wanted to see how the loaf would fare with a half cup of fiber-rich pumpkin puree, and as you can see, it turned out quite good.

My big test for any new loaf is toast, and this one was divine!

I love toast so much.

To make my pumpkin sandwich bread even more rustic and autumn-like, I swapped out a good amount of my usual white whole wheat flour in favor of whole dark rye and played up that rye infusion with a spoonful of caraway seed. I swapped in molasses for honey because I love the deep, earthy flavor of molasses with rye. It all worked beautifully, and the aroma of this loaf as it emerged from the oven was nothing short of fantastic. Sometimes it pays to experiment.

Let’s get baking!

Inspired by Sourdough Sandwich Bread with Pre-cooked Flour | The Perfect Loaf

Fair warning, my recipe is written in metric measurement because that’s the way I bake. Scaling a recipe by volume measurements is a near-impossible task, and I will say honestly that my cheap digital kitchen scale is one of the items I would never go without today.

This loaf depends on a portion of ripe sourdough starter. “Ripe” means it has been refreshed within the past 8 to 12 hours, so it is fully fermented, active and ready to use. If you don’t have a sourdough starter, you could try a swap-in of canned pumpkin for about half of the water called for in your favorite yeast-based recipe, and then add about 2 tablespoons of extra water. It would be best to experiment with a recipe that you are very familiar with, so you have a better sense of when the dough looks and feels “right.”

Here’s how it went down in my kitchen, beginning with the flour and milk paste, which are whisked together and cooked over medium heat until it looks like a roux. This stage needs constant attention, so don’t look away even for a moment, and be ready to switch from whisk to spoon when it starts to get thickened so you don’t get it all caught up in the whisk.


Next, combine the pumpkin and warm water, whisk in the molasses and olive oil, and then combine it with the sourdough starter and the cooled roux paste in the bowl of a stand mixer. Use the beater blade for this and blend it for several minutes, until it’s smooth and evenly mixed.


Whisk the flours together—here I used a combination of dark rye, white whole wheat and bread flour, which is high in gluten for a strong rise—and stir in the salt and caraway seed. Add a spoonful of these dry ingredients at a time to the mixing bowl while it’s running, until the dough begins to look like batter. Then turn off the mixer and add the rest of the flour ingredients all at once. This is not an essential step for the recipe, but my technique for reducing the splash that usually happens when I start my mixer with wet and dry ingredients in the bowl. I hate the mess, and this really helps!


Continue mixing until all the dry ingredients are completely incorporated. Stop the mixer and scrape the dough off the beater blade into the bowl. Cover the bowl and let the dough rest for at least 20 minutes, up to an hour. This is a departure from Maurizio’s recipe; it’s my own trick for making the dough more workable, as the rest time gives the grain time to fully hydrate. Fit the mixer with the dough hook and knead the dough until it’s smooth, soft and shiny. Resist the temptation to add more flour—yes, the dough will seem too soft, but the next step of stretching and folding will increase its strength. Trust the process. Transfer the soft dough to a large, lightly oiled bowl. Cover it and stay nearby for the next step.


I was working alone in the kitchen on this day, so the stretch and fold pictures I’m sharing below are borrowed from an earlier post for a different bread (notice the ugly old counters?), but the process is exactly the same. Do this at least twice (three is better), about 30 minutes apart during the first part of the ferment time. This may not seem like much, but this step builds a great deal of strength in the dough so it rises big in the oven.


After about three hours, the dough will be puffy and stretchy. Turn it out onto a lightly floured countertop and gently press and stretch it into a long rectangle. Beginning on the short end nearest you, roll it up tightly into a cylinder shape, tucking in the sides as you go. Pinch the ends of the roll closed and seal the long edge. Place the loaf, seam side-down, into a greased (or non-stick) bread pan. Cover with plastic wrap and place the pan in a draft-free zone in your kitchen—tucked into the microwave is a good bet—until the dough rises to one inch above the rim of the pan.


Preheat the oven to 400° F with rack in center position and another rack in the lowest part of the oven, which you’ll use for a steam pan. Fill a second, shallow baking pan with hot water and place the pan on the lowest rack while the oven preheats.

Bake 22 minutes with steam, then remove the steam pan and rotate the bread to bake more evenly. If the loaf is already brown on top, place a loose foil tent over it to prevent burning. Bake 22 minutes more, until bread is golden brown all over and internal temperature is around 205° F.


Turn the finished bread out onto a cooling rack immediately and cool at least four hours—preferably longer—before cutting into it. That is, if you can stand the wait. 😊

Sourdough Pumpkin Rye Sandwich Loaf

  • Servings: 16 slices
  • Difficulty: Intermediate
  • Print

This bread is rich with the rustic flavors of fall, and well worth the wait!


Ingredients

  • 148 g whole milk
  • 37 g whole dark rye flour
  • 106 g sourdough starter, recently refreshed
  • 100 g pureed pumpkin (NOT pie filling)
  • 85 g filtered water, heated 30 seconds in the microwave
  • 18 g unsulphured molasses
  • 30 g extra virgin olive oil
  • 285 g bread flour
  • 60 g white whole wheat flour
  • 28 g whole dark rye flour
  • 2 tsp. caraway seed (optional)
  • 1 1/4 tsp. salt

Directions

  1. Combine milk and first amount of rye flour together in a small saucepan. Whisk them together over medium-low heat until flour is thickened into a paste-like texture. This will take about 10 minutes. Let the mixture cool to room temperature.
  2. In a measuring cup with a pour spout, combine pumpkin, water, molasses and oil. Whisk until smooth. Combine this mixture with the sourdough starter and rye-milk paste, using the beater blade, until the mixture is evenly blended.
  3. Whisk remaining flour ingredients together with salt and caraway seed. Add flour ingredients and continue mixing with beater blade just until the mixture comes together and pulls away from the sides of the bowl. Scrape dough from blade, cover the bowl and let it rest at least 20 minutes, up to one hour.
  4. Attach the dough hook to the mixer and knead on medium-low speed for about 8 minutes, until dough is smooth and shiny. Transfer dough to a large, lightly oiled bowl. Cover and rest for up to three hours. Perform a few stretch-and-folds during the first hour and a half. These folds will help build strength in the dough.
  5. When the dough has puffed considerably, shape it into a loaf and place it in a greased pan, seam side down. Cover and let rise for about two hours, until dough has risen about one inch above the rim of the pan.
  6. During the end of the rising time, preheat oven to 400 F with rack in center position and another rack near the bottom of the oven. Prepare a shallow pan with hot water and place it on the lower shelf during preheating time. This will provide steam for the first half of baking.
  7. Bake 22 minutes with steam, then carefully remove the steam pan. Rotate the bread pan and cover with a loose foil tent to prevent over browning. Continue to bake 22 more minutes, until bread is deep golden brown and internal temperature is in the 200-205 F range.
  8. Turn bread out immediately onto a cooling rack and cool completely before wrapping.


Whole Grain Soft Pitas

A commitment to healthier eating is kept with small, consistent adjustments. That probably sounds like a ridiculous statement coming from the cook who shared steak & potato pizza and decadent bananas Foster ice cream within the past few weeks, but I don’t necessarily mean just counting calories. I’m referring to more sweeping lifestyle changes that incorporate healthier choices and become the norm. Every time I have tried to “diet,” my plan falls apart, and I am quite accomplished at beating myself up under those circumstances. It is better, I have found, to find a few things that I can do without feeling cheated and simply apply those things across the board in my cooking repertoire. Eating healthier in general helps me feel better about the more luxurious things I enjoy in “moderation.”

For example, I hardly ever eat highly processed foods—including meat with nitrites and pantry items containing high fructose corn syrup or hydrogenated oils. On the rare occasions that I do consume those things, it’s because I am ordering in a restaurant where the ingredients list is not easily reviewed. I ditched soft drinks a long time ago, and I make my own salad dressings most of the time, using vinegar or fruit juice, spices and extra virgin olive oil. We are diligent to seek out grass-fed beef (and we don’t eat nearly as much as we once did) and free-range chicken, and we are big supporters of the local butcher shop that carries responsibly raised pork.

The biggest change I’ve made over the past several years, though, is a shift toward whole grains in the baked goods I eat, and this got a lot easier when I started making my own bread at home. Not every recipe I make is 100% whole grain (including this one, which checks in at about 65%), but swapping white flour with some amount of whole wheat has been a smart decision that is easy to stick with. Nutrition experts rank whole grains more highly for two main reasons—the fiber they bring to a dish, and the complex carbohydrates that help keep our blood sugar levels regulated. 

If you bake at home, and you want to try shifting toward whole grain, I highly recommend picking up a bag of “white whole wheat” flour, made by King Arthur Baking Company. I am not a paid representative of this company (though my friends and family have said I should be, as much as I rave), but from one friend to another, I don’t mind telling you that this one product has changed the way I bake and eat, and I can hardly notice a difference in a typical recipe. Unlike some whole wheat flours, which are made from hard red wheat and carry a slight bitter flavor, King Arthur’s white whole wheat flour is produced from exactly that—hard white wheat—and it behaves and tastes almost exactly the same as an all-purpose flour. It can be swapped in 1:1 in most recipes for breads, pancakes, cookies and muffins. If you want to make a gradual switch, start by subbing about one-fourth of the total flour with the white whole wheat, then increase it to your liking as you go. Over time, you may find all-white breads to be flat and bland. That has certainly been the case at our house.

These whole grain goodies are terrific as sandwich wraps, and also great for cutting into wedges and dipping into fresh hummus!

For these soft wraps, I’ve taken a recipe that I posted in May 2020, when my blog was still in its infancy, and I’ve flipped the ratio of flours so that it uses twice as much white whole wheat as all-purpose flour. That earlier recipe for Soft Pita Breads is still great, and I’ve linked to it so you can check out the original. But this version, in all its whole grain glory, turned out so good with the falafel we made at home recently that it will become my go-to. What makes the pita breads so soft and bendy is an unusual technique of pre-cooking a portion of the flour before adding the rest of the ingredients. The pitas are “baked” on a griddle rather than in the oven, or you can use a dry cast-iron skillet if that’s what you have.

This recipe is easy even for beginning bakers, and unlike most of my bread-related shares, it does not depend on sourdough starter.

Enjoy!


Ingredients

2 cups white whole wheat flour* (see notes)

1 1/4 cups boiling water (plus up to 2 Tbsp. additional water)

1 cup unbleached all-purpose flour

1/2 cup dried potato flakes*

1 Tbsp. milled flax seed (optional, but so good for you)

1 1/4 tsp. salt

1/2 tsp. onion powder (optional)

1 tsp. instant yeast*

2 Tbsp. extra virgin olive oil


*Notes

When measuring by volume, it’s important to fluff the flour first to avoid compacting it in the measuring cup. For best results, follow the fluff-sprinkle-level method.

Fellow label readers, you may find it difficult to find dried potato flakes that aren’t filled with dozens of unknown ingredients. Most “instant mashed potato” brands don’t make the cut in my recipes, but I have found two sources that are truly just potatoes, and that is the way to go. One is the 365 brand, available at Whole Foods and on Amazon, and the other is this one from Bob’s Red Mill. I promise, for my next batch, I will test a recipe that uses cooked potatoes.

Take note of what kind of yeast you have. Instant dry yeast is not the same as “active dry” yeast. The latter must be proved in warm water before using, whereas instant yeast can be added directly with the other dry ingredients. If you only have active dry yeast, try reserving 1/4 cup of the boiling water. Let it cool to bathwater temperature and dissolve the yeast in it for about 10 minutes. Add this mixture with the rest of the dry ingredients as directed in the recipe.


Instructions


My Favorite Sourdough Sandwich Bread

If I had to guess a number, I’d say conservatively that I have probably made about 280 loaves of sourdough bread since I developed my starter back in the spring of 2016. That’s figuring an average of one loaf per week for 5½ years. Of course, there have been some weeks that I have baked much more than that (especially during holiday seasons) and others that I have not baked at all, either because our schedule didn’t allow it or we didn’t need it or, as has been the case recently, because we didn’t have a kitchen.

What to do with my sourdough starter was a big part of the discussion when my husband, Les, and I sat down to figure out the details of our kitchen renovation, which I am pleased to say is nearly done. Would I just let the starter go to sleep and try to revive it when all was said and done? I supposed that I could at least make my Sourdough English Muffins, which are cooked on a griddle. Or should I keep feeding the yeasty rascal on schedule and just call the discard a total loss? That would be a shame.

A freshly baked loaf of homemade sourdough bread was the last thing I made in our old, time-worn kitchen, and it is the first thing I have made in the shiny new kitchen, even though a few loose ends remain before we can do our big reveal. The bread I made both times was this one—a sourdough-based recipe by Maurizio Leo, a master bread maker whose own blog, The Perfect Loaf, has been on my radar for about a year, thanks to a few contributions he has made to the King Arthur Baking website. Maurizio is a genius when it comes to sourdough, and I can hardly keep up with my desire to bake everything on his blog at least once.


This bread, which Maurizio has named Sourdough Sandwich Bread with Pre-cooked Flour, is a favorite at our house because of its softness, height, chewy crust and versatility for sandwiches, toast and just plain eating with a fat schmear of soft butter. As the recipe name suggests, there is an amount of the flour that is pre-cooked, specifically with whole milk, and this pre-cooking of the flour creates a sticky, roux-like addition that lends a beautiful texture to the finished bread and, as a bonus, prolongs its shelf life. This pre-cooking technique itself is not new; the Japanese have been doing it for a long time, and they call it “tangzhong.” But the combination of that milk-cooked method with sourdough and no added commercial yeast sends it straight over the top for me. Quite simply, I love this bread. 

I’m happy to report that I have been able to make bread, even without access to my beloved oven during this remodel, thanks to the generosity of a couple of our neighbors, who offered their own ovens as surrogates. They received their own loaves of this bread as a barter for their oven services (not to mention the benefit of that lingering aroma), so it was a win-win situation.


The crumb is soft, tender and perfectly composed with no crumbling. The crust is chewy and soft.

So, have I put my own spin on this fantastic bread? Kind of, but not much. My method of steam baking is less sophisticated than what Maurizio Leo describes in his original recipe, but it works. I have fiddled with the ratio of flours in favor of greater percentage of whole grain and have even swapped in whole rye for the pre-cooked part several times, and the bread still comes out terrific. I have also subbed out the honey—with brown sugar, maple syrup, molasses and even sorghum—and it wows me every time. Finally, I’ve halved the original recipe because I usually only make one loaf at a time (unless, of course, I’m baking at a neighbor’s).

One of these days, I’ll get around to trying some of Maurizio’s other recipes; I especially want to check out the Jalapeno Cheddar Sourdough Bread (yum!), and for sure, my Thanksgiving table deserves his Super-soft Sourdough Rolls this year. How ridiculous is it, given that I love making fresh bread, that I have never made it at Thanksgiving? I guess I have been too busy with everything else for the table, or else I didn’t plan well to have the oven free, but this will be the year.

In the meantime, I’ll keep making this darn-near perfect bread, my favorite, go-to sourdough. Enjoy!


Before you begin:

This recipe requires use of a mature, ripe starter. Plan to feed your starter eight to 12 hours before making this dough.

All ingredients are listed by weight. I highly recommend use of a digital scale for sourdough baking.

Plan to have a shallow pan available for steam baking. It is also helpful, but not essential, to have a digital thermometer for testing doneness of the bread at the end of baking time.


Ingredients

148 g whole milk

38 g whole wheat flour* (see notes)

175 g room temperature water

18 g honey*

32 g olive oil

106 g sourdough starter, recently refreshed (starter should be 100% hydration)

295 g bread flour

78 g whole wheat flour*

8.5 oz. fine sea salt


*Notes

I have had great success using whole grain rye flour in the first step of pre-cooking. The resulting dough will be rather sticky, but I find it more manageable to handle it with wet hands.

If you want to increase the nutrition by using more whole wheat flour in this recipe, try swapping about 30 grams for equal amount of the bread flour. Greater adjustment may require that you also increase the volume of water by a small amount, as whole wheat flour absorbs more water.

Alternative sweeteners can be an equal swap by weight if they are liquid. If you swap in sugar or brown sugar, try using two heaping tablespoons, and add them with the dry ingredients rather than in the starter mixture.


Instructions

The images in the how-to are from a previous bake, so please don’t be startled to see the old kitchen.

  1. Whisk together milk and first amount of flour in a small saucepan. Cook over medium heat, whisking constantly, until mixture thickens and becomes sticky and heavy. Remove from heat and spread the mixture out onto a plate to cool for several minutes.
  2. Combine bread flour, whole wheat flour and salt in a bowl.
  3. In the bowl of a stand mixer, combine starter, water, honey and olive oil until blended and smooth. Add pre-cooked flour mixture and blend with the beater blade until smooth. Add dry ingredients all at once and mix with the beater blade until all the flour is incorporated and the dough begins to look organized on the blade. Scrape dough from blade and cover the bowl. Allow it to rest for about 30 minutes before kneading.
  4. Switch to the dough hook, kneading the dough on speed two for about 7 minutes. Spray a large glass bowl with oil and transfer the dough into the bowl. Cover and rest it for 30 minutes.
  5. Wet your hands, then stretch and fold the dough like this: Loosen the dough from the edge of the bowl that is farthest away from you and lift it, stretching and folding it down toward the center. Rotate the bowl to fold the opposite, then rotate the bowl to repeat the folds on the sides of the dough. Cover and rest again and repeat the folds twice more at 30-minute intervals.
  6. By the final stretch and fold, you will find that the dough has built enough strength to feel resistant. Prepare a large loaf pan, oiling and dusting with semolina or cornmeal if needed to reduce sticking.
  7. Shape the loaf by flattening it out onto a flour-covered board, the rolling it up tightly into a cylinder shape. Pinch the final rolled edge to seal it, and pinch the ends of the roll. Cover the loaf pan with plastic wrap or an elastic bowl cover and let it nap in a warm spot in the kitchen, with no drafts. Final proofing will be about 90 minutes.
  8. Preheat oven to 400° F, with one rack in the center of the oven and another rack below it for the steam pan. When oven reaches temperature, place a shallow pan of hot tap water on the lower rack and allow it to preheat 10 minutes longer.
  9. Bake the bread with steam for 20 minutes. Remove the steam pan, rotate the bread for even browning, and cover with a loose tent foil if the bread is browning quickly. If the loaf is still pale, the foil may not be necessary. Bake an additional 25 minutes without steam. Internal temperature of finished bread should be 205° F. Remove from pan right away and cool on a rack.

This most recent bake had significantly more whole wheat, and it still turned out just perfect. I love a versatile recipe!


Sourdough Onion & Sage Bread

With the arrival of fall comes the joy of having the house filled with the addictive aromas of meaty stews, roasted vegetables, and every variety of freshly baked breads and desserts. A few days before we dismantled the kitchen for our remodel, I pulled this favorite sourdough recipe out of my arsenal and baked it to accompany the roasted butternut squash lasagna that I shared last month.

The recipe I share today is a mashup of several bread recipes I have tried from an amazing blog called “The Fresh Loaf.” The site is a virtual community and message board for sourdough lovers—from novice to expert—and over the years, I have gained invaluable wisdom by eavesdropping on the conversations of those I consider to be far advanced of my own skills. I was barely beginning my own sourdough journey when I discovered TFL, but the pictures and formulas I found there inspired me to attempt new techniques, and I now proudly consider myself to be an “intermediate” bread maker.

One of the methods I learned is baking with steam, a simple technique that results in a perfectly crusty yet chewy exterior and lovely crumb texture that the aficionados would call “gelatinized.” Breads made with this steam-baked method make fantastic toast and sandwiches (especially grilled cheese).

The extra hydration of the dough creates the big, open crumb inside the bread. The steam makes the crust perfectly chewy.

The generous amounts of onion and sage I’ve added to this loaf also make it perfect for Thanksgiving stuffing or dressing, or you can follow my lead with any stale leftovers and turn it into savory croutons for hearty salads and all the soups you’ll be simmering during the autumn and winter months ahead.

Up close, you can see the golden polenta, the bits of onion and flecks of sage. This bread is perfect for fall!

Besides the intoxicating fall-scented flavors, this loaf also uses a pre-ferment, which is a fancy way of describing a pumped-up sourdough starter, and a soaker, which is nothing more than grains (in this instance, corn) that have been soaked overnight in water—a technique that coaxes the deepest flavors out of the grain and into the bread.


The kneading method used for this bread is also a bit different. It’s called “stretch and fold,” and it is an easy way to build strength in dough with a high volume of water, without so much messy, sticky kneading. Try this a few times, and you will be astonished at the elastic texture and volume achieved in the bread dough.

If this all seems confusing, trust me, it isn’t. I have found sourdough baking to be joyfully simple once you get the hang of it. As I mentioned last fall when I made the sourdough pumpkin challah, this kind of baking—naturally leavened and slow-fermented—is like a good relationship; the more you open yourself up to it, the more it comes back to you until you finally reach a point of familiarity that you can’t imagine ever buying a loaf of bread at the grocery store.

One more note: I strongly recommend measuring ingredients by weight when baking any kind of bread, but especially sourdough. Weight measuring takes the guesswork out of your ingredient ratios, and you can find an inexpensive, easy-to-use kitchen scale just about anywhere, including Walmart (where I bought mine).

That’s my story, and this is my favorite sourdough for autumn. I hope the pictures entice my fellow sourdough bakers to give it a go, and if you scroll to the bottom of the post, you’ll find a downloadable PDF for your recipe files. My ingredients are listed in grams (sorry, no volume measurements), so go on and get your kitchen scale and get baking.

Enjoy!


I could eat the whole loaf all by myself! 🙂


Sourdough Pumpernickel

We have entered the last full week of March, and I’ve yet to mention that it is “National Flour Month,” a near-unforgivable oversight for someone who enjoys making homemade bread as much as I do. My adventures with sourdough have been well-documented here on Comfort du Jour, but it took St. Patrick’s Day to bring me back around to making our favorite sourdough pumpernickel. It had to be done, given the volume of homemade corned beef we have (not to mention all that pastrami), and the rising aroma of this bread from the oven was enough on its own to convince me I’d waited too long.

What makes this bread extra special for me is that I make my own flour for it, from freshly milled rye grain. This sounds more impressive than it really is, thanks to a handy grain mill that latches onto my KitchenAid stand mixer. I just turn the dial to select the grind, pour in the grain and turn it on. I purchased the mill in the summer of 2016, when “Pete,” my sourdough starter, was still wet behind the ears, and I’ve found it particularly useful for some of my lesser-used grains, including rye. After whole grain has been milled into flour, the freshness clock starts ticking, and there is nothing tasty about rancid flour. Now, when I want to make rye bread (or pumpernickel, which is technically almost the same), I mill the grain fresh, but only the amount I need, and I’m good to go with flour that far excels what I could have bought pre-milled.

Milling the grain myself allows me to grind only the amount I need, so my whole grain stays fresh longer.

This recipe relies on sourdough for rise and flavor, though there is also a small (optional) amount of instant dry yeast to boost the rising power and make the ferment time more predictable. As with many other sourdough loaves, this one begins the day before with a pre-ferment called a “sponge,” and that’s when the freshly milled rye flour starts working its magic. The rest of the flour is high-protein bread flour, which is needed for its strength because rye does not have a lot of gluten.

Coarse-milled whole rye grain is known as pumpernickel meal, and it may surprise you to know that the dark, rich color of “pumpernickel” bread is mostly for show, and it comes into the bread by way of either caramel color (which isn’t likely in your pantry), strong coffee (either liquid or powdered) or—as is the case with mine—cocoa powder! And no, it does not make the bread taste like chocolate. There’s also an unusual, time-honored technique that will come into play with this bread, and it involves bread from another time (more on that in a minute).

Up to this point, the sourdough pumpernickel recipe I’m describing has been drawn straight from p. 246 of Peter Reinhart’s The Bread Baker’s Apprentice, the same book I depended on to learn sourdough baking in the first place. But something in my nature will not let me leave well enough alone, and I have put my own spin on this recipe—not because I think I know better than the author, but because I love certain additional flavors in my rye breads, and so I have either substituted or added ingredients, following rules that Reinhart himself would approve. Rather than brown sugar, I add molasses for a deep, earthy sweetness, and I accent this bread with onions, dill and caraway seeds, none of which are called for in the original recipe.

The resulting bread never ceases to thrill my taste buds, and it has been terrific this past week with our homemade corned beef, but I confess my favorite way to enjoy it is the same as most every bread—it makes fabulous toast!

Just give me this, every day for the rest of my life, please!

Ingredients

On Day 1:

7 oz. ripe (recently fed) sourdough starter

4.25 oz. coarse whole grain rye flour* (see notes)

6 oz. water, room temperature

Combine the starter, coarse rye flour and water in a medium bowl. Cover with plastic wrap and let it ferment at room temperature about 5 hours, until it looks very bubbly and active. Transfer the sponge to the refrigerator overnight.

On Day 2:

2 Tbsp. molasses

2 oz. water, room temperature

2 Tbsp. olive oil (mine is infused with dill)

1 heaping Tbsp. minced dried onion, rehydrated with warm water

9 oz. bread flour*

1 Tbsp. cocoa powder* (optional, see notes)

1 tsp. instant dry yeast*

1 1/2 tsp. fine-textured salt

1 Tbsp. caraway seed, plus a few sprinkles for topping* (optional)

Up to a cup of dry bread crumbs from a previous rye loaf* (optional)

1 or 2 tsp. dried dill leaves (optional)

Egg wash for topping and cornmeal for baking

*Notes

If you don’t have a grain mill, it’s no problem. Use whole rye flour, which is available in specialty markets such as Whole Foods. The pre-milled flour and resulting bread will have a finer texture, but all the flavors will still be present.

I mentioned above that strong coffee is sometimes used to give deep color to pumpernickel, but for this recipe, I would not recommend using brewed coffee in the overnight sponge. Espresso powder or a fine-textured instant coffee mixed with the flour would be a better bet if coffee is your coloring agent of choice.

Caraway seeds give a distinct note to rye or pumpernickel bread, but it is a polarizing flavor for some people. When someone tells me they don’t like rye bread, I usually assume it is the caraway. It is a warm, slightly biting flavor, and I love it, so I put it in the dough and also on top of the bread.

The addition of the “old” bread crumbs is optional, but it adds an interesting texture and depth of flavor to the finished bread. In a way, the secondary crumbs are another type of sourdough, given that the flavor and existing yeast in them contribute something to the final product. If you choose to try this, I would recommend using crumbs from a home-baked bread, and preferably sourdough, to exclude unnecessary commercial preservatives and such.


Instructions


  1. The day before you intend to make this sourdough pumpernickel, you will need to feed your starter with the entire amount of coarse, whole grain rye flour and water to make it a soupy mixture. Cover it with plastic wrap and give it a few hours at room temperature until it becomes foamy and bubbly, then put it to bed in the fridge until morning.
  2. Remove the sponge from the fridge for about an hour to knock the chill off it. Pour a small amount of boiling water over the dried chopped onions to re-hydrate them.
  3. In the mixing bowl of a stand mixer, combine the bread flour, cocoa, salt, instant dry yeast and caraway seed. If using the “old bread” technique, also add the crumbs to the flour blend.
  4. Stir water, molasses and oil into the fermented sponge.
  5. Combine the sponge mixture and re-hydrated onions with the dry ingredients and mix with a beater blade until dough becomes a cohesive mass around the beater. Scrape down dough, cover the bowl with plastic wrap or a slightly damp towel and rest 30 minutes.
  6. Switch to the dough hook and knead in the stand mixer about 5 minutes. The dough will be dense and sticky, but resist the temptation to add more flour or you will end up with a gummy bread.
  7. Shape dough into a smooth ball and place it in a large, oiled bowl. Cover and rest in a quiet, warm spot of the kitchen until dough has doubled in size, which may be anywhere from 2 to 3 hours, depending on ambient room temperature.
  8. Grease a 9-inch loaf pan and sprinkle corn meal into the pan, tapping to distribute it evenly in the pan.
  9. Turn dough out onto a lightly floured counter, pressing and stretching the dough into an oblong shape, about 8 inches wide and 16 inches long. Sprinkle the dried dill onto the dough, then roll it up into a loaf shape to match the length of your bread pan. The loaf will rise more evenly if the ends of the dough meet the ends of the pan. Cover with plastic wrap or an elastic cover and let the bread proof 60 to 90 minutes, until dough has risen to about an inch above the rim of the pan.
  10. Near the end of the proofing time, preheat the oven to 350° F, with rack in the center.
  11. Brush the surface of the bread with egg wash and sprinkle it with additional caraway seeds.
  12. Bake for 45 minutes, turning bread halfway through baking time. Internal temperature should be about 190° F and the bread should sound hollow when thumped on the bottom.
  13. Turn bread out onto a cooling rack, and cool completely before slicing.

No, this pretty girl is not asking for pumpernickel. She can smell butter from 100 miles away!

Want to make this sourdough pumpernickel?


Sourdough Potato Bread with Onion & Dill

The joy of baking homemade bread, for me, is second only to the bliss of eating it. Or is it the other way around? When I established my sourdough culture in early 2016, I wasn’t sure how successful the adventure would be or if I would tire of eating “only” sourdough. As I’ve declared here several times, though, sourdough is not exclusively a flavor of bread, but a method of giving rise to the dough, and I rarely use commercial yeast in any form of bread anymore—whether it’s pizza dough, English muffins, waffles, soft pita breads, challah or focaccia. For me, there’s no turning back, and I cannot imagine tiring of it. Sourdough rules!

The potato bread I’m sharing today is my adaptation of a sandwich bread recipe I’ve grown to love by King Arthur Baking Company. KA’s version of this bread uses dry active yeast, but I’ve converted it by conjuring my math skills; I’ve swapped out equal amounts of liquid and flour (by grams, of course) for the appropriate percentage of my ripe-and-ready starter (sourdough nerds understand me). The result is terrific on its own, but I’ve recently taken the recipe a bit further with the addition of minced onions and a dill swirl and—well, wow.

The dill swirl lends a nice touch to your favorite sandwiches. My hubby especially loves it with his tuna salad and a fresh leaf of lettuce.

The recipe itself is unusual, in that the mixed dough does not have an initial rise at room temperature; it moves directly to the refrigerator for cold overnight fermentation. It’s very sticky dough that is not easily kneaded, so I recommend use of a stand mixer if you have one. After chilling overnight, the cold dough is easier to handle and shape into a loaf to proof at warm room temperature until it’s ready to bake. Words don’t adequately describe the aroma that wafts from the oven.

The cooked Yukon gold potato and softened butter lend a soft texture and lovely gold color, and the onion and dill I’ve added make it a great choice for all kinds of sandwiches. My hubby declared a few mornings ago that this sourdough potato bread may be his favorite bread ever for breakfast toast. Of course, he has said that about my soft sourdough rye, too (I’ll share that one soon).

My ingredients are measured by weight, because that’s how I bake. I highly recommend a digital scale for consistent results in any kind of baking, but especially for bread. If you’re not ready to get on the sourdough train, you can still enjoy this bread. Follow the original instructions offered by King Arthur, but halve the ingredients, as KA’s recipe makes two loaves. The onion and dill flavors are my own Comfort du Jour twist.


Adapted from King Arthur Baking Company
Makes one loaf

Ingredients

1 large Yukon gold potato, peeled and cut into large chunks (boil and mash the potato, then measure out 100g for use in this recipe)

100g ripe sourdough starter (fed 8 to10 hours earlier; my starter is 100% hydration)

100g lukewarm water* (include the potato cooking water in this total)

40g (about 3 tablespoons) sugar

260g unbleached all-purpose flour*

80g white whole wheat flour*

1 large egg (room temperature)

1 1/4 tsp. fine sea salt

6 Tbsp. unsalted butter, cut into pieces and softened to room temperature.

2 Tbsp. dried minced onion, rehydrated 15 minutes in 2 Tbsp. warm water (optional)

2 tsp. dried dill leaves (or 2 Tbsp. fresh dill if you have it)


*Notes

Reserve the water used in cooking the potato, and add more water to total the amount needed for the recipe. The potato starch in the cooking water will add to the fine texture of the bread.

The original KA recipe calls for only all-purpose flour, but I always swap in at least some amount of whole grain flour. Make it as you like, but don’t swap more than 25% of the total flour without also adjusting the ratio of liquid. My swap is within that suggested limit, and it works great.


Instructions – Day One


  1. Combine all ingredients, except butter and dill, in the bowl of a stand mixer. Mix on low speed until ingredients come together and form a shaggy ball on the beater blade, and all flour is incorporated. Scrape dough from beater blade. Cover and allow dough to rest 20 minutes.
  2. Switch to the dough hook and knead the dough on low speed for about 2 minutes.
  3. Add the pieces of softened butter, one or two at a time, and mix on speed 2 until each addition of butter is worked into the dough. Continue to knead at this speed for about six more minutes. The dough will be very soft and sticky.
  4. Transfer the dough to a lightly oiled bowl. Cover it with plastic wrap or elastic cover and transfer immediately to the refrigerator at least overnight or up to 24 hours.

On Baking Day


  1. Lightly spray a clean countertop (and a 9 x 4” bread pan) with olive oil spray. Remove the refrigerated dough to the counter and use your fingers to spread it out into a rectangle shape, about 6 x 18”. Sprinkle the dough with the dill leaves.
  2. Beginning at one of the short ends, roll the dough up tightly, tucking in the ends as you go to keep the dough in a smooth cylinder shape. Use a bench scraper if needed to release the sticky dough from the counter. When you get to the end, pinch the seam closed. Tuck the ends as needed to fit the dough into the greased bread pan. Cover with plastic wrap or elastic “shower cap” cover and proof at warm room temperature until the dough rises above the top of the pan.  This may take anywhere from 4 to 6 hours, depending on the strength of your starter and the temperature of the room.
  3. Near the end of rising time, preheat oven to 350° F, with baking rack in center position.
  4. Remove plastic wrap from pan and gently transfer the loaf to the oven. At this point, the dough may appear “jiggly;” you don’t want to cause it to collapse, so try not to jostle it too much. Bake at 350 for a total of 45 to 50 minutes, turning halfway through baking time to ensure even browning. At the halfway point, cover the loaf loosely with a foil tent to prevent over-browning. Bread is fully baked when it reaches 190° internal temperature. Cool in the pan for about 5 minutes, then carefully turn it out onto a cooling rack. You may need to run a clean knife or plastic scraper along the edges of the bread for easier release. Cool at least two hours before cutting, and completely (this may mean overnight) before wrapping it up in a plastic bag.  
The dill makes a pretty swirl in this loaf, but you could easily substitute another favorite dried herb.

Want to make this bread?