Three favorite key ingredients, plus onions, garlic, butter and a splash of white wine—it sounds simple, because it is. This is a delicious entrée I like to call a “Sunday Supper” because there are a few extra steps that make it special without making it complicated. A recipe that takes a little more time is what I love, in part because it feels relaxing to prepare food slowly with more intention, but mostly because as the meal develops and the house becomes increasingly filled with savory aromas, it creates a tension and anticipation that isn’t often present with a quickly cooked weeknight meal.
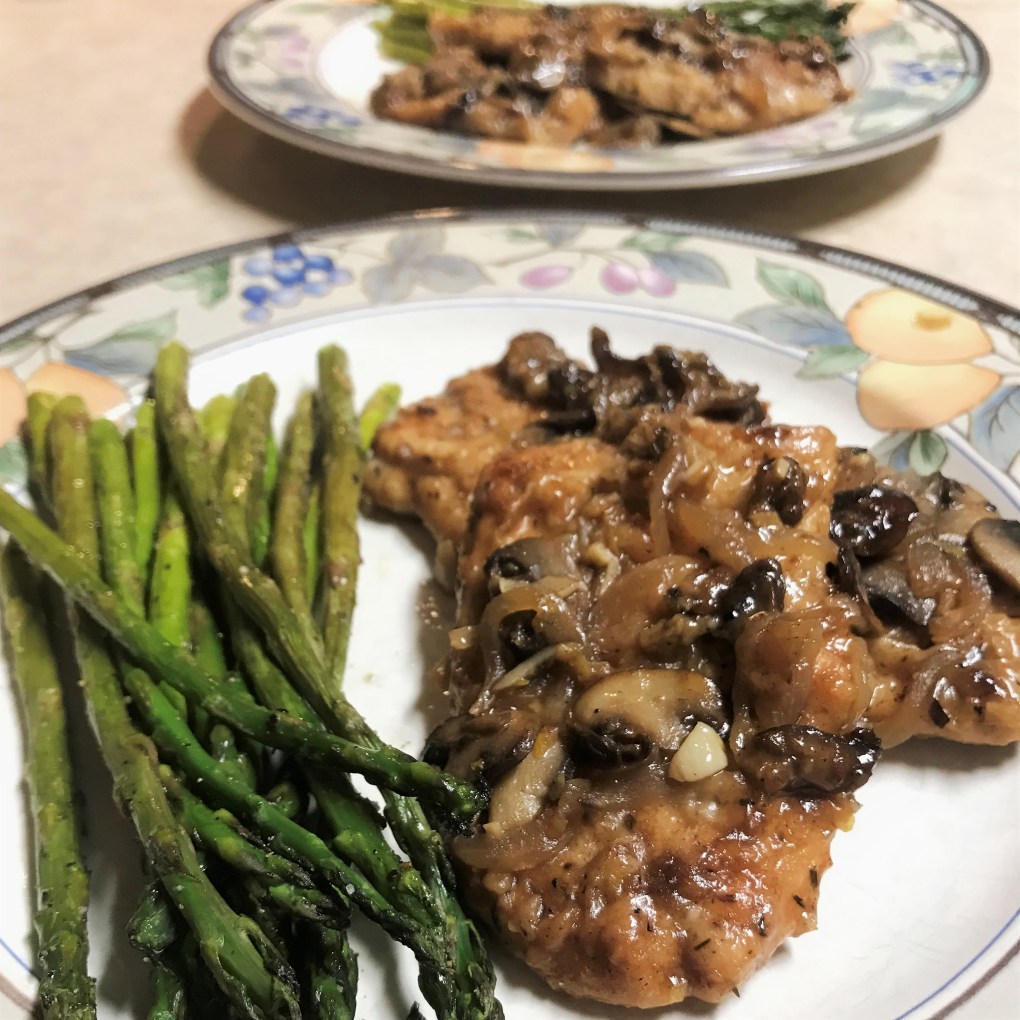
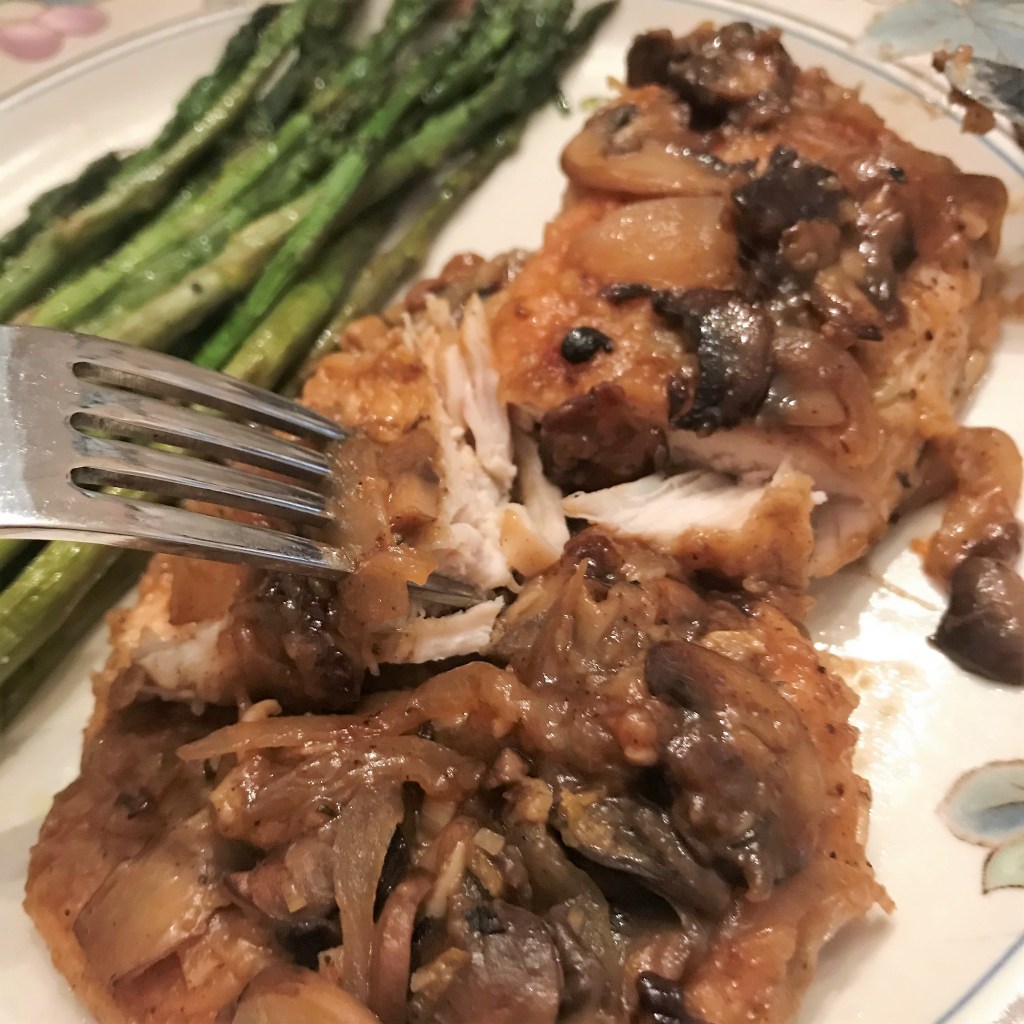
The result of the extra care and patience required for this dish is well worth the time and effort—tender, juicy bites of chicken with a rich, onion-y mushroom gravy-like coating. It’s satisfying and comforting, in a way that only a home-cooked meal can be. You can taste the love in this kind of food. The mushrooms contribute an earthiness that is not overwhelming, and the freshly squeezed lemon, thyme and white wine give the impression of something far more gourmet than the simple instructions I’m about to describe.
I prefer to make this recipe on the stove in a skillet because it’s usually just me and my husband at the dinner table, and I like to keep my counter space open. But if you are doubling the recipe and happen to have a large electric skillet, that would be a terrific option—provided it has a cover, which is an important part of finishing the recipe. I’ll walk you through preparation of the dish, but if you’re ready to dive straight into it, you can scroll to the bottom to download a printed copy of the recipe. But then, of course, you’d miss the pictures. 🙂
Here’s how to make it.
First, the chicken breasts are sliced and pounded thin to ensure tender, uniform pieces. I do this myself at home because it’s an easy way to save the extra cost of pre-sliced cutlets. It’s OK if you don’t have a meat tenderizer; you can use the bottom of a small pot to do the same. Next, season the pieces with salt and pepper and a couple of pinches of dried thyme. It’s important to do this first, because you want the seasoning in the chicken—not just on the coating. Then drag the cutlets through some seasoned flour and let them rest while chopping a sweet onion and a couple cloves of garlic.

My tenderizer mallet has two sides, and I’m using the smooth side to flatten the chicken slices between parchment sheets. Take your time with this step so the chicken stays intact. 
Thin slices ensures that there will be plenty of flour in the pan to thicken the broth later. Dredge again just before browning.
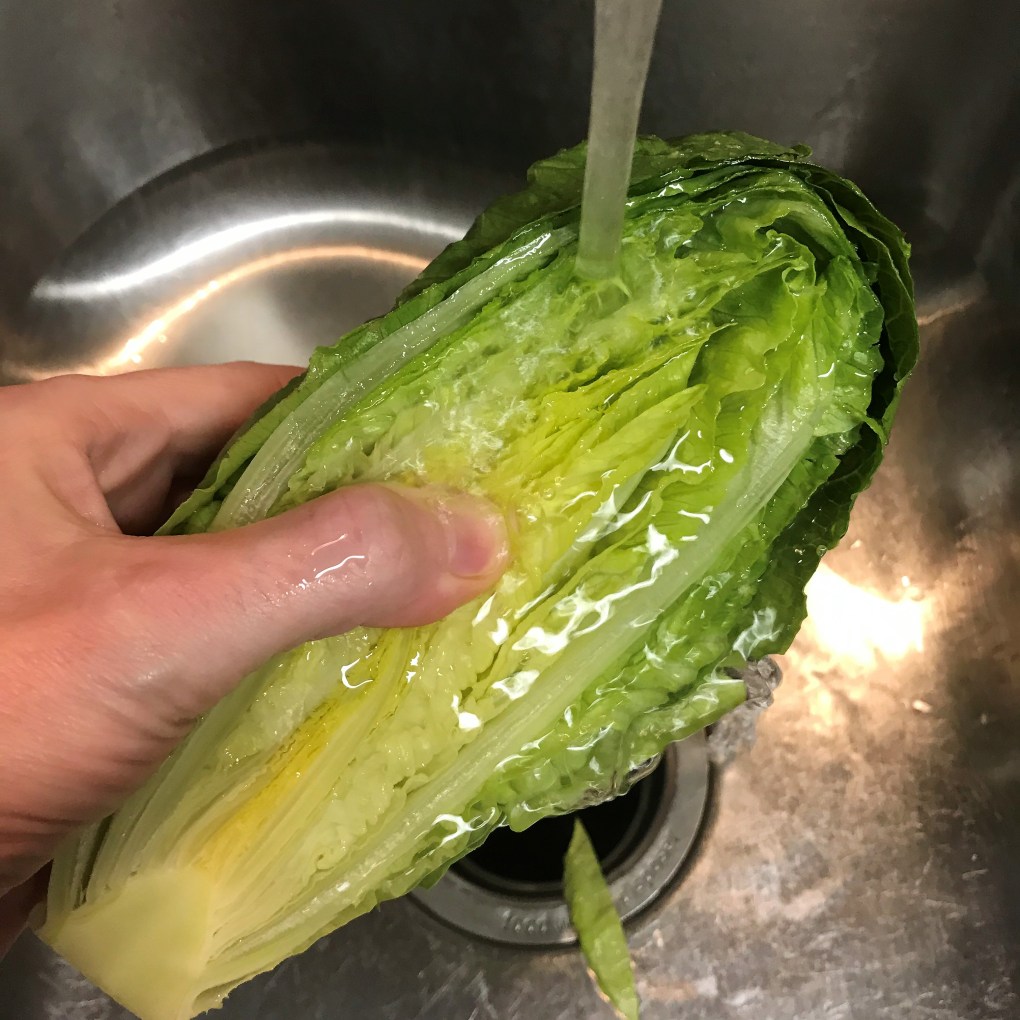
Clean and slice a full package of fresh mushrooms. It may seem overkill for a four-serving recipe, but they cook down considerably and they are a key component of the dish. My favorite type is cremini (sometimes called baby portabella, though technically they are not), but white button mushrooms or shiitake would work fine as well. Are you on the fence about the right way to clean mushrooms? I used to be afraid that rinsing them would make them soggy, but I learned a few years ago that mushrooms don’t absorb much water unless you soak them (thank you for that, Alton Brown!), so go ahead with a thorough cold water rinse then use a clean paper towel to dry them and wipe away any remaining debris. Finish the prep by trimming the stems and slicing them into 3/8” thick, perfectly uniform slices. Say what? Here’s how to do the slicing part in less than one minute:
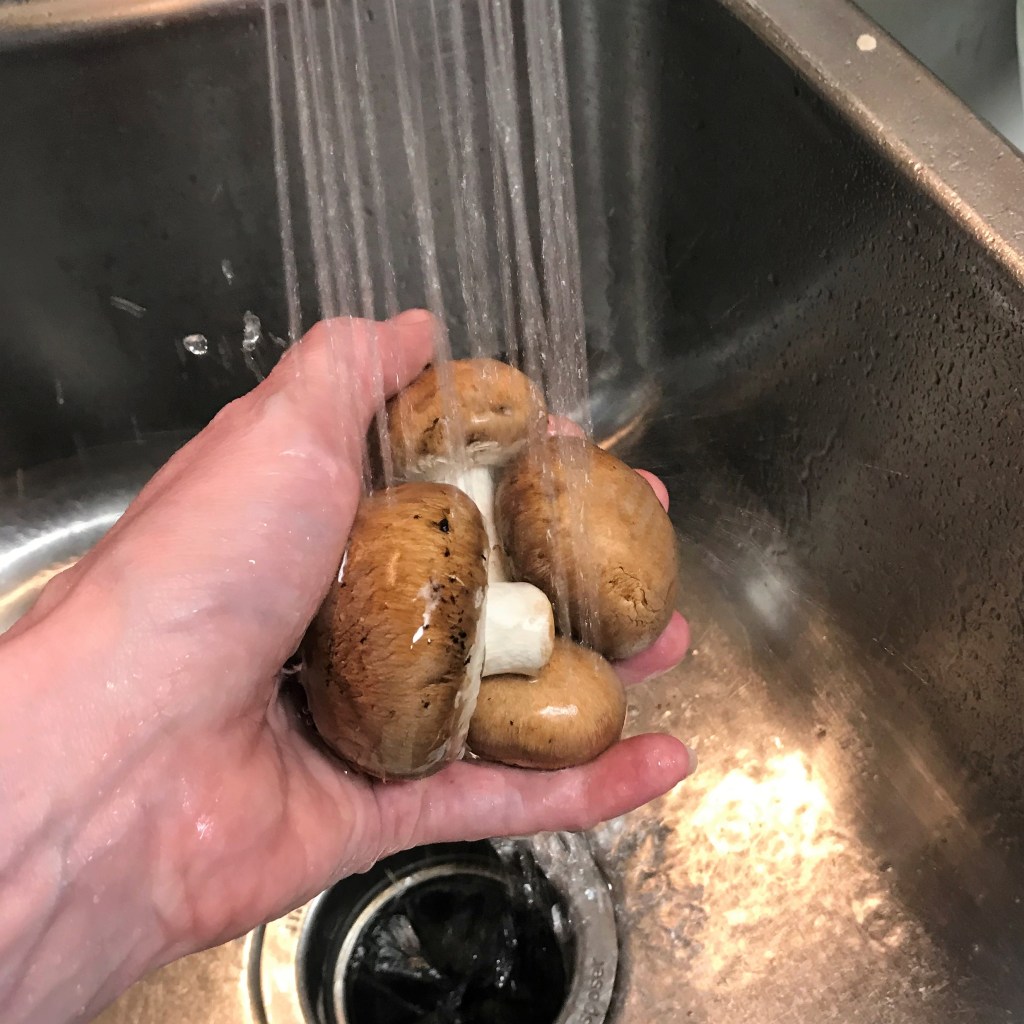
A quick rinse under cold water is all it takes to loosen the crud from fresh mushrooms. Don’t skip this step. 
Use a clean paper towel to gently wipe away moisture and debris. Work from the top of the crown, outward. 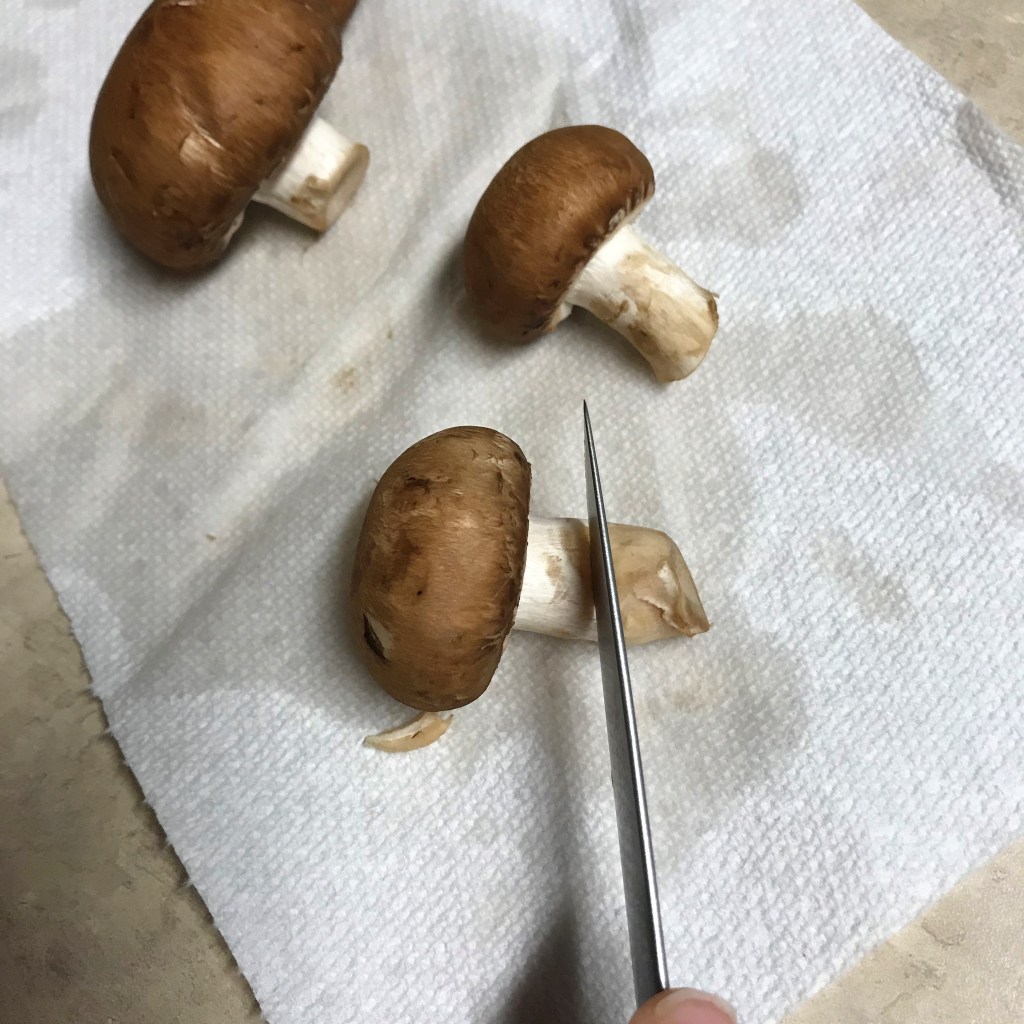
Trim off the ends of the stems, as they tend to hold onto debris. 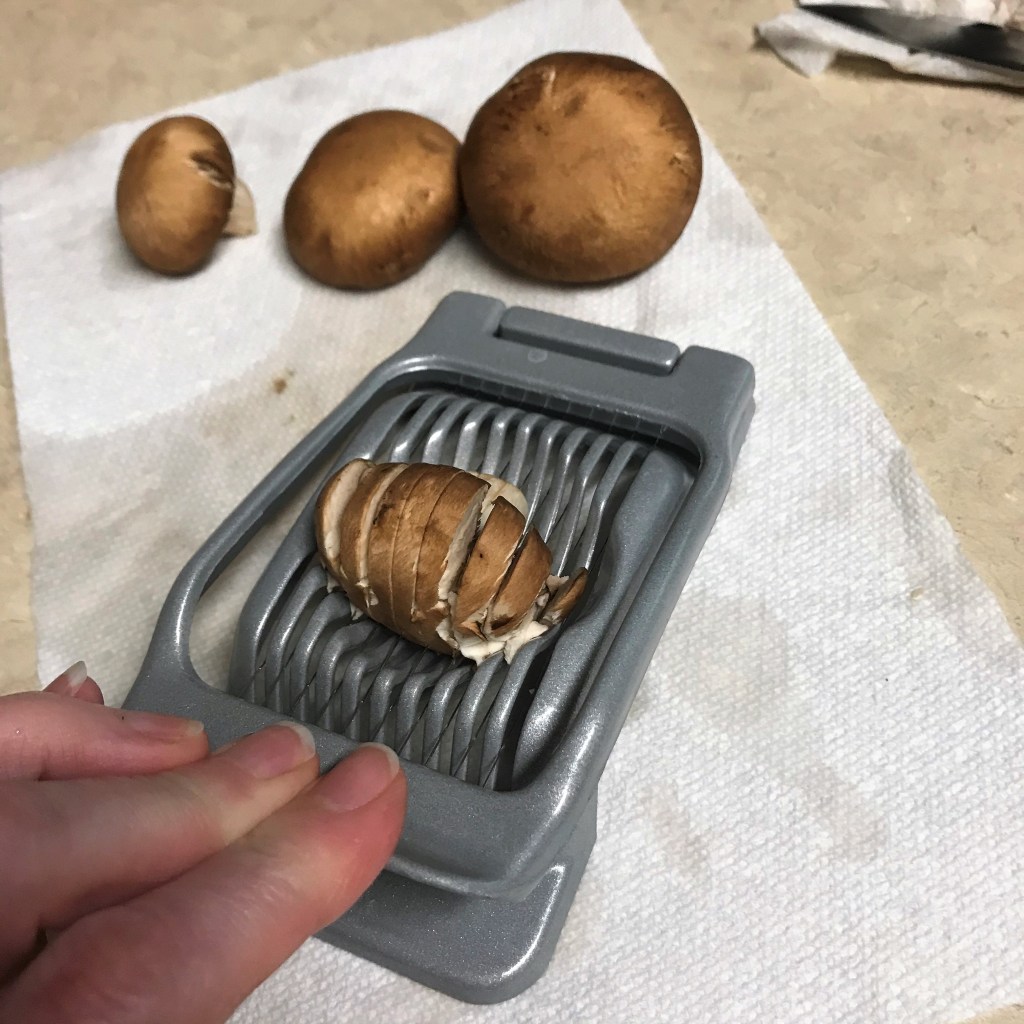
A sturdy egg slicer gets this job done in record time!
My egg slicer is made of metal, with cutting wires that are sturdy enough to tackle slicing mushrooms and strawberries, and I love that I get clean, uniform slices with minimal effort. Maybe someday I’ll use this thing to slice eggs. If you don’t have an egg slicer, use your best sharp knife, and don’t sweat over the thickness—just slice them as evenly as you can, but not paper thin.
The onions go into a heated skillet with olive oil, but you’ll notice in the photos that I don’t take them very far toward caramelization. You want them to be nice and soft, so keep the heat in the medium-low range and cook just until they soften and begin to look translucent. Add the mushrooms in batches and cook them without crowding the pan. These guys give off a lot of moisture when they cook, and if you have too many at once, they will steam rather than brown. Take your time, and when the first handful of mushrooms reaches that “lightly browned” stage, move them aside and add another handful. When the whole batch is finished, add the chopped garlic and sauté briefly, then transfer the mixture to a bowl.

Everything is “mise en place,” a French term chefs use to explain that their ingredients are prepped and in place for the recipe. 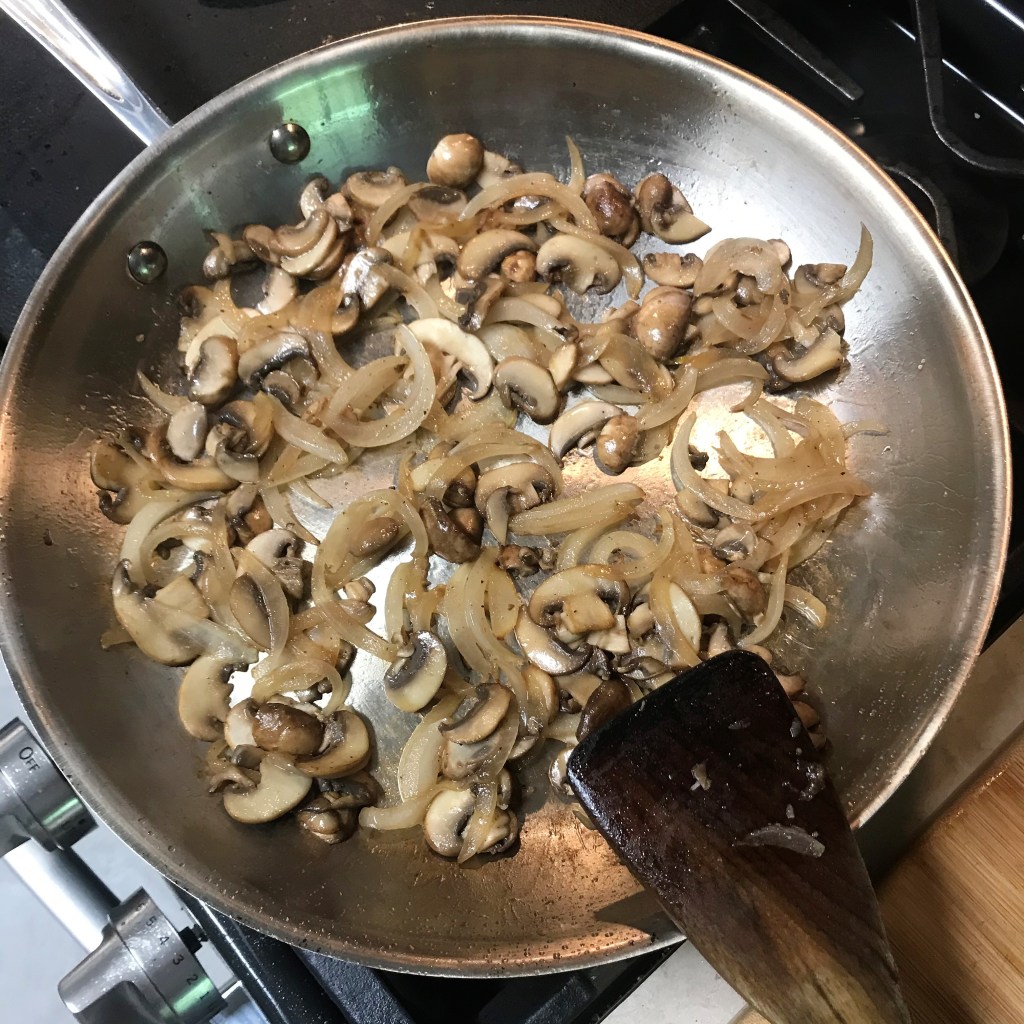
I usually caramelize onions, but I want them to remain soft for this recipe. By the time I’m done, they will seem nearly melted.
Give the cutlets another quick dip through the seasoned flour while you melt butter in the same skillet. It’s not unusual for the flour to absorb moisture from the chicken during the initial rest, and they should be completely (but lightly) coated before they hit the hot butter. This will create a roux-like coating on the chicken, and the broth you add later will break that down into delicious gravy as it simmers.
When the butter is melted and bubbly, carefully arrange the cutlets into the pan in a single layer, again taking care not to crowd the pan. Depending on how many pieces you have, this may need to be done in batches as well. Turn the cutlets over when they are a nice golden brown on the underside, and stack them on top of each other when both sides are done, to make room in the pan for any remaining cutlets.
Remove the browned cutlets and rest them on top of the reserved mushroom-onion mixture. This will make room for you to de-glaze the skillet, bringing all the beautiful browned bits back into the dish. Reduce the heat to low, then working quickly, pour in the white wine and use a whisk or other utensil to scrape up those flavorful remnants. Squeeze in the lemon juice and swirl the pan to combine. Place the chicken cutlets back into the skillet and pile the mushrooms and onions on top. Carefully pour in chicken broth, but only enough to slightly cover the chicken. Give the skillet a gentle shake to help the broth get under and around the chicken, then cover the skillet and walk away.
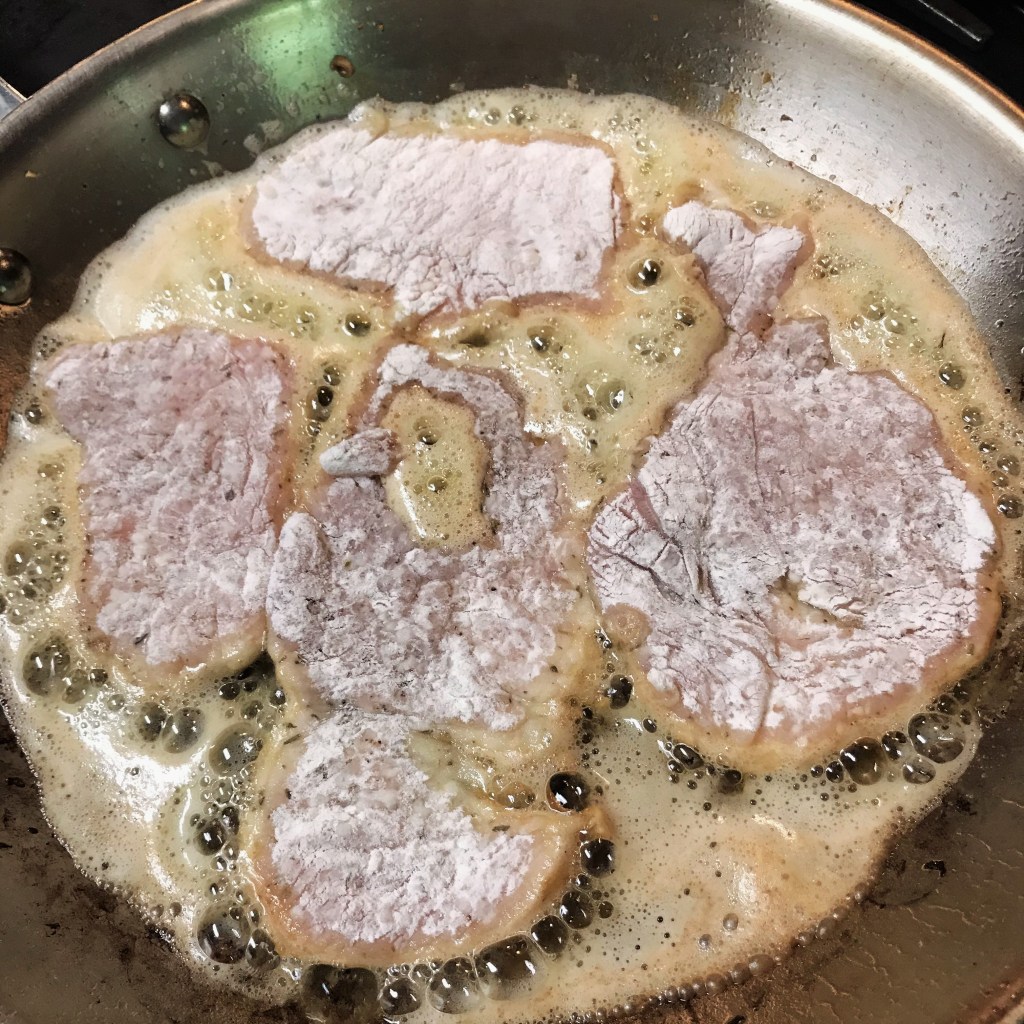
Butter is best for attaining the perfect golden brown color. If you avoid dairy, substitute olive, canola or avocado oil. 
Add another tablespoon of butter if you need it for the remaining cutlets. 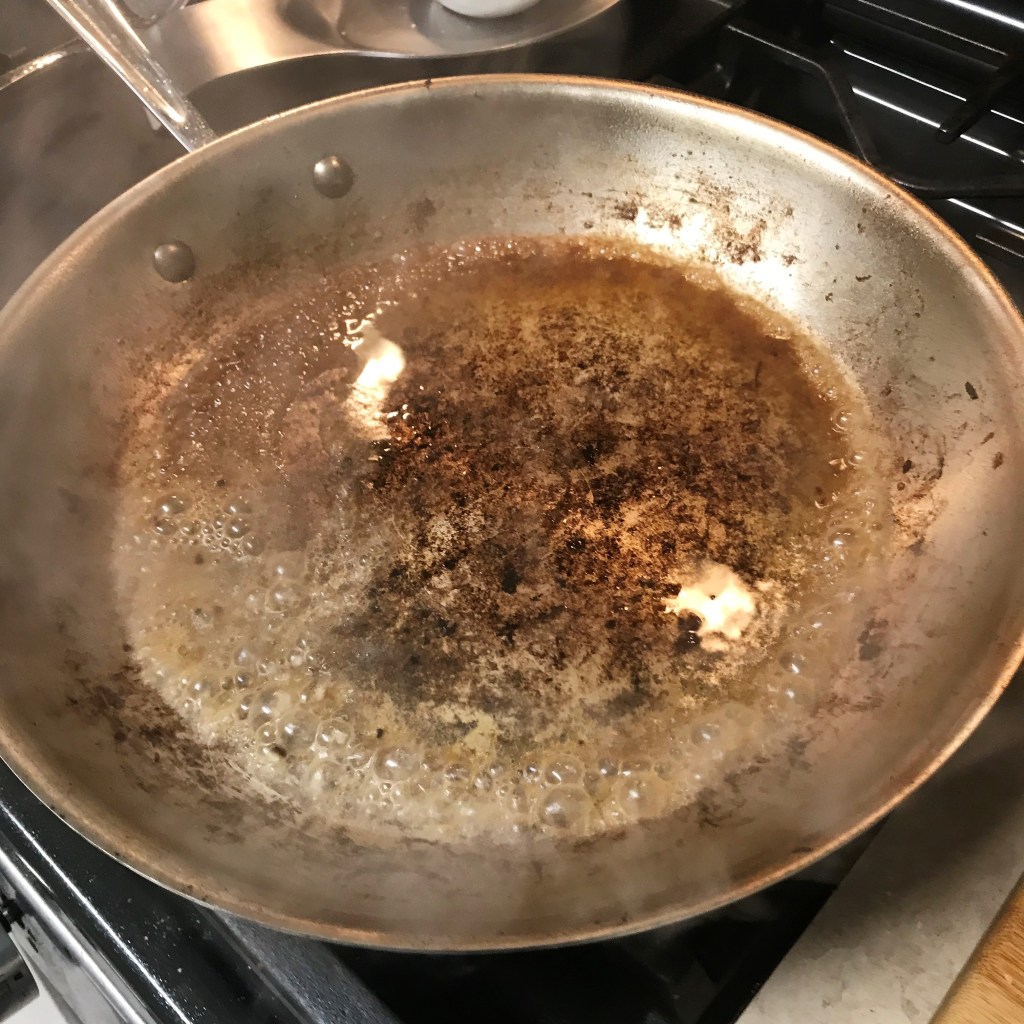
The acid in the wine and lemon juice begins loosening all the browned bits from the pan. We want those flavors back in the dish! 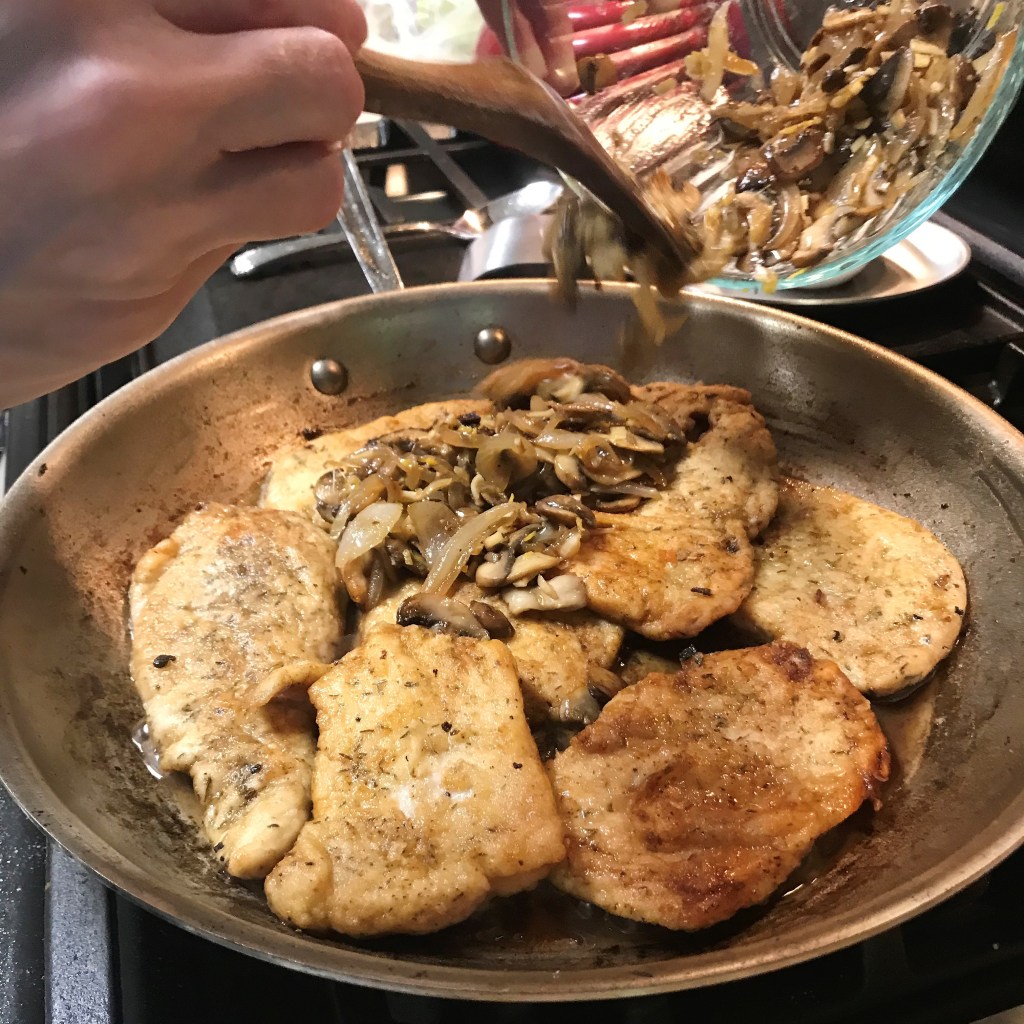
Pile the onions and mushrooms all over the top of your chicken cutlets. They’ll help keep the cutlets moist while the pan simmers. 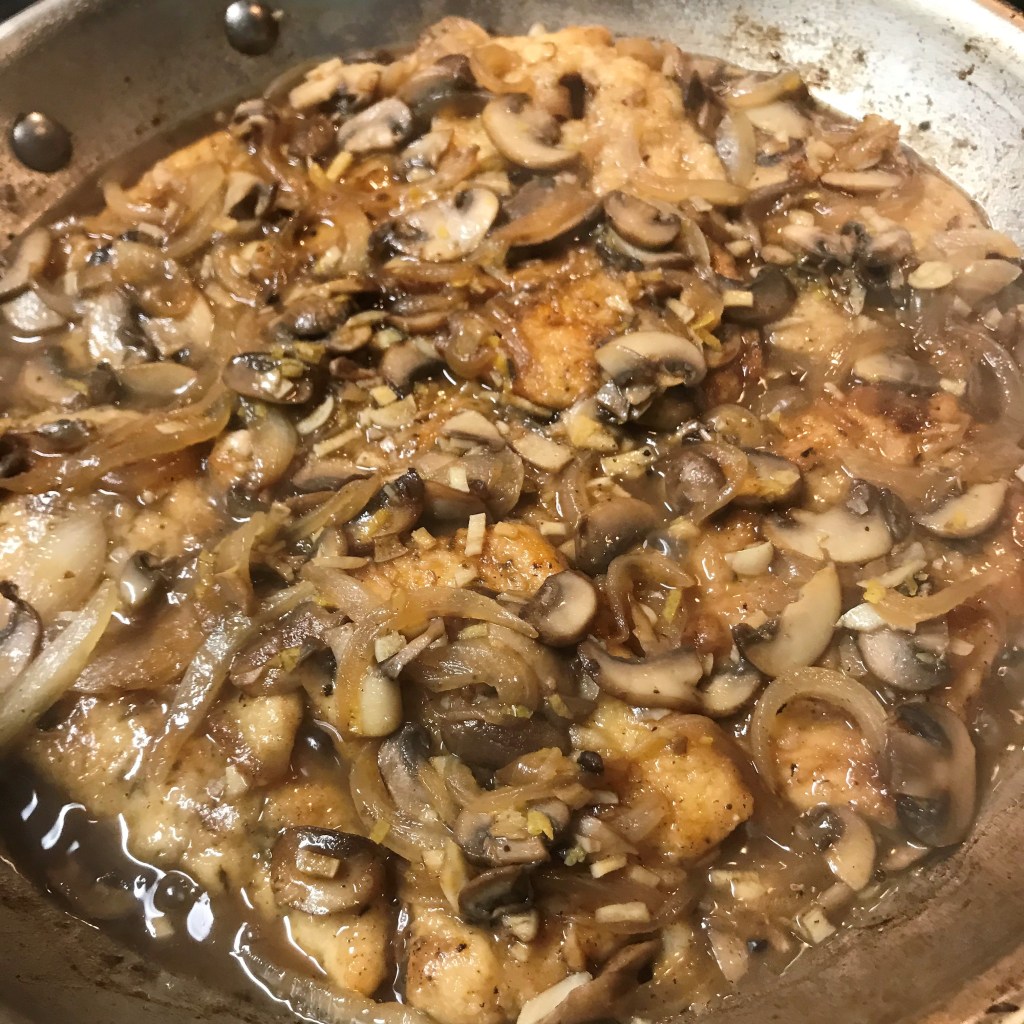
Add the broth and give the pan a gentle shake. Time to put a lid on it and relax a bit before supper.
The chicken will simmer at this low temperature for 35 to 40 minutes. It will be fully cooked well before this time, but the long simmer will result in the tenderness and richness I described at the beginning. What’s great about a recipe like this is that while the magic is quietly happening in the skillet, I have time to tidy up the prep dishes, set the table and enjoy a glass of wine with my husband. This is also a good time to prep whatever vegetable or salad I plan to serve. When the main dish is more involved, as this one is, I usually opt for a simple vegetable side. The lemon mushroom chicken deserves center stage.

For this meal, I roasted fresh asparagus. If you are cooking asparagus some other way, I will be so bold as to declare you have been missing out! Try roasting once and you’ll see what I mean. Rinse and trim the stalks, arrange them on a parchment lined baking sheet, drizzle with olive oil and roll them around to coat. Give them a little salt and pepper to taste, and pop them into a 400° F oven for 15 minutes. They should be slightly tender and retain a bright green color. Easy, yet so elegant.
And there you have it—this “Sunday Supper” dish takes a little more time than an average weeknight meal, but the payoff for your patience is a tender portion of delicate chicken, covered in savory mushrooms and fully enveloped in a rich, gravy-like coating. We like this on its own with a fresh roasted vegetable or salad, but it would also be beautiful on top of your favorite mashed potatoes, rice or linguine.
Ingredients
1.5 lb. package skinless, boneless chicken breast (or same weight of prepared thin cutlets, if you prefer)
Salt, pepper and 1/2 tsp. dried thyme leaves
1/2 cup all-purpose flour
Extra virgin olive oil
1 medium sweet onion, sliced into crescent shapes
8 oz. package fresh cremini mushrooms, cleaned and sliced
2 or 3 cloves of fresh garlic, finely chopped
4 Tbsp. unsalted butter (cold from the fridge is fine)
1/3 cup dry white wine (I use pinot grigio, or sometimes dry vermouth as substitute)
1 fresh lemon
1/2 to 3/4 cup low-sodium chicken broth (use enough to just cover the browned cutlets)
Ready to make this recipe?
If you make this lemon mushroom chicken, please let me know in the comments how it turned out for you.