After 30-plus years in the Southeast, I’ve come to appreciate many of the traditions, especially the ones related to food. There’s a particularly tasty tradition that occurs here in the fall, when churches, civic groups and Boy Scout troops set up giant, outdoor cast-iron kettles for their Brunswick stew fundraisers. They sign up volunteers, who take turns stirring the simplest of ingredients into a delicious aromatic stew, and folks arrive in droves to enjoy it by the bowl, and to take home quarts for freezing. It’s tradition and it’s delicious.
If you look into some of the old-time church cookbooks, you’d likely find Brunswick stew recipes that begin with fresh-caught rabbits or even squirrels, but (thankfully) my introduction to this homey, comforting soup was a chicken version, and that’s what I’m sharing today.
Brunswick stew is one of those comfort foods that tastes rich and hearty, but checks in on the low end of the fat-and-calories scale. Feel free to swap in other vegetables that suit your fancy—it’s what folks do in different parts of the South and depending on where you are, you might find potatoes, green beans or carrots in the bowl.
You can roast your own chicken if you’d like (overnight in the slow cooker makes amazing broth at the same time), but to keep it quick and simple, I’m using a rotisserie chicken this time, plus packaged broth, a few simple fresh and frozen vegetables, and a can of tomatoes. Whip up some corn muffins while it simmers, and dinner is served.
Can you taste the comfort?
Ingredients
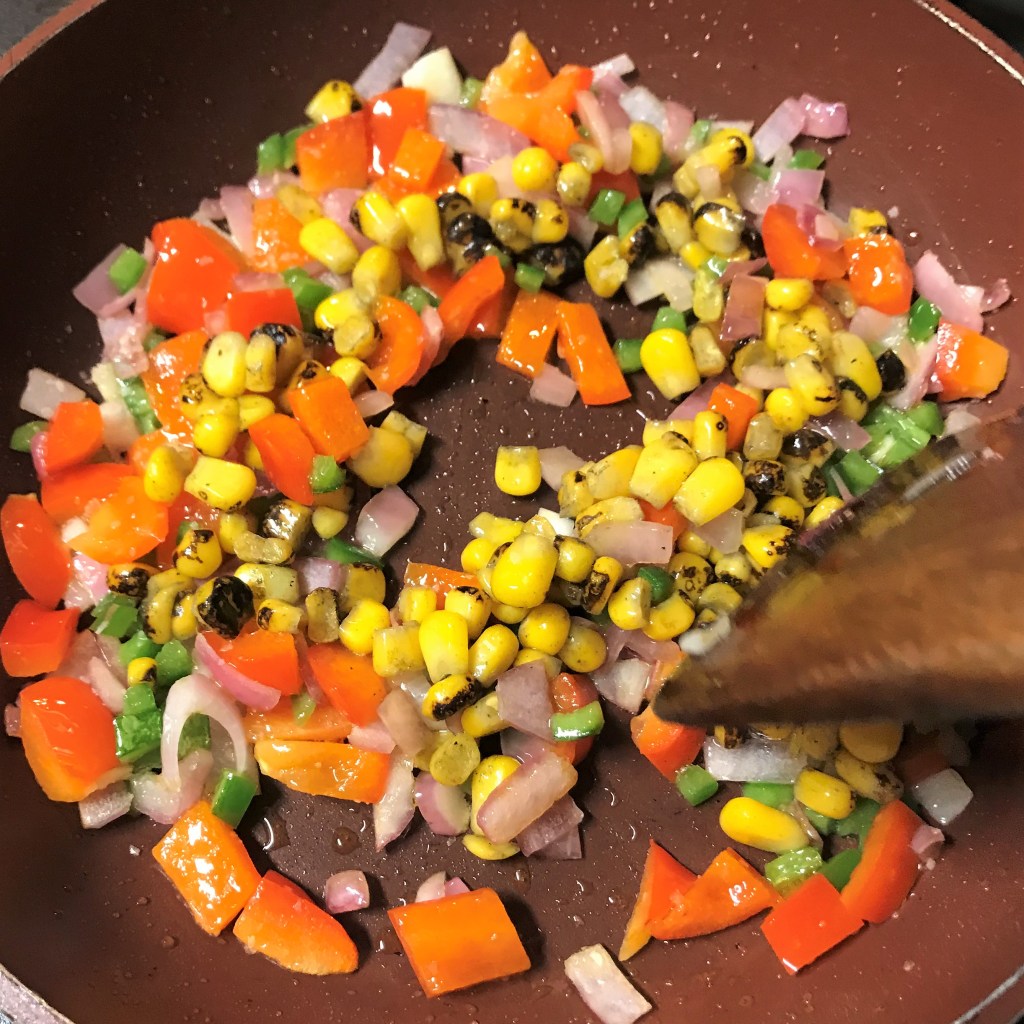
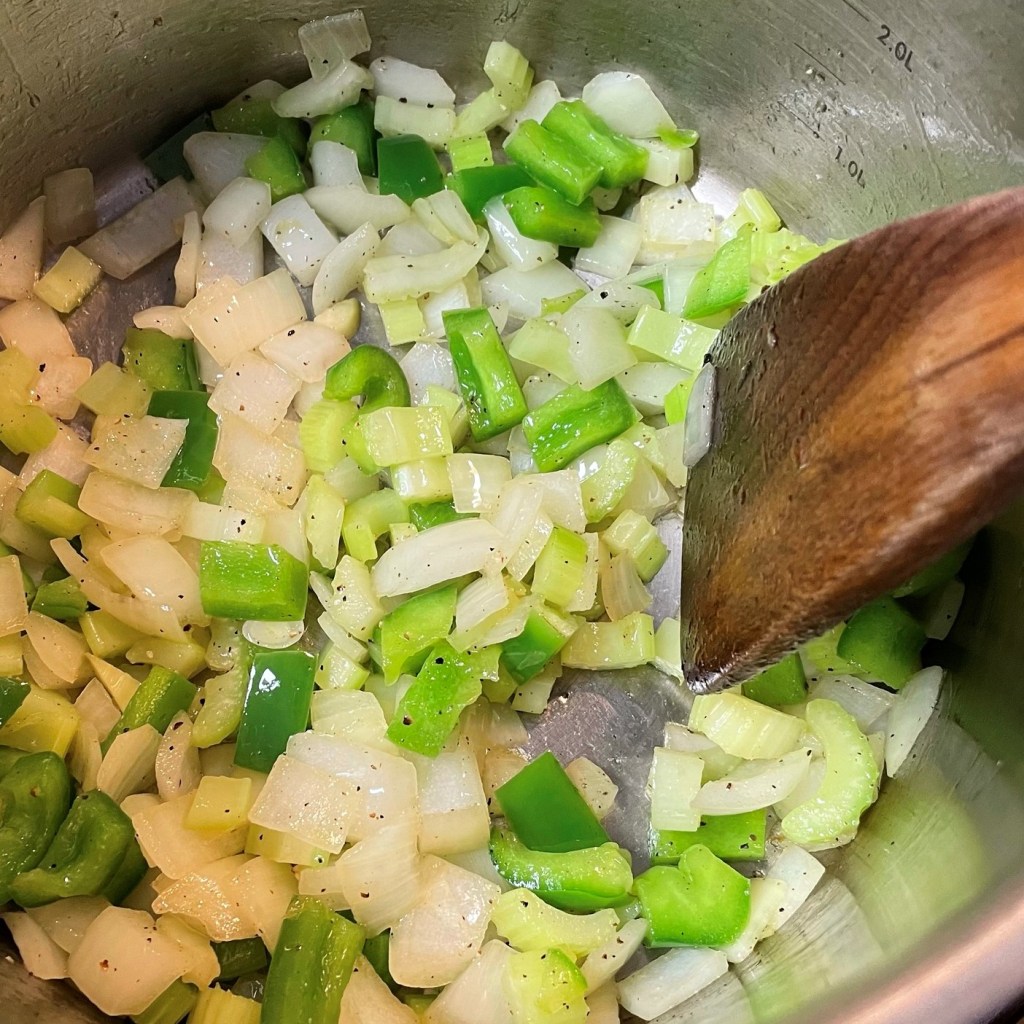
First, the essentials. This is a Southern classic comfort food, so the “holy trinity” of peppers, onions and celery is the foundation of the recipe. Any color bell pepper is fine for Brunswick stew, but I personally find the red and orange bells to be a bit on the sweet side, so I’m using a green bell.
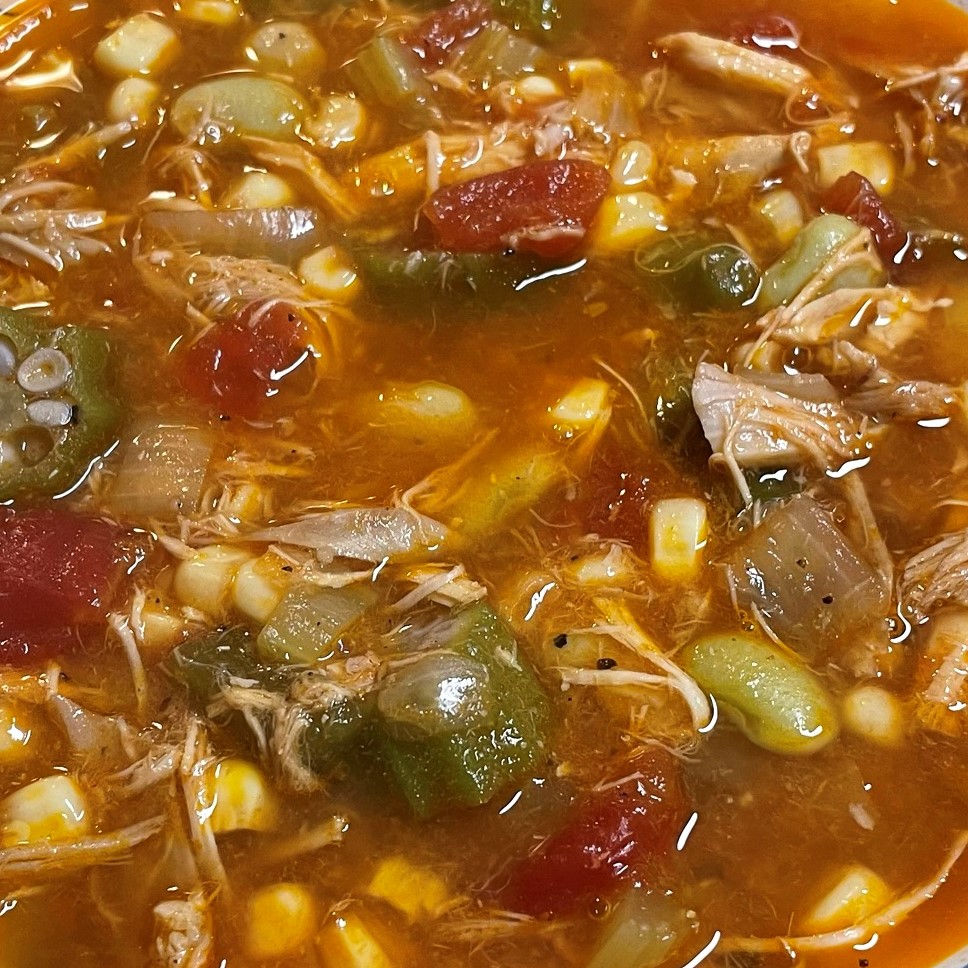
Okra came to the Americas from Africa in the 1600s, and it remains a staple of Southern cooking. You’ll find it in many Cajun and Creole recipes in Louisiana, and it’s not unusual to see it breaded and fried, or even pickled, which I love in a Southern-style potato salad or on deviled eggs. The pectin in okra gives it some thickening power when it’s cooked in liquid, but some people are turned off by the slightly slimy texture. Two things can minimize this: don’t overcook it (for this recipe, it’s added at the end), and cook it in combination with tomatoes, which is what’s happening in this Brunswick stew.
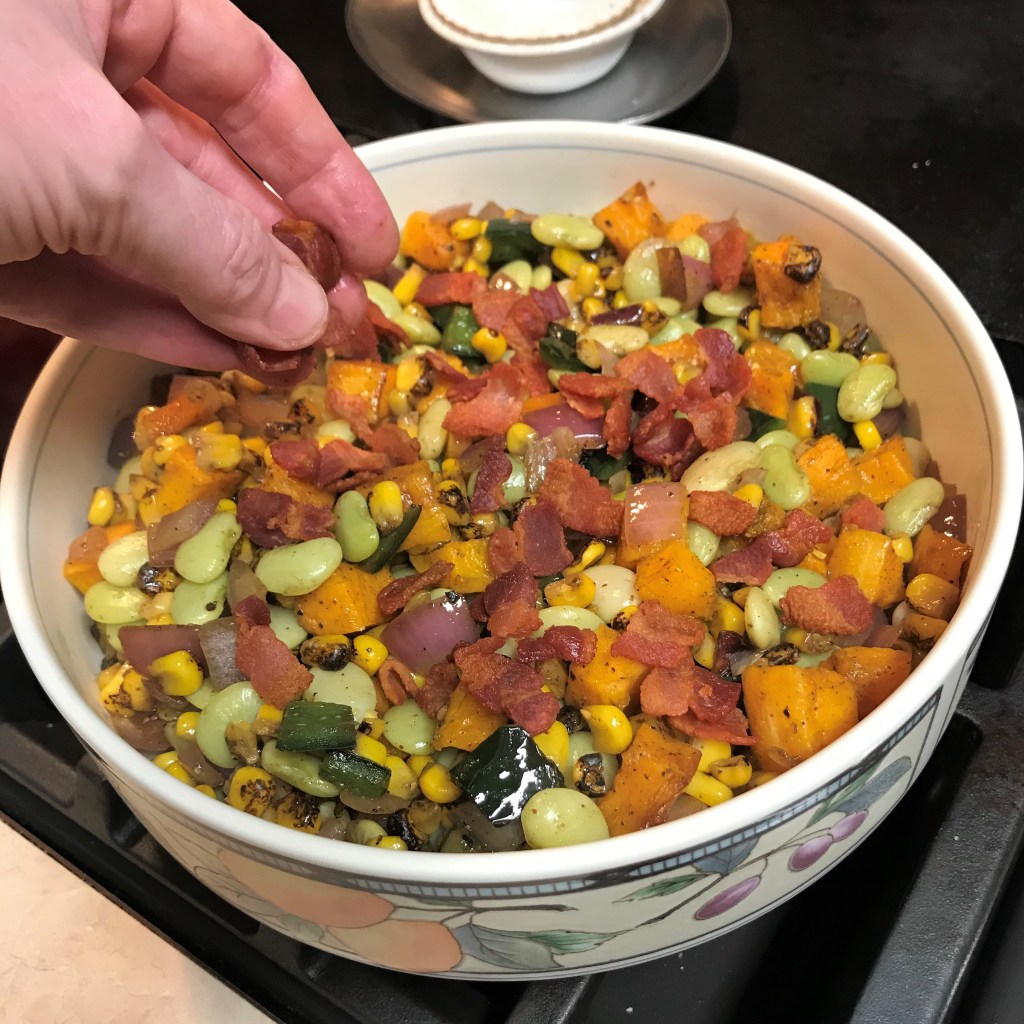
If you make this stew in the late summer or fall, of course you would want to use fresh corn, lima beans and okra.
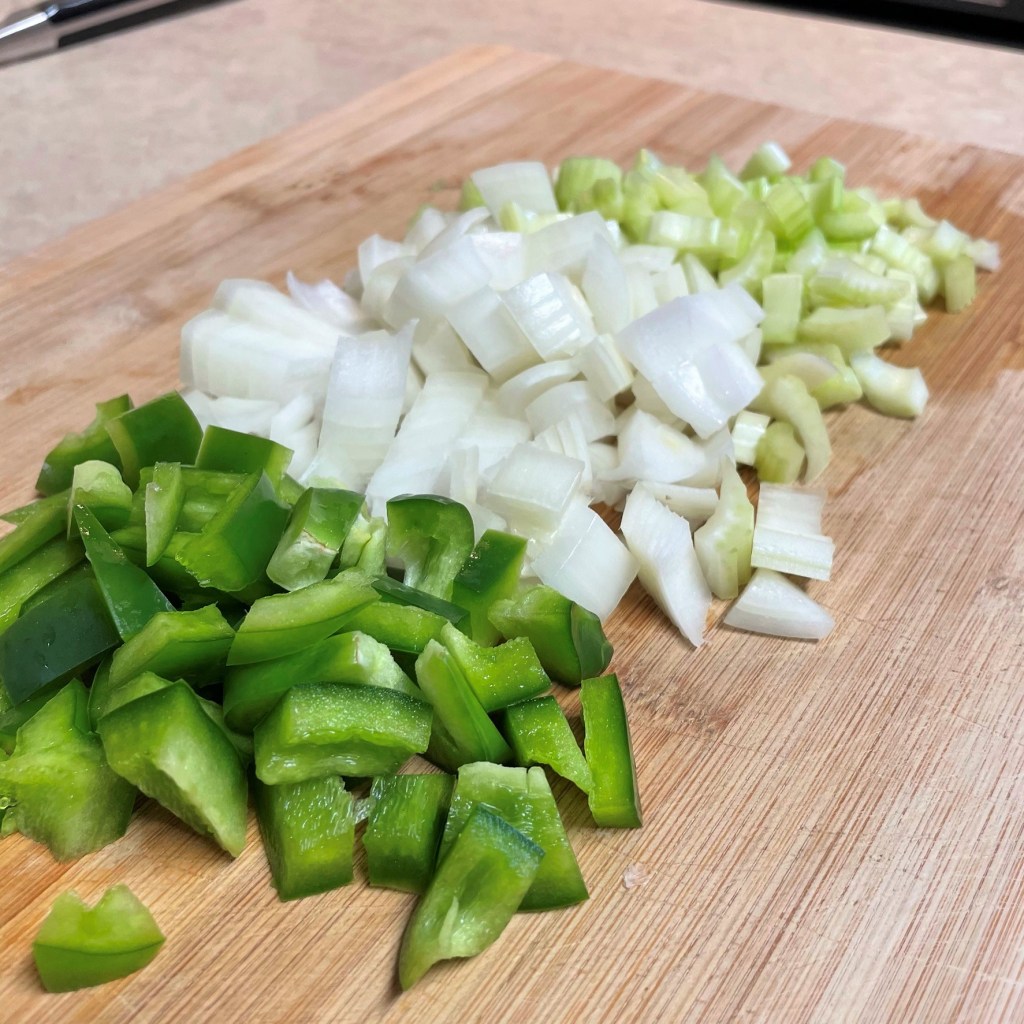
For this recipe, I like the trinity to be a bit on the chunky side.
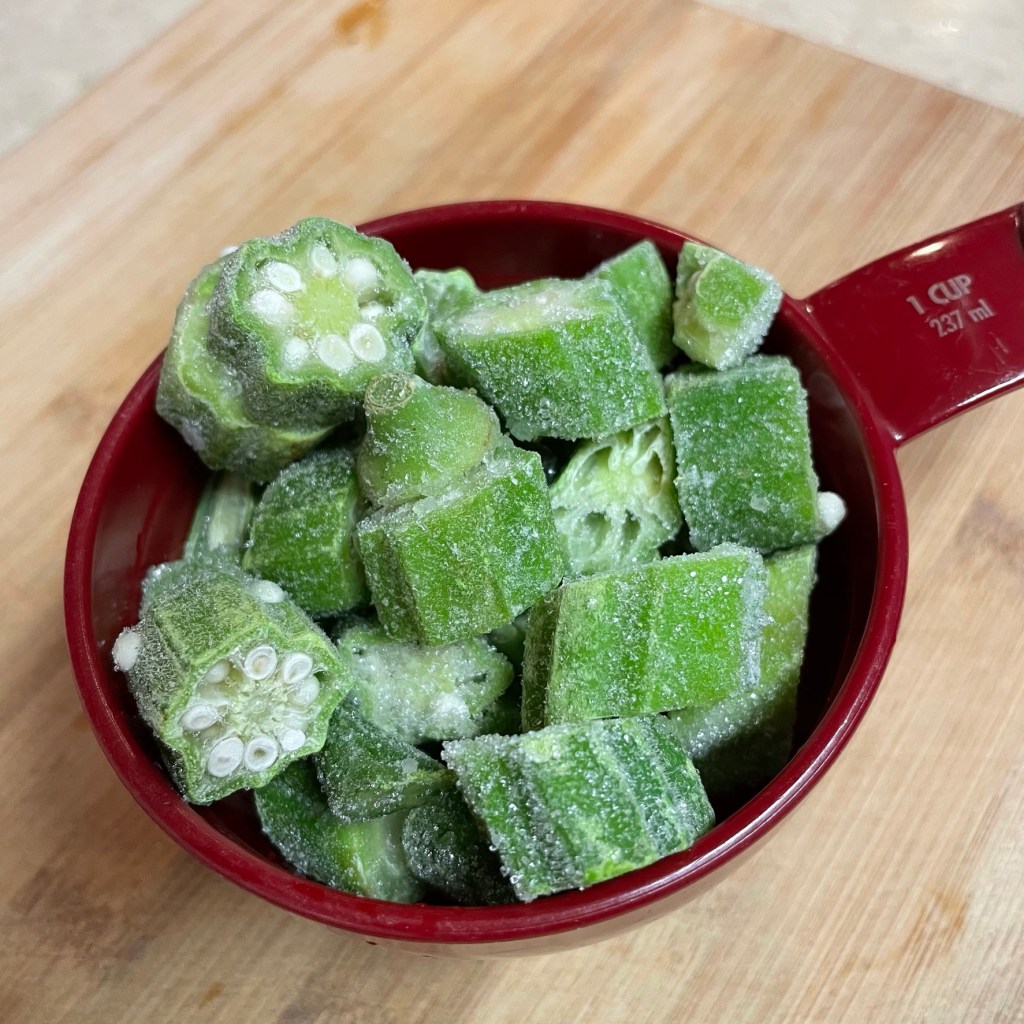
Did I mention that okra is rich in folate, B vitamins and fiber?
1 deli roasted chicken, dark and white meat shredded* (see notes)
2 Tbsp. extra virgin olive oil
1 yellow onion, chopped
4 stalks celery, trimmed and chopped
1 green bell pepper, seeded and chopped
3 large cloves garlic, chopped
15 oz. can diced tomatoes
2 quarts chicken or vegetable broth
1 bay leaf
2 cups frozen corn
2 cups frozen lima beans
2 cups frozen sliced okra
1/4 cup BBQ sauce
2 to 3 Tbsp. tomato paste
A few shakes hot sauce (optional, Frank’s RedHot or Texas Pete recommended)
Salt and pepper, of course
*Notes
If you prefer to roast your own chicken, more power to you! If you have time to work ahead, you might also want to make your own stock. Or you could make your own stock from the frame of the rotisserie chicken. After de-boning and shredding the meat, toss the bones and skin into a pot with cut-up onions, celery, carrots and just enough water to cover it all. Simmer a few hours then strain out the solids, and you’d have a great alternative to the packaged broth (or, at least, some of it).
Instructions
If the pictures here seem to defy the ingredient amounts listed, there’s good reason for it—on this particular day, I only had half a rotisserie chicken, so I halved the entire recipe. The ratios are the same, and this stew is so satisfying and delicious, I’m already regretting that I didn’t run to the store for another chicken!
Sauteing the vegetables isn’t absolutely necessary, but I always do it. If you’re making the stew in a slow cooker, feel free to add them as they are.
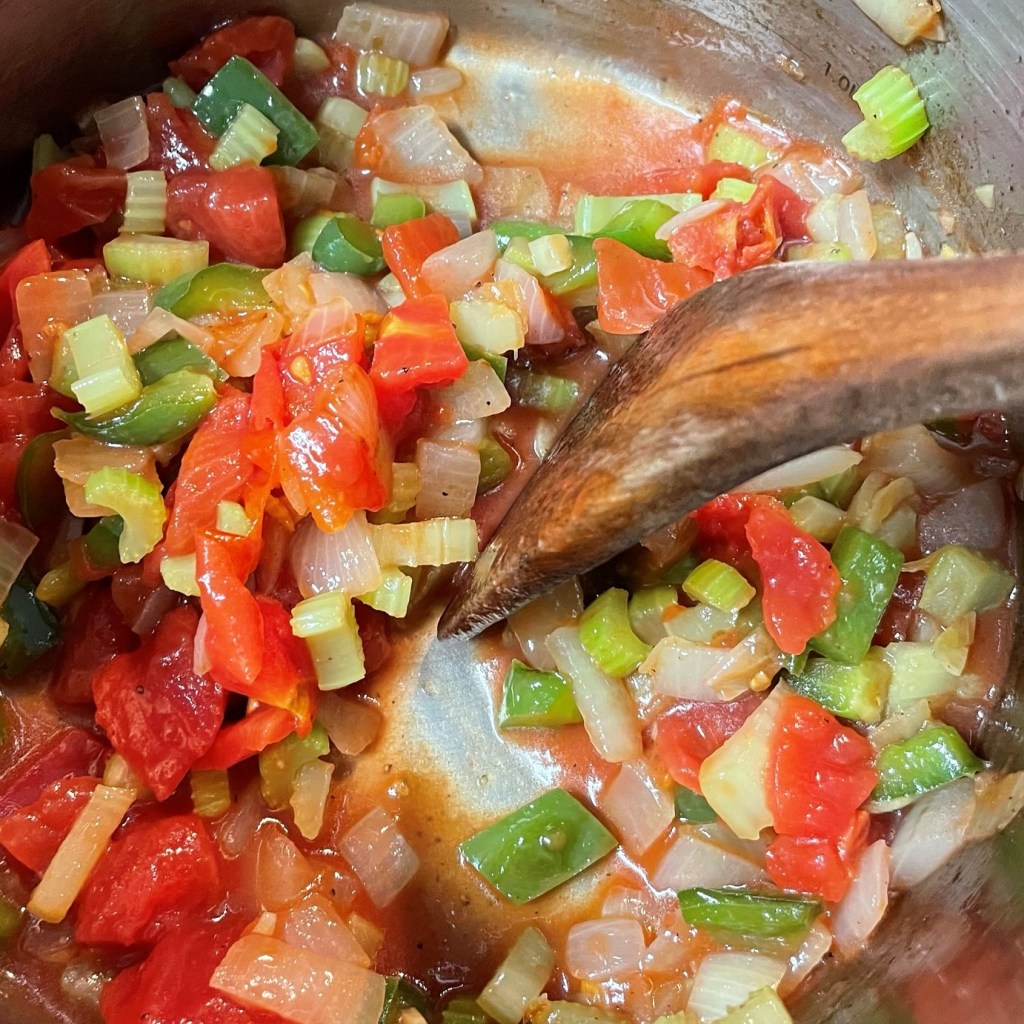
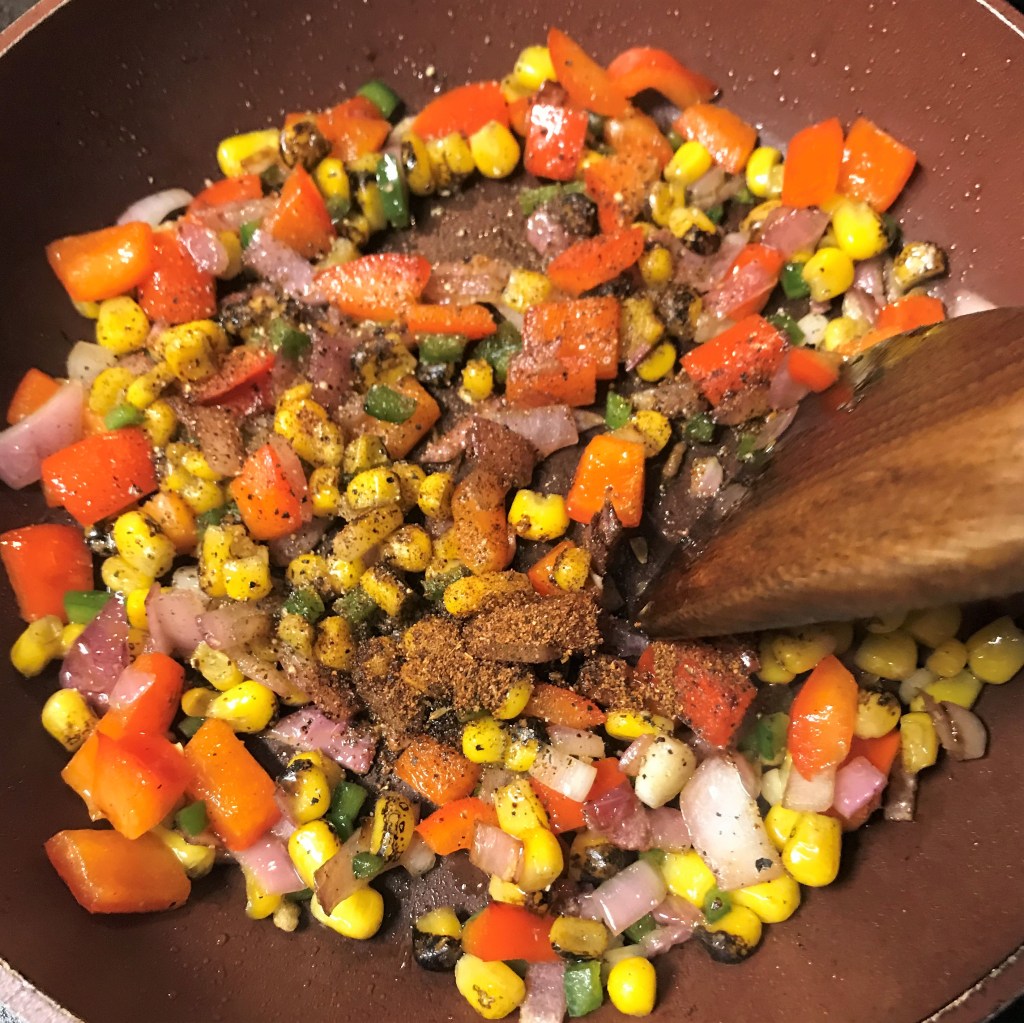
Tomatoes can take over this dish, so I keep the ratio fairly low, with only one can in a batch, and I boost their flavor with a little tomato paste.
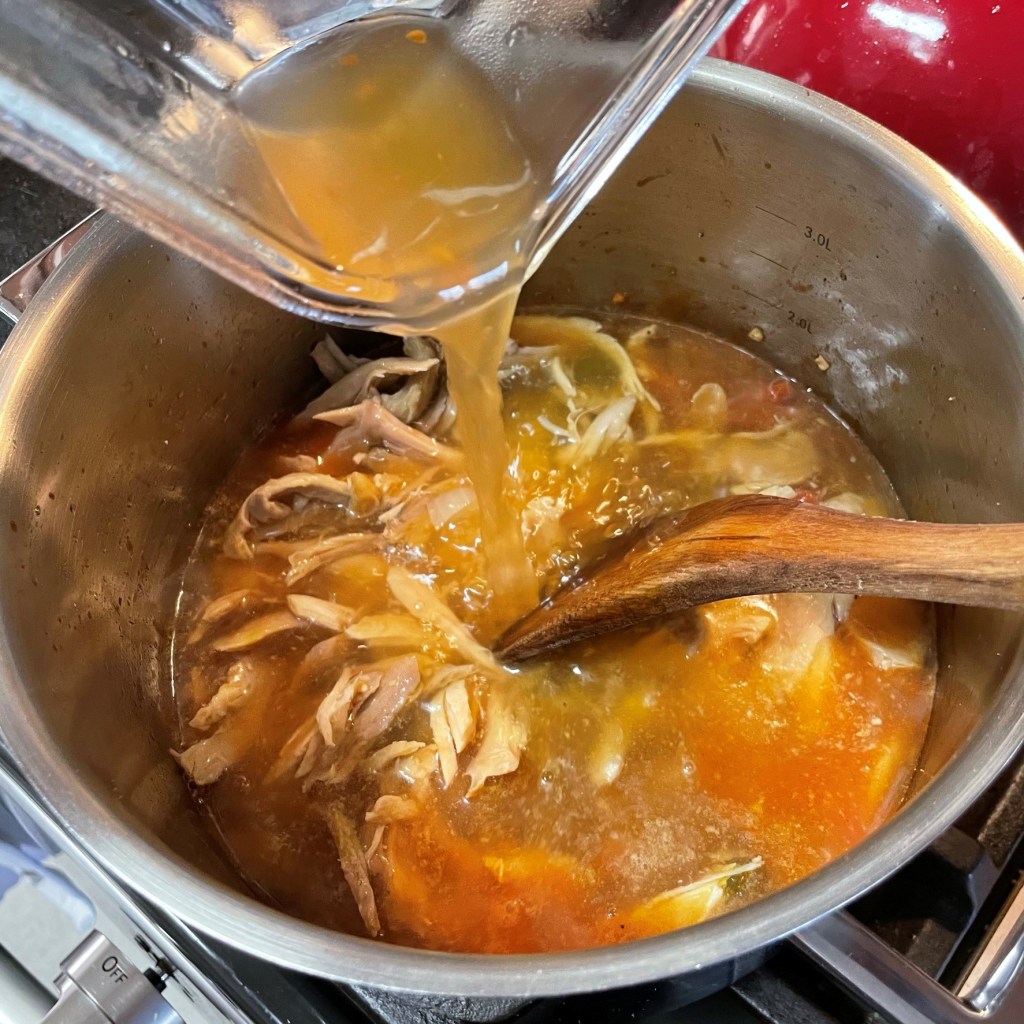
The best Brunswick stew I’ve ever made included an overnight slow-cooked chicken stock, but packaged chicken or vegetable broth works just fine, and it’s easy!
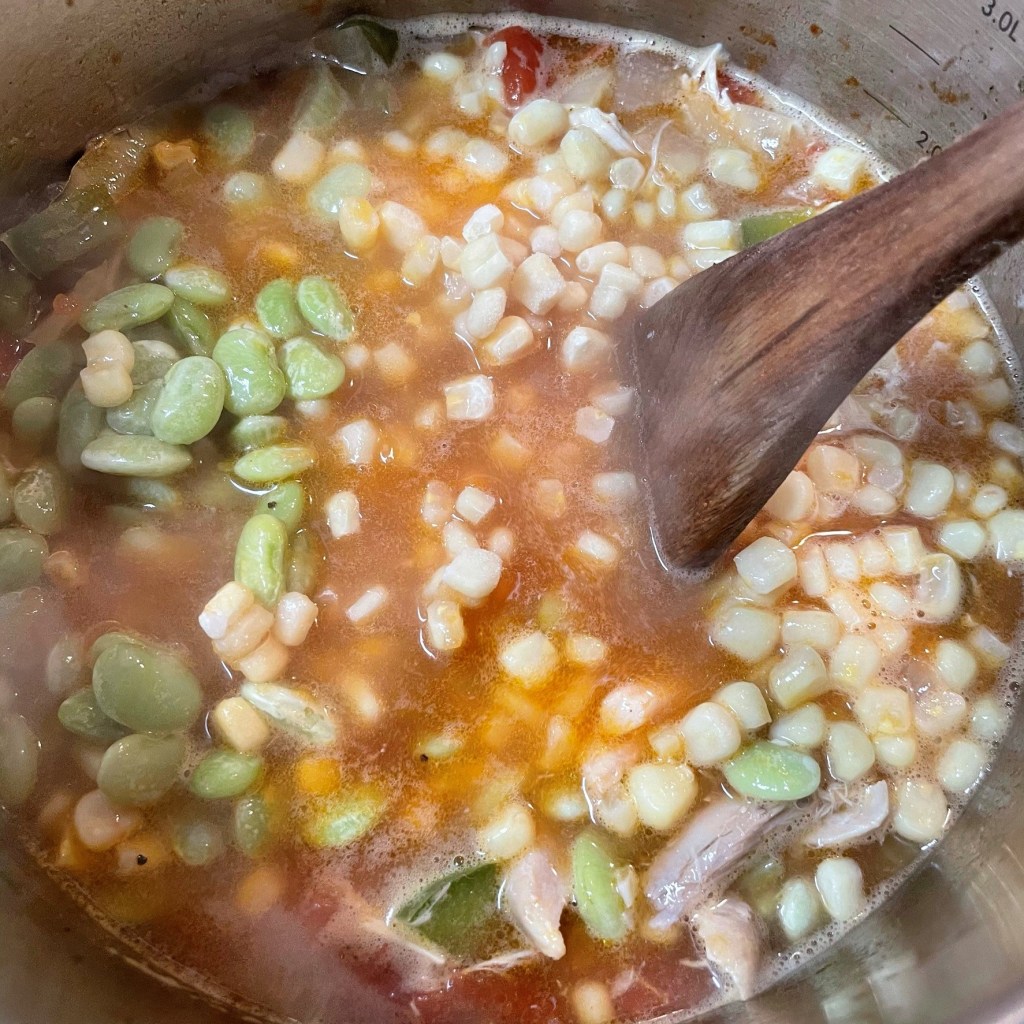
If your pantry includes canned corn or lima beans, they are perfectly welcome in this stew, but I’d recommend taking note of the sodium content and adjust your seasoning accordingly.
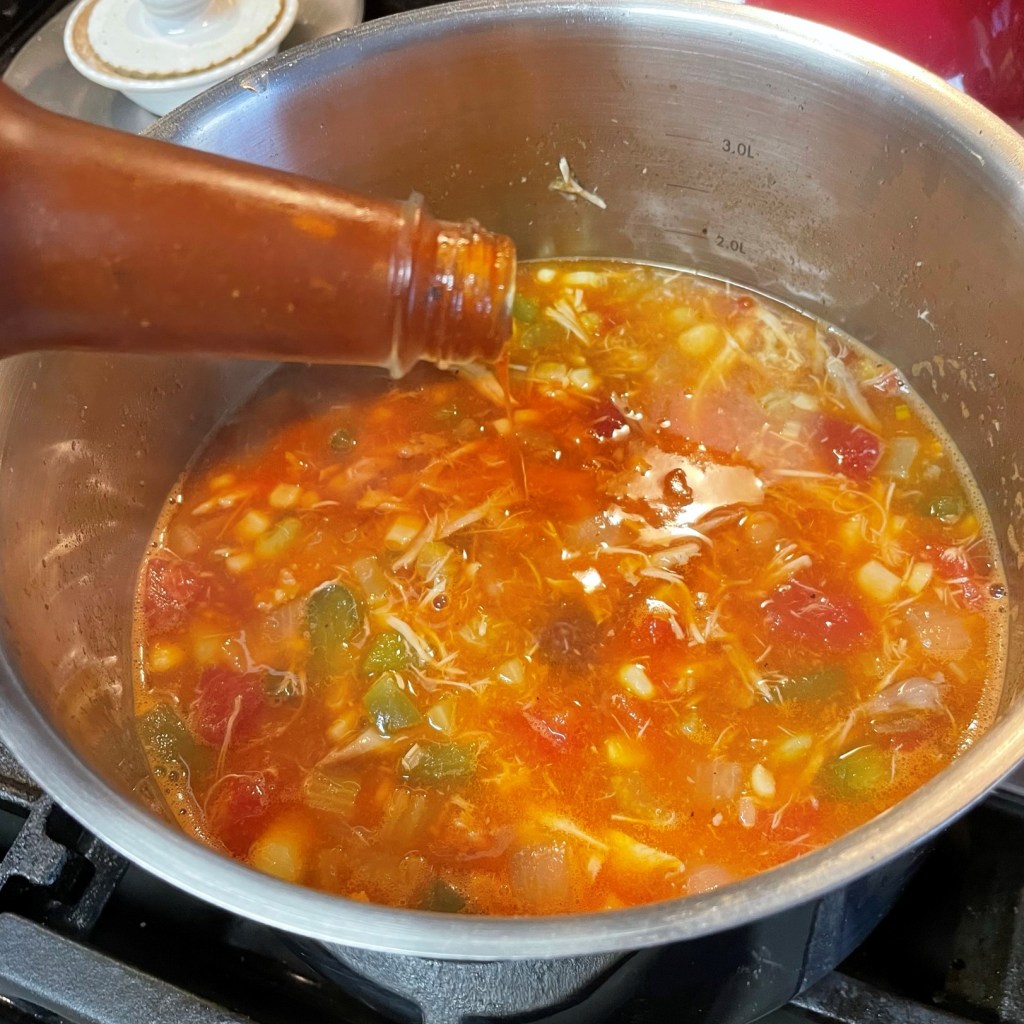
Any BBQ sauce you like is appropriate. this time, I used a bottled steak sauce that we find a little too sweet for steak. It was perfect!
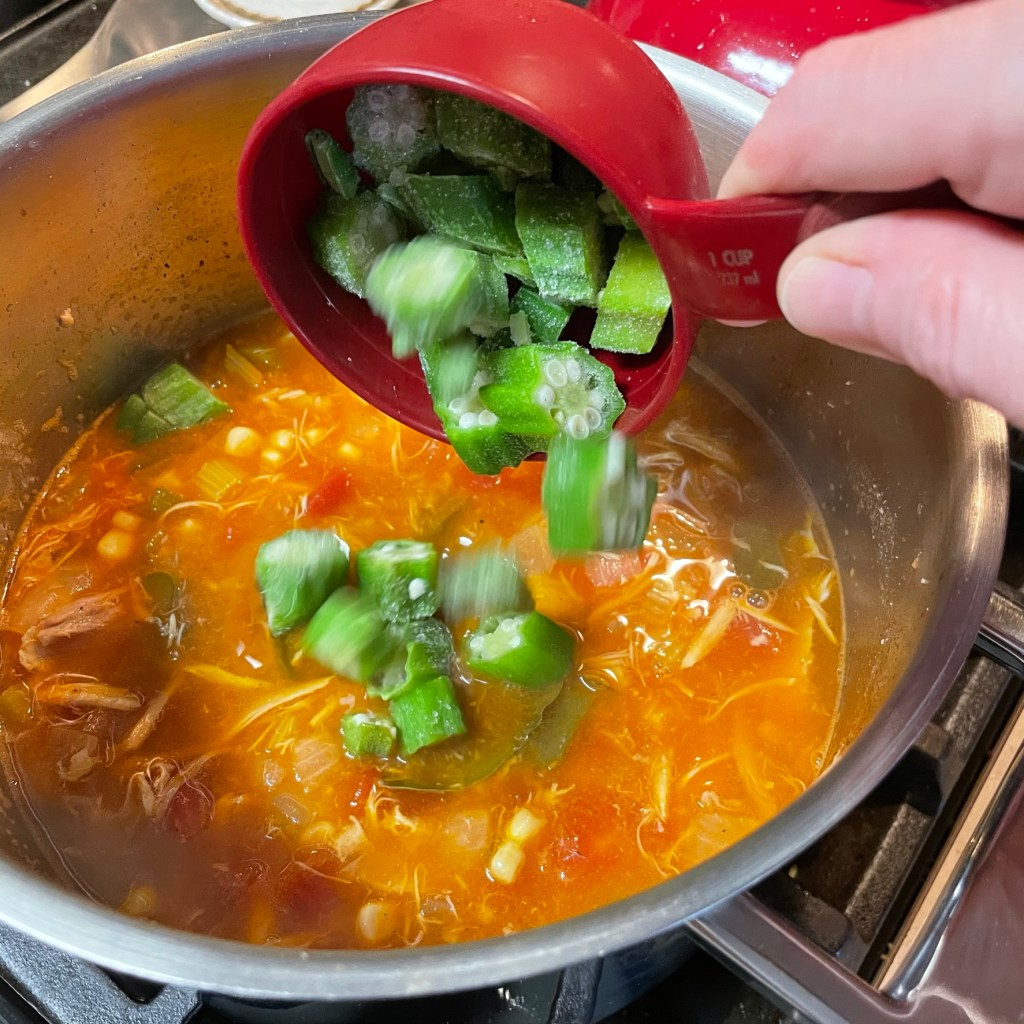
The okra goes in at the end, and it will act as a slight thickener for the stew. Simmer just until the bright green begins to fade.
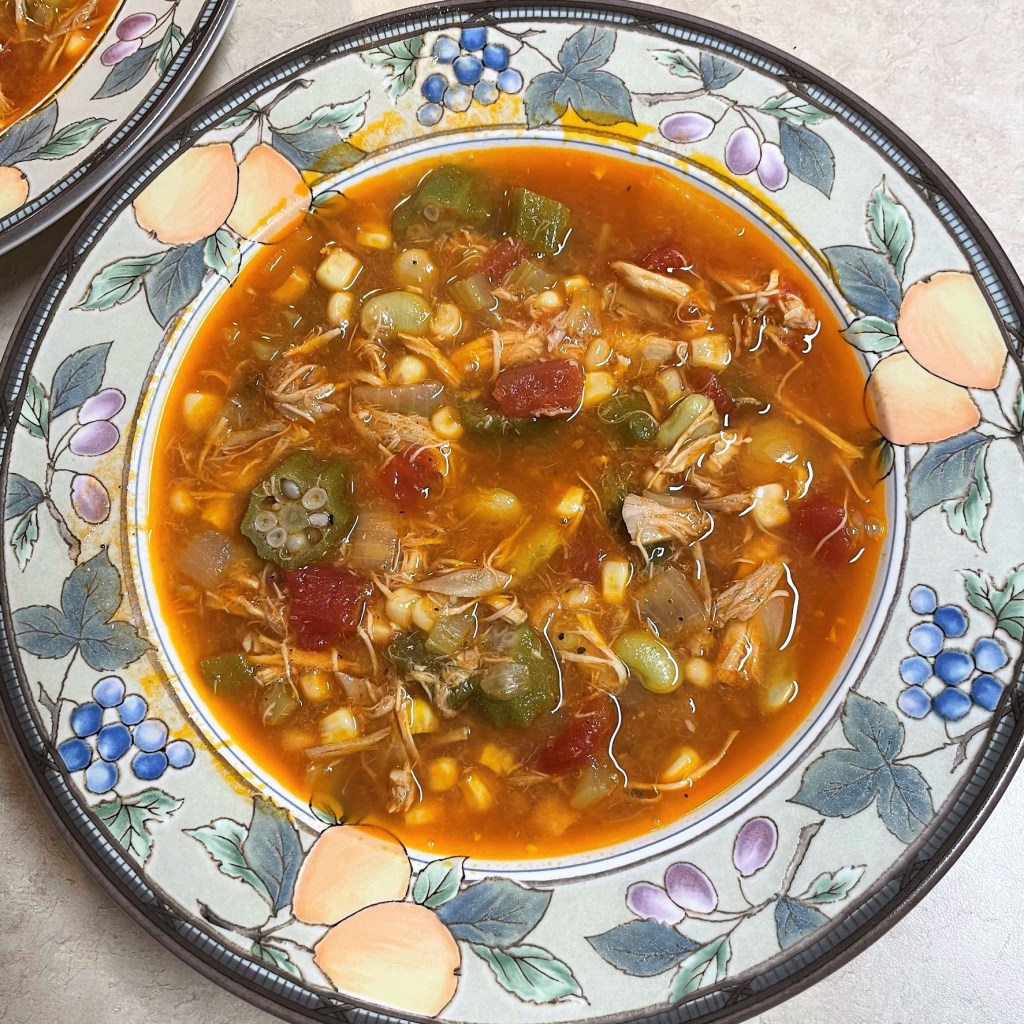
Brunswick stew is packed with nutrients, fiber and goodness. This is real, down-home Southern comfort food!
Place a large, heavy-bottomed pot over medium heat. Swirl in olive oil. Sauté onion, celery, bell pepper and garlic until vegetables are soft and onions are translucent. Season with salt and pepper.
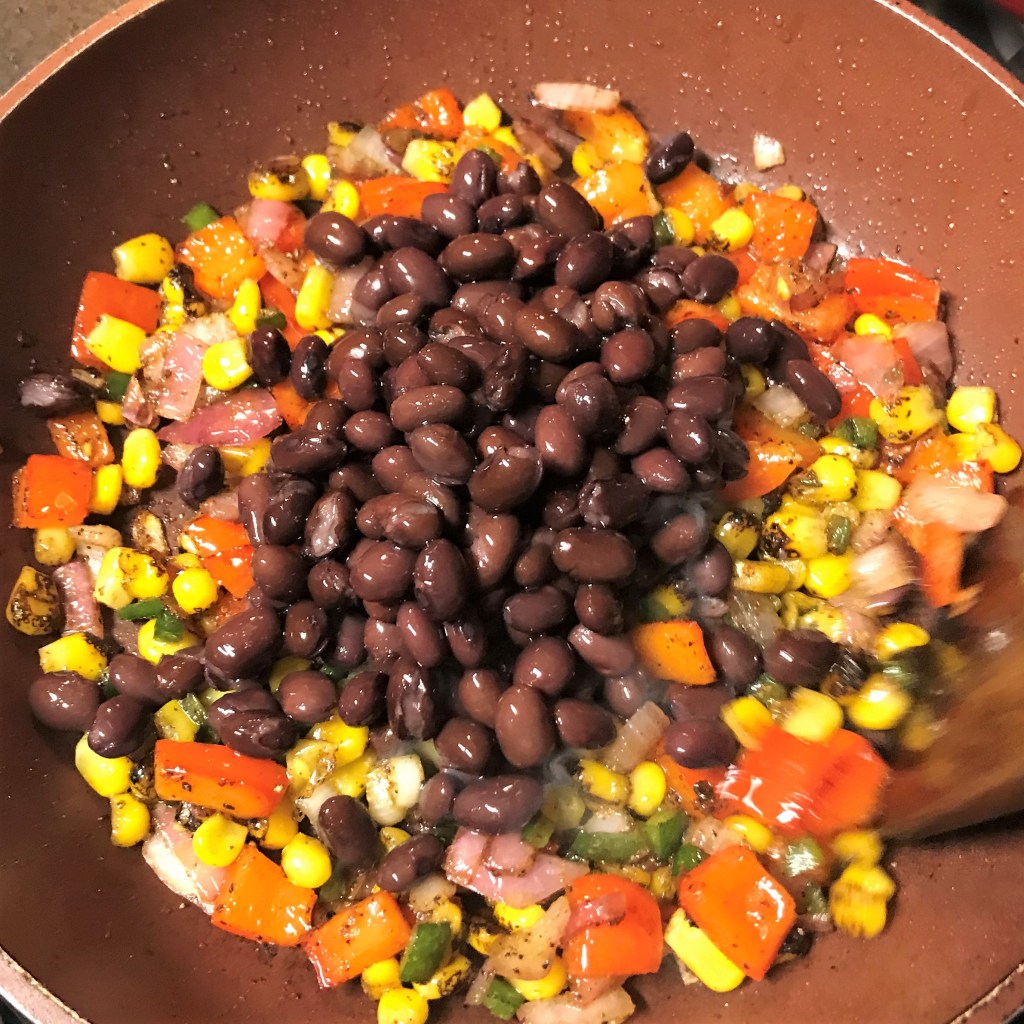
Stir in tomatoes, tomato paste, shredded chicken and broth. Add bay leaf, reduce heat and simmer up to an hour.
Add frozen corn and lima beans, but reserve frozen okra until about 20 minutes before serving, to prevent the okra from breaking down too much. Give it a taste and add salt and pepper to your preference.
Stir in BBQ sauce (and hot sauce, if using), and add the okra to the pot. When the bright green color of the okra begins to fade a bit, it’s ready to serve!
Tomorrow at daybreak, about 80 miles outside of Pittsburgh, Pennsylvania, one of the strangest of all American traditions will occur. Punxsutawney Phil, the notorious groundhog (or woodchuck, as he is known in my old neck of the woods), will be dragged out of bed by the scruff of his neck and ordered to break the news to the faithful fans who have traveled there to get a verdict on winter. The mayor of Punxsutawney will hold this oversized rodent up to the crowd as Mufasa did in the presentation of Simba, and poor Phil will probably be some combination of terrified, confused and sleepy. Depending on whether he sees his shadow, we will either have an early spring or six more weeks of winter. I can never remember which scenario leads to which outcome, but how do we really know what he sees, anyway?
Such a curious thing, to imagine this whole scene is a valid means of setting expectation for what’s to come. Surely these folks have calendars. Winter ends March 20, when spring begins, and from Groundhog Day, the calendar states clearly that it is six more weeks, plus a few days. I suppose that everywhere else in the world, people just think of it as Feb. 2. I’m in favor of letting the rascal sleep.
At least we can watch the amusing Bill Murray movie. Again. 😉
From a purely whimsical standpoint, the observance of Groundhog Day does, if nothing else, provide a little comic relief from the heaviness of winter. Punxsutawney Phil may not be a real prognosticator, but he is a beacon of hope, a light at the end of the tunnel that was gray January. I’ve been trying to offer the same recently with presentation of bright and colorful dishes to chase away that gray.
A sprinkling of cilantro and squeeze of fresh lime completes this colorful Meatless Monday meal!
These Tex-Mex stuffed sweet potatoes will bring a big generous pop of color to your Meatless Monday, and vibrant flavors, too. Zesty peppers and fire-roasted sweet corn, combined with black beans and cheese on an oven-roasted sweet potato is both nourishing and tasty, customized to your own heat preference, and you can top it with avocado, your favorite salsa, sour cream or whatever else you like. Our go-to seasoning for Tex-Mex dishes is my own spice blend, lovingly named “Fire & Brimstone,” given its multiple layers of spicy heat and smoky depth. Of course, I’ll share that, too.
This is one recipe that takes almost no skill in the kitchen. Really, if you can chop an onion, you’ve got this. You could even pop the sweet potatoes in the oven while you watch Groundhog Day on TBS (they’ll have it on a 24/7 loop, I’m sure), and finish the rest of the prep during the commercial breaks.
Serves 2 (or double it so you can have it again tomorrow)
Beautiful colors, and loads of Tex-Mex flavor!
Ingredients
2 large fresh sweet potatoes, scrubbed clean
1 Tbsp. kosher salt
1/2 medium red onion, chopped
1/2 red bell pepper, chopped
1 Tbsp. jalapeno, chopped
1/4 cup fire-roasted frozen corn (or regular corn)
A few shakes of Fire & Brimstone* (or another Tex-Mex seasoning, see notes)
About 2 oz. finely shredded mild cheddar cheese (or Colby, Monterey Jack, etc.)
1/2 can black beans, drained and rinsed
1/2 ripe avocado, cubed
Fresh cilantro and lime, for serving
Side accoutrements as desired, such as sour cream, salsa or pico de gallo
*Notes
My homemade spice blends do not have salt in them. Be mindful of the sodium content in whatever seasoning you use, so you don’t overdo it on additional salt while preparing the dish. If you’d like to try my Fire & Brimstone, see the ingredients listed at the end of the post.
Instructions
Soak the sweet potatoes in a simple salt brine for about 20 minutes before roasting.
“X” marks the spot, and allows steam to escape the sweet potatoes as they roast.
Lightly saute the peppers and onions, then add the corn to heat through.
Add a few shakes of your favorite Tex-Mex seasoning to incorporate flavor throughout the veggie mixture.
Black beans add protein and fiber, making this dish ultra-satisfying for Meatless Monday.
Split the warm potato open along the cut lines and smash gently with a fork to create a base for your toppings.
Sprinkle cheese on first, giving it a chance to melt between the warm potato and toppings.
Pile on the bean and veggie mixture next.
Use a paring knife to score the flesh of the avocado. It makes scooping simple and less messy.
A sprinkling of cilantro and squeeze of fresh lime completes this colorful Meatless Monday meal!
In a large bowl, combine kosher salt with enough hot water to cover both sweet potatoes completely. Allow the potatoes to rest in this quick brine for about 20 minutes.
Preheat oven to 400° F, with rack in center of the oven.
Remove potatoes from brine and dry completely with paper towels. Use a sharp knife to cut an “X” about 3/4″ deep into the top of each sweet potato. This will be an “escape valve” for steam as the potato bakes. Place the potatoes on a parchment lined baking sheet.
Bake the sweet potatoes for about 1 hour plus 15 minutes, or until soft enough to squeeze easily with a towel. About halfway through baking time, remove the pan and carefully cut the X marks a little bit deeper, but not all the way through.
Near the end of baking time, heat olive oil in a small skillet over medium heat. Add onions, red bell pepper, jalapeno (if using) and corn. Sauté until onions are softened and translucent, about five minutes. Add black beans to the mixture and toss to heat through.
Transfer sweet potatoes to serving plates. Carefully squeeze open the potato, using the X marks to guide them open. Use a fork to lightly smash the potato. Sprinkle with salt and pepper.
Divide the shredded cheese directly onto the hot potato, then top with the bean-corn mixture.
Use a sharp paring knife to score the avocado flesh for easy scooping. Divide the avocado onto the plates as a side to the sweet potato. Sprinkle with cilantro, give it a squeeze of fresh lime and serve.
Where there’s smoke, there’s fire! This is a recipe blend I developed after repeated disappointment with all the salt in commercial blends. I use a variety of pepper ingredients, from mild and fruity to hot and smoky, and it works well as a sprinkle-on seasoning, chili add-in or even a dry rub on steaks or roasts. Adjust the amounts of any ingredient to suit your preferences. This recipe makes about 1/2 cup of spice blend. Store in an airtight jar in a cool, dry cabinet.
All’s well that ends well, and after a few unexpected issues with the ingredients in this dish, I’m pleased to deliver the end result. It’s a colorful mix of healthful ingredients, with a little bit of crispy bacon on top, just because.
In case you aren’t familiar, succotash is a very popular dish in the southeast U.S., one that I first met when I dated a guy who was born and raised in rural North Carolina. His mother made succotash with sweet corn and lima beans as a regular part of her Sunday supper, which was immediately followed by three hours of gazing at a NASCAR race (yawn). They were nice people and she made juicy fried chicken (and the best coconut cake I’ve ever had the pleasure of eating). When I dared to make Thanksgiving dinner for them, I was admonished by boyfriend’s dad, who informed me that I needed to learn how to cook green beans. In the South, this would customarily involve a pressure cooker and a pound of “fatback,” a pretty dramatic contrast to my “upstate” green beans, which were delicately blanched and served with butter and almonds. Yep, they were still actually green. My bad.
I’m quite sure his family would not have approved all the liberties I’ve taken today with this succotash, adding all this crazy color and bold flavor, but what can I say—you can’t fix sassy.
For my version of succotash, I changed course for a moment with an idea to use golden hominy rather than corn because the hominy matched the size of the butter beans and roasted squash pieces. But as they say about the best-laid plans, things didn’t work out when the canned hominy proved to have texture equal to hog slop—it would have looked even worse in pictures than it did in the bowl. That’ll teach me second-guessing myself (this time, anyway).
I suspended preparation of the dish, long enough for my super-efficient husband to pick up a bag of our favorite frozen roasted corn, which brought me back to my Plan A. The roasted corn is pretty and rustic, and with addition of the big pieces of red onion and dark, earthy poblano pepper, my sassy succotash is a bona fide hit for Thanksgiving this year.
The finished dish has so many different colors and textures. It’s flavorful, and full of nutrients, too!
Oh, and I married the right guy, too—born and raised in NYC, and couldn’t care less about NASCAR. All’s well that ends well. ❤
2 cups frozen butter beans*, cooked according to package
3 slices uncured, smoked bacon, cut into 1” pieces
1/2 medium red onion, chopped
1/2 large poblano pepper, chopped*
1/4 tsp. ancho chile powder* (see notes)
1 1/2 cups frozen roasted corn*
*Notes
Butter beans are usually a bit larger than lima beans, although I’m not sure it was the case with the bag I purchased. Either will work fine in this dish, so don’t sweat it.
I chose poblano for this dish because of its dark green color and mildly smoky flavor. It’s not as hot as jalapeno, but does have a little kick to it, though the heat dissipates during cooking. You could substitute a dark green bell pepper if you prefer.
Ancho chile is the dried, smoked version of poblano peppers. If you cannot find it, substitute any chili powder—it’s a small amount, so you won’t compromise or alter the flavor much.
We love the roasted corn from Trader Joe’s in so many things. I have seen other brands occasionally, but it would also be fine to use regular frozen corn, or, of course, you could upstage me and grill fresh corn!
The hominy setback turned out to be a blessing, because everything was prepped and ready to go for assembling the dish. Here’s how it goes, and you’ll find written instructions below, along with a downloadable version for your recipe files. Enjoy!
The top part of my butternut squash measured about two cups of cubes. I’ll use the rest of the squash for another dish later.
The squash cubes get tossed in oil, seasoned and roasted for about 25 minutes. You want them softened, but still a bit firm.
Frozen butter beans need to be cooked. Follow package instructions, then shock them in cold water to stop the cooking.
I love that my bacon didn’t leave a lot of “crumbs” in the pan. If yours does, just use a spoon to pick out the obvious pieces, but keep the grease!
Cook these guys until they are slightly soft, but not mushy. Remember to season with salt and pepper.
Add the corn, and then the butter beans.
Be gentle with the squash pieces so they don’t fall apart. By the way, is it blurry in here, or just me? 😀
Once it’s heated through, it’s ready to serve!
The crispy bacon provides a great crunchy contrast to the other textures. Sprinkle it on top just before serving.
Instructions
Preheat oven to 400° F. Line a rimmed baking sheet with parchment paper.
Toss the butternut squash pieces in olive oil, just enough to coat all sides. Season with salt and pepper and roast them for about 25 minutes, or until fork tender, but firm.
Prepare the frozen lima beans according to package instructions, and then shock them in cold water to halt the cooking so they don’t get mushy. Drain and set aside.
Heat a large, nonstick skillet over medium heat. Add the bacon pieces and toss to cook until they are done and crispy; remove to a drain on a paper towel. Do not drain the bacon grease.
Add the red onion and poblano peppers to the skillet and sauté in bacon grease until they are very slightly soft. Sprinkle ancho chile powder over the mix and toss to coat.
Add the frozen corn to the skillet and toss until heated through. Add the cooked butter beans and toss again.
Just before serving, toss the butternut squash into the pan and toss the mixture to reheat the squash and combine everything evenly. Transfer the succotash to a serving bowl, and sprinkle with the reserved crispy bacon pieces.
About that extra squash…I had a sweet patient girl waiting for just such an occasion. Good catch, Nilla! ❤ (She is lightning fast!)
Want to make this dish vegan?
Omit the bacon, and saute the onions and peppers in a tablespoon of olive oil rather than bacon grease. No other adjustments will be necessary. I love an adaptable recipe!
One of these days, I may write a cookbook including only wild and wacky ideas for incorporating leftovers into new recipes. No matter what you had the first time, there’s always a creative way to re-purpose what’s left over into something delicious. Vegetables find their way into omelets or onto pizzas, a lone chicken breast can be diced and turned into a salad spread, and even stale bread can be reinvigorated into a delicious dessert (soon, I’ll share the recipe for my Gram’s unmatchable bread pudding).
Recently, I rallied together some black beans left over from Taco Tuesday, more (but different) beans left over from a take-out fried chicken meal, several bits and pieces of leftover peppers and onions, and the remnants of corn from the sweet corn ice cream that I highlighted during National Ice Cream Month (I promised I’d do something fun with them, and here it is)—and turning the whole thing into dinner, covering Meatless Monday and National Waffle Day, all in one swoop. Did you follow all that? This is how my brain works, friends, so when I share with you that I sometimes wake up thinking about recipes, I do hope you realize I’m not joking.
Flashback from the ice cream: Don’t think for a minute that I won’t find a good use for the leftover corn pulp! Delivering on that promise today!
The truth is, I already had these waffles in mind for using the leftover corn from the ice cream. These sourdough-based crispy gems are adapted from one of my favorite recipes from King Arthur Baking’s website. I’ve never made the recipe as written (theirs is for pancakes), but I have enjoyed various versions of it as waffles. If you don’t have sourdough going (this recipe requires it), use any other recipe for waffles with corn mix-in—maybe this one, but omit vanilla, cinnamon or anything else that would make them sweet or “breakfast-y.” The corn itself is sweet enough. Or just use cornmeal waffles or cornmeal pancakes—you know, be the boss of your own kitchen.
The southwest-inspired topping was a no-brainer for me, with the beans and bell peppers I had left over, and it will be a great dance partner to the corn and scallion flavors in the waffles. You may note that the King Arthur recipe calls for a “bean salad” topping, which is similar but more of a cool, relish-y accompaniment. I wanted something warm and hearty enough to be served as dinner.
I cook by instinct, rarely by recipe, and for no particular reason while dreaming up ideas for this meal, I had a question pop up in my mind about how to add another element to the finished dish so it didn’t seem dry, as waffles without a sauce sometimes do. We use sour cream as a topper on a lot of southwest-themed dishes, but I hate that it makes the entire dish cold before you take a single bite. Anything liquid would make the waffles soggy, completely defeating the purpose of the whole meal. And then, suddenly, every light in the world came on at once in my imagination. Perhaps one of the biggest “aha moments” my brain has ever experienced in the kitchen.
Whipped cream. But not sweet. Add a savory spice. But not salt. Boom!
The result was super light and airy, with a rich but subtle flavor that melted into a silky river all the way through the bean topping. It was absolutely delicious, and I cannot believe I’ve never had something like it in a restaurant. I seasoned it with chipotle, but paprika or cumin would’ve been just as tasty.
And oh man, just like that, I’m off and running with a million other things this savory whipped cream should accompany. Makes me ache for autumn, when I can spend a whole afternoon simmering black bean soup.
But it’s almost dinner time, so I’ll have to back-burner that idea for a few months. Let’s get cooking!
Hearty, satisfying, meatless and made entirely from leftovers.
1/2 cup plus 2 Tbsp. all purpose flour (remember to fluff, sprinkle, level when you measure)
1/2 cup milk
2 Tbsp. canola oil (if making pancakes, only use 1 1/2 tsp.)
1 tsp. baking soda
1/4 tsp. salt
1 large egg
1/2 cup cooked corn kernels
3 scallions, chopped (white and green parts)
Waffle Instructions
Combine the starter, flour and milk in a large bowl, mixing until thoroughly incorporated. Cover and allow it to rest on the counter at least 30 minutes in a warm place, such as the microwave.
Add the oil, baking soda, salt and egg, and stir until combined. Fold in the corn and scallions, plus about half of the chopped jalapeno listed in the topping ingredients. Note that if you are making waffles with the mixture, you should use the greater amount of oil noted above. The oil in the batter helps prevent sticking and also ensures a lovely crispy exterior to the waffles.
Bake according to your waffle maker’s recommendations, and keep the waffles warm while you finish the topping.
The leftover corn is sweet after its role in the Sweet Corn Ice Cream. That will lend a terrific flavor balance to the zesty scallions in my waffles.
The batter is full of texture and smells delicious when it hits the hot waffle iron.
Crispy on the outside, fluffy and tender on the inside. Sourdough waffles are the best!
I’ve made these waffles in both a Belgian waffle maker and a standard maker. Les and I decided we like the standard waffles best. If you don’t have a waffle maker, use the lesser amount of oil and make the recipe as pancakes, as suggested on the King Arthur website.
Topping Ingredients
Extra virgin olive oil
1/2 cup chopped red onion
1/4 cup chopped green bell pepper
1 small jalapeno, diced and divided* (see notes)
1 1/2 cups leftover cooked beans* (I used leftover black beans plus Bojangles’ takeout beans)
1/2 cup cherry tomatoes, halved
Juice of 1/2 lime
Handful fresh cilantro for garnish
1/4 cup heavy whipping cream
1/4 tsp. ground chipotle powder
*Notes
Maybe you don’t have this exact amount of leftover beans staring at you from the fridge? I get it. This is what I used because it was what I had. If you’re starting from scratch, any kind of canned beans would be suitable here, and you’ll need about a can and a half. Pinto beans would be closest to my leftover recipe, and I’d suggest do not drain or rinse them. The can liquid would be very similar to the leftover takeout beans I used.
We love spicy things in our house, but obviously you can simply omit the jalapeno if it isn’t your thing. I divided the total amount listed, using half in the waffles and the rest in the topping.
I recommend getting your waffles in order first, because the topping comes together quickly while they are baking in the iron. No waffle iron? Go get one. Just kidding—use the King Arthur recipe I suggested, which is technically designed for pancakes that would be every bit as wonderful in this kind of recipe. And then tomorrow, go get a waffle iron—I’ll give you plenty of reasons to love having one. 😊
Instructions for the topping
The leftover takeout beans were already in a thin sauce, otherwise I would have added a touch of broth.
The tomatoes add a pop of color, but also a bright freshness to balance the savory flavors of the beans.
Heat a small non-stick skillet over medium heat. Add olive oil and sauté the onions and peppers until softened and slightly translucent.
Add the cooked beans and give the whole thing a quick stir to combine. If it seems dry, add some broth or tomato sauce to compensate.
Slice and season the cherry tomatoes and toss them on top. Cover the pan and simmer over low heat to give the flavors time to mix.
Use a hand mixer or whisk to whip the cream until it is soft and pillowy. You never want to push whipped cream too far (they call that butter), because once it gets to the “chunky” appearance, you cannot rein it back in. Sprinkle in chipotle, paprika or cumin and whisk gently to distribute it.
When your waffles or pancakes are ready, spoon the bean mixture over the top and sprinkle with cilantro leaves. Dollop the whipped cream on top and dinner is served.
The savory chipotle whipped cream melted and oozed through the toppings, creating the most scrumptious sauce.
You don’t have to visit Mexico to experience the delicious combination of flavors in elote, the beloved Mexican street food staple that is roasted fresh corn on the cob, seasoned with spices, lime and grated cheese. Here’s a pasta side salad that captures the essence of this simple street food. It’s sweet, spicy, savory, smoky and perfectly delicious next to the saucy ribs Les pulled off the grill.
Easy to put together, and mixing up south-of-the-border flavor with a timeless classic American comfort food, the macaroni salad.
I’m loving this!
Ingredients
12 oz. pkg. casarecce pasta* (see notes)
2 ears freshly grilled corn*
1/2 cup red onion, chopped
1 average-size jalapeno, seeded and diced
3 scallions, trimmed and grilled
Handful fresh cilantro, rough chopped for serving
Crumbled feta or parmesan cheese for serving
Additional slices fresh jalapeno (optional, for garnish)
1 small ripe avocado, cut into cubes
Dressing Ingredients
1/4 cup canola mayo
1/2 cup light sour cream
Juice of 1/2 lime
1 Tbsp. extra virgin olive oil (or avocado oil)
3/4 tsp. ground chipotle
1/2 tsp. cumin
1/2 tsp. sweet smoked paprika
Freshly cracked black pepper
*Notes
Casarecce pasta is a long, shaped noodle that looks like a rolled-up rectangle. I like it here because it has a firm, toothy texture that anchors all the other ingredients, which are cut into smaller pieces. Any substantial-sized pasta with texture will work in its place though, including penne, rotini or farfalle (bow ties).
Grilling fresh corn is one of the simplest pleasures. We strip the husk and silk, then smear with softened butter, salt and pepper. Wrap them up in foil and grill on direct 300-350 F heat for about 35 minutes. If you prefer, you could also pick up some frozen roasted corn and thaw before using. You will need about 1 1/2 cups.
Instructions
Cook pasta according to package directions. Cut kernels from corn and prep all other vegetables while pasta is cooking.
Combine dressing ingredients in a small bowl or glass measuring cup, whisk or stir until smooth. If dressing seems very thick, add another tablespoon of olive oil and another squeeze of lime.
Drain pasta and toss to evaporate excess moisture. Add a small amount of the dressing and toss to coat. This helps to prevent the pasta sticking together. Let the pasta cool a few minutes, then add corn, jalapeno and red onion to the pasta bowl. Pour in remaining dressing and toss to combine. Chill until cold, at least one hour.
To serve, top salad with chopped grilled scallions, parmesan or finely crumbled feta, avocado, jalapeno slices and cilantro.
Mexican street corn meets macaroni salad, and it rocks!
We’re halfway through National Ice Cream Month, and though I’ll be sad when it ends, I’m reminded that we can enjoy ice cream anytime we like. Don’t fret, fellow frozen treat lovers, because I have plenty more where all this came from—tried-and-true ice cream flavors as well as some new ones brewing in my culinary mind.
But this one, Sweet Corn Ice Cream with Blueberry-Whiskey Ribbon, is in my bowl today. I’ve confessed already that I seldom make the same recipe twice, but this will be the third time in two years I’ve made this one, so it’s clearly won a special place in my life. It’s creamy and sweet, unmistakably “corn-y,” inspired by the pure sweetness of summer and ever-so-slightly boozy, thanks to the brilliant blueberry-infused small batch whiskey produced by one of our local distilleries.
Two of my favorite things about summer, in one perfectly frozen little bite.
This recipe makes 1 1/2 quarts ice cream. There are two equally important components: the custard and the compote. The custard needs plenty of time to chill before freezing, so we’ll begin here.
Ingredients – the custard
2 cups whole milk
1 1/2 cups heavy cream
1 cup organic cane sugar, divided
Pinch of sea salt
4 good-sized ears fresh sweet corn, husk and silk removed*
3 free range egg yolks
1 Tbsp. vodka* (optional, for improved texture)
Blueberry-whiskey compote (recipe and instructions follow)
*Notes
Corn—choose the deepest yellow color corn you can find, for a richer appearance of ice cream. It also helps to have corn picked at its peak level of sweetness. If you have a local farmer’s market, that’s the first place I’d recommend!
Vodka—the alcohol is completely optional in this ice cream. It does not affect the flavor, but can be helpful for the final texture, making the ice cream easier to scoop straight from the freezer. For this batch, I used Tito’s handcrafted vodka, which is made from 100% corn. It seemed appropriate here.
Instructions for the custard
Trim the ends of the corn ears. This will make it easier to cut the kernels off each piece. Standing an ear on end, use your knife to carefully strip the kernels completely off the ear. They will not come off the ear perfectly – some will get smashed or split, and that’s OK. Repeat with all pieces of corn and keep the cobs. Cut the cobs in half crosswise, into chunks about 3 inches long.
Add milk, heavy cream and half of the sugar to a heavy bottomed pot and warm over medium-low heat, stirring constantly to dissolve sugar. Add all of the corn kernels and the cob chunks to the pot. Stir to submerge the cobs, reduce the heat and simmer on low until mixture is just barely bubbling at the edges. Remove cobs from the mixture and allow them to cool enough to handle, then squeeze each cob with your clean hands to extract the flavorful goodness. Discard the cobs, and remove the corn-cream mixture from the heat.
Use the immersion blender* to process the corn-cream mixture, but only for about 15 to 20 seconds. You don’t want to puree the whole batch; we’re just trying to extract another hit of flavor before we strain and discard the corn.
(*Alternatively, use a ladle to scoop about 2 cups of the corn-cream into a regular blender or smoothie blender, and let it cool just enough to blend for a few seconds, then pick up with the recipe from this point.)
Set a large double-mesh strainer over a large glass bowl, and pour the pureed mixture through it to separate the corn solids from the cream. Gently press down on the corn to extract as much liquid as you can; you might even want to do this in batches. Either discard the corn solids, or save it for another use.
That’s funny, the bin said all the corn would be yellow. Looks like we have a rebel in the bunch! 🙂
The kernels do not need to be cut off perfectly. I recommend stripping the cobs slowly, unless you want Nilla to come over and catch the kernels that bounce to the floor.
It’s tough to cut through raw corn cobs. If you can make a halfway cut, just break them the rest of the way. Or put them in whole if your pot is large enough.
The cobs and kernels go straight into the pot to infuse the cream mixture with sweet summer flavor.
Allow the cobs to cool to the touch, then squeeze the cream mixture from them, back into the pot.
Use an immersion blender to puree the cream mixture for 30 seconds. You’ll strain out the solids, but a good bit of the corn flavor will stay behind.
Don’t think for a minute that I won’t find a good use for the leftover corn pulp! It will be a fabulous addition to my next cornbread or corn-scallion pancakes.
Return the strained cream to the heavy-bottomed pot. Gently stir over low heat just until it begins to steam.
In a mixing bowl, whisk egg yolks with remaining sugar on a medium low speed (or by hand) until the mixture is smooth, light-colored and slightly thickened.
Ladle out 1 cup of the hot cream mixture into a measuring cup with a pour spout. While whisking the yolks, pour a slow and steady stream of the cream mixture into them. This is called “tempering.” Do not rush this step, which is essentially emulsifying the mixture so that the egg yolks are incorporated but not scrambled. Do it again with another 1/2 cup of the cream mixture.
Pour the tempered egg mixture back into the pot with the remaining cream, stirring constantly over low heat. Frequently check the back of your spoon – when you can make a visible line on it with your finger, the custard is done.
Remove from heat, pour into a large glass bowl resting in an ice bath, and stir gently until mixture cools. Lay a sheet of heavy plastic wrap directly on the surface, sealing out any air bubbles. Cover the entire bowl with a lid or another layer of plastic wrap and place the bowl in the refrigerator overnight.
There was no color adjustment on this photo. Free range egg yolks always have a deep yellow or orange color, because the chickens have a better diet.
I always look for this third-party certification on eggs. When chickens have room to roam as nature intended, they produce better quality eggs.
The yolks take on a light, lemony color when they are properly whipped with the sugar. This is ready for the hot cream mixture.
Take your time streaming the hot cream mixture into the beaten eggs. If you add the hot liquid too quickly, the eggs will scramble.
Return the tempered eggs to the strained custard mixture in the pot and cook just until custard thickens.
My lighting is terrible, but the line on the back of the spoon shows that the custard is fully cooked and ready to chill down in the ice bath.
Stir the mixture steadily to cool down the custard. Look at the pretty yellow corn color!
It may seem strange to place the plastic on the surface of the custard, but it helps prevent condensation that could give the ice cream an unpleasant “icy” texture.
Next up, make the blueberry-whiskey compote for your ribbon!
Ingredients – the compote
The Smashing Violet is really the standout star of this compote. If you cannot get your hands on it, a smooth whiskey or bourbon will also work, but stick with something in the lower proof range.
1 cup frozen blueberries (I especially love to use “wild” blueberries)
1/2 cup organic cane sugar
1/2 cup blueberry juice (optional; substitute ¼ cup water)
3 oz. Smashing Violet blueberry-infused whiskey*
Generous squeeze of fresh lemon juice
You can’t expect me to use it in my sweet corn ice cream without properly researching it, right?
*This stuff is pretty incredible, but only available in North Carolina, either at the Broad Branch Distillery in Winston-Salem or select North Carolina ABC stores. Substitute a craft bourbon of your choice for similar results, but for sure look for the blueberry juice to make up the difference. While I’m on the subject of Broad Branch, here’s another reason I’m loving them right now.
Instructions for the compote
The blueberry juice will underscore the flavor of the compote. If you can’t find it, use half as much water.
When most of the liquid has evaporated, the compote will suddenly shift toward becoming syrup. When the bubbles go crazy like this, it’s time to add the blueberry whiskey.
This is the perfect consistency, a thin syrup clinging to the spoon.
I’m loving this DEEP purple color!
In a medium saucepan, combine the blueberries, cane sugar and blueberry juice (or water) over medium-high heat. Stir until sugar dissolves and mixture comes to a boil. Reduce heat to medium-low and simmer, stirring and smashing berries occasionally, until mixture is reduced and begins to bubble vigorously. This will take longer if you’re using the blueberry juice, somewhere between 15 and 25 minutes.
Stir in Smashing Violet whiskey (or your whiskey/bourbon substitute). It may seem like 3 oz. is a lot of booze—and, well, you’re damn right it is. No apologies here (but c’mon, it’s only 60 proof anyway). Simmer another 5 to 8 minutes, to burn off some of the sharpness of the alcohol while reducing the compote again.
Remove from heat, cool to room temperature, then place plastic wrap directly on top of the compote and chill in refrigerator at least an hour, but preferably overnight. This mixture will thicken up significantly as it cools.
I scream, you scream…
In the morning, set up the ice cream machine and freeze the sweet corn custard according to manufacturer’s instructions. The blueberry ribbon is added later, so only do the custard at this stage.
If you want to experiment with fun ice cream flavors, I highly recommend investment in an ice cream maker. We use ours several times a year!
Add a layer of custard into insulated container, then alternate layers of blueberry whiskey compote and custard (ending with custard on top) and freeze until firm, at least 4 hours, but overnight is better.
Begin with a layer of ice cream, then stripes of compote.
I’ve staggered the second layer of compote in a different pattern, so the marbling will be better when I scoop it.
Finish with a layer of ice cream, and freeze at least four hours before serving.
Call a couple friends to come over and hang out in the backyard, and thank God for the sweet blessings of summer.
Ever had cornmeal pancakes with blueberry syrup? It’s like that, only better because it’s ice cream!