You know the drill when a song gets stuck in your head and certain parts of it play over and over and over, driving you nearly mad? It might be a song you love or one you hate, or maybe even one that you love to hate, and sometimes (but not always) its sudden appearance in your mind is triggered by something someone says or perhaps a TV commercial or a fleeting memory. Or it could just be completely random. In any situation, it drives me nuts, and the only method I’ve found for releasing it is to lean in. I search out the offensive song on Spotify and actually play it. Singing it loudly seems to help as well, and then I can get on with my life.
This phenomenon is widely known as an “earworm,” and research suggests that as many as 98% of people have experienced it, though it’s rarely considered to be a serious condition.
An earworm is not the same as a brain worm, which is a far more daunting phenomenon in which a weak human brain becomes invaded by a parasite that eats the lobe associated with common sense, leading to conspiracy theory-driven psychosis that prompts the afflicted to seek a government leadership position so that they can eliminate longstanding, important public health policies in favor of nonsensical theories, such as rendered beef fat possibly being more beneficial than monounsaturated plant oils or the notion that vaccines are more dangerous than the diseases they aim to prevent, or that food dyes in soda are a greater enemy than childhood cancer. But I digress.
For some reason, the songs that become earworms in my head are generally tunes that annoy me— that damn “Piña Colada Song” from 1979, for example, or the repetitive hook that’s currently making the rounds on social media, actually creating the very anxiety it speaks of. Or (dare I suggest) “Pink Pony Club.” And there are occasionally good earworms that I actually enjoy— one of them being an old Schoolhouse Rock ditty, and I frequently bust out the chorus these days, easily recalling from my Gen-X childhood every single word of the Preamble to the Constitution. Again, I digress.
My latest earworm, however, is not musical. It is more an obsession with color and possibility, and it was re-triggered after an activity my husband, Les, and I enjoyed last weekend when we visited the Van Gogh Immersive Experience (speaking of people crippled by persistent thoughts). This was a multimedia adventure, filled with detail about the artist’s life, work, death and legacy, and we concluded our visit with a virtual-reality experience that was by far the coolest part of the exhibit. Since then, visions of sunflowers and starry night scenes have been swirling in my mind, and I’m not exactly fighting them. I’m leaning in, allowing the visions to swirl, and trying to immerse myself in them. For years, my muse has been challenging me to produce two specific, highly creative things from my culinary bucket list that are directly connected to Van Gogh’s art. I’ve accepted the challenge, and I’ll tell (and show) you how it goes.
Until we get there, please enjoy this quick recap of the Van Gogh Immersive Experience, along with one of Les’s very favorite ear worms.
Saturday marks the fifth anniversary of Comfort du Jour. I am 448 blog entries into the story of my life through food, and that boggles my mind a bit. I cannot reflect on my culinary passions without thinking of my maternal grandmother, and thinking about her makes me long for the flavors of “home.” This simple yet iconic sandwich of my old neck of the woods has been pushed around on my culinary bucket list since 2020, and I am aware that my procrastination in making it has nothing to do with ingredients or complexity. It has everything to do with my own expectation and the same old, six-word worry:
What if I mess it up?
Fear is a weird phenomenon, isn’t it? And for people who’ve been raised by perfectionists and other hard-to-please grown-ups, it becomes a normal state of mind that lingers long after the initial disappointees have faded into the background. Fear has kept me from a million things in this life, culinary challenges among them. But I threw caution to the wind last week and tried my hand at beef on weck, figuring, seriously, what’s the worst that could happen?
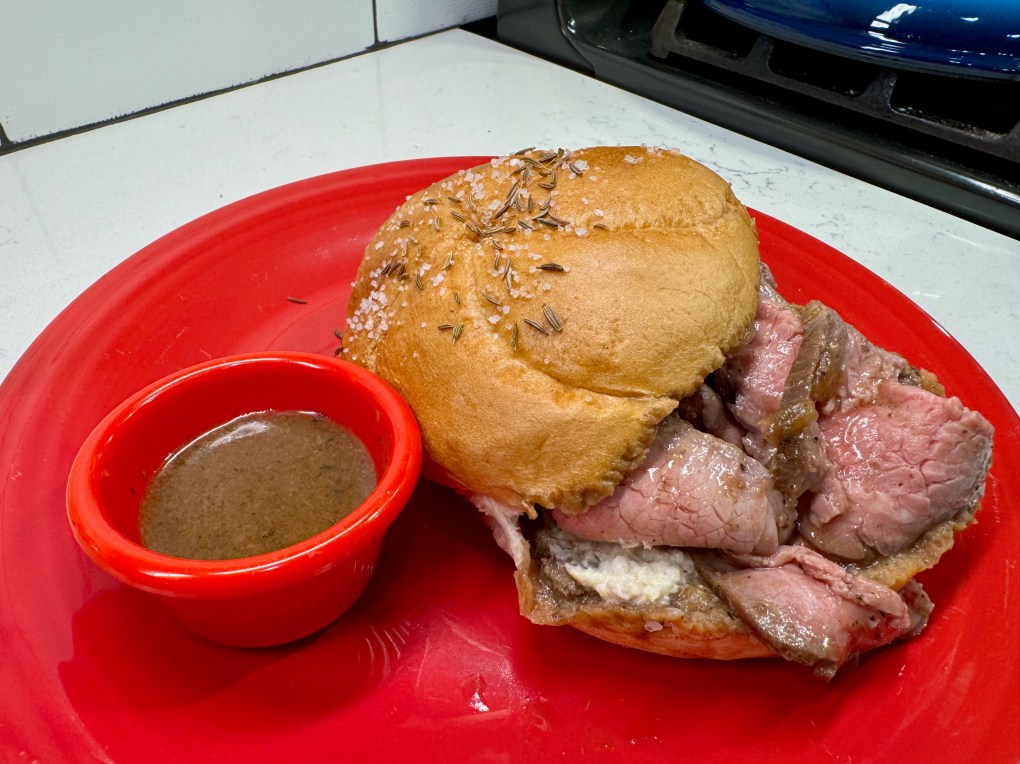
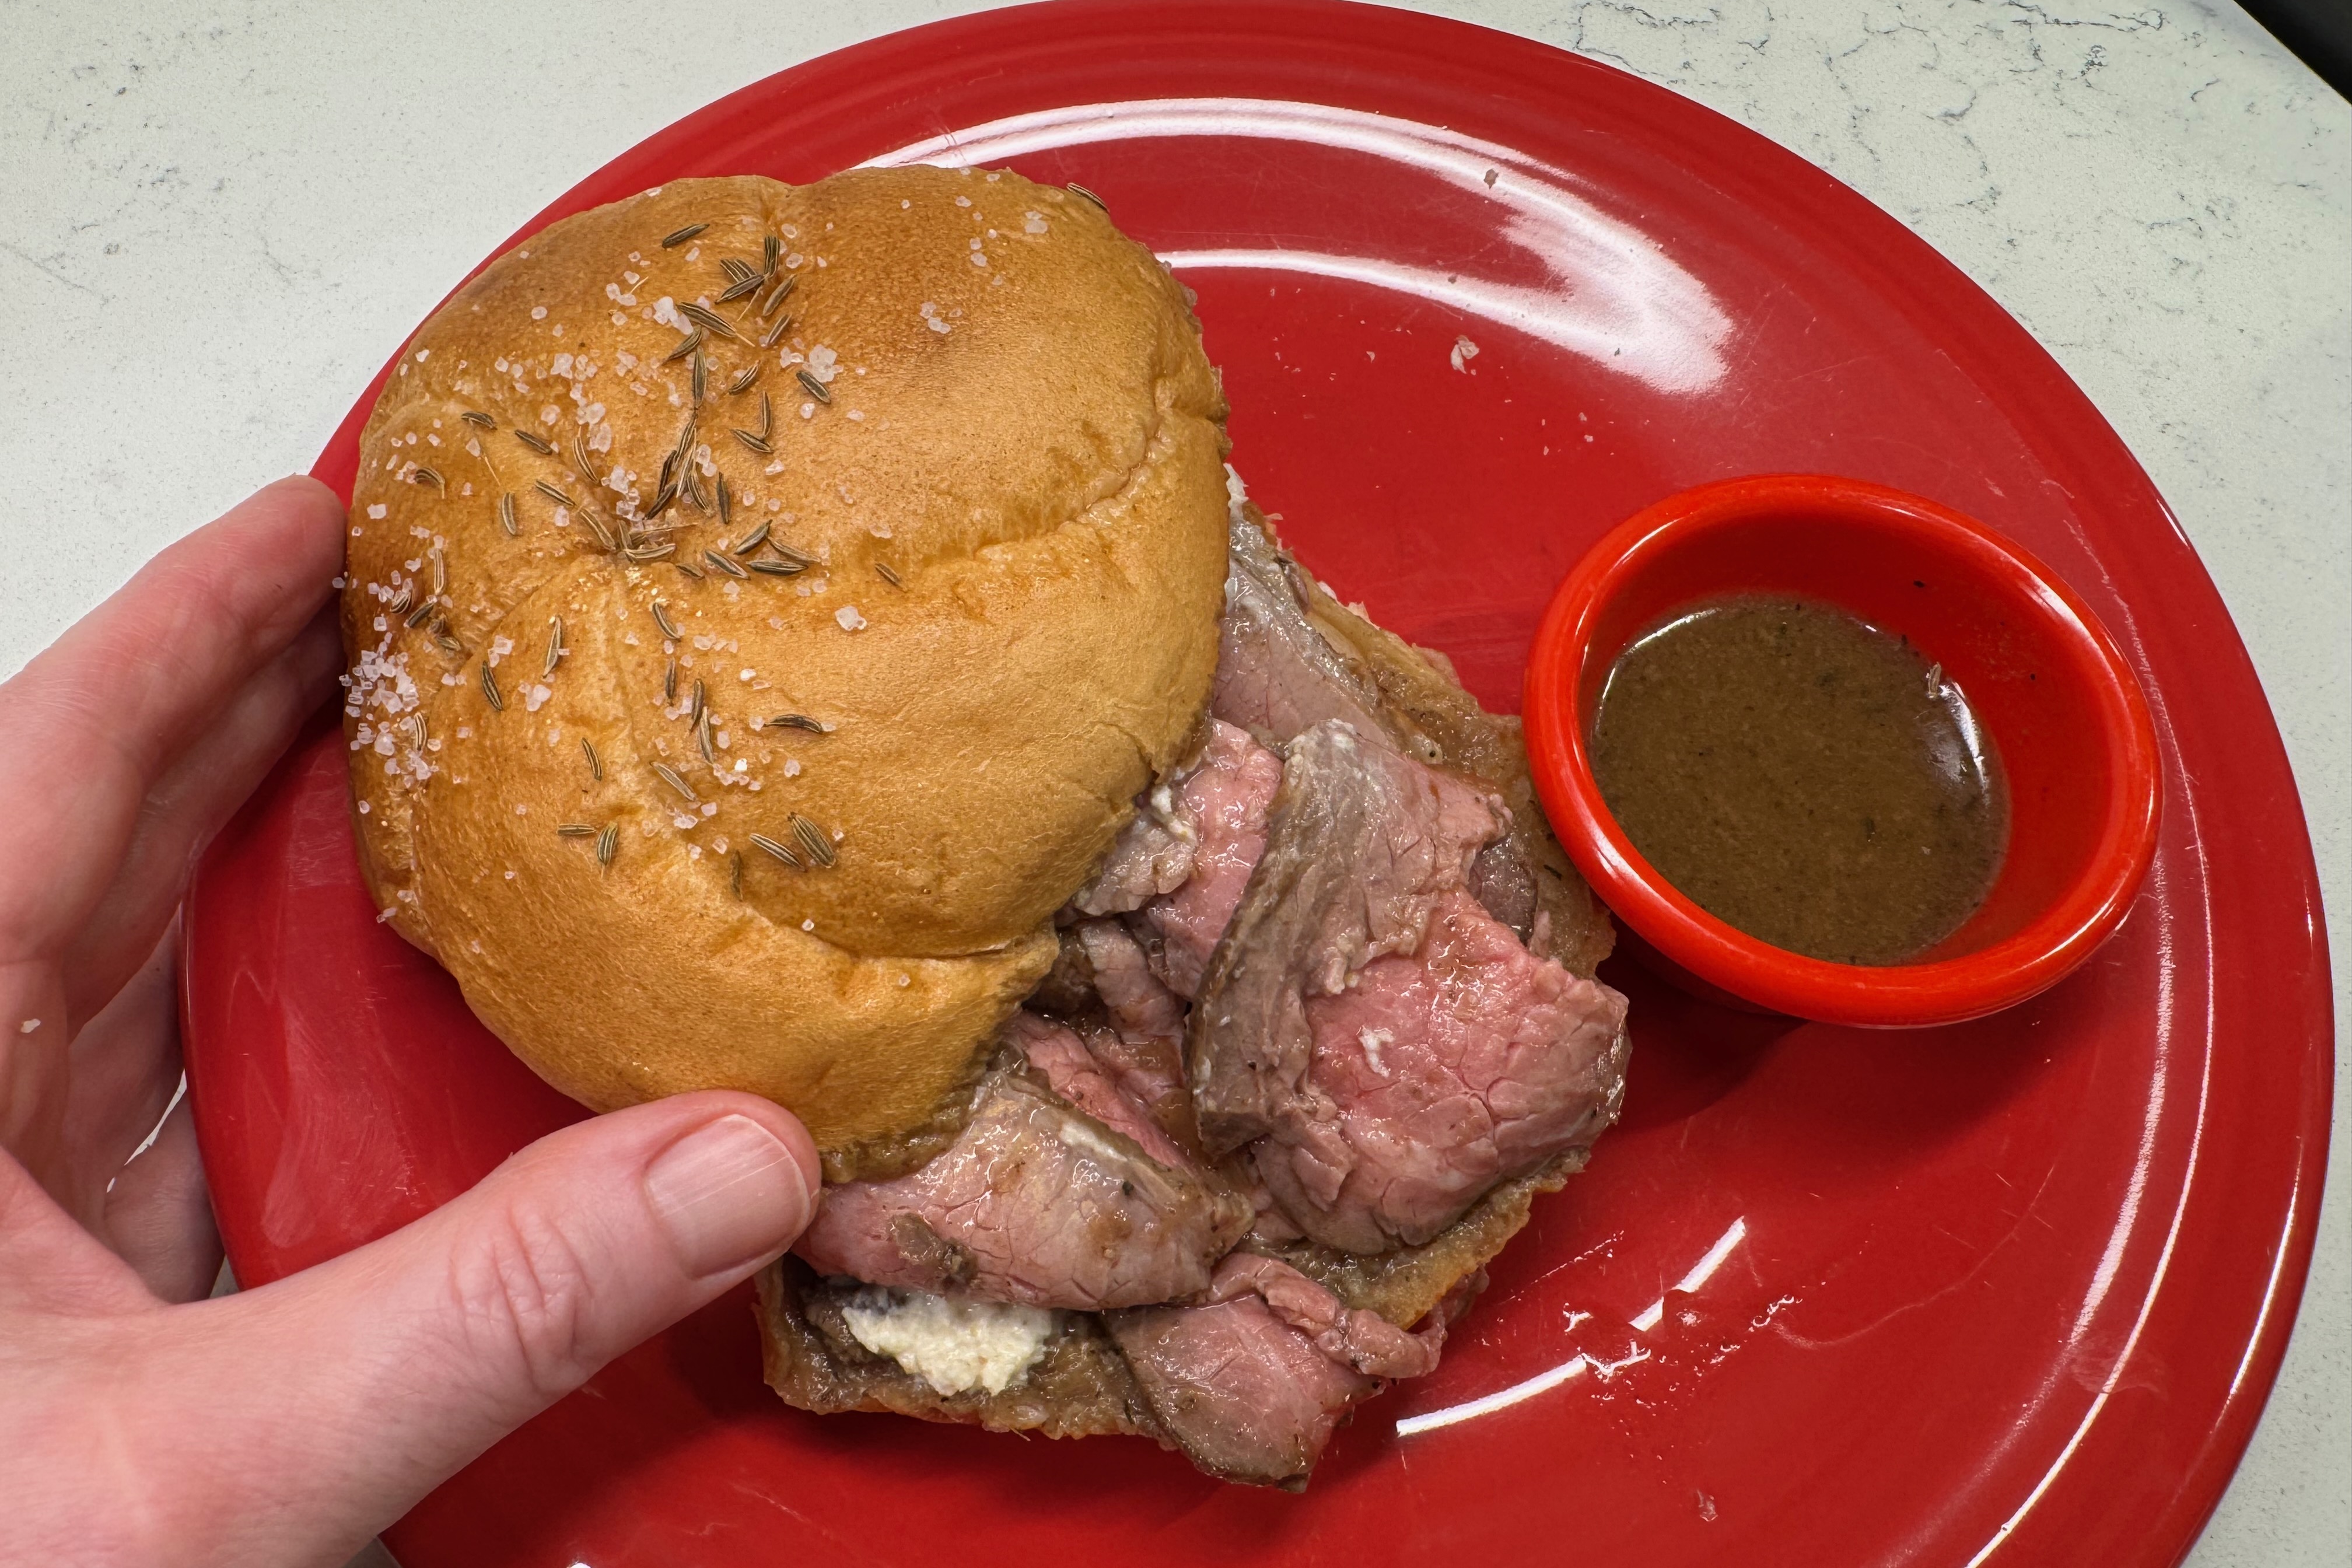
Yes, it was as delish as it looks!
This experiment was not without lessons, mind you, but the outcome was so delicious and so well received at my house (I made it while my husband’s son, Alex, was visiting from his home in Hungary), that you can bet I’ll be making it again and again, with these notes as my template.
Whattya mean, no sandwiches?!
I am always happy to see Alex arrive for a visit. He’s a cool millennial kid who, like his dad, never met a stranger. His knack for making friends quickly is a great asset for someone who co-owns and operates a hostel in Budapest. In the quiet breaks in my work-from-home schedule, Alex and I had some great conversations, including several around food. When I asked him what kind of sandwiches are popular in Budapest, he hesitated a few beats and then admitted, “none, really.” Despite the constant stream of international tourists, the Hungarian capital is oddly bereft of good sandwich shops amid all the Asian and Italian hot spots aimed at visitors.
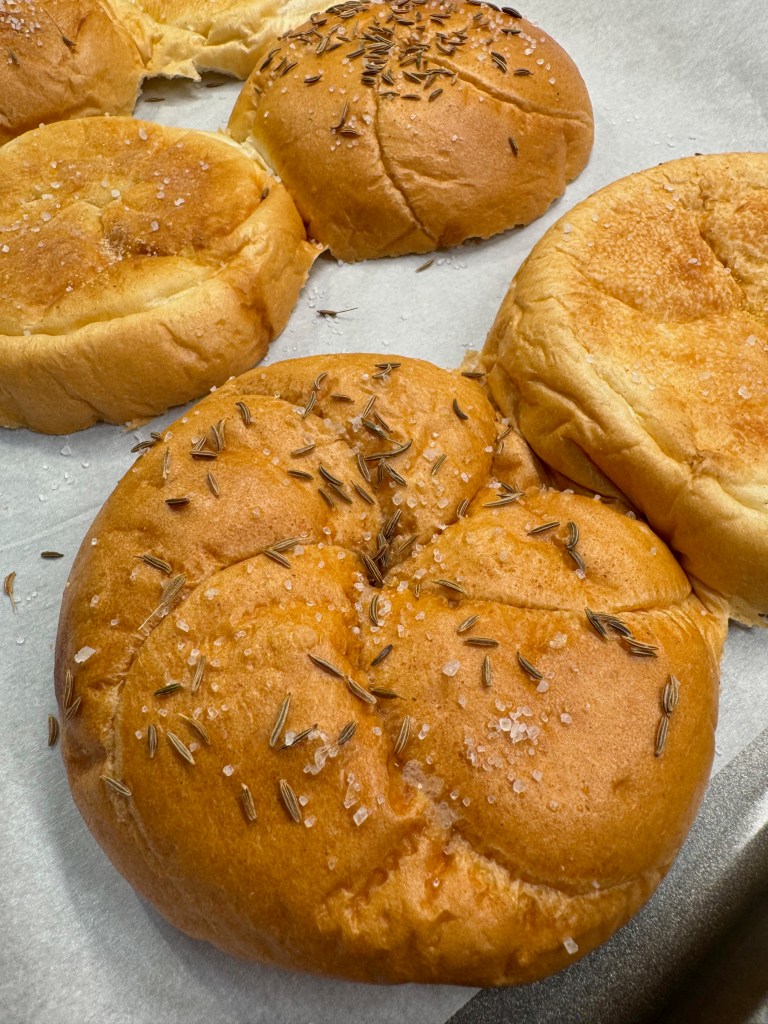
This, I thought, was a tragedy, and it was the final push I needed to get on top of making beef on weck. What American-born man doesn’t want a good, medium-rare roast beef on a bun? The bun, in this case, being a kummelweck roll (or kimmelweck, depending on who you ask), which is essentially a kaiser roll that has been adorned with aromatic caraway seeds and coarse salt. I wanted so much to make my own rolls for this, but I cheated a bit and gussied up plain kaiser rolls from my supermarket bakery. It worked perfectly.
The butcher always knows…
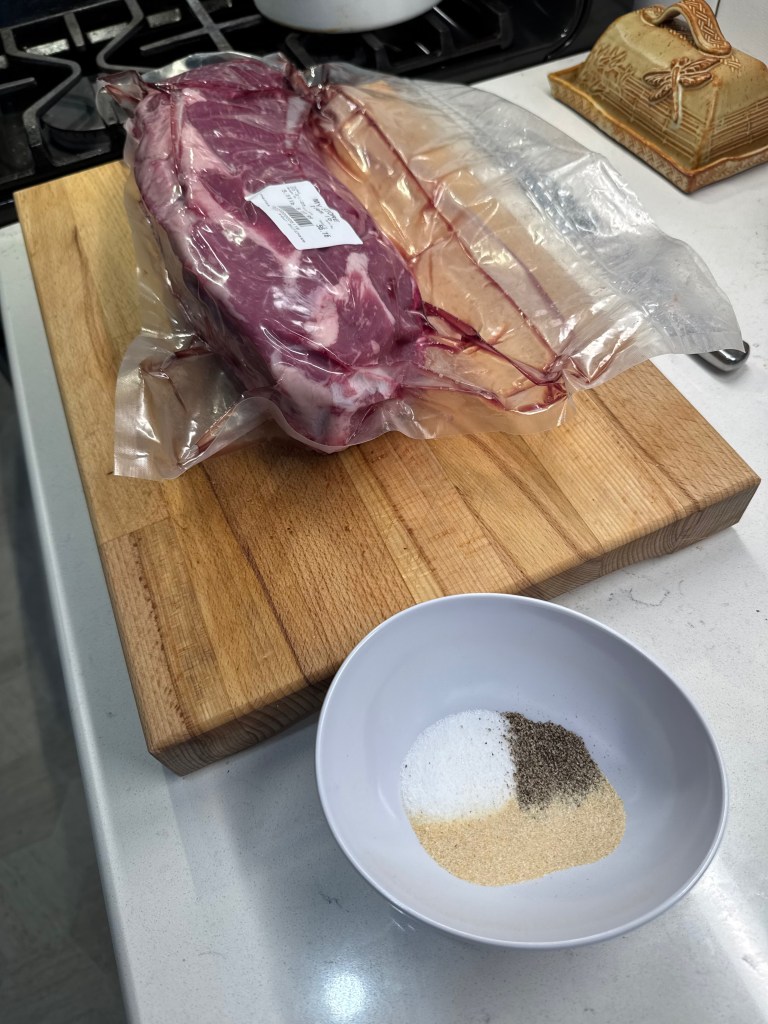
We are very fortunate to have a high quality, local-sourcing, independent butcher in our city. The guys at @SmokeCityMeats in Winston-Salem always set me up for success. When I asked Matt about getting an eye of round roast for beef on weck for three people with plenty of leftovers, Matt replied that he may as well set aside a whole one for me, and this cut was a little over five pounds. It seemed like A LOT, but it turned out to be exactly what we needed for our meal plan. This is why I trust my butchers, the same guys who hooked me up with the pork belly and tenderloin that became my fabulous porchetta, and the lamb for my tasty grilled lamb burgers and the duck breasts for my crispy five spice duck with cherry-pinot noir sauce, and the strip steaks I used in my reverse-sear experiment. They always know best, and I’m grateful for their expert suggestions.
I know it probably sounds like a commercial, but I swear that they are not paying me to promote their shop. I’m genuinely a happy customer who is proud to support local, and in return, we get to enjoy responsibly raised, incredibly flavorful local meats. It’s truly a win-win.
A method to my madness
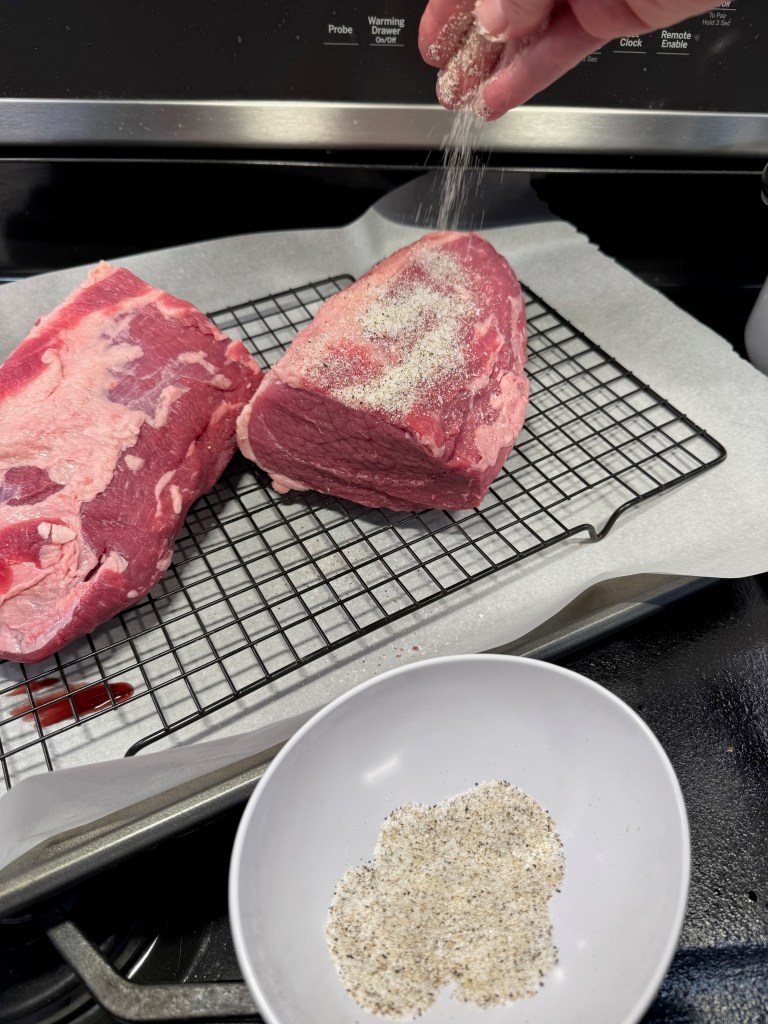
It isn’t enough to have an incredible cut of meat— one also needs to know the best technique for preparing it, and for that, I’m trusting J. Kenji Lopez-Alt, the science-y chef whose method for dry brining has become my standard. Whether I’m prepping duck breasts, a Thanksgiving turkey or a pulled pork shoulder, you can bet I’ll be sprinkling it with salt and stuffing it into the fridge overnight. I cannot overstate how much this technique has elevated my cooking. The key is to place the meat in the fridge uncovered, so that the salt draws out moisture, dissolves into a brine and then soaks back into the meat. For my beef on weck, my salt was also peppered and spiked with onion powder.
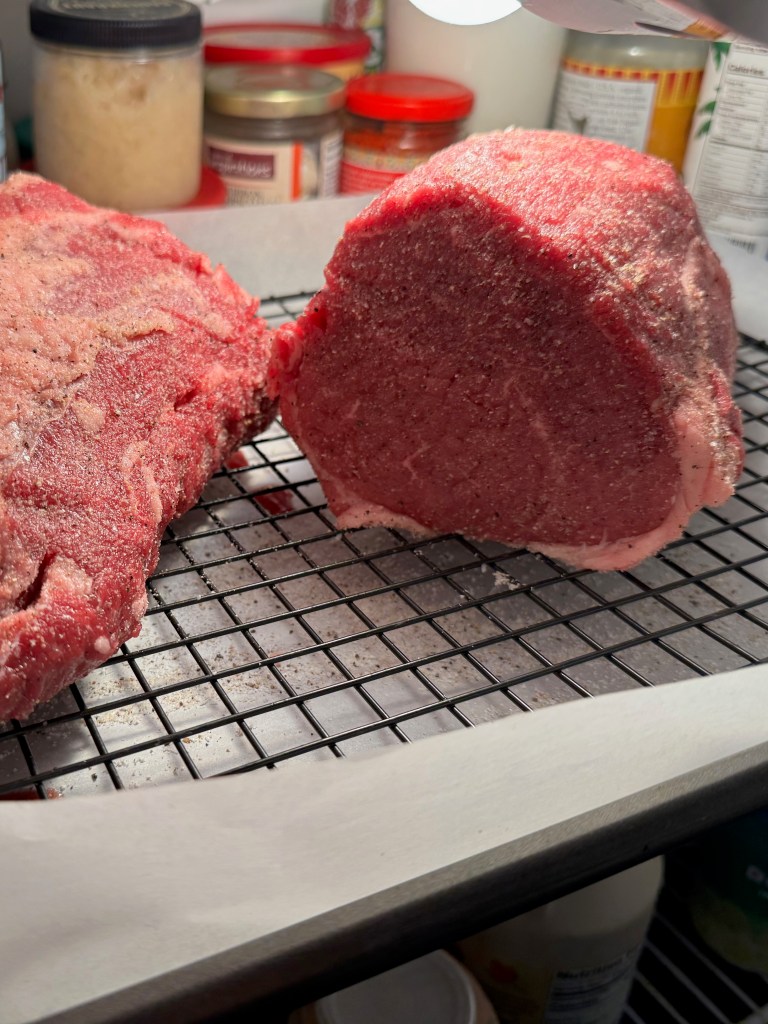
This is scary the first time, because when you open the fridge the next day, the meat will look dry, tight and somewhat shriveled. The level of panic you feel will be directly related to the price you paid for the meat in question. My first time dry brining was a heritage-breed Thanksgiving turkey, and the price tag was about $100, so it was a huge amount of faith placed in Kenji’s knowledge and experience. It was also one of the most delicious turkeys I’ve ever done. This time, it was a $56 eye of round roast, and I was confident as could be. Try it once, and I promise you won’t be disappointed.
Horseradish and kummelweck(the signature flavors)
The horseradish sauce is merely a small bowlful of drained, prepared horseradish mixed with a spoonful each of sour cream and mayonnaise. It is quite pungent, and if you are not a fan of horseradish, you may want to skip this. But it is a key component in an authentic beef on weck. The important thing is keeping the horseradish flavor front and center, with only enough of the creamy ingredients to make it somewhat spreadable. You can make this ahead and keep it in the fridge until ready to serve.
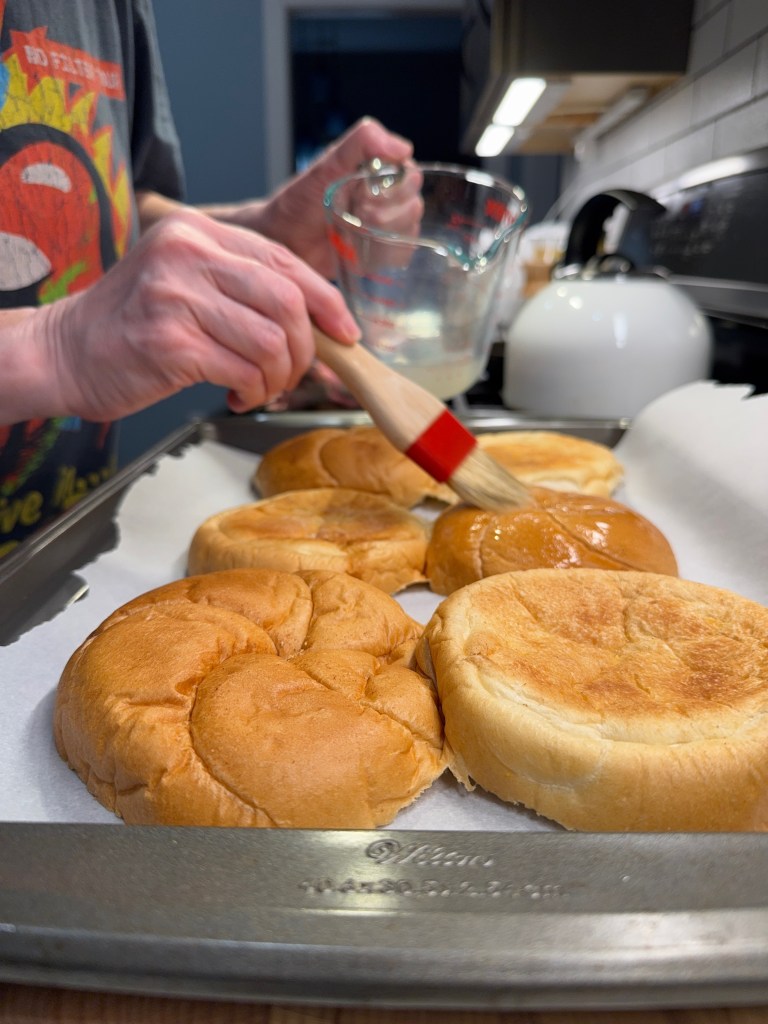
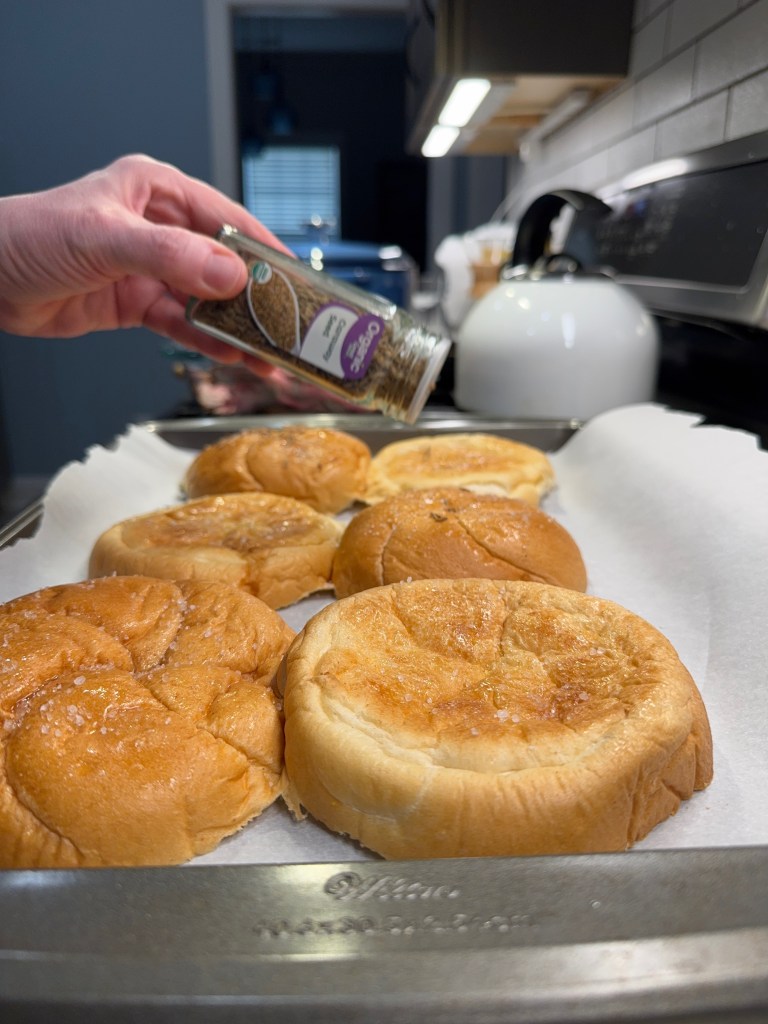
For the kummelweck rolls, you may not find them ready-made if you are outside the Western New York area. Fortunately, it is easy to transform more readily available kaiser rolls simply by brushing them with a cornstarch slurry, sprinkling with coarse salt and caraway seeds, and baking until the seeds are set and the rolls are crispy again. The caraway, like the horseradish, is also very traditional for this sandwich. If you don’t care for the flavor, go with a sesame-topped kaiser instead. But if you skip both the horseradish and the caraway bun, you’re basically just eating a roast beef sandwich.
In hindsight, I believe these buns were more authentic than my homemade would have been.
Achieving the perfect roast beef
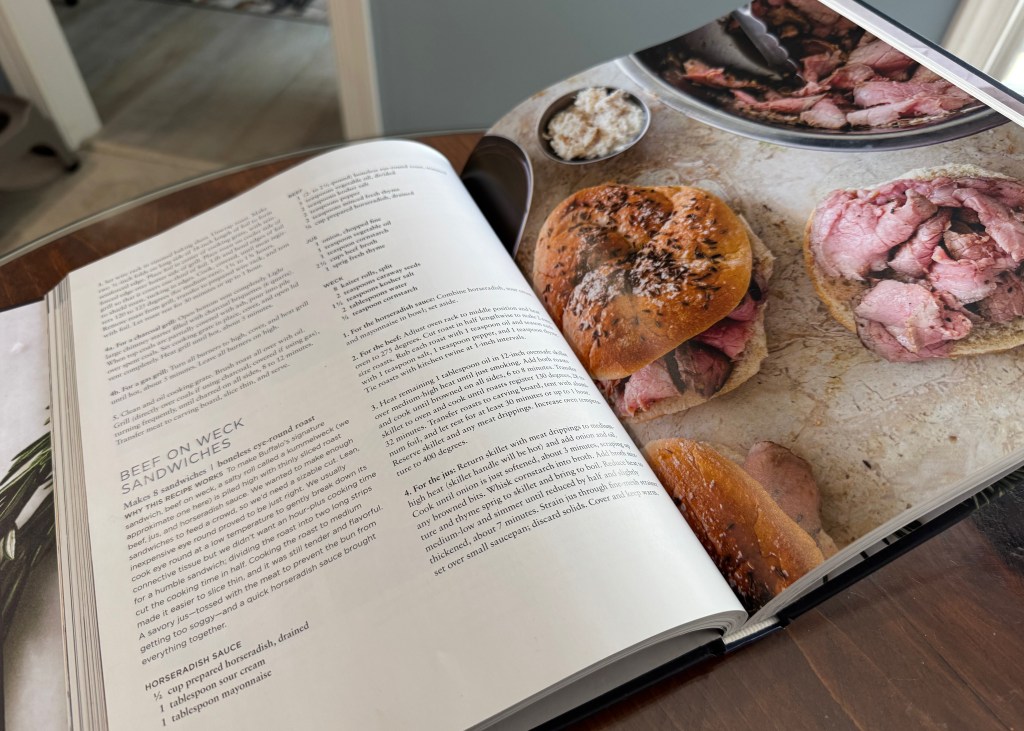
This is not in my wheelhouse (hence my hesitation making beef on weck in the first place), but as luck would have it, a book that I gave Les at Christmukkah happened to have instructions for roasting eye of round— for beef on weck— right there on page 134!
I didn’t follow every part of this recipe, but the roasting instructions were very helpful!
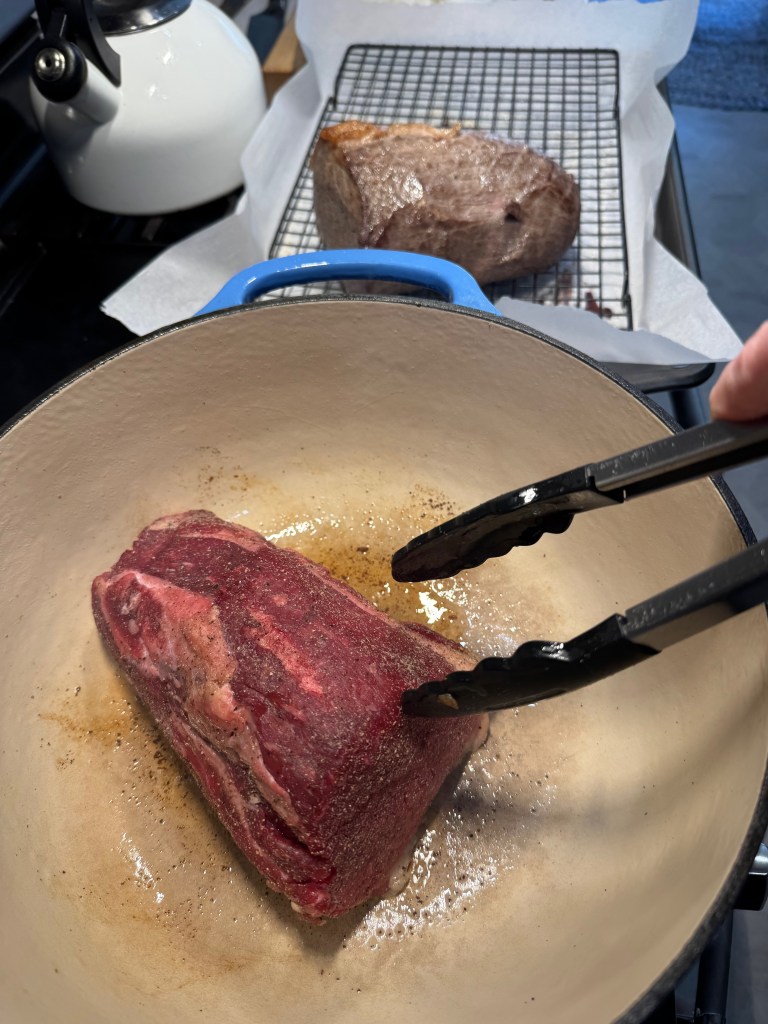
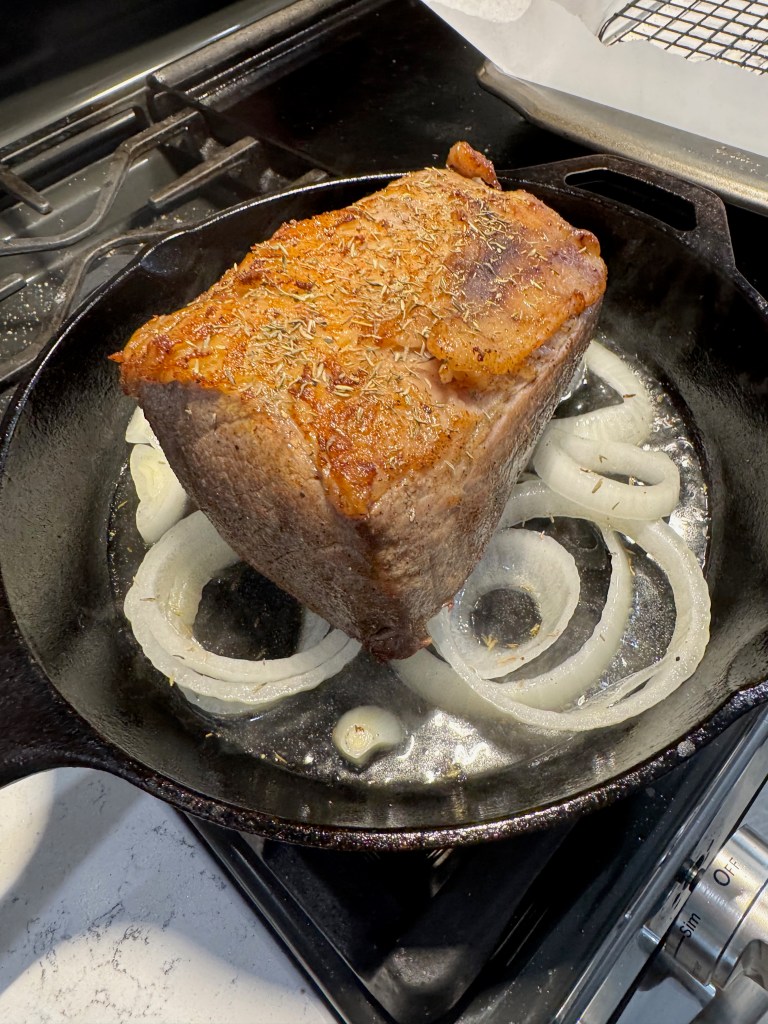
To this point, the only thing my recipe had in common with the one I found in Meat Illustrated was the specific cut, eye of round. Mine was twice the size called for, and I had already done the 20+ hour dry brine, which was not outlined in the book. But I needed a solid method for cooking said roast, and this one was perfect. It prescribed a low oven (275° F), a couple of heavy skillets (I went with a cast iron and my enameled Dutch oven) and a bit of oil for searing all the sides of the meat. My own instinct told me to placed the seared roasts onto beds of sliced onions, as I really wanted that flavor in the final mix.
After a quick browning on all sides, the meat goes into the oven on top of the onions.
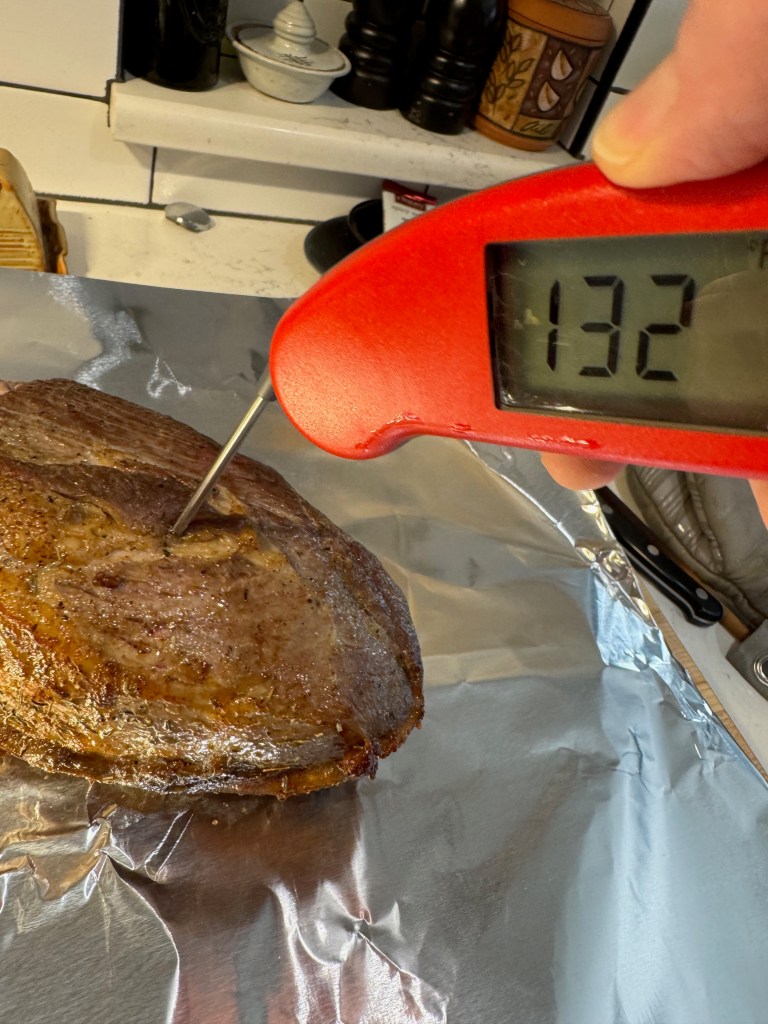
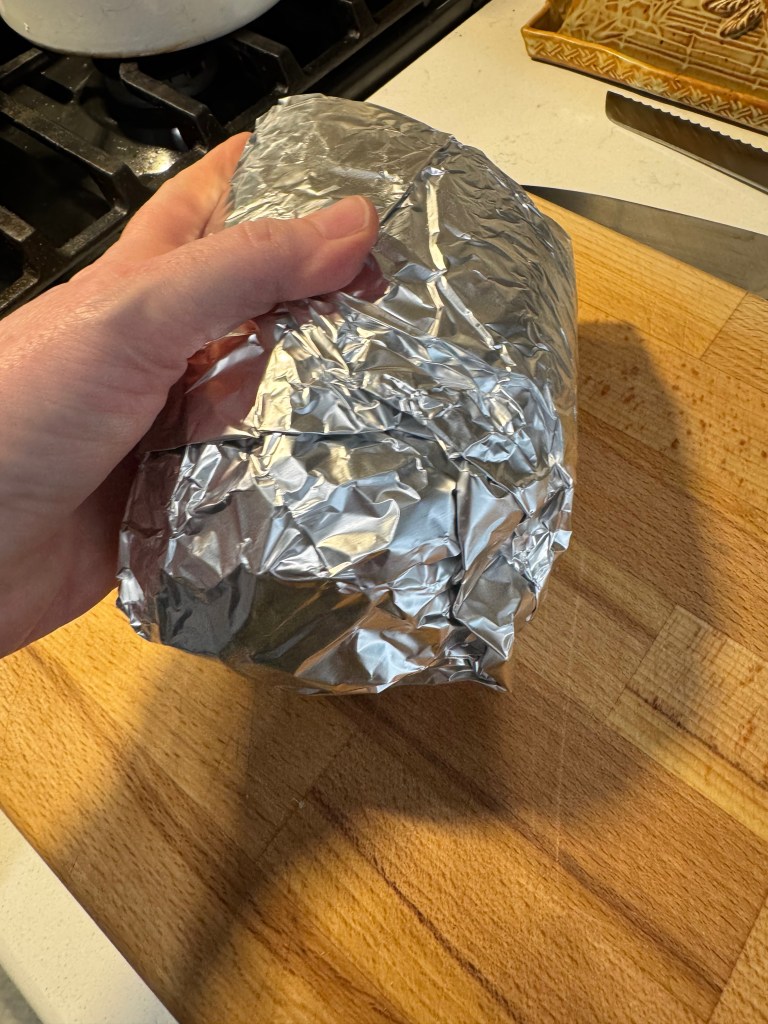
The first roast (in the Dutch oven) reached optimal temperature within 45 minutes, significantly less time than the second (in the skillet), which took an hour and 20 minutes. They were roughly the same size and went into the oven at the same time, so my best guess on this difference is that the ambient heat from the high sides of the Dutch oven get credit for the quicker result. Because the time cannot be trusted for consistency, I strongly recommend using an internal thermometer to gauge doneness. I followed instructions to wrap the finished roasts snugly in foil, which ensures that the juices redistribute evenly through the meat.
I could not resist carving the first roast as soon as it had finished resting, but my recommendation is to chill the meat overnight so that it can be sliced super thin for these iconic sandwiches.
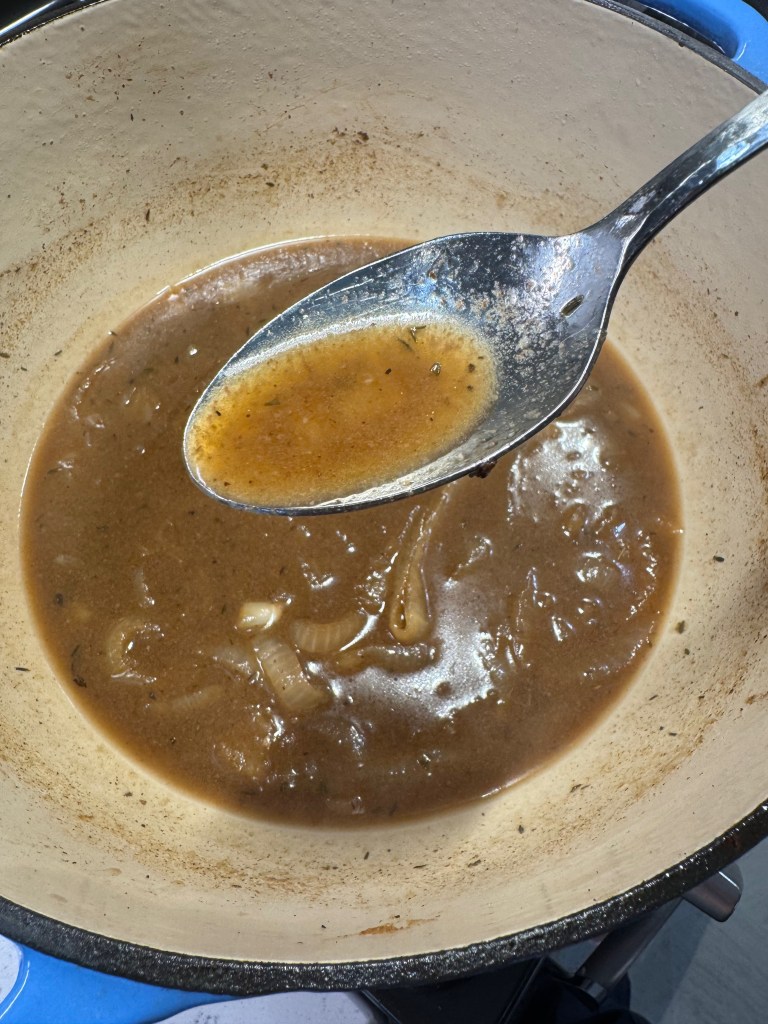
Last but not least, the jus!
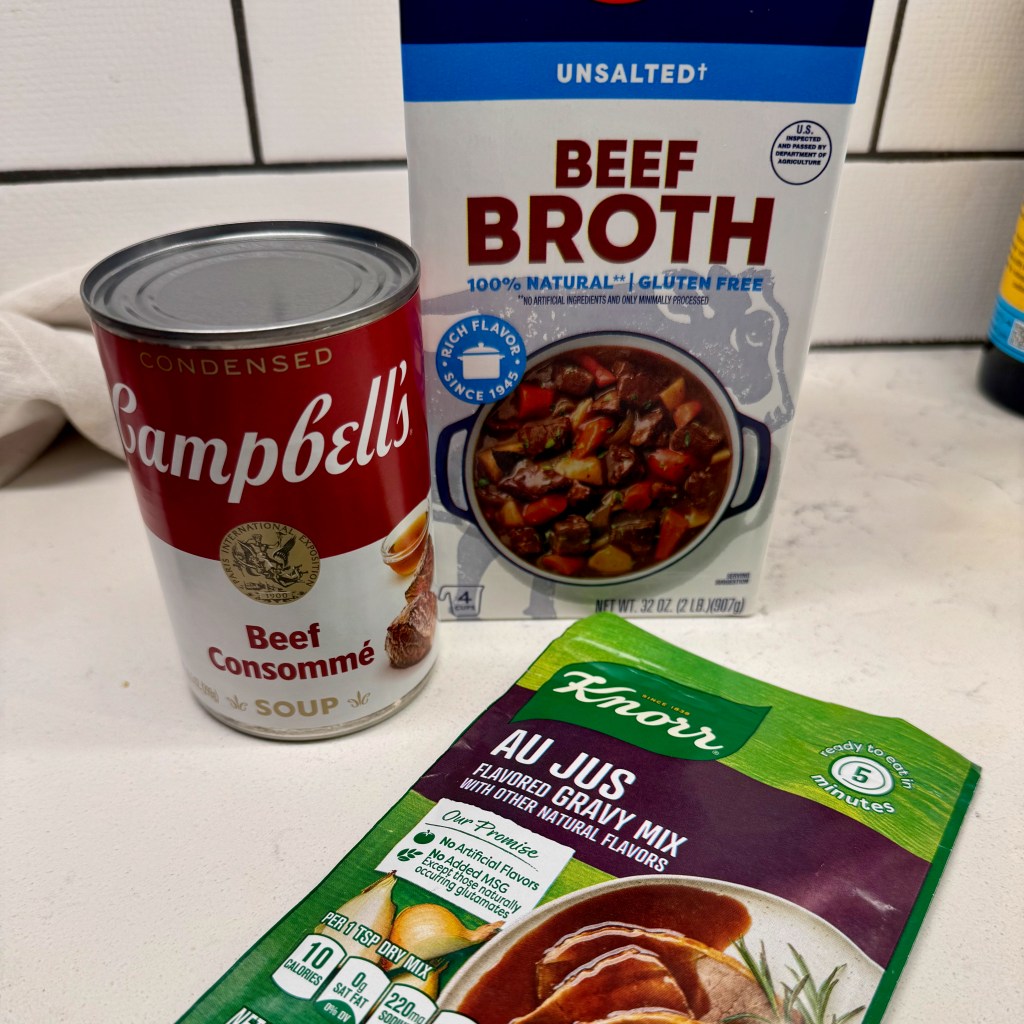
This part of the sandwich gave me the most pause, as I struggled to remember how the side sauce tasted. It was beefy, but not gravy-like. It was similar to au jus that one might find alongside a French Dip sandwich, but not as salty. I waffled quite a bit on how to achieve this traditional flavor, and of the three options I purchased, there was a very clear winner.
This decision threw me for a loop, but the answer was so obvious in the end.
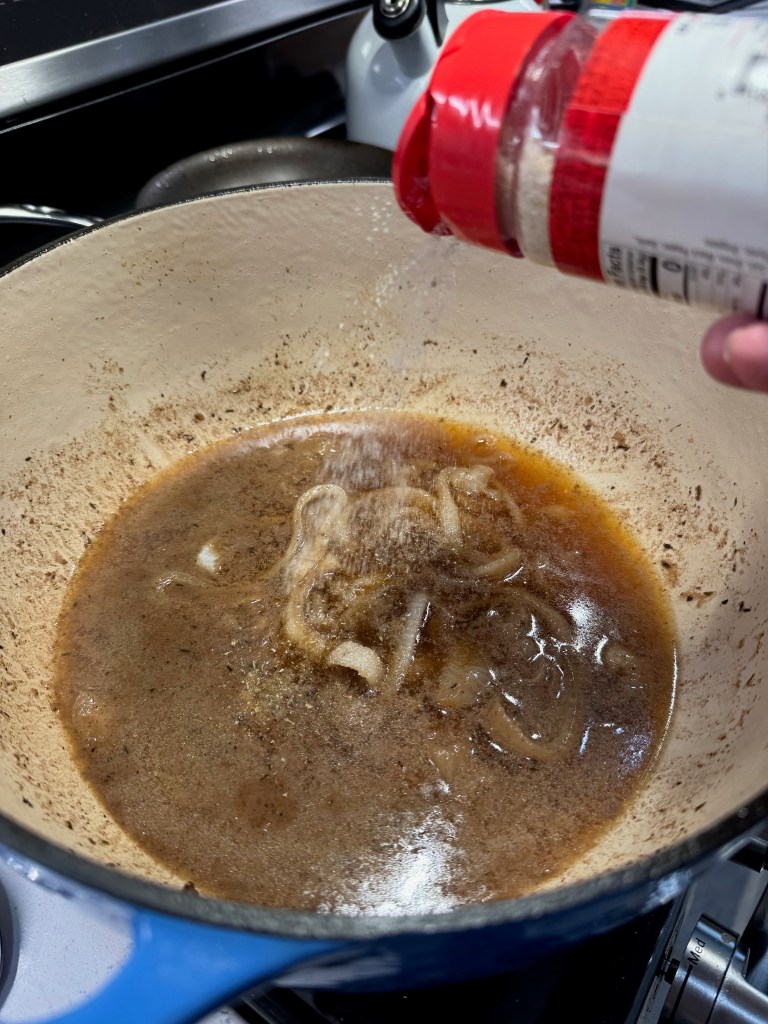
Let me cut to the chase and tell you that the beef broth won this battle. The consommé had a heavy soy flavor that was not working, and the dry jus packet (which I didn’t think to inspect until I was home with it) had exactly zero beef ingredients, so that was a hard no. My hungry husband, who had never had beef on weck in his life, made the winning suggestion to add a half packet of dry French onion soup mix to the sodium-free beef broth. It was perfect!
A slight amount of cornstarch lends a nice texture to the jus, but you don’t want it to be like gravy.
Assembling the beef on weck
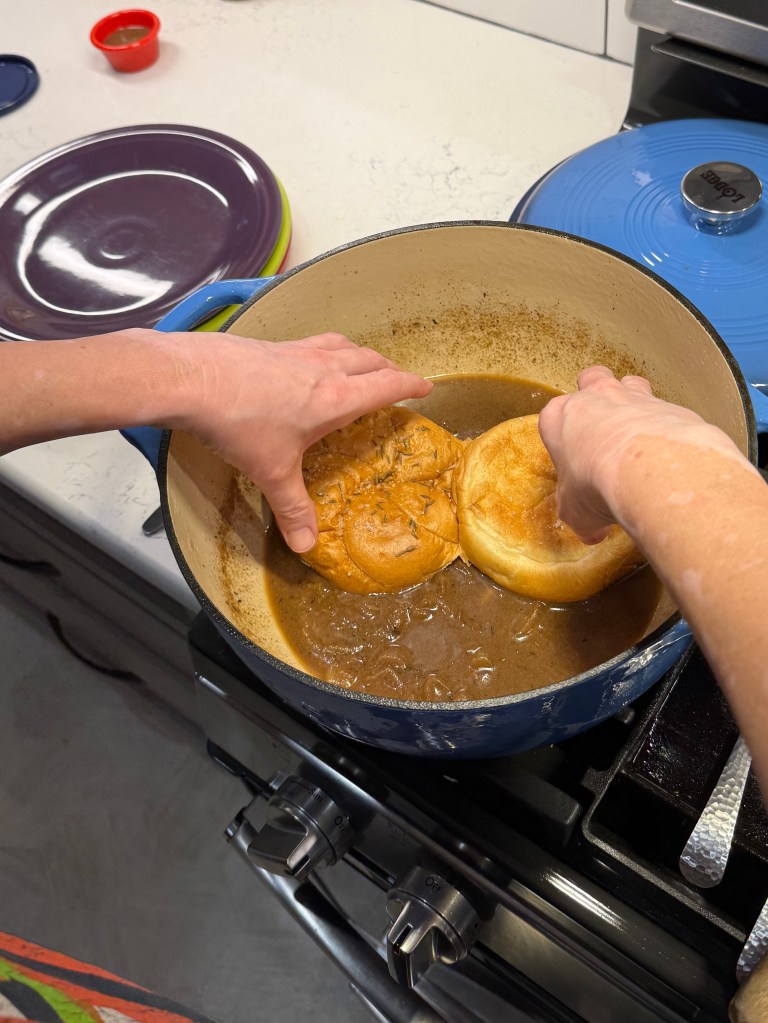
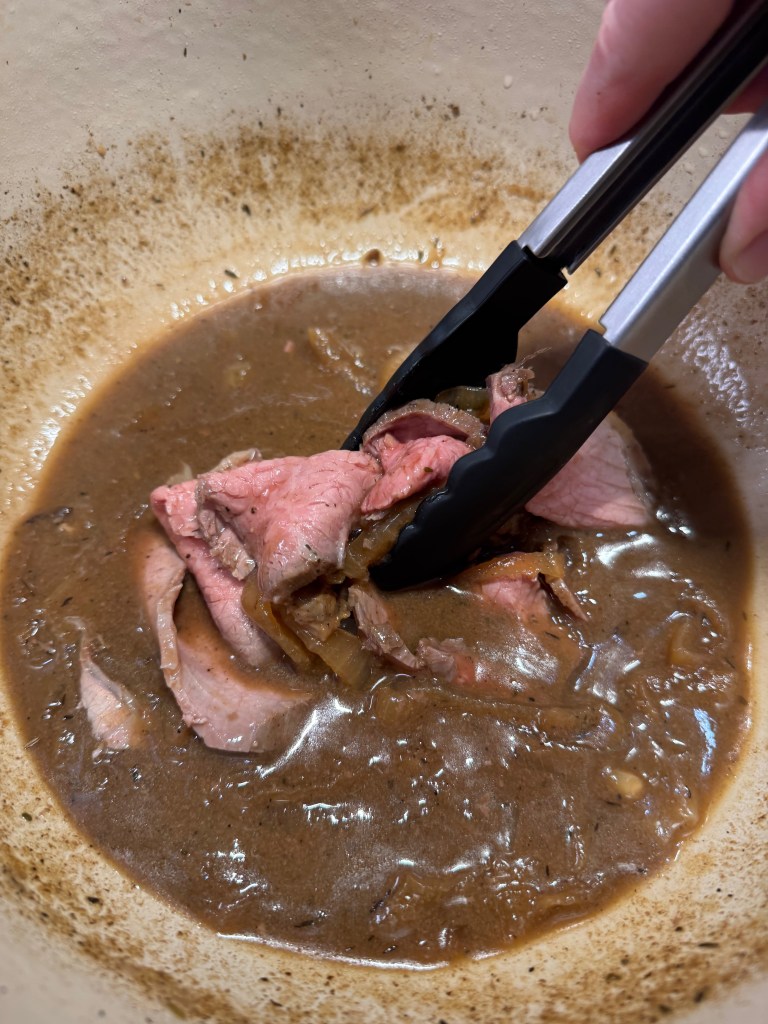
The traditional, Western New York way to serve this sandwich is to first dip the cut sides of the kummelweck roll into the jus, then smear on a little horseradish spread and pile on the meat. I warmed the thinly sliced beef in the hot jus, and so I grabbed a few of the soft onions in the process, and this was not a problem at all. Extra jus and/or horseradish may be served on the side.
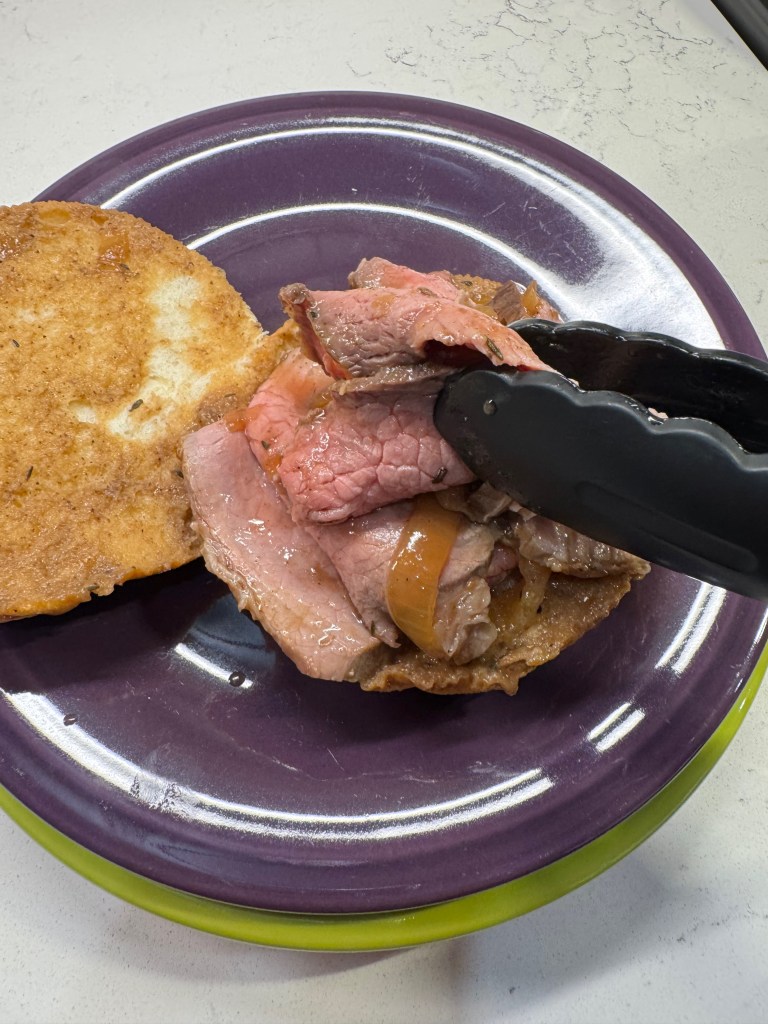
My beef on weck was authentic in aroma and flavor!
I've been craving this taste of home for a very long time, and a few trusted tricks helped me move this into the done column of my culinary bucket list!
Ingredients
5 lb. eye of round roast, locally sourced if possible
4 tsp. kosher salt
25 twists freshly ground black pepper
1/2 tsp. onion powder
2 Tbsp. extra virgin olive oil
1 large sweet onion, cut into thick slices
1/2 cup water
2 1/2 cups no-salt beef broth, combined with a teaspoon of cornstarch
1/2 packet French onion soup mix
Horseradish sauce (recipe in notes)
Kummelweck rolls (see notes for instruction)
Note: For most tender, flavorful results, apply the dry brine ingredients to the meat and refrigerate at least overnight (up to 24 hours) before roasting. This will allow the salt to dissolve into the meat, creating a brine that ultimately absorbs back into the meat. You will need either a very large Dutch oven or perhaps two cast iron skillets for the roasting. If you only have one vessel, consider roasting only one piece of meat at at time. Rest meat at room temperature for one hour before roasting!
This roast is best sliced when very cold. If time allows, roast it the day before you intend to serve so that it can chill completely in the refrigerator after roasting.
For horseradish sauce, combine 1/2 cup drained prepared horseradish with 1 tablespoon each sour cream and mayonnaise.
Plain kaiser rolls are easily transformed into kummelweck rolls with a few simple ingredients. Heat oven to 400° F. Combine 2 tablespoons cold water with 1/2 teaspoon corn starch. Microwave the mixture until it thickens slightly. Brush onto tops and bottoms of sliced kaiser rolls, then generously sprinkle kosher salt and caraway seeds onto the rolls. Bake for about six minutes until seeds are set and rolls are slightly crispy.
Directions
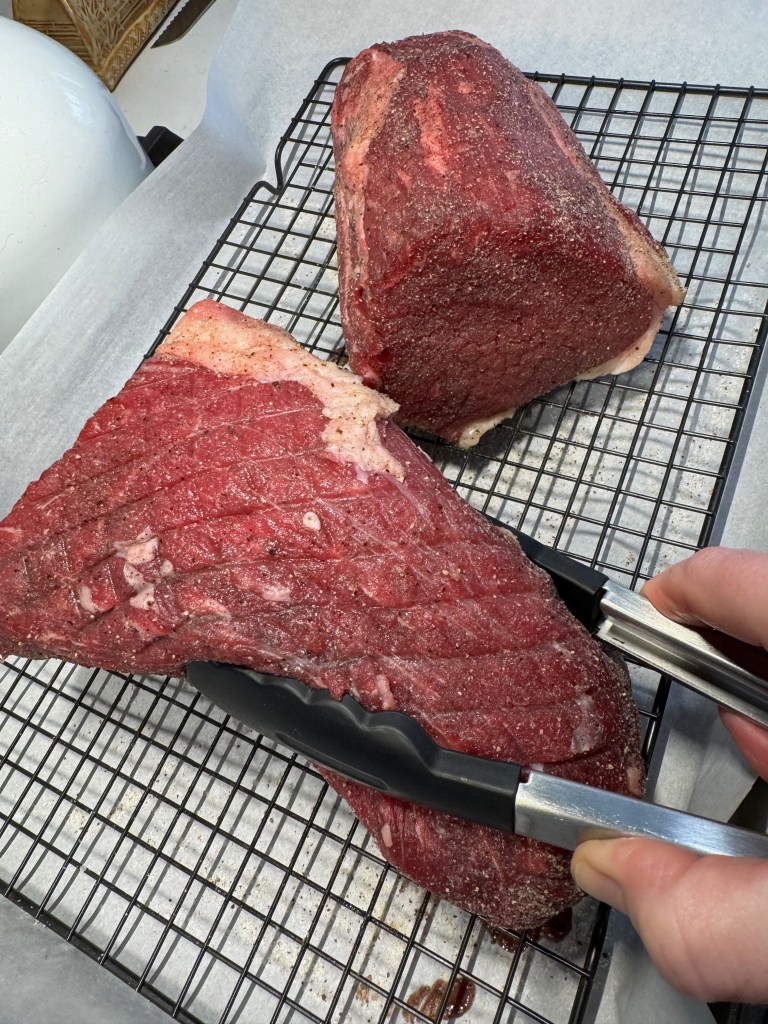
Trim eye of round of excess fat and cut crosswise into two equal-ish chunks. Place meat on a rack over a parchment-lined baking sheet.
Combine salt, pepper and onion powder in a small bowl. Sprinkle dry brine mixture generously over the entire surface of both roasts. Gently pat the mixture so that it adheres well. Place the sheet, uncovered, into the fridge for up to 24 hours.
Preheat oven to 275° F, with oven rack in lower third of the oven. Place Dutch oven or oven-safe skillet over medium heat with olive oil. When oil is glistening, Use tongs to sear every side of the eye of round until browned. Set aside.
Add onion slices to the pot and toss to cook for about one minute. Add 1/4 cup water and scrape up any browned bits stuck to the pot. Place browned roast on top of onions and transfer to oven, roasting until meat is 130 to 135° F internal temp for medium rare doneness. Remove from pot and wrap tightly in heavy duty foil, resting at room temperature for at least 30 minutes (longer is better, chilling is best) before slicing.
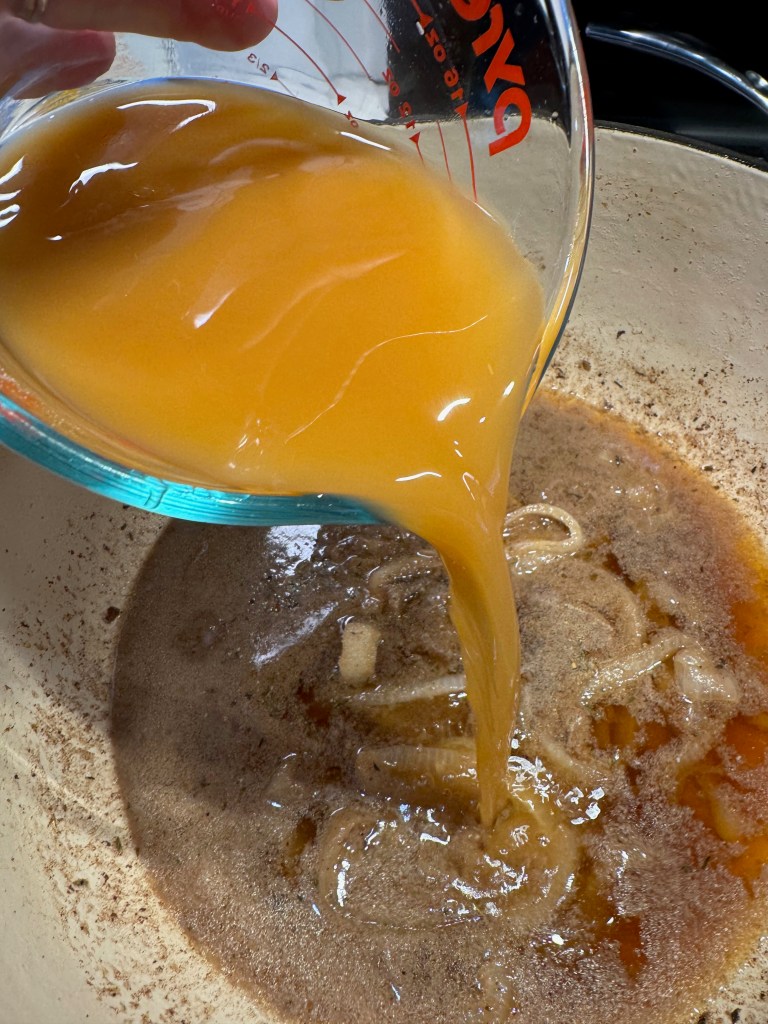
Add French onion soup mix to the softened onions left in the roasting pan. Dissolve cornstarch into beef broth and add the liquid to the pot, stirring and cooking until bubbly and slightly thickened.
To assemble sandwiches, dip cut sides of kummelweck rolls into the beef jus and then swirl a handful of sliced beef at a time in the hot jus. Pile the meat onto the buns and serve immediately with horseradish sauce and a cup of jus.
Now and then, my smartphone surprises me with an unsolicited trip down memory lane, in the form of a fully animated slide show recapping a theme, an occasion or a season from my past. The most recent of these was a reminder of “Thanksgiving through the years,” and the images from 2020 and 2021 struck me because those years were so different when we were all sidelined by the Covid-19 pandemic.
As the past-years’ photos scrolled to an indiscernible soundtrack, I noticed that in addition to the more adventurous dishes my husband and I created in 2020 (we figured a dinner without guests was a good time to experiment), I also created some meals that were scaled way back from the usual spread, in a way that might ease the expectation of a full-blown Thanksgiving but still satisfy the yearning for its traditional flavors. These two were delicious enough to make again one day.
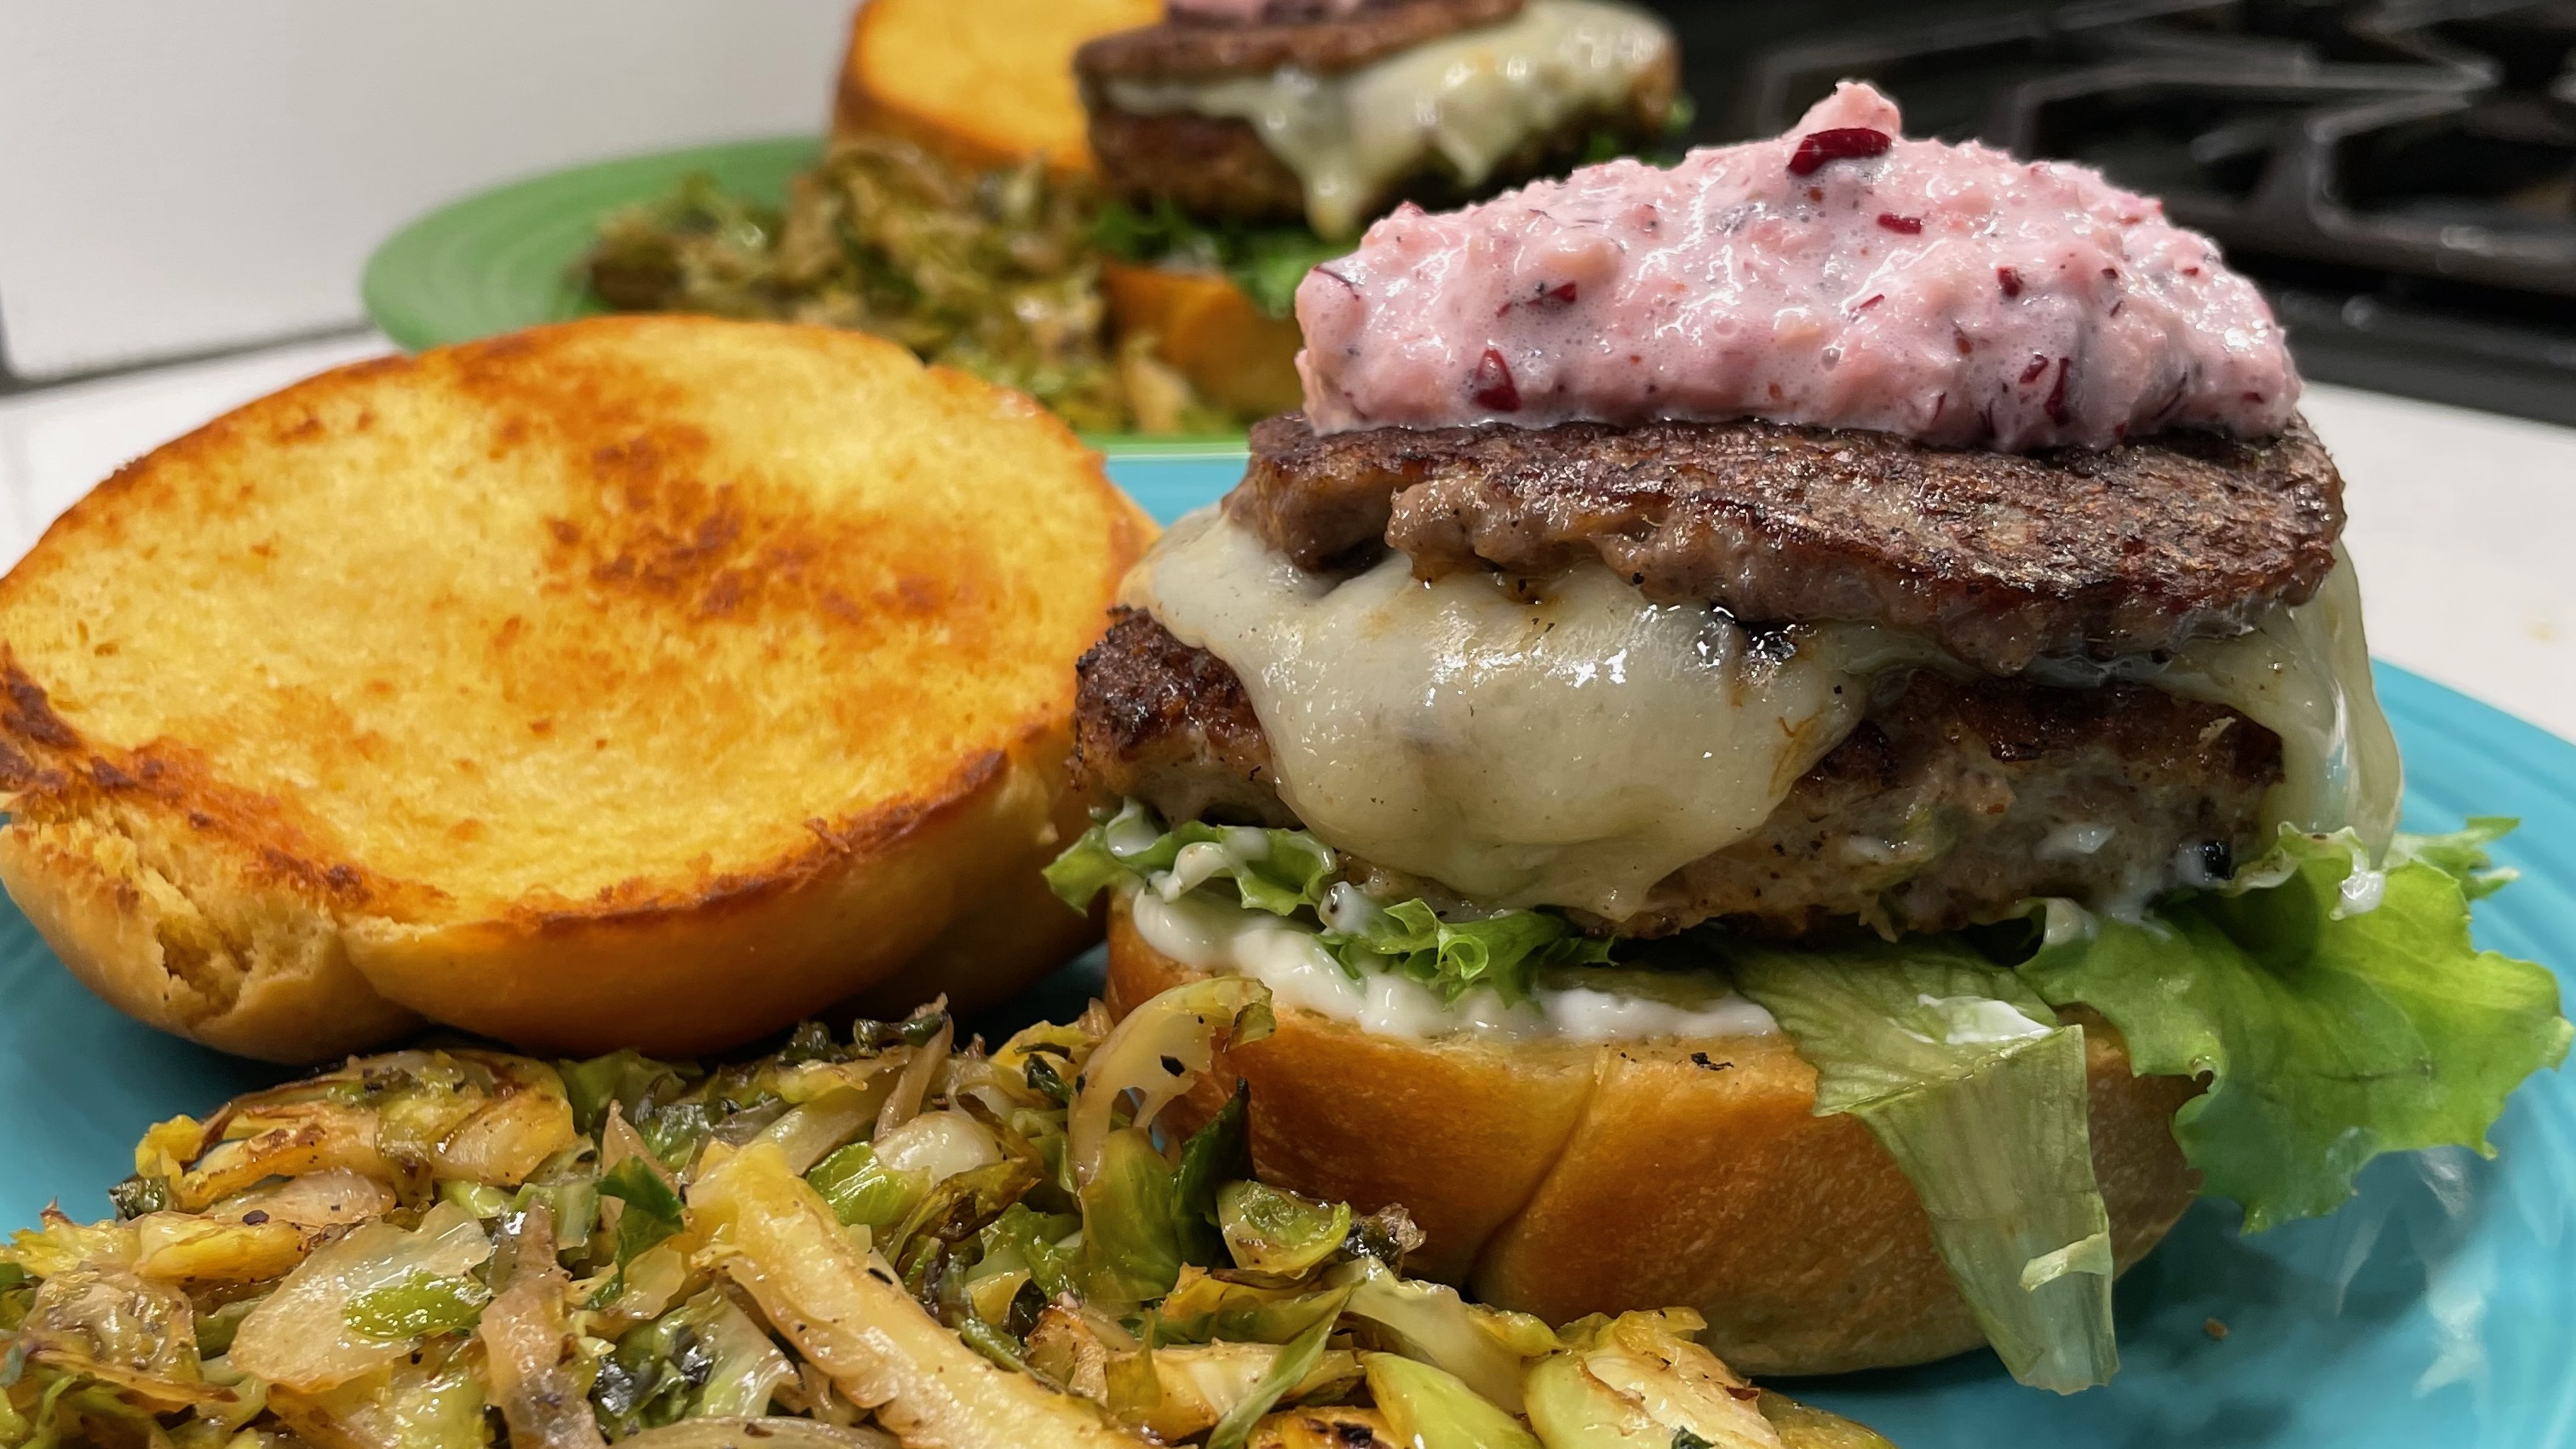
Thankfully, Covid has evolved to become more a nuisance than cause for panic (for most of us), and gathering with loved ones is fun again. At our house, we are counting the days until Thanksgiving (14 to go)! But some people still have neither the time nor inclination to produce an entire spread for Thanksgiving, and that has me thinking again about ways to capture the essence of the occasion in a single, simple bite. This is my first— but not last— attempt at making a Thanksgiving burger.
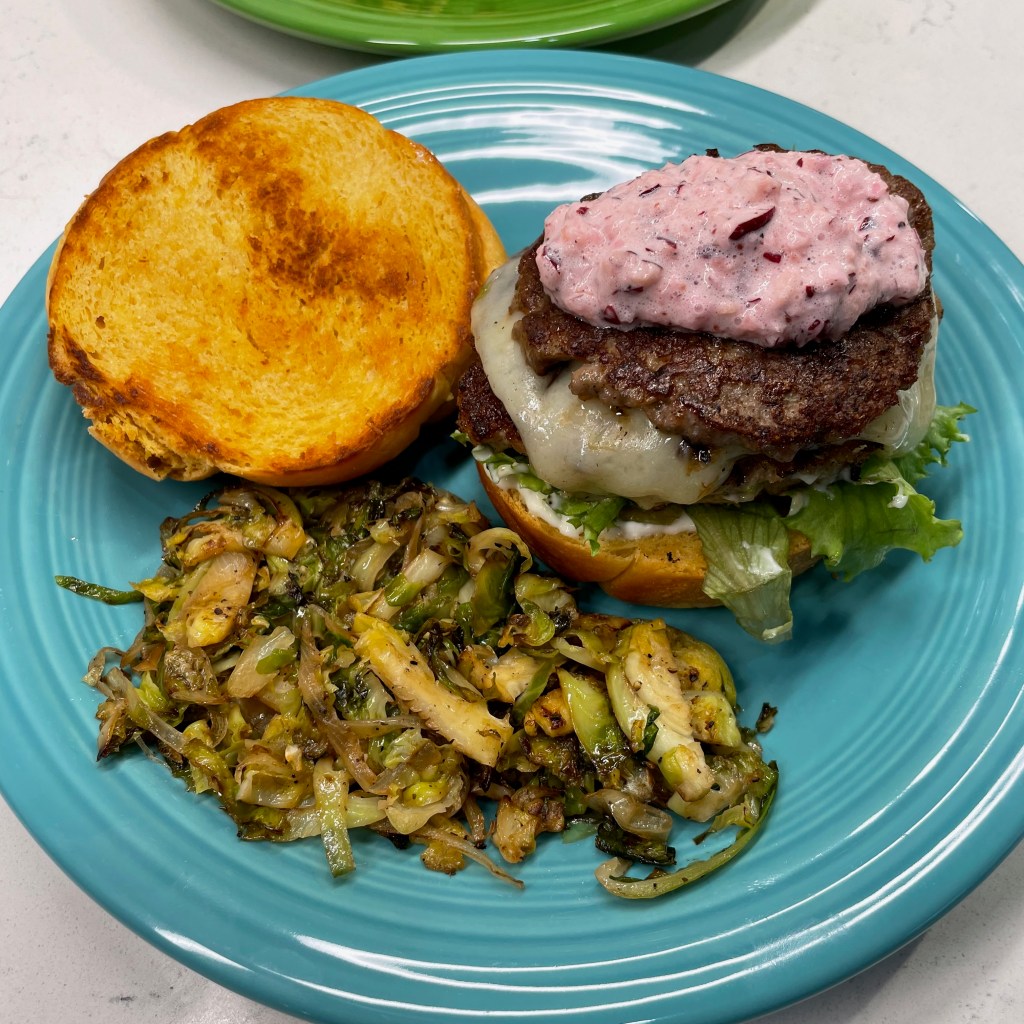
Pretty, isn’t it? 🙂
The Plan
I started this recipe with the bun, and though I considered a store-bought potato bun, I went instead with a recipe I found on King Arthur Baking website for sweet potato sandwich rolls They were very easy to make, and I followed the KA recipe to the letter. The recipe is linked, if you’d like to try them.
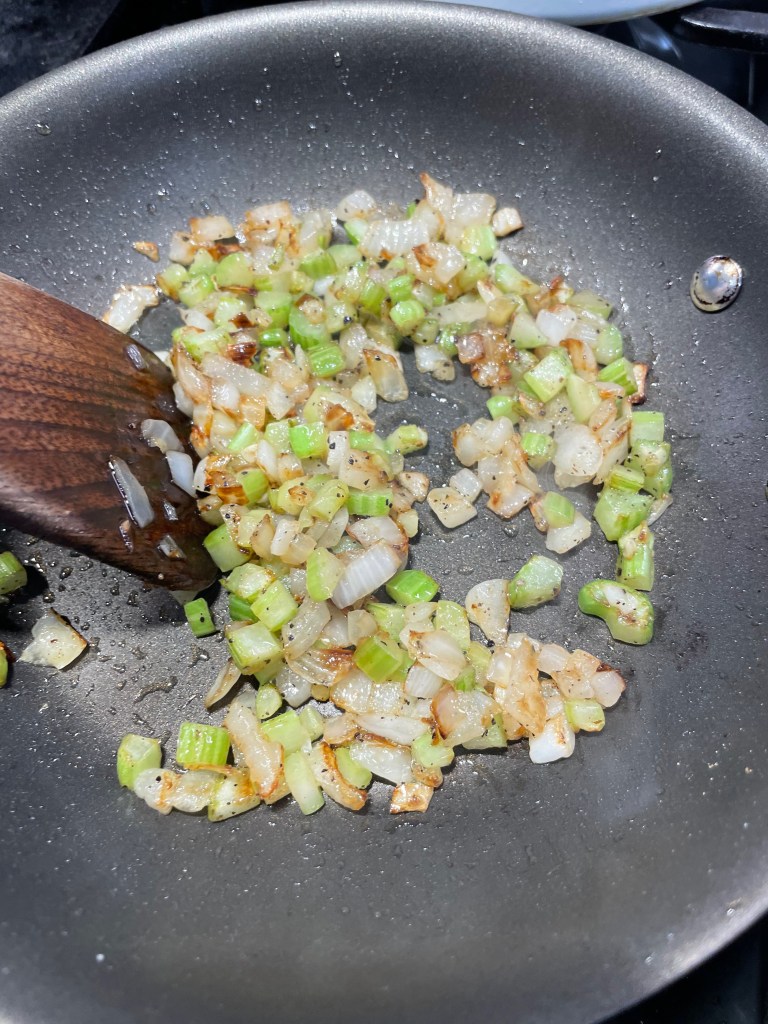
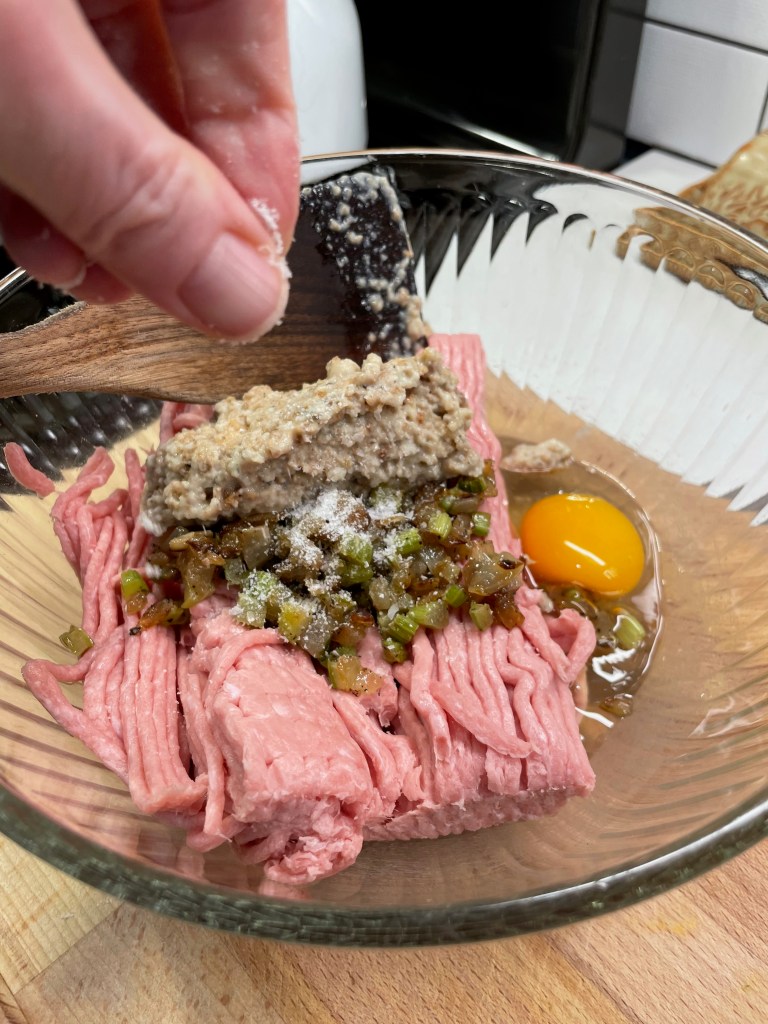
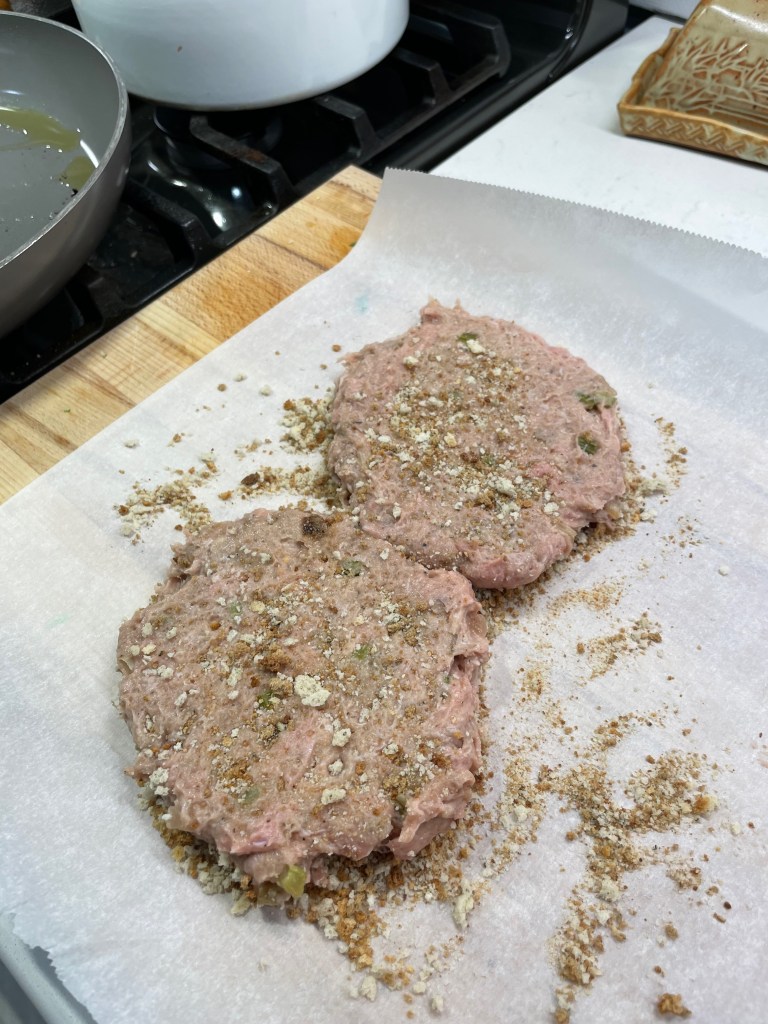
My burger is made from ground turkey, with sautéed celery and onions, plus an egg and a panade of herb stuffing mix blended in for structure and traditional flavor. The “burgers,” which were really more like meatloaf patties, were embellished with a spoonful of poultry seasoning to amplify the familiar Thanksgiving flavor.
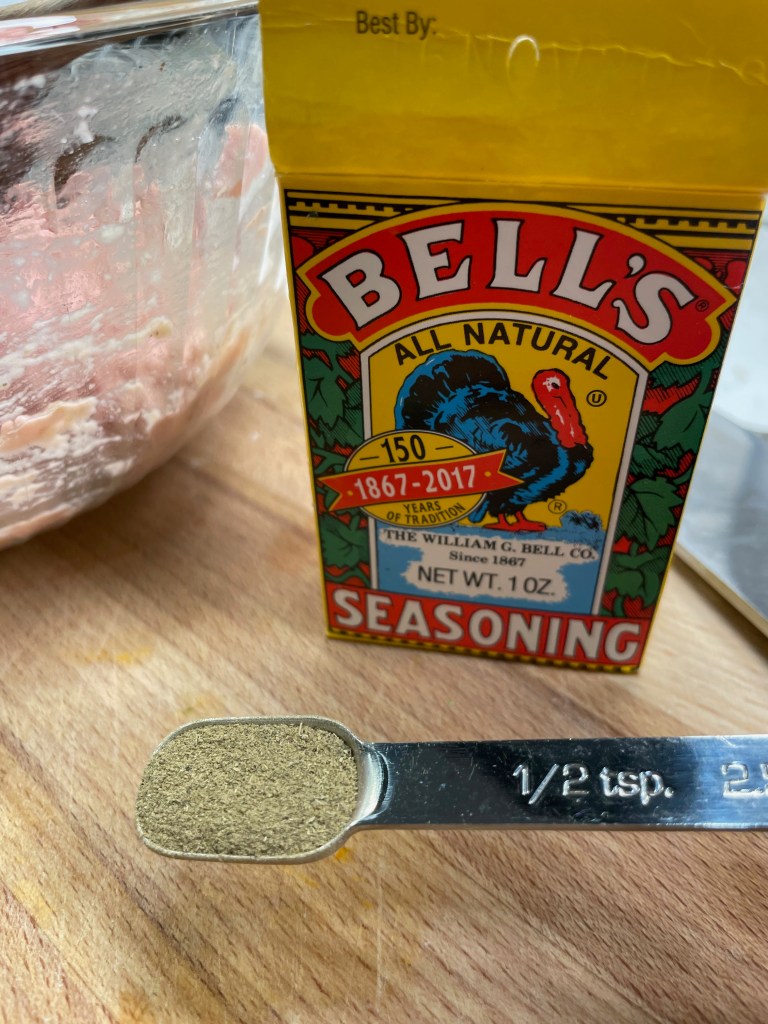
I made a basic turkey meatloaf recipe, with herb stuffing mix in the binder and Bell’s poultry seasoning for Thanksgiving flavor.
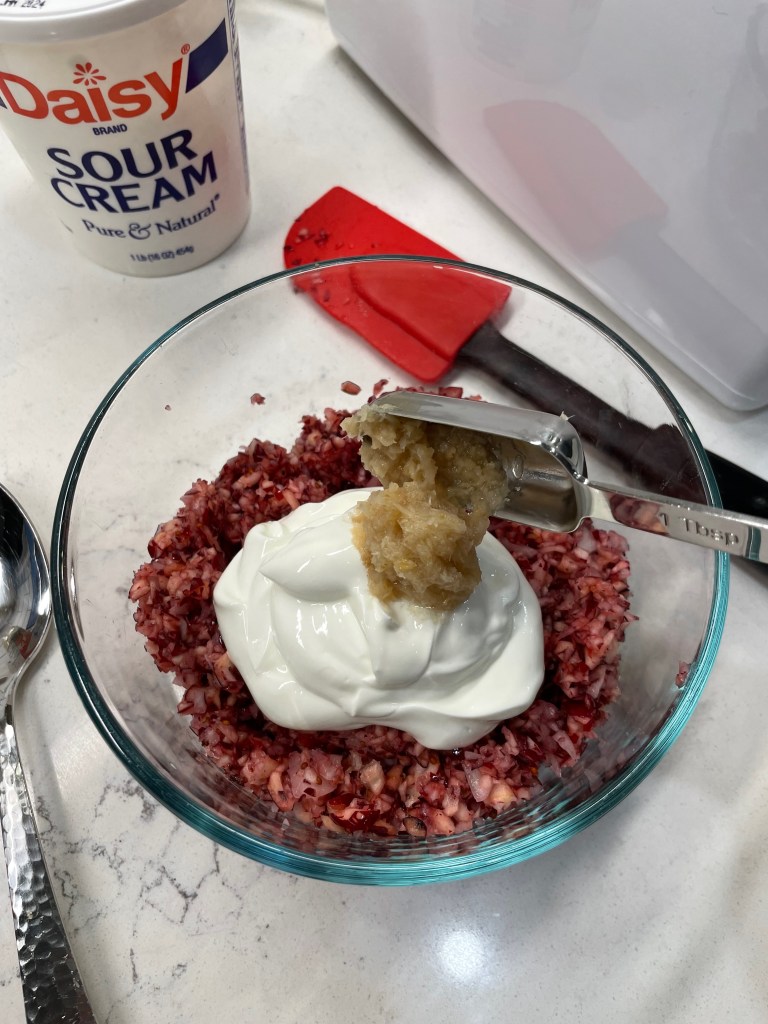
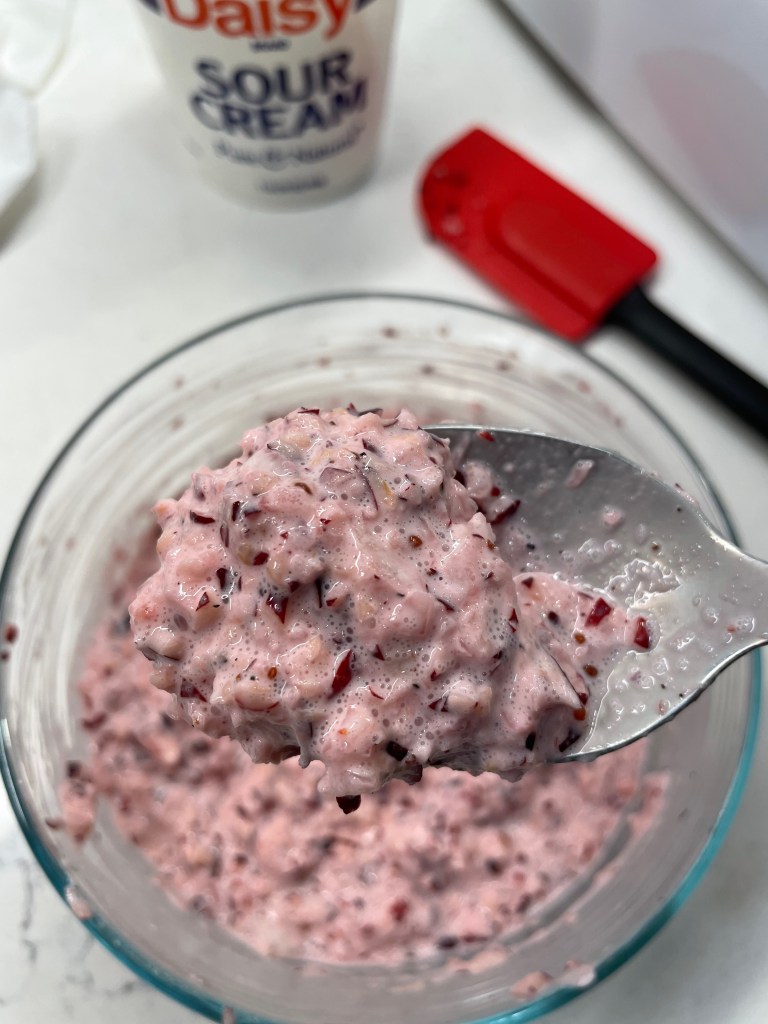
I thought, for a change of pace, this would be a good time to try the famous “NPR cranberry relish” that I’ve read about over the years. It uses fresh cranberries, sour cream and horseradish, if you can believe it. I made an only a half batch because Les tolerates horseradish but doesn’t love it as much as I do. More on this in a moment.
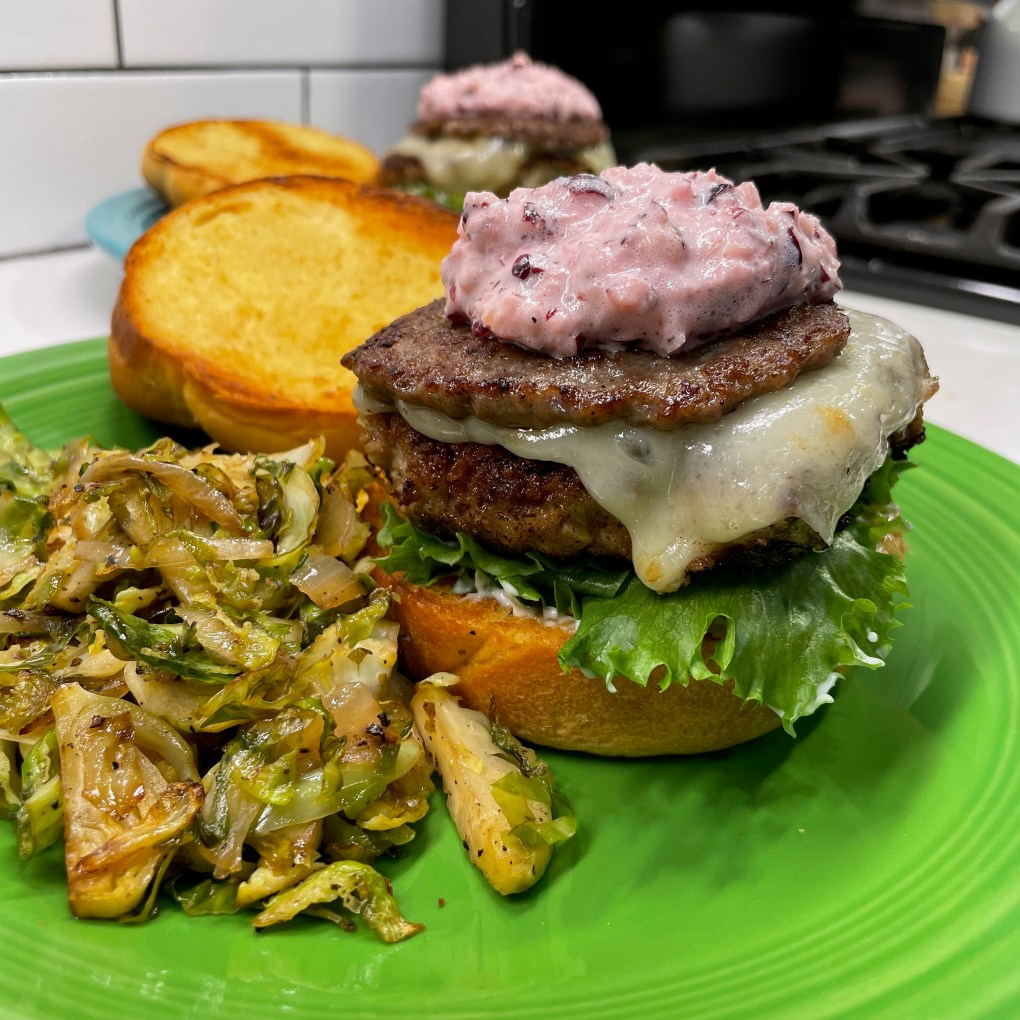
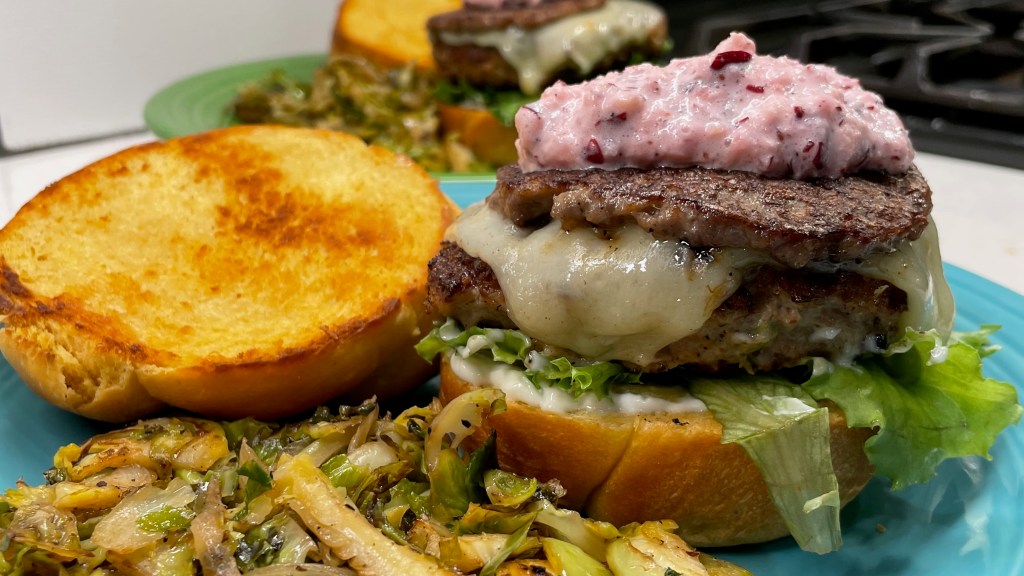
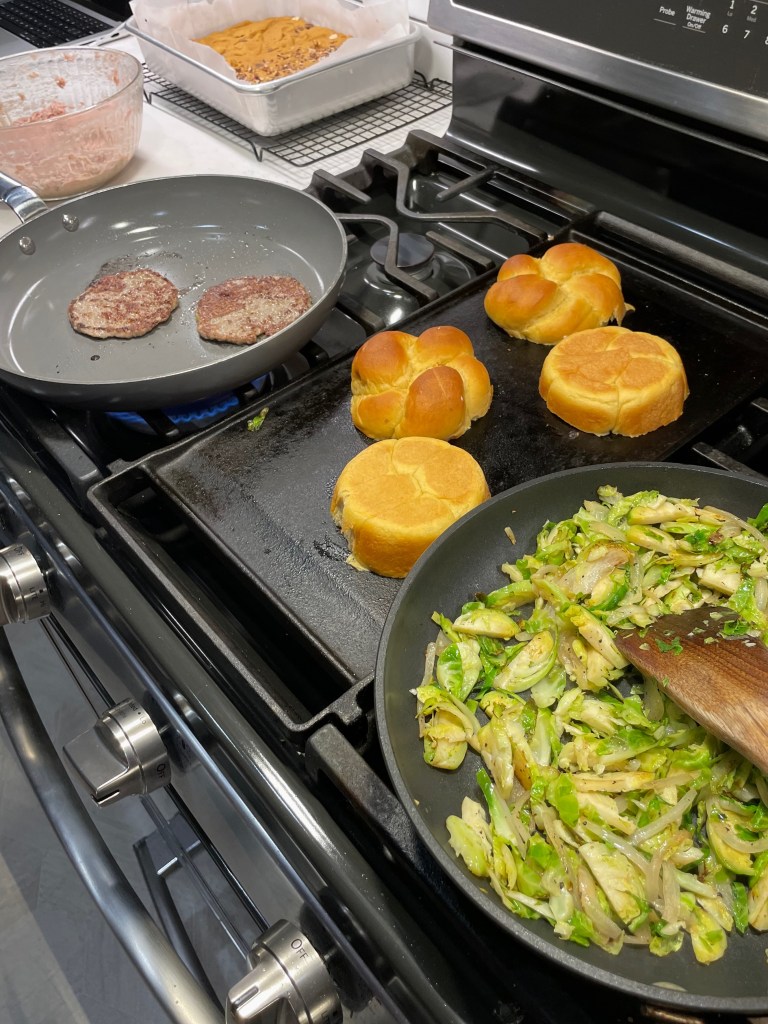
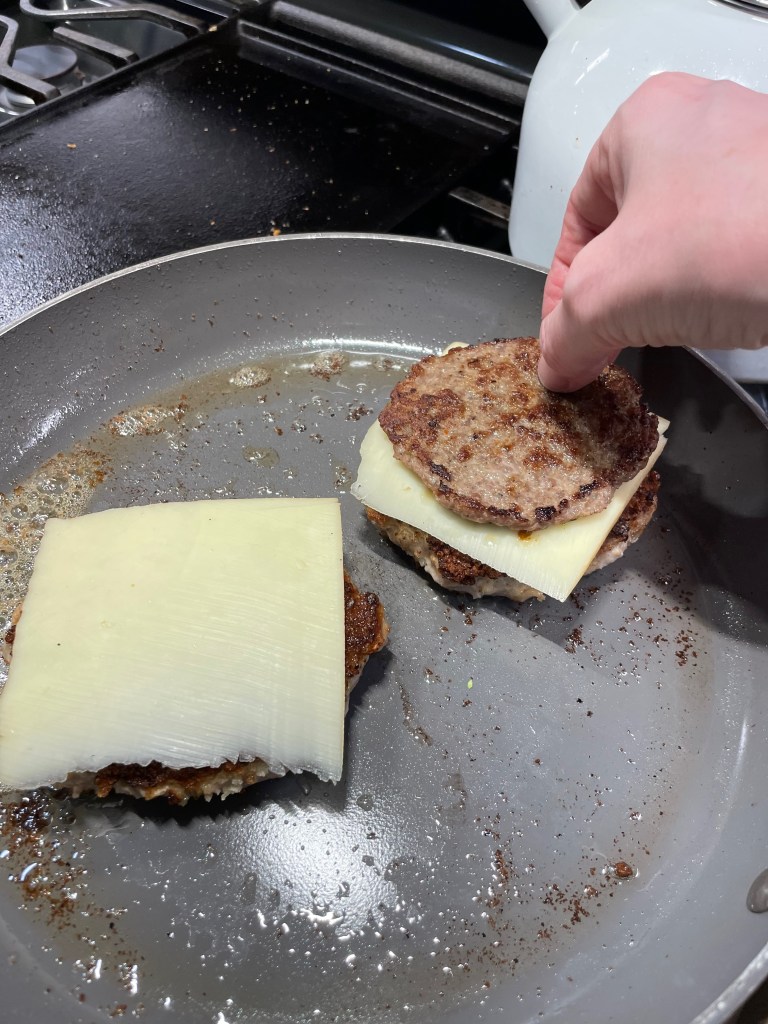
Sausage is a core ingredient of my usual holiday dressing, so I flattened some maple sausage patties and cooked them up to layer with my burgers. I buttered and griddled the sweet potato rolls, melted a slice of apple-smoked gruyère over the burgers, topped them with the thin sausage patties and loaded them onto the buns with some baby romaine for freshness.
The extra stuffing mix coating the patties was key to getting the crunchy surface I wanted on the burgers.
My first Thanksgiving burger, with a side of shaved Brussels sprouts, sautéed with onions, salt and pepper.
The Verdict
I had covered all the flavor bases with my plan— sweet potato, turkey, stuffing and cranberry— and overall it was a very tasty burger, but it didn’t exactly scream “Thanksgiving” to me and my husband, and so there will be other efforts. The sweet potato rolls (which I made exactly as written on the KA site) were wonderful, but very subtle in sweet potato flavor and too tall for this sandwich, and that made taking a bite a little tricky (and messy). The herb-seasoned turkey patties were moist and tasty and their crunchy exterior was spot-on. They could have carried a bit more of the savory herb flavor, but otherwise they were excellent and I’ll make them again, for sure.
What about that unusual cranberry relish? This “famous” recipe was the biggest surprise for me, and not in a good way. As someone who really loves the zing of horseradish, I found this stuff—which has oodles of rave reviews online, by the way— to be rather plain, runny and uninteresting, even with the extra hot horseradish. My husband thought the sandwich would be better with a more traditional cooked cranberry topping, and I agreed.
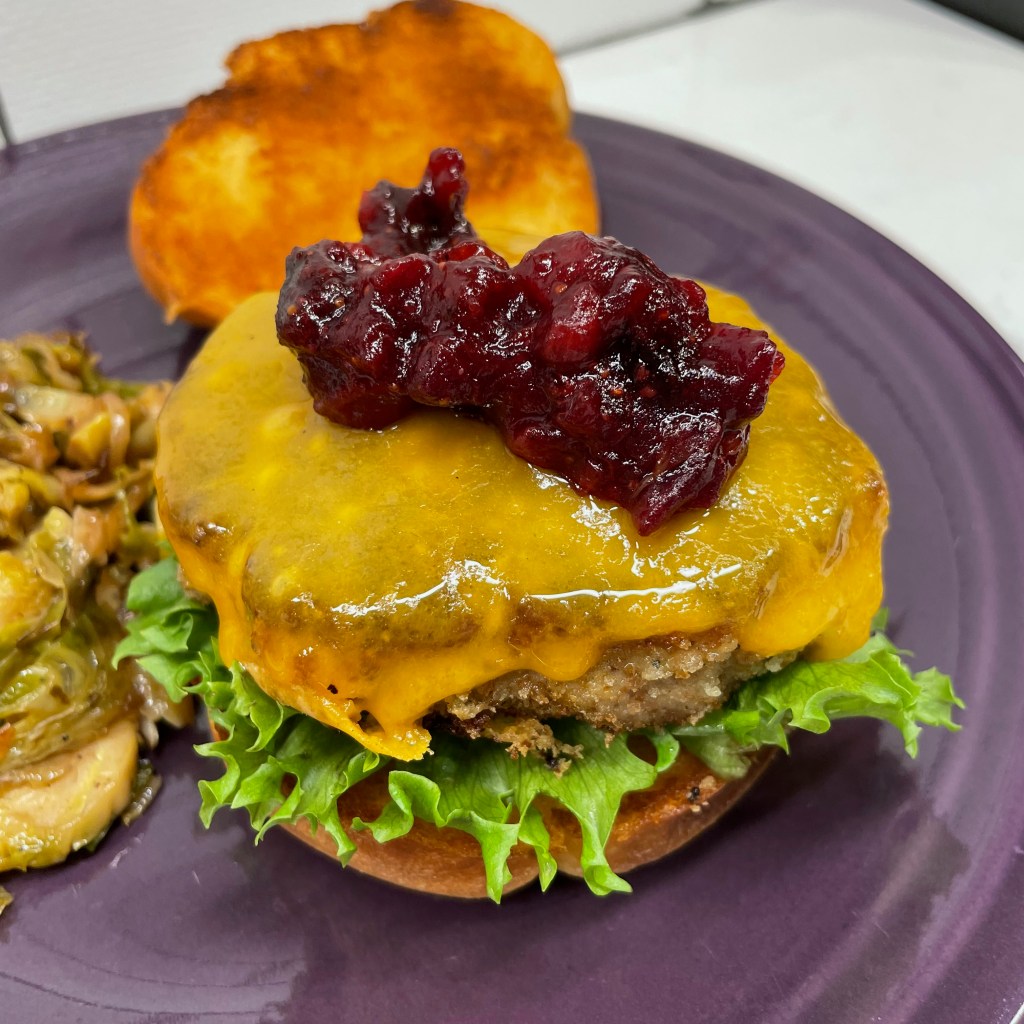
As luck and leftovers would have it, I did have a chance to try again with a few changes! On my second run, I skipped the sausage altogether, and I tried a different cranberry concoction that was so delicious, I will be super excited to share it with you in a post of its own later this week!
Les also requested cheddar rather than the fancy schmancy gruyère. 😉
What about next time?
There’s still room for improvement on this idea and I’m keeping it in the “in-progress” column of my bucket list until I get it right. I’ll share below the recipe I created for the turkey patties because that part of the recipe was great, Thanksgiving or not. But I’d really like to hear from you, too, so that I might incorporate your ideas into a future iteration of the burger. How would you bring your favorite traditional flavors into this “Thanksgiving-in-a-bite challenge?” Please share your ideas in the comments section, and let’s see what we can come up with together!
The rest of the burger is a work in progress, but this recipe for Thanksgiving-flavored turkey burger patties is a keeper!
Ingredients
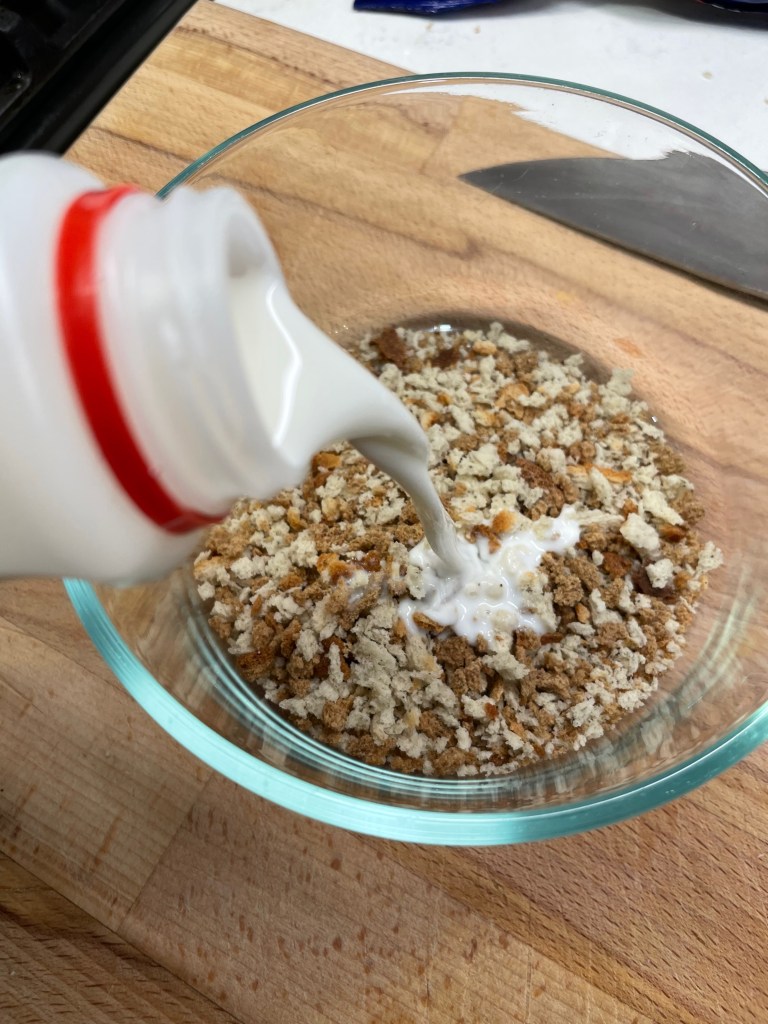
1/2 cup Pepperidge Farm herb seasoned stuffing mix, crushed
1/3 cup milk, to moisten the stuffing mix
1/2 sweet onion, minced
1 rib celery heart, strings removed and minced
1 Tbsp. extra virgin olive oil
Salt and pepper
1 pound ground turkey (I used 90% lean, but turkey breast would be great, too)
1 large egg
1 teaspoon ground poultry seasoning (I used Bell’s brand)
Additional 1/2 cup herb stuffing mix, crushed for coating the burgers before frying
Olive oil for frying
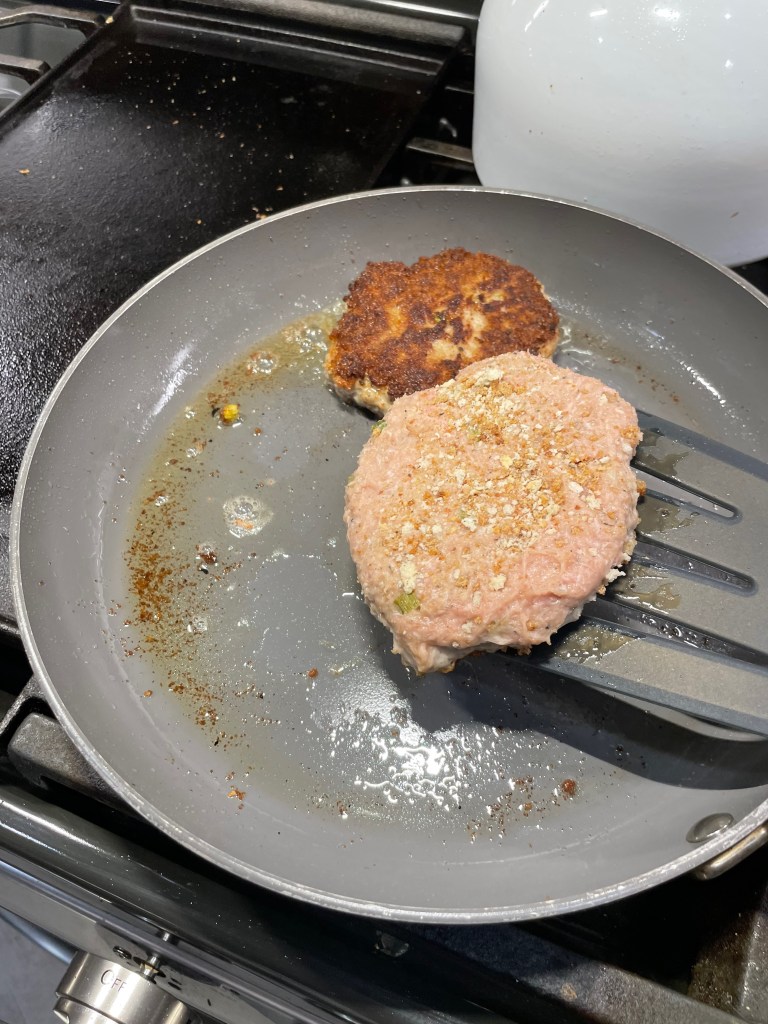
This ground turkey mixture is much leaner and softer than a typical burger mixture. For easy shaping of the patties, spoon dollops of the meat mixture onto a sheet of parchment paper that is sprinkled with the additional herb stuffing crumbs. Scatter more crumbs on top of the meat dollops and fold the parchment over them to flatten with your palm or a spatula. Be gentle with them, and keep them on the parchment until the skillet is ready.
Directions
Combine herb stuffing crumbs and milk in a small bowl and let rest for at least 15 minutes to soften into a panade. This mixture will help bind together the other ingredients into patties.
Heat a small skillet over medium heat. Add first measure of olive oil and sauté onions and celery until softened. Season with salt and pepper.
In a medium mixing bowl, combine ground turkey, panade, sautéed vegetables, egg and poultry seasoning. Season with salt and pepper. Use a heavy wooden spoon or your hands to fully blend the burger ingredients. Cover bowl and refrigerate a few hours so that the mixture will firm up.
When ready to cook, heat a large, non-stick skillet over medium heat with 2 tablespoons of olive oil. Shape the meat mixture into patties and coat them on both sides with the second measure of crushed stuffing mix.
Carefully arrange burger patties into the skillet, keeping enough room between them for easy turning. Leave them undisturbed for 5 minutes, or until the first side is nicely crusted. Turn the patties to cook the other side. If using cheese on your Thanksgiving burgers, lay the slices over the burgers immediately after turning so that it will melt.
I woke up this morning, fully aware of Autumn. I did not need the calendar to tell me that it has officially begun; the weather spells it out quite clearly— gentle rain from the mid-season tropical system moving up our coast a few hours away, cooler temperatures and a stillness that I haven’t witnessed since I’m not sure when. Even the cicadas, which North Carolina sees and hears every summer, have gone about their business.
This is my favorite time of year, and the gears in my mind are churning out visions of stews and soups and homemade breads and all-day roasts. I tolerate the blistering heat of these southern summers only for the joy of autumn, and it should come as no surprise that the foods are my favorite thing. This is the start of Sunday Supper season!
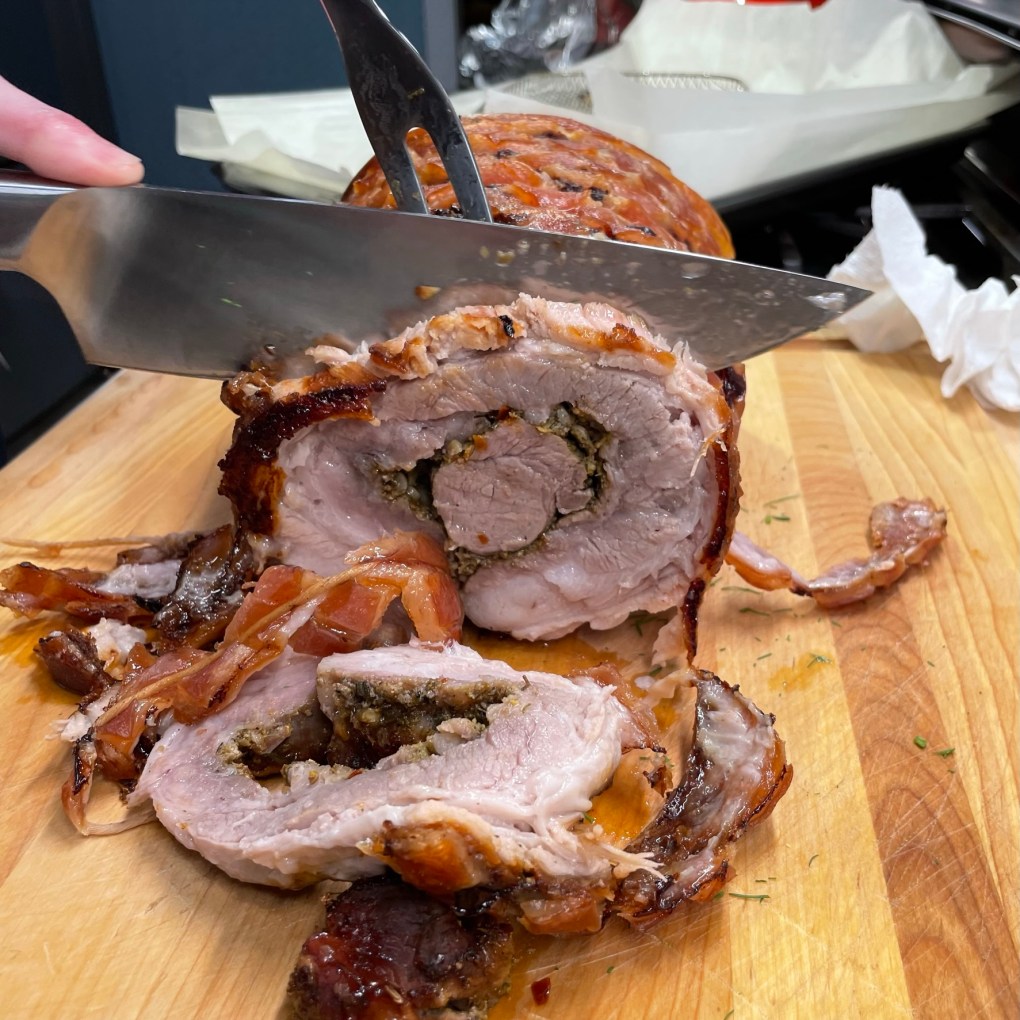
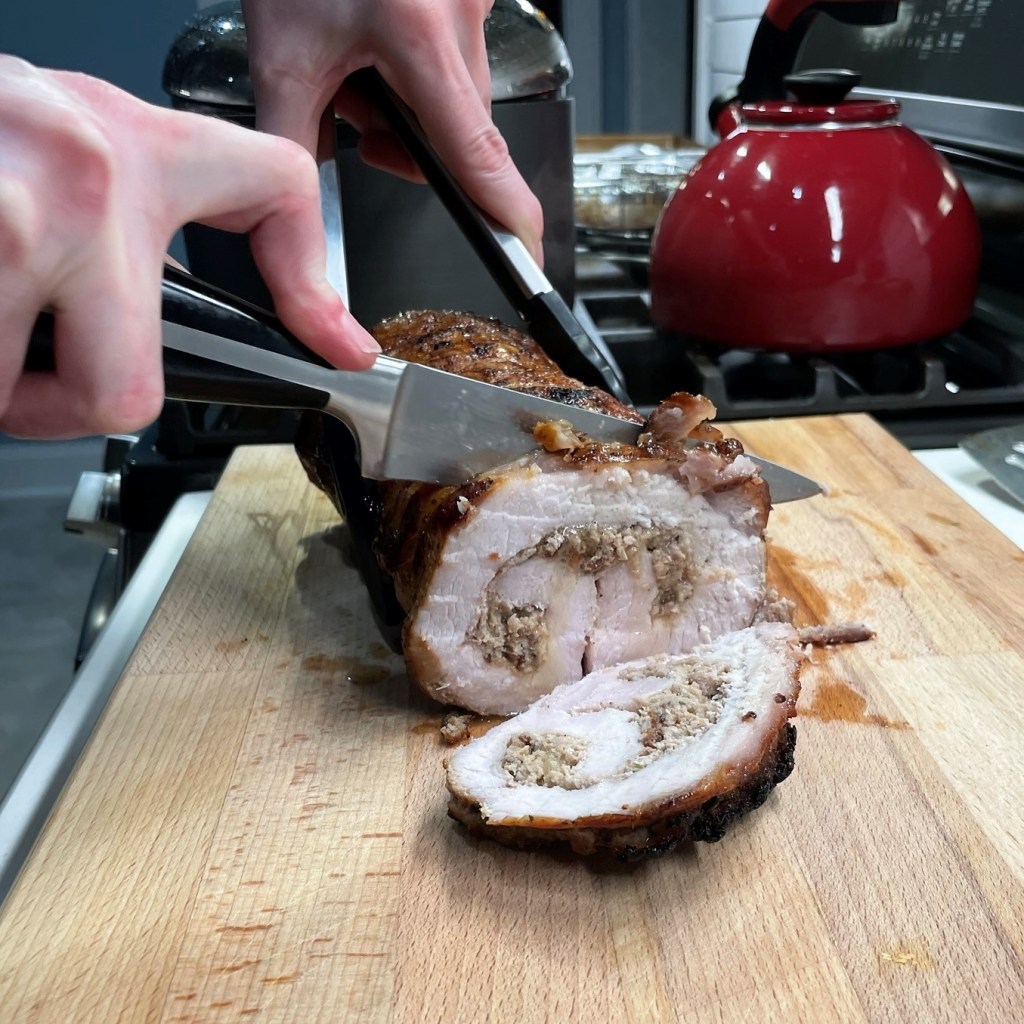
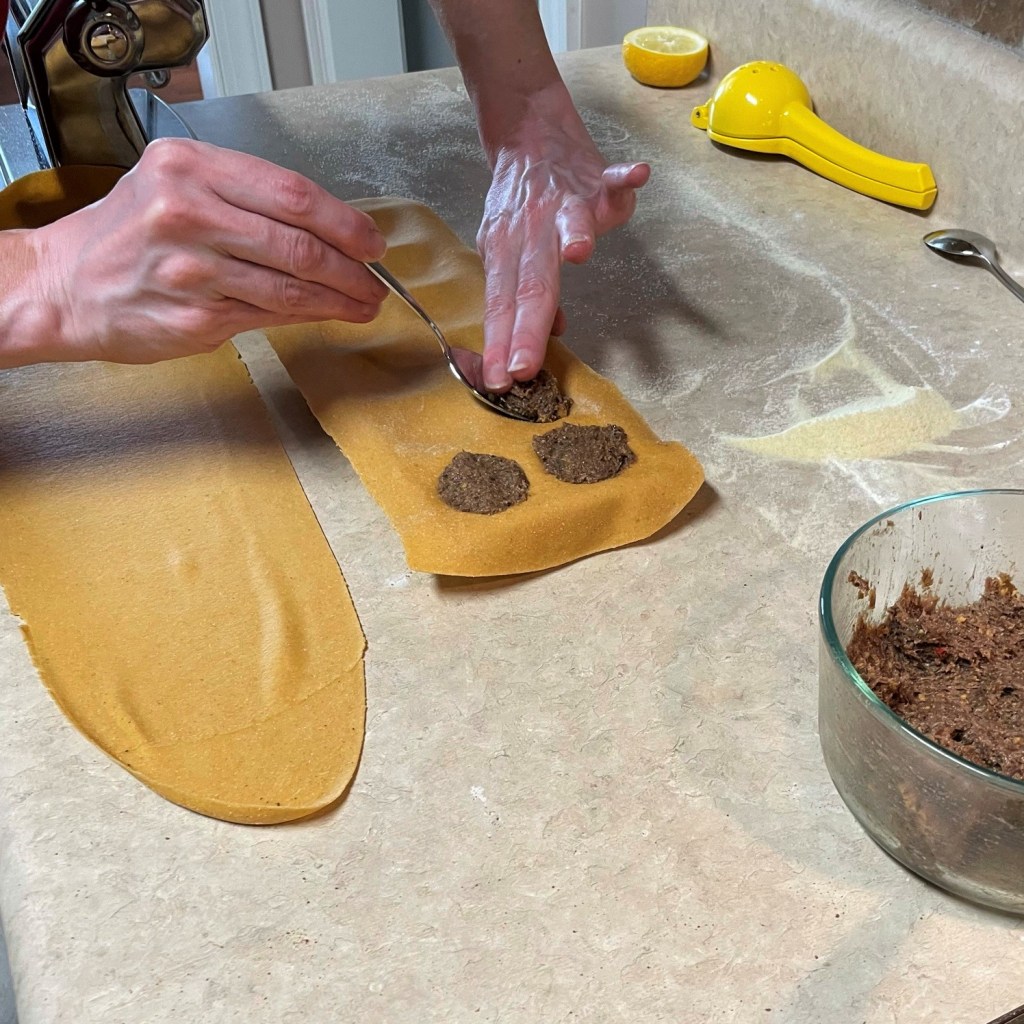
Porchetta— a recipe of central Italian origin— had been on my culinary bucket list since before I started this blog, and for the life of me, I don’t know why I imagined it to be complicated. As roasts go, it was probably one of the simplest I’ve ever made. Perhaps it is because I have looked it up so many times over the years that I already had a sense of how to make it. Or maybe it really is just easy. I’ll let you review my process and decide.
There are many, many recipes for porchetta on the internet. Opinions vary (of course) about what makes it truly authentic, and this argument seems to be regional. In some parts of Italy, it might be an entire suckling pig that is stuffed with herbs (or not) and roasted. In others, it would be only the pork belly, rolled upon itself with a filling of the pig’s entrails (yuck). Still others have you wrapping the belly around a pork loin or (as is the case with mine) tenderloin.
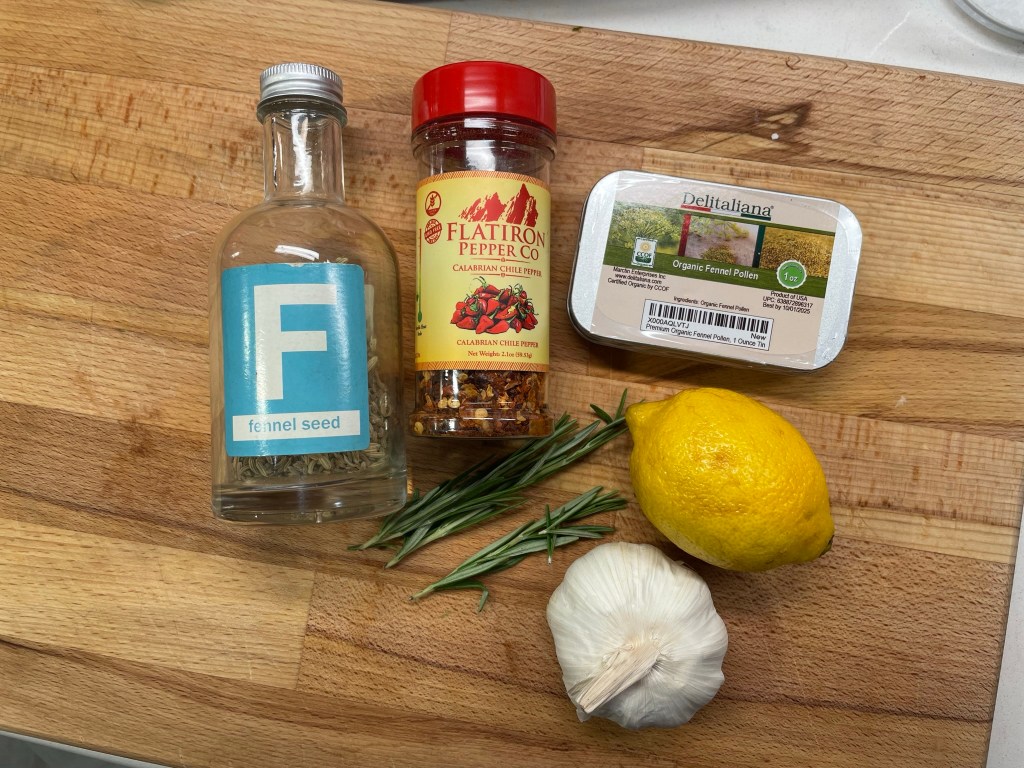
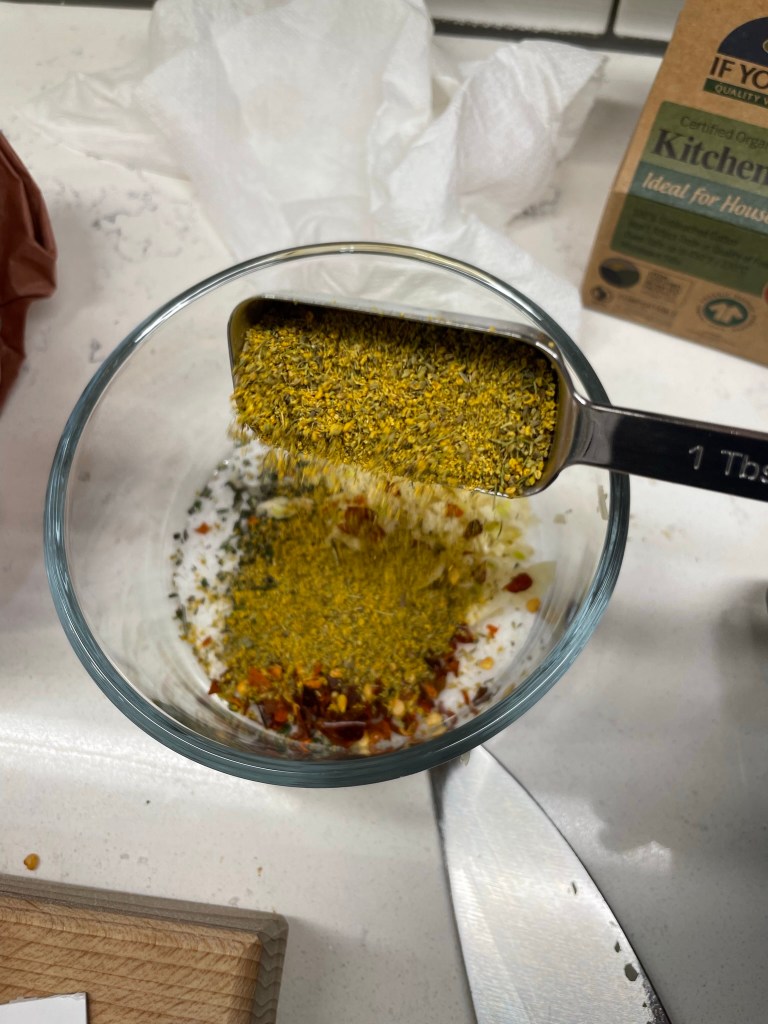
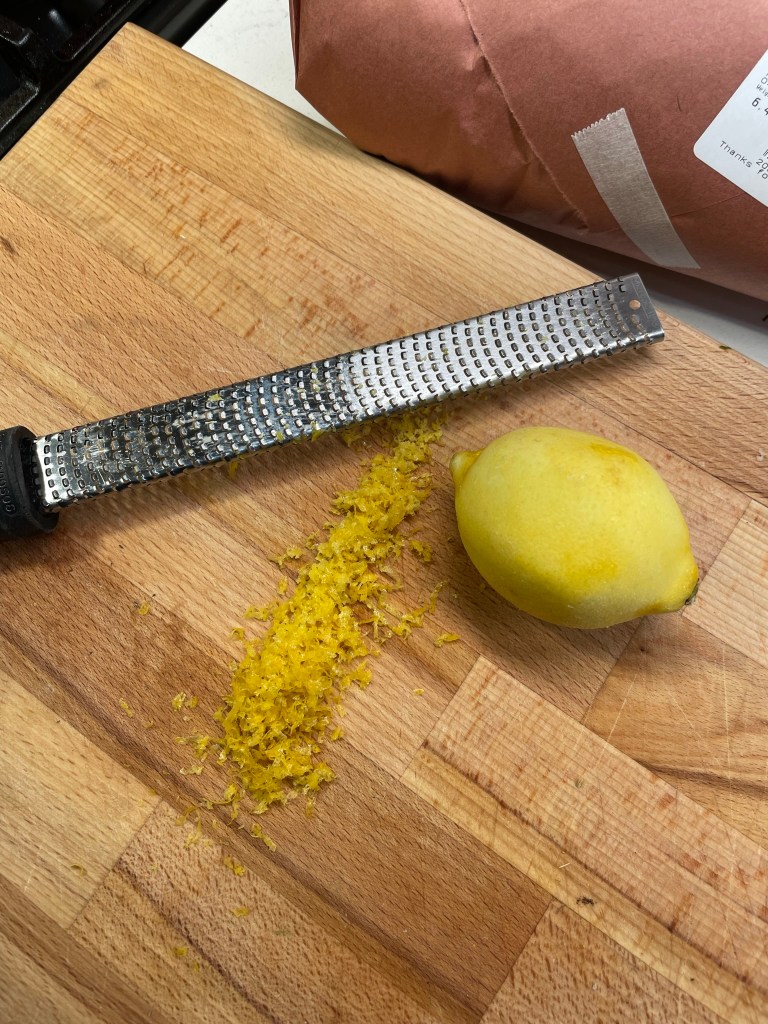
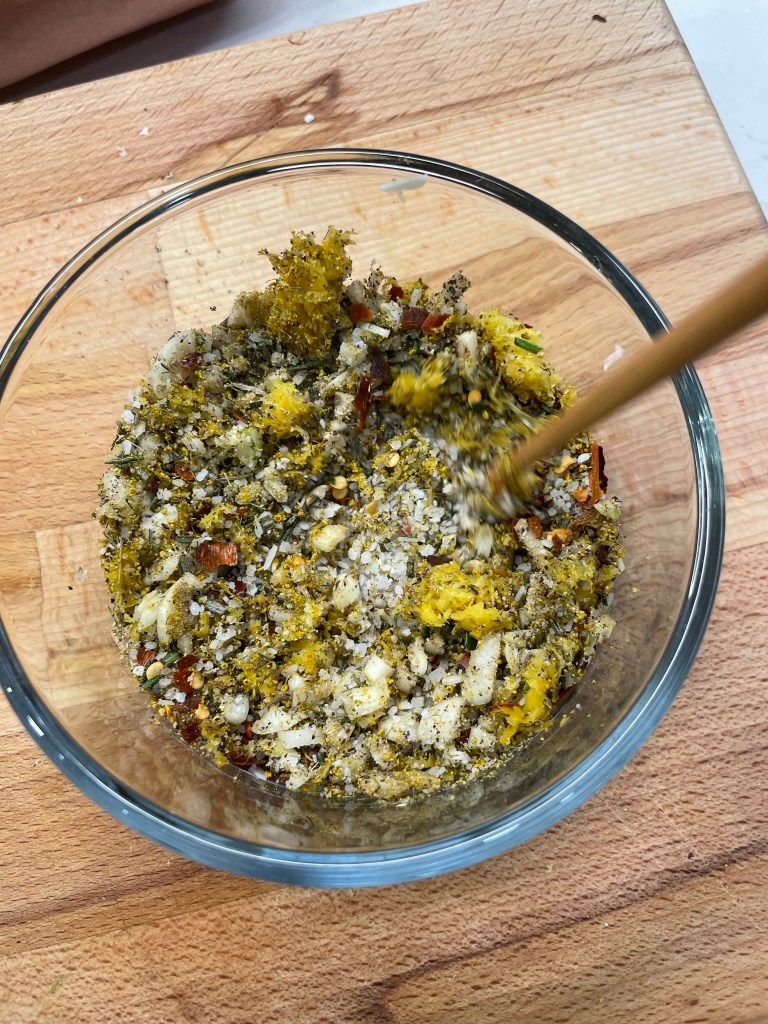
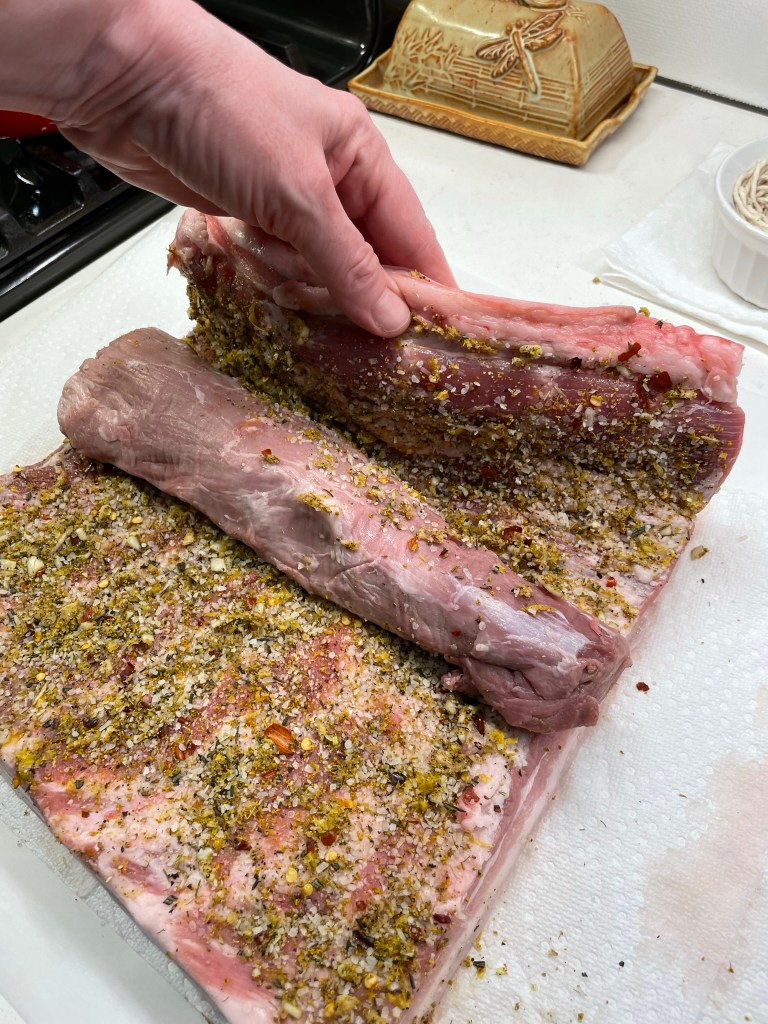
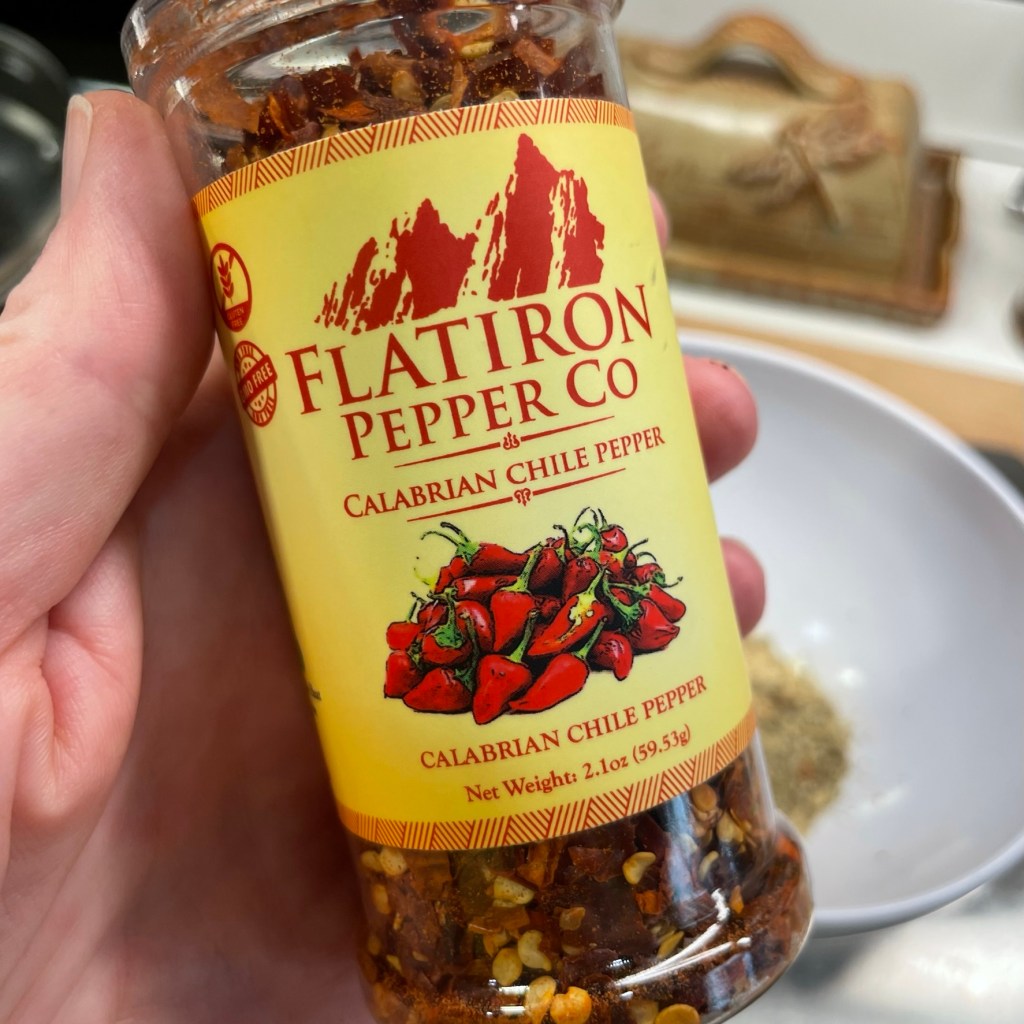
My kitchen is not located in any region of Italy, so I took a few liberties, based on what sounded like the most flavorful “authentic” option. My filling was very fragrant and herbal, with garlic, fennel and rosemary, plus a generous spoonful of lemon zest and a few shakes of dried Calabrian chile flakes. I want to make another batch of this just as aromatherapy when I’m having a bad day.
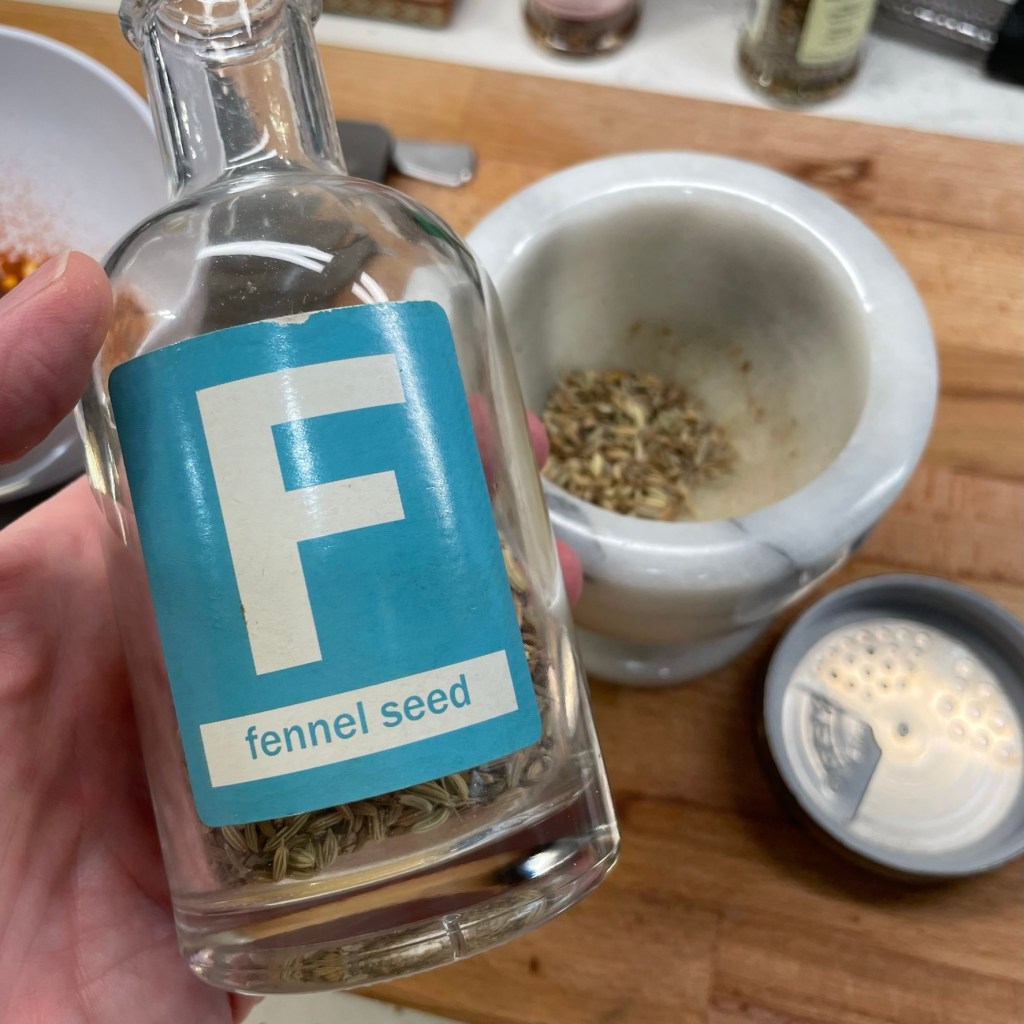
In my research, I learned that there is a difference between fennel seed and fennel pollen, the latter of which I had to purchase online because no stores around here carry it. Perhaps where you are, an Italian market could set you up with some. The fennel pollen is very delicate and fragrant and is distinctly brighter and lighter than fennel seed. The small tin, which is roughly half the size of an Altoid tin, set me back about $18, but I only used one-quarter of it.
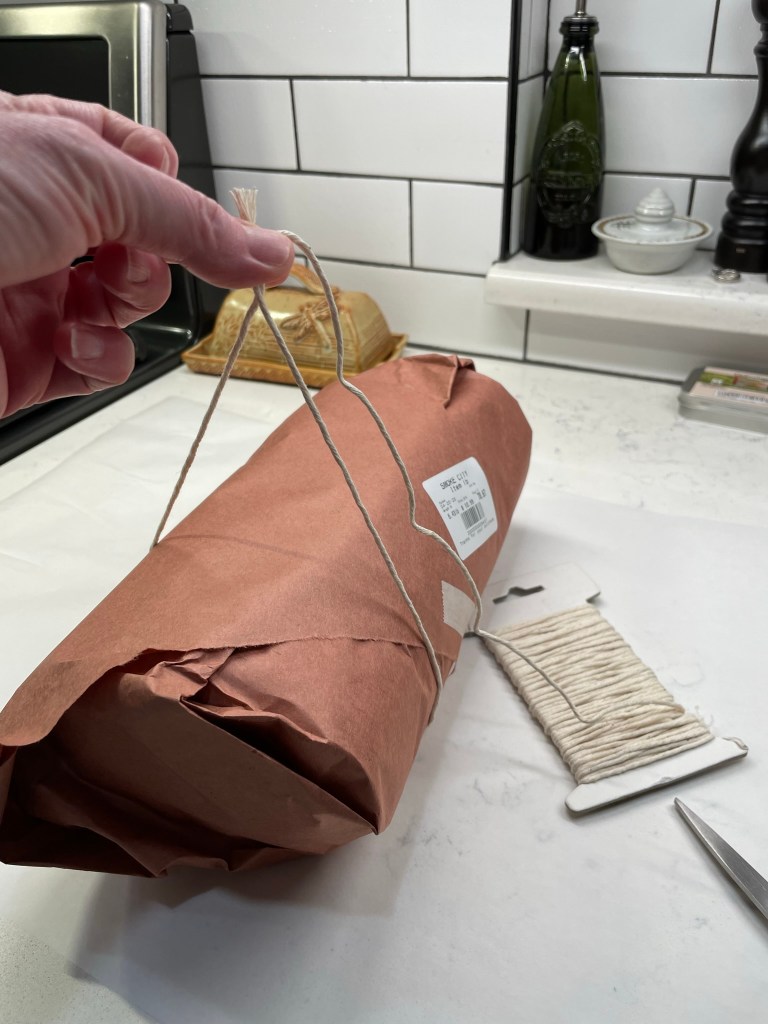
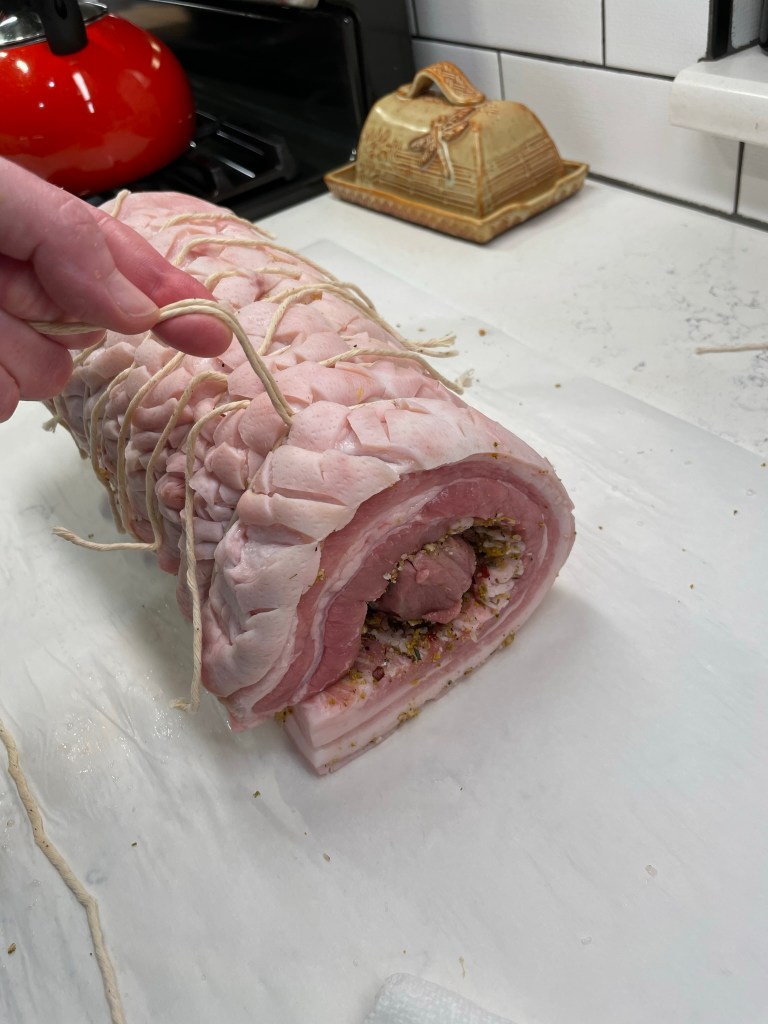
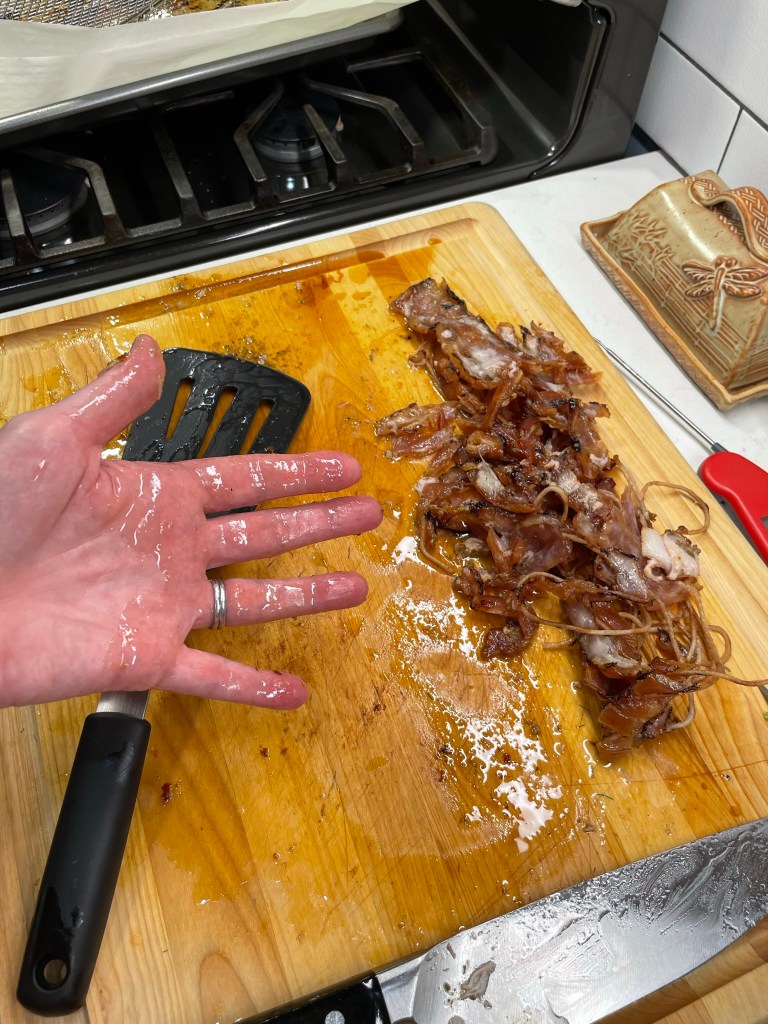
Putting the roast together was so easy. I began by measuring a piece of kitchen twine around the package of pork, and then I cut several pieces to that length and soaked them in cold water, for tying up my porchetta. My local butcher had cut the belly piece to match the length of the tenderloin, and even took time to show me the right steps for success, as the belly must be rolled in a certain direction for easy slicing and perfect tenderness.
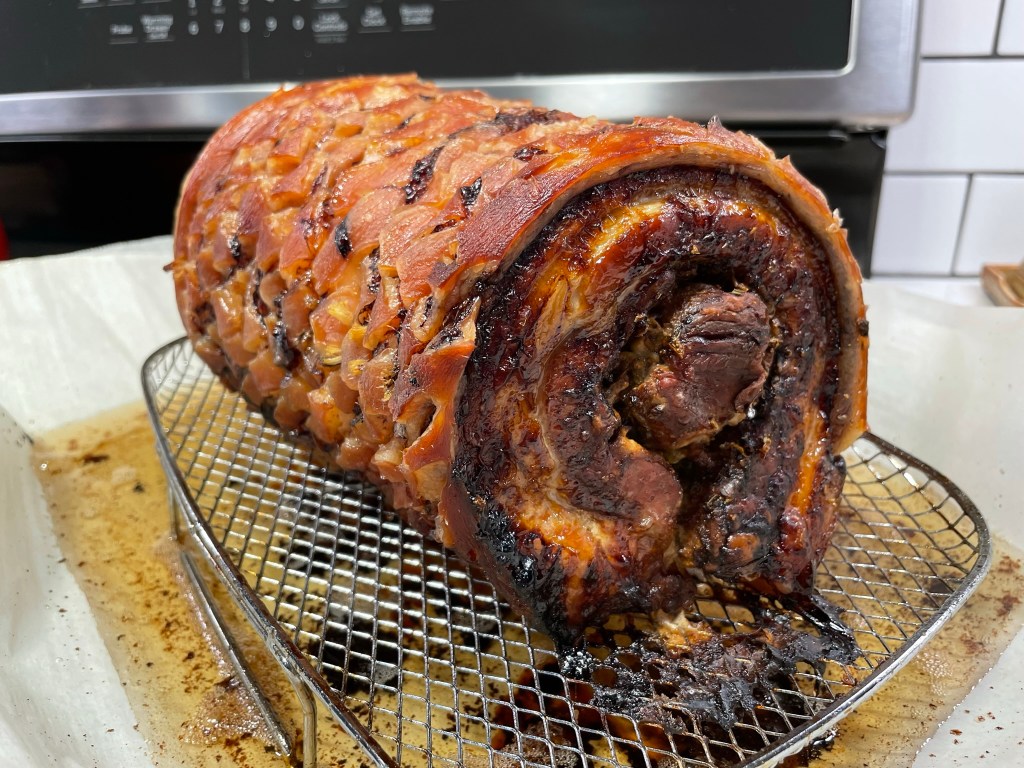
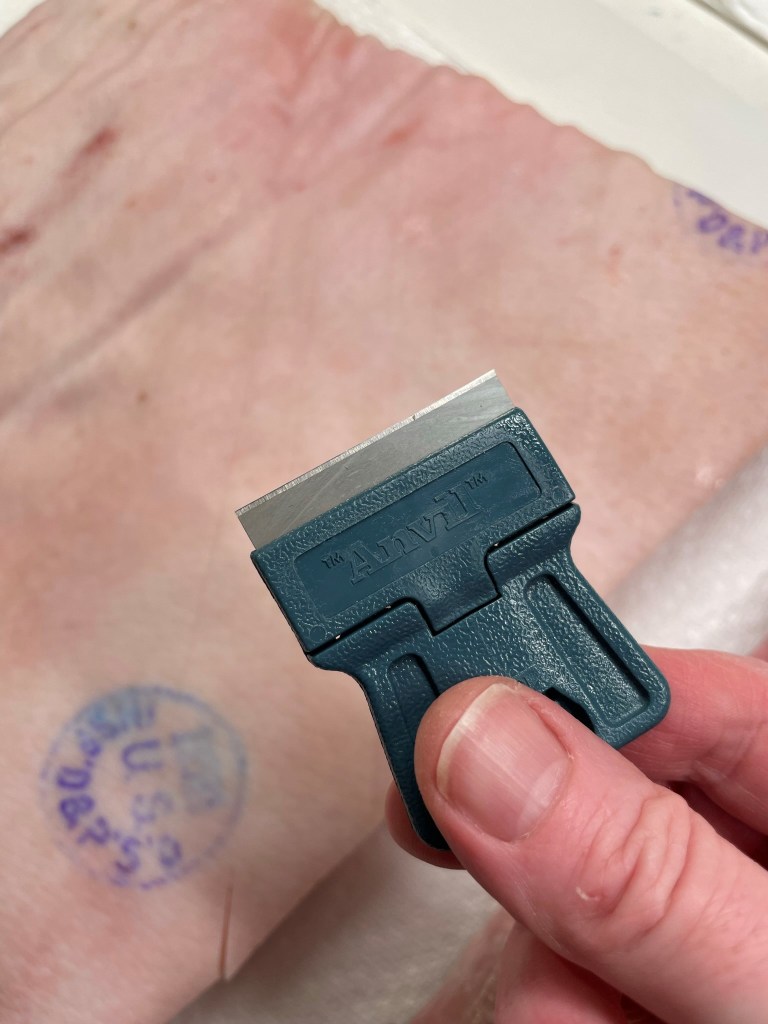
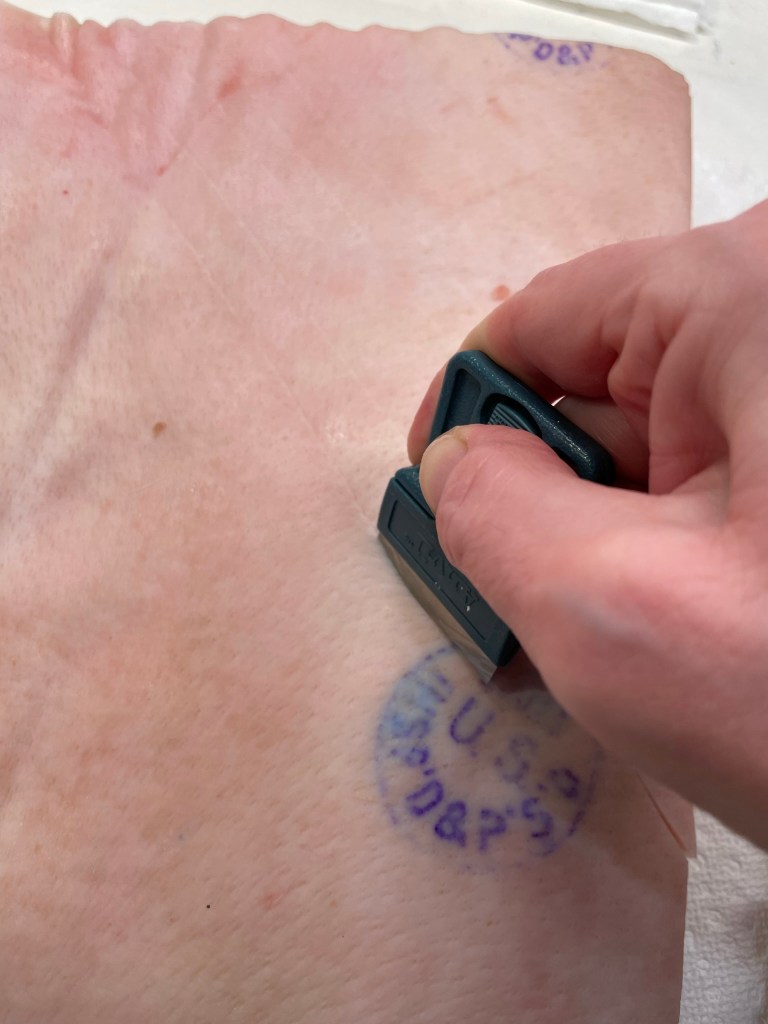
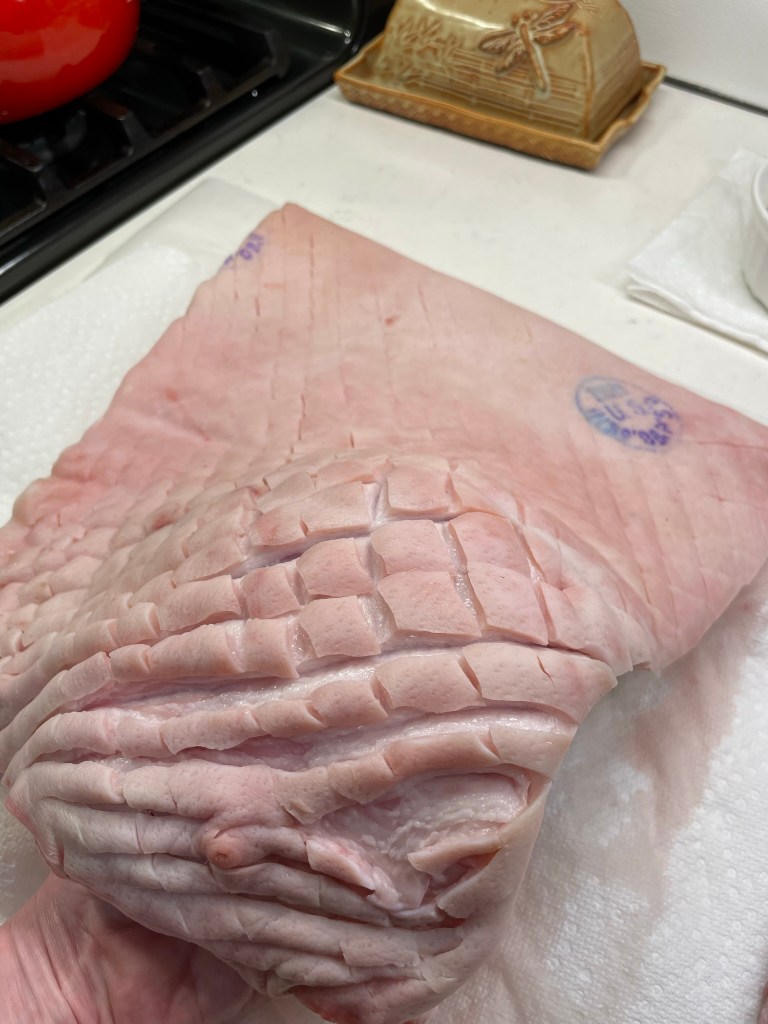
He had also echoed what I had seen in every recipe, which is that the roasted skin should be golden brown and “crackling” crisp. To achieve this, I scored the skin side of the belly in a crosshatch pattern, which would ease the rendering of the thick layer of fat. This process is simple to do, but you need to use something very sharp to cut through the heavy skin. I opted for a razor blade scraper— yep, the same kind of tool you’d use to scrape paint off a window pane. It may sound odd, but it was perfect because it was easy to control the cuts and nearly impossible to go too deep. Scoring the skin this way also made it more flexible for wrapping around the tenderloin.
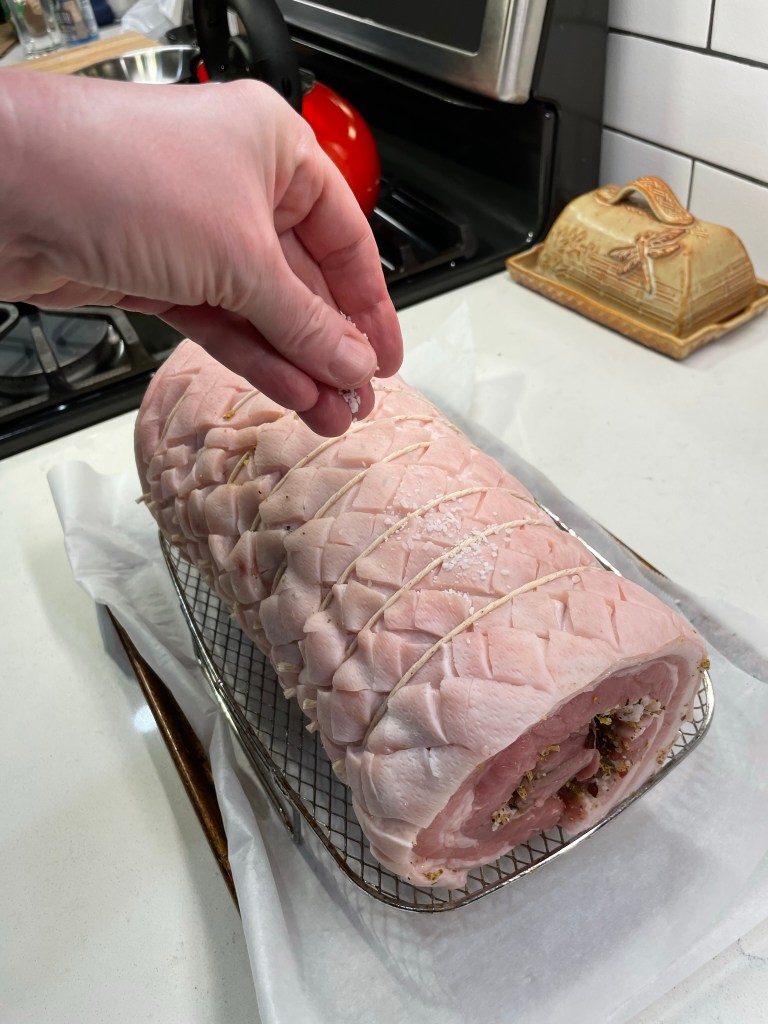
I spread that aromatic filling evenly over the inside of the pork belly, all the way to the edges, and rolled it up around the tenderloin and then laid it across my soaked twine pieces. I tied it up, sprinkled it all over with kosher salt and laid it on a rack to dry out overnight in the fridge. If it seems counterintuitive that drying out the meat before roasting leads to a juicier finish, believe me, I feel you. This was a huge mental hurdle for me when I first read about dry brining, but I have such incredible results that I will never look back.
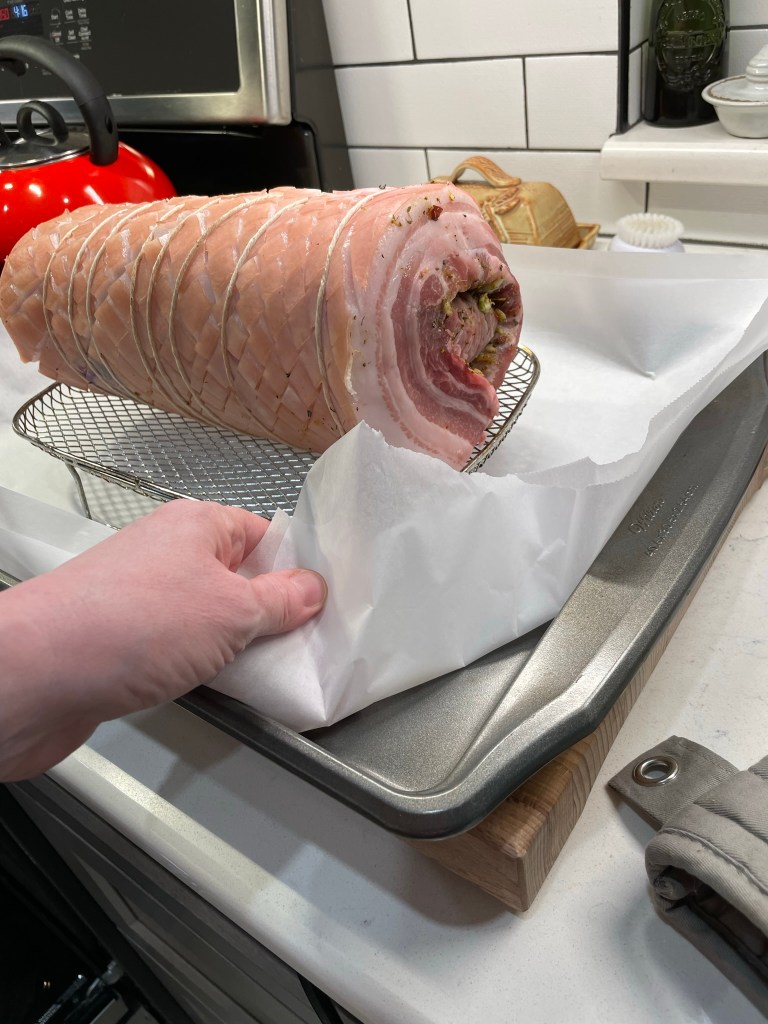
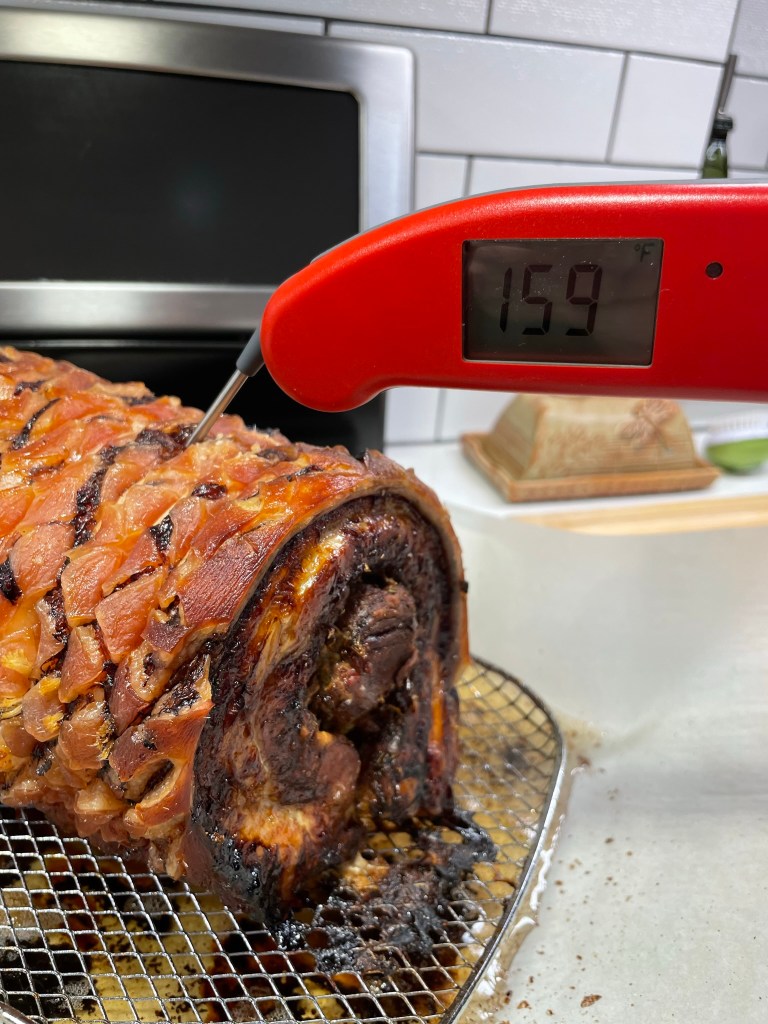
Eighteen hours later, when I was ready to roast my porchetta, I pulled it from the fridge and gave it some time to rest at room temperature while I preheated the oven to 350° F. There was nothing left but to roast it!
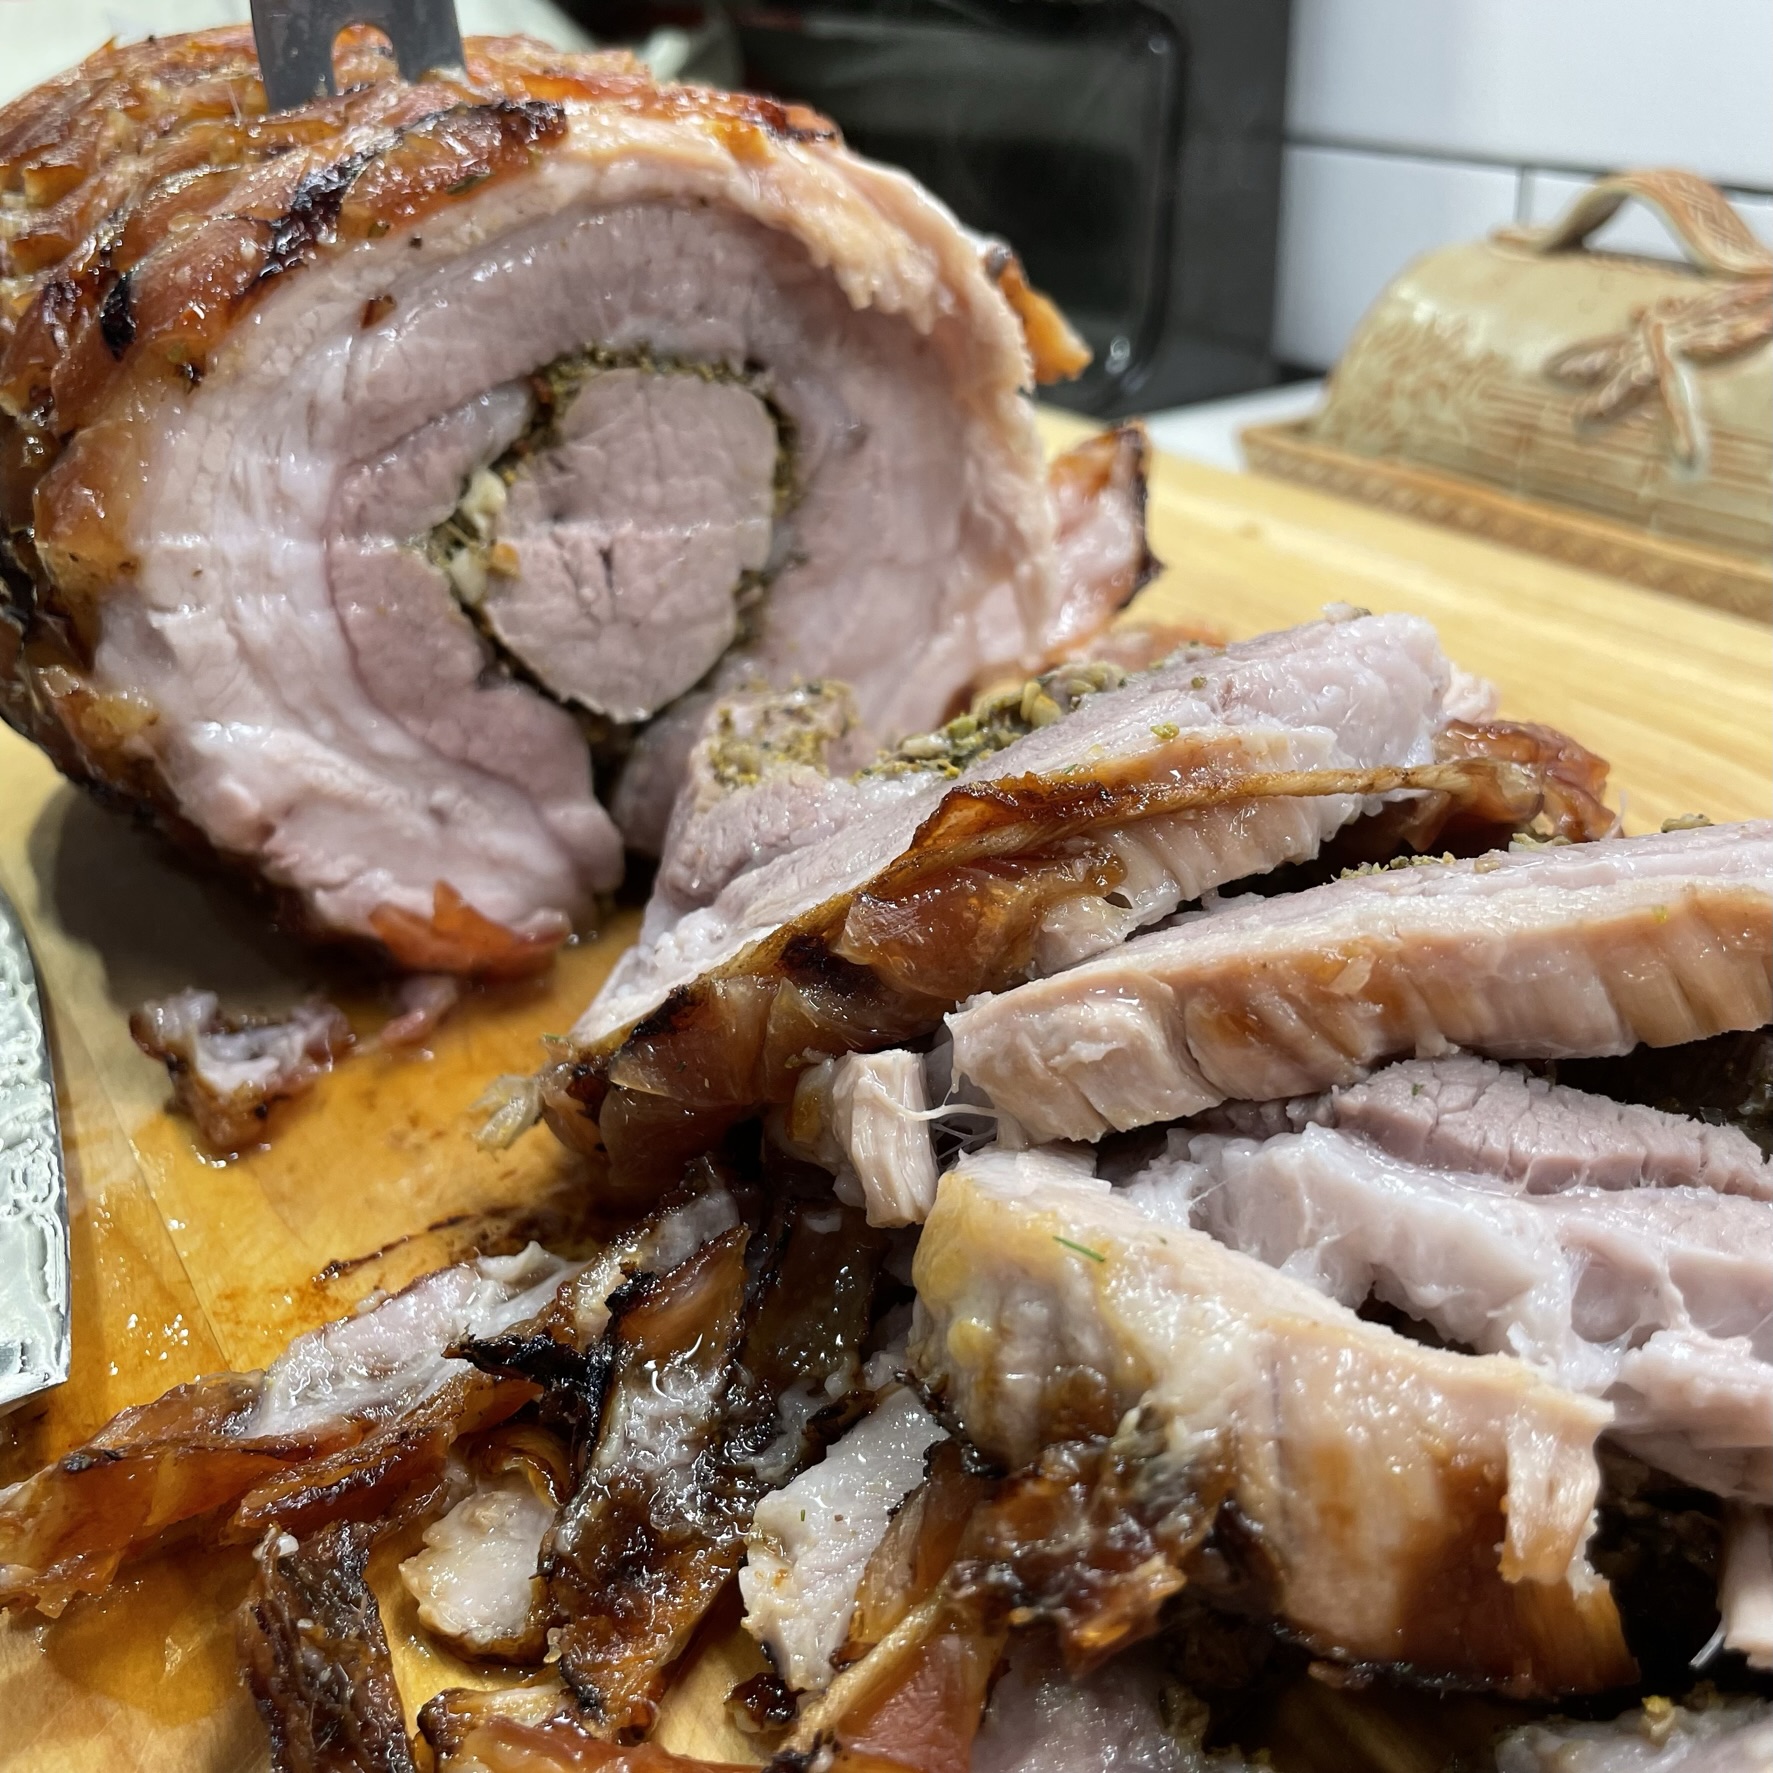
Sometimes the simplest dishes intimidate me, and I attribute this to unfamiliarity. I don’t have an ounce of Italian heritage, so nobody in my family has ever made porchetta. The only way to overcome insecurity in the kitchen is to muster up the courage to try that new thing. I’m thrilled to move porchetta into the done column on my bucket list!
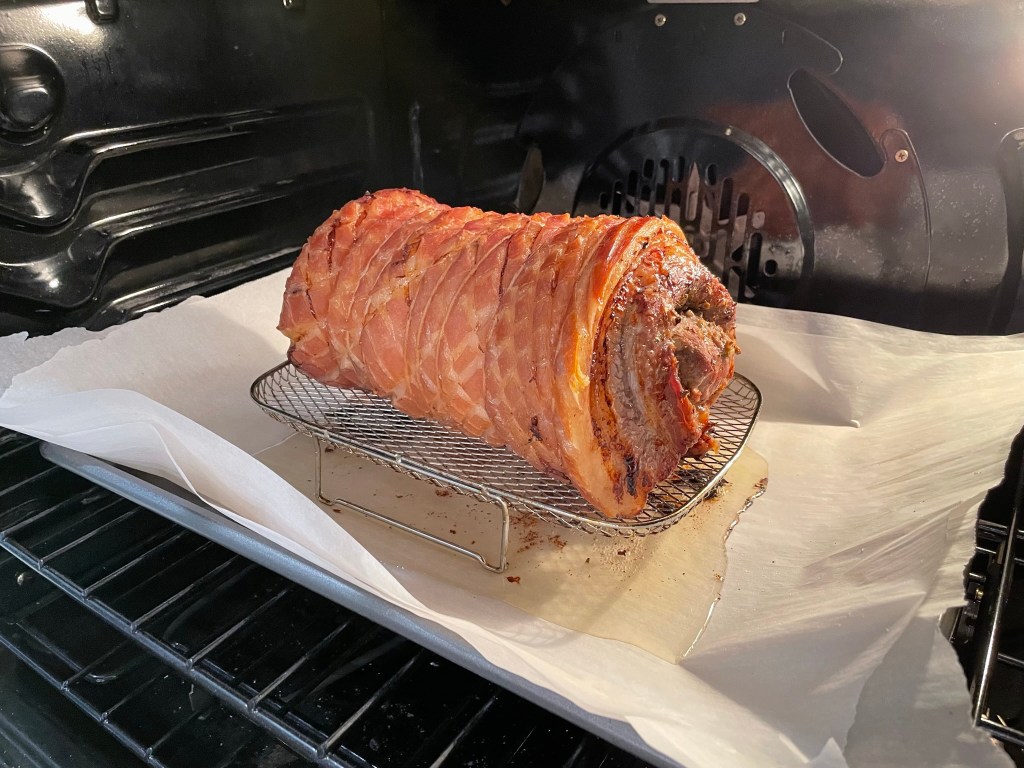
It may surprise you to know that porchetta is likely a one-and-done for me, but not for any bad reason. The roast was off-the-chart delicious, easy to make, and it produced fantastic leftovers.
My hesitation for a repeat begins with the cost. Sure, a grocery store pork belly and tenderloin would be cheaper than the $70 I spent at my local butcher. But we don’t buy a lot of grocery store meat because we object to most conventional production methods. Our local butcher sources its meats from area farmers who follow sustainability practices such as regenerative farming. This is better for the environment and the animals, and also a vast improvement in terms of flavor.
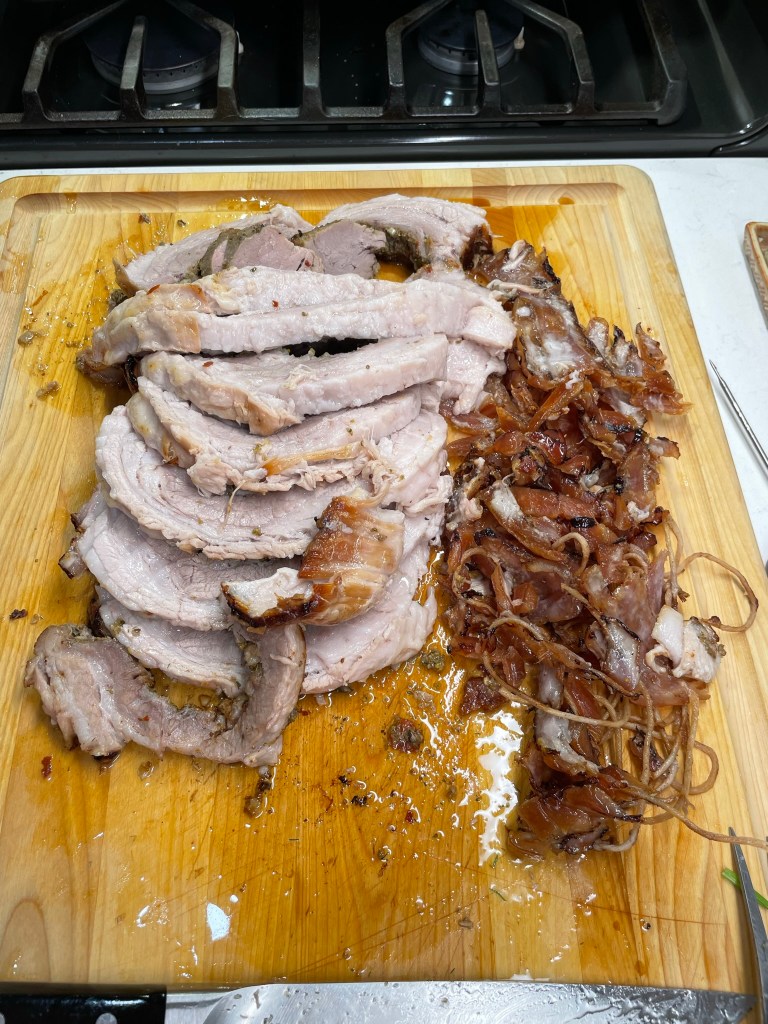
Porchetta is not the kind of thing you can make in small quantity for a party of two, though, which is how we usually cook and eat. I might consider making it again for a special occasion meal with guests, but many of our friends steer clear of fatty meat, and that is another point of contention for us. A single slice of porchetta includes the equivalent of three to four pieces of bacon, and that’s a lot of fat to consume in one meal, no matter how delicious (and boy, oh boy, it is). With more practice, I could probably figure out how to tie up and roast the porchetta for more even fat rendering, so that we didn’t end up with a lot of bulky fat that was not suitable to eat.
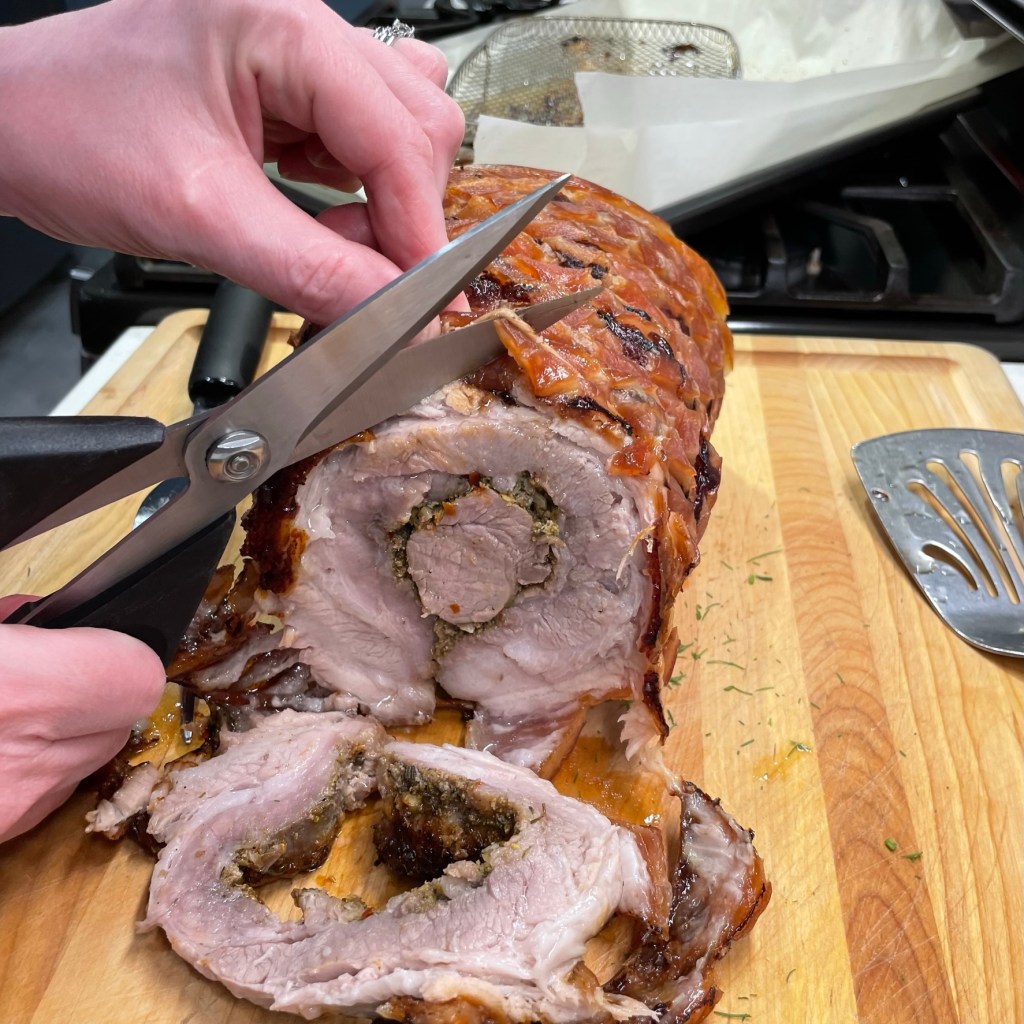
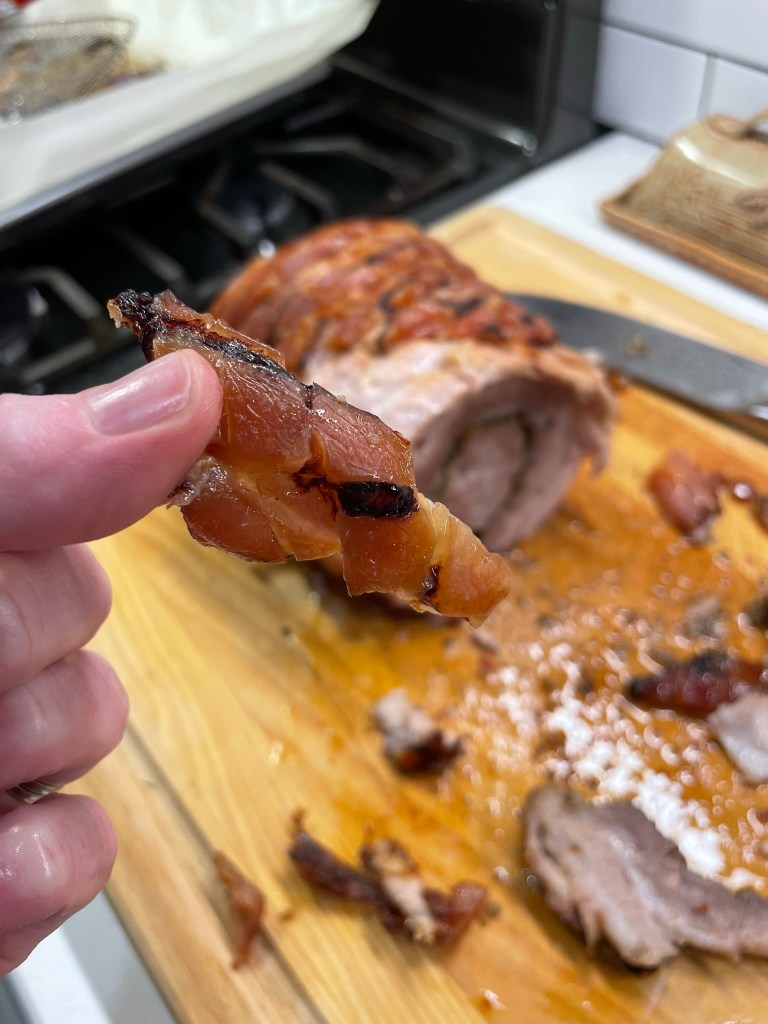
Finally, there’s the skin, which— for all the ruckus and raving about the crackling crispness— did not impress me much. Our porchetta did get very crackly, but that “perfect” skin simply is not edible. It was like biting into a Lego. And the hardness of the crackled skin also made slicing the porchetta quite challenging. If I ever do make this again, I’d probably score the skin in straight squares rather than on a diagonal, so that I can use the score lines as a guide for slicing. But it’s still kind of a waste because you can’t eat that beautiful skin.
Here’s what I’m thinking: the best things about this porchetta were its tenderness and the incredible aroma and flavor of the filling. So why couldn’t I apply the fennel pollen mixture to some other cut of marbled pork? Maybe a boneless, butterflied shoulder, which I could roll up with the herb filling and slow roast (or smoke— wouldn’t that be something)? I’m even imagining that incorporating the fennel pollen filling ingredients into a homemade sausage isn’t a terrible idea, so don’t be surprised if that shows up here in the near future.
If you have been jonesing to try porchetta yourself, it’s definitely worth the effort, and maybe you’ll find something useful for your own experience in my click-to-print recipe below. Please slip a note in the comments if you have tips that might make it worth a second run for me, and do let me know what autumn meal you’re most looking forward to!
There's so much incredible flavor in this Italian-born pork roast, and the leftovers are even tastier!
Ingredients
fresh pork tenderloin
fresh pork belly, cut to length of tenderloin
kosher salt, weighing 1.5% of total meat weight
2 Tbsp. fresh minced garlic (this was about 5 cloves)
1 Tbsp. fresh lemon zest (organic is best)
1 Tbsp. fennel pollen (tricky to find; check Italian market or online)
1 tsp. red pepper flakes (I love the Calabrian chiles from Flatiron Pepper Co.)
1 tsp. fresh rosemary, chopped (I would have used more of this if my hubby was a fan)
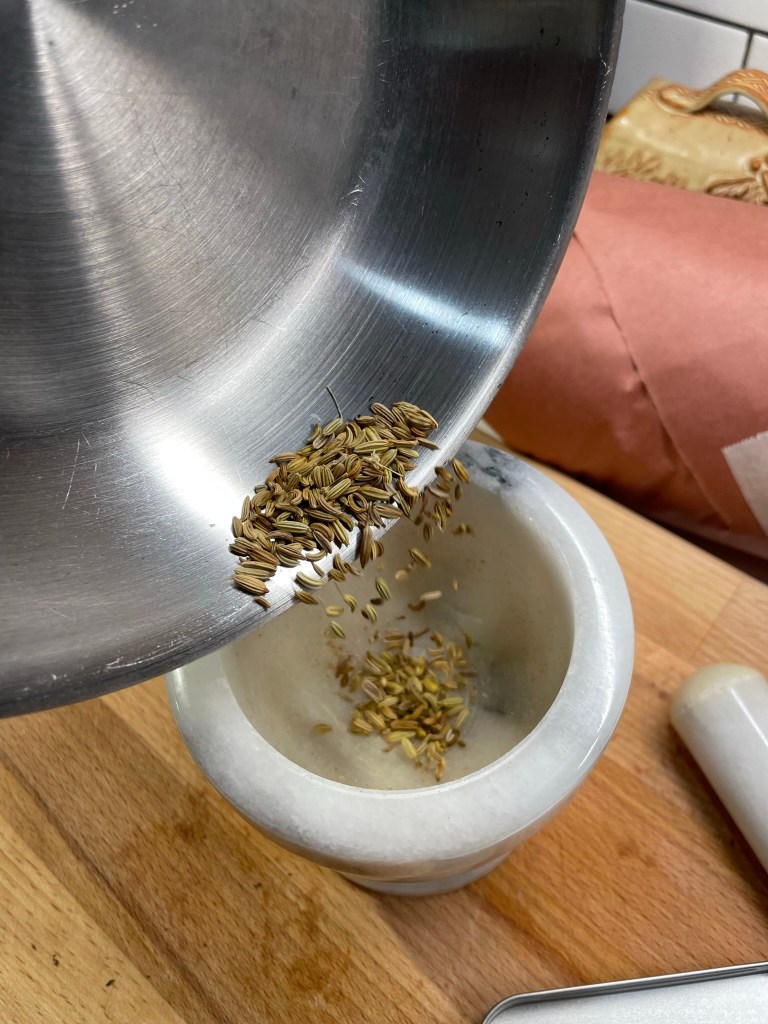
1 tsp. fennel seed, toasted until fragrant and then crushed to nearly a powder
About 30 twists of freshly ground black peppercorn
Notes: You will need a few things for success with this recipe. First, kitchen twine for tying up the roast. Plan for at least 5 feet, and soak it in cold water while you prep the roast. Also, a roasting rack to keep the porchetta above the pan during overnight fridge rest and roasting. Finally, a good meat thermometer to help you track the internal temperature.
Directions
Score skin side of the pork belly with very sharp knife or razor blade. This will help render the fat better during cooking, plus it will deliver a crackling skin. Scoring also makes the belly a bit more flexible for easier wrapping around the tenderloin.
Cut several pieces of unbleached butcher’s twine, long enough to wrap and tie around rolled up belly. I used the packaged meat to help me determine how long I needed the pieces to be. Soak the twine lengths in cold water until ready to wrap.
Mix the herb filling, including salt that equals 1.5% of the meat weight.
Line a sheet pan with parchment or foil and place a small roasting rack on it to hold the porchetta roast.
Spread the herbal filling over the meat side of the pork belly, all the way to the edges. Place the tenderloin on the belly, perpendicular to the lines on the cut sides of the belly. The sides of the belly resemble the lines of bacon.
Roll up the roast, but not so tightly that you lose the filling. Check the open ends; the tenderloin should look as if surrounded by a ring of bacon.
Place the rolled roast across several soaked pieces of twine and tie it up, securing each twine with a knot. Sprinkle the porchetta all over with about 1 teaspoon kosher salt and place the sheet pan (uncovered) in the refrigerator overnight, up to 24 hours.
Remove roast from the fridge and bring to room temperature while preheating oven to 350° F. Oven rack should be slightly lower than center.
Roast uncovered for about 4 hours, until skin is crackled all over and internal temperature is 160° F. Cover loosely with foil and rest for about 15 minutes before slicing.
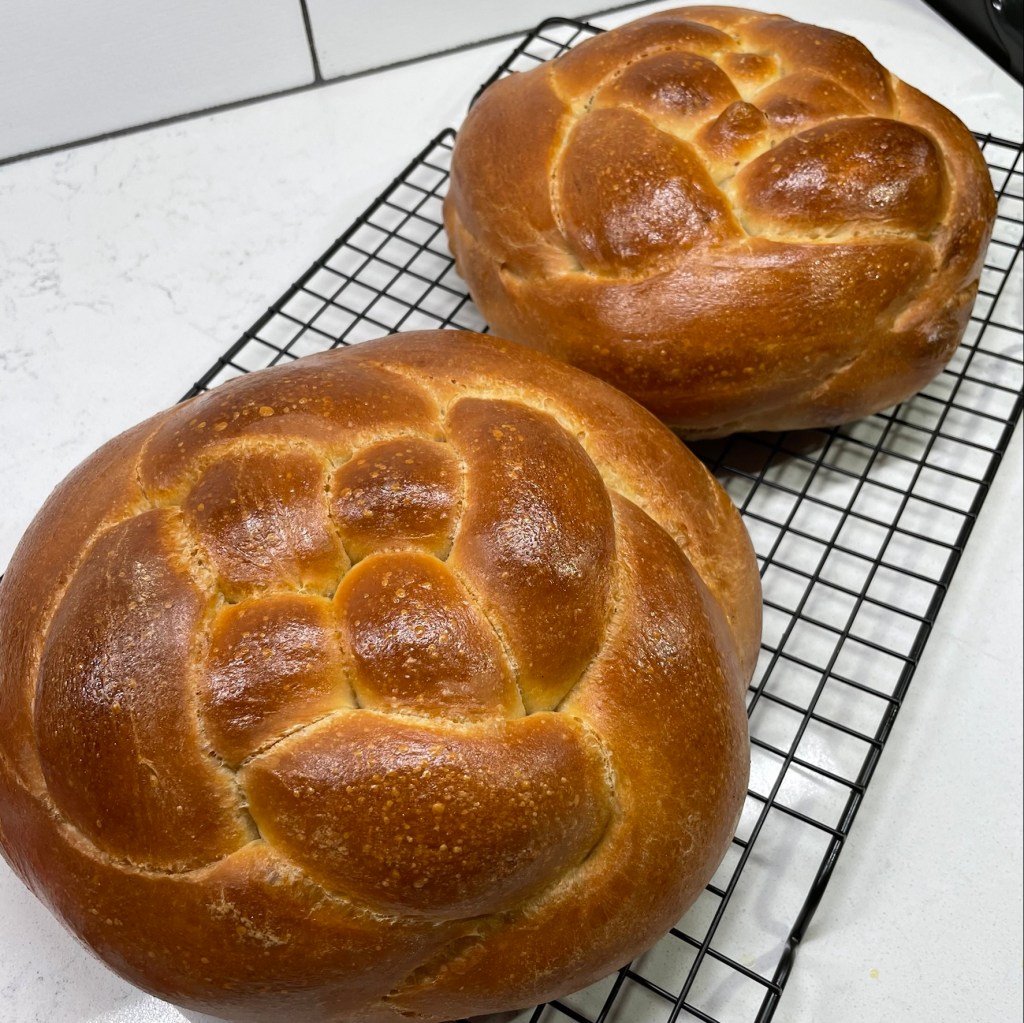
Each fall since I began dating my husband, I’ve made a concerted effort to celebrate the season of Rosh Hashanah— the Jewish New Year— by baking a special bread. That first year, Les had visited a local apple festival and brought back a bagful of gorgeous Jonagold apples, which were lovely in a coiled-into-a-round challah. I was so proud of my bread that I took a picture of it— way before I began blogging— and I even took time to leave a review on the King Arthur website to report my great results.
Not a bad effort in 2015! But my iPhone 5 camera…
The round shape is significant to Rosh Hashanah because it represents the idea of coming full circle into a new year. The apples were a nice touch, because apples and honey make an appearance on everyone’s holiday table— symbolizing the wishes for a sweet year ahead. Most years since that first one, I’ve worked on my challah braiding skills, specifically the four-strand loaf that is woven like a basket. Here are a few examples of those breads, using my sourdough starter.
L to R: pumpkin challah, fruit-studded challah, over proofed challah!
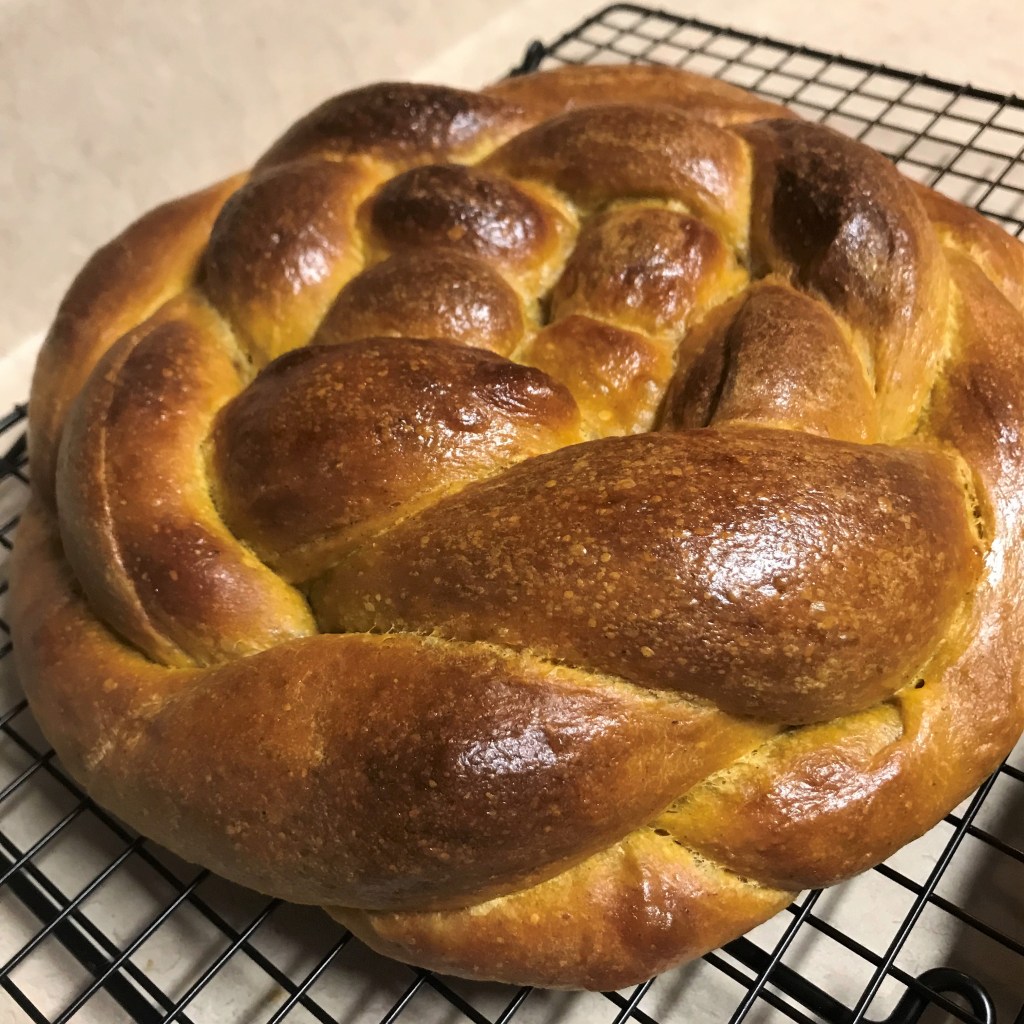
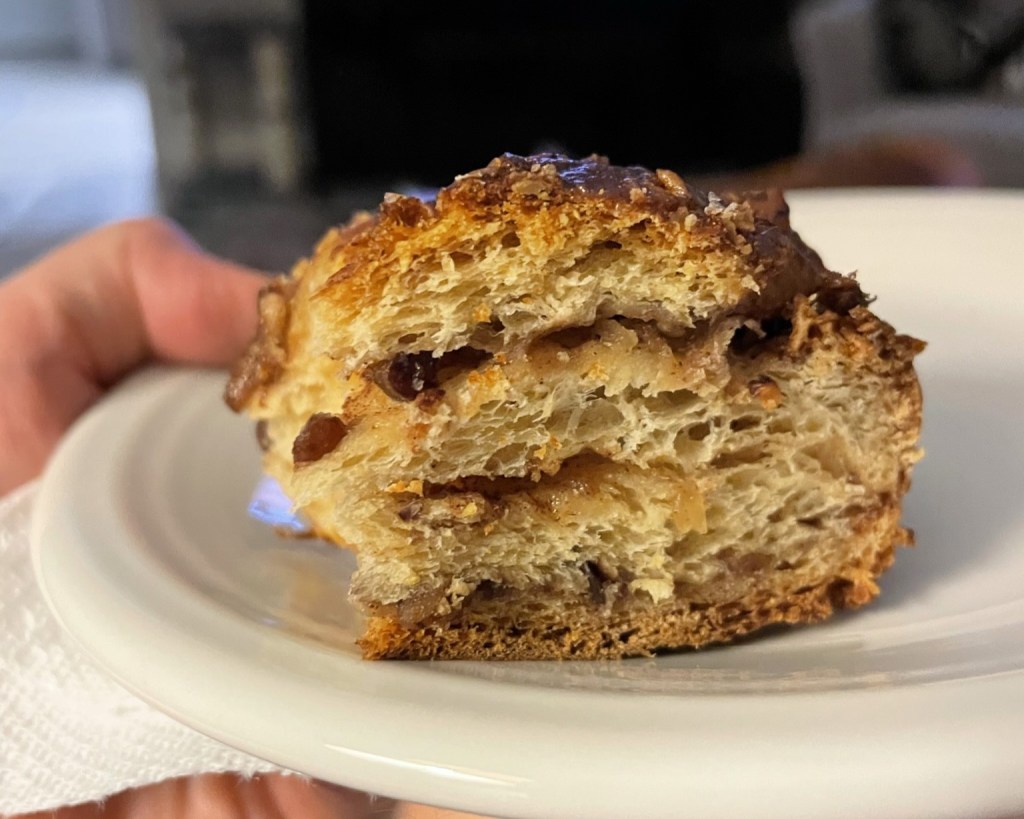
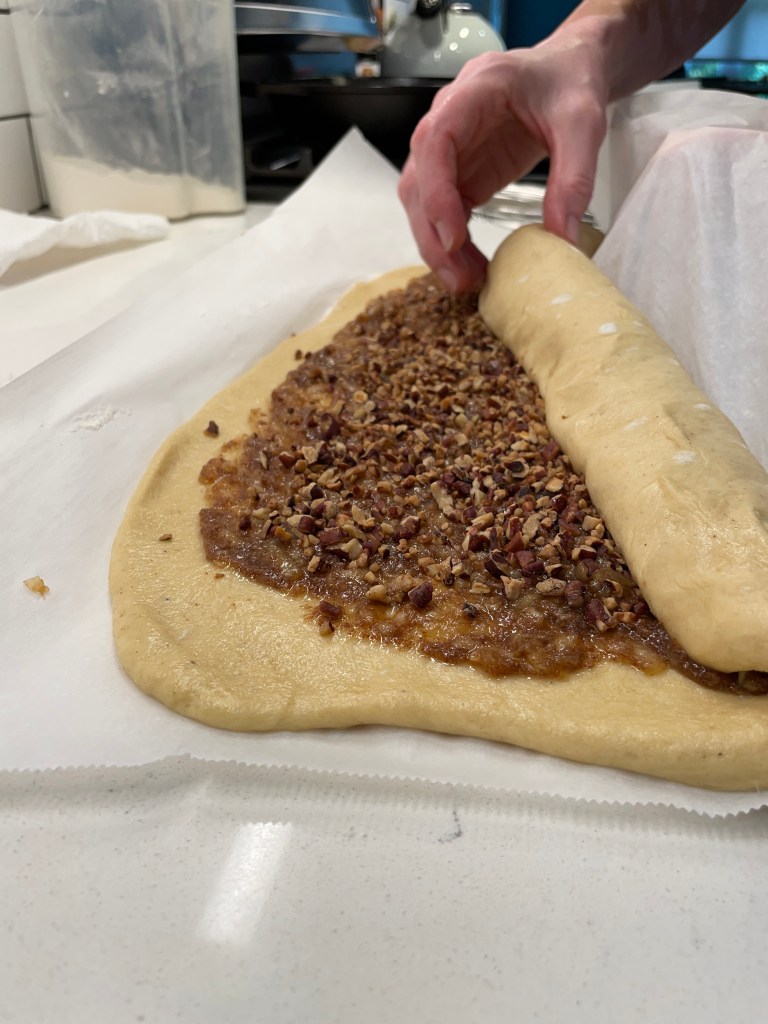
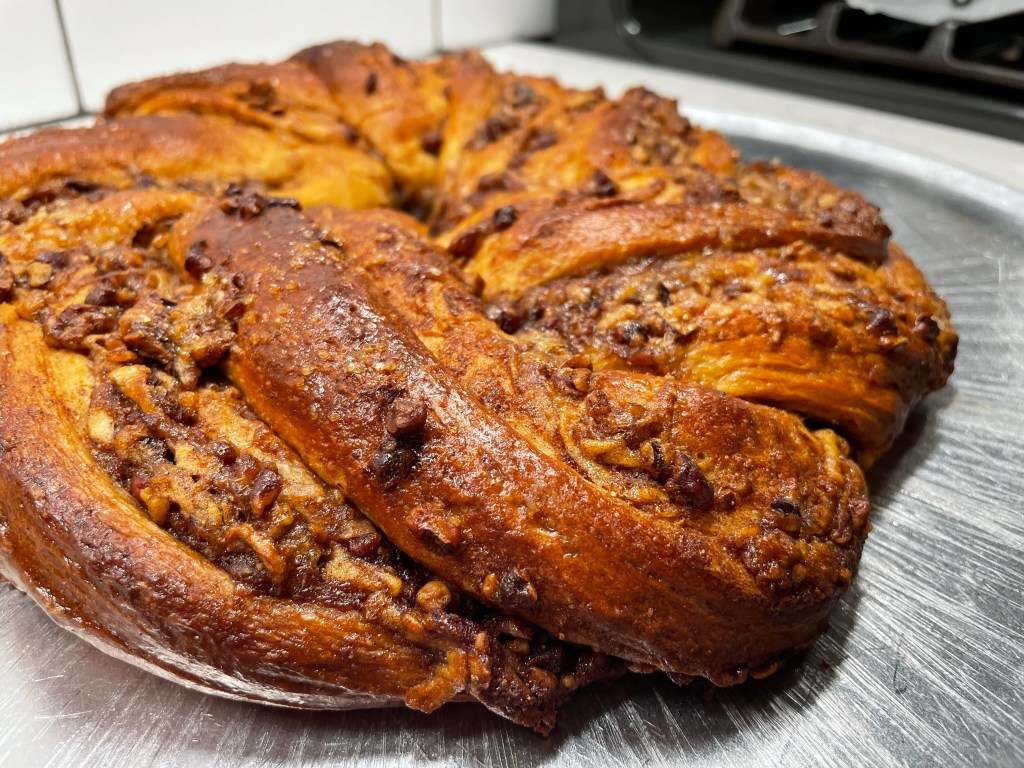
This year, however, I decided to tackle another item on my culinary bucket list, and I’ve made a babka! This is another traditional Jewish bread, and I’ve wanted to make one for years but never got around to it until now. Most babka recipes I have seen involve a chocolate filling, which is most dramatic looking in the typical swirly pattern. I pondered, what about a babka that had apples and honey? That would be perfect for Rosh Hashanah, and a double win in that it finally moves babka to the “done” column.
I didn’t have to look very far for an inspiration recipe, because the first place I looked was King Arthur Baking. Of course!
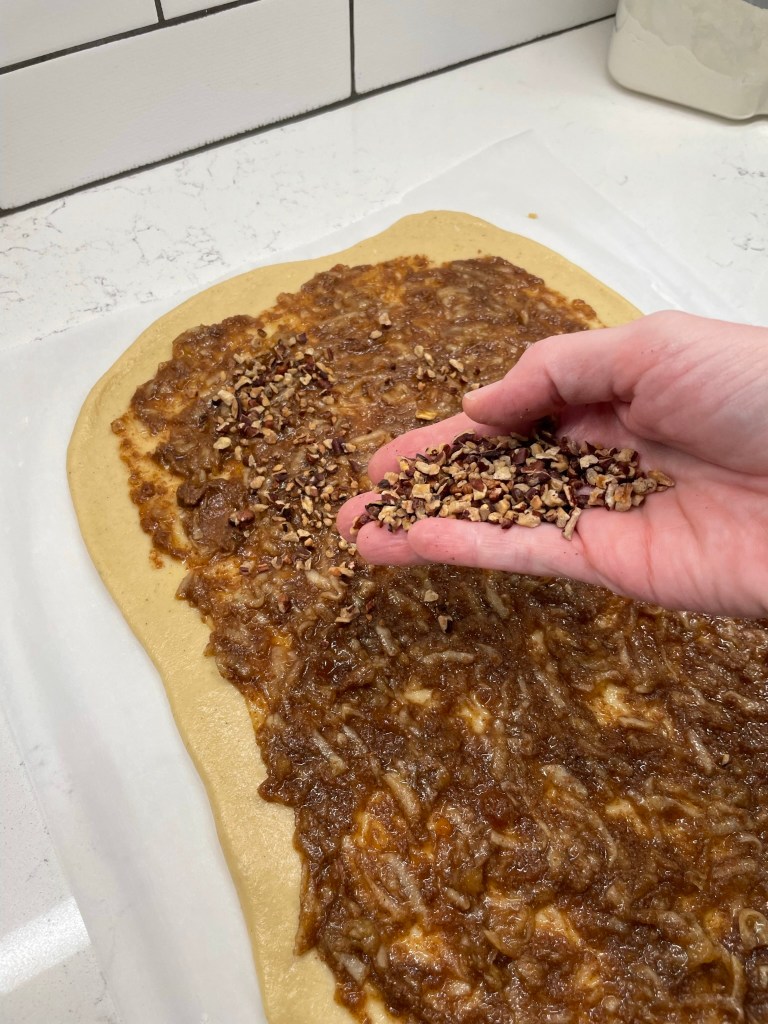
The layers of apple, spices and pecan make this extra special!
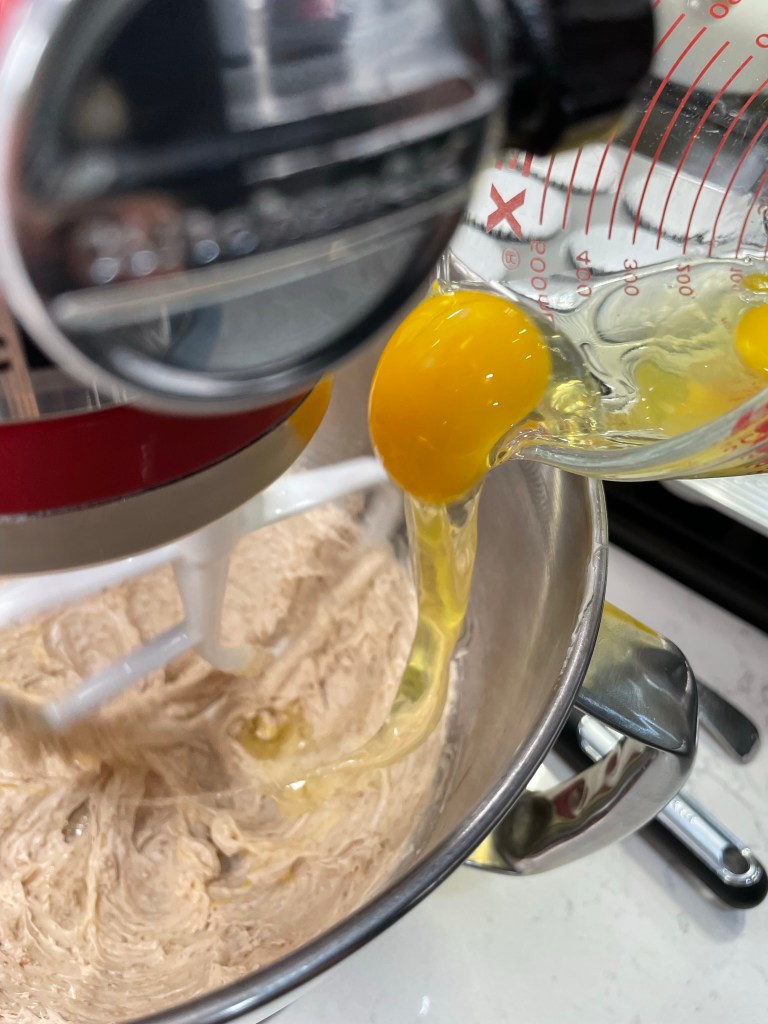
I’ve been a big fan of King Arthur products for years (and no, they never have paid me to say so), and my devotion to them is stronger than ever since my trip to their Vermont baking school, where I am proud to have completed their four-day “Principles & Practice” baking course. I learned a good many things during my time there, and made friends with several of my classmates. Among the takeaway lessons was the importance of using high-quality ingredients (i.e., theirs) and having them organized and properly measured before you begin mixing. That’s how I set up for this recipe, and I swapped in honey for the sugar, following the same helpful tips I used last month when I made my s’mores cupcakes.
Baking is much easier when I’m organized!
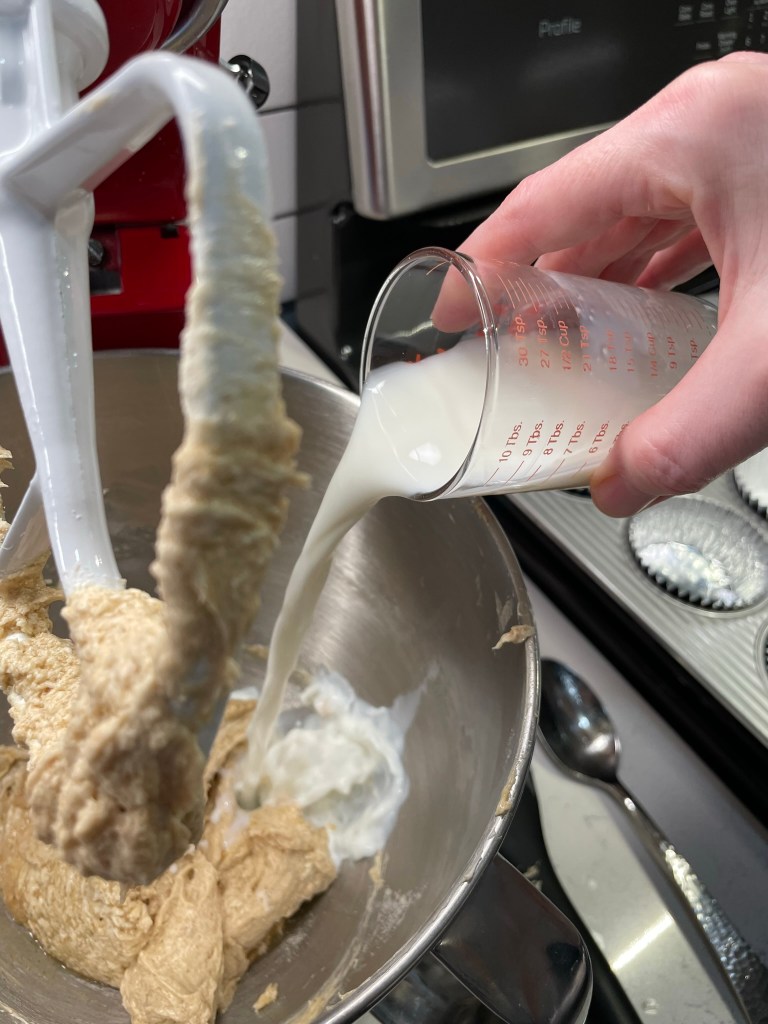
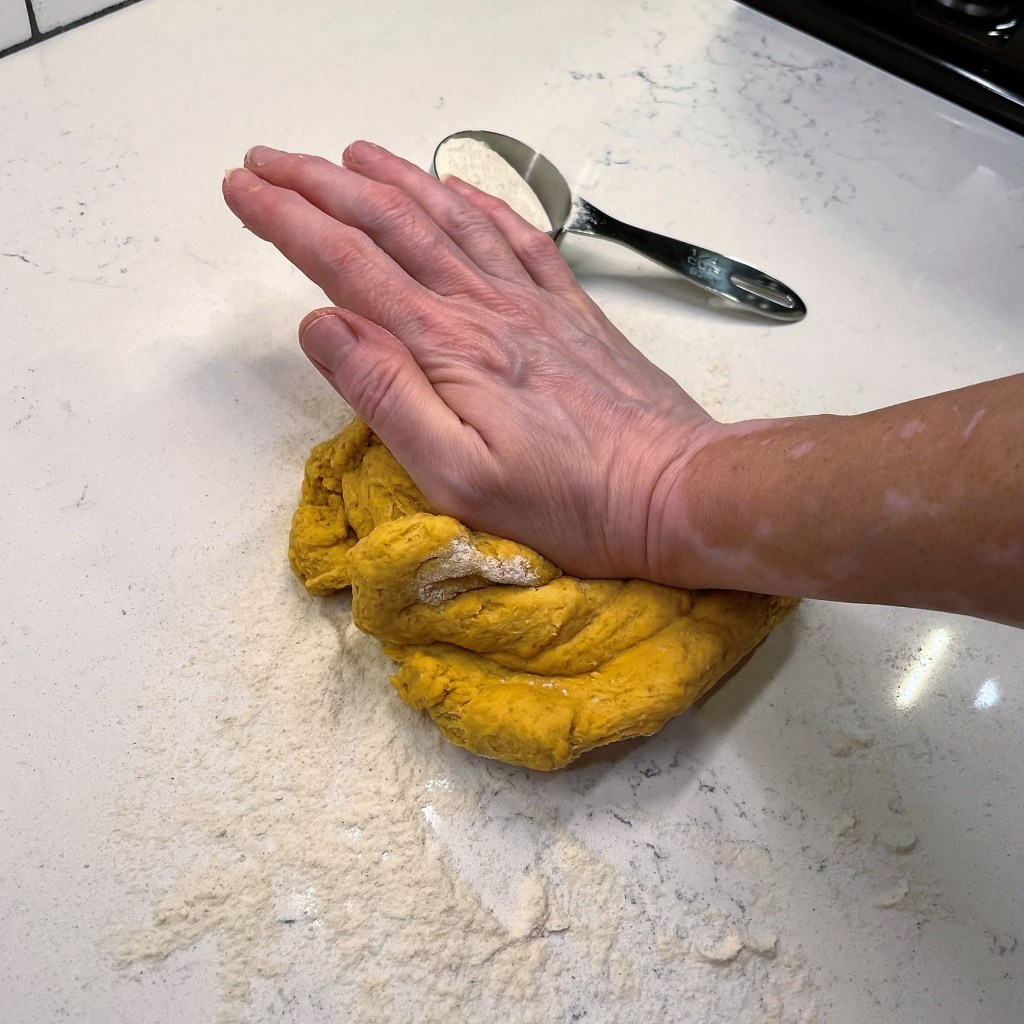
My main dry ingredients were measured by weight, which is something I was already doing before my King Arthur class, and all of our instructors during the four days emphasized the benefit of this. I cannot remember the last time I measured by volume, but there is a sensible way to do it for consistent results. They call it the fluff, sprinkle, level method, and it helps ensure that you don’t have dense results in your baked goods. If you are reluctant to get a kitchen scale, I highly recommend following that three-step method; otherwise, you may find your baked goods dense from being flour-heavy.
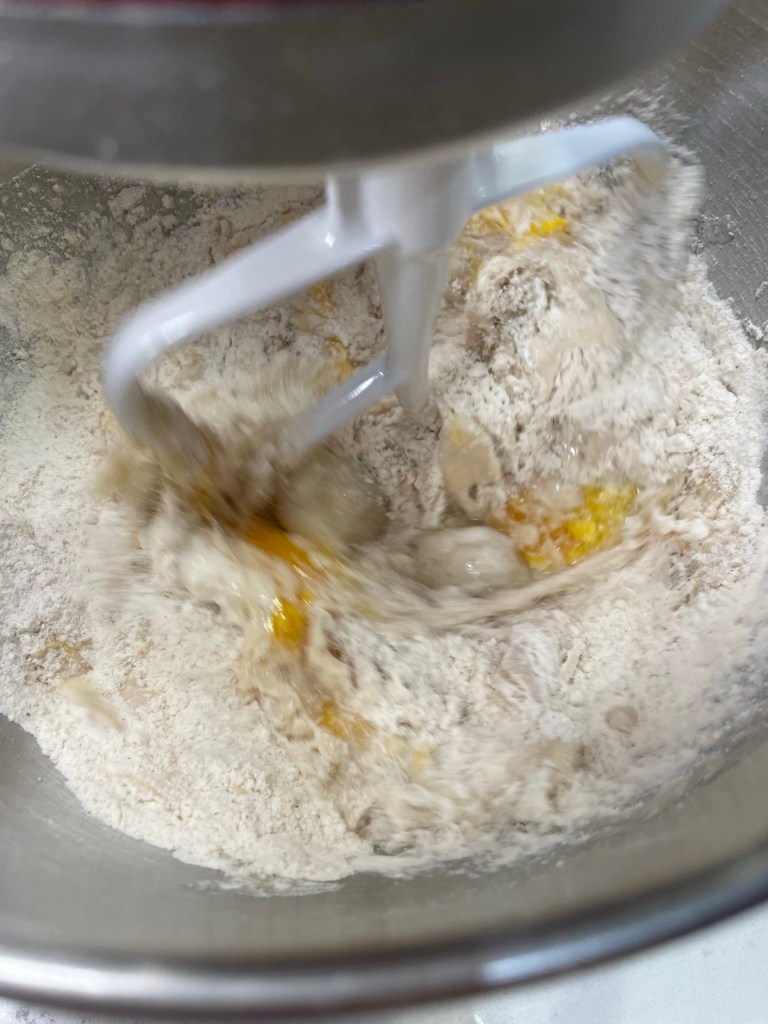
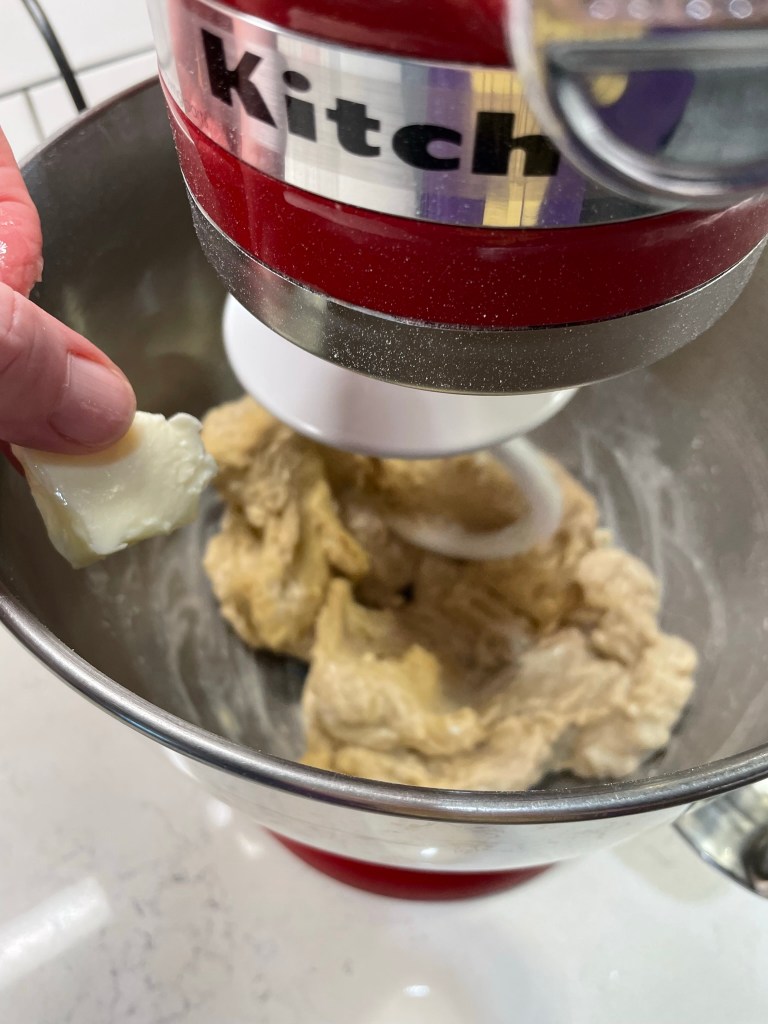
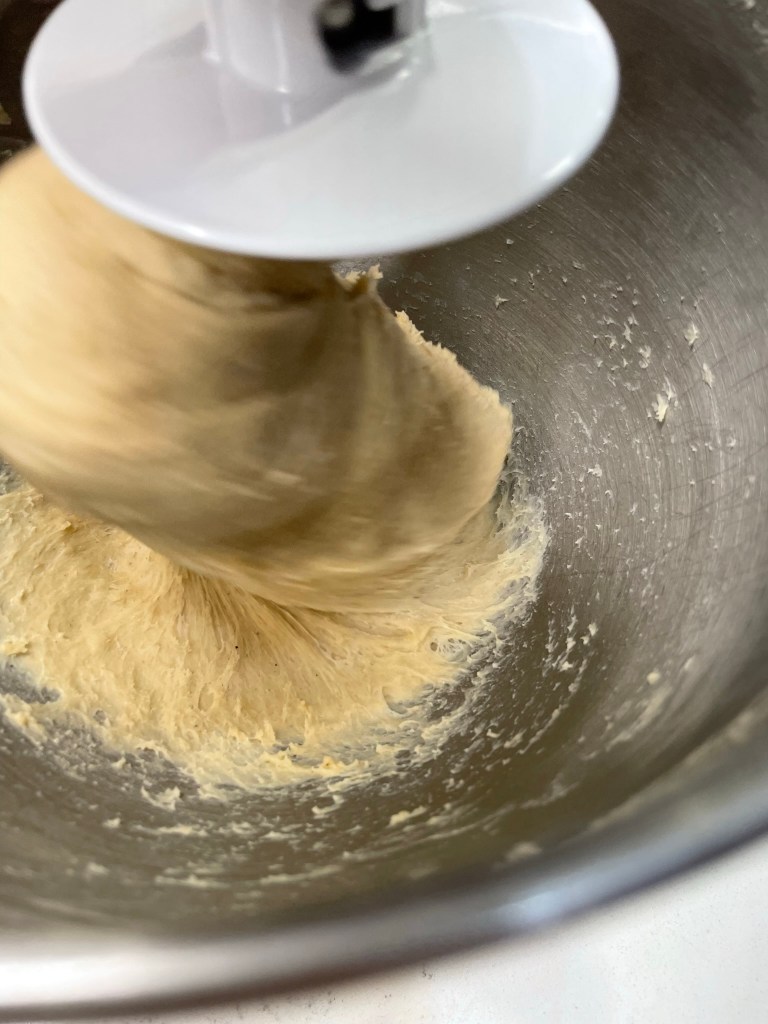
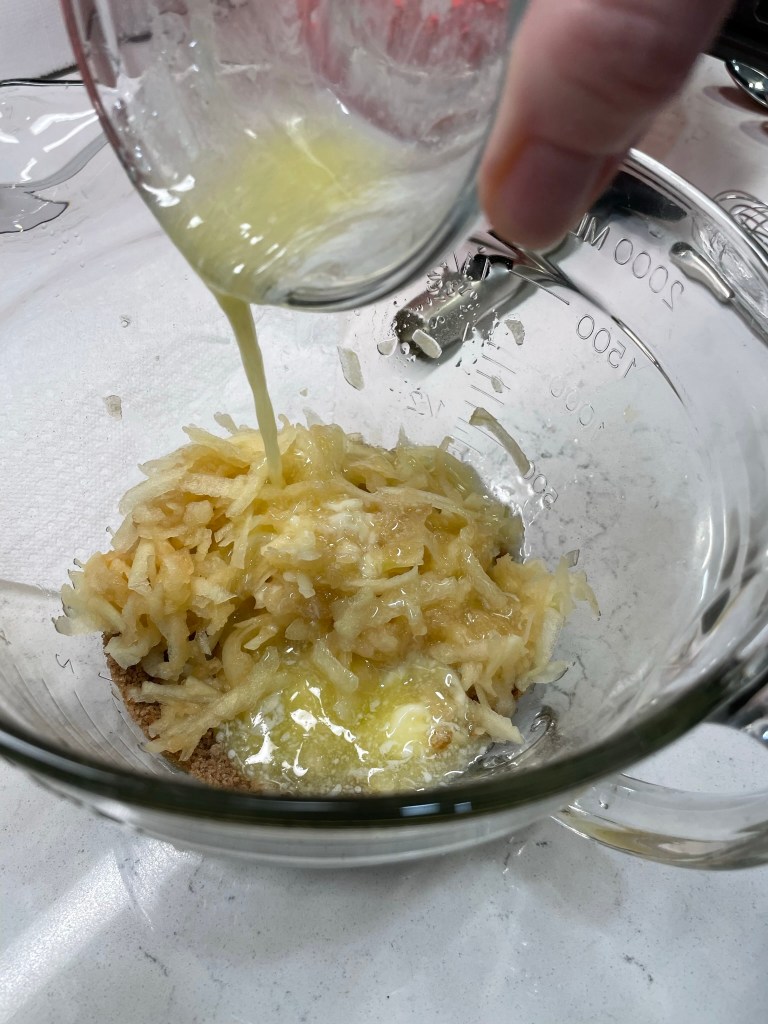
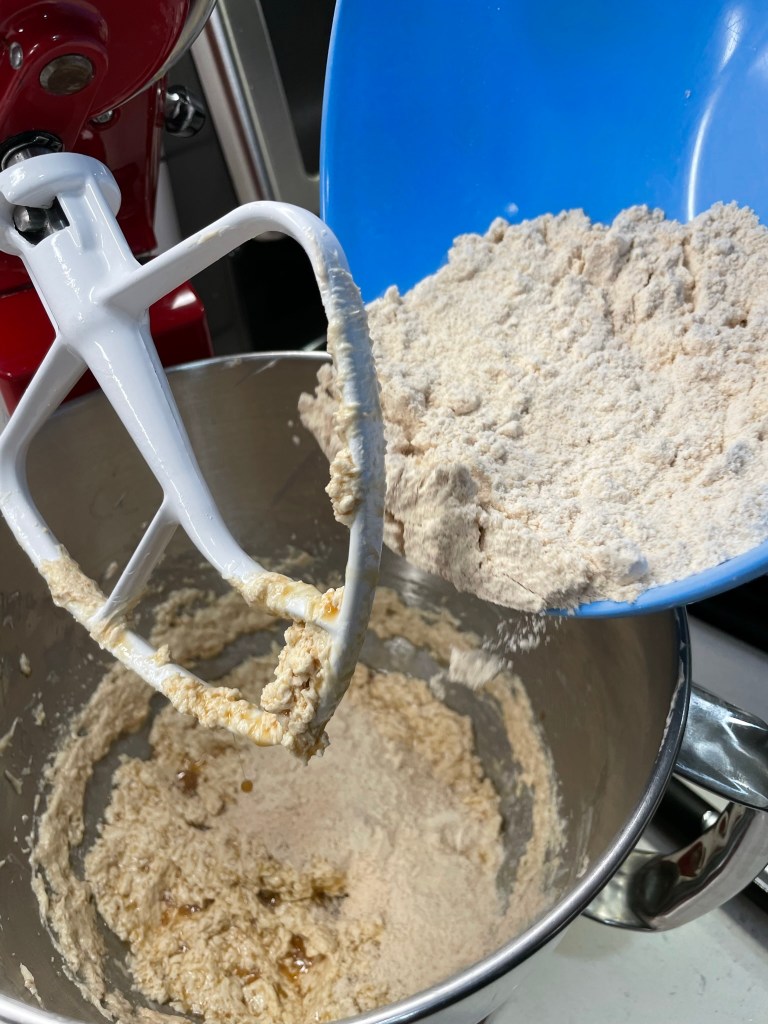
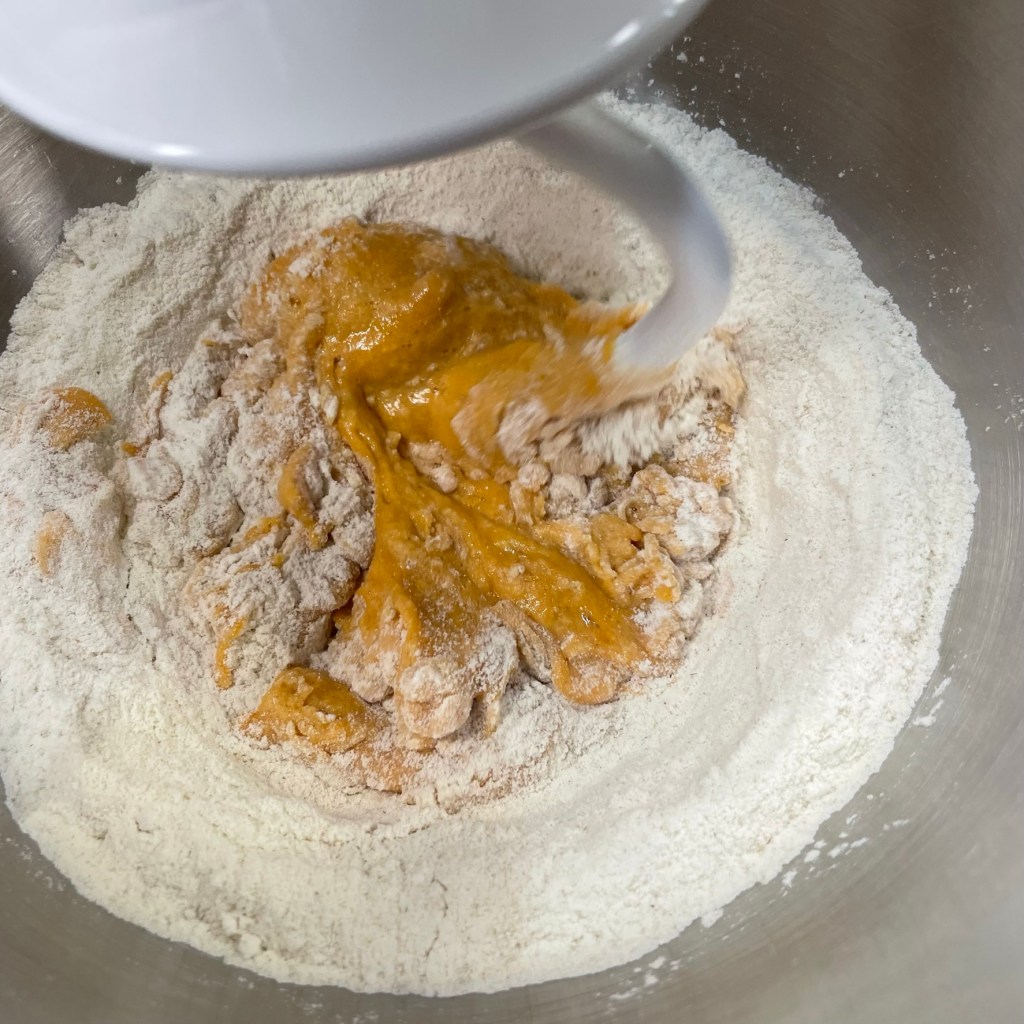
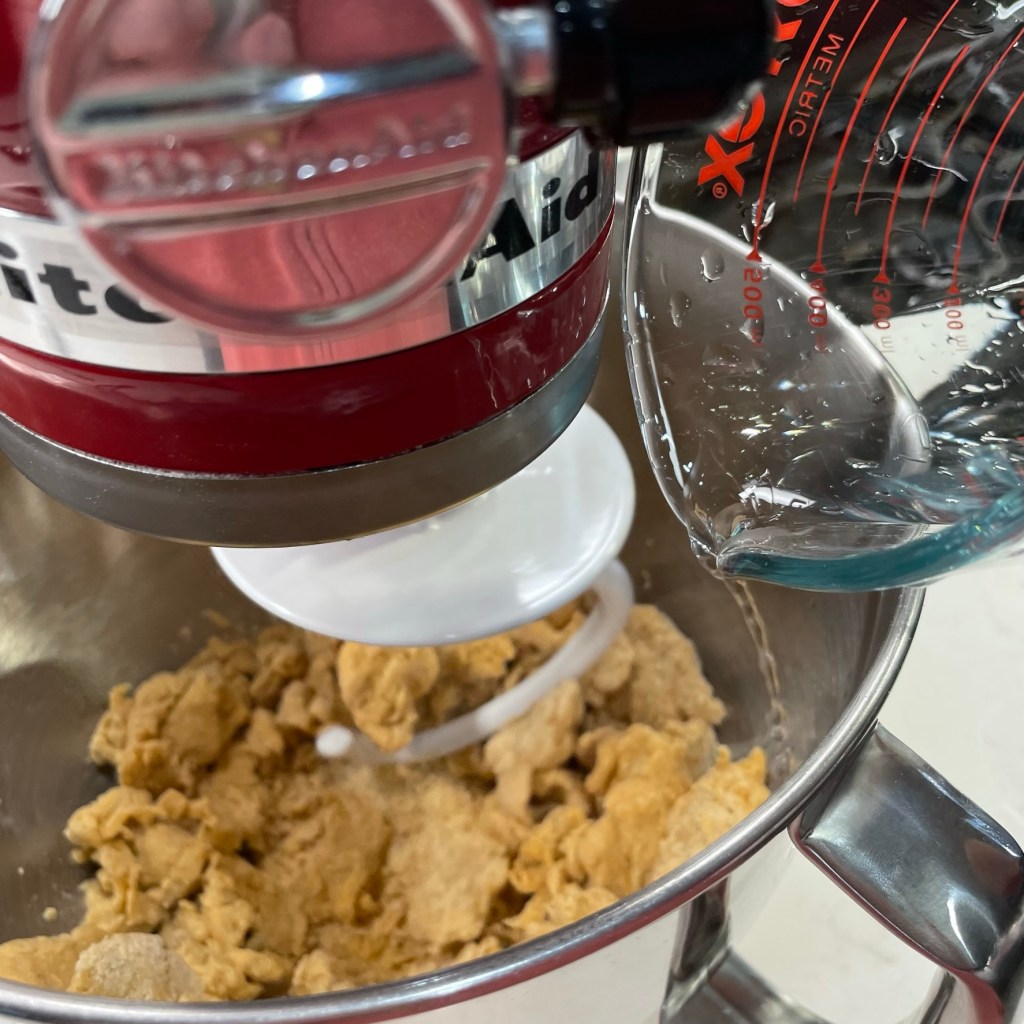
The process of the apple babka recipe was straightforward. I introduced the wet ingredients to the dry ones, then switched to the kneading hook and worked in the softened butter. This recipe would not be suitable for a meal that also includes meat— kosher rules require that meat and dairy not be served together— but it would be wonderful served with breakfast or dessert on another occasion. The dough rested about two hours until it was doubled and puffy.
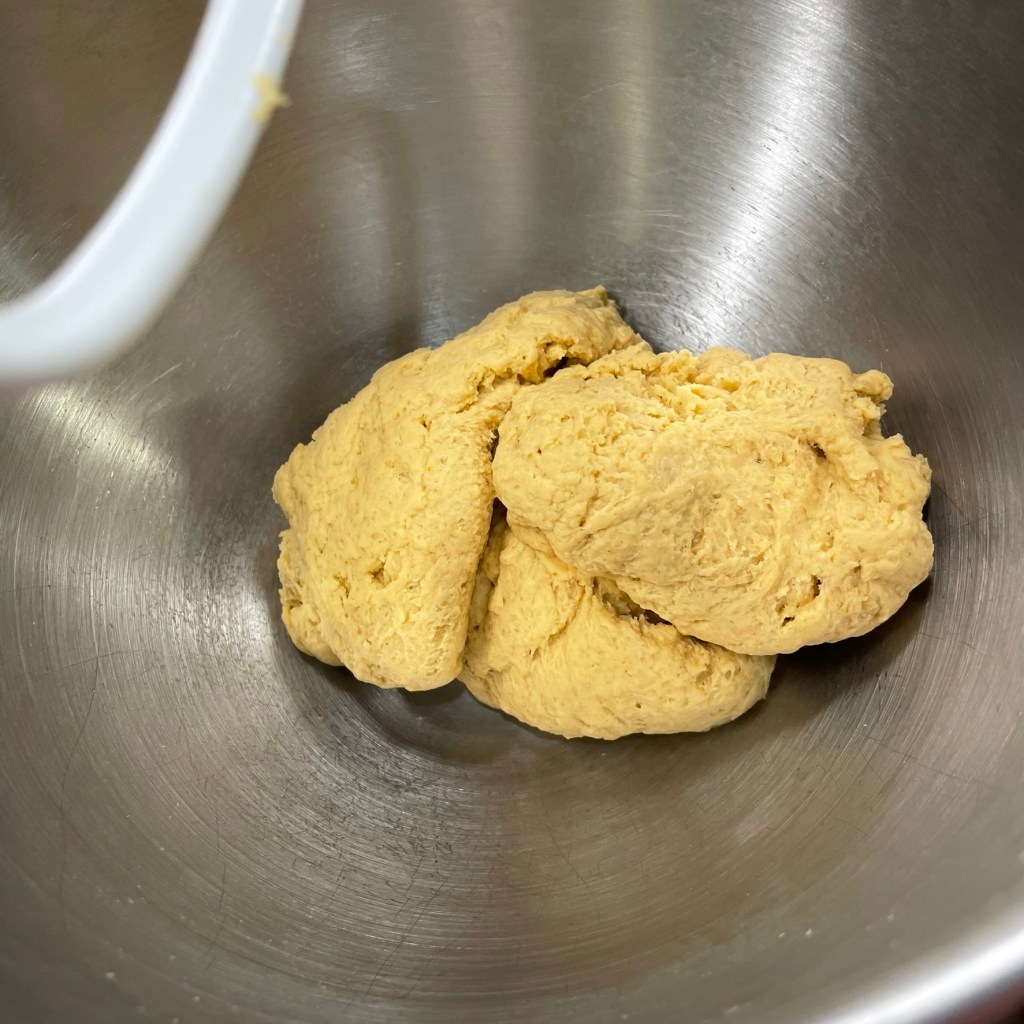
With 6 tablespoons of butter, this dough was very silky.Did I sample the filling on its own? Of course!
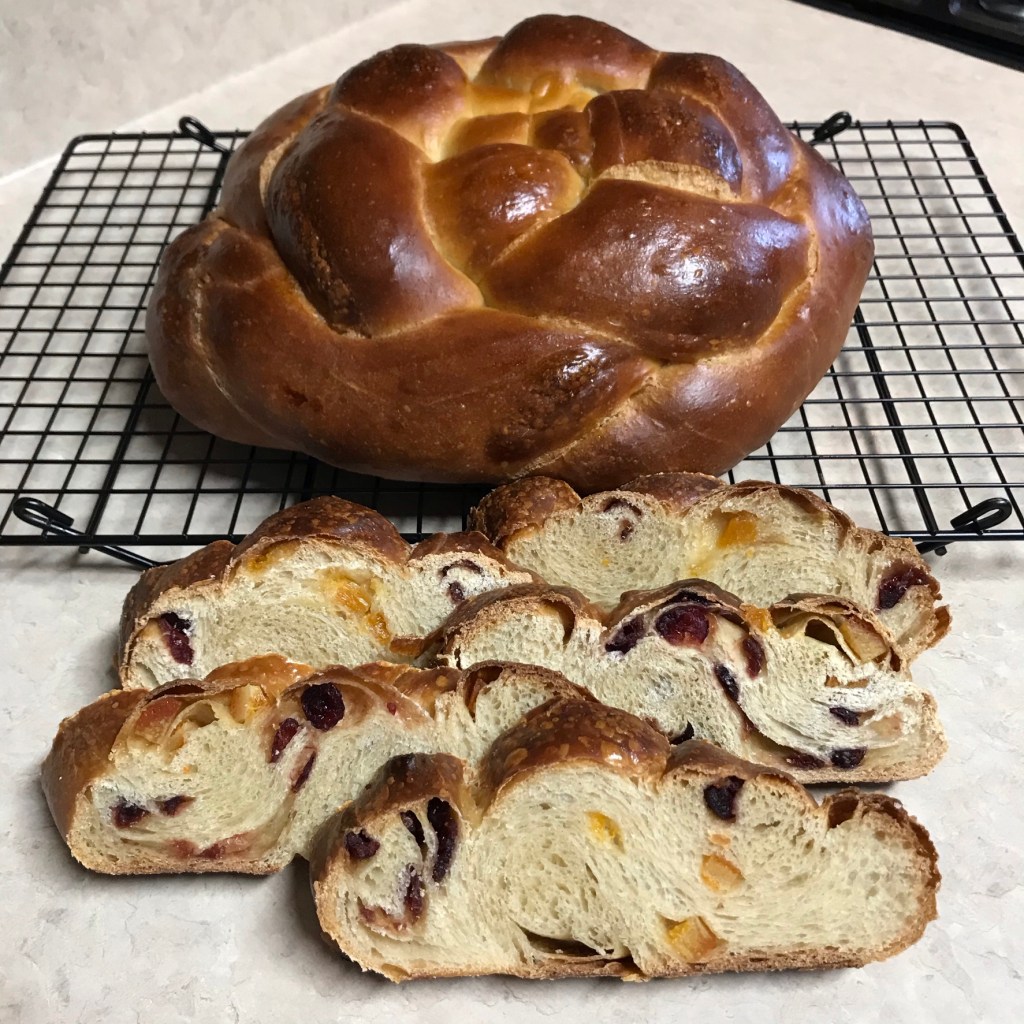
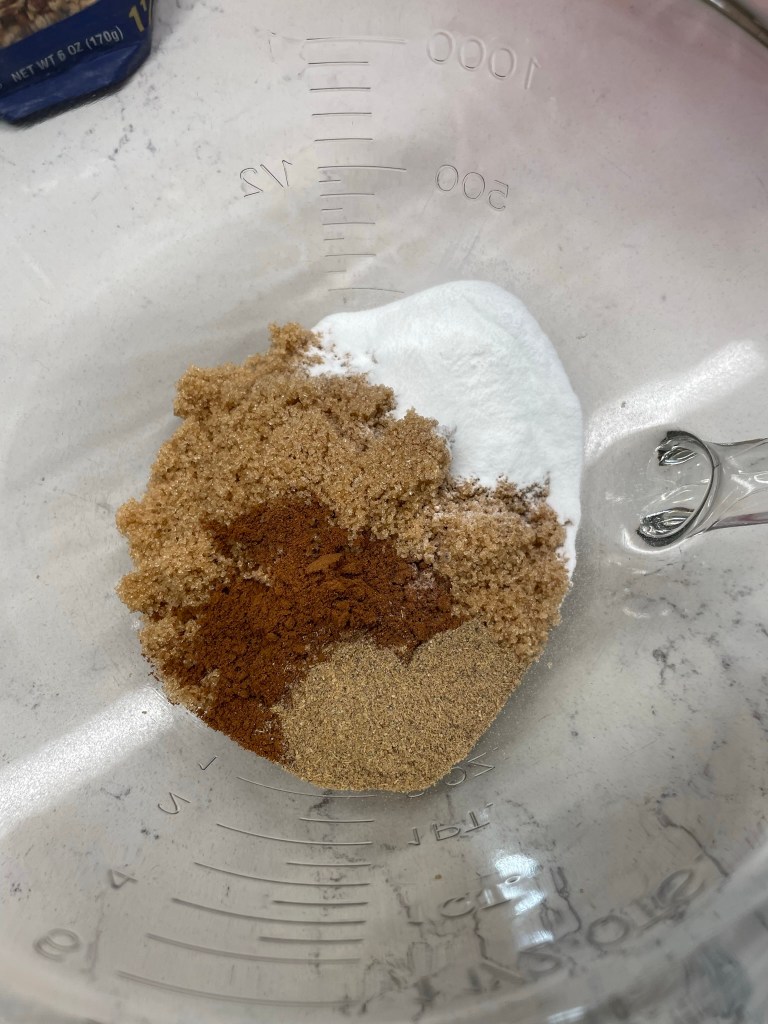
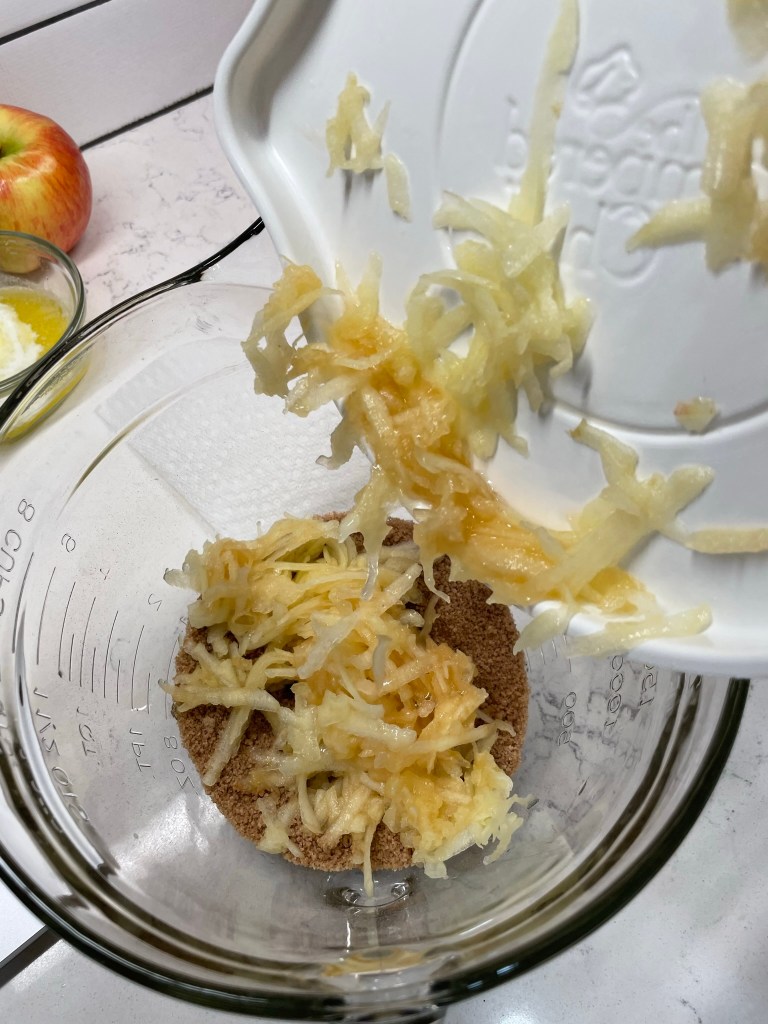
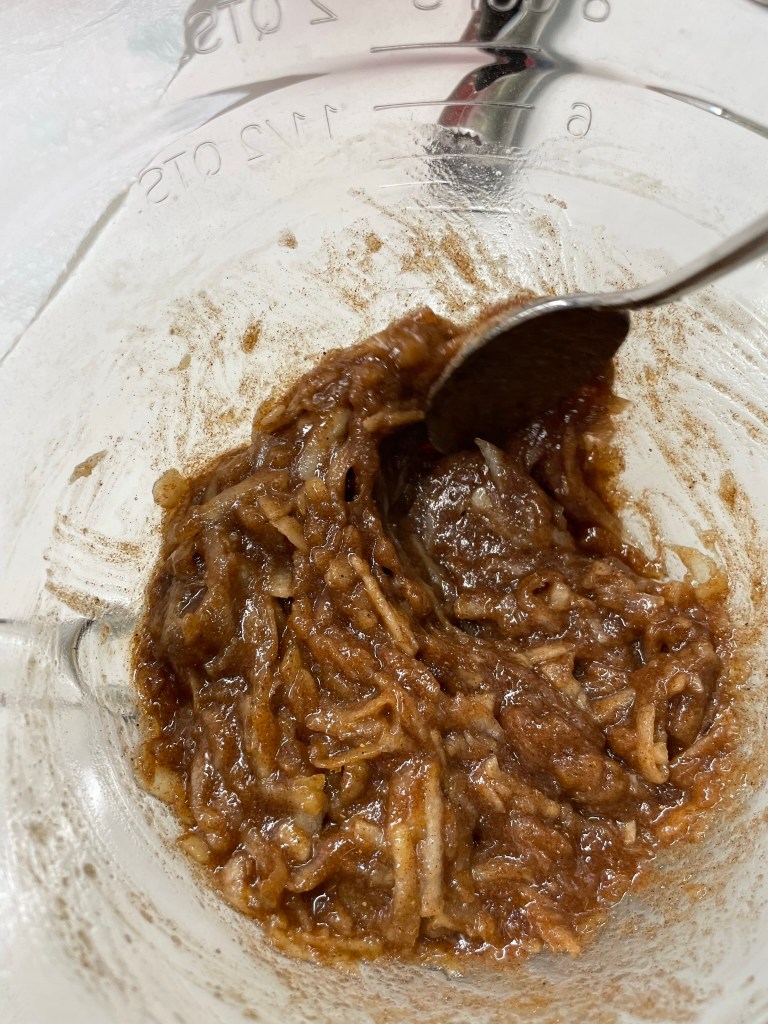
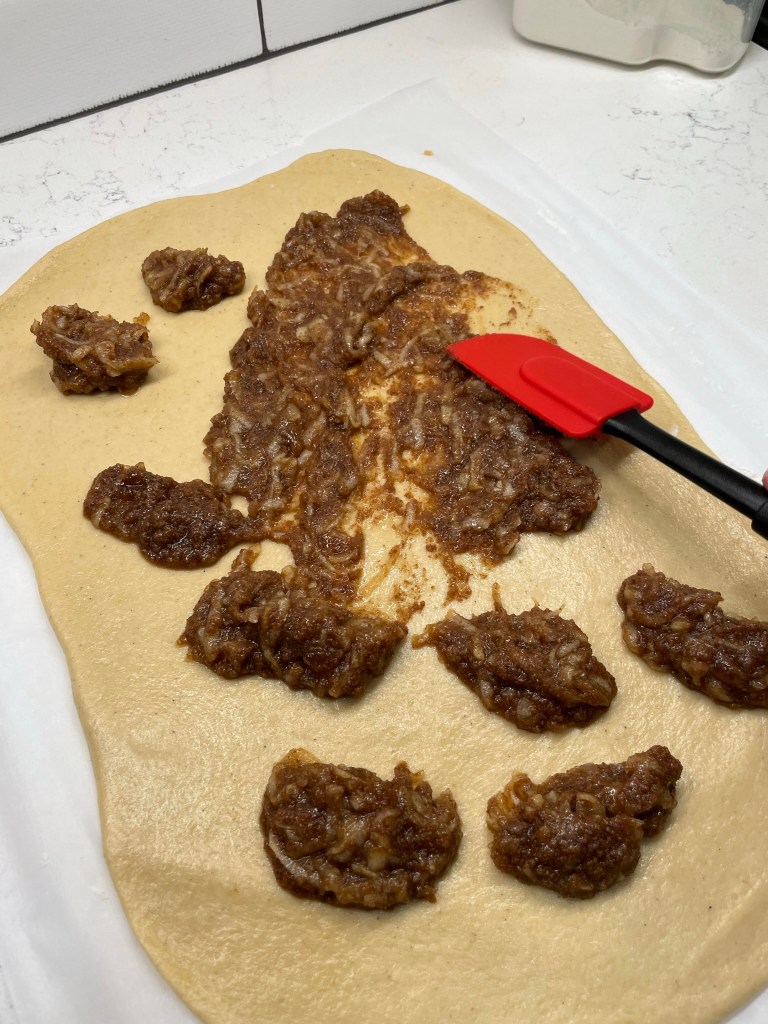
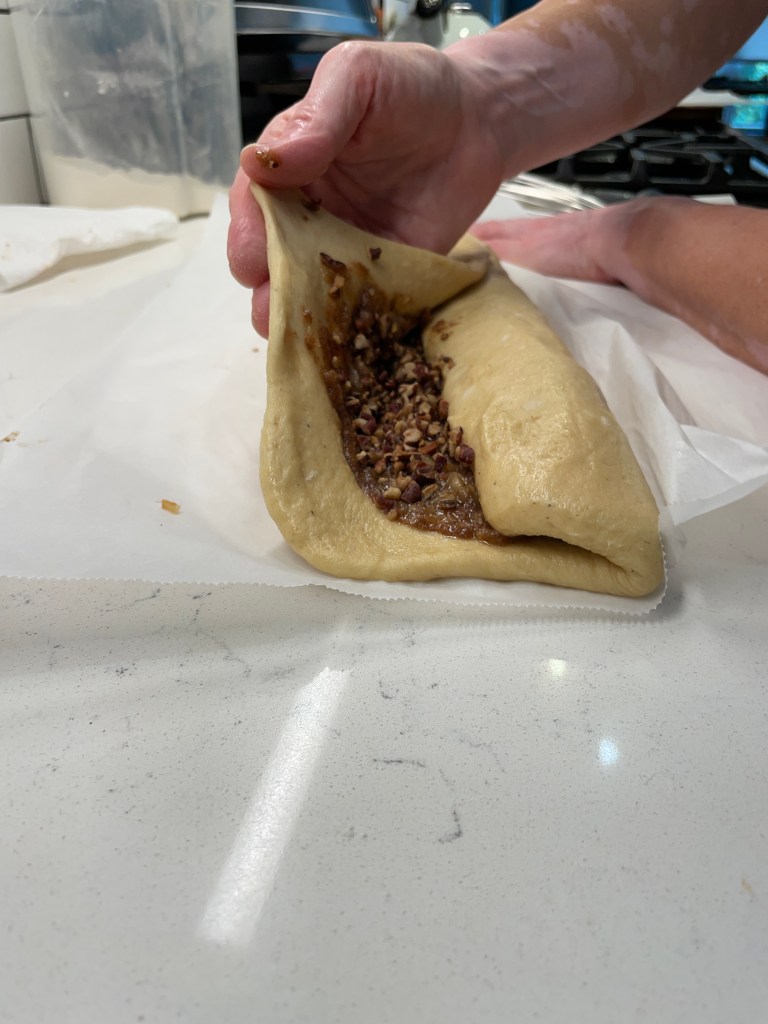
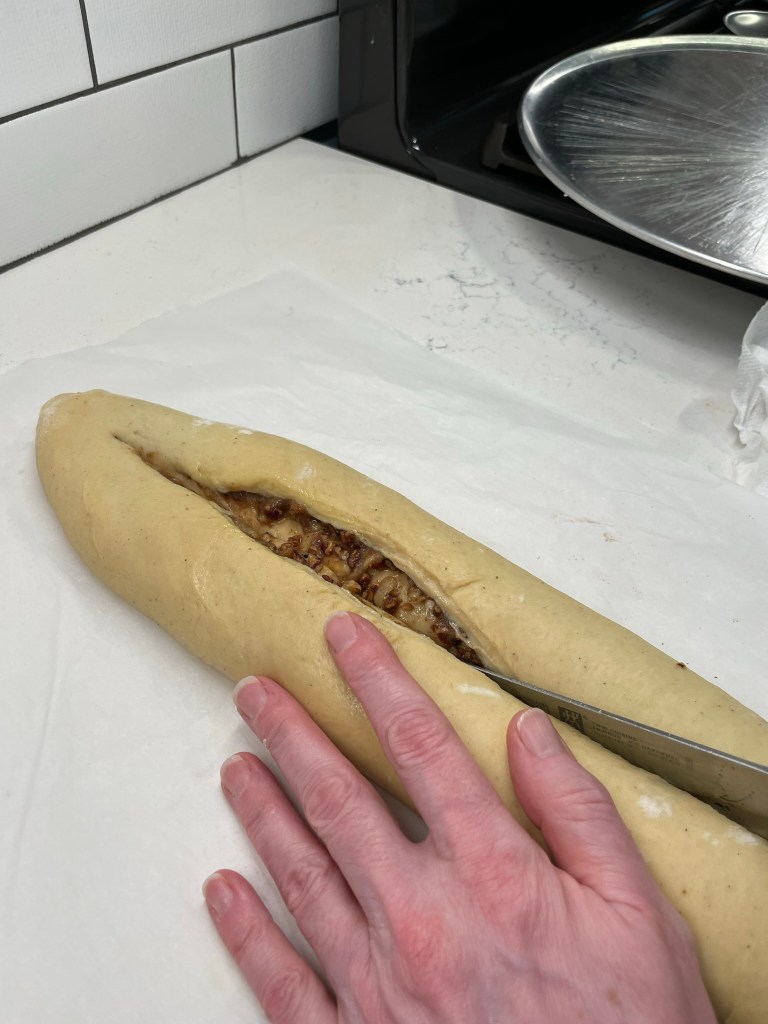
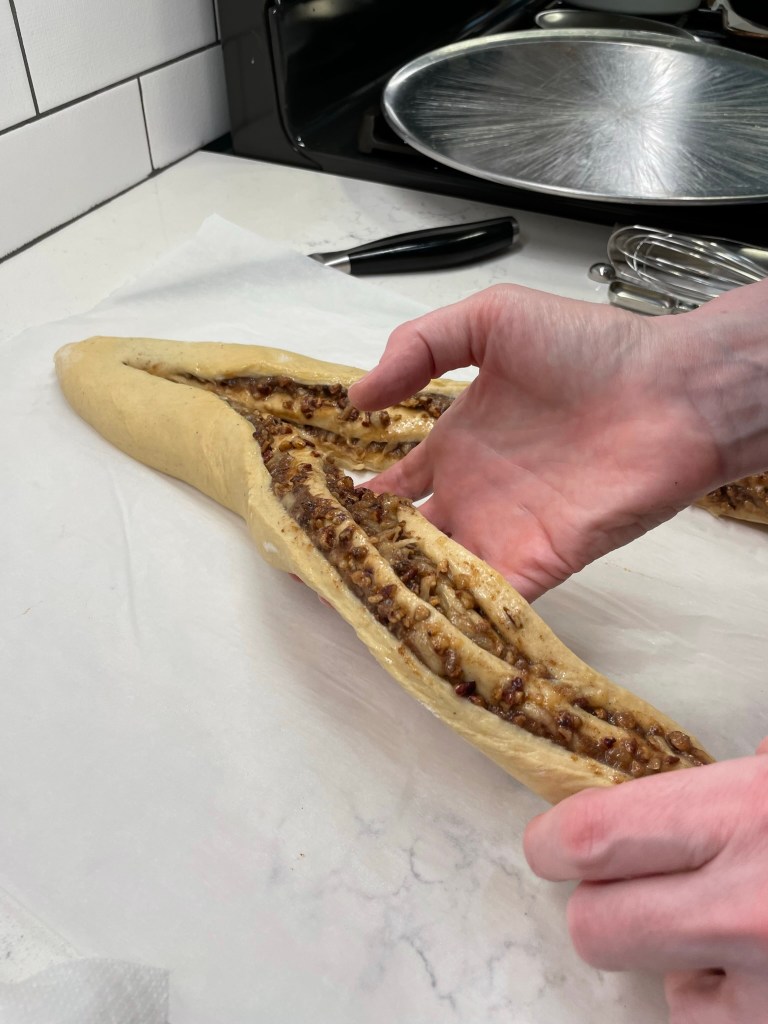
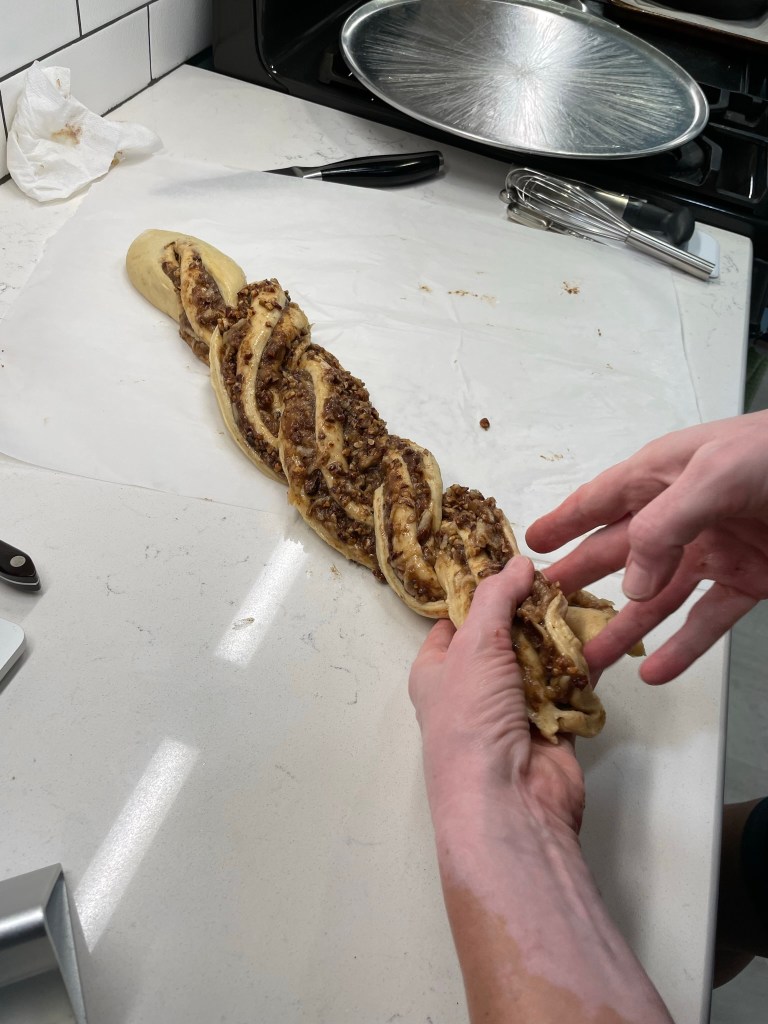
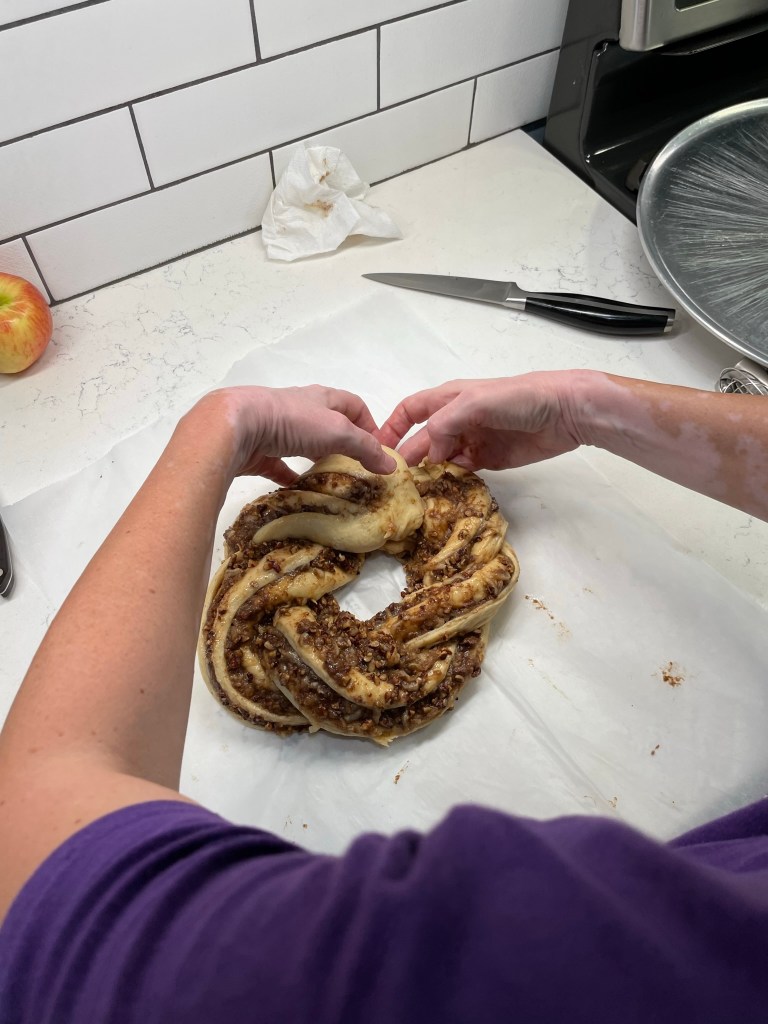
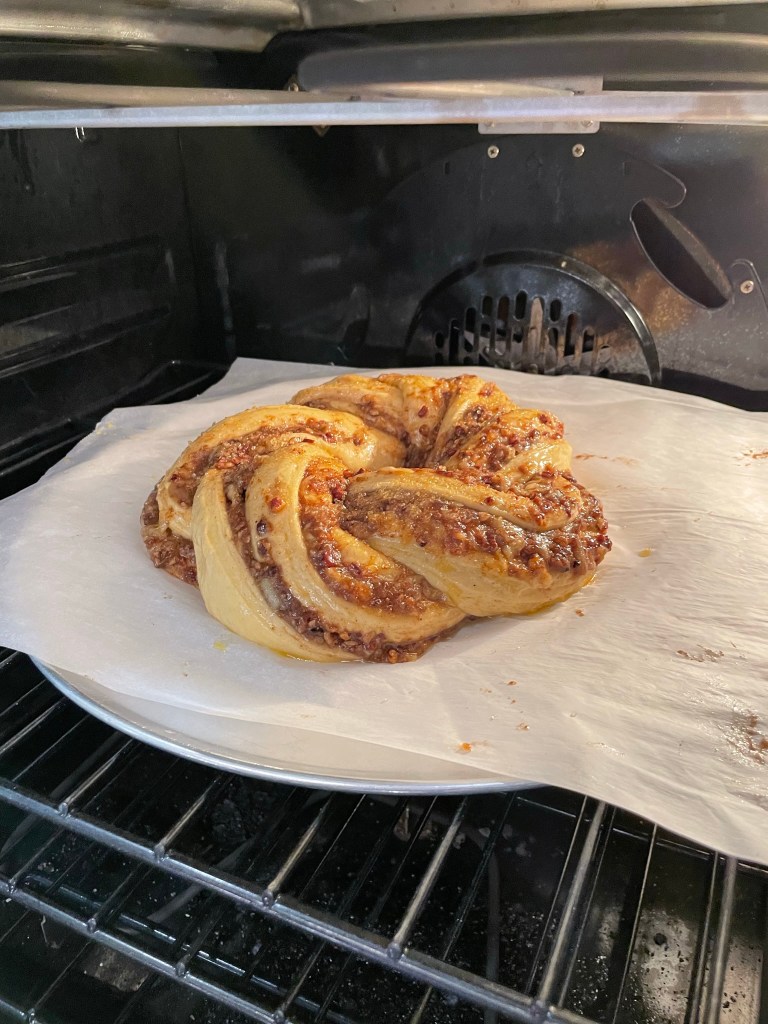
The filling was easy as well— brown sugar, cinnamon, cardamom and grated apple. Honeycrisp seemed appropriate for the occasion of Rosh Hashanah. Next came the rolling up and cutting, and I think this part would have been easier if this dough had been chilled, as the filling was very wet and loose. It was not difficult, but very messy, and not as pretty as I wanted it to be. I shaped the braided babka into a round, like a wreath, and covered it to proof for baking.
Next time, I will refrigerate the roll before cutting and shaping.
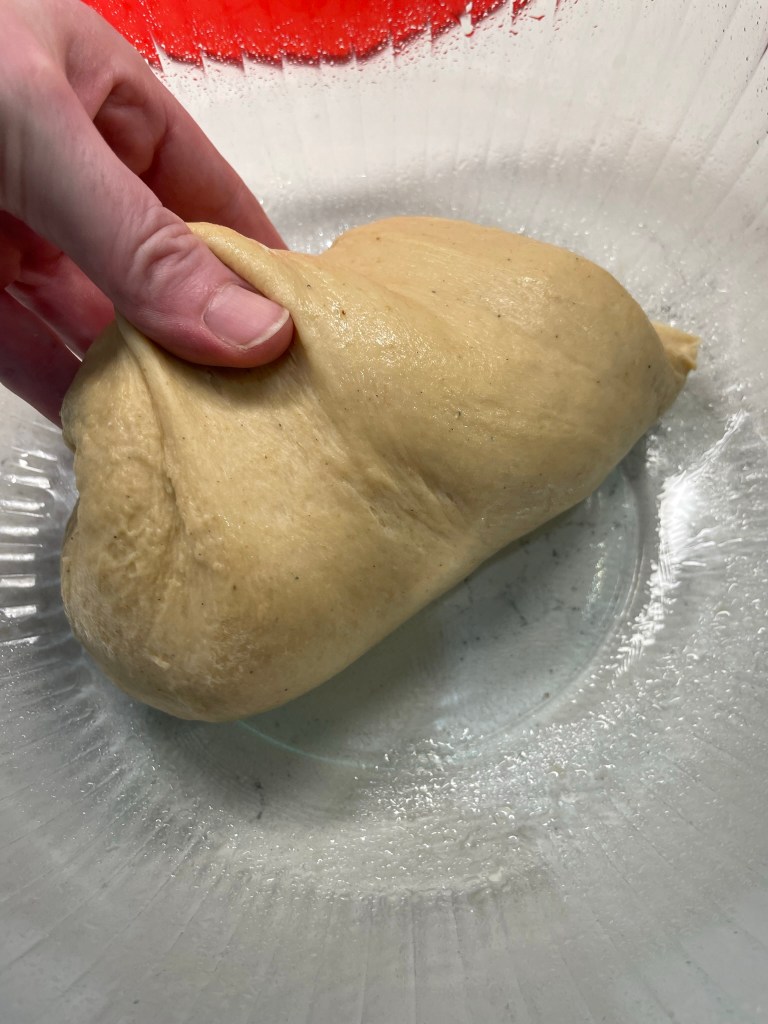
One of the other lessons in the King Arthur class was the simple way to determine whether your dough has proofed sufficiently for baking. If you poke the dough with a floured fingertip and the indent remains, it’s ready. If it bounces back, it needs more time. This one was ready!
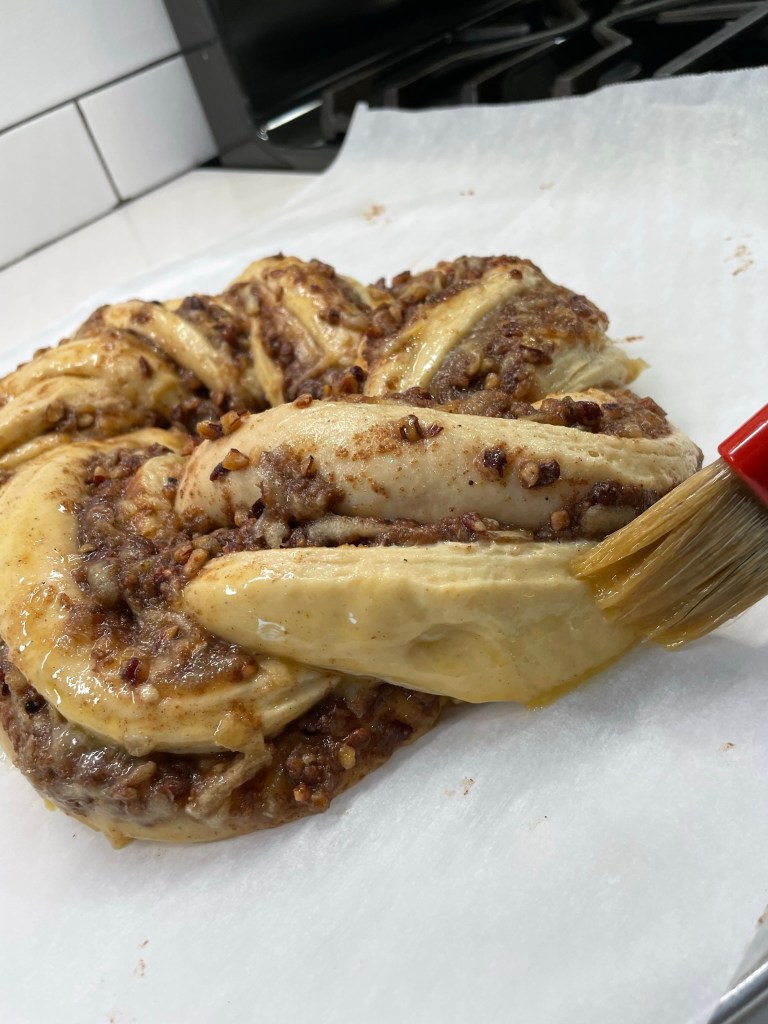
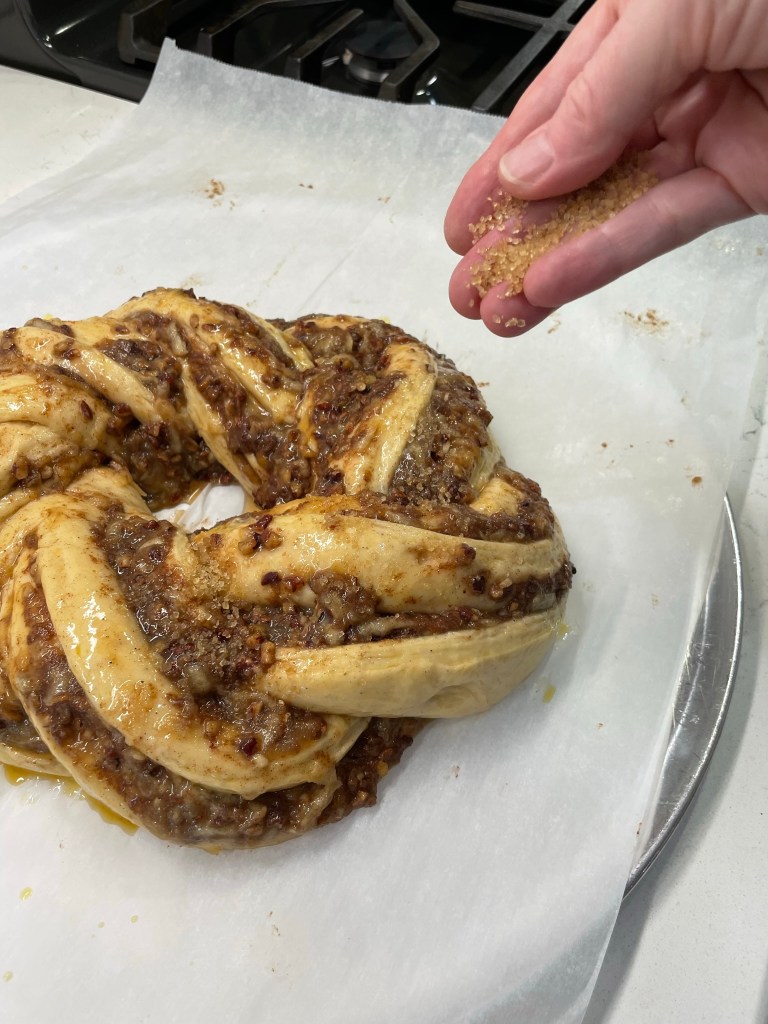
The egg wash and sprinkles of turbinado sugar made this beautiful!
Time for an egg wash and bake, and we are ready for Rosh Hashanah! Of course, you don’t have to be Jewish to enjoy the lovely flavors. The apple, honey and spices make it perfectly appropriate through the rest of the year.
My cousin, Annie, has a wicked sense of humor. Wicked, meaning funny, but also just a little bit wicked. During my visit last month at her lake house in Connecticut, Annie caught me off guard with what seemed like would be important, somber information.
“OK, listen” she began, cracking open a tall pantry door next to the kitchen of her sweet, cozy cottage. “If something happens to me, and you guys have to come here to the lake after I’m gone…”
“Yes,” I said, swallowing hard at that awful thought, as she pointed to a lower shelf inside the cabinet.
“Here’s where you’ll find the stuff for s’mores.”
Honest to God, I don’t know how she keeps a straight face when she delivers a punchline like that. But one thing is for sure, if there is an opportunity to bring joy to any situation or gathering, she has it covered— including s’mores, which we enjoyed as we relaxed in front of her patio fireplace, with the backdrop of gentle lapping sounds of the lake and an occasional bullfrog bellowing somewhere off in the distant darkness.
Who doesn’t have fun s’mores memories? The sweet little campfire sandwich of graham crackers, chocolate bar and toasted marshmallow has been a favorite of mine since I was a kid, and I was thrilled a few years ago to learn that the sugary treat has been awarded its very own day of celebration— National S’mores Day! Each August 10th since I started Comfort du Jour, I have presented a fun interpretation of s’mores. In 2020, it was a duo of treats with a s’mores cocktail and dessert pizza. In 2021, I gave you s’mores ice cream. Last year, those ooey-gooey s’mores brownies. And this year, well, it isn’t really a surprise, is it?
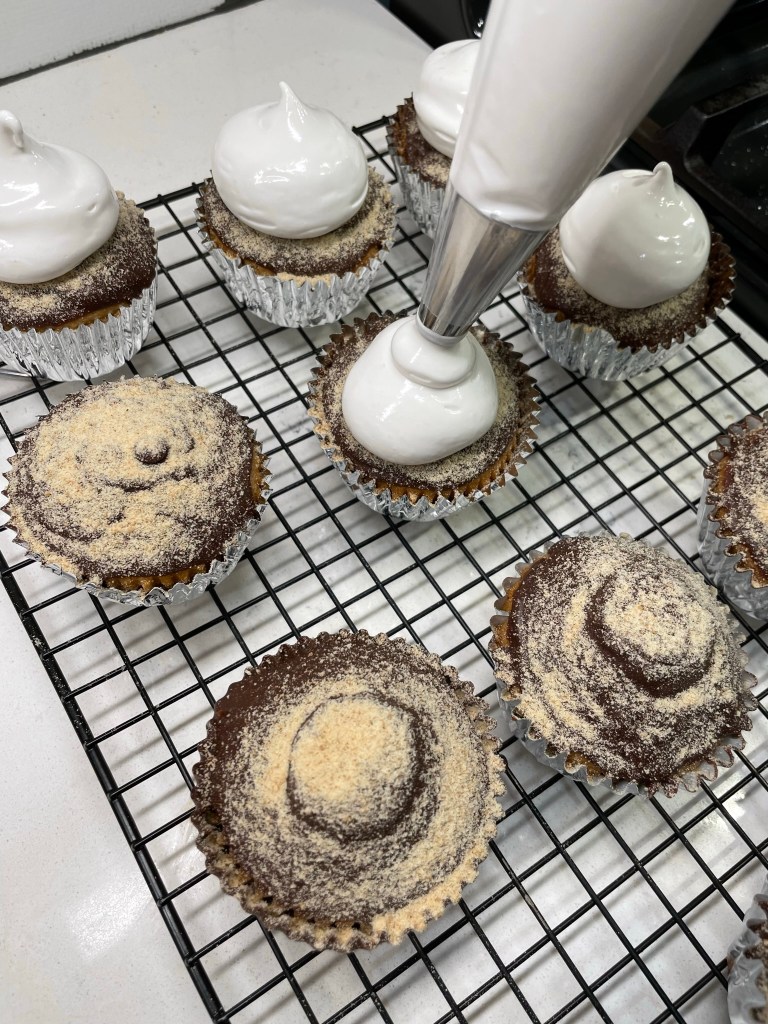
Behold, s’mores cupcakes!
These turned out to be everything I wanted!
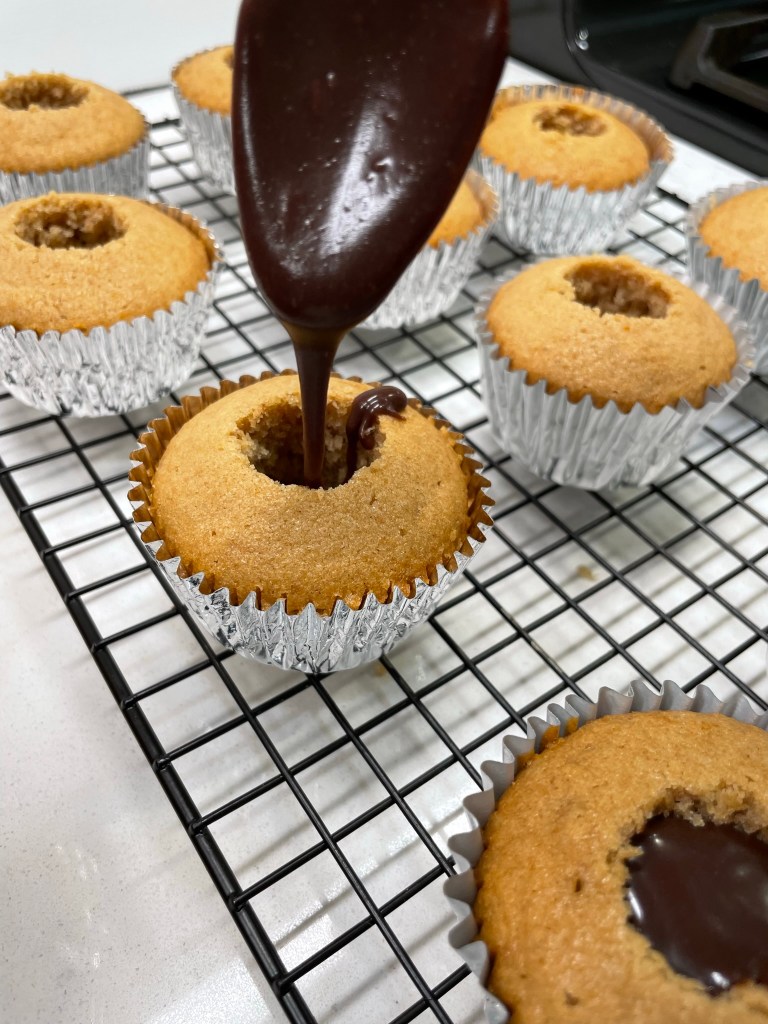
With a sweet honey-graham cake base, hollowed out for a dark-and-milk chocolate ganache filling, and topped with a homemade marshmallow frosting (toasted, of course), this may be my favorite s’mores treat to date.
I’d been scouting out component recipes for these for several months, and finally nailed it down after flipping through a special edition Food Network Magazine, called “The Cupcake Cookbook.” The pages held all kinds of cupcake creations, from fruit to spice to chocolate and vanilla, plus numerous flavors and types of frosting, icing and glaze. It was their recipe for “honey-graham cupcakes” that sealed the deal for my s’mores recipe, but I did (of course) put my own spin on them, using honey in place of sugar for an extra-sweet, extra-“graham-y” impression.
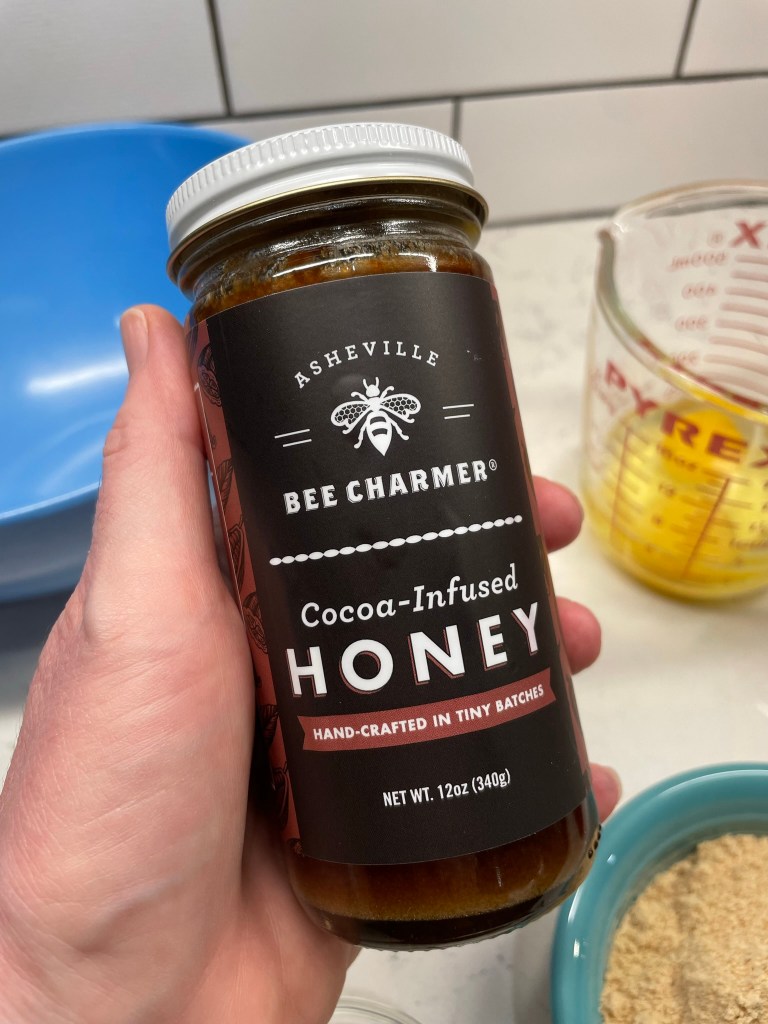
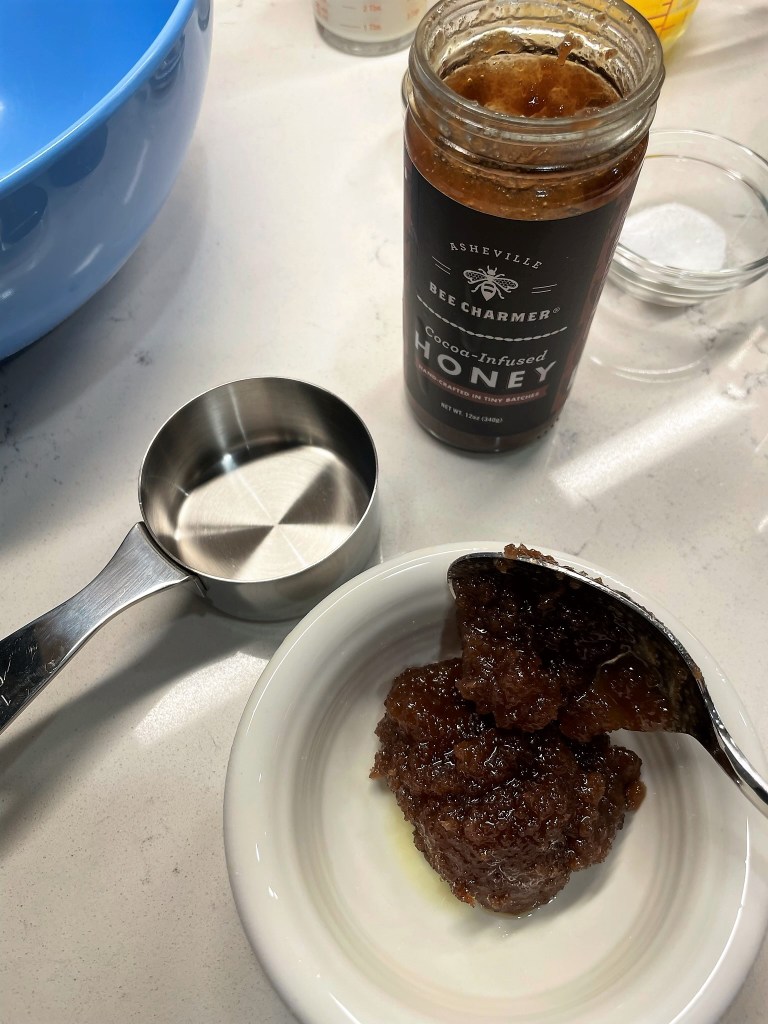
I had this cocoa-infused honey that I had picked up on an earlier trip to Asheville, N.C., where we go occasionally to visit my husband’s adult daughter. I suspected that the cocoa infusion would lend itself nicely to the s’mores vibe, and I was correct. The honey has been in my cabinet for about a year, so it was fairly crystallized, but the texture was no problem for my baked recipe.
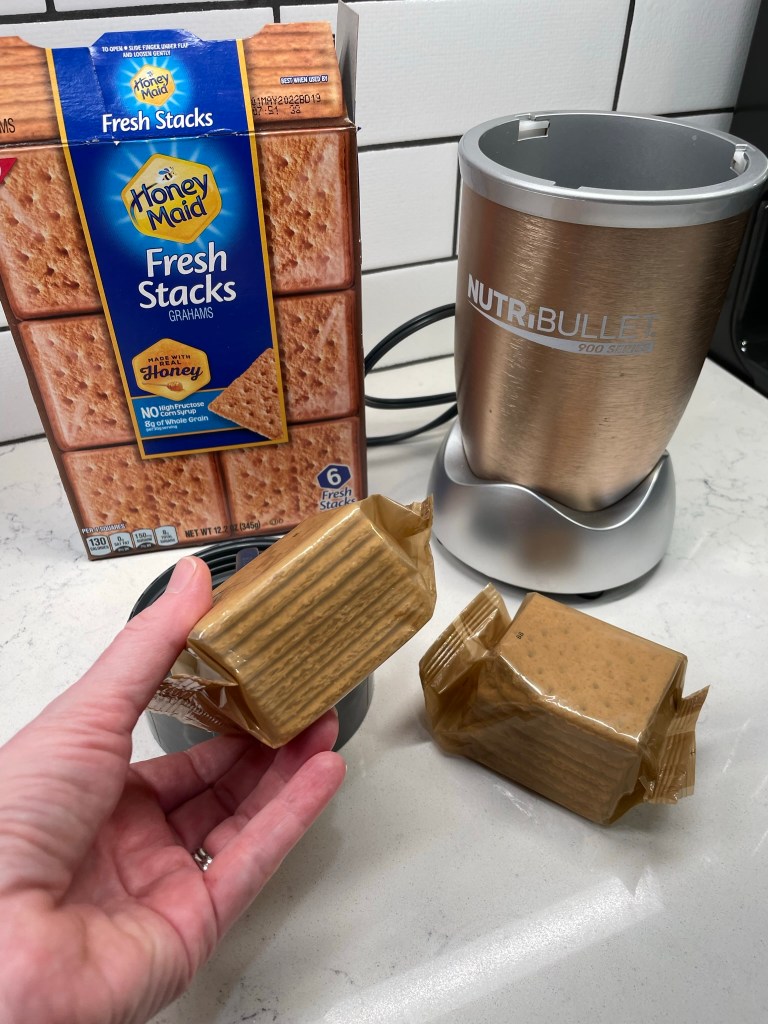
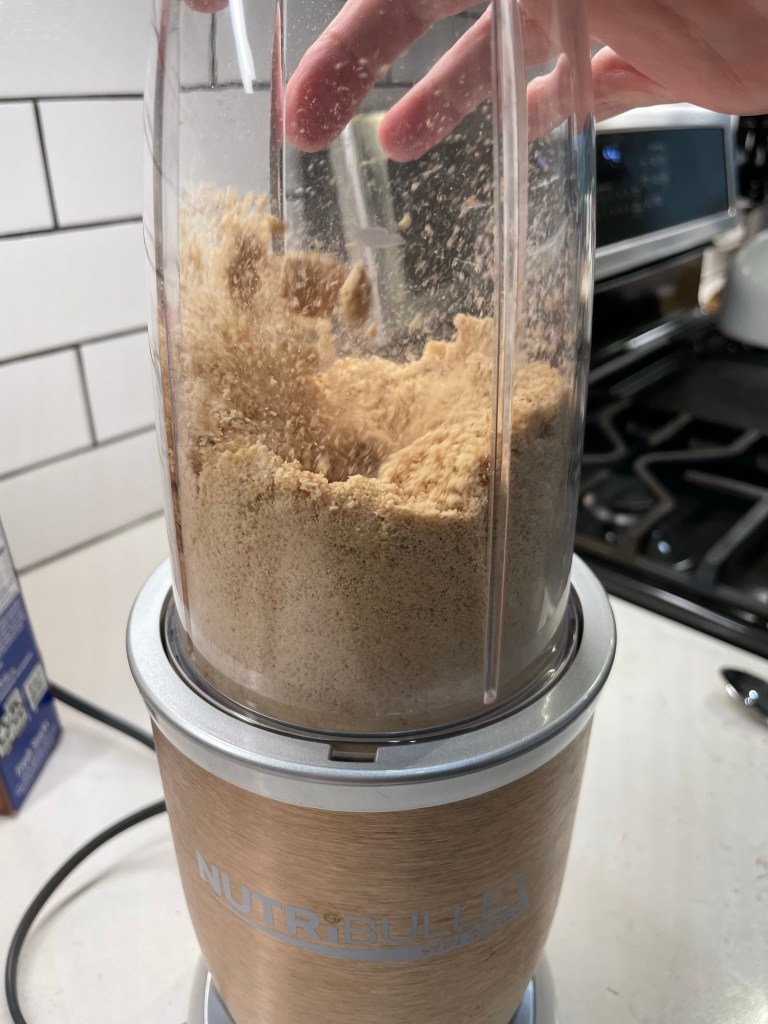
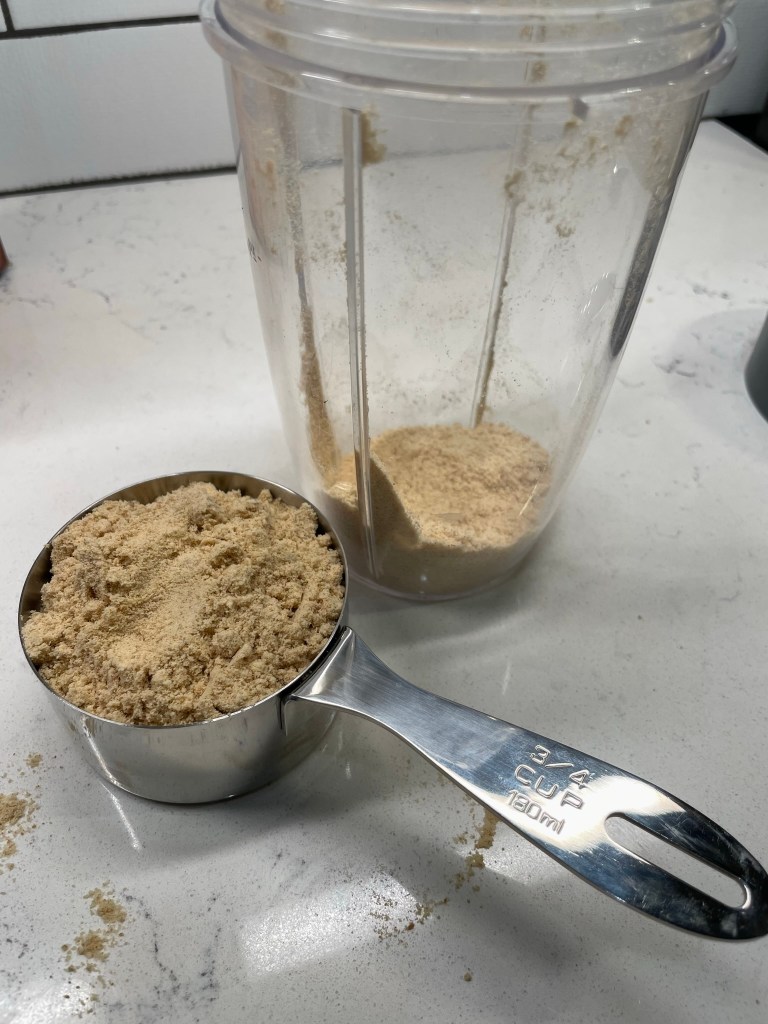
One of the things that appealed to me about the Food Network cupcake recipe is that it included actual crushed graham crackers. I was guaranteed to have the flavor I wanted, along with a slightly grainy feel from the already baked crumbs mixed into the cupcake batter. To crush the graham crackers, I piled a couple sleeves of them into my bullet-style blender and pulsed them for about 20 seconds, until they were reduced to a fine powder. I had the 3/4 cup of crumbs that I needed, plus 1/4 cup left over that I figured I’d use in the topping.
With all my ingredients lined up and measured, I was finally ready to bake!
Generally speaking, you can swap honey for sugar in a baking recipe, but you must take a few things into consideration, which I learned thanks to this article from an online honey supplier. Following those tips, I made the following adjustments:
used less honey than the sugar amount called for (because honey is sweeter)
reduced the milk amount slightly (because honey is also somewhat liquid)
added a touch of baking soda to balance the acidic effect of the honey
reduced the baking temperature a bit (because honey burns more easily than sugar), and slightly increased the baking time to compensate
I have accounted for all of those adjustments in my instructions, but the click-to-print recipe below also describes how the recipe should look if you’re using sugar to sweeten the cupcakes.
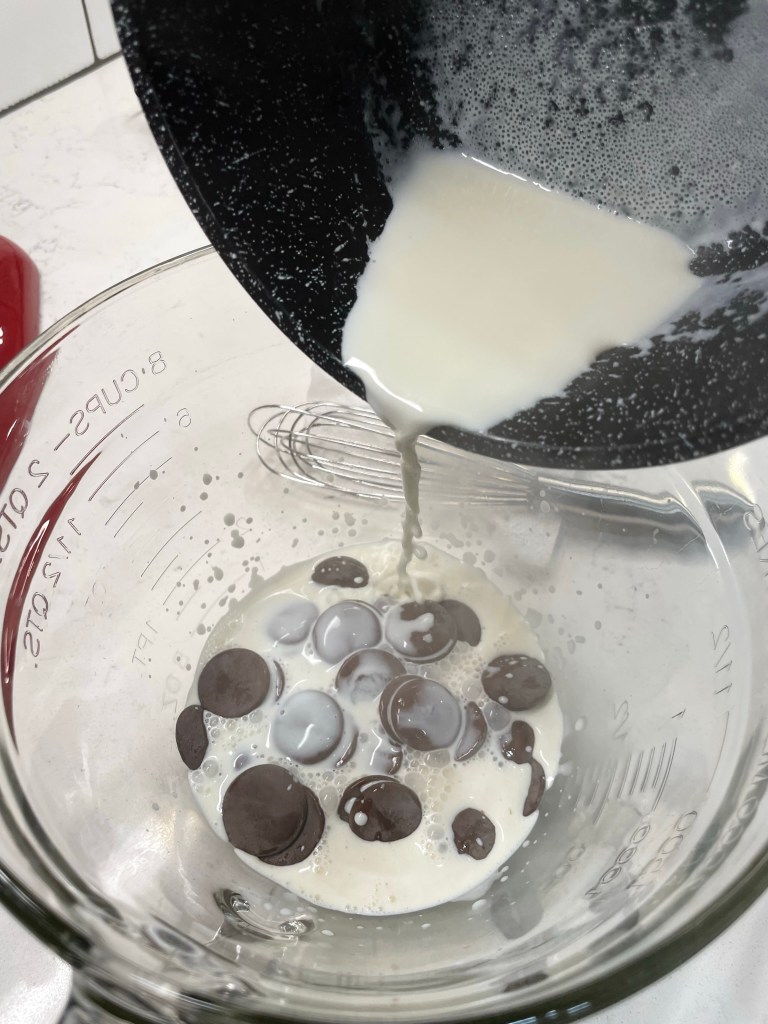
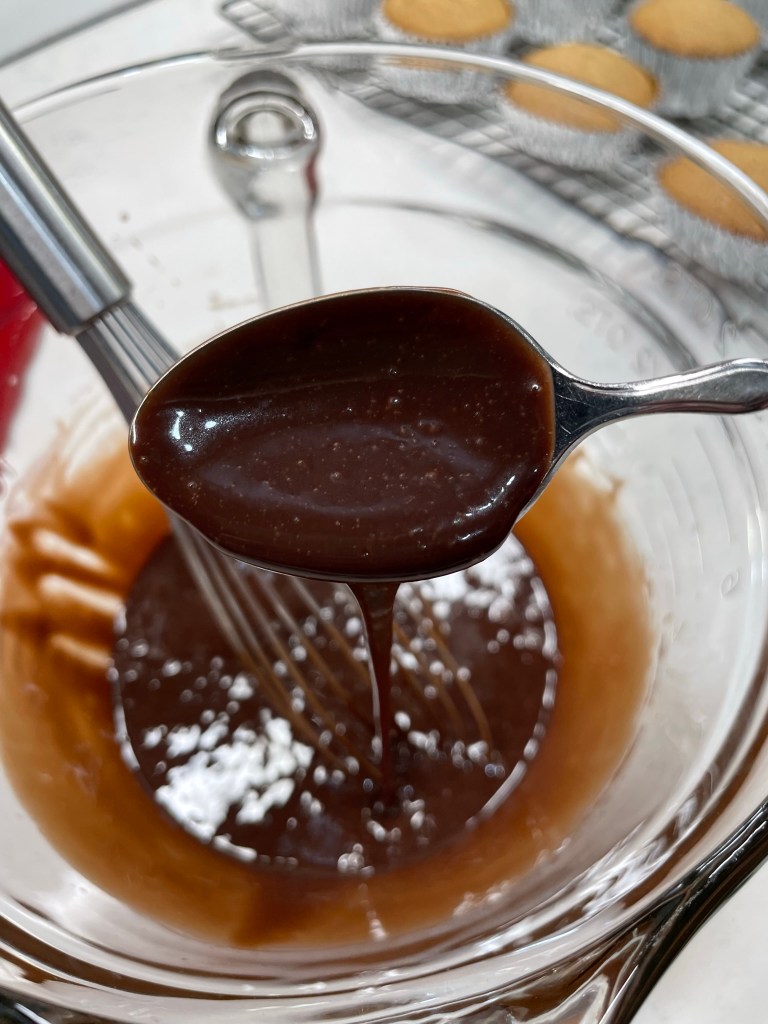
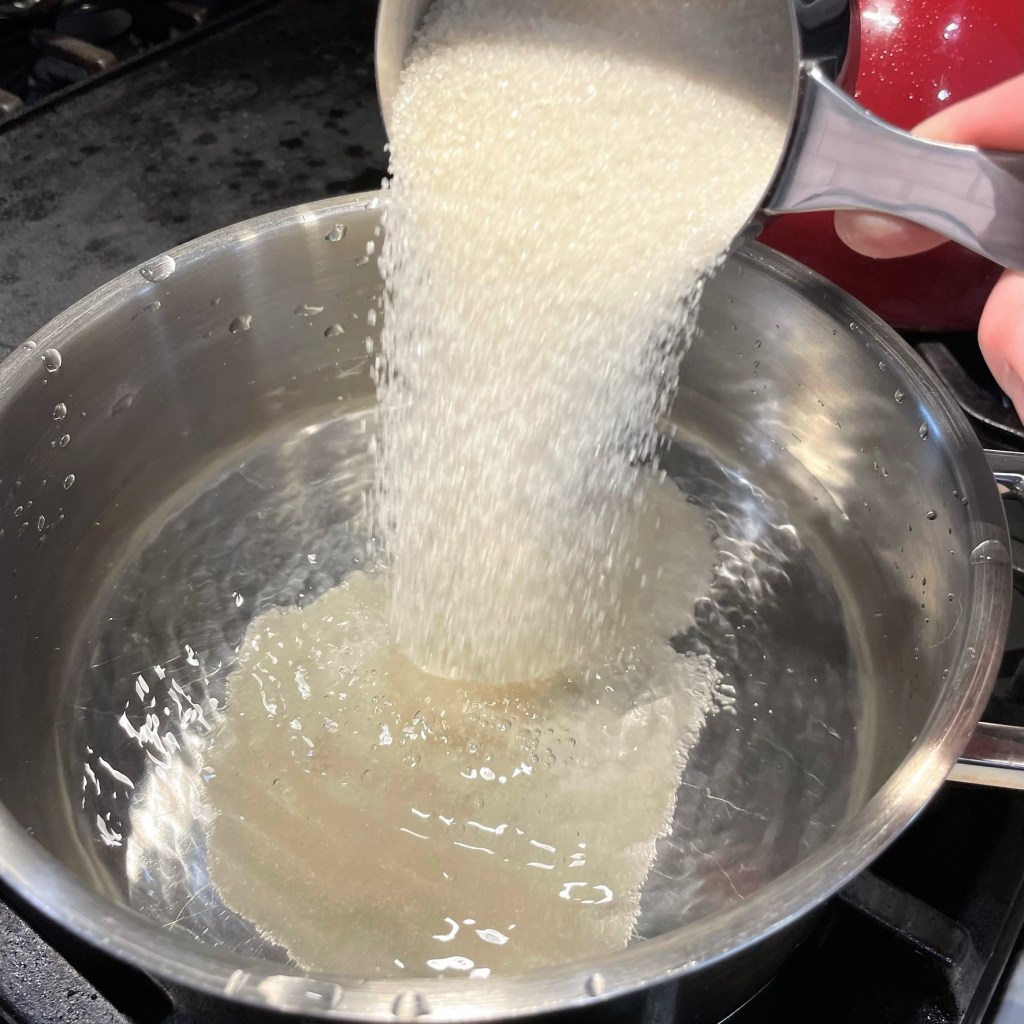
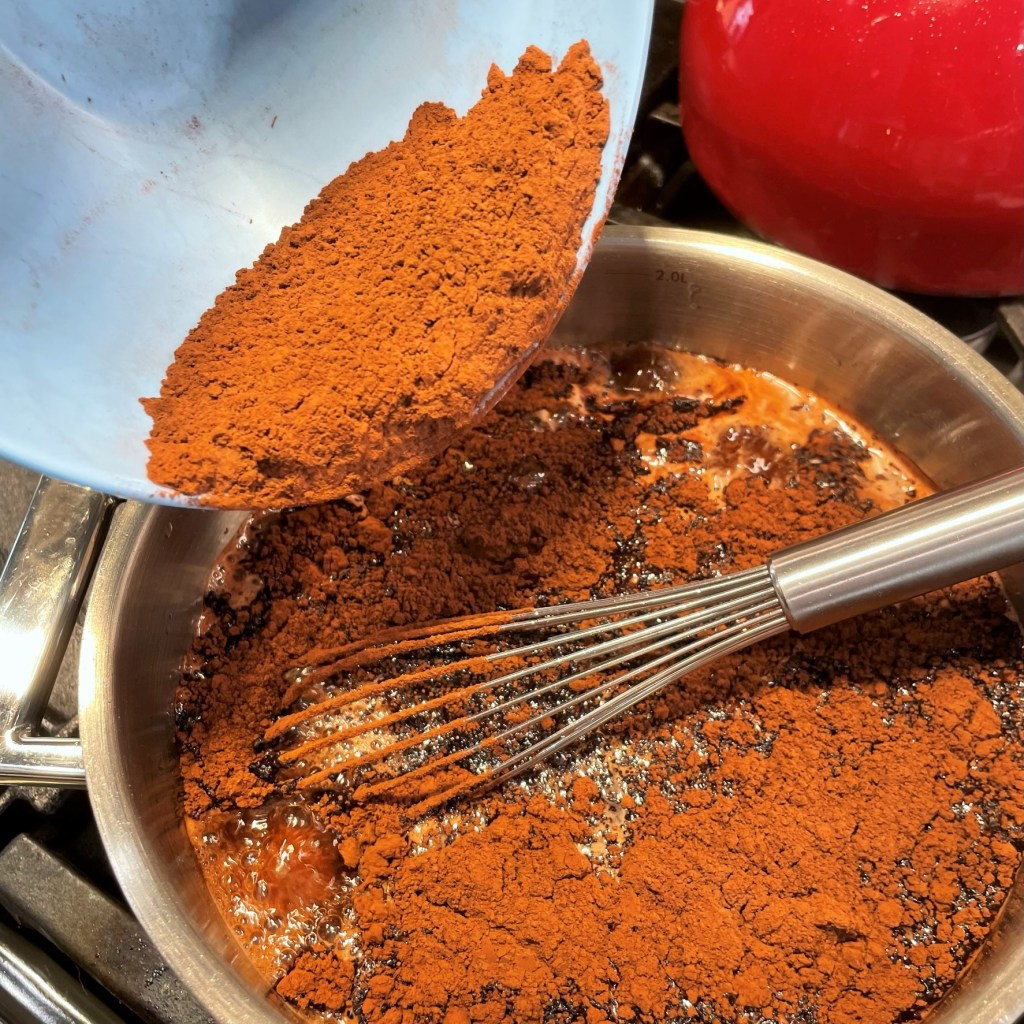
The ganache filling was the simplest component of this recipe; nearly equal parts chocolate— I used a combination of dark and milk chocolate for this— and heavy cream heated to just-shy of boiling. If you’ve never made ganache, you might be surprised how simple it is. Just heat the cream, pour it over the chocolate so it’s complete covered, wait 10 minutes, and stir to blend. Don’t be alarmed if the mixture seems very runny at first— it will thicken and firm up a bit as it cools. I wanted the ganache to be soft but not too messy, so I used slightly more chocolate than cream. In hindsight, equal parts would have been fine.
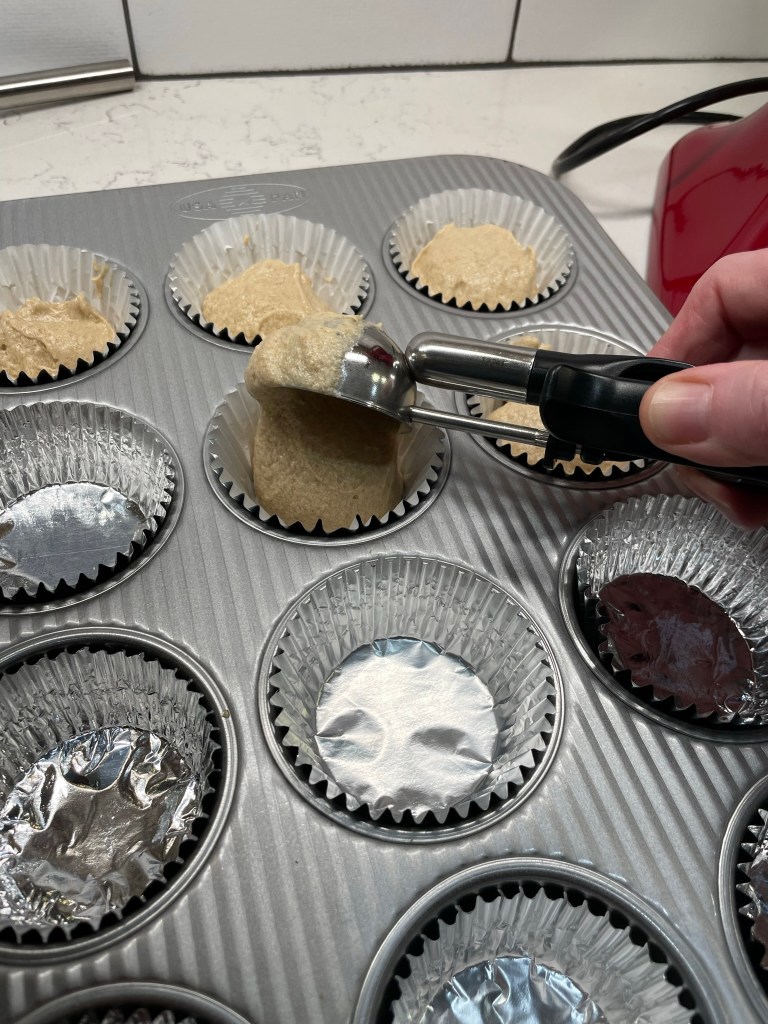
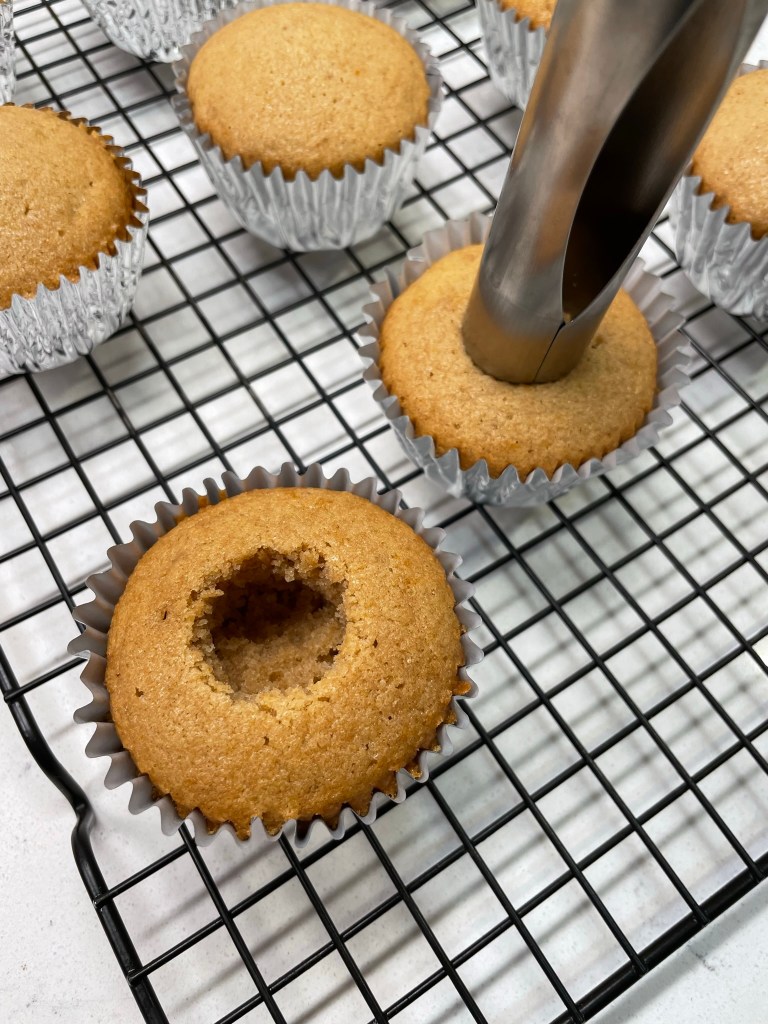
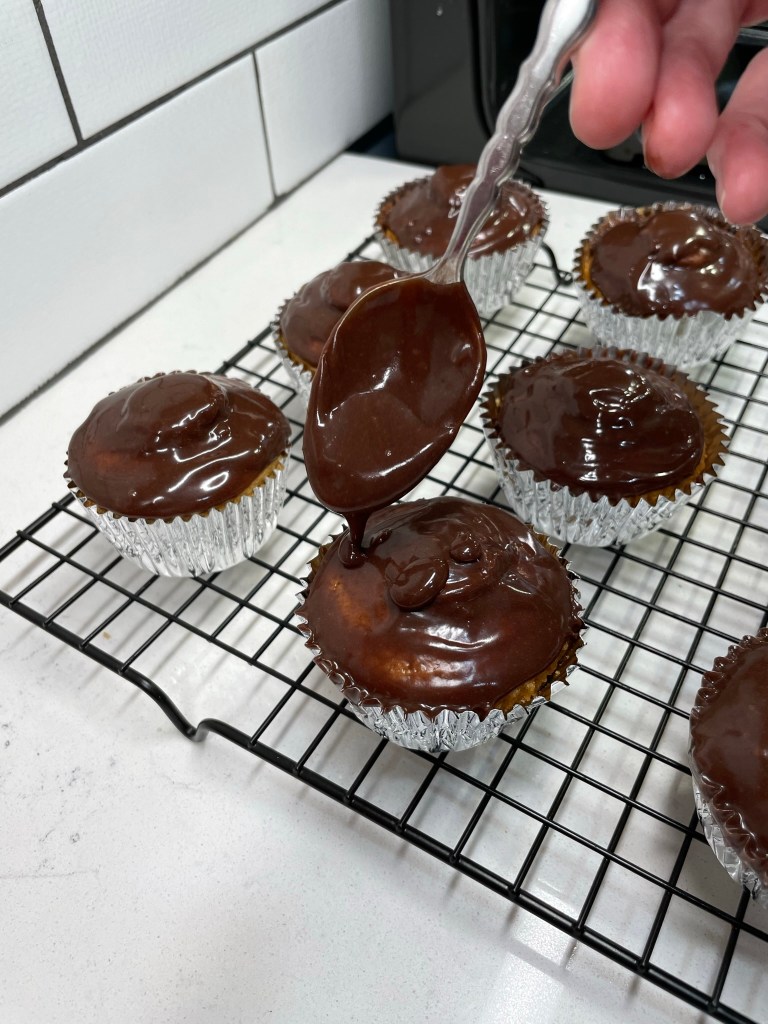
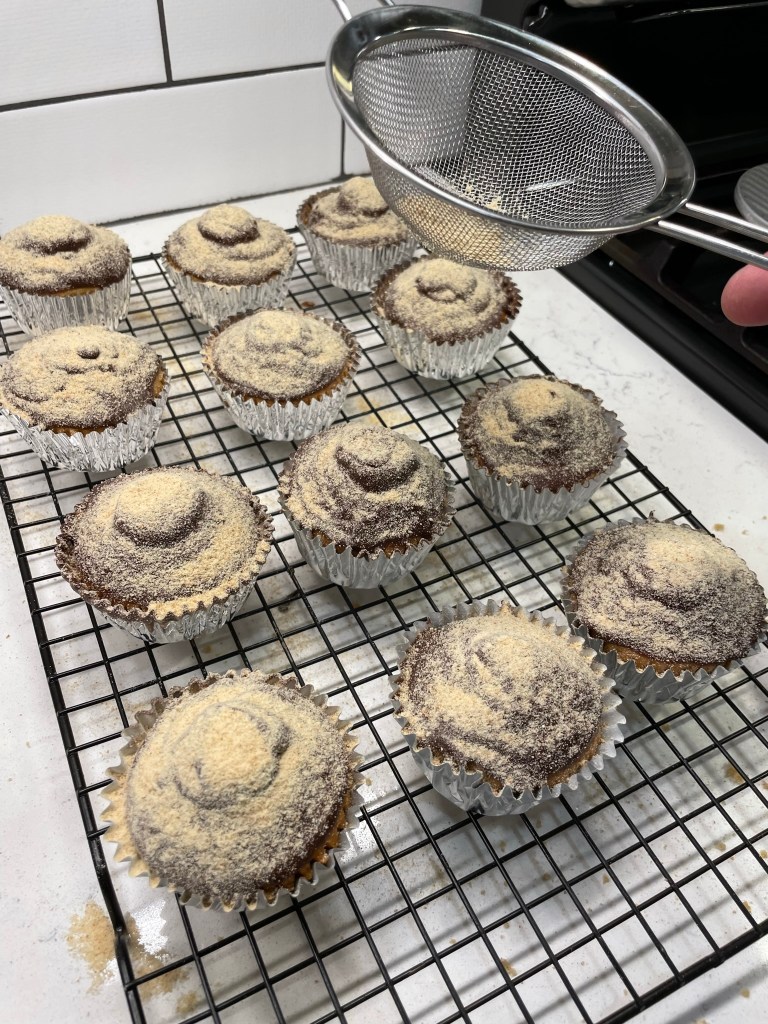
When the cupcakes were cooled, I used my apple corer tool to carefully cut out a plug shape bit of cake, keeping those pieces intact, to place back on top of the ganache, which I spooned inside the cupcake cavity. I didn’t mind that the tops didn’t sit flush with the cakes, because the whole thing would soon be buried in marshmallow frosting anyway. I had some ganache left over after filling the cupcakes, so I warmed it over hot water back to a spreadable consistency, and glazed the top of each cupcake, and then sifted some of the remaining graham crumbs on top as a bed for the marshmallow frosting.
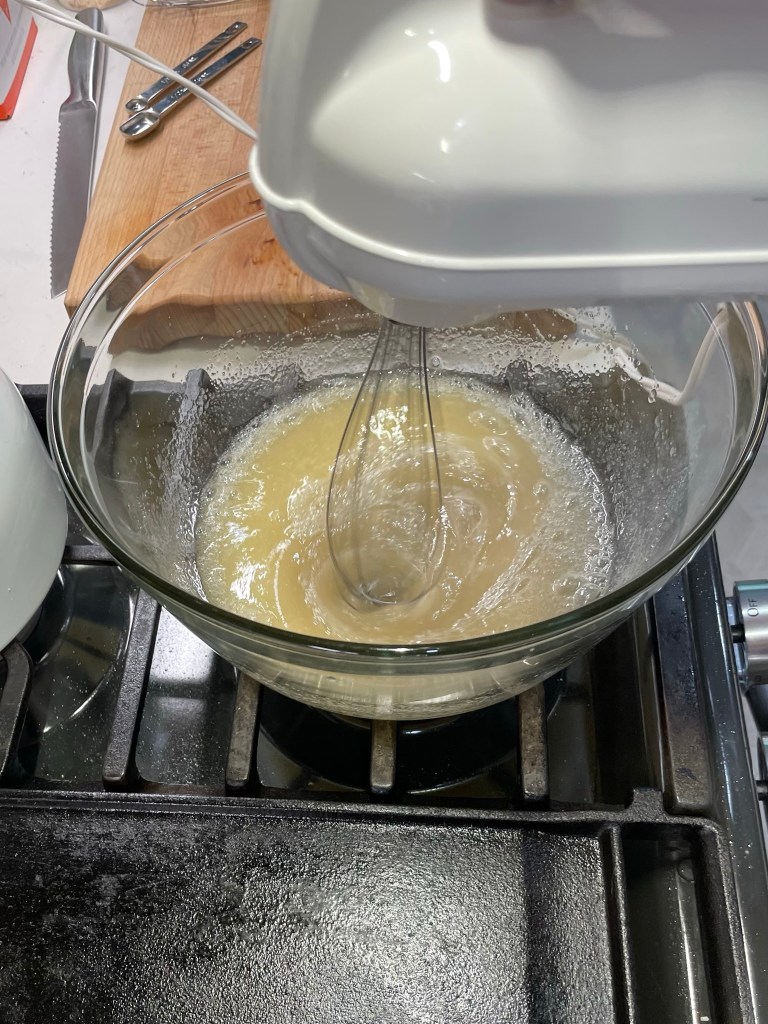
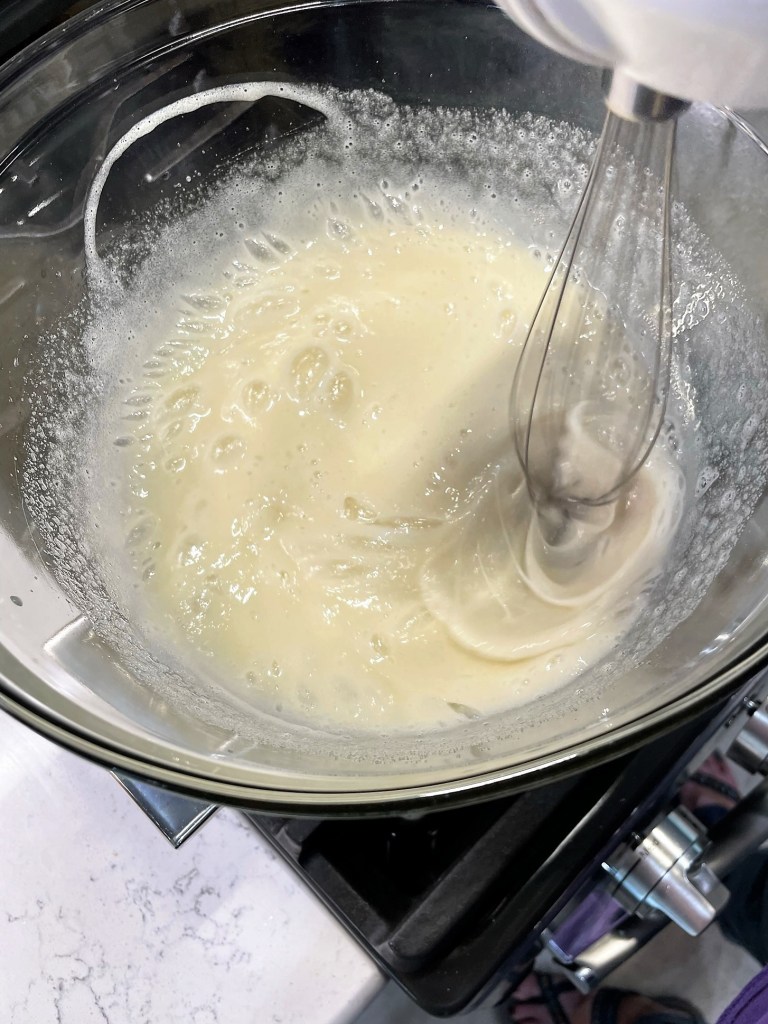
Almost done! I agonized a bit over which frosting recipe to use, and considered one in the Food Network Cupcake magazine, but it sounded more like meringue than frosting, and I wanted mine to be stable enough to keep its shape without getting watery. I finally found a “marshmallow frosting” recipe online that sounded more hefty, and about the time I got to the step to “whip it with a mixer for seven minutes over simmering water,” it occurred to me that this was exactly the same as a topping that my grandmother frequently made during her having-company-over days.
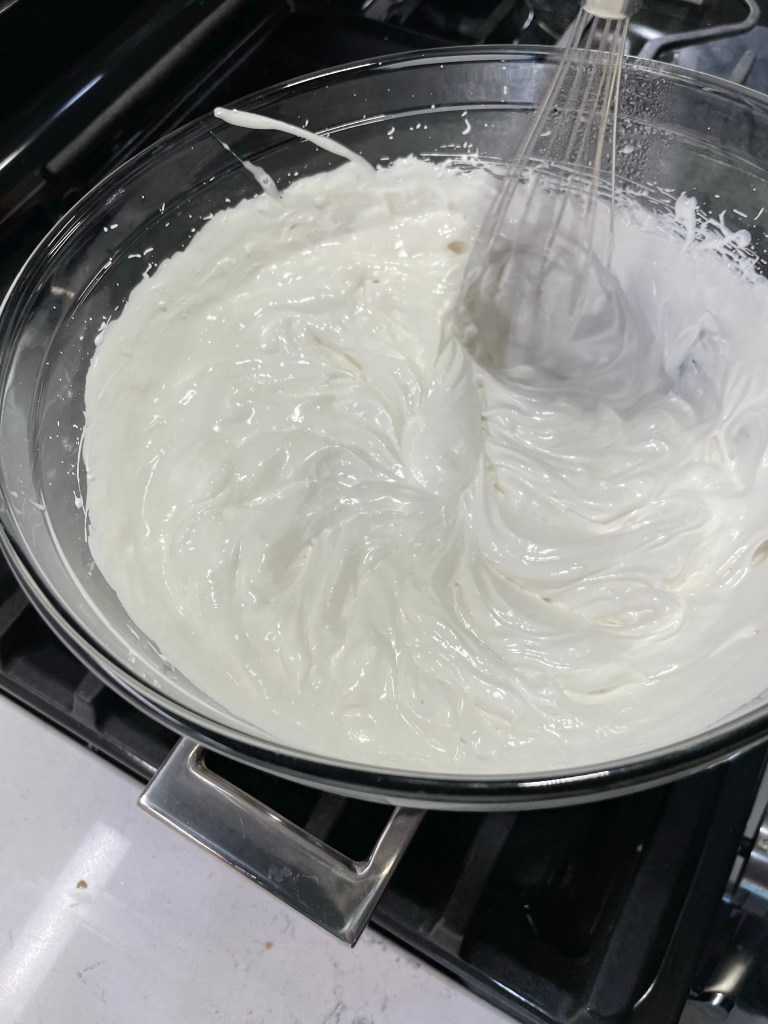
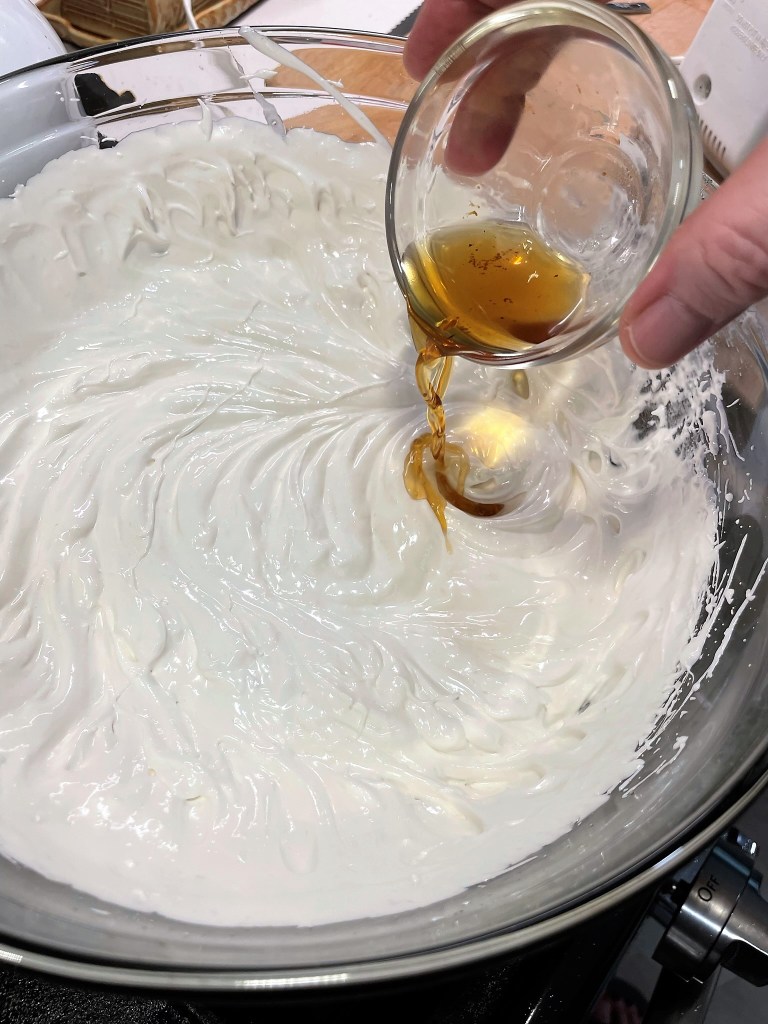
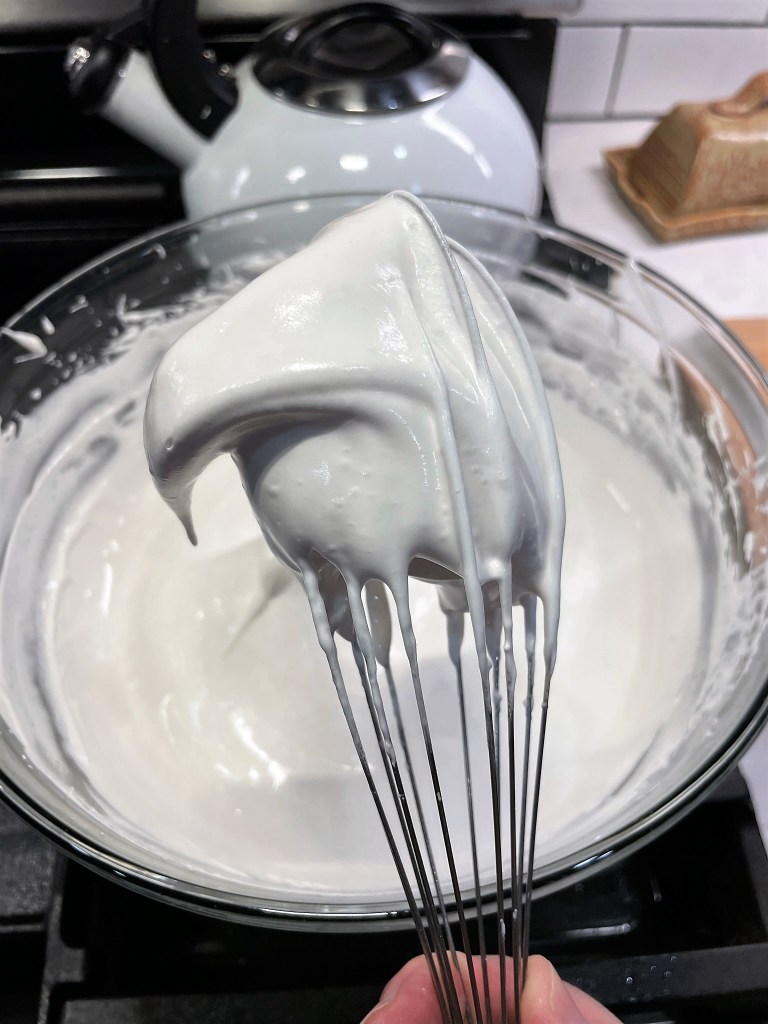
Corn syrup prevents crystallization.Start the frosting off the heat.Place over steaming water and continue beating.After 7 minutes, the eggs are cooked and soft peaks form.Vanilla goes in at the end.Marshmallow frosting!
Turns out, seven-minute frosting is essentially marshmallow creme. I suppose you could probably just top the cupcakes with store-bought marshmallow creme, but by this time, my frosting was already done and I did enjoy piping the stuff onto the cupcakes— it made me feel like a real baker!
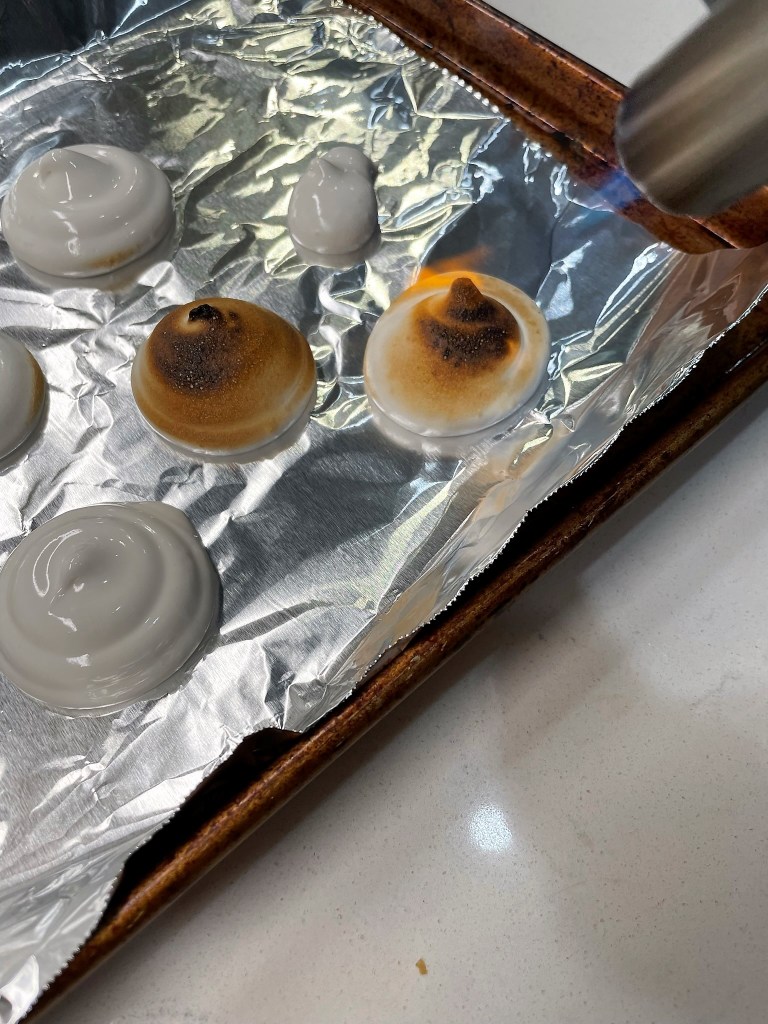
The only thing left to do was was toast the marshmallow topping. Having never done this before, and not wanting to ruin my pretty little s’mores cupcakes, I piped out some of the leftover marshmallow frosting onto a sheet of foil, and hit the dollops with my culinary torch to practice. Would you believe, this turned out to be the simplest part of the recipe?! The frosting toasted beautifully, and it stayed pretty for a few days after I made the cupcakes.
Incidentally, I had enough marshmallow frosting left over to cover at least two more batches of cupcakes, and most of the extra went to waste because I didn’t have a plan ready for using it. Perhaps I could have whipped up a quick batch of Krispie treats— and that of course, gives me an idea for National S’mores Day next year. 😉
With a sweet honey-graham cake base, hollowed out for a dark-and-milk chocolate ganache filling, and topped with a homemade marshmallow frosting (toasted, of course), this may be my favorite s’mores treat to date. There are three components of this treat, and I've described each separately below.
Ingredients
3/4 cup honey graham crackers, crushed fine (see notes)
3/4 cup all-purpose flour
1 tsp. baking powder
1/8 tsp. baking soda (omit if using sugar in place of honey)
1/2 tsp. salt
1 stick unsalted butter
1/2 cup honey (or 1 cup granulated sugar)
2 eggs
2 tsp. real vanilla extract
1/2 cup milk (minus 2 tablespoons if using honey)
Notes: Butter, eggs and milk should be at cool room temperature. Remove them from refrigerator about one hour before you plan to start the recipe.
To get a fine crush on the graham crackers, I broke them up into my bullet-style blender and processed them for about 15 seconds. Sift through them with your fingers to remove any remaining chunks. I used two wrapped packs of “Fresh Stacks” crackers, and had about 1/4 cup of crumbs left over, which I sprinkled on top of the ganache before frosting.
Directions
Preheat oven to 330° F (or 350° F if using sugar), and line cupcake pan with foil liners.
Combine crumbs, flour, baking powder, soda and salt in a medium bowl and set aside.
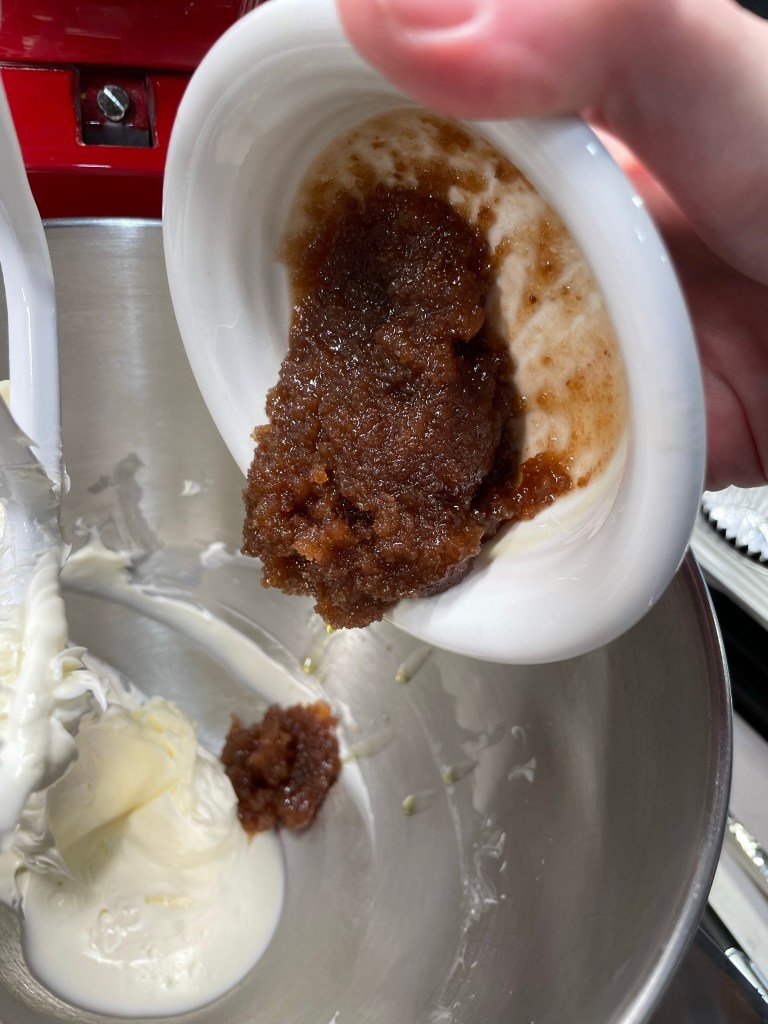
In a stand mixer, cream butter on medium speed until light and airy, about one minute. Add honey and beat on medium speed until fluffy and evenly blended, about four more minutes. Scrape down sides of the bowl.
Add one egg at a time, beating to blend after each. Scrape down sides of the bowl. On low speed, beat in one-third of the flour mixture just until no visible dry ingredients remain. Beat in half of the milk. Repeat with dry ingredients, then milk, then final dry ingredients. Scrape down sides.
Scoop cupcake batter into lined cupcake pan. Each cup should be about 2/3 filled.
Bake 25 to 30 minutes (less if using sugar), until cupcakes are golden and spring back easily when touched in the center.
Cool cupcakes in pan 5 minutes, then transfer to a wire rack to cool completely.
While the cupcakes are baking, prepare the ganache filling. It’s best to fill the cupcakes while the ganache is still somewhat warm and easily drizzled.
Ingredients
2/3 cup quality chocolate, wafers or bars preferred over chips
1/2 cup heavy cream
Directions
Add chocolate pieces to a medium bowl. Heat cream to just-shy of boiling point. Pour cream over chocolate and let sit 10 minutes.
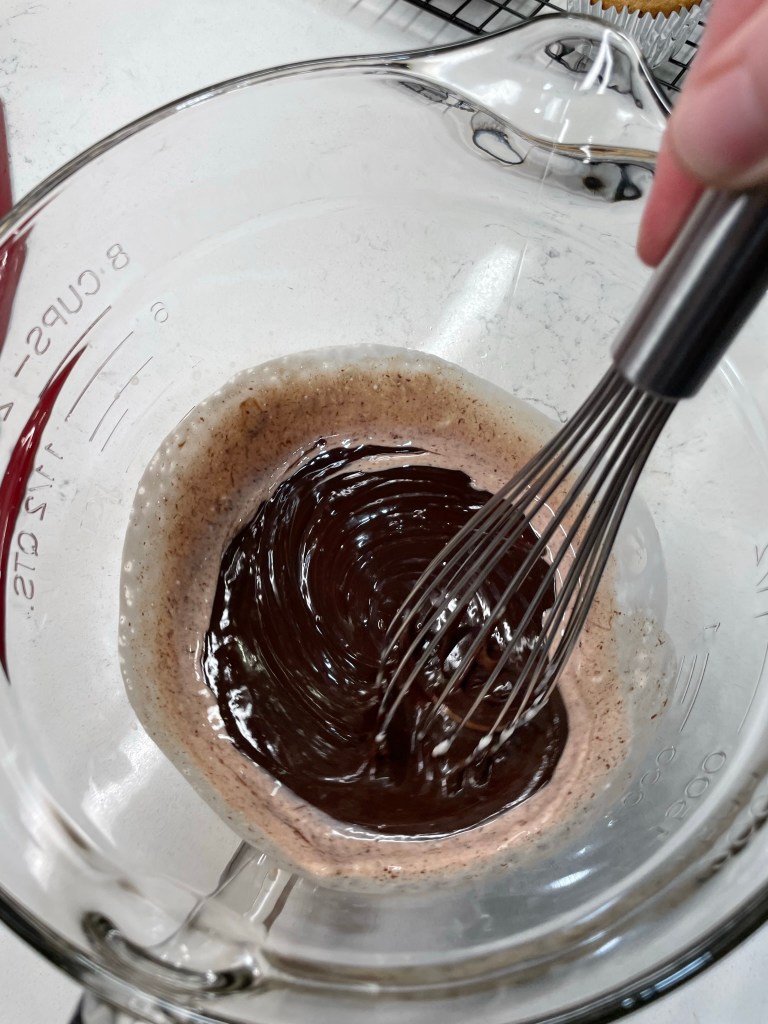
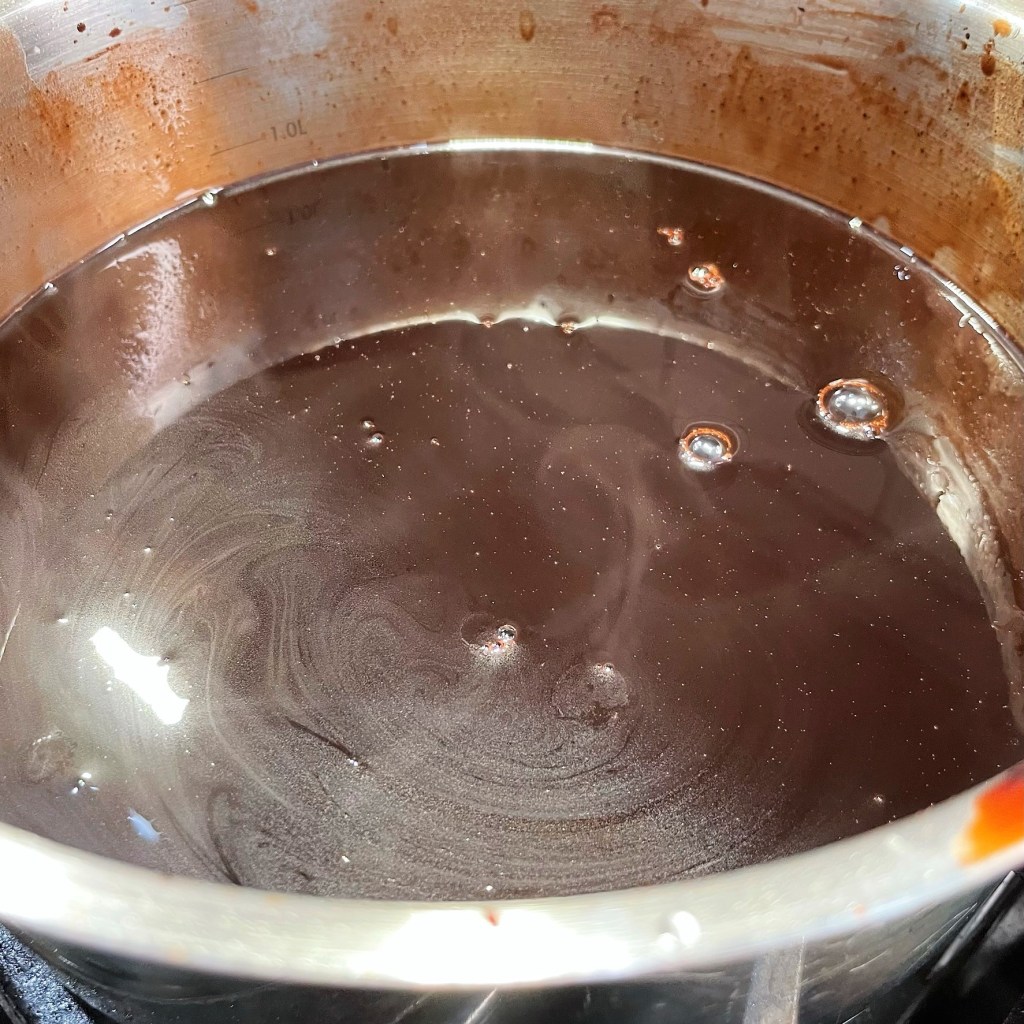
Gently whisk or stir cream and chocolate together until evenly blended. This will seem impossible at first, but within one minute, it should be glossy and silky.
When cupcakes are completely cool, used an apple corer tool or paring knife to carefully cut a one-inch plug from the center of each cupcake. Set these aside.
Use a spoon to drizzle the warm ganache into each cupcake hole, then press the plugs back onto the cupcake. Carefully glaze the filled cupcakes with any remaining ganache. Scatter some of the remaining graham crumbs over the top and cool completely while you make the marshmallow frosting.
To prepare the frosting, you will need an electric hand mixer and a double boiler or a large, heatproof bowl that will fit over, but not inside, a medium saucepan. Be sure the mixing bowl and beater blades are completely clean, as any amount of oil or fat on them will prevent the egg whites from forming peaks.
Ingredients
2 egg whites, at room temperature
1 1/2 cups granulated sugar (I used a 50/50 mix of cane sugar and superfine caster sugar)
Bring a medium saucepan of water to a slight boil over medium heat. The water should not be high enough to touch the bottom of the bowl used in the next step.
In the heatproof bowl, combine all ingredients except vanilla. Do not place the bowl over the hot water yet.
Use a hand mixer to whip the frosting ingredients together. Start on low speed and increase slightly when the mixture starts to get frothy. After a minute or two, place the bowl over the simmering water.
Continue to whip with the mixer for 7 minutes, until all the sugar has dissolved and soft peaks form in the frosting. Remove from heat.
Add vanilla and beat again just until incorporated. Cool a few minutes before frosting cupcakes.
Load frosting into a piping bag with a wide, round tip. Pipe frosting onto cupcakes.
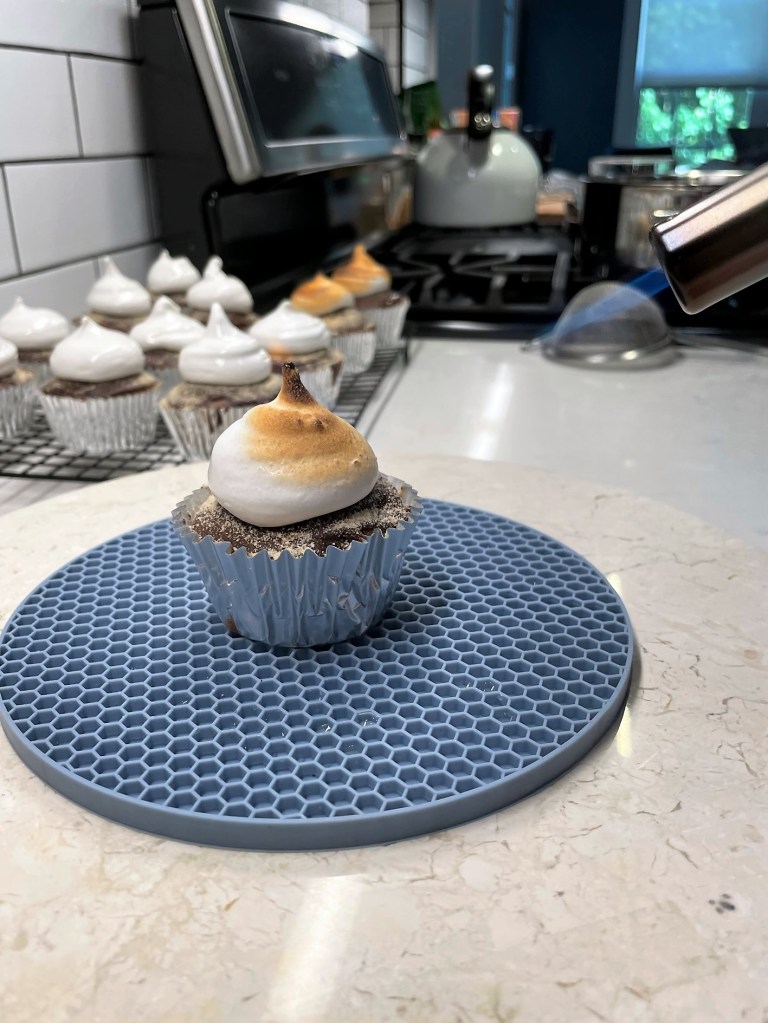
Use a culinary torch to carefully toast the marshmallow topping. Cool before enjoying.
First things first, this matzo is not kosher for Passover, and honestly not even kosher at all. I know this because, for starters, I am not Jewish and I don’t keep a kosher kitchen. After that, there are probably at least a dozen other reasons that my matzo is not kosher, but none of that is important right now because I have big news.
Passover starts on Wednesday, and I have finally done my DIY matzo challenge, moving it to the done column of my culinary bucket list. To me, this is worth celebrating!
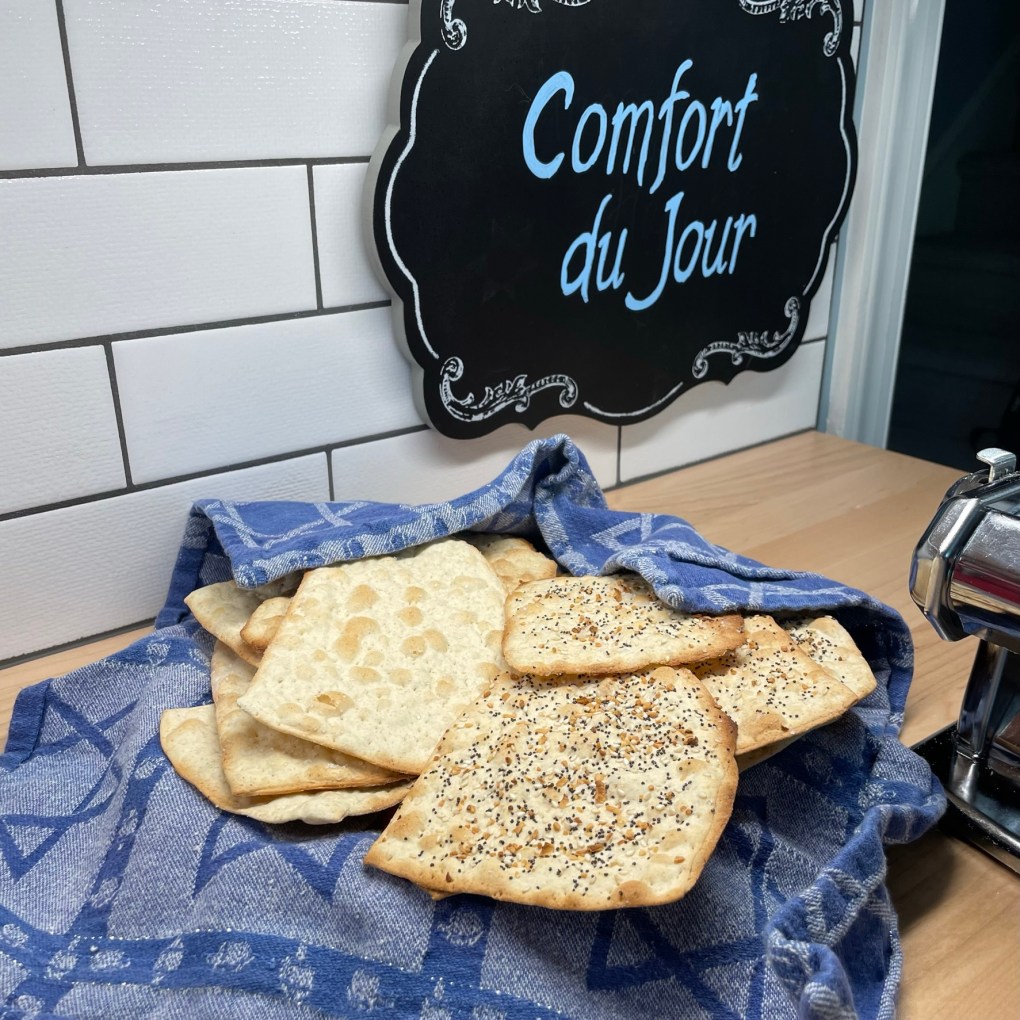
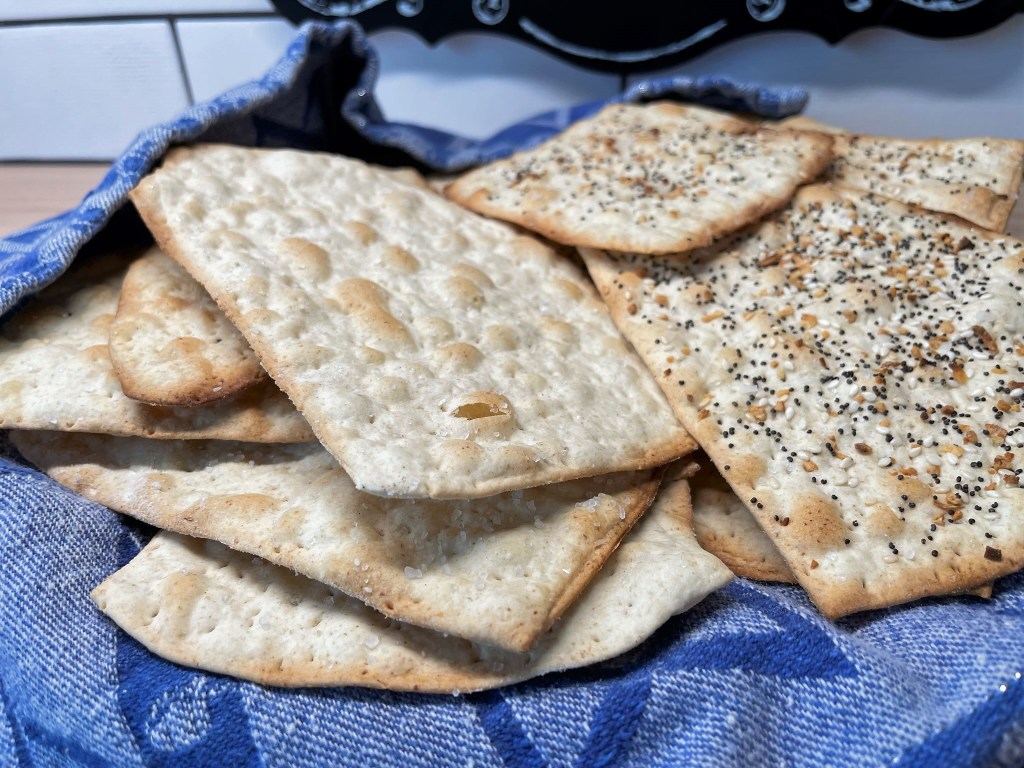
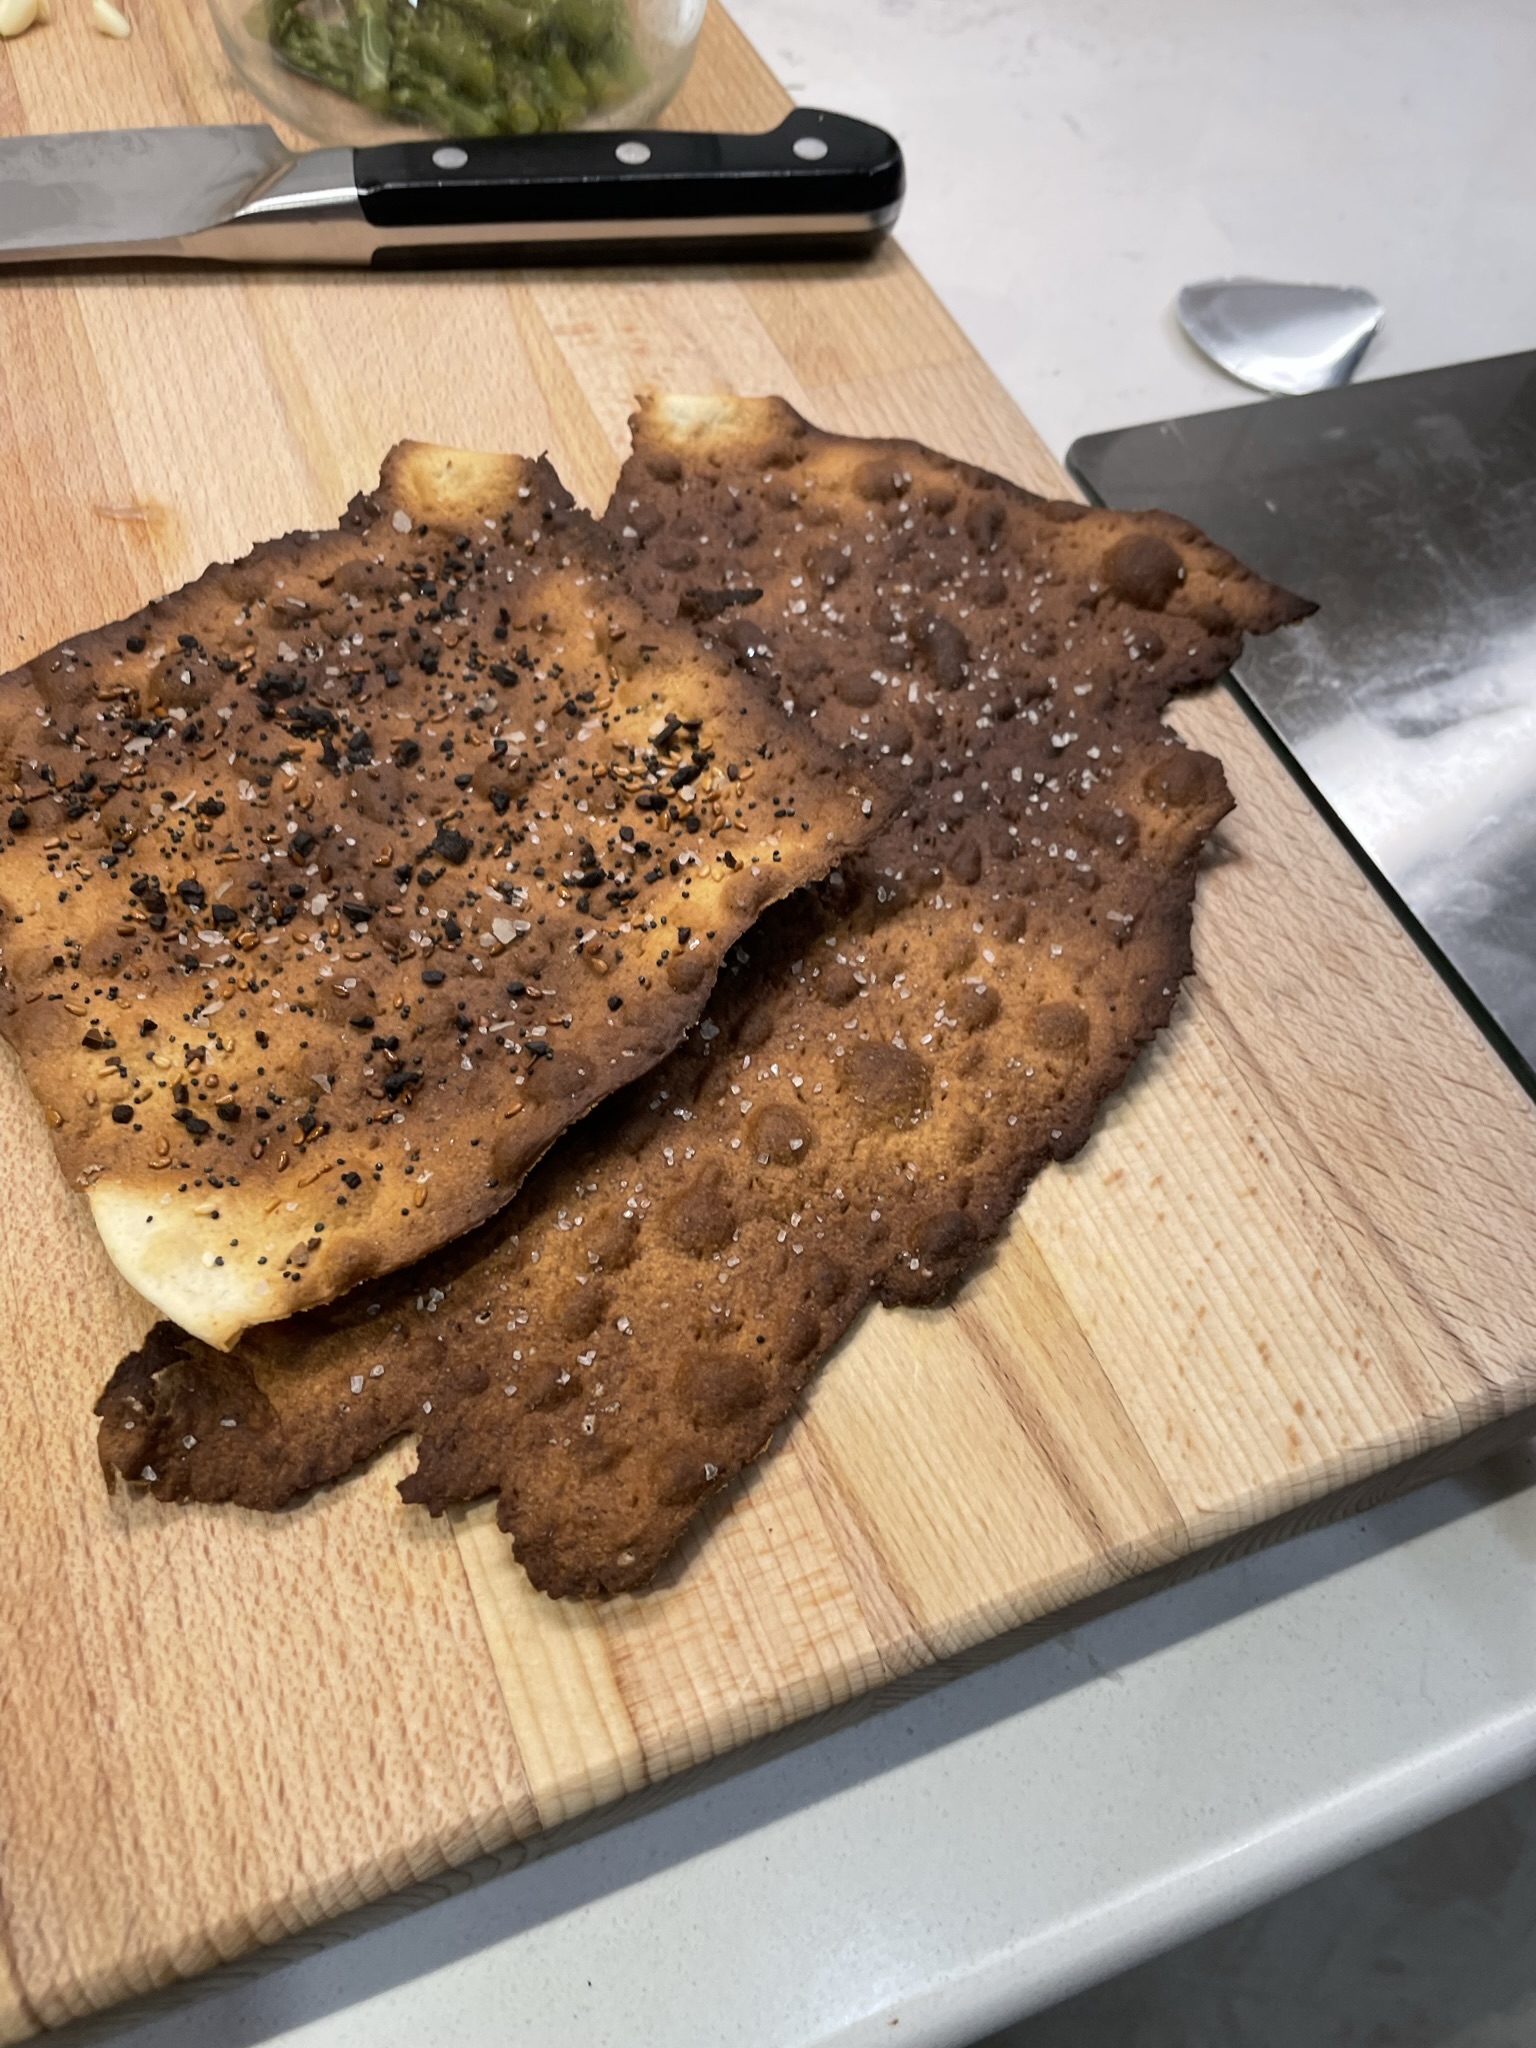
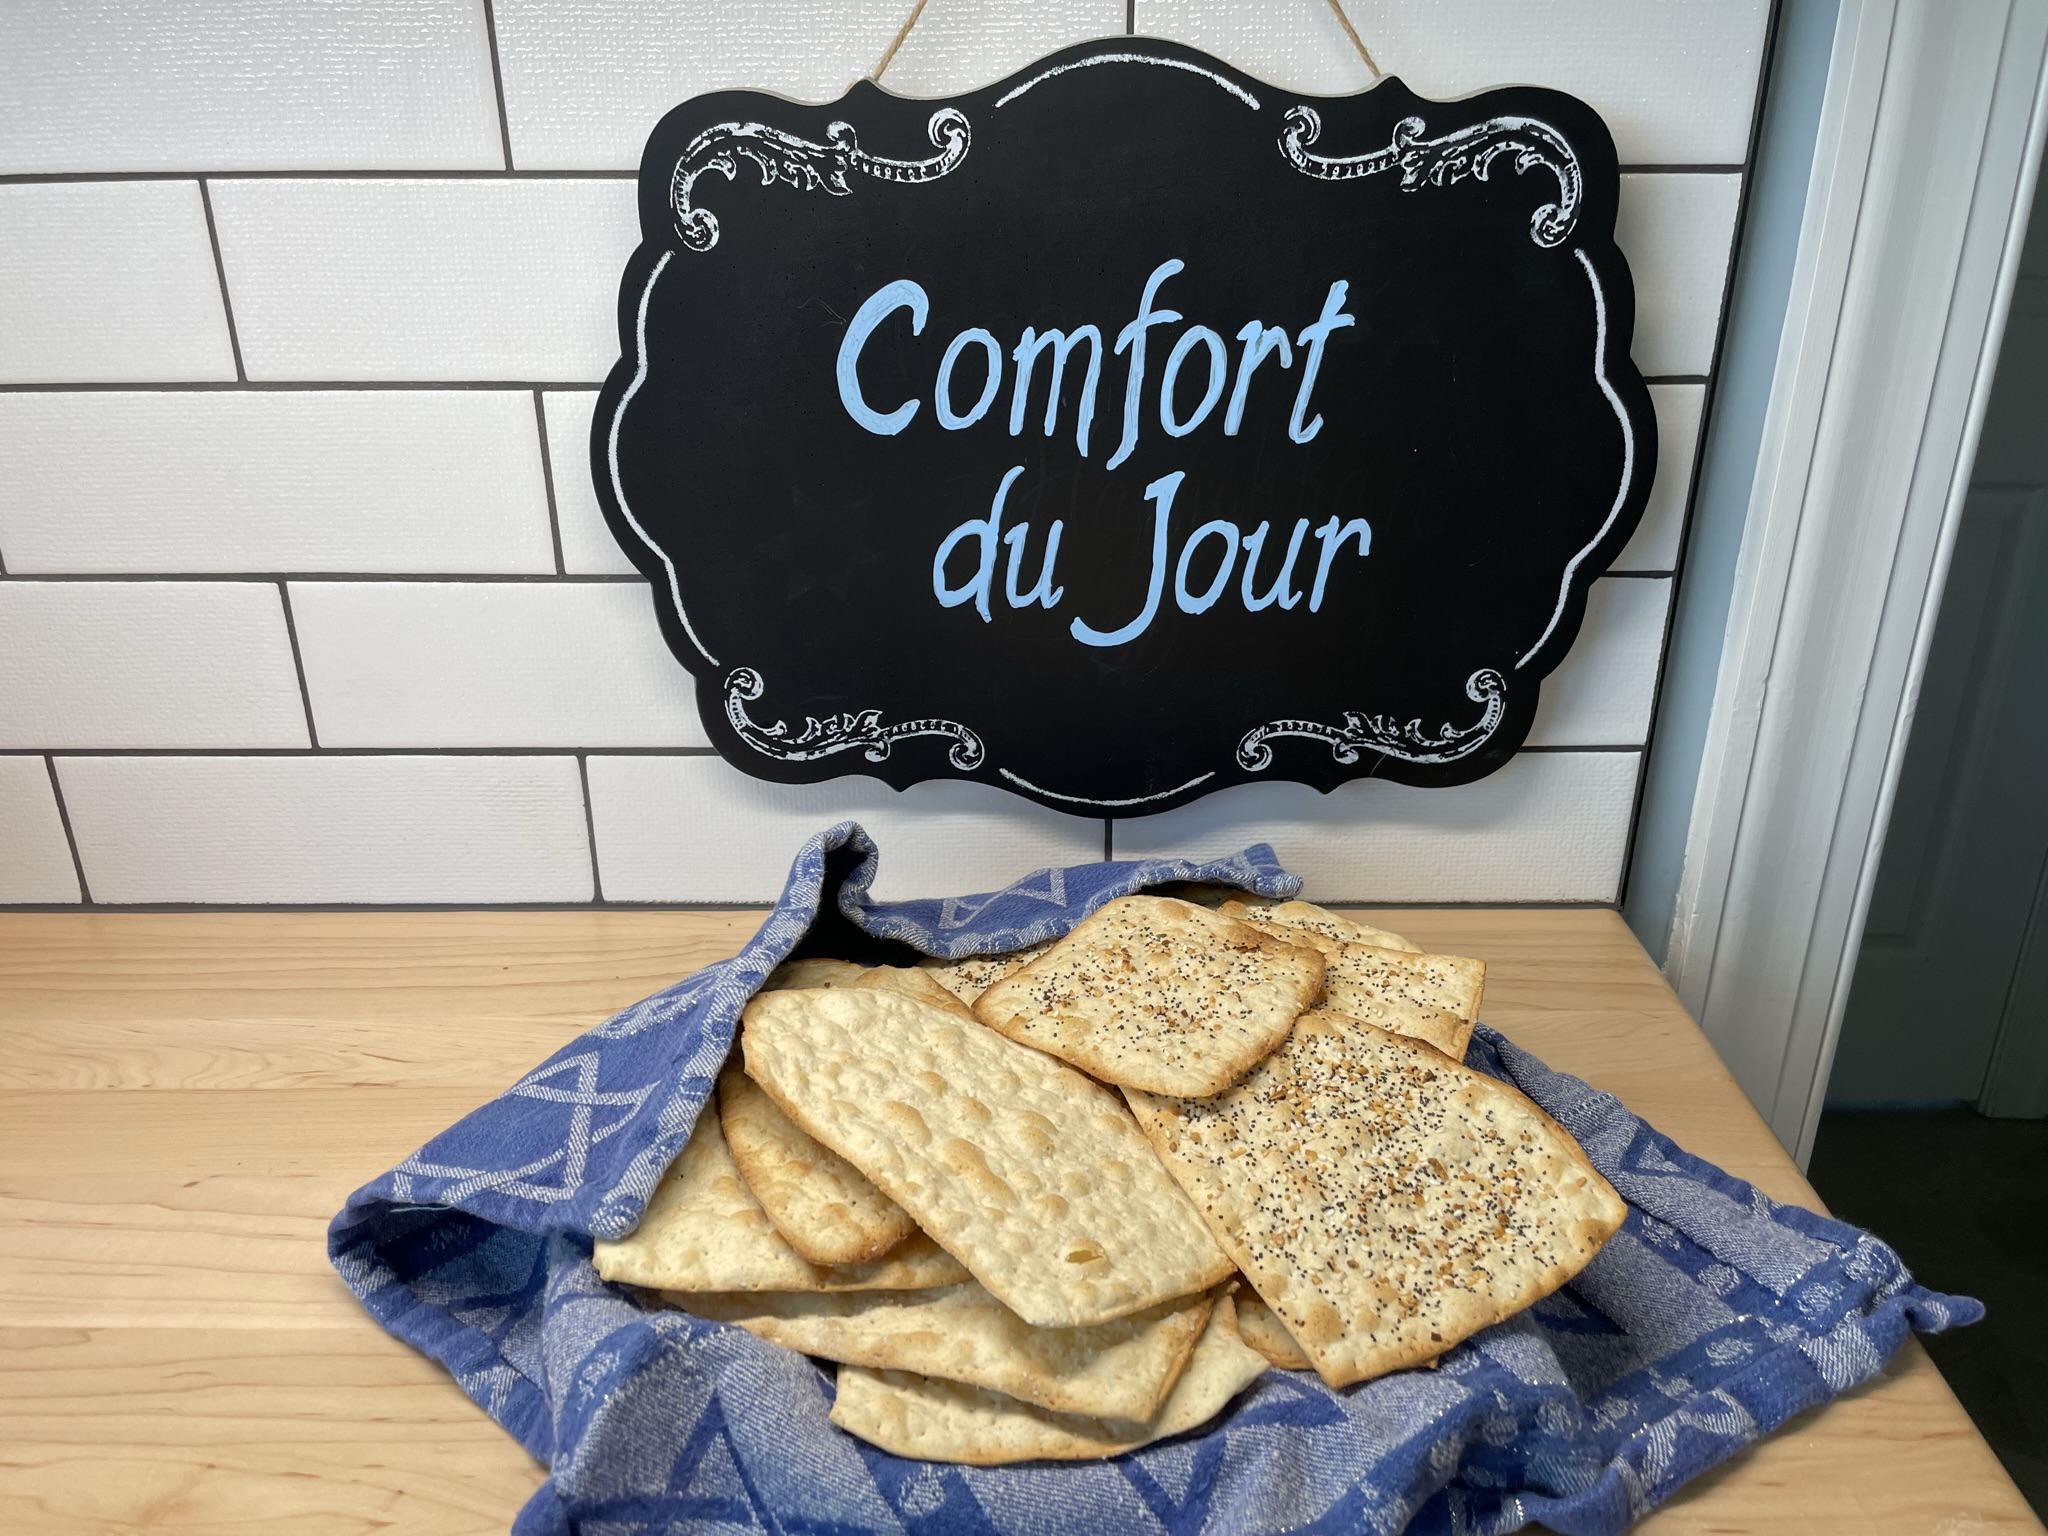
Matzo!
When I first met my now-husband, Les, I had a lot of questions about his Jewish heritage and especially the foods. Though Les has never kept the dietary kosher rules, he does avoid leavened bread during the eight days of Passover. That first year we were together, he shared some of his matzo with me and, well, what can I say— blah. The standard boxed matzo— unleavened bread— is like the worst, most bland, boring cracker you can imagine. But, you know, tradition!
The Jewish tradition around matzo is a remembrance of the enslaved Hebrew people, who had a moment’s notice to pack for the Promised Land when Moses was called to lead them out of Egypt. They didn’t have time to make their usual bread, so they mixed the flour and water, rolled it out and baked it on the spot without fermentation or leavening. By kosher rules, it all has to happen in under 18 minutes, start to finish. No wonder it tastes so bland— and does such a negative number on the digestive system (it ain’t pretty).
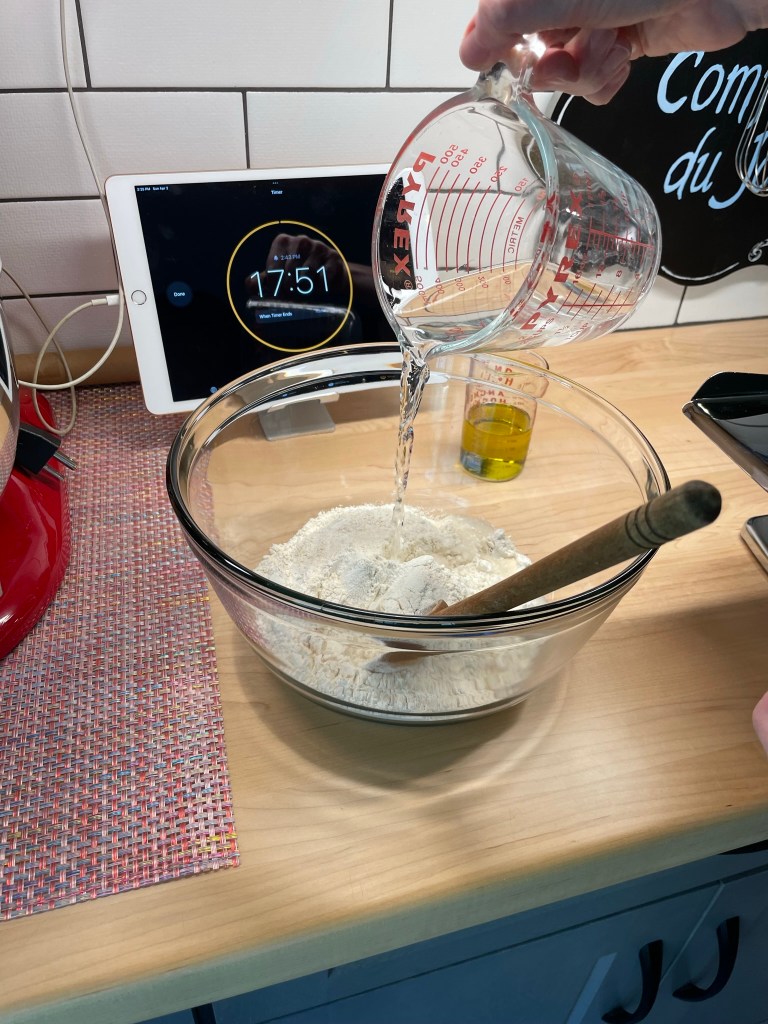
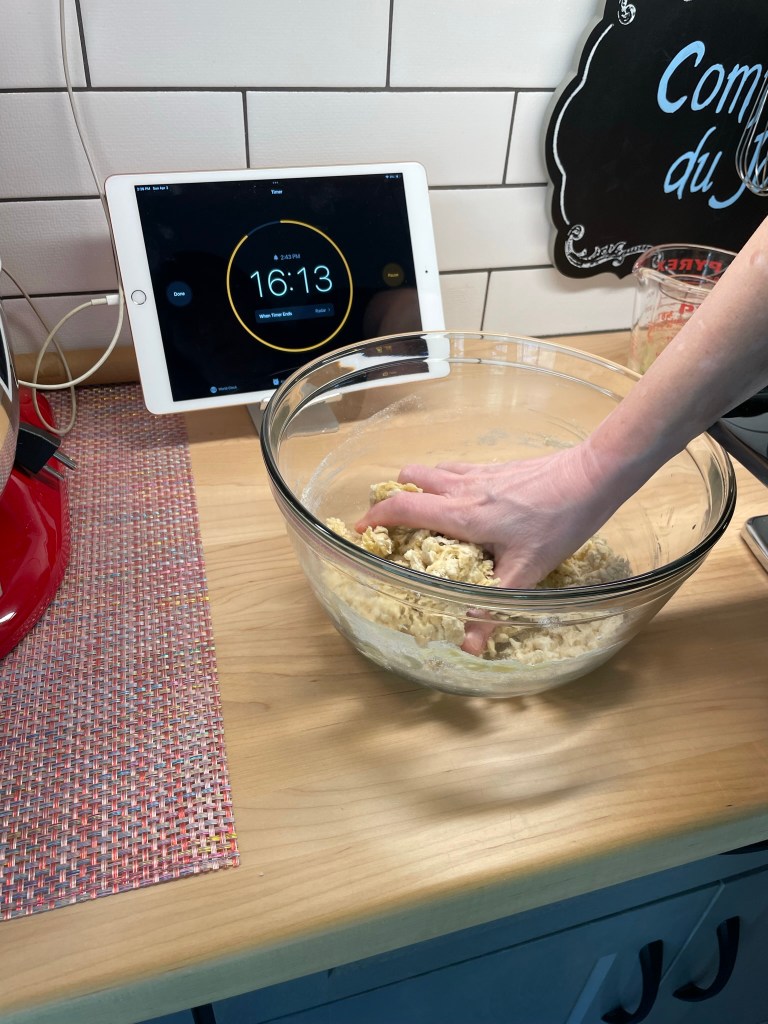
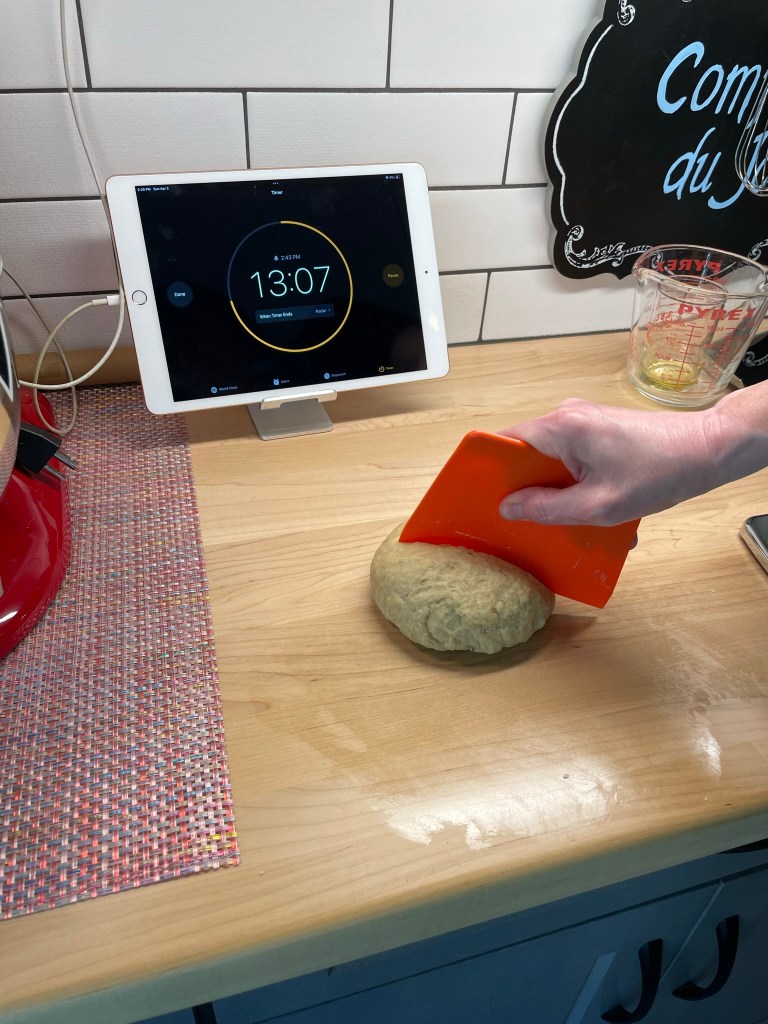
But Les chokes down this dry stuff every Passover, subbing it in for his usual morning half bagel, using it as a canvas for his tuna salad, and sometimes just laying a schmear of butter on it as a snack. Anything to use up the box! I’ve been threatening for at least five years to make matzo from scratch, and between the internet and my Jewish recipe books, I had done a lot of research. I was confident about getting it done, so I set up my matzo-making station with all my ingredients, tools and even my iPad to keep me on track for the 18-minute limit. How hard could it be? Turns out, I still had a lot to learn, and no “Bubbie” (Jewish grandmother) to walk me through it.
I had things set up and ready, hoping to beat the 18-minute buzzer!
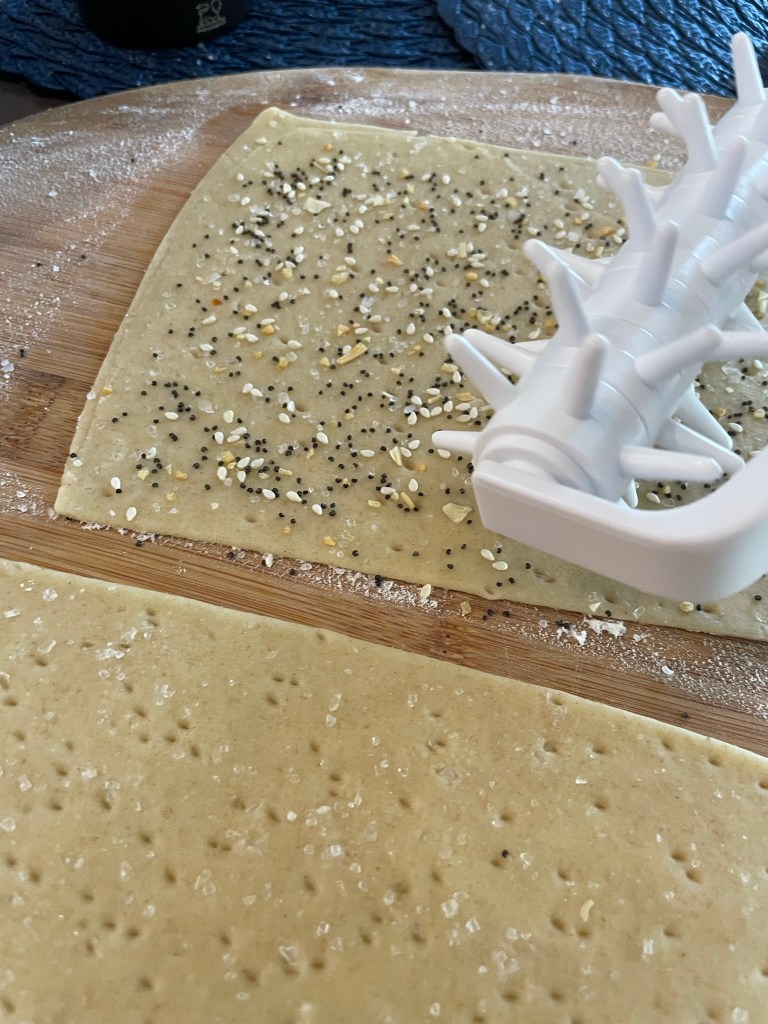
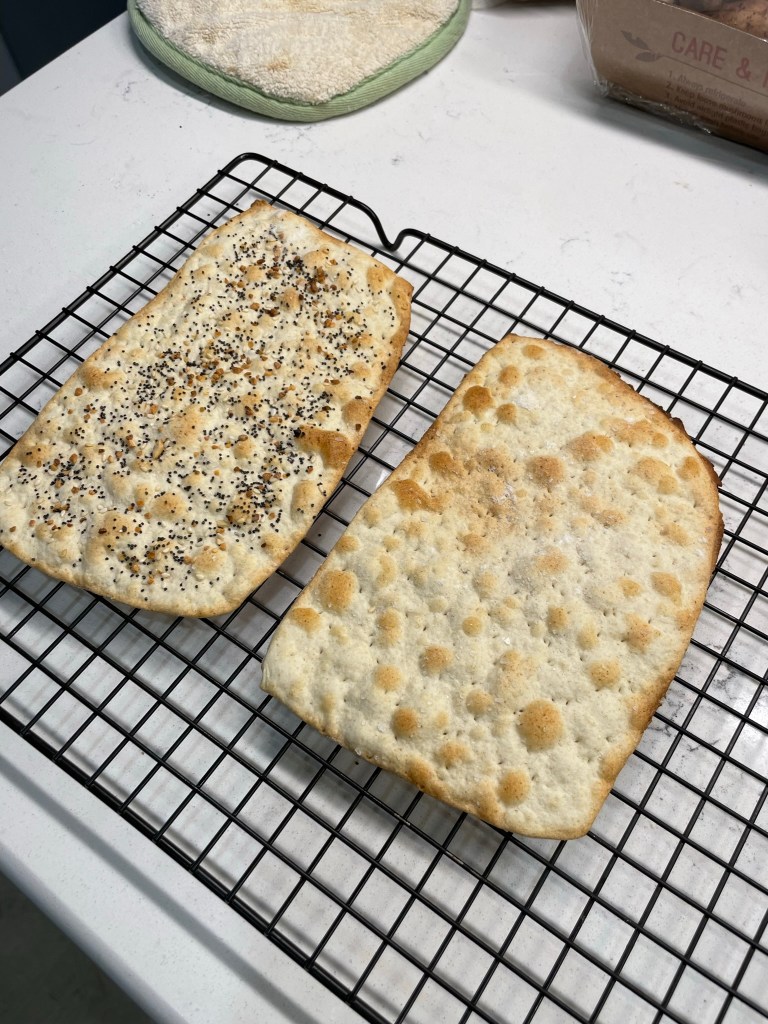
Making matzo is a full 180 from my usual sourdough bread baking, which relies on long, slow fermentations and higher hydration doughs. My breads bake up light and airy, not flat and dry. Matzo is nothing but flour and water in its most traditional state (in other words, boring). But we have already established that my version would not be kosher, and I wanted to bend the rules a little further, adding a sprinkle of sea salt and maybe even some everything bagel seasoning to jazz it up a bit.
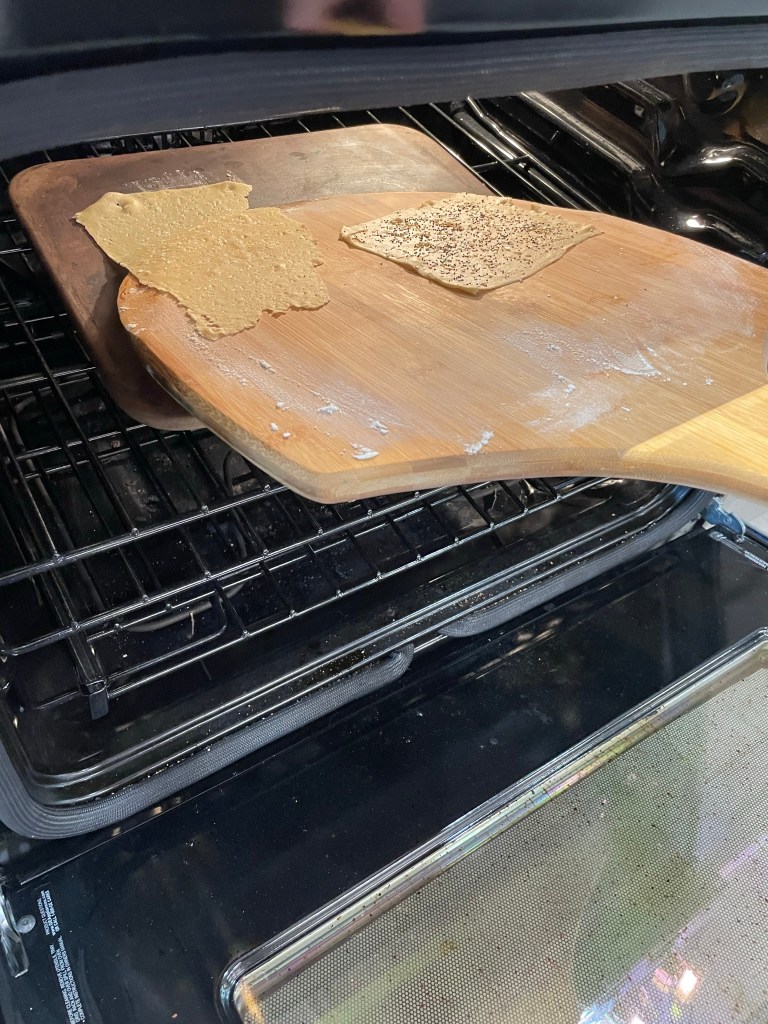
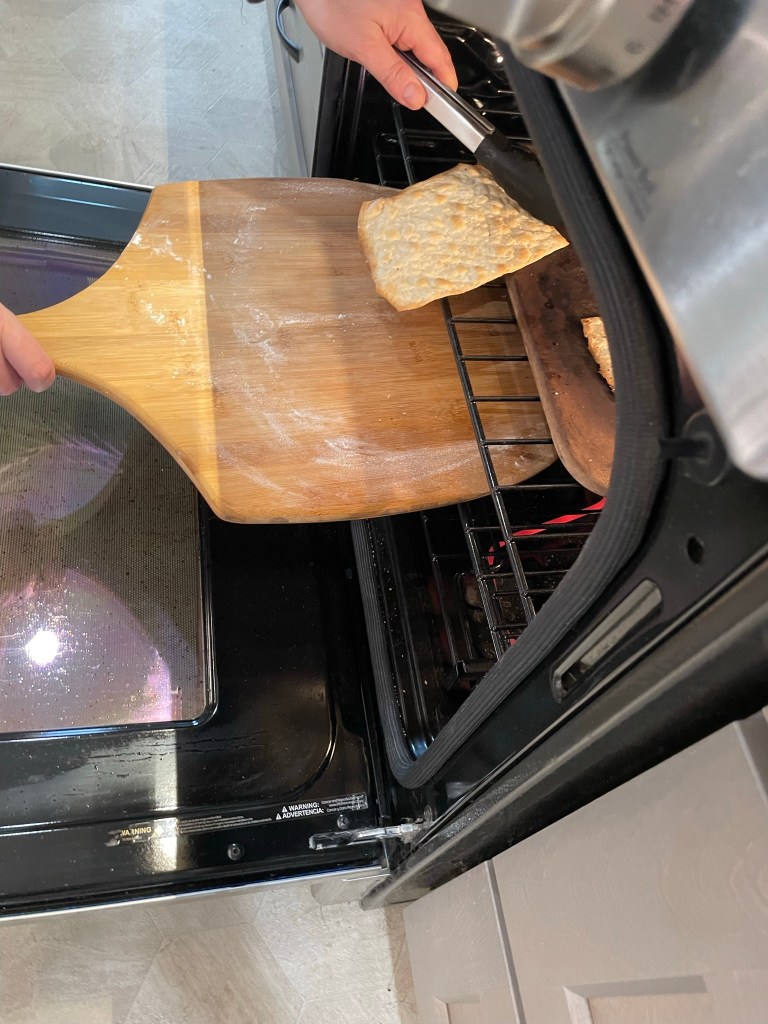
I found a recipe on NYT Cooking that included salt for flavor, olive oil to make the dough more workable and a swap-in of some whole wheat flour, so I was on board for the ingredients, but I ditched the rest of the recipe. It called for rolling out the matzo dough with a rolling pin (a challenge with such a hard dough) and would have produced four dense, tortilla-like flatbreads— nothing like the thin sheets of matzo we usually pick up from the store. I set up my trusty pasta machine to roll the dough out thin, like the matzo we are used to, and kept a close eye on the oven because they baked quickly on my preheated baking stone— so quickly, in fact, that my first batch was burnt to a crisp. I was not deterred!
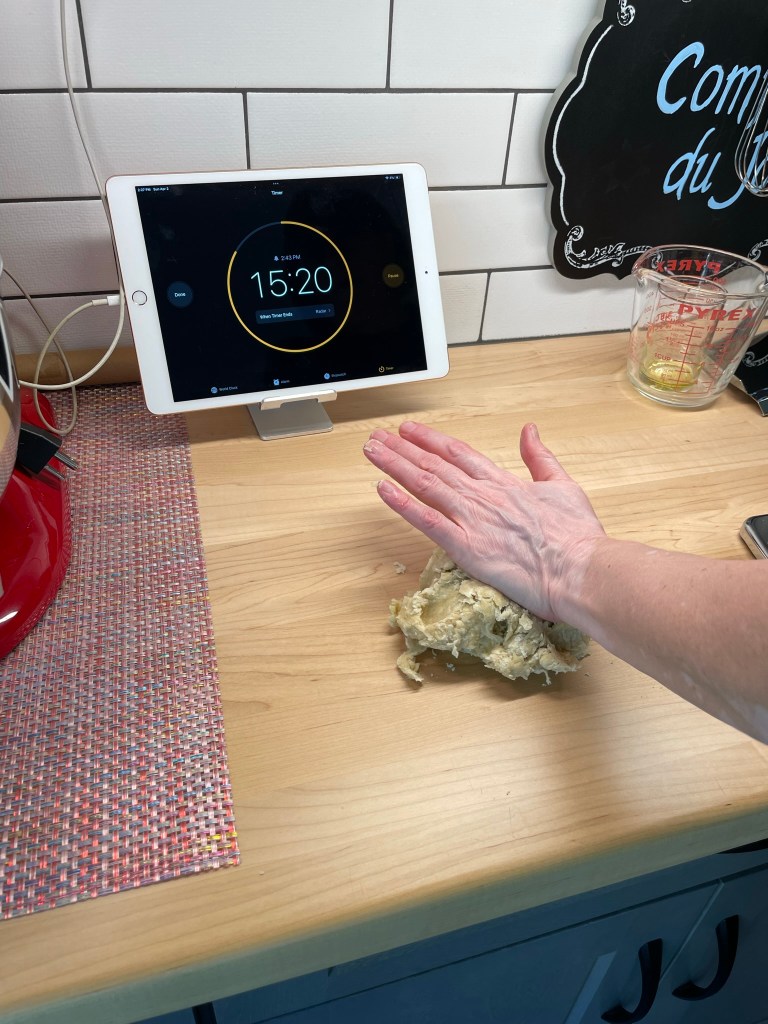
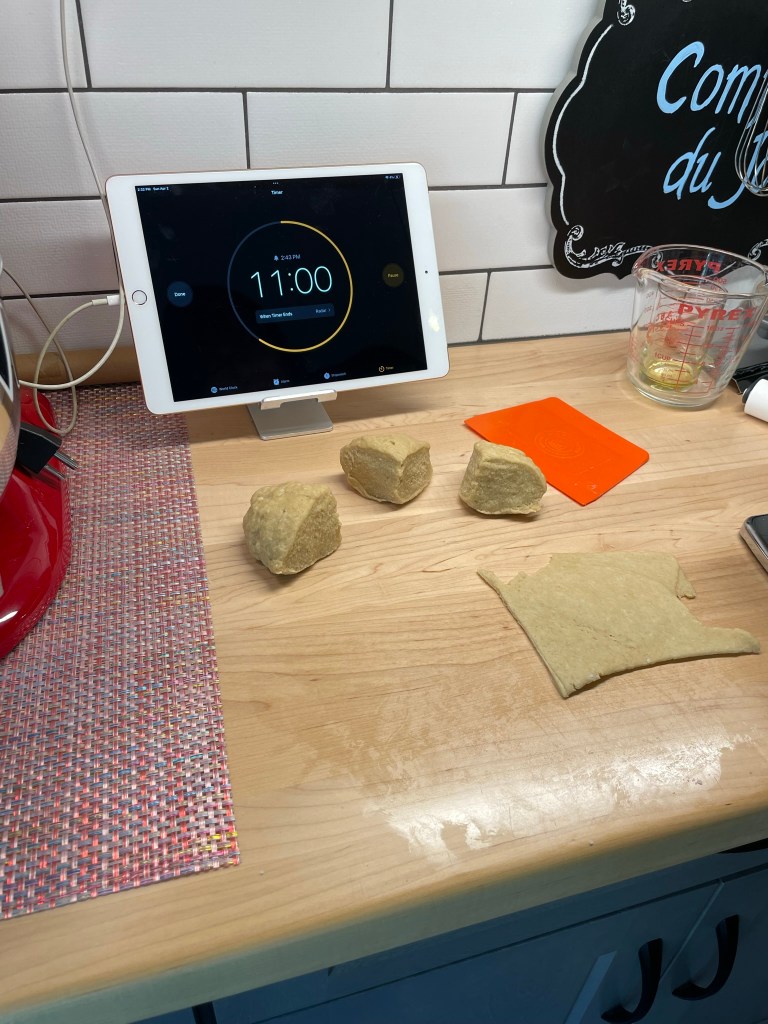
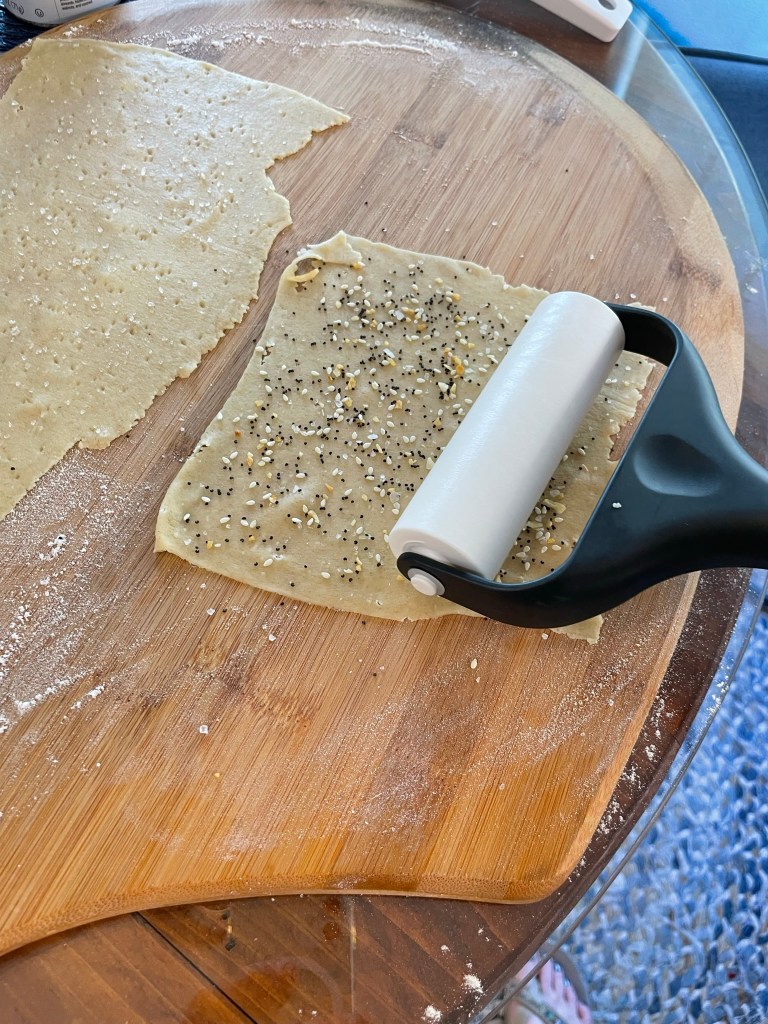
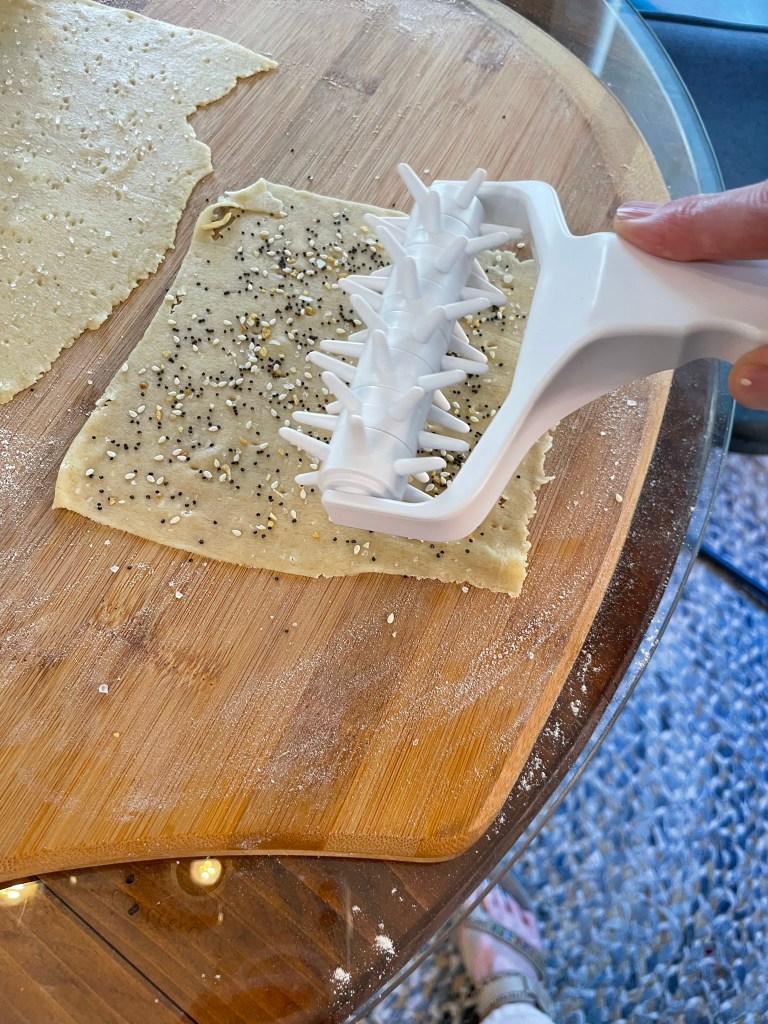
Already 9 seconds in!My large bowl allowed easier kneading.I finished the kneading by hand.Five minutes in, and cutting the dough into pieces.The dough is very firm and tough to roll by hand.It took MANY passes through my pasta roller, and I had to trim the dough a few times to keep it manageable. Yikes, the clock!!!I pressed the salt and seeds on with my hand roller.Docking the matzo dough ensures the pieces don’t puff in the oven.The recipe said “as thin as possible,” but mine were like parchment paper.
Oy vey, that didn’t go well!
Moving forward, I rolled the dough a little bit thicker and called out to Les to find out which Yiddish word for “crazy” was appropriate for my situation (it’s meshuggeneh). I put him in charge of the oven, and the subsequent batches turned out great. We ended up with enough matzo to fill a large Rubbermaid container, and, of course, we still have a box of the grocery store matzo, just in case. 🙂
For my remaining batches, I rolled the dough a little thicker and gave up on beating the buzzer.Les added his helping hands, and things went much smoother.Thicker dough and shorter baking time redeemed my matzo-making effort.
My matzo challenge is complete, and I will probably change things up a bit next time— less salt on top for sure, and I might play around with different types of flour.
Eighteen minutes is a tough time goal, though, and probably best accomplished in a kosher kitchen full of Jewish bubbies who actually know what they’re doing. I gave up on beating the buzzer when I was pulling the burnt ones from the oven.
Flaky sea salt and everything bagel seasoning, optional
This dough is very stiff and requires a heavy hand for rolling. If you have one, set up a pasta rolling machine, as it makes the process much quicker. I rolled my dough to the thinness of the second-to-thinnest setting, and baking time was 4 minutes. For thicker dough, adjust baking time accordingly.
Directions
Preheat oven and baking stone at 500F for at least 30 minutes from the time it reaches temperature. Prepare a pizza peel or back of a baking sheet by dusting lightly wtih flour. This will be an aid for easy transfer of the matzo dough into and out of the oven.
Combine flours and salt in a large bowl. Add warm water and olive oil all at once and stir with a wooden spoon until the mixture resembles a shaggy dough.
Turn dough out on to a counter and knead by hand for a few minutes until all dry ingredients are incorporated. Use a knife or bench scraper to divide dough into four equal quarters. Use plastic wrap to cover three of the dough sections.
Use your hand or a rolling pin to flatten the first dough section into a disc. Cut the disc into two pieces and flatten each into an even thinner disc. Run the dough through a pasta roller, reducing the thickness after each pass until you get to the second-to-last notch on the machine. You will need to cut the dough in half at some point, as smaller pieces are easier to work with.
Arrange two pieces of matzo dough on the pizza peel or reversed cookie sheet. Sprinkle each with sea salt or everything bagel seasoning and lightly roll with a rolling pin to adhere the seasonings. Prick each piece of dough all over with a fork.
Slide matzo onto the preheated baking stone and bake for 3 to 4 minutes (watch the clock closely). Matzo is ready when it has air bubbles and is lightly golden brown all over. Use tongs to pull the baked matzo from the oven. Cool on a baking rack. Repeat with remaining dough.
When matzo is completely cooled, stack the sheets in a sealable container or zip-top bag and store on the counter for up to a week (if it lasts that long).
If I were able to physically load my stress onto the pages of a calendar, December would be the heaviest, but it has nothing to do with holiday anxiety or preparing to entertain. For me, the stress comes with realization of all that I didn’t accomplish during the year, despite my intentions and wishes. I have tried to shift my attention to the things I’ve finished rather than not but, sadly, this seems to be my default. It is heavy on my mind this week as I have reviewed my culinary bucket list, and the ever-growing “I want to try” column.
My most frequent lamentation to my husband is that “I want to do everything at once!” Most of the time, I’m doing good to just break even on my get-it-done list, and the biggest obstacle I face is my own lofty expectation, especially in the kitchen. I don’t want to throw proverbial spaghetti at the wall, hoping something will stick. I research unfamiliar techniques and recipes carefully and if they seem complex, I research some more until I feel at least somewhat equipped for the task. Sometimes, I just keep researching until I flat-out scare myself away from it.
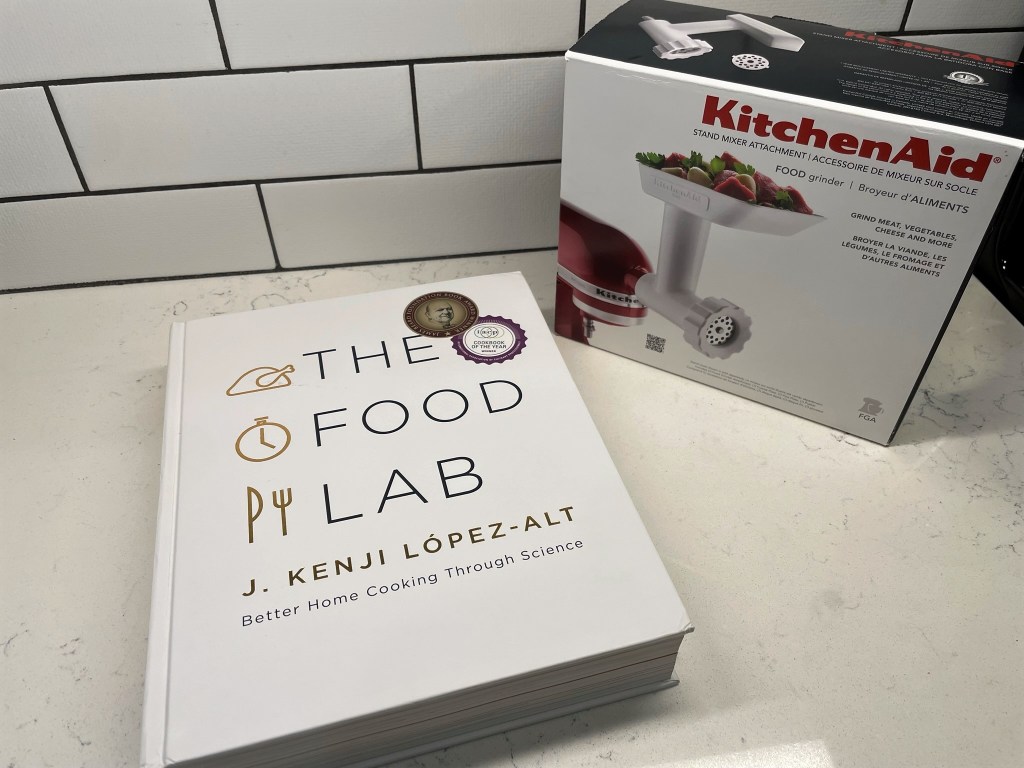
But once in a while I give in and try something that surprises me with its simplicity, and this homemade sausage is one of those things. Turning a chunk of pork shoulder into a flavorful, composed ground meat mixture is not at all the challenge I imagined it to be, thanks in large part to this book by J. Kenji López-Alt and an easy-to-use attachment for my stand mixer.
I was gifted this fascinating book a couple of years ago for my birthday, and I love the science that its author lays out on every page. If you want the full scoop and Kenji’s brilliant approach to things in the kitchen, get the book. You won’t regret it. But not everyone cares to know the backstory details of a recipe and why it works (what can I say? I’m a nerd), so rather than echo the 13 pages of detailed, scientific information Kenji has provided on this subject, I’m grinding it down into three takeaway points and then I’ll share my own adventure in sausage-making. Here goes!
Use a digital scale to determine how much salt and seasoning to use in your sausage; don’t make yourself crazy trying to do the math using cups or teaspoons.
Let the meat chill in the fridge with the proper amount of salt and seasonings for about 24 hours before grinding; it changes the texture of the meat so it’s optimal when you grind.
Keep it cold, cold, cold for best results; this means putting your grinding tools (and the meat, for a time) in the freezer, and working quickly to avoid a big mess.
I should disclose here that I did not go “all in” to the point of using casings for link sausages. Frankly, I’m not sure where to even buy them, though I might talk with our favorite local butcher about that in the future, especially before next summer’s grilling and smoking season rolls around. This experiment has been all about bulk sausage, and I have not had a bad batch yet!
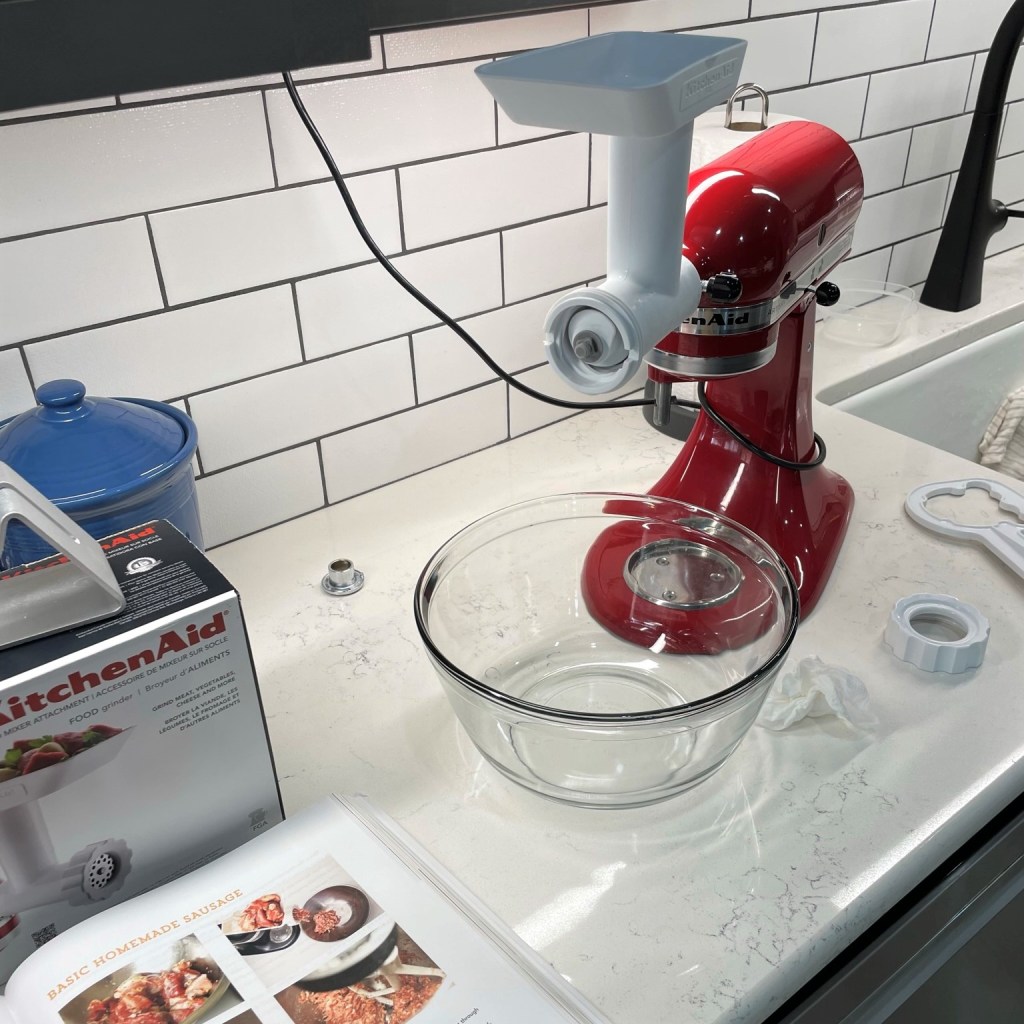
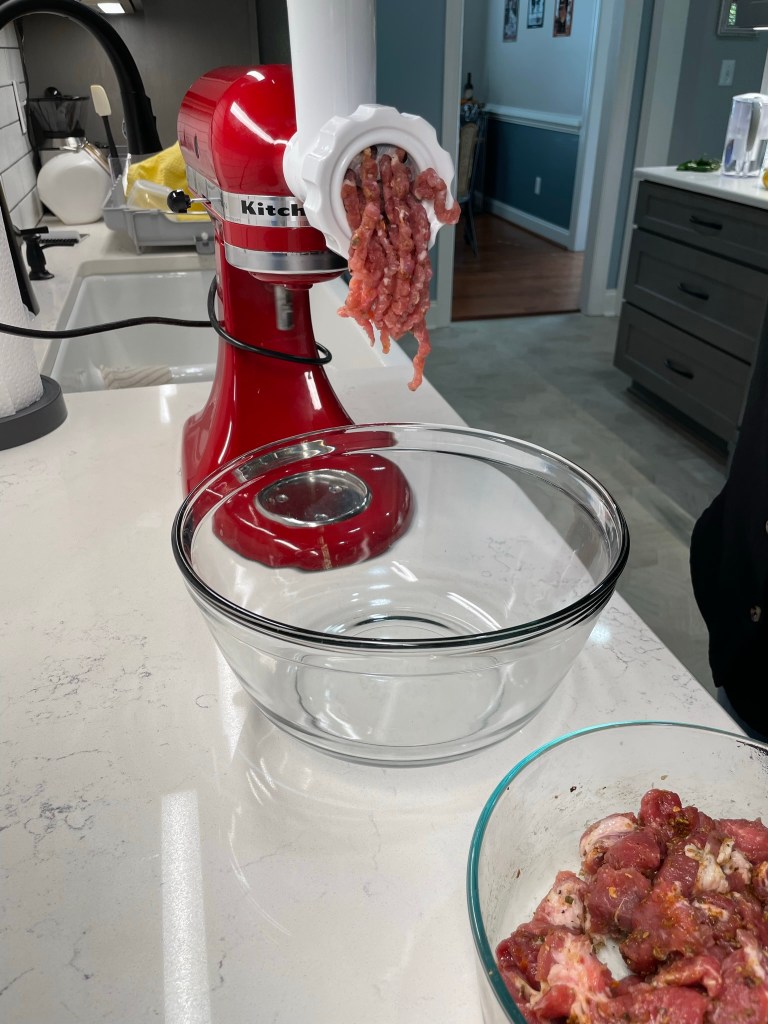
If you have a Kitchen Aid stand mixer, there’s a simple attachment that allows for grinding of food with a propeller-type blade that cuts the food chunks as they pass through a feeder tube. It takes practice, but works great. If you don’t have this device, I think you could probably begin with smaller chunks of meat and use the pulse function of a food processor to achieve a similar result. Kenji even discusses that in The Food Lab.
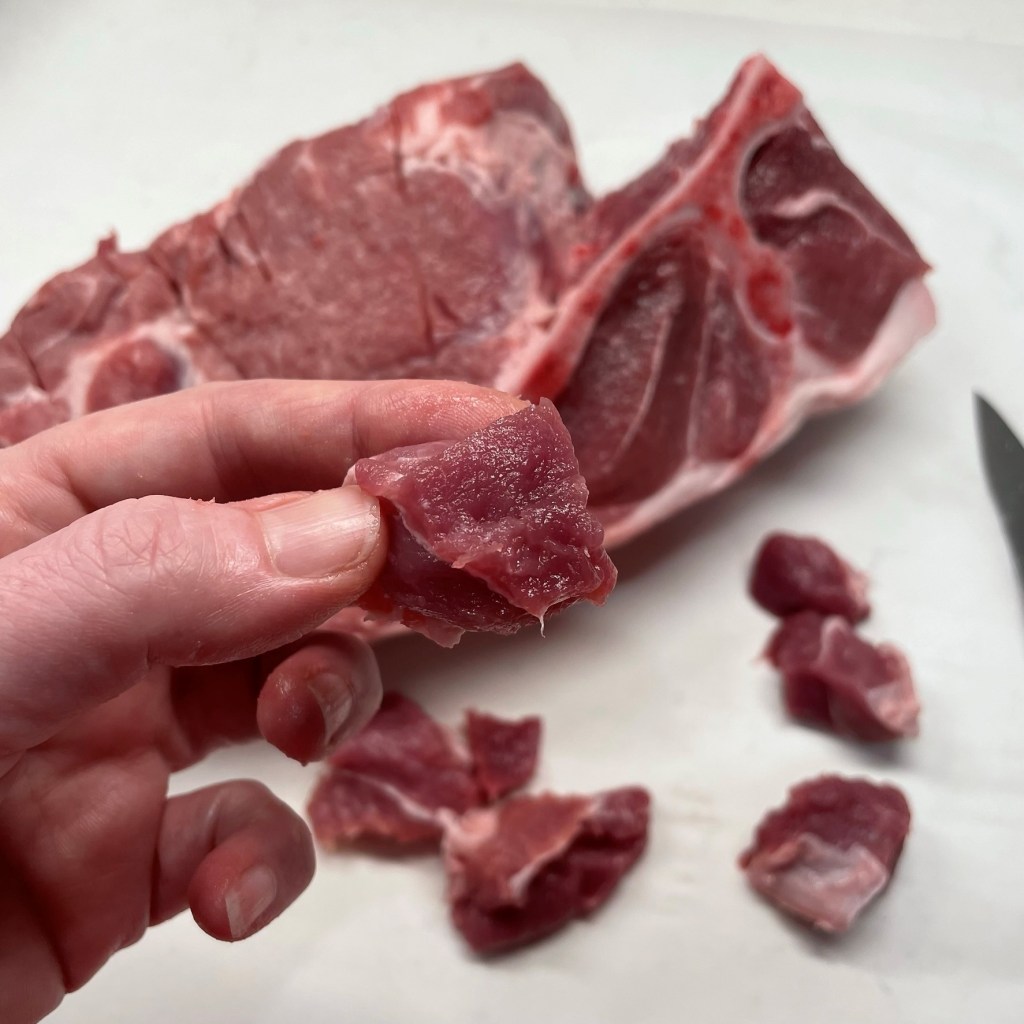
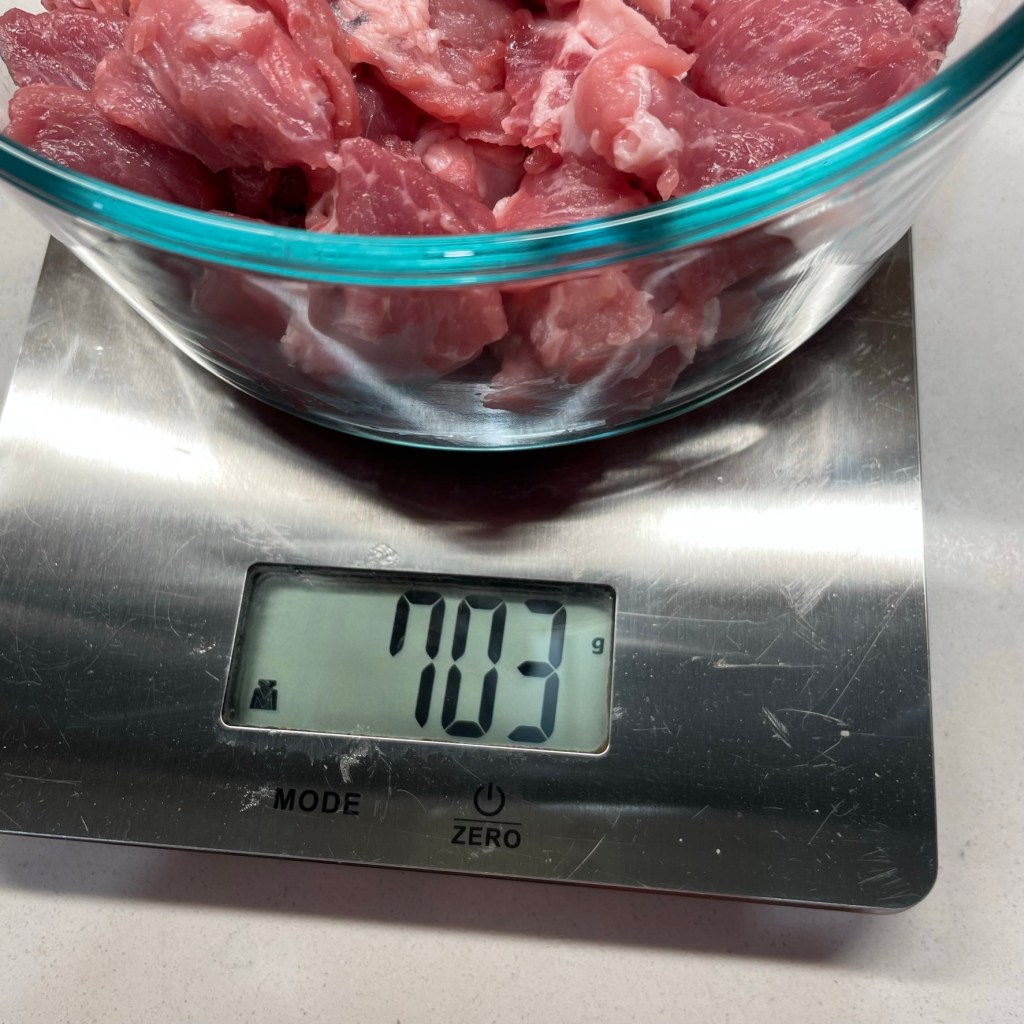
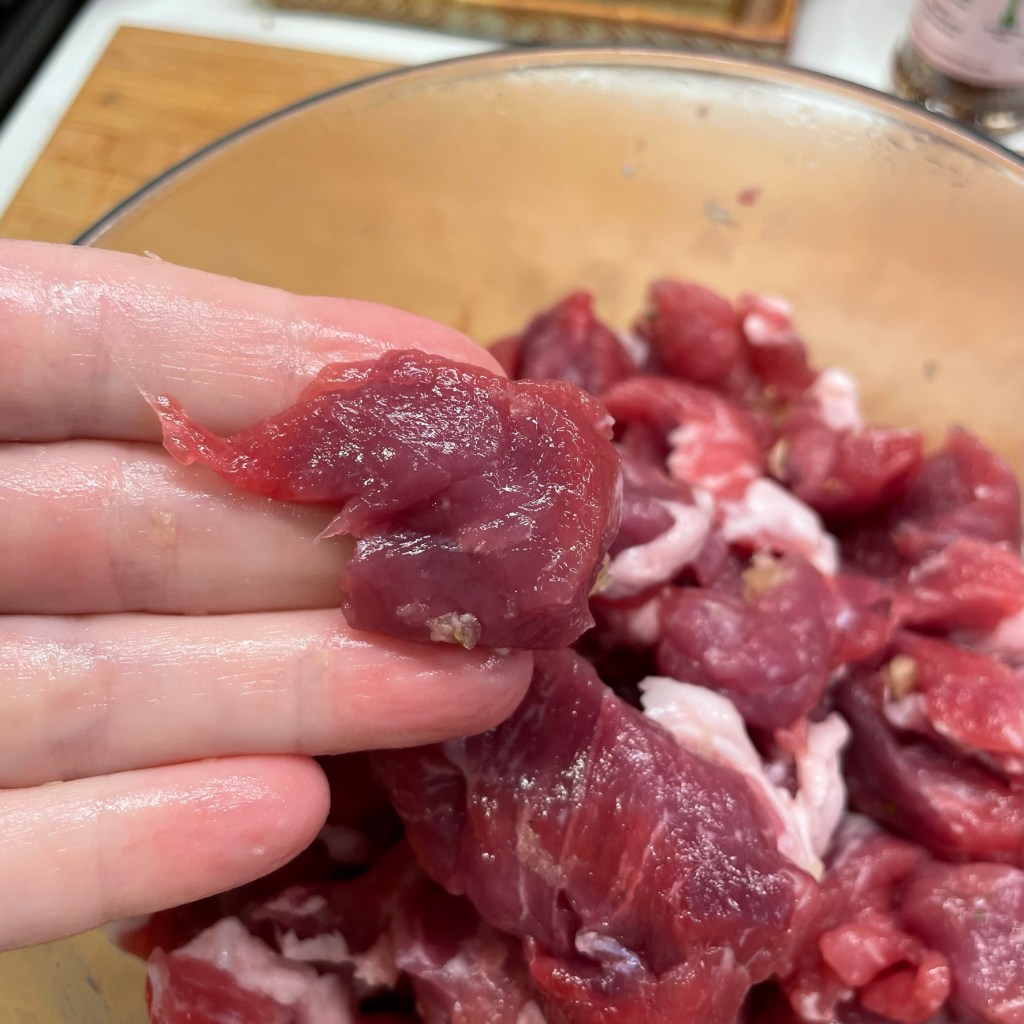
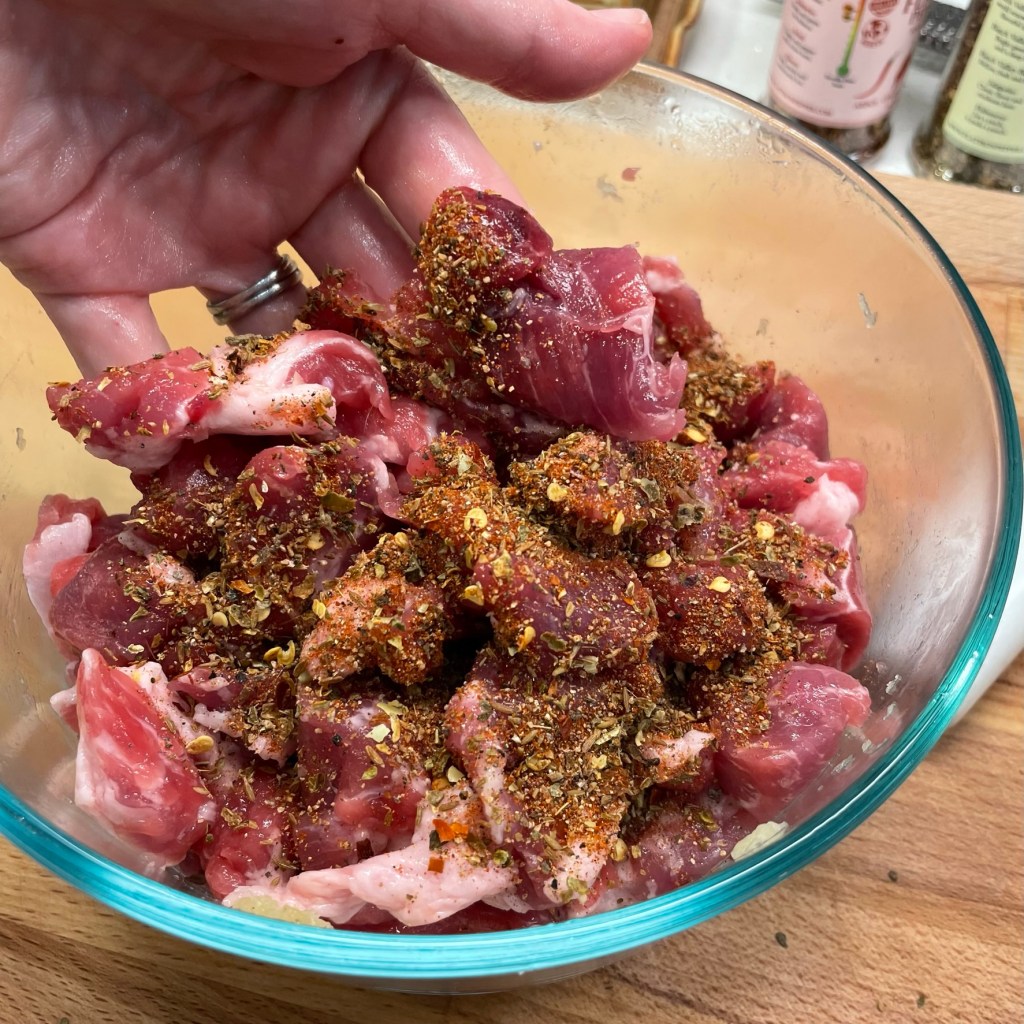
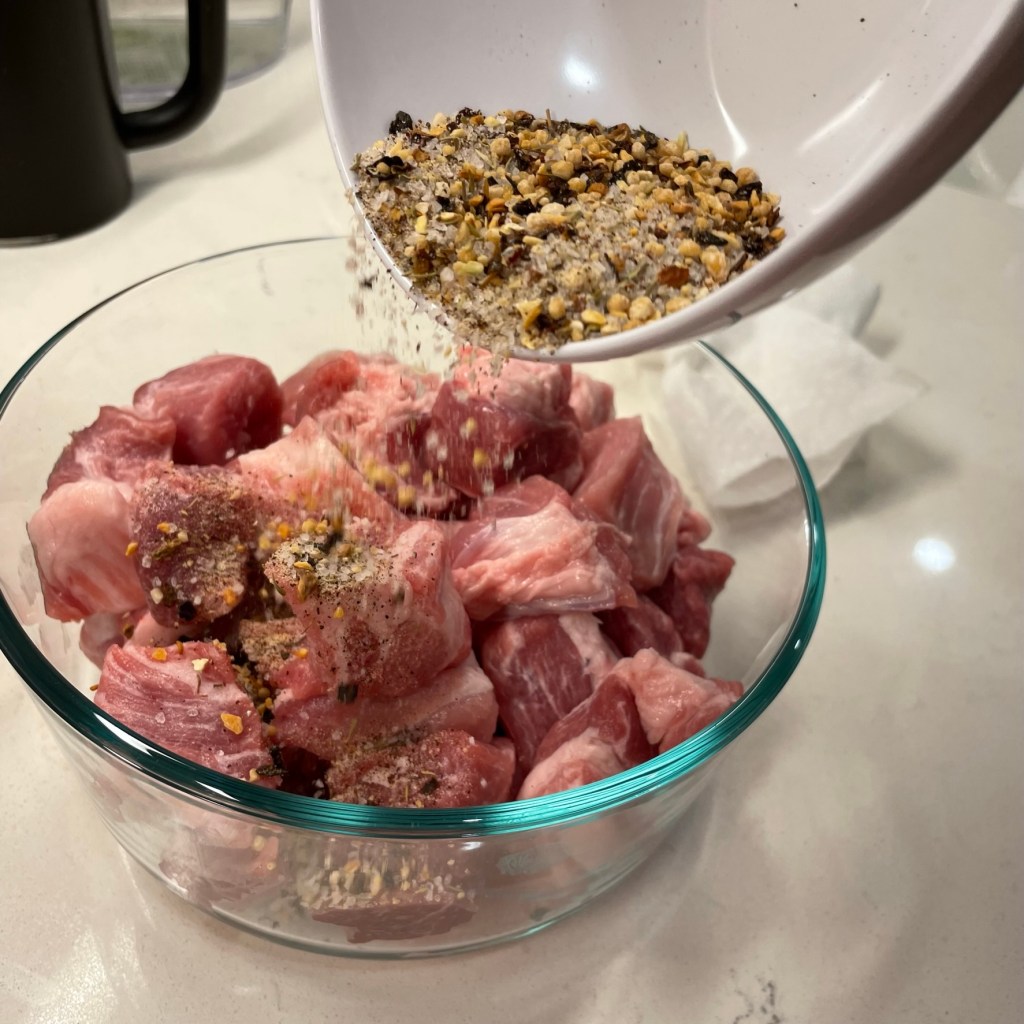
Here’s the basic technique that I learned from Kenji. Cut up the pork shoulder (best quality you have available, of course) into chunks about the size of walnuts. Weigh the raw meat, using the grams setting of a digital scale. Next, grab a calculator to determine what is 1.5% of the meat weight—that’s how much kosher salt you need. Not that this is kosher, mind you. It’s pork, so of course not. But un-iodized salt is recommended here, and kosher is what I use in the kitchen anyway. Sea salt would probably be fine.
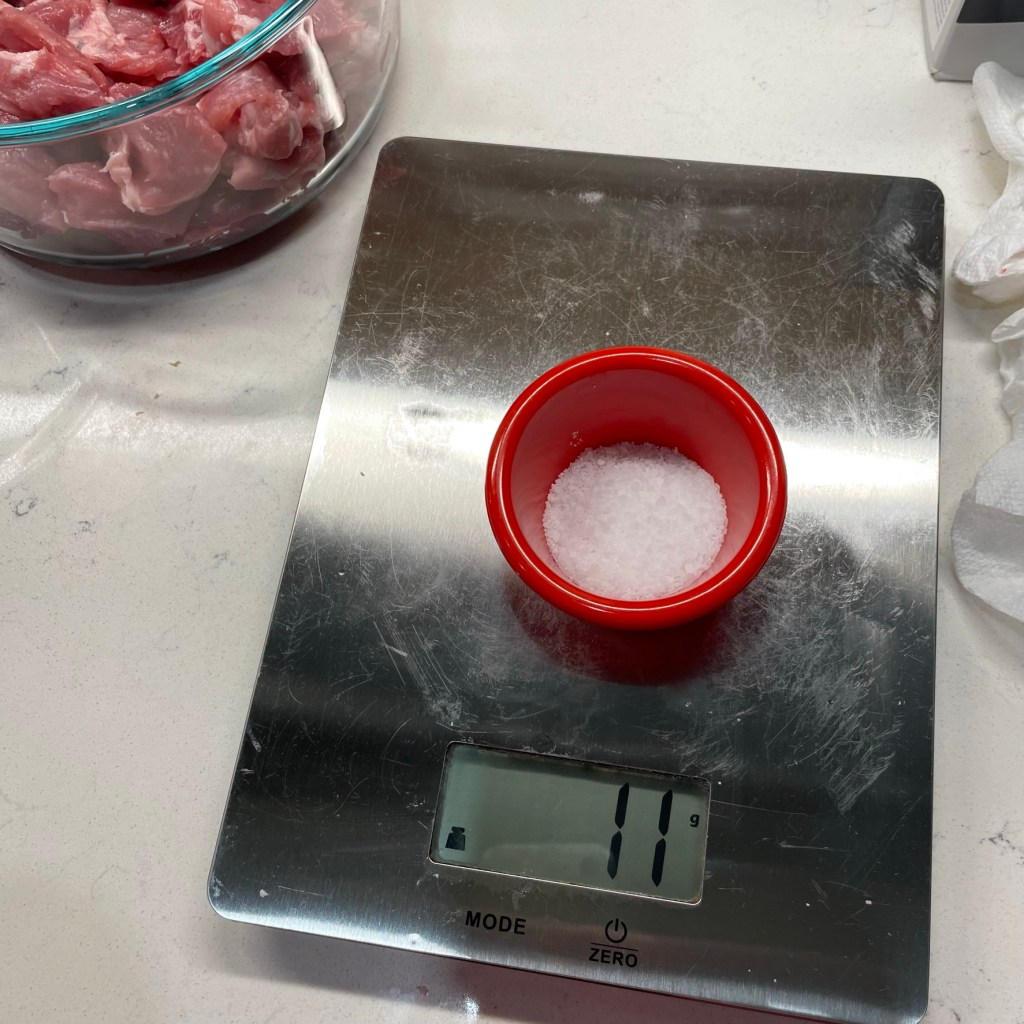
703 (grams of meat) X .015 (1.5%) = 10.54, which I rounded up to 11 grams of salt.
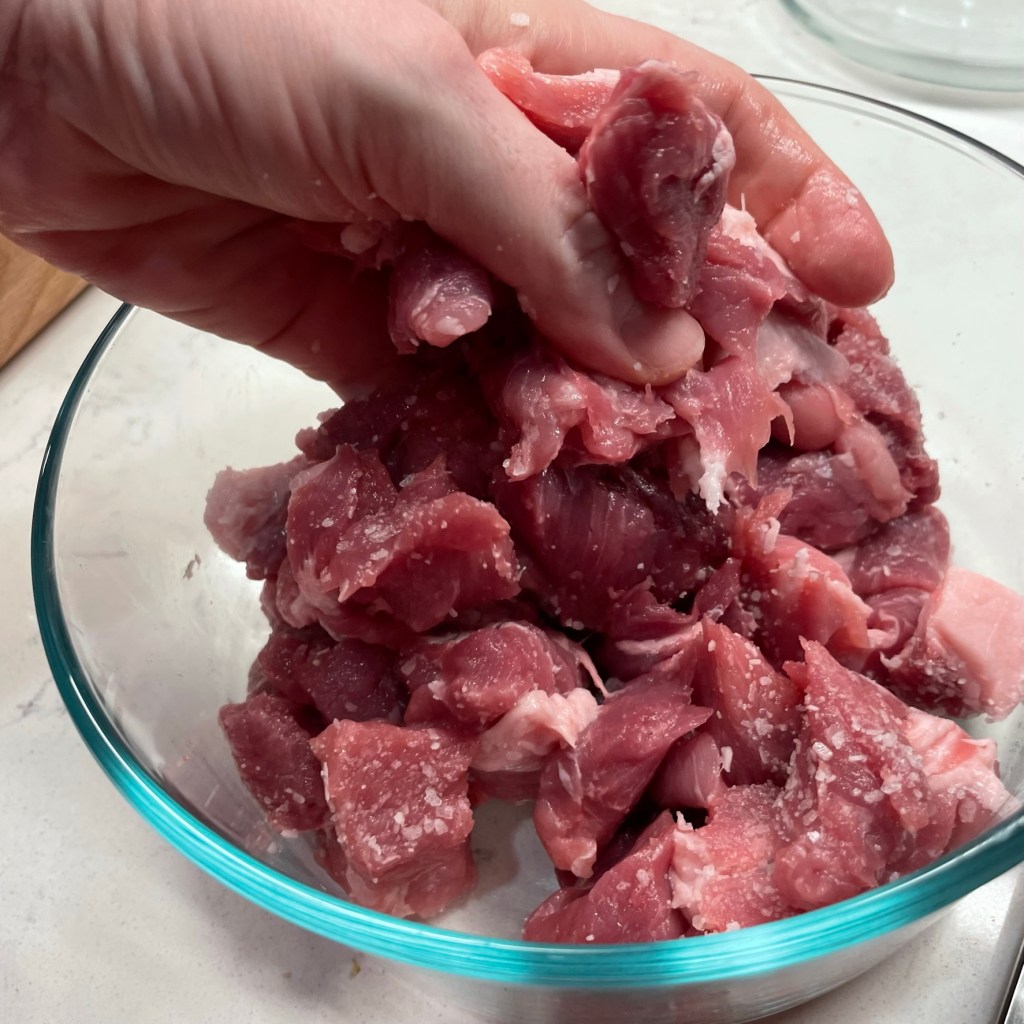
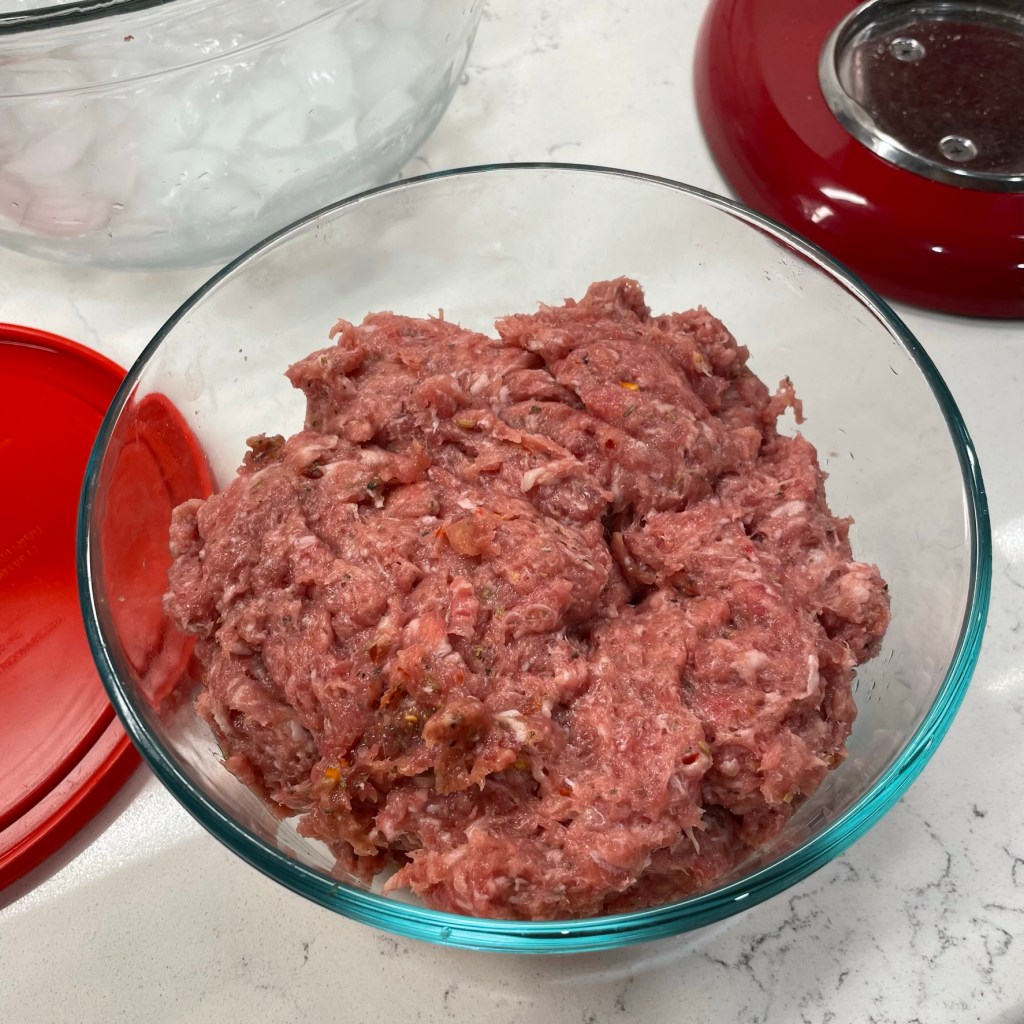
Toss the meat chunks to evenly distribute the salt, cover the bowl and refrigerate it for 24 hours. After the rest time, you can see the difference in the texture of the meat. It looks darker, smooth and glossy, and is noticeably smaller in volume. This consistency change is what makes sausage different from regular ground meat, and it’s as easy as “salt and wait.”
My interest in making homemade sausage stems largely from repeated disappointment at the Whole Foods meat counter, where I used to buy a fantastic green chile and habanero pork sausage that was wonderfully spicy and perfect for my favorite green chili recipe. But, as with most “big box” retailers, Whole Foods only appeals to the masses now (even more so since they were bought by Amazon) and after hearing for the umpteenth time that “nobody wants to buy that spicy sausage,” I finally decided to get on with things and make my own.
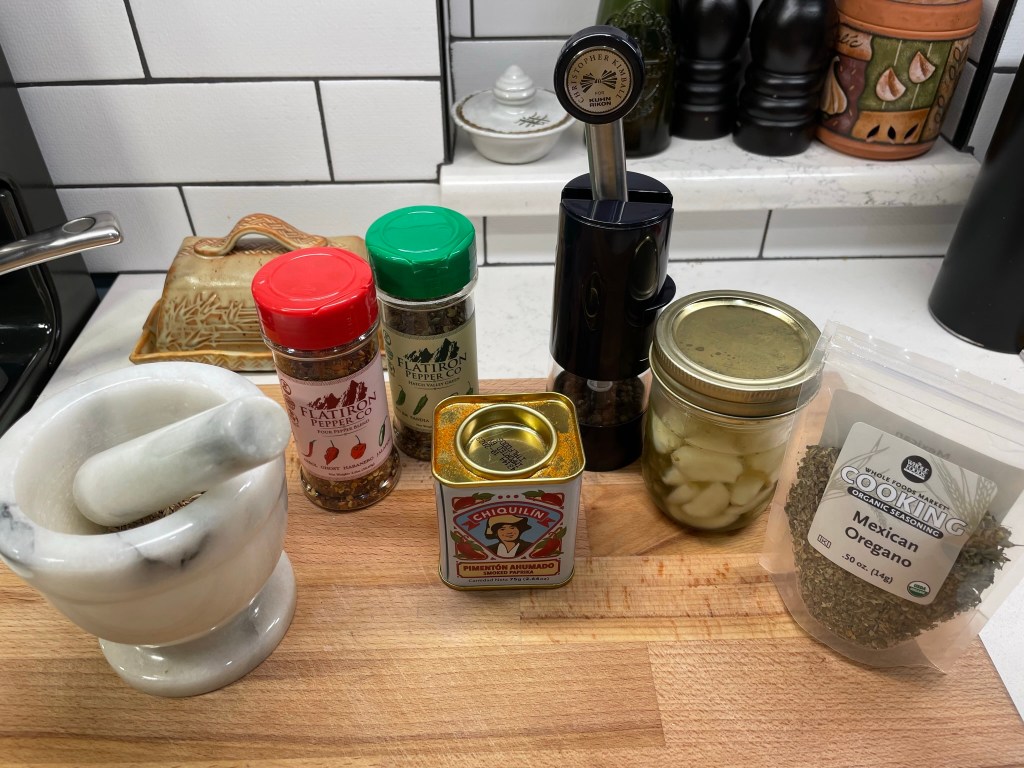
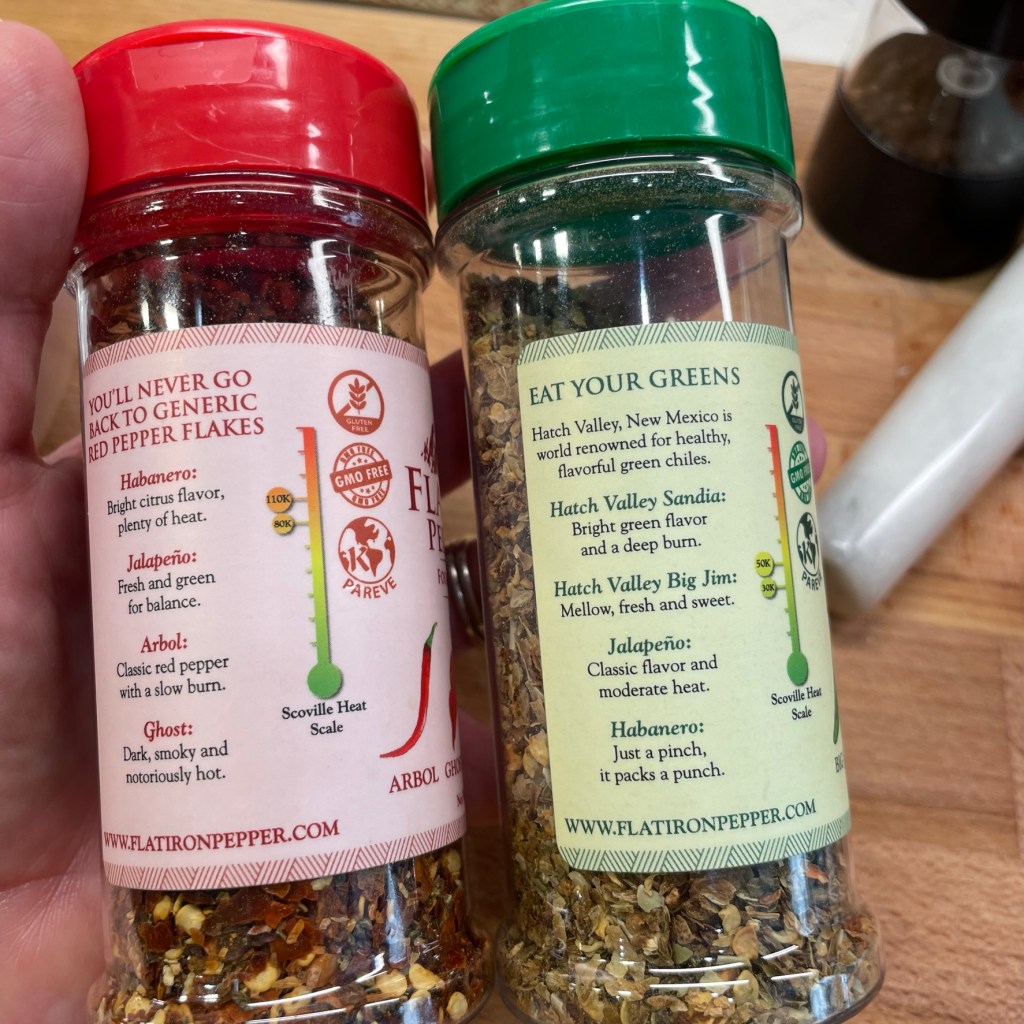
Kenji’s tutorial in The Food Lab did not include suggested seasonings for a green chile-habanero version, but I trusted my instinct and put the flavors together myself. Two kinds of Flatiron Pepper Co. chile flakes, smoked paprika, cumin seeds, pickled garlic (which I ended up not using because I couldn’t get the darn lid off), Mexican oregano and black pepper.
For this batch, I waited to add the seasonings (2% of the original meat weight, per Kenji), but I discovered later that I could have added it at the same time as the salt. In subsequent batches, I’ve added my spices at the same time as the 1.5% of kosher salt.
703 (grams of meat) X .02 (2%) = 14 grams of (non-salt) seasoning.
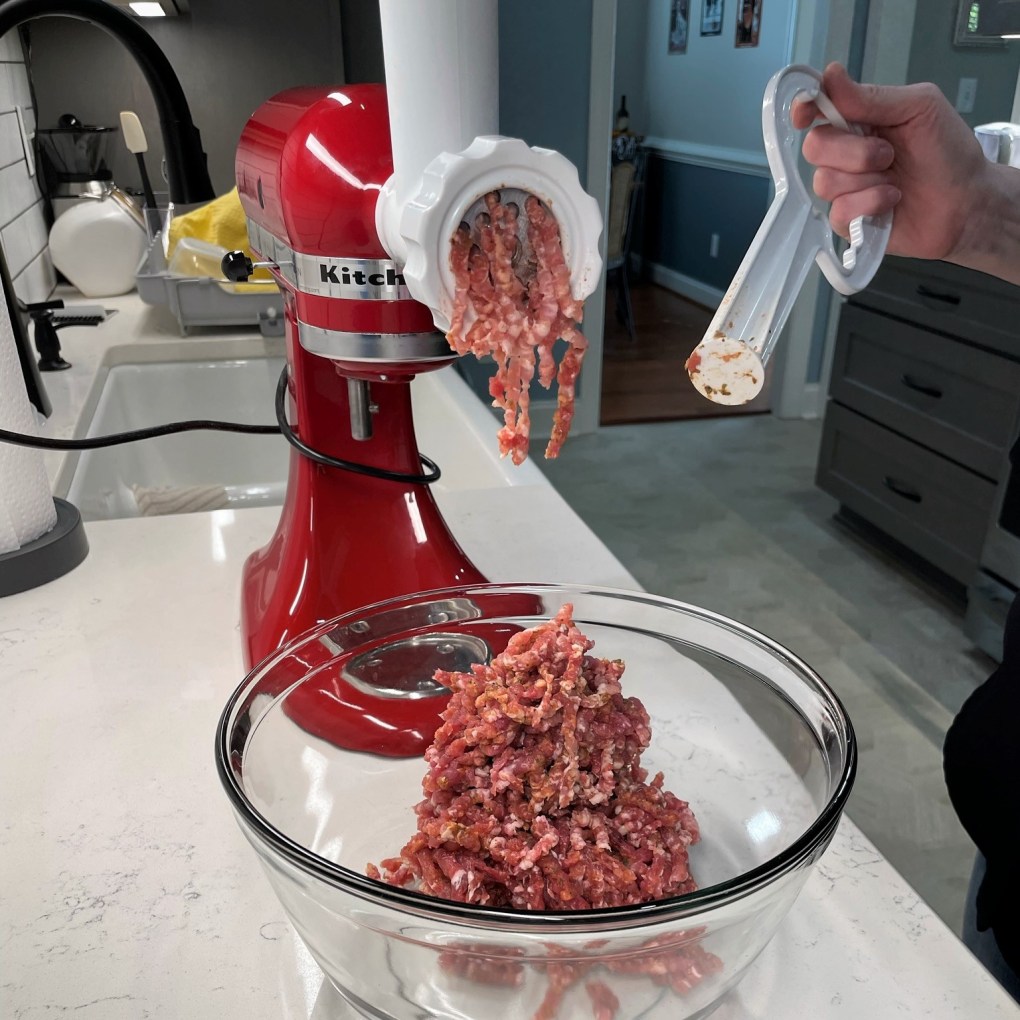
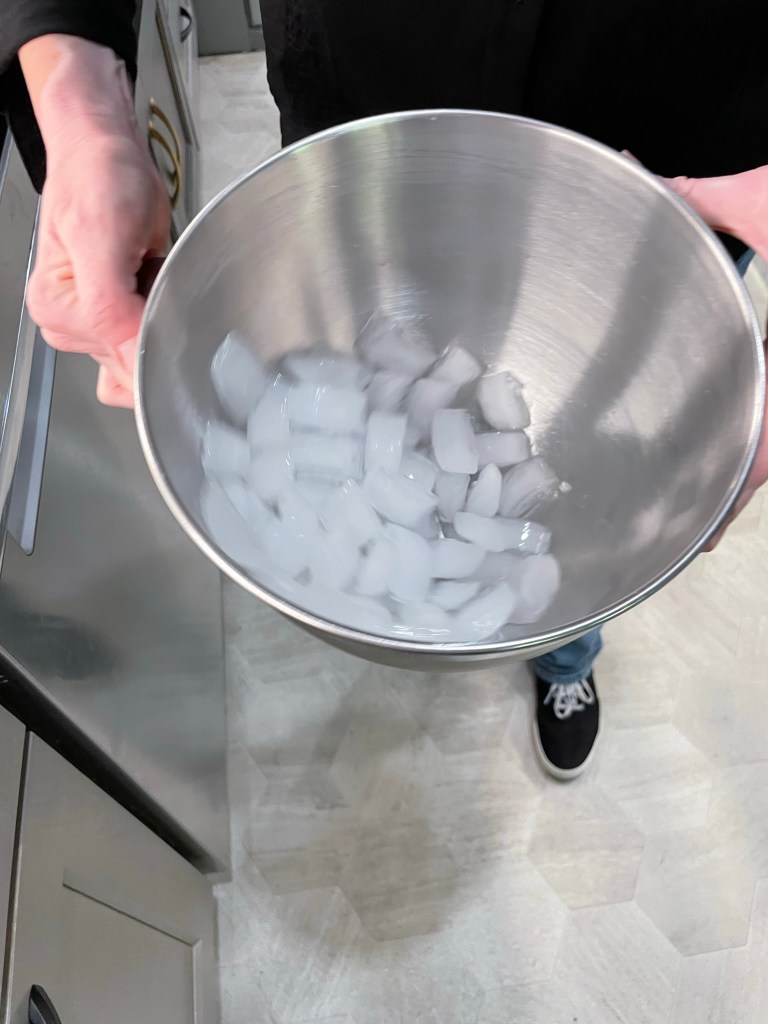
I spread the meat out into a single layer on a baking sheet and slipped it into the freezer for 15 minutes while I set up the meat grinder attachment for my stand mixer. The meat and all the parts that touch the meat should be really cold, so I also put the cutter blade, the large-hole cutter plate and my mixer’s beater blade into the freezer. I took Kenji’s advice about this to heart and it paid off with an easy grinding process. I also put ice in my stainless steel mixing bowl to chill it down for the next step.
The mixer image doesn’t show it, but there is a blade and plate assembly that fits over the grinder. It was still in the freezer when I snapped the photo.
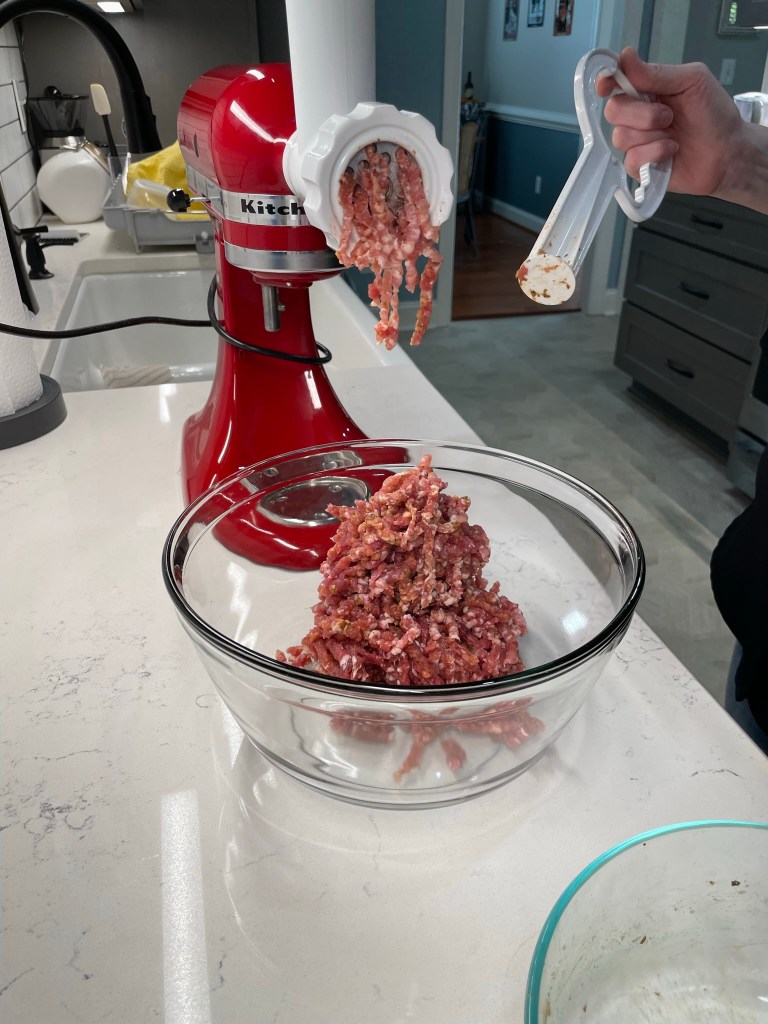
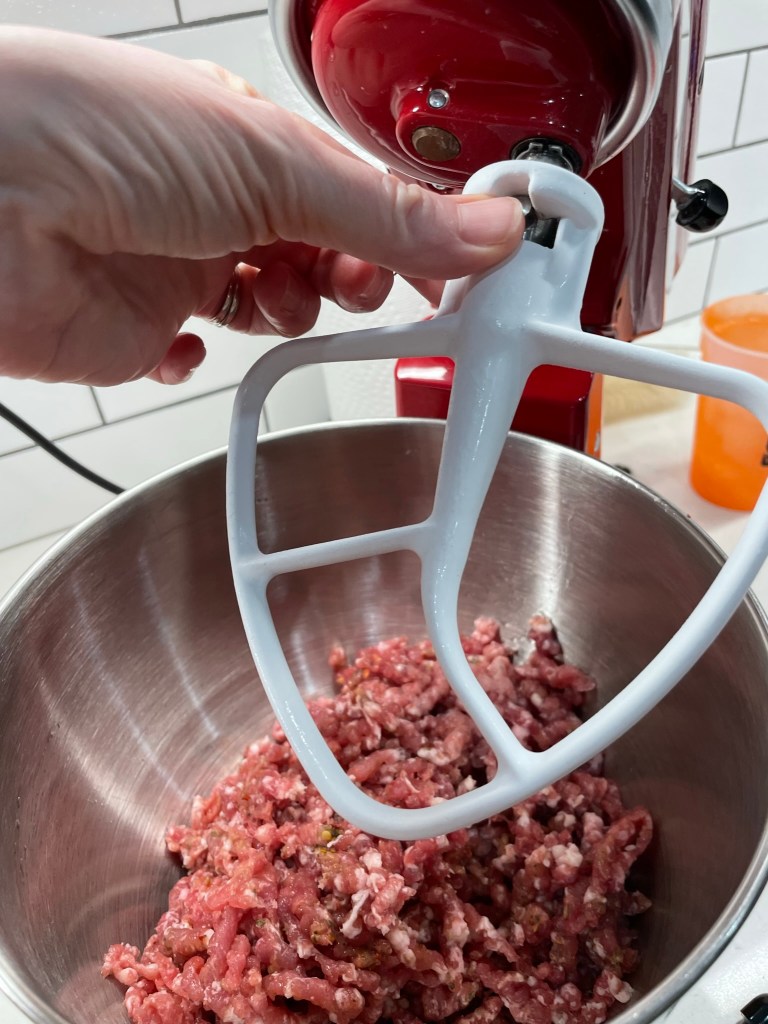
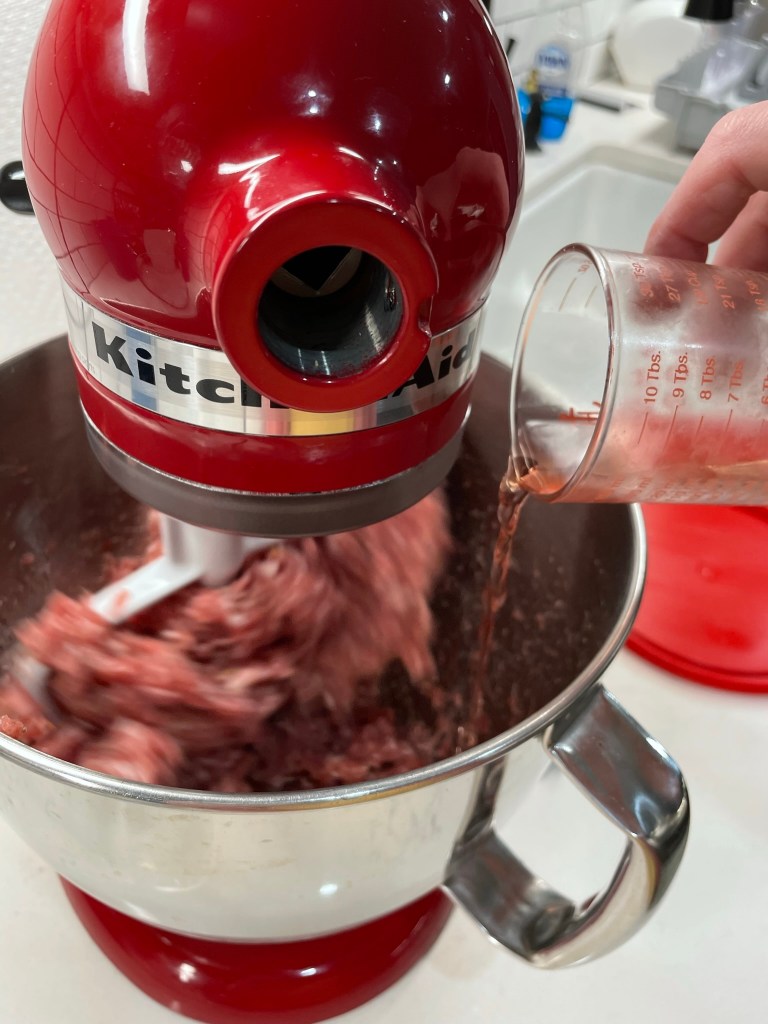
This part of sausage production moved quickly, and I couldn’t take pictures from every angle as I pulverized the very cold meat, but the action shots here tell the story pretty well. As soon as it was ground, I transferred it to my chilled mixing bowl and used the beater blade to whip it around for about 2 minutes. During this mixing stage, which essentially serves to make the meat mixture sticky and cohesive, I poured in roughly 2 tablespoons of red wine vinegar. That acidity makes all the difference in flavor!
If you don’t use a stand mixer, this blending stage can be done with a sturdy spoon and some elbow grease.
For my first batch of sausage, I passed the meat through the grinder a second time before mixing it, using the small-hole cutter plate included with my food grinder. This proved to be tedious and unnecessary, and my later batches were all done in one pass, using only the large-hole cutter plate. Sometimes the lesson is about what you don’t need to do, right?
My first batch of homemade sausage! 🙂
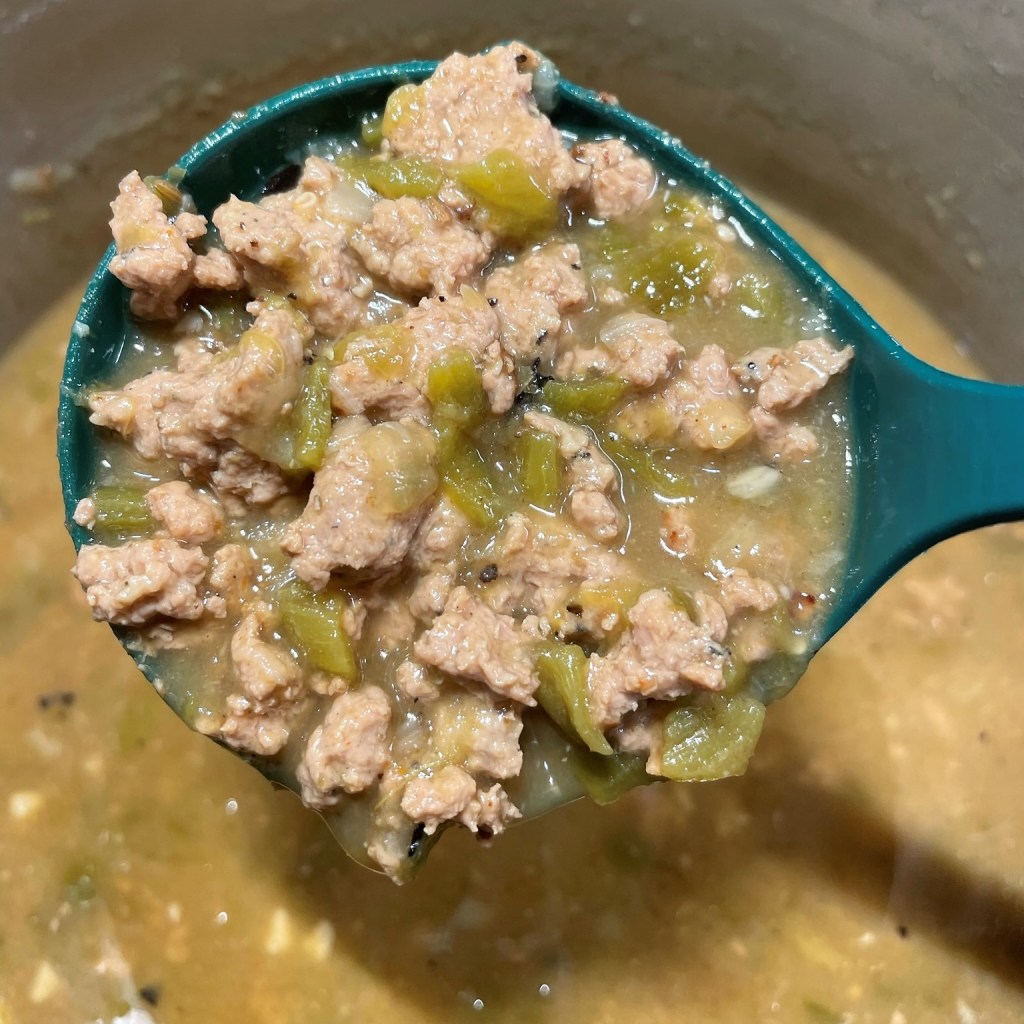
The green chile sausage was fantastic, and I used it make a pot of this oh-so-comforting green chili for burritos. This is a favorite dish from my childhood, and I’ll share the recipe in January.
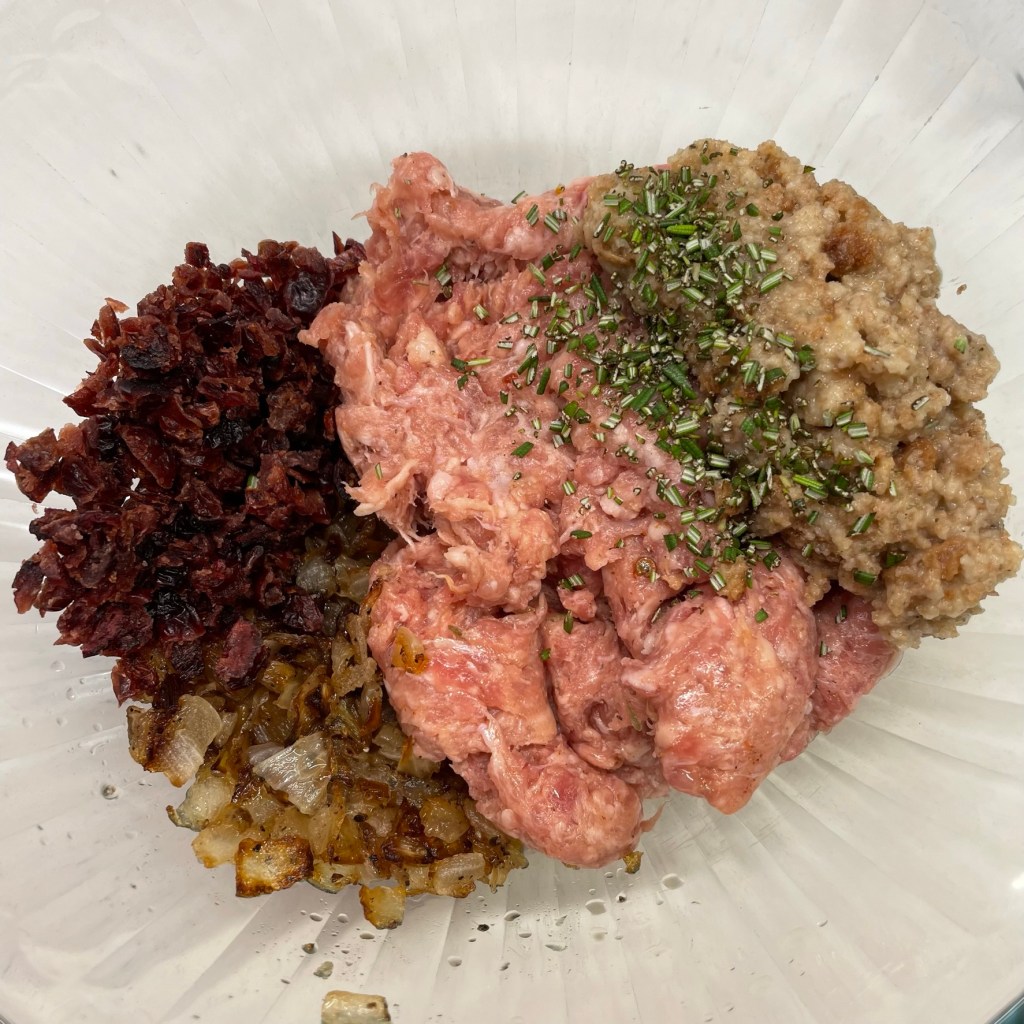
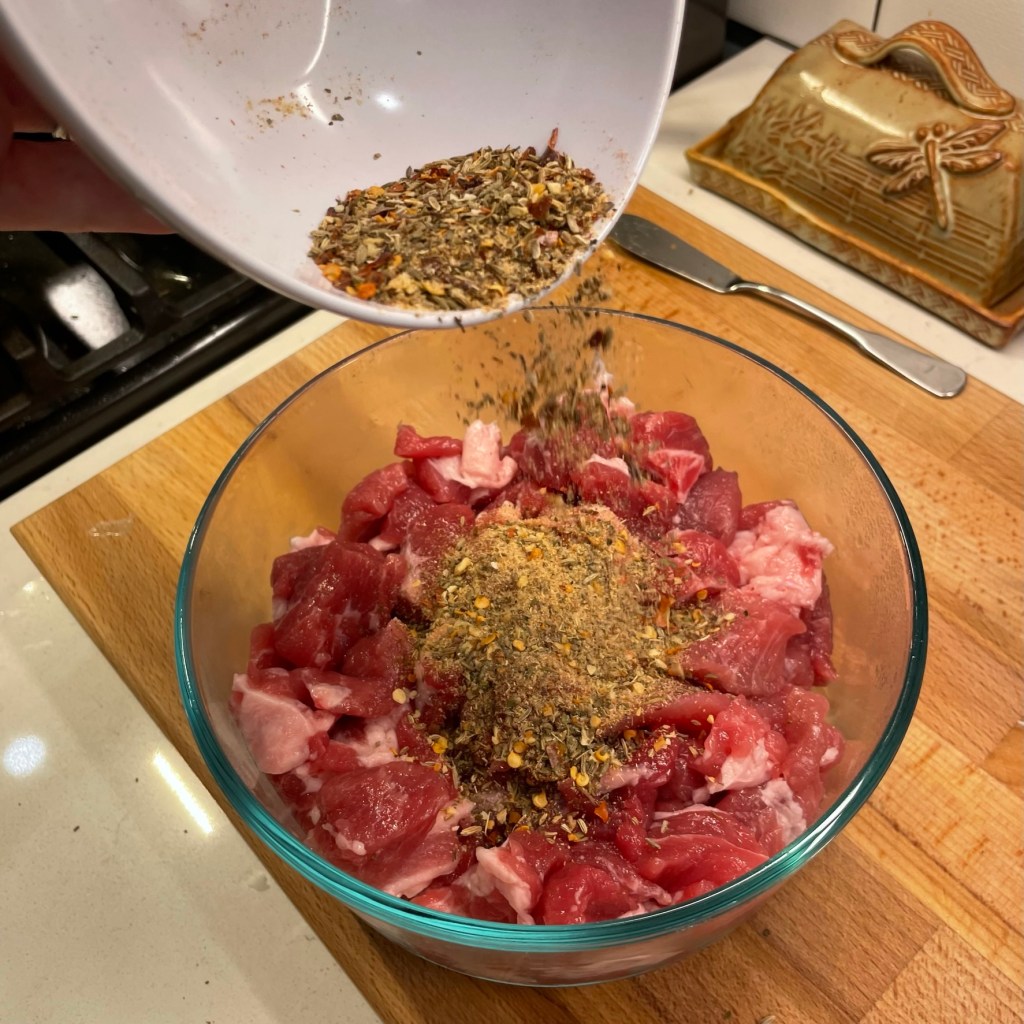
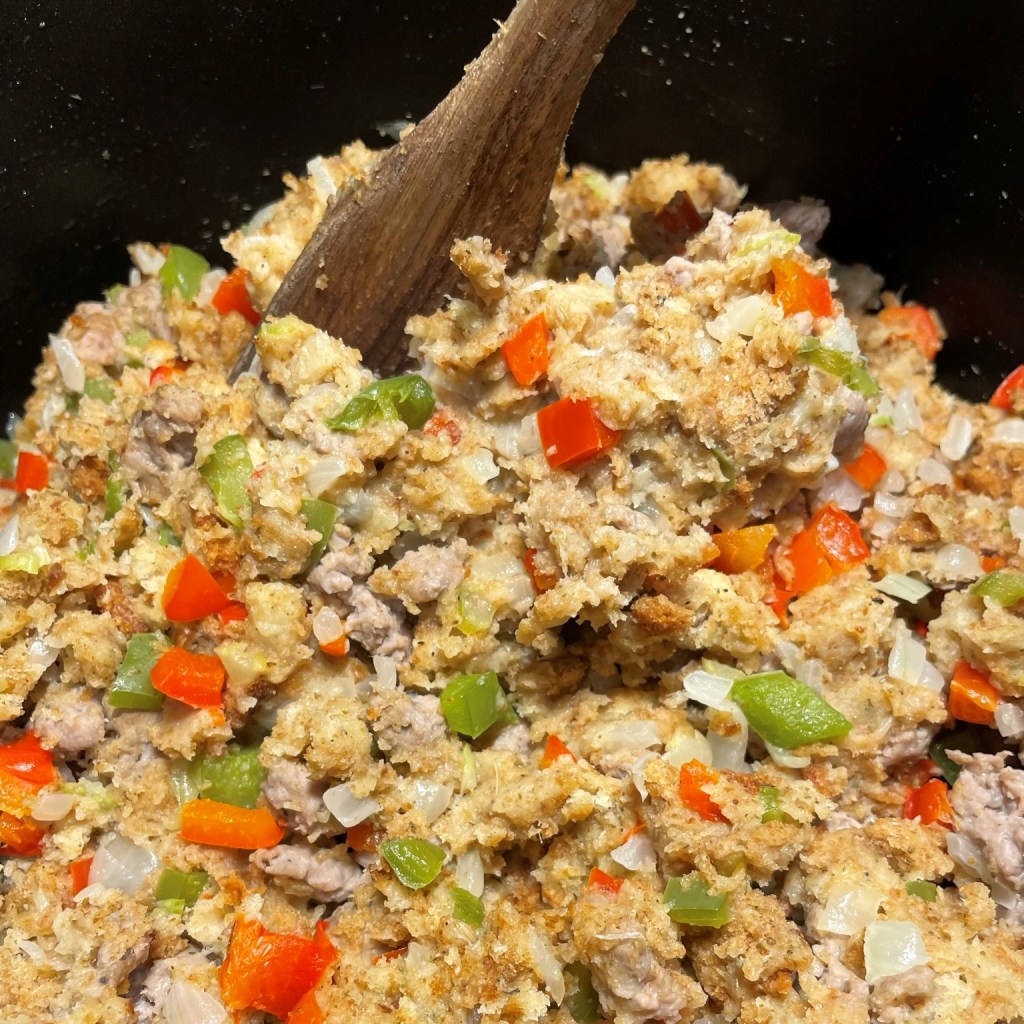
I also made a chipotle, ancho chile and maple sausage, which I used in a stuffing blend for a rolled pork loin roast that we enjoyed with friends a few weeks ahead of Thanksgiving. I’ll share the recipe for that lovely roast sometime in the next couple of weeks.
And I made an Italian fennel and Calabrian chile sausage, which became the big flavor enhancer for the sausage used in Les’s amazing Thanksgiving stuffing. It was his year for the bird, and though I said it was his best turkey ever, he declared the sausage made it his best-ever stuffing. We are a darn good team!
We have used up all the sausage I’ve made so far, but I already have a dozen ideas for flavors I want to make next. Here I go again, wanting to do everything at once! I can’t, of course. But homemade sausage is now definitively in the “done” column, with more variations coming your way soon. 🙂
Making your own sausage is not as intimidating as it may seem. All you need is the right meat-to-salt ratio, a good imagination for flavor, and a device to grind the meat. Use a digital scale to measure the ingredients and keep the meat and grinding device as cold as possible through the entire process.
Ingredients
Good quality pork shoulder meat, with a decent amount of fat
Kosher (or other non-iodized) salt, in 1.5% proportion to meat weight
Non-salt seasonings of your choice, in 2% proportion to meat weight
1 to 2 Tbsp. vinegar for each pound of meat
Use the “grams” setting of a digital scale for the easiest ratio calculation. Weigh the meat, then use a calculator to determine percentages. If your calculator doesn’t have a percentage button, convert it to decimal value. 1.5% = .015 and 2% = .02.
Directions
Cut the pork shoulder into chunks about the size of walnuts. Place a bowl on the digital scale and zero the tare weight. Add the pork and take note of the gram total weight.
Calculate salt and seasoning measurements, using the notes above as a guide. Sprinkle both over the pork chunks and toss to combine. Refrigerate overnight, preferably 24 hours.
Arrange meat in a single layer on a parchment-lined baking sheet. Place the sheet pan into a flat space in the freezer for about 15 minutes to partially freeze the pork chunks. Also place the metal grinder parts into the freezer for this time, as the meat grinds best when it is perfectly cold. Measure the vinegar into a glass or cup and put it in the fridge to chill.
Grind according to manufacturer’s instructions for your grinder. Place ground meat immediately into the fridge again to chill it down.
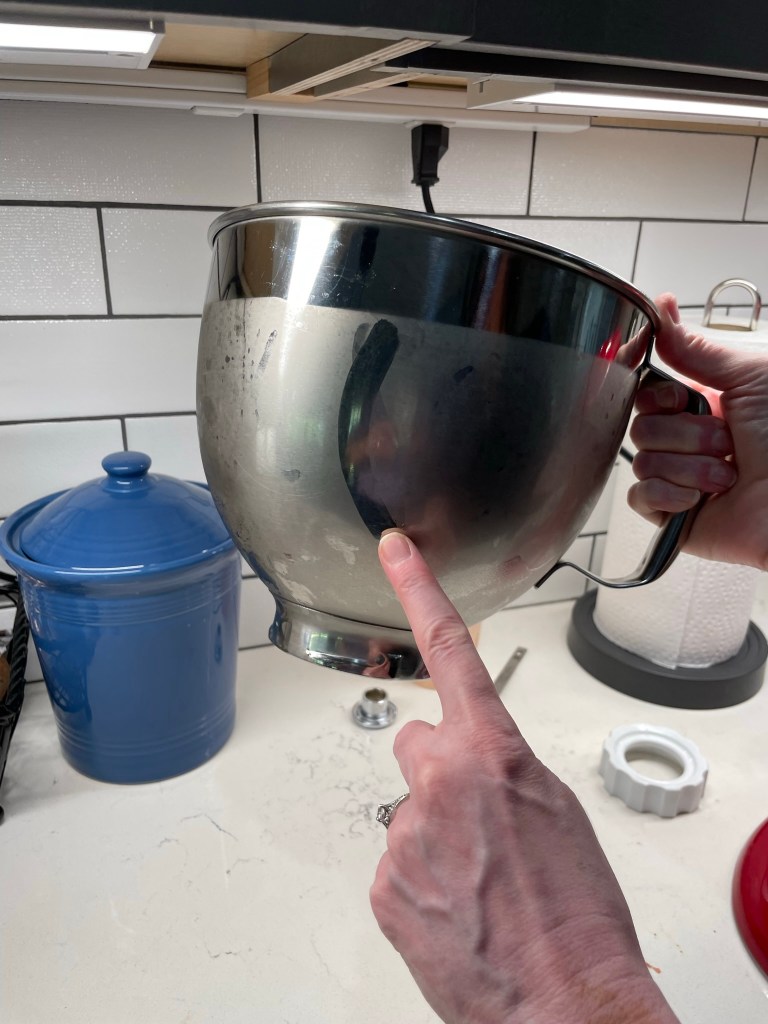
Add 2 cups of ice to the bowl of stand mixer (or bowl you’ll be using to blend ground meat) and swirl it around to chill the bowl. Dry the inside with paper towels.
Add chilled ground meat to the cold bowl and beat for 1 to 2 minutes, adding vinegar a bit at a time until blended in.
It is very rewarding to be able to strike an item off my culinary bucket list, and I’ve done it with this handmade pasta, speckled with the gorgeous autumn-orange color of pureed pumpkin.
I love this warm color and the tiny flecks of earthy rye flour.
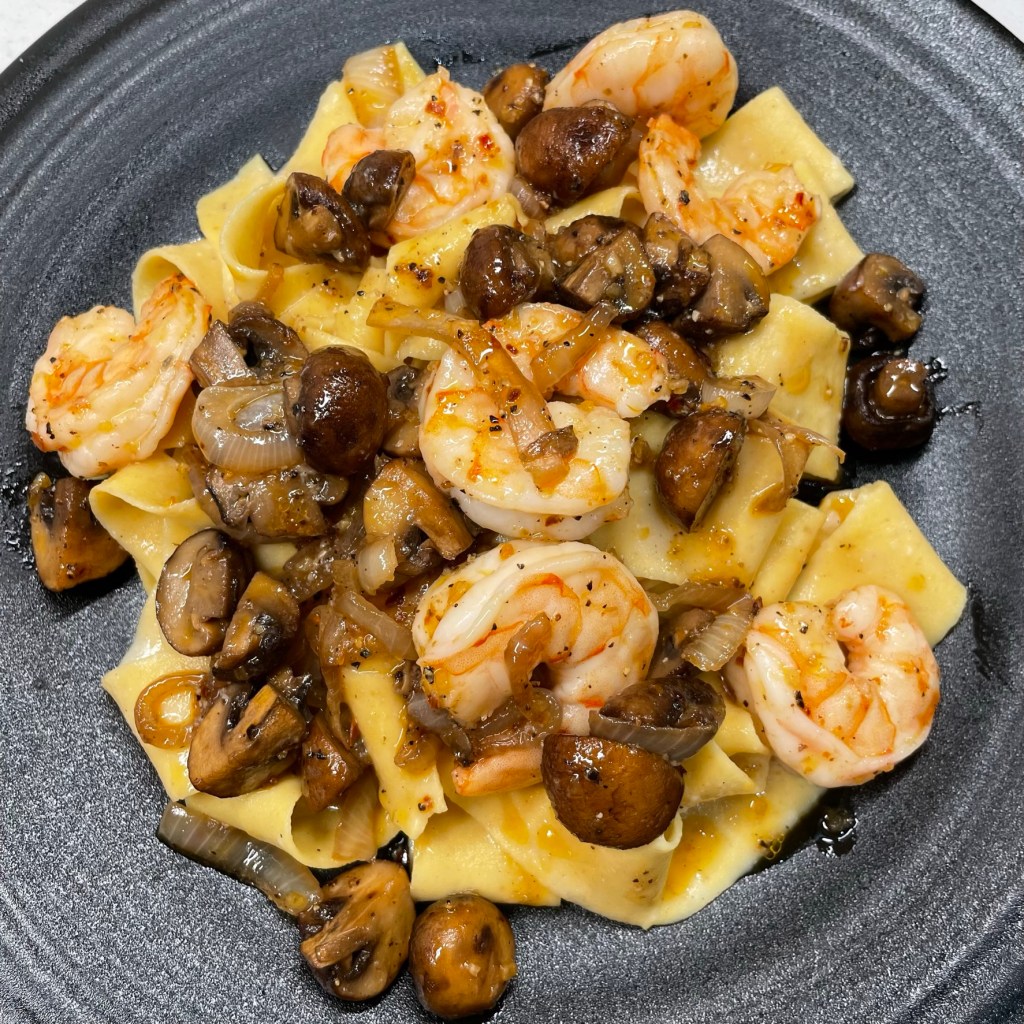
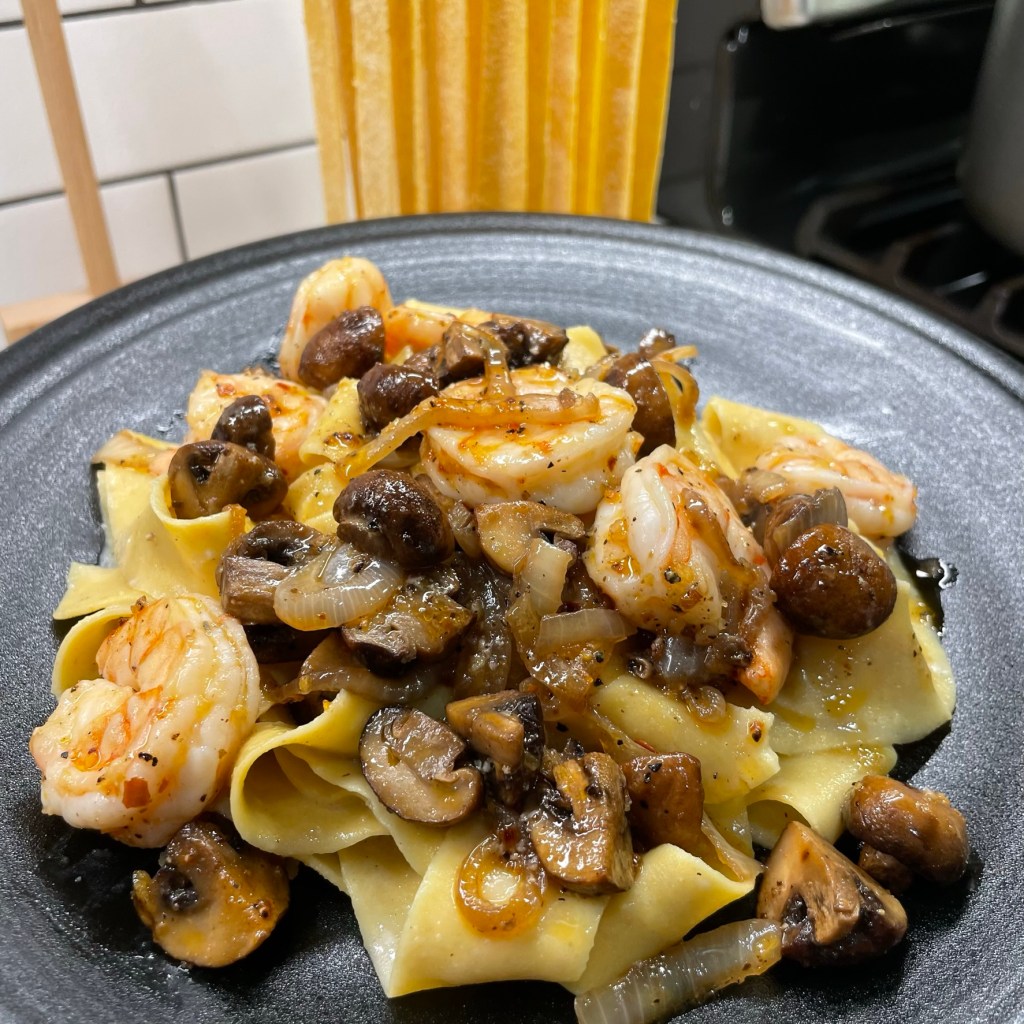
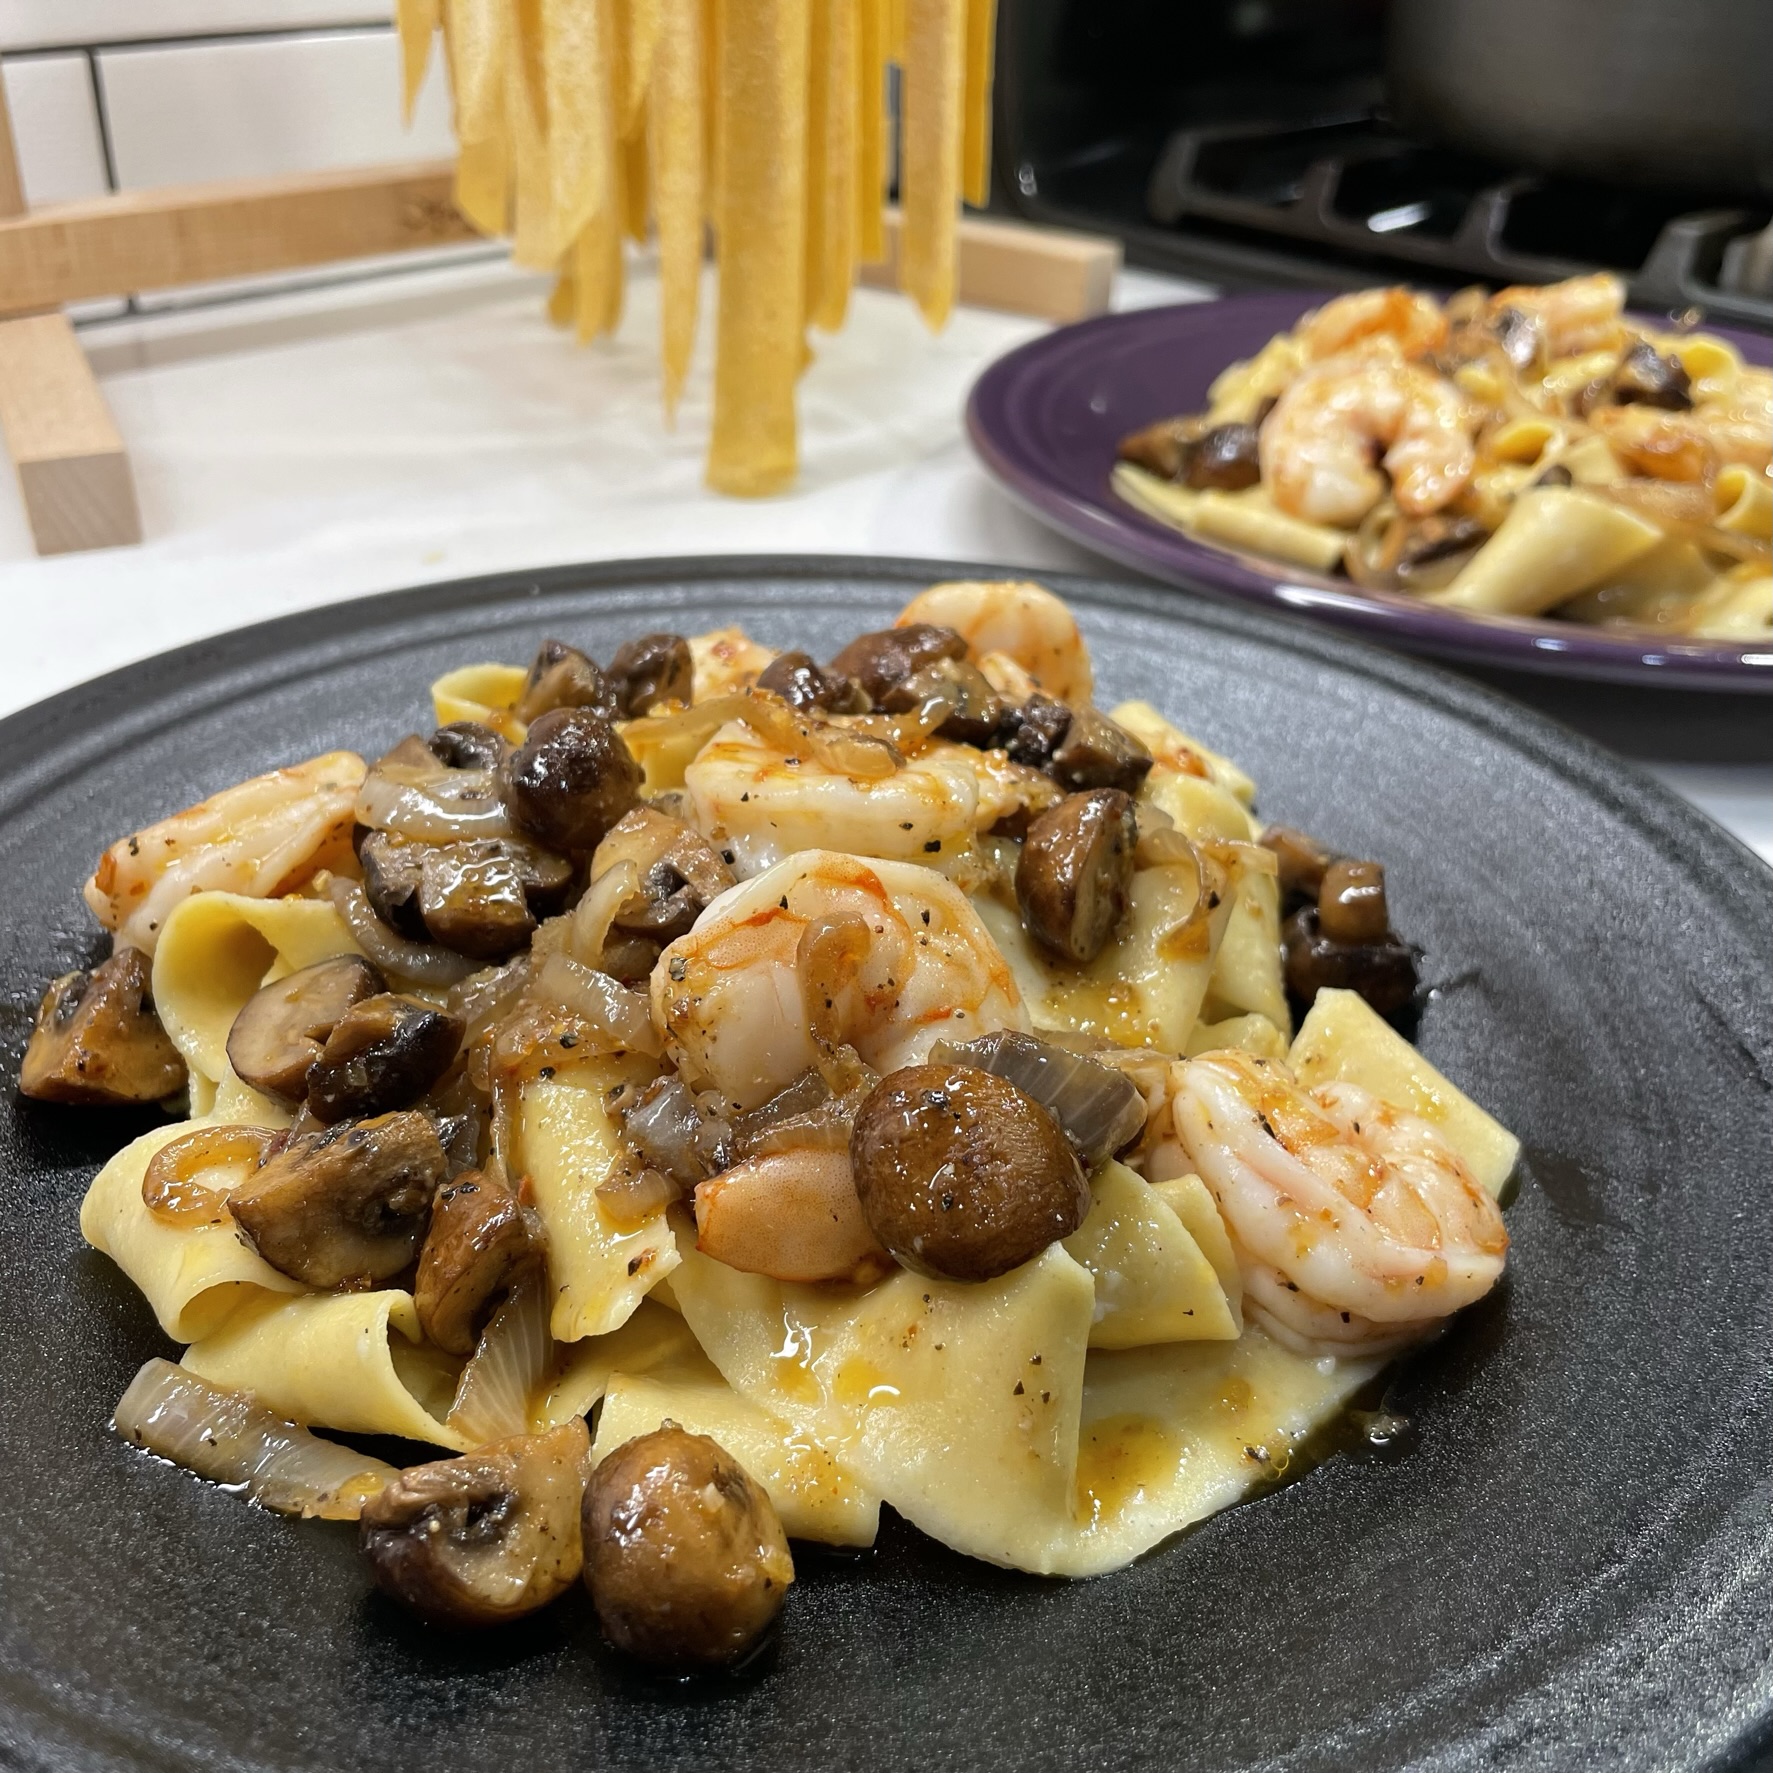
Pappardelle is a long, flat pasta and is usually served with a low-and-slow, braised meat sauce, perfect for a Sunday supper. I excel in rule-breaking, though, so I topped my handmade pumpkin pappardelle with roasted shrimp, onions and mushrooms in a chili crisp sauce and served it up on a weeknight. It was scrumptious!
Pumpkin pappardelle with chili crunch-roasted shrimp and mushrooms.
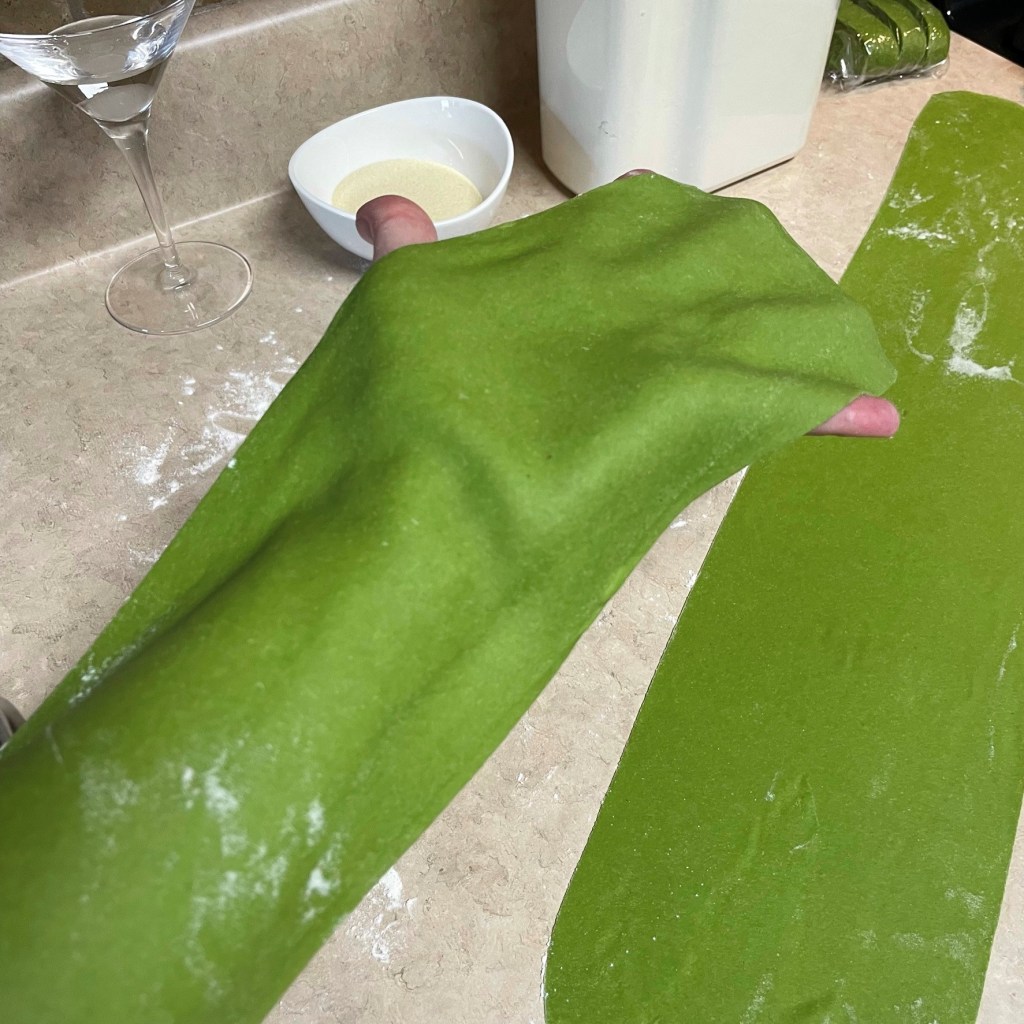
When I first started making pasta sometime around 2012, I stuck mostly to script, using the basic flour and egg recipe. But my imagination quickly took over and led me to try adding flavor and color to fresh pasta. My first experiment was a lovely lemon zest and pepper fettuccine, and I’ve hardly looked back since that time, infusing my dough with everything from fresh herbs to roasted garlic to pureed vegetables. And of course, I have also begun to experiment with different types of flour, and I almost always incorporate some amount of whole grain for the flavor and nutrition value it offers.
Lemon zest and fresh parsley-infused fettuccine.This one was sun-dried tomato.This dough was flavored with spinach.Thick egg noodles, a la chitarra.
Last Spring, I was excited to order a copy of the book, Pasta, Pretty Please by Linda Miller Nicholson. Linda started her brand, Salty Seattle, after discovering that colorful pasta would get her kid to eat vegetables— you know, necessity being the mother of invention and all— and she was recently recognized on Oprah’s 2022 list of favorite things for her “crocchi,” a colorful, croissant-shaped pasta. In her recent email newsletter, Linda described life as a whirlwind, and I suppose that’s what happens when you put your whole heart and soul into doing what makes you happy!
If you enjoy making handmade pasta, I highly recommend Linda’s book for its recipes and just for the artistry of it, and you can also follow her on social media for visual instruction on some of the more intricate pasta shapes (I am mesmerized by her work). As with most “recipe” books I own, I have drawn inspiration from Pasta, Pretty Please more than I have followed any recipes. Interestingly, of all the brilliant pasta colors in her book, Linda does not seem to use pumpkin in any of them!
So many colors, so little time.
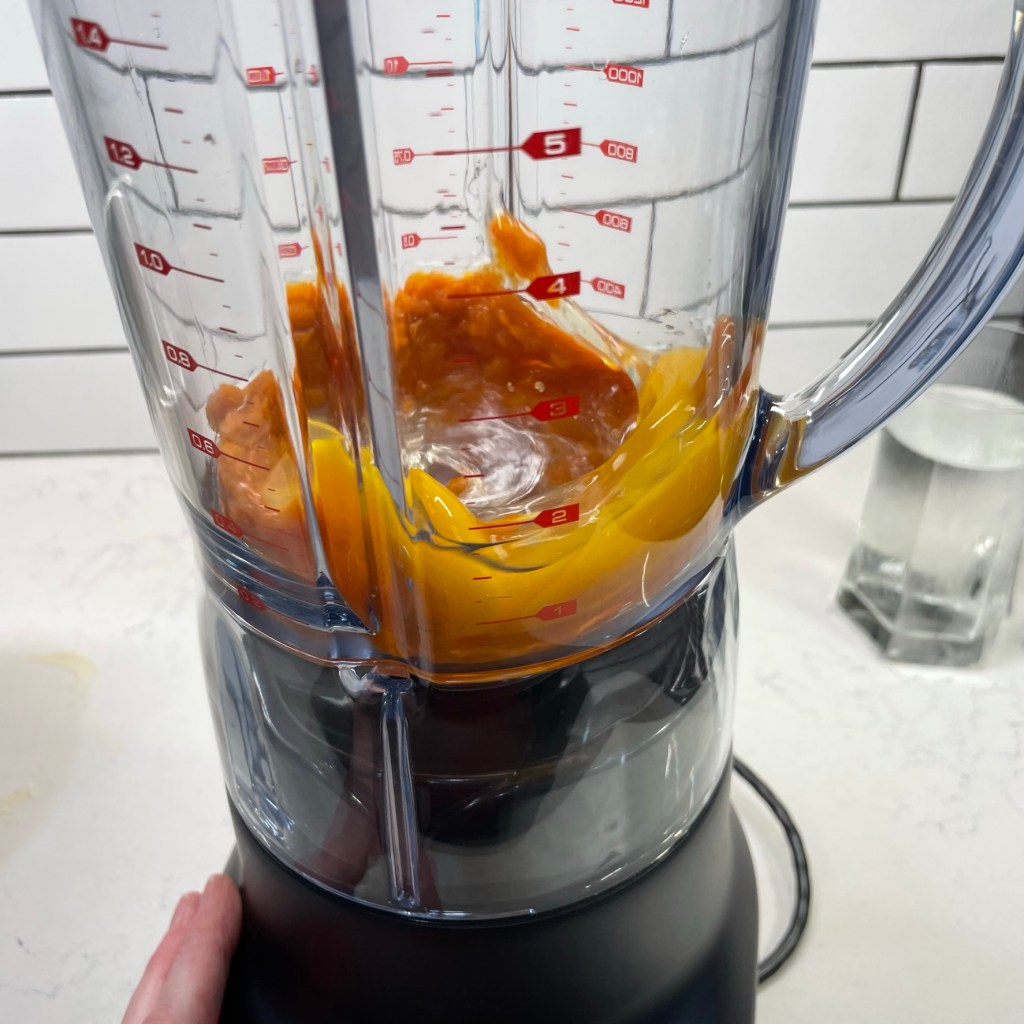
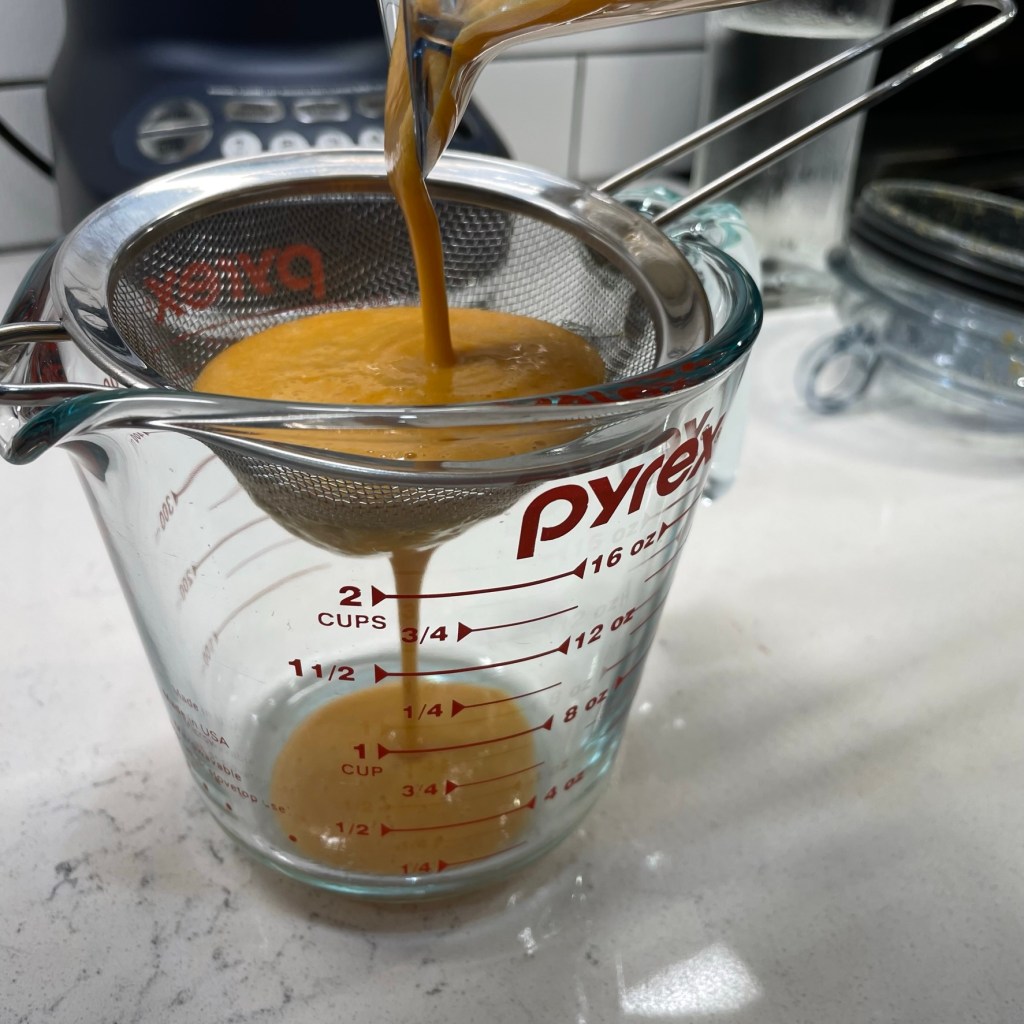
But Linda does offer a simple flour-to-liquid formula, and that’s what helped me achieve this bucket list victory. I followed her rule of 3/4 cup liquid to 2-1/4 cups flour, beginning with a portion of pumpkin puree plus room temperature eggs. I whizzed those together in my blender and strained out the solids through a mesh strainer. The blend measured almost exactly 3/4 cup, but there was a layer of tiny bubbles on top, so I figured (correctly) that I’d need to add some amount of water to get the dough just right. How much? It was too soon to tell.
My free range eggs contributed to the gorgeous color, too!
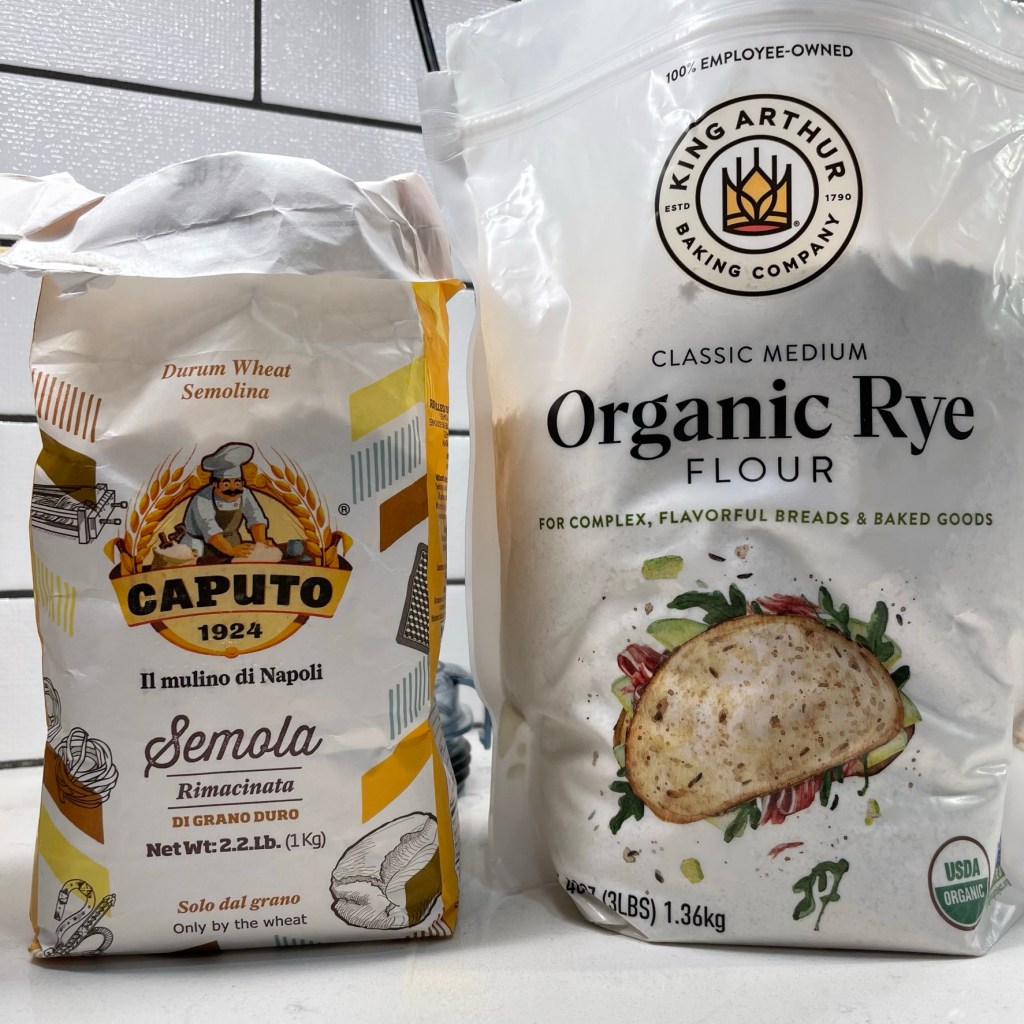
For the flour ingredients, I went with my usual “00” white flour and durum blend, but also subbed in some rye flour because I liked it so much with the pumpkin in my recent sourdough pumpkin rye sandwich bread. After mixing the flours with a touch of onion powder and a pinch of salt, I measured out 1/4 cup to be used for adjustment and rolling the dough. I only needed it for the latter, but every kitchen is its own environment. Humidity, temperature and even the age of your flour are all variables for successful pasta.
Both flours shown here are specialty items that you can find online or in a gourmet market. Very finely milled “00” flour (not pictured) was my primary flour.
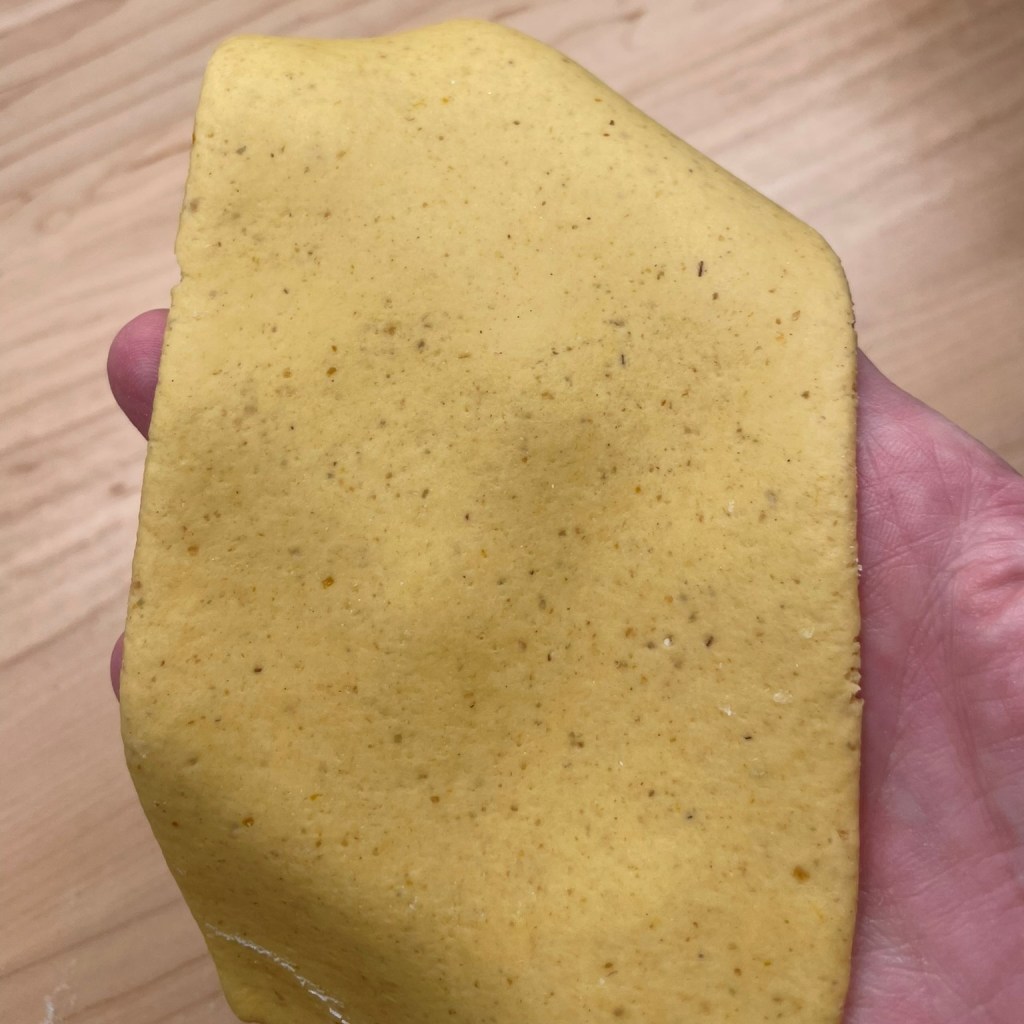
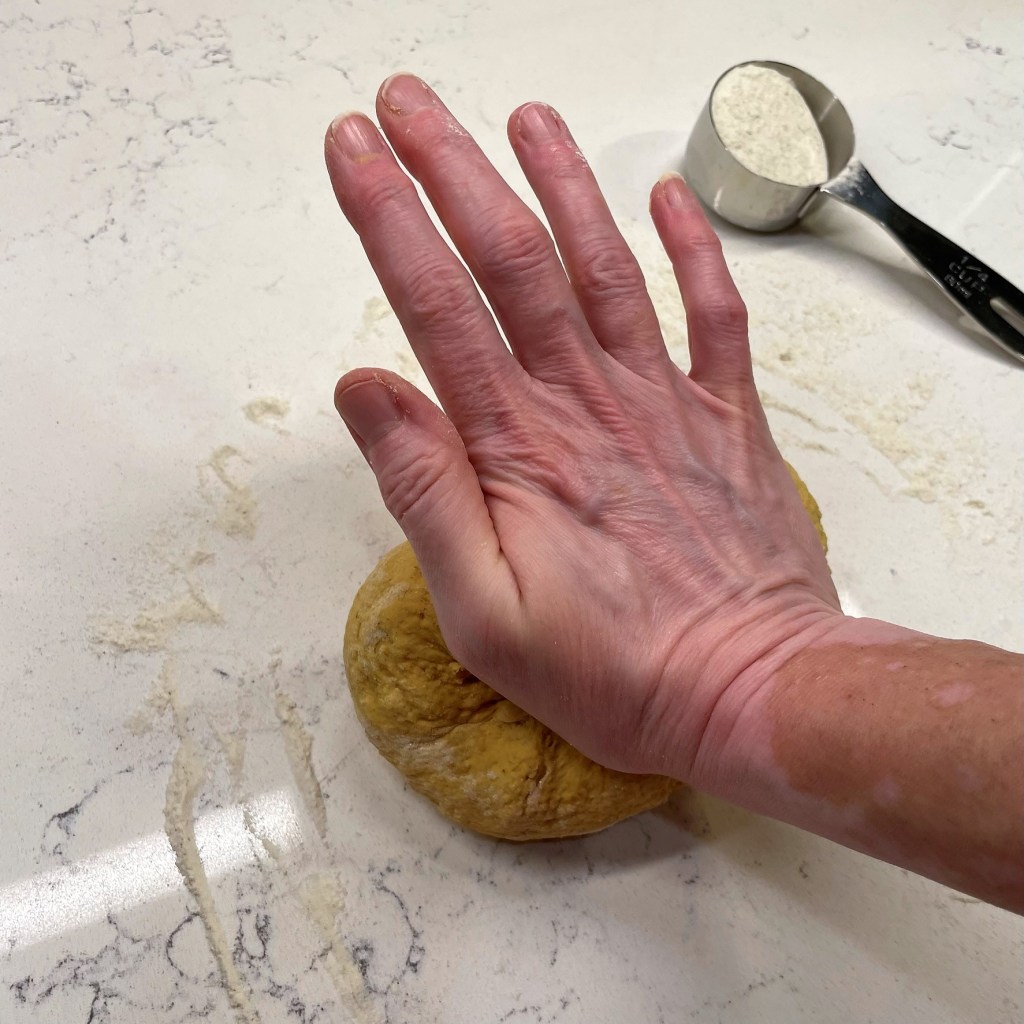
My stand mixer did most of the work making the dough, and I used the kneading hook to mimic the action of mixing it by hand— at least, until I realized how much more water would be needed. To that point, the dough was very crumbly and unorganized but a couple tablespoons of water made it better and a couple more got it done. I recommend trying a recipe like this if you are already adept at making regular pasta because it helps to know how the dough should feel and look at every stage.
The dough should be fully hydrated and pull cleanly from the bowl, but it should not be very sticky.Kneading by hand helps to strengthen the gluten structure so the pasta will hold its shape later.
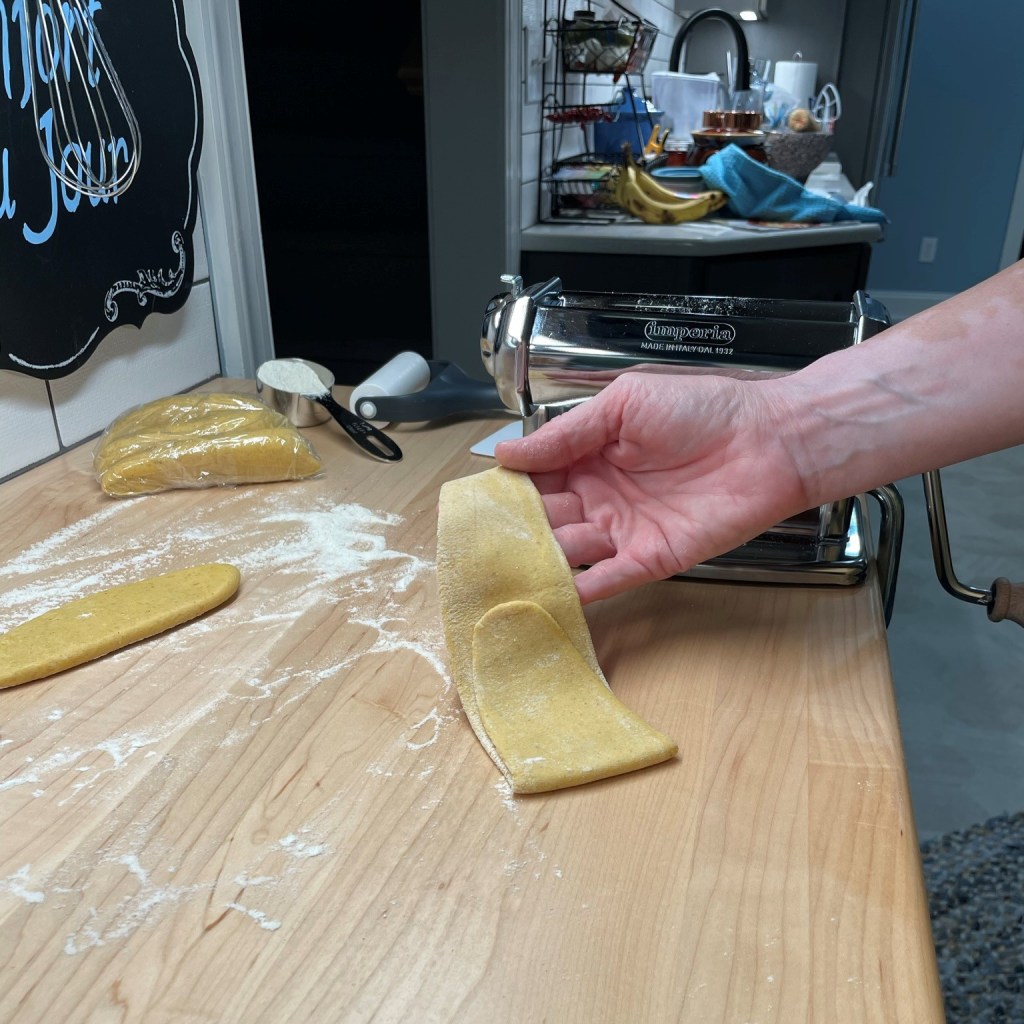
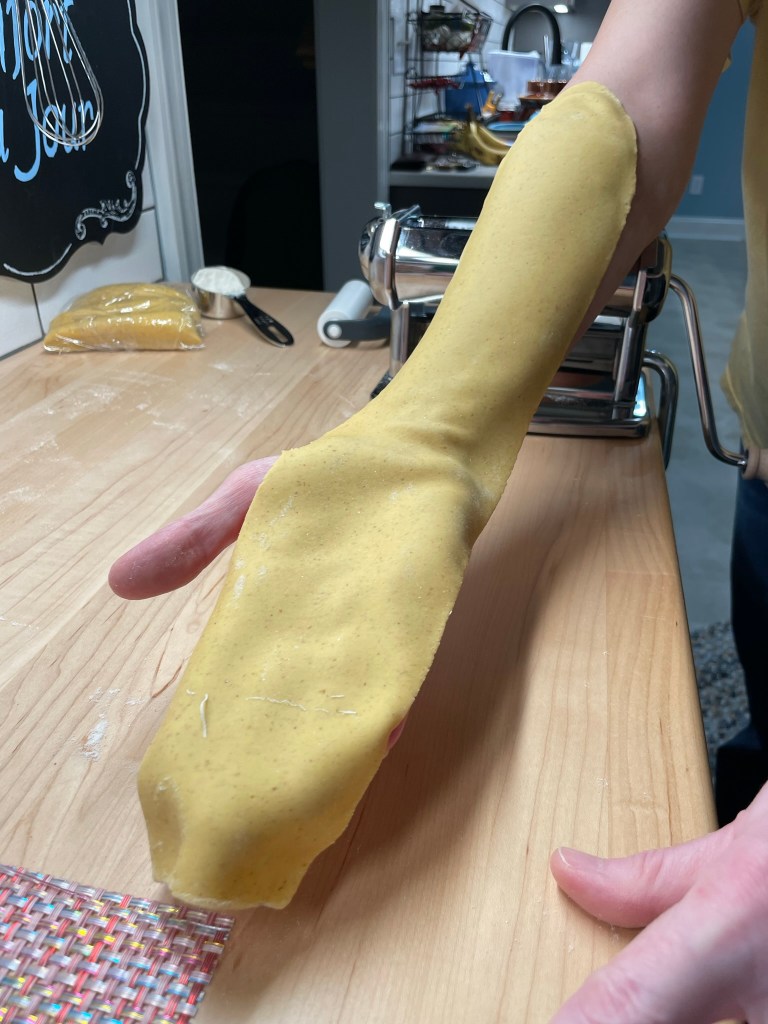
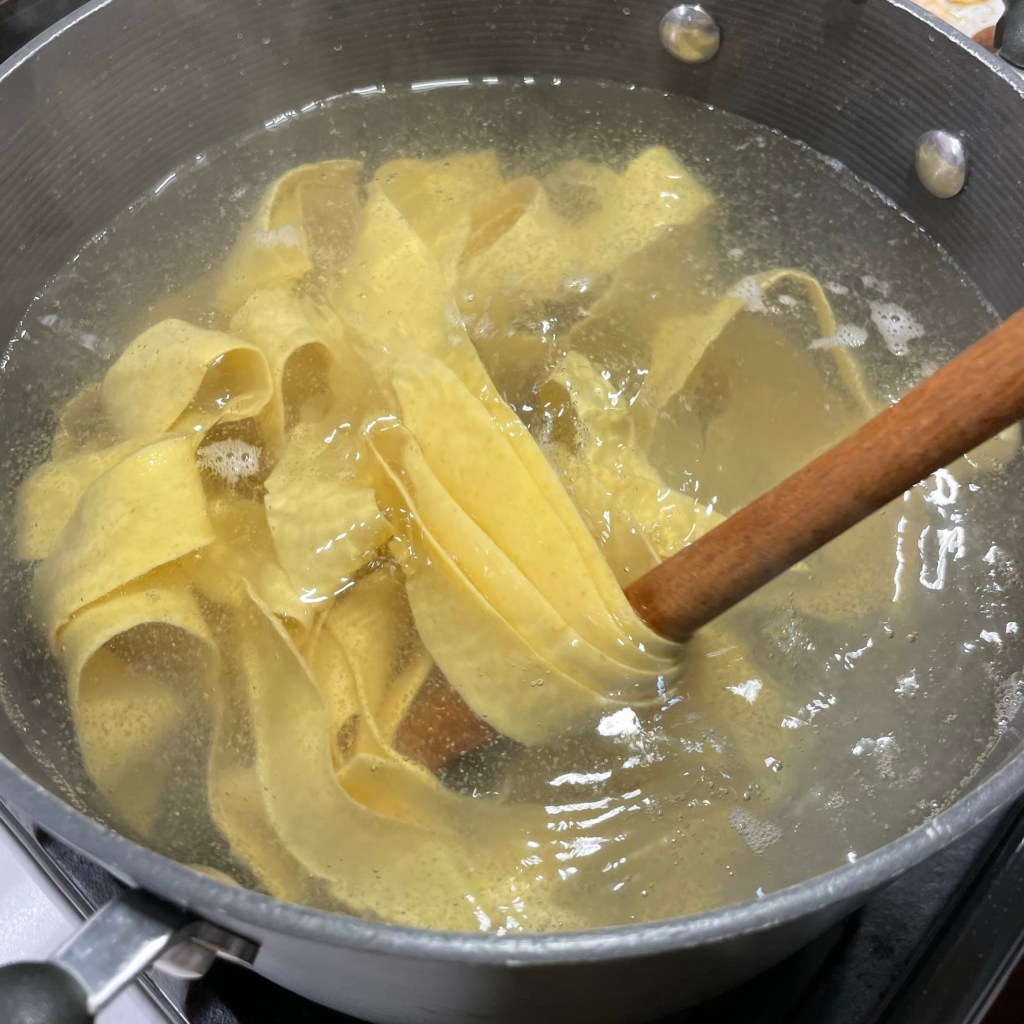
About 10 minutes of hand-kneading later, my dough was ready for a nap in the fridge, and then I proceeded with my usual rolling process to produce the pappardelle strands. Now, I will assume that if you intend to make this pasta, you already have some experience making basic fresh pasta. If you’re still getting started, check out my previous post for handmade lemon-herb pasta for more in-depth instruction and tips. Rather than describing every step again, I’ll focus here on the points that are relevant for this pumpkin pappardelle.
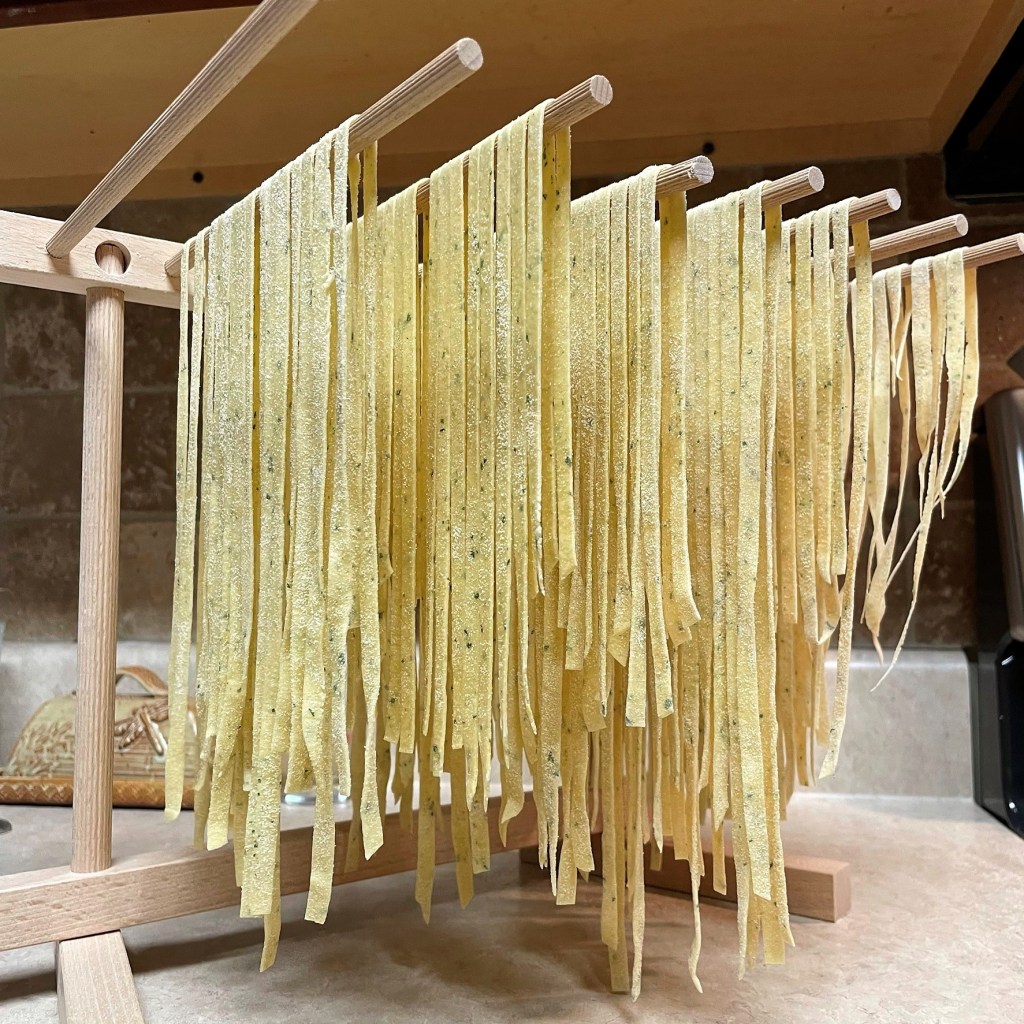
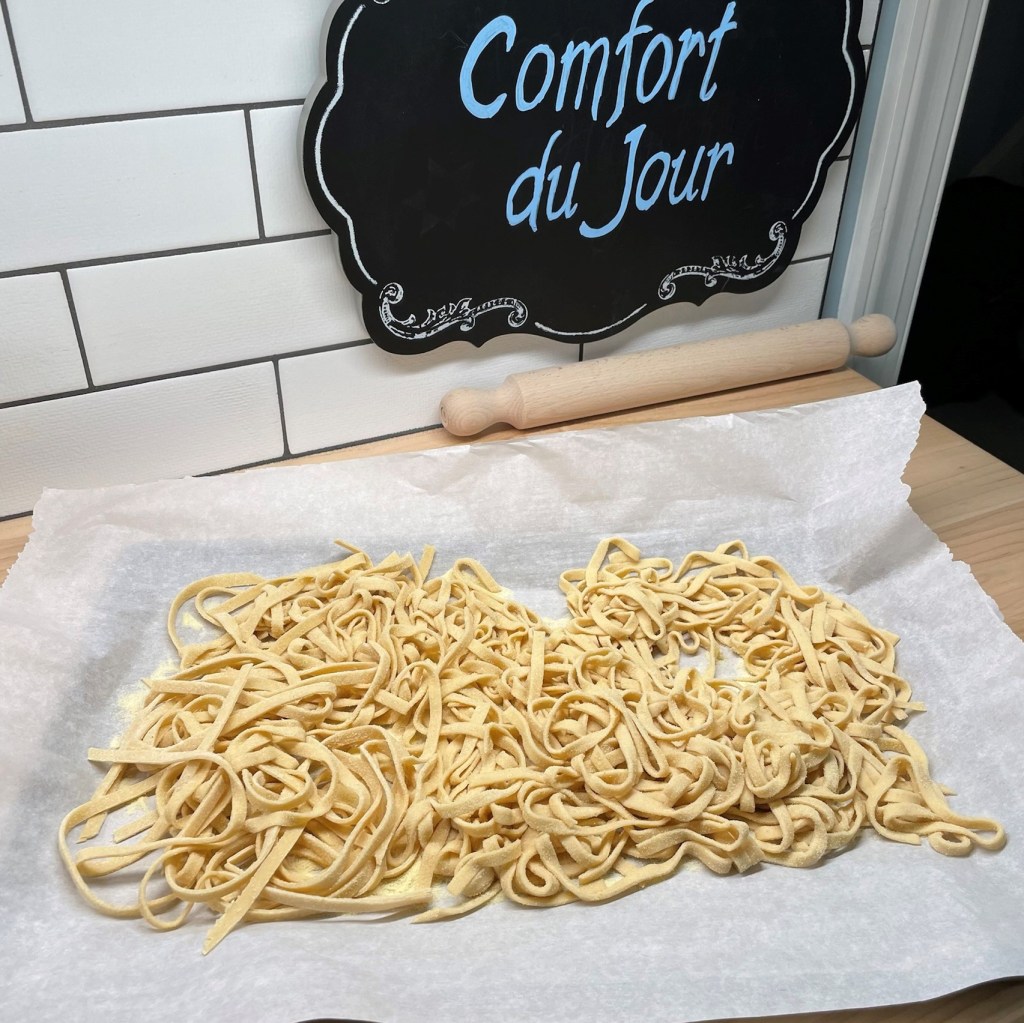
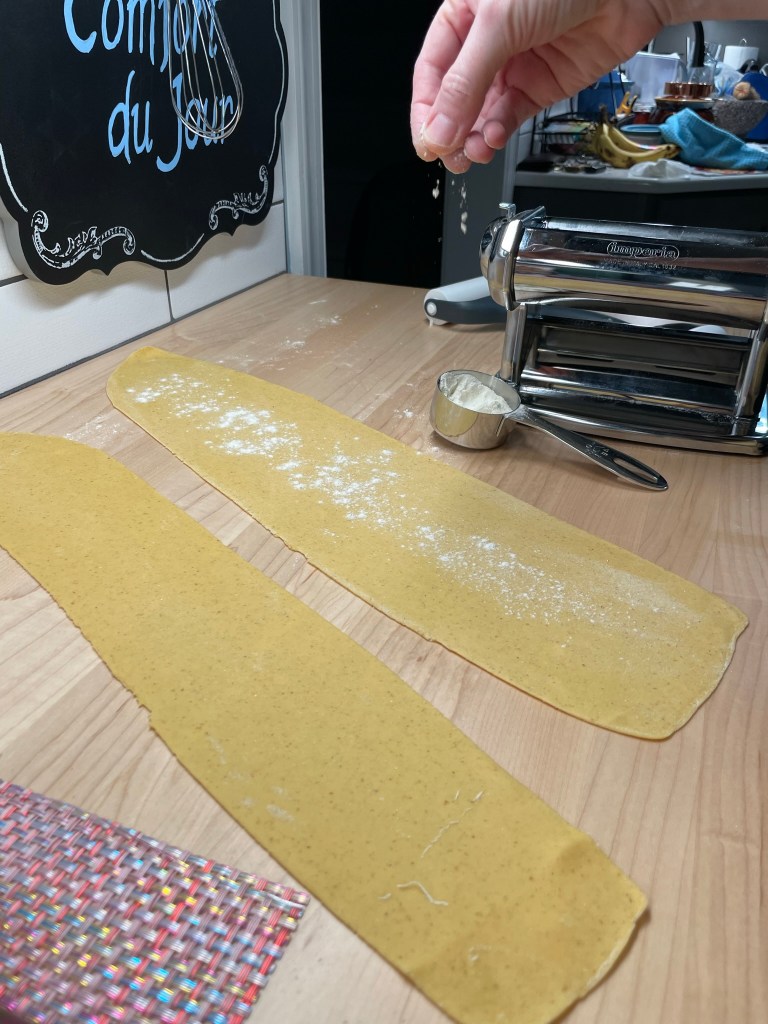
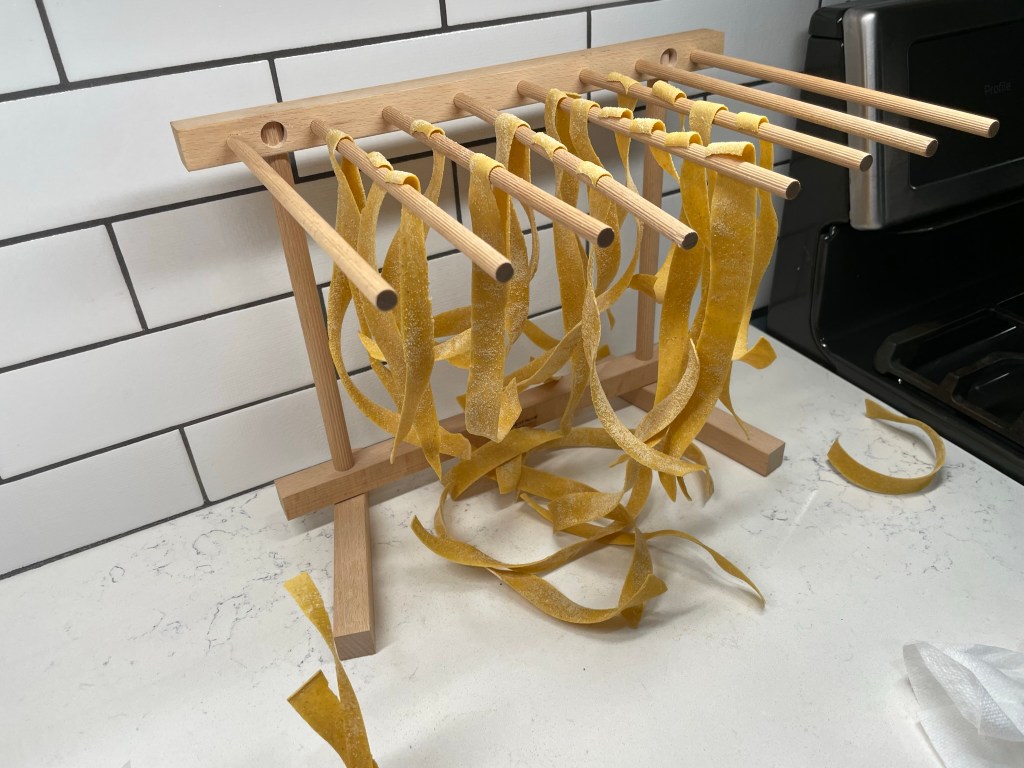
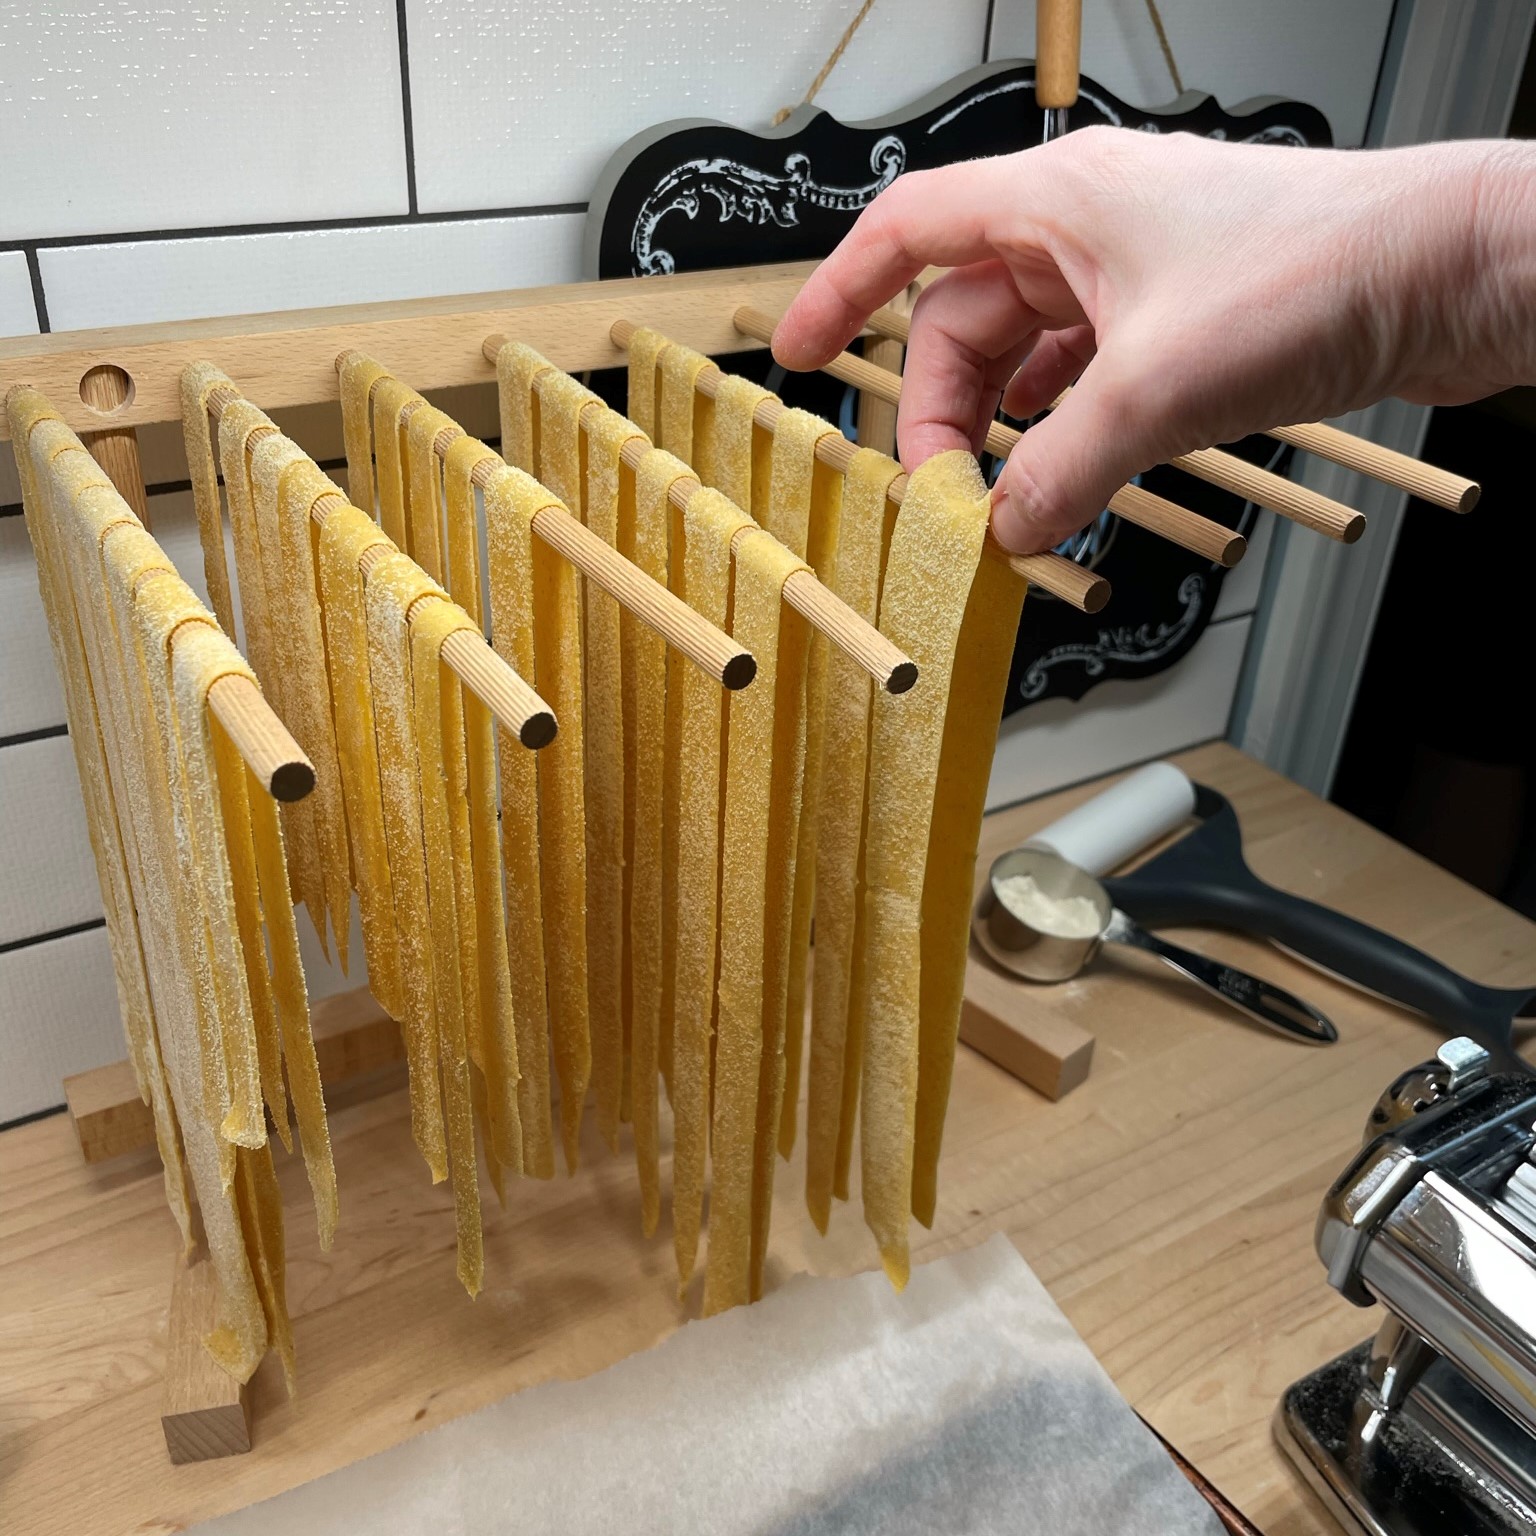
First, keep that reserved 1/4 cup of flour on hand in case you need it during the lamination steps and roll-out of your sheets, because the pumpkin does make the dough a bit more sticky than usual and so does the rye. Second, have some coarse-grind semolina nearby, for folding up the long sheets when you’re ready to trim the dough into wide strips. I have found that the coarse semolina does a better job of preventing sticking. Finally, if you will use a drying rack as I did, get that set up in advance. If you don’t have a drying rack, you can give the cut pappardelle an extra dusting in the coarse semolina and wind the strips into loose little “nests” for drying. Here’s a few images of how it went in my kitchen:
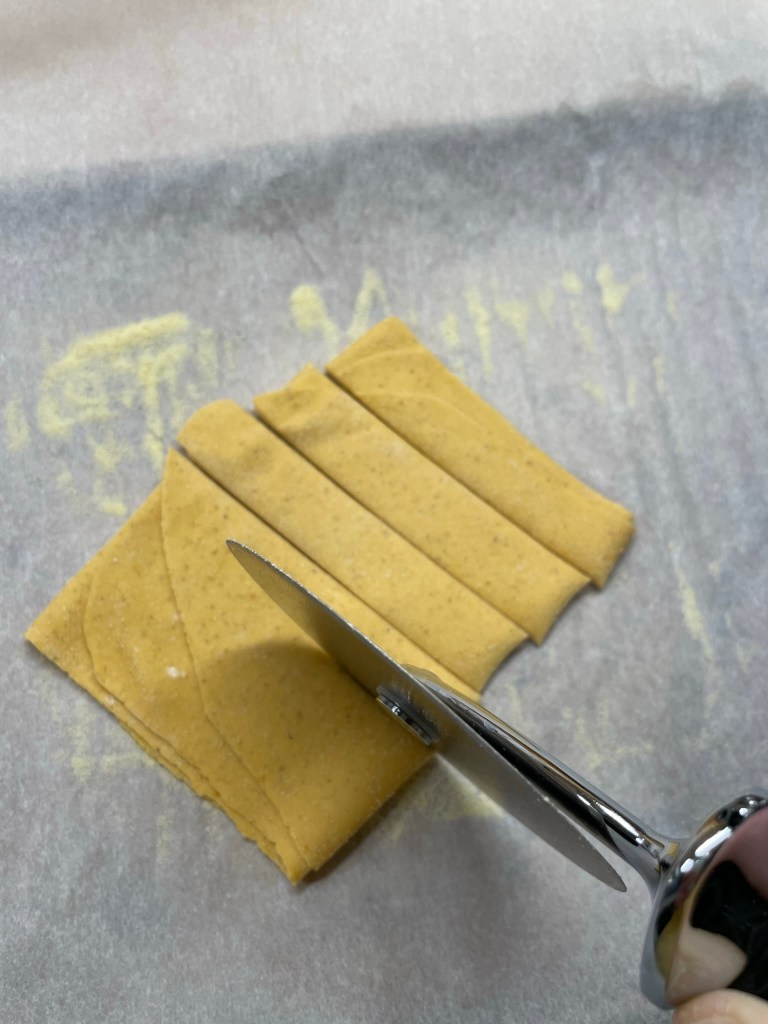
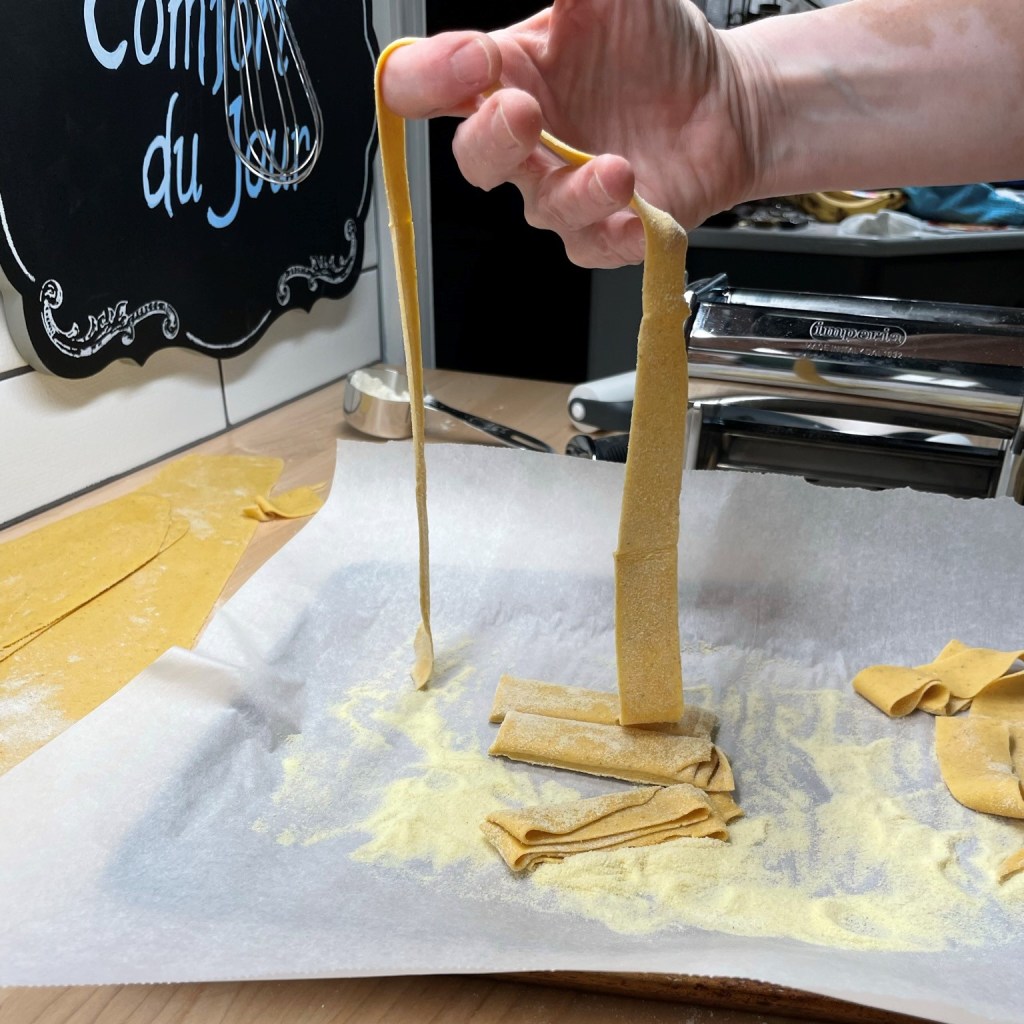
Folding the rolled pasta onto itself adds strength.Make pappardelle about 16 inches long.Flour the sheets generously before folding.This is much easier than cutting straight on a long piece of dough!Unfurl the strips as soon as you finish cutting and hang them to dry.
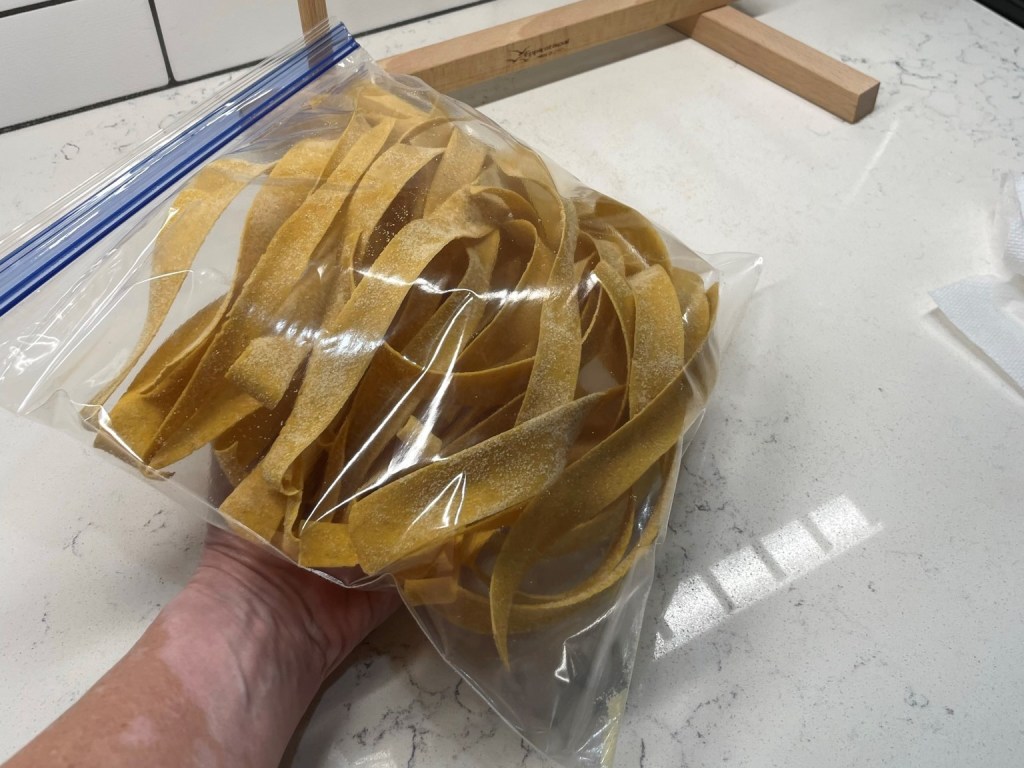
For the freshest outcome, I like to cook the pasta the same day I make it, but it does seem to do best when it has dried for at least an hour. Any remaining pasta can be dried further and then tucked into a zip-top freezer bag for longer term storage.
My pappardelle dried to the breaking point overnight. Good thing I made those strands nice and long! They have egg in the dough, so they must be stored in a safe spot of the freezer.
Time for dinner!
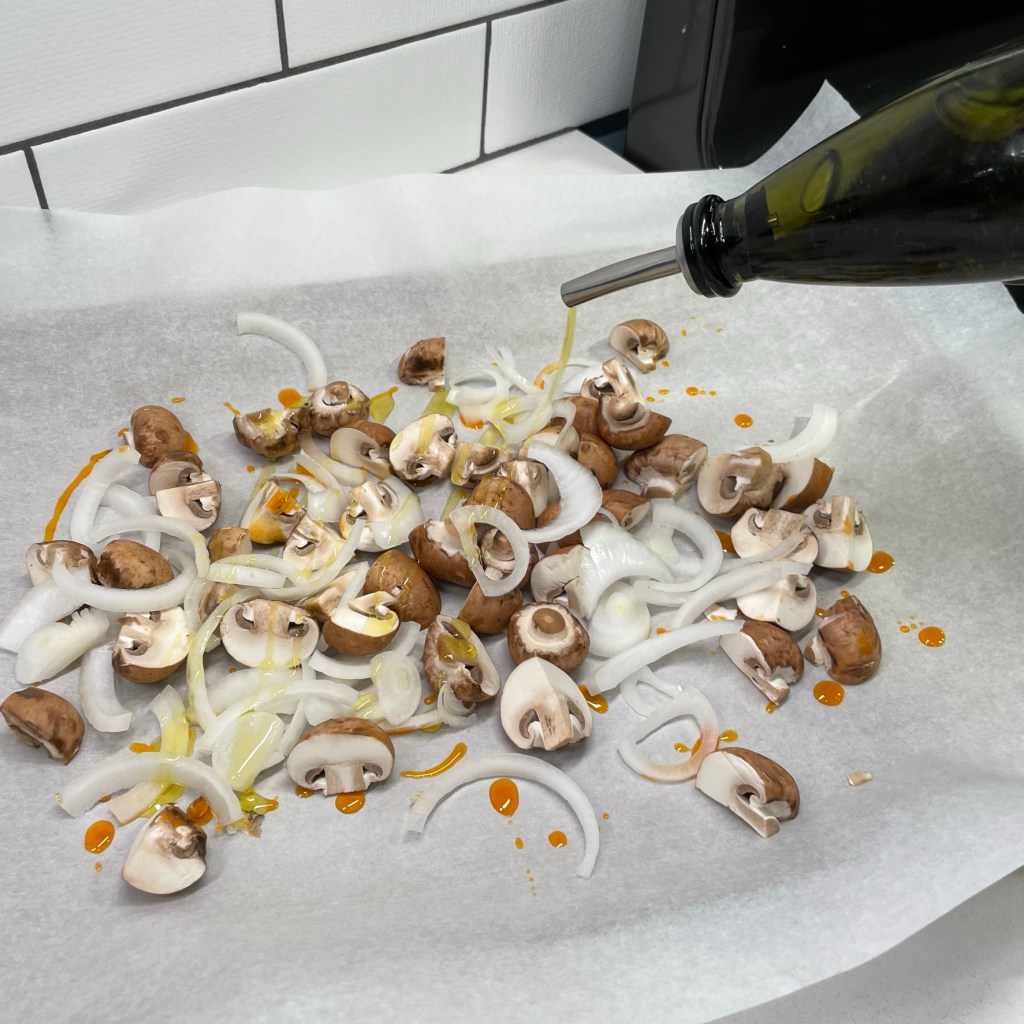
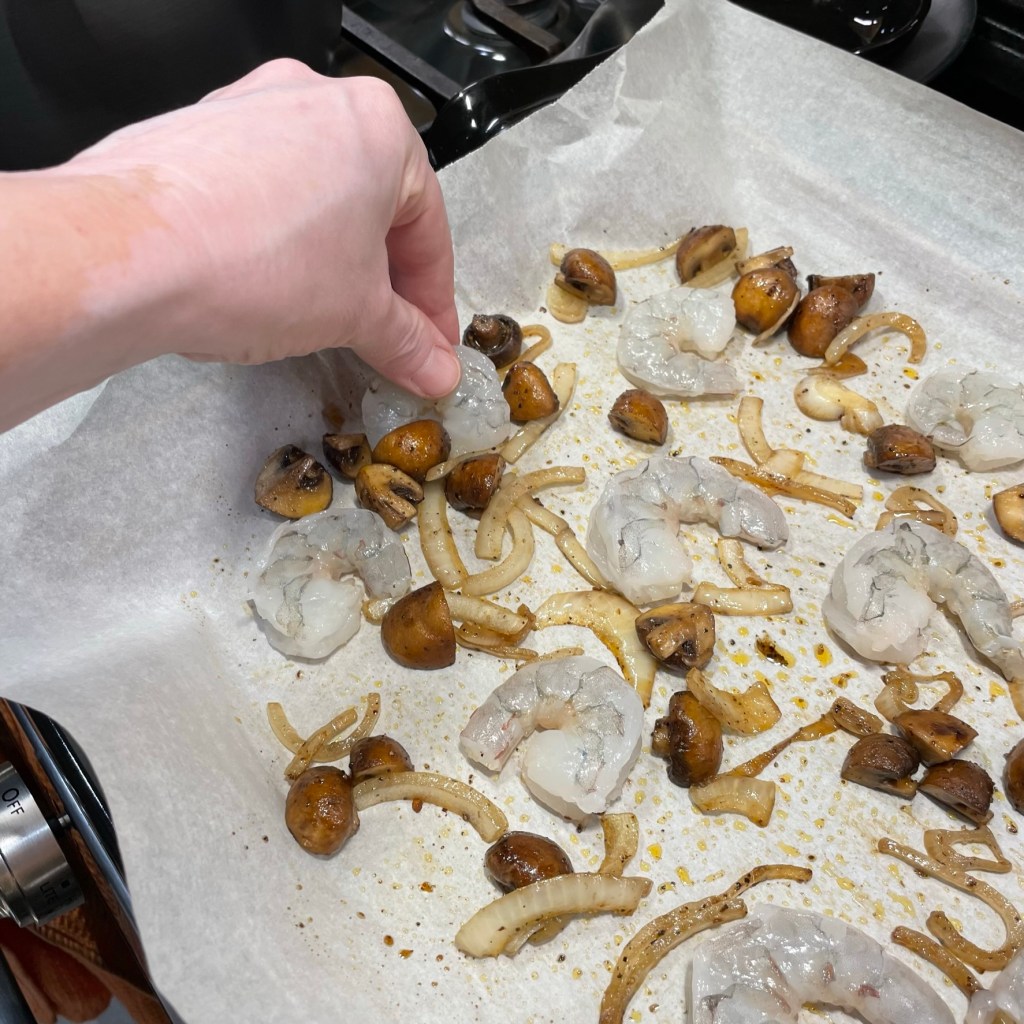
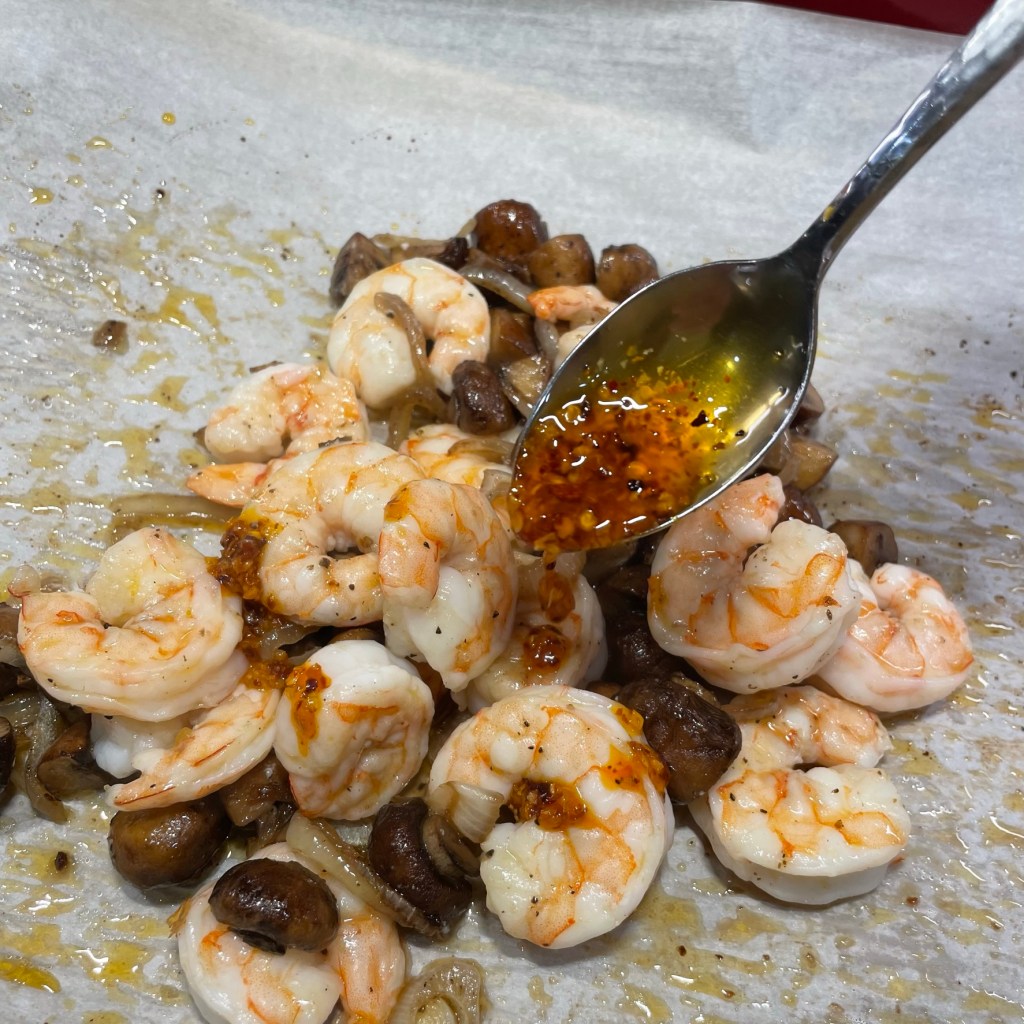
The roasted shrimp topping on my pappardelle was very easy to make, and I borrowed a page from Ina Garten’s playbook to get this done. The Barefoot Contessa’s method of roasting shrimp rather than boiling it ensures perfect doneness without having to watch it like a hawk. The onions and mushrooms needed more time, so I started with those, roasting with a drizzle of olive oil and a drizzle of the oil on top of the chili onion crunch from Trader Joe’s. If you don’t have a TJ’s near you, check your supermarket for the new Heinz version of this, or seek out a recipe for “chili crisp” online.
My mushrooms and onions got a 13 minute head start, then 7 more minutes for perfectly cooked shrimp.
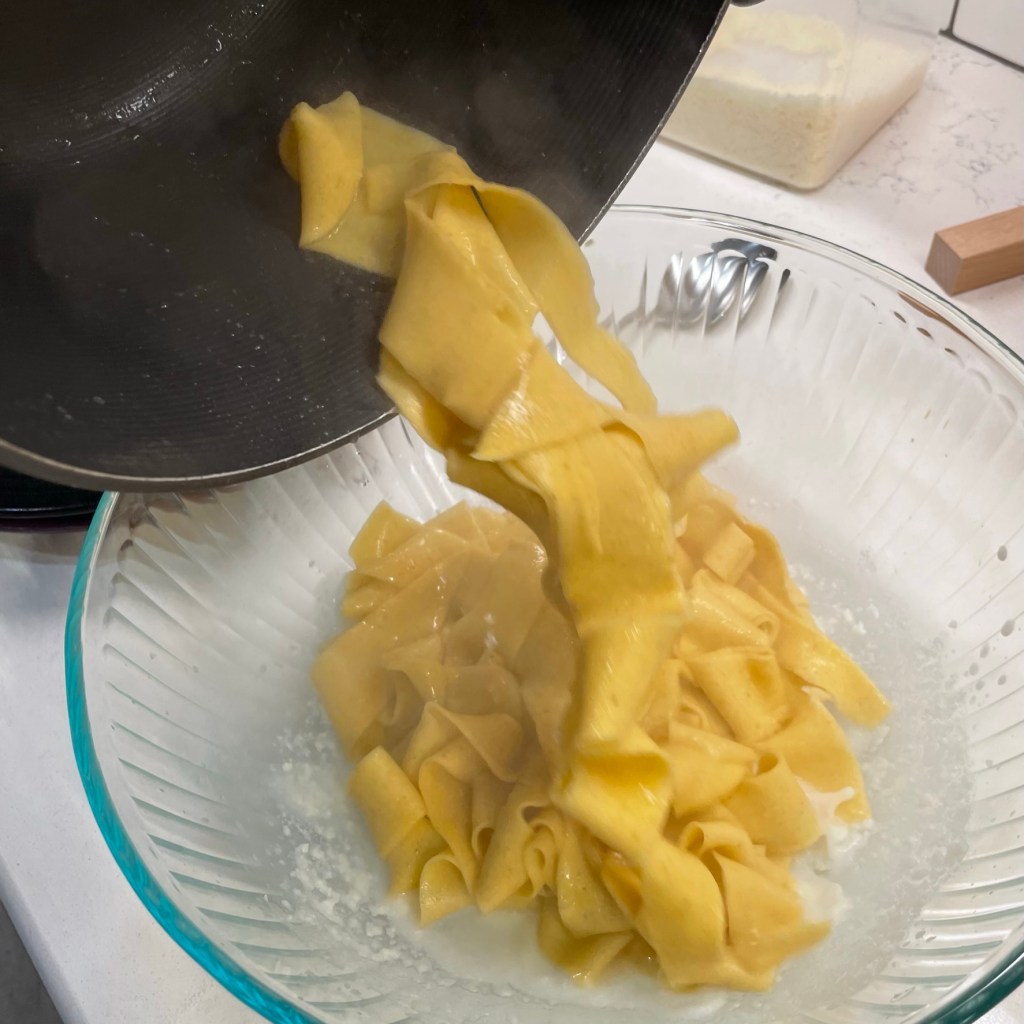
When my pappardelle was just right (al dente stage), I tossed it in a bowl with a generous amount of Parm-Romano blend and black pepper— a makeshift cacio e pepe treatment, if you will— and topped it with the roasted shrimp and mushrooms, plus an extra drizzle of the chili onion crunch.
This was so, so good. The pumpkin flavor was subtle but the pasta definitely had an autumn vibe. Next time, I’ll increase the pumpkin and reduce to one egg when I make my pumpkin pasta dough and I’ll turn it into a ravioli or tortellini. Tell me, dear friends, what flavors should I put in the filling when I do it? 🙂
An infusion of real pumpkin puree and a portion of rye flour give this handmade pasta a rustic, substantial feel and flavor.
Ingredients
1/3 cup pumpkin puree (NOT pie filling)
2 large eggs, room temperature
2 to 4 Tbsp. water, room temperature (use only as needed)
1 cup “00” or all-purpose flour (see ingredient notes for measuring tips)
3/4 cup fine durum (semolina) flour
1/2 cup whole rye flour
1/2 tsp. onion powder (optional)
2 pinches kosher salt
Coarse-grind semolina, for dusting during roll-out of pasta
For best results, sift flour before measuring by volume, or fluff it with a whisk before spooning it into the measuring cup and then leveling it off. If you dip your measuring cup into the flour, it will be too dense and produce a dry, tough pasta.
Directions
Combine the pumpkin and eggs in a blender container and pulse a few times, followed by constant blending, until the mixture is even and smooth.
Pour the pumpkin mixture through a fine mesh strainer to remove any lingering solids. Add enough water to produce 3/4 cup liquid ingredients.
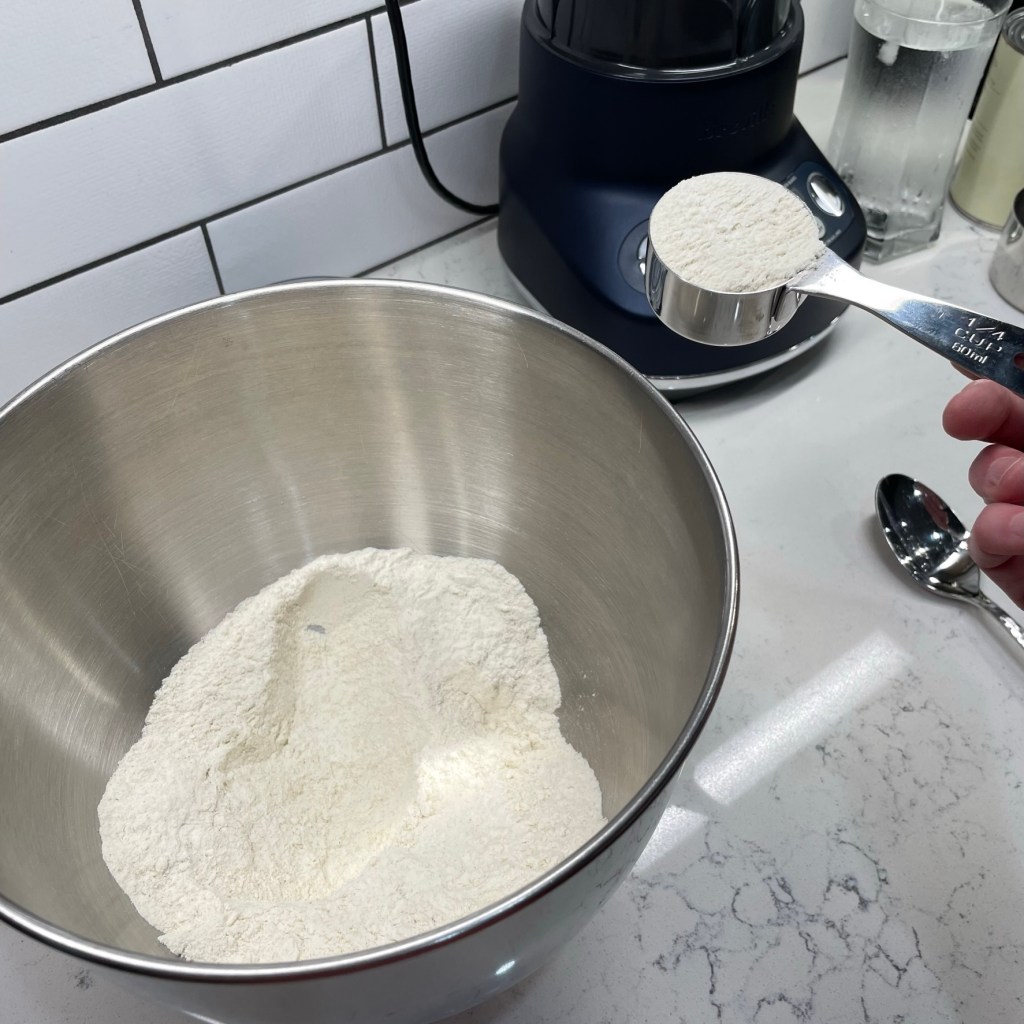
In the bowl of a stand mixer, whisk together all flours with the onion powder and salt, and then measure out about 1/4 cup to have on reserve. This makes for easier adjustment of the dough and can also be used during the rolling stage of the pasta dough.
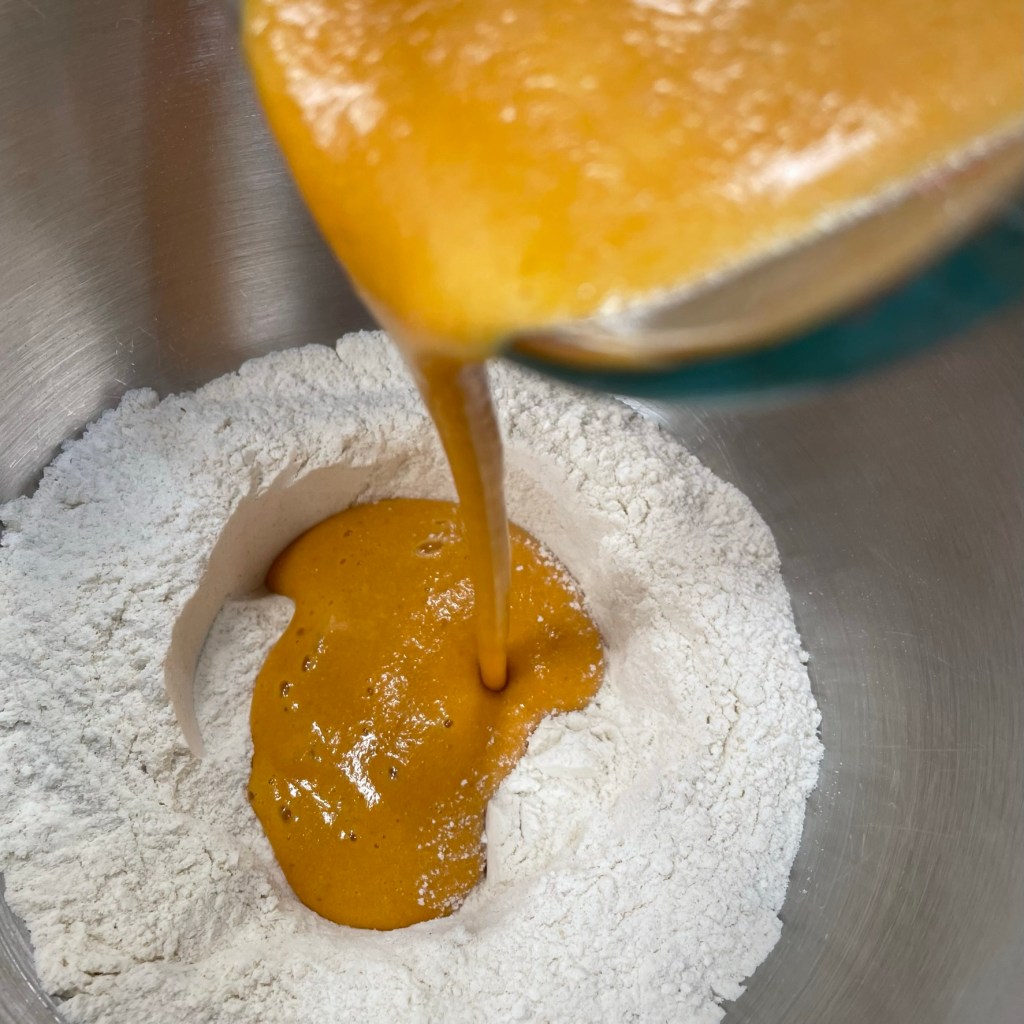
Make a well in the flour and pour the liquid mixture into it all at once. Use the kneading hook attachment to mix the flour and liquids together until most of the flour is incorporated. If the dough seems too dry or crumbly, add one tablespoon of water and mix again, repeating until the dough is soft and pulls cleanly away from the sides of the bowl.
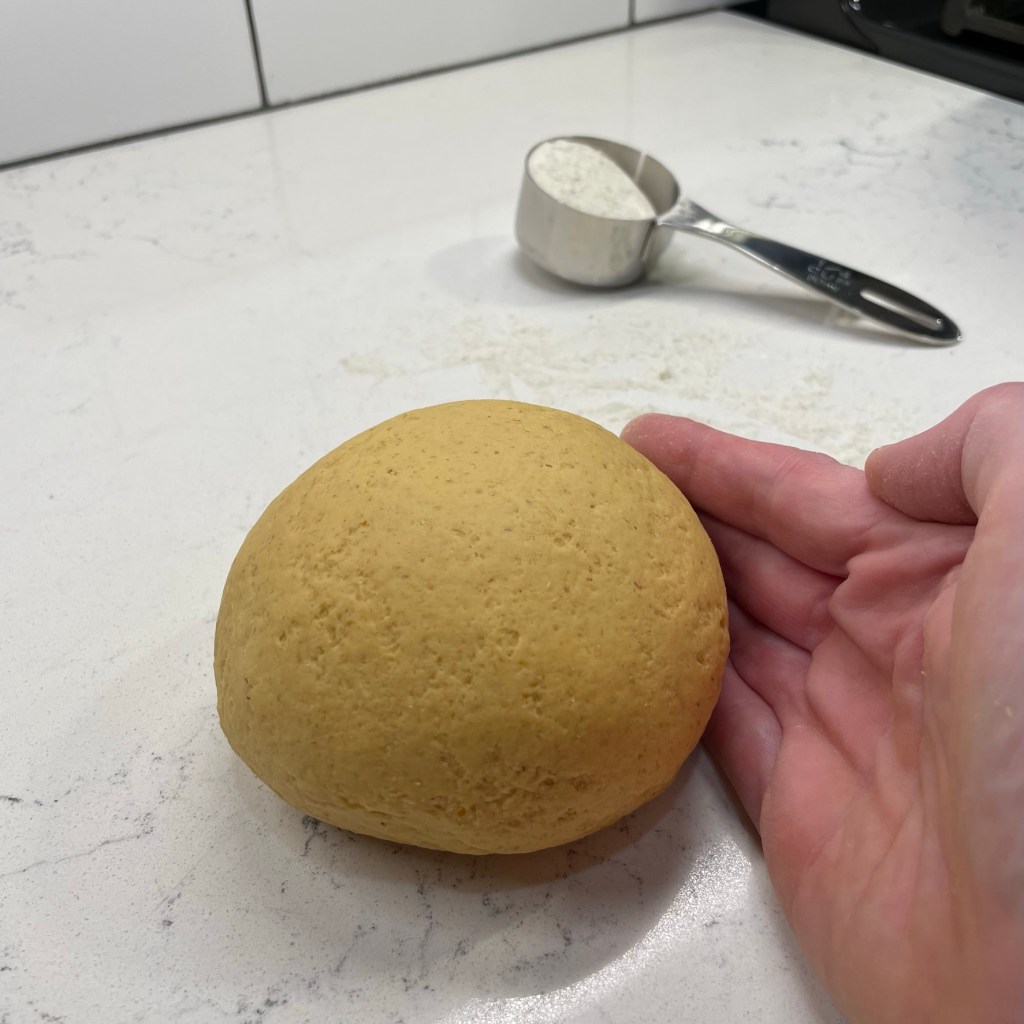
Turn dough out onto a lightly floured counter and knead by hand for about 10 minutes, or until it has a smooth, even surface without stickiness.
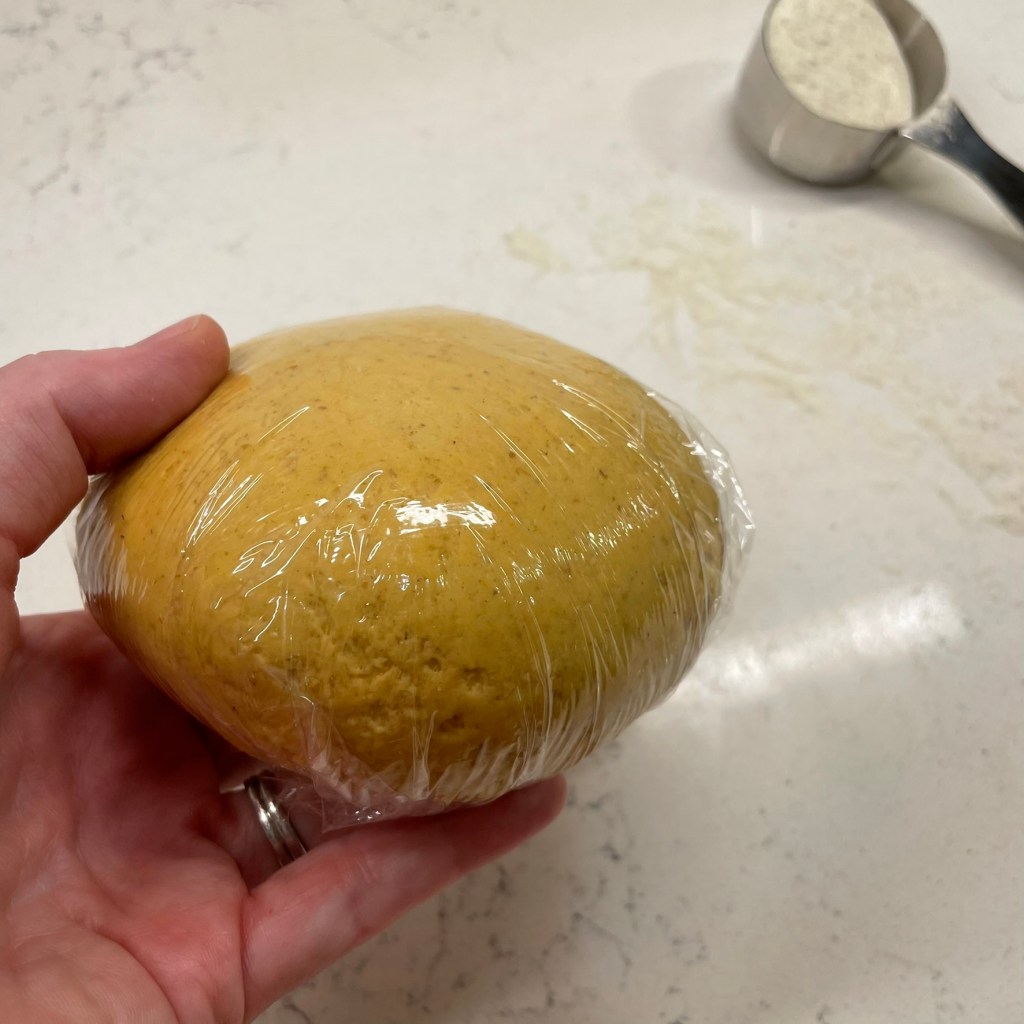
Wrap the dough tightly in plastic wrap and refrigerate for at least an hour to fully hydrate the dough and to relax the gluten structure a bit.
Remove dough from fridge about 30 minutes before rolling, and then roll as usual by hand or with a pasta machine. Roll it into sheets approximately 16 inches in length. Dust generously with coarse semolina flour and fold the sheet over several times to a width of about 4 inches. Use a very sharp knife or pizza wheel to cut the pasta dough into evenly spaced strips. Immediately unfold each strip and place it on a drying rack, or twirl it into a small nest to dry for an hour before cooking.
Pumpkin Pappardelle with Chili Crisp-roasted Shrimp & Mushrooms
Most of this meal happens on a sheet pan, which is a great time saver after spending an afternoon making handmade pasta.
Ingredients
1/2 batch pumpkin pappardelle (see recipe above)
2/3 pound large shrimp, peeled and deveined
1/2 sweet onion, trimmed and sliced into crescent shapes
4 oz. cremini mushrooms, cleaned and halved or quartered into bite sized pieces
About 2 tsp. chili crisp with oil* (see ingredient note)
2 Tbsp. extra virgin olive oil
1/4 cup finely shredded Parm-Romano blend (or Parmesan; preferably fresh rather than canned)
1/2 tsp. freshly ground black pepper
*Ingredient note: The “chili crisp” I used is the Trader Joe’s Crunchy Chili Onion, which used to be labeled “Chili Onion Crunch.” If you don’t have a TJ’s near you, check your supermarket for a similar product made by Heinz, or search online for a “chili crisp” recipe. The product is a spicy blend of dried red chiles, onions and garlic in oil. It’s fantastic!
Directions
Bring a pot of water to boil for cooking the pappardelle. Preheat oven to 400 F, with rack in center position. Line a rimmed cookie sheet with parchment paper, and drizzle it with chili crisp oil and olive oil.
Scatter the onions and mushrooms on the sheet and roast for about 13 to 15 minutes, until onions are slightly soft and mushrooms have reduced in size. Arrange the shrimp on the sheet, drizzle with a bit more oil and return to the oven for 6 to 8 minutes, depending on the size and initial temperature of the shrimp. You want to remove the pan as soon as the shrimp are opaque. Drizzle a little more chili crisp with oil all over the shrimp and mushroom mixture, tossing to coat.
Cook the pappardelle while the shrimp are roasting. Fresh pasta should only take about 4 to 5 minutes to reach al dente stage. Drain promptly and toss it into a large bowl with Parm-Romano and black pepper. Toss gently to coat.
Plate the pappardelle and top with the chili crisp-coated shrimp and mushrooms. Serve immediately.
Here we are, knee-deep into July, and I’m taking a break from the overflow of zucchini coming from my garden to share another ice cream. No, it isn’t zucchini ice cream—pretty sure nobody would even try that—but it is unusual, and technically not ice “cream” at all. Nope, it is a sorbet, with plenty of real dark chocolate, and though it does not have a bit of dairy product (nor substitutes), there are two surprise ingredients that give it tremendously creamy texture.
I’ve been seeking ways to update old favorites for better health, and that means eating lighter and limiting saturated fats. I was pretty excited last month to discover that I could use the fat-free version of sweetened condensed milk to create an ice cream that is equally creamy to its full-fat counterpart (check out my Reduced-Guilt Vanilla Ice Cream if you missed it). But this time, I wanted to go a different direction, using no cream or dairy whatsoever. I’ve made sorbets plenty of times, but they always had fruit juice or puree in them, and I knew this would not. I’ve made chocolate ice cream several times as well, but those recipes all involved melting solid chocolate with cream or milk, so that was a no-go. Last summer, I made a luscious chocolate syrup that became a ribbon through my S’mores Ice Cream, but I wasn’t sure how to make a larger batch of that while avoiding “icy” texture that is common to sorbet. Somehow, I needed to merge these ideas in a way that would still give me the creamy texture I crave in frozen dessert.
My deep-dive into this dark chocolate sorbet was largely inspired by a dessert I saw on another blog earlier this year. Back around Valentine’s Day, one of my blog buddies (Dorothy, from The New Vintage Kitchen) shared a recipe she had made for her husband, called “love your heart chocolate pudding.” I was enthralled by Dorothy’s adaptation of one of her husband’s favorite dessert treats (using avocado in place of saturated fats), and it had reminded me of a similar product I’d seen many years ago at Whole Foods—a dark chocolate gelato, made with avocado. Attempting my own version of this has been on my culinary bucket list for a long time, and this was exactly the inspiration I needed.
Armed with information on a number of different methods, I set out to mix and match my way to this recipe. When it came down to it, this sorbet was surprisingly easy to make, and I’ve got the scoop for you, right here in the middle of National Ice Cream Month!
One scoop is all I need to satisfy my sweet tooth!
One of my favorite resources for ice cream ideas is a little spiral-bound book I picked up years ago on the clearance shelf at TJMaxx. It includes an entry for “bittersweet cocoa sorbet,” which was a syrup-only base, described as intensely bitter on the chocolate front—more than I was aiming for, anyway—so I considered it a starting point and made several adjustments to the recipe to tone it down and make it my own.
Call me fainthearted. This was a good starting point for my sorbet.
For my simple syrup, I dialed back the cocoa by half, increased the sugar (mine was turbinado) and used one less cup of water. Sweeter is better, especially if I want my husband to enjoy it with me; I also knew that heavier concentration of sugar in the simple syrup would make it freeze softer. Thank you, Alton Brown, for your wisdom over the years.
To underscore the richness of the cocoa, I applied three specific ingredients: real vanilla paste for complexity and balance, espresso powder to deepen the chocolate flavor, and a pinch of salt to bring out the best of everything. I am a firm believer in using a touch of salt in every dessert.
The chocolate syrup took about 40 minutes, start to finish.
The syrup itself was heavenly, with a deep flavor of dark chocolate. But the real magic happened in the blender, when I combined the chilled syrup with two healthful ingredients—frozen banana and avocado! I use frozen ripe bananas in all my smoothies, and it does an amazing job of adding body and texture to the mix. I wasn’t sure whether the flavor would overwhelm the chocolate flavor, and I’ll share my thoughts about that at the end. The avocado was soft and ripe, and I placed it in the refrigerator the night before, to help me stay on schedule for freezing my sorbet mixture right away.
If your blender does not have a smoothie setting, pulse to combine the ingredients, then blend/puree until completely smooth.
After one minute on the “smoothie” setting of my blender, I had my results. Admittedly, I was not emotionally prepared for the thick, silky texture of this sorbet base! It literally had the viscosity of prepared pudding, and it was luxurious and delicious, even in this unfrozen state.
Oh. My. Goodness.
My hunch is that I could have transferred this blended mixture directly into my insulated container and sent it straight to the freezer. The base definitely increased in volume in the blender and I think it would have frozen into a dense, almost-custardy sorbet. But my ice cream maker was already set up and ready, so I proceeded to freeze it as I would any ice cream. Near the end of churning, I poured in just a splash (OK, two) of Godiva chocolate liqueur, to help keep the sorbet from freezing solid. Disregard the grainy appearance in these photos; it honestly does not have a grainy mouthfeel at all—just creamy, smooth and very chocolate-y, like a frozen Dove chocolate melting on your tongue.
So, let’s talk about the banana. I had some hesitation about how much flavor it might impart to my dark chocolate sorbet, and the answer is—quite a lot. I don’t mind the flavor, and the chocolate does shine through prominently, but the next time I make this sorbet (and trust me, there most definitely will be a next time), I will ditch the banana in favor of a second ripe avocado. It was the avocado fruit that lent the smooth creamy texture, and that makes sense, when you consider than an average avocado has 29 grams of healthy fats. There is absolutely no flavor of avocado in this sorbet, so I figure the tradeoff would only improve the richness of it.
As for this banana-forward batch, my husband suggested we play that up by nestling a scoop of our dark chocolate sorbet into a banana split with some fresh strawberries, and now I think I know what we’ll enjoy for dessert this weekend. 😉
This sorbet has all the richness I crave in an ice cream, but without a bit of dairy! Choose a good quality dark cocoa, and use a ripe avocado. If you prefer, swap the banana for a second avocado.
Ingredients
3 cups water
1-1/2 cups turbinado sugar
1/2 cup dark unsweetened cocoa (I used a combination of Hershey’s dark and King Arthur’s double dark dutch cocoa)
1 Tbsp. real vanilla paste (or 1 tsp. real vanilla extract)
1-1/2 tsp. espresso powder (optional, but it intensifies the chocolate flavor)
pinch of kosher salt
1 ripe banana (peeled and frozen ahead; omit for a second avocado if you wish)
1 ripe avocado (put in refrigerator the night before)
1 Tbsp. chocolate liqueur or vodka, optional for improved texture when frozen
Directions
Combine water and sugar in a deep saucepan over medium heat. Stir until sugar is dissolved.
Sift cocoa powder to eliminate clumps. Add to simple syrup and whisk until blended. Bring mixture to a boil, then reduce heat and simmer for about 20 minutes, stirring frequently. The syrup should reduce slightly and have a thicker consistency when finished.
Remove syrup from heat. Stir in vanilla paste, espresso powder and salt. Cool to room temperature, then cover and refrigerate until cold.
Set up ice cream machine. Gently stir the chocolate syrup to reincorporate ingredients that may have settled.
Add syrup to blender, along with frozen banana (broken into chunks) and avocado flesh. If your blender has a smoothie setting, use that to mix the sorbet base. Otherwise, pulse a few times to combine and then use the blend and/or puree settings until the mixture is completely smooth with no lumps.
Pour mixture directly into ice cream machine and follow manufacturer’s instructions for freezing. Add liqueur (if using) in the final minute.
Transfer sorbet to an insulated container for freezing. Place a piece of waxed or parchment paper directly on the surface of the sorbet to minimize ice crystals.