Fried Green Tomatoes (with Mexican Street Corn)

Some decisions come back to bite you. I know this because I have really missed having fresh-off-the-vine tomatoes and zucchini this year, and I’ve felt twinges of regret over having ripped out my deer-ravaged garden a couple of summers ago. I just didn’t have it in me anymore, but at least we have the farmers’ market. I recently invited a neighbor to join me at our fabulous Saturday market, and I brought home a few fresh tomatoes as well as some green ones. 


Most people assume that fried green tomatoes are a delicacy of the American South, but this is only because of the now-classic 1991 film based on the Fannie Flagg book, Fried Green Tomatoes at the Whistle Stop Cafe, which was set in 1920s Alabama. But food historians credit midwestern newspapers and Jewish cookbooks with the first published recipes for this dish.

Wherever the heck they came from, I’m grateful. And today, I’ve put a fun flavor twist on this classic, in the form of— you know it— Mexican street corn.

Didn’t I tell you there’d be more elote to come?

How do you make fried green tomatoes?

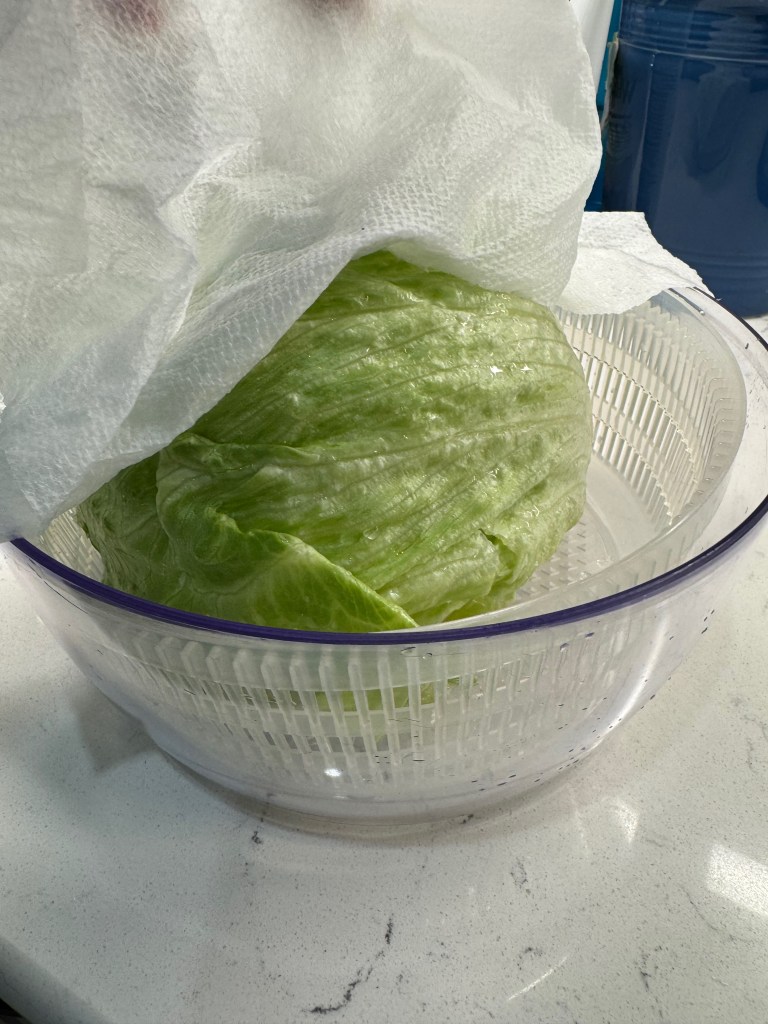
Confession time: I had never made these before, and so I was relying mostly on a recipe from Southern Living magazine as well as my own memories of having eaten fried green tomatoes at some of our local hot spots. The trick, apparently, is to use tomatoes that are truly green, freshly picked off the vine or farm stand while still firm and solid. This is necessary because frying won’t work on softer, juicier tomatoes. I bought my tomatoes on a Saturday, and by the time I got my proverbial ducks in a row on Tuesday, two of my maters were already headed toward varying shades of pink, but they worked out fine.

Still green enough, thankfully!

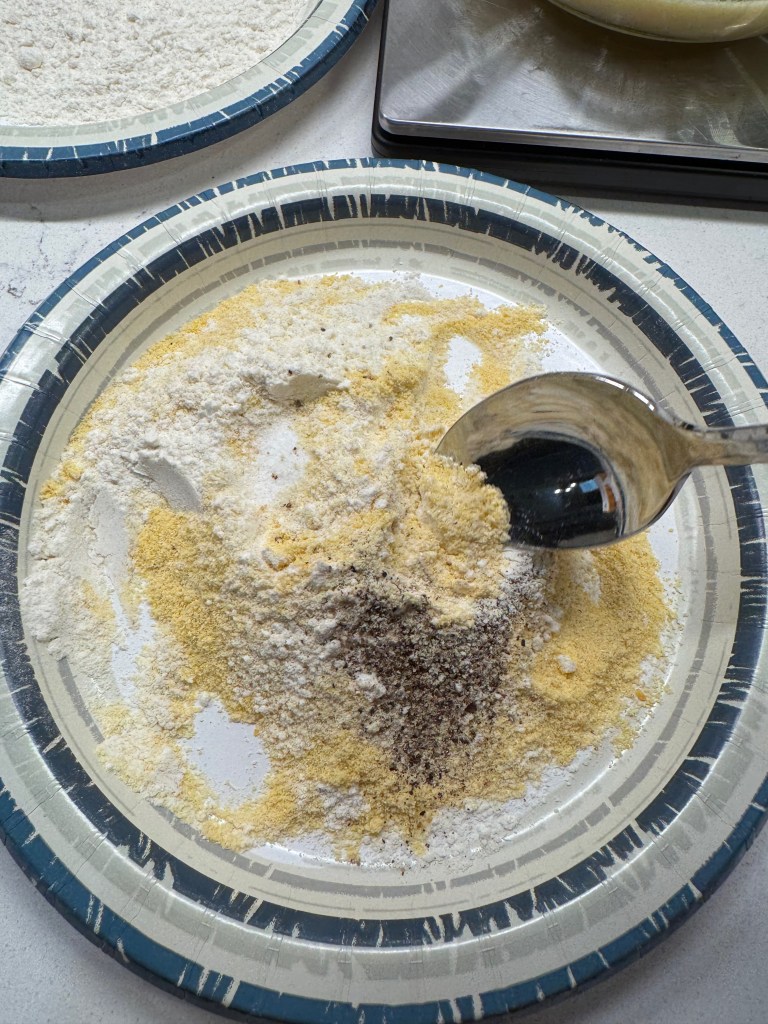
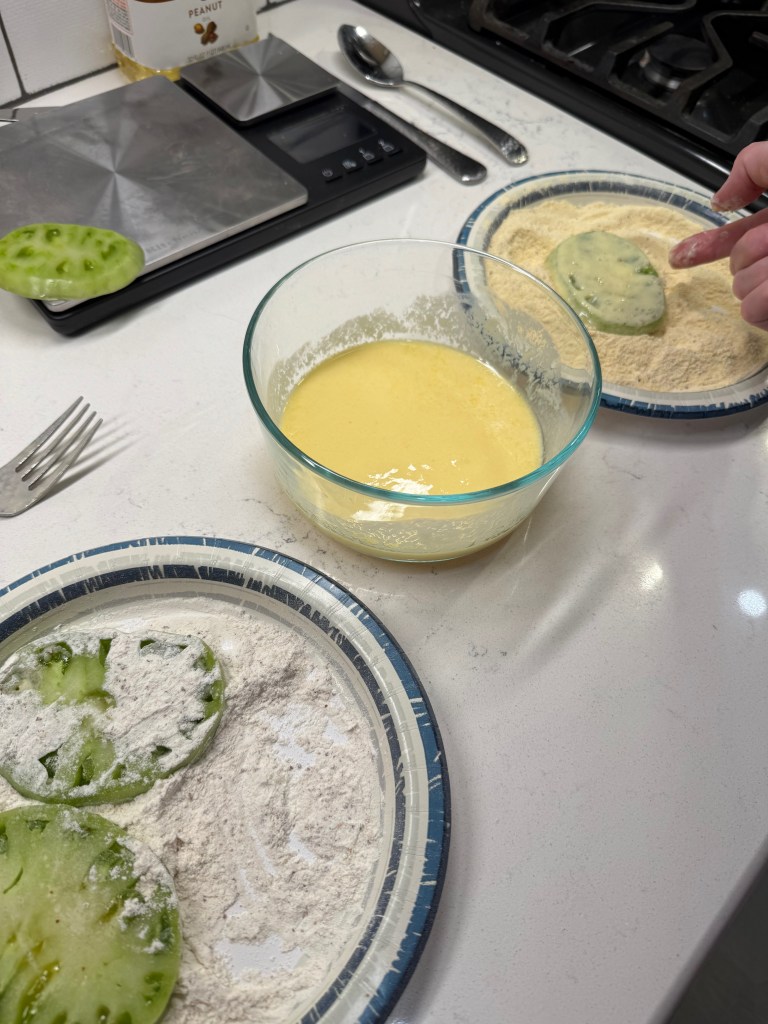
You’ll need a dredging station— that is seasoned flour, buttermilk with beaten egg and a seasoned cornmeal-flour mixture— and a hot skillet with a half-inch or so of neutral frying oil. I used peanut oil, but grapeseed, soybean, canola or safflower would be good options. Olive oil has a low smoke point and is not good for frying at this temperature. Save that for sautéing and salads.

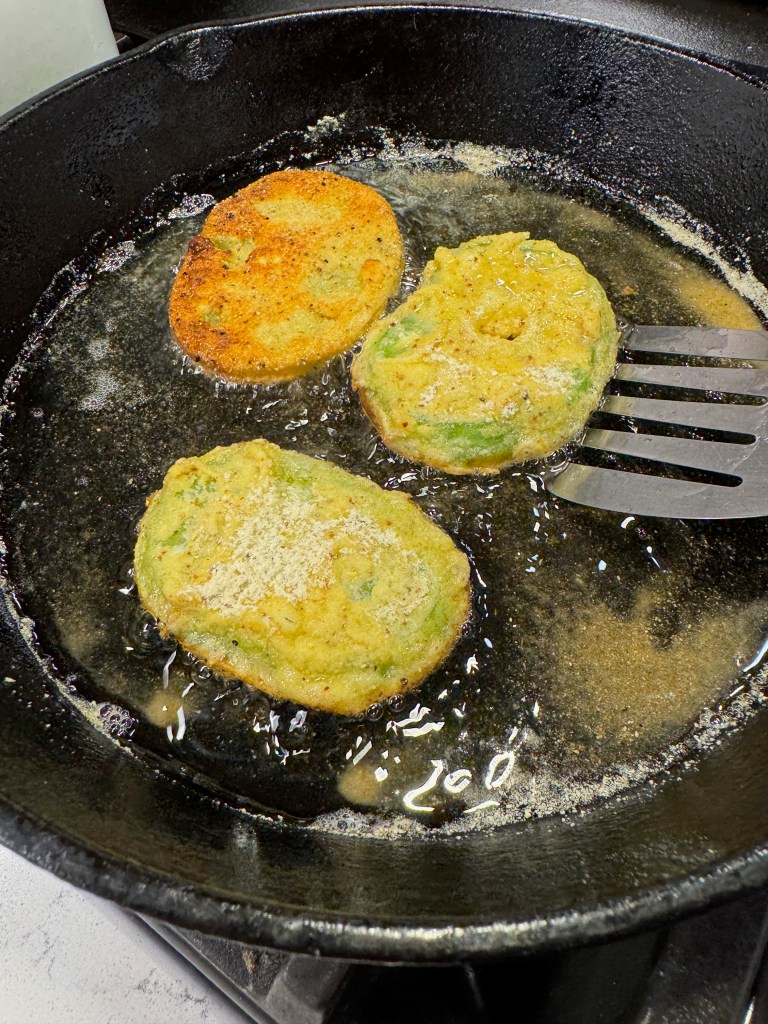
The fun part: frying the green tomatoes!

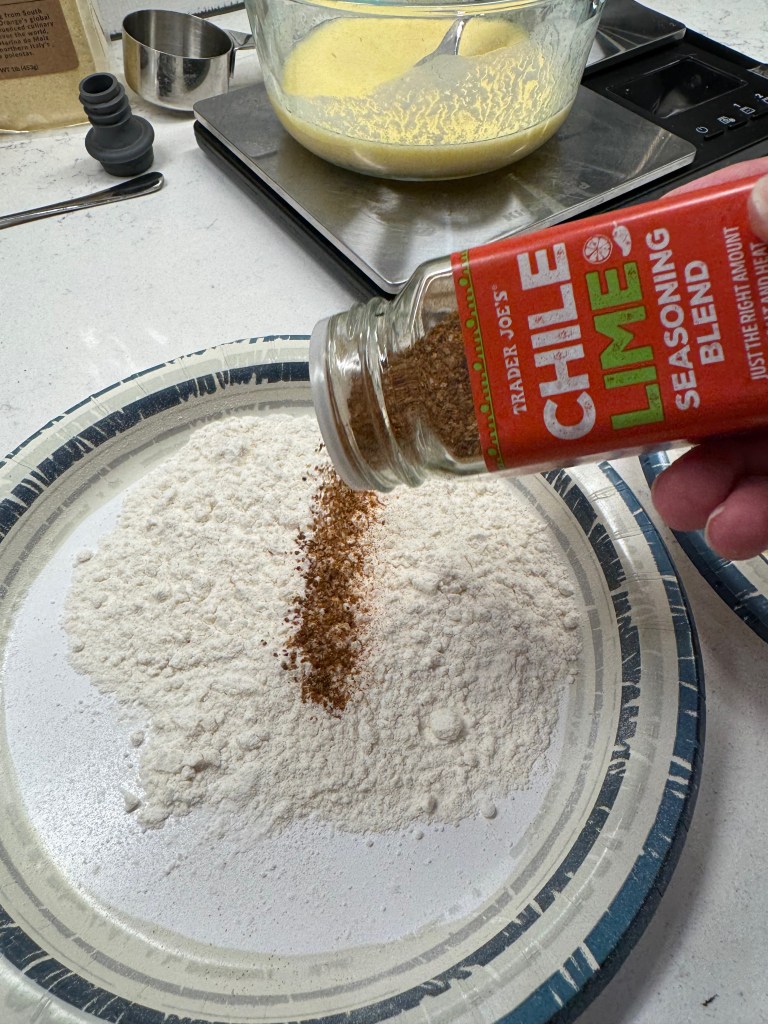
Because I wanted to marry these fried green tomatoes with Mexican street corn, I took the liberty of seasoning every layer of my dredging station. This meant a couple of dashes of local hot sauce into the buttermilk mixture and a few shakes of Trader Joe’s “Chile Lime” seasoning into both the flour and cornmeal mixtures.


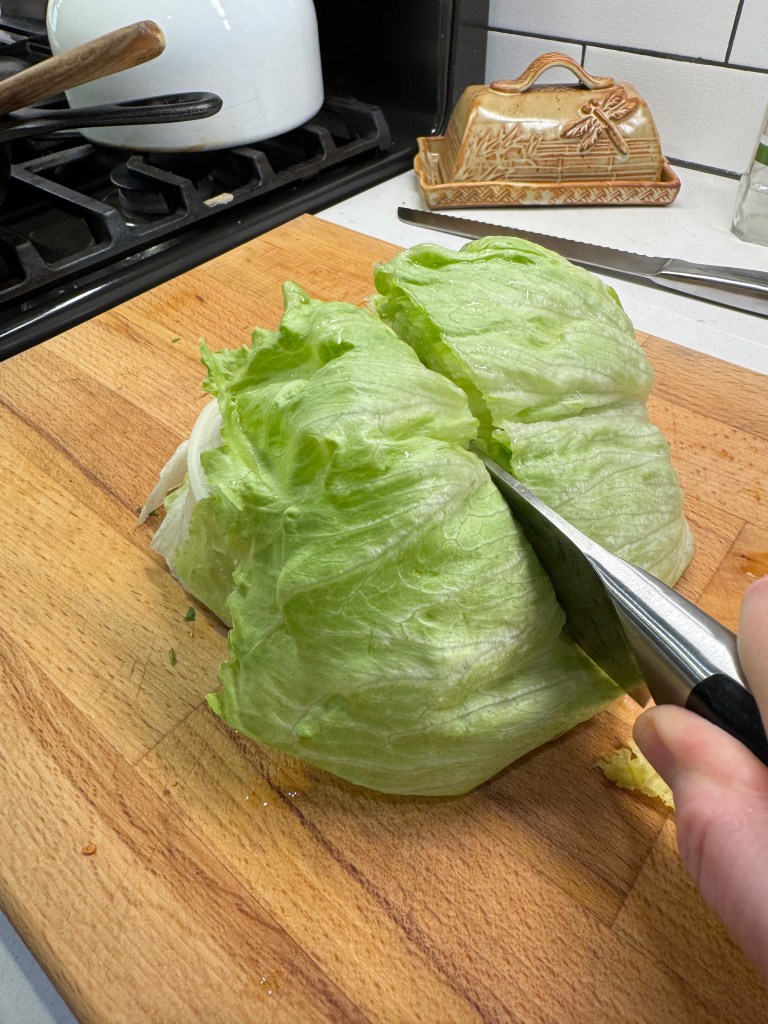
The tomatoes are sliced to approximately 1/3-inch thick, and then dredged and laid carefully into the hot oil until browned and crispy. This only takes a few minutes on each side. As with anything fried, give it a quick salt when they emerge from the pan, and keep them warm while you finish the remaining slices. 


About these Mexican street corn flavors

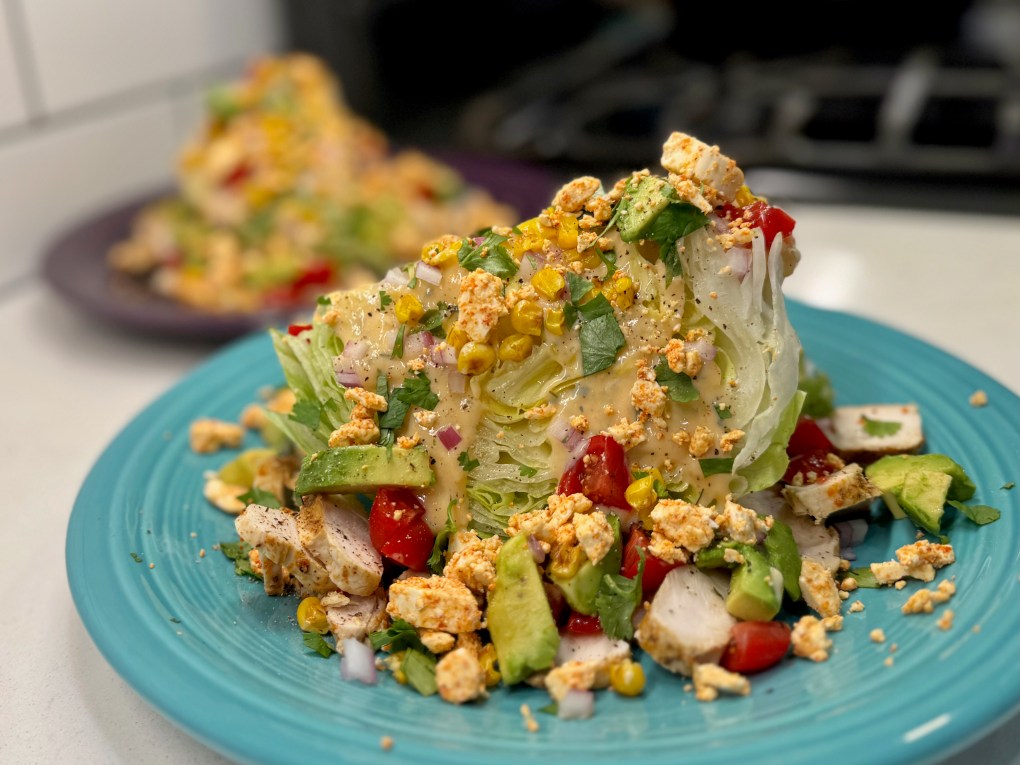
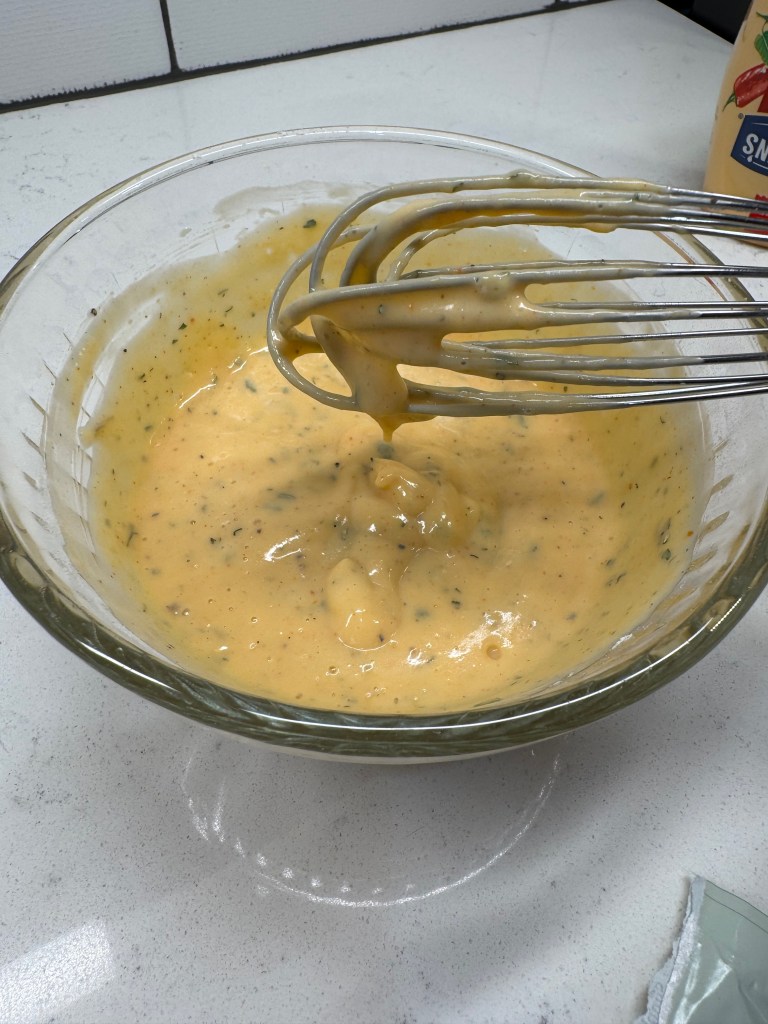
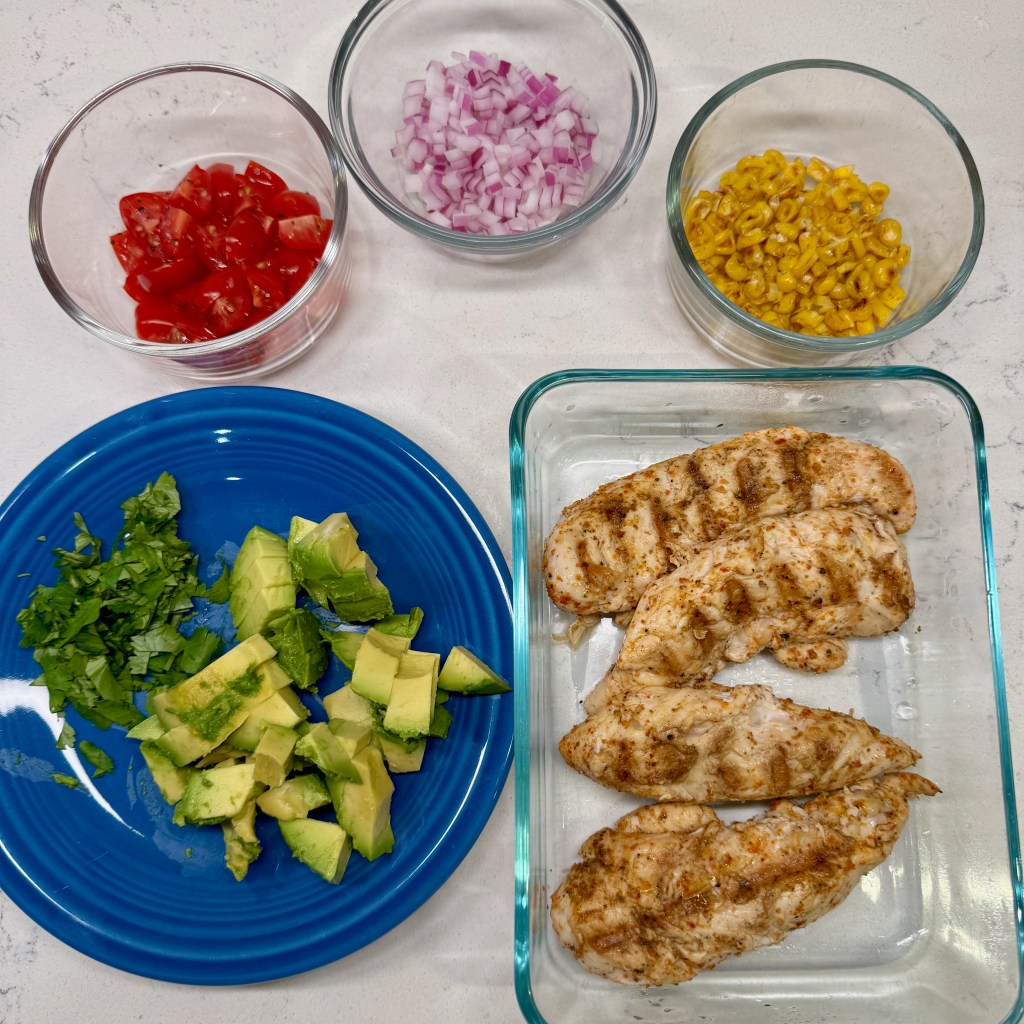
I’ve been all about elote lately, and this dish was simple to adapt, beginning with those flavor embellishments to the dredging ingredients. To seal the deal, I squeezed a few drizzles of spicy mayonnaise over the hot fried green tomatoes, and then scattered them with leftover grilled corn, some crumbled Tajin-flavored feta (my new favorite ingredient) and fresh chopped cilantro.


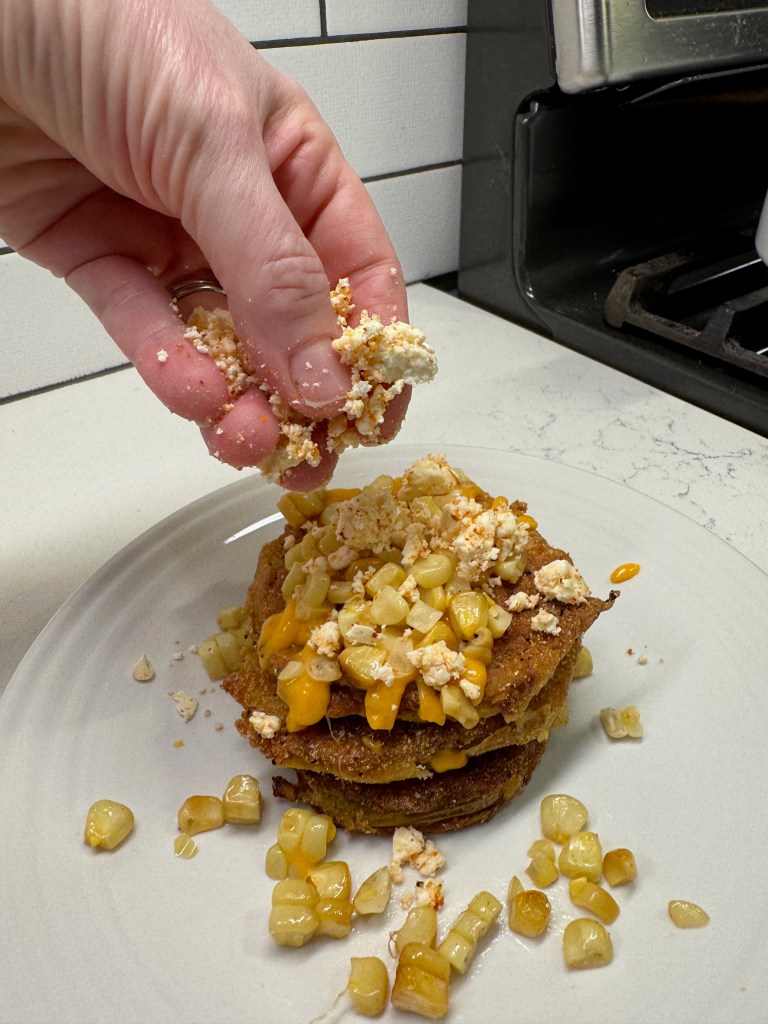
The marriage with street corn felt like it was meant to be, and the grilled corn played so well with the cornmeal crust on the tender green tomatoes, which were delightfully tangy underneath that spicy mayo and salty feta. My intention was for this to be a side dish, but they were so filling, we found them to be perfect on their own and called it a meal. 

Fried Green Tomatoes (with Mexican Street Corn)

  • Servings: About 4
  • Difficulty: Average
  • Print

These tasty treats are bringing a south-of-the-border flavor to what has become a staple appetizer in the American South. A great way to use any green tomatoes that linger on the vines this fall.


Ingredients

  • 3 good size very green fresh tomatoes
  • 1 cup all-purpose flour, divided (see directions)
  • 1 cup fine cornmeal
  • 1 tsp. salt
  • 1/2 tsp. black pepper
  • Several shakes chili powder or Trader Joe’s “Chile Lime” seasoning
  • 1/2 cup real buttermilk (thick is best)
  • 1 large egg
  • Bottled hot sauce to taste
  • Neutral cooking oil for frying
  • 1/4 cup spicy mayonnaise
  • Kernels of one grilled corn on the cob
  • 1/2 cup Tajin-flavored feta (or make your own, or use traditional cotija)
  • Fresh cilantro leaves, chopped (for garnish)

Notes: It’s crucial that you select very firm green tomatoes. Juicy tomatoes will not yield a good result. Arrange your ingredients before you begin, as the cooking moves quickly.

Directions

  1. Slice tomatoes cross-wise into roughly 1/3-inch slices and pat dry with paper towels. Heat enough oil in a cast iron or electric skillet between 1/4-inch and 1/2-inch deep. The oil should be 375° F; use a thermometer if you have one, or consider cooking a test tomato and adjust the temperature as needed.
  2. Combine buttermilk and egg in a shallow bowl, and beat in a few shakes of bottled hot sauce. Place 1/2 cup of the flour on a deep paper plate. Combine the rest with the cornmeal on a second plate, and season both plates with a few shakes of chile lime seasoning, plus the salt and pepper.
  3. Moving quickly, dredge the tomato slices in the flour, then dip into the buttermilk mixture and finally into the seasoned cornmeal mixture. Shake off excess breading and carefully lay the slices into the hot oil. Cook for about three minutes, until you can see the edges turning deep golden color. Use a spatula together with a fork to turn the slices over (this will help you avoid splashing the hot oil). Cook the second side two to three minutes, then carefully transfer to the wire rack placed over a baking sheet. Season tomatoes with salt promptly, and repeat with remaining tomatoes.
  4. To dress them up Mexican street corn-style, stack three tomatoes onto a plate and drizzle spicy mayonnaise over the top, then follow that with the grilled corn, feta and cilantro.


Southwest Wedge Salad

Sometimes a food captures me in such a way that I can’t think about much of anything else. I just want more of it, and I call up all the possibilities for enjoying that food. It’s like falling in love, I suppose, and I’ll be the first to admit I have become somewhat obsessed with the flavors of Mexican street corn. I’ve been daydreaming about new ways to incorporate the sweet kernels of corn, creamy spicy mayo, Tajin, tangy lime and fresh cilantro into our menu plan, as I did when I made the Mexican street corn potato salad a couple of months ago. Today’s salad is not specifically a Mexican street corn dish, but it was definitely inspired by its flavors. Expect a few more “street corn” creations in the weeks ahead, as I am undeniably head over heels.

All my cravings are covered here, from crunchy to creamy and cool to spicy!

Keeping meals cool in the hot summer

It’s been a brutal summer in North Carolina, with temperatures far exceeding the typical, plus too much humidity. This week has been more tolerable, but all of July and the better part of August were sweltering. When it’s too hot, we try to make the most of our outdoor cooking by grilling up extra proteins (and sometimes vegetables) to use later in the week. Chicken is the simplest, and I love the ease and flexibility of tenders, which can be seasoned any number of ways for sandwiches, wraps and salads. This time, we had grilled our tenders with Tajin, and that was quite on purpose because my muse was already busy developing this salad. Here’s how the rest of it came to be, starting with the lettuce.

During most months of the year, I am a lettuce snob, opting for romaine over less-expensive varieties. Plus, I generally prefer the substantial texture of romaine for a Caesar or garden salad. But in the summertime, there’s something irresistible about iceberg— that crispy, hydrating crunch and refreshing, slightly bitter flavor— and it is obviously the star of any wedge salad.


The simplest way to clean iceberg lettuce is from the inside out, and that requires removing the core. You could carve it out with a knife, I suppose, but I rely on a simpler trick of smacking the head on the counter to break the core from the leaves, then the core just pulls right out. This makes it easy to rinse the lettuce head, and then shake out the excess water and let it drain in the fridge for a few hours.

A shortcut to flavor

I made the dressing early in the day so that the flavors had a chance to meld before dinner. I knew that I wanted a creamy, ranch-style dressing, and I considered making it from scratch before I found a packet mix with simple, clean ingredients. For southwestern flair, I subbed in a spicy mayo along with the buttermilk. It was perfect for this salad, and saved a bunch of time.


The street corn inspiration is evident here, but I wanted more pop and color, so I also prepped a handful of baby tomatoes, some diced red onion and cubed avocado. The only thing left to do was build this salad!

I love when the simplest of ingredients become something special.

A south-of-the-border twist on a classic wedge

A wedge salad is exactly that— a wedge of the lettuce head— and so I cut this crunchy iceberg in half, then halved one side again for our two portions. The dressing is spooned over the cut edge so that it runs down the sides, and then it was simply a matter of piling the other ingredients on and around it, finishing the salad with all those lovely Mexican street corn flavors. We used the Tajin-flavored feta that Les had found for the potato salad, and it was a perfect stand-in for the bleu cheese you’d normally find on a wedge. 


Delicious as this was, I doubt that it has satisfied my fervor for Mexican street corn, and I’ll be dreaming up other ways to incorporate the flavors again very soon. I’m open to ideas, of course! And I’m curious whether you have a similar experience with being obsessed about particular foods. What can’t you get enough of that you want to present in new and interesting ways? Let’s chat about it in the comments!

Southwest Wedge Salad

  • Servings: 2
  • Difficulty: Easy
  • Print

The wedge salad, classic though it is, can also be a blank canvas for interesting flavor twists, such as this one with vibrant southwestern flavors and a hint of Mexican street corn.


Ingredients

  • 1/2 large head iceberg lettuce (rinsed and chilled)
  • Southwest ranch dressing (choose bottled or make your own from a packet, using spicy mayo in place of regular)
  • 4 large grilled chicken tenders, pre-seasoned with Tajin spice blend (see notes)
  • 1/2 ripe avocado, cubed and dressed with a squeeze of fresh lime to preserve color
  • 1/3 cup leftover grilled corn (we seasoned ours with Trader Joe’s “Everything But the Elote” seasoning)
  • 1/4 cup minced red onion
  • Handful of cherry or grape tomatoes, quartered and seasoned with salt and pepper
  • Handful of fresh cilantro leaves, rough-chopped
  • 1/4 cup Tajin-seasoned feta crumbles (see notes for substitution ideas)

Notes: For a tasty seafood option, consider spice-grilled shrimp or cubes of grilled firm fish, such as halibut or tuna.

If your specialty cheese section doesn’t have the Tajin-seasoned feta, make your own by crumbling a handful of feta into a small bowl with a spoonful of Tajin. Shake gently to coat, and perhaps do this a few hours ahead so that the seasoning melds into the feta. Alternatively, if you want less spice, use plain feta or cotija, which is the traditional Mexican hard cheese used in street corn.

Directions

  1. Using a large knife, cut the iceberg into equal wedges and place them, curved side-down, onto a chilled plate. Spoon about two tablespoons of the dressing over the top, allowing it to run down both sides.
  2. Scatter sliced pieces of chicken around the wedge, and top the wedge with the corn, tomatoes, red onions and avocado cubes. Sprinkle with cilantro and feta.
  3. Enjoy!


Spanakopita Scampi

Thank goodness for frozen shrimp. I mean this sincerely, as there are many times when life is too busy and even the best-laid plans can’t be pulled together in time to feed the hungry faces in my house. 

We have a weekly ritual here that begins around Sunday morning, when my husband, Les, and I sit down with our respective calendars, the long-range forecast displayed on one of our phones, and we do our best to map out what we are going to do about dinner in the week ahead. This includes a quick inventory of what we already have in the fridge and freezer, consideration of what nights might be good for cooking outdoors, acknowledgement of whether one of us has a hellish workday that week, and— last but not least— how much time we can allot to said meals and which of us will be cooking them.  

It’s a lot of moving parts and sometimes, our meal game falls apart and we need to punt. 

On such an occasion recently, I postponed a more-involved food plan in favor of this ad hoc dish, which turned out so good that I wrote down the ingredients to share it here. It’s something of a mashup of Italian shrimp scampi and Greek spanakopita, and it met all the requirements for a busy weeknight: quick, easy, flavorful and relatively healthful. 

Not too shabby for a last minute improvisation.

What ingredients do you need for spanakopita scampi?

My dish features peeled shrimp (fresh or thawed), garlic and plenty of olive oil, onions, spinach, feta, lemon, parsley and dill. And though I had both angel hair and linguine pastas— two options I’d typically reach for when making scampi, I decided to use the whole wheat orzo that was feeling ignored in the pantry. Orzo is a staple pantry ingredient in Greek cuisine, so it seemed a logical stand in for the spanakopita element of the dish, but almost any small pasta shape you like would work fine.

The most time-consuming part of this meal was thawing and prepping the shrimp, a task that I almost always hand off to Les’s capable hands. If you’re in a hurry, purchase shrimp that is already peeled and deveined to save valuable time. 

How to make spanakopita scampi

Everything else comes together quickly, beginning with a patient poaching of minced garlic in a large sauté pan. This should be done at a very low temperature, with almost no bubbles evident, so that you don’t burn the garlic. After about 10 minutes, increase the heat and add the diced onions, tossing to soften them in the warm, garlicky oil. Add the chopped spinach (I didn’t have enough so I supplemented with some thawed and squeezed frozen spinach), and then the fresh herbs.


Get the orzo going and toss the feta into the spinach mixture, then transfer that to a bowl and keep it warm. Heat some more olive oil in the same pan, or a bit of butter (or both), and cook the shrimp until it’s just barely a pink/coral color. Always use a delicate touch when cooking shrimp, as it only takes one extra minute to overdo it. My method is to place the shrimp into the hot pan one at a time in concentric circles, and by the time the last shrimp goes in, the first is ready to turn. If you can see a bit of color on the inside curl of the shrimp, that’s your sign to turn it over and cook the other side. The smaller ones will usually cook faster, and if your burner has a hot spot (as mine does), then check the ones there first.


When all the shrimp have been turned over, squeeze fresh lemon over them and turn off the heat. Drain the orzo and toss it in a bit more of butter. Plate it up with the warm spinach-feta mixture and shrimp. Enjoy!

Spanakopita Scampi

  • Servings: 4
  • Difficulty: Average
  • Print

This is a quick and easy weeknight dinner that combines two of my all-time favorite Mediterranean classics. If you don't have orzo, use any kind of small pasta shape that you have on hand.


Ingredients

  • 2 Tbsp. extra virgin olive oil (possibly more for cooking shrimp)
  • 2 cloves garlic, minced
  • 1/3 cup diced sweet or yellow onion
  • Kosher salt and freshly ground black pepper
  • 4 fat handfuls baby spinach leaves, rough chopped* (see notes)
  • A handful each of fresh dill and flat-leaf parsley, chopped
  • 1/3 cup feta, drained and cubed or crumbled
  • 1 Tbsp. butter* (see notes)
  • 1 pound fresh wild-caught shrimp, peeled and deveined
  • Juice of 1/2 fresh lemon
  • Cooked orzo and fresh lemon slices, for serving

Note: Fresh spinach is best, but if you don’t have enough, you can supplement with some frozen chopped spinach. Microwave it in a glass dish until thawed, then press out as much water as possible and add it to the onions after they’re already softened. Proceed with the rest of the recipe as usual.

I was fortunate to have a bit of “dill and shallot” compound butter left over from another recipe, and it was perfect for cooking the shrimp! If using regular butter or oil, consider adding a few shakes of dried dill weed at this step, or reserve a bit of fresh dill for sprinkling over the top of the finished dish.

Directions

  1. Please a large skillet over low heat and add two generous swirls of olive oil with the garlic. Cook this very low and slow, with almost no bubbling action in the pan, so that the garlic become very soft and fragrant. It should take about 10 minutes, and this mellows the flavor of the garlic. Too much heat will give the garlic a burned and acrid taste.
  2. When the garlic is softened, increase the heat to medium and add the onions. Season with salt and pepper and toss to sauté until onions are translucent. Add spinach by the handful, tossing until each handful has wilted before adding the next. If supplementing with frozen spinach, wait until the fresh spinach has fully cooked.
  3. Add fresh herbs and toss for about 30 seconds, then add feta and remove the pan from heat. You may either transfer this mixture to a bowl (keep it warm) and use the same pan for the shrimp, or use a second pan for the shrimp.
  4. Add butter (or oil) to the skillet over medium heat. Place shrimp down in the hot butter and season with salt and pepper, and a quick shake of dried dill if you have it. Watch the shrimp closely, and turn them when you notice the color changing on the inside curl. Depending on the size of your shrimp, two to three minutes total should do it. After the shrimp has cooked on the second side, squeeze the fresh lemon juice into the pan and toss to coat.
  5. Toss cooked orzo with a bit of butter or oil, and serve it with the spinach mixture and shrimp piled on top. Add a lemon slice on the side for one last burst of freshness.


Thick & Hearty Sweet Potato Chili

Super Bowl’s coming, and my arteries are feeling clogged just thinking about it. Why do so many game day snacks have to be loaded with saturated fat, sodium and calories? I know— because it’s all about comfort food and they’re delicious, right?! I spent half an hour of quality time last week with my primary care physician, who informed me after my labs that my blood work isn’t exactly a pretty picture. Again. This is the second time in three years that I’ve gotten a bad report on my cholesterol (the year in between, I didn’t ask), and the weight gain that followed menopause hasn’t shown any effort to find its way out, either. As I told my doctor, I have a huge disadvantage in that I never had to fight for the healthy weight I enjoyed in my younger years. I always pretty much ate and drank what I wanted and I stayed in my optimal size. But not anymore. And I loathe the gym, so changing up my diet is pretty much my only option to get back to good. It pisses me off, if you want the truth.

But I wanted to prove to myself that eating better doesn’t have to mean sacrificing every single thing I love. Why couldn’t I tap into my creativity a little bit and see what kind of magic might happen in the kitchen? I’ll go after mac and cheese another day, but with the big game coming up, I figured a practice run at the most Super Bowl-y of all Super Bowl foods might be a good way to ease into things. Chili at its core could be pretty health-conscious— at least until you pile on the cheese, sour cream and chips for dipping in it— so this makeover was mostly about maximizing flavor and minimizing the heaviness.

I don’t necessarily need meat in chili, so I set my sights on making a plant-forward version that had plenty of what I do want— big flavor, hearty texture, smokiness and heat. This bowl has all of the above. What it doesn’t have is saturated fat. My ingredients are clean, and I used only extra virgin olive oil for roasting and sautéing the various components.

So thick, my spoon stands on end in the chili!

The flavor is smoky and spicy, with a subtle sweetness from the sweet potatoes. Nutrition-wise, this chili is off the charts. Protein, fiber, folate, magnesium, antioxidants, lycopene, potassium— it’s all there. And there’s no broth or juice added to the chili, which makes it thick enough for a spoon to stand straight up in it. Is it the same as the rich and meaty chili that my husband loves to make for Super Bowl? Of course not— there’s no meat inside. But if it satisfies my craving while I’m trying to do better, well, that’s good enough for me.

Let’s get into it!

I roasted the sweet potatoes rather than simmering, which deepened the flavor as well as reduced moisture. The seasonings are smoky and aromatic, adding layers of flavor that only get deeper when you stir in the pureed chipotle with adobo sauce. I used about three tablespoons of this dark red paste, but the amount is flexible to match your taste for heat. 


Fire roasted tomatoes added another layer of smokiness, but also a major hit of acid alongside the crushed tomatoes that went in with it. Next, a smidge of baking soda. This may seem like a strange addition to a pot of chili, but its alkaline nature helps soften the too-bright acidity of so many tomatoes. Let it bubble and foam for a minute or so, then carry on with the rest of the recipe.


Black beans, the roasted sweet potatoes and cooked wheat berries finished this off, and it was thick, hearty and satisfying— all the things I wanted, none that I don’t. I suppose you could sub in pinto or kidney beans, but I love the earthiness of black beans. If you’re gluten free, you’d have to sub something for the chewy whole grain wheat berries— maybe cooked quinoa or buckwheat groats. 


Thick & Hearty Sweet Potato Chili

  • Servings: About 6
  • Difficulty: Average
  • Print

Game day food is notoriously heavy and calorie-laden, but this chili is scoring big on flavor and fiber, without saturated fat or excess calories. Did I mention that it's also vegan? Plant-based for the win!


Ingredients

  • 2 large sweet potatoes, peeled and cut into cubes
  • 4 Tbsp. extra virgin olive oil, divided
  • 1 medium-large sweet or yellow onion, chopped
  • 4 cloves garlic, smashed and sliced thin
  • 1 tsp. kosher salt
  • 3/4 tsp. cumin seed, crushed into powder
  • 1 tsp. smoked paprika
  • 3/4 tsp. ancho chile powder
  • About 14 twists freshly ground black pepper
  • 2 to 4 Tbsp. pureed chipotle with adobo (see notes)
  • 28 oz. canned fire roasted diced tomatoes
  • 14 oz. can or carton crushed tomatoes
  • 1/8 tsp. baking soda (optional, see notes)
  • 2 cans low-sodium black beans, drained
  • 1 cup cooked wheat berries (see notes)

Notes: The chipotle puree is made by dumping an entire can of chipotles in adobo into the small bowl of a food processor and blending until smooth. The flavor is ultra-smoky and deeply hot. You will only need about a third of the total can amount, but the rest can be used in many other southwest-themed dishes.

If the acidity of the tomatoes is too much, add a tiny bit of baking soda to neutralize it. This doesn’t change the flavor of the chili, it only softens the sharp acid notes of the tomatoes.

If not for the wheat berries, this recipe would be gluten free as well as vegan! If you are sensitive to gluten, omit them entirely or consider substituting with al denté cooked brown rice, quinoa or buckwheat groats.

Directions

  1. Preheat oven to 400° F, with oven rack in center position. Line a heavy sheet pan with parchment paper.
  2. Toss sweet potatoes in two tablespoons of olive oil and spread evenly onto parchment-lined sheet pan. Season with kosher salt and pepper. Roast for about 40 minutes, until potatoes can be easily pierced with a knife tip and edges are caramelized.
  3. Meanwhile, place a medium, heavy-bottomed pot over medium heat. Swirl in remaining two tablespoons olive oil when pan is hot. Add onions and sauté several minutes, until onions are softened with edges just beginning to brown. Reduce heat, add garlic and stir to heat through.
  4. Combine salt and spices in a small bowl. Sprinkle over sautéed onion mixture and toss to coat. Allow spices to bloom for about two minutes, then stir in chipotle with adobo puree.
  5. Add diced and crushed tomatoes, stirring to combine evenly with seasoned onion mixture. Return heat to medium and bring to a simmer. Stir in baking soda and cook for about one minute.
  6. Add black beans, roasted sweet potatoes and cooked wheat berries. Heat through and serve.


Hatteras-style Clam Chowder

There are days that I go looking for a good inspiration recipe, and then there are days when they pop up out of nowhere while I’m looking for something else. This recipe, I suppose, was somewhere in between. 

I’ve been wanting to make a clam chowder with the fresh chopped clams that always tempt me from the case at my local seafood shop, but I didn’t want either of the classic chowder options that you always hear about. New England style, of course, is the creamy, white version that uses potatoes, clams, onions and loads of heavy cream. It’s luxurious and comforting, but high on the saturated fat scale. And then there’s Manhattan style, with its light tomato broth, onions, big chunks of potato and chewy clams. It’s a lovely light bite, but some people (my New York-born-and-raised husband included) don’t find brothy soups as satisfying. 

A perfect in-between

As I pondered how to find a happy medium between the lighter, tomato brothy chowder I craved and the creamy but bland version my husband favored, I got to thinking maybe it would fun to create something altogether new— a chowder with more texture and maybe some autumn ingredients. That’s when my search for “autumn clam chowder” turned up a terrific inspiration recipe on the Southern Living website— they called it Hatteras Chowder.

How in the world this dish escaped my eye after the 37+ years I’ve lived in North Carolina is beyond me, and I am taking it as my sign that I need to finally visit the Outer Banks, where Hatteras Island graces the Atlantic coastline with the tallest brick lighthouse in the United States. 

Hatteras Lightstation
Photo by Shalom Shore on Pexels.com

It was lucky that I stumbled on this inspiration, because I had been wrestling with what to make to honor my state on North Carolina Day. I’ll share my own version of this recipe in a moment, but first, I want to brag on my state a little bit. After all, I have called it home for nearly four decades! 

I love living in North Carolina. I drove into town in my little white Pontiac (that had no A/C), with my cat, my clothes, a big stereo system and $800 in my pocket. This place gave me hope for achieving my dream, and I found more than I had imagined, personally and career-wise. We have the coast just a few hours east and the mountains two hours west. We get to enjoy all four seasons, though we haven’t seen much snow in recent winters in my neck of the woods.

The city of Winston-Salem, where Les and I met and live, boasts a vibrant arts and innovation culture— a big step up from the days when Winston-Salem was only about tobacco. We have terrific indoor and outdoor venues nearby for live music, great food and drink, and our city is proud of the diversity of its citizens. Yes, we have our share of unfortunate political embarrassments (you’ve probably read about one of them even this week, but we will take care of that in November), and our coastline frequently bears the brunt of tropical storms and hurricanes, but the good in North Carolina truly outweighs the bad or we wouldn’t still be here!


Our state is also well known for many foods, including pulled pork bbq, collard greens and pimento cheese, but this Hatteras chowder that I’ve just learned about is made with fresh-from-the-Atlantic clams, red potatoes, bacon, onion, celery, carrot, white wine, herbs and clam juice. As written, the recipe sounds delicious. But you know me, I have to make it my own.

Twisting up a classic

I didn’t have carrots on hand, but butternut squash stood in nicely. A jalapeño in the produce drawer promised to add a subtle layer of heat, which Les would never argue against. I sautéed those in the fat rendered from the bacon. To add a little extra body to the chowder, I cooked in a bit of flour just before deglazing the pot with white vermouth (because I never have wine on hand anymore).


Believe it or not, I did have two bottles of clam juice in the pantry, because I’ve been jonesing to make chowder for over a year. The recipe called for three, but I didn’t mind keeping this on the thicker side. To bring a tiny bit of “Manhattan” into it, I tossed in a can of Rotel tomatoes which also brought another layer of heat, and that touch of acidity was perfect for balancing the flavors. Finally, my sliced Yukon gold potatoes (I didn’t have red), fresh thyme sprigs and dried bay leaves, and then it was time to simmer this hearty, chock-full-of-flavor autumn soup.


Here comes the big shortcut I took with this recipe. The Southern Living article said that only fresh whole clams were appropriate for this chowder—not chopped— and it included steps for purging the grit and then cooking the clams separately. I’m sure that canned chopped clams would come up short here, but the fresh chopped clams from my favorite local seafood chop were sweet, slightly chewy and so fresh; I’d put them up against the fussy whole-clam process any day of the week. These sweet little gems and their liquid get stirred in just at the end, along with the crisped-up bacon that started this whole thing.


This chowder was satisfying in every way— it had the hearty, chunky texture that Les wanted without the heavy cream that I didn’t want. The jalapeño and Rotel put a slight south-of-the-border spin on it, and I’ll add that this chowder reheated as leftovers very well. The only thing I’d do differently next time is make a double batch. 


So this is a new “North Carolina” recipe that I will most definitely add to my repertoire, and it was a perfect way to celebrate all things Tar Heel on North Carolina Day. Click to print recipe is below; I hope you enjoy it.

For a fun little sendoff today, I’ve also prepared a Spotify playlist of artists that call North Carolina home. Some of these names will be instantly familiar; others will be new. I hope you find something fun among them. 

Cheers, y’all!


Hatteras-style Clam Chowder

  • Servings: About 6
  • Difficulty: Average
  • Print

Somehow, I've missed this delicious coastal North Carolina dish, despite having lived in the state more than 30 years. My version swaps in winter squash for carrots and adds jalapeño and spicy tomatoes for a little extra pizzazz.


Ingredients

  • 4 slices thick bacon, chopped
  • 1 medium onion, chopped
  • 3 ribs celery, strings removed and sliced
  • 1 cup butternut squash cubes
  • Kosher salt and black pepper
  • 1/4 cup all-purpose flour
  • 1/2 cup dry white wine (I used dry vermouth)
  • 1/2 cup water
  • 1/2 can original Rotel
  • 2 bottles clam juice
  • 2 cups Yukon gold potatoes, scrubbed and diced
  • 2 dried bay leaves and 3 sprigs fresh thyme
  • 1 lb. fresh chopped clam meat (with liquor)

I found this chowder recipe very versatile to accept substitutions, based on what you like or have on hand. I’m sure that you could swap in shrimp or whitefish for the clams, and seafood or veggie broth in place of the clam juice. My inspiration recipe used carrots rather than butternut squash and it did not include flour for thickening. The tomatoes and jalapeño were my additions, and a fun twist!

Directions

  1. In a heavy-bottomed pot, cook bacon over medium heat until crispy and then remove to a separate bowl.
  2. Add onion, celery, butternut squash and jalapeños (season with salt and pepper)and sauté until softened. Add flour and stir until foamy. Add wine (or vermouth) and water, Rotel and clam juice. Add potatoes, bay leaves and thyme and reduce heat to low. Simmer for about 30 minutes.
  3. Gently stir clams (including liquid) into the pot. Add bacon and heat through. Serve right away with hot sauce and saltine or butter crackers.


Mahi Florentine

The past few weeks have been a struggle for me as my husband and I have committed to making mindful changes to our eating plan. I don’t mind the challenge of eating better, so it isn’t that. My problem has been that I’ve tried too hard to develop original recipes worth sharing here on Comfort du Jour, but so much of what I have done has been with random leftovers that nobody else in their right mind is likely to have on hand. At the end of this post, I’ll show you a glimpse of some of those dishes, and perhaps you’ll draw inspiration for how to repurpose some of your own leftovers with a shift toward healthy.

Moving forward, one of the easiest ways I know to eat better is to choose lean meats and seafood and add a lot of vegetables. So in the weeks to come, you’ll likely see a lot more green on my plate, and I mean that quite literally with this dish, featuring a gorgeous, bright green bed of sautéed spinach, my husband’s all-time favorite vegetable.

What’s so great about spinach?

We all remember from the Popeye cartoons of childhood that spinach made Popeye strong— OK, that connection was overstated. But there is a hint of truth in it, as nutrition science shows the natural nitrates found in leafy greens support healthy muscle function. Spinach is also rich in Vitamins A, C and K, as well as iron, potassium and folate, a B vitamin that helps the body generate healthy cells.

Is it better to eat spinach raw or cooked?

There is no health consequence of eating raw spinach; one of my favorite salads is made from it, along with hard-boiled eggs, red onion slices and goat cheese. But we might miss more than we gain by eating it raw. In addition to all its benefits, raw spinach also contains oxalic acid, which is the stuff that makes your teeth feel squeaky. Oddly, the oxalic acid blocks absorption of some of the very nutrients spinach provides. The cooking process breaks that down, though, so a quick sauté or steaming helps you reap the most benefit of this versatile vegetable. I’ll be using spinach again and again in the coming weeks, so all of my leafy green lovers will want to stay tuned. 😀

So what about this dish?

Today’s recipe is a twist on Mahi Hemingway, a dish I posted a few years ago, and my copycat version of a pricey meal I had enjoyed many times at a local restaurant. This time, I’ve plated the fish and sauce atop fresh spinach rather than a pile of carb-y pasta. It’s colorful, easy to prepare and absolutely delicious!

Delicious, and pretty!

To make it, you’ll need a couple fillets of fresh mahi—season them with salt and lemon pepper— plus a fat handful of fresh baby spinach, a little garlic, diced tomato, capers, dry white wine, a squeeze of fresh lemon and a little swirl of butter at the end for a delicate but flavorful sauce. If mahi is unavailable (or not your favorite), try this dish with halibut, grouper or even a mild cut of salmon.

Parsley garnish is optional, but recommended, and you can make two servings of this meal for less than half the cost of a restaurant meal for one. It’s light, delicious, gluten-free and diet-friendly. It’s also easy to make (there’s a click-to-print recipe below), and my Instagram reel will show you in 60 seconds how to put it on your table tonight. Mise en place (having everything in place) is important here, because the dish moves quickly once the pan is hot. Enjoy!


Mahi Florentine

  • Servings: 2
  • Difficulty: Average
  • Print

There's plenty of flavor and nutrition in this light and easy seafood dish, and it comes together in under half an hour. Perfect for a busy weeknight!


Ingredients

  • 2 skinless mahi fillets, about 6 ounces each
  • Several shakes salt-free “lemon pepper” seasoning, such as Mrs. Dash
  • Kosher salt and freshly ground black pepper
  • 3 Tbsp. extra virgin olive oil, divided (1 for the spinach, 2 for the fish)
  • 2 fat handfuls fresh baby spinach, roughly chopped (this is approximately six ounces)
  • 2 cloves fresh garlic, minced
  • 1/3 cup dry white wine, divided (you’ll use some for the spinach, some for the fish; substitutions in the recipe notes)
  • Juice and zest of 1/2 large lemon
  • 1/3 cup petite diced tomatoes, drained
  • 1 Tbsp. nonpareil capers, drained but not rinsed
  • 1 Tbsp. cold butter, cut into teaspoon-size pieces, for swirling into sauce at the end
  • A sprinkle of fresh, chopped parsley to garnish

Notes: This recipe moves quickly, especially once you remove the fish from the skillet. Be sure to have all your ingredients lined up and ready before you begin cooking.

Any firm fish fillet may be substituted for the mahi; I think salmon, grouper, tilapia or halibut would all be terrific in this dish.

Dry vermouth may be used in place of the white wine. If you prefer to avoid alcohol, substitute a quarter cup of low-sodium vegetable broth for the wine and add an extra squeeze of lemon.

Use fresh tomatoes when they’re in season; otherwise, salt-free canned tomatoes work great. If you have trouble with the acidity in tomatoes, try neutralizing it with a pinch of baking soda. Stir the soda into the tomatoes before you begin, and give it a few minutes for any foaminess to subside before proceeding. This will help take the edge off the acid of the tomatoes.

Directions

  1. Pat the mahi fillets dry with a paper towel. Season with salt and pepper, plus a generous few shakes of the lemon pepper seasoning. Set aside to warm to room temp while you prepare the spinach.
  2. Place a non-stick skillet or pot over medium heat. Swirl in about a tablespoon of the olive oil, and then add the spinach a handful at a time. Give it a toss through the oil, then season lightly with salt and pepper. Use an easy touch here, so the spinach isn’t too salty after it wilts down.
  3. Add garlic to the pan and toss until spinach is fully wilted but still bright green. Add a splash of the white wine, plus the zest of the half-lemon. Continue to cook until the wine evaporates. Remove from heat and cover to keep warm.
  4. While the spinach is cooking, heat a second skillet (preferably not non-stick) over medium heat. Add remaining oil when the pan is hot. Place the fish fillets, “pretty” side-down, into the skillet. You should hear them sizzle instantly. Leave the fillets alone until you can see the fish is cooked through about 1/3 of its thickness, about three minutes. Use a metal spatula to carefully turn the fillets to cook the other side, about two additional minutes. They will be a little translucent in the center, but the residual heat will cook them through. Transfer the fillets to a warm plate and set aside while you prepare the sauce.
  5. Add the diced tomatoes and capers into the fish skillet. Add a generous splash of the white wine, and use a whisk or utensil to scrape up all the cooked-on bits in the pan. Turn down the heat to medium-low and cook until wine is reduced by half. Squeeze in the lemon juice and stir until the moisture is reduced by about half; this should happen within about a minute.
  6. Turn off the heat. Carefully swirl the cold butter, a teaspoon at a time, into the pan sauce. This will emulsify and thicken the sauce.
  7. Divide the spinach between serving plates. Place a mahi fillet on top of each and spoon the pan sauce over the fish. Garnish with fresh parsley and serve at once.


Here’s a snapshot of some of the other delicious foods I’ve made since we committed to healthier eating. Some were made from leftovers that you probably don’t have, but others are repeats of favorites, with previous recipes linked for your convenience.


Chicken Curry with Autumn Vegetables

The best thing about Thanksgiving leftovers— for me, anyway— is when they are gone. For all the excitement leading up to the biggest food holiday of the year, I’m usually over it after two rounds of leftovers. Yes, I look forward to a good turkey sandwich, usually with a thin layer of leftover dressing and a smear of tangy cranberry sauce, plus a dab of mayo and perhaps a piece of lettuce in a ridiculous effort to offset all those carbs. And obviously, I enjoy transforming the turkey bits into spicy dishes, such as my turkey and black bean enchiladas or a delicious, comforting bowl of leftover turkey gumbo.

But my taste buds get weary after all that butter and gravy, and I start craving something with more pizzazz, and (for reasons I cannot explain) preferably from a culture other than my own. This impromptu Indian-inspired meal gave me not only delicious, warm spicy flavors, but also a generous dose of comfort on a dreary November night. My chicken curry came together more quickly than you might imagine, and it was a great way to incorporate some nutritious autumn vegetables and use up a package of skinless chicken thighs that I had stashed in the freezer.

There’s flavor, color and loads of nutrients. What more could I ask?

Curry is not a cuisine of my youth; I first learned to enjoy it about 15 years ago in a local Thai restaurant, and I finally got brave enough to try making it at home within the past few years.  There are many varieties and styles (or colors, if you will) of curry, and it has taken me some time to learn which ones I like best. In Thailand, a green curry might include lemongrass, garlic, kaffir lime and hot chile spices, and those flavors are spectacular with seafood in a broth softened with coconut milk. In nearby India, a curry looks altogether different and usually gets its flavor from a blend of dry spices, including cardamom, coriander, ginger, cumin and turmeric. If you purchase a jar or can of “curry powder,” it may contain any combination of those pre-ground ingredients, but it’s easy enough to mix and match your own flavors if you already have the individual spices.


My chicken and autumn veggies dish is more similar to an Indian curry, and I started my blend with a quick toasting of whole cumin and coriander seeds. Heat brings forth the intense flavors, whether by toasting whole spices or by adding ground spices to hot oil in the pan. The technical term for this is “blooming,” and you don’t want to miss this easy step for the extra flavor it imparts to your final dish. I toasted the seeds in a hot, dry skillet— swirling the whole time for about 45 seconds until they were intensely fragrant— and then let them cool before crushing them in a mortar and pestle. Next up, I assembled my other dry, pre-ground spices, including ginger, cardamom, turmeric, cinnamon and hot chile flakes.


I chose boneless chicken thighs for their texture and flavor, but chicken breast or tenderloins would also be delicious here. I cut them into one-inch chunks, seasoned them with salt and pepper and let them rest while I cut up onions, red bell peppers, fresh broccoli and delicata squash. For this dish, I highly recommend getting all your components lined up and ready, as the cooking goes quickly once it begins.

Behold all the vitamins and fiber on that cutting board!

You’ll also need a bit of oil to get things started. Choose an oil that performs well over high heat, such as canola, peanut or coconut oil. I cooked the chicken first, just until the bits were no longer pink, and then transferred them to a separate bowl while I sautéed the vegetables. When I’m cooking veggies of varying textures, I usually begin with the firmer ones, adding the rest in descending order of necessary cooking time. The best time to add the spices is just before adding more vegetables— this allows them to bloom in the hot oil that coats the veggies. Season along the way, of course, with salt and pepper as well. This does more than add salty flavor; salting during cooking helps to draw moisture out of the ingredients for better texture.


A dab of tomato paste in the center of the pot adds a rich, warm color and also a burst of umami flavor from the concentrated glutamates in the tomatoes. A little broth to thin it out, and then the chicken goes back into the pan with half a can of light coconut milk to simmer until everything is nice and tender. This took about 30 minutes, long enough to cook up a pan of basmati rice, perfect for soaking up the flavorful curry.


This kind of meal hits the spot after so much gravy, dressing and mashed potatoes, and the heavy load of vegetables does the body good, too! 

Chicken Curry with Autumn Vegetables

  • Servings: 4
  • Difficulty: Average
  • Print

This dish ticks all the boxes with big flavor, warming comfort and exceptional nutrition. It's easy enough for a busy weeknight and rich with autumn comfort.


Ingredients

  • 1 pound boneless, skinless chicken thighs, patted dry and cut into 1-inch chunks
  • Kosher salt and black pepper
  • 1/2 tsp. whole cumin seeds
  • 1/2 tsp. whole coriander seeds
  • 1/4 tsp. EACH cardamom, cinnamon, red pepper flakes, ginger, turmeric (see recipe note below)
  • 1/2 sweet or yellow onion, chopped
  • 1 small delicata squash, cleaned and cut into 1-inch chunks
  • 1/2 bunch fresh broccoli, cut into small florets
  • 1/2 red bell pepper, chopped
  • 2 Tbsp. high-heat cooking oil (I used coconut, but canola or peanut would be good)
  • 1 to 2 Tbsp. tomato paste
  • 1/2 cup low sodium broth (chicken or vegetable)
  • 1/2 can light coconut milk
  • Basmati or brown rice for serving
  • Fresh cilantro for serving (optional)

Recipe Notes: I created my own curry spice blend because I have the individual ingredients, and 1/4 teaspoon each was a good starting point for my adjustments. This is a good way to control the heat and balance the blend with the spices you like best, but there’s no harm in buying a pre-made curry powder. Use 1 to 2 teaspoons, depending on how intense you’d like the flavors to be.

Because this dish moves quickly once cooking begins, I recommend having all ingredients prepped and on standby before you turn on the burner.

Directions

  1. Season the chicken chunks with about 3/4 teaspoon salt and a few twists of black pepper. Toss to coat, and allow it to rest at room temperature while you prep the spices and vegetables.
  2. Heat a small dry skillet over medium-high heat. Add seed spices and toast, swirling the pan constantly until the spices are very fragrant. Transfer to a bowl to cool, and then grind in a mortar and pestle or electric spice grinder.
  3. Measure remaining spices into a bowl and set aside.
  4. Place a wide, heavy-bottomed pot over medium-high heat. Add oil and heat until shimmering, then toss the chicken pieces just until all sides are no longer pink. Transfer chicken to a bowl and keep warm.
  5. Add vegetables to the pot, beginning with the firmest and adding the others in descending order of time needed to soften. Season with a pinch or two of salt to help draw out the moisture. Add spice blend and ground seed spices to the hot vegetables and toss to coat.
  6. Stir in tomato paste for rich color and burst of umami flavor. Add broth and cook until the liquid begins to simmer.
  7. Return chicken to pan. Stir in coconut milk. Cover pan and reduce heat to simmer the curry for about 25 minutes. Serve with basmati rice and sprinkle with chopped cilantro, if desired.


Smashed Cucumber Salad

Over the past few months, I’ve seen numerous recipes for something called smashed cucumber salad and wondered, what’s so special about that? Sure, I love cucumbers and the way they freshen up a salad with an extra level of cool and crunch. But why not just, you know, slice them? Of course, that was before I tried one, and I may never be the same.

I enjoyed my first-ever smashed cucumber salad last month, when I joined my blog buddy, Dorothy, and her husband at one of their favorite restaurants, Starry Night Cafe in Ferrisburgh, Vermont. That salad had a rustic Italian flair with Calabrian chili flakes, anchovy, parmesan and ripe heirloom tomatoes. It was a masterful arrangement of fresh, seasonal food just doing its thing.


Every flavor complemented the next, but what struck me most about “smashed” cucumber salad was the texture— the open, craggy edges held onto the dressing, and the big chunks made it sooo crunchy and satisfying. And that was only the opener of our incredible meal.

Starry Night Cafe demonstrated its commitment to partnering with local farmers and producers in every single thing brought to our table. From the specialty cocktail (don’t you worry, I’ll share it soon) to the coal-roasted oysters and grilled shrimp spiedini all the way to the stunning main course of wild halibut, I found myself wishing we lived closer!


Food really does taste better when it’s fresh and seasonal, grown without pesticides or chemical fertilizers and picked at peak ripeness. My entire visit through Vermont reignited my excitement for local food, and our Starry Night experience was the icing on the cake— er, salad. I started imagining what other flavors would play nice with the versatile cucumber, and I think I came up with a winner in this pretty plate.


My smashed cucumber salad is not a remake of the Italian-ish salad we shared at Starry Night Cafe, but an Asian-inspired interpretation, built on some fun ingredients I found when Les and I visited our own farmers’ market here in Winston-Salem. I wanted a dressing that was savory, sweet and tangy. Creamy but without cream. And with a touch of heat to accent all of the above. So I poked around on the internet for a bit and found a lemon-miso dressing on a blog called A Nourishing Plate


The author’s recipe satisfied most of my wish list, and I followed it mostly as written, subbing tahini in place of cashew butter because I always have a jar of tahini in the fridge. I used slightly less sugar and oil, and for a pop of heat, I added a few shakes of Asian Reds hot chile flakes from Flatiron Pepper Company. This is different from generic “red pepper flake,” as the chiles are specific to various parts of Asia. The dressing is so good, and easily adjusted for sweet and heat. I love the contrast it provided this cooling cucumber salad, and I can imagine it would also be good as a roast vegetable topper. The dressing thickens up a bit in the fridge, so I’d recommend making it ahead.

English cucumber is ideal for this type of salad, for its smaller seeds and thinner skin. My grocery stores all sell this type of cucumber, but usually they have a waxy coating to keep them fresh during transport from God-knows-where (yet another reason to choose local). You can use anything you have on hand for smashing it— the flat side of a chef’s knife, bottom of a skillet, whatever— but don’t use a heavy hand unless you want cucumber juice all over yourself and the kitchen. Just enough to crack it open is good, and then use a knife to cut the smashed cucumber into generous chunks. Season it, and toss with the other ingredients. Could it be more simple?


The most brilliant element of this dish— and I mean brilliant in the sense of “wow, look at that shocking pink color!”— is the watermelon radish. That neon pink color seems to be everywhere right now, thanks to the Barbie movie, and though I’ve seen these radishes in food magazines and cooking shows, I have never run across one in the supermarket.


Turns out the farmers’ market is also the place to score Barbie-colored vegetables, and I couldn’t resist slicing one up to complement my smashed cucumber salad. It made a lovely border, don’t you think? And it carries the same pungent, spicy flavor as a typical radish— just larger and way prettier. I’m still deciding what to do with the other watermelon radish (stay tuned).

I love trying new foods! What ingredients are you curious to try, and will you scout them out this weekend at the farmers’ market in your neck of the woods? I hope so!


Smashed Cucumber Salad

  • Servings: 4
  • Difficulty: Average
  • Print

An Asian-inspired dressing puts a flavorful jacket on this super-refreshing and oh-so-fresh cucumber salad. Don't skip the smashing part, as it contributes to the amazing texture of this new summer favorite.


Ingredients

  • 1 large organic English cucumber, cleaned and dried
  • 1 large carrot, peeled and sliced thin
  • 3 scallions, washed and sliced thin (green parts reserved for garnish)
  • 1 medium watermelon radish, peeled and sliced thin
  • Spicy lemon-miso dressing (see below)
  • Lettuce leaves for plating, optional
  • A few shakes toasted sesame seeds (for garnish)

Directions

  1. Prepare the spicy lemon-miso dressing and refrigerate until you’re ready to make and serve the salad. If using the red pepper flake, remember that the flavor will become more intense after the flakes rehydrate.
  2. Lightly smash the cucumber, just enough to split it open. Cut into chunks and add them to a large bowl with the carrots and the white parts of the scallions. Sprinkle with kosher salt and gently toss to distribute the seasoning.
  3. Spoon about half of the dressing over the salad and toss to coat.
  4. Arrange lettuce leaves and watermelon radish on a serving platter. Spoon the smashed cucumber salad onto the plate and garnish with reserved scallion tops and sesame seeds.

Notes: Make the lemon-miso dressing ahead; the flavors mingle nicely in the refrigerator, and the red pepper flakes will rehydrate for maximum punch. You will only need about half of the dressing recipe for this smashed cucumber salad. Save the rest for another salad or to drizzle on grilled vegetables.

Ingredients

  • 2 Tablespoons white miso paste
  • 1 Tablespoon rice vinegar
  • 1 Tablespoon tahini paste
  • 2 teaspoons organic cane sugar
  • Juice and zest of one large lemon
  • Kosher salt and black pepper
  • A few shakes of red pepper flake, optional but wow!
  • 3 Tablespoons extra virgin olive oil

Directions

  1. In a small bowl, combine miso, vinegar, tahini, sugar and lemon juice plus zest. Season to taste with salt and pepper. Add a few shakes of red pepper flake if you want a bit of heat. I like Flatiron Pepper Company’s Asian Reds here.
  2. Slowly drizzle oil into the dressing, whisking constantly to create an emulsion. Adjust seasoning to taste and refrigerate. Dressing will thicken slightly in the fridge.


Peach Panzanella

The heat is getting to me, I think. Since I returned from my solo trip through New England, I have barely wanted to cook. It’s just too hot to think about standing at the stove in the late part of the day. Usually in summer, we at least enjoy firing up the grill for a backyard barbecue, but with it being 97° F in the shade at dinner time, the idea of the grill feels even more oppressive than turning on the stove. I only want cool foods, and it better not take long to prepare. Thank goodness for ripe summer tomatoes and sweet southern peaches! 

There’s a saying out there in foodie land that “if it grows together, it goes together,” and I’m not claiming that peaches and tomatoes are good companions in the garden— how could they be, with peaches growing on trees and all— but I do know that they’re both coming ripe right about now, and I may be onto something with this fresh, light (and did I mention easy?) summer salad.

This is one more thing to love about summer!

Panzanella, in case you have never had the pleasure, is a rustic dish of Tuscan origin, usually made with ripe, juicy tomatoes, cucumber and other fresh ingredients, along with chunks of day-old bread that soak up the juices. The bread gives the salad body and bulk, and the rest of the ingredients are cool and refreshing when the summer weather is everything but. 

I was about to make a classic panzanella, but then I spotted that peach!

It seems I always have a stale end of bread hanging around the kitchen, and for panzanella, you want the bread to be a “lean” one— that is, not enriched with fats, dairy or sugars. If the bread is soft and pliable, it will quickly turn to mush and you’ll be disappointed in your panzanella. Something like a French baguette or crusty homemade sourdough loaf is perfect because it will generally holds its shape. Whole grain works well, and even seeds on top will work! Tear or cut the bread into small, bite-size chunks, and remove the crust if it seems extra thick or chewy.


Next, prep all the fresh ingredients, cutting each into smallish bites. My personal rule of thumb for salads to break down the ingredients into small enough pieces that I will be able to get a little bit of everything in a single bite, but not so small that it’s hard to spear them with a fork. I only had a slicing cucumber, so I did remove the tough peel and most of the seeds, but with a Persian or English cuke, there’d be no harm in just washing and cutting it up. A quick seasoning with salt and pepper on all of that, and then I’m on to the dressing. 


A classic panzanella would be strictly savory, so a vinaigrette with Italian herbs and garlic would be appropriate. But I wanted a lighter, fruitier touch for this one because of the sweet summer peach, so I started with a citrus-y vinegar from Trader Joe’s and jazzed it up with Dijon, a squeeze of fresh lemon and a generous drizzle of fruity, extra virgin olive oil. Any light, fruity vinegar would work well here, or even a white wine or champagne vinegar. If yours is tart and sharp, give the dressing a little balance with a bit of honey or a few pinches of cane sugar. And don’t forget salt and pepper.

Here comes the best part! Drizzle that dressing all over the salad, and don’t worry if it seems like a lot— the stale bread will slurp it up so it won’t go to waste. Toss gently a few times to fully incorporate the dressing, and allow the panzanella to rest while you set the table. Just for fun, I sprinkled on some feta chunks and fresh, summery basil. Italian parsley would have been just as delicious, or even fresh mint to add another cooling layer.


I served my peach panzanella with petite fillets of halibut. They were super easy to make, seasoned with only salt and pepper and baked in the oven for a mere 15 minutes. Easy, quick and done!


Peach Panzanella

  • Servings: About 3
  • Difficulty: Easy
  • Print

A ripe and juicy summer peach puts a delicious and unexpected twist on a classic panzanella. It's a cool and tasty way to beat the summer heat!


Ingredients

  • 3 cups torn sourdough bread (dry or stale)
  • 1/2 slicing cucumber, peeled and seeded
  • 2 small yellow tomatoes, halved and cut into wedges
  • 1 Roma tomato, quartered lengthwise and cut into wedges
  • 1 large ripe peach, peeled and pitted then cut into chunks
  • 1/4 cup thinly sliced red onion
  • 2 oz. real feta, crumbled or cut into cubes
  • Small handful of fresh basil, torn or rough-chopped for garnish
  • Vinaigrette dressing (see below)

The dressing for the panzanella can be made ahead if desired. Choose a vinegar that is light and summery, such as white wine vinegar or something infused with citrus.

Ingredients

  • 3 Tbsp. Muscat orange-champagne vinegar (or something fruity and tart)
  • 1 tsp. Dijon
  • Salt and pepper
  • 1/4 cup extra virgin olive oil
  • 1 tsp. honey or sugar if vinegar is very tart

Directions

  1. Add all salad ingredients except feta and basil to a large bowl, in order, so that bread pieces are on the bottom. Season with salt and pepper and set aside while you make the vinaigrette.
  2. Whisk together dressing ingredients. Adjust salt and pepper to taste.
  3. Pour dressing all over salad. Toss gently to incorporate, and allow the bread a few minutes to soak up the dressing and juices.
  4. Sprinkle with feta and fresh basil. Serve at once.


Les’s Nachos for Dinner

One of the things I like about my marriage is how Terrie and I respect each other’s kitchen capabilities. I certainly know and trust in her judgment, but she also respects the way I can surprise her once in a while with a “guy” food. Like, say, nachos.

As with many guys, I like nachos from days in the sports bars. Great eats while grabbing a beer and watching a game. Somewhere along in my adulting—and I believe it began with thinking of new uses for leftover chili, but I can’t say for sure—I decided I could do nachos every bit as good as a sports bar, whose chips were typically stale and plentiful, while toppings were bland and sparse.

Over the years, I refined my approach to use a block of cheddar or Monterey jack or something similar (a suggestion from Terrie, who, as regular readers of this blog know, abhors shredded cheese in a bag), a fun protein and any of a number of complementary items before the oven or after: fire-roasted corn, onions, black beans, refried beans, pickled jalapenos (or fresh if you slice them thinly), scallions, avocados, guacamole, sour cream, salsa.

Lots of flavor and texture here.

The nachos I’m sharing here feature Terrie’s homemade chorizo, which I fried in a cast-iron pan along with some diced onions and then set aside. We prepped (Terrie contributed here, serving as my sous chef, a definite change of pace for us!) by chopping up some pickled jalapeno peppers (dry them first), avocado and scallions, while I shredded a little better than a cup combined of sharp cheddar and habanero cheddar. The fun part is putting this bad boy together. OK, I kid you all. It’s incredibly simple.


Preheat your oven to 350 F. Put a piece of parchment over a cookie sheet and then lay your favorite tortilla chips on to cover the surface. We used a blue corn chip put out by a company called Xochitl. They were very good, but if you can find a local restaurant with an awesome, homemade fresh chip, so much the better. A moment here to lament the loss of Tijuana Flats, a small national chain that was our “go-to” place for chips, which were freshly made, thin and perfectly seasoned. We used to buy bags of them for just $1.25 to complement any Southwestern or Mexican dish we made; these chips were the flagship of our annual Super Bowl party. Alas, the local restaurant closed at the start of the pandemic and we still miss it. The Xochitl brand is as close as we’ve found.


Anyway, with your chips nicely arranged (you shouldn’t see any big parchment peeking through), top first with your protein, which today was the chorizo-onion mix. I then sprinkled on a generous amount of chopped jalapenos and fire-roasted corn, and then the cheese. Off to the oven it went for 10 minutes. The nachos are done when the cheese is nice and melted. A side note here: We had believed a pre-made queso would work great rather than grated cheese, but it doesn’t. The heat of the oven breaks up the queso, and it runs underneath the chips, which makes them soggy. Freshly grated cheese is the way to go.


I topped this batch of nachos with scallions and diced avocado, and we served salsa and sour cream on the table. Probably a dozen or more years ago, I found this very wide spatula for handling fish and, wouldn’t you know, it works great for portioning out a generous mound of hot nachos.

Just call me Nacho Daddy!

Les's Nachos for Dinner

  • Servings: About 4
  • Difficulty: Easy
  • Print

Somewhere along in my adulting, I decided I could do nachos every bit as good as a sports bar. Here is my latest iteration of this 'guy food' served up as a meal at home.


Ingredients

  • About 1/2 pound bulk chorizo sausage (or other protein)
  • 1/2 medium sweet or yellow onion, chopped
  • Salt and pepper as needed (use your judgment, based on the flavor of your protein)
  • Enough corn tortilla chips to evenly cover a baking pan (about 1/2 standard bag)
  • 1/4 cup sliced pickled jalapenos, blotted on paper towels
  • 1/2 cup fire-roasted corn kernels (frozen is fine)
  • 1 cup grated cheddar cheese (or other variety, such as Monterey Jack or colby; preferably not pre-shredded from a bag)
  • 2 scallions, white and green parts thinly sliced
  • 1/2 large avocado, cubed
  • Sour cream and salsa, for serving

Feel free to substitute any favorite protein you have on hand. I’ve used cut-up chicken, ground turkey, ground beef and even black beans; it all works! If your chosen protein is unseasoned, consider adding some chili powder or other Southwest seasoning to the meat as it cooks. If you prefer less heat, swap in bell pepper for the jalapenos and saute them with the meat and onions.

Directions

  1. Preheat oven to 350 F, with rack in center position. Line a rimmed baking sheet with parchment paper.
  2. Heat a cast iron skillet over medium heat and cook sausage with onions until the meat is browned and onions are softened.
  3. Arrange tortilla chips over parchment paper. It’s OK for the chips to overlap, but aim for a single layer so that each chip gets some toppings. Scatter the cooked sausage-onion mixture evenly over the chips, followed by the jalapenos, roasted corn and grated cheese.
  4. Bake at 350 F for about 10 minutes, until cheese is melted all over. Immediately top nachos with scallions and avocado. Serve with sour cream and salsa at the table.