Romesco Potato Salad

Well, here we are, staring down the unofficial end of summer. Labor Day weekend is upon us in the U.S., and though it signifies the waning days of summer, we are hardly ready to trade in our shorts and flip flops for boots and cozy sweaters. It’s still plenty hot, and we still have weeks— if not months— of good grilling weather remaining.

If you’ll be grilling out this weekend, and perhaps looking for a different take on potato salad, I have a fun one for you. This salad was the result of wracking my brain for another mayo-free potato side, not unlike the potato salad with chive and parsley pesto that I shared at the start of summer. That was a NY Times Cooking Recipe, and this one happens to be inspired by another recipe from the same site.  

It had already occurred to me that romesco sauce would be a delicious flavor to apply to potato salad, when lo and behold, a recipe appeared in my inbox for a “romesco egg salad.” There was confirmation for my inspiration, and I was off and running.


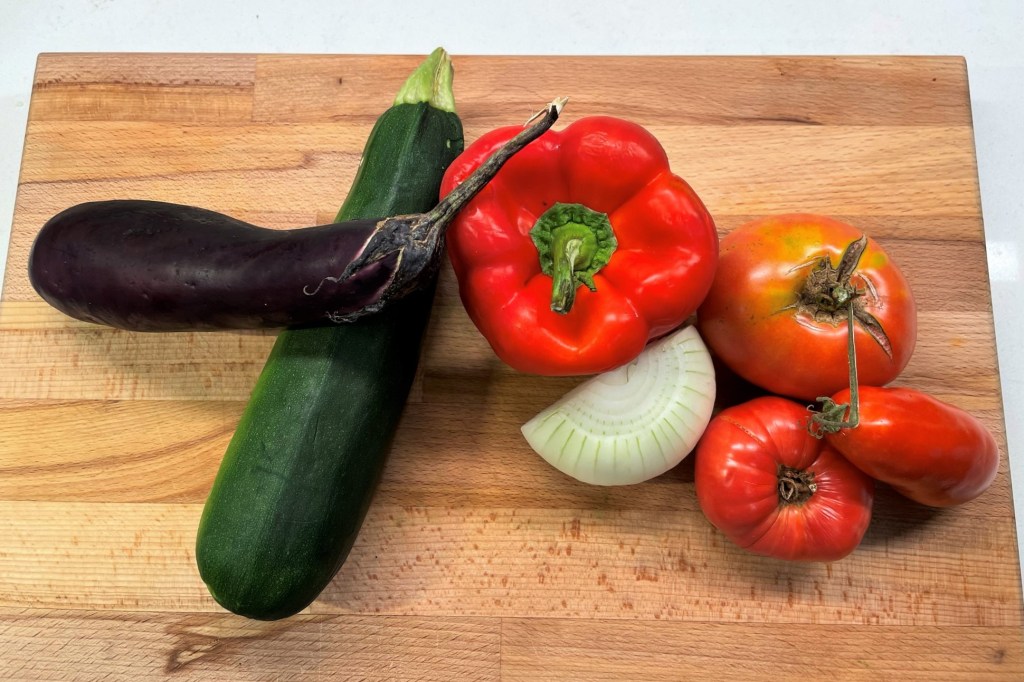
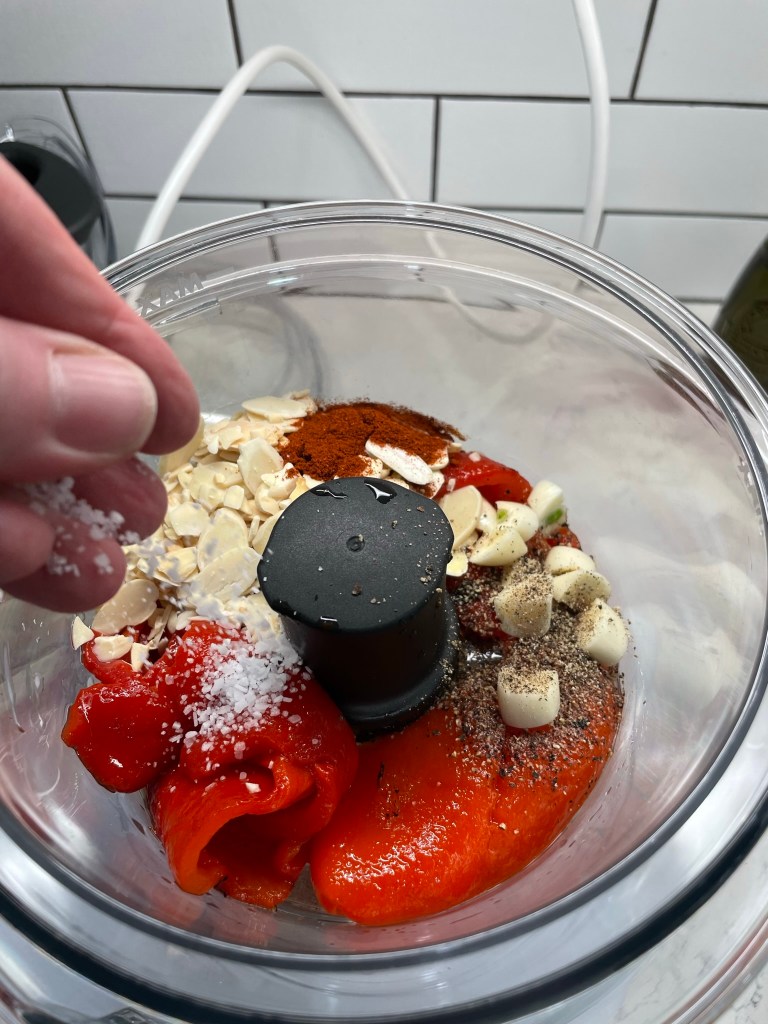
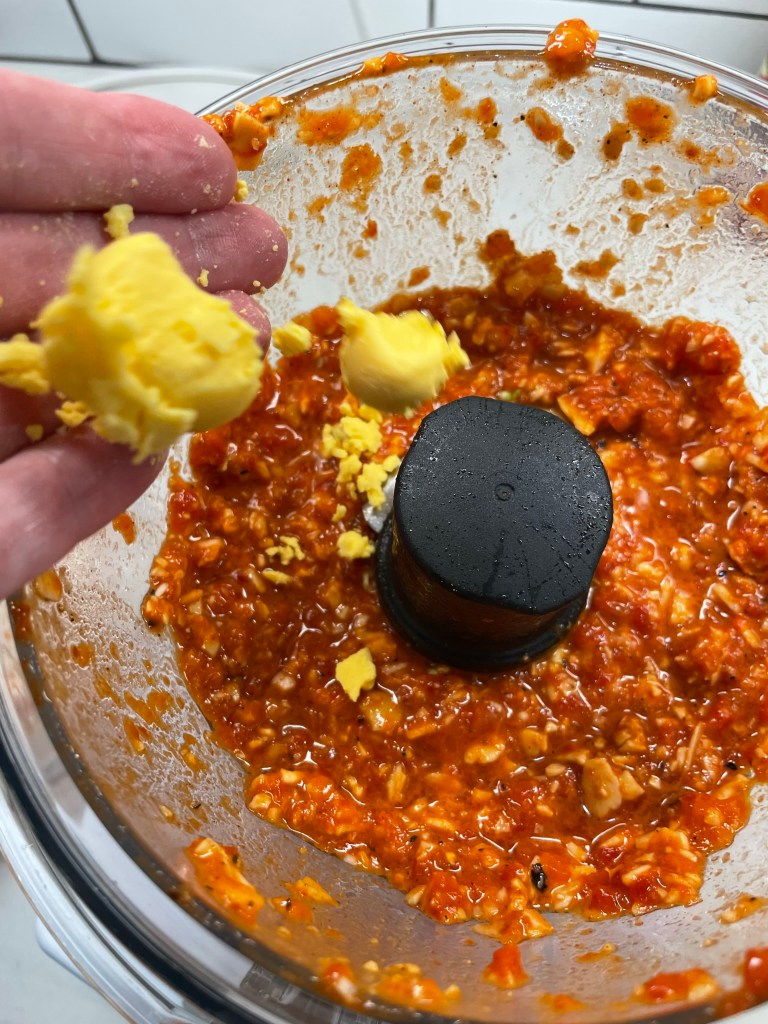
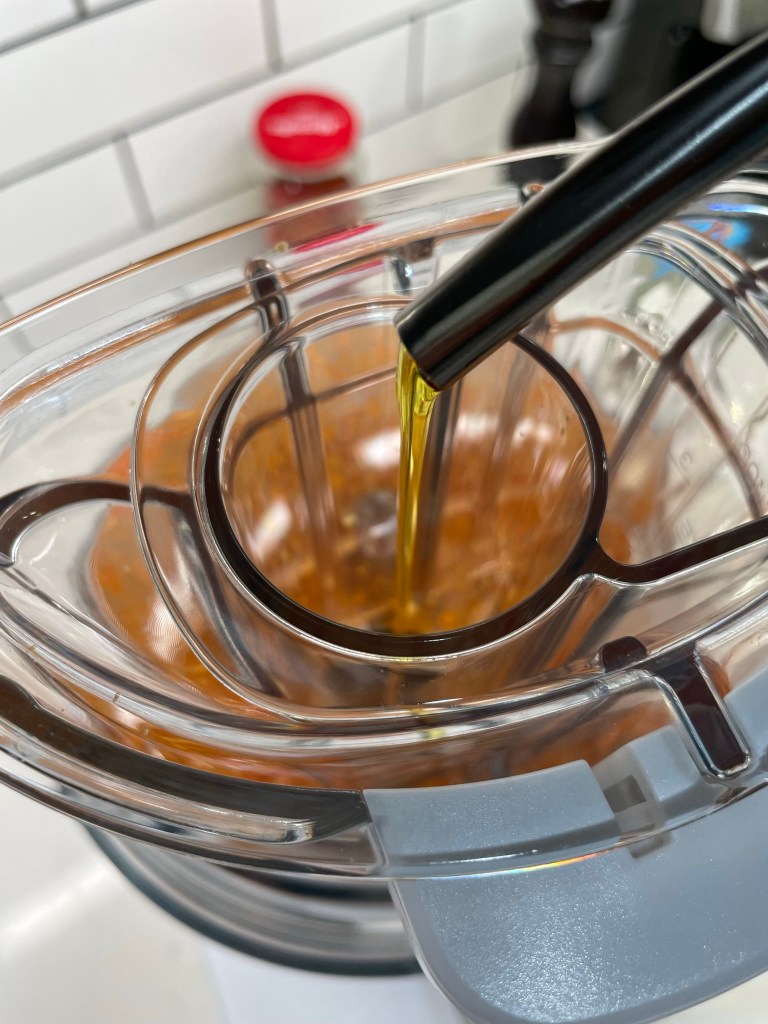
Romesco, in case you are not familiar, is a Spanish-inspired sauce made of pureed roasted red pepper, almonds and paprika. Typically, it would include roasted tomatoes, but I omitted those to keep my sauce thicker. It is sometimes also blended with stale bread to give the sauce more body, but I didn’t want carbs on carbs, so I skipped that, too, which also kept it gluten free. My romesco is spiked with garlic, vinegar, sherry and capers for extra bright flavor, and a peppery extra virgin olive oil holds the whole thing together. The sauce was delicious and substantial for dressing a potato salad.


What I like about this salad, besides it being free of greasy mayonnaise that separates at the first hint of heat, is that it packs a ton of flavor that you might not expect on a potato salad. The roasted red pepper lends more than enough moisture to keep the tender boiled potatoes from feeling sticky or dry, and the smoked paprika, capers and hard boiled egg give it an unmistakable flair of Spanish cuisine.


It comes together easily, especially if you use jarred roasted red peppers, as I did for this one. Simply process together the romesco ingredients, seasoning as you go, and then fold it into tender cooked baby potatoes. A few hours to chill it down is all you need, then top it with chopped eggs, onions, capers and parsley, and this is potluck-ready! 

We enjoyed this romesco potato salad at our house on Fourth of July weekend, but it would be a perfect way to celebrate the end of summer while also welcoming in some of the bolder flavors of fall. It would be excellent alongside a grilled skirt steak or zesty marinated chicken breasts, or keep it light and healthy— as we did, by serving it alongside a grilled whole branzino. 


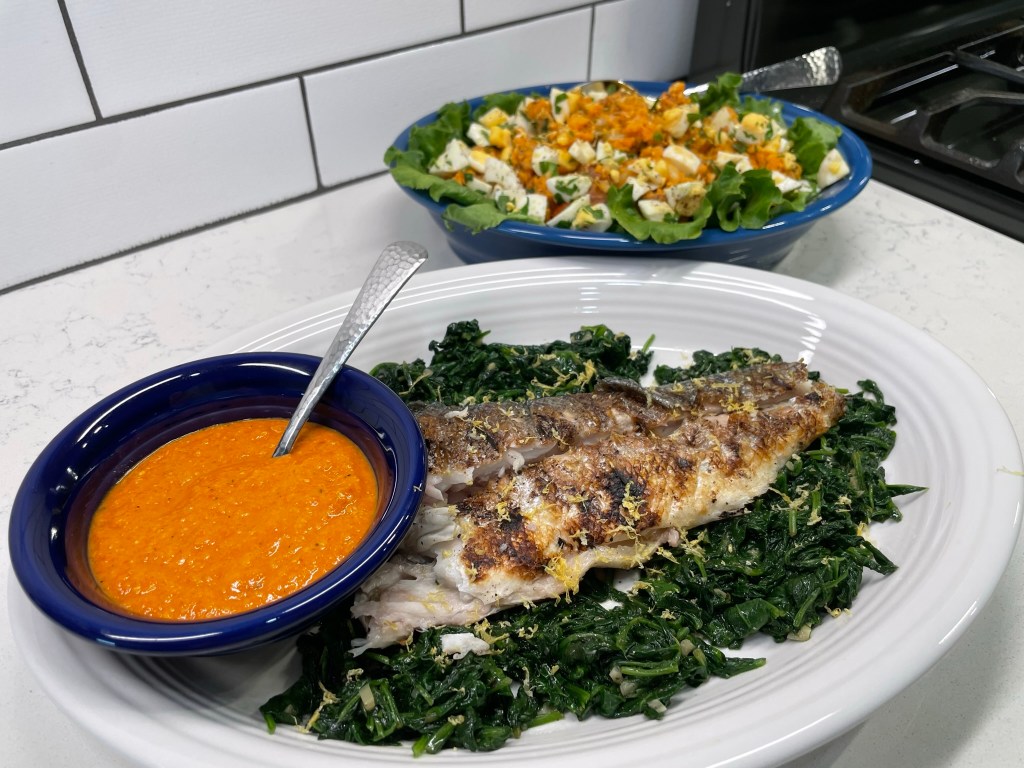
This recipe made enough romesco to dress the salad plus a little extra to serve on the side with the grilled fish. If you don’t want the extra, simply prepare an extra half-pound of potatoes. But trust me on this, you’re going to want the extra. 😁


Romesco Potato Salad

  • Servings: About 6
  • Difficulty: Average
  • Print

The Spanish-inspired flavors of roasted red pepper, paprika, sherry and almond lend a zesty flair to this mayo-free potato salad!


Ingredients

  • 1 pound itty bitty red potatoes
  • 3 eggs, hard boiled, cooled and peeled
  • 1/2 cup roasted red peppers
  • 1/3 cup almonds
  • 1 Tbsp red wine vinegar
  • 1 Tbsp sherry (see recipe notes)
  • 3/4 tsp smoked paprika
  • 2 cloves garlic
  • 1/3 cup evoo; add 2 Tbsp at first, drizzle remaining in while processor runs
  • Kosher salt and freshly ground black pepper, to taste
  • Additional roasted red bell pepper, chopped
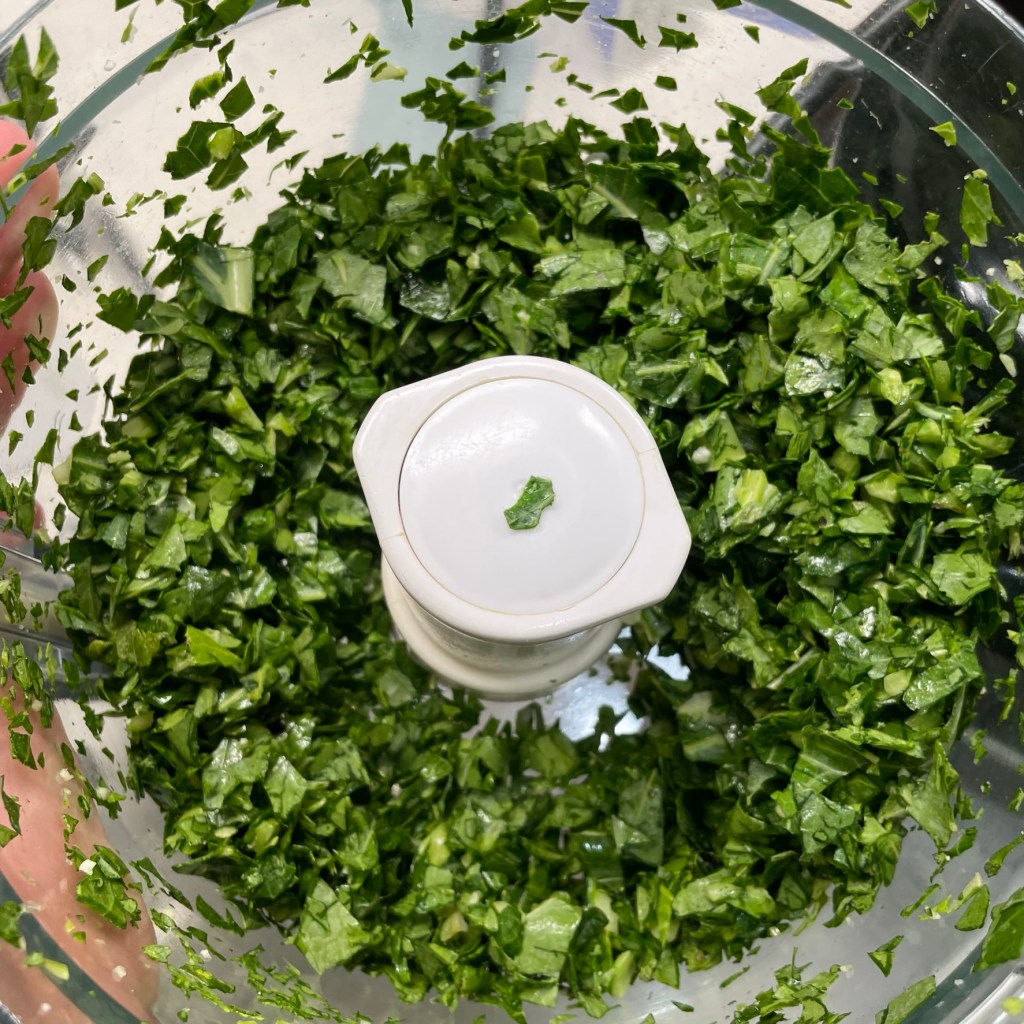
  • 1/4 cup parsley leaves and stems, chopped
  • 1 Tbsp capers, rough chopped
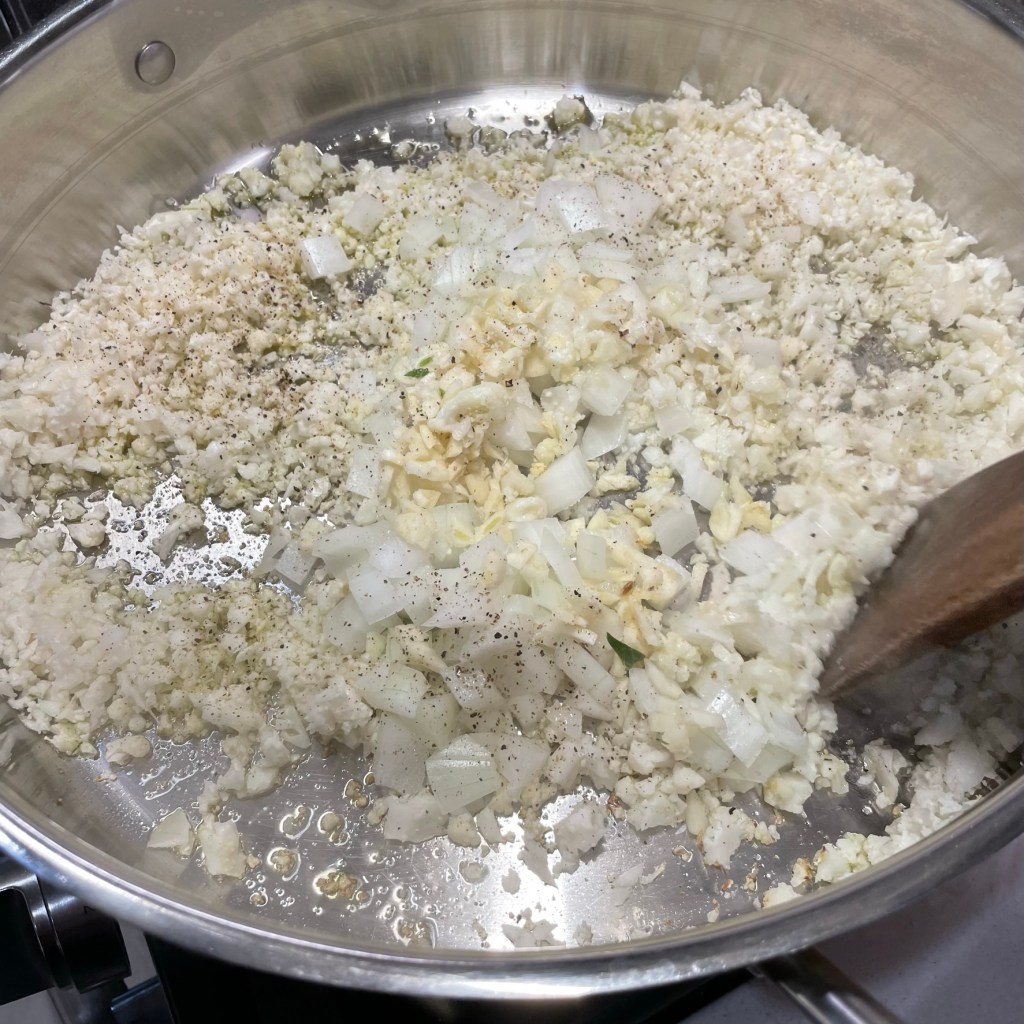
  • 1/4 cup diced Spanish onion

Recipe Notes: Sherry vinegar is traditional for romesco, but I substituted a 50/50 mix of red wine vinegar and good quality drinking sherry. Odd, isn’t it, that I had sherry but not the vinegar? You will likely only need about 2/3 of the romesco to dress the potato salad. Save the rest for another purpose (it’s great on sandwiches or with grilled fish), or do an extra 1/2 pound of potatoes.

Directions

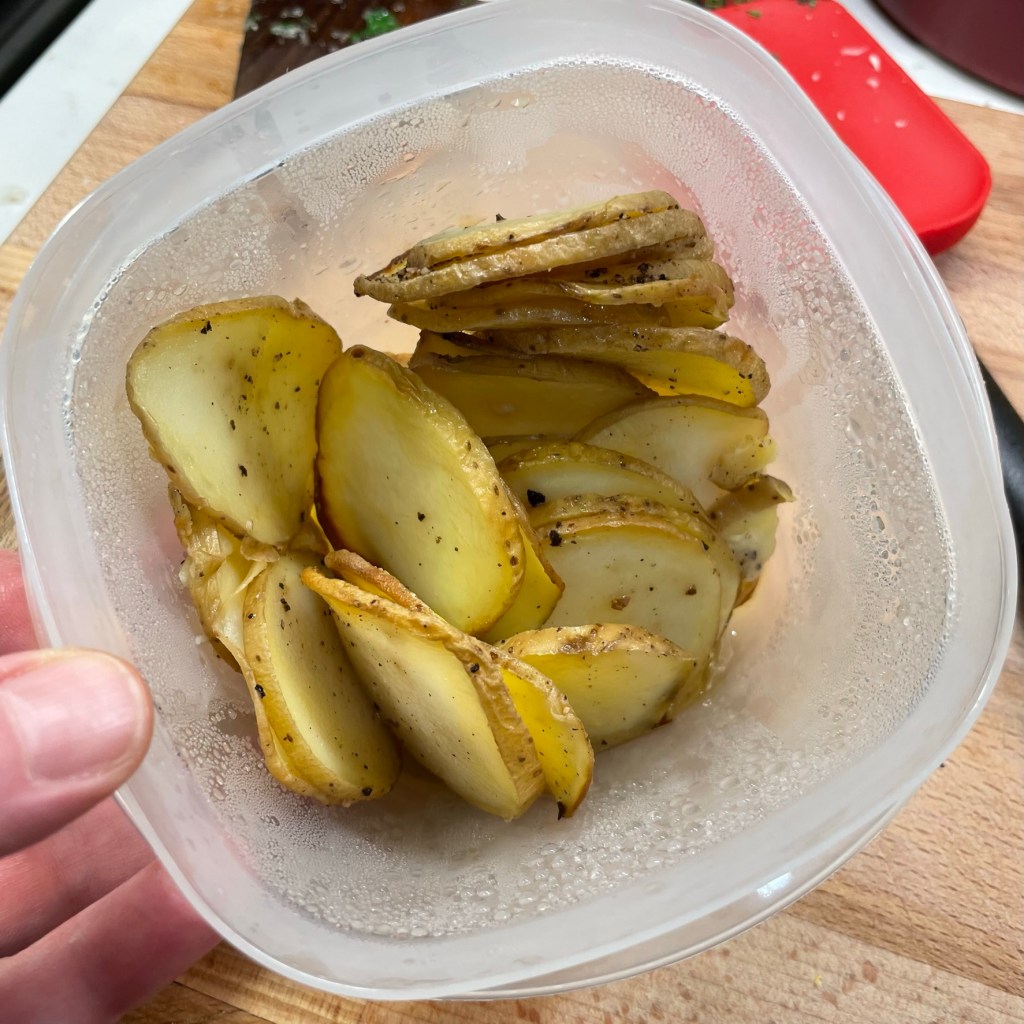
  1. Add baby potatoes and water to a medium pot. Bring to a gentle boil, then reduce slightly to simmer until potatoes are tender. Drain immediately and let them relax in the colander to dissipate the steam. Lightly smash the potatoes, not to the point of mashing them, but enough to break them open just a bit.
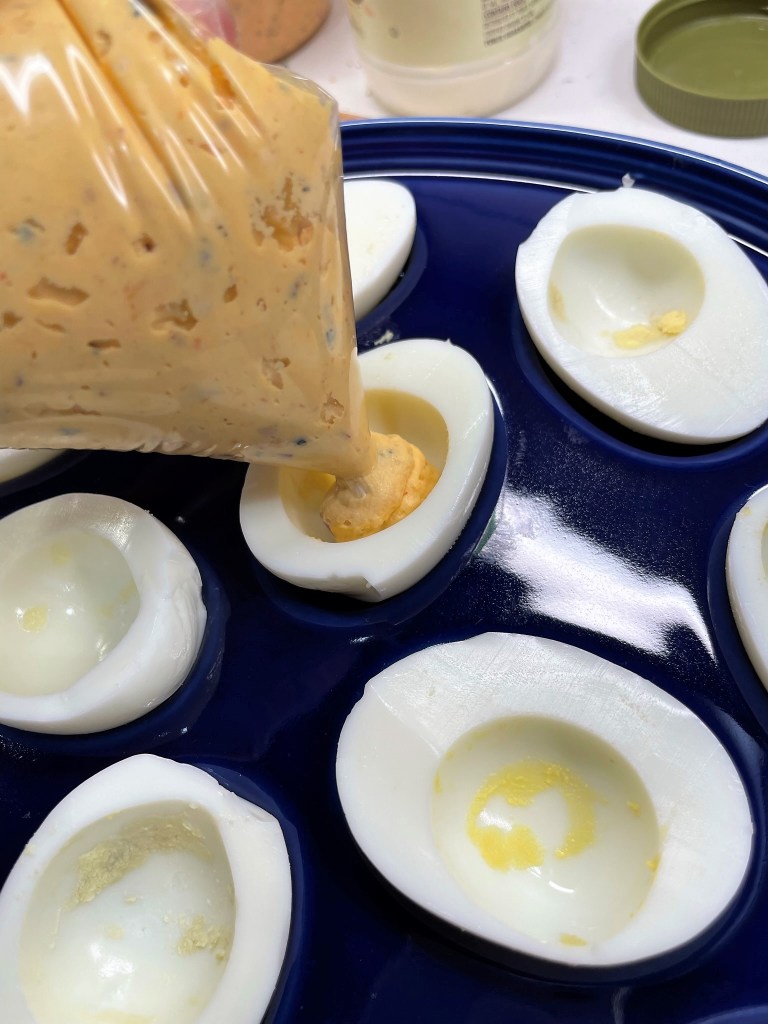
  2. In the bowl of a food processor, combine roasted red pepper, garlic, almonds, vinegar, sherry and paprika. Season with salt and pepper. Pulse a few quick times to roughly blend the sauce. Add one yolk of hard boiled egg if desired. Add two tablespoons of the olive oil and pulse again, then run the machine continuously while you slowly drizzle in the remaining oil.
  3. When potatoes are warm but no longer hot, gently fold in the romesco sauce. You’ll probably want to use a little more sauce than you initially think it needs, as the warm potatoes will absorb some of the moisture in the sauce.
  4. At serving time, top with additional red pepper, onion, chopped hard-boiled egg, capers and parsley. Add one last drizzle of olive oil, if desired.


Green Shakshuka

Breakfast for dinner is one of my favorite meal categories, and now that I have discovered the joy of shakshuka— the Mediterranean dish that combines vegetables and sauce with gently cooked eggs— there seems a world of possibilities beyond the standard rearrangements of eggs, bacon and pancakes. 

Shakshuka, which is very popular in Jewish culture, is typically made with a tomato sauce base and any variety of vegetables. The ingredients are stewed together in one pot, and eggs are simmered on top until set. It’s quick, hearty, simple and inexpensive (depending on egg prices, of course). My husband and I have enjoyed many versions of this dish since I first learned to make it in 2017, including last summer when I made a Ratatouille Shakshuka that was so, so good.

This time, however, my shakshuka is missing the bright red color of tomatoes because I have swapped them out in favor of hearty green ingredients.


Tis the season to be green!

In Spring, it’s only natural that cooks everywhere would begin to lean into the freshness of green vegetables. This past week, I opened my email to find a Green Gumbo, posted by my blog buddy Maylee at Beyond Gumbo. I had never heard of “green gumbo,” made with ham and every leafy green under the sun, but if this is what they’re doing with food in Louisiana, then I’ve got to get down there as soon as possible!

We are still some time away from harvesting the tender vegetables of spring, but consider all the cool-weather vegetables that can carry us until then— broccoli, kale, collards, spinach, leeks and bok choy would all be very easy to incorporate into shakshuka, which is a cook’s choice kind of dish anyway. The main consideration is knowing how long your chosen vegetables need to be cooked so you can plan your time accordingly. The rest is subjective, so find what you like and get cooking!

I like a dish to be texturally interesting, so I went with cauliflower, which I pulsed down into “rice” in the food processor, collard greens, also processed into smaller bits for quicker cooking, and shiitake mushrooms for a little bit of chewy, almost-meaty goodness. Onions and garlic, of course, and some sliced cooked potatoes, just because I had a few left over from another meal. They were a good addition. For kicks, I also tucked in a spoonful of the crazy-hot habanero chili crisp that I picked up at Trader Joe’s. They are no longer selling it, but if you bought a jar, you know that it keeps for a long, long time, and it adds a serious punch of spicy flavor to a dish. I’m still looking for ways to use it and it worked here, but you could sub in any other kind of seasoning you like.


An easy approach to shakshuka

The easiest way to approach shakshuka is to build it in layers, starting with a quick saute of the firmer ingredients and aromatics. Next, I added my mushrooms and chopped collards and steamed the mixture down in a half cup of vegetable broth, plus a squeeze of lemon to balance the slight bitterness of the greens. I spread the potato slices out over the top with a little more broth, and then slipped the eggs into the mixture. This stage of the recipe can be done in the oven, but I have found it simpler and quicker to put a lid on it and keep it stovetop. The eggs cook within a matter of a few minutes, and the meal can be served straight from the pot.


Feta crumbles and fresh chopped dill were a nice final flavor touch to this twist on a classic. We enjoyed our green shakshuka with one of our final pieces of store-bought matzo left over from Passover. We are always so glad to see it go. 😉


What creative twists would you like to see in shakshuka, or which have you already tried? I love reading your comments and I’m always up for a challenge, so please let me know what you think below the printable recipe.


Green Shakshuka

  • Servings: 4
  • Difficulty: Average
  • Print

Ingredients

  • About 2 cups of fresh cauliflower florets
  • 2 Tbsp. extra virgin olive oil
  • 1/2 medium sweet or yellow onion, chopped
  • 2 cloves garlic, minced
  • Salt and pepper
  • 1 cup sliced shiitake mushrooms
  • 1 tsp. spicy chili crisp (mine was Trader Joe’s habanero)
  • 1 small bunch fresh collard greens, cleaned and rough-chopped
  • 3/4 to 1 cup low-sodium vegetable broth, divided
  • Juice of 1/2 small lemon
  • 1 cup cooked sliced potatoes
  • 4 large eggs, room temperature
  • Crumbled feta and fresh dill, optional for serving

This dish can be made with any number of vegetable substitutions. Consider the cooking time for each vegetable you plan to use and add them to the pot accordingly. Chopping the vegetables into very small bits will significantly shorten the cooking time, and is a good way to get this dish on the table in a hurry.

Directions

  1. In the bowl of a food processor, pulse the cauliflower into small bits. Heat oil over medium heat in a wide, heavy-bottomed pot or skillet. Add cauliflower, onions and garlic and season with salt and pepper. When onions and cauliflower are softened, add the mushrooms and chili crisp and saute to cook off some of the moisture.
  2. Pulse the collard greens in the food processor to the size of cereal flakes; this will help them cook quickly and will prevent the shakshuka mixture being too chunky. Add greens to the pot and toss to combine. Pour in about 1/2 cup of the broth plus the lemon juice and reduce heat to simmer, until the greens begin to tenderize (about 5 minutes).
  3. Arrange potato slices all over the top of the mixture and pour over additional broth as needed to just cover them. Cover the pot with a lid and steam until potatoes are hot.
  4. Use the back of a large spoon to create four indents in the shakshuka mixture. Carefully slip an egg into each of the indents. Season with salt and pepper and cover the pot with a lid. Steam for about 10 minutes, or until the eggs are set to your liking. Sprinkle with crumbled feta and fresh chopped dill and serve immediately.


Spicy Pimento Cheese Deviled Eggs

Every home cook has an arsenal of “go-to” dishes, tricks or final touches to elevate their menus in a given situation. One of mine is deviled eggs—who doesn’t love them, right? It’s a staple at potlucks and family get-togethers for good reason. This simple but universally loved finger food is one that I consider a blank canvas for interesting variations. With just a few ingredient swaps, you can turn a basic deviled egg into something flavorful and unexpected, and that’s what happened with these pimento cheese deviled eggs only a few weeks ago. 

Go ahead, grab one!

When my husband’s adult son, Alex, announced in February that he would be visiting from Europe for a few weeks, my mind went racing about all his favorite tastes of home I would need to make while he stayed at our house. Like his dad, Alex has a very short list of foods he doesn’t enjoy, and pretty much everything else is fair game, especially if there’s spicy heat involved. He likes spice so much, in fact, that the hostel he co-owns in Budapest is literally called Spicy Hostel! It is apparently the place for young, adventurous people to stay when visiting the capital of Hungary.

That’s Alex, on the bench!

The hostel keeps Alex very busy, so we try to make the most of his infrequent visits home, and I was ready to cook whatever he requested! On the first day of his visit, I invited him to join me on a journey to one of our supermarkets, where I quickly realized that the “taste of home” he missed the most was not any home-cooked meal at all—nope, he wanted junk food! I watched in awe as he piled cans of Spaghetti-Os, Spam and chunk light tuna into the shopping cart. These are all things he cannot easily find in Budapest, so he spent the first week or so satisfying those cravings. He was also pretty excited about York peppermint patties, which he loves so much that he smuggled a multi-pack onto the plane for his trip home.

By the end of his three-week visit, though, we had treated Alex to many home-cooked meals, including the Hot Italian Sausage and Cherry Pepper Pizza that was inspired by our 2021 visit to New Haven’s Modern Apizza. We tossed some burgers on the grill, with American cheese—something we take for granted around here—and he loved it. He also requested fresh seafood (not much of that in Hungary, either), and I was happy to oblige with a panko-crusted halibut, as described in my post about Kenji Lopez-Alt’s Miraculous Mayo Marinade. Finally, Les fired up the bullet smoker at the end of his visit and made a veritable feast of smoked meats, including a pork shoulder, brisket, several artisan sausages and a gorgeous side of fresh salmon.

This smoker holds enough to feed a hostel-ful of hungry travelers!

For that smoked feast, Alex invited a couple of local friends over for dinner, and we enjoyed a great meal that started with a smoked salmon spread that Les makes—I will insist that he make it again this summer and share it here on Comfort du Jour—and these pimento cheese deviled eggs.

This is about to become a flavor explosion.

I had picked up this very spicy pimento cheese in the cold pantry section at the butcher shop where I purchased the meat for the smoker. The spread was quite heavy on the mayo (not really our thing), so rather than serving it just with crackers, I decided to mix it with the egg yolk filling for a batch of deviled eggs. There was so much heat and flavor in the pimento cheese that no other seasonings were necessary. I only needed a little dab of extra mayo to loosen the filling and some finely minced shallot for crunch. As usual, I grabbed a small zip-top bag to use as a makeshift piping bag for filling the split egg whites. It’s easier and less messy than spooning it in.


Let me tell you, Alex and his friends devoured these deviled eggs in no time flat, and you can bet this treat will be coming up in the rotation again this summer. Come to think of it, deviled eggs are great for both Easter (this Sunday) and Passover, which starts this evening at sundown. I might be convinced to make another batch this weekend!


Spicy Pimento Cheese Deviled Eggs

  • Servings: 6
  • Difficulty: Easy
  • Print

Here come two of the South’s favorite all-time foods, combined into one tasty little two-bite appetizer—let’s just call this a win-win!


Ingredients

  • 6 large or extra large chicken eggs
  • 1/2 cup prepared pimento cheese, on the mayonnaise-y side
  • 2 Tbsp. finely chopped onion
  • A few tablespoons additional mayo, as needed to loosen yolk filling
  • Salt and pepper as desired

There’s no “right” amount of pimento cheese or mayonnaise to add, as it depends on the texture of the egg yolks and pimento cheese. Adjust each ingredient to suit your fancy.

Directions

  1. Boil the eggs, following your own preferred method. Here’s mine: Bring a pot of water to a full, rolling boil, then lower the eggs in on a slotted spoon. Set a timer for 12 minutes, then use the same spoon to transfer the eggs directly to an ice water bath for about 30 minutes. Peel under cold running water. Works great every time.
  2. Cut the eggs lengthwise, and empty the yolks into a medium bowl.
  3. Add pimento cheese, onion and additional mayo (if needed) to the yolks, blending to a smooth, creamy texture. Adjust seasoning to taste. Spoon the mixture into a quart size zip-top bag and seal.
  4. If working ahead, chill the filling and the egg white halves (covered, of course) until just before serving. Snip a small triangle on the corner of the zip-top bag and pipe the filling into the egg white halves. You will probably have some filling left over; enjoy it on crackers or fill a couple of celery sticks. Or, if nobody is watching, squeeze the bag directly into your mouth. 🙂


Ratatouille Shakshuka

How is it possible that the simplest combination of ripe-at-the-same-time ingredients turns out to be such a mouthwatering flavor explosion, no matter how you put it together?

Any way you plate it, this is a great combo!

I never get tired of rearranging ratatouille—eggplant, zucchini, red bell pepper, onions and tomatoes—and this time, I married the classic Provencal stew with a classic Jewish breakfast dish, shakshuka.

The first time I heard of shakshuka was during a pre-wedding meeting with Rabbi Mark, who formerly led Temple Emanuel in Winston-Salem, where my then-fiancé, Les, is a member. When our ceremony-planning conversation took a detour toward food and cooking (as literally every conversation with me eventually does), Mark asked if I’d ever made shakshuka, the Middle Eastern dish that is a breakfast staple in many Jewish households. I was stumped because I had never even heard of this dish, let alone made it. But that changed quickly, and it has become an occasional favorite at our house.

Shakshuka is a humble and hearty, tomato-based skillet meal, and a great way to use up whatever other vegetables you have on hand, with eggs simmered right into the sauce. It is very similar to a dish the Italians call “eggs in purgatory.” I especially appreciate how simple it is to pull together when I have had a busy week with little time to plan a menu. Up until now, I have made it only with the spicy flavors that are traditional to the northern African region, where shakshuka originated—cumin, paprika, hot pepper, garlic and oregano.

But this time, I took the concept of shakshuka northward across the Mediterranean Sea, into the south of France, using Herbs de Provence alongside all the beloved vegetables of ratatouille. The result, as you can see, was awesome!

Served with a light sprinkle of Parm-Romano blend cheese at the table.

There was so much nourishing comfort in the stewed vegetables, which simmered long enough to become soft and melded, and the delicate herbs were just right. I’m already craving it again!

As with most recipes, it’s helpful to have all your ingredients chopped and ready before you begin. For any stew, I like to cut up the vegetables into roughly similar size. This ensures more even cooking, and also makes it possible to get a little bit of everything in each delicious bite. I used a large zucchini, a large “millionaire” eggplant (the slender, Japanese variety), half of a large onion, half of a huge red bell pepper and three fresh, red tomatoes from my garden. In addition to the fresh ingredients, you’ll need a 15 oz. can of tomato sauce, a splash of dry white wine (I used dry French vermouth), a pinch or two of Herbs de Provence, and up to six eggs.

We’re going to need a bigger pot!

That’s a lot of veggies! I made this version of shakshuka in a larger pot than usual because I knew that tossing all of these fresh vegetables in my go-to cast iron would be a serious challenge, and I wanted to avoid making a big mess. The ratatouille also needs to be stirred as it cooks, so be sure your cooking vessel can handle the volume of ingredients as well as the mixing requirement. Choose a pot that has a snug-fitting lid, as this will be important for simmering.

The width of the pot is what matters, so you’ll have plenty of room to place the eggs.

Begin by heating the pan over medium flame. Add oil and start sautéing the vegetables. Eggplant soaks up oil fast so I held that back until the peppers, onions and zucchini had a chance to soften. Remember to season each layer with a pinch of salt and pepper, not only for flavor, but also because salt helps to draw excess moisture from the vegetables as they cook. During this stage, also add a few pinches of Herbs de Provence, a French blend that includes any combination of thyme, savory, rosemary, marjoram and lavender. These are delicate herbs, but they do pack a fragrant punch, so start with a small amount and inch up to taste.


When the vegetables are visibly softened, add the fresh garden tomatoes and give it a stir. Add the tomato sauce and dry white wine. If I have used a canned ingredient, I usually swish the wine around in the empty can to rinse out the last bit of flavor. Another quick pinch of salt and pepper, and then reduce the heat, cover the pan and allow it to simmer for 15 to 20 minutes. The vegetables will continue to soften, melding the flavors together, but the sauce should not reduce too much. While it simmers, take the eggs out of the fridge; they will set in the shakshuka better if they are closer to room temperature.


When the ratatouille stew has become very soft, crack each egg into a ramekin dish for easy transfer to the shakshuka. This may seem unnecessary, but trust me when I tell you that it is no fun at all trying to fish out itty-bitty pieces of egg shell that went astray into a big saucy mixture. If anything goes sideways with your cracked eggs, you want it to happen in the ramekin, not in your beautiful recipe!

Give the stew a gentle stir, and then use the back of a large serving spoon to create a slight depression for each egg to rest. This doesn’t have to be perfect, and you only need a spot about 3 inches across for each egg. I had room for six eggs in my large pot, but I only used four because I knew the extras would not warm up well without overcooking. Better to add fresh eggs when you heat up the leftovers.

Cook as many eggs as you plan to serve initially. Make more eggs when you reheat the leftovers.

Slip an egg into each depression and give the shakshuka one final pinch of salt and pepper before covering the pot. Keep the flame set on low and cook for 8 to 10 minutes, until the whites are set but the yolks still have a bit of jiggle to them.

I wish you could smell this! 😋

Scatter fresh, chopped herbs over the dish (I used fresh basil from the garden, but flat-leaf parsley would be nice, too), and serve immediately with a slice of crusty French bread. The best way to serve this dish is to use a wide, somewhat flat spoon to scoop underneath an egg, grabbing as much of the surrounding stew as possible at the same time. Sprinkle on a teaspoon or so of grated Parmesan for a big burst of umami flavor.


Ratatouille Shakshuka

  • Servings: 6
  • Difficulty: average
  • Print

Choose a wide, covered pot for making your ratatouille, and prepare your workstation by chopping all vegetables before you begin.

Ingredients

  • 1 large zucchini, trimmed and chopped
  • 1/2 large sweet onion, chopped
  • 1/2 large (or 1 medium) red bell pepper, chopped
  • 1 large Japanese eggplant, chopped (or about 2 cups of alternate variety)
  • 3 Tbsp. extra virgin olive oil
  • Kosher salt and black pepper to taste
  • Up to 1 tsp. Herbs de Provence (or Italian seasoning, if preferred)
  • 3 small, fresh tomatoes, chopped
  • 15 oz. can low-sodium tomato sauce
  • 2 Tbsp. dry white wine (or dry vermouth)
  • 6 large eggs* (see recipe note below)
  • Fresh basil or Italian parsley, for garnish

Note: If you wish, cook only the number of eggs you intend to serve initially. When you use the leftovers, fresh eggs will yield a better result at that time.

Directions

  1. Heat large pan over medium heat. Add olive oil and saute vegetables, beginning with only zucchini, onion and bell pepper. When the first vegetables begin to soften, add the eggplant and saute until all veggies are tender. Season with salt, pepper and Herbs de Provence.
  2. Add fresh tomatoes, tomato sauce and dry wine, stirring to combine evenly. Reduce heat, cover and simmer 15 to 20 minutes. Remove eggs from fridge during the simmer time.
  3. When vegetables are fulley softened, crack each egg into a ramekin cup for easy transfer into the pot. Use the back or a large serving spoon to make a depression for each egg. Slip the eggs into the depressions, season with salt and pepper and cover the pan.
  4. Cook over low heat about 8 minutes, until egg whites are set and yolks are still slightly jiggly. Serve immediately.


Garden Veggie Spiral Quiche

About once a week, my husband, Les, flashes me his phone to announce what has appeared on his Facebook page—“Five years ago, today!” It’s usually a throwback photo of our dog, Nilla, and I always love the ones that were taken years before I even met them. She was an adorable little fluff pup, and he has taken a ton of pictures of her through the years! The other day, though, he presented me with a picture that was instantly familiar— a pretty, fresh-from-the-oven spiral quiche made of fresh zucchini, yellow squash and eggplant from our own garden. The timing was remarkable, given that I had made plans to make the same recipe with veggies from this year’s garden, just days apart from the one I made in 2017. For your comparison, here they are, side by side:

Is it a quiche or a tart? Let’s just call it delicious.

My inspiration for this brunch-worthy dish came directly from Pinterest, but the recipe did not. It was one of those pins that appeared with an exciting image, but no title or description, and a link that led to absolutely nothing. But I took the clickbait in stride because at that point, I had all the inspiration I needed; my mind was already racing with my own ideas for creating such a pretty pie. I’d use thin slices of eggplant and squash from my own garden, layering them around and around inside a blind-baked pastry in my springform pan. I’d slip a few store-bought carrot slices in wherever I could make them fit, and then I’d pour an omelet mixture over the whole thing and bake it until the eggs were set. I was not blogging at that time, so it didn’t occur to me to write down what I had done—I just followed my instinct and used what was fresh from the garden at the time. I had one measly cherry tomato that year (the deer got the rest), and I showcased it by placing it right in the center.

As it happens, the same things are fresh from the garden at the same time this year!

This is a veggie-packed quiche! I ended up swapping the parsley for fresh basil, and I skipped the fresh onion and garlic.


This was a delicious, meatless dinner, and I dressed up our quiche servings with a generous spoonful of marinara sauce and some sprinkles of our favorite parm-romano blend cheese. It was hearty and satisfying, and just look at all those layers of vegetables.


I began with a homemade pastry dough, but there’s no reason you couldn’t use a pre-made crust; be sure it’s the kind you can roll out, rather than a crust already in a tin. Because of the spiral, this will work best in a baking pan with straight sides. I used a springform pan, but a regular 9-inch cake pan with straight sides will work fine as well.


At this point, I made a mistake and you have probably already spotted it. Trimming off the excess dough, even with the top of the springform pan, seemed like the logical thing to do. But I didn’t take into account that the crust would shrink during blind baking, and the pan did not have any slope to keep it in position. The better choice would be to keep a bit of dough hanging just over the edge of the pan. Or, as I suspect was my method in 2017, use a double layer of foil to hold the pastry in place during baking. So, my advice here is, “do as I say, not as I do.” 😊

Follow whatever blind-baking method feels right to you, and check on it during baking. I docked a few holes in the pastry (the bottom and the sides), laid a parchment round into the pan and filled a shallow layer of dried beans to keep it from bubbling. One of these days, I will buy some pie weights! As you can see, my trimming method backfired, and the dough slid down the sides a bit. Live and learn—let’s call it “rustic,” shall we?


Allow the crust to cool completely while you prep the veggies. Trim and slice the zucchini, squash, eggplant and carrots into 1/4” thin planks. This was a task for the mandolin, which is serious business, so I didn’t attempt to take pictures of that process. Use a knife if you must and aim to keep the planks as uniformly thin as possible. The carrots were cut into thinner, 1/8″ slices. Sprinkle all the veggies with salt and pepper and arrange your ingredients for easy assembly. Combine beaten eggs with ricotta and whisk evenly. Shred the cheese and chop the basil into strips.


When the pastry is cooled, layer the zucchini and eggplant slices around the pan, overlapping them slightly to eliminate gaps. Don’t worry about keeping the slices even—it’s natural for some of them to sit higher in the pan—and expect that you may have a few veggie planks left over. Wiggle in the carrot slices wherever they fit, and then sprinkle the shredded cheese and sliced basil over the tart.


Pour the egg-ricotta mixture slowly over the veggie swirl, taking care to let it seep evenly as much as possible. This was a bit tricky with mine, given that my pastry had collapsed in several places, but it worked out OK. In a nod to my 2017 tart, I also placed a cherry tomato in the center before I slid it into the oven. About an hour later, the eggs were set and the veggies were tender, but there was a fair amount of excess moisture pooled on top in spots.

I used a paper towel to blot away the excess moisture, and tucked it back into the oven for another minute or two.

The moisture was not disastrous, and it didn’t make the crust soggy, but next time, I’ll salt the vegetables longer to draw out moisture, the same as I do with eggplant for moussaka or eggplant parm, and my instructions reflect this suggestion, too. More lessons learned. 😊


Garden Veggie Spiral Quiche

  • Servings: 8 wedges
  • Difficulty: intermediate
  • Print

It’s fun to make, and uses up some of the fresh veggies coming out of the garden! This was delicious for Meatless Monday, or make it the star of the show at a summer brunch.

Ingredients

  • 1 rollout pie pastry (store-bought or homemade; my recipe is below)
  • 1 large or 2 medium zucchini, sliced lengthwise into 1/4″ planks
  • 2 medium Japanese variety eggplant, sliced lengthwise into 1/4″ planks
  • 1 medium yellow or zephyr squash, sliced lengthwise into 1/4″ planks
  • 3 medium carrots, peeled and sliced lengthwise into 1/8″ planks
  • Kosher salt and black pepper
  • 4 large eggs
  • 1/2 cup ricotta
  • 1 tsp. dried minced onions
  • 1/2 cup shredded gruyere or cheddar cheese
  • Small handful of fresh basil leaves (or substitute Italian parsley)
  • Marinara sauce and grated parmesan, for serving

Directions

  1. Preheat oven to 350° F. Prepare and blind-bake the pastry in a 9″ springform or other straight-sided cake pan. Allow it to cool to room temperature.
  2. Spread out the veggie planks and season them generously with salt and pepper. Allow them to rest for about an hour, to draw out some of the moisture. Blot dry with paper towels. Select a smaller, “bendy” slice or two for the center of your quiche.
  3. Whisk together the eggs and ricotta until evenly blended. Stir in dried minced onions.
  4. Arrange zucchini, eggplant and yellow squash planks in the cooled pastry crust, overlapping slightly and alternating veggies for visual interest. Wrap the reserved slices tightly around your index finger and place it in the center (it will unwind to fill up the space). Tuck carrot slices in wherever you can make them fit.
  5. Scatter shredded gruyere all over the veggie spiral. Slice or tear the basil leaves and scatter those over the quiche as well.
  6. Carefully pour the egg mixture over the tart, taking care to let it seep down between the veggie planks. The mixture may or may not come all the way to the top.
  7. Bake the quiche at 350° F for about an hour, until eggs are fully set and vegetables are softened. Let it cool at least ten minutes before slicing and serving.

Use your favorite pie pastry recipe, or take a shortcut with a store-bought, roll-out crust. Below is the recipe I used for mine.

Ingredients

  • 1 cup all-purpose flour
  • 1 cup whole wheat pastry flour (or white whole wheat)
  • 1/2 stick unsalted butter, cold, cut into small cubes
  • 1/8 tsp. kosher salt
  • 1/3 cup very cold water

Directions

  1. Combine the two flours and salt in the bowl of a food processor. Pulse one or two times to evenly mix.
  2. Scatter the butter cubes all over the flour. Pulse about five times until the butter bits are smaller and coated in flour.
  3. Slowly pour the cold water into the chute of the processor. Run continuously as you add the water, and mix just until the dough forms a ball. Turn the dough out onto a piece of plastic film; wrap it up tightly and refrigerate at least one hour or up to overnight.
  4. To blind-bake the pastry, preheat oven to 350° F. Roll the dough out on a lightly floured countertop and drape it into the springform pan; trim off excess, but allow the dough to catch the edge a bit. Use a fork to prick a few holes into the dough; this helps reduce puffing while baking. Lay a piece of parchment over the bottom of the crust and fill with ceramic beads (or dried beans work well). Alternative, gently lay a doubled sheet of foil directly over the raw crust and up the sides. Bake for about 20 minutes, just until pastry is set but not golden. Allow it to cool before filling.


Matzo Brei Florentine

Make something off limits, and that’ll be exactly what you crave, right? We only started Passover on Friday evening, and I can’t stop thinking about wanting a big, fat sandwich. To be clear, my husband does not expect me to adhere strictly to this Jewish custom of his—heck, he’s the first to admit that he is not religious himself about this requirement when he is out and about—but he does not eat bread at home during the Passover week. His choice is not about strict religious mandates, but tradition that helps him feel connection with his ancestors, and especially his late father. I am not Jewish myself, but I respect the tradition and so I am making an effort to accommodate this food called matzo.

Iconic, yes. But matzo needs a whole lot of help to become flavorful or interesting.

If you have never had the anti-joy of eating matzo, allow me to describe it for you— try to remember the driest, most bland, and perhaps even stalest, saltine cracker you’ve ever eaten. It may have been a cellophane-wrapped packet that a diner waitress fished out of her apron pocket for your bowl of chili in 1974. Maybe you got stuck in traffic on the interstate during a blizzard and had to resort to eating whatever random things you found in the glove compartment. Or perhaps you found some old takeout crackers in the back of your desk drawer when you finally made it back to the office after two years of COVID shutdown. Whatever memory you conjured, hang onto that for a moment and try to remember the taste. Yep, matzo is like that. But not as good. And without salt.

You could search the entire world and not find a less interesting cracker. Or is it considered bread? The Jewish people developed matzo as a reference to the unleavened bread their ancestors were forced to eat when they fled Egypt in a hurry. There was no time for the bread to rise, so they baked the dough as it was and took it on the run. Whatever category you put matzo in (bread or crackers), this stuff is undeniably boring, but a common sight in my home now—at least during Passover. My goal, as the primary meal maker, is to find ways to make matzo more palatable because eating it from the box can only be described as “choking it down.” And I won’t even mention what it does to the digestive system (it ain’t pretty).

Thank goodness for the New York Times Cooking e-letter, which is always brimming with menu ideas, including a classic, basic version of this dish, called matzo brei. According to Melissa Clark, the author of the recipe, brei rhymes with “fry,” which is exactly what you do with the matzo before scrambling it into eggs. As written, the recipe sounded dull, but as I started working at the stove, I asked Les if there was any reason that I couldn’t jazz up this humble dish just a bit—maybe with addition of onions and some spinach? Sure, was his response, and this was the result.

My first attempt at matzo brei got my gears turning about other possible flavor twists. What do you think would be good?

I liked this dish! Spinach is nothing new with eggs at our house, as I incorporate it often into omelets. Onions were a no-brainer, and some matzo is even onion-flavored, though that variety is not usually considered kosher for Passover. And the matzo pieces, fried in butter and mingled throughout the scrambled egg mixture, reminded me a little bit of a baked pasta, especially for the crispy, buttered edges. I don’t know what prompted me to top the dish with sour cream, but it was a good call, and the fresh dill I had picked up at the market was a perfect finish for this savory, ready-in-15-minutes breakfast. As Les and I scarfed down our matzo brei with spinach (Florentine, if you will), we began brainstorming other flavor combinations— maybe peppers and mushrooms, or feta and asparagus. Wait, how many days of Passover do we have left?

The recipe was not without challenges, despite its simplicity. I messed up the beginning of the recipe by commencing to fry the matzo in butter straight from the box, and it wasn’t until my common sense began to question the technique that I noticed in the recipe’s steps that I was supposed to rinse and soak the matzo first. Why it was not listed as such in the ingredients, I’ll never know, but I’ll add the oversight to my list of what I call the problem with recipes. The ingredients of the NYT Cooking recipe did not include water, so it didn’t occur to me until it was (almost) too late.

All’s well that ends well, and I’ll describe in my recipe notes how I recovered from my mistake (it was easy). Regardless of whether I ever make matzo brei again, I discovered for sure that I always want to have sour cream and fresh dill on my scrambled eggs now. And with five days of Passover left to go, we are least down two more sheets of matzo.


Ingredients (serves 2)

2 sheets plain matzo, rinsed under warm water and set aside to soften* (see notes)

3 Tbsp. salted butter

1/4 cup chopped sweet onion

Good handful fresh baby spinach, rough-chopped

Kosher salt and ground black pepper (to taste)

3 eggs*, room temperature, beaten with a splash of water or milk

A hefty dollop of sour cream (for serving)

1 Tbsp. chopped fresh dill (for garnish)


*Notes

My mistake led me to an alternate method of softening the matzo. Since I had missed the step of rinsing and resting the matzo ahead of time, I simply poured about 1/4 cup warm water from my tea kettle right into the skillet with the butter and matzo pieces. The dry matzo soaked up the water and fried in the butter with no issues. This may truly be a better method than the original because I didn’t have to wash an extra “soaking” dish or clean up a soggy matzo mess from the counter. Do what works for you!

The original recipe that inspired me suggested using four eggs, but I followed my instinct and used three, as I always do for an omelet-for-two. If you have an extra hearty appetite, go with four eggs.


Instructions

I’ll walk you through it in pictures, and keep scrolling to find it ready to print or save for your recipe files!


Smoked Maple Bourbon Crème Brûlée

WARNING:
Consumption of this rich and decadent dessert after a big meal may result in excessive lazing on the sofa, and may also force extended procrastination of post-entertaining kitchen cleanup.


At least, that’s what happened at our house—twice.

We had a very small gathering at our home for Thanksgiving—just me, my husband and our friend, Maria. I knew when I was planning dinner that it would not make sense to have large pies, cakes or other desserts that yielded 12 portions. As it is, we are scarce on refrigerator space for the leftover turkey and sides, and we certainly did not need extra portions of dessert hanging around. I wanted to make something special for our intimate holiday, and this crème brûlée definitely fit the bill, both for Thanksgiving Day and again for “leftovers” night on Saturday. And let me tell you, even after said lazing kept us up until after 11 pm washing dishes, I had no regrets about this dessert.

If you follow my blog regularly, you already know about our recent discovery of the Knob Creek smoked maple bourbon—the amazing dark spirit that became the star of our 2021 signature cocktail. I have made crème brûlée before, using the incomparable Ina Garten’s recipe as a guide, but I have never added bourbon to it before now. The warmth of the smoked maple bourbon married so perfectly to the creamy silkiness of our individual little custards, and the maple sugar that I torched on top was exactly what it should have been; crunchy, sweet and toffee-like. The custard inside was silky, sweet and creamy, with hints of the smoked maple bourbon. Yes, it was divine, as you’d expect from a dessert that is made from egg yolks, cream and sugar.


I can only hope that when we smashed the tips of our spoons into the crème brûlée, some of the calories fell out. On second thought, who cares?


Adapted from Barefoot Contessa | Crème Brûlée | Recipes
Recipe yields ~32 ounces, good for 6 to 8 ramekins, depending on their size

Ingredients

3 cups heavy cream

1 small pinch kosher salt*

5 large egg yolks + 1 large egg (at room temperature)

1/2 cup maple sugar* + extra for torching (see notes)

1/2 tsp. real vanilla extract

2 Tbsp. Knob Creek smoked maple bourbon


*Notes

I purchase maple sugar online from Big Tree Maple, a company that is based near my hometown in upstate New York. You might also find it in the baking aisle of a specialty market, or substitute caster sugar, which does not have the maple flavor but is also finely textured for easy dissolving.

Ina’s recipe does not call for salt, but I like to put a pinch in most dessert recipes because it highlights the flavors and balances the sweet.

If you use a stand mixer to make the crème brûlée, keep it fitted with the mixing paddle rather than the whisk, and work on the slowest speed so you don’t create a lot of bubbles. If you mix by hand, use a whisk but keep a gentle touch when adding the hot cream to the eggs.

As if our holiday was not already joyful, I also had the pleasure of finishing our dessert tableside with my kitchen torch, a dramatic endeavor that just pleased the dickens out of my Leo personality.

Let’s do this!

Instructions

  1. Preheat the oven to 300° F. Heat about 2 cups of water in a tea kettle for a water bath. Prepare your ramekins by arranging them in a handled pan with sides at least as high as the ramekins.
  2. In a medium saucepan, heat heavy cream over medium-low heat until hot but not boiling. Stir in a pinch of salt. Transfer the hot cream to a measuring cup with a spout for easier blending in the next steps.
  3. Combine the egg and egg yolks in a mixing bowl, and gradually stir in the maple sugar until the mixture is smooth and even, and the sugar appears somewhat dissolved.
  4. Very gradually pour the hot cream into the egg mixture, stirring constantly to prevent curdling. This is easiest with a stand mixer, but you can do it by hand as well. I recommend placing your mixing bowl on something that will prevent it from slipping while you stir or whisk.
  5. Strain the custard mixture through a mesh strainer over a pitcher bowl or large measuring cup. This is not absolutely necessary, but it will help strain out any curdled bits of egg.
  6. Stir vanilla and bourbon into the custard. Slowly pour the custard into the ramekins. I did this by filling each of them halfway, then “topping them off” around the pan until all were filled equally.
  7. Carefully pour hot water into the pan, taking care to not splash it into the ramekins. The water bath should be about halfway up the sides of the ramekins. Transfer the water bath pan to the preheated oven and bake for 35 to 40 minutes, or until custards are just barely jiggly. They will continue to cook when you remove the pan from the oven. Allow the pan to cool until you’re comfortable handling them. Remove the ramekins and cool on a rack, then cover and transfer them to the refrigerator for several hours to overnight.
  8. To finish the crème brûlée, remove ramekins from the fridge about 20 minutes before you’re ready to serve. Sprinkle about two teaspoons of maple sugar over the entire surface of each custard. Use a kitchen torch to caramelize the sugar evenly. Sprinkle an additional teaspoon onto each, and torch again. Allow the crème brûlées to cool for at least a minute so the melted sugar will harden and create the beautiful, shiny crust.

I’m thinking that maybe I need to make this again. You know, just to be sure.


Mexican Street Corn Hash and Eggs

Before we get too carried away into kitchen renovation land, I owe the month of September its due respect. We are now 10 days into National Better Breakfast Month, and given that breakfast is my favorite meal, I should have more breakfast recipes on the blog already. But at our house, weekends are the only time we do anything fun or fancy for breakfast, so my opportunities are somewhat limited (much to my chagrin).

Today’s recipe is not fancy, but it gets high marks in the fun department because of all the flavors and textures. My inspiration for the dish came from a restaurant where my work team had its first face-to-face meeting since the pandemic started. The restaurant, which specializes in breakfast and brunch, had a “specials” board that announced, “Mexican street corn hash,” featuring chorizo, corn, potatoes and a sunny-side egg. It was good, but not particularly spicy, and it was missing a little something for me (smoke). My mind started working to break down the flavors and figure out how to improve it, and the outcome was delicious!

My adjustments made this breakfast spicier and smokier than the restaurant version.

For my version of the dish, I amped up the flavors of a store-bought chorizo, using ordinary spices and a surprise ingredient (keep reading) to boost the texture of the sausage while enhancing the Mexican flavors. I used a combination of red jalapeno peppers and onions to make the potato hash interesting, and I finished the plate with crumbly cotija cheese, avocado cubes and a quick squeeze of fresh lime juice.

As I was discussing with a friend recently, if you have dietary restrictions, you don’t necessarily have to give up all the flavors you love. In this recipe, the yummy Mexican chorizo flavor can be easily adapted to turkey sausage or ground turkey (but be sure to adjust the spices and use a little oil for browning). You will still get the texture and flavors that made this dish delicious, without the ingredients that cause discomfort or health problems.


Ingredients

3 small, skin-on red potatoes, scrubbed and cut into cubes

1/2 tsp. baking soda

1/2 lb. fresh chorizo sausage* (see notes)

1/2 tsp. smoked Spanish paprika (or combine with cayenne, if you dare!)

A few shakes ground cumin

A few shakes of dried Mexican oregano*

1 to 2 Tbsp. fine ground corn meal or masa harina*

1/2 medium yellow onion, chopped

1/2 red jalapeno pepper, finely diced* (handle with care!)

1/2 cup frozen fire-roasted corn kernels*

2 large eggs (and a swirl of oil to fry them)

1/2 ripe avocado, cubed

1/4 cup crumbled cotija cheese*

1/2 fresh lime


*Notes

I used 3 fresh chorizo links, similar in size to Italian sausage, with the casings removed. I don’t recommend the hard chorizo sausage that is typical of Spanish cuisine. If you substitute 1/2 lb. ground turkey or turkey sausage, add a bit of garlic powder and adjust the other seasonings to assimilate the flavor of chorizo, and be sure to use a little canola or olive oil in the skillet to make up for the sausage fat.

Mexican oregano, not to be confused with typical Mediterranean oregano, has an earthy flavor with similarities to citrus. This gives a different impression than the oregano you’d use in Greek or Italian recipes, which is a member of the mint family.

Are you wondering about the corn meal? I discovered a few years ago that adding corn meal (or masa harina, the ingredient used to make corn tortillas) gives a distinctly Mexican flavor to taco seasoning, and for this recipe, it adds a bit of the grainy, gritty texture that is so good in chorizo. It also seems to help absorb some of the grease when the chorizo cooks. Try it and see!

If jalapeno is too spicy for your palate, sub in a similar amount of red bell pepper.

I used Trader Joe’s fire-roasted corn, available in the freezer section. Regular sweet corn would work just as well, but I really like the slightly charred, smoky flavor that the roasted corn conveys.

Cotija is a dry, crumbly cheese that lends a salty touch to Mexican dishes. If you cannot find it, crumbled feta would be a good substitute.


Instructions

  1. Bring a medium pot of water to boil. Add the potatoes when the water comes to a boil and stir in the baking soda. This will “rough up” the surface of the potatoes to make them more crispy and more porous to the seasonings in the skillet. When the potatoes are just tender enough to pierce with the tip of a knife (but not mushy), drain and set aside.
  2. Remove any casings from the chorizo and sprinkle the paprika, cumin, oregano and corn meal over it. Using your hands, squeeze to combine the seasonings thoroughly into the sausage.
  3. Heat a cast-iron skillet over medium heat. Crumble the sausage into the skillet and cook until all sides have a nice brown crust on them. Add the onions and jalapenos; continue cooking until the onions are soft.
  4. Move the sausage and onion mixture to the edges of the skillet. Add a quick swirl of oil if the skillet is dry. Add the potatoes to the center of the skillet, cooking them to desired texture. Add the corn and cook until heated through.
  5. In a separate, non-stick skillet, heat 1 Tbsp. oil over medium heat and fry the eggs to desired doneness.
  6. Divide the hash for two servings. Sprinkle each with 2 Tbsp. of the cotija cheese and scatter the avocado cubes around the plate. Squeeze a bit of lime juice over the hash, top with an egg and serve. Any chorizo drippings left in the skillet may be drizzled over the egg if you like. 😊


Tri-tip Benedicts with Roasted Red Pepper Sauce

Everyone has hobbies, and one of my favorites is re-creating or upcycling a recipe I have enjoyed in a restaurant. I’ve been doing it for years, sometimes drawing inspiration from memories of something delicious from childhood and other times because I realize an expensive restaurant dish is easy enough to do at home for a fraction of the price, as was the case with mahi Hemingway, which is still the most-visited post here on Comfort du Jour. And occasionally, I will reimagine a meal as I am eating it—not because I think I know better than the chef, but because I know what flavors would elevate it for me. That’s what happened when my husband, Les, and I pondered the final meal of our recent getaway to Roanoke, Virginia. As you can see, we were not exactly roughing it.

The Hotel Roanoke

I know what you’re thinking, and you’re correct—I am a very lucky woman. For our 4th wedding anniversary, Les had booked us for the weekend in this luxurious, historic hotel, and we had a wonderful and relaxing time, including a luxury foot soak for couples that he arranged in the hotel spa (far and away the most romantic thing we have done together). We were within easy walking distance to some terrific local restaurants, and thanks to Virginia’s smart COVID policies and the protocols of the restaurants we visited (I was still a few days away from my second dose of vaccine), we were able to safely experience incredible food and drink, including this dramatic entrée, served up at a place called Table 50.

Blackened Ahi Tuna with andouille sausage and crawfish risotto and asparagus garnish. I ate every last bite of it!

By the time we got to Sunday morning, we were feeling pretty darn pampered, and we opted for a pre-checkout brunch in the fancy-schmancy hotel dining room. Les and I both zeroed in on the same entrée, which seems to happen more often than it did in our earlier years together. The benedicts before us were served with steak tips, wilted spinach and hollandaise.

Want to make breakfast fancier? Add a white tablecloth! 🙂

Very classic and delicious, though I’m not a huge fan of hollandaise. Les has picked up on my habit of upcycling recipes, and the gears were already turning in both of our minds. Why couldn’t we add some bold flavors to this otherwise classic brunch staple, and make it our own at home? Of course we could, and so we did.

This is our version of that brunch benedict—a toasted English muffin (only one between us), topped with spinach that was sauteed with onion, thin slices of our zesty coffee-rubbed tri-tip steak, a poached runny egg and a generous draping of the roasted red pepper sauce I shared yesterday. Upscaled, yet somehow more rustic and casual. Definitely a Comfort du Jour thing.


Ingredients

Serves 2

1 English muffin, split, toasted and buttered

1 Tbsp. extra virgin olive oil

1/4 onion, thinly sliced

1 fat handful baby spinach leaves

About 4 oz. thinly sliced coffee-rubbed tri-tip steak* (see notes)

2 large eggs, room temperature

About 1/2 cup roasted red pepper sauce*


*Notes

Obviously, to enjoy the benedict this way, you would need to first cook the tri-tip steak according to the recipe Les shared a couple of weeks ago, and you would not regret it. But maybe you have some steak leftover from a nice dinner out, and you could slice that into the recipe instead. Start looking at your leftovers differently and you never know what kind of fabulous creations will happen in your kitchen.

The roasted red pepper sauce is an extremely versatile recipe, and one that we have enjoyed across a variety of recipes. If you make it in advance, you will have about 2 cups, so this recipe only requires a portion of it.

For me, the biggest pain about any benedict is the eggs. I don’t have a lot of success with poaching eggs, and most of the time I just do a quick steam-poach in a non-stick skillet. I’ve tried various poaching gadgets, including the silicone one you’ll see in the slideshow, but they still argue with me. My first set of eggs was way overcooked by the time I had the rest of the benedict plated. I stuck with it and had better success with the second set of eggs, but the whole thing broke my momentum. Follow your own kitchen rules. And if you have any unusual tricks for poaching eggs, I’d sure love to hear them!


Instructions

  1. Put a pot on to boil if you are poaching the eggs, as this will take some time to be ready. Crack each of the eggs into its own custard cup for easy slipping into the water. Say a prayer—oh wait, that’s just for me.
  2. Slice the tri-tip into thin, even slices and set them aside.
  3. Heat a non-stick skillet over medium heat and swirl in the olive oil. Add the onions and baby spinach and sauté until most of the moisture is cooked out of the spinach. If it is still steaming in the pan, it needs another minute. Remove the skillet from the heat and lay the slices of tri-tip on top of the spinach. Cover it to keep warm.
  4. Warm up the roasted red pepper sauce, either in the microwave or in a small saucepan.
  5. Stir the simmering water and slip the eggs, one at a time, into the pot. Watch them closely, because they don’t take long. Or cook the eggs according to your own kitchen rules.
  6. Drop the English muffin halves to toast them, and swipe a quick smear of butter across their nook-and-cranny surfaces if you wish.
  7. Start layering—first spinach, then tri-tip slices, the poached egg and, finally, the roasted red pepper sauce.


Greek-inspired Frittata with Potato Crust

It’s that moment when you find that the package of chicken you were counting on for dinner is two days past its “best by” date. Or the panic that hits you when you suddenly realize at the end of a hectic work-from-home day that you completely forgot to go to the grocery store. Moments such as these demand improvisation, and when catastrophe occurs, I have one Plan B that I can always count on—breakfast for dinner.

Even if it’s slim pickings in the refrigerator, there’s a very good chance I have eggs and few random vegetables. There’s always some kind of cheese in the deli drawer, and that already sounds like an omelet in the making, which is our go-to dish when we are looking at breakfast for dinner. But this time, I went all in on a big-flavor frittata, pulling together a Greek theme with spinach, onions and red bell peppers I found in the fridge, along with some feta cheese, kalamata olives, oregano and dill. And though frittatas—which are basically quiche’s crustless cousins—usually only have eggs and fillings, this one takes advantage of that half-bag of shredded potatoes I found in the back of the cheese drawer. OK, who’s hungry?

Great Mediterranean flavors and plenty of nutrition in this filling “breakfast for dinner!”

Turning random leftovers into a flavorful breakfast for dinner on a busy weeknight? That’s Comfort du Jour.


Ingredients

3 or 4 slices bacon, chopped into one inch pieces

1/2 bag Simply Potatoes hash browns* (see notes)

1/2 onion, chopped

1/2 red bell pepper, chopped

1/2 tsp. dried oregano

2 fat handfuls fresh baby spinach leaves, rough chopped

1/4 tsp. dried dill leaves

6 eggs, at room temperature

1/2 cup half and half*

2 oz. block feta cheese, crumbled

Fresh parsley (for garnish)

Handful pitted kalamata olives, rough chopped (for garnish)


*Notes

Simply Potatoes is a brand of pre-shredded potatoes, usually found in the refrigerated breakfast section of the supermarket, or sometimes in dairy (though I don’t know why). I use this convenience product when I make our favorite Easy Hash Brown Waffles, so I frequently have them in my fridge. If you prefer, use about two cups finely shredded fresh potatoes, but wrap them first in a clean towel and squeeze out as much water as you can. Better yet, skip the potato crust and make it a more traditional frittata. May as well keep it simple. 😉

For readers abroad, “half and half” is a common dairy ingredient in the U.S. that is essentially equal parts cream and whole milk. If you are minimizing fat in your diet, you may also substitute with evaporated whole milk.


Instructions

This was simple to make, as you’ll see in the photos. If you’d like written instructions, or a downloadable PDF for your recipe files, keep scrolling.


  1. Preheat oven to 350° F with rack in center of oven.
  2. Place a cast-iron skillet over medium heat. Add chopped bacon and cook until crispy. Remove with a slotted spoon to a plate lined with paper towels. Drain off most of the bacon grease.
  3. Sauté onions and peppers until slightly soft and translucent. Season with salt, pepper and oregano.
  4. Add chopped spinach, one handful at a time, and cook until wilted. Transfer veggies to a separate bowl and set aside. Sprinkle with dried dill.
  5. Increase the skillet heat to medium-high and drizzle in about a tablespoon of olive oil. Add the shredded potatoes to the skillet, using a spoon or utensil to press it into the sides. Cook the potatoes in the skillet for about five minutes, then transfer the skillet to the oven for about 20 minutes (or additional 10 minutes for crispier crust).
  6. Combine eggs with half and half, whisking only until blended.
  7. When potatoes are golden at the edges, spread the veggies over the crust, and then scatter the crispy bacon pieces.
  8. Pour egg mixture evenly over the frittata filling. Crumble the feta evenly over the frittata.
  9. Transfer to the oven and bake for about 20 minutes, until eggs are set and edges are pulled away from the skillet.
  10. Cool about 5 minutes before cutting into wedges. Top portions with fresh chopped parsley and chopped kalamata olives.

Want to save this recipe?