My New Garden

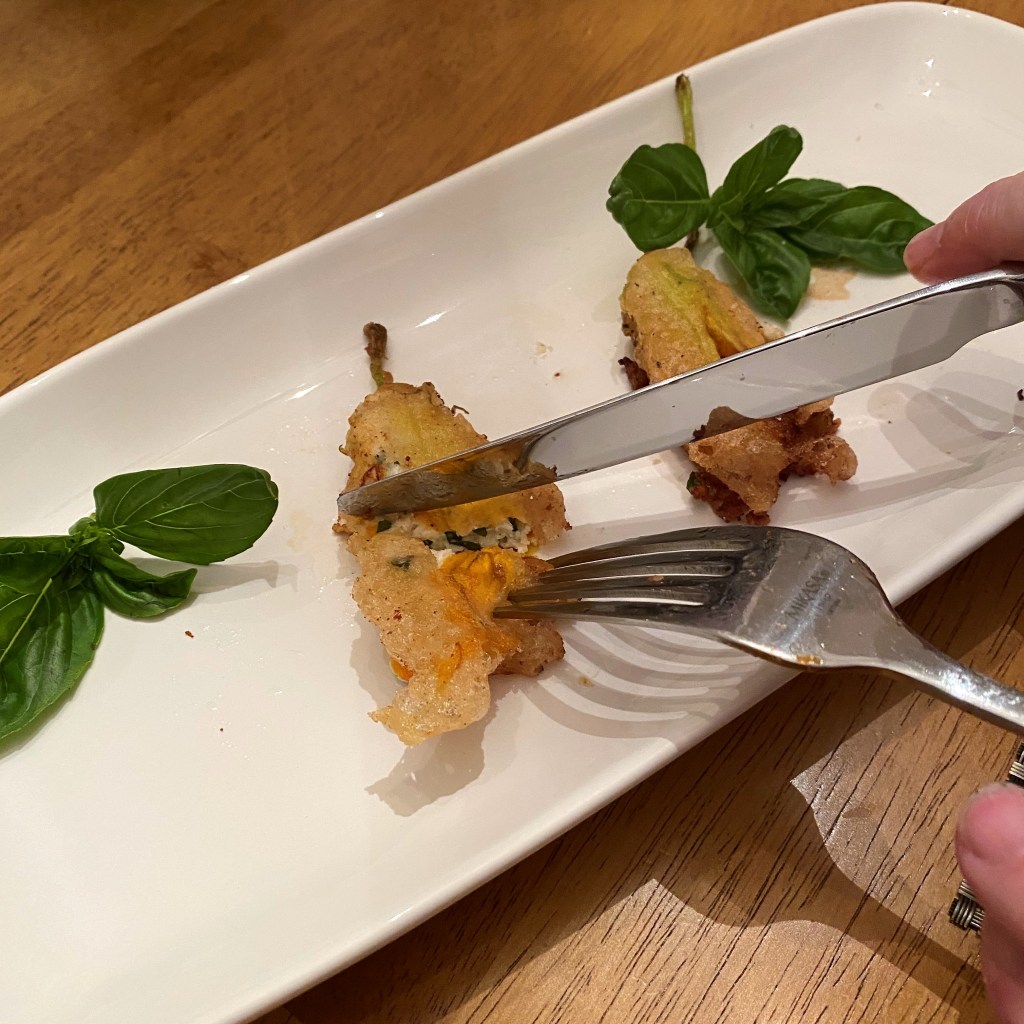
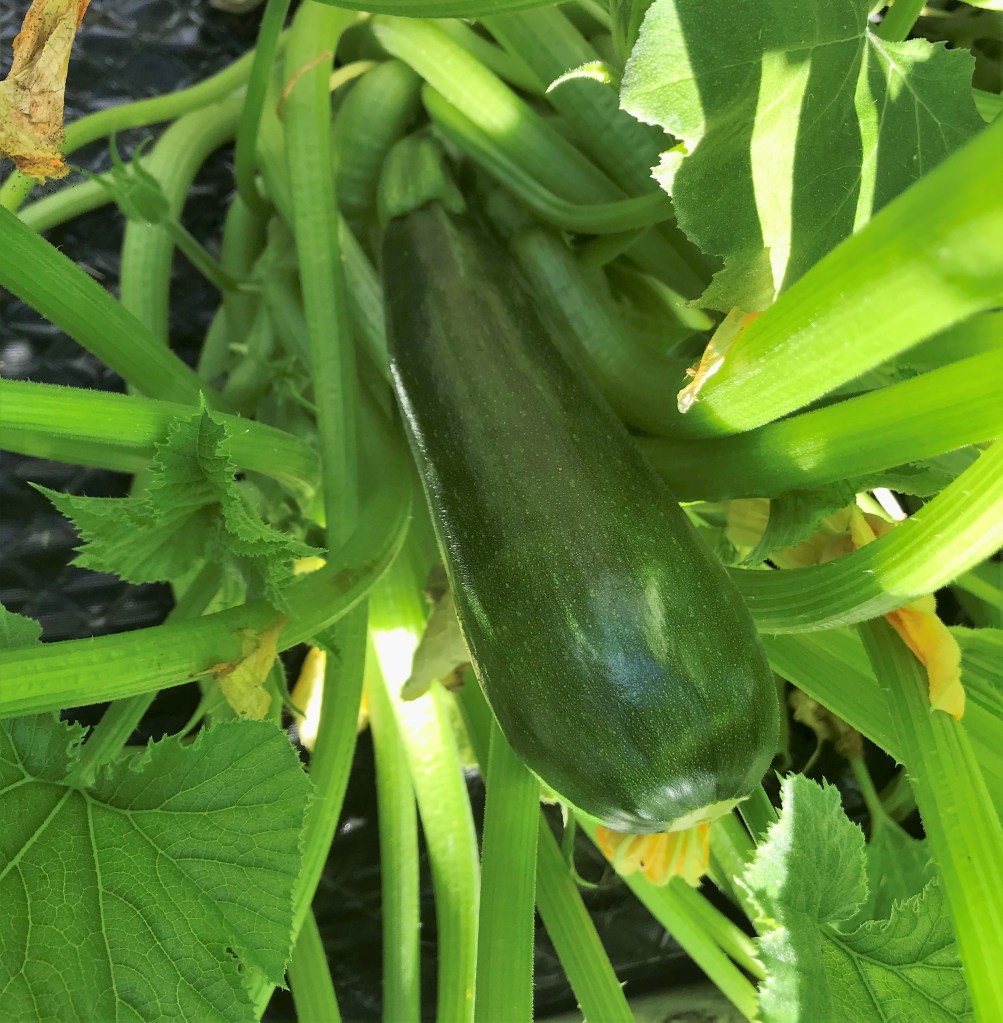
Nobody ever accused me of having a green thumb, and when I made the decision last fall to rip out what was left of my sad, deer-raided vegetable garden, I knew that I would miss a few things. There is a certain joy in taking twenty steps out the door and returning with zucchini so fresh that the stem is still oozing its sap, or tomatoes that are perfectly ripe and juicy, ready to be sliced up for a sandwich or salad. But for me, the bad things about gardening outweighed the good, and I just got too frustrated with the weather, the weeds, the vine-boring pests and the resident deer. I don’t regret leveling the thing and planting grass. I can buy myself flowers (and vegetables) at the farmers’ market for a lot less hassle. 

You can’t even tell a garden used to be here!

The thing I miss, though, is the satisfaction of watching something grow under my watch, and for a fix in that department, I present to you my chair garden!


When I dragged this abandoned chair to the checkout of a local consignment store a few years ago, my husband, Les, thought I was nuts. What was I gonna do with just one chair, especially with the hideous striped fabric on the padded seat. But it was a steal at seven dollars, and I had a special plan to turn it into something that was part art, part garden.


What I realized as I was looking back through my photos is that during the height of COVID, I didn’t bother to put my garden chair together, and that coincides with the years I was trying so hard to keep a vegetable garden. But I’m back to it this year, and I thought it would be fun to walk you through how I made it. You know, if you’re feeing creative and by some chance you happen upon a single, seven dollar wrought iron chair at your nearest consignment shop.

Prepping the chair

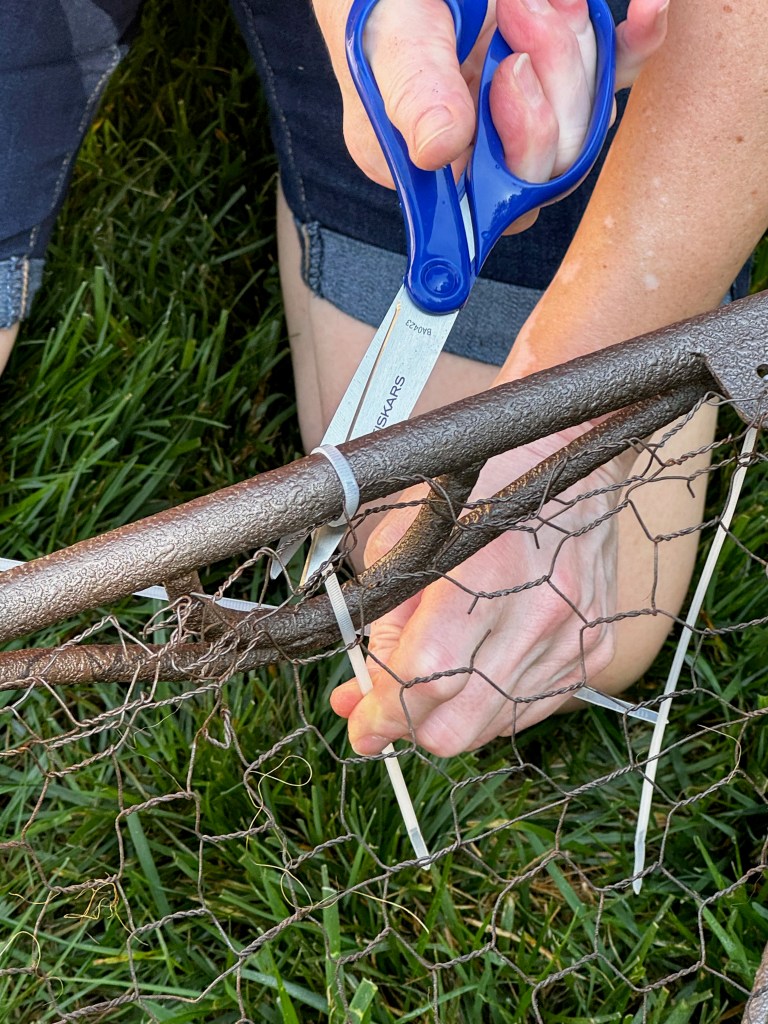
If you’re going to do this as an outdoor piece, be sure you use a very solid chair that won’t easily topple in wind or be otherwise ruined in bad weather. This chair is really heavy, especially when fitted with a few pounds of potting soil and plants. Remove the seat cushion by loosening the screws on the bottom. Next, you need something to serve as a sling or hammock to hold a plant liner and soil. We had a scrap piece of chicken wire in the garage (from what, I don’t know), and I hooked that around the iron frame of the chair to serve as support.

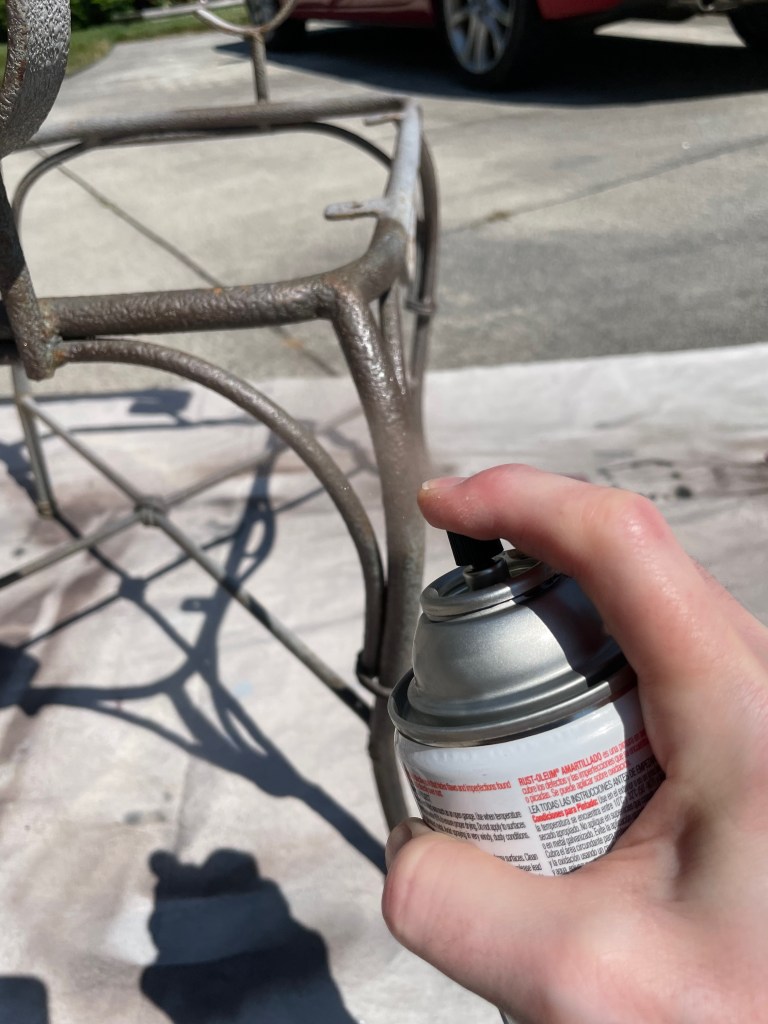
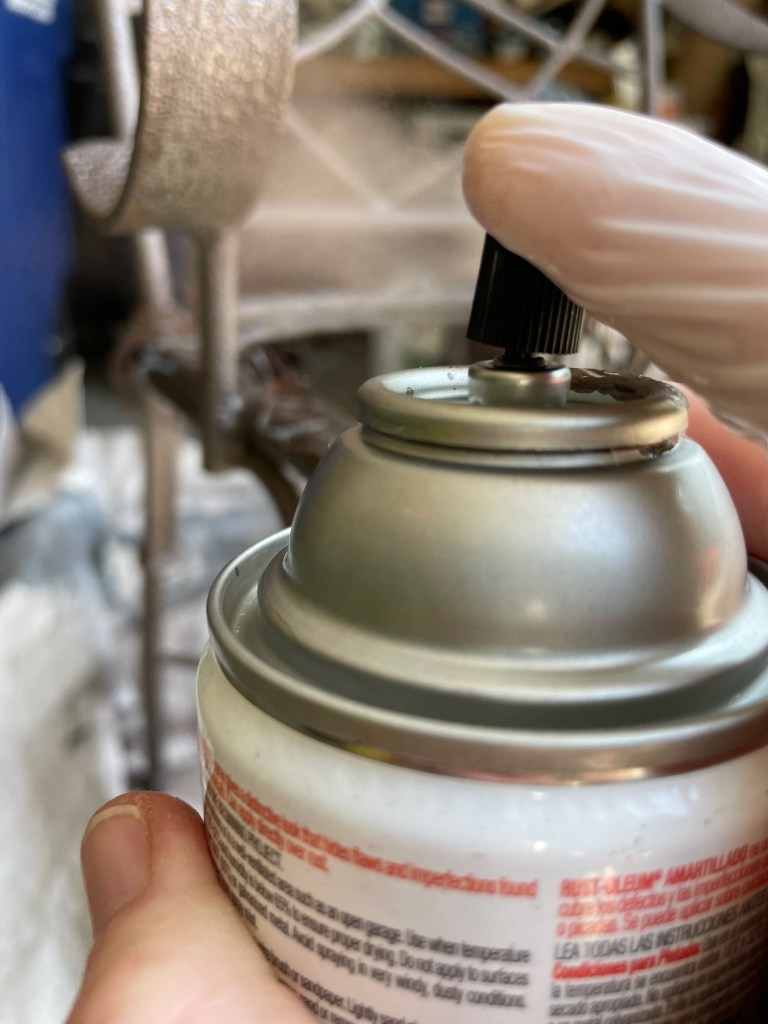
My chair’s makeover began last summer, when I applied a solid coat of Rustoleum spray paint, for a protective coating against the harsh and humid southern summers. I washed and dried the chair first and used a bit of sandpaper to knock off random rust buildup, and then I sprayed paint onto the chair from every angle to ensure good coverage. After it dried, I looked at it in different light and retouched a few areas that I had missed the first time.


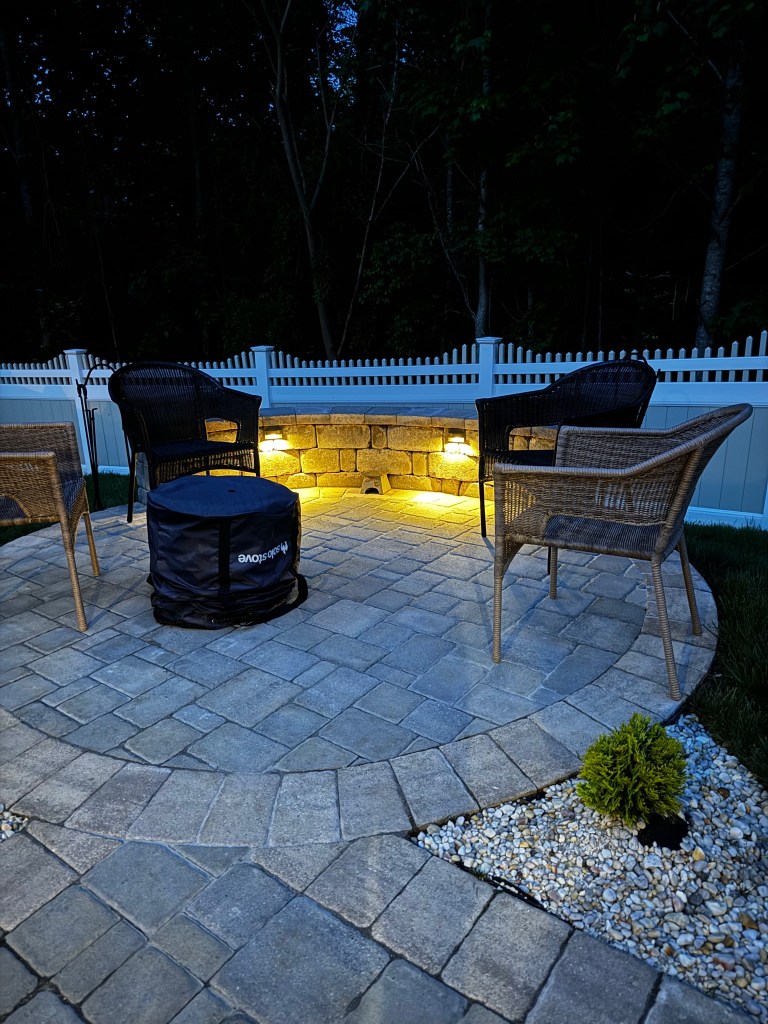
My vision for the chair this year was to complement the theme we are building for our newly remodeled patio and backyard space. Since last July, we’ve upgraded our patio with a paver border, round seating area and sidewalk. We also installed a new fence that matches the house, plus professional lighting and numerous shrubs and plants to pretty up the space. We love it!


There’s one bummer spot near the garage end of the house where the utility lines all run underground, so planting there is not an option. I thought, why not make use of my garden chair to add dimension and interest to that corner? So I gathered up supplies and handed Les my phone for pictures. Here we go!

The basics for container gardening

For a small container such as this, no fillers are necessary in the bottom of the planting vessel. Even with the chicken wire hanging below the seat level, there’s only room for about six inches of soil. For a very deep container, it’s recommended to put some kind of filler material in the bottom, both for drainage and to limit the expense and weight of so much potting soil. Rocks are not a great option, unless it’s a smaller container. Use styrofoam packing peanuts, empty starter pots, smashed soda cans or any other lightweight material that allows air and water to move through. If you will be planting herbs or any other edible plant, be sure all your materials are non-toxic. Whatever you’re using as a container for a garden, it’s important to have some method of drainage at the bottom; without a place for water to escape, your plants could succumb to fungus. 

I got mise en place, just like in the kitchen! 😉

Speaking of soil, you definitely want potting soil designed for containers, as this variety contains small granules of absorbent material for moisture retention. A container garden can dry up quicker than something planted in the ground, so this is important. You might even consider cutting up a cellulose kitchen sponge into pieces and mix them into the bottom layer of soil for the same purpose. The sponge pieces would take in extra water for slow release into the soil later when the plants need it. For a “container” as small as my chair, this wasn’t necessary.

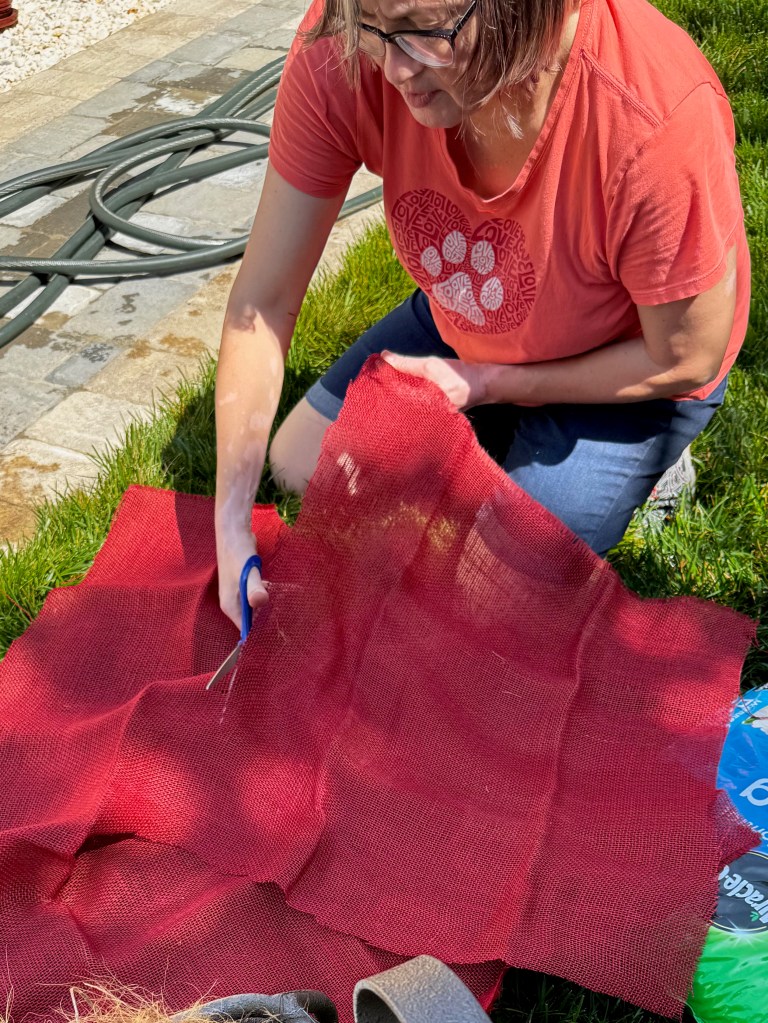
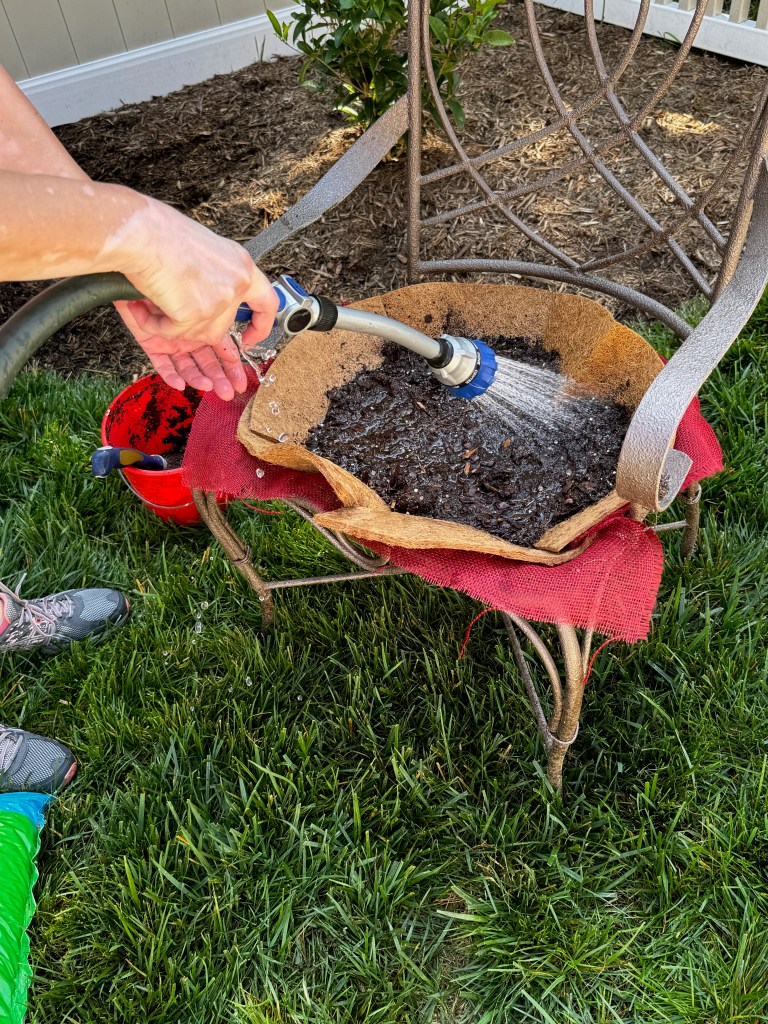
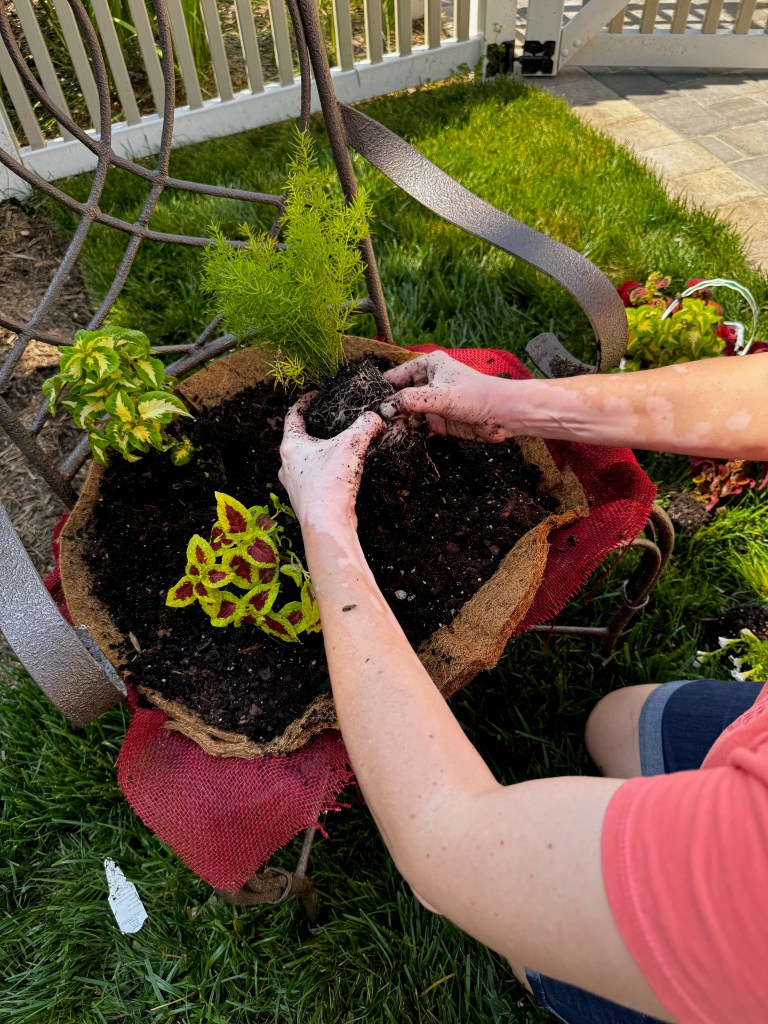
I fortified the chicken wire sling this year with zip ties, to ensure that things stay put, and I cut off the excess length of the ties. Next, I cut a piece of brightly colored burlap fabric to complement the color of our patio umbrella and laid it over the chicken wire. This alone would not be enough to hold the potting soil, though, so the next layer was a flexible cut coco liner that I found online. In previous years, I had only found the ready-made round liners that are designed for hanging baskets, but they never quite covered the full chicken wire. I found these pre-cut liners a better option for the shape of my chair seat. I added potting soil, mixing in water from the hose after every few handfuls to give my plants a good start.
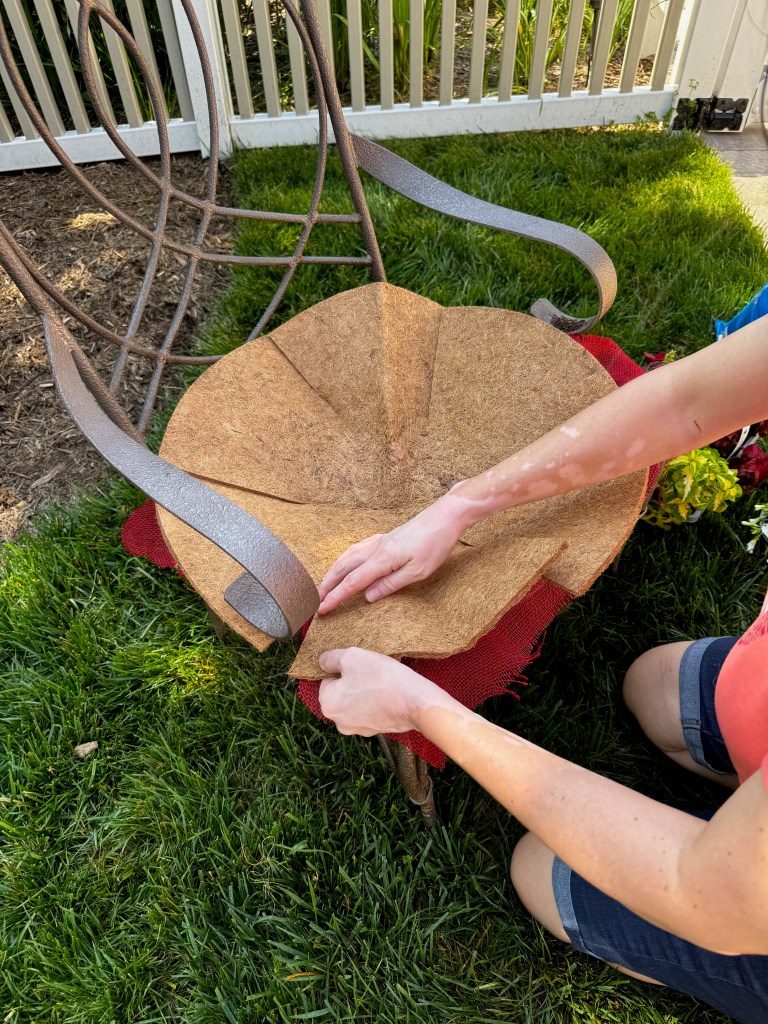

Choosing the plants

There’s a simple rule of thumb for a striking container garden; you need a thriller (one or two plants to stand tall and steal the spotlight), a spiller (one that trails or falls out of the container) and a filler (one that spreads throughout the garden as it grows). Choose colors and textures that contrast, but complement one another. Most nursery plants come with a tag that indicates sun or shade needs, mature height and watering requirements. Pay attention to those as you select your plants. The corner where my chair will go gets a few hours of late morning sun, and is in the shade by 1:30 in the afternoon, so I had plenty of options.

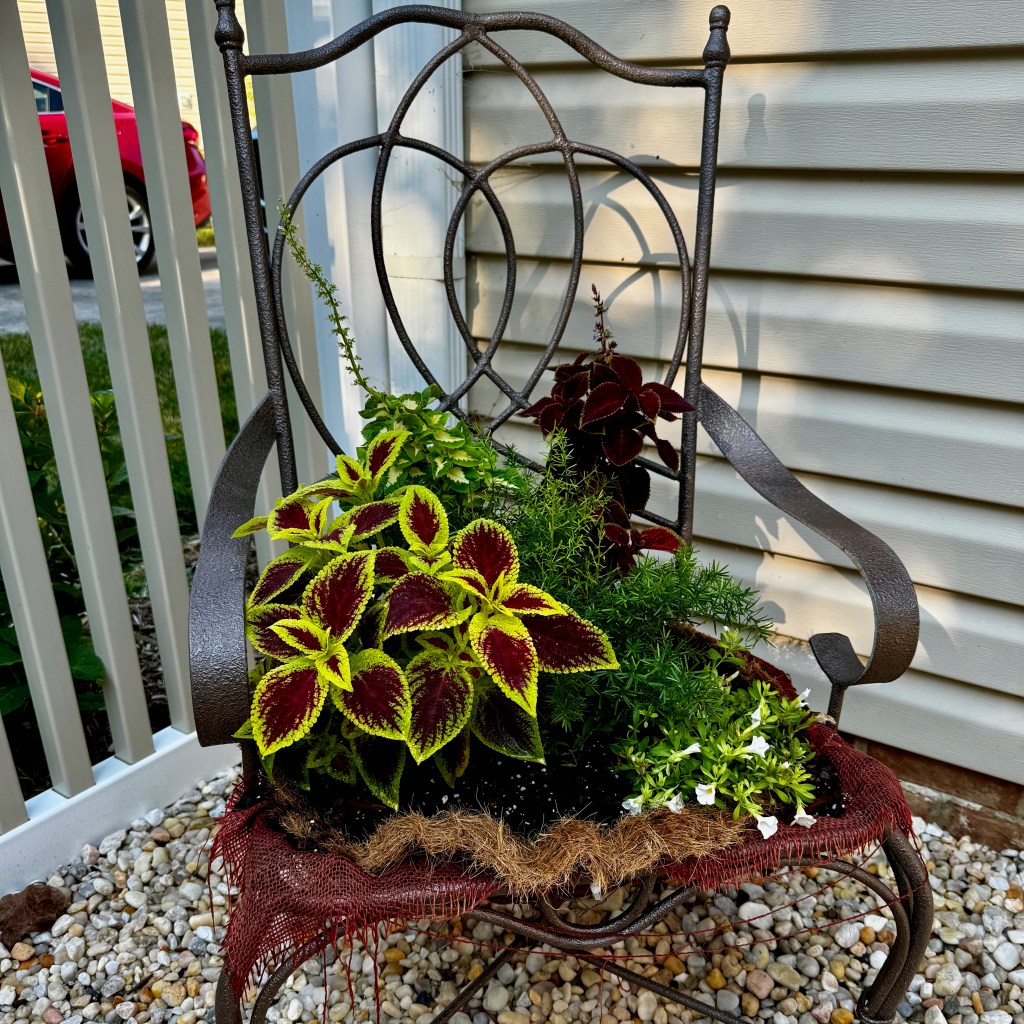
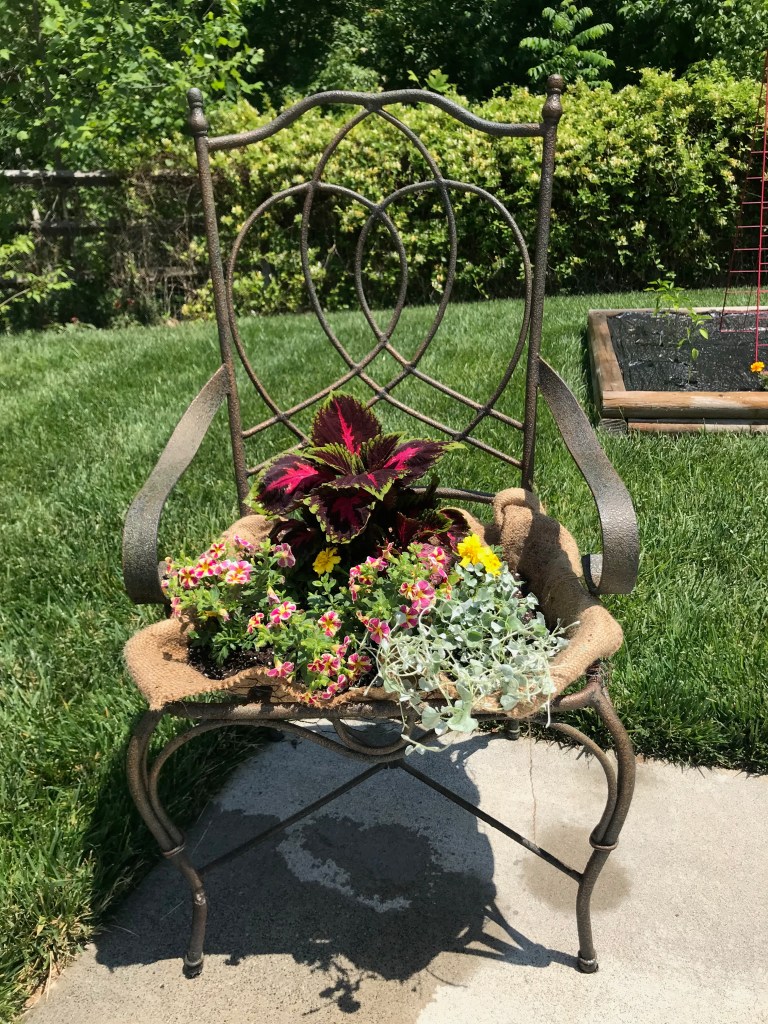
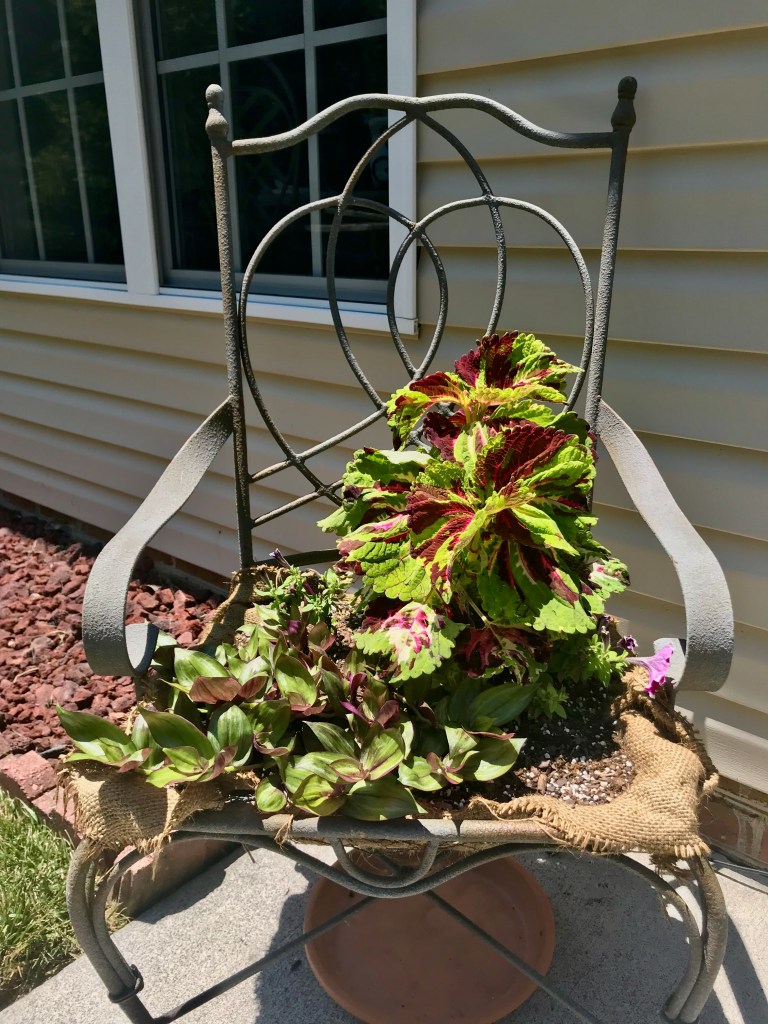
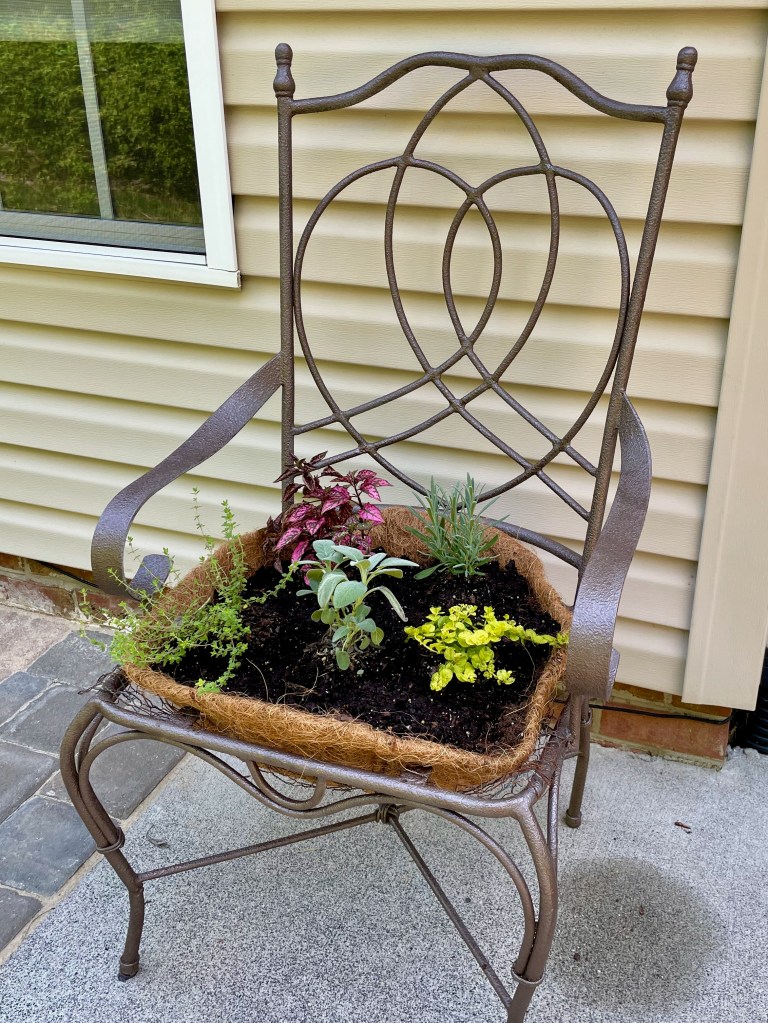
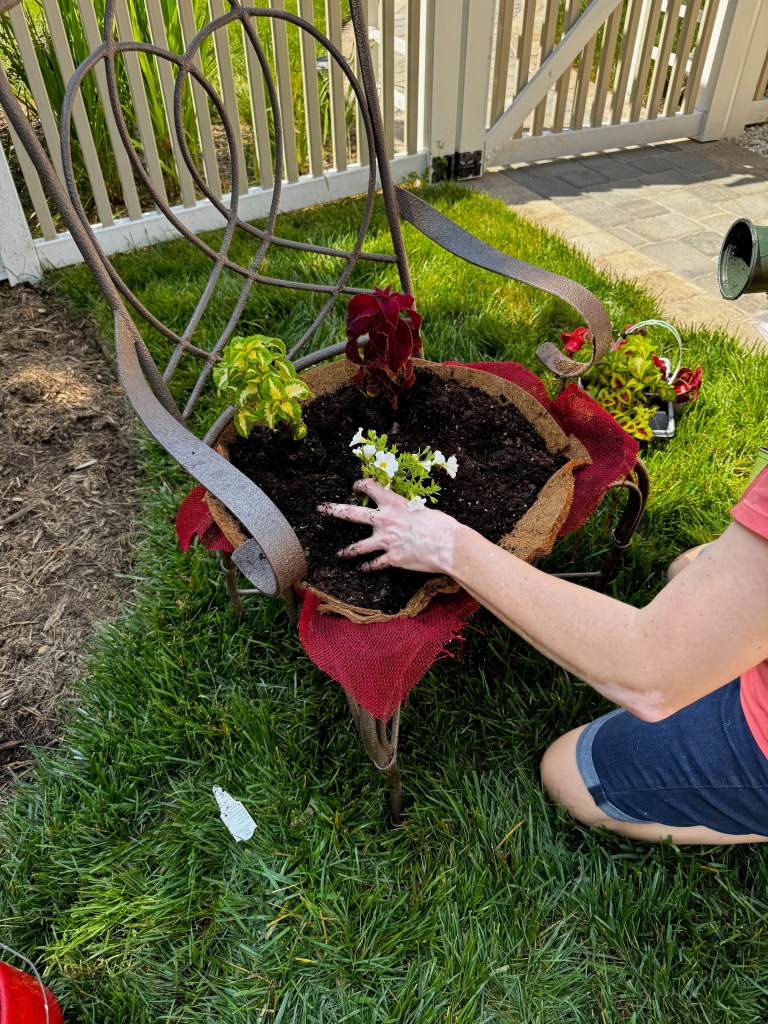
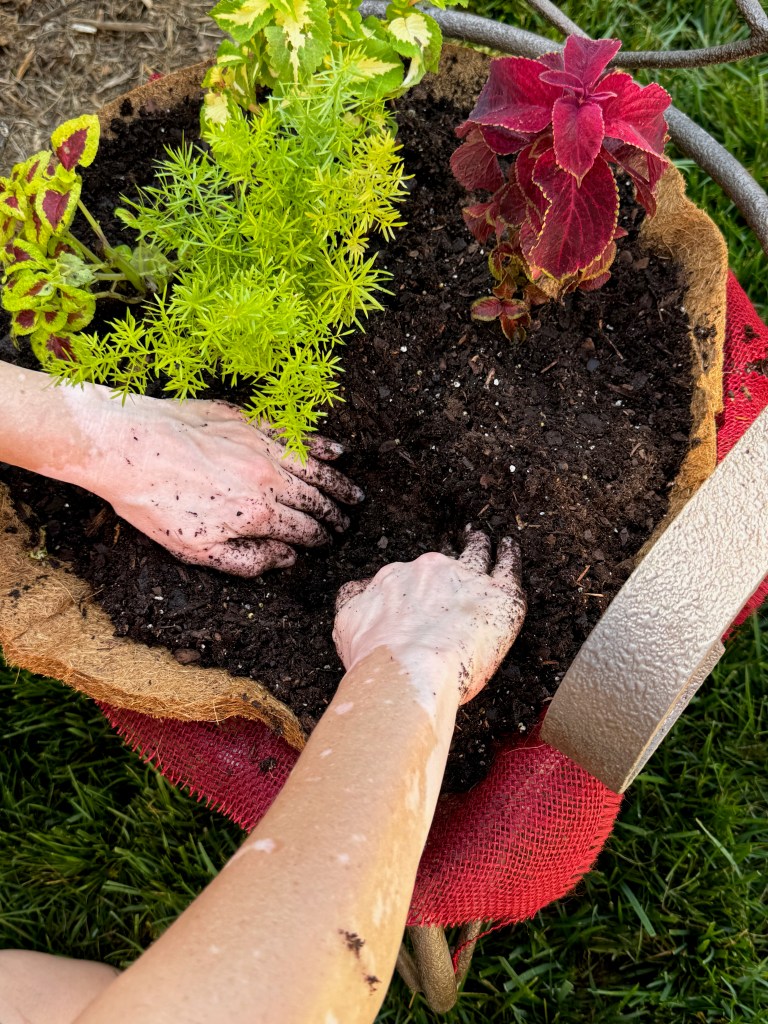
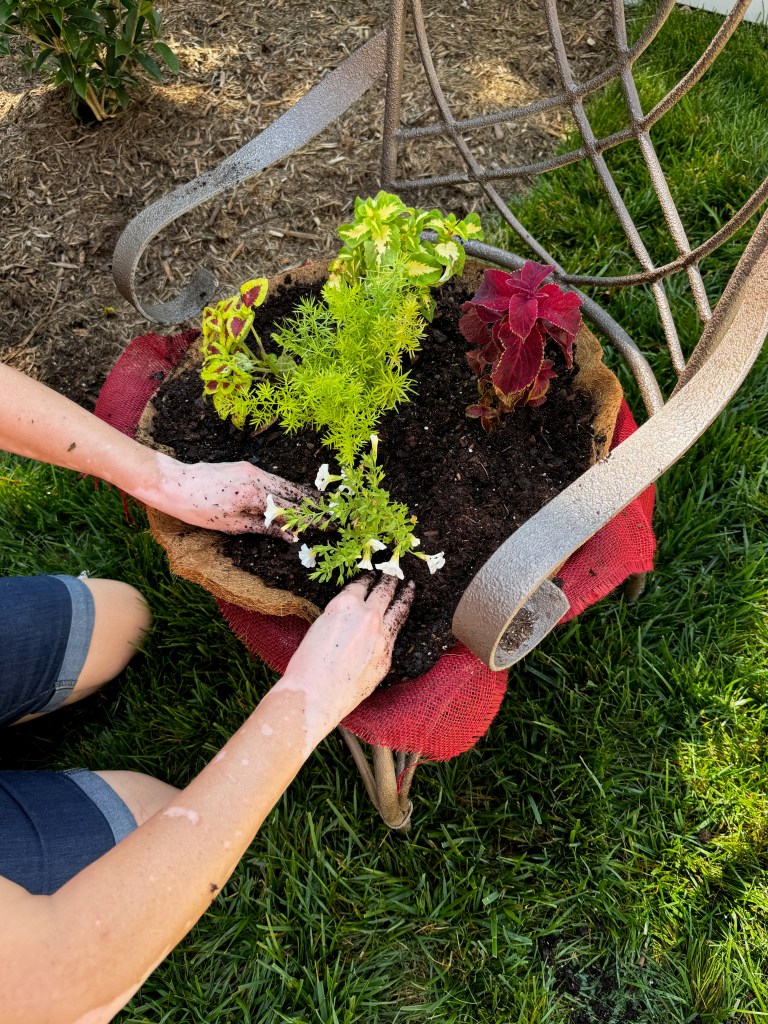
Almost every year, a coleus has been the thriller plant of my chair garden. I love the rich hues of coleus, and I’ve been lucky to find many varieties of it at my local nursery. My spillers have been everything from creeping Jenny to wandering Jew and variegated thyme. For fillers, I’ve chosen mostly flowers and herbs, including petunias, sage and calibrachoa, which is a favorite because it comes in a variety of colors, the blooms are small and plentiful, and it also trails a little bit. I used three coleus of different sizes this time around, filling the space with an asparagus fern, and using a white calibrachoa as my spiller (still waiting for it to spill, though).

Arranging your container garden

It’s fairly obvious that you want your thriller plant to be the center of attention, but that may not mean the center of the container garden. Consider the shape of your container, and whether it will be seen from all sides or only from one angle. For my chair, which will be positioned in a corner, it makes sense to place the thriller near the back; Asparagus fern, which I’ve never grown before, went in the center, a smaller variegated coleus in the front corner, and the white calibrachoa in front on the other side. Position them a few different ways until you achieve the look you want, and then make a large enough hole for the plants, watering thoroughly for each one.


As a final touch, spread extra potting soil over and around all the plant bases, even to the point of heaping, as after some time (and rain), the soil will settle. Our garden chair looks great in its new corner spot. Now, who has ideas for hiding all those ugly utility boxes? 😂


Tips for success

My chair garden has had varying degrees of success, determined by my choice of plants, location of the chair, attention to watering and, in general, the weather. Do your best to keep the soil watered as needed— gently, so that you don’t displace the soil— and if it gets very dry, don’t give it a flood of water all at once. Place ice cubes across the top of the soil and allow them to melt, giving the garden a slow watering before you pour water onto it. 

If you are reusing a container from last year, give it a thorough cleaning with soap, scrubbing with a brush as needed to remove debris and any fungus that might be lingering from previous plants. Let them dry in the sun before prepping and planting for the new season. 

Choose your garden’s location carefully before you begin, especially if your container is heavy to lift, as it may be best to build the garden in place. 

Most of all, enjoy your handiwork! Keep good notes for what you’d do differently next time. As with cooking, there’s always something new to learn and experience is the best teacher! 


Ricotta Squash Blossoms

A couple of unexpected things have begun to happen since I first started this blog back in April. The first is that I’m getting more serious about using up foods from the freezer and the other is that I’m finally tackling some of the foods on my culinary “bucket list.” I keep a running list of dishes I’d like to try one day—either because I’ve seen it in a magazine or cooking show or because I’ve tasted it somewhere. And when I taste something and love it, my instinct is “I’ve got to make that!” As of now, the list includes (among other things) pierogis, handmade mozzarella, and black-and-white cookies, a childhood favorite of Les, my NYC-raised husband.

Today, I can scratch off a dish that I only added to the list as a “maybe someday” item—fried squash blossoms. I’d never dared even think about what was involved in making these lovely delicacies, but I knew how delicious they are from a wine dinner menu years ago at one of our city’s authentic Italian restaurants. So I added them to the list even though they intimidated me.

Last week, once the shock of discovering life in my raised-bed garden wore off, I got serious about trying them for real. After all, I had a hearty handful of these perfect little blossoms, and what’s the worst that could happen—I’d fail?

The thing is, it was not a failure at all. Quite the contrary. They were surprisingly simple (yes, really) and perfectly delicious. I scanned a few internet recipes for suggestions of what they should be stuffed with and to learn how to fry them without overwhelming their delicate structure, and then I got to work. When I launched Comfort du Jour, I had two goals, but I’ve put most of my effort toward only one of them—taking a classic comfort food to new levels. This project is a delicious example of my second goal—finding a way to make a complex or intimidating dish more approachable.

Before you shake your head and decide you could never make these, let me put this out there—if you can pick a flower and if you can squeeze ricotta cheese from a corner-cut zip top bag, you can make these. Yes, it’s really that simple. Grab an apron and let’s get started.


Ingredients

Handful of freshly picked squash blossoms* (see notes below)

3/4 cup whole milk ricotta cheese

Handful of fresh basil leaves*

1/4 cup grated parm-romano cheese

Sea salt and freshly cracked black pepper

3/4 cup all-purpose flour

1/2 can chilled, unflavored seltzer water (or club soda or very mild beer)

1/2 cup canola oil for frying*


*Notes

In my First Fruits post earlier this week, I pointed out what I’d learned about squash plants having “male” and “female” blossoms. For this recipe, I used only male blossoms. It’s easy to identify them because they don’t show the beginnings of any tiny squash fruit. Once the female blossoms have been pollinated (as mine were), the male flowers are basically just decoration.

Basil is one of those polarizing herbs. Some people swear it tastes like dish soap, and I’d hate for that to stop anyone from trying these special treats. Swap the basil out for thyme, parsley or oregano as you like.

Another neutral oil would be fine for frying. Be sure it is an oil with a high smoke point, such as avocado, coconut or grapeseed oil.

Instructions


  1. Place the ricotta in a mesh strainer over a measuring cup to drain excess moisture.
  2. Carefully reach inside the squash blossoms and remove the stamen, which is a bulbous yellow thing inside. It’s the, um—how shall I say it?—male part of the blossom. Don’t worry if the petals tear a little bit. And may I suggest that you consider doing this step outside at the garden. I made a first-timer’s mistake of doing this at the kitchen sink and scared the bejeezus out of a pollinator bee inside a blossom. Sadly, I had to smash it in the sink because Les is terribly allergic to bee stings. I felt awful about it, but I went through a lot to find this wonderful man, and it was him or the bee.
  3. Rinse the blossoms under cold running water, and gently shake them to empty out excess water. Lay them on a couple layers of paper towel to drain.
  4. Rinse and blot dry the fresh basil leaves, then stack and chop them into small pieces. Mix the basil leaves into the strained ricotta, along with the parm-romano cheese, salt and pepper. Spoon the ricotta mixture into a small zip top bag and seal it.
  5. Snip a small corner off one end of the zip top bag, and gently squeeze a heaping tablespoon of the ricotta mixture inside each blossom. The blossoms will “give” a little bit as you go, and it will feel obvious that you’ve filled them enough. Stretch the blossom petals around to fully cover the filling and twist the tops very gently to seal them up. They don’t have to be perfect, but the goal is to keep the filling from spilling out during frying. Rest the filled blossoms on a paper towel while you prepare the batter and frying oil.
  6. Place a cast-iron skillet over medium heat and add the canola oil. This is not a lot of oil, so it will heat up fairly quickly. It should be about 1/2″ deep in your skillet.
  7. In a medium-size bowl, mix some salt and pepper into the flour, and stir in enough seltzer water to make a thin batter. It will bubble quite a bit, and that’s a good thing. It should be thinner than pancake batter, but not quite as thin as heavy cream. When I dipped the blossoms into the batter, they were coated, but I could still see them through the batter.
  8. Very gently lay the blossoms into the hot oil and be careful not to crowd them or they will stick together. When the bottom side is lightly golden and crisp, turn them to cook the other side. Drain the fried blossoms on fresh paper towels, sprinkle immediately with sea salt and serve.
They were so pretty, and remarkably easy to make. I’m proud of myself for this elegant appetizer!

Oh yes.

So light and crispy, and they didn’t need any kind of dipping sauce or other accoutrements. To keep our dinner easy and light that evening, I put together a simple tomato sauce (thank you, leftovers) with bucatini pasta. These three pictures describe how easy that was, and it really needs no additional explanation. Simple is good, right?

If this is how they eat in Italy, I want to move there tomorrow!

My “bucket list” experiment of making fried squash blossoms ended very, very well. It was also Les’s first experience tasting them, and though skeptical at first, he declared during dinner that he was a fan.

These were Les’s first ever squash blossoms, and he really enjoyed them.

Do you have foods on a bucket list? Tell me about it in the comments, and then go cook them. Be brave in your kitchen!

Want to print this recipe?


First Fruits

Last week, when I came home from a weekly grocery run, I stepped warily toward the garden at the end of the driveway. I’m accustomed to feeling like a lousy farmer thanks to the herd of deer in our woods. With a sigh on my lips, I lifted back the giant leaves drooping from our squash and zucchini plants, anticipating root rot or squash bug infestation or something equally disgusting and disheartening.

Gasp—there’s life in there! Pinch me, I must be dreaming.

Truly, nobody is more surprised than I am to find that our pitiful little raised bed is displaying its first fruits. Remember the carnage I found recently, in discovering that our eggplant and pepper plants had their tops chomped off? But as Jeff Goldblum’s character said in the original Jurassic Park film, “life finds a way,” and it seems to be true in our side yard. Hallelujah!

In addition to the first beautiful zucchini, which I almost left to grow another day (nope—I’ve learned my lesson there), we have lots of basil and a whole bunch of yellow squash blossoms. In past years, I mistakenly assumed that loads of blossoms would mean as many actual fruit. But unlike the reality of our “gender lesson” in bell peppers a few weeks ago, squash blossoms do present either male or female, and most of these will not be producing squash babies.

Most of these blossoms are male, meaning they will not yield a squash plant.

The male flowers are still important, naturally, for their role in pollination of the female blossoms. The hardworking bees, which have taken up residence in the nearby wildflower garden (you know what they say—location, location, location), will be blossom-hopping for the next few weeks to do just that. I hope we continue to see fruit on these plants, and now that I know they’re producing, I’ll be watching the undersides of the leaves to protect against squash bugs. I love zucchini and squash in absolutely every form, and I have a new spiralizer tool I’m eager to try, so I’m crossing my fingers.

And the basil—holy wow, the basil is growing like crazy but is in need of my immediate attention or I may lose the whole lot of it. If you haven’t grown your own, or maybe you have but with varying degrees of success, I’ll be happy to share what I’ve learned about properly tending to these fragrant summer herbs. When they start to show these little clusters on the ends of the stems, they’re getting ready to go to seed (or “bolt”), and that would be a disappointing end to my pesto goals because once it goes to seed, the basil leaves lose their full flavor and take on a bitterness that is most unpleasant.

This is a sign that my basil plant is getting ready to “bolt.” It’s time to prune!

A few years ago, a Pinterest post led me through a  simple basil pruning technique which made a world of difference in my herb gardening. The basil needs to be “pinched back.” Removal of those little clusters before they begin to flower will send a message to the basil that there’s more growing to do, and if you keep at it, the plant will continue to become bushier until you almost literally have basil coming out your ears. In my case, it might also help protect the other surviving plants in my garden because deer allegedly cannot stand the smell of basil. Here’s hoping!

It’s easy to do—get up close to the cluster and look for a point along the stem below it where twin leaves are positioned across from each other. Just above those twin leaves, pinch off the stem. That’s all there is to it. I usually take a kitchen scissors out to the garden with me and snip them rather than pinching. It goes faster, makes a cleaner cut and doesn’t leave my hands smelling like strong basil. The stems you snip will stop growing, leaving room for new stems to form from the twin leaves. Where there used to be one stem, there will soon be two.

As you go, the basil will require more frequent pruning because stems will multiply. But if there’s a big jar of fresh pesto at the end of it, I’m in! The plant may grow upward somewhat, but mostly you will see a bushy formation, and each time I prune, I’ll have plenty to use along the way to pesto heaven.

I’m going to find a simple way to use these in the kitchen.

It’s been an exciting day in the garden, and I’m going to whip up something delicious with my first fruit haul. I’ll show you in a day or two what I came up with.

Oh, happy day!