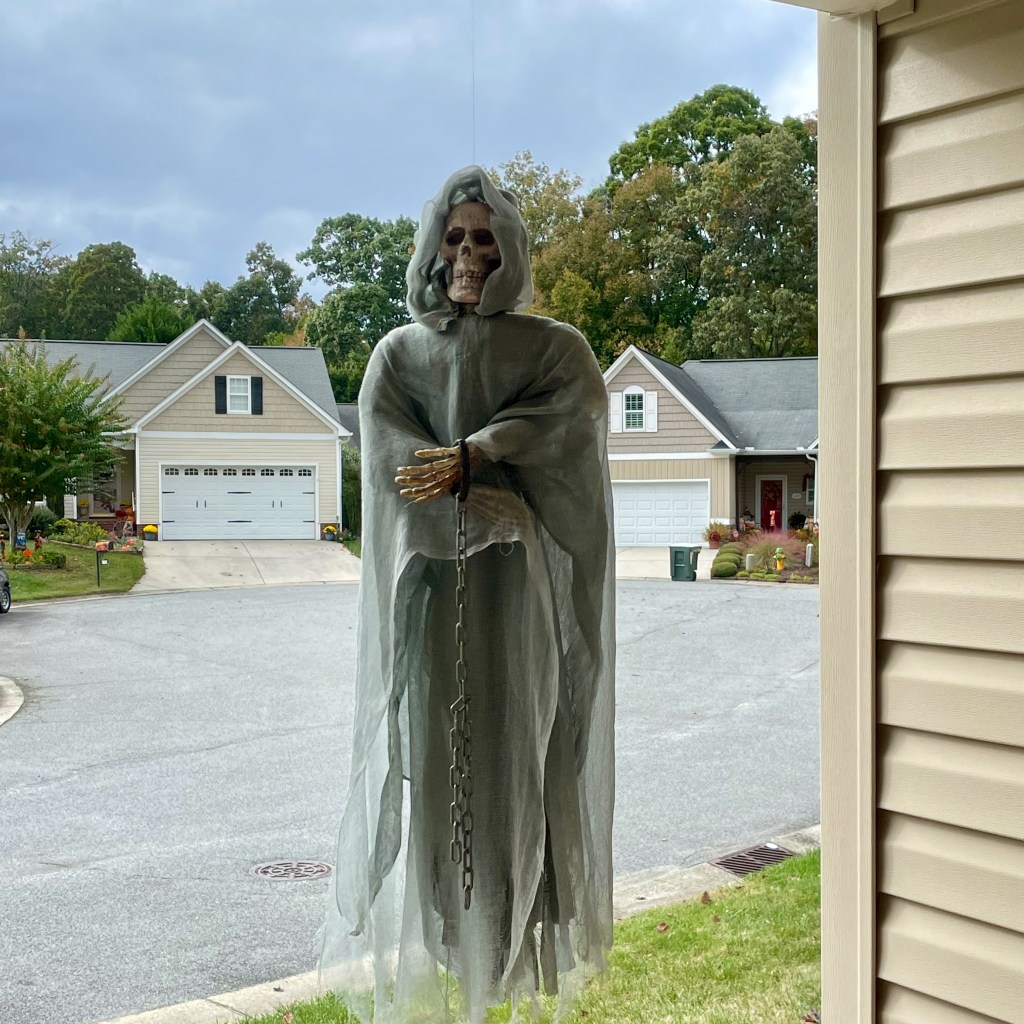
It’s October, and that means that my front door is now being guarded (or is it watched?) by Mr. Bones, the spooky, gauzy dude that my husband has placed on our porch every October since 2007. He gives me the major creeps because every time I open the front door, he’s staring at me. It doesn’t matter which way we hang him on the nail of our entry, either. He turns on the breeze to stare me down. But in his defense, he was here long before me, so I adjust. 💀
Could you not, Mr. Bones?!
Last year, in my attempt to entice more than five trick-or-treaters to our house for Halloween, I added to the theme with the fun DIY project that I’m sharing today. This cute little decoration was inspired by something I saw on Pinterest, but it was unclear who actually made and posted the lanterns. That’s one of the things about social media— a great idea can be shared by someone who doesn’t understand the settings of their account, and sometimes it ends up being just a photo with no accompanying information. What can you do?
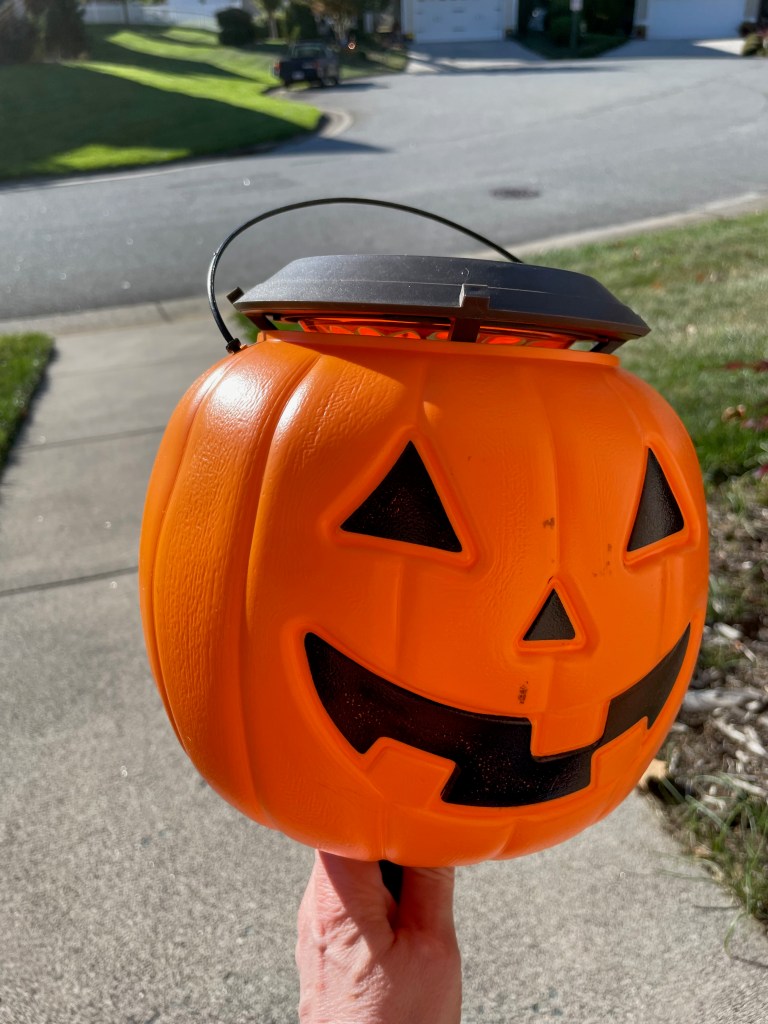
But in this case, it was clear to me that the project involved plastic pumpkin candy buckets and solar lights, and I figured, “how hard could it be?” Turns out, it wasn’t difficult at all.
The pumpkins make Mr. Bones look even more creepy.
What materials do you need for a DIY solar jack o’lantern?
This kid-friendly project requires only the plastic pumpkins and some solar yard lights sized to match the top opening of the bucket. My lights were nothing special, just some off-the-shelf items I picked up at Lowes, and I found the pumpkins in the seasonal section at Walmart. Naturally, you want to be sure that some light will shine through the pumpkin buckets before you cut them, and you can easily test this by holding a bucket upside down over a lamp bulb in your home. If the bucket is translucent enough to let the light shine through, you’re good to go!
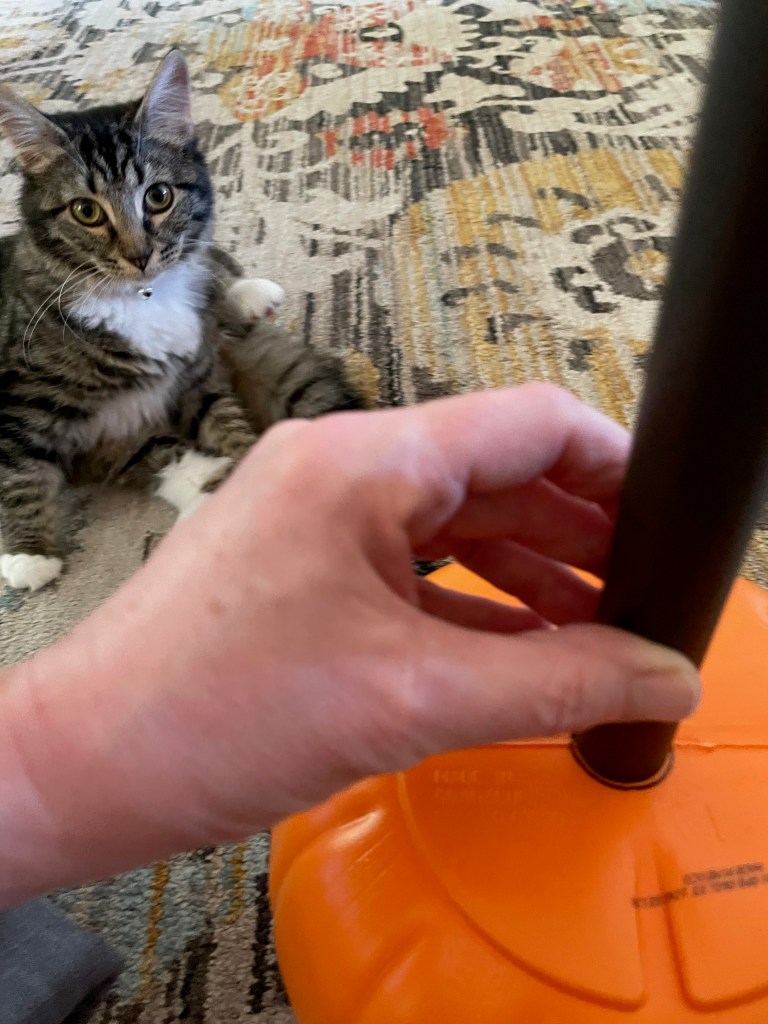
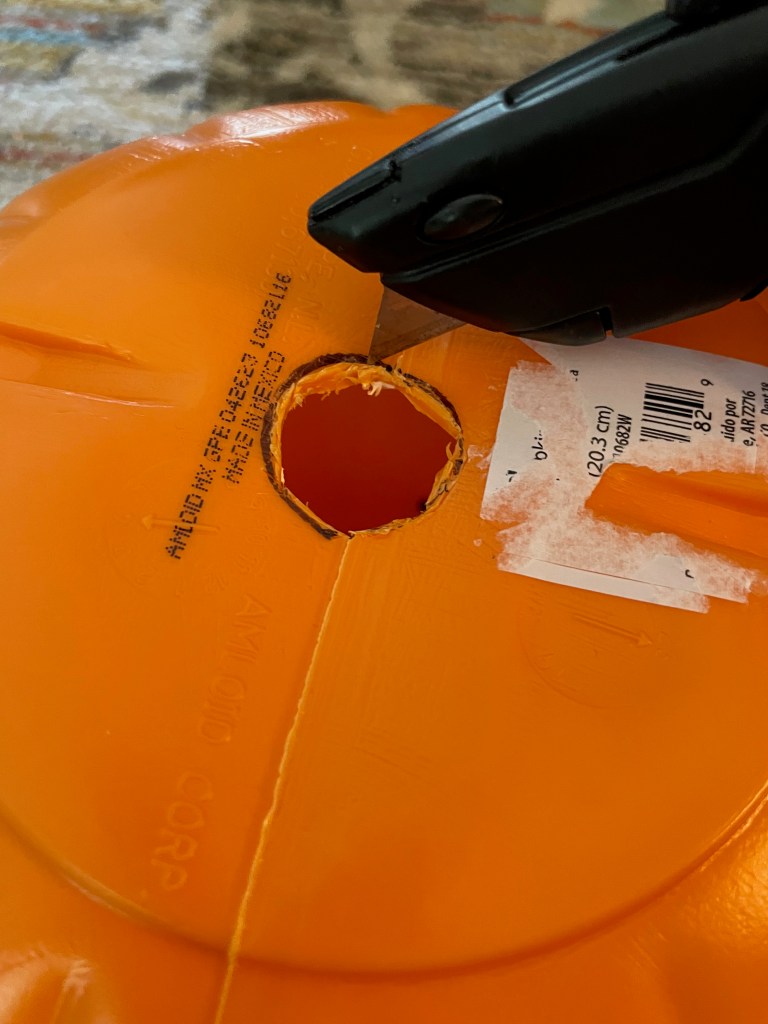
A couple of easy tools are necessary for this project, including a pen (for tracing around the solar light stem onto the bottom of the pumpkin) and either a utility knife or a cordless drill fitted with a hole drill bit the size of your circle. For safety sake, only an adult should tackle this part of the project. I used a utility knife, and to minimize risk of injury, I adjusted the knife so that only a small point of the blade was exposed.
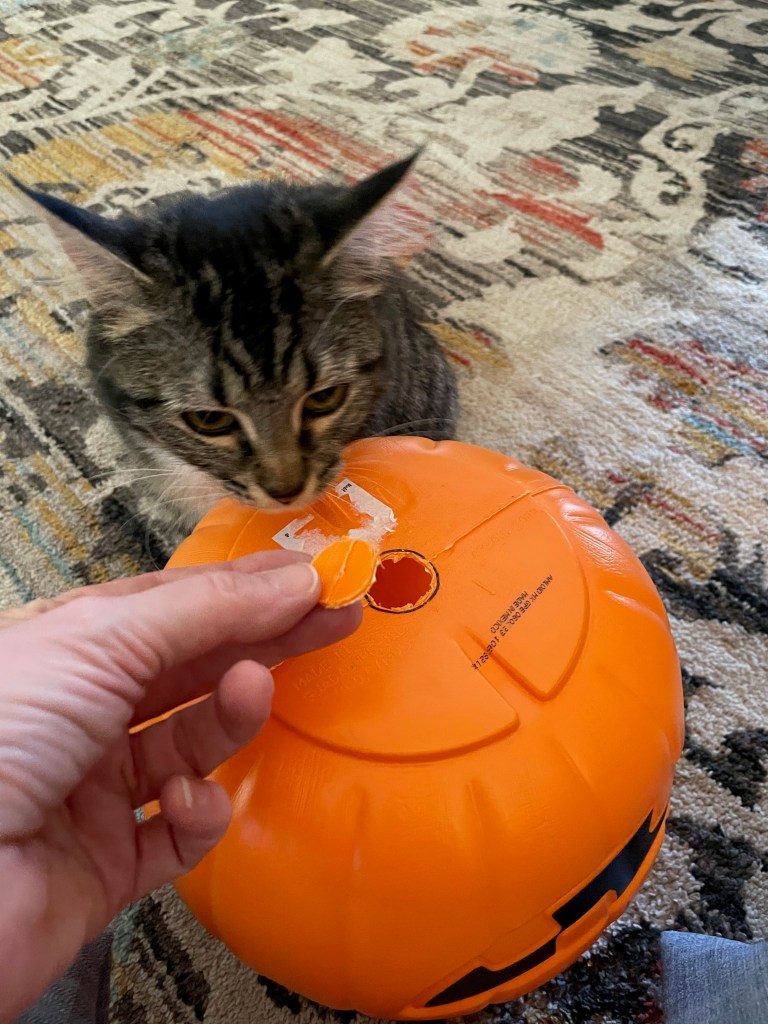
I had the most adorable helper! Nadia was only about 5 months old when I made these.
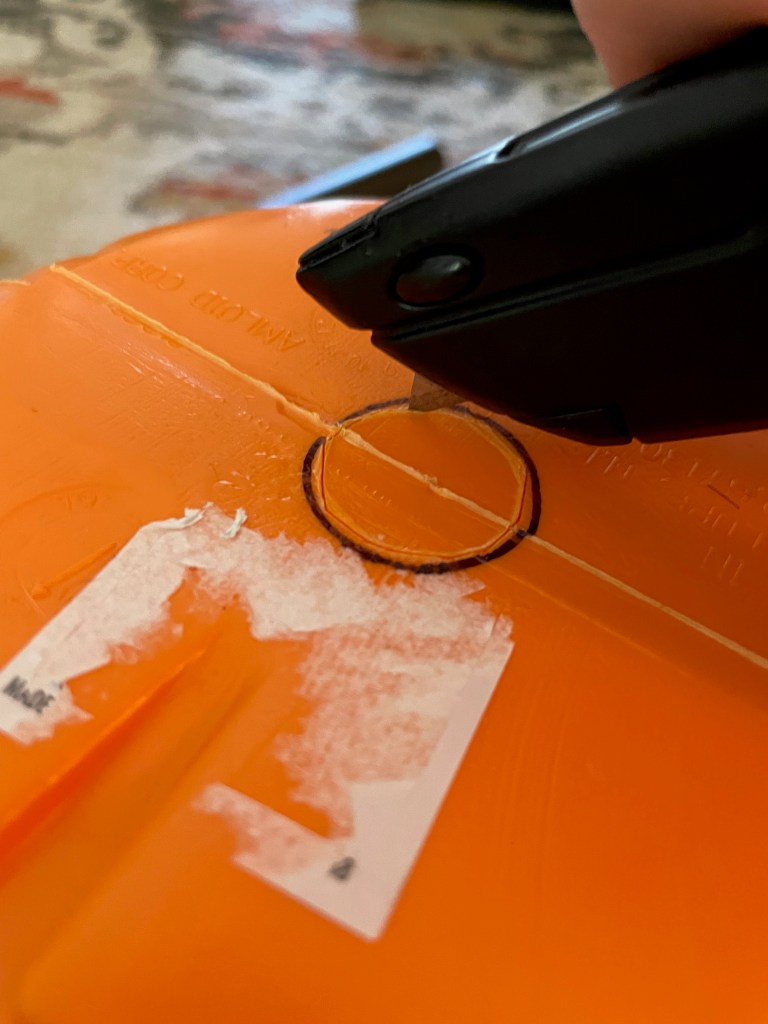
The first pass with the knife was only to “score” the plastic, and I made subsequent passes to make a deeper cut until the circle could be punched out. A quick test with the solar light stem, and adjustment if needed, and then reassembly of the solar light.
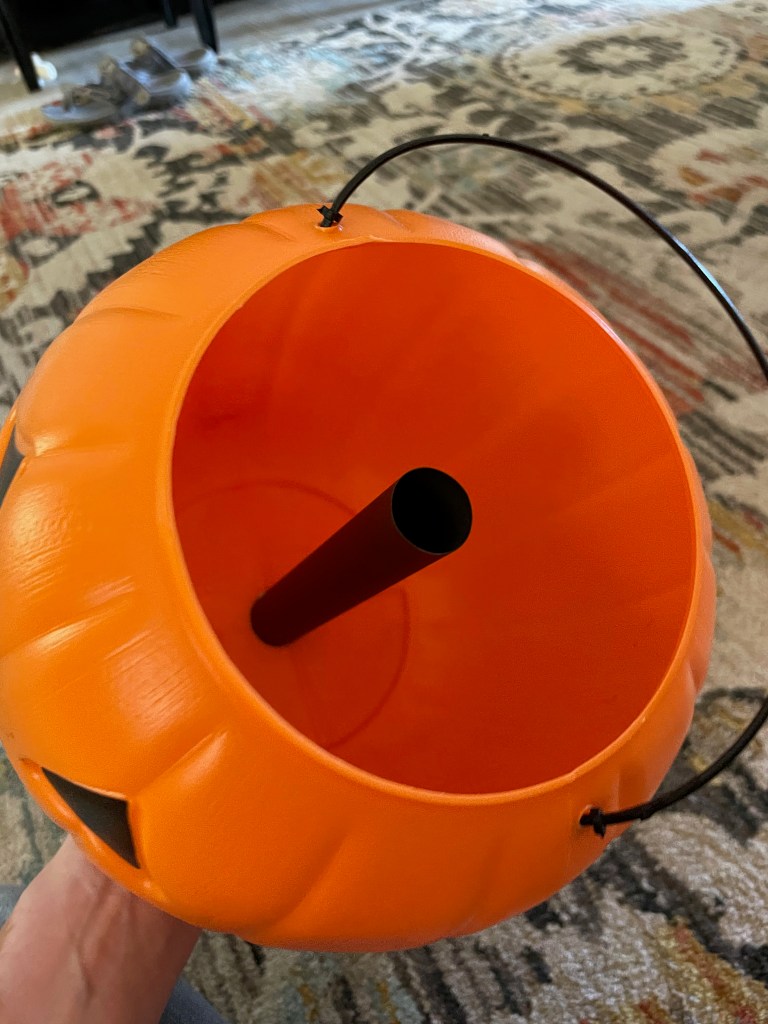
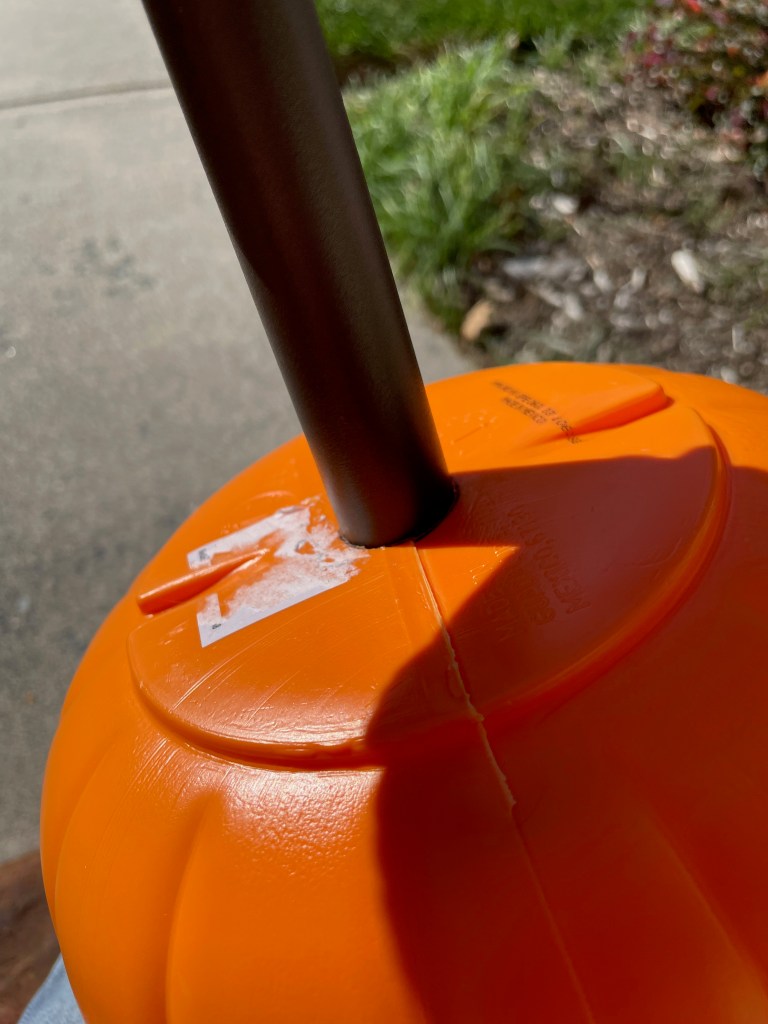
For a snug fit, try fitting the light stem with a heavy rubber band.
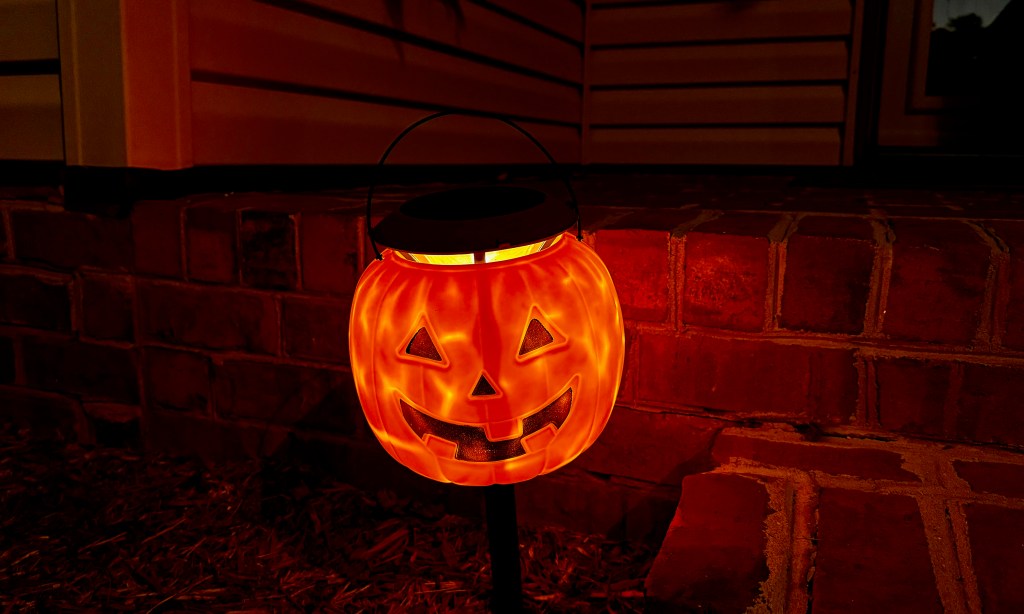
The solar light cap should be slightly larger than the top opening of the pumpkin bucket, so that rain water does not collect inside. Mine look like the pumpkins have a little hat! The pumpkin buckets wanted to slide down the lamp stems after a few minutes, so I used a couple of heavy rubber bands— the thick kind that grocery stores use on broccoli— to snug around the stems, keeping the pumpkin in place all month long. Another fun thing about this decoration is that you can remove the pumpkins from the solar lights after Halloween and set them aside for next year.
Please ring our bell. Plenty of candy inside!
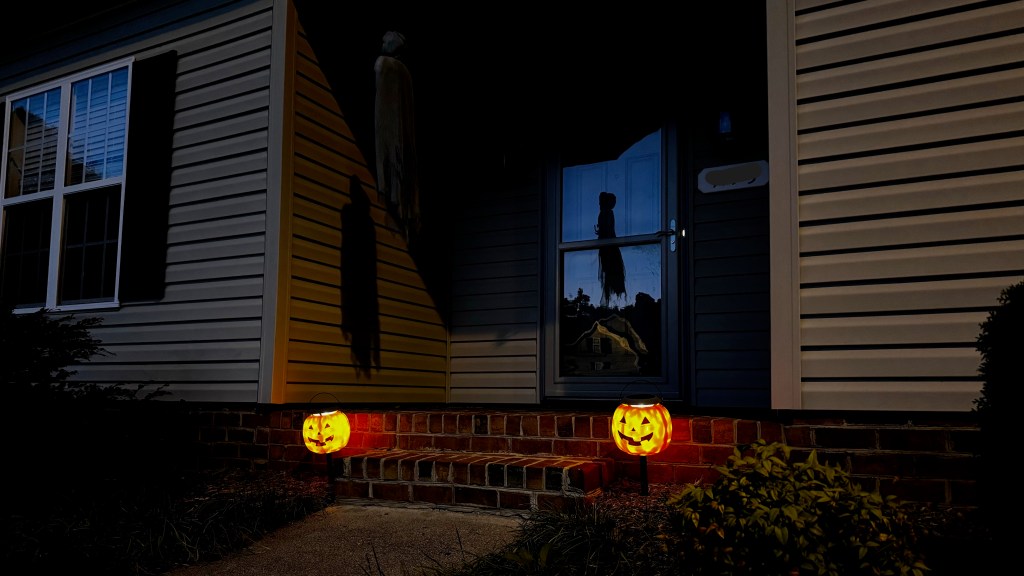
My solar lights have a slight “bubble” texture to them, so the pumpkins also have a dappled glow. I can’t say that the solar jack o’lanterns made a difference in our trick-or-treater turnout— we still ended up with a mountain of leftover candy, as usual— but I guess changing neighborhood habits can’t be as easy as this little project.
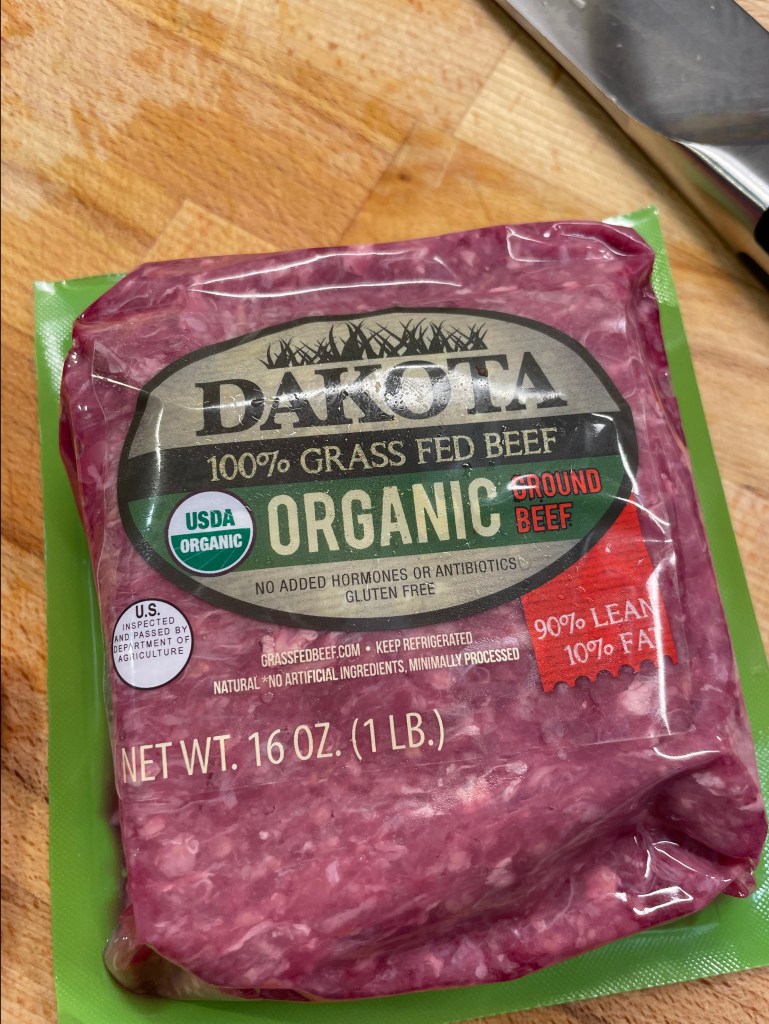
Here’s an easy, kid-friendly main dish that brings back a lot of memories from my childhood. There were just a few foods that my mother made on repeat, including some of the Mexican-themed meals I’ve shared here. Ground beef tacos were in hot rotation, as was tuna noodle casserole, green chili burritos and something she called “Swiss steak.” Once in a while, she also whipped up a pot of good old American goulash, but not quite the way I’ve prepared this batch. My single mom was all about shortcuts in the kitchen, so her version of goulash usually involved a jar of store-bought spaghetti sauce, probably Ragú, given that there weren’t many other brands available in the 1970s when I lived with her.
In the traditional sense, goulash— which has its roots in Hungarian cuisine— would not have the Italian flavors found in spaghetti sauce, and I’ve come around to making it my own way in my adult years. I do use ground beef, as my mom did, and this is a distinct Americanization of goulash, which would traditionally be made with stewed cuts of meat, plus vegetables and probably potatoes.
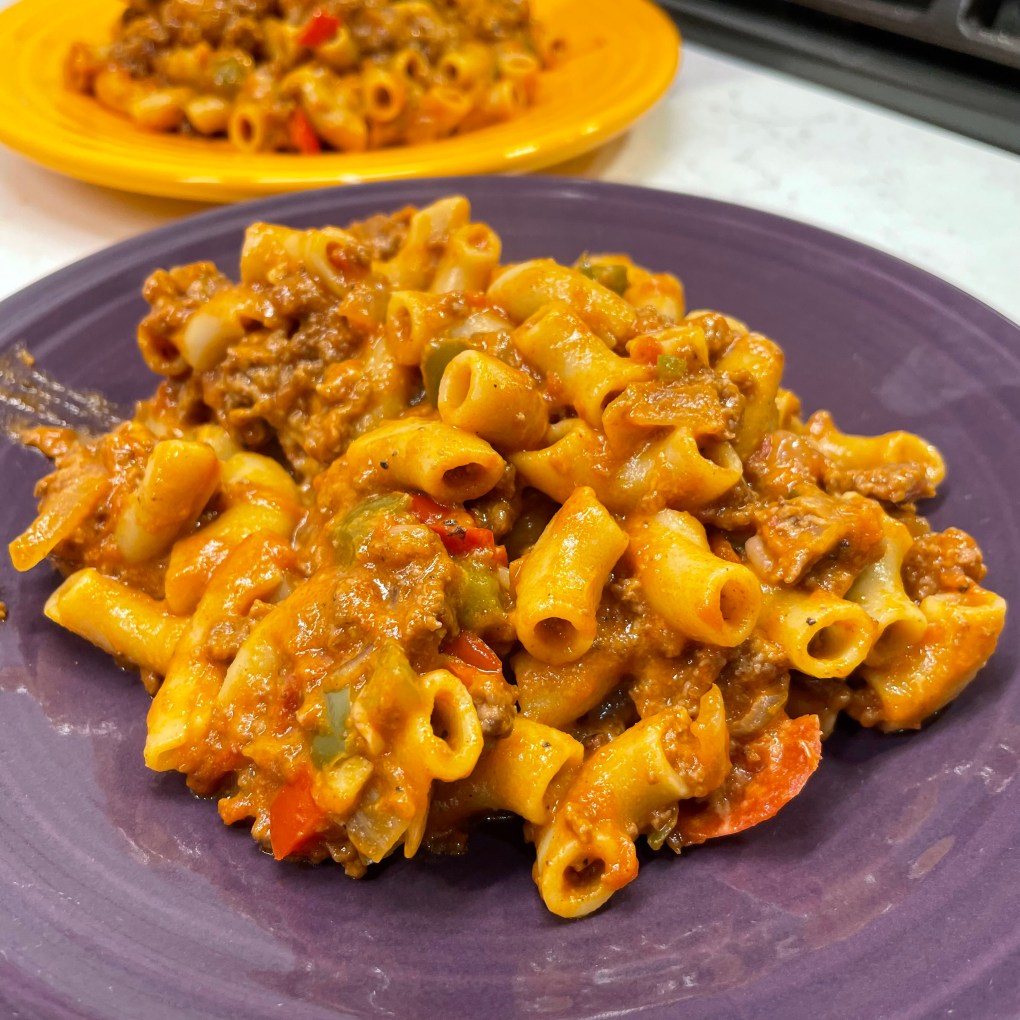
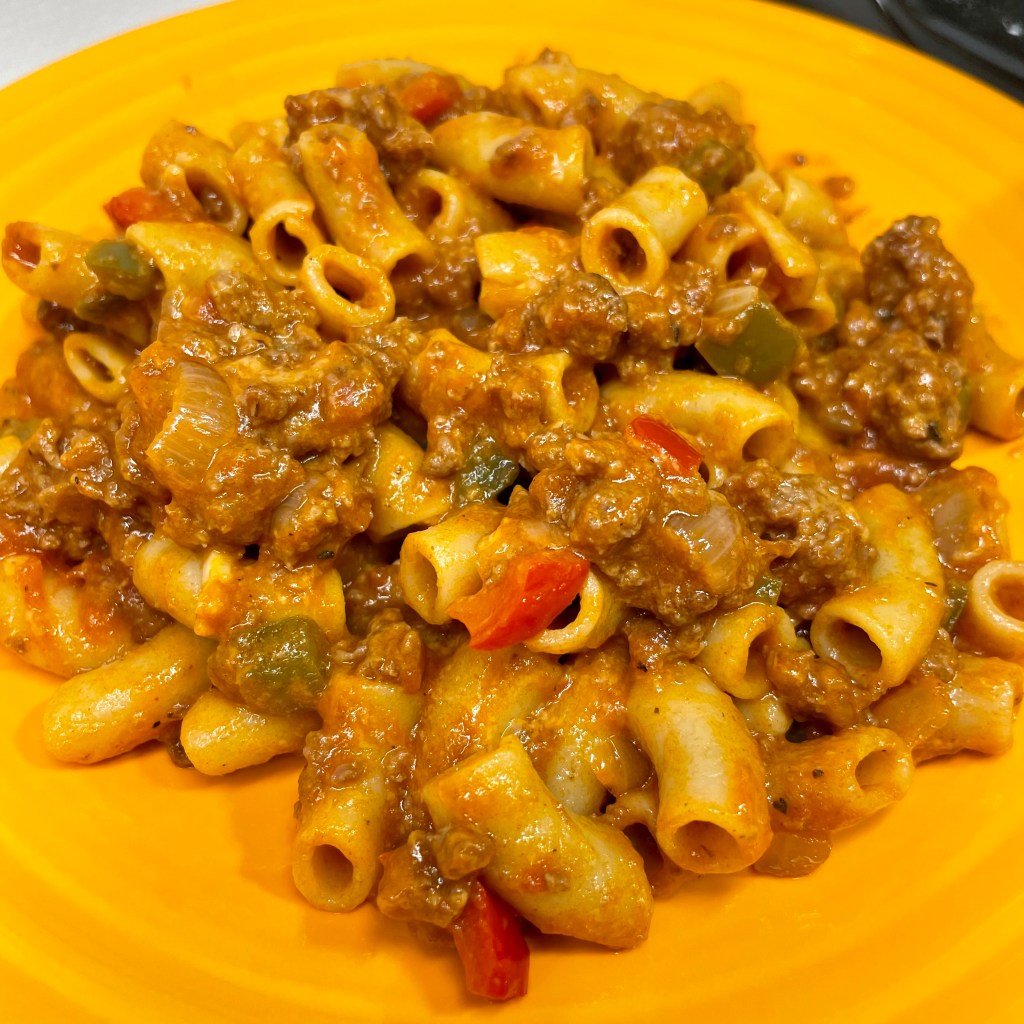
Not a Hungarian goulash, but so delish! And look at that brilliant Halloween color.
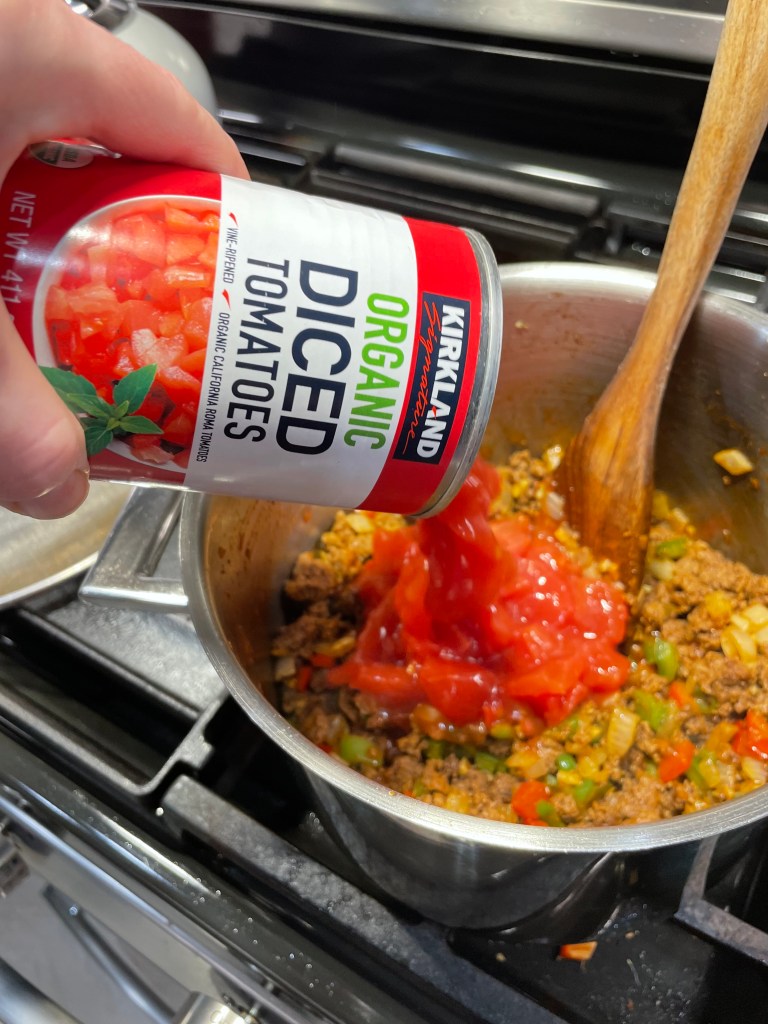
My version brings back some of the traditional goulash flavor, seasoned with plenty of smoked paprika, canned whole tomatoes, bell peppers, onions and garlic. In the devilish spirit of Halloween, I have also taken the liberty of adding some fiery heat in the form of a fresh jalapeño, chopped up with seeds and all. Even when I was a kid, I loved spicy flavors, and that was my mother’s influence, especially during the years we lived in southern Colorado.
If you’re not feeling it for the fire, or if you’re feeding little goblins whose taste buds aren’t quite there yet, feel free to omit the jalapeño, and maybe pull back on the smoked paprika a bit, too. Cooked pasta is another “American” twist on goulash, and I like large elbows for this because the shape is open to grab up plenty of that flavorful sauce, and it’s also easy to pick up with your fork, along with the tasty bits of meat, onion and pepper.
One last thing, and this is also a departure from my mom’s old standby recipe but is very popular in my house today. Just before serving, I stir in a half cup or so of shredded sharp cheddar. It’s a tangy little twist that makes this an even heartier meal, or perhaps even a graveyard smash. 👻
This is my adaptation of a dish I had countless times during my childhood. It makes good use of simple pantry ingredients and it is economical, using ground meat of your choice. I prefer it served from the stovetop, but it easy to adapt to a baked dish if you prefer to make it ahead.
Ingredients
Extra virgin olive oil
1 pound lean ground meat (beef, bison or turkey work well)
1/2 sweet or yellow onion, chopped
1 bell pepper, chopped (use green, red or a combination)
2 cloves garlic, minced
1 fresh jalapeño (optional), minced with or without seeds
Salt and pepper
1 teaspoon smoked paprika (Hungarian is traditional, but Spanish works nicely)
15 oz. can diced tomatoes, including juice
8 oz. can low-sodium tomato sauce
1/2 pound large elbow macaroni
About 1/2 cup shredded sharp or medium cheddar cheese
You can adjust the smoke and spice of this dish to your liking. For less heat, discard the seeds and membranes of the jalapeño or omit it entirely. For extra “smoke,” use two teaspoons of the paprika. For less smoke, substitute sweet paprika.
Directions
Bring a pot of salted water to boil for cooking the pasta. Heat a medium size, heavy-bottomed pot over medium heat. Swirl in a tablespoon or so of olive oil and add the ground meat, a little bit at a time, cooking until most of the pink color is gone.
Add chopped and minced vegetables and season with salt and pepper. Cook and stir until vegetables are softened and onions are slightly translucent.
Stir in paprika and then add tomatoes and tomato sauce. Reduce heat and cook at low temperature, stirring occasionally to prevent burning.
While the goulash mixture simmers, cook the pasta to al dente or desired doneness for serving from the stovetop. If you intend to bake the dish after mixing, undercook the pasta slightly as it will continue to absorb moisture and cook during baking.
Add cooked pasta and a few tablespoons of the pasta water to the meat mixture. Gently fold to combine. Stir in shredded cheddar and serve. If baking, transfer the mixture to a casserole dish and bake at 350° F for about 40 minutes. Consider topping the casserole with extra cheese before baking.
There are age-old tales of hauntings on the North Carolina coast, especially in the Wilmington area and along the Outer Banks. I thought it apropos to explore the legends as we inch toward Halloween.
Folks say that Wilmington, which is nestled in a triangle between the Atlantic Ocean and the Cape Fear River, is particularly prone to hauntings because of an old superstition that says ghosts—or haints, as the Gullah people call them—cannot cross over water. The Gullah people, in case you aren’t aware, are direct descendants of formerly enslaved people brought over from West Africa, and though they once inhabited the coastline from the Outer Banks to the north coast of Florida, only a remnant of the subculture remains today in the Sea Islands near Charleston, South Carolina. The heritage of the Gullah people is largely Creole, and superstitions abound, especially in their folklore about the dead. Whether or not the water theory is true, people all across the South still paint their porch ceilings blue, presumably to keep the ghosts at bay.
But the Cape Fear region has plenty to offer for adventurous souls who come seeking those ghostly encounters. And smart marketing teams have capitalized on the legends that persist there, with everything from ticketed ghost walks to haunted pool halls. Don’t believe in it? Suit yourself.
If you venture further north of Wilmington, especially toward the inlets along the Outer Banks, you might catch a ghostly glimpse of one Edward Teach— notoriously, the pirate Blackbeard. He is said to have made his home in those parts, probably for the cover it provided him in between his plundering of unsuspecting cargo ships headed for Port Wilmington. Some modern thrill seekers claim to have witnessed a mysterious light moving around in the waters there, or experienced a spooky wailing that sounded like someone crying out, “Where’s my head?”
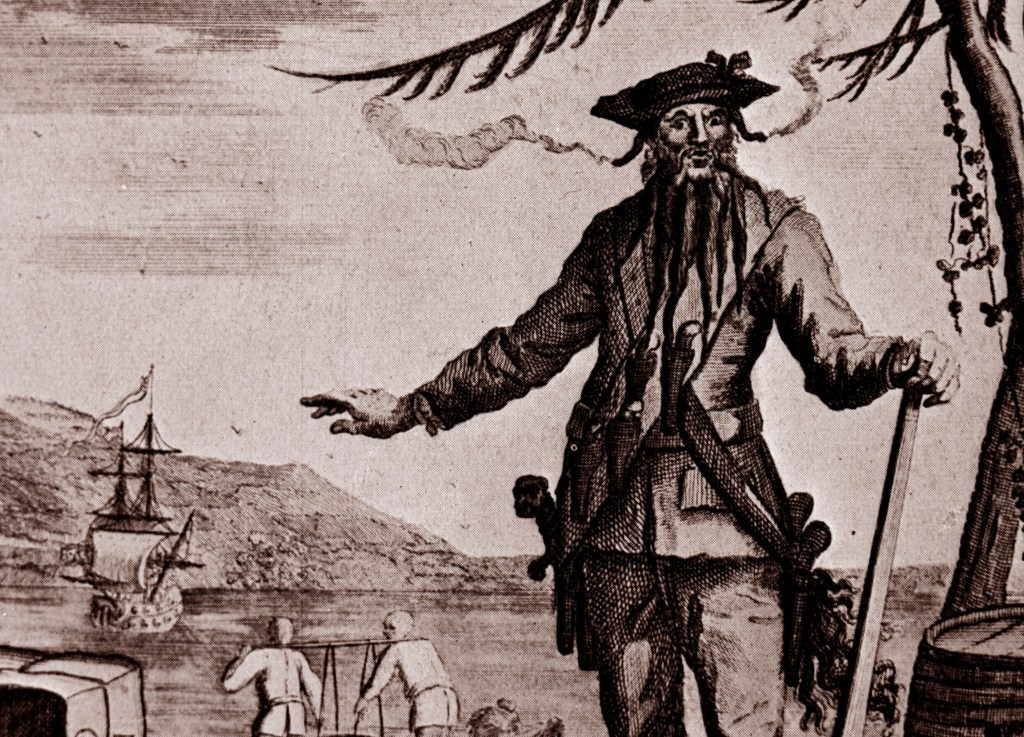
They say it’s Blackbeard.
Now, if the notion of pirates conjures comical images of Johnny Depp in Hollywood garb and black eyeliner, well, you can forget that. Blackbeard was no such flamboyant, clever-tongued misfit. He was a badass—a wild, fearsome figure with a long, braided black beard. Some historians say that when he was about to attack a ship, Blackbeard would weave hemp cords into his beard and torch them to make it look like his head was smoking—a tactic to further terrify his unsuspecting victims so they would give up without a fight. Indeed, he was the bulliest of all the bullies of his time.
Blackbeard’s reign of terror came to a violent end in 1718, when the governor of neighboring Virginia dispatched a military ship to take him out, and in the end, Blackbeard was shot, stabbed to death and decapitated. His gnarly head was hung from the mast of the military ship and later put on display atop a pole in Hampton Roads, Virginia—let that be a lesson to other would-be nautical thieves, I guess.
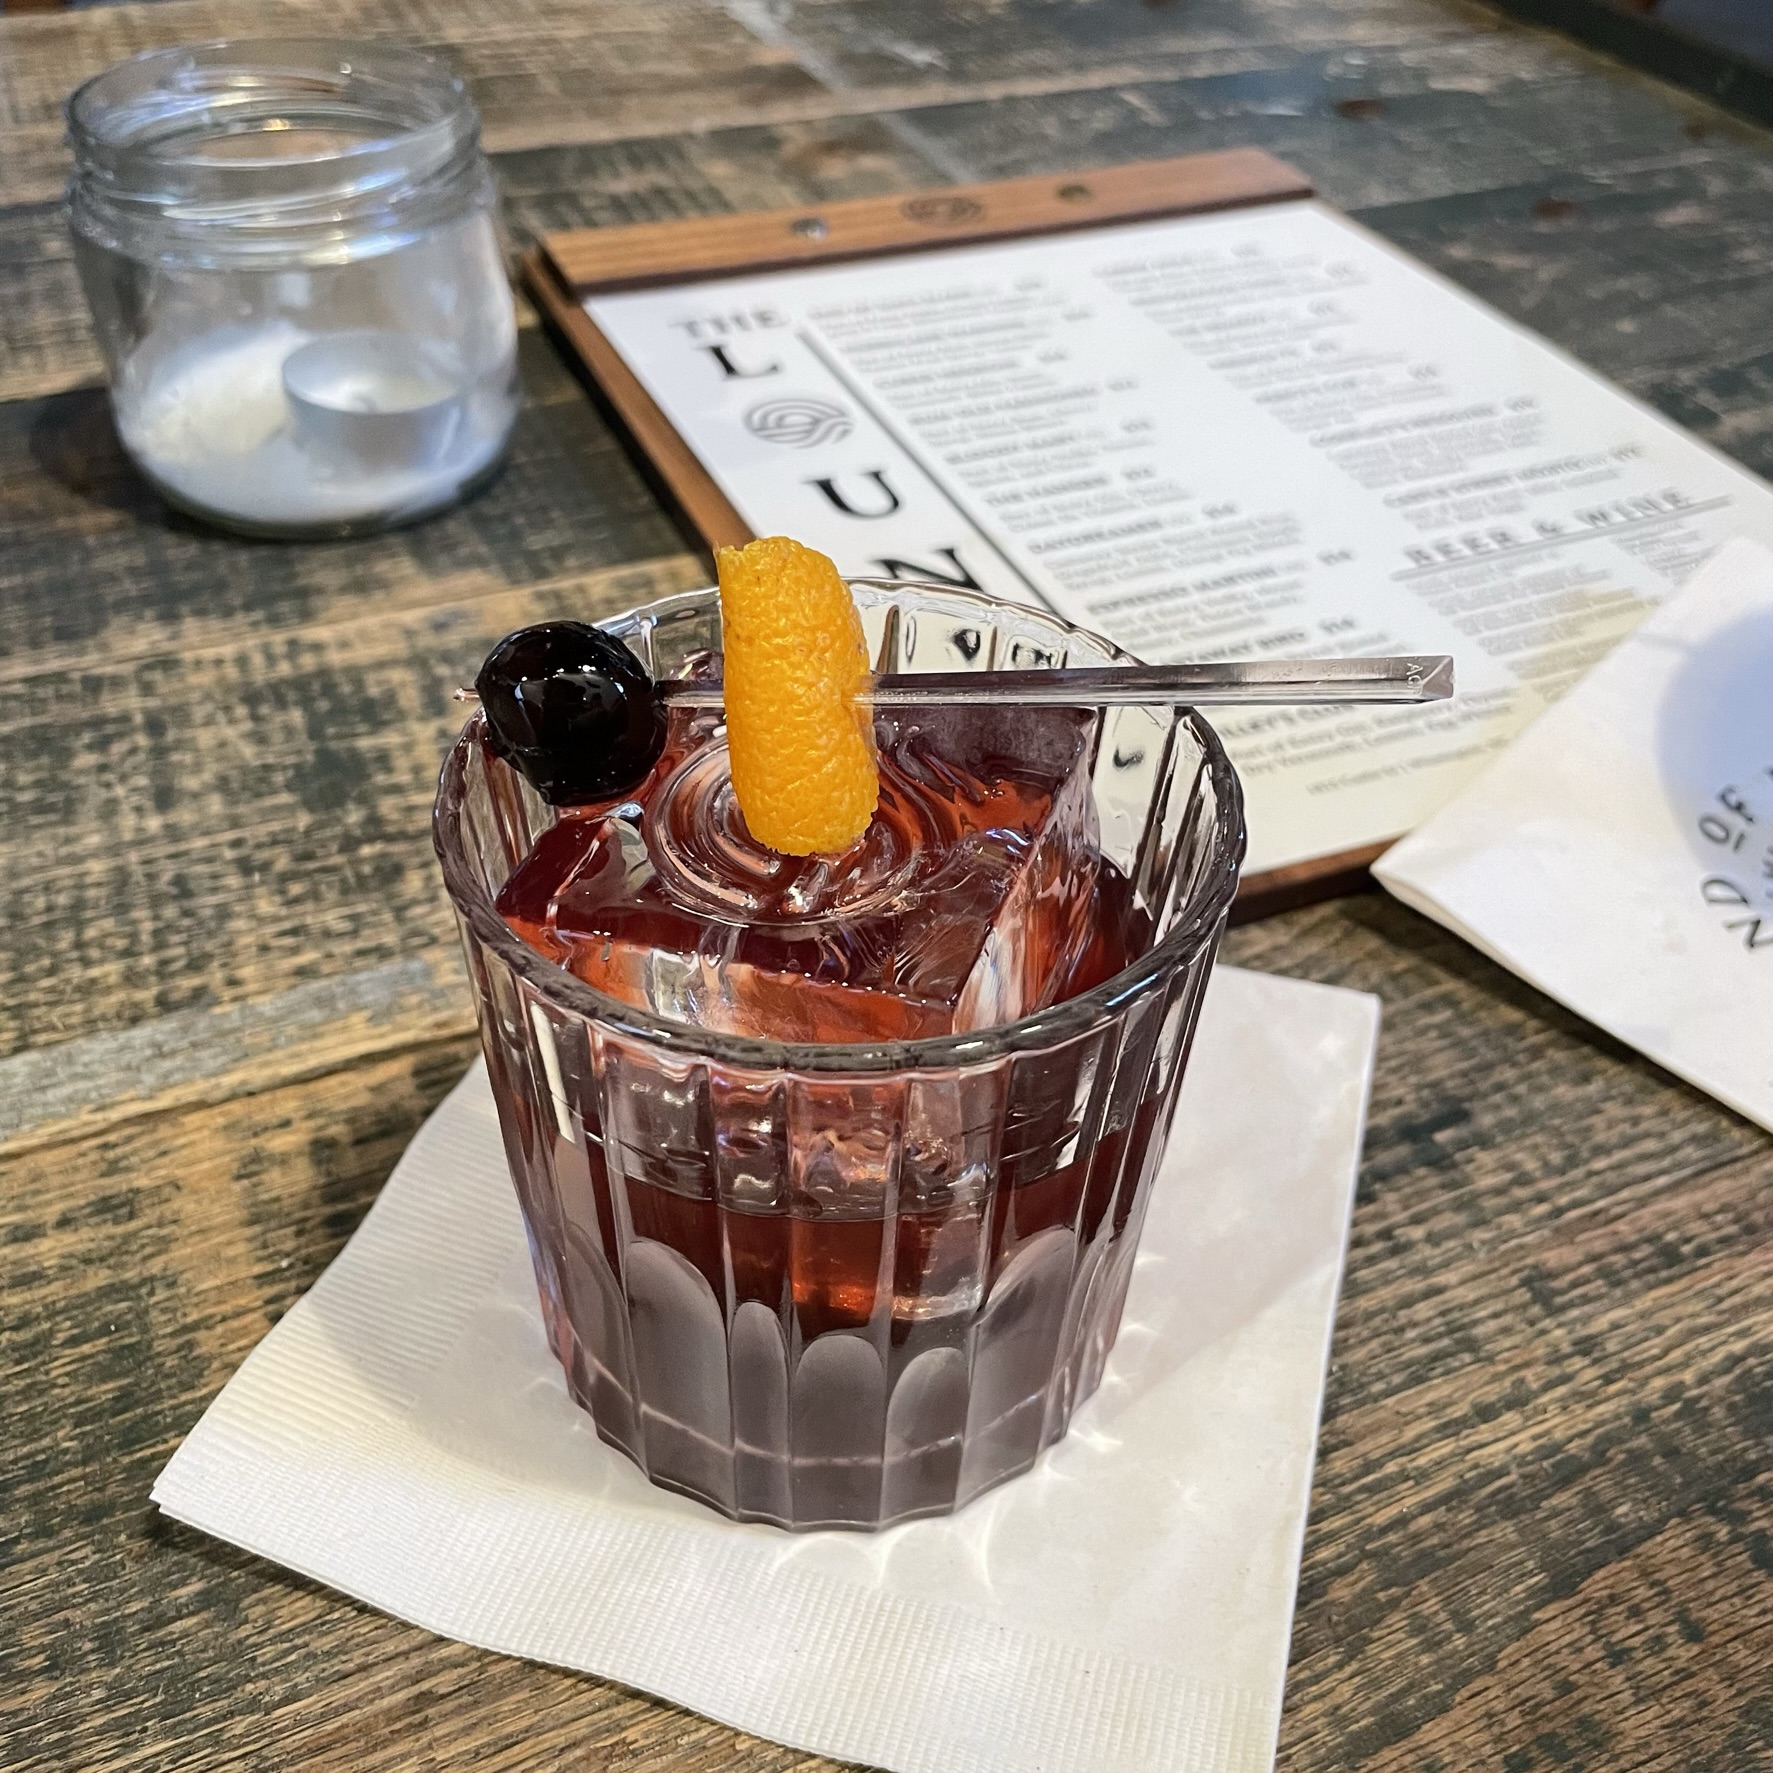
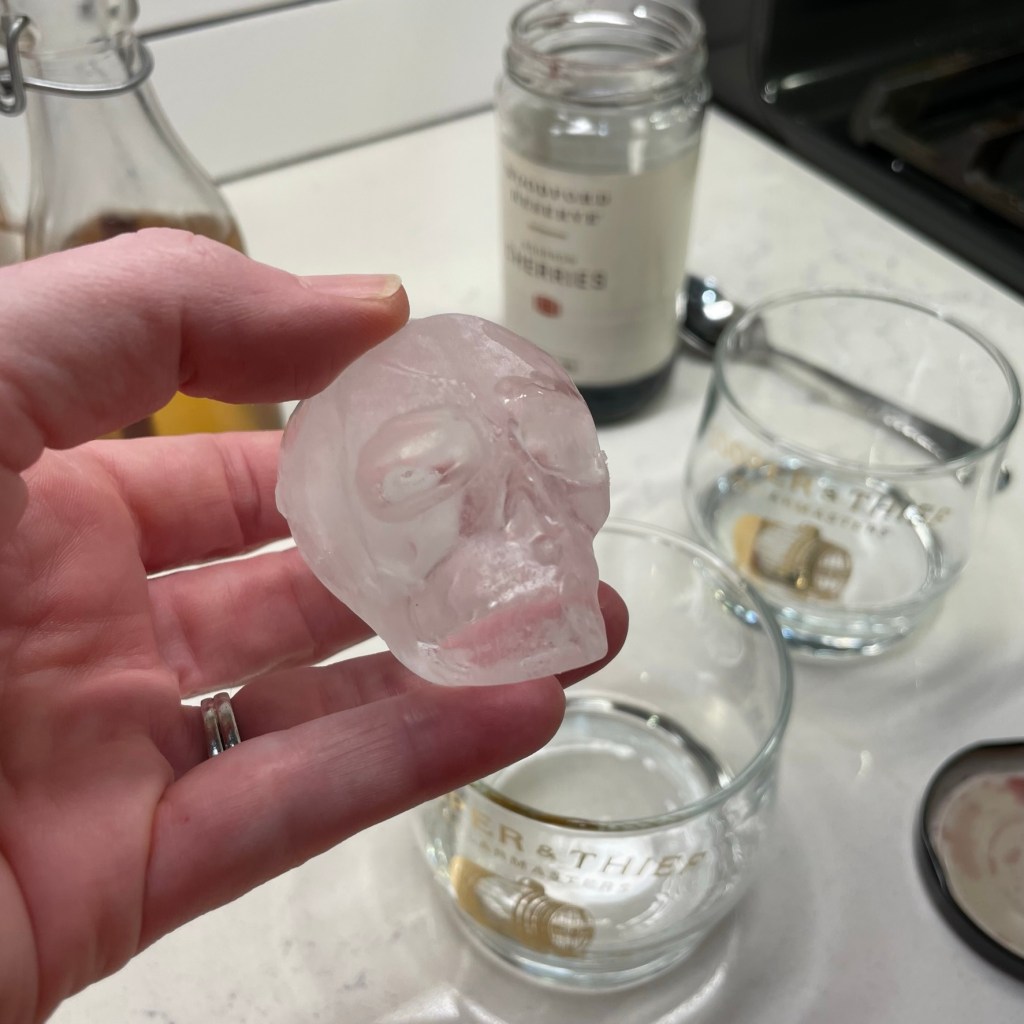
When my husband and I celebrated our wedding anniversary on the North Carolina coast earlier this year, we didn’t find Blackbeard—OK, we weren’t actually looking for him—but I did find inspiration in a cocktail we enjoyed at End of Days Distillery in Wilmington. The distillery produces vodka, gin and rum—I’m cool with all three and ordered a frilly gin drink, and Les gravitates toward sweeter, dark liquor. He ordered the rum old fashioned, which is pretty much the same as a classic old fashioned, but with rum rather than bourbon, and a splash of cherry syrup in place of the usual sugar. It was delicious!
If you look closely at the top of the large ice cube, you’ll see that they have branded their logo into it!
We bought a bottle of the End of Days “Castaway” barrel-aged rum, and I promised Les I would re-create the drink at home, but it took Halloween and a deeper dive into the history of Blackbeard to properly motivate me. This cocktail embodies a few points of the Blackbeard story—rum, because we all know it was a pirate’s drink of choice—cinnamon syrup and spicy Jamaican Jerk bitters for a little bite, and cherry juice to symbolize the bloodshed of Blackbeard’s last stand.
Cinnamon simple syrup is easy to make at home, and I highly recommend having a jar or bottle on hand for the upcoming holiday season because it works with so many spirits. Combine equal parts water and cane sugar and heat to a slight boil, then add cinnamon sticks to steep a warm, spicy flavor into the syrup. The longer it steeps, the more intense the flavor. The bitters are a specialty item, and I’ve linked to the company’s website if you’re interested in checking them out. For this cocktail, I turned to Woodford Reserve’s brand of bourbon cocktail cherries, rather than my usual Luxardo, because I wanted the color more than the sweetness. Look for the Woodford brand in the mixers section of Total Wine or Bevmo, or the Tillen brand would also work in a pinch.
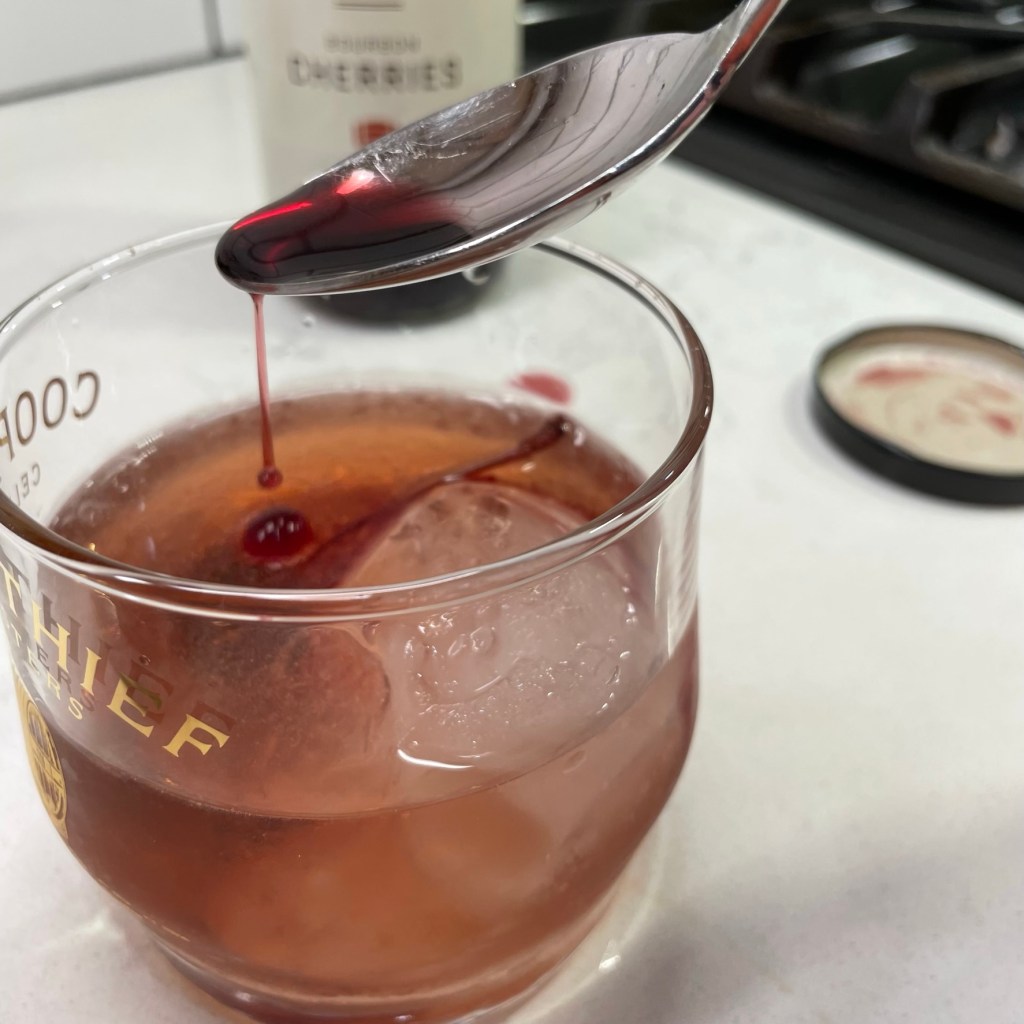
I combined all of the above with ice in my cocktail shaker and then poured it over a spooky, skull-shaped ice, drizzling in a little more cherry juice for effect, and a cherry as a garnish. Tovolo makes the skull mold for ice, and I found it on Amazon.
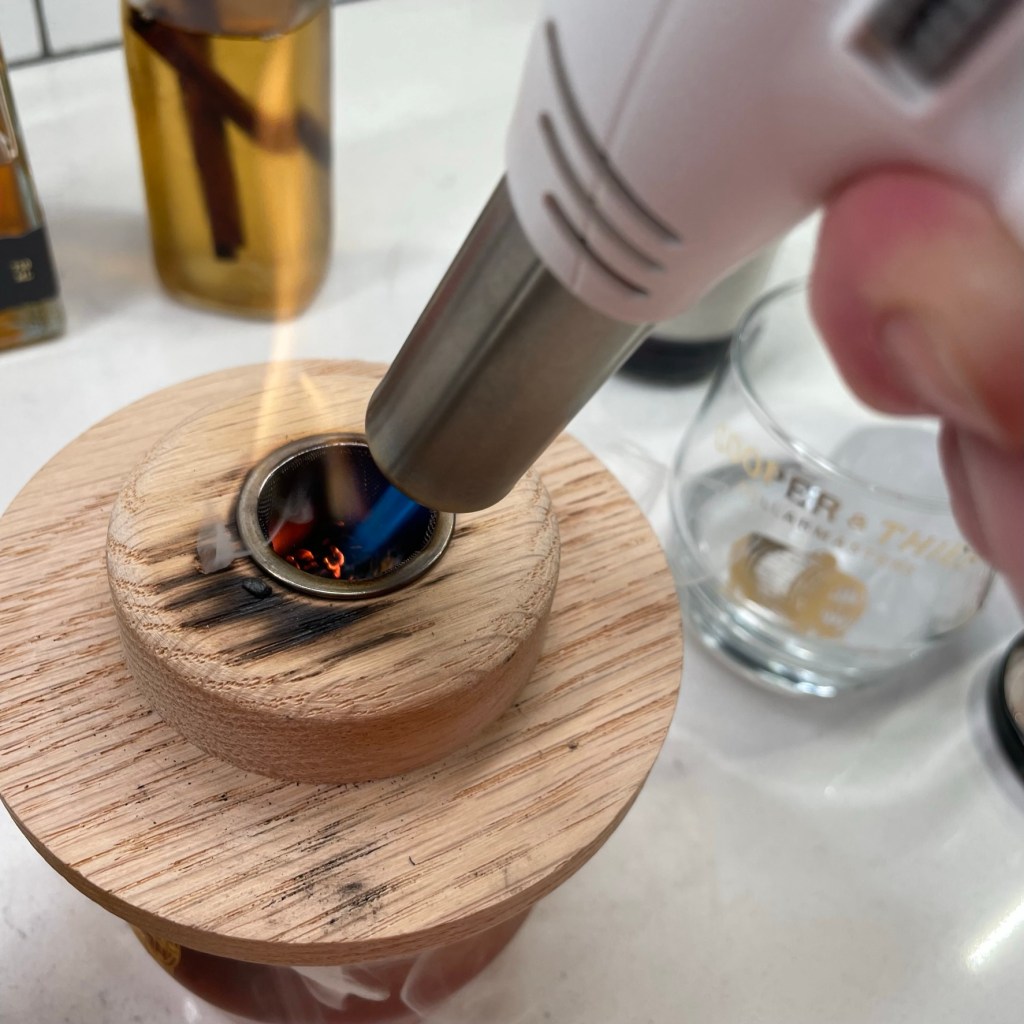
Finally, the dramatic moment! This past summer, our friend, Bob, introduced us to a nifty cocktail smoking kit and I promised I’d be getting one to make a fun Halloween drink. Our kit included several varieties of wood chips—apple, pecan, hickory and oak—and I chose oak to echo the essence of that in the barrel-aged rum.
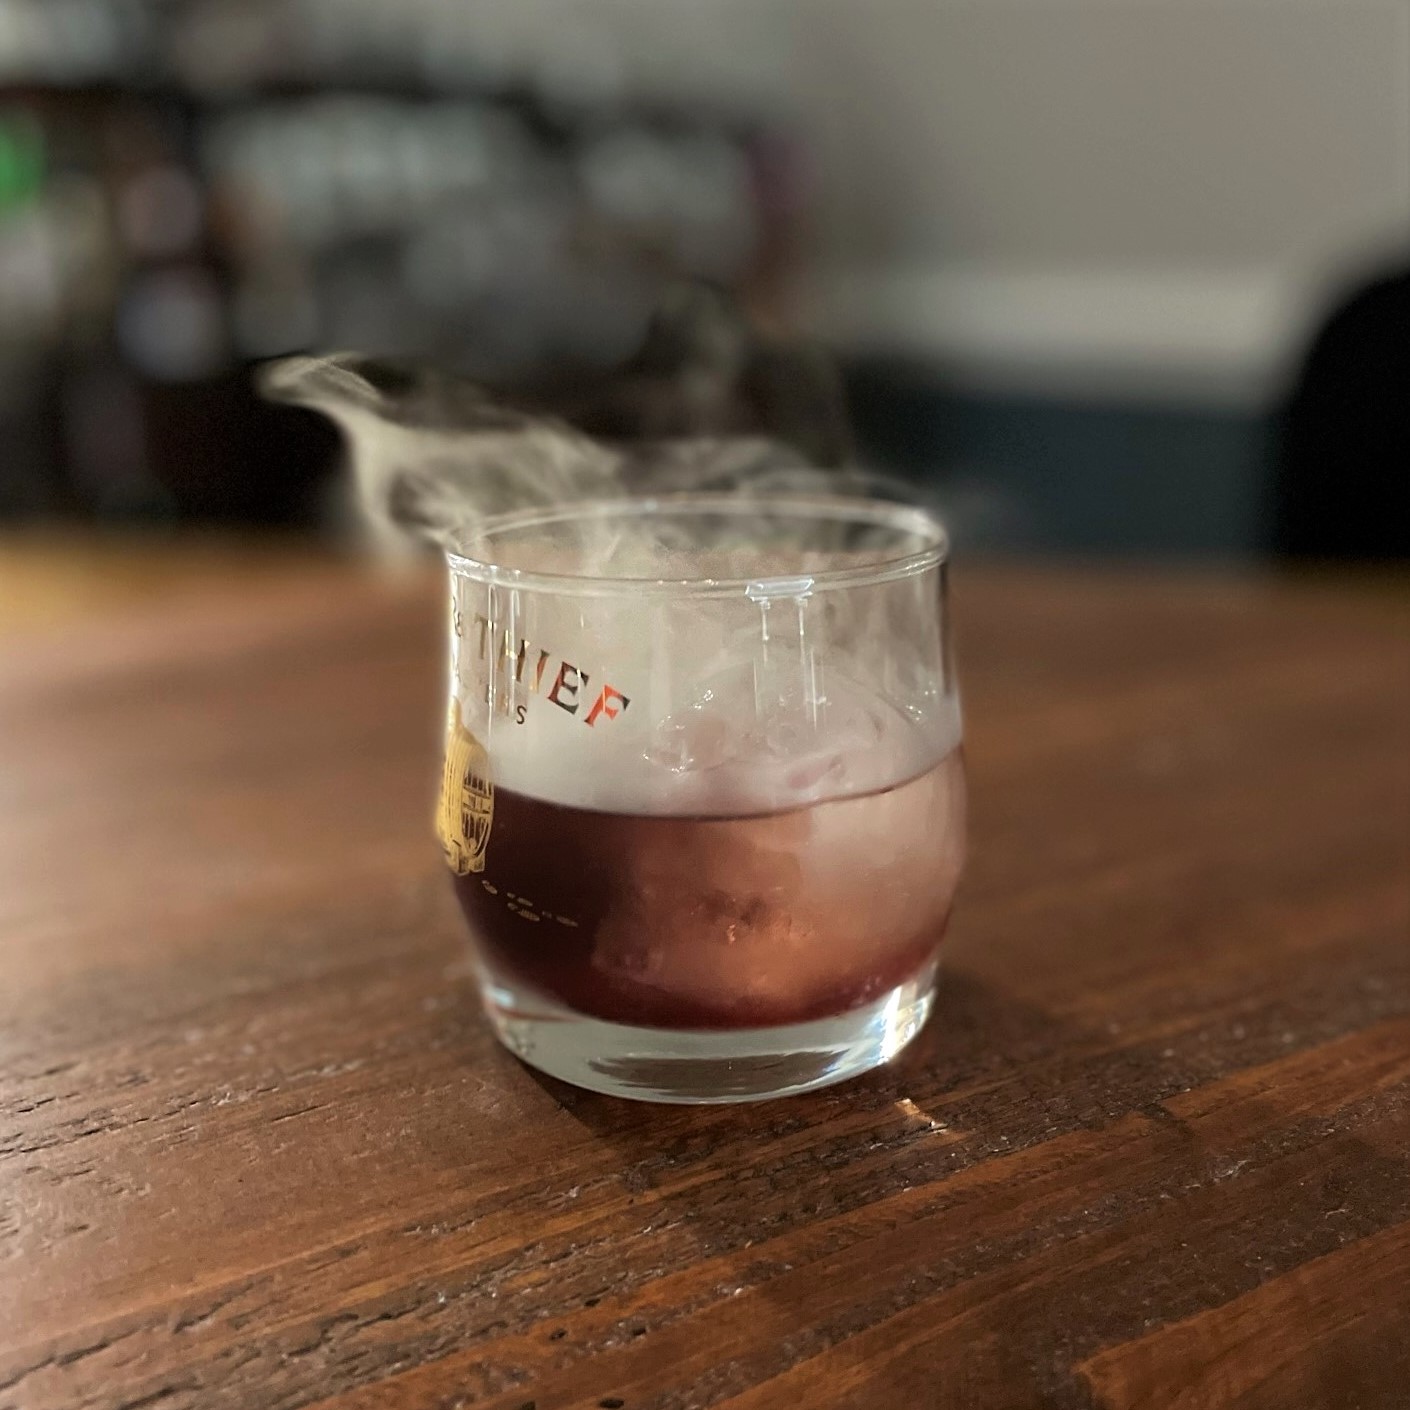
When the smoke cleared from the cocktail, it was far from spooky; the sweetness of the rum and cinnamon syrup were prominent, and the spicy bitters kind of sting the tongue. But just thinking of mean old Blackbeard as we sipped our cocktails made for a fun evening.
Blackbeard’s Comeuppance – a smoked cocktail for Halloween
Oak chips and cocktail smoking kit (optional, but fun!)
Directions
Measure rum, simple syrup, cherry syrup and bitters into a cocktail shaker or mixing glass. Add one cup of ice and shake or stir vigorously until outside of mixing container is frosty. Strain over new ice in a rocks glass. Add a cherry to garnish, and drizzle in another spoonful of the cherry syrup to mimic Blackbeard’s blood.
Place smoking accessory on top of glass and light the oak chips until smoke begins to appear. Cover the accessory until the smoke fills the open space in the glass. Remove the accessory and allow smoke to dissipate before enjoying.
For cinnamon simple syrup, combine 1/2 cup filtered water and 1/2 cup cane sugar in a small saucepan. Heat and stir until sugar is dissolved. Rinse 2 sticks of cinnamon (about 3-inches each) briefly under running water. Add the cinnamon sticks to the simple syrup and heat just until the syrup begins to bubble. Turn off heat and cool to room temperature. Transfer syrup to a sealed jar or bottle (it’s OK to leave cinnamon sticks in it), and refrigerate for up to 2 months.
If you’re interested in the cocktail smoking kit, Aged & Charred is the company that made ours. We didn’t receive any payment or product for my mention of them, but I wholeheartedly recommend it!
Before the kiddos head out for trick or treating on Monday night, parents hope that they have a decent, balanced meal in their little bellies. You know, so that they aren’t just chowing down on sugar from all those Snickers, Reeses and Skittles that they get in their trick-or-treat bags.
In my limited experience with children, I learned one lesson loud and clear—a simple way to get kids interested in eating good-for-them food is to make it FUN.
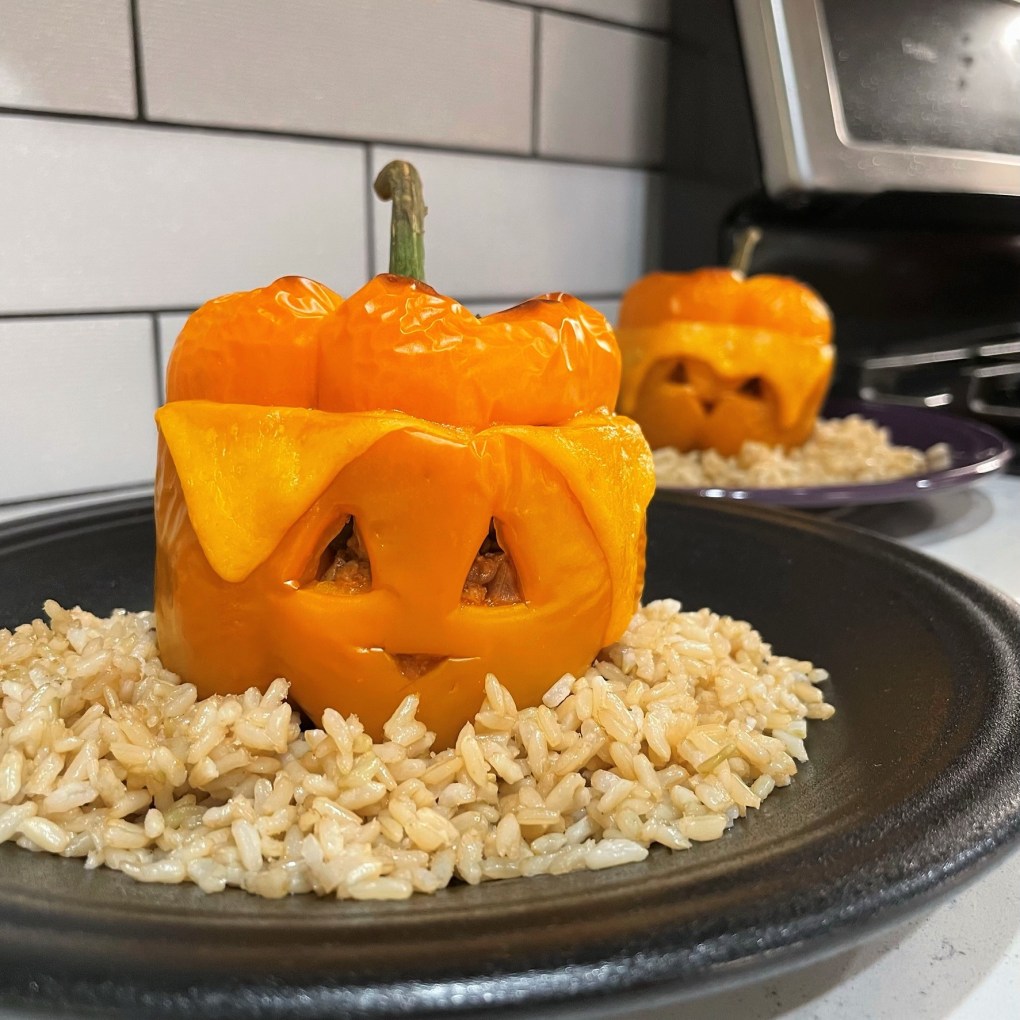
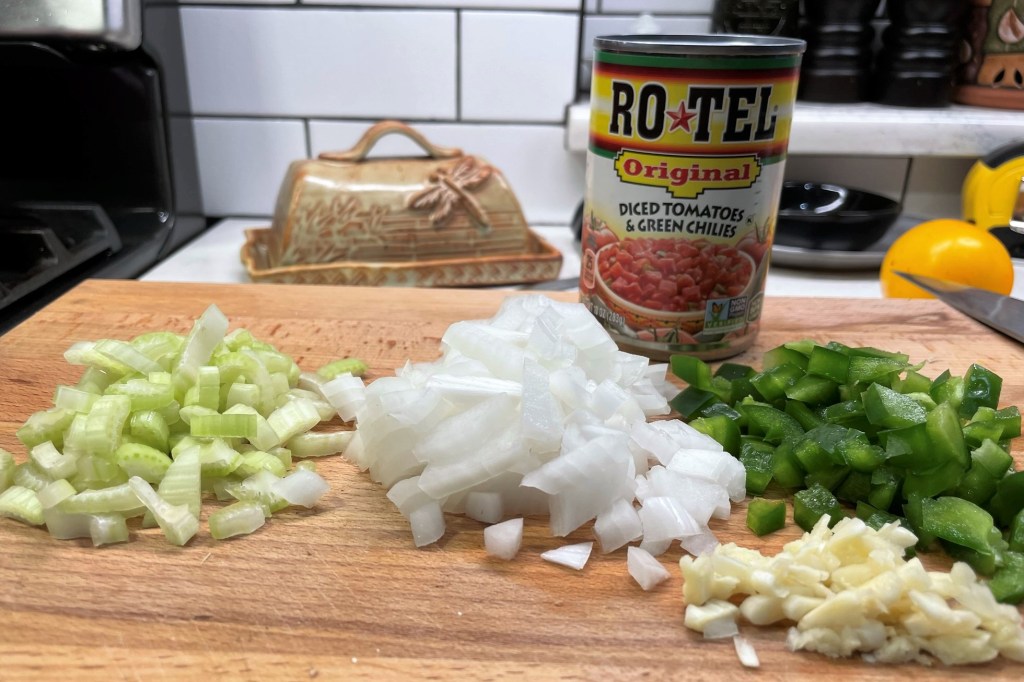
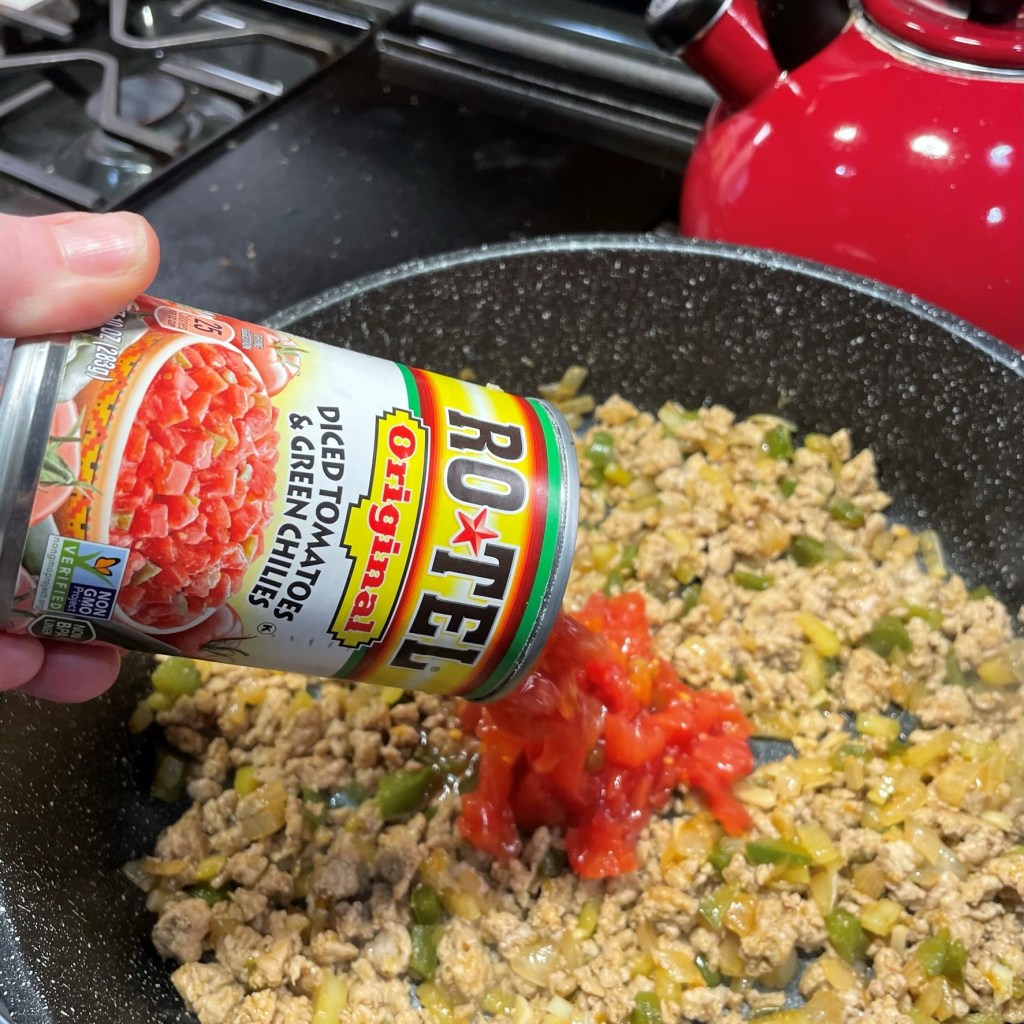
With a little imagination, you can turn an ordinary bell pepper into a fun Halloween supper, and you can fill it with whatever your kids (or grandkids, great-grandkids, neighbor kids, friends’ kids, etc.) like to eat. Mine are stuffed with cooked ground turkey in a Mexican-ish flavor profile—a combination of onions, green bell peppers, celery, garlic and Rotel tomatoes, spiffed up with chili powder and tomato paste—but there’s no reason you couldn’t change it up and make it Italian. Or Greek. Or vegan with a kale and quinoa kind of thing. Or any other combination you think the kids would like to eat. For the big kids at our house (that would be me and my husband), I went in big for veggies and lean protein.
Use any combination of vegetables that makes sense for the flavors you like.
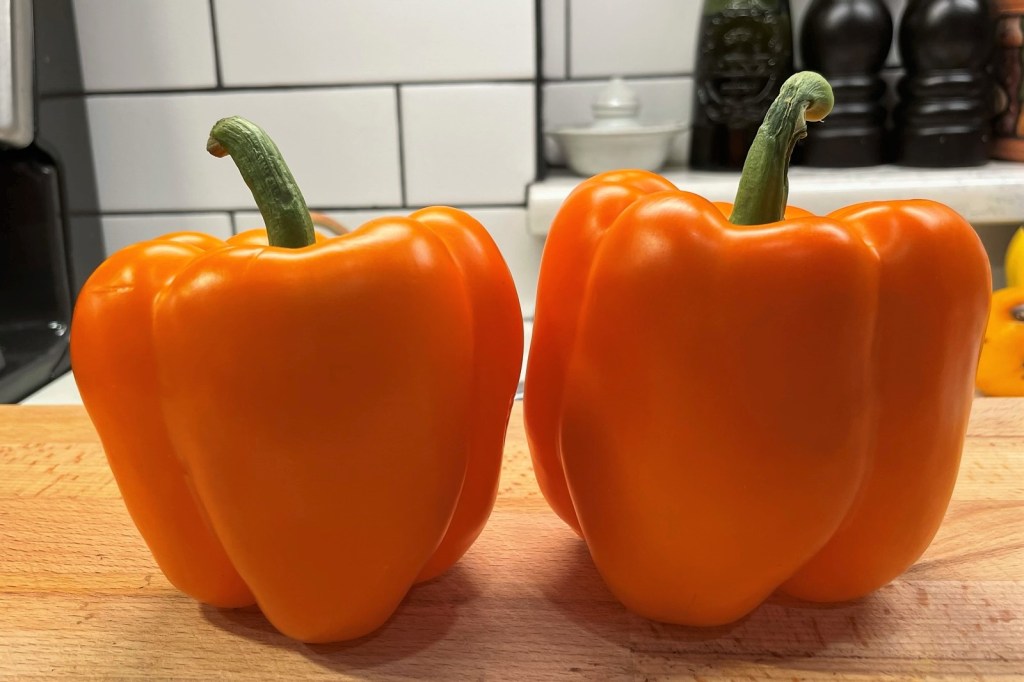
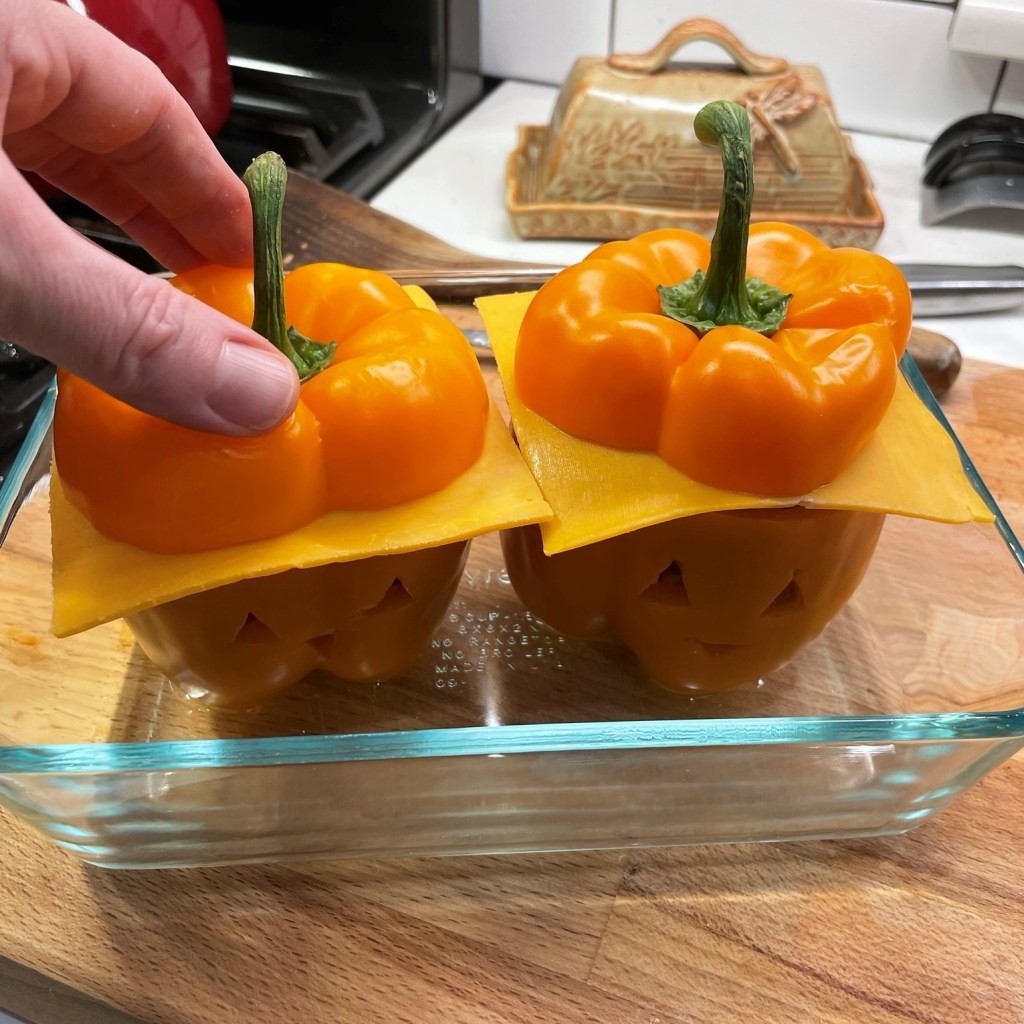
You could use another color of bell pepper if you’d like, but the orange ones are good here, not only for their impersonation of a jack o’lantern, but also because hungry trick or treaters may be more receptive to their flavor, which is sweeter than a typical green bell pepper.
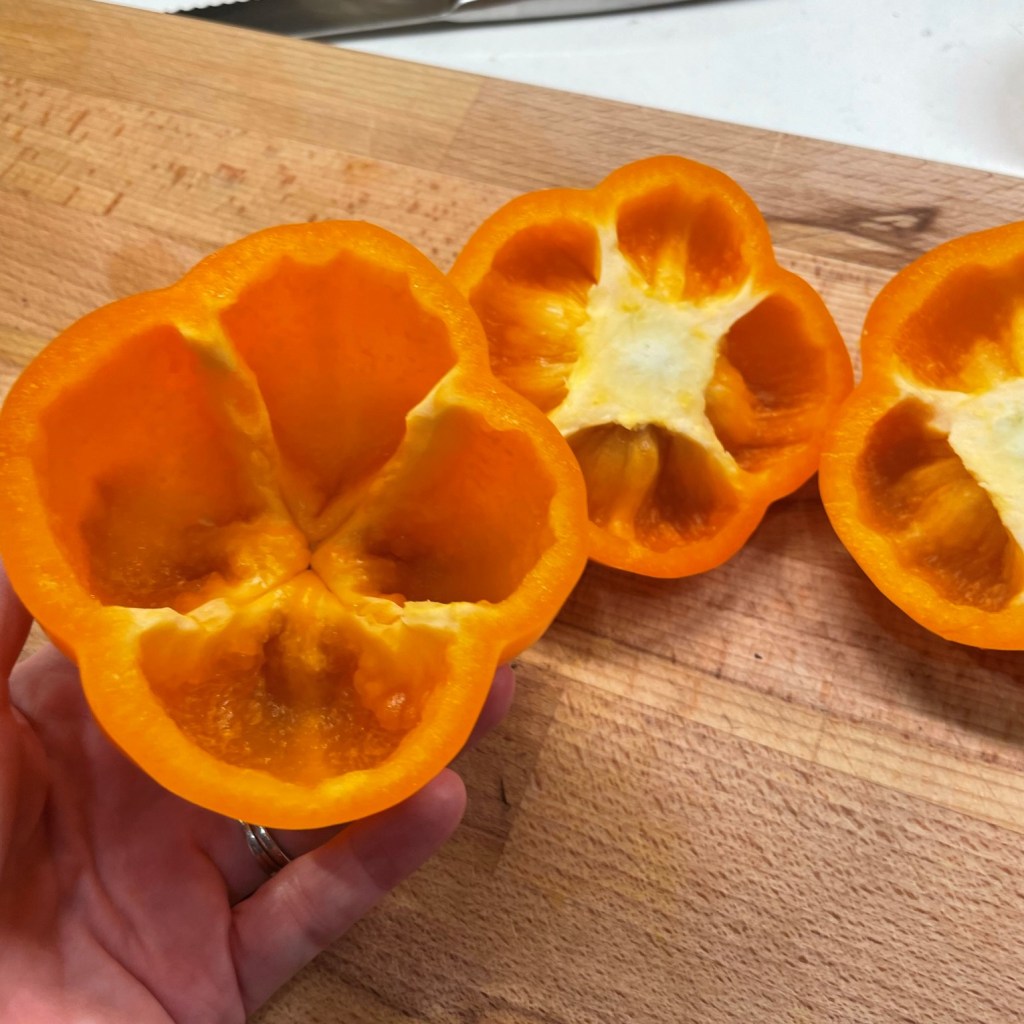
Choose peppers with a good stem, and peppers that will stand up on their own.
To prep the peppers, carefully slice the tops off, taking note of how far down the stem extends so that you keep the top of the pepper intact. Clean out the seeds and excess membranes, and then place the peppers, upside-down, into a glass baking dish with about one inch of water. Put the pepper tops in there, too, and microwave them on high for about five minutes. This will steam and soften the peppers so that they don’t need as much time in the oven after they are stuffed.
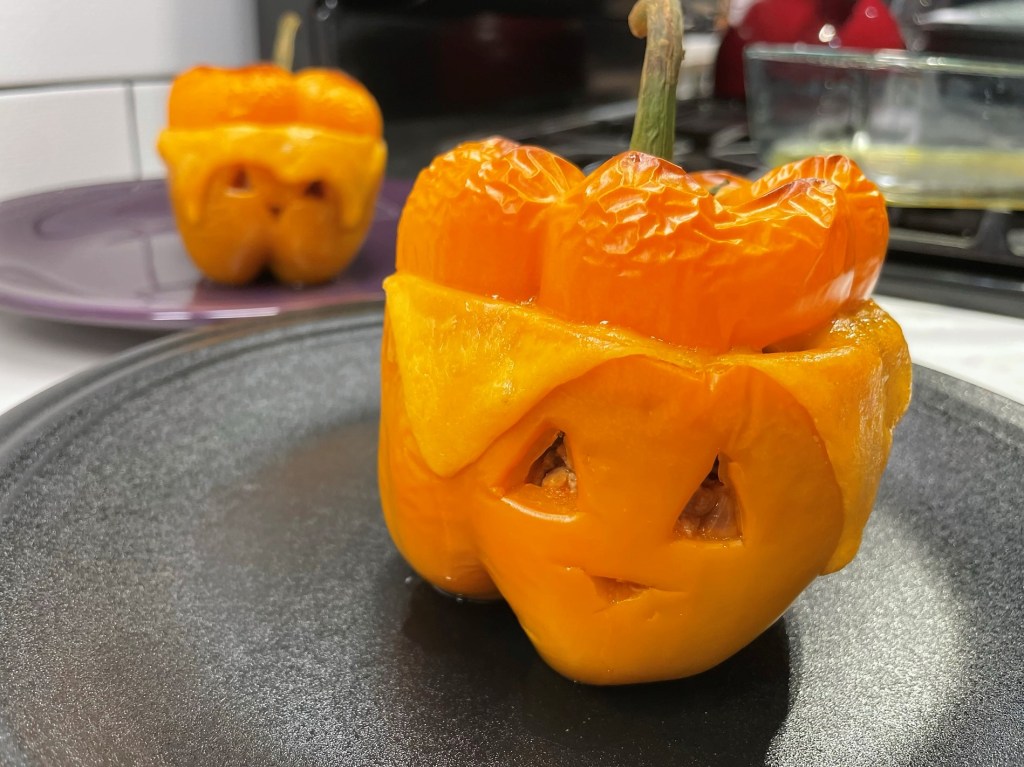
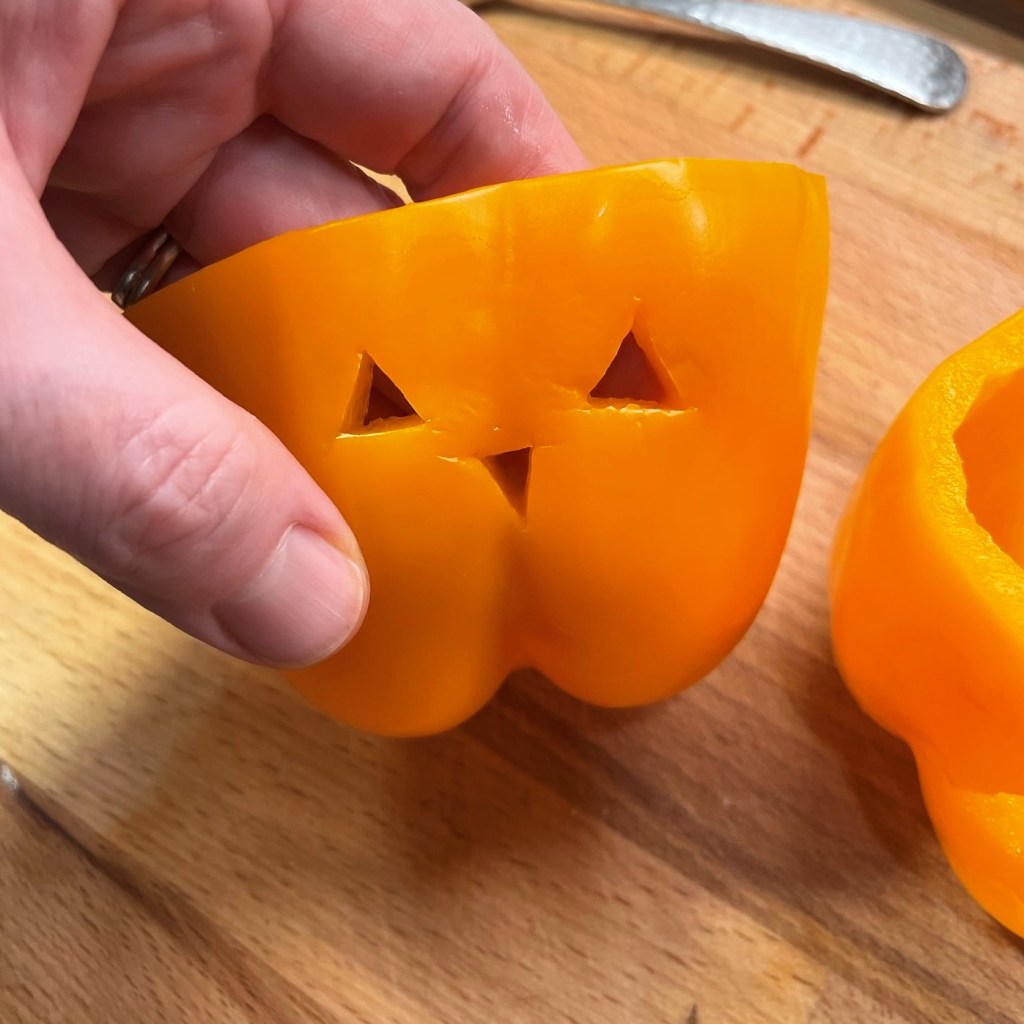
When they are cool enough to handle, use the top of a sharp paring knife to cut out triangle eyes and a nose into each bell pepper body. If you’re feeling extra creative, you could also cut a toothy smile into the peppers, too, but be careful because you don’t want the filling to seep out of its whole face.
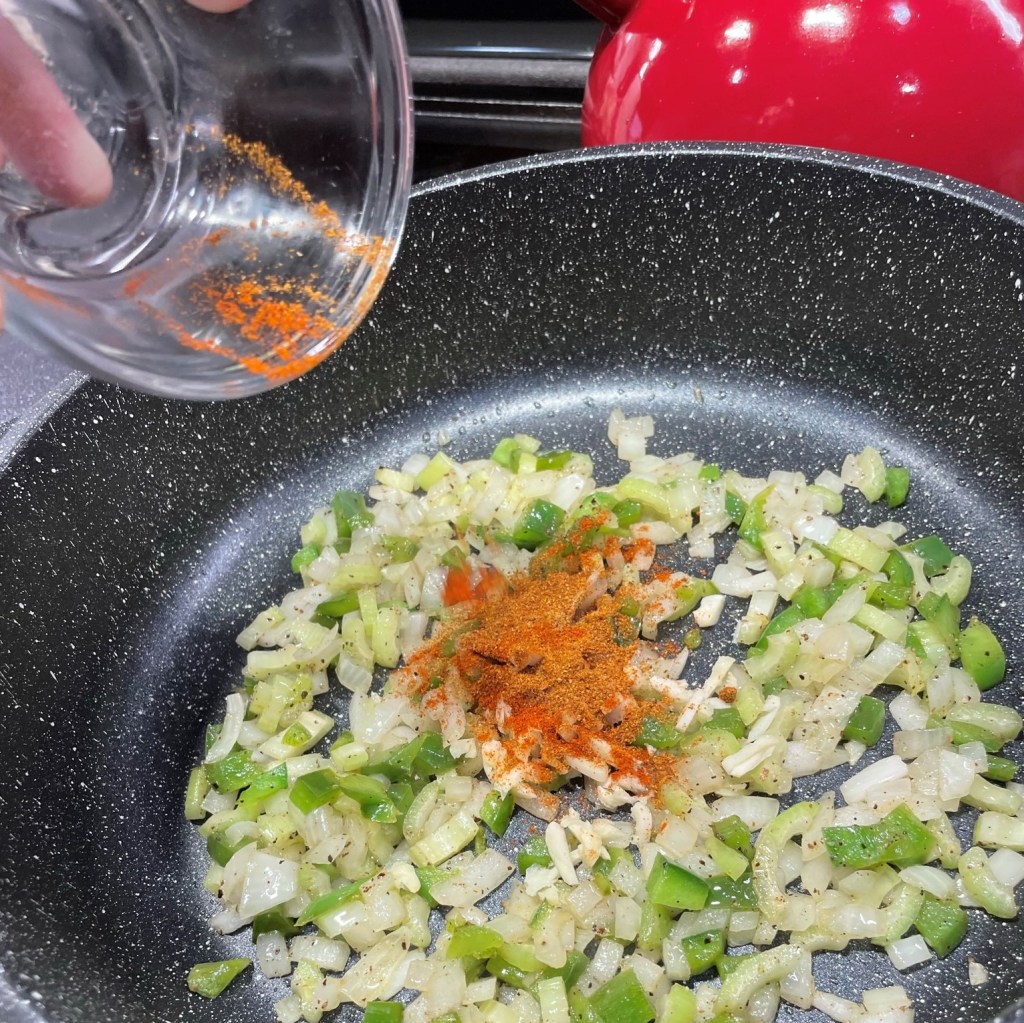
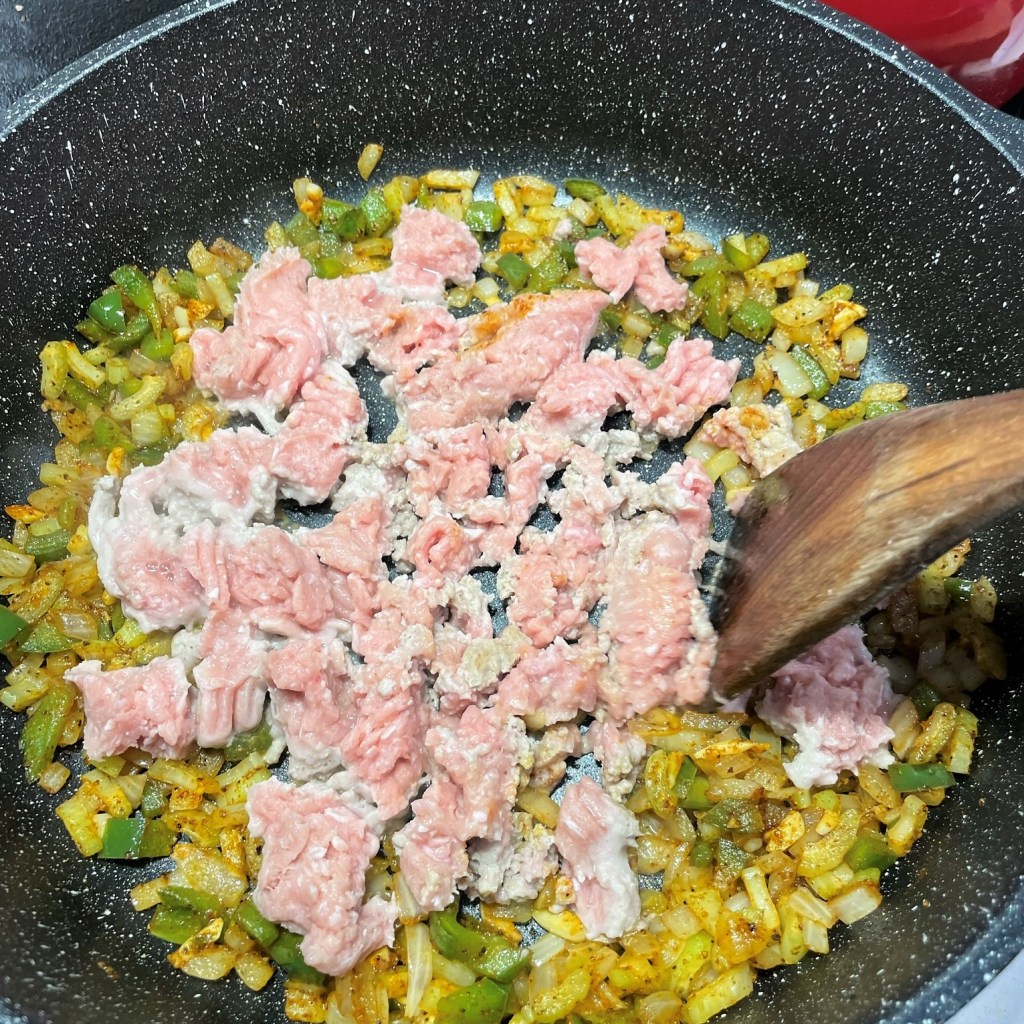
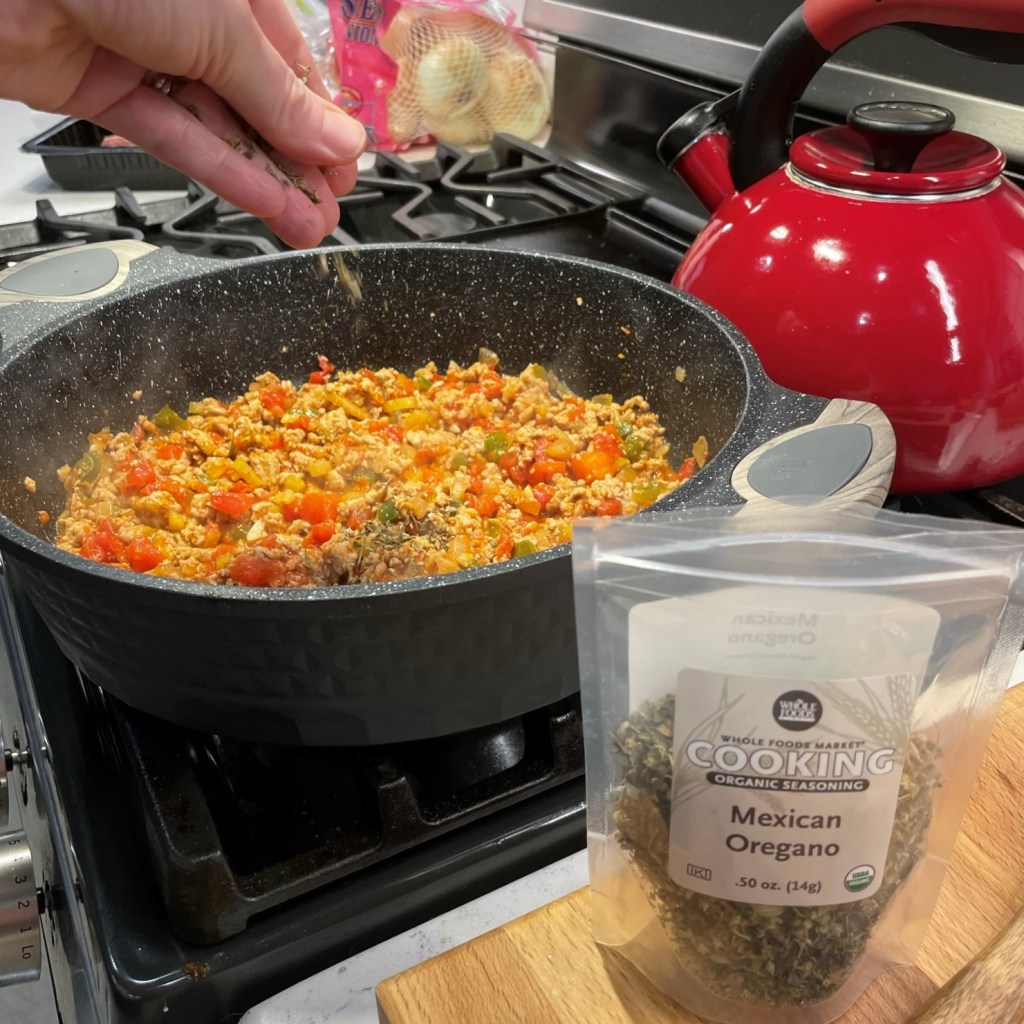
Preheat the oven, with a rack in the center position. Heat a little olive oil in a skillet and sauté the vegetables until they are just softened. Remember to season with salt and pepper, and then add the spice seasonings to bloom their flavors. Crumble in the ground turkey, a little at a time, and toss to stir until no pink color remains. Add the Rotel and a little tomato paste to intensify the tomato flavor, and a pinch of dried Mexican oregano.
I stuffed my peppers with a Mexican-themed filling, but you could take this in so many other directions!
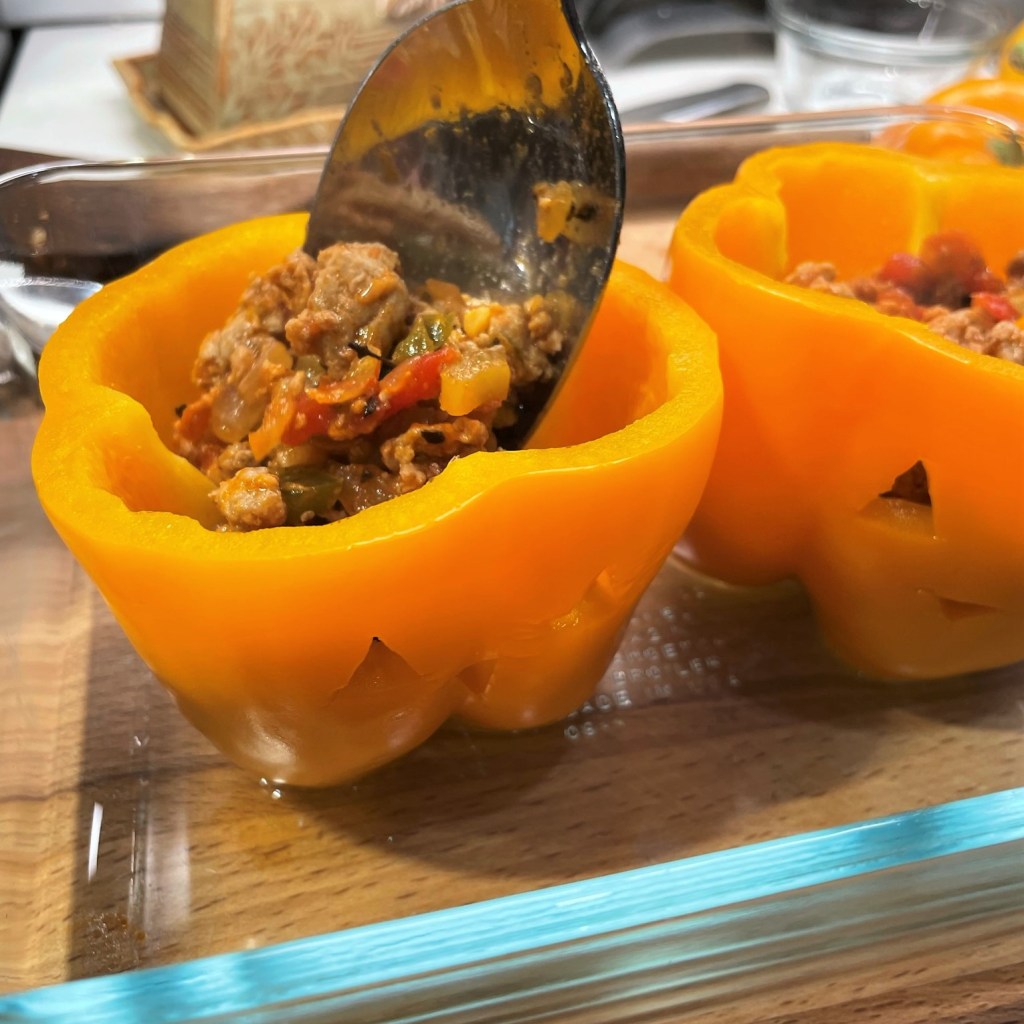
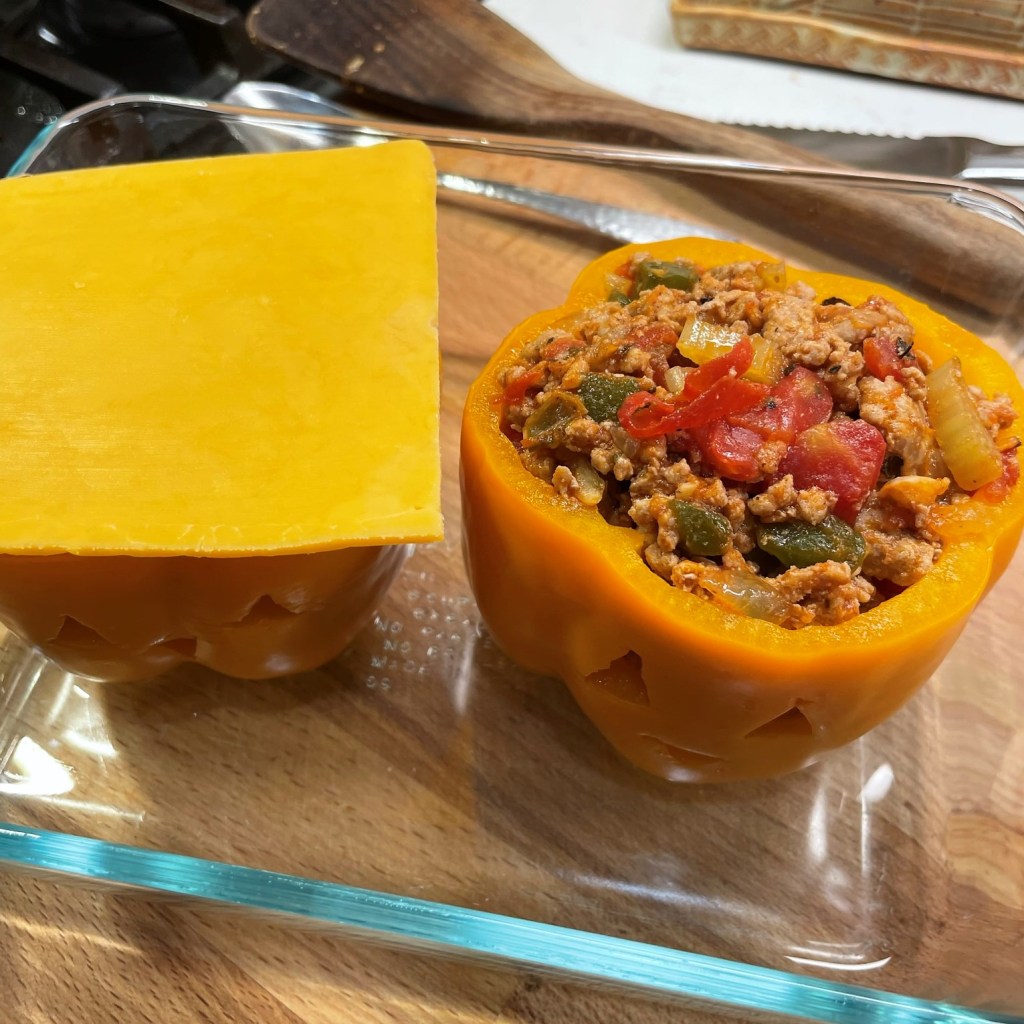
Spoon the filling into the peppers, lay a slice of sharp cheddar over the filling, and then reposition the pepper tops before sliding it into the oven. At this point, all the ingredients are fully cooked, so the peppers only need to be in the oven long enough to heat through, finish softening and melt the cheese.
Try to position the cheese so that it won’t melt into your peppers’ “eyes!”
Serve the peppers right away with a few spoonfuls of cooked rice, and get those kids costumed up for their night of fun!
This is a fun way to feed the little ones something on the healthy side before they go trick-or-treating for all that candy. Mix and match ingredients based on what the kids like.
Ingredients
4 orange bell peppers (choose them for shape and size, plus strong stems)
2 Tbsp. extra virgin olive oil
1/2 sweet onion, chopped
2 ribs celery, trimmed and chopped
1/2 green bell pepper, chopped
2 cloves garlic, smashed and minced
Salt and pepper to taste
1 tsp. salt-free seasoning (I used a combination of chili powder, cumin and paprika)
1 lb. fresh ground turkey (or other lean ground meat)
10 oz. can Rotel diced tomatoes (there are many heat levels; choose what’s right for you)
2 Tbsp. tomato paste
A pinch or two of dried oregano
4 slices sharp cheddar or other favorite melting cheese
Brown rice, for serving
Directions
Preheat oven to 350 F, with oven rack in center position.
Wash the bell peppers. Carefully cut the tops off the peppers, low enough to keep the stems intact. Remove seeds and membranes and place the peppers upside down in a microwave-safe dish. Add about an inch of water to the dish and microwave on high for 5 minutes, or longer if needed until peppers are somewhat softened. Set aside until cool enough to handle.
While the peppers are cooling, heat a large skillet over medium heat. Add oil to the pan and sauté onions, green bell pepper and celery for about 5 minutes, until softened. Add garlic, salt and pepper, plus salt-free seasoning of your choice. Cook another minute.
Crumble ground meat into the skillet, about half at a time so it doesn’t overcrowd the pan. When meat is no longer pink, add the Rotel tomatoes, tomato paste and dried oregano. Cook until mixture is bubbly, then turn off heat and cover the pan.
Use a sharp paring knife to carefully cut out triangle eyes and noses in each of the bell peppers (toss the bits into the pan with the rest of the filling).
Spoon the filling into the peppers. Arrange a slice of cheddar over each pepper, positioning the slices so that they will not melt to cover the eyes on the peppers. Replace the pepper tops and bake (uncovered) for 25 minutes, until heated through and cheese is melted. Serve immediately with brown rice.
What if everything we have always assumed about the Wicked Witch of the West turned out to be smear campaign, orchestrated by someone else, whose own reputation was at stake? What if the Wicked Witch was misunderstood, mischaracterized and scapegoated? What if she was driven to be wicked or what if she was never wicked at all?
These are all questions I have pondered, after my husband, Les, and I enjoyed seeing the touring performance of Wicked: The Untold Story of the Witches of Oz. Neither of us had seen or heard much about the story, which began as a book in 1995, and was adapted for the Broadway stage in 2003, ultimately skyrocketing into the $1 billion+ range in ticket sales. There has been talk for more than a decade about a live-action film based on the story, which remains to be finalized, but I have my fingers crossed!
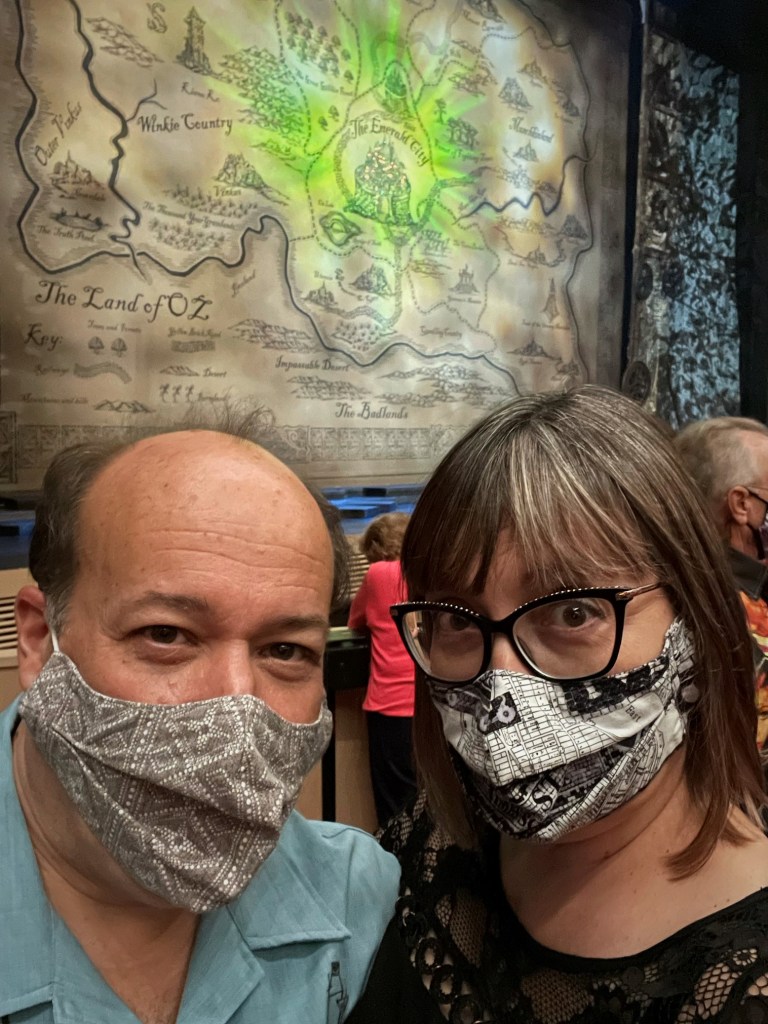
No recordings or photos were allowed during the performance, but the beautiful backdrop was perfect for selfies before the show!
The performance we attended in Greensboro, N.C. was delightful, funny, magical and thought-provoking. The set decoration and costumes were breathtaking, and the music was simply spectacular! I had often heard the tale of Wicked described as a “prequel” to The Wizard of Oz, but we found it to be more departed from that classic, beloved story—perhaps more of a re-telling or an alternate perspective with more context. The tale revolves around the unexpected early connection between Glinda and Elphaba (see?—the wicked witch actually had a name), their rivalry in magic school and in a love triangle, and the final straw that became the wedge to drive them apart. Well, sort of.
There is a flashy scene near the middle of Wicked, when Glinda and Elphaba first discover the glitz and glamour of the Emerald City, and Glinda remarks that it’s “all very Oz-mopolitan!” When Les and I left the theatre, I removed my mask and said, “You know I’m gonna have to make a Wicked cocktail, right?”
I will not present any spoilers, in case you have not seen the play, but I will say that my cocktail is a very slight riff on a classic drink called “The Last Word,” and there’s a reason (other than the color) that I chose this drink. The story of Wicked is itself a riff on a classic, and in that magical tale, it is Elphaba, the perhaps-not-so-wicked witch, who has the last word, and that is what left me with all the questions I pondered at the beginning of this post.
Now, about this green drink. 😉
It’s a shimmery, green, dramatic version of a classic Prohibition-era cocktail. Perfect for Halloween or any other time you are feeling a little “witchy.”
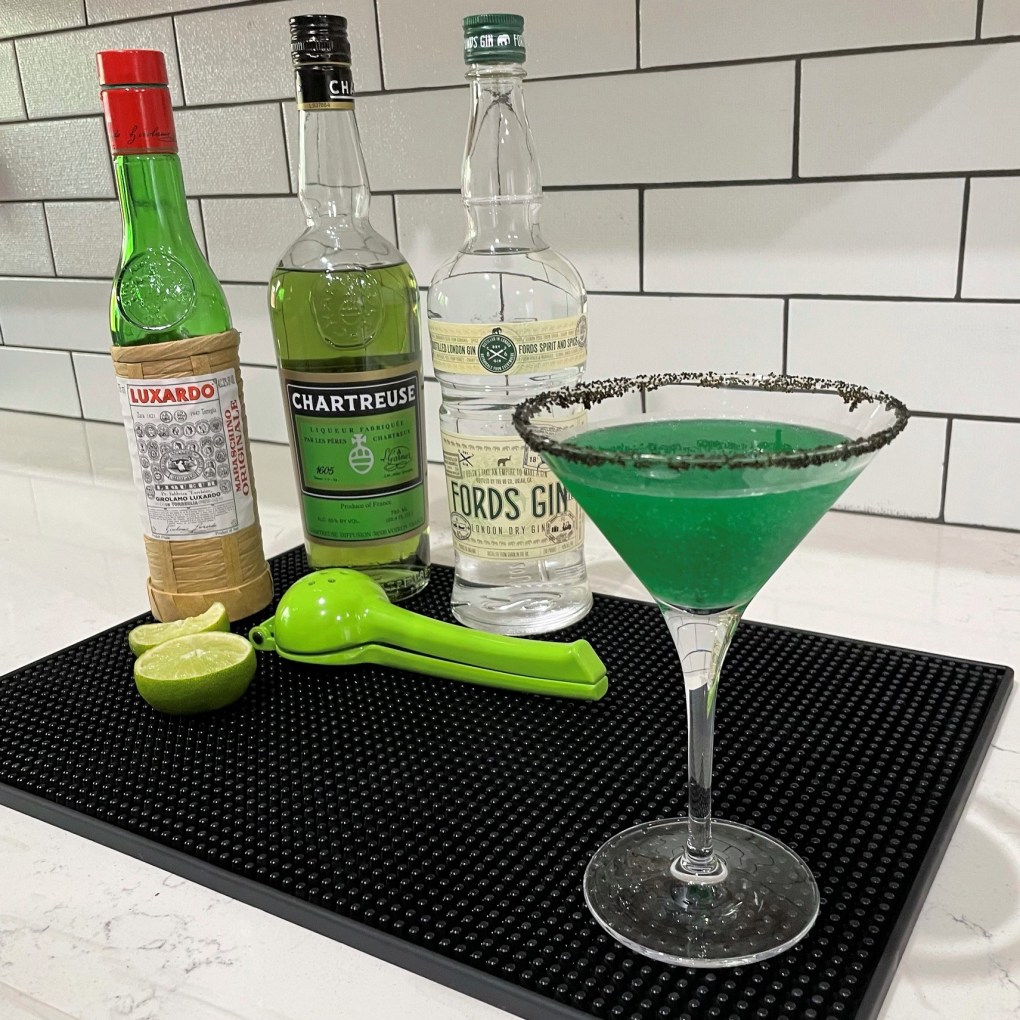
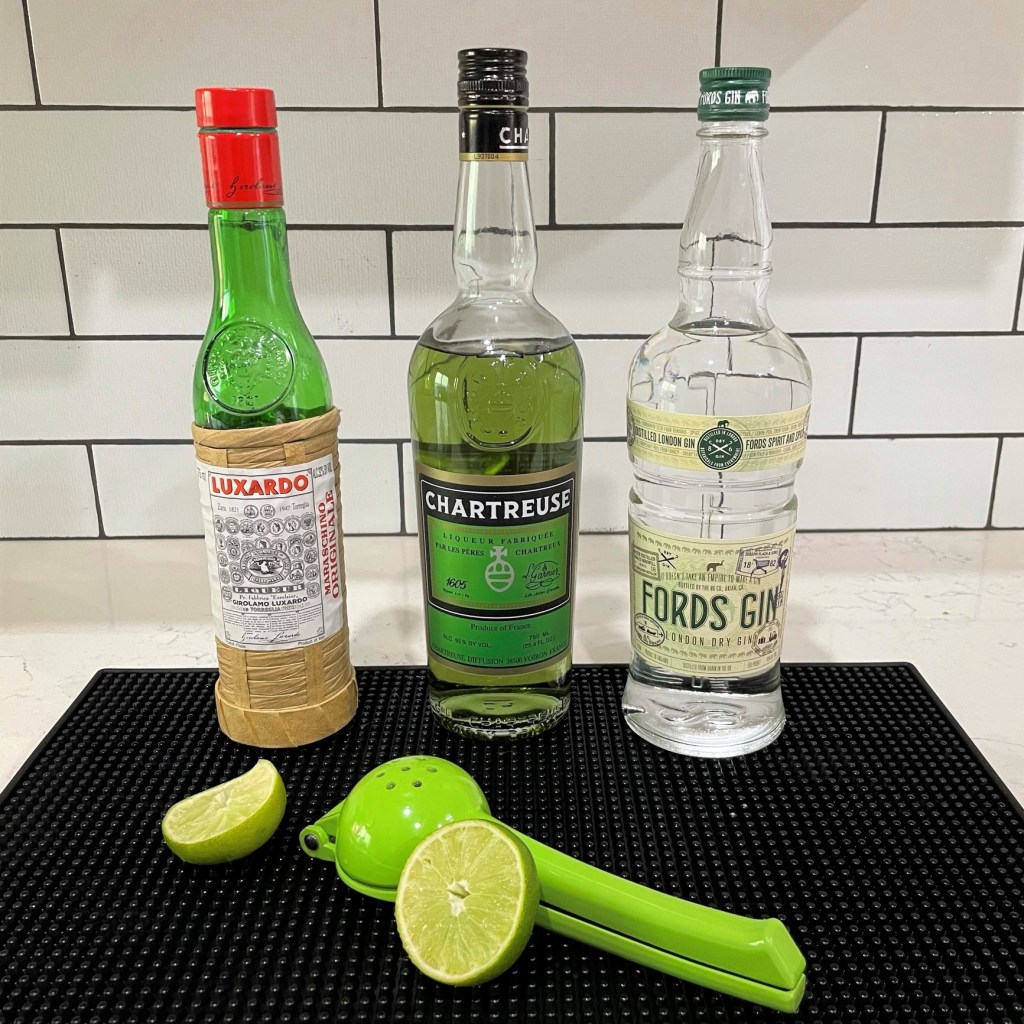
The original drink, The Last Word, was a Prohibition-era classic—made with equal parts gin, green Chartreuse, maraschino liqueur and freshly squeezed lime juice—and it is all at once herbal, sweet, citrus-y and complex. I have not altered the recipe of The Last Word; rather, I have pushed it into “wicked” territory by use of three simple but dramatic special effects.
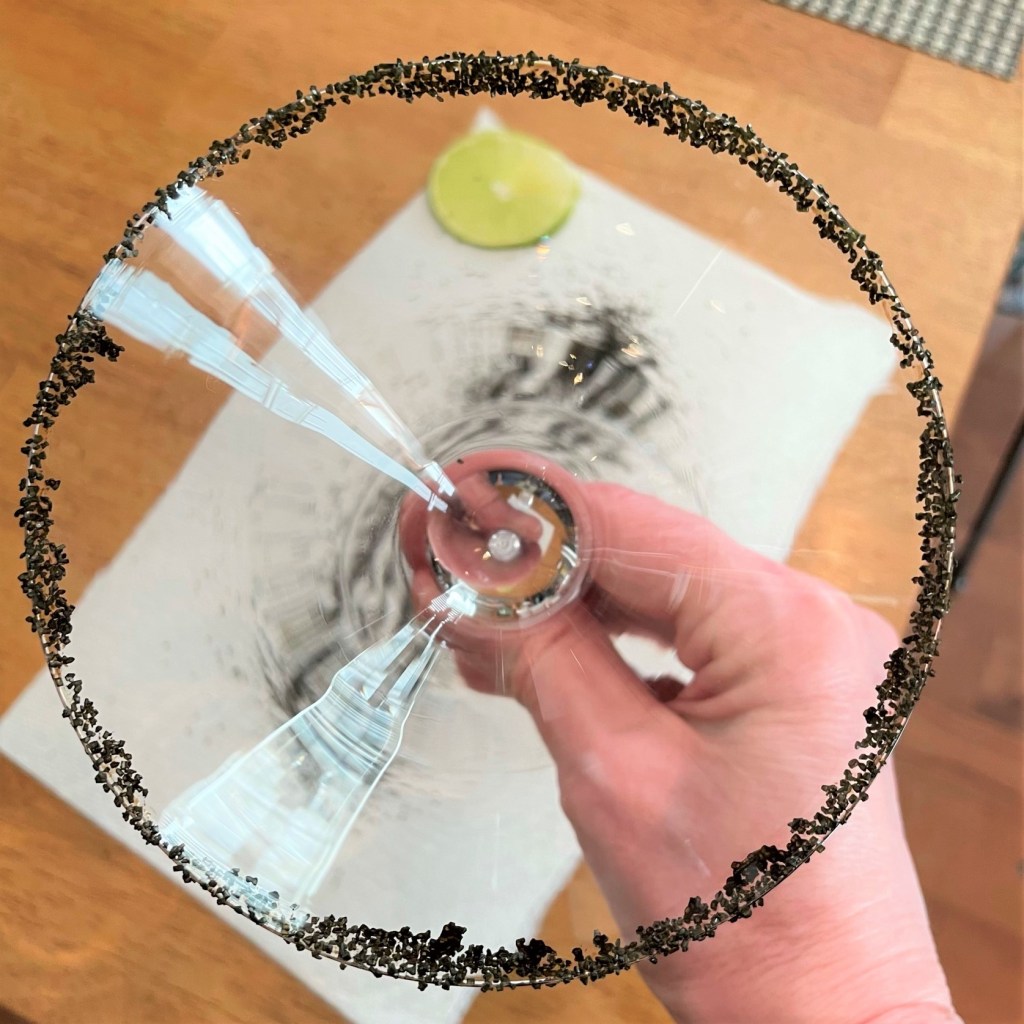
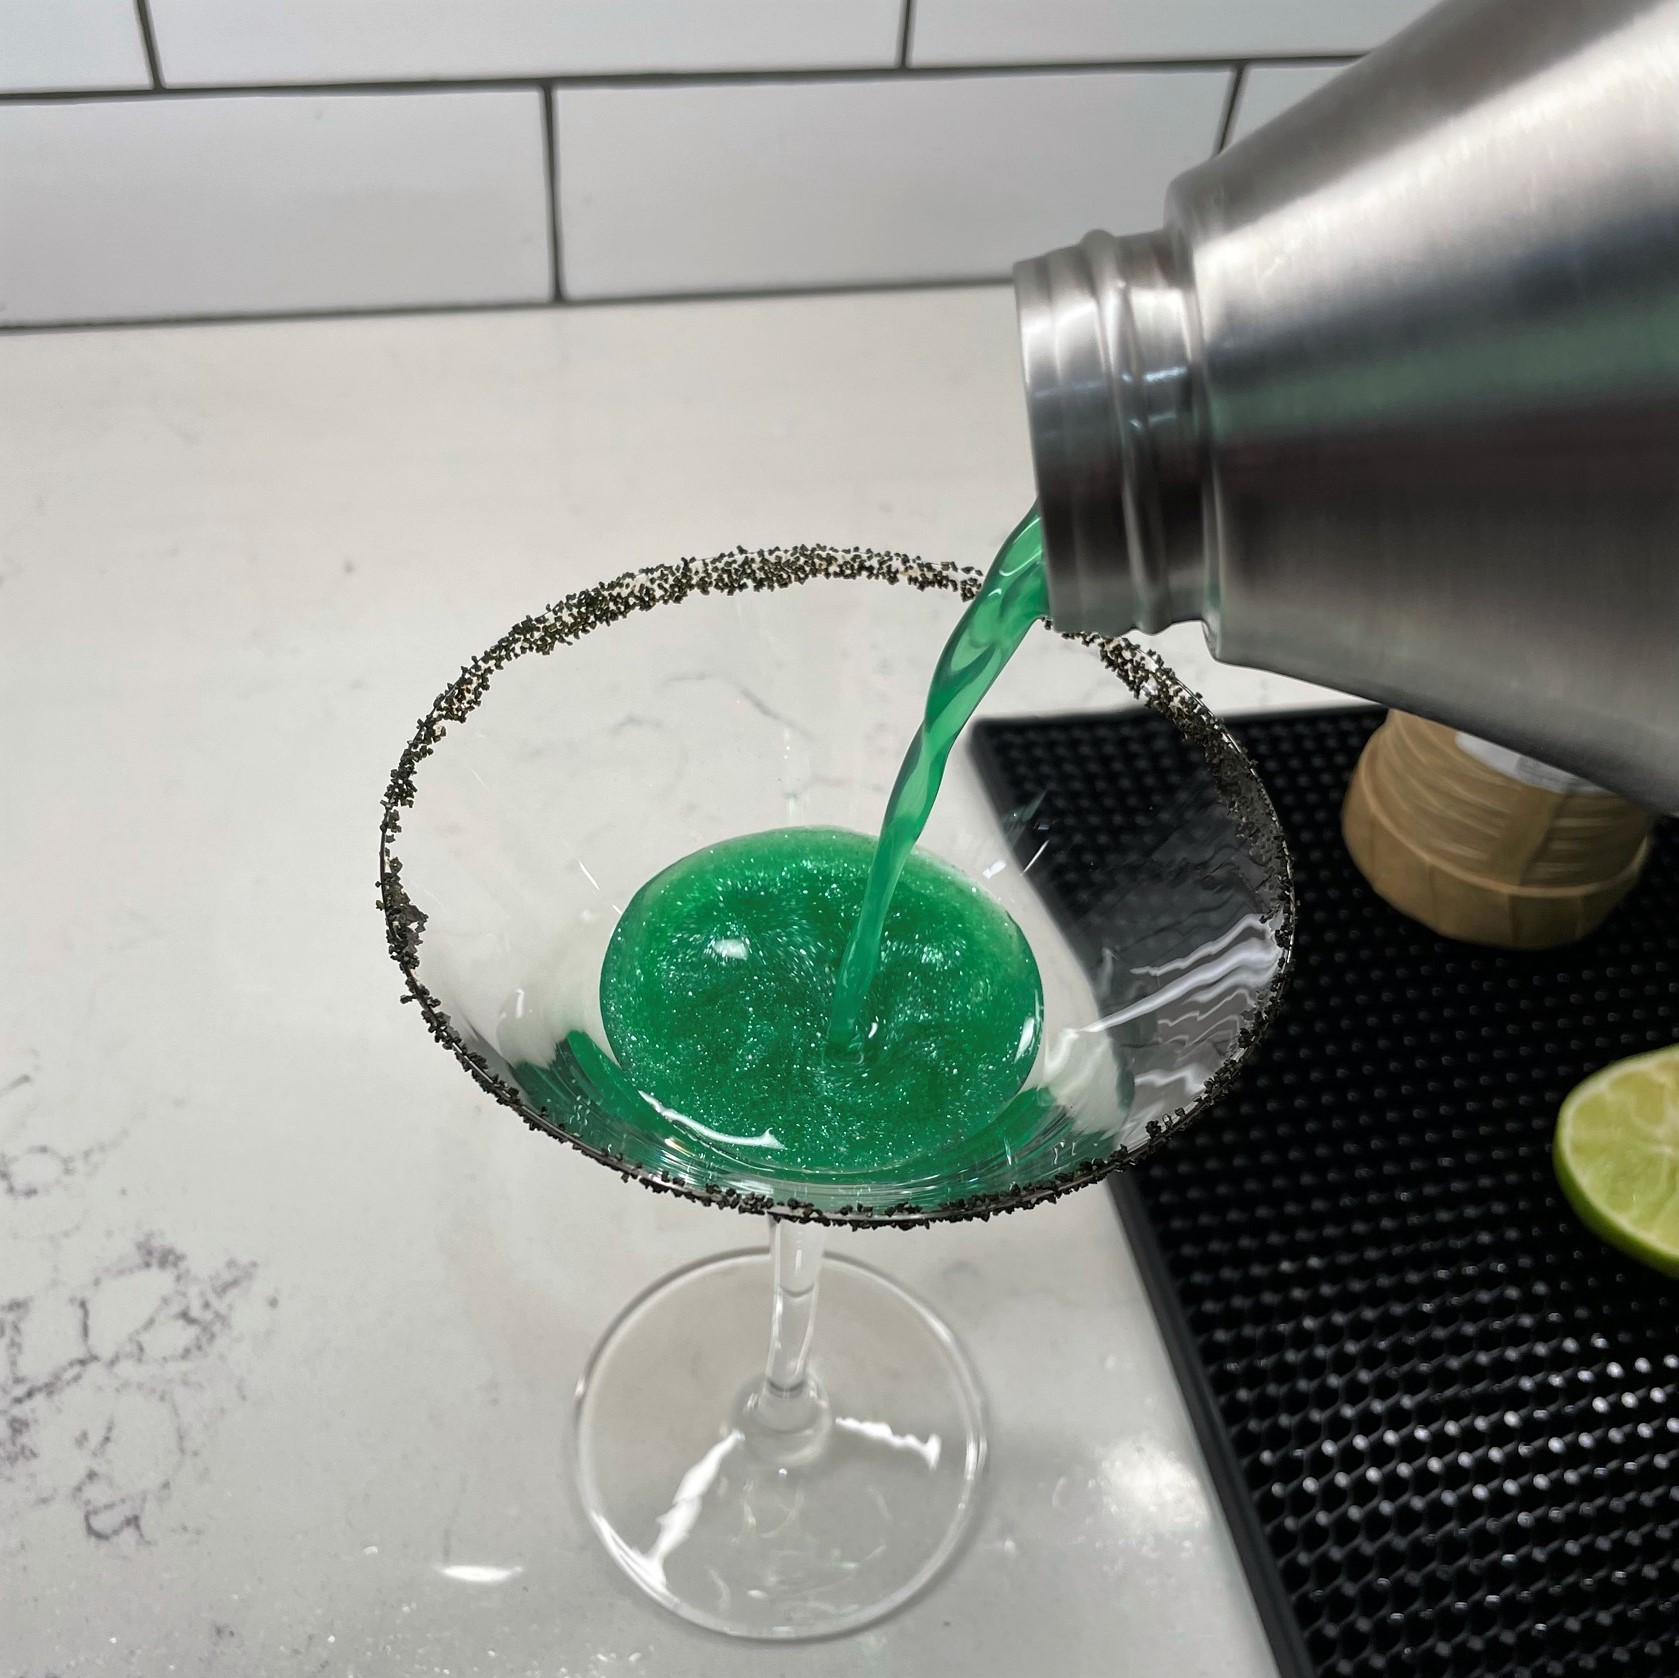
A rim of sparkly black sugar dresses up the glass and gives it a slight feel of wickedness.
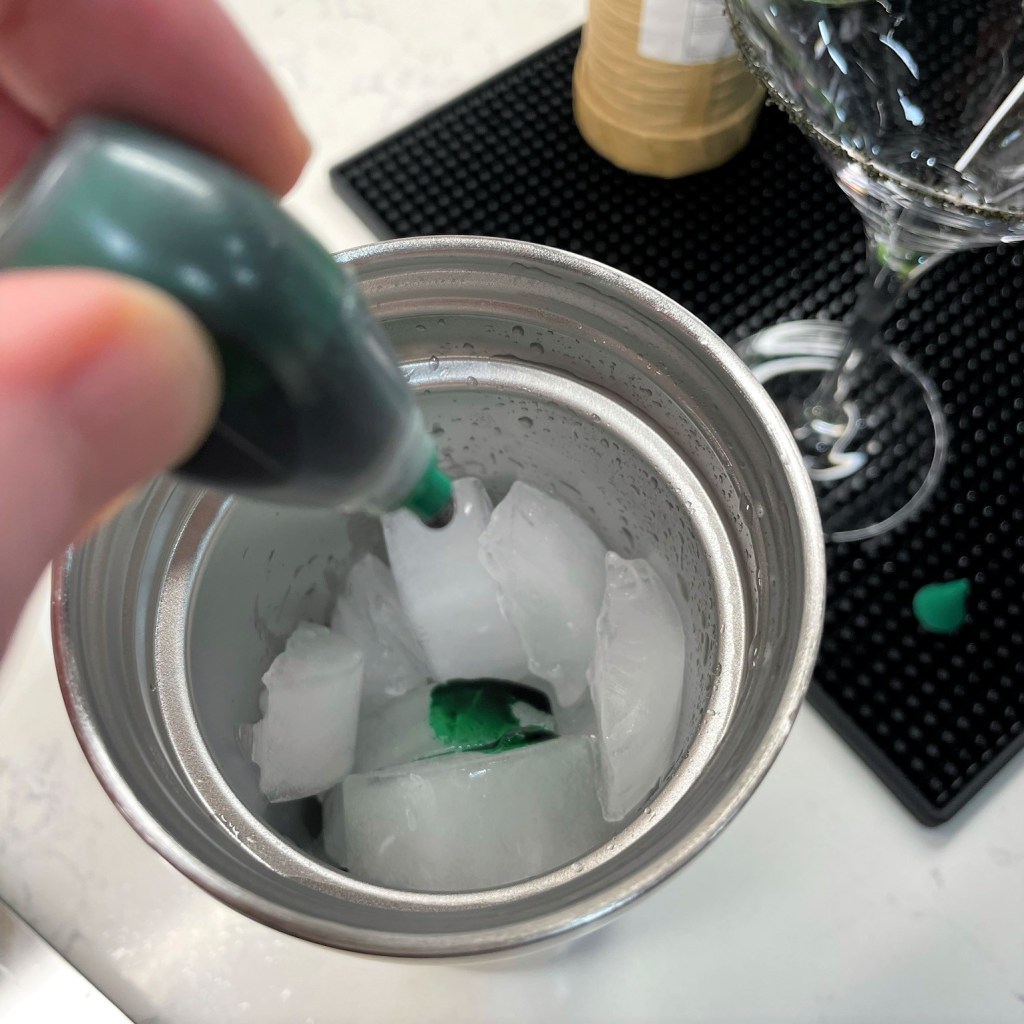
A drop (or maybe two) of green food coloring, in honor of Elphaba and her beautiful green skin.
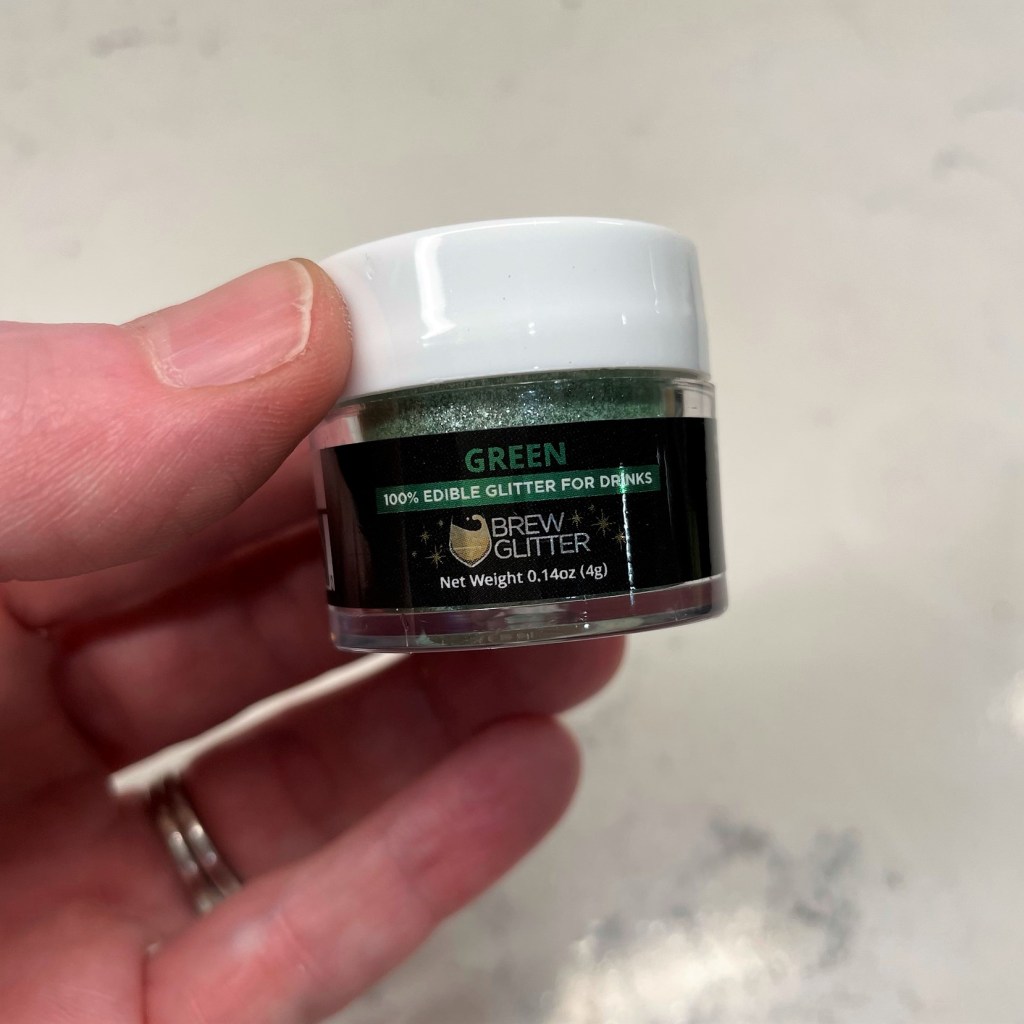
Edible green glitter makes this cocktail fun and magical.
And for those special effects, I have renamed my version “Oz-mopolitan.” Enjoy!
Equal parts of gin, Chartreuse, maraschino liqueur and lime juice make up the classic cocktail called “The Last Word.” You are also getting a sneak preview of my new kitchen in these images!
Ingredients (makes one cocktail)
3/4 oz. dry gin
3/4 oz. green Chartreuse liqueur* (see notes)
3/4 oz. maraschino liqueur*
3/4 oz. freshly squeezed lime juice
Special effects
Black sugar sprinkles*
Pearl green edible glitter*
Green food coloring
*Notes
Chartreuse is a French liqueur, and there are two varieties of it—yellow and green. The green version (used in this drink) is strong, bold and herbaceous, almost medicinal on its own. For the most part, it is enjoyed as part of a cocktail rather than as a cordial.
Maraschino liqueur is also generally used as a mixer with an anchor spirit, such as vodka or gin. It is not as “cherry flavored” as you might expect, but it does lend a tart cherry accent to a cocktail. Luxardo makes a terrific version of this liqueur.
The black sugar and edible shimmer dust I used for this were very easy to find on Amazon, but you might also check the cake decorating section of a well-stocked craft store, such as Michael’s. Be sure the products you choose are clearly marked as “food grade” or “edible.”
Instructions
Run a slice of lime around the rim of the glass, then ROLL it along the outside edge only. If you “dip” the glass into the sugar, bits will fall into your drink.
Sprinkle a very small amount, not quite 1/8 teaspoon, of edible glitter into the bottom of the glass.
Combine the cocktail ingredients, plus the green food coloring. Add ice and shake 20 seconds. Pour the drink directly onto the glitter, and let the sparkling begin!
After several minutes, the edible glitter will settle somewhat. Use a cocktail straw to swirl and reactivate the shimmer. 🙂
Prepare a martini or coupe glass by swiping a slice of lime all the way around the rim. Sprinkle black sugar onto a clean paper towel and roll the outside rim of the glass over the sugar, repeating the roll as needed for full coverage. It’s best to do this several minutes ahead, giving the sugar time to “set up” on the rim of the glass.
Combine the cocktail ingredients in a shaker, add ice and a drop or two of green food coloring. Shake vigorously for about 20 seconds.
Sprinkle a small amount (I used just shy of 1/8 teaspoon) of edible shimmer dust into the bottom of the rimmed glass.
Strain the cocktail into the glass and watch the shimmer dust create a gorgeous, magical swirl!
Here’s another grown-up beverage offering for Halloween week, and my series of “spooky” cocktails. I realize that not everyone enjoys the taste of bourbon or other liquors, and I’m just beginning to explore the wide array of cocktails that are made with wine and beer. One that comes up frequently in my Pinterest feed is a “snakebite,” which is a layered cocktail made of hard cider and lager or stout beer.
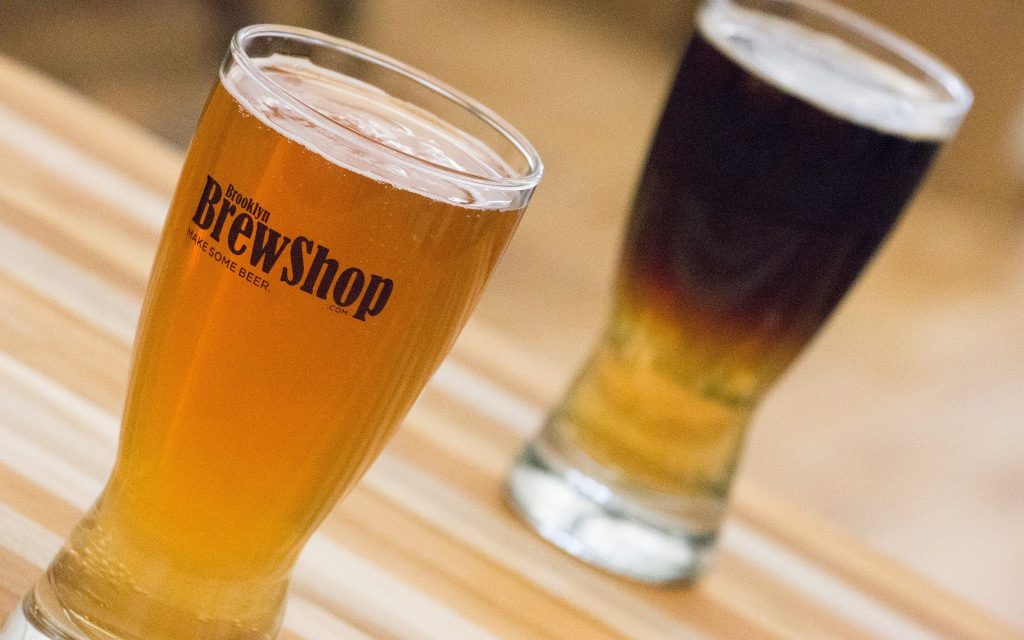
The color of a “snakebite” drink depends on whether you layer a lager beer or a stout over the hard cider.
(image from brooklynbrewshop.com)
It looks cool, like a classic black and tan (or a tan and tan, depending on the type of beer), but the fermented apple base gives it a distinctly tart seasonal flavor, and that’s what I wanted to emphasize for my Halloween drink series. I thought, “what if I take that seasonal aspect to the nth degree by mixing it with my favorite seasonal beer?”
If you missed my earlier post about this brew (Hello, Pumking!) you can revisit that for proper introduction to what is, in my opinion, the BEST pumpkin ale ever, and I’m not just saying that because we were born in the same part of upstate New York. My opinion is shared by enough other people that Pumking’s maker, Southern Tier Brewing, has expanded the brand to include a nitro version, a cold brew version and even a small batch whiskey. The newer offerings aren’t readily available in my part of North Carolina, but I’ll keep loving original Pumking until the shelves go bare. Then I’ll wait patiently until next autumn, the same way Linus stood guard in the pumpkin patch, waiting for the arrival of the Great Pumpkin.
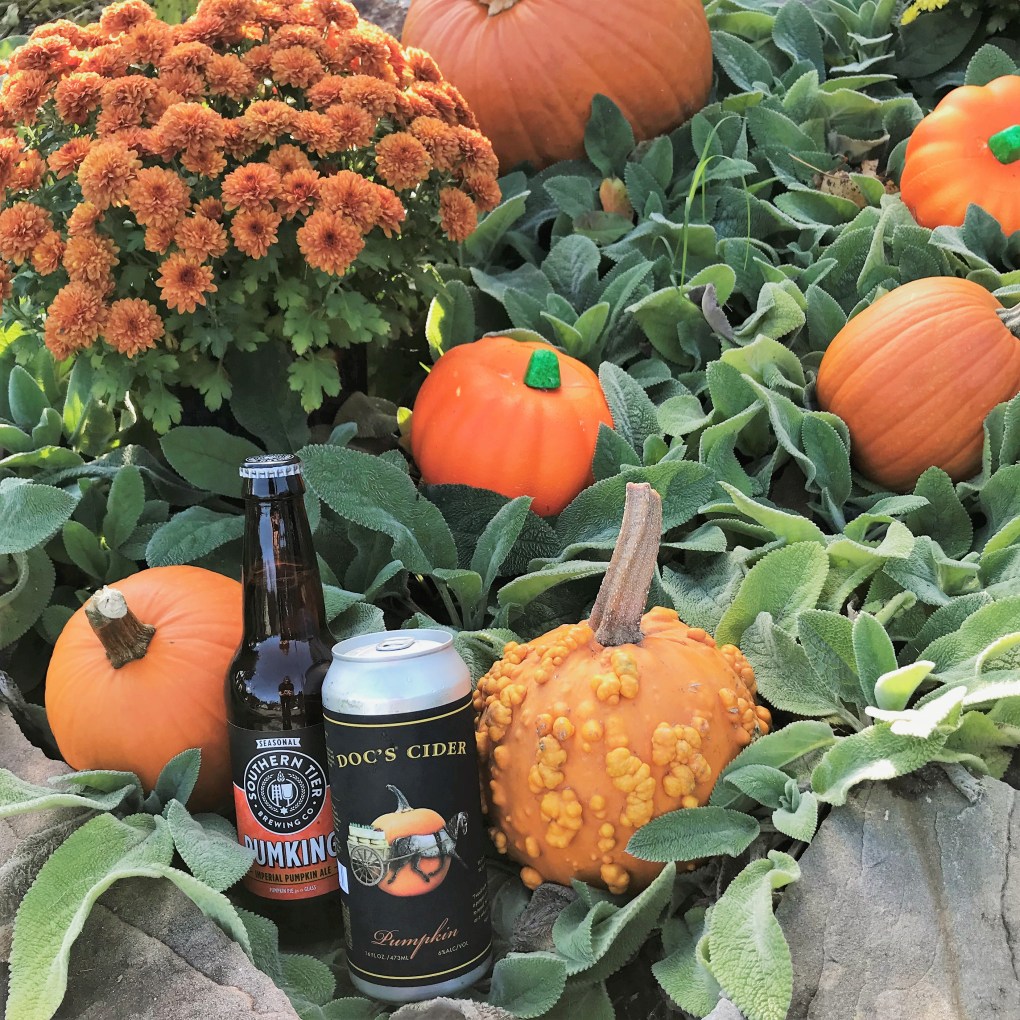
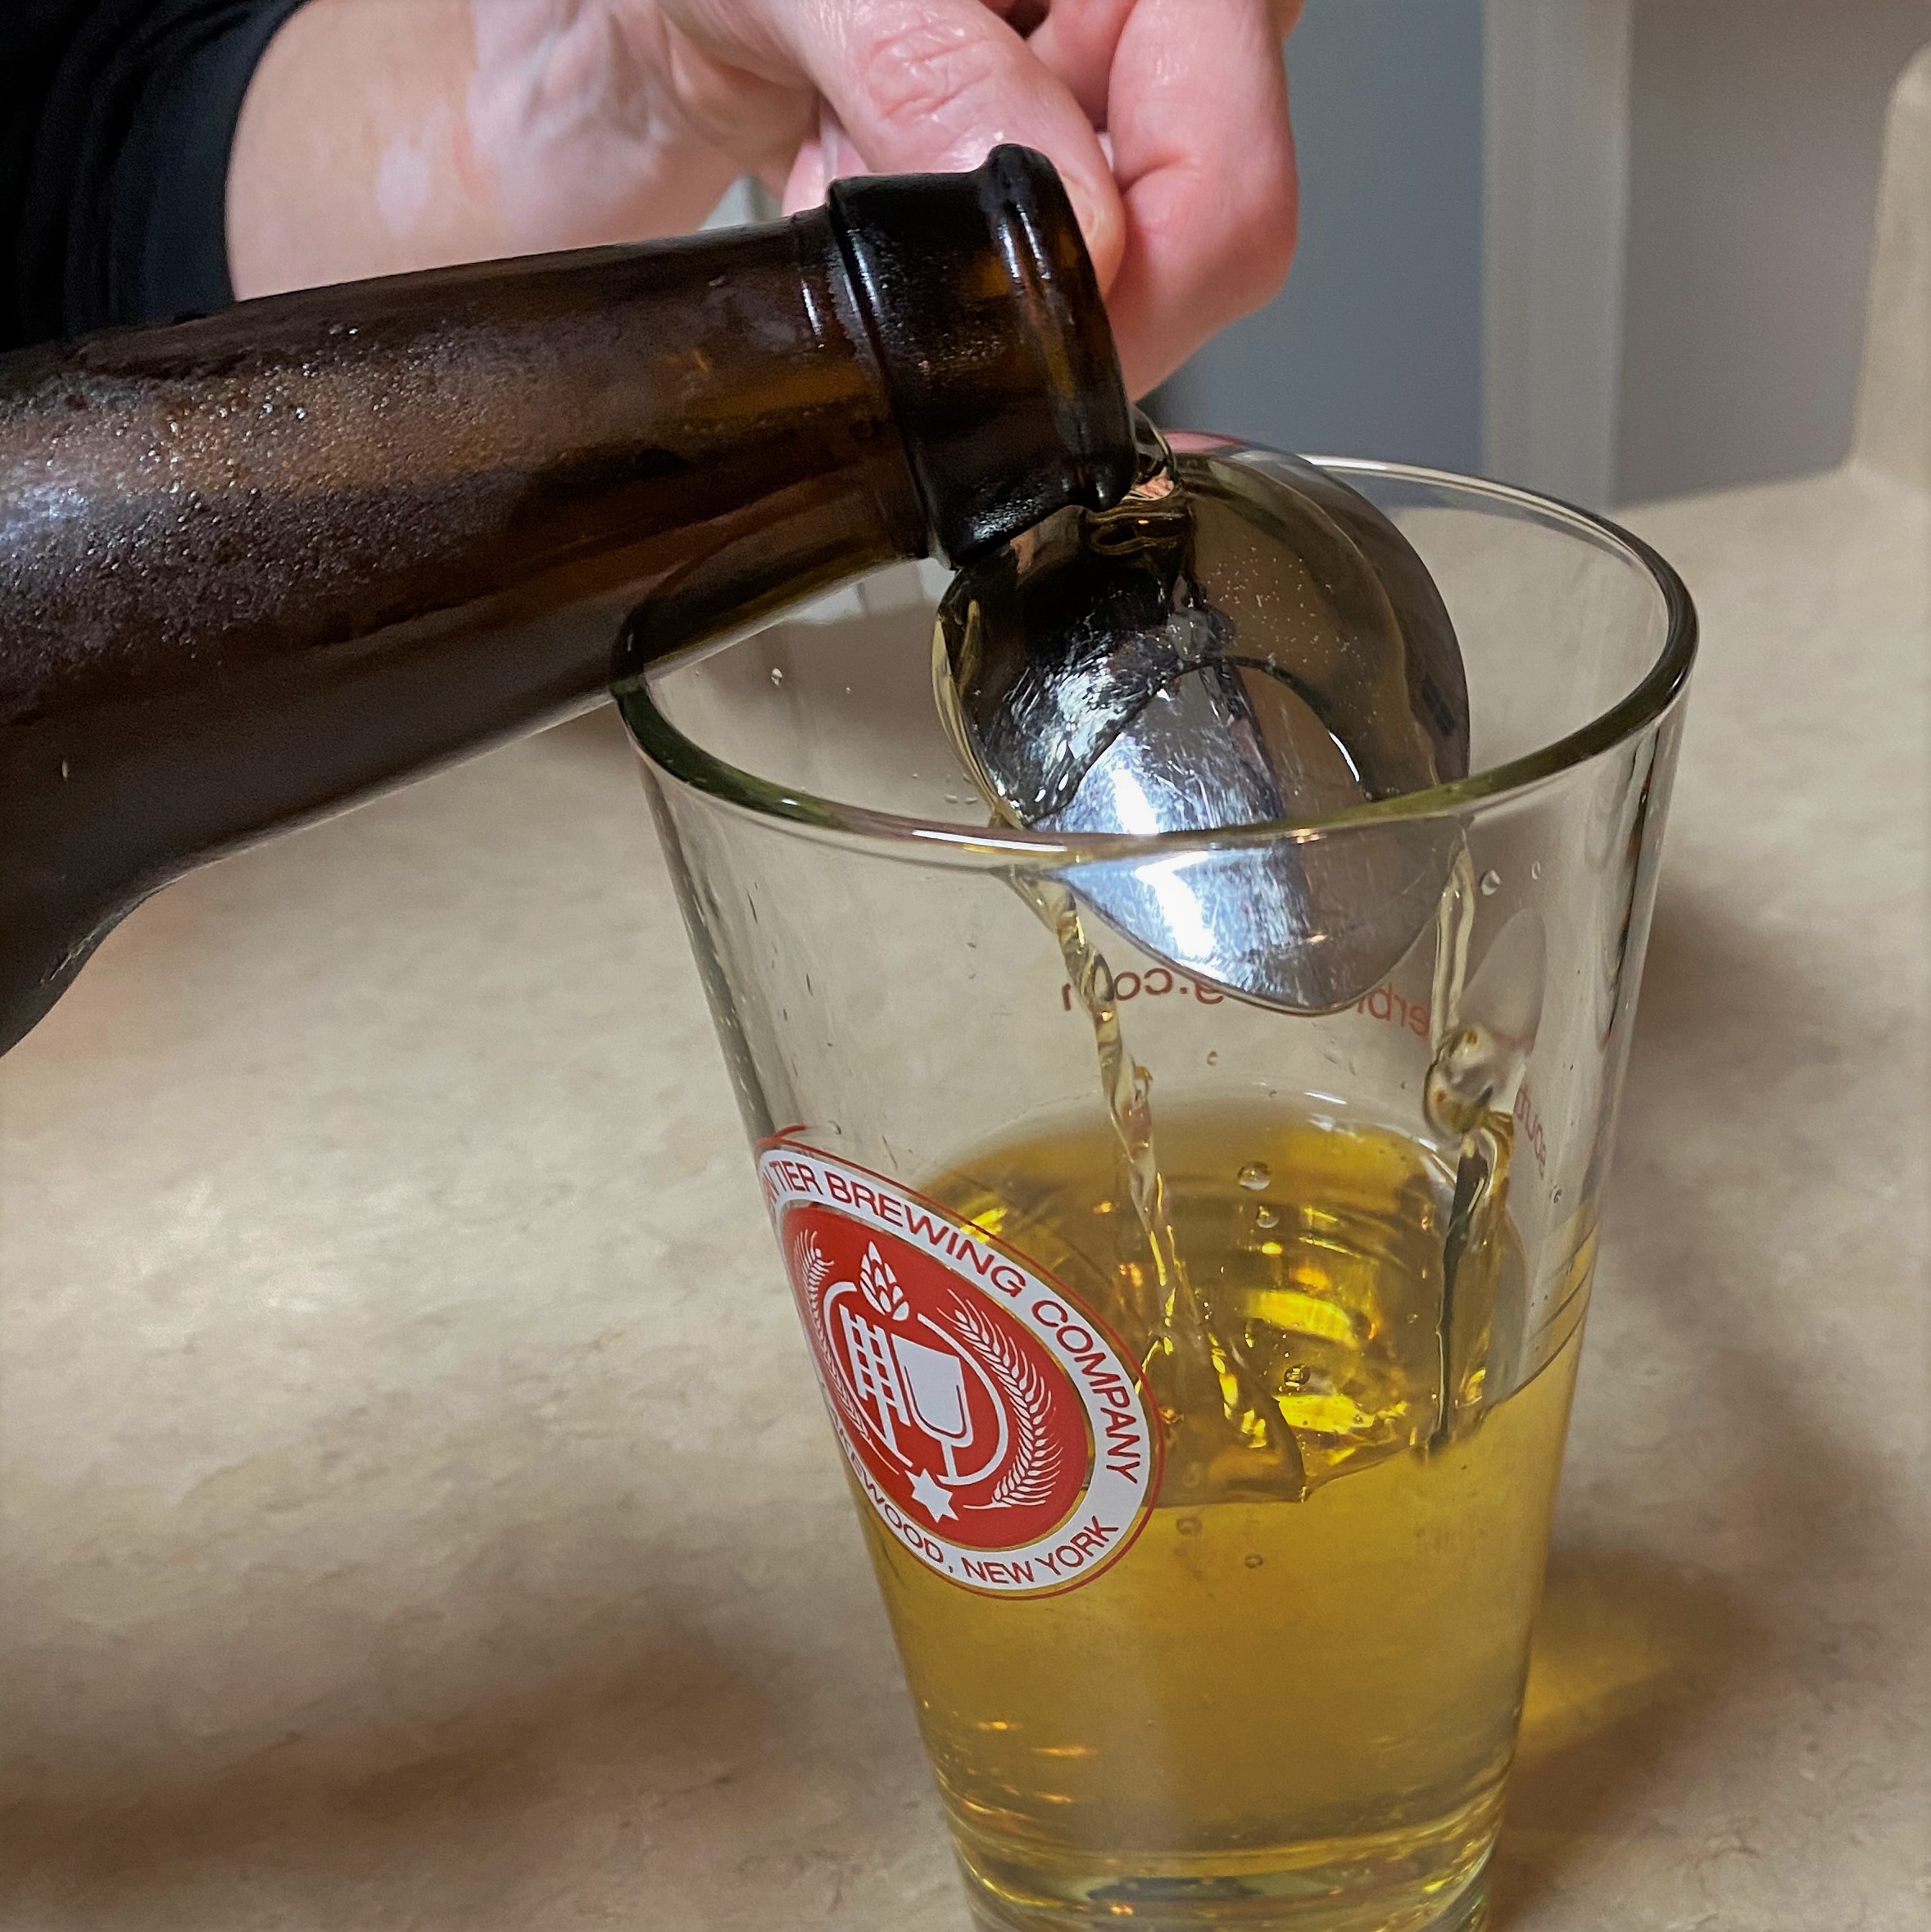
For my Halloween version of a snakebite, I’ve layered the Pumking over a hard cider, but I wasn’t satisfied with any old hard cider. Nope, I tripped down the craft aisle until I found one that is also enhanced with pumpkin and spice. I found it, of course, in the pumpkin spice capital of everywhere, Trader Joe’s.
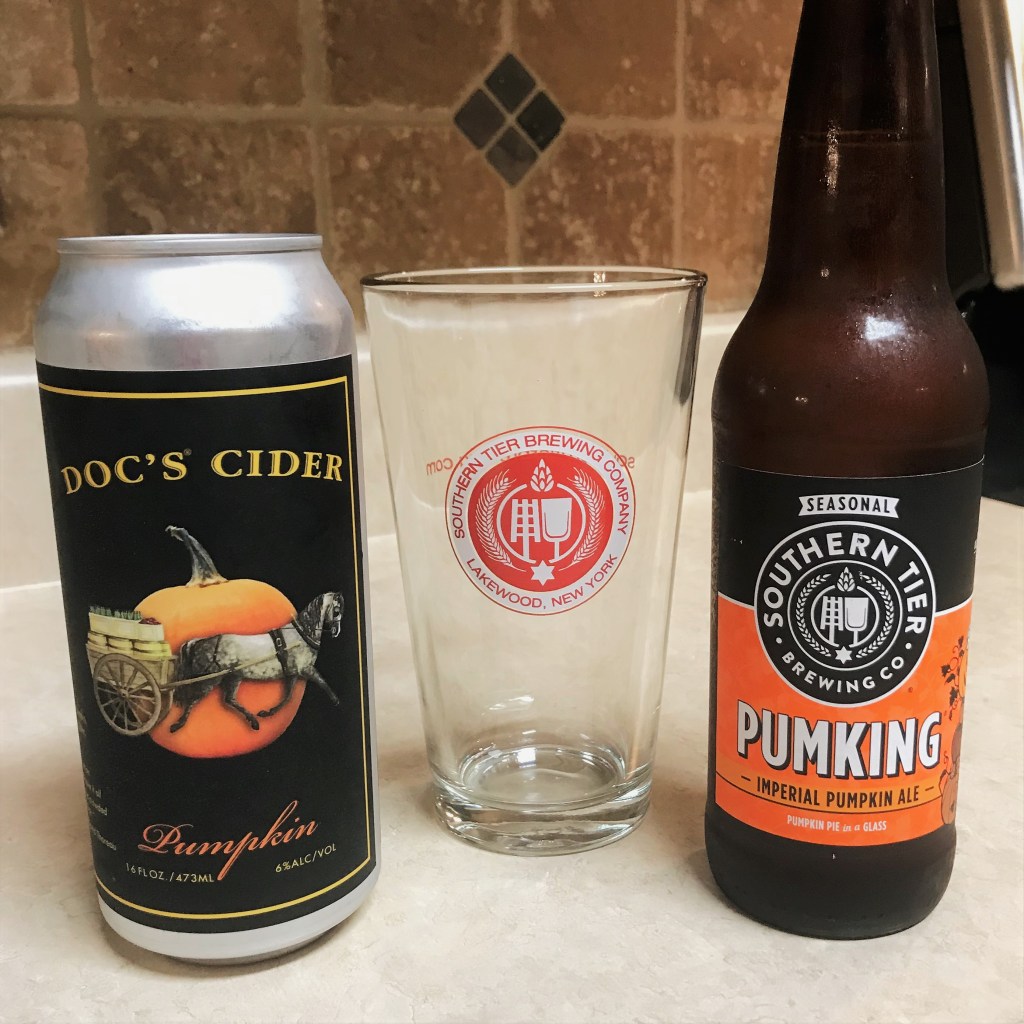
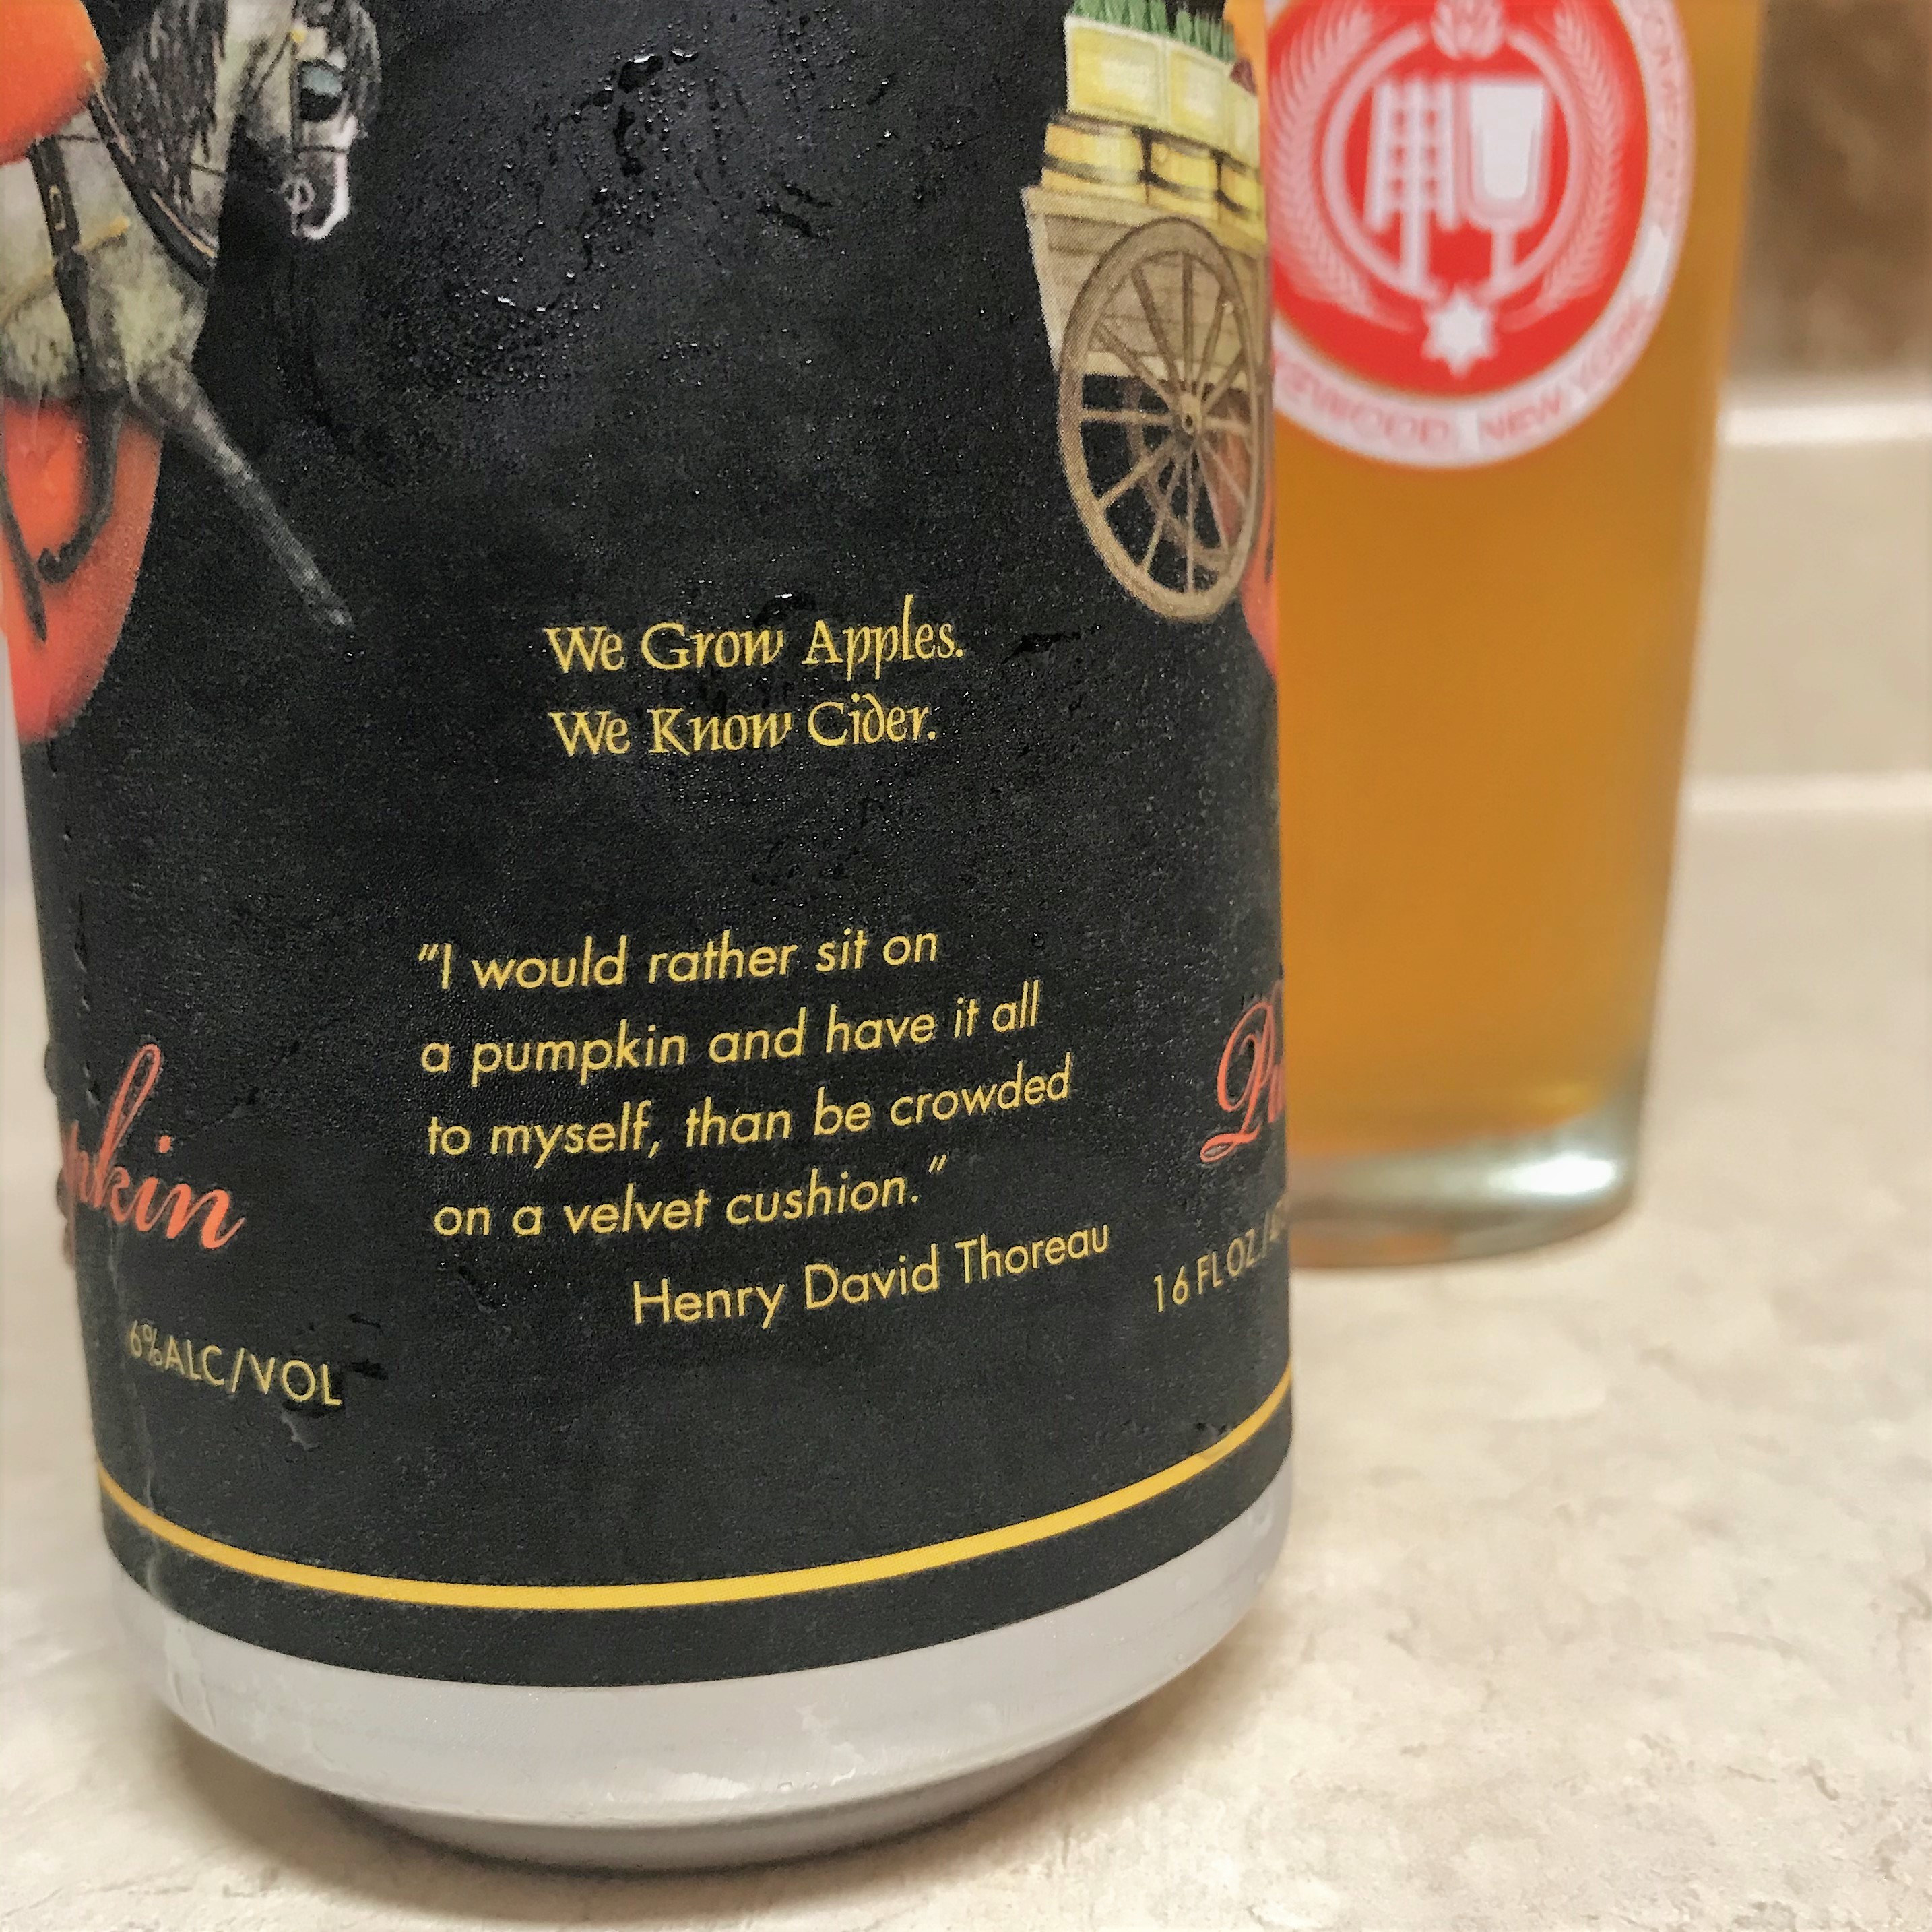
Doc’s Cider hails from another part of upstate New York, and this pumpkin spiced version is delightfully bright and crisp. My beloved Pumking, of course, is from Southern Tier Brewing Co.
Ingredients
6 oz. pumpkin spice hard cider
6 oz. Pumking (or other pumpkin ale, if you must)
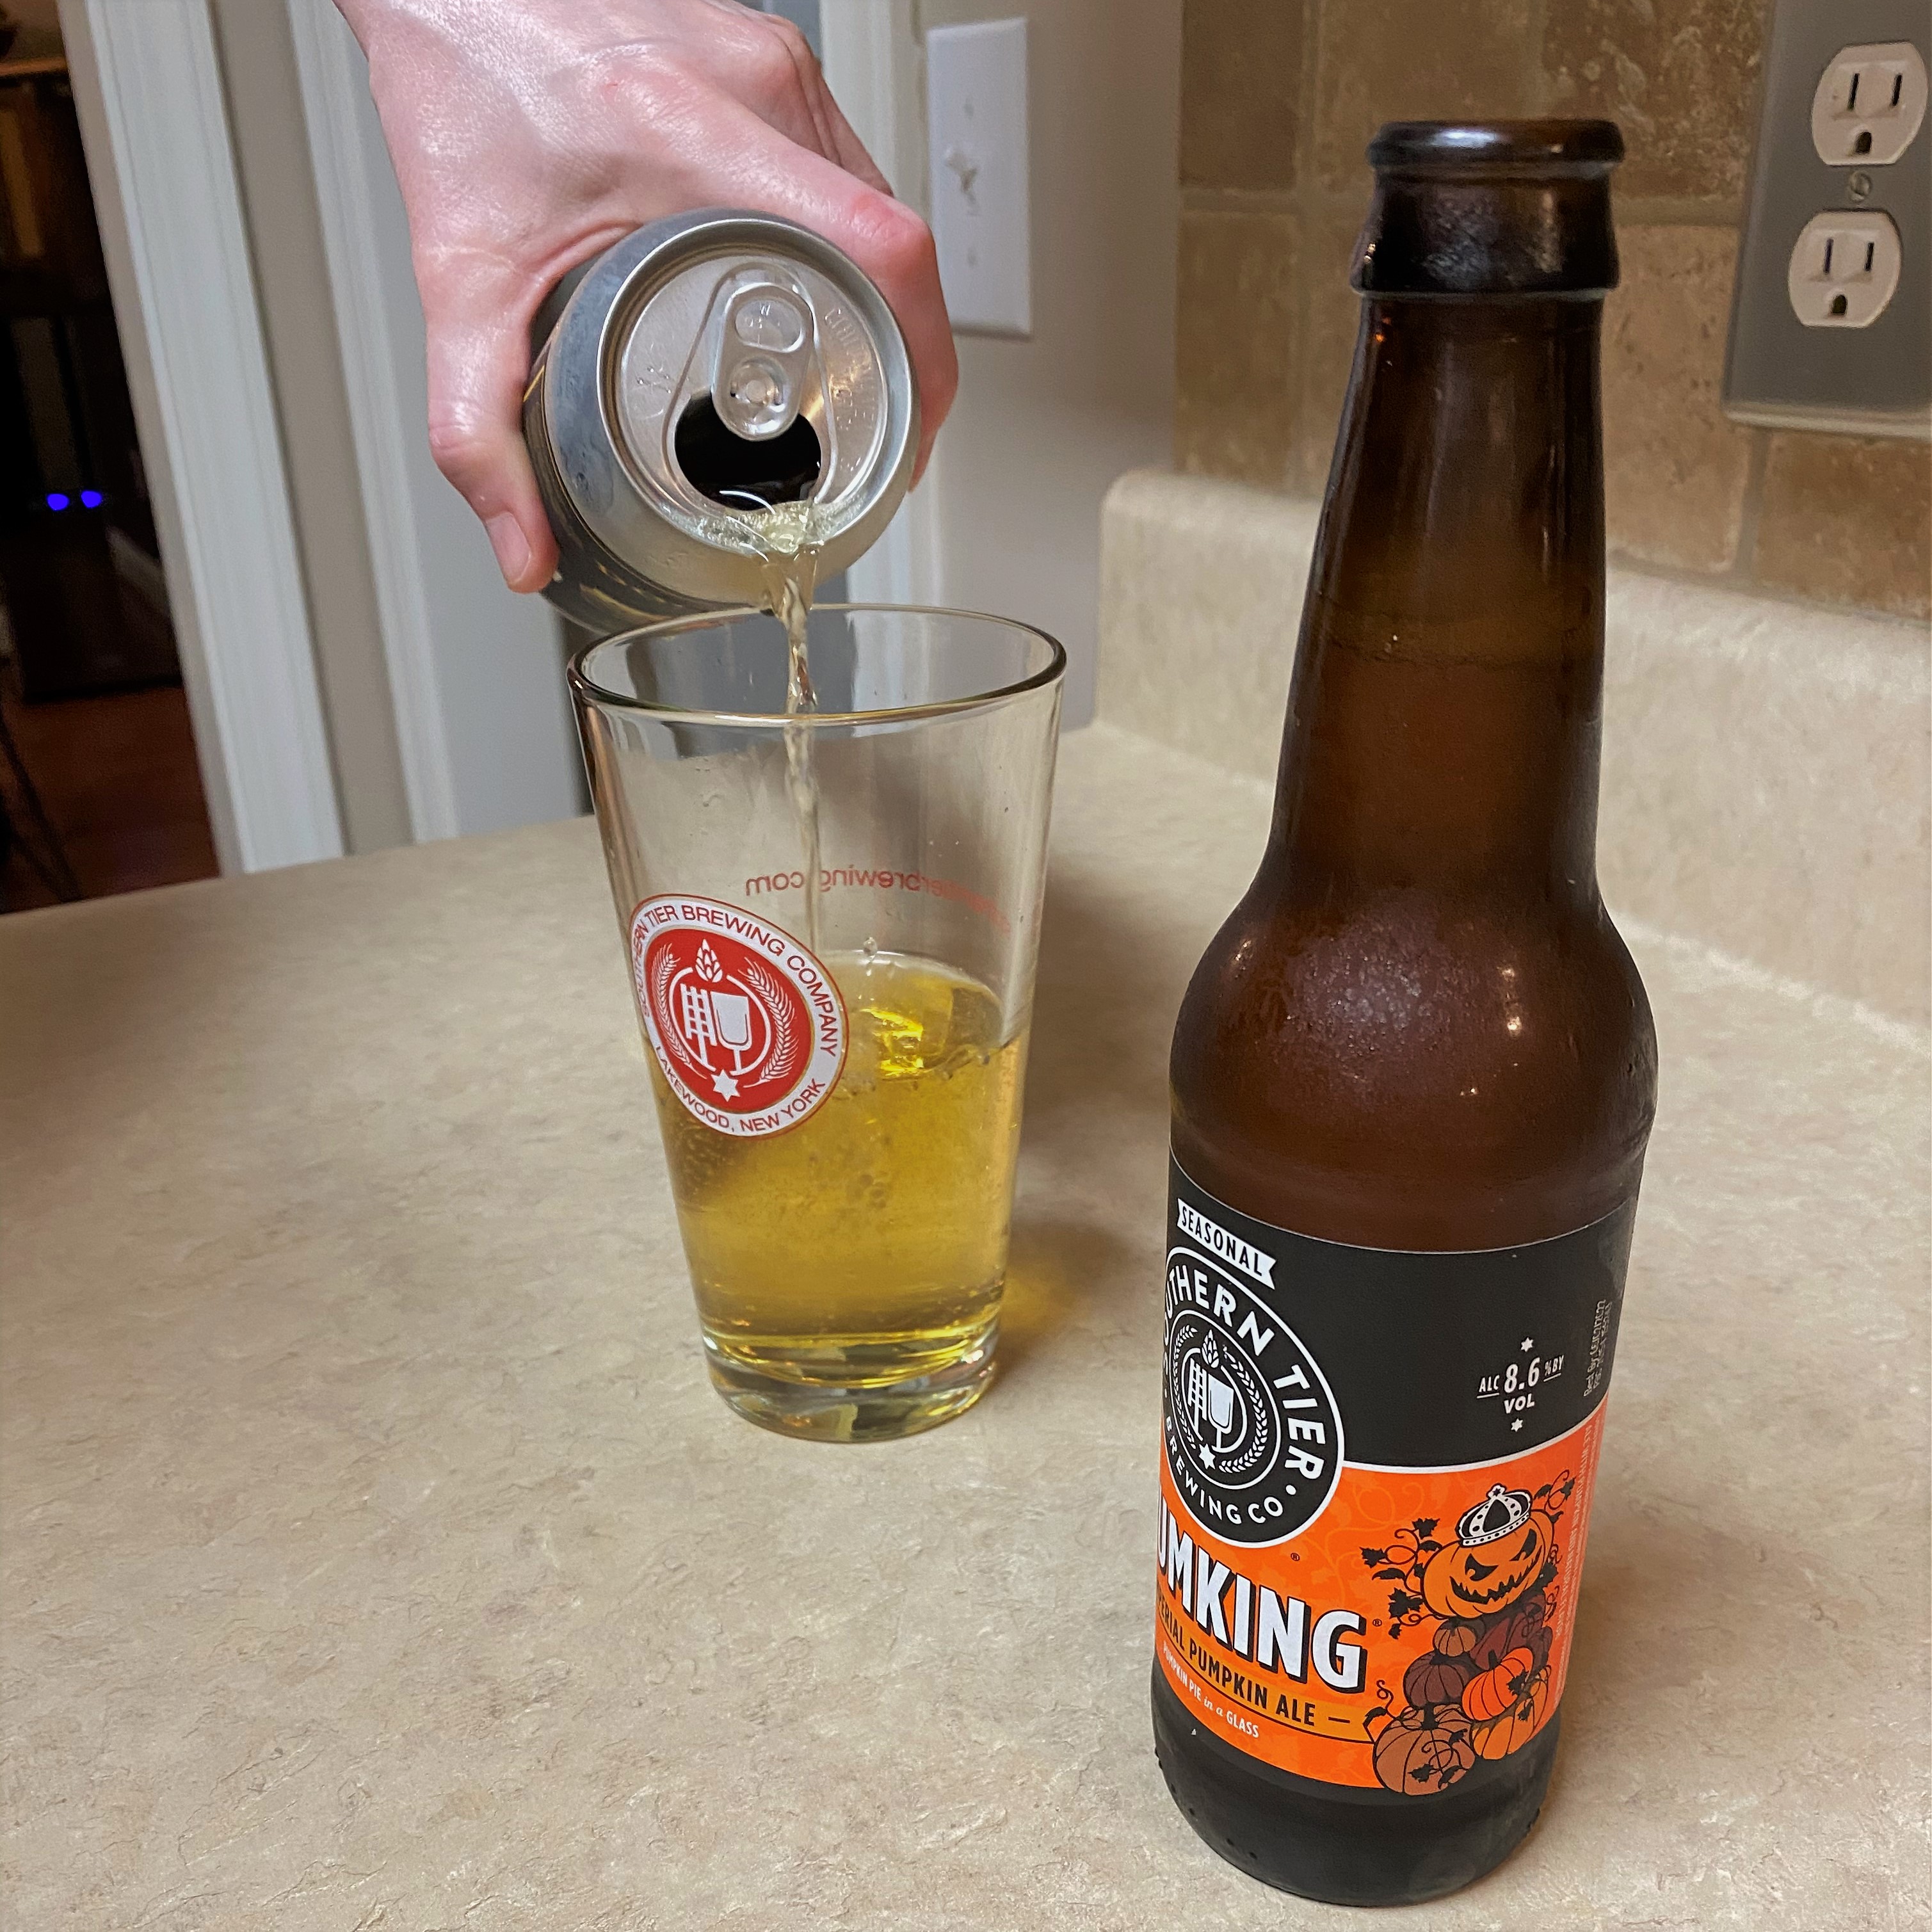
Layering a beer drink is easy to do, but it only works if the two ingredients have different specific gravity weight. In the classic drink, it works because Guinness ale is dry and light so it hovers neatly over the sweeter cider. Layering is not really necessary for my version of this drink, given that the cider and Pumking are virtually the same color anyway. Give it a try if you’d like (I’ll show you how in the slideshow), or just pour them in together. Either way, the resulting blend of tart, crisp cider and creamy, spicy ale is something quite special and it goes down very easy, but watch your step—as the name implies, these guys will definitely sneak up on you!
Fill half the pint glass with the hard cider. So far, so good.
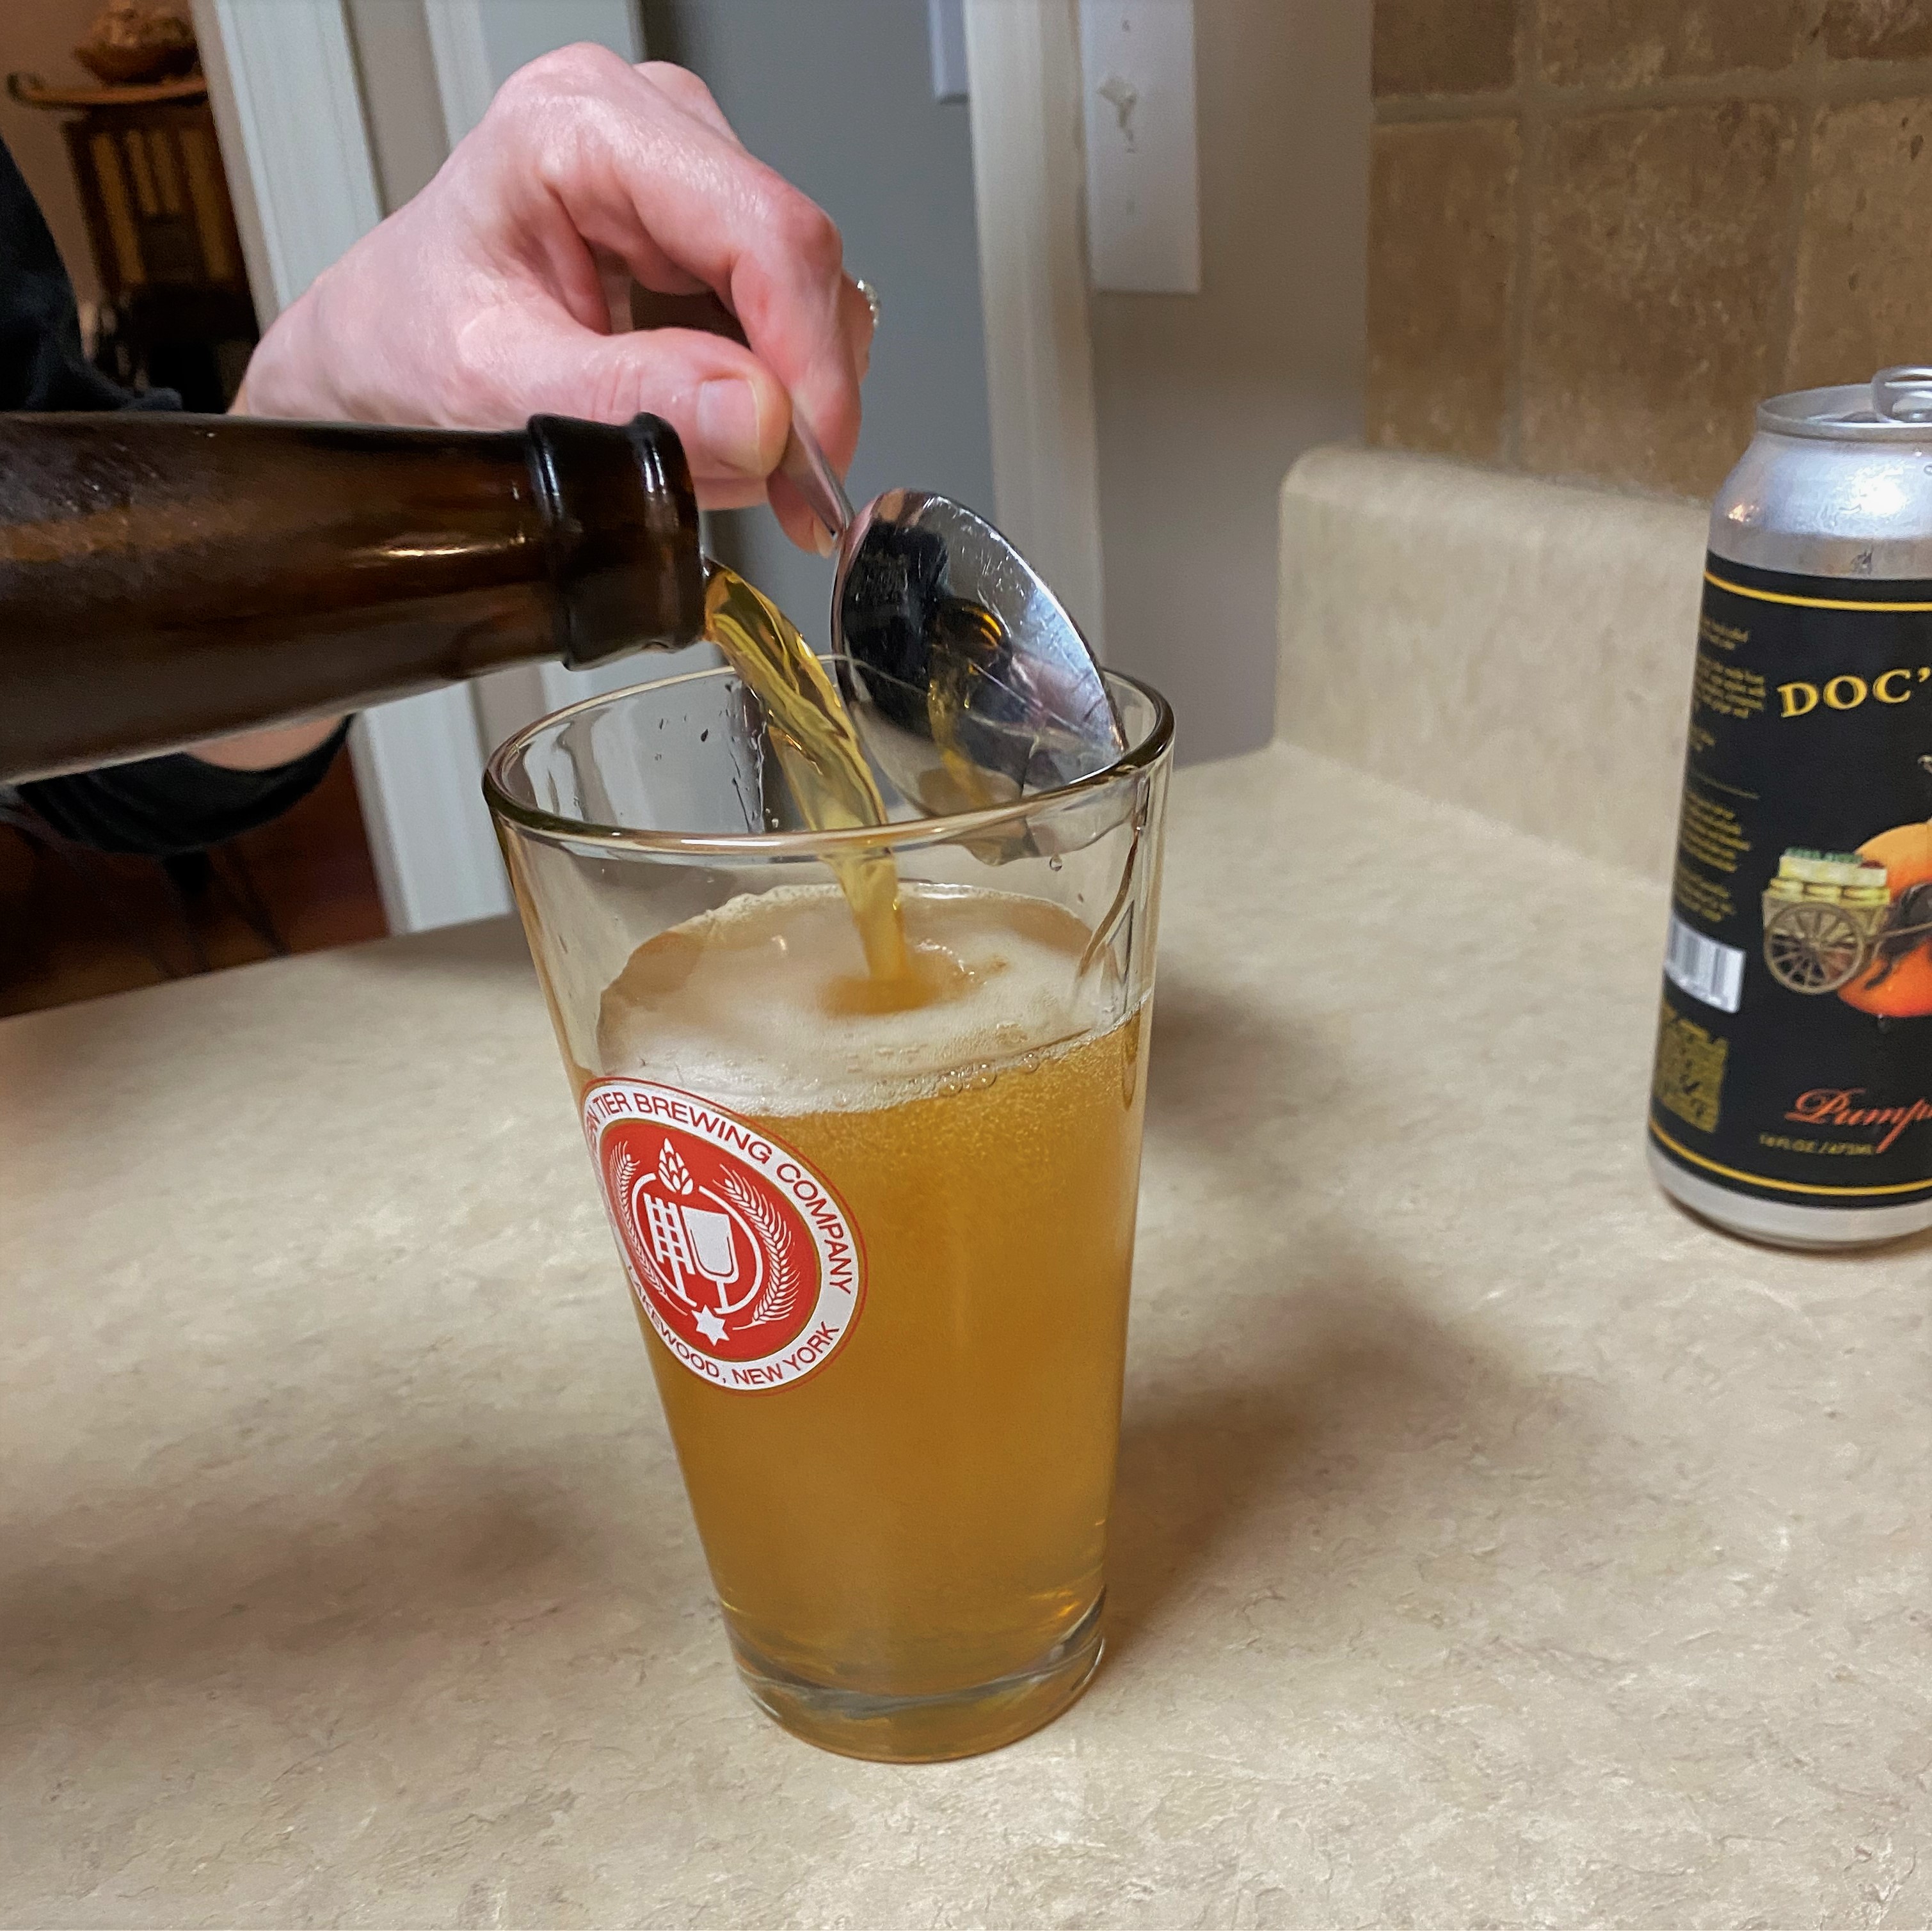
Pour the Pumking ale slowly over the back of the spoon to layer over the cider and to keep it from foaming too much.
If you prefer a drink that’s more mixed, just pour the Pumking right into the cider. They taste great together!
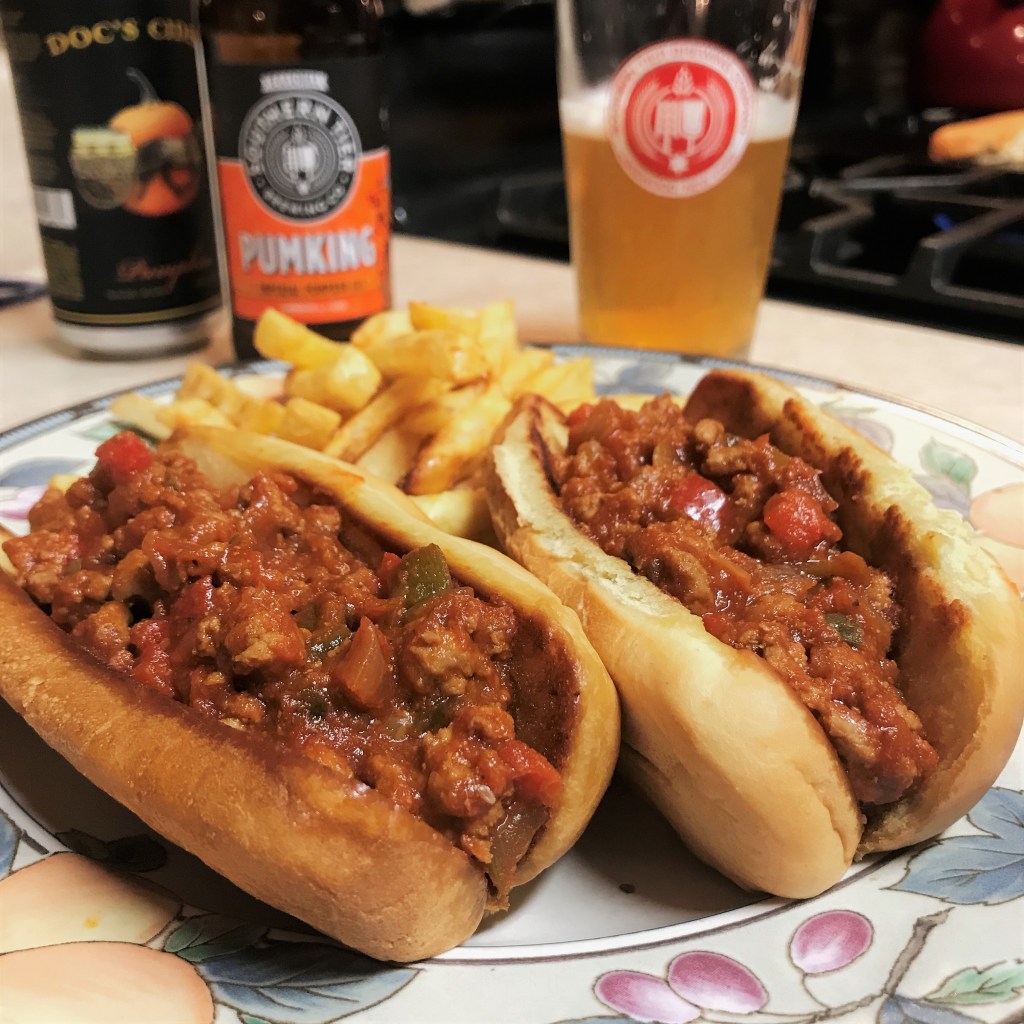
Here you have it, Snakes in the Pumking Patch. Better watch your step! 🙂
Agreed, especially in these times. Thank you, good sir!
This Halloween-themed beer cocktail is super easy to make in about 30 seconds, and it was a great way to wash down our Sloppy Dogs! Recipe for these yummy treats coming Friday!
You may be wondering if I’m a paid endorser for the products I spotlight on Comfort du Jour, and the answer is “no.” I do not receive money or products for my recommendations, and what that means for you is that you can count on me to give an honest opinion. If something changes, I will update my disclosures. Either way, you can still count on me to be honest in my recommendations, as I will only stand behind products I believe in. Fair enough? 😀
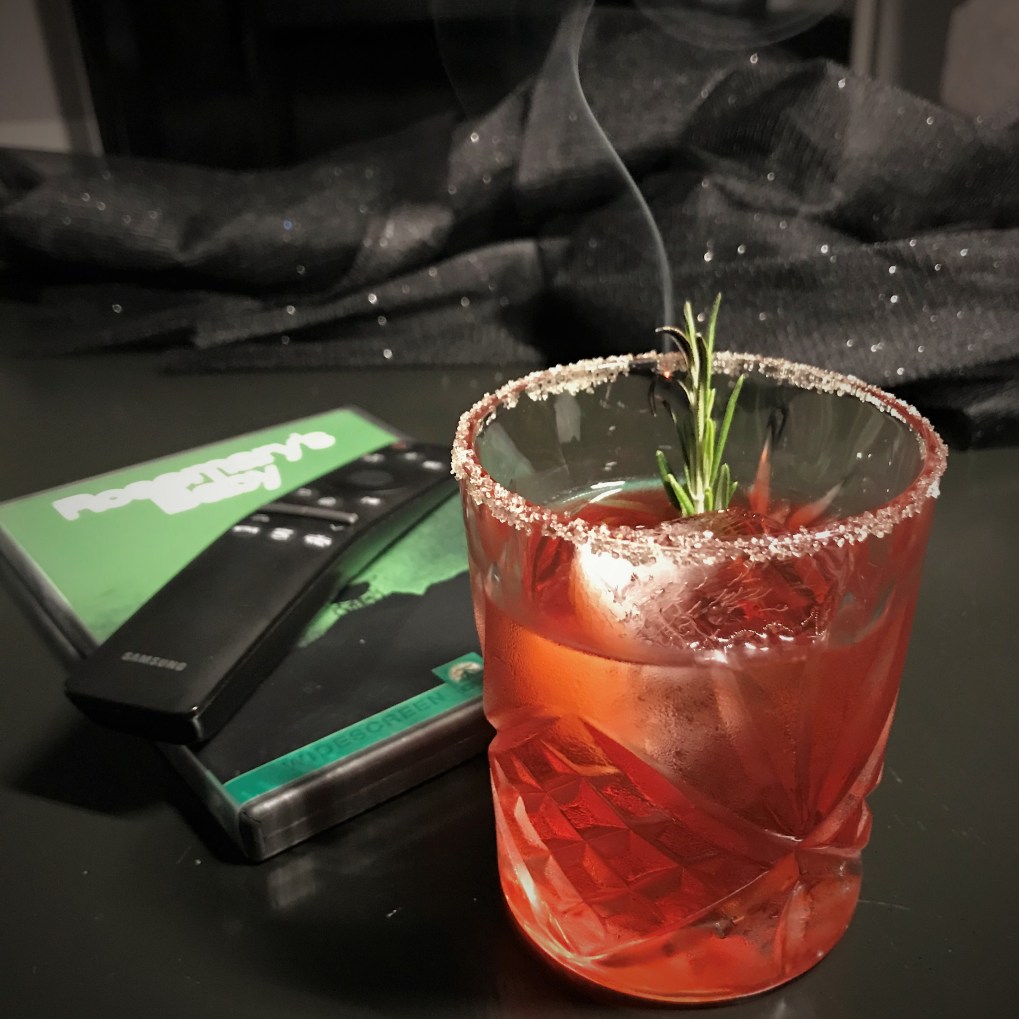
Around the time of Kentucky Derby 2.0 (the actual running of the horses in September), my husband, Les, challenged me to create a Halloween cocktail and call it Rosemary’s Baby, after the 1968 Roman Polanski film that is, frankly, the most terrifying psychological thriller I’ve ever seen. Les’s suggestion was inspired by the rosemary old-fashioned I’d made for the Derby, and this weirdly addictive mezcal-based cocktail, infused and decorated with rosemary, is my response.
Mezcal (which I incorrectly assumed was just cheap tequila) is produced from agave hearts that have been roasted and fermented underground in clay ovens. Most mezcal is produced in Oaxaca, in the far southern region of Mexico and some brands are quite sophisticated (and pricey). By local tradition, mezcal would be consumed straight and savored for its unique smoky funk and flavor. But in the U.S., it has seen resurgence in craft cocktails, especially as a substitute for other more “common” spirits, replacing bourbon in old fashioned drinks and gin in negronis.
My spooky libation is a version of the latter, and it is not for the faint of heart. A classic negroni is already an “acquired” taste, with the standard equal parts gin, Campari and sweet vermouth. Here, I’ve subbed in mezcal for the gin to replicate the fiery, smoky depths of hell that poor Rosemary must have gone through when her selfish husband sacrificed his soul—and her womb—to the devil. Worst husband ever.
Smoky, spicy, bitter and sweet. With spirits from Mexican to Italy to France, this is a complex cocktail situation.
Predictably, the mezcal is smoking up the glass, big time, and the Campari is lending its usual herbal bitterness. Sweet vermouth is keeping it in the Negroni family, and spicy chile syrup surprises you with just enough heat. With a habanero sugar rim, this drink (like that poor little demon baby) is trying to be sweet, but can’t quite linger there because of the intensity of what lurks underneath.
Remember the chilling scene at the end of the movie where Mia Farrow’s character is assured by the creepy devil-worshipping neighbors that her newborn son “has his father’s eyes?” I’m betting he had smoke in them.
That smokiness lingered in the air for a while.
Ingredients
1 oz. mezcal
1 oz. sweet (red) vermouth
1 oz. Campari
a few rosemary leaves for muddling
1 Tbsp. three chiles syrup (available online, but I found it in the mixers section at Total Wine)
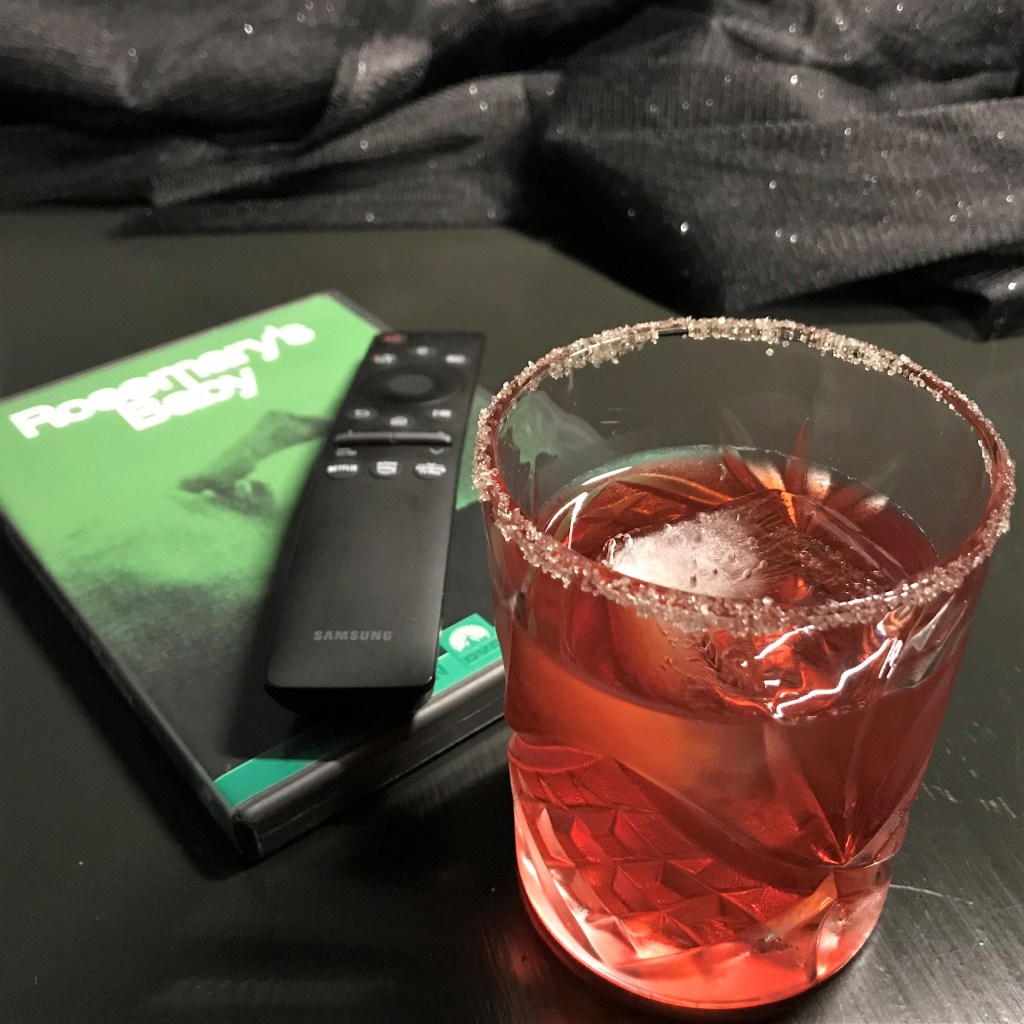
The only thing missing is the smoldering rosemary.
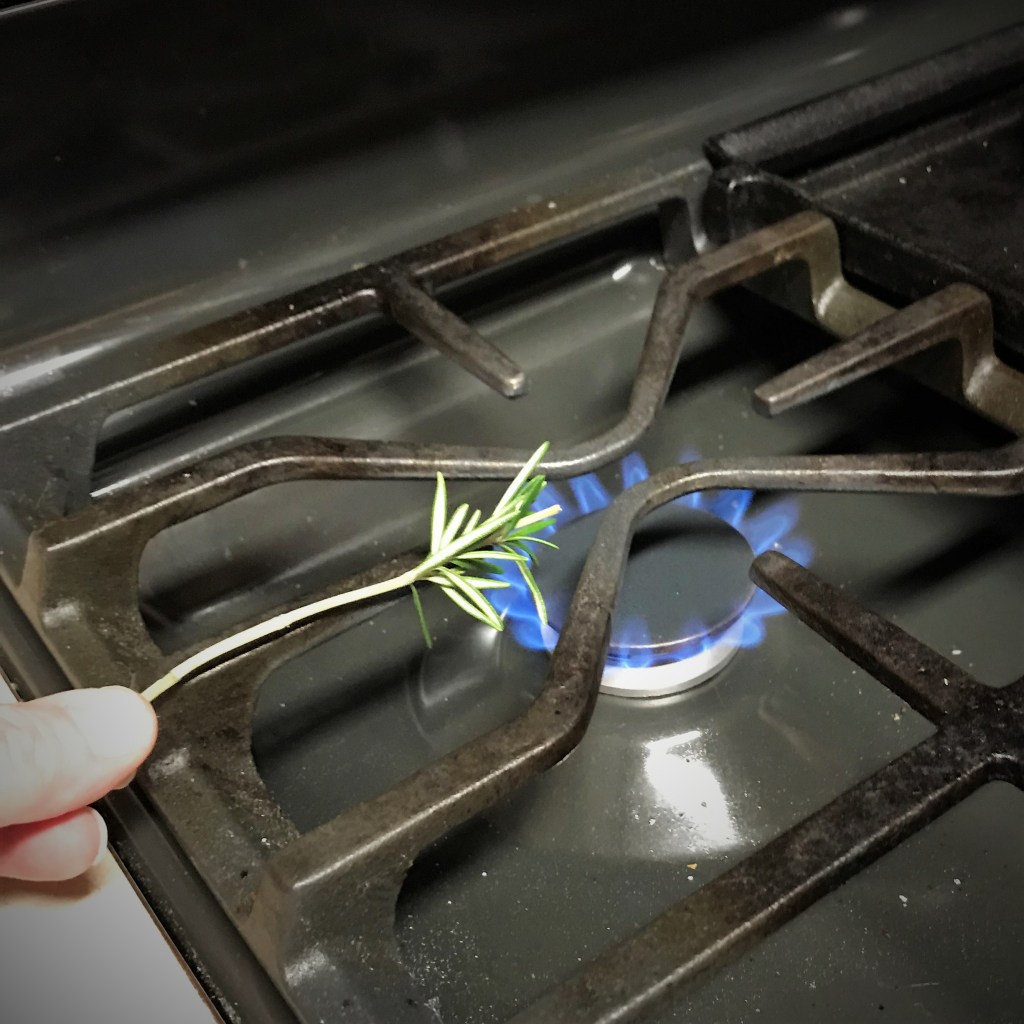
My kitchen torch was out of fuel, so I turned to my trusty gas range to scorch the rosemary.
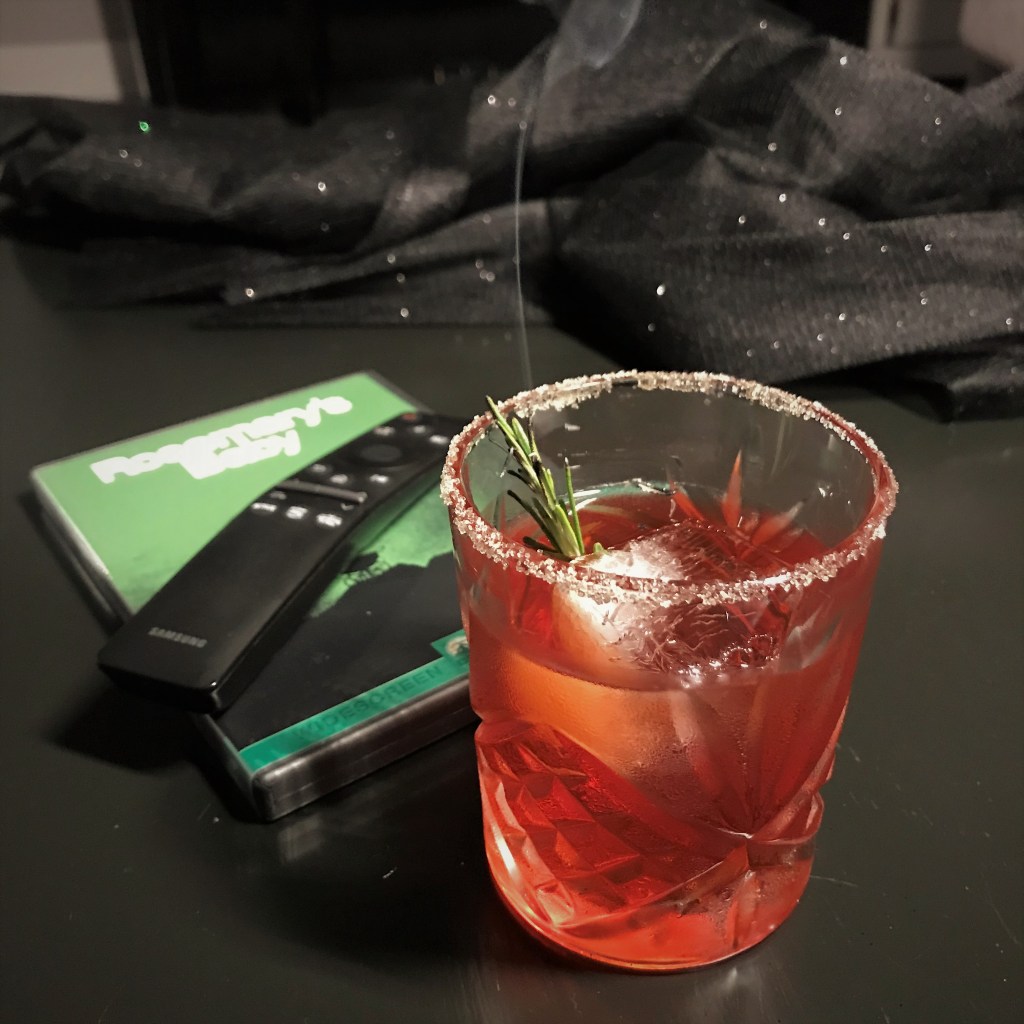
Smoke wafting from the rosemary affects every sip.
Feeling brave?
To rim the glass, wet the outer edge of the rim with a lime slice, then roll the outside of the glass into habanero sugar sprinkled on a paper towel. Do this a few minutes ahead to allow time for the sugar rim to harden and set. This embellishment brought quite a bit of additional heat to the drink. If you prefer, skip it or substitute a fine sea salt rim as a tribute to Rosemary’s salty tears.
In a cocktail shaker or mixing glass, muddle the rosemary leaves with a small amount of the campari. Add remaining campari, mezcal, vermouth and simple syrup. Add ice and shake or stir vigorously until the outside of the container is frosty. Strain over a large ice cube into the prepared sugar-rimmed glass. Scorch the rosemary sprig until leaves begin to burn, then drop the sprig into the glass. The smoke will linger as the flame dies away.
Halloween is not my thing—let’s just put that out there. I stopped celebrating it years ago, mainly because the world is scary enough without conjuring spirits from the dark beyond (I’m looking at you, 2020). But I do love a theme for parties, dinners and drinks, so I’m making an exception long enough to present a series of themed cocktails in advance of Halloween this weekend. The first drink of the series is a sweet one, and a payback to my grown-up self for something I was robbed of as a kid. Allow me to explain:
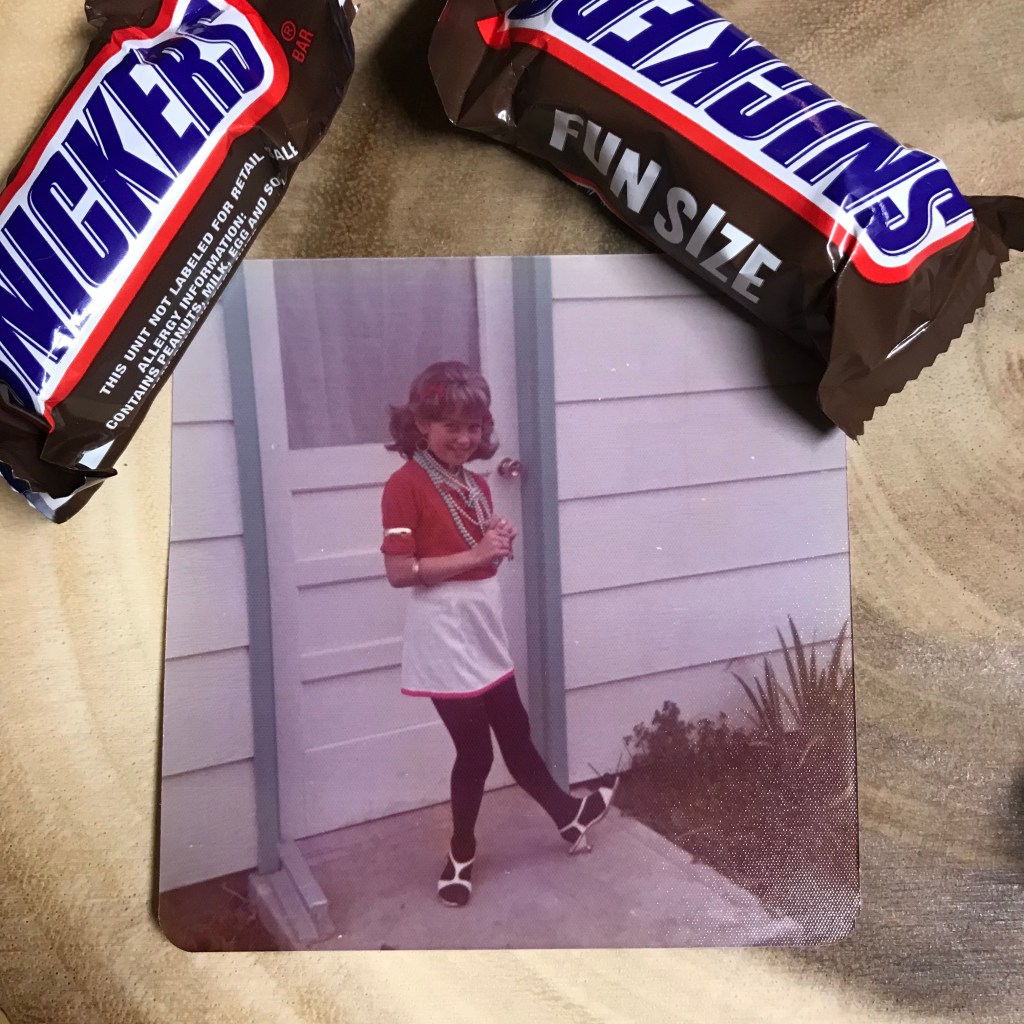
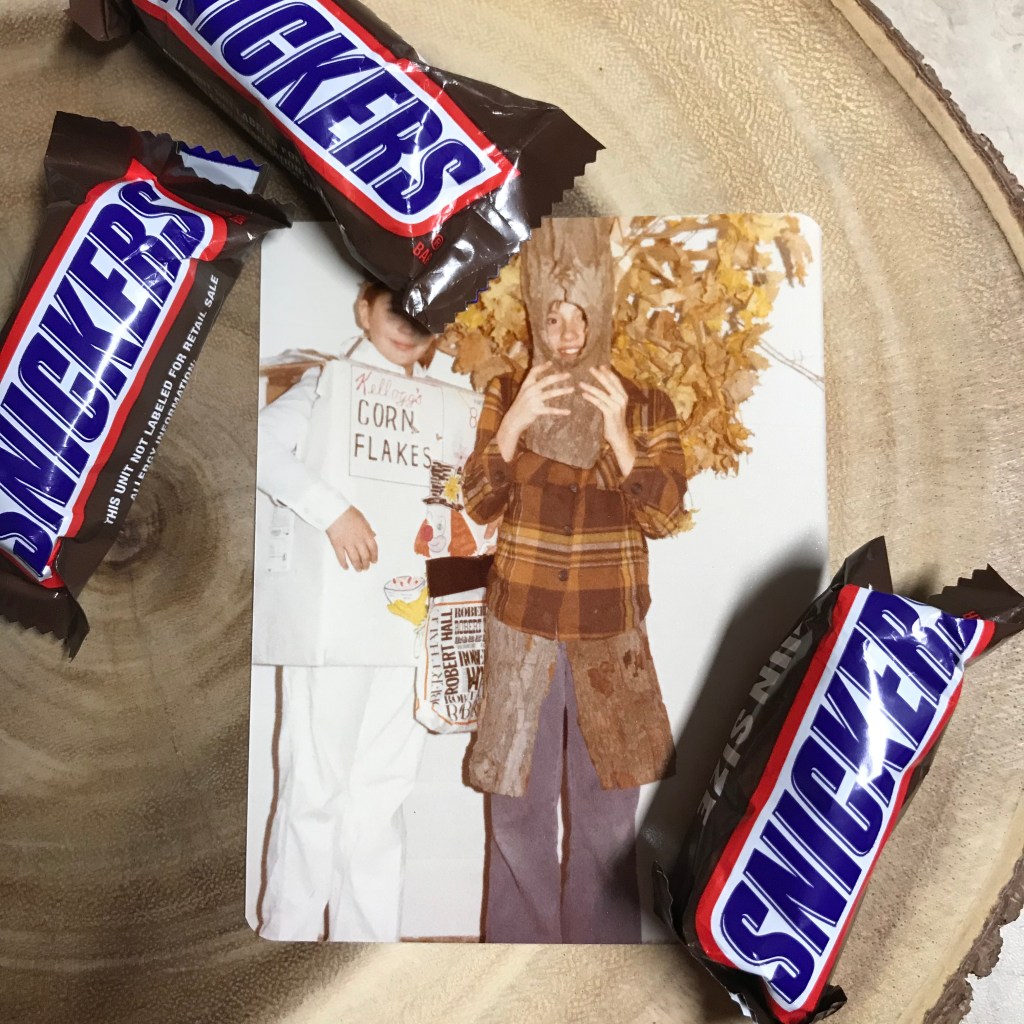
When I was younger, I did enjoy the fun side of Halloween with friends. My small, upstate New York town was perfect for trick-or-treating because everyone knew everyone else, so there was an innate sense of safety—for the kids and for the parents. We even had some neighbors who passed out treats such as homemade cookies and colorful candied popcorn balls, and this was deemed perfectly acceptable. My Halloween costumes were also always homemade (not always in a good way), and usually a last-minute effort. There was the year I went as a “gypsy,” which meant I was wearing a mismatched set of my mom’s clothes and jewelry, plus a wig. There was also the year that my dad made my costume, the one I was kind of embarrassed to wear next to my friend who was dressed like a beautifully detailed box of Kellogg’s corn flakes. I was supposed to be a tree.
In hindsight, these costumes weren’t really that bad.
Notwithstanding what I feared were lame costumes, we had a big time in those days, even in the years we had ankle deep snow on Halloween (thanks, “lake effect”), and we were willing to walk as far as it took to fill up our candy bags. For me, the big, fat downside to trick-or-treating was the “inspection” that my father insisted must be done on my bag of candy. I was no dummy, and it was no coincidence that my bag was noticeably lighter after the so-called safety check. Specifically, my “fun-sized” bars of Milky Way and Snickers would be wiped out. Yes, my dad stole my favorite candy bars. Why didn’t I catch on to this trick and hide my treats before handing over the bag? —all I can say is that I was a very compliant kid. My bad.
This year, Les and I have purchased the obligatory bags of candy to pass out to the neighbor kids who ring our bell every year—all three of them. Apparently, we don’t have strong participation in our subdivision, and most of the nearby kids don’t bother looking for porch lights over here. But we will stock up on Snickers, all the same, and we will be generous in handing them out. You know, it’ll be kind of nice to have someone come to the door, and we will take all necessary safety precautions (those long handled grilling tongs will surely come in handy).
If the kids do make a strong showing (who knows what 2020 will bring, right?), we’ll give away all the candy and we will still be able to enjoy the flavors of my favorite candy bar in this cocktail, which is equal parts salted caramel whiskey, peanut butter whiskey and dark chocolate liqueur. A little salted caramel on the rim, a fun-sized Snickers garnish. Yes, it’ll do. 😊
The salted caramel rim makes every sip sweet and sticky.
Ingredients
1 oz. salted caramel whiskey
1 oz. “Skrewball” peanut butter whiskey
1 oz. Godiva dark chocolate liqueur
Salted caramel and fine sea salt (for the rim), small Snickers candy (optional, for garnish)
The only flavor not represented in this cocktail is “nougat,” whatever the heck that is.
Instructions
To rim the cocktail glass, heat a small amount of salted caramel ice cream topping in a small bowl. Sprinkle a small amount of fine sea salt onto a clean paper towel. Use the back of a small spoon to swipe the caramel around the outer edge of the glass rim. Immediately roll the outside edge of the glass on the salted towel. Use a light touch for the perfect amount of saltiness; you don’t want to salt it like a margarita glass! 🙂 Do this a few minutes ahead to give the caramel time to cool and set.
In a cocktail shaker or mixing glass, combine the salted caramel whiskey, peanut butter whiskey and chocolate liqueur. Add ice and stir vigorously until shaker or glass is frosty. Add a large ice cube to your caramel-rimmed glass, and strain the cocktail into the glass. Garnish with a real Snickers bar, just for fun!