Hibiscus Bee’s Knees 🌺

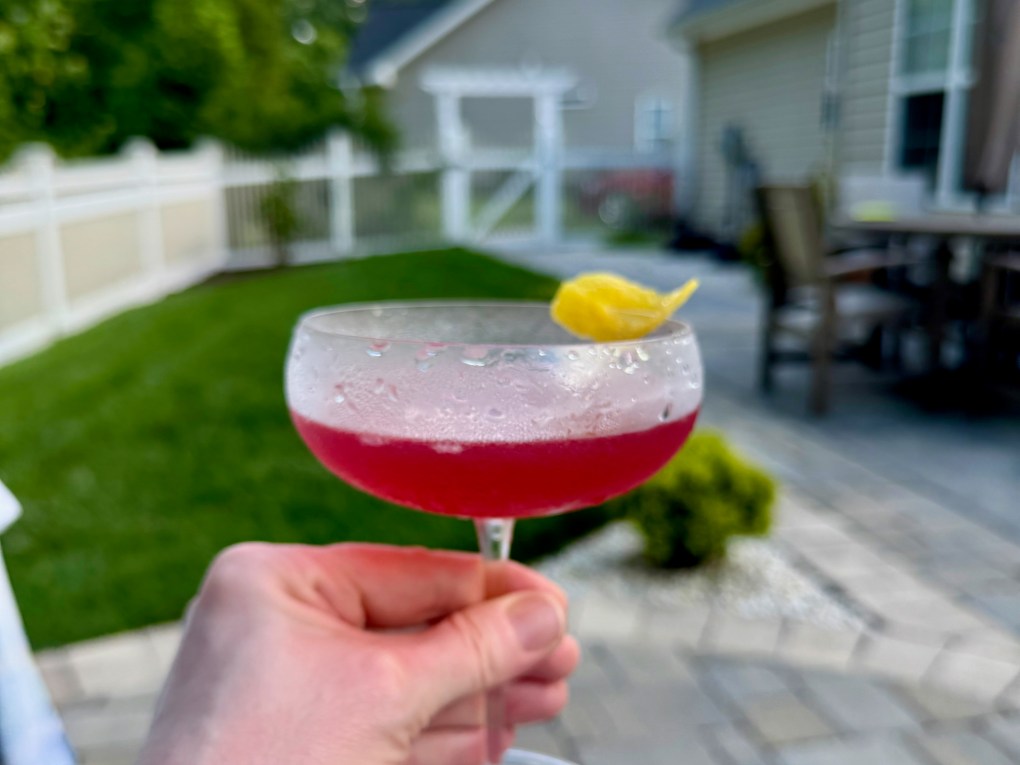
The saying goes that there’s nothing new under the sun, and though I generally believe it to be true with food and drink, I do think that sometimes a twist on a classic is different enough to warrant calling it “new.” Case in point, this tart and sassy summer cocktail.

It’s refreshing, balanced and beautiful!

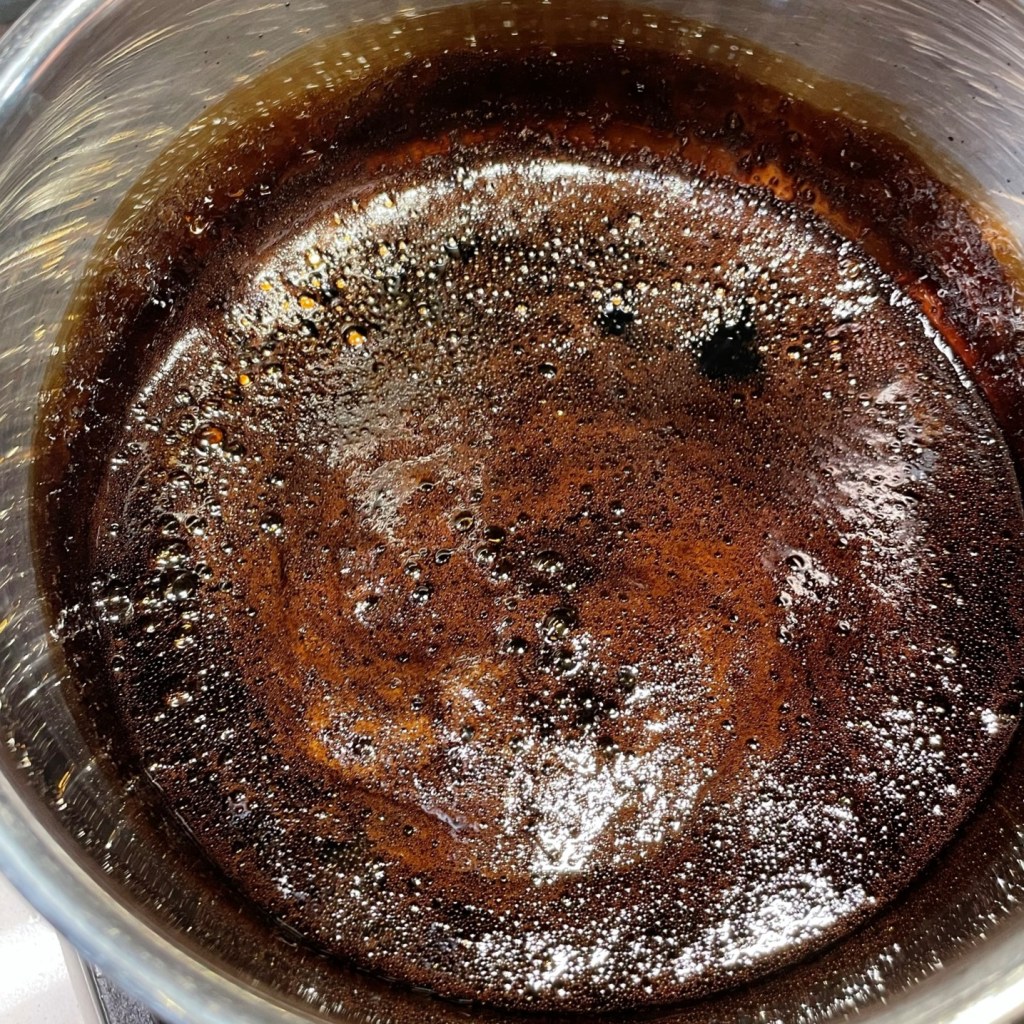
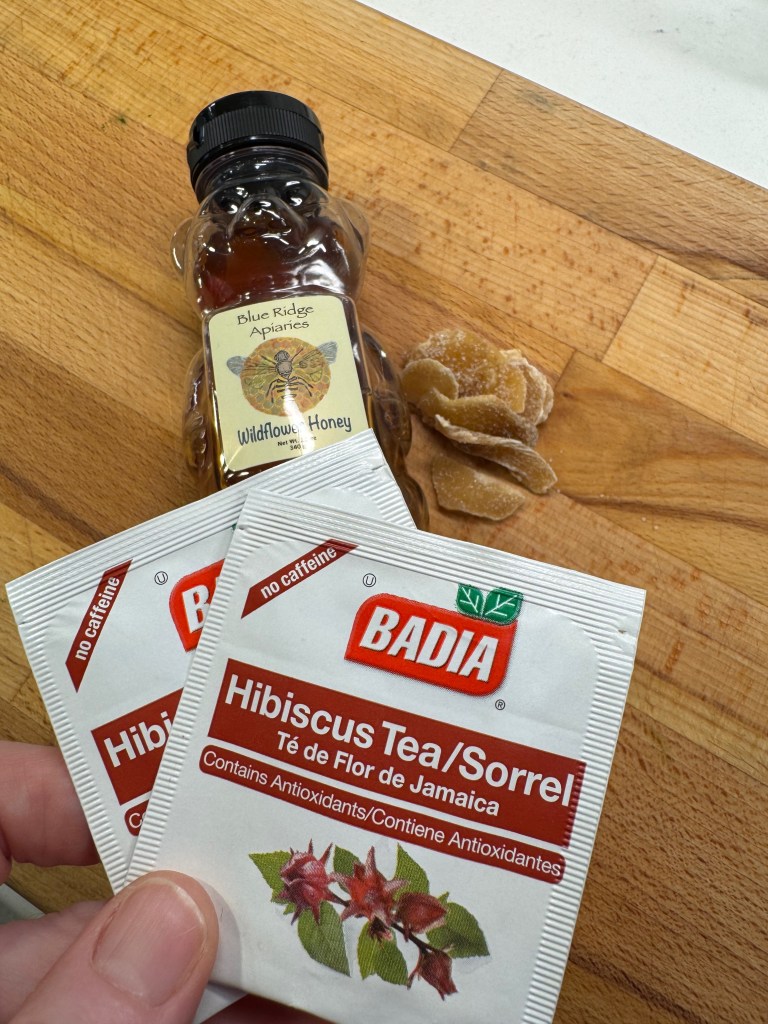
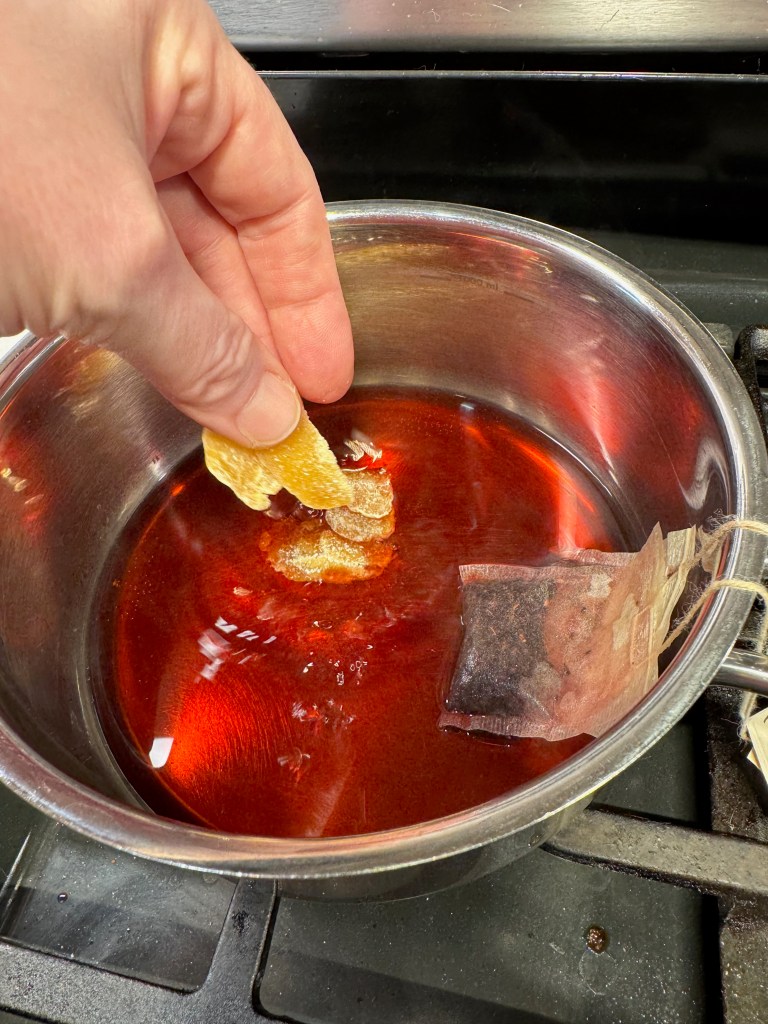
Mine is a two-ingredient update to a Prohibition-era cocktail, and it pushes a classic into the modern, with a vibrant reddish hue that is perfect for Juneteenth or the summer solstice. The key difference is hibiscus, in the form of pure hibiscus tea bags, which I simmered in boiling water long enough to draw out the tart, floral flavors. A few pieces of crystallized ginger added a subtle zing of spice, and I think it would be even better with fresh ginger if you like the flavor.

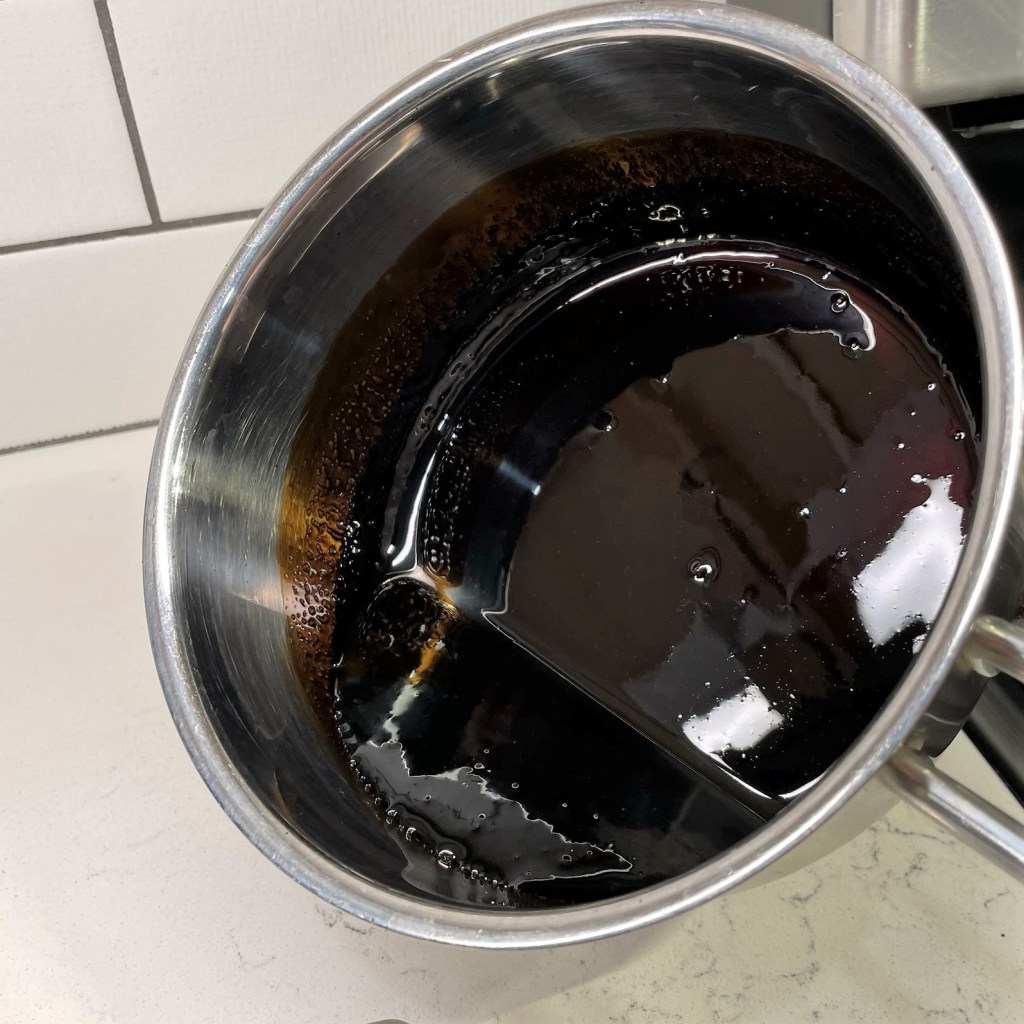
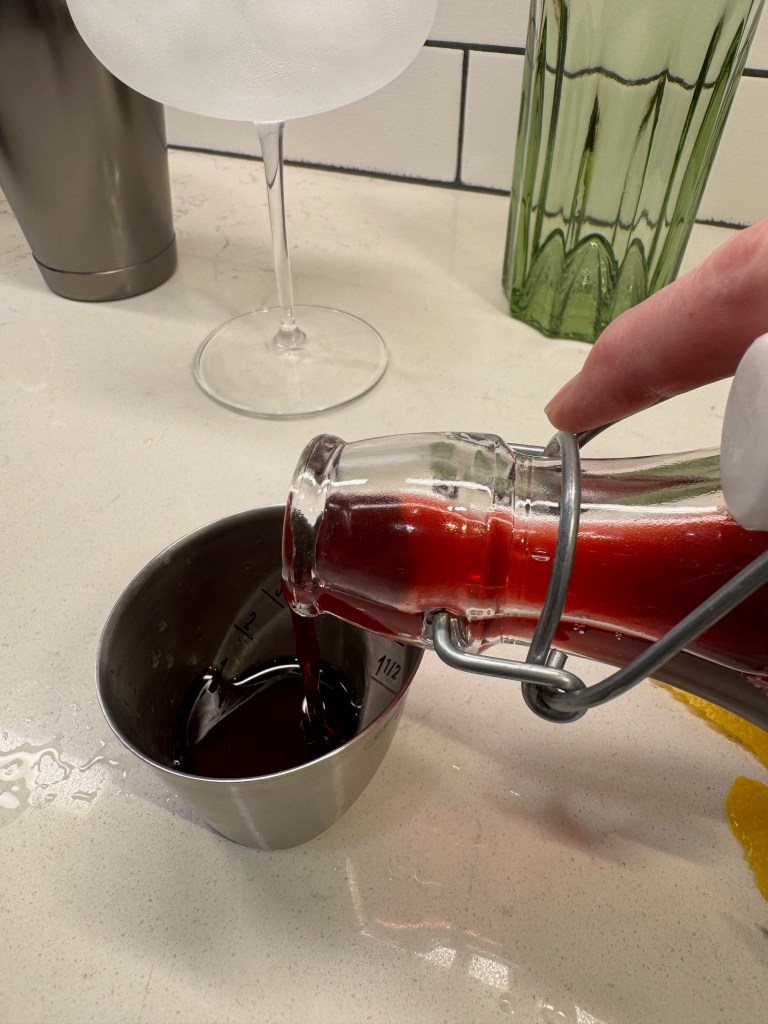
The resulting strong tea was sweetened with a generous squeeze of local honey, for a syrup that is thin enough to blend well with the cocktail ingredients in a shaker filled with ice. I do not recommend adding honey straight, as it would remain heavy and thick. But in an equal parts syrup, it’s perfect.


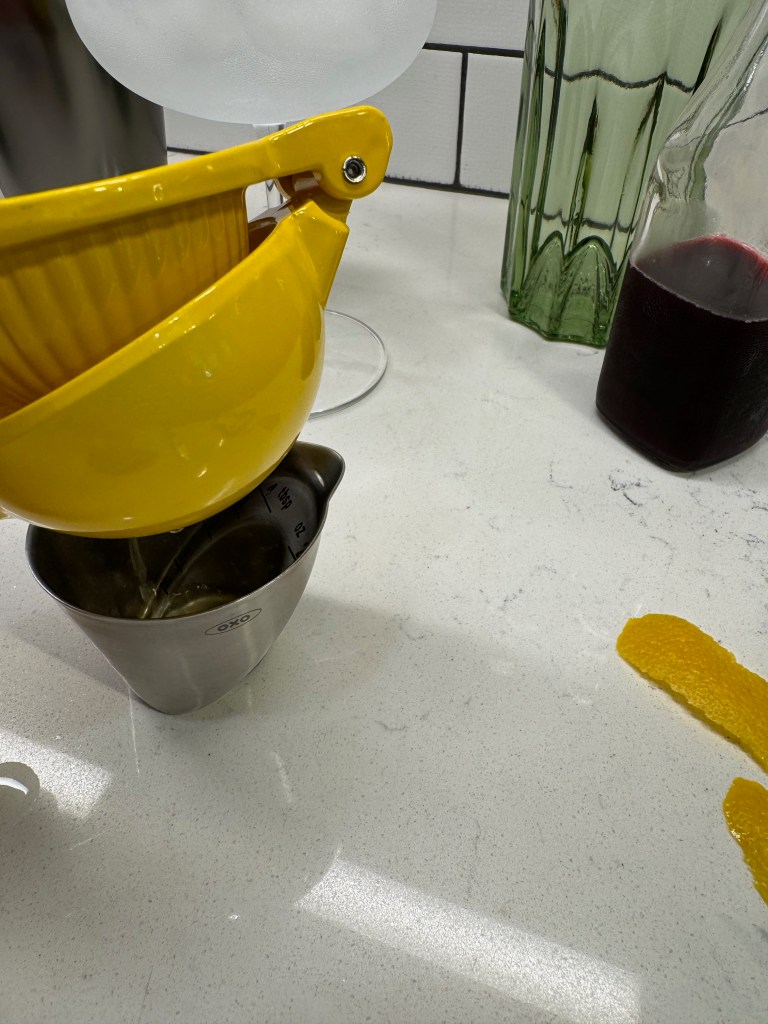
This hibiscus-ginger syrup will keep in the fridge for about two weeks, and I have no doubt that it would be great in other cocktails or even as a flavor enhancer for sparkling water or tonic on a hot summer day. But for this featured cocktail, we need gin— the traditional spirit for bee’s knees— and fresh lemon. Grab a cocktail shaker, a lemon squeezer and a peeler to strip a bit of peel for garnish, and chill down a cocktail glass with ice water.

Once the syrup is made, it’s quite a simple drink.

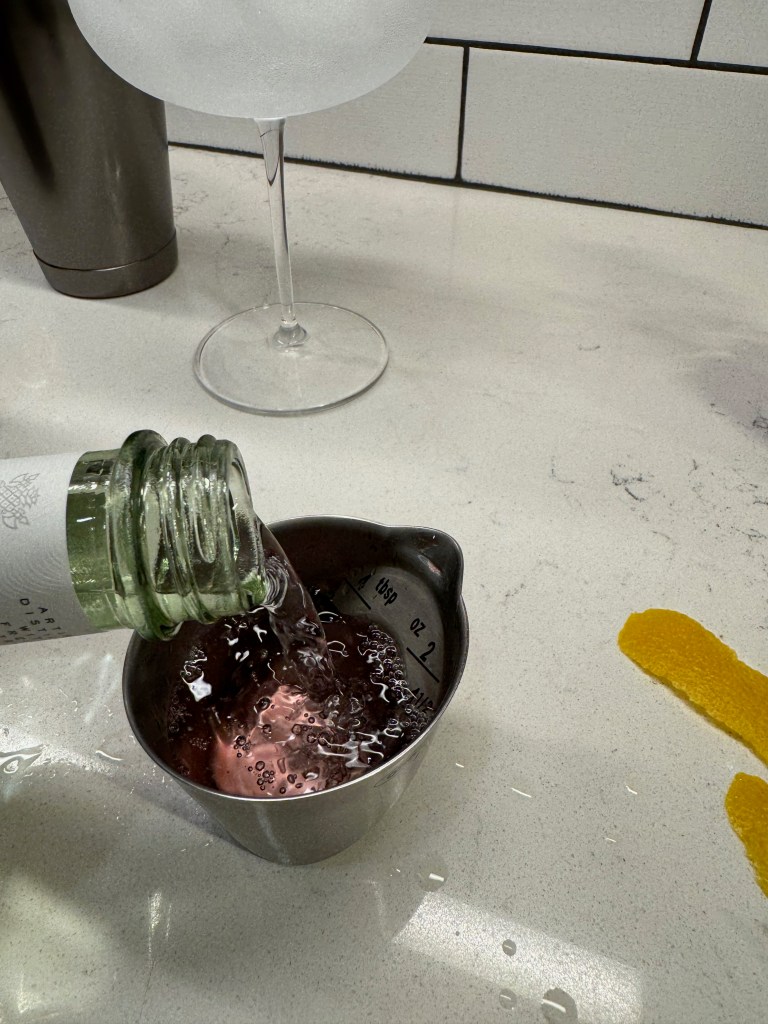
Get your lemon strip first, then cut the lemon in half for easy squeezing into the shaker. Add an equal amount of hibiscus-ginger honey syrup and then two ounces of your favorite gin. While you enjoy these refreshing images, let’s take a trip down nostalgia lane to learn more about the original “bee’s knees.”


How did the bees knees come about?

Back in the days of Prohibition, otherwise known as “the U.S. Government’s 13-year attempt at controlling its citizens,” grown adults had to get creative to find ways to cover up the questionable flavors of crappy liquor, the only kind they could get their hands on at the time. There were bootleggers, of course, who smuggled booze into the cities. And there were also people making their own at home, and the term “bathtub gin” arose from that era, a fair description of what was likely not very palatable. 

Honey and lemon juice, both strong flavors on their own, did a terrific job of hiding the paltry gin enough for them to choke it down and get their buzz on. People enjoyed the combination so much that the the drink became known by a phrase that everyone was using at the time to describe what was “the best.” The bee’s knees!

Early recipes for bee’s knees were in the “equal parts” category, meaning that they used the same amounts of gin, lemon and honey. Yikes. For modern times, the recipe is adjusted to a more standard ratio of 2 ounces gin and 3/4 ounce each of the other two ingredients. It’s nicely balanced, not too sweet and not too acidic.

I found a fun and informative article that delves deeper into the history of the bee’s knees, including its possible connection to “the Unsinkable Molly Brown,” as well as some interesting variations that I’d love to try sometime. Check it out here if you’re curious.

Back to our cocktail!

Today, of course, we have plenty of options for quality gin, and I imagine that your favorite would work just fine in this drink. I’ll also say that if you have always considered yourself to be a non-gin drinker, the bee’s knees might be the cocktail to change your mind. 

I’ve chosen Tanqueray No. 10 this time, for no other reason than the store was sold out of my usual Ford’s gin. Actor Stanley Tucci recently collaborated with Tanqueray No. 10 in an ad campaign, where he discussed the proper way to order a martini, and his description of the spirit won me over. Or maybe it was his voice. Either way, there’s a distinctive citrus note running through this gin, making it a nice anchor for the lemon and hibiscus.

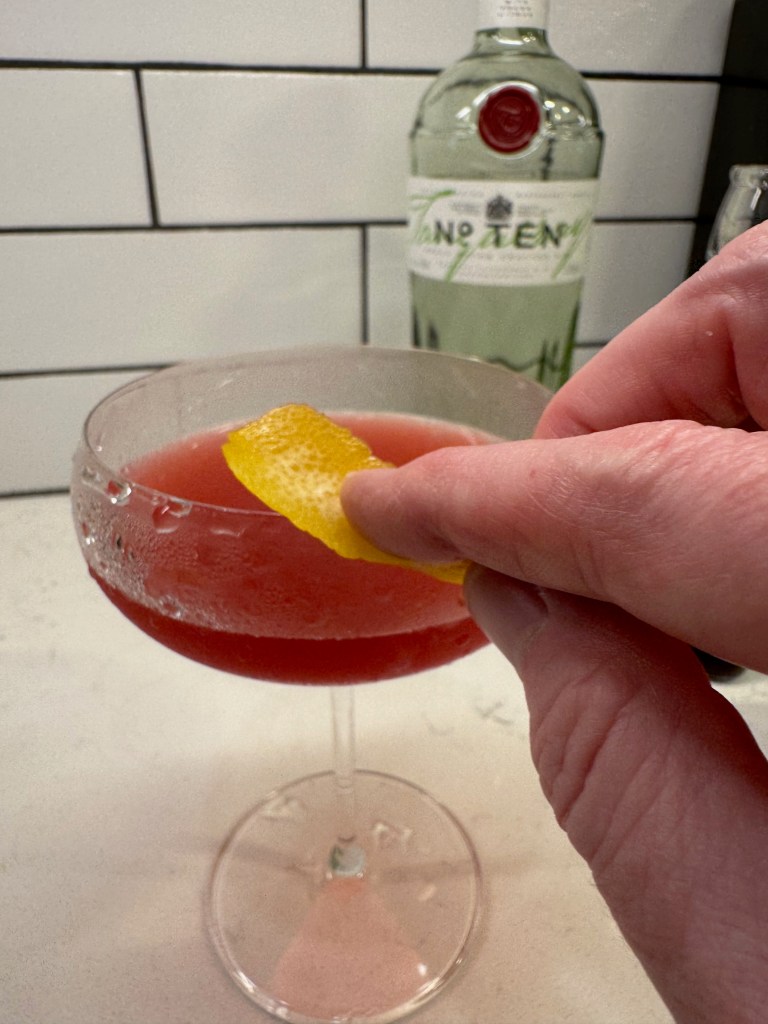
Shake your cocktail ingredients with plenty of ice until the outside of the shaker is uncomfortable to hold. Strain it into the chilled glass and express the lemon peel over the drink, finishing with a wipe of the oily side of the peel all around the edge. 

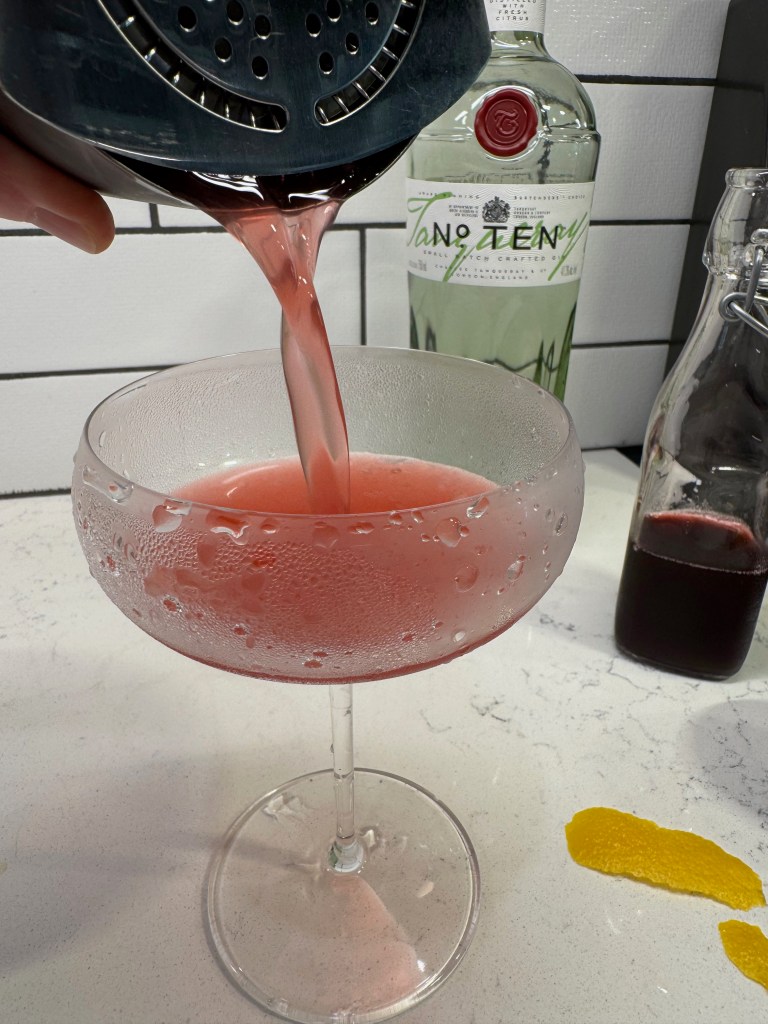
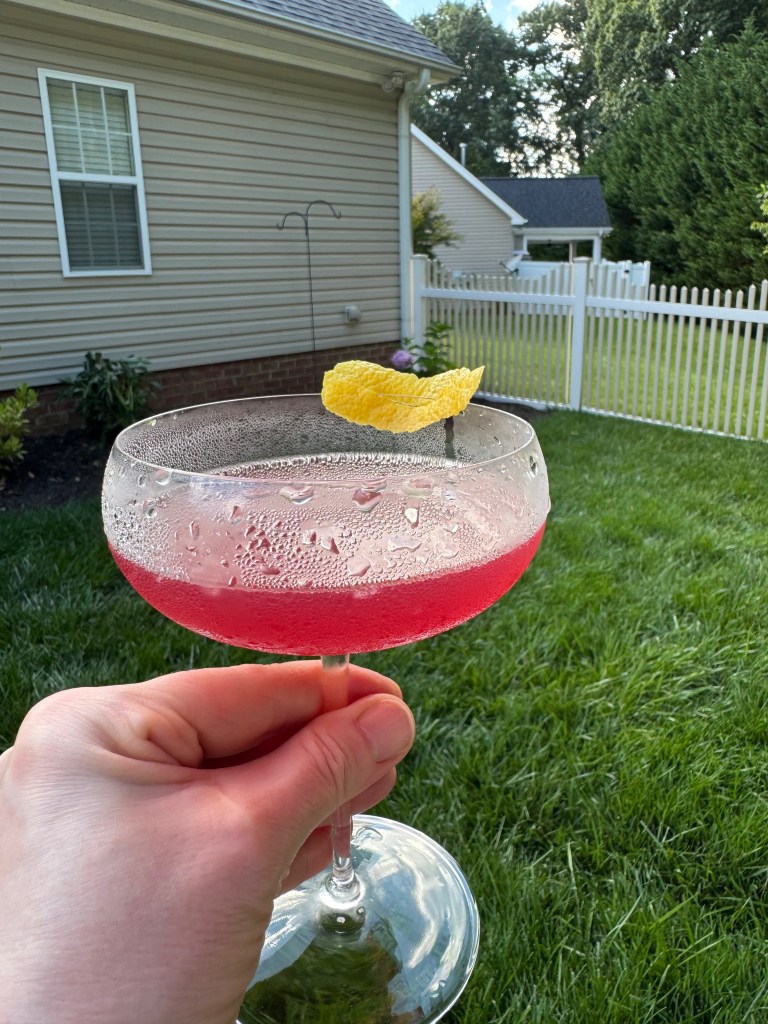
The pretty, bright reddish hue of this drink makes it suitable for a Juneteenth celebration, where the color red symbolizes strength and resilience. And I can’t think of a more appropriate drink for summer than one made with fresh citrus and bright florals. This one deserves to be on repeat for the whole season!

Hibiscus Bee's Knees

  • Servings: 1 cocktail
  • Difficulty: Easy
  • Print

This two-ingredient twist on a classic cocktail is bright, beautiful and delicious enough to deserve a spot in the rotation all summer long. Use pure hibiscus tea bags, or seek out dried hibiscus flowers to make the syrup.


Ingredients

  • 2 oz. citrus-forward gin
  • 3/4 oz. fresh lemon juice
  • 3/4 oz. hibiscus-ginger honey syrup (see below for recipe)
  • A strip of lemon peel, for garnish

Directions

  1. Add a generous amount of ice, plus water, to a cocktail glass to chill it down. Set aside while you prepare the cocktail.
  2. Combine gin, lemon juice and hibiscus-ginger honey syrup in a cocktail shaker.
  3. Add at least one cup of ice and shake vigorously for about 20 seconds. Strain into the chilled glass. Squeeze the outside curve of lemon peel over the drink, swiping the peel all around the edge of the glass. Drop peel in glass or cut a slit in it to balance it on the edge.

Note: Make the hibiscus-ginger honey syrup early enough to allow it to fully cool before using in cocktails. Strain the syrup into a sealable bottle or jar, and keep it in the fridge for up to two weeks. This recipe will make enough syrup for about six cocktails or cocktails.

Ingredients

  • 1/2 cup cold water
  • 2 pure hibiscus tea bags
  • About 6 pieces crystallized ginger (or half as much fresh sliced ginger)
  • 1/2 cup local honey

Directions

  1. Bring water to a gentle boil in a small saucepan. Turn off heat and add tea bags and ginger, swirling and steeping for about five minutes. Remove tea bags. Stir honey into the tea and continue to steep with the ginger until cooled to room temperature.
  2. Strain out solids and transfer syrup to a jar or bottle.


Jalapeño-Honey Cornbread

A shrug. That’s pretty much all I get from my husband when I mention that I might whip up a batch of cornbread. As a born-and-raised New York City guy, he’s more into bagels and dinner rolls than grainy, dense cornbread. 

But that was before I decided to put jalapeño and honey into it. 😉

We are counting the days until we tear out what’s left of our “well, we tried” summer garden, and the jalapeños are making a valiant effort to compensate for the disappointment of everything else I attempted to grow this year. With four jalapeño plants, and plenty of post-summer full sun, I’m pretty much sneaking these spicy peppers into everything I can. That works out great for my heat-loving husband, and I found it easy to substitute honey for the usual sugar in my favorite cornbread recipe.


And that brings me to an important point— you don’t have to use my recipe to enjoy jalapeño-honey cornbread. If you have a favorite recipe already, a few simple adjustments might just make this a favorite at your house, too.

This was so good with leftover autumn minestrone!
Imagine it with a bowl of chili or black bean soup. Mmm.

A couple of quick notes— jalapeño can range in Scoville units (the heat factor), but you can take charge of the overall intensity with a simple decision of keeping or removing the seeds and membranes. The other note is about the honey. I used a local wildflower honey, and because honey is sweeter than cane sugar, you can get away with using a little less than the amount of sugar called for in the recipe.


If you’d like to bake your cornbread in a cast-iron skillet, I recommend melting a tablespoon or so of butter in the skillet over medium heat before adding the batter and moving it to the oven. This extra butter will ensure clean, even wedges straight from the pan and almost no cleanup!


My inspiration recipe, as expected, comes from my favorite flour company, King Arthur Baking. I made a few modifications, including swapping honey for sugar and subbing in a portion of white whole wheat for nutrition and flavor. Plus, of course, the jalapeños! I also whipped up a small batch of honey butter for drizzling at serving time. 😋

Jalapeño-Honey Cornbread

  • Servings: About 8
  • Difficulty: So easy!
  • Print

Just two ingredient swaps are throwing a big flavor twist onto a classic cornbread. This will be great with almost any rustic soup you make this fall and winter!


Ingredients

  • 1 cup all-purpose flour
  • 3/4 cup white whole wheat flour
  • 1 cup cornmeal
  • 2 tsp. baking powder
  • 1/4 tsp. baking soda
  • 3/4 tsp. fine sea salt
  • 1 large jalapeño, diced (seeds or no seeds, depending on your heat tolerance)
  • 1 1/4 cups milk, warmed (I used whole milk, but 2%, skim or plant milk would be fine)
  • 3 Tbsp. local wildflower honey
  • 1 large egg, room temperature
  • 1/4 cup expeller-pressed canola oil
  • 1/2 stick butter, melted (plant butter would be fine)
  • 1 additional tablespoon butter for melting in the skillet (or buttering a baking dish)

This is delicious drizzled with honey butter. To make some, stir honey into softened, salted butter until smooth. At room temperature, it will drizzle nicely over the warm cornbread. If chilled, it will be more firm but still spreadable. Store leftover cornbread wrapped tightly in foil, or freeze for later.

Directions

  1. Preheat oven to 350°F, with rack in center position. Place a cast iron skillet over medium heat and melt the extra tablespoon of butter into it.
  2. Measure out and whisk together the dry ingredients in a large batter bowl. Toss the jalapeños into that mixture as well.
  3. Combine the wet ingredients, blending well to completely mix in the honey.
  4. Pour the wet mixture into the bowl with the dry ingredients and fold gently several times until dry ingredients are fully incorporated.
  5. Pour the batter into the hot, buttered skillet and slide the pan into the oven to bake for about 20 minutes. Cool for a few minutes, then cut into wedges and enjoy!


Apple & Honey Babka

Each fall since I began dating my husband, I’ve made a concerted effort to celebrate the season of Rosh Hashanah— the Jewish New Year— by baking a special bread. That first year, Les had visited a local apple festival and brought back a bagful of gorgeous Jonagold apples, which were lovely in a coiled-into-a-round challah. I was so proud of my bread that I took a picture of it— way before I began blogging— and I even took time to leave a review on the King Arthur website to report my great results. 

Not a bad effort in 2015! But my iPhone 5 camera…

The round shape is significant to Rosh Hashanah because it represents the idea of coming full circle into a new year. The apples were a nice touch, because apples and honey make an appearance on everyone’s holiday table— symbolizing the wishes for a sweet year ahead. Most years since that first one, I’ve worked on my challah braiding skills, specifically the four-strand loaf that is woven like a basket. Here are a few examples of those breads, using my sourdough starter.


This year, however, I decided to tackle another item on my culinary bucket list, and I’ve made a babka! This is another traditional Jewish bread, and I’ve wanted to make one for years but never got around to it until now. Most babka recipes I have seen involve a chocolate filling, which is most dramatic looking in the typical swirly pattern. I pondered, what about a babka that had apples and honey? That would be perfect for Rosh Hashanah, and a double win in that it finally moves babka to the “done” column. 

I didn’t have to look very far for an inspiration recipe, because the first place I looked was King Arthur Baking. Of course!

The layers of apple, spices and pecan make this extra special!

I’ve been a big fan of King Arthur products for years (and no, they never have paid me to say so), and my devotion to them is stronger than ever since my trip to their Vermont baking school, where I am proud to have completed their four-day “Principles & Practice” baking course. I learned a good many things during my time there, and made friends with several of my classmates. Among the takeaway lessons was the importance of using high-quality ingredients (i.e., theirs) and having them organized and properly measured before you begin mixing. That’s how I set up for this recipe, and I swapped in honey for the sugar, following the same helpful tips I used last month when I made my s’mores cupcakes.

Baking is much easier when I’m organized!

My main dry ingredients were measured by weight, which is something I was already doing before my King Arthur class, and all of our instructors during the four days emphasized the benefit of this. I cannot remember the last time I measured by volume, but there is a sensible way to do it for consistent results. They call it the fluff, sprinkle, level method, and it helps ensure that you don’t have dense results in your baked goods. If you are reluctant to get a kitchen scale, I highly recommend following that three-step method; otherwise, you may find your baked goods dense from being flour-heavy. 

The process of the apple babka recipe was straightforward. I introduced the wet ingredients to the dry ones, then switched to the kneading hook and worked in the softened butter. This recipe would not be suitable for a meal that also includes meat— kosher rules require that meat and dairy not be served together— but it would be wonderful served with breakfast or dessert on another occasion. The dough rested about two hours until it was doubled and puffy.


The filling was easy as well— brown sugar, cinnamon, cardamom and grated apple. Honeycrisp seemed appropriate for the occasion of Rosh Hashanah. Next came the rolling up and cutting, and I think this part would have been easier if this dough had been chilled, as the filling was very wet and loose. It was not difficult, but very messy, and not as pretty as I wanted it to be. I shaped the braided babka into a round, like a wreath, and covered it to proof for baking.


One of the other lessons in the King Arthur class was the simple way to determine whether your dough has proofed sufficiently for baking. If you poke the dough with a floured fingertip and the indent remains, it’s ready. If it bounces back, it needs more time. This one was ready!


Time for an egg wash and bake, and we are ready for Rosh Hashanah! Of course, you don’t have to be Jewish to enjoy the lovely flavors. The apple, honey and spices make it perfectly appropriate through the rest of the year.

Shana Tova!

Link here for the inspiration recipe: https://www.kingarthurbaking.com/recipes/apple-pie-babka-recipe

I made a few slight adjustments:

  • subbed in a portion of white whole wheat for all-purpose flour
  • replaced dough sugar with honey, but 2/3 as much as honey is sweeter
  • slight reduction of water, about 2 tablespoons (because honey is also liquid)
  • replaced boiled cider with apple balsamic (but I could have omitted it)
  • replaced instant clear gel with a pie filling thickener (but all-purpose flour would have worked, too)
  • allowed a few extra minutes on the bake to ensure the dough in the center of the wreath was done


Sunflower & Honey Sandwich Bread 🌻

My heart has ached this week, at the approach of today’s one-year anniversary of Russia’s unprovoked attack on Ukraine. The people of that nation have stunned the world with their incredible resilience and dedication to their country. Many brave men, women and families have refused to leave in the wake of hostile invasion and are living under constant threat amid air raid sirens, bombings and widespread power outages. They are truly an inspiration.

The older I get, the more grateful I am to have never experienced true hardship or food insecurity, and when stories like the ones emerging from Ukraine are presented, I want to do something, anything, to help. It isn’t possible, of course, for me to make a huge meal to help people on the other side of the world, but I am proud to support an organization that puts itself on the front line to do exactly that.

In a few days, my husband and I will be in attendance for a lecture by Chef José Andrés, the founder of World Central Kitchen, a non-profit organization that has spent the last year bringing much needed food and comfort to war-torn Ukraine, as well as other regions stricken by climate disaster and other catastrophic situations— usually, it even juggles multiple relief efforts at once (see a sampling of their current work here). That’s how strong they are!

The decision to support a relief organization is personal, and if you’re like me, you do some homework to be sure your money is being used responsibly. I am extremely impressed by the integrity of World Central Kitchen, which has earned an A+ rating from charitywatch.org, and meets or exceeds all its requirements for governance and transparency. The organization is powered by thousands of volunteers, professional and amateur, and they are able to activate and mobilize very quickly when a crisis occurs. Yesterday, I also registered to be a volunteer; if a crisis occurs near me, I’m already signed up and ready to go. Giving and volunteering is easy to do on the WCK website.

I cannot make enough bread in my kitchen to feed the people of Ukraine, but I have great confidence in knowing that my tax-deductible contributions to World Central Kitchen are used wisely and effectively to care for the people whose hardships weigh heavily on me. If you also wish you could do something to help, I hope you’ll consider partnering with this exceptional effort. 


If I could make enough bread to make a difference, I’d make a million loaves of this one, mostly because it’s a hearty and nutritious whole grain loaf, but also because it is sweetened with honey and embellished inside and out with sunflower seeds. The beautiful sunflower is the national flower of Ukraine, and also happens to be a favorite of honeybees. To me, a bread like this is a reminder that we are all connected on this big blue ball we call home.


This bread is an adaptation of my favorite sourdough sandwich bread, and the substitutions I made were easy. 

Rather than repeat all the instruction I’ve already given for my basic bread, I’ll point to what I did differently for this one, and trust you’ll find your way back to my earlier post if you need more visual information. This bread, like the other, depends on a portion of fed, ripe sourdough starter. It uses a special technique of pre-cooking a portion of the flour in milk, then cooling it before adding to the recipe. 

I swapped in a generous amount of white whole wheat flour as well as a portion of an ancient grains blend flour from King Arthur, called Super 10. This super-nutritious flour includes quinoa,  buckwheat, amaranth and millet, among others. It gives my bread a flavor and texture boost without making it dense or heavy. I nearly doubled the amount of honey from my base recipe, and used the stretch-and-fold phase of the fermentation to fold in about a half cup of toasted sunflower seeds. This dough is very sticky, thanks to the ancient grains and high hydration, so use wet hands to complete the stretches. This is a gentle but effective way to knead the dough and incorporate the extra ingredient of seeds.


When the dough was ready for shaping, I used wet hands again to form a loaf, and then moistened the underside and rolled it lightly in additional sunflower seeds before placing it in my baking pan. Then, I baked the loaf as directed in my original post. Use a steam pan for the first 20 minutes, and a tent foil for the remainder of the baking time.


We love a good sandwich bread at our house. My husband filled two slices of this one with tuna salad for lunch, and I’ve already enjoyed it toasted with breakfast. Without a doubt, this bread will become a regular item in our rotation, and with every loaf I pull from the oven, I’ll hold the mighty people of Ukraine in my heart. 💙💛


Honey-Lavender Ice Cream with… well, read and see!

I know, I know—we are not exactly in “ice cream season,” but this is not an ordinary, warm weather ice cream, and I found it so interesting, I could not wait until next summer to share it!

My inspiration for this ice cream came very naturally, in the course of conversation with dear friends after a feast that concluded with one of my homemade ice cream recipes. Our friend, Charlotte, casually mentioned that she had once had a chance to try a most unusual ice cream flavor, and that she had lingering regrets over passing on that opportunity so many years earlier. It was bleu cheese ice cream, she said, and she had never stopped thinking about it.

I’ll be honest—my brain could not imagine it. Bleu cheese? In ice cream? Yikes.

But my taste buds took the wheel, reminding me that I have enjoyed many charcuterie boards with the combination of bleu cheese with fresh and dried fruits, and bleu cheese drizzled with honey, and both were fantastic! So if I’ve enjoyed bleu cheese with sweet flavors in other ways, why wouldn’t it be possible—or potentially even good—in an ice cream?

Many years ago, I made a honey and goat cheese ice cream that was fantastic, so it wasn’t out of the realm of possibility. Before long, I joined Charlotte in wondering if bleu cheese ice cream would be amazing—or just weird.

That was about two years ago, and as time rolled along, I moved on to what seemed to be more “normal” ideas for ice cream, including several that I have posted here on Comfort du Jour, but a few weeks ago, Charlotte and her partner, David, joined us for pizza night at our house and she clearly had not forgotten about this most unusual frozen treat, and she put it right out there as a challenge:

“So, what do you think about doing the bleu cheese ice cream?”

And all at once, my brain connected the dots.

The bleu cheese would need a sweet base to carry it, and I remembered the jar of specialty honey—a local one, infused with lavender—that sat mostly untouched in the back of my cabinet. Of course! That would infuse the base of my ice cream, and I would embellish it with additional dried lavender buds, steeped in the cream mixture and strained out before churning. With or without bleu cheese, I knew that would be a delightful dessert, and when I tasted the base, I let go an audible moan. It was, OMG, perfect.


There could be no vanilla in this ice cream because I didn’t want a distraction from the honey or the lavender. Sweetened condensed milk would provide structure to the base, and something else would have to run through the ice cream to split the difference between the sweet, floral background and the salty, funky bits of bleu cheese. Something tart and unexpected (as if bleu cheese wasn’t unexpected enough)—yes, it would have to be balsamic vinegar!


Now, if you had told me a few years ago that I would one day make ice cream with vinegar and bleu cheese, I would have decided then and there that you were completely off your rocker. But this balsamic is not ordinary vinegar—it’s a specialty product, infused with lavender. Something in my subconscious had already predicted this moment, because I found an unopened bottle of the stuff in my pantry overflow. I poured some into a pan and reduced it to a thick, syrupy consistency, which concentrated both its sweetness and its tang, and I drizzled that syrup through the churned base as a ribbon—no, more like a thread—that literally streaks through each scrumptious scoop, accentuating the positives of the warm honey, the fragrant lavender, the sweet cream and yes, the funky bleu cheese.


For this recipe, I recommend a bleu cheese that is not too funky or overly vein-y. I actually picked up three different bleu cheeses to determine which one was right. The first turned out to be too pungent and heavy on the funky veins— better for chunky bleu cheese dressing, and that’s exactly what I ended up making with it. The second bleu cheese had great promise, as the woman in the specialty cheese department at the market described it as being “smoked over hazelnut shells,” but in one taste, I knew that it would overwhelm the delicate lavender (It’ll be great, though, on a charcuterie tray). My third option turned out to be just right, with a classic, salty flavor and nice blue-color veins running through creamy-looking white cheese. I layered crumbles of it over the churned ice cream, which was streaked with a fine drizzle of the balsamic reduction.


I’m not so naïve to think that everyone reading this now would enjoy this ice cream because not everyone has a strong sense of adventure. Frankly, not everyone even likes bleu cheese. If you’d rather have a reduced-guilt vanilla ice cream or a homemade Cherry Garcia, I’ve got you, and you can skip over to those posts for the recipes. No judgment here. But for those of you who do have that adventurous side—you read this to the end, after all—you’re gonna be telling your friends about this one!

Charlotte was thrilled to finally have bleu cheese ice cream, and just in time for her birthday. ❤ 🙂


Honey-Lavender Ice Cream with Bleu Cheese

  • Servings: About 8
  • Difficulty: Intermediate
  • Print

Not for the unadventurous, but a sophisticated combination of flavors in an elegant, indulgent ice cream.


Ingredients

  • 3/4 can sweetened condensed milk (about 10 ounces)
  • 1 cup whole milk
  • 1 1/2 cup heavy cream
  • 1/2 cup half and half
  • 3 Tbsp. lavender-infused honey* (see ingredient notes)
  • 1 tsp. edible dried lavender buds*
  • Pinch kosher salt
  • 1 Tbsp. vodka (optional, added at end of churning for improved texture)
  • 1/3 cup lavender-infused balsamic vinegar*
  • 1/3 cup mild bleu cheese crumbles*

I used Cloister brand whipped lavender honey, but there are many notable varieties available with a quick internet search. If possible, choose a honey made locally. The dried lavender buds underscored the floral essence of the honey, and I recommend them. Be sure you select lavender that is labeled as “food-grade” or “edible,” as some on the market are intended for cosmetic formulas only. The lavender-infused balsamic is another specialty ingredient that you can find at any one of the balsamic and olive oil stores that have popped up all over the U.S. If your local shop’s supplier is Veronica Foods, you’re in the right place.

Directions

  1. Heat the milk in a small saucepan over medium-low heat. When it begins to steam around the edges, whisk in the honey to dissolve it. Add the lavender buds to the pan and turn off the heat. Allow the buds to steep until the milk has cooled to room temperature.
  2. Pour 3/4 of a can of sweetened condensed milk into a pitcher bowl. Pour the lavender-infused milk through a mesh strainer into the bowl, discarding the spent lavender buds. Whisk the milks together until evenly blended. Add heavy cream and half and half, whisking to combine but taking care to not whip air bubbles into the mixture. Cover and refrigerate several hours until completely cold.
  3. Heat the balsamic vinegar in a small saucepan over medium heat, stirring occasionally, until it reduces in volume and takes on a syrupy consistency. Cool to room temperature.
  4. Set up ice cream machine. Gently whisk ice cream base mixture to reincorporate any ingredients that have settled. Freeze ice cream according to manufacturer’s instructions. In the final minute of churning, add vodka to ice cream and allow it the machine to churn it all the way through.
  5. Spoon about 1/3 of frozen ice cream mixture to an insulated freezer container. Use a whisk to carefully drizzle a slight ribbon of reduced balsamic over the layer of ice cream, and use a toothpick or thin knife to gently marble the balsamic down into the ice cream, but be careful not to “muddy” it. Scatter half of the bleu cheese crumbles over the balsamic, and then repeat with another layer of ice cream, balsamic and bleu cheese. You probably won’t use all of the reduction, but you can use the rest of it to drizzle over the ice cream at serving time. Finish layer the last of the ice cream base on top. Smooth gently, cover with parchment or wax paper and freeze until firm (about 8 hours).


“Beer” Can Honey Roasted Heirloom Chicken

We are a few days into the Jewish New Year, and I’m taking a new approach to roasting an heirloom chicken in my favorite blend of flavors—honey, garlic and rosemary. Honey is a big deal during Rosh Hashanah, as it represents the hope for a sweet new year. Any kind of honey is appropriate, but I am fond of a local unfiltered sourwood honey, and I just picked up a new jar a few weeks ago. Despite its name, it is sweet with a rich and earthy flavor, and it is strong enough to stand up to the plentiful garlic and aromatic rosemary.

For a special occasion such as Rosh Hashanah, I didn’t want to go too casual with beer, so for this recipe, I’ve emptied the beer from the can and filled it with white wine. Oh, and to shake things up a bit, we’re also roasting this wine-filled, beer-can chicken in the oven—not on the grill. The liquid inside the beer can contributes to the juiciest, most tender chicken, and this effort did not disappoint.

This heirloom chicken smelled sooo good as it roasted, and because it involves more love and care, plus a few hours, it qualifies for Sunday Supper status. Alongside this mouthwatering chicken, we plated some of Les’s garlic-parm mashed potatoes (which are pretty amazing, even as leftovers) and fresh Brussels sprouts, roasted with sliced shallots and tossed in a glaze of lemon-infused olive oil and pomegranate-flavored balsamic. Pomegranate, like honey, is also symbolic at Rosh Hashanah, and the hope is that our blessings in the new year will be as numerous as the arils (seeds) in the pomegranate. We are hoping that for you as well. 🙂

The lemon oil and pomegranate balsamic was a great combination for Rosh Hashanah. This recipe would also be terrific at Thanksgiving.


Ingredients

3 cloves garlic, minced

1 Tbsp. fresh rosemary leaves, finely chopped

2 Tbsp. honey* (see notes)

Juice of 1/2 lemon

2 Tbsp. dry white wine*

1/4 cup extra virgin olive oil

1 tsp. kosher salt

Freshly ground black pepper

4 pound heirloom chicken*


For the beer can:

3 additional cloves garlic, crushed

1 sprig fresh rosemary

3/4 cup dry white wine


*Notes

Any flavor of honey will work, but I’ve used sourwood honey, which is a liquid form of honey. Solid or crystallized honeys are not recommended here.

“Dry” wine means wine that is not sweet, but it can still be confusing to know which kind of wine will work best for a recipe. Aim for a “neutral” flavor of white wine, such as pinot grigio, rather than an oaky wine as Chardonnay. I used a white blend of chenin blanc and viognier, which has a soft and delicate floral essence, and it worked out great.

An “heirloom” chicken is a specialty item, usually an older or heritage breed of chicken, and raised in an ethical manner. Birds raised this way will be more expensive, but well worth it. My chicken also happened to be quite large—it weighed in at a little over 4.5 pounds!

This may have been the largest chicken I’ve ever roasted.


Instructions

  1. Combine all marinade ingredients in a large bowl and whisk until smooth.
  2. Pat chicken dry with paper towels and season all over with kosher salt and black pepper. Place the chicken in the bowl with the marinade and turn several times to evenly coat the bird. Allow chicken to rest 30 minutes.
  3. Remove all oven racks, except for the lowest. Preheat the oven to 450° F. Note in step 6 that this is not the final roasting temperature, just the beginning.
  4. Empty the beer can (don’t worry—I poured it into a frosty pint glass for my sous chef-husband), and replace it with the wine, crushed garlic and rosemary sprig.
  5. Center the beer can on a rimmed baking sheet (we used the base part of our broiler pan). Carefully place the chicken over top of the can, so that it is nearly fully inside the bird. The wine and aromatics will season the bird from the inside and will keep the chicken moist. Pour remaining marinade all over the bird.
  6. Cover the top of the chicken loosely with a piece of foil, to protect it from burning in the oven. Transfer the chicken on the baking sheet to the lower rack of the oven.
  7. Roast for only 10 minutes at 450°, then reduce oven temperature to 325° and roast about one hour, or until juices run clear when a thigh is pierced with the tip of a knife. The time may vary based on the chicken’s weight. For best results, use a thermometer to confirm the temperature in the thickest part of the thigh is 165° F.
  8. Remove chicken and rest for 15 minutes.
  9. Return oven temperature to 400° F, and roast the Brussels sprouts.
Just hanging out while the brussels sprouts get their roast on.

Ingredients for Brussels Sprouts

1 pound Brussels sprouts, trimmed and halved lengthwise

Drizzle of extra virgin olive oil

Salt and pepper

1 shallot, sliced

4 tsp. lemon-infused olive oil (or regular oil + juice of 1/2 lemon)

4 tsp. pomegranate-flavored balsamic vinegar

Look at the caramelization on those brussels sprouts! The balsamic-oil dressing was tossed on them only for the last few minutes of roasting.

Instructions

  1. Spread sprouts onto a parchment-lined baking sheet and drizzle with olive oil and season with salt and pepper. Toss to coat, and arrange sprouts, cut-side down.
  2. Roast for 15 minutes. Whisk together the infused oil and flavored vinegar. Scatter the sliced shallots onto the roasted Brussels sprouts, and then toss the vegetables with the oil-vinegar blend. Roast an additional 5 minutes, then remove and serve.
Dinner is served!

Want to print these recipes?