Genealogically speaking, I don’t believe I have a single Italian bone in my body. Nope—my people came from other parts of Europe and beyond. But I am so in love with Italian food, especially the southern regional dishes, such as layered baked pasta dishes and big red sauces (or “Sunday gravy,” as it would be called). My grandmother taught me some authentic Scandinavian dishes, but I had to do my own research to learn the real deal on Italian flavors, so I could ditch the bland and overly sweet jarred sauces. I’ve learned how to make my own pasta (that’ll be another post), and hopefully I’ll prove today that I can rock a red sauce that is molto buono!
Chicken cacciatore is my “comfort du jour,” moist and oh-so-tender chicken, stewed slowly and thoughtfully with tomatoes and Italian herbs and spices. This is some serious, old-school Italian comfort food right here! I can’t say that I’ve added a twist to this recipe (maybe the bomba?), but if you’ve never made cacciatore before, I hope you’ll find my recipe approachable. You’ve got this—and here’s a quick rundown of what I learned before I made my own.
What’s the big deal about San Marzano tomatoes?
For Italian sauce recipes, there is really no substitute for San Marzano tomatoes. They are super meaty with a perfect acidic-to-sweet balance, and exceptional for the richest Italian sauces. In appearance, they are essentially plum tomatoes and they are the genetic ancestors of the common supermarket Roma, but to be legally called San Marzano, they must be cultivated in the southern region of Italy of the same name, where the climate and rich, volcanic soil work their magic. Are real San Marzano tomatoes worth the extra buck per can? You bet!
What is bomba sauce?

Delicious, that’s what! Bomba sauce is typically a paste-like seasoning, centered around dried chile peppers from the southern regions of Italy, mixed with olive oil, spices and vinegar. It’s a pungent condiment that is meant to be used sparingly. Trader Joe’s has its version of the sauce that I absolutely love—it’s unique because the Calabrian chiles are fermented, which lends extraordinary depth and flavor. I’ve added a very small amount to my cacciatore, but it wouldn’t be the same without the bomba.
Can I substitute skinless chicken breast for the chicken thighs in this recipe?
Of course, you can always substitute white meat, skinless or boneless, but the dish will not have as much depth and richness, and you’d need to use extra oil to prevent the meat from sticking in the pan. I choose large, bone-in chicken thighs for this recipe because they’re a perfect portion size and the dark meat is so flavorful. Keeping the skin on allows you to draw every bit of chicken-y goodness into the meal. Also, I only select organic, free-range chicken because birds that have freedom to roam in the fresh air and sunshine are healthier, and you know what they say—we are what we eat.
What flavors are in Italian seasoning?
Italian cooks have always relied on the abundant flavors of fresh herbs. If you pick up any bottle of “Italian seasoning” at the supermarket, you can predictably find it contains the big three—oregano, basil and thyme, but there are many other flavors that play well with Italy’s flavorful sauces and roasted meats. In the north, you’d expect to see rosemary and sage. In the south, spicier flavors like red pepper are prominent. Two of my favorites are marjoram (cousin of mint and very similar to oregano) and fennel seed, which has a floral, slightly licorice flavor. It’s what makes Italian sausage taste special. I make my own “Mama Mia” seasoning blend without salt, and I use the big three, plus garlic, fennel seed and crushed red pepper. It’s good for a little punch of flavor in any Italian red sauce, sprinkled on pizza or mixed with olive oil as a bread dipping condiment. If you want to make mine, the recipe is at the end. Otherwise, substitute as noted in the ingredients.
Serves 4 – Prep in 20 minutes, cook for 90 minutes
Ingredients
Extra virgin olive oil
4 large chicken thighs (bone-in, skin on)
2 large bell peppers, seeded and sliced lengthwise, about 1/4” thin
1 medium-size sweet onion, sliced lengthwise 1/4” thin
4 or 5 cloves fresh garlic, rough chopped or sliced
2 tsp. Mama Mia Italian seasoning blend—or
1/4 tsp. each: oregano, basil, ground fennel seed, thyme leaves, garlic powder, onion powder, crushed red pepper flakes (this is not exactly the same as my Mama Mia blend, but close)
1 or 2 tsp. Trader Joe’s Italian Bomba hot pepper sauce
Handful Kalamata olives (pitted), rough-chopped into pieces
1/4 cup dry red wine (It doesn’t have to be Italian; I used a CA red blend that was already open)
1 28 oz. can whole plum tomatoes in puree (San Marzano, if possible)
1/2 package linguine (preferably “bronze-cut” for best texture)
Freshly grated parmesan or parm-romano blend, for serving
Small handful Italian flat leaf parsley, cleaned and chopped
A loaf of fresh Italian bread for sopping up every single drop of the sauce
Instructions
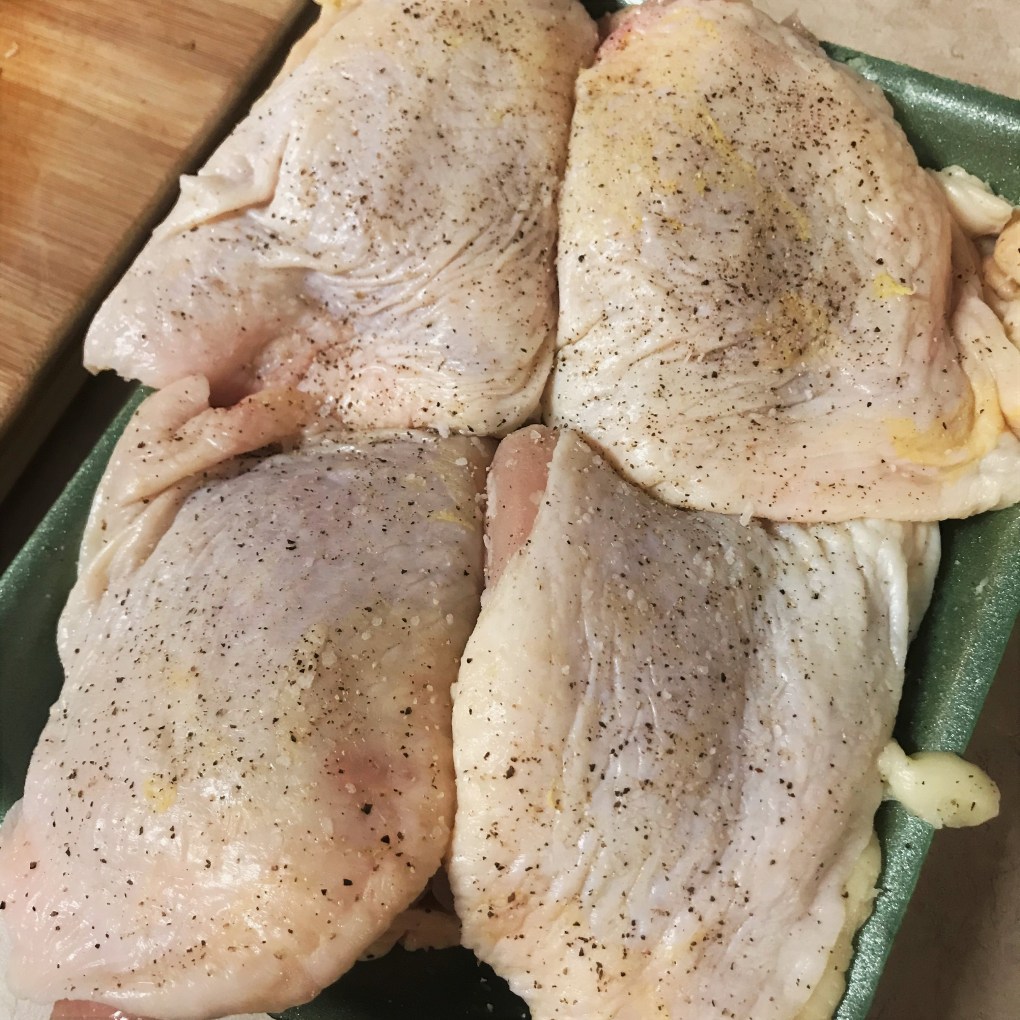
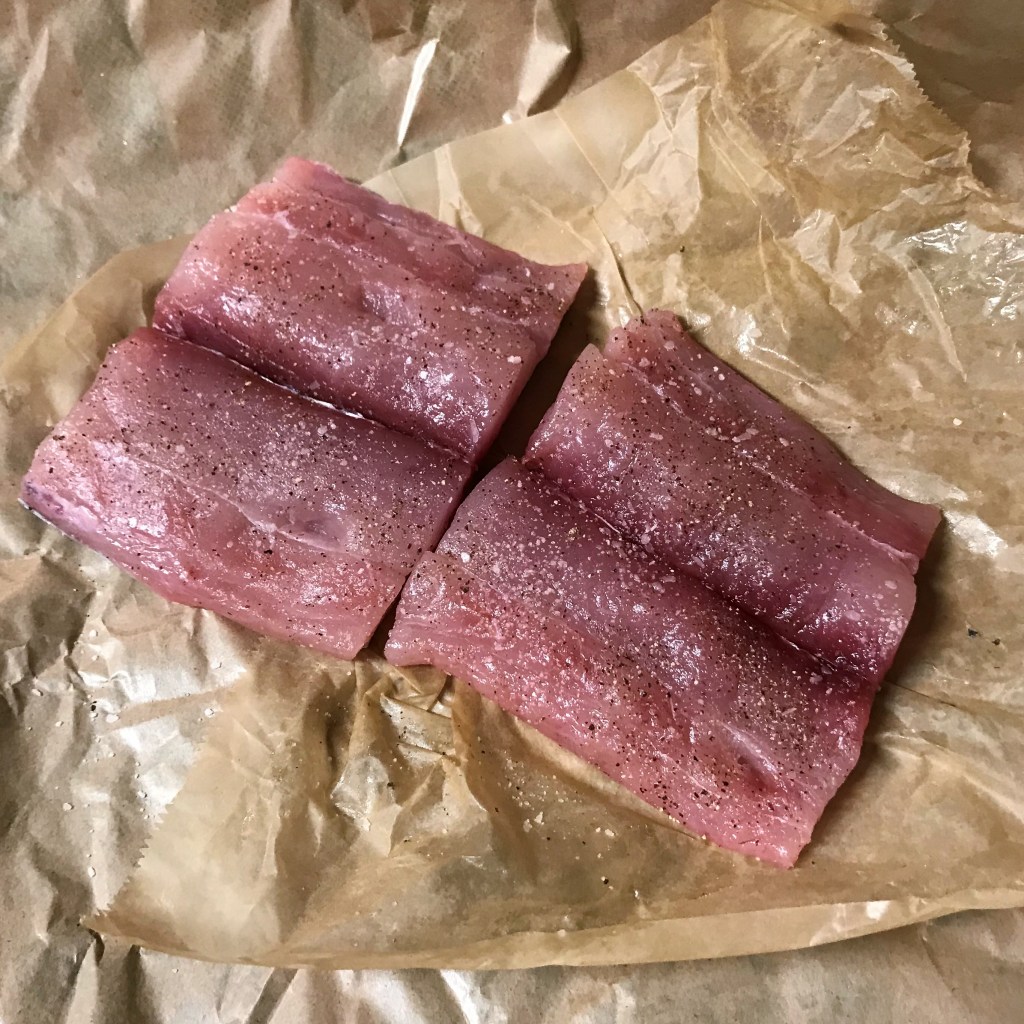
Always season meat before you begin cooking, or your flavor will be only on the outside. 
Skin side down at the beginning will render the natural fats of the chicken, which becomes the base for so much flavor in the dish. 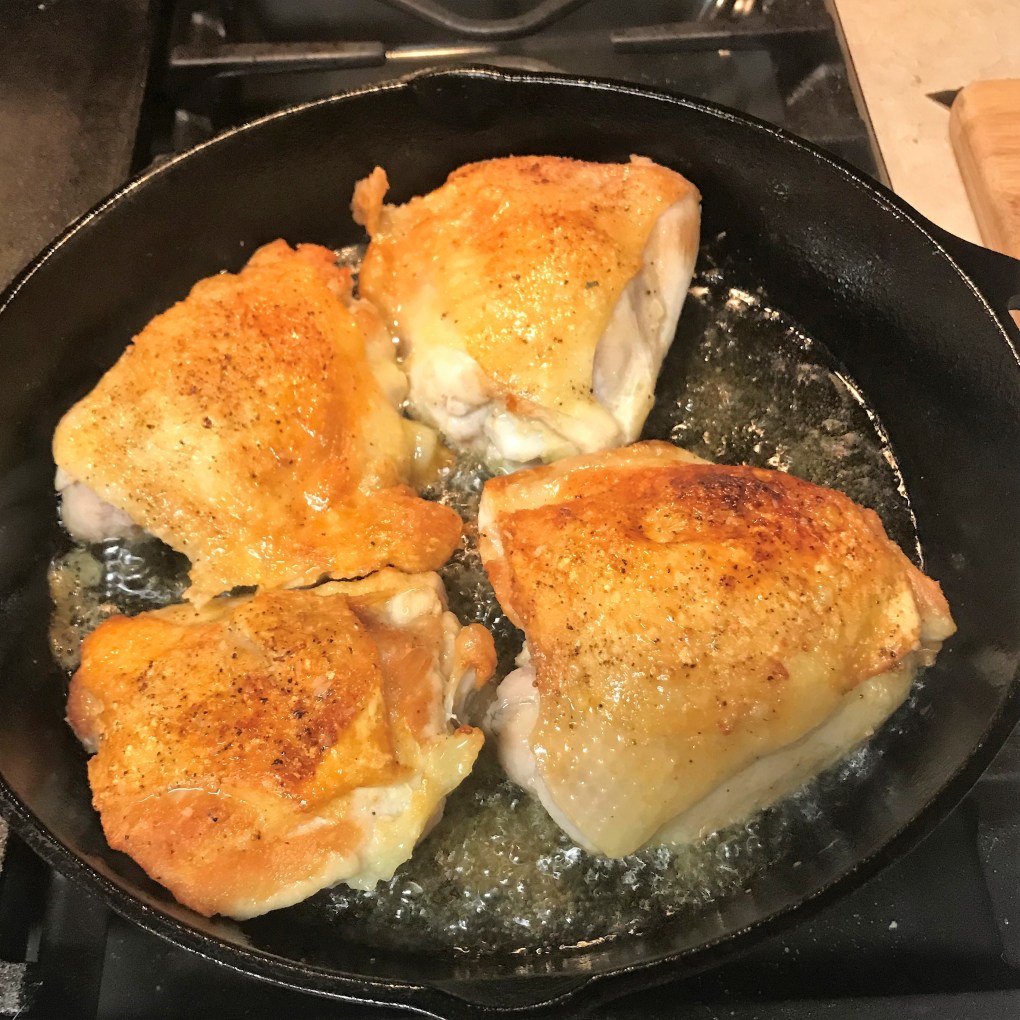
Don’t turn the chicken pieces over until they have a golden crust. The large piece on the right still has some uncooked skin, so I’ll hold it with tongs to crust that area. 
These ingredients are game changers for my cacciatore. The bomba sauce lends subtle heat and depth, and the kalamata olives are meaty and briny, terrific against the red sauce. 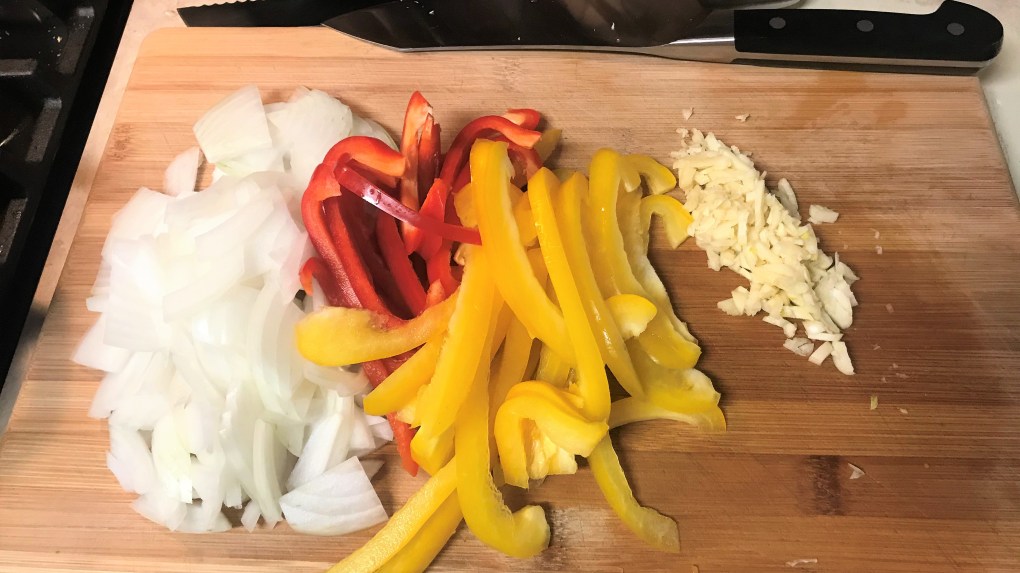
I like to see pieces of pepper, but you could chop them if you like. Any color bell pepper will work, but I prefer the sweeter ones rather than green for this dish. 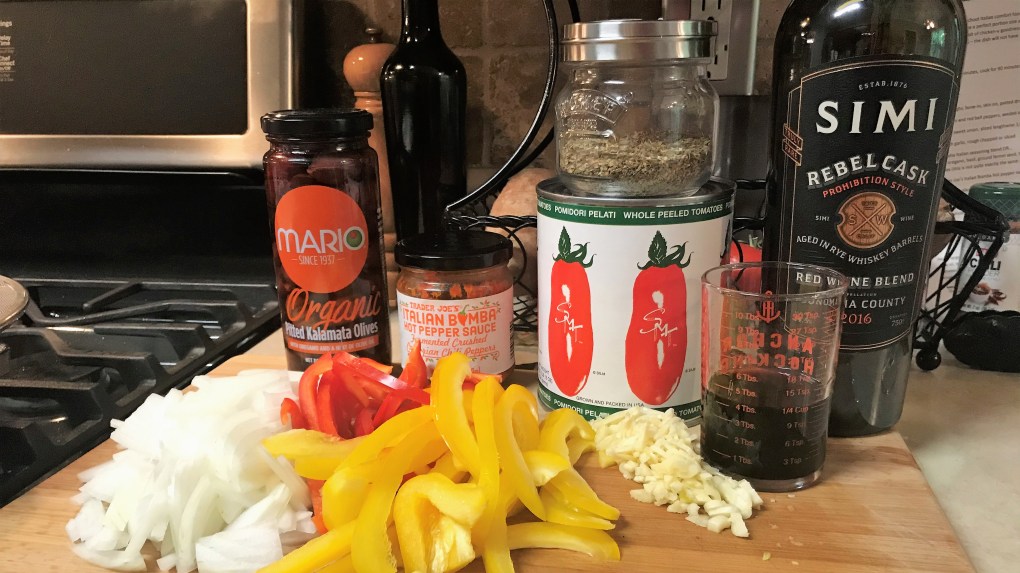
When it comes down to it, this really is a pretty simple recipe. 
If the sauce is thin, stir in a couple tablespoons of tomato paste with the bomba sauce. 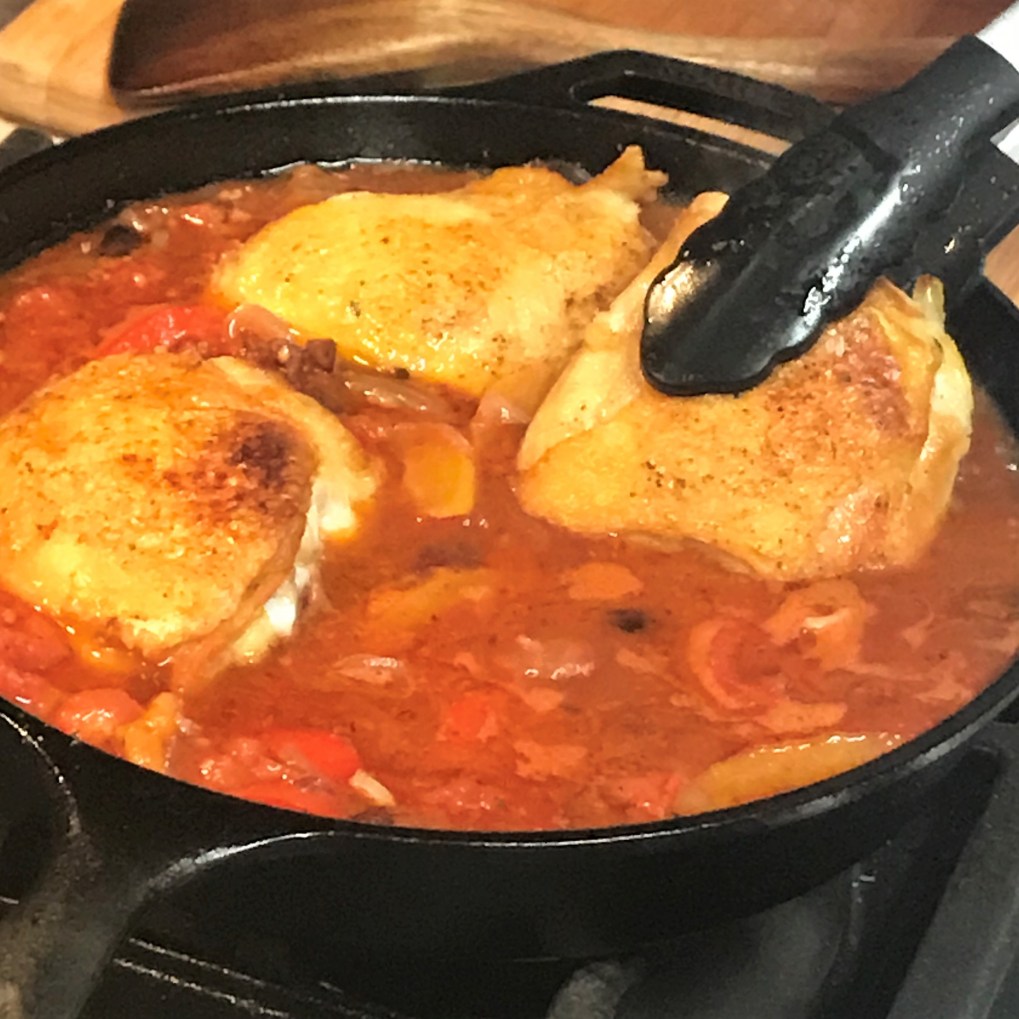
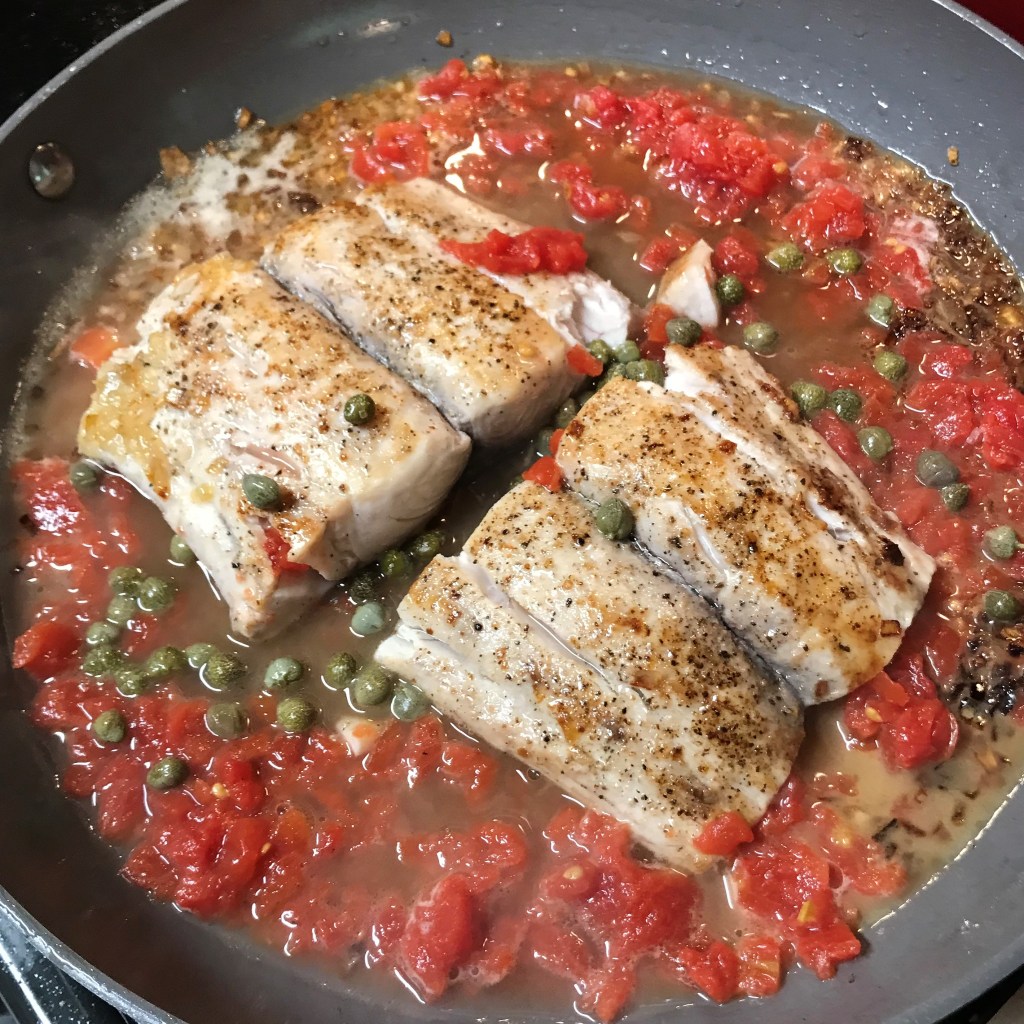
Return the chicken thighs, skin side up, and gently spoon a bit of the sauce over them. 
As it simmers, the sauce will thicken and the chicken will become fall-off-the-bone tender. 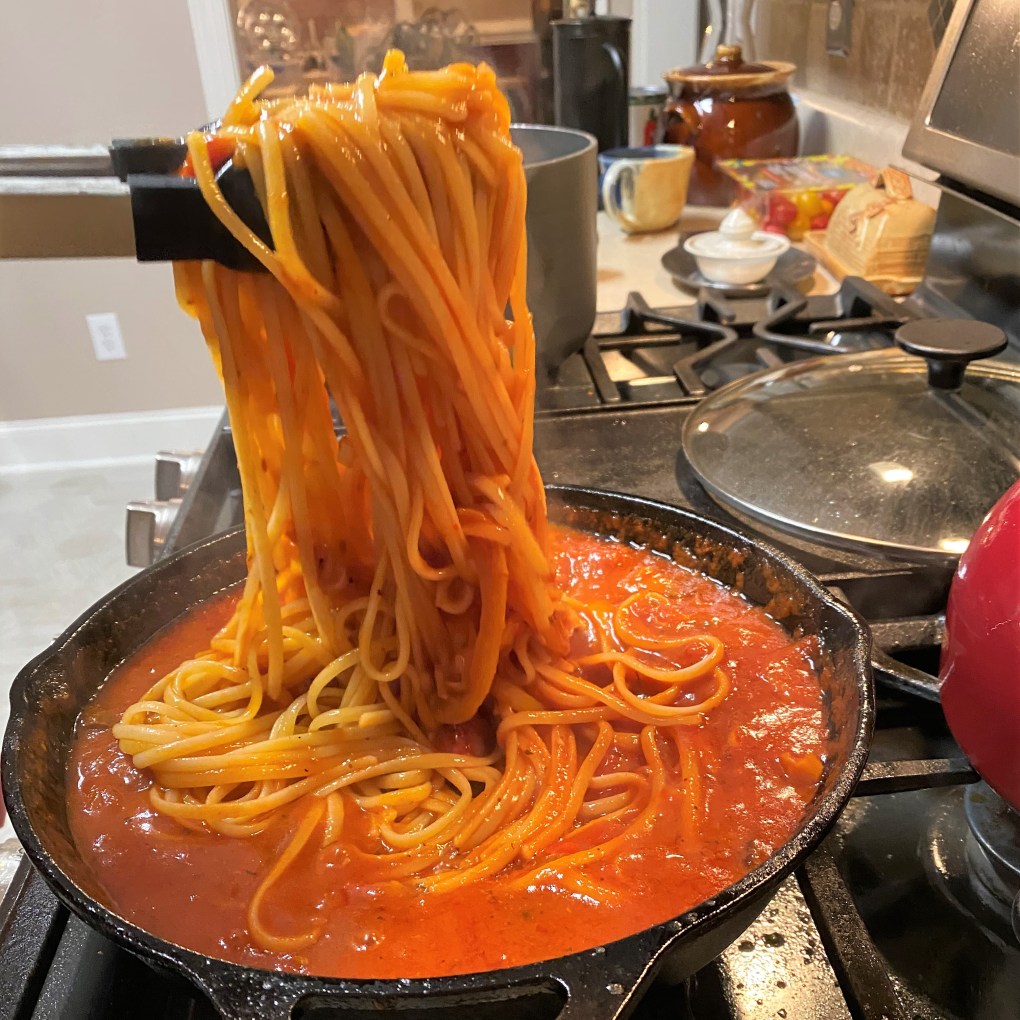
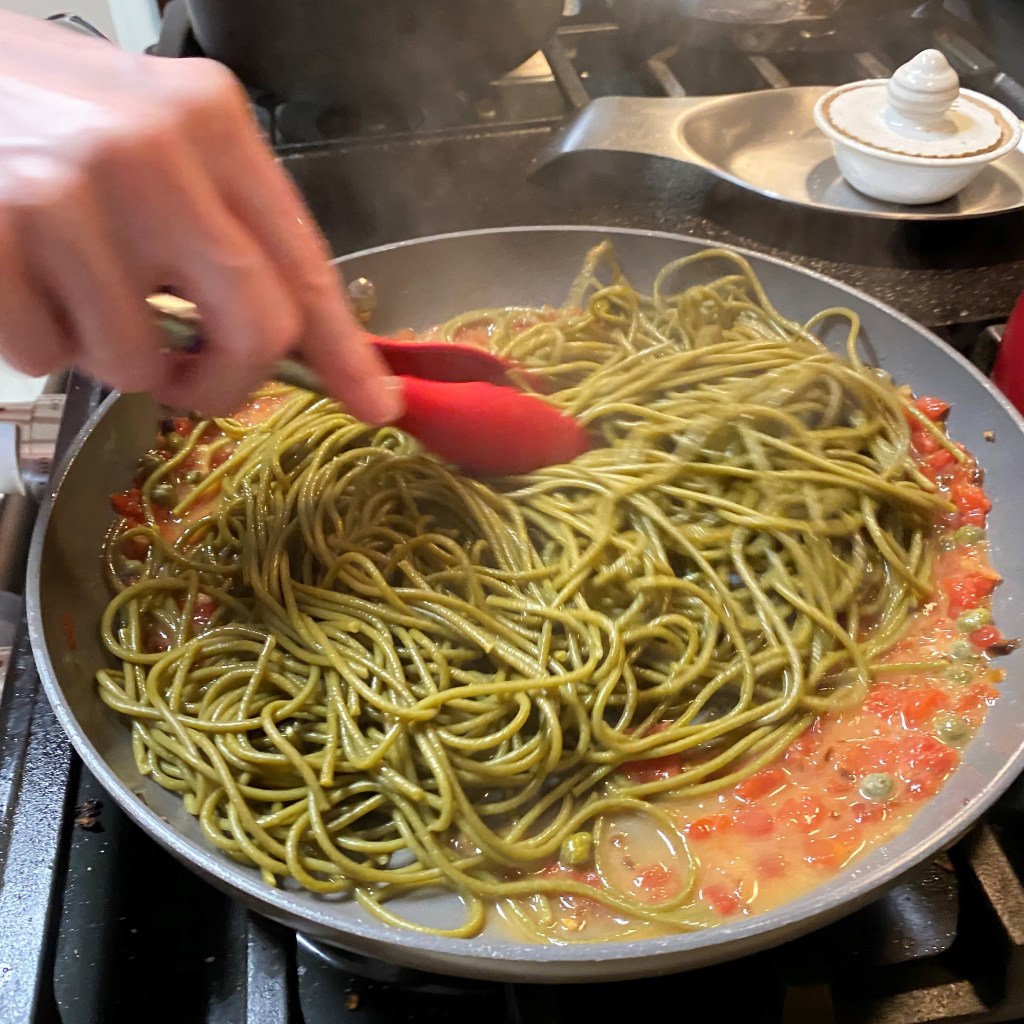
To make more room for finishing the pasta, I moved the chicken thighs to a covered plate. ALWAYS swish the pasta through the sauce before serving. 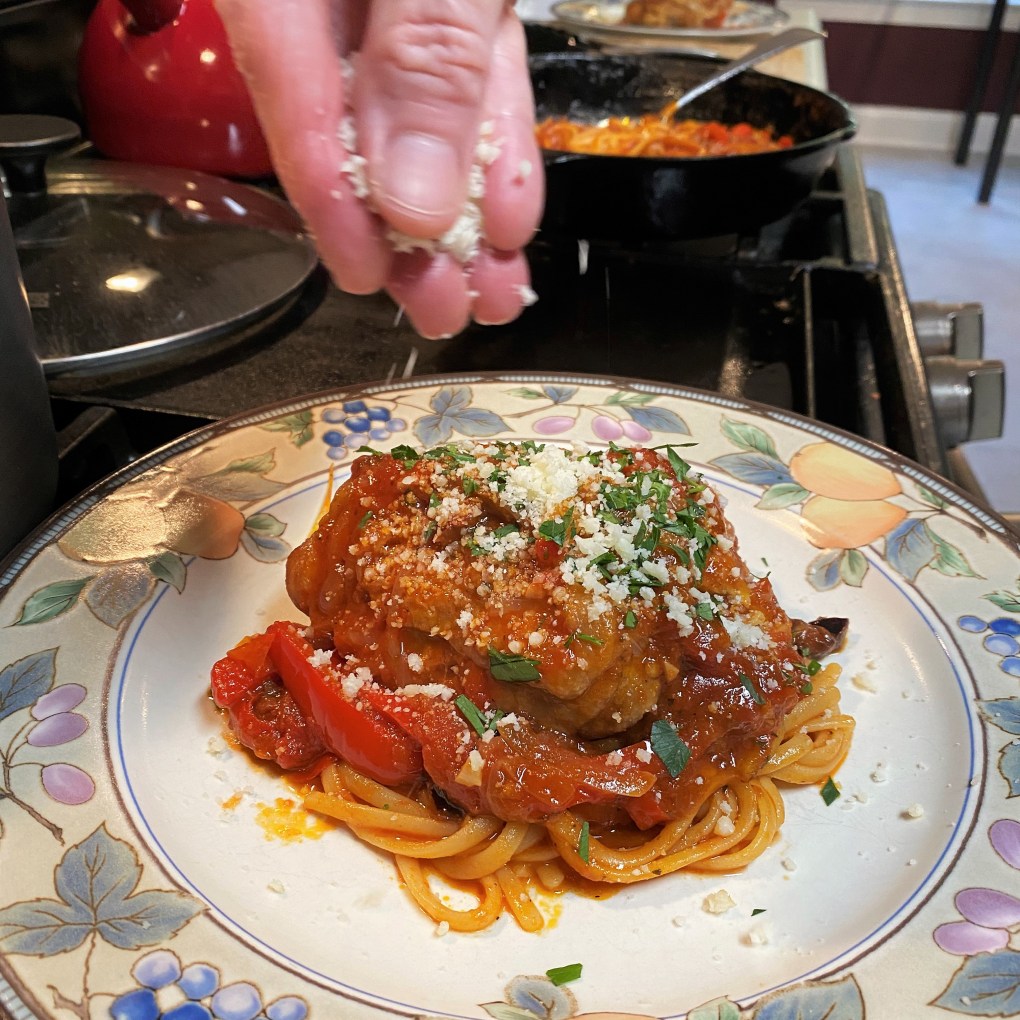
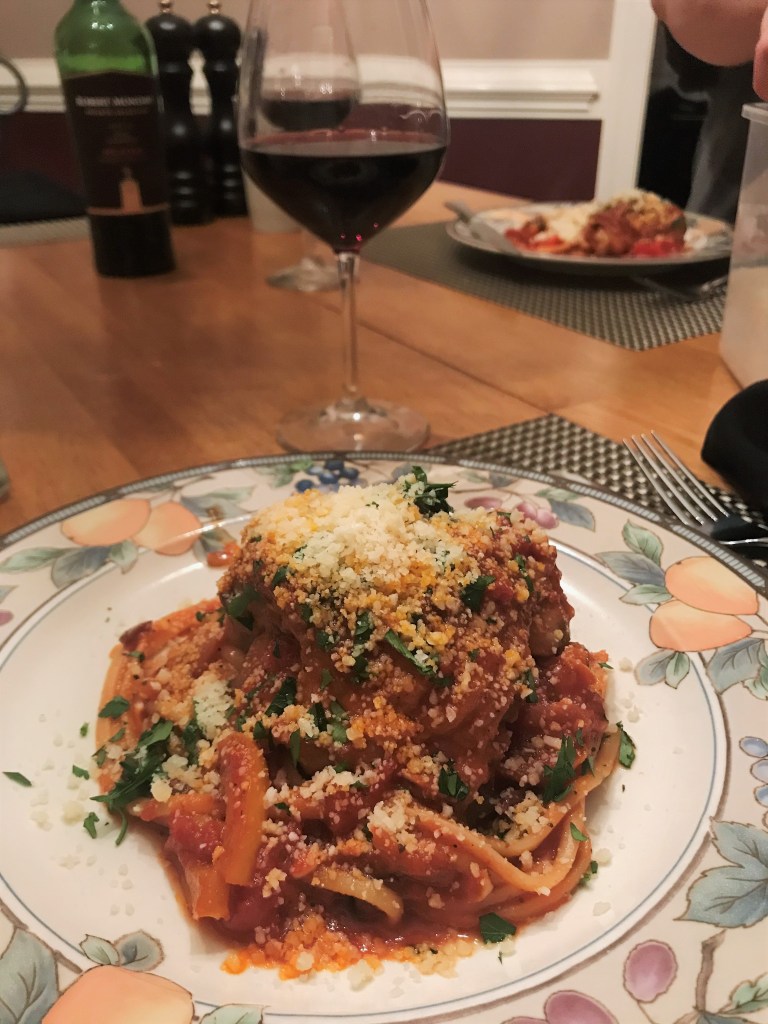
A little more freshly grated parm-romano blend? Yes, please!
- Pat the chicken pieces dry with a paper towel and season both sides generously with kosher salt and black pepper.
- Heat a large (12”) cast-iron skillet (or electric skillet) to medium-hot, and swirl in about 2 tablespoons of olive oil. When oil is just shimmering, place chicken thighs in pan, skin side down, leaving plenty of room between them. Cover the pan (I use a spatter screen) and leave them undisturbed about 7 minutes to allow a deep golden crust to form on the skin. Loosen and turn the thighs and cook until just lightly browned on the other side, about 2 minutes. The chicken will finish cooking later in the sauce. Remove the pieces to a plate and keep warm while you prep the sauce.
- If the remaining oil is sputtering or popping in the pan, allow a few seconds for the moisture droplets to cook off. Reduce heat to medium. All at once, add your onions and bell peppers to the pan, and stir them around until they begin to soften. Add the Mama Mia seasoning, plus salt and pepper, over the entire mixture. Add the garlic and cook another 2 to 3 minutes, or until the onions are slightly translucent. Stir in the Kalamata olives, the Bomba sauce and the red wine.
- Add the peeled tomatoes, using your hand to squeeze each one into the pan. This releases more of the juices quickly and gives the tomatoes a head start on breaking up. Pour all remaining juice from the tomatoes into the pan, but discard any large basil leaves that may have been included in the can (they’ve already done their job). Add a splash of water (or wine!) to the tomato can to swish out every last bit of flavor in there. Scrape up any browned bits that may be stuck to the pan and stir the mixture until it has a uniform appearance. Cover and allow the mixture to come up to a slight boil.
- Add the chicken thighs back to the pan, skin side up, and spoon the tomato mixture lightly over the tops. They don’t need to be buried in it, but you want to moisten them with the flavorful sauce. Cover the pan and reduce heat to medium-low, turning the chicken only twice over the next 90 minutes.
- When the sauce is a deep red color and the chicken shreds with a light twist of your fork, reduce heat to warm and prepare your pasta water. Remember to use plenty of water and plenty of salt.
- When the salted water reaches a steady boil, add your pasta and stir at once to prevent sticking. Cook to just barely al dente, or a couple of minutes under what seems perfect. You’re going to finish it in the sauce. Before draining the pasta, ladle out 2 to 3 tablespoons of the water into the sauce. This adds the pasta starch to the sauce, which helps “marry” them to coat the pasta better.
- Move the chicken pieces to the outer edges of the pan (or remove to a plate if the pan is crowded), making a well of sauce in the center. Drain the pasta and immediately add it to the center of the pot, stirring quickly to evenly coat it in the sauce. I use silicone tongs to do this because I can grab hold of the pasta while moving it. Cover the pan and turn off the heat while you pour another glass of wine and call everyone to the table.
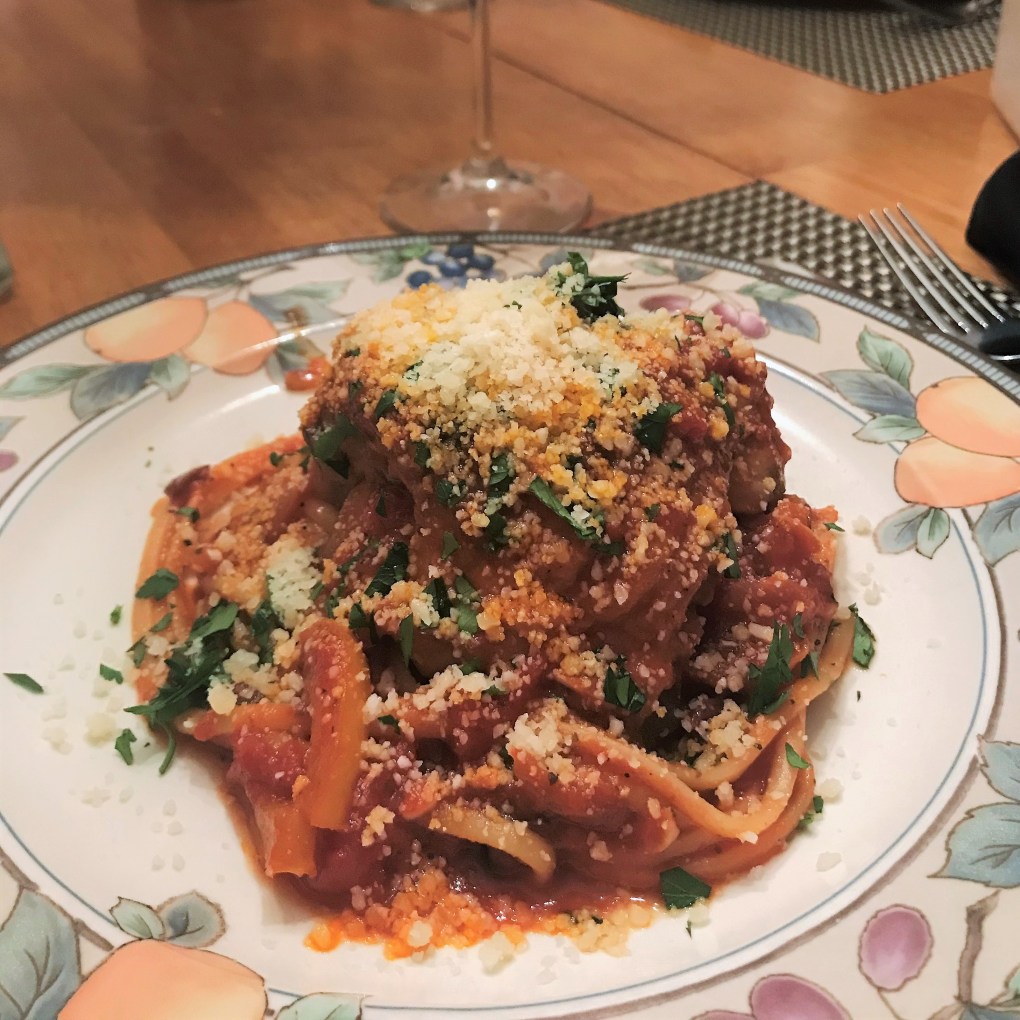
Portion the pasta onto the serving plates, top with a spoonful of sauce, then a chicken thigh, and divvy out the rest of the flavorful sauce. Sprinkle some grated cheese and a bit of fresh chopped parsley on top and enjoy!
Want to print this recipe?
Mama Mia seasoning
(makes about 1/3 cup seasoning blend)
I created my own blend of Italian spices, to customize the flavors we like best at our house. Most of my blends do not contain salt, and this allows more flexibility with different application and better control of the sodium in my dishes. Most of the time, I double the recipe so I always have a jar of the blend at the ready. The beauty of a blend like this one is that you can increase or decrease or even eliminate ingredients based on your taste preference. And every time, it’ll be perfect!
This blend is great for your own Italian red sauce, or add a teaspoon to a puddle of extra virgin olive oil and top with freshly grated parmesan for a flavorful bread dipping oil.
1 Tbsp. whole fennel seed
1 Tbsp. dried minced garlic
1 Tbsp. granulated garlic
1 Tbsp. dried basil leaves
2 tsp. dried thyme leaves
2 tsp. crushed red pepper flakes
1 1/2 tsp. dried Mediterranean oregano
1 1/2 tsp. dried marjoram
1 1/2 tsp. onion powder
To make it:
Heat a dry skillet (no oil!) over medium high heat and add fennel seeds, swirling the pan constantly for about one minute, until the seeds become fragrant. Remove immediately to a bowl to cool completely, then crush seeds with a mortar and pestle or pulse a few quick times in a spice grinder.
Add all other seasoning to the bowl and stir to combine. Transfer to a jar or empty spice bottle.