When I set out last week to make a somewhat traditional Rosh Hashanah meal to enjoy with my semi-observant husband, I felt a bit of a knot in my belly. What if I get it wrong and ruin Rosh Hashanah? Dramatic, I know, but this is me. I have no Jewish heritage myself— at least not that I’m aware of— and I always worry that my effort might be disrespectful to someone else’s tradition. Les says this is silly, and has at times even suggested that in all my diligence, I might even be more Jewish than he is.
Still, I gave much thought to our meal for Rosh Hashanah (the Jewish New Year) and I settled on roasted chicken with a bevy of root vegetables, including carrots, red potatoes and parsnips with a simple pan dripping gravy. Delicious! And for dessert, kugel, made with noodles, sugar, eggs and various forms of dairy. I want to emphasize that in a kosher household, this dessert would not be served with chicken because Jewish dietary law prohibits meat and dairy together on the table. This rule is born from the commandments in Exodus and Deuteronomy that you should not cook a young goat in its mother’s milk— which over time expanded to “no kind of meat with any kind of dairy, even if said meat doesn’t make milk.” Don’t blame me, I don’t make these rules.
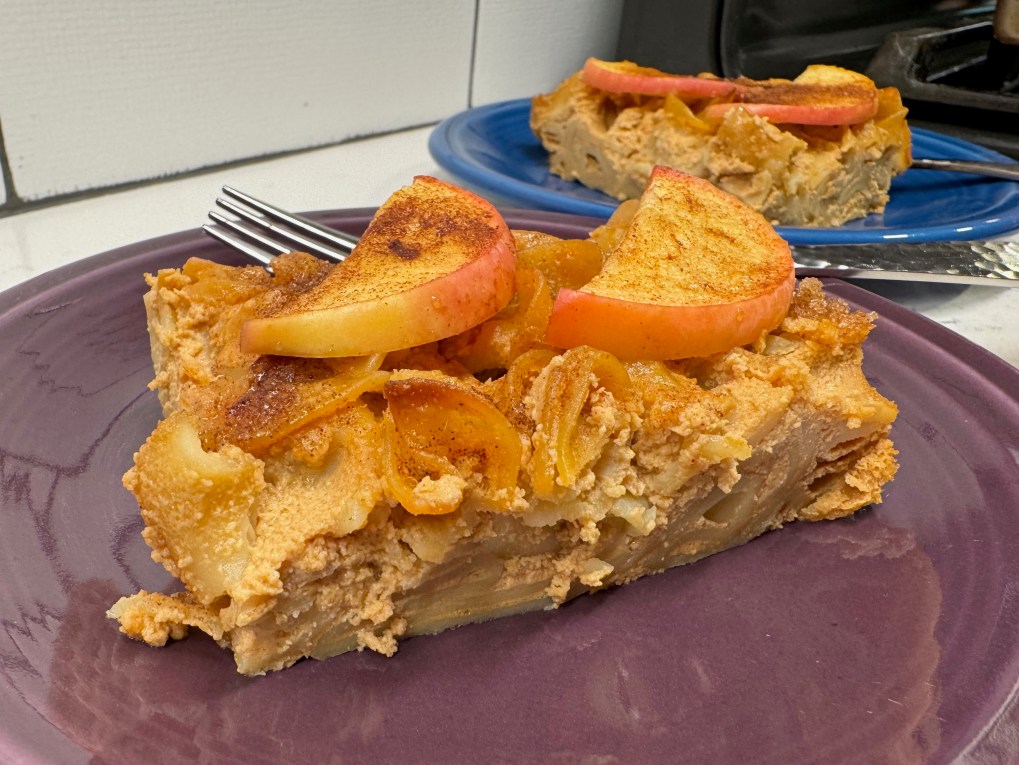
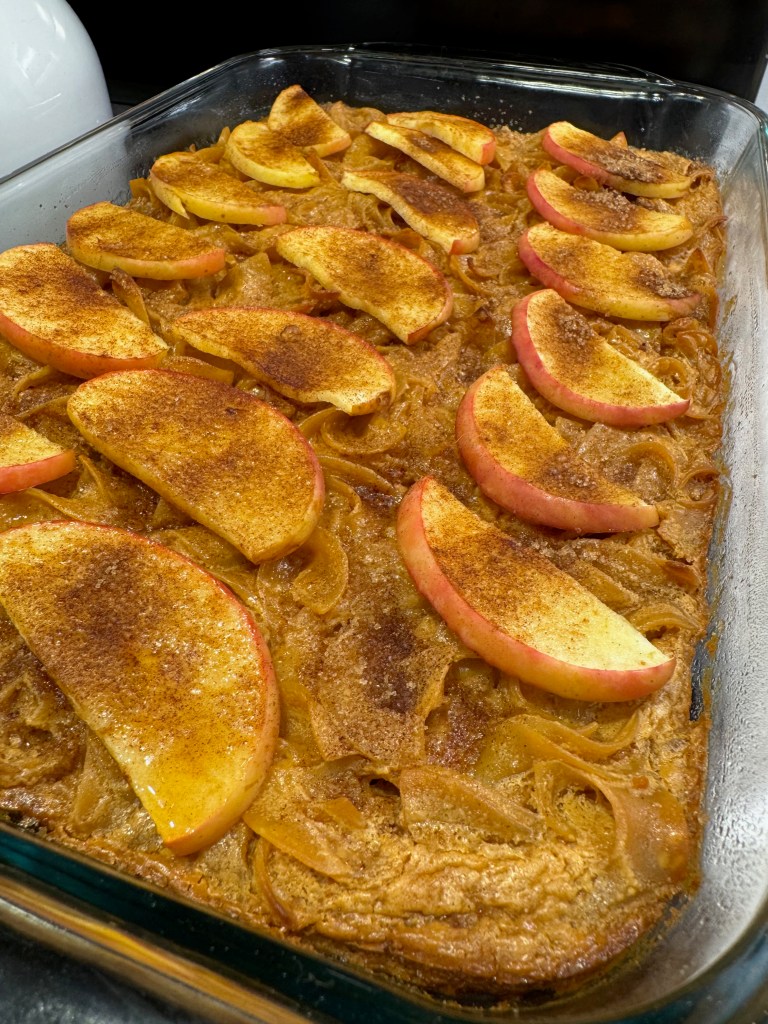
Our meal was delicious and fully representative of autumn, especially with this kugel, with all the flavors of a sweet caramel apple from the county fair.
This smelled sooo good from the oven!
Apples are traditional at Rosh Hashanah, usually paired with honey and symbolic for sweet wishes in the new year. I had been thinking about apples and caramel together in a dessert after spotting a caramel apple display at the supermarket. Kugel is a dish perfected by the Ashkenazi (ASH-kuh-NAH-zee) Jews of Eastern Europe, and it is a blank canvas of sorts for any combination of sweet ingredients. It may seem strange the first time you make one; I mean, noodles in a dessert? But trust me, it’s delicious!
Here’s how my dish came together. Enjoy!
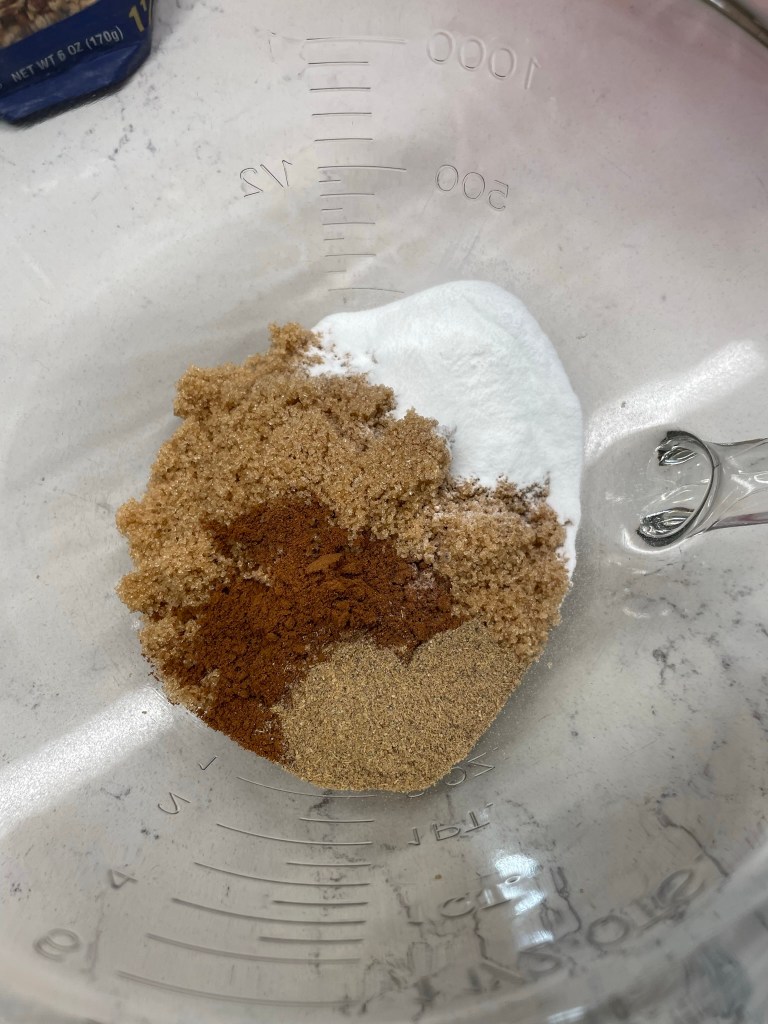
The caramel
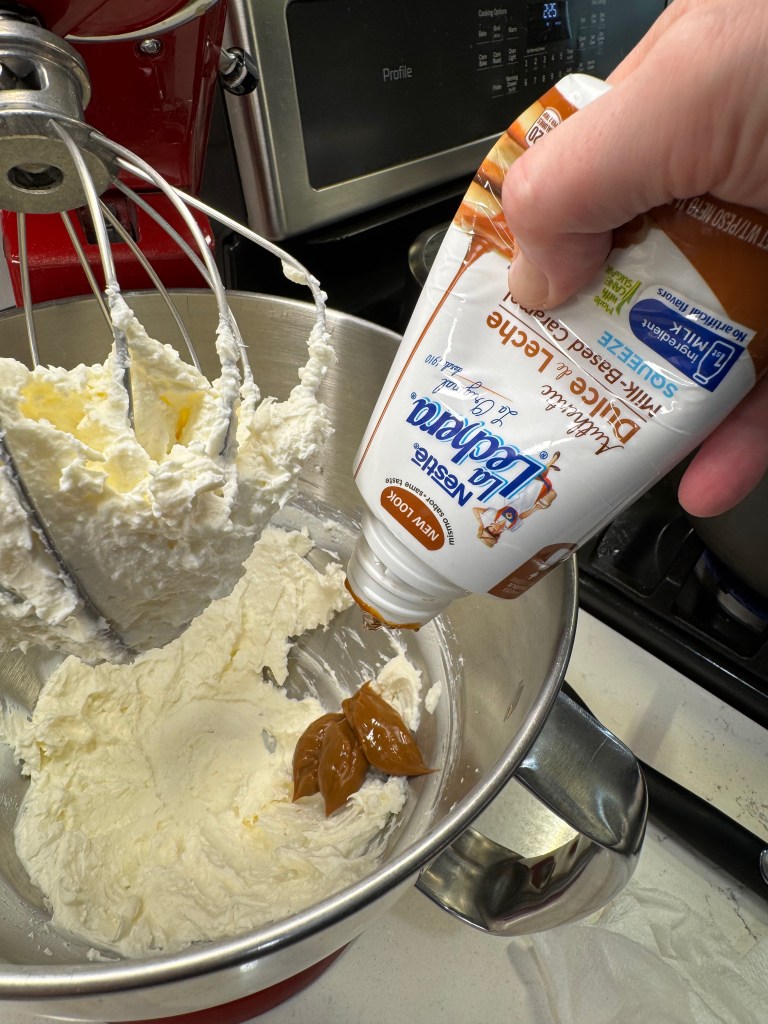
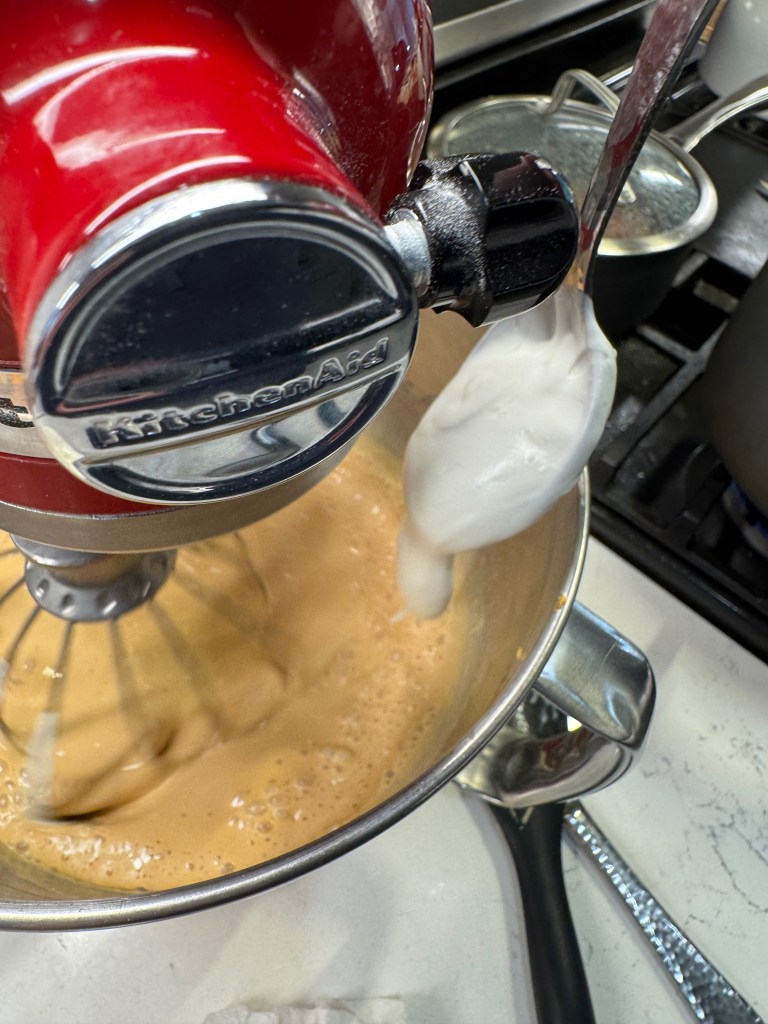
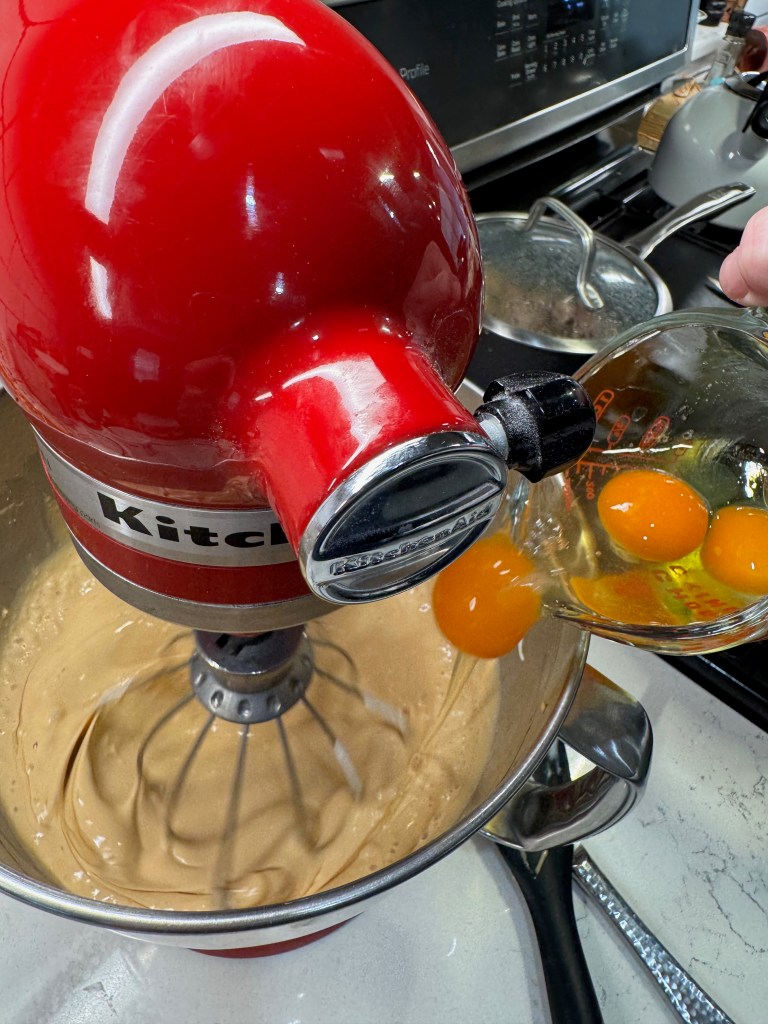
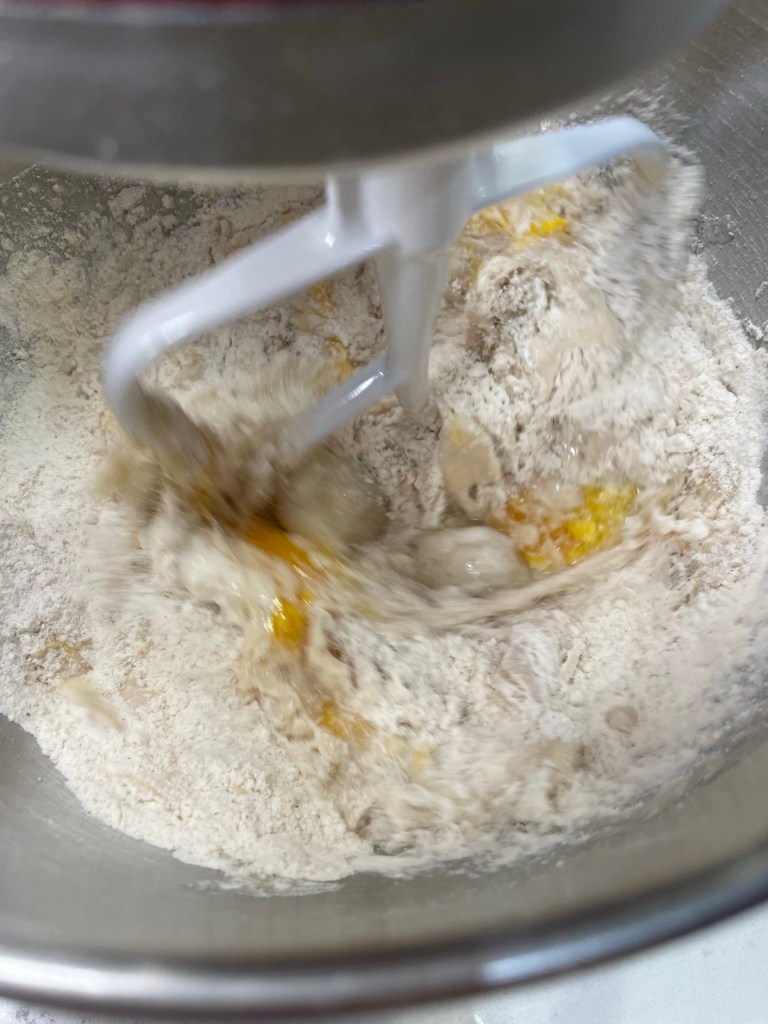
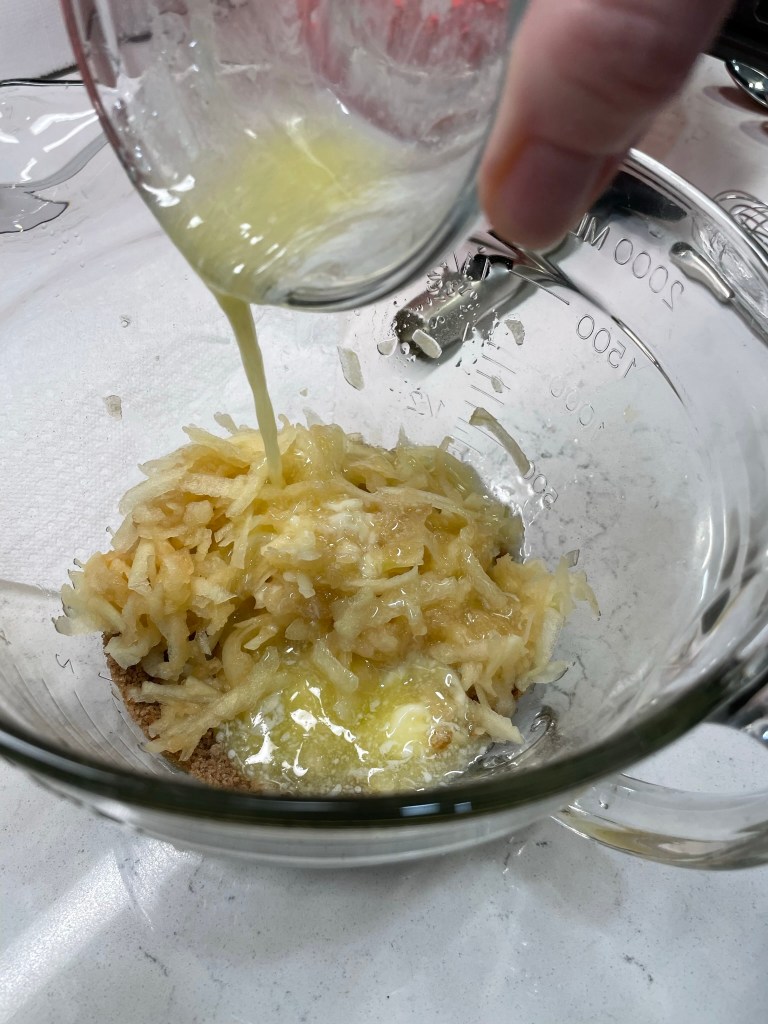
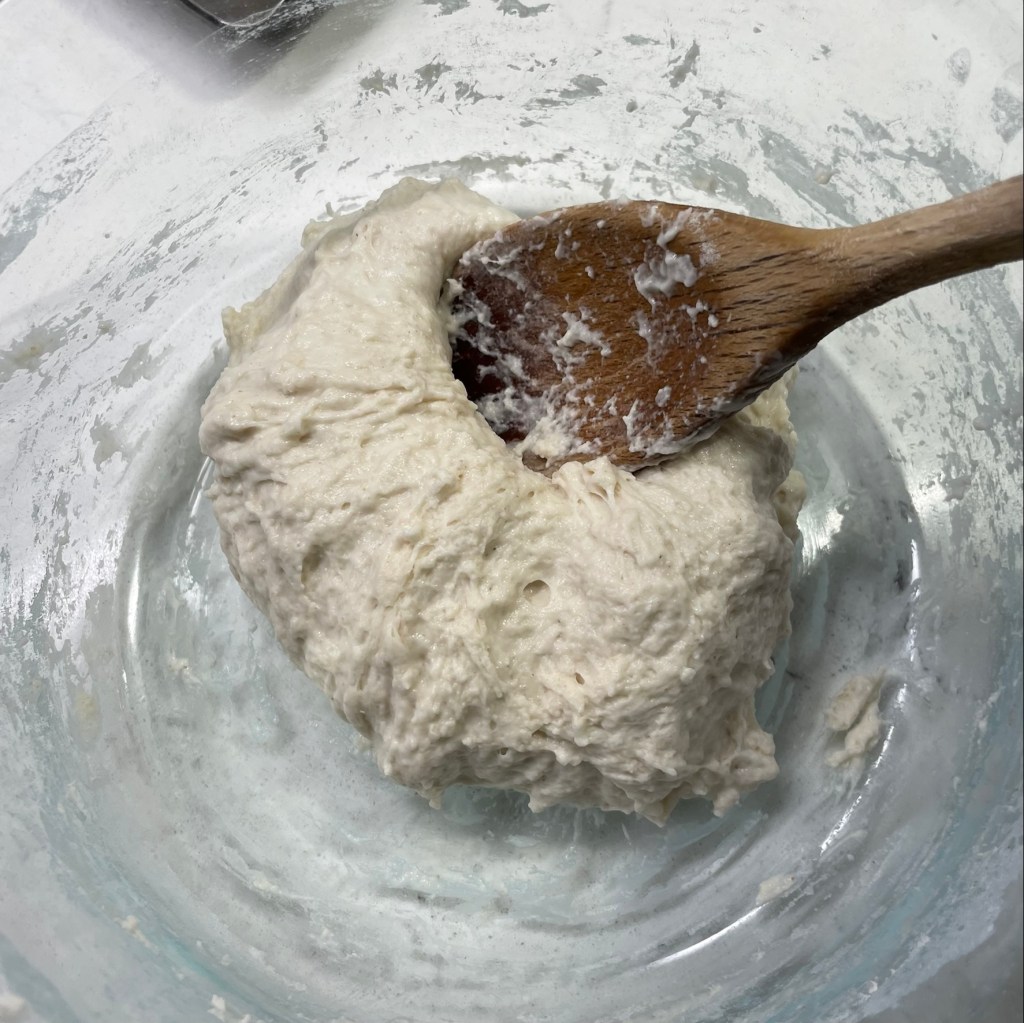
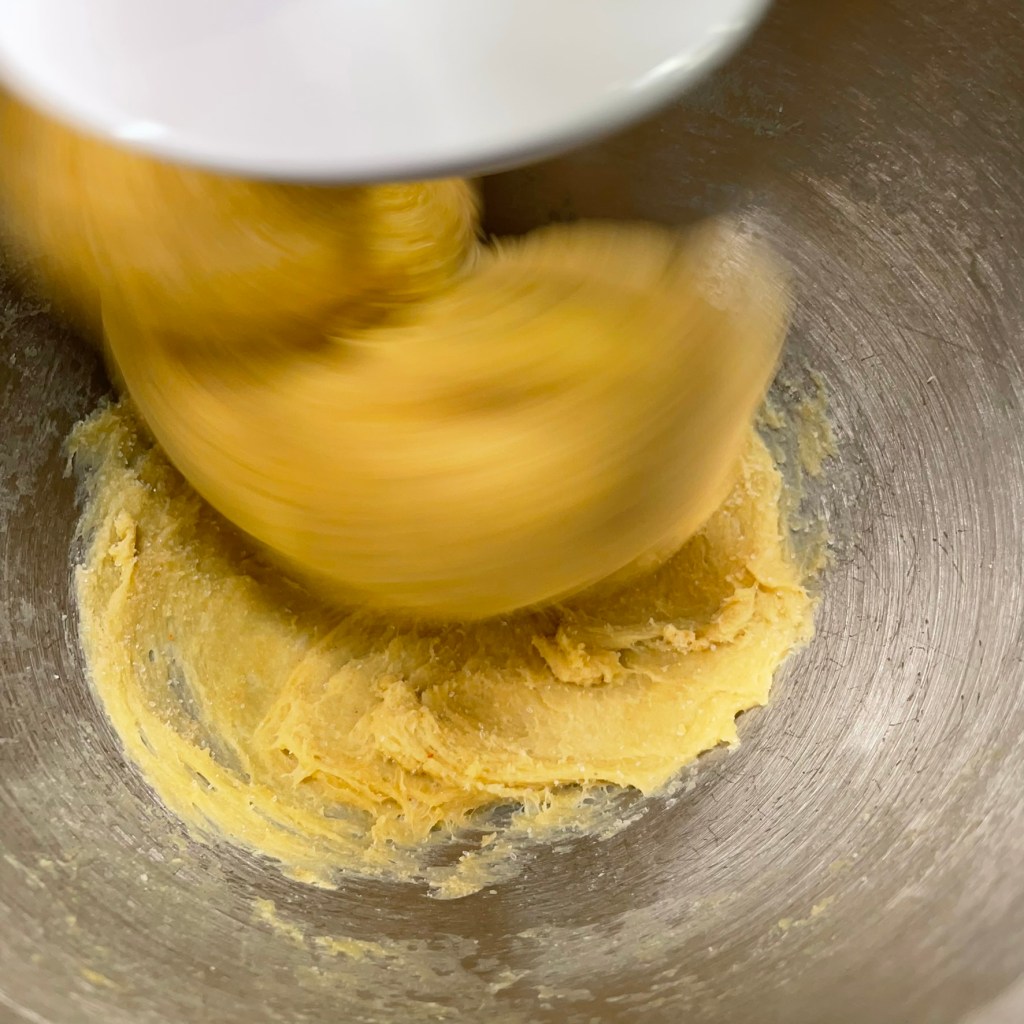
Now, I may not be Jewish, but I come from a long line of improvisers, and my instinct told me that dulce de leche, a thick, rich caramel sauce, would be a reasonable stand-in for most of the sugar in the basic kugel recipe I had found, and for some portion of the milk as well. I blended the thick dulce de leche with cream cheese, cottage cheese, milk, eggs, sour cream and vanilla, and folded in the buttered egg noodles, hoping that some measure of Ashkenazi wisdom would emanate from the wooden spoon that we had rescued from Les’s mother’s condo after she passed. Surely the spoon had done this before.
Think of it as bread pudding, but with noodles instead of bread!
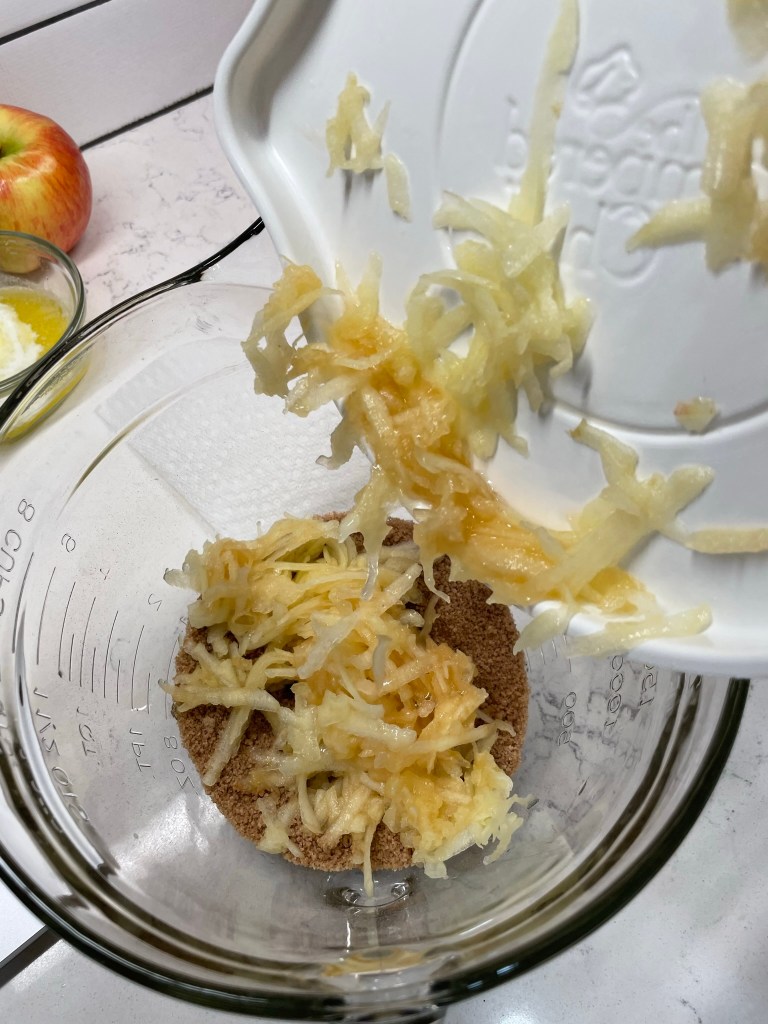
The apples
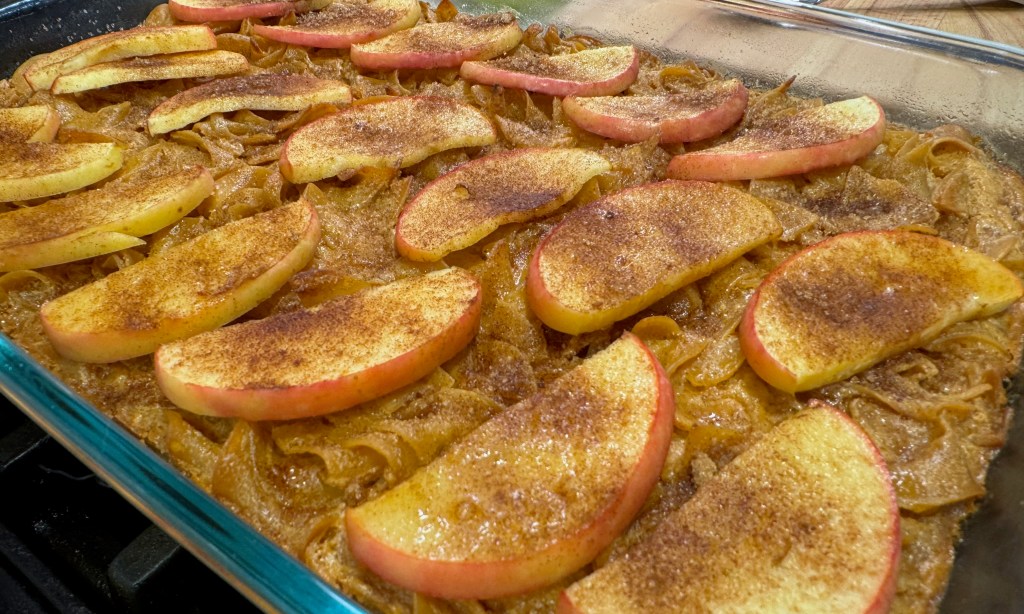
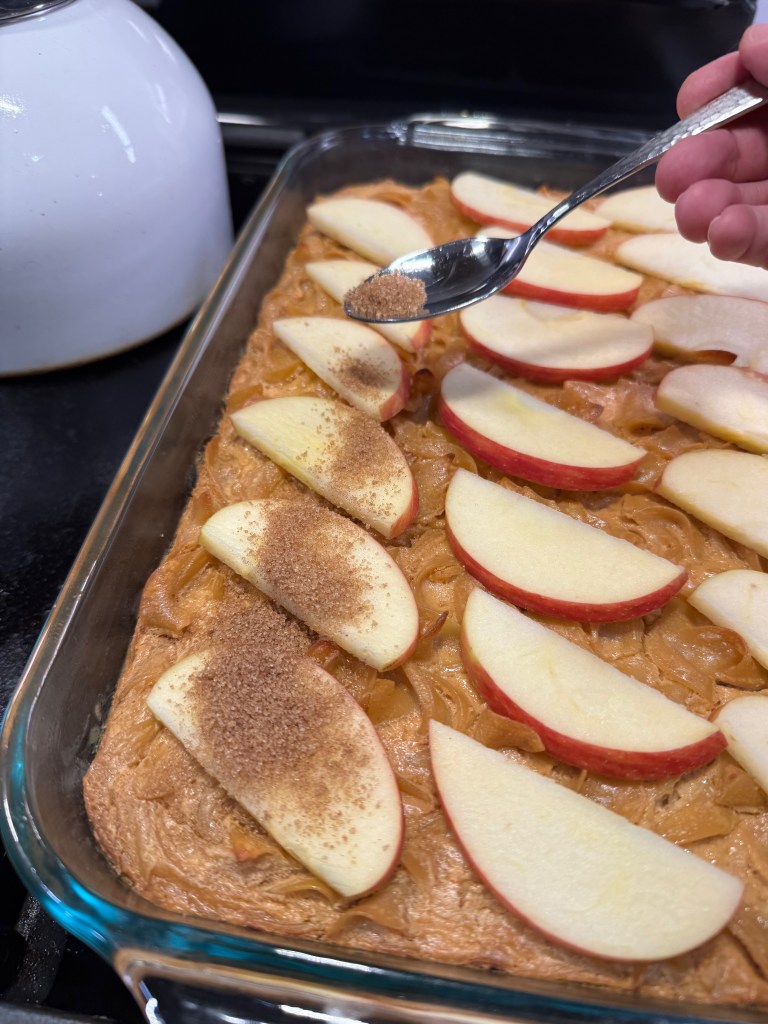
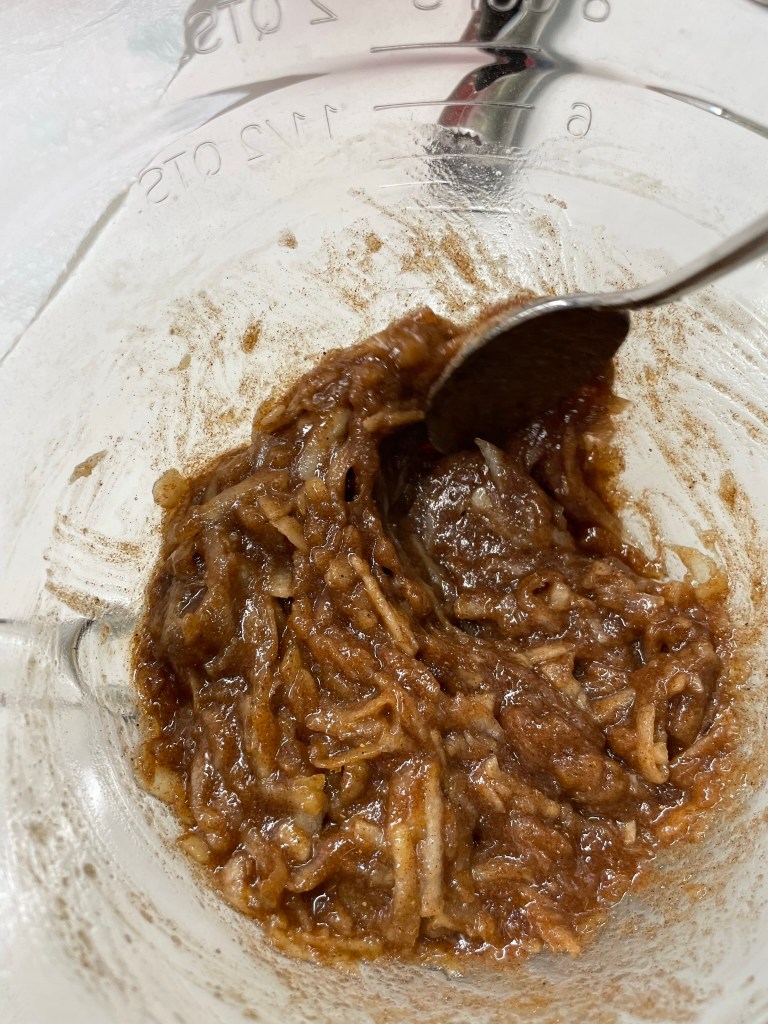
My doubts set in again about the apples because kugel is usually dotted with dried fruits such as raisins, prunes or apricots. Should I cook the apples first? Or dice them up and stir them into the custardy noodles, or would the moisture cause the whole thing to become a big mess? In the end, I decided to par-bake the noodle custard, top it with thin slices of apple and a sprinkling of brown sugar and cinnamon and then bake it again. It turned out to be just the right amount of apple, and the brown sugar-cinnamon topping emphasized the caramel flavors inside.
Adding the apple topping
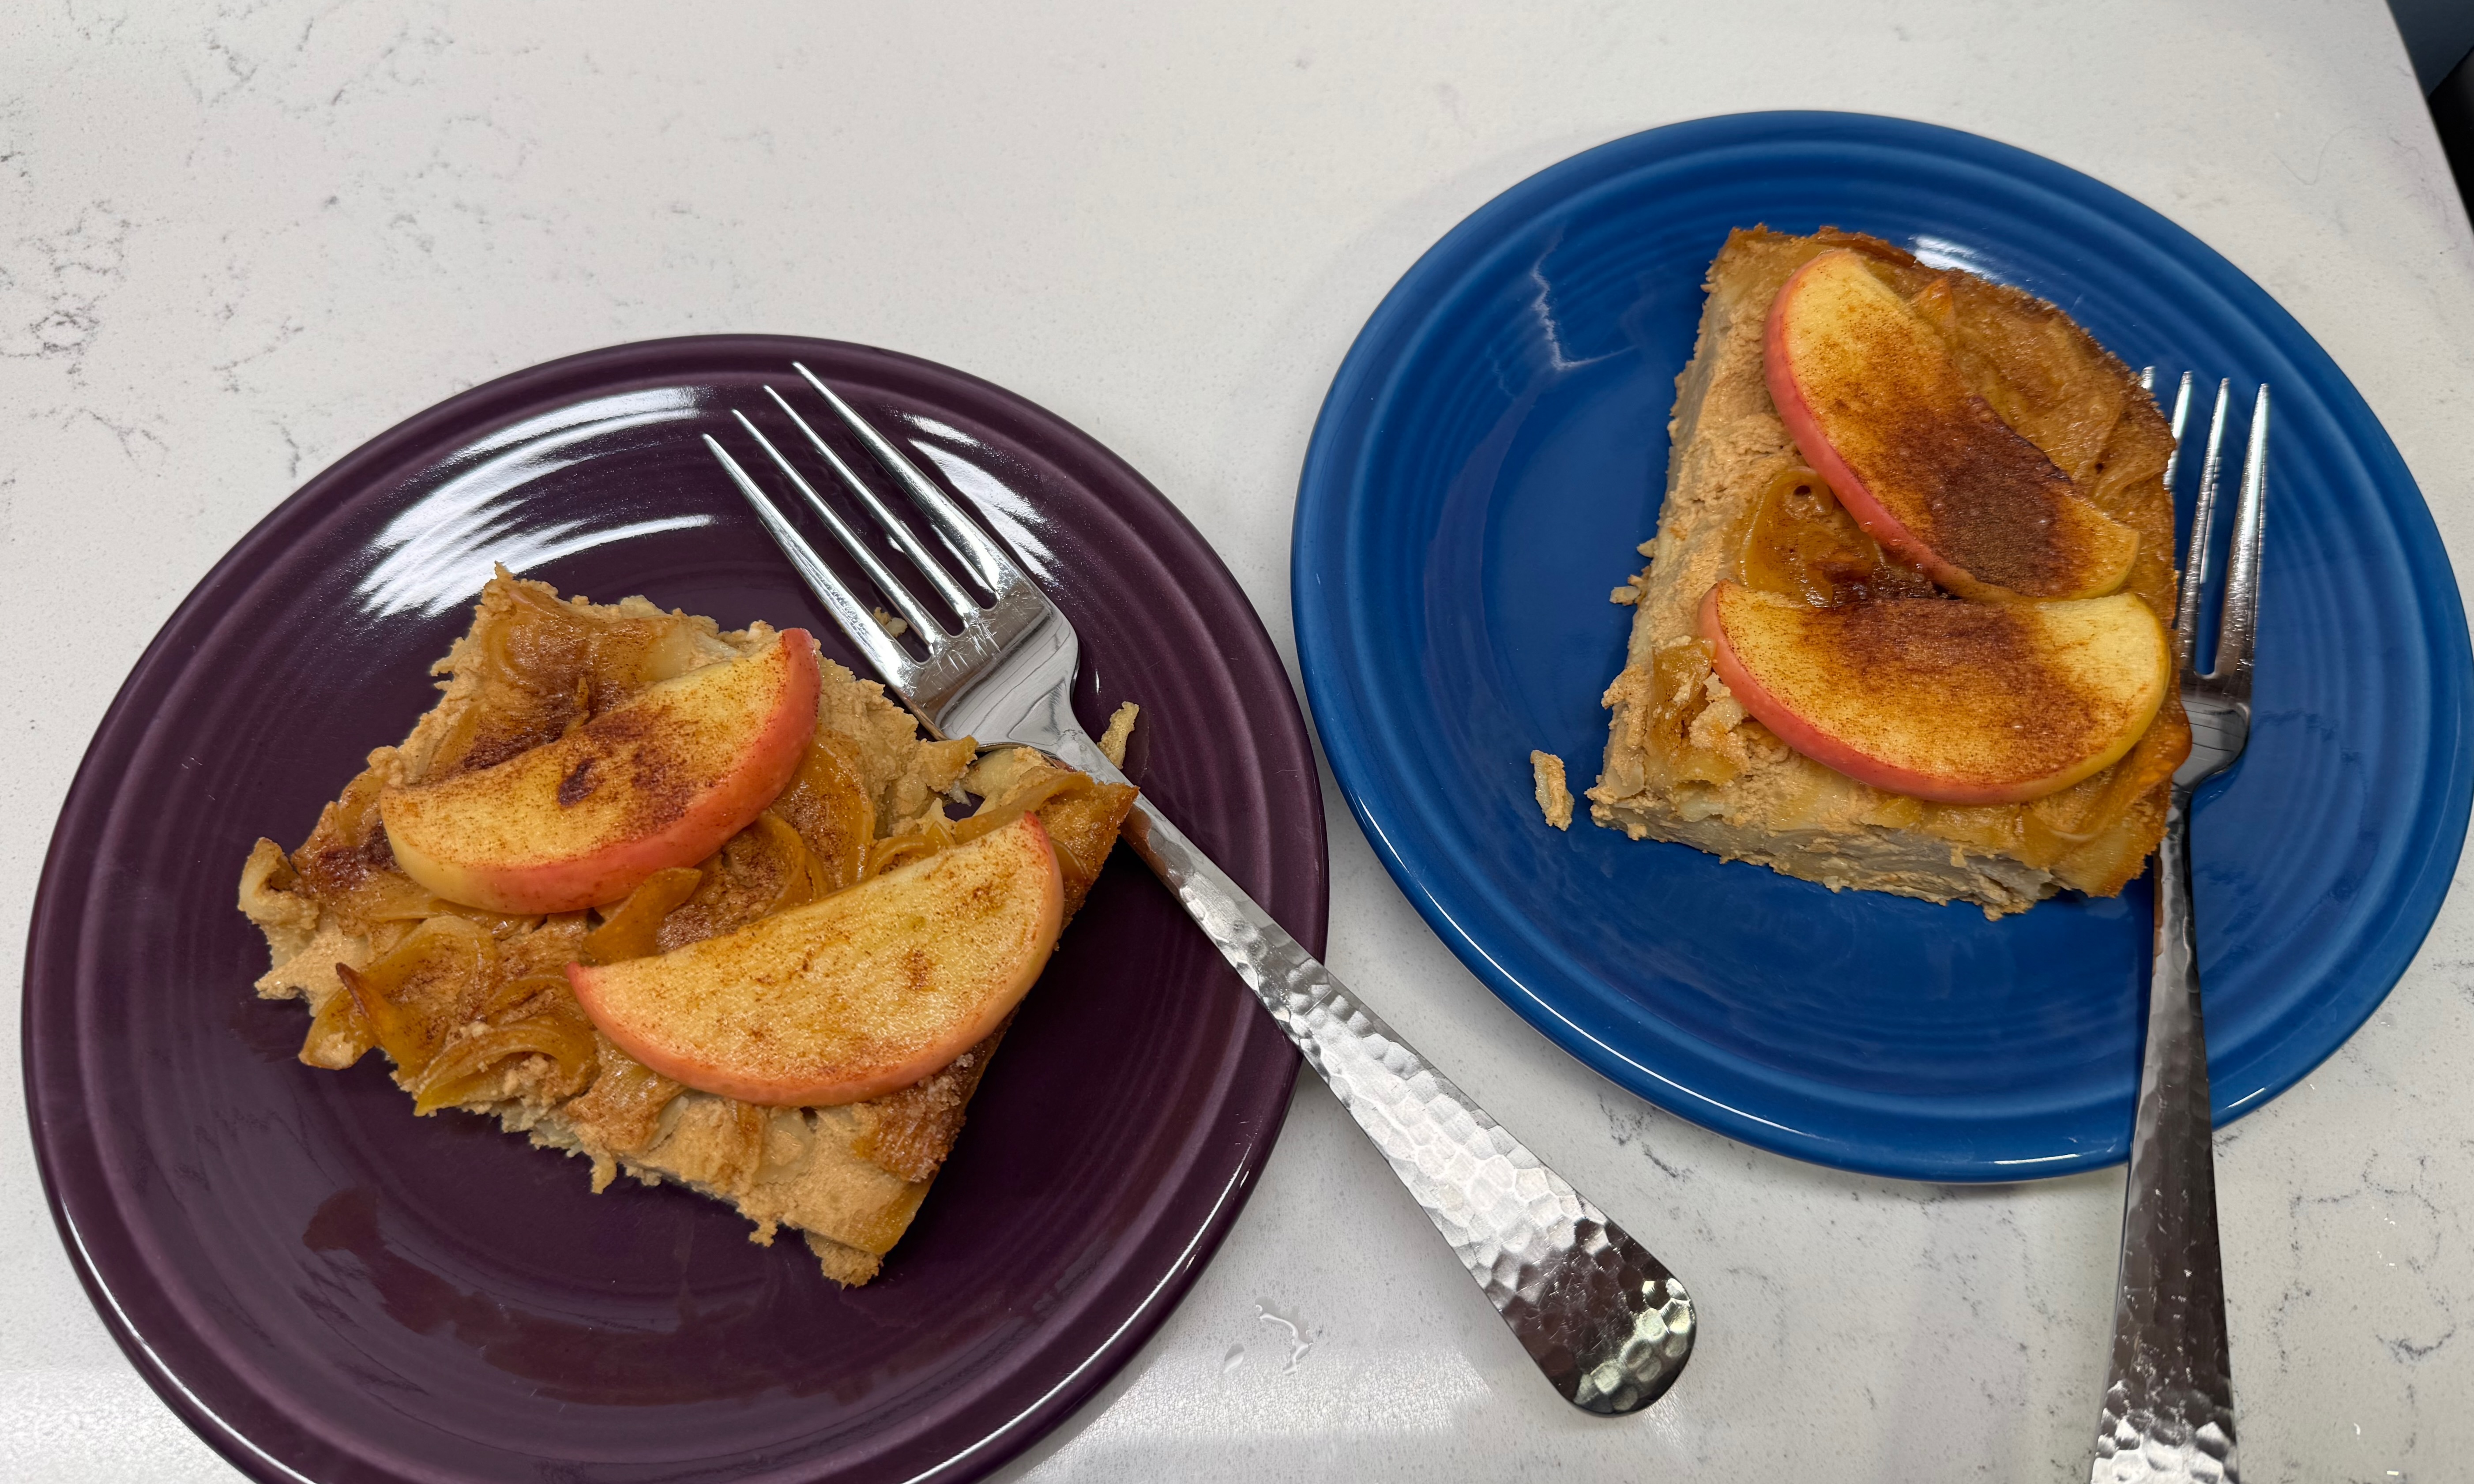
This kugel was very well-received by my hubby, who had made his own version of kugel a few years back when we were clearing out the pantry for our kitchen remodel. We enjoyed this caramel apple version at Rosh Hashanah and again straight from the fridge later in the week, and I think we may even have a couple of slices left for our “break the fast” meal when Yom Kippur ends tonight.
Jewish New Year calls for a celebratory dessert, and I chose apples and caramel to bring in some comforting fall flavors.
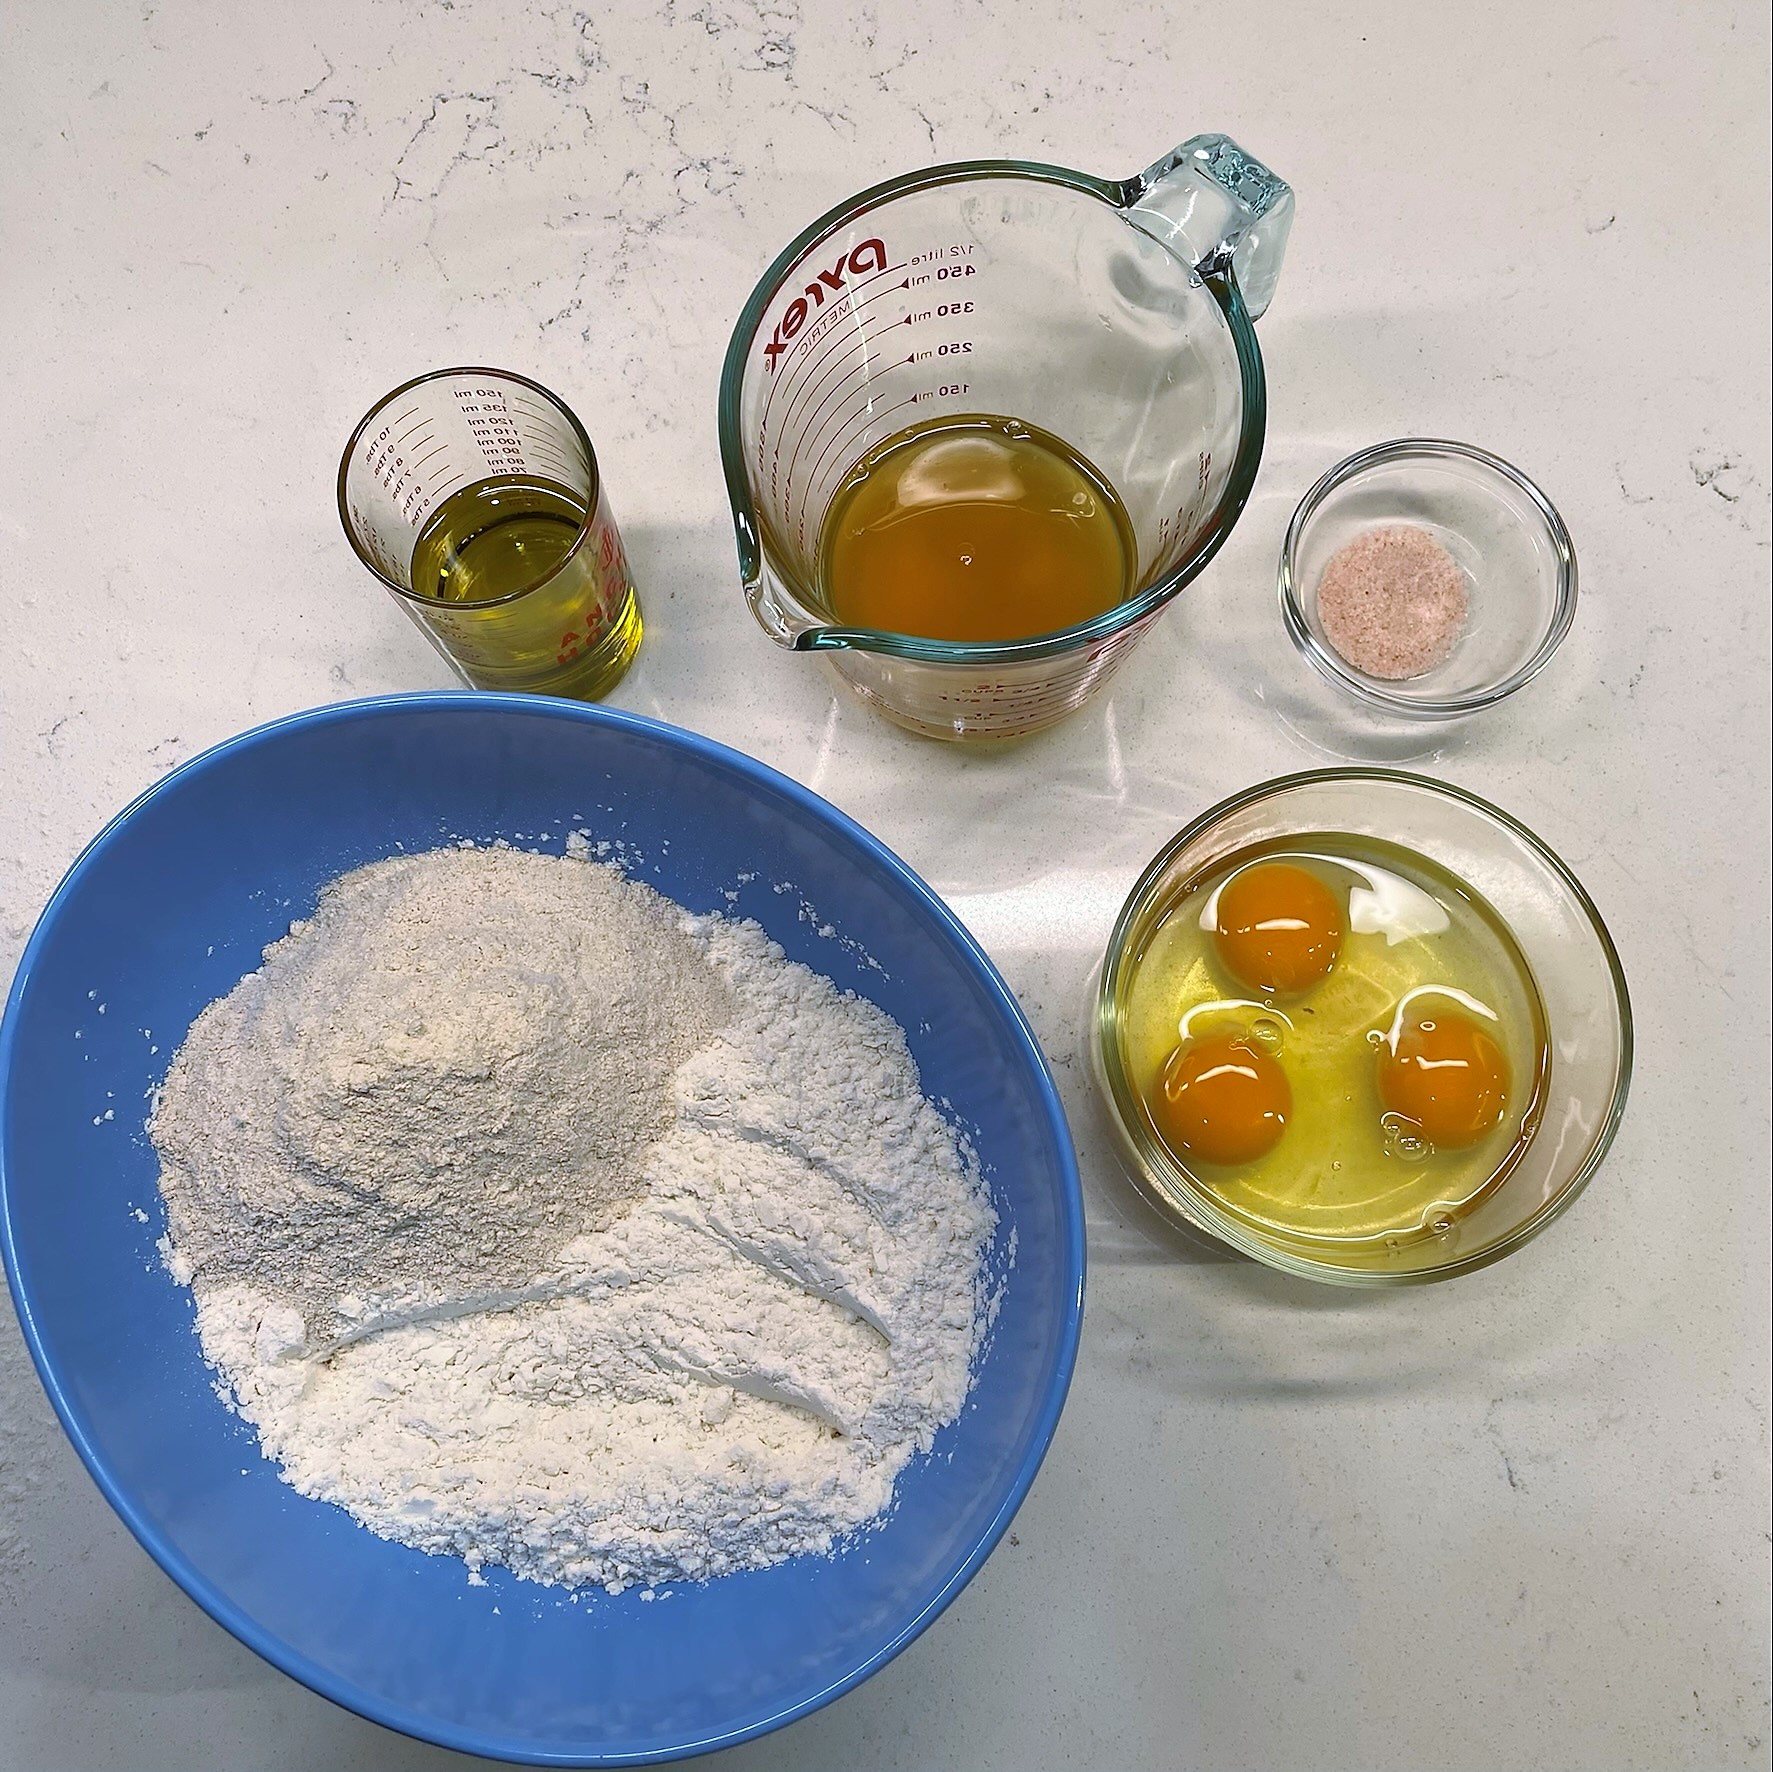
Ingredients
8 oz. cream cheese, softened to room temperature
1 cup small curd cottage cheese
1/2 cup (or more) dulce de leche
2 Tbsp. brown sugar
1/4 cup sour cream (or plain Greek yogurt)
1 1/2 cups whole milk
3 large eggs
1 tsp. vanilla
12 oz. package extra wide egg noodles
6 Tbsp. butter, room temperature (I used salted)
1 large Honeycrisp apple, cored and cut into thin slices
1 Tbsp. brown sugar, mixed with 1/2 tsp. ground cinnamon
Notes: Dulce de leche is usually found in a can, in the same supermarket section as sweetened condensed milk, or possibly in the Hispanic section. If you cannot find this product, a thick, milk-based caramel ice cream topping would work fine.
Directions
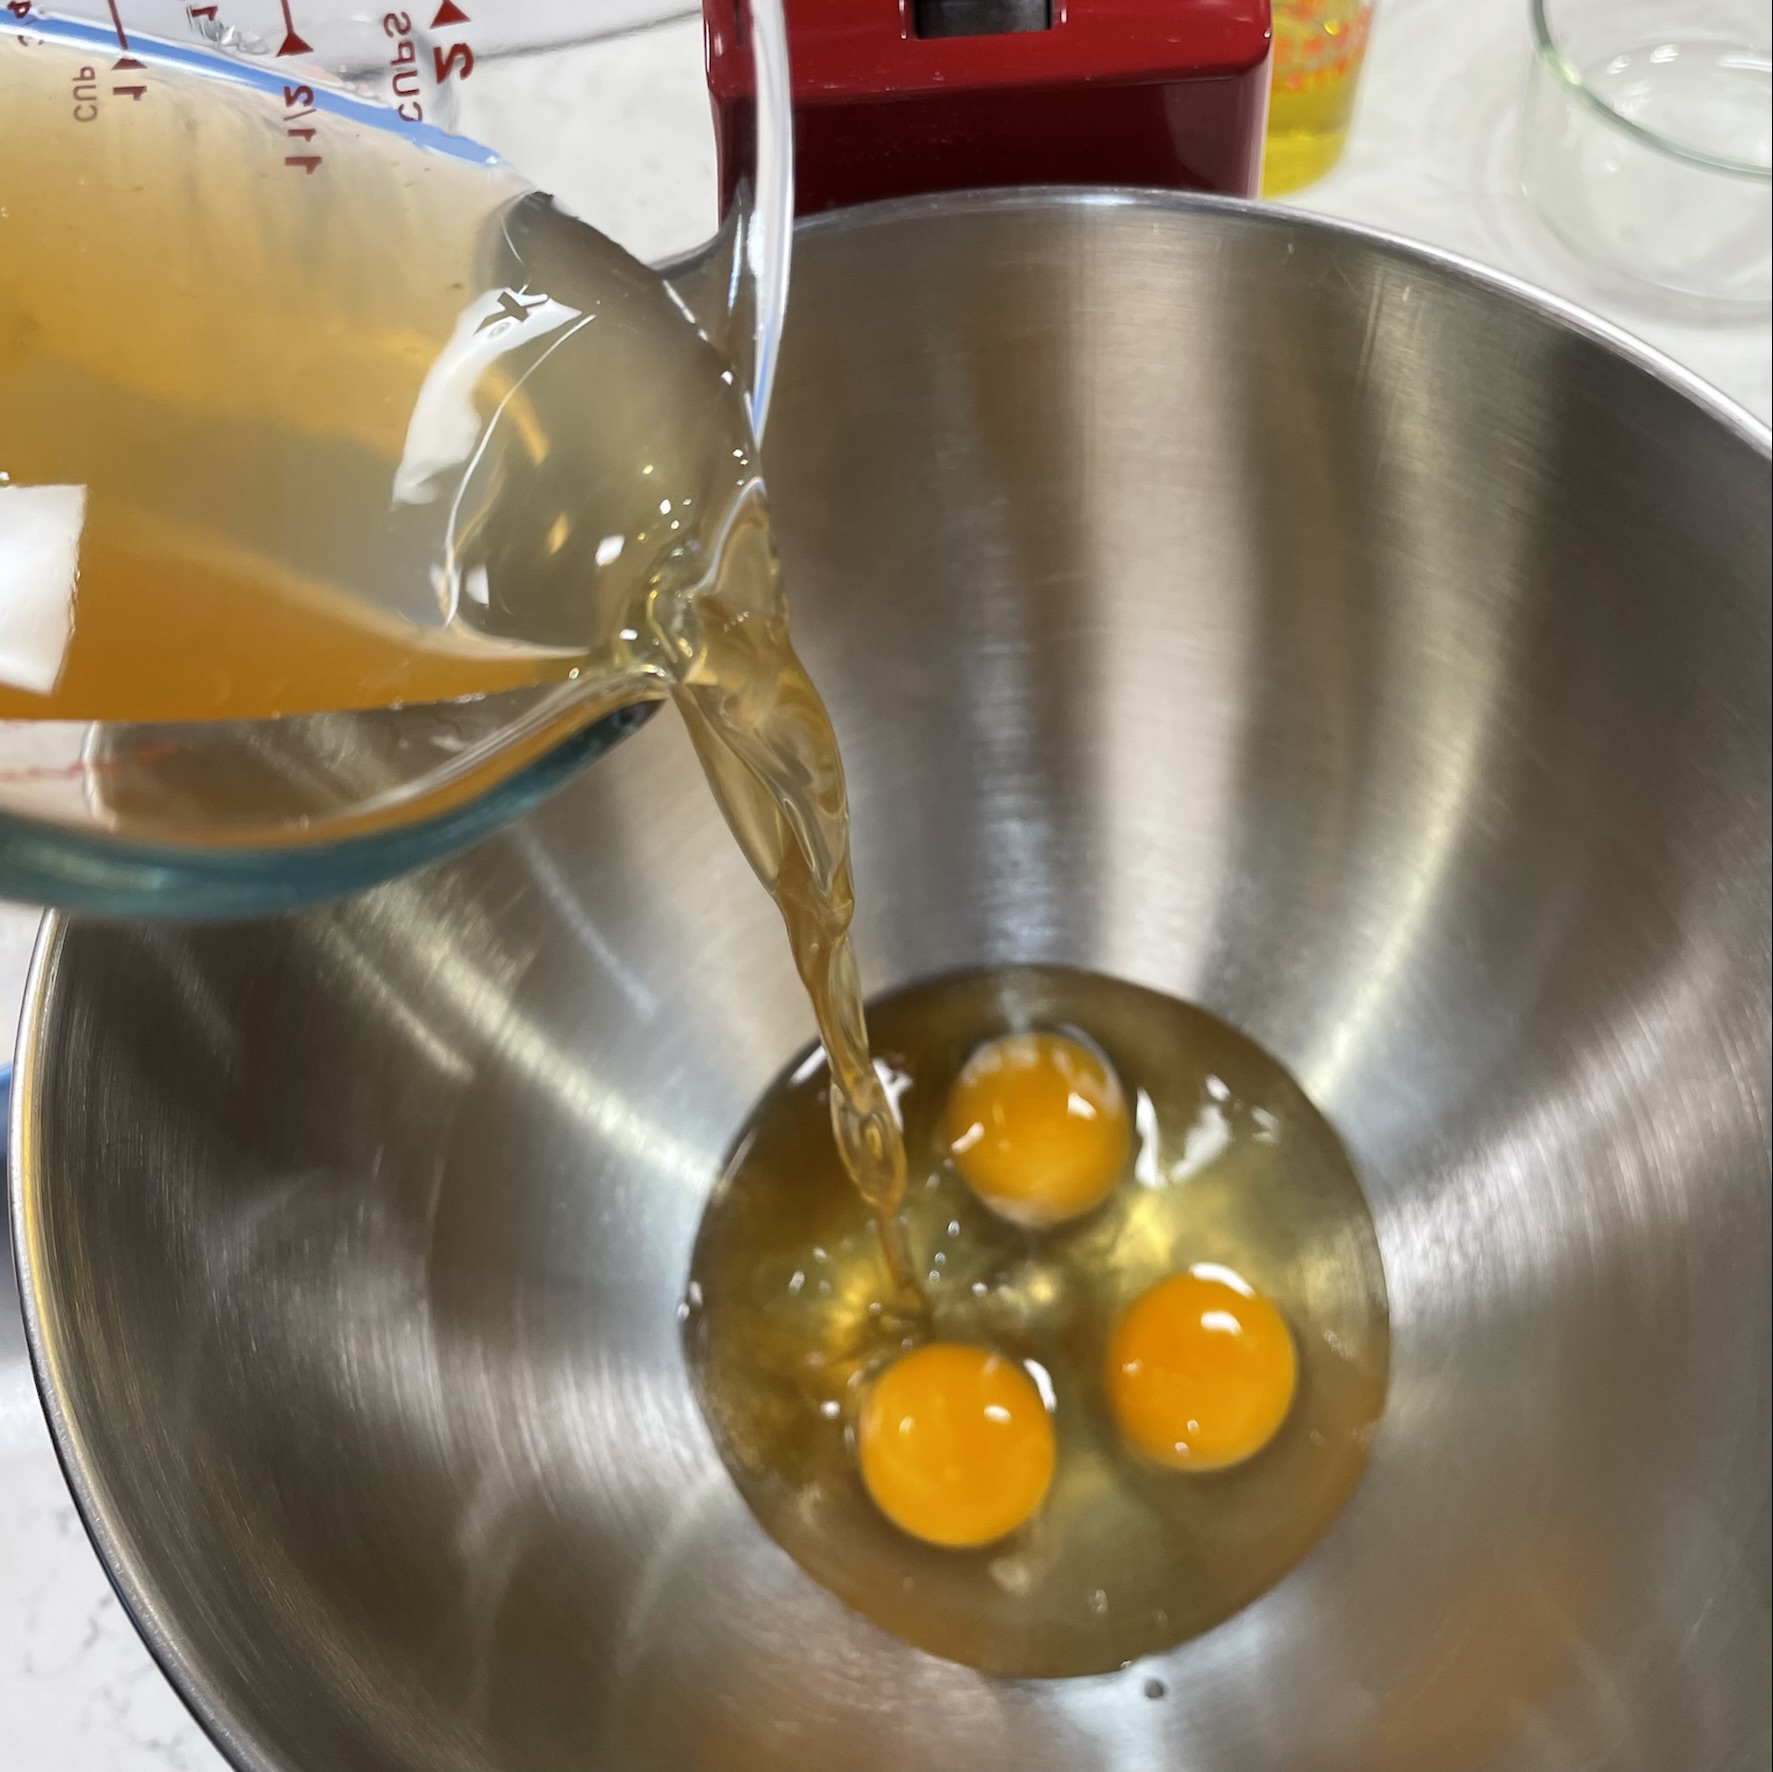
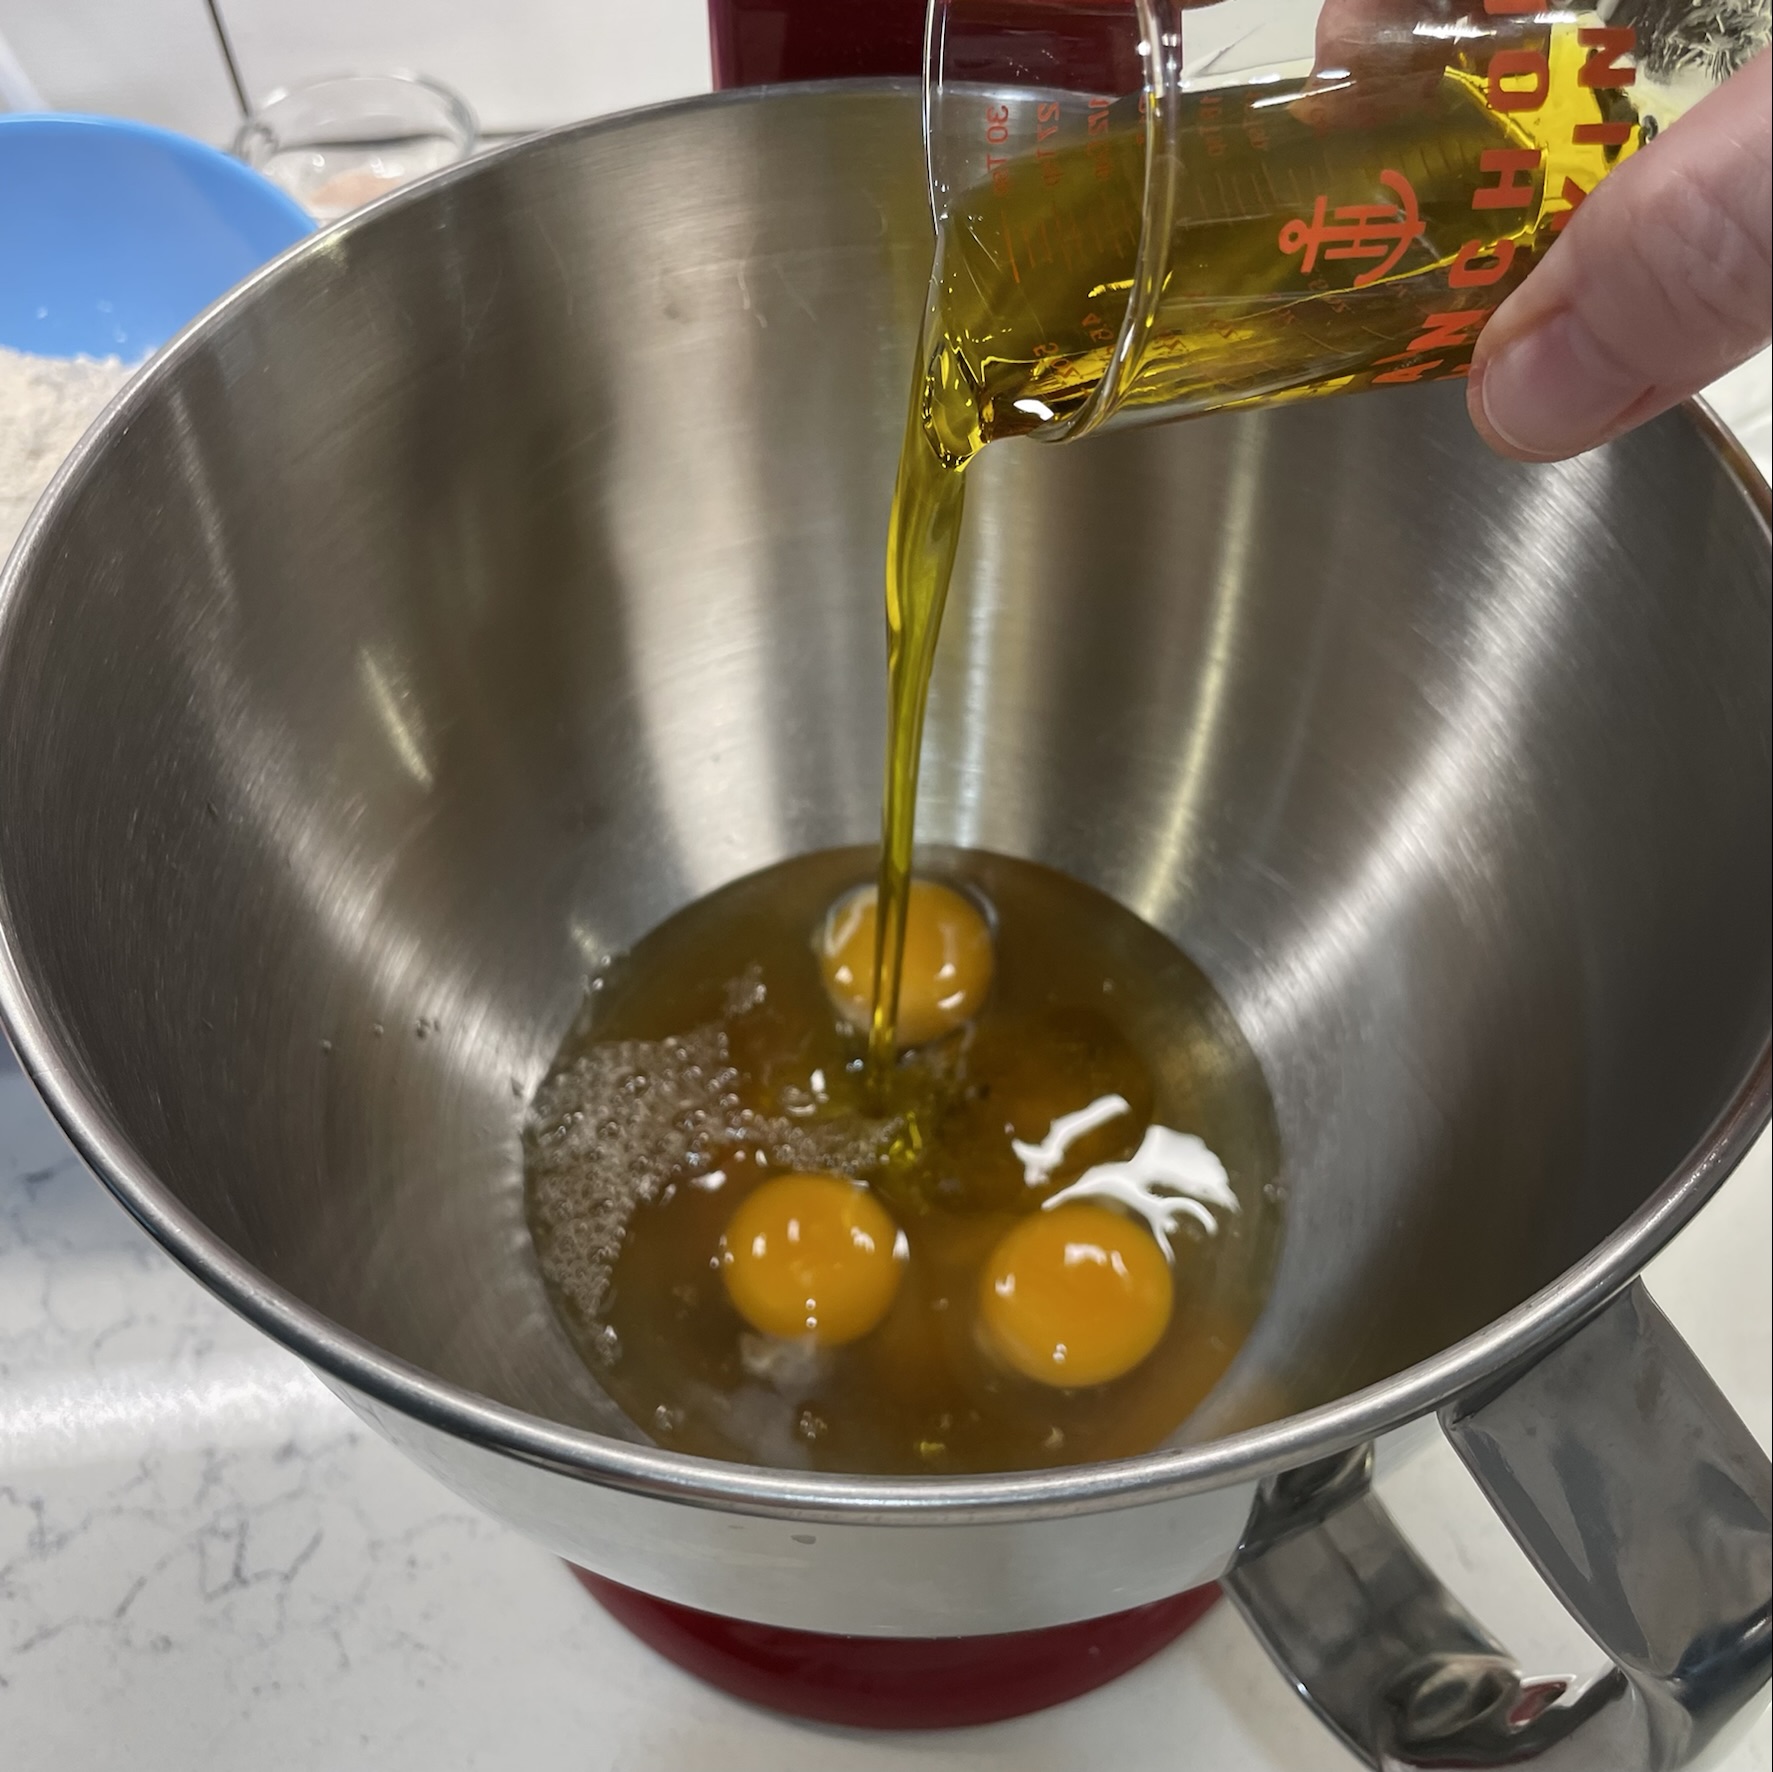
Add cream cheese, cottage cheese and dulce de leche to the bowl of a stand mixer, fitted with the whisk attachment. Blend together on speed 2 or 3 for about two minutes, or until the mixture is evenly combined.
Add brown sugar and sour cream, whisking on low speed until blended. Gradually pour the milk into the bowl while the mixer is running, to avoid splashing. Add the eggs, one at a time and then stir in vanilla.
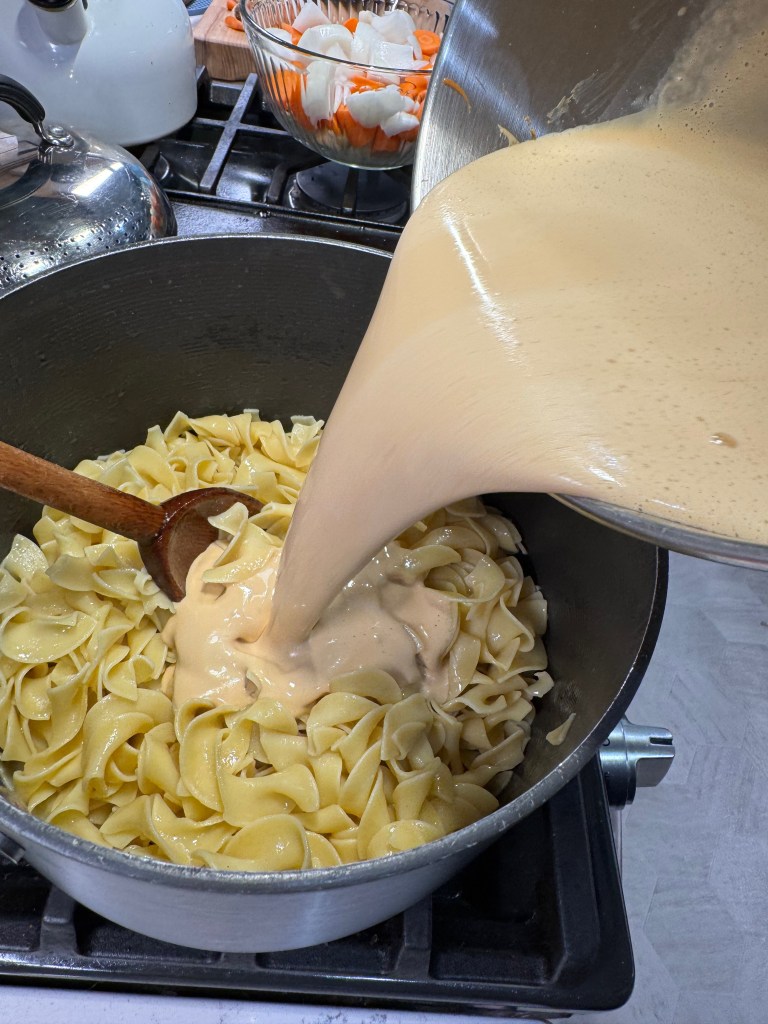
Meanwhile, cook the egg noodles until just tender, according to package instructions. Drain the noodles and toss with butter until fully melted.
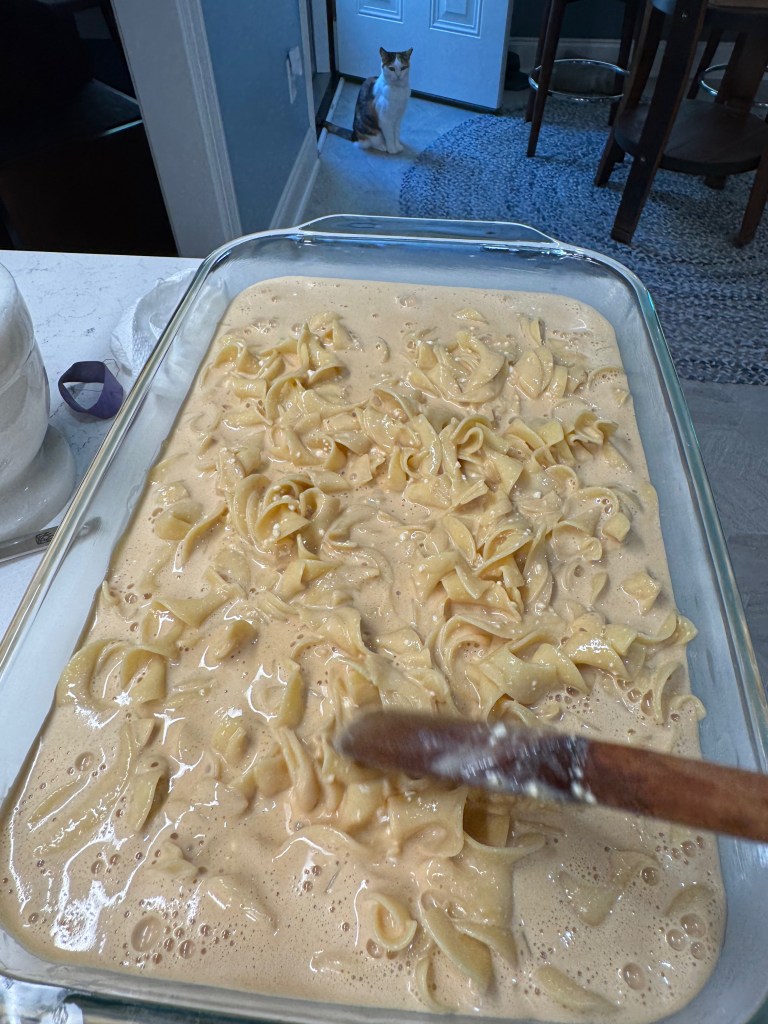
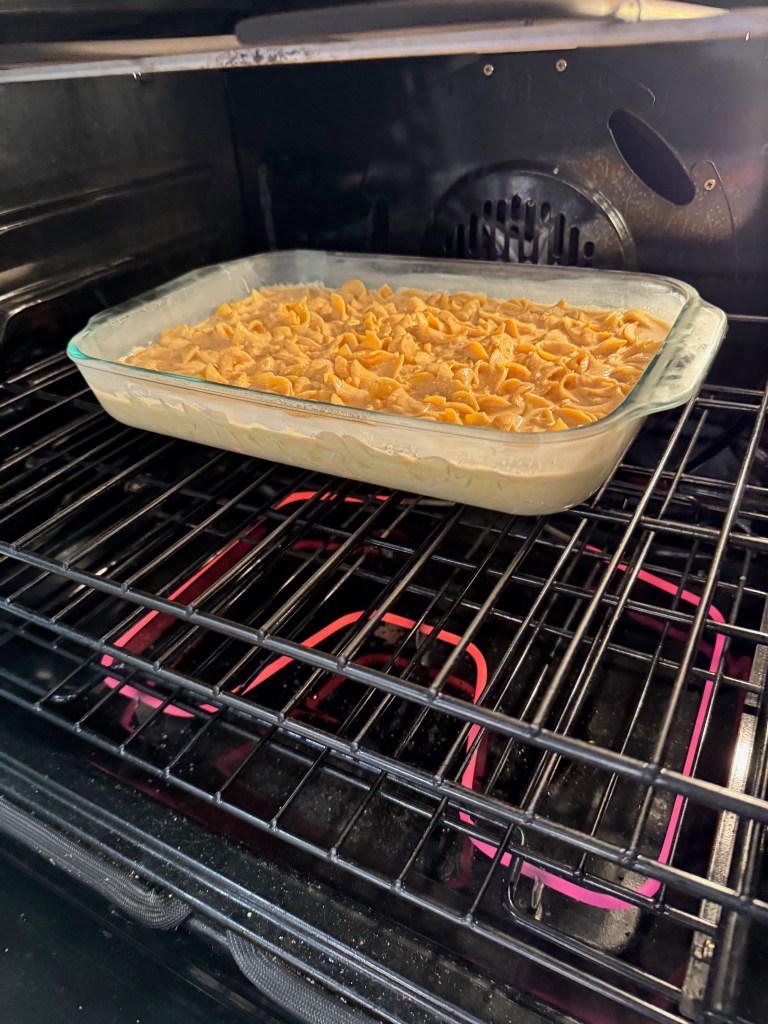
Pour the caramel mixture into the warm noodles and toss to combine. It will seem very liquid-y. Transfer this mixture to a buttered 9 x 13 glass baking dish and spread it out until even. Cover the dish and refrigerate for a couple of hours or overnight.
Preheat oven to 350° F, with rack in center position.
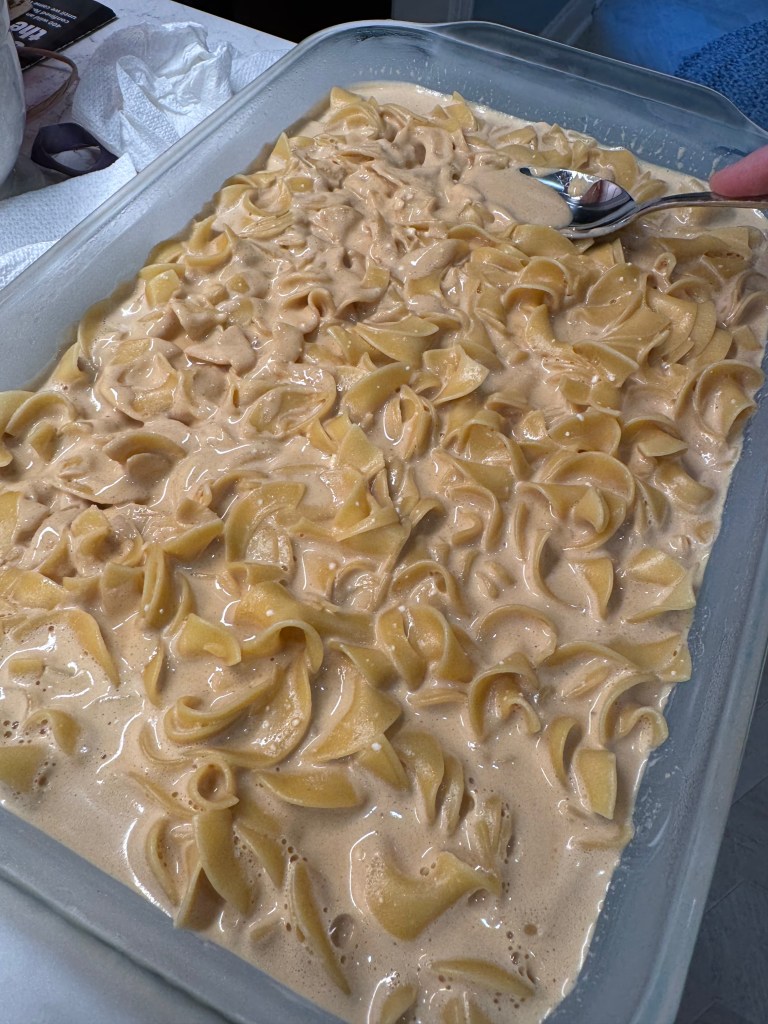
Uncover kugel and use the back of a spoon to press down any noodles that have emerged from the caramel custard mixture. Bake uncovered for 35 minutes. Remove from oven, arrange sliced apples evenly over the top and sprinkle the surface with the brown sugar-cinnamon mixture. Return to oven for 15 more minutes.
Cool to room temperature before enjoying, and refrigerate leftovers. When chilled, the kugel can be cut easily into squares and served almost like brownies.
Just for grins
As desserts go, this one packs a substantial amount of protein with cream cheese, cottage cheese, eggs, sour cream and milk. It also doesn’t have as much sugar as you might expect, with only three tablespoons, plus the sugar in the dulce de leche. Les and I got into a lukewarm debate about the protein content of this dish, with him asserting that the ingredients are spread out across 12 portions, making each portion skimpy on protein. I disagreed, so I did the math to bolster my case and here’s the result:
INGREDIENT
PROTEIN GRAMS
cream cheese, full-fat
16
cottage cheese, 2%
28
whole milk
12
dulce de leche
6
eggs
18
sour cream, full-fat
4
noodles
(this number surprised me!) 40
butter
2
Total grams protein
126
divided by 12 servings
10.5
Each square contains 10 1/2 grams of protein, significantly more than you can say for most desserts. A serving of vanilla ice cream, for example, typically contains 2 to 3 grams and a slice of chocolate cake is around 4 grams. I’m not claiming this to be a health food by any stretch of imagination. The fat and sugar content are high, and there are irrefutable downsides to that. I’m only suggesting that this could be considered something of a power dessert, if there is such a thing. 😉
Each fall since I began dating my husband, I’ve made a concerted effort to celebrate the season of Rosh Hashanah— the Jewish New Year— by baking a special bread. That first year, Les had visited a local apple festival and brought back a bagful of gorgeous Jonagold apples, which were lovely in a coiled-into-a-round challah. I was so proud of my bread that I took a picture of it— way before I began blogging— and I even took time to leave a review on the King Arthur website to report my great results.
Not a bad effort in 2015! But my iPhone 5 camera…
The round shape is significant to Rosh Hashanah because it represents the idea of coming full circle into a new year. The apples were a nice touch, because apples and honey make an appearance on everyone’s holiday table— symbolizing the wishes for a sweet year ahead. Most years since that first one, I’ve worked on my challah braiding skills, specifically the four-strand loaf that is woven like a basket. Here are a few examples of those breads, using my sourdough starter.
L to R: pumpkin challah, fruit-studded challah, over proofed challah!
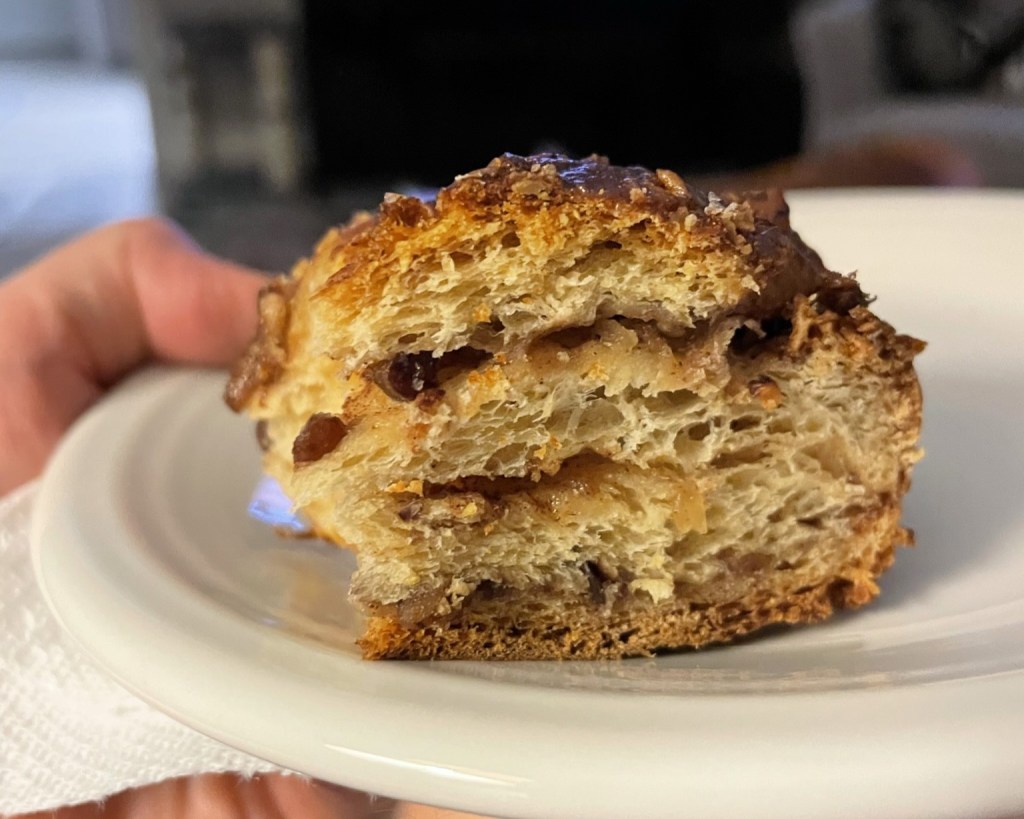
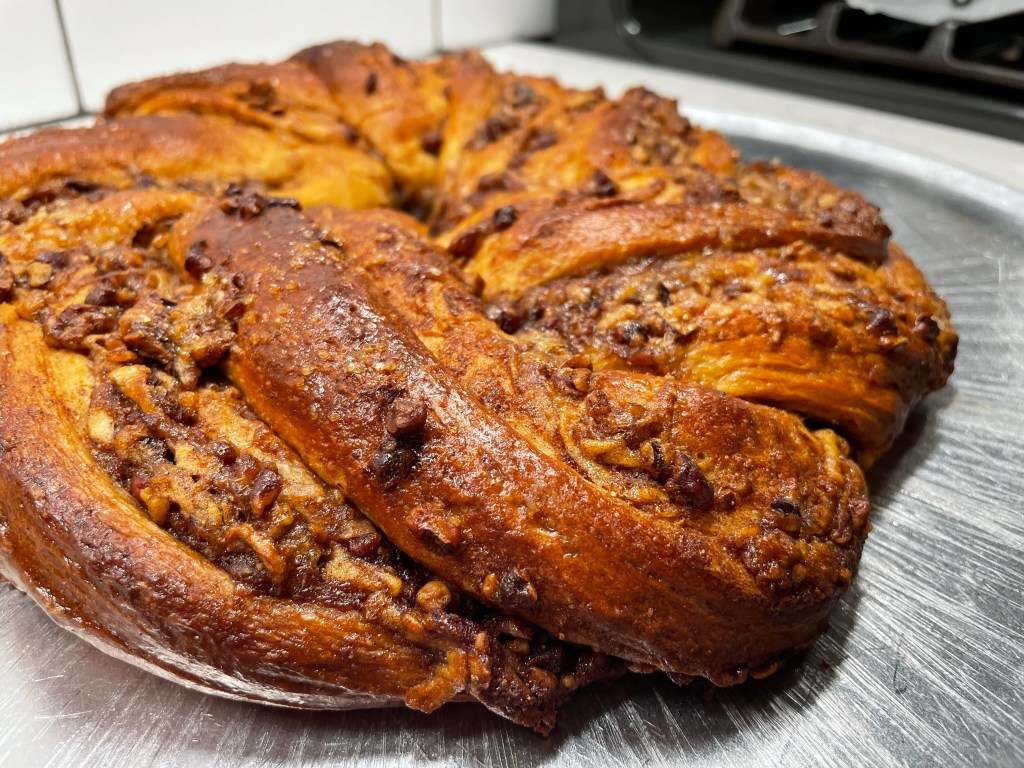
This year, however, I decided to tackle another item on my culinary bucket list, and I’ve made a babka! This is another traditional Jewish bread, and I’ve wanted to make one for years but never got around to it until now. Most babka recipes I have seen involve a chocolate filling, which is most dramatic looking in the typical swirly pattern. I pondered, what about a babka that had apples and honey? That would be perfect for Rosh Hashanah, and a double win in that it finally moves babka to the “done” column.
I didn’t have to look very far for an inspiration recipe, because the first place I looked was King Arthur Baking. Of course!
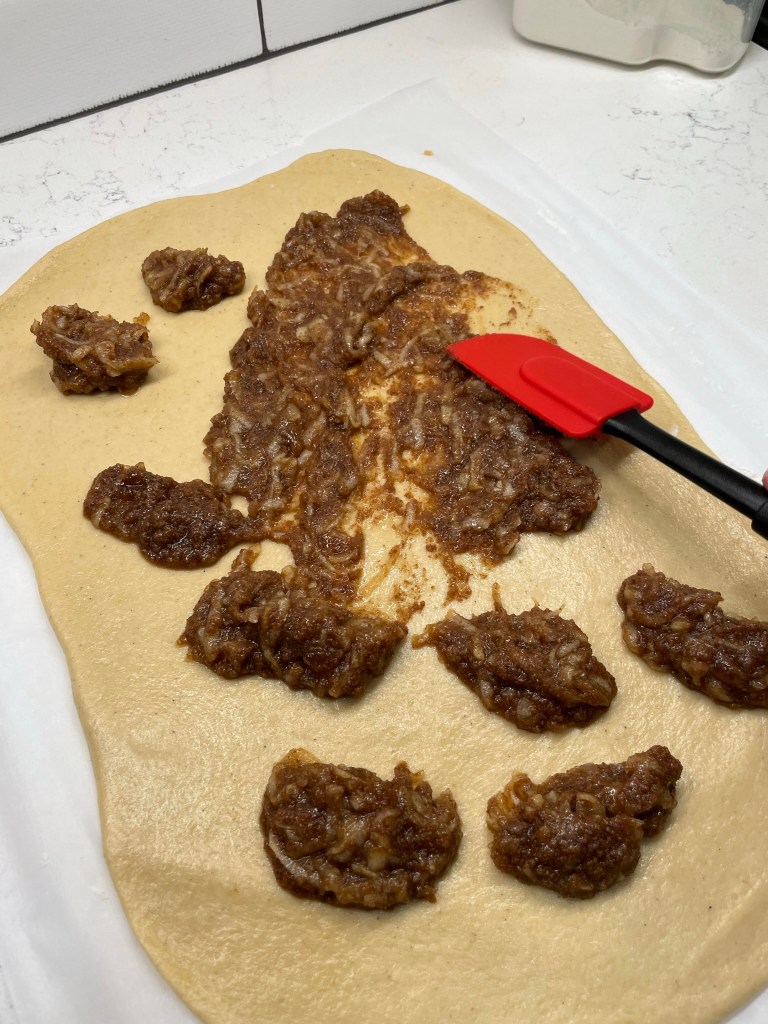
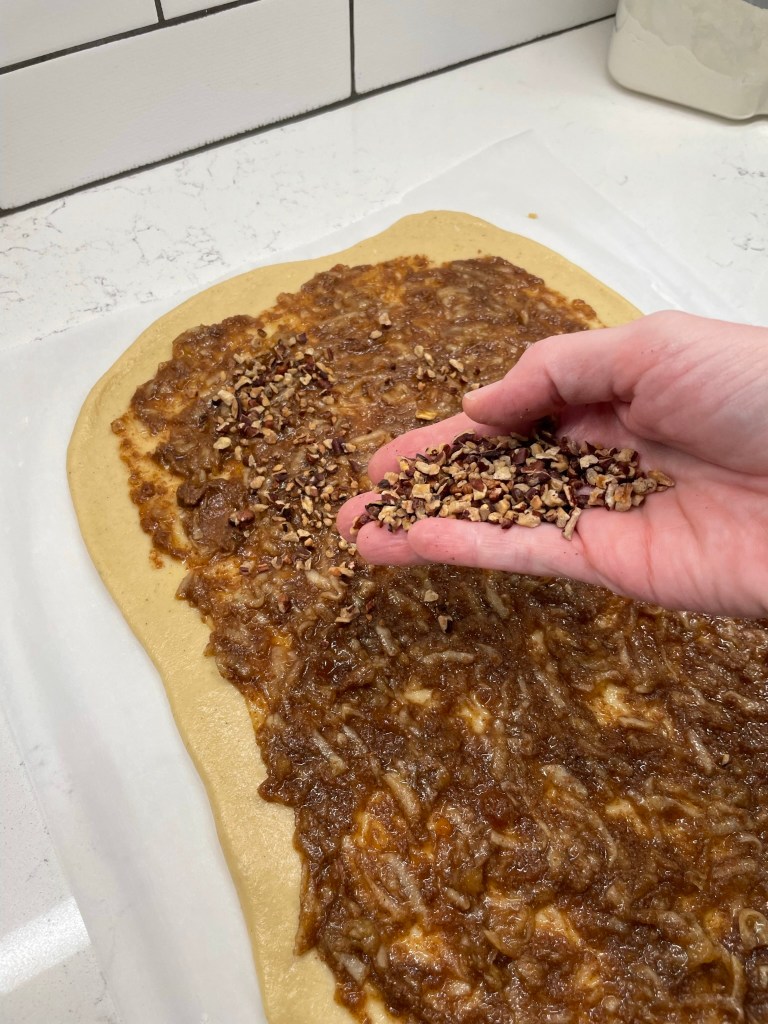
The layers of apple, spices and pecan make this extra special!
I’ve been a big fan of King Arthur products for years (and no, they never have paid me to say so), and my devotion to them is stronger than ever since my trip to their Vermont baking school, where I am proud to have completed their four-day “Principles & Practice” baking course. I learned a good many things during my time there, and made friends with several of my classmates. Among the takeaway lessons was the importance of using high-quality ingredients (i.e., theirs) and having them organized and properly measured before you begin mixing. That’s how I set up for this recipe, and I swapped in honey for the sugar, following the same helpful tips I used last month when I made my s’mores cupcakes.
Baking is much easier when I’m organized!
My main dry ingredients were measured by weight, which is something I was already doing before my King Arthur class, and all of our instructors during the four days emphasized the benefit of this. I cannot remember the last time I measured by volume, but there is a sensible way to do it for consistent results. They call it the fluff, sprinkle, level method, and it helps ensure that you don’t have dense results in your baked goods. If you are reluctant to get a kitchen scale, I highly recommend following that three-step method; otherwise, you may find your baked goods dense from being flour-heavy.
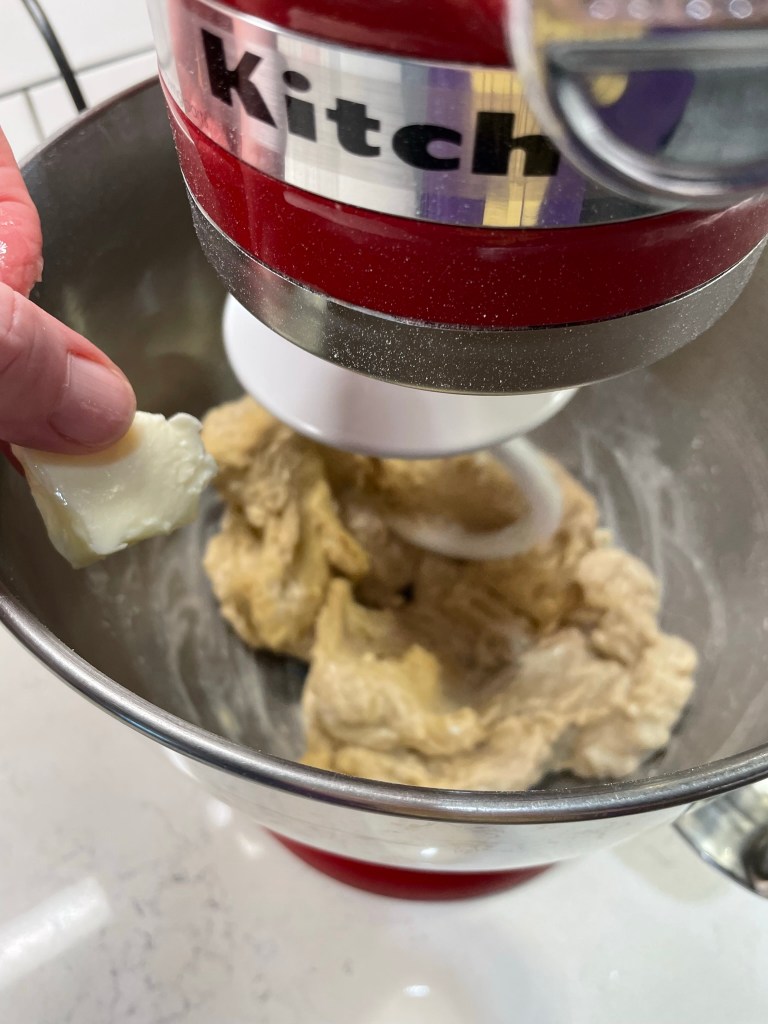
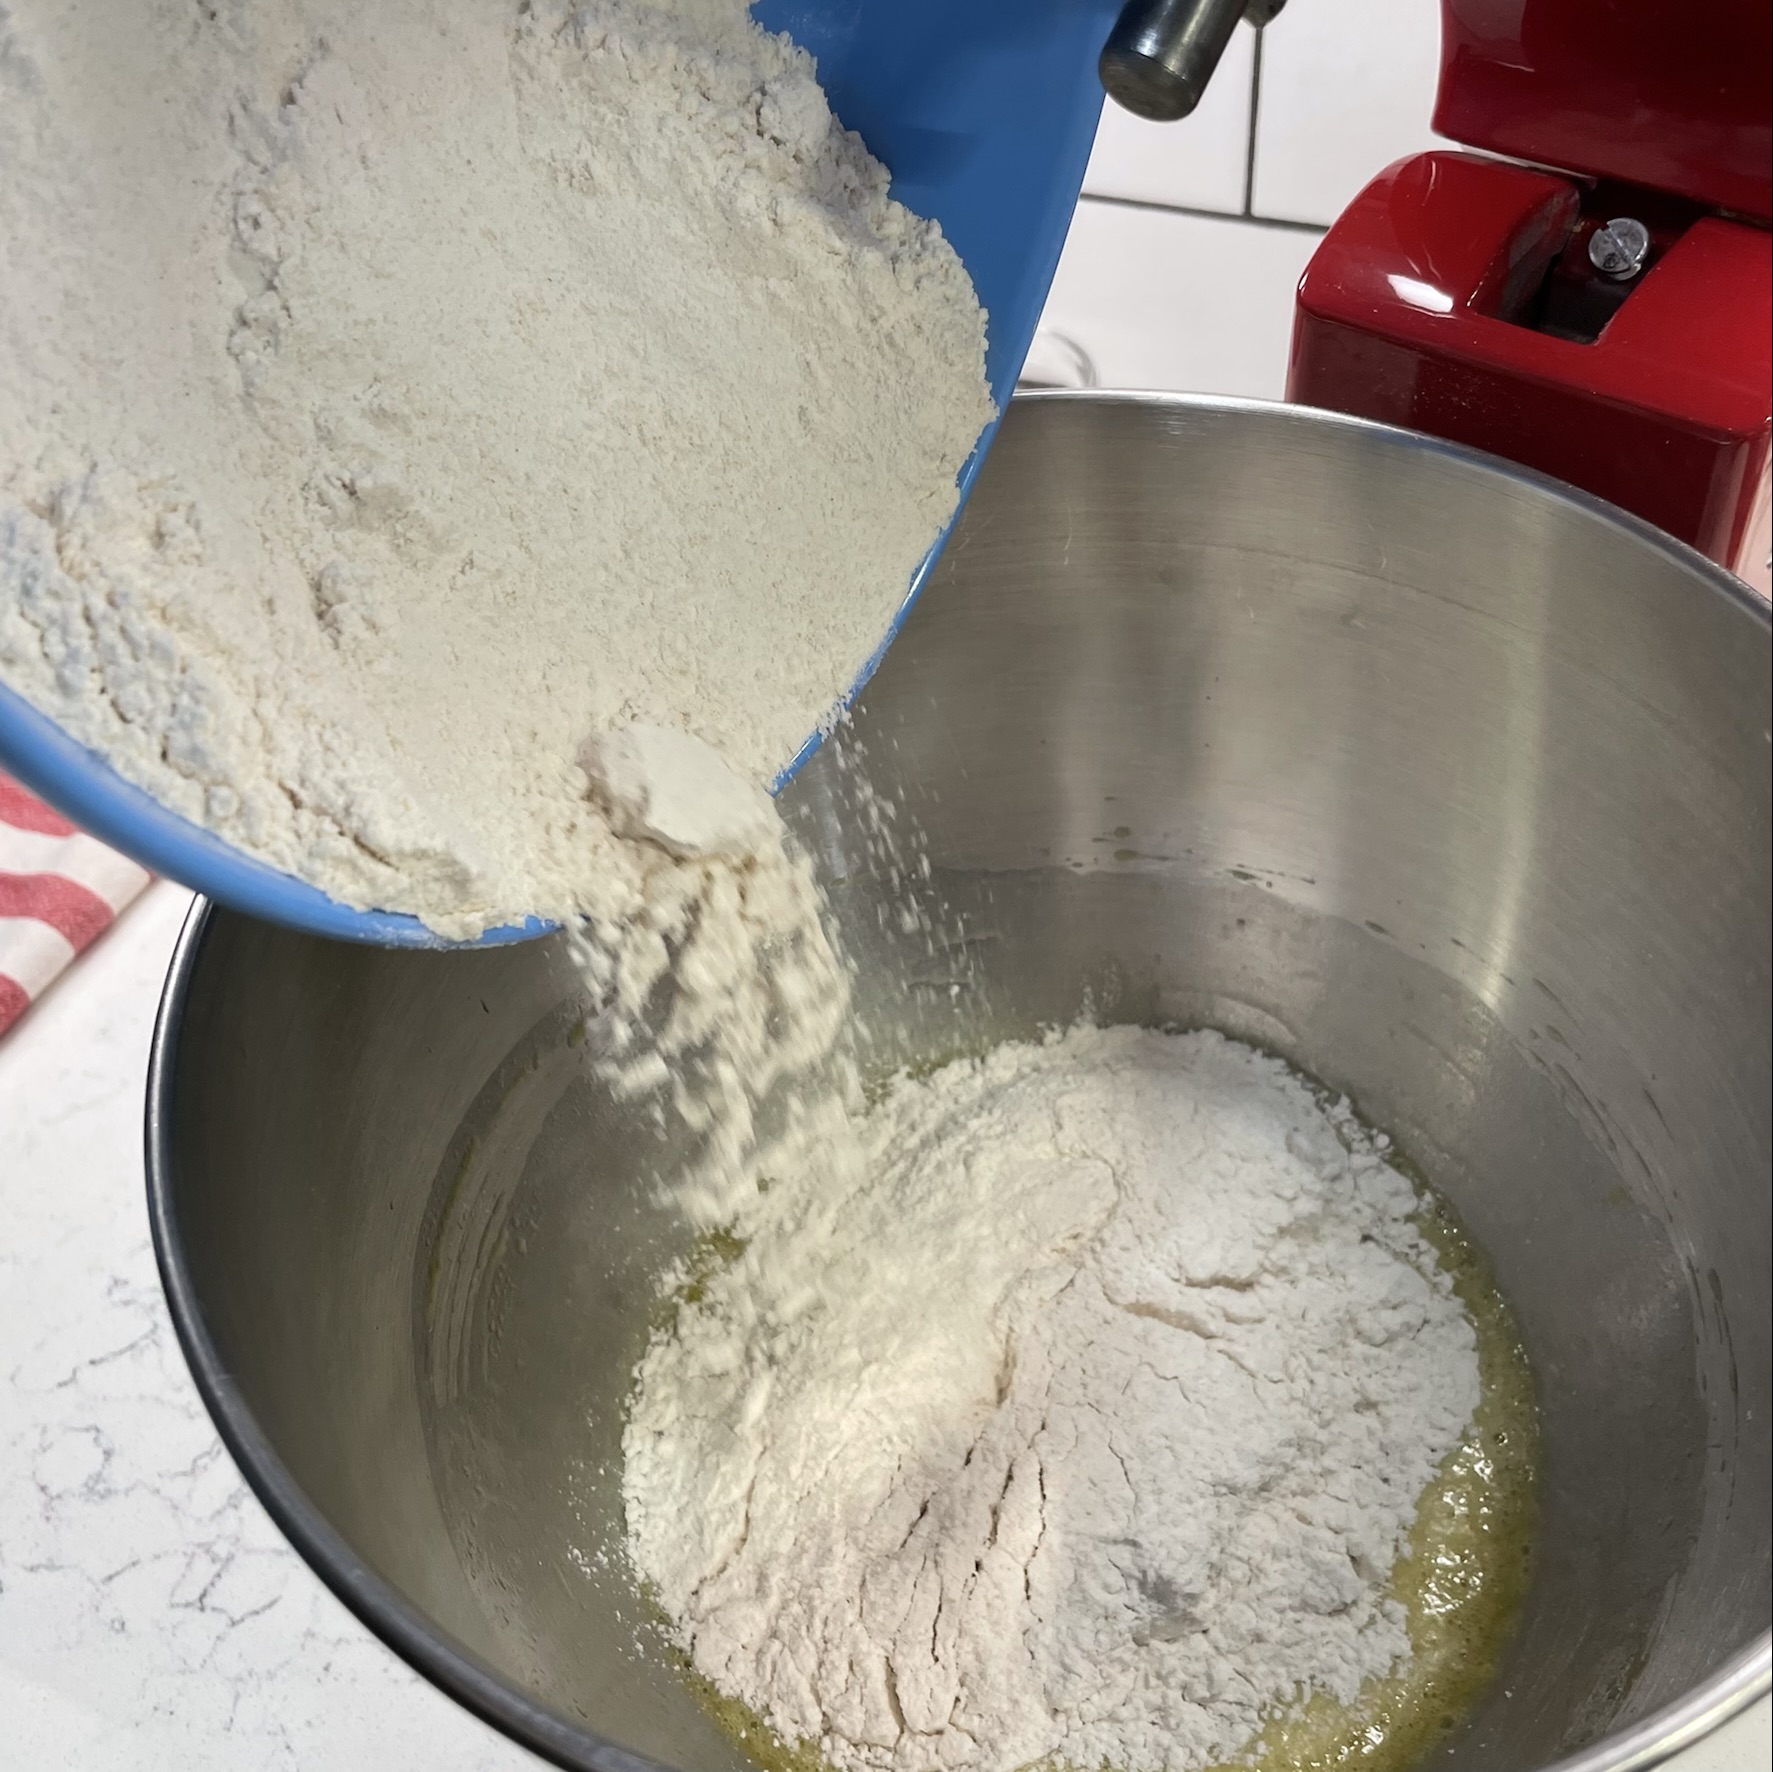
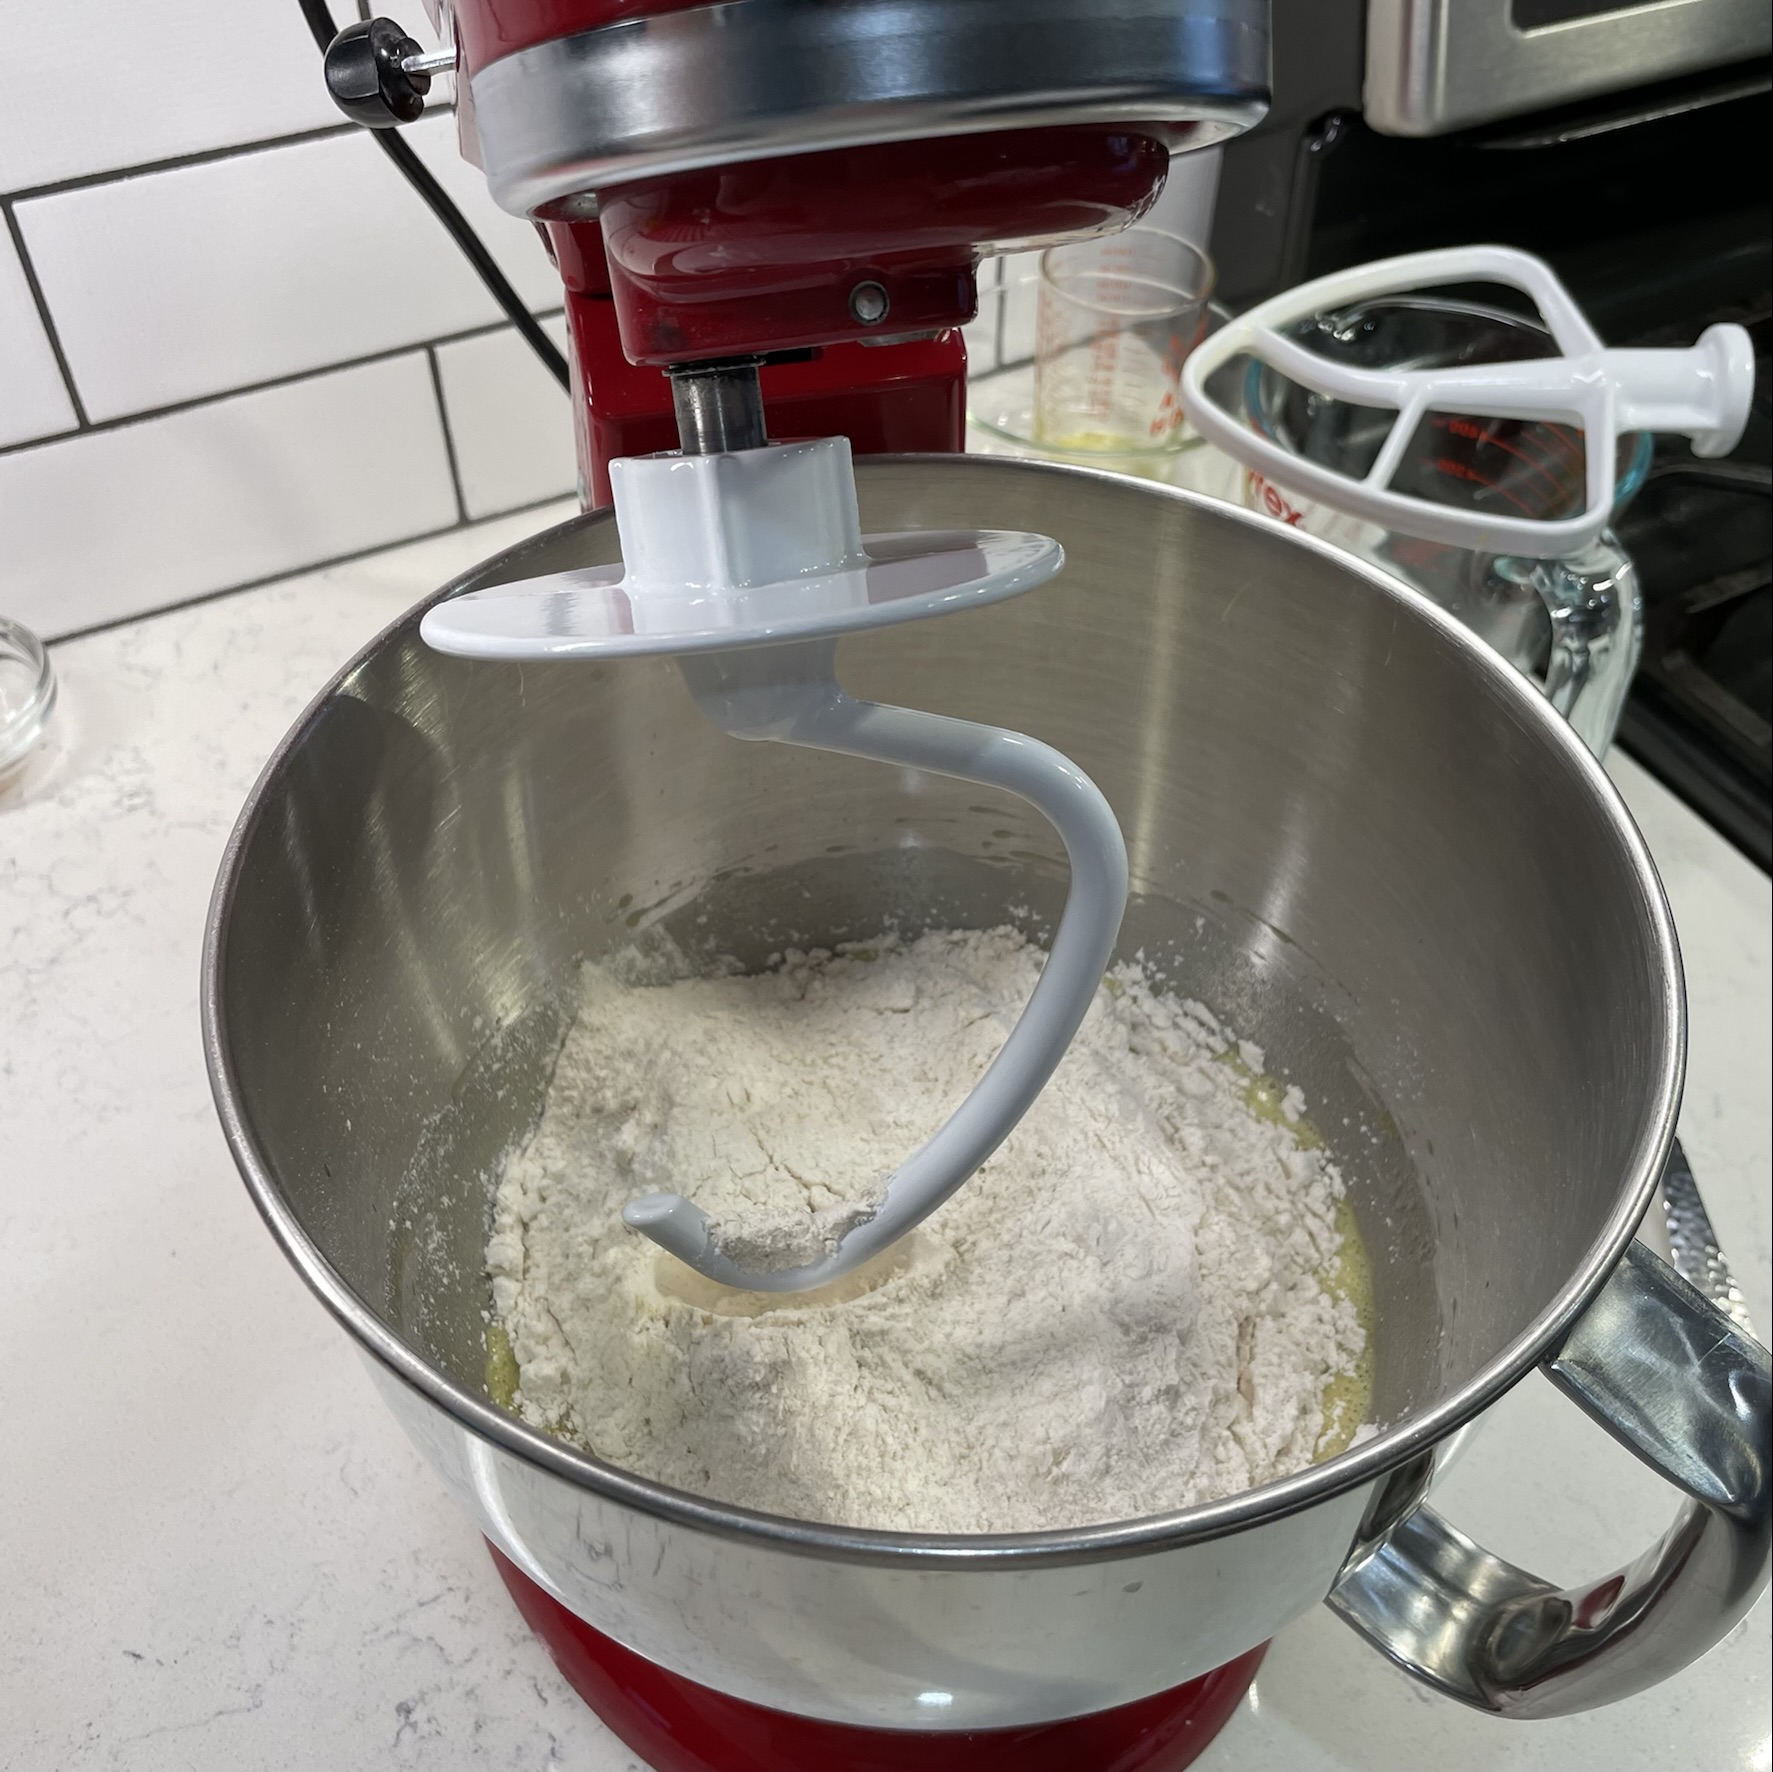
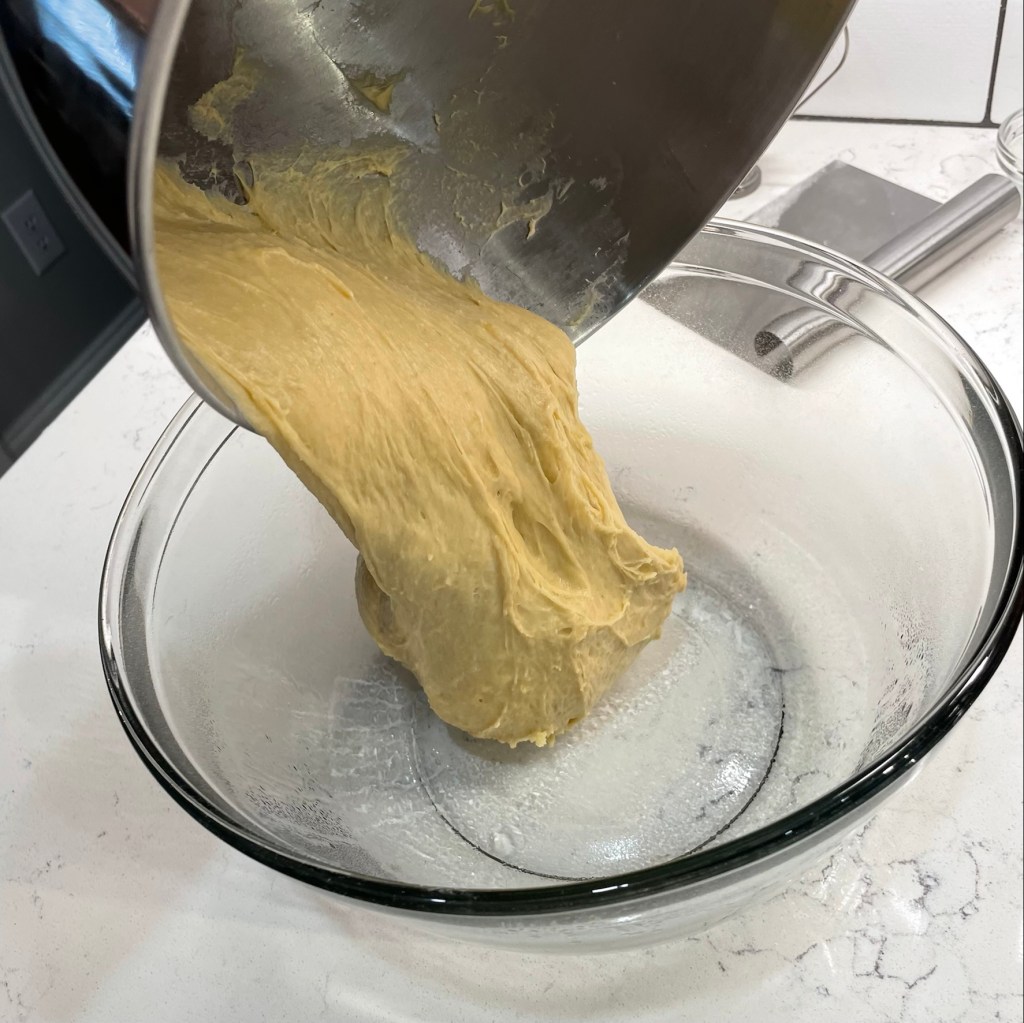
The process of the apple babka recipe was straightforward. I introduced the wet ingredients to the dry ones, then switched to the kneading hook and worked in the softened butter. This recipe would not be suitable for a meal that also includes meat— kosher rules require that meat and dairy not be served together— but it would be wonderful served with breakfast or dessert on another occasion. The dough rested about two hours until it was doubled and puffy.
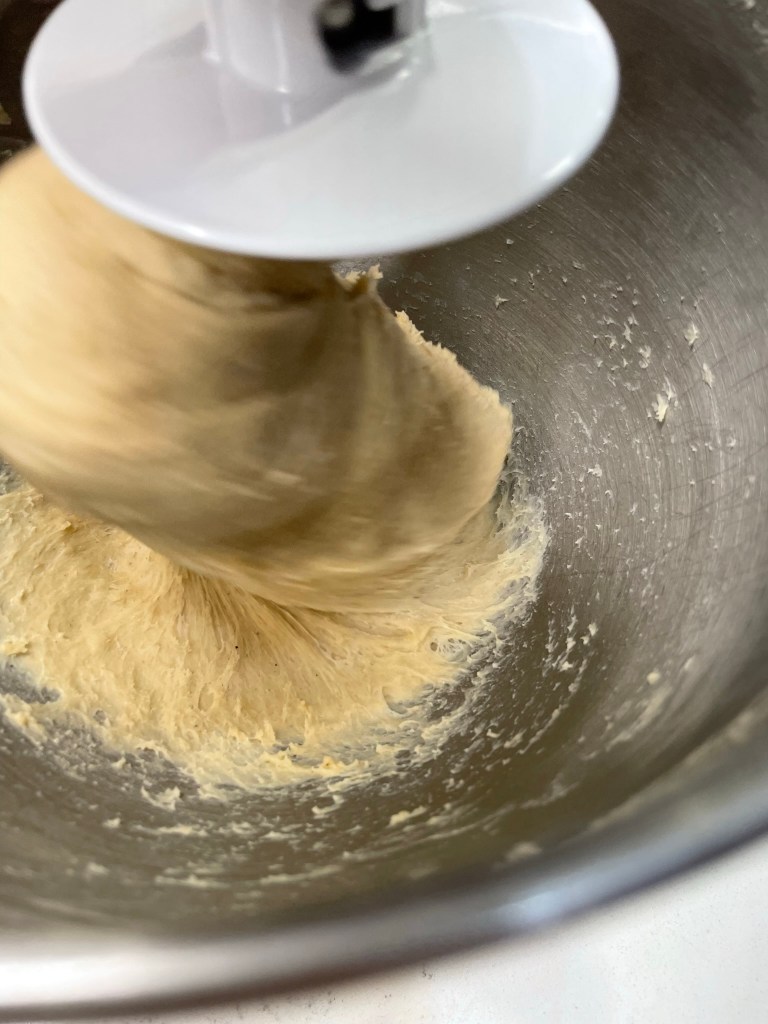
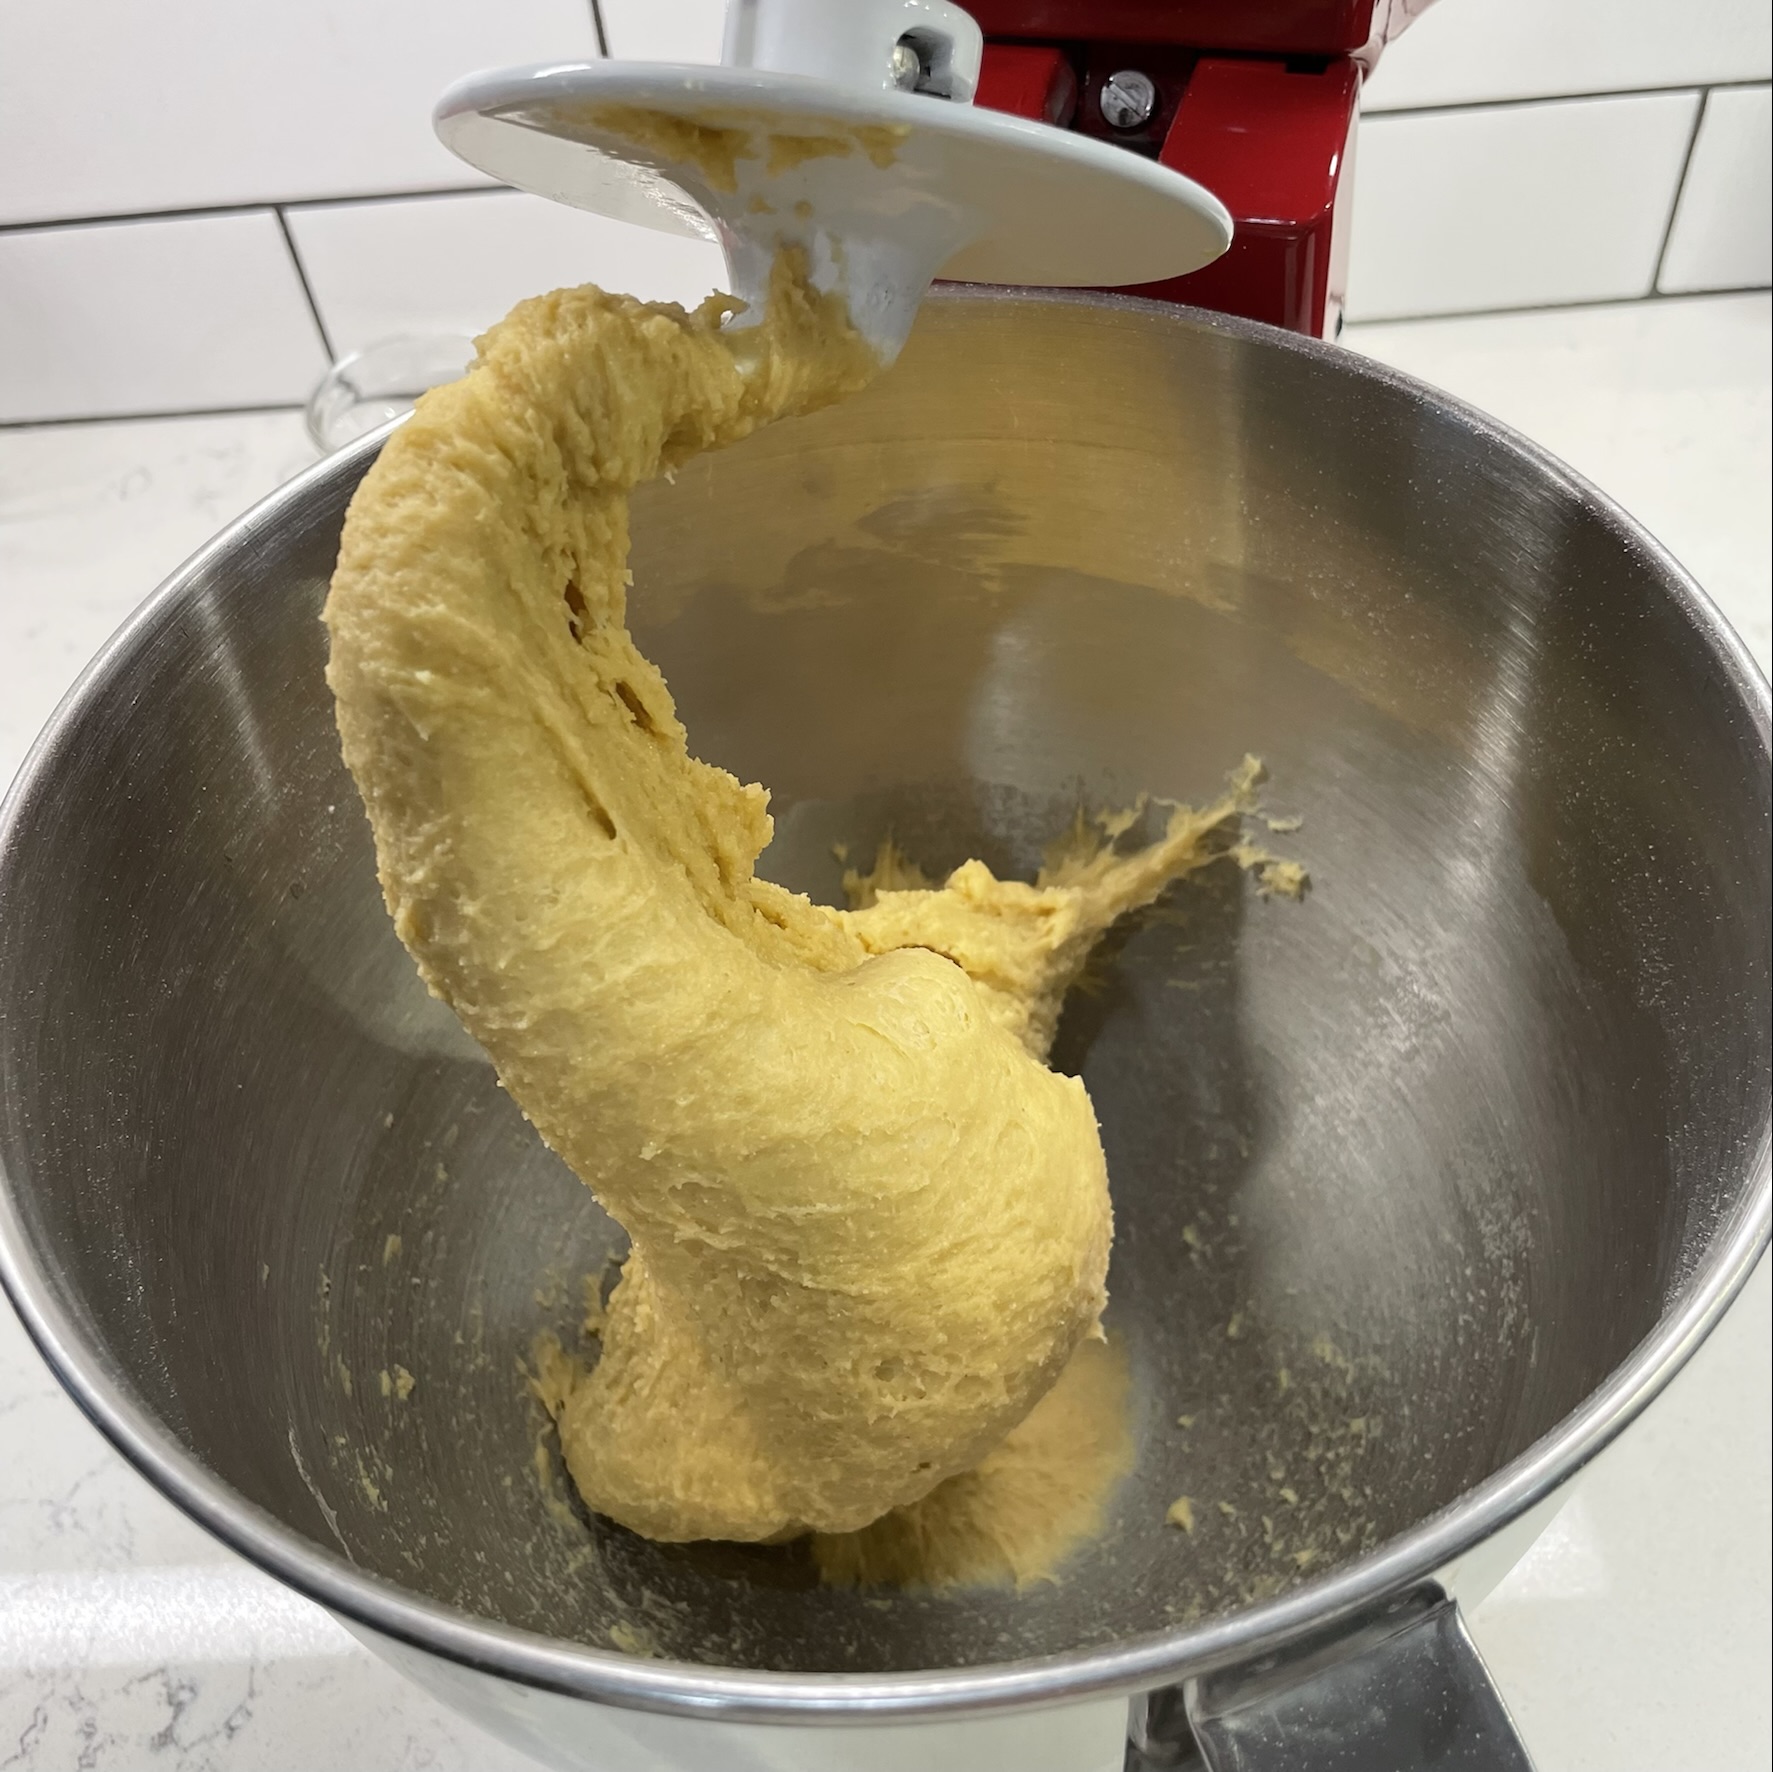
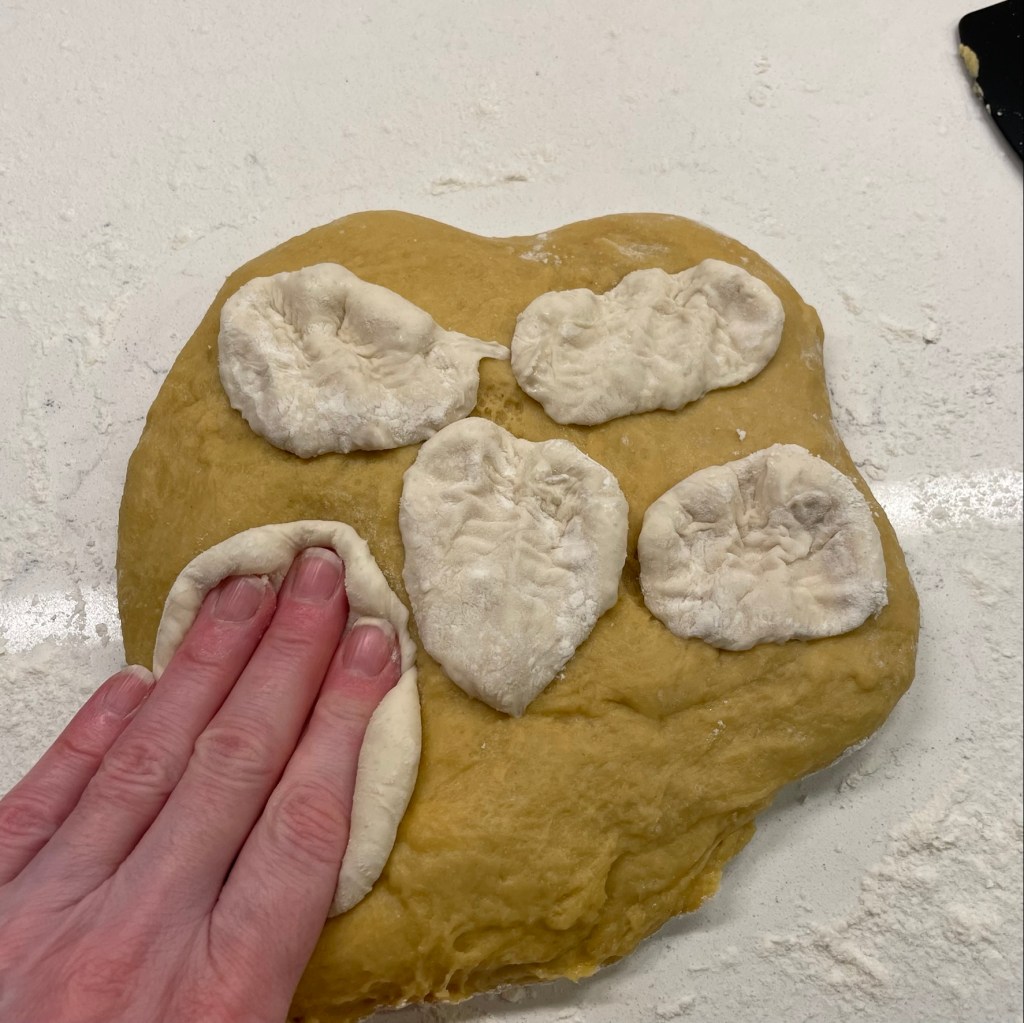
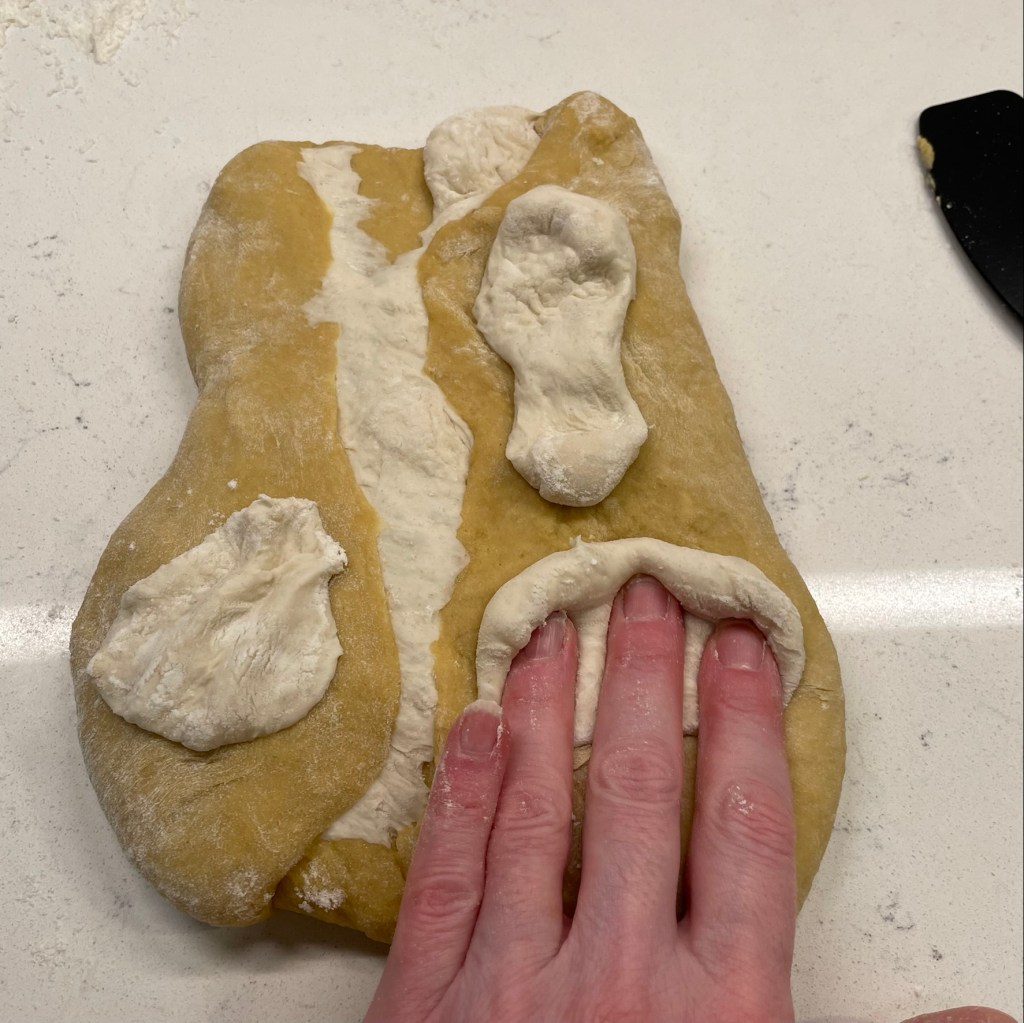
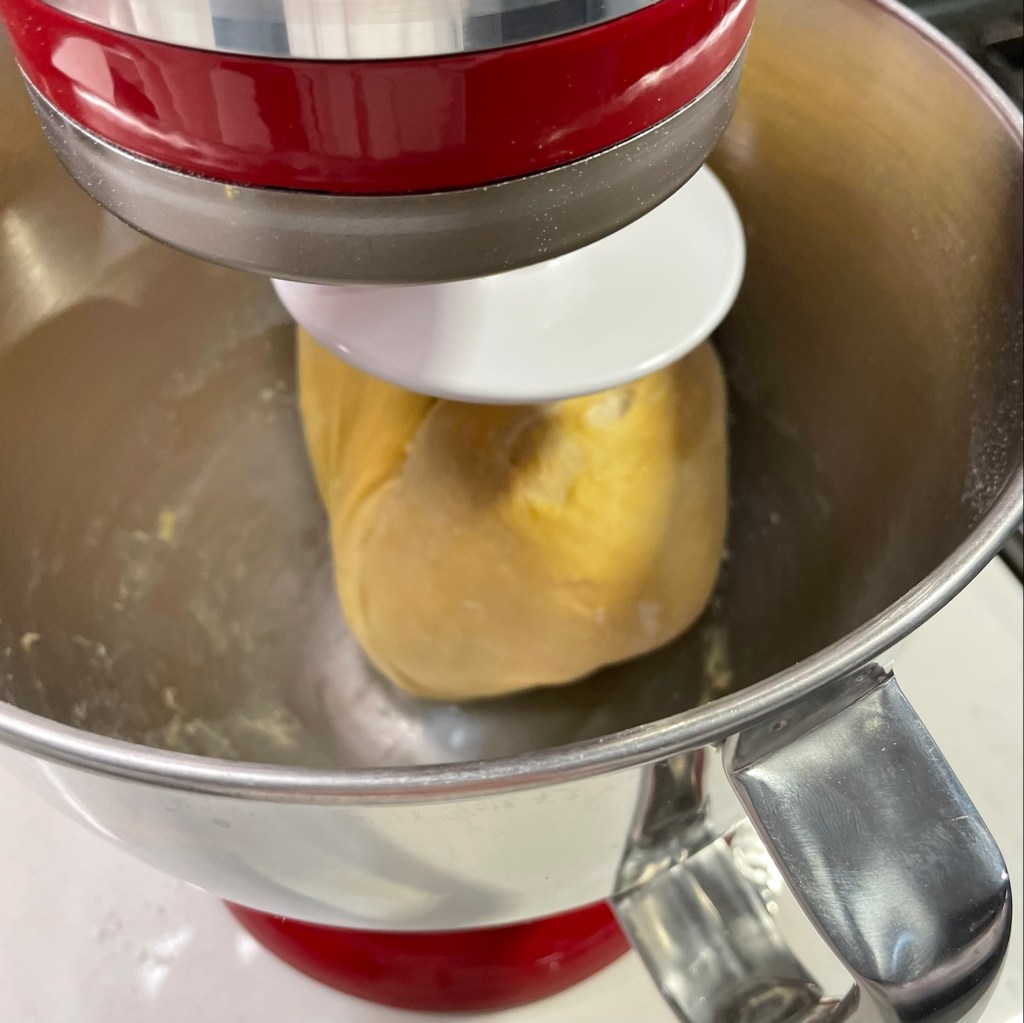
With 6 tablespoons of butter, this dough was very silky.Did I sample the filling on its own? Of course!
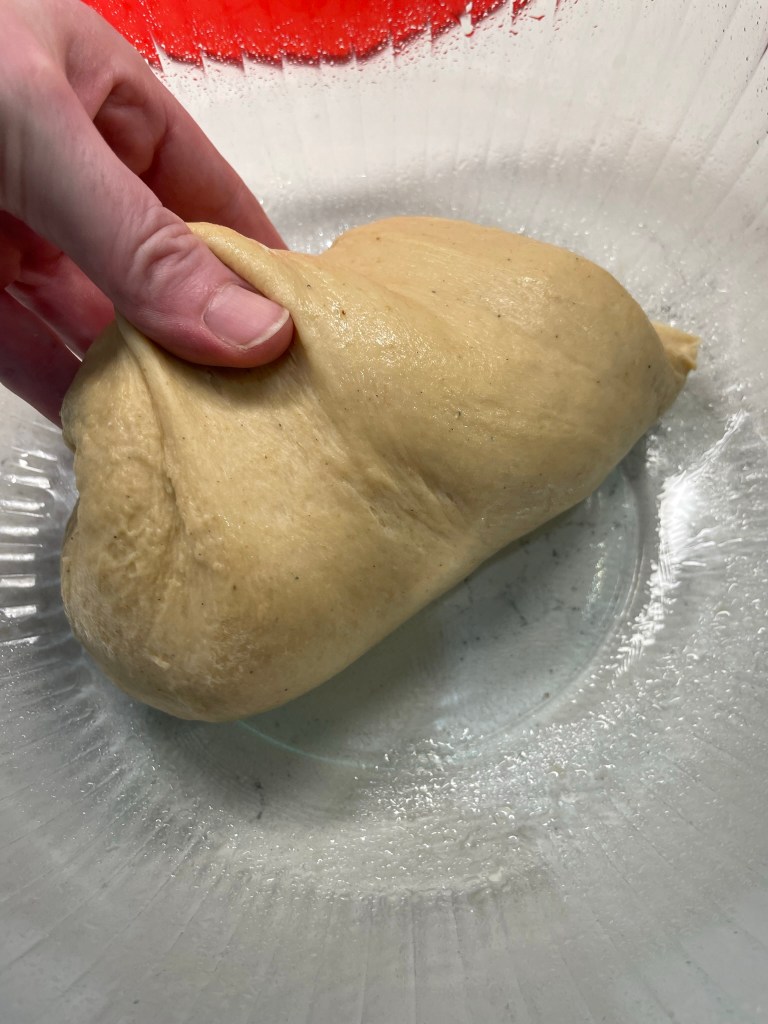
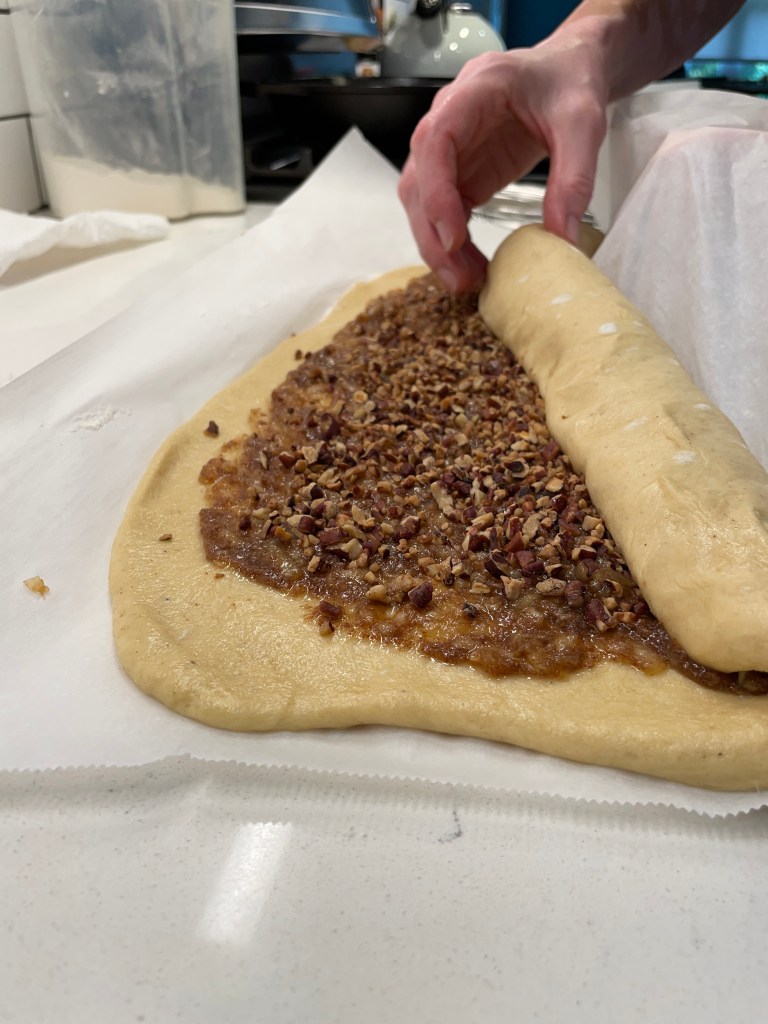
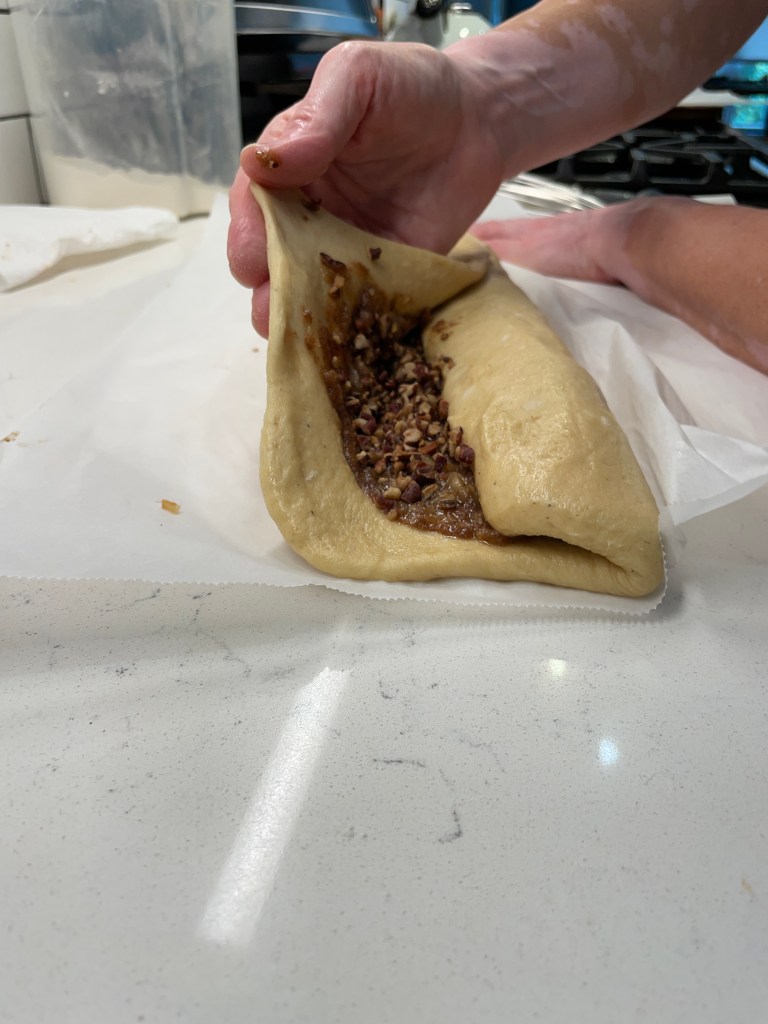
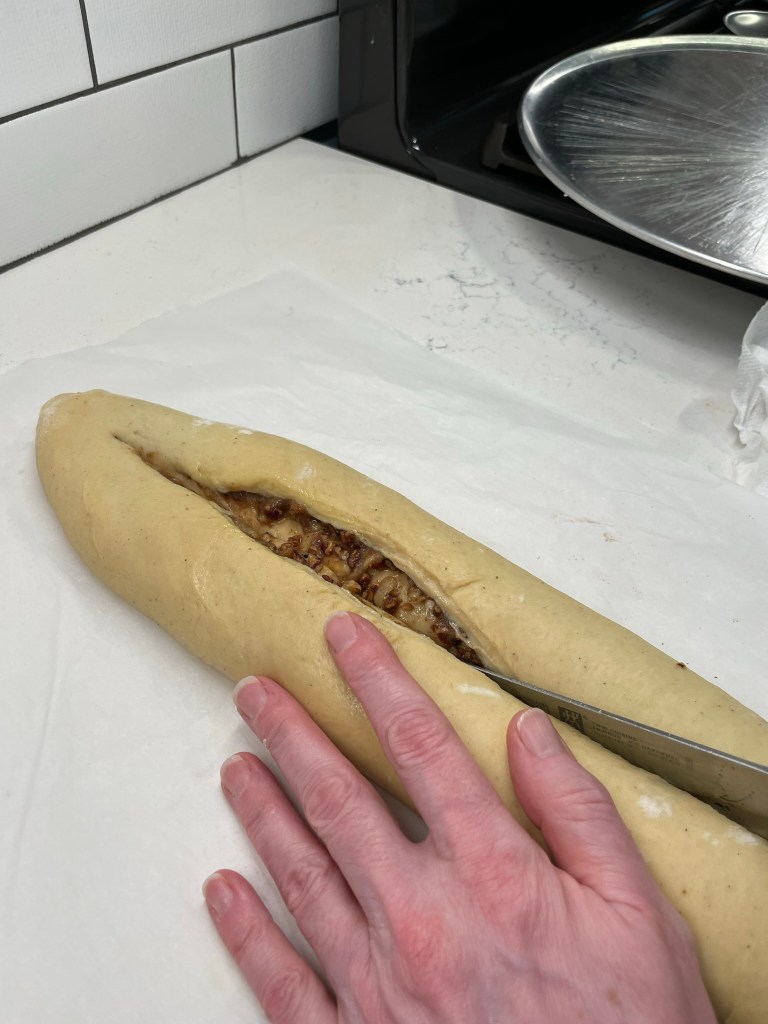
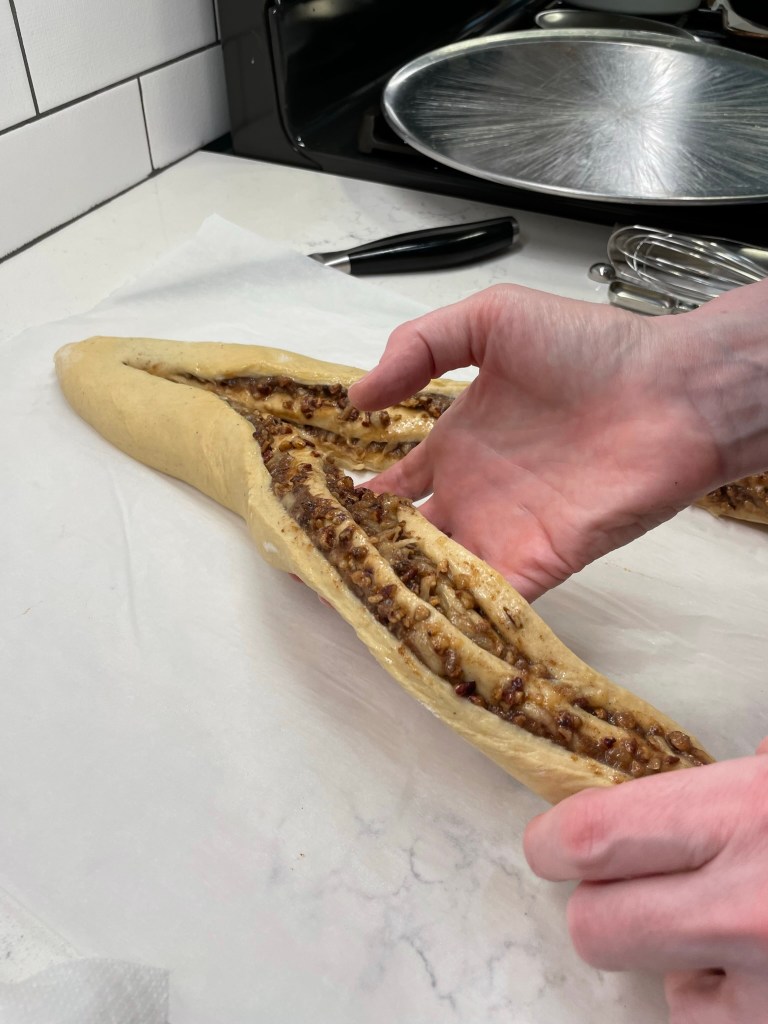
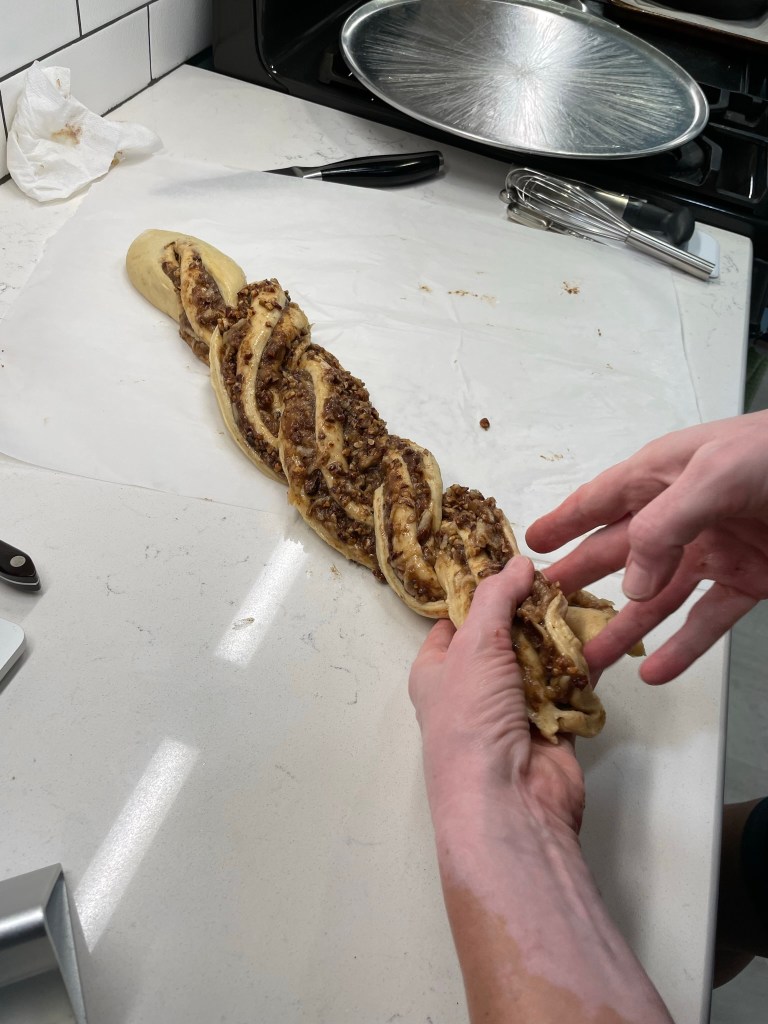
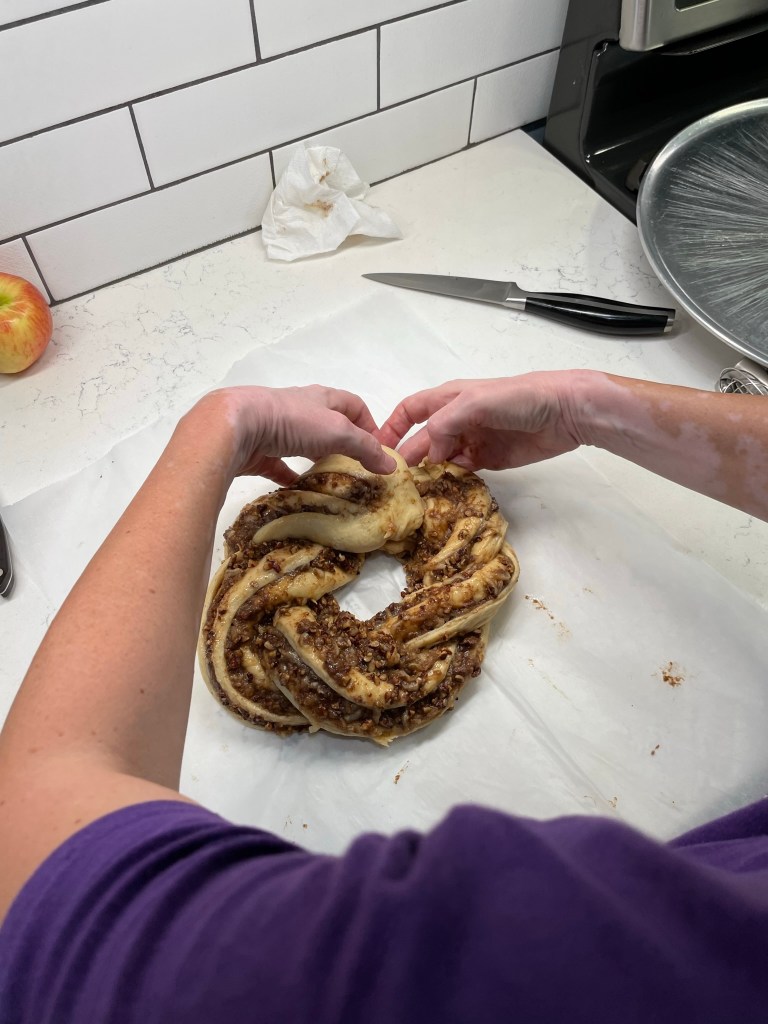
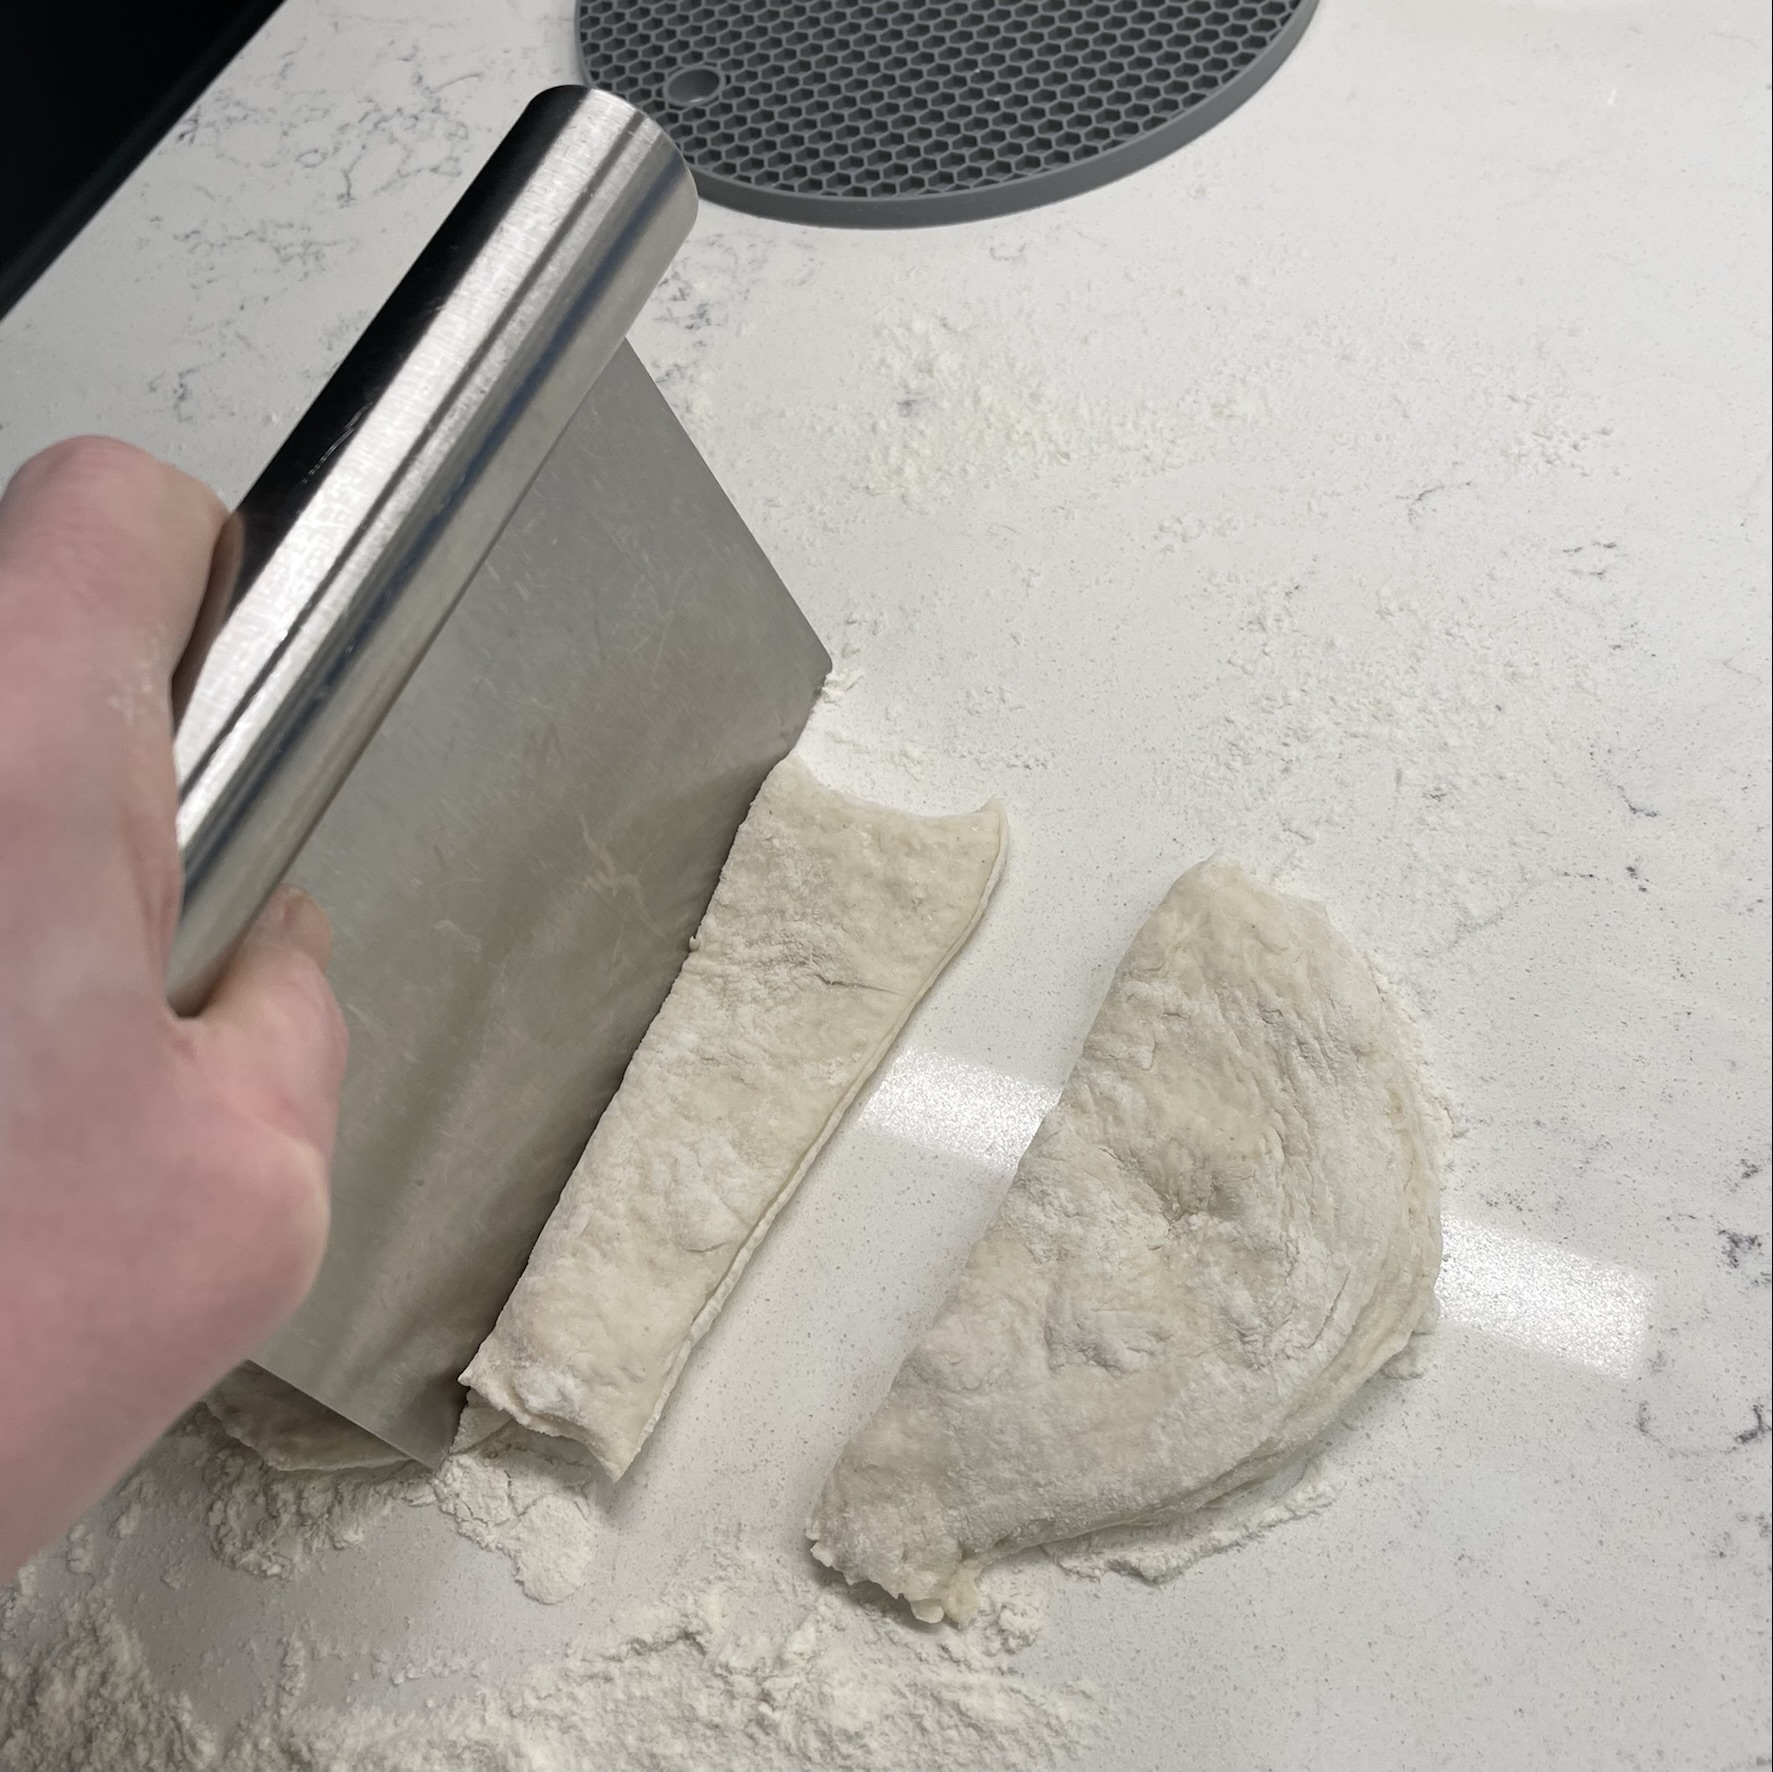
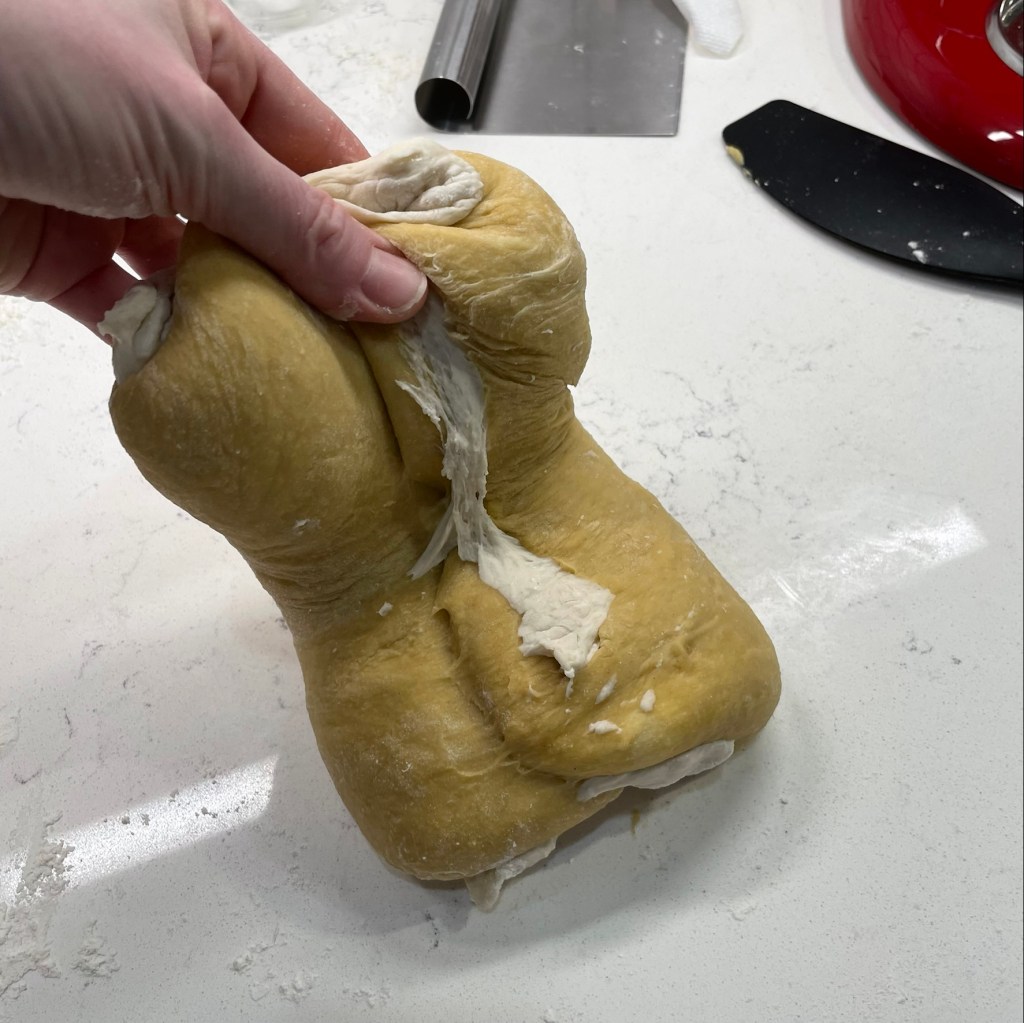
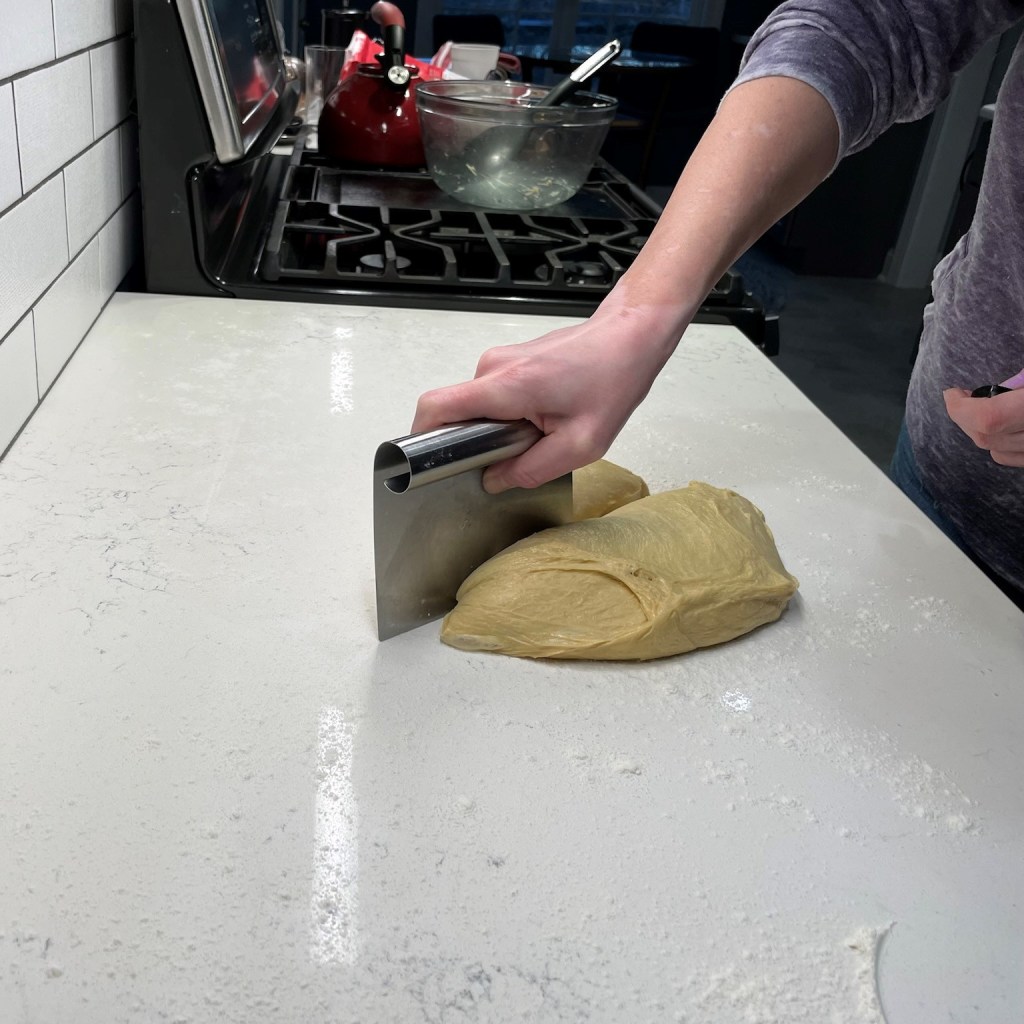
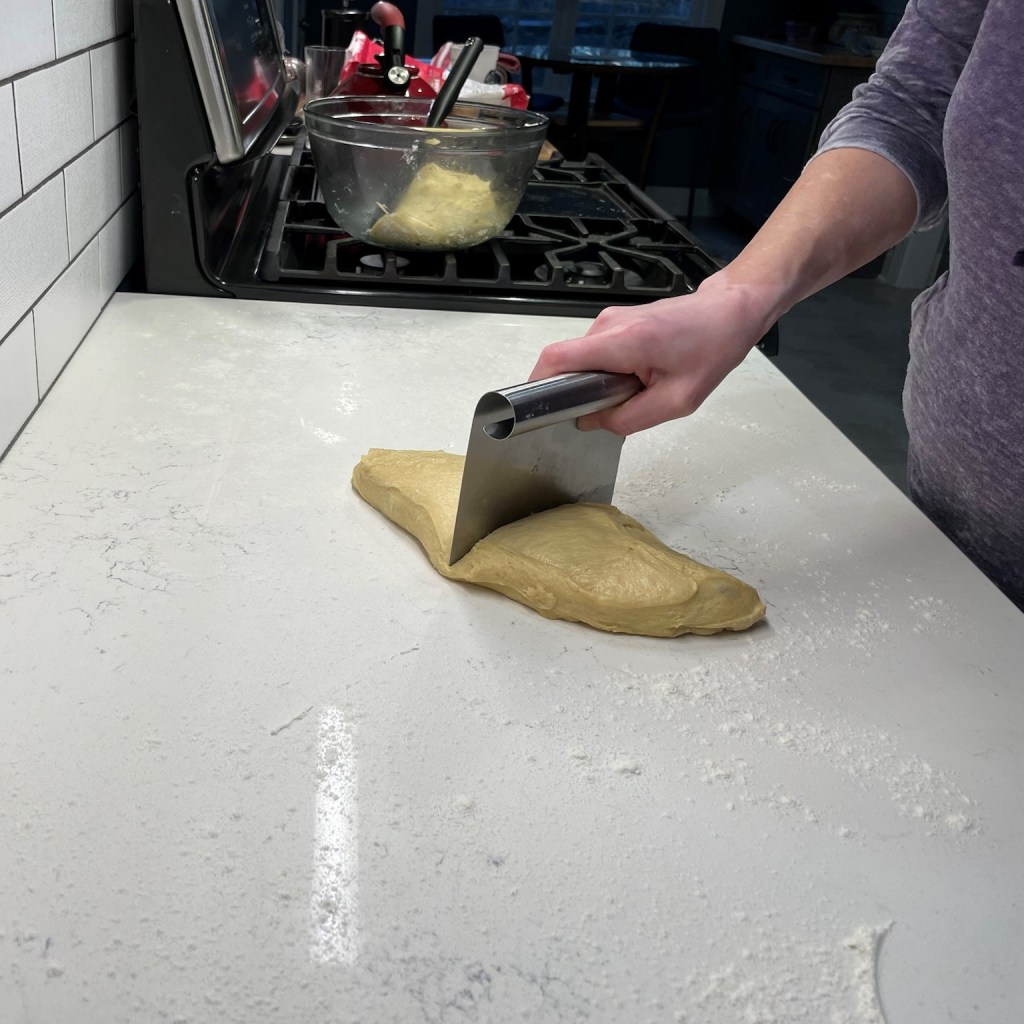
The filling was easy as well— brown sugar, cinnamon, cardamom and grated apple. Honeycrisp seemed appropriate for the occasion of Rosh Hashanah. Next came the rolling up and cutting, and I think this part would have been easier if this dough had been chilled, as the filling was very wet and loose. It was not difficult, but very messy, and not as pretty as I wanted it to be. I shaped the braided babka into a round, like a wreath, and covered it to proof for baking.
Next time, I will refrigerate the roll before cutting and shaping.
One of the other lessons in the King Arthur class was the simple way to determine whether your dough has proofed sufficiently for baking. If you poke the dough with a floured fingertip and the indent remains, it’s ready. If it bounces back, it needs more time. This one was ready!
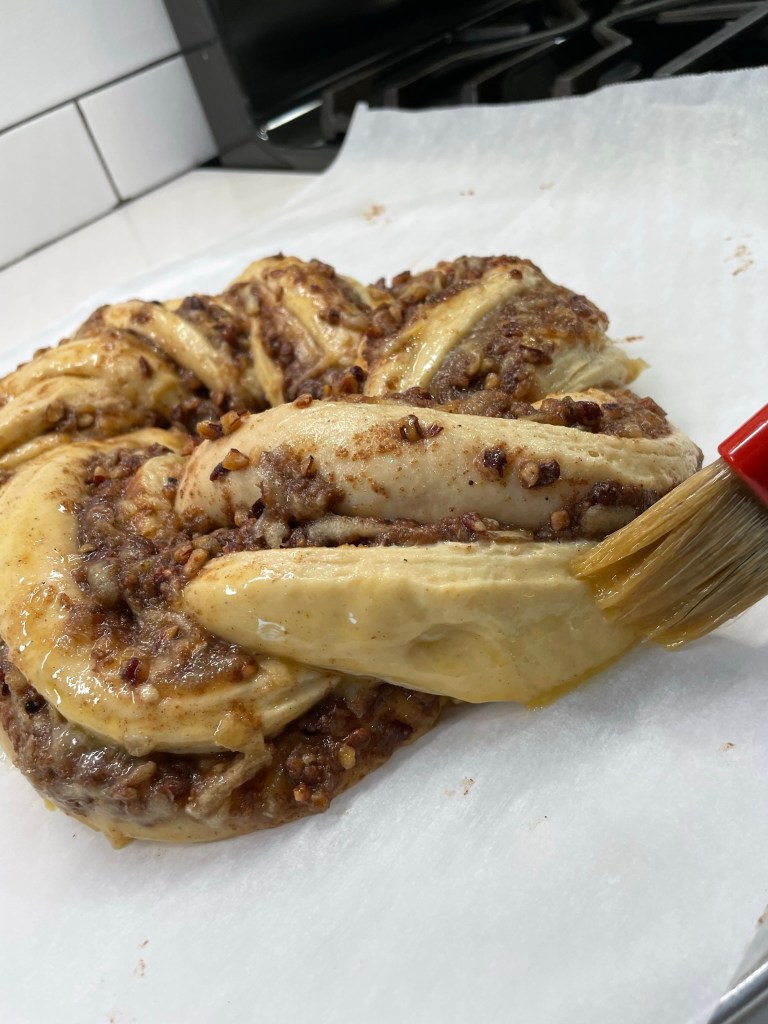
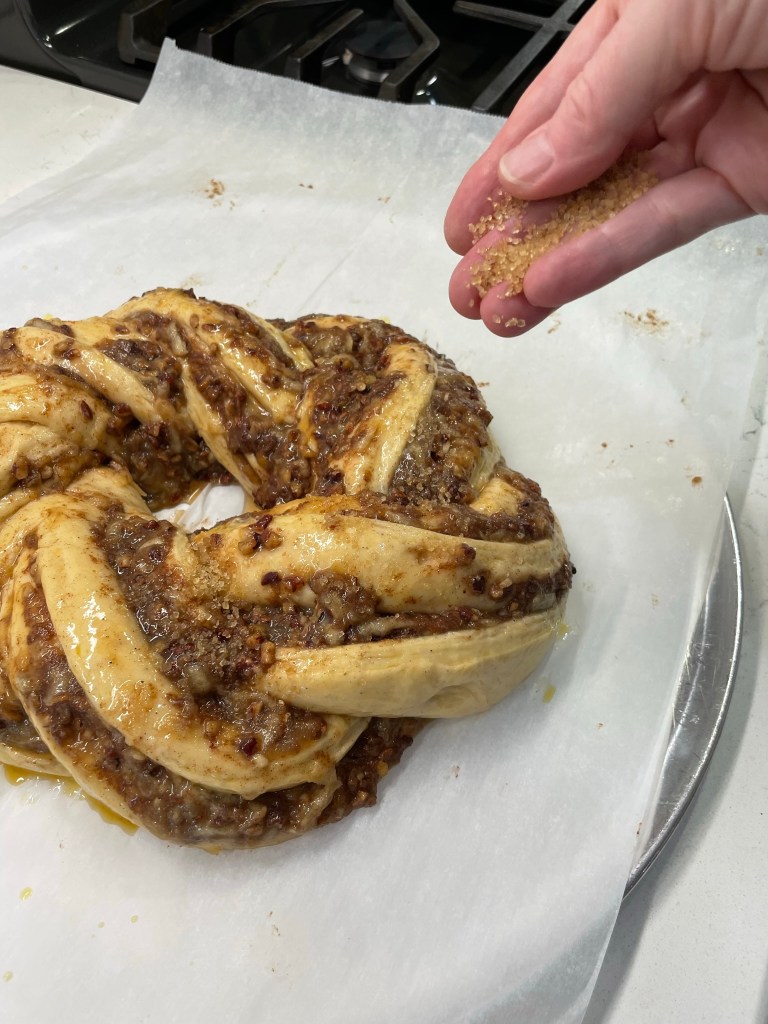
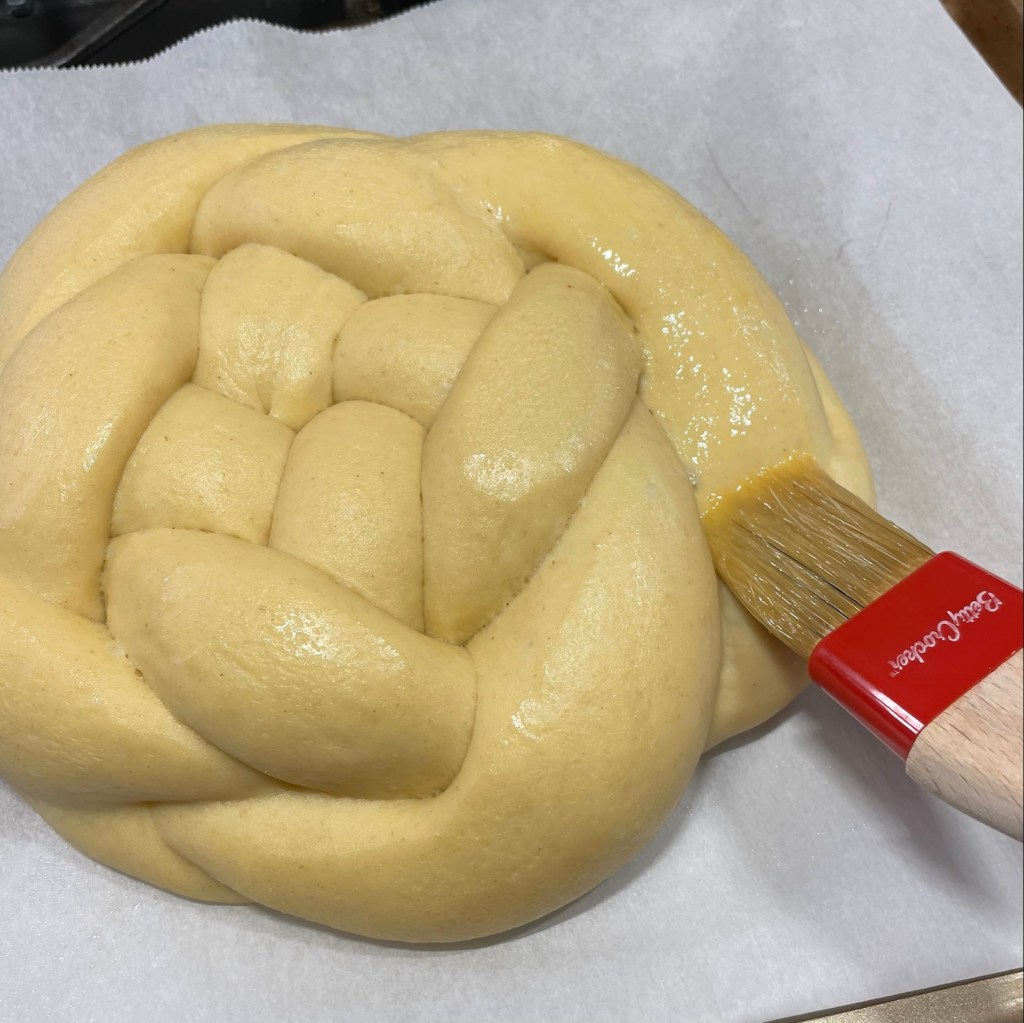
The egg wash and sprinkles of turbinado sugar made this beautiful!
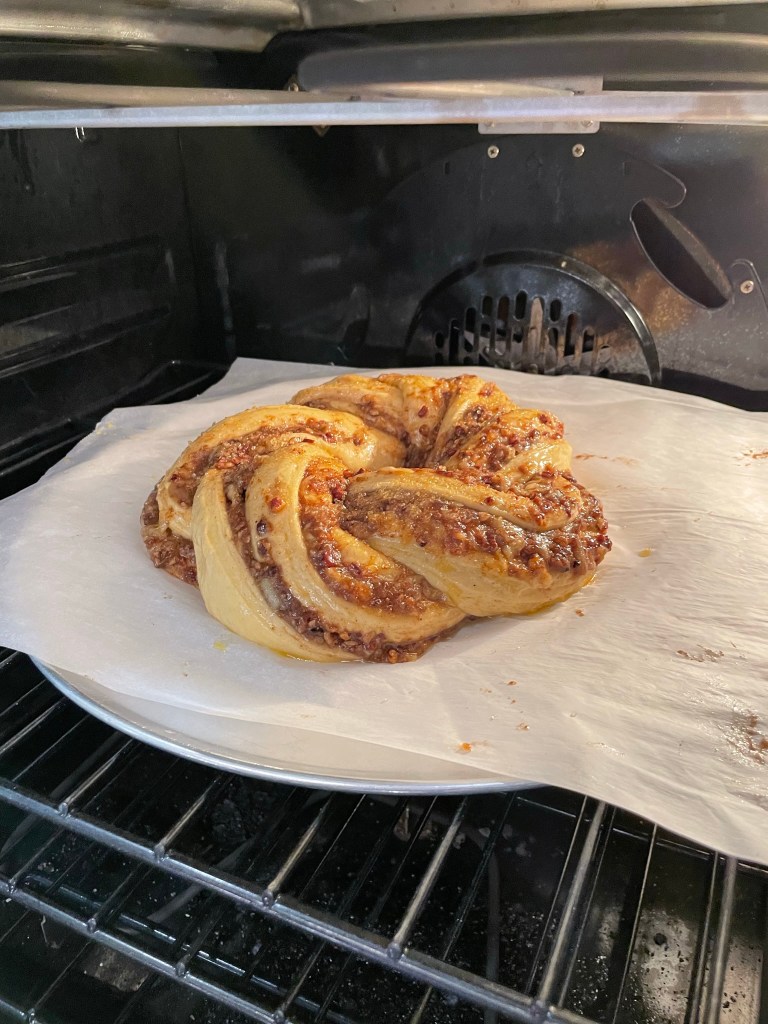
Time for an egg wash and bake, and we are ready for Rosh Hashanah! Of course, you don’t have to be Jewish to enjoy the lovely flavors. The apple, honey and spices make it perfectly appropriate through the rest of the year.
The Jewish High Holy Days are upon us, and that means it’s time for me to share one of my favorite breads. Regardless of your religious background or practices, you have probably heard of, seen or tasted this classic Jewish bread, which is rich with eggs, oil and honey. Challah is a mainstay of Jewish life, and is served weekly at Shabbat services and especially during holidays—or, at least, the ones in which leavened bread is allowed. Rosh Hashanah is a perfect time to enjoy this round version of challah, and there’s no doubt every last crumb will be gone before the fasting of Yom Kippur begins next Tuesday.
The great thing about challah, besides the fact that it is a sweet, soft and tasty bread, is that you don’t have to be Jewish to enjoy it or to make it (I’m proof of both points). From the time I became seriously involved with my husband, Les, I have been very interested in learning the foods of his Jewish heritage, and challah has become a favorite in our rotation. My sourdough version is a bit sturdier than a yeasted loaf, thanks to the higher protein bread flour that ensures a good oven rise. But the texture is still airy and it makes excellent toast, French toast and bread pudding.
There are two main challenges I’ve faced in making sourdough challah, but both can be resolved with time and practice. The first is the challenge of getting this dough to rise; any bread dough with a high volume of sugar (or honey, in this case) struggles against the yeast action, and challah is even more so because it contains so much heavy oil. The best way to win this battle is simply to give it more time. From start to finish, this bread takes almost a full day, but most of that time is spent just waiting—for the pre-ferment to be ready, for the dough to double in size (which it hardly ever does), and for it to rise for baking. Make it on a day that you have lots of other things going on at home so you aren’t tempted to stand and watch it, which I have learned the hard way doesn’t make it happen any faster.
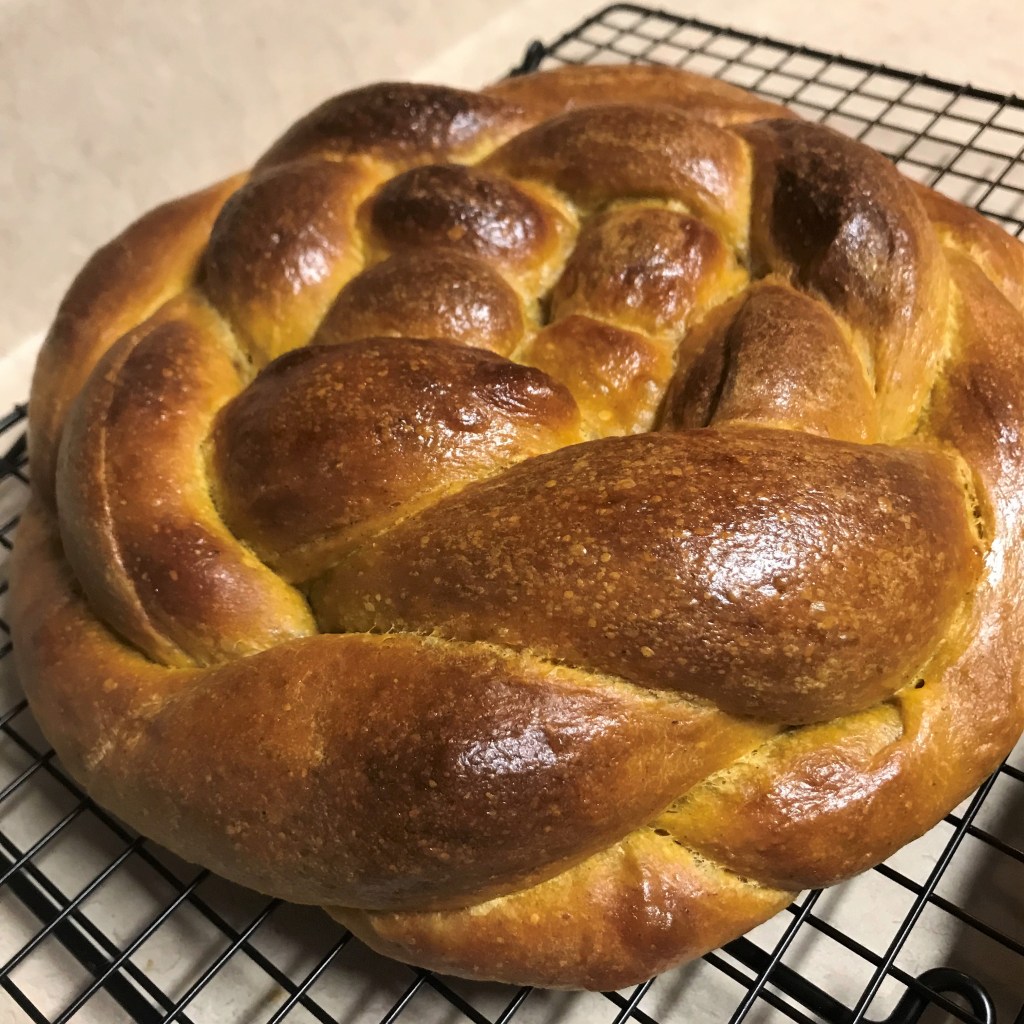
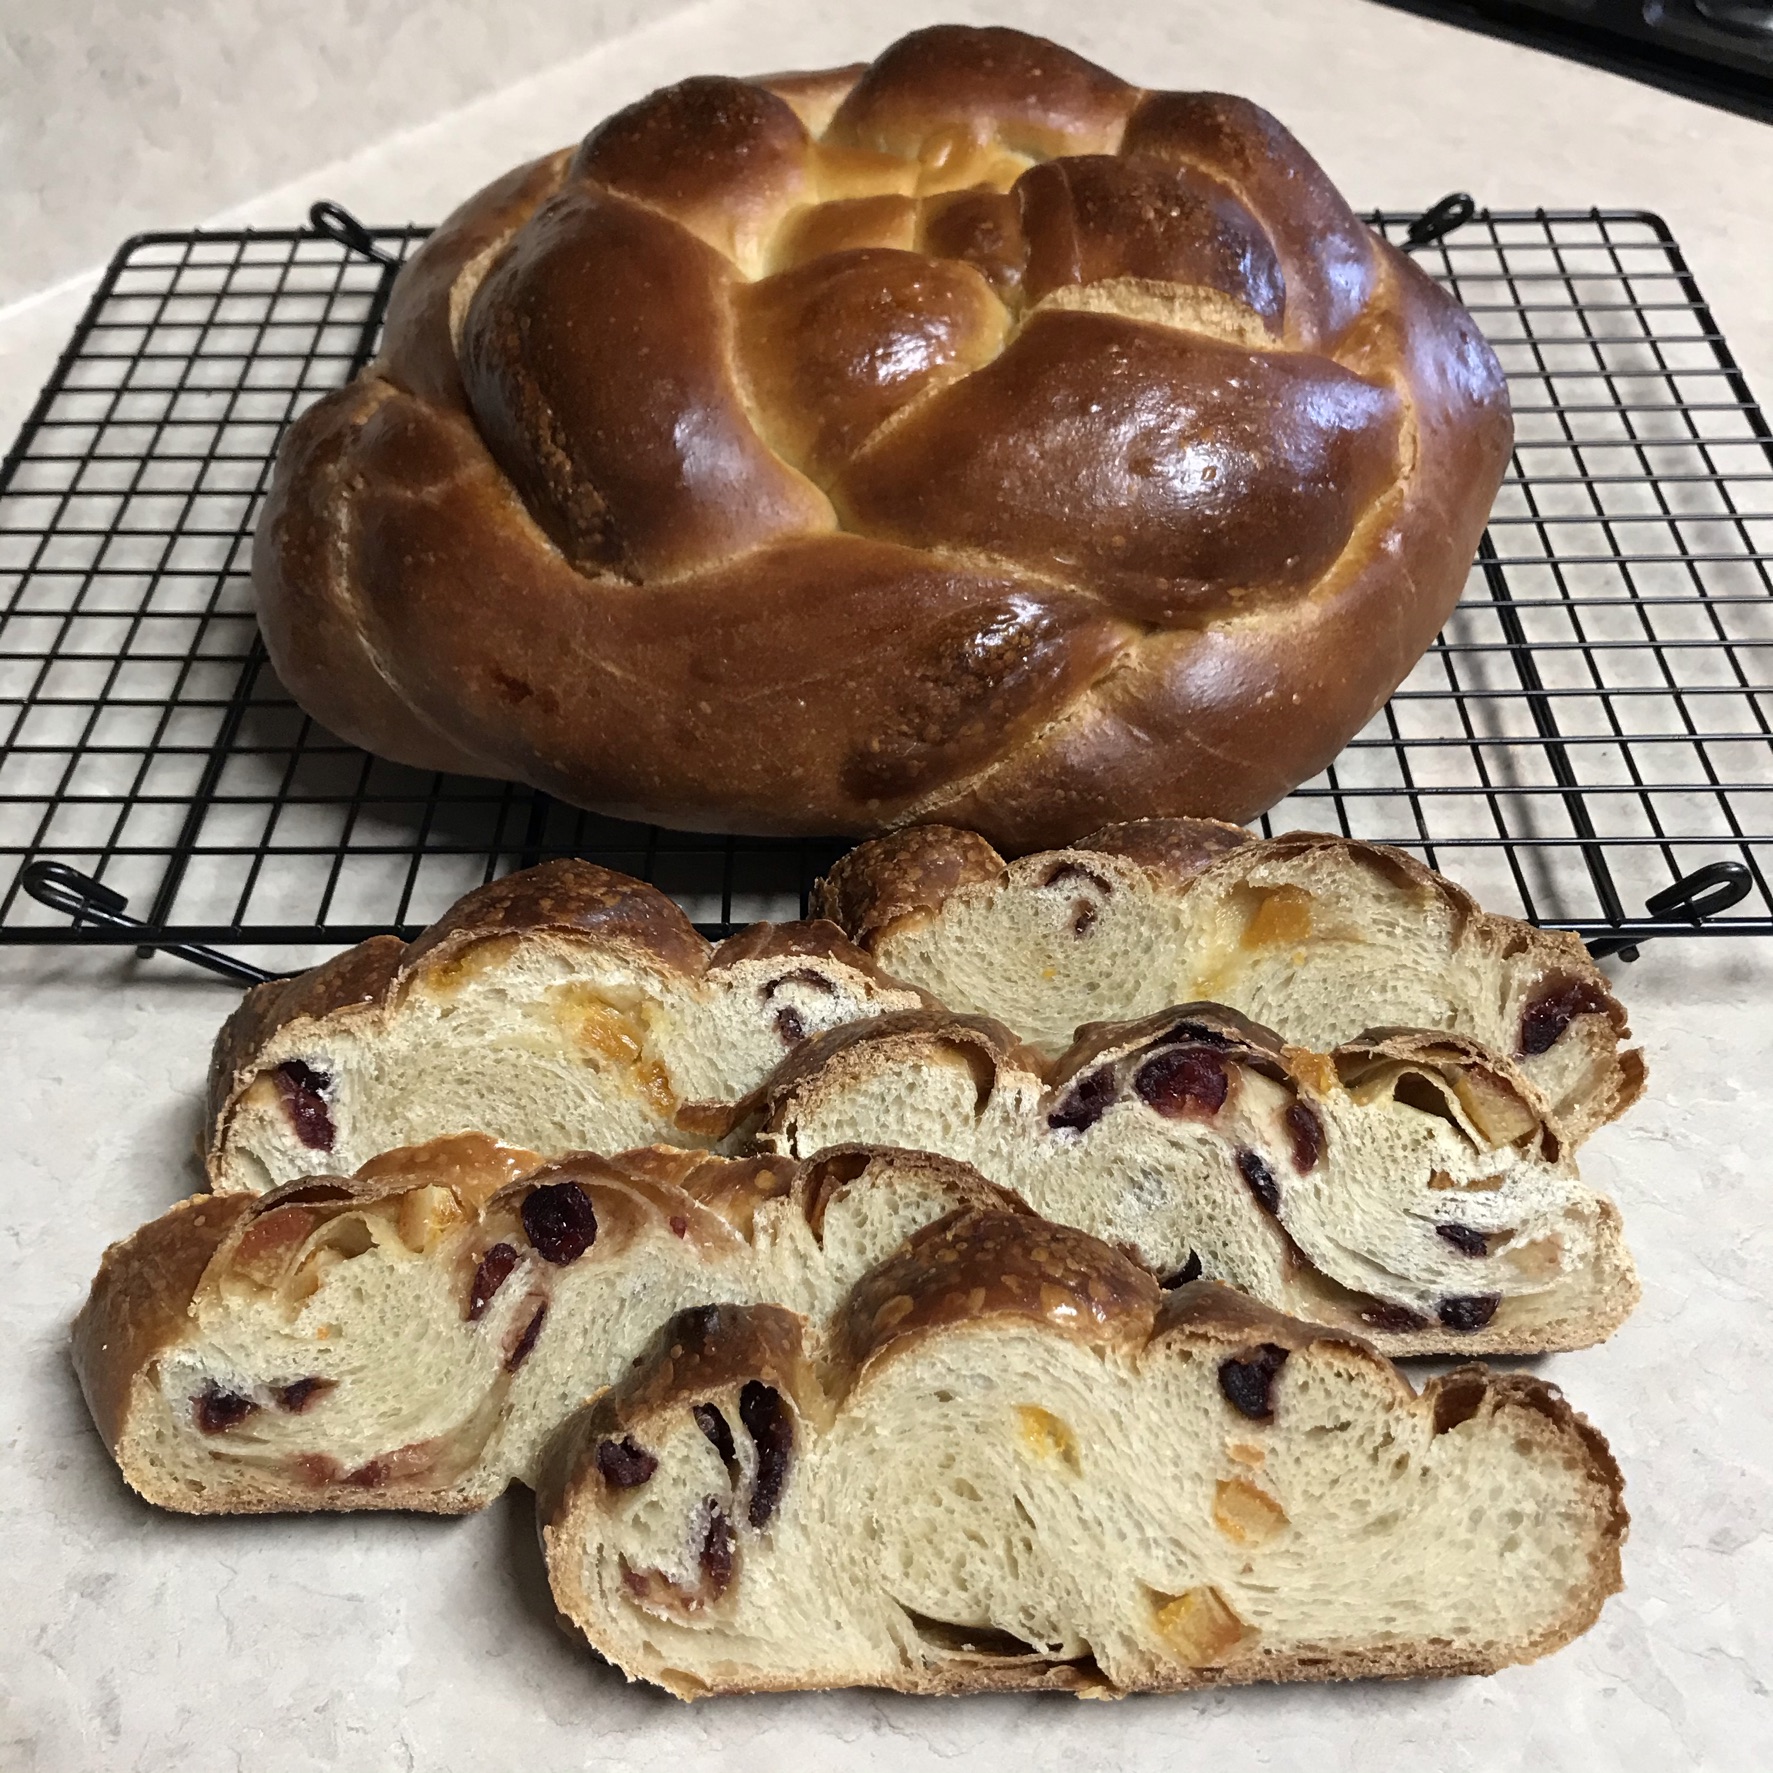
The second challenge with making challah (sourdough or otherwise) is creating the beautiful, braided shapes. This is not nearly as complicated as you might think, and I’ll share my own technique for doing this, whether you want to try making a basket-weave round (as in the featured photo) or a simpler straight braid, which is no more difficult than braiding a kid’s hair. For Rosh Hashanah, I like to make challah in a round, as its shape is a symbol for coming full circle into a new spiritual year.
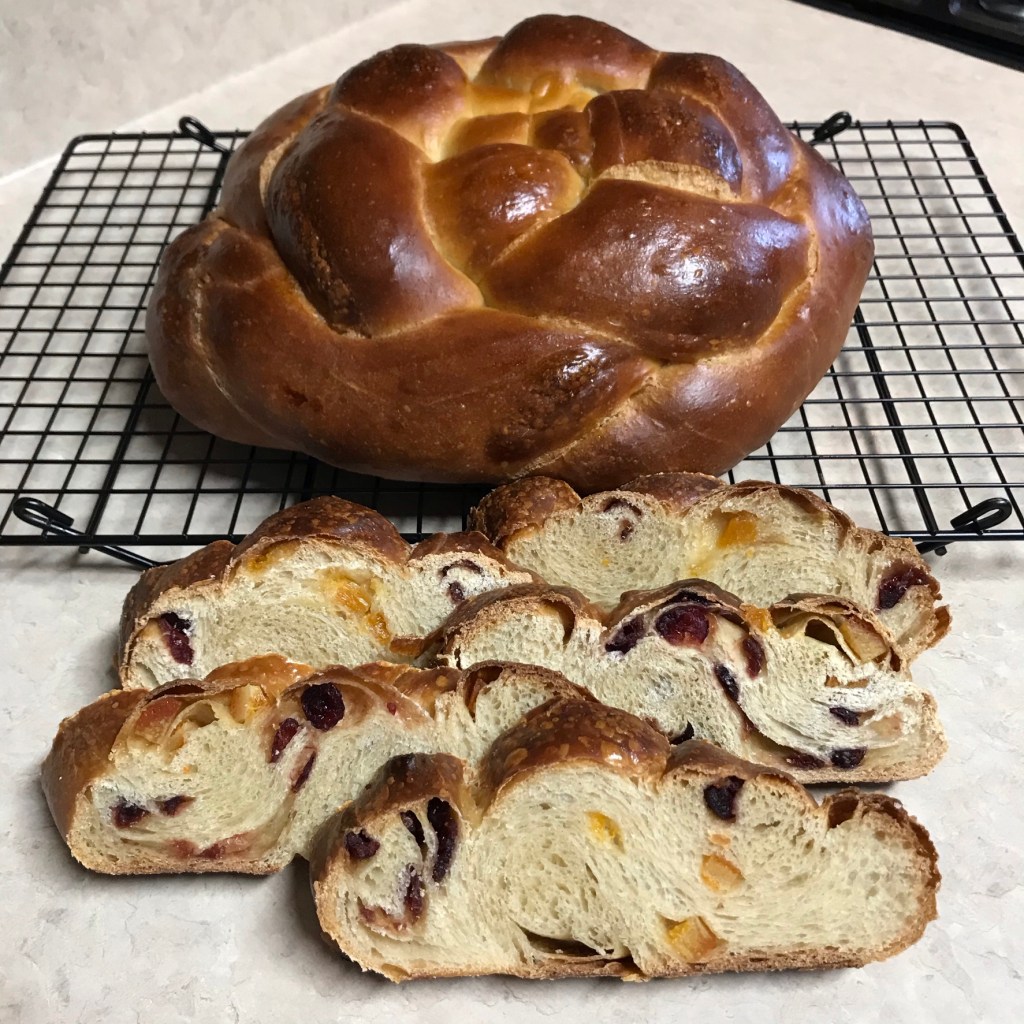
For extra flair and flavor, I use orange- or lemon-infused olive oil in my dough because I love the aroma of the challah in the oven and the intoxicating citrus scent in the finished loaf. Extra virgin olive oil does impart a slightly stronger flavor to the challah, but I find it delicious. Also, I frequently add dried fruit to the dough as it is rolled up for braiding, but the photos I’ll share are mainly without it. If you do choose to add dried fruit, such as raisins or cranberries, don’t concern yourself with rehydrating it first; it bakes up beautifully straight from the package, and for your effort, you’ll be rewarded with beautifully studded slices. Did I mention that it is amazing in French toast? 🙂
This is an old photo of a loaf I made before our kitchen remodel last year. The braids are stuffed with dried cranberries and oranges.
This bread requires a ripe sourdough starter, an intermediate overnight feeding, about 3 hours to ferment on baking day, and up to 5 hours for final rise after shaping, so plan accordingly. Don’t let this lengthy process alarm you; if you make the starter the night before, you only need about an hour of hands-on time for making the dough and about half an hour to shape it for proofing. As I said, there’s a lot of waiting. All my measurements are metric, so please depend on a digital scale for getting your ingredients right.
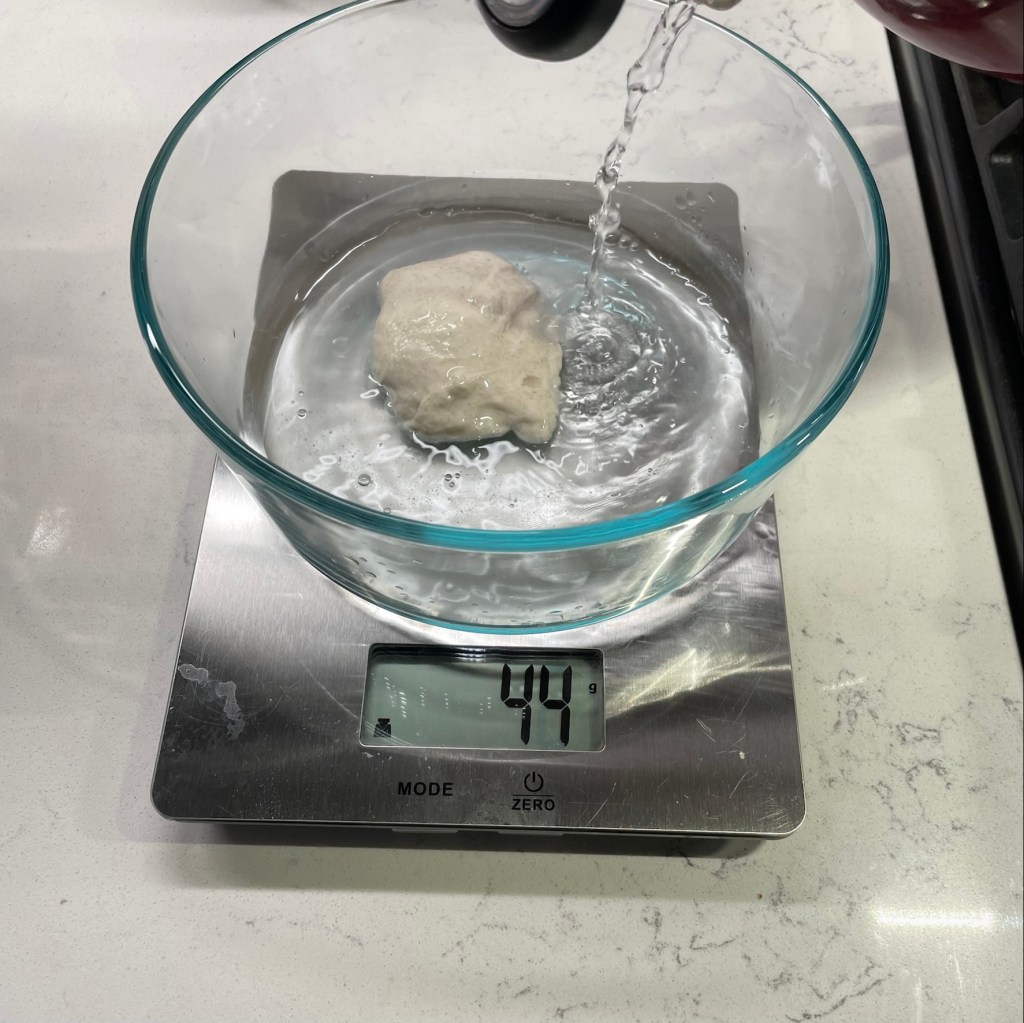
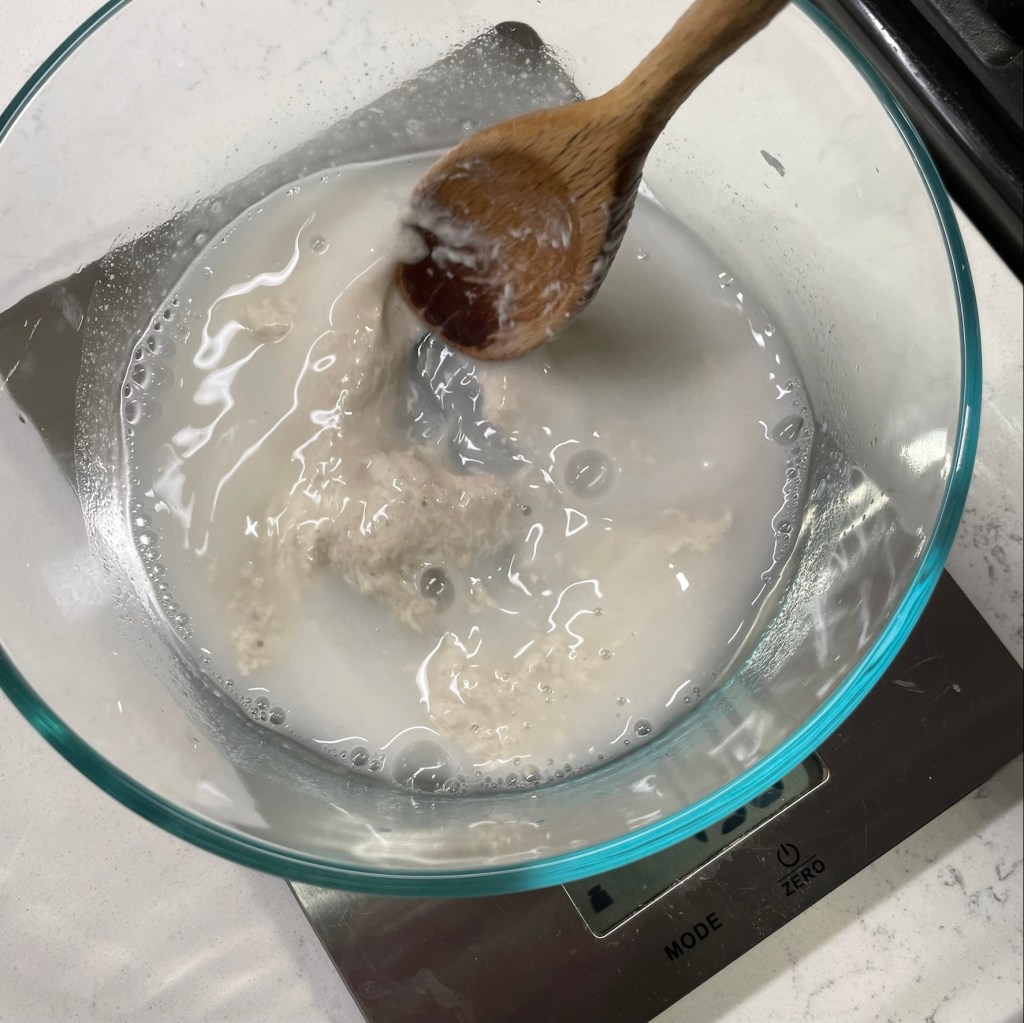
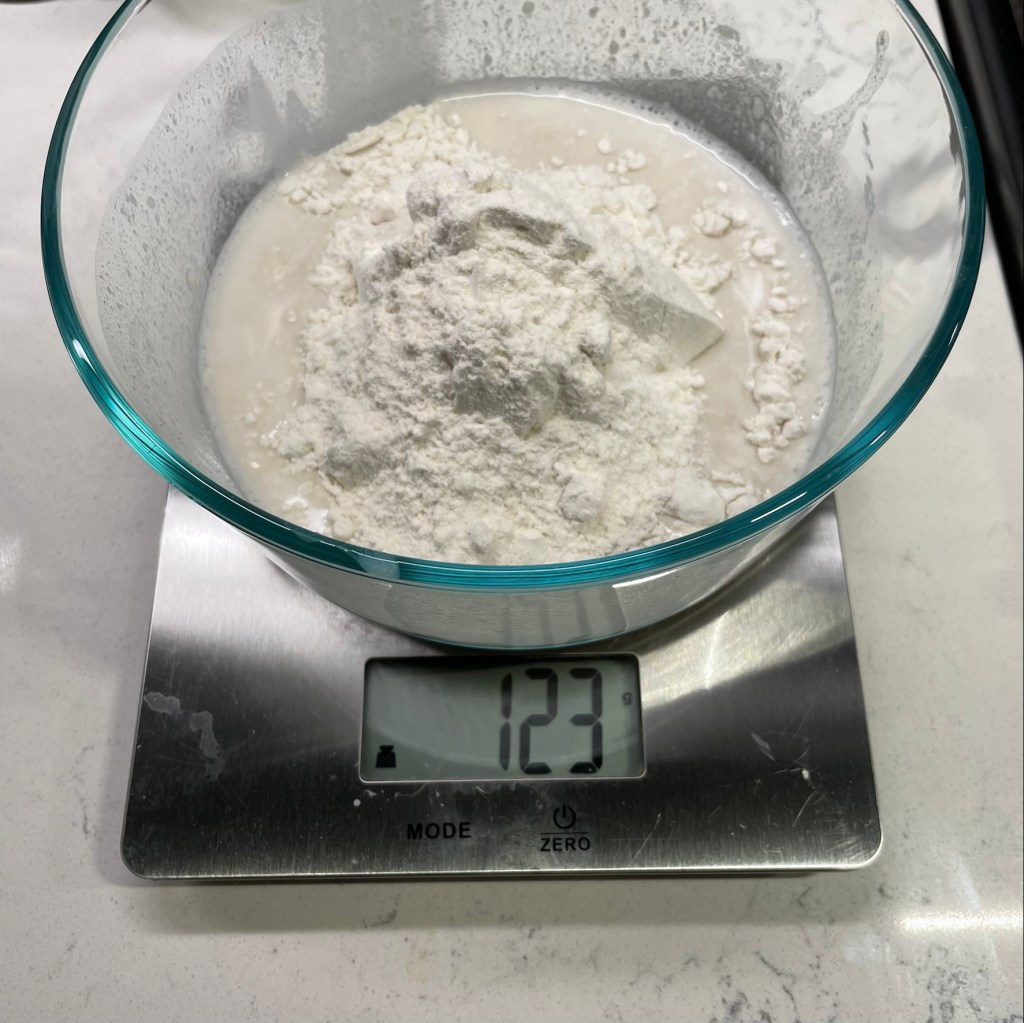
You’ll begin the night before you plan to bake, with creation of a firm starter, which is essentially an in-between feeding that bridges the basic wet starter and the final dough. This type of starter, also called “levain,” uses less water than a wet starter, and it concentrates the rising power of the culture in your final dough. Begin with a slight amount of ripe wet starter, stirring in water to make a slurry and then flour and mixing it together until no dry flour remains. The firm starter must ferment several hours, so it’s easiest to do this the night before and leave the bowl covered at room temperature, then bake the next day. If you wish, you can make the firm starter farther ahead and then refrigerate it for up to one day.
The next morning, measure out your flour and get all the other ingredients lined up, including your firm starter, which should be cut into pieces for easy introduction to the final dough. Most of the moisture in this dough comes from oil and eggs, so there is very little water to measure for the final dough. In this picture, my honey is stirred together with the small amount of water, but I usually measure the oil first and then measure the honey in the same cup—it slides right out without sticking. You’ll have an easier time mixing the eggs into the dough if they are closer to room temperature, so give them a few extra minutes on the counter before you begin.
Challah ingredients, clockwise from the top: honey and water, salt (I like to use mineral-rich pink salt), whole large eggs, flour (I use a blend of high-protein bread flour and white whole wheat) and olive oil (mine is blood orange-infused extra virgin).
In the bowl of a stand mixer (or in a really large mixing bowl, if you don’t mind mixing by hand), combine the eggs, oil, honey and water and whisk until even. Add the flour all at once. Mix until all flour is completely incorporated, about two minutes in a mixer. Sprinkle the salt over the dough, cover the bowl and let it rest for about 30 minutes. This gives the flour time to absorb the moisture, and kneading is easier at that point.
Mixing the honey with the water makes it easier to pour. Add it to the eggs in the bowl of a stand mixer.
This is a rare occasion when the oil is added to the dough early on. Mix these wet ingredients until completely blended.
Next, add the flour all at once.
I use the dough hook for this initial mixing. It replicates the action of mixing by hand better than using the paddle, and produces less splash.
Blend just until the dough comes together on the hook, with no flour remaining on the sides of the bowl. Swipe it off the hook to rest in the bowl for about 30 minutes.
Sprinkle the salt over the dough, which will be very dense at this point. As the dough rests, the flour will absorb moisture and the salt will begin to dissolve.
Turn the firm starter out onto a floured counter and cut it into pieces about the size of walnuts. Cover with a towel and set aside while the dough rests.
After the rest time, the salt will have begun to dissolve. Knead on medium speed to fully incorporate the salt, which should take 3 to 4 minutes. Transfer the dough to the counter or kneading board and press several pieces of the firm starter all over it. Fold the dough into thirds (like a letter) and press in the remaining pieces of firm starter. Move the dough back into the mixing bowl and knead on medium speed for 6 minutes, long enough to evenly blend the firm starter into the dough and also to get the gluten development going. Transfer the dough to a large bowl, cover and let rest at room temperature for at least 3 hours to ferment.
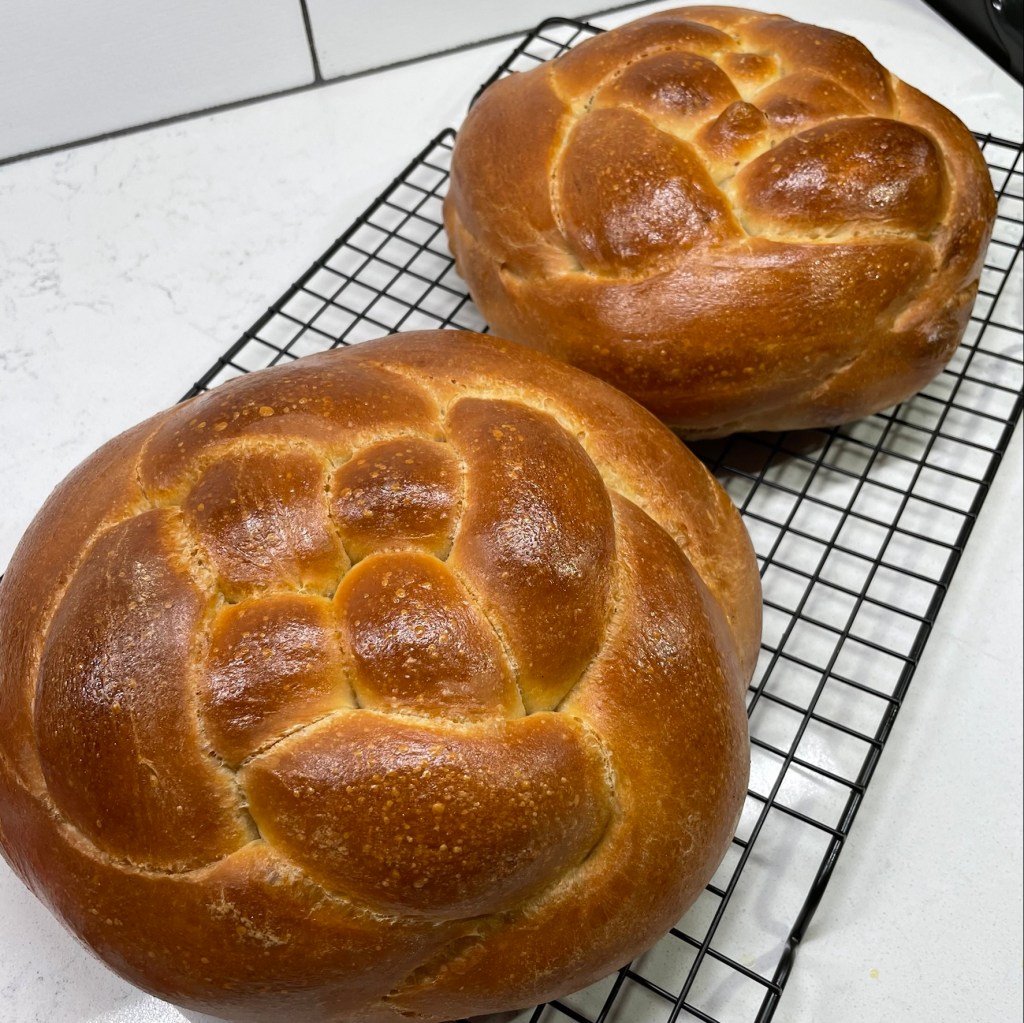
When the dough has fermented (you’ll know because it won’t spring back from a good finger poke), turn it out onto the counter and divide it into halves. This recipe makes two loaves; return one half of the dough to the bowl while you shape the first. Depending on how adventurous you want to be with braiding, divide the first dough section into either 3 or 4 equal-sized pieces. A 3-strand challah is made the easy way, as you would braid a child’s hair. To make the basket-weave round challah, you need 4 pieces.
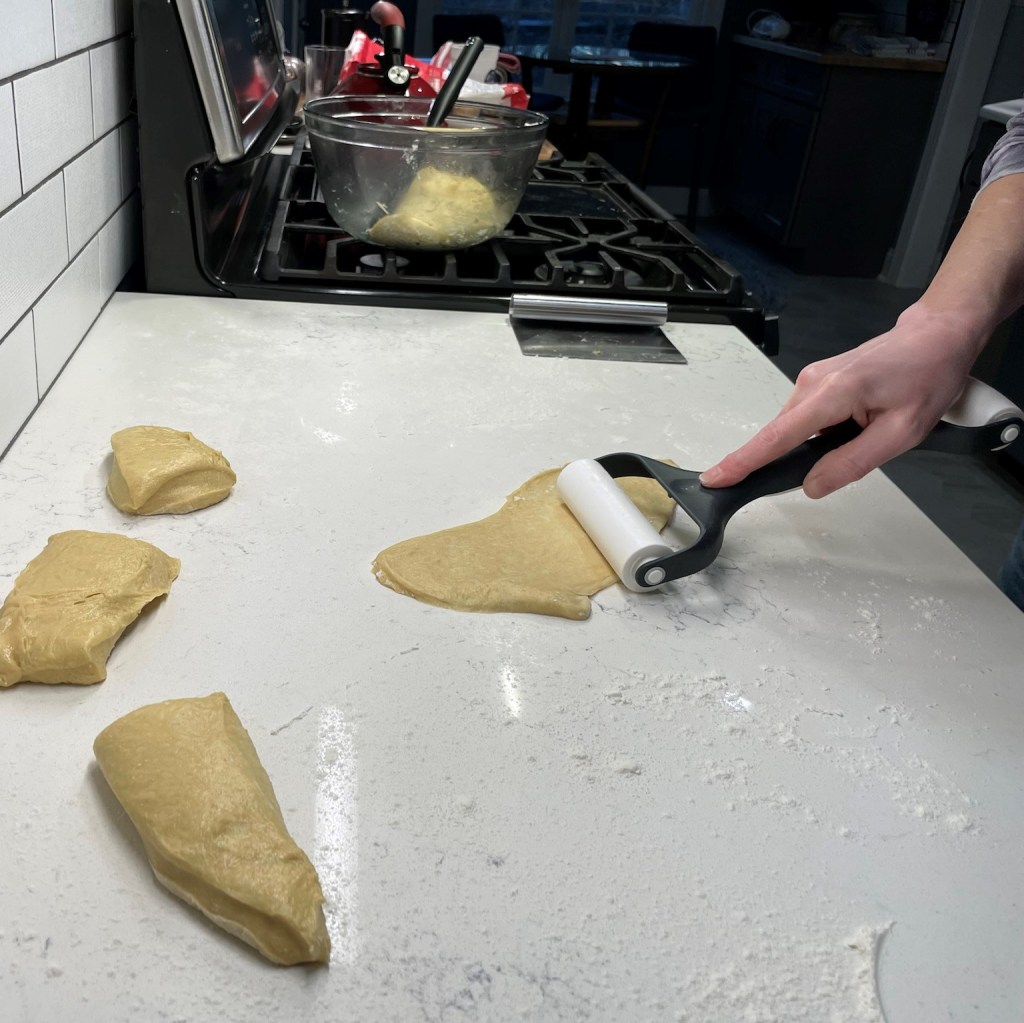
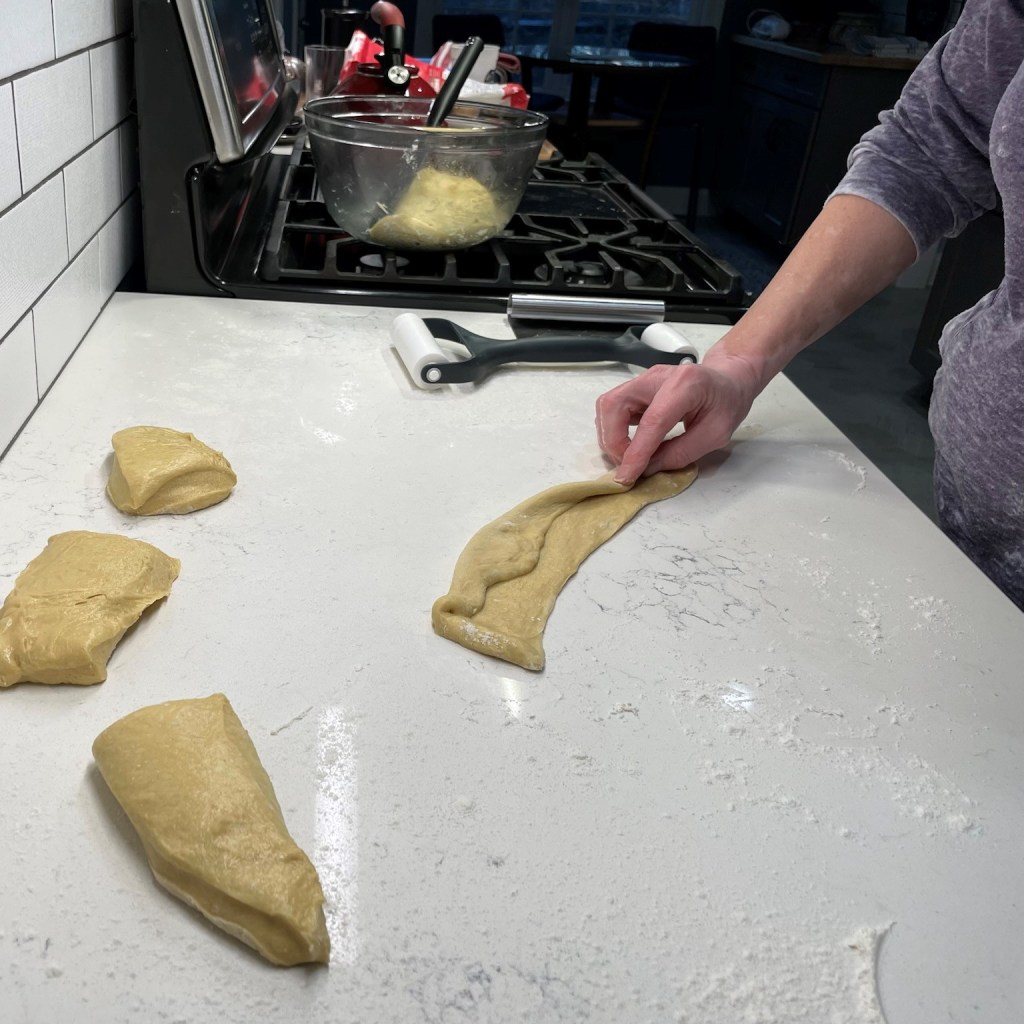
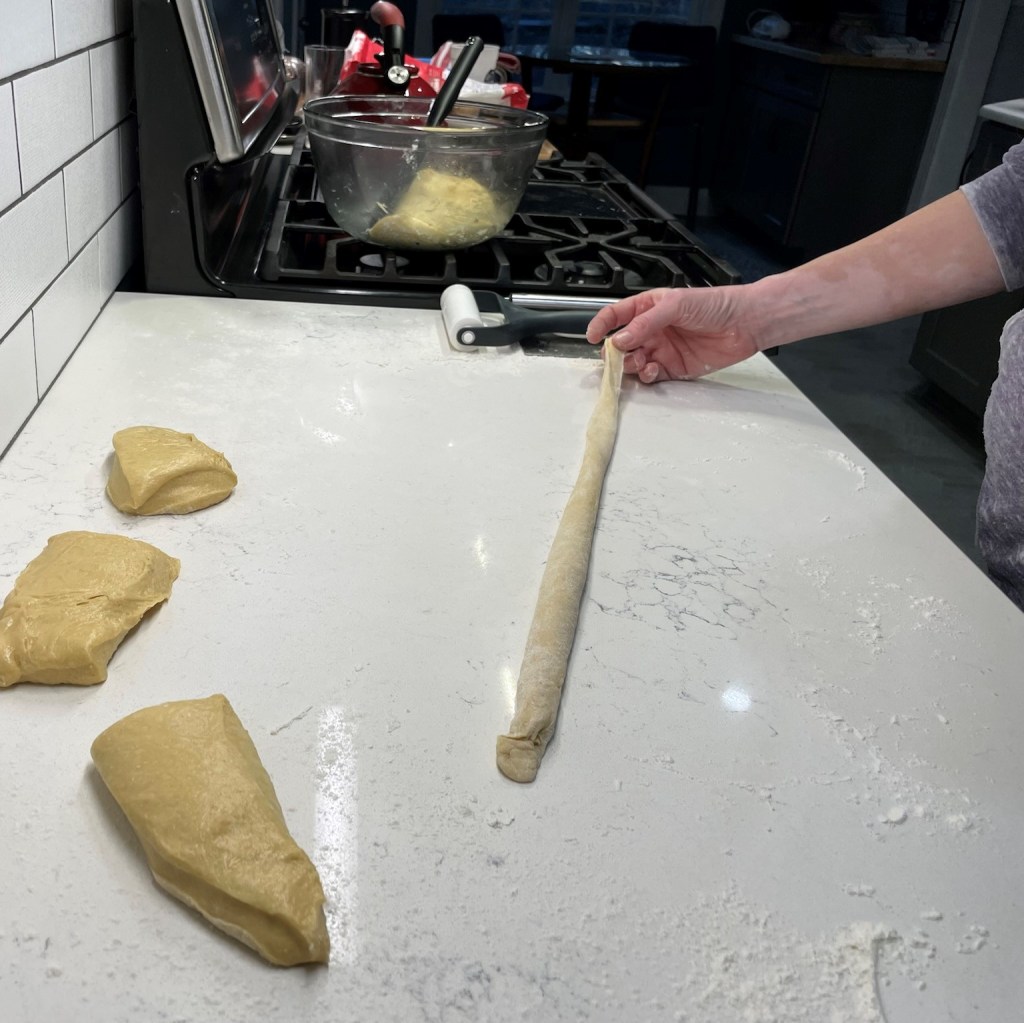
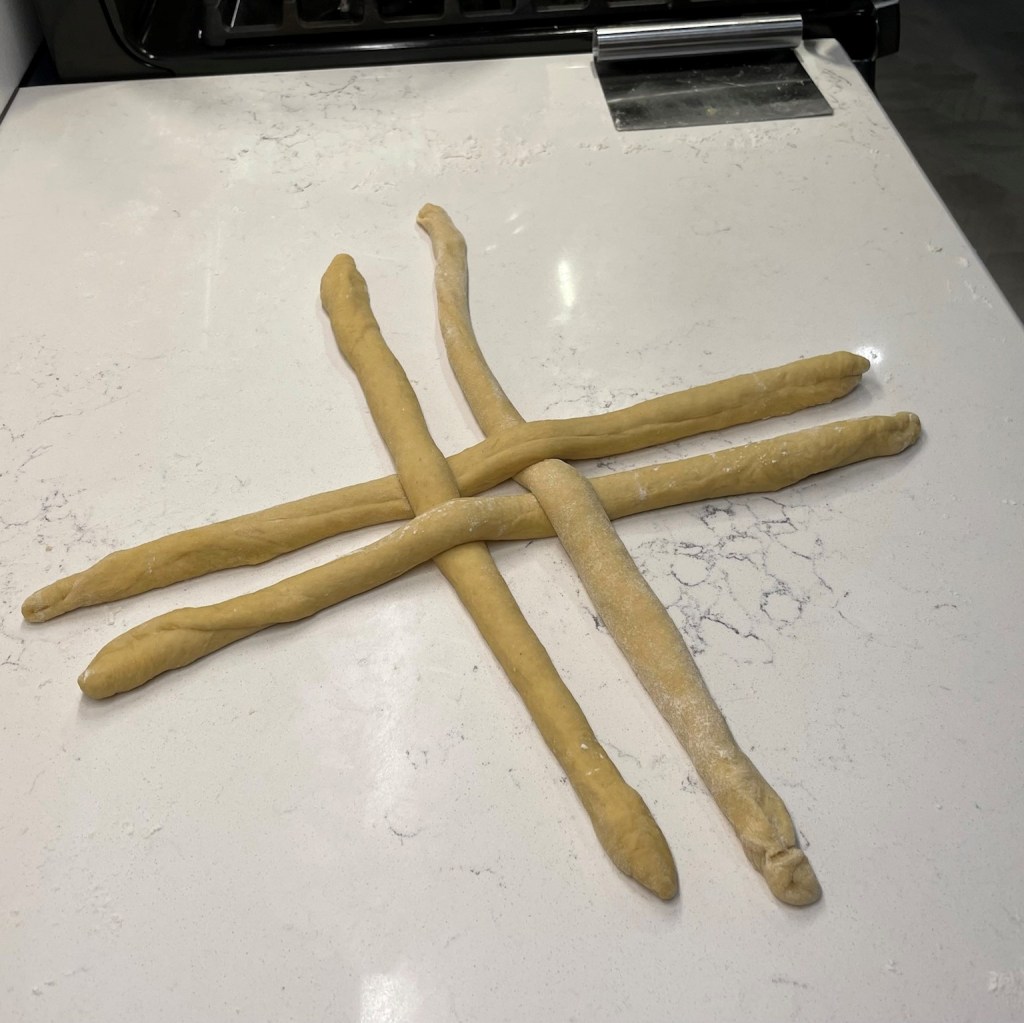
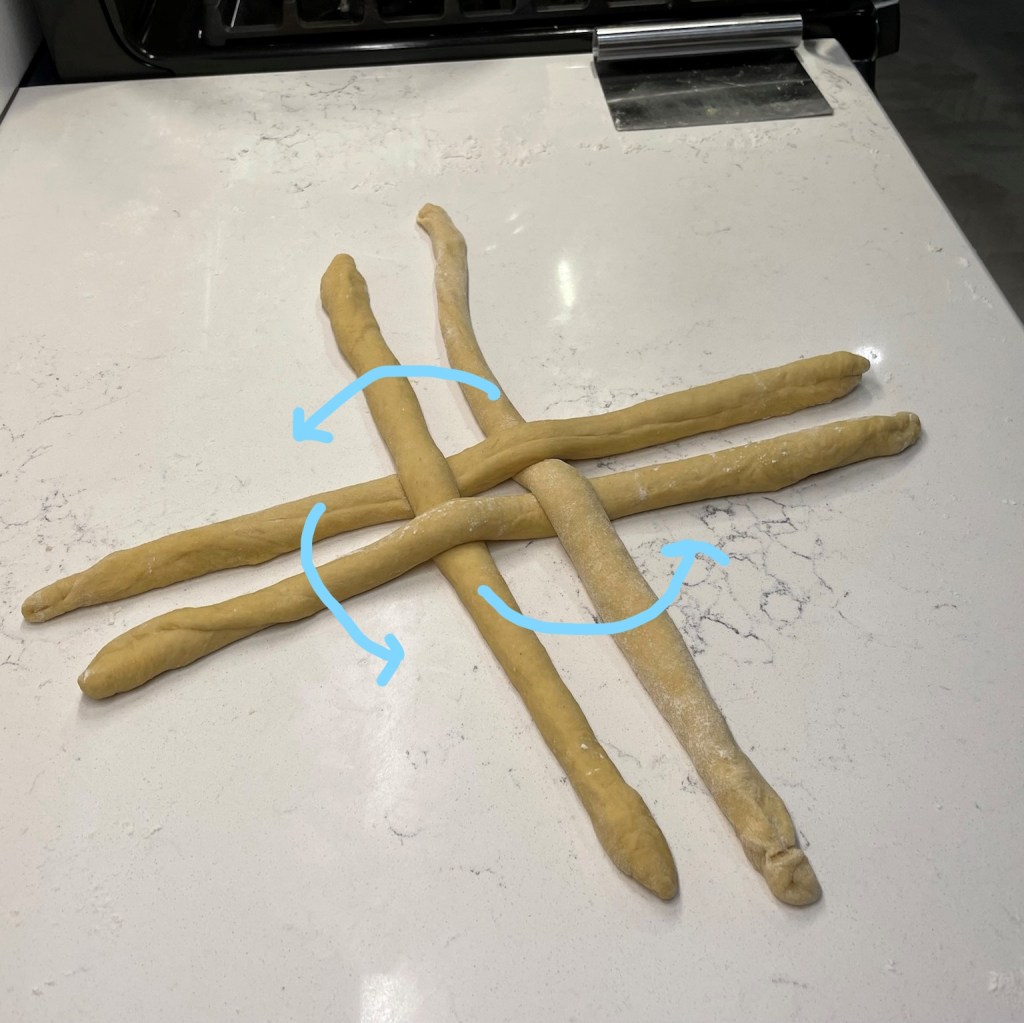
Stretch each section of dough out into an imperfect rectangle shape, and then use a rolling pin to roll it into a long, oval shape. The dough will be very thin on the counter, and that’s good. Use spray oil to keep it from sticking, or dust the counter with a very light amount of flour. Roll up the oval into a long rope shape, keeping it tight as you roll and pinching the seam to secure it. Roll it out firmly to stretch the rope into an 18″ length, with the ends somewhat tapered from the fuller, center part of the rope. Repeat with the other three pieces and arrange them in a tic-tac-toe shape, with the centers fairly close together (but not tight) and long strands extended in all four directions. Notice the over-under pattern, as this is the important starting position for braiding a round.
One important thing to note is that you do not want the dough strands to be too tightly crossed, either at the start or after braiding. You should be able to wiggle a finger between strands after braiding, and this is important because the dough needs room to expand during proofing; otherwise, it will expand into one large blob and you’ll lose the beautiful pattern.
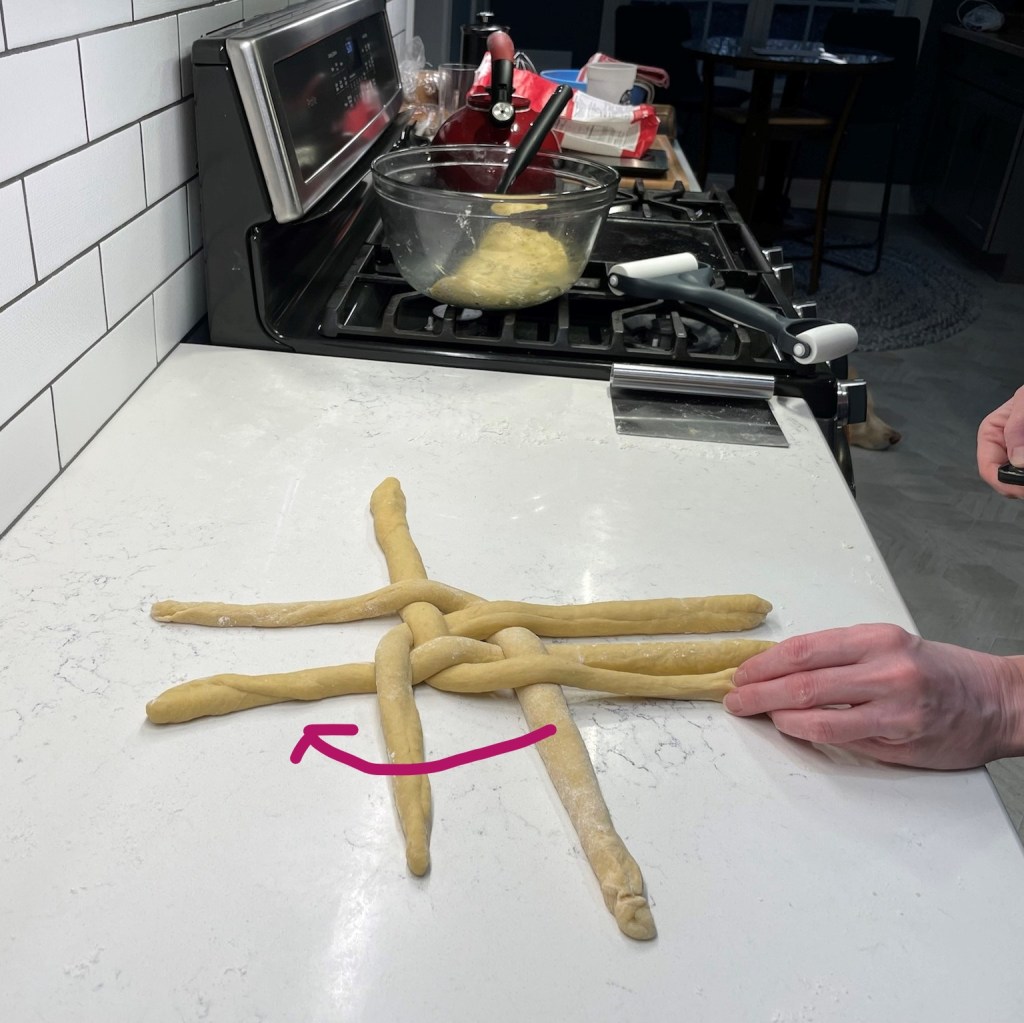
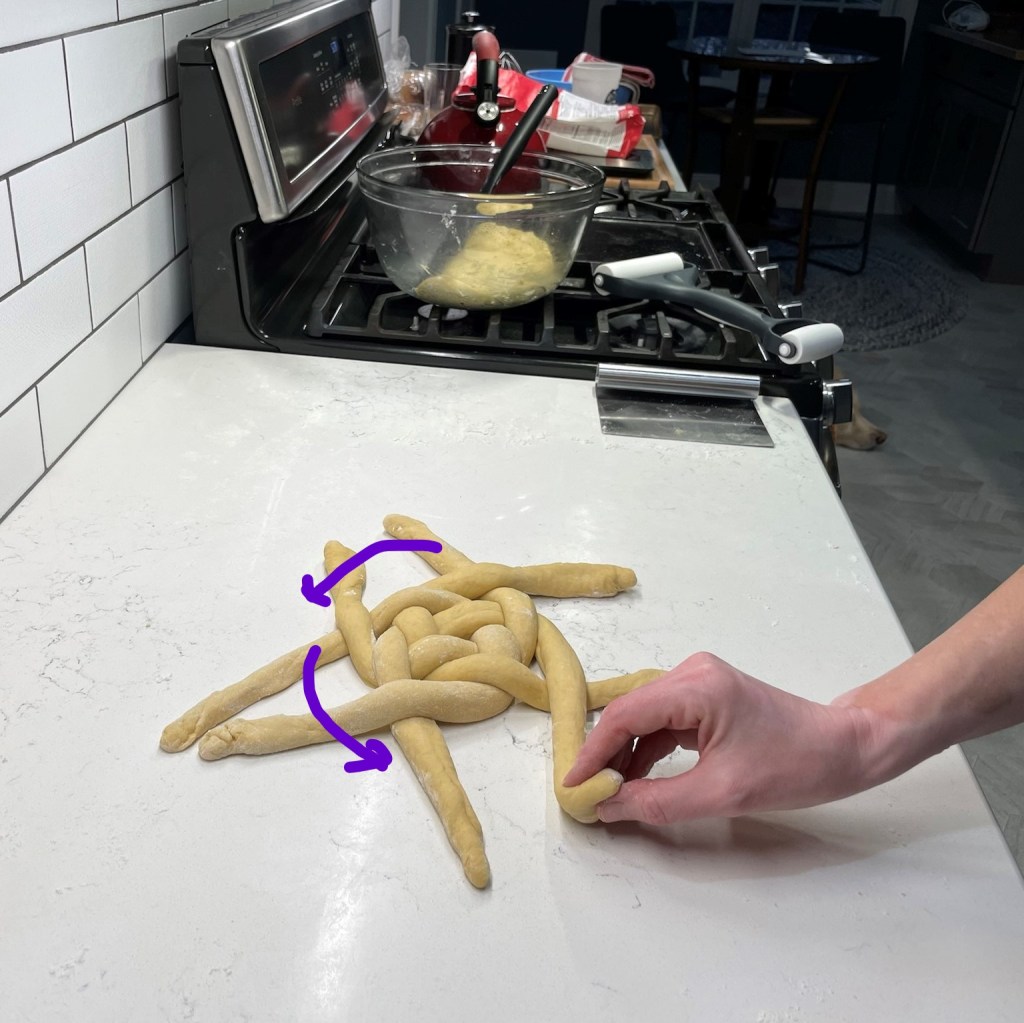
Shaping the dough is probably best learned through pictures, but I’ll try to describe it here. Take any long strand that is under the piece that crosses it, and sweep it over the piece parallel to it so that its new position is parallel to the cross piece. Repeat with the other four strands. Next, reverse direction but do the same thing, taking the underneath pieces and cross over to make them parallel to the piece next door. Repeat with the other four. Continue this pattern of reverse-crossing until the strands are too small to cross over. At that point, twist and pinch together the ends you would otherwise cross so that the dough doesn’t unravel. Tuck the twisted ends underneath and transfer the bread to a parchment-lined baking sheet.
Follow the arrows to see how the braiding goes. To begin, you’ll simply move the ropes that are underneath a cross piece over top of their parallel rope and perpendicular to their original direction.
Next, reverse the direction and do the same with the ropes that are now in underneath position.
Keep reversing and crossing until you run out of dough length.
When you can no longer cross the ropes, bring them together in a twist to seal them into place.
Tuck the twisted ends underneath. Remember that it doesn’t have to be perfect, and you can practice the technique with yarn, twine or strips of fabric to get a feel for it.
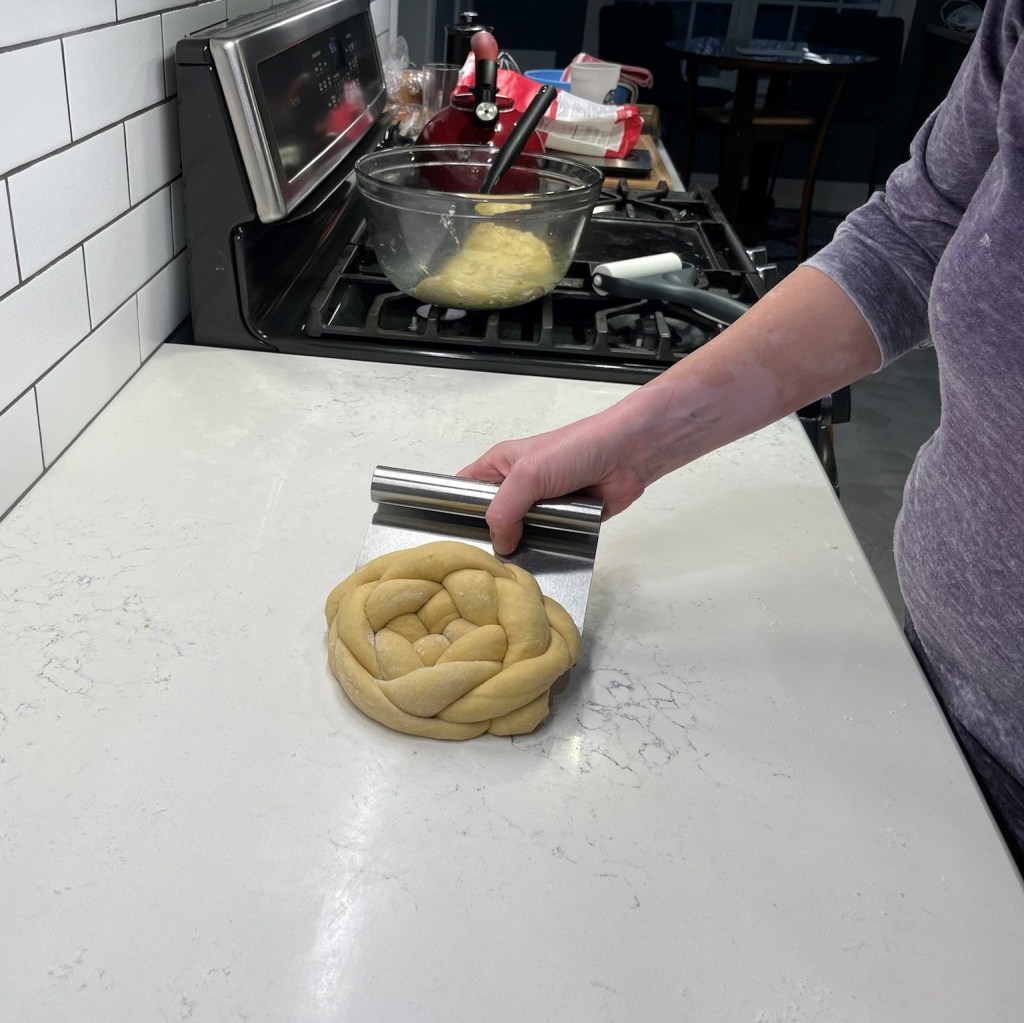
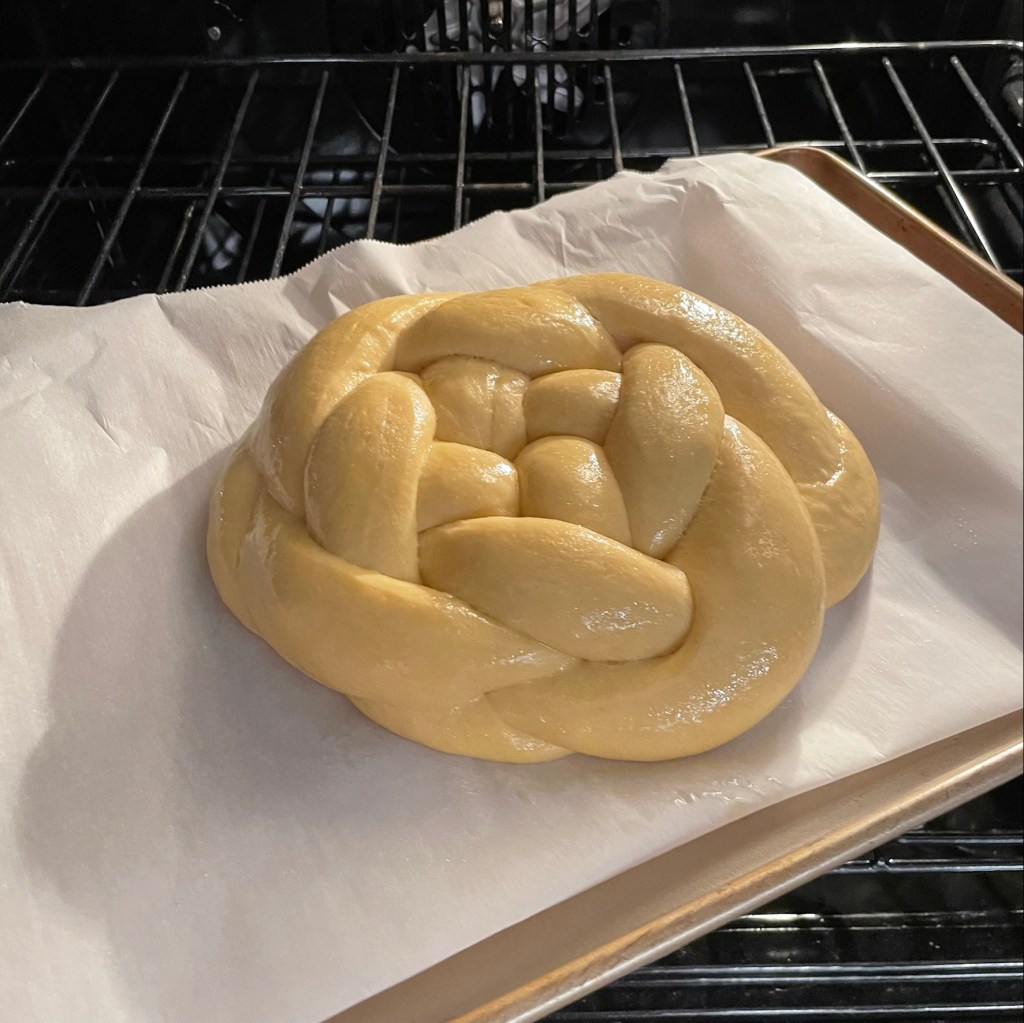
When the braiding is finished, the challah round won’t be much larger than a bread plate, but don’t worry, it’ll rise significantly during the proofing stage!
Here’s how I fill a braid with fruit. Simply scatter about two tablespoons worth of dried fruit over the section of dough before rolling it into a rope. It will feel lumpy as you stretch out the rope, but it settles down during proofing.
Repeat with the second batch of dough and lightly spray or brush the loaves with olive oil and secure a couple of layers of plastic wrap over them. Keep the plastic somewhat loose, allowing room for rising, but not so much that air can dry out your loaves.
Proof the loaves at warm room temperature for up to 5 hours, until they have at least doubled in size. They will be quite “poofy” when they are ready. Preheat the oven, brush all over with egg wash (get into every nook and cranny) and bake until they are deep golden brown all over, with internal temperature at 200° F.
Transfer to cooling racks and cool completely before slicing or wrapping.
The braiding technique is the easiest thing about these loaves, which are enriched with eggs, citrus-scented olive oil and sweet honey. The recipe takes time, but the reward is as sweet as my wish for you in the Jewish New Year.
Ingredients
35g recently fed sourdough starter
80g room temperature water
130g bread flour
Mix the firm starter ingredients together, cover and let stand at room temperature overnight. Or, refrigerate after 8 hours fermentation and remove from fridge one hour before proceeding.
Ingredients
65g warm water
65g honey
3 large eggs, room temperature
55g olive oil
300g bread flour
100g white whole wheat flour
1 1/2 tsp. fine sea salt
all of the firm starter (above)
1 large egg, mixed with a tablespoon of water (for egg wash)
Directions
In the bowl of a stand mixer, combine the water, honey, eggs and oil. Whisk together until fully blended. Add flour ingredients and mix with the dough hook until all flour is incorporated.
Remove dough from hook, sprinkle with salt and cover. Rest the dough for about 30 minutes, as this will make kneading easier. Rinse all dough bits from the hook so it’s ready for the next kneading step.
Turn the fermented firm starter out onto a floured countertop. Use a bench scraper to cut the dough into several pieces, toss them in the flour to coat, and then cover with plastic wrap or a clean towel to keep it from drying out.
After resting, the salt on top of the dough will have dissolved a bit. Knead with the dough hook for a few minutes to fully incorporate the salt, then transfer the dough to a lightly floured countertop.
Spread the challah dough out to enlarge it, and then press several pieces of the firm starter into it. Fold it up in thirds, like a letter, and press the remaining pieces of firm starter into it. Return the dough to the mixing bowl and knead with the dough hook for several minutes. You should not see any streaks of starter, and the dough should be dense, smooth and shiny. Transfer it to a large, oiled bowl and cover. Let it ferment at room temperature for about 3 hours. It likely will not double in size, but it will expand somewhat.
Turn the dough out onto a clean counter and use a bench scraper to divide it in half. Return one half to the bowl and cover to prevent drying while you shape the first loaf.
Cut the first dough portion into equal parts for braiding, either 3 or 4 pieces. Flatten into rough rectangle/oval shapes and roll up tightly into ropes, pinching to seal the edges. Roll out with the flat part of your palms to stretch the ropes to 18″, with ends that are tapered a bit.
8, Arrange the dough ropes for braiding, following visual instructions in this post. Place braided loaves on parchment-lined baking sheets and cover with lightly oiled plastic wrap. Proofing time will be anywhere from 3 to 5 hours, depending on the temperature of your kitchen, humidity and moon cycle. Just kidding on that last one, but honestly, the time needed for proof can vary broadly, so my best advice is to begin checking after 3 hours. Dough will double or nearly triple in size, and it is ready to egg wash and bake when it refuses to bounce back after a finger poke.
Preheat oven to 350° F. Gently brush egg wash all over every visible surface of the challah loaves. Bake for approximately 35 minutes, until bread is deep golden brown all over. Internal temperature should be about 200° F. Transfer to a cooling rack and cool completely before slicing or wrapping.
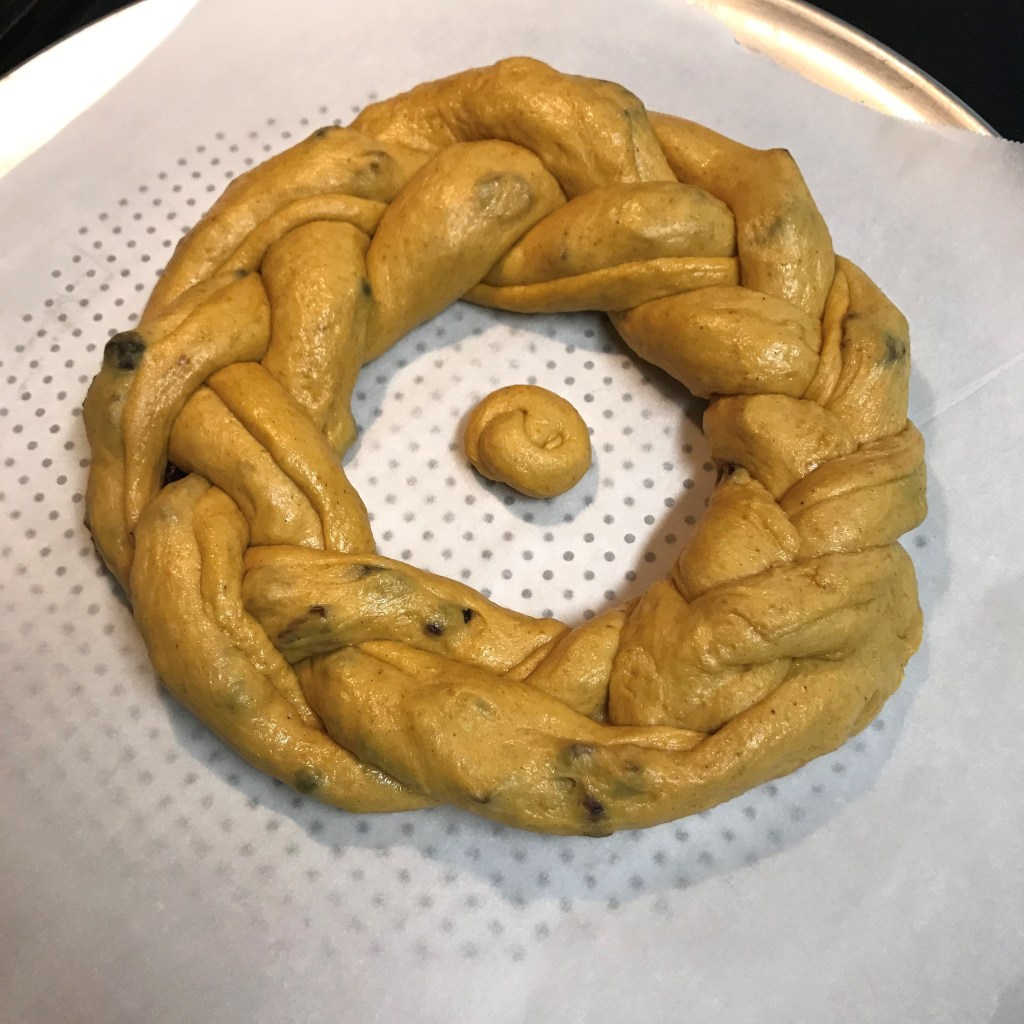
From the CDJ archive, here’s another way you can achieve a “round” challah, if you aren’t feeling the love for the basket-weave design. Divide your dough for one of the loaves into three equal segments and braid them like a hair braid, and then curl it around, tucking and pinching to seal the ends together. It’s more of a wreath than a round, but still has the circle symbolism. This was an experimental sourdough pumpkin challah, filled with Trader Joe’s “golden berry blend” dried fruit, and it was nothing short of fabulous. 🙂
The wreath shaped loaf is filled with a blend of dried fruits: cranberries, golden raisins, blueberries and cherries.