The newness of this season makes eating lighter feel more natural and easy, and I think I’m finally onto something in our recent quest to lighten up our meals. Up til now, my first thought for a new meal has been focused on the protein— deciding how to keep it “a smidge healthier,” as my blog pal, Bernadette from New Classic Recipe would say. 😉
It gets exhausting from a decision-making standpoint, though, and then by the end of my workday when I have figured out how to adapt the protein part of a meal, I’m fresh out of ideas for planning the sides. Here’s what happened when I stepped back and redirected my focus onto the vegetables.
This tackled all my flavor cravings. And won!
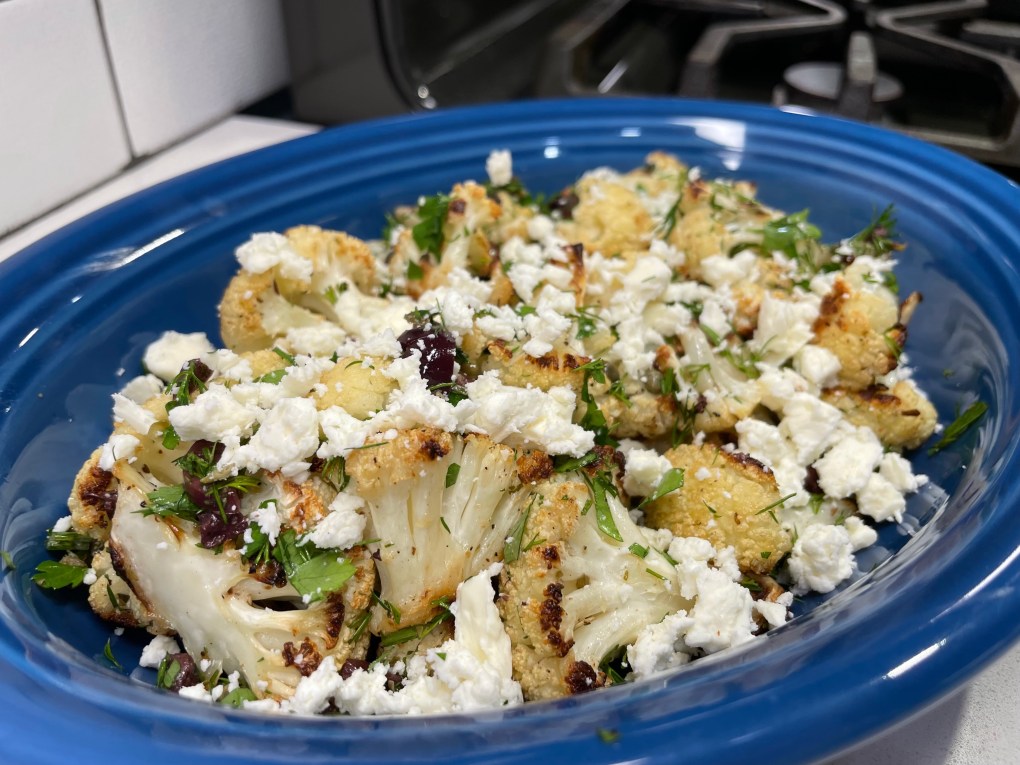
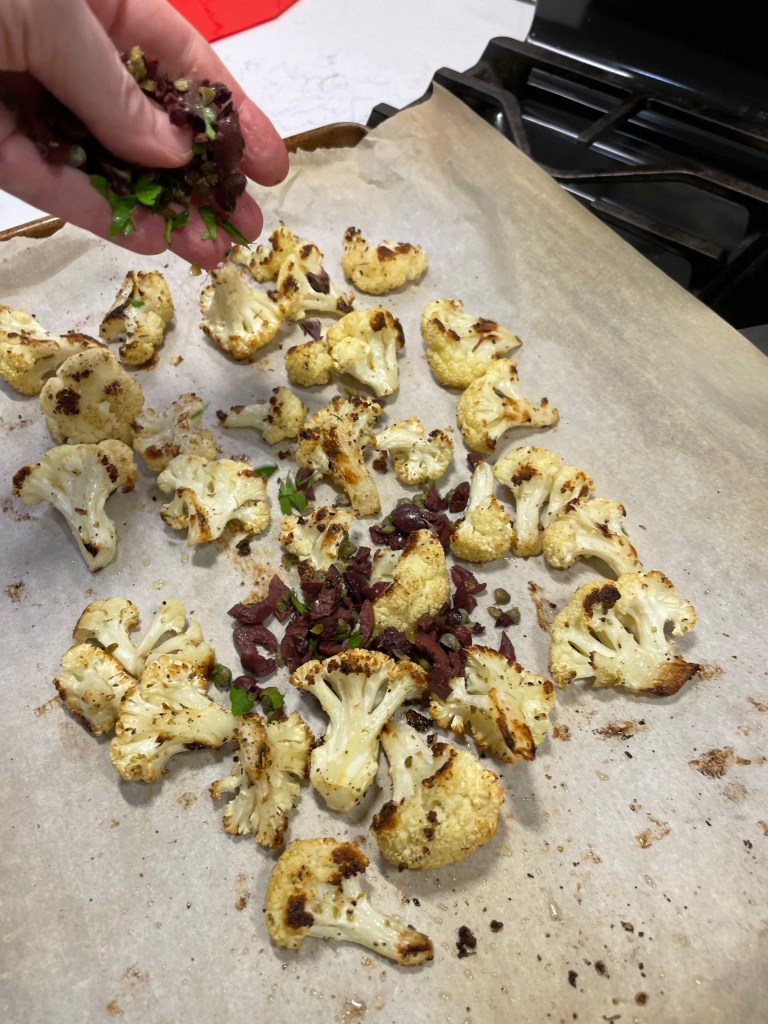
What grabs the eye in this photo isn’t the panko-crusted baked halibut, though it was truly delicious and satisfyingly easy to make. It’s the Greek-inspired roasted cauliflower stealing the show here, and no wonder. It’s embellished with tangy feta, kalamata olives, capers and herbs. Packed with flavor, and still very easy to make.
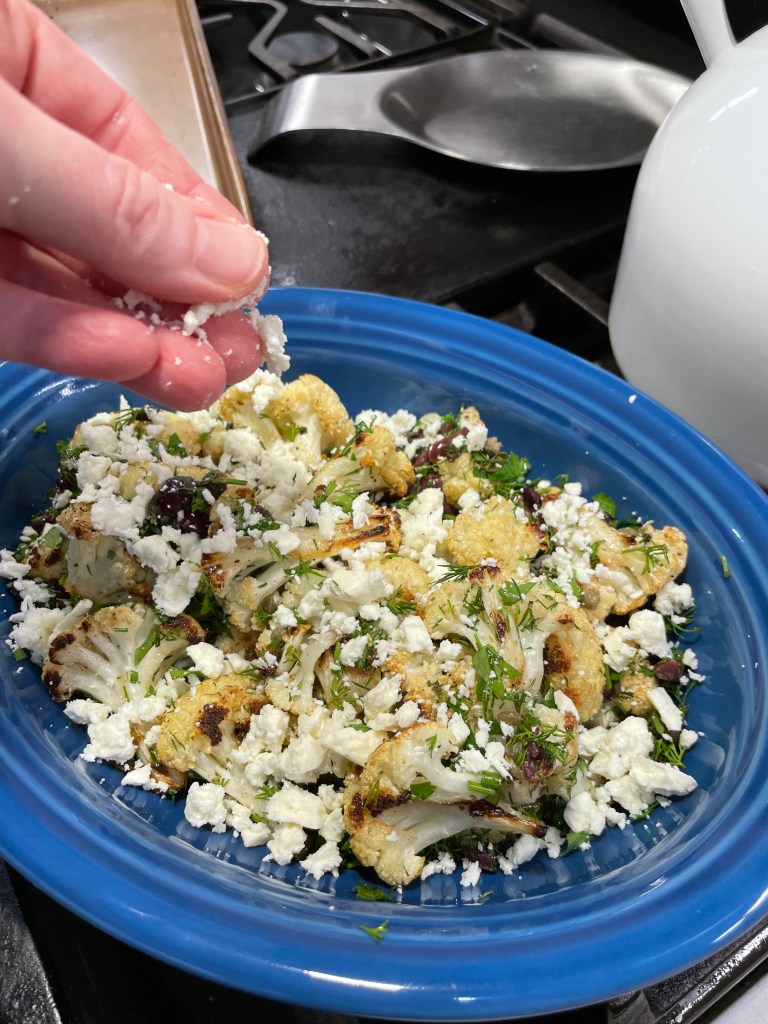
Only an ounce of feta per serving, and it brought more than enough flavor.
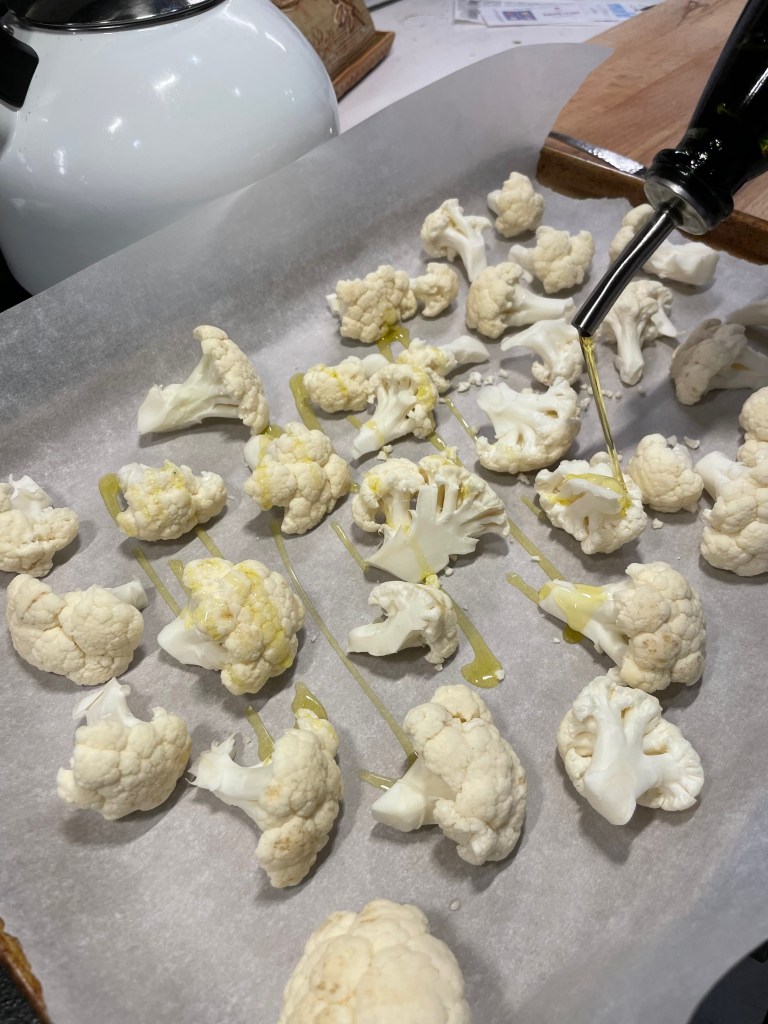
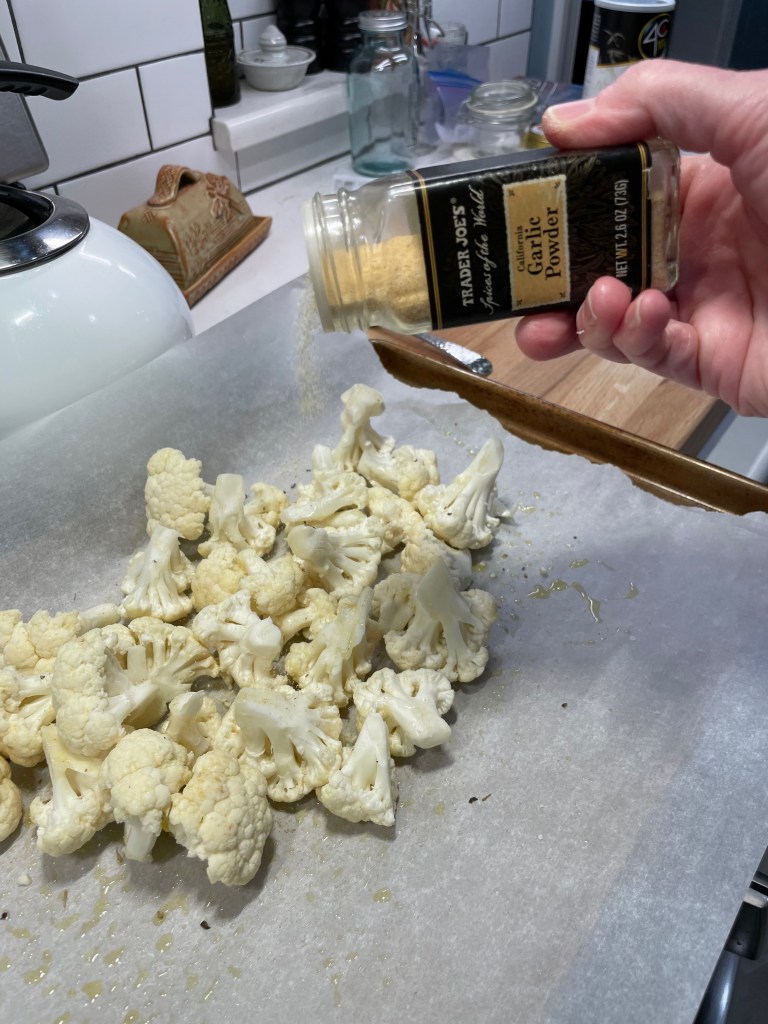
I chose cauliflower to carry these flavors because it is neutral on its own, suitable for just about any seasonings, and I kept the Greek flavors fresh by adding most of them after the cauliflower was roasted. My florets were drizzled with extra virgin olive oil and sprinkled with garlic powder, dried oregano, salt and pepper.
Drizzle extra virgin olive oil over the raw cauliflower, then toss and sprinkle with seasonings.
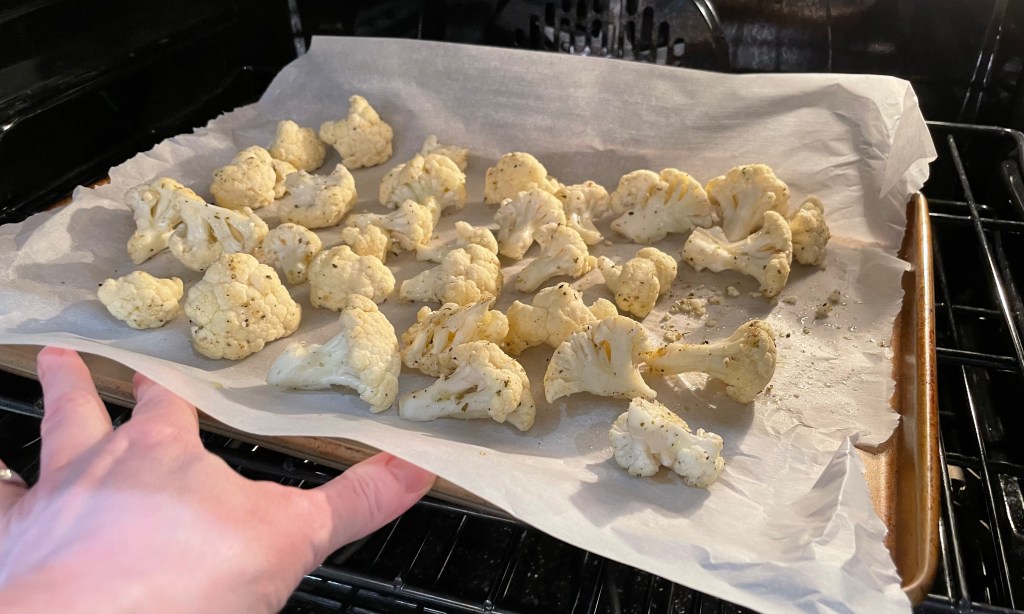
It’s best to roast vegetables at a higher heat, so that you get caramelization on the exterior before they have a chance to turn to mush on the inside. Mine went 25 minutes at 425° F, and the result was perfect for this recipe. The cauliflower held their texture and absorbed the flavors I tossed in at the end.
When the cauliflower emerged from the oven, browned on the edges and perfectly al denté, I simply tossed it with the chopped olives, capers and herbs and then gave it a good squeeze of fresh lemon, plus a final drizzle of the extra virgin olive oil. A scattering of crumbled feta finished the dish, and provided a sharp, tangy flavor that was great with my panko crusted halibut. Don’t worry, I’ll have that recipe for you in a few days!
Adding these flavors at the end keeps the colors and flavors bright.
I like this idea of putting the vegetables first, and I made a decision last week that sort of paints me into a corner so that I keep doing it. More on that soon. 😁
This dish features all the lovely flavors of the Mediterranean, and is an easy, impressive side to fish or chicken.
Ingredients
Small head cauliflower, cleaned and broken down into florets
3 Tbsp. extra virgin olive oil (use two for roasting, one for finishing)
Salt and pepper
A few shakes granulated garlic
A few shakes dried mediterranean oregano
3 Tbsp. chopped kalamata olives
1 Tbsp. capers, chopped but not rinsed
2 oz. feta cheese, crumbled
Handful each of fresh parsley and fresh dill, chopped
A squeeze of fresh lemon
Directions
Preheat oven to 425° F, with oven rack in center position. Line a baking sheet with parchment.
Drizzle cauliflower with olive oil and toss with garlic powder, oregano, salt and pepper. Toss to coat evenly, then spread out over parchment-lined sheet, keeping a bit of space between pieces for more even browning. Roast for 25 minutes, or until browned edges are visible on most of the pieces. Taste a piece to be sure it is done to your liking.
Add the olives, capers and fresh herbs to the roasted cauliflower and toss gently to distribute. Give the mix a light drizzle of olive oil and a squeeze of lemon to finish, and then transfer to a bowl and scatter feta over the entire bowl.
Soup. It’s one of the simplest and most comforting pleasures of the cold weather season, and when I spied a bag of dried black beans in the back of my tall pantry a couple months ago, I thought, “Great, this will be easy!” Soak them overnight, drain and rinse, then cook them up with a few aromatic veggies, spice and broth, right? Well, as you may have already guessed, this one didn’t go quite that smoothly. And it’s my own fault for not paying attention to the “best by” date on the side of the cellophane bag. Oops.
Though dried beans are easy, there are a few guidelines, and using them up before they get too old is one that should not be overlooked. I was already more than a day into it, though, when I realized that my beans had “expired” more than two years earlier. I’m thankful that I was able to call for backup, and I received expert advice that rescued my black bean soup, which turned out as delicious and comforting as I had hoped.
Don’t worry, this story has a happy ending. 🙂
But before I get to the rescue of my soup, let’s talk about how things should go when making soup from dried beans, and hopefully I’ll remember my own advice next time!
Prep the beans
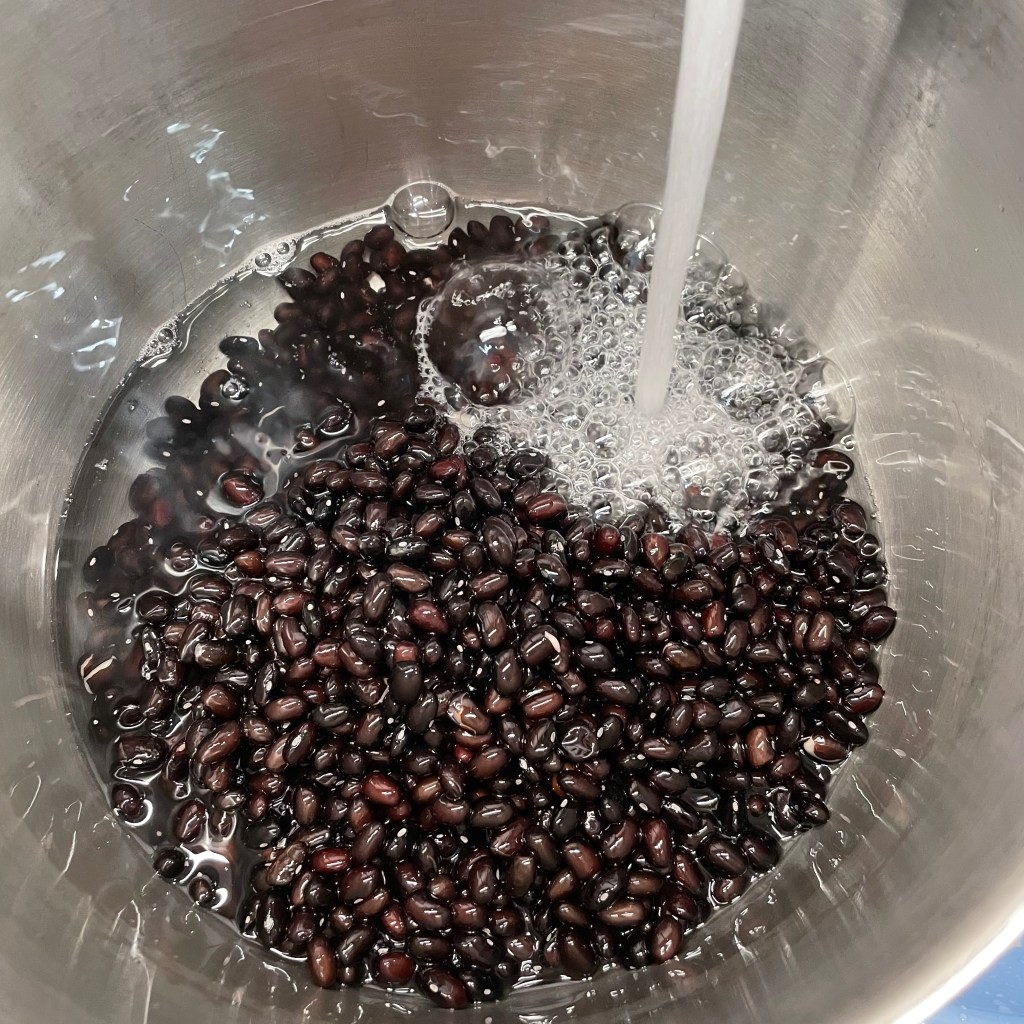
The first rule of thumb is to rinse and sort through the beans, just in case there is a random stone or other debris in the bag. I have never found one, but I’m certain that I would split a molar if I skipped this step even one time. So, sort them I do, under cold running water, and then I dump them into a deep pot with plenty of water for an overnight soak.
There are many viewpoints about whether the soak is necessary (spoiler alert— it technically isn’t), but the “shortcut” instructions for skipping the soak always leaves me with beans that are too “al dente” for my taste, and they take forever to cook (turns out mine would, anyway, but I’ll get to that).
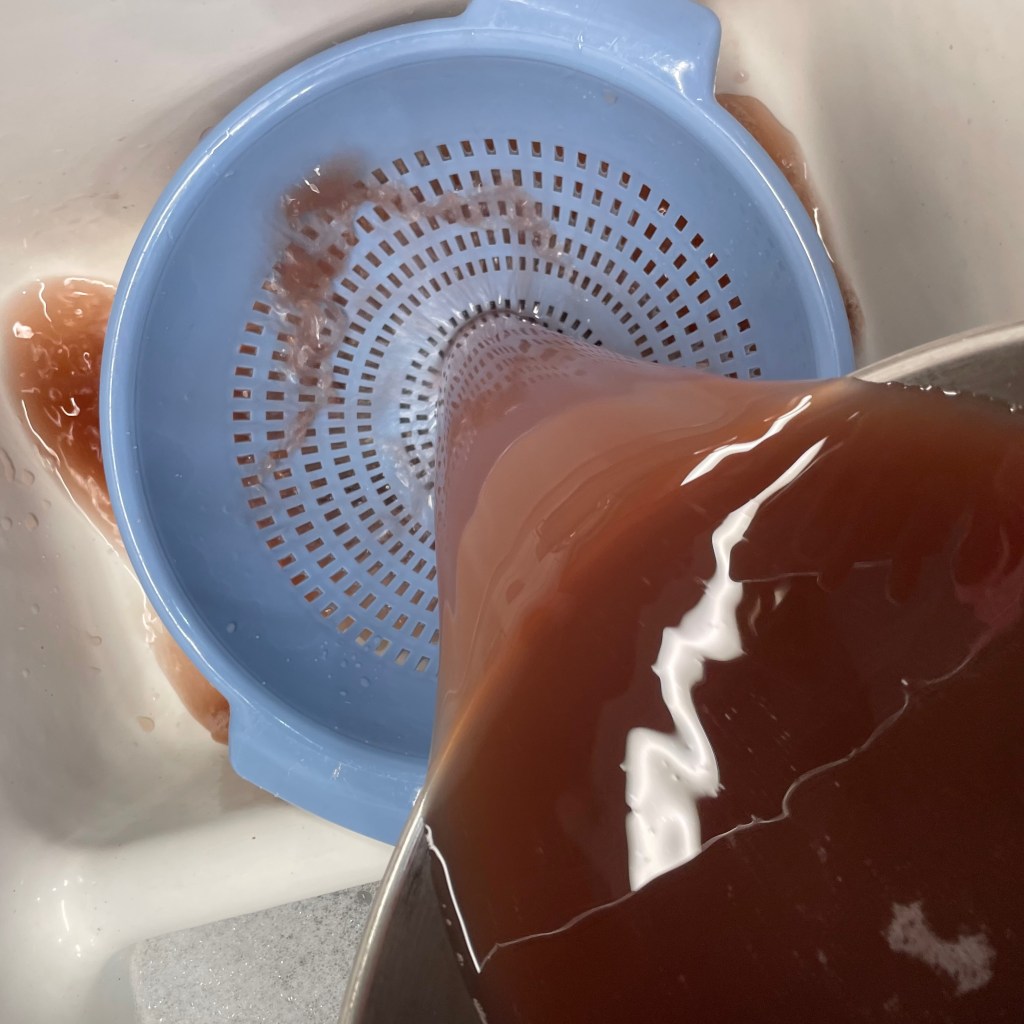
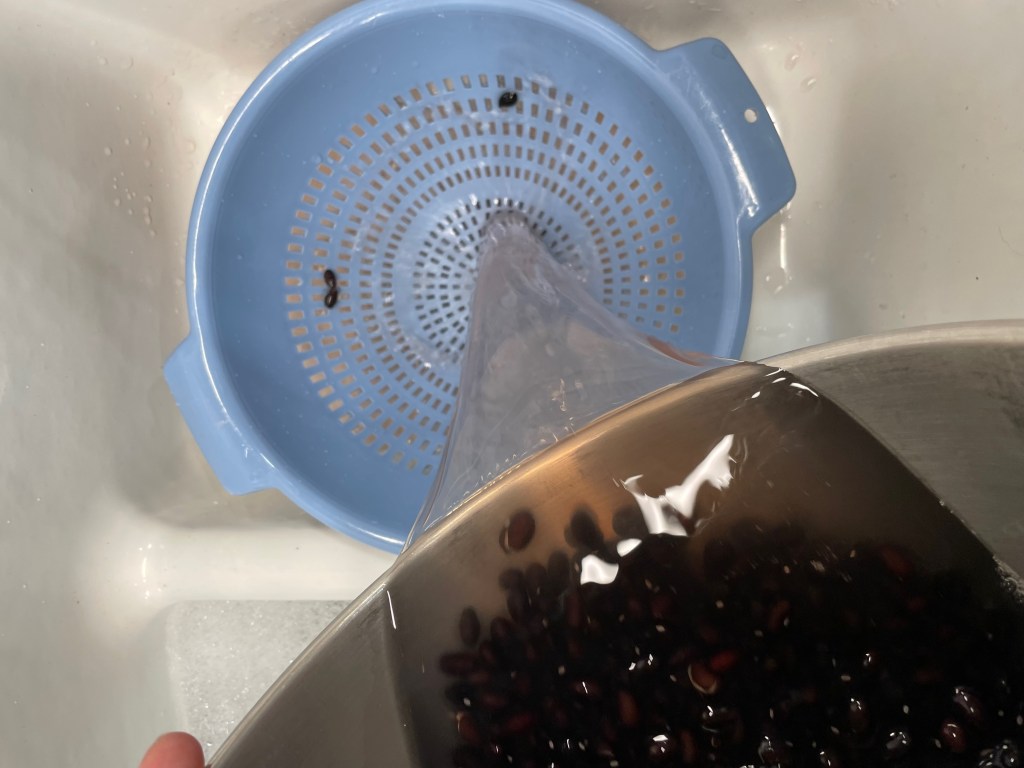
Drain, rinse and drain again!
Draining soaked black beans is especially dramatic because of the purplish color of the soaking water, but it is usually cloudy and foamy, too, and this is because you’re eliminating some of the complex sugars that make beans difficult to digest. The soak gives the beans a chance to let loose some of that gas (so you don’t have to). 😏
Season every layer, except this one?
If there is one myth we should all unsubscribe from, it is the notion that salt is an enemy to dried beans, and that using it too soon will keep the beans from softening. Honestly, who are the bean police making up these rules? I’ve heard this one my entire adult life, but it has been proven to be untrue. Some cooks even add salt to the soaking water, and there is nothing wrong with doing so. If you wait until the very end to add salt— as so many recipes insist you must— then you’re prone to end up with beans that taste unseasoned and overly salty at exactly the same time. You might guess from this statement that I’ve learned this the hard way, and you’d be correct!
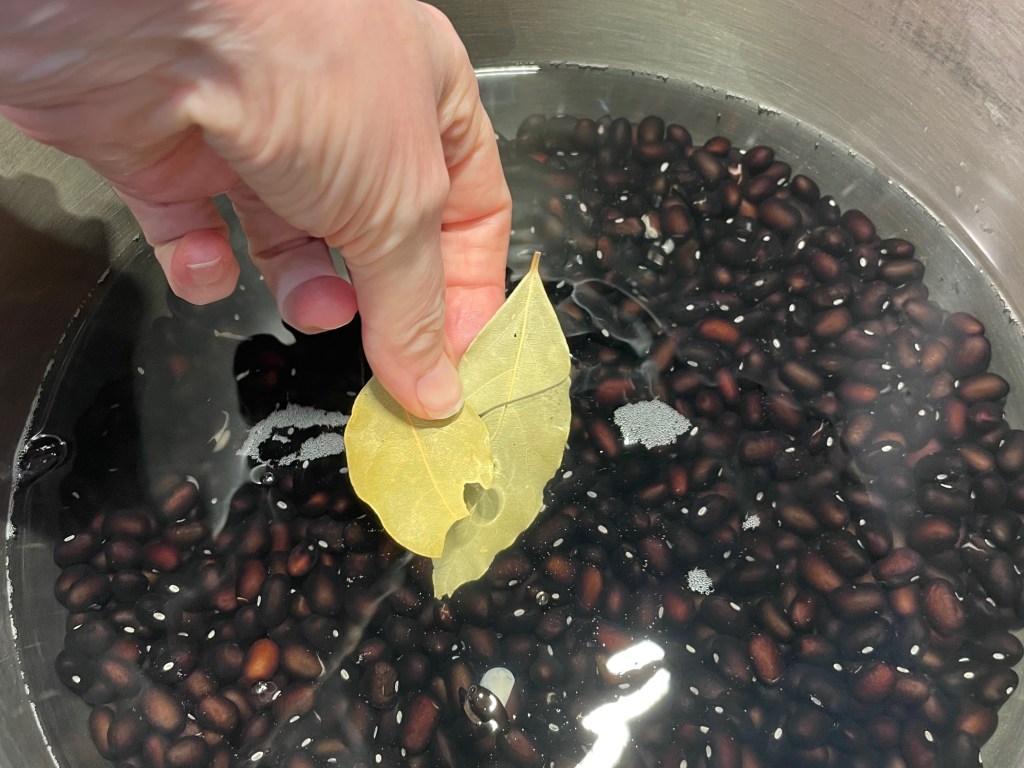
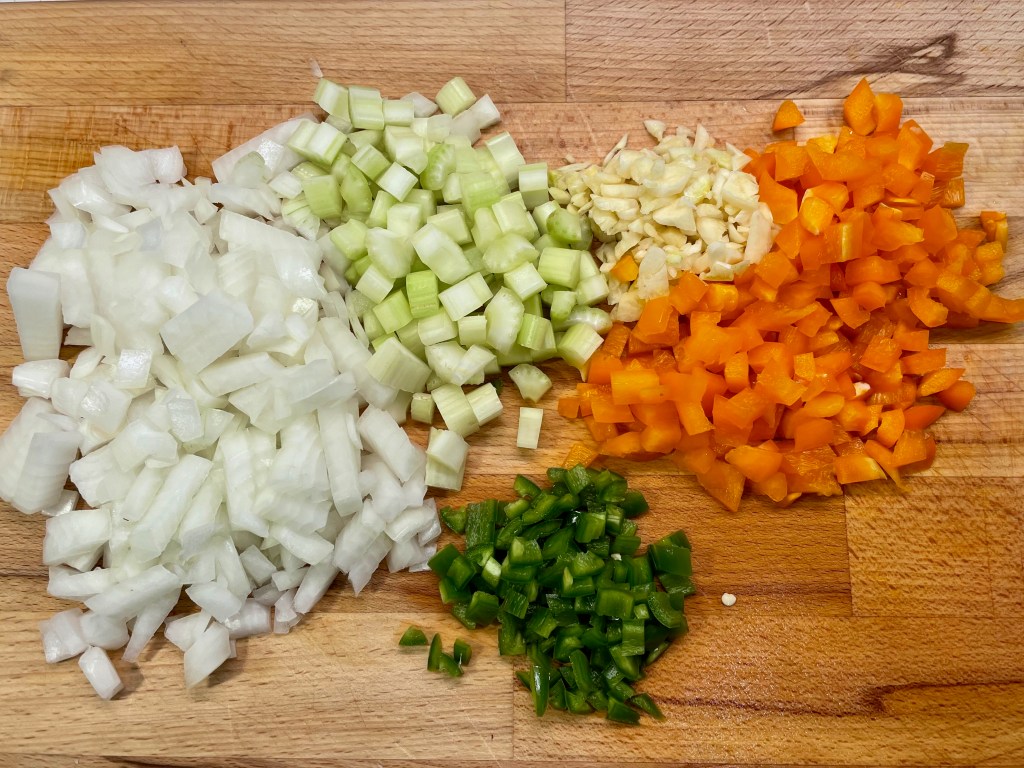
I placed my beans, covered with water, over medium heat with a couple of bay leaves, and got to work prepping the aromatics that would flavor my soup: onions, garlic, celery, red bell pepper and jalapeño.
Simple ingredients, but so much flavor!
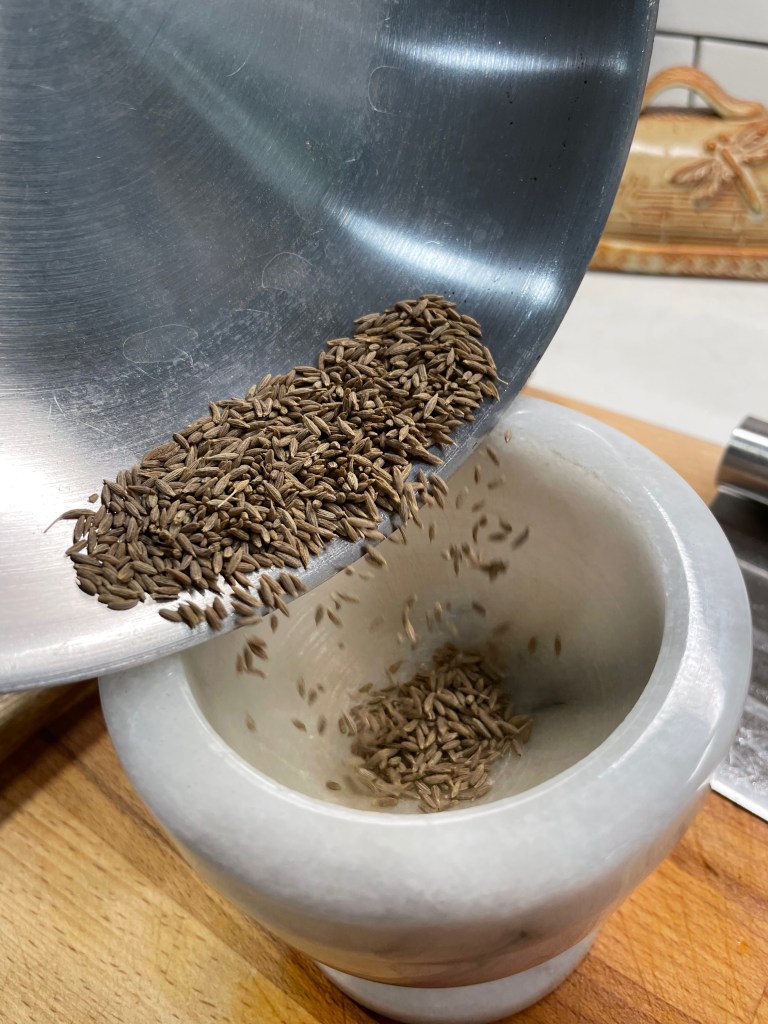
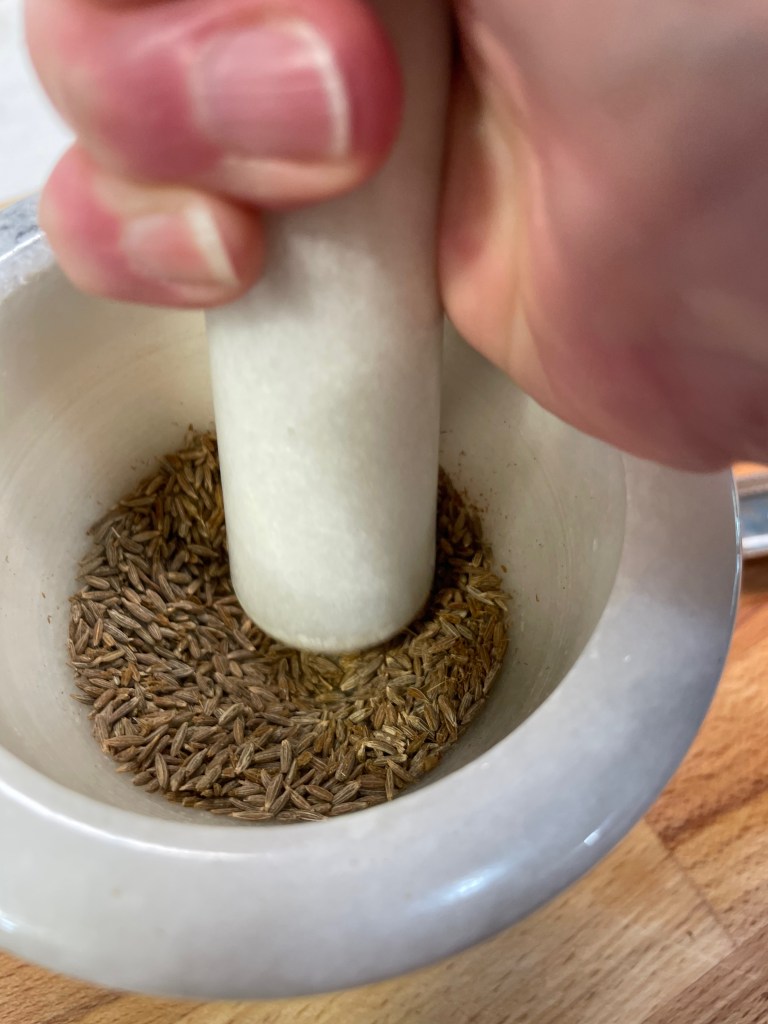
The seasonings came next. I pulled out a small skillet to toast up some whole cumin seed. Toasting seed spices is an easy way to elevate their flavor, and a quick crushing in my mortar and pestle revealed a most potent aroma. Add to that a generous sprinkling of chipotle chile powder, plus salt and pepper (of course), and my kitchen already smelled inviting!
Cumin is one of my favorite spices. It’s versatile and smoky without heat!
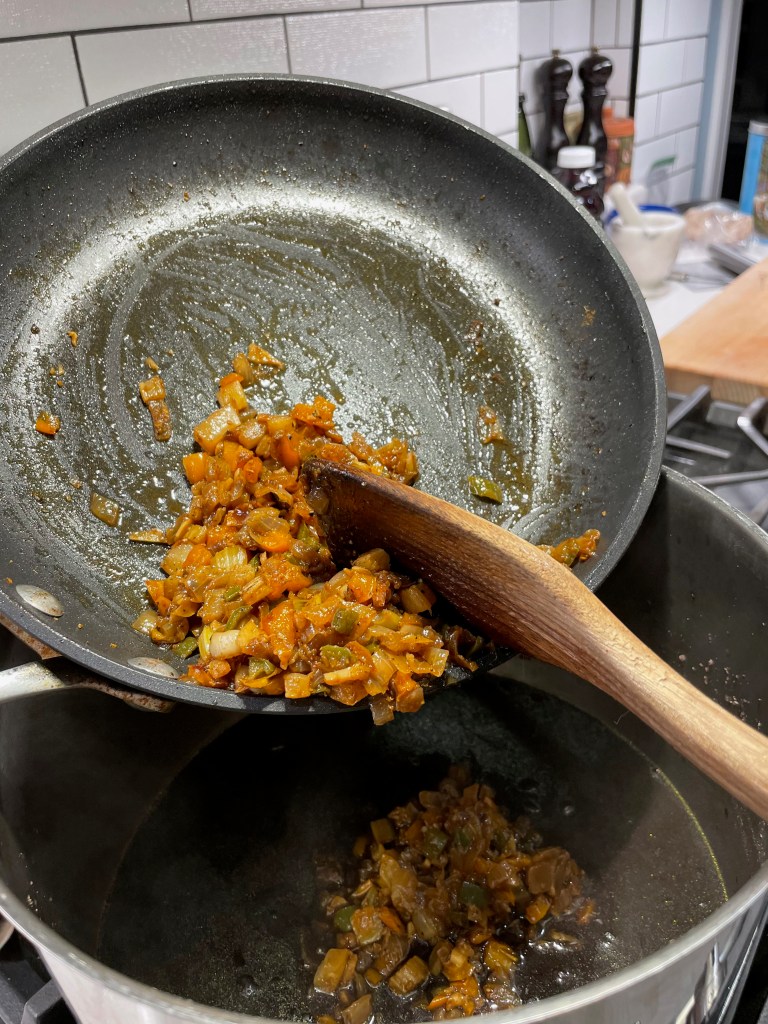
Under normal circumstances, those veggies would go into the pot after about an hour, when my beans became tender. But my ignorance about the best-by date on my beans is where the trouble came in. After 20 hours of soaking and two solid hours of simmering, my beans were still very firm. Not crack-a-tooth firm, but firm enough that they didn’t budge when I pressed on them with the back of a fork. Dang it! I almost scrapped the whole thing, and I had to come up with another plan for dinner. I needed help.
Thank goodness for foodie friends!
I am ever appreciative for the friendships I’ve made since I began food blogging, and on that day, my gratitude for Dorothy at The New Vintage Kitchen was multiplied. Dorothy is a revered graduate of the “waste nothing” school of culinary excellence, and I reached out with a text message, figuring if there was a way to salvage my beans from this debacle, she would point me toward it.
“I’d probably add a bit of baking soda and keep cooking them,” Dorothy texted me. She also encouraged me to “go ahead and salt them.” I was grateful for that advice, too, because old habits die hard.
Amazing that such a small amount of baking soda has such an impact!
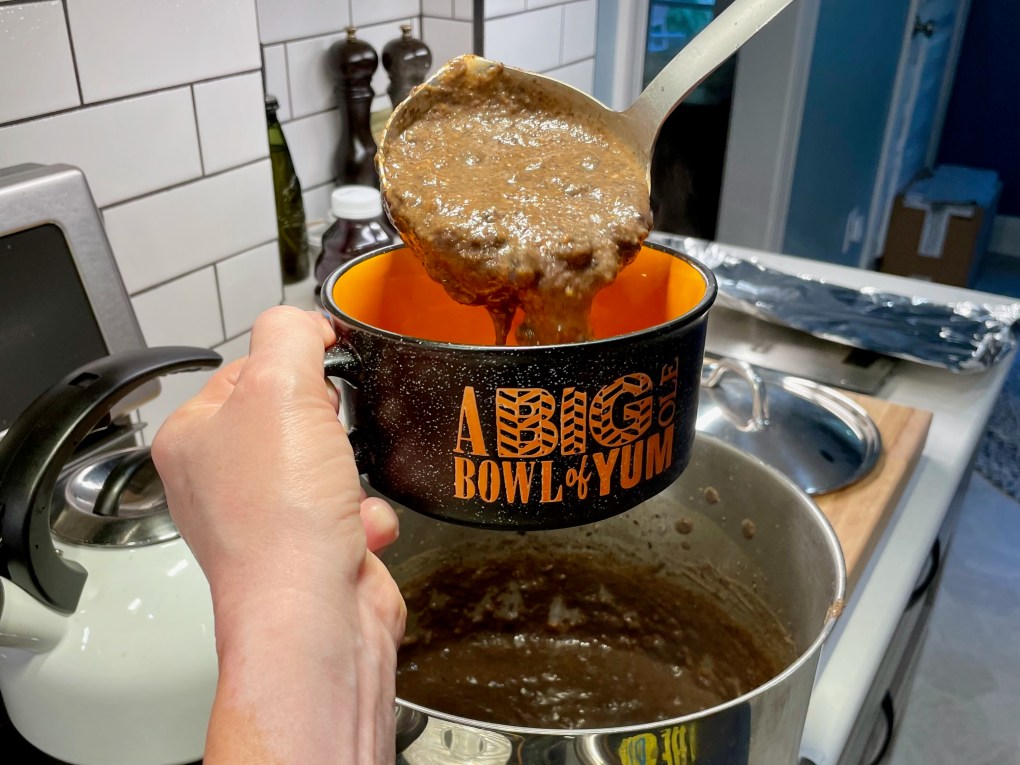
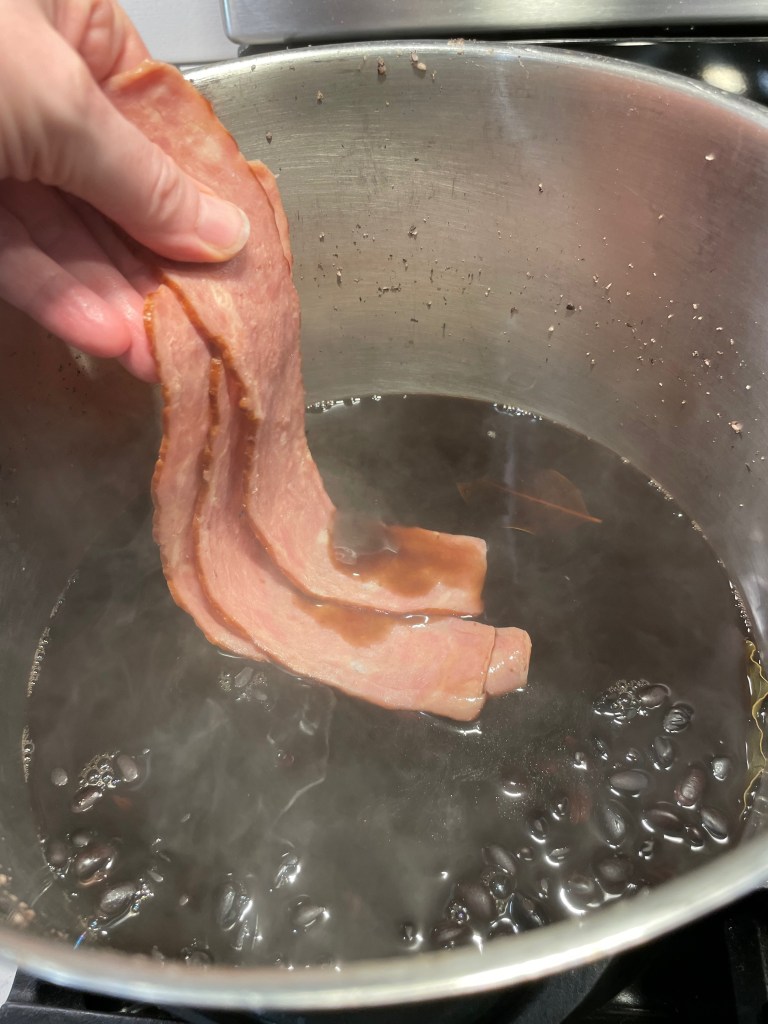
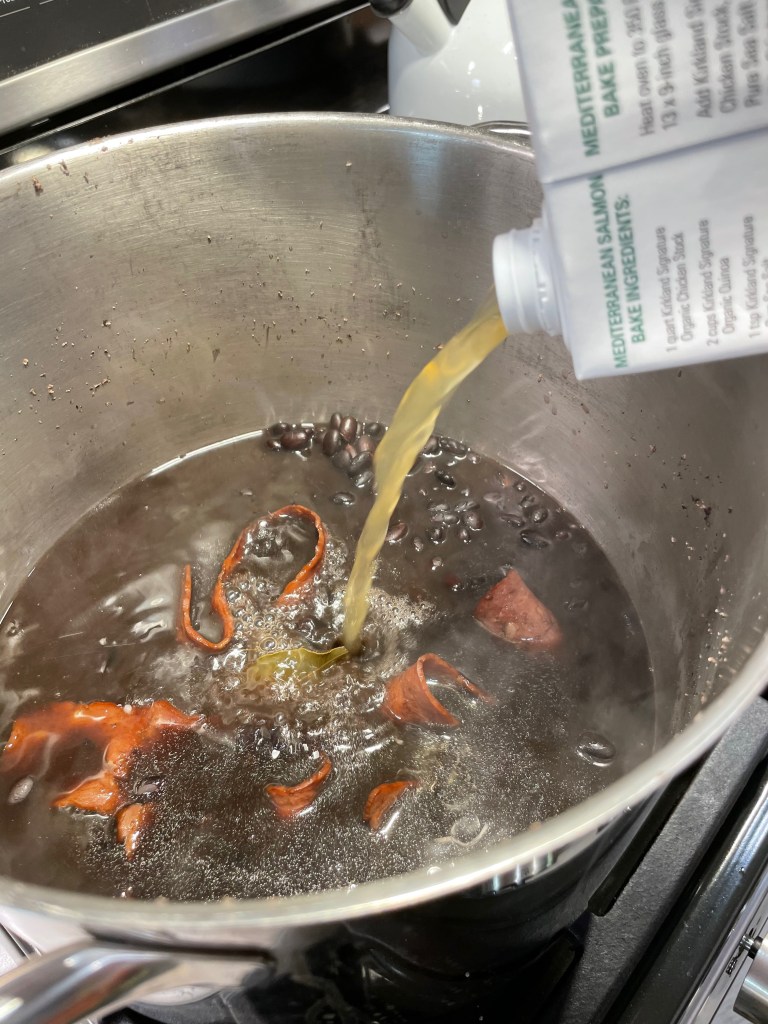
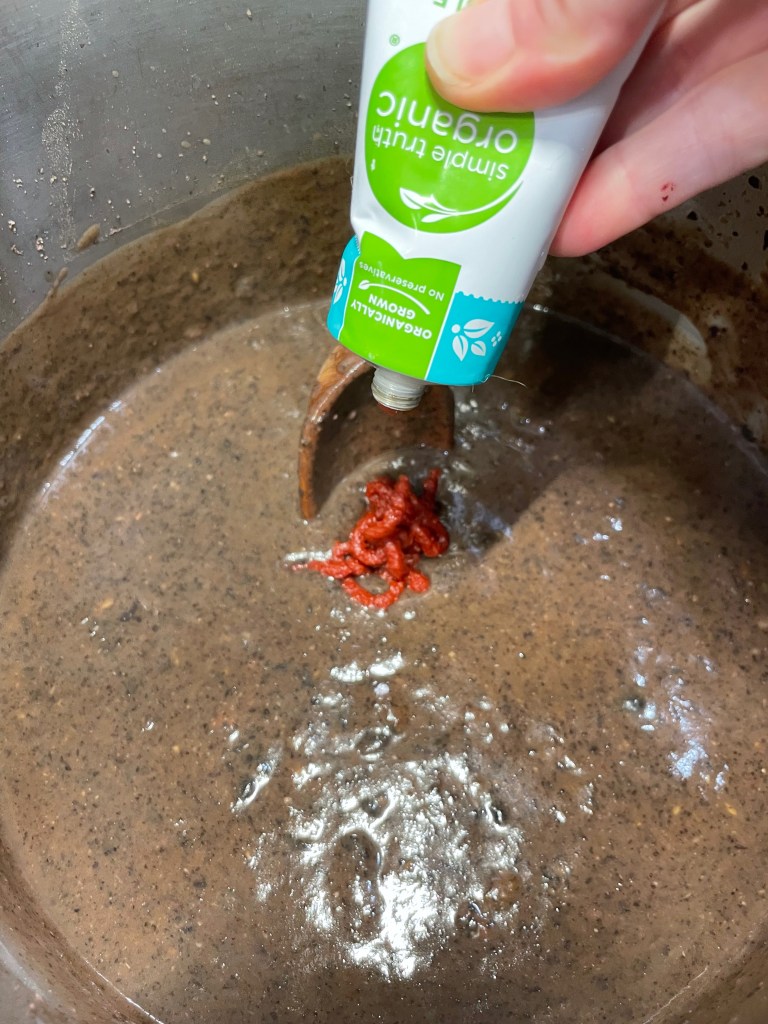
And just like that, I was back in business! Thanks to the alkaline nature of baking soda, my beans were softened about an hour later, and I added a couple of strips of turkey bacon for smoky flavor, all my sautéed veggies, plus some low-sodium veggie broth. Soon enough, my soup was ready for final touches! I took my immersion blender for a 20-second spin and stirred in some tomato paste to perk up the flavors.
This recipe moved quickly once my beans finally cooked.
By the time the bean crisis was averted, I had already pivoted to Plan B for dinner that night, so I stashed the soup in the fridge and rewarmed it the following evening. Soup is always better on the second day anyway, and this big ol’ bowl of yum made my hubby and me very happy.
One happy husband. 😘
The tip that keeps on giving…
The story doesn’t end with my own soup, and this is the beauty of sharing foodie tips with fellow cooks. A few weeks after my own panic attack, I got a text from my cousin, who had run into trouble making ham and bean soup. Brad had combined his beans with ham and vegetable broth and dumped in a can of—yikes— diced tomatoes before he noticed the recipe said to hold that last ingredient til the end. Unlike salt, acidity is an enemy to dried beans, and Brad described his panicked effort to strain the beans out of the mixture a “fool’s errand.” This is such a frustrating moment for any cook, and I shared how my black bean soup was saved by a quarter teaspoon of baking soda.
“Give it a try,” I suggested.
Brad texted me the next day. The baking soda had neutralized enough of the acidity of the tomatoes; the beans softened and his soup was saved! He also shared his success story with a buddy who complained that his chili made with dried beans never came out quite right, and he’s going to try the baking soda trick next time, too!
One of these days, I’m going to make a list of all the brilliant uses for baking soda in the kitchen. I’m betting that my fellow cooks have other examples to share. Until then, stay warm and enjoy this comforting black bean soup. A big ole bowl of yum!
This easy soup is smoky and flavorful, made with simple ingredients and so comforting on a cold winter's night!
Ingredients
1 lb. dried black beans, sorted, rinsed and soaked overnight
Plenty of water, for soaking and cooking
2 dried bay leaves
1/4 tsp. baking soda (see recipe note below)
2 Tbsp. extra virgin olive oil
1 medium sweet or yellow onion, chopped
2 stalks celery, strings removed and chopped
1 medium red bell pepper, seeded and chopped
3 cloves garlic, finely chopped
1 jalapeño, seeded and finely chopped
Kosher salt and freshly ground black pepper
1 tsp. cumin seeds, toasted and ground
1 Tbsp. chili powder (I used ground chipotle chiles)
3 strips smoked turkey bacon
2 cups low sodium vegetable or chicken broth
2 Tbsp. tomato paste
Sour cream and scallions, for serving
Recipe Note: Be sure to check the “best by” date on your dried beans. If they are more than a year old, they will likely take longer to cook. A bit of baking soda will help the beans soften if they are older or seem to be taking a long time.
Directions
Drain and rinse the soaked beans, transferring them into a large, heavy-bottomed pot. Cover with at least two inches of cold water. Add a teaspoon of salt and a couple of bay leaves to the pot. Bring to a slight boil, then cover and simmer for about one hour until beans begin to feel tender.
Place a sauté pan over medium heat and add olive oil. Add onion, celery and pepper to the pan with a generous pinch of salt and black pepper. Sauté for about 3 minutes, until they are softened and slightly translucent. Add garlic and jalapeño and cook 2 more minutes. Season with cumin and chili powder. Set aside to cool.
When beans are tender, add turkey bacon to the pot, along with broth and sautéed vegetables. Simmer until the mixture is hot throughout and bacon is shriveled. Remove bacon strips and bay leaves.
Use an immersion blender to purée the soup. It can be smooth or chunky, to your liking. Alternatively, transfer a cooled portion of the soup to a conventional blender and stir the pureed portion back into the pot. Use caution, and do not purée a hot liquid in a closed blender container.
Stir in tomato paste and adjust seasonings to taste.
Serve with a swirl of sour cream and chopped scallions.
To say that I love a bargain is an understatement. I’ve never fawned over the vanilla-scented gourmet kitchen stores at the mall— the ones that sell the high-dollar pan sets, expensive crystal, and pre-made mixes for quick breads and specialty gravy bases. Those stores are filled with lovely things, don’t get me wrong. But you’re more likely to find me pacing the aisles at T.J. Maxx, Home Goods and Big Lots, where I’ve found many a bargain. I’m not talking about low prices for cheap items, but the way. It’s quality at a better price that I want, and I’m willing to take my chances with the unpredictability of these bargain stores’ inventories.
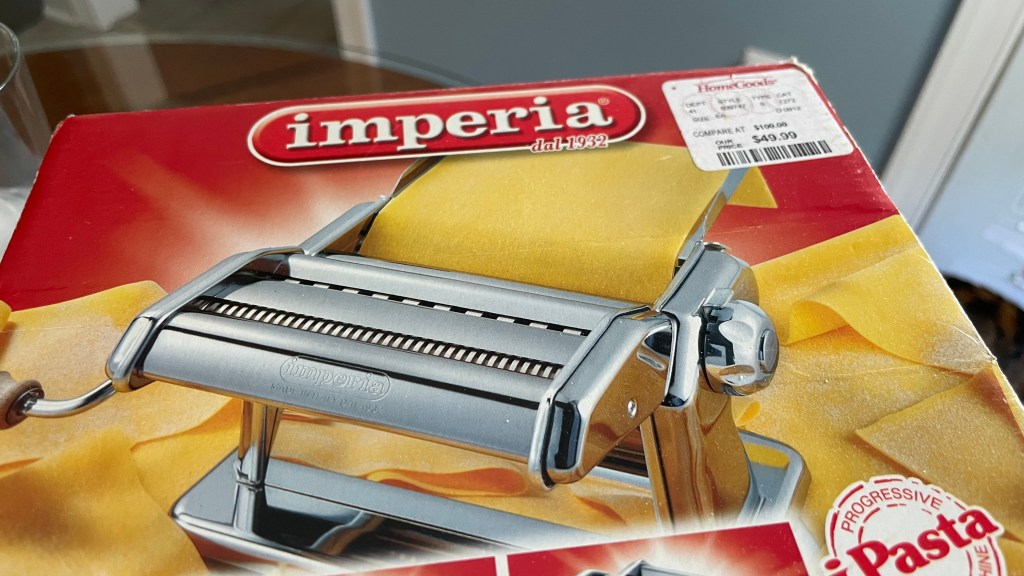
For example, my Italian-made pasta rolling machine that had been on my wish list for at least two Christmases (if not for the $100+ price tag), jumped into my cart unexpectedly about 12 years ago for the low, low price of— well, zoom in on the picture below and see for yourself. The exact item sells today at the vanilla-scented store for $149.95. I’d rather apply that hundred-dollar savings to the food I will make with the thing and just sniff my own bottle of vanilla at home as I delight in my good fortune.
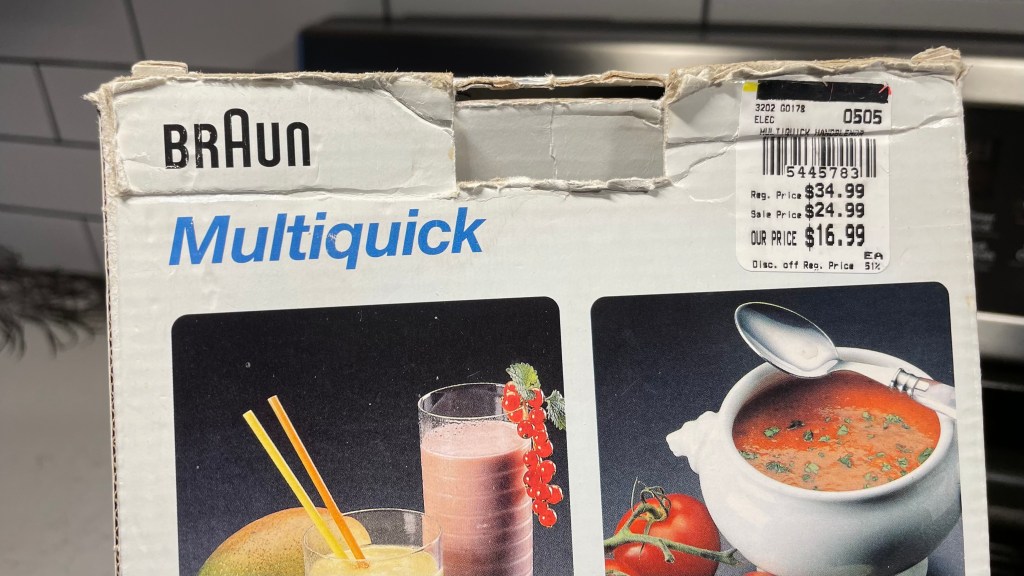
Likewise, my Braun immersion blender, which is still going strong after pureeing hundreds of soups and cheese sauces for the past 15 years, only set me back $17. Could we please have a moment of silence for Tuesday Morning? Thank you. Oh, how I miss that store.
Another super find that has served me well is my Cuisinart Pure Indulgence 2-quart ice cream maker, and this was a major scoop at only $49, but wait, it gets better! I bought this when Big Lots was still doing its old rewards program of 20% off an item after 10 purchases of $20 or more. In other words, I only spent $39 for an ice cream machine that retailed for more than double that price. The purchases I made to get that discount were staple items that I would have bought anyway— mostly Bob’s Red Mill products and cleaning supplies.
It’s the thrill of the hunt that I love, but I also enjoy having these quality items in my cabinets because they make it easier for me to produce delicious foods for myself and my loved ones. Plus, I can count on them to last a long time.
This past week, I made my latest ice cream— using my Cuisinart machine, of course— and though I don’t usually post two desserts in a row, I decided to share this right away for a couple of reasons. First, it’s super easy and might take some pressure off my foodie friends as we all plan the various holiday meals on the horizon. Second, it’s a natural follow-up to a question posed by my New Jersey blog buddy, Bernadette, in the comments section of my pumpkin chai blondies post a few days ago. I’m keeping good on my promise. 😁
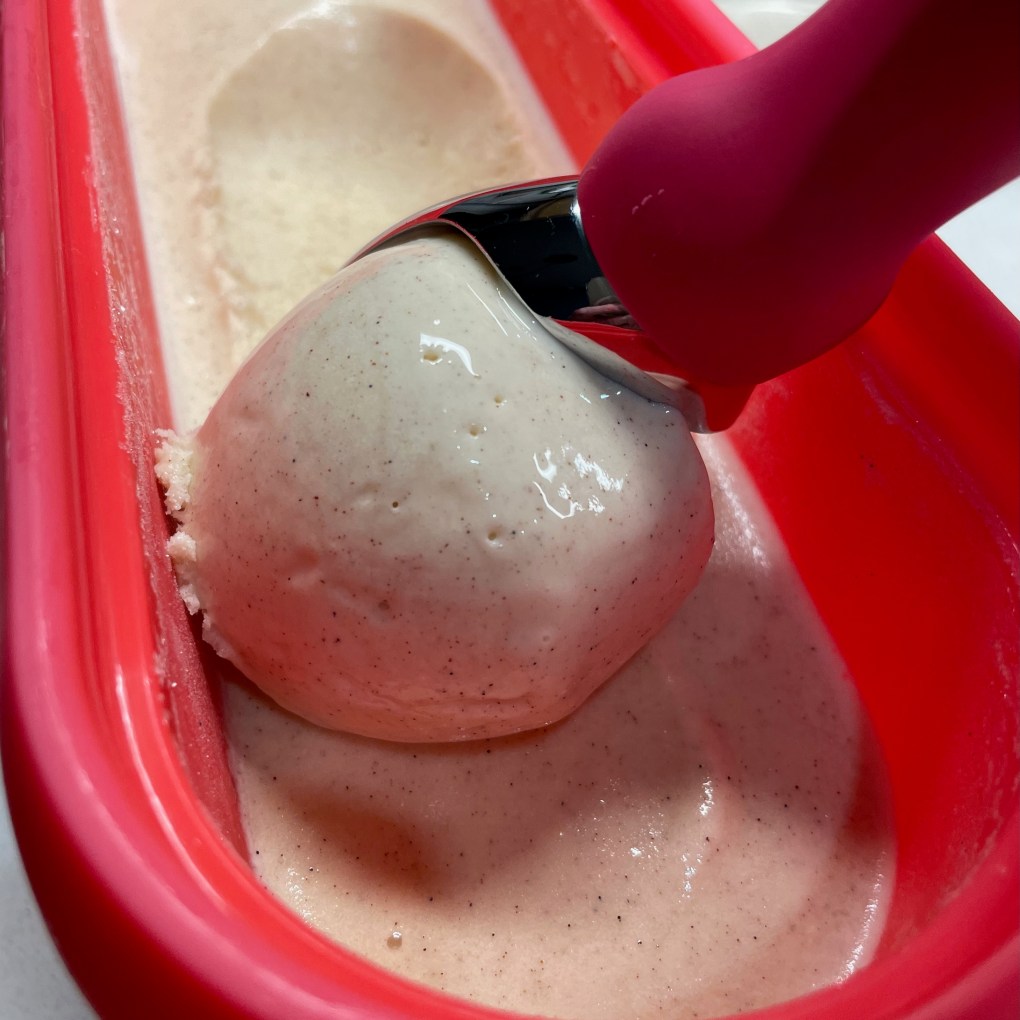
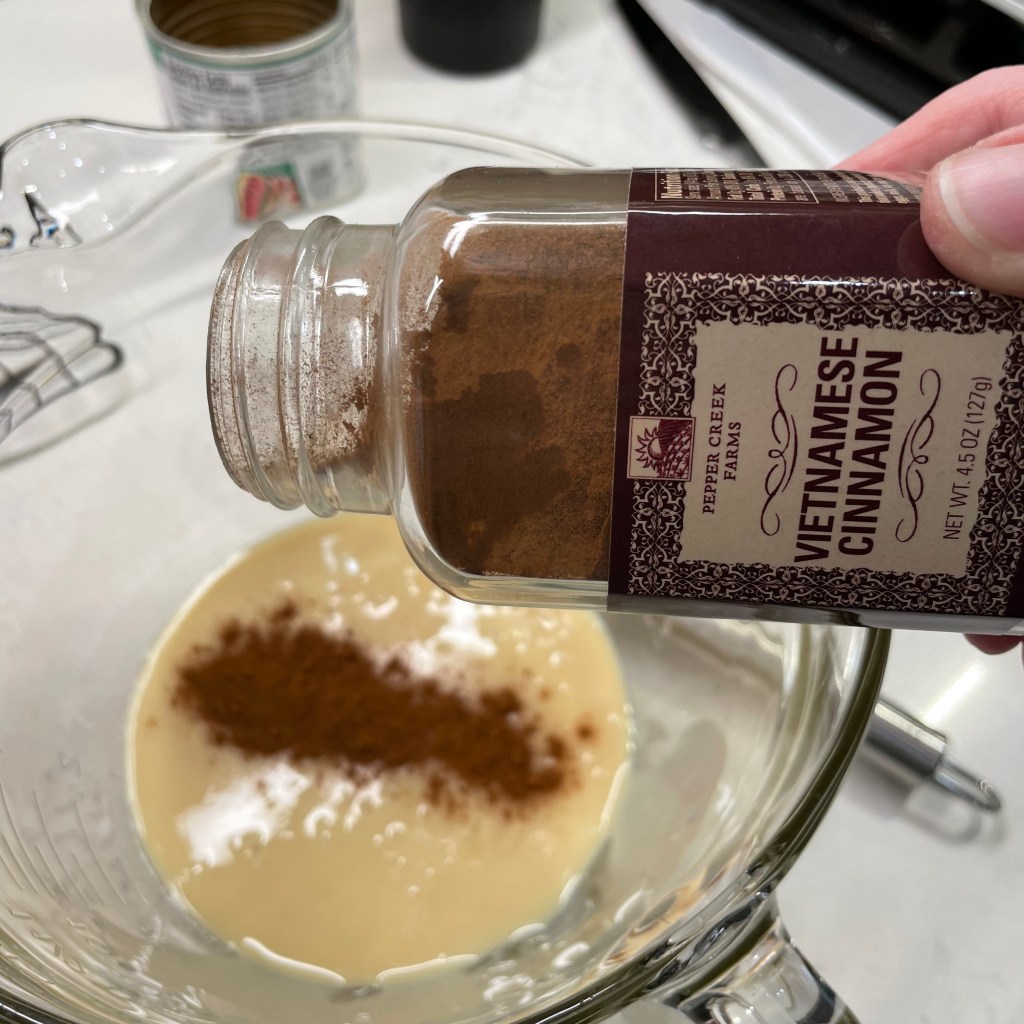
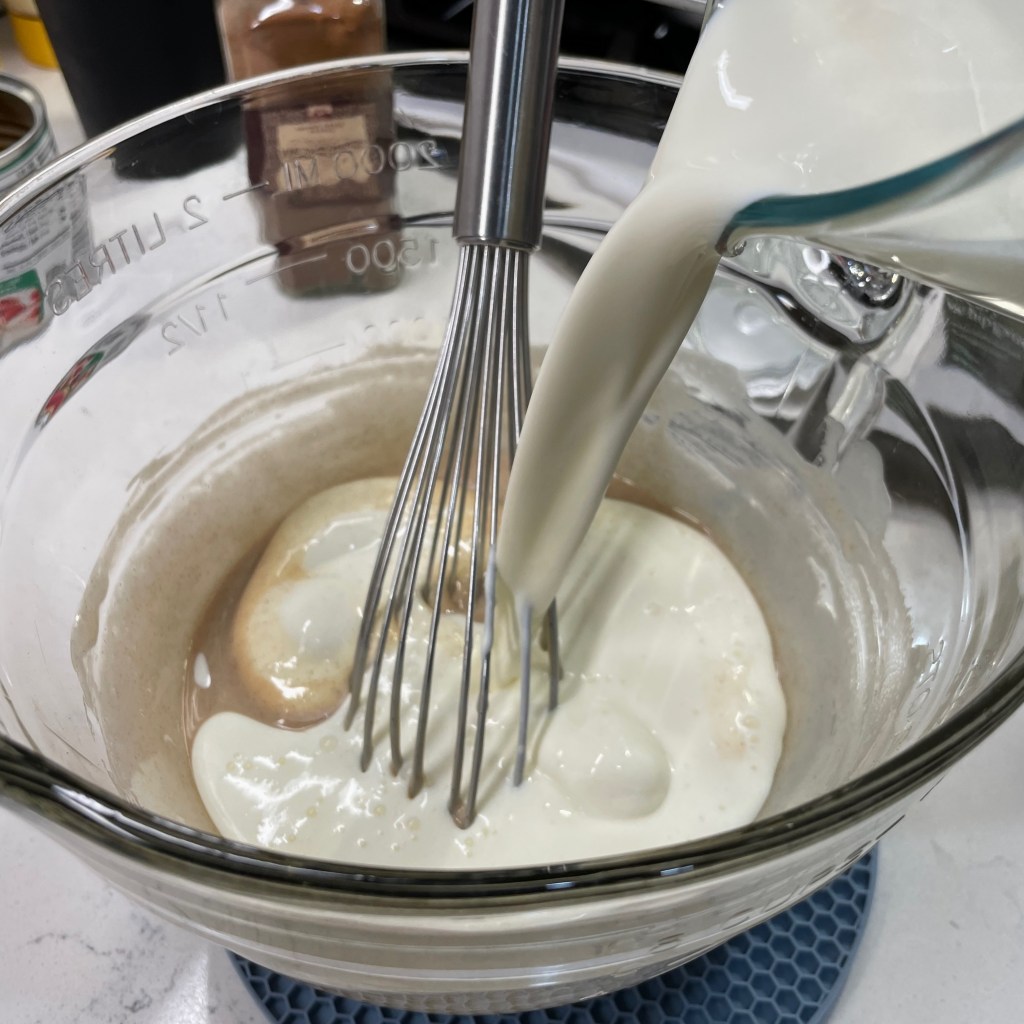
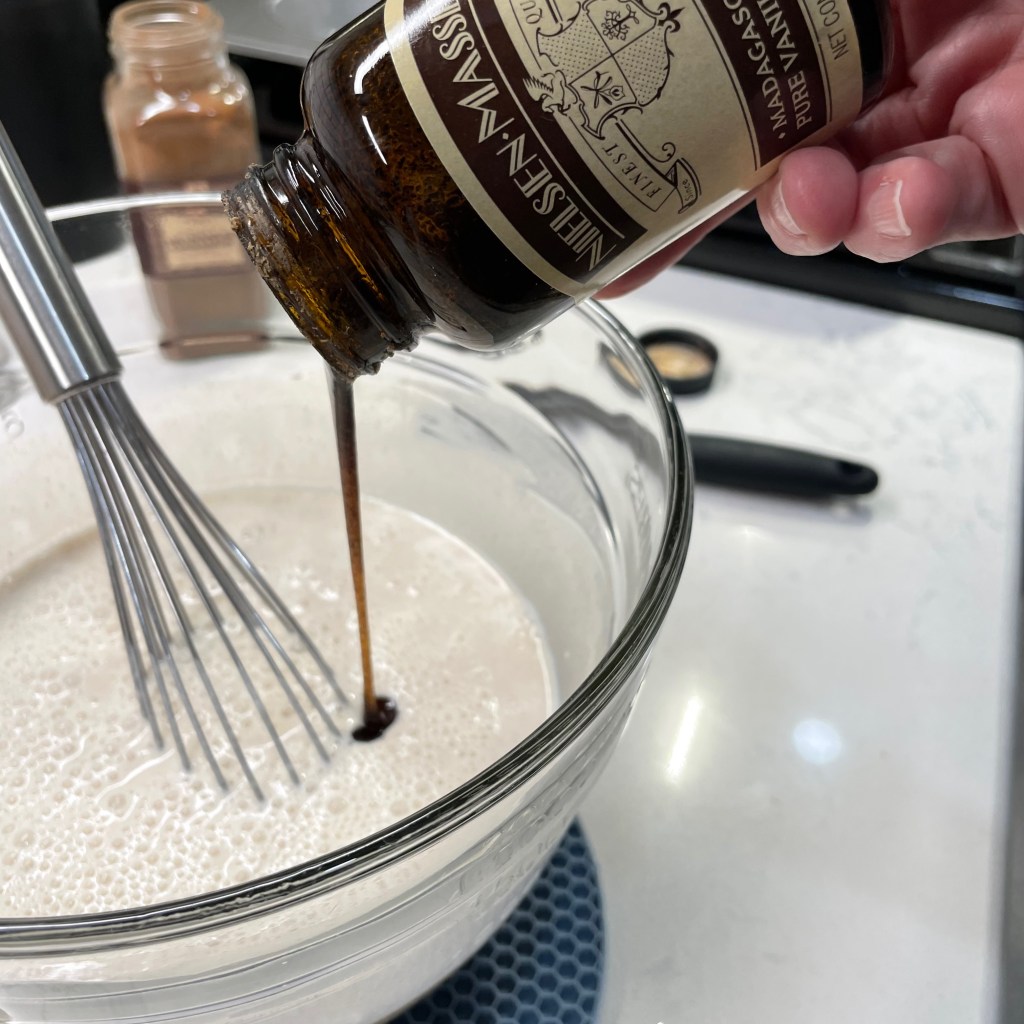
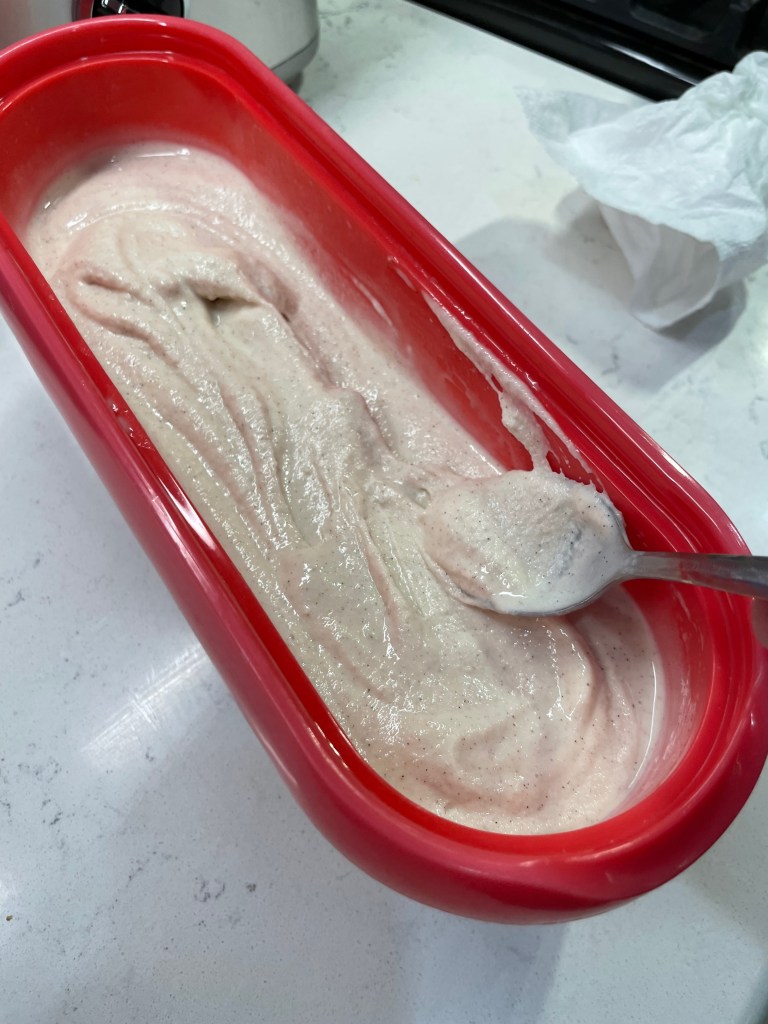
Here it is, Bern— not maple, but cinnamon, and I think you’re gonna love it! The base takes mere minutes to make, and the ingredient list is short: just cinnamon stirred into sweetened condensed milk (fat-free is totally fine here), then milk and heavy cream, plus a little splash of vanilla (or vanilla bean paste, if you’re me).
It’s worth mentioning that the cinnamon and vanilla bean paste were purchased at Home Goods, in the gourmet foods section. 🙂
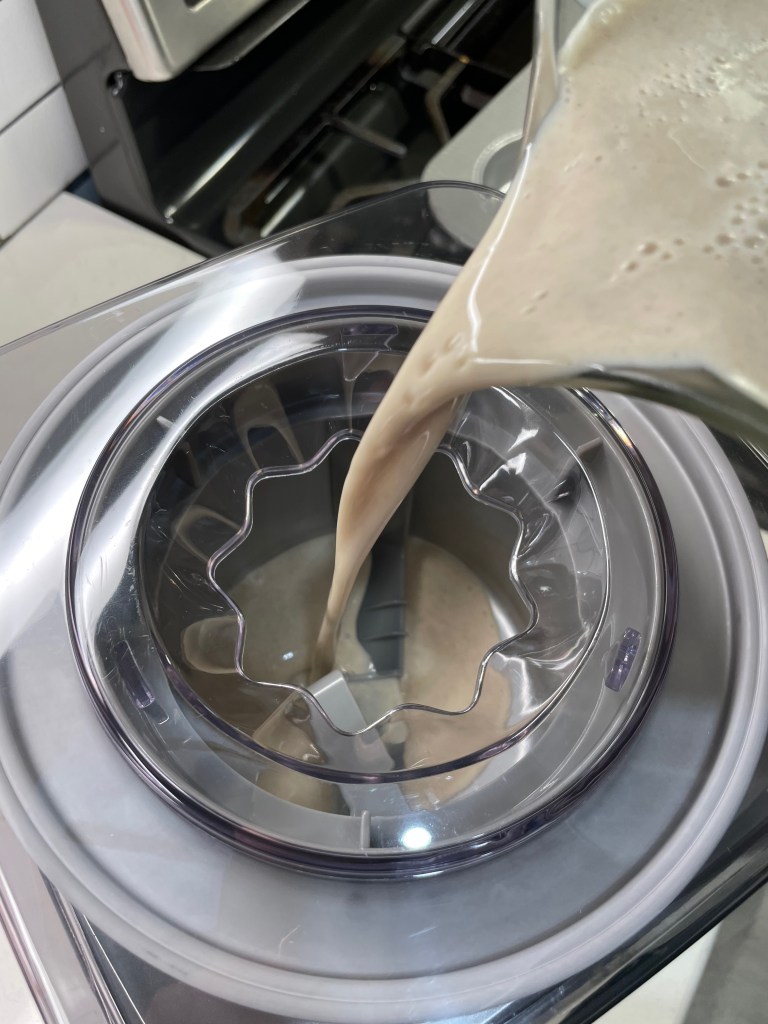
I chilled the base thoroughly in the fridge for a few hours, and then my Cuisinart churned it into silky ice cream in about 25 minutes. Into the freezer for overnight ripening, and it was done.
This cinnamon ice cream is the little black dress of the holiday dessert table— versatile and perfect for any type of occasion. It was a great complement to the pumpkin chai blondies, but it would also be a stunning sidekick to my pal Christine’s mile high apple pie, or the festive fig butter cranberry apple galette that I made last fall. How about chocolate cake or pecan pie or— well, what desserts are you making this holiday season that would be good with a sweet scoop of cinnamon ice cream?
This easy-to-make ice cream is creamy, delicious on its own, and pairs nicely with nearly any autumn or holiday dessert.
Ingredients
14 oz. can sweetened condensed milk (regular or fat-free, see recipe notes)
1 teaspoon ground cinnamon
1 cup whole milk
1 cup heavy cream
2 teaspoons vanilla extract or 1 Tablespoon vanilla bean paste
1 Tablespoon vodka (optional, added in the final minute for improved texture)
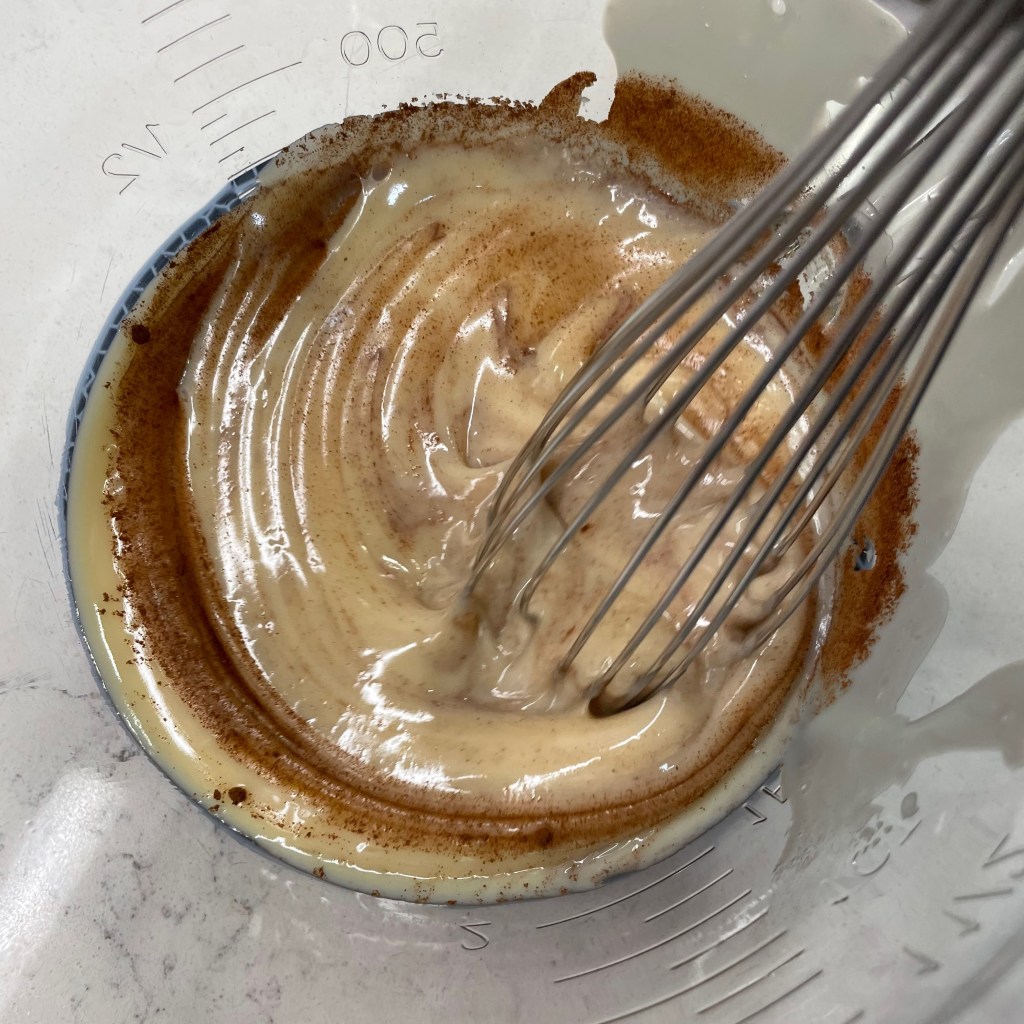
Notes: When you mix the ice cream base, add the cinnamon to the sweetened condensed milk first. Ground spices tend to “float” on liquids, so this helps to incorporate it into the mix before the thinner liquids are added.
I’ve found the fat-free version of condensed milk perfectly acceptable for making ice cream, with only one caveat: plan to use the ice cream within a couple of days of making it, or the texture may become more icy than creamy.
Directions
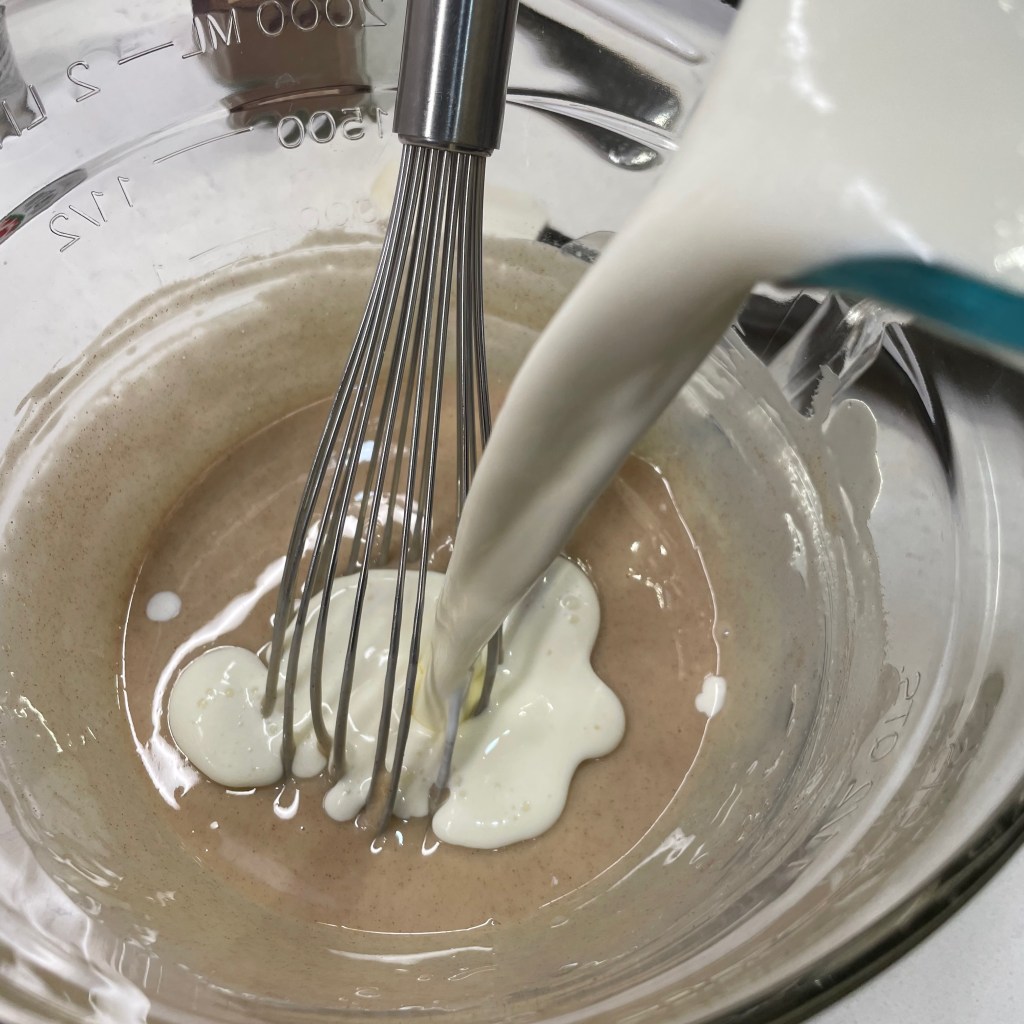
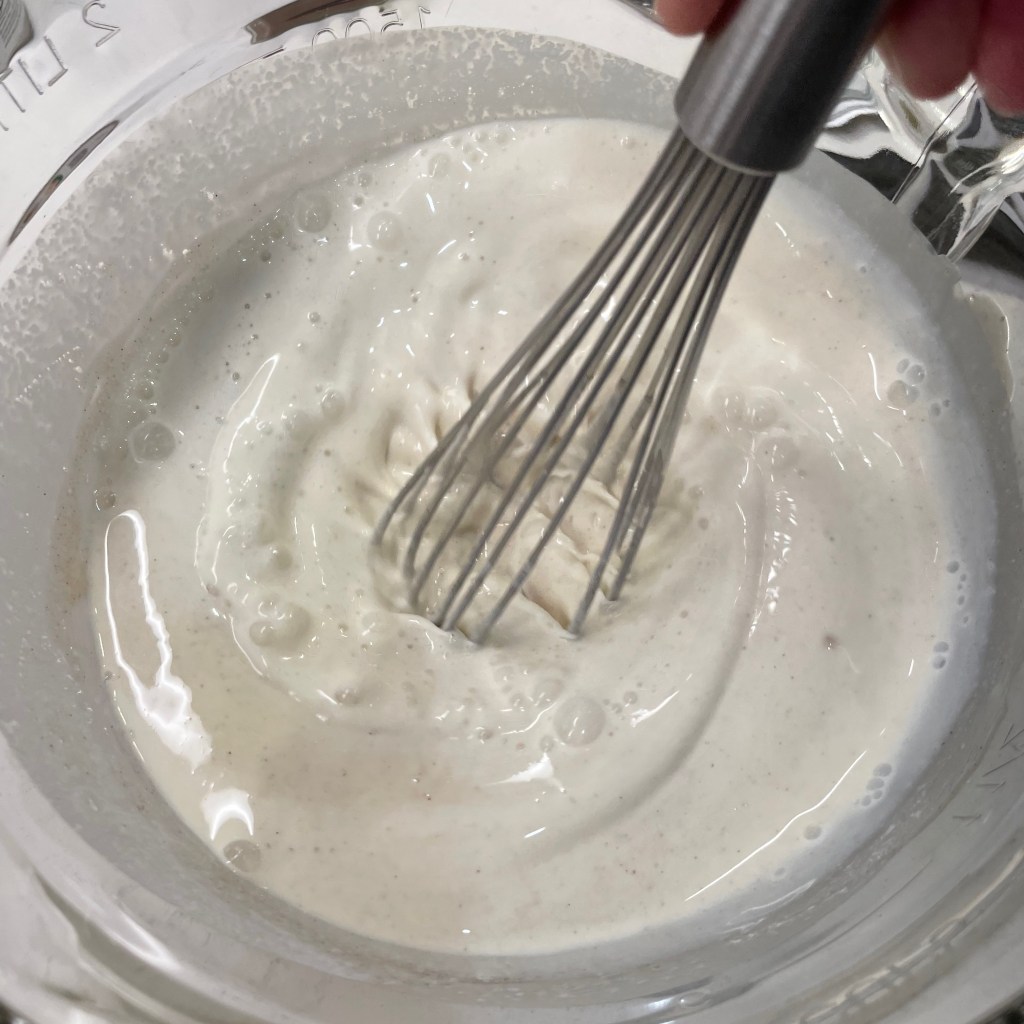
Combine sweetened condensed milk and cinnamon in a large bowl and whisk to thoroughly incorporate the cinnamon. Whisk in milk, cream and vanilla. Cover the bowl and refrigerate until the mixture is thoroughly chilled, at least a couple of hours.
Set up your ice cream machine. Gently whisk the ice cream base to re-blend any ingredients that may have settled during chilling. Pour the ice cream base into the machine and churn according to manufacturer’s instructions. My Cuisinart gets this done in about 25 minutes. Add vodka during the final minute of churning to make the ice cream easier to scoop directly from the freezer (omit this step if the ice cream will be served to children or other non-drinkers).
Transfer the ice cream to an insulated freezer container and freeze at least eight hours, preferably 24 hours, to ripen.
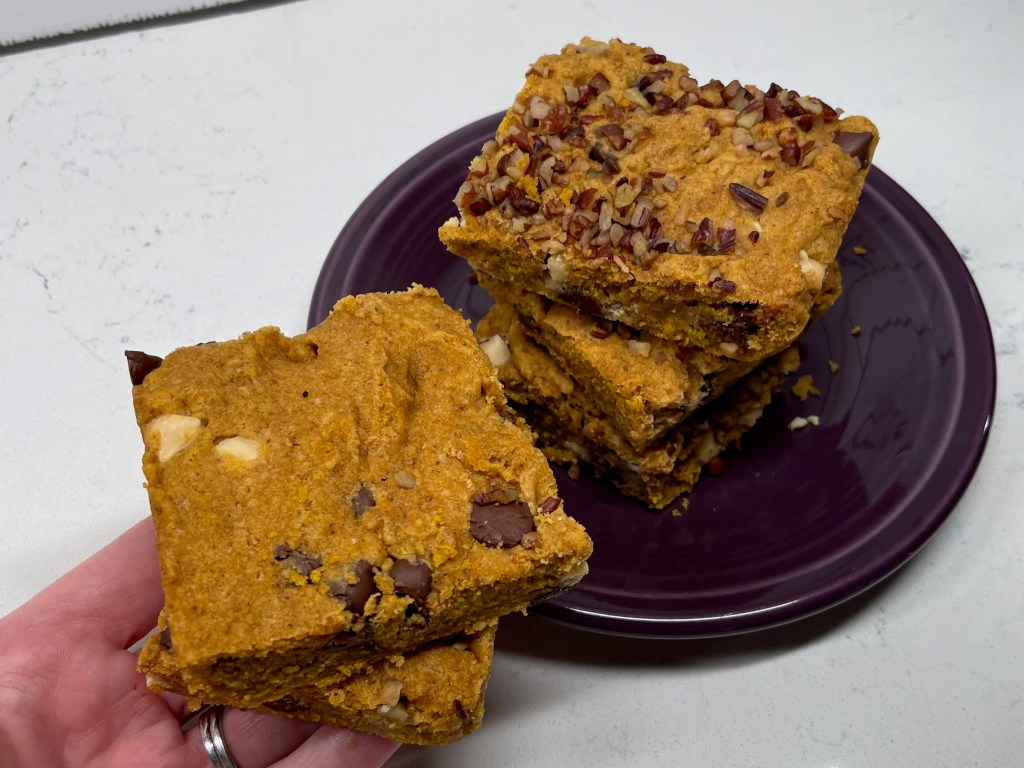
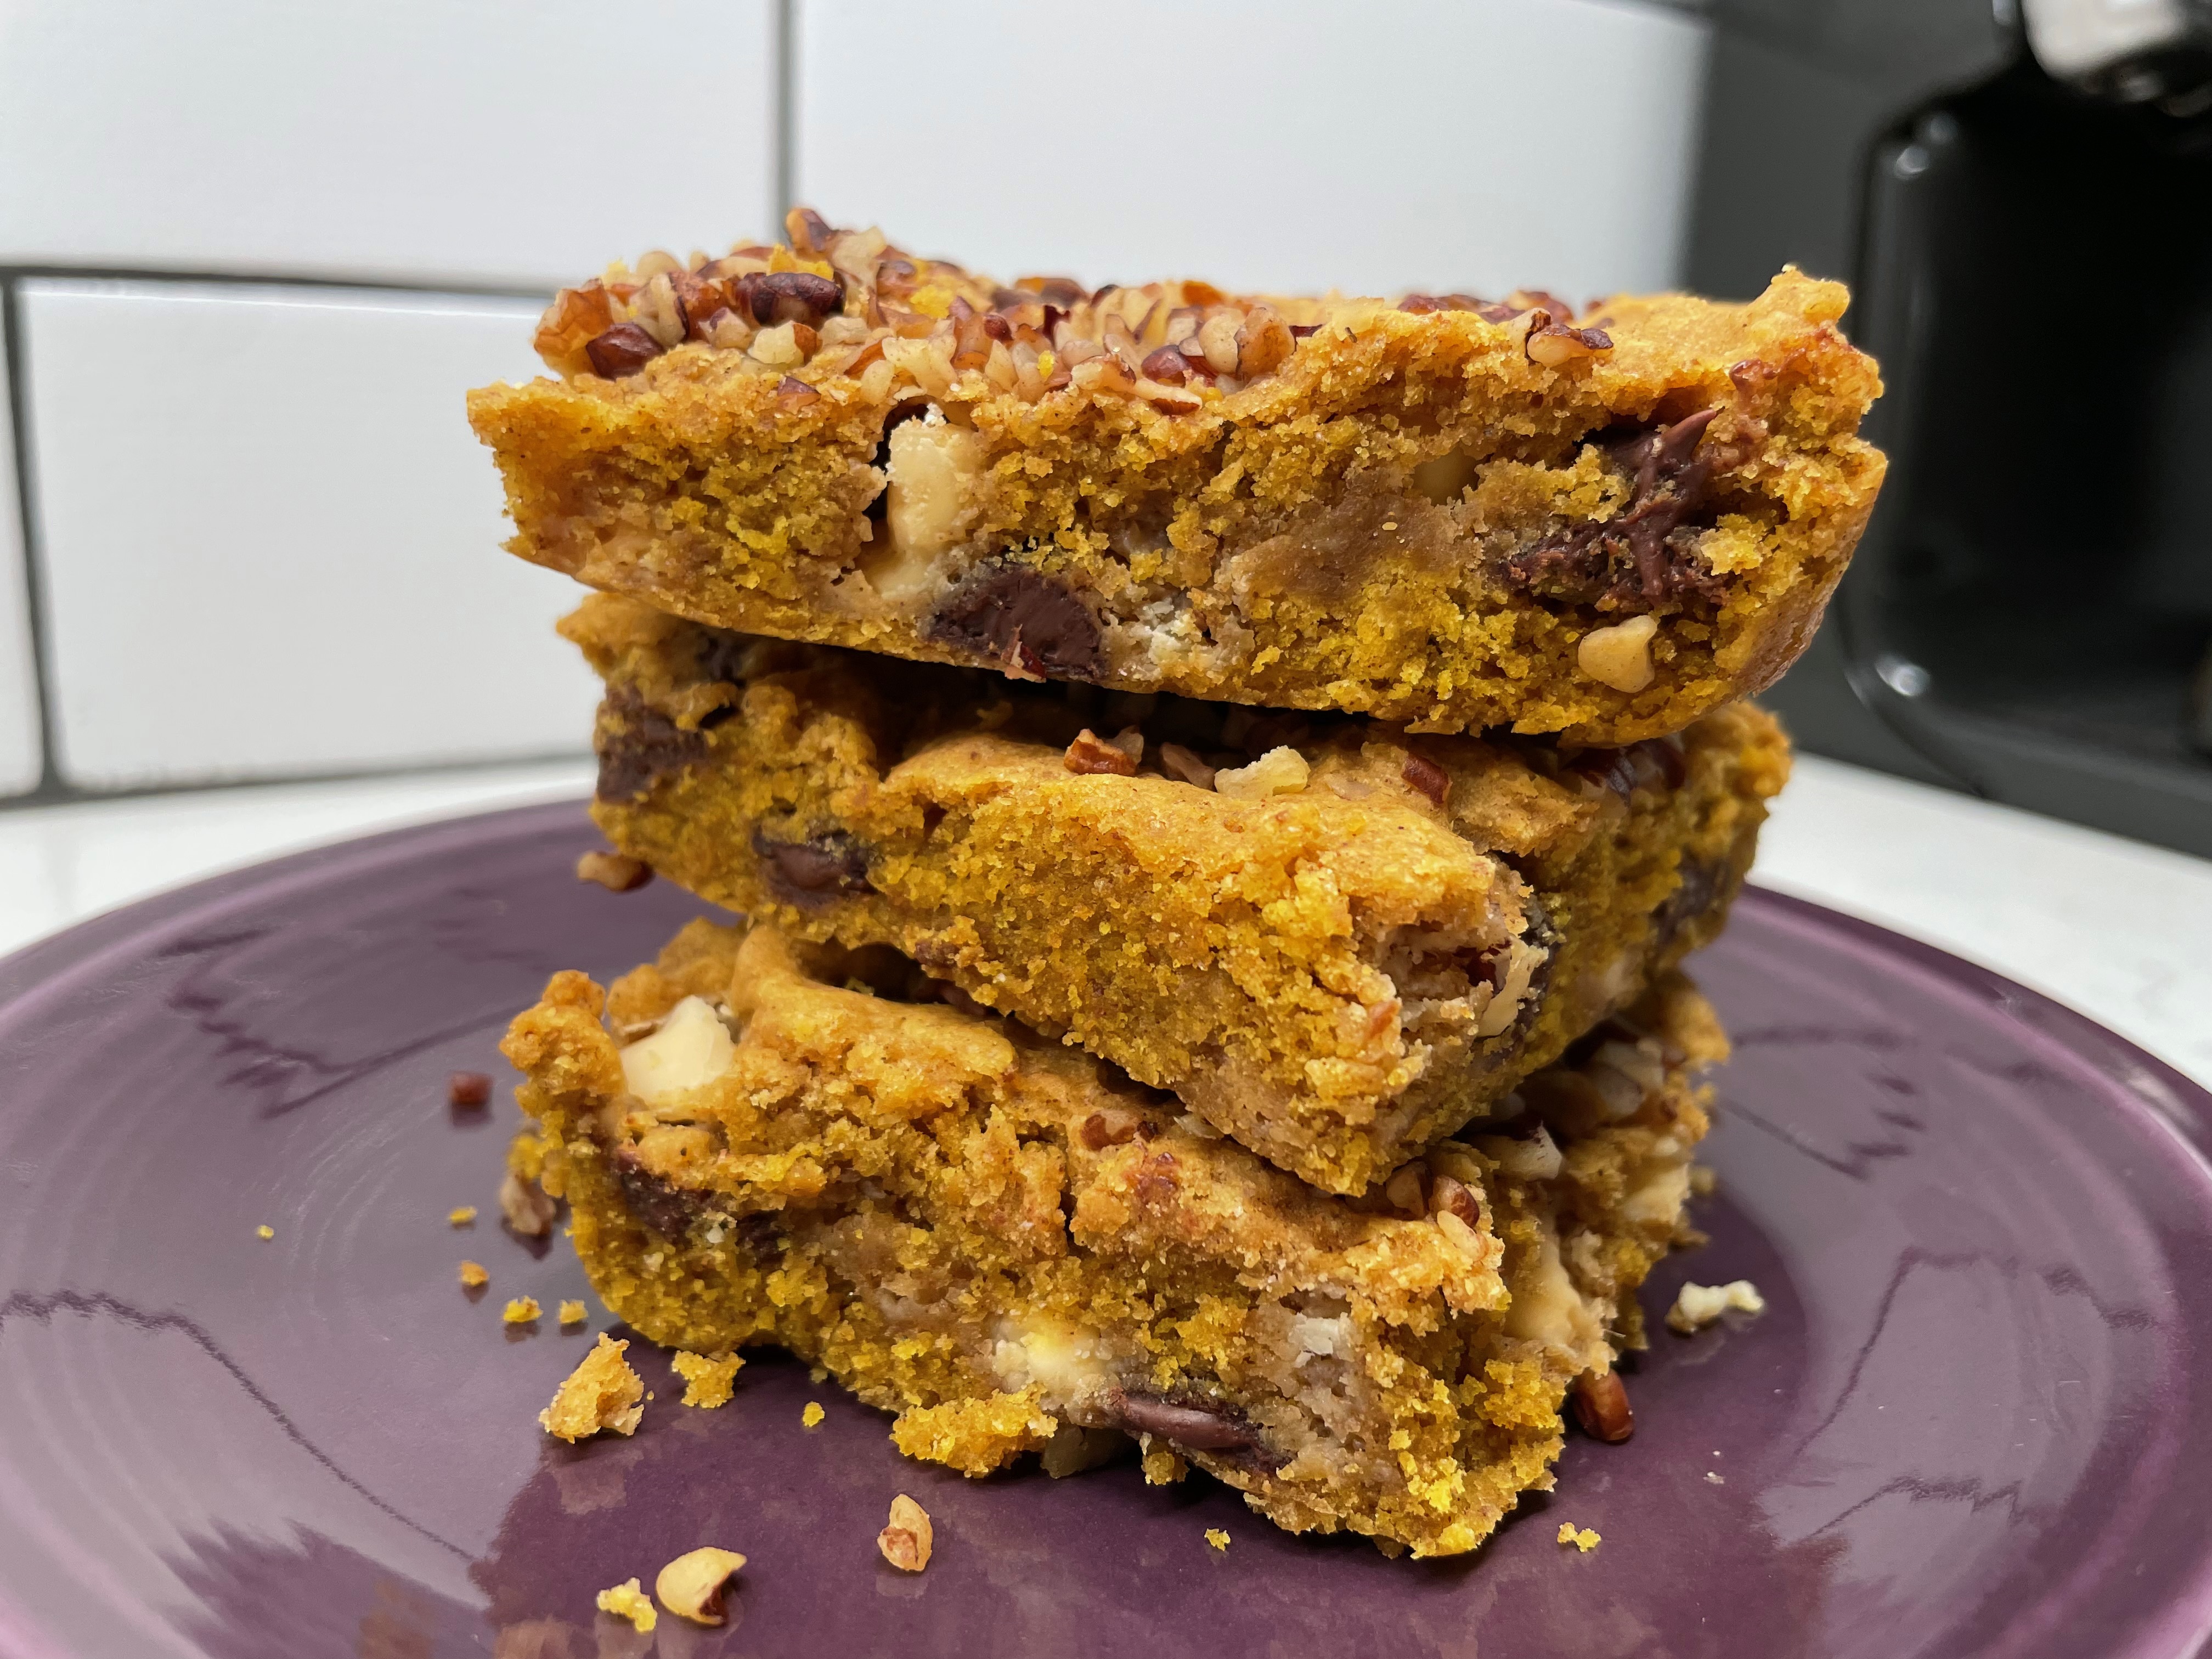
Is it fair to call these autumn-hued bar cookies “blondies?” Unlike classic blondies, which have a light golden color and are basically just chocolate chip bar cookies, these stunningly brilliant treats practically scream fall, with a deep orange color born from half a can of pumpkin puree. What else shall we call them— russets? Auburns?
They are still in essence a “blondie,” which is meant to have all the delightfully chewy texture of brownies, just without the cocoa. But these have a lot more going on, with add-ins of white and dark chocolate chips and crunchy pecan bits on top (well, half of it, anyway). There’s a lot to love here, and I have no doubt there are many other add-ins that would be great.
What do you think— maybe dried cranberries or butterscotch chips?
Let’s start with the fact that they satisfy any craving for pumpkin and spice— though this recipe does incorporate a more assertive spice blend than most “pumpkin spice” foods. To kick these up a few notches, I used equal parts Vietnamese cinnamon and chai spice, an Indian-inspired blend of cinnamon, ginger, cardamom, anise and black pepper (yes, really). The bold spices gave these blondies an edge over some of the too-sweet, ordinary desserts you find in a supermarket bakery, and the flavor is still familiar but with a little special something.
I’ve been looking for ways to sneak pumpkin into so many things.
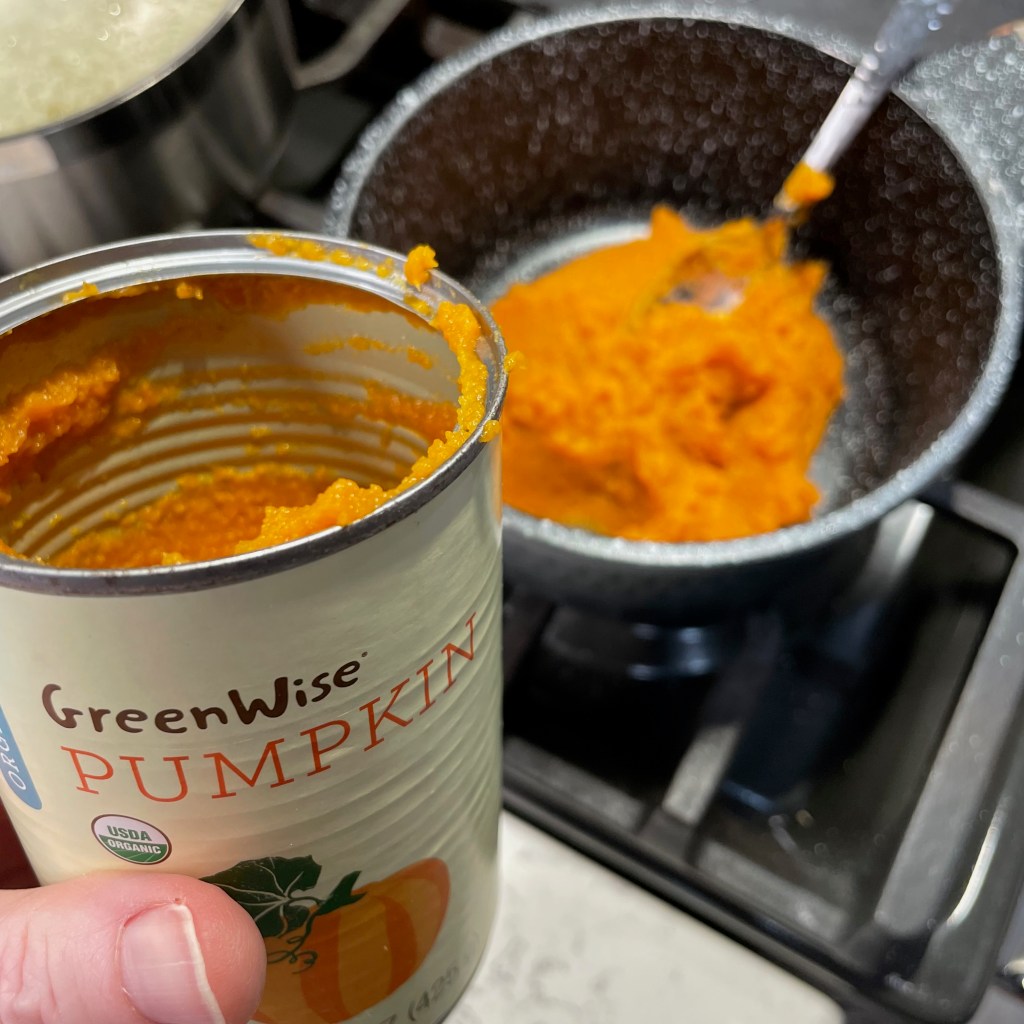
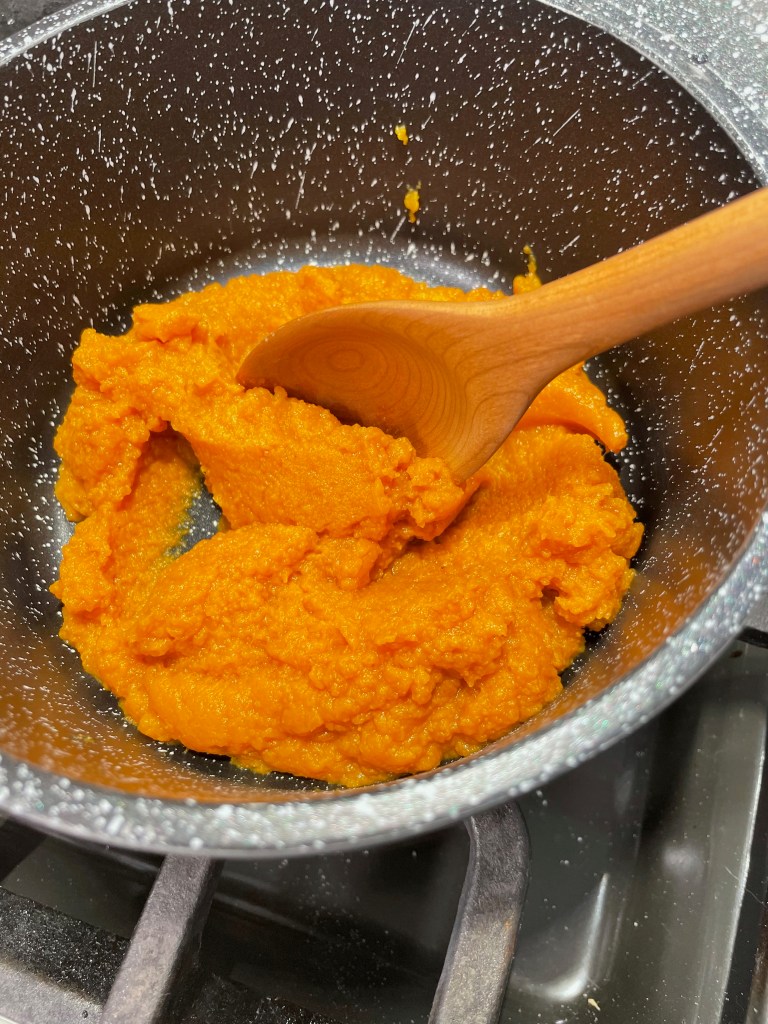
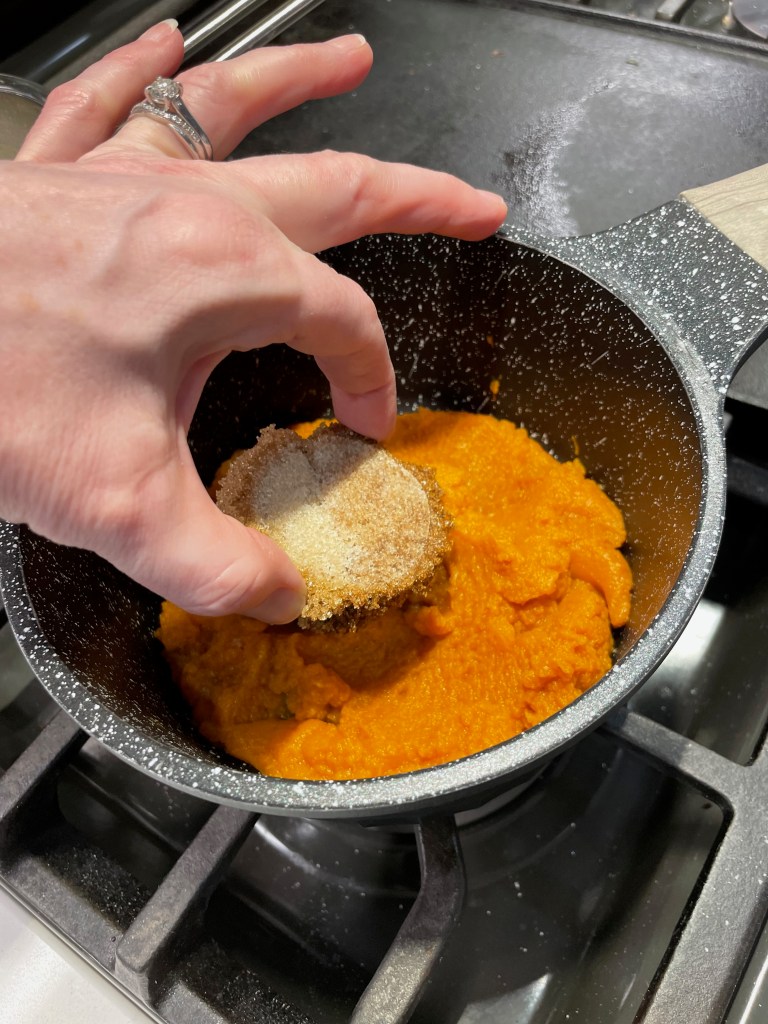
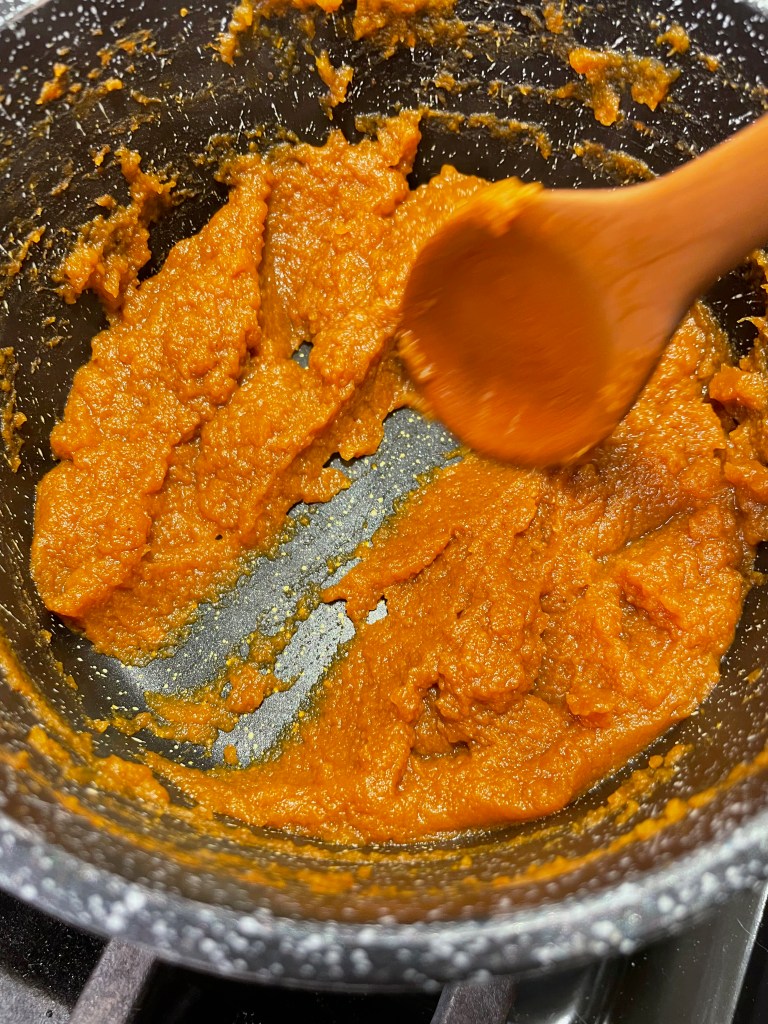
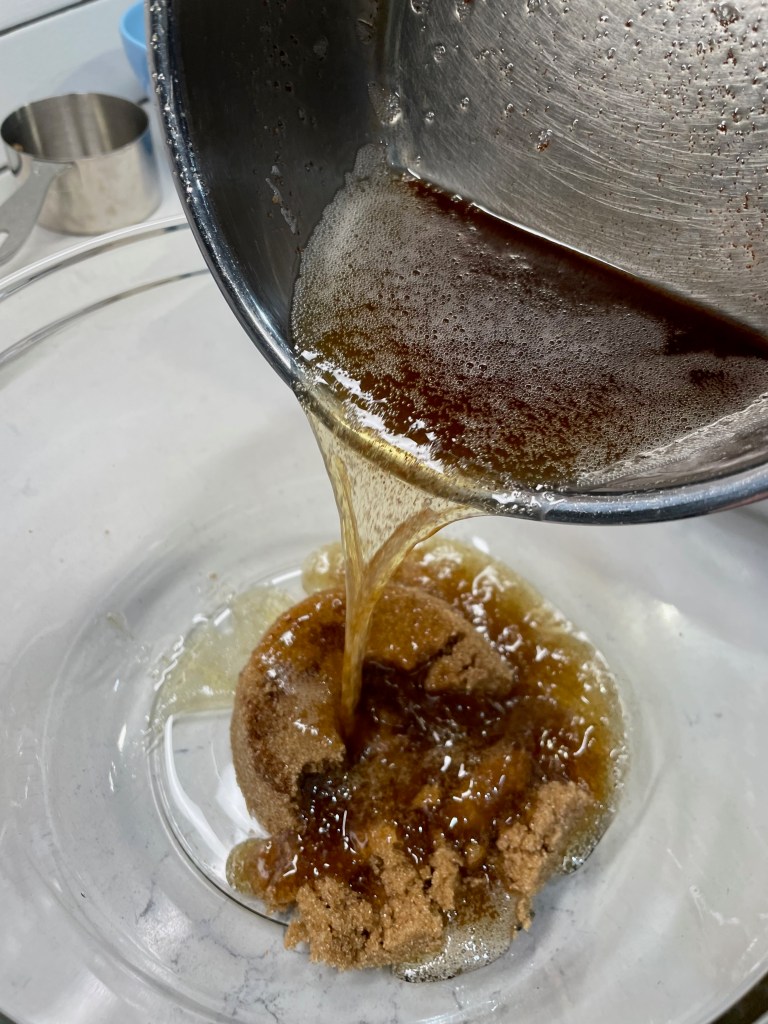
The downside of baking with pumpkin puree is that most recipes I’ve tried tend to be more cake-like than chewy— which is great when you want a cupcake, but not so much if you crave a cookie or blondie— and this is because of the high moisture content of the canned pumpkin. To counter this, I pulled a trick from the King Arthur Baking playbook, which is to cook the pumpkin puree until it is somewhat caramelized. The result is a thicker, more concentrated pumpkin flavor and a denser, more fudge-like texture of the finished auburns— er, blondies. I cooked mine with a bit of the brown sugar from the recipe, and the result was almost like pumpkin butter. So good!
I had a weird clump in my brown sugar container, so I dissolved it by cooking it with the pumpkin.
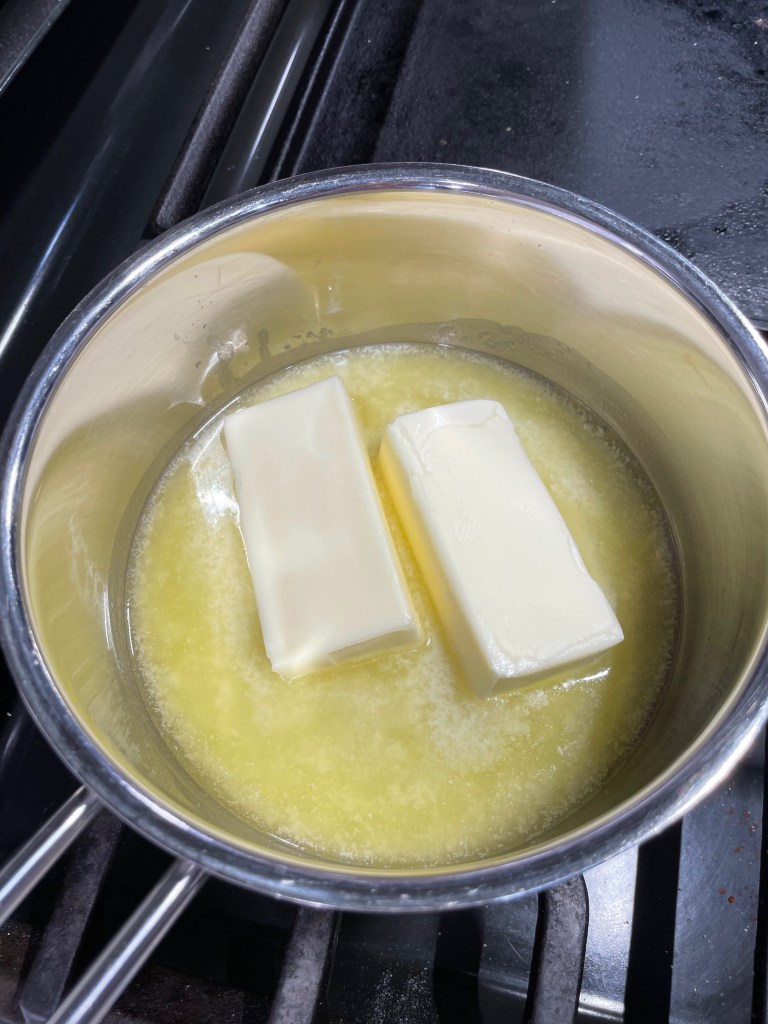
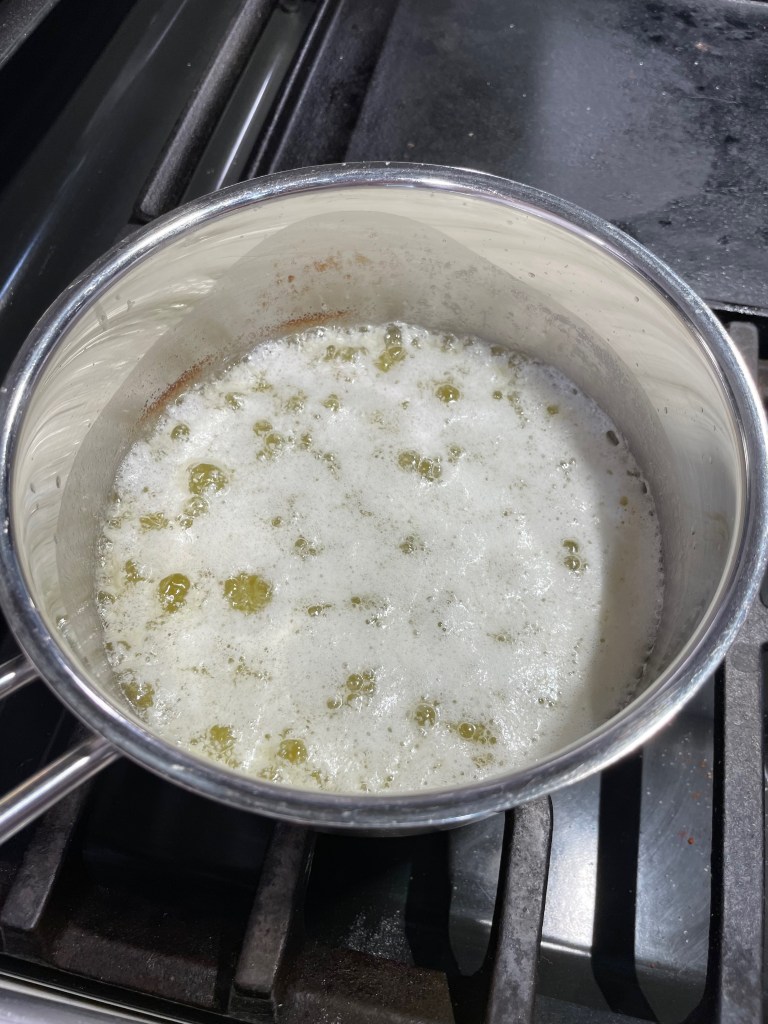
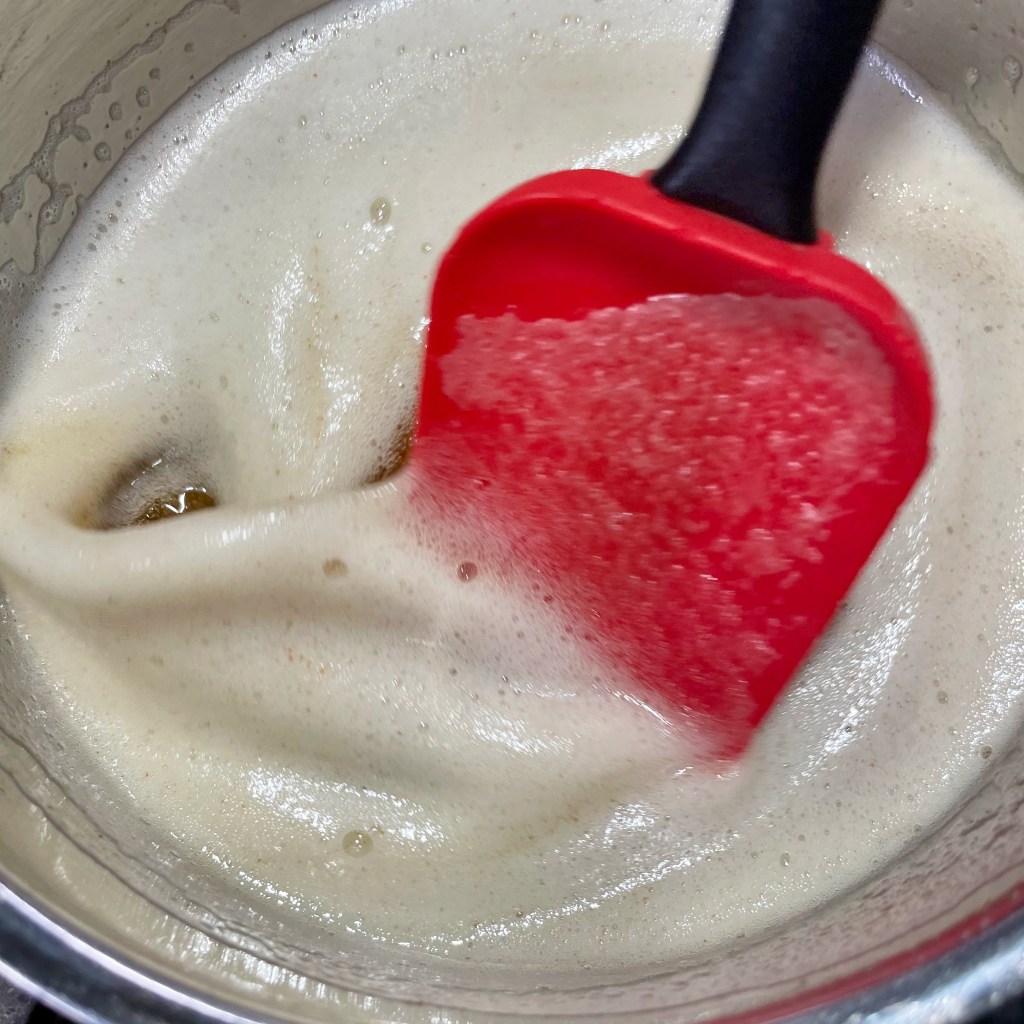
For additional autumn-inspired flavor, this recipe leans on browned butter, which is very easy to make though I don’t recommend trying to do it while multitasking the other components of the recipe. Browning butter takes very little effort but quite a bit of attention. Look away long enough to measure out your flour or caramelize your pumpkin, for example, and you may just find that the butter has turned to a charred, blackish liquid. I guess you can tell that I’m speaking from experience! 🤷🏻♀️
My butter was off to a good start, but it went too far. Oops!
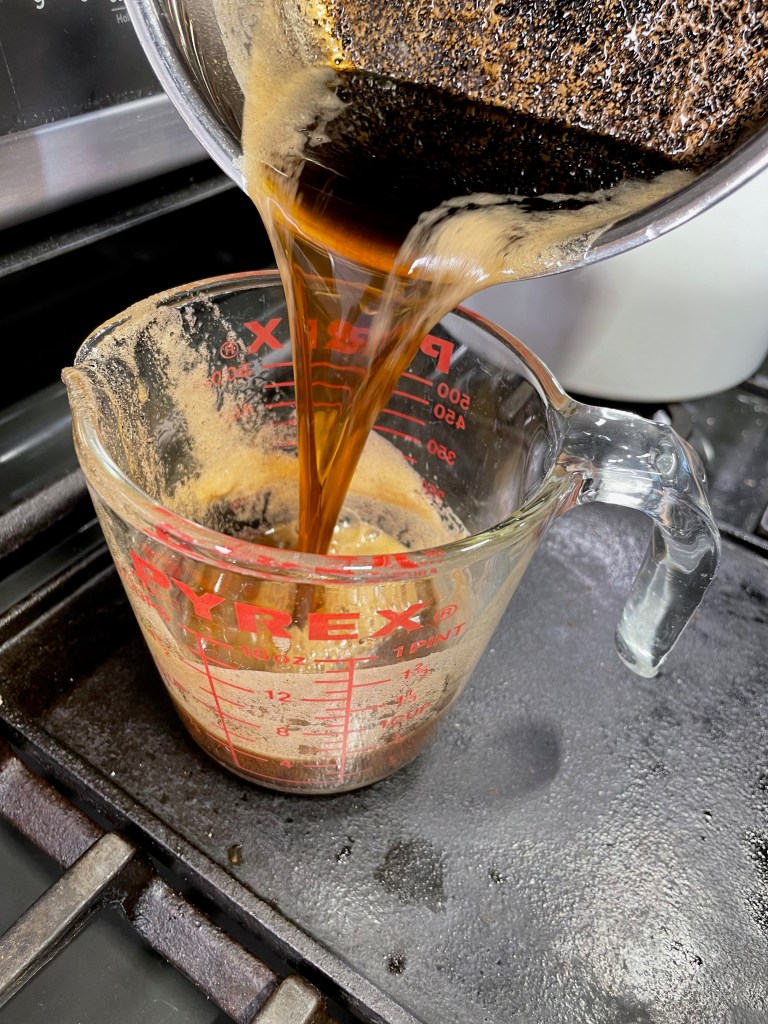
My second attempt went much better!
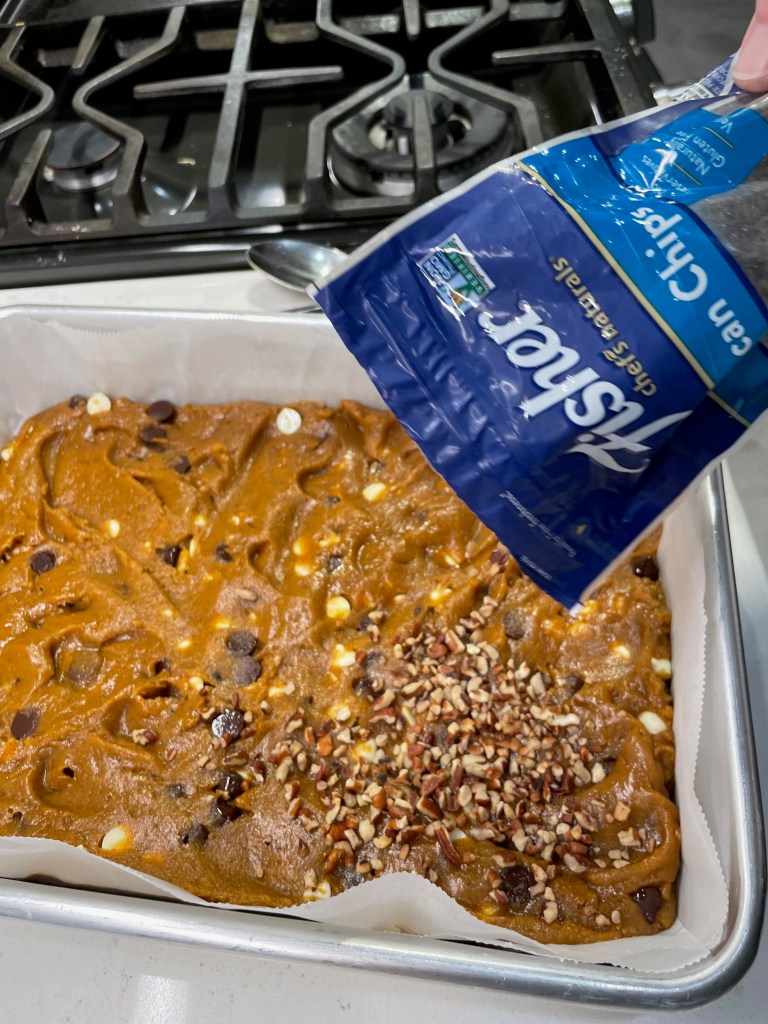
Other than that, it’s a typical dessert recipe— flour (I used part whole wheat), baking powder, egg, sugar (light brown, in this case), splash of vanilla and some white and dark chocolate chips just for fun. For a little extra something, I also scattered pecan bits over half of the blondies after spreading it out into the baking pan. This is optional, and if you have any guests who cannot digest nuts, follow my lead and sprinkle the nuts on half. Everyone wins!
These came together really easily.
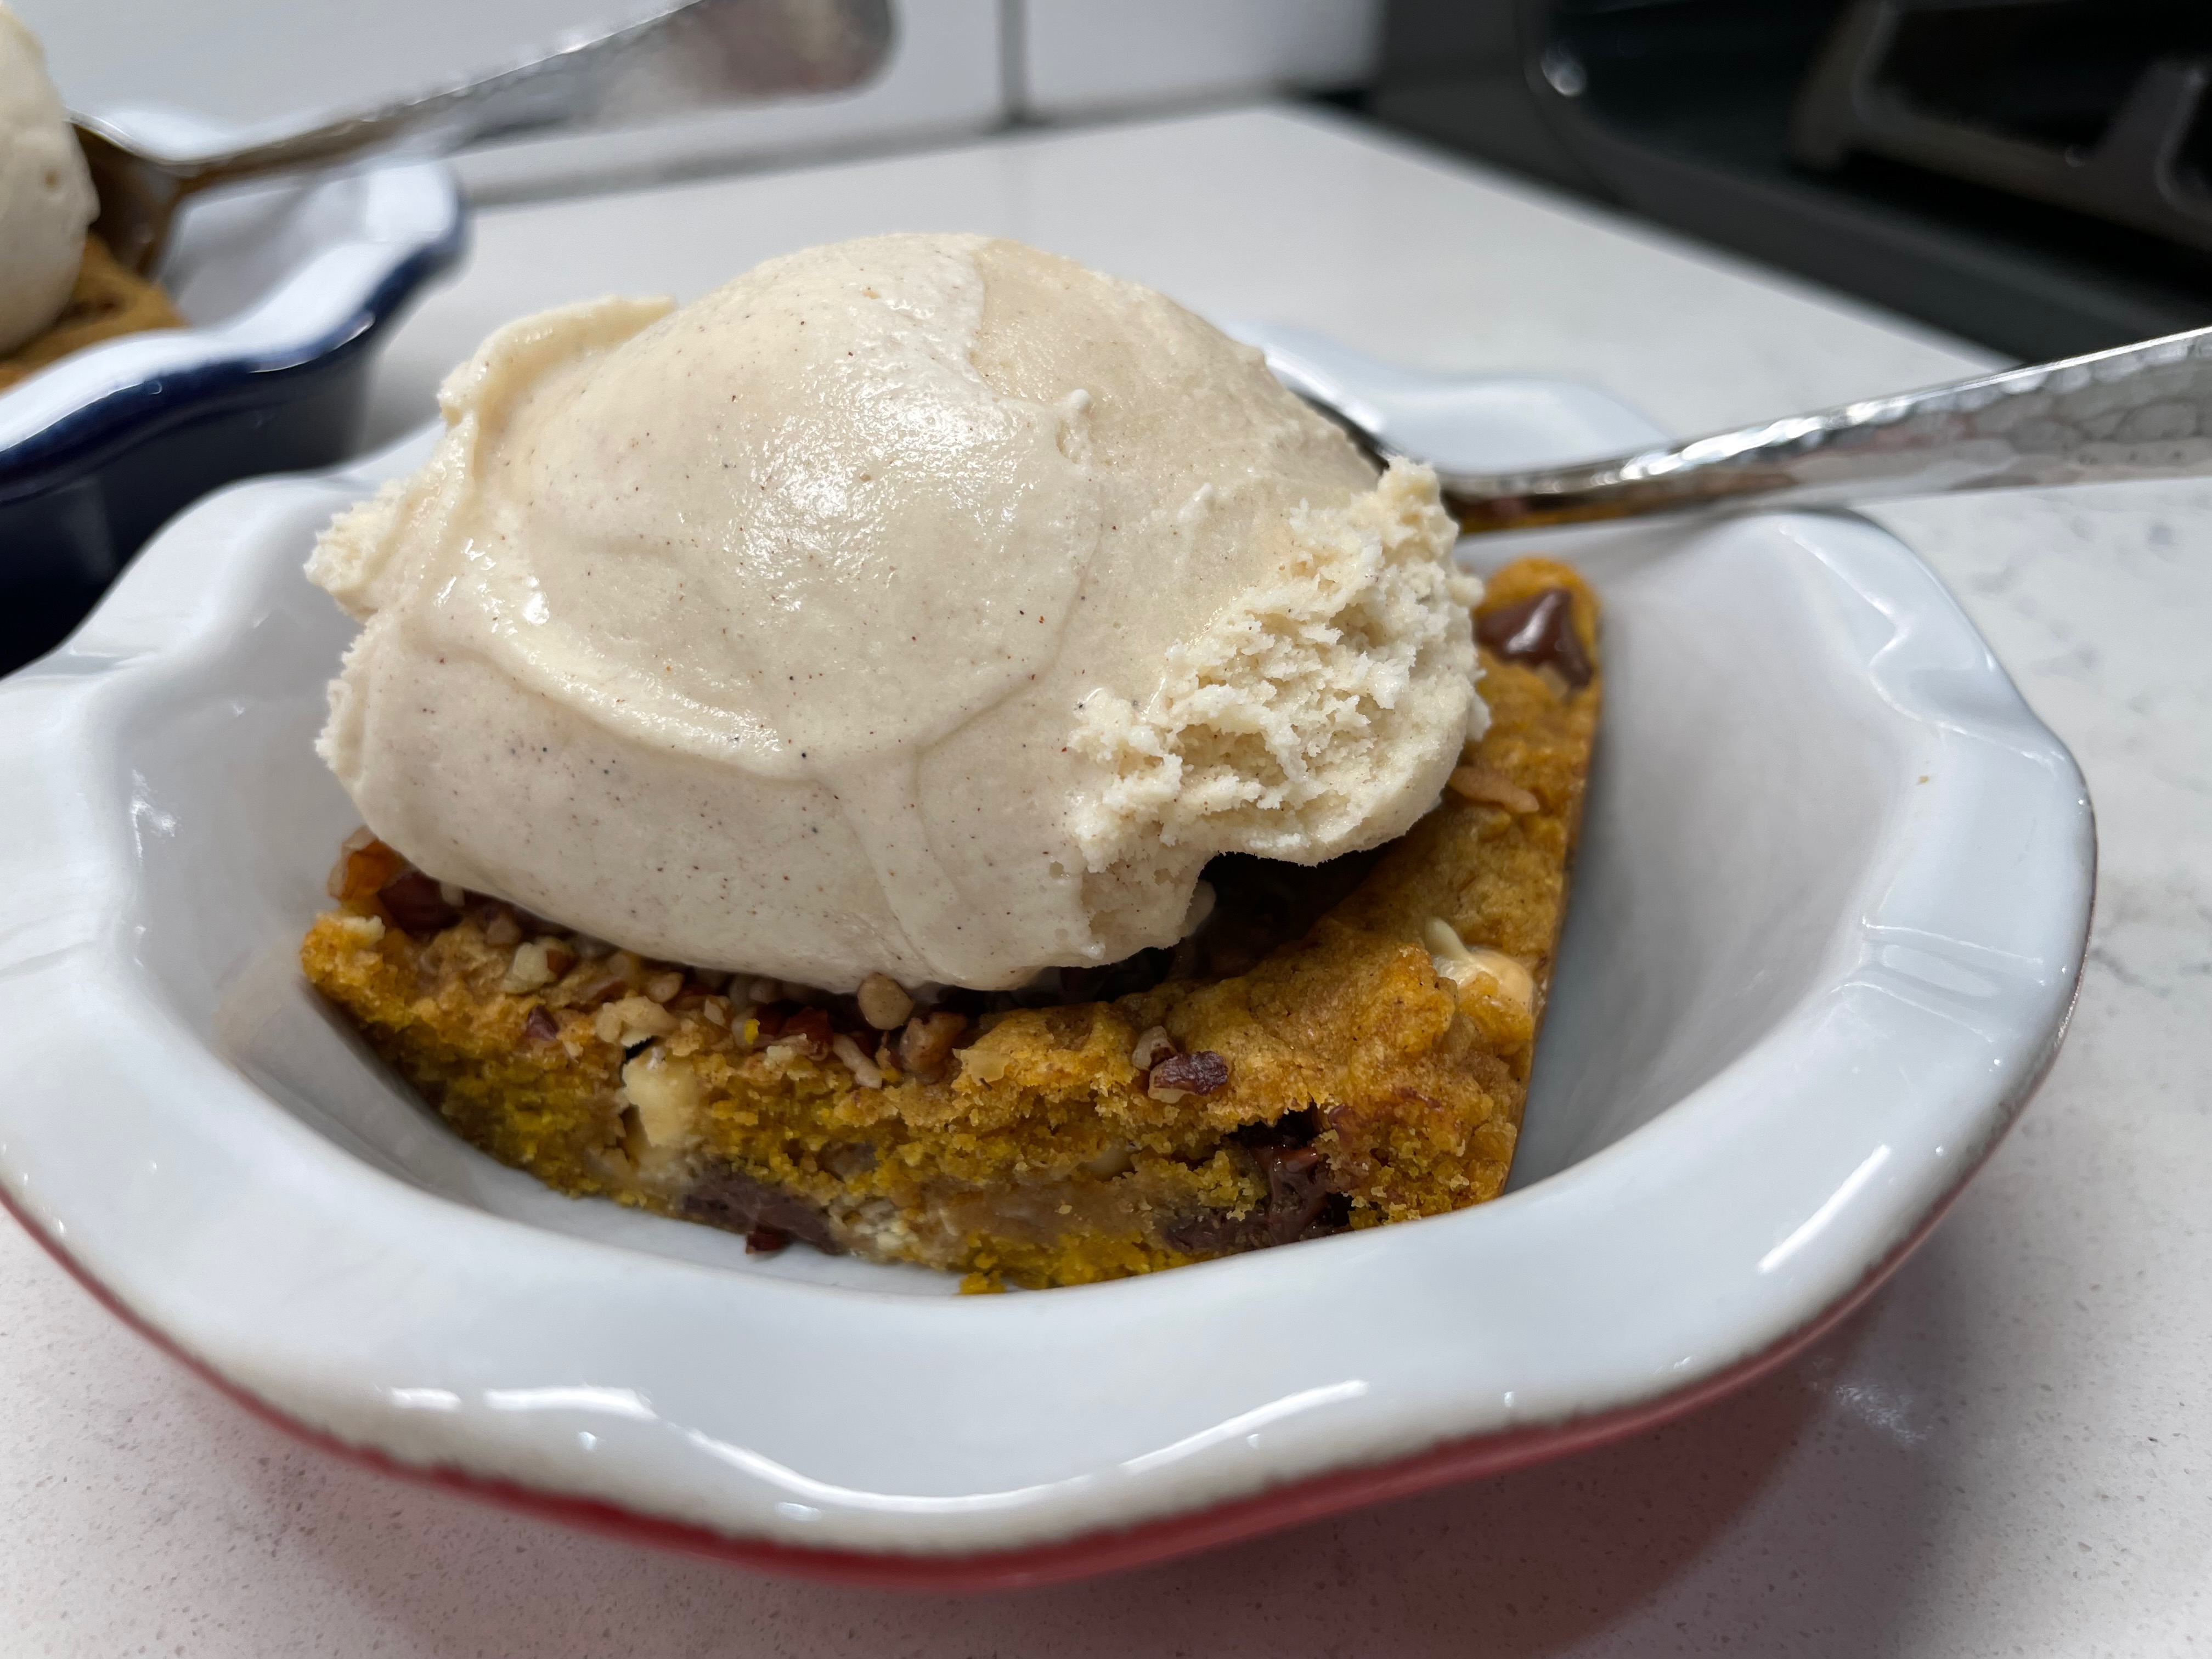
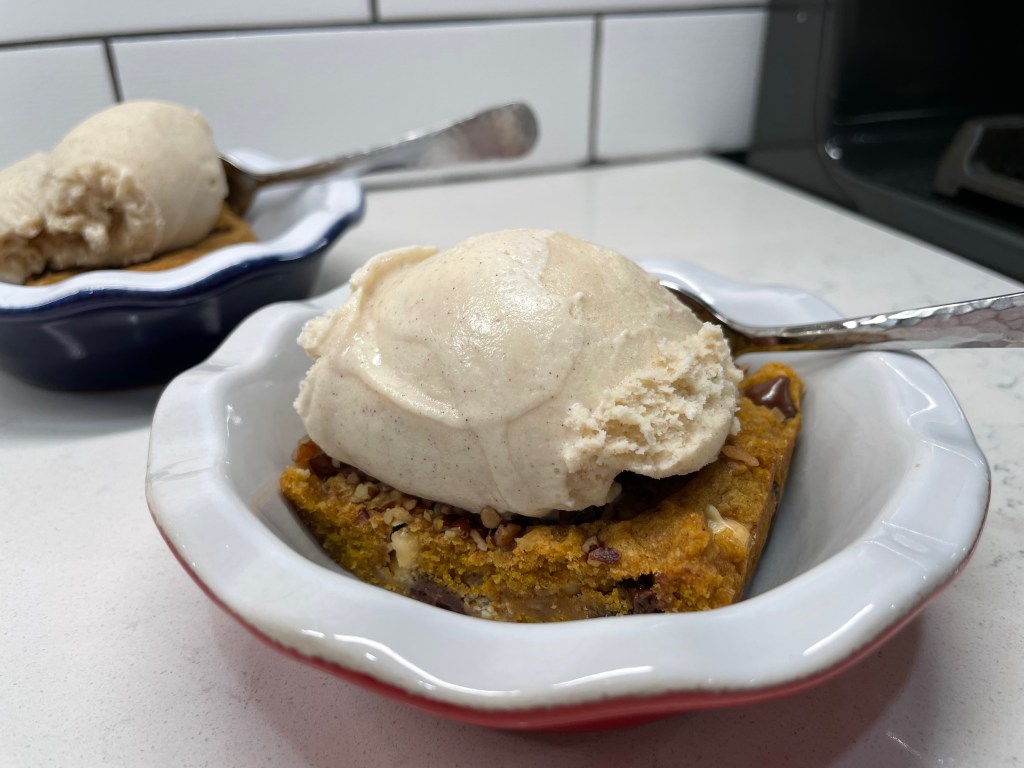
This was a fun fall dessert that would be nice for a casual Thanksgiving meal, the kids’ table, a brunch with friends, a treat for a special teacher or perhaps a snack for visiting grandkids that’s a bit healthier without them knowing it! As for us, we enjoyed it warmed 30 seconds in the microwave with a small scoop of ice cream. Delish!
Cooking the pumpkin puree before mixing the batter keeps this autumn-hued blondies nice and chewy, and the flavor will make you wish for fall to linger a little longer.
Ingredients
2 sticks unsalted butter
1 cup pumpkin puree
1 cup light brown sugar, packed
1 large egg, room temperature
2 teaspoons vanilla extract
1 1/4 cup all-purpose flour
1 cup white whole wheat flour
1 tsp. ground cinnamon
1 tsp. ground chai spice blend
1 tsp. kosher salt (I used Diamond crystals)
3/4 tsp. baking powder
1 cup white chocolate chips
1 cup dark chocolate chips
1/2 cup pecan bits (optional, or 1/4 cup for half the blondies)
Directions
Melt the butter in a saucepan, swirling frequently and watching carefully to prevent burning. Cook melted butter until it takes on a deep golden color and has a nutty aroma. Allow it to cool for about half an hour.
Meanwhile, add pumpkin puree and a few tablespoons of the brown sugar to a second saucepan. Cook over medium heat, stirring almost constantly, until sugar is dissolved and pumpkin puree has reduced slightly. Cool completely before proceeding.
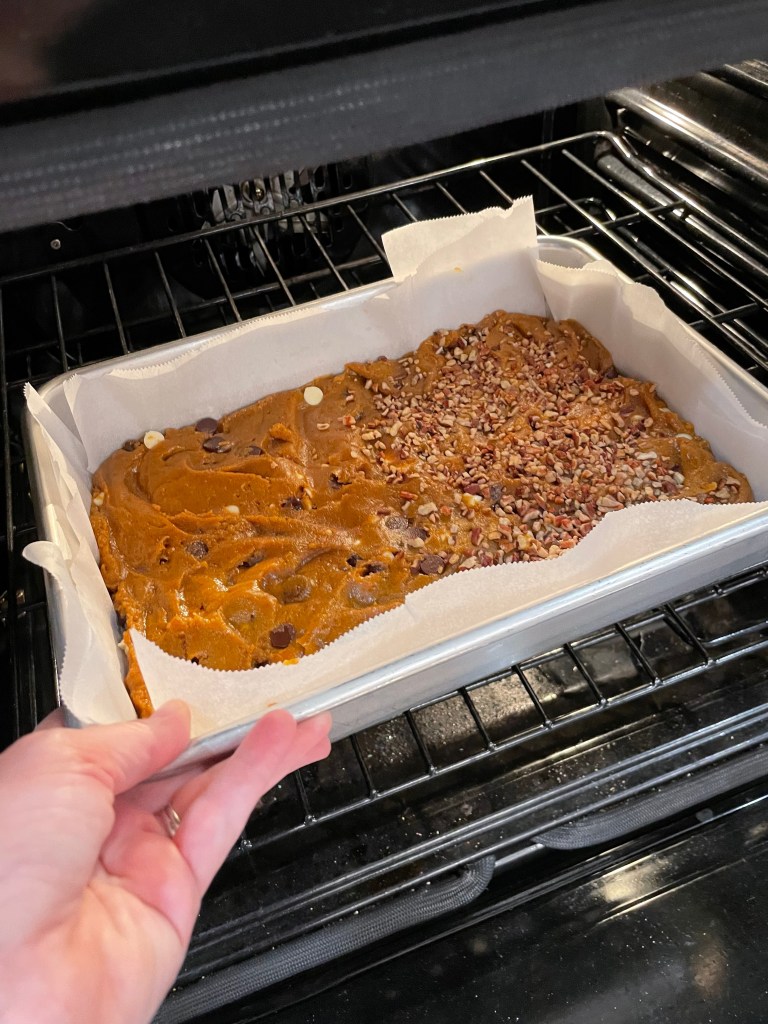
Preheat oven to 350° F, with oven rack in center position. Line a 9 x 13 baking pan with parchment paper, keeping a little extra to overhang for easy lifting of the blondies from the pan after baking.
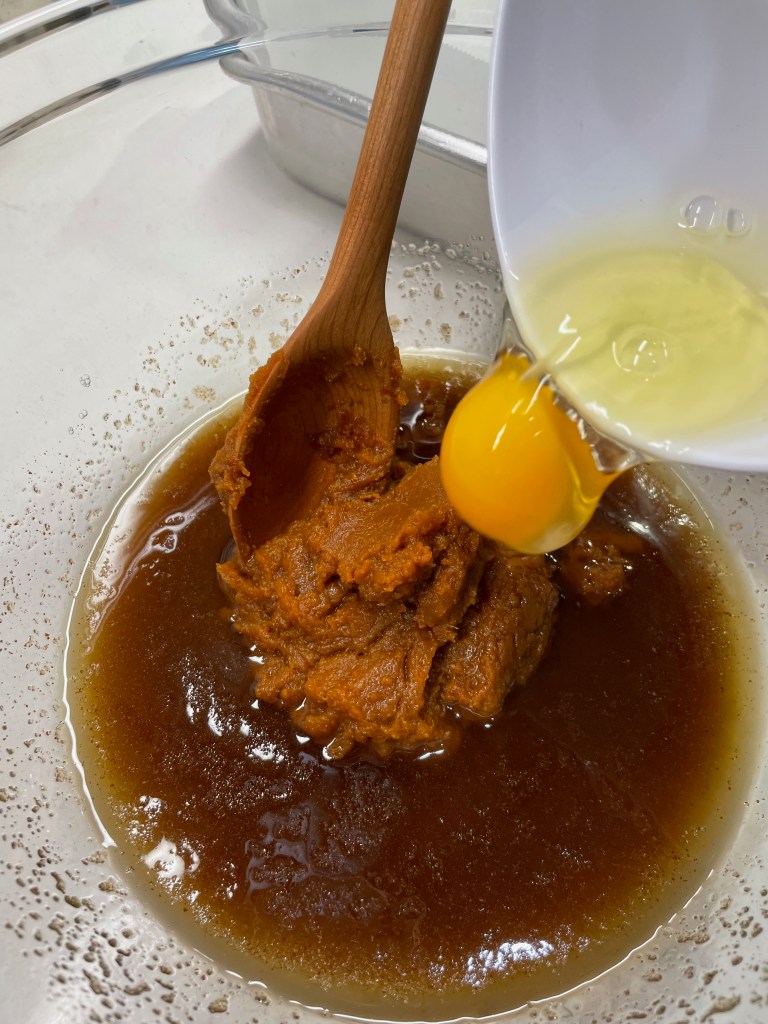
In a large mixing bowl (or the bowl of a stand mixer fitted with paddle), stir together browned butter and remaining brown sugar until evenly combined. Add reduced pumpkin puree and egg. Beat until combined.
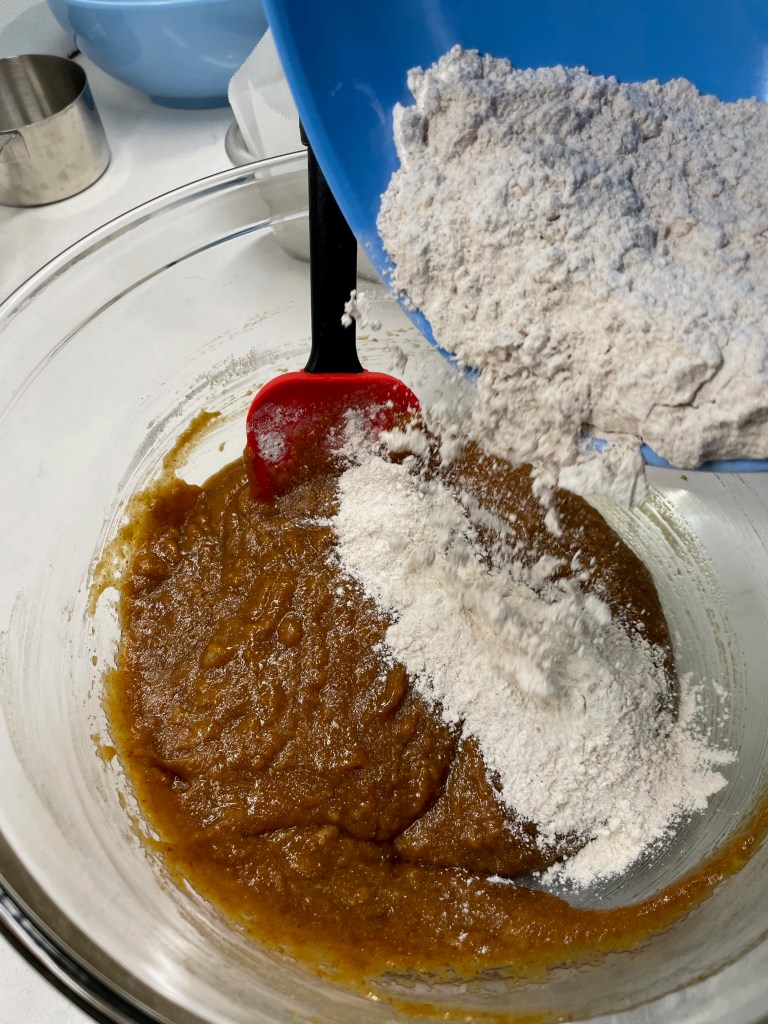
In a medium bowl, whisk together flours with spices, baking powder and salt. Add half the flour mixture to the butter mixture, folding just until all the dry ingredients are incorporated. Repeat with remaining flour blend. Gently fold in chocolate chips. The batter will be very thick and dense.
Spread batter evenly over parchment-lined baking pan. Sprinkle pecan chips over all or half the blondies, if desired. Bake for 30 minutes, or until blondies are set but not overly dry. Remember that they will continue to cook for a few minutes after removal. As with brownies, the type of pan may affect the outcome. For a glass pan, add a few extra minutes to the baking time.
Cool for about 30 minutes before using parchment to lift blondies from the pan. Cut into squares for serving. Keep leftover blondies wrapped or in a sealed container, at room temperature for up to three days.
These warm up beautifully in the microwave (give them 30 to 45 seconds on high), and they are delicious served with a scoop of ice cream.
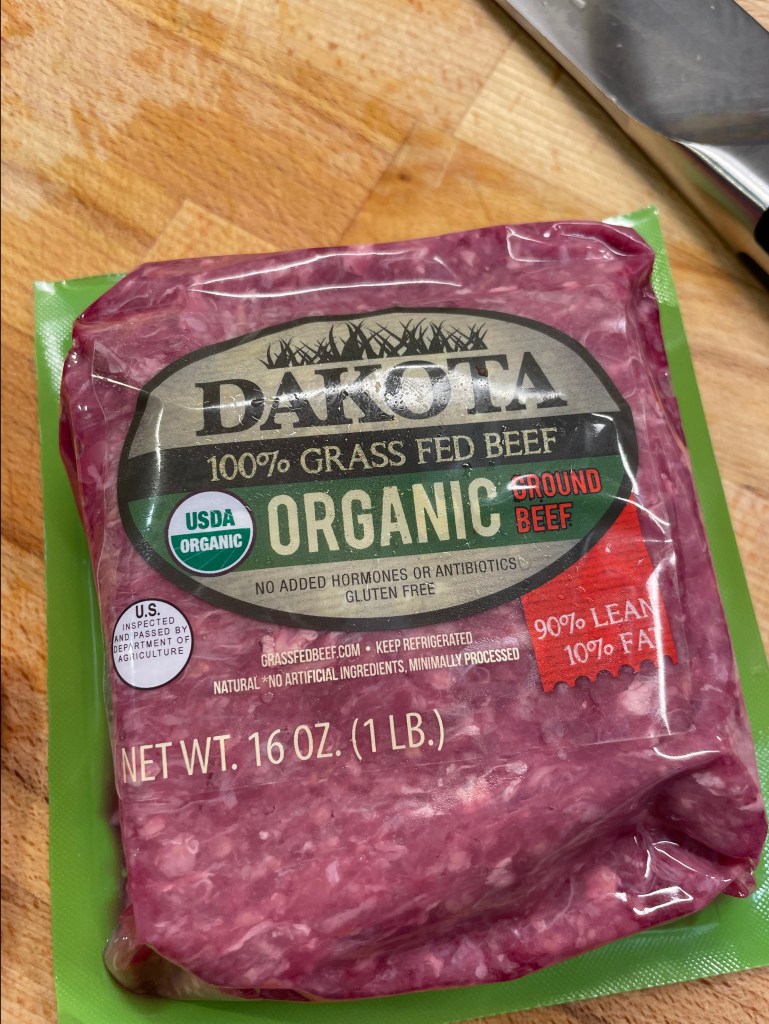
Here’s an easy, kid-friendly main dish that brings back a lot of memories from my childhood. There were just a few foods that my mother made on repeat, including some of the Mexican-themed meals I’ve shared here. Ground beef tacos were in hot rotation, as was tuna noodle casserole, green chili burritos and something she called “Swiss steak.” Once in a while, she also whipped up a pot of good old American goulash, but not quite the way I’ve prepared this batch. My single mom was all about shortcuts in the kitchen, so her version of goulash usually involved a jar of store-bought spaghetti sauce, probably Ragú, given that there weren’t many other brands available in the 1970s when I lived with her.
In the traditional sense, goulash— which has its roots in Hungarian cuisine— would not have the Italian flavors found in spaghetti sauce, and I’ve come around to making it my own way in my adult years. I do use ground beef, as my mom did, and this is a distinct Americanization of goulash, which would traditionally be made with stewed cuts of meat, plus vegetables and probably potatoes.
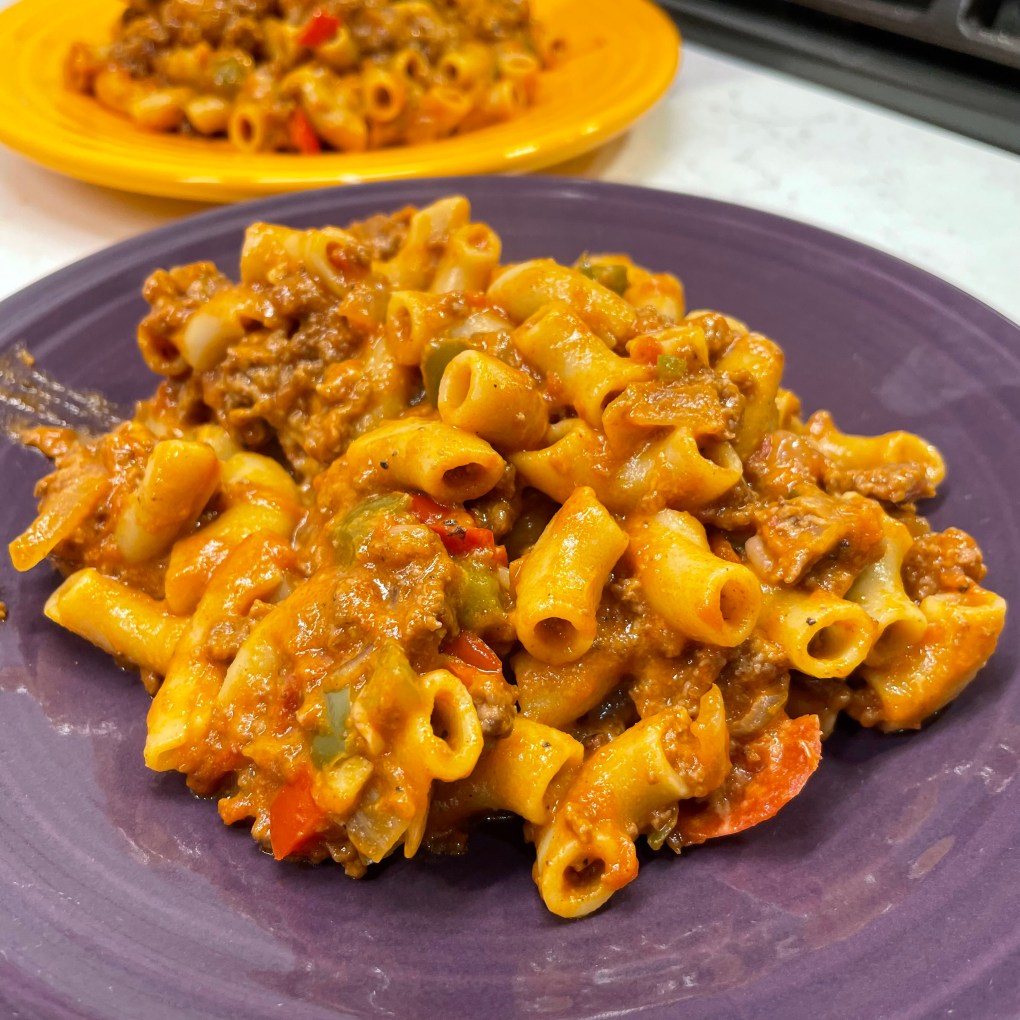
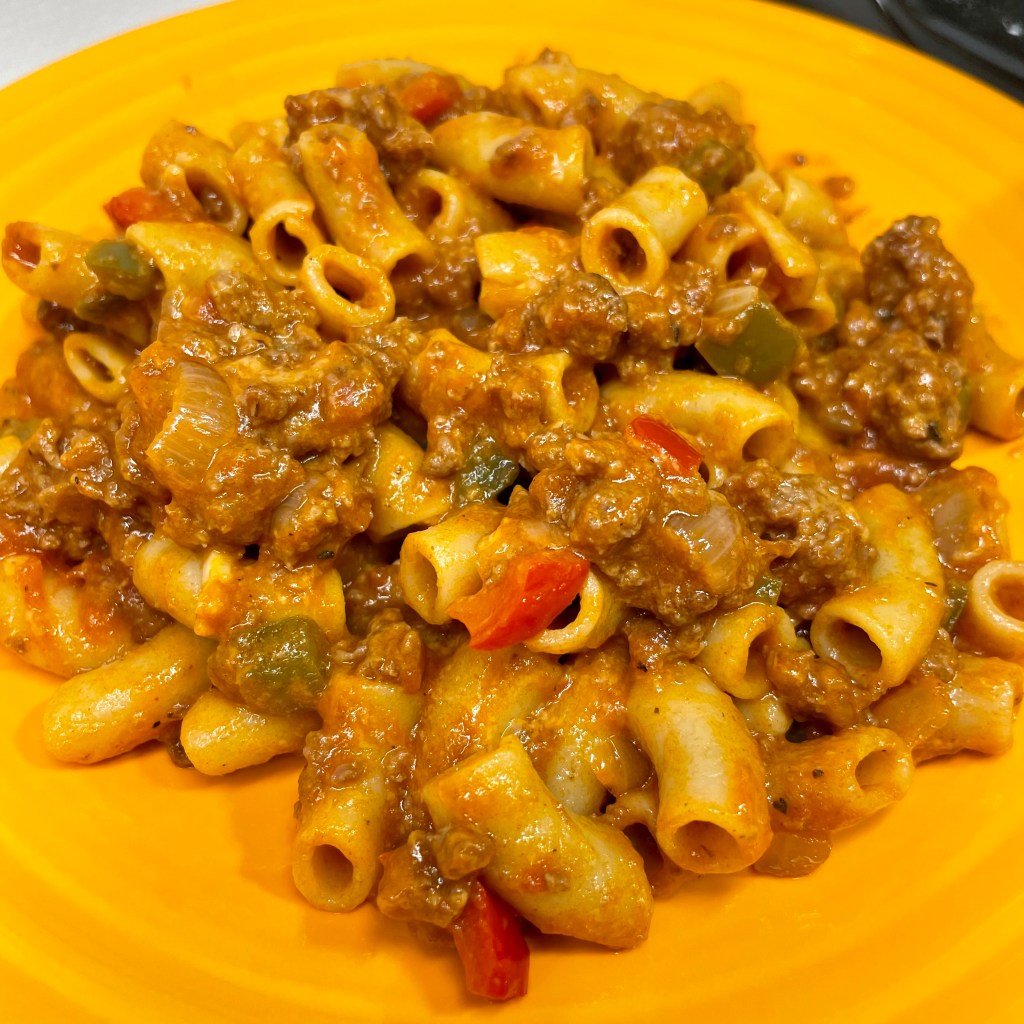
Not a Hungarian goulash, but so delish! And look at that brilliant Halloween color.
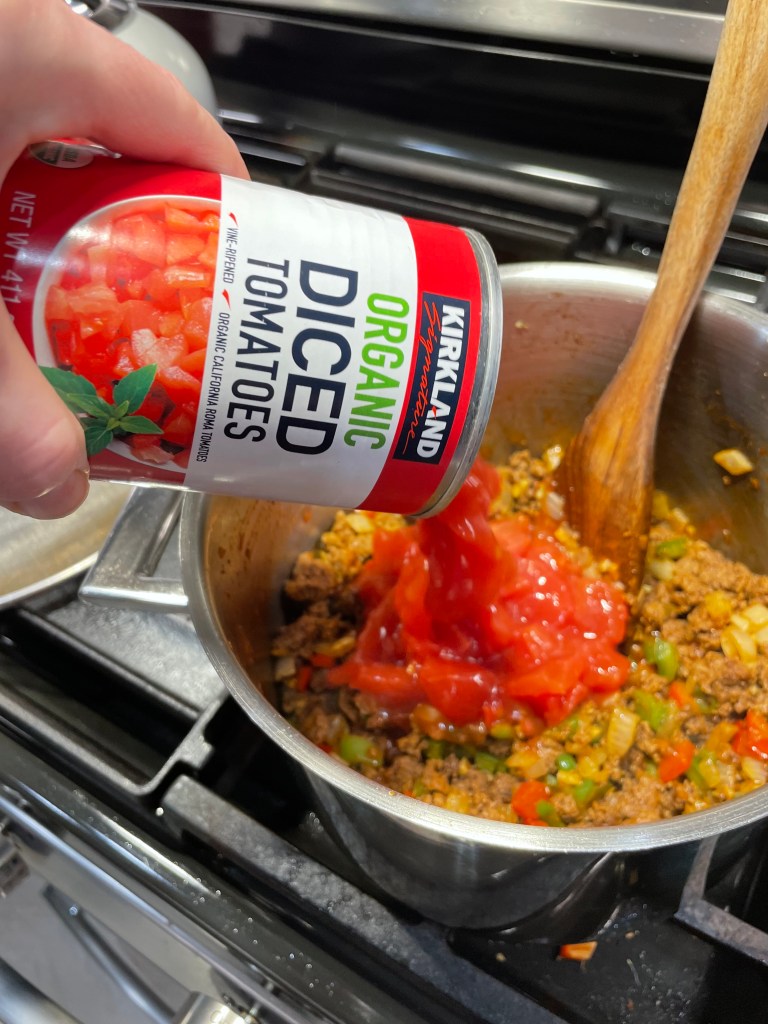
My version brings back some of the traditional goulash flavor, seasoned with plenty of smoked paprika, canned whole tomatoes, bell peppers, onions and garlic. In the devilish spirit of Halloween, I have also taken the liberty of adding some fiery heat in the form of a fresh jalapeño, chopped up with seeds and all. Even when I was a kid, I loved spicy flavors, and that was my mother’s influence, especially during the years we lived in southern Colorado.
If you’re not feeling it for the fire, or if you’re feeding little goblins whose taste buds aren’t quite there yet, feel free to omit the jalapeño, and maybe pull back on the smoked paprika a bit, too. Cooked pasta is another “American” twist on goulash, and I like large elbows for this because the shape is open to grab up plenty of that flavorful sauce, and it’s also easy to pick up with your fork, along with the tasty bits of meat, onion and pepper.
One last thing, and this is also a departure from my mom’s old standby recipe but is very popular in my house today. Just before serving, I stir in a half cup or so of shredded sharp cheddar. It’s a tangy little twist that makes this an even heartier meal, or perhaps even a graveyard smash. 👻
This is my adaptation of a dish I had countless times during my childhood. It makes good use of simple pantry ingredients and it is economical, using ground meat of your choice. I prefer it served from the stovetop, but it easy to adapt to a baked dish if you prefer to make it ahead.
Ingredients
Extra virgin olive oil
1 pound lean ground meat (beef, bison or turkey work well)
1/2 sweet or yellow onion, chopped
1 bell pepper, chopped (use green, red or a combination)
2 cloves garlic, minced
1 fresh jalapeño (optional), minced with or without seeds
Salt and pepper
1 teaspoon smoked paprika (Hungarian is traditional, but Spanish works nicely)
15 oz. can diced tomatoes, including juice
8 oz. can low-sodium tomato sauce
1/2 pound large elbow macaroni
About 1/2 cup shredded sharp or medium cheddar cheese
You can adjust the smoke and spice of this dish to your liking. For less heat, discard the seeds and membranes of the jalapeño or omit it entirely. For extra “smoke,” use two teaspoons of the paprika. For less smoke, substitute sweet paprika.
Directions
Bring a pot of salted water to boil for cooking the pasta. Heat a medium size, heavy-bottomed pot over medium heat. Swirl in a tablespoon or so of olive oil and add the ground meat, a little bit at a time, cooking until most of the pink color is gone.
Add chopped and minced vegetables and season with salt and pepper. Cook and stir until vegetables are softened and onions are slightly translucent.
Stir in paprika and then add tomatoes and tomato sauce. Reduce heat and cook at low temperature, stirring occasionally to prevent burning.
While the goulash mixture simmers, cook the pasta to al dente or desired doneness for serving from the stovetop. If you intend to bake the dish after mixing, undercook the pasta slightly as it will continue to absorb moisture and cook during baking.
Add cooked pasta and a few tablespoons of the pasta water to the meat mixture. Gently fold to combine. Stir in shredded cheddar and serve. If baking, transfer the mixture to a casserole dish and bake at 350° F for about 40 minutes. Consider topping the casserole with extra cheese before baking.
A shrug. That’s pretty much all I get from my husband when I mention that I might whip up a batch of cornbread. As a born-and-raised New York City guy, he’s more into bagels and dinner rolls than grainy, dense cornbread.
But that was before I decided to put jalapeño and honey into it. 😉
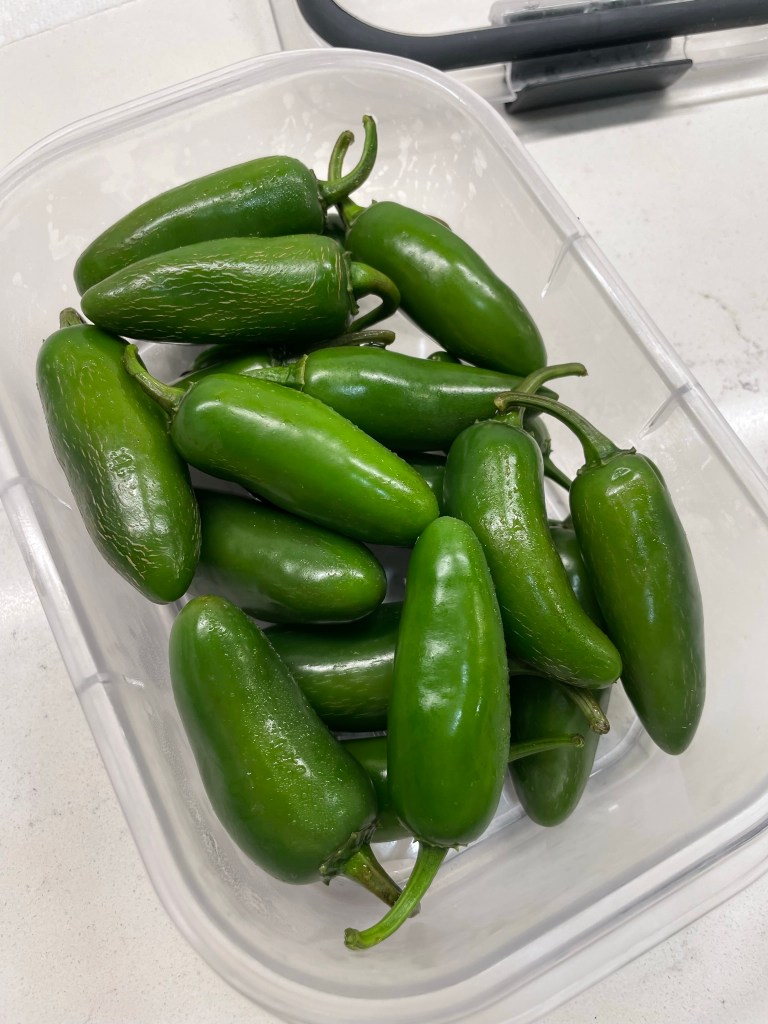
We are counting the days until we tear out what’s left of our “well, we tried” summer garden, and the jalapeños are making a valiant effort to compensate for the disappointment of everything else I attempted to grow this year. With four jalapeño plants, and plenty of post-summer full sun, I’m pretty much sneaking these spicy peppers into everything I can. That works out great for my heat-loving husband, and I found it easy to substitute honey for the usual sugar in my favorite cornbread recipe.
And that brings me to an important point— you don’t have to use my recipe to enjoy jalapeño-honey cornbread. If you have a favorite recipe already, a few simple adjustments might just make this a favorite at your house, too.
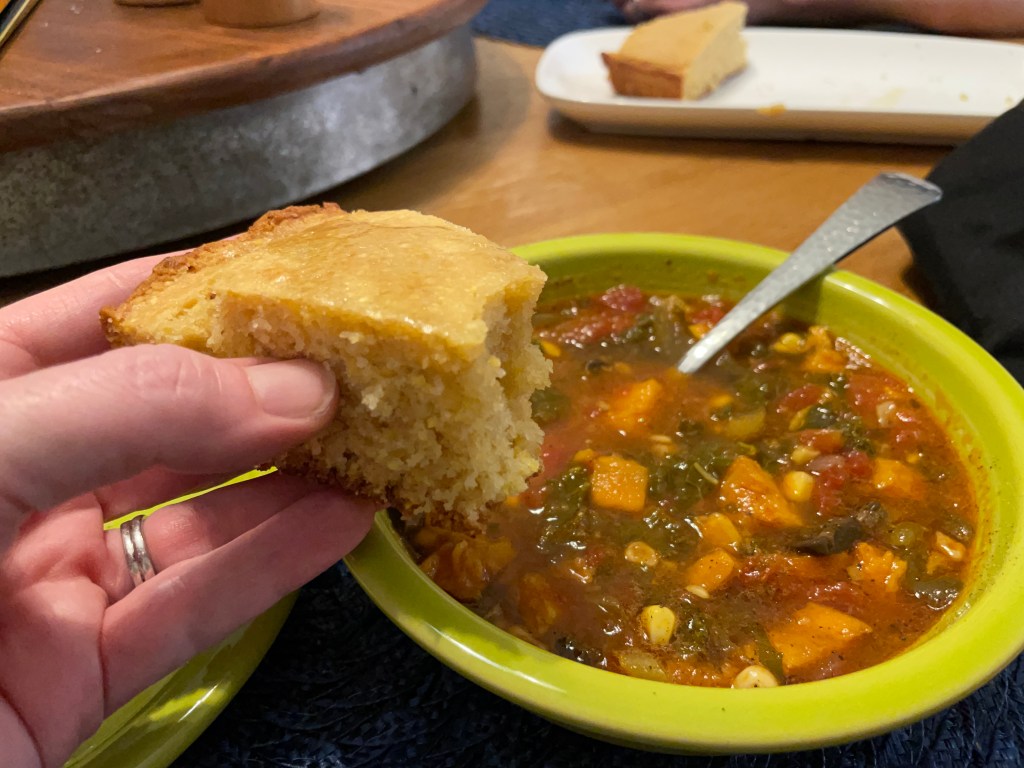
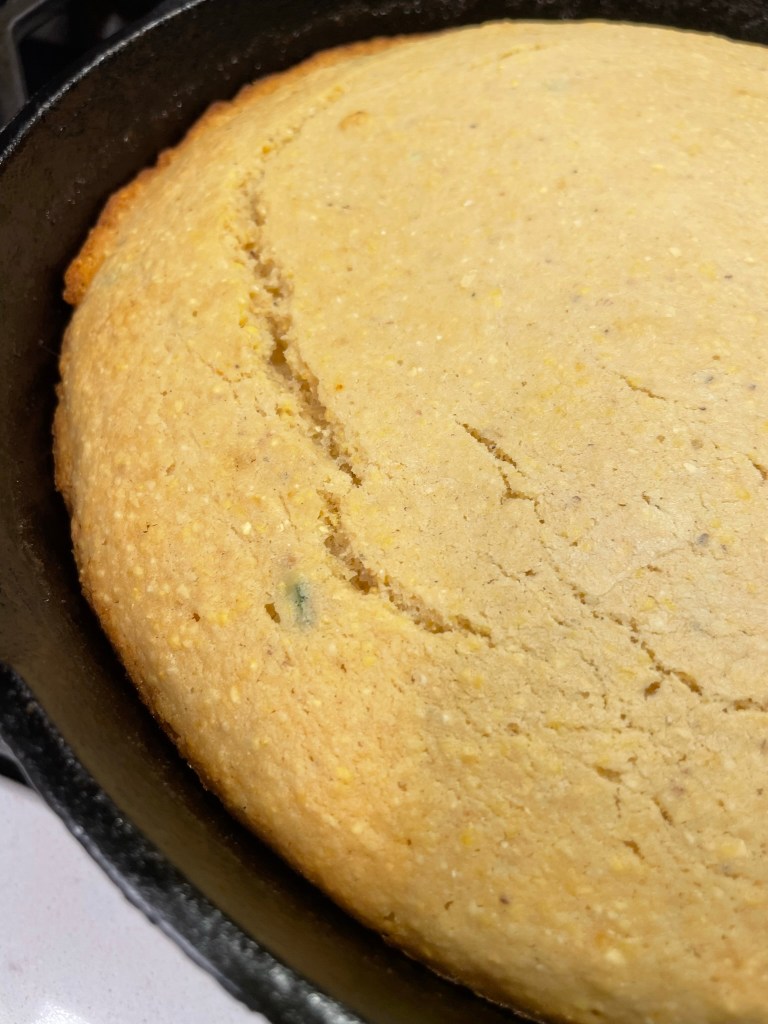
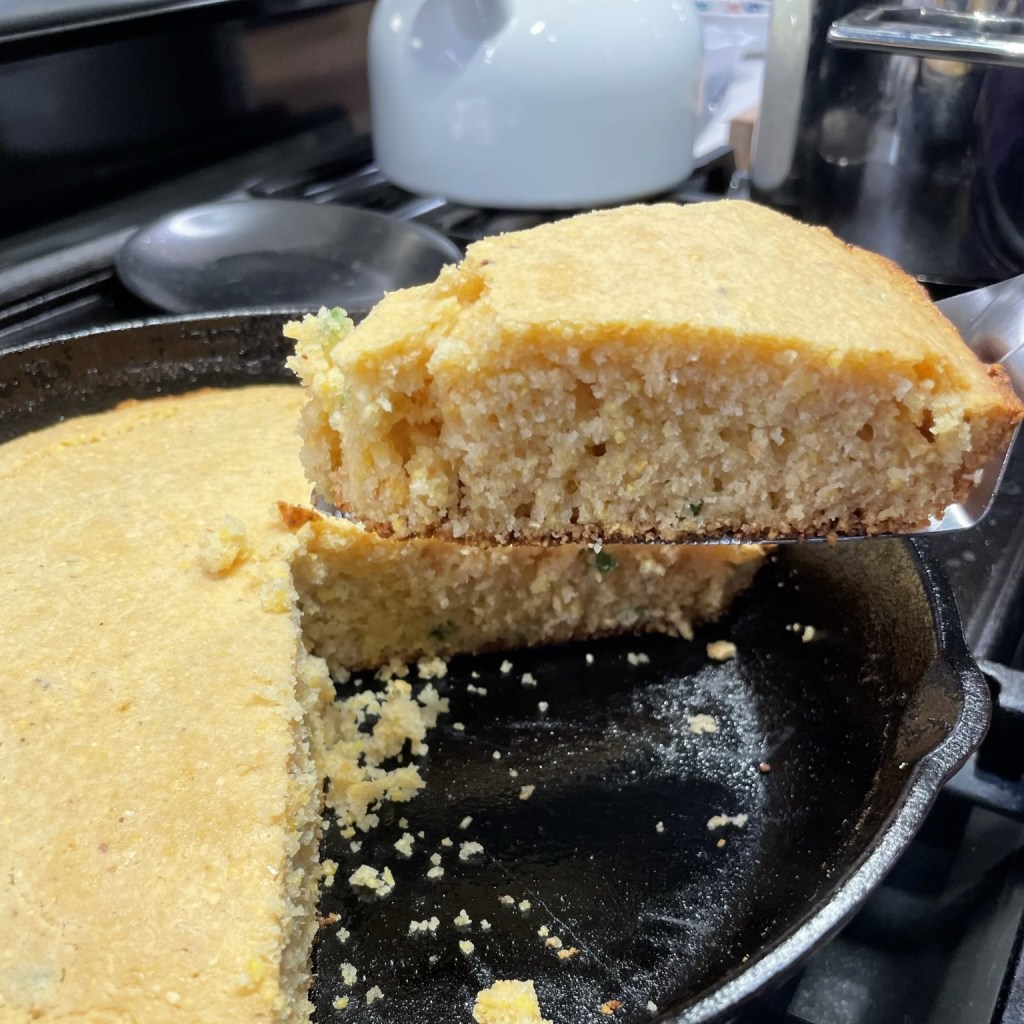
This was so good with leftover autumn minestrone! Imagine it with a bowl of chili or black bean soup. Mmm.
A couple of quick notes— jalapeño can range in Scoville units (the heat factor), but you can take charge of the overall intensity with a simple decision of keeping or removing the seeds and membranes. The other note is about the honey. I used a local wildflower honey, and because honey is sweeter than cane sugar, you can get away with using a little less than the amount of sugar called for in the recipe.
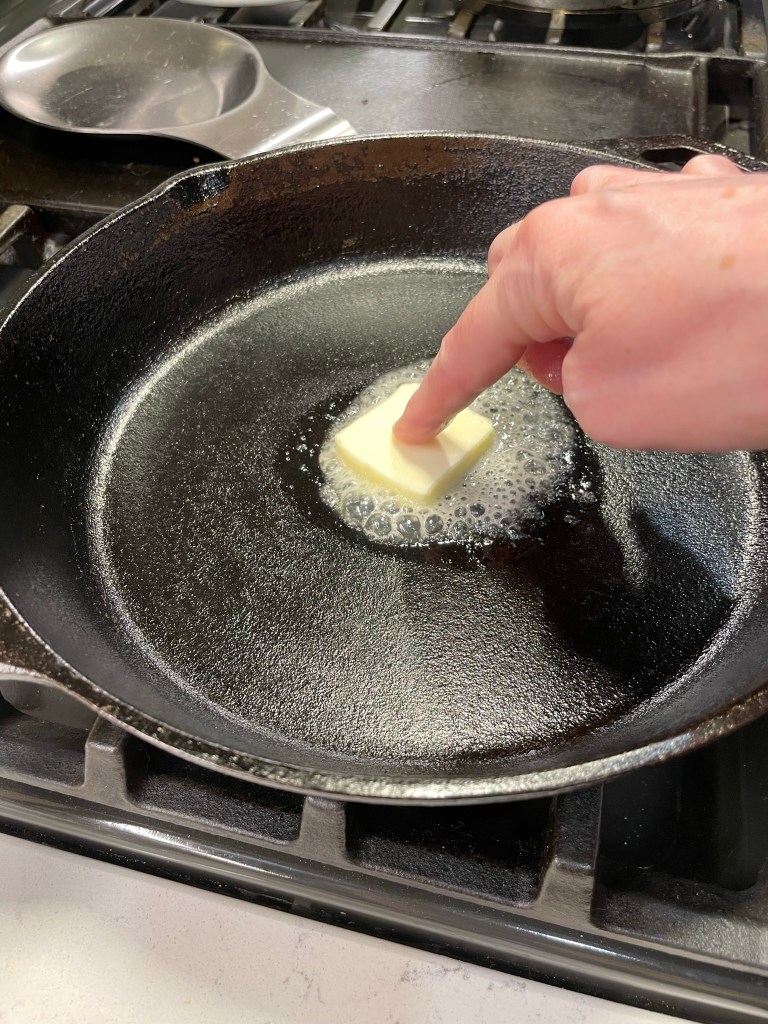
If you’d like to bake your cornbread in a cast-iron skillet, I recommend melting a tablespoon or so of butter in the skillet over medium heat before adding the batter and moving it to the oven. This extra butter will ensure clean, even wedges straight from the pan and almost no cleanup!
My inspiration recipe, as expected, comes from my favorite flour company, King Arthur Baking. I made a few modifications, including swapping honey for sugar and subbing in a portion of white whole wheat for nutrition and flavor. Plus, of course, the jalapeños! I also whipped up a small batch of honey butter for drizzling at serving time. 😋
Just two ingredient swaps are throwing a big flavor twist onto a classic cornbread. This will be great with almost any rustic soup you make this fall and winter!
Ingredients
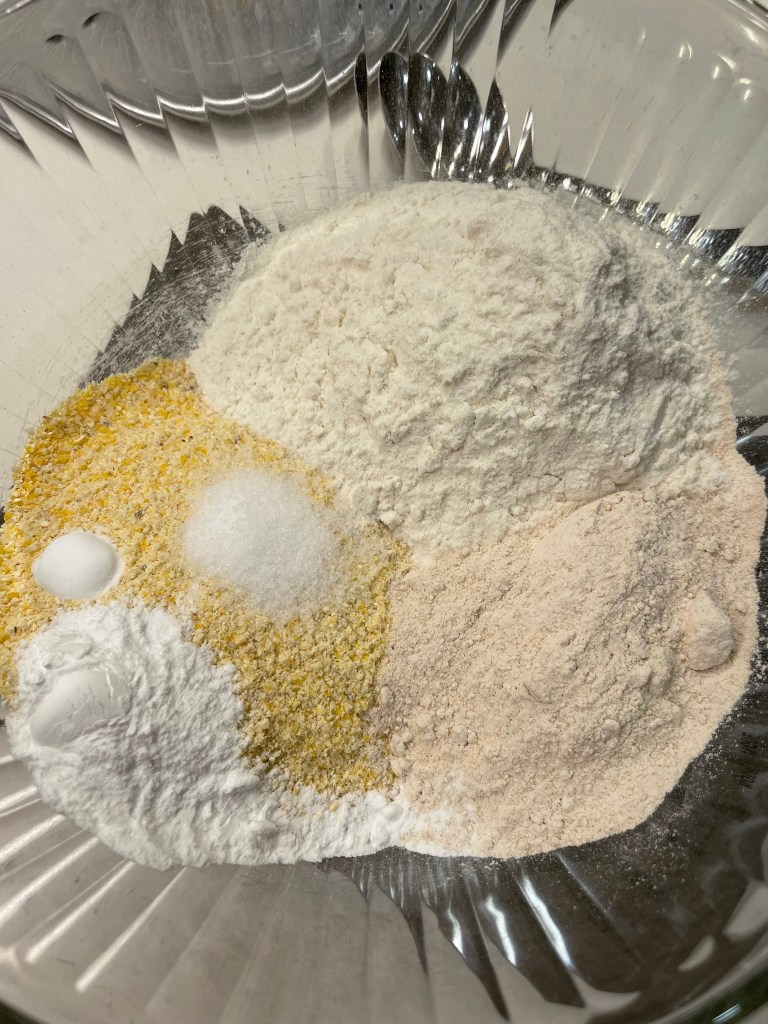
1 cup all-purpose flour
3/4 cup white whole wheat flour
1 cup cornmeal
2 tsp. baking powder
1/4 tsp. baking soda
3/4 tsp. fine sea salt
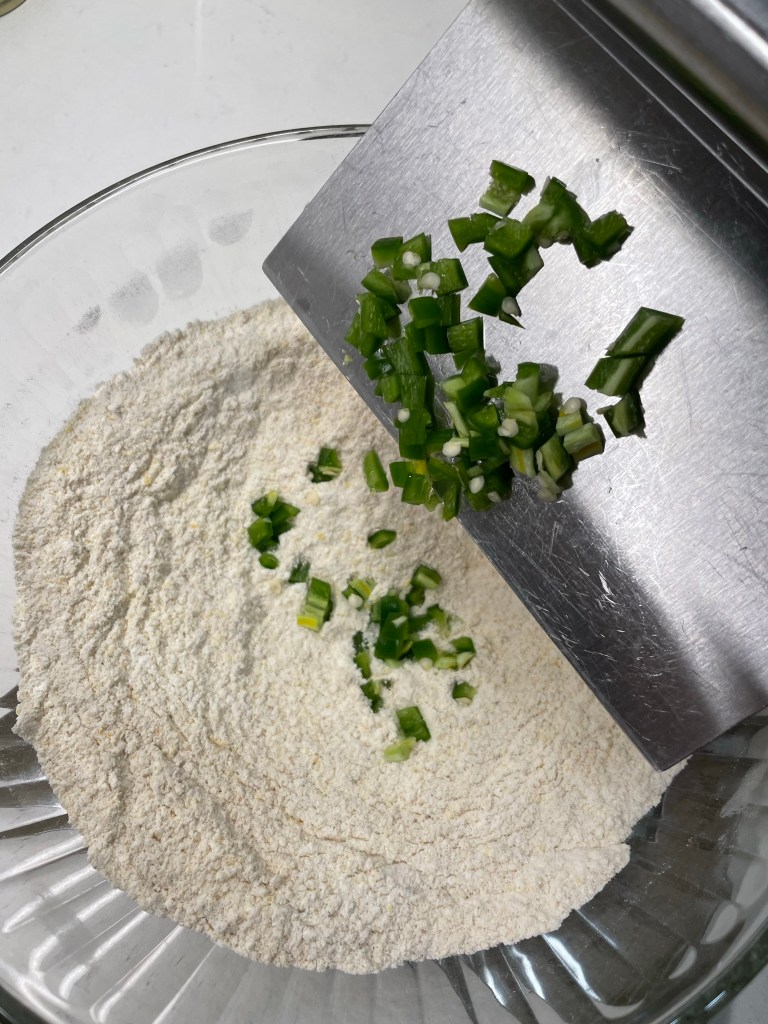
1 large jalapeño, diced (seeds or no seeds, depending on your heat tolerance)
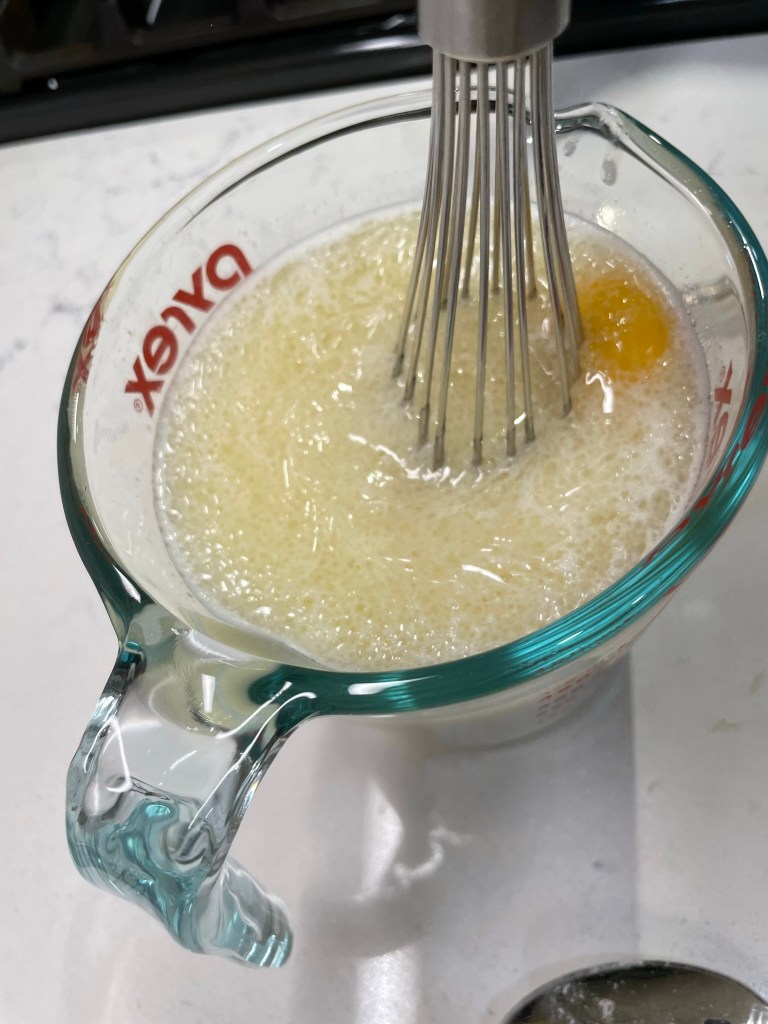
1 1/4 cups milk, warmed (I used whole milk, but 2%, skim or plant milk would be fine)
3 Tbsp. local wildflower honey
1 large egg, room temperature
1/4 cup expeller-pressed canola oil
1/2 stick butter, melted (plant butter would be fine)
1 additional tablespoon butter for melting in the skillet (or buttering a baking dish)
This is delicious drizzled with honey butter. To make some, stir honey into softened, salted butter until smooth. At room temperature, it will drizzle nicely over the warm cornbread. If chilled, it will be more firm but still spreadable. Store leftover cornbread wrapped tightly in foil, or freeze for later.
Directions
Preheat oven to 350°F, with rack in center position. Place a cast iron skillet over medium heat and melt the extra tablespoon of butter into it.
Measure out and whisk together the dry ingredients in a large batter bowl. Toss the jalapeños into that mixture as well.
Combine the wet ingredients, blending well to completely mix in the honey.
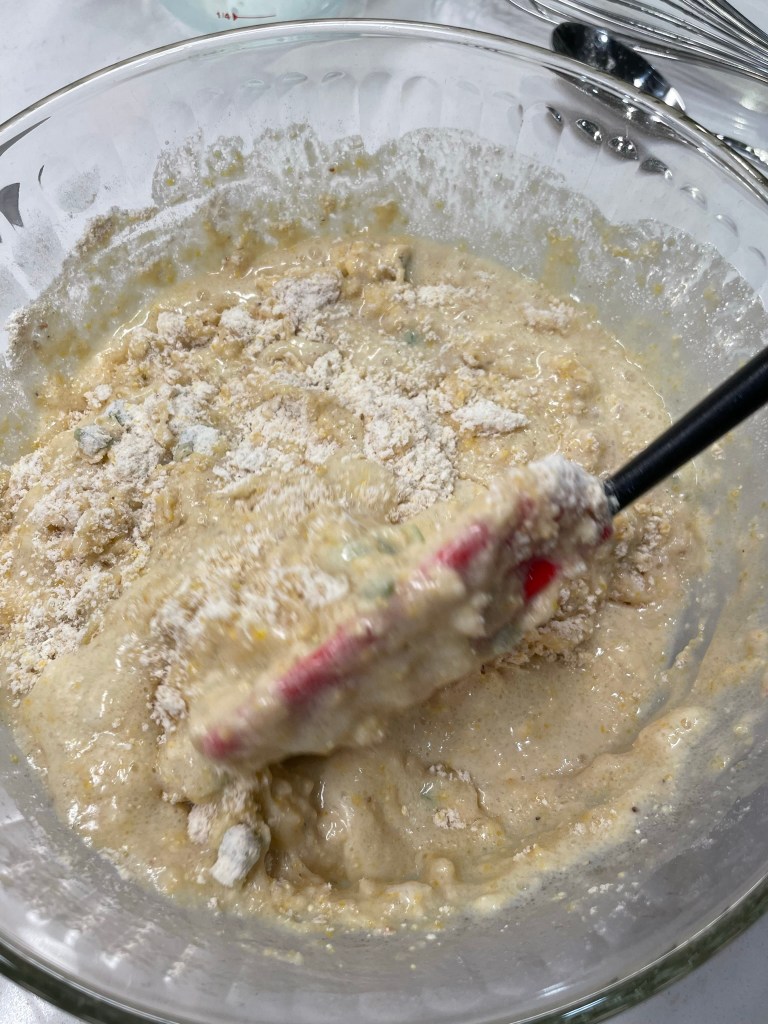
Pour the wet mixture into the bowl with the dry ingredients and fold gently several times until dry ingredients are fully incorporated.
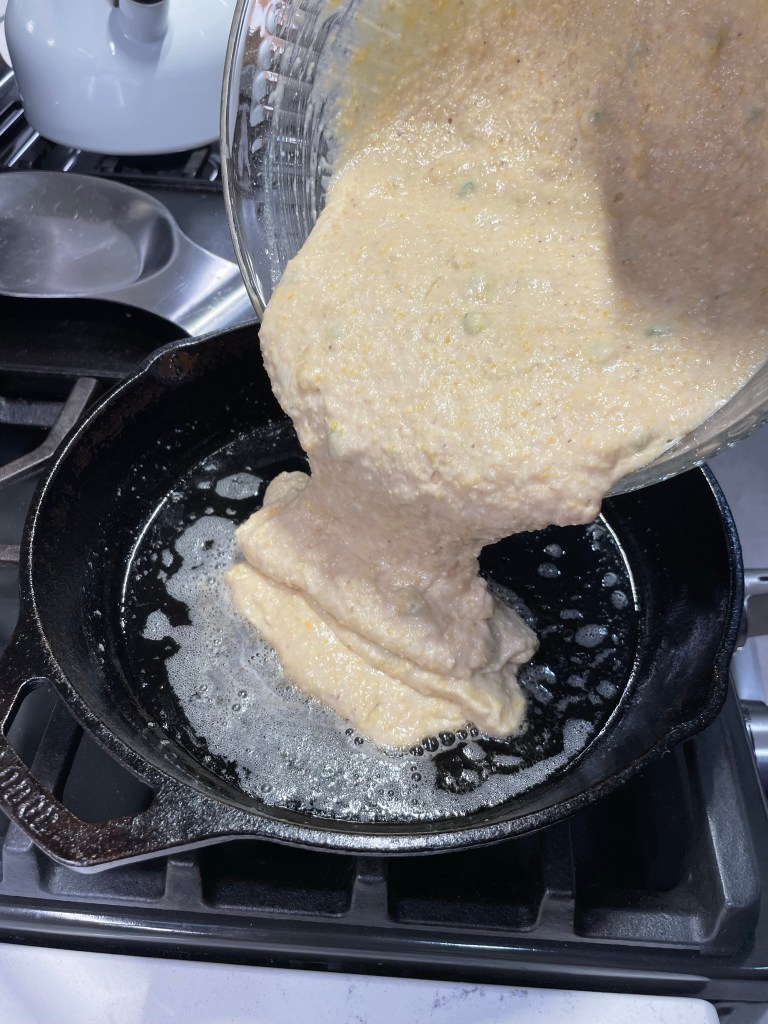
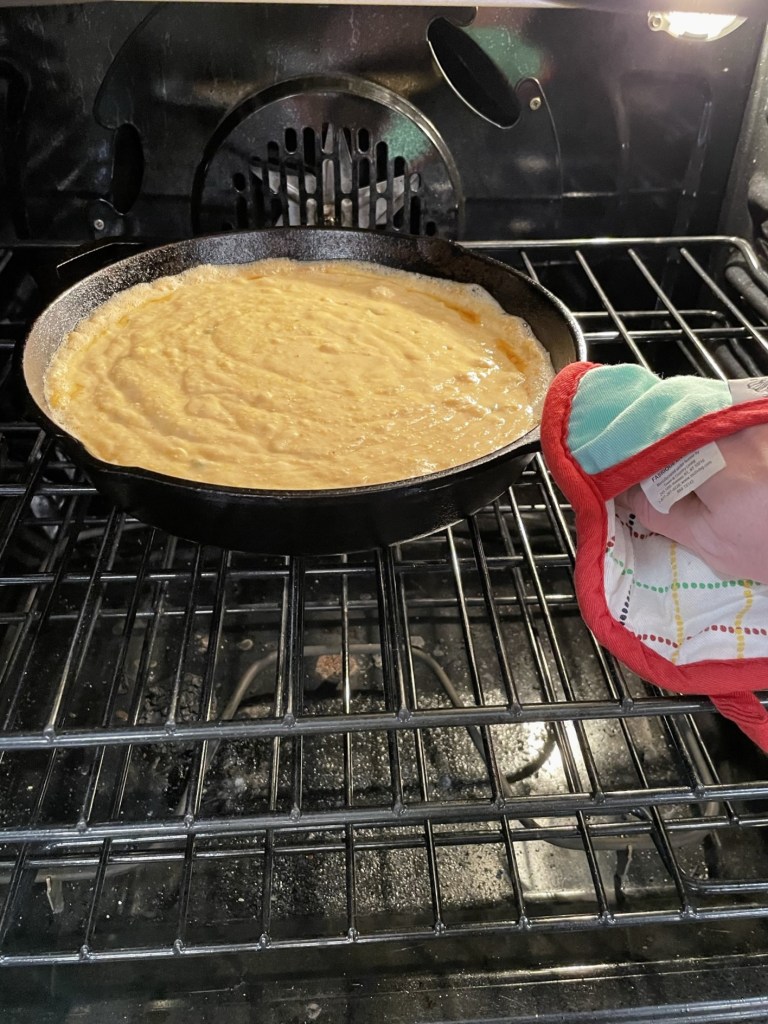
Pour the batter into the hot, buttered skillet and slide the pan into the oven to bake for about 20 minutes. Cool for a few minutes, then cut into wedges and enjoy!
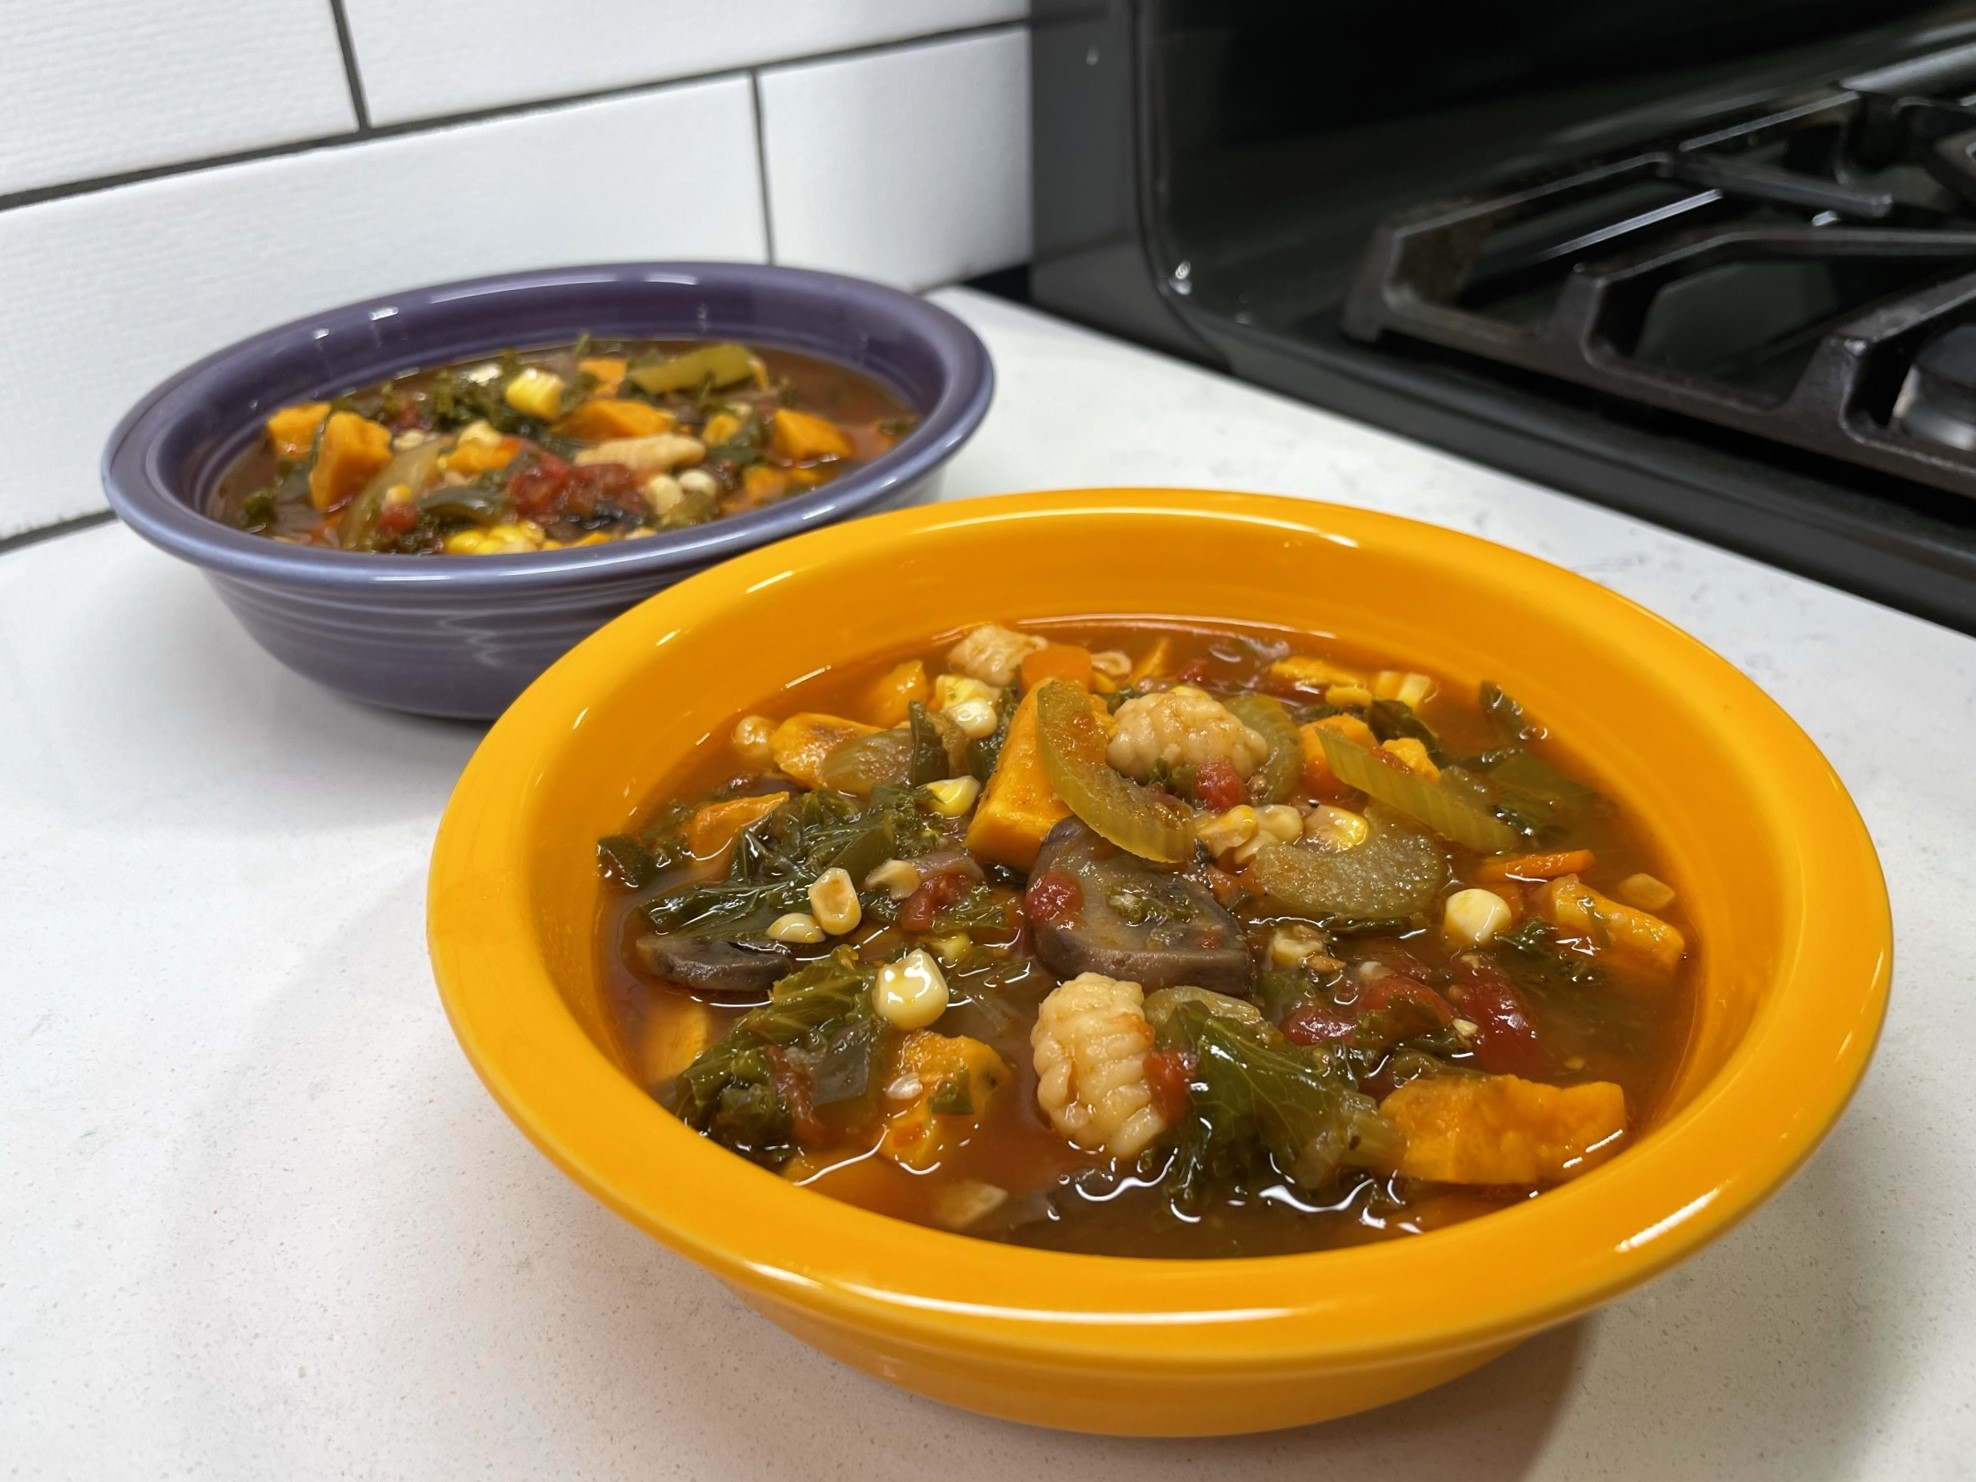
This post is kind of a recipe within a recipe, and my inspiration for the soup was born from my effort to make pasta using sourdough discard. I know— who would imagine such a thing, right? When Les and I traveled to Nashville, Tenn. recently, we met some friends for dinner and got to talking about gluten issues that each of them suffer. Our friend, Dick, said he had found real sourdough bread more digestible and that a few gluten-free breads were helpful to satisfy his carb cravings, but that pasta had been another story; it always left him feeling bloated and uncomfortable, and he didn’t enjoy the texture of the gluten-free options on the market. He knew about my food blog, and he said, “if you could make a real pasta that I could eat and enjoy…”
And over here was me— just hating the thought of someone missing out on a favorite food. There has to be a way, and I’m on a mission to find a way to ease the uncomfortable symptoms that gluten brings to people with mild or moderate sensitivities. If I can figure this out, and then advance to making an egg-free version that is suitable to dry, I will send some to Dick for feedback. My version is not gluten-free, obviously (I use wheat flour), but the fermentation process changes the gluten structure and exhausts the anti-nutrients that mess with non-celiac individuals, and that just might be enough for Dick. We’ll see.
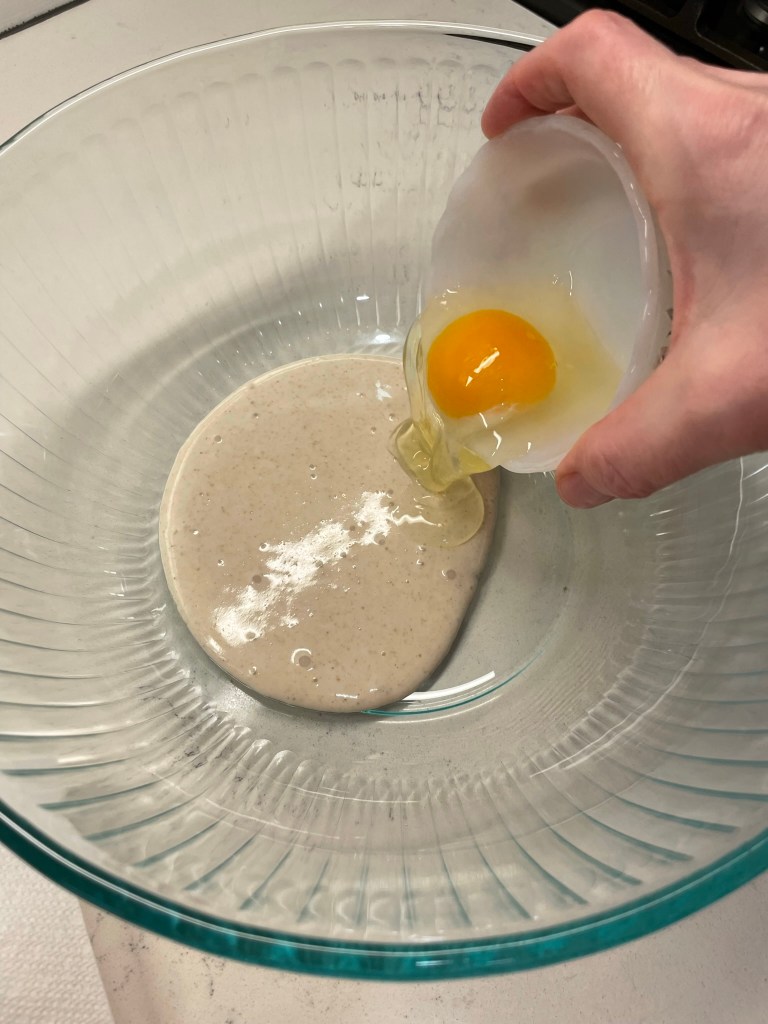
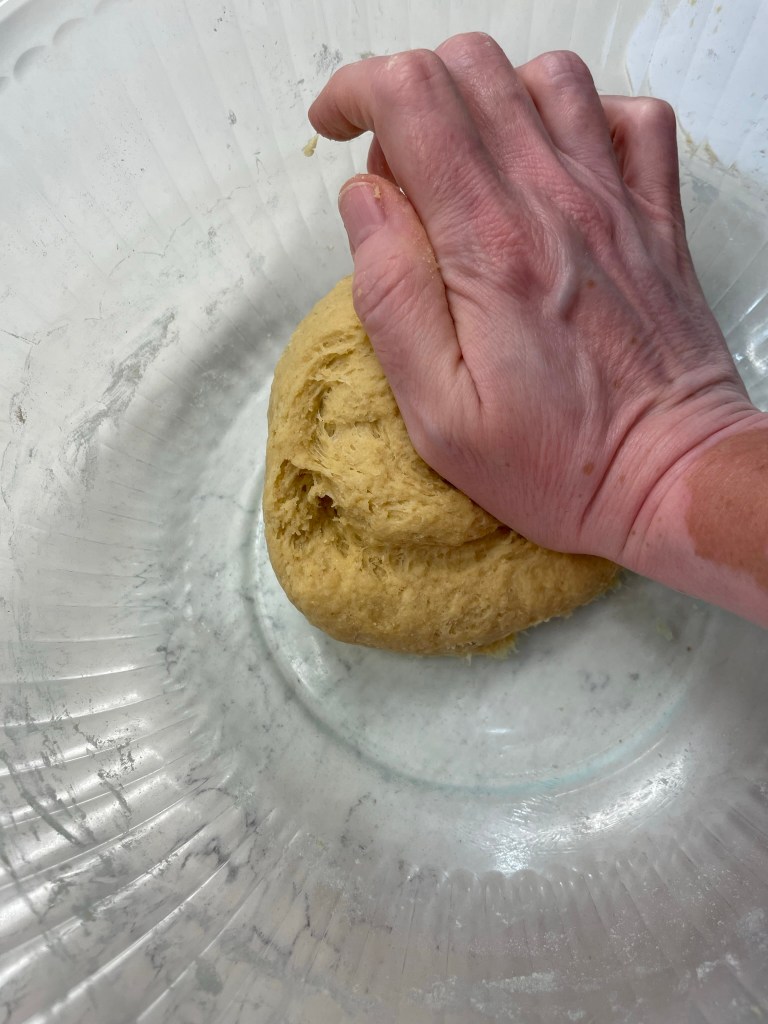
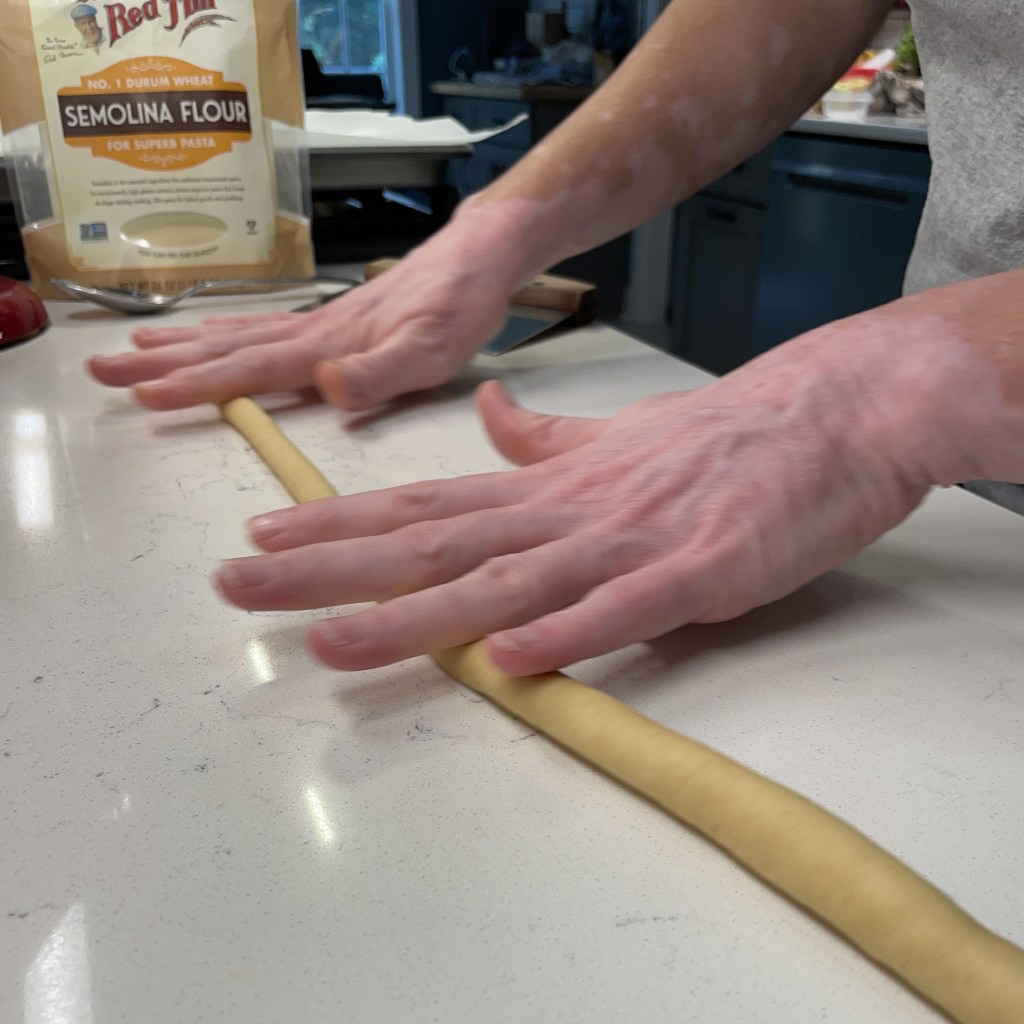
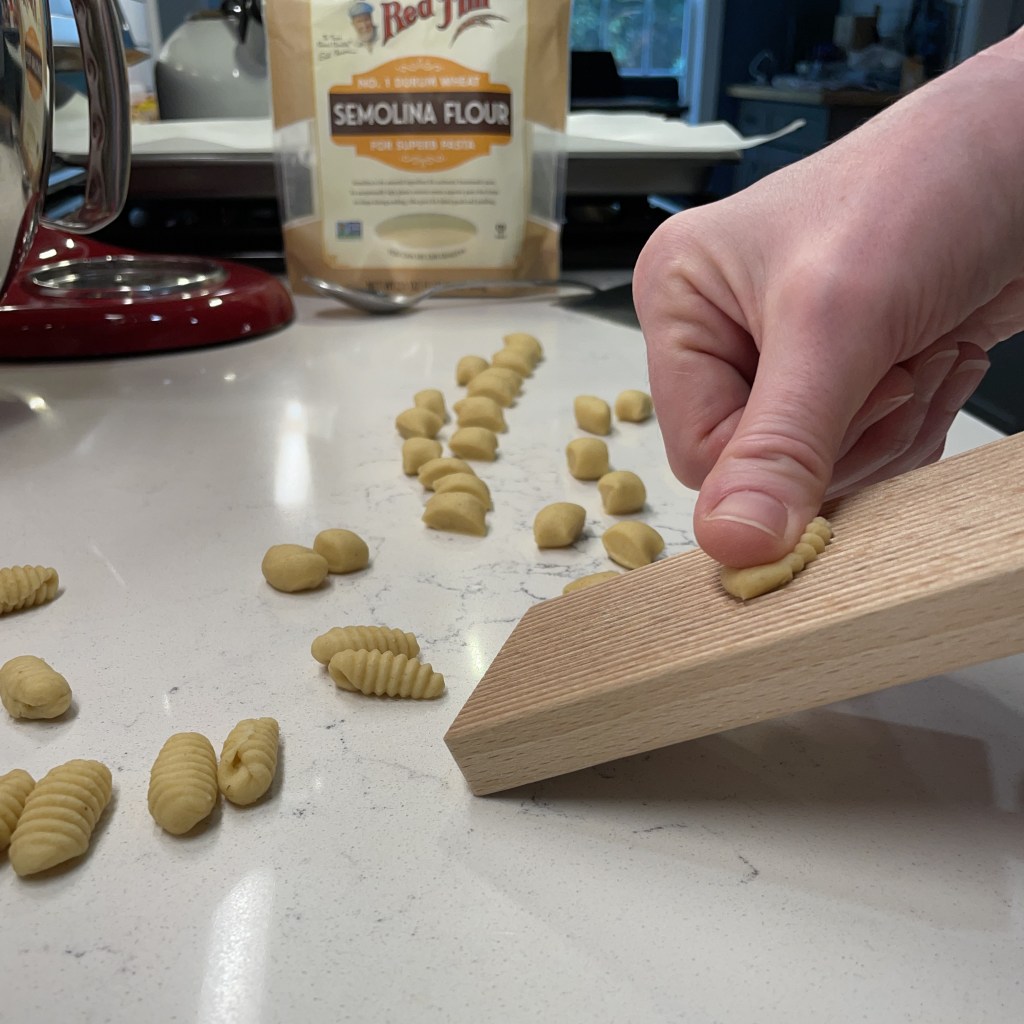
I’ll let you know how things progress with the sourdough pasta quest, but my immediate challenge was finding a good way to use my test batch. I used a combination of all-purpose, white whole wheat and semolina flours, plus sourdough discard and eggs, to make my pasta dough. It had been chilling in the fridge for a day, and I rolled it into ropes and shaped it into little gnocchi-meets-shell-shaped things. The first thing that came to mind for these little bites was soup, and here we are!
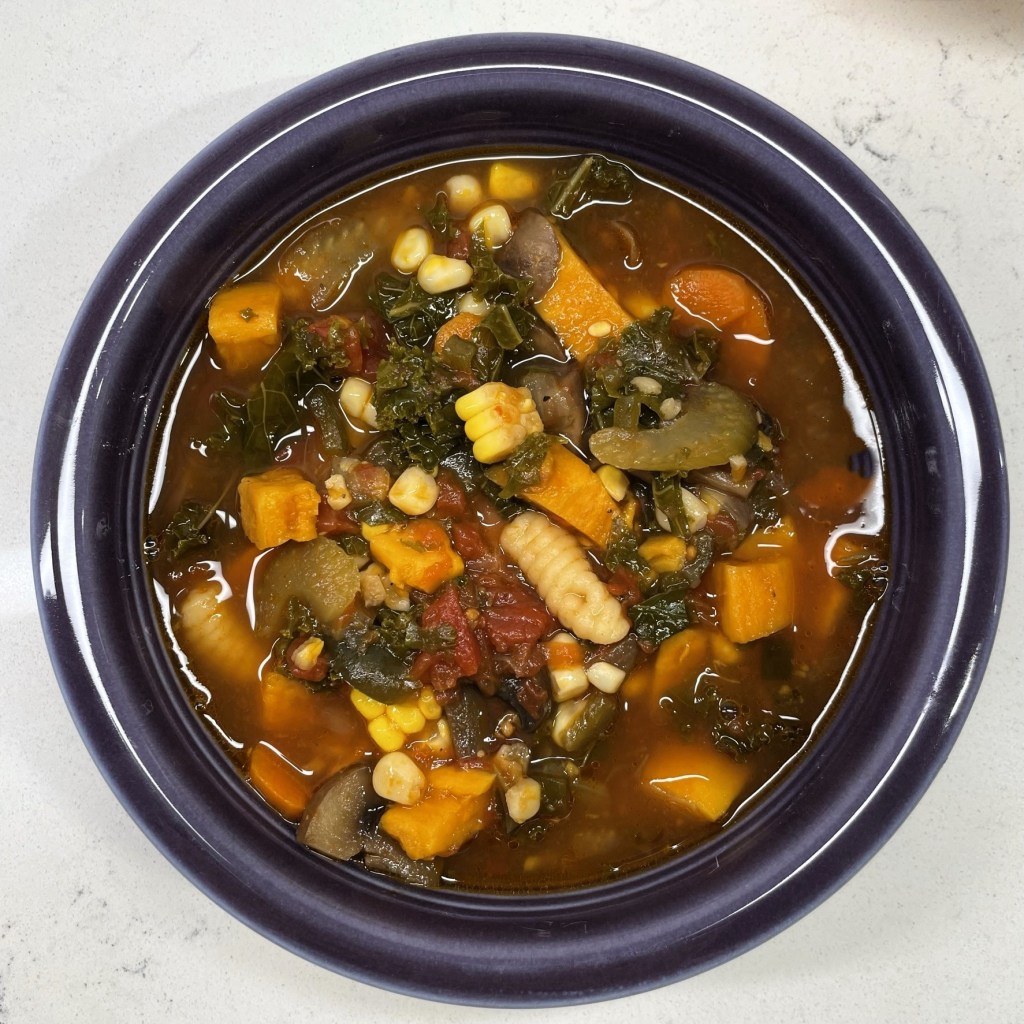
Mmmm, so good!
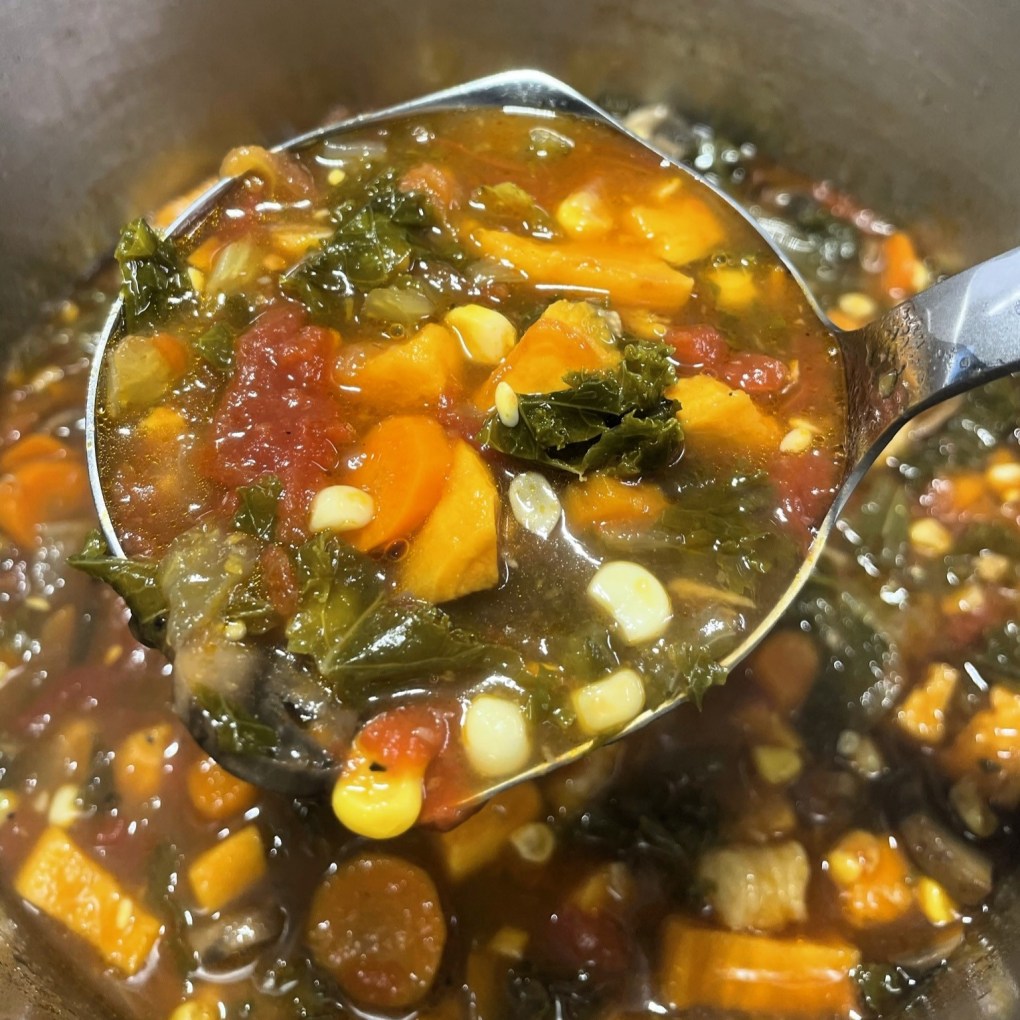
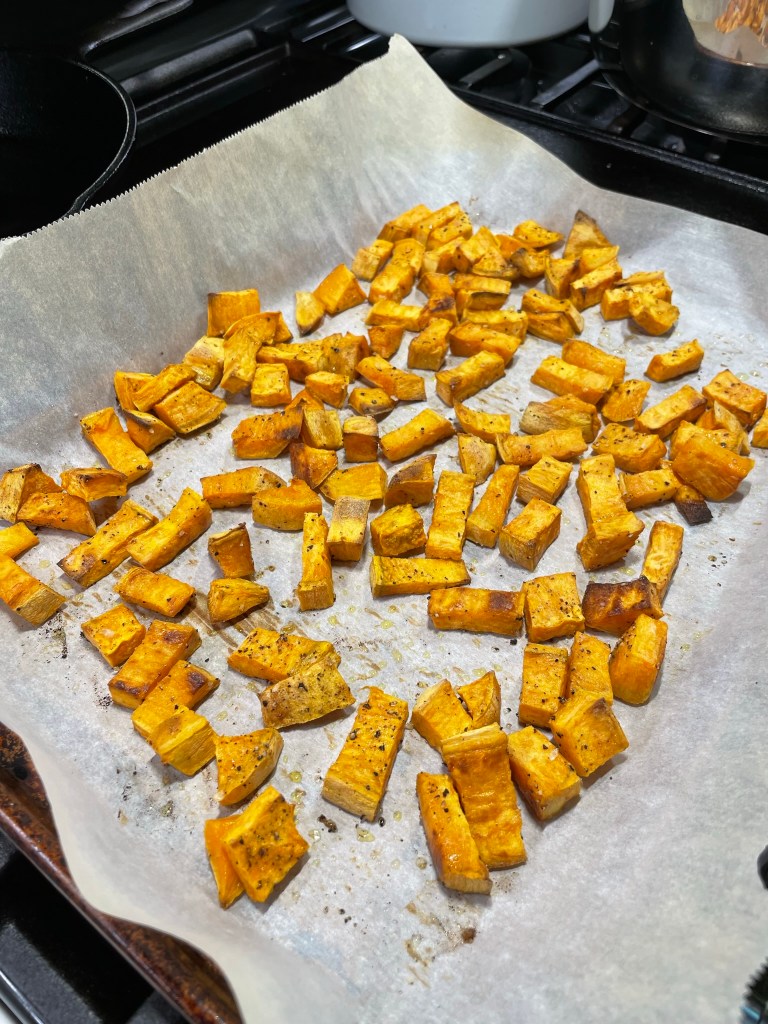
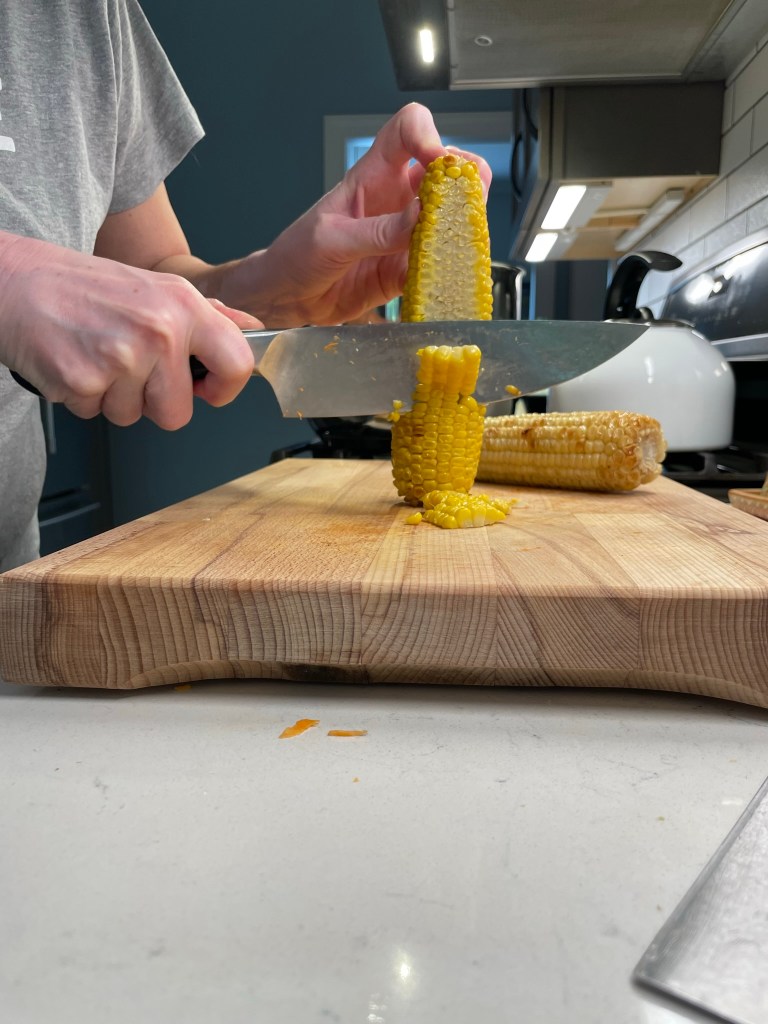
This soup brings together the best of two things for me— a whole bunch of terrific early fall ingredients and an all-day simmered vegetable soup. Sweet potatoes are abundant already this season, so I cut up a large one and roasted it with a touch of olive oil, salt and pepper. I could have put the cubes right into the soup, but I knew this would be a long simmer and I didn’t want them to turn to mush. Besides, roasting sweet potatoes caramelizes them and intensifies their autumn flavor. This turned out to be worth the extra step, for sure.
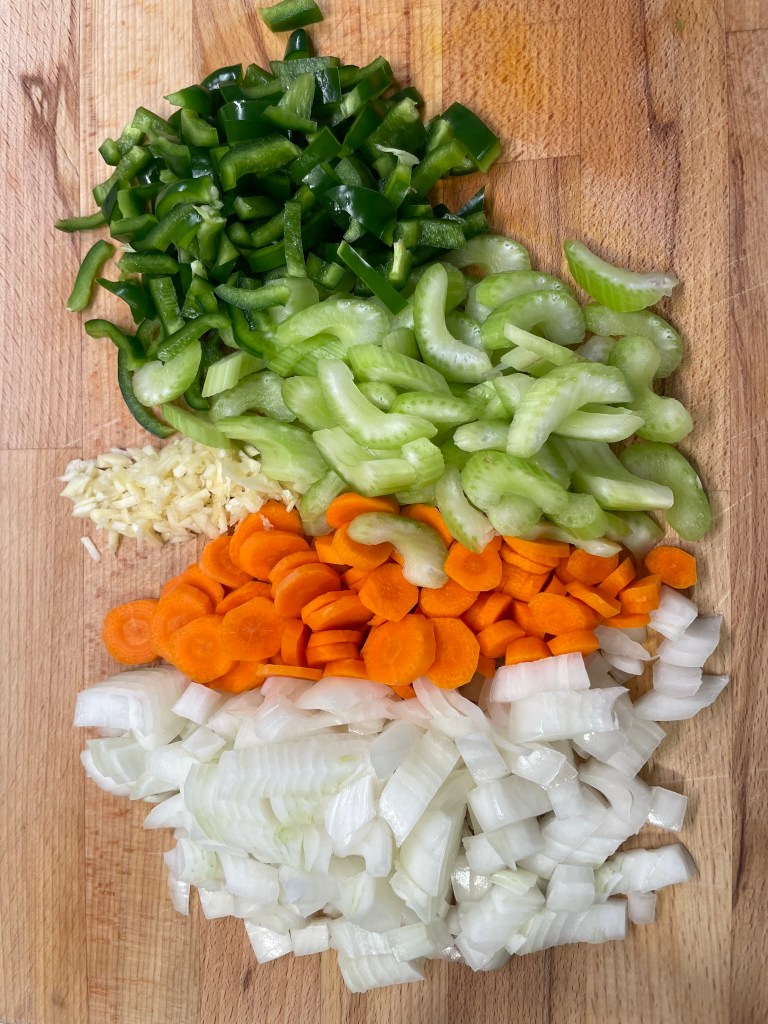
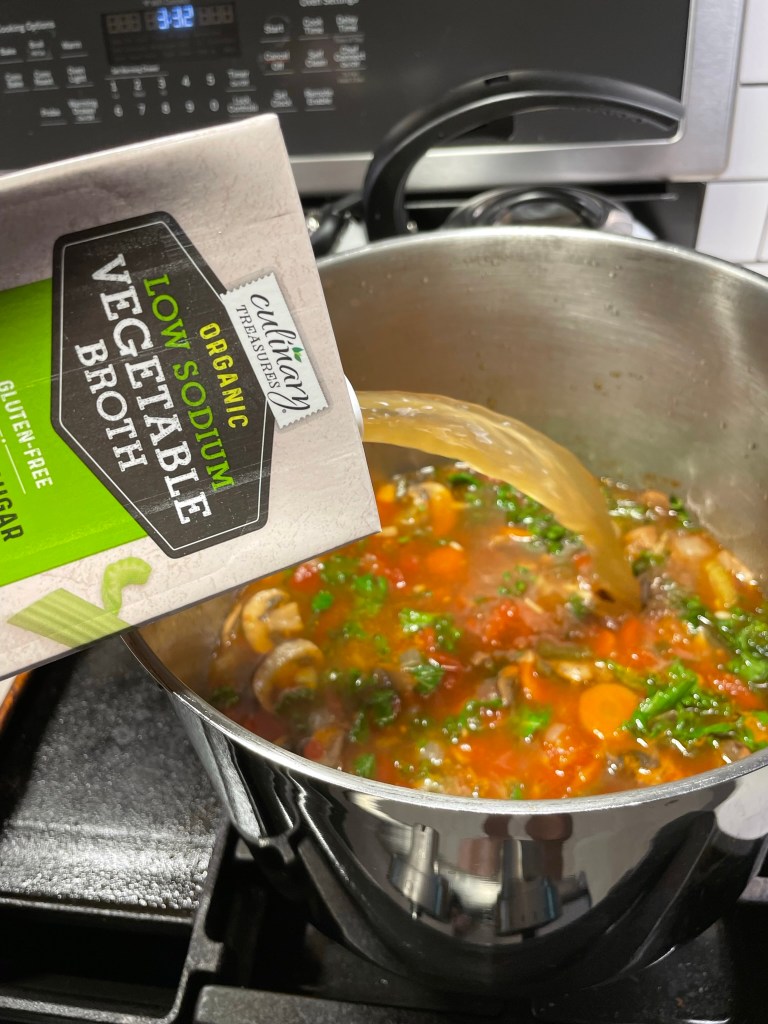
The corn season runs long around here, so I had Les grill up a couple extra ears when we had it for dinner recently. I stripped the kernels and set them aside while I prepared to build the soup base with carrots, celery and onion (otherwise known as mirepoix), plus poblano pepper and garlic. Whole canned tomatoes went in next, then mushrooms and veggie broth.
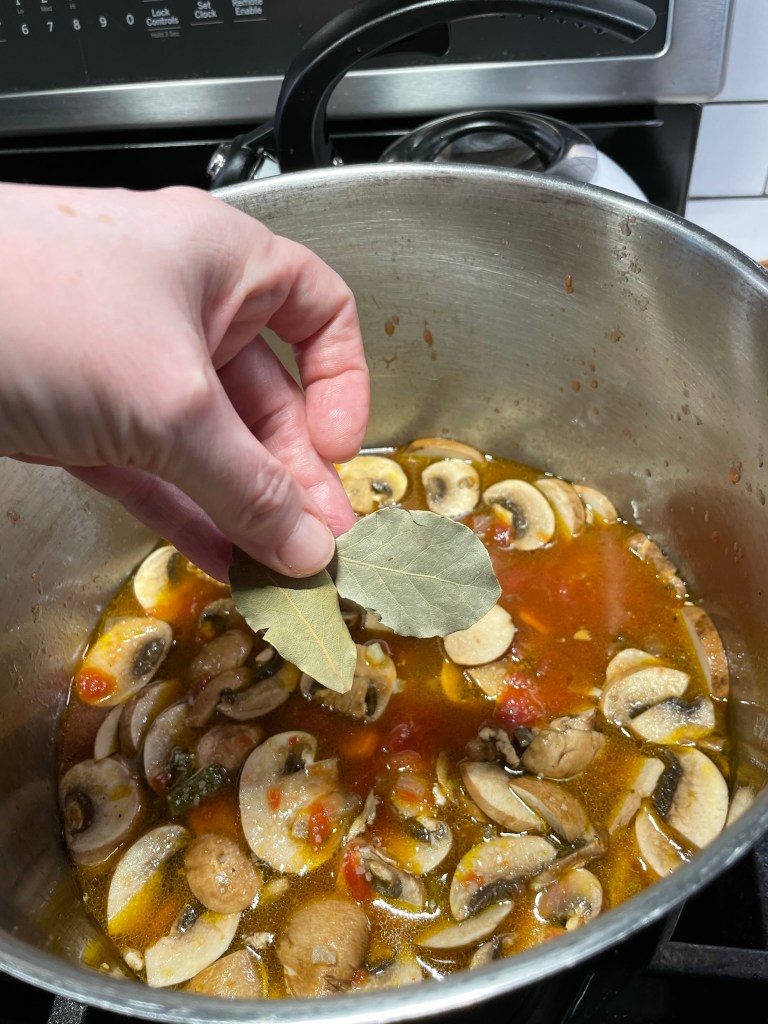
The only seasoning I added to this soup— other than the usual kosher salt and black pepper— was a couple of bay leaves. Anytime I make a simmered soup, stew or roast, bay leaf is like a magic ingredient that is not only flavorful but highly aromatic.
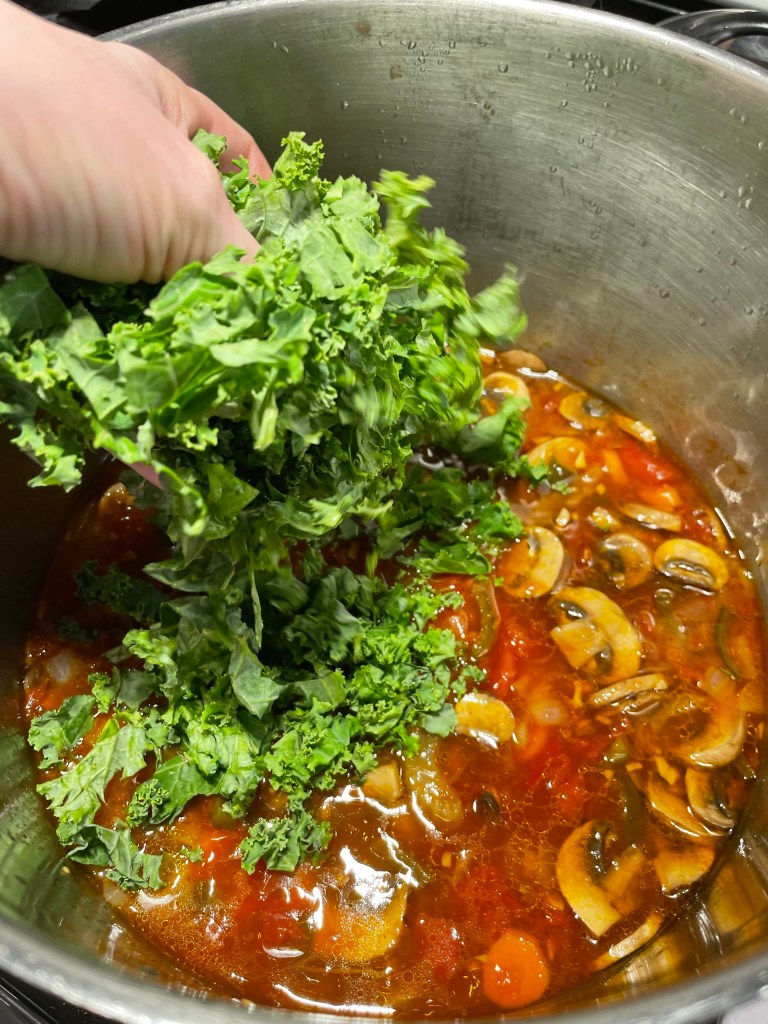
After a nice, long simmer—about an hour— I removed the bay leaves, added two “fat handfuls” of chopped kale, more broth and my homemade sourdough pasta (which went in straight from the freezer), and brought it up to a gentle simmer to cook the pasta through.
Finally, my soup was ready for the roasted add-ins I had prepared earlier, and dinner was served!
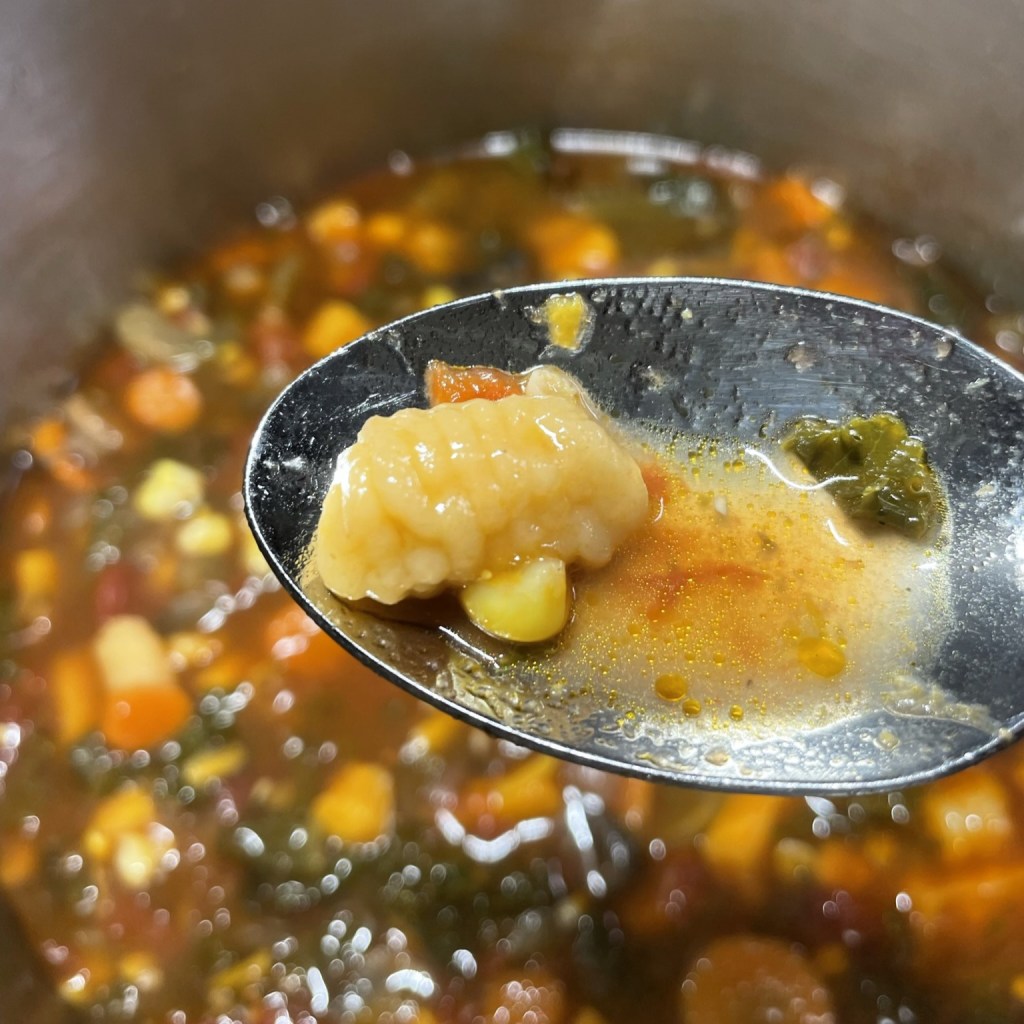
My friends, this autumn minestrone was far and away more delicious than any other vegetable soup I’ve ever made! All those flavors melded together wonderfully, and between the roasted, grilled and simmered vegetables, there was plenty of interesting texture, too.
The pasta cooked up like pudgy, tender dumplings and the tangy earthiness of the sourdough was a really nice complement to some of the sweeter flavors in the soup. If I had not been experimenting with the homemade sourdough pasta, any box pasta with hefty texture would have been a good choice (think rotini, trumpets or those cute little wagon wheels). Using box pasta would also have kept my soup vegan; the eggs in the pasta dough disqualified it from that category.
Oh, this soup hit the spot on a dreary, rainy early autumn day. But you can bet I won’t wait for another one to make this soup again!
This soup brings together the best of two things for me— a whole bunch of terrific early fall ingredients and an all-day simmered vegetable soup.
Ingredients
1 large sweet potato, peeled and cubed (about
1/4 cup extra virgin olive oil, divided (you’ll use a tablespoon to roast the sweet potato and the rest to sauté vegetables in the pot)
Kosher salt and freshly ground black pepper
1 sweet onion, chopped
2 medium carrots, peeled and thinly sliced
2 ribs celery, strings removed and sliced
2 cloves garlic, finely minced
1 poblano pepper, chopped
28 oz. can whole peeled tomatoes, drained (reserve liquid for another recipe)
6 cups low-sodium vegetable broth, divided (see directions for breakdown)
2 bay leaves
8 oz. carton cremini mushrooms, cleaned and sliced
2 fat handfuls kale, washed and rough chopped
1/2 pound pasta shapes (homemade or otherwise)
2 ears roasted corn, kernels cut from cob
Notes: I roasted the sweet potatoes first so that their flavor could be concentrated, and to keep them from turning mushy in the soup. Butternut squash would be a great substitute. I used a fresh homemade pasta that was shaped like baby gnocchi. My pasta contained eggs and I added to the soup straight from the freezer. Dry pasta such as elbows or rotini would be a great substitute.
Directions
Preheat oven to 350° F, with rack in center position. Line a sheet pan with parchment and arrange sweet potato cubes in a single layer. Drizzle with olive oil and season with salt and pepper. Roast about 45 minutes, until sweet potatoes are reduced in size and golden on all the edges. Set aside.
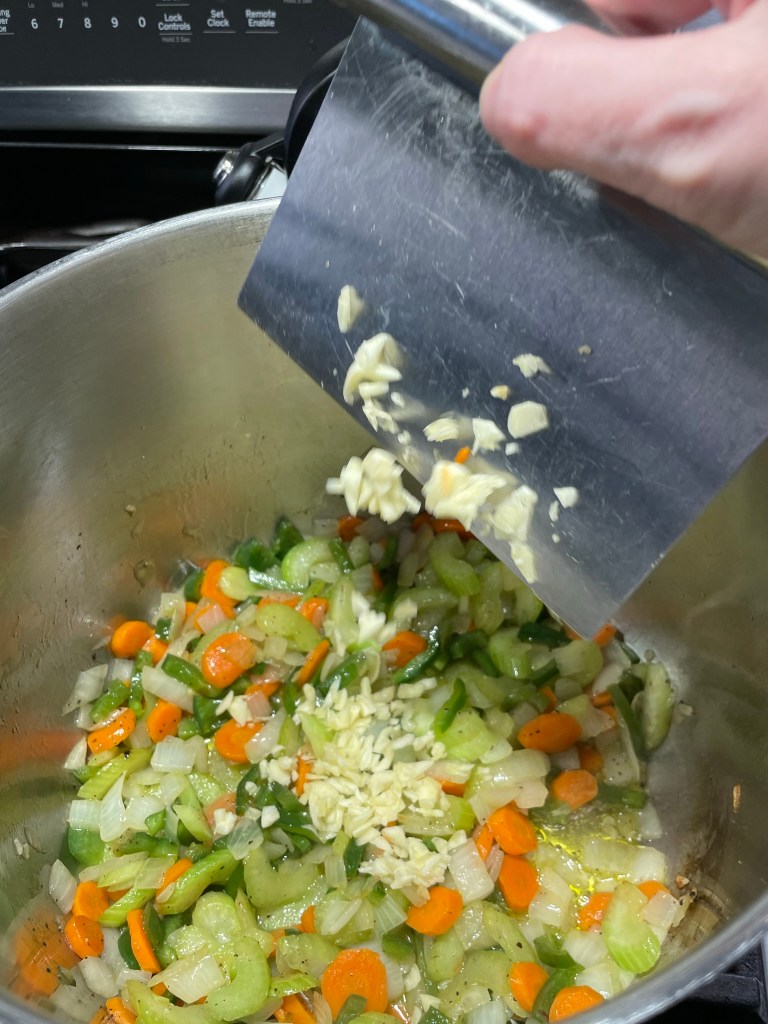
While the sweet potatoes are roasting, place a deep, heavy-bottomed pot over medium heat. Swirl in remaining olive oil and sauté the onions, carrots, celery and poblano peppers. Season with salt and pepper and cook until translucent. Add the garlic and continue to cook until vegetables are very soft.
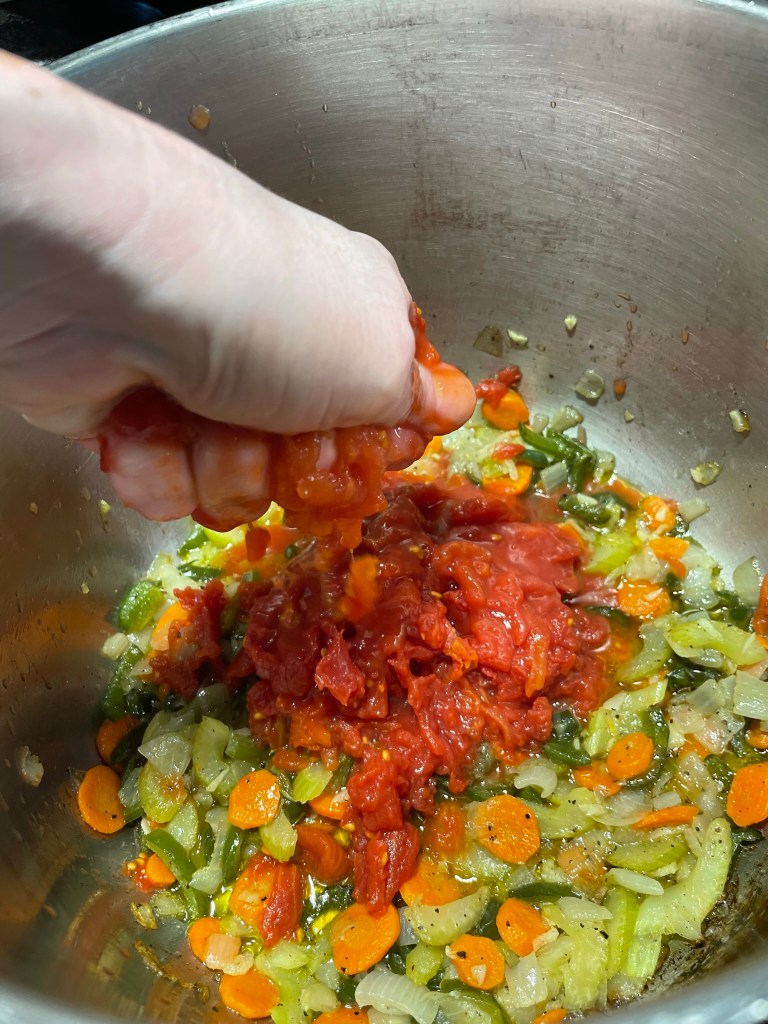
Use your hands to squeeze the whole tomatoes into the pot. Add 4 cups of the vegetable broth and bring to a slight boil. Adjust salt to taste. Reduce heat to simmer.
Add sliced mushrooms and bay leaves and simmer for about an hour. Stir in chopped kale leaves until wilted. Add remaining vegetable broth and bring to a gentle boil.
Add pasta straight from the box or freezer and cook it in the minestrone until tender.
Finally, stir in corn kernels and roasted sweet potatoes. Make a final adjustment to salt and pepper, and then cook on low until heated through.
The inspiration for this scrumptious chicken highlighting the flavors of peach and bourbon came from Instagram, but it was salmon rather than chicken. And it was baked rather than grilled (I think). I don’t remember the details, and anyone who is on Instagram knows that’s the nature of the social media beast— either follow it or lose it. And I don’t want to follow every single thing that interests me because I’m scatterbrained enough, and I don’t always think to “save” a recipe post to my favorites collection. I need that sacred space for videos of hero dogs making their final flight home, hungry raccoons snatching a donut at the Dunkin’ drive-thru, and onesie-wearing dachshunds munching on carrots by a cozy fireplace. Yep, I use social media for mindless entertainment. When it comes to food posts, I’m only looking for inspiration.
That mention of a peaches and bourbon combo was enough to get me going, though, and it stuck with me for days after I saw it, so when Les and I were asking each other what we’d do for dinner last weekend, I remembered the package of chicken thighs I had just bought that day and I blurted without even thinking, “peach-bourbon glazed chicken.” And there was no arm-twisting involved, because anytime we are pairing anything and bourbon, we’re good. All I needed was a recipe, right?
Not so fast.
If I had time only to share one message for people who think they don’t know how to cook, it would be this: trust yourself! Recipes only get you so far; you still have to understand some things about cooking, and that boils down to pairing flavors and mastering a few techniques. You already know what flavors you like together, so learn the methods that will help you be successful and the rest will fall into place. I didn’t write down anything about the recipe from that fleeting Instagram post— but I am going to connect the dots from what struck me about it: peaches, bourbon, meat and the grill.
The Flavor Pairings
Peaches are sweet, juicy and summery. What complements sweet? Tart, spice or smoke. That helps narrow down my next move toward pairing flavors. Bourbon is strong, with a boozy bite and a light smokiness from oak barrel aging, so I already have a complementary flavor profile (smoke) taking shape. I can inch it further toward smoke with introduction of a spice, but which ones are smoky? Off the top of my head, I know I have cumin, but that starts heading off into more specific ethnic cuisines (Mexican or Indian), which is not where I’m going. I wanted this to taste like an all-American summer. Paprika is also smoky and brings the benefit of adding vibrant brick-red color. That’s my choice for this dish, and I happen to have a bourbon-smoked paprika, which is a no-brainer here. Finally, I want to take the edge off the bourbon without losing its flavor, and a bit of brown sugar will do that while also supporting the sweetness of the peach. See how easy that was?
Lest you think that I analyze every recipe I make this way, I can assure that most of this mental processing happens unconsciously, much the same as getting dressed in the morning and instantly knowing which colors, styles and patterns will work or clash. The more time you spend in the kitchen, the more natural these decisions become.
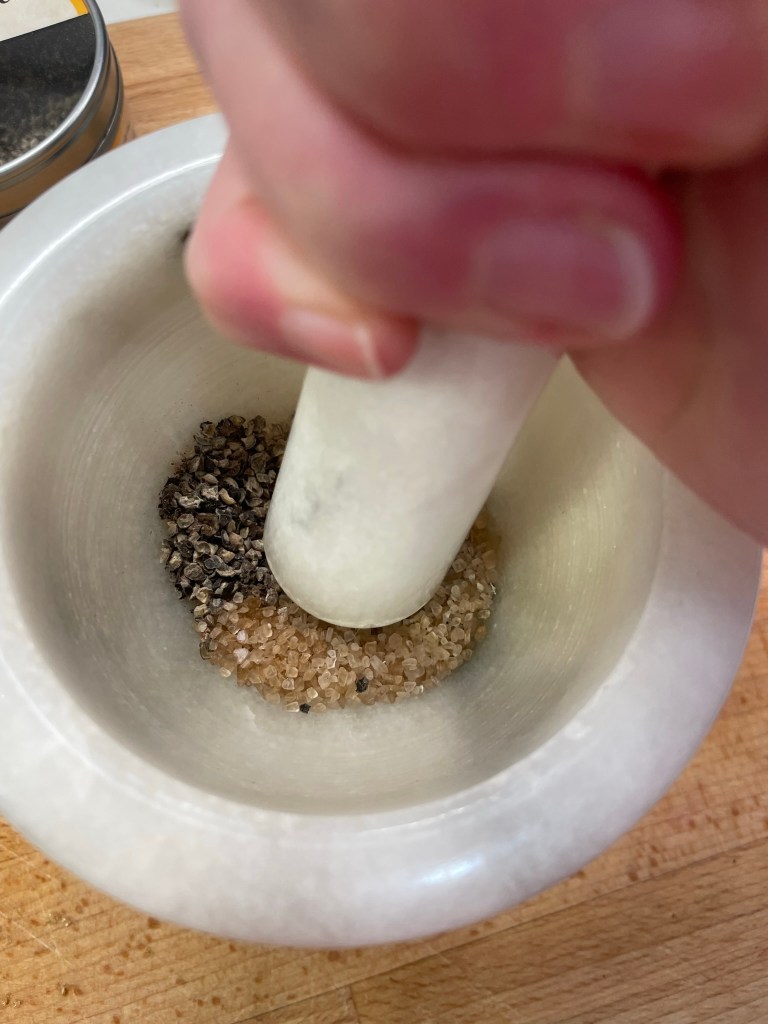
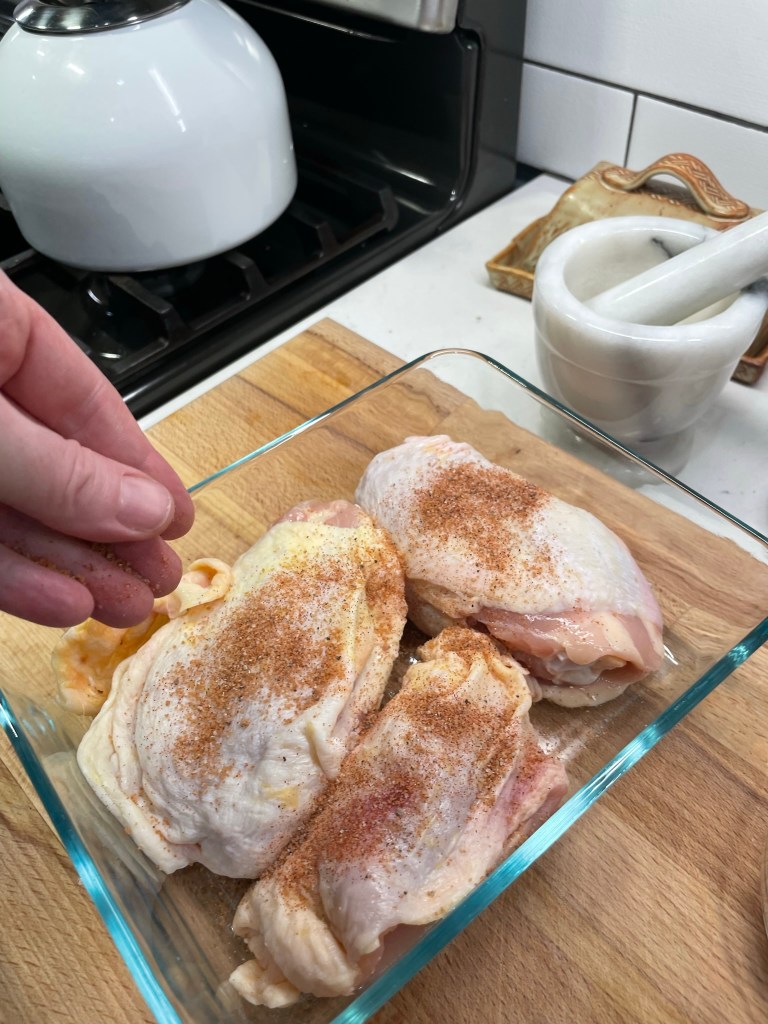
Salt and pepper: the simplest seasonings are usually enough when you’re grilling, and it’s the way to go when you want the flavor of the meat to take center stage.
Smoked paprika: this lends a light smoky flavor, which is always a winner for the grill. This spice might not have been right for berries or citrus, but it worked great with peaches.
Brown sugar: this will underscore the sweetness of the peaches, soften the bourbon and also encourage even caramelization of the meat during grilling and glazing.
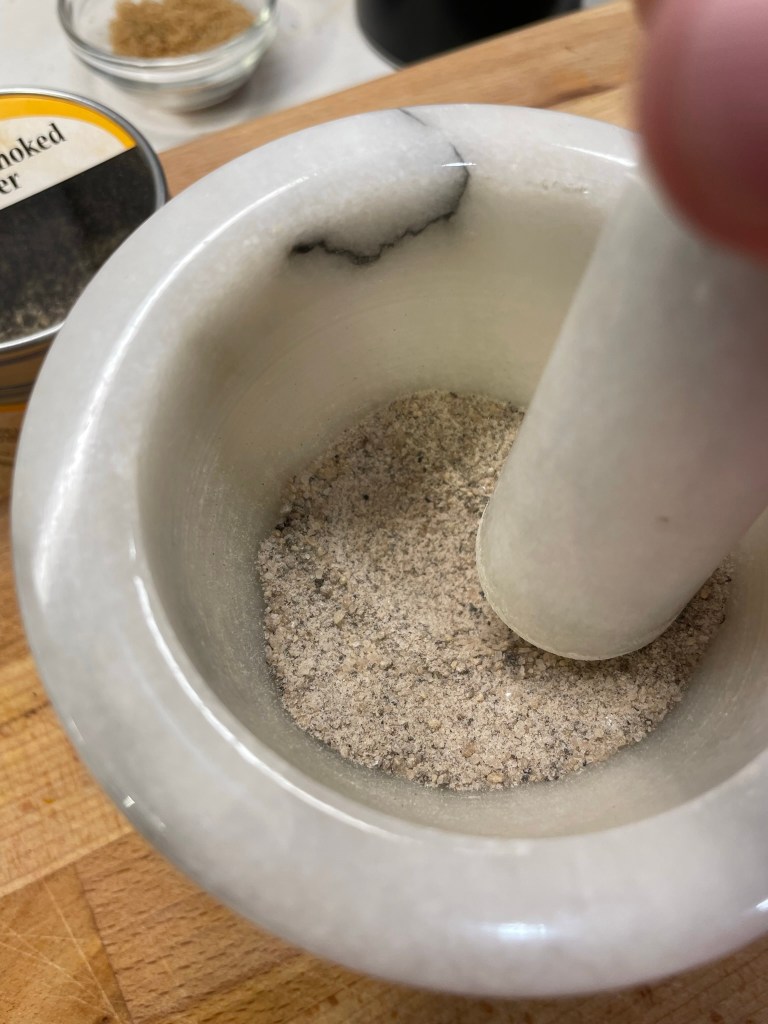
My bourbon smoked salt and pepper were very chunky, so I crushed them fine, then added the mixture to the paprika and brown sugar.
The Technique
Les and I have both grilled food for years, but we always have something new to learn. I’ve been leaning heavily lately on the teachings of Kenji López-Alt, whose book The Food Lab describes in detail the benefits of dry-brining meat before roasting or grilling. It’s a whole science-y thing that involves reverse osmosis or something, and it works every time, producing both a great crispy skin and a juicy, tender interior. So for these chicken thighs, I did a quick dry brine with the seasoning blend above, and I held back a spoonful to use in the peach-bourbon glaze (more on that in a moment).
Pat the chicken fully dry before seasoning both sides with the spice rub, then send it to the fridge WITHOUT a cover.
With better planning, I would have done this seasoning step the night before we cooked, to give the chicken skin more than five hours of dry brining time. But sometimes these ideas hit me on the same day I want to cook, and five hours turned out to be plenty to give the chicken a locked-in delicious flavor. An extra few hours would likely have dried out the skin more for an even crispier exterior, so maybe next time. 😉
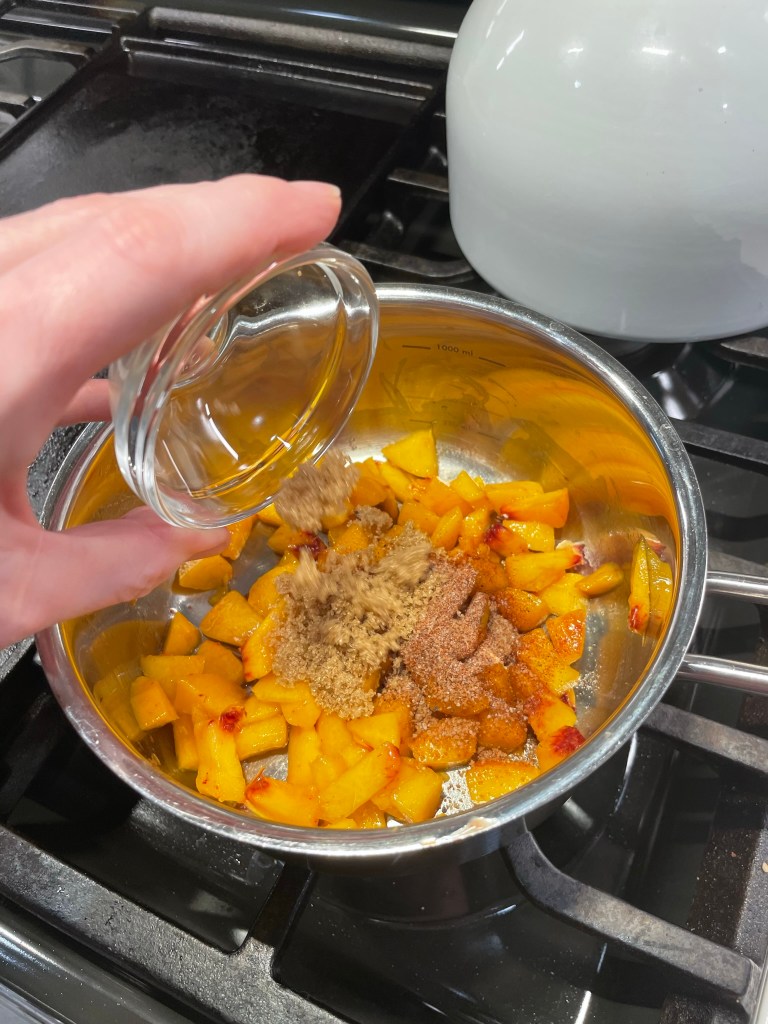
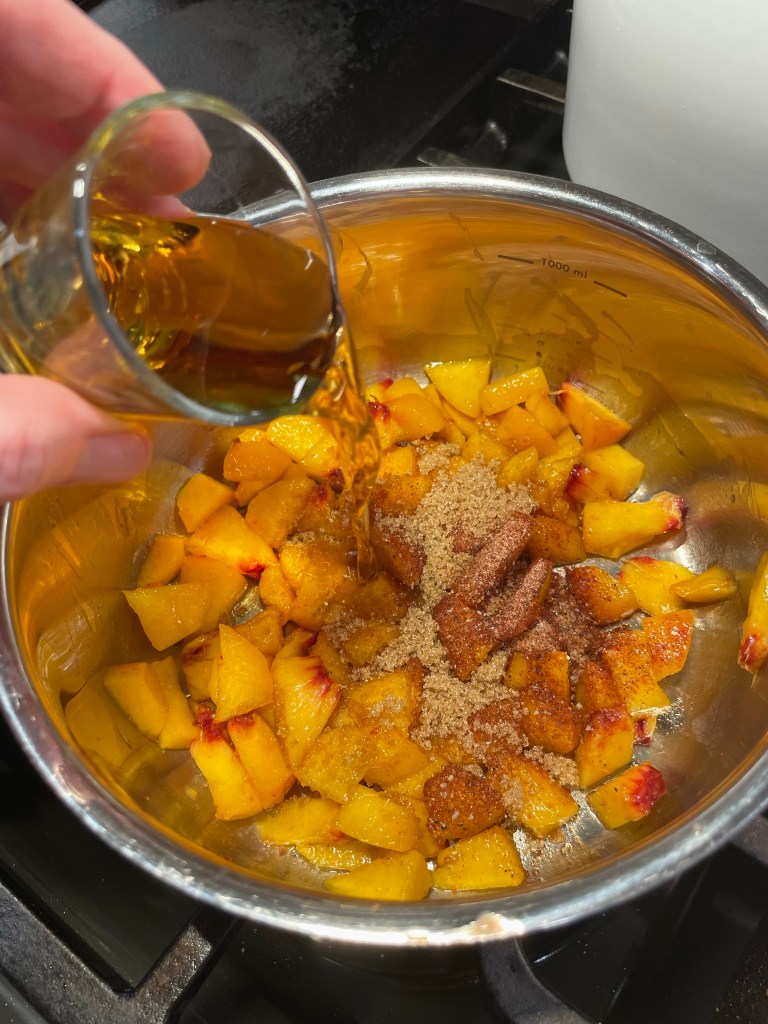
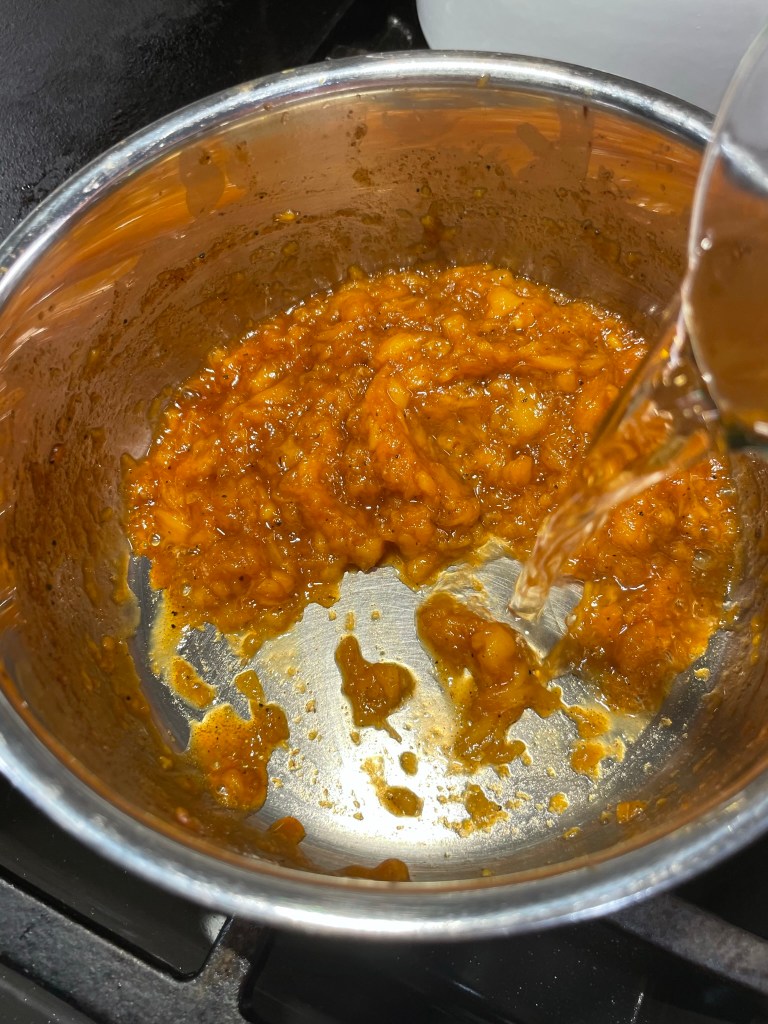
The Peach-Bourbon Glaze
The peach-bourbon flavor combination that started it all was the last thing I prepared, but you can see by now that it was the basis for everything else I did. This is usually how I develop a recipe, whether it’s for a cocktail, a dessert or a main dish. The same spice blend I rubbed on the chicken also seasoned the peaches I cooked down for the glaze. An extra spoonful of brown sugar made the glaze syrupy, but too much would have made it cloyingly sweet. For the bourbon, I scanned my bar for ideas. Would regular bourbon have worked? Of course. Black-cherry infused bourbon? Not so much. The smoked maple was next-level, the winner!
Notice that I added the smoked maple bourbon twice? Half a shot at the beginning of cooking, and half a shot at the very end.
More Technique
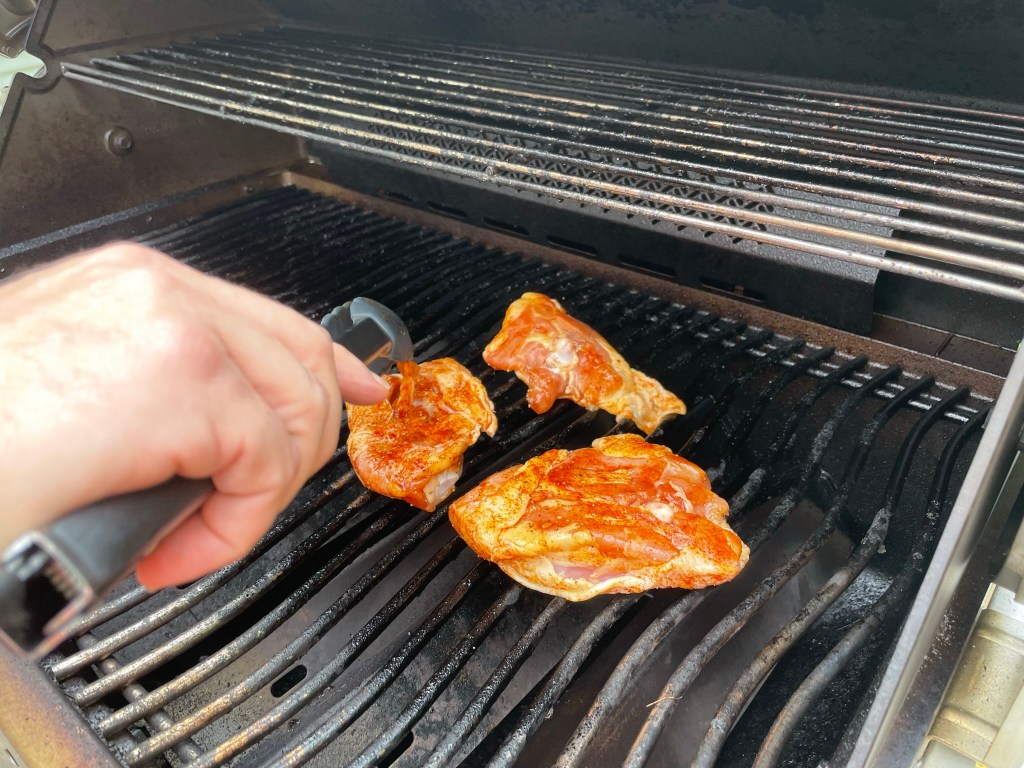
The rest of the process belonged to my husband, also known here as “Master of the Grill.” He has been relentless in learning the nuances of our new Napoleon gas grill with its numerous bells and whistles, including infrared searing zones, and some of those features come with a steep learning curve. For chicken thighs, Napoleon recommends a “reverse-sear” technique—Kenji would approve— and so Les preheated the grill to 350° F, with indirect heat on one side. The goal with this kind of cooking is to slow-cook the meat to achieve proper temperature before sealing the deal with crispy skin and glaze.
This reverse sear technique seemed backward from our usual way of grilling, but it paid off.
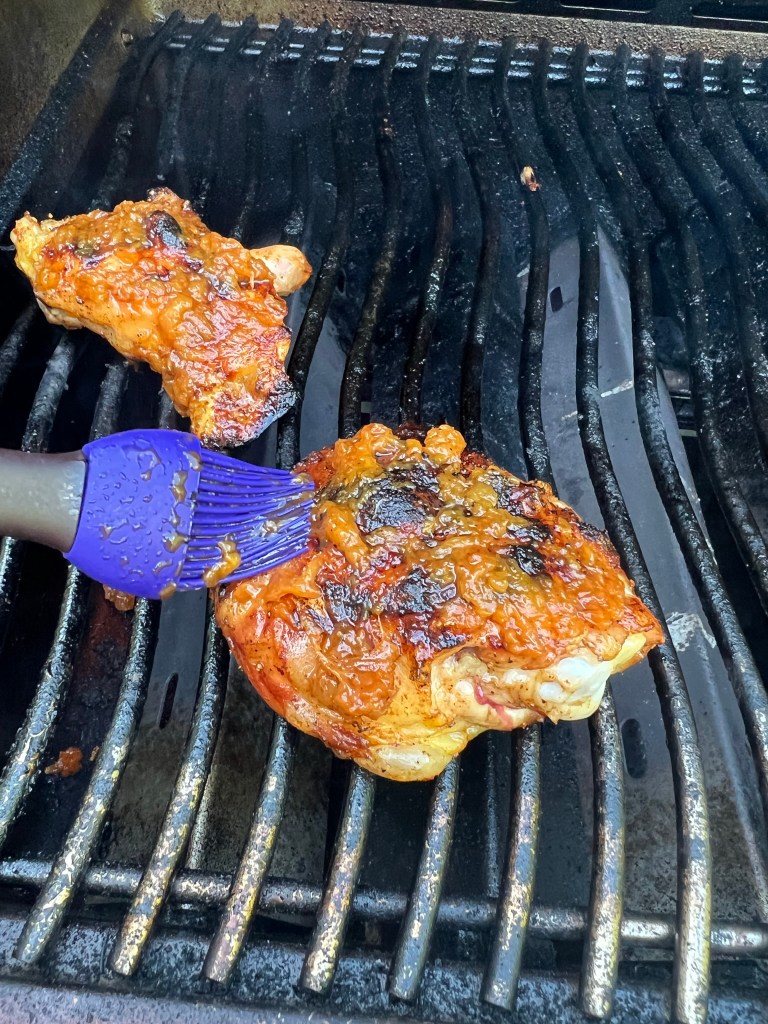
Les placed the thighs skin side-down on that indirect side and closed the grill cover, turning them only once during a whole 25 minutes, and checking the internal temperature periodically until it reached the recommended 145° F. Finally, the chicken was ready to move to the direct heat side of the grill, where it was licked by the flames for about four minutes, until the skin was crispy and the final meat temperature was 165° F. Only then did Les brush the peach-bourbon glaze onto the thighs for a final grilling, and gave them another quick sear to lock in the glaze.
If he had done the glazing too early, two things could have gone wrong— the glaze (with all its sugars) would probably have burned, and the wetness of it would have kept the skin from reaching and keeping its ideal, crispy texture. Patience, Grasshopper.
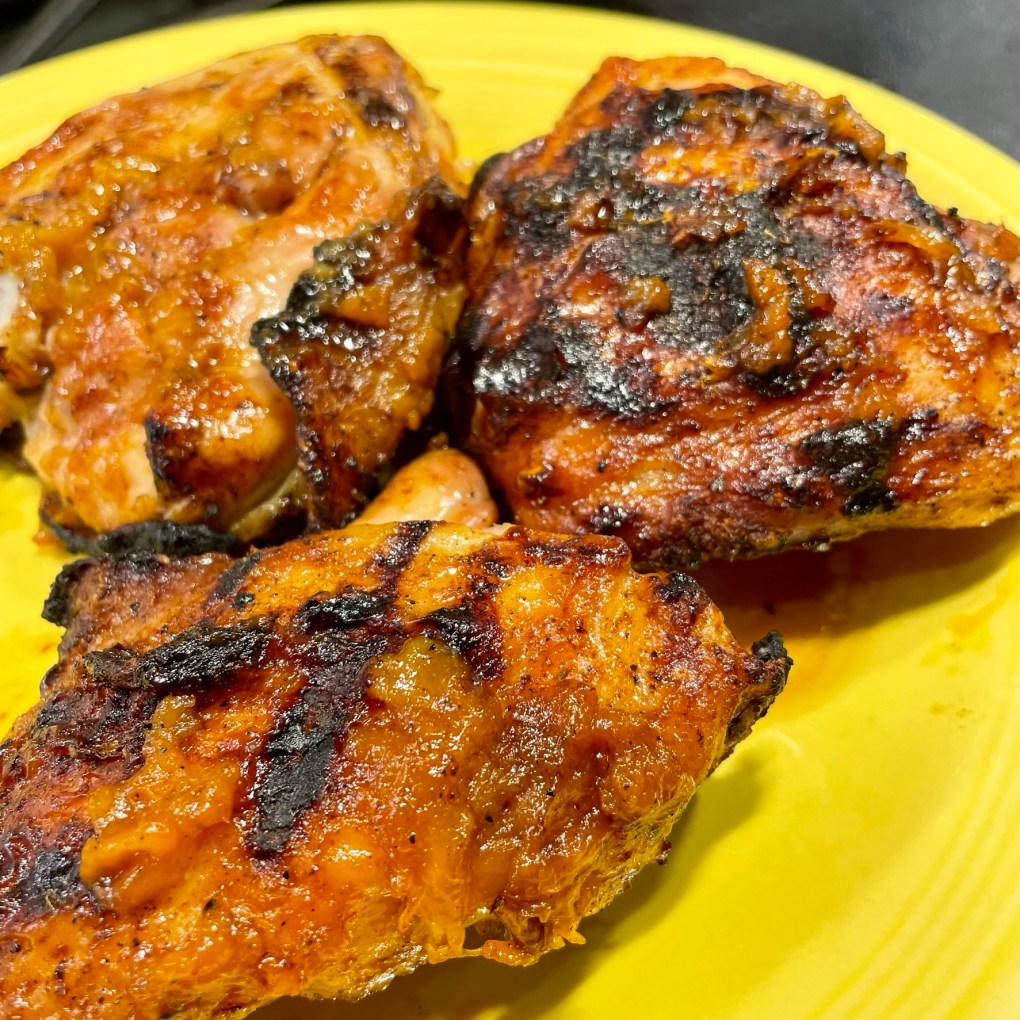
The Result
So there we have it: peach-bourbon inspiration + simple, complementary seasonings + unconventional technique + teamwork = one winner of a dish! The chicken thighs were juicy and tender inside, with a nice, crispy skin and a flavorful coating that combined one of summer’s greatest gifts and one of our favorite spirits.
A smoky spice is a wonderful complement to the sweetness of fresh, summer peaches in this flavorful grilled chicken recipe.
Ingredients
1 pound chicken thighs
1 tsp. smoked paprika (Spanish-style, not “hot” or Hungarian)
1 tsp. kosher salt
1/2 tsp. black pepper
3 tsp. brown sugar (use 2 for the rub and 1 in the glaze)
1 large peach, peeled and diced
1 1/2 oz. bourbon (I used smoked maple, and it was great!)
A splash of water, as needed, to cook down the peaches
This recipe relies on two specific techniques: dry-brining and indirect grilling. Both are outlined below, and they take longer than a conventional recipe, so plan ahead. I promise, the extra wait time is well worth it in the end! You’ll need to check the internal temperature of the chicken, so it’s beneficial to have a meat thermometer handy when you begin.
Directions
Do not rinse the chicken. Pat the pieces dry on all sides with paper towels. Arrange on a plate or in a glass dish.
Combine paprika, salt and pepper in a small bowl. Add two teaspoons of the brown sugar and mix until evenly blended. Sprinkle all over both sides of the chicken, reserving about one teaspoon of the spice mix for the glaze. Place the chicken, uncovered and skin side exposed, into the fridge and let it rest for several hours.
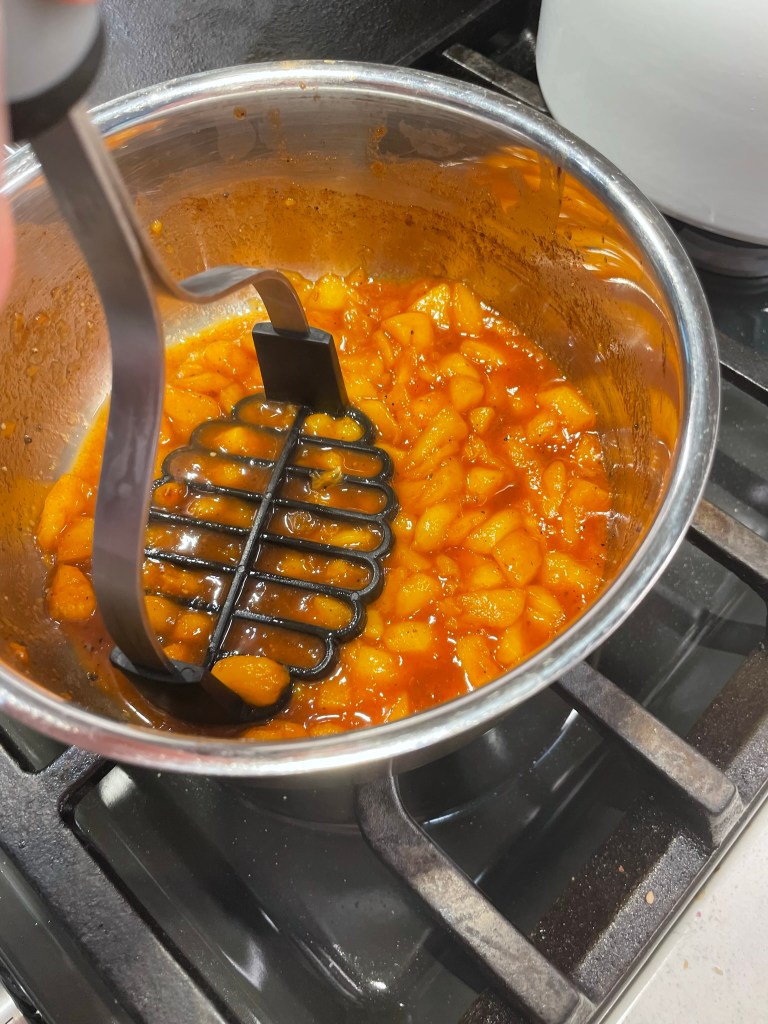
Add diced peaches to a small saucepan with remaining spice blend and another teaspoon of brown sugar. Pour in half of the bourbon and cook over medium low heat until peaches break down and mixture is slightly syrupy. If needed, add a splash or two of water to achieve this consistency.
After about 15 minutes, mash the peaches slightly into a chunky puree. When all the moisture has evaporated, stir in the remaining half shot of bourbon and remove from heat. If you make and chill this ahead, bring it to room temp before grilling.
Remove chicken from fridge about 30 minutes before grilling. Heat grill to 350° F, with burners or coals only one one side of the grill for indirect cooking.
Arrange chicken pieces, skin side-down, on indirect side of the grill. Cook for about 25 minutes, turning once or twice, until internal temperature is 145° F. Move chicken to direct heat side to finish cooking and crisp the skin.
When chicken internal temp reaches 165° F, brush on peach-bourbon glaze, and continue to cook on direct heat side briefly, until glaze has a “baked-on” appearance. Watch it closely so the sugars don’t burn.
Serve chicken immediately. When cooking by reverse-sear, post-cooking rest is not necessary.
When I mention Kentucky Derby and cocktails in the same sentence, there’s a very good chance that a mint julep pops into your mind— and for good reason. The refreshing bourbon and mint drink piled high with crushed ice is ubiquitous at Derby festivities everywhere, including Churchill Downs. But not everyone loves mint, and some of us like to change things up just for the sake of change.
I consider myself an explorer in the world of cocktails, and when I ran across this one in a little gift book, Tiny Bubbles, I bookmarked it for this year’s Derby. Author Kate Simon describes this drink as the one “for your bourbon-obsessed friend who thinks he doesn’t like bubbly cocktails,” and goes on to describe the drink as being like a “fizzy Old Fashioned.”
I can’t attest to the drink’s ability to win over a non-fizz drinker— my husband certainly would not be swayed, and most people don’t announce their dislike for something with a secret hope of being convinced otherwise— but I do think this cocktail has an elegance and flair about it that is quite nice, especially because it is made with easy-to-find ingredients. If you’re looking for a change, maybe this is the one.
This lovely libation is known as a Seelbach Cocktail, so named for the Seelbach Hotel in Louisville where it is said to have originated in the years before Prohibition. As with so many cocktail backstories, there have been a few objections to the declared history of the Seelbach, and even the bartender who supposedly revived it in the 1990s “from an old hotel menu” fessed up to having conjured the story for his own glory.
But I say, who cares? The drink is fun without being too fussy, and a little change of pace is a good thing once in a while, even for an event as steeped in tradition as the Kentucky Derby. I don’t mind that the backstory is pure fiction, as long as it tastes good.
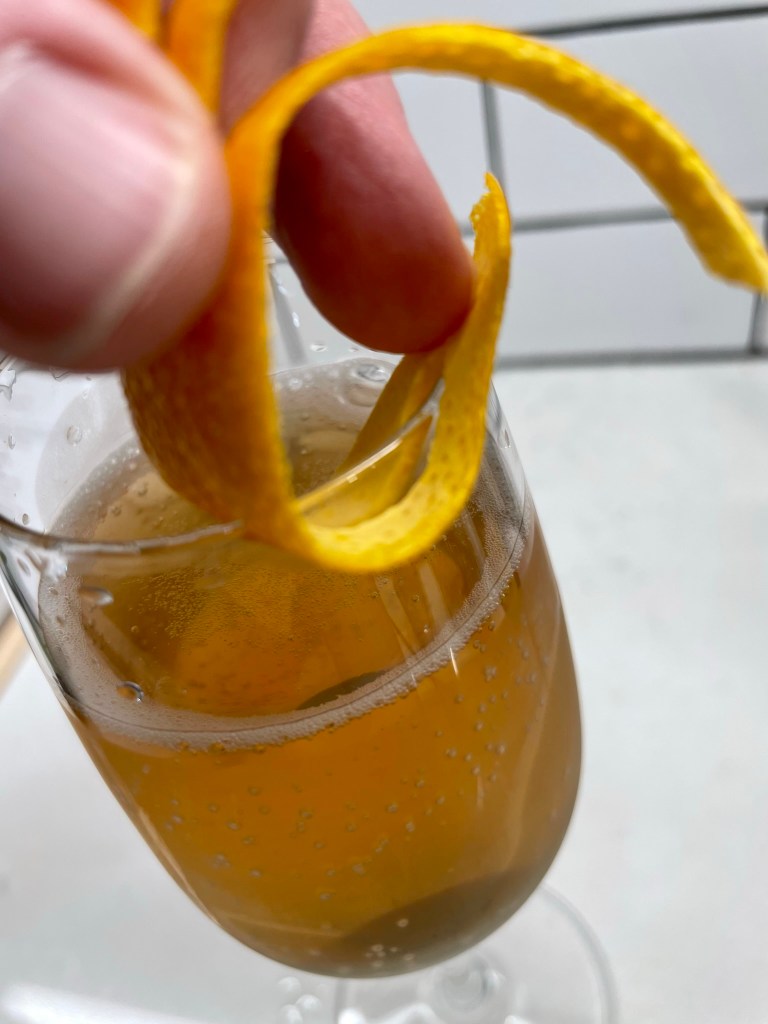
Bourbon (I used Elijah Craig Small Batch) is paired with Cointreau, an orange liqueur that mimics the expressed orange in a typical Old Fashioned. The cocktail is heavy on the bitters (two kinds, traditionally), which is a nice balance to the sweetness of the Cointreau, and a brut Champagne makes an entrance to provide the fizzy part. A cherry sits on the bottom of the glass as a sweet, last-sip reward, and an orange twist garnish gives it a fancy photo finish. I made my “twist” extra frilly, and as it sits perched on the rim of the chilled flute, it reminds me of the flashy fascinator hats that will be worn by the ladies at the Kentucky Derby.
Whenever I’m making cocktails, I like to get my ducks in a row— or horses, as the case may be for this weekend’s event. There’s no joy in realizing after you’ve started mixing that you forgot to wash the orange, for example, that will be used for garnish. And hopefully you’re doing that. Don’t ever cut up your fruit straight from the grocery store, as any variety of junk and pesticides will have taken up residence in the peel. Line up your tools and ingredients, and ice down the champagne flute so your drink stays chilly after it’s poured.
As many of my blog followers know, I have trouble sticking to the rules and rarely make a recipe exactly as written, so I’ll explain my “swaps” from the original Seelbach recipe, beginning with the mixing vessel. The Tiny Bubbles recipe suggests using a shaker, but I tried it and had trouble straining it from the shaker top neatly into the small opening of my flute glass. The rule of thumb in mixology is to use a shaker if you are combining ingredients with widely different viscosity— the thickness or simple syrup and watery nature of citrus juices will blend with alcohol better in a shaker. But this drink is all alcohol, so a mixing glass is my choice for easier dispensing. Use what works for you.
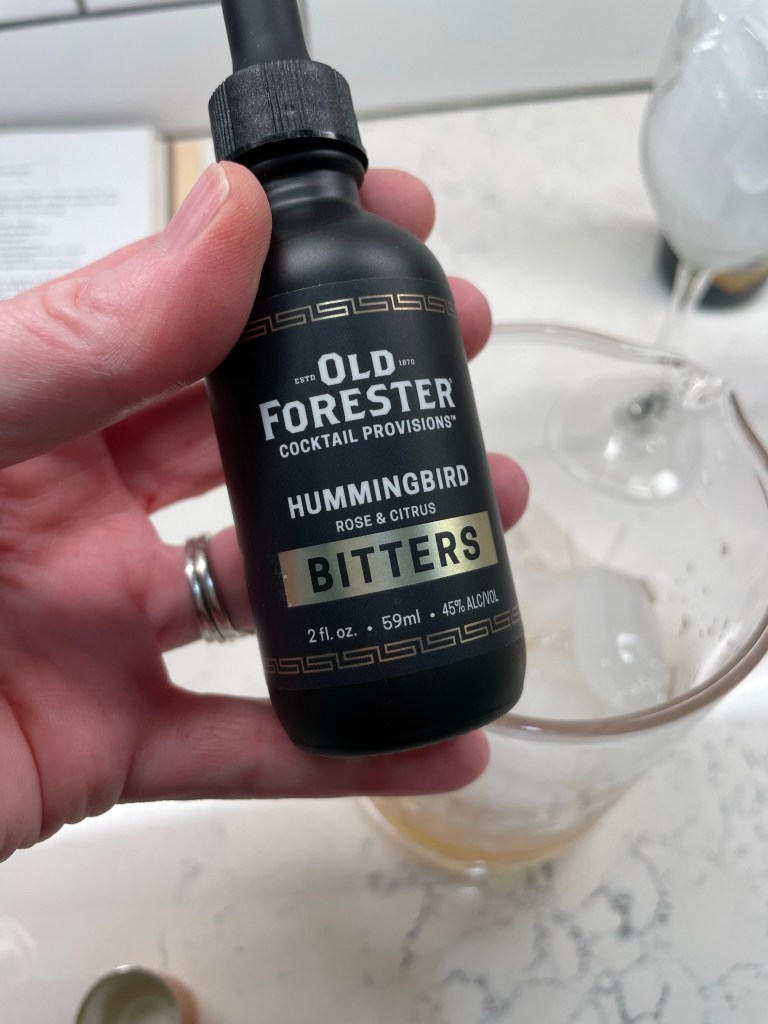
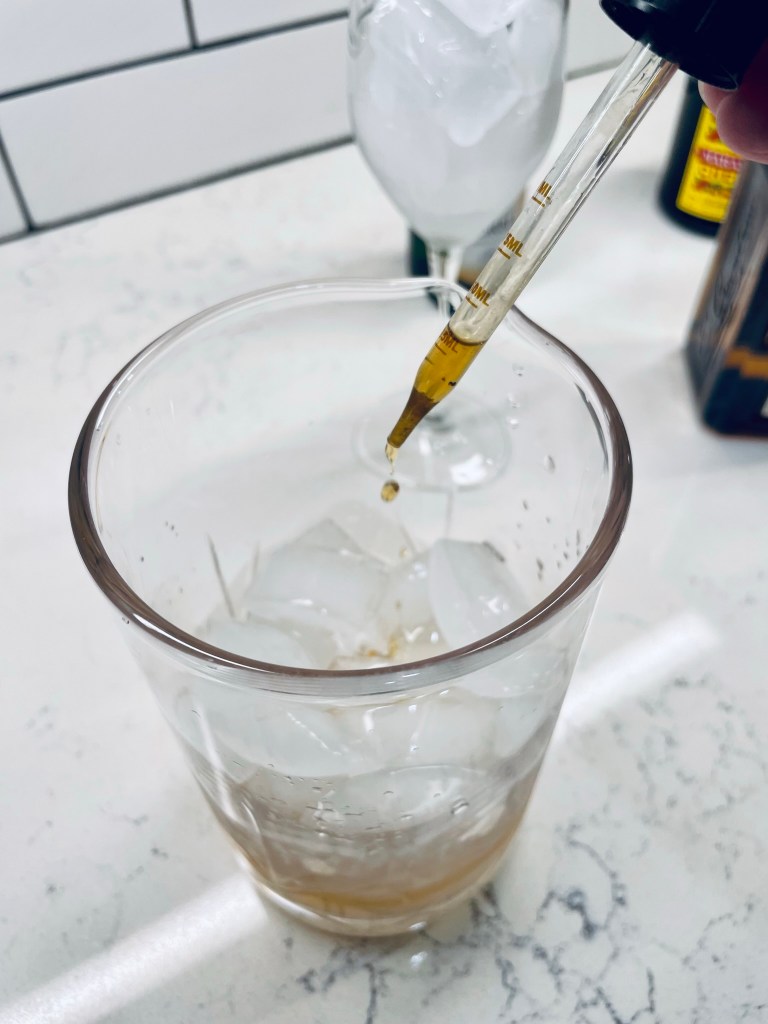
As for the bitters, the original recipe calls for both Angostura and Peychaud’s bitters, the latter of which has a lovely pink color but a strong anise flavor. I tried it that way, but didn’t love it. The combination doesn’t fit my perception of Kentucky Derby elegance, and I’ve been looking for a way to use these Hummingbird bitters, which combine rose and citrus essences. The Derby is literally the “Run for the Roses,” and I liked that tie-in for this frilly-meets-fizzy drink. It worked beautifully! If the Hummingbird bitters are not an option for you (I found them online but it’s a bit late to order them for the Derby), I personally think orange bitters would be a better fit than the Angostura-Peychaud’s combination. Experiment to find what tickles your fancy.
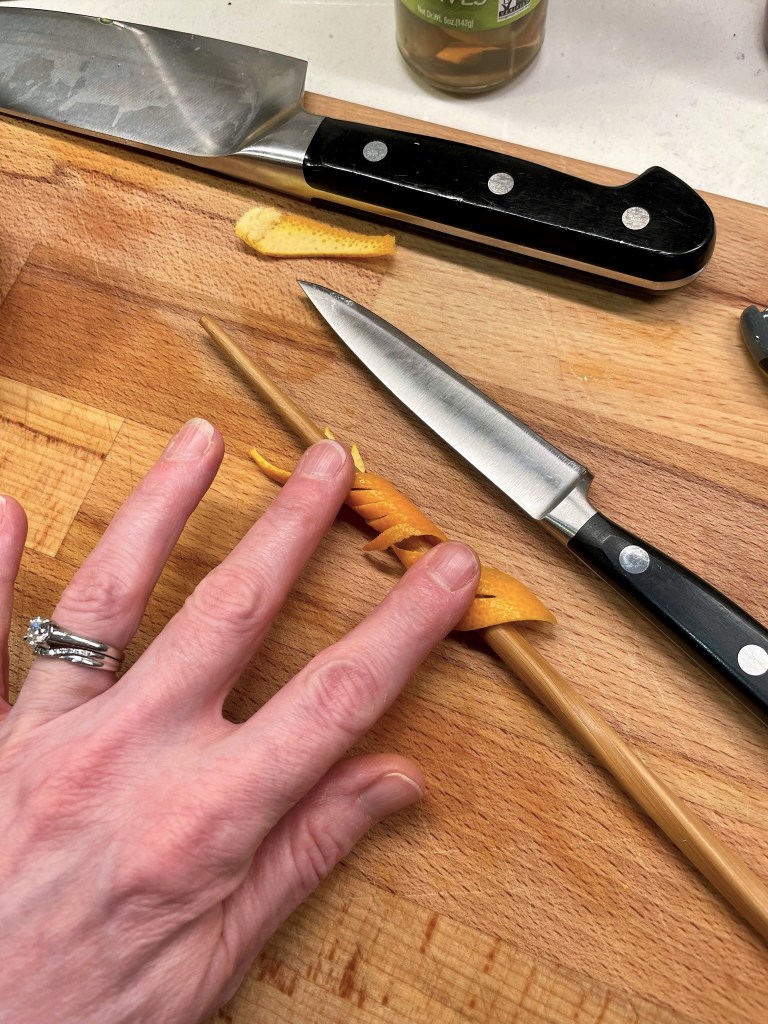
To get started on my cocktail, I made my orange peel garnish first by stripping off only the bright orange part of the fruit, leaving the bitter white pith behind. Use a sharp paring knife to trim it into clean lines, and make cuts as follows— a long, thin cut in the center of one end (this is where you’ll attach it to the rim of your glass), and several lengthy cuts on the other end, almost like fringe or a feather.
Wrap the orange peel snugly around a chopstick or wooden spoon handle and hold it for several seconds to coax it into shape. When it seems to be holding its own, begin making your cocktail.
Combine the bourbon, cointreau and bitters in an ice-filled cocktail mixing glass, and stir the drink for about 20 seconds to chill it down. If you’re using a shaker, have at it for about the same amount of time, until the shaker becomes uncomfortably cold.
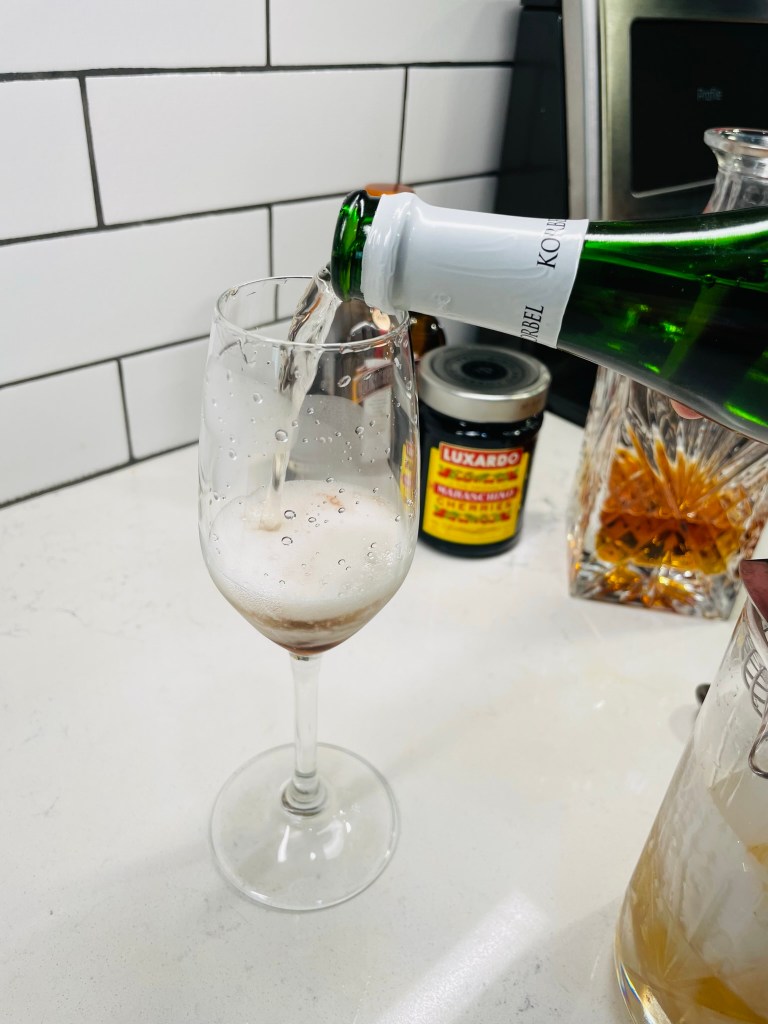
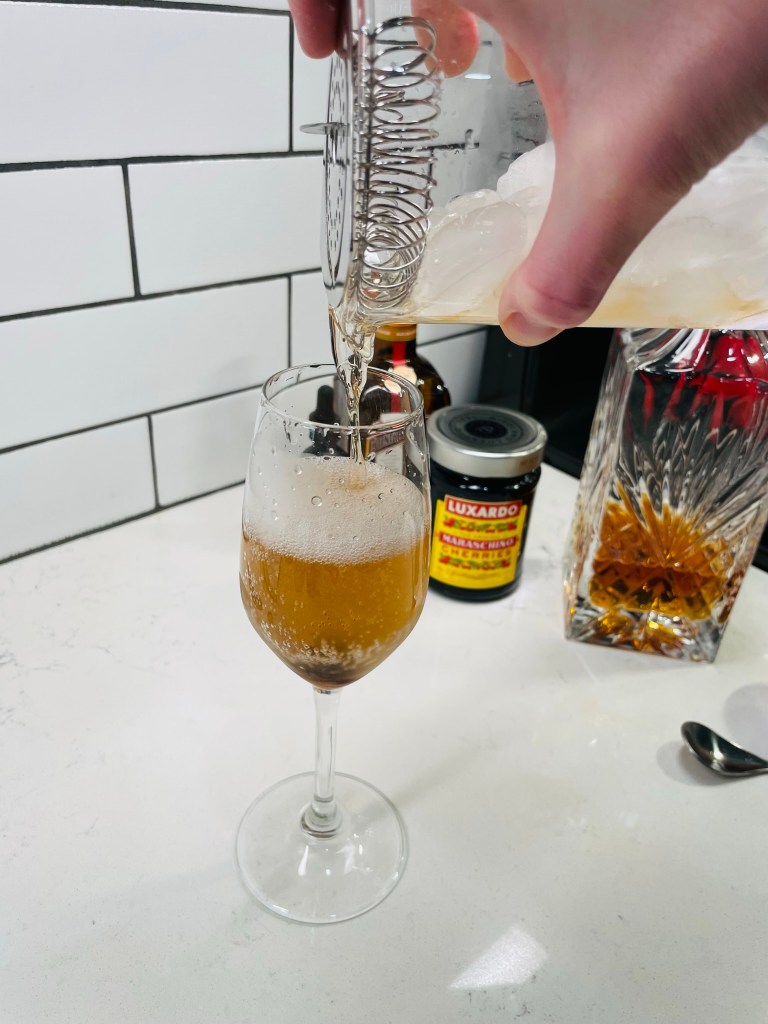
Add a Luxardo cherry to the bottom of the flute, and don’t worry at all if a bit of the luscious syrup goes with it. Pour in about half of the specified champagne (this helps ensure the drink is well-mixed), then strain the cocktail over the glass and top it off with the rest of the bubbly. Perch your frou-frou orange garnish on the edge of a glass like a fascinator, and enjoy in moderation. Fair warning: the effervescence in this drink will go straight to your head, so it might be a good starter before you switch to something more mainstream. A mint julep, perhaps? 🙂
With the flavors of an Old Fashioned, and the fizziness of Champagne, this Louisville-based cocktail will be a lovely option for a Kentucky Derby watch party.
Ingredients
1 oz. bourbon (I used Elijah Craig Small Batch; it’s smooth and 94 proof)
1/2 oz. Cointreau (or other orange liqueur)
About 7 drops Hummingbird bitters (available online, or substitute orange and/or Angostura)
3 oz. brut Champagne or other sparkling wine, chilled
Ice for shaking/stirring and chilling glass
Good quality cocktail cherry, such as Luxardo
Strip of orange peel for garnish
Directions
Fill champagne flute (or white wine glass) with ice to chill it.
Fill a shaker or mixing glass halfway with ice. Add bourbon, Cointreau and bitters and stir or shake for about 20 seconds.
Empty ice from flute and place cocktail cherry in the bottom.
Pour about 2 oz. of the Champagne into the glass. Strain the cocktail into the glass and top it off with remaining Champagne.
How do you know when a dish is a winner? Is it compliments received or perhaps a request for the recipe? Maybe it’s no words at all as the eaters enjoy each bite in blissful silence. It could be any of the above, but in my experience, an empty plate tells no lies!
When Kentucky Derby rolled around last year, my husband and I were invited to join some friends for an afternoon of snacking, sipping and generally feeling fancy with gussied-up hats and minty bourbon cocktails. I offered to bring an appetizer and though it isn’t really my style to share a straight-up classic, I decided on Benedictine, a cream cheese-based spread developed by an early-20th century Louisville caterer.
As Wikipedia tells it, Jennie Carter Benedict served this concoction to her catering clients and later to guests in her tea room, though at that time it was more of a silky dip than a spread, made with the juices of cucumber and onions and sometimes a few drops of green food coloring for effect. The combination of cream cheese and cucumber is cool and refreshing and makes Benedictine a delectable filling in pretty cucumber sandwiches. Its popularity continues all these years later, with a few modernizations. There will be plenty of it served up at Kentucky Derby gatherings alongside mint juleps and hot brown sandwiches, and probably even at Churchill Downs itself when the riders take their positions on the first Saturday of May.
Benedictine is made with very simple ingredients, requires no cooking, and can be made a day ahead and stored in the fridge until post time. And, as I mentioned, the empty plate I brought home after last year’s Run for the Roses was proof that this appetizer was a clear winner.
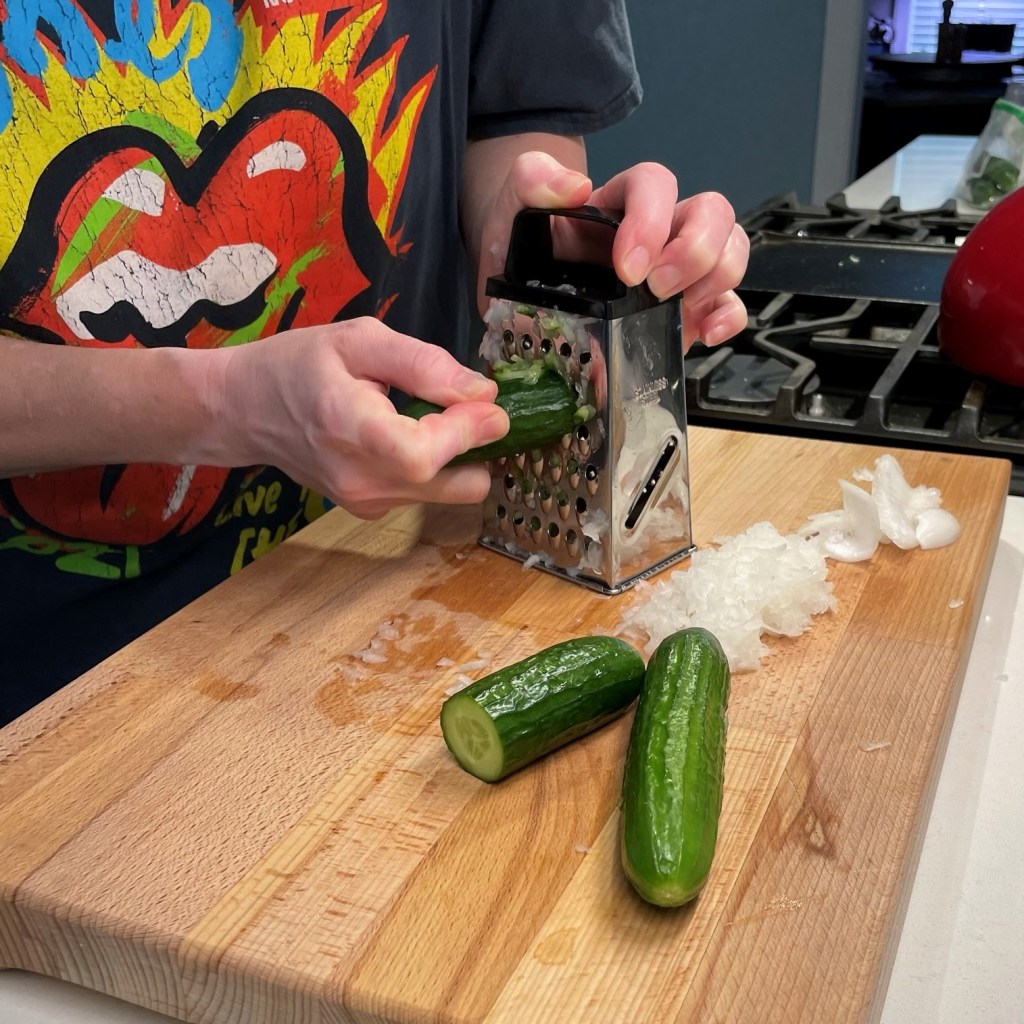
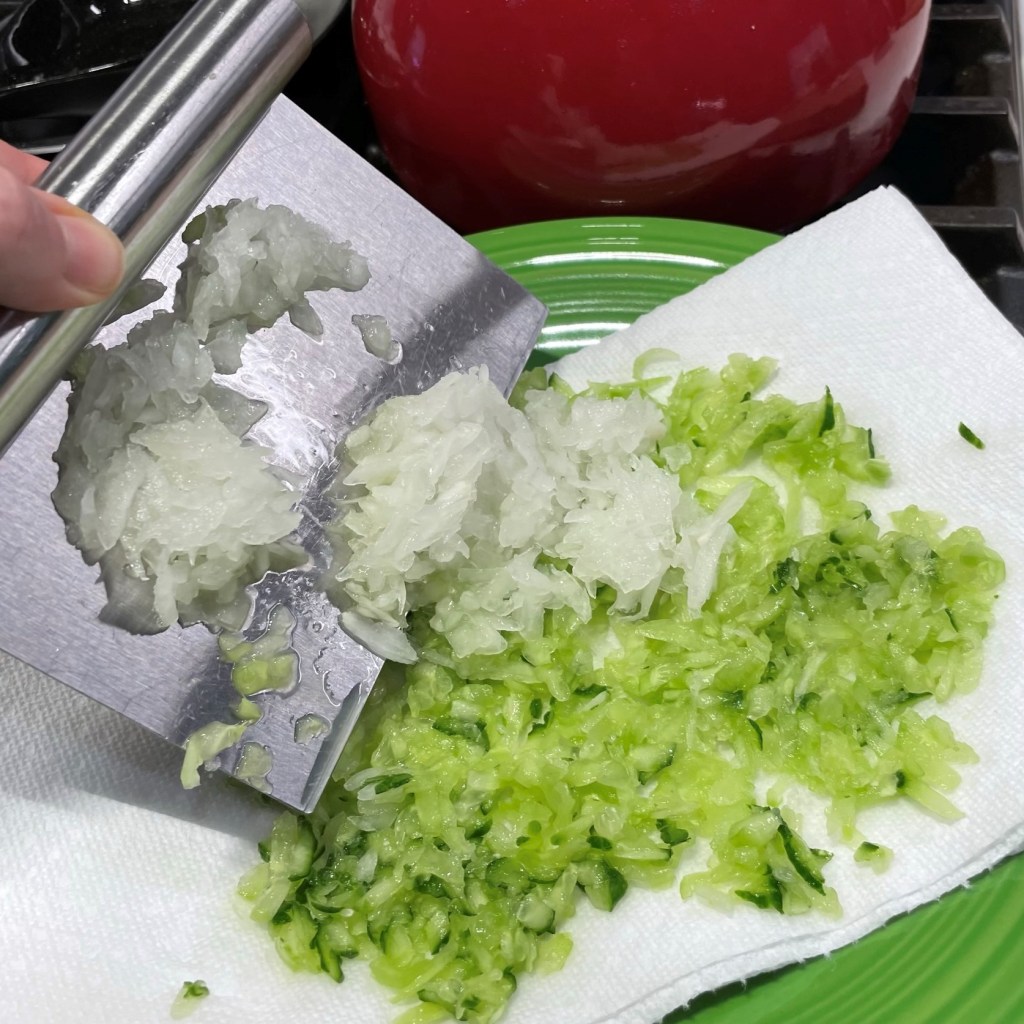
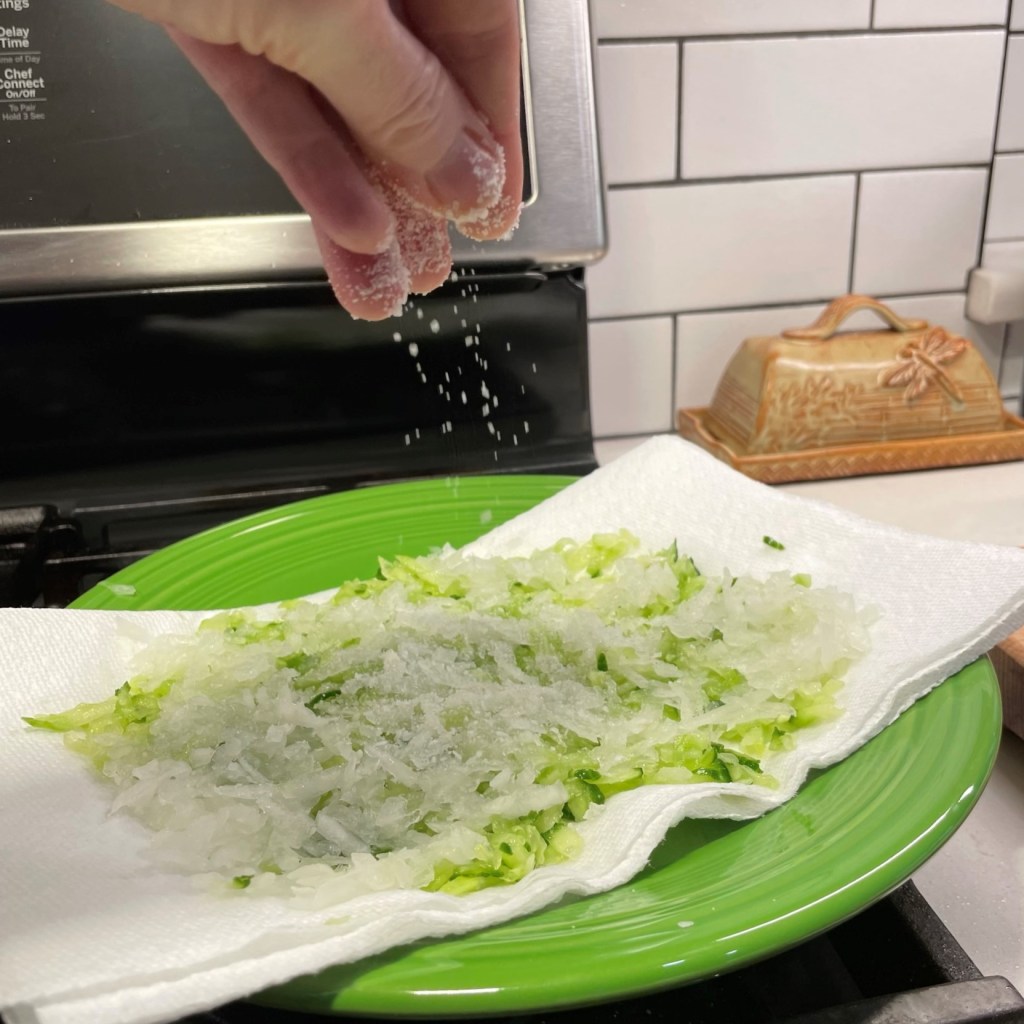
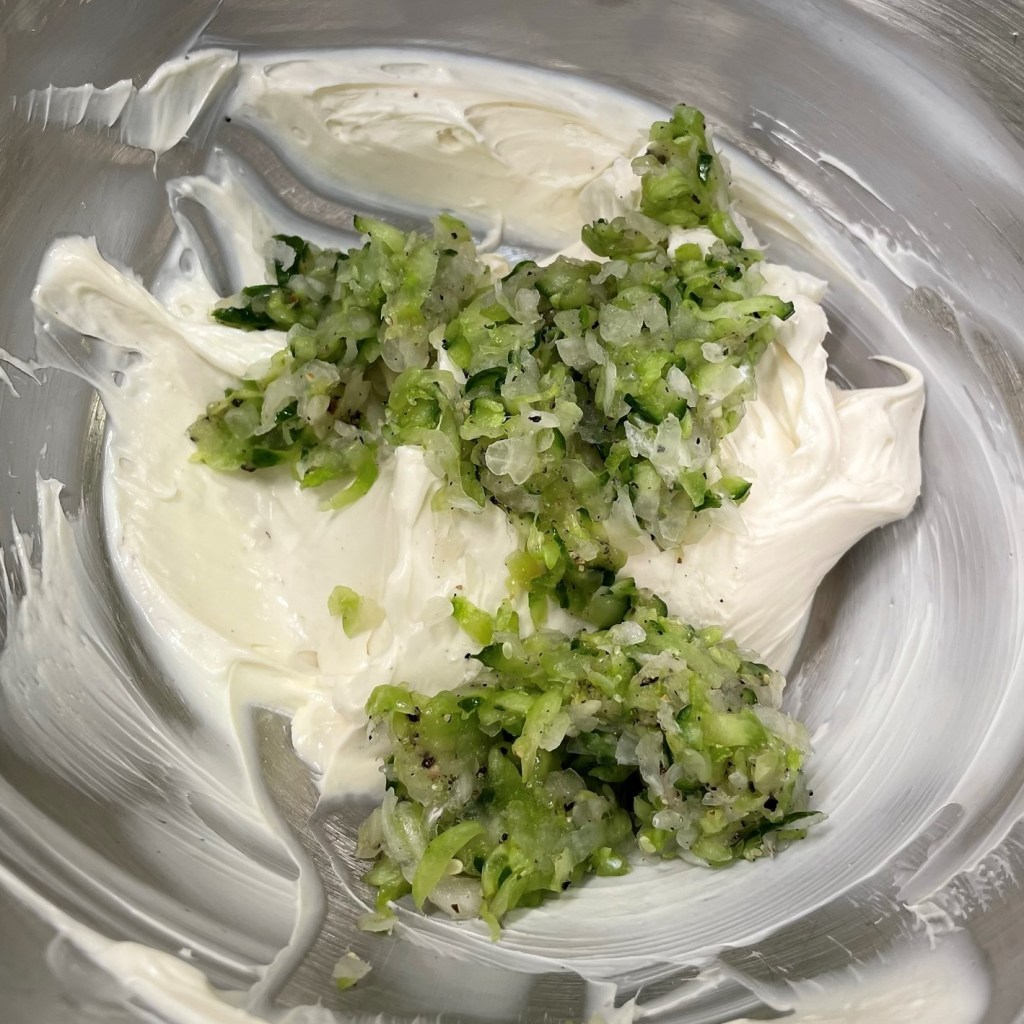
This recipe for Benedictine is inspired by the original, but follows my own general formula for a cream cheese-based dip. As with my tzatziki dip, I salted and drained the grated cucumbers to ensure the shreds would not turn the spread soupy. I did the same with the onions, swapping new paper towels over the mixture until they no longer felt soaked. I did this part of the recipe first, and let the cukes rest in the fridge for a couple of hours before proceeding. I used Persian cucumbers because they have fewer seeds and the skin is tender enough for some of it to be included.
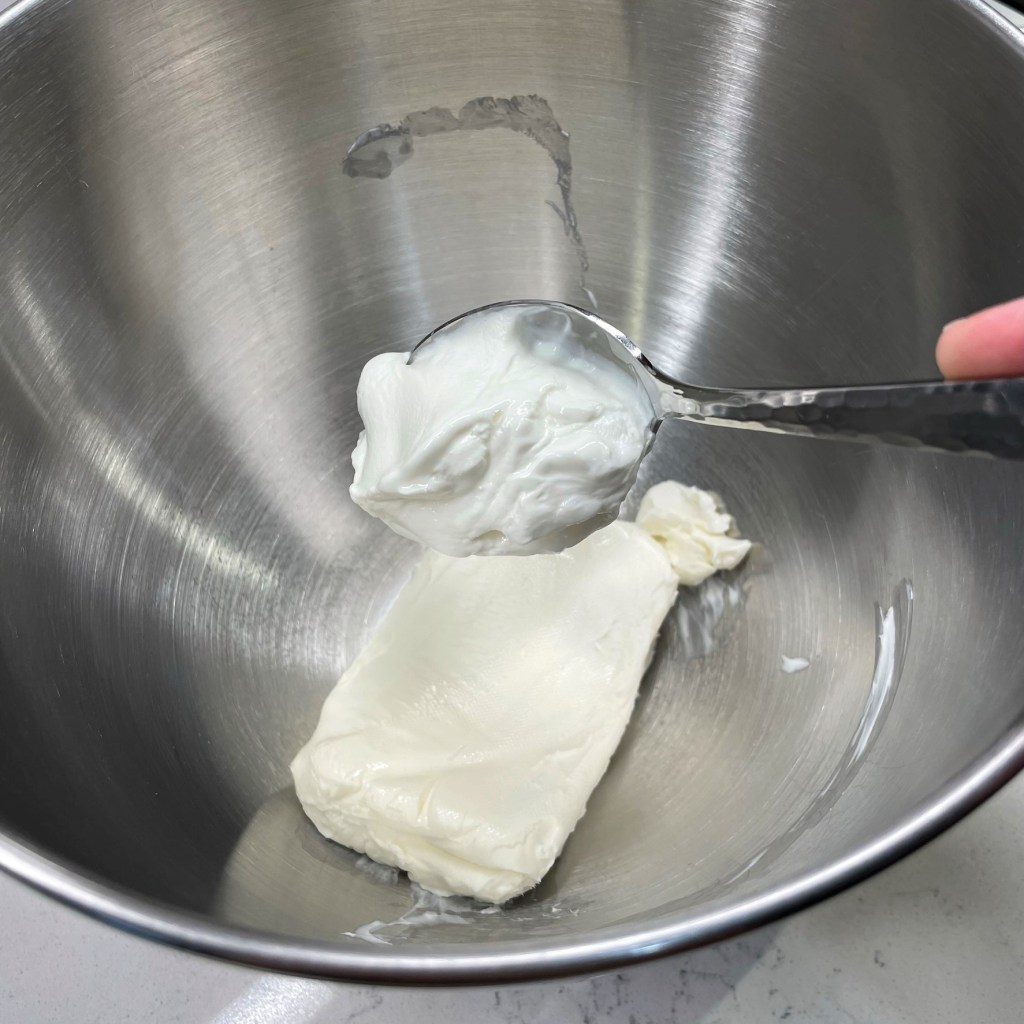
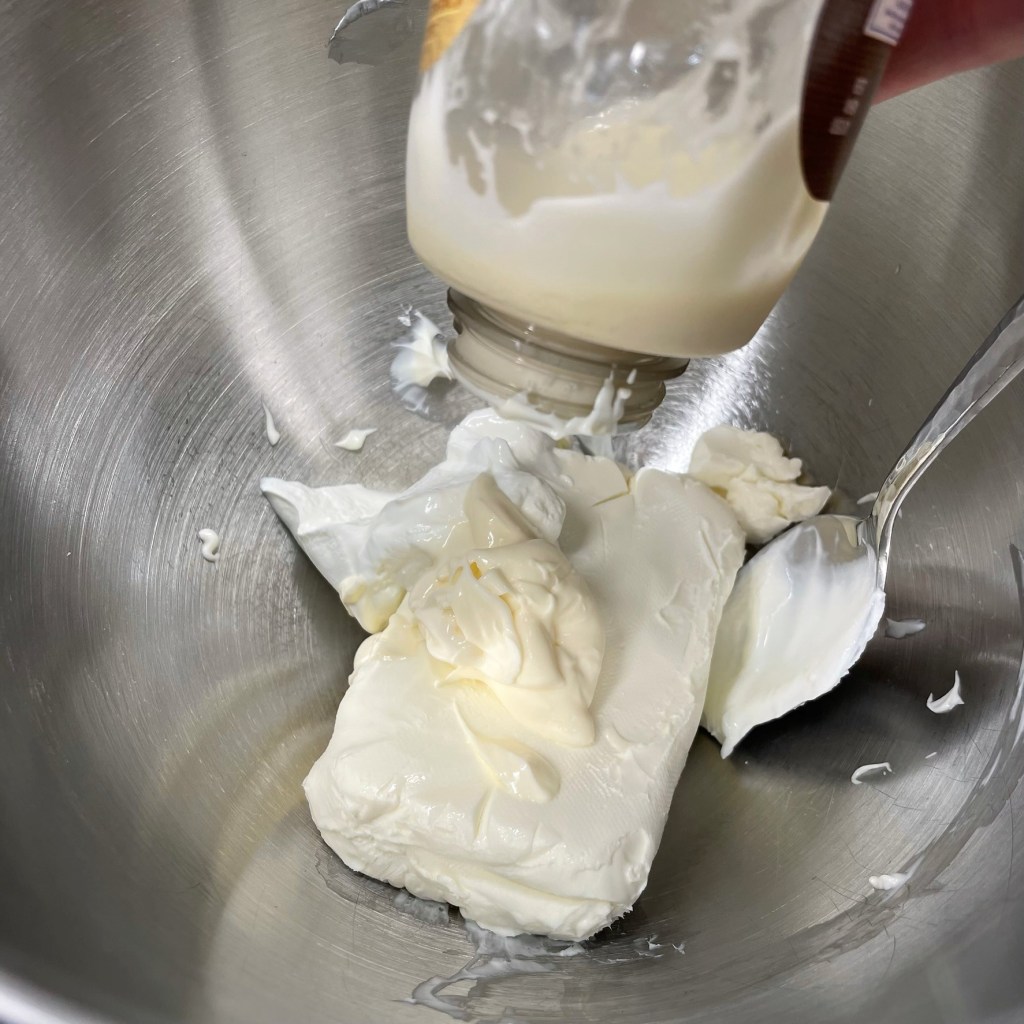
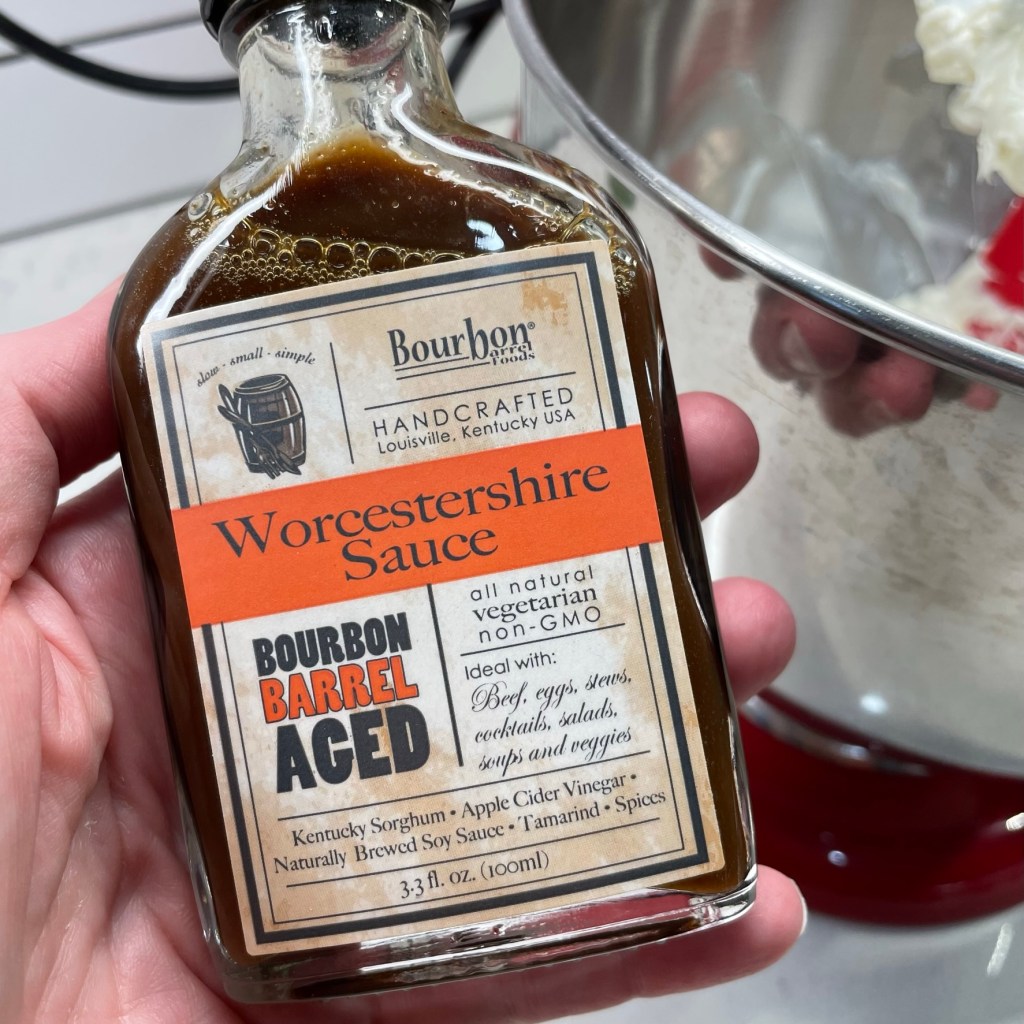
The creamy base was a blend of light cream cheese, sour cream and a bit of mayonnaise. Rather than drops of hot sauce (mentioned in the Wikipedia article), I gave my Benedictine a little zing from a bourbon barrel-rested Worcestershire sauce made in Louisville—that seemed apropos for a Derby Day recipe and it was a pleasant, savory complement to the freshness of the cucumbers. This sauce also happens to be vegetarian, as it omits the usual anchovies.
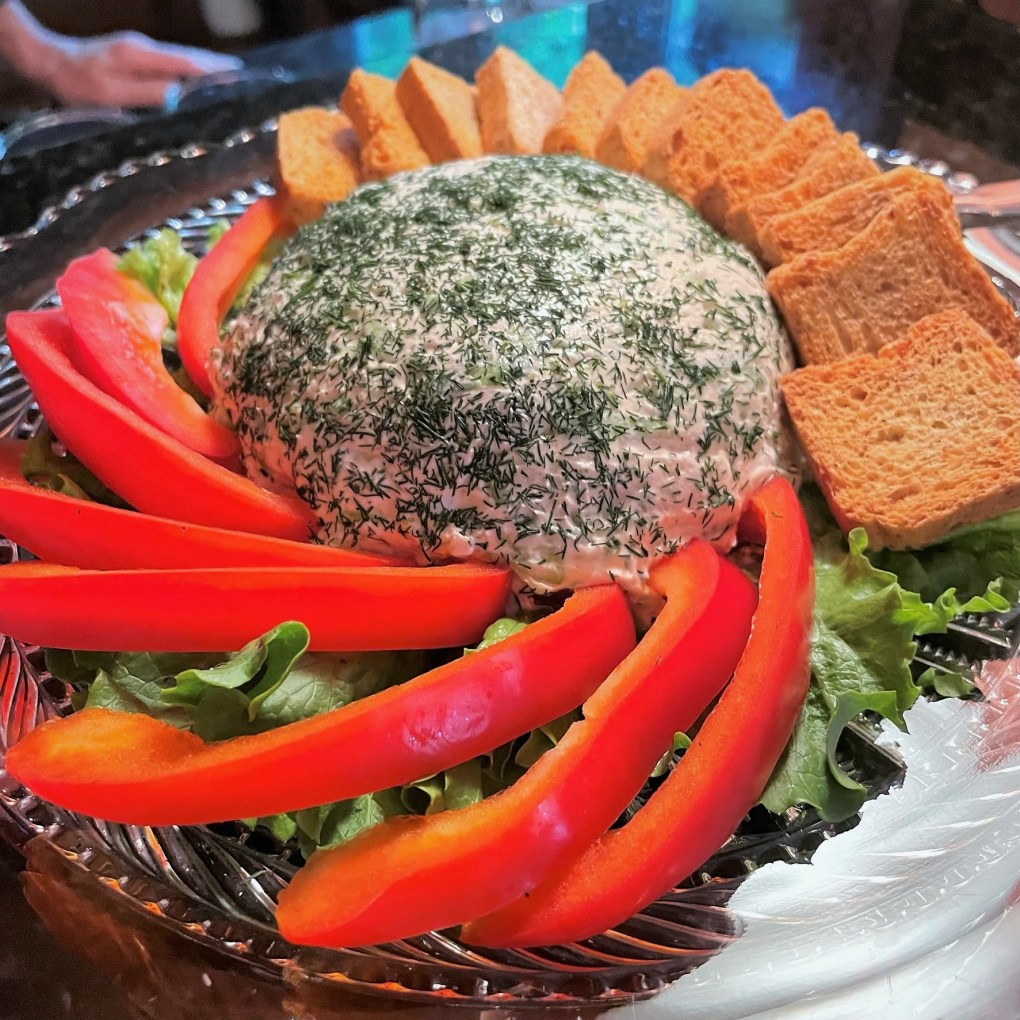
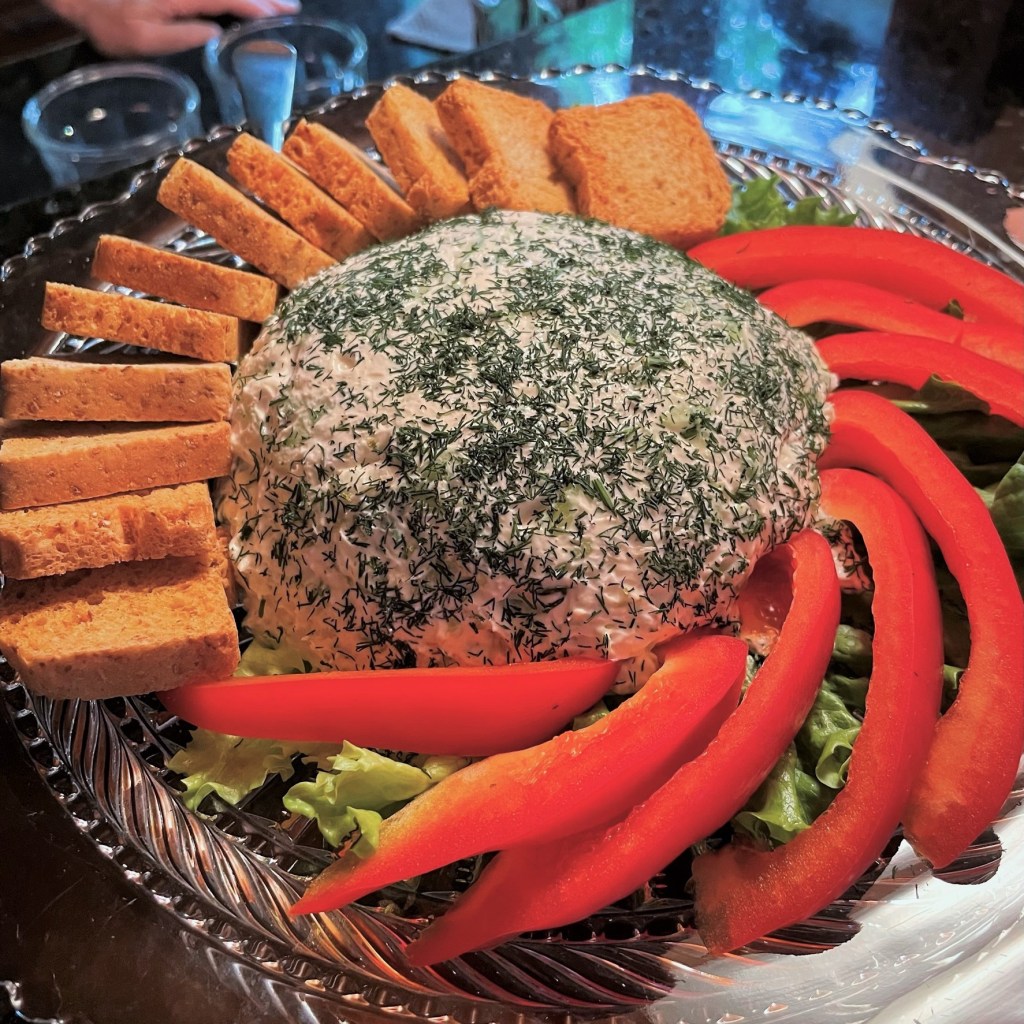
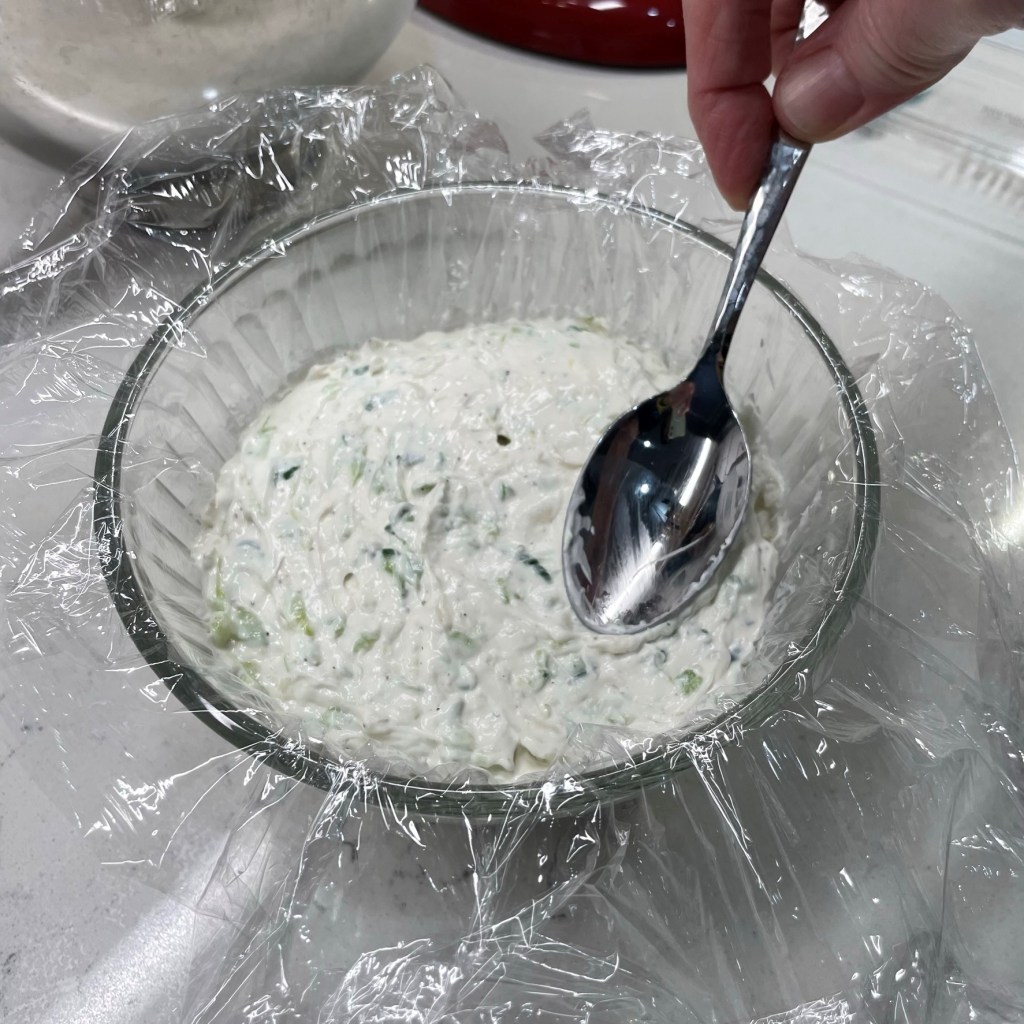
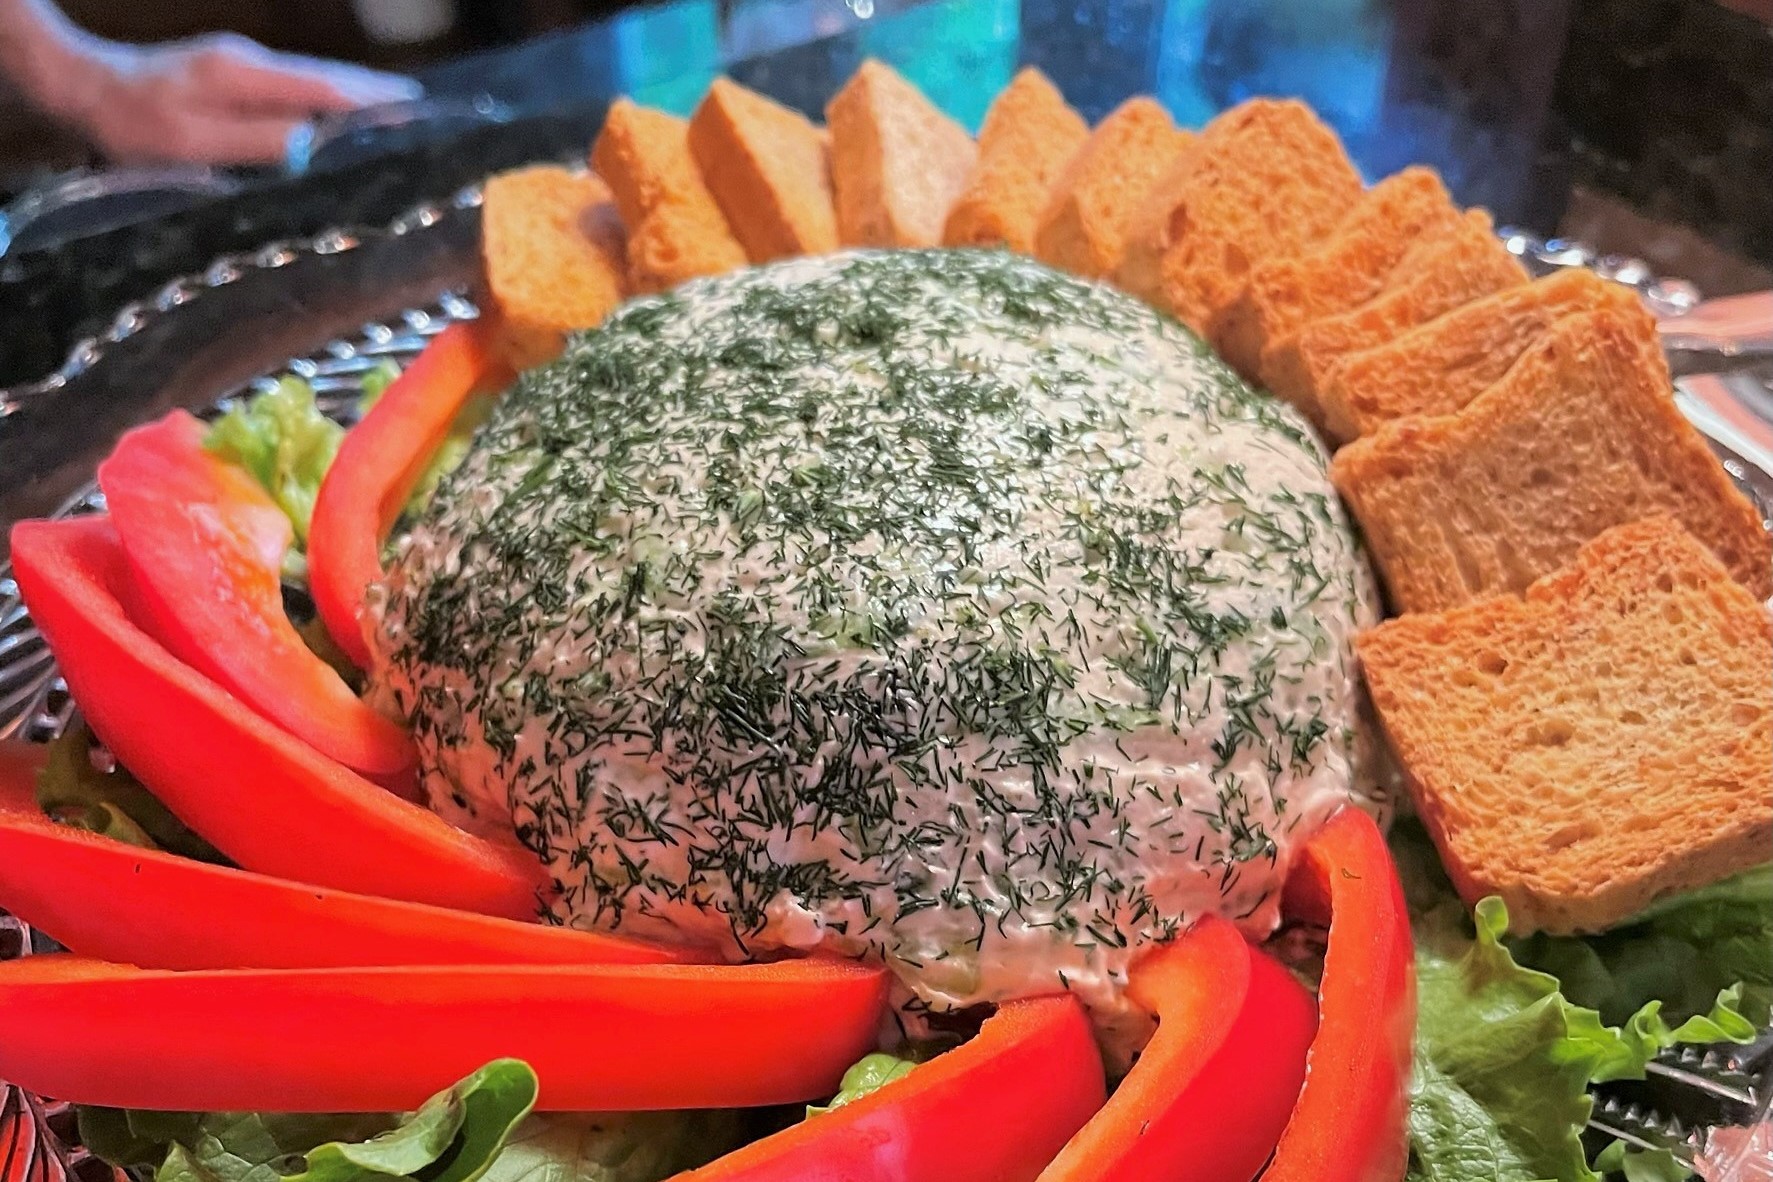
If I were in a hurry or making cucumber sandwiches, this would have been ready as soon as the drained cucumber and onion shreds were mixed in, but I wanted to serve my Benedictine on a platter with fresh veggies for dipping and some toasted mini brioche squares, so I pressed it into a bowl lined with plastic wrap and gave it some fridge time to set up for prettier presentation.
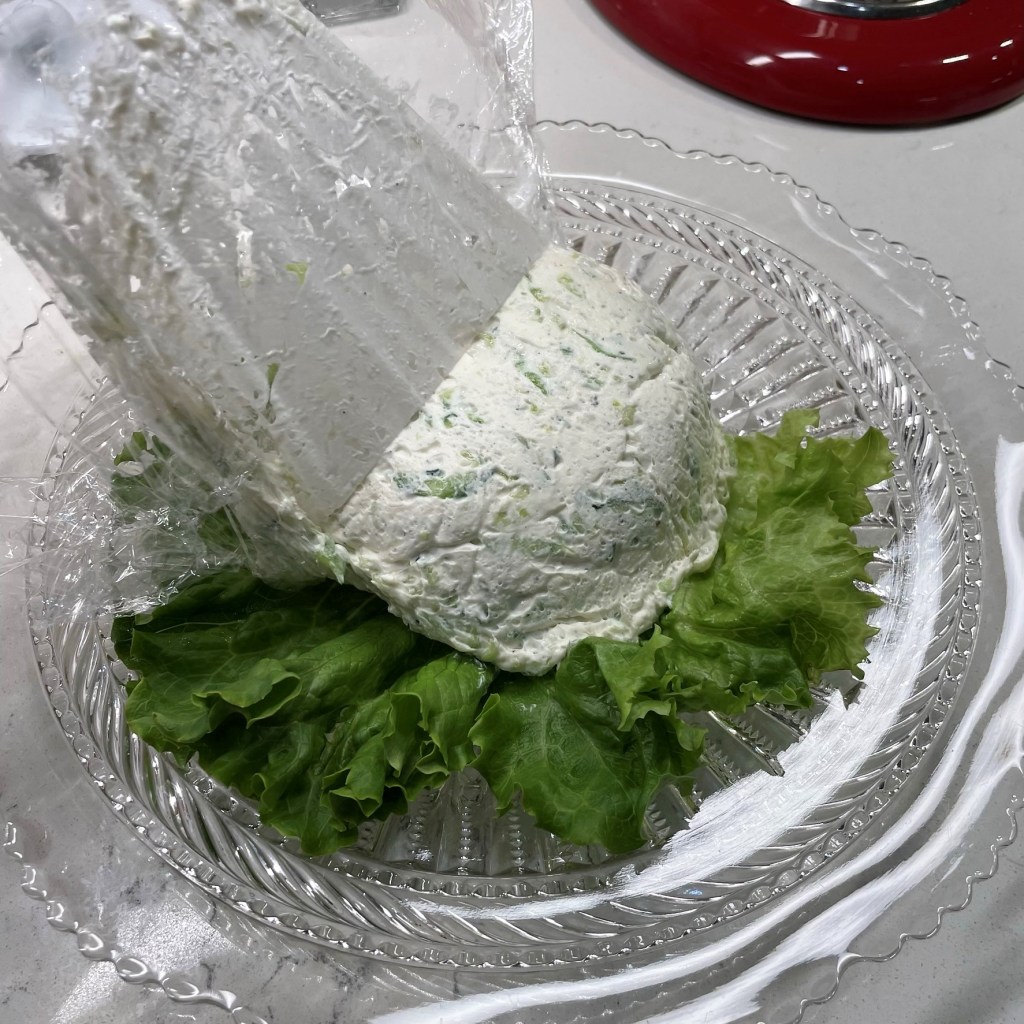
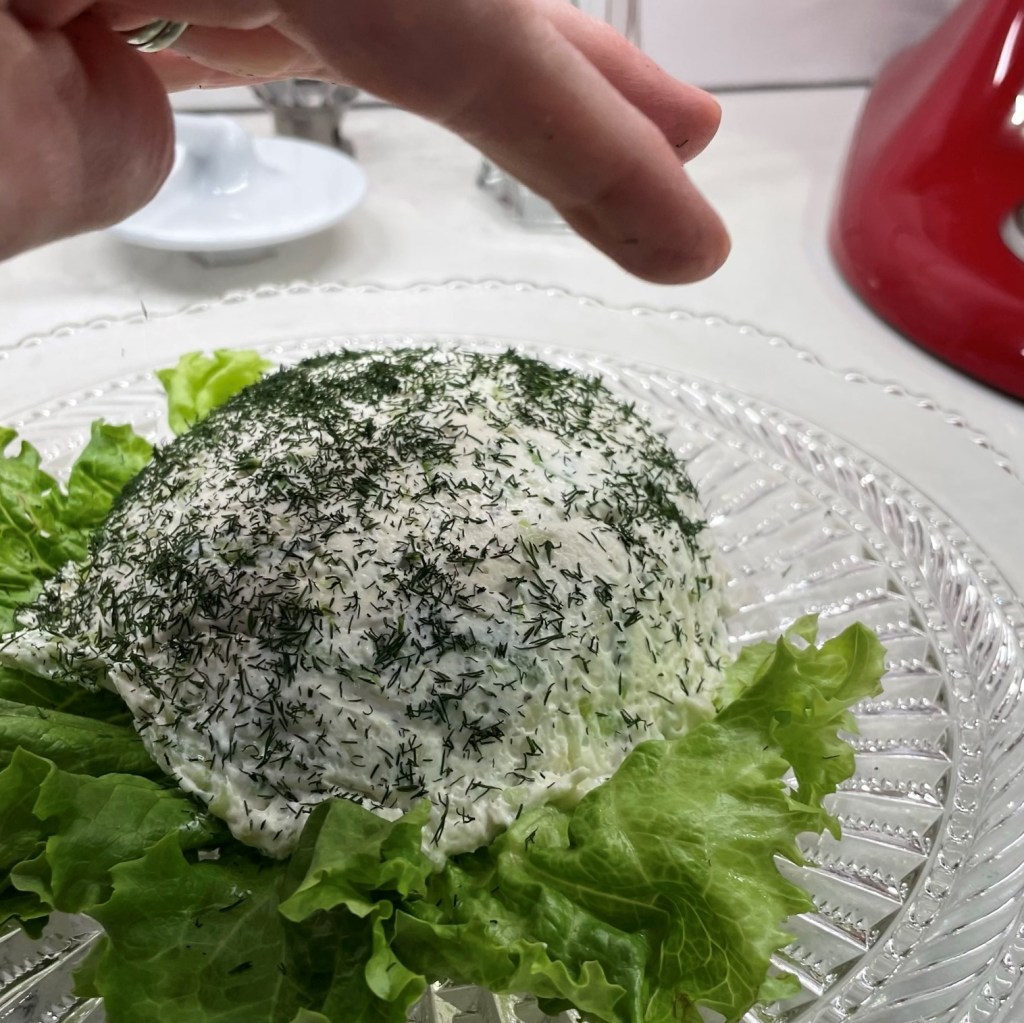
When I inverted it onto a lettuce-lined platter a few hours later, it occurred to me that fresh herbs would finish it nicely. Unfortunately, all I had in the fridge that day was cilantro (not the best match here), and it was too late for a last-minute dash to the store, so I had to concede to using dried dill leaves. The flavor was still very good, but fresh dill would take the win—by a nose. 😉
Persian cucumbers are usually about five inches length and they have fewer seeds and more tender skin than typical “slicing” cucumbers. Consider peeling and seeding other types of cucumber. This recipe requires about 1 cup of grated cucumber. I peeled one of my Persians, and kept the other intact.
Directions
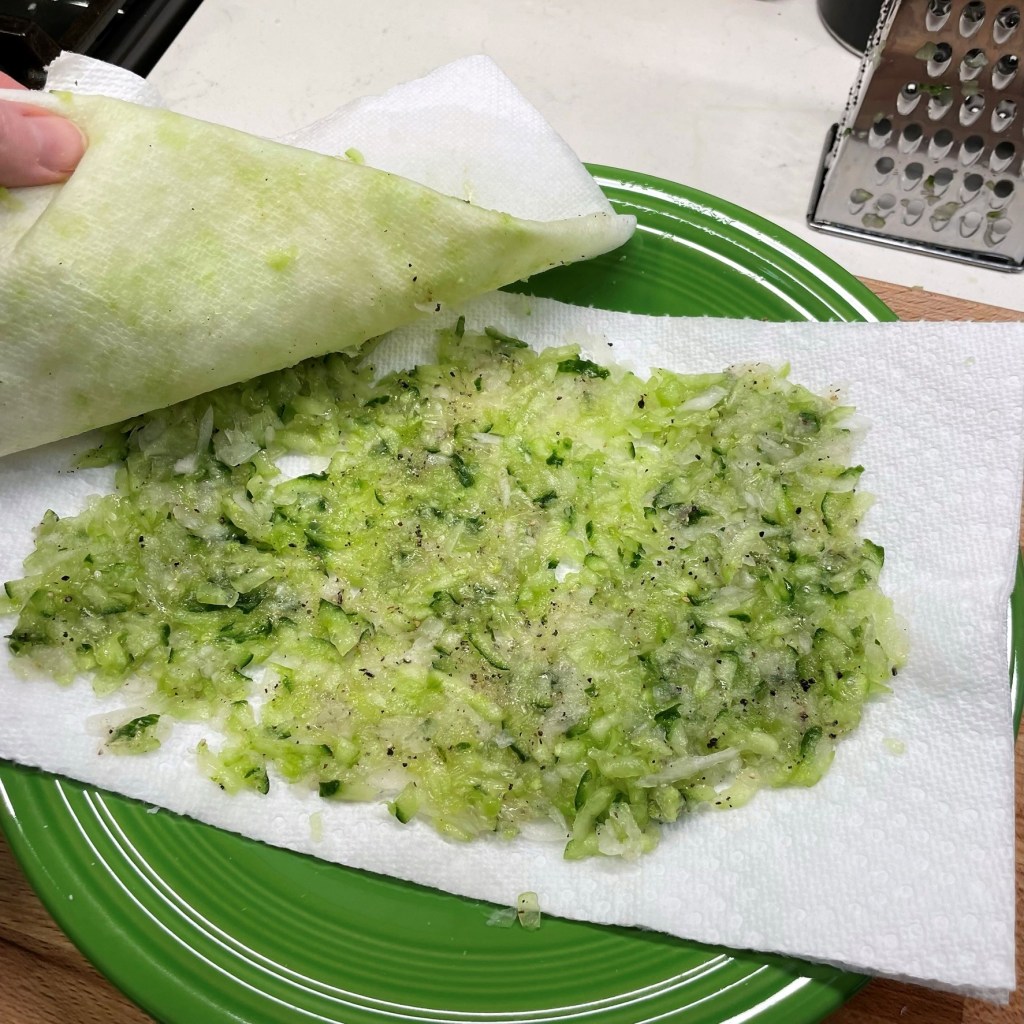
Use a box grater to shred the cucumbers and onion. Place shreds in a bowl or plate, lined with layers of paper towels. Sprinkle with salt and pepper, and then wrap in the paper towels; refrigerate a couple of hours to draw out as much excess moisture as possible.
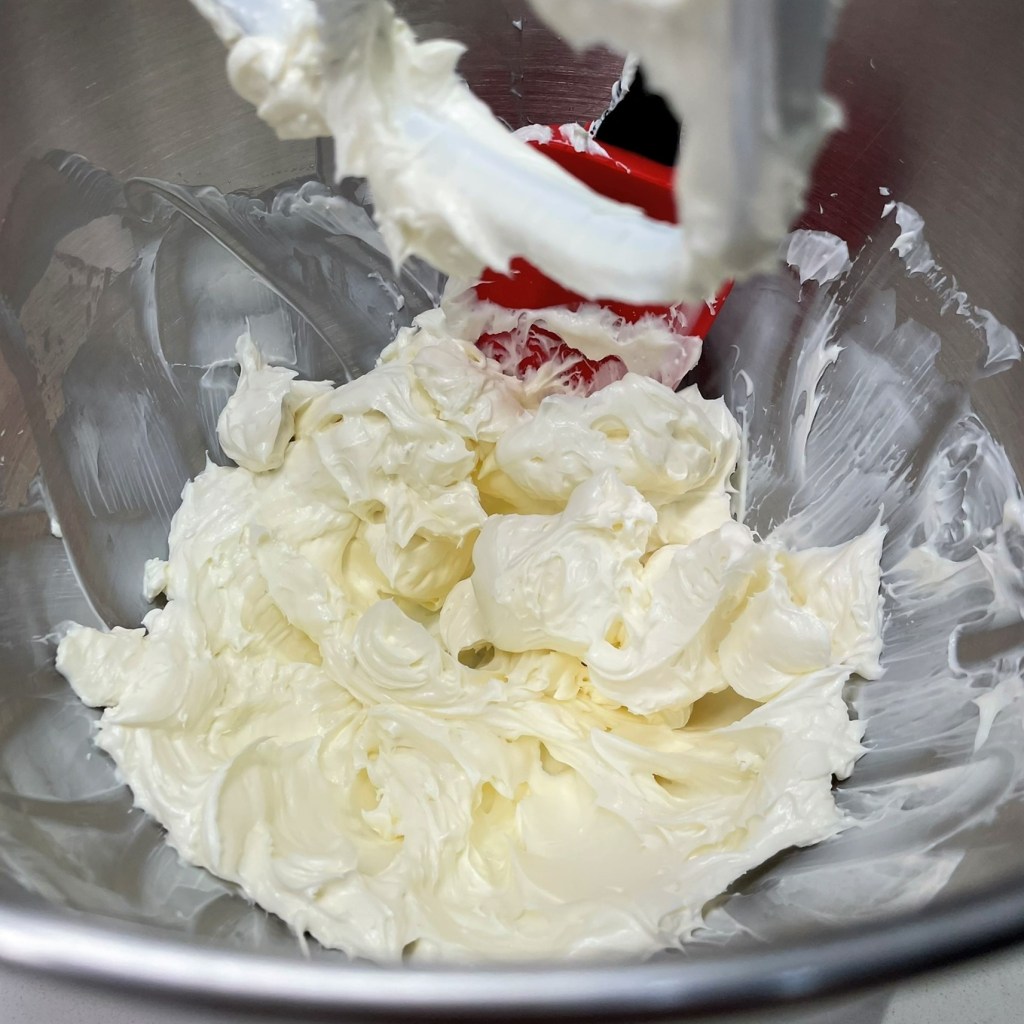
By hand or with a stand mixer, combine cream cheese, sour cream and mayonnaise until smooth and fluffy. Stir in Worcestershire. Cover and refrigerate until ready to combine with cucumber mixture.
Use clean paper towels to blot away any lingering excess moisture from cucumber-onion shreds. Blend evenly into cream cheese mixture.
Transfer Benedictine spread to a small bowl lined with plastic wrap. Press and smooth the mixture so that it assumes the shape of the bowl with no air bubbles. Cover and refrigerate a couple of hours to firm up.
Invert Benedictine onto a lettuce leaf-lined serving plate. Remove plastic and sprinkle with fresh herbs. Serve with fresh vegetables, crackers, crostini or toasted brioche squares.