Nothing makes me crave soup more than a snow day, or as is usually the case in North Carolina, an “ice day.” Like much of the U.S., we have been under threat of severe winter weather this week, and it finally arrived overnight in the shape of freezing rain. Bleh. Rather than stare out the window at the ice accumulating on the trees behind our home (beautiful, but dangerous), I’ve decided that I will make soup, and I am thankful once again to be cooking with gas. Power outages be damned, we will have a comforting bowl of something to eat. I wish I had a pot large enough to feed all of Texas this week.
Soup is a very forgiving meal, allowing you to use whatever you already have in the fridge and pantry, and this one is very true to that. A few cans of beans, some stock from a carton, basic vegetables and thick-sliced bacon comes together to create hearty, soul-warming goodness.
Ingredients
A few slices of thick-cut bacon, cubed (measuring about 1½ cups)
1 medium onion, chopped
3 ribs celery, chopped
Several carrots, chopped (about 1 cup)
Salt and pepper
3 cans (15 oz.) white beans (cannellini, great northern or navy)
1 carton low-sodium vegetable broth
2 Tbsp. tomato paste
1 or 2 bay leaves
Instructions
The bacon was hand cut at a local butcher counter, and the slices are very thick, which is recommended for this soup recipe.
I cut the bacon into cubes about the size of sugar cubes. It’s OK that some pieces are mostly fat; it will render to add tons of flavor.
Carrot, onion and celery are central ingredients to many soup recipes. They lend flavor, texture and aroma.
Even the drained off fat from this bacon is delicious! My grandmother always had a bacon fat jar, and would use it in place of oil or butter for pan-frying foods.
Saute the veggies until slightly softened and aromatic. Season with salt and pepper, of course.
Chicken broth would be fine, but my low sodium veggie broth is a standby for flavorful soups.
Tomato paste adds a touch of tangy flavor and richer color. And I always add a bay leaf to a simmering pot of soup.
The flavors will all come together after simmering on the stove or in the slow cooker.
I get a lot of mileage out of my immersion blender. Puree the soup to desired consistency. I love to have some beans and texture remaining.
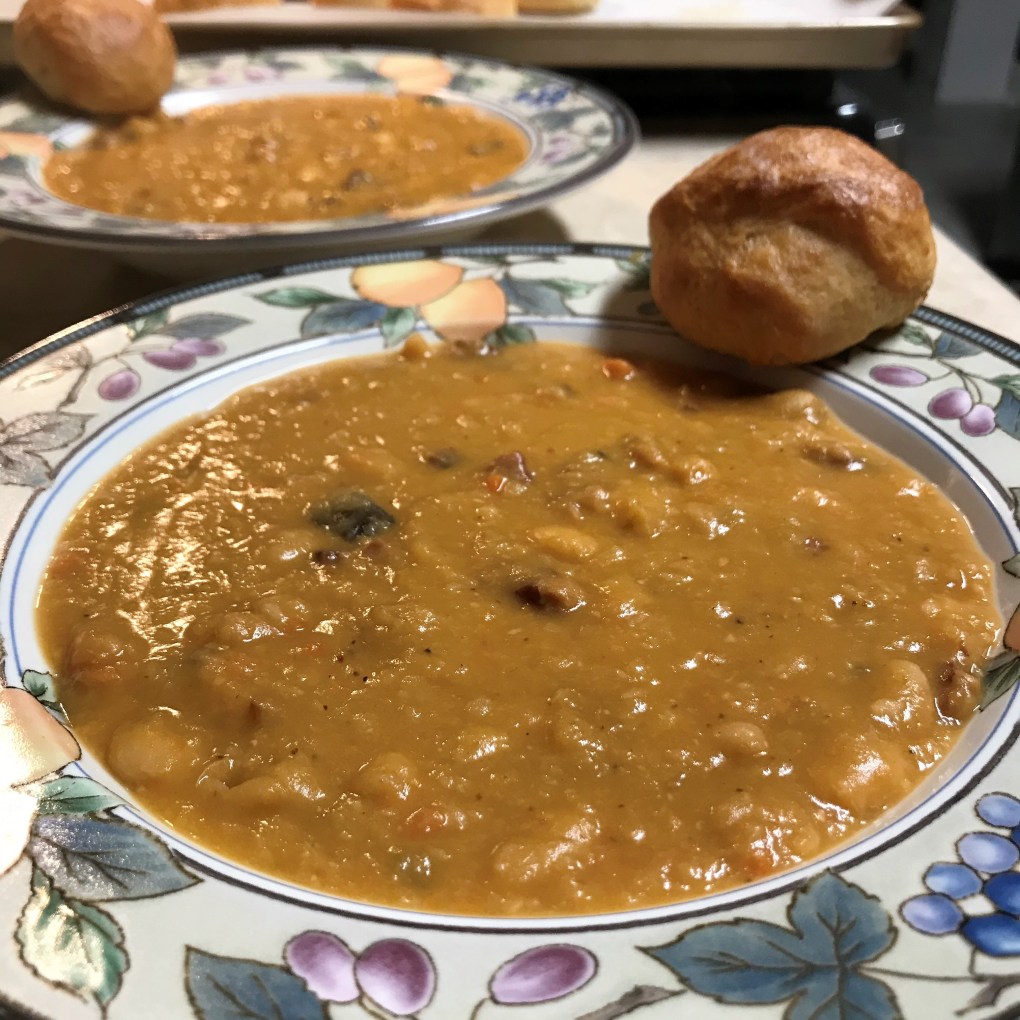
Stir the crispy bacon pieces into the soup and simmer again until the bacon is softened.
The soup is thick, rich and flavorful. Perfect on a cold winter night!
Heat a medium-size soup pot over medium heat. Toss the bacon cubes in the pot until all edges are crispy and fat is mostly rendered. Transfer the bacon to a paper towel-lined bowl and drain off excess grease, keeping about two tablespoons of it in the pot. You’ll return the bacon to the soup after it is simmered and pureed.
Add the mirepoix (onion-celery-carrot) to the pot and season with salt and pepper. Sauté until onions are translucent and carrots are just tender.
Drain and rinse the canned beans and add them to the pot. Season with salt and pepper.
Add vegetable broth, tomato paste and bay leaves. Stir to combine and bring soup to a low boil, then reduce heat, cover pot and simmer an hour or two.
Remove bay leaves and puree some of the soup, using an immersion blender, regular blender or food processor. If the power is out and you’re cooking in the dark, use a potato masher. Blend as much or as little as you like; for me, this is usually about 2/3 smooth with chunks of bean and vegetable throughout.
Return crisped bacon to the pot and continue to simmer about an hour, until bacon is softened and its smoky flavor has infused the soup.
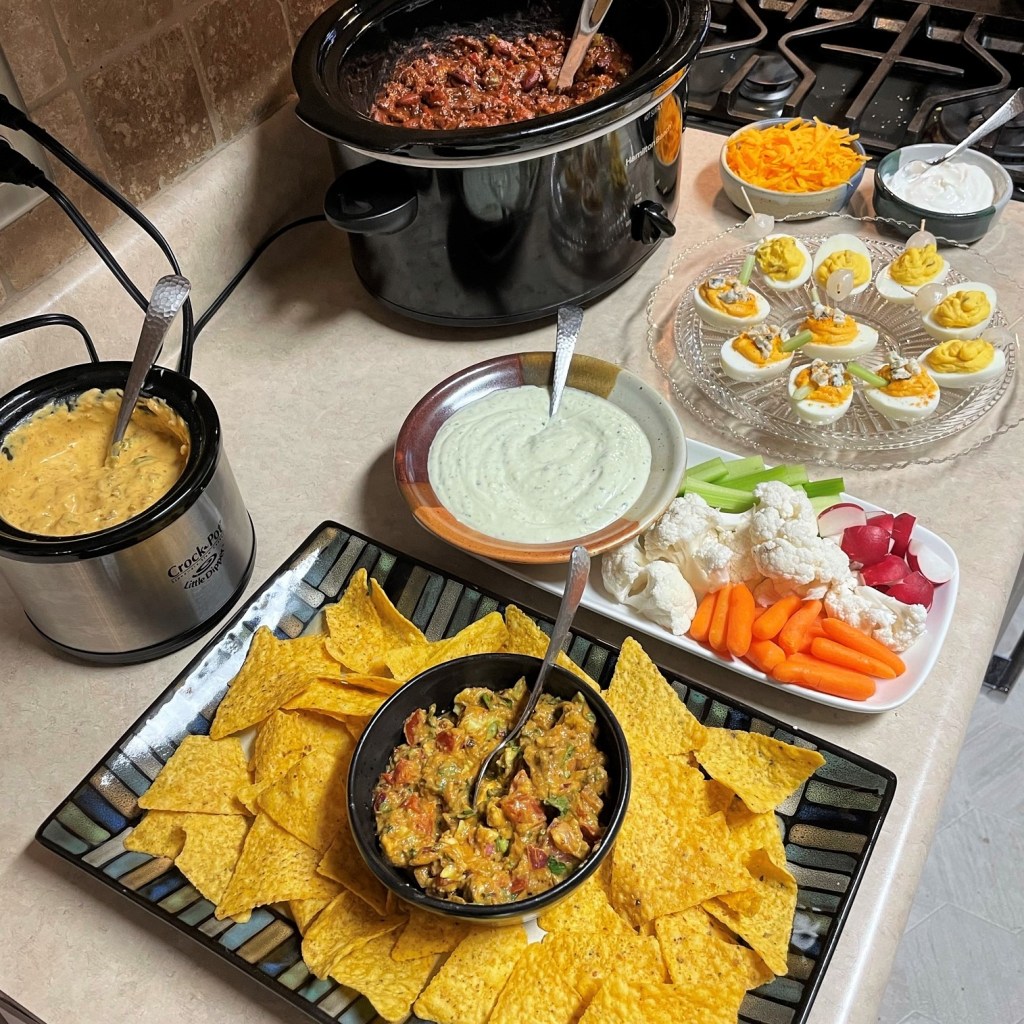
There was more than a little bit of disappointment this year in limiting the number and scale of dishes my husband, Les, and I create for our annual Super Bowl party. Obviously, we didn’t have 25 people in the house this year—that would be ludicrous in these times—but the Super Bowl wasn’t cancelled, and neither was our celebration, even if reduced to just the two of us. The challenge for us was finding new ways to enjoy the flavors we’ve come to expect on this ultimate football occasion.
Deviled eggs are always on our party table and so are Buffalo wings. Why not combine the flavors into one tasty bite?
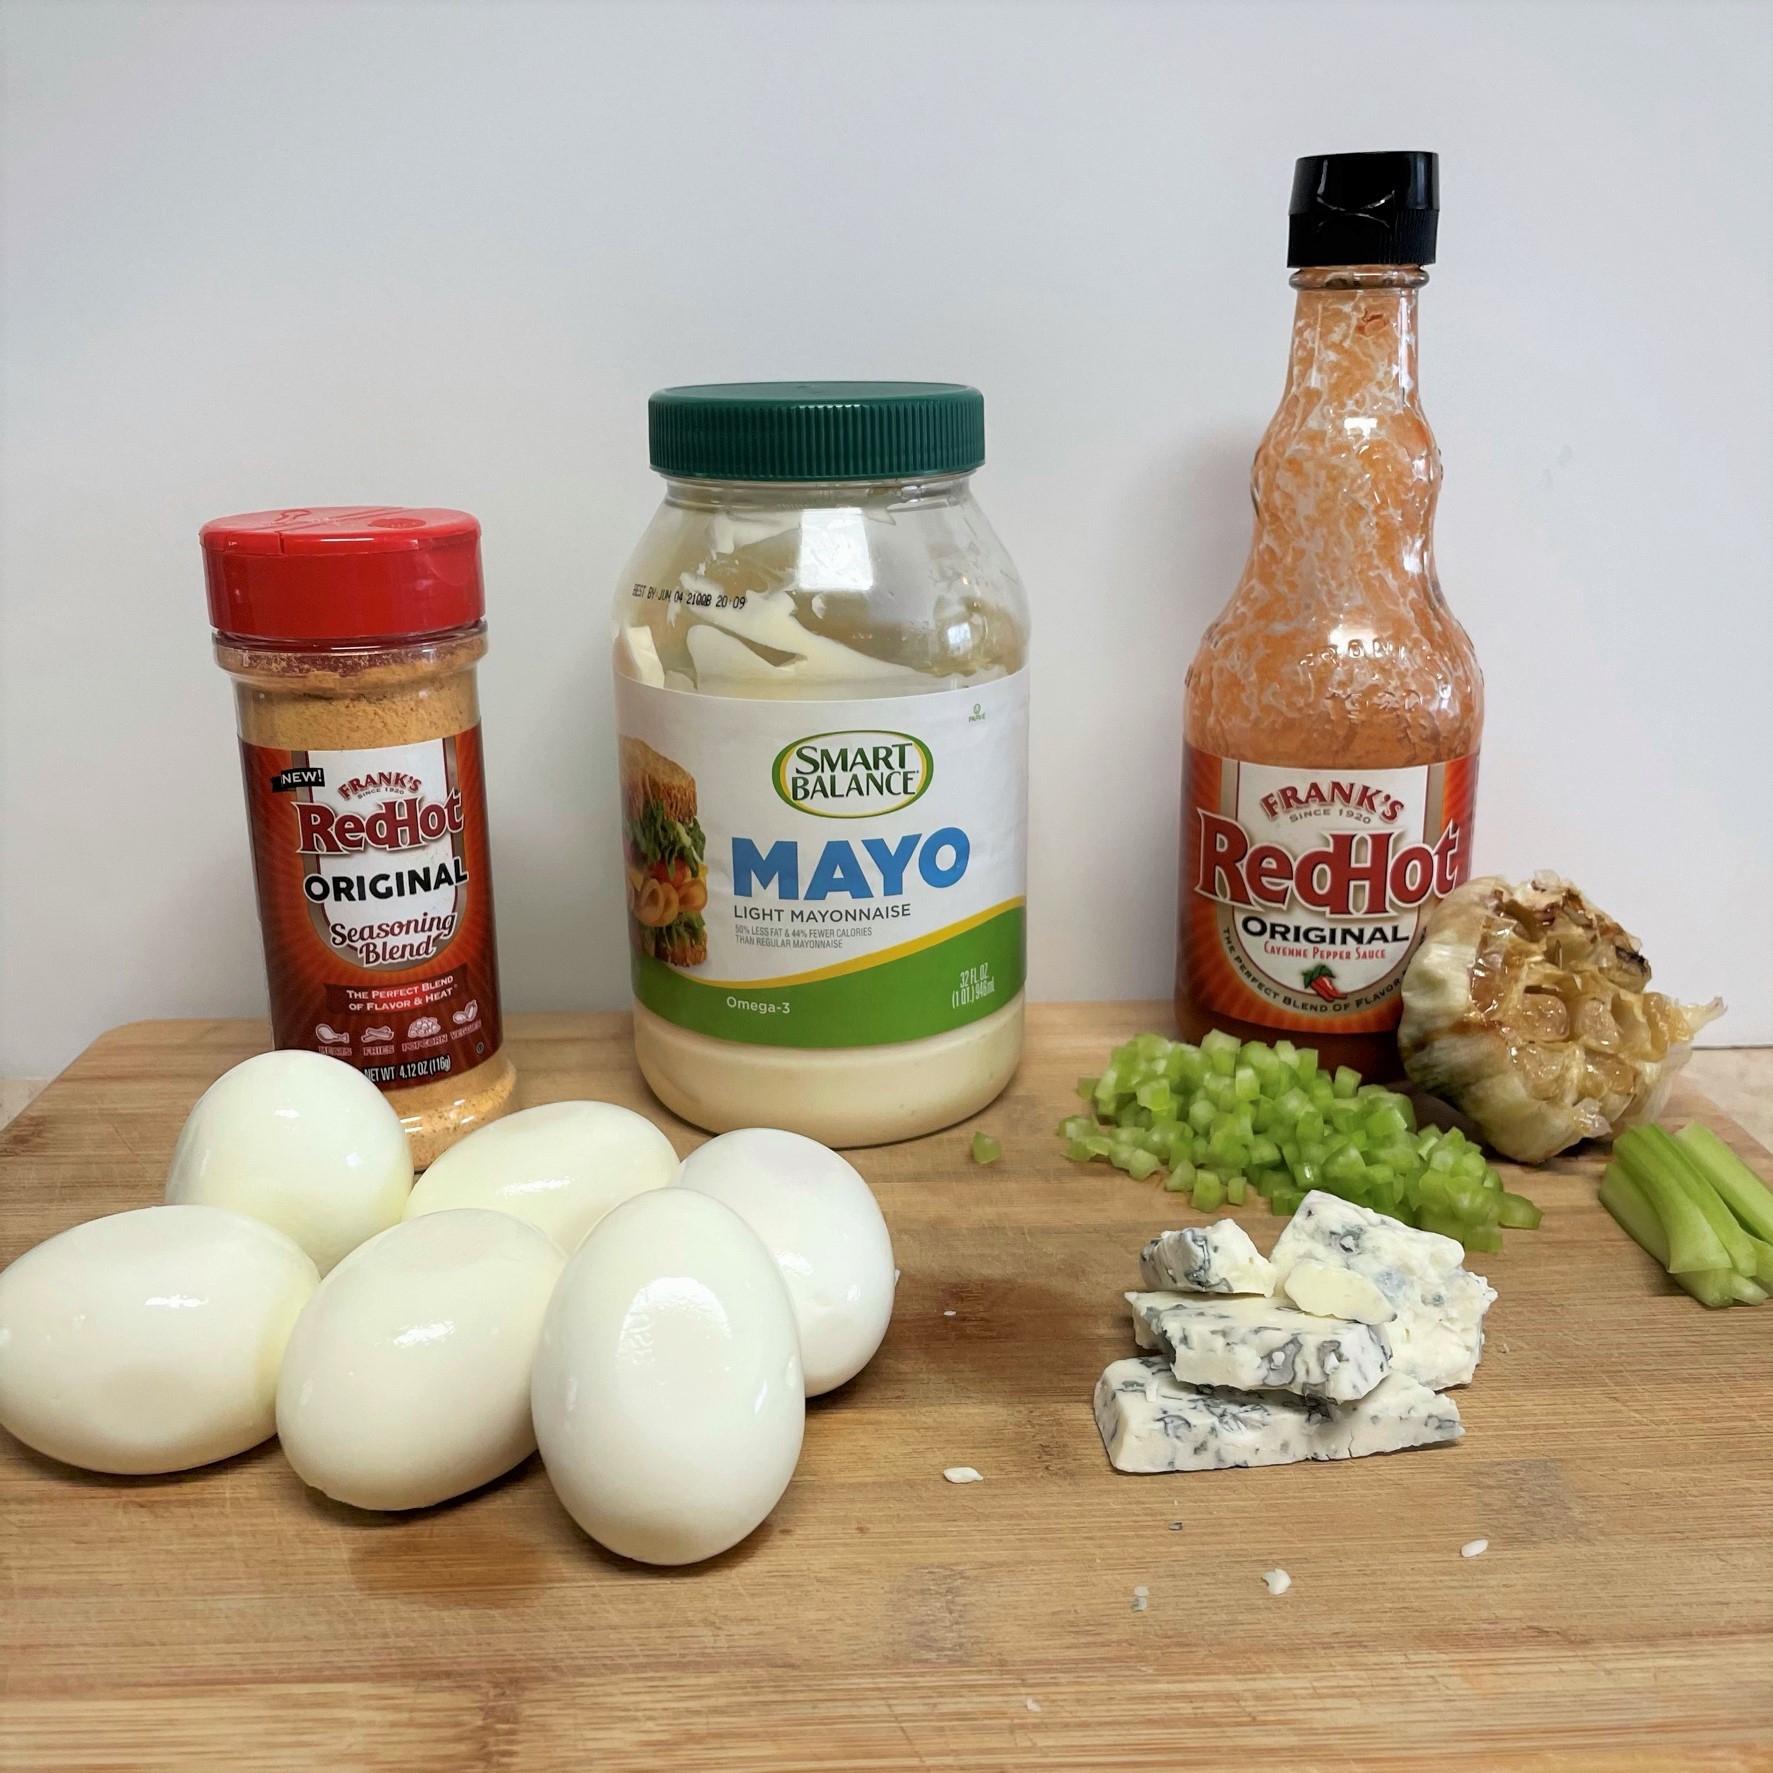
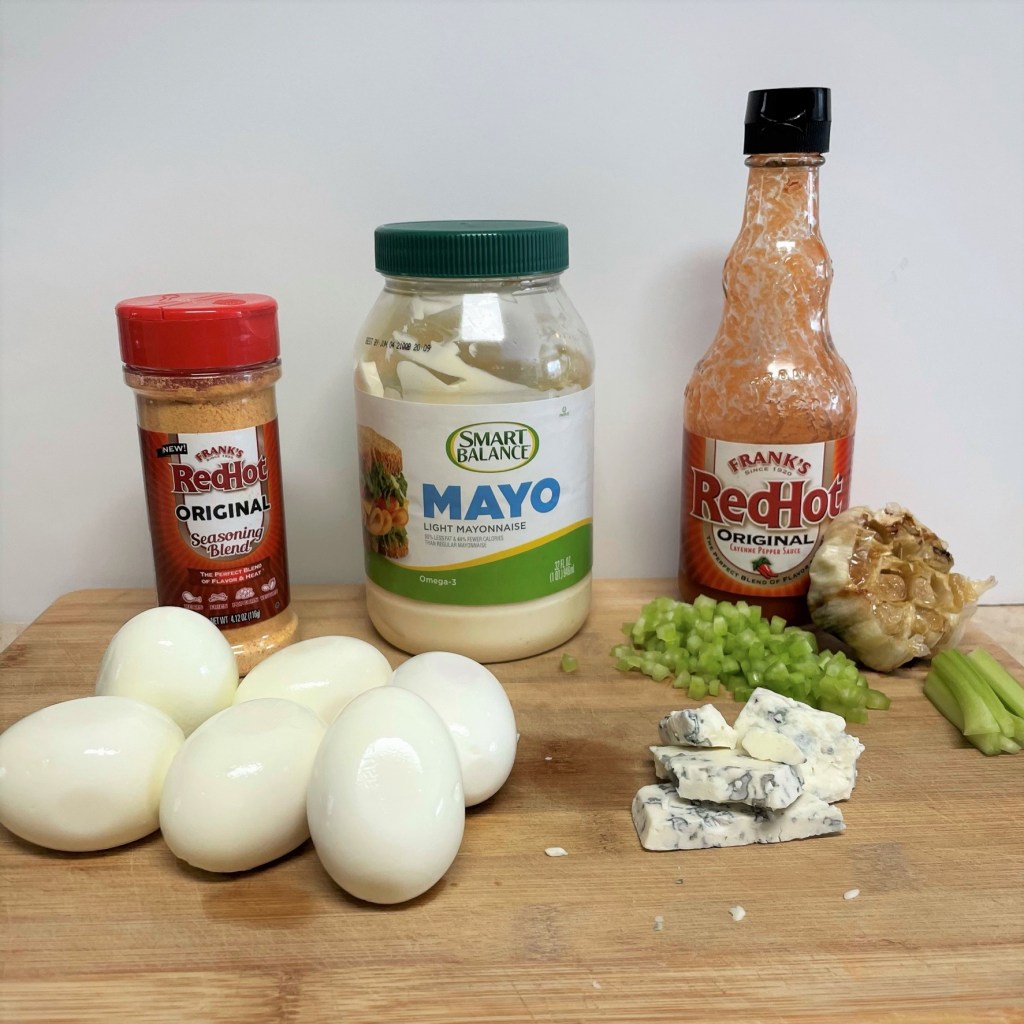
These little hors d’oeuvres have the big, bold flavor of Frank’s RedHot sauce, which is the only acceptable flavor for Buffalo wings, in this Western New York girl’s humble opinion. Little bits of crunchy celery do their part to mimic the experience, and crumbled bleu cheese is the proverbial icing on the cake.
Deviled eggs are one of my favorite “blank canvas” foods, meaning that you can twist up the flavors to suit the occasion. I made these Buffalo-flavored eggs at the same time as the Dirty Martini Deviled Eggs, which is in keeping with my usual practice of putting more than one flavor on the table. The ingredients and instructions below describe my process for splitting the two flavors, but if you’d prefer to make only the Buffalo deviled eggs, no problem—simply double the ingredients as noted below.
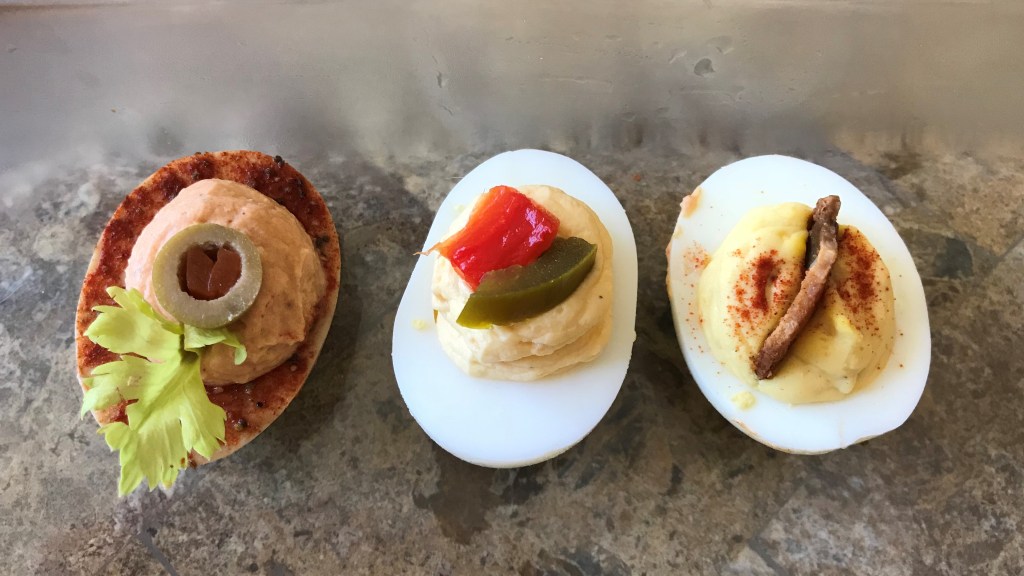
Two flavors are better than one!
If you are intrigued with the idea of trying new flavors, check out my post from last spring, Egg-stravaganza. I’ll bet you will find a flavor combination that’s right up your alley!
Ingredients
9 large eggs, hard-boiled and peeled
1/4 cup + 1 Tbsp. light mayonnaise
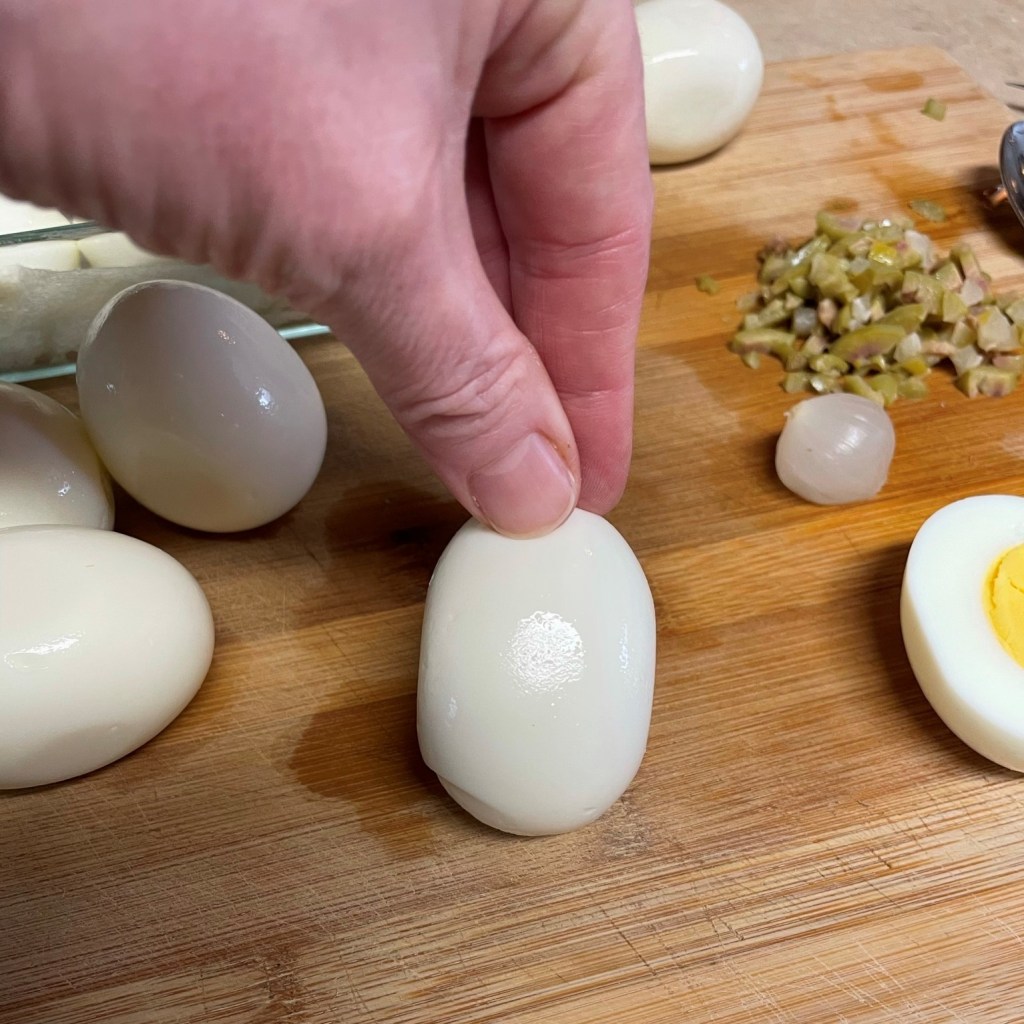
I peel my hardboiled eggs as soon as they are cooled, and they go into the fridge in a flat, shallow covered pyrex. The result is two flat sides, so my eggs sit level on a serving plate.
My recipe begins the same as any other deviled egg recipe, but I’ll divide the basic yolk mixture for two separate flavors.
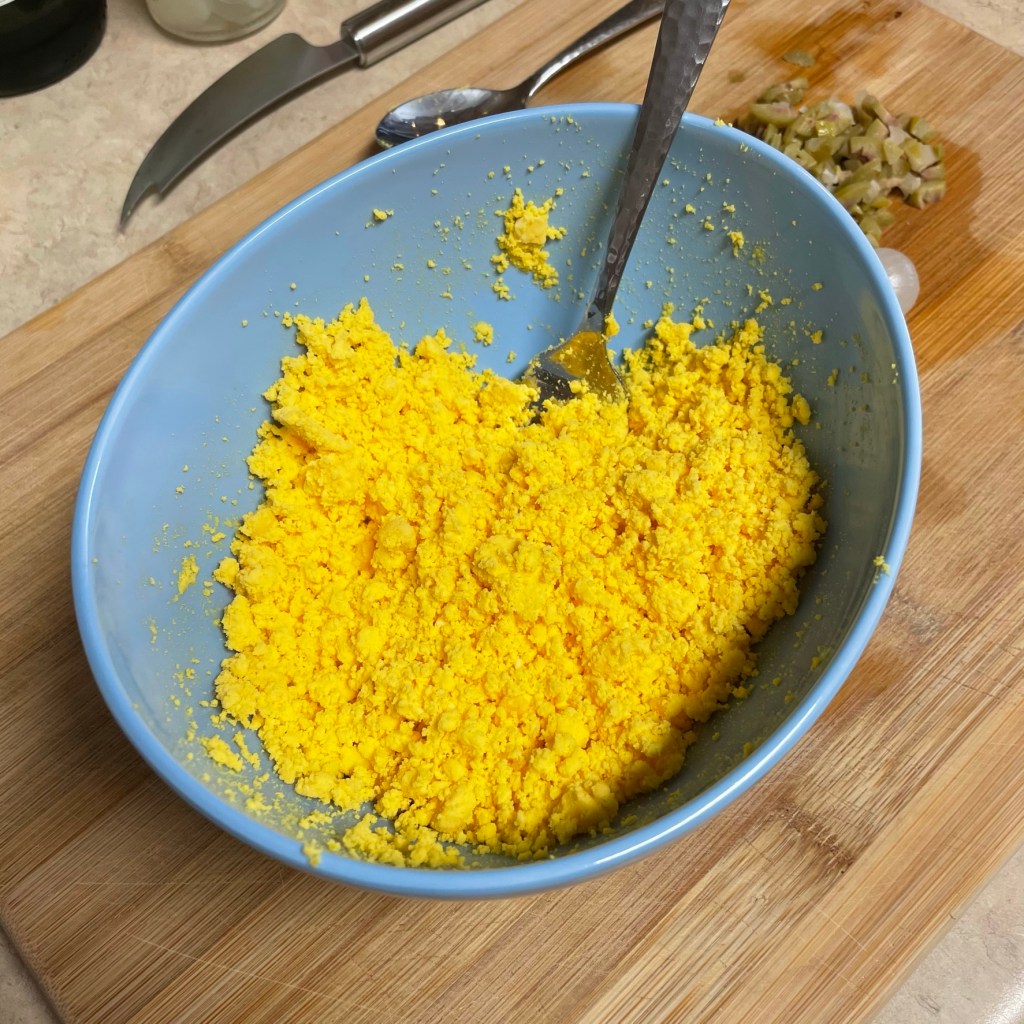
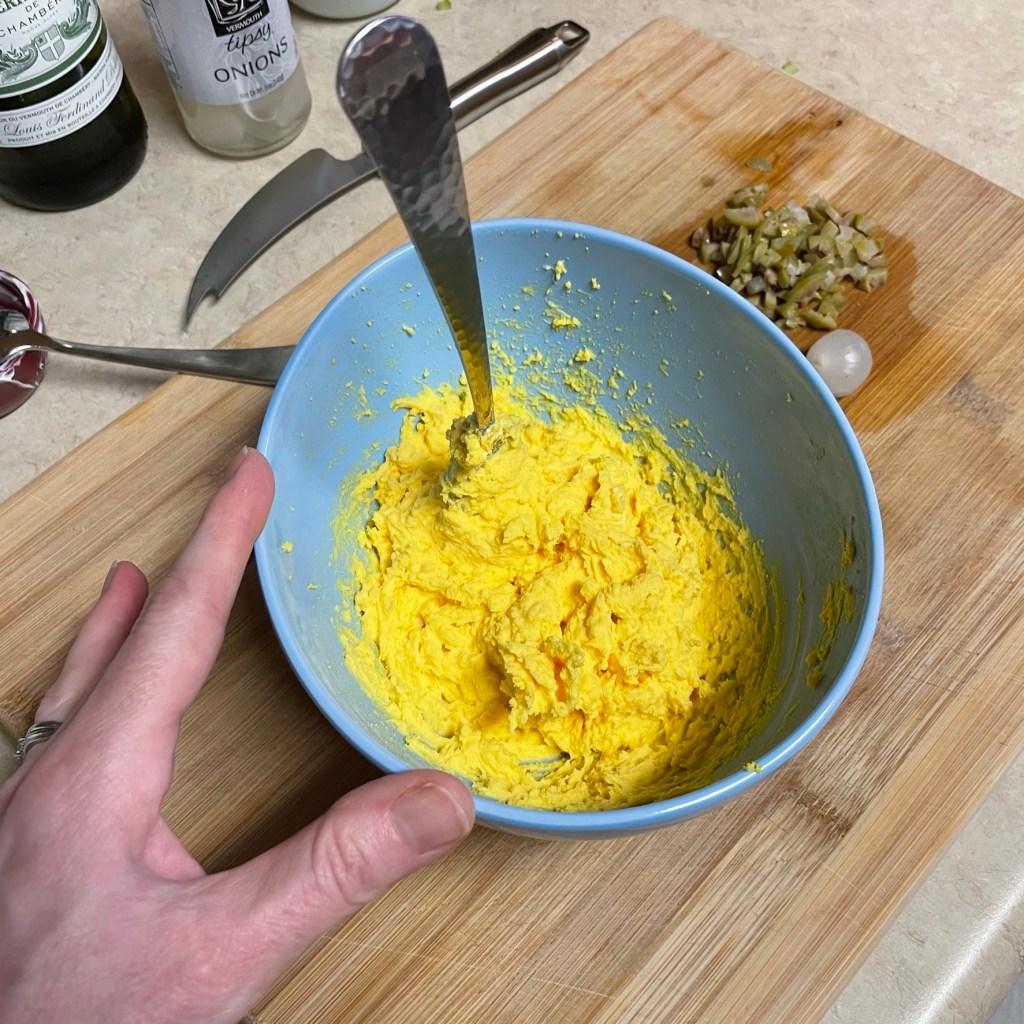
I shred the yolks on their own first, which makes for smooth blending of the mayo and other ingredients.
Begin with 1/4 cup of mayo, and add more if you need it.
If your fork stands straight up in the yolk mixture, you need more mayo. I added another tablespoon.
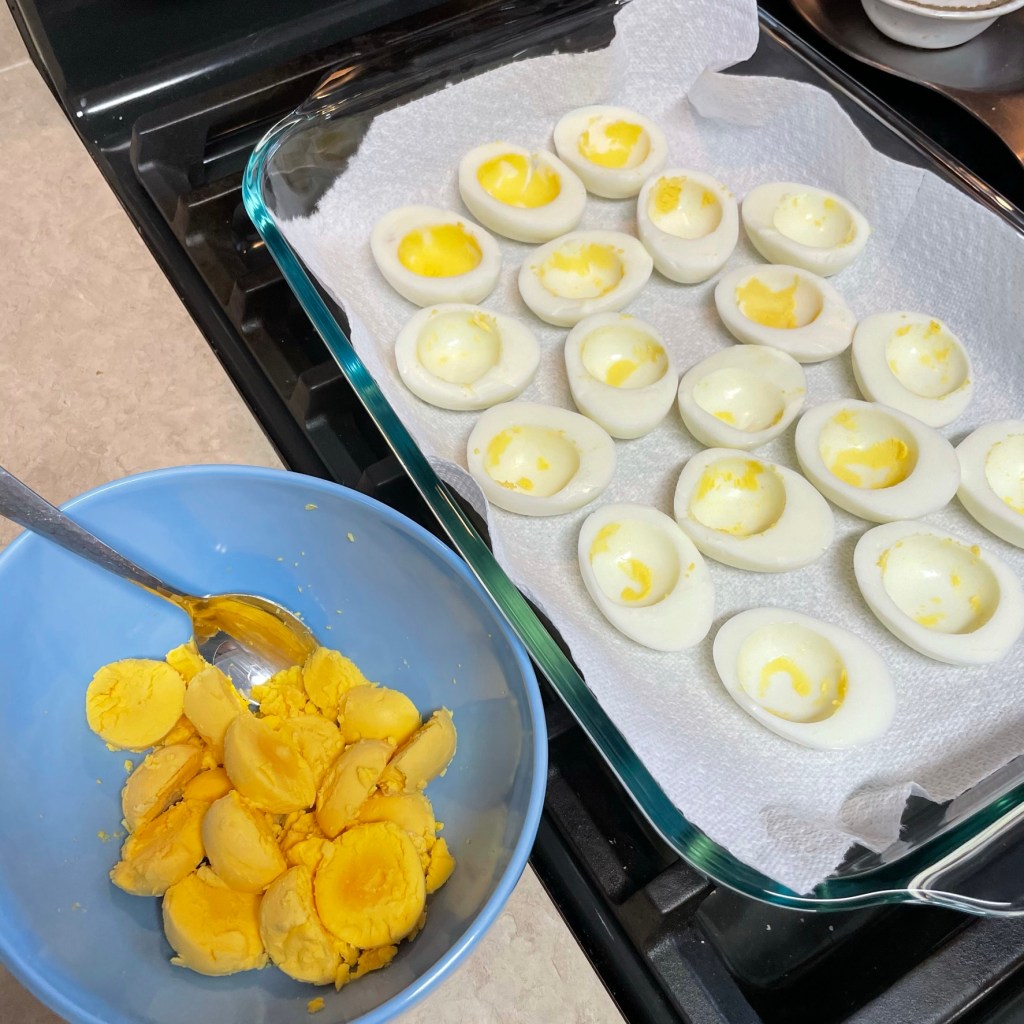
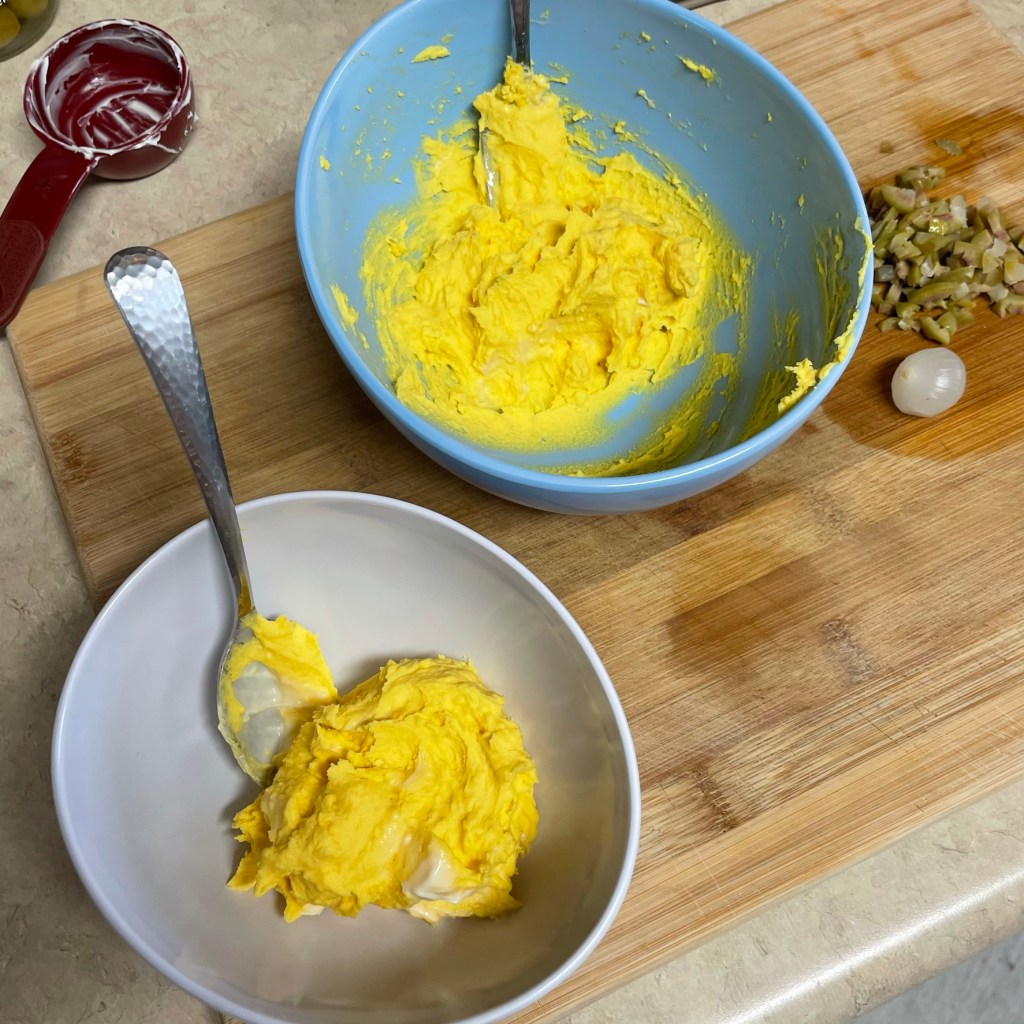
When the consistency meets approval, divide half of the yolk mixture into a second bowl for a separate filling flavor.
Carefully turn out the egg yolks into a medium-sized bowl. Mash thoroughly with a fork until yolks resemble dry crumbs. Add mayonnaise and blend until smooth. Divide yolk mixture by transferring half to a second bowl (unless you intend to make all one flavor). Follow additional instructions below for making the two kinds of deviled eggs I made this particular day.
For the Buffalo flavor (double if making all nine eggs)
All the flavors of Buffalo wings, ready to take over my deviled eggs.
2 or 3 tsp. Frank’s original RedHot sauce (adjust to your heat preference)
Frank’s RedHot dry seasoning, to sprinkle on at serving time (or substitute paprika)
Instructions for Buffalo eggs
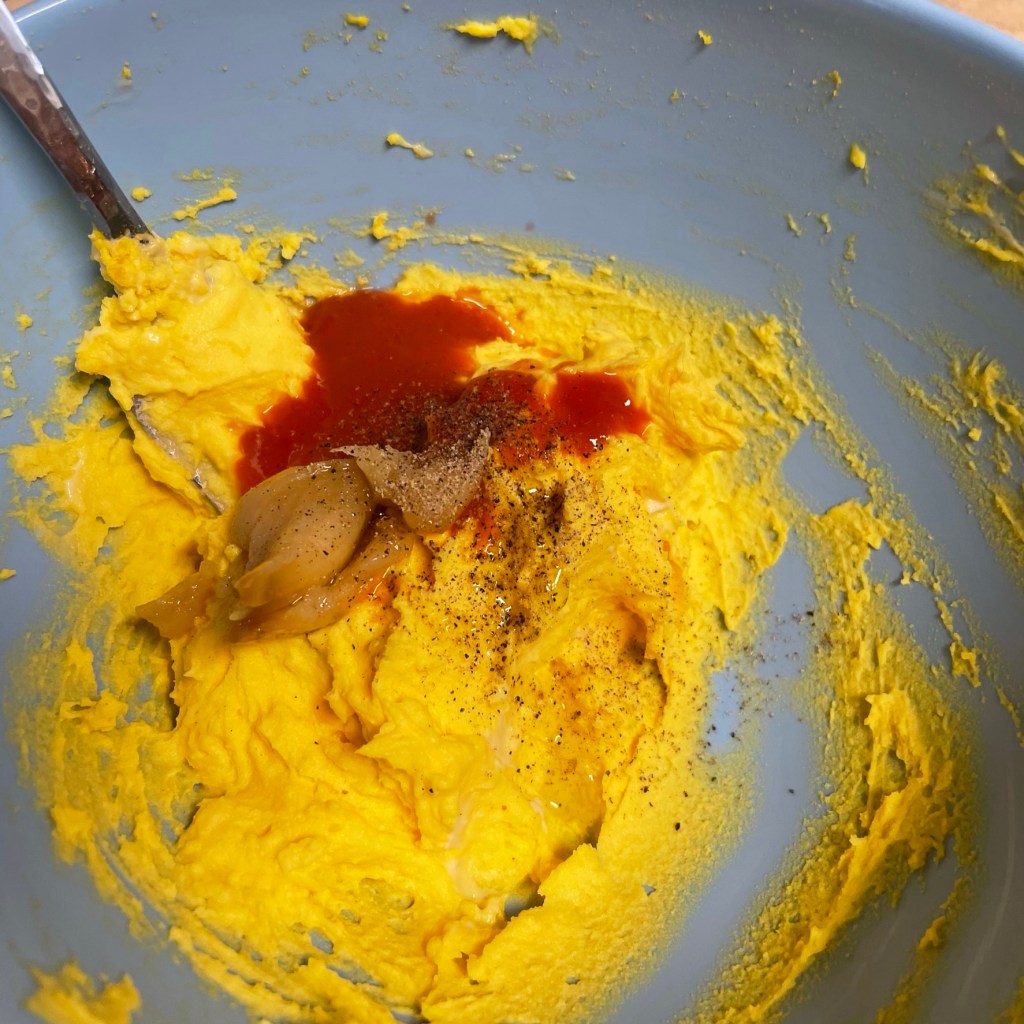
Add RedHot sauce, roasted garlic and black pepper to one bowl of the yolk mixture. Blend smooth with a fork or spoon. Fold in chopped celery bits.
Place a small zip-top bag into a glass, and use a spatula to scoop the filling mixture into it. Seal up the bag, snip one corner to create a makeshift piping bag, and gently fill half of egg whites. Garnish top of Buffalo eggs with crumbled bleu cheese and mini celery sticks.
For the Buffalo egg filling, I added two teaspoons of Frank’s sauce, the roasted garlic and black pepper.
The filling was tasty, but I wanted more heat so I added another teaspoon. You decide what flavor level is right for you!
I stirred in about a tablespoon of finely chopped celery, then scooped the filling into a small zip top bag, which I’m using as a piping bag.
Snip a corner of the bag (make it large enough for chunky ingredients to pass through), and pipe the filling into the empty egg halves. Garnish the eggs as desired.
My Buffalo deviled eggs are garnished with celery sticks and tiny crumbles of real bleu cheese.
For the Dirty Martini flavor (double if making all nine eggs)
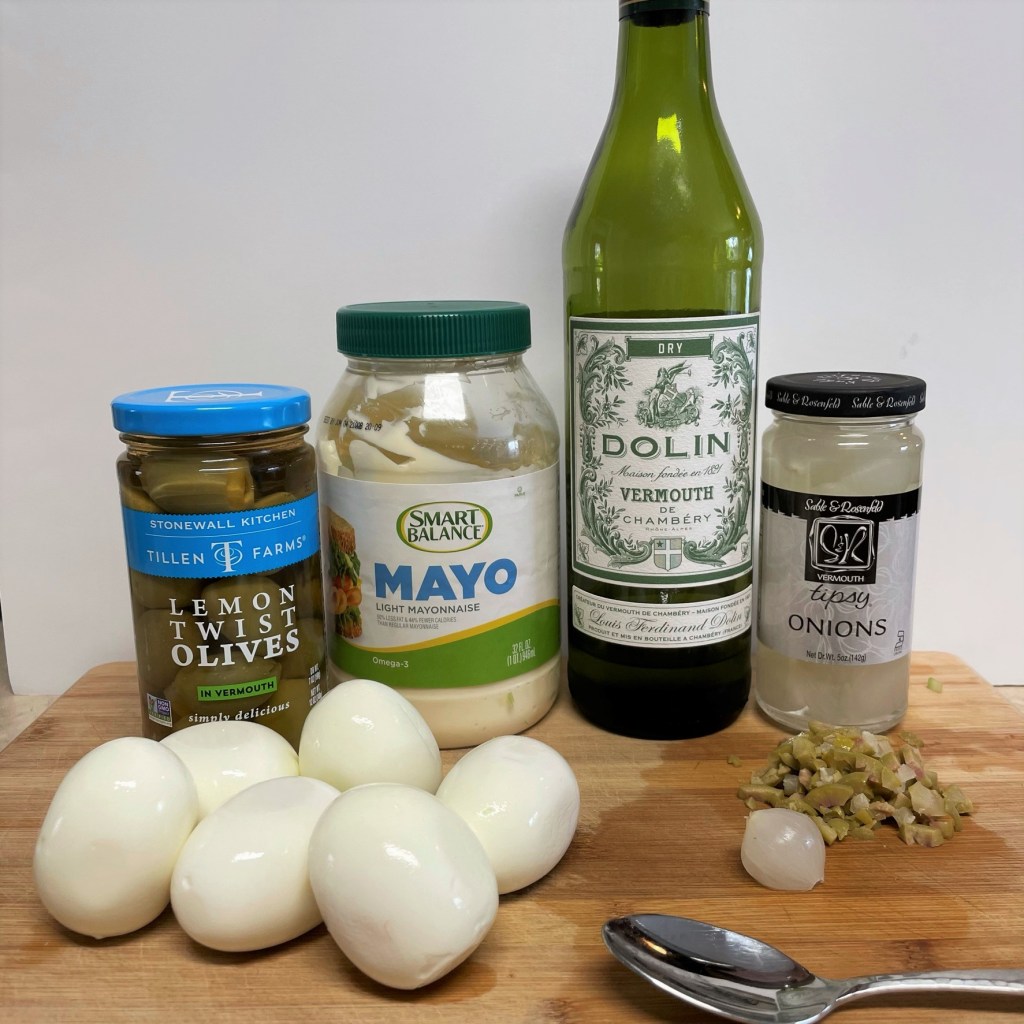
No vodka or gin in my dirty martini deviled eggs, but the vermouth and garnishes add all the right flavors.
1 Tbsp. dry vermouth (or use additional olive brine)
2 cocktail olives, finely chopped
1 or 2 cocktail onions, finely chopped (for filling)
1 tsp. olive brine
4 cocktail onions, halved (for garnish)
Instructions for Dirty Martini eggs
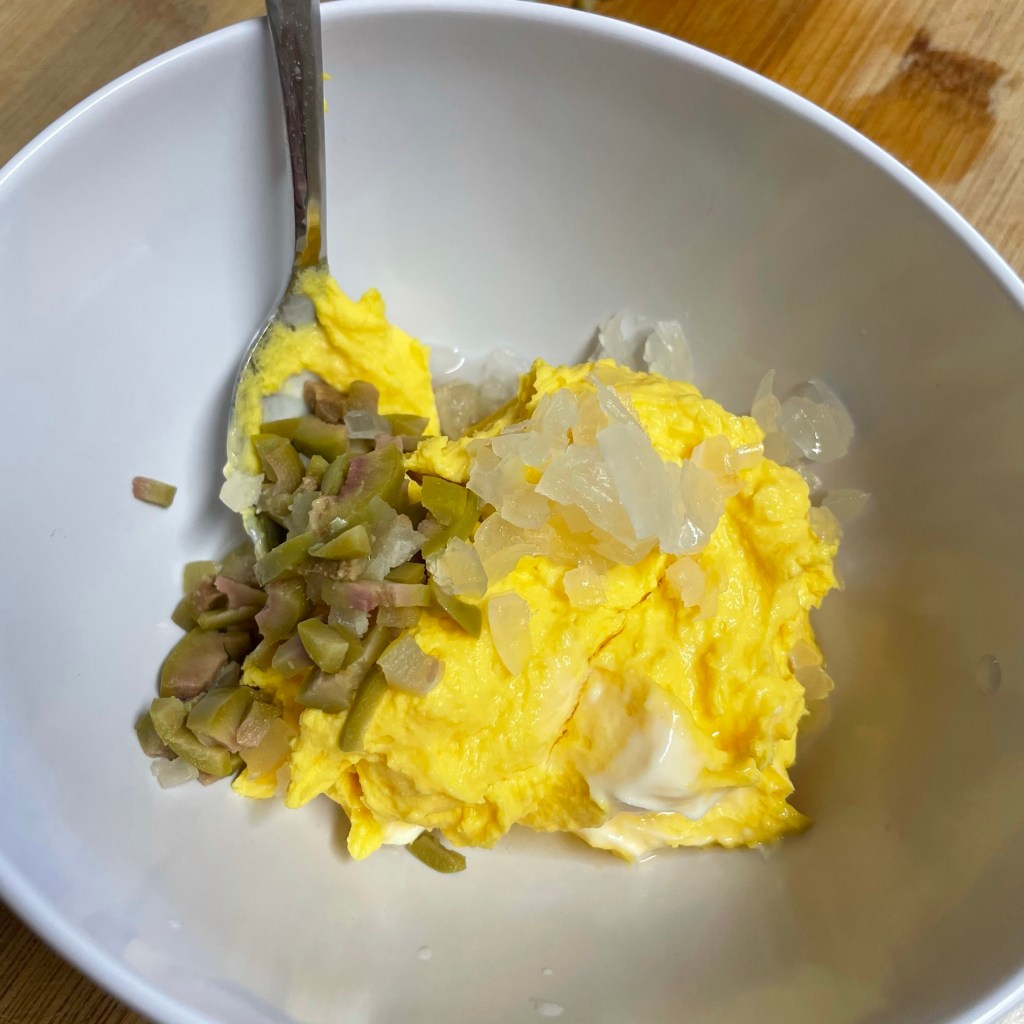
Add dry vermouth, chopped olives, onion and brine to yolk mixture. Blend smooth with a fork or spoon.
Place a small zip-top bag into a glass, and use a spatula to scoop the filling mixture into it. Seal up the bag, snip one corner to create a makeshift piping bag, and gently fill half of egg whites. Garnish with cocktail onion halves, skewered on a toothpick if you wish, to mimic the appearance of a martini.
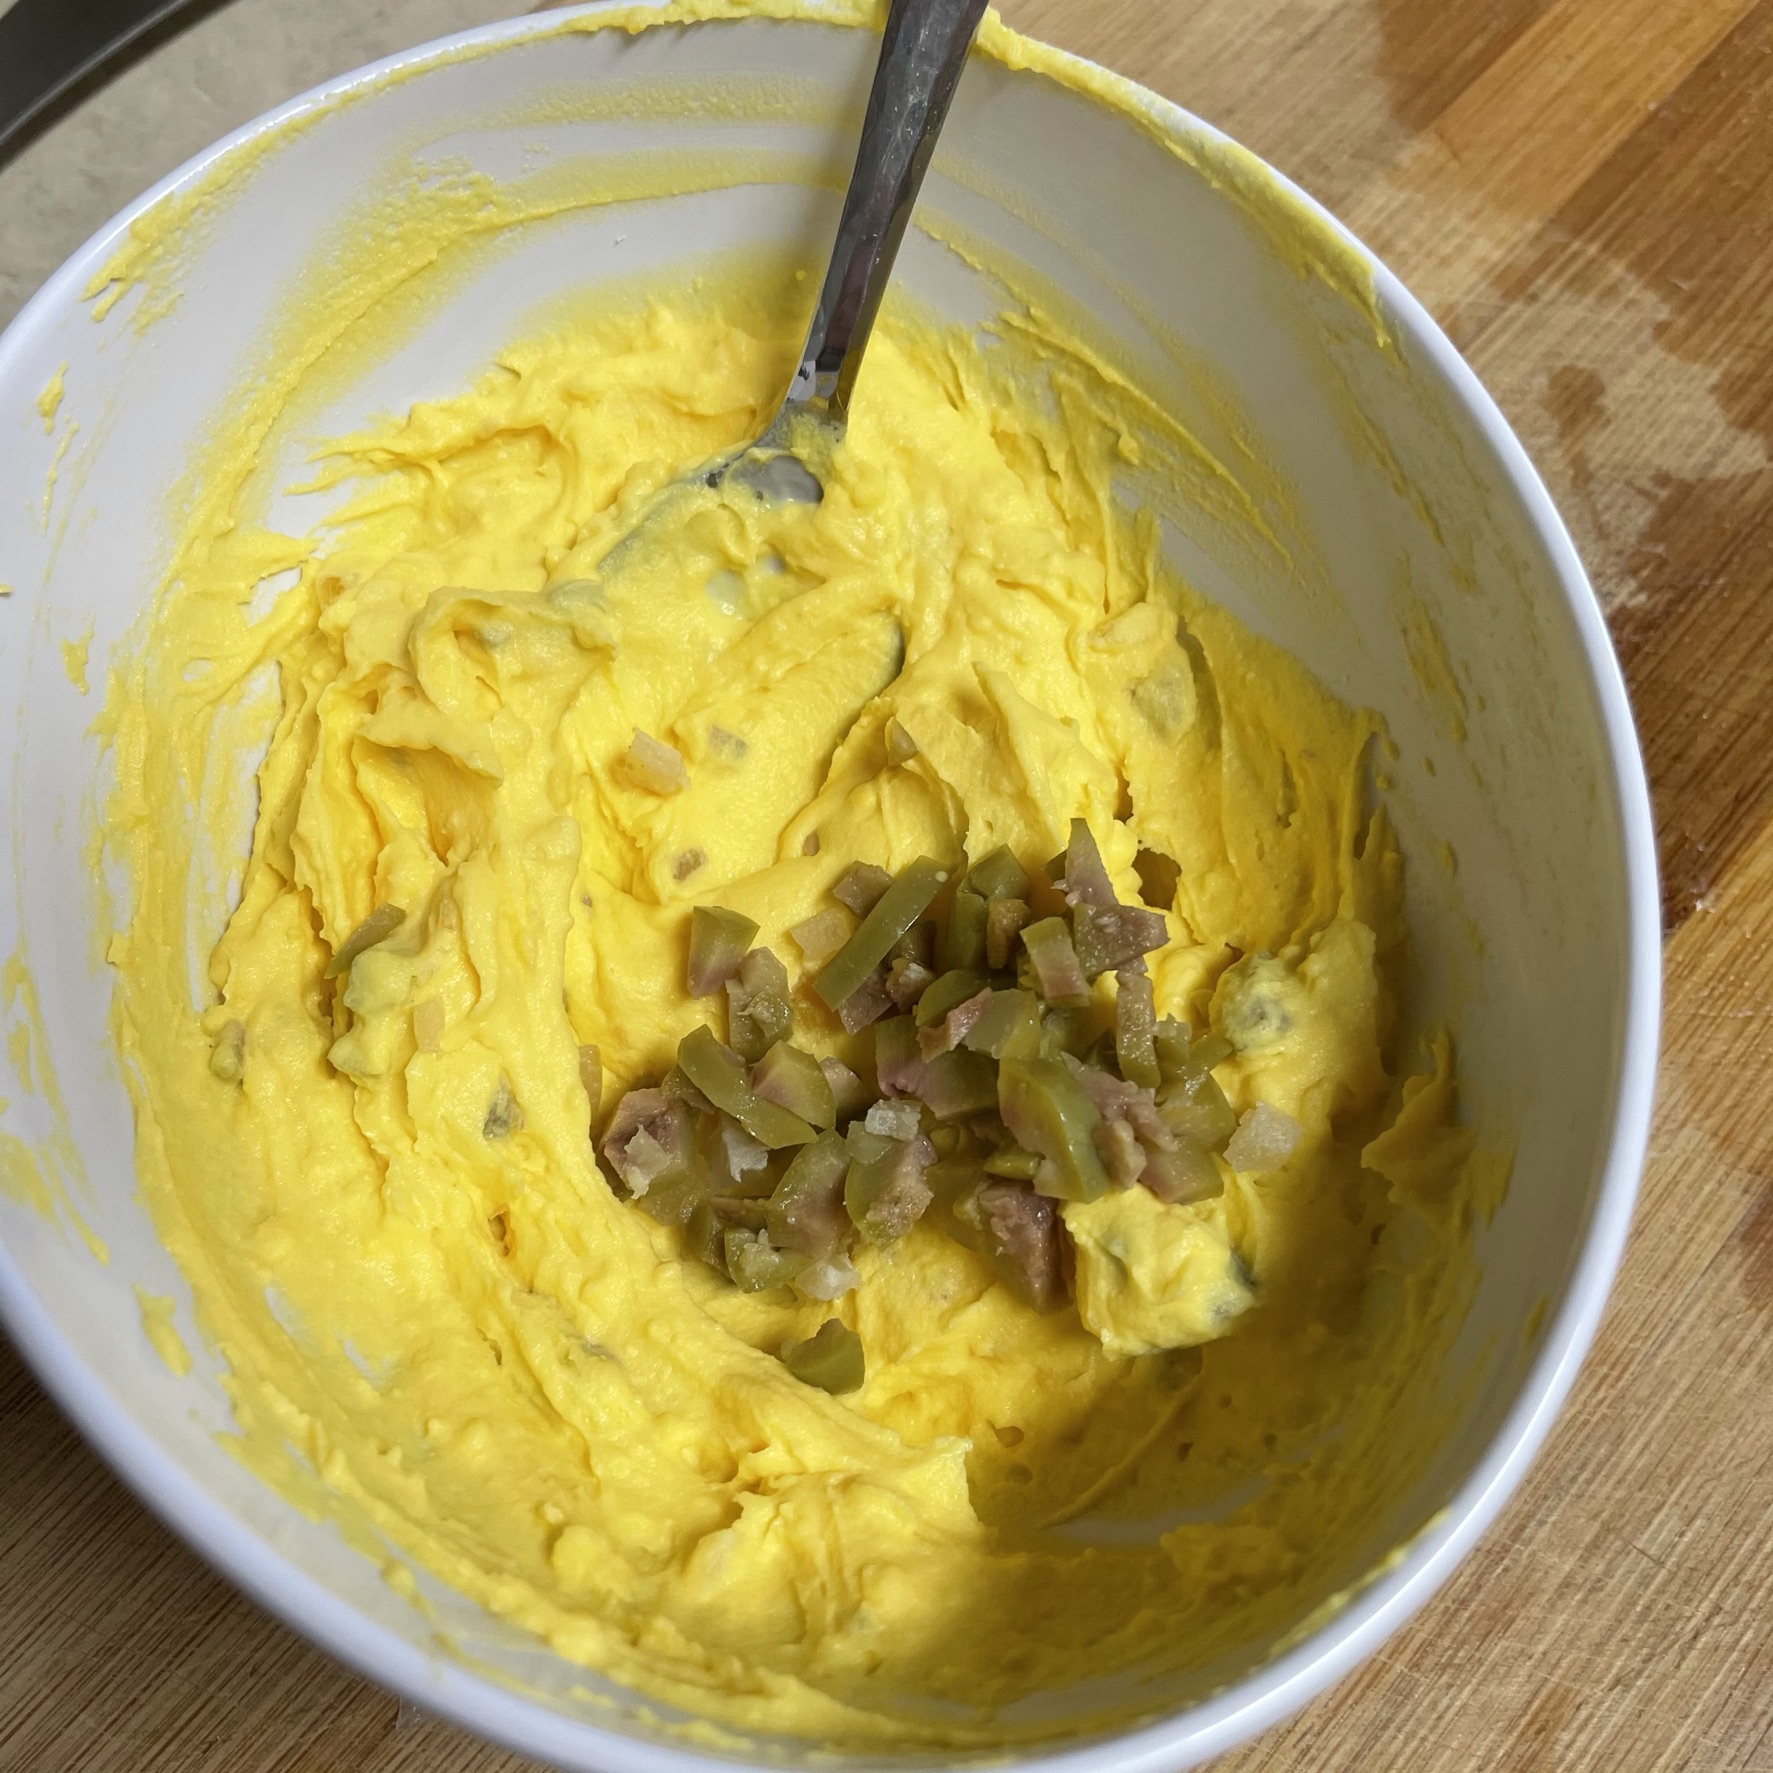
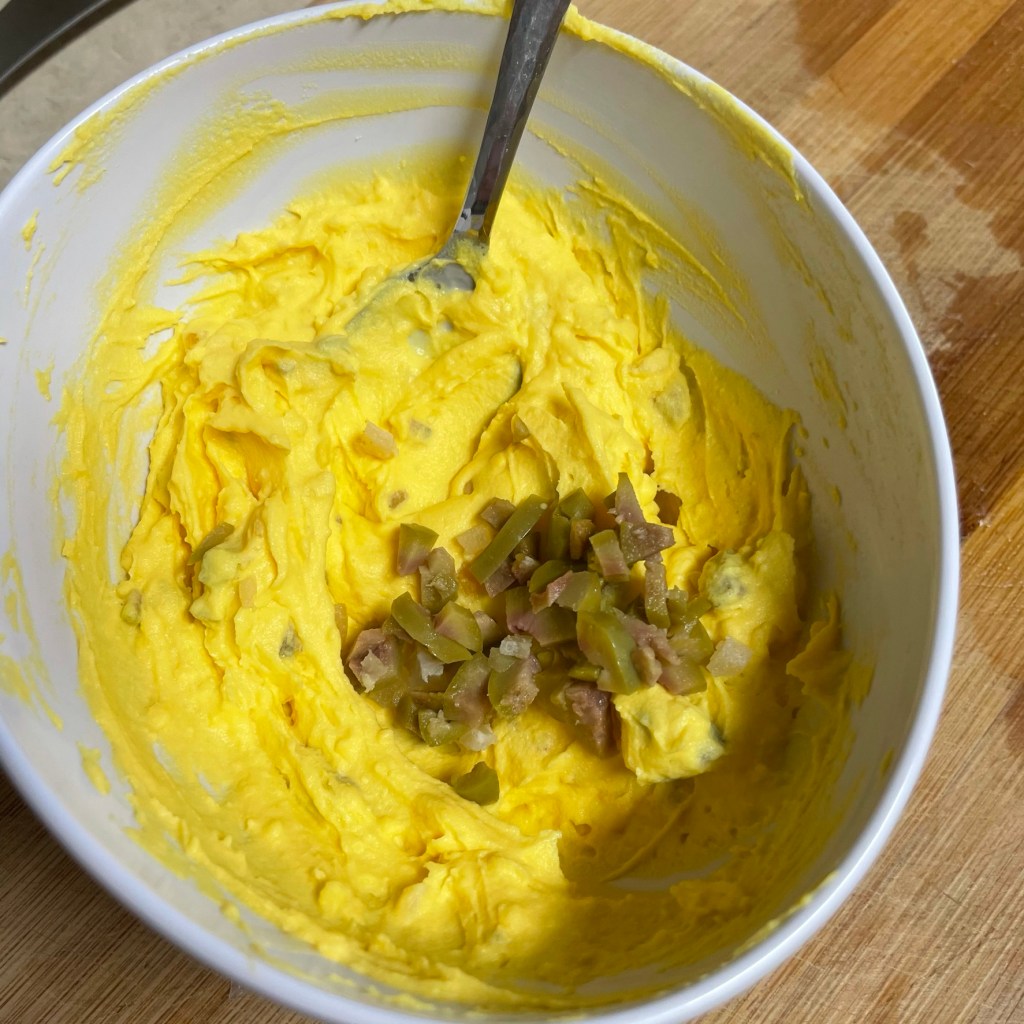
For the dirty martini filling, I’ve added dry vermouth, finely chopped cocktail olives and onions and a tiny splash of olive brine.
This mixture could stand more olive flavor, so I chopped up another one. Remember, you can add but you can’t take away!
My dirty martini deviled eggs are garnished with a halved cocktail onion on a pick.
At serving time, I sprinkled the Buffalo eggs with the Frank’s dry seasoning. These deviled eggs made a fine appearance at our Super Bowl party for two! 🙂
Every Super Bowl party my husband, Les, and I have hosted together has been a little different in terms of food offerings, but you can count on two things—his incredible, thick and meaty chili (one day I promise I’ll squeeze the recipe out of him) and at least a couple of flavors of deviled eggs. This is one of those foods that everybody (except the vegans) goes a little nuts over, and I love making them because the deviled egg is what I call a “blank canvas” food. If you can dream up a flavor, a deviled egg can probably carry it.
When I shared my Egg-stravaganzapost last spring, I made mention of my “Bloody Mary” deviled eggs, filled with all the signature savory flavors you’d find in the ubiquitous Sunday brunch cocktail. Today, I’m presenting a non-spicy counterpart in this Dirty Martini version of deviled eggs, which includes the tangy brininess of lemon-stuffed cocktail olives, pickled cocktail onions and a splash of dry white vermouth. This new riff on a classic hors d’oeuvres will undoubtedly make a repeat appearance on our table at some point in the future, and it’s a fun way to enjoy one of my favorite cocktail combinations, too.
Two flavors are better than one!
I made these tasty bites at the same time as my Buffalo Deviled Eggs with Bleu Cheese, and the ingredients and instructions below describe my process for splitting the two flavors. If you’d prefer to make only the dirty martini deviled eggs, no problem—simply double the ingredients as noted below.
Cheers!
Ingredients for base filling
9 large eggs, hard-boiled and peeled
1/4 cup + 1 Tbsp. light mayonnaise
I peel my hardboiled eggs as soon as they are cooled, and they go into the fridge in a flat, shallow covered pyrex. The result is two flat sides, so my eggs sit level on a serving plate.
My recipe begins the same as any other deviled egg recipe, but I’ll divide the basic yolk mixture for two separate flavors.
I shred the yolks on their own first, which makes for smooth blending of the mayo and other ingredients.
Begin with 1/4 cup of mayo, and add more if you need it.
If your fork stands straight up in the yolk mixture, you need more mayo. I added another tablespoon.
When the consistency meets approval, divide half of the yolk mixture into a second bowl for a separate filling flavor.
Carefully turn out the egg yolks into a medium-sized bowl. Mash thoroughly with a fork until yolks resemble dry crumbs. Add mayonnaise and blend until smooth. Divide yolk mixture by transferring half to a second bowl (unless you intend to make all one flavor). Follow additional instructions below for making the two kinds of deviled eggs I made this particular day.
For the Dirty Martini flavor (double ingredients if making all nine eggs)
No vodka or gin in my dirty martini deviled eggs, but the vermouth and garnishes add all the right flavors.
1 Tbsp. dry vermouth (or use additional olive brine)
2 cocktail olives, finely chopped
1 cocktail onion, finely chopped
1 tsp. olive brine
4 cocktail onions, halved (for garnish)
Instructions for Dirty Martini eggs
For the dirty martini filling, I’ve added dry vermouth, finely chopped cocktail olives and onions and a tiny splash of olive brine.
This mixture could stand more olive flavor, so I chopped up another one. Remember, you can add but you can’t take away!
My dirty martini deviled eggs are garnished with a halved cocktail onion on a pick.
Add dry vermouth, chopped olives, onion and brine to yolk mixture. Blend smooth with a form or spoon.
Place a small zip-top bag into a glass, and use a spatula to scoop the filling mixture into it. Seal up the bag, snip one corner to create a makeshift piping bag, and gently fill half of egg whites (See slides for Buffalo deviled eggs for a visual on this technique). Garnish with cocktail onion halves, skewered on a toothpick if you wish, to mimic the appearance of a martini.
For the Buffalo flavor
All the flavors of Buffalo wings, ready to take over my deviled eggs.
2 or 3 tsp. Frank’s original RedHot sauce (adjust to your heat preference)
Frank’s RedHot dry seasoning, to sprinkle on at serving (or substitute paprika)
Instructions for Buffalo deviled eggs
For the Buffalo egg filling, I added two teaspoons of Frank’s sauce, the roasted garlic and black pepper.
I stirred in about a tablespoon of finely chopped celery, then scooped the filling into a small zip top bag, which I’m using as a piping bag.
Snip a corner of the bag (make it large enough for chunky ingredients to pass through), and pipe the filling into the empty egg halves. Garnish the eggs as desired.
My Buffalo deviled eggs are garnished with celery sticks and tiny crumbles of real bleu cheese.
Add RedHot sauce, roasted garlic and black pepper to one bowl of the yolk mixture. Blend smooth with a fork or spoon. Fold in chopped celery bits.
Place a small zip-top bag into a glass, and use a spatula to scoop the filling mixture into it. Seal up the bag, snip one corner to create a makeshift piping bag, and gently fill half of egg whites. Garnish top of Buffalo eggs with crumbled bleu cheese and mini celery sticks.
If you like the fun idea of switching up flavors on your next batch of deviled eggs, have a look at my previous post for Egg-Stravaganza, and see how I made these fun varieties!
(L to R) Bloody Mary, jalapeno pimiento cheese, bacon, egg and cheese.
Pardon me for a moment, as I ponder the best part of Super Bowl LV—I don’t mean the game, though I’m sure that Tampa Bay fans everywhere are still celebrating and bragging on social media about the blowout win. I’m not talking about the fun party, because as much as I love chilling at home with my husband (and making great food together), we were definitely feeling the void and missing our usual houseful of friends and neighbors. Nope, I am calling out the best part. For me, it was these brownies.
With a winning combination of all the right flavors, these brownies deserve their own trophy.
I’m not trying to ruin anyone’s diet or anything; just hear me out for a sec on these brownies. Soft and fudgy, peanut butter swirly, crunchy pretzel salty, holy moly, yum. They smelled fantastic while baking, and I don’t feel one bit ashamed for taking a major shortcut—a box brownie mix.
There, I said it. Though I love my time in the kitchen, especially creating fun, new twists on foods everybody loves (pizza, for instance), I don’t make desserts very often because I don’t have much of a sweet tooth. That’s probably what attracted me to these brownies in the first place—they are not only sweet, but also nutty and salty and crunchy. I’ve adapted these from a scratch recipe by Valerie Bertinelli, the actress who now has her own cooking show on Food Network. I considered (for about a second) making them from scratch myself for our quiet, at-home Super Bowl festivities, but the reality is that Ghirardelli does it way better than I do. It was the peanut butter swirl and salty pretzel topping that won me over, anyway.
I gleaned a few bits of wisdom from the reviews for Valerie’s scratch-made recipe, such as using a smaller pan and a lesser amount of the peanut butter swirl mixture, and then I settled in to enjoy a shortcut version of what so many fellow bakers had to say—”best brownies ever!”
Ingredients
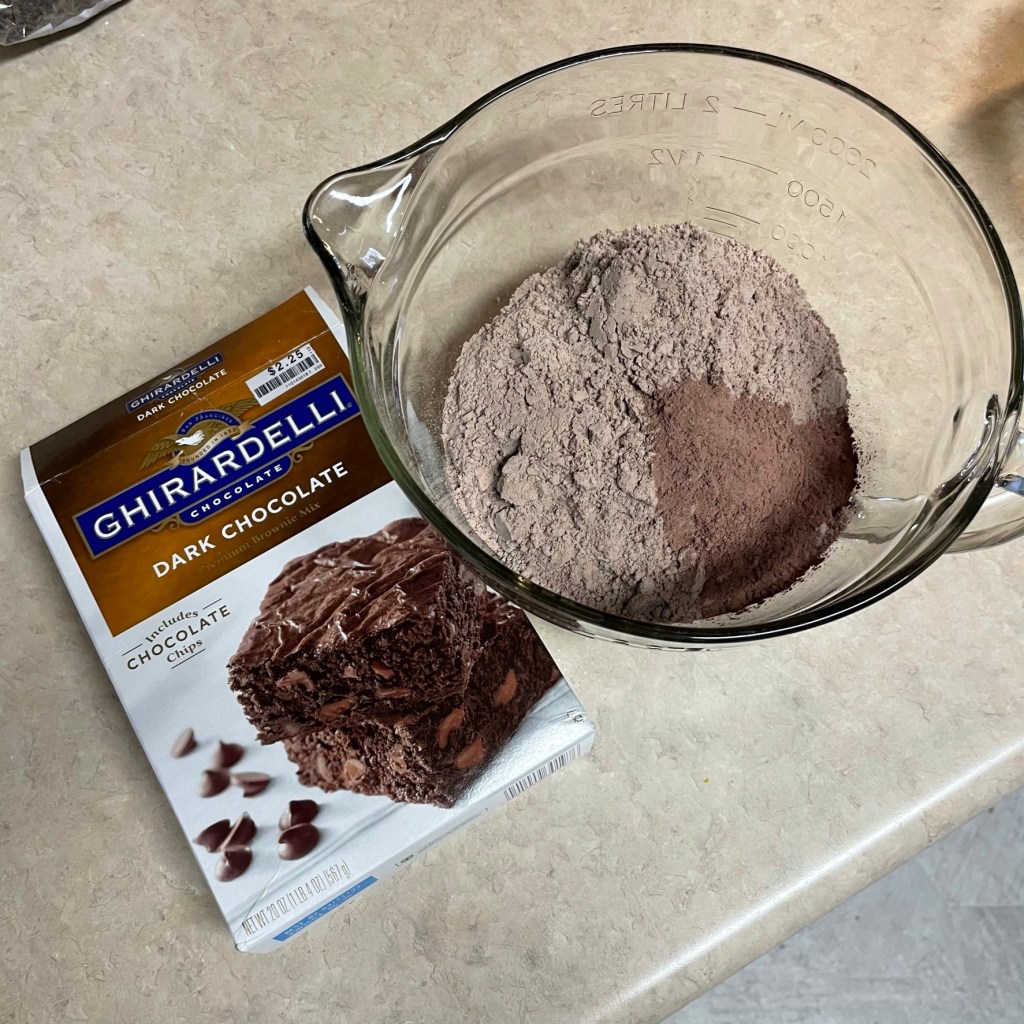
1 box Ghirardelli brand “dark chocolate” brownies, + ingredients to make them, which included an egg, 1/2 cup oil and 1/4 cup water.
1 Tbsp. dark cocoa powder
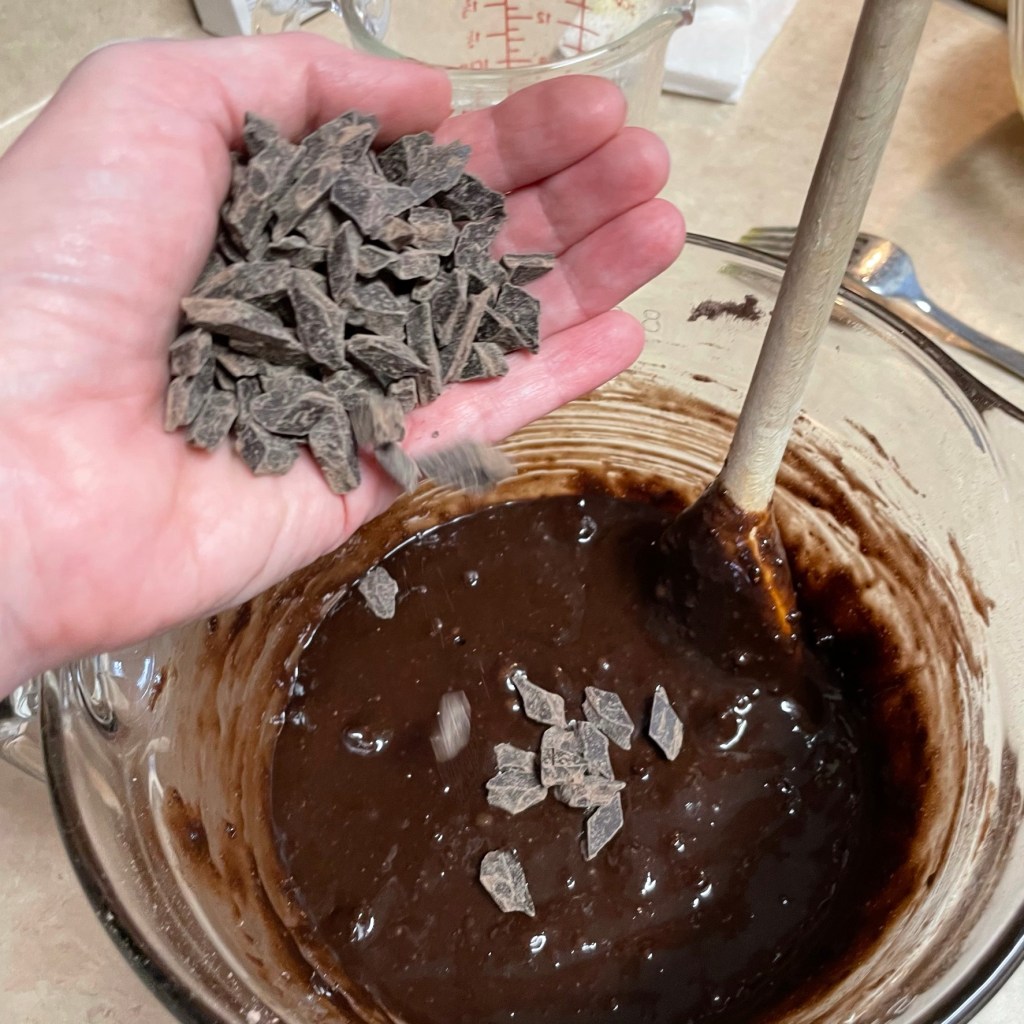
1/3 cup semi-sweet chocolate chips or chunks
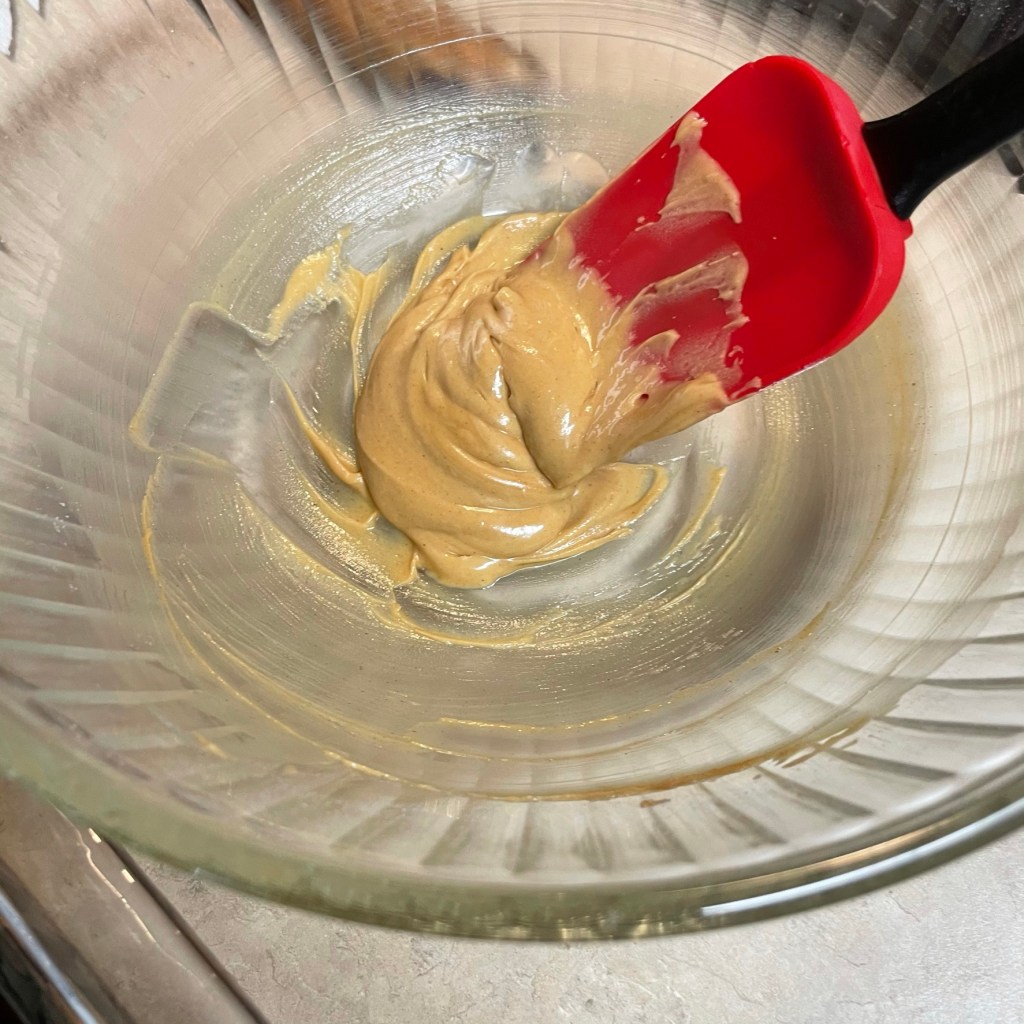
1/2 cup smooth and creamy peanut butter (not the “natural” variety)
1/3 cup confectioner’s sugar, sifted to remove lumps
3 Tbsp. salted butter, melted
A handful of salted mini pretzels, broken by hand
An extra sprinkle of coarse sea salt, if you like a bit more of this contrasting flavor
Instructions
The photos tell the story, but if you keep scrolling, you’ll find a downloadable PDF you can save and print for your recipe files. Enjoy!
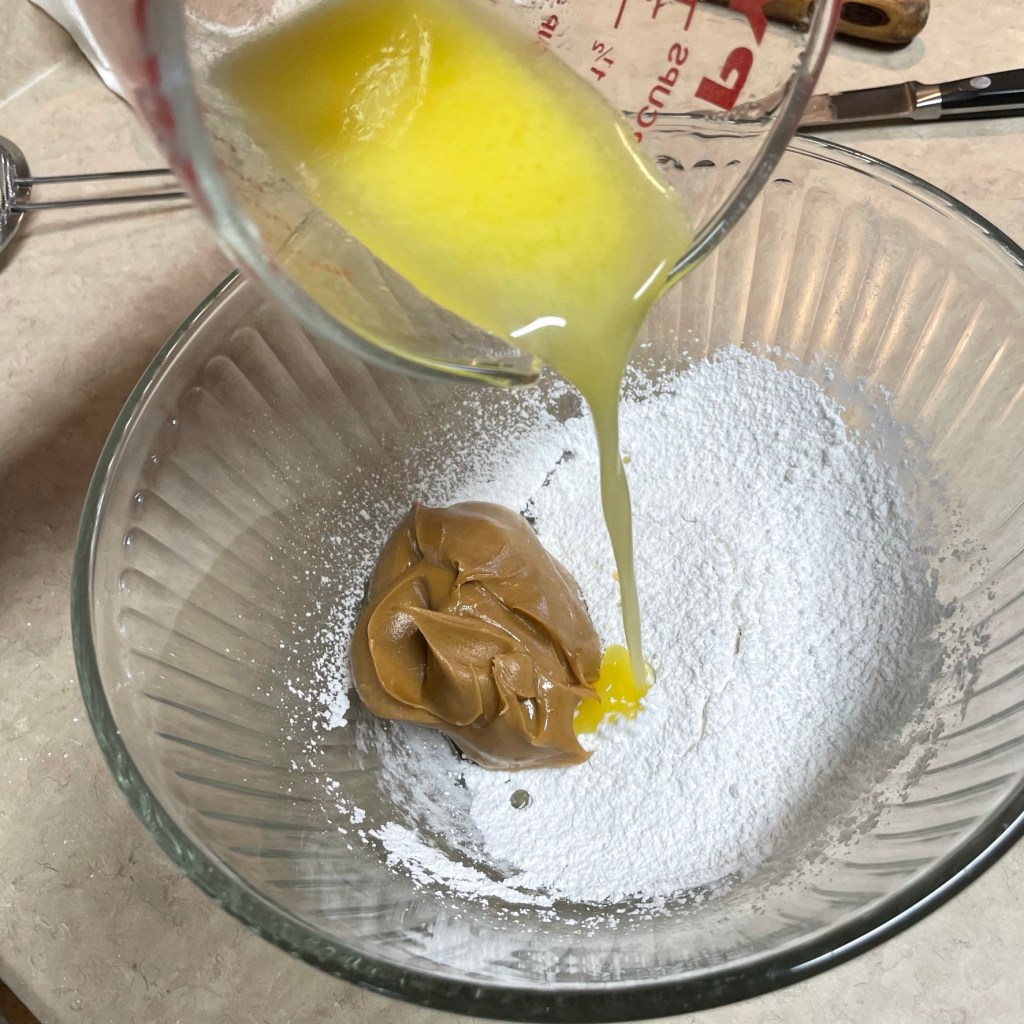
For this recipe, I used a “smooth” style peanut butter, rather than my usual natural style. The creaminess created a wonderful marbling.
My handheld electric mixer brought this together in record time, but I’m sure you could also whip it together with a spoon.
These dark chocolate brownies are already decadent, but I cannot stop myself from adding even more depth with some extra cocoa powder.
The liquids are exactly what is recommended on the box brownie mix—oil, egg and water.
Oh, why not?? If loving extra chocolate is wrong, I don’t want to be right.
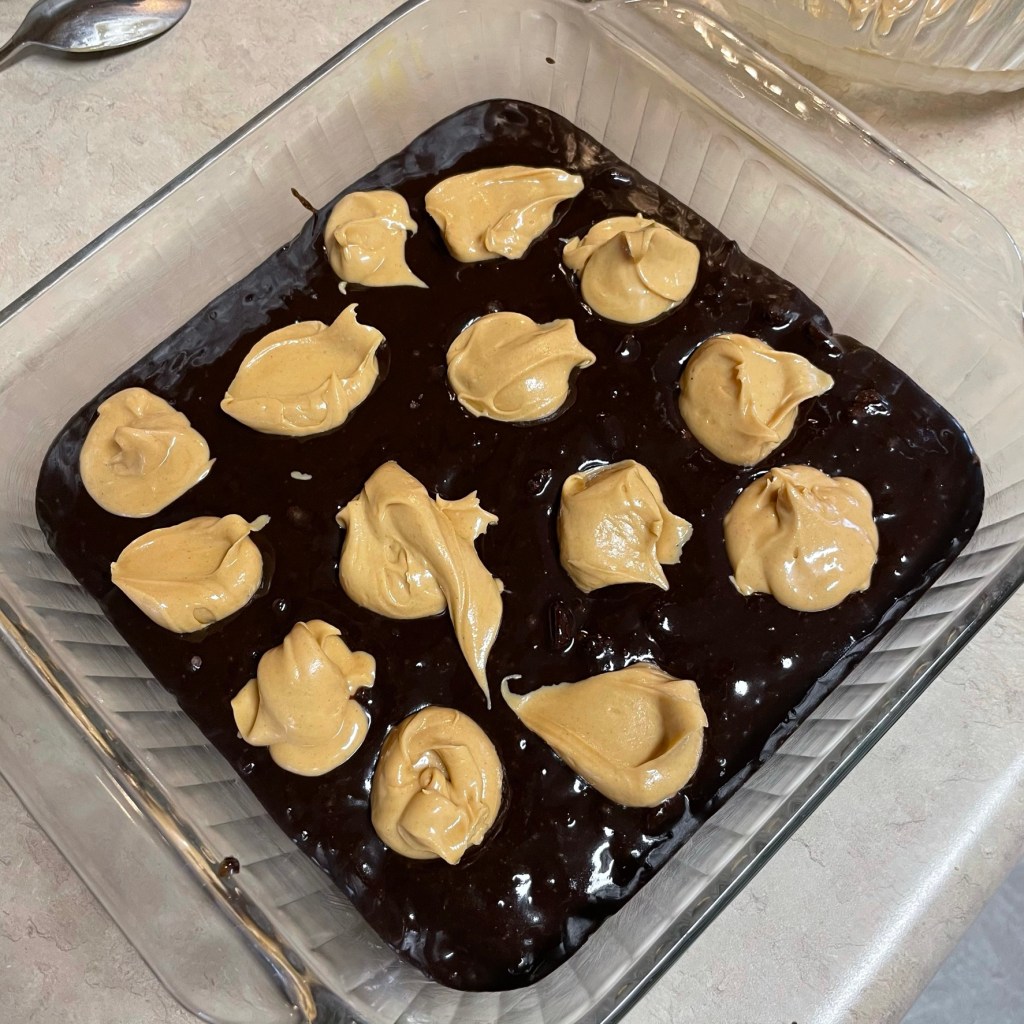
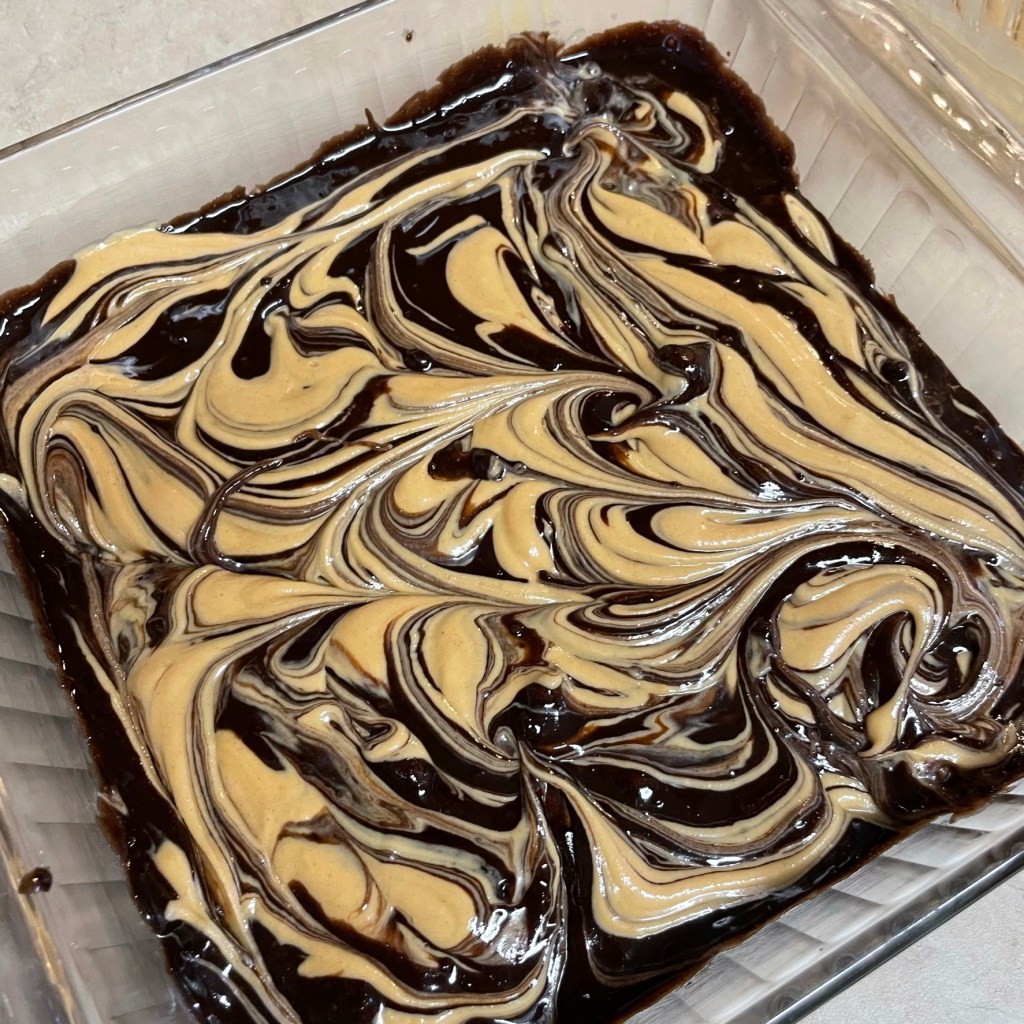
The peanut butter swirly mixture was like little kisses from heaven all over this ultra-dark brownie batter.
Based on reviews of the original recipe, I made a smaller amount of the peanut butter filling, but still had extra. Did I eat it straight from the bowl? You bet I did.
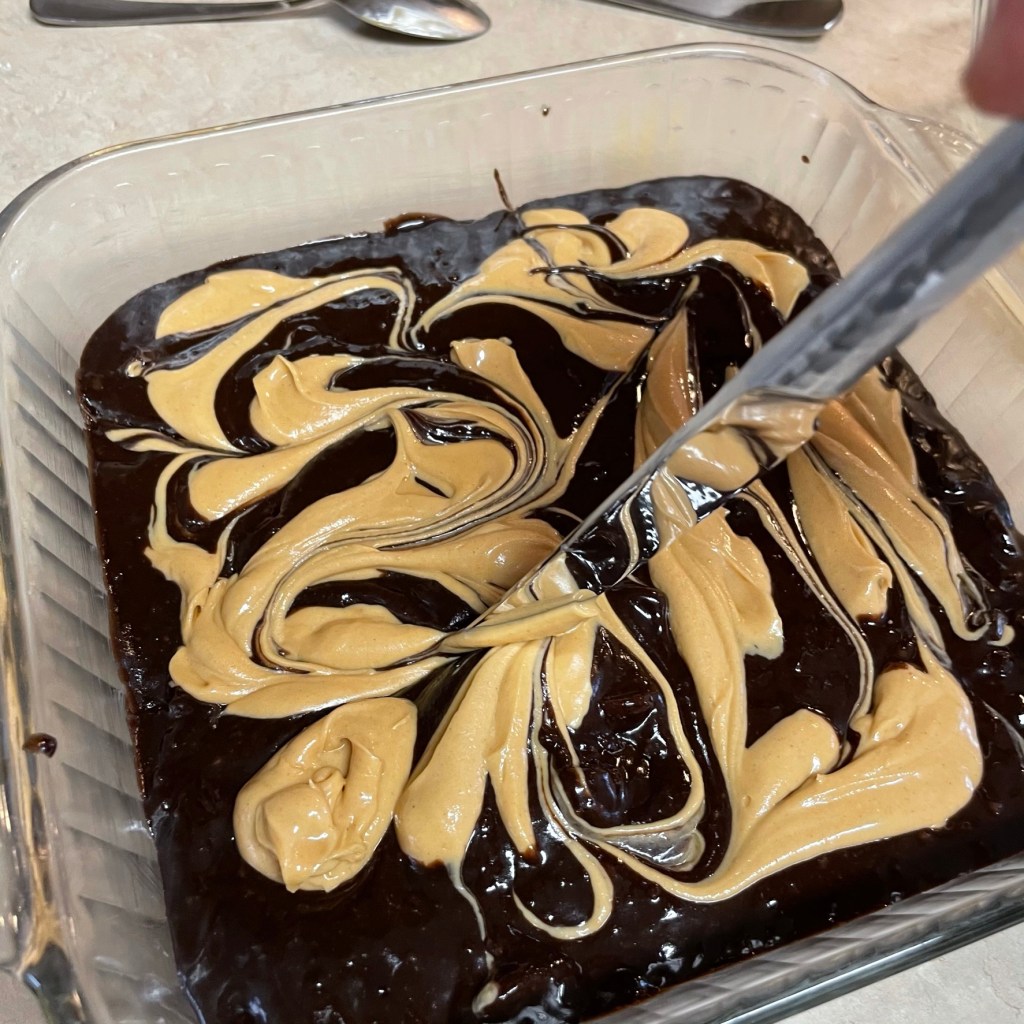
Swirling the peanut butter mixture was easy, and I followed no pattern.
This felt a little bit like art class.
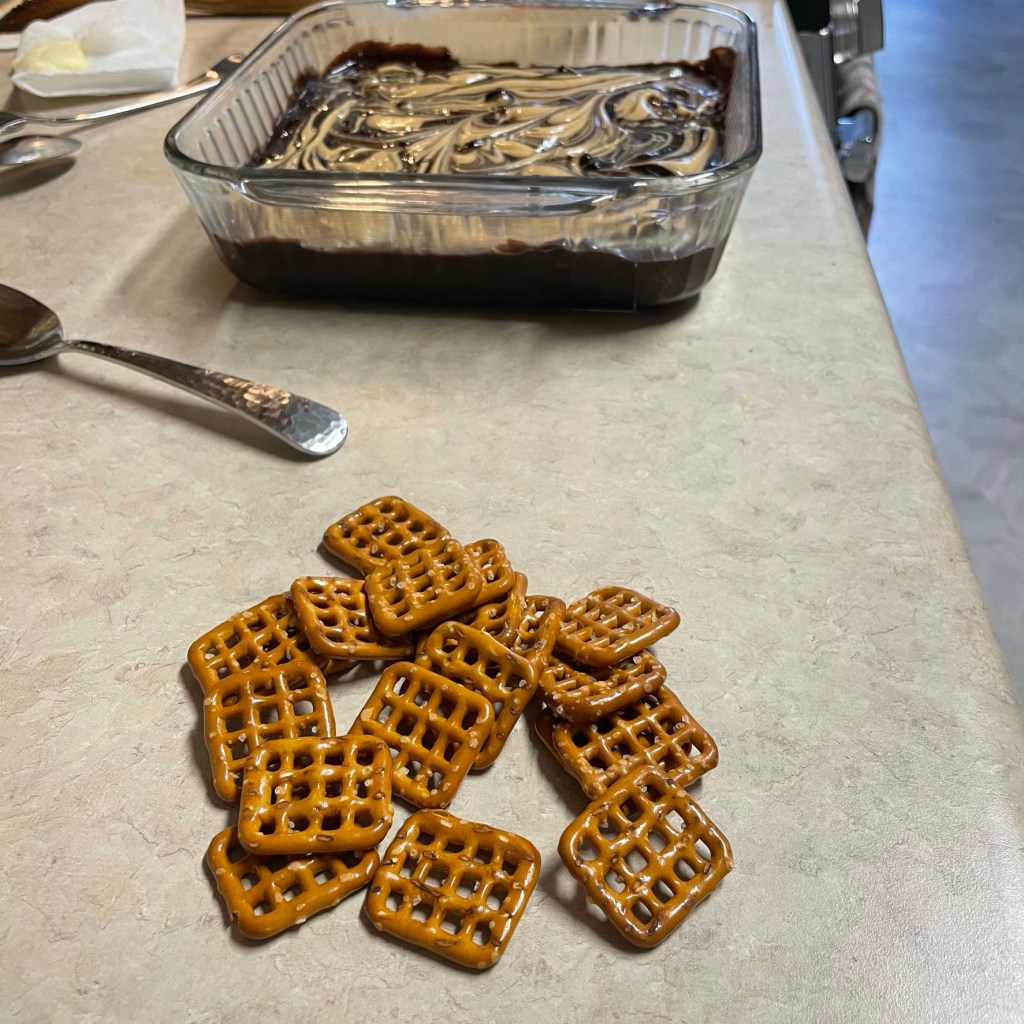
In hindsight, I could have used more pretzels, and I will next time. Break them by hand so you have pieces, rather than crumbs.
I pressed lightly on the larger bits of pretzel, to be sure they got down into the brownie mixture. If you love salty with your sweet, sprinkle on additional coarse sea salt.
Baked as directed on the brownie box. Cool completely before cutting into serving pieces.
Preheat oven to 325° F, with rack in center of oven. Butter a glass 8 x 8” baking dish.
In a medium mixing bowl, combine the peanut butter, confectioner’s sugar and melted butter. I used my handheld mixer for this step, but Valerie mixed it up just fine with a spoon, so do what you like there. Set this mixture aside while you prepare the brownie base.
Add dark cocoa to the brownie mix. Add the egg, oil and water, blending together until all dry ingredients are moistened. Fold in the extra chocolate pieces. Spread batter evenly into baking dish.
Spoon dollops of the peanut butter mixture randomly over the top of the brownie base. You may find that you have a little bit of the peanut butter mixture left over, as I did. But if that’s the case, just follow my lead and eat it straight off the spatula, the beaters, the bowl, and that little bit that spattered on the counter. No problem (it’s delicious).
Use a butter knife blade to drag the peanut butter dollops through the brownies, marbling as much or as little as you like.
Use your hands to break the mini pretzels into pieces, scattering them all over the brownies. Sprinkle on a few pinches of coarse sea salt (optional).
Bake brownies 45 to 50 minutes, according to package instructions. Cool completely before cutting, and try not to eat the whole batch in one evening.
The center of the brownie is soft and fudgy, the corners and edges are perfectly chewy, and that whole peanut butter swirly pretzel thing? Totally elevating my happy!
Terrie and I enjoy surprising each other with gifts that we know the other will appreciate and play to our sense of adventure in the kitchen. So it was a few Christmases back when I opened one of my gifts and unveiled the book Buenos Nachos! by Gina Hamadey. Terrie knew that I already enjoyed making different kinds of nachos and had come to recognize herself how enjoyable nachos could be as a dinner, and relatively healthy, too, if you plan for it. The book is, as the title indicates, a treasure trove of nacho recipes, many of which come from restaurants whose owners shared their secrets. The part of the book I’ve put most to use, though, is in the smaller section on accoutrements such as salsa, guacamole, queso and “refreshments.”
Specifically, I’ve latched onto “Smoky Guacamole” as a go-to offering at parties or pre-dinner snacks at our house. I was a latecomer to guacamole, I have to admit. I moved to Southern California after college and refused to get into the chill, SoCal swing of things and eat a disgusting-looking condiment with a questionable consistency. Instead, I simply expanded George Carlin’s skepticism about “blue foods” to include pasty green stuff. I don’t remember exactly when I gave in and tried guacamole, but I cannot imagine life without it now. The freshness of the lime and cilantro added to chunks of avocado and tomatoes was made for a nacho chip. Or, in the recent case in our household, as a side/add-on to homemade barbacoa tacos.
The reason I like this particular recipe—the very first one I tried from Buenos Nachos!—is the boost guacamole gets by simply adding in a couple of tablespoons (or more, as I like to do) of chipotles in adobo sauce. The smoky spice of the adobo sauce gives guac exactly the kind of “elevate your happy” that my better half talks about so often.
Coincidentally, smoky guacamole also serves as a fine topping or side for any of the nacho dinners I put together. Next up for me out of Buenos Nachos! will be liberating and enhancing a savory cheese sauce from one of the nacho recipes. But for now, I hope you enjoy this smoky guacamole as much as we do.
The usual guac suspects are all here, but the chipotles in adobo is the standout ingredient that puts the smoke in Smoky Guacamole.
Ingredients
3 avocados, halved and cubed
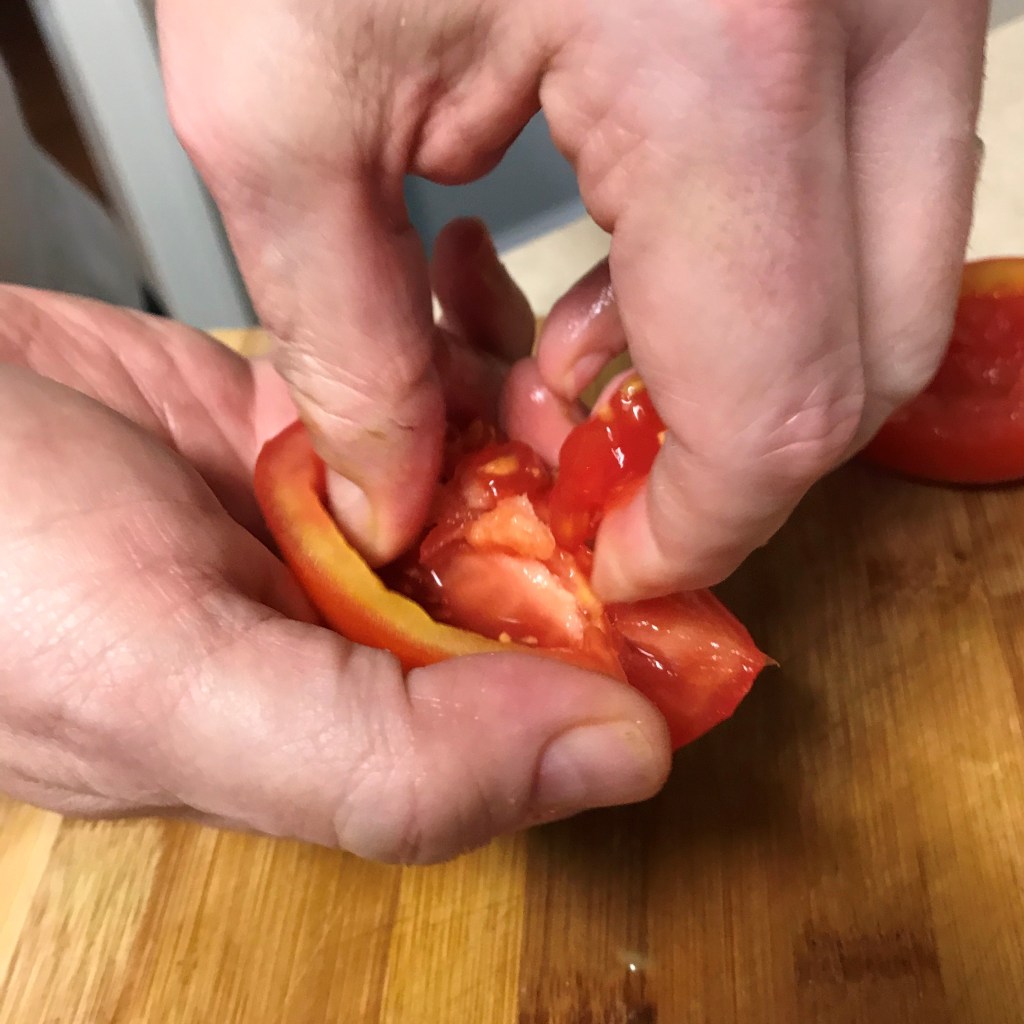
2 Roma tomatoes, seeded and chopped
Juice of half a lime
1/2 medium red onion, chopped
2 Tbsp. or more pureed chipotles in adobo sauce* (see notes)
3 Tbsp. chopped fresh cilantro
Salt and pepper
*Notes
To make the chipotle puree, empty an entire 7 oz. can of chipotle peppers with adobo sauce into a food processor. Pulse several times until mixture is mostly smooth. Transfer mixture to a bowl and keep in the fridge for about two weeks. In this recipe, use as much adobo as your spice meter desires. Add some to your next batch of chili, or use it to kick up a homemade bbq sauce.
Instructions
Empty the whole can of chipotles, including adobo sauce, into the processor. Blend until it’s a pureed consistency.
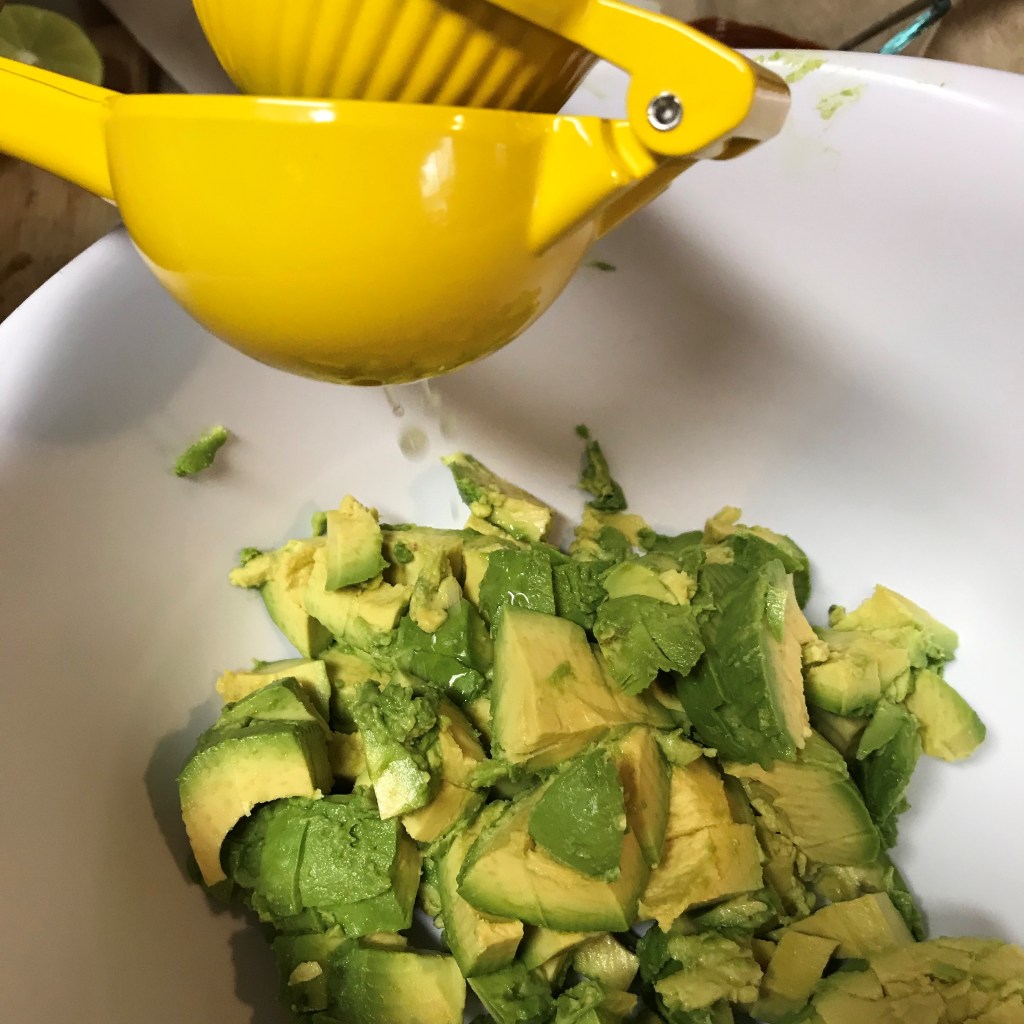
Choose avocados that are ripe but not super soft. Scoop them from their shells and cut into cubes.
The acid in lime juice prevents browning, so toss the avocados with it before proceeding with the other ingredients.
Roma tomatoes are meaty, but you may still need to remove the wet seeds. Cut them in half lengthwise and scoop them with your fingers.
Chop the tomatoes whatever size you like. I’m keeping them chunky for this batch of guac.
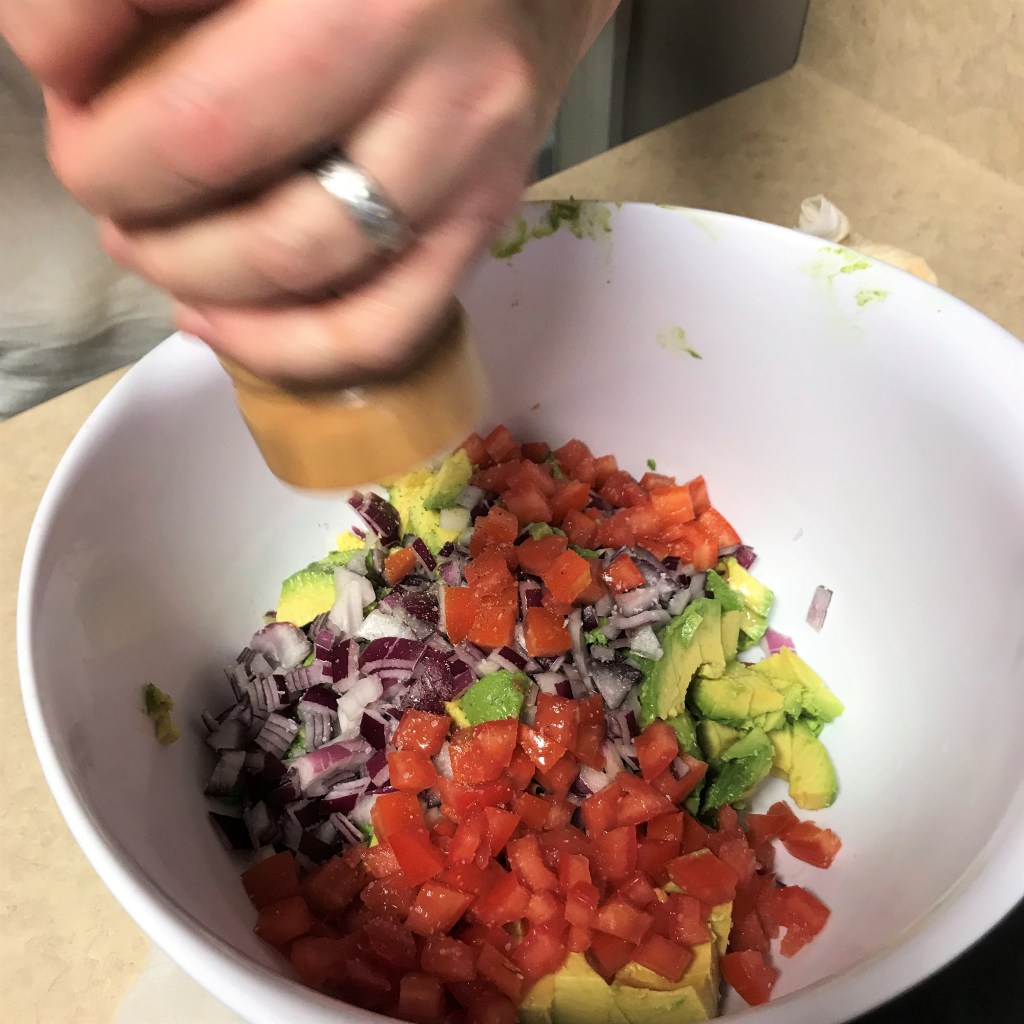
Each ingredient brings its own flavor and texture to the tortilla chip.
Give the whole mix a few pinches of salt and twists of fresh cracked pepper.
Bring on the smoke, by adding as much (or little) chipotle-adobo puree as your heat meter desires.
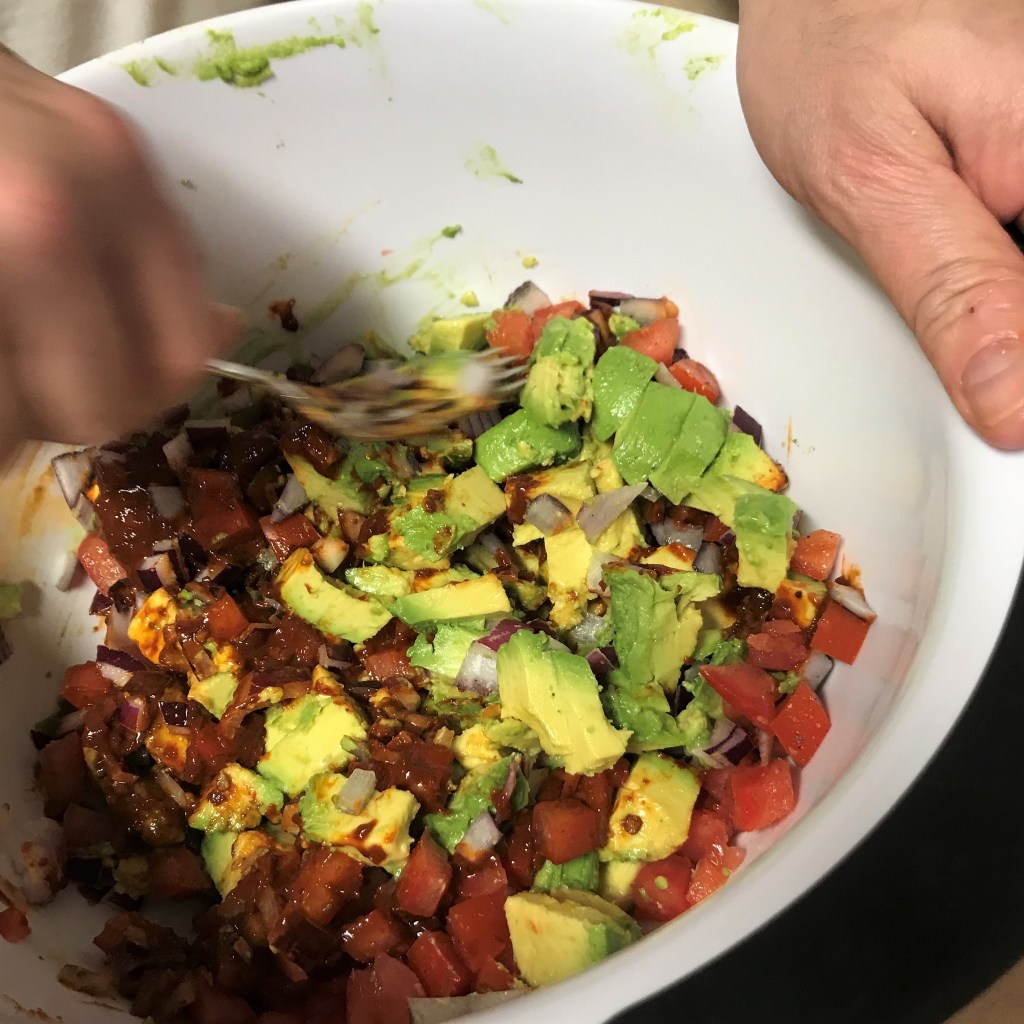
I use a fork to mash the ingredients together. Some of the avocado pieces will stay intact. If you prefer a smoother guac, try smashing up the avocado first, then fold in the other ingredients.
Cilantro is traditional in guacamole. You can either sprinkle it on at serving time, or mix it in as I do.
If you’re making the guac ahead of time, layer plastic wrap directly onto the surface. This prevents air from turning the avocados brown.
Yeah, baby.
Put the diced avocado in a large bowl and add the lime juice. Toss lightly to prevent the avocado browning.
Add in the tomatoes, onion and chipotle-adobo puree. Stir with a large spoon or mash with a fork; if you prefer a smoother guacamole, you can mash the avocados first, but fans of chunky texture can settle for just mixing up the ingredients.
Season with salt and pepper to taste. Finally, add the cilantro and fold again.
Cold weather and shorter days gettin’ you down? Me, too. We’ve had a few close calls this season for snow or wintry mix, but not much has materialized here in the South, though we’ve had our share of cold, dreary days and nights. My friends and family around New York and Boston have seen far more than their share of winter this week, thanks to the Nor’easter that dropped a foot or more of snow. And Punxsutawney Phil, the jumbo rodent in charge of this whole thing, saw his shadow (or perhaps felt the snowflakes falling against his fat cheeks) this morning, and declared “six more weeks of winter.” The bottom line is that winter is getting old; we are all tired of it. What we need is some warm and nourishing comfort food.
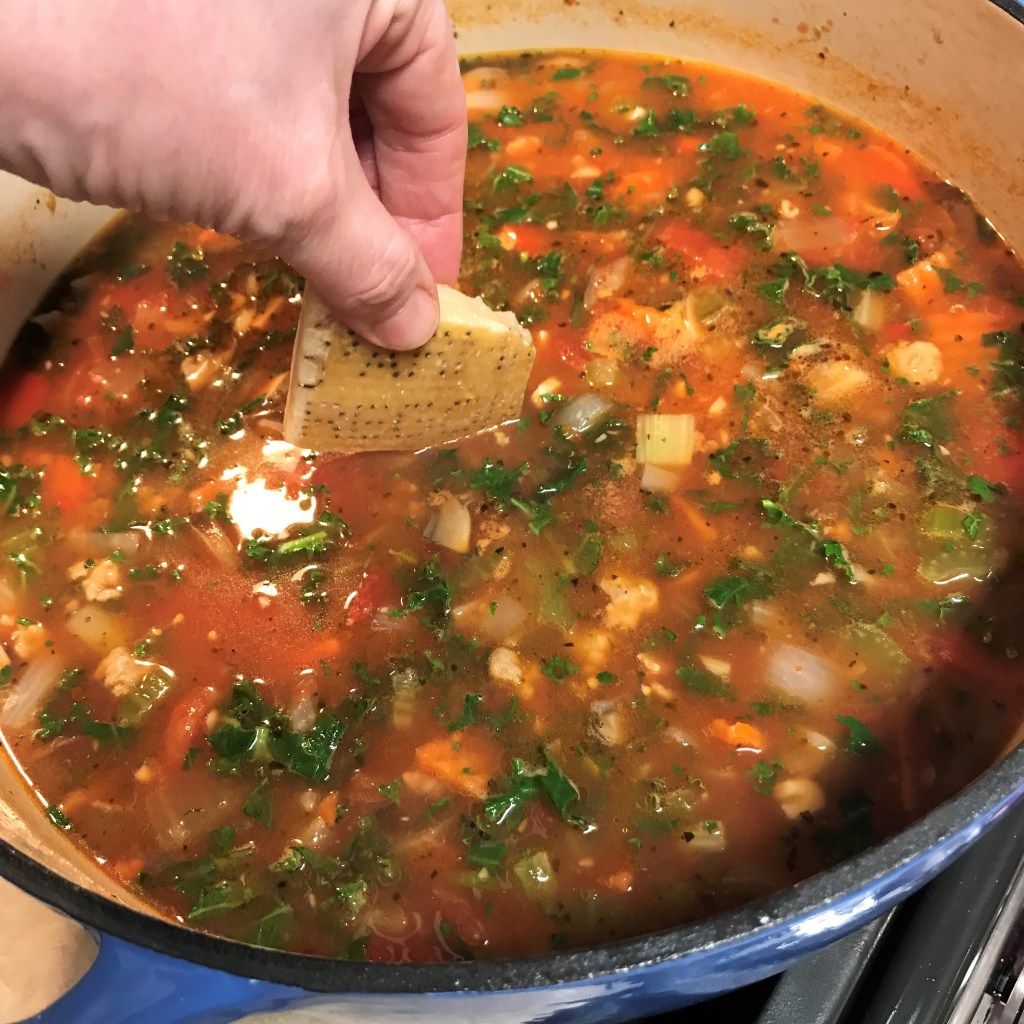
I finally pulled out our 7-quart cast-iron Dutch oven and made a huge batch of this soup that never fails to chase away my midwinter blues—a steaming hot bowl of Italian flavor that is chock-full of fresh, nutritious vegetables, spicy Italian sausage, creamy beans and petite pasta. This is the kind of food that warms you from the inside, whether you’re dining at the table or curled up with a soft blanket on the sofa while eating your minestrone from a pottery mug and binging on Netflix. Whatever comfort looks like for you, this soup has it covered.
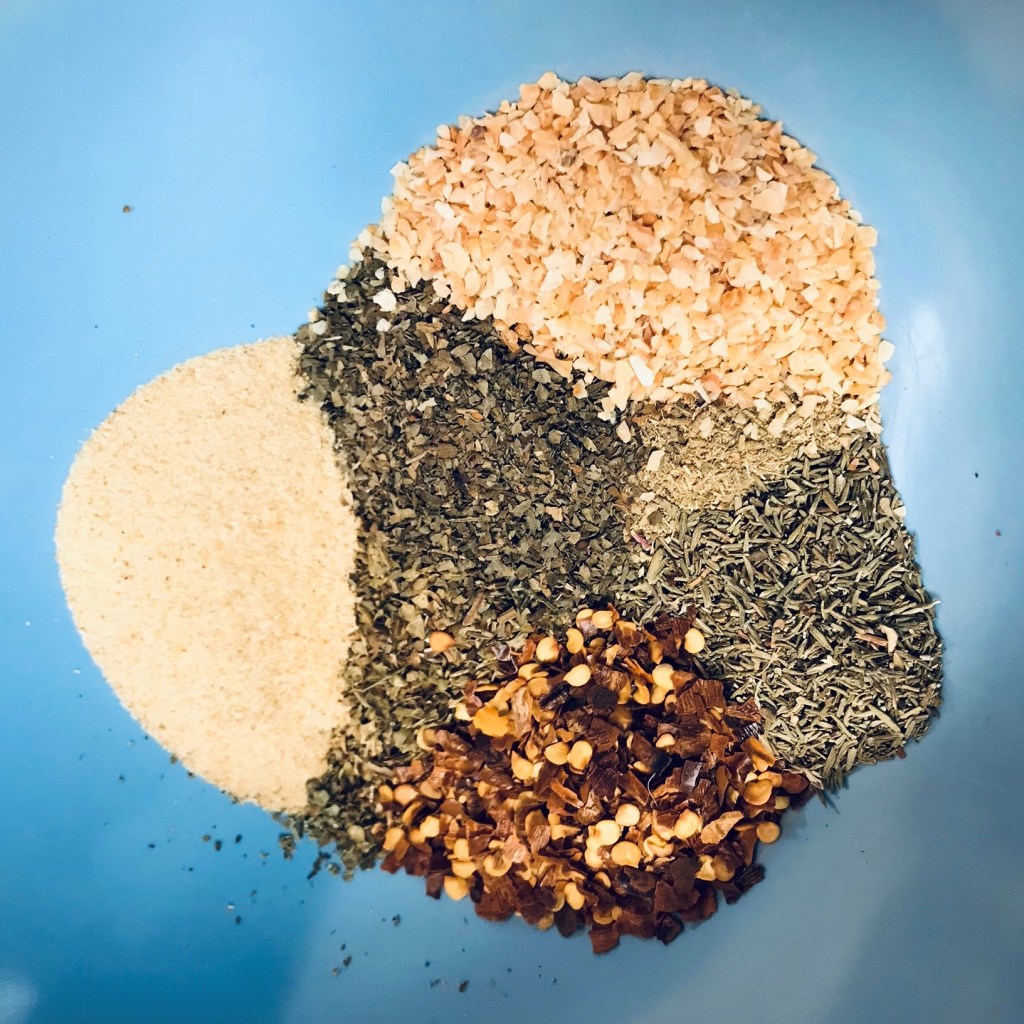
Minestrone is Italian, obviously, so I’ve seasoned it with my own “Mamma Mia” blend of herbs and spices. This seasoning blend was born more than a decade ago when I participated in a “reverse offering” experiment at church. We were given $20 and challenged to double (or more) that money for charitable donation. The effort was intended to show how we could use our own talents to make a difference in the world. I bought a bunch of bulk spices, turned them into blends and packaged them into baby food jars (which I found for free on Craigslist) with little fabric-wrapped tops for individual sale. The end of the story is that my $20 turned into almost $60 (a fine return), and I still have several of my blends in regular rotation today. Mamma Mia seasoning contains dried oregano, basil, thyme, marjoram and ground fennel seed, plus garlic and crushed red pepper. It’s zesty, herbal and a little bit spicy, and just the right punch of flavor in this minestrone.
Nothing says “comfort” better than a bowl of nourishing soup, and I hope you’ll find it just right for stuck-at-home days, snow days, waiting for snow days, sick of the snow days and—well, pretty much all the days.
Who says comfort food can’t be good for you? This soup has so much going on nutritionally.
This recipe makes about 4 quarts. You will need a large soup pot, slow cooker or Dutch oven to hold all the ingredients, but the recipe can easily be halved for a more manageable batch. This soup also freezes well, so you can pack some away for another gloomy day.
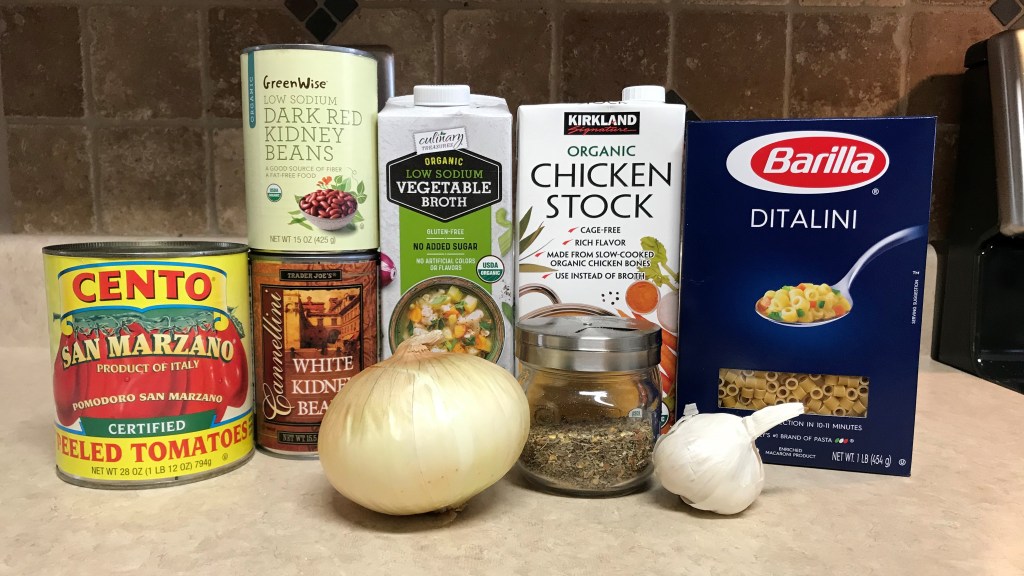
Ingredients from the pantry
Choose low-sodium, organic ingredients as much as possible. The spice blend in the jar is my own Mamma Mia seasoning.
Extra virgin olive oil, salt and pepper (of course)
1 medium onion, chopped
2 Tbsp. fresh chopped garlic
1 carton low-sodium vegetable broth
1 carton low-sodium chicken broth* (see notes)
28 oz. can whole peeled tomatoes in tomato puree (San Marzano preferred)
15 oz. can white kidney beans, drained and rinsed (cannellini)
15 oz. can dark red kidney beans, drained and rinsed
2 tsp. Mamma Mia Seasoning blend (see the end of the post for ingredients, or substitute another salt-free Italian seasoning + a few hearty shakes crushed red pepper flakes)
2 cups dry ditalini (or other petite shaped pasta, such as small elbows or mini farfalle)
Ingredients from the fridge
It looks like we are eating the rainbow with this soup!
3 stalks celery, chopped
1 cup chopped carrots
1 cup each green and red bell peppers, chopped
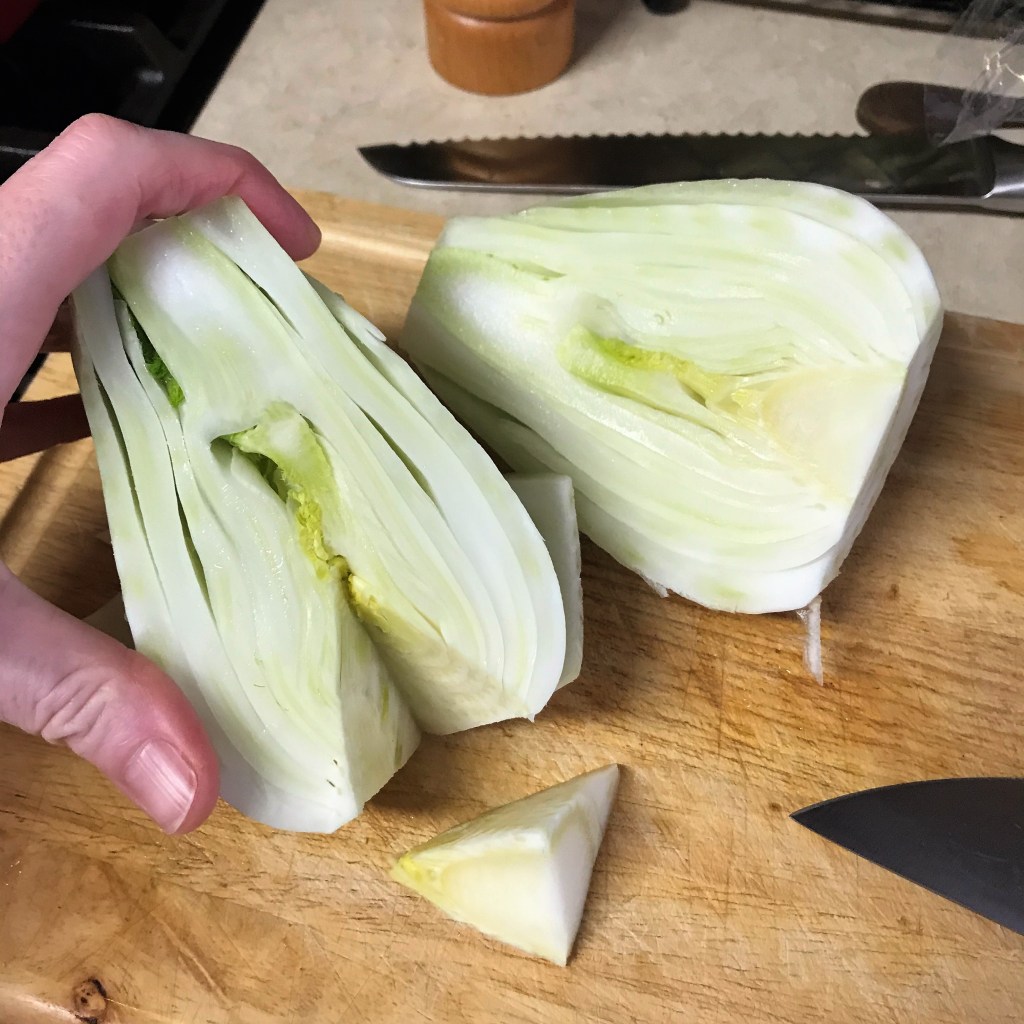
1/2 bulb fennel, sliced and chopped*
8 oz. cremini mushrooms, cleaned and sliced
1 fat handful kale leaves, chopped small*
1 handful fresh Italian (flat leaf) parsley, cleaned and finely chopped for garnish at serving
1 or 2 lbs. bulk hot Italian sausage* (optional, see notes)
*Notes
Minestrone is perfectly adaptable for a vegetarian, or even vegan, option. Simply swap more vegetable broth for the chicken broth and skip the sausage in favor of additional beans. For texture and interest, I’d recommend a can of garbanzo beans in place of the meat.
Fennel provides a real Italian flavor to minestrone, and the flavor is echoed in my Mamma Mia seasoning, which includes ground fennel seed. It has a crunchy texture that is similar to celery, and a slight licorice flavor that blends well with the other ingredients. Use only the white bulb part of the vegetable (see the slides for more description).
Any type of kale can be used in minestrone. Lacinato kale is commonly used in Italian cooking, but I used curly kale. If you prefer, you could also substitute about 1 1/2 cups finely shredded and chopped green cabbage. These hearty greens add texture and fiber to the soup.
You decide how much sausage, if any, you use in this recipe. My batch included only 1 pound this time, and I used a chicken sausage that was labeled “hot Italian.” Turkey or pork sausage would also work or as mentioned above, you could omit the meat altogether for a vegan version.
Want to make this in a slow cooker? Go for it! The soup doesn’t need much attention other than occasional stirring or adding ingredients. After the initial cooking of sausage and veggies, simply dump everything into the slow cooker and let it go on high heat for several hours, or low heat overnight. It may help to give the kale a quick sauté before adding to the crock, given that it is much larger volume before cooking and most slow cookers recommend filling only 2/3 full.
Instructions
First, the pictures, or you can scroll down for written instructions and a downloadable PDF for your recipe files.
Looks like celery and bok choy had a baby, but fennel has a flavor all its own.
Cut the fennel crosswise, where the stems meet the bulb.
Cut the fennel bulb in half from stem to root, and then carve out the core in each half, then slice or chop the fennel as needed.
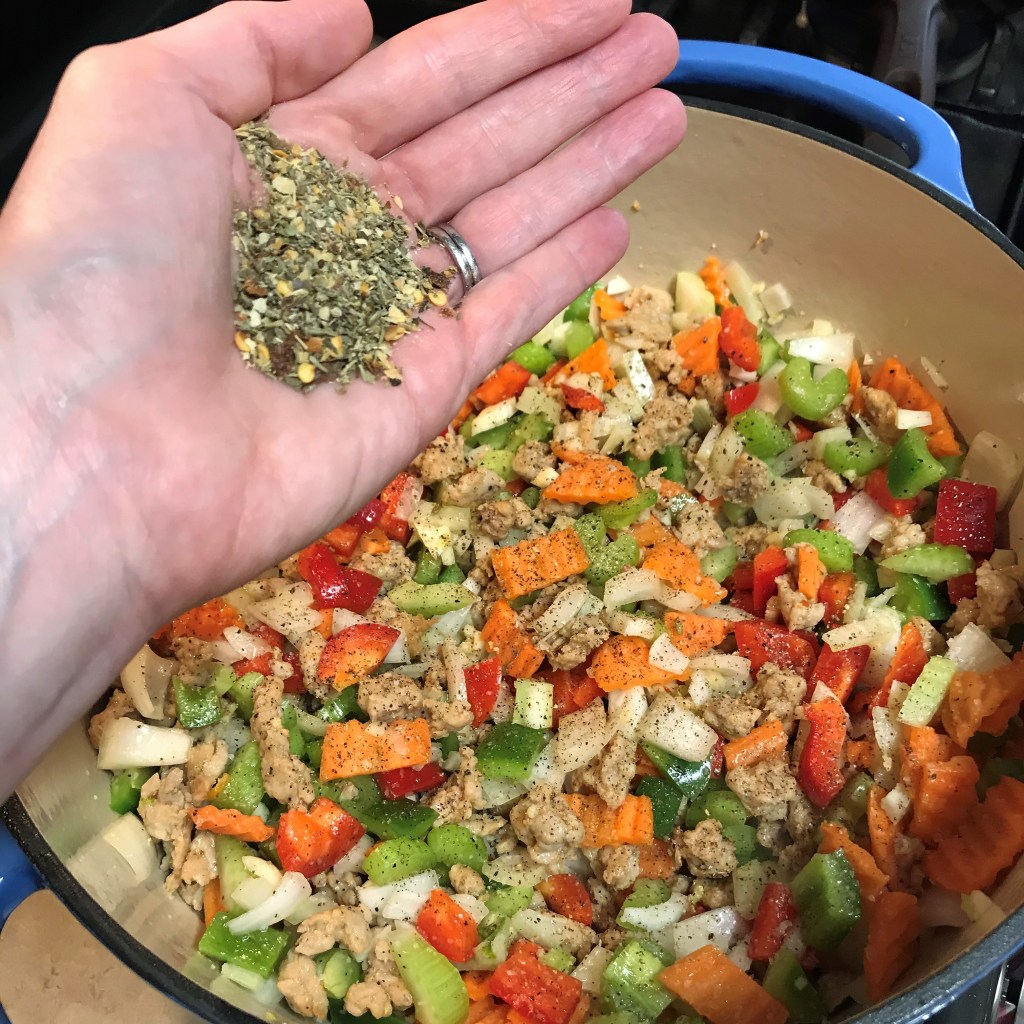
Fennel, bell pepper, celery, onion, carrots and garlic. Can you taste all these fresh, beautiful colors?
If you’re using sausage with a good bit of fat, you may not need oil at all. Here, I’ve used about 4 tablespoons extra virgin olive oil (from Italy, of course).
Break up the sausage with a spoon or utensil as it cooks. You want smaller pieces so that you get a little bit in every bite.
Add the veggies all at once, and stir to combine.
Any Italian seasoning will serve you well. My Mamma Mia blend includes oregano, basil, thyme, marjoram, garlic, fennel seed and crushed red pepper.
I added the mushrooms in batches. Add a bit of oil to the center of the pot if needed for browning them.
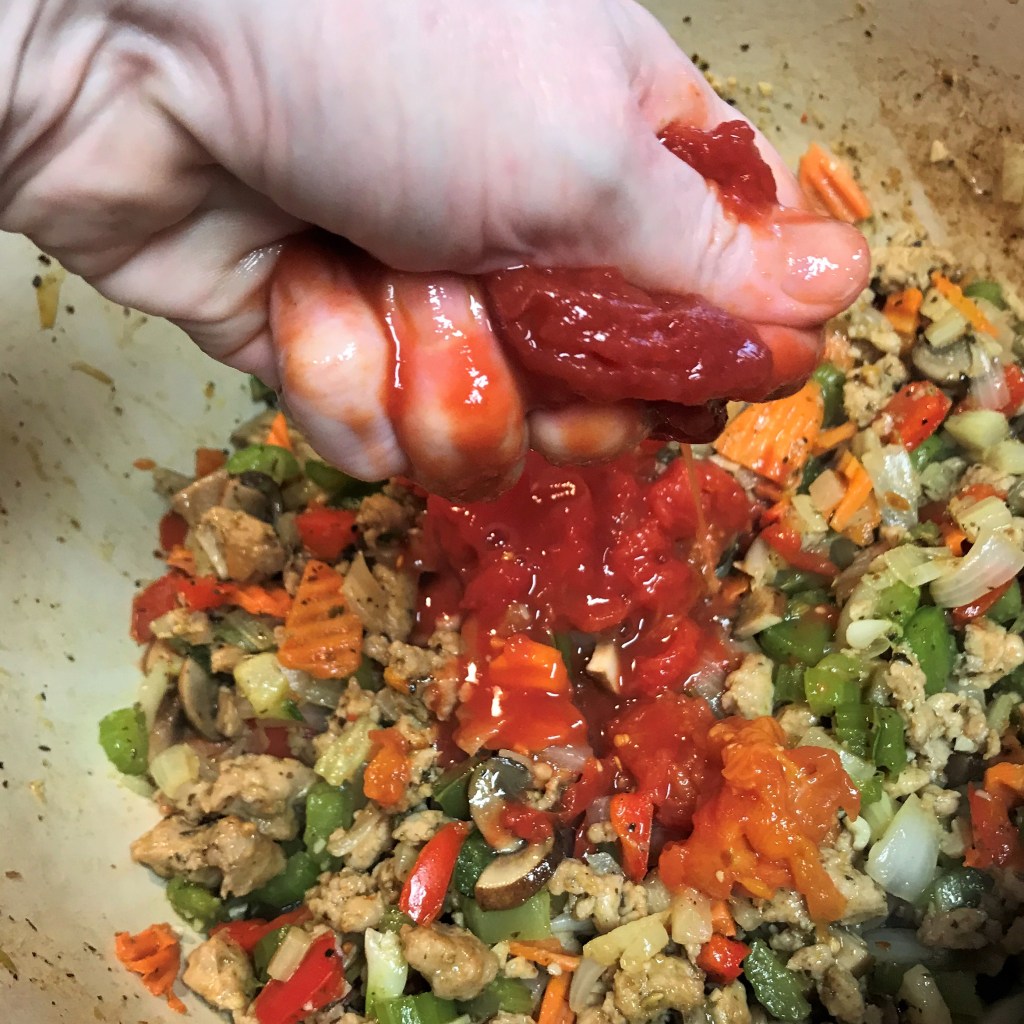
If you want to use a slow cooker to finish the recipe, transfer the mixture at this point, then squeeze the tomatoes into the blend.
With the tomatoes and broth added, it’s beginning to look like soup!
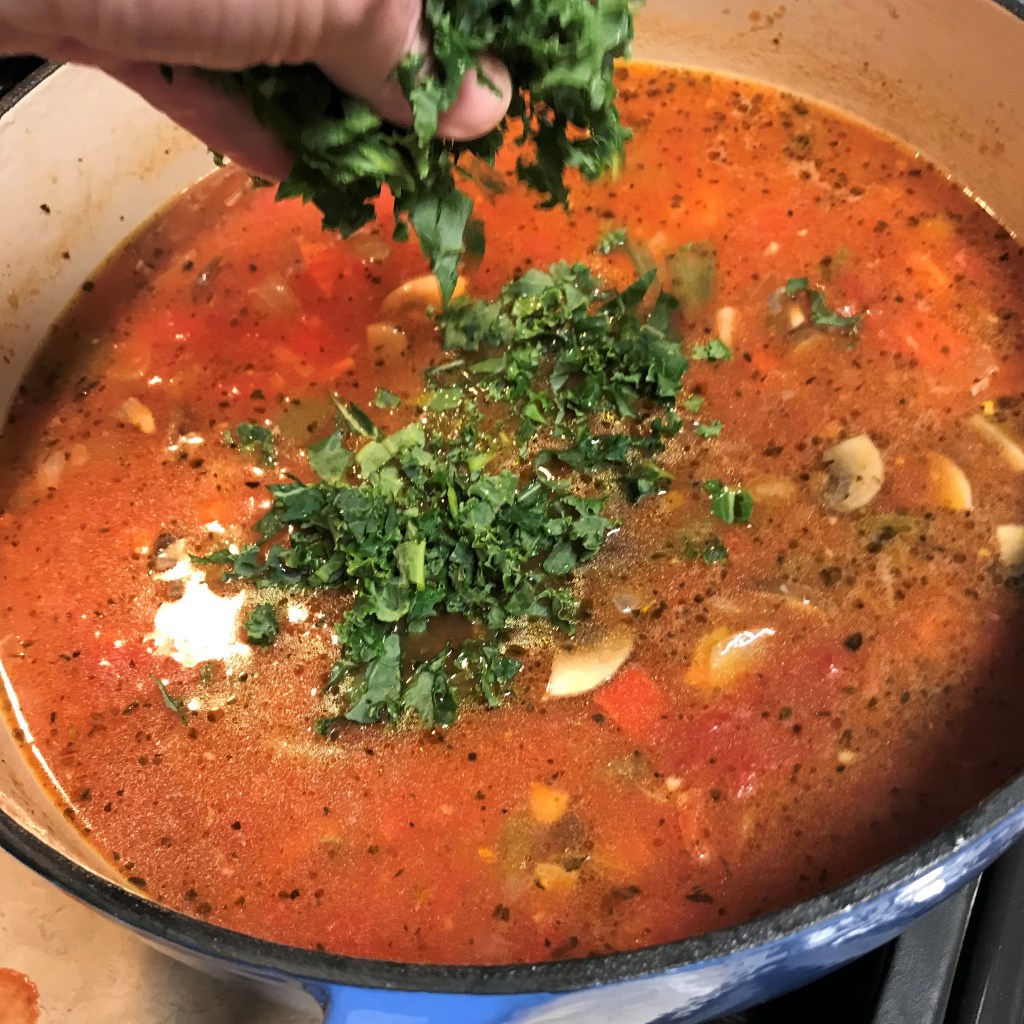
This is what I call a “fat handful” of kale. Remove the heavy pieces of stem as much as possible and chop before adding to the minestrone.
The kale will cook down considerably in the hot soup. Don’t be alarmed if it seems like a lot at first.
Minestrone gets a huge flavor boost from a rind of Parmigiano-Reggiano. Allow the rind to simmer in the soup.
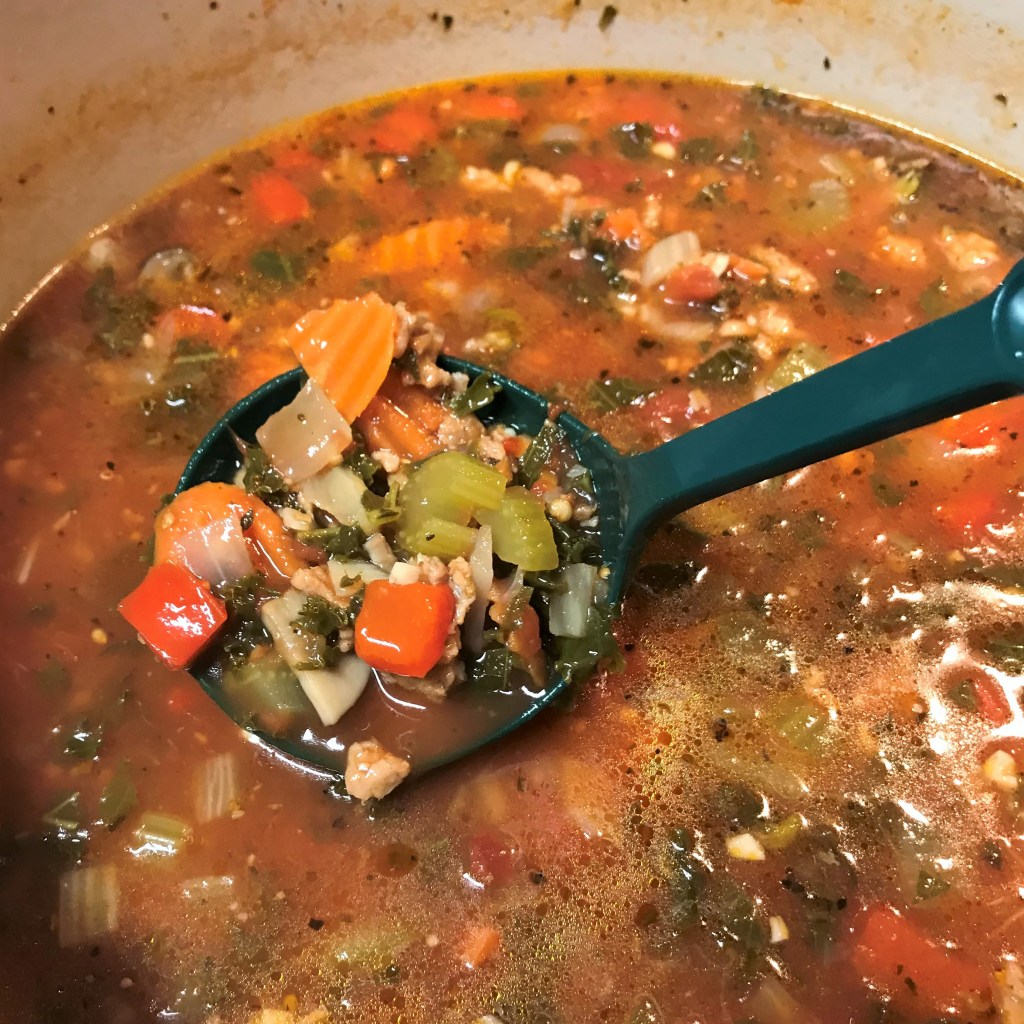
After a few hours, the vegetables are tender and the flavors are nicely blended.
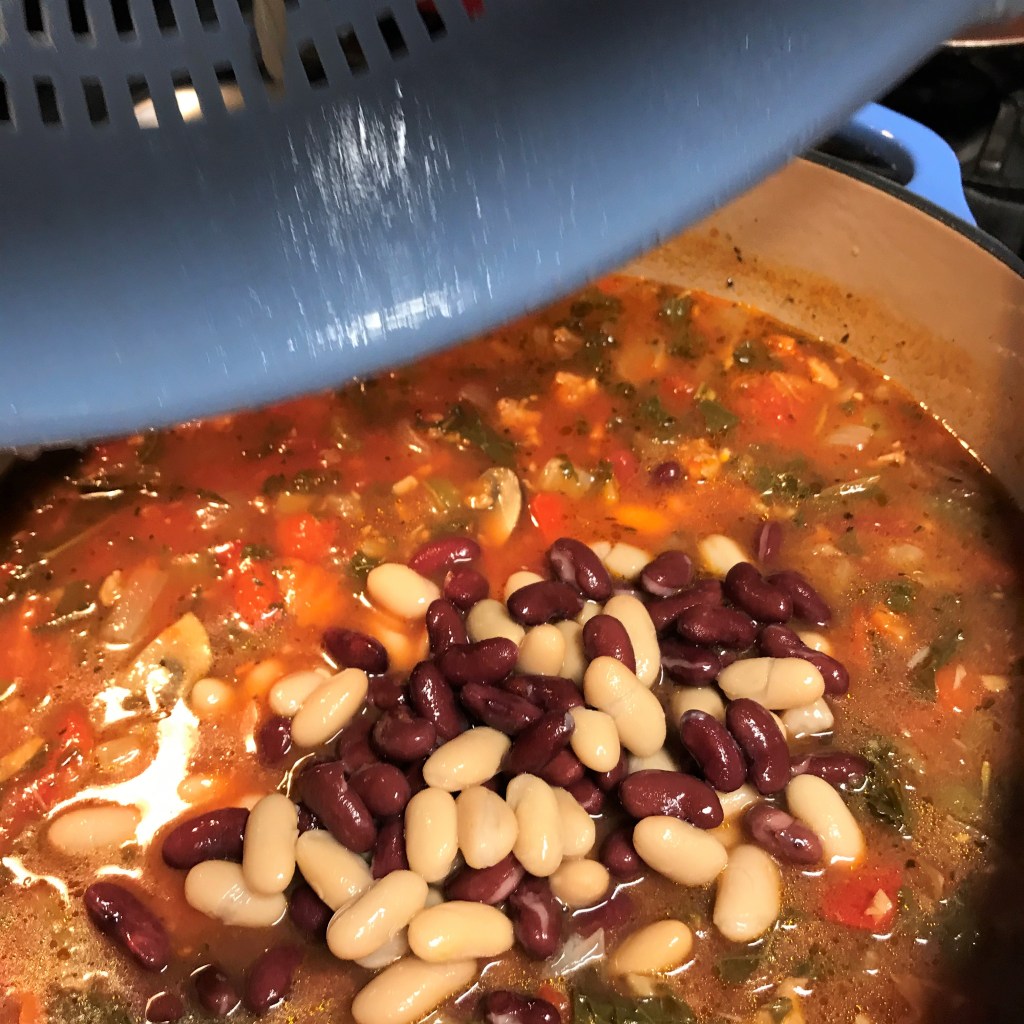
Rinse the canned beans, and season them with a pinch of salt before adding to the soup.
If you’re skipping sausage, add a third can of beans for texture and protein.
Any petite shape of pasta works great in minestrone. I’ve chosen ditalini, and I cook it separately and add to servings individually.
Soup’s on! 🙂
In a large soup pot or Dutch oven, heat 4 Tbsp. olive oil over medium-high heat. Add sausage and cook until browned, breaking up larger pieces with a spoon or wooden utensil.
Add chopped onions, carrots, celery, peppers, fennel and garlic. Stir and cook until vegetables soften, and the moisture released from them has mostly evaporated.
Scatter Italian seasoning blend over the ingredients and stir to combine.
Move the sausage and vegetables to the outer edges of the pot and drizzle another tablespoon of olive oil in the center. Toss in the mushrooms, half at a time, and gently toss them around to lightly brown them. If you’re using a slow cooker, transfer the mixture at the end of this step.
Add the whole plum tomatoes, squeezing each thoroughly by hand directly into the pot. This will assist in breaking down the tomatoes for quicker cooking. Empty all puree into the pot as well.
Add the vegetable and chicken broths and stir to combine. Heat soup to a low boiling point, then reduce heat to a simmer. This will take about 15 minutes.
Stir in finely chopped kale and stir. Add piece of Parmesan rind and allow it to simmer with the soup for a few hours.
Near the end of your expected cooking time, drain and rinse the canned beans. Season them with salt and pepper before adding them to the soup.
Fill a large pot with water and cook the ditalini (or other petite pasta) to al dente texture. Drain pasta and add to the soup just before serving. Alternatively, drain the pasta, toss with a small amount of oil to prevent sticking, and transfer it to a separate bowl to be added to soup as it’s served. This will help you enjoy the soup several days later, without mushy noodles.
Tomorrow at daybreak, about 80 miles outside of Pittsburgh, Pennsylvania, one of the strangest of all American traditions will occur. Punxsutawney Phil, the notorious groundhog (or woodchuck, as he is known in my old neck of the woods), will be dragged out of bed by the scruff of his neck and ordered to break the news to the faithful fans who have traveled there to get a verdict on winter. The mayor of Punxsutawney will hold this oversized rodent up to the crowd as Mufasa did in the presentation of Simba, and poor Phil will probably be some combination of terrified, confused and sleepy. Depending on whether he sees his shadow, we will either have an early spring or six more weeks of winter. I can never remember which scenario leads to which outcome, but how do we really know what he sees, anyway?
Such a curious thing, to imagine this whole scene is a valid means of setting expectation for what’s to come. Surely these folks have calendars. Winter ends March 20, when spring begins, and from Groundhog Day, the calendar states clearly that it is six more weeks, plus a few days. I suppose that everywhere else in the world, people just think of it as Feb. 2. I’m in favor of letting the rascal sleep.
At least we can watch the amusing Bill Murray movie. Again. 😉
From a purely whimsical standpoint, the observance of Groundhog Day does, if nothing else, provide a little comic relief from the heaviness of winter. Punxsutawney Phil may not be a real prognosticator, but he is a beacon of hope, a light at the end of the tunnel that was gray January. I’ve been trying to offer the same recently with presentation of bright and colorful dishes to chase away that gray.
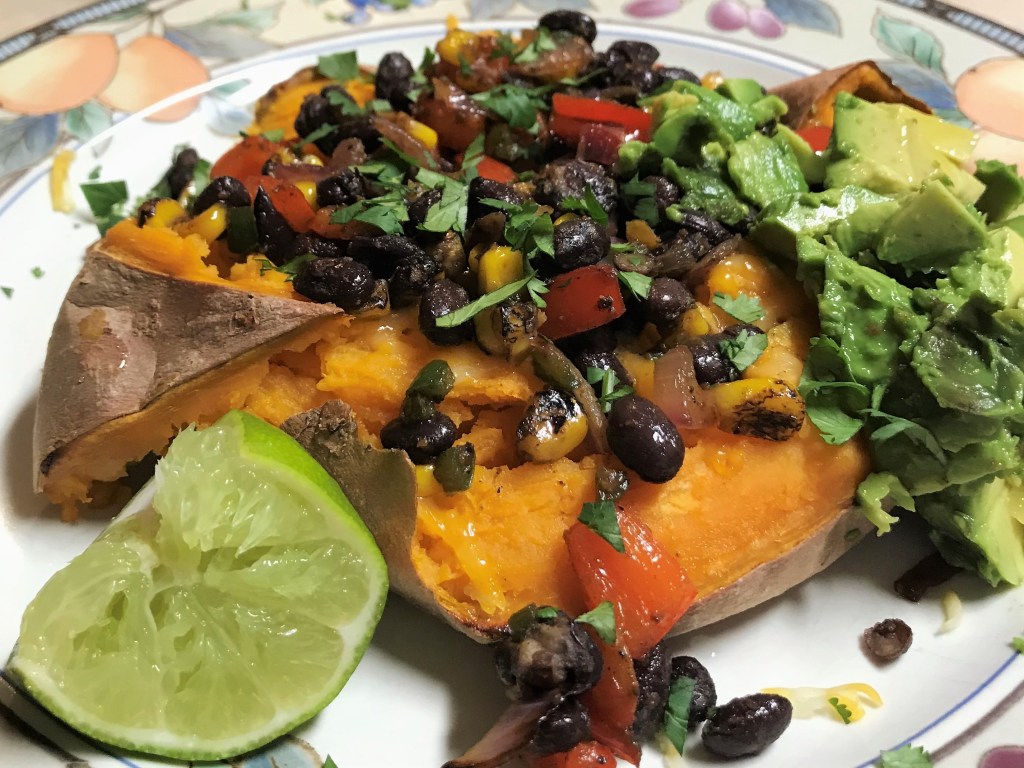
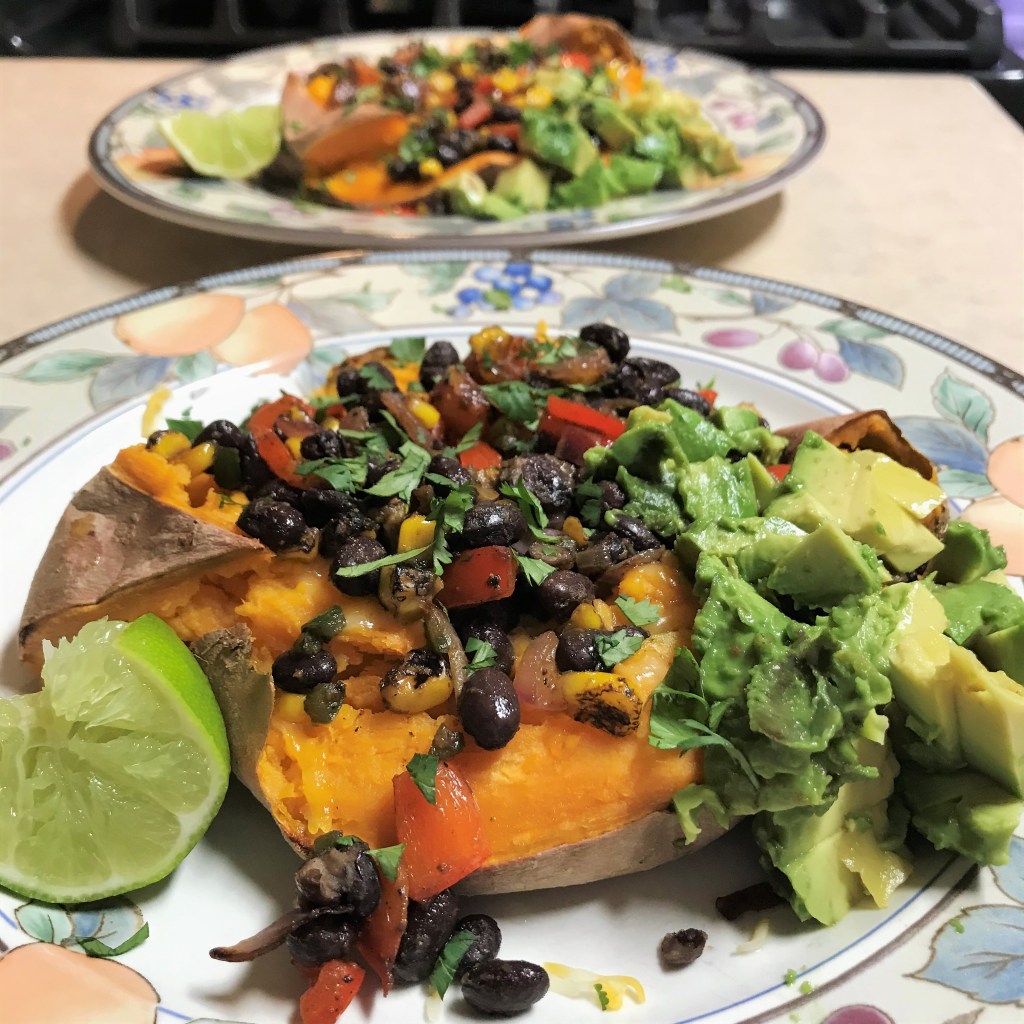
A sprinkling of cilantro and squeeze of fresh lime completes this colorful Meatless Monday meal!
These Tex-Mex stuffed sweet potatoes will bring a big generous pop of color to your Meatless Monday, and vibrant flavors, too. Zesty peppers and fire-roasted sweet corn, combined with black beans and cheese on an oven-roasted sweet potato is both nourishing and tasty, customized to your own heat preference, and you can top it with avocado, your favorite salsa, sour cream or whatever else you like. Our go-to seasoning for Tex-Mex dishes is my own spice blend, lovingly named “Fire & Brimstone,” given its multiple layers of spicy heat and smoky depth. Of course, I’ll share that, too.
This is one recipe that takes almost no skill in the kitchen. Really, if you can chop an onion, you’ve got this. You could even pop the sweet potatoes in the oven while you watch Groundhog Day on TBS (they’ll have it on a 24/7 loop, I’m sure), and finish the rest of the prep during the commercial breaks.
Serves 2 (or double it so you can have it again tomorrow)
Beautiful colors, and loads of Tex-Mex flavor!
Ingredients
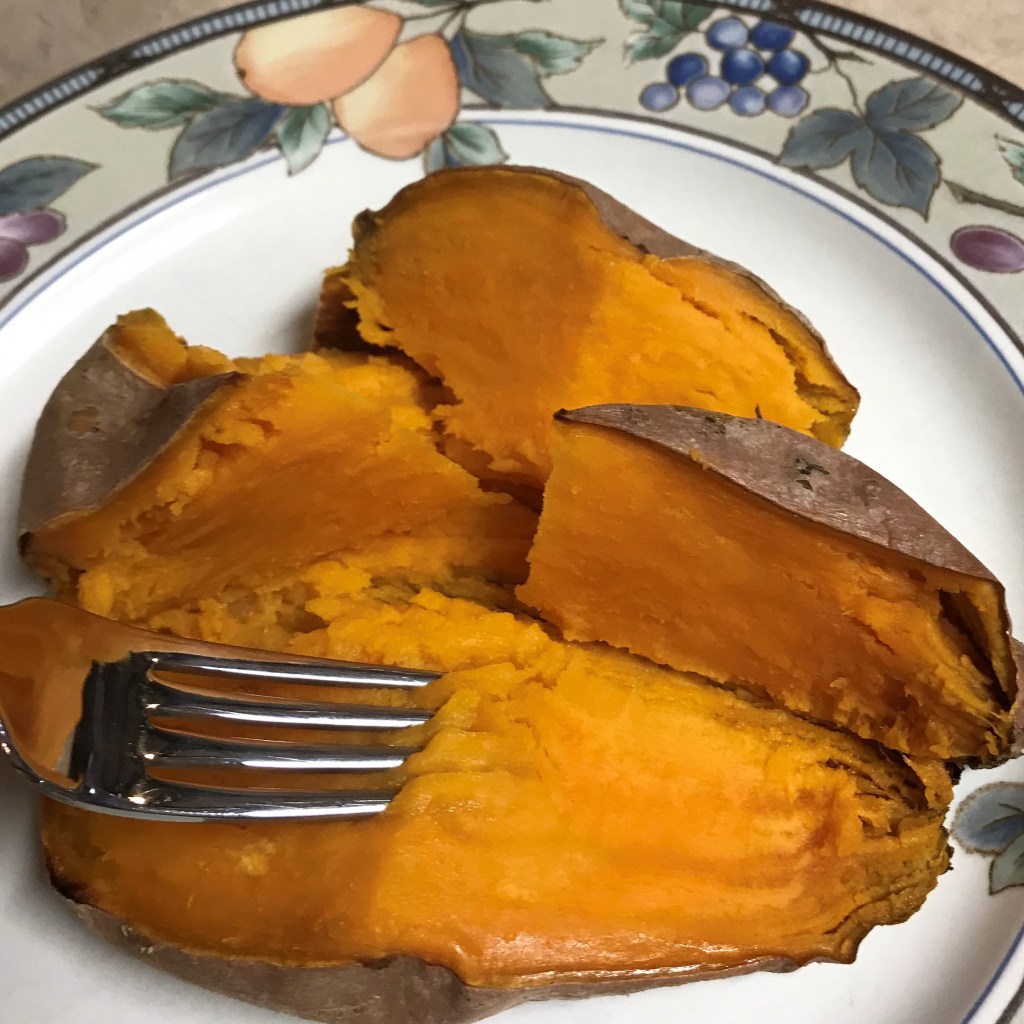
2 large fresh sweet potatoes, scrubbed clean
1 Tbsp. kosher salt
1/2 medium red onion, chopped
1/2 red bell pepper, chopped
1 Tbsp. jalapeno, chopped
1/4 cup fire-roasted frozen corn (or regular corn)
A few shakes of Fire & Brimstone* (or another Tex-Mex seasoning, see notes)
About 2 oz. finely shredded mild cheddar cheese (or Colby, Monterey Jack, etc.)
1/2 can black beans, drained and rinsed
1/2 ripe avocado, cubed
Fresh cilantro and lime, for serving
Side accoutrements as desired, such as sour cream, salsa or pico de gallo
*Notes
My homemade spice blends do not have salt in them. Be mindful of the sodium content in whatever seasoning you use, so you don’t overdo it on additional salt while preparing the dish. If you’d like to try my Fire & Brimstone, see the ingredients listed at the end of the post.
Instructions
Soak the sweet potatoes in a simple salt brine for about 20 minutes before roasting.
“X” marks the spot, and allows steam to escape the sweet potatoes as they roast.
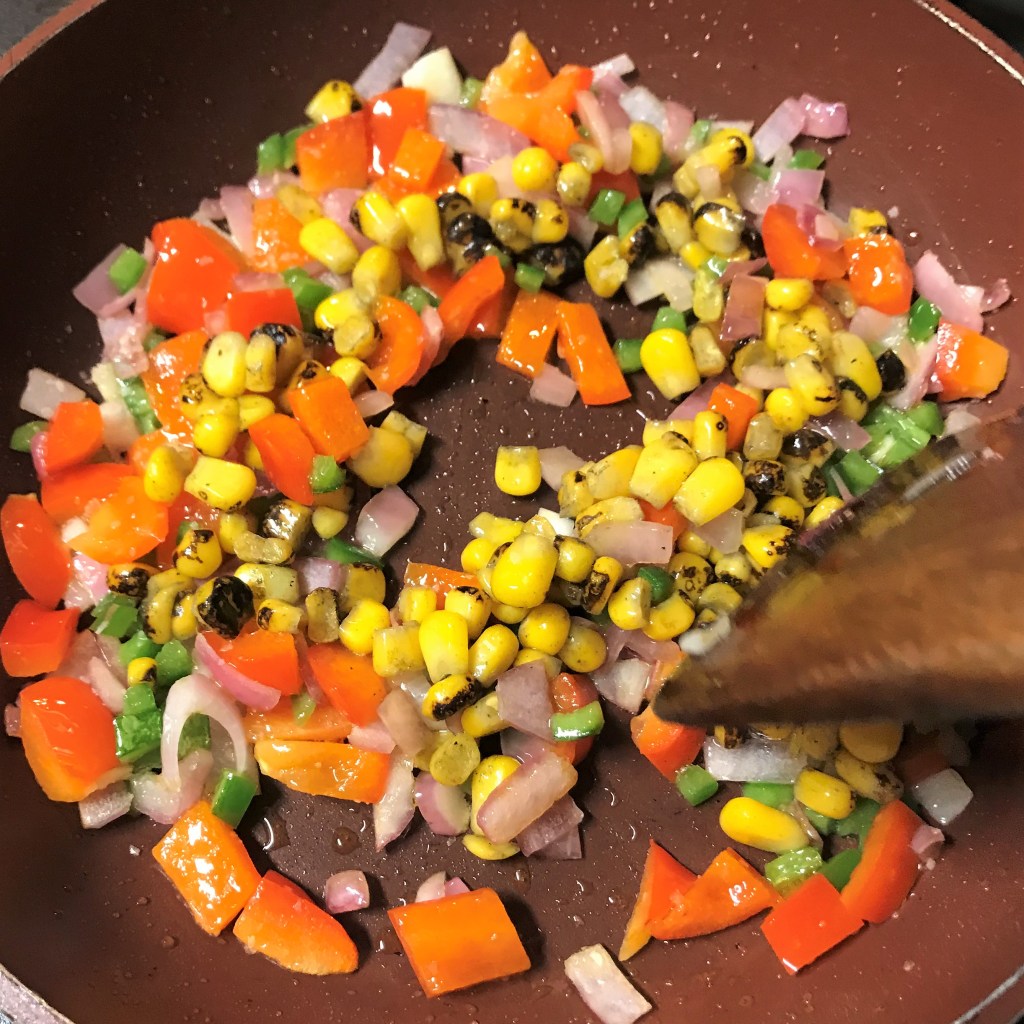
Lightly saute the peppers and onions, then add the corn to heat through.
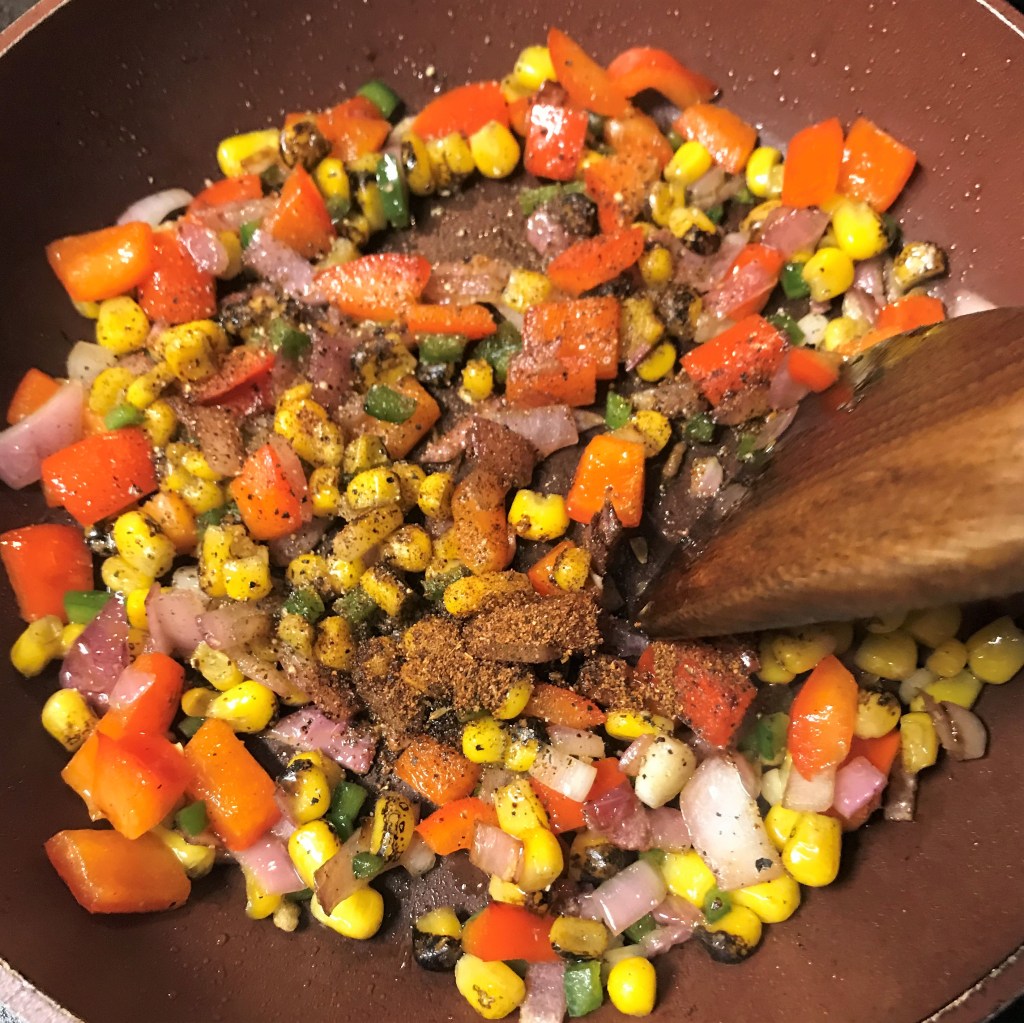
Add a few shakes of your favorite Tex-Mex seasoning to incorporate flavor throughout the veggie mixture.
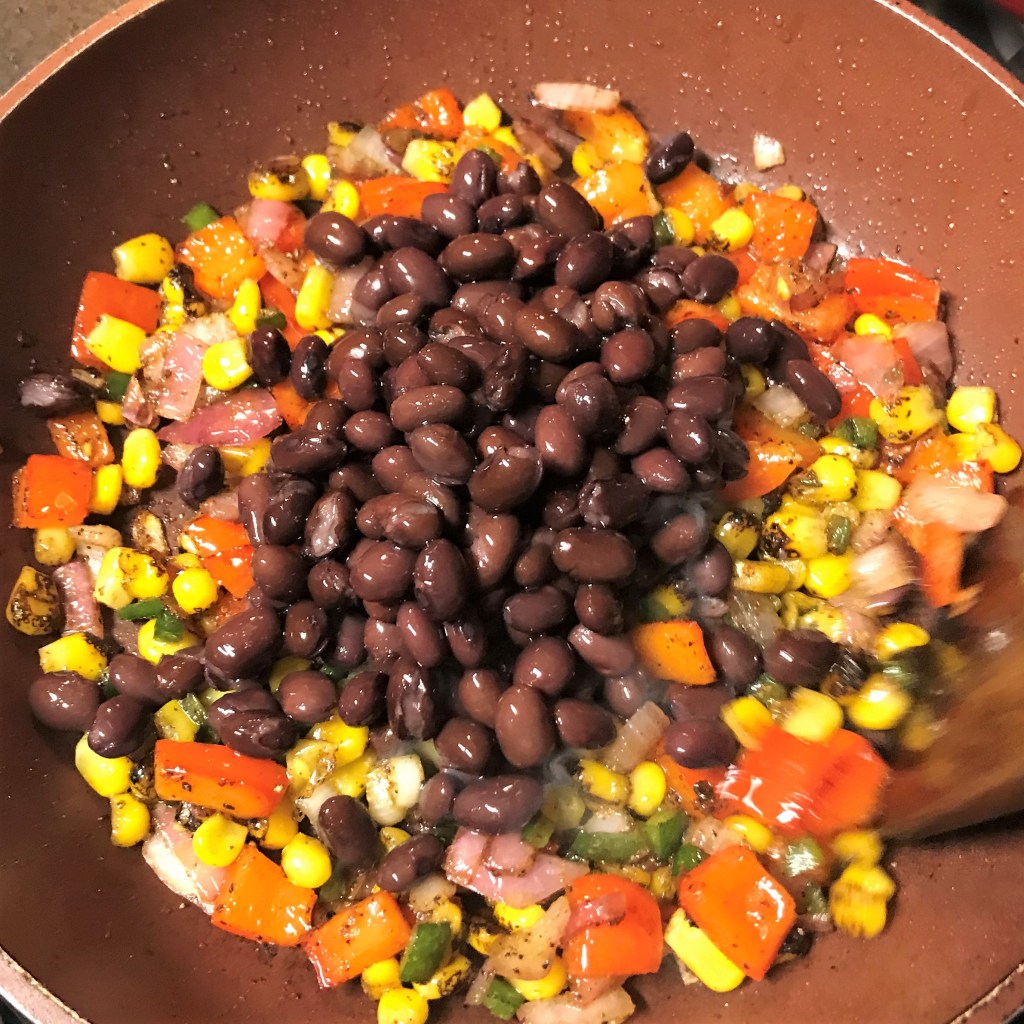
Black beans add protein and fiber, making this dish ultra-satisfying for Meatless Monday.
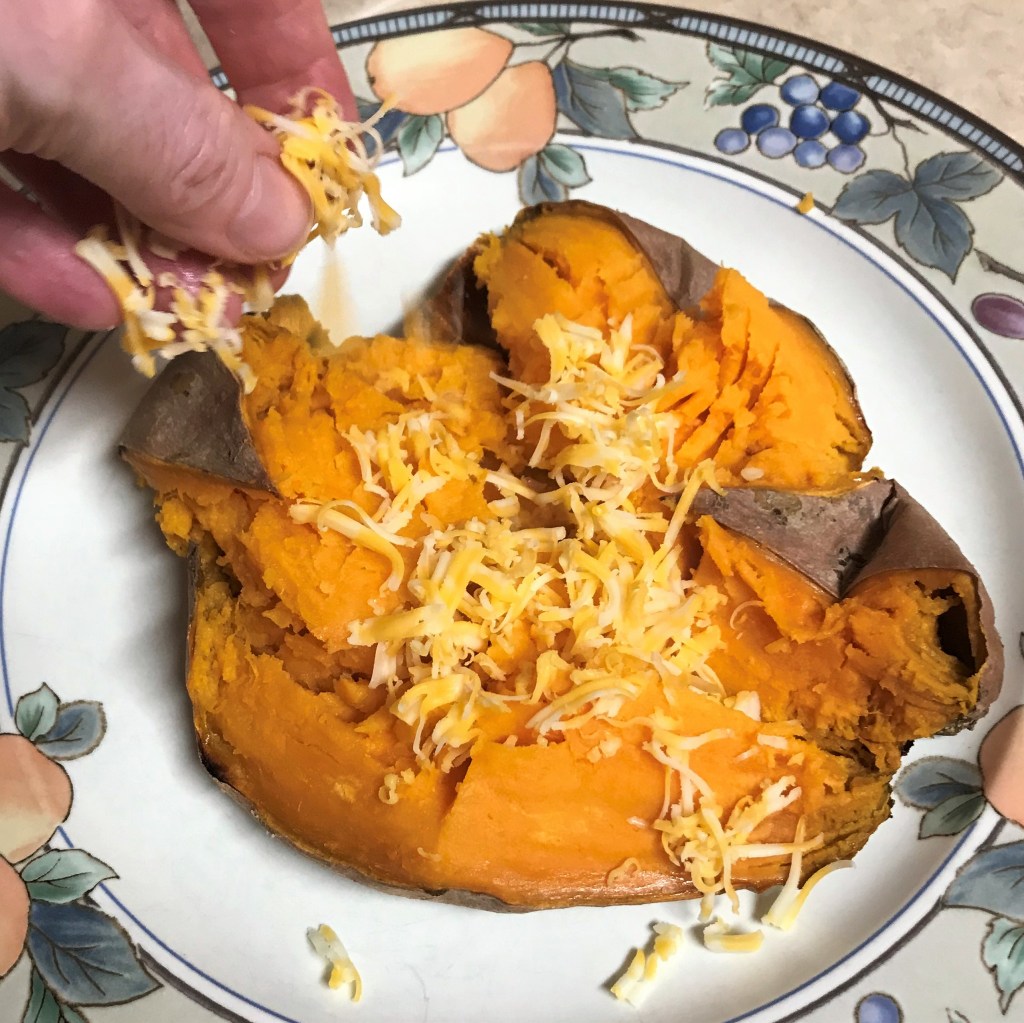
Split the warm potato open along the cut lines and smash gently with a fork to create a base for your toppings.
Sprinkle cheese on first, giving it a chance to melt between the warm potato and toppings.
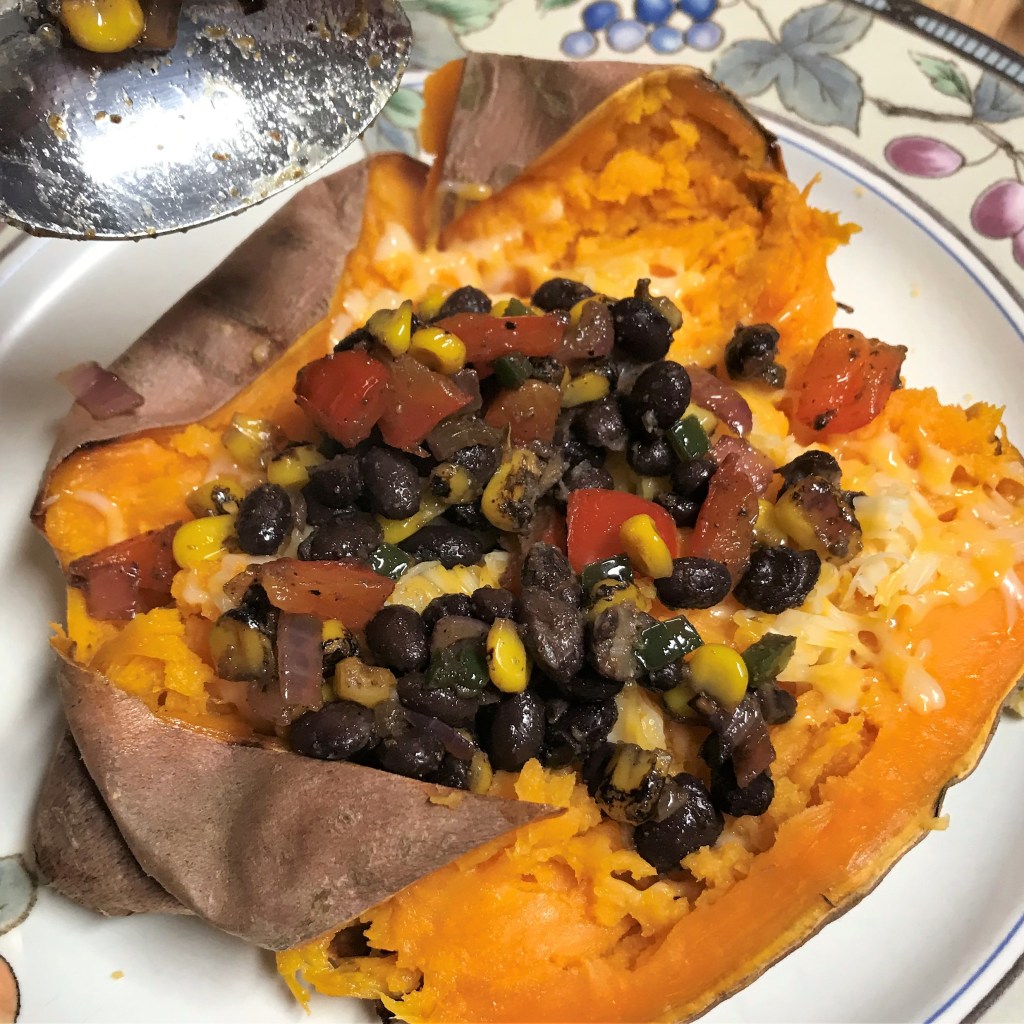
Pile on the bean and veggie mixture next.
Use a paring knife to score the flesh of the avocado. It makes scooping simple and less messy.
A sprinkling of cilantro and squeeze of fresh lime completes this colorful Meatless Monday meal!
In a large bowl, combine kosher salt with enough hot water to cover both sweet potatoes completely. Allow the potatoes to rest in this quick brine for about 20 minutes.
Preheat oven to 400° F, with rack in center of the oven.
Remove potatoes from brine and dry completely with paper towels. Use a sharp knife to cut an “X” about 3/4″ deep into the top of each sweet potato. This will be an “escape valve” for steam as the potato bakes. Place the potatoes on a parchment lined baking sheet.
Bake the sweet potatoes for about 1 hour plus 15 minutes, or until soft enough to squeeze easily with a towel. About halfway through baking time, remove the pan and carefully cut the X marks a little bit deeper, but not all the way through.
Near the end of baking time, heat olive oil in a small skillet over medium heat. Add onions, red bell pepper, jalapeno (if using) and corn. Sauté until onions are softened and translucent, about five minutes. Add black beans to the mixture and toss to heat through.
Transfer sweet potatoes to serving plates. Carefully squeeze open the potato, using the X marks to guide them open. Use a fork to lightly smash the potato. Sprinkle with salt and pepper.
Divide the shredded cheese directly onto the hot potato, then top with the bean-corn mixture.
Use a sharp paring knife to score the avocado flesh for easy scooping. Divide the avocado onto the plates as a side to the sweet potato. Sprinkle with cilantro, give it a squeeze of fresh lime and serve.
Where there’s smoke, there’s fire! This is a recipe blend I developed after repeated disappointment with all the salt in commercial blends. I use a variety of pepper ingredients, from mild and fruity to hot and smoky, and it works well as a sprinkle-on seasoning, chili add-in or even a dry rub on steaks or roasts. Adjust the amounts of any ingredient to suit your preferences. This recipe makes about 1/2 cup of spice blend. Store in an airtight jar in a cool, dry cabinet.
One of my favorite things to do in the kitchen is an unexpected twist on a food from my childhood. I remember seeing a recipe card in some family member’s collection for a dish called “glumpkies” or “go-umpkees” or something like it. Who knows the story on the name of the dish, but I remember that I really liked these rolled up packages of seasoned meat and rice inside tender leaves of cabbage and smothered in rich tomato sauce. It was pure comfort food, and though I’ve made them plenty of times in their classic form, I much prefer this simple, one-pot interpretation.
My Comfort du Jour twist on stuffed cabbage is what you might call a “deconstruction,” and it makes the classic dish a lot more approachable with minimal effort. It’s a pain to pre-cook the cabbage for traditional stuffed rolls, and in many ways, it even feels dangerous. I’ve burned myself in some of my early attempts to make the rolled-up version, and in some other attempts I’ve ended up with too much of the cabbage head remaining, and limited options for how to use it because it’s been boiled. That certainly won’t work for cole slaw, and what else are you gonna do with a bunch of extra, partially-cooked cabbage?
One of the flavors I always associate with cabbage rolls is caraway, the same seed that gives deli rye bread a distinct seasoning. I don’t know where the caraway was introduced to this dish for me, but it adds a little something that really works with the rustic chunks of cabbage, tomato and ground beef. If your family has a favorite traditional season, consider how you might put your own spin on my recipe with those beloved flavors.
The rest of the ingredients are simple, and you only need a medium stockpot and about an hour of simmering to get it on the table. Enjoy!
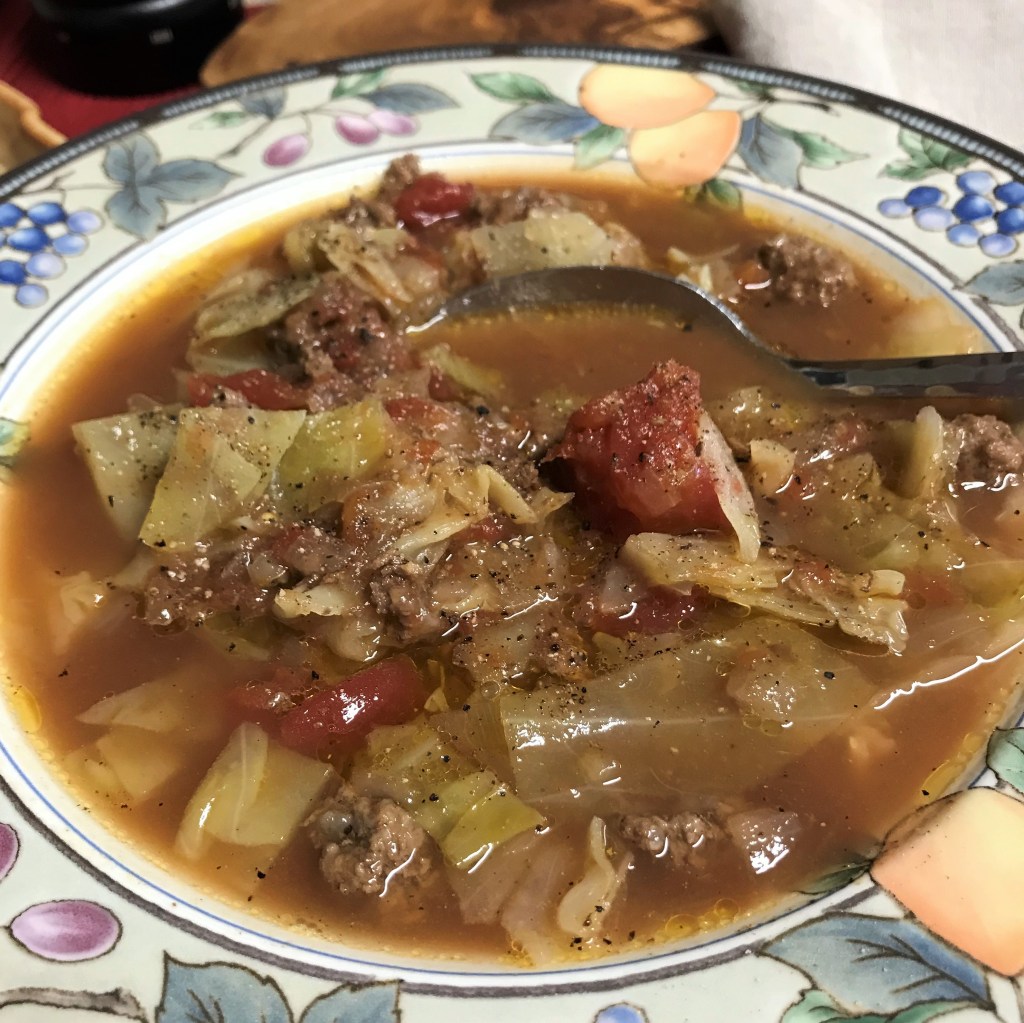
Served with a slice of crusty bread, this soup is hearty, satisfying and comforting.
Ingredients
1 lb. lean ground beef (90% lean is good)
1 tsp. caraway seed, crushed or milled in a spice grinder*
1 medium onion, rough chopped
Extra virgin olive oil
2 cups green cabbage, rough chopped
15 oz. can diced tomatoes, preferably low sodium
Salt and pepper
1 32 oz. carton beef broth, preferably low sodium
Cooked brown rice for serving
*Notes
Caraway seed is the same spice that gives rye bread a distinctive flavor. I’m not sure how I came to associate this flavor with stuffed cabbage rolls, but it is really delicious with the cabbage, tomato and meat. Substitute your own favorite flavor, or simply omit this ingredient. The soup will be delicious either way!
Instructions
A blade-style coffee grinder is great for grinding or milling seed spices. If you don’t have a grinder or mortar and pestle, it’s fine to add the caraway seeds whole. Or omit them, whichever. 🙂
Press the ground caraway seed into the meat, to ensure that the flavor is equally distributed throughout the soup.
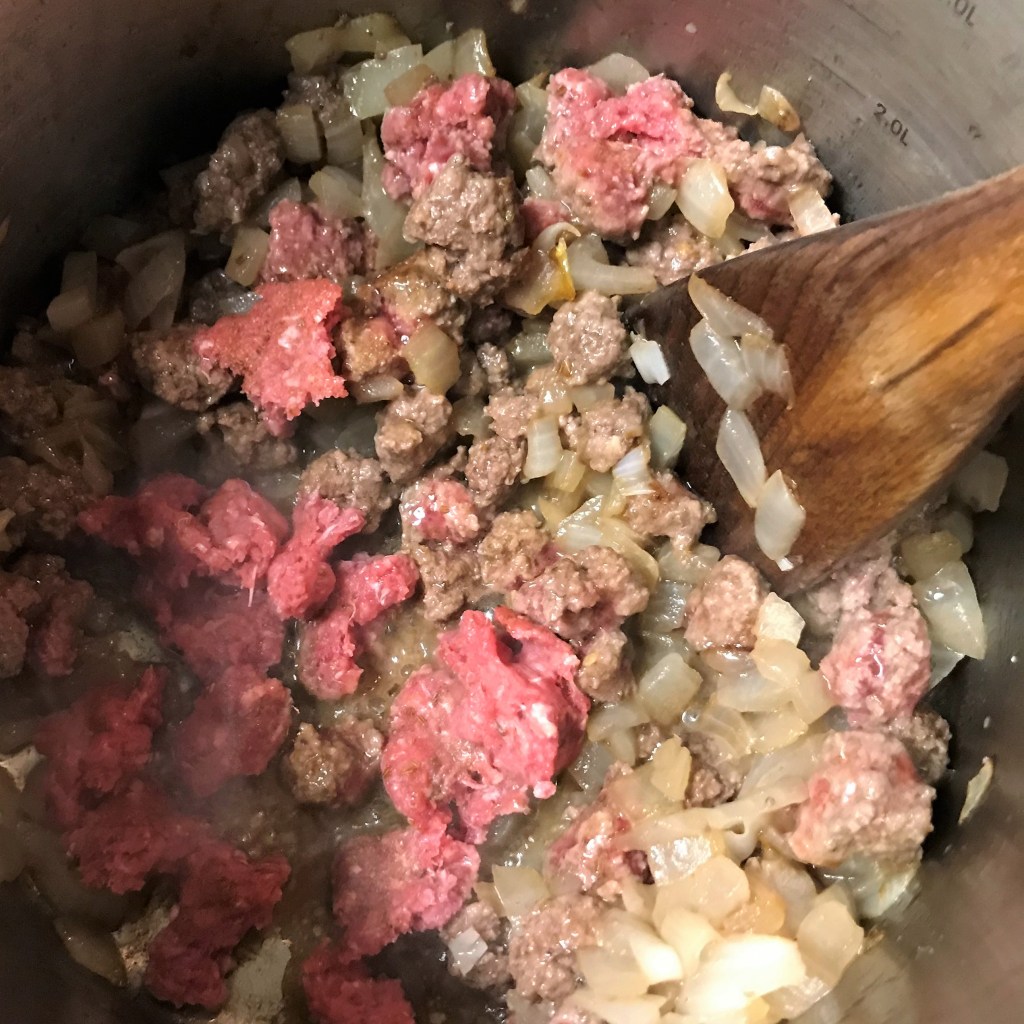
Give the bits of beef a chance to brown and cook before adding more. This will help them keep their shape in the finished soup.
Continue until all the meat has been browned.
My cabbage was medium sized, and I used this entire half in the soup. Well, except for a few “extra” pieces.
Use the whole can of diced tomatoes, juice and all.
Use any brand of beef broth, but try to look for one in the 500mg sodium per serving range.
Allow the soup to simmer until the cabbage is wilted and tender and the tomatoes have broken down a bit.
My solution for the extra cabbage pieces. She is such an unusual dog. ❤
Serve big scoops of soup over cooked brown rice. It’s all the same flavors of stuffed cabbage rolls, and none of the fuss!
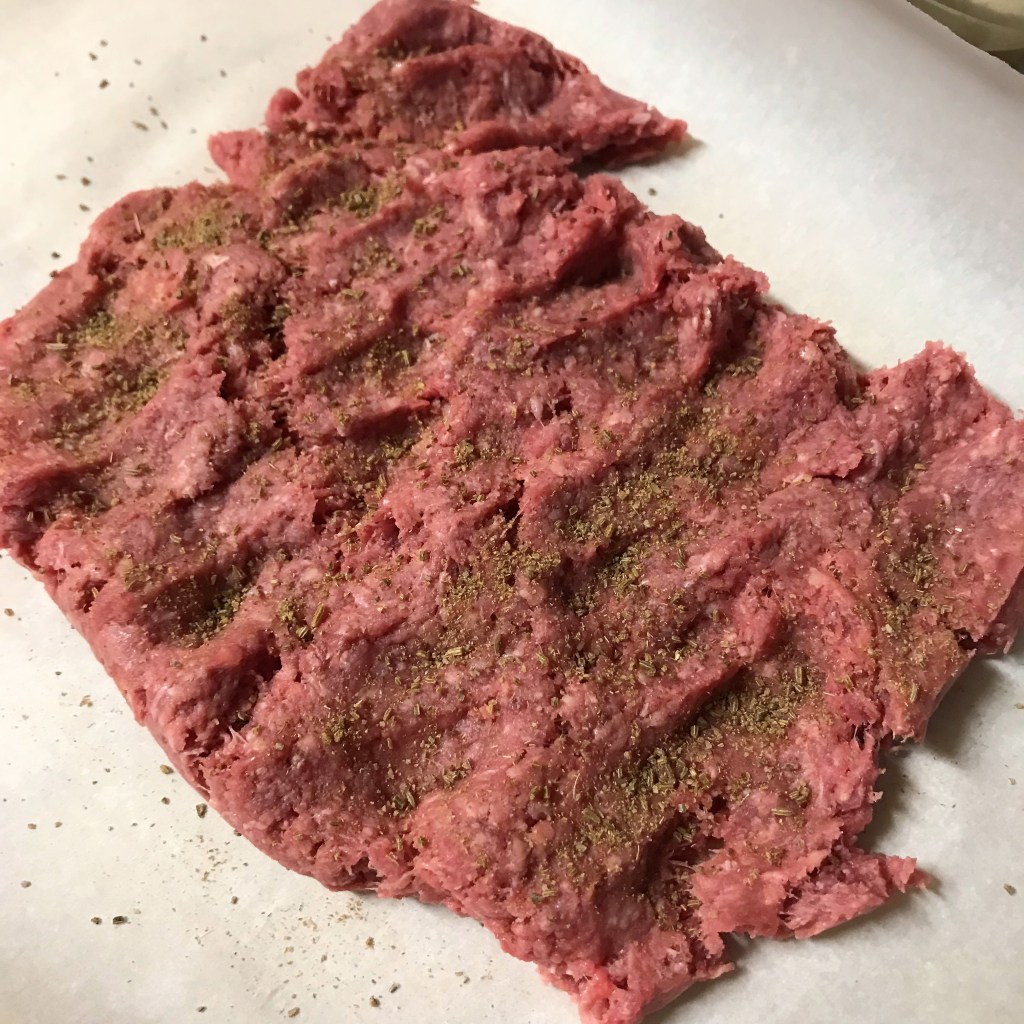
Press ground beef on a cutting board or parchment into a flat shape, about 1/2″ thick.
If you have a spice grinder or mortar and pestle, use it to crush or grind the caraway seed into smaller bits. This is not essential, but it contributes flavor without the seed texture.
Sprinkle the caraway powder or whole seeds all over the surface of the ground beef, and press to fully adhere it.
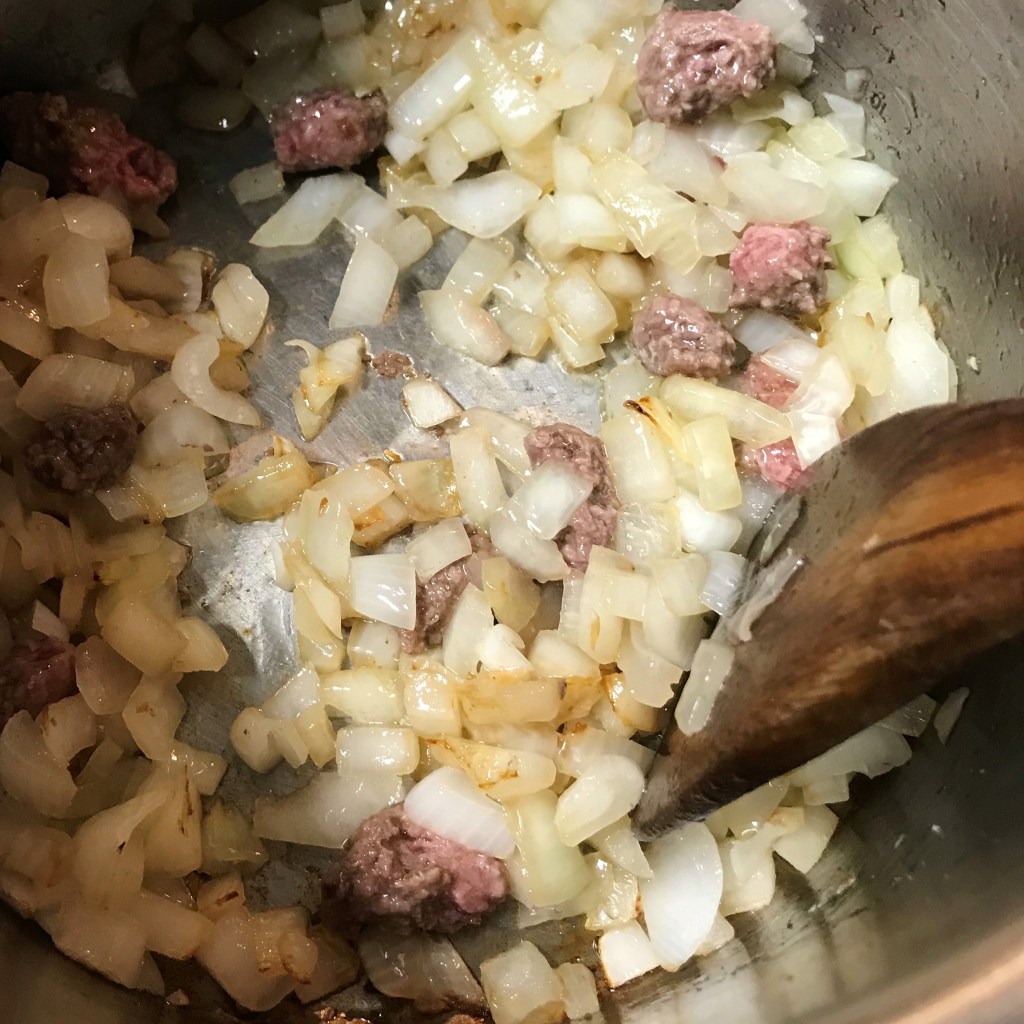
Place a medium, heavy-bottomed pot over medium heat. Swirl in about a tablespoon of olive oil. Add onions and sauté until slightly softened and golden. Season with salt and pepper.
Tear off bits of ground beef and add them, only a few at a time, tossing in the hot oil to cook the edges before adding another small handful. Repeat until all ground beef is lightly browned. Avoid the temptation to add all the meat at once, as this will result in mushy meat rather than browned, individual bits.
Add the chopped cabbage to the pot and toss to begin cooking. Add tomatoes, sauce included.
Add beef broth and stir to combine. Allow mixture to come to a light boil, then cover and reduce heat. Simmer about an hour, until cabbage is tender.
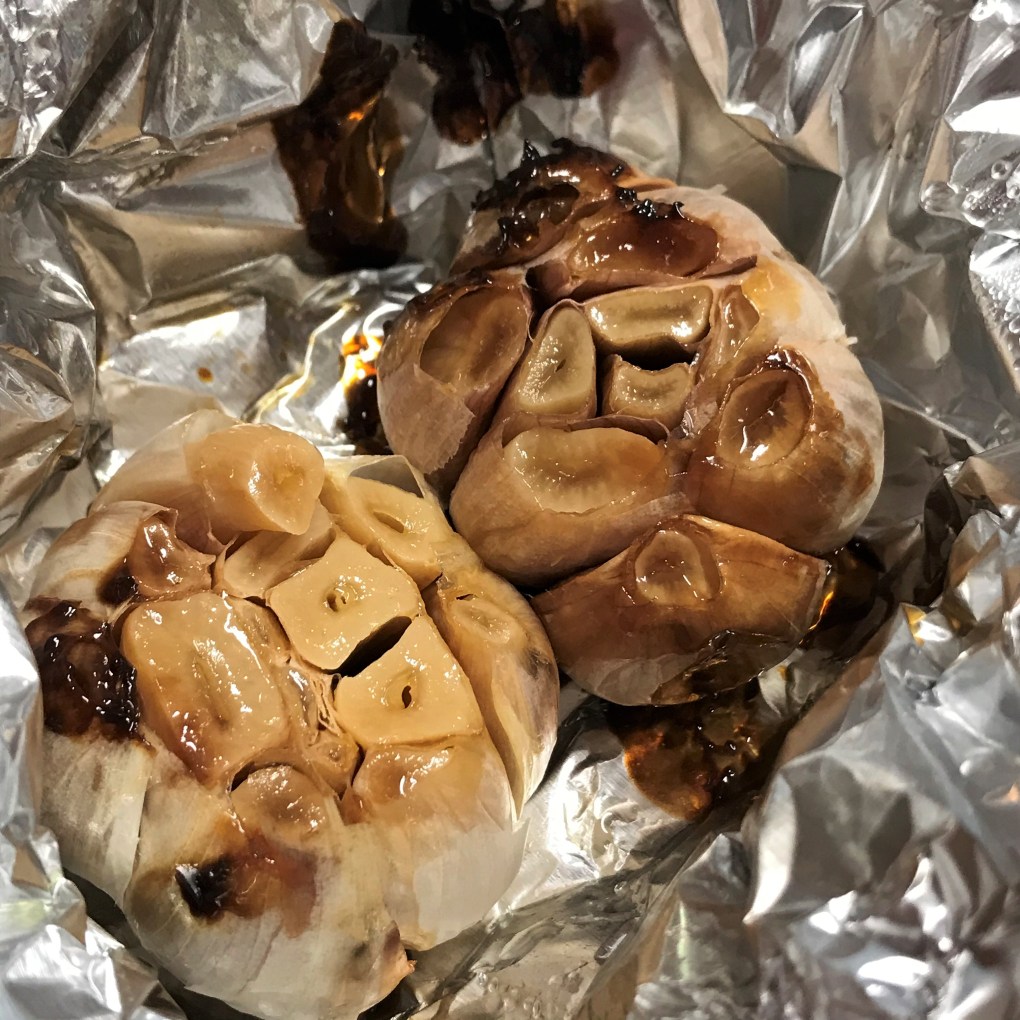
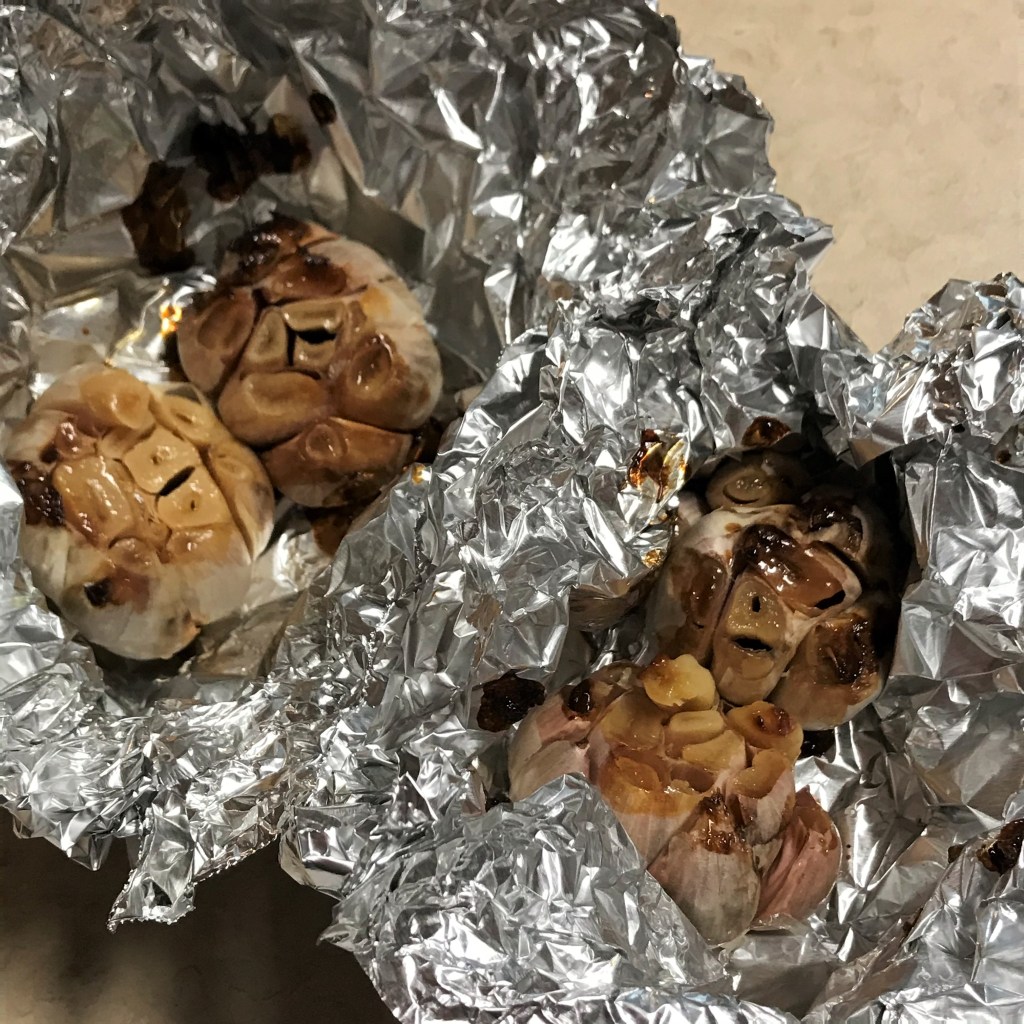
Something magical happens to garlic when you wrap it in foil and put it in the oven. All the pungent, sharp spiciness fades like a bad memory as it becomes entirely different—creamy, mellow, warm and nutty.
In our kitchen, roasted garlic gets plenty of action, particularly at the holidays when we are making casseroles, gravies, appetizers and roast meats. If you are not roasting your own garlic, it’s a good time to start, especially in advance of many of the recipes I’ll be offering over the next week. You’ll save a lot of time and money over buying it pre-roasted, and I promise you this—you’ll never want to go back to any store-bought substitute. Roasting garlic is simple to do, and it doesn’t require any special equipment or gadgets.
Before I break it down into steps, let’s take a moment to explore the world of garlic to better understand more about it and how this roasting “magic” happens.
What gives raw garlic a sharp flavor?
Garlic belongs to the same botanical family (allium) as onions, leeks and chives. All of them contain organosulfur compounds (most notably allicin), which contribute to the strong aroma as well as the sharp, biting flavor. You may not know that the way you cut garlic can affect the flavor of it in a dish. When used in whole cloves, it is relatively mild. Slices are stronger, and chopped garlic really exaggerates the sharpness because of the release of the oils within the cloves.
How long has garlic been used in cooking?
A mighty long time! Food historians estimate that garlic had culinary uses in ancient China and Egypt as long as 4,000 years ago. There’s even a passage in the Bible to corroborate claims of garlic’s longstanding place in our diets. The verses are embedded in the Old Testament story of Moses trying his darnedest to lead the Israelites out of Egypt to the Promised Land. A group of complainers started grousing about the manna that God provided to them each day for nourishment along the way. All they could think about was how great everything “used to be.” (Hmm, such clamoring seems somehow familiar.)
The rabble with them began to crave other food, and again the Israelites started wailing and said, “If only we had meat to eat! We remember the fish we ate in Egypt at no cost—also the cucumbers, melons, leeks, onions and garlic. But now we have lost our appetite: we never see anything but this manna!”
Numbers 11:4-5, New International Version
Garlic’s prevalence eventually spread throughout the Asian and European continents and pretty much everywhere else, and I’d be hard-pressed to name a cuisine today that does not use garlic.
Is garlic good for you?
Maybe, but you should always check with your doctor before assuming that it’s safe to ingest garlic in large quantity or concentrated form. Anecdotes on the internet may suggest that chewing raw garlic does everything from preventing hangovers to curing cancer, but please be smart. There are mixed results from actual medical research, and for people with certain pre-existing conditions or those who take certain prescription medications, too much (or any amount of) garlic can cause more harm than good. In moderation among relatively healthy people, garlic delivers a good dose of B vitamins, manganese, phosphorus, iron and zinc. It has a wonderful taste, but it’s no wonder drug (sorry).
Can you give garlic to pets?
Please don’t. Though some “holistic” websites claim raw garlic is an effective way to prevent flea infestation in pets, the science shows any food from the allium family can be toxic to dogs and cats. For safety’s sake (and for the love of your fur babies), consult a licensed veterinarian.
What about the legends of garlic and vampires?
It is well-documented (c’mon, we’ve all seen the movies) that eating raw garlic provides protection against vampires and other evil forces. It is also a highly effective and diplomatic way to bring a bad first date to an immediate end. Or so I’m told.
Why does roasting garlic change its flavor?
Allicin, the organosulfuric compound that makes garlic “stinky,” becomes neutralized when it reaches 140° F and is converted to a different compound called polysulfides. The flavor shifts from “sharp” to “mellow” and even somewhat sweet. This conversion can be achieved during careful sautéing or frying, but more easily and consistently by slow roasting.
Can I roast garlic in the microwave?
Nope. It may soften a bit, but the texture and flavor will be all wrong, and the best you can hope for is a small mess in the microwave. And that lingering smell…phew. Don’t rush it.
How do you keep roasted garlic?
We go through it pretty fast at our house, so we usually just keep it wrapped in its roasting foil near the onion basket on the counter. If it will be several days or more before you plan to use it, I’d recommend transferring the roasted garlic to a covered container in the fridge.
Ready to make some? Gather up this very short list of ingredients, and let’s get started!
When we have a big cooking event approaching, I roast a bunch of garlic at once. We did 10 bulbs this day!
Ingredients
fresh whole bulbs of garlic
extra virgin olive oil (or spray)
aluminum foil
Instructions
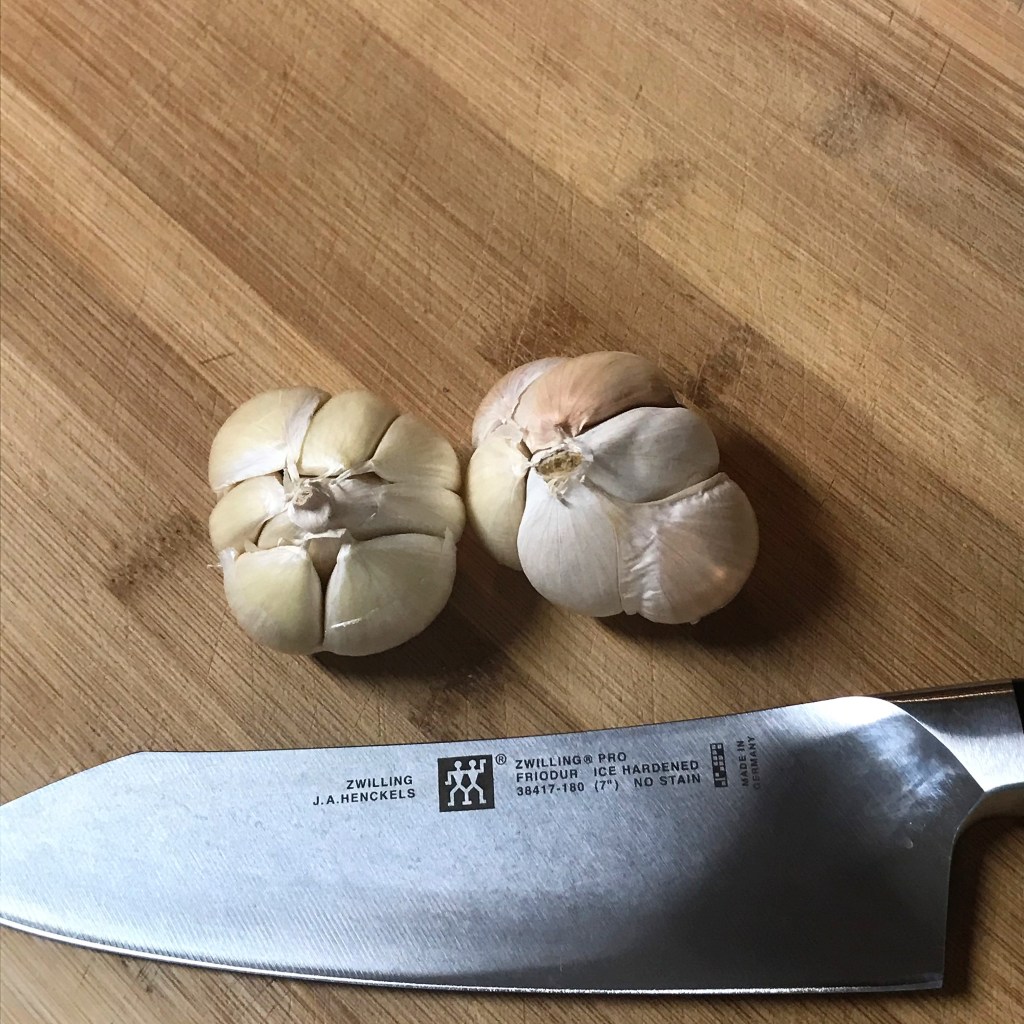
Peel away most of the paper around the garlic, so you can see the individual cloves. This makes it easier (and less messy) to squeeze them out when the roasting is finished.
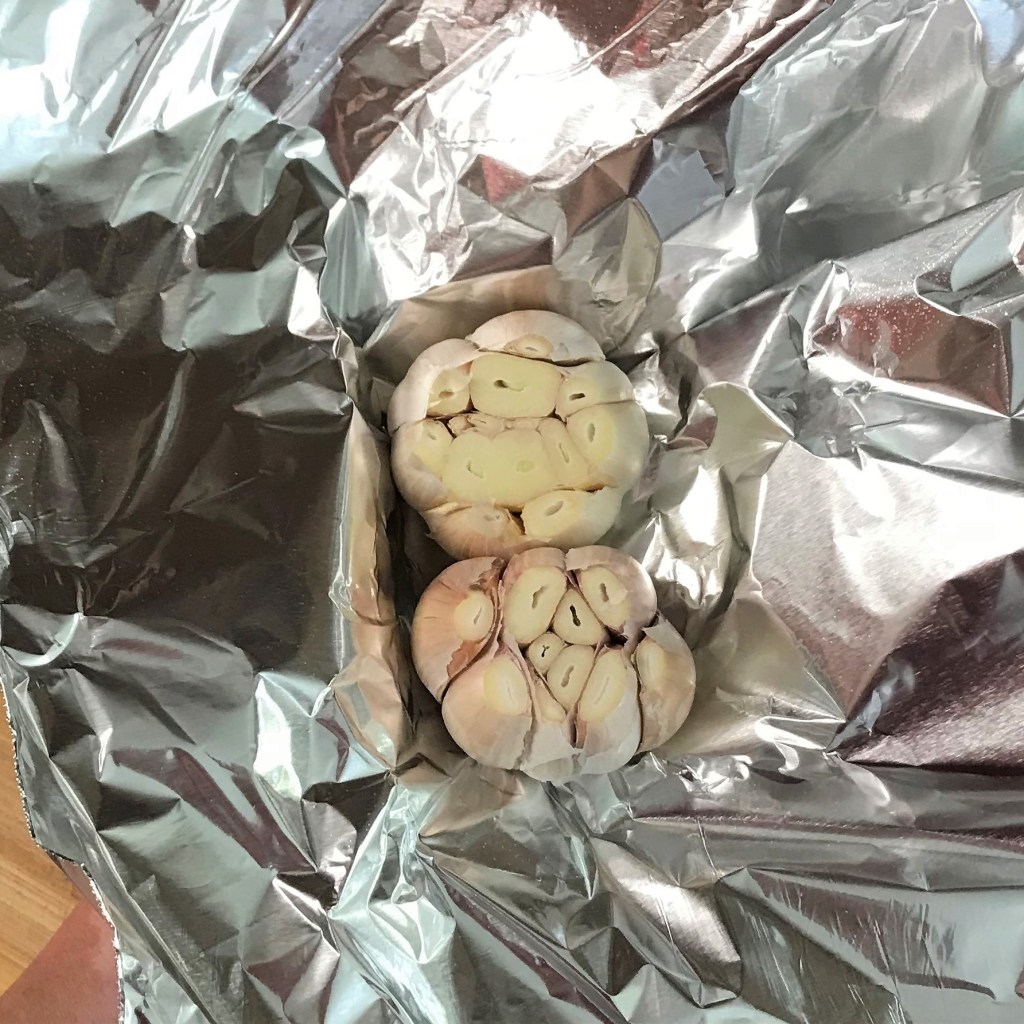
It’s fine to package them two or three at once in foil, especially if the bulbs are small as mine were.
Drizzle extra virgin olive oil directly onto the tops of the garlic. It will seep in between the cloves for nice even roasting.
Olive oil spray is very convenient for this task. Be sure to choose one that does not contain propellants.
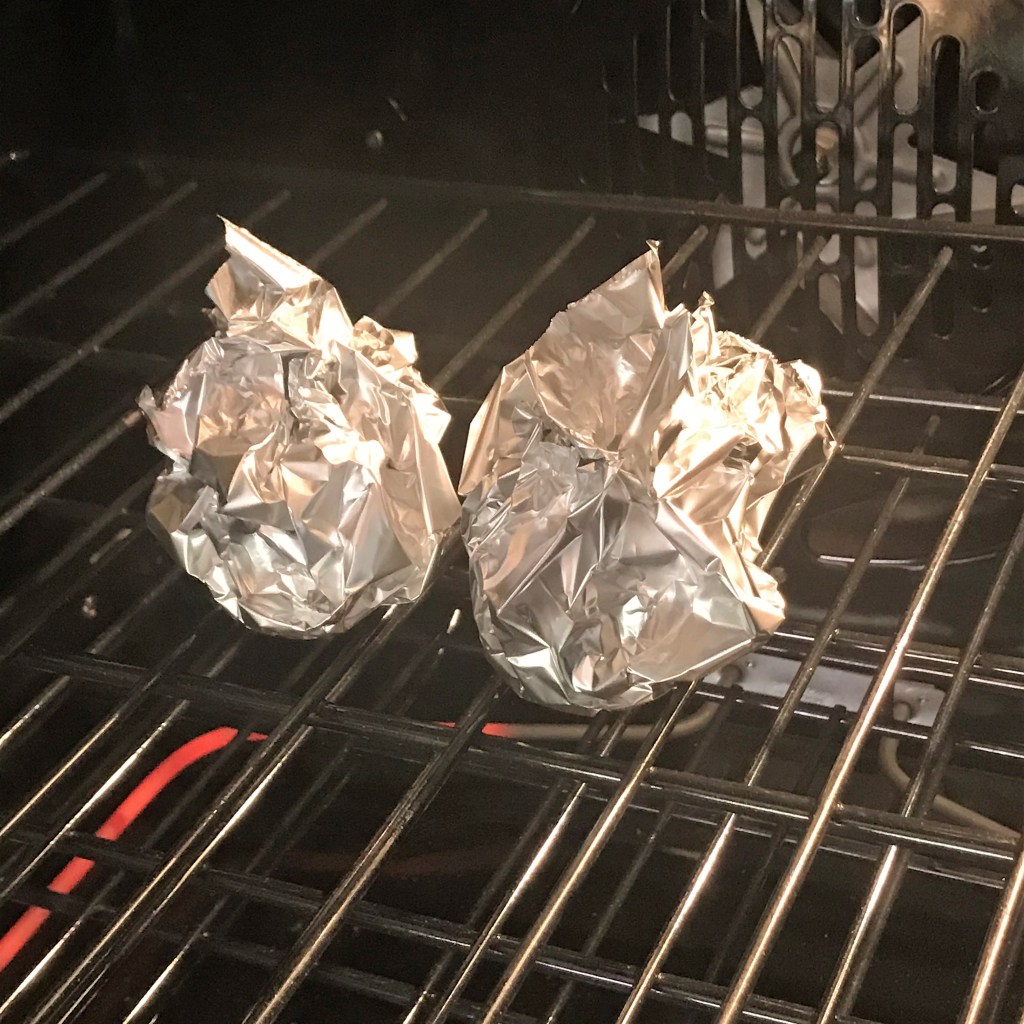
You don’t need any special equipment to do this. I usually put the garlic pouches directly on my oven rack.
The bulbs on the left have a more golden color, but I especially love the deep, rich bulbs on the right. Color = flavor.
Pre-heat the oven to 350° F.
Peel away most of the dry “paper” layer that protects the garlic, leaving only the layer closest to the cloves. This assists with more even roasting, and minimal mess when you are ready to use the garlic.
Use a sharp knife to carefully cut the top off the entire bulb of garlic. It’s best to lay the garlic on its side to do this. If the individual cloves are offset at different heights, you can use the tip of a paring knife to expose the shorter ones.
Place the cloves (individually or two at a time) on a square of aluminum foil, and wrap the foil up the sides to create a bundle, but leave it open at the top. Drizzle or spray oil lightly over the exposed tops of the cloves.
Close up the foil tightly and bake, either on a cookie sheet or in a skillet, for about an hour. The garlic doesn’t take up much space in the oven, so I usually do this while I’m also baking a roast, a casserole or a loaf of bread.
The color of roasted garlic may vary, depending on your oven temperature, the age of the garlic and the length of roasting time. Once it is soft and easily squeezed from the cloves, it’s done, even if it has a somewhat “blonde” color. We usually let it roast until it is a deep golden shade.
To use the roasted garlic, simply turn the bulb upside down and gently squeeze the sides. The soft cloves will slide right out into your bowl or recipe. Add roasted garlic to soups, dips, hummus, vegetables, spreads, sauces or meats, or enjoy it in its simplest form by spreading it right onto crackers or crostini.
Recently in my news feed wanderings, I spotted an article claiming to list the “7 Classic American Dishes No One Eats Anymore.” This type article always grabs my attention because I immediately assume I’m the exceptional person—the one who does actually still eat the foods that are supposedly yesterday’s news.
The list held a few surprises for me.
Chicken cordon bleu made a showing at #5, and I cannot get behind that. Soon, I’ll share my recipe for this classic dish and a story about the time I made chicken cordon bleu from memory at midnight—on a dare. Some of the other dishes listed in the article truly are better left in the past, such as turkey tetrazzini, which is just a hot mess of a dish that includes leftover turkey with spaghetti and canned peas (blech), and the dreaded creamed chipped beef on toast. Folks, there’s a reason everyone started calling that dish sh!t on a shingle. Let’s just leave it behind, shall we?
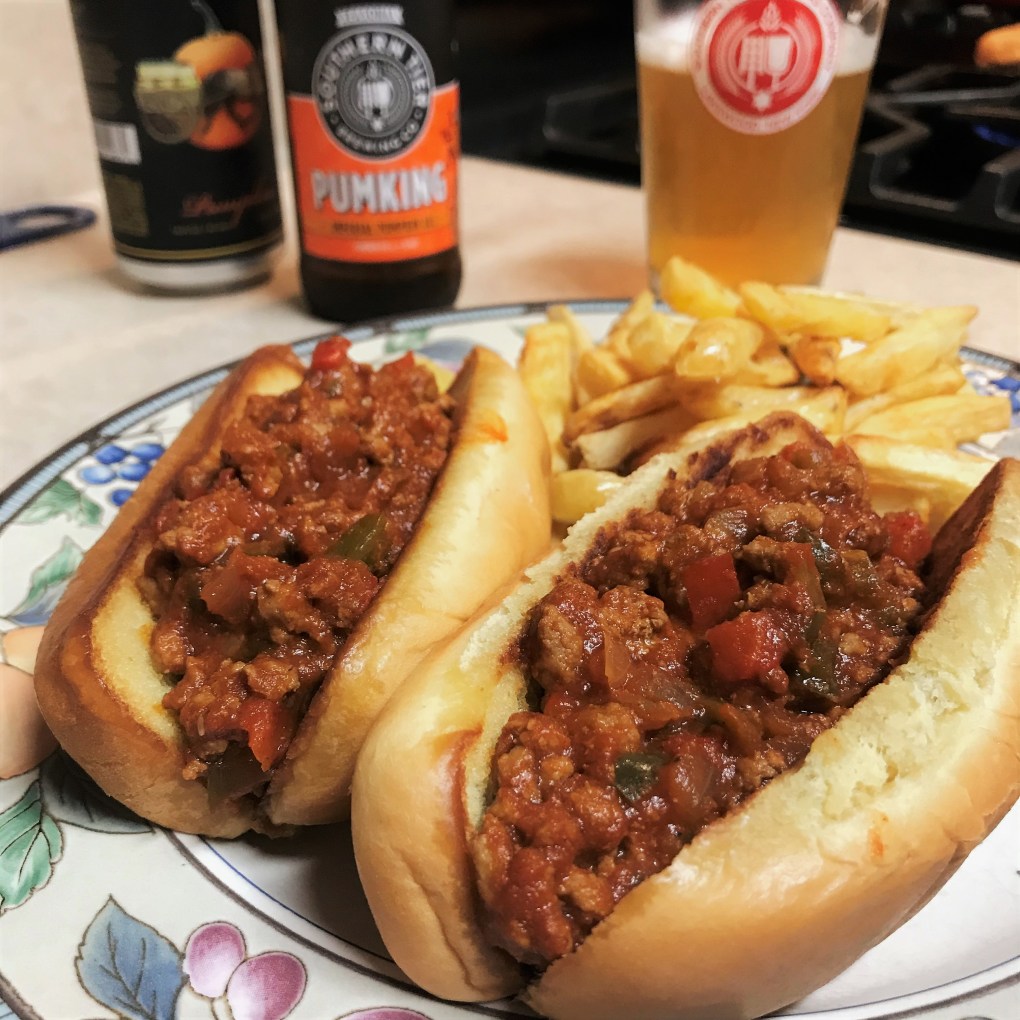
Today though, I’m showing due respect for the food item that ranked #1 on the list, the sloppy joe. What is the world coming to, if people are giving up on this fun and tasty handheld, with all its sweet, spicy, tangy sauce? Was it the SNL skit featuring Adam Sandler and the late Chris Farley? I thought that catchy tune was responsible for saving the sloppy joe, not burying it.
The only thing I can find to blame for sloppy joe’s ill-fated appearance on this list of “has-beens” is that people have grown bored with the mass-produced stuff that made sloppy joes so common in the first place, and that would be the canned sloppy joe sauce. Yep, good old Manwich. It exploded onto the convenience food scene in 1969, and everyone embraced this miracle in a can that turned a pound of ground meat into an easy, casual family dinner.
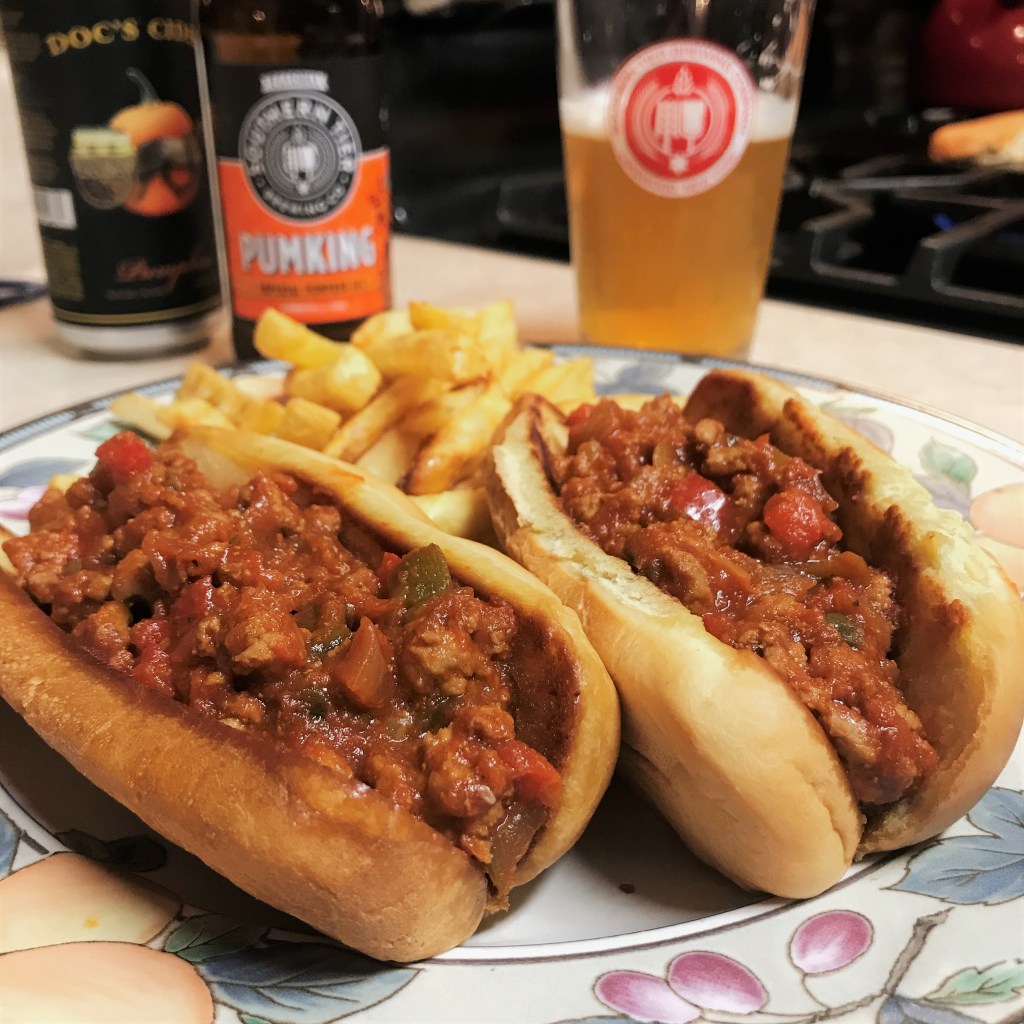
Fast forward 51 years. Palates have evolved (for better or worse), and at the same time, Manwich and other convenience foods went all in with the use of cheap, controversial ingredients—namely, high fructose corn syrup (boo, hiss). Despite mounting flak from savvy consumers, the fake sweetener is still listed as an ingredient on the Manwich label, so it won’t land in my grocery cart anytime soon. No matter, because it’s super easy to make sloppy joes at home without a pre-made commercial sauce. I’ll show you how to mix and match ingredients that are already in your refrigerator door to get the same fun, tangy flavor, but without weird additives (caramel color doesn’t add a thing to Manwich anyway). Use any kind of ground meat you like—I’m going to lighten mine up with ground turkey, and I’m also switching up the presentation by serving them on toasted hot dog buns. That makes them sloppy dogs! Who’s hungry?
2 Tbsp. chopped pickle chips (sweet, spicy or whatever you like)
4 toasted hot dog (or burger) buns, for serving
Instructions
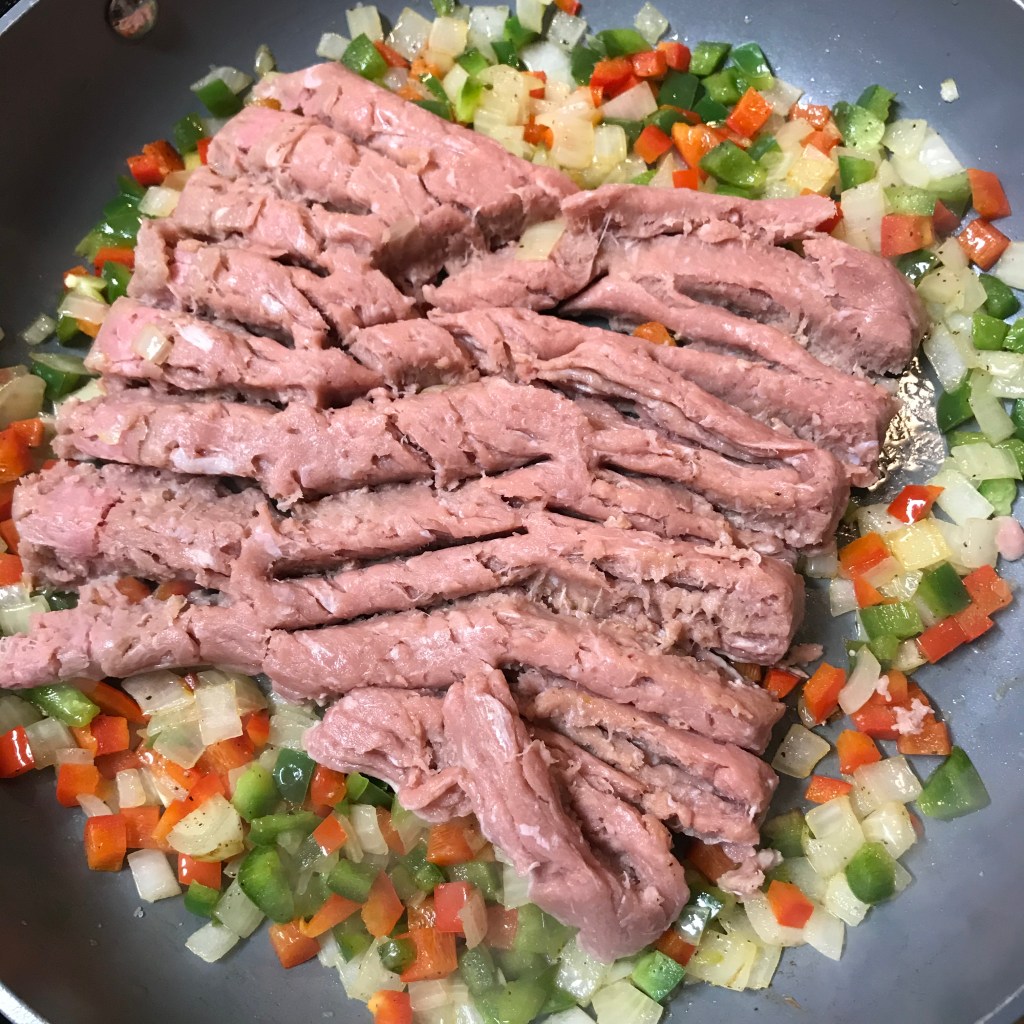
Saute the onions and peppers until soft, but don’t brown them.
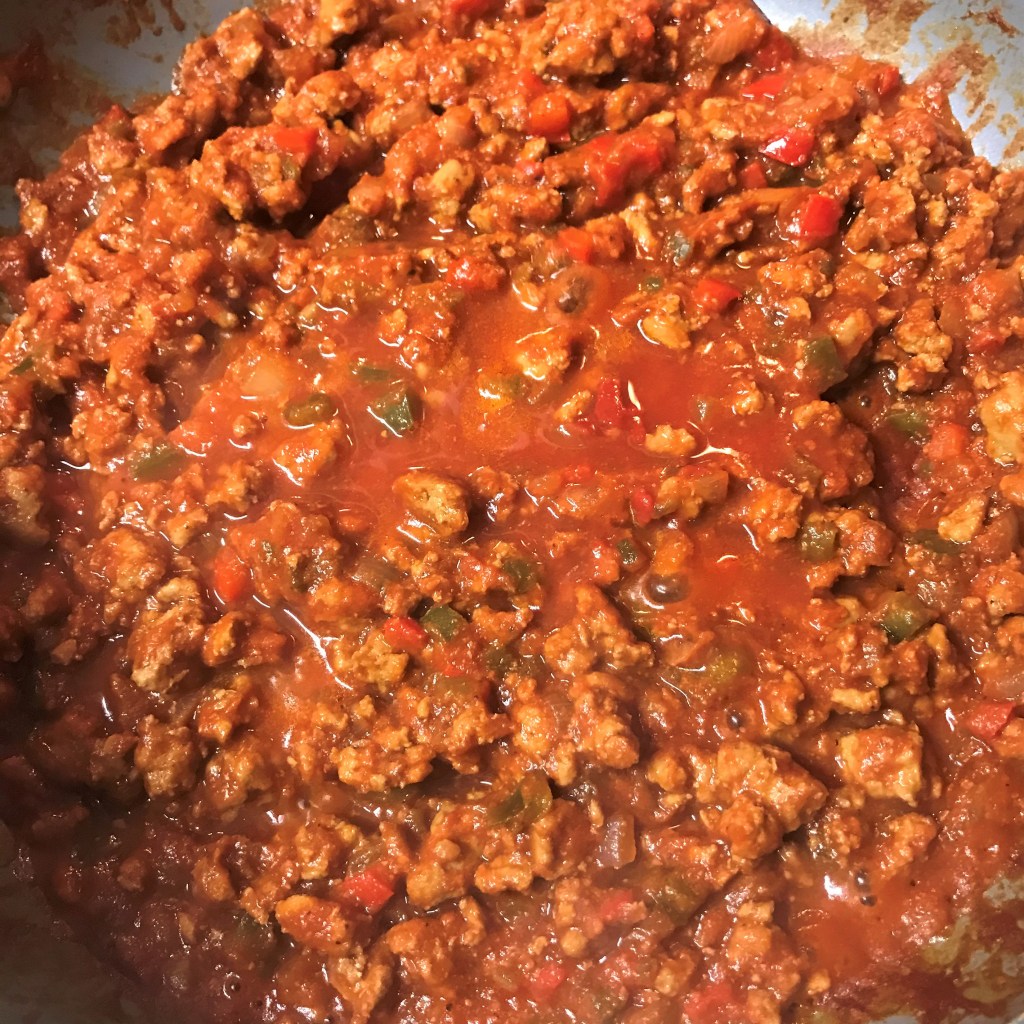
Add the whole package of ground turkey, and just barely break up the meat. This will produce large chunks in the finished sauce.
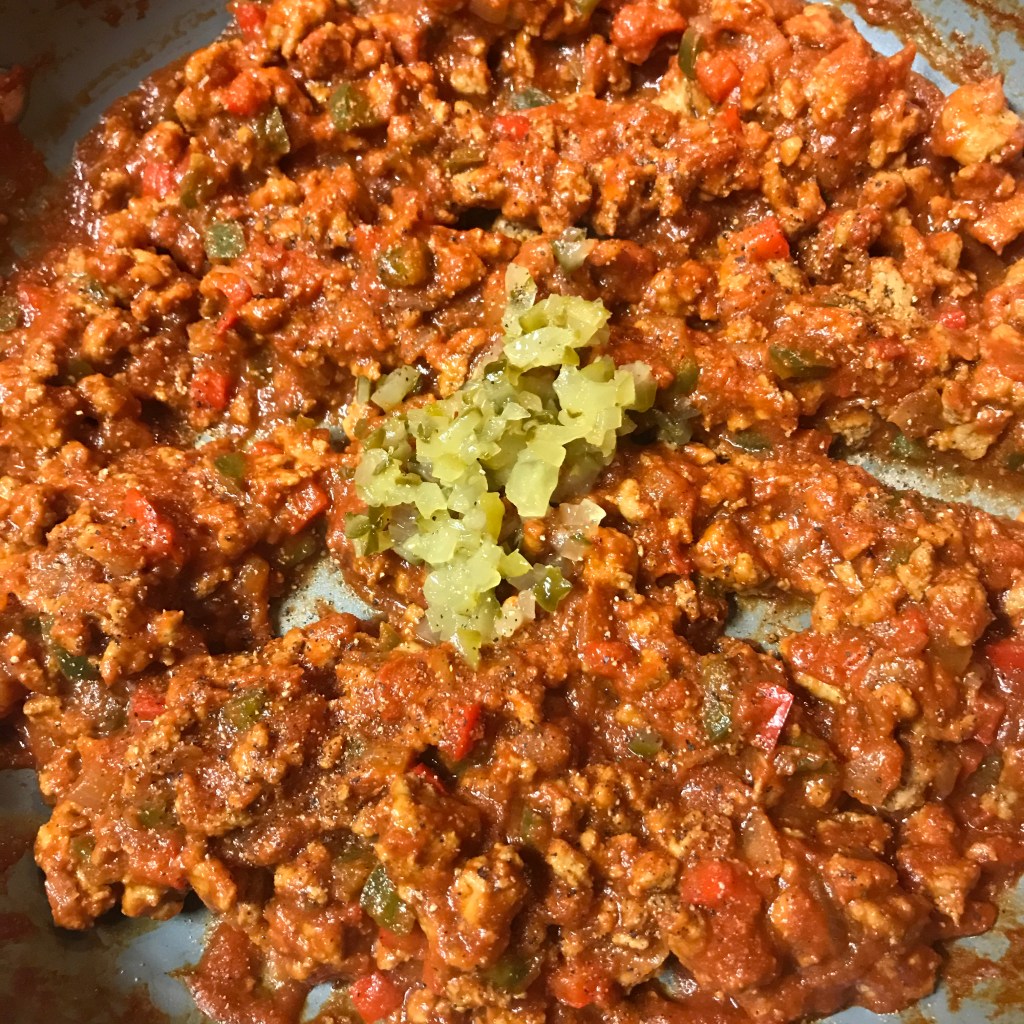
Add the tomato sauce and all other flavor ingredients and mix well.
At the end, add the chopped pickles. They can be dill, sweet, spicy or anywhere in between, to match your taste.
Adjust the thickness of sauce, if needed, by adding water or tomato paste. Let it simmer a few minutes until ready to serve.
This would be a fun, casual meal for Halloween night or a low key weeknight.
Heat a large non-stick skillet over medium heat. Add olive oil and saute onions and bell peppers until soft and translucent, but not browned.
Add ground meat in a large chunk, on top of the vegetables. Gradually break up the meat with a wooden spoon or spatula and aim to keep the meat chunky.
Combine tomato sauce, tomato paste, vinegar, mustard, molasses, Worcestershire and spices. Add to the meat mixture and stir gently to blend. If mixture looks is too thick, add a splash of water. If it’s too thin, add another spoon of tomato paste. It’s your kitchen, so take charge and don’t worry about my recipe. Let your taste buds tell you whether the mixture needs more salt, sweet or tang, and adjust accordingly.
Add the chopped pickles near the end of cooking time, for a zippy crunch.
Cover mixture and simmer a few minutes as needed to prepare the rest of your dinner.
Butter the cut insides of your dog (or burger) buns, and toast the buttered side on a griddle or hot skillet.
Pile the sloppy mixture onto the toasted buns and enjoy!