Spotlight on Peppers

Some women are dazzled by diamonds, others by expensive cars. Me, I tend to get overjoyed with really simple things, such as this stunning display of fresh peppers I ran into on one of my recent grocery runs. There are so many things I can do with peppers, and I couldn’t resist buying up a bunch of them.

But all of my best intentions lost a bit of their sparkle when I came home to the harsh reminder that we still don’t have enough room in the veggie drawer for two weeks’ worth of fresh stuff. So I had to come up with a plan, and fast. As a result, this week and next I’ll be focusing on some go-to recipes, along with new twists and some experiments, for using up those peppers. Along with some (hopefully) great dishes, I’ll show you a few of the tips I’ve learned for working with them, especially from my time in the catering kitchen, where every minute counted.

But first, a lesson, and forgive me if you’ve already seen this on Pinterest:

Who knew?

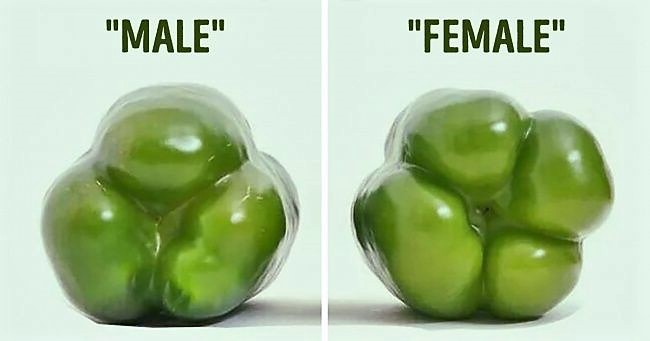
Did you know about the idea that bell peppers with three lobes on the bottom are males, best for cooking, while peppers with four lobes are females, chock-full of seeds, but sweeter and better for eating raw? This is fascinating to me.

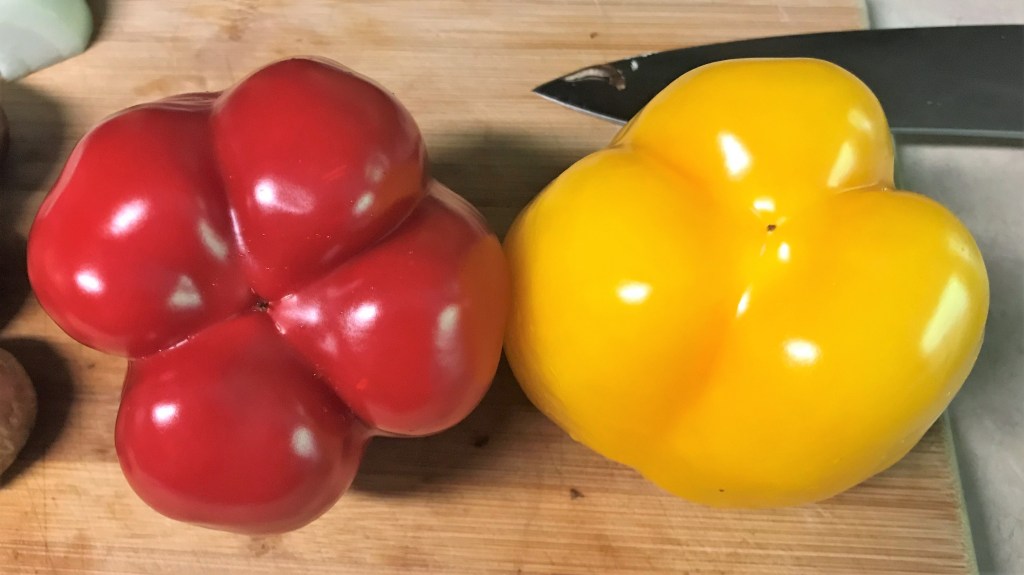
As luck would have it, I have one of each—a yellow “male” and a bright red “female.” We’ll test this claim, but more importantly, here comes my first tip. To avoid getting seeds everywhere when you cut open a pepper, turn it upside down and use a sharp paring knife to just barely cut through the skin, along the natural lines of the pepper. Then, pull the individual sections of pepper out and down toward the stem, like you’re peeling an orange. Keep going until the section snaps at the stem end, leaving the seed pod behind. Repeat with the other sections until all you have left is the stem and seeds.

Almost all the seeds remained with the stem piece, which means less time you’ll spend wiping them off your knife blade or sweeping them away from the cutting board. I did the same with the “male” pepper, and you can see the two compared. The yellow pepper definitely cut apart cleaner, which is more about how I cut it than anything else—no messy seed cleanup. But how about that claim that the “female” pepper is sweeter and has more seeds?

OK, the red pepper probably is sweeter, but not because it’s female. It’s because of the color. All deeply colored fruits and vegetables are more flavorful than their paler counterparts because they are more ripe. Without standing here and counting the seeds, I can honestly say I don’t see much of a difference between the two stems I’m holding.

As cool as it would have been to get the skinny on the whole male vs. female pepper thing, the truth is it’s a bogus claim. And although the rumor continues to spread faster than kudzu all over the internet, botanical experts everywhere have declared it has no merit, so let’s just move along because it’s almost dinner time and I think we can all agree we’re getting hungry just staring at all these fresh peppers, especially now that I’ve thrown in a zucchini.

We are getting about six servings of vegetables in this one meal!

This first “spotlight on peppers” recipe is super simple, perfect for outdoor cooking and an easy way to max out our daily servings of vegetables. It doesn’t hurt that we also won’t have a lot of cleanup, because we’re moving this party outside—to the grill!

You’ll need some grilling skewers for threading the vegetables and shrimp, or, even easier, one of those cool stainless steel grilling baskets.


Ingredients

1 red bell pepper  (any gender is fine) 🙂

1 yellow bell pepper

1 medium onion, cut into large chunks

1 medium zucchini, cut into large chunks

8 oz. package fresh cremini mushrooms, cleaned and trimmed


Marinade*

1 Tbsp. Dijon mustard

3 Tbsp. red wine vinegar

Garlic pepper or lemon pepper seasoning

1/2 tsp. dried herb leaves (oregano, basil, whatever you like)

3 Tbsp. extra virgin olive oil


About 1 lb. fresh shrimp, peeled and deveined

2 cloves garlic, finely minced

Juice of 1/2 fresh lemon, plus a little of the zest

1 Tbsp. extra virgin olive oil

Kosher salt and freshly cracked black pepper


*Notes

Much of the time, I don’t even bother marinating veggies before grilling, because a little olive oil and plain old sea salt and pepper brings out enough of their flavor. But on this occasion, I discovered an almost-empty bottle of Dijon mustard in the fridge, so it seems like a good time to offer one of my favorite tricks for using every last little bit. I use Dijon anyway to aid in blending a vinaigrette-style dressing or marinade, and when I can’t squeeze any more out of the bottle, I just add the other ingredients to it and shake it up to use what’s left. As a bonus, it further reduces the dirty dishes, because I can discard or recycle the bottle when I’m done with the marinade.

I realize the odds are low that your own Dijon is also down to the dregs, so I’ve offered approximate amounts, but keep this idea in mind the next time you’re at the bottom of a bottle (of mustard, that is).


Instructions

Combine the marinade ingredients, then toss the peppers, zucchini and mushrooms and let them rest while you prep the rest of the recipe. I’ve gently tossed the onions chunks in a different bowl, so they don’t separate too much before I thread everything onto skewers.

Combine the garlic, lemon juice and olive oil and toss the shrimp to coat. They don’t need to be dripping in the marinade—just a light coating is fine.

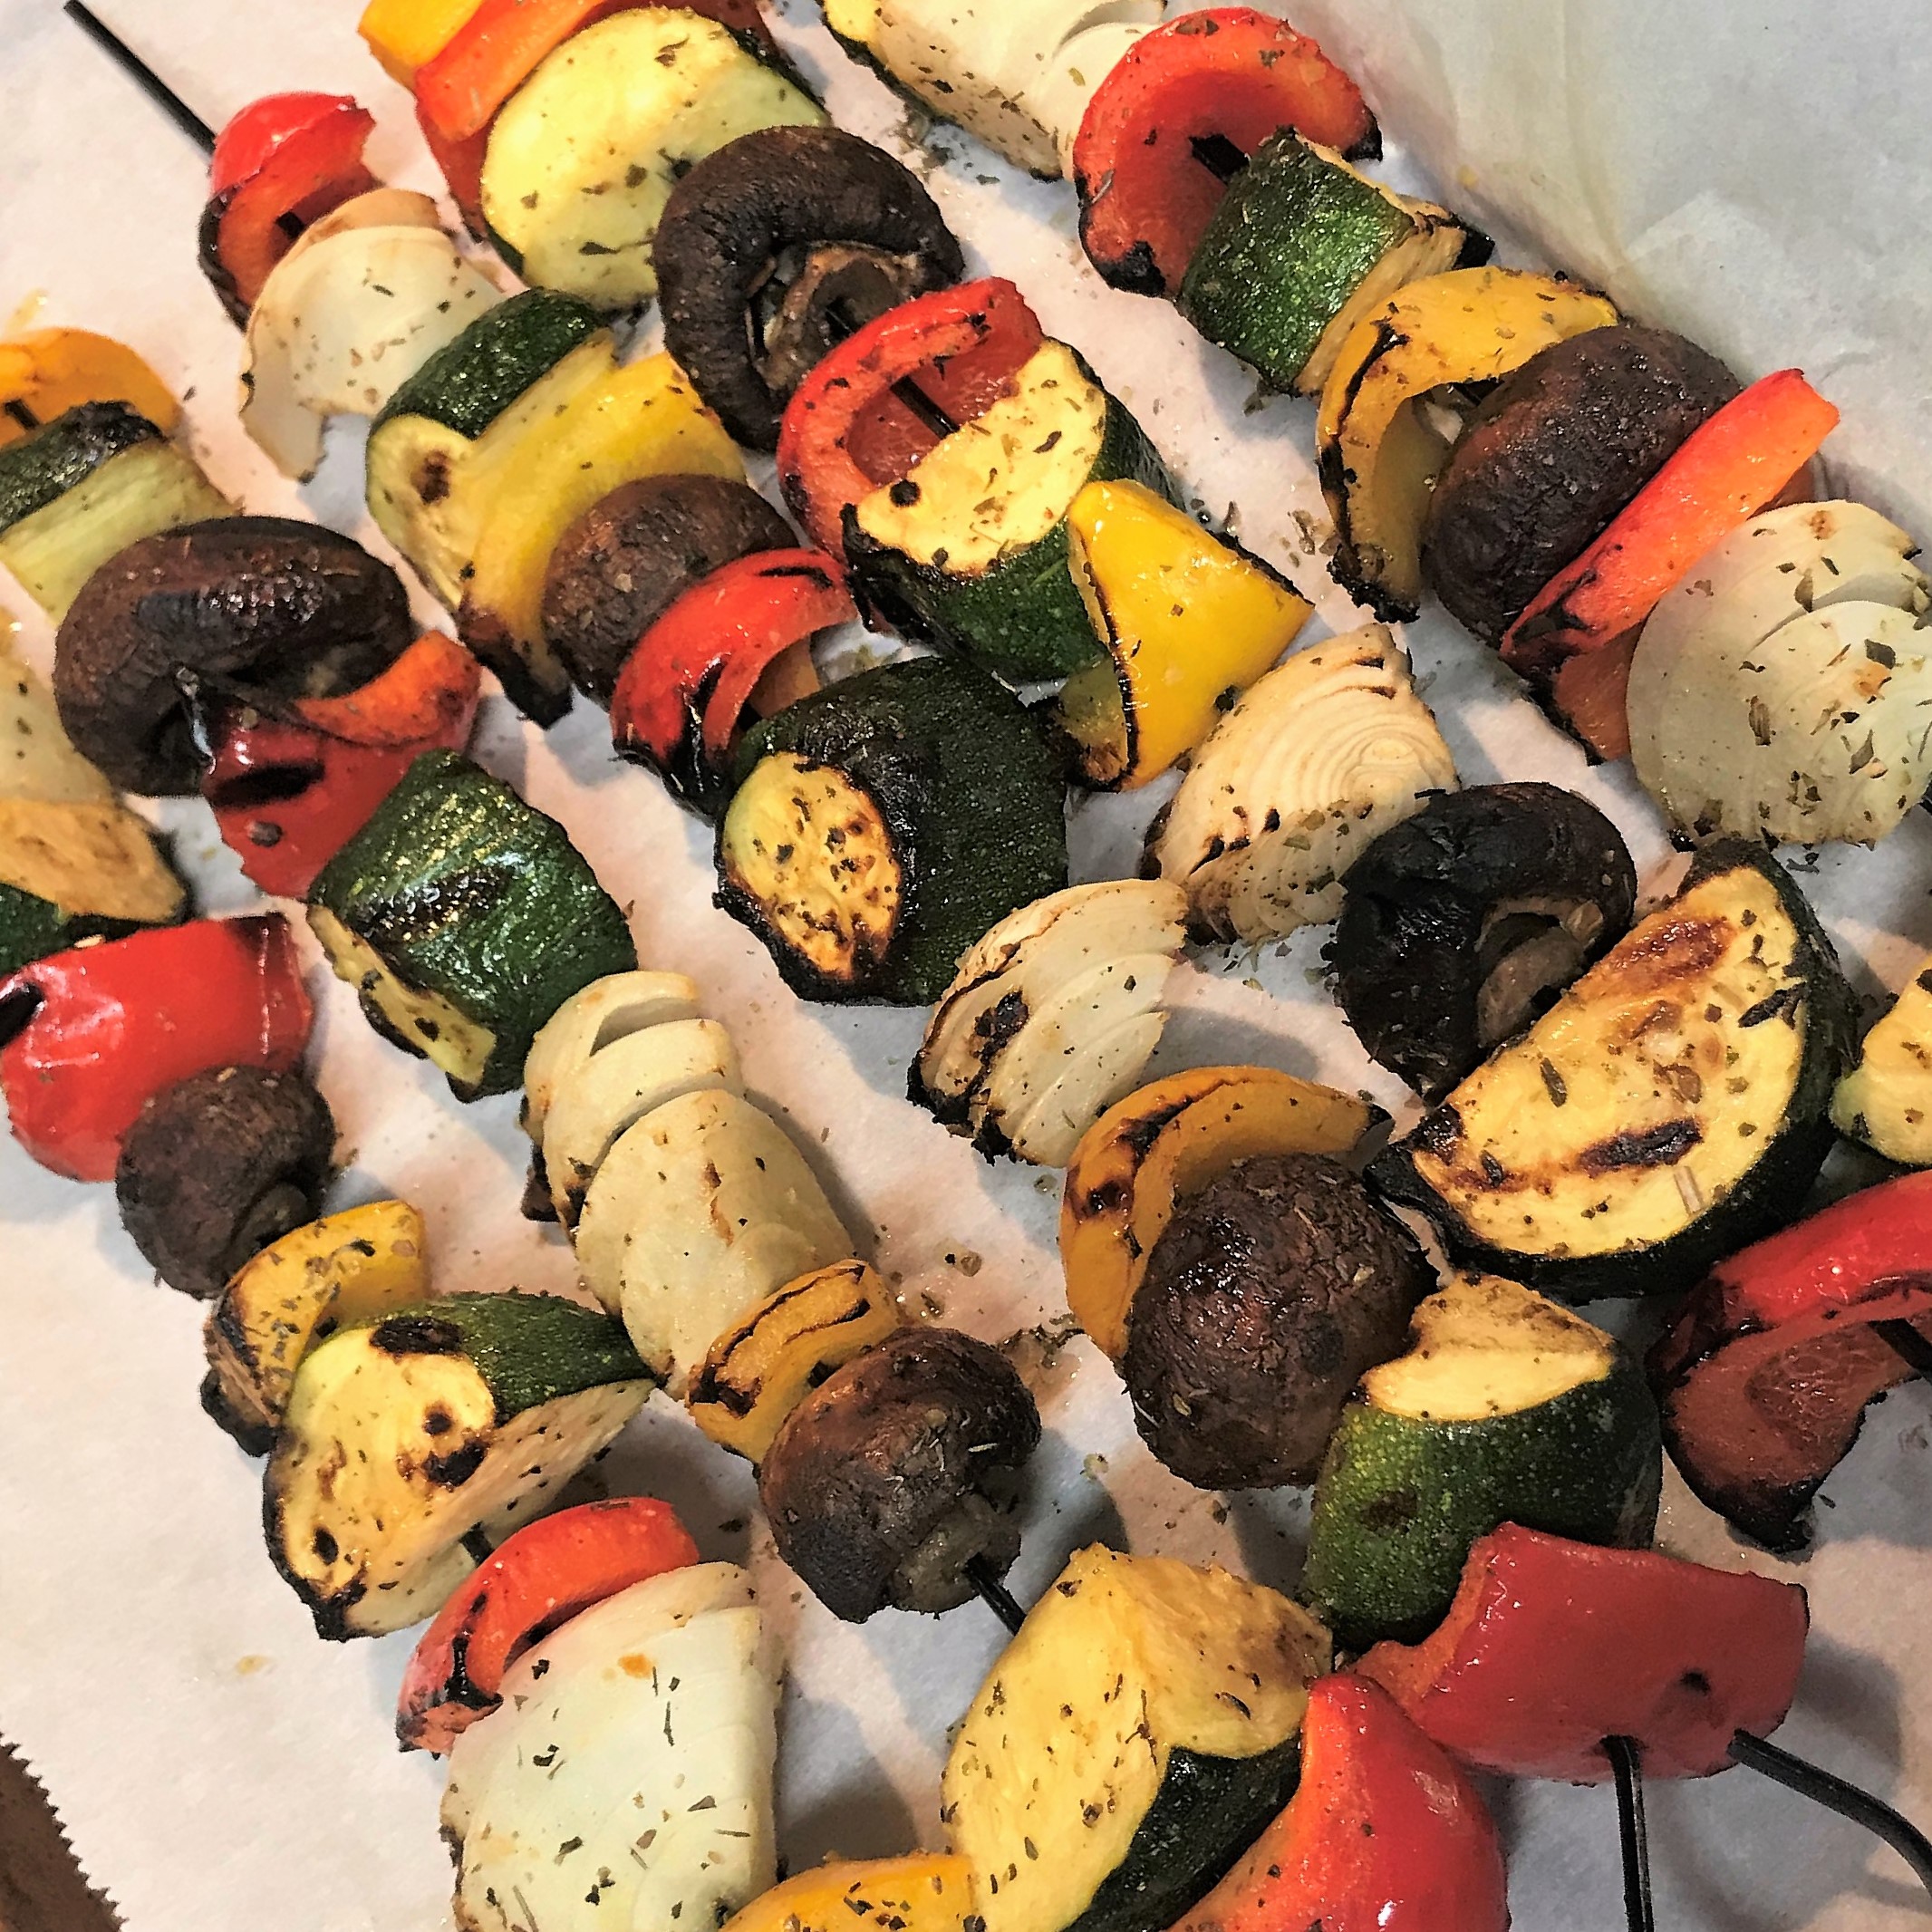
Preheat the grill to medium heat, and thread the veggies onto the skewers however you’d like—if you want to keep all peppers together, separate from skewers full of mushrooms or zucchini, that’s cool. I usually mix them up, but I always keep the shrimp separate because they don’t require as much time.

Here’s a quick tip I’ve found on the skewering, to prevent spearing yourself when you thread them—especially if they’re a little slippery from the marinade. Put the veggies flat on the cutting board and then stab the skewer down into them. It keeps your hands out of the line of fire. No sense turning an easy dinner into an all-night adventure at urgent care.

Move the skewered veggies to the grill and cook over low to medium heat until tender and lightly charred. The shrimp cook quickly, so add them to the mix when everything else is nearly done.


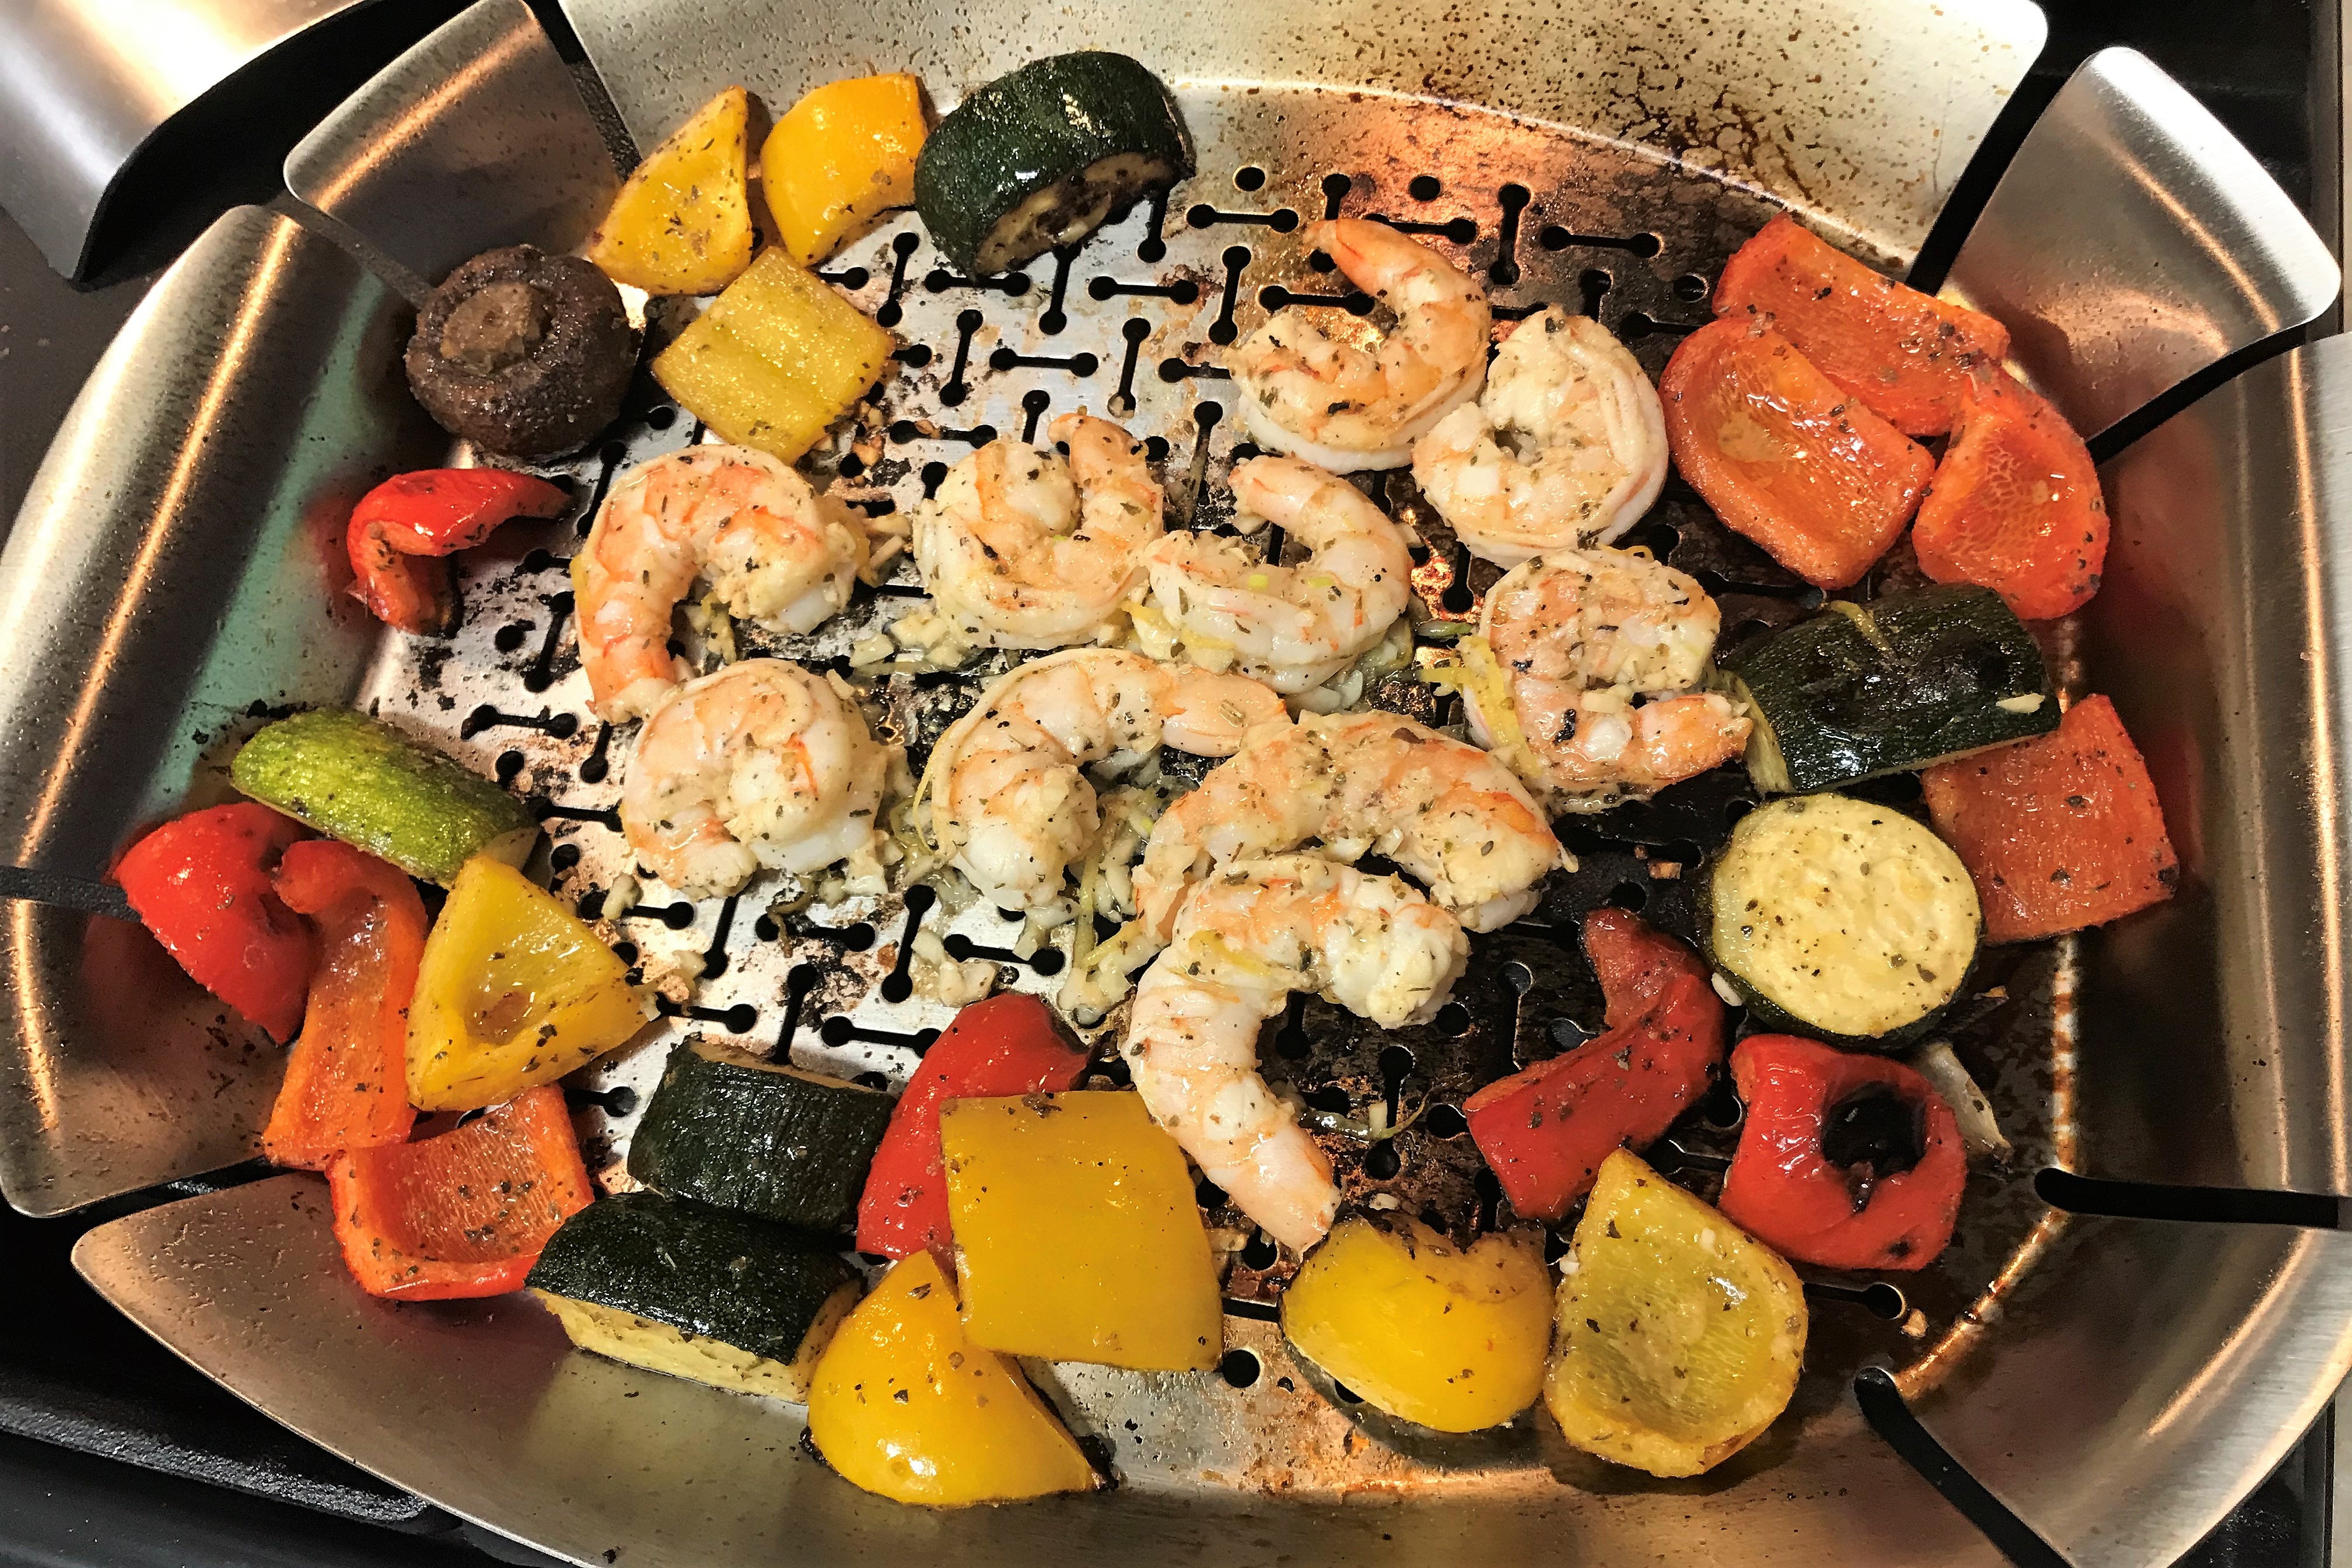
Light, fresh and healthy. Les and I love this simple kind of meal just as it is, but it would also be great over a bed of herbed rice, pasta or polenta.

Want to print this recipe?


Bonus tip:

For the record, sometimes I do recommend peeking at the bottom of peppers and selecting the ones with four lobes instead of three—not because of any weird gender claim, but simply because they stand up better when they’re stuffed with meat or rice if they are even and balanced on the bottom. Let’s revisit that when we make some Caribbean stuffed peppers next week.


Pork Chops & Applesauce

Thanks to the classic Brady Bunch episode in which young Peter tries to imitate Humphrey Bogart, I can hardly imagine eating pork chops without applesauce. My husband, Les, and I recently had an online happy hour with some friends in Raleigh and we were shocked to learn they had no recollection of the episode. Just in case you missed it as well, this should help provide a little context, and, in honor of Father’s Day, some good advice from one of America’s favorite TV dads about the importance of being yourself.

With or without the pop culture reference, there’s no question that pork chops and applesauce make a great combination. They were a frequent menu item at my grandmother’s house for Sunday supper. The applesauce was always homemade, as my grandparents had a small tree in the side yard that was prolific with small, greenish apples during the late summer. She’d send me and one of my cousins out there to pick up apples that had fallen, and she’d wash them and cut out any bad spots, then throw them into a pot—peels, cores, seeds and all. When they were cooked and tender, she’d scoop them into her Foley food mill and call in the kids to crank the handle. The food mill had a spiral blade that pressed the cooked apples through a mesh strainer, while keeping all the unwanted peels and parts behind. We’d sweeten it to taste and flavor it up with cinnamon, and it was just about the best thing ever. To this day, my cousin, Brad, and I are convinced that these adventures laid the groundwork for our passion for food.

I found this image on Etsy, and its very similar to the Foley food mill my Gram used to make her applesauce.

As much as I’d love to have Gram’s Foley food mill, I must admit that Les has found another really easy way to make homemade applesauce from scratch, and I’m grateful that he’s willing to make it several times a year on request. We always have some on our Thanksgiving table, and if we time it right, enough leftover to enjoy on latkes during Hanukkah. All you need is a slow cooker and a potato masher, and of course, fresh apples.

Gram usually did her pork chops in a cast iron skillet with a simple gravy, but I’m elevating them today with a quick and easy brine. We want to enjoy them on the grill, and the brine ensures the meat will stay moist and flavorful. I’ll top the chops with the easiest chutney you’ve ever heard of, and it really pulls the whole meal together.

Doesn’t this look schwell? 🙂

Ingredients – the pork chops

4 bone-in loin end pork chops

1 cup coarse kosher salt (do not use iodized table salt)

1 cup brown sugar

1 Tbsp. black peppercorns

1 Tbsp. dry mustard powder

2 cups apple cider vinegar

3 cups ice cubes

For chutney:

1 medium onion, halved and sliced lengthwise into crescent shapes

1 Tbsp. extra virgin olive oil

3 Tbsp. homemade applesauce

1 tsp. apple cider vinegar

Kosher salt and freshly cracked black pepper

The brine recipe has been my go-to since I first saw Alton Brown make it on Food Network. Brown sugar and dry mustard bring a terrific balance of sweet and savory. If you wanted to echo the apple flavor, you could swap in some apple juice or cider in place of some of the ice, but I usually use it exactly as ordered. Don’t brine your chops longer than two hours, or they will be too salty.

Instructions for brining

Heat the cider vinegar in a small sauce pan until hot.

In a large glass bowl, combine the salt, sugar, peppercorns and mustard powder. Pour in the vinegar and stir to dissolve the other ingredients. Give it 10 minutes to mingle the flavors, then add ice cubes and stir until they are melted. If brine isn’t completely cool, refrigerate before proceeding.

We ordered extra thick chops from our favorite local butcher, so we only used two. Use a heavy plate to help keep the chops submerged in the brine.

Place the pork chops in a gallon size zip top bag and pour the brine over them to cover completely. Squeeze out as much air as possible, seal the bag and refrigerate for two hours. I usually place the zip bag inside a container large enough to hold the brine, just in case the bag springs a leak (which is always possible when using bone-in meats). Turn the bag over halfway through brining time for more even flavoring.

Ingredients – the applesauce

9 large apples*, peeled, cored and cut into chunks

1/2 cup brown sugar (either light or dark)

Juice of 1/2 large lemon*

1 tsp. ground cinnamon

*Notes

Consider mixing together a few different varieties of apple, for more interesting flavor. Choose apples with a firm texture, such as Granny Smith, honeycrisp or fuji. Varieties with a “mealy” texture, such as red or golden delicious or McIntosh, are not the best for applesauce.

The lemon juice helps to prevent browning of the apples as they begin to cook and soften, and the acidity gives a nice tart balance to the sweetness of the applesauce. In a pinch, a couple teaspoons of bottled lemon juice can be substituted here, but fresh is always better because it’s pure and doesn’t contain weird preservatives.

Instructions

You’re going to love how easy this is!

Place all apple chunks into the slow cooker, toss chunks in the lemon juice and sprinkle the brown sugar and cinnamon. Give it a good stir to mix everything up and cook on low setting for about 8 hours or overnight.

In the morning, use a potato masher to break up any pieces still large enough to stand out. We enjoy having a few chunks, but that’s just how we roll. Transfer to a bowl and refrigerate.

Instructions – the pork chops and chutney

Remove chops from brine mixture, rinse under cold running water and pat dry with paper towels.

A quick sear on both sides helps seal in the juices, then nice and slow to finish them.

Grill the chops. Les seared them for 30 seconds on both sides, then reduced the grill temperature to low, cooking to medium well (about 150° F). I know we’ve all been told that pork must be cooked all the way to well done, but this is OK because they will continue to cook during a 5-minute rest inside.

Make the simple chutney. I sautéed the onions in olive oil until they were softened and lightly caramelized on the edges. A quick seasoning of salt and pepper, and at the last second, I opted for a quick shake of dried thyme leaves. Then, stir in applesauce and cider vinegar. Mix until heated through.

I sauteed the onions until they were tender with a bit of char on some of the edges.
Some of Les’s applesauce and a splash of cider vinegar makes it seem like this topping was cooking all afternoon.

This chutney will connect the dots between the savory pork chops and the sweet applesauce—an easy little Comfort du Jour twist to a classic “pork chopsh and appleshaucsh.”

I’m loving those perfect grill marks. The quick “chutney” pulls everything together to elevate our simple Sunday supper!

Want to print this recipe?

So delischioush!!!

Creamy Crab and Artichoke Dip

Of all the recipes I stashed away in my mind during the time I spent working in a catering kitchen, the hot artichoke dip takes the gold as my most durable. During my two years as a kitchen assistant, I probably made this dip more than 100 times. It was a favorite among clients, and for good reason. It’s easy to make ahead, easy to serve in large quantity and an undeniable crowd pleaser. It also happens to be extremely adaptable to other ingredients, as we learned with the Kentucky Hot Brown Dip a few weeks ago. By keeping the base recipe the same, I’m able to adjust the other ingredients to create whatever impression I wish, and I encourage you to do the same with ingredients that sound good to you.

What I haven’t confessed is that the cream cheese part of the recipe I share today is technically my own adjustment to the original, which (I’m sorry to say) was completely off the charts in fat content. If you spend even a little bit of time in a commercial kitchen, you will quickly come to realize the overwhelming dependence on mayonnaise. I’m not kidding—pro chefs use that stuff for everything—from dips and dressings (which makes sense) to spreading on fish before rolling in bread crumbs (why not eggs or Dijon?) and replacing butter for grilling sandwiches (I’m sorry—what’s wrong with butter?). As crazy as it seems, the solution presented in the catering kitchen to the oiliness that would appear when the artichoke dip was drowning in melted mayonnaise was, “add more bread crumbs.” Yowza. When I decided to make it at home, this recipe got an easy makeover.

For any creamy hot dip, light cream cheese fits the bill as a substitute for so much mayonnaise. It maintains the silky creamy texture, gives better structure and (in my humble opinion) improves the overall experience of the dip because it doesn’t separate or become greasy. I don’t need to create an infographic to describe to you the nutritional comparison. (Spoiler—the cream cheese wins.)

And although the original recipe is for artichoke dip, the base is a neutral canvas for whatever you want in the dip. This time, I kept the marinated artichoke hearts, added cooked crab, swapped out cheddar in favor of cheeses that paired better with the delicate crab, and topped the whole thing with garlic-buttered (not mayonnaise-laden) panko crumbs. We wanted something on the “heavy hors d’oeuvres” side for a backyard happy hour, and this was perfectly transportable and an absolute winner. As you can see, the ingredient list is short and sweet, just like our time spent laughing and relaxing with our friends on a beautiful spring evening. Charlotte was convinced this must be difficult to make—just wait until she sees the simplicity of this recipe! 🙂

Whether you’re gathering safely with friends as we did or hoarding the whole batch for yourself (I’m not judging), I hope you’ll feel free to swap ingredients to suit your palate for your next “happy hour.”

This dip is really, really easy to make with only a handful of ingredients. The crab is already cooked, so it comes together quickly. If you’re pressed for time, it’s OK to use pre-shredded cheese.

Ingredients

8 oz. brick light cream cheese (Neufchatel), softened

1/3 cup canola oil mayonnaise

2 tsp. dried chopped onion (or 1/4 cup sauteed onion)

Sea salt and freshly ground black pepper

A few shakes of Old Bay seasoning (optional, but so good with crab)

1 cup shredded Swiss cheese (to save time, I used a pre-shredded blend from Trader Joe’s)*

4 oz. prepared crab meat*

3/4 cup marinated artichoke hearts, chopped into bite-sized pieces

2 Tbsp. salted butter

1 clove garlic, minced

1/2 cup panko bread crumbs

1/4 cup parmesan-romano cheese

*Notes

I’m eating my words from other posts regarding the use of pre-shredded cheese. Normally, I cringe at their use because of the no-clump coating that generally prevents even mixing or melting. The truth is, I was pressed for time on the day I made this scrumptious dip, because my stylist was able to squeeze me in for my first hair appointment in more than 90 days! As always, my tips are only suggestions. If it comes down to taking a shortcut or missing the opportunity, please always take the shortcut!

Use any cooked crab meat you prefer. In some dishes, fresh is crucial—but in this hot dip, I’ve found that the prepared blue crab available in my supermarket’s seafood section is perfectly suitable.

Instructions

Using either a stand mixer or handheld mixer, beat the cream cheese and mayonnaise together until smooth and creamy. Add the dried onion, plus salt and pepper to taste, and mix to combine. This is the base recipe, and you can use it as a backdrop for any other ingredients you wish, provided you follow the general ratio of added ingredients, and none of them are excessively wet.

To continue with the crab artichoke dip recipe, add the Old Bay seasoning and shredded cheese and stir or mix on low until it’s evenly incorporated. Use a rubber spatula or spoon to gently fold in the crab meat and artichoke hearts. You want these ingredients to keep their shape, so easy does it here.

For serving at home, transfer the mixture to a 9-inch pie plate. Because we were planning to share the dip at a safely-distanced backyard happy hour, I divided it among three smaller oven-safe ramekins—one for us, one for our friends, and a third to leave behind for them to enjoy later in the weekend.

Melt butter in a small skillet and sauté the garlic over medium-low heat. Stir in the panko crumbs and toss them around until all are coated evenly. (Want to save a bit of time here? While the butter is melting, put the panko crumbs in a small Rubbermaid-style bowl. After sautéing the garlic, pour the butter mixture over the crumbs then seal the bowl and shake the heck out of it. It’s one more dish to wash, but you will make quick work of blending the butter with the crumbs more evenly.)

Sprinkle the buttered crumbs evenly over the crab-artichoke mixture, then sprinkle with parm-romano blend and cover with foil and tuck it into the fridge until you’re ready to bake.

Bake at 350° F for 35-40 minutes, or until dip is bubbly and parm-romano crumb mixture is lightly browned. Serve warm with crackers, pita or toasted baguettes. Wouldn’t you know?—we were in a rush to get over to our backyard happy hour, and I was so excited about seeing our friends in person, I forgot to snap a picture of the bubbly dip while it was hot from the oven. I guess I’ll have to make it again, and then I’ll update the post. 🙂

Want to print this recipe?


Les’s Homemade Pimiento Cheese

Every Super Bowl party, every Thanksgiving appetizer hour and several other times throughout the year—you’ll find this quick and simple spread on our table. Though he doesn’t know the exact origin of his pimiento cheese recipe, my husband, Les, recalls that it was shared with him by a colleague at one of his former jobs. And that’s the nature of recipes, isn’t it? We enjoy a food that someone else prepared and we ask for the recipe. Maybe it’s their original recipe or maybe they got it from a cousin or a neighbor or their church potluck cookbook or the back of a soup can. When the recipe tickles your fancy, it doesn’t matter where it came from—just enjoy the fact that someone is willing to share it.

Les has graciously shared this one with me, to be shared with you. I was busy watching and jotting down the amounts of each ingredient he used, so I missed getting pictures along the way. But would you really need them for a recipe this simple? Let’s just go straight to the money shot.

Pimiento cheese is a southern food staple, delicious on a burger or little luncheon sandwiches, or even just spread on a cracker.

Unlike so many southern-style pimiento cheese recipes, this one is easy on the mayonnaise and lets the cheese take center stage. Nothing turns me off, food-wise, more than too much mayonnaise. The addition of diced tomatoes provides a nice touch of acidity to balance the richness of the cheese, and the tiniest splash of an unexpected ingredient adds a savory undertone. This spread is sturdy enough that a delicate cracker will break when you dip it. You need a hefty cracker or crostini, or do as we do and use a serving knife to spread it on your preferred snack canvas.

We enjoyed some of this recently when we had a small, physically distanced gathering with another couple. It was a fabulous backyard happy hour, long-overdue, and complete with snacks and David’s awesome martinis.

Go on, open a box of crackers, and make it a big one—in case you decide to devour the whole batch in one sitting. Nobody would blame you.

Ingredients

2/3 cup mayonnaise (we use an all-canola oil brand)

1/2 can Rotel tomatoes, very well drained*

2 oz. jar of diced pimientos, drained of excess moisture

1 tsp. Worcestershire sauce (surprise!)

2 blocks (8 oz. each) cheddar cheese, freshly shredded*

Freshly cracked black pepper

*Notes

Les uses the “hot” version of Rotel, which has habanero pepper but honestly isn’t really that hot. If spicy isn’t your thing, use the original.

Try using a couple different types of cheese, to keep it interesting. This time around, Les used sharp yellow cheddar and extra sharp white cheddar. But if you want to get creative and use smoked cheddar, or mix it up with gouda or another favorite firm cheese—we would both say, “go for it!”

For sure, do not use the pre-shredded cheese in a bag. They coat that stuff with a substance that keeps it from sticking together in the bag, and it adds a weird texture to finished recipes. In our opinion, all cheese is best when you buy it whole and grate it yourself.

Instructions

Stir together the mayonnaise, tomatoes, pimientos and Worcestershire sauce in a large mixing bowl, and season to your liking with black pepper. You won’t need to add salt because the cheese has enough. Add the shredded cheddar cheese and mix until evenly combined. I will note that Les and I differ on how to put together certain types of dishes, this being one of them. He grates the cheese first and then blends in each ingredient after that; my thought is that mixing the wet ingredients first and then blending in the dry makes life far easier. (Coincidentally, our methods differ in the same way for cookies. But that’s another post.) You can serve the spread immediately, but the flavor is best after a few hours in the refrigerator.

Simple ingredients, simple to make, and delicious!

Want to print this recipe?

Pimiento cheese is practically its own food group in the South. If you have never heard of it (or maybe even pimientos themselves), here’s some background info to bring you up to speed:

What are pimientos?

Also sometimes spelled “pimento,” these are smallish round sweet peppers, about the size of a golf ball, and they are commonly referred to as “cherry peppers” because they have a similar shape. When jarred, the peppers are usually diced quite small. Most likely, you’ve seen pimientos before, stuffed into the inside of pitted green olives. Of course, now I’m craving a martini.

Are pimientos spicy?

Most people would agree that pimientos are not spicy, but sweet in flavor. For reference, they land somewhere about 200 on the Scoville scale, which measures the capsaicin, or heat value, of peppers. To compare, jalapenos are somewhere around 3,000. Having said that, if you decide to grow some pimientos, give them some distance from spicier peppers in your garden, as they have a tendency to take on more heat once they have cross-pollinated.

What else can you do with pimientos?

You can use pimientos the same way you’d use any other sweet pepper—in salads, soups, spreads or omelets. They are nearly bite-sized, so you might also remove the stem and clean out the seeds, then stuff them with herbed cream cheese or tuna salad. If you just have way too much time your hands, I suppose you could buy a bushel, dehydrate them and grind them into a powder. Voilà—homemade paprika.

How can I dress up pimiento cheese?

Adjust the flavor profile by blending in different kinds of cheese—smoked gouda, asiago or bleu cheese would each lend an interesting twist to pimiento cheese. Or add small amounts of other ingredients, such as pickled jalapenos, pickles or even cooked crumbled bacon for variety.

How can I use leftover pimiento cheese?

I’m sorry—I don’t think I understand this question, because we never have leftovers! 🙂 But sometimes, Les makes a double batch so we have enough to use for other things, such as topping a burger, melting over a toasted bagel, slathering inside omelets or elevating our happy in a macaroni and cheese. Go on, make some!


Chicken Caesar Salad (on the grill)

We must be headed into summer, because I can hardly tear myself away from grilled food ideas. I’m dreaming about classic summer favorites, but I’m also having fun imagining new ways to enjoy fruit, vegetables, pizza and who knows what else on the grill. One thing you can expect from me in the coming weeks is a grilled watermelon gazpacho. True story, I woke up thinking about it the other day. After a bunch of rainy days and weekends, we’ve finally eased into some nicer days, and cooking outside is the best part of that!

Most of the time, mentions of grilling conjures images of burgers and ribs and heavy smoky things. But I’ve definitely been feeling it more for freshness lately, and craving lighter foods that will help me feel less sluggish after so many weeks of “comfort food,” Zoom happy hours and going absolutely nowhere.

Over the next few weeks, we’ll be planning an expansion of our patio and some other embellishments to help make it even more inviting. And hopefully one day soon (or at least not too far off), we will be able to share the space with friends more than current circumstances allow.

Our sweet little patio is our safe haven right now.

For now, we’re thankful to have comfy patio chairs, a private backyard, and a great Char-Broil gas grill, and tonight we’re cooking up a grilled chicken Caesar. Not just grilled chicken on the Caesar, mind you—more than that, the Caesar will be grilled as well. If you have not yet enjoyed grilled romaine, it’s such a treat, and yet so, so simple. It’s basically a poster child for Comfort du Jour—a familiar comfortable food, but with a fun and simple twist to elevate your happy. Let’s get cooking!

Recipe serves 2.

Ingredients

2 boneless, skinless chicken breasts (preferably free range)

2 Tbsp. red wine vinegar

Juice of half a lemon

1 tsp. prepared Dijon mustard

1 tsp. garlic pepper seasoning*

3 Tbsp. extra virgin olive oil

1 romaine heart (the tender inside part of romaine lettuce)

Sea salt and freshly ground black pepper

4 Tbsp. bottled Caesar dressing (the simpler, the better)

4 anchovy fillets

Freshly shaved parmesan or pecorino romano cheese for serving

*Notes

Check your brand of garlic pepper seasoning for salt content, and adjust your marinade ingredients to taste. We have McCormick brand, and the salt is just right. If yours is salt-free, you’ll probably want to add about 1/4 tsp. salt along with it, or season the chicken with salt before you add the marinade.

In our house, we’re careful to avoid a lot of highly processed ingredients, such as high-fructose corn syrup and just about any version of soybean oil (it has no nutritional value and is usually genetically modified). We like the brand pictured in this post (Marzetti’s “Simply Dressed”) because it’s made with real ingredients and nothing that makes us cringe. Find it refrigerated in the produce section of your market.

Anchovies have gotten a bad rap, in my opinion. For a long time, I assumed I didn’t like anchovies because other people didn’t like them. But in small amounts, and paired with the right things, they add a fantastic savory pop to a dish. If you haven’t tried them lately, give them a shot in this recipe!

Instructions

Pat the chicken breasts dry with paper towels and set aside while you prepare the simple grilling marinade.

In a small bowl, combine red wine vinegar, lemon juice, Dijon and garlic pepper seasoning. Drizzle in olive oil in a slow and steady stream, whisking constantly to incorporate and emulsify. Pour the marinade over the chicken breasts in a covered glass dish or a zip top plastic bag. Put in the fridge until about 30 minutes before grilling.

Next, prep the romaine for grilling by trimming the end and any loose leaves, and cut in half lengthwise. Rinse under cold water, ruffling the leaves to let the water get inside the layers. Shake off excess water and place romaine halves, cut-side down, on a plate lined with a double layer of paper towels. Lay a damp paper towel over the top and put the plate in the fridge for several hours. The water will continue to drain from the cut leaves, and the romaine will get nice and crunchy during its chill time.

I always rinse with cold running water, and I “fluff” the leaves to let the water work all the way through.

Preheat your grill or grilling pan to about 450° F. The chicken should rest at room temperature about 30 minutes. This isn’t absolutely necessary, but it helps the chicken cook more evenly. Reduce the temperature to about 350° and grill the chicken until it’s nicely charred on the outside and the juices run clear. At this point in the recipe, I usually bid adieu to my husband, Les, who handles most of our outdoor cooking. He’ll tend the chicken while he sips on a cold one and catches up with his Facebook feed. I have my own business to tend—the dressing.

Straight honest truth, if you’ve ever had authentic, scratch-made Caesar dressing, you know that there simply is no equal. The lemon, egg, anchovy and garlic create a perfect harmony that literally is the Caesar salad. Without it, you have basically a pile of romaine. But on a busy weeknight, who has time to coddle eggs? Me neither. What we can do instead is elevate a store bought “Caesar” dressing (I’ve yet to find one that has all the right stuff) with the addition of a couple of simple ingredients.

Homemade Caesar dressing is the absolute bomb.
But this is my simple “cheat” to add pizzazz to a store-bought dressing.

Don’t start making faces now. Anchovies are surprisingly delicious if you don’t overdo it, and we definitely won’t here. I’m only using a few fillets of these salty little fishes, and they will add a whole new layer of flavor to my otherwise “OK” dressing.

Chop them into small pieces (so you don’t get too much in any single bite), then stir or whisk them into the Caesar dressing. If the dressing seems a little thick, also pour in a little of the oil packed with the anchovies. Give it a quick taste—if it’s too salty, add a squeeze of fresh lemon juice to tone it down. Grind some fresh black pepper into it for a little more bite. This is your salad, so make it work for your taste.

Pull the romaine from the fridge and move it to the next step by drizzling good quality extra virgin olive oil over the cut side. Allow the oil to trickle down between the leaves a little, but don’t drench it. Season the halves with sea salt and freshly cracked pepper, then take it out to the grill.

When the chicken is nearly finished, place the romaine halves directly on the grill, cut side down. And leave it. The first time I made grilled romaine, this felt so strange—putting delicate lettuce on the grill? But it’s really an incredible difference it makes in the salad, and I look forward to grilling season for things just like this. Obviously, we can eat salad all year, but in our winter months, it isn’t always practical to fire up the grill. For sure, my hubby isn’t gonna stand out there in 20° weather. Especially in the dark (which is usually is at dinner time during winter). It is, of course, possible to do this on an indoor grill pan, but there’s something more special about it when it’s cooked outside.

When the romaine has a nice amount of caramelization on the cut side (you decide when it reaches that point), turn over the halves and allow the other side to grill for a minute or two.

To serve, rest the chicken breasts then slice into crosswise strips. Serve alongside the romaine half, drizzling both with the jazzed-up Caesar dressing and a sprinkling of freshly grated parmesan or romano cheese. If you prefer, chop the grilled romaine as well, and toss it together with the chicken and dressing, then divide on two plates and top with shredded cheese.

Enjoy!

A good drizzle of our “spiked” Caesar dressing, and freshly grated parm. Dinner is served!

Want to print this recipe?


Cole Slaw Two Ways

There’s no good reason to depend on bottled cole slaw dressing, made up mostly of ingredients we’d never find in our own pantry cabinets. Not when it’s so quick and easy to make our own dressing from the fresh things we do have in our cabinets or refrigerators.

Whether you like the slightly tangy-sweet creaminess of a mayonnaise-based cole slaw (KFC-style) or an elegant, vinaigrette-type dressing that stands up better to extended time on a picnic table, you can handle it yourself in only a few minutes. The one thing for sure is it’ll taste infinitely better than the soybean oil-xanthan gum concoction you’d otherwise pick up in the dressing aisle.

Begin with a basic combination of 4 to 5 cups shredded or chopped cabbage (red, green or both—you decide) and carrots. Use a food processor to save time or chop by hand for a more rustic texture. Then, choose your style and dress it up!

Creamy Slaw Dressing

The creamy-style dressing is on the sweet side, with a distinctive white pepper flavor that is reminiscent of the “colonel’s” cole slaw.

Ingredients

About 1 Tbsp. finely grated onion* (see notes on this)

1/4 cup mayonnaise (I used canola mayo)

2 Tbsp. whole milk

2 Tbsp. buttermilk*

1 Tbsp. white vinegar or white balsamic vinegar*

1 Tbsp. fresh lemon juice*

2 Tbsp. cane sugar*

1/2 tsp. kosher salt

A couple pinches white pepper

*Notes

Grate the onion and use a paper towel to absorb as much excess juice as possible before proceeding with the recipe.

Real cultured buttermilk works best, but you could have similar results with the same amount of plain yogurt or Greek yogurt.

I am a big fan of flavored balsamic vinegars and olive oils, and whenever I have it on hand, I substitute the “Sicilian Lemon” white balsamic for the combined amounts of vinegar and lemon juice in this recipe. If you have access to this product from a specialty store in your area, it’s worth the expense.

Reduce the sugar by half with the white balsamic substitution.

Instructions

Empty the grated onion into a glass measuring cup. Add remaining dressing ingredients and use a mini-whisk or small spoon to blend into a smooth, even mixture.

Use less dressing than you think is correct. Trust me, you won’t mind eating the extra dressing with a spoon!

Pour half of the dressing over the shredded cabbage and carrots and toss to coat, then add more dressing as desired. As the creamy dressing settles in, the cabbage will soften and shrink a good bit. It’s easier to add dressing than to take it away. Cover salad and refrigerate a couple of hours until ready to serve.

Poppy Seed and Lime Vinaigrette Slaw Dressing

The vinaigrette-style dressing is tangy and onion-y, an elegant change of pace for your backyard cookout. The poppy seeds can be left out if you aren’t a fan.

Ingredients

1/2 small onion (sweet, yellow or red—whatever you like)

2 tsp. poppy seeds* (see notes)

2 Tbsp. sugar

Juice of 1/2 fresh lime

1 Tbsp. white wine vinegar

1/2 tsp. dry mustard powder

3/4 tsp. kosher salt

1/2 tsp. freshly ground black pepper

1/4 cup canola oil (or other neutral-flavored oil)

2 Tbsp. extra virgin olive oil*

*Notes

Poppy seeds are sold by the bottle in the spice section of most grocery markets. Celery seed would be a good substitute here, or if seeds cause you trouble, you could easily skip them altogether, but you still want to begin the recipe on the stove.

Extra virgin olive oils provide the most health benefits, but some of them have a very “green” or pungent flavor. For this recipe, use the most neutral-flavored olive oil you can find, such as arbequina. Specialty oil and vinegar shops offer free tastings to help you find your favorites.

Instructions

Grate the onion into a bowl, keeping the juice. Combine sugar, lime juice, vinegar, mustard powder, salt and pepper in a glass measuring cup.

Place a small, heavy-bottomed sauce pan over medium heat and add the poppy seeds. Swirl the pan constantly and toast the seeds for 2 to 3 minutes, until lightly fragrant. All at once, add the onion (with juice) and the lime juice mixture and stir until sugar is dissolved and mixture begins to simmer at the edges of the pan. Remove from heat and transfer to the small bowl of a food processor. Turn on processor and slowly stream canola oil into the mixture, then repeat with olive oil.

When mixture is fully emulsified, pour about 1/3 cup of it over cabbage mixture. Toss to coat, add more dressing if desired, and refrigerate slaw until ready to serve. Save leftover dressing for use on other salads–perhaps a spinach salad with fresh strawberries.

Want to print these recipes?


Spanish Onion Sauce

For just about everyone, the term “comfort food” applies specifically to the foods we learned to love during childhood. For me, that’s the made-from-scratch foods I learned in my grandma’s kitchen, including applesauce, soft molasses cookies and bread pudding. For my husband, Les, it’s pretty much all the foods you can only find in a Jewish deli and on the streets of New York. I’ve grown to love many of these foods myself—the bagels, the knishes, the in-house pastrami from Katz’s deli and of course, the pizza (am I the only one hearing angels sing right now?).

Any true New Yorker will admonish you for assuming you could just pick up a bag of Lender’s and call it “close enough.” The best bagels are apparently made with NYC water, but we are thankful to have a very good option for them in our home city. Then there’s the matter of pizza, but let’s not even start on that, though I’m proud to report we’ve finally perfected our at-home pies to nearly the level of Les’s high standards. And although hot dogs (even the Kosher, all-beef kind) are readily available in every corner of these United States, there’s no match for a good, old-fashioned New York hot dog. And for one main reason. The Spanish onion sauce.

Honestly, no other condiments are needed.

This stuff is simple enough, just sliced onions cooked in a thin, lightly spiced tomato sauce. But like any food that’s part of the very fabric of your life, it’s the memory of it that means something. You want it to taste the way you remember it. When I finished this batch of onion sauce, I cautiously asked Les to give it a taste and tell me what it needed. Last time, it was “pretty close,” so imagine my relief (and utter joy) when he licked the spoon and said, “Yep, that’s it!” Pardon me while I do the h-a-p-p-y dance. And though I’m only from “upstate” (not the same as New York, he reminds me, ad nauseum), and I don’t have my own early memories of this onion sauce, I have to say, it’s pretty darn tasty, and super easy to make. If this is all it takes to elevate his happy, I’m golden.

Ingredients

1 Tbsp. extra virgin olive oil

1 medium Spanish onion (about the size of a tennis ball)

3 Tbsp. tomato ketchup (preferably one made with real sugar)

2 pinches chili powder* (see notes)

Pinch of dried, crushed red pepper*

Pinch of ground cinnamon

1/4 tsp. kosher salt

1/4 cup water

*Chili powder is an ingredient that is wildly inconsistent, because different brands have different formulas and sometimes high amounts of salt. Use the most “neutral” chili powder you have, or substitute whatever makes you happy. For my most recent batch of onion sauce, I swapped out both noted spices for about 1 tsp. of the oil poured off a jar of Trader Joe’s “Chili Onion Crunch.” This earned an enthusiastic thumbs up from my New York-born taste tester. Don’t be shy about experimenting with the stuff in your cabinet—it’s how I’ve found all my best recipes.

Instructions

Cut the onion in half lengthwise. With flat side down, slice the onion into 1/4” crescent-shaped slices. For this recipe, I find it better to have similar-sized pieces of onion, rather than ring slices.

Heat a medium-size skillet over medium heat. Swirl in olive oil, then add onion slices and saute for about 8 minutes until softened and slightly translucent. Mix together the ketchup, spices, salt and water, and add to the onions. Stir to combine and bring to a slight boil, then reduce heat to low and simmer, uncovered, for about 30 minutes. Much of the liquid will evaporate, and you’ll be left with silky onions glistening in a light, tomato-y glaze.

Quite simply—it’s real Nu Yawk daawg sauce.

We served our Spanish onion sauce on uncured all-beef dogs and homemade potato buns. Delish!

Want to print this recipe?


Chili for Hot Dogs

As I was jotting down the ingredients I used in this chili, I almost felt that I should put an asterisk next to every spice ingredient. Taste is subjective, and it seems no culinary divide is greater than the one created by spicy heat. Some people love it (hear, hear), some can’t tolerate it at all and others want a little kick as long as they don’t feel too much burn.

If you make some version of this chili, use the level of heat that makes sense for you and whomever else you’re feeding. My husband and I are so much on the same page when it comes to heat, and we are quick to admit, we want a little burn. We might pay a price for it tomorrow, but that’s a consequence we will be willing to accept. Every. Single. Time. If you’re shaking your head “no,” you might find some of the spice notes helpful for adjusting the amounts to your personal taste, while still enjoying plenty of flavor.

There’s no need to spend extra for packaged “chili powder.” Mix and match spices you already have and come up with a winner.

Chipotle

Made of dried and smoked jalapeno chiles, this is a smoky-style, medium heat spice. I usually don’t even think of this spice as being “hot,” because I’m mainly captivated by the smoke. But it does bring some heat, so if you’re squeamish, skip this one and look at ancho or cumin instead.

Cumin

This spice is made from seeds, not chile peppers, and it’s common to various Latin cuisines as well as some Indian and Northern African cooking. The flavor is warm and gently smoky. “Comforting” is a good word for this spice. I adore it in fried breakfast potatoes, and it finds its way into every kind of chili I make. Cumin doesn’t have heat, but it plays so nicely with hot spices, it’s never far off in recipes with chile spices.

Cayenne

No doubt, this is a speecy-spicy one! Cayenne is a long, skinny red pepper, the variety used widely in Cajun cuisine, and the main ingredient in popular bottled hot sauces, including Tabasco and Frank’s original “red hot” sauce, as well as Texas Pete, which doesn’t hail from Texas, but Winston-Salem, NC (go figure). It’s not as hot as habanero or ghost peppers (not even close on the Scoville heat scale), but it’s fair warning to say that if you can’t stand the heat, you should get the heck out of cayenne’s kitchen.

Ancho

Made of dried and smoked poblano chiles, this one has a little heat, but is mainly smoky and fruity, especially if the seeds are removed before grinding it into powder. Ancho chiles are a favorite of celebrity chef Bobby Flay, who puts it in nearly everything. It’s a very balanced chile flavor, and though it isn’t listed as an ingredient in my chili for hot dogs, you might find it a good substitute for the chipotle if you like smokiness and peppers with a little less kick.

Paprika

This is an overly general name for a spice that varies a great deal from bottle to bottle. Some paprika is smoked, some is sweet, some is hot—it’s just all over the place. If you do an online search for “what pepper is used for paprika,” you’ll find everything from red bell pepper to cayenne, so it’s clearly a bit of a gamble. The variety I used in this recipe is specifically labeled “sweet Spanish paprika,” and I appreciate that because it helps me know what to expect. It is light and kind of fruity, with the tiniest amount of smoke (probably on the red bell pepper end of the paprika spectrum), and it adds bright color and a pleasant sweet pepper flavor without bringing heat. A bottle labeled “hot Hungarian paprika” would turn this chili into something totally different, so take notice of the differences.

Wait, what about plain old “chili powder?”

Frankly, my dear, there is no such thing. “Chili powder” is a generic term used by every spice company out there, and what’s in it is anyone’s guess. Sure, you could look at the label ingredients, but they are usually suspiciously vague—a blend of “red chile powder” (okay, but which chile?), herbs and spices (again, which ones?), plus a whole lotta salt and usually some other unnecessary ingredients with long, unpronounceable names. Personally, I don’t touch the stuff because it presumes to know what my flavor and sodium levels should be. I’ll decide what goes into my chili, thank you very much, and hopefully this quick little chili tutorial will empower you to do the same.

Ingredients

1 Tbsp. extra virgin olive oil

1/2 lb. lean ground meat*

1/2 cup yellow onion, finely chopped

2 Tbsp. apple cider vinegar or red wine vinegar

1/4 cup water*

8 oz. can tomato sauce

Kosher or sea salt to taste

Spices

1/2 tsp. each ground black pepper, ground chipotle, cumin, sweet paprika, garlic powder, onion powder

1/4 tsp. ground cayenne pepper, if you’re living on the edge

*Notes

For this batch of chili, I used 90% lean ground bison. Beef is an easy go-to, and it would also be just fine with ground turkey.

Feel free to substitute beer for the water, if you wish, as my husband does with his famous Super Bowl chili. (I hope that wasn’t a secret, Babe!)

Instructions

Heat a cast-iron skillet over medium heat. Swirl in olive oil, then add ground meat, onions, vinegar and water all together. Cooking the meat in the water rather than browning it first will result in the fine texture that’s perfect for topping a hot dog. Stir the meat mixture frequently as it cooks, until the water has completely evaporated. Season with salt and pepper, then add tomato sauce and spices. Cook and stir several more minutes, until liquid reduces and chili thickens to your liking. I like this kind of chili to be on the thicker side, so it stays on the dog without making the bun soggy.

The chili is good on its own, but I throw on more onion just because.

Want to print this recipe?


Soft Pita Breads

(and a BONUS recipe!)

This recipe has become one of my go-to breads. It’s simple to make and doesn’t require use of the oven, which is great when the weather is warm. This is an adaptation of a recipe from King Arthur Flour. Theirs is great, but I always substitute a portion of whole wheat flour into the recipe, and I add milled flax seed and onion flavor to this one as well. It’s an unusual style of recipe, which begins with “cooking” some of the flour with boiling water. This unique method, and the addition of potato flakes, results in a very soft, bendable pita bread—perfect for gyros or souvlaki wraps, but you can also cut them into wedges and drag through a bowl of fresh hummus. Yum!

Ingredients

2 cups unbleached all-purpose flour, divided* (see notes)

1 cup whole wheat flour* (I use KAF’s white whole wheat)

1 1/4 cups boiling water

1/2 cup dried potato flakes*

1 tsp. milled flax seed (optional)

1 1/4 tsp. salt

1/2 tsp. onion powder

1 tsp. instant yeast*

2 Tbsp. extra virgin olive oil

*Notes

Accurately measure the flour by fluffing it, spooning it into measuring cup, and leveling off.

Look for potato flakes without added ingredients (Whole Foods has them). Or use real cooked potato and only 3/4 cup water in the recipe, and use the potato cooking water.

Instant yeast does not behave in the same way as active dry yeast, which needs to be “proved” first. Dissolve active dry yeast for five minutes in a few tablespoons of warm water, and reduce the overall water in the recipe by the same amount. If your yeast doesn’t become foamy during this step, it’s dead (I’m so sorry for your loss). Next time, keep it in the freezer.


Instructions

Add 1 cup all-purpose flour and the whole wheat flour into a mixing bowl, and pour the boiling water over it. Mix with a heavy spoon (or use a stand mixer) until combined and smooth. This is going to feel a little bit like paste, but trust me, they will turn out great. Cover and allow mixture to rest 30 minutes.

Combine the remaining all-purpose flour with rest of the dry ingredients and add to the cooked flour paste. Mix until fully incorporated, then add olive oil to the mixing bowl and knead several minutes until dough is smooth and supple. Shape dough into a ball and allow it to rise, covered, in a lightly oiled bowl about 1 hour until it is puffy. If it doesn’t bounce back when you poke it, you’re ready to proceed. If it giggles, well…

Turn the dough out onto a lightly floured surface, gently deflate, and cut into eight pieces. Shape the pieces into balls, then cover with a clean towel and allow them to rest 15 minutes. This gives the gluten time to relax so the dough is easier to roll.


Heat a griddle or dry skillet over medium-low heat (about 325° F). While surface is heating, roll out one dough ball at a time (on floured surface) into a thin circle, about 8 inches across. Cook about 1 minute on the first side or until you see toasty flecks on the bottom. Carefully turn to cook the other side 1 minute. The pita breads will puff up quite a bit on the griddle while the second side is cooking. Remove them to a wire rack.

These are best enjoyed right away, but you can also cool them completely and store in a tightly sealed bag at room temperature for about 4 days. King Arthur says you can freeze them, but I’ve never tried it because we always devour them within a day or two. Leftovers (if you have them) are great as scrambled egg wraps.

But wait, there’s MORE!

Souvlaki Bonus Recipe

There’s so much flavor in these tasty little bites, you’ll be surprised at how easy it is to make them. They’re mouthwateringly lemony, packed with Mediterranean herbal flavor, and versatile. Serve them on soft pita breads with tzatziki or on top of a Greek salad. They’re also not bad eaten cold, straight from the fridge. Or, so I’ve heard. Give the marinade plenty of time to work its magic—the results are definitely worth the wait!

Ingredients

1 pound boneless, skinless chicken breast*

Juice of 1 large lemon

1 Tbsp. red wine vinegar

3 or 4 cloves fresh garlic, finely chopped

2 tsp. dried Mediterranean oregano

1 tsp. dried thyme leaves

1/2 tsp. each kosher salt and freshly cracked black pepper

1/4 cup extra virgin olive oil

*This marinade is also delicious on pork. Cut up 1 pound of lean pork loin and proceed as for chicken. It would be tasty on shrimp also, but reduce the marinating time to 1 hour and shorten cooking time as well.

Instructions

Cut chicken breast into bite-size chunks and add them to a large glass (or other non-reactive) bowl. In a measuring cup with a pour spout, combine lemon juice, vinegar, garlic, herbs, salt and pepper. Drizzle the olive oil into the mixture, whisking constantly, until it’s combined. Pour marinade over the chicken pieces and toss to coat, then cover and refrigerate several hours to overnight.

Preheat gas grill to 400° F. Thread chicken pieces onto skewers or use a grilling pan. Discard remaining marinade. Cook chicken 12 to 14 minutes, turning to cook all sides, until edges are lightly charred and crispy, and juices run clear. Enjoy on a Greek salad or soft pita breads.

Want to print these recipes?


Colorful Sweet Potato Quinoa Salad

This dish practically sings “Meatless Monday!” It has lots of color and interesting texture, it works either warm or cold, it’s easy to make from simple ingredients, and it’s vegan, low-calorie, high-fiber, gluten-free and flexible on spice. Somehow, it still manages to taste delicious.

Skip straight down to the picture if you’re ready for the recipe, but if you’re new to the idea of quinoa, allow me to make a proper introduction:

What the heck is quinoa?

Quinoa has been around for thousands of years, but it only surfaced into the mainstream American diet a decade or so ago. It is native to South America—Peru and Bolivia specifically, but is now being grown in the southern part of Colorado (in an area where I once lived) and a few other regions in Washington state and Idaho. It’s pronounced “KEEN-wah,” and its nutritional value is exceptional, offering high levels of protein, B vitamins, manganese and phosphorous. It’s often lumped into the “grain” category, but quinoa is technically related to spinach and amaranth. Although the leaves are also edible, the part we usually eat is the seed, which can range in color from pale straw to red to nearly black, depending on the cultivar. On the pale end, it’s mild and almost nutty. On the dark side, expect a deeper earthy flavor.

Why does quinoa taste bitter?

It shouldn’t. If the quinoa dishes you’ve tried had a bitter or soapy taste, it may not have been rinsed well enough before cooking. Nature takes care of itself, and this tiny seed grows with its own special coating designed to keep birds and insects away. Much of that coating is removed during processing before the quinoa gets to market, but you may want to give it another thorough rinse under running water for about 1 minute before cooking it. Use a mesh strainer, because the seeds are very small and will slip right through a typical colander.

How do you cook quinoa?

You can cook quinoa either from its raw, dried state or you can lightly toast it (after rinsing) in the pan first. A basic recipe is a little less than 2 cups water (or broth) to 1 cup quinoa. Combine in a saucepan over medium-high heat and bring to a boil. Reduce heat to a very low simmer, cover and cook about 15 minutes. When it’s done, the quinoa will have absorbed all the water and the edges of the seed will separate a bit. It kind of looks like the seeds have little tails. Properly cooked quinoa is fluffy, not soggy or mushy. This recipe will make almost 3 cups of cooked quinoa.

How do you use quinoa?

Quinoa is a very versatile ingredient, and its mild flavor makes it suitable for all kinds of application. Serve it warm as a breakfast cereal with a dollop of vanilla yogurt and fresh blueberries (talk about a power breakfast!), or season it with herbs and spices as a bed for fish, meat or vegetables. You can also toss it into a salad in place of other grains such as rice or barley, or add it to soup for texture and protein.

Now, about this recipe for Colorful Sweet Potato Quinoa Salad…

It’s colorful, has texture and flavor galore, and so satisfying. What’s not to like?

Ingredients

2 cups cooked quinoa (I used tri-color)

1 large sweet potato (mine was a little bigger than the can of beans)

Extra virgin olive oil

Kosher salt, black pepper and cumin

1 can (15 oz.) black beans, drained and rinsed

1/2 medium red onion, chopped

1 cup frozen sweet corn*

2 Tbsp. chopped pickled jalapeno (optional)

Fresh chopped parsley or cilantro for serving

*My preferred corn for this would have been the fire roasted sweet corn from Trader Joe’s, but all we had in the freezer was this southwestern corn, and it worked great! Next time, I’ll probably add chopped red pepper to this recipe.

They will never convince me that it’s safe to steam food in a plastic bag.
I used about half this bag, from frozen, and the recipe turned out great.

Ingredients – the Dressing

Juice of one lime

1 clove garlic, finely minced

Pinch of sugar (I used coconut sugar)

1/2 tsp. Dijon mustard

Kosher salt, black pepper, cumin and (optional) ground chipotle

1/4 cup extra virgin olive oil

Instructions

Preheat oven to 400° F. Peel sweet potato and cut into large, bite-size chunks. Toss on parchment lined baking sheet with a generous drizzle of olive oil, season with salt, pepper and cumin to taste, and roast about 20 minutes. Sweet potato chunks should be tender enough to pierce with a fork but not soft enough to smash. Set aside to cool.

Heat a small skillet over medium heat and add a swirl of olive oil. Sauté red onions about 5 minutes, or just until lightly softened. Add frozen corn, salt and pepper to taste, and cook just until corn is heated through.

In a large bowl, combine drained beans, cooked quinoa, roasted and cooled sweet potato, corn with onions, and chopped jalapeno.

Arranging the ingredients in the bowl this way helps me gauge how much of each is correct.

In a glass measuring cup, combine lime juice with Dijon, garlic and spices (use cumin and optional chipotle to your own taste), then whisk olive oil into the mixture until emulsified and slightly thickened. Taste the dressing and adjust as desired. Pour the dressing over the bowl ingredients, toss and serve.

We enjoyed this warm as a Meatless Monday entrée, but it would also be good as a side salad to chicken, burgers or fish, and the leftovers were just as delicious cold from the fridge.

Meatless Monday, easy and done!

Want to print this recipe?