The kid in me comes out to play in July. It’s my birthday month, and so my memories call me back to childhood more than in other months. But I also think it’s because I learned a few years ago that July is National Ice Cream month. And what kid (even a grownup one) doesn’t love ice cream in the summer?
There’s a saying out there, attributed to President Harry Truman, that “there is nothing new in the world except the history that you do not know,” and though most U.S. citizens grew up believing that apple pie is an all-American dish— right alongside baseball, hot dogs and Chevrolet, remember?— the backstory of apple pie is much older. I found this article in Southern Living interesting; if you like rabbit holes (as I do), then dig into this after we finish this ice cream.
We may not have invented it, but we do indeed love apple pie in this country, and I have many fond childhood memories of my grandmother making pies and applesauce from the tart green apples produced by a tree next to the side of her house in Western New York. My cousins and I would go out there to pick them (sometimes off the ground), and Gram would spin a few other ingredients around like magic, and just like that, a pie would appear. A slice of that pie, alongside a scoop of vanilla ice cream and a wedge of sharp New York cheddar— oh, it was like heaven.
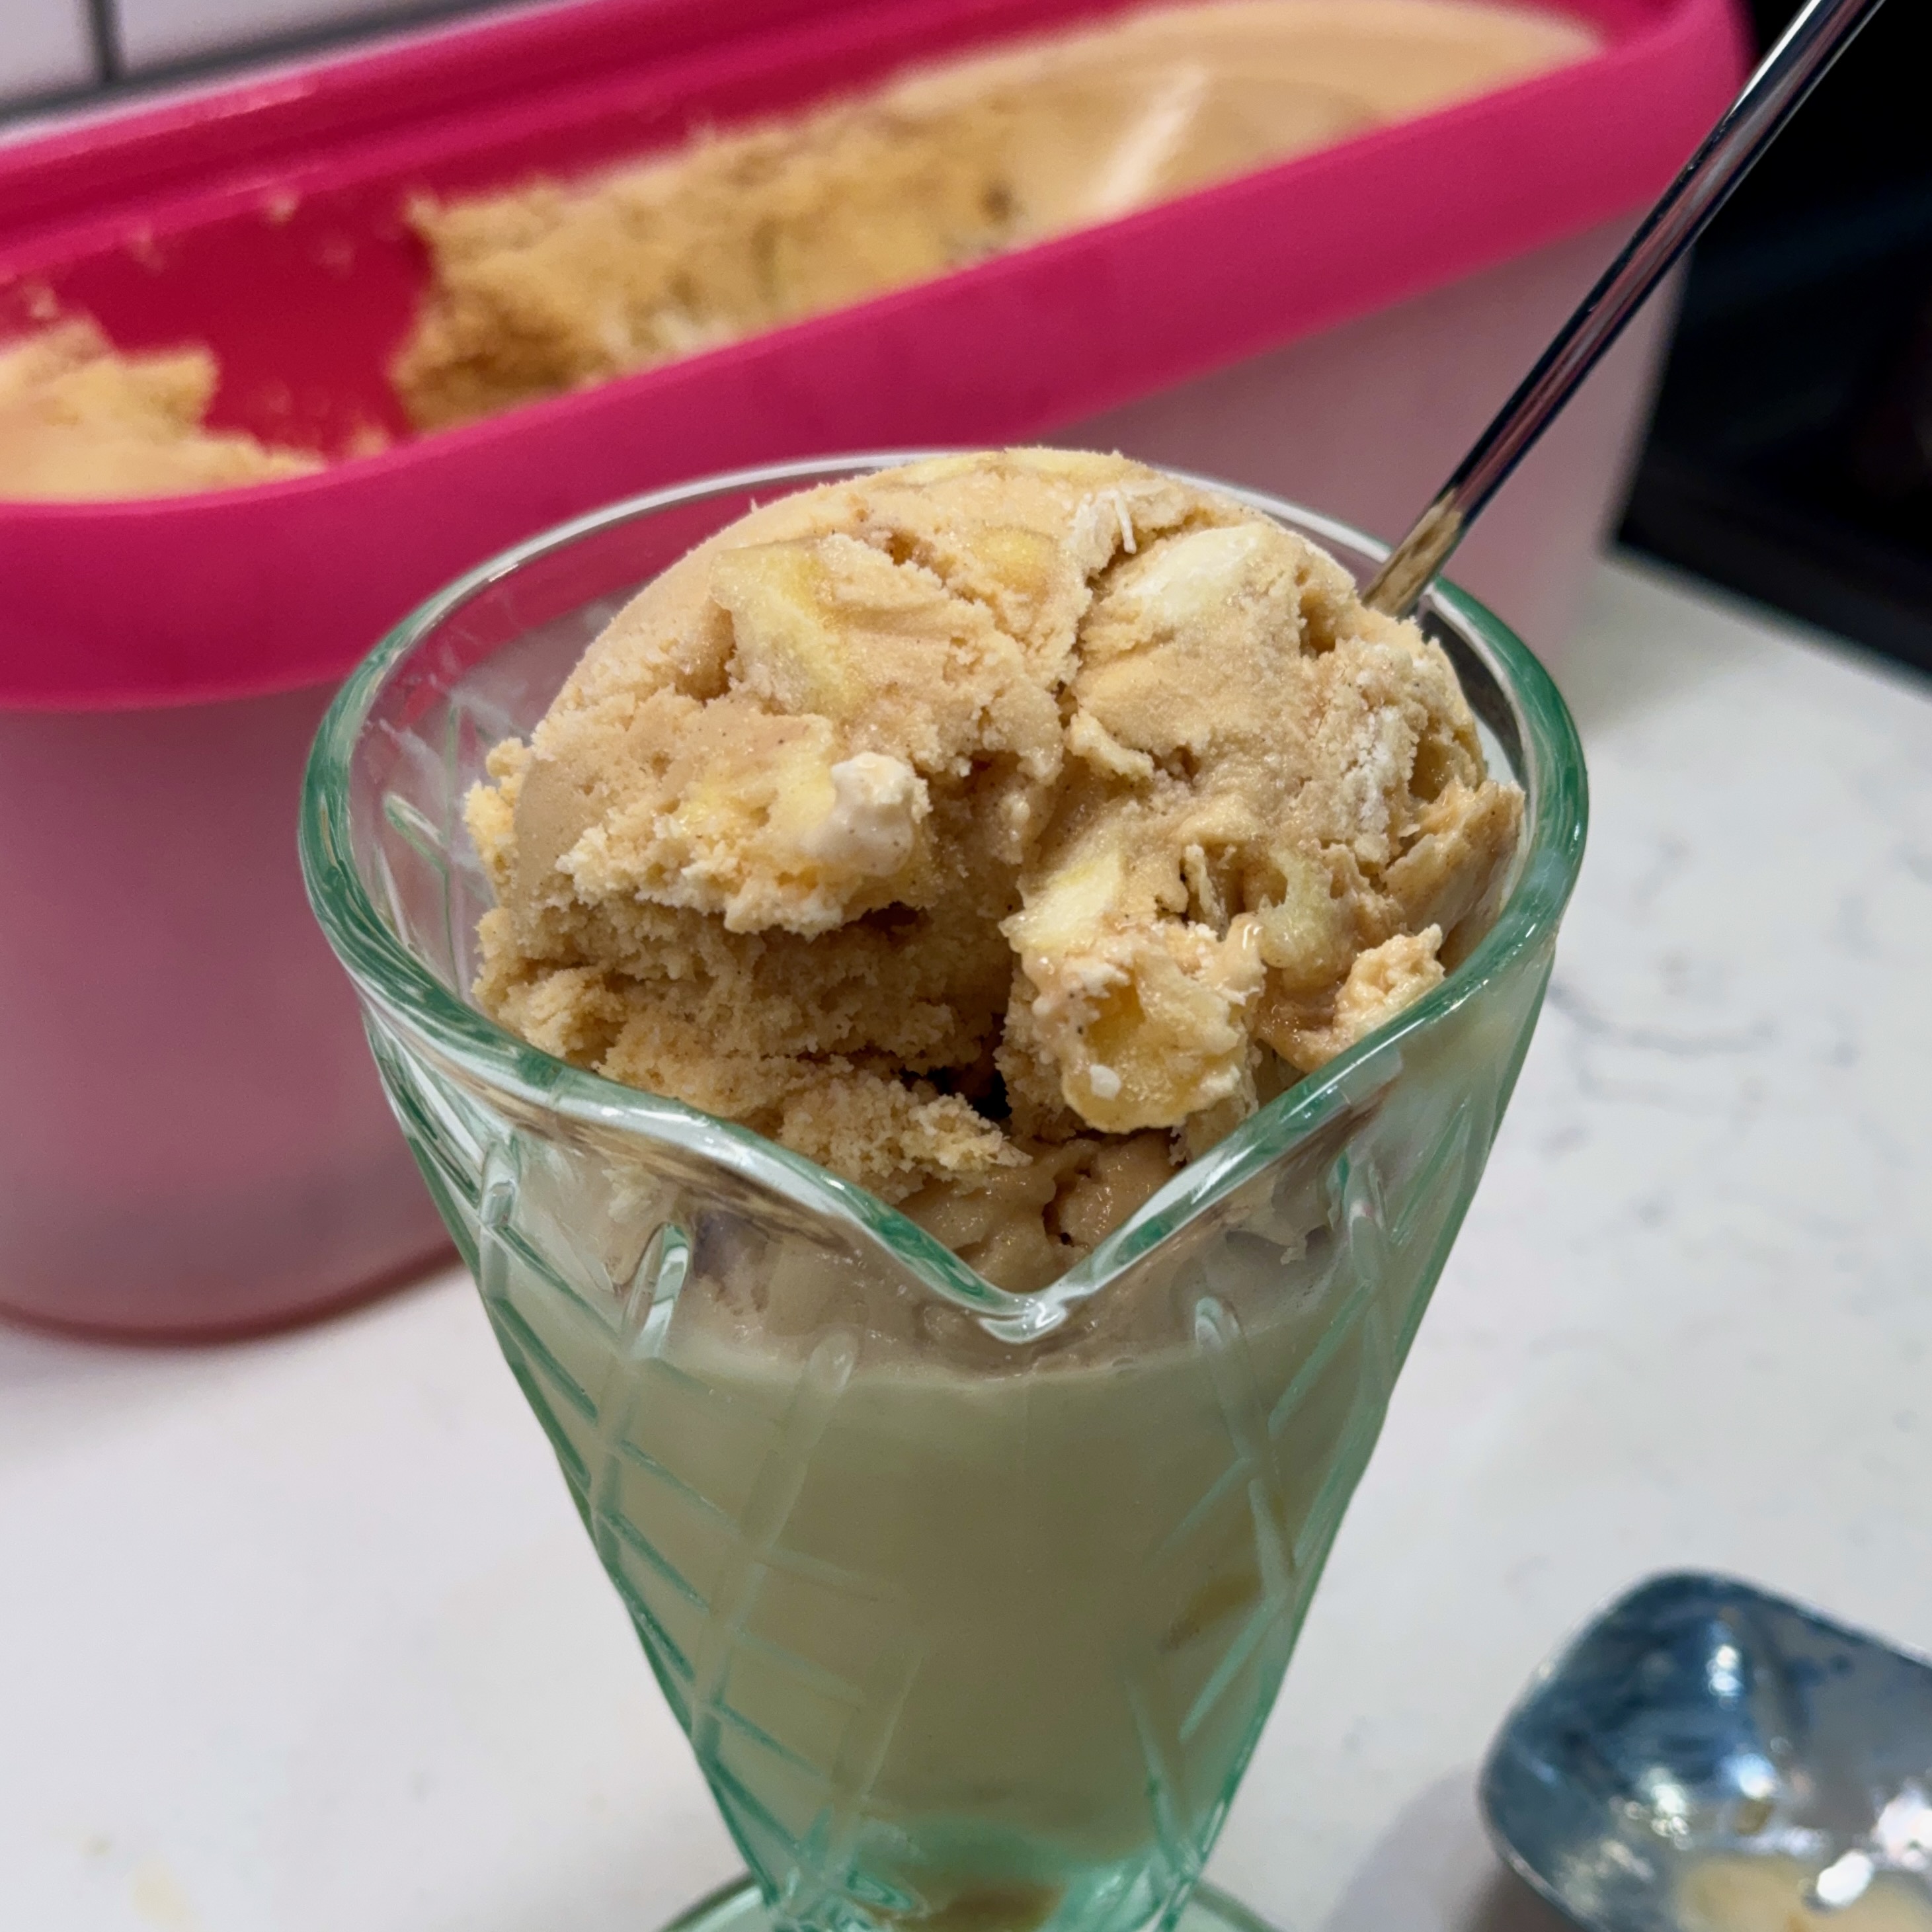
This year, the kid in me was craving something a little simpler, and so for our July Fourth celebration this year, it’ll be this apple pie ice cream. Two summer favorites in one scrumptious scoop!
It’s apple pie and à la mode, all in one!
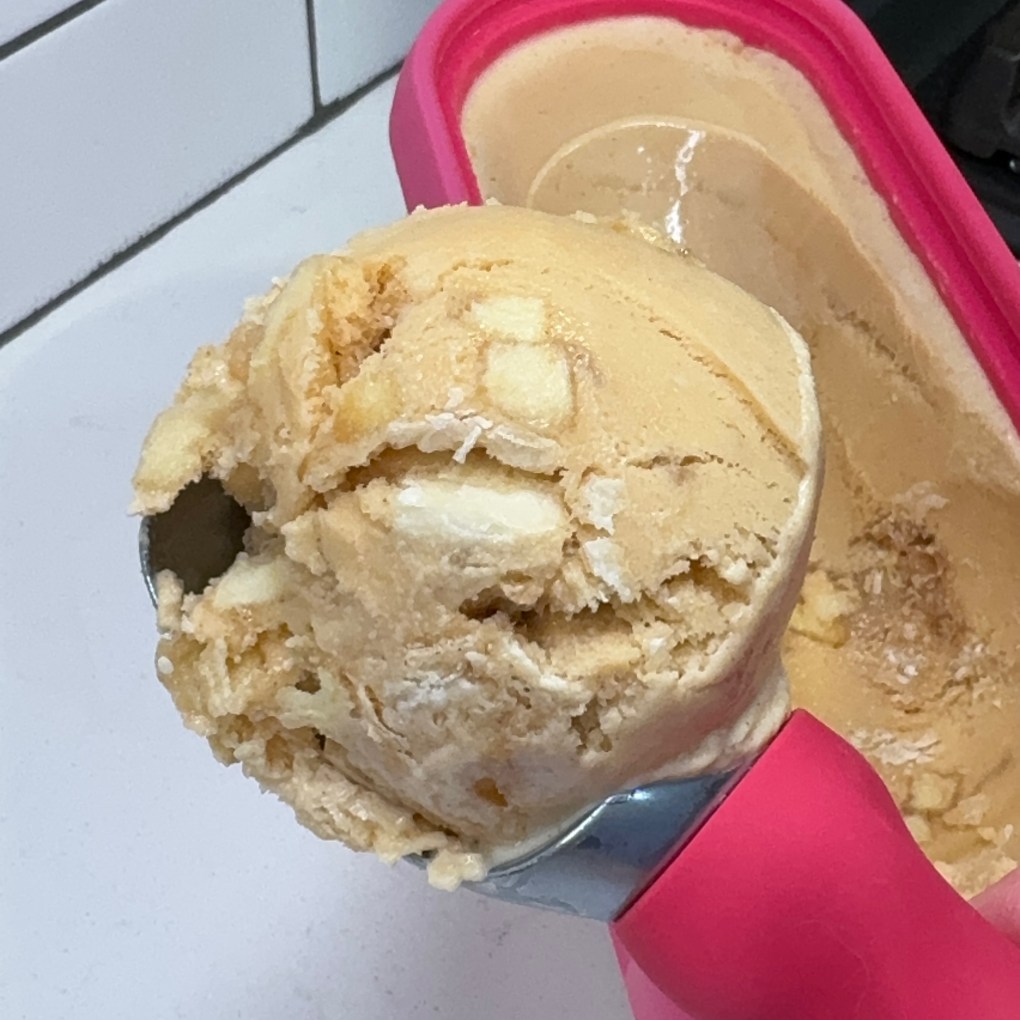
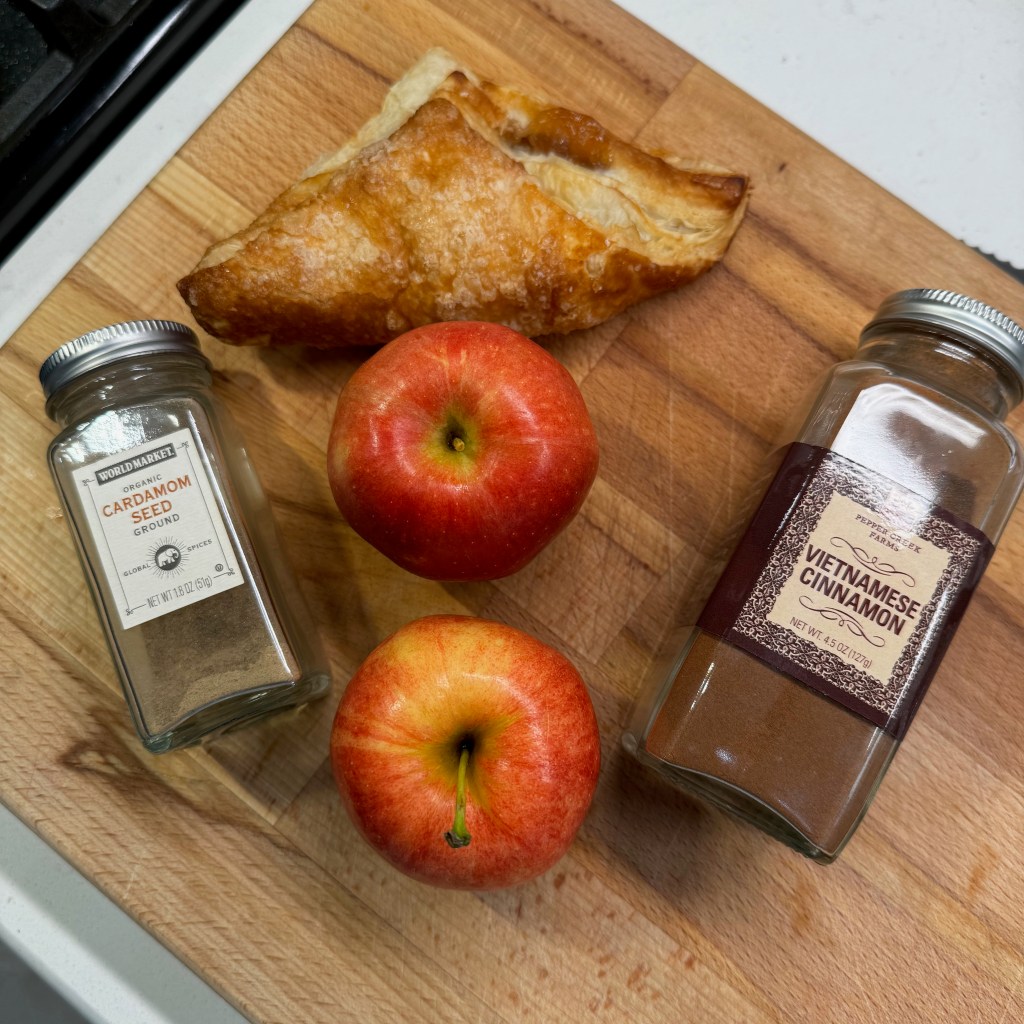
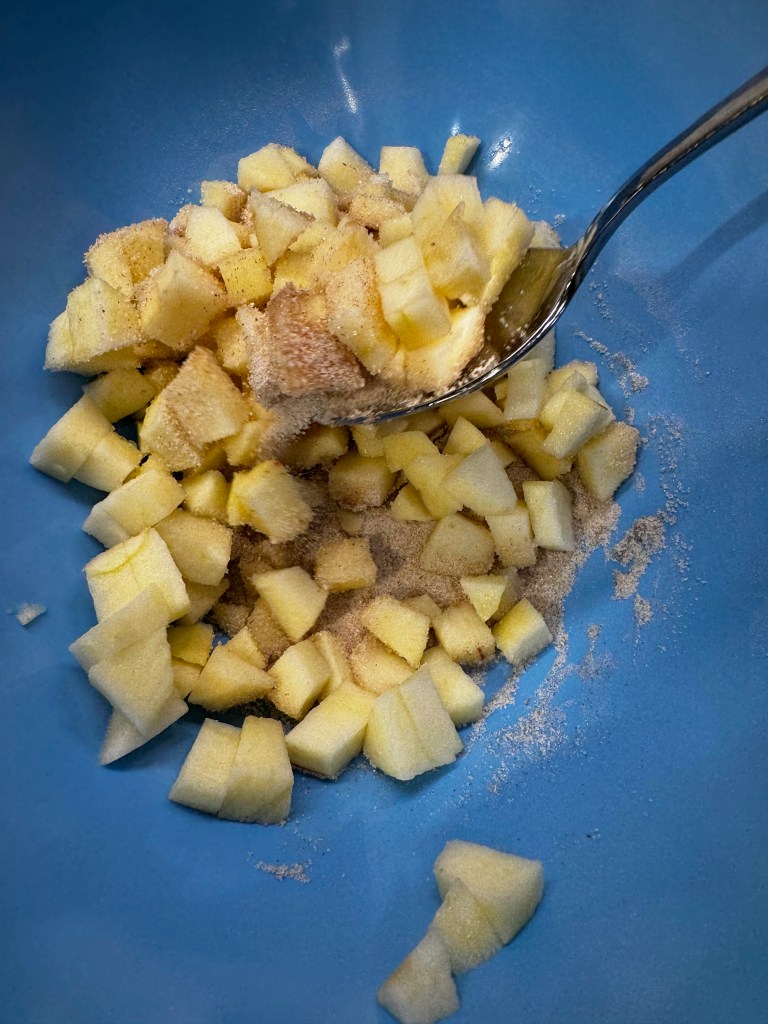
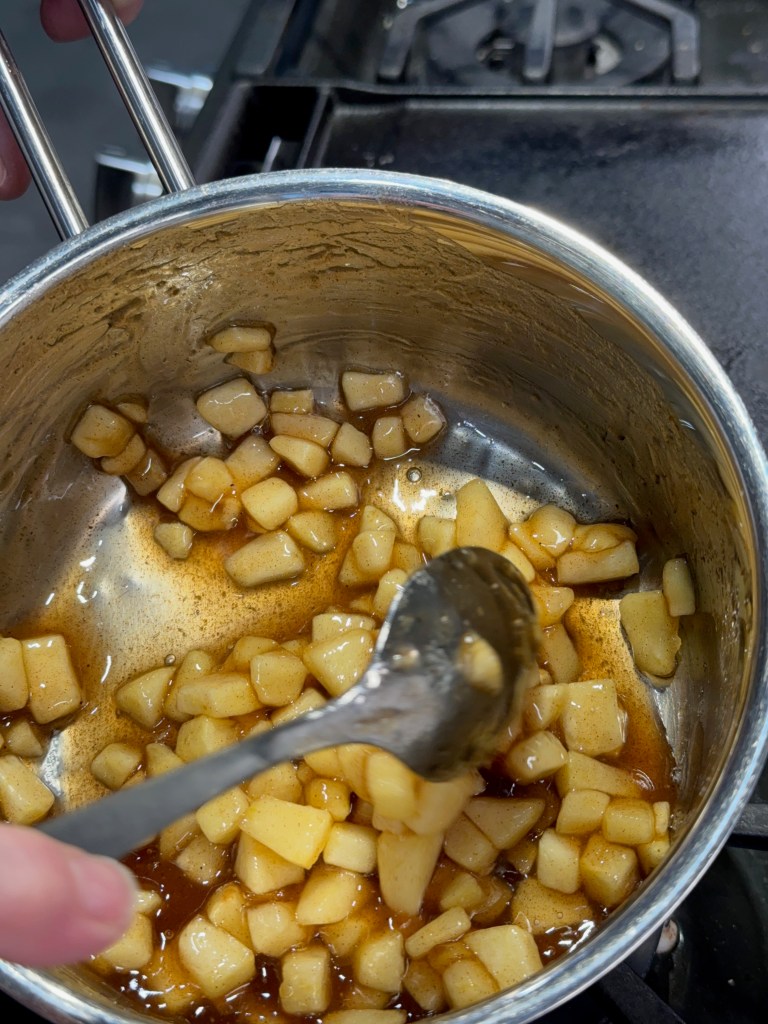
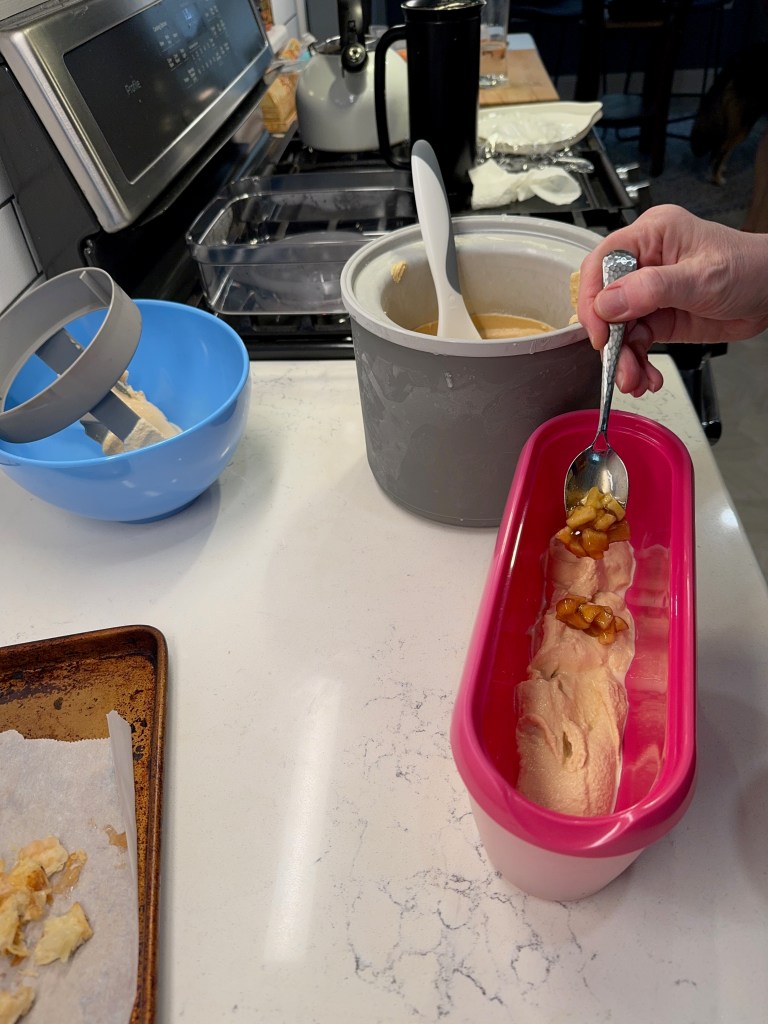
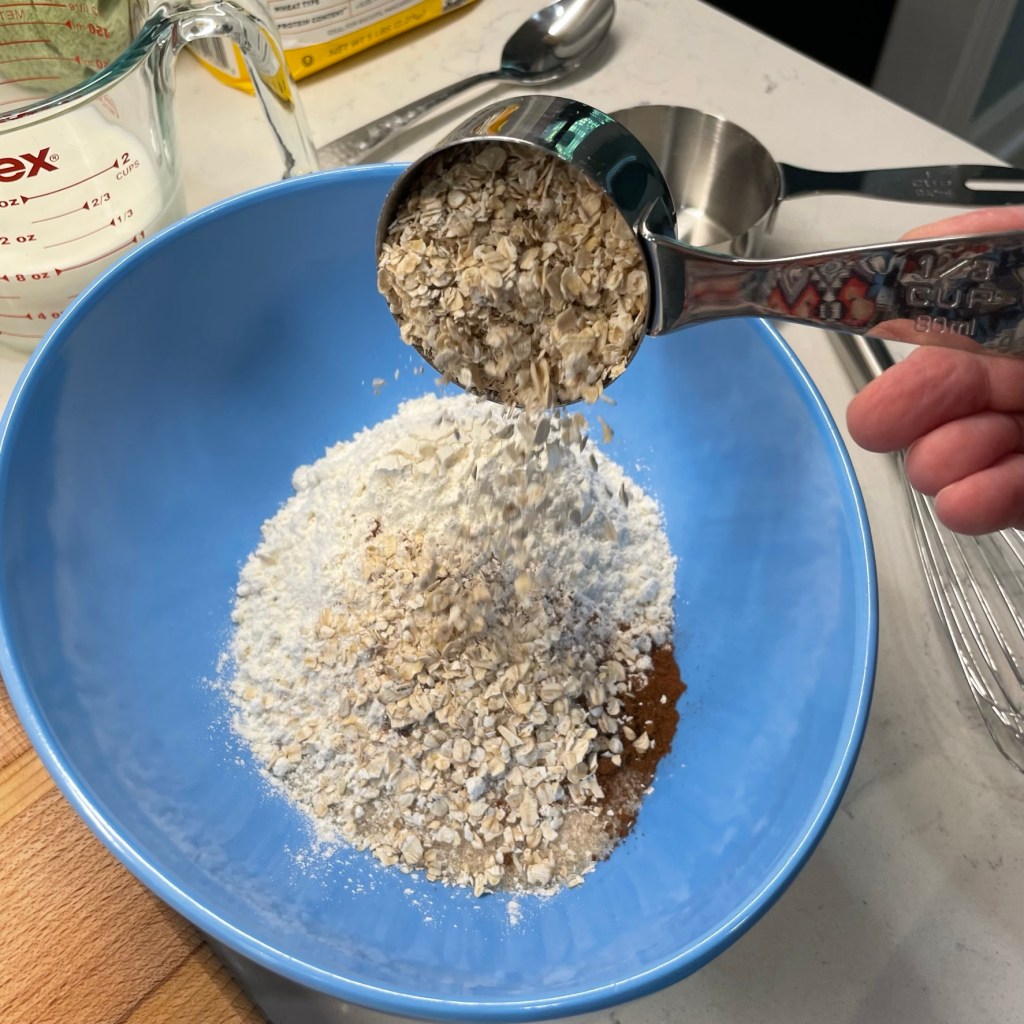
There’s no magic to it, and only a little bit of cooking to get the chopped apples softened and syrupy with cinnamon, sugar and cardamom flavors. I used two small Gala apples, which cooked down to approximately one half cup of syrupy deliciousness. I was on the fence whether to blend those bits into the ice cream base itself or merely layer with the base at the end. Ultimately, I layered them because I love the visual appeal of all the tasty flavors swirled into each scoop.
These flavors were begging to be worked into an ice cream!
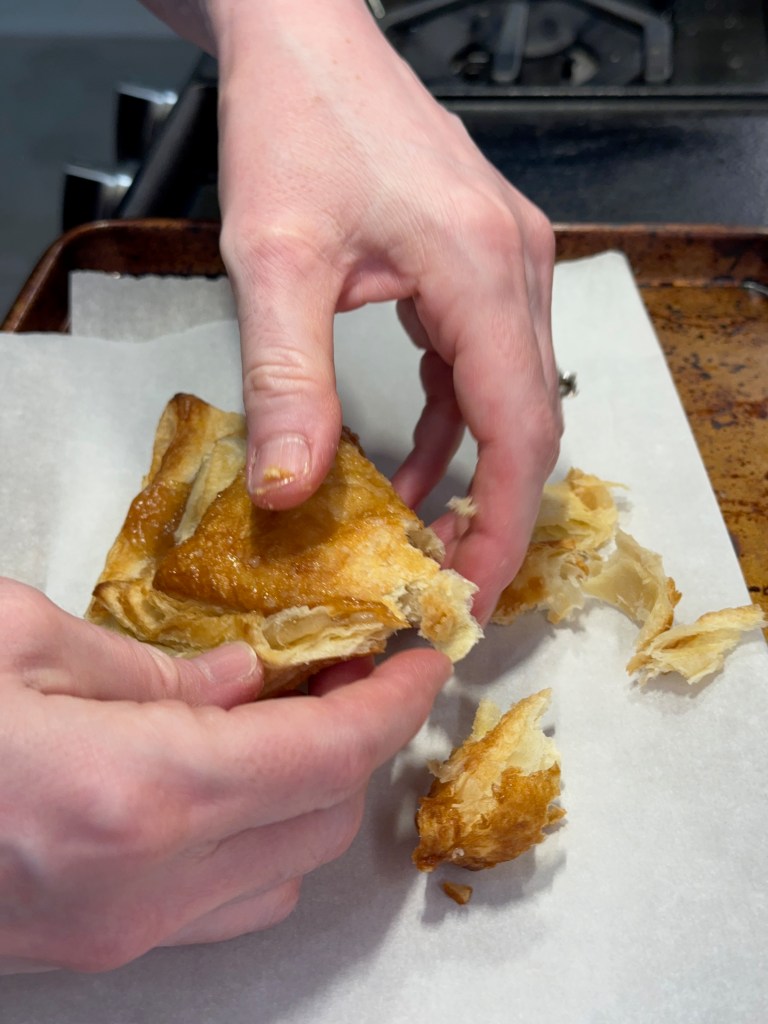
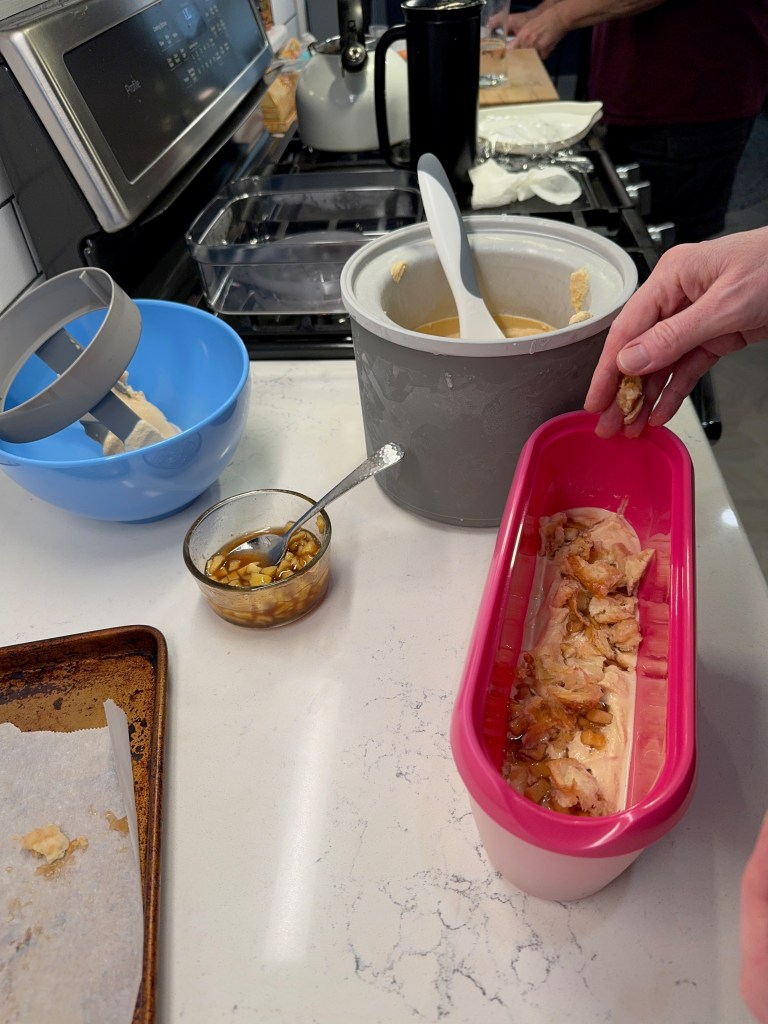
The “pie” part of my recipe comes not from pie crust, but from buttery, flaky apple turnovers. I took a shortcut by using store-bought pastries, but it was a relief to not turn on the oven. If you make the turnovers yourself, you are officially the apple of my eye! 🤩
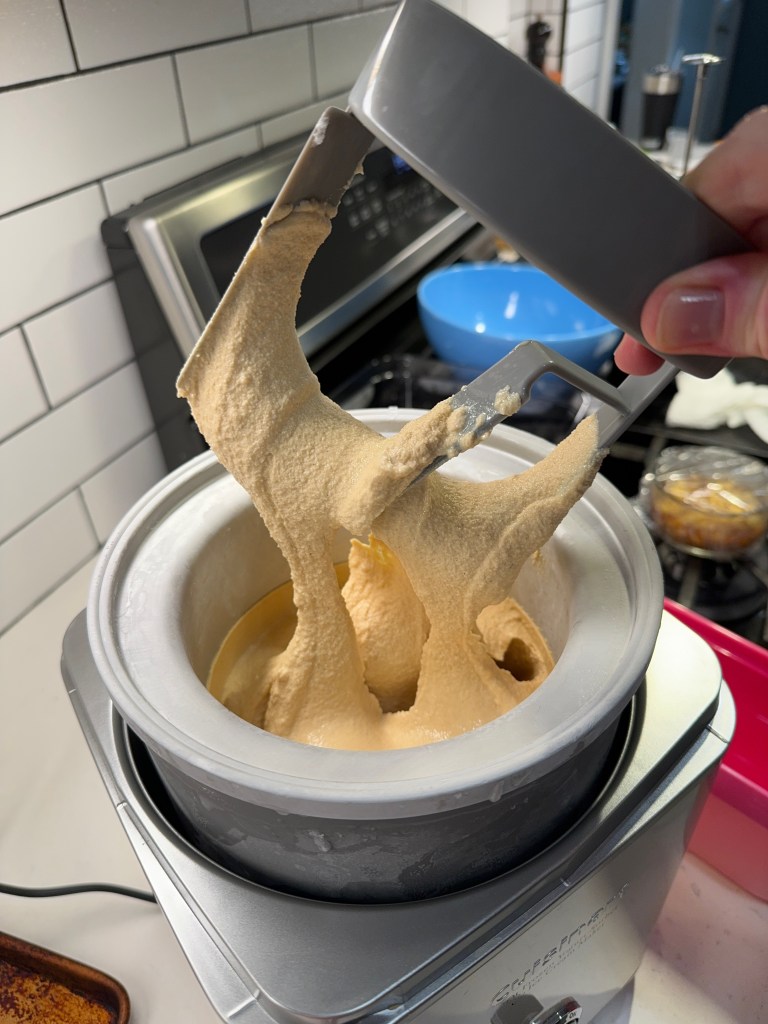
The only difficult part of making this ice cream was the waiting!
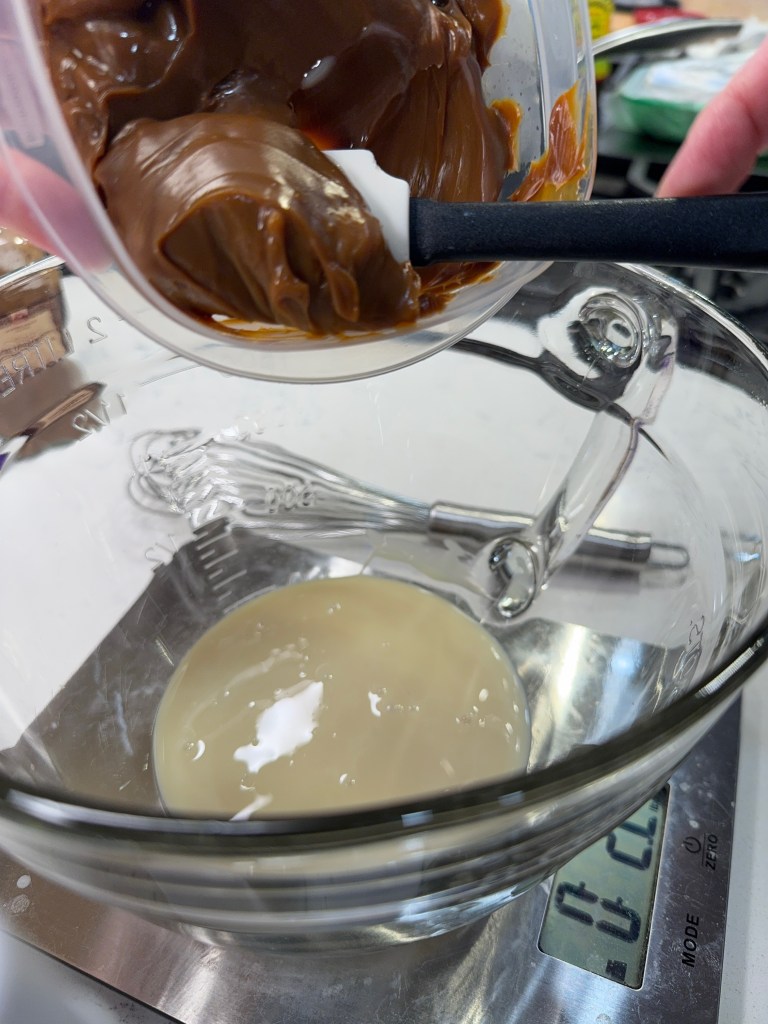
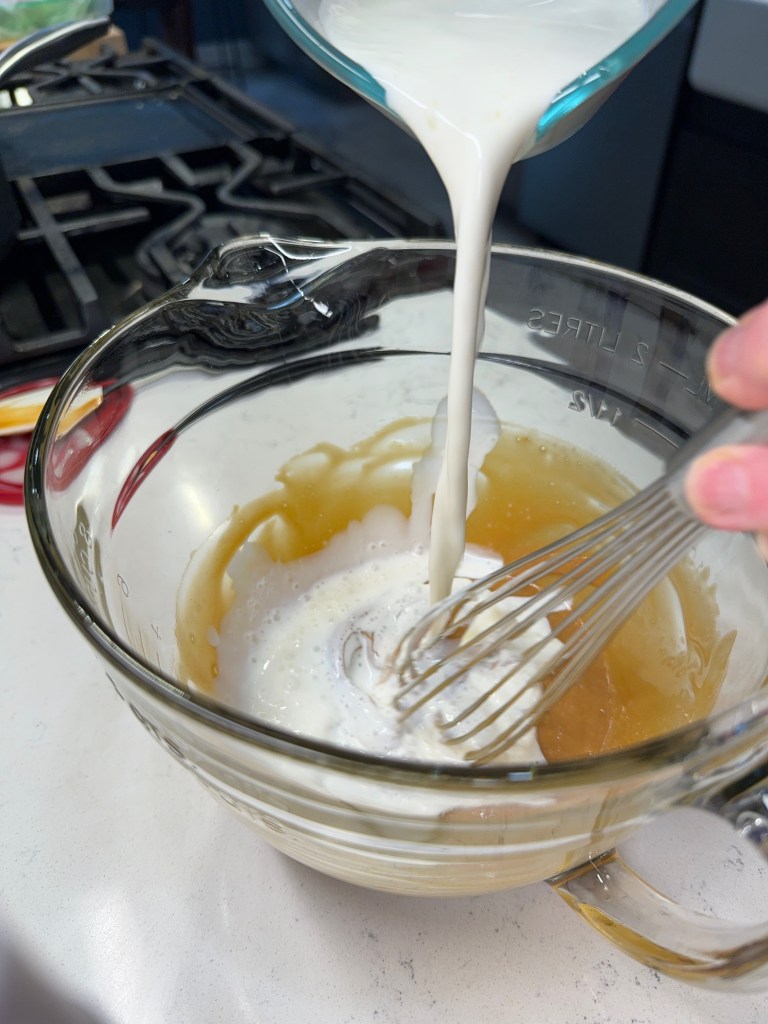
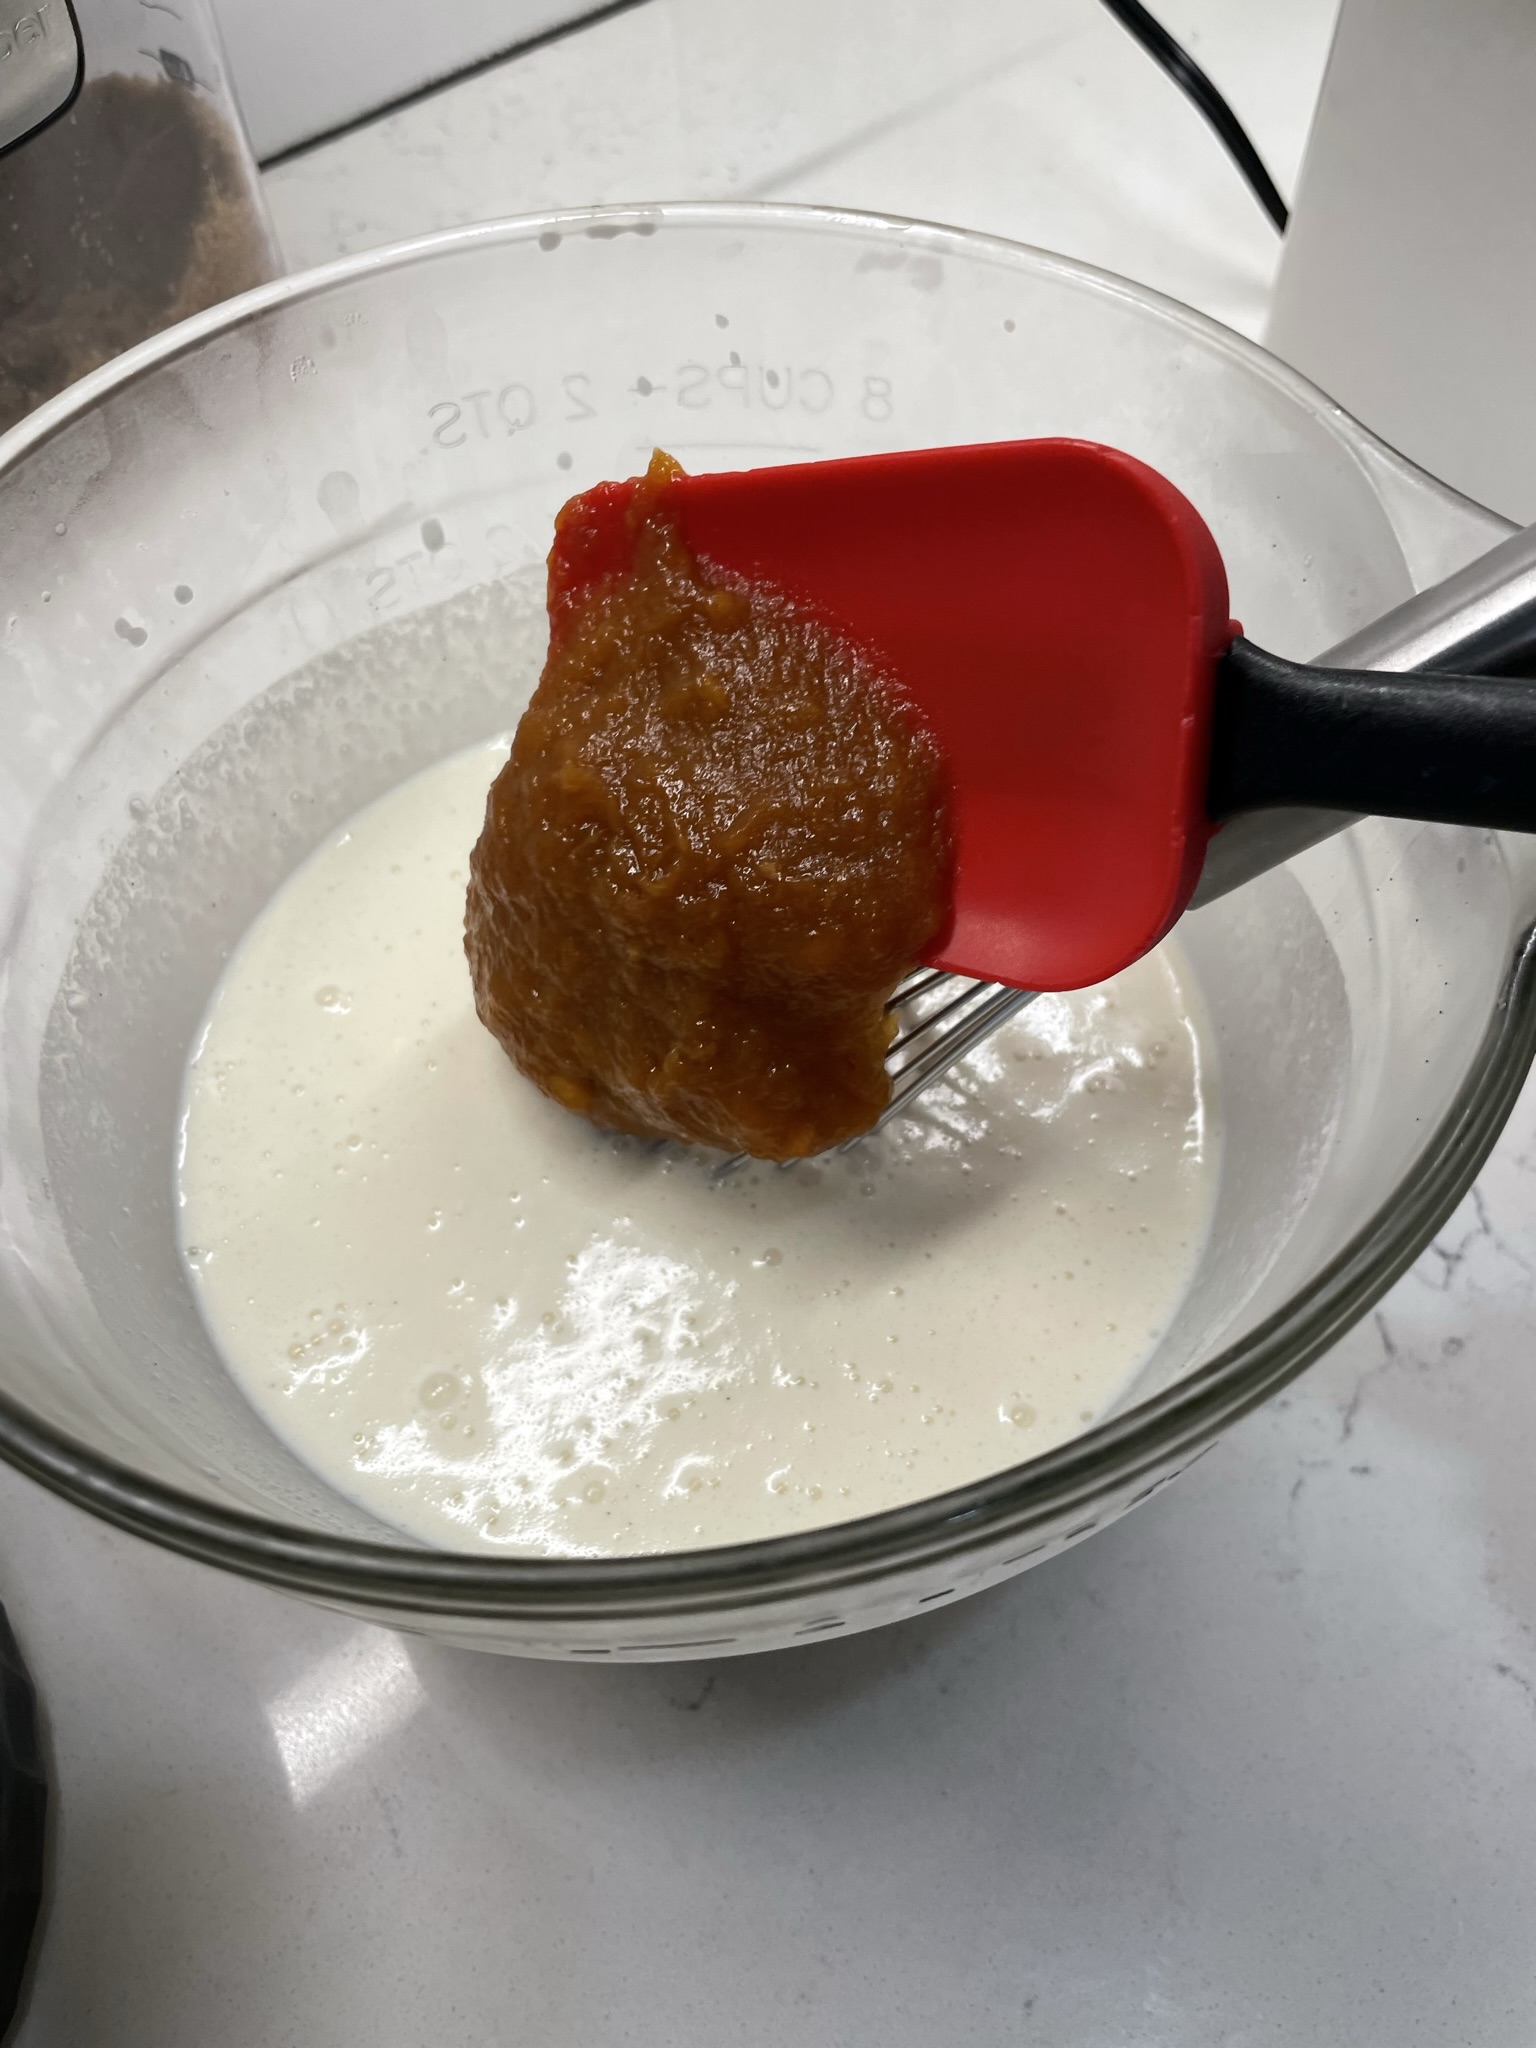
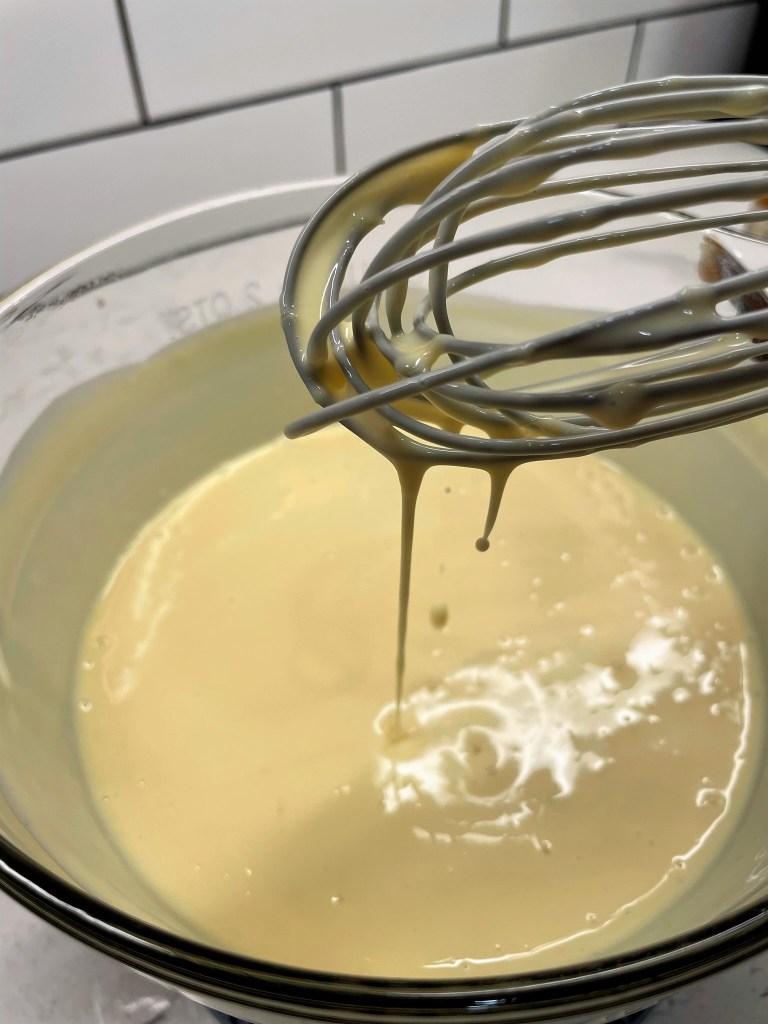
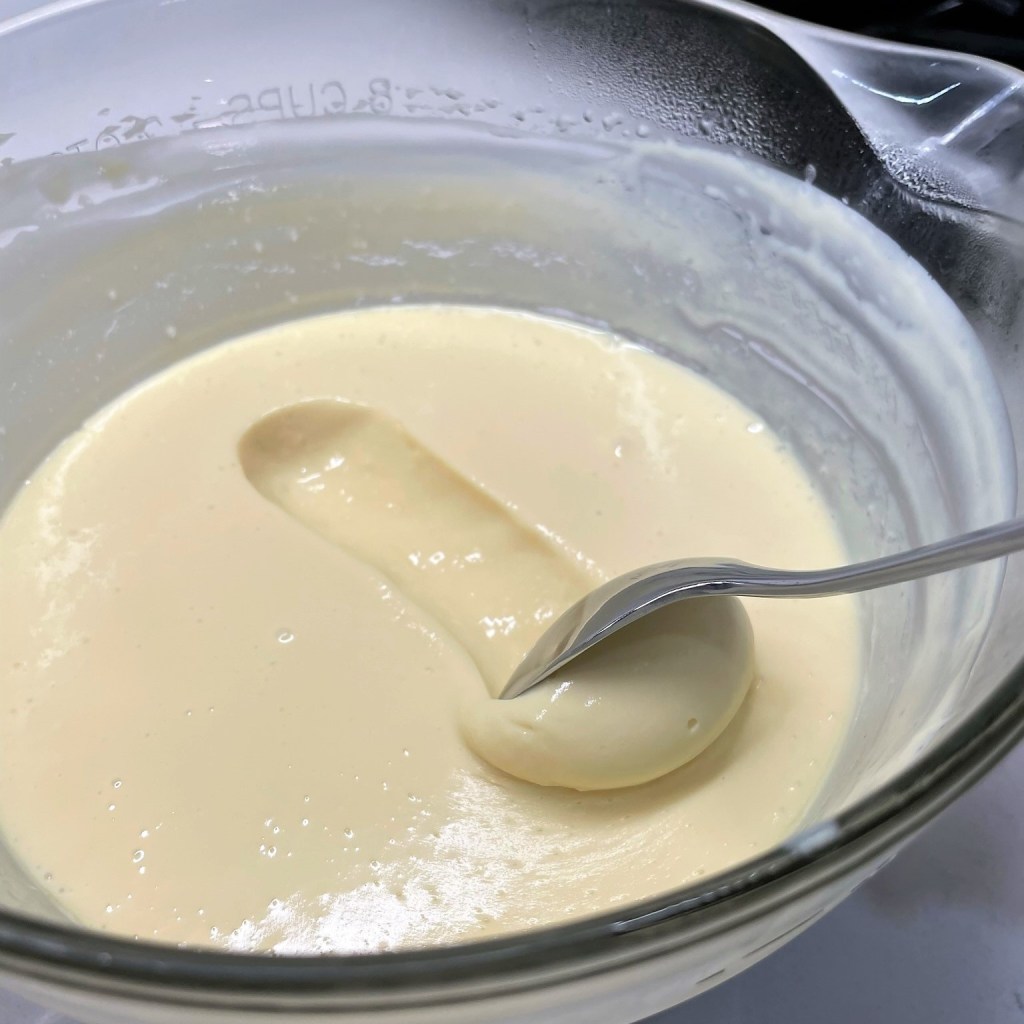
The ice cream base I used is my go-to, with sweetened condensed milk, cream, whole milk and a touch more cinnamon. This time, though, I got a notion to swap in a portion of dulce de leche sweetened condensed milk. It’s a thicker, caramelized version of condensed milk, and its rich, caramel-y flavor gave my ice cream even more of an apple pie vibe. Notice that I did not include vanilla? I wanted no distraction from the apples, caramel and spices.
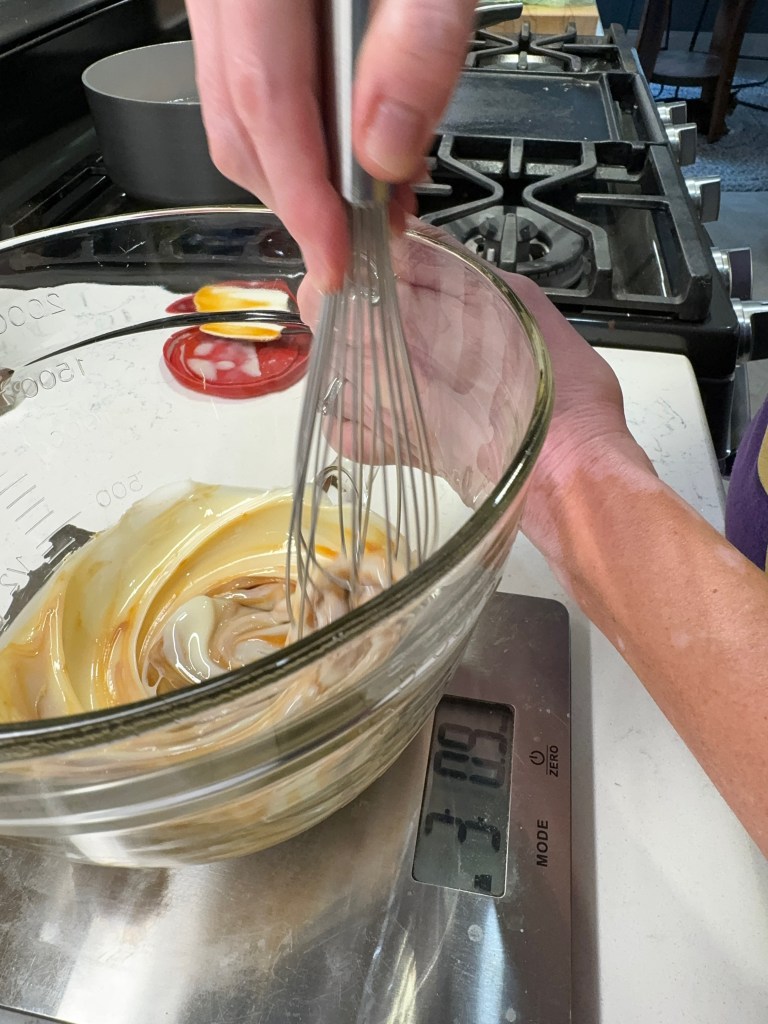
A bit of dulce de leche gave this a caramel touch.This is the best time to whisk in the cinnamon.Milk and cream finish up the base.
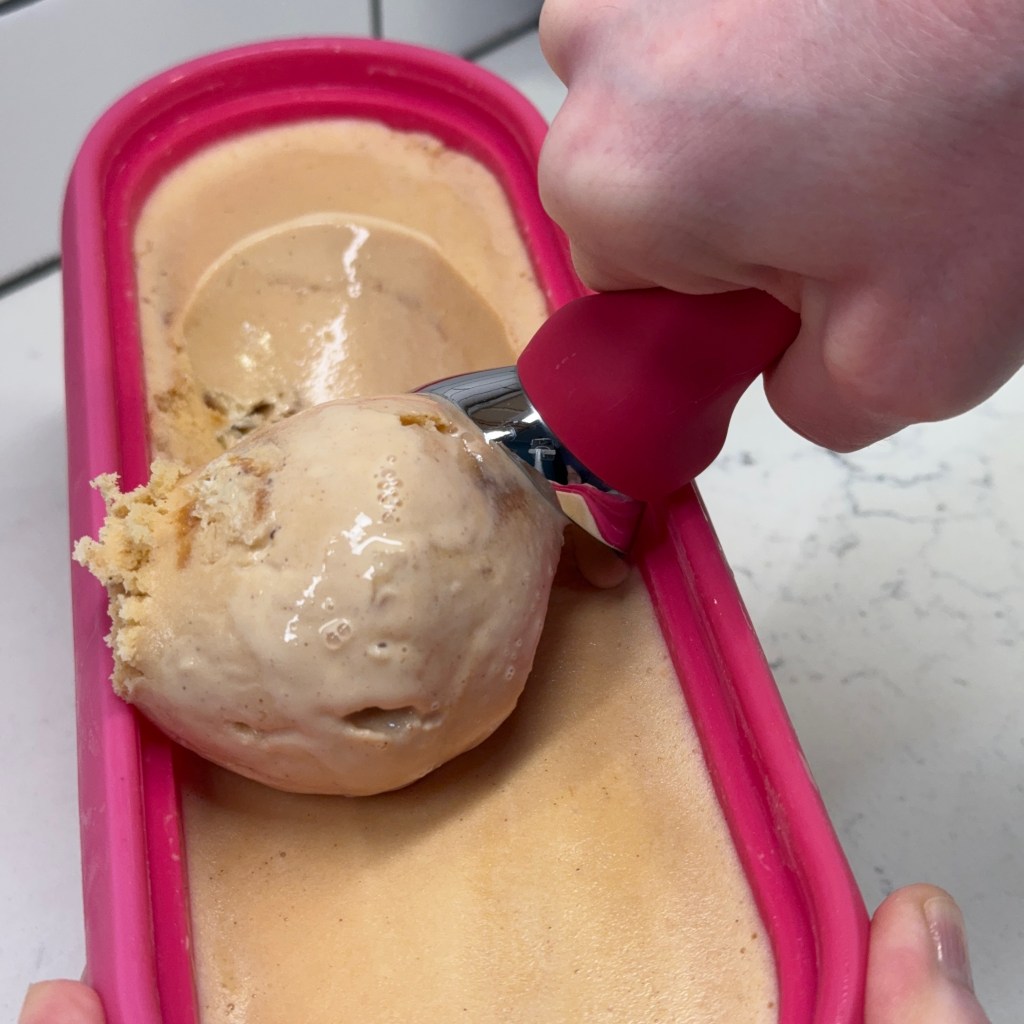
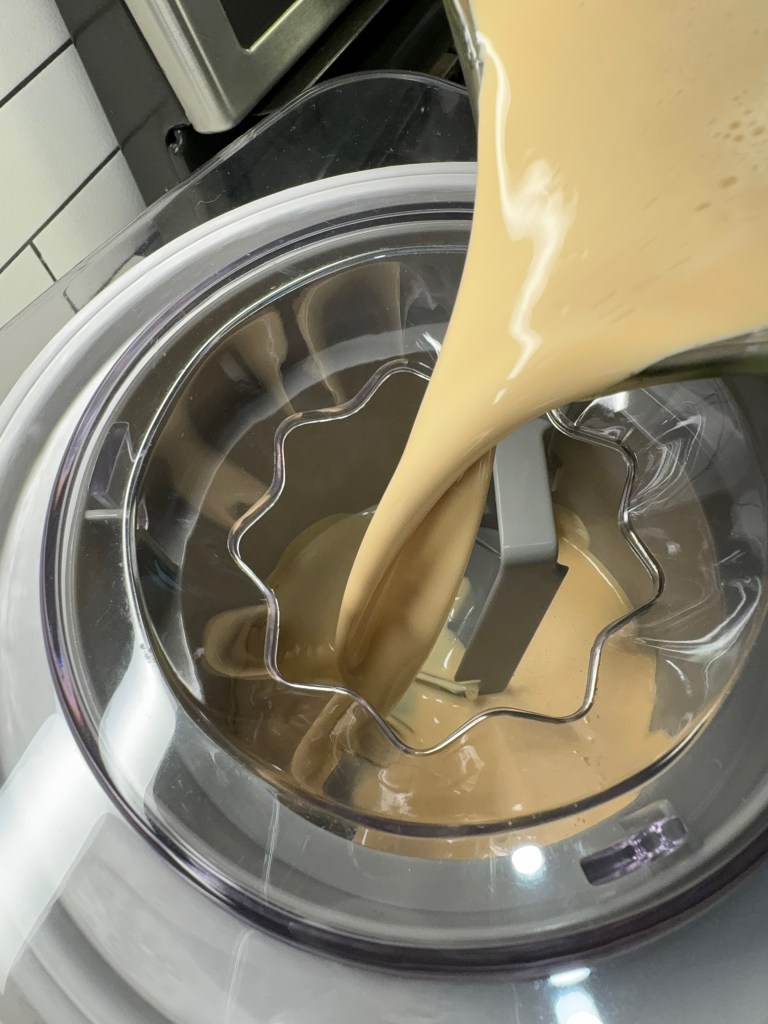
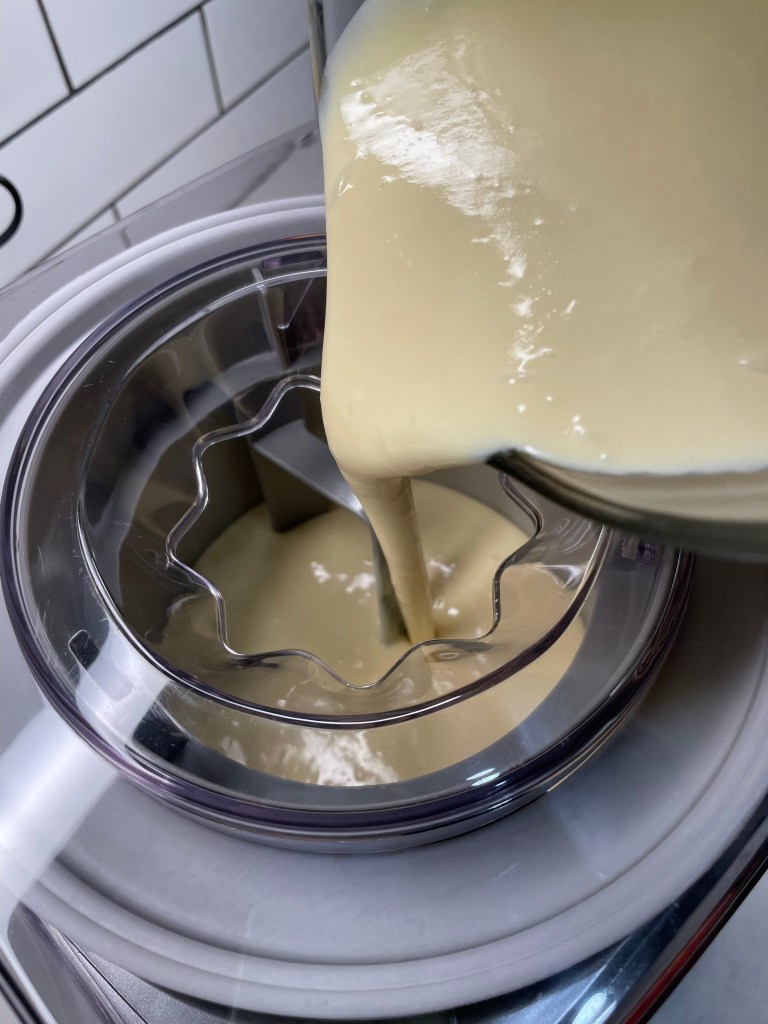
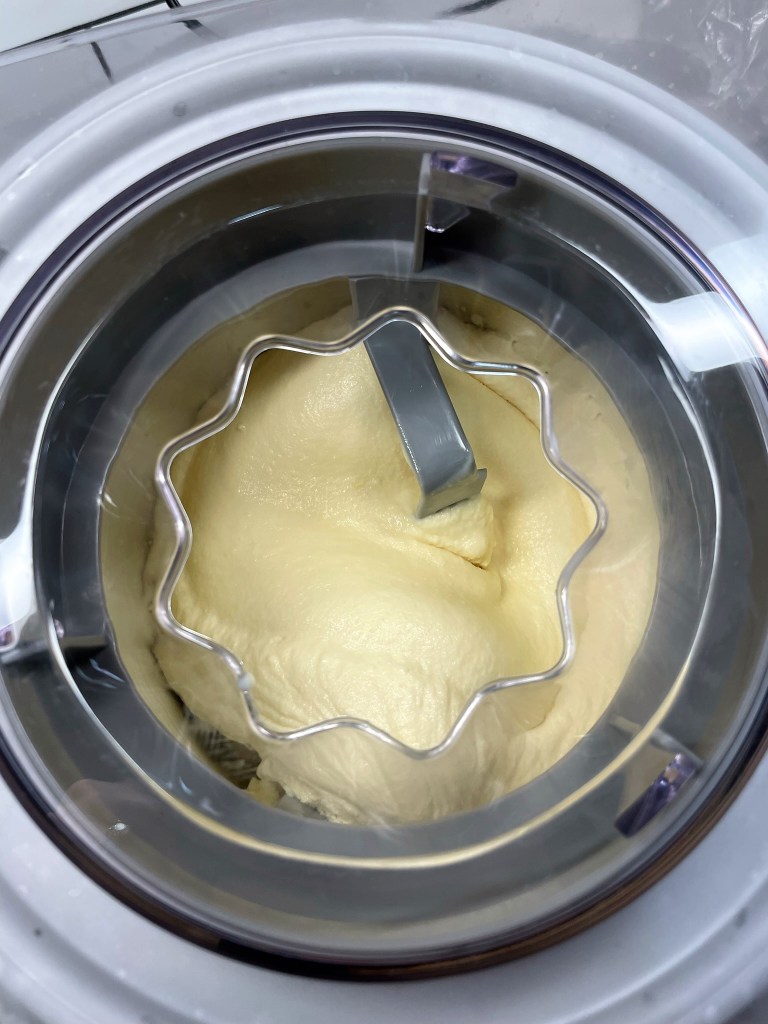
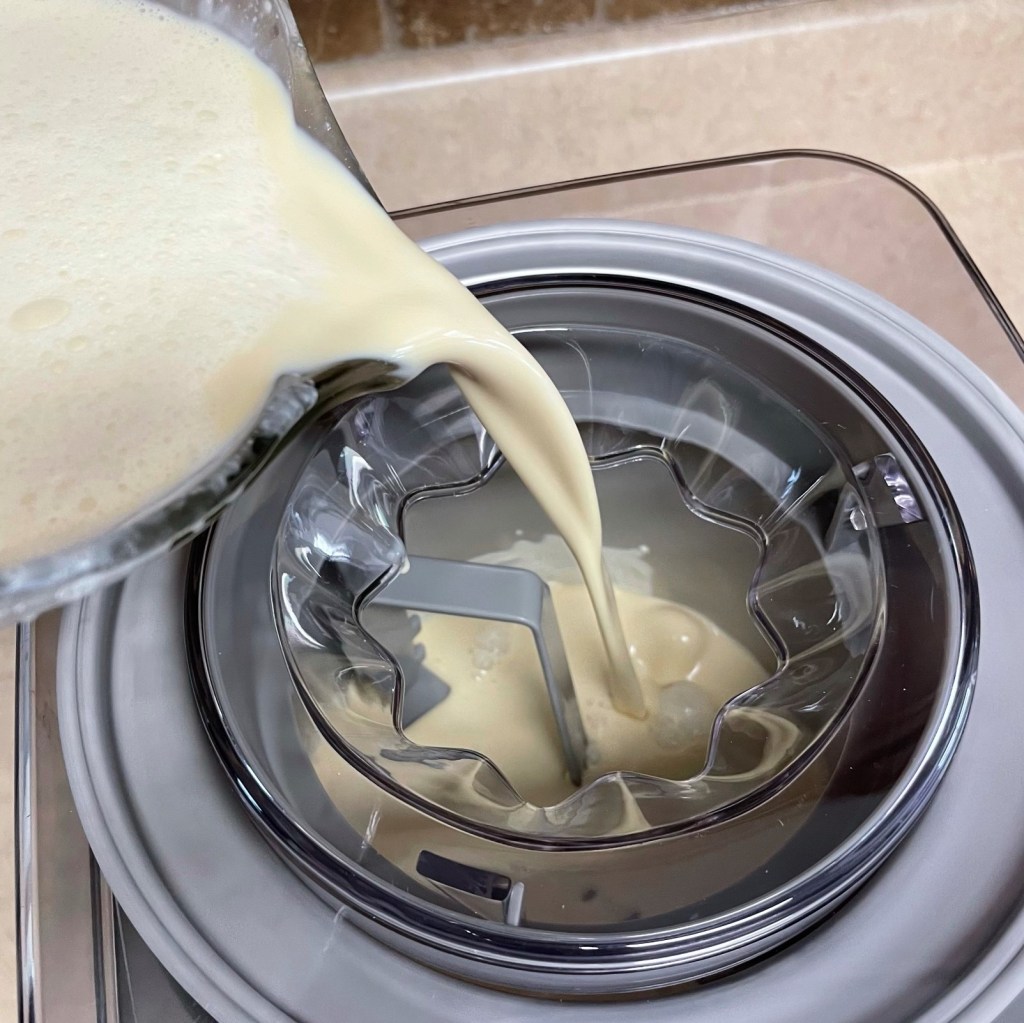
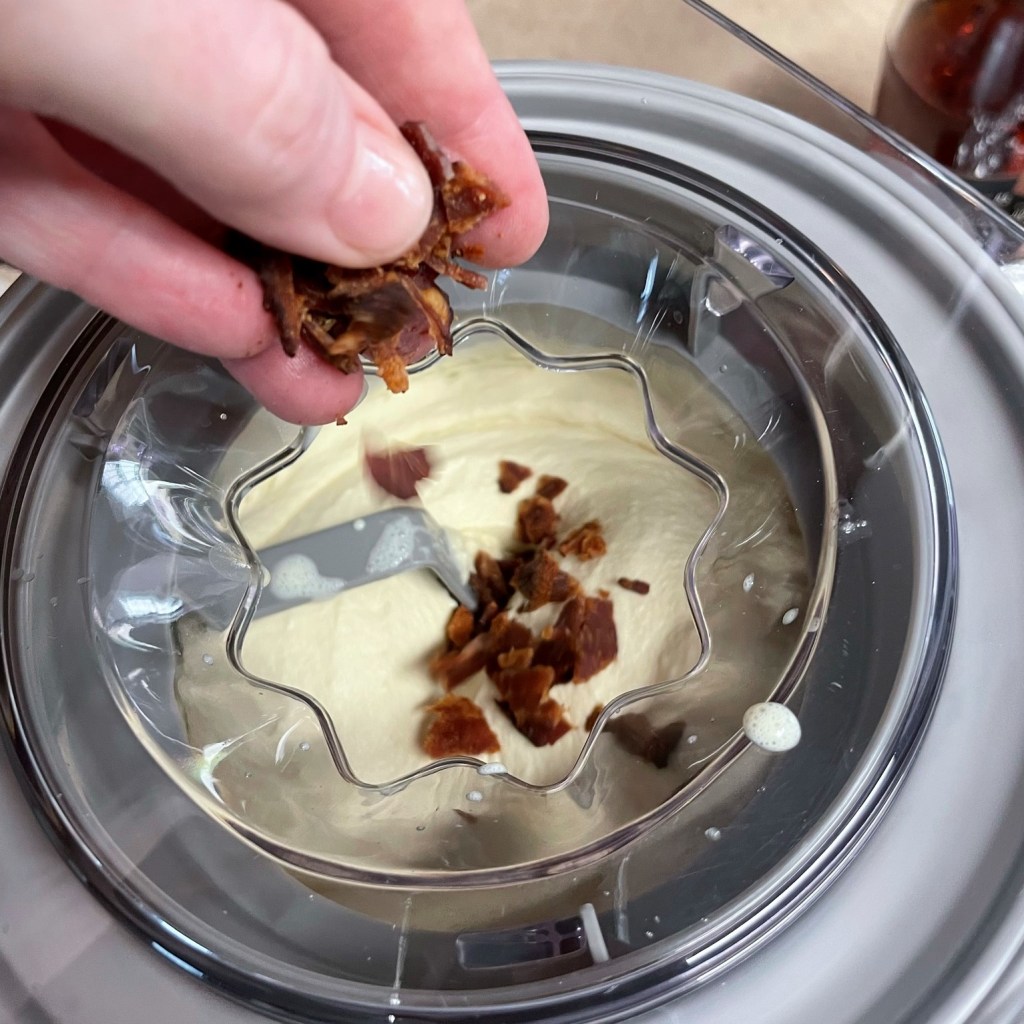
After churning the ice cream in my handy Cuisinart machine, which has paid for itself dozens of times over since I bought it more than 15 years ago, I layered the sweet base with those syrupy apples and some torn up bits of apple turnovers.
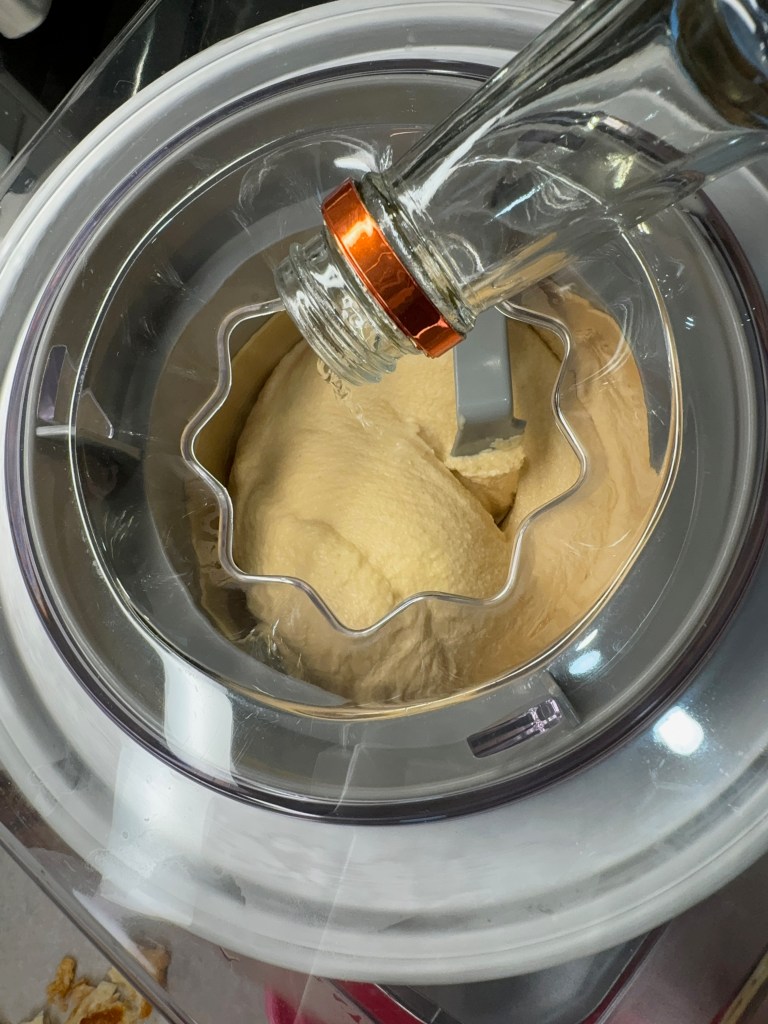
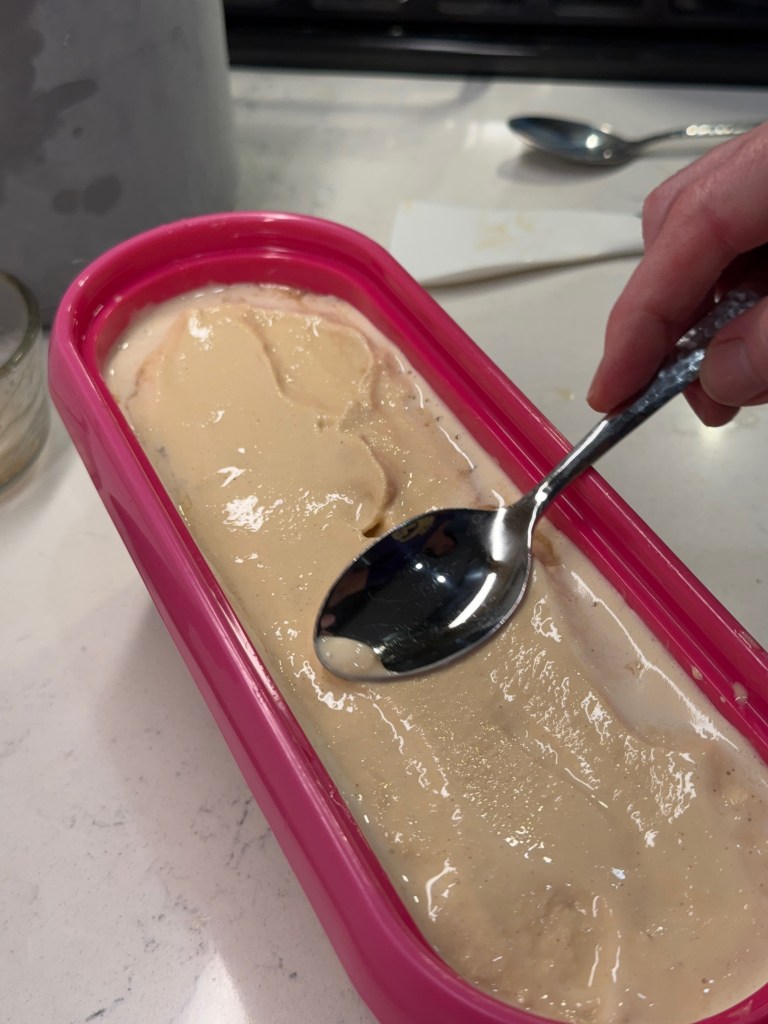
With the machine running, pour in the base mixture.A splash of vodka at the end for easy scooping.This is my favorite part!Layer a bit of the apples over some of the ice cream base.After a scatter of turnover bits, repeat the layers.Finish with a layer of ice cream and freeze!
My inner kid is grinning ear to ear for this one, and it feels like a perfect way to kick off National Ice Cream Month. Don’t be surprised to see a few other fun flavors pop up here in the weeks to come. Hello, July! 😎
This is my adaptation of two favorite summer treats, all layered together into one scrumptious scoop!
Ingredients
14 oz. sweetened condensed milk (or swap in a small amount of dulce de leche)
1/2 tsp. cinnamon
1 cup whole milk
1 cup light cream
2 small gala apples, peeled and chopped into bits
1/4 cup sugar
1/4 tsp. cinnamon
1/8 tsp. ground cardamom
pinch of salt
2 tsp. pie filling enhancer (a King Arthur product, or sub a teaspoon corn starch)
2 Tbsp. water
1 large baked apple turnover, torn into small pieces
Notes: Do your prep ahead so that everything has time to chill thoroughly in the fridge before churning and layering the ice cream. For easy scooping straight from the freezer, add a tablespoon of vodka during the final minute of churning. This ice cream is best after ripening in the freezer at least 8 hours or preferably overnight.
Directions
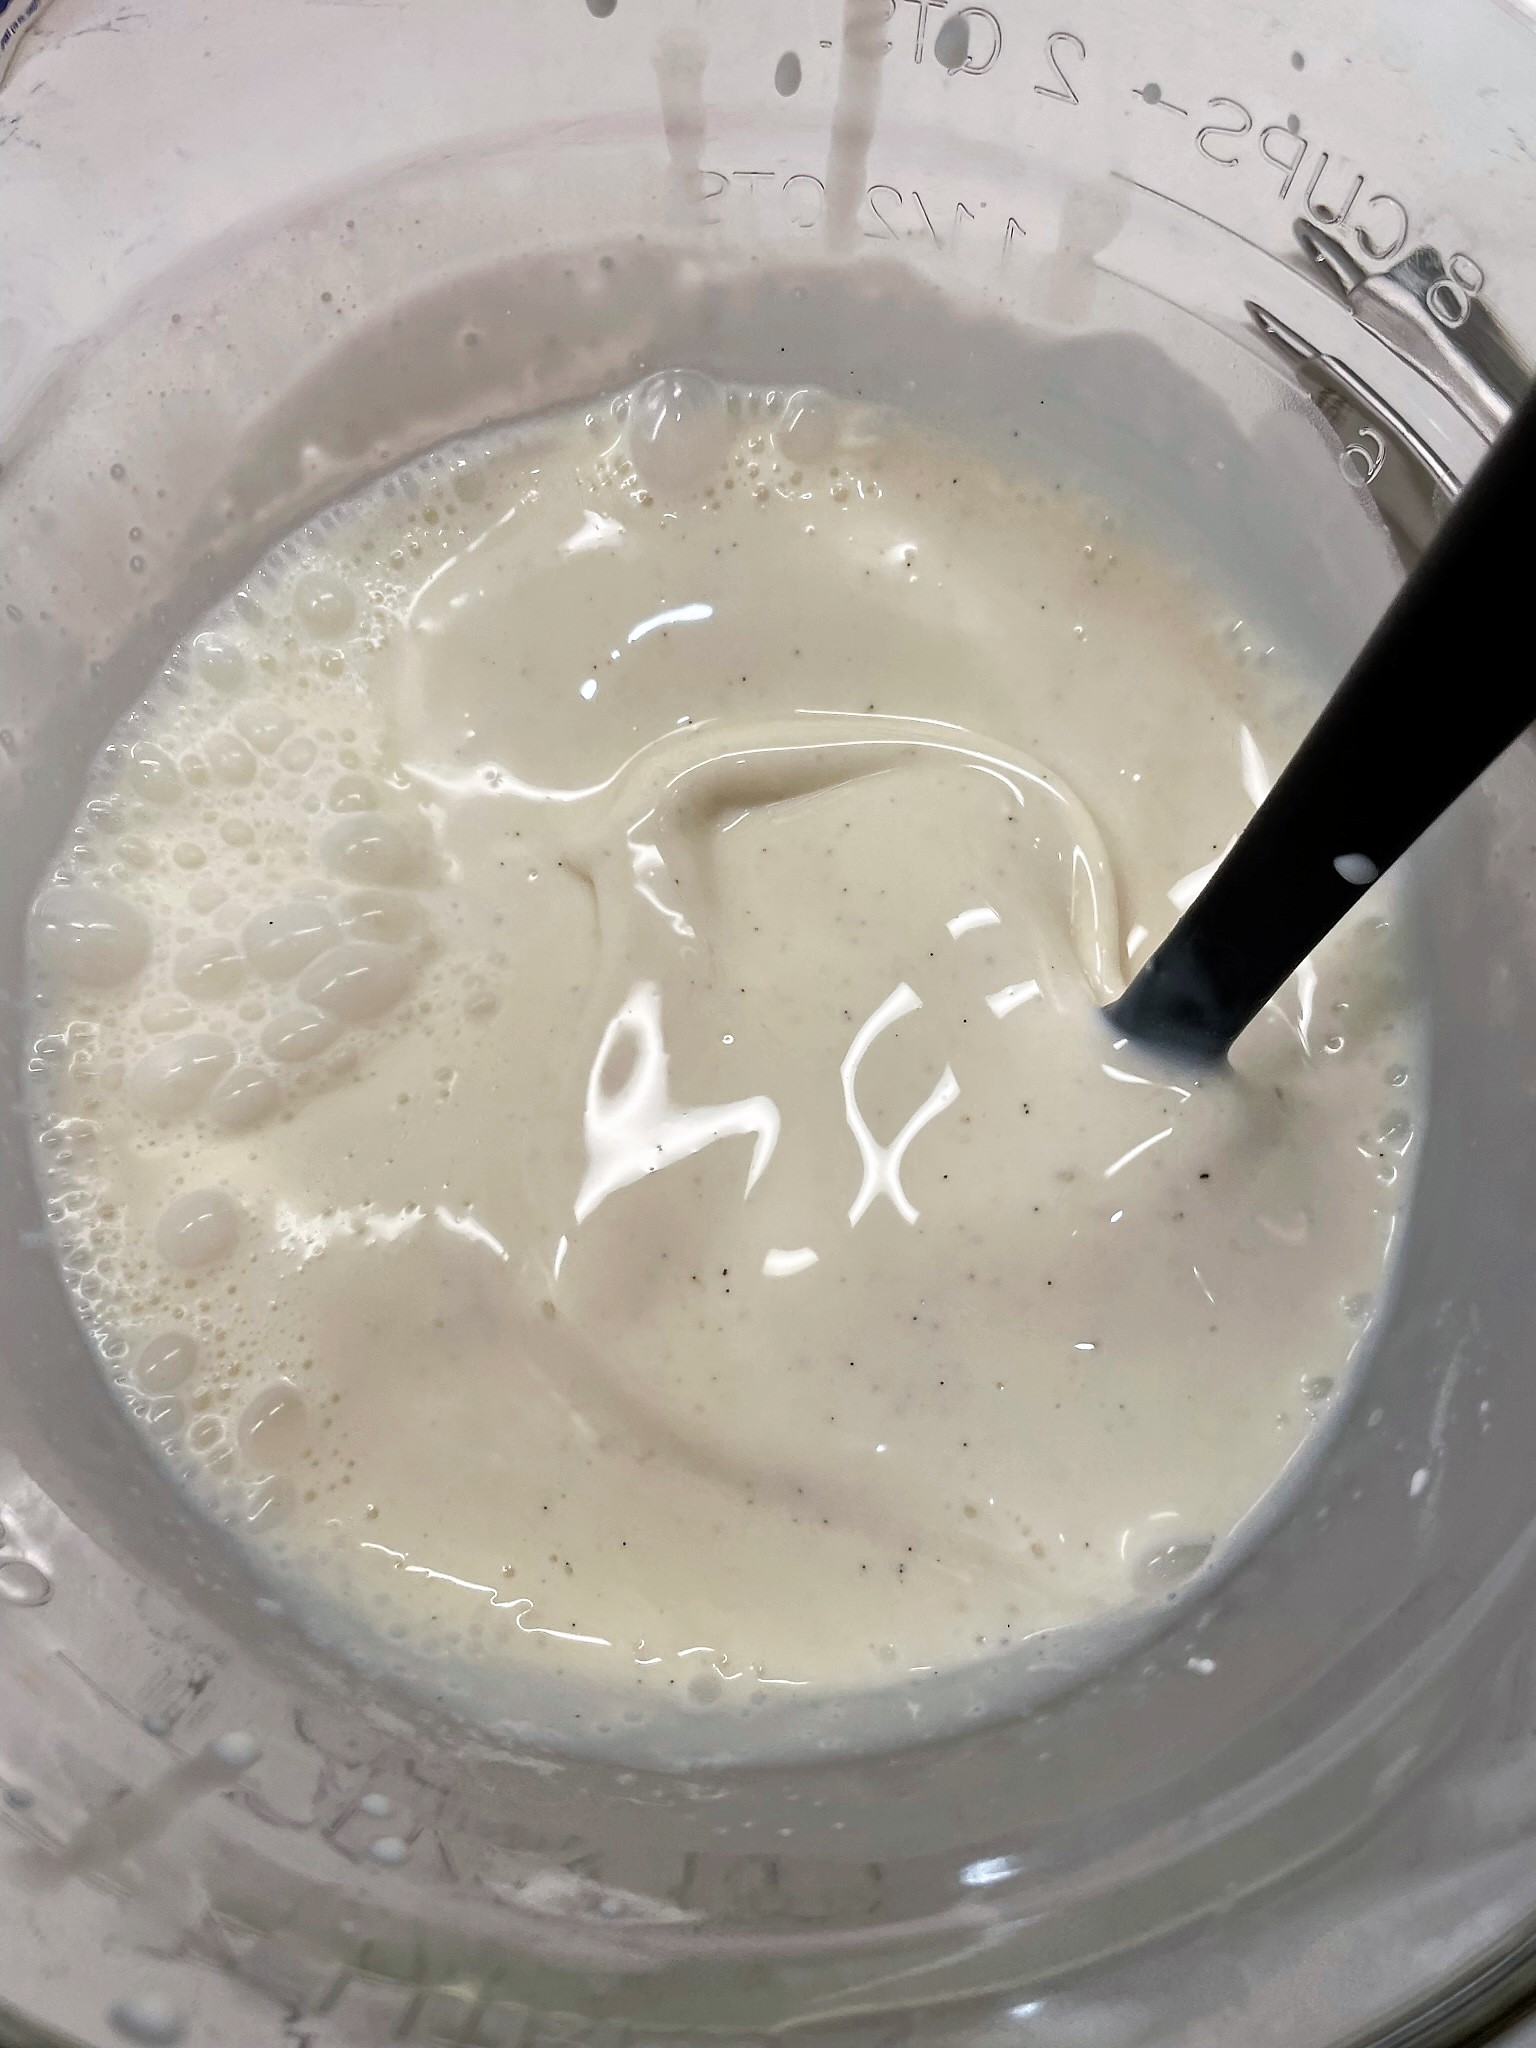
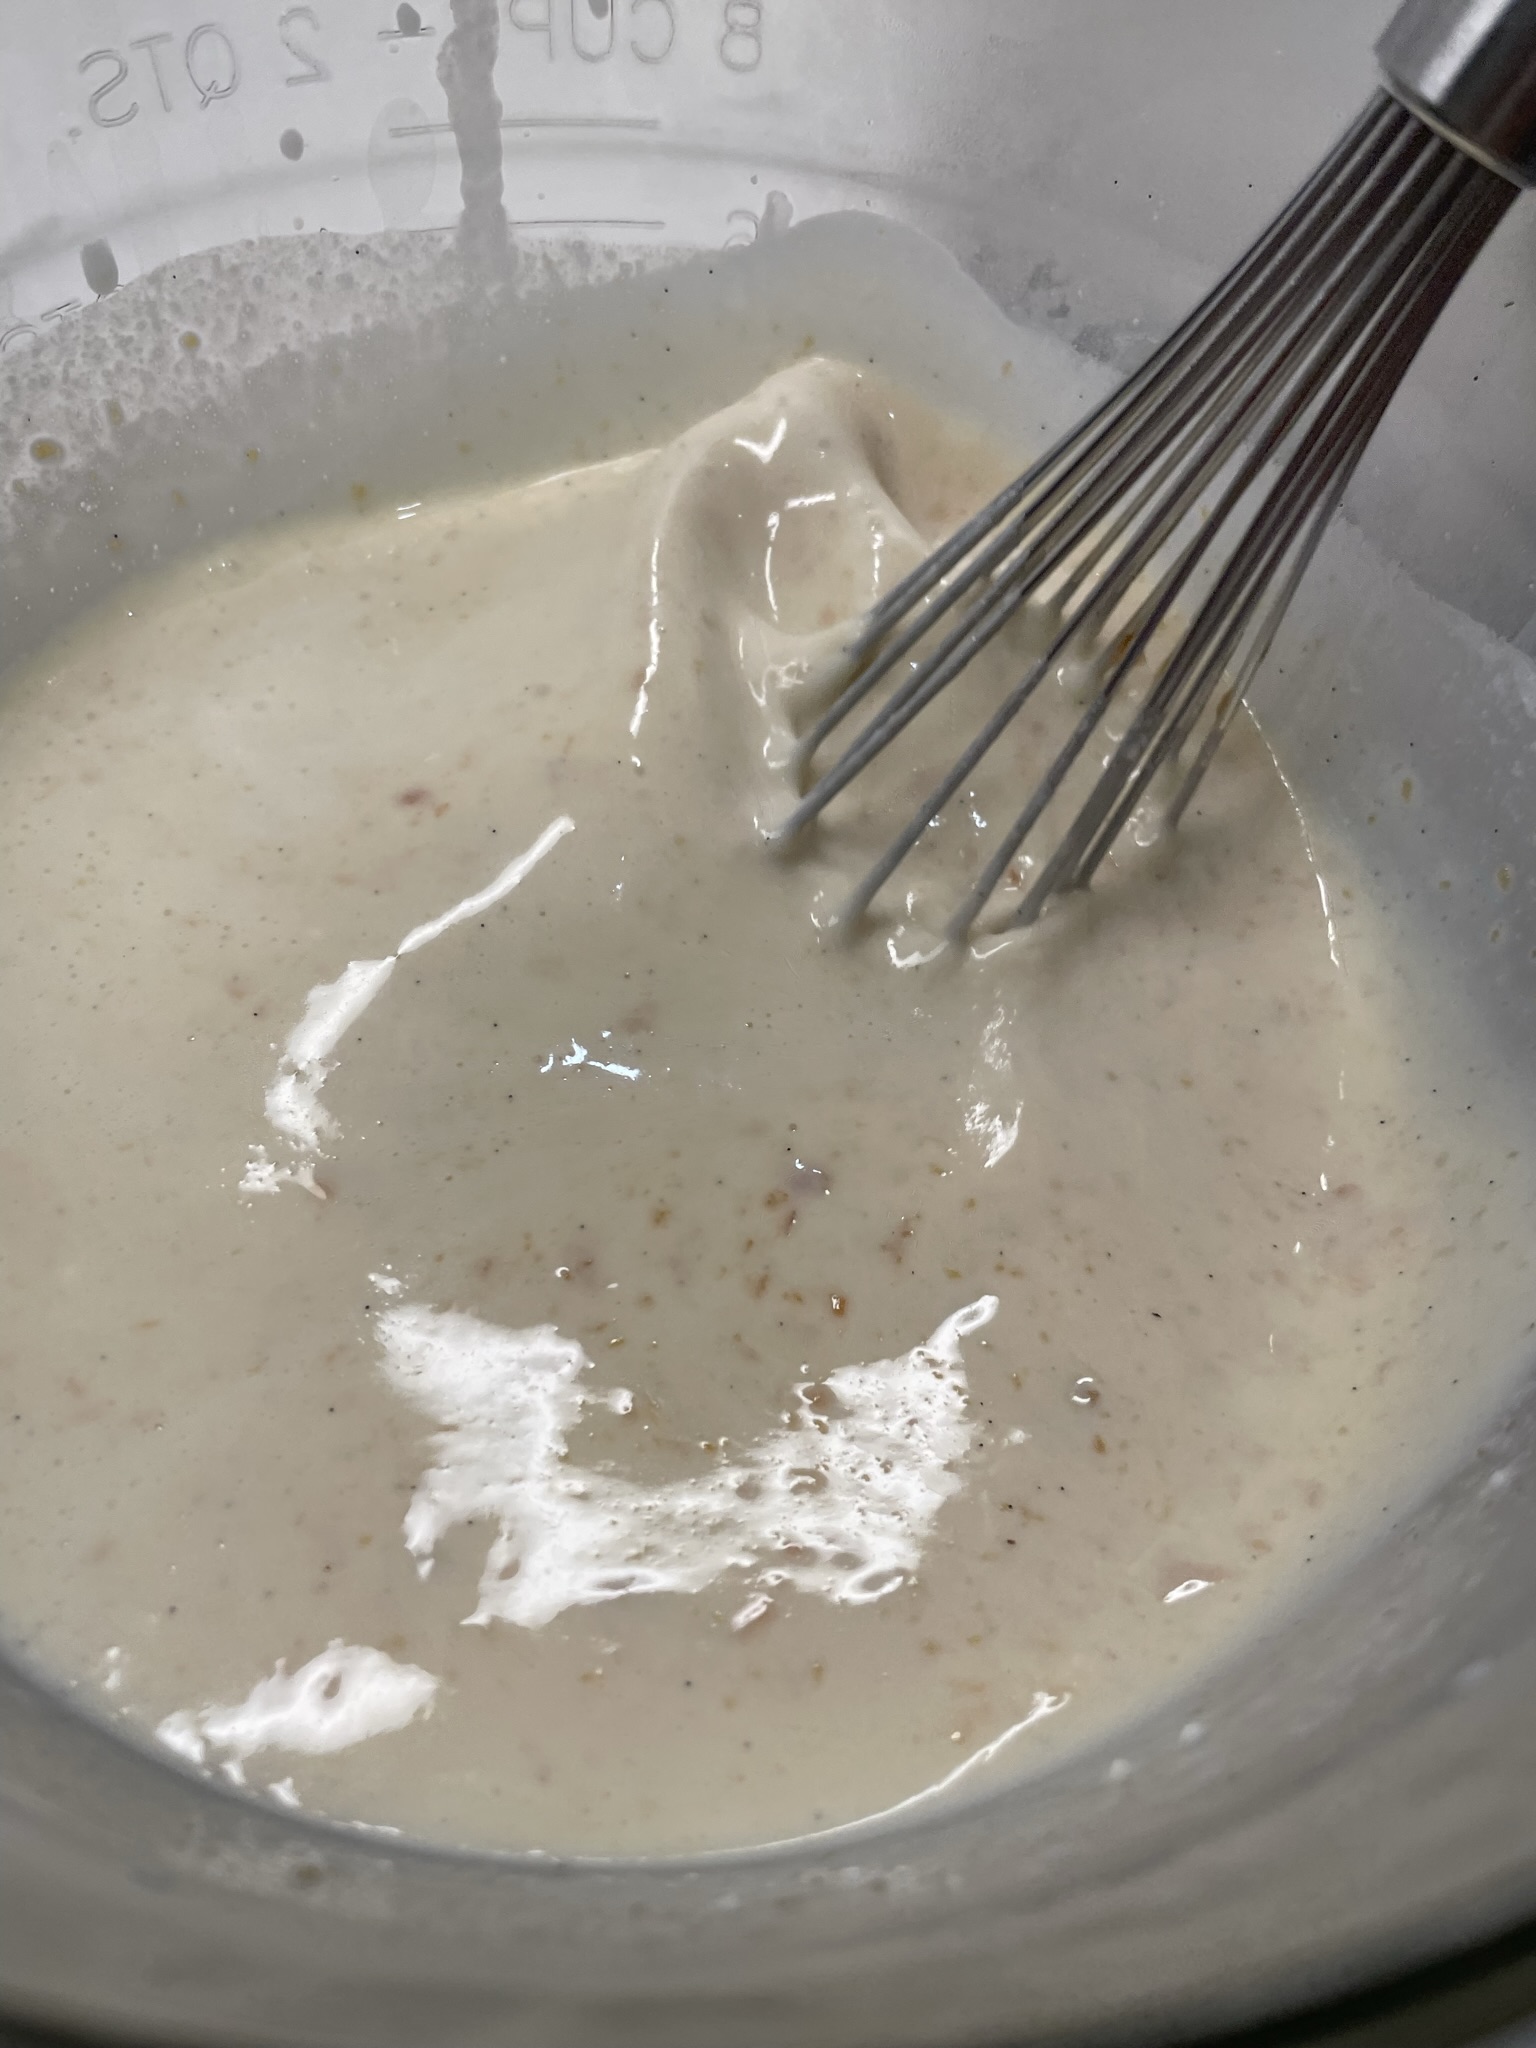
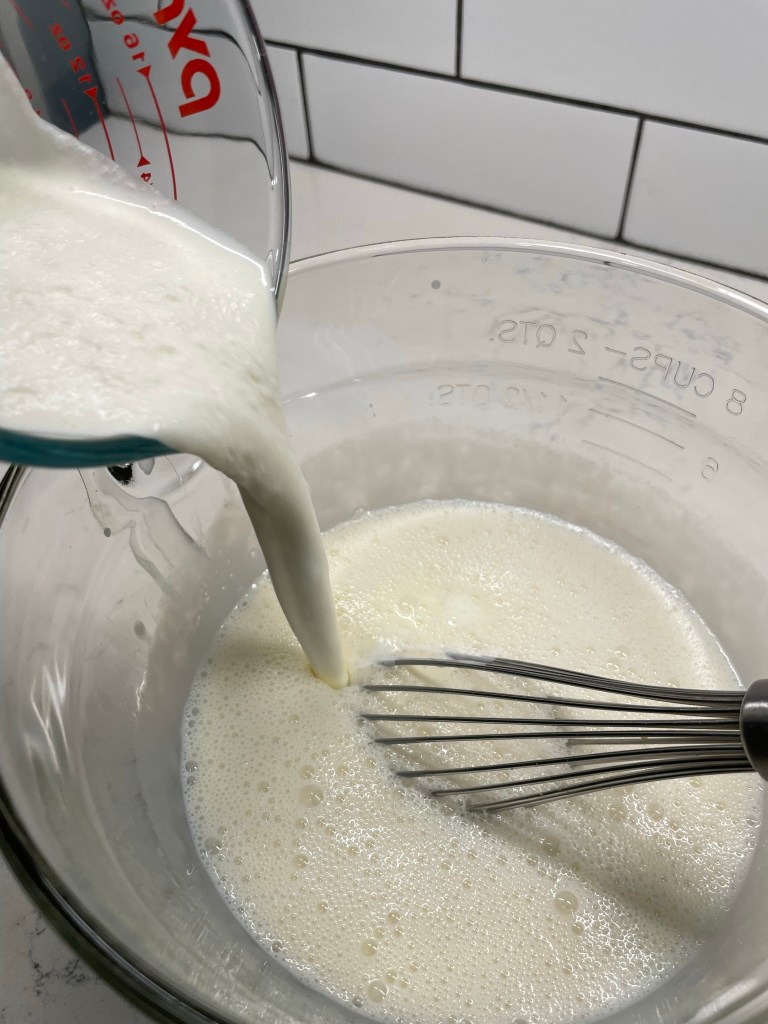
Whisk together sweetened condensed milk and cinnamon. Add milk and cream, and whisk until smooth. Refrigerate until mixture is completely cold.
Toss apple bits with sugar, cinnamon, cardamom, salt and pie filling enhancer (or corn starch). Add to a small saucepan with water and cook over low heat until mixture is thickened and apples are soft with only a light resistance to the bite. Transfer to a small bowl to cool and refrigerate until chilled.
Chop or tear the apple turnover into small pieces. Spread the pieces out on a parchment lined plate or small baking sheet and place in the freezer for at least one hour.
Churn the dairy base in ice cream machine, following manufacturer’s instructions. If using vodka for texture, only add it during the final minute of churning. Transfer ice cream to an insulated freezer container, layering with stewed spiced apples and torn bits of frozen turnover. Ripen in freezer several hours (overnight is best).
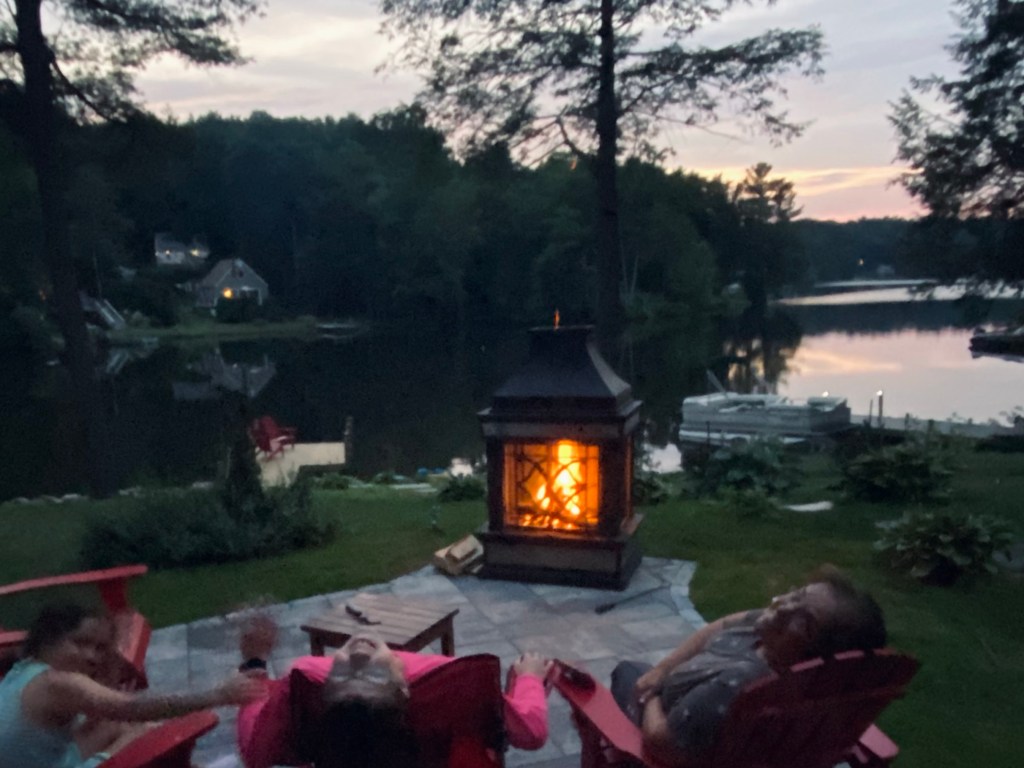
My cousin, Annie, has a wicked sense of humor. Wicked, meaning funny, but also just a little bit wicked. During my visit last month at her lake house in Connecticut, Annie caught me off guard with what seemed like would be important, somber information.
“OK, listen” she began, cracking open a tall pantry door next to the kitchen of her sweet, cozy cottage. “If something happens to me, and you guys have to come here to the lake after I’m gone…”
“Yes,” I said, swallowing hard at that awful thought, as she pointed to a lower shelf inside the cabinet.
“Here’s where you’ll find the stuff for s’mores.”
Honest to God, I don’t know how she keeps a straight face when she delivers a punchline like that. But one thing is for sure, if there is an opportunity to bring joy to any situation or gathering, she has it covered— including s’mores, which we enjoyed as we relaxed in front of her patio fireplace, with the backdrop of gentle lapping sounds of the lake and an occasional bullfrog bellowing somewhere off in the distant darkness.
Who doesn’t have fun s’mores memories? The sweet little campfire sandwich of graham crackers, chocolate bar and toasted marshmallow has been a favorite of mine since I was a kid, and I was thrilled a few years ago to learn that the sugary treat has been awarded its very own day of celebration— National S’mores Day! Each August 10th since I started Comfort du Jour, I have presented a fun interpretation of s’mores. In 2020, it was a duo of treats with a s’mores cocktail and dessert pizza. In 2021, I gave you s’mores ice cream. Last year, those ooey-gooey s’mores brownies. And this year, well, it isn’t really a surprise, is it?
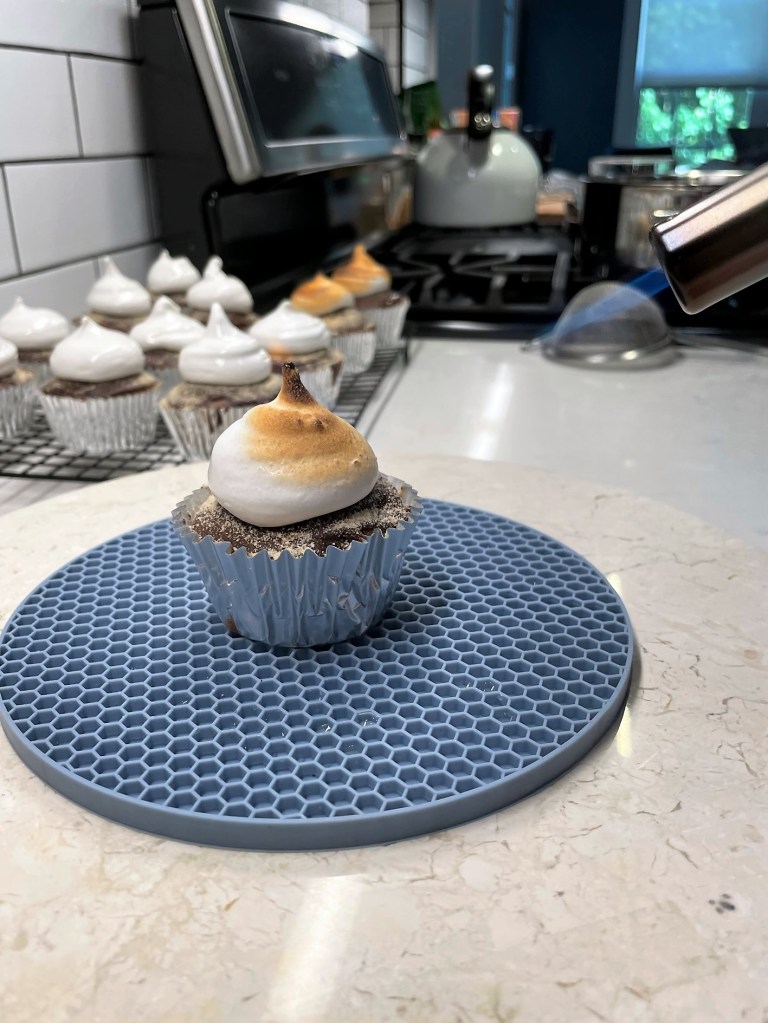
Behold, s’mores cupcakes!
These turned out to be everything I wanted!
With a sweet honey-graham cake base, hollowed out for a dark-and-milk chocolate ganache filling, and topped with a homemade marshmallow frosting (toasted, of course), this may be my favorite s’mores treat to date.
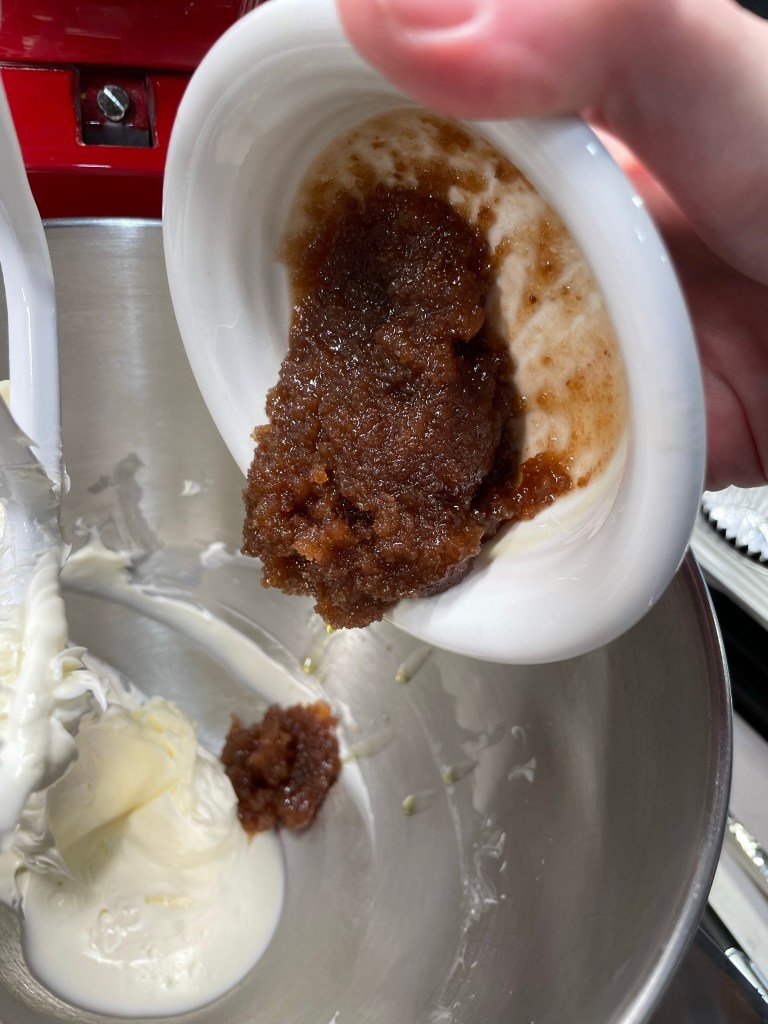
I’d been scouting out component recipes for these for several months, and finally nailed it down after flipping through a special edition Food Network Magazine, called “The Cupcake Cookbook.” The pages held all kinds of cupcake creations, from fruit to spice to chocolate and vanilla, plus numerous flavors and types of frosting, icing and glaze. It was their recipe for “honey-graham cupcakes” that sealed the deal for my s’mores recipe, but I did (of course) put my own spin on them, using honey in place of sugar for an extra-sweet, extra-“graham-y” impression.
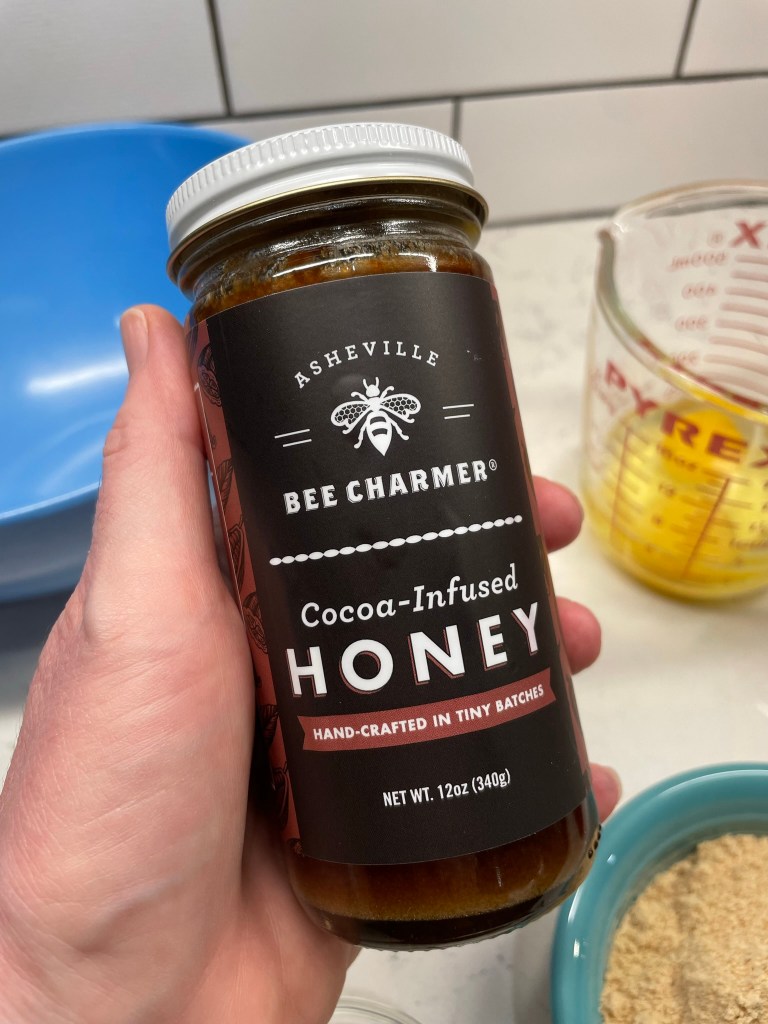
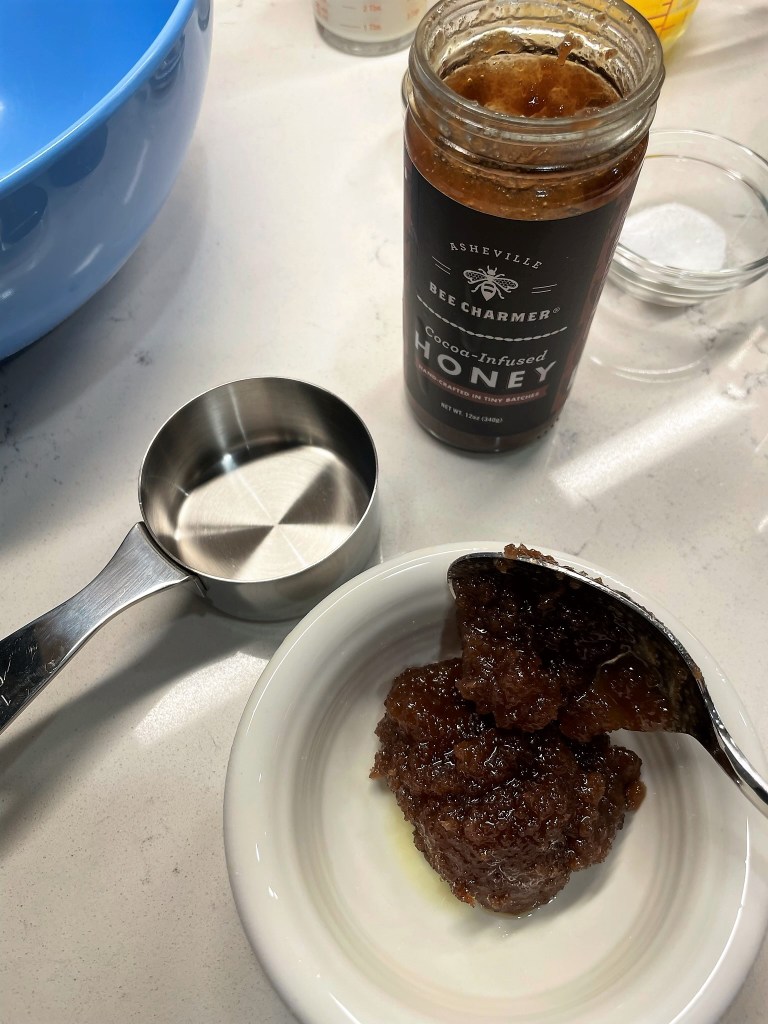
I had this cocoa-infused honey that I had picked up on an earlier trip to Asheville, N.C., where we go occasionally to visit my husband’s adult daughter. I suspected that the cocoa infusion would lend itself nicely to the s’mores vibe, and I was correct. The honey has been in my cabinet for about a year, so it was fairly crystallized, but the texture was no problem for my baked recipe.
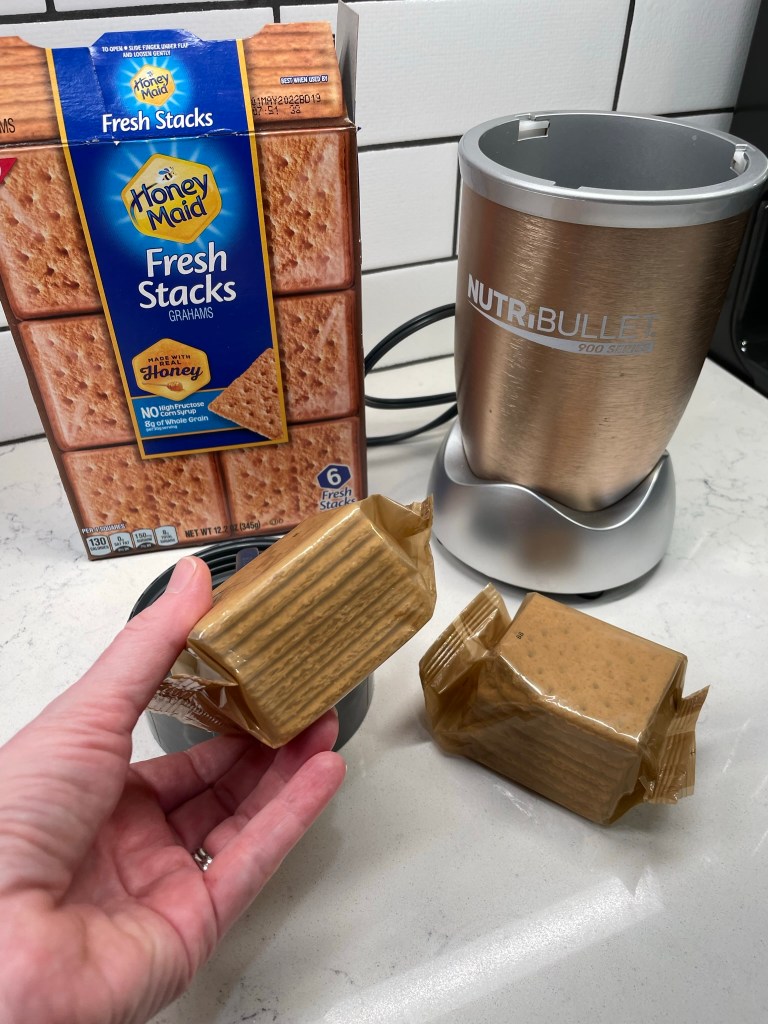
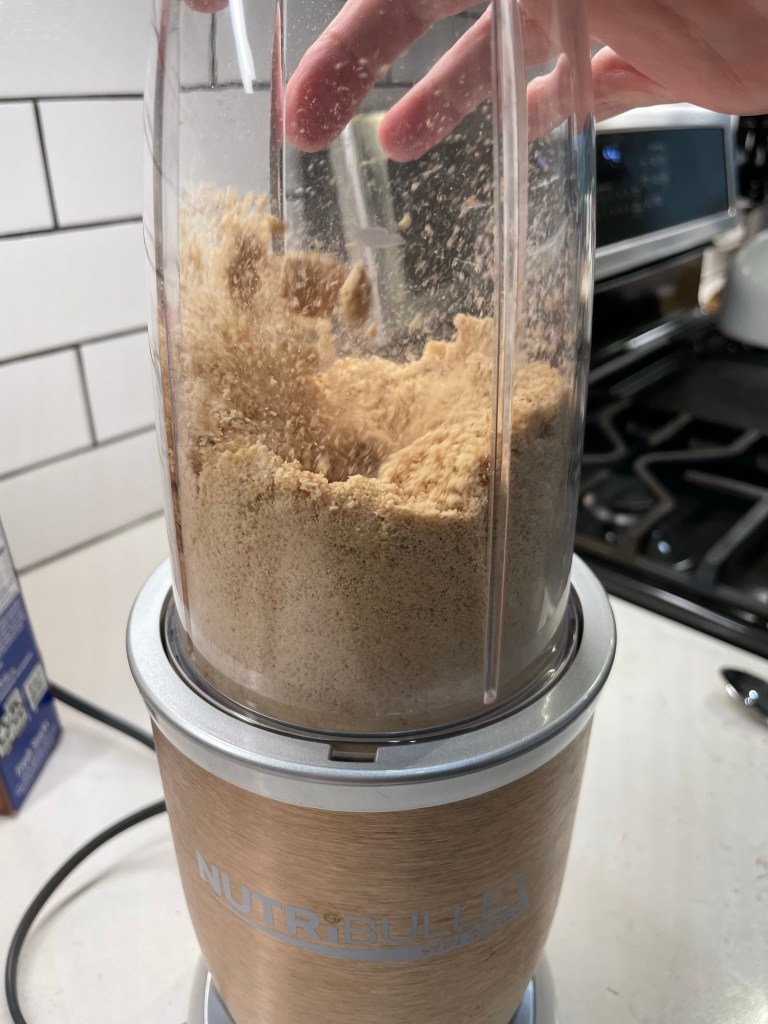
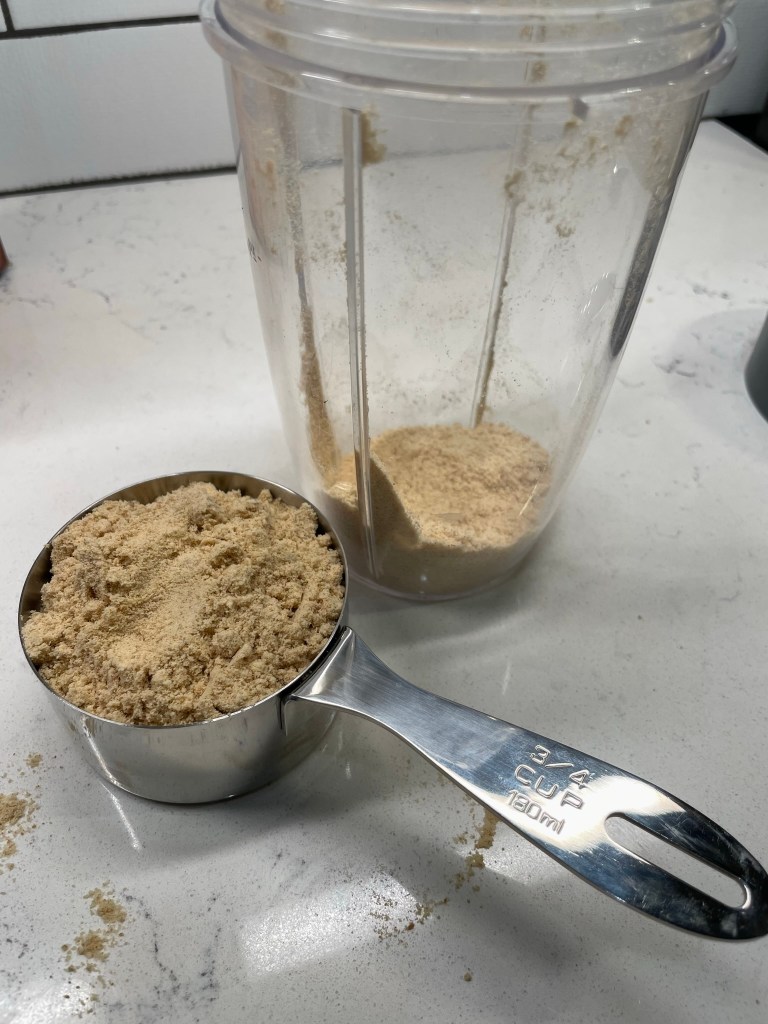
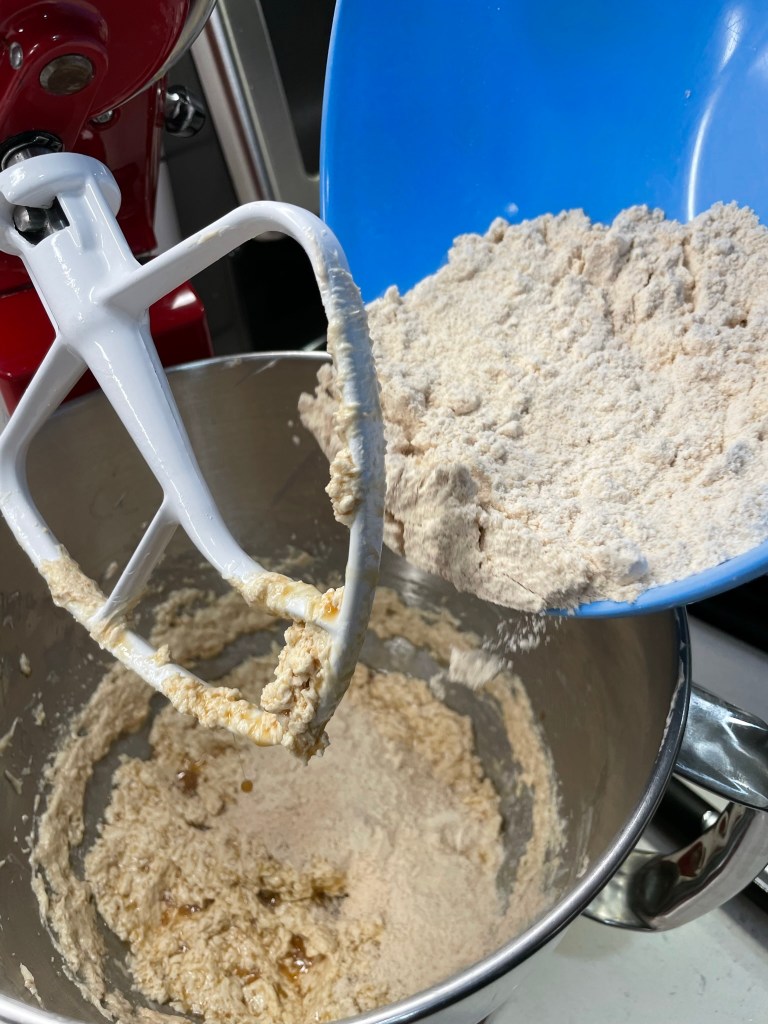
One of the things that appealed to me about the Food Network cupcake recipe is that it included actual crushed graham crackers. I was guaranteed to have the flavor I wanted, along with a slightly grainy feel from the already baked crumbs mixed into the cupcake batter. To crush the graham crackers, I piled a couple sleeves of them into my bullet-style blender and pulsed them for about 20 seconds, until they were reduced to a fine powder. I had the 3/4 cup of crumbs that I needed, plus 1/4 cup left over that I figured I’d use in the topping.
With all my ingredients lined up and measured, I was finally ready to bake!
Generally speaking, you can swap honey for sugar in a baking recipe, but you must take a few things into consideration, which I learned thanks to this article from an online honey supplier. Following those tips, I made the following adjustments:
used less honey than the sugar amount called for (because honey is sweeter)
reduced the milk amount slightly (because honey is also somewhat liquid)
added a touch of baking soda to balance the acidic effect of the honey
reduced the baking temperature a bit (because honey burns more easily than sugar), and slightly increased the baking time to compensate
I have accounted for all of those adjustments in my instructions, but the click-to-print recipe below also describes how the recipe should look if you’re using sugar to sweeten the cupcakes.
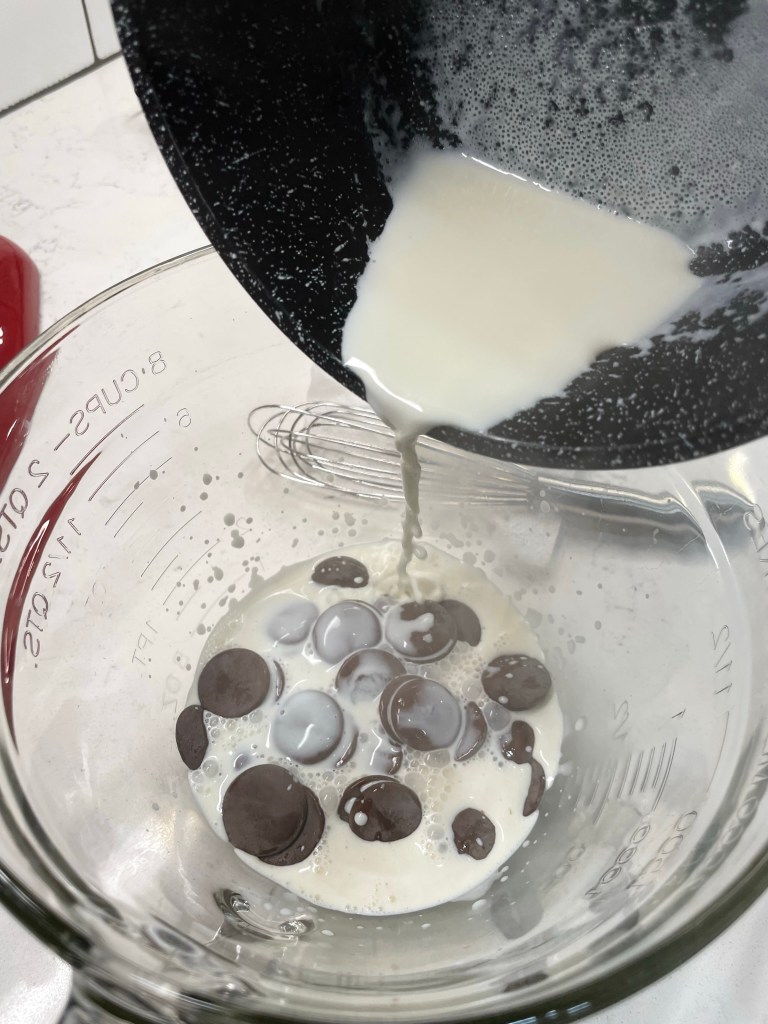
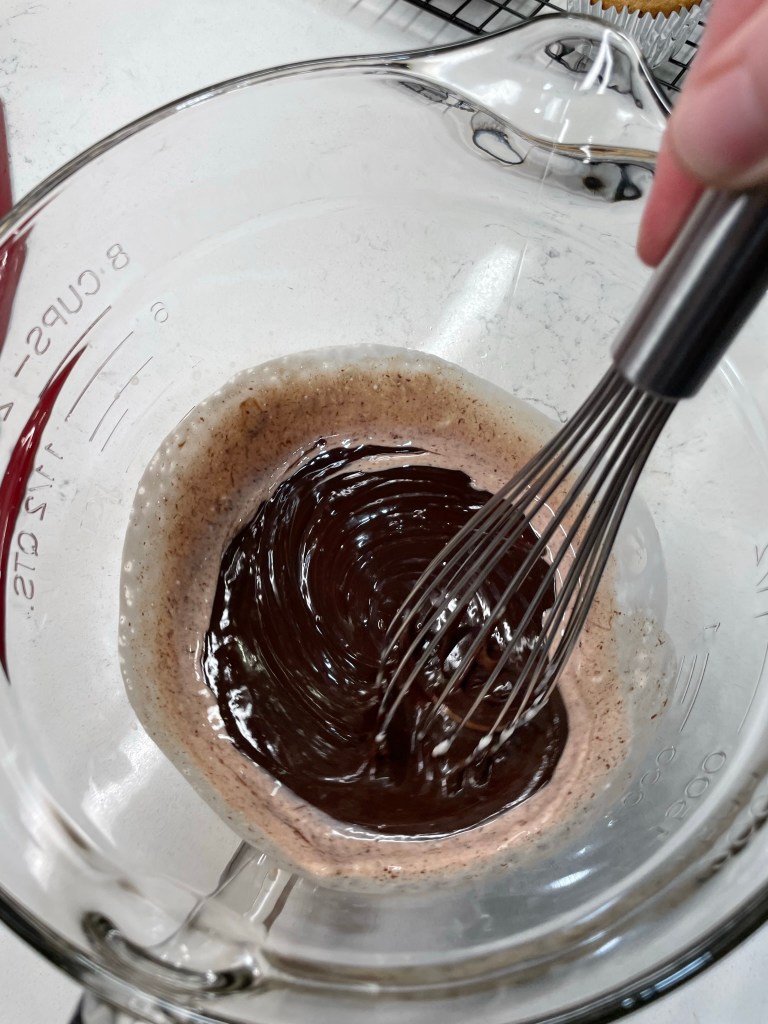
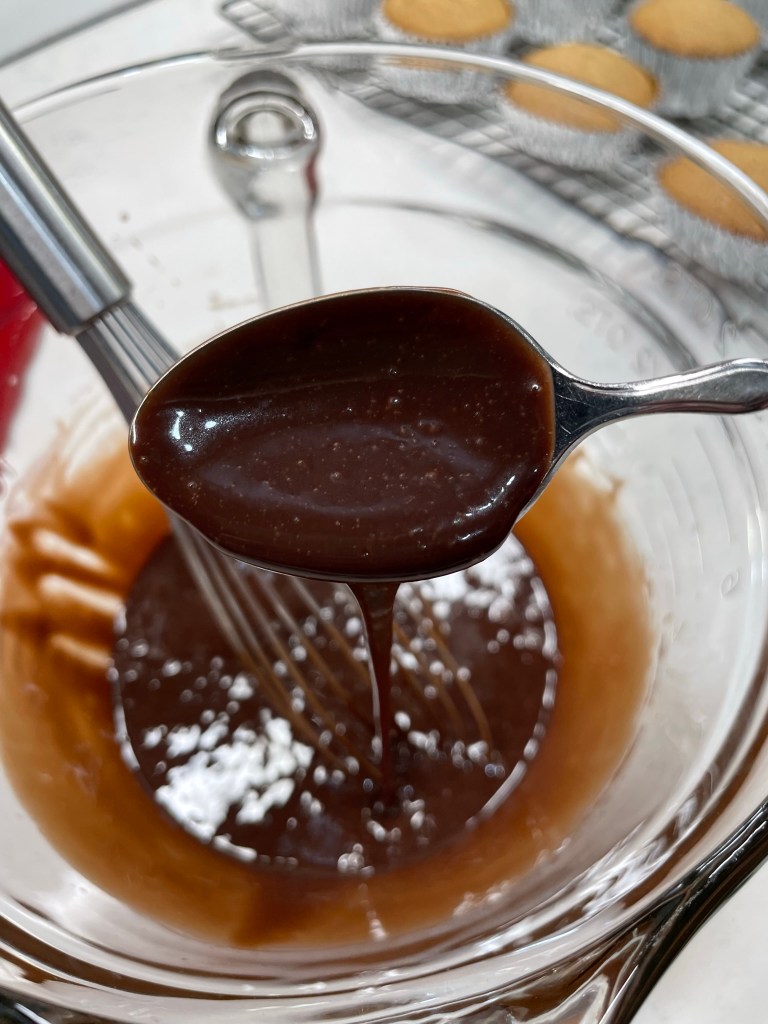
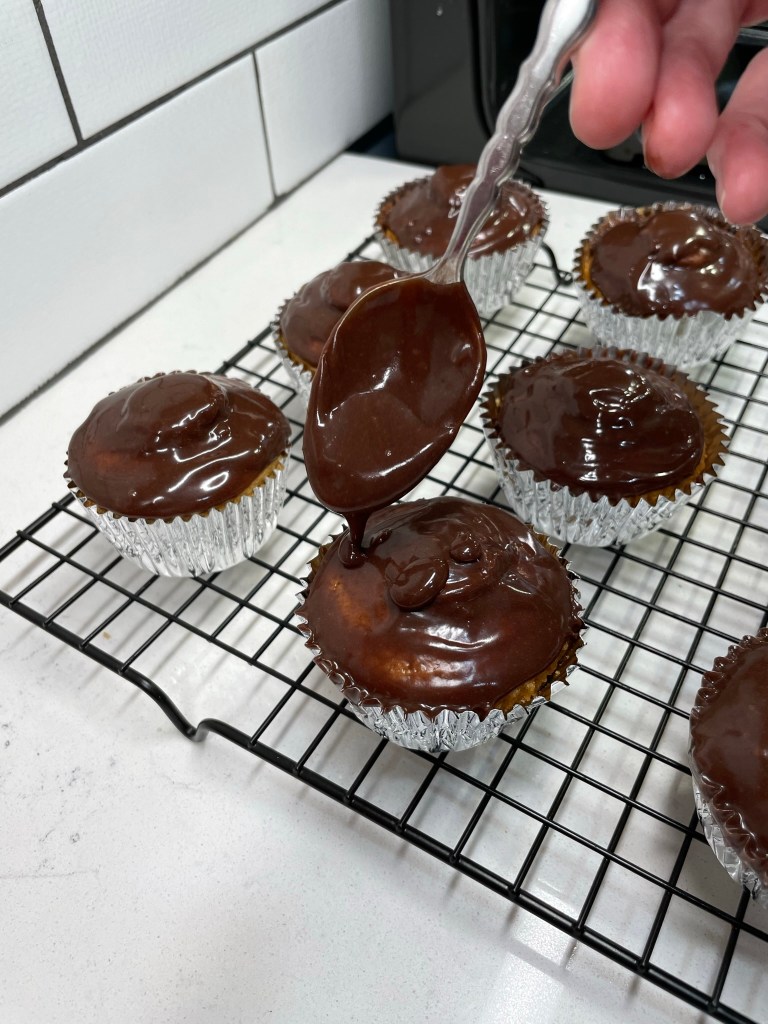
The ganache filling was the simplest component of this recipe; nearly equal parts chocolate— I used a combination of dark and milk chocolate for this— and heavy cream heated to just-shy of boiling. If you’ve never made ganache, you might be surprised how simple it is. Just heat the cream, pour it over the chocolate so it’s complete covered, wait 10 minutes, and stir to blend. Don’t be alarmed if the mixture seems very runny at first— it will thicken and firm up a bit as it cools. I wanted the ganache to be soft but not too messy, so I used slightly more chocolate than cream. In hindsight, equal parts would have been fine.
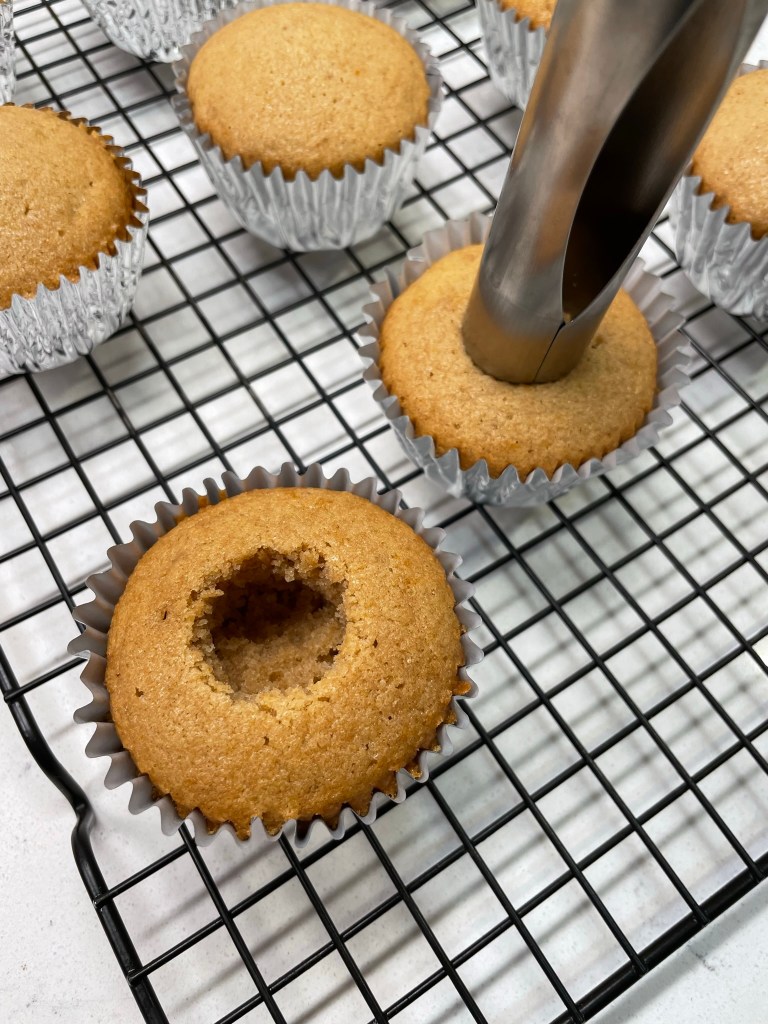
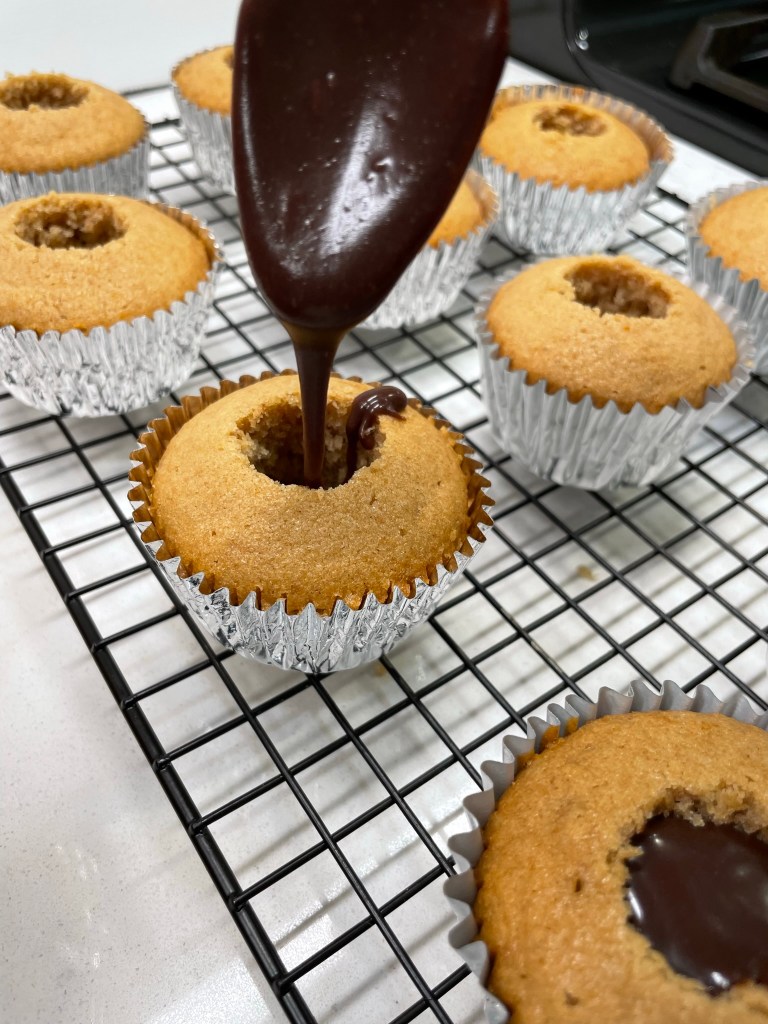
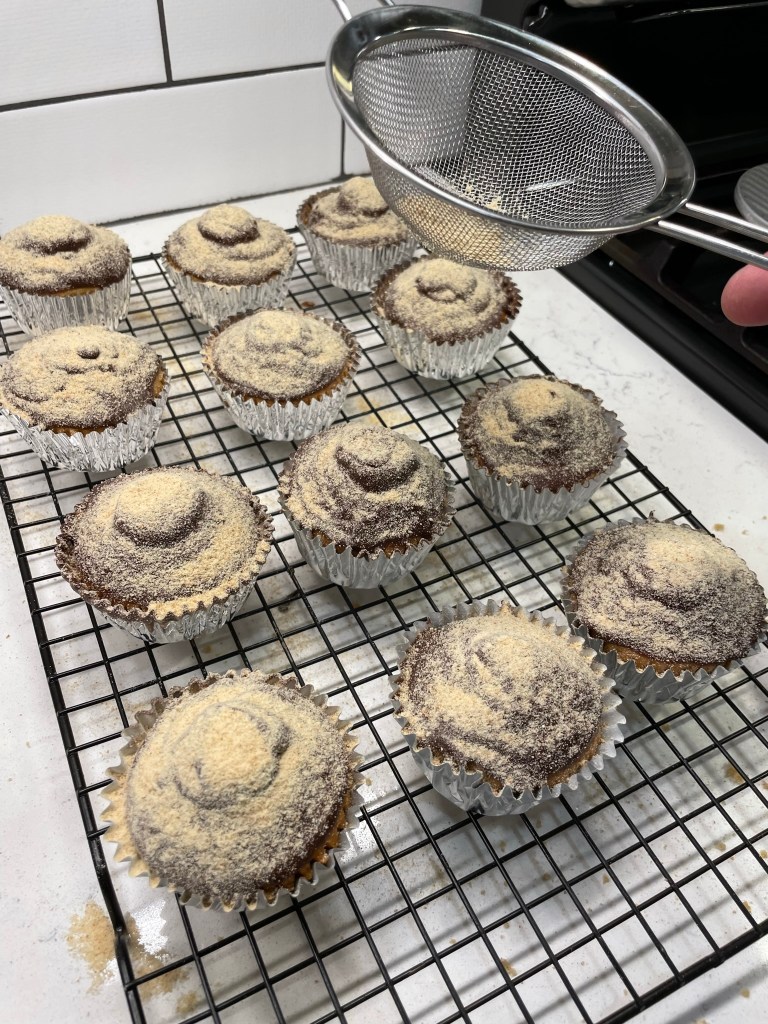
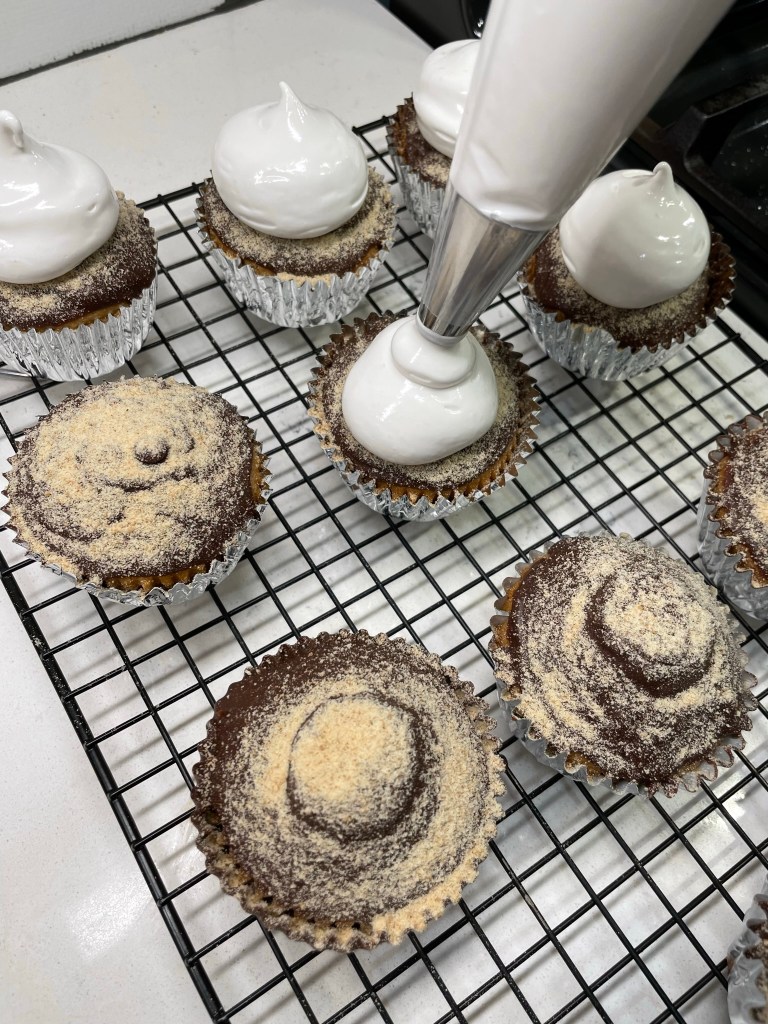
When the cupcakes were cooled, I used my apple corer tool to carefully cut out a plug shape bit of cake, keeping those pieces intact, to place back on top of the ganache, which I spooned inside the cupcake cavity. I didn’t mind that the tops didn’t sit flush with the cakes, because the whole thing would soon be buried in marshmallow frosting anyway. I had some ganache left over after filling the cupcakes, so I warmed it over hot water back to a spreadable consistency, and glazed the top of each cupcake, and then sifted some of the remaining graham crumbs on top as a bed for the marshmallow frosting.
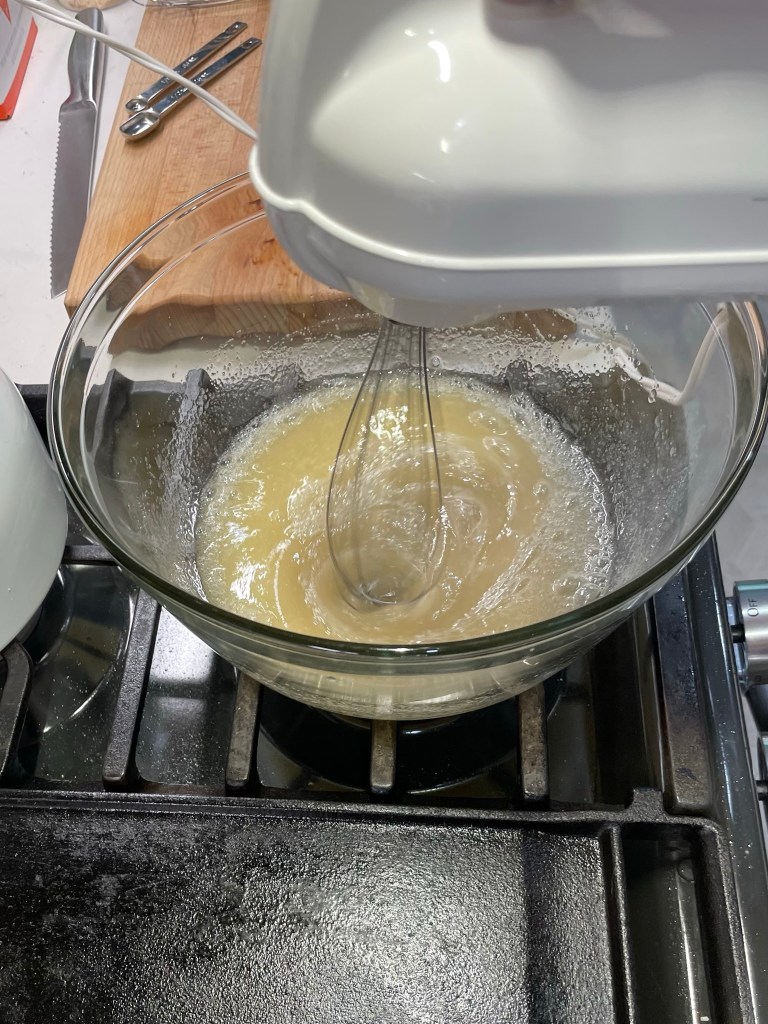
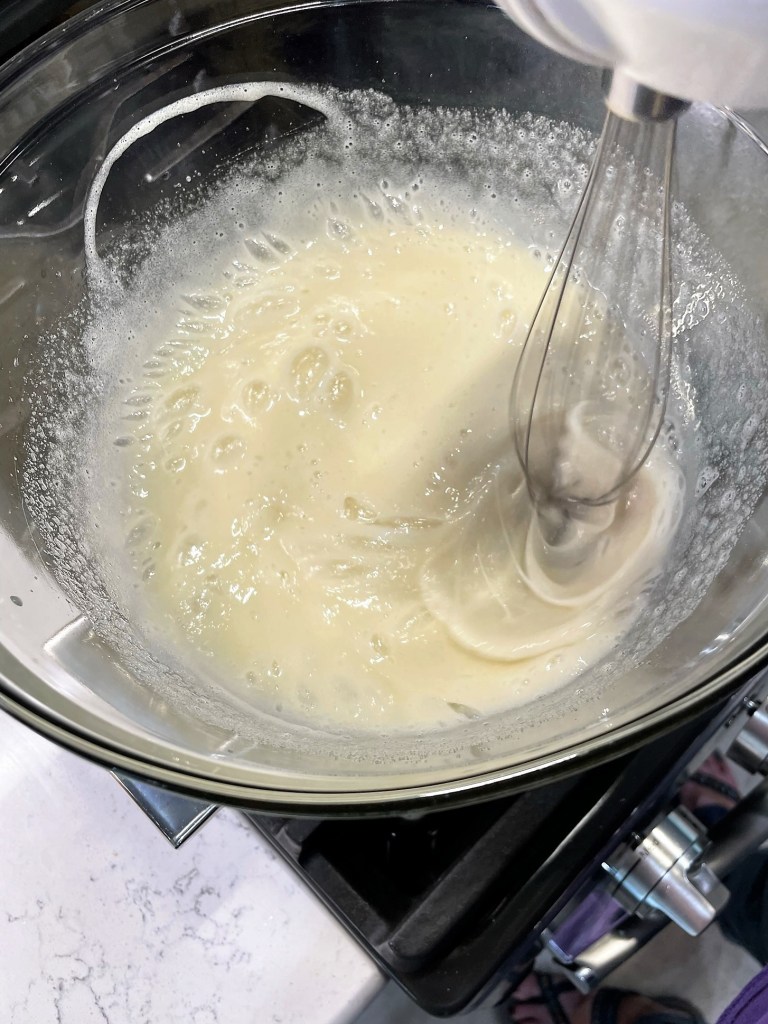
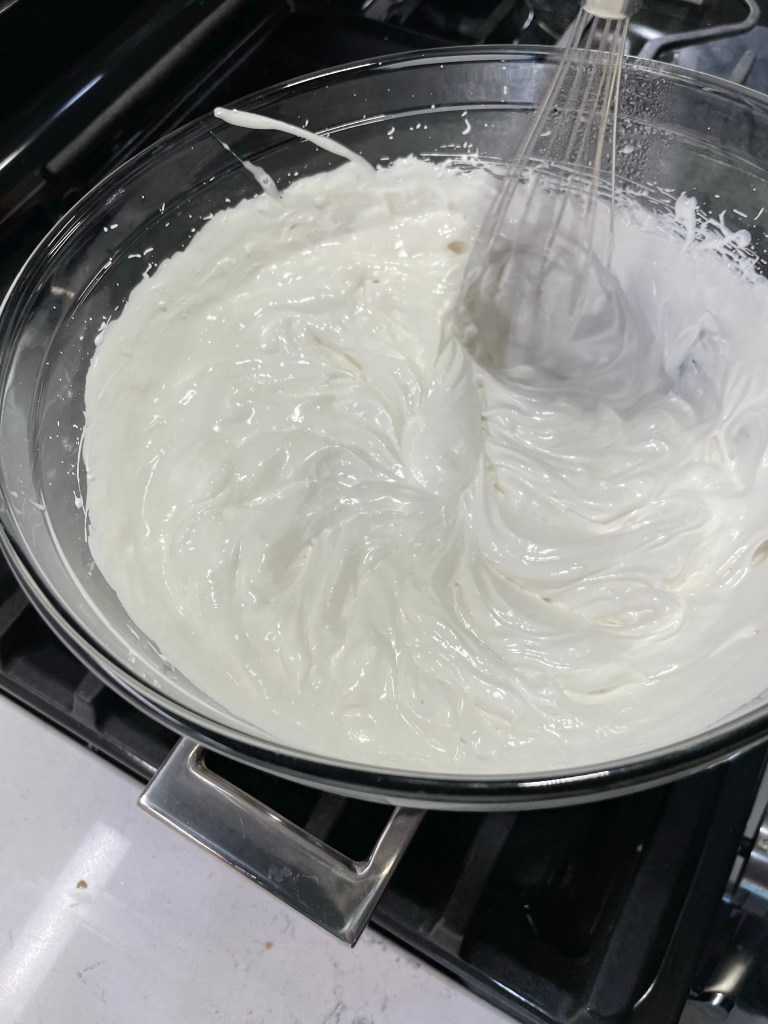
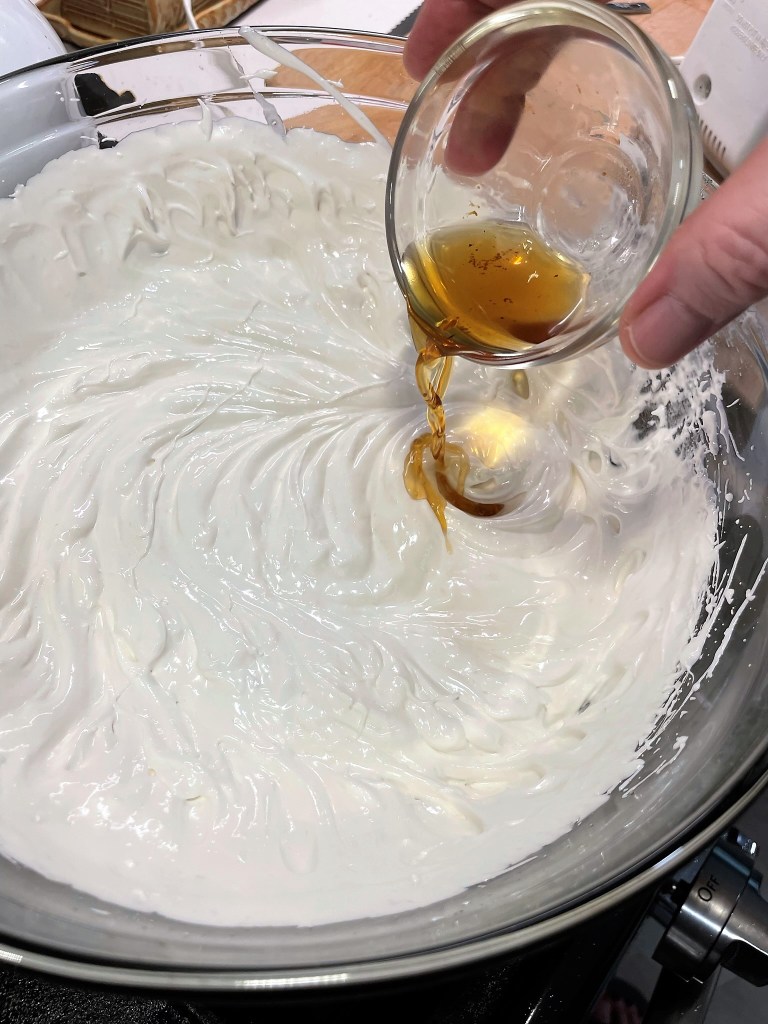
Almost done! I agonized a bit over which frosting recipe to use, and considered one in the Food Network Cupcake magazine, but it sounded more like meringue than frosting, and I wanted mine to be stable enough to keep its shape without getting watery. I finally found a “marshmallow frosting” recipe online that sounded more hefty, and about the time I got to the step to “whip it with a mixer for seven minutes over simmering water,” it occurred to me that this was exactly the same as a topping that my grandmother frequently made during her having-company-over days.
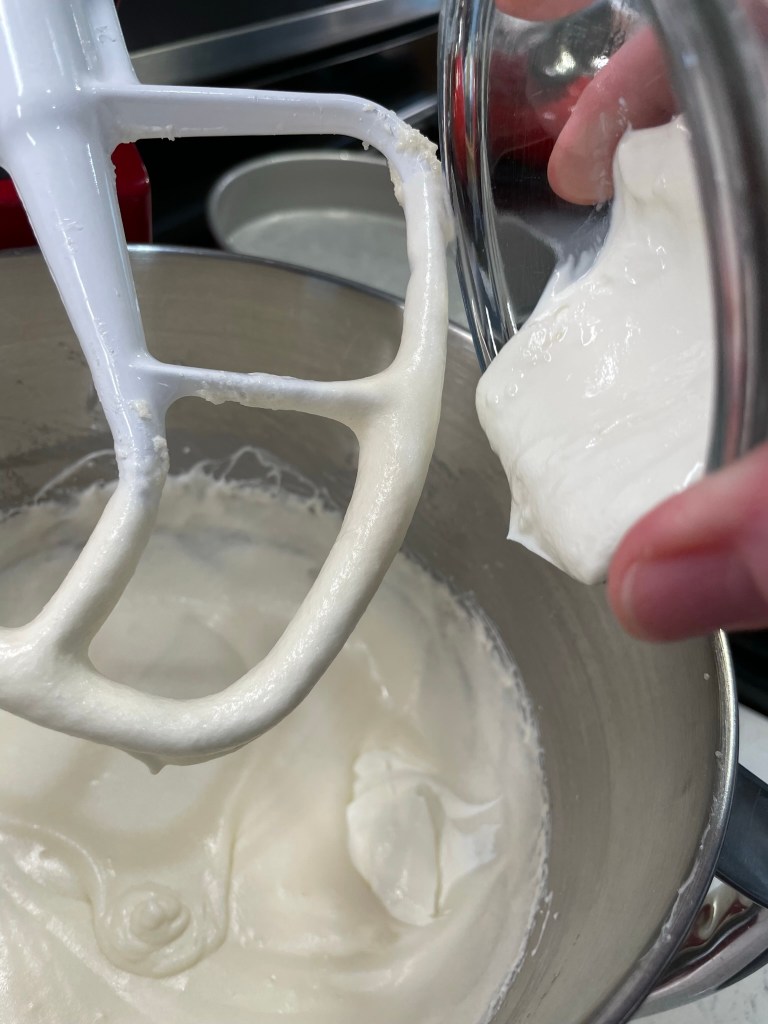
Corn syrup prevents crystallization.Start the frosting off the heat.Place over steaming water and continue beating.After 7 minutes, the eggs are cooked and soft peaks form.Vanilla goes in at the end.Marshmallow frosting!
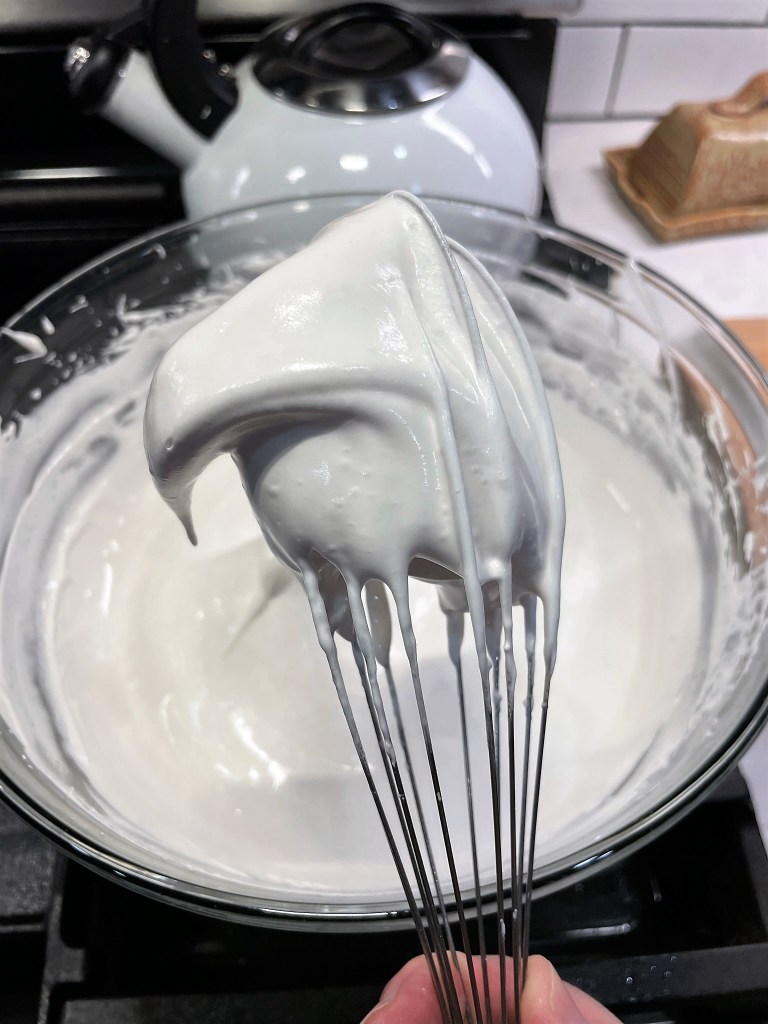
Turns out, seven-minute frosting is essentially marshmallow creme. I suppose you could probably just top the cupcakes with store-bought marshmallow creme, but by this time, my frosting was already done and I did enjoy piping the stuff onto the cupcakes— it made me feel like a real baker!
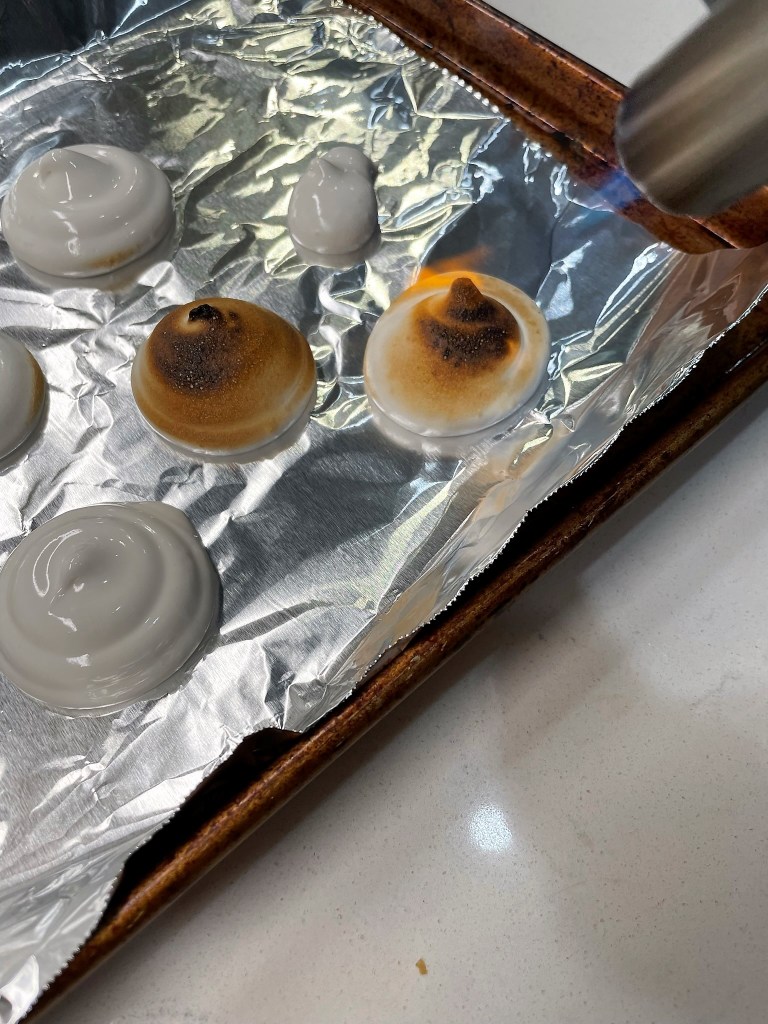
The only thing left to do was was toast the marshmallow topping. Having never done this before, and not wanting to ruin my pretty little s’mores cupcakes, I piped out some of the leftover marshmallow frosting onto a sheet of foil, and hit the dollops with my culinary torch to practice. Would you believe, this turned out to be the simplest part of the recipe?! The frosting toasted beautifully, and it stayed pretty for a few days after I made the cupcakes.
Incidentally, I had enough marshmallow frosting left over to cover at least two more batches of cupcakes, and most of the extra went to waste because I didn’t have a plan ready for using it. Perhaps I could have whipped up a quick batch of Krispie treats— and that of course, gives me an idea for National S’mores Day next year. 😉
With a sweet honey-graham cake base, hollowed out for a dark-and-milk chocolate ganache filling, and topped with a homemade marshmallow frosting (toasted, of course), this may be my favorite s’mores treat to date. There are three components of this treat, and I've described each separately below.
Ingredients
3/4 cup honey graham crackers, crushed fine (see notes)
3/4 cup all-purpose flour
1 tsp. baking powder
1/8 tsp. baking soda (omit if using sugar in place of honey)
1/2 tsp. salt
1 stick unsalted butter
1/2 cup honey (or 1 cup granulated sugar)
2 eggs
2 tsp. real vanilla extract
1/2 cup milk (minus 2 tablespoons if using honey)
Notes: Butter, eggs and milk should be at cool room temperature. Remove them from refrigerator about one hour before you plan to start the recipe.
To get a fine crush on the graham crackers, I broke them up into my bullet-style blender and processed them for about 15 seconds. Sift through them with your fingers to remove any remaining chunks. I used two wrapped packs of “Fresh Stacks” crackers, and had about 1/4 cup of crumbs left over, which I sprinkled on top of the ganache before frosting.
Directions
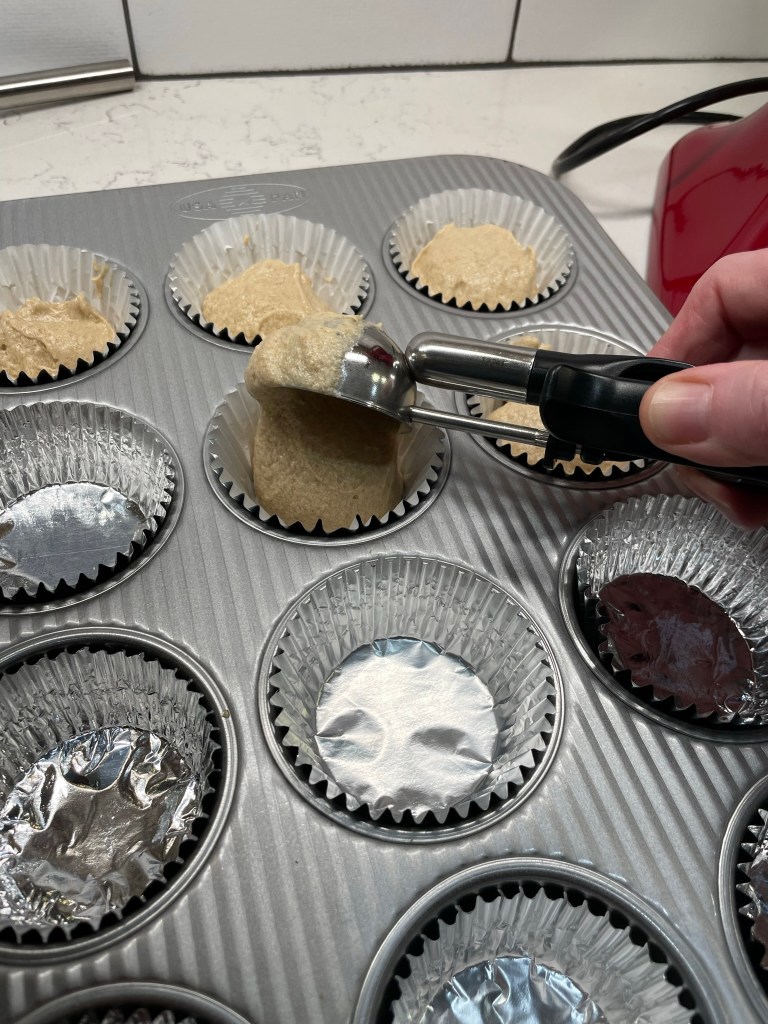
Preheat oven to 330° F (or 350° F if using sugar), and line cupcake pan with foil liners.
Combine crumbs, flour, baking powder, soda and salt in a medium bowl and set aside.
In a stand mixer, cream butter on medium speed until light and airy, about one minute. Add honey and beat on medium speed until fluffy and evenly blended, about four more minutes. Scrape down sides of the bowl.
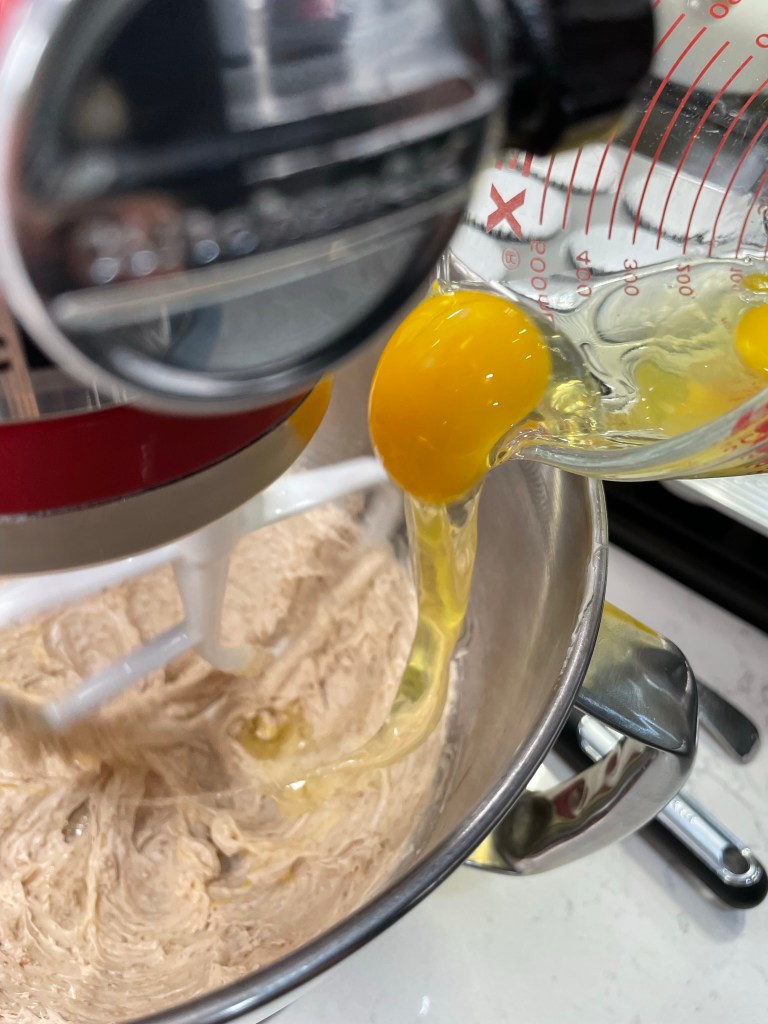
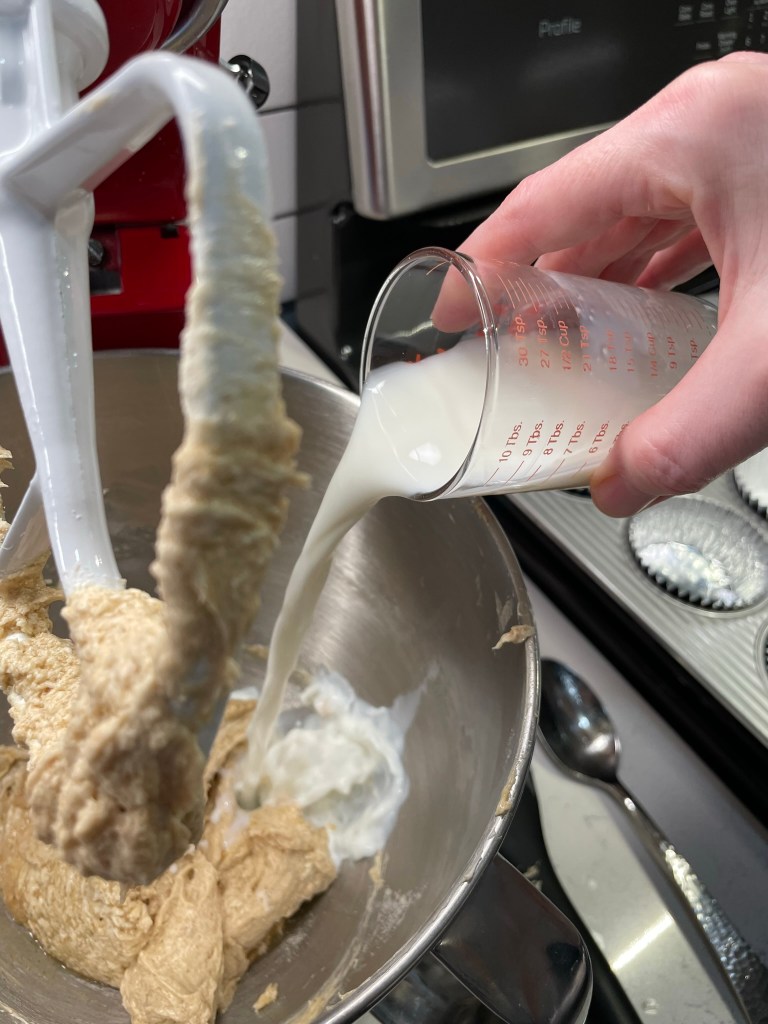
Add one egg at a time, beating to blend after each. Scrape down sides of the bowl. On low speed, beat in one-third of the flour mixture just until no visible dry ingredients remain. Beat in half of the milk. Repeat with dry ingredients, then milk, then final dry ingredients. Scrape down sides.
Scoop cupcake batter into lined cupcake pan. Each cup should be about 2/3 filled.
Bake 25 to 30 minutes (less if using sugar), until cupcakes are golden and spring back easily when touched in the center.
Cool cupcakes in pan 5 minutes, then transfer to a wire rack to cool completely.
While the cupcakes are baking, prepare the ganache filling. It’s best to fill the cupcakes while the ganache is still somewhat warm and easily drizzled.
Ingredients
2/3 cup quality chocolate, wafers or bars preferred over chips
1/2 cup heavy cream
Directions
Add chocolate pieces to a medium bowl. Heat cream to just-shy of boiling point. Pour cream over chocolate and let sit 10 minutes.
Gently whisk or stir cream and chocolate together until evenly blended. This will seem impossible at first, but within one minute, it should be glossy and silky.
When cupcakes are completely cool, used an apple corer tool or paring knife to carefully cut a one-inch plug from the center of each cupcake. Set these aside.
Use a spoon to drizzle the warm ganache into each cupcake hole, then press the plugs back onto the cupcake. Carefully glaze the filled cupcakes with any remaining ganache. Scatter some of the remaining graham crumbs over the top and cool completely while you make the marshmallow frosting.
To prepare the frosting, you will need an electric hand mixer and a double boiler or a large, heatproof bowl that will fit over, but not inside, a medium saucepan. Be sure the mixing bowl and beater blades are completely clean, as any amount of oil or fat on them will prevent the egg whites from forming peaks.
Ingredients
2 egg whites, at room temperature
1 1/2 cups granulated sugar (I used a 50/50 mix of cane sugar and superfine caster sugar)
Bring a medium saucepan of water to a slight boil over medium heat. The water should not be high enough to touch the bottom of the bowl used in the next step.
In the heatproof bowl, combine all ingredients except vanilla. Do not place the bowl over the hot water yet.
Use a hand mixer to whip the frosting ingredients together. Start on low speed and increase slightly when the mixture starts to get frothy. After a minute or two, place the bowl over the simmering water.
Continue to whip with the mixer for 7 minutes, until all the sugar has dissolved and soft peaks form in the frosting. Remove from heat.
Add vanilla and beat again just until incorporated. Cool a few minutes before frosting cupcakes.
Load frosting into a piping bag with a wide, round tip. Pipe frosting onto cupcakes.
Use a culinary torch to carefully toast the marshmallow topping. Cool before enjoying.
It’s interesting to me that some foods have their own variations in different parts of the country. Take barbecue, for example. Depending on where you go— Texas, Kansas City or the Carolinas— you might be presented with dry-rubbed beef brisket, saucy ribs or burnt ends, or slow-braised, pork shoulder with vinegar sauce. And for sure, natives of each area will proclaim theirs to be the “true” barbecue, the best or most authentic. It is, of course, a matter of opinion and upbringing.
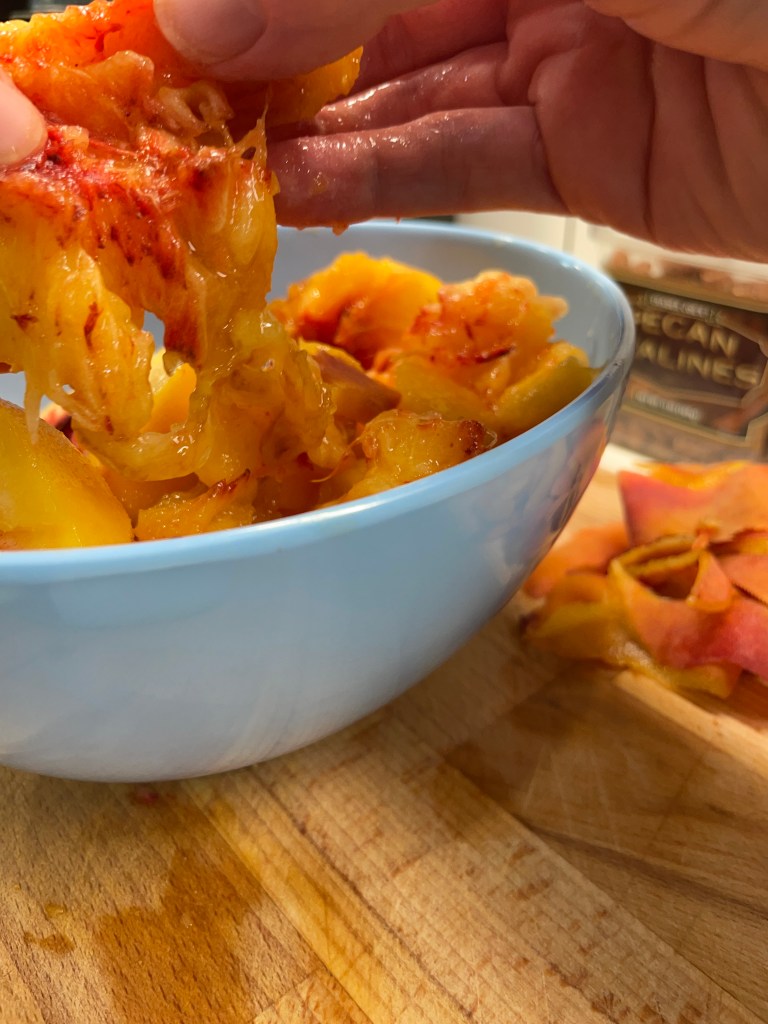
The same can be said for peach cobbler. Here in the South, most cobblers I’ve had at church potlucks, diners or restaurants resemble another popular dessert here, the dump cake. Everything gets slopped into a pan, usually with the batter on the bottom and the fruit on top, and somehow during the baking process, the dough finds its way to rise up through the peaches. It’s tasty, but a bit soupy and mostly a mushy texture— definitely not the peach cobbler of my childhood, and we all know that comfort food is what you remember from those early days. So I’m about to say something that irritates Southerners more than anything else, ever:
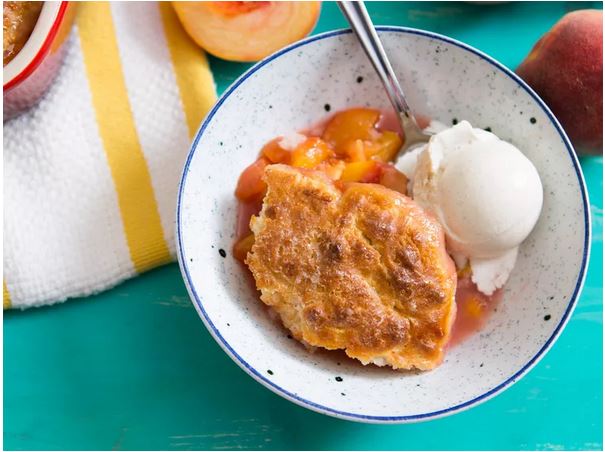
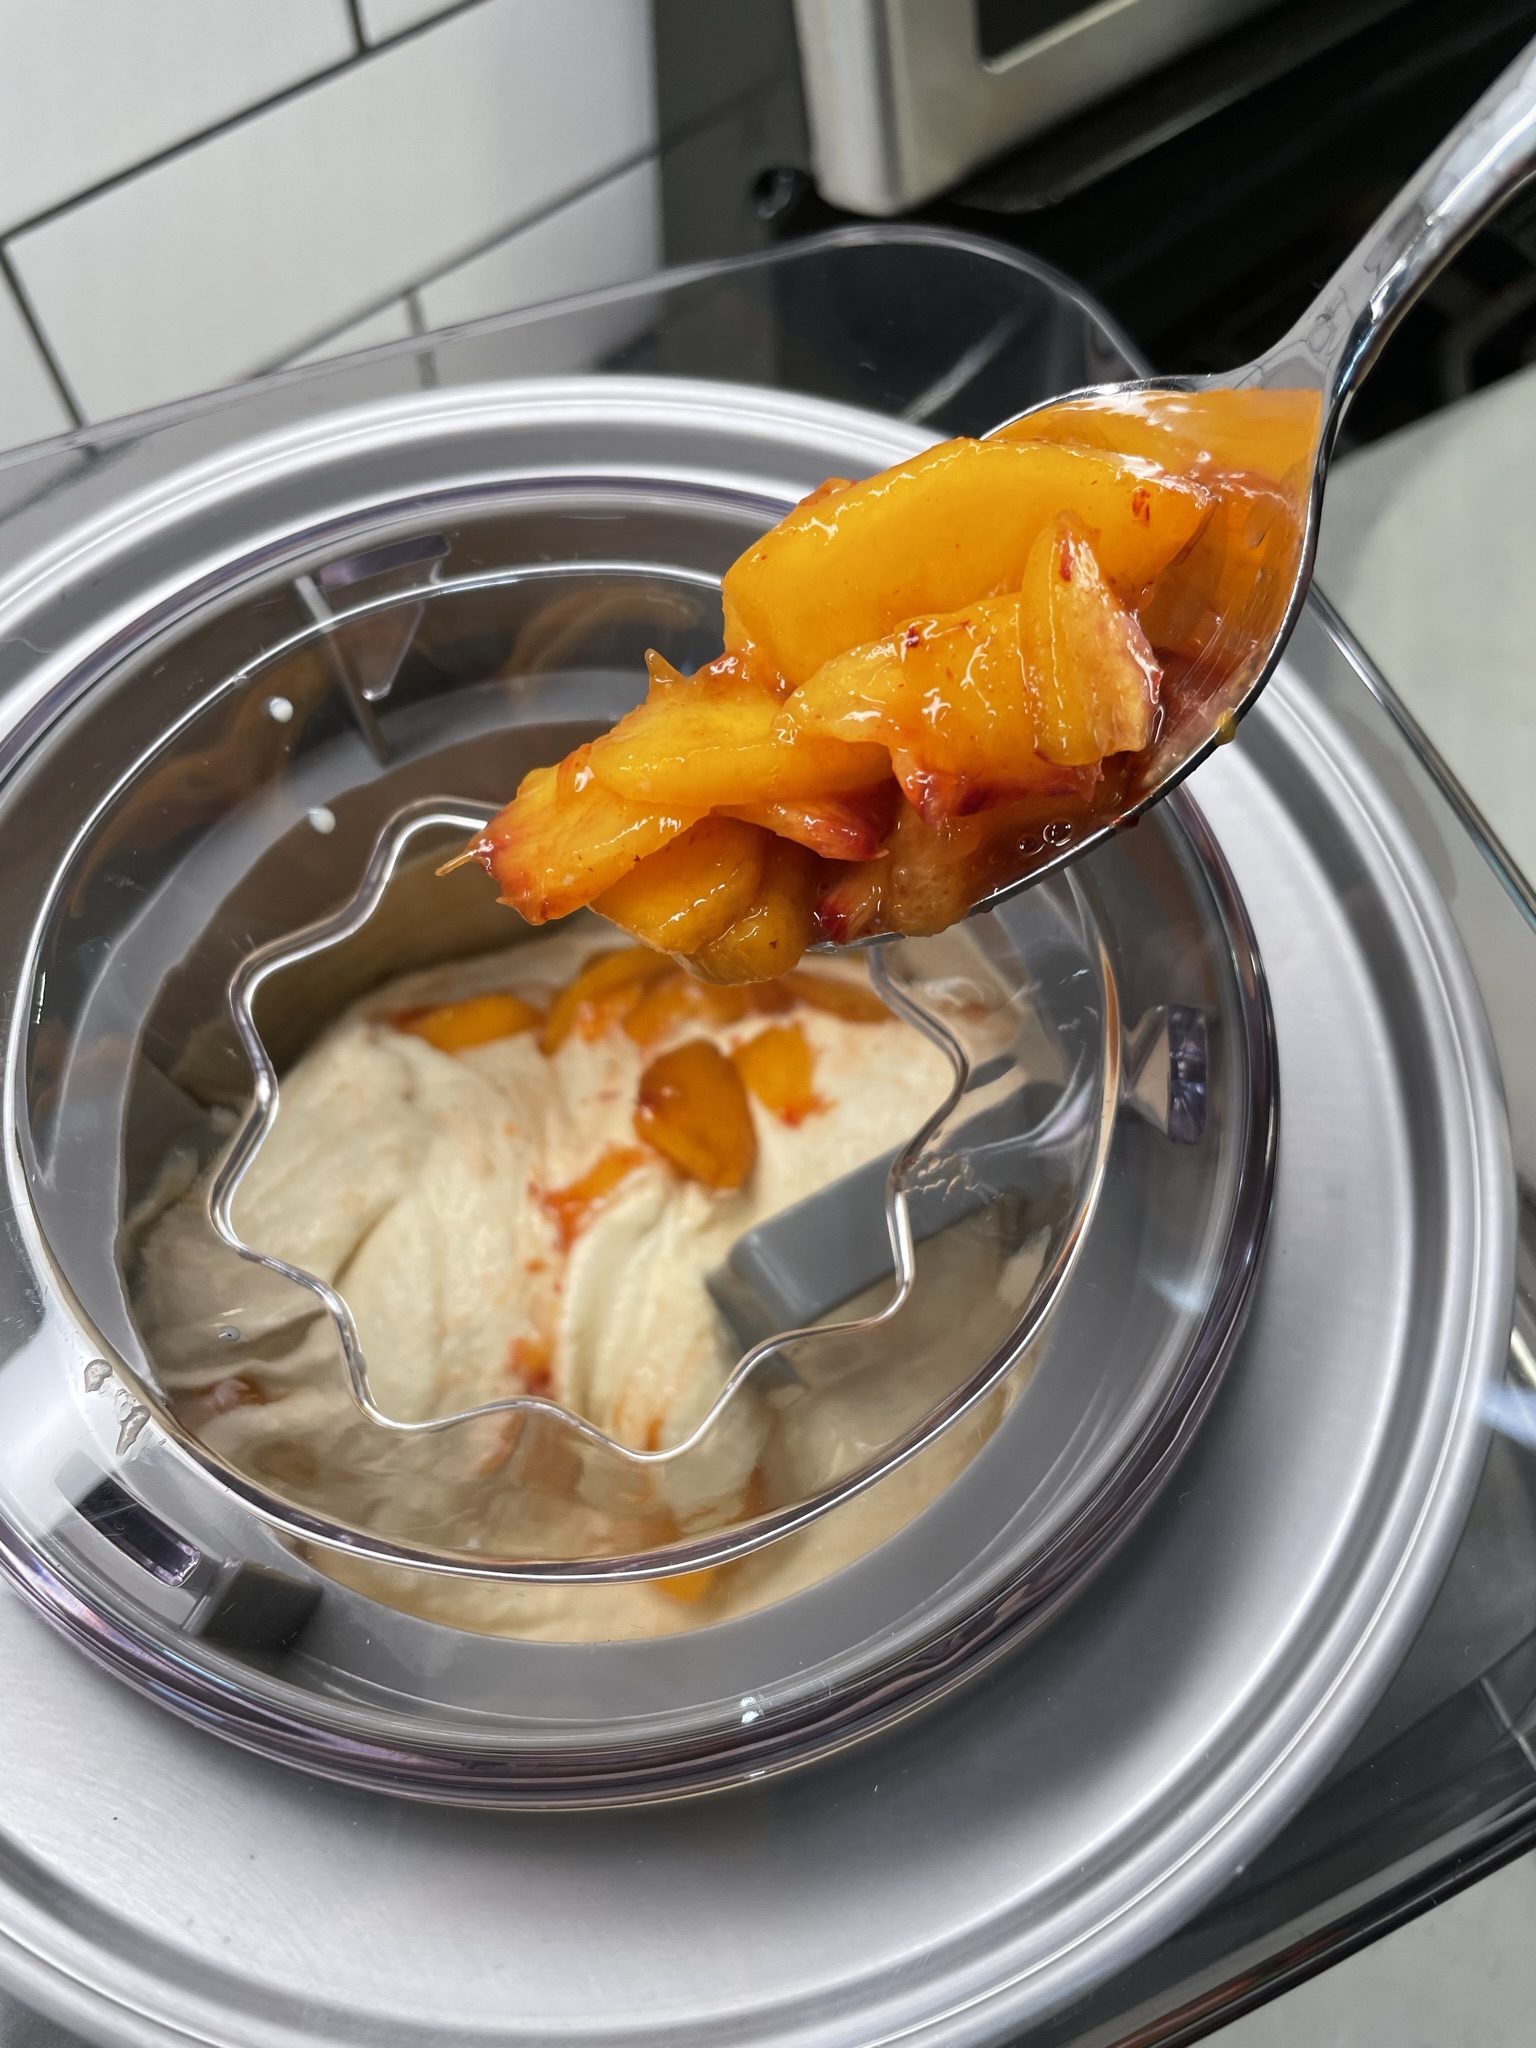
Sweet juicy peaches, tossed with sugar, corn starch and a touch of cinnamon, cooked until tender and saucy under a crown of tender biscuits that have just a touch of crunch on the edges. Crystals of sugar on top that add a little extra something with each bite. Served warm with a scoop of vanilla ice cream. That, to me, is a real deal peach cobbler. As the sun sets on National Ice Cream month this year, I’ve transformed that favorite summer dessert into a single, glorious scoop of peach cobbler ice cream.
This recipe is my own, developed out of my experience with several other past recipes, with and without peaches. To explain how I got here, it makes sense to share what I’ve learned from past efforts and mistakes.
What’s the best way to make ice cream with fruit?
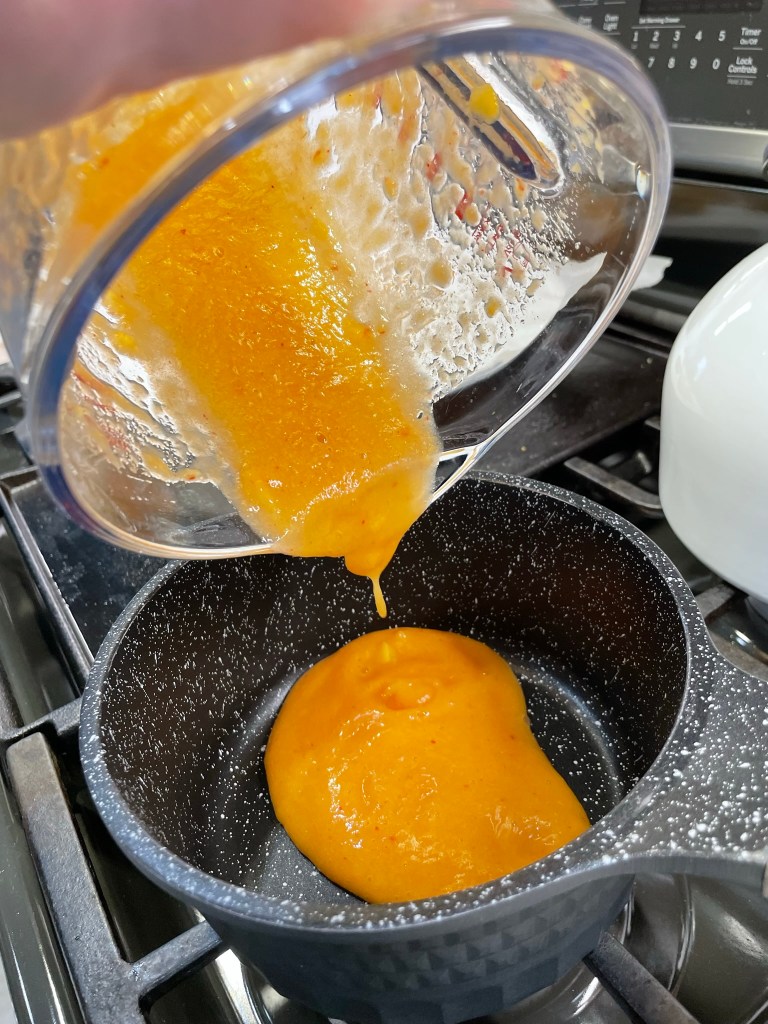
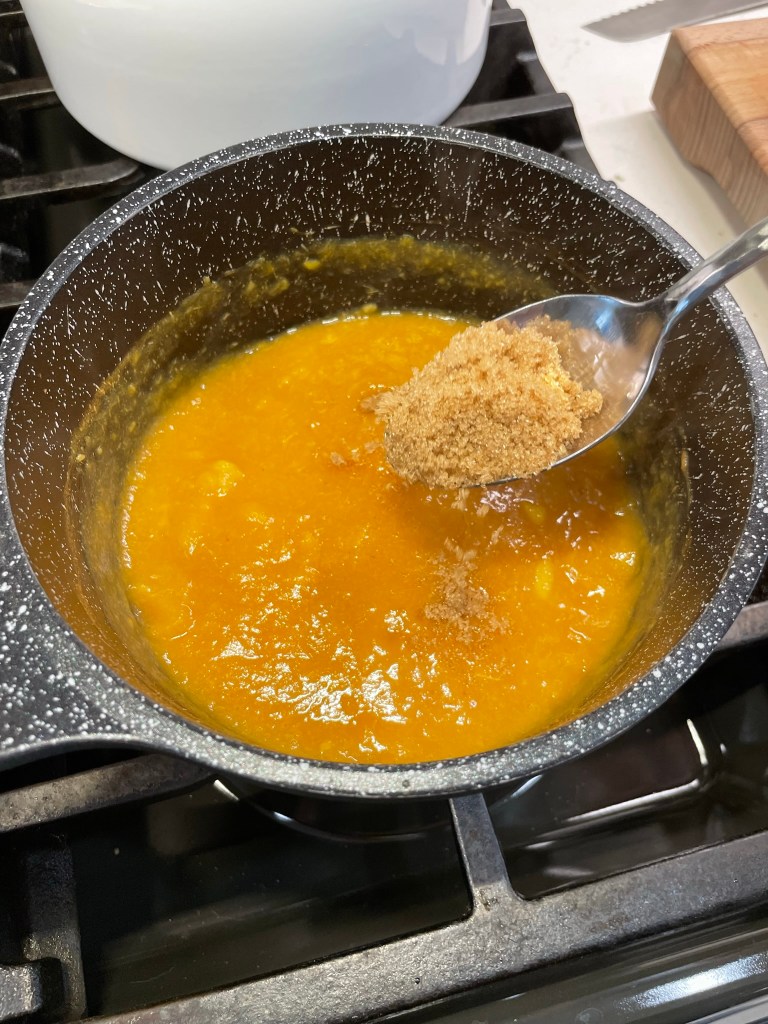
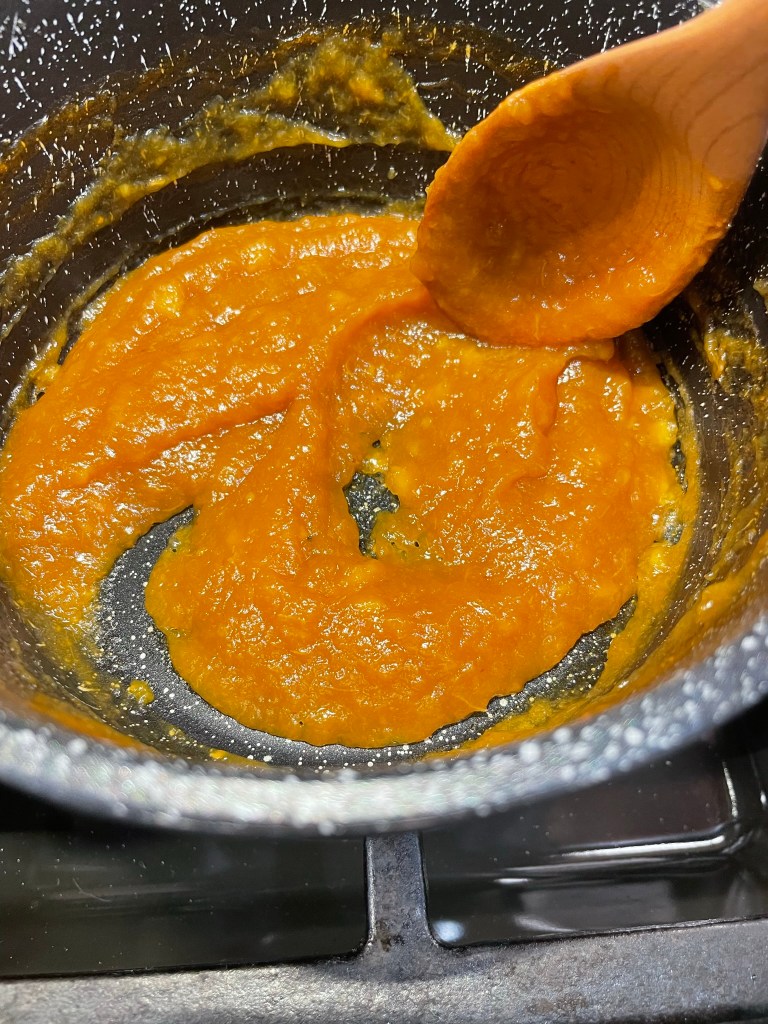
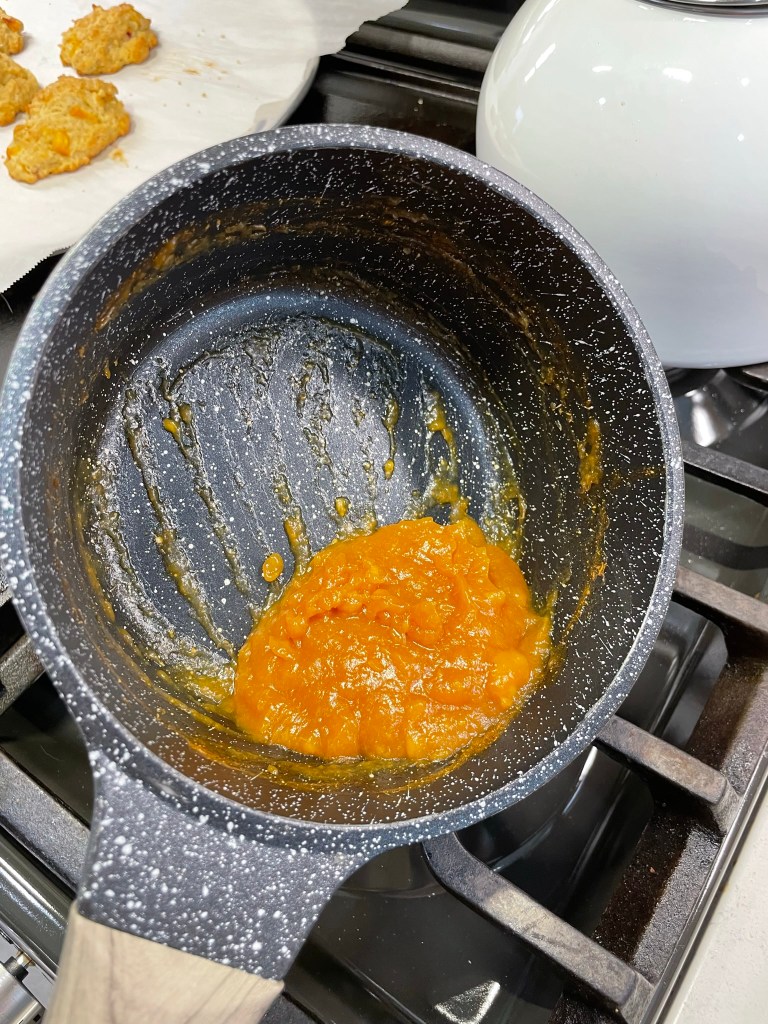
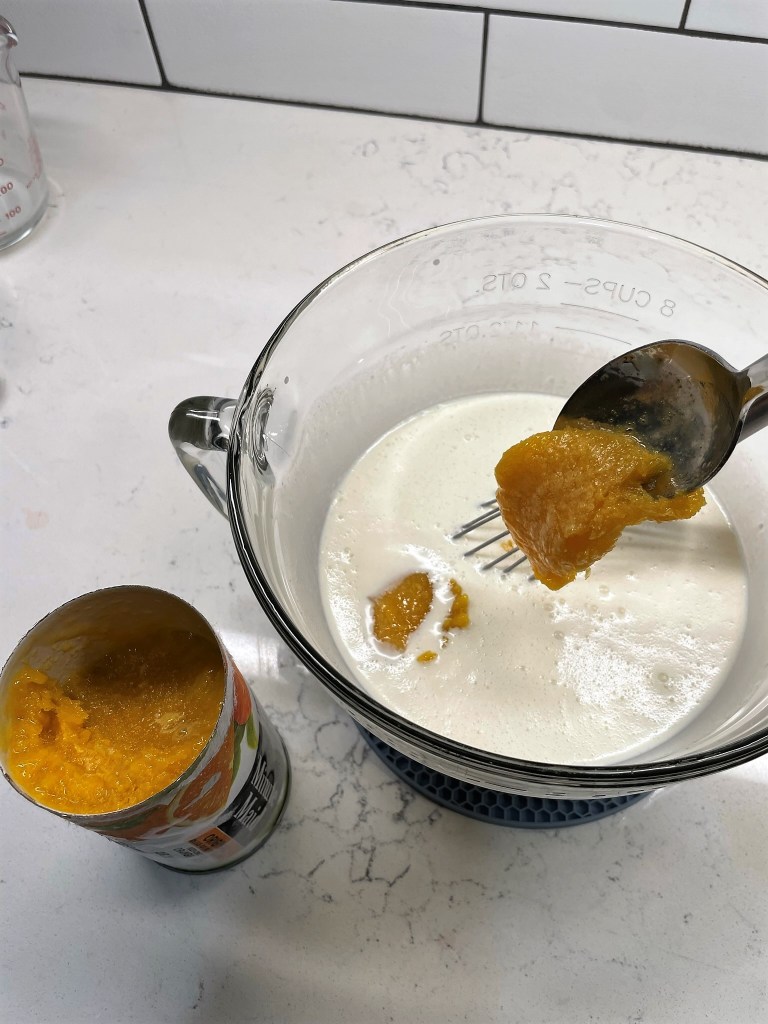
Too many fresh fruit bits can make the finished ice cream feel too icy. I learned this especially when I made a strawberry-mascarpone ice cream a few years ago. Fruit, especially fresh fruit, contains a great deal of moisture, and when you freeze it, ice crystals form inside, making for an unpleasant bite that hurts my teeth. One day, I will re-work that recipe to improve the texture. But to counter the icy effect in this peach cobbler ice cream, I cooked the peaches, borrowing a technique I learned recently when I made that heavenly, boozy strawberry daiquiri cake. Cooked fruit loses volume as the moisture evaporates, but all the flavor remains, so I peeled and pureed a couple of peaches, then cooked them down into a sticky, concentrated peach paste. I still embellished the ice cream with a few bits of fresh peach for pops of color and flavor, but the ice cream gets most of its peachy keen flavor from the puree.
A touch of brown sugar in the puree made this extra delicious!
How do you incorporate other foods into an ice cream?
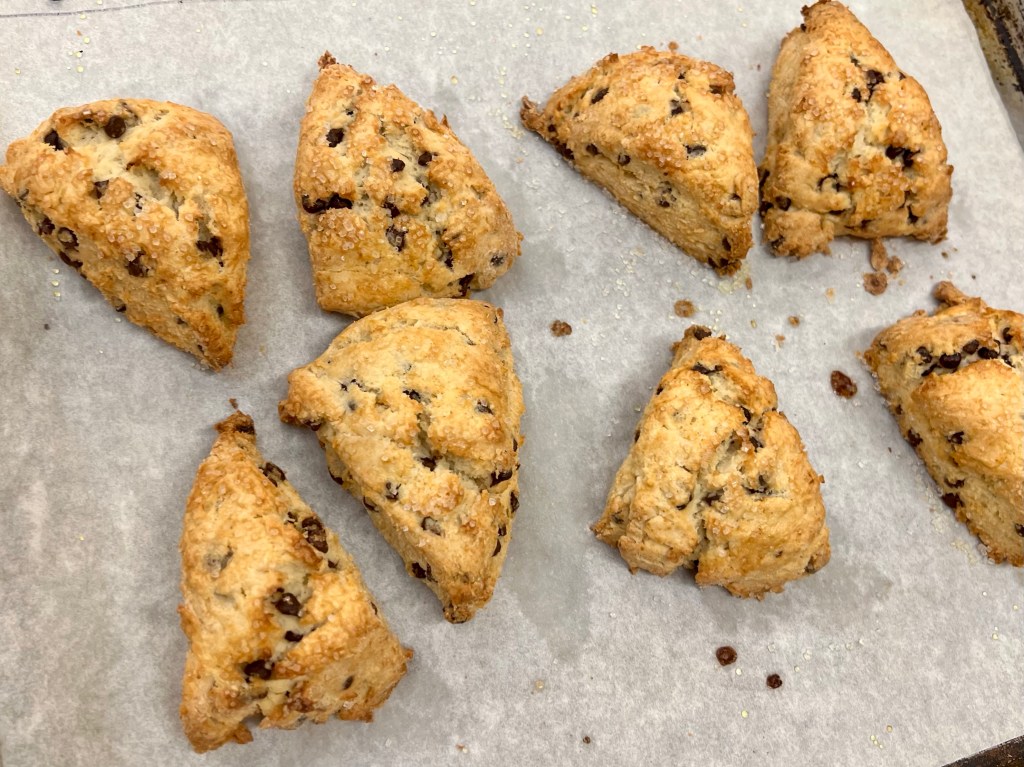
I’ve had to get a little creative with some ingredients, because adding the ingredient directly would have resulted in a weird texture. For my s’mores ice cream, I wanted every element of a s’more— the melty chocolate, toasty marshmallow, the sweet graham cracker— but can you imagine what would happen if I tried to swirl actual melted chocolate into an ice cream base? Yep, a big mess. Same with toasted marshmallows, which just get hard and sticky in the refrigerator, let alone the freezer. My solution for that ice cream was to use a dark chocolate syrup to play the role of the Hershey square, and a marshmallow fluff-cream cheese mixture to stand in for the toasted marshmallow element. It was delicious, but I’ve been hankering for a re-do on that one as well, so stay tuned! For this peach cobbler ice cream, I wanted the “biscuit” texture that I loved in my up-north cobblers, but a plain old biscuit would have been dry and crumbly. That’s when I remembered one of my baking class experiences at King Arthur earlier this month— we made scones!
Thanks to Michelle, my baking partner, for taking this picture! It was such a hectic day, I forgot! 🙂
What’s the difference between a biscuit and a scone?
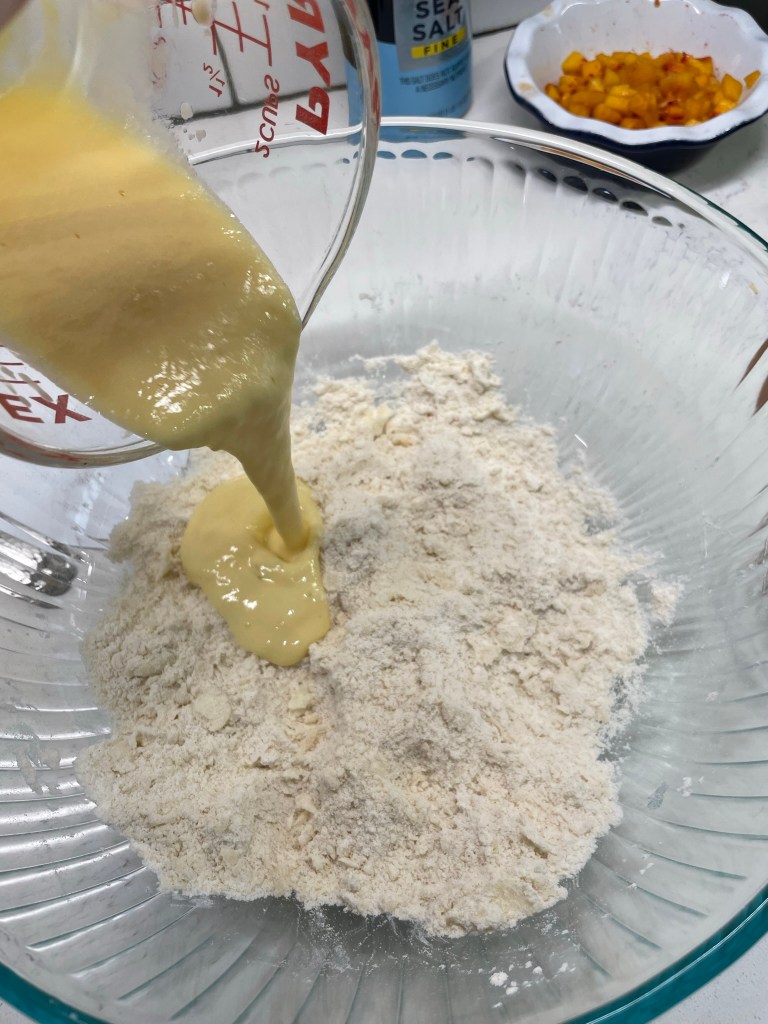
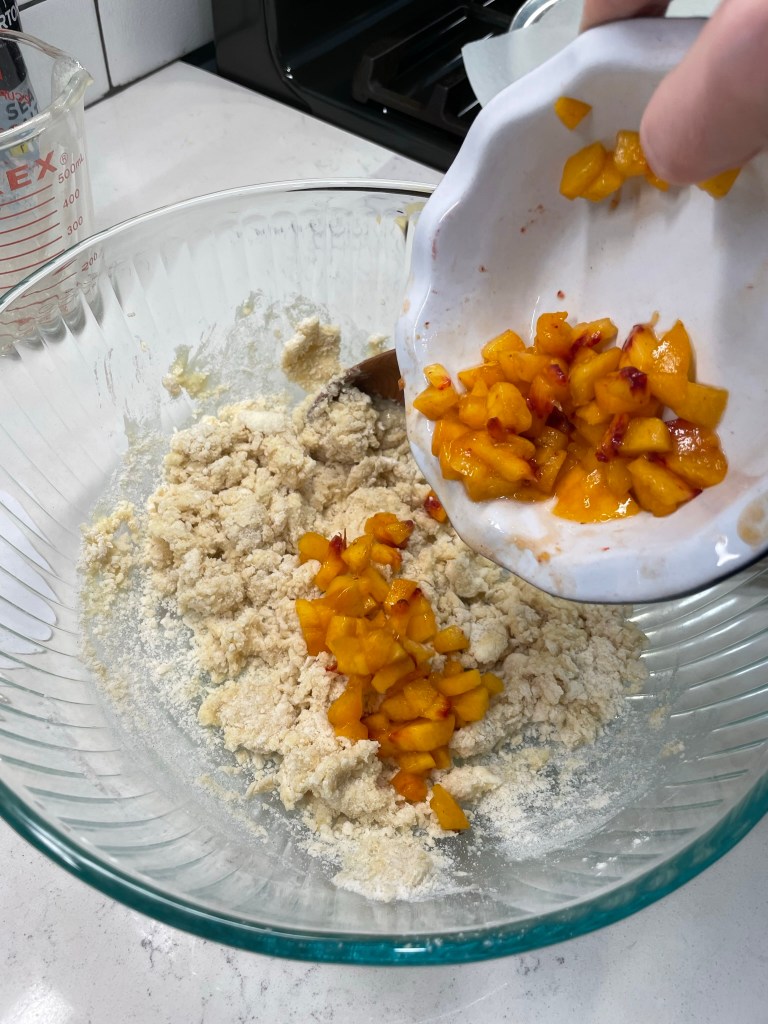
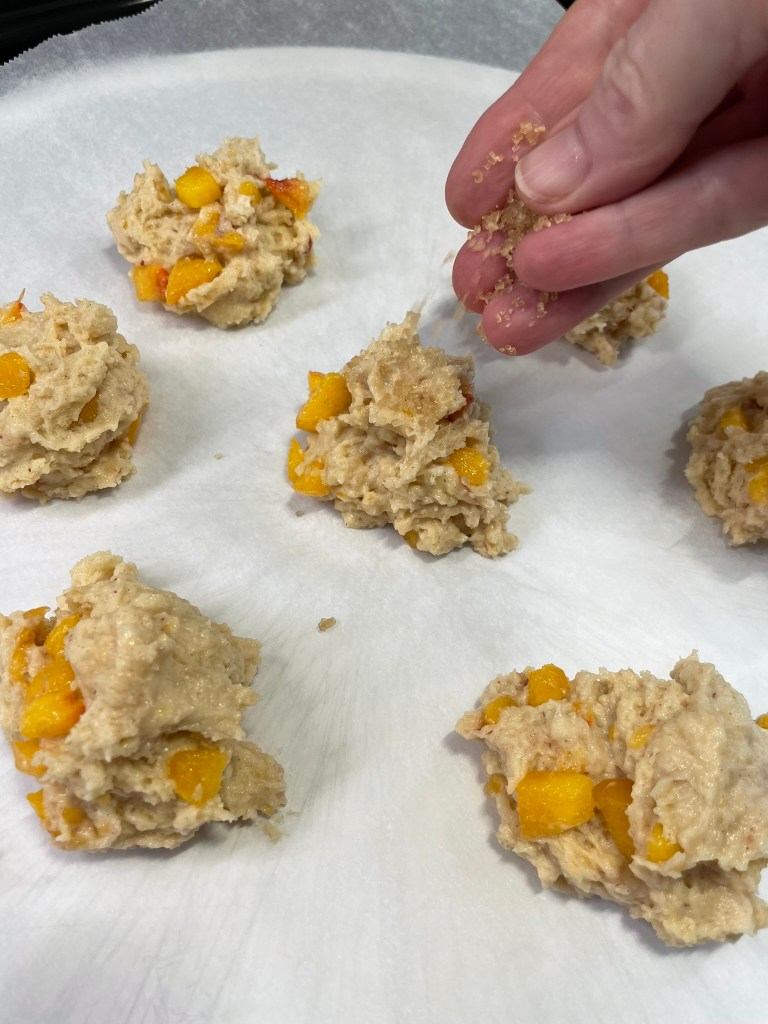
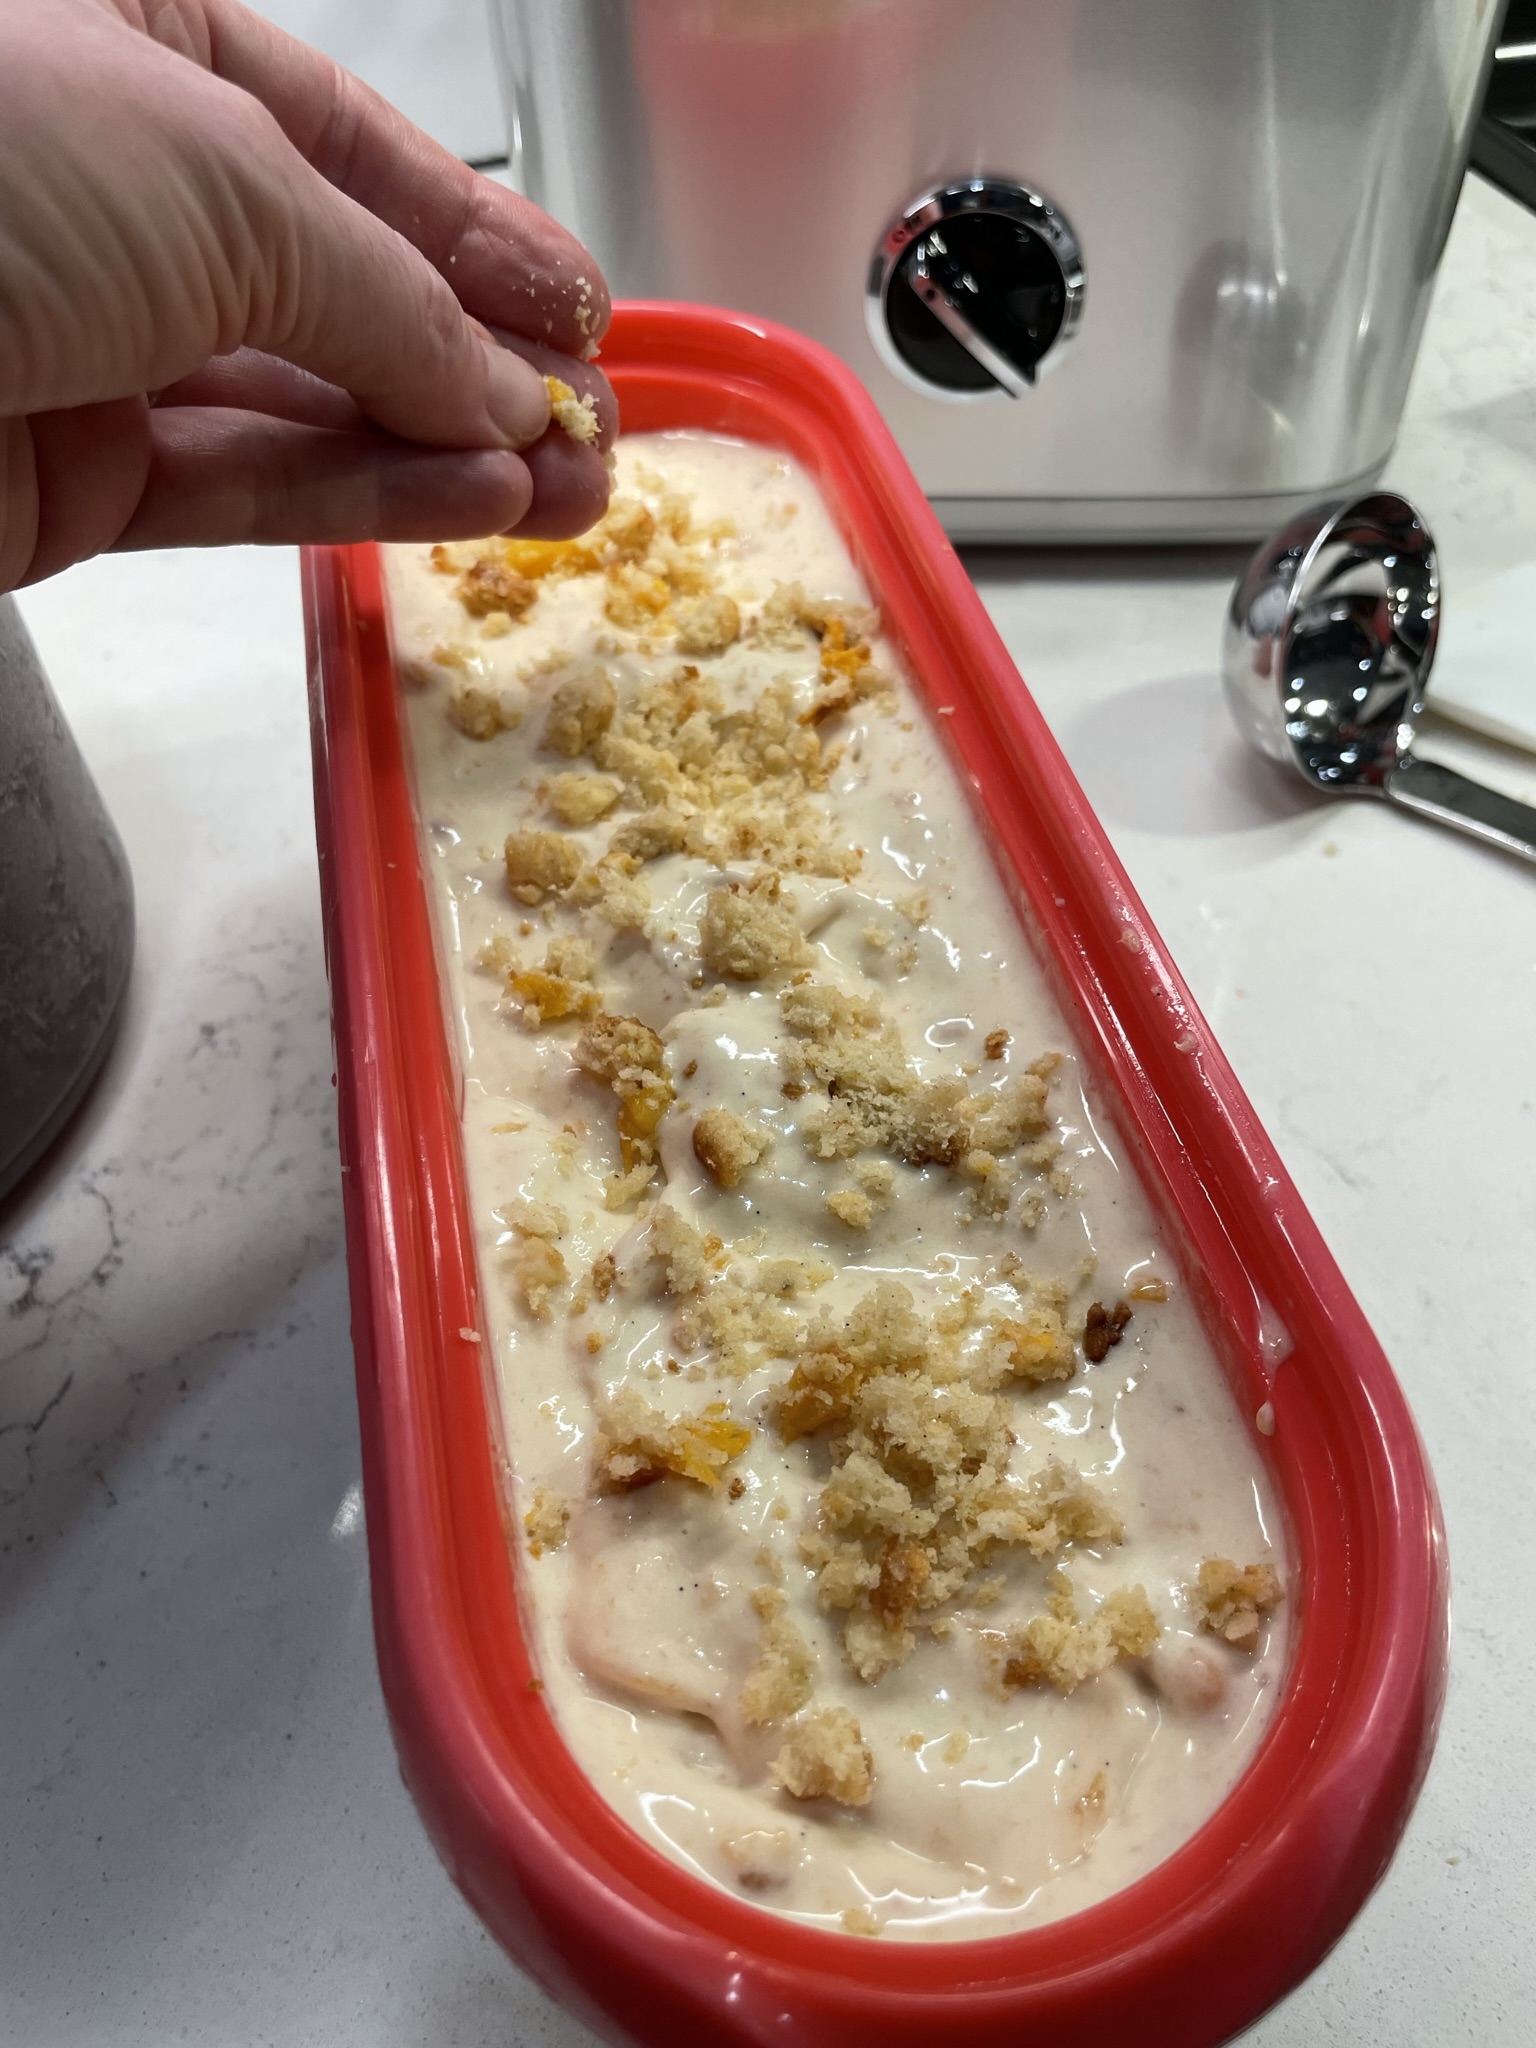
Scones are similar to biscuits in that they use a chemical leavening— baking powder, in this instance— but different because the dough usually incorporates more sweetness and an egg for richness and texture. At the tail end of my Bread: Principles & Practice class, we whipped up a batch of scones as we waited for another bread recipe to do its thing. The scones were delightfully tender, like a biscuit, but sweeter, softer and almost cookie-like. That, I decided, would be a perfect solution for the “cobbler” element of my ice cream, and would you believe it? King Arthur Baking has a recipe for tender peach scones! I whipped up half a batch (exactly as written, if you can imagine), and crumbled two of them to layer in my ice cream.
These drop scones were deliciously peachy, with a tender, almost spongy texture.
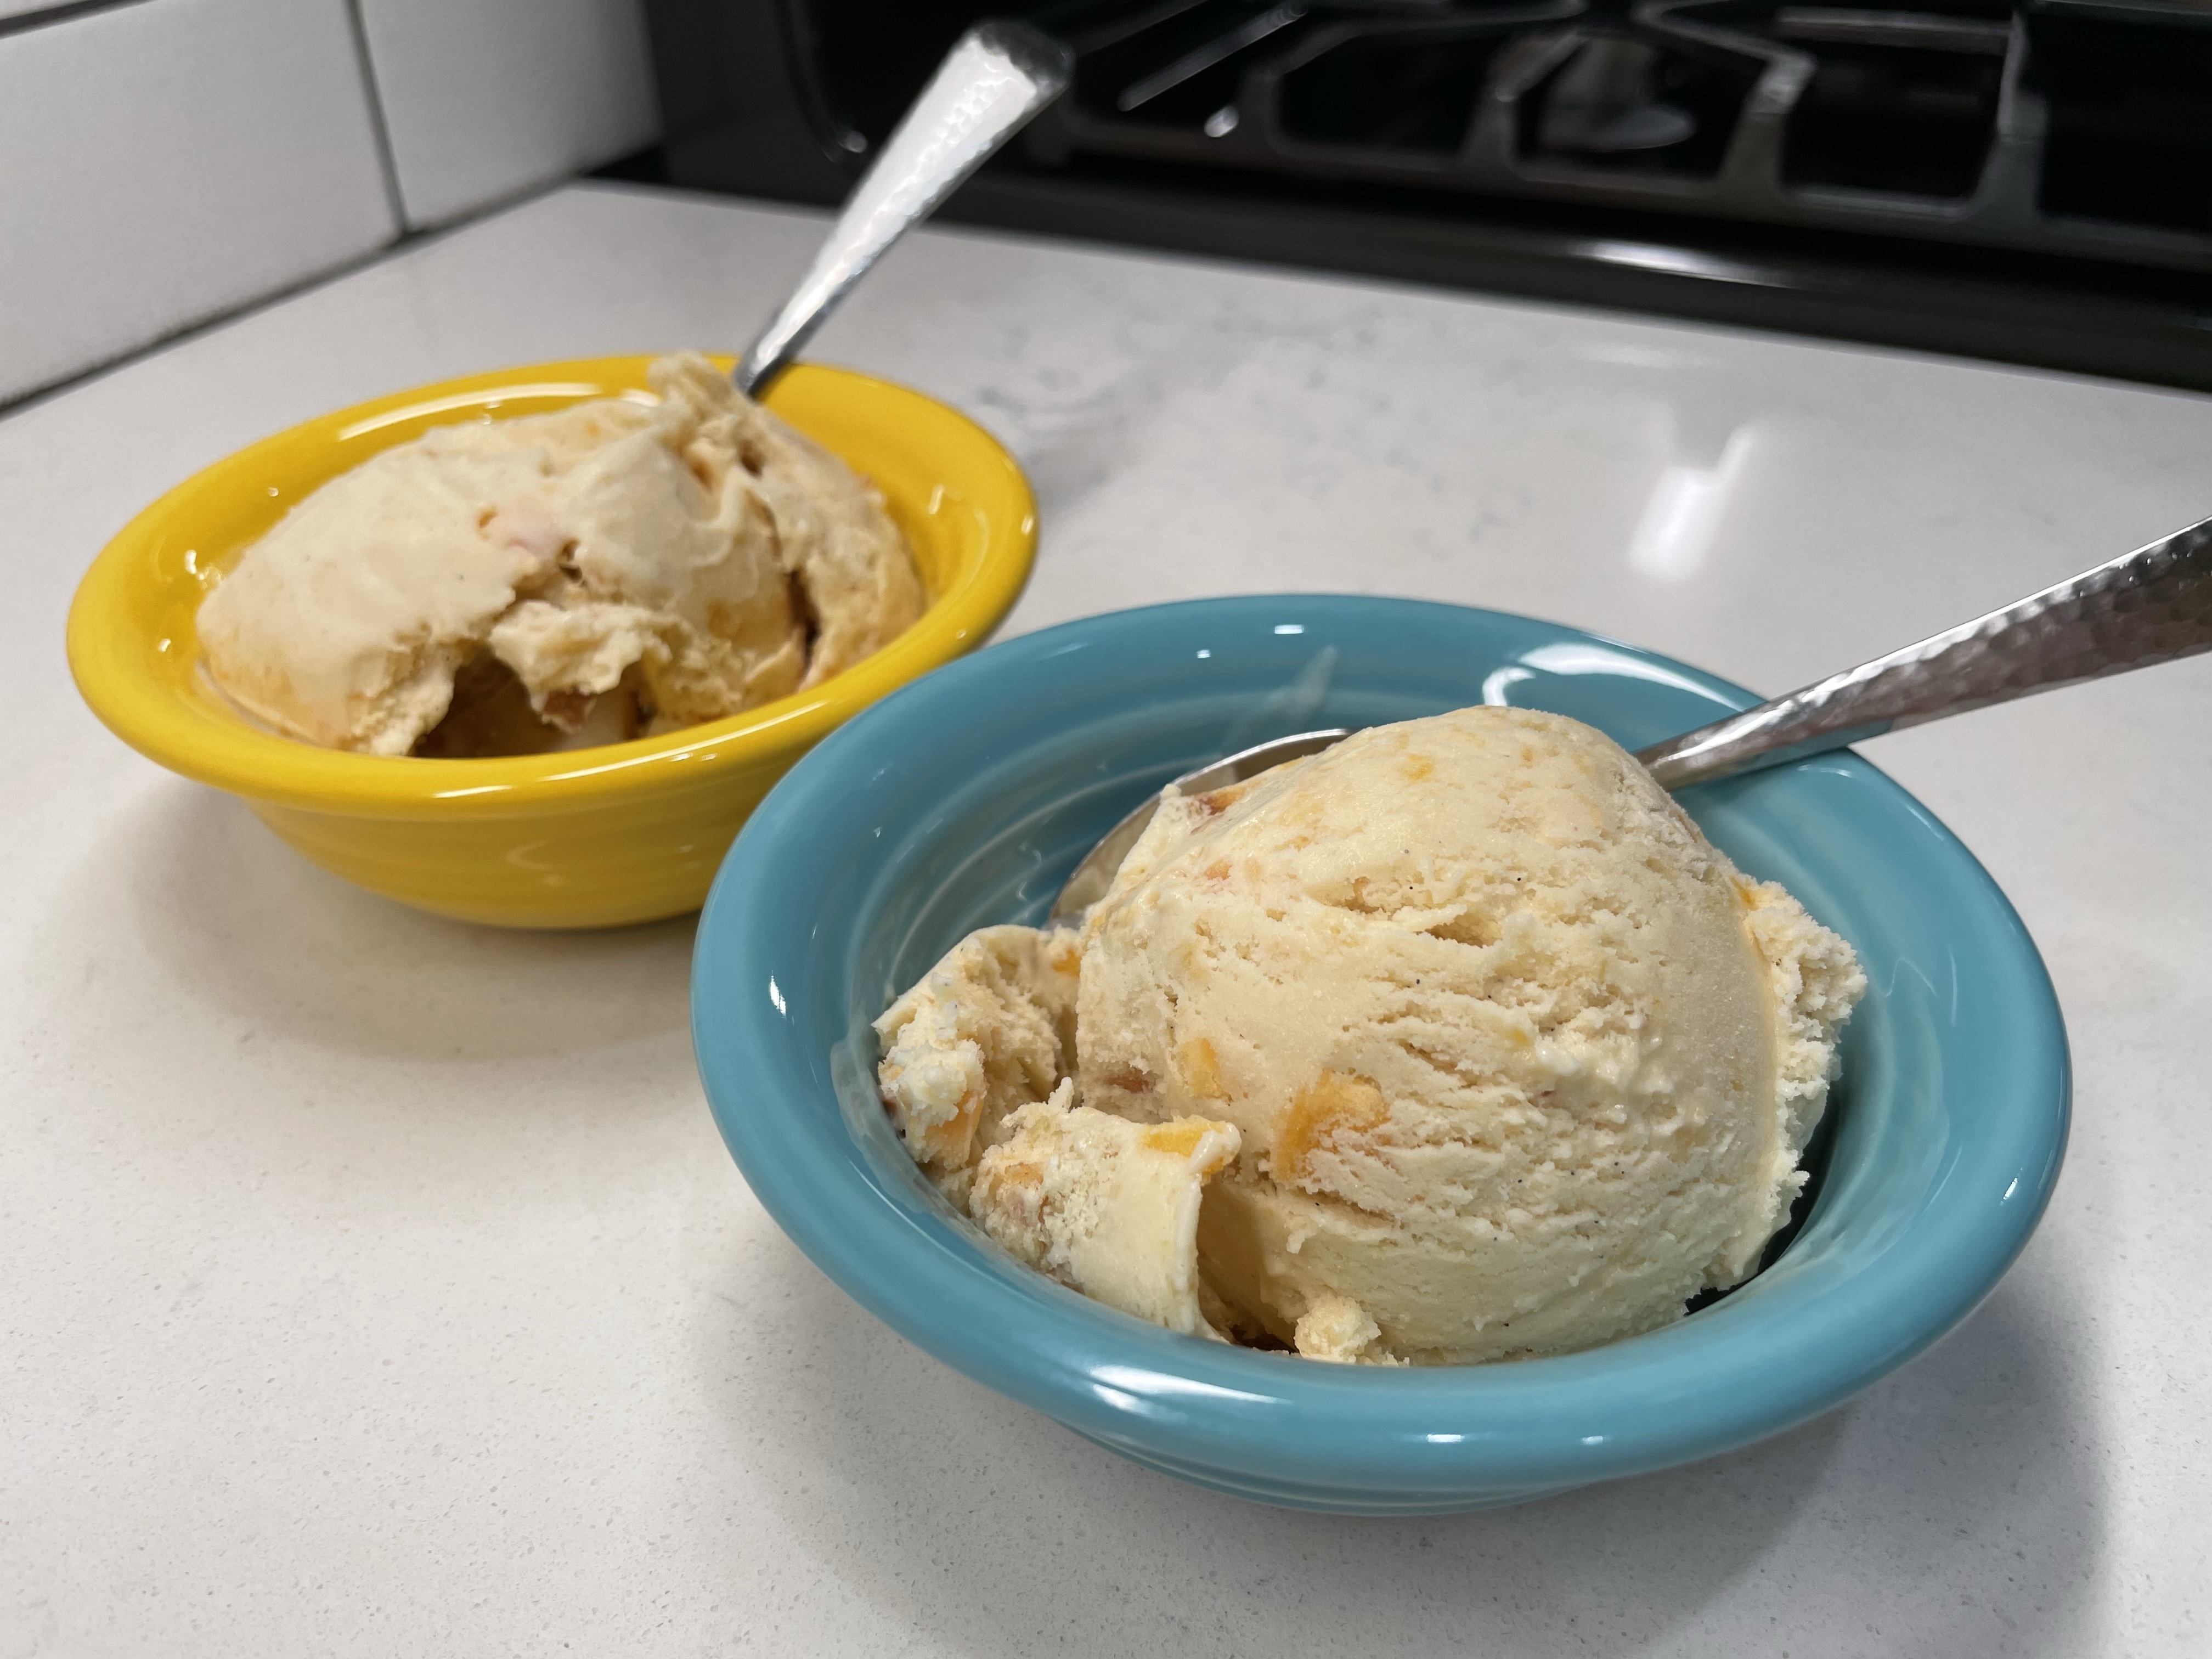
I hope I always find something new to learn in the kitchen. This is my blue ribbon-hopeful peach cobbler ice cream, my final bow for this year’s National Ice Cream Month. Enjoy!
A cooked puree of peaches adds a concentrated fruit flavor to the base of this ice cream, and tender peach scones provide the 'cobbler' element.
Ingredients
3 fresh, ripe peaches (you’ll puree two and dice the third)
2 teaspoons fresh lemon juice (divided between peaches above)
1 Tbsp. light brown sugar
14 oz. sweetened condensed milk (regular or fat free)
1 cup whole milk
1 cup heavy cream
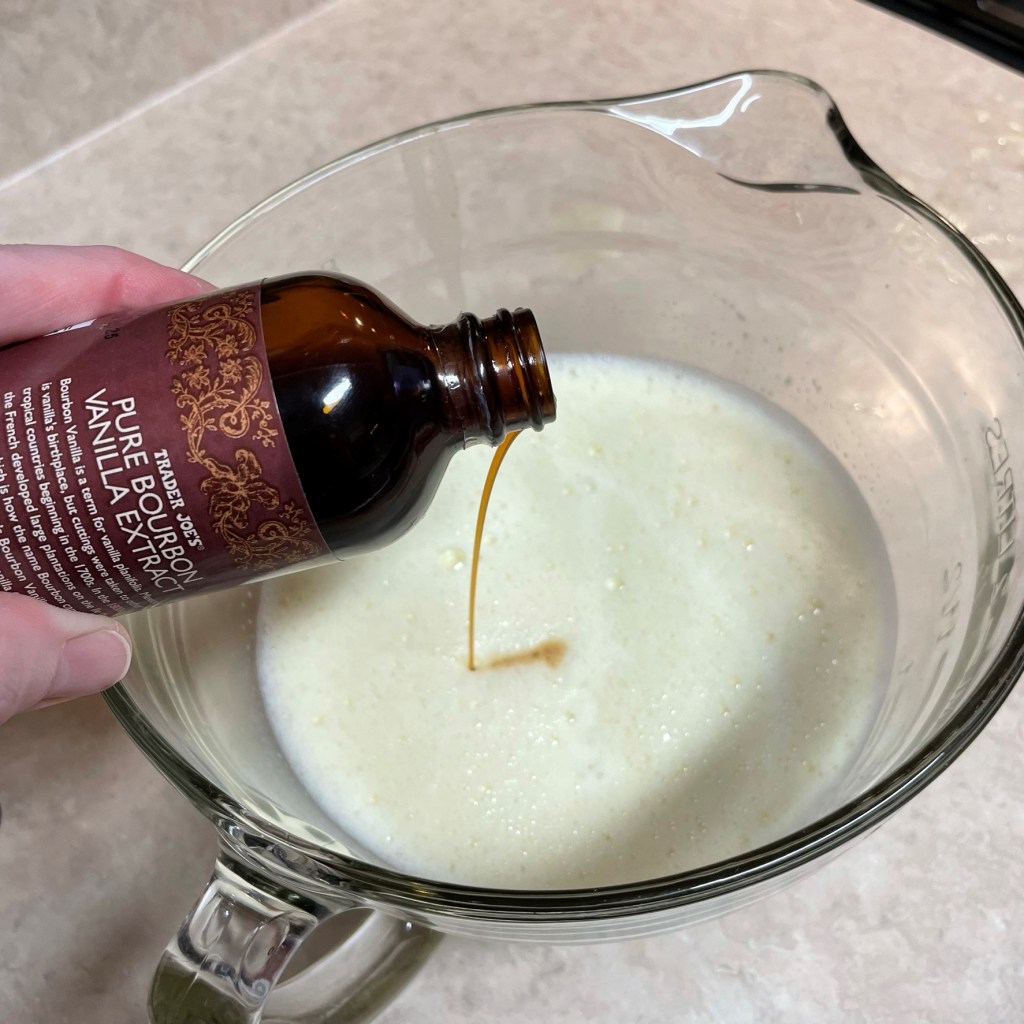
1 Tablespoon vanilla bean paste
1 Tablespoon vodka (optional, added at end for improved scooping texture)
1 cup crumbled peach scones (recipe linked in story), or substitute as noted below.
To mimic the texture and sweetness of cobbler batter, I baked a half batch of tender peach scones, found on King Arthur Baking website, and crumbled two of them to layer in this ice cream. Other great options would be buttery sweet drop biscuits, a yellow cupcake or even a few snickerdoodle cookies! If you want to skip the cobbler portion, the peach ice cream on its own will still be sweet and summery.
Directions
Peel two of the peaches and add to a blender or food processor bowl. Add one teaspoon of lemon juice. Puree for 20 seconds, keeping a few bits if you wish. Cook the puree and brown sugar over medium heat, stirring constantly, until reduced to about 1/2 cup volume (about 20 minutes). Cool to room temperature, then press a piece of plastic wrap directly onto puree. Refrigerate until thoroughly chilled. Peel and dice the third peach and toss bits with lemon juice to prevent browning. Cover with plastic wrap and keep chilled until ready to freeze.
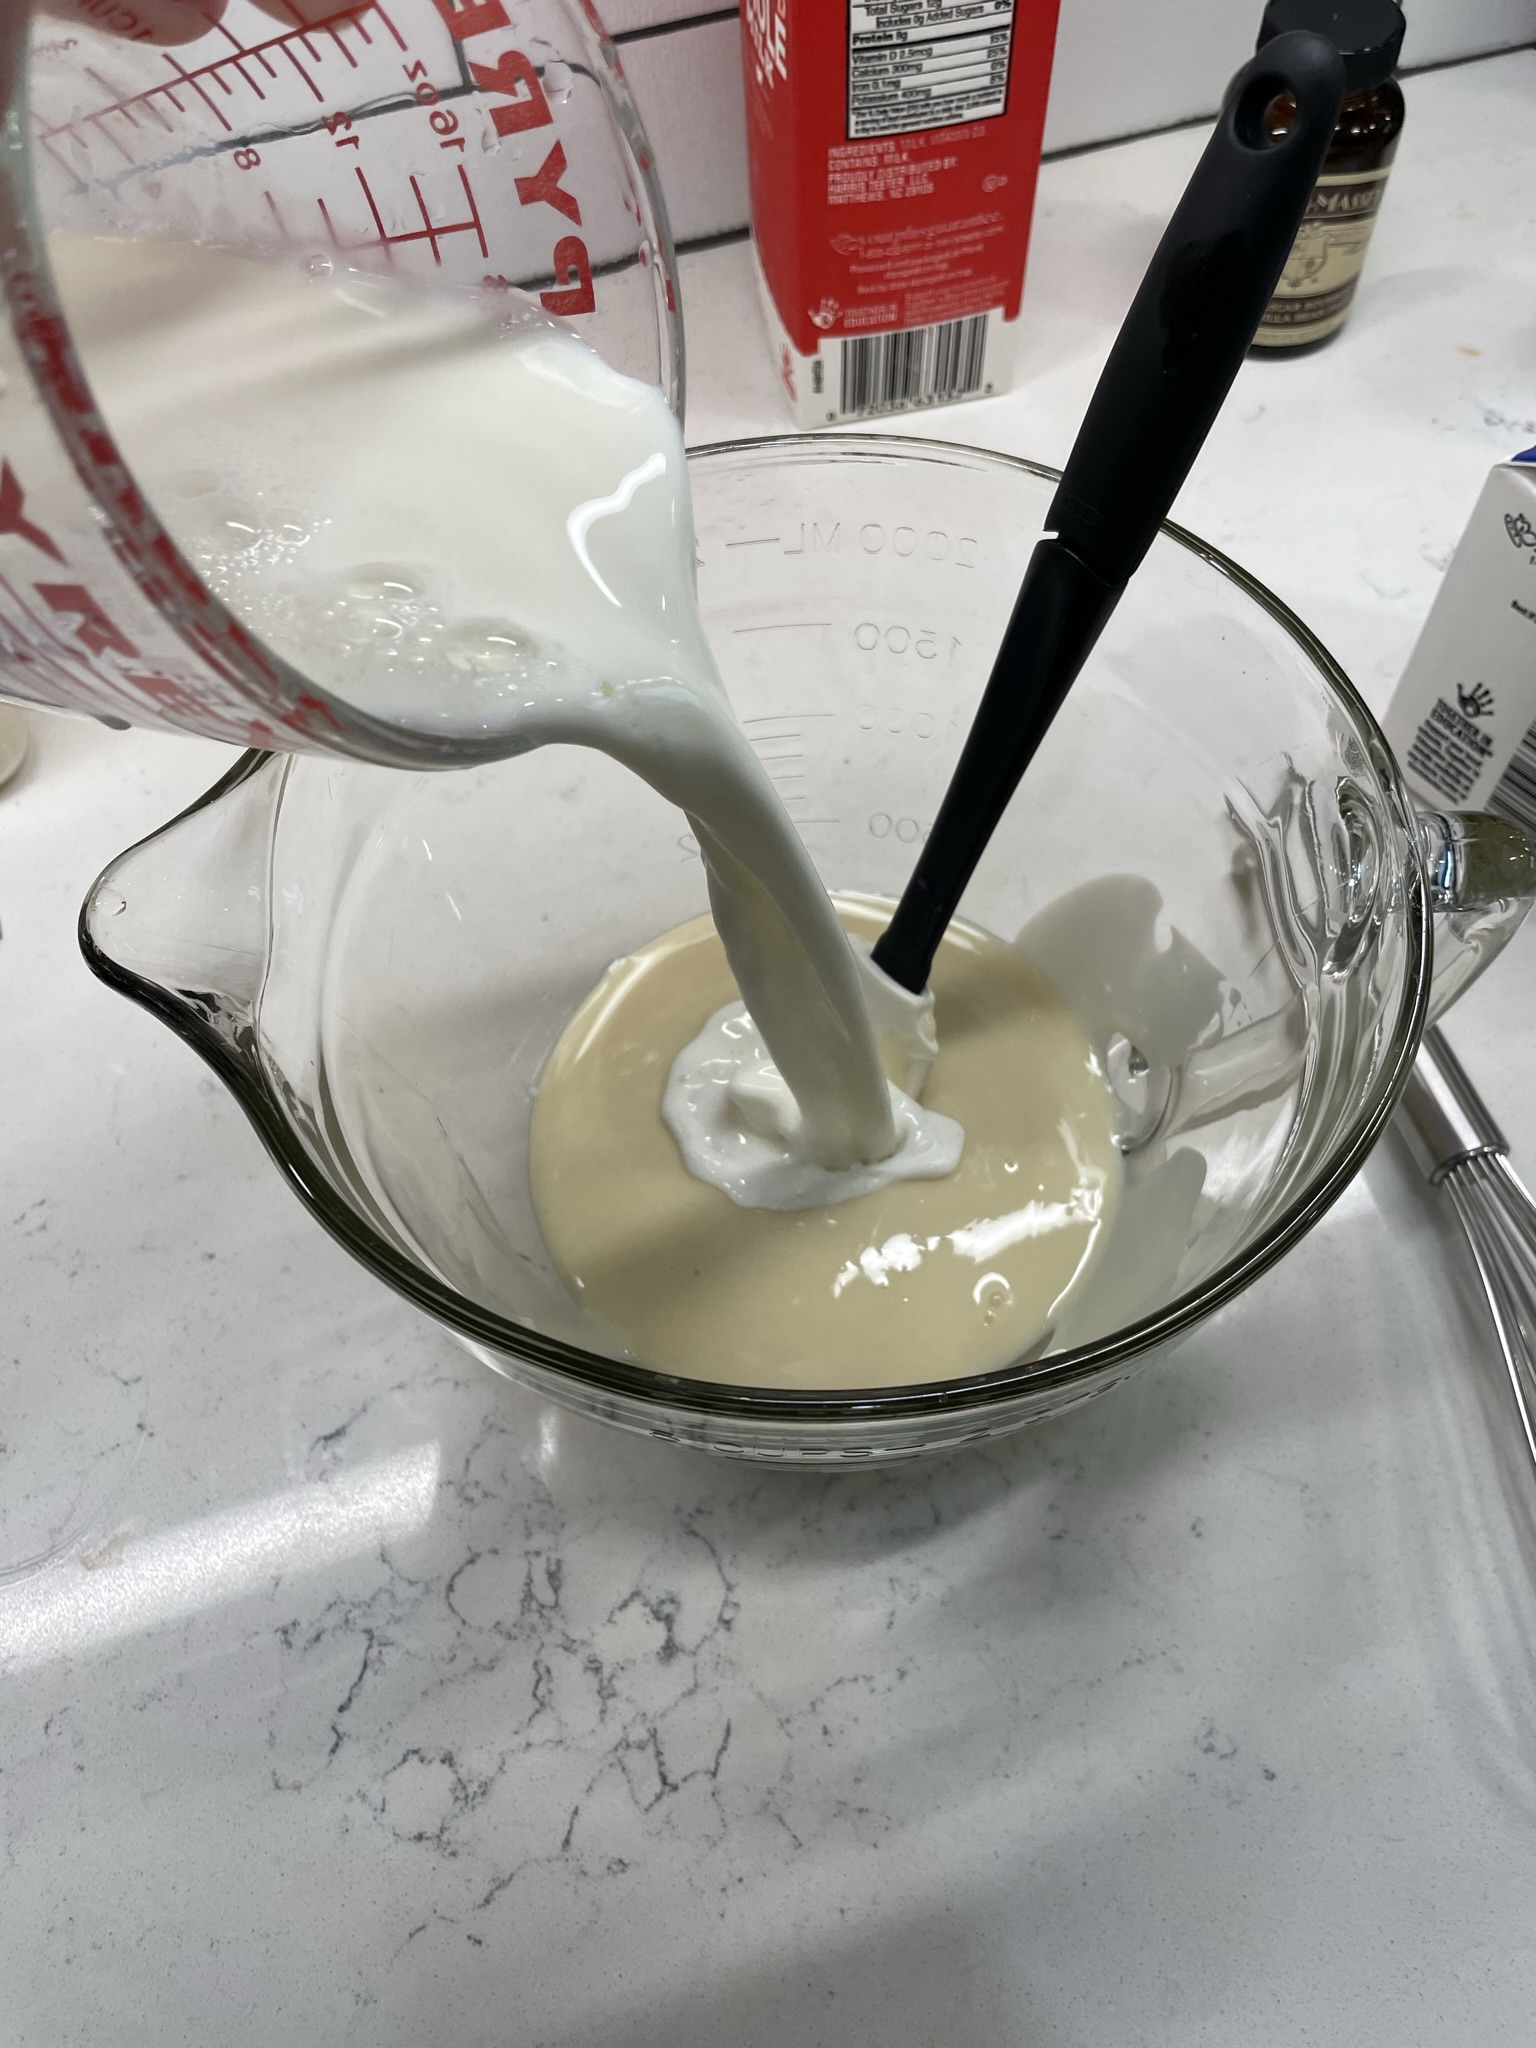
In a large bowl or pitcher, combine condensed milk, milk and heavy cream until evenly blended. Stir in vanilla bean paste. Refrigerate at least 3 hours until thoroughly chilled.
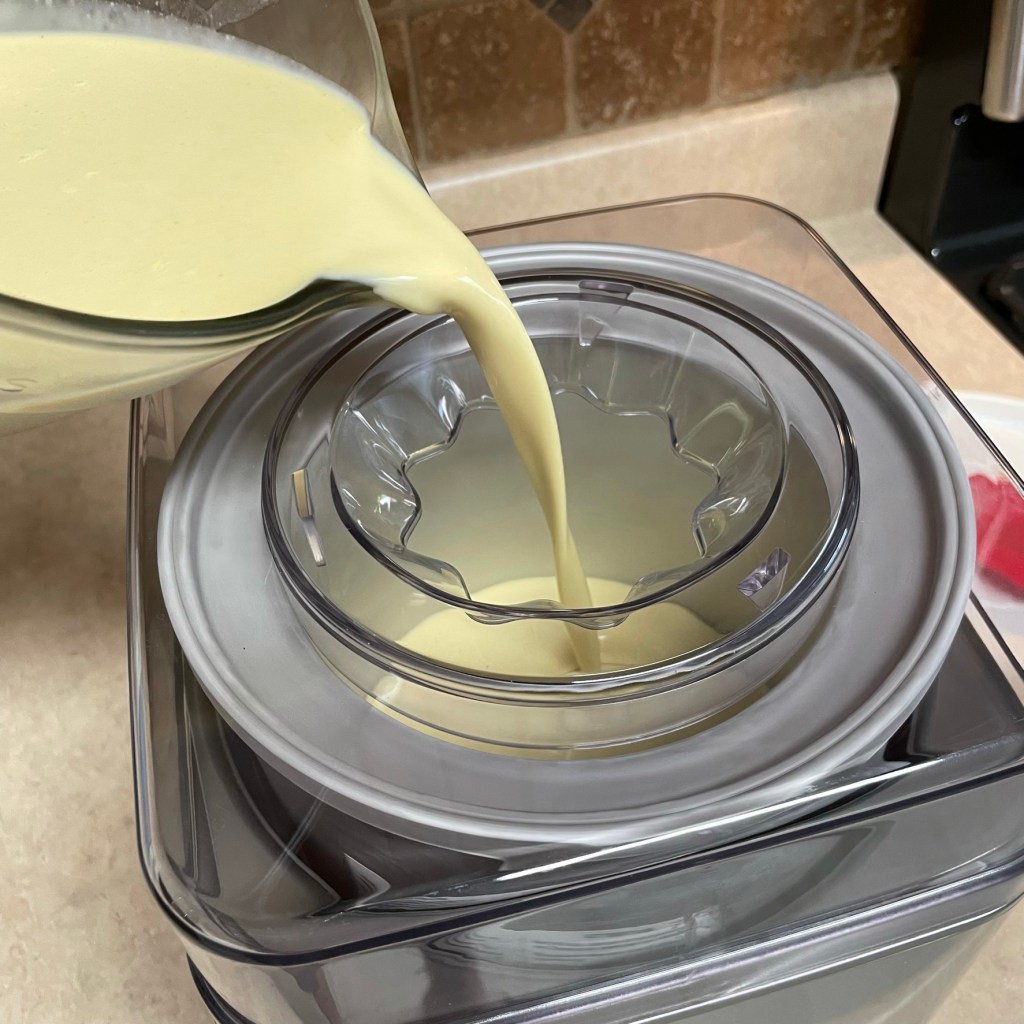
Gently whisk cold peach puree into ice cream base. Freeze in ice cream machine according to manufacturer’s instructions. In the final two minutes of churning, spoon the reserved diced peaches into the machine and pour in vodka (if using). Churn until fully blended.
Transfer ice cream to an insulated freezer container, layered with scone crumbles. Cover and place container in freezer several hours or overnight for best texture.
“This time, I’m gonna try something new!” I say it so many times when my husband and I visit Kilwins, a franchise candy shop and ice cream parlor that seems to always be on the way home from wherever the heck we’ve been. And if it isn’t already on the way home, we might conjure a reason that we must visit Trader Joe’s, and that makes it on the way home so we have an excuse to stop for a sweet treat.
The ice cream at Kilwins is superb— a huge variety of flavors, deliciously creamy, and big, generous scoops served up in your choice of three cones (or a bowl if you really can’t wait to just dig in). Les usually gets the one called “Kilwins Tracks,” which is a house version of Moose Tracks, a swirly mess of vanilla ice cream, chocolate-covered peanut butter truffles and trails of thick chocolate fudge. Or he might stray toward the ever-popular sea salt caramel, which is exactly as amazing as you expect it would be. There are dozens of other flavors, including mint chip, cherry, chocolate-coconut, peanut butter, rum raisin, a groovy, tie-dye colored variety called Superman, and even a few additional flavors hiding in the back.
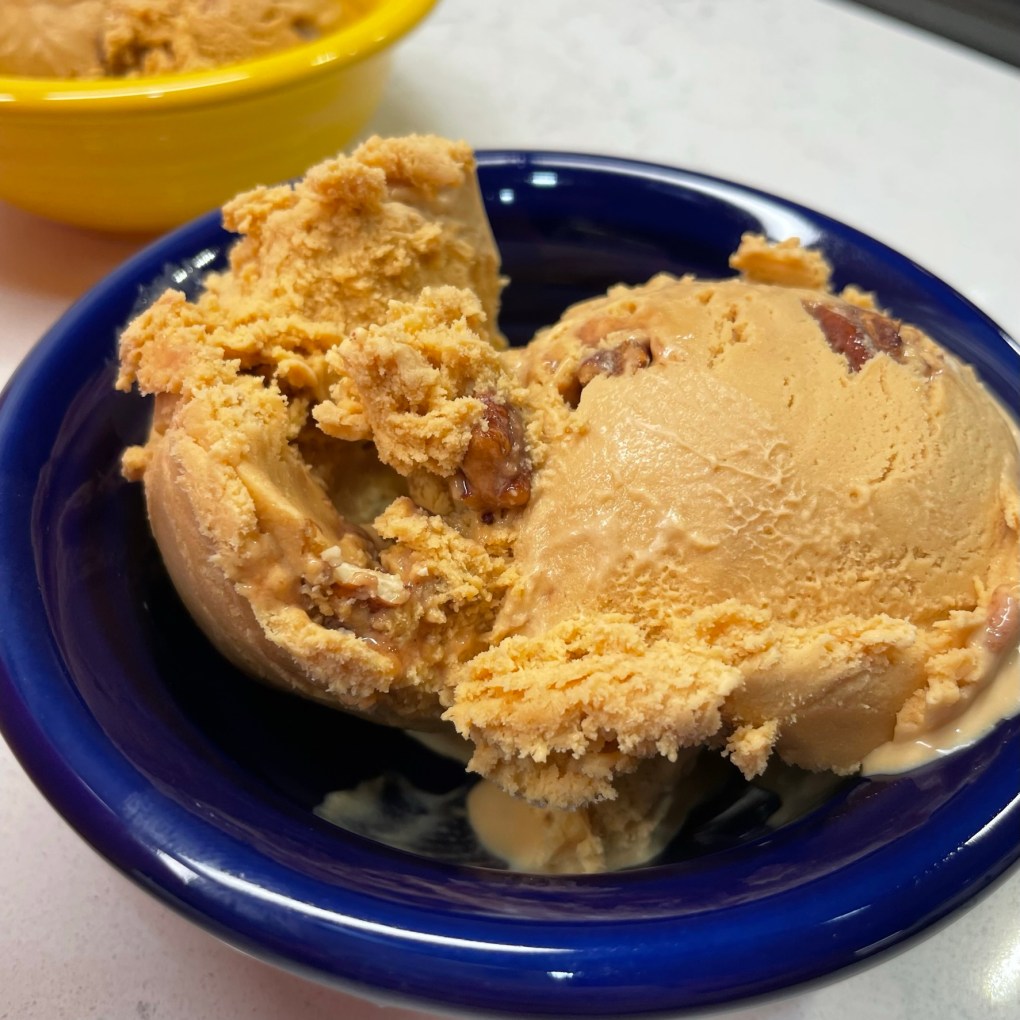
But when I stand there in front of that long glass case, trying to keep my word on choosing something different from my usual, a wave of sadness comes over me. It isn’t because there aren’t enough delicious options— it’s because I just love the New Orleans Praline Pecan that much. And, for the sake of the growing line of people behind me as much as for myself, I usually just give in and get it. So much for trying something new!
I just can’t tear myself away from my favorite!
In my defense, I stopped dating other guys when I chose my husband, so why should it matter if I get the same ice cream each and every time? It’s a perfect blend of creamy, sweet, nutty, slightly salty, caramel-y goodness. Naturally, I decided it was time for me to try to re-create this decadent treat at home, and when I found these pecan praline candies last fall at Trader Joe’s, it was exactly the nudge I needed. I have made it a few more times since, and National Ice Cream Month feels like the right time to share it!
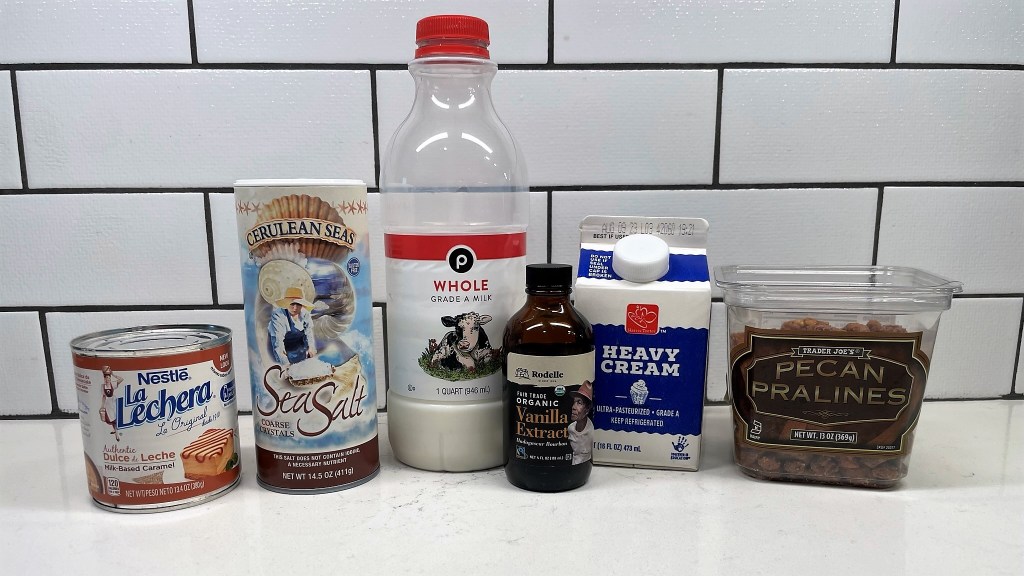
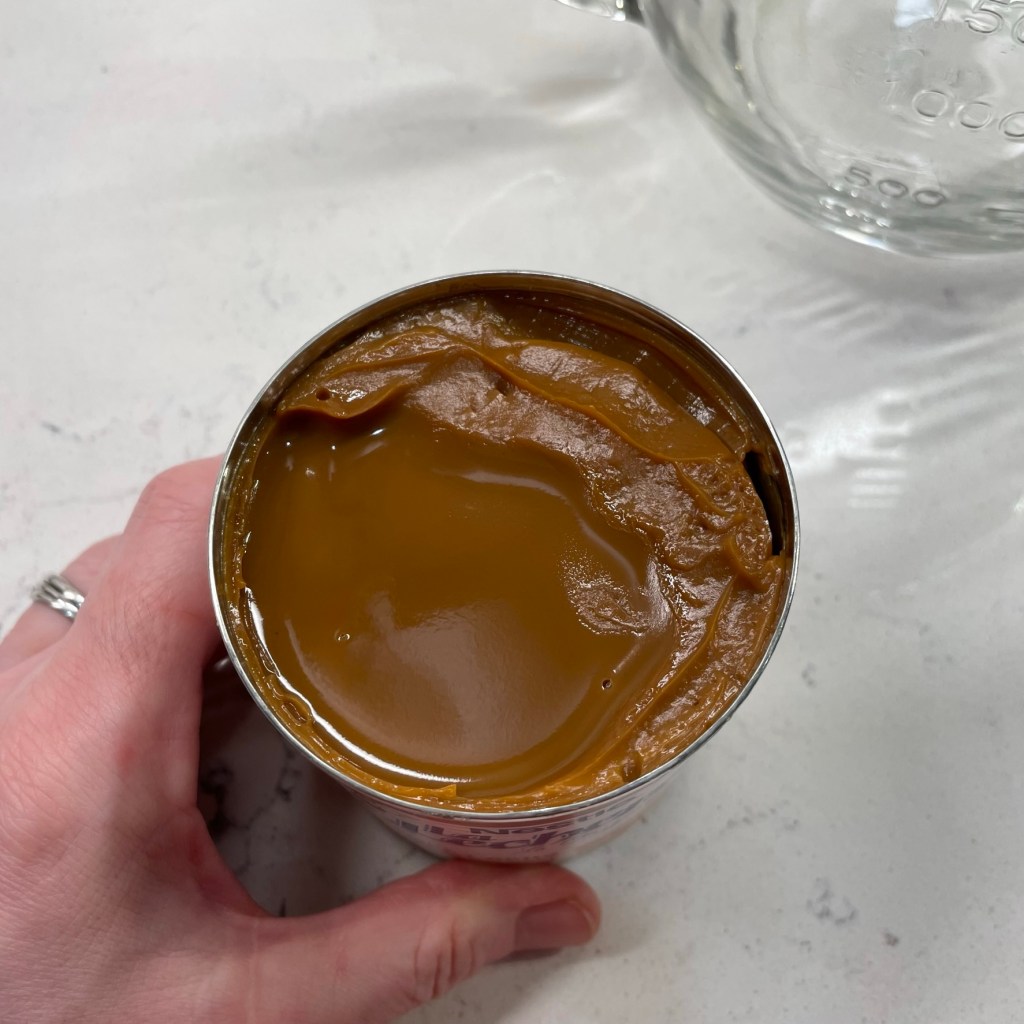
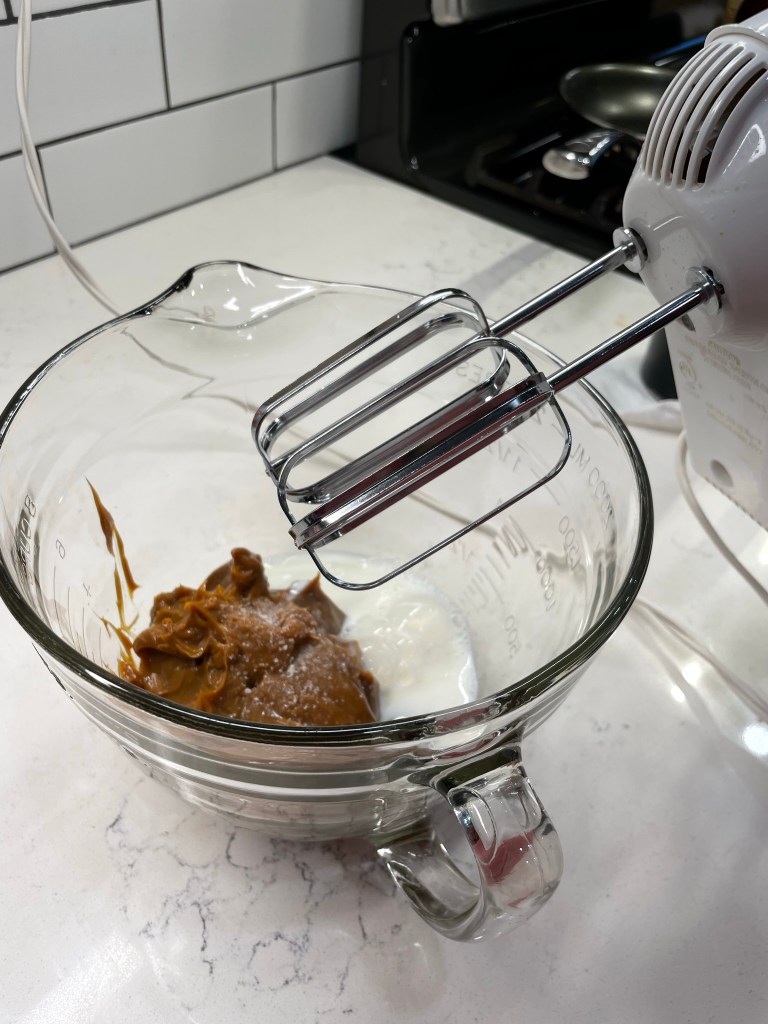
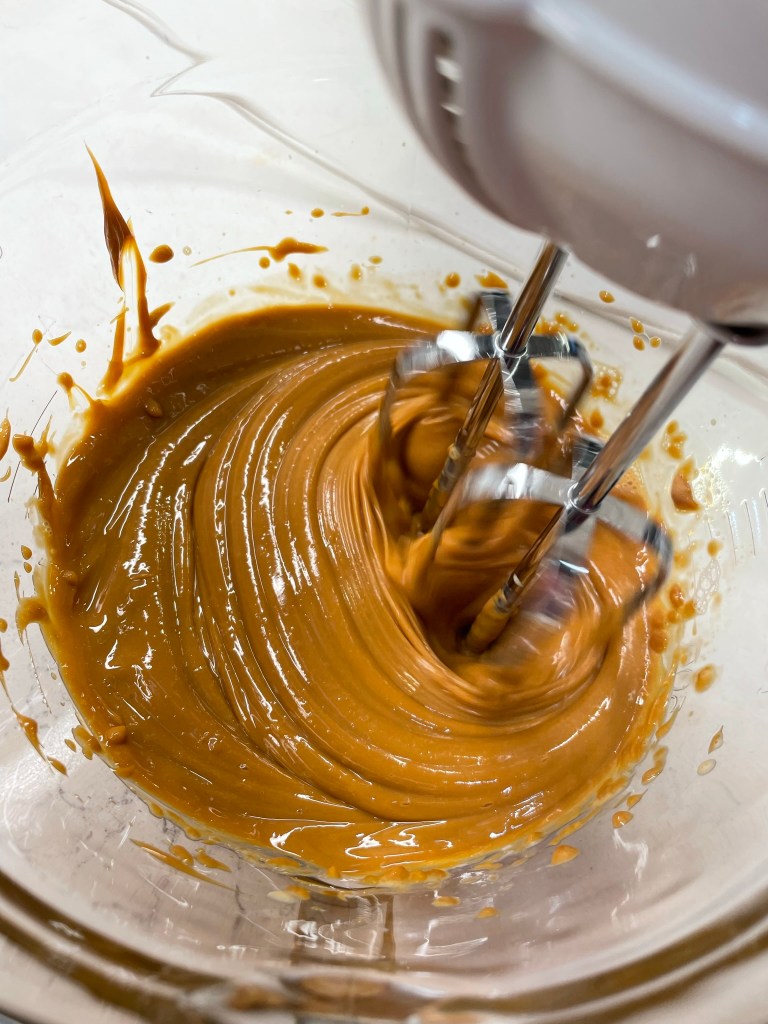
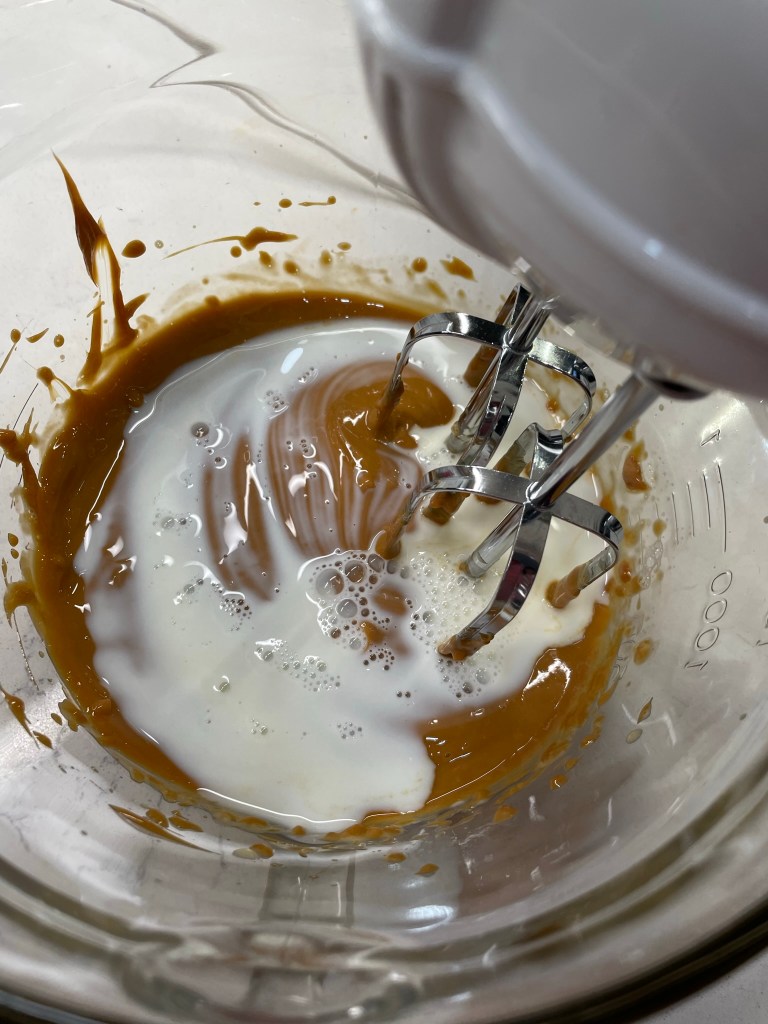
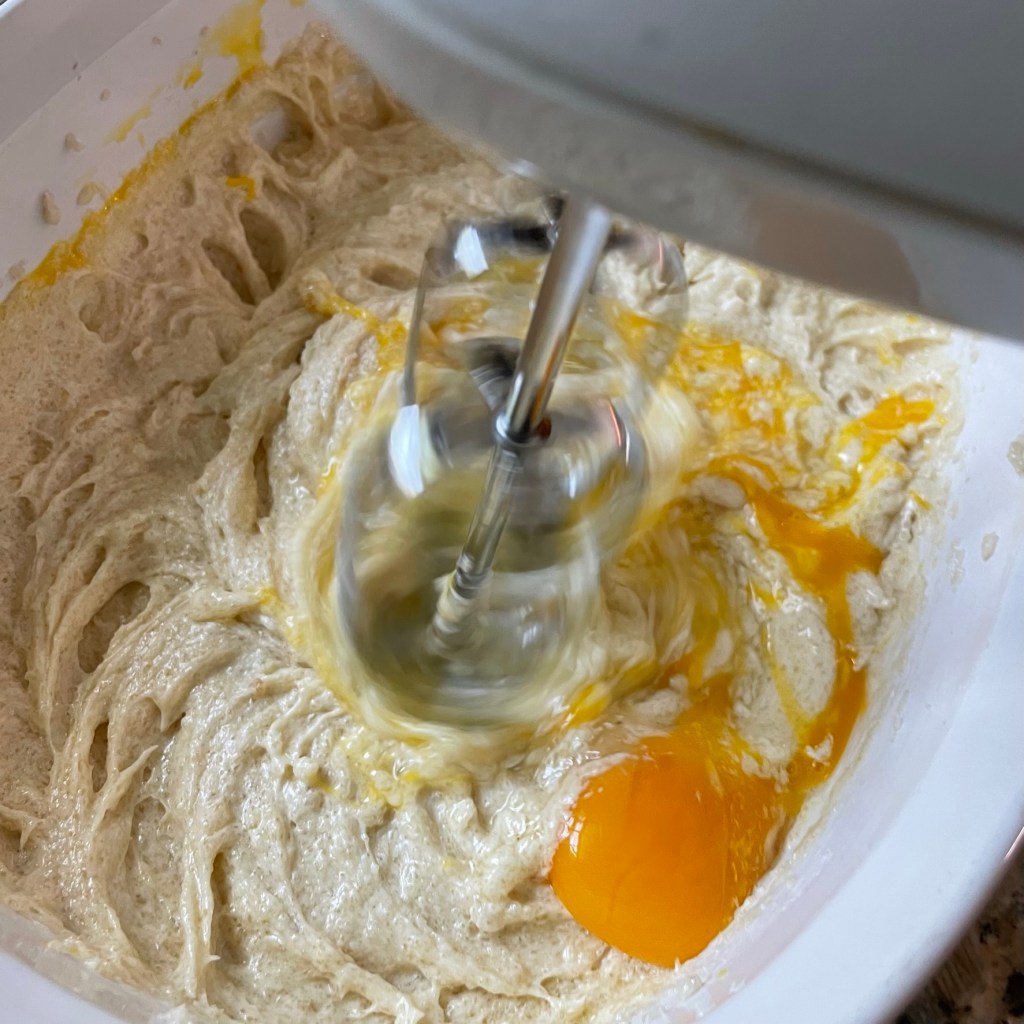
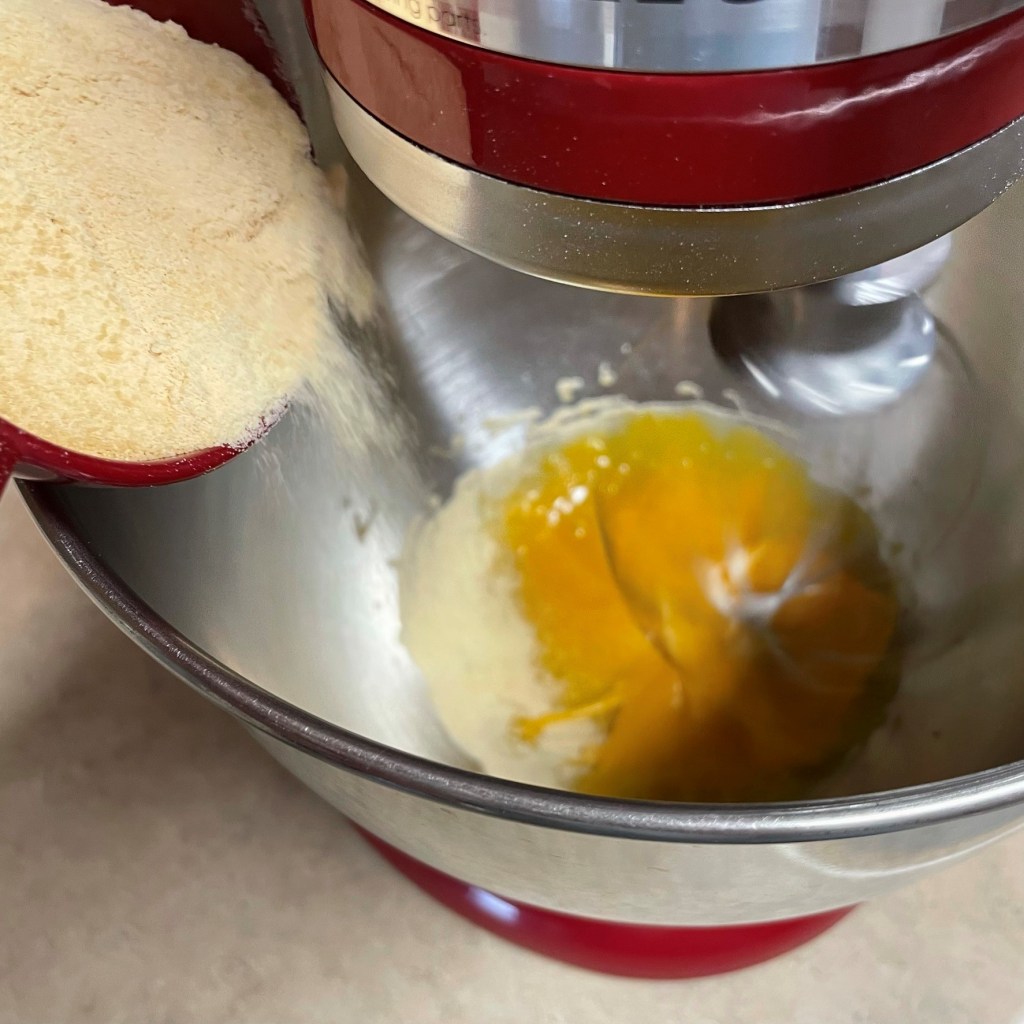
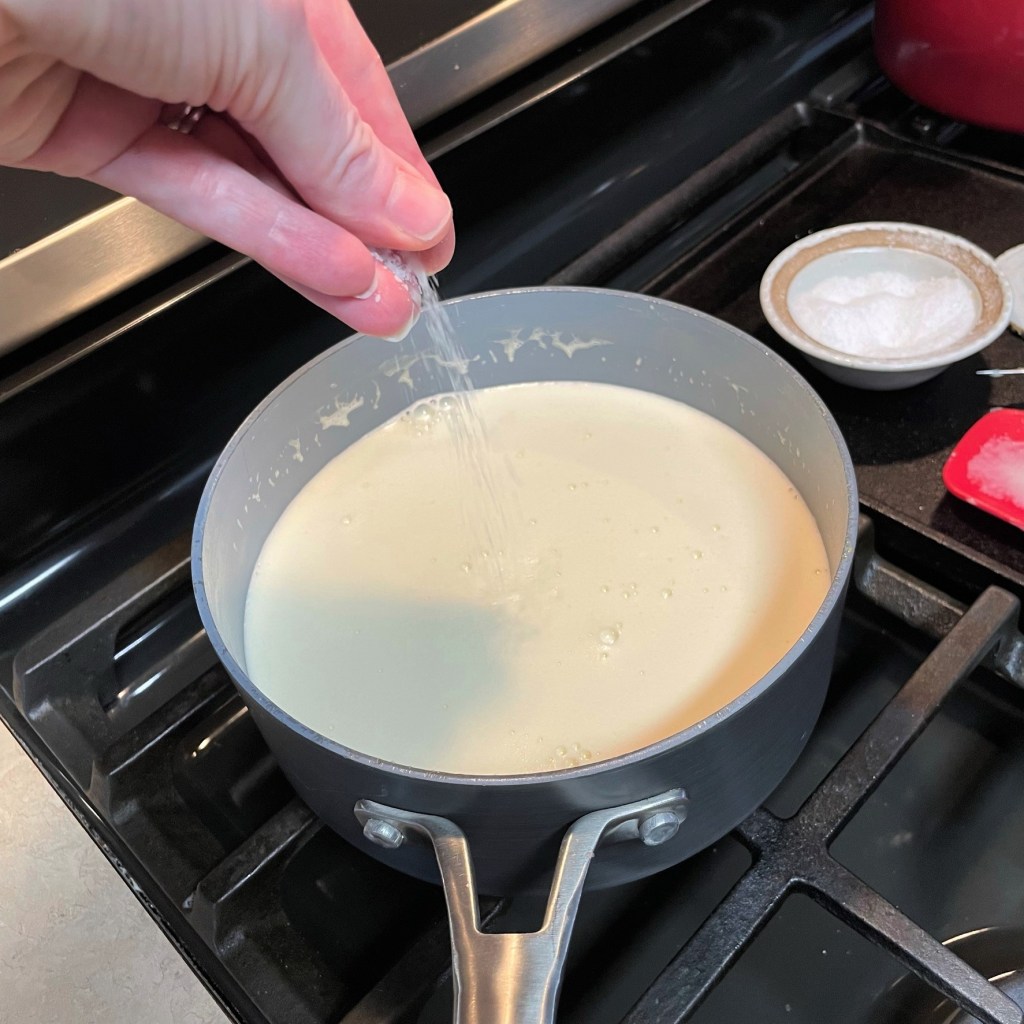
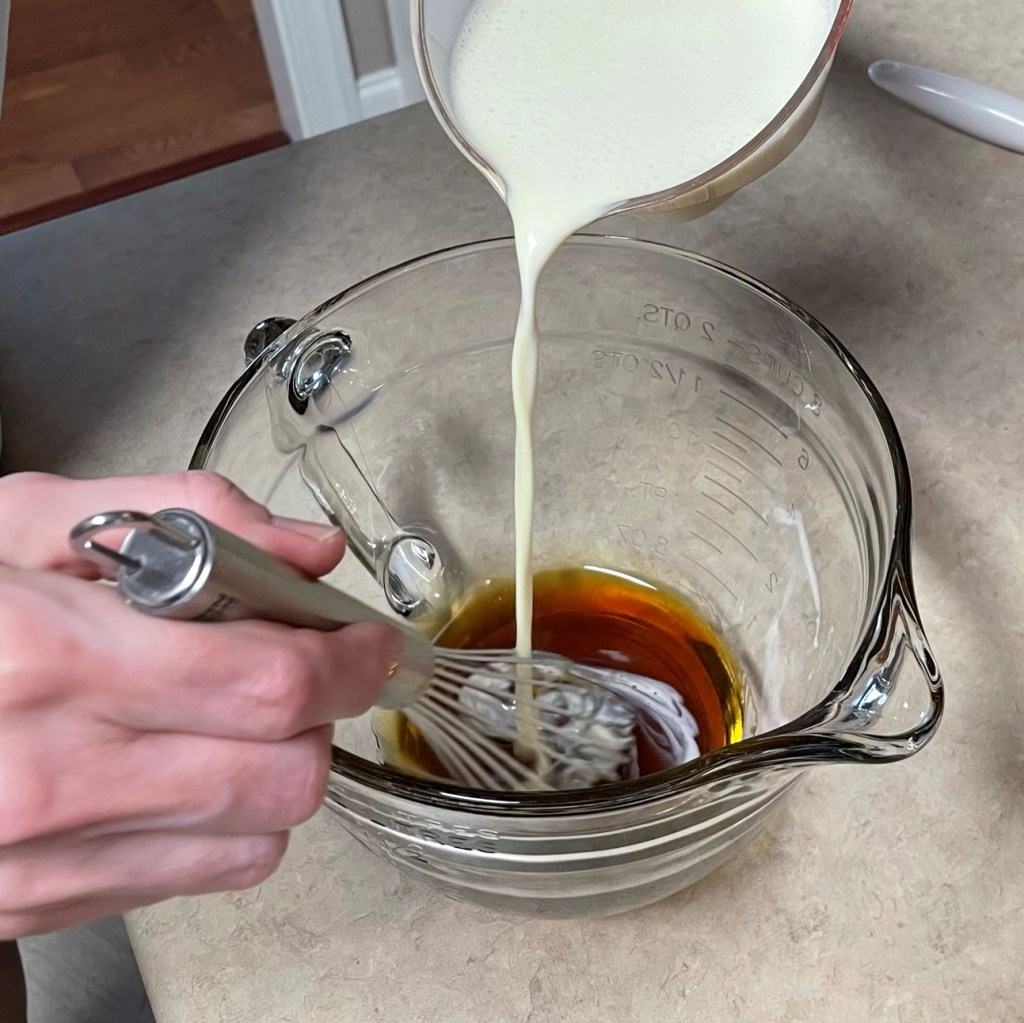
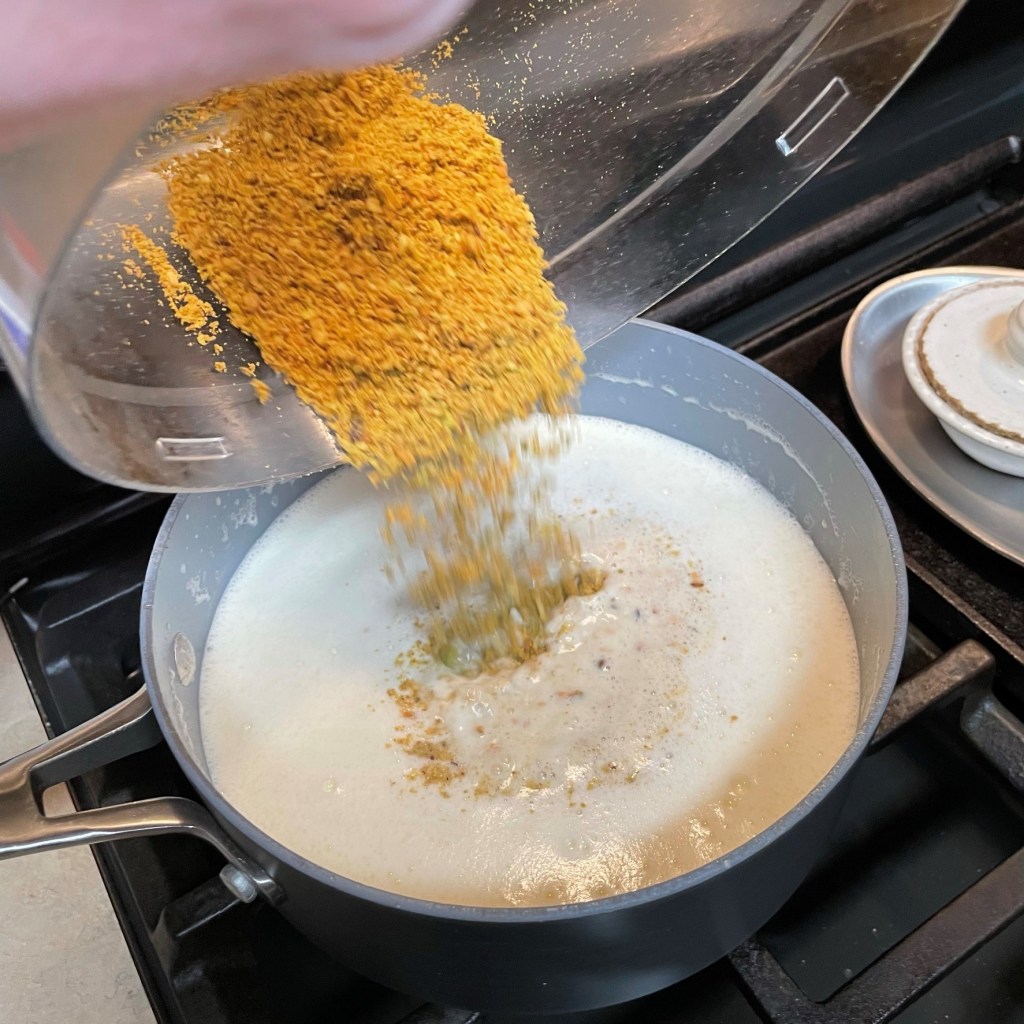
The ingredients for this ice cream are pretty simple, and if you have a recipe to make your own candied pecans, all the better! Rather than using regular sweetened condensed milk, as I have started doing in recent years, I use the dulce de leche variety, which has been cooked to a richly caramelized consistency. It is very thick, so you’ll have to use a small scraper to dig it out of the can. I sprinkle about 1/4 teaspoon sea salt over the caramel for that delicious contrast. Mixing in the milk is a little more challenging with the thick caramel, so I recommend using a handheld electric mixer over trying to whisk it. I also suggest blending in the milk a little bit at a time so you don’t spatter caramel milk all over the kitchen, as I did on my first effort!
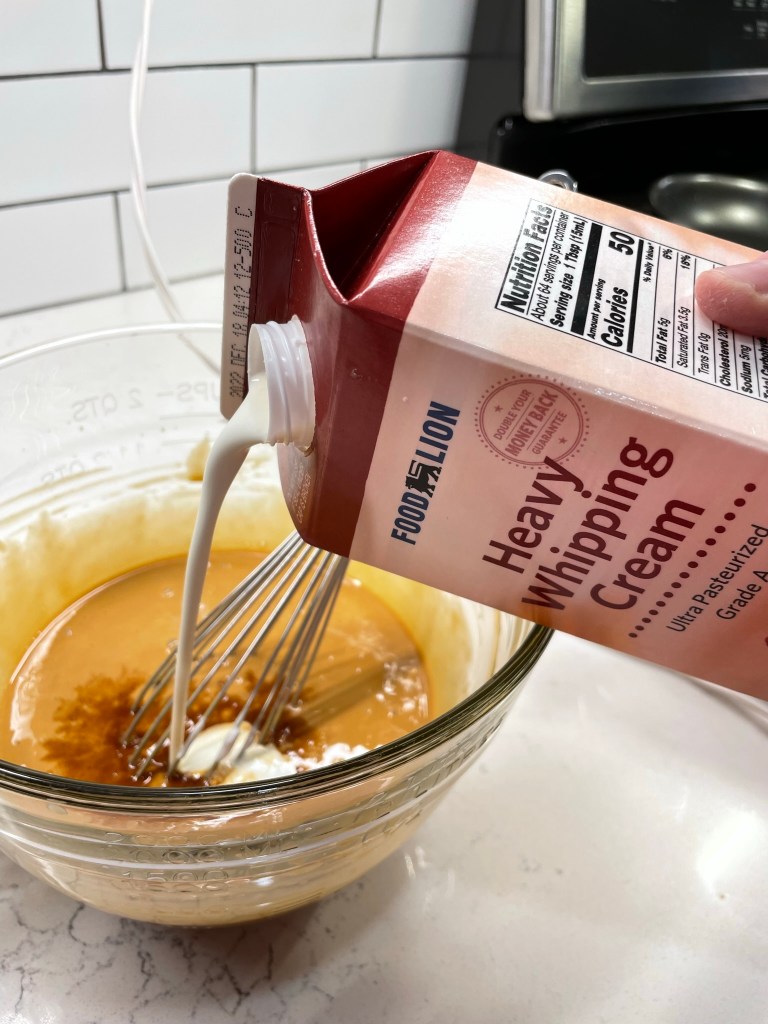
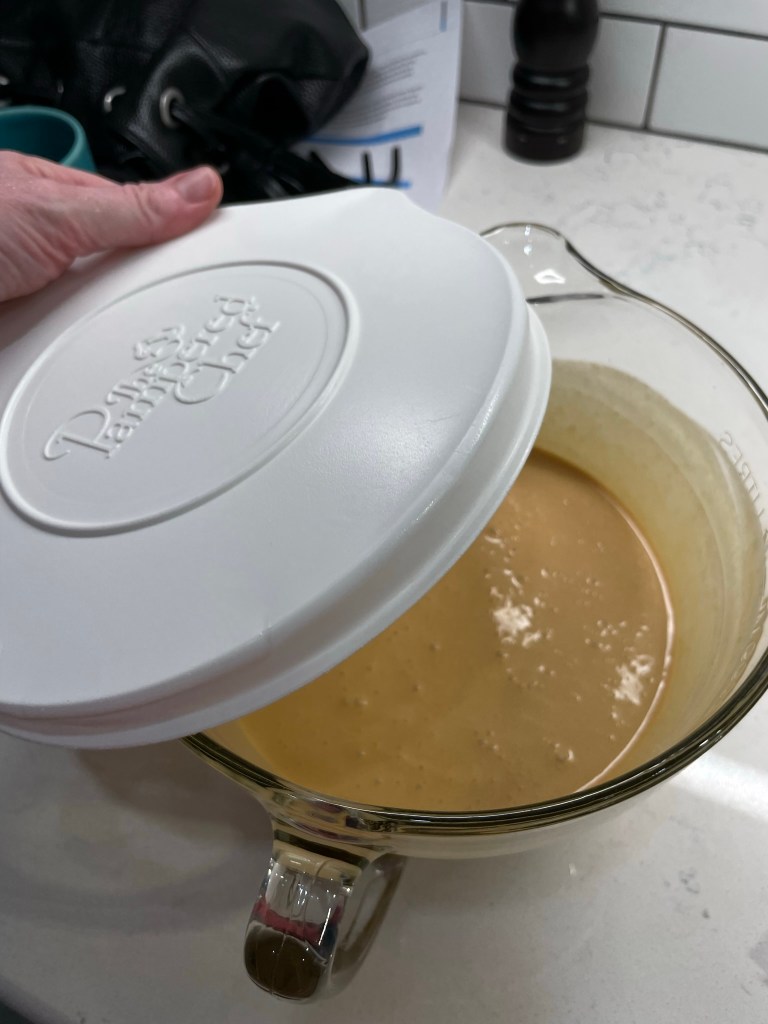
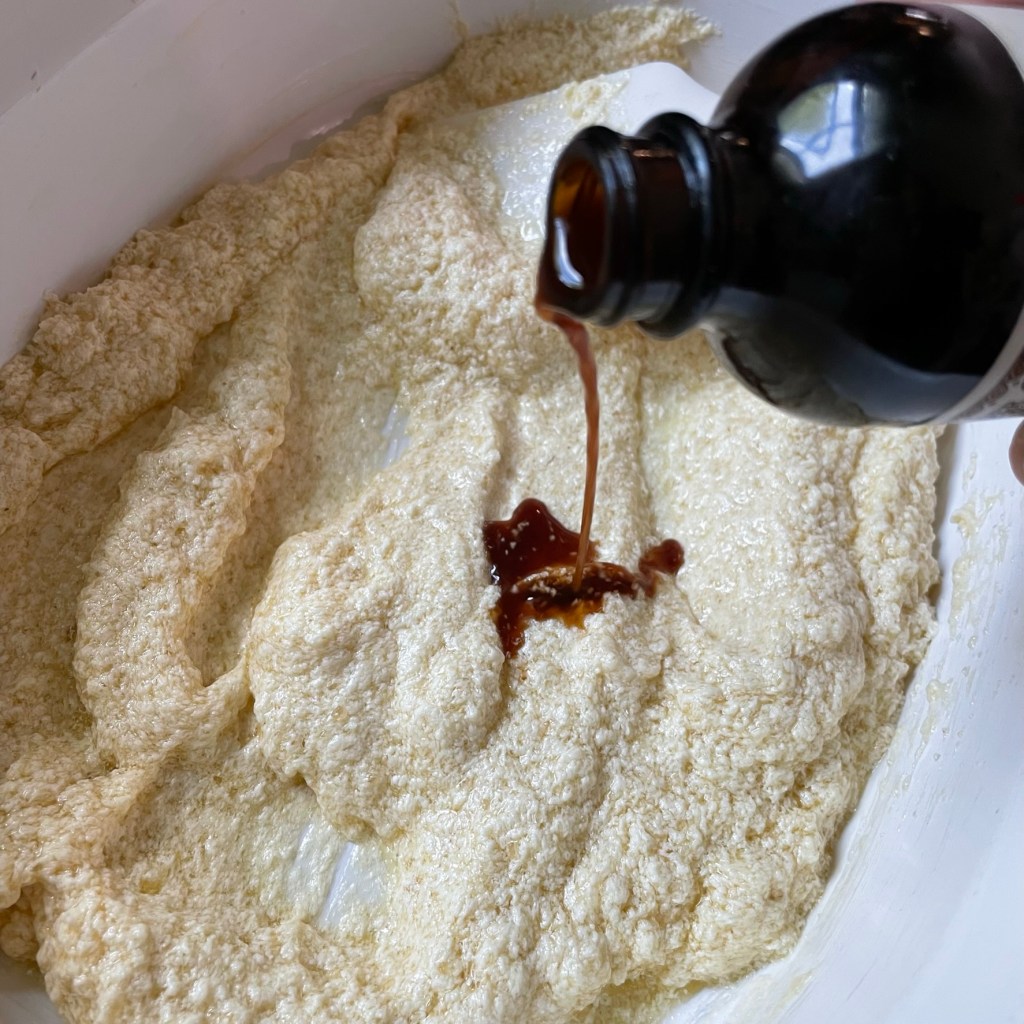
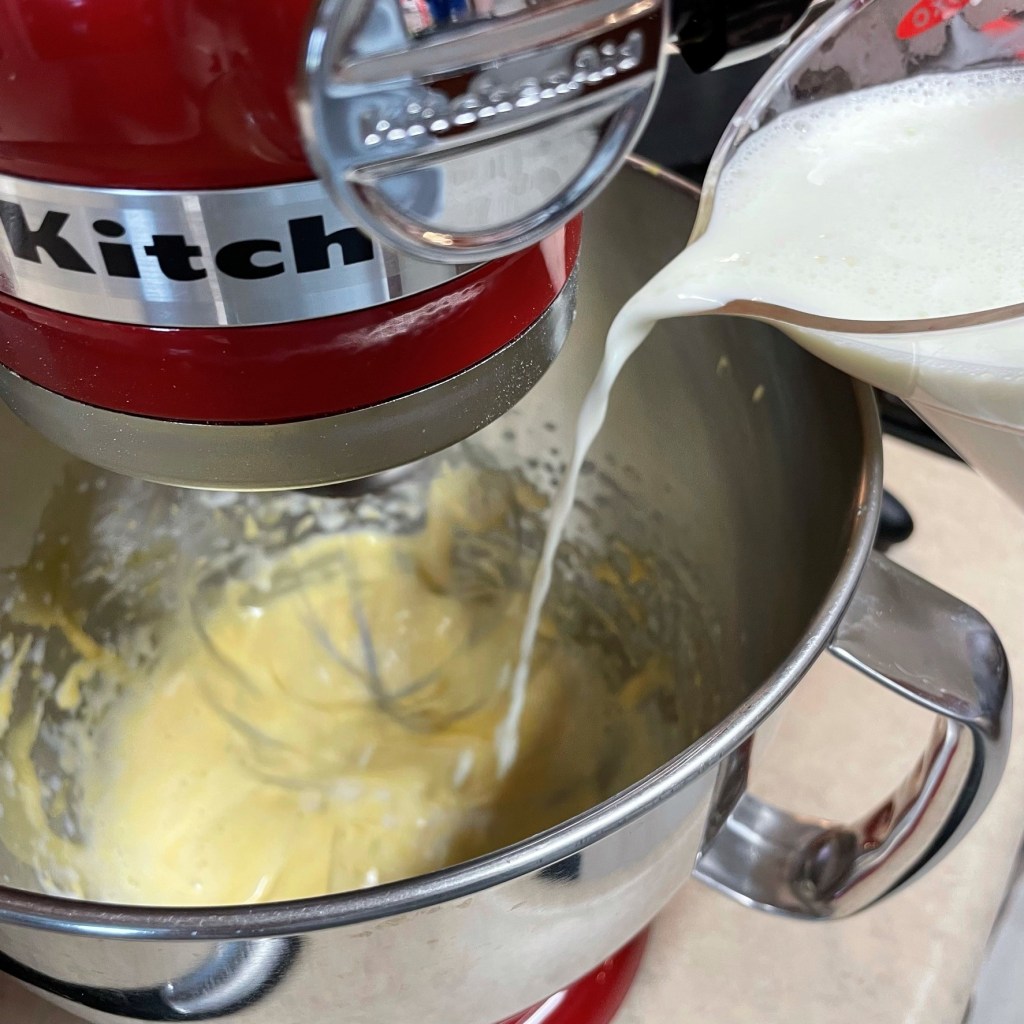
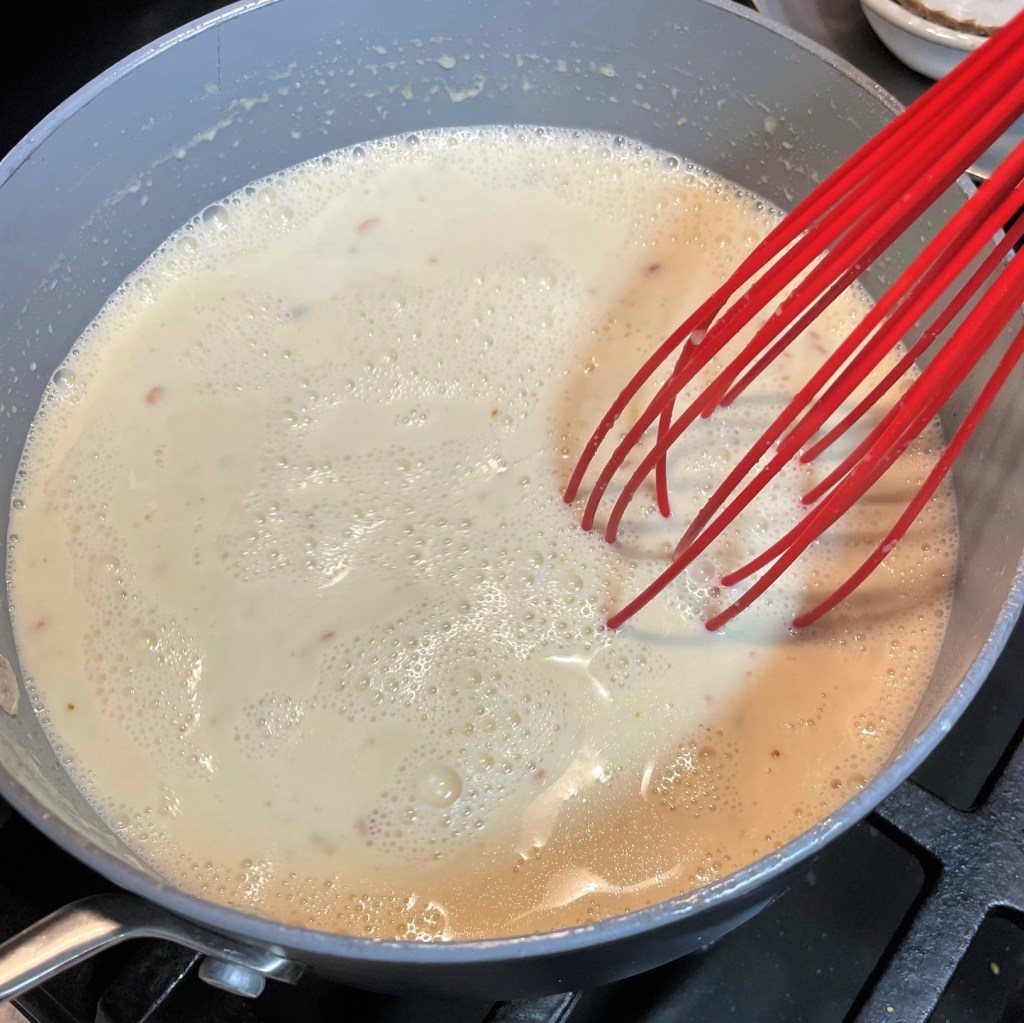
It’s easy enough to switch to a whisk for blending in the vanilla and heavy cream, and then cover the bowl and send it to the fridge for several hours to overnight. Unless you have a fancy, professional-style ice cream maker, you always want your base to be super cold before you add it to the freezer bowl for churning.
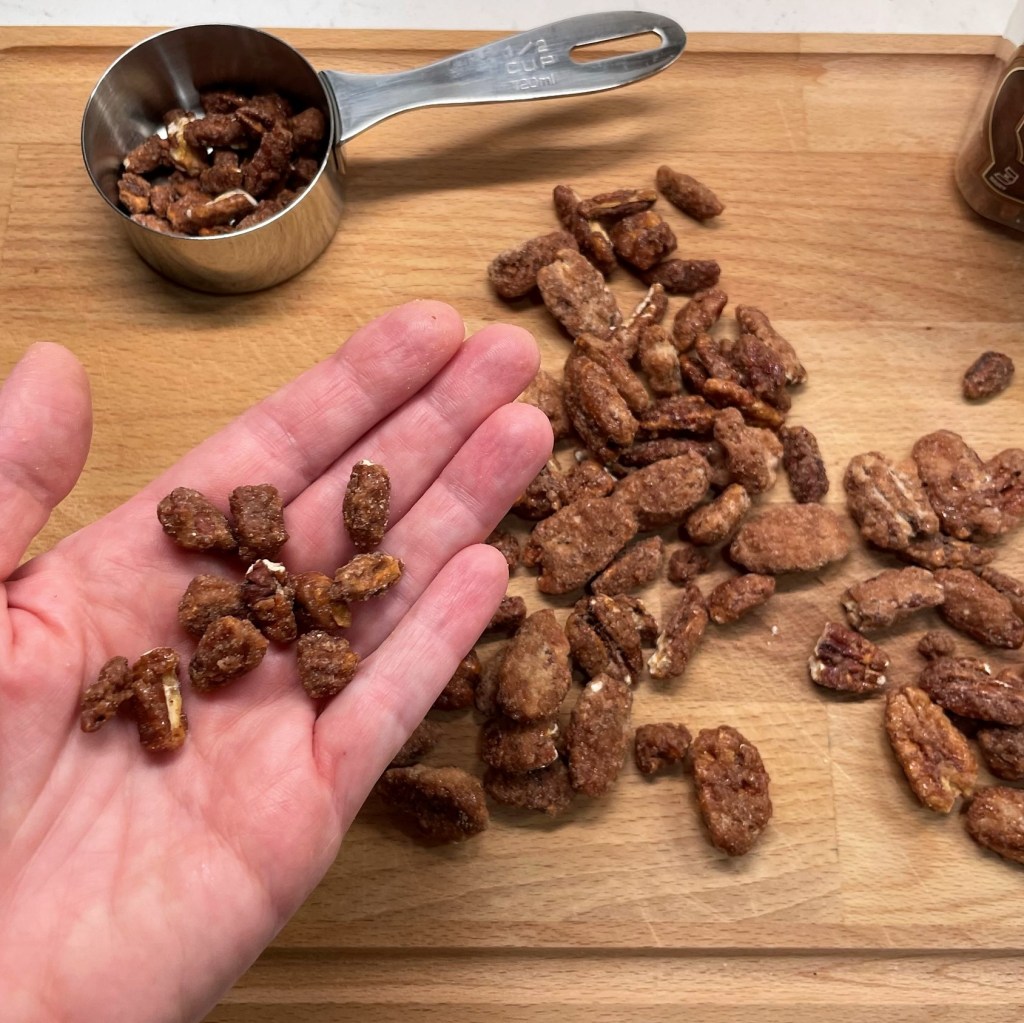
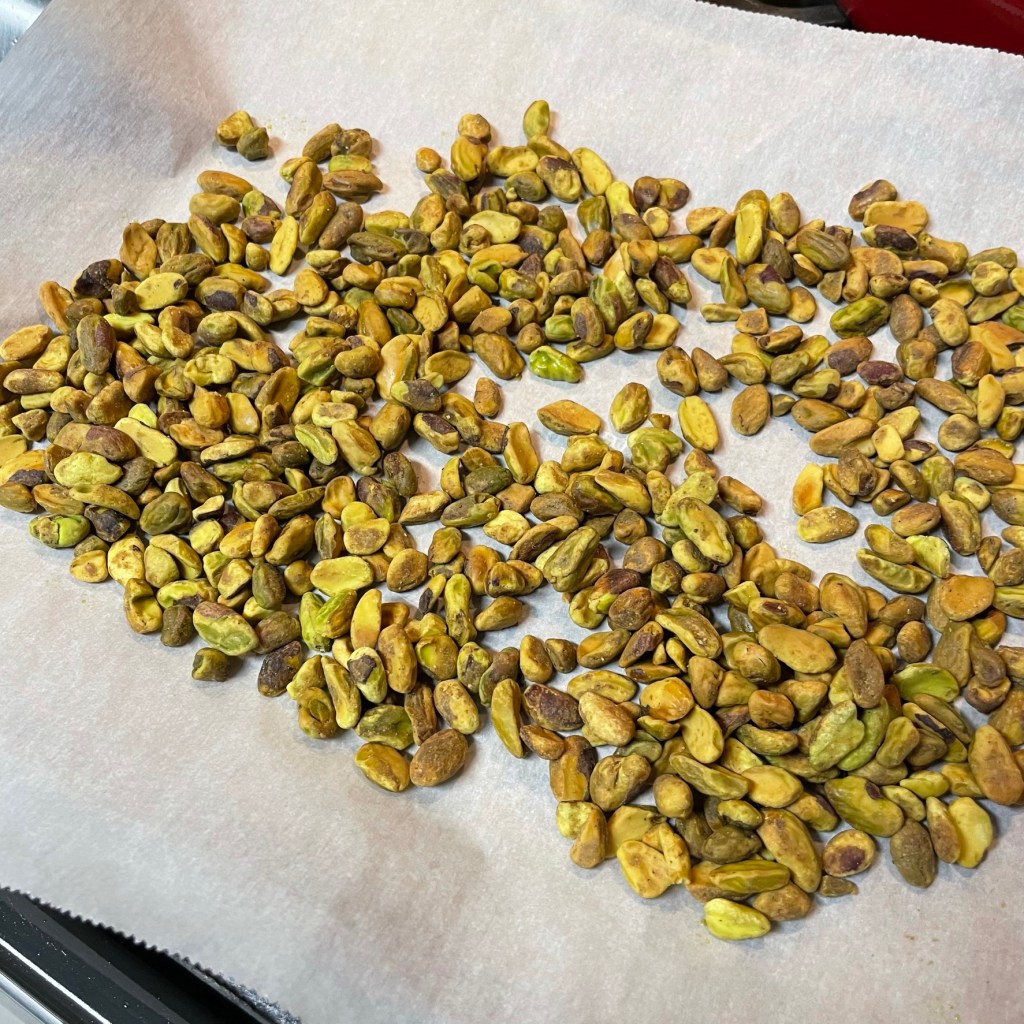
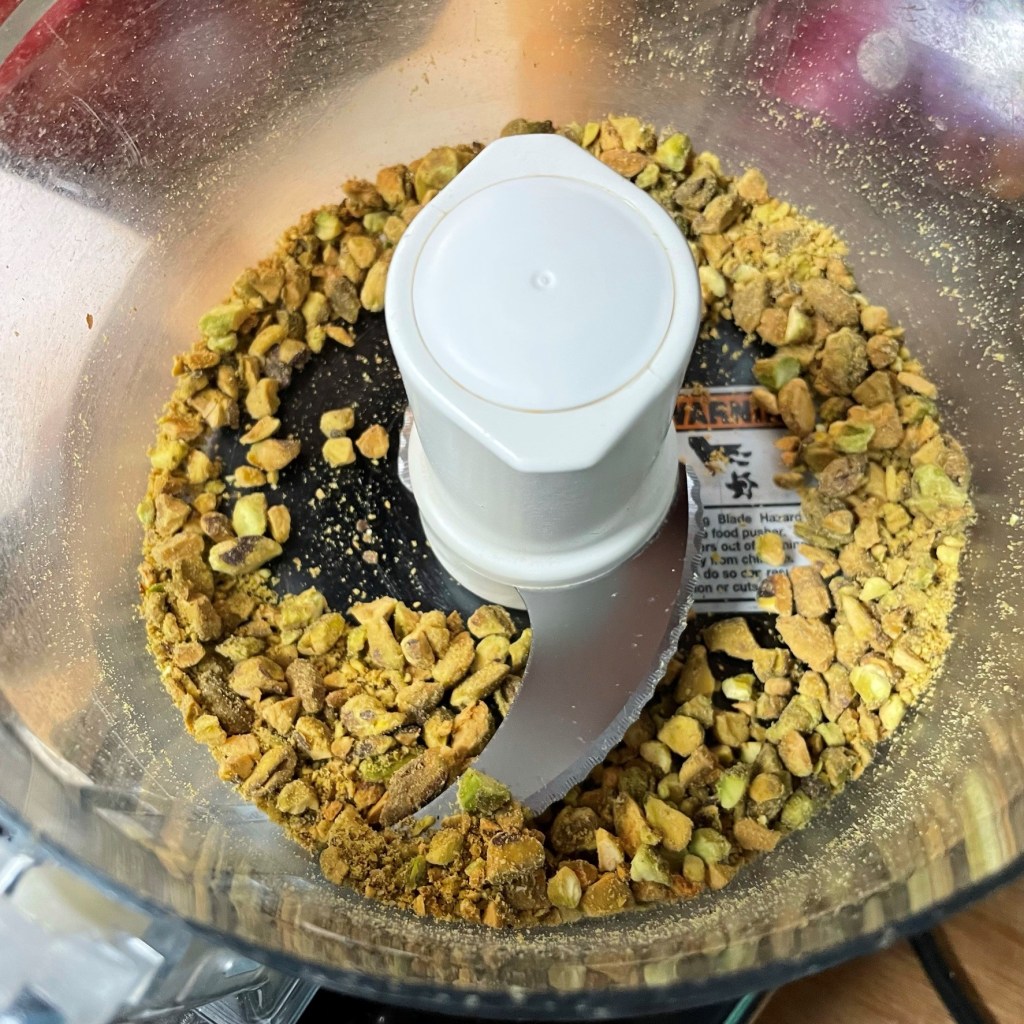
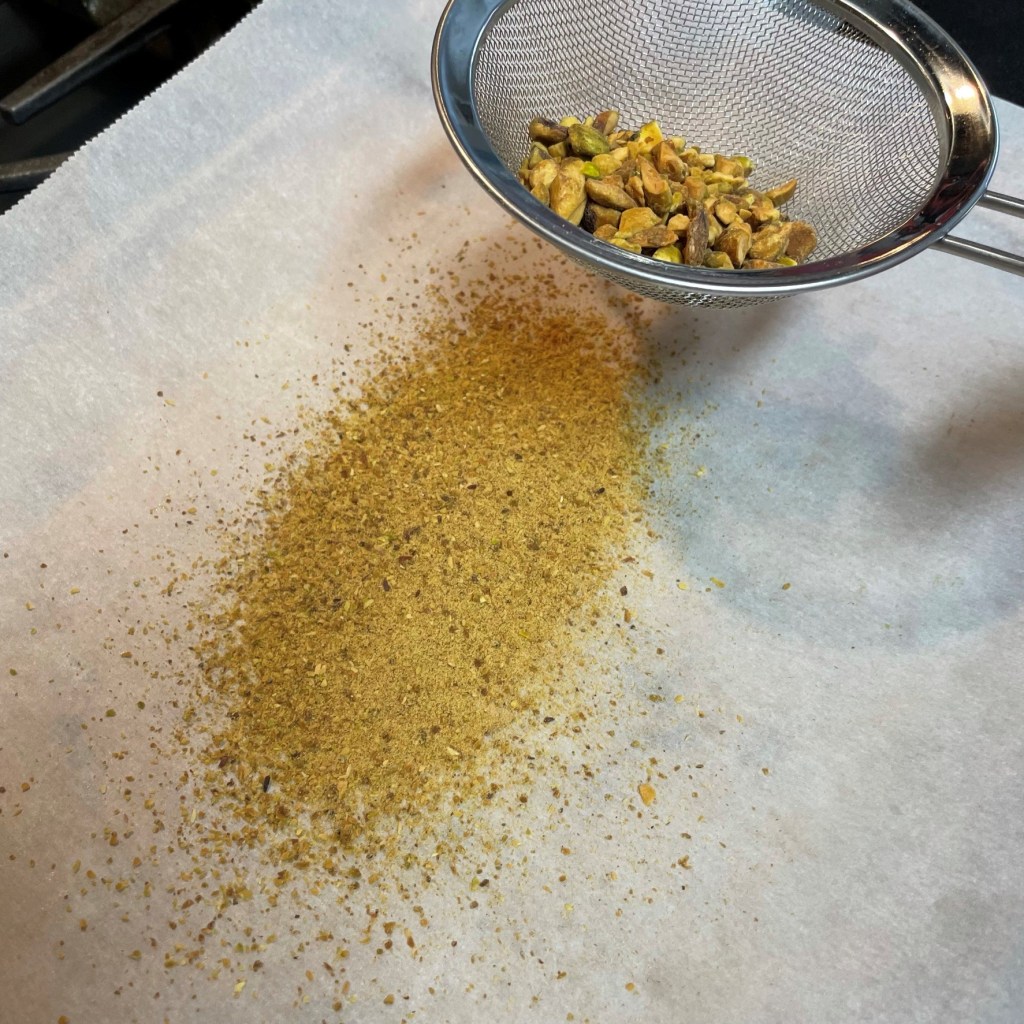
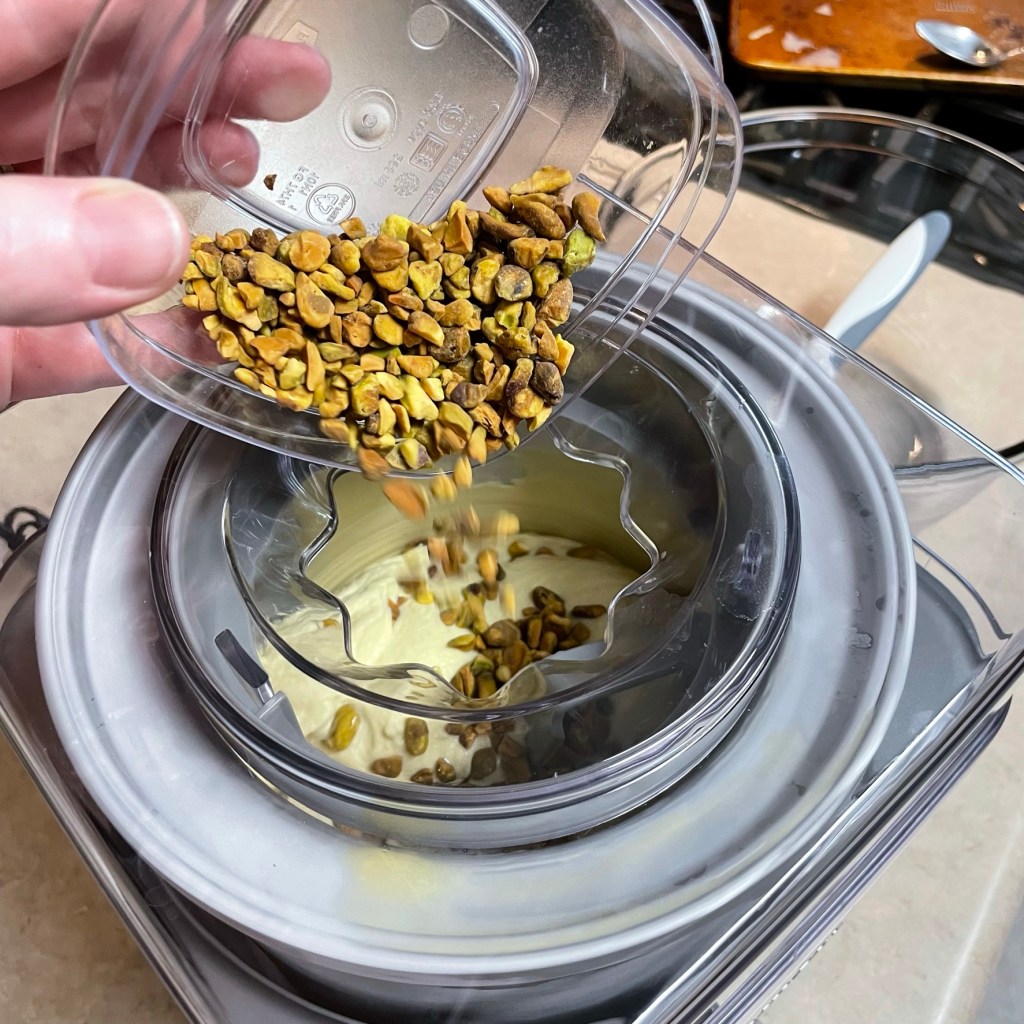
My Cuisinart machine usually takes about 25 minutes to achieve a perfectly churned consistency. While it’s going, I take a few minutes to break up about a half cup worth of the praline pecans into small pieces. It takes a little extra effort than chopping them, but I don’t end up with all the little shards that are not the most pleasant texture. If they are at most one-quarter the size of a whole pecan, that’s just right. When the ice cream is almost finished, the only step left is adding in the pecans and transferring to an insulated container.
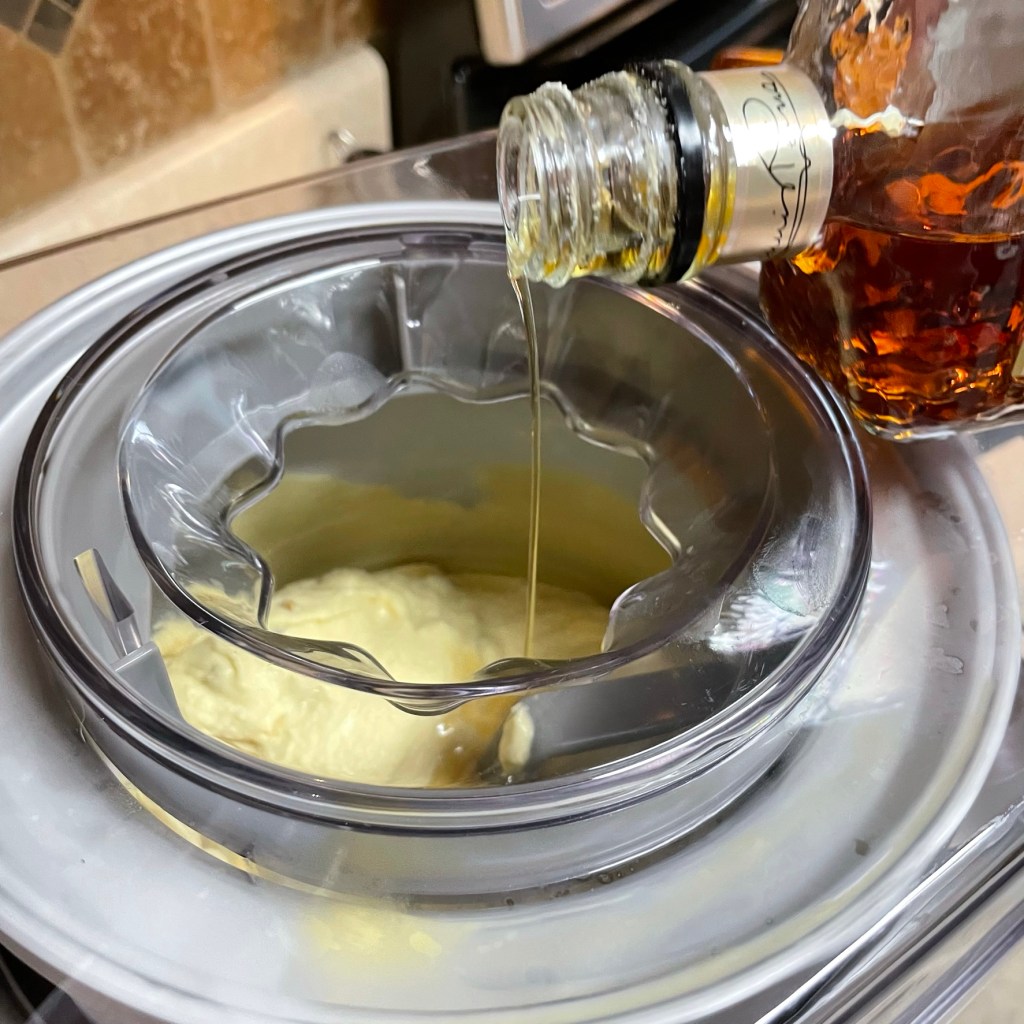
For best results, freeze at least eight hours before enjoying. I should also point out that if you don’t like or cannot eat pecans, you could substitute toffee bits and still enjoy the contrast of a little crunch mixed in. Or, omit them entirely and you’d have sea salt caramel ice cream. Speaking from experience, I can tell you that would be pretty awesome, too!
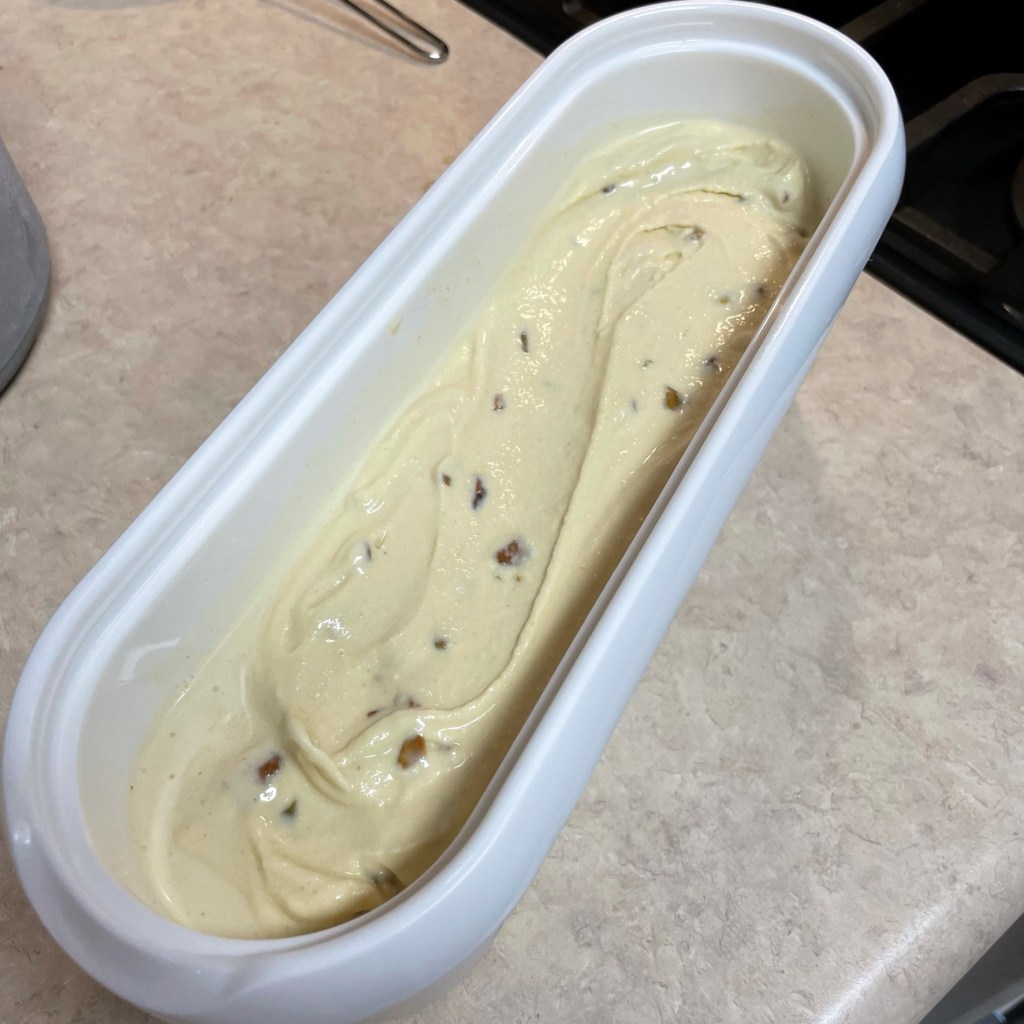
You only need a few fridge and pantry ingredients to create a specialty ice cream at home. I've relied on a canned dulce de leche milk and store-bought candied pecans to replicate one of my favorite ice cream parlor treats!
Ingredients
14 ounce can Nestle’s dulce de leche condensed milk (see ingredient notes below)
1/4 teaspoon coarse sea salt
1 cup whole milk
1 teaspoon real vanilla extract
1 cup heavy cream
1/2 cup candied pecan pieces
Ingredient Notes: If you cannot find the dulce de leche condensed milk, it’s fine to use regular or fat-free condensed milk in its place. The finished ice cream will not have quite the same caramel-flavored base, but the candied pecans will still provide plenty of praline flavor.
Directions
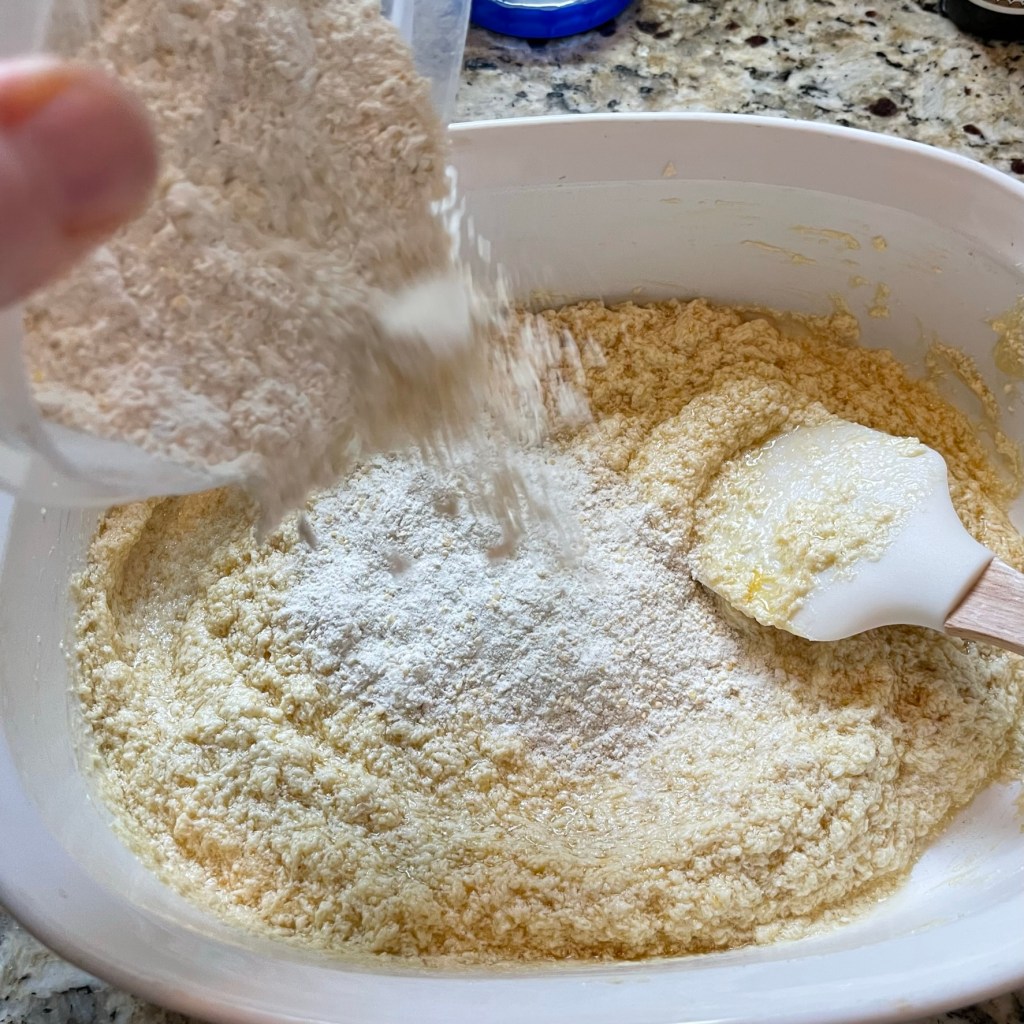
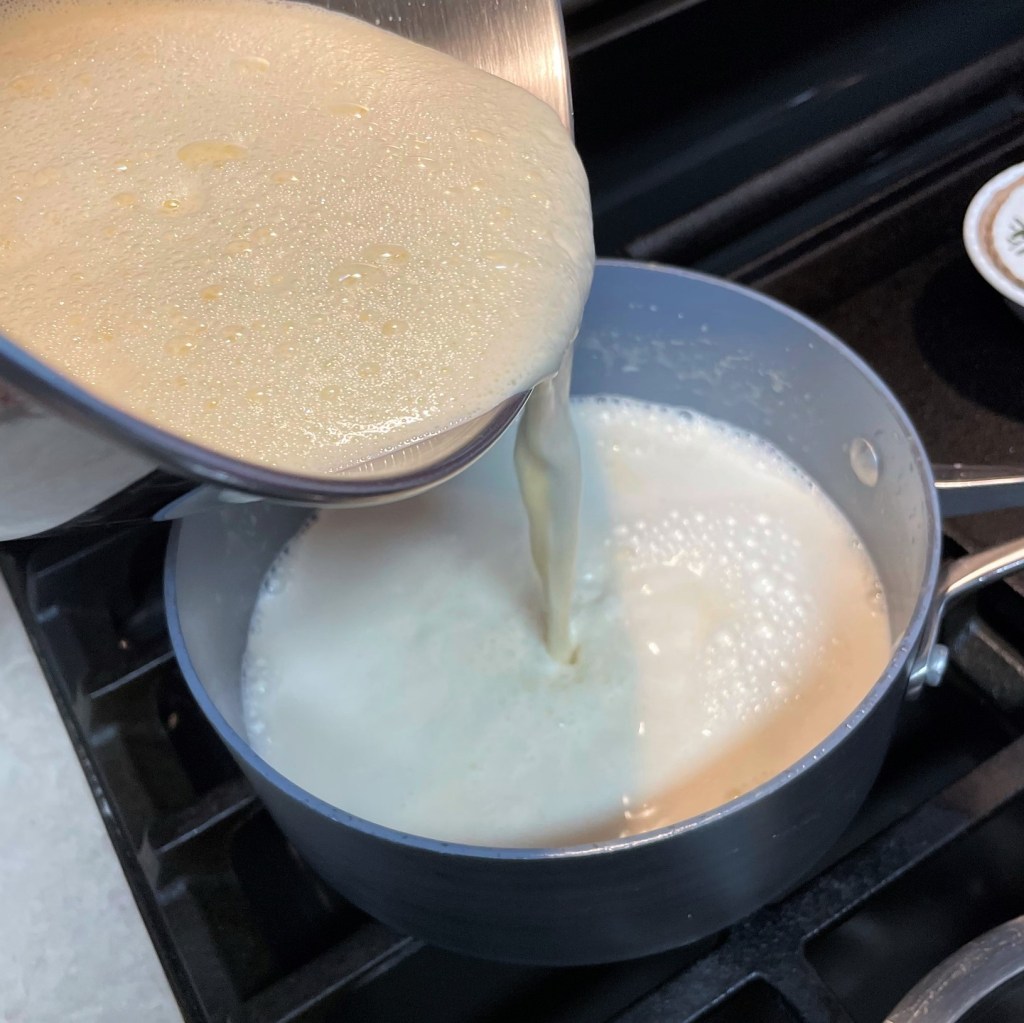
Combine Lechera condensed milk and sea salt in a large bowl or mixing pitcher. Use a handheld mixer to blend in the whole milk, about 1/4 cup at a time to avoid spattering.
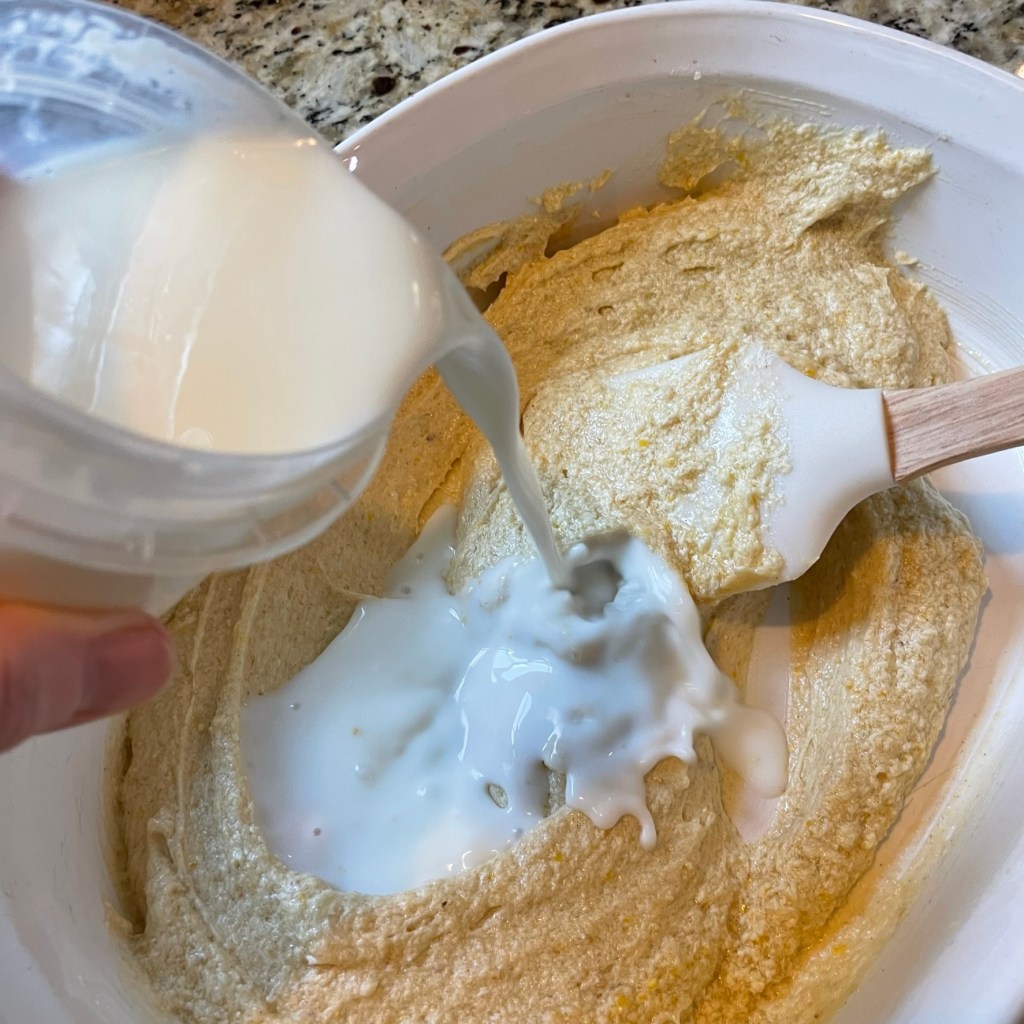
When the whole milk is completely blended in, add vanilla extract and heavy cream. Switch to a whisk if you wish, or blend only briefly with a mixer to avoid whipping too much air into the cream. Cover the bowl and refrigerate the base mixture several hours to overnight.
Freeze ice cream, following manufacturer’s instructions for your model machine. During the last couple of minutes, add the candied pecan pieces to incorporate them throughout the ice cream base. Transfer ice cream to an insulated container and freeze several hours to firm it completely before serving.
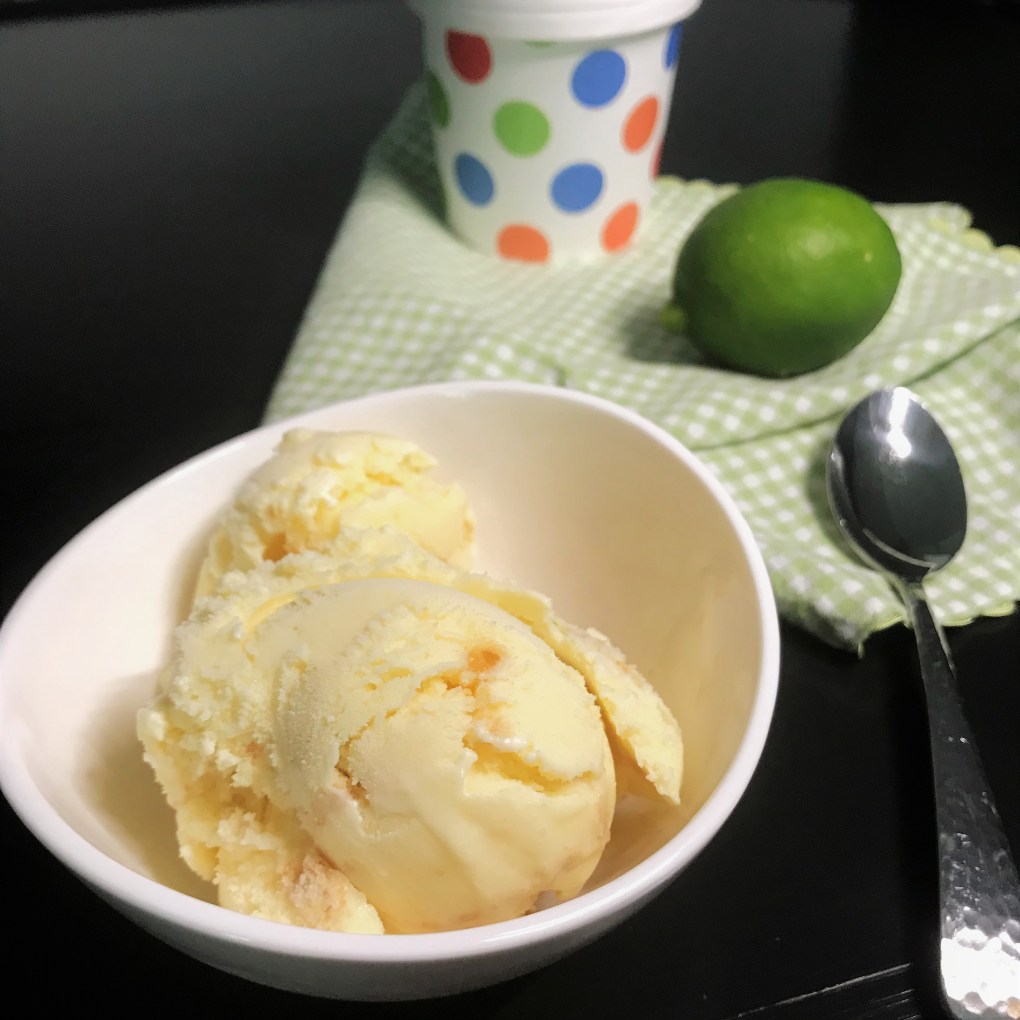
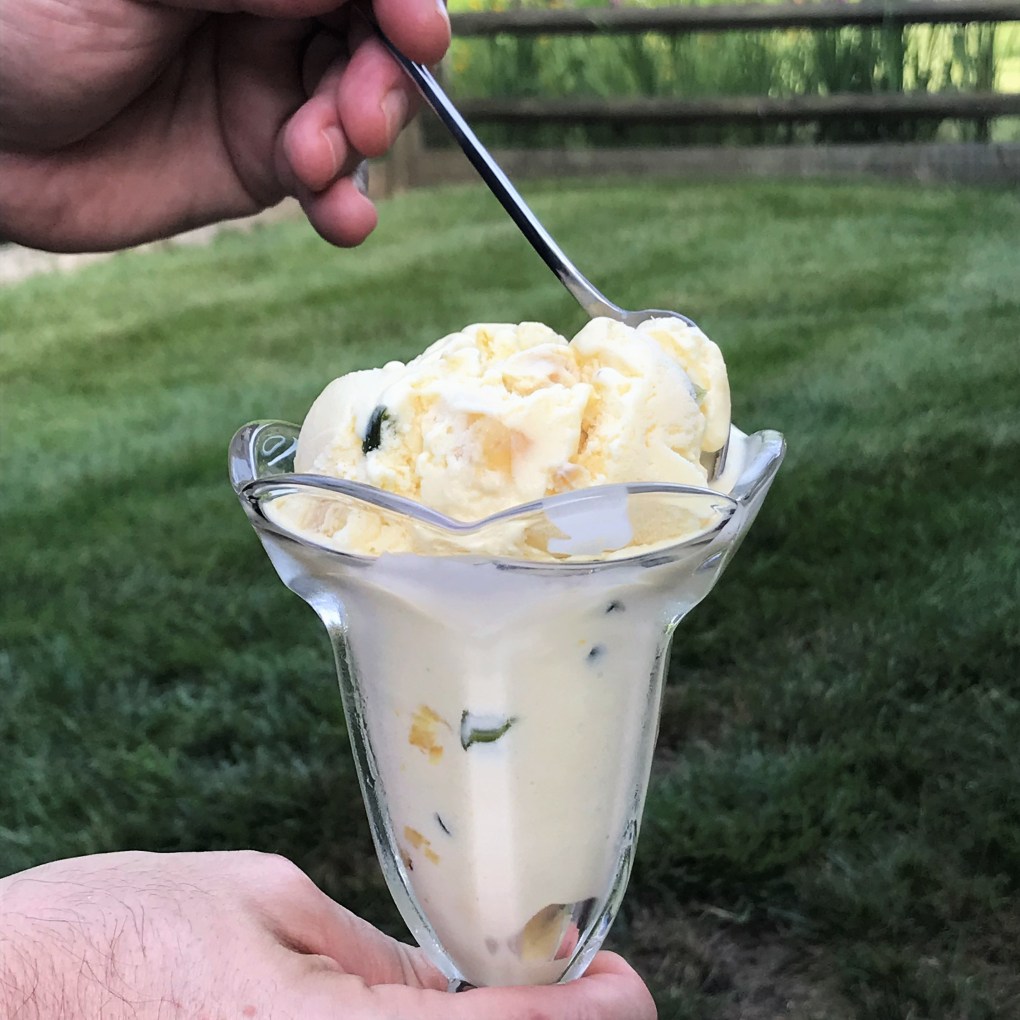
Do you remember your favorite frozen summertime treat? I had three, and they were pretty much neck and neck: an ice cream called “blue moon,” with an unidentified fruity flavor and bits of pineapple (one day I will figure out how to make it), the Rocket Pop in all its red, white and artificial blue glory, and of course, the Creamsicle. That combination of orange sherbet over vanilla ice cream on a stick was synonymous with summer in my youth. I loved it so much that I can’t resist sharing my scoopable version of a Creamsicle to kick off National Ice Cream Month.
I feel great about this ice cream for a few reasons. First, of course, is the nostalgia of it. The mingled flavors of vanilla and orange take me back to the summers of the 1970s, when life was so carefree. It conjures memories of splashing at the community pool with friends and walking barefoot in the freshly cut grass behind my grandmother’s house. I envision water balloon fights and the familiar sound of the ice cream truck coming down the street, drawing the kids like moths to a flame. God, I loved those days.
This is also exciting for me because my previous efforts at Creamsicle ice cream fell sorta flat, probably because I was still relying on my custard-based ice cream formula. Custard ice cream is wonderful, but it’s a lot of effort and sometimes the richness overpowers the flavors. The first time I used sweetened condensed milk for my ice cream— it was when I made S’mores Ice Cream, and I did it to keep the color nice and white— was a major “aha” moment for me. Homemade ice cream doesn’t have to be so fussy as standing over the stove tempering egg yolks and cream, crossing your fingers that you don’t scramble the eggs and have to start over. Then waiting for the mixture to cool overnight before you can churn it? It’s so extra.
Sweetened condensed milk provides an excellent, smooth texture in the base of an ice cream, it provides exactly the right level of sweetness, and it comes with a bonus advantage in that you can swap in the fat-free version with almost zero impact on the texture. Delicious ice cream and reduced guilt? Sign me up!
Who’s ready for some ice cream?
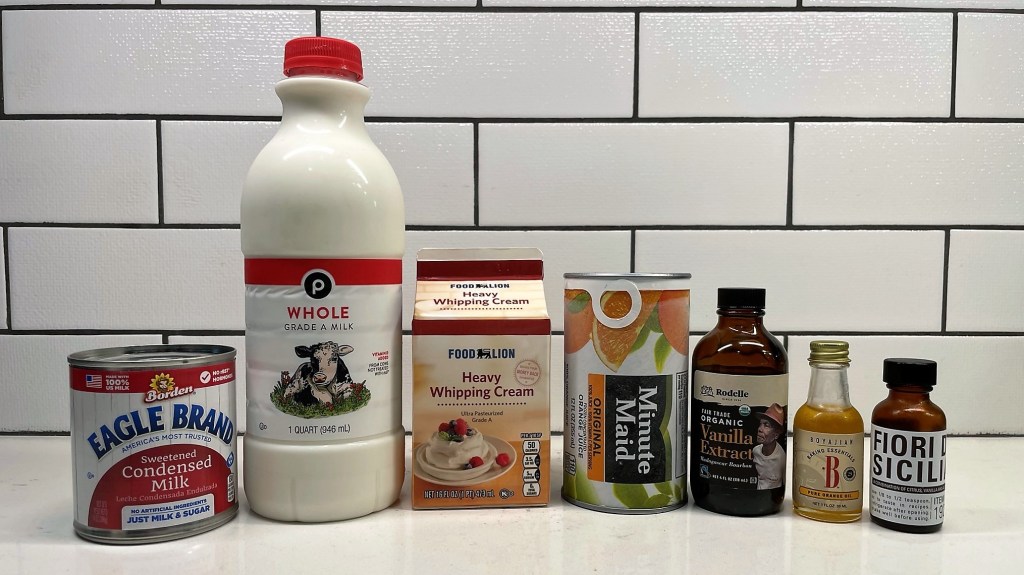
The base of this ice cream is so simple, with only four main ingredients— milk, cream, condensed milk and frozen orange juice from concentrate. The addition of vanilla extract alone would give the impression of a Creamsicle, but I’ve amped up the intensity with two secret weapons that I highly recommend.
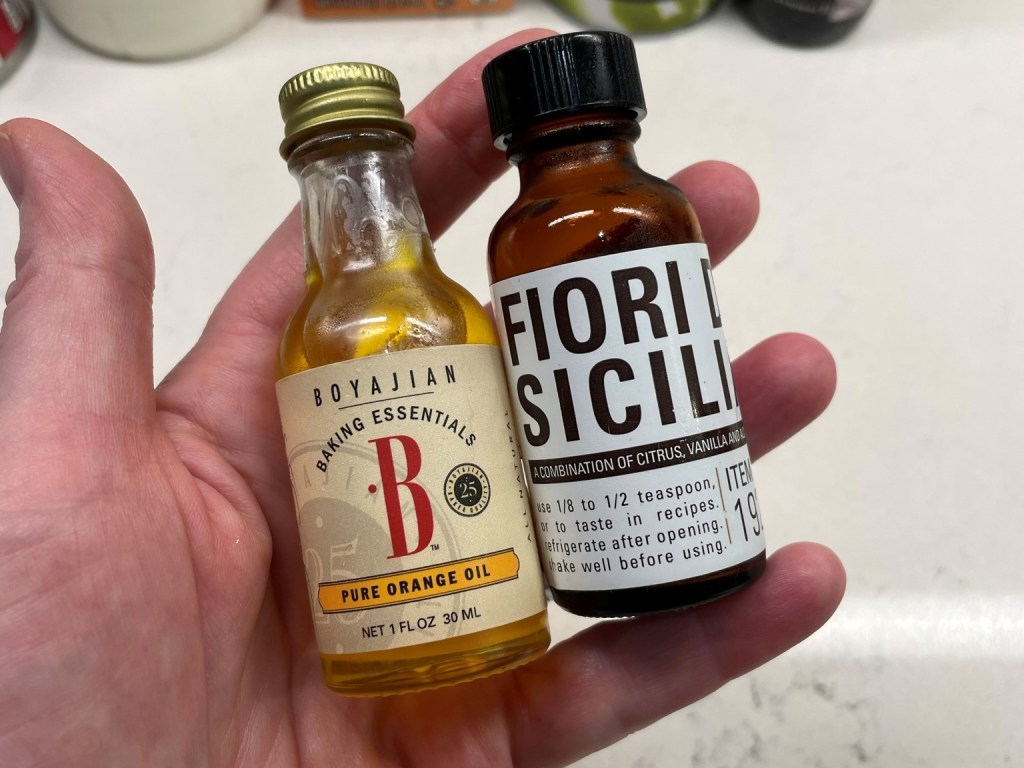
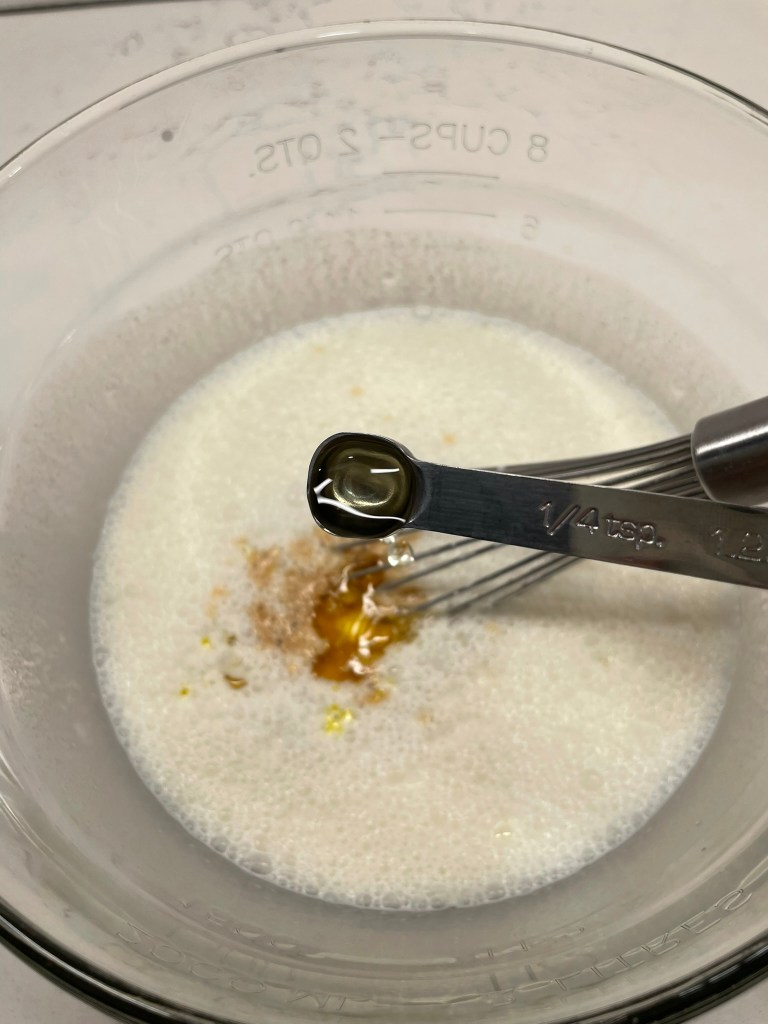
Orange oil is derived from real orange peel, and it adds a very concentrated orange flavor without adding more orange juice, which would make the ice cream too icy. Fiori di Sicilia is a citrusy-vanilla extract that is used for making panettone, and it is so potent that you only need a scant 1/4 teaspoon to get the job done in this ice cream. I purchased both of these specialty ingredients from King Arthur Baking Company, but you might also find them at a specialty store, such as Williams-Sonoma or Sur La Table, either in store or online.
Can you make the ice cream without these ingredients? Of course, but if you want more than a hint of Creamsicle in your ice cream, these will help you get there.
Here’s how it goes:
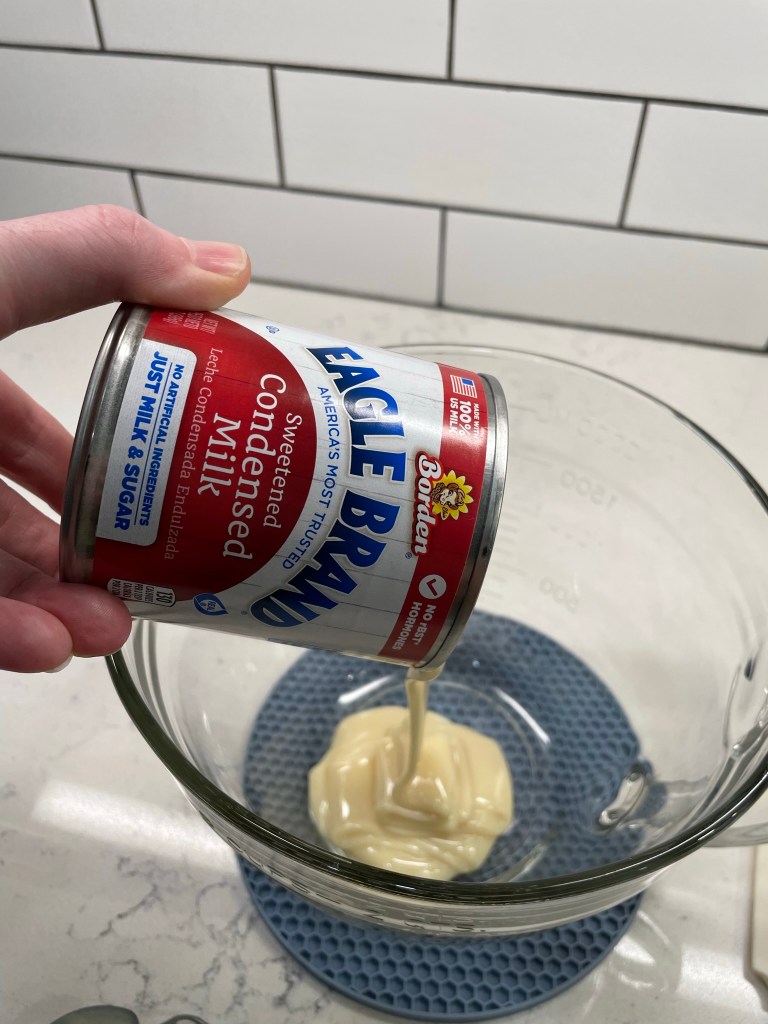
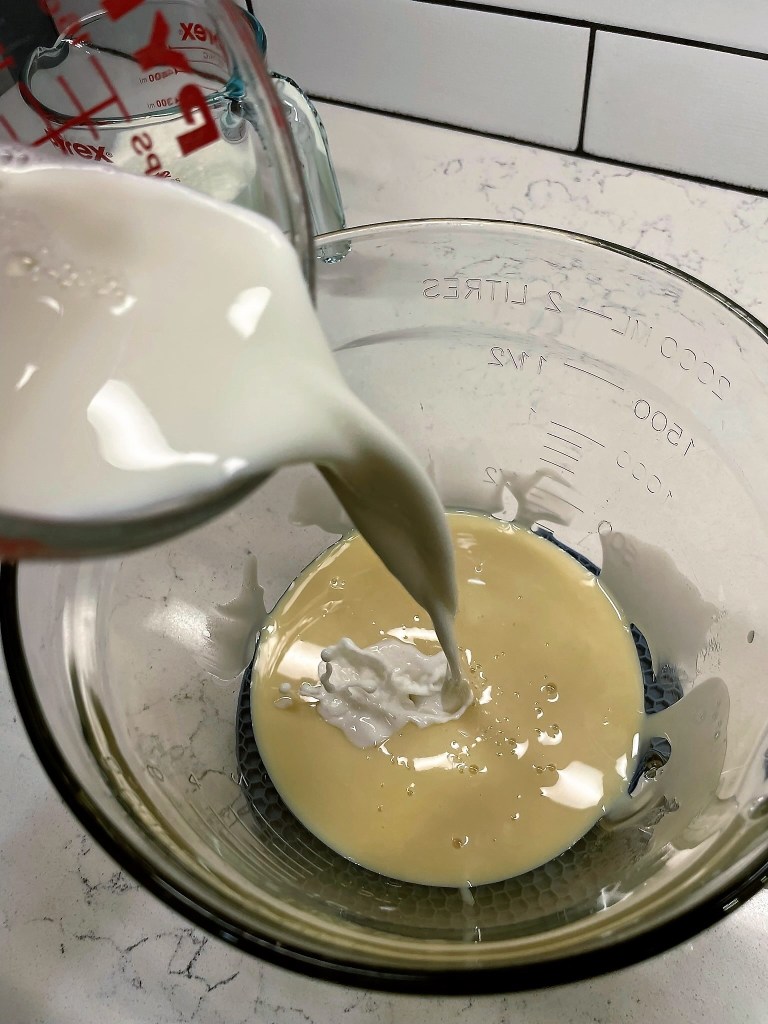
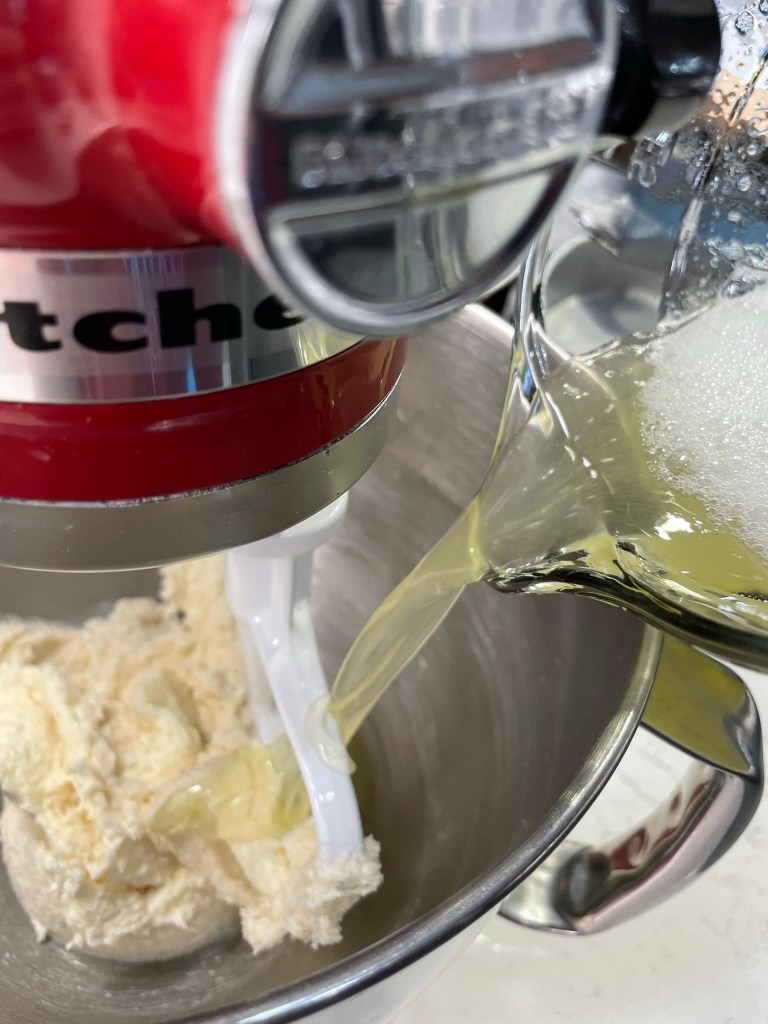
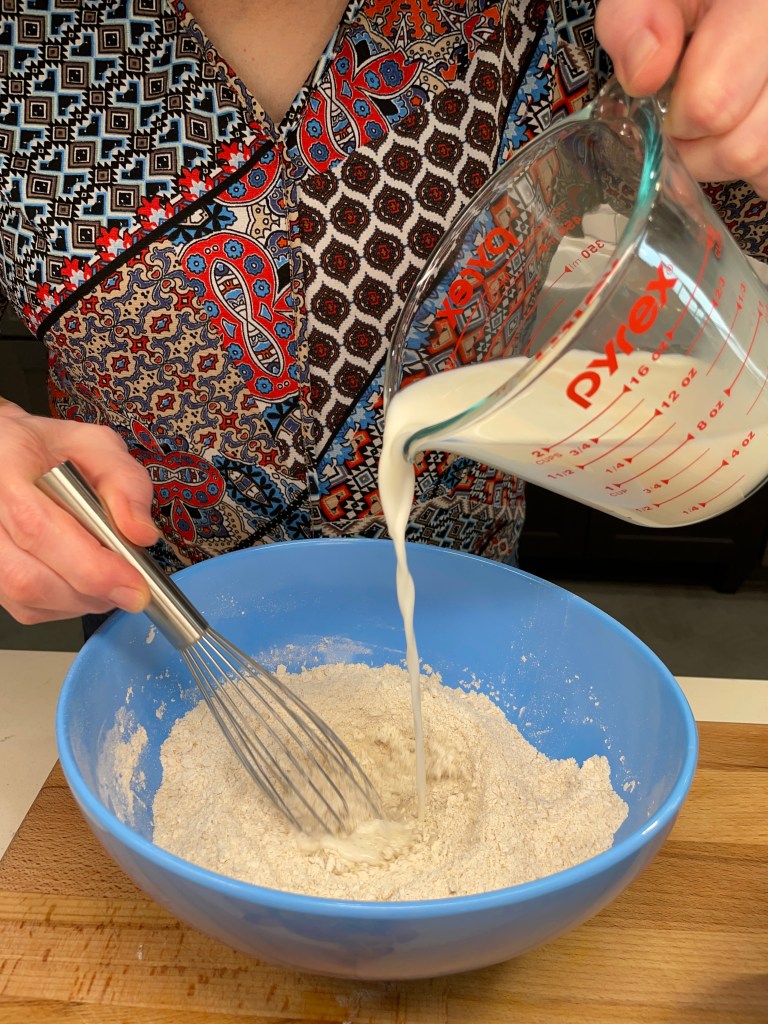
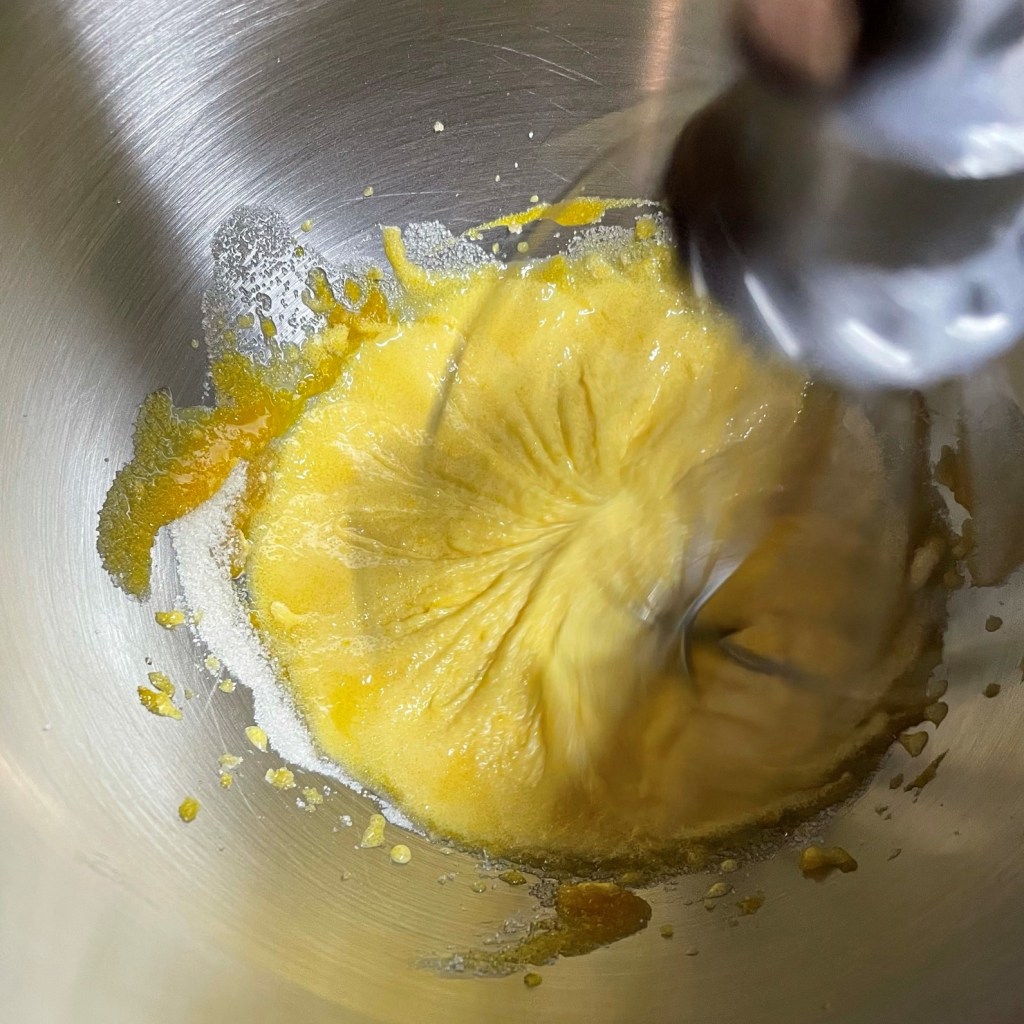
Feel free to swap in fat-free condensed milk here; on this day, I only had original in the cabinet. Whisk the whole milk into the condensed milk first, because their viscosities are very different and it requires some hefty whisking to combine them. Next, gently whisk in the heavy cream.
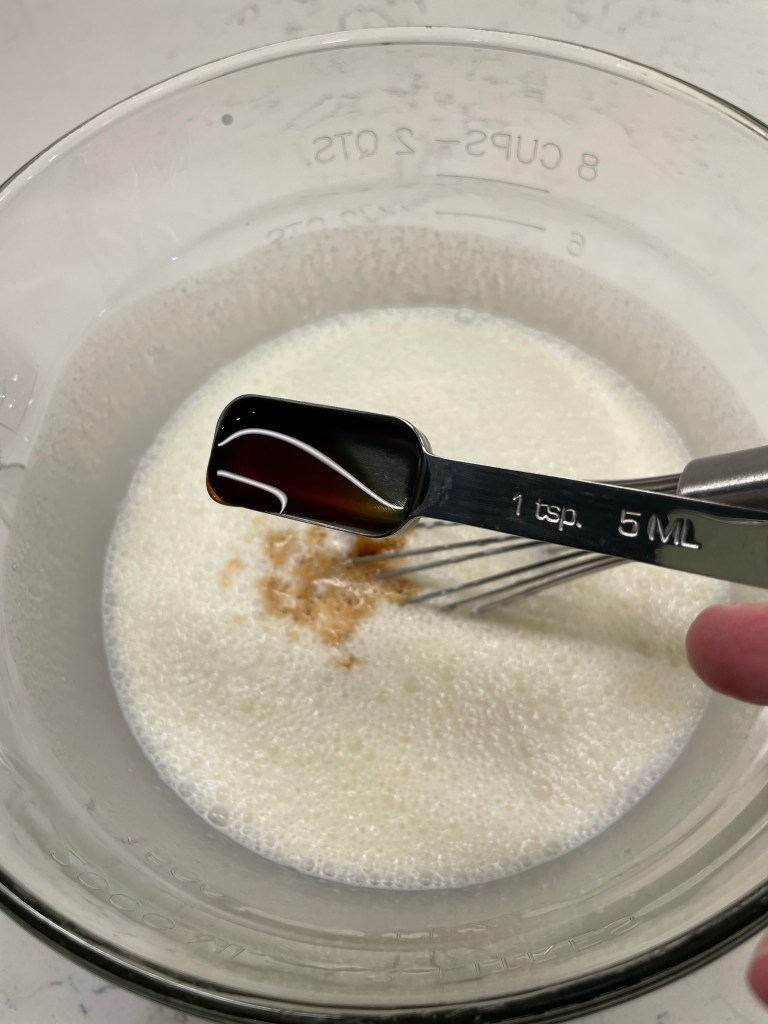
The flavoring agents are next: vanilla extract, orange oil and Fiori di Sicilia. Finally, half a can of orange juice concentrate, the kind your mom used to buy in the frozen section. Choose a reputable brand that lists only orange juice as an ingredient.
Whisk gently to incorporate the frozen orange juice, and then cover the bowl and refrigerate several hours or overnight. Now, something magical happens when you combine condensed milk and an acidic ingredient like citrus juice. OK, it isn’t magic, it’s science. This reaction happens with any kind of dairy milk, but the result with condensed milk is a nicer consistency. The acid changes the structure of the proteins in the milk, causing them to curdle or thicken. In the morning, you can expect it to look a little like pudding. Deliciously creamy, citrus-vanilla pudding.
Nobody would blame you if you eat a spoonful of it right on the spot.
The thickness is not a problem, and a quick whisking will bring the ice cream base to a thick but pourable consistency. Freeze as usual in an ice cream machine and then transfer to an insulated container to ripen it in the coldest spot of the freezer. Overnight is best, but if you can’t resist, you’ll still enjoy this Creamsicle ice cream in soft-serve form.
Orange and vanilla are a superb combination! With this recipe, I wanted to recreate the flavor of Creamsicles, which I loved so much in my childhood. Mission accomplished.
Ingredients
14 ounce can sweetened condensed milk (regular or fat-free)
1 cup whole milk
1 cup heavy cream
2 teaspoons real vanilla extract
1/2 teaspoon orange oil (optional, but recommended)
1/4 teaspoon Fiori di Sicilia (optional, but recommended)
Approximately 6 ounces frozen orange juice concentrate
Directions
In a large bowl or pitcher, combine condensed milk and whole milk and whisk to combine. Gently whisk in heavy cream. Stir in vanilla extract, orange oil and Fiori di Sicilia.
Add spoonfuls of frozen orange juice concentrate, gently whisking to incorporate each spoonful before adding more. Cover bowl with a lid or plastic wrap and refrigerate several hours to fully chill the mixture. The ice cream base will thicken significantly because of a chemical reaction between the dairy and citrus. Simply whisk to loosen it when you’re ready to freeze.
Freeze ice cream base, following manufacturer’s instructions for your particular machine. Transfer churned ice cream to an insulated container and freeze overnight before serving.
This ice cream is ready to scoop and serve straight from the freezer. As with any homemade ice cream, it is best enjoyed within about a week.
Here I go, answering my own question of “what other cocktails could be turned into a cake?” I asked this just a few weeks ago, when I presented the tiki cocktail skillet cake that put a fun, boozy spin on a pineapple upside-down cake. I started making a list of other drinks that could work, including some suggested by followers in the comments section.
Somehow, this one was not on the tip of my tongue when I first asked the question. It came about when I found beautifully ripe, organic strawberries on a recent shopping visit. I told Les I would make strawberry shortcake for Father’s Day, but he challenged me to come up with something more imaginative that didn’t involve sponge cake or biscuits (neither are his favorites). What about a strawberry cake, I asked? And he said, “that would be better, and do you think you could make it a little boozy?”
C’mon, could I make it a little boozy?! I mean, does he even know me?
My first step was to find a recipe that would accommodate a ton of fresh strawberries, plus booze. Even a novice baker like me knows that too much liquid will wreck a cake, so that was a major hurdle. The internet is full of strawberry cake recipes, and most of them are dressed-up versions of a boxed cake mix, which didn’t fit my goal. I don’t mean to be snobbish, and if you’re cool with a box mix, I’m not judging. But I’m super sensitive to artificial flavorings, colors, thickeners and sweeteners, so desserts tend to be a little more complicated for me.
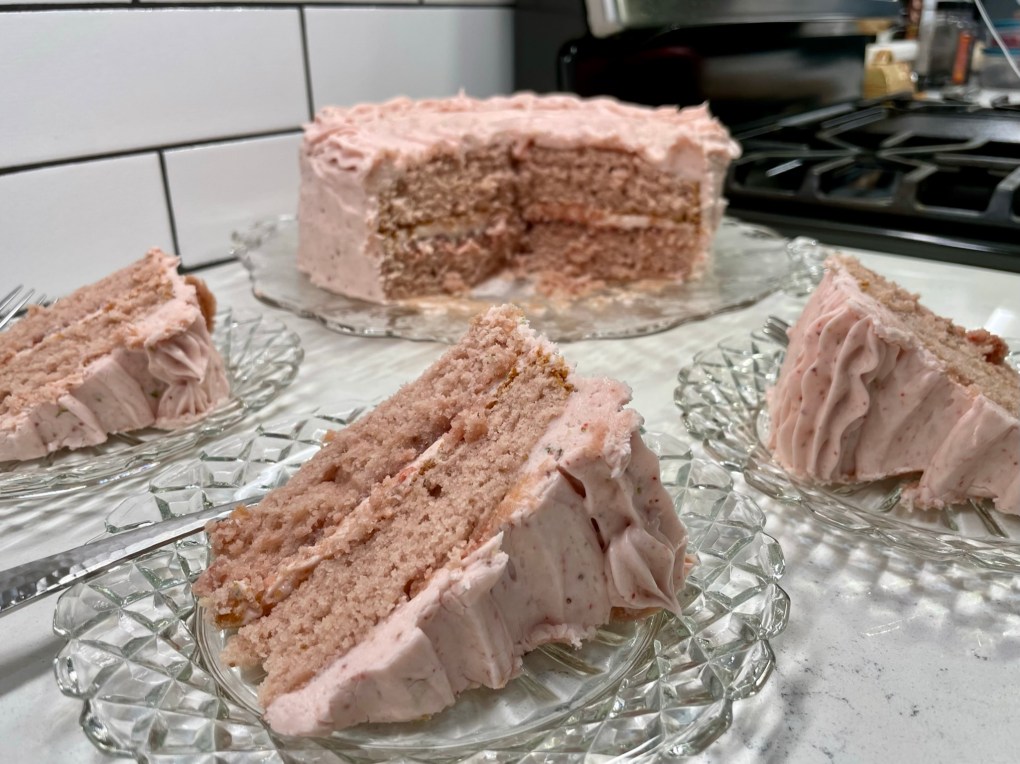
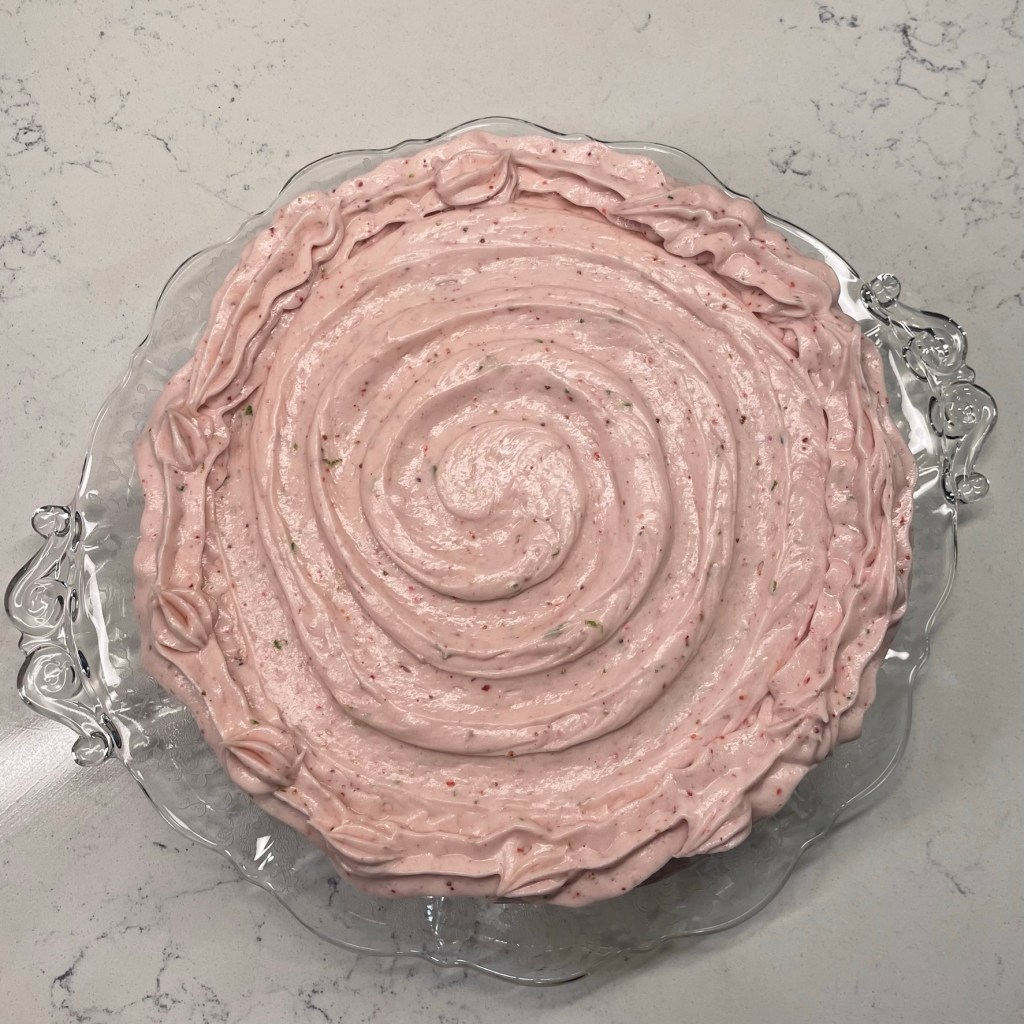
Hello, Gorgeous!
Besides, my goal was to take advantage of these beautiful fresh berries that are at their peak, so I searched until I found a scratch recipe that satisfied both my palate and my baking comfort level. Several recipes in my search results leveraged a technique called “reverse creaming,” which I’ve never heard of, let alone tried. Too much experimentation at once gets me into trouble, so I passed on those. Finally, I found this scratch strawberry cake recipe on Sally’s Baking Addiction blog that would be a good starting point, and I made only a few adjustments to booze up the ingredients, and one to make the process more familiar to me.
Get ready for oodles of photos on this one; there were a lot of steps for this cake, and I wanted to be detailed, for my future self as much as any other reason. If it’s all too much for you, skip ahead to the end, where I’ve included a click-to-print recipe card. You know, in the event you find gorgeous strawberries at your market, too. 🙂
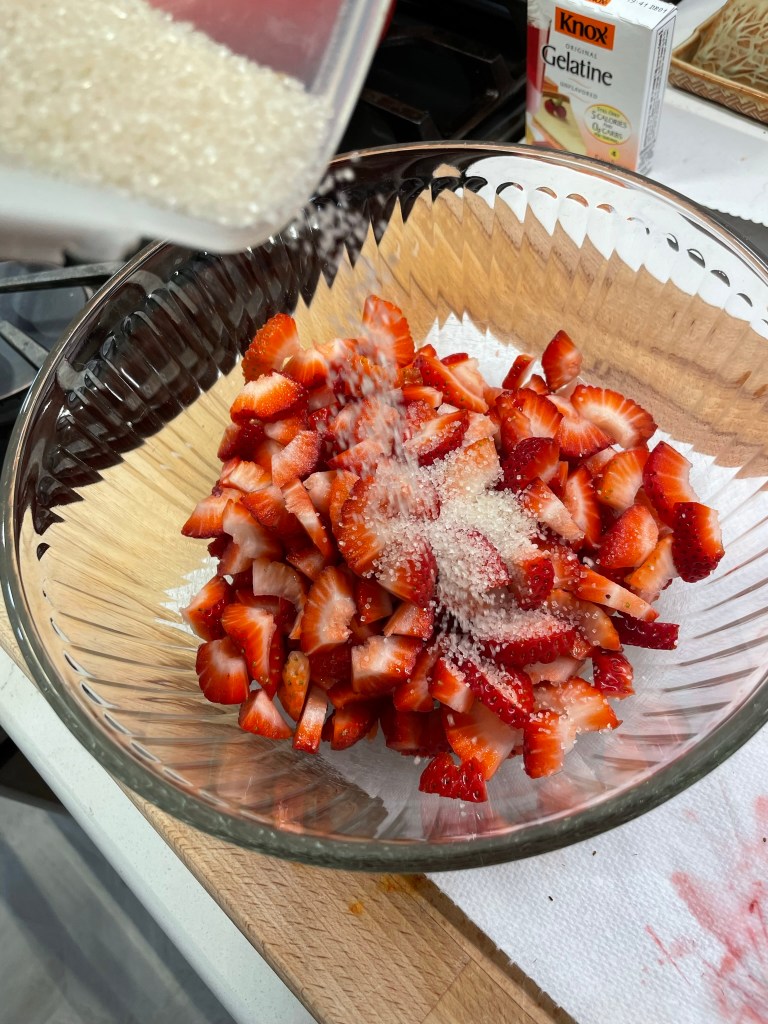
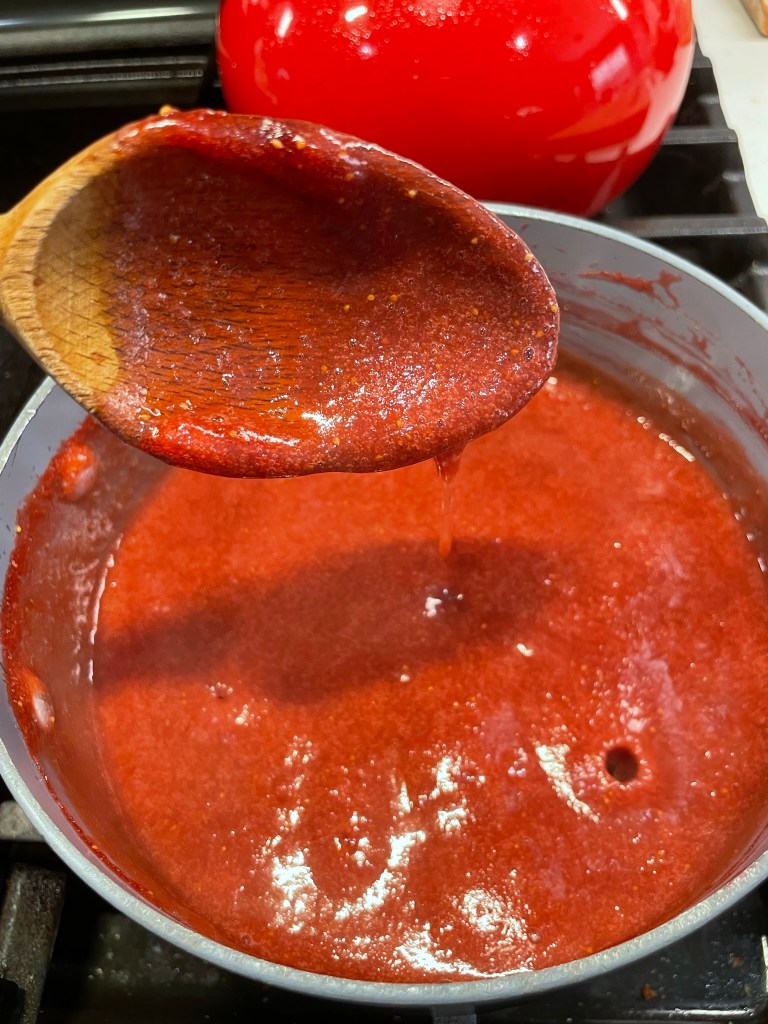
I got a little excited about the berries, and muscle memory took over when I sliced them up. Without thinking, I dumped in a bunch of sugar to macerate them before I even found the recipe I wanted to use. That turned out to be a problem because Sally’s recipe specifically said “don’t” add sugar to the berries before reducing. Oops. There was obviously no undo button for that, and I had to do some fancy math to make up for the sugar I had already used. This also meant that I had to watch the sweetened puree carefully to keep it from burning as I reduced it. If this all sounds complicated, well, what can I say? Nobody has ever accused me of doing things the easy way! It worked out just fine; next time I would just puree the strawberries naked and follow the recipe for the full amount of sugar. Don’t worry, that’s how I wrote the recipe.
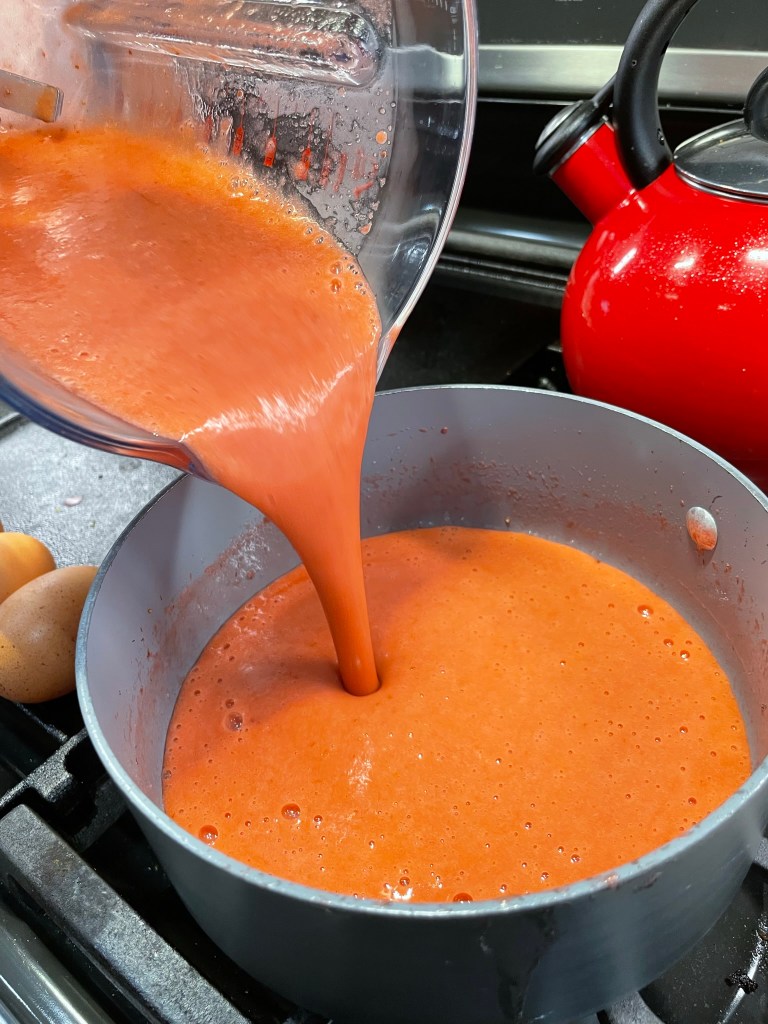
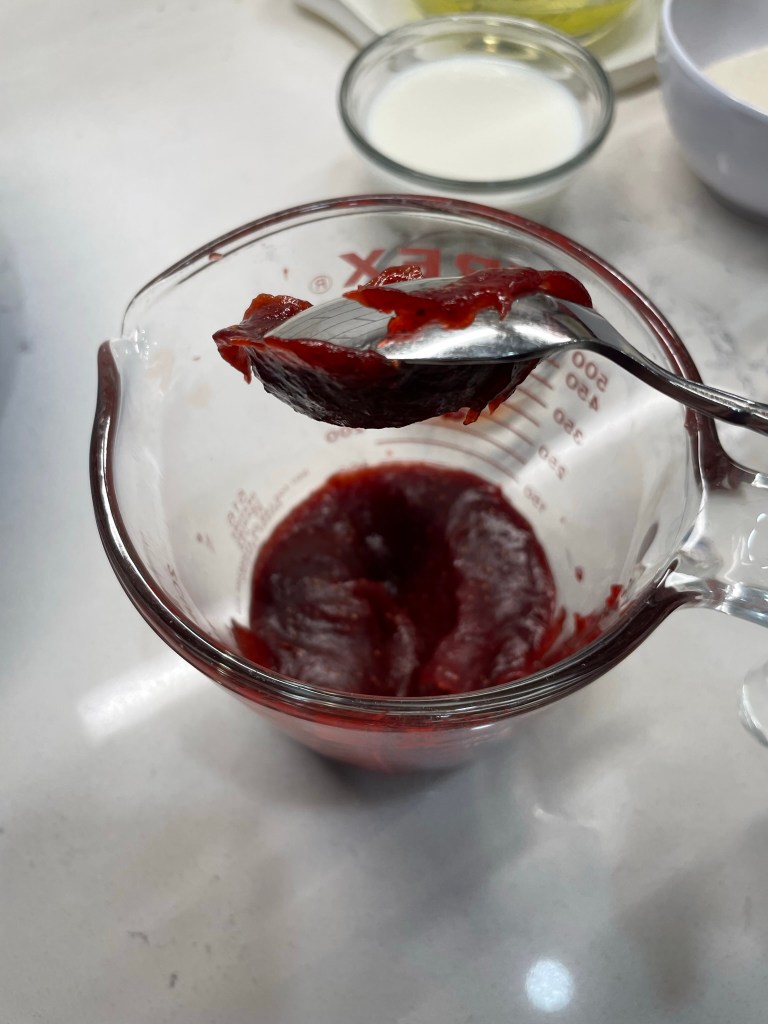
This is how you turn a pound of berries into a half cup of flavor.
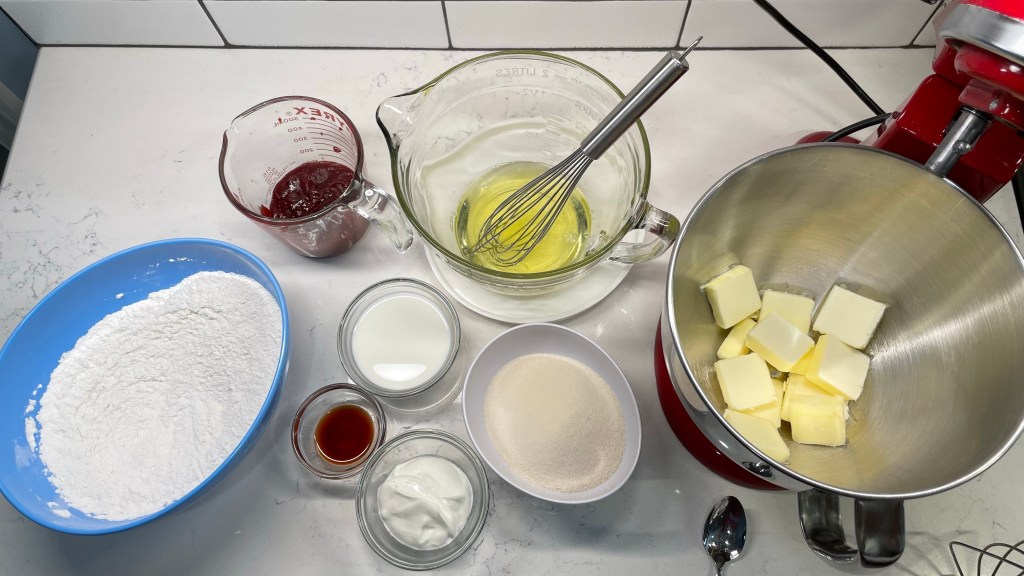
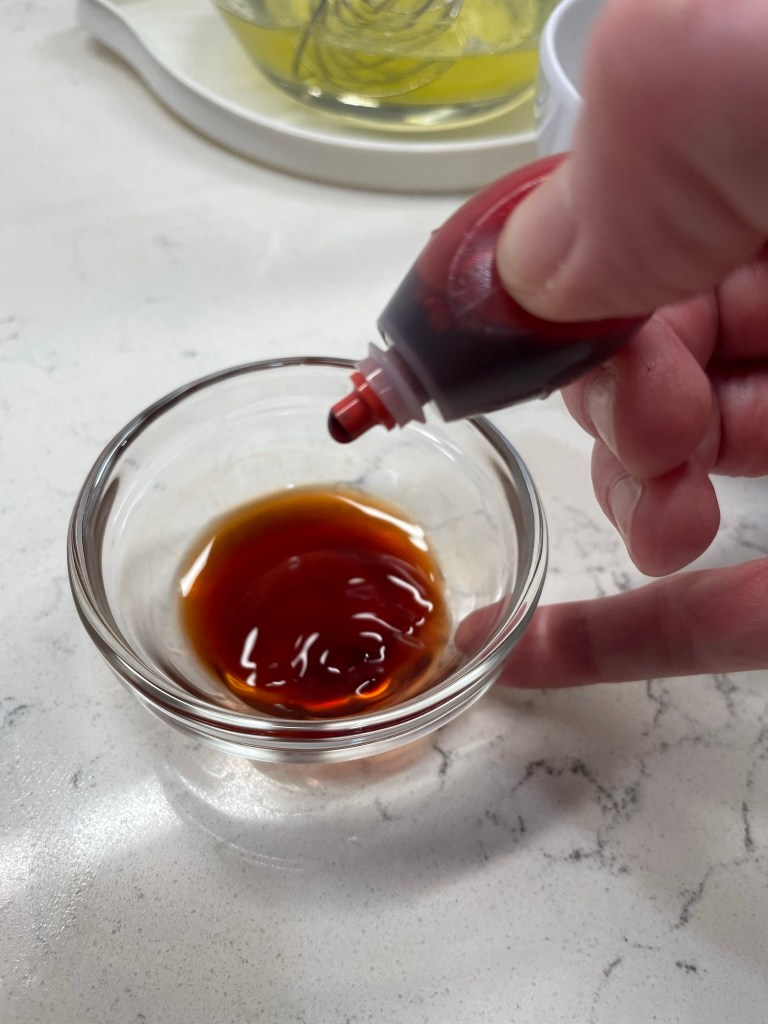
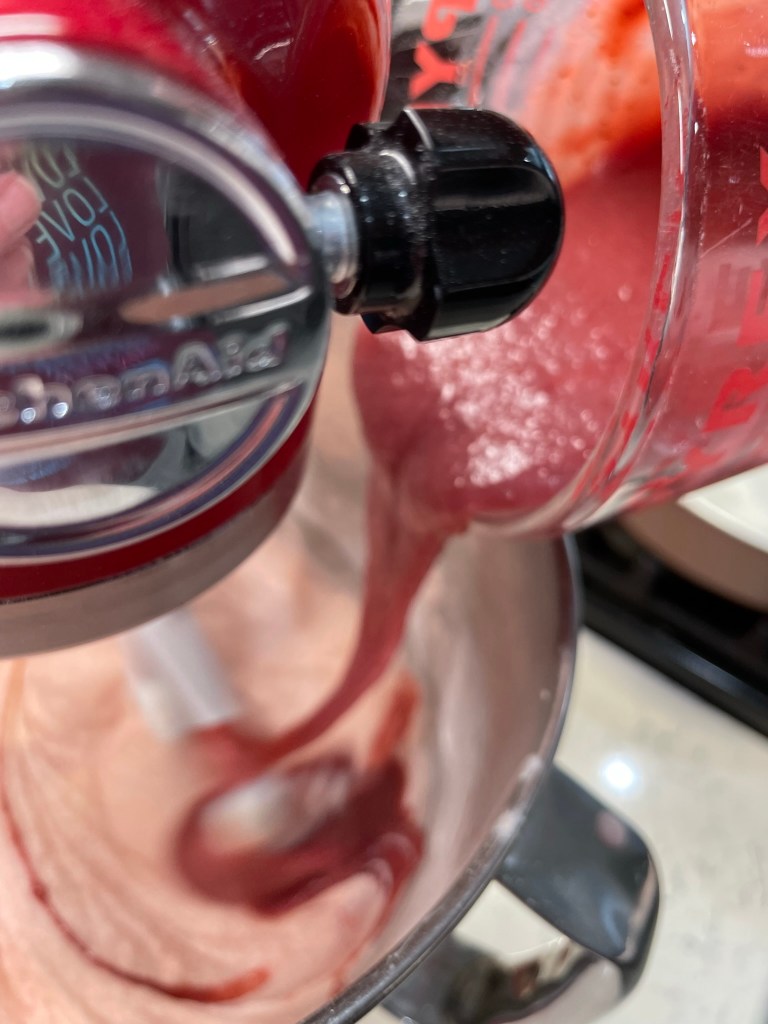
The puree needed time to cool, so I used that down time to get my other ingredients lined up and organized. This really helped me when I made my tiki skillet cake, so I’m trying to make it a habit. It still felt like too many components, so I combined a few things that made sense to me. That puree was thick as tomato paste, so I mixed the milk into it to make it pourable. I didn’t want to forget to add a few drops of natural red food coloring, so I added that to the extracts. Finally, I prepped my 9-inch cake pans and preheated the oven to 350 F.
When the butter was softened enough to blend, I started by creaming it with sugar, then whipped in the egg whites, sour cream and extracts. So far, so good!
My next adjustment was in technique. The inspiration recipe suggested adding whole amounts of some ingredients all at once, rather than alternating dry and wet additions to the batter. Perhaps this works well for a more skilled sweets baker, but I didn’t want to take any chances with unincorporated ingredients, especially when I was aiming to please my husband on Father’s Day. I did this the way my grandma would have suggested, and poured the batter into my prepped pans, one of which was fitted with a cake strip. These things are soaked in water then wrapped around the cake pan, and the intent is to help the cake bake evenly without too much “dome.” I only used it on one layer, as I didn’t mind the top layer being rounded a bit. As it turned out, neither layer had a dome.
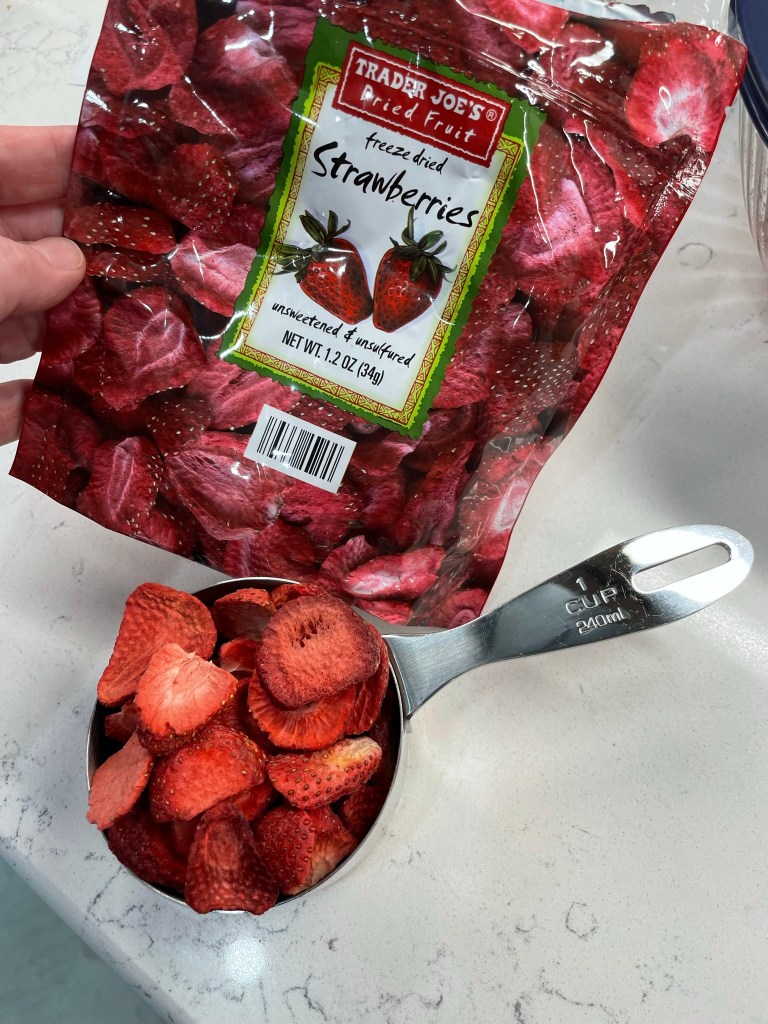
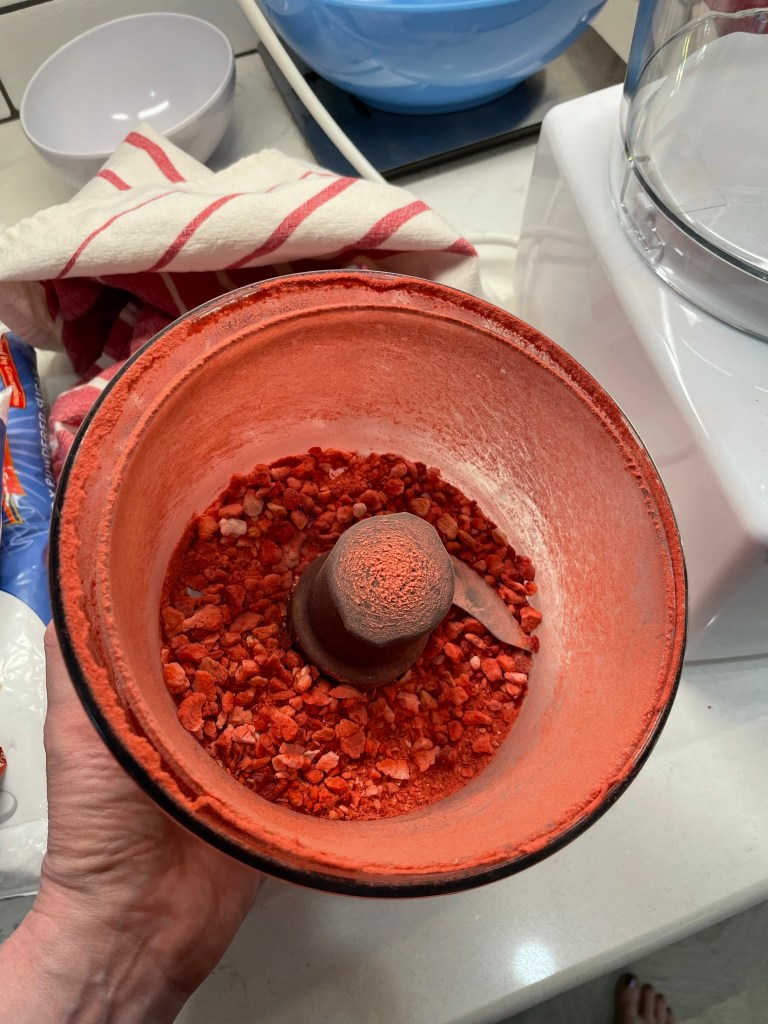
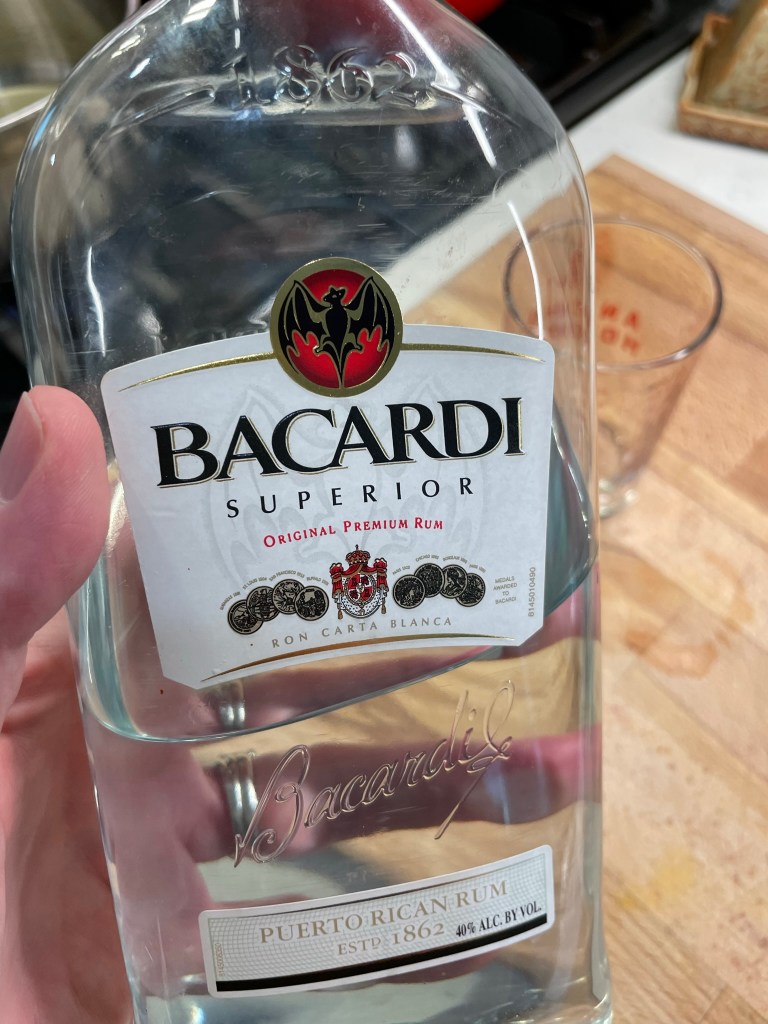
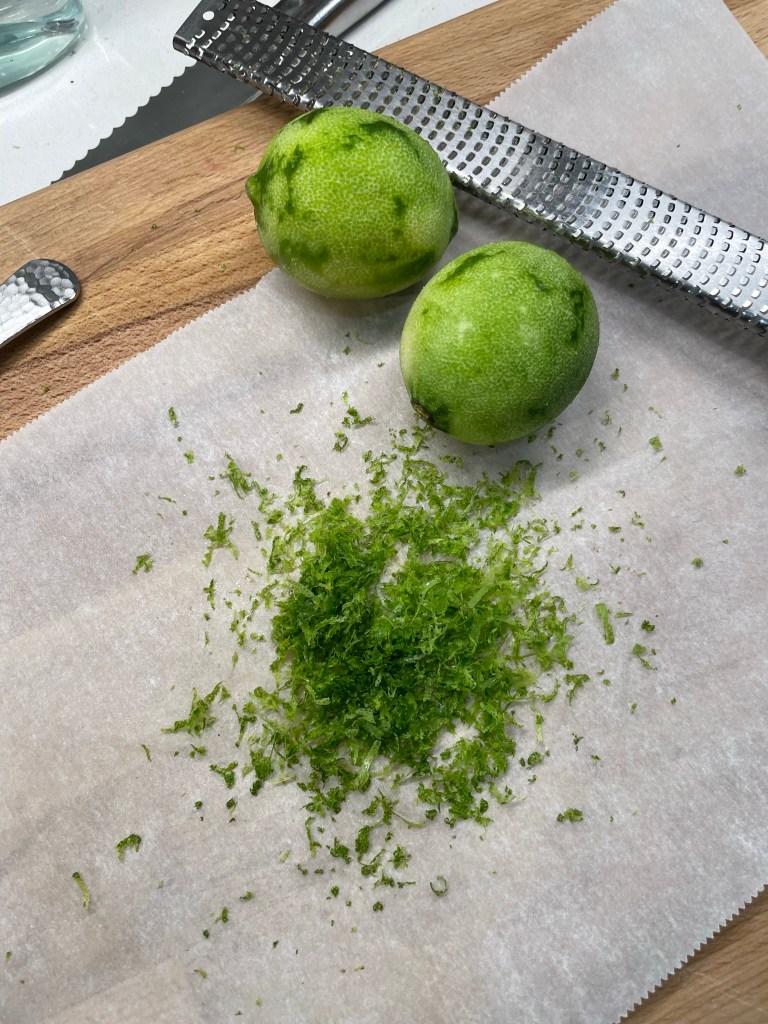
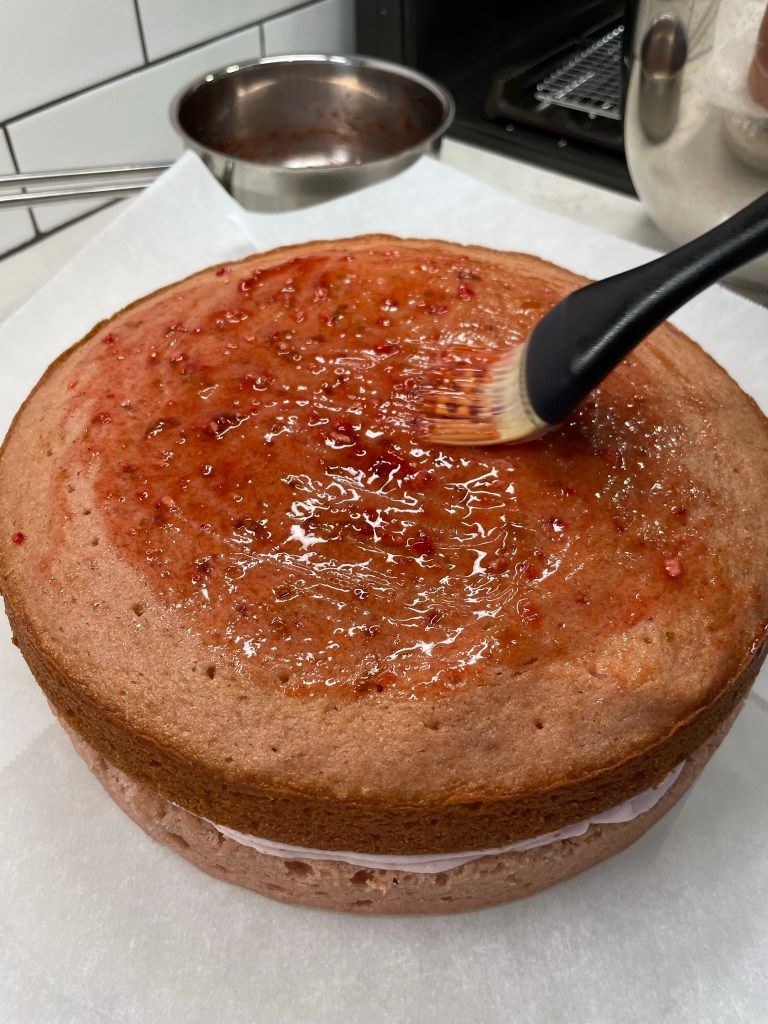
To achieve the “daiquiri” effect, I had swapped out some of the vanilla in favor of rum extract, and I cooked up a boozy strawberry daiquiri syrup for soaking the baked cake layers before icing. That alone was so good, I’ll have to think up another reason to make it again— and soon! The syrup was flavored with Bacardi white rum, fresh lime zest, and bits of freeze-dried strawberries, which I had processed into powder in the food processor. I’m pretty sure I’ll still be finding strawberry powder in random parts of the kitchen this time next strawberry season. Who has a better suggestion for turning that stuff into powder?
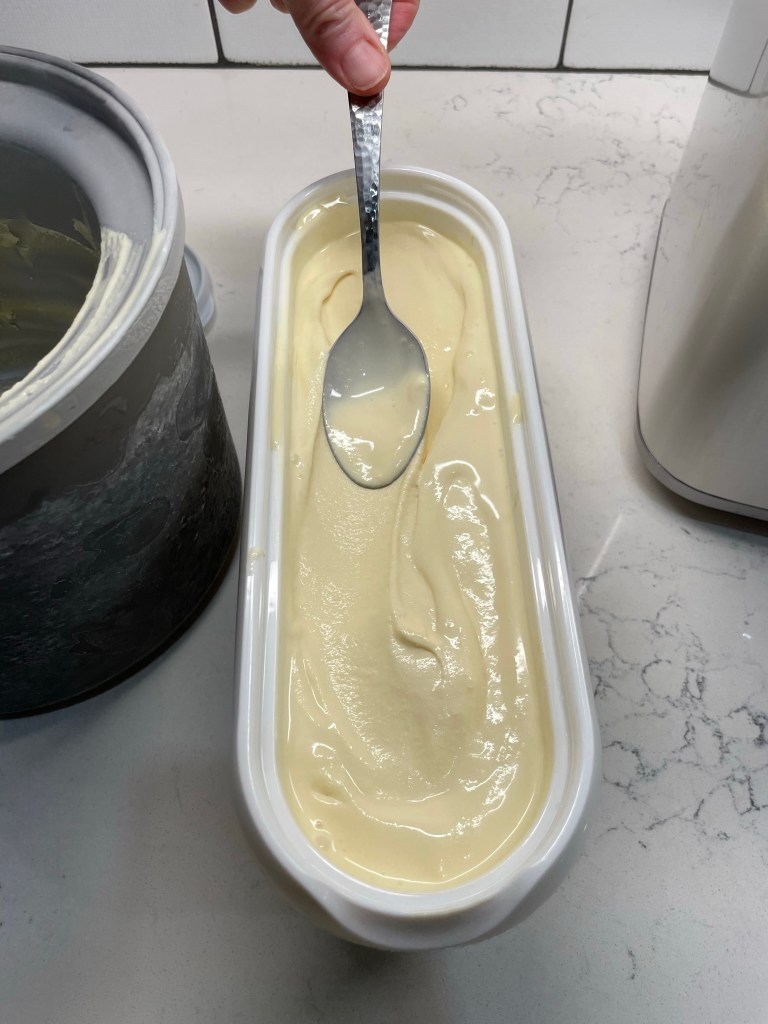
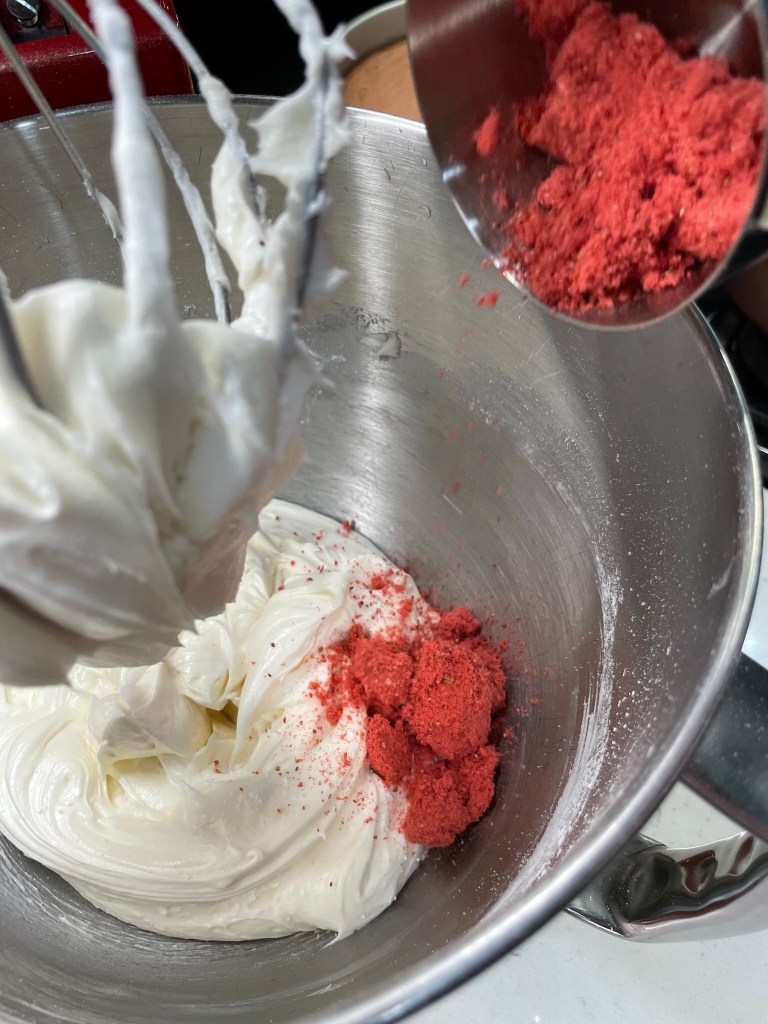
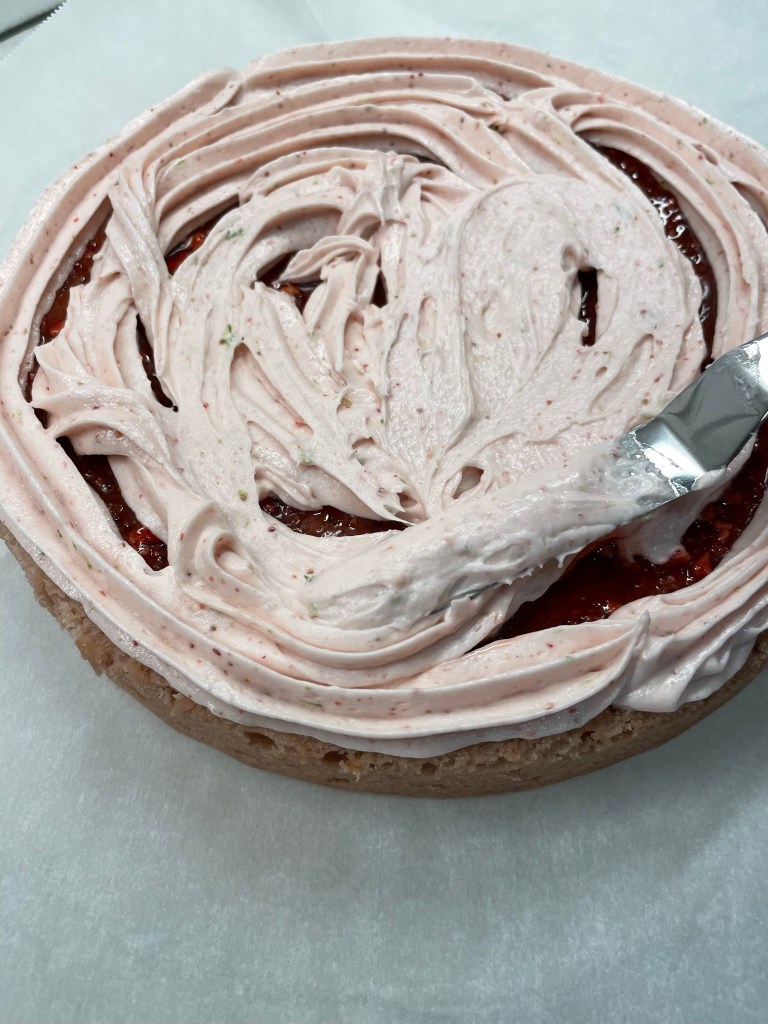
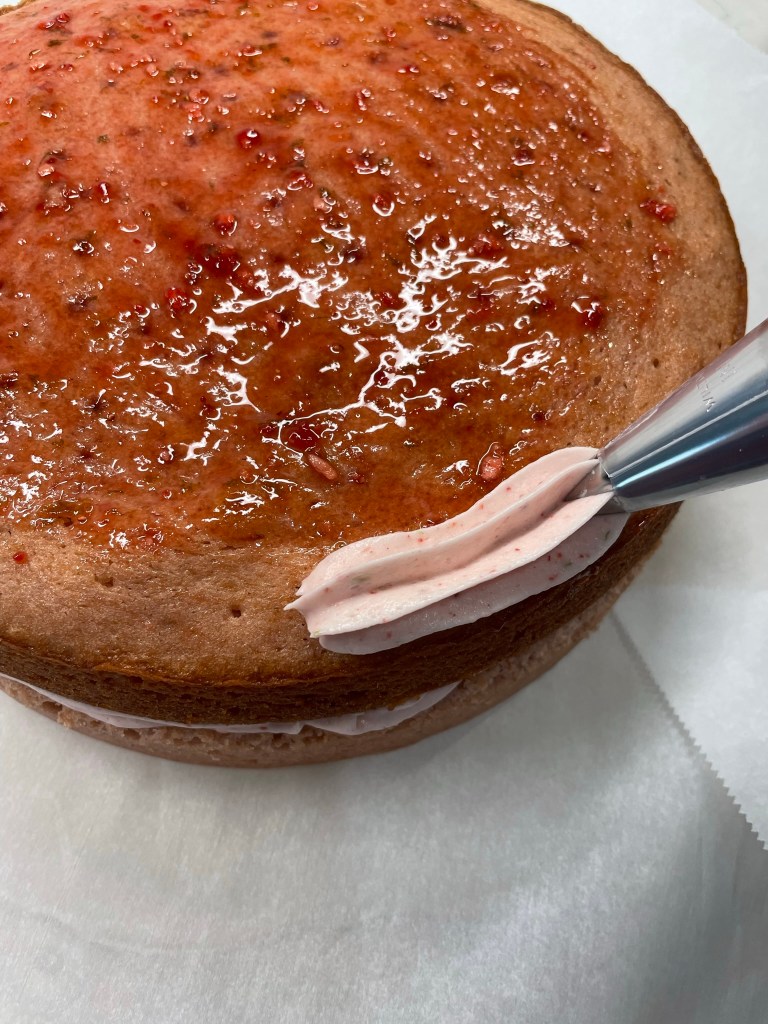
Almost finished! The cream cheese frosting got its pretty pink color from the freeze-dried strawberry powder, which put a ton of fresh berry flavor into play, without messing up the texture with too much moisture. I used an extra cup of powdered sugar from Sally’s recipe, because I wanted it to be sturdier. More lime zest and another splash of rum, and this frosting was good to go. And when I say, “good,” I mean really gooood!
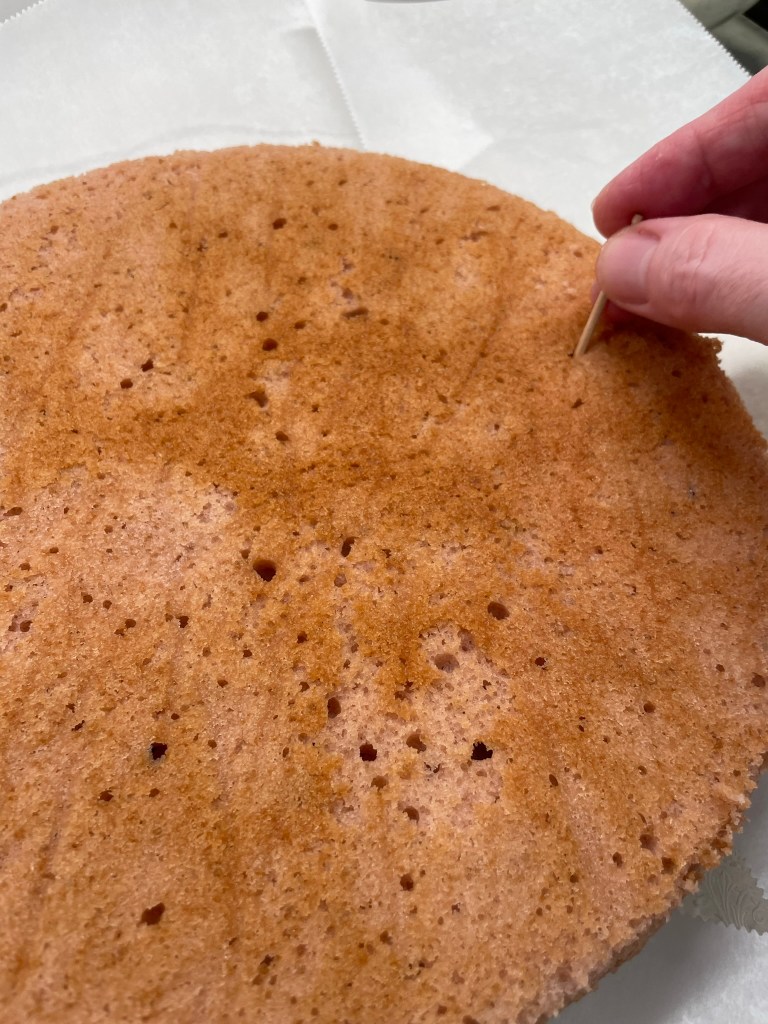
Putting the cake together was the easy part! I spooned most of that boozy daiquiri syrup over the first layer, which I poked all over with a toothpick first. A little edge of frosting kept it from soaking down the sides, and then I topped it with the second layer and frosted it up all over.
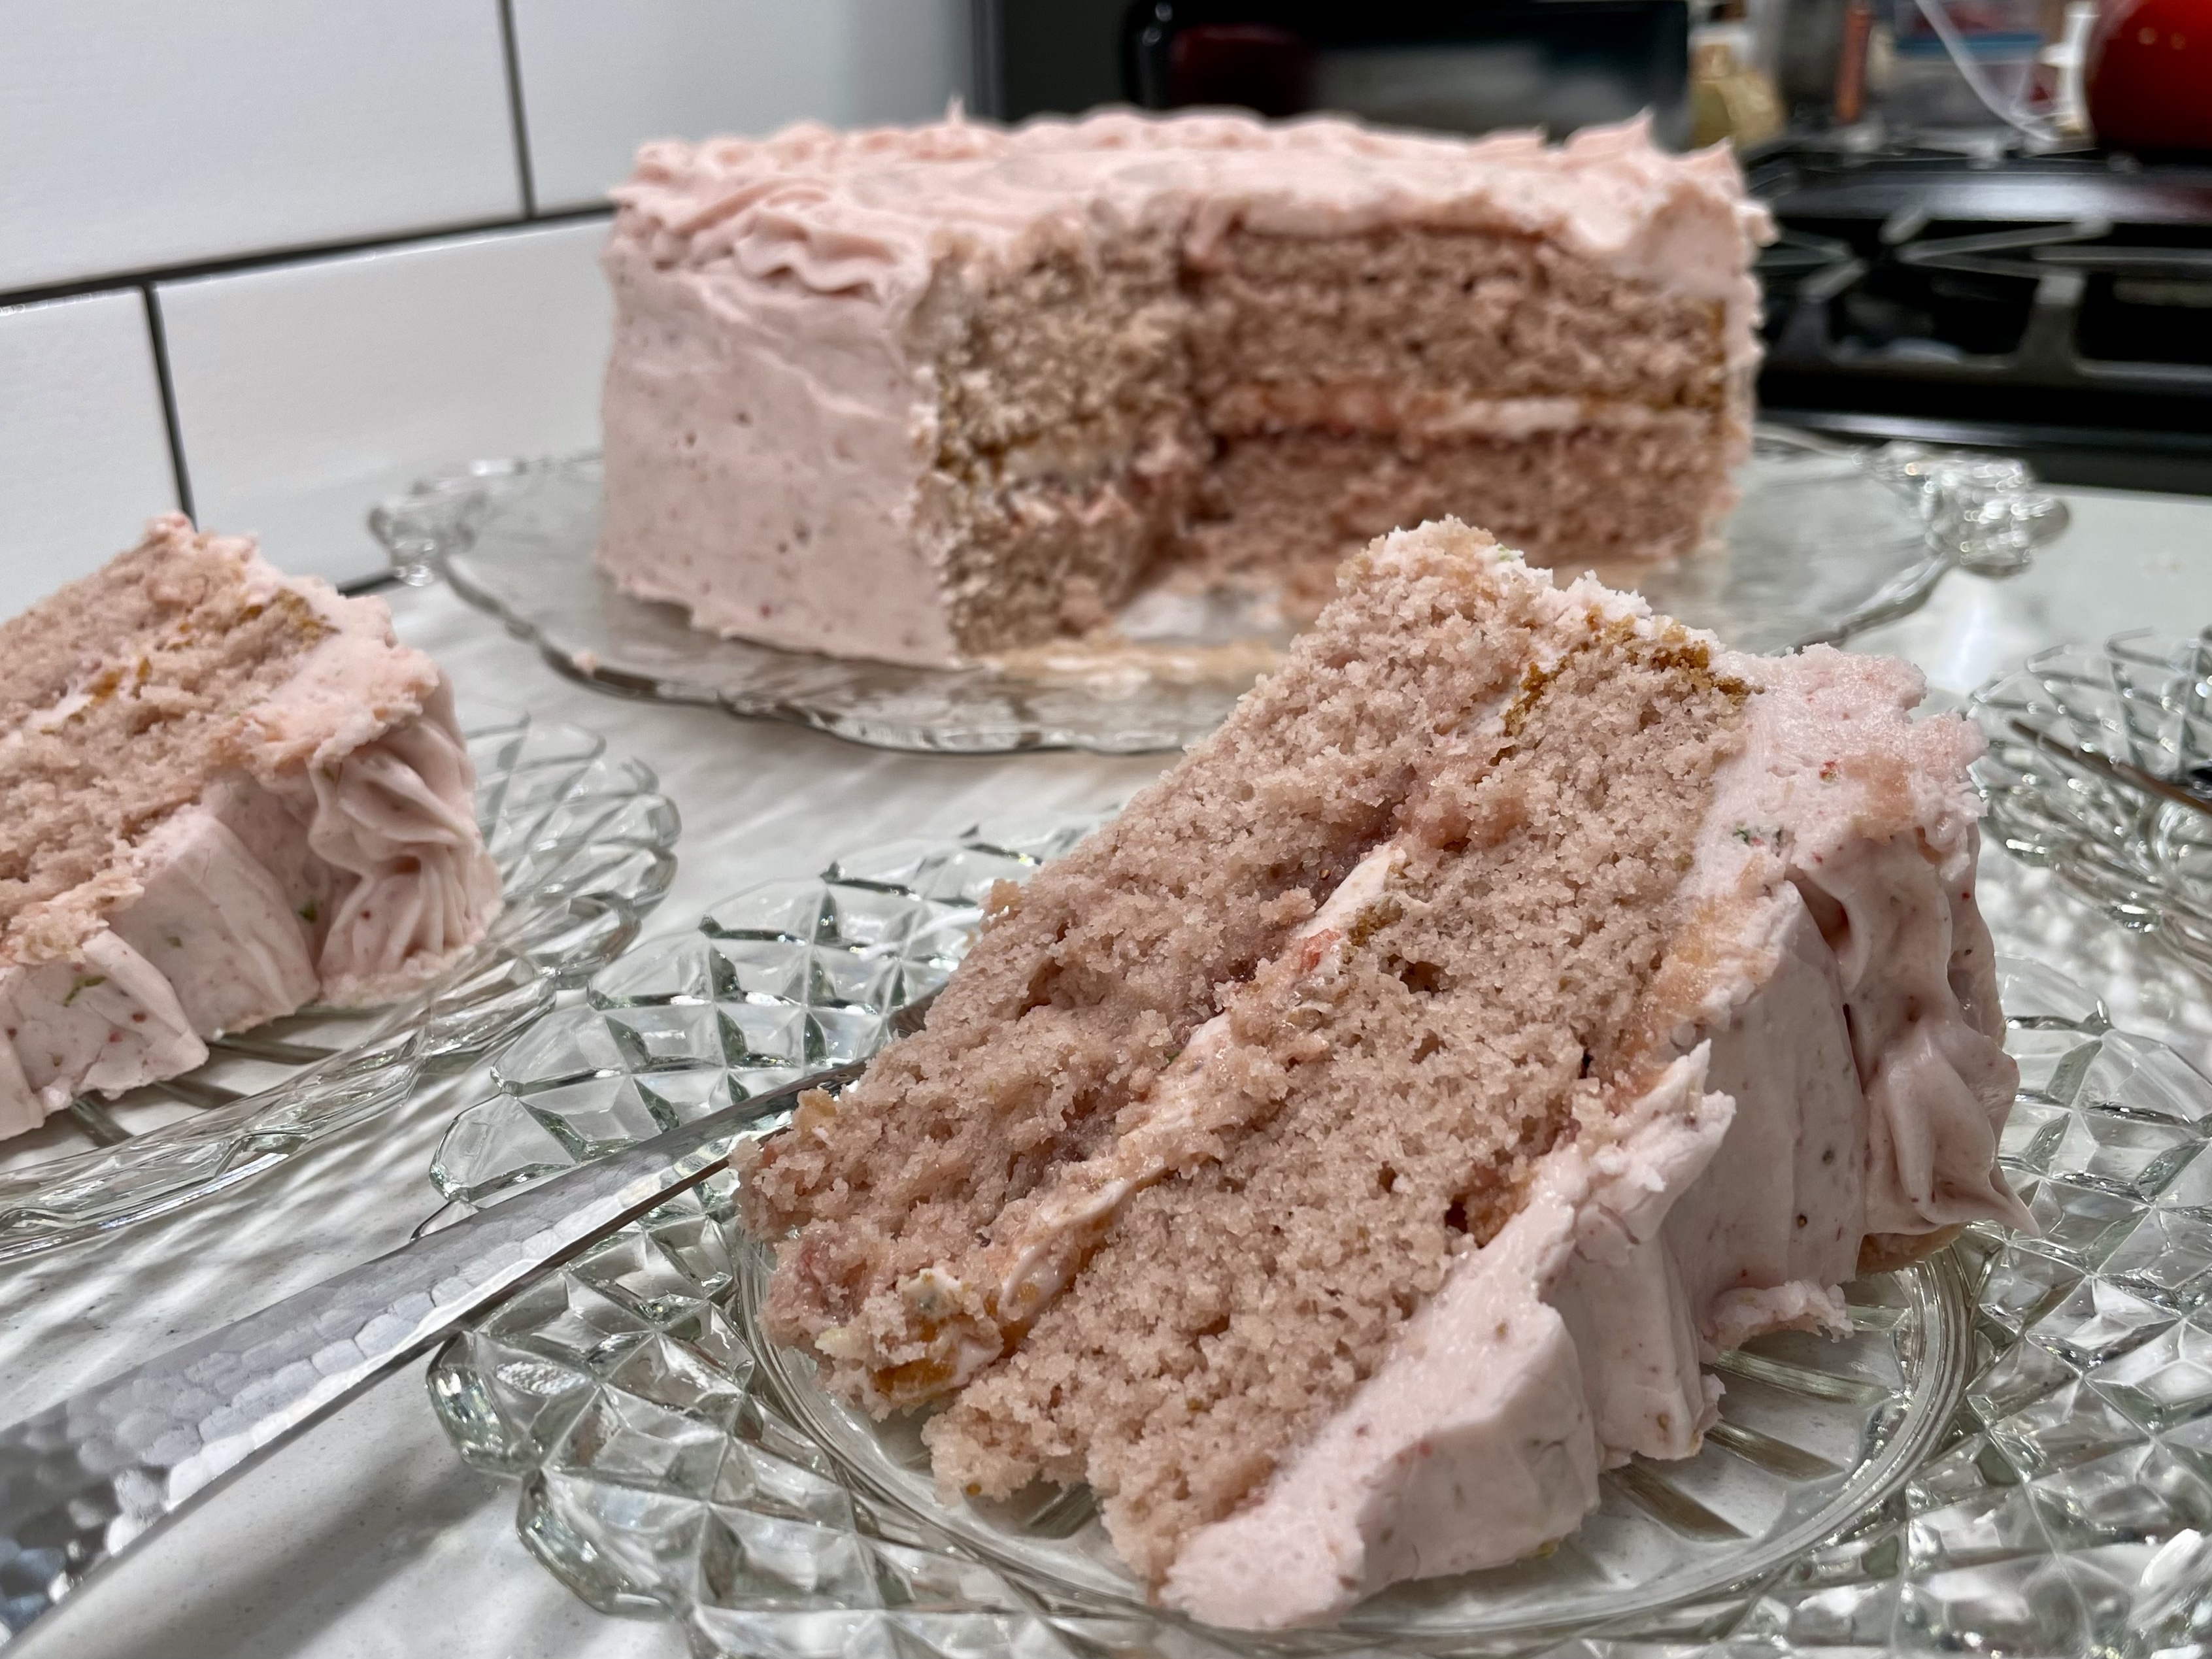
The resulting cake was beautiful and very tasty. Would I change anything next time? Not really, except for skipping the macerating of berries, which I wasn’t supposed to do in the first place. It wouldn’t be terrible to double the daiquiri syrup, and maybe it would soak in deeper if I applied it when the cake layers were still warm. I might put a little extra gel coloring into the batter to achieve more of a pink look. And I’d probably save a few of the prettiest fresh berries to garnish the cake at serving time.
But even without all of that, this was a big time winner. Les loved his Father’s Day cake, and I’m conquering my fear of baking, one recipe at a time. 🍓😉
This pretty cake is packed with fresh strawberry flavor, and I found a way to put a fun cocktail spin on it, too!
For the cake batter, plan ahead for the time needed to puree and cook the strawberries, as the reduction needs to be cooled to room temperature, along with the butter, egg whites and sour cream. For best results, measure out and line up all your ingredients before beginning this recipe. The ingredients and directions are split up into three components: the batter, the daiquiri syrup and the frosting.
Ingredients
1 pound fresh ripe strawberries, rinsed and hulled (these will be pureed and cooked)
2 1/2 cups cake flour (see notes)
2 tsp. baking powder
1/2 tsp. baking soda
1 tsp. fine salt
3/4 cup (1 1/2 sticks) unsalted butter, room temperature
1 3/4 cups cane sugar
5 large egg whites, room temperature
1/3 cup sour cream, room temperature (full fat for best results)
1 tsp. real vanilla extract
1 tsp. rum extract
4 drops red food color (optional, for extra pink color)
1/2 whole milk, room temperature
Directions
Puree the strawberries in a blender or food processor until smooth. Cook the resulting puree over medium low heat for about half an hour, until the berries have reduced down to about 1/2 cup volume. The mixture should be almost as thick and sticky as tomato paste. Set this aside to cool.
Preheat oven to 350 F, with oven rack in center position. Prepare two 9-inch cake pans by buttering the sides and bottom. Lay parchment rounds over the bottom and butter that as well for easy removal of the cake layers.
Combine flour, baking powder, baking soda and salt in a medium bowl.
Beat butter in stand mixer with paddle blade. Add sugar gradually, beating until light and fluffy. Whisk egg whites until frothy; pour into mixer bowl and beat with paddle until evenly combined, about two minutes. Add sour cream, vanilla and rum extracts and food color (if using); beat until smooth.
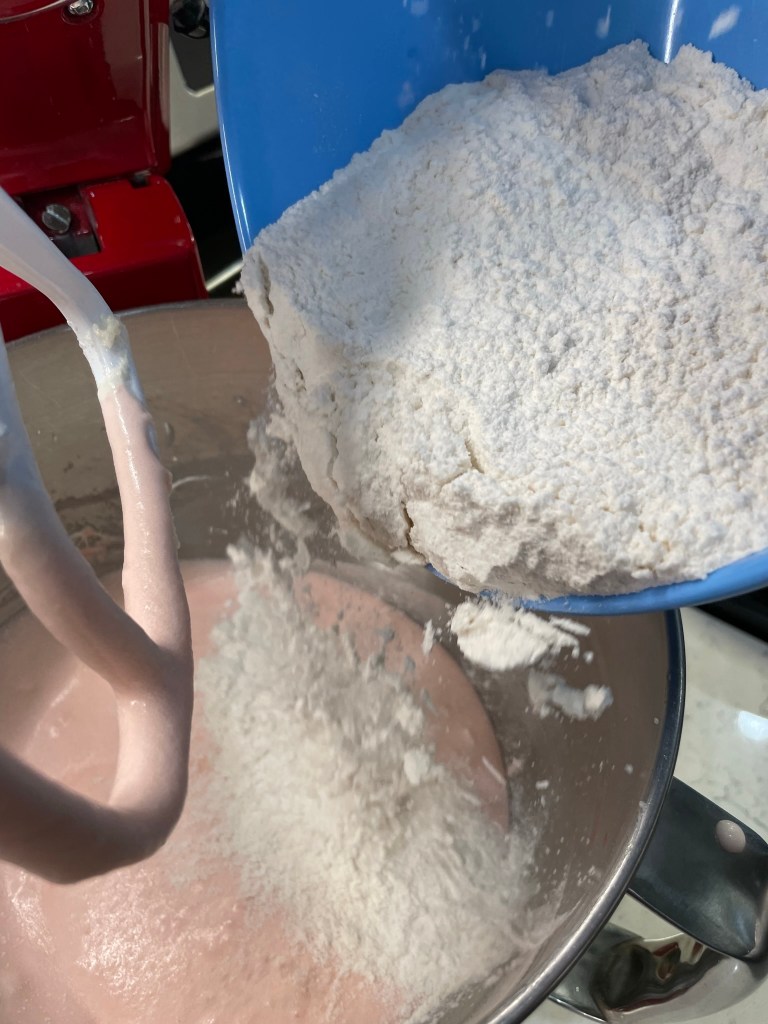
Whisk the cooled strawberry puree into the milk to create a thick liquid. Add dry and wet ingredients to the batter, alternating so that you begin with flour, then strawberry-milk, flour, milk, flour. After each addition, beat on low speed only until addition is incorporated. Scrape down the sides of the bowl a couple of times during these additions.
Divide batter between prepared cake pans. Bake 25 minutes, using the toothpick test to check for doneness. Allow cake layers to cool in the pans, set on a cooling rack for even air flow underneath. When cakes are cooled, invert onto cooling racks.
The daiquiri syrup is next, and this can be made ahead and brought to room temperature before soaking baked cake layers. The syrup uses some of the freeze-dried strawberries that are also used in the frosting. Process those into a powder during this stage, and reserve most of the powder for the frosting.
Ingredients
1/4 cup cane sugar
2 Tbsp. water
1/4 cup white rum (I used Bacardi brand)
zest of one organic lime
1 Tbsp. powdered, freeze-dried strawberries plus small bits (see frosting ingredients below)
Directions
Add the freeze-dried strawberries to a blender or the small bowl of a food processor. Pulse about 20 times to transform the berries into a powder. Sift the berry powder through a wire strainer, and measure out a tablespoon or so to be used in the simple syrup, along with some of the larger bits caught in the mesh strainer.
Make the daiquiri syrup by heating sugar, water and rum over medium heat until slightly bubbly. Add about a tablespoon of the strawberry powder, and a spoonful of the small bits, which will rehydrate in syrup. Stir in lime zest and set aside to cool. If you’d like, you can make this ahead and keep it in the fridge, but bring it to room temp when you’re ready to assemble the cake.
For the frosting, I like salted butter because it emphasizes the bright flavors of strawberry, rum and lime. If you prefer unsalted butter, it’s an even swap.
Ingredients
1 heaping cup freeze-dried strawberries (look for them at Trader Joe’s, Whole Foods or online)
8 ounces full-fat cream cheese, room temperature
1 stick salted butter, room temperature
4 cups confectioner’s sugar
1 Tbsp. white rum
zest of one organic lime
Directions
Make the frosting; cream together the cream cheese and butter on high speed, using the stand mixer with whisk attachment. Stop mixer and add confectioner’s sugar, one cup at a time. Whisk until smooth and scrape down sides as needed. Beat in rum, then add powdered strawberry dust and lime zest. Beat until fluffy. If the frosting seems a little soft, cover the bowl and refrigerate a half hour or so, then whip at high speed for a fluffy texture.
Smear a little bit of frosting onto serving platter, then position first cake layer upside-down on the dab of frosting to prevent it sliding around on the platter. Use a toothpick to poke small holes all over the first cake layer. This will help the daiquiri syrup soak into the bottom layer of the cake.
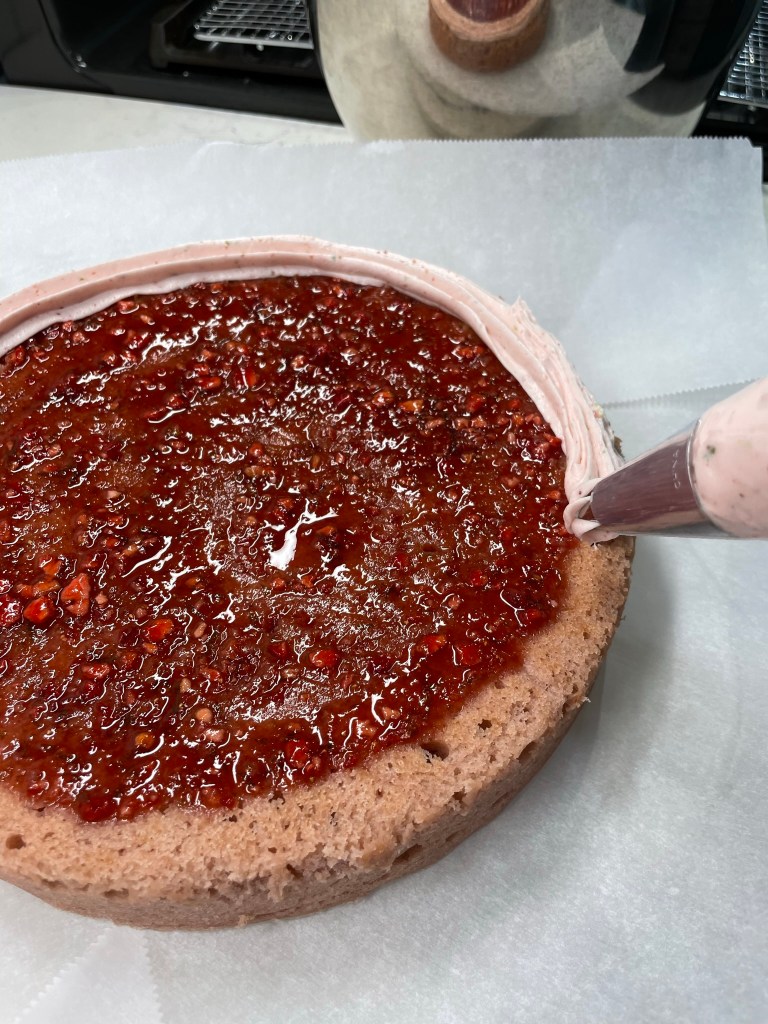
Fill a piping bag with frosting, and lay a thick line around the outer edge of the first layer. Spoon most of the daiquiri syrup evenly over the cake layer, spreading it up to the edge of the frosting line to encourage it into the toothpick holes. When the syrup appears mostly soaked into the cake, pipe frosting all over the top and use an offset spatula to gently smooth it over the syrup. It doesn’t have to be perfect.
Position the second layer of cake over the first. Use the toothpick to poke holes over this layer and gently brush the remaining daiquiri syrup over the top, stopping about one inch from the edges. This layer should have only a slight coating of the syrup; otherwise, the frosting might not stay put. Pipe a line of frosting around the edge of the top layer, then frost the sides and top of the cake.
Cover and refrigerate the cake a couple of hours before serving for best results.
I’m ready for fall—there, I said it. Summer has been wonderful this year, especially for the fact that we have enjoyed the company of friends more this year than in the previous two summers. It’s good to be (mostly) back to normal. But my confession is true; I have found myself longing for the goodness that autumn brings—you know, cooler evening breezes, crisp morning air, comfy sweaters and (of course) the food. Soon enough, I suppose.
As we wind our way through these waning days of summer, I am delighted with the freshness we have enjoyed from our own garden and the various other local sources that have supplied our meals.
We are clinging to the end of fresh peach season here in the South, and I have two delicious desserts to share with you. It is unusual for me to share two recipes at once but, given the short time left for enjoying fresh, in-season peaches, I thought it made sense to present these at the same time. Both are prepared in a skillet, and both include fresh peaches, but that’s pretty much where the similarities end. One is super simple to make and serve straight from the skillet; the other is a bit more involved, though not difficult, and serves up with a more elegant flair. Either is delicious, and if you only have enough time (or peaches) to make one of them, you can hardly choose wrong.
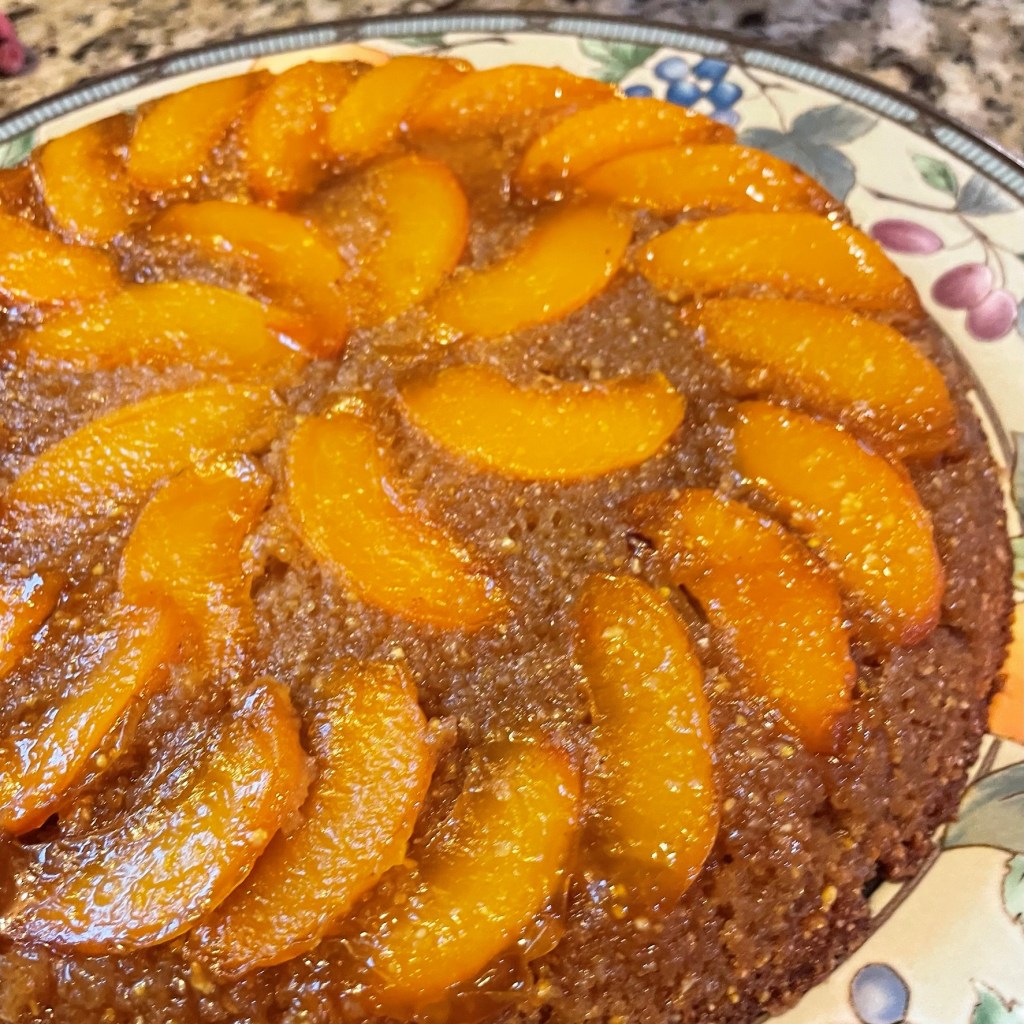
Peach Bourbon Upside-down Skillet Cake
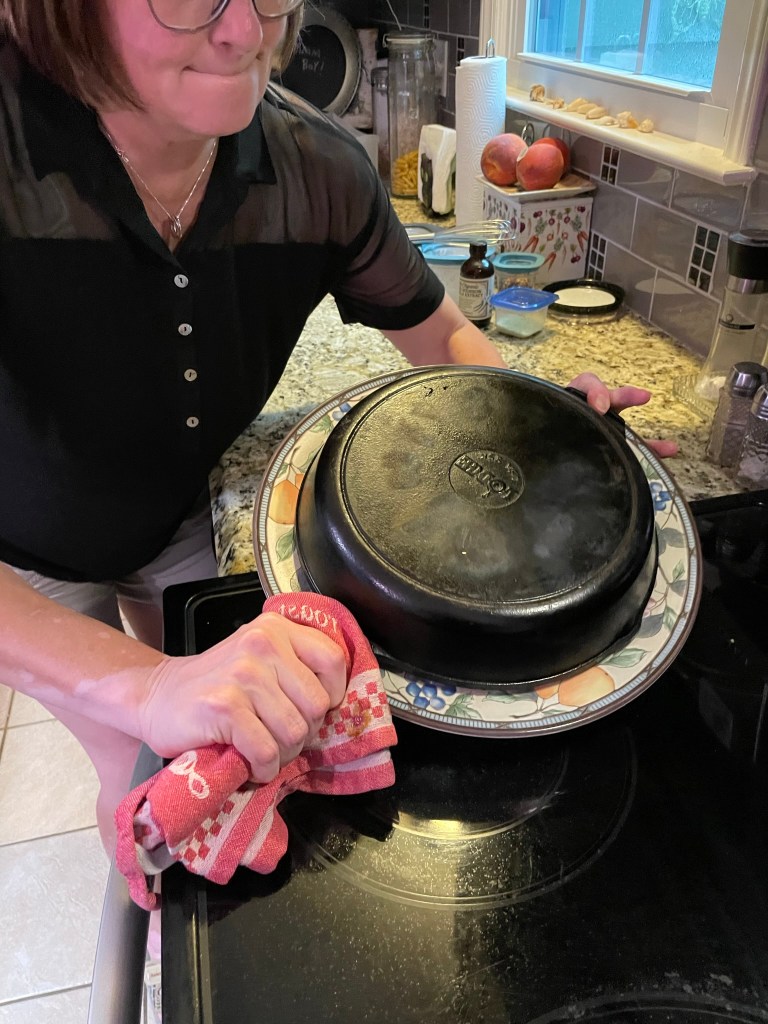
The first of these yummy desserts was made “on location,” just about a month ago, during a visit with friends outside Raleigh, N.C. When we arranged our day trip to visit Bob and Peg, I told them I’d love to make a dessert using the fresh peaches off their backyard tree. If you have the time to invest in a few extra steps, this is the dessert I recommend. For me, the trickiest part is inverting the thing while the heavy cast iron skillet is still warm. If you’re comfortable doing so, this cake is well worth the effort, and it’s one that I have made several times over the years. I turned it into a bit of an adventure this time by packing up all the pre-measured ingredients and then assembling and baking it at Bob and Peg’s. This was easier than it might sound, and it went like this:
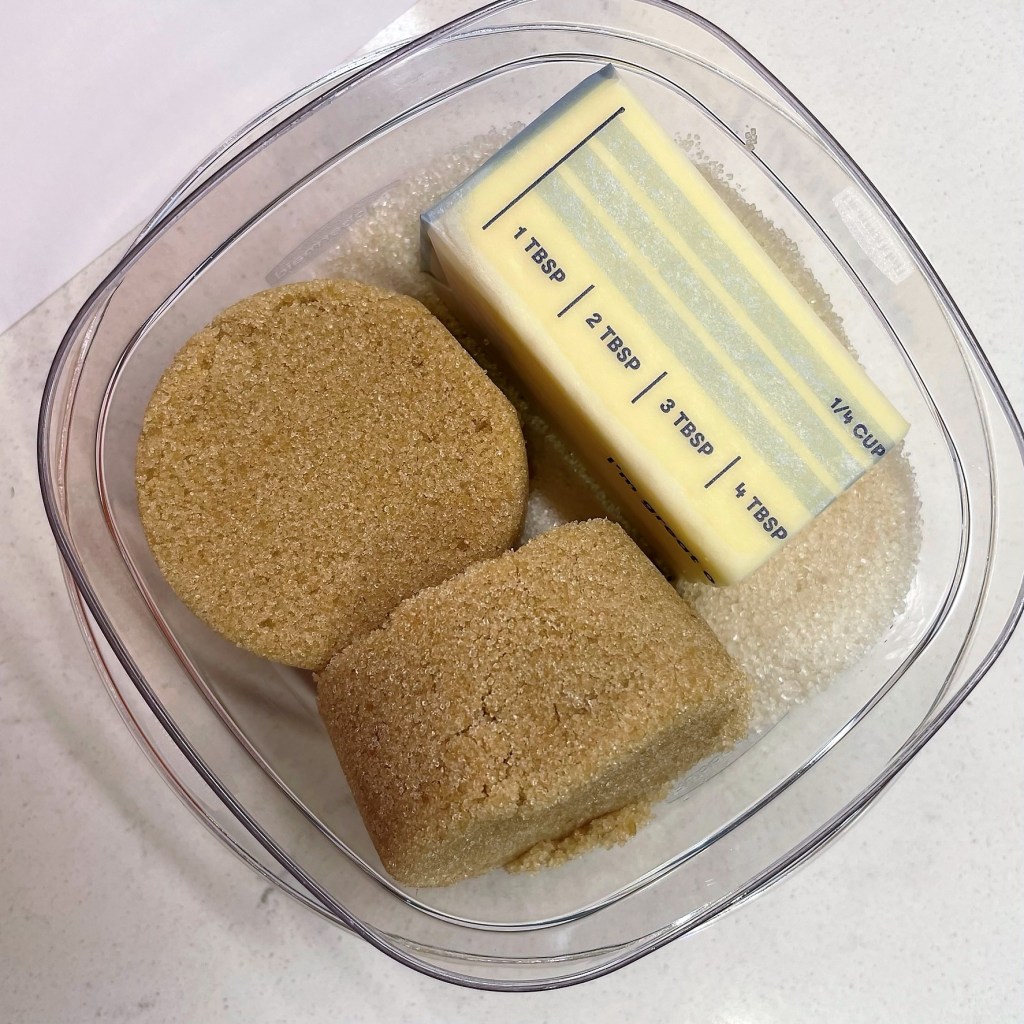
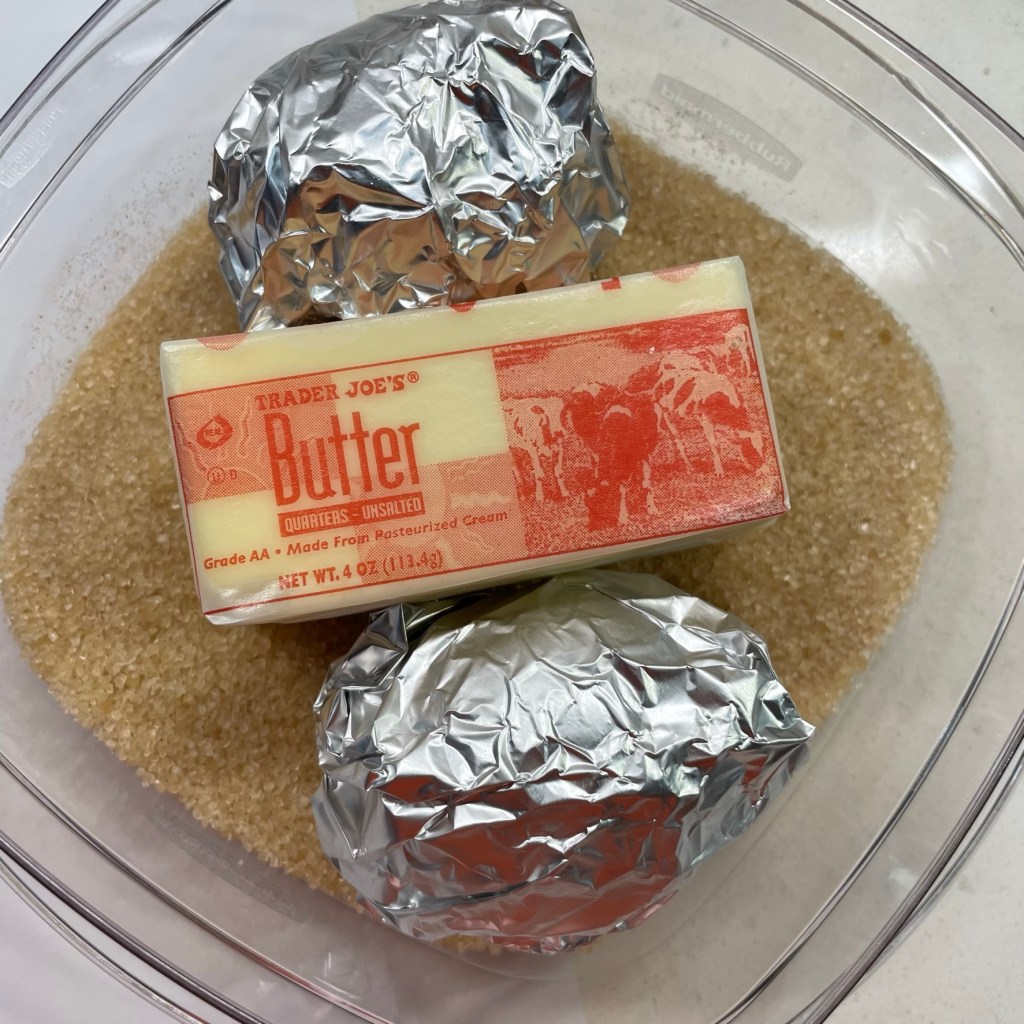
I measured my ingredients and grouped them together as I’d need them for the skillet cake. The eggs are wrapped in foil for protection.
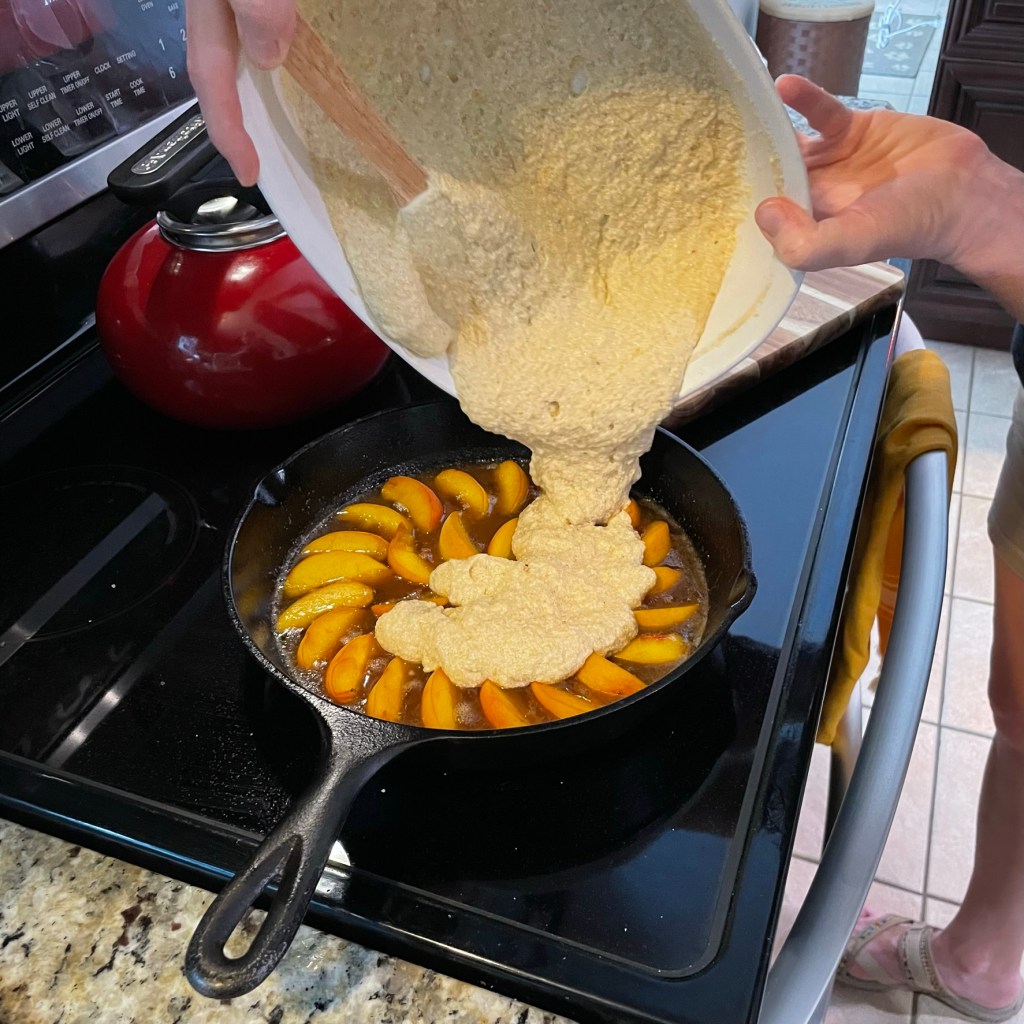
As with any upside-down cake, this dessert was built backward, beginning with the sticky-sweet, sugary base in the skillet and finishing with the batter that gets poured right on top—which, of course, becomes the bottom after the cake is baked and inverted.
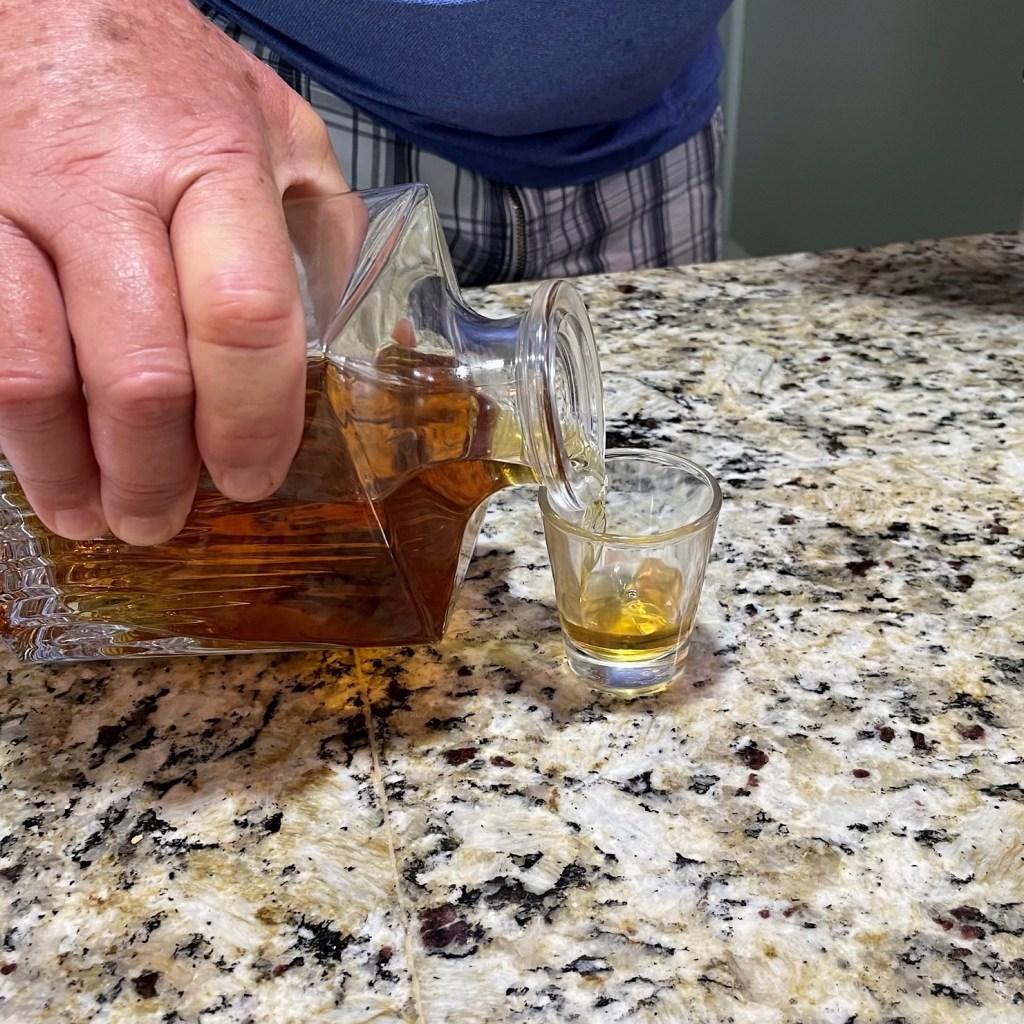
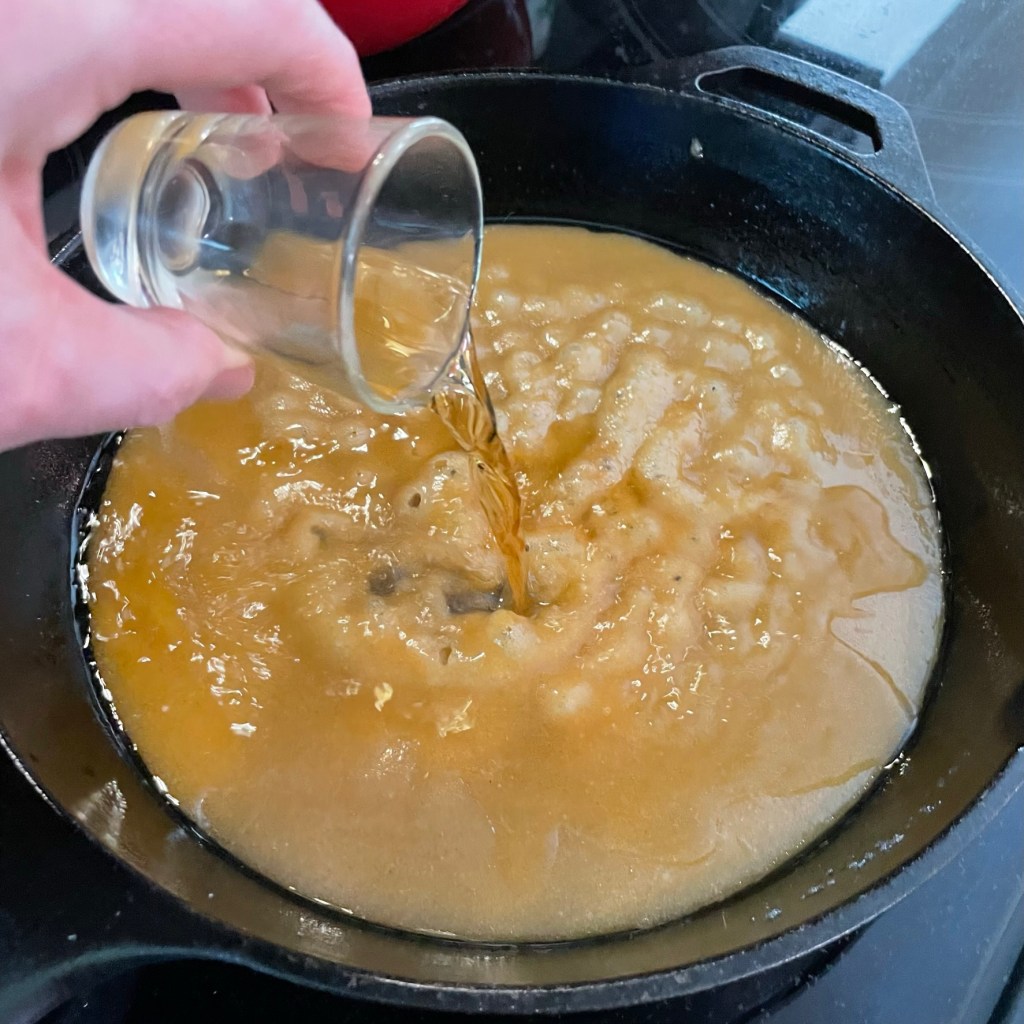
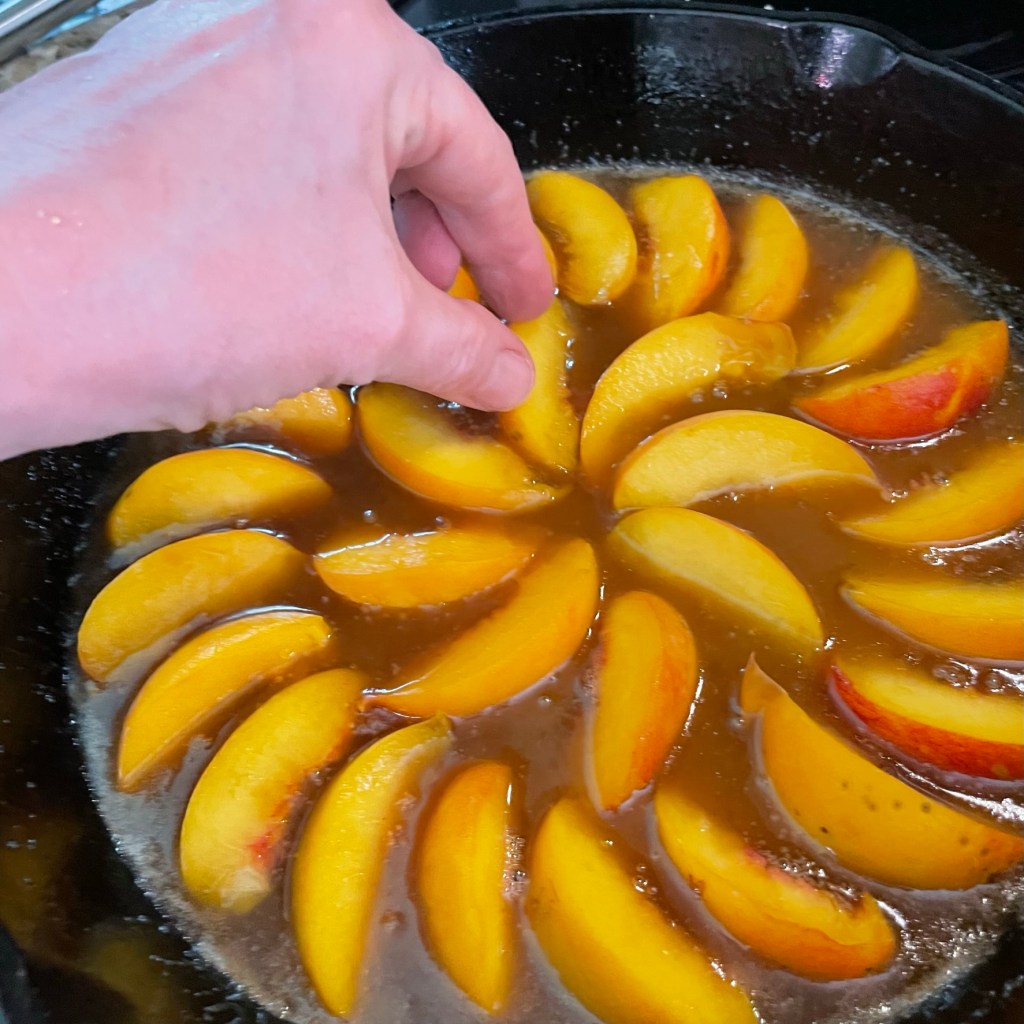
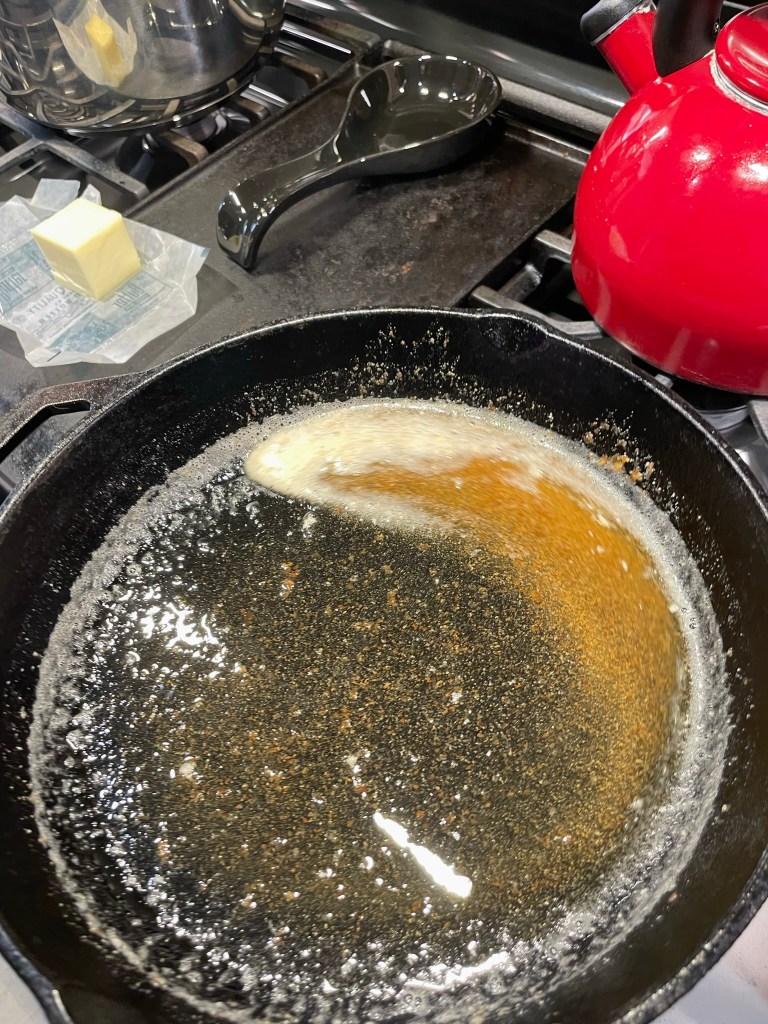
I like a combination of white and brown sugars for the base because the white sugar puts a bit of crunch in the caramel and the brown sugar provides more depth of flavor. Add both to the butter as it melts over a stovetop burner and let it mingle into syrupy lusciousness. If the butter gets a little browned in the process of melting it down, so much the better, and you must know me well enough to know that I had to pour in a shot of bourbon once the sugar mixture was bubbly. Bob was pouring bourbon anyway, and peaches and bourbon is a match made in summer heaven, as far as I’m concerned. Next, arrange sliced peaches all the way around over the butter-sugar base.
“Hey, Bob, pour me a shot for this cake, would ya?”
The batter for this cake is pleasantly dense, with cornmeal adding whole grain goodness and texture, and buttermilk providing a necessary acidic boost to the baking powder and soda. Begin by beating softened butter and sugar together, then adding eggs and vanilla, and finally blending in the flour and buttermilk ingredients.
The batter will be kind of thick, and don’t worry if it seems a little broken. It will even out as it bakes.
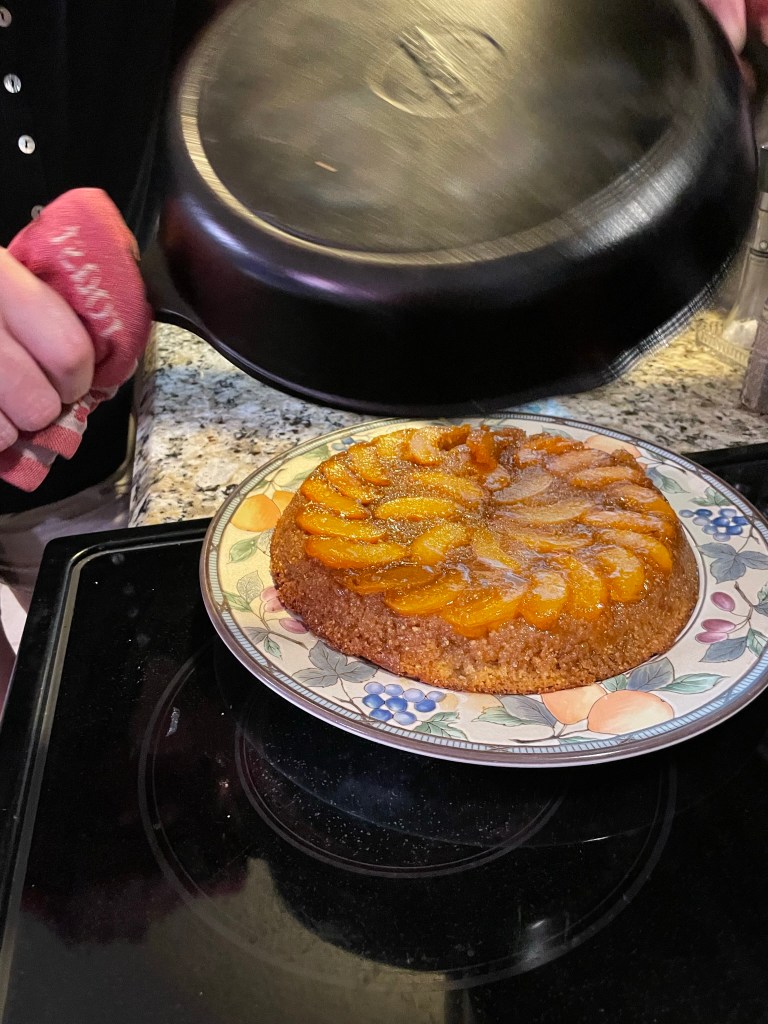
Pour the batter over the peaches in the hot skillet and transfer it directly to a preheated oven until the edges have pulled away from the skillet and the center resembles cornbread. After a brief rest, run a knife around the edge to loosen the cake and carefully invert it onto a serving plate. If any of the “upside-down” sticks, replace it on the cake and smooth it while it is still warm. Delicious!
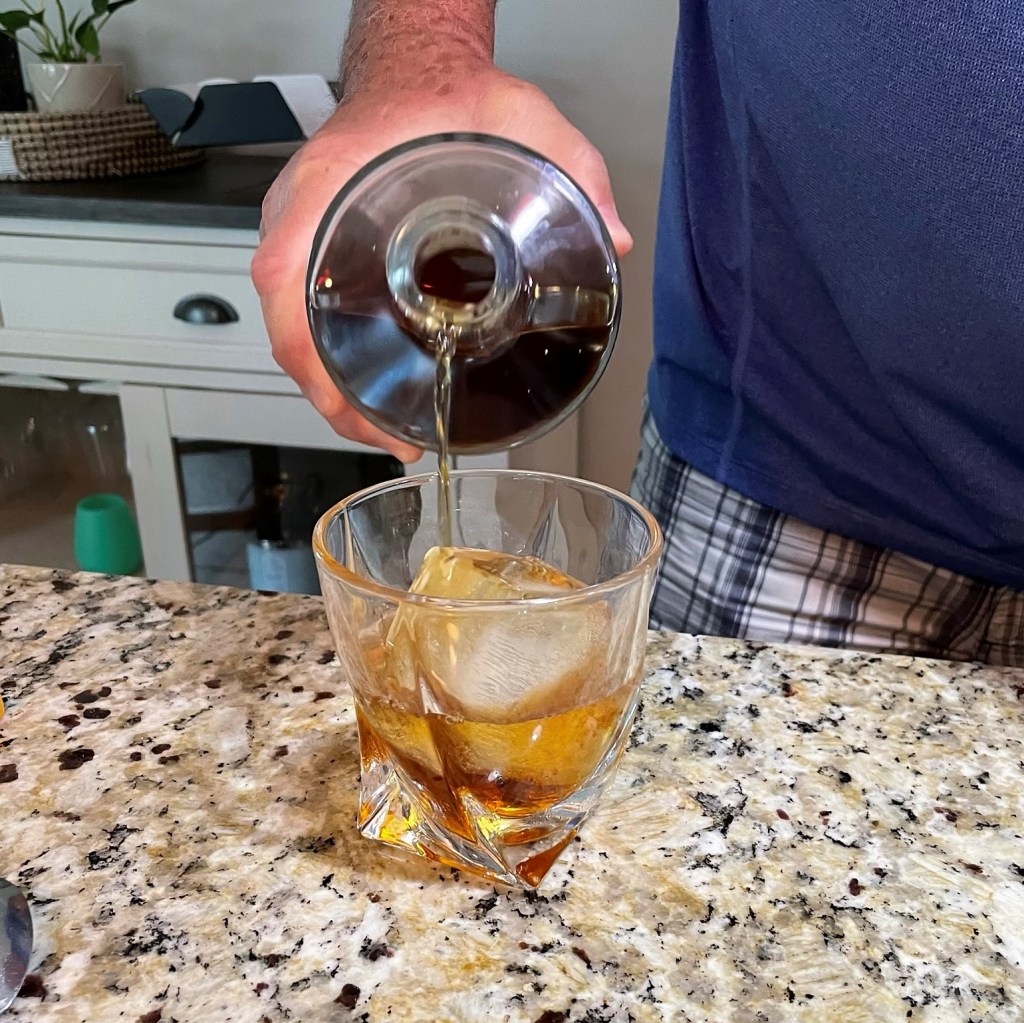
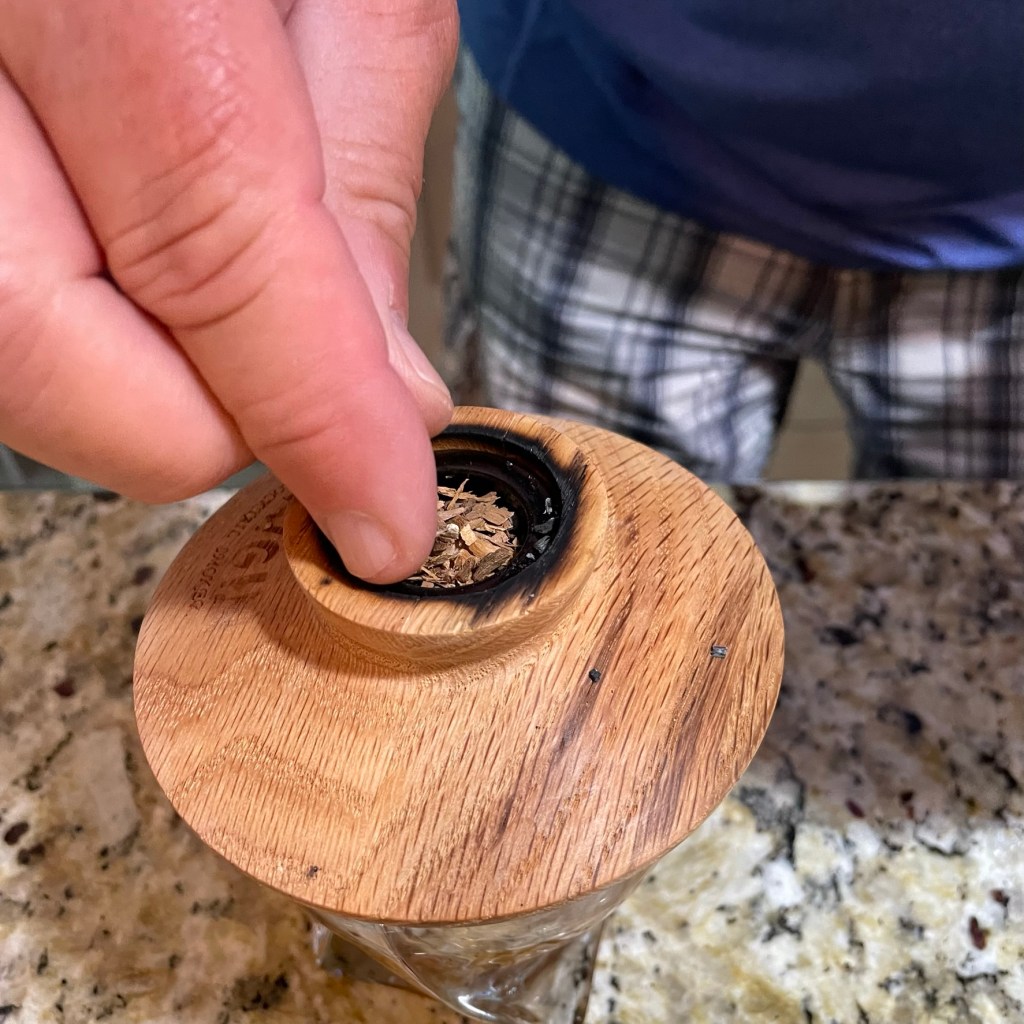
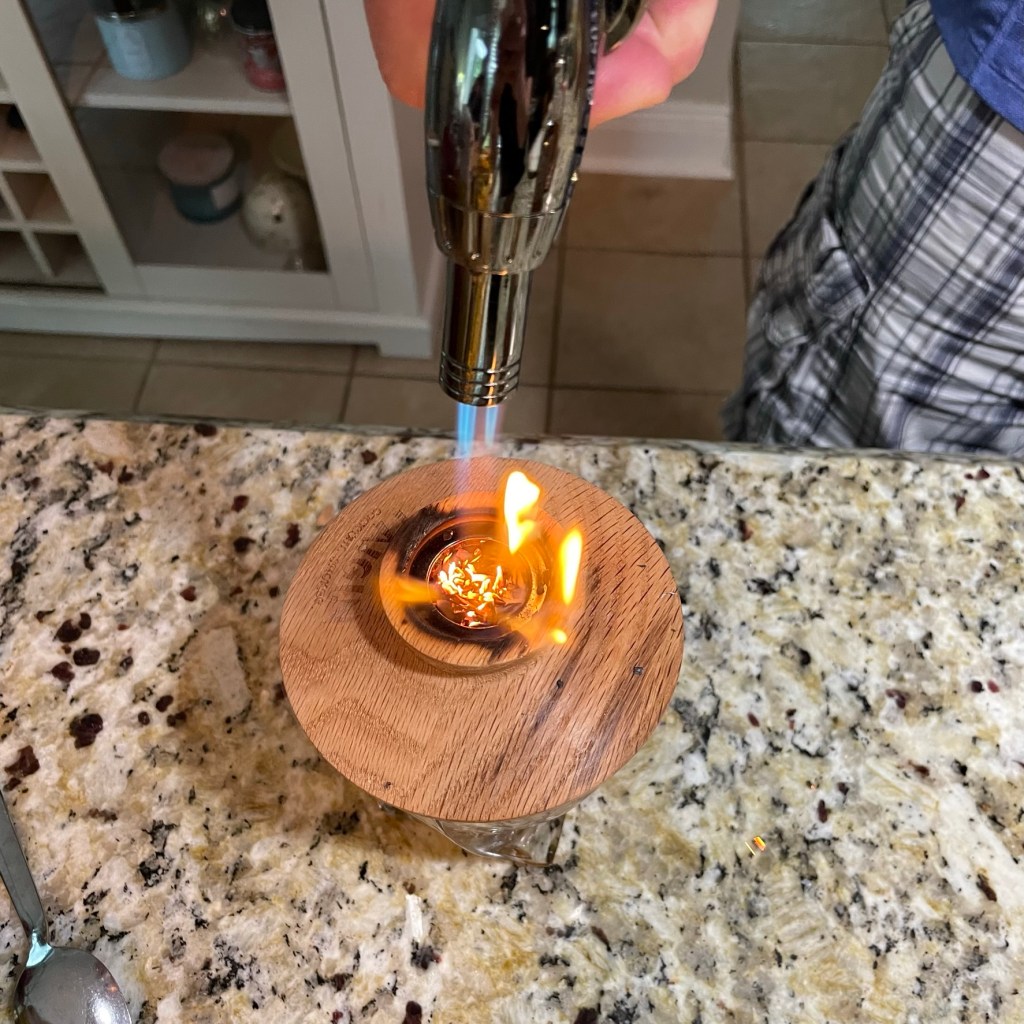
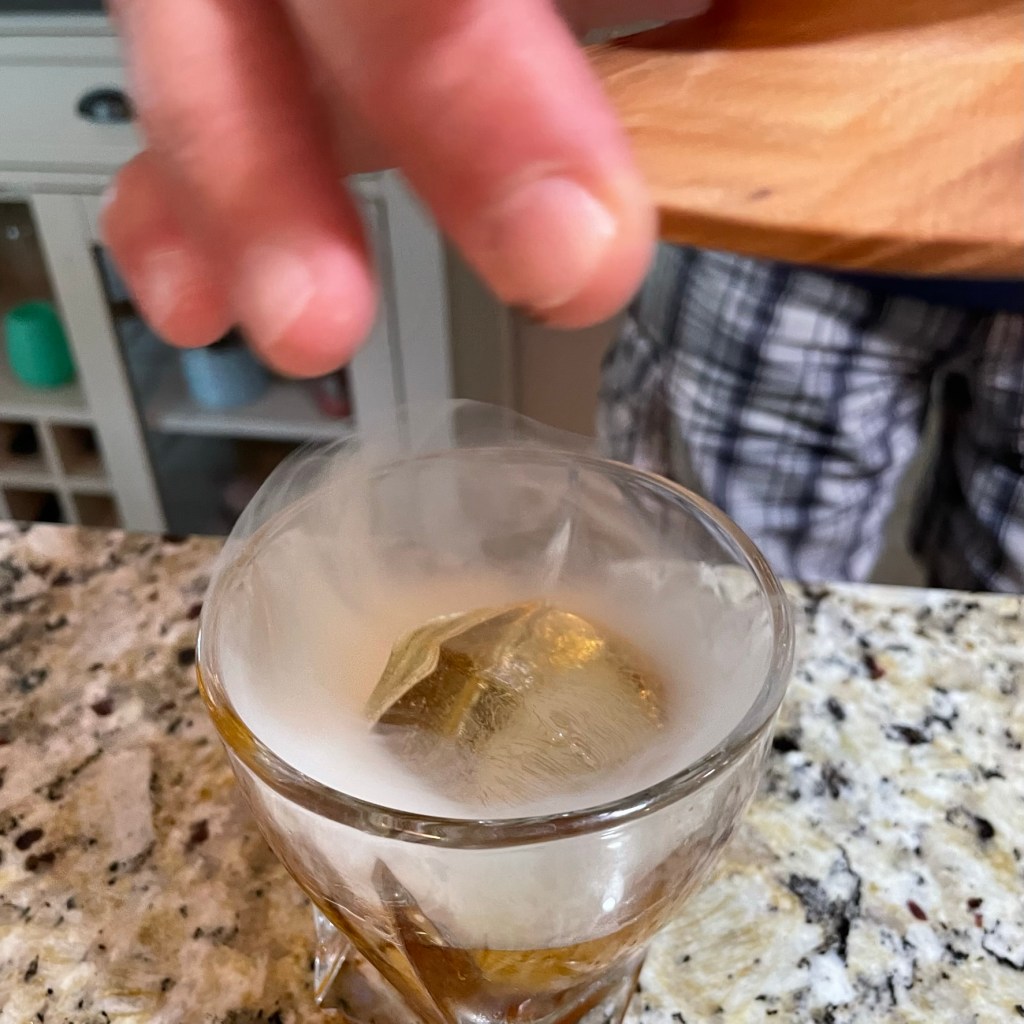
At the end of this post, I will include easy, click-to-print recipe cards for both of these peachy skillet recipes. But first, I must show you what our pal, Bob, was doing to break my baking concentration with his magical cocktail-making abilities. My husband and I always have a wonderful time hanging out with Bob and Peg, and as we waited for the peach bourbon upside-down cake to finish baking, we witnessed a master class in—get this—smoking cocktails. Yes.
This was mesmerizing!
Now, the cocktail itself could not have been simpler. No measuring required, even—it was straight up bourbon over a big-ass ice cube. But that smoke infusion contraption took a nice bourbon into a whole new territory, and you can bet I’ll be getting one of those before I present this year’s signature Halloween cocktail. More to come. 😉
Ready to talk about this other delicious, peachy keen skillet dessert? It’s a cobbler!
Peach Praline Skillet Cobbler
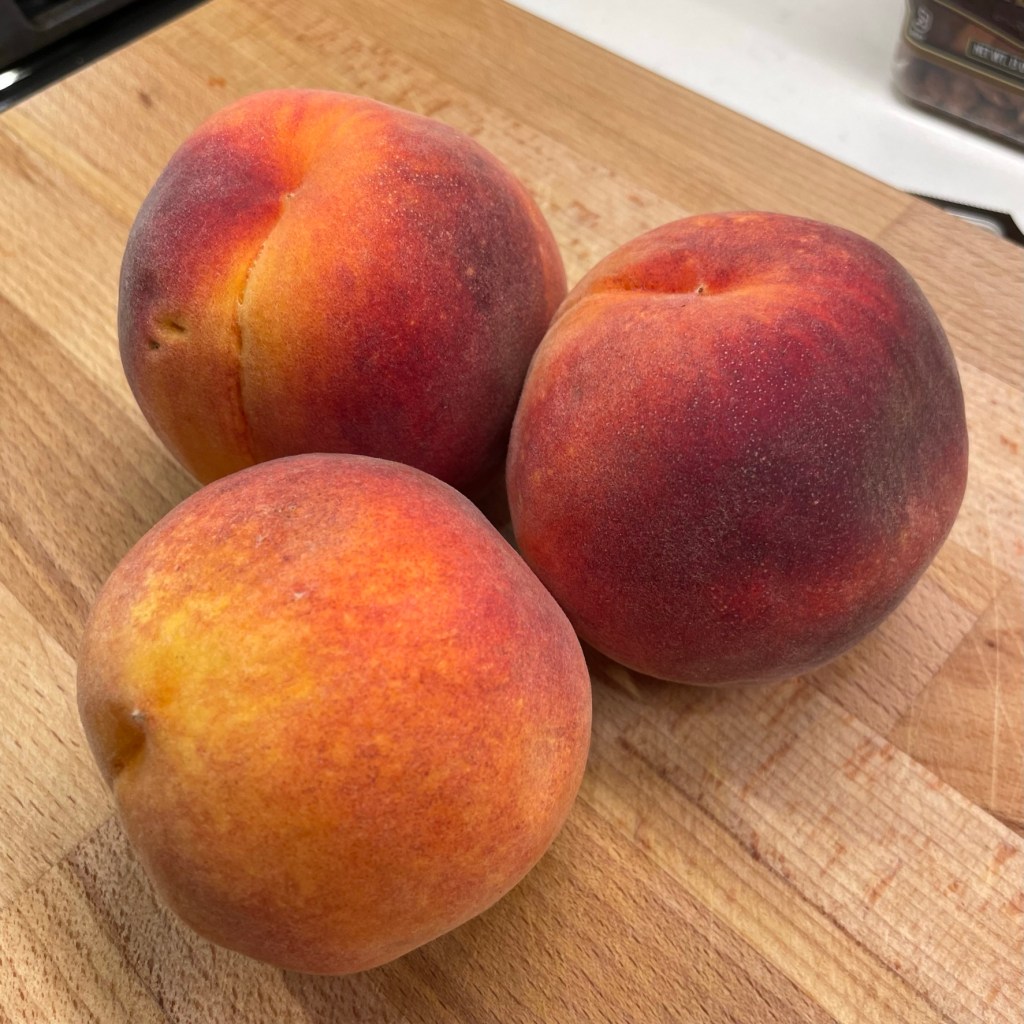
For now, let’s shift gears back to the cast-iron skillet and talk about this ridiculously easy cobbler, which I whipped up in no more than 15 minutes, plus baking. The only time-consuming thing here was peeling and cutting up the peaches, which was hardly a burden, given that I thoroughly enjoyed licking the juices off my fingers when I finished. These particular peaches were gifted to us by our neighbor, Pam, following a day trip she had made to the North Carolina mountains. Pam has followed my adventures on Comfort du Jour from the beginning, and she said upon delivering these perfectly ripe peaches, “I can’t wait to see what you create with these!” Well, here it is—a skillet cobbler!
These peaches were huge and juicy!
I only used three of the peaches here (they were huge), and that measured about 2 cups, once they were peeled, pitted and cut into bits. In a pinch, I’m sure you could use thawed frozen peaches as well, which means this dessert doesn’t have to be limited to summertime enjoyment.
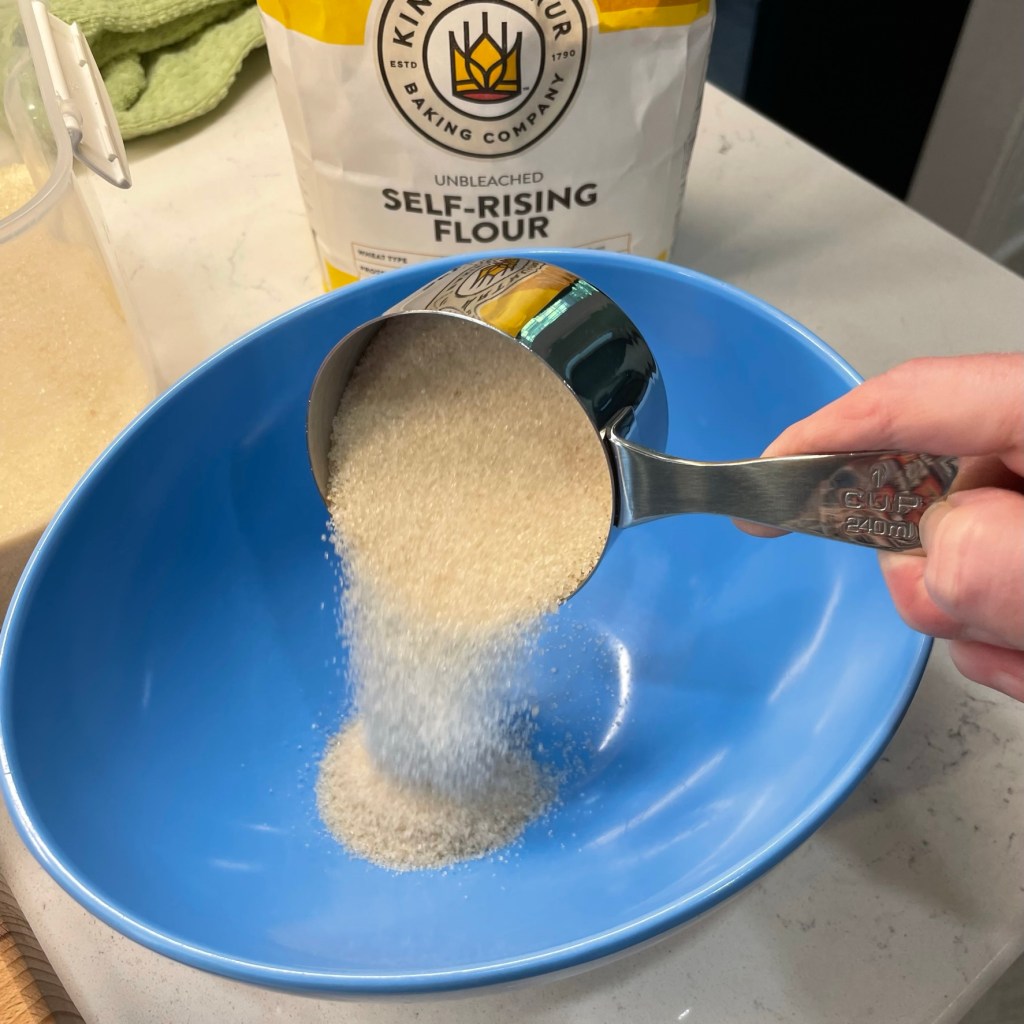
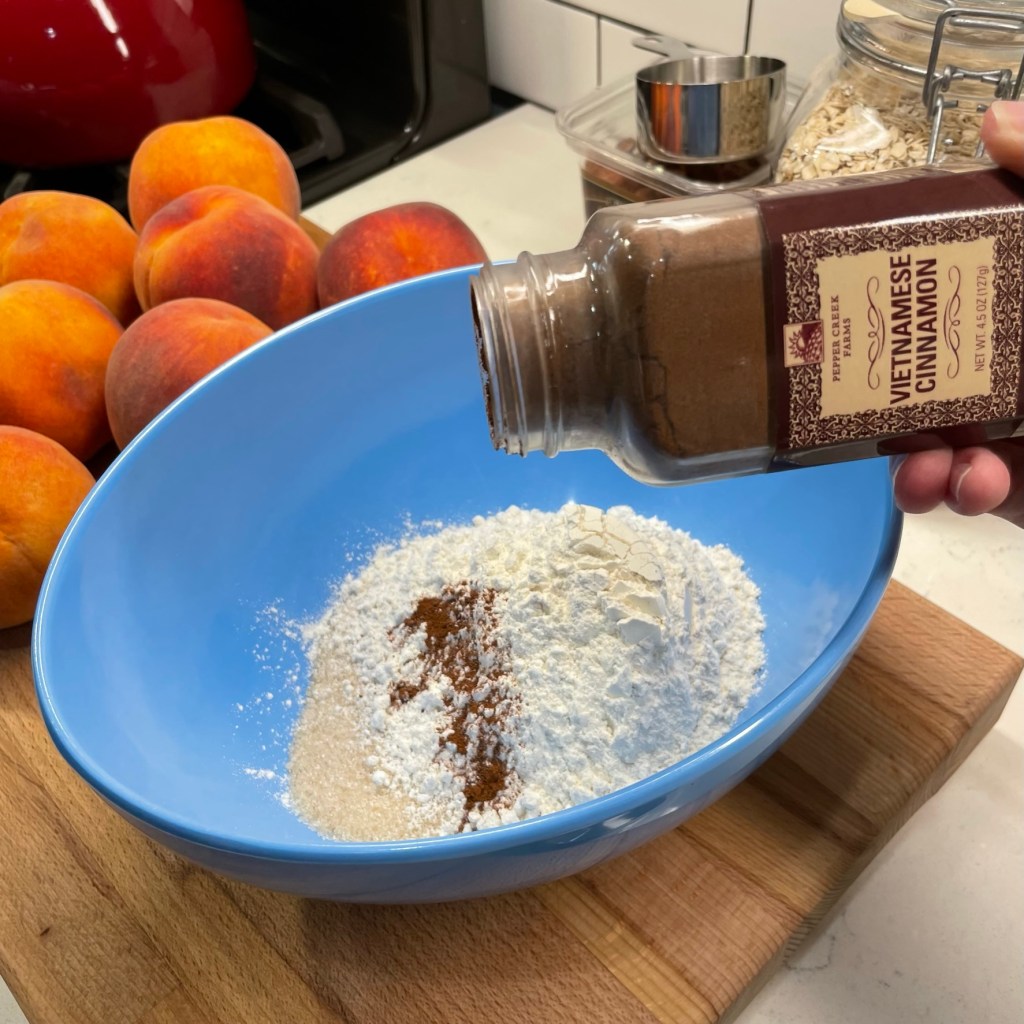
There are several varieties of cobbler out there, and because we roll pretty casual in the South, I skipped over the options that required making biscuits or pastry dough and steered directly to the “batter” option. This is a dessert that seems incorrect, because the batter is quite runny, and it’s hard to visualize how it will come together in the oven (but it does). The batter is made with self-rising flour, sugar, cinnamon and milk—that’s it. Me being me, though, I had to incorporate some amount of whole grain into it, so for this batch, I also stirred in 1/3 cup of quick-cooking oats and that turned out to be a great decision. Unlike a typical cobbler with juicy, almost soupy consistency, this one held together more like a custard because the oats plumped up inside the cobbler. I would not recommend increasing the oats because it might turn out gummy, and I am sure that quick oats is the way to go. Old fashioned, rolled oats may not cook through as tender, or they may absorb too much of the liquid in the batter.
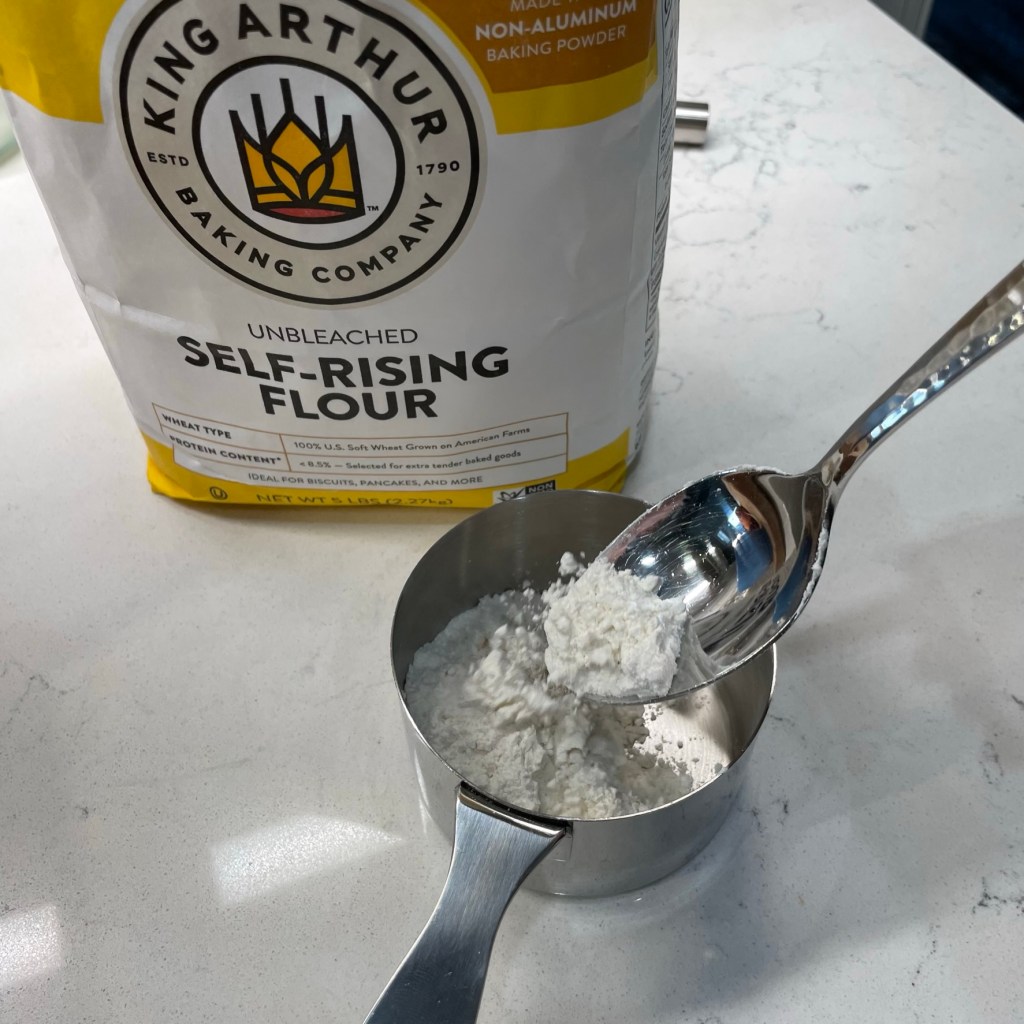
Be sure to measure your flour correctly, using the “fluff, sprinkle, level” method.
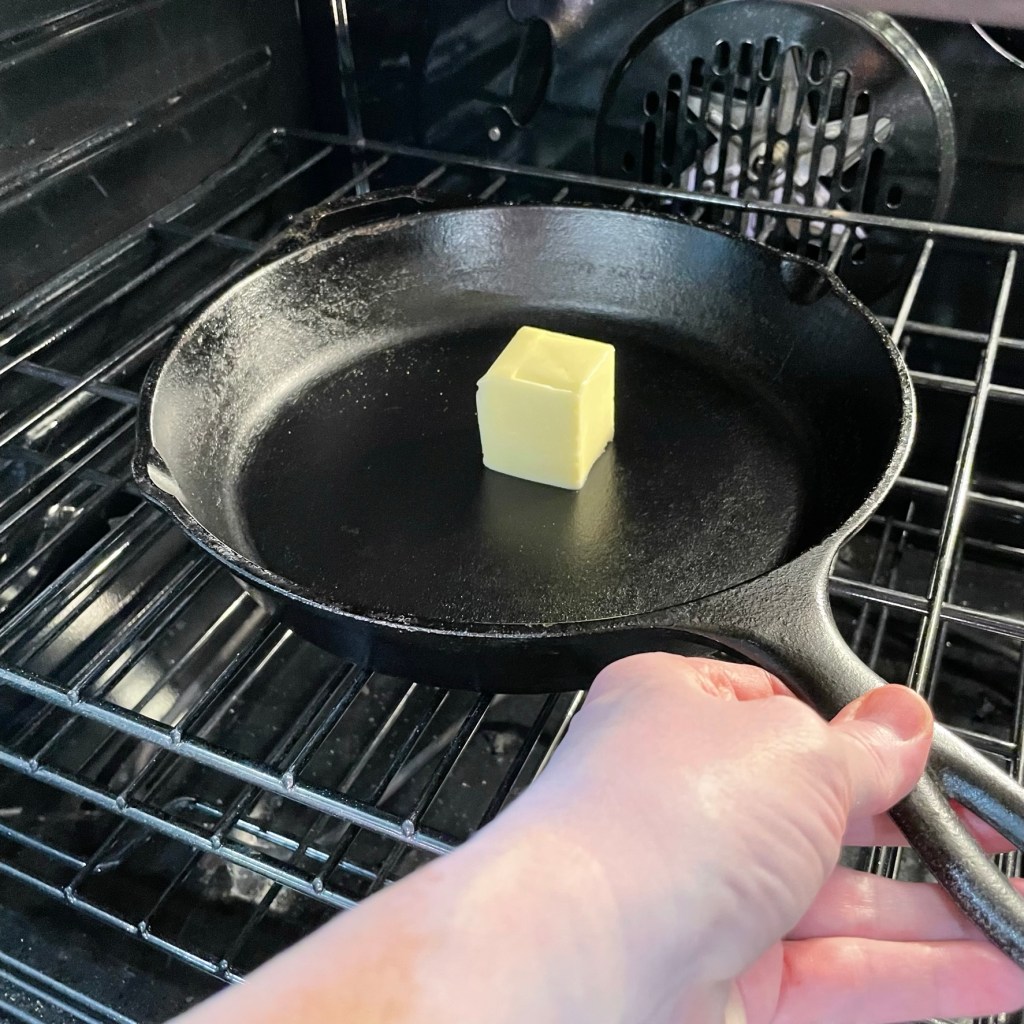
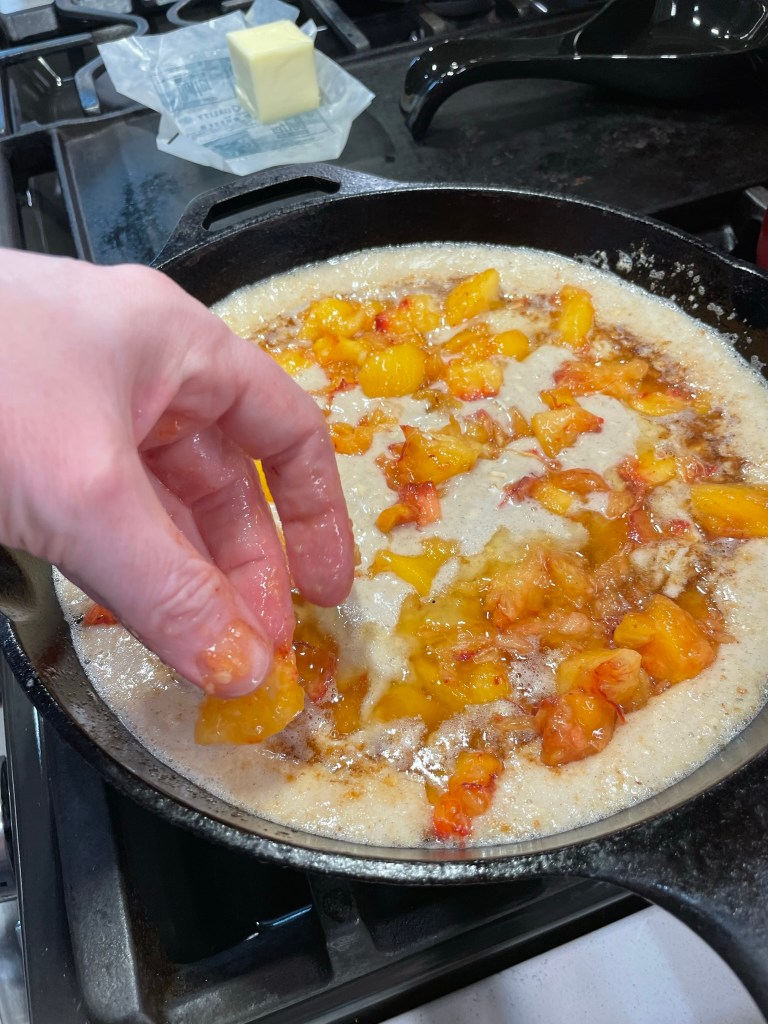
While I measured and mixed those ingredients, I pre-heated the oven with a half stick of butter in it, and then swirled the browned butter around to fully coat the pan once the oven was hot. The batter is slowly poured into the hot buttered skillet, and then the peaches are arranged (if you want to call it that) all over the top. Typically, a cobbler is sprinkled lightly with sugar before it’s baked, but I can’t stick with typical, so I chopped up some pecan pralines (from Trader Joe’s, but anything similar will work) and scattered those on top instead.
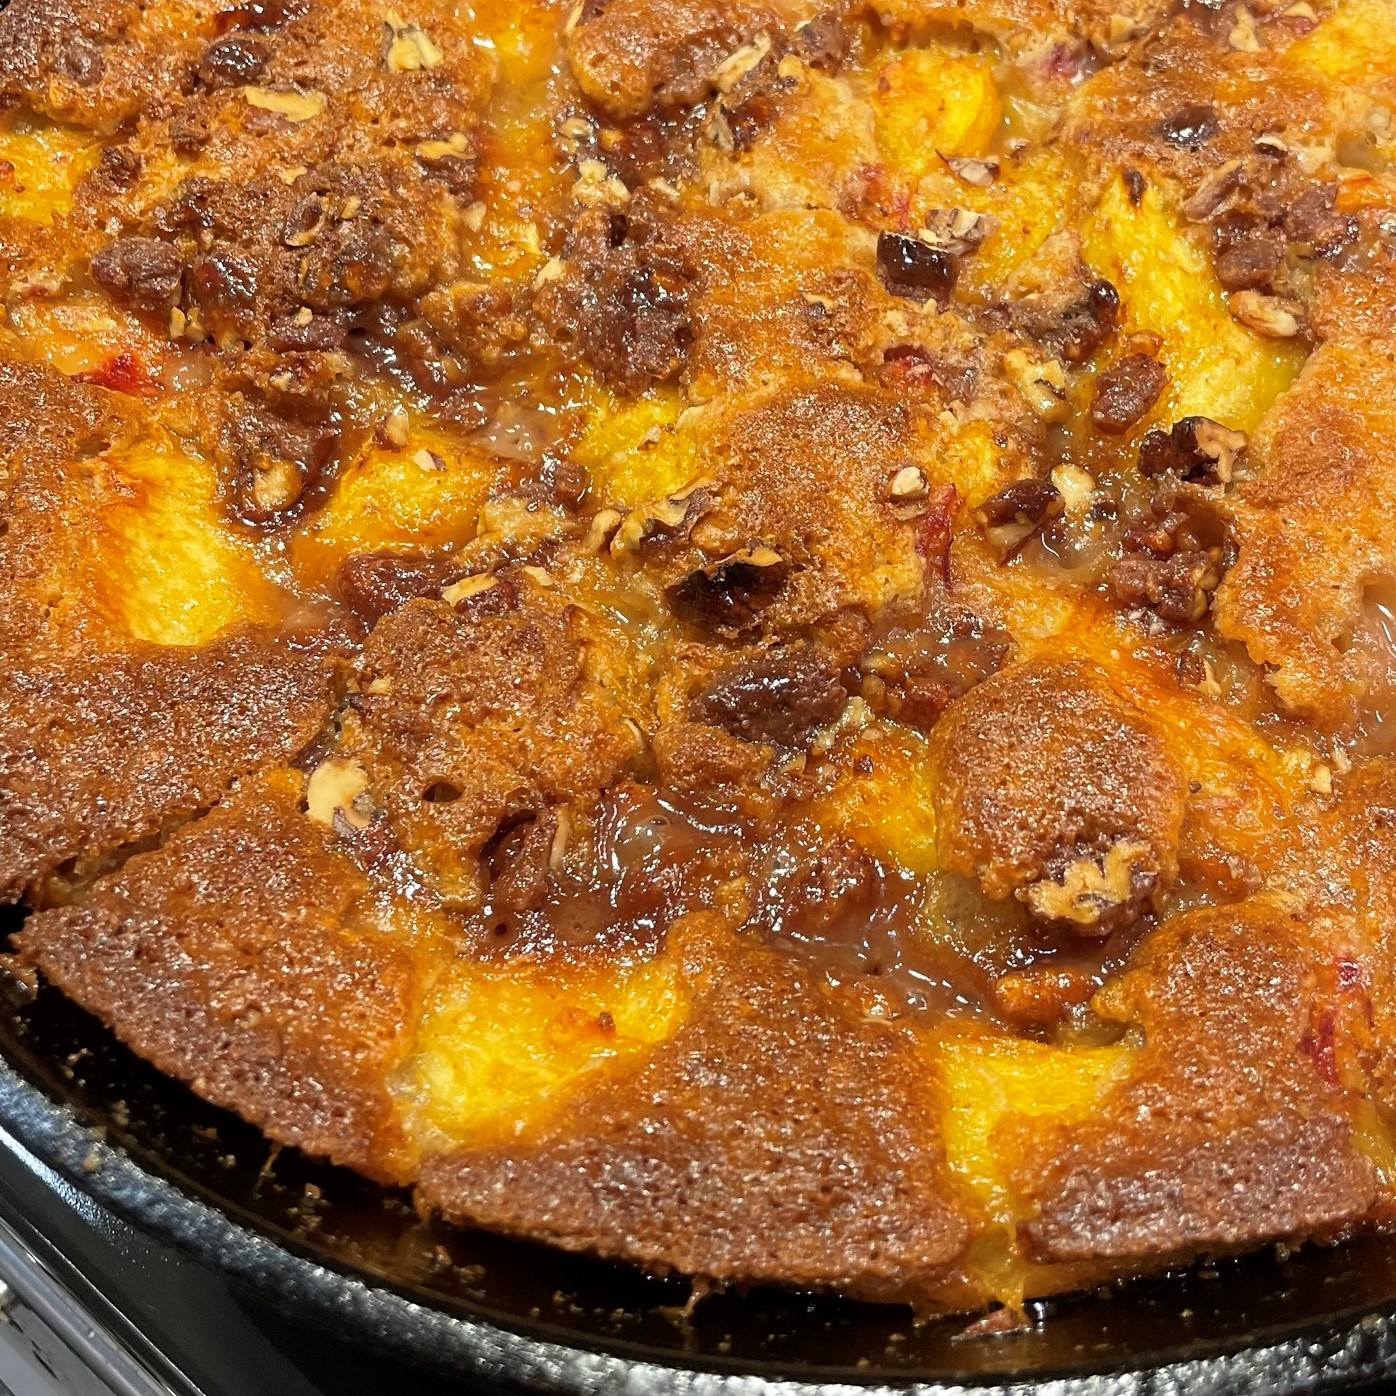
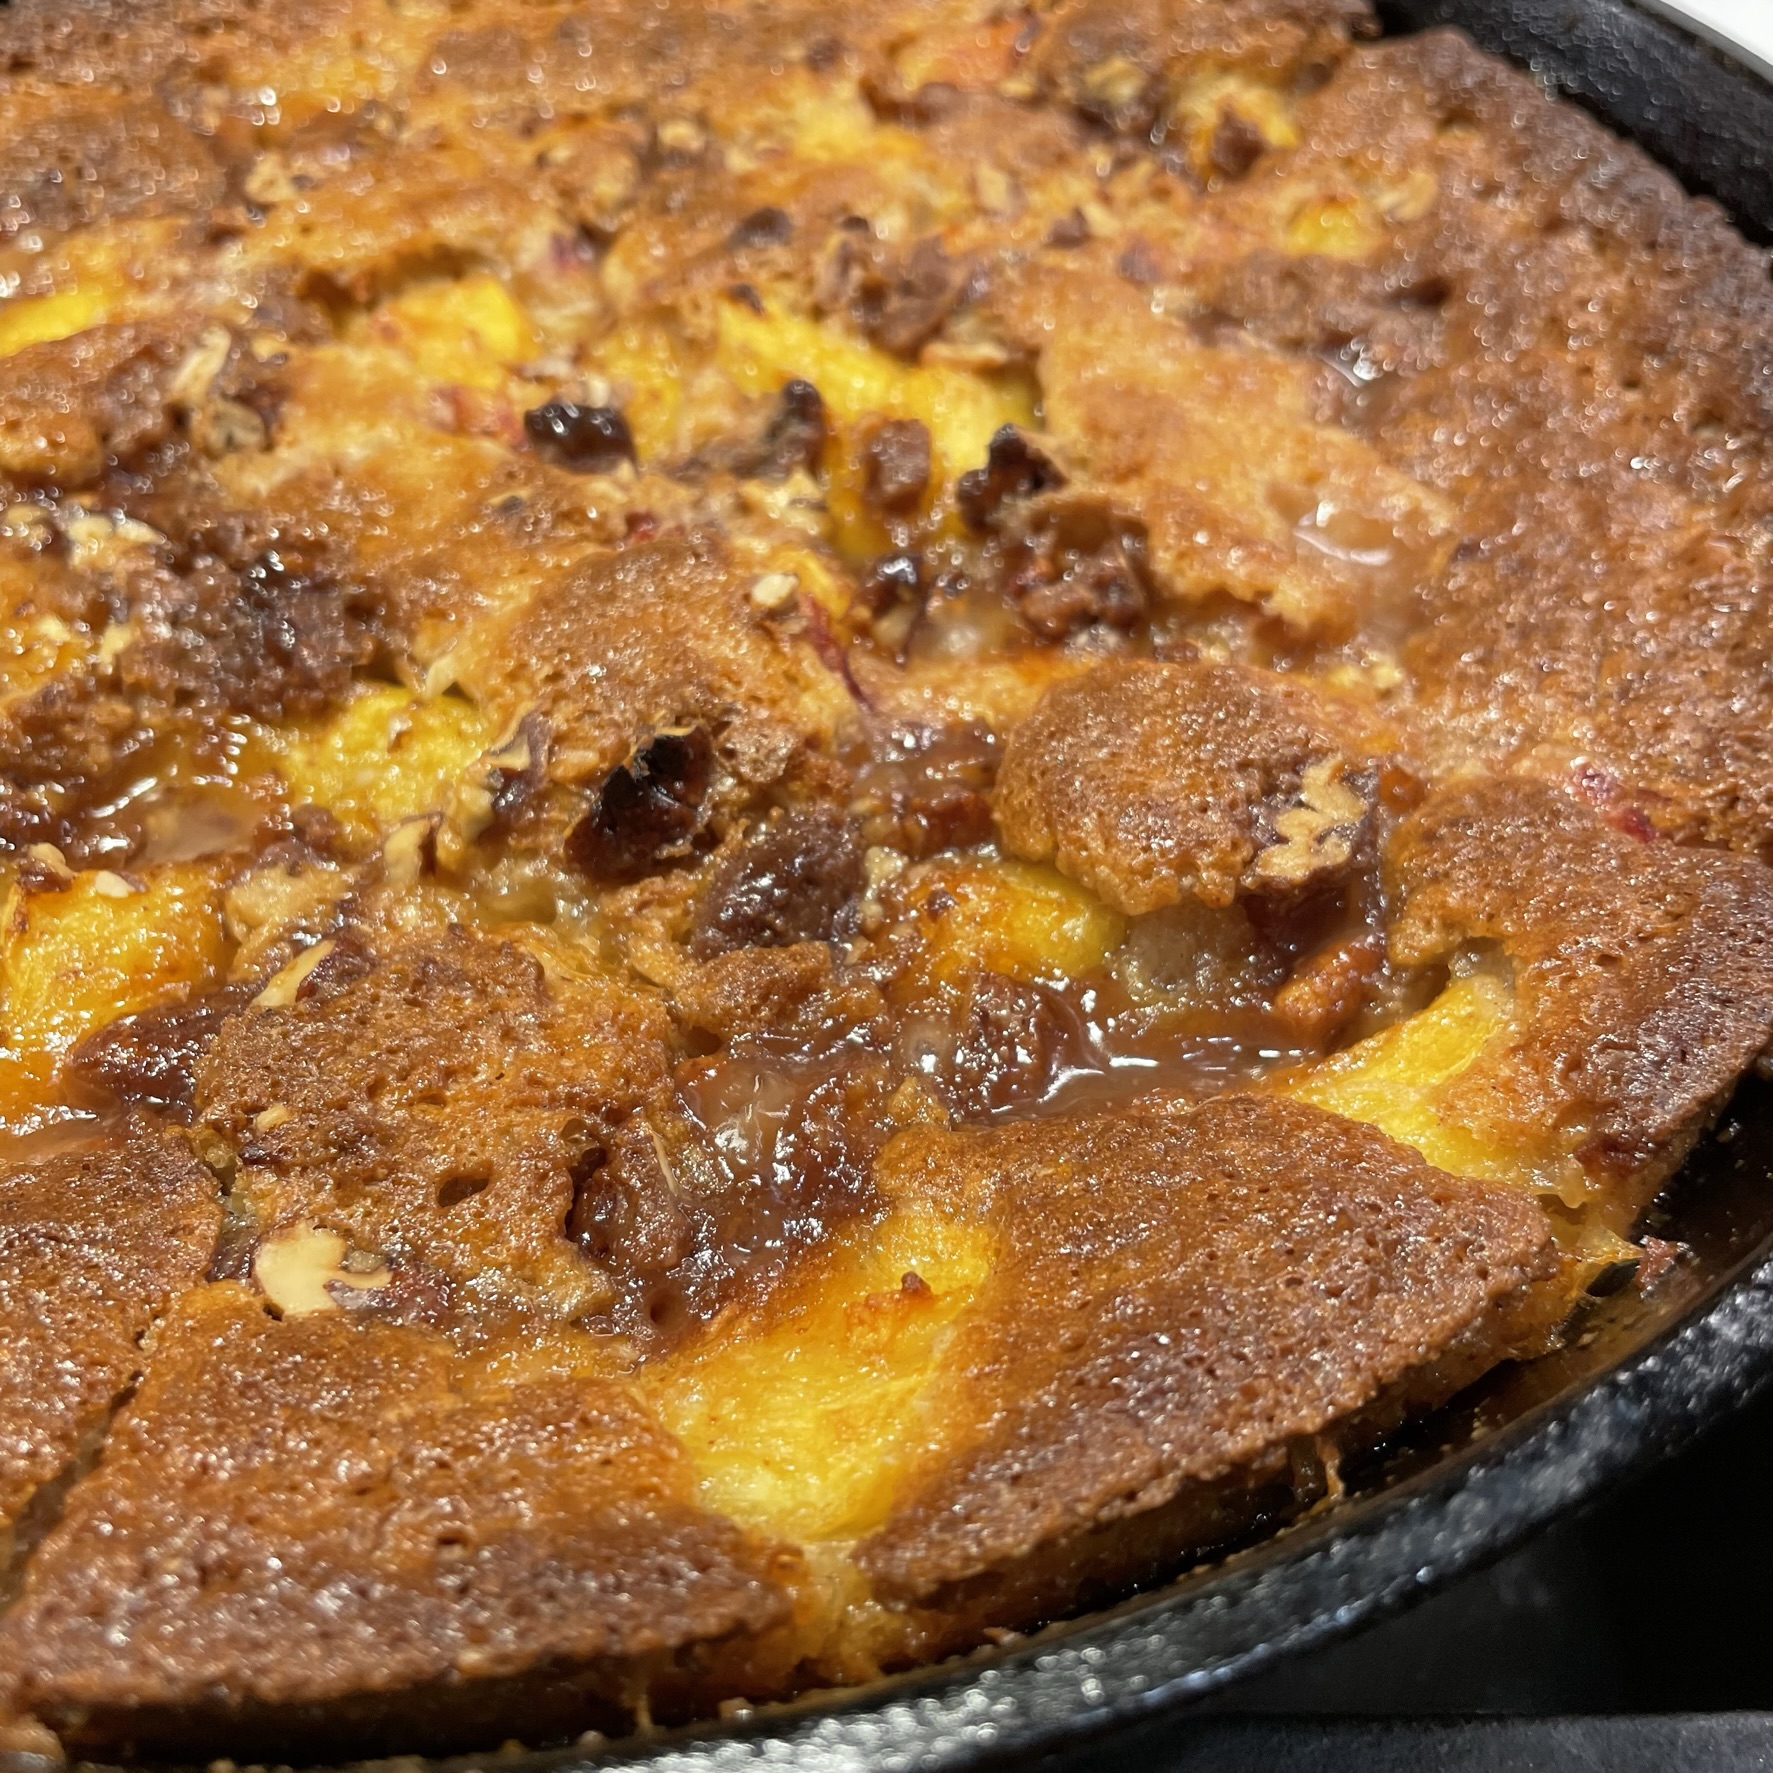
Isn’t this just peachy? 🙂
As I said, you can’t go wrong with either of these peachy keen skillet desserts, so grab your cast iron and peel those peaches and enjoy what’s left of summer.
This beautiful skillet dessert makes the most of fresh, late-summer peaches, and bourbon marries nicely into the “upside-down” as cornmeal brings texture to every bite.
Ingredients
1/2 stick salted butter (for the upside-down)
1/2 cup brown sugar
1/4 cup cane sugar
1 shot bourbon (optional, but heck yes)
4 medium fresh peaches, sliced with peel
1 cup all-purpose flour
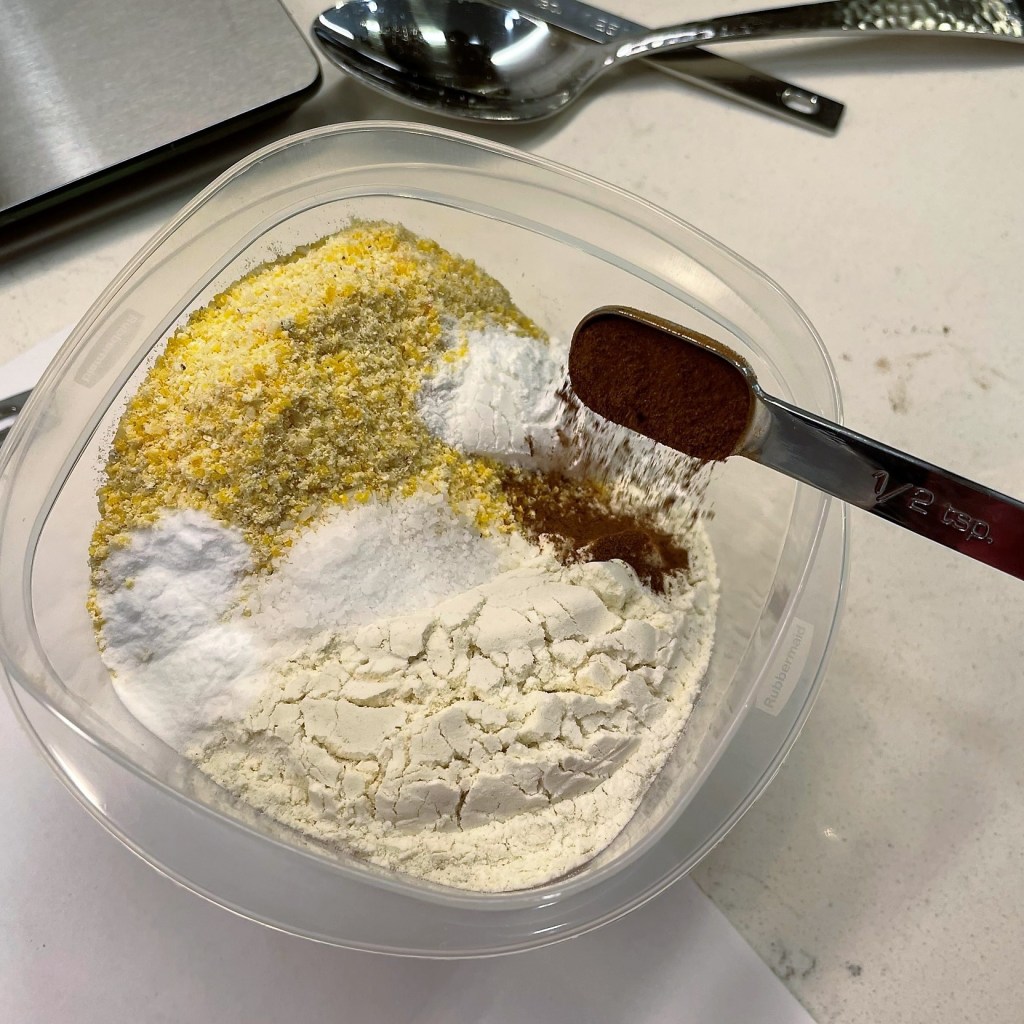
1/2 cup medium grind cornmeal
1/4 cup toasted pecan pieces (optional)
1 tsp. baking powder
1/2 tsp. baking soda
1/2 tsp. salt
1/2 tsp. ground cinnamon
1 stick unsalted butter, softened (for batter)
3/4 cup cane sugar (for batter)
2 large eggs
1 tsp. vanilla extract
1 cup buttermilk, shaken well
Whipped cream for serving
Directions
Preheat the oven to 375° F, with oven rack in the center position.
Place a 10″ cast iron skillet over medium heat. Heat first amount of butter until melted. Add brown and cane sugars and stir to combine. Let them mingle over the heat until the mixture looks dissolved and begins to bubble. Add the bourbon (if using) and stir to blend. Reduce heat to low and arrange peach slices in a round pattern over the syrupy bourbon mixture. Set aside while you prepare the batter.
Combine flour and cornmeal in a medium bowl. Add pecans, baking powder, soda, salt and cinnamon. Set aside for later addition to the batter.
Using a handheld mixer, cream together the remaining sugar with the stick of unsalted butter. Beat this mixture until it’s lighter and fluffier in texture. Add eggs, one at a time, beating completely to blend. Beat in vanilla.
Use a rubber spatula to fold about half of the flour mixture into the batter, blending until all dry ingredients are incorporated. Gently mix the buttermilk into the batter, and then fold the remaining flour mixture, again blending until no dry spots of flour are visible.
Pour the batter over the peaches in the skillet, taking care not to disturb the arrangement. Gently smooth the batter, and slide the skillet into the oven.
Bake for 50 to 55 minutes, until baked batter has pulled away from the edges of the skillet and the cake portion tests clean when a toothpick is inserted into the center.
Cool 15 minutes before loosening the cake around the edges. Carefully invert the cake onto a large platter. If any bits of peach get stuck to the skillet, place them back into place and smooth the upside-down caramel coating while it’s still warm.
Slice into wedges when cooled and serve with a dollop of whipped cream or ice cream. Wrap leftovers in plastic and keep in the fridge.
This recipe is easy as can be, and a bit of quick-cooking oats mixed into the batter gives the cobbler a touch of whole grain goodness and a wonderful texture.
Ingredients
1/2 stick unsalted butter (4 Tbsp.)
3/4 cup cane sugar
1 cup self-rising flour (see ingredient note below)
1/3 cup quick-cooking oats
1/4 to 1/2 tsp. ground cinnamon
1 cup whole milk
About 3 large peaches, or enough to measure 2 heaping cups (peel and chop)
1/2 cup candied pecans, roughly chopped (I used Trader Joe’s pecan pralines)
Note: self-rising flour already has the proper ratio of leavening agent; if you do not have self-rising flour, use regular all-purpose flour and add to it 1 1/2 tsp. baking powder and 1/4 tsp. salt
Directions
Preheat oven to 400° F, with oven rack in center position. Place cold butter in a 10-inch cast iron skillet and put it in the oven during preheating. Keep an eye on it so that the butter does not burn.
Whisk together the self-rising flour, sugar, oats and cinnamon. Add the milk to the dry ingredients and whisk until combined, and no pockets of unincorporated dry ingredients remain. The batter will be quite runny.
Remove hot skillet from the oven and swirl the pan to evenly coat with the melted butter. Slowly pour the batter right into the center of the pan. The butter will naturally scoot out to the edges of the pan, and that’s OK. It may also seem to foam a bit at the edges, which is normal.
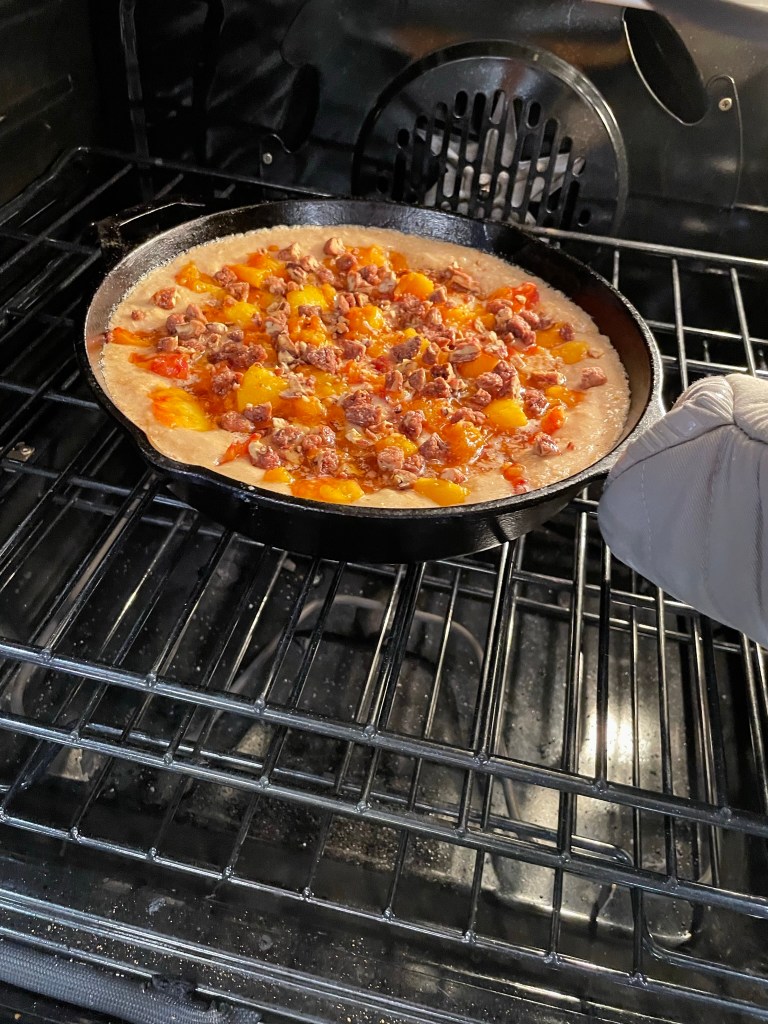
Top the batter filling evenly with the peach chunks. Scatter the chopped candied pecans over the top. Bake 40 to 45 minutes, until the cobbler is golden brown and bubbly in spots. Serve warm with a scoop of vanilla ice cream.
There is something very special and nostalgic about s’mores, the delightfully sugary campfire treat that I first learned of when I was a young girl. I cannot say for sure that my first experience of s’mores was during my time as a Girl Scout, though legend has it a troop leader named Loretta Scott Crew first dreamed them up to feed 16 hungry girl campers in 1927. But I do know that my first taste of this wonderful confection—toasted marshmallow and Hershey’s chocolate square, melted between two graham crackers—was like a seductive symphony of ooey-gooey summer heaven. The only cooking involved in making s’mores is toasting a marshmallow to golden perfection, and then allowing the contained heat within the marshmallow to melt the piece of chocolate bar when you squish the graham cracker cookies together.
Truth be told, I was prone to wreck my marshmallows by over-toasting them. I’d position my marshmallow stick (and yes, where I come from, we used actual sticks) directly into the hottest part of the campfire until my puffy marshmallows blazed with a blue light around them. I’d blow out the fire, only to skim off and eat the scorched sugary jacket and plunge them back into the fire for another round of overcooking. I’m quite sure that was not the intention behind the “toasted” marshmallow portion of s’mores, but nobody ever accused me of following the rules—I like what I like.
Now that I’m all grown up, I still love the idea of s’mores, but I cannot fathom the notion of sitting around a campfire in the dead heat of summer, and we don’t usually fire up our patio chiminea until at least October. Not even for a sticky-sweet s’more—sorry.
Luckily, I have other plans for those delicious flavors, and just in the nick of time, it seems, given that today is National S’mores Day. Why, I wondered, couldn’t I represent the same s’mores flavors in a cold treat form that was more suitable for the middle of August?
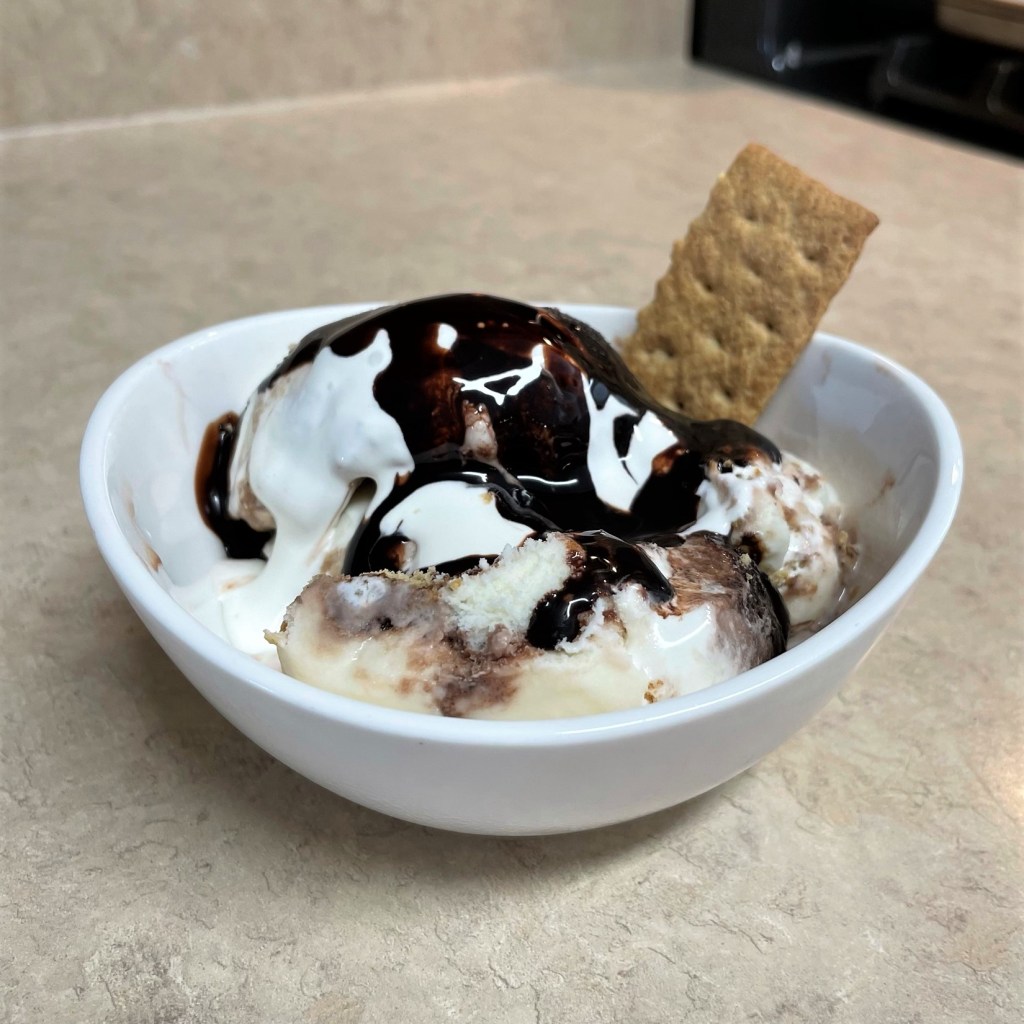
No campfire required!
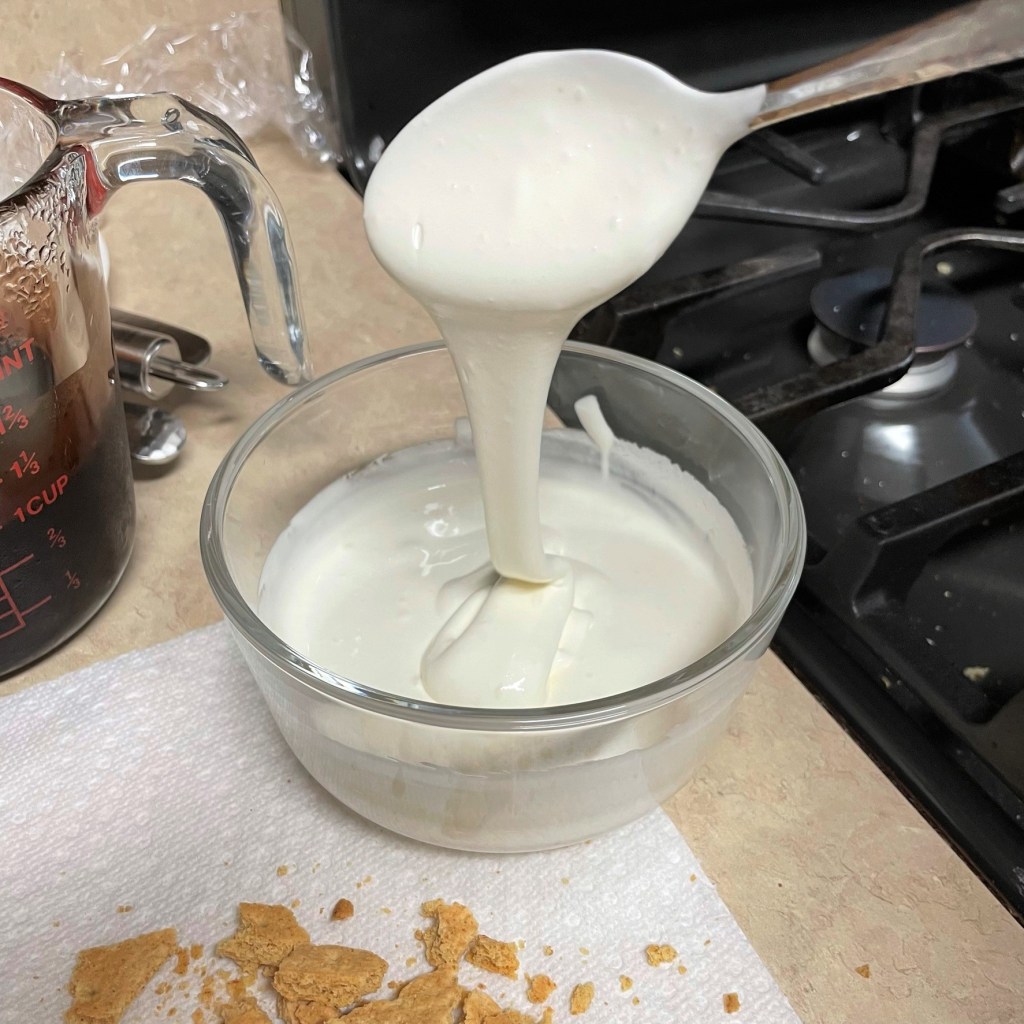
And that was my approach to this yummy spectacle of summer sweetness. For a change of pace, I skipped the eggs in my ice cream base and used sweetened condensed milk instead. I wanted the vanilla ice cream to be a pure palate of white, but I was also trying to avoid cooking as much as possible. It’s been pretty dang hot here in the South, and if I have the option to keep the stove turned off, I’m taking it. The marshmallow swirl was also a no-cook step, and for this, I relied on a tried-and-true fruit dip recipe that fuses marshmallow fluff with cream cheese. The dairy ingredient gave the fluff just enough body to take away the ultra-sticky consistency but retain the marshmallow flavor.
See how the cream cheese mellowed out the sticky marshmallow fluff? And it still tastes exactly like marshmallow (but creamier).
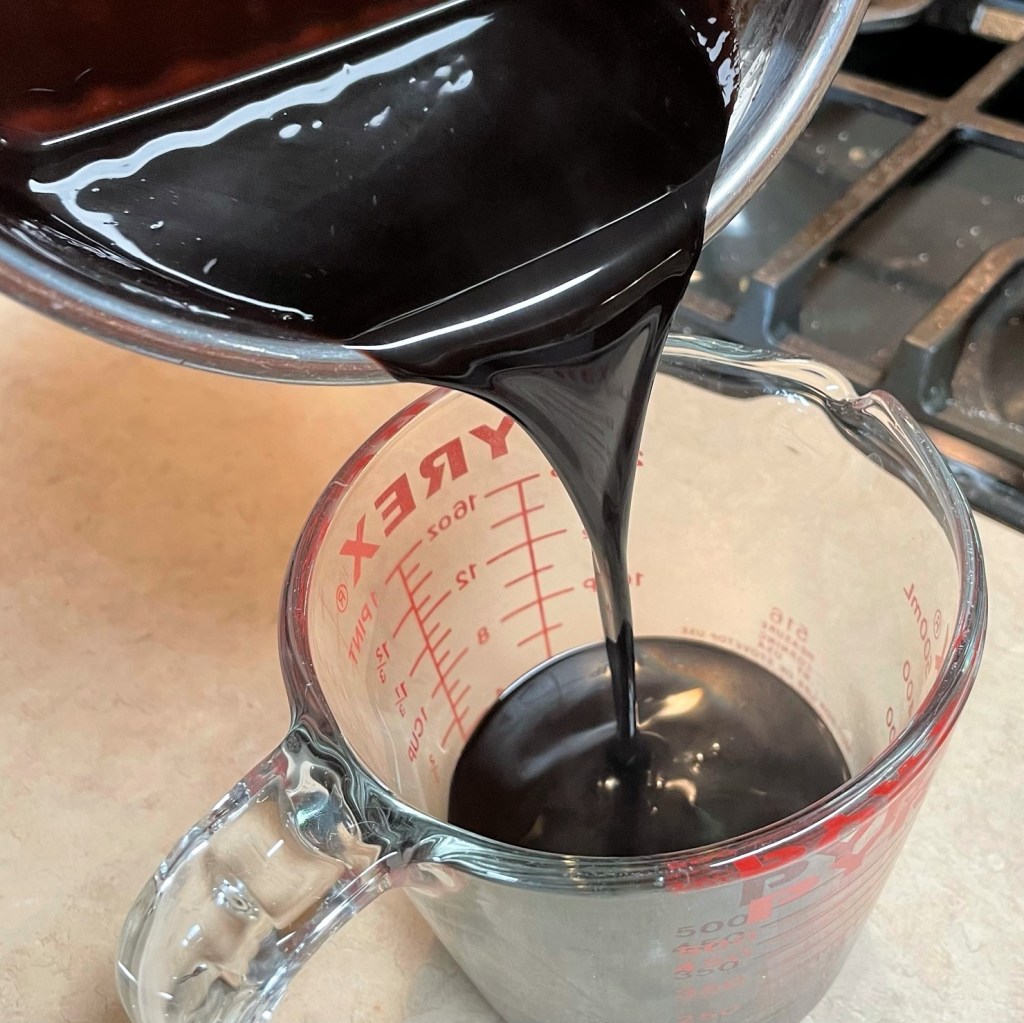
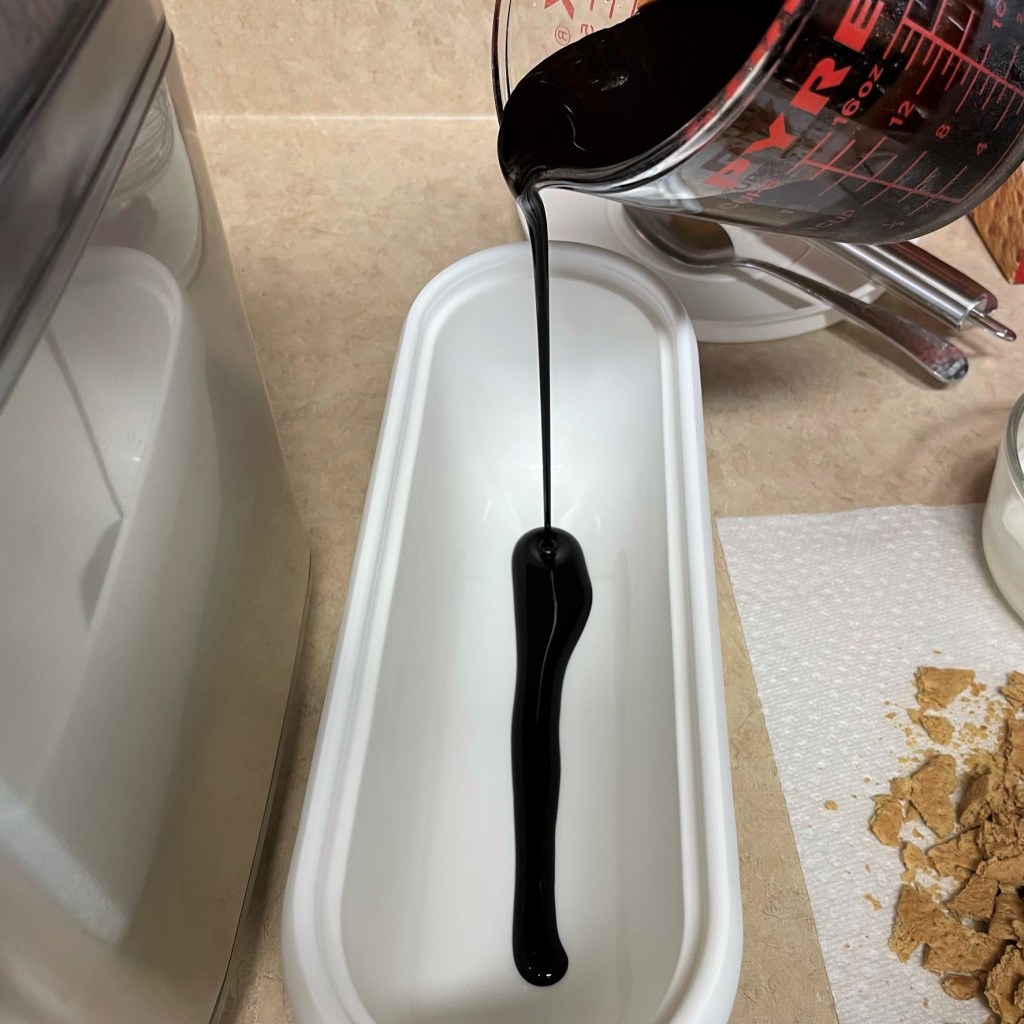
I did turn on the stove briefly to make the fudgy swirl that represents the melted chocolate square of a traditional s’more, but that was a small price to pay for this delicious final result.
Looks like delicious black gold, doesn’t it?
Happy S’mores Day, everyone!
Yes, please, may I have s’more?!
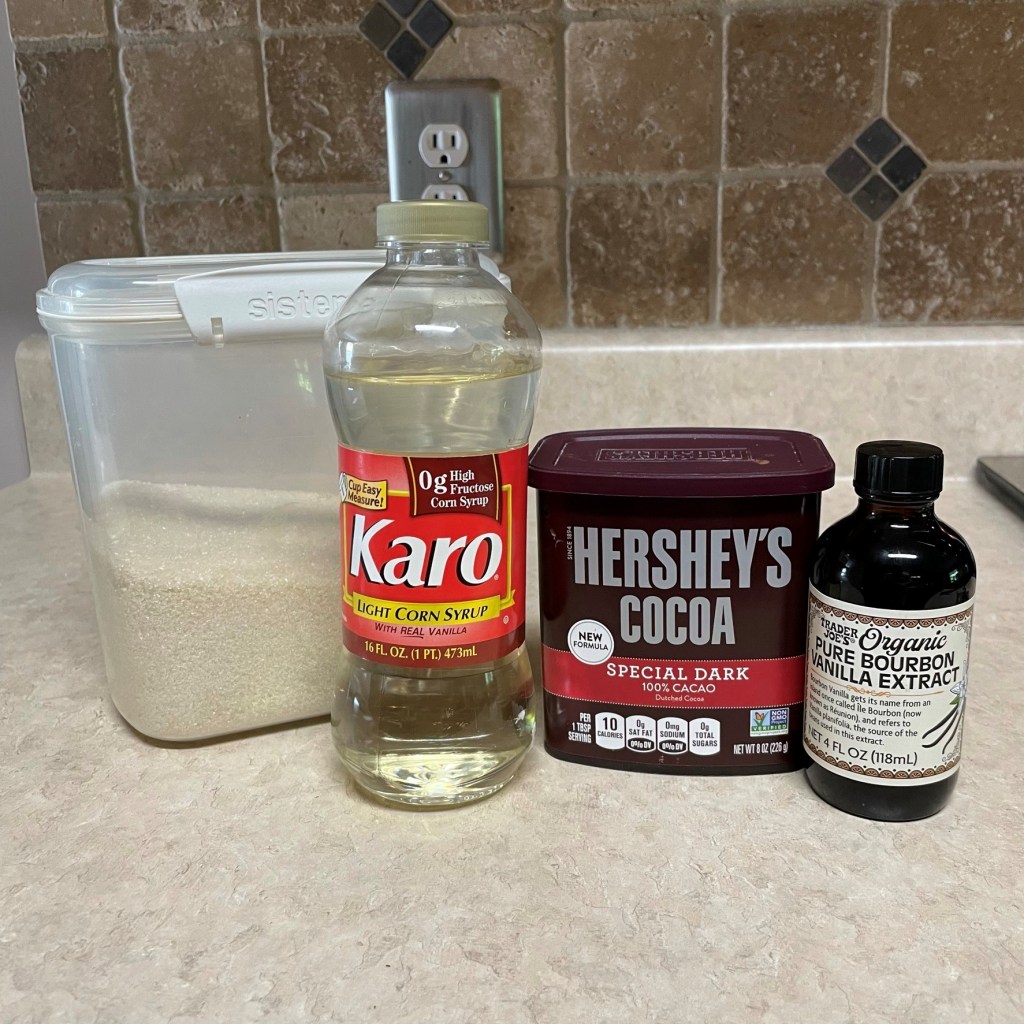
Ingredients
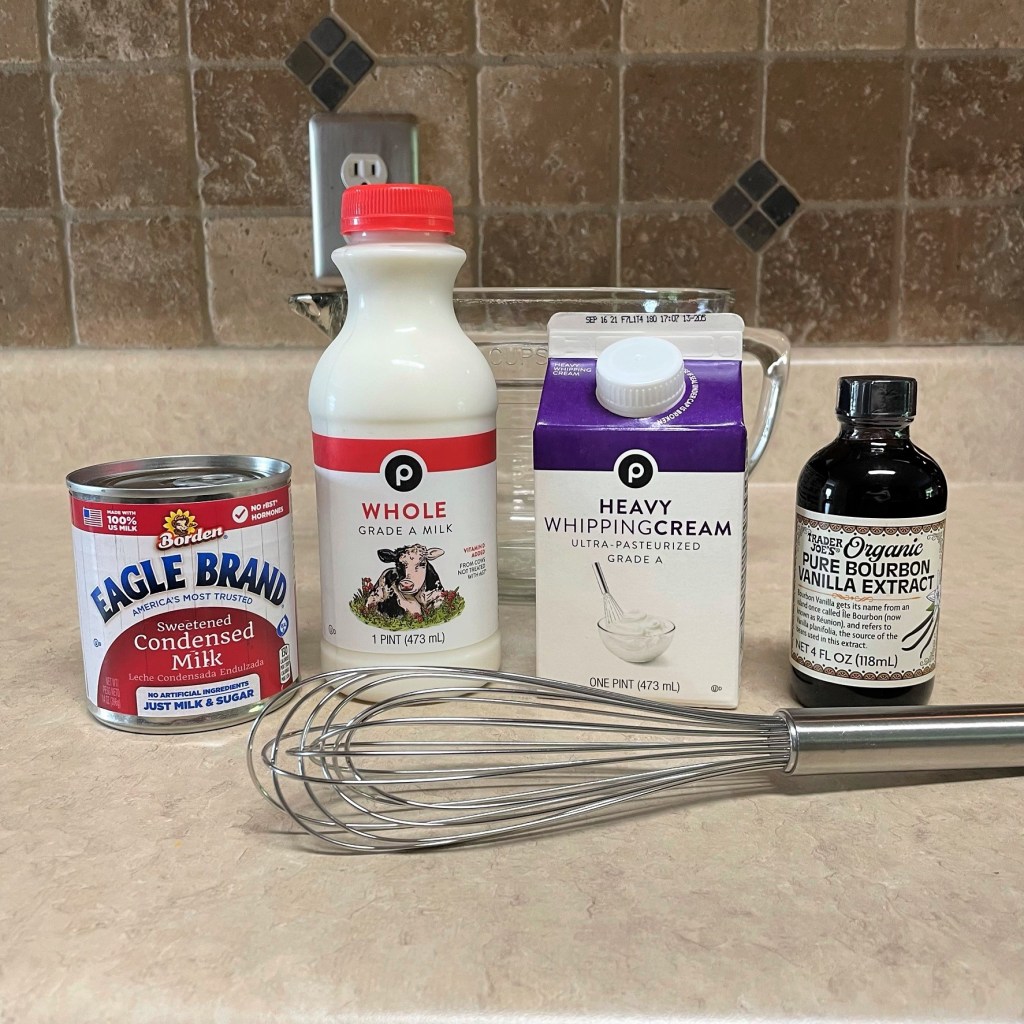
No eggs = no cooking! The sweetened condensed milk also provides all the sugar I need for this ice cream.
A little bit of cream cheese will soften the stickiness of the marshmallow fluff and help improve the texture when frozen.
These ingredients will produce a chocolate syrup, but with no high fructose stuff!
And of course, graham crackers! 🙂
Ice Cream Base
14.5 oz. can sweetened condensed milk
1 cup whole milk
1 cup heavy cream
1 tsp. real vanilla extract
1 Tbsp. vanilla flavored vodka (optional, for improved texture)
Gooey Marshmallow Swirl
2 oz. full-fat cream cheese (this is 1/4 of a regular brick)
1 cup marshmallow fluff (give or take, as this stuff is difficult to scoop and measure)
Of course, you will also need graham crackers, about 6 cookie sheets, broken into pieces
Instructions
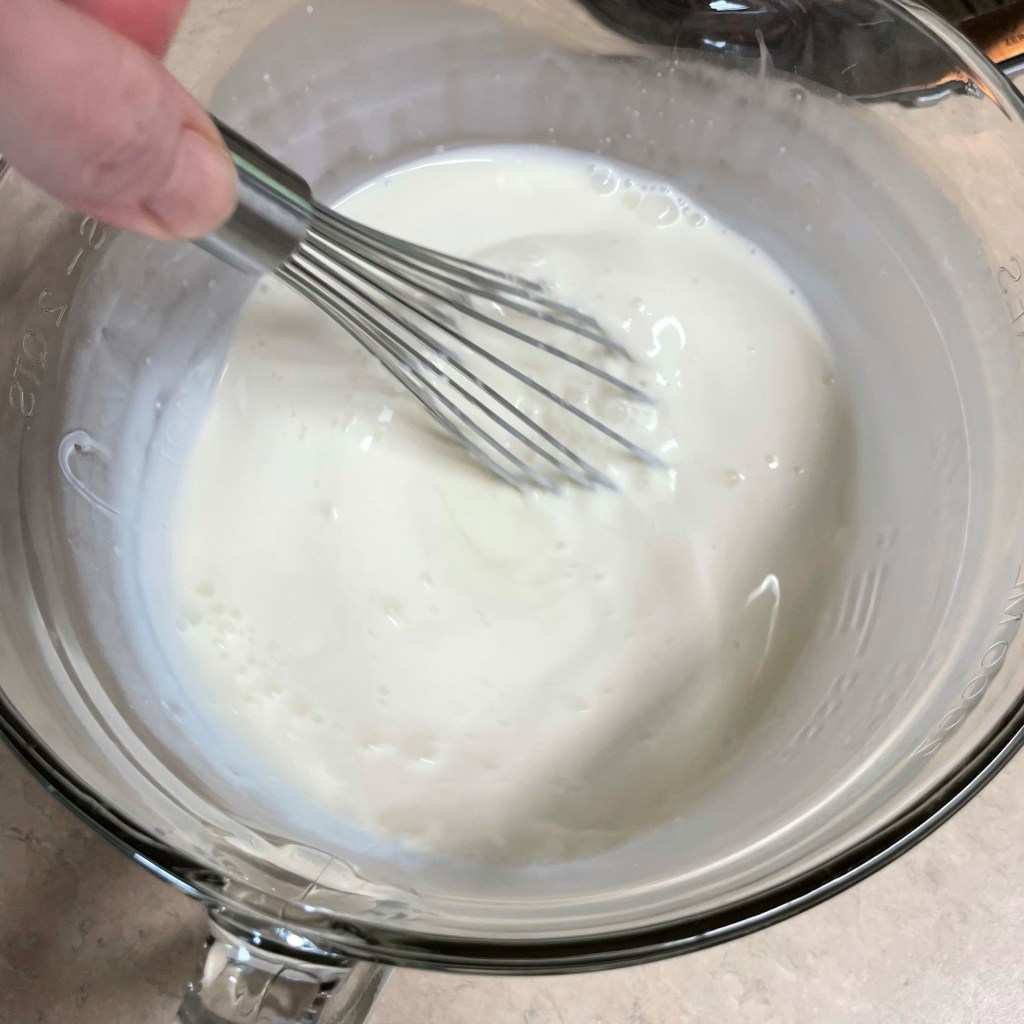
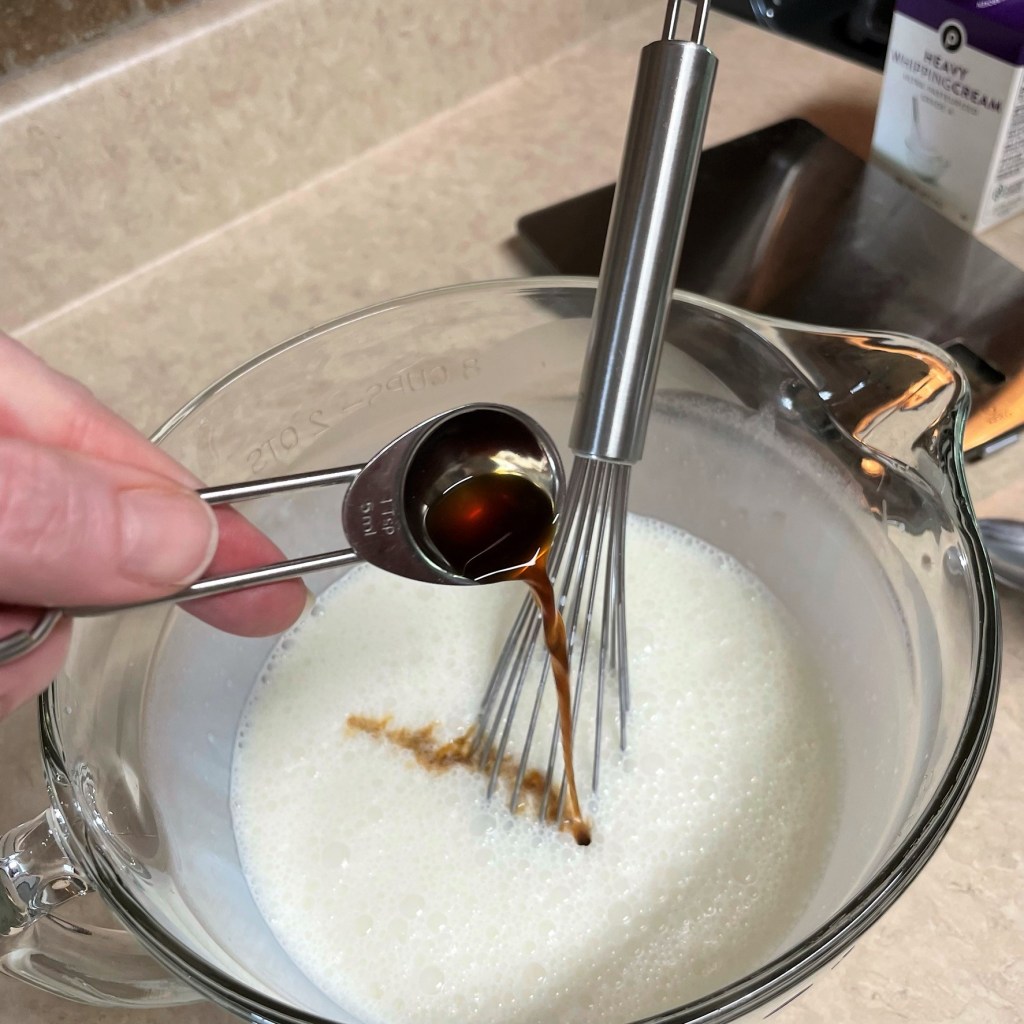
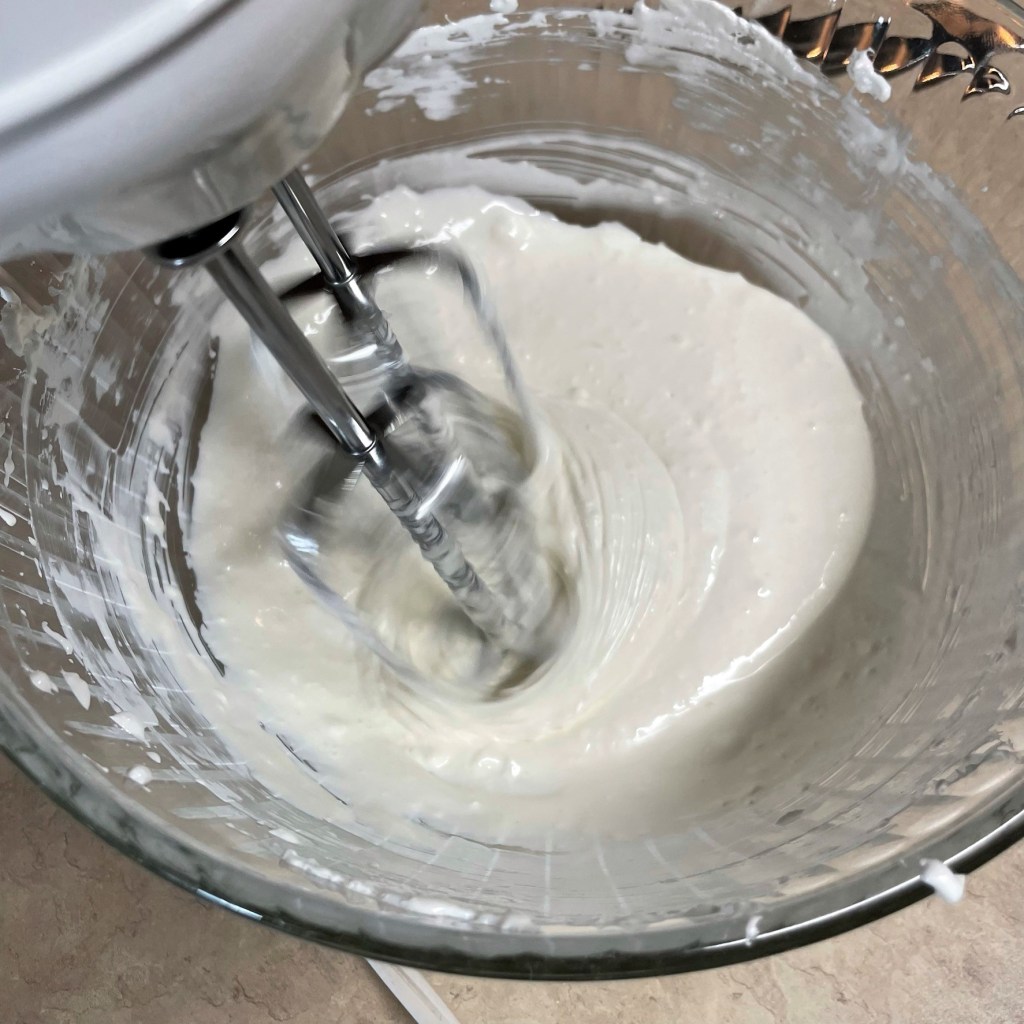
For the base of the ice cream, whisk together the condensed milk, whole milk and heavy cream. When the mixture is smooth and even, stir in vanilla extract. Cover and refrigerate until all other ingredients are cold and ready for layering.
Take plenty of time to thoroughly whisk these together. The condensed milk is very thick.
A splash of real vanilla extract, and the base is done!
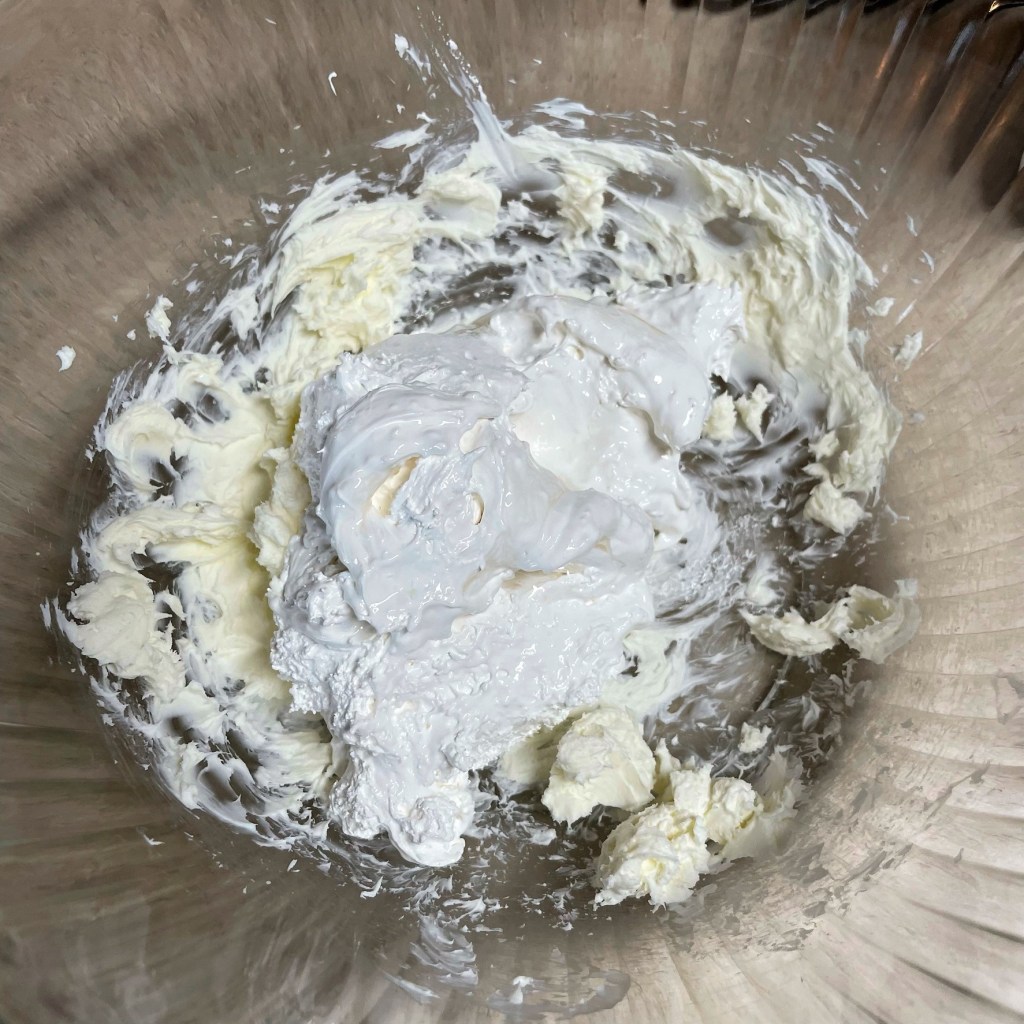
For the marshmallow swirl, use an electric mixer to whip the cream cheese and marshmallow fluff together. Allow enough time for the mixture to settle into a smooth consistency. Cover and refrigerate.
I whipped the 2 oz. chunk of cream cheese briefly before adding the VERY STICKY fluff to the bowl.
Beat on low until the ingredients come together a bit, then increase the speed to whip out any lumps or bubbles.
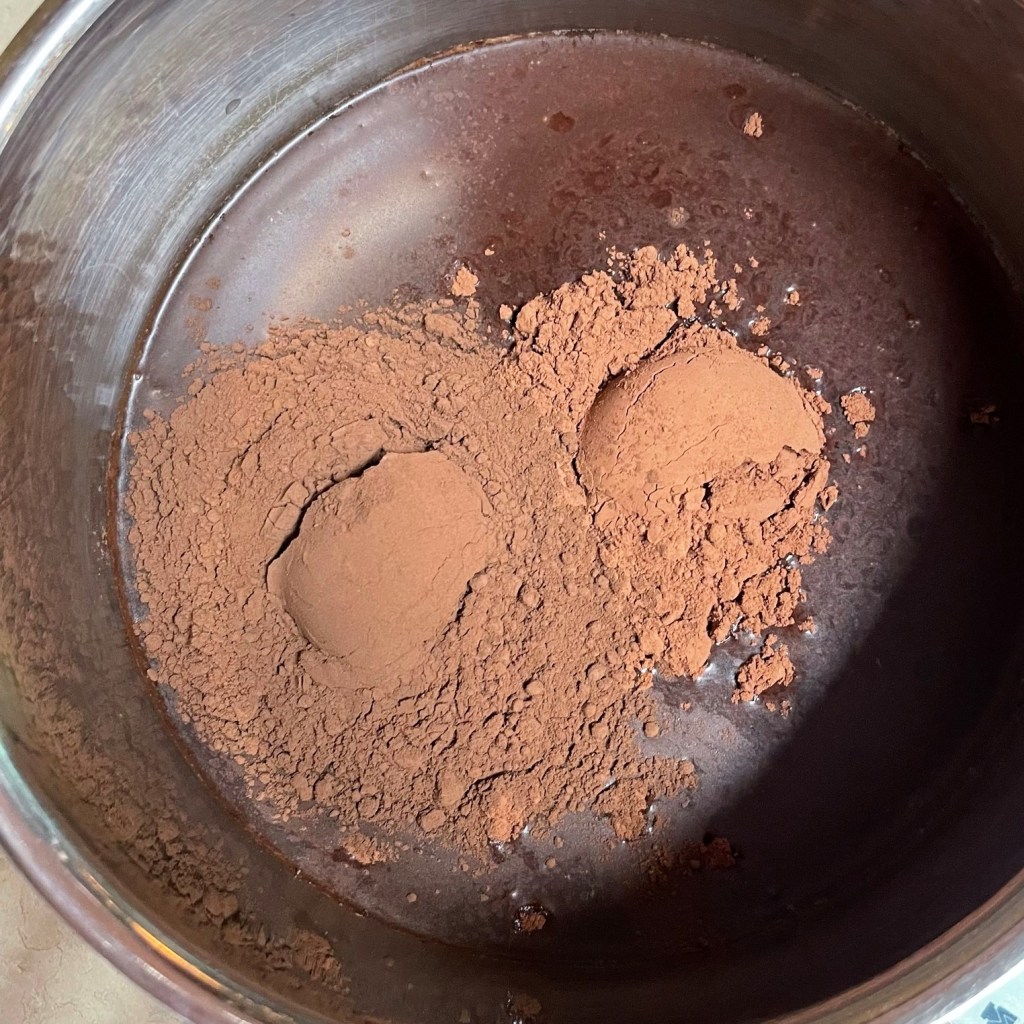
For the fudge ripple, combine sugar, corn syrup, water and cocoa powders in a small saucepan over medium-low heat. Whisk constantly until mixture reaches a just-barely-boiling point. Remove from heat and stir in sea salt and vanilla extract. Transfer to a bowl, cool several minutes, then cover and refrigerate until fully chilled.
The intense color and flavor of the Double Dutch dark cocoa (on the left) can’t be beat.
Whisk the syrup ingredients constantly over medium-low heat, until it just comes to boil, like this. Turn off the heat and stir in the vanilla and sea salt.
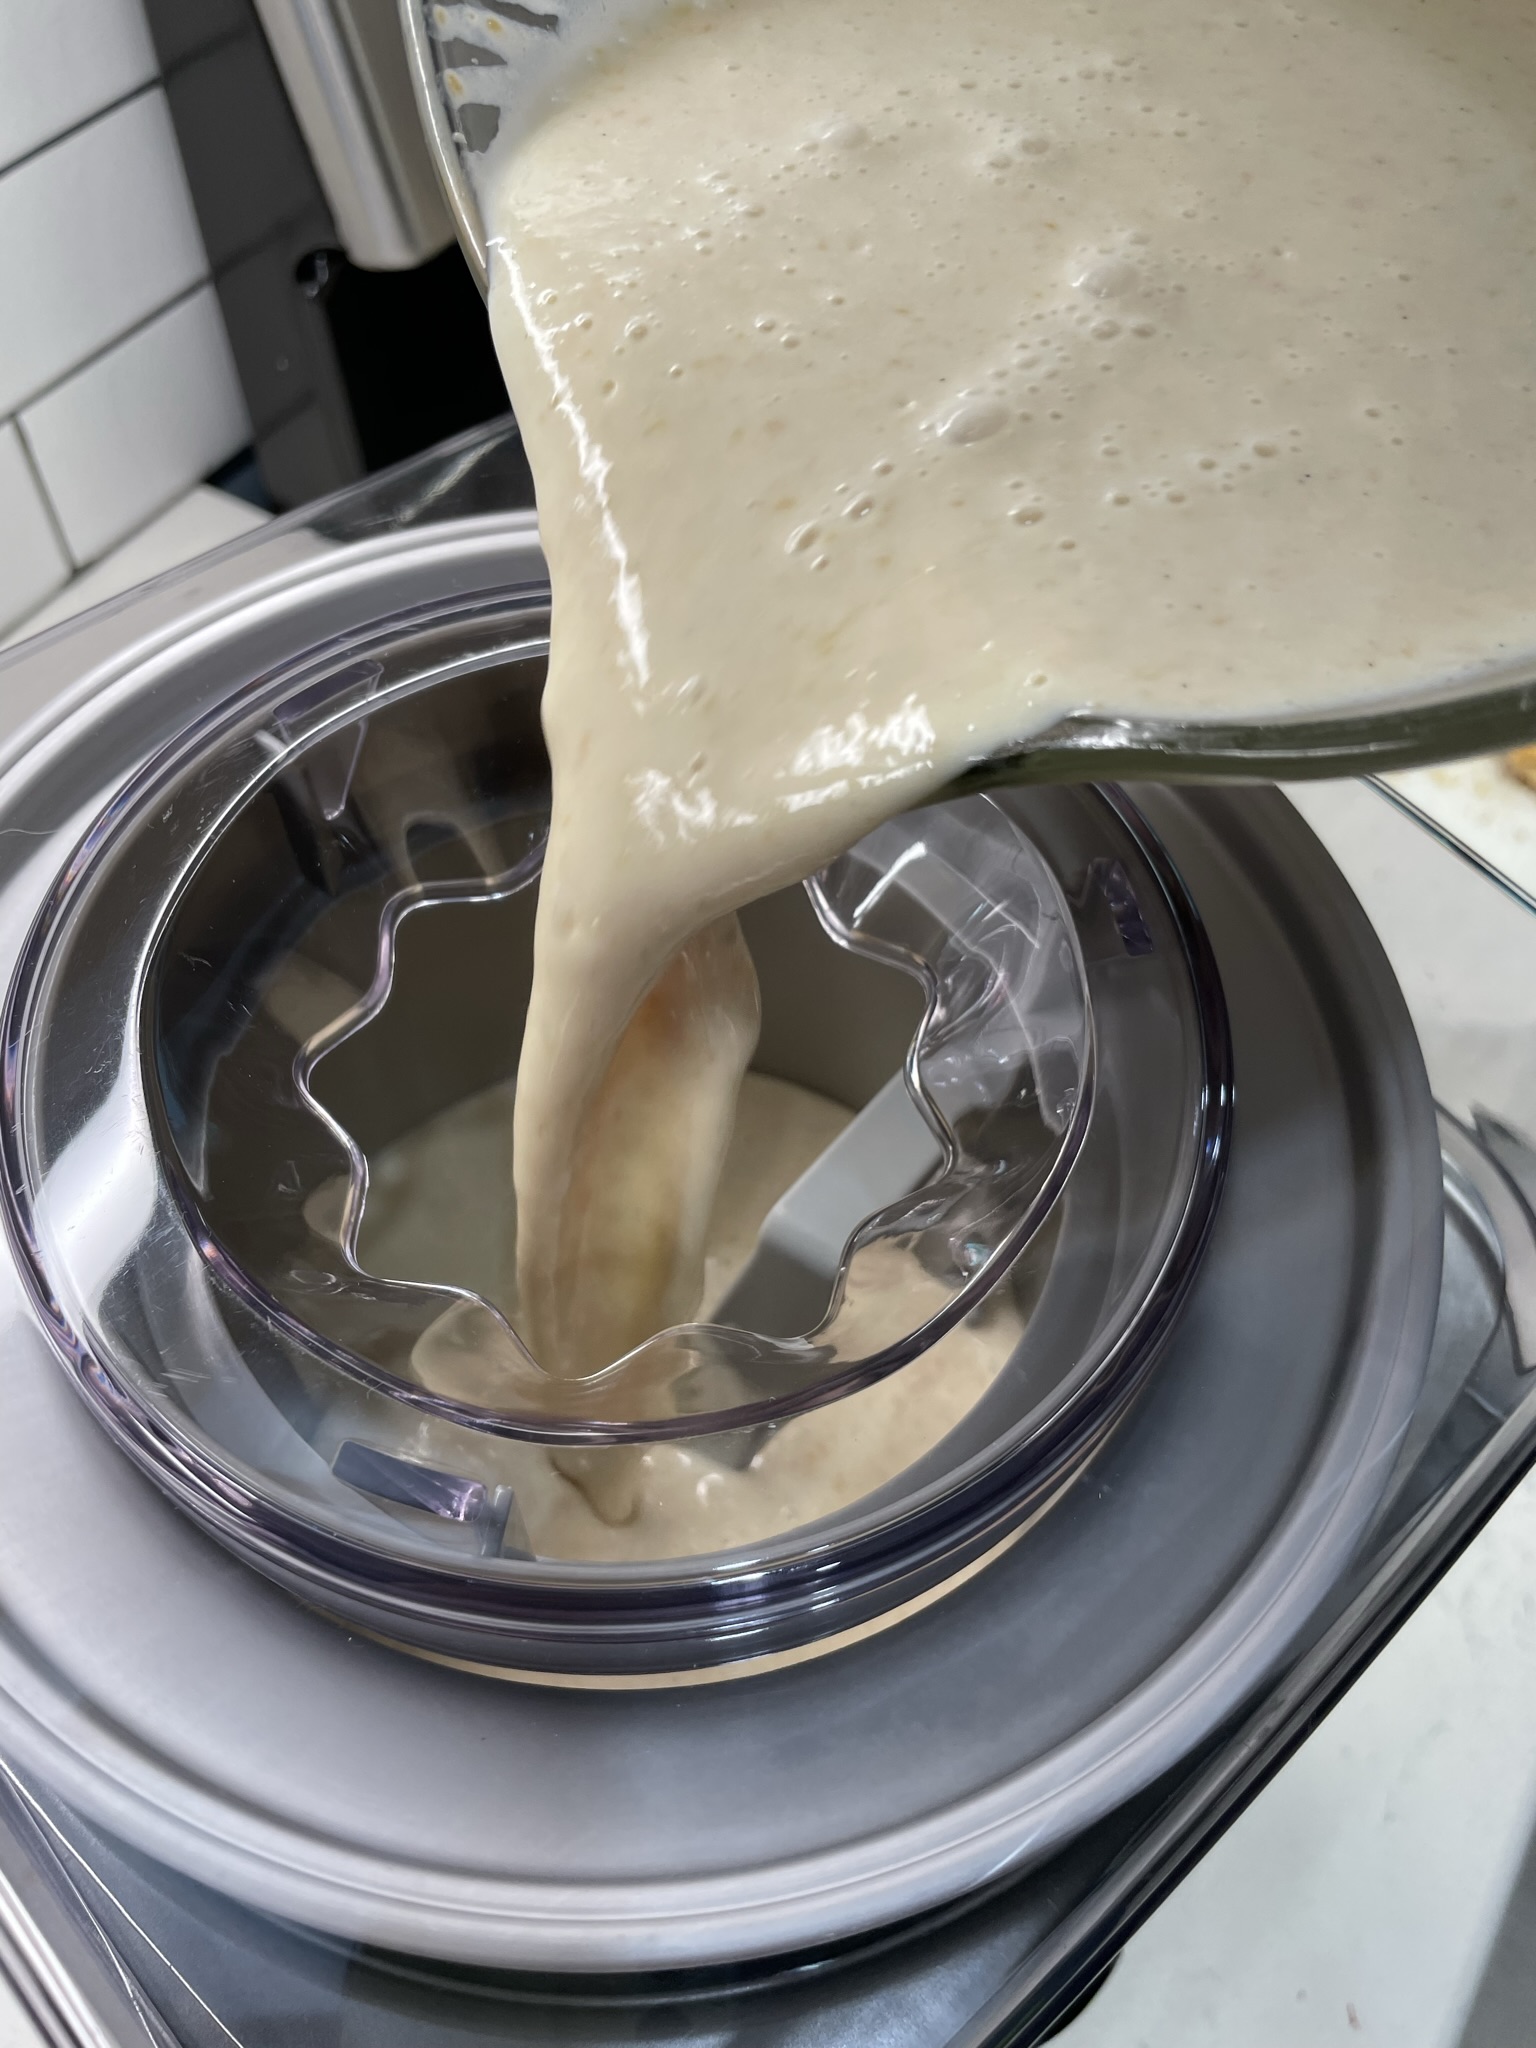
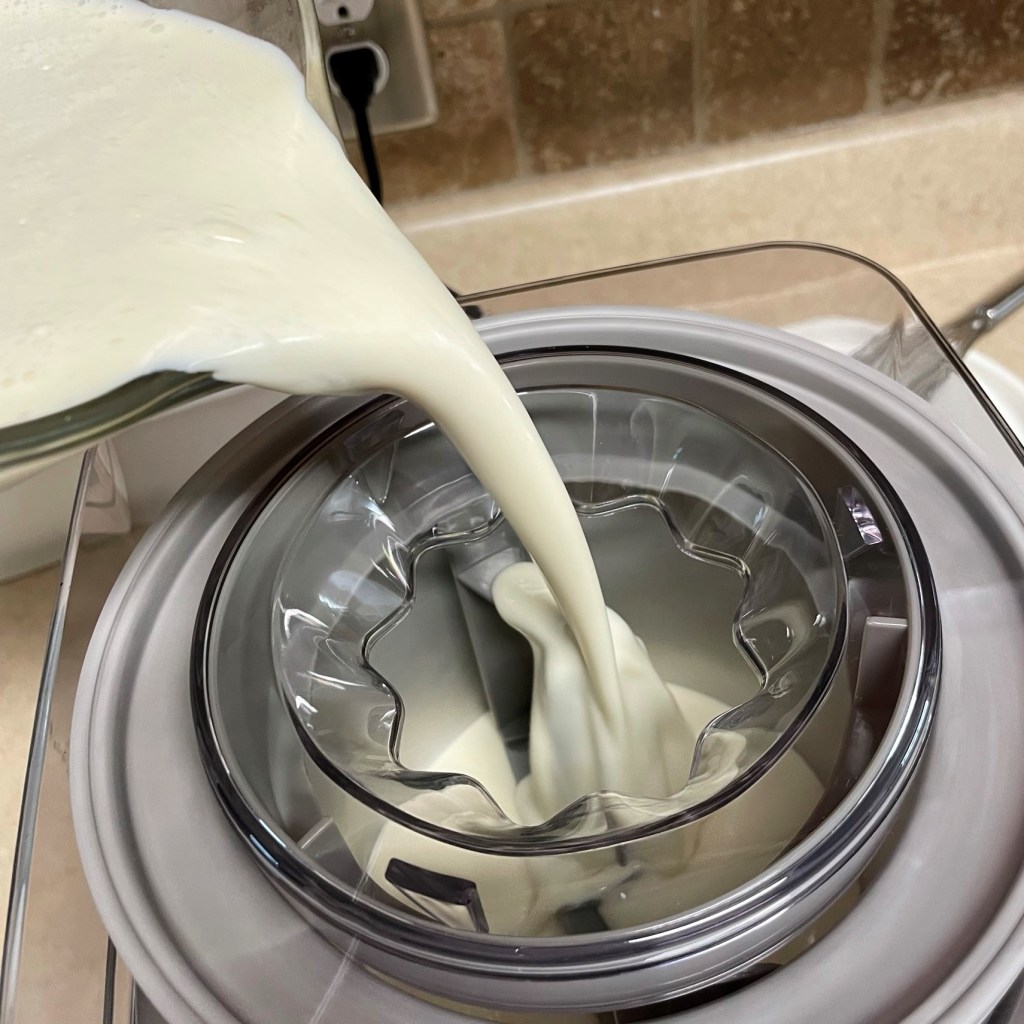
To make the layered ice cream: Freeze the base ice cream according to manufacturer’s instructions; my Cuisinart machine takes about 20 minutes. During the final minute, add the vanilla flavored vodka. This ingredient is not essential, but it helps make the ice cream scoopable immediately upon removal from the freezer. If you avoid alcohol—no problem; simply remove the ice cream about 15 minutes before serving to slightly soften.
Pour the chilled ice cream base into the freezer bowl, and wait 20 minutes for summer dessert magic.
Add a tablespoon of vodka during the final minute of churning. Skip this step if you’ll be feeding kids or others who avoid alcohol.
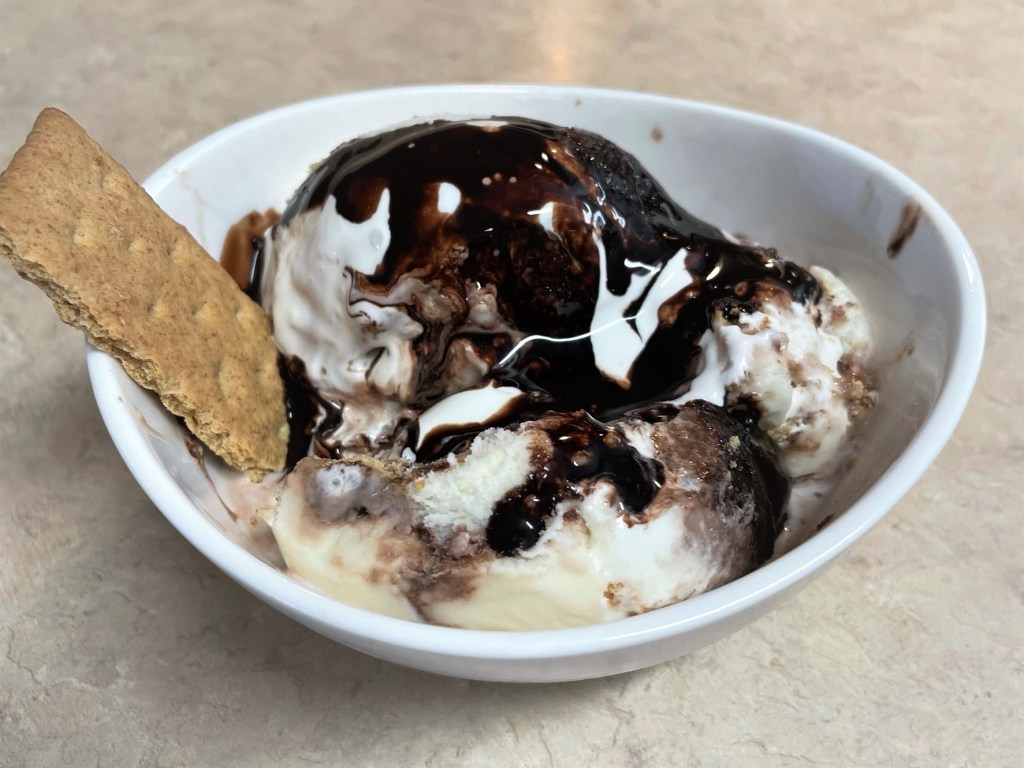
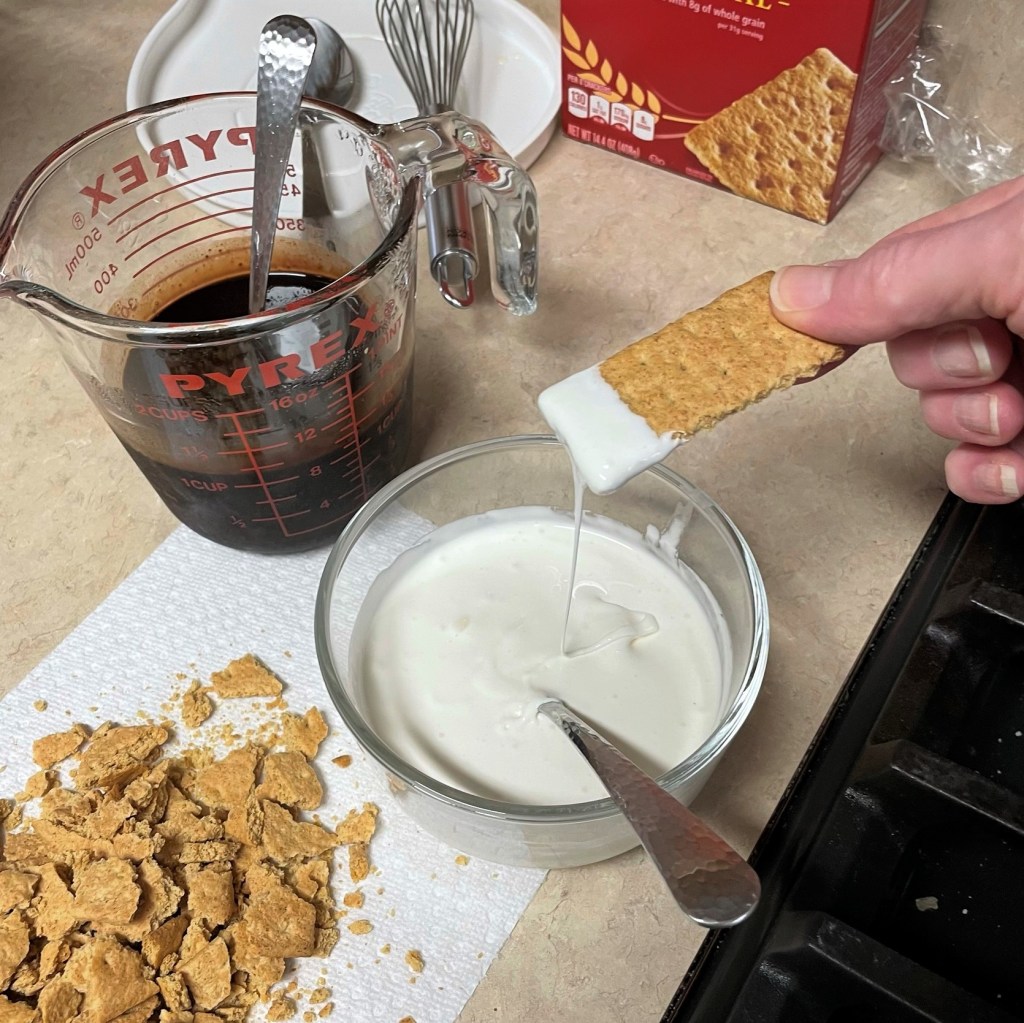
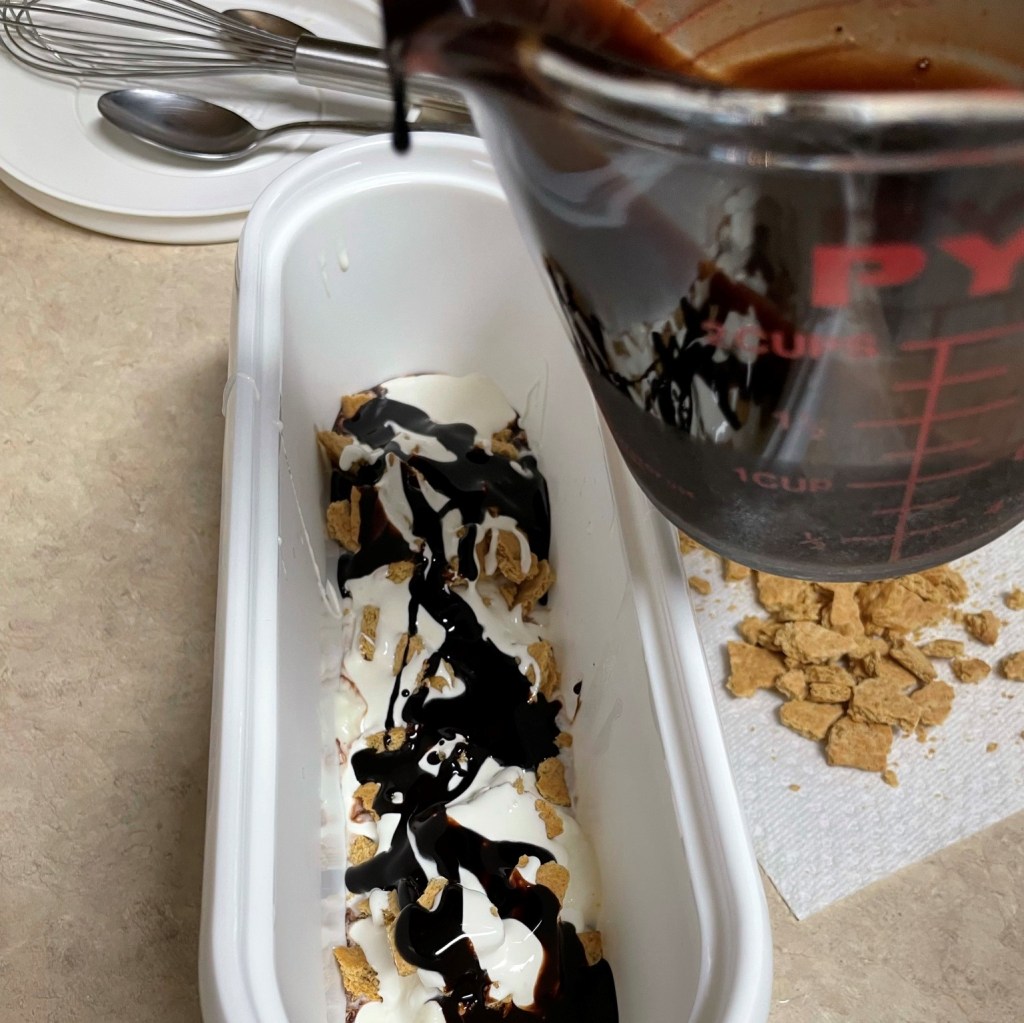
When ice cream is finished churning, add a slight ribbon of fudgy ripple to the bottom of an insulated ice cream container. Spoon in a few dollops of the ice cream base, followed by the graham cracker pieces and a generous drizzling of the marshmallow fluff mixture. Swirl on more fudge ripple, then repeat with ice cream, graham pieces and marshmallow fluff mixture. Be generous with the s’mores ingredients for best results. Any remaining fluff or fudge swirl mixture can be used to “dress up” your ice cream at serving time.
I had all my s’mores add-in ingredients on standby, and I couldn’t resist sampling the goods. 😉
The anticipation usually gets to me right at this point.
I scream, you scream…
For no particular reason, I drizzled some of the chocolate syrup into the bottom of the insulated ice cream container.
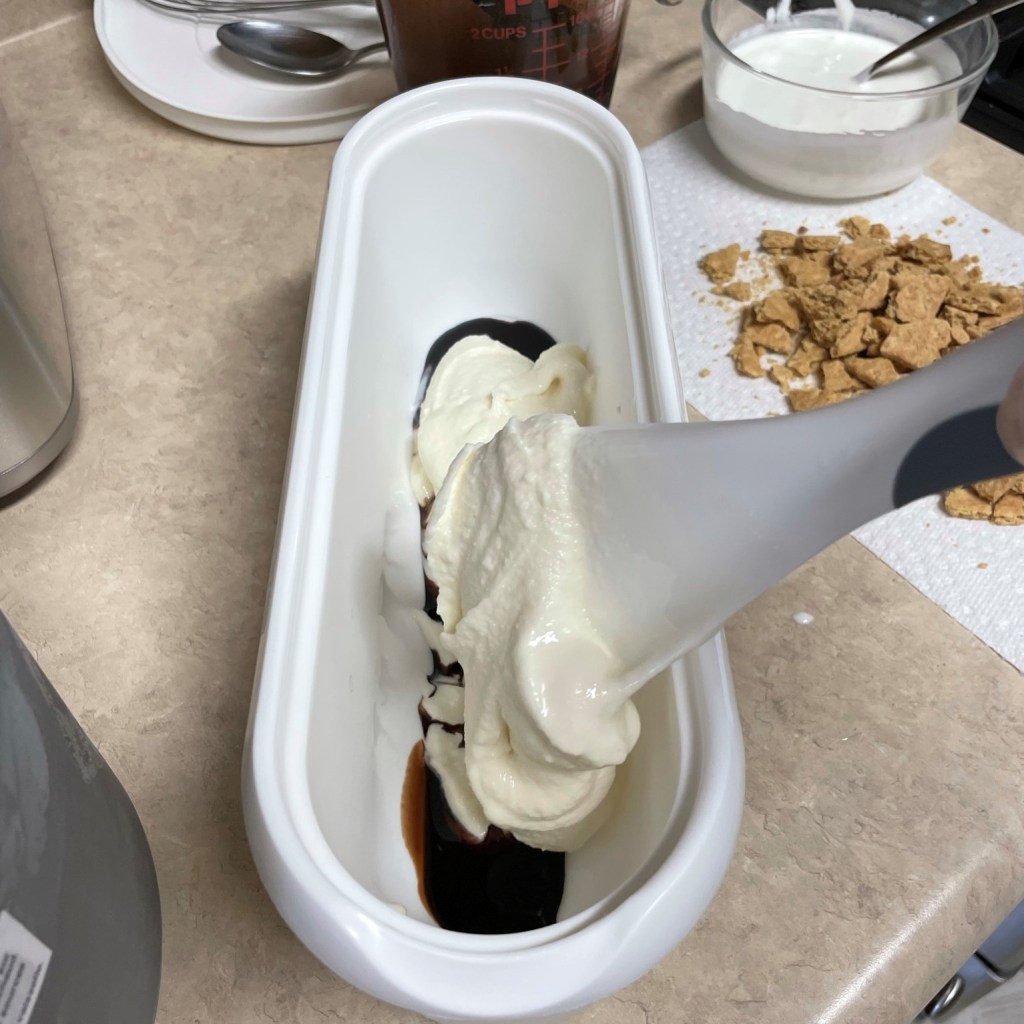
Spoon in a layer of the churned ice cream, but resist the urge to “swirl” it in the syrup.
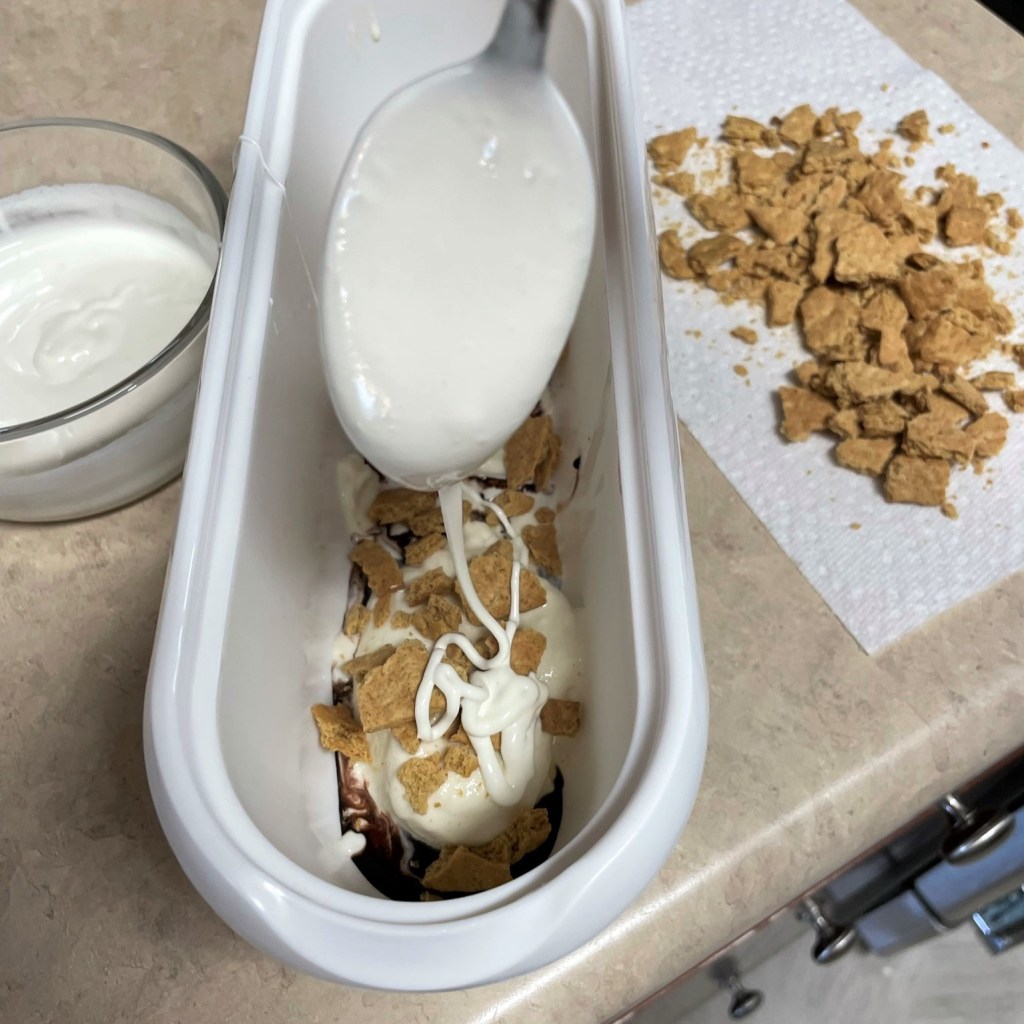
Sprinkle on a generous layer of crushed graham crackers and several spoonfuls of the marshmallow mixture.
Another layer of chocolate syrup, and repeat the layers, finishing with ice cream on top.
Scatter all the graham crumbs on top of the ice cream and send it to the freezer to firm up.
It wouldn’t be summer without ice cream, and it wouldn’t be Comfort du Jour without some unexpected flavor twists. One of the biggest reasons I love my ice cream machine is that I can choose my own flavors rather than relying on the same old varieties you find everywhere else. Using my easy formula for custard ice cream base, I’ve whipped two of my all-time favorite flavors into one frosty treat.
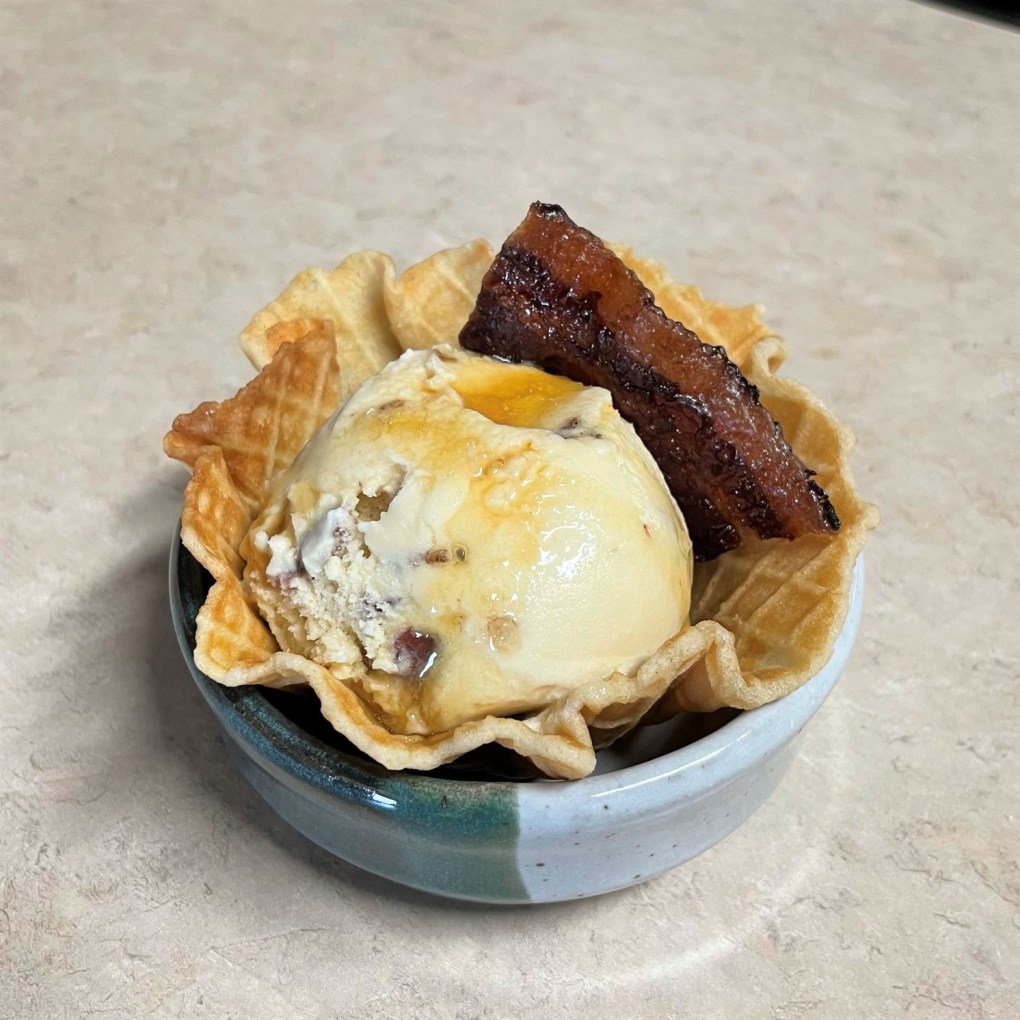
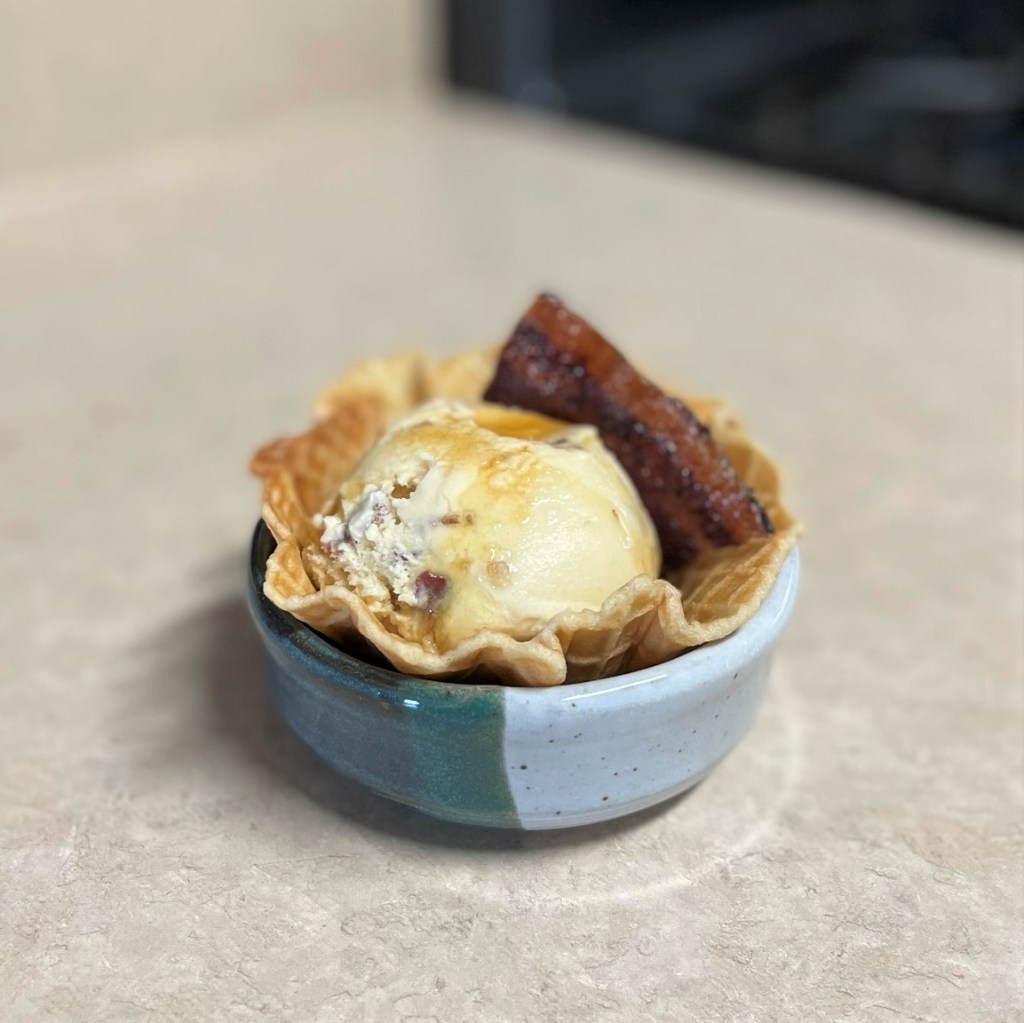
I’ve swapped out sugar in favor of maple syrup, and paired it with the delicious, smoky flavor of real bacon! These two flavors are like an old married couple, finishing each other’s sentences and picking up each other’s slack. When the maple syrup starts to feel too sweet, here comes the salty, savory bacon to keep it in check. And because we get a little crazy at our house about the sweet-salty combination of maple and bacon, I’ve garnished the ice cream with additional bacon, glazed with maple syrup. I’ll share that, too.
It’s National Ice Cream Day, smack in the middle of National Ice Cream Month, and I am on it!
I know you want some.
Ingredients
1 1/2 cups whole milk
1 1/2 cups heavy cream
1/3 cup maple sugar* (see notes)
3 egg yolks
1/2 cup dark maple syrup
1/2 tsp. kosher salt
4 thin slices uncured maple bacon, cooked until crispy, then broken into bits*
1 Tbsp. bourbon (optional but recommended for improved texture)
*Notes
Double maple means double tasty!
My maple sugar is sourced from the same place I order my syrup, Big Tree Maple in Lakewood, N.Y., which is just up the road from where I grew up. Maple sugar is not as easy to find in local stores as maple syrup, but you will be happy to know that Big Tree offers shipping on its products. You could also substitute with caster sugar (sometimes called “superfine” sugar) or simply increase the maple syrup to a total of 3/4 cup.
All 4 pieces of bacon are intended for mixing into the ice cream. Cook a few extra slices of bacon if you want to make the maple-glazed candied bacon garnish. And, trust me, you want to! 😉
Instructions
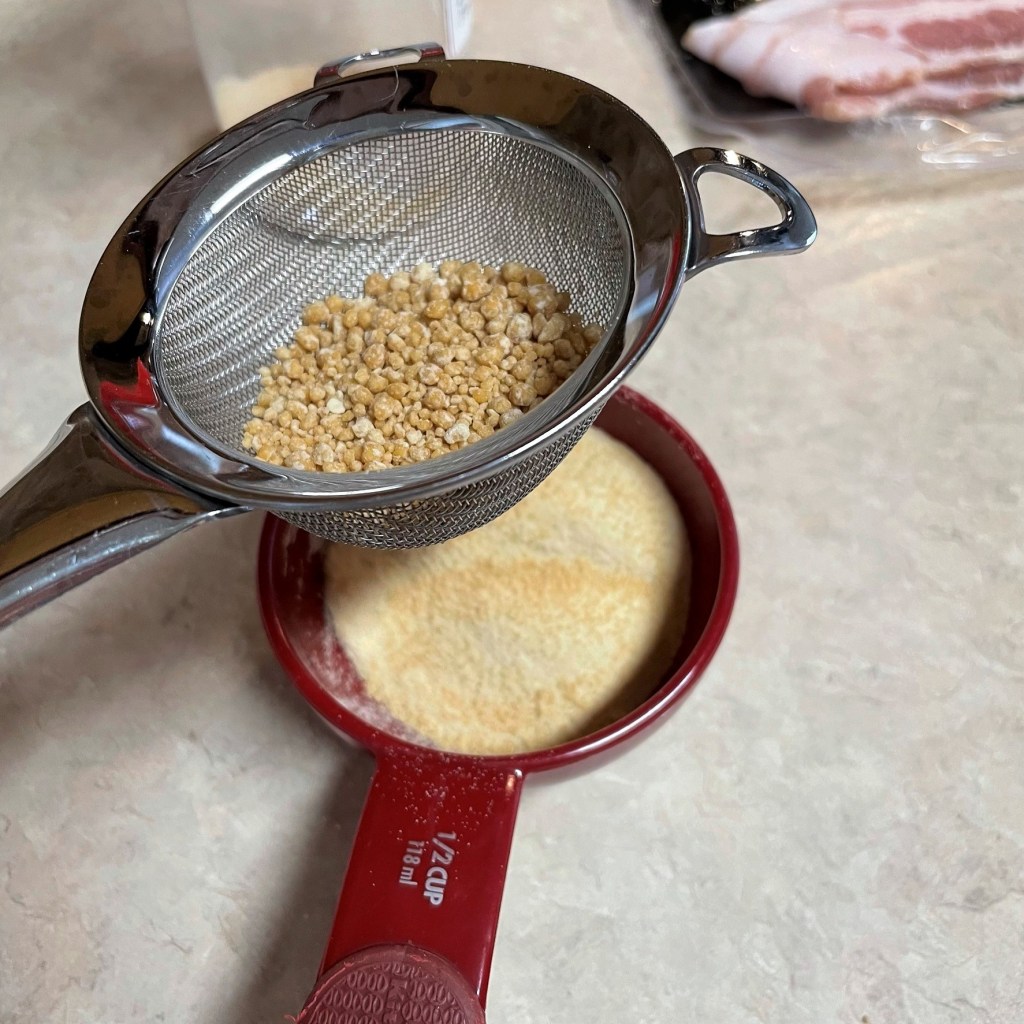
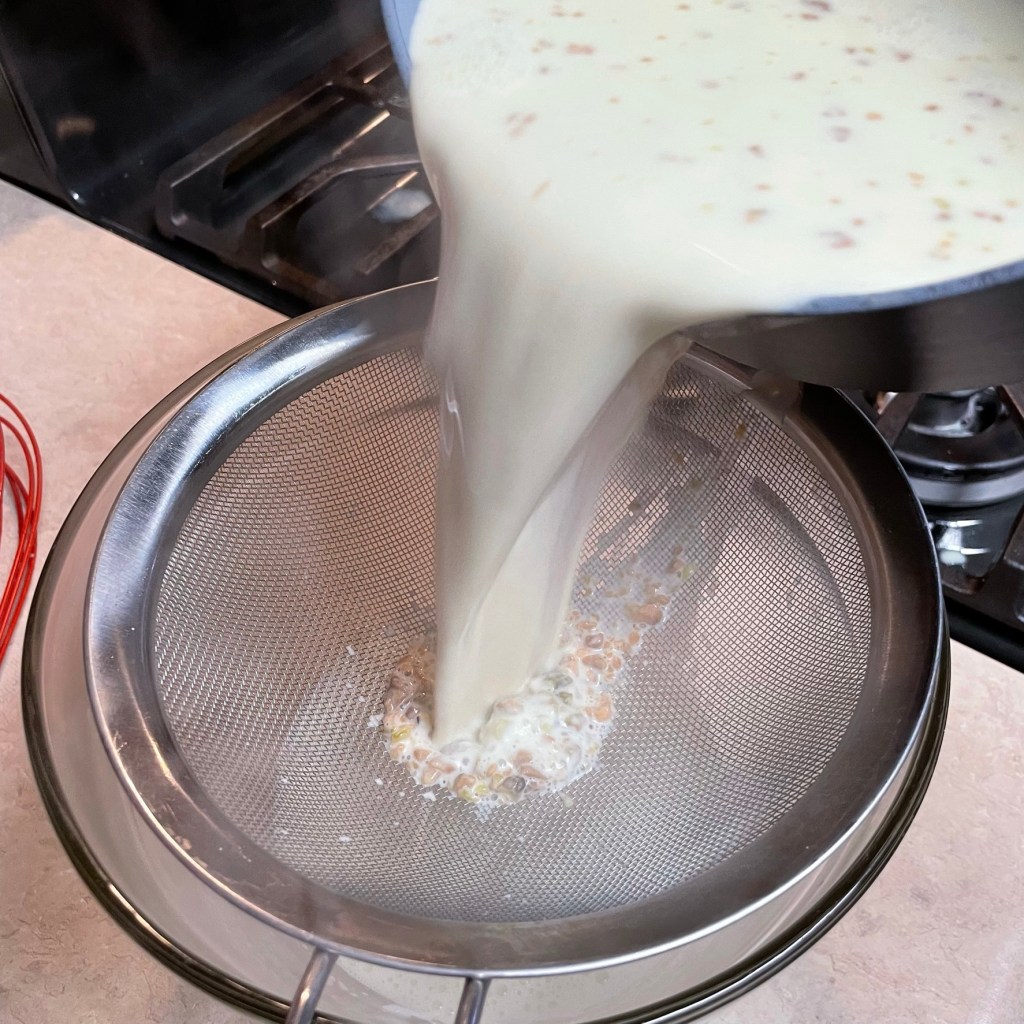
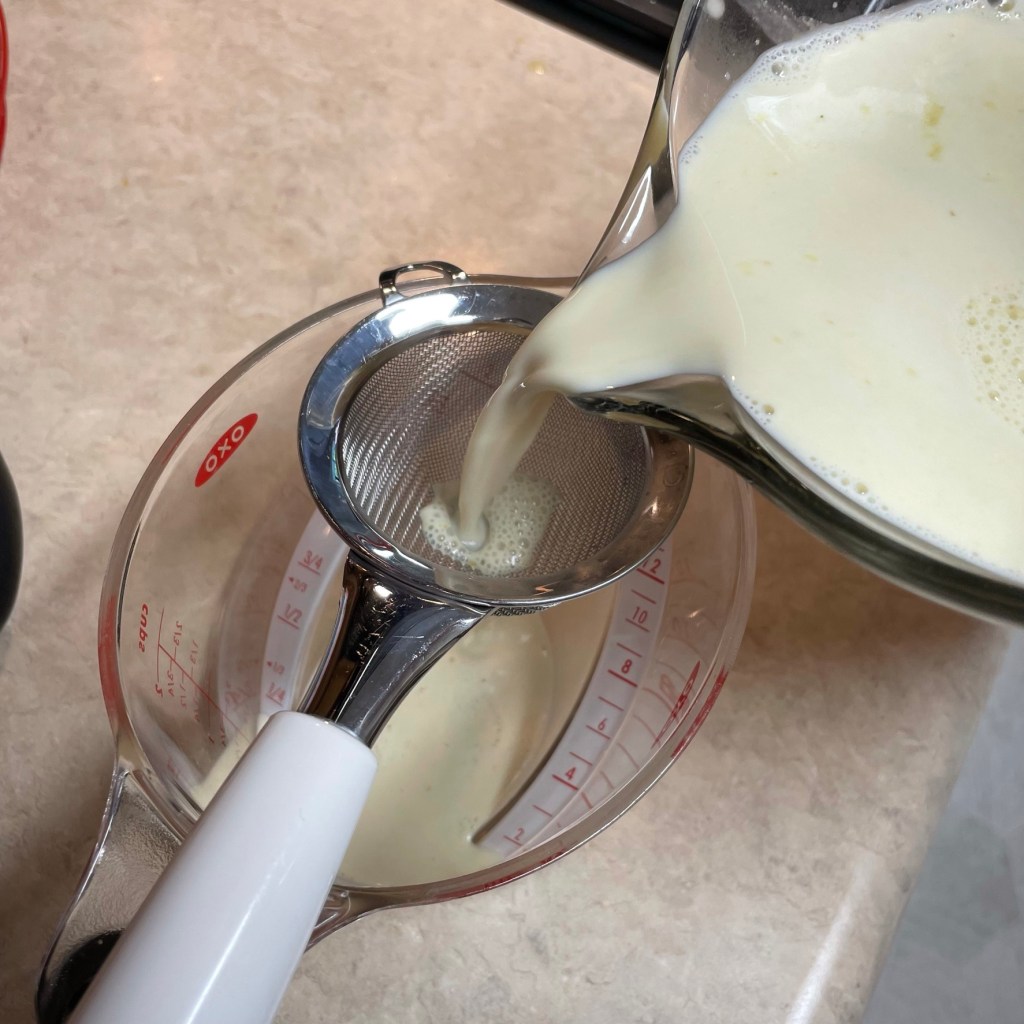
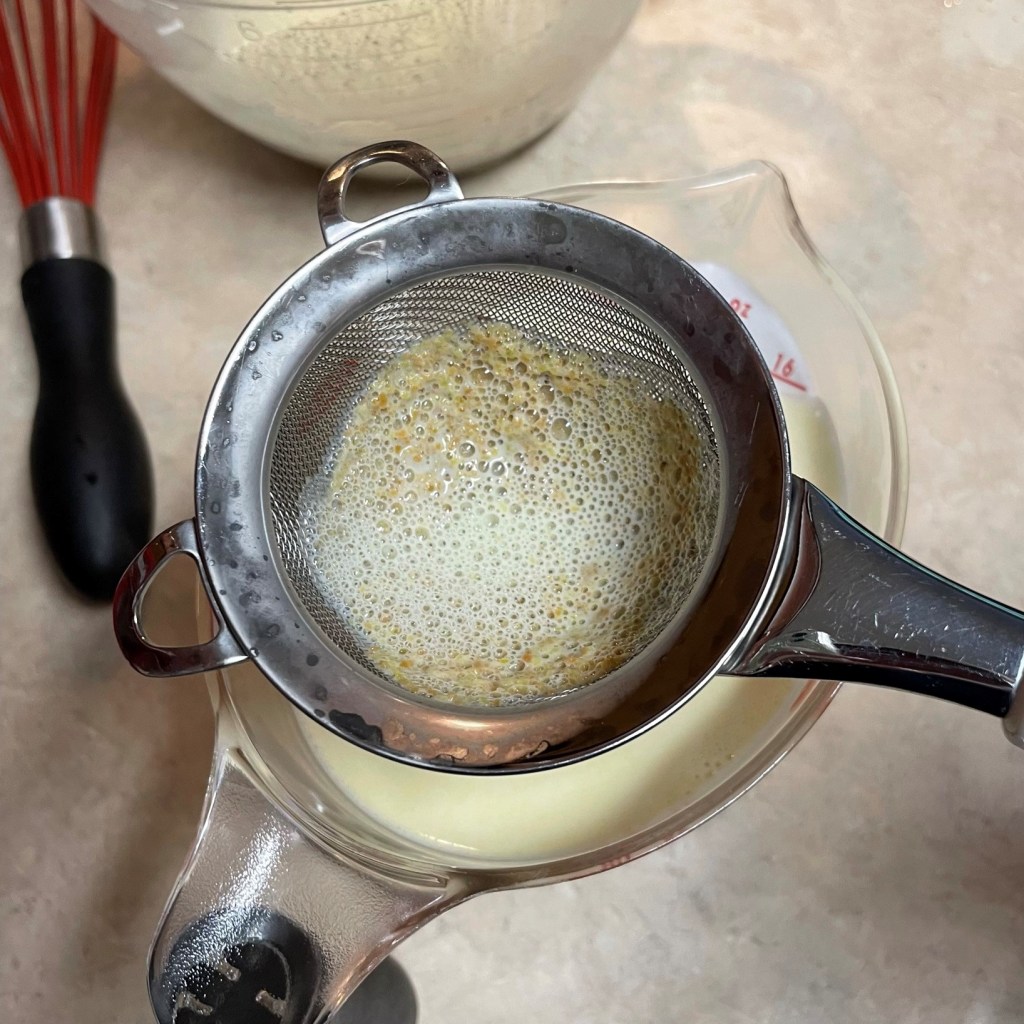
The maple sugar will be dissolved into the eggs, so I used a mesh strainer to separate the clumps. I dissolved the clumps into the milk mixture.
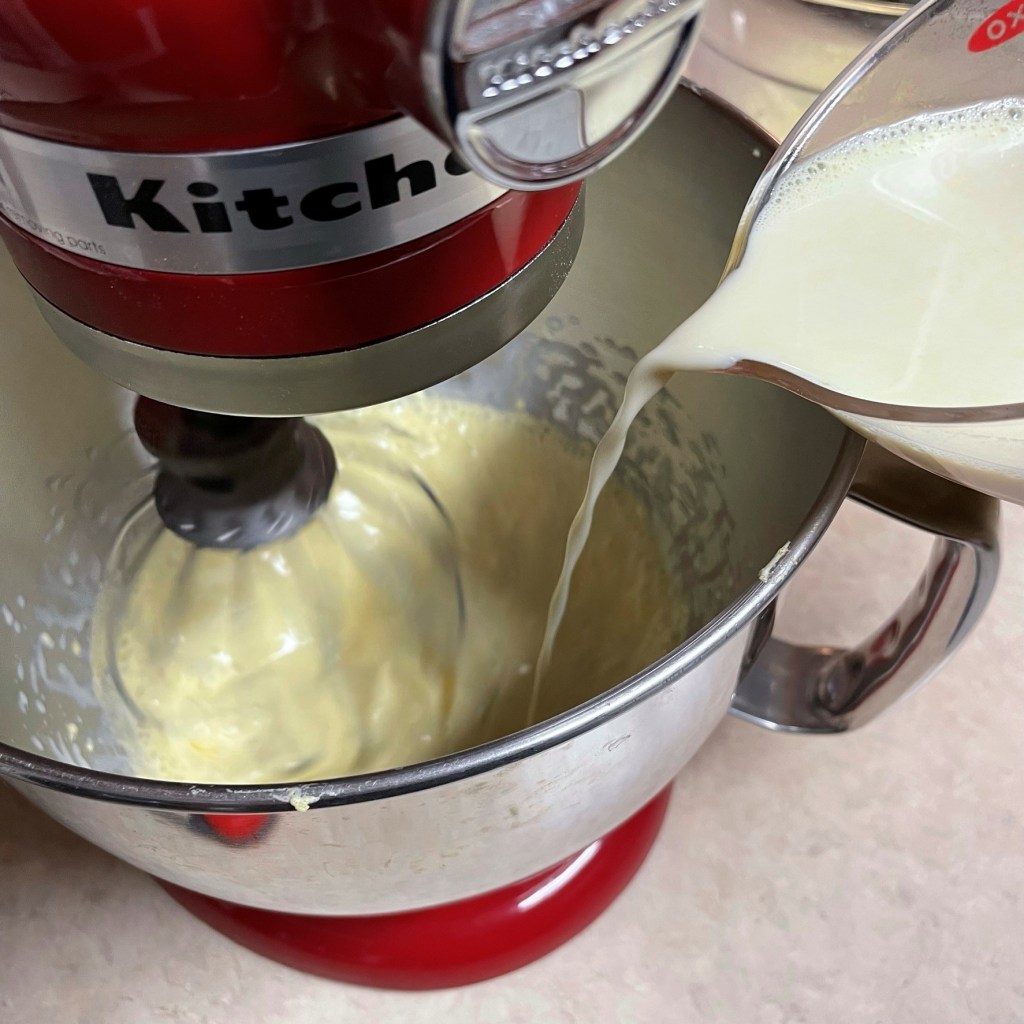
Adding sugar gradually to the whipped eggs is the way to go.
After whipping, the yolk mixture is thick, smooth and light-colored.
The hot milk and cream mixture is added very gradually to the egg mixture, to cook them without scrambling.
The tempered egg mixture is returned to the pot with remaining milk mixture.
A generous pinch of kosher salt will give my maple ice cream a salty kiss.
Cook and stir the custard until it thickens slightly. It should coat the back of a spoon like this.
I gradually whisked the cooked custard mixture into the cold syrup. I didn’t want to break the custard by shocking it.
Always lay plastic wrap directly onto the surface of a cooked ice cream base. This prevents condensation that might drip into the custard.
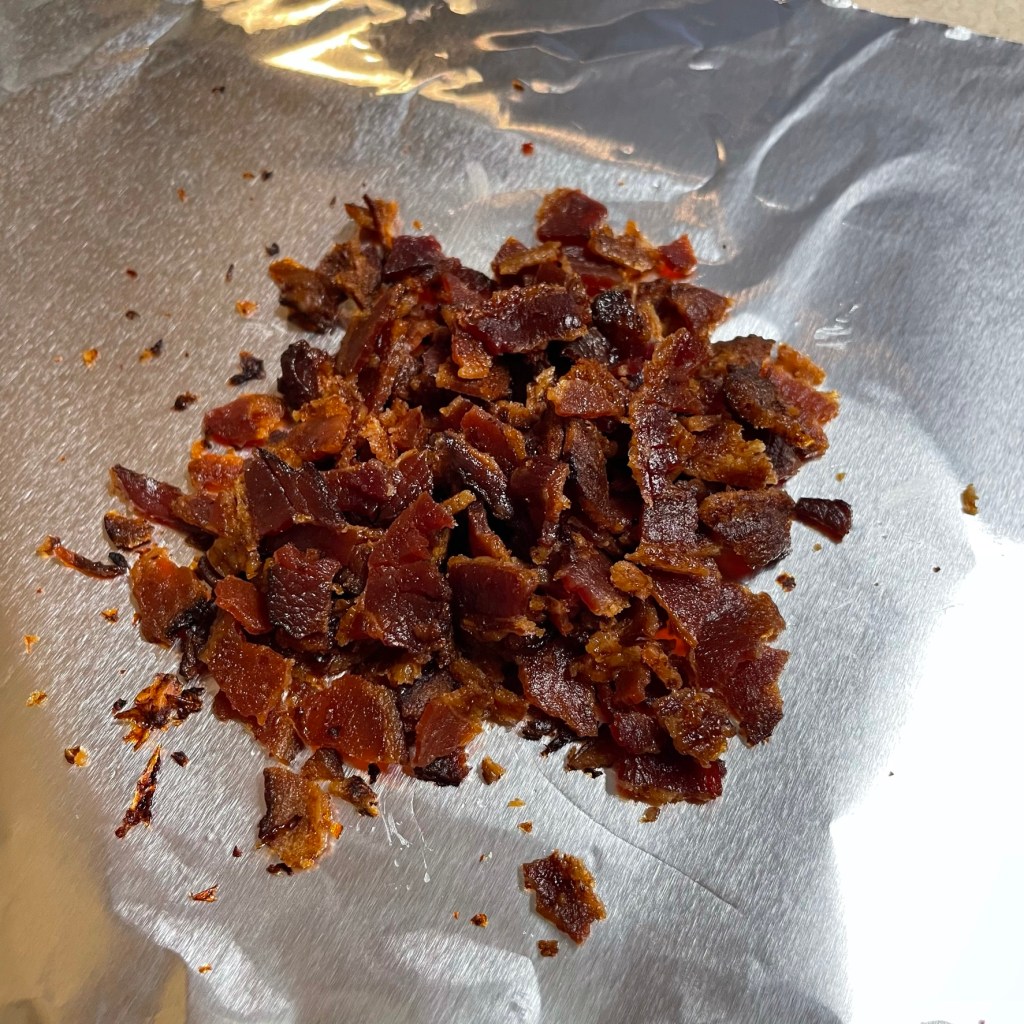
The rest of the bacon is cooked until crispy, drained of excess grease and broken into crumbs.
Put the crumbles into the fridge so they are good and cold when you blend them into the ice cream.
In a stand mixer or bowl with hand mixer, whip egg yolks until they get frothy and increase in volume. Gradually add maple sugar, whipping constantly and stopping occasionally to scrape down the sides of the bowl.
Heat milk and cream until hot and steaming but not boiling. Reduce the heat to very low (or turn it off) at this point, so that the milk mixture doesn’t curdle. Measure out about 1 cup of the hot milk mixture. Stream it slowly into the egg yolk mixture while running the mixer. Use a lower speed on the mixer to avoid whipping too much air into the cream mixture.
Transfer the tempered yolk mixture back to the saucepan with the remaining milk-cream mixture and cook over medium-low heat, stirring constantly, until custard is smooth and coats the back of the spoon. Remove from heat. Stir in kosher salt until dissolved.
Whisk in maple syrup, stirring thoroughly to combine. Lay plastic film directly onto the surface of the custard to prevent condensation. Cover the bowl with additional film or lid and refrigerate several hours to overnight.
Time to freeze the ice cream!
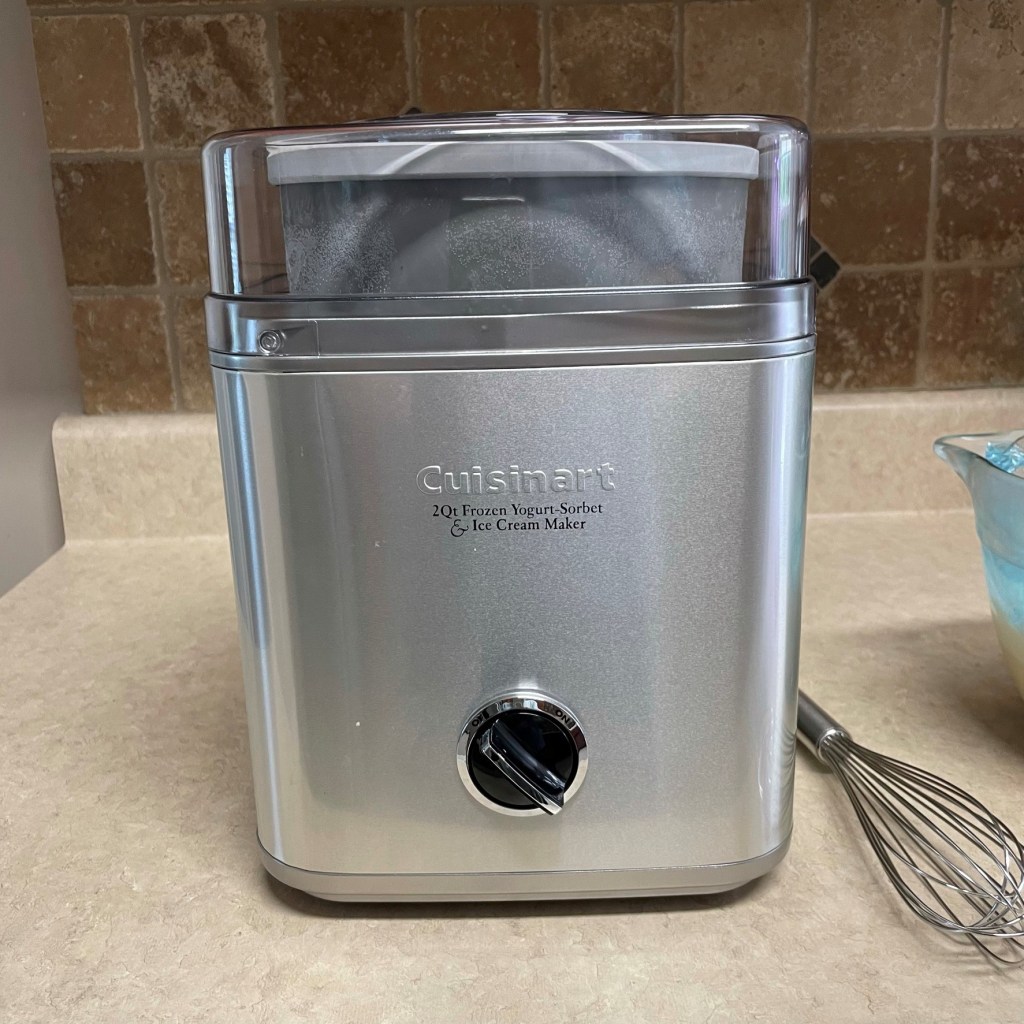
My ice cream maker is guaranteed a permanent home in my kitchen! We love all the fun flavors you can create at home.
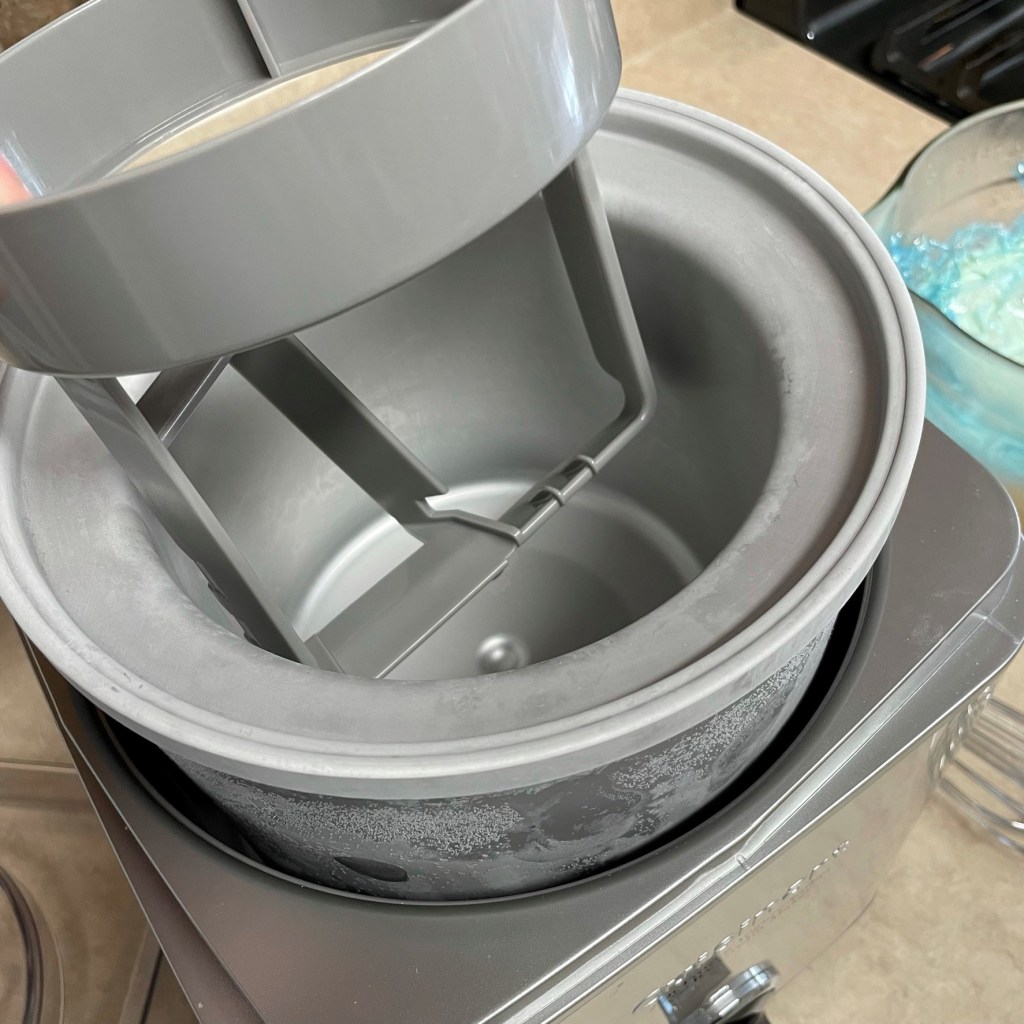
The churning paddle fits into the freezer bowl, and it keeps the ice cream mixture moving when the bowl spins.
Pour the chilled custard into the freezer bowl, and let the machine work its magic.
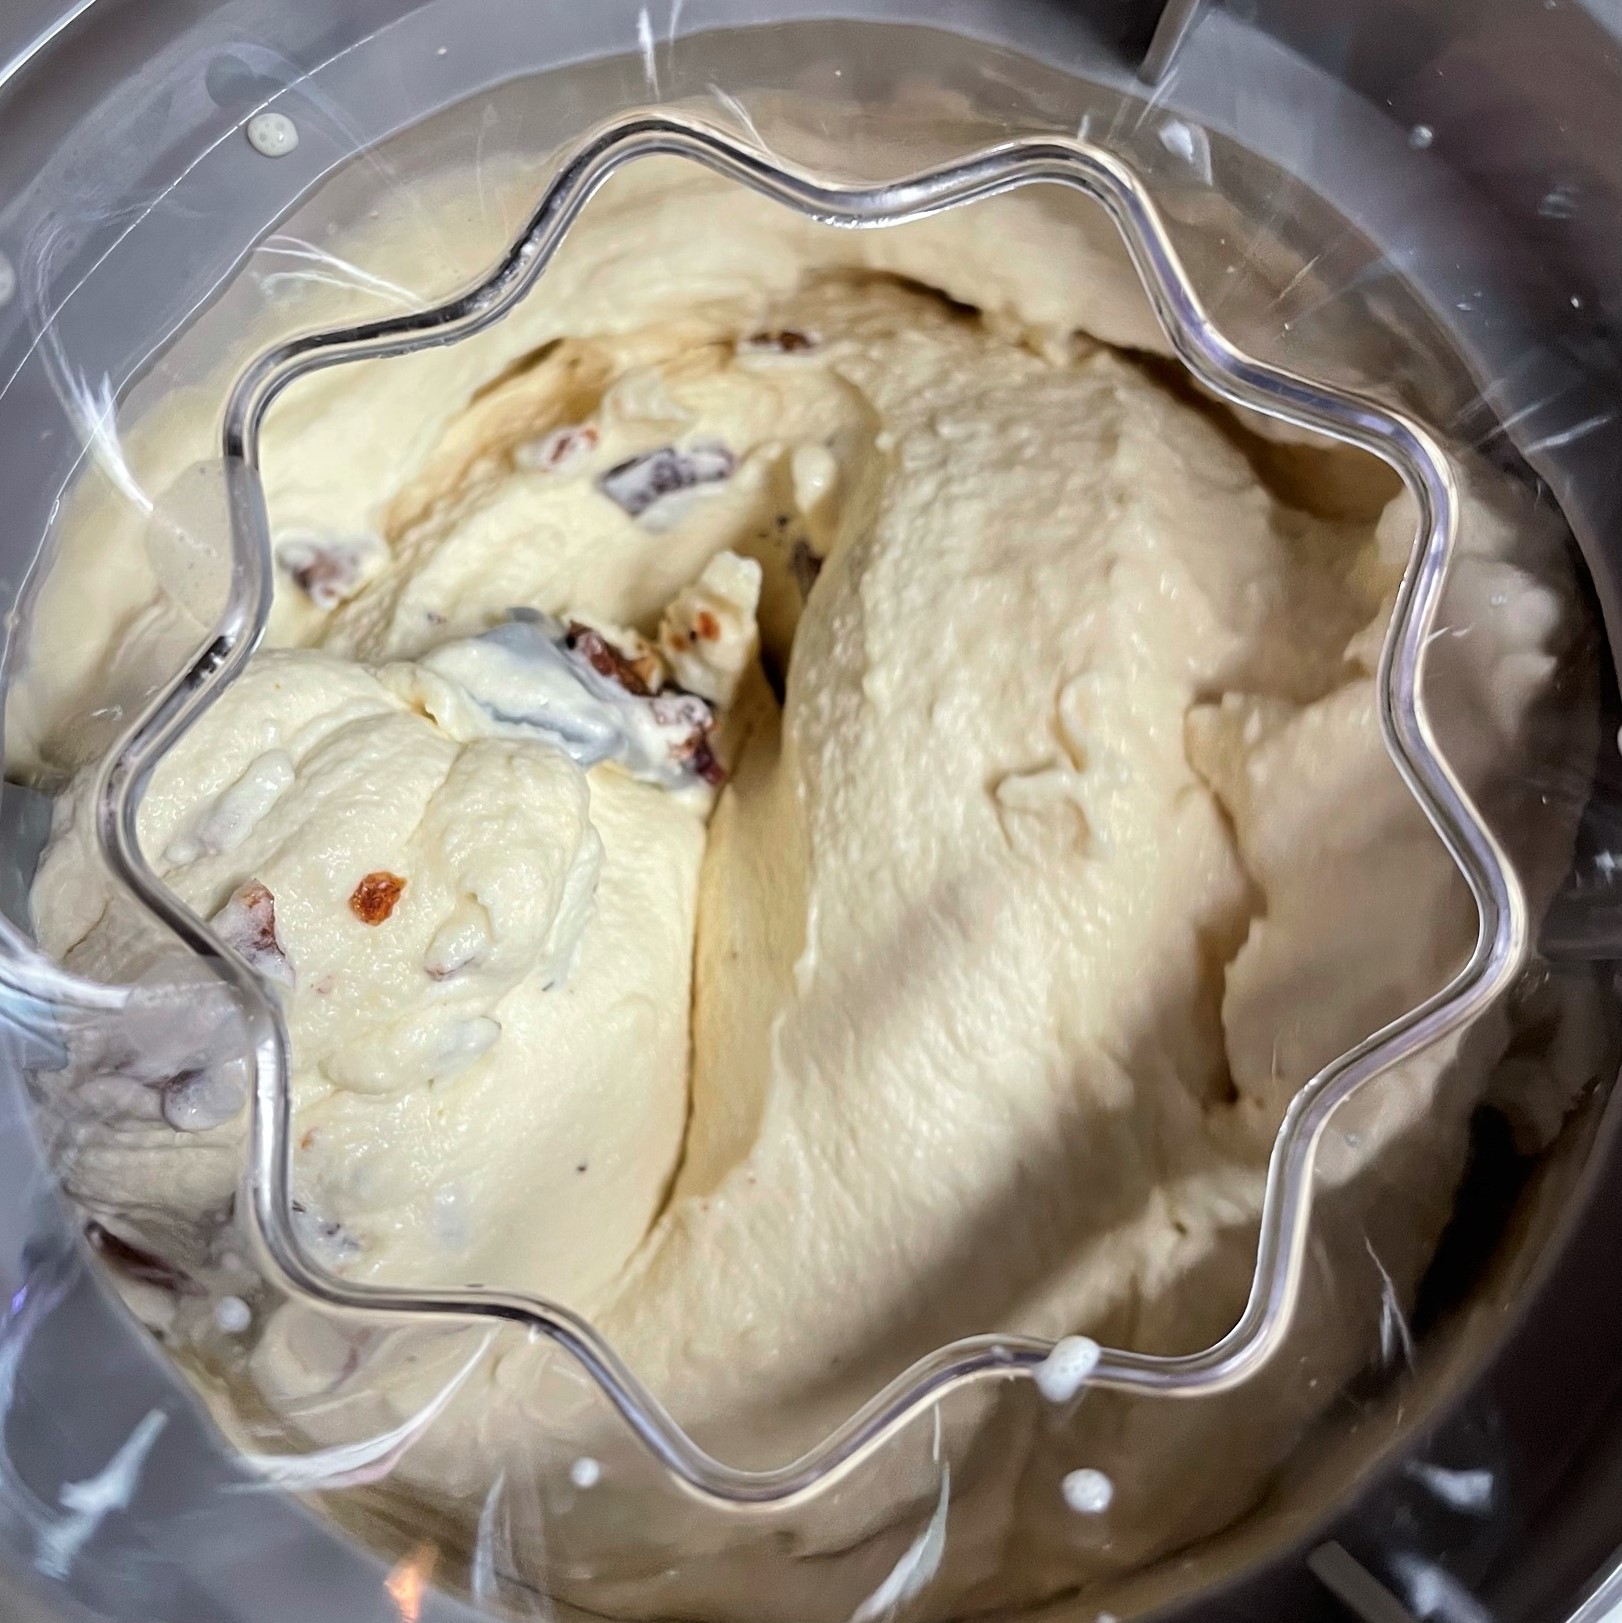
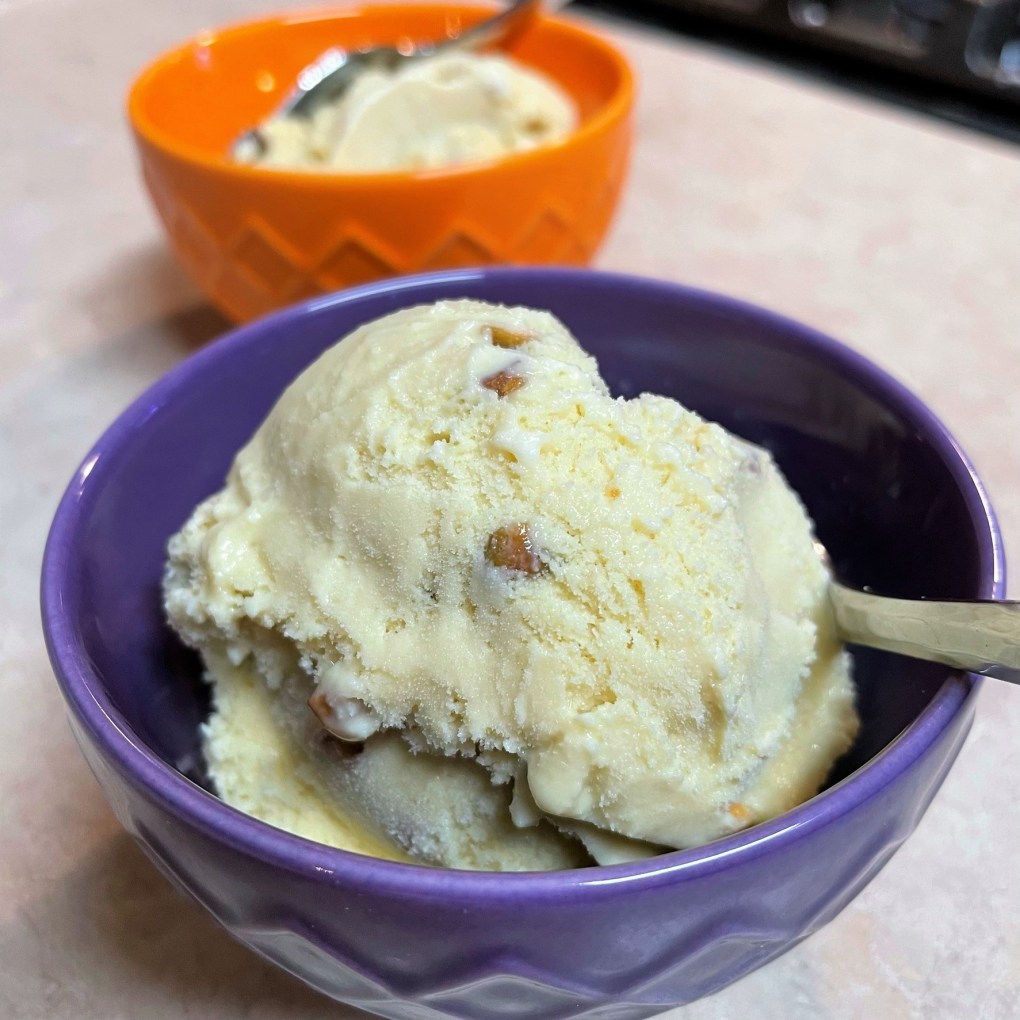
After about 20 minutes, the custard base should resemble soft-serve ice cream. Add the bacon during the final few minutes.
I know you want some.
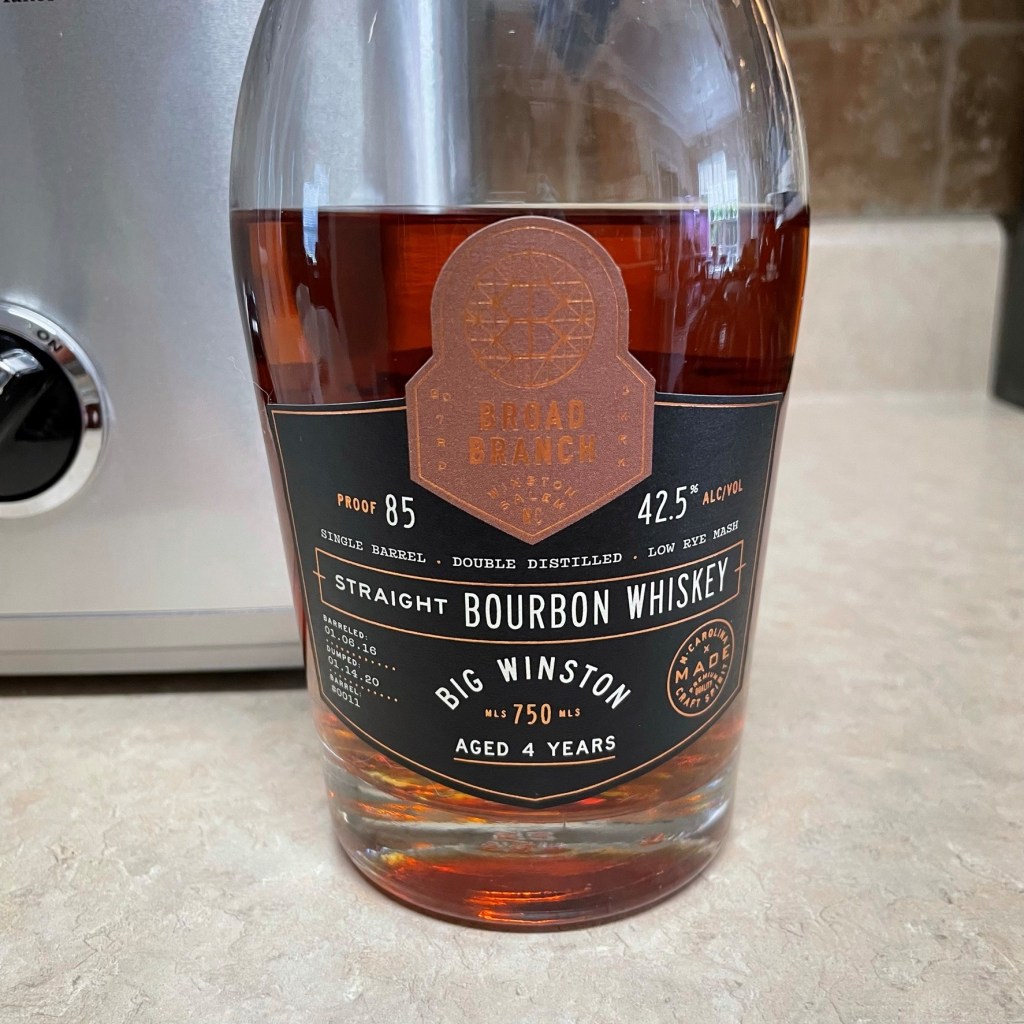
A splash of alcohol at the last moment of churning ensures easy scooping straight from the fridge. To complement the maple and bacon, I used a locally produced bourbon this time. We love it!
Transfer the ice cream to an insulated container and ripen in the freezer at least four hours, or preferably overnight before serving.
Before freezing, remove plastic film and stir mixture to reincorporate any ingredients that may have settled to the bottom. Freeze in ice cream maker according to manufacturer’s instructions.
In the last few minutes of churning, add bacon crumbles to the ice cream.
Mix in a tablespoon of bourbon in the final minute. The alcohol will just barely flavor the ice cream, but the real benefit will be improved texture for scooping directly from the freezer.
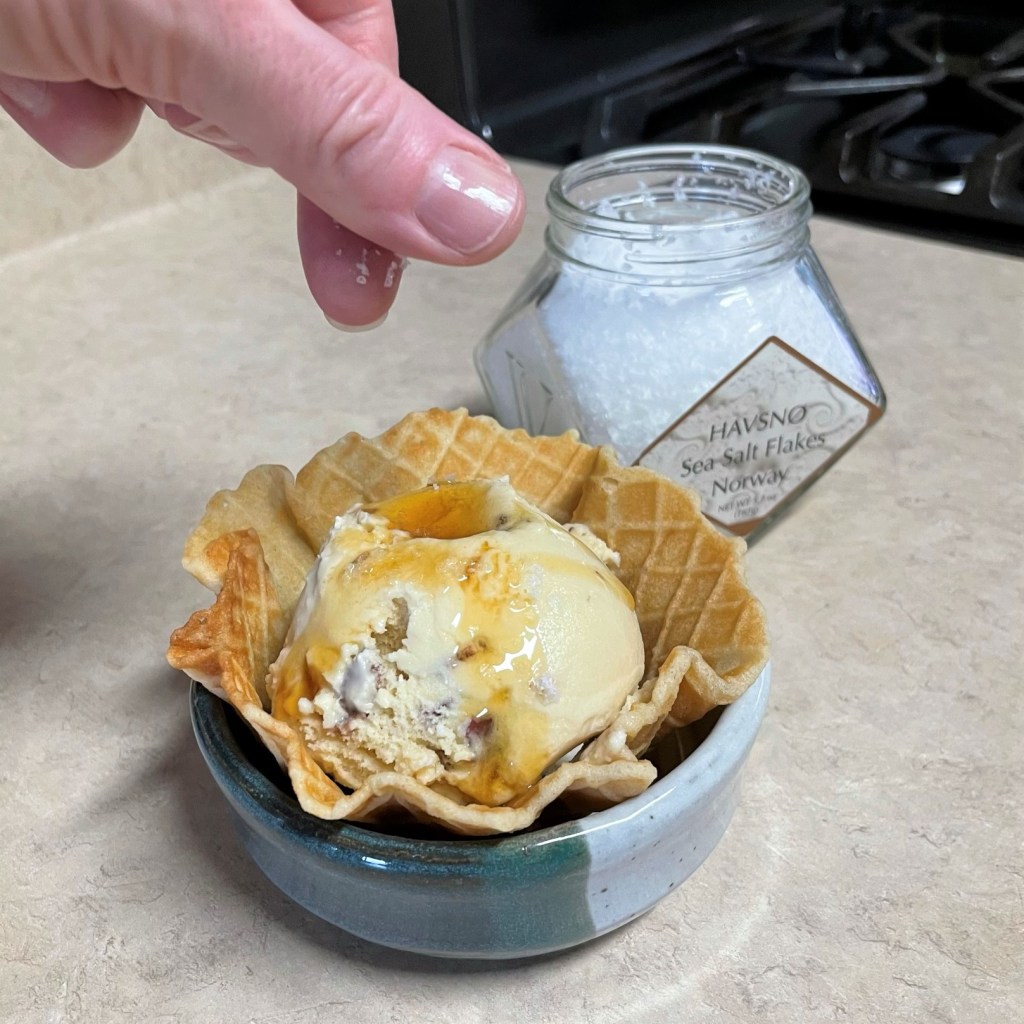
I can’t help myself. I drizzled another bit of maple syrup over the ice cream to serve.And a sprinkle of flaky sea salt, for flavor and crunch.This is the stuff my ice cream dreams are made of!
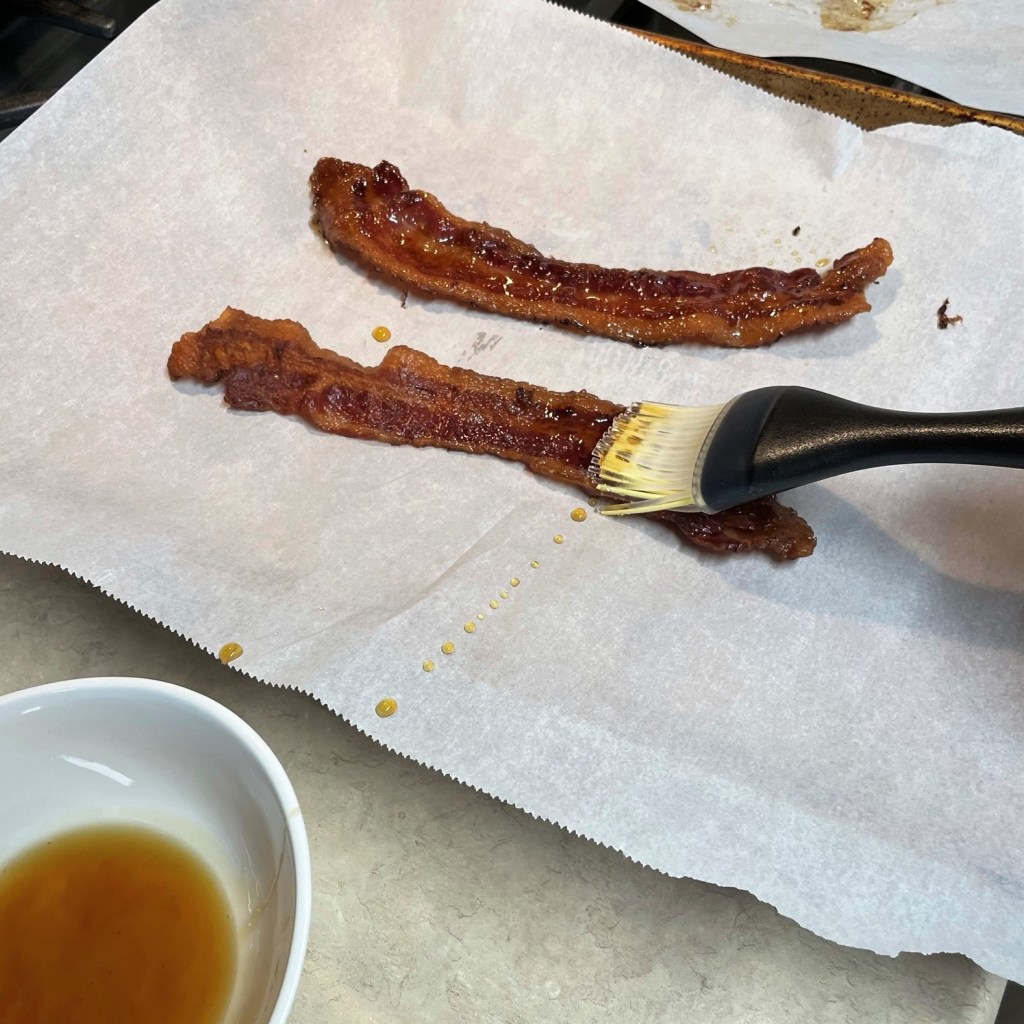
Bonus recipe – Candied Maple Bacon
2 to 3 thin strips uncured maple bacon
2 Tbsp. maple syrup
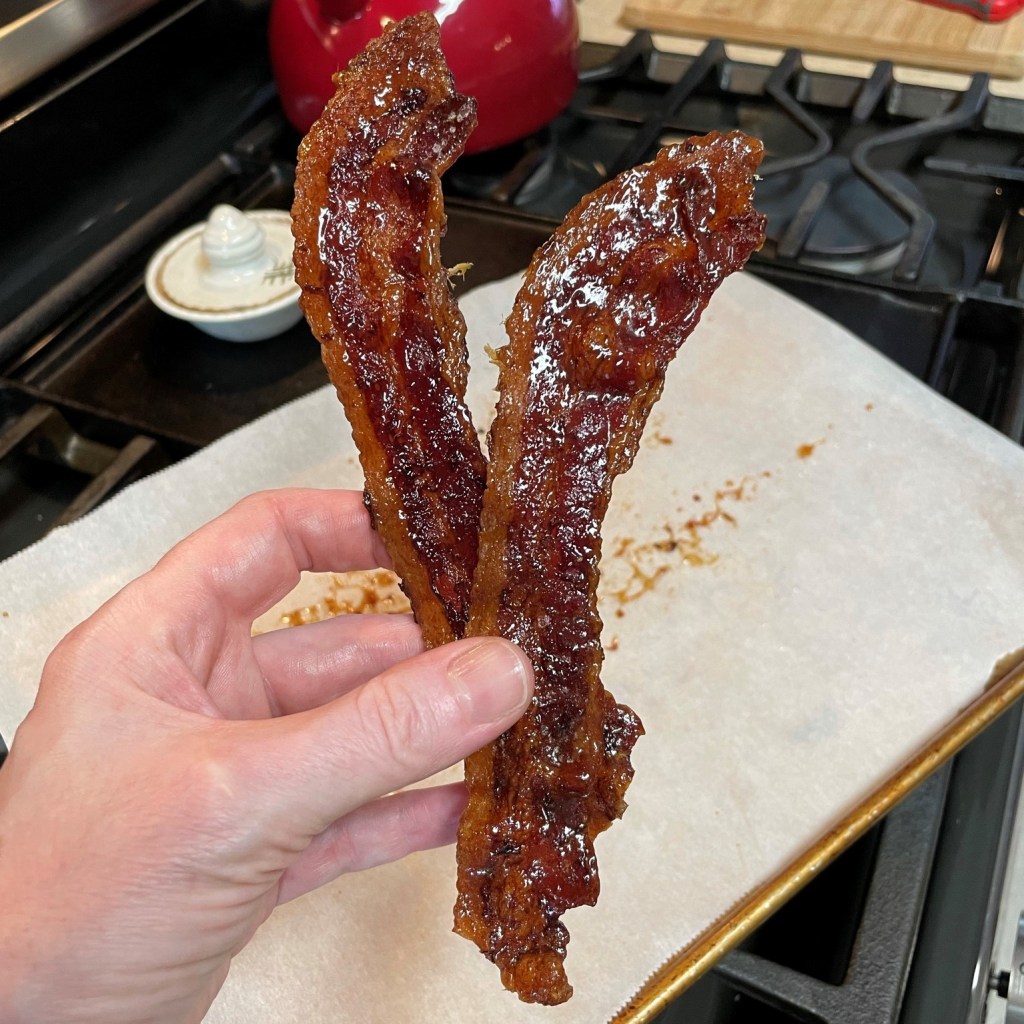
Cook bacon in the 350°F oven on a parchment-lined baking sheet. When bacon is crisp, transfer to a paper towel and replace parchment paper. Lightly brush maple syrup onto each side of the bacon slices, and return it to the oven for a few minutes. Repeat two or three more times, until syrup is hardened and bacon looks like candy. Cool completely and wrap loosely in foil or parchment. Garnish ice cream portions with a piece of the bacon.
I cooked the bacon in the oven, then brushed on about three layers of maple syrup, baking a couple of minutes in between coats.The result was perfectly candied maple bacon!
You may be wondering if I’m a paid endorser for the brands and products I spotlight on Comfort du Jour, and the answer is “no.” I do not receive money or merchandise for my recommendations, and what that means for you is that you can count on me to give an honest opinion. If something changes, I will update my disclosures. Either way, you can still count on me to be honest in my recommendations, as I will only stand behind services and products I believe in. Fair enough? 😀
When our new kitchen is installed this fall, organization will be priority one. My husband, Les, and I are not doing all this planning and spending only to fall into the same jumbled mess of stuff we started with. To that point, every gadget we own is going to be catching a little side eye, as we make some hard, overdue decisions about what deserves to stay in our beautiful new prime real estate and what must go.
One small electric that has already passed muster in my mind is my Cuisinart ice cream maker. This device gets plenty of action at our house, and I have no complaints about it whatsoever. It’s easy to use, requires no hand-cranking effort or rock salt, and it quickly churns out up to two quarts of ice cream at a time. I purchased it several years ago (when I lived in a different kitchen) and it was one of the first things I laid claim to when I struck out on my own. I have made some delicious, memorable ice creams with this machine, and it technically does not fall into the single-purpose category because I can also use it to make sorbets and fruity wine slushies. How could I not love that, especially during summer?
Check out these fun ice cream flavors I churned out in summer of 2020:
July is one of my favorite months, not only because I will celebrate my birthday in the late part of the month, but also because it happens to be National Ice Cream Month! For your summer refreshment pleasure, I’ll be sharing several delicious ice cream recipes in the coming weeks. If you enjoy ice cream (especially if you like unexpected flavor combinations), I urge you to make a small, one-time investment in an ice cream machine. Sure, there are about a million “no-churn” recipes for ice cream on Pinterest and other internet sites, but if you look closely at some of those recipes, they often depend on numerous extra steps to produce the texture you expect in an ice cream, including setting a timer to pull it out of the freezer every couple of hours to stir it up. I’d rather just use an ice cream maker and be done with it.
The first ice cream for 2021 is pistachio, and though this was my first time making this particular flavor, it was simple because it begins with my “basic” formula for custard-based ice cream, which is as follows:
1 1/2 cups each of heavy cream and whole milk
3/4 cup organic cane sugar
3 free-range egg yolks
The cream and milk are heated together with half of the sugar, and the egg yolks are whipped with the rest of it. When the cream mixture is hot enough, I whisk it into the whipped yolks to temper them, then it all goes back into the pot to cook until custardy. From that point, you can flavor it up as you like, chill it and then churn it in the ice cream machine. Homemade ice cream has a somewhat shorter shelf life than store-bought because it doesn’t have any weird, chemistry-lab ingredients. But here’s the fun flip side—you don’t need homemade ice cream to have a long shelf life because it’s usually gobbled up within a few days anyway!
To infuse this ice cream with the unique flavor of pistachio, I toasted the pistachios briefly, pulsed them in the food processor, and then infused their flavor into the cream mixture. I double-strained the mixture to remove the gritty bits of pistachio before tempering the eggs, but next time I will use cheesecloth to simplify that step. At the end of the freeze-churn stage, I added roasted pieces of pistachio for extra flavor and texture. A little touch of amaretto churned in during the final minute gave the ice cream a perfectly scoopable consistency for serving, straight from the freezer.
Ingredients
1 1/2 cups whole milk
1 1/2 cups heavy cream
3/4 cup organic cane sugar, divided
3 egg yolks
1 cup raw, unsalted pistachio meats, divided
1/2 tsp. real vanilla extract
1/2 tsp. pure almond extract
1 Tbsp. amaretto liqueur (optional at the end of churning, for improved texture)
Instructions
Half of the sugar is dissolved in the milk-cream mixture.
The remaining sugar is whipped into the egg yolks until the mixture is light, fluffy and lemon colored.
Roast the pistachio nuts until fragrant and lightly toasted.
Process half of the toasted nuts to infuse flavor into the cream mixture.
Add the pulverized pistachios to the cream mixture and steep several minutes.
The pistachio nuts give a pale green color to the cream mixture.
Strain the cream mixture to remove the nut solids.
I strained a second time to filter out the teeny bits of nut.
These tiny nut particles would not give a pleasant texture to the ice cream.
Slowly stream the hot cream mixture into the beaten egg yolk mixture to temper the eggs.
Return the tempered egg mixture to the clean pan and cook until the custard coats the back of your spoon.
Transfer the cooked custard to a bowl for chilling overnight.
Stir in real vanilla extract after the custard has been removed from the heat.
A little almond extract highlights the pistachio flavor.
After chilling overnight, the custard mixture is really showing the pistachio color!
Pour the chilled custard into the ice cream maker and freeze according to manufacturer’s instructions.
Chop the remaining pistachios into bits, and sift them through a mesh strainer to separate the rough crumbs.
My ice cream maker gets the job done in about 20 minutes.
Add the nuts during the last few minutes of churning.
When the ice cream reaches this smooth consistency, it is finished.
A tablespoon of alcohol at the very end is optional. It helps the ice cream keep a scoopable consistency from the freezer. I used amaretto, which is almond liqueur. Delicious!
This ice cream is ready for the freezer! Let it “ripen” overnight for best results.
Here’s another device that gets to stay in my kitchen. This Pampered Chef tool scrapes the ice cream freezer bowl clean without scratching! I love this thing.
See? No scratches.
Preheat oven to 350°F. Toast the pistachio meats on a parchment-lined baking sheet for about 7 minutes, or until fragrant and toasty. Remove from oven and cool. Divide pistachios evenly, transferring half of them to a food processor bowl. Pulse a few times until the nuts are reduced to small bits, but not to the point of powder. Use a sharp knife to gently chop the remaining pistachios. Set them aside for mixing into the ice cream during freezing.
Combine milk and cream in a medium saucepan over medium heat. Add half the amount of sugar and whisk gently until sugar is dissolved. Add the pulverized pistachios to the milk mixture and simmer until the mixture is hot but not quite boiling. Remove from heat and let this stand for about 10 minutes. This will steep the pistachio flavor into the cream mixture.
When steeping is finished (you will know because the cream mixture will have taken on a slightly chartreuse green color), pour the mixture through a mesh strainer lined with cheesecloth to remove the nut solids. Clean out the saucepan and dry it. Return the strained cream mixture to the pan and heat over medium until it returns to the not-quite-boiling stage.
While the cream mixture is heating, use a hand or stand mixer to whip the egg yolks until silky. Add the sugar, a little bit at a time, mixing well and stopping a couple of times to scrape down the sides of the bowl. Whip until the mixture is soft, light and lemon-colored.
Measure out about 2 cups of the milk-cream mixture. Slowly pour it into the egg mixture, whisking or beating with electric mixer the entire time. This step will temper the eggs, gradually cooking them without scrambling or breaking them.
Pour the egg mixture back into the remaining milk-cream mixture and cook over medium heat, stirring constantly, until the custard begins to slightly thicken and coats the back of your spoon.
Remove from heat immediately. Stir in vanilla and almond extracts. Lay a film of plastic wrap directly onto the surface of the custard to prevent condensation from forming. Cover the entire bowl with a lid or additional plastic wrap. Refrigerate several hours or overnight until fully chilled.
When you’re ready to freeze the ice cream, give the cream mixture a good stirring to minimize any settling that has occurred in the fridge. Freeze according to manufacturer’s instructions. My Cuisinart takes about 20 minutes. Sift the reserved pistachio nuts in a mesh strainer to remove any powdery crumbs from chopping them. Add them to the ice cream machine only for the last few minutes. Add amaretto (optional, but recommended) for the final minute of mixing. You will not taste the alcohol, but its addition ensures easy scooping of the ice cream straight from the freezer. If you avoid alcohol, or if you will be serving children, skip it and simply remove the ice cream from the freezer about 15 minutes ahead of serving.