Apple Pie Old Fashioned

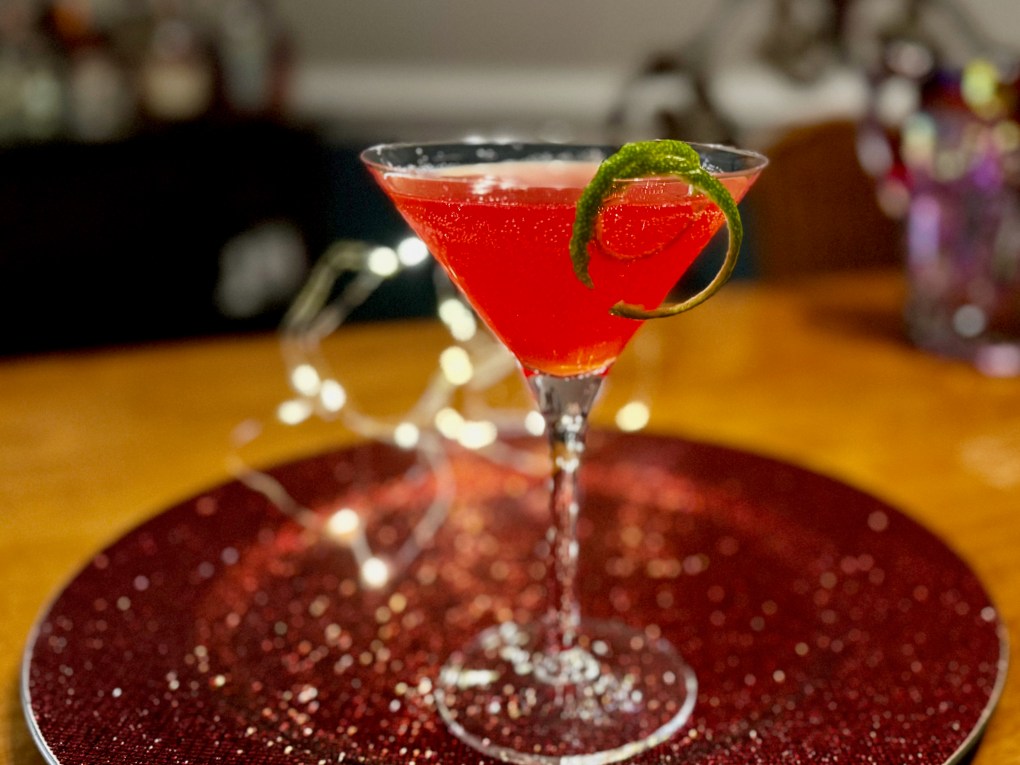
When all the chaos of shopping, prepping and cooking for Thanksgiving is done, there’s no happier feeling for me than hearing the doorbell, as guests begin to arrive for time spent together and stories and laughter around a carefully prepared meal. At our house, that ritual includes a cocktail, and this year, mine is a tipsy, on-ice adaptation of America’s favorite pie. Care to join in?


Why have a signature cocktail for holidays?

It might seem snooty to offer a signature cocktail for a holiday gathering, but hear me out on the reason that I started doing this. When guests arrive for dinner, we are almost always heading into the final stretch of prepping, which can be hectic or even intense at our house— depending on whose year it is for the turkey (this year, it’s mine). I love to play mixologist, and our bar is well-stocked to make just about any drink you could imagine, which is kind of the problem. Rather than overwhelm our guests with dozens of choices from our bar, I have found it beneficial to offer a thoughtful signature drink— something that captures the essence of the season with broad appeal for any number of tastes— and our guests seem to agree.

What goes into an apple pie old fashioned?

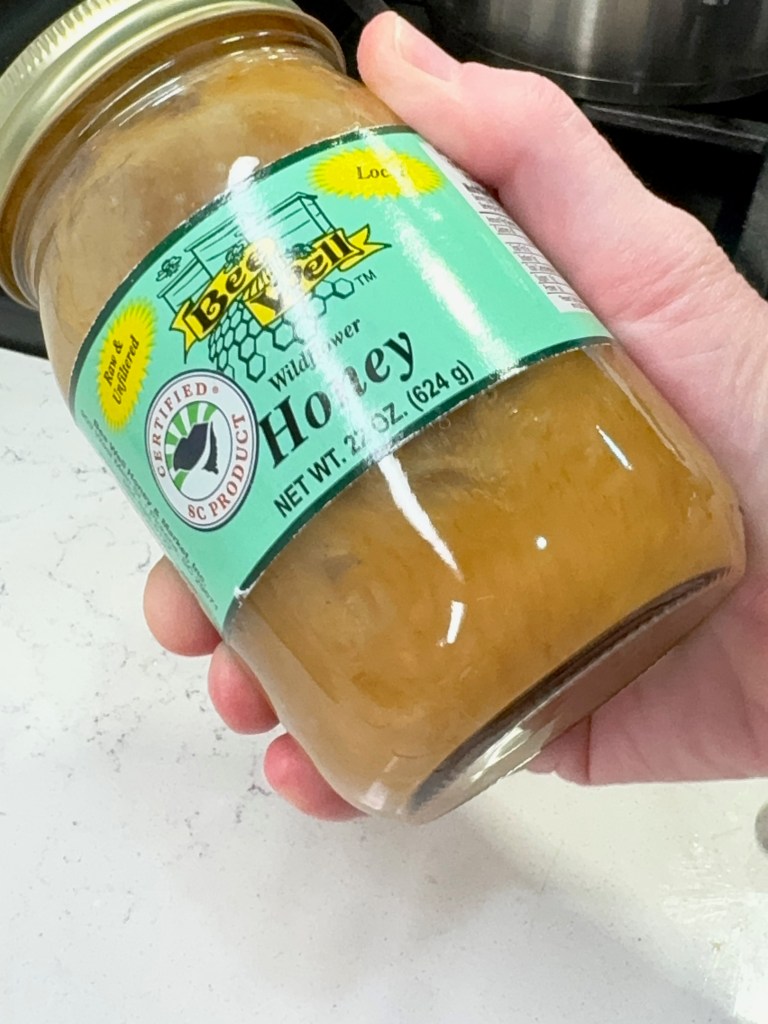
An apple pie old fashioned infuses the sweet and warm flavors of cooked apples with the smoothness of bourbon, and for an extra homey touch, I’ve “fat washed” the bourbon with an embellished browned butter— a nostalgic nod to an all-butter pie crust. The cooked apple flavor in this drink comes from an apple cider syrup, which replaces the sugar cube or simple syrup that would otherwise be muddled into the cocktail.

Does all of this sound complicated or intimidating? It isn’t! But it does take some advance planning so that you have your ingredients ready to wow your guests when they arrive. Watch me break it down.
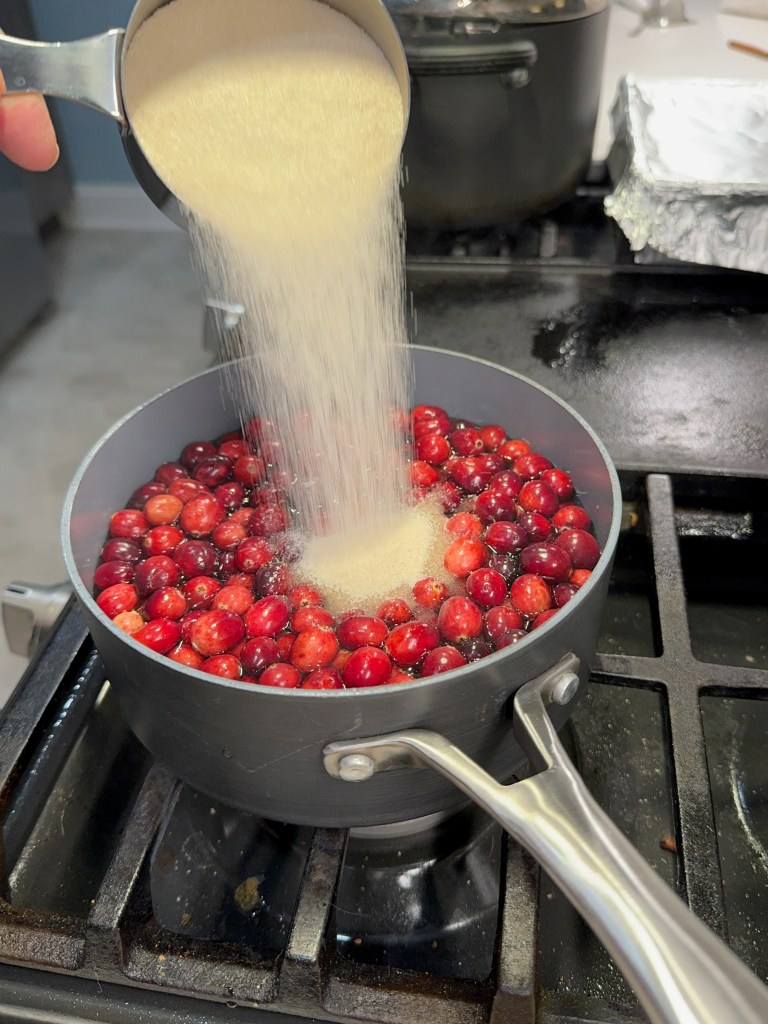
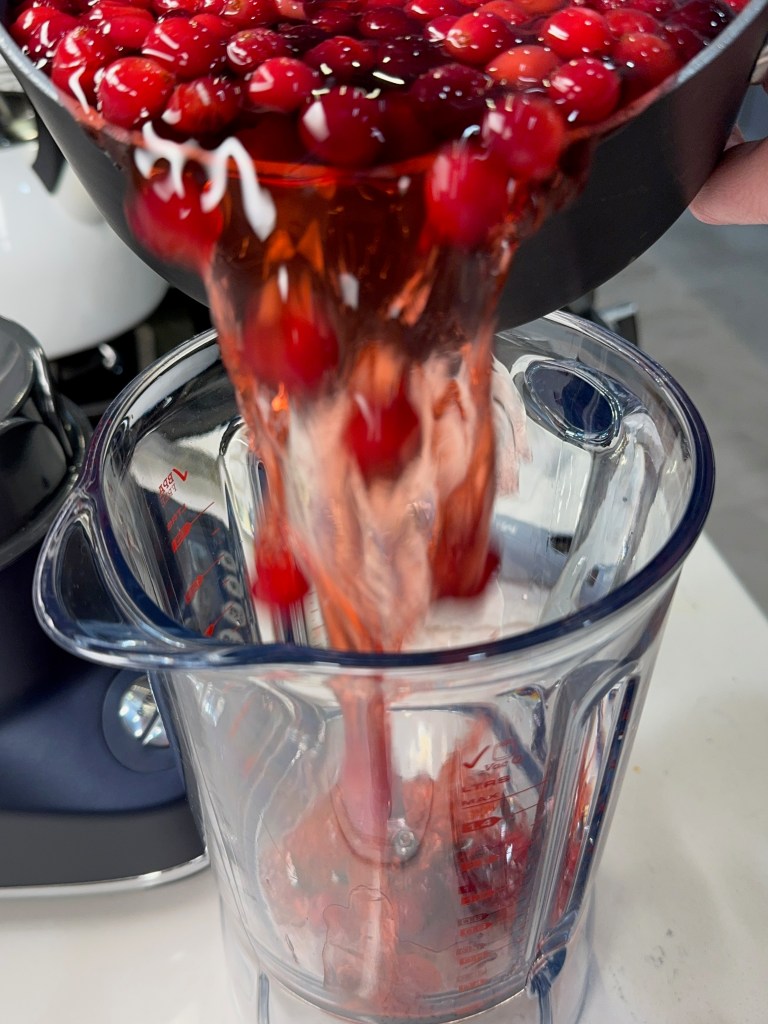
Apple pie syrup

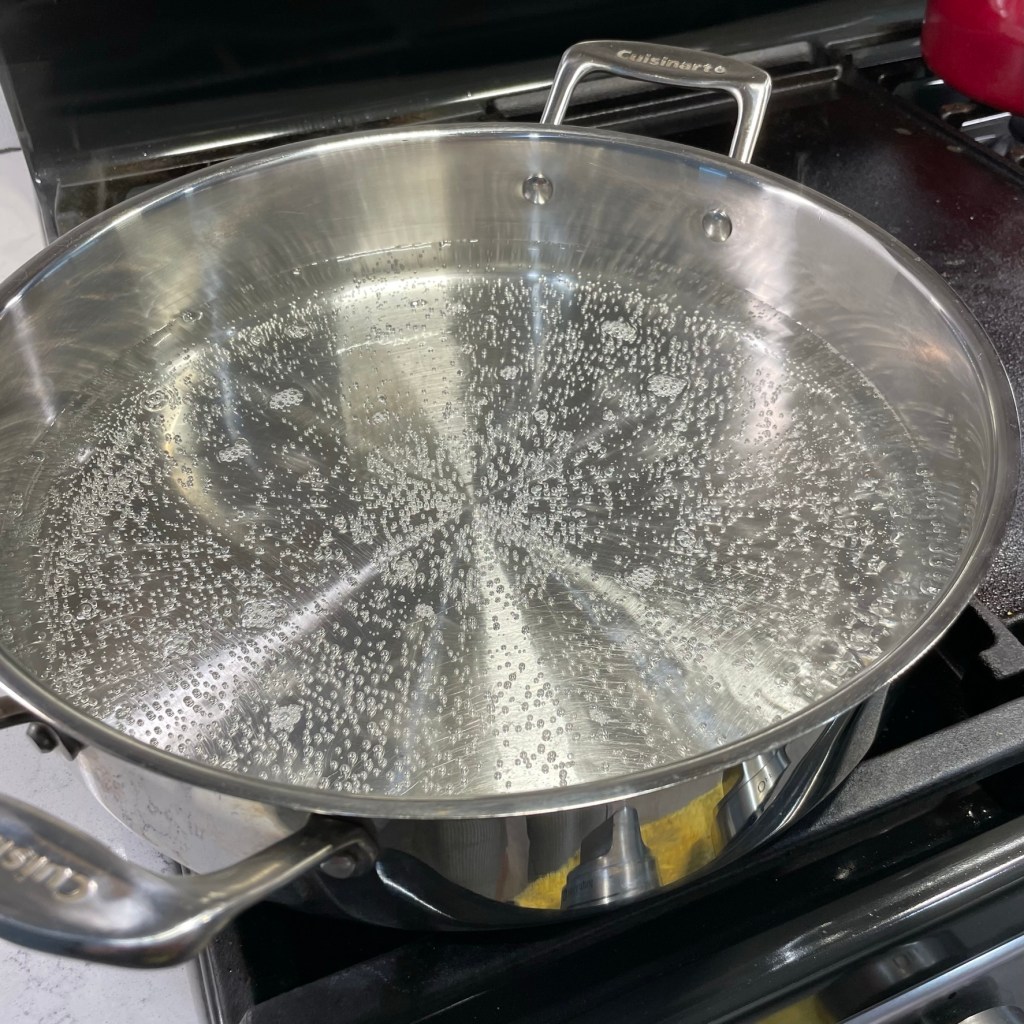
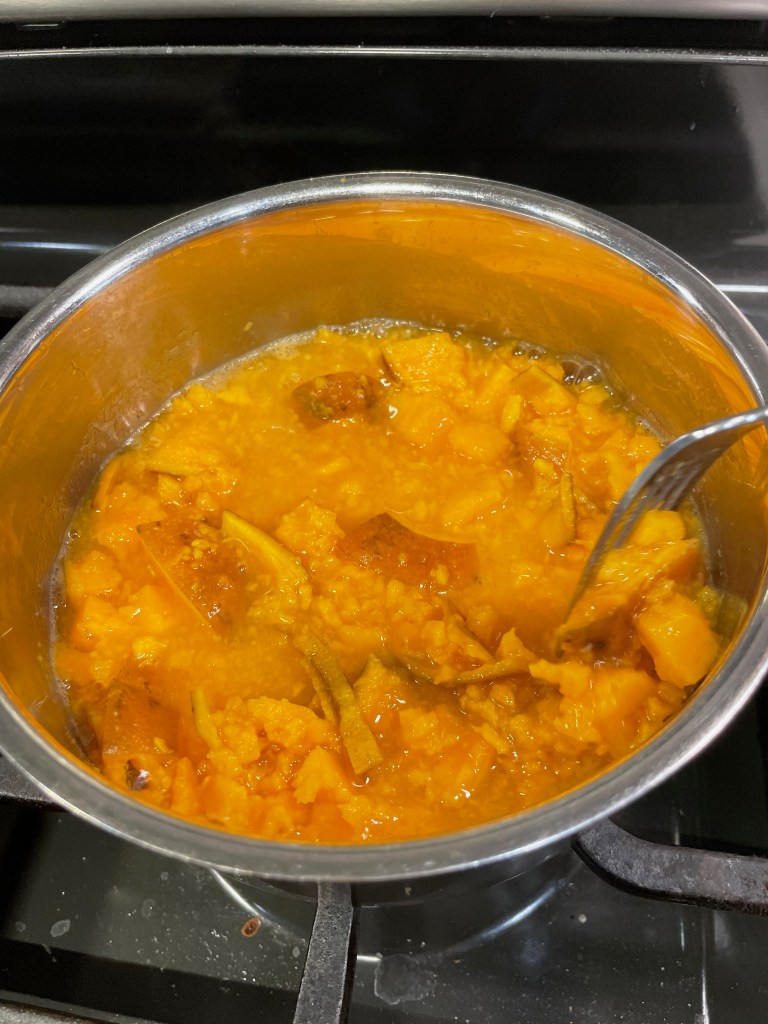
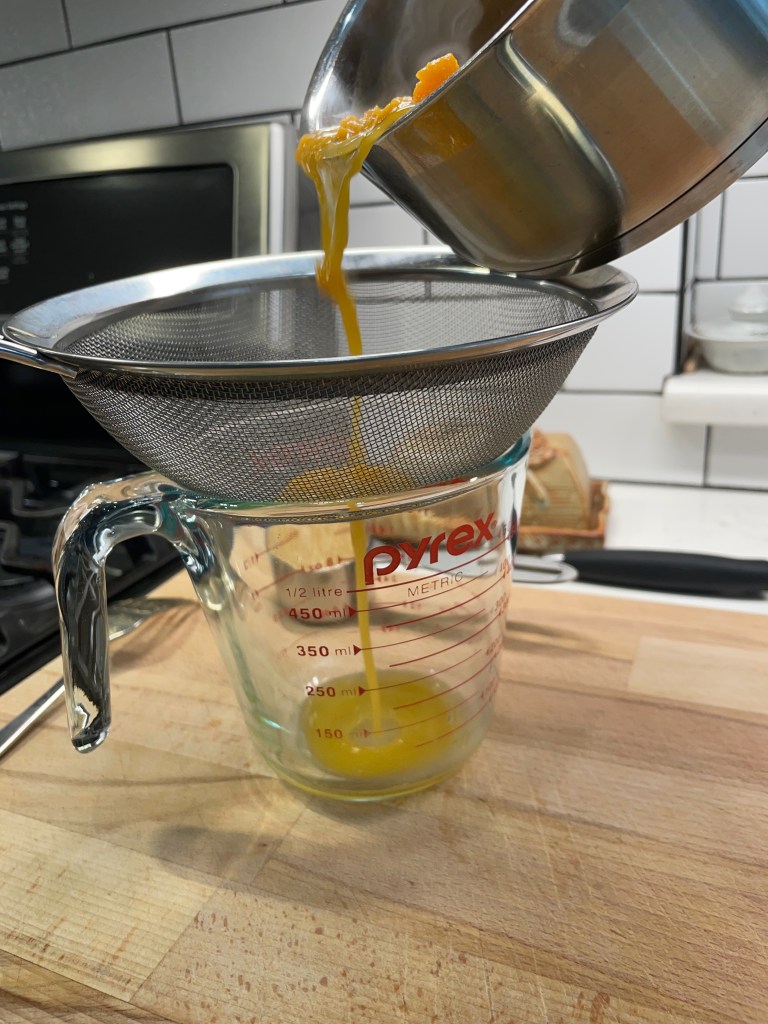
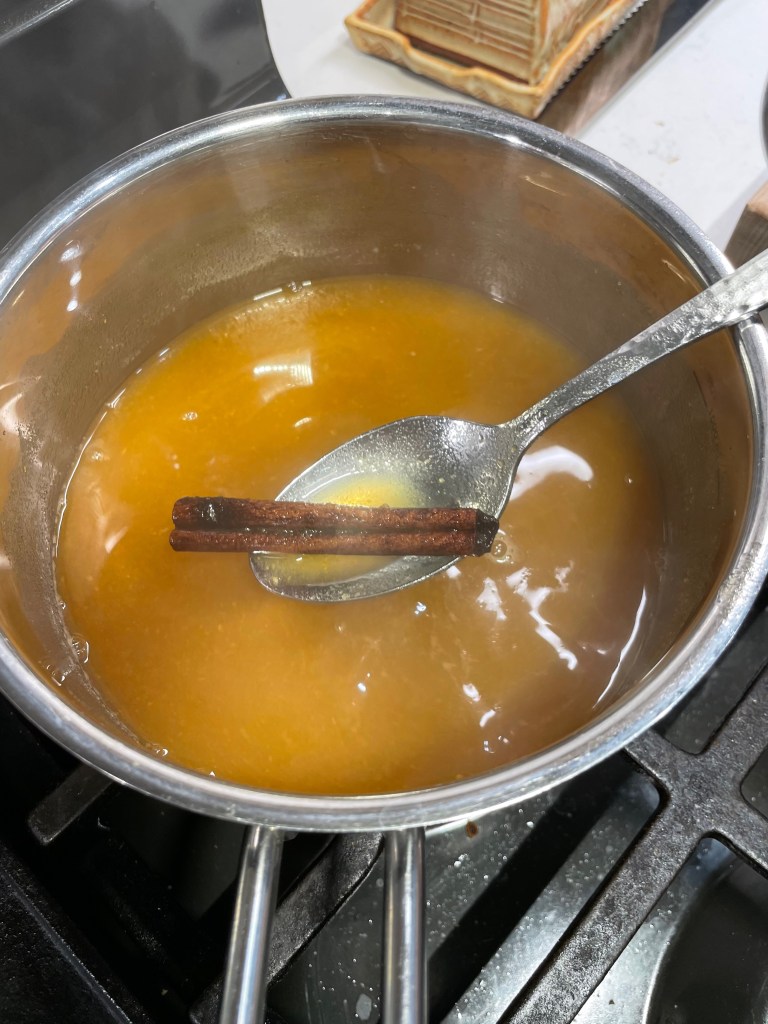
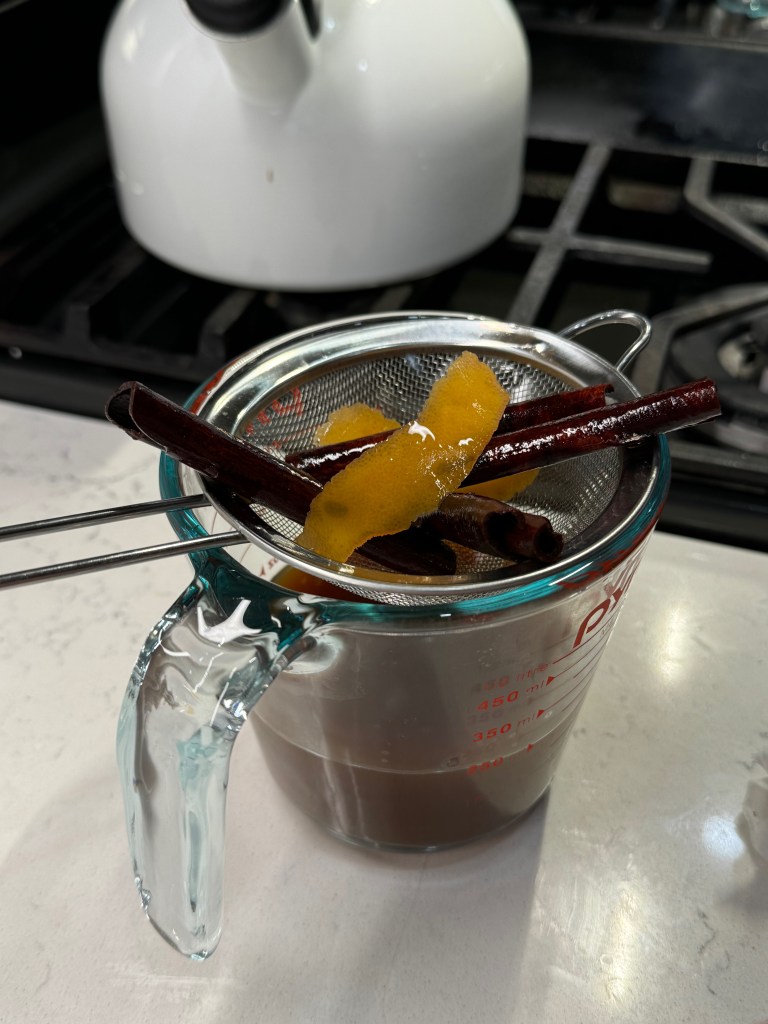
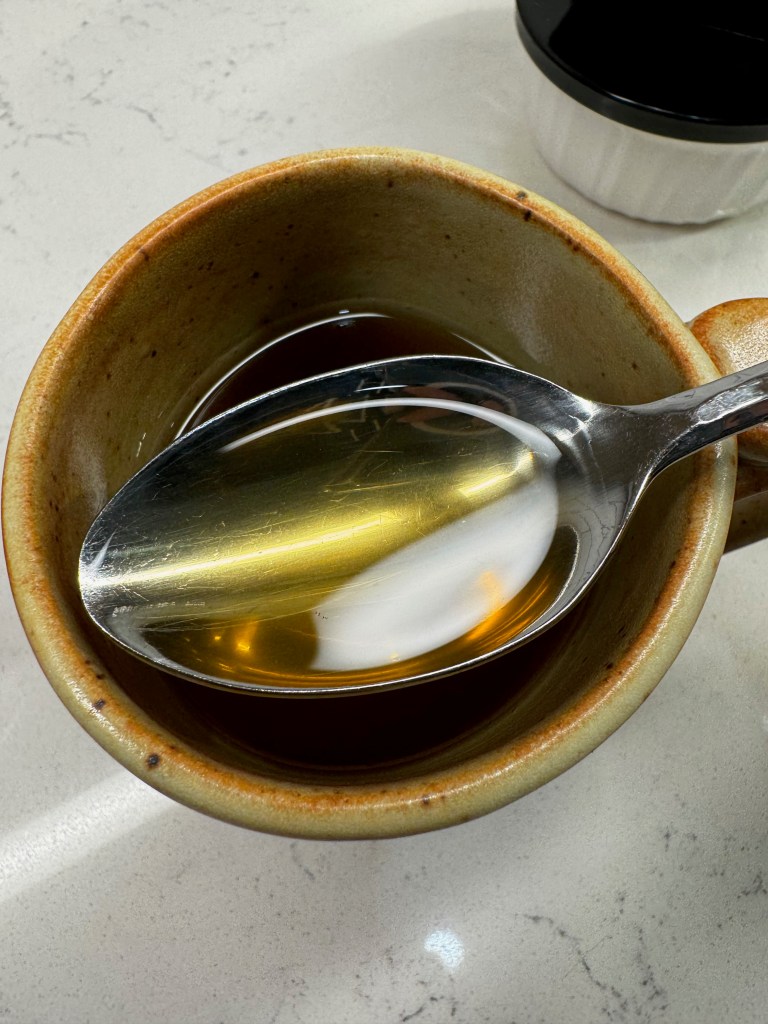
For best results, purchase a fresh apple cider from the produce cold case, rather than a bottled version off the shelf. If you can get one from a local supplier, that’s even better! Heat the cider with a spoonful of brown sugar, the peel of a lemon and a couple of cinnamon sticks. Reducing the cider is necessary so that you get enough apple flavor without adding too much cider and over-diluting the drink. Strain out the solids, and bottle it up! This will keep in the fridge for about three weeks.


The amplified browned butter wash

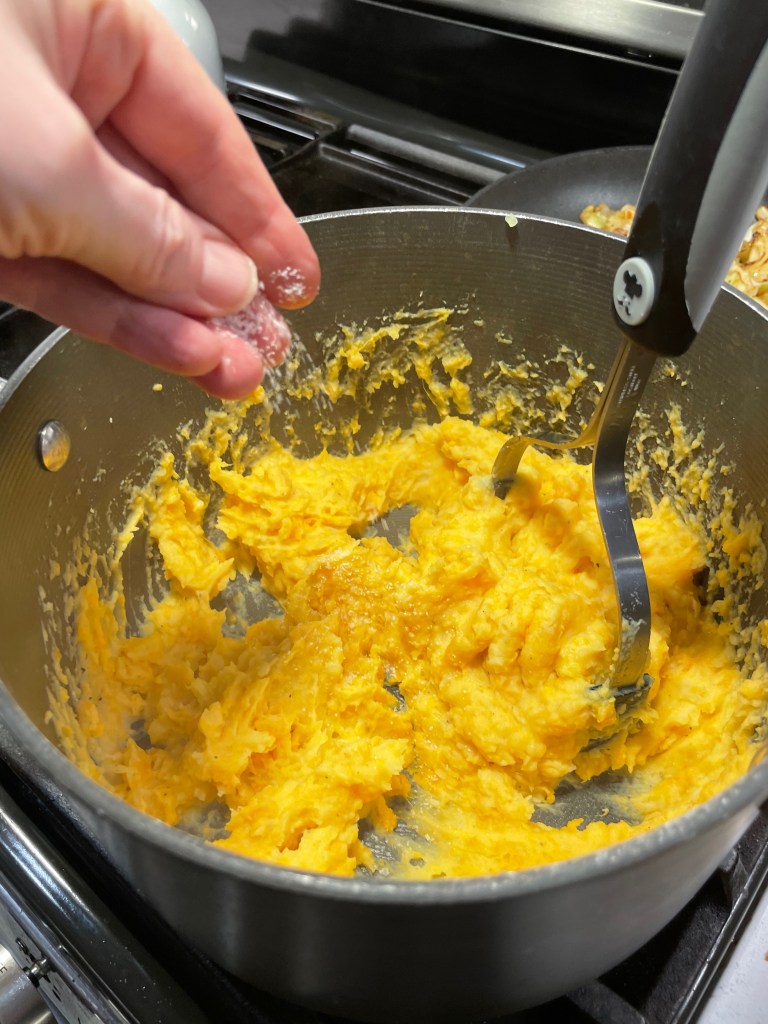
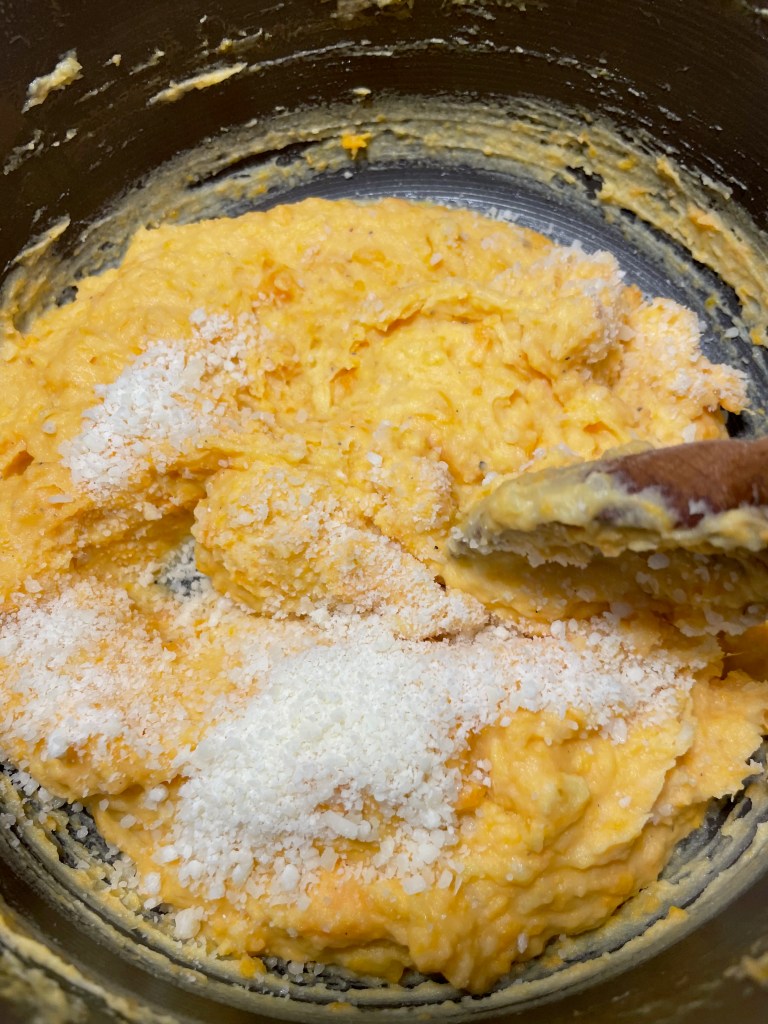
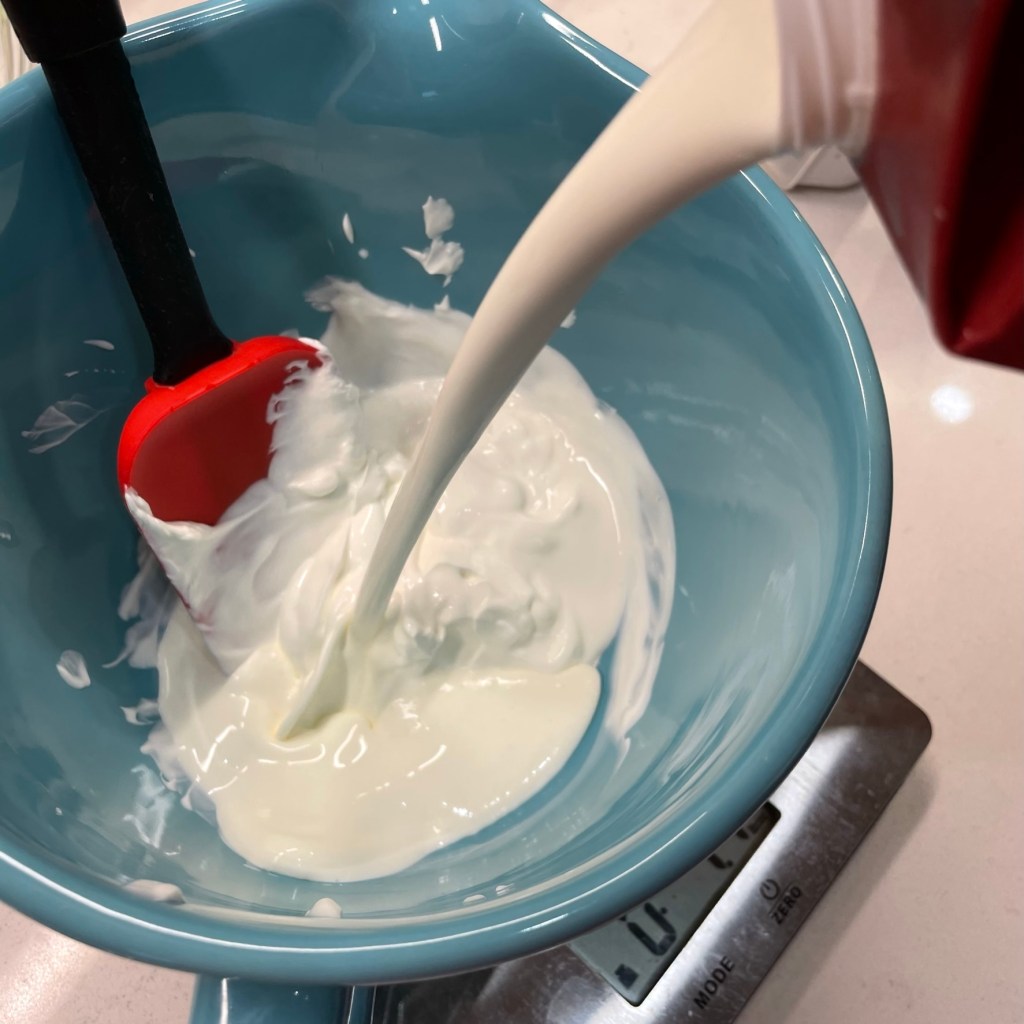
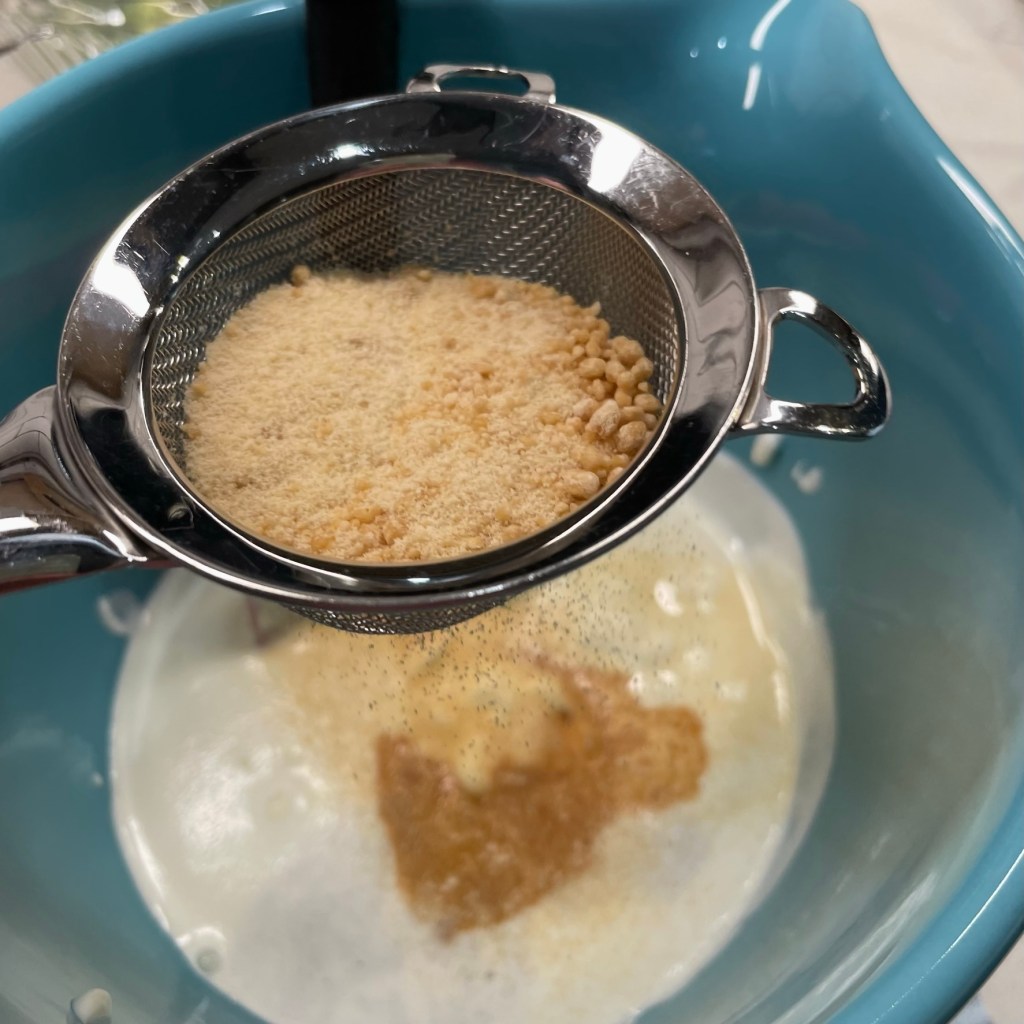
For the browned butter trick, I ventured into the science of food and tried the viral recipe trick for making the most delicious browned butter ever. You might recall mention of this last autumn, when I presented the caramel apple blondies that were also made with browned butter, but with a boost. An addition of dried milk powder enhanced the toasty, nutty flavor of browned butter, and the result was just beyond. I knew when I made the blondies that I’d have to try this trick again for a fat-washed bourbon, and here we are!


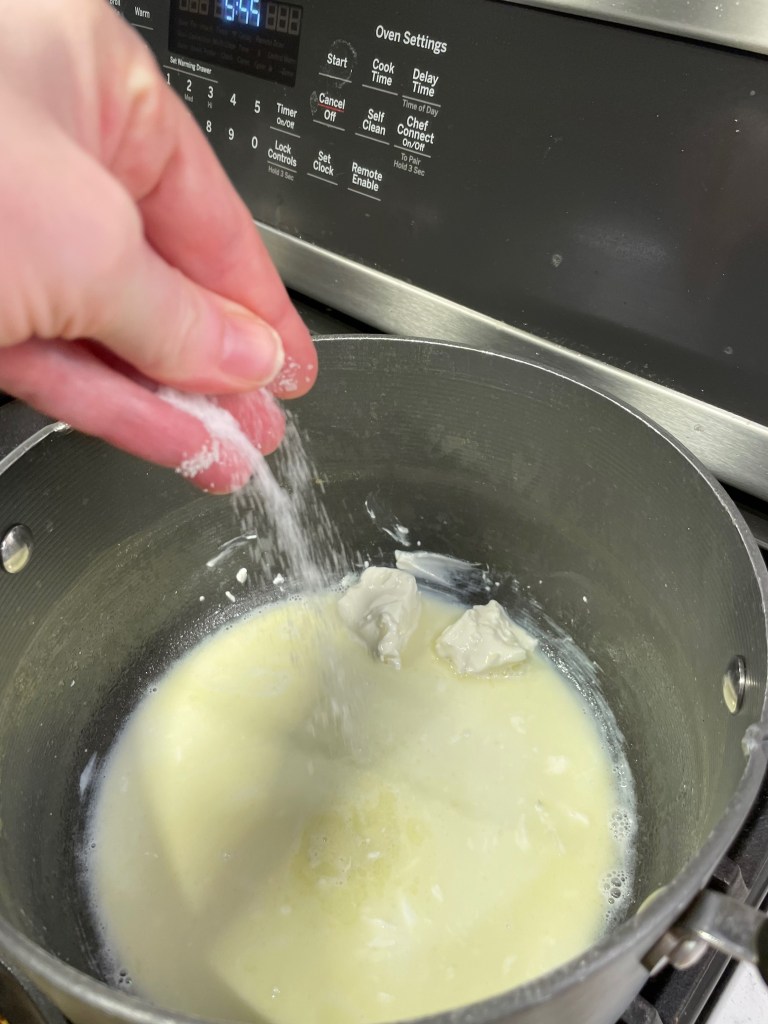
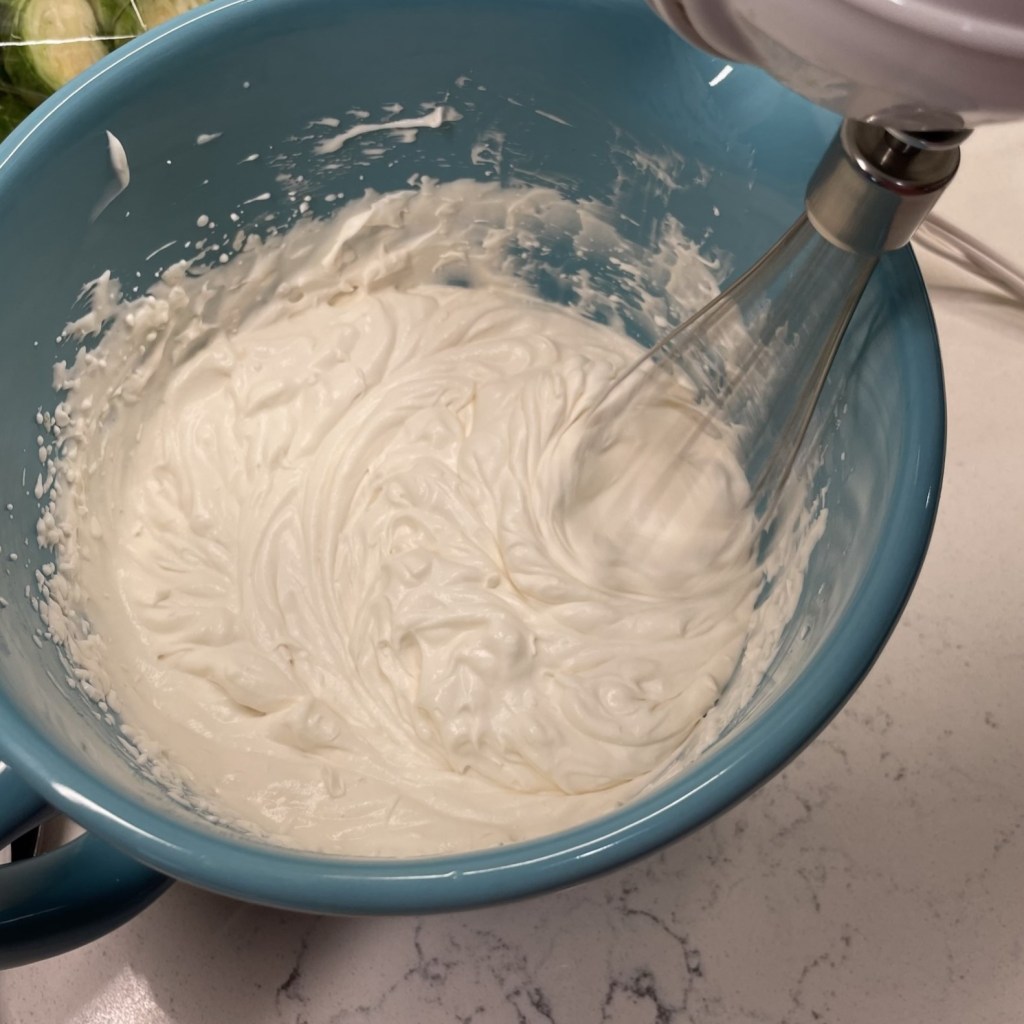
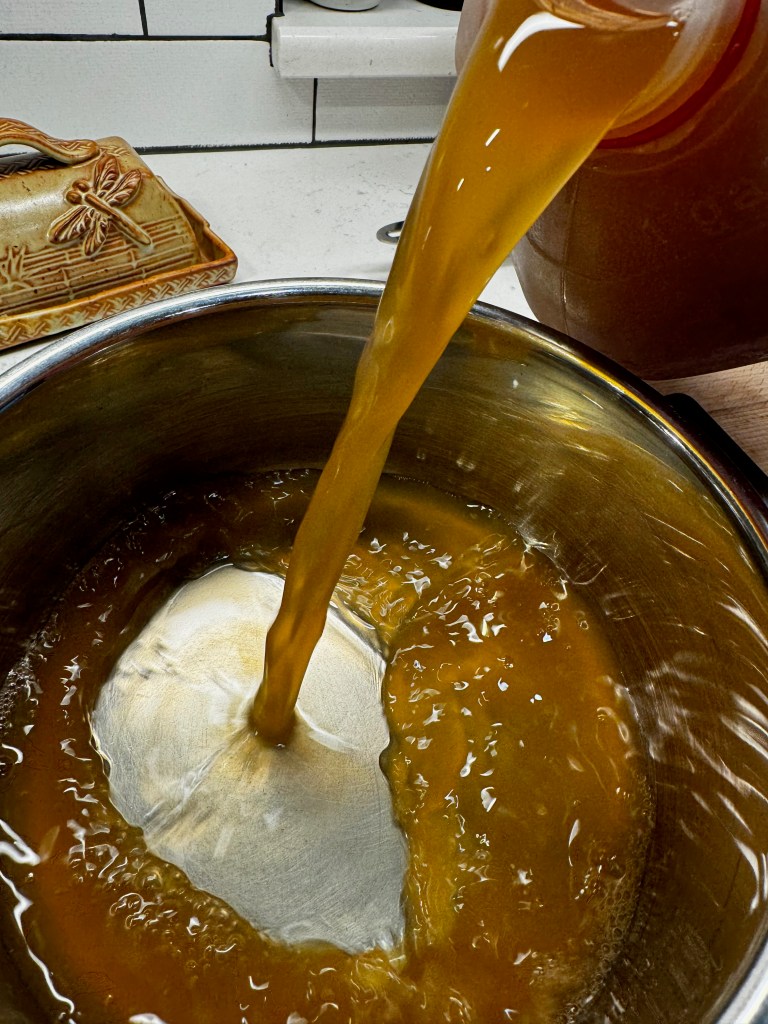
I waffled a bit on whether to use salted or unsalted butter for the cocktail, and when I tasted the outcome of my efforts using unsalted butter, I knew instantly that it was the wrong choice. Salt does the same thing for a cocktail as it does for a dish, so I remedied this with a pinch of salt in the finished butter— no harm, no foul. Pour the bourbon into the jar with the cooled browned butter and give the jar a few gentle shakes. Let the mixture settle and separate, and then refrigerate overnight or up to two days.


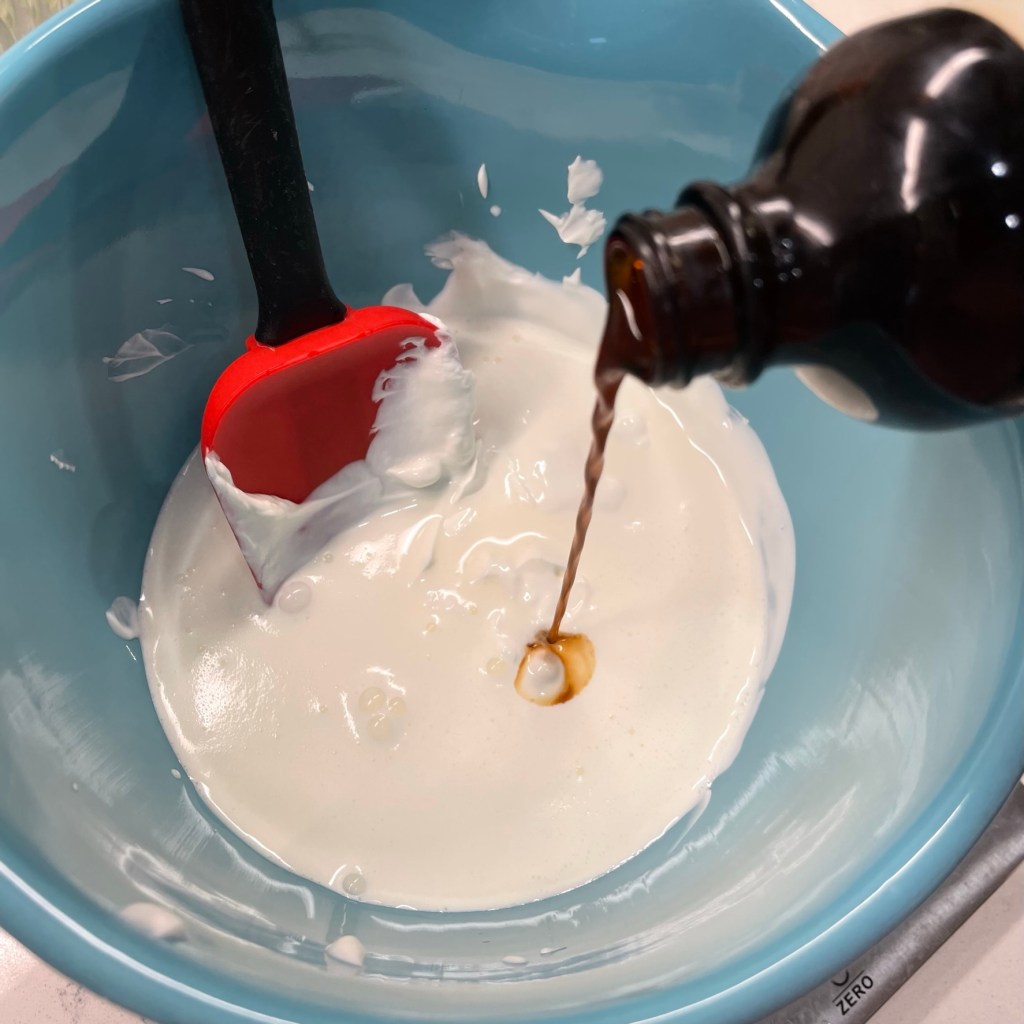
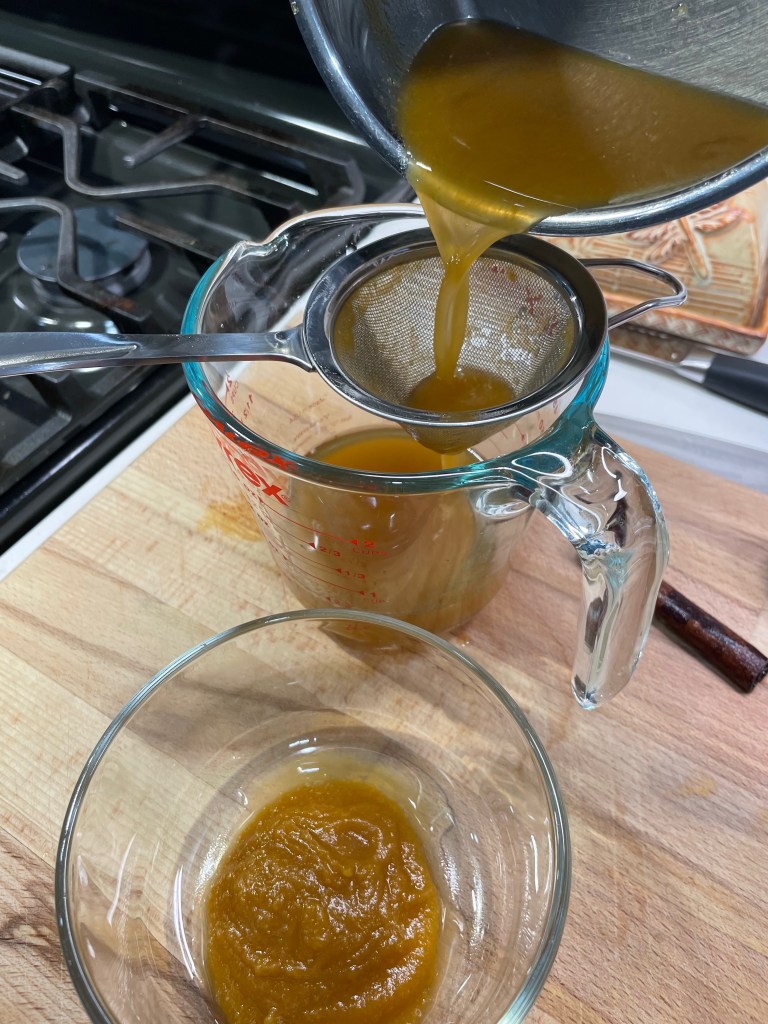
The extra milk fat from the powdered milk, plus that hint of salt, produced a deeply addictive flavor, which I infused into my bourbon overnight and then strained out through a coffee filter the next day. By the way, do not discard that butter! As the browned butter flavors the bourbon, so the bourbon flavors the butter solids. Repurpose the butter in your sweet potato casserole or green beans amandine or anything else that would enjoy a little kick of bourbon.


It’s cocktail time!

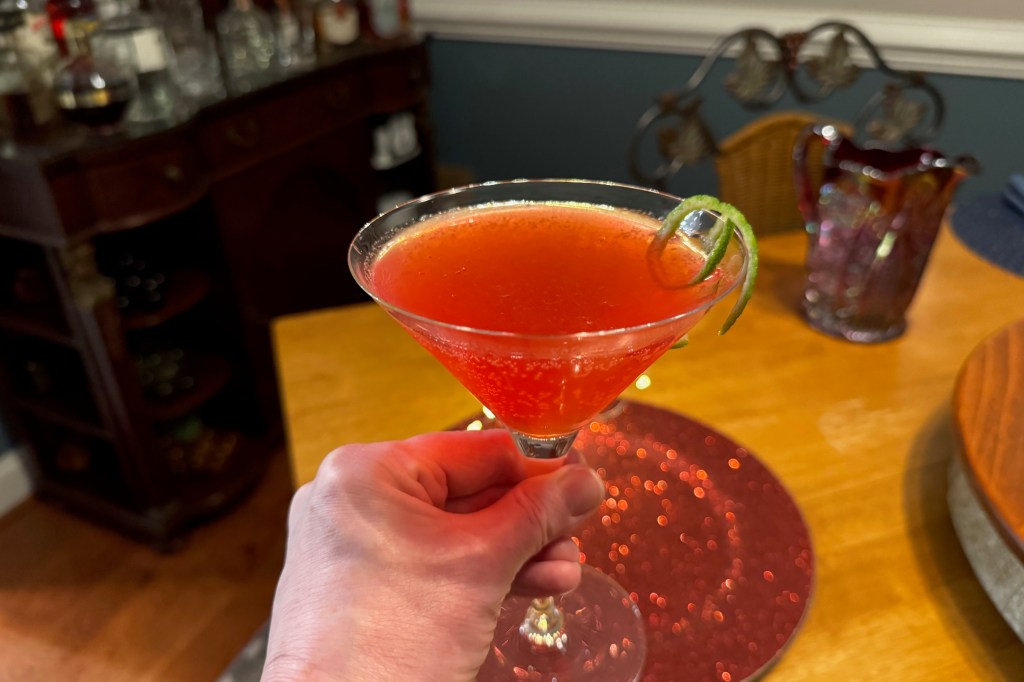
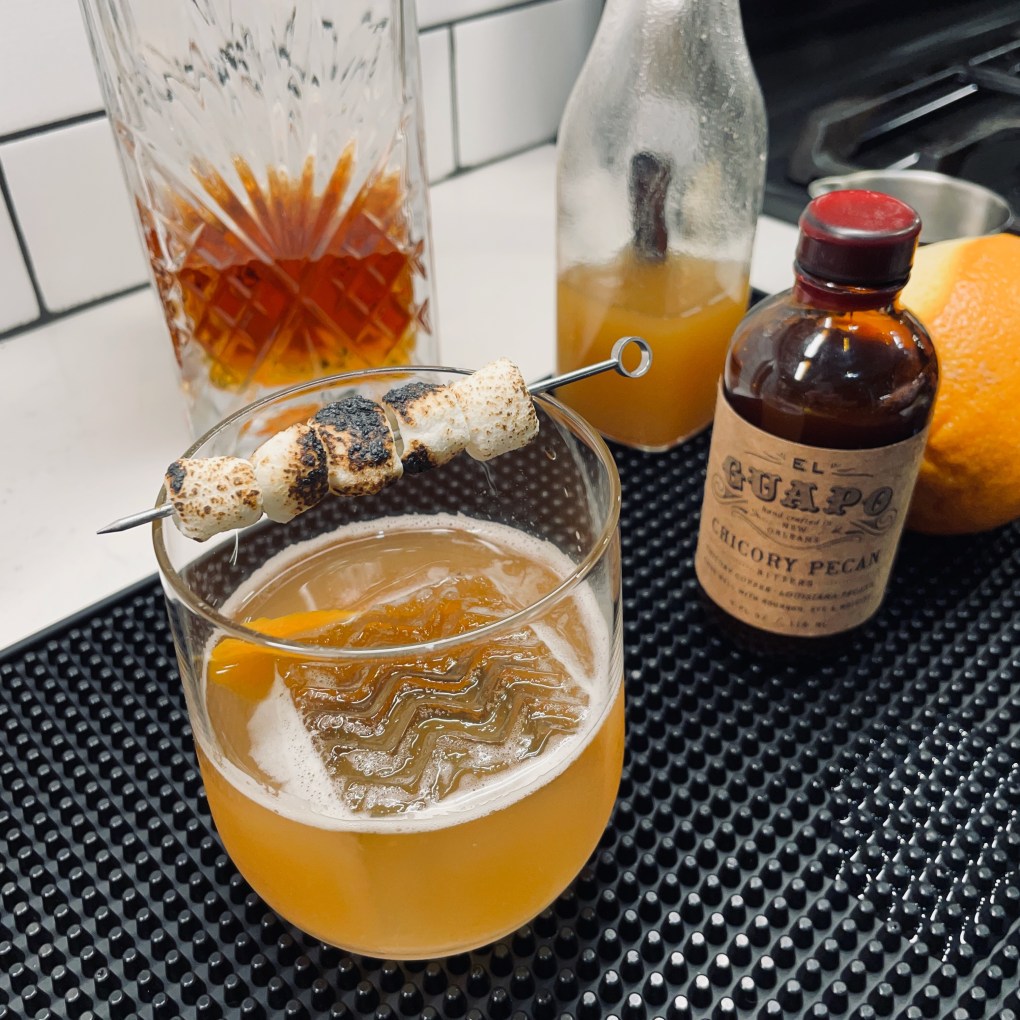
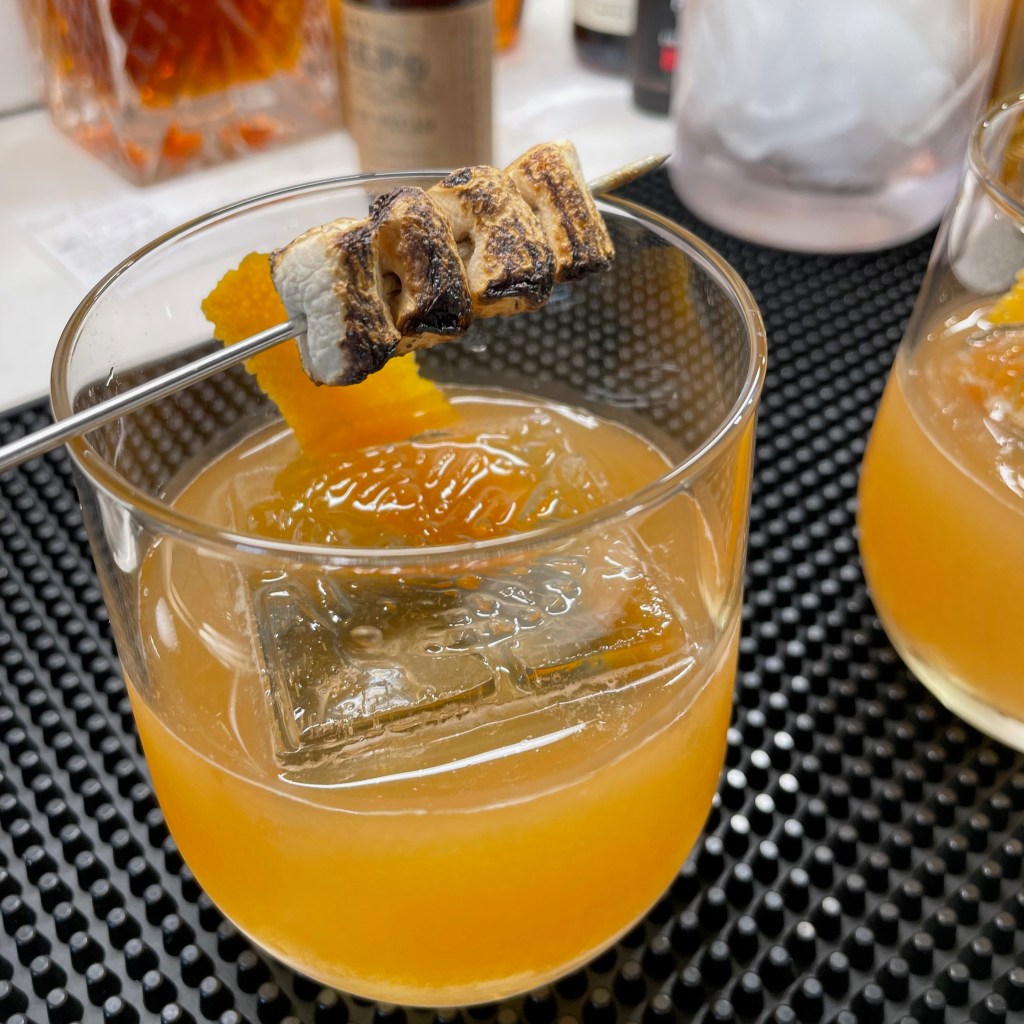
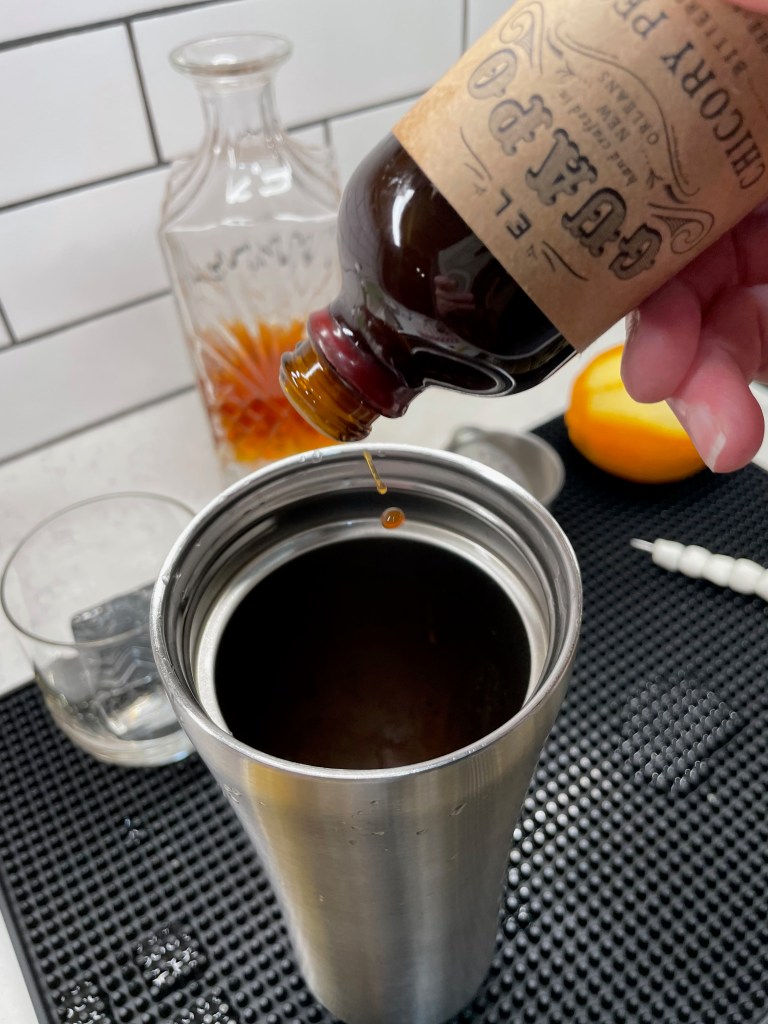
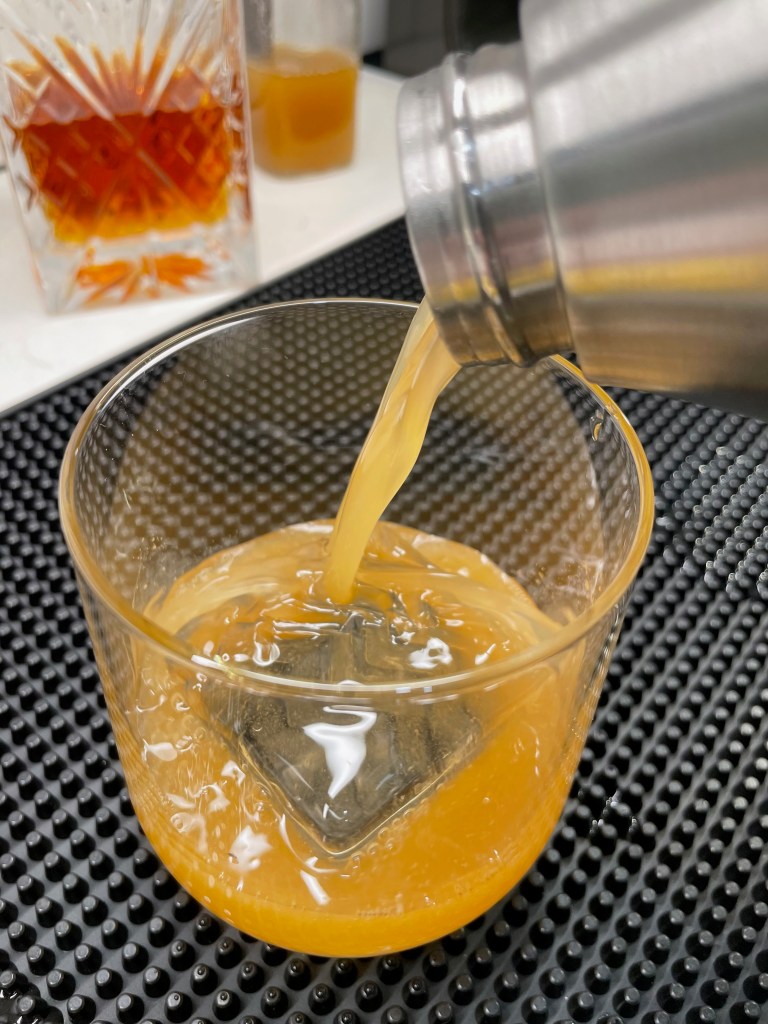
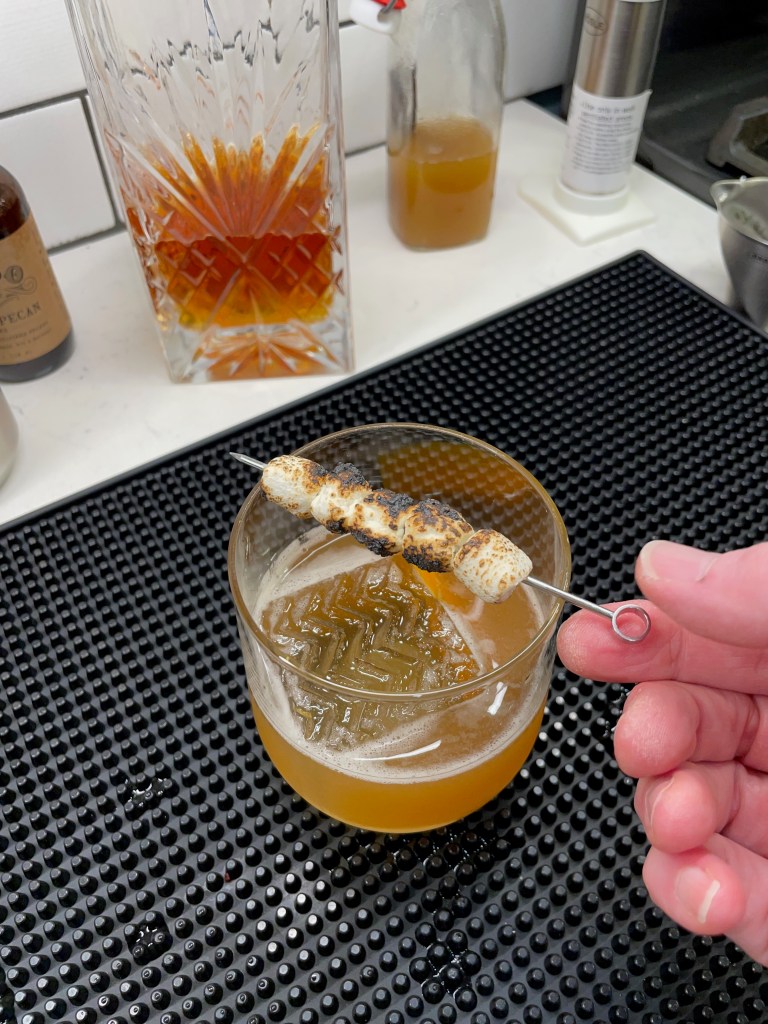
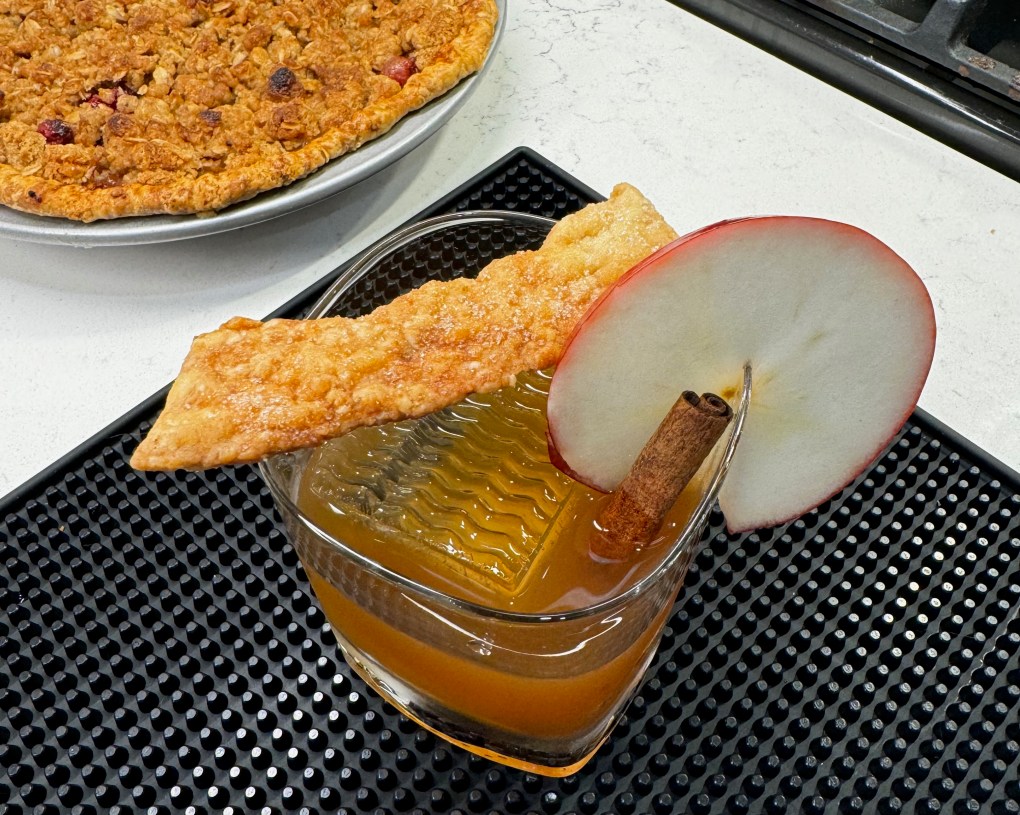
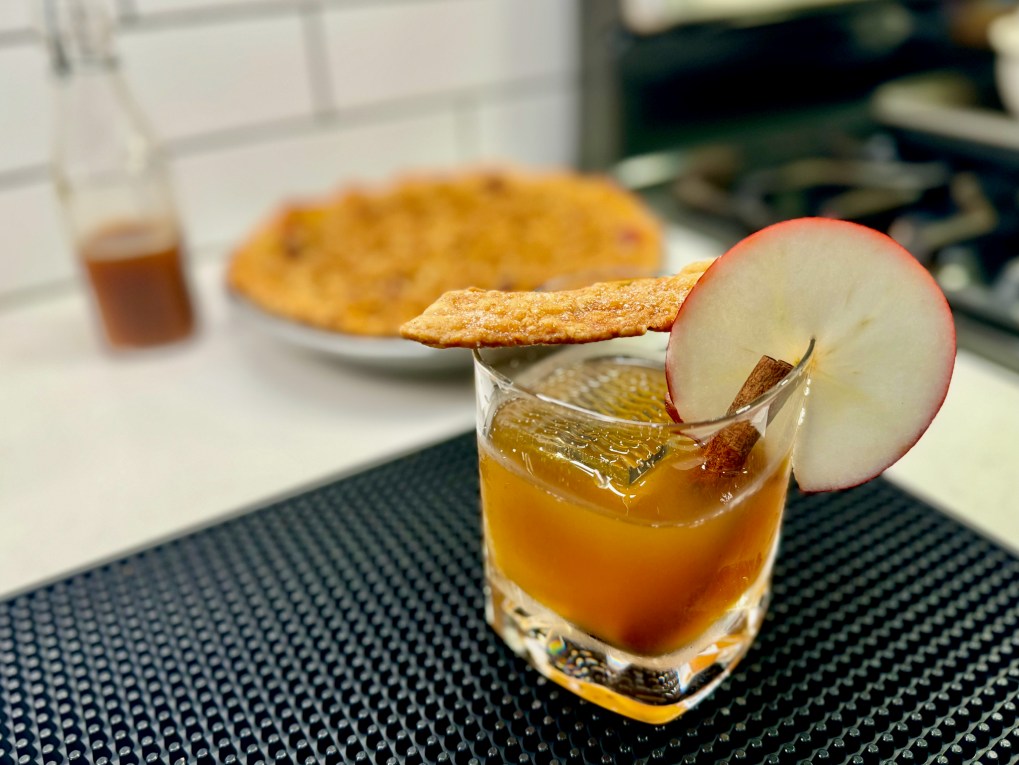
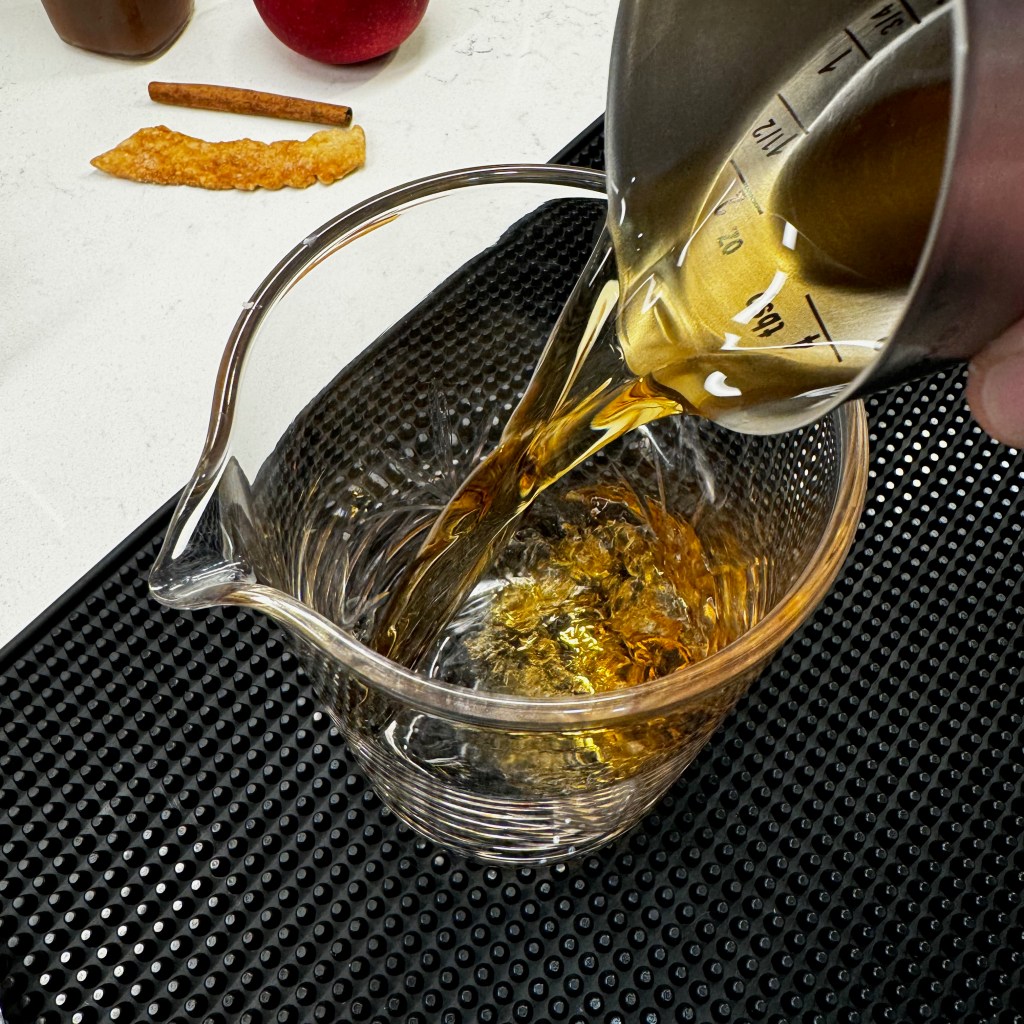
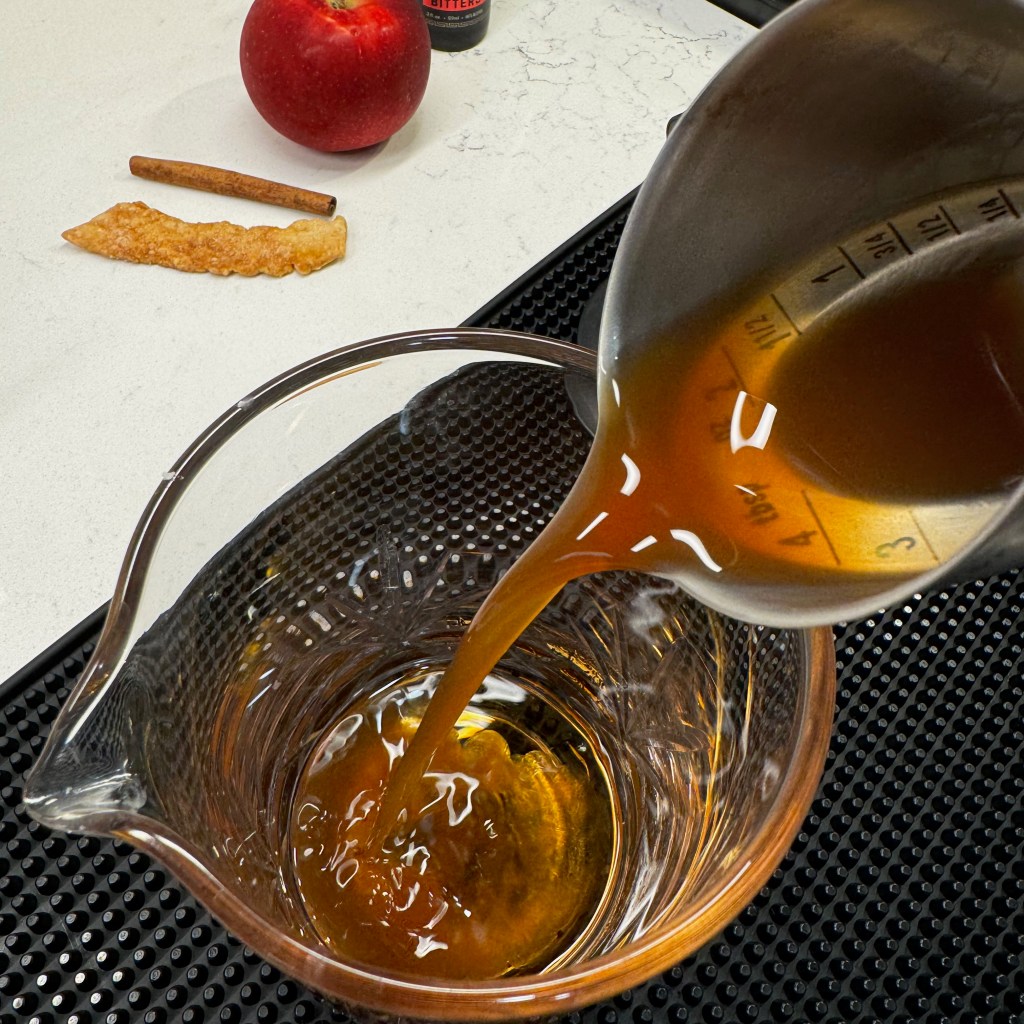
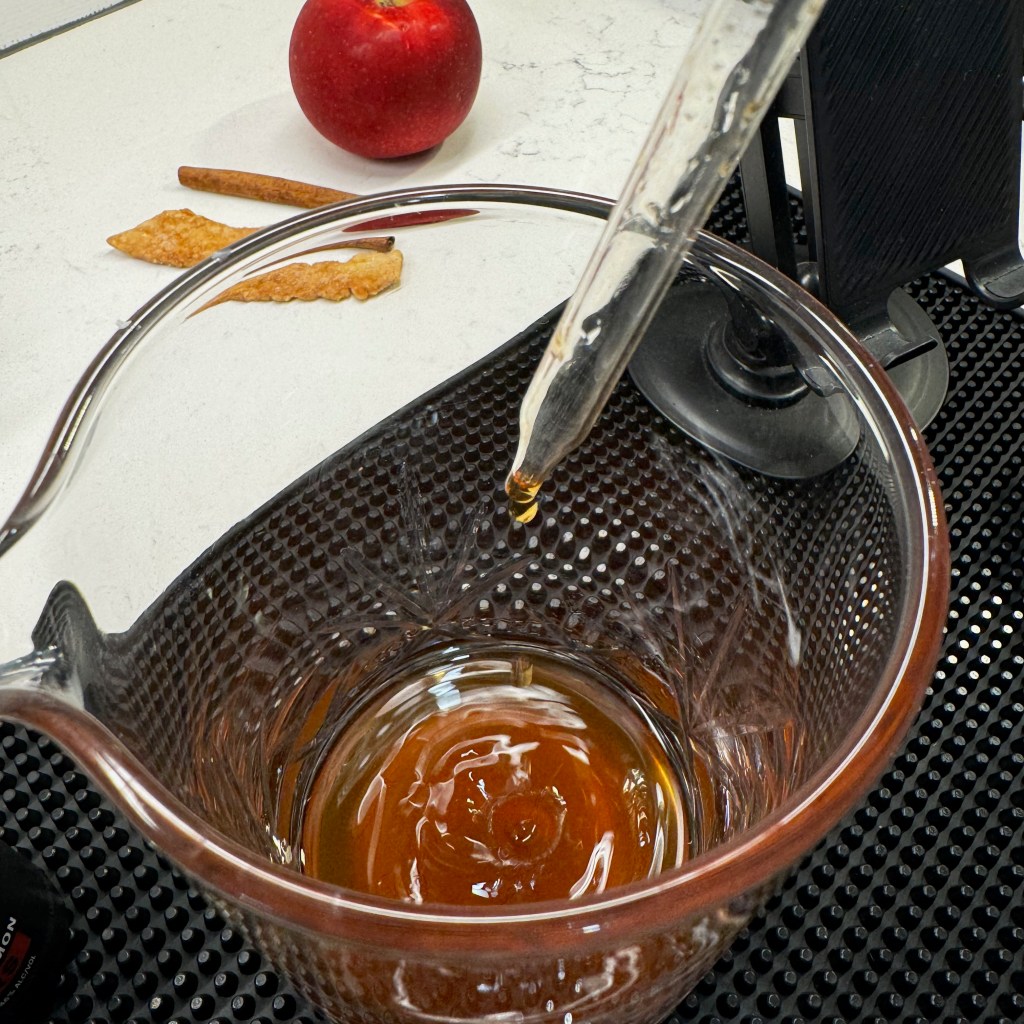
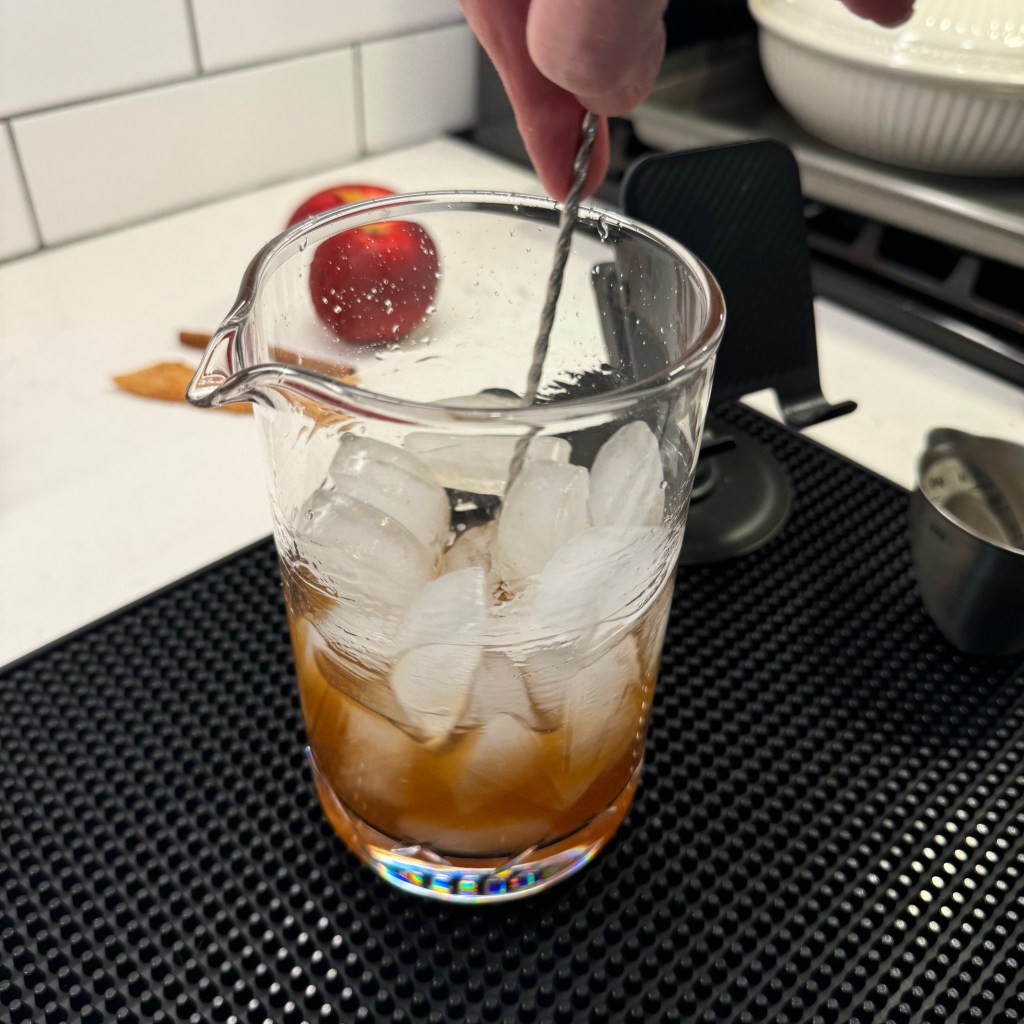
Having the apple cider syrup and browned butter-washed bourbon ready ahead of time makes it a snap to stir up these apple pie old fashioneds when your guests arrive for cocktail hour. The drink is easy to make, combining the browned-butter washed bourbon, a splash of the spiced cider syrup and a quick dash of spiced bitters in a mixing glass with plenty of ice, then strained over a fresh ice cube and garnished with an apple slice and cinnamon stick.


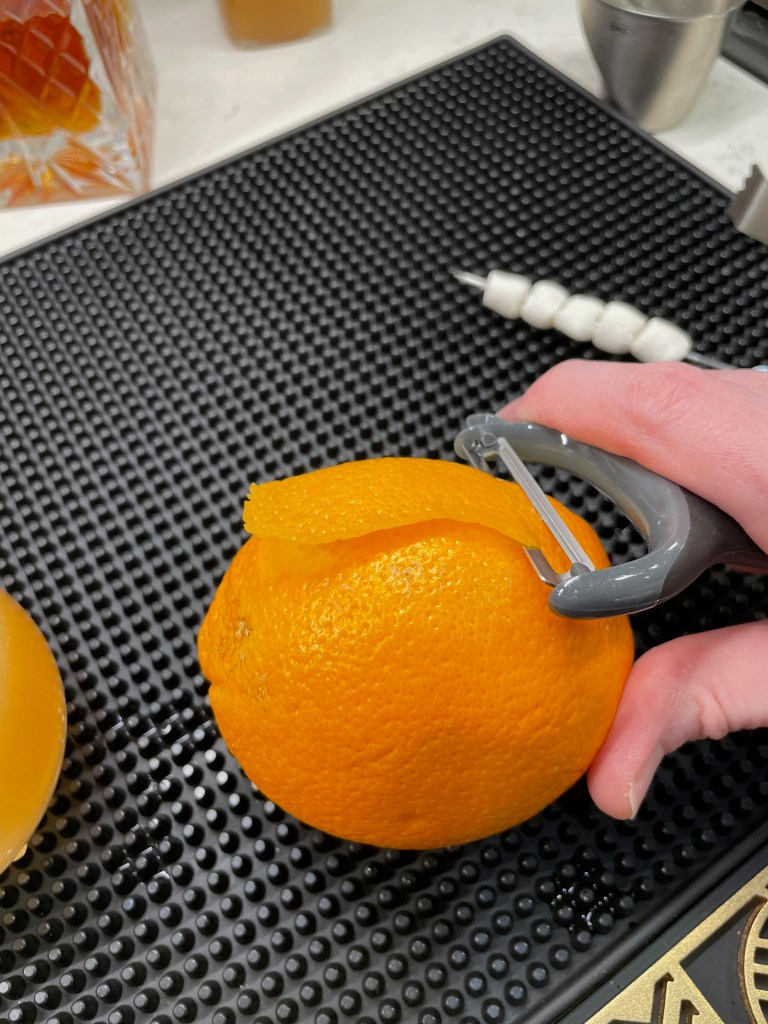
Wanna go for bonus garnish points? Balance a strip of cinnamon-dusted baked pastry dough on the edge of the glass, too. If you’re making a pie for the holiday, simply save a few strips of dough, giving them a sprinkle of cinnamon sugar before you bake to golden crispy goodness. These are best fresh; if you don’t have time, the apple and cinnamon stick will be impressive enough!


Apple Pie Old Fashioned Cocktail

  • Servings: 1
  • Difficulty: Average
  • Print

This cocktail requires some advance planning to prepare a cider syrup and browned butter-washed bourbon, but you can believe it's worth the trouble!


Ingredients

  • 2 oz. browned butter-washed bourbon (description below)
  • 3/4 oz. spiced cider syrup (instructions below)
  • a quick shake of cocktail bitters (cinnamon, cardamom or ginger work nicely)
  • big square ice cube
  • cinnamon sticks, fresh apple slices and sugared pie crust for garnish

Directions

  1. Combine bourbon, syrup and bitters in a cocktail mixing glass or shaker. Add one cup of ice and stir for about 20 seconds. Strain over a large ice in a double rocks glass.
  2. Garnish with an apple slice and cinnamon stick, plus a baked strip of sugared pie crust if desired.

Make the browned butter-washed bourbon ahead of time. Use salted butter for best results, and consider using whole fat dried milk powder if you can find it. The washed bourbon will keep for several weeks in the fridge, and you can repurpose the butter solids in a dessert or sweet potato casserole.

Directions

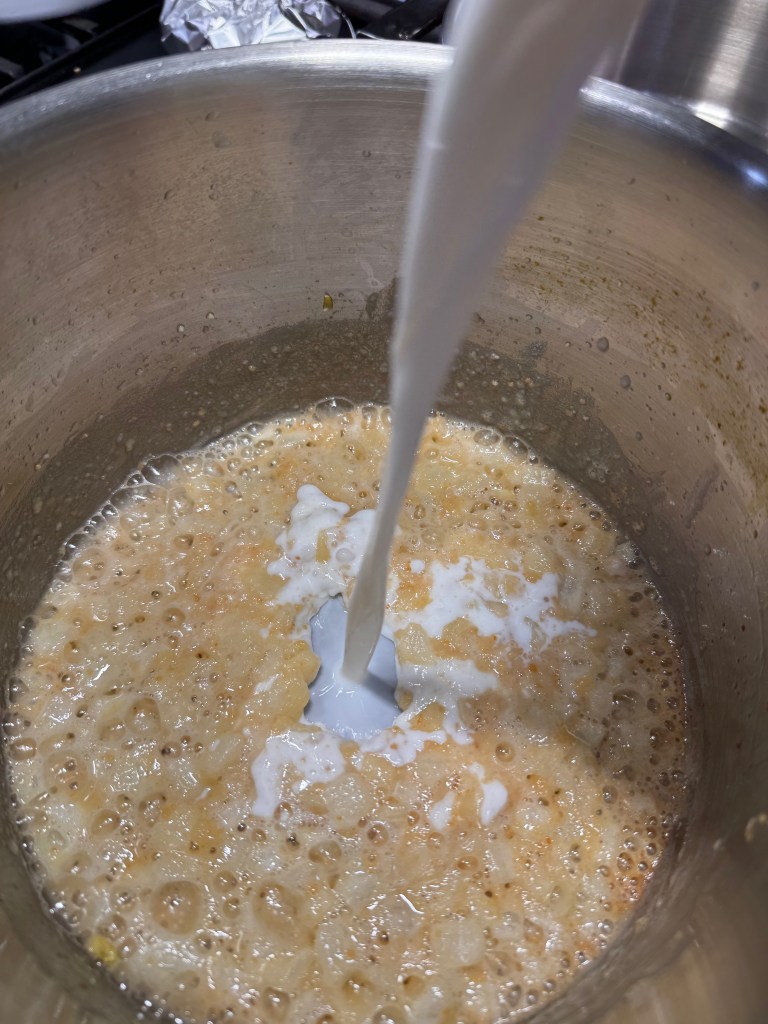
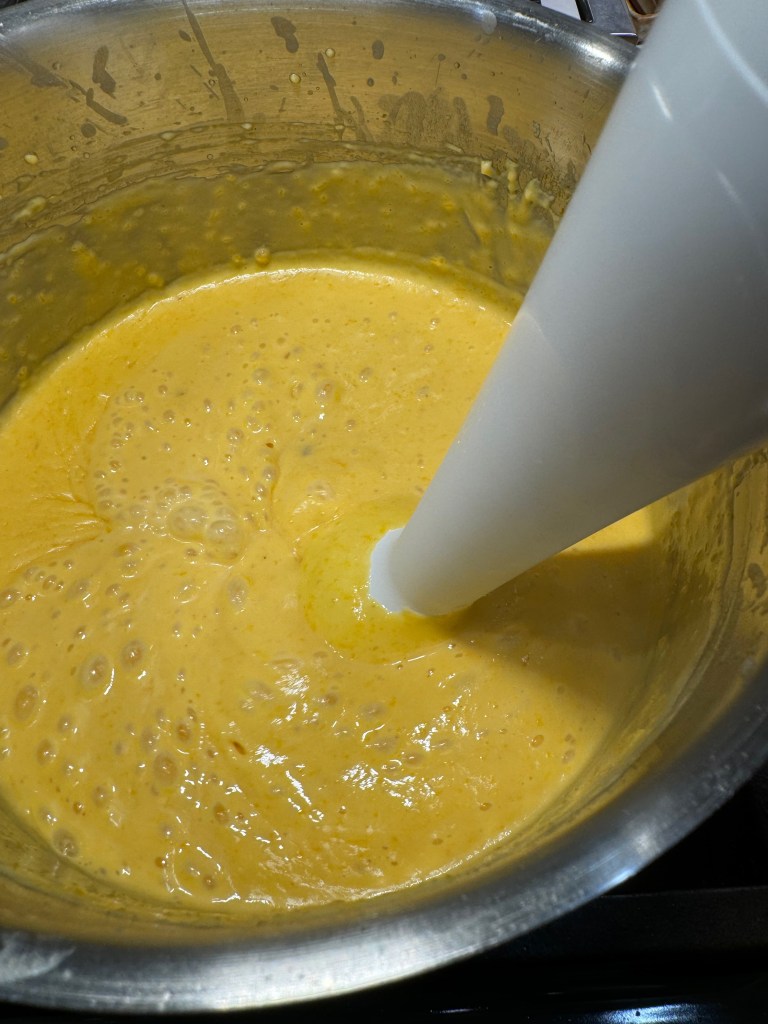
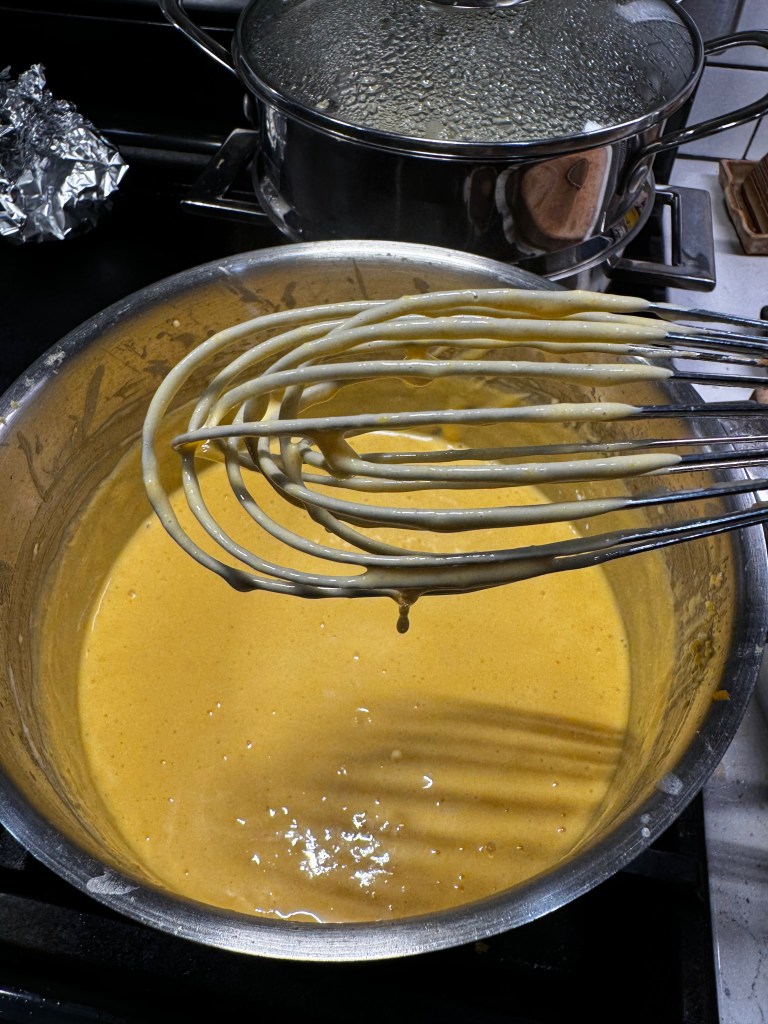
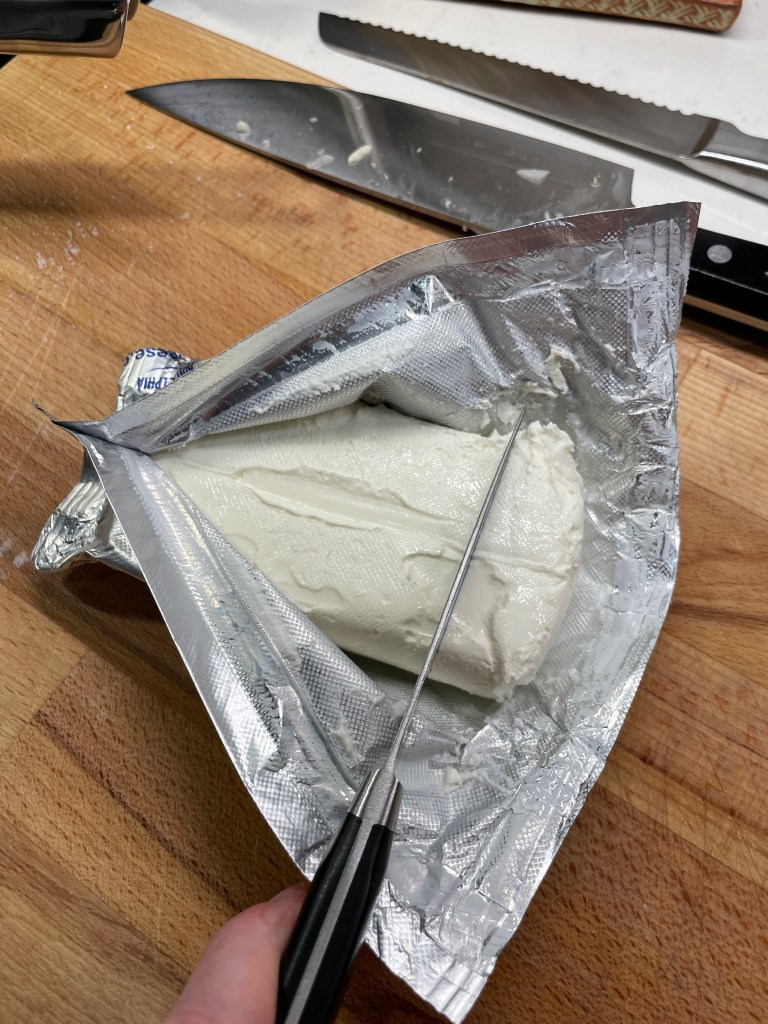
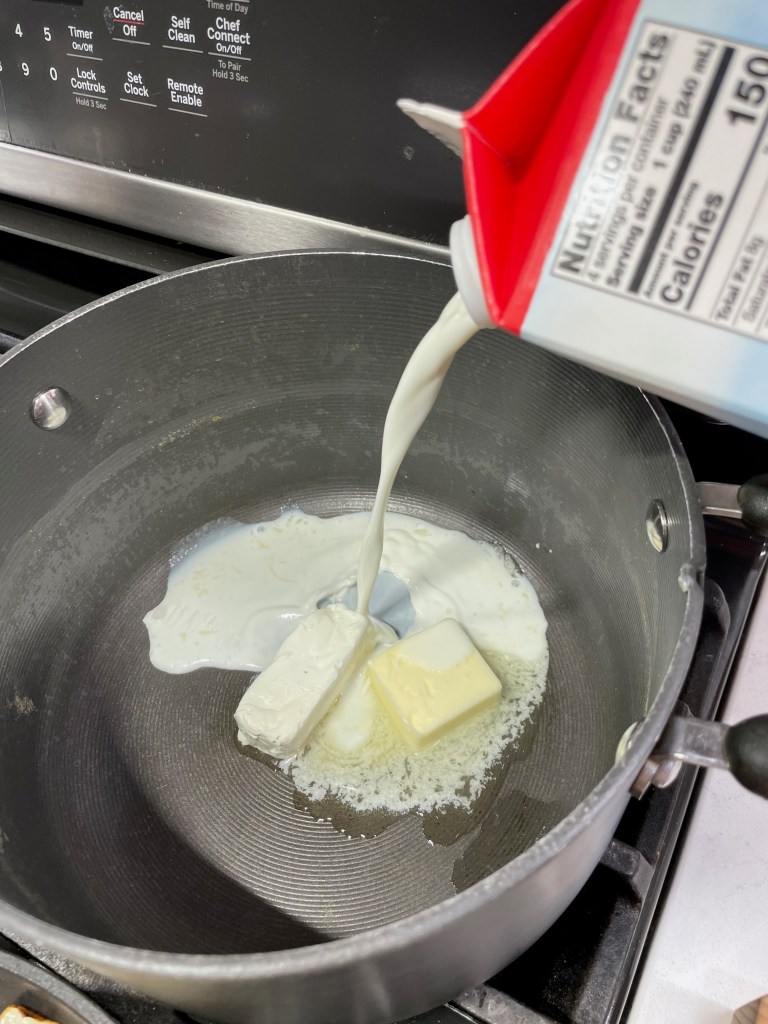
  1. Melt one stick (8 Tbsp.) butter in a small saucepan over medium heat. When the butter begins to bubble and froth, quickly whisk in a tablespoon of dry milk powder and whisk constantly until the froth dies down and the milk solids take on a caramel color. Remove from heat immediately and pour the hot butter into a large glass jar to cool.
  2. Pour two cups bourbon into the jar of cooled browned butter, cap it and give it a few gentle shakes. Allow it to settle and separate, and then put it in the refrigerator overnight.
  3. Spoon out the butter solids and strain the bourbon through a coffee filter-lined strainer or pour-over device. Bottle the washed bourbon and keep refrigerated until ready to use. This is enough for eight cocktails.

Make the apple cider syrup ahead of time as well. For best results, use fresh-pressed apple cider from a farm stand or the produce department rather than bottled from the juice aisle.

Directions

  1. Pour 2 cups apple cider into a small saucepan over medium heat. Add the thin peel of an organic lemon (none of the white pith, and wash it first!), and two or three pieces of cinnamon stick.
  2. Bring the mixture to a slight boil, then reduce the heat to medium-low and simmer until the liquid is reduced by about half. Stir in a tablespoon of brown sugar until dissolved. Allow the syrup to cool before straining out the lemon peel and cinnamon sticks. Transfer to a bottle and refrigerate up to three weeks. This makes enough syrup for at least eight cocktails.


Butternut Squash Mac & Cheese

Sometimes a recipe idea has an unexpected side benefit, and that was the case with this macaroni and cheese recipe I made for our Thanksgiving meal last year. Though I intended it a way to “sneak” a few more vegetables onto our plates— namely butternut squash and cauliflower— my husband surprised me with his assessment that this was “the best mac and cheese” I’d ever made! My memory tells me he may have said this about a few others as well, but still, it’s high praise!

Mac and cheese is a standout comfort food, and I love bending it into various flavor directions, which you already know if you’ve been following me for any length of time. It is the “comfort” in Comfort du Jour and was the first recipe I posted when I began this blog more than five years ago. Mac and cheese is in a category that I call “blank canvas foods,” open for suggestion and adaptation with endless possibilities or, should I say, “pastabilities?” 😉

I don’t usually include mac and cheese on the Thanksgiving table because it’s a dish that I make year-round and we have so many other seasonal dishes that demand space. Our guests would revolt if we didn’t have Les’s incredible garlic mashed potatoes or his cranberry sauce with Mandarin oranges. And Brussels sprouts of some variety are a must. But this mac and cheese feels unique with the butternut squash that brought a distinctively “autumn” flair. I can easily make a case for adding this to the list of Thanksgiving standards. Come along, and I’ll show you how easy it was to make!

Stand-ins for the squash

There are two substitutes that come to mind if butternut squash isn’t your thing or if it’s out of reach for any reason. Pumpkin and sweet potato each have similar texture and color, and either would work great here— just be sure they are cooked soft enough to puree smoothly. Canned pumpkin is a good option, and I made a savory pumpkin mac and cheese a few years ago that proves this point. 

Prepping the vegetables

Both the squash and cauliflower will be pureed, so I needed to cook them to full tenderness ahead of making the dish. My steamer insert doesn’t get much action, but it earned its keep this time, as I boiled the squash cubes and simultaneously steamed the cauli in the insert. Three cheers for only needing one burner! This took about 25 minutes. I pressed the squash through a mesh strainer and then blotted away excess moisture with paper towels. The cauli only needed to cool.


The cheese sauce

All my mac and cheese recipes begin the same way— with a roux. This simple mixture of butter (or oil) and flour creates a thickening base for whatever liquid you plan to use (in this case, milk). It’s one of the first important lessons I learned in my grandmother’s kitchen when I was barely even tall enough to reach the stove. While my butter melted and browned slightly, I tossed in some finely diced onion for flavor before adding the flour and, eventually, the milk. 


The cheese came next, beginning with a few ounces of American processed cheese. I know, I know, some say that this isn’t “real” cheese. But as Kenji López-Alt, one of my culinary idols, has said, it’s like saying that meatloaf isn’t meat. American cheese is just cheese that has been chemically adjusted with certain salts and stabilizers that prevent fat separation when you melt it. Using a little bit in my cheese sauce sets the stage for the other cheeses to remain more stable. In other words, it keeps my cheese sauce more creamy than gloppy! The other cheeses I used were gruyere, which I love for its nutty flavor, and sharp white cheddar. 


Do you see my secret weapon there? Roasted garlic adds incredible depth of flavor to a cheese sauce, and I squeezed out the entire thing into this one, plus the squash puree and (though I missed getting a picture of it) the tender steamed cauliflower. After whisking it all together, you can see that my sauce looks a little broken, but my immersion blender takes care of that! 


I started using this trick a few years ago and I’ve been very pleased with the smooth consistency of my cheese sauces. I highly recommend, though it isn’t a dealbreaker if you don’t have one. Try pureeing the squash, garlic and cauliflower in a bullet or regular blender with a bit of warm milk or cream before whisking it into the sauce. Be sure the components are cool first!

Putting it all together

Despite my efforts, sometimes I mess up and forget to take pictures at certain stages of making a dish, and that’s exactly what happened here. For a full rundown on how I finished this mac and cheese, check out the click-to-print recipe card at the end of the post. Here’s the Cliffs Notes version:

  1. Cook the large elbow until al denté and stir in the cheese sauce while the pasta is hot.
  2. Make some buttery toasted panko crumbs.
  3. Sprinkle the crumbs on top and bake until the cheese is ooey-gooey and bubbly and the crumbs are crispy crunchy toasty. Because in my kitchen, it’s all about texture!

What’s happening in your kitchen this Thanksgiving? Let’s find out in the comments whether you’re sticking with the standards or adding something new to the repertoire! And what would cause a revolt in your family if you omitted it from the table?

Butternut Squash Mac & Cheese

  • Servings: About 8
  • Difficulty: Average
  • Print

This was meant to be a way to sneak extra vegetables into my dish, but the squash and cauliflower actually gave this a terrific flavor. Use an immersion blender if you have one, to make the sauce extra smooth and creamy.


Ingredients

  • 4 Tbsp. salted butter
  • 1 cup diced sweet onion
  • 1/2 tsp. kosher salt
  • 3 Tbsp. all-purpose flour
  • 2 1/2 cups whole milk
  • Several grates fresh nutmeg
  • About 1/4 tsp. white pepper
  • About 4 oz. American cheese, shredded or cubed
  • 8 oz. gruyere cheese, shredded (reserve some for the top)
  • 6 oz. sharp cheddar cheese, shredded
  • 1 cup butternut squash puree, pressed dry with paper towels
  • 1 whole bulb roasted garlic
  • Most of a box large elbow macaroni, cooked to slightly firmer than al dente
  • 1 1/2 cups cauliflower mini florets, steamed until tender and smashed with a fork
  • 1/2 cup unseasoned panko crumbs
  • 1/4 cup grated Parm-Romano blend cheese (freshly grated)
  • 2 Tbsp. butter

Note: If you don’t have an immersion blender, you can take a different route to achieve a smoother sauce. After the butternut squash and cauliflower have cooled to near-room temperature, add them to a blender with the roasted garlic and about 1/4 cup cream or milk. Blend until puréed and smooth, and then whisk this into the cheese sauce. Do not use a blender while these ingredients are hot, unless you remove the top vent cover. If you have a bullet-style blender, the mixture must be no more than lukewarm.

Want to work ahead? The vegetables can be prepped and cooked the day before, and you can make the mac and cheese ahead of time and refrigerate. Bake it cold, but give it a few extra minutes to heat through and become bubbly.

Directions

  1. Melt butter over medium heat in a small stockpot. Add diced onion and salt and cook until the onions are tender and translucent, but not brown. Sprinkle in flour and cook, stirring constantly, until the roux is bubbly and golden in color. Pour in half of the milk and whisk until smooth and thickened; repeat with the rest of the milk.
  2. Add the American processed cheese to the sauce, whisking until fully melted. This cheese will aid in achieving a sauce that is smooth and creamy rather than grainy. Add the gruyere and cheddar in handfuls, mixing and melting after each.
  3. Whisk in the butternut squash puree, roasted garlic and tender cauliflower. The mixture will be slightly textured.
  4. Use an immersion blender to puree the sauce directly in the pot. When it’s smooth and creamy to your liking, pour it over the cooked elbow macaroni and fold several times to coat the pasta. Be intentional about this step, so that the sauce has a chance to seep inside the hollow macaroni shapes.
  5. In a separate small skillet, melt the two tablespoons of butter and toss the panko crumbs until they are toasted and golden. Season with salt and pepper, plus garlic or onion powder if you wish. Remove from heat and stir in the Parmesan.
  6. Transfer the mac and cheese to a large baking dish. Top with the buttered crumbs and preheat the oven to 350° F, with the oven rack in center position. Bake the mac and cheese for about 30 minutes, or until bubbles appear all the way around th edge of the dish. Let rest for 10 minutes before serving.


Collards with Sausage and Beer Malt Vinegar

When families gather for Thanksgiving in a few weeks, there will be an array of traditions on display— from formal and elegant catered affairs, to casual and easygoing drop-ins, and even a few backyard shenanigans (probably involving a deep fryer). Too many families are still brainstorming how to make ends meet, with the government continuing to play tug-of-war with the benefits that help them stay afloat, and this distresses me greatly. How can we ever be a great nation if we don’t care for our neighbors? Sigh.

One of my own “traditions” for Thanksgiving is that we break tradition by rotating dishes and switching things up. I know, everyone has their “favorites” for Thanksgiving, and we do keep the standards on the playlist to avert an uprising— the bird, some kind of dressing, cranberry sauce and mashed potatoes with gravy. Beyond that? Anything goes!

This year, I have a seasonal cake in mind for dessert (still thinking it through), and I intend to include collard greens in the lineup. Their earthy composure will be most welcome, and in these parts of the American South, they are on a short list of comfort foods. I also love that collard greens are inexpensive (always a bonus), and they can be made a few days in advance and warmed up in time for the big dinner. Anything that makes the meal more “homey,” and allows for more time chatting and less time fussing, is good with me!

A dish this comforting deserves a spot on the Thanksgiving table.

Making collard greens 101

I’m amused recalling that I once shied away from making collard greens at home. I liked them, but had no idea how to transform the thick, leathery leaves into something tender and edible. There are two schools of thought on this, and the first was daunting enough that I kept my distance for years. It involves a dense, salty hunk of what our locals call “fatback,” and boiling (or even pressure cooking) the collards for hours on end, until they no longer resemble a vegetable. Some people love it; I do not.

But the other method, shared with me by a kind lady in the grocery store, is not only quicker and easier— it also tastes better and leaves plenty of room for creative interpretation. This method involves briefly frying the trimmed collard greens in a small amount of oil or fat and then simmering for half an hour or so in whatever braising liquid makes you happy. To date, I’ve used broth, beer, whiskey, tequila and hard cider. And I’ve tossed a variety of flavor modifiers into my collard recipes, too, including bacon, tomatoes, mushrooms, onions, garlic, and even sweet potatoes (which was great). I guess what I’m saying is that collard greens are finding their way onto my list of “blank canvas” foods, and that isn’t at all a bad thing.

My sausage and beer malt version

My collards are usually intended as a casual side for roasted chicken, grilled pork chops or meatloaf. But this time, I knew I’d be using some of the leftovers in the collard dip recipe I shared a few weeks ago in memory of our friend who passed away unexpectedly earlier this year. He was a big-time foodie, always sharing cool food stories and interesting products that he found in his many travel adventures. About a year ago, I was surprised to receive a package that Jerry had ordered for me— it was a sampler of specialty vinegars from American Vinegar Works, which he described as “doing it the old-school way, handcrafted and aged.” And I suppose you can guess which one caught my eye first.

What a fun surprise this was!

I’d never heard of beer malt vinegar before, but I knew it would be complex and delicious. And using it for the collards that would become part of the collard dip was a great way to honor the memory of my friend who gifted me the sample collection of vinegars.

For this iteration of collard greens, I started with a local spicy pork breakfast sausage, browned up in bulk with chopped onions and a few garlic cloves, plus a smoky pepper seasoning. When I was happy with the browning, I transferred the meat mixture into a separate bowl while I sautéed the collards, one handful at a time, just as the nice grocery lady told me.


I chose the beer malt vinegar to deglaze the pot before simmering the collards to tenderness, and it was an excellent call. These greens are very fibrous, and a shot of acidity is helpful for breaking them down more quickly (plus it’s delicious). A generous splash of veggie broth finished the job with a 40 minute simmer, and then I stirred the sausage and onion mixture back in at the end, just long enough to heat the dish through.


If your Thanksgiving table needs another vegetable side, and you want something easy and hearty that won’t break the bank, give collard greens a try. Below today’s click-to-print recipe card, you’ll see a few other recipe options for this powerhouse green vegetable. And if your family has a similar tradition of “breaking tradition,” let’s hear about it in the comments!

Collards with Sausage and Beer Malt Vinegar

  • Servings: About 8
  • Difficulty: Average
  • Print

Beer malt vinegar gave my collard greens a savory twist, making them a great option for Thanksgiving.


Ingredients

  • 1/2 pound bulk breakfast-style sausage (spicy is great here)
  • 1/2 large onion, chopped
  • Salt and pepper
  • 2 cloves garlic, minced
  • A few shakes of dried pepper flakes (mine were smoky chipotle)
  • 1 large bunch fresh collard greens, cleaned and trimmed (see notes)
  • 1/4 cup beer malt vinegar (see notes)
  • 1 cup low-sodium vegetable broth

Notes: Collard greens may be available in a “pillow” type package, and those are convenient but not the same quality as fresh collards you purchase in a bunch. They will require more time cleaning and trimming, but it’s time well spent.

The beer malt vinegar I used was from American Vinegar Works, and they seem to have two different beer varieties. My vinegar was made with IPA malt, but they also have one made with porter malt that must be amazing! If you can’t get your hands on this specialty product, try using a splash each of beer and regular malt vinegar.

Directions

  1. Place a wide, shallow skillet or pot over medium heat. Add a swirl of olive oil and crumble up the sausage into the pan. Let it be for a couple of minutes before you toss it with a utensil, to allow browning to happen. Once the sausage begins to brown, add the onions and continue to cook until the meat is fully browned and the onions are tender. Add garlic and the smoky pepper seasoning. Transfer the sausage mixture to a separate bowl and set aside until after the next step.
  2. Add the collard greens, a handful at a time, tossing until each is wilted before adding the next handful. Once all the greens are wilted and bright green in the pot, pour in the beer malt vinegar. Use your utensil to scrape any browned bits from the pan. Add vegetable broth and stir to blend. Reduce heat to low, cover the pot and simmer for 30 to 40 minutes, depending on how tender you like your greens.
  3. When greens are done to your liking, return the sausage and onion mixture back to the pot with the collards, just long enough to heat it through.


Sparkling Fresh Cranberry-Ginger Cosmo

I know I promised you a cocktail before Thanksgiving, and I should know by now that late November is not the time to make promises I might not be able to keep. 🤷🏻‍♀️ Better late than never, and it’s all good because what I’m about to share with you could be the holiday miracle your entertaining plans have been waiting for. This drink became an accidental star at our Thanksgiving happy hour, and the great news is that its seasonal flavors and fancy presentation make it perfect for all the holidays coming up. 

I found this inspiration quite unexpectedly while scrolling Instagram in the wee hours, as I am wont to do. A few days before Thanksgiving, Food Network had posted a slideshow of recipes offered by its celeb chefs. There were variations on casseroles and desserts and—oh, who am I kidding? I have no idea what else was in the photo carousel because the fresh cranberry cosmo stopped me dead in my tracks. The ingredient list was simple, the technique brilliant and the drink divine.

Cheers, Christmas!

It was star chef Alton Brown who presented the formula for the cranberry granita that is the base of this stunning, neon-colored drink, and the granita itself could be served as a palate cleanser or even a light dessert after a rich holiday meal. His granita was made by simmering fresh cranberries, sugar and lime zest in a fair amount of water, and then blending, straining and freezing. Later, he used a fork to shred the icy mixture into a substance not unlike a snow-cone. That granita mixture is then shaken with vodka and fresh lime juice— no additional ice necessary— and strained into a martini glass for the brightest, freshest seasonal cocktail I’ve ever enjoyed. 

Of course, I couldn’t leave it at that (do ya know me?), and Alton himself is partly to blame for my tendency to twist a classic. During the early aughts, I hardly missed an episode of his “Good Eats” program on Food Network, and that was unquestionably when I became fascinated with the science of food and drink, inspiring me to push the culinary boundaries in my own kitchen. So, Alton, I’ll see your cranberry granita and I’ll raise you some crystallized ginger and orange zest. Because, Christmas. 🎁


You don’t want to know how many spoons I used tasting this stuff along the way, nor how many sample cosmos I made for myself, just to be sure I wasn’t imagining how good it was. The cranberry-ginger granita is equally tart and sweet, and my mind is still racing with possibilities for drinks beyond this festive cosmo. Imagine swapping the vodka for blanco tequila— instant Christmas margarita! Or substitute white rum for a cranberry-ginger daiquiri. Seriously, can anyone give me one reason not to mix it with gin and lemon and top it with champagne for a cranberry-ginger French 75? Could this be the little black dress of the holiday cocktail season?

For that matter, I should also be able to sub something non-alcoholic for a tasty mocktail to delight non-drinkers at my party, right? I did that for one of our Thanksgiving guests, and I guarantee you can’t tell which of these glasses held the zero-proof drink. She said it was delicious.

I’ll give you a hint: it wasn’t mine. 😂

Making this sparkling fresh cranberry-ginger cosmo couldn’t be easier, and I’ll also share my tips for the mocktail in the click-to-print recipe card you’ll find at the bottom of the post. Start by making the granita a few days before you plan to entertain, and wash up several fresh limes so they are ready for happy hour. Plan on one lime for every two drinks; you’ll use the juice in the drinks and a strip of zest for garnish. And for a little extra holiday pizzazz, pick up a four-pack of blood orange ginger beer to top off your cocktails with a sparkly finish. Chill your cocktail glasses while you mix, and use a fine mesh strainer if you don’t want little bits of zest floating in your glass.


Sparkling Fresh Cranberry Cosmo

  • Servings: 1 cocktail
  • Difficulty: Easy
  • Print

This gorgeous holiday drink uses a make-ahead cranberry-ginger granita that is so delicious, you'll want to use it in other drinks, too!


Ingredients

  • 1 1/2 oz. Ketel One (or other premium) vodka
  • 2 1/2 oz. cranberry-ginger granita (recipe follows)
  • 1/2 oz. freshly squeezed lime juice
  • 1 oz. Fever Tree blood orange ginger beer (or regular ginger beer, if desired)
  • lime zest twist to garnish

Notes: Make the cranberry-ginger granita ahead of time, and transfer to airtight containers in your freezer for safekeeping. I recommend using a fine-mesh strainer when pouring the drink into the glass, unless you’re OK with having the zest bits floating in the drink.

For an easy mocktail, swap in Simply Lemonade for the vodka, use 1/4 oz. lime juice and increase the ginger beer a bit. When making both alcohol and non-alcohol drinks for party guests, consider using two separate shakers to avoid mixups and in-between cleanings.

Directions

  1. Chill cocktail glass with ice water, or place in freezer 20 minutes before mixing the drinks.
  2. Measure vodka, granita and lime juice into a shaker. Cover and shake the shake out of it until the thing is too frosty to hold comfortably. The granita will melt with the other ingredients, so no ice is required for this step.
  3. Strain into the glass, top off with ginger beer and garnish with the lime strip.

Notes: The cranberry-ginger granita will be enough for about 20 cocktails. Make it ahead and keep it in the freezer so it’s ready for all the holidays.

Ingredients

  • 3 cups water
  • 2 1/4 cups fresh whole cranberries
  • 1 cup plus 2 tablespoons organic cane sugar
  • 2 tablespoons minced crystallized ginger
  • Zest of one lime and half an orange (organic is best and washed thoroughly)

Directions


1. Combine water, cranberries, sugar and ginger in a medium saucepan over medium-high heat. Bring to a boil and then simmer for several minutes until the berries soften and split. Remove from heat and cool for a few minutes.
2. Transfer cranberry mixture to a blender (remove vent cover) or use an immersion blender to puree the mixture into a slurry. Pour through a mesh strainer into an oblong, shallow pan. I used a silicone scraper to gently move the puree back and forth on the strainer surface, as the pectin from the berries was quite heavy.
3. Stir in the citrus zest. Cover with plastic wrap and place the pan flat in the freezer for several hours until solid (overnight is fine).
4. Use a fork to scrape the surface of the mixture until you have multiple layers of icy granita. Note that the mixture will likely clump as it refreezes. If you want it to be uniform consistency for cocktail hour, transfer it to a food processor and pulse a few times.

Directions


Half-Sweet Mashed Potatoes

Can you make room on the table for one more Thanksgiving side dish? This is an easy one, and we’ve had it at our house for autumn meals other than Thanksgiving even more than on the holiday itself. Combining the fluffiness of Yukon gold potatoes and the sweetness of seasonal sweet potatoes satisfies two cravings at once, and there’s so much flavor and creamy texture between them that minimal extra ingredients are needed. Let’s get into this!

Who can resist a big bowl of mashed potatoes?

The first time I made these half-sweet mashed potatoes was just ahead of Thanksgiving, 2020, when my husband, Les, and I realized it would be just the two of us for the holiday (thanks for nothing, Covid). My food blog was still on training wheels, and I had fun sharing new food ideas with the homebound, given that we were all in the same boat of scaled-back Thanksgivings. I whipped up a batch of these potatoes to use as a topper for my Thanksgiving mini meatloaf recipe, and the sweet-and-gold combo of potatoes was so good, we made them again and again— with or without a holiday.

When I looked back at that mini meatloaf post, I cringed seeing the lousy lighting, crappy counters and sketchy photography skills that were the norm for me back in those days. My blog and my kitchen have come a long way since then, but I still remember the excitement I felt in trying new things and distracting myself from the news of the day (a feeling that is familiar once again). As I perused that first recipe, there was one standout thing about the potatoes I made for those mini meatloaf bites that I don’t recommend if you’re serving them on the side— I had whisked in some egg white to help the potatoes hold their shape on the mini loaves. This is completely unnecessary when making them for a side dish, but I wouldn’t blame you if you wanted to add a few sprinkles of Parm-Romano cheese blend, as I did for that post. Les would proclaim that Parm-Romano never ruined any dish! And he’s right, of course.

Let’s get cooking!

This recipe is geared toward smaller occasions, but it’s easy to double, triple or even quadruple if you’re cooking for a larger crowd. I began with a pound and a half each of Yukon golds and sweet potatoes, peeled and cut into manageable size chunks.

Use equal amounts, give or take.

While your large chunks of potatoes mingle in salted cooking water, get ready with a two-ounce bit of cream cheese. It’s helpful to have this at near-room temperature, though you’ll have a chance to warm it up while the potatoes drain. Place the cooking pot back over medium-low heat to melt the cream cheese with a thick pat of butter, a splash of milk and, of course, salt. The beauty of using these kinds of potatoes is that they don’t suck up as much liquid or butter as russets, so you can have good results with less of those high-fat add-ins.


This part of the recipe technique is one of several “poTAYto-poTAHto” moments that Les and I squabble over every Thanksgiving. If you want to add cold-from-the-fridge milk and butter straight into the hot potatoes (the way my husband does), you go right ahead— it’s your kitchen after all. But if you want to do it the right way (you see what I did there?), then for goodness sake, warm those ingredients in the pot first and then add the hot potatoes! In my thinking, it helps keep the overall dish warm, and also ensures that you don’t shock the starches with cold milk and change their texture. Besides, they’ll be ready to serve sooner. (I can’t wait ’til he reads this. 🤭)


Mash them to your liking with a handheld masher. No need to get fancy here with a ricer or any other kitchen gadget. There’s something nostalgic or even comforting about finding a lump or two in there. Give the dish a final seasoning to taste and— OK, Les wanted to toss in some Parm-Romano, so we did that, too. See? Despite our occasional differences in technique, we are still a team. ☺️

And there you have it— one of the easiest Thanksgiving sides ever— one that tastes great, looks good on the table and settles the question of whether to make sweet potatoes or mashed. The best of both, win-win. Your guests will enjoy them, and they can be made ahead for easy reheating, too. Do you realize we are less than a week from Thanksgiving?

Coming next week, a signature cocktail. Until then, cheers!

Half-Sweet Mashed Potatoes

  • Servings: About 6
  • Difficulty: So stinkin' easy
  • Print

This recipe for half-sweet mashed potatoes combines Yukon gold and sweet potatoes, offering a flavorful Thanksgiving side dish. Minimal ingredients enhance both taste and creaminess. The dish is easy to prepare, suitable for any gathering, and can be made ahead for convenience. A perfect solution for sweet and savory cravings.


Ingredients

  • 1 1/2 pounds russet potatoes, peeled and cut into large chunks
  • 1 1/2 pounds sweet potatoes, peeled and cut into large chunks
  • A hefty pinch of kosher salt for seasoning the cooking water
  • 2 ounces (about 1/4 standard package) cream cheese
  • 2 Tbsp. salted butter
  • 1/4 cup whole or 2% milk, or half and half (depending how rich you like them)
  • Salt (and pepper, if you wish) to taste
  • A few spoons freshly grated Parm-Romano blend cheese, if you feel like it

Notes: Cut yourself some slack on the weight of the potatoes. They don’t have to be absolutely equal amounts, by any means. If they weigh about three pounds together, you’re golden. Or sweet, whichever.

Directions

  1. Place a heavy-bottomed pot filled with cold water over medium heat. Add both kinds of potatoes to the pot and bring to a light boil, then reduce heat and simmer until potatoes are good and tender, approximately 20 minutes.
  2. Drain the potatoes in a colander and immediately return the pot to the stove over medium heat. Add cream cheese, butter and milk to the pot, along with a good pinch of salt, and stir or whisk until smooth and evenly combined. Do not boil this mixture.
  3. Add the drained, hot potatoes back to the pot with the cream cheese mixture. Mash with a hand masher until creamy. Don’t mind a few lumps here or there. Give it a final salt adjustment, and add grated Parm-Romano cheese, if desired, stirring in just before serving.


Smoky Chipotle-Maple Roasted Sweet Potatoes

There’s an old piece of culinary wisdom out there, and it goes like this— “Don’t mess with Thanksgiving!” If you’re a traditionalist when it comes to what goes on the table at everyone’s favorite food holiday, then you probably want to look away, keep scrolling, move along. Because what I’m about to share may seem blasphemous.

But if you like to shake things up from time to time, and if you can handle a little heat, then you may have just stumbled upon a new favorite sweet potato recipe. These roasted chunks are caramelized and crispy on the outside, tender and creamy on the inside and spicy-sweet all the way through. It’s a far cry from the usual sweet potato sides, but you know that other old piece of wisdom— “Variety of the spice of life!”

The crispy bacon is optional but delicious.

How spicy are we talking here?

This spice list is short— ground chipotle, smoked black pepper and a hint of cinnamon. And for the sweet counterpart to those spices, maple sugar. I love pairing maple with heat, and when fall rolls around, I pretty much try to put a little bit of maple into everything. If you don’t like the heat of chipotle, you could substitute smoked paprika. If you like the heat but don’t care for the smoky notes, try subbing a lesser amount of cayenne pepper. As with any recipe I share, you are always welcome to make it your own.

Maple sugar is a nice seasonal touch, but light brown sugar would work in a pinch.

Prepping sweet potatoes for roasting

To keep things visually interesting, I picked up three different varieties of sweet potato, and you can see that they each had a unique color after peeling. The texture was the same on all three, so I expected they would roast evenly. I cut them into big chunks and laid them out onto a parchment-lined baking sheet, where they were drizzled with oil and tossed with the maple sugar and spice blend. My quick method for tossing them involves grabbing up two corners of the parchment into each hand like a hammock and quickly “swaying” it left and right. Do this first with just the oil, and again after you add the spices.


The pan slides into a hot oven for about half an hour, with a quick toss-around of the potatoes about halfway through. They will emerge fork-tender, with browned corners and a deeply smoky flavor and just enough sweet to balance the heat. 

While they roast, cook up a couple slices of cut-up bacon to play up the smoke flavor even more. I go through phases where I put bacon in everything, but these sweet potatoes would be just fine without it. Do not, however, miss out on the caramelized onions. A sweet onion would be ideal here, but on the day that I made this recipe, I didn’t have one, so I sliced a shallot into rings and cooked them up in the bacon drippings until they were golden brown. 


That unnecessary bacon goes on top at serving time, if you so choose. As with all roasted vegetables, these will have their best texture when they are fresh out of the oven, but they can also be done in advance and warmed at dinner time. Just hold the bacon til the end for best contrast of texture.

Smoky Chipotle-Maple Roasted Sweet Potatoes

  • Servings: About 6
  • Difficulty: Average
  • Print

This combination of smoky chipotle and not-too-sweet maple shakes things up for this side, which is a bold one for Thanksgiving or any cold-weather weeknight dinner.


Ingredients

  • 3 extra large sweet potatoes (any color), cut into large chunks
  • 2 Tbsp. extra virgin olive oil
  • 2 Tbsp. brown sugar
  • 2 Tbsp. maple sugar (or additional brown sugar if not available)
  • 1 tsp. kosher salt (less if regular table salt)
  • 1/2 tsp. ground chipotle powder (see notes for substitution ideas)
  • 1/4 tsp. ground cinnamon
  • 1/2 tsp. freshly ground black pepper (smoked, if you can find it)
  • 4 slices uncured bacon, cut into one-inch pieces
  • 1 large shallot, sliced into rings (or 1/2 cup chopped sweet onion)

Notes: There are several substitutes for chipotle powder, depending on preference. Paprika is good if like the smoky flavor but not the heat. Cayenne would provide heat without smoke. Ancho chile powder is slightly hot with brighter, fruity pepper notes. Choose what works for you.

Omit the bacon, if you wish, and sauté the shallots instead in a teaspoon or two of olive oil.

Directions

  1. Preheat oven to 375° F, with rack in center position. Line a baking sheet with parchment paper.
  2. Combine brown and maple sugars in a small bowl with the other dry seasonings and mix to blend evenly.
  3. Drizzle olive oil over sweet potato chunks on parchment, and then sprinkle the seasonings all over them. Gather up both short ends of the parchment to make a “pouch” and gently shake it side-to-side to coat the chunks with the seasonings.
  4. Roast potatoes 30 to 35 minutes, until they are fork-tender.
  5. While potatoes roast, cut bacon into bite sized pieces and cook in a cast iron skillet until crispy. Transfer the bacon to a paper towel to drain, but keep the drippings in the skillet. Add the shallots to the skillet and season them with salt and pepper. Cook over medium heat, tossing frequently, until the onions are as caramelized or crispy as you like them.
  6. Scatter onions all over the roasted potatoes (while they are still on the parchment sheet pan), and then transfer the mix to a serving bowl. Sprinkle bacon bits over the potatoes and serve.


Roasted Brussels Sprouts with Delicata

Smaller holiday gatherings can still be special without the heavy lift of making a huge spread of food or having a bazillion dishes on the table. During the Covid years, my husband and I learned that combining favorite Thanksgiving foods into fewer dishes was a good way to satisfy all our cravings for tradition when it was only the two of us at the table.

I got the idea for this dish only a couple of years ago, and it features two of our favorite veggies, Brussels sprouts and winter squash. There’s a scatter of crispy bacon in there, too, and a luscious cranberry-maple dressing that makes it super addictive. For me, one of the requirements for Thanksgiving food is visual appeal, and this tasty side certainly has that covered, too.

This is making me hungry!

There’s nothing difficult about this autumn recipe, but it is best served immediately after cooking, so get ahead of the game by making the dressing and prepping the veggies early so that putting it together at dinner time is a snap. Here we go!

The basics of roasting Brussels sprouts

Choose Brussels sprouts that are large, if possible, as they shrink considerably during roasting. They should have a fresh appearance, with tightly formed leaves. Ideally, the sprouts should all be about the same size so that they roast evenly.

These sprouts were about the size of a ping pong ball, just right!

We follow two key principles for perfectly roasted Brussels sprouts, and the first is removing all excess moisture. You’ll rinse them, of course, and then trim off the brown ends and halve them top to bottom. Spread the sprouts out onto a clean kitchen towel, and then roll it up and place it in a large bowl in the fridge for a couple of hours or up to one day, and bring them back to room temperature before proceeding with the roasting stage. 


The second principle for roasting any vegetable, including Brussels sprouts, is to toss them lightly with olive oil—I like to do this in a large zip-top bag— and then roast them at a high temperature so that good caramelization can take place before the veggies have a chance to turn soft or soggy. An ideal temperature is 425° F, so crank up the oven right after you take the turkey out. 


And now, the rest of the recipe

The rest of this dish is easy peasy, with sautéed onions and bacon and roasted slices of tender delicata squash. This variety of winter squash is so easy and doesn’t require peeling, because the skin is soft and edible after cooking. Go ahead and prep the squash ahead, as with the sprouts, and let them rest at room temp for a bit before you toss them in oil for roasting.


You will roast the squash at the same time as the sprouts, but not together on the same pan. They each need some breathing room for proper roasting, and then the two are layered and and drizzled with the cranberry-maple dressing when you’re ready to serve.

Ooh, this autumn dressing! 😋

This tart and sweet dressing would be delicious on any roasted autumn vegetable or even a green salad, and if you make vinaigrettes at home, you already know how easy it is to whisk a few simple ingredients together to create an emulsion. If you prefer, you could choose any store bought vinaigrette with flavors that say“autumn” to you. Avoid oil-free dressings, as their moisture content would wreck the crispy edges of the roasted sprouts.


As with most roasted vegetables, this dish is best served right away, so make it one of the last things you do while the turkey is resting under foil. If you choose to make the entire thing ahead, it will still have terrific flavor, but it will lose the satisfying crispy texture after reheating.

Just one more thing. If you omit the bacon, this dish is entirely vegan. 😊 Enjoy!


Roasted Brussels Sprouts with Delicata & Cranberry-Maple Dressing

  • Servings: About 8
  • Difficulty: Average
  • Print

Ingredients

  • 1 1/2 pounds Brussels sprouts, trimmed and halved
  • 1 medium delicata squash, seeded and cut into 1/2-inch slices
  • 2 Tbsp. extra virgin olive oil, divided (you’ll use some to roast each vegetable)
  • Salt and pepper to taste
  • 2 slices bacon, cut into 1-inch pieces
  • 1/2 medium onion, cut lengthwise into crescents
  • Cranberry-maple vinaigrette (recipe below)

Notes: All components of this dish may be done one day in advance, but for best texture and flavor, suspend roasting the vegetables and assembling the dish until just before dinner.

Directions

  1. Rinse and gently toss fresh Brussels sprouts in a colander under running water. Trim off brown ends and cut the sprouts in half lengthwise, discarding any damaged or discolored leaves. Spread the sprouts out onto a clean kitchen towel, and then roll it up and place it in a large bowl in the fridge for a couple of hours or up to one day. Let them sit a room temperature for an hour or so before roasting.
  2. Heat a heavy skillet over medium heat. Cook bacon and onions together until bacon is just crispy and onions are somewhat tender and browned. Remove from heat and set aside.
  3. Preheat oven to 425° F, with one rack just above center and the other just below. Line two baking sheets with parchment paper.
  4. Transfer the sprouts to a large bowl or zip-top bag and drizzle with a tablespoon of olive oil. Toss to coat, and arrange them, cut side down, on one of the baking sheets. Sprinkle with kosher salt and give them a few twists of freshly ground pepper.
  5. Toss squash slices in another tablespoon of oil and arrange slices on the other baking sheet. Resist the temptation to roast the squash and sprouts together, as they both need a little breathing room so that they don’t trap steam and turn mushy.
  6. Slide both baking sheets into the oven to roast for about 20 minutes, with sprouts on the top rack and squash on the lower one. At the halfway mark, turn squash pieces over and swap the pan positions.
  7. When you see plenty of roasted edges on the sprouts, remove both pans from the oven. Turn over all the sprouts to prevent steam getting trapped between the leaves. Arrange the squash slices over the sprouts and scatter the bacon and onions over the whole thing. Drizzle with the vinaigrette, but be careful not to drown them. You will have some dressing left over. Transfer to a serving bowl and enjoy!


This cranberry-maple dressing is a winner all by itself! Note that this recipe makes more dressing than you will need for the Brussels sprouts and delicata dish; enjoy the rest on a mixed greens salad with apples and candied pecans!

Ingredients

  • 2 Tbsp. white wine vinegar
  • 2 Tbsp. real maple syrup
  • 1 Tbsp. cranberry juice
  • 1 tsp. Dijon mustard
  • Kosher salt and freshly ground black pepper to taste
  • 4 Tbsp. extra virgin olive oil

Directions


Whisk together vinegar, syrup, cranberry juice and Dijon mustard. Season with salt and pepper to taste. Drizzle in olive oil, whisking constantly to create an emulsion.


Cider-braised Collards with Sweet Potatoes

The race is on toward the biggest food holiday of the year, and I couldn’t be more ready! It’s an even-numbered year and at our house, that means my husband, Les, will take the reins on the Thanksgiving turkey. This agreement to alternate years for the bird was literally written into our wedding vows because we both enjoy it so much, and on “his” years, I have more time to turn attention to the sides. All this month, I’ll be sharing a few new ways to enjoy some classic Thanksgiving side dishes. 

This first one is dedicated to my readers in the South, where collard greens reign supreme— on Thanksgiving or any other family meal. When I first learned to cook collards about five years ago, I didn’t imagine that there could be so many variations, but it seems that every time I try a new addition or different braising liquid, I find another favorite. This is the first time I’ve considered putting a seasonal spin on collards, and I’m so glad I did.

These are as flavorful as they look!

These collard greens have a touch of sweetness going on in the cubed sweet potatoes, and the smoky sausage makes each bite super satisfying. Did I mention that they’re braised this time in hard apple cider? So good!

Get to know collard greens

These sturdy leafy greens are similar to Lacinato kale (which is sometimes called dinosaur kale) in that they are huge, earthy and leathery. To cook collard greens, you must either boil and boil and boil them, or do as I do and fry them up in some kind of oil before braising a shorter time in liquid. The amount of liquid can vary, depending on how tender you’d like the collards to be. If you like them bright green and hefty— first of all, you clearly ain’t from the South— then you’ll use minimal liquid and cook them a shorter time. If you want them to be fall-apart tender, almost like sautéed spinach, then get that pot a’boilin’ from breakfast onward.

Either way, you have to prep the greens. Let’s get to it!

How to prep collard greens for cooking

In my earlier collard cooking days, I purchased the queen pillow-sized bags of chopped and pre-washed collards, believing that it would be a shortcut. But I spent so much time picking through the chopped pieces to remove all the tough stems that are as big around as a #2 pencil, I quickly realized that this “shortcut” wasn’t worth the trouble.


The easier way is to do them fresh, and it involves two quick tricks. After rinsing the collard greens really well, hold a stem firmly with one hand, keeping the other hand at the base of the stem and give the stem a good pull, zipping the leaf right off. Next, wrap the collard leaves in a clean kitchen towel to blot away excess moisture. 

Now, here comes the second trick, and it’s a fun knife technique called chiffonade that you might use when garnishing with fresh basil. Stack the collard leaves together as neatly as possible, and then tightly roll the stack up lengthwise so it looks like a big cigar. Make cross cuts with a sharp knife, and then cut through those pinwheel slices. Voilà, a quick and easy pile of chopped collards (and no bulky stems).


Let’s get cooking!

Most of my collard recipes involve bacon, but Les had brought in a successful haul from the smoker on the day that I made these, and I had a hunch that smoked sausage would be a terrific substitute. When I reached for a sweet onion in my countertop basket, I noticed a lone sweet potato in there and couldn’t help throwing some cubes of that in there, too.


The only remaining decision was a braising liquid, and that’s when I spotted a bottle of Angry Orchard hard cider in the back of the fridge. I’m not suggesting that regular apple cider wouldn’t have worked (though I expect it would have leaned very sweet), but I know from past adventures that a splash of booze helps tenderize the greens better than other liquids, so I went for it. I also appreciated that the hard cider had a tartness to balance the smoky sausage and sweet potatoes. My lucky day!


This autumn spin on collard greens would make a great addition to the Thanksgiving table, especially in the South, or serve them up with meatloaf, fried chicken or mac and cheese for any Sunday supper!

Cider-braised Collards with Sweet Potatoes and Smoked Sausage

  • Servings: About 8
  • Difficulty: Average
  • Print

There's so much autumn flavor going on in these collards, they'd be perfect as a side to your Thanksgiving meal!


Ingredients

  • 1 large bunch fresh collards, cleaned and chopped
  • 1 small Vidalia or other sweet onion, chopped
  • 2 Tbsp. extra virgin olive oil
  • Salt and pepper to taste
  • 1 link smoked sausage, halved lengthwise and then sliced
  • 1 medium sweet potato, peeled and cubed
  • 1/2 bottle Angry Orchard (or other brand) hard apple cider

Notes: The smoked sausage I used was a local butcher product, and it was seasoned with autumn spices. Any smoked sausage would work here, including kielbasa, Andouille or even hot links. Consider the sodium content of the sausage so that you may adjust additional salt accordingly.

Directions

  1. Heat a heavy-bottomed wide pot over medium heat. Swirl in olive oil and sauté onions briefly until just barely tender. Add collards, a handful at a time, until all are in the pot. Season with salt and pepper, and toss until all collard leaves are wilted.
  2. Add sweet potato cubes and smoked sausage and toss until the contents of the pot are heated through.
  3. Pour in hard cider, give it a stir, and then cover the pot and reduce heat to a simmer. Cook the collards for 20 to 45 minutes, until collards are tender to your liking. If you like collards extremely tender, consider delaying addition of the sweet potatoes until about a half hour before the finish.


Sweet Potato Cheesecake

If there’s one aspect of Thanksgiving dinner that is a conundrum for me, it’s dessert. As much as I love to cook and entertain and shake up interesting cocktails, I have an irrational fear around making pastry dough. And wouldn’t you know it? All the classic Thanksgiving desserts are pies. 

My personal preference for dessert leans toward the fruity, nutty crumble or cobbler kinds of things or lighter, citrusy things, such as key lime pie, with a crumb crust that doesn’t require rolling out a flaky dough. 

But certain flavors and textures are expected on Thanksgiving, so when I bumped into this sweet potato cheesecake recipe last year, I found it to be a perfect mashup of holiday tradition and ease of preparation. It was pretty darn delicious, too.


The original recipe for this cheesecake is on The Kitchn, and my version of it is similar enough that I’m happy to send you there for the details. I made very few adjustments as follows:

A zestier crumb crust

Rather than graham crackers in the base, I used Biscoff cookies— you know, the ones they give you on the airplane? They are crispy, buttery (though there’s no butter in them) and very cinnamon-y, a nice backdrop to the creamy sweet potato filling in the cheesecake. The cookies were sweet enough that I also reduced the sugar called for in the crust, and I skipped the extra cinnamon altogether.


Another favorite seasonal flavor

I also substituted real maple sugar in place of the regular sugar called for in the recipe, in keeping with the season and also because I happen to love the maple flavor. Everything else about the recipe was the same— roasted sweet potato, cream cheese, sour cream, vanilla and warm spices. Then free-range eggs, one at a time, and into the pre-baked crust— gently, of course, so as to not disturb the no-fuss crust.


Topping on the side, please

Next, I did not spread the sweetened sour cream topping over the entire cake before serving. The Kitchn version of this cheesecake was gorgeous, but we had a small gathering and I knew we would need to store the leftovers in the fridge. I made the topping— also with maple sugar— and saved it to dollop onto the individual pieces at serving time.


The dreaded water bath!

Finally, and this was the big one for me, I found a way around the usual “water bath” that is recommended for baking cheesecake. The process of wrapping up a springform pan with layers and layers of aluminum foil so that it can be surrounded with two to three inches of hot water in the oven is nothing but a big fat hassle. If even a small tear happens in that foil, water gets in and ruins the whole expensive thing. I wonder why, after so many years of springform pan baking, hasn’t someone developed a leak-proof version? Can we bring in the engineers who figured out the walk-in bathtub? That’s the technology we need here. 

If they can do this, WHY can’t they make a leak-proof springform pan?

So, in my frustration, I did some research on the water bath method for cheesecakes and here’s what I learned: it isn’t the hot water that keeps the cheesecake from splitting or overbaking, it’s the steam! The cheesecake needs a very humid environment for slow and gentle cooking, but the cheesecake doesn’t need to actually be in the water for the steam to work. Though I had already wrapped my pan in foil, I went rogue at the last minute with a gigantic steam pan underneath my cheesecake, and watch what happened.


My cheesecake was perfect! As with any cheesecake recipe, the instructions said to bake it until the filling was set but the center was “still slightly wobbly,” and I cooled it in the oven for about an hour before taking the thing out. There was no water in my cake, no drama trying to lift it from the water bath, and no cracks on top. 

All in all for me? A Thanksgiving dessert that was, dare I say, a piece of (cheese)cake.


Where’s the recipe?

This is where you’d usually find a click-to-print recipe on my blog, but today I’m comfortable redirecting you to the original source. My adjustments, though meaningful to me, were slight, and I found the tips and instructions on The Kitchn to be clear and helpful. If you’re feeling inspired, go get it!

Happy Thanksgiving to my friends, followers and visitors!

https://www.thekitchn.com/sweet-potato-cheesecake-recipe-23421088


Sweet Potato Casserole Old Fashioned

I’ll bet I know what you’re thinking. She did what?! 😂

The matter of a signature cocktail for Thanksgiving is always a priority for me. I want guests at our table to immediately feel welcome and for the signature drink to set the mood for the occasion. And though I don’t especially like the old-school sweet potato casserole— you know the one, topped with sticky browned marshmallows— when the idea rose of putting those nostalgic flavors into a cocktail? Well, that’s quite a different story!

This discussion of a sweet potato casserole cocktail came about several months ago, as my blog buddy, Maylee over at Beyond Gumbo, and I were e-chatting about a New Orleans-based company that makes cocktail ingredients. El Guapo is the brand, and I had recently purchased a bottle of its chicory pecan bitters. I’m always on lookout for unusual cocktail ingredients, and this one struck my fancy for making holiday themed drinks.

Chicory has a slight bitter flavor that is reminiscent of roast coffee.

As so often happens, though, the bitters sat on my bar for a while as I pondered how to build a drink that would benefit from the interesting combination of flavors. I’ve used it to make a pecan pie old-fashioned, and then it got left behind until recently, when Maylee posted a wonderful recipe for a homemade pumpkin spice latte that sounds way better than anything I could buy at Starbucks. For her latte, she made a pumpkin spice syrup and she reminded me in the comments section about the sweet potato cocktail we’d discussed months earlier. Thank goodness she remembered!

And here we are! My friend’s pumpkin spice syrup inspired me to try my own version of sweet potato syrup, which was not only simple to make, but literally makes this bourbon drink taste like a tipsy liquid version of a retro sweet potato casserole. This is one of the things I love most about food blogging, the way my online friends and I are always inspiring one another to try and succeed at new things, and we keep going until we all run out of ideas. 

I hope that’s a very long time. Cheers! 😁


What you’ll need

If you want to try this yourself, take a moment right now to purchase the chicory pecan bitters, as they are essential to the drink. You can buy them directly from El Guapo’s site or take advantage of speedy shipping from Amazon. Don’t worry about how to use the rest of the bottle, as I’ll be experimenting and sharing other recipes as I develop or discover them.

The other ingredients you’ll need are bourbon (a sweet one, such as Maker’s Mark or Elijah Craig), a good-sized sweet potato, a bit of turbinado or brown sugar and a cinnamon stick, plus the mini marshmallows to garnish the drink, vintage style.

Once the syrup is ready, the rest of the drink is easy peasy!

Make-ahead sweet potato syrup

The sweet potato syrup is easy to make ahead, and I’d recommend doing it this weekend so you’ll be ready when guests arrive next Thursday. Simmer the sweet potato chunks until tender, then gently mash and strain the liquid into a measuring glass. Add enough water to total 1 1/4 cups. Pour the strained liquid back into the pan with the sugar and cinnamon stick. Bring to a slight boil, then simmer for about 15 minutes. Cool to room temperature, and then strain again— this time through a very fine mesh strainer to filter the solids as much as possible. Transfer it to a bottle and chill until you’re ready for cocktails.


When my syrup was finished, it measured 3/4 cup, exactly enough for 8 cocktails. If you’ll be making more drinks, my click-to-print recipe below is easy enough to double.

Time for a cocktail!

When the bell rings for happy hour, get your cocktail tools and ingredients ready to go. You’ll need a shaker (this is best when mixing ingredients of different viscosity), a measuring tool for the ingredients, ice for shaking, heatproof cocktail picks and a culinary torch or lighter to toast the marshmallows. 

The toasted marshmallows are a whimsical nod to the sweet potato casserole of my childhood!

I recommend threading the marshmallows onto the cocktail pick first so you can get straight to enjoying this delicious drink as soon as it’s poured. To reduce the stickiness, I smeared the cocktail picks with a bit of butter before adding the marshmallows. I like a little orange peel expressed over my drink, so this is good time to strip that off a washed orange, too.

Here comes the mixing! Combine the bourbon, syrup and chicory pecan bitters in a shaker with about a cup of ice. Shake for 20 seconds, or until the outside of the shaker is cold and frosty. Strain over new ice. Express the orange peel (if using) over the drink and toast the marshmallows to garnish the glass.


Sweet Potato Casserole Old Fashioned

  • Servings: 1 cocktail
  • Difficulty: Average
  • Print

Yes, this fun recipe is exactly what you imagine; the flavors of a classic Thanksgiving side, transformed into a delicious holiday cocktail.


Ingredients

  • 1 1/2 ounces bourbon (a sweet one, such as Maker’s Mark or Elijah Craig)
  • 3/4 ounce sweet potato syrup (recipe and directions below)
  • 3 shakes El Guapo chicory pecan bitters
  • miniature marshmallows, threaded onto a heatproof cocktail pick
  • 3-inch strip of orange peel, optional for expressing over cocktail

Directions

  1. Combine bourbon, sweet potato syrup and chicory pecan bitters in a cocktail shaker with a cup of ice. Shake for 20 seconds, or until shaker is frosty.
  2. Strain over a large ice cube in a double rocks glass. Espresso orange peel over drink, if desired. Toast marshmallows and garnish the cocktail.
  3. Cheers!

The only fussy element of this drink is the sweet potato syrup. Plan to make this ahead, and keep it in the fridge for up to two weeks. The recipe below makes enough syrup for 8 cocktails.

Ingredients

  • 1 large sweet potato, peeled and cut into chunks
  • 1/3 cup turbinado or brown sugar
  • 4-inch piece of cinnamon stick

Directions

  1. Cover sweet potato chunks with cold water in a medium saucepan. Cook over medium heat until potatoes are fork-tender, about 35 minutes. Gently mash the potatoes, still in the water, with the back of the fork. Strain through a wire mesh strainer into a glass measuring cup. Add enough water if needed to total 1 1/4 cups. Rinse any solids out of the pan.
  2. Pour sweet potato liquid back into the saucepan. Add sugar and cinnamon stick and simmer over medium-low heat for about 10 minutes until sugar is fully dissolved and mixture takes on a syrupy consistency. Remove from heat and cool to room temperature.
  3. Strain again, this time through a fine mesh strainer or coffee filter. Finished syrup should measure approximately 3/4 cup. Transfer syrup to a jar or sealable bottle and refrigerate for up to two weeks.


Elevate it even further!

Want to take this drink a flavor step further in the direction of a sweet potato casserole? Try this trick of “fat-washing” your bourbon with browned, unsalted butter. It’s easy to do, and as a bonus, you’ll have a small bowlful of bourbon-infused butter left over to flavor something else on the table. The actual sweet potato casserole, perhaps? 😉