Sweet and Savory Cranberry Chutney

A few weeks ago, as I was rummaging through my little black recipe box, I ran across a yellowed snippet I cut out years ago from one of those old-school women’s magazines perched at the grocery store checkout. This is a long-time habit of mine— hoarding recipes— and I’m only slightly embarrassed to admit that I frequently don’t get around to making the things that intrigue me enough to impulse-buy a magazine or cookbook. Or if I do make one of these recipes, I change it up so much that it barely resembles the thing that caught my eye in the first place. Blogging has changed me for the better, though, and I’ve been revisiting my box full of clippings, even creating a culinary bucket list of things to try.

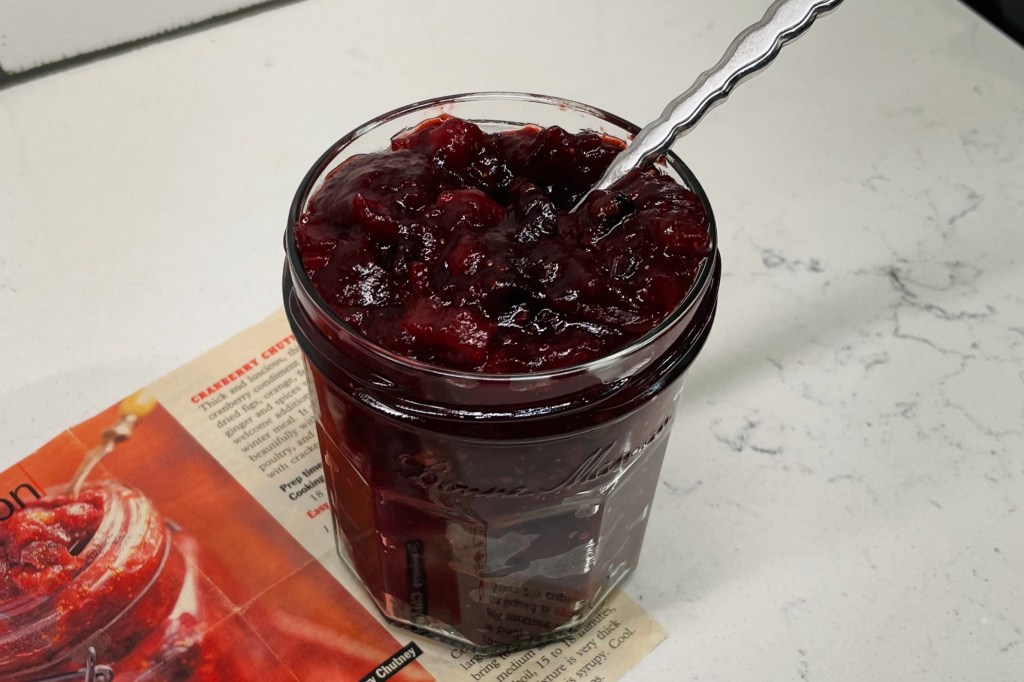
I have finally gotten around to this cranberry chutney, and for the life of me, I don’t know why I waited so long. It’s absolutely delicious! With a few adjustments (of course).


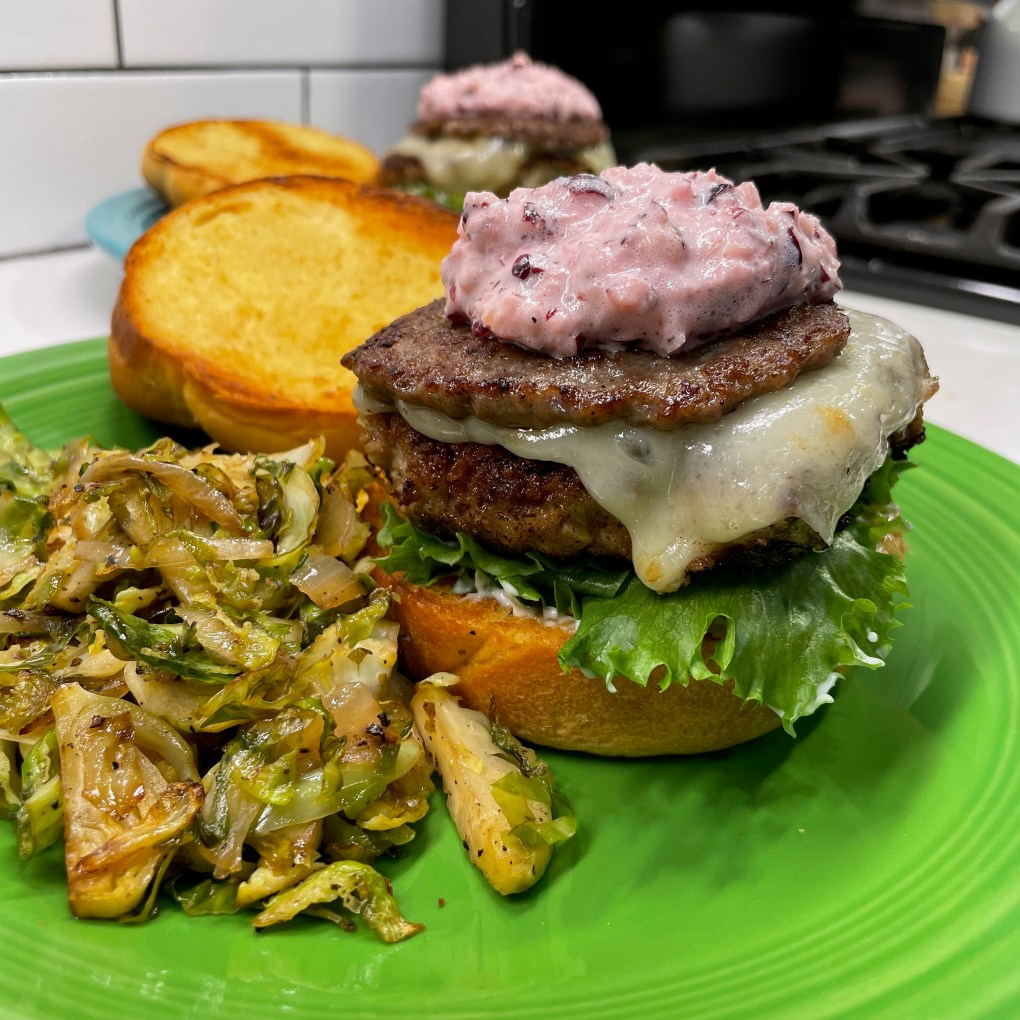
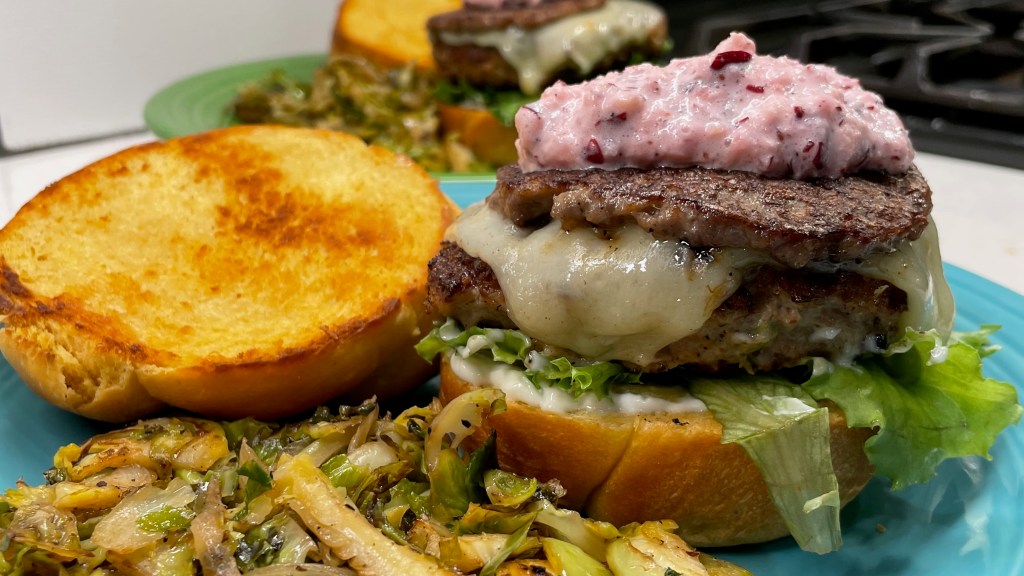
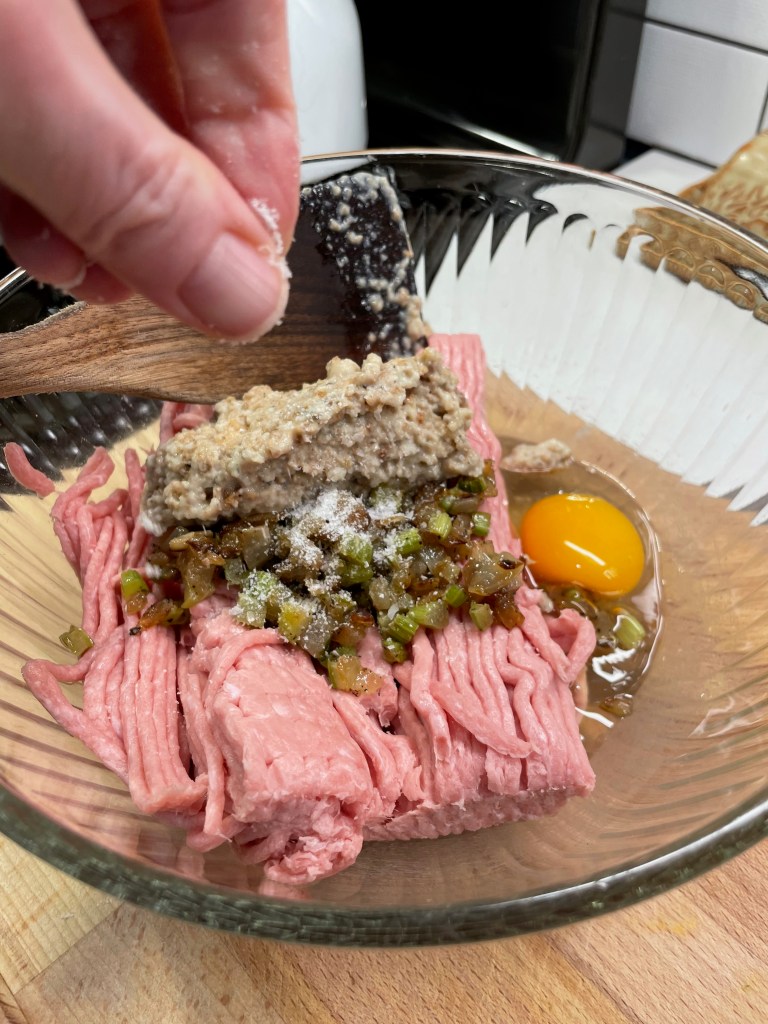
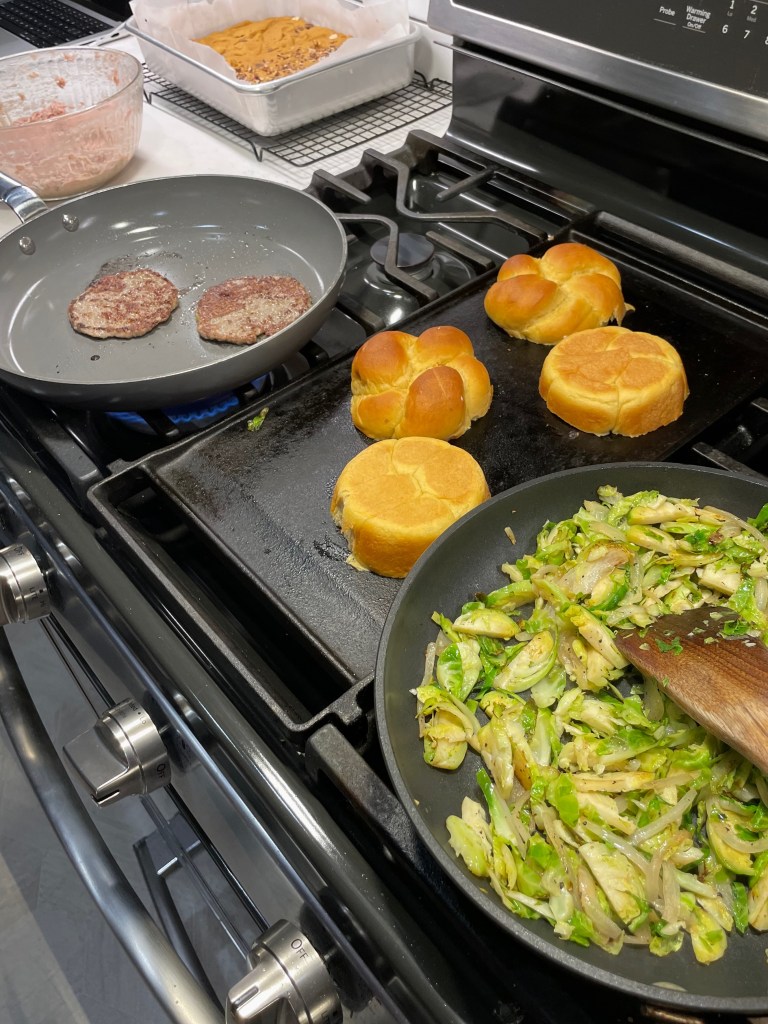
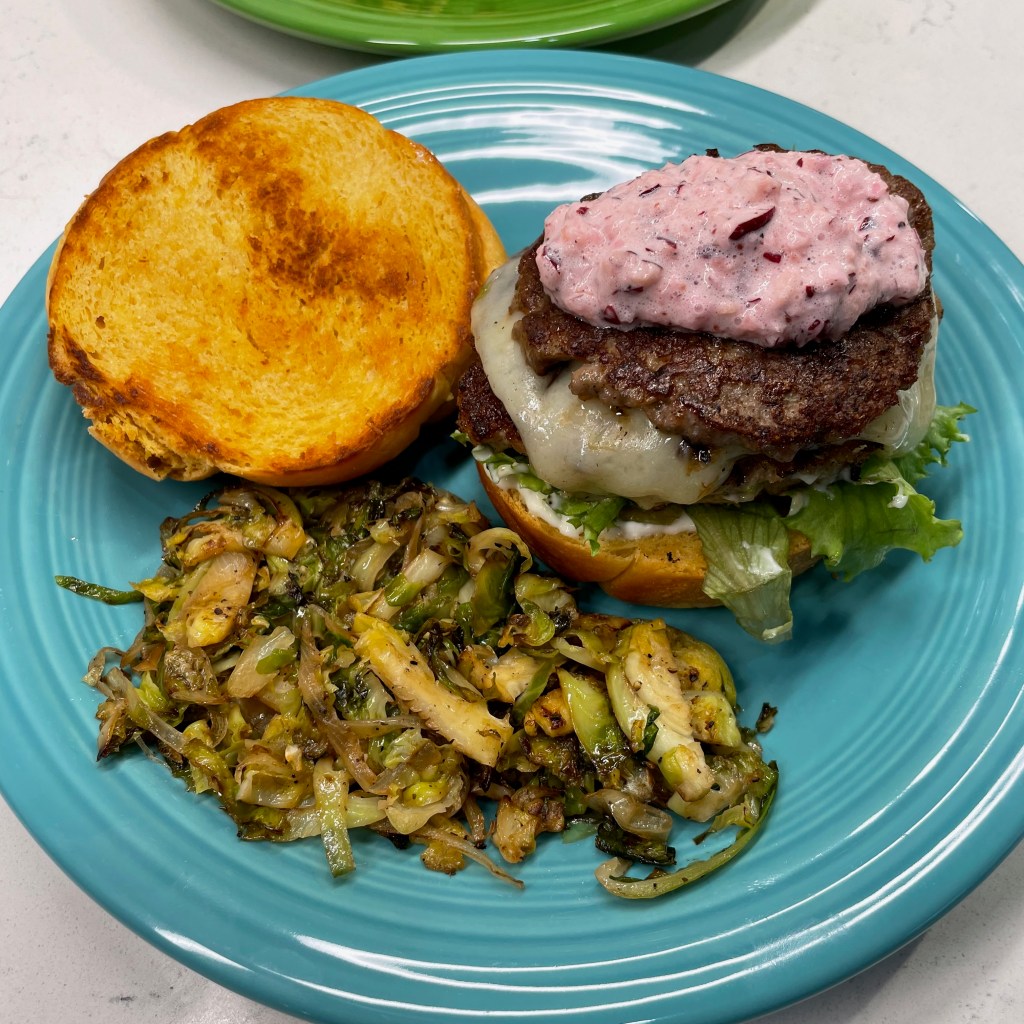
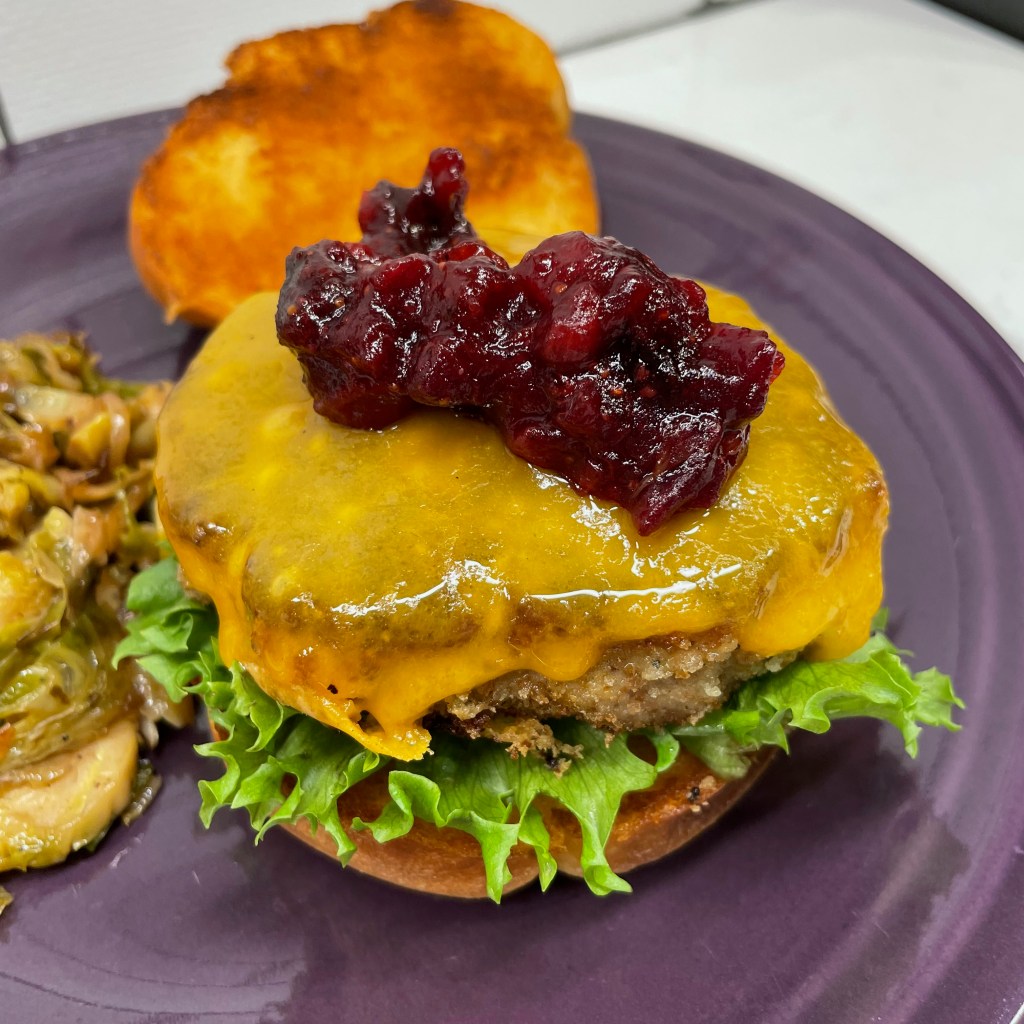
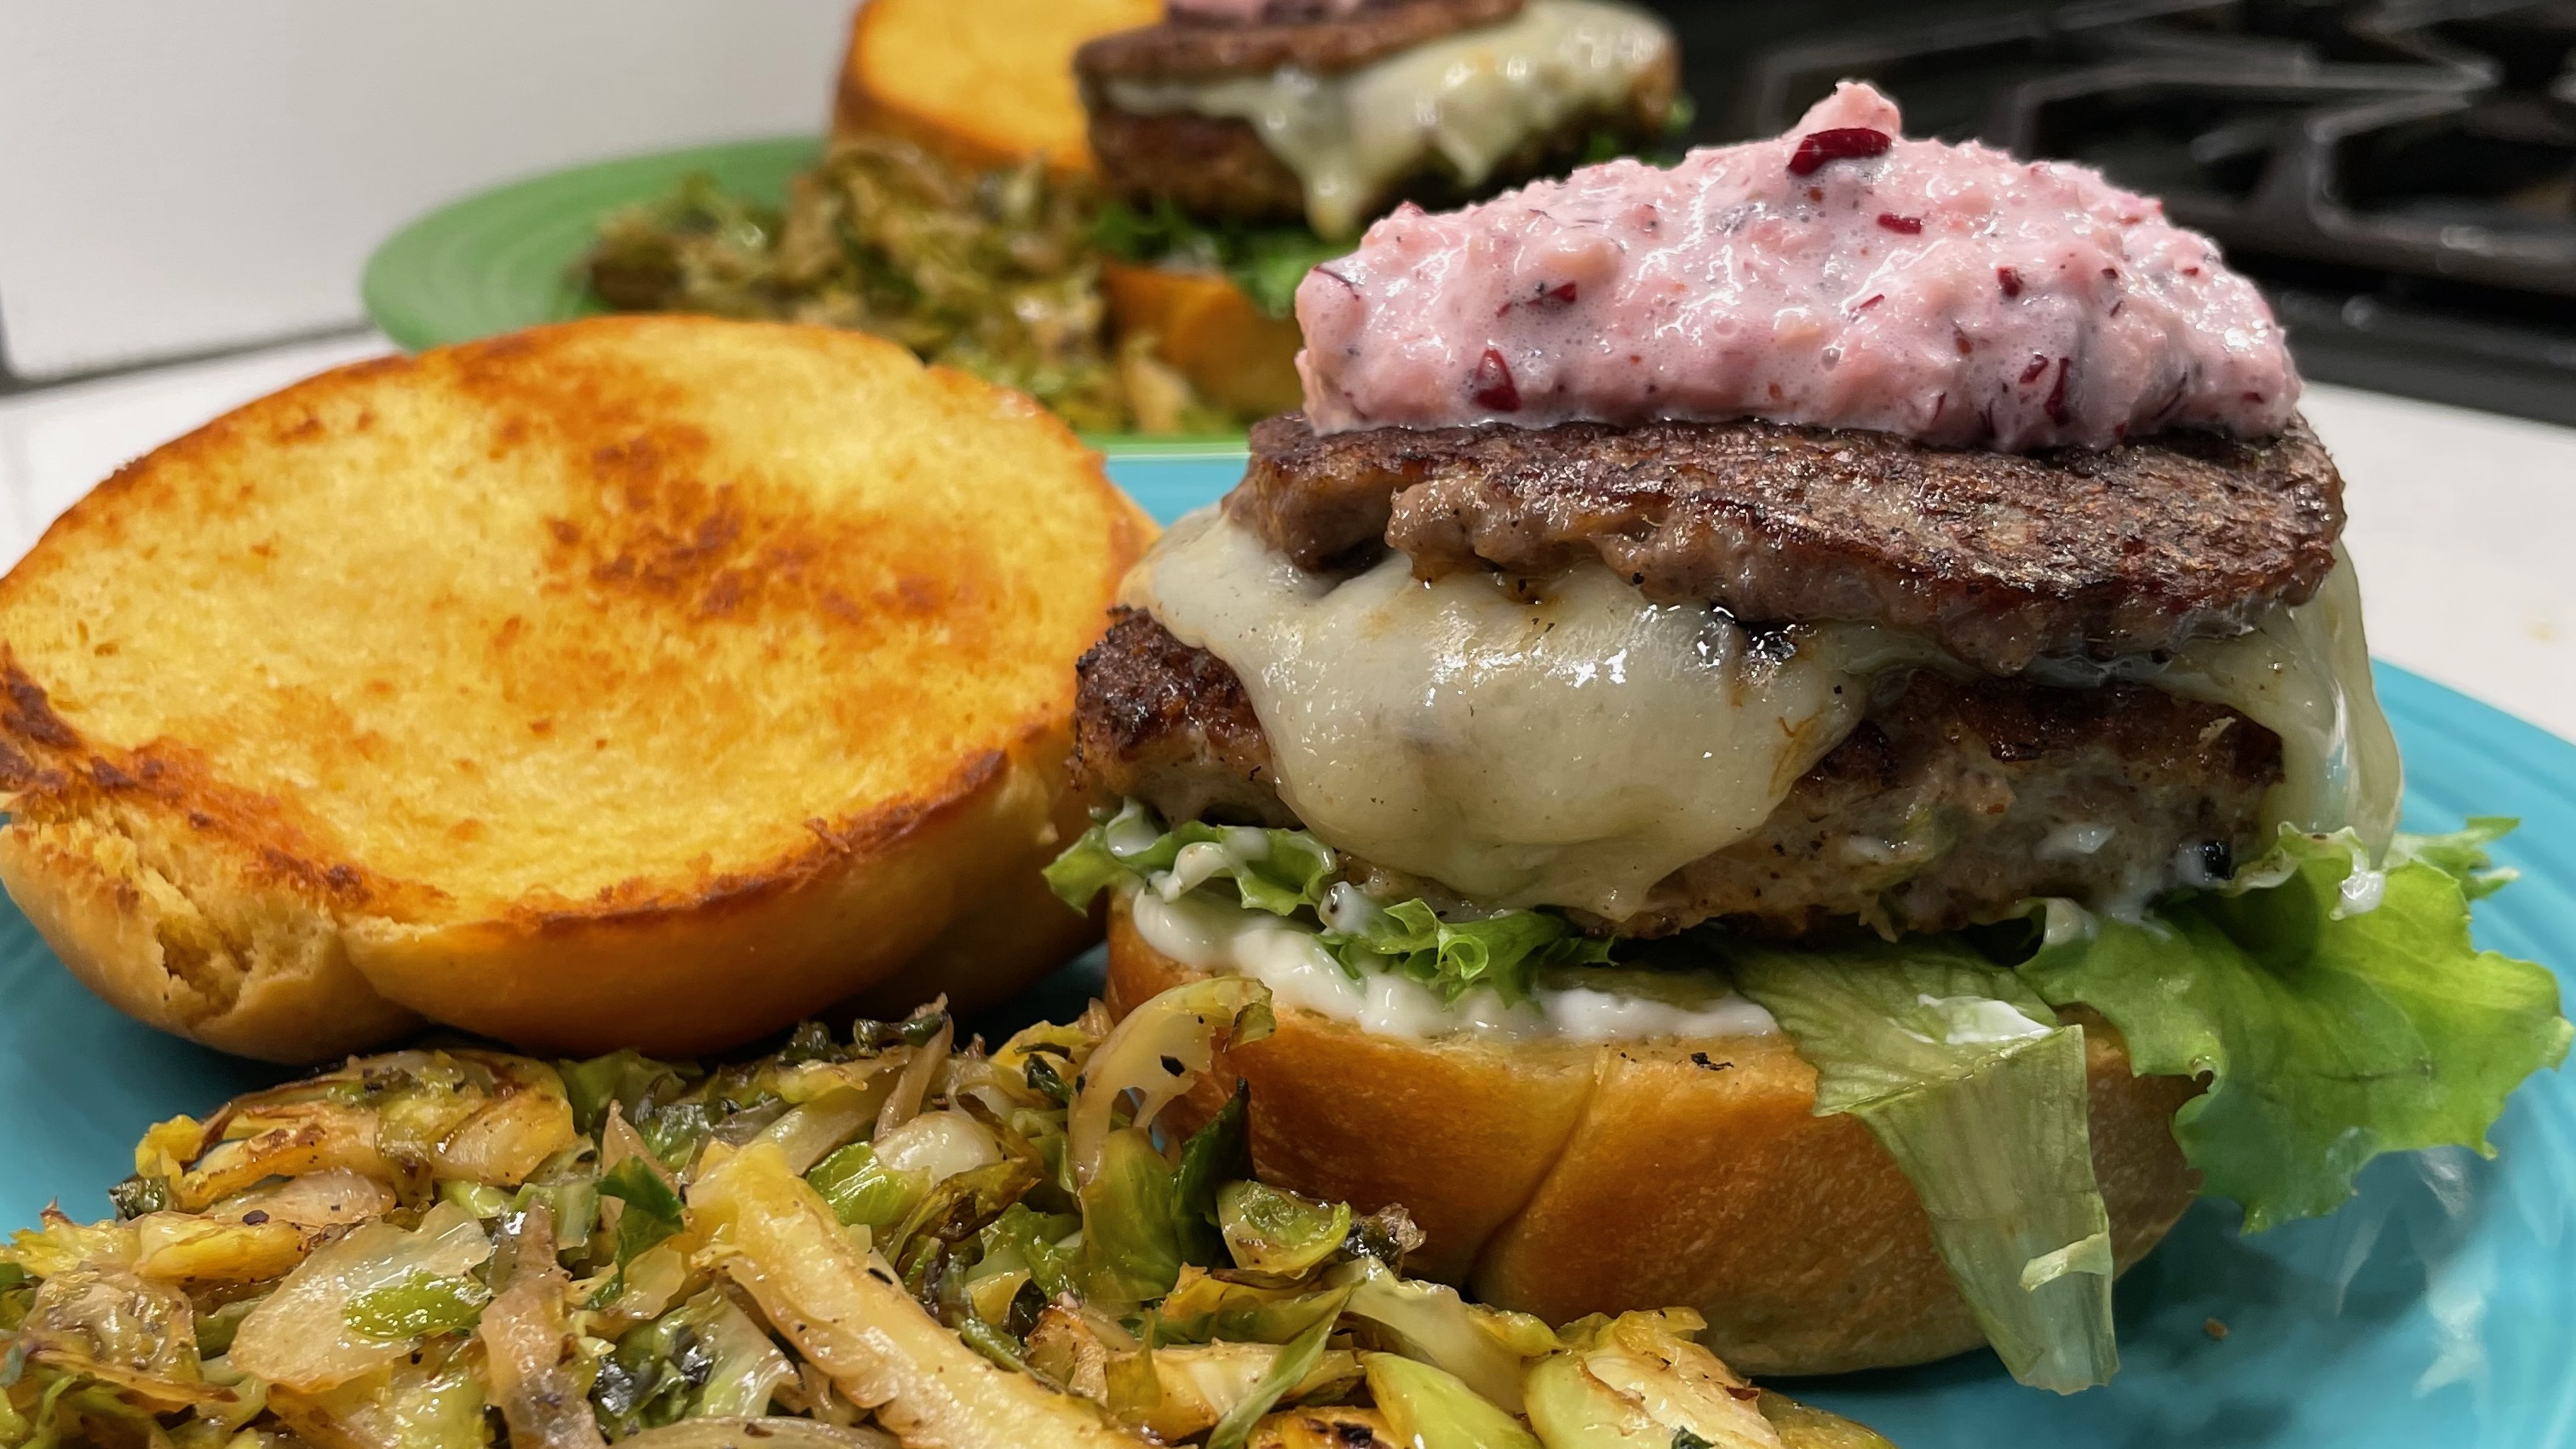
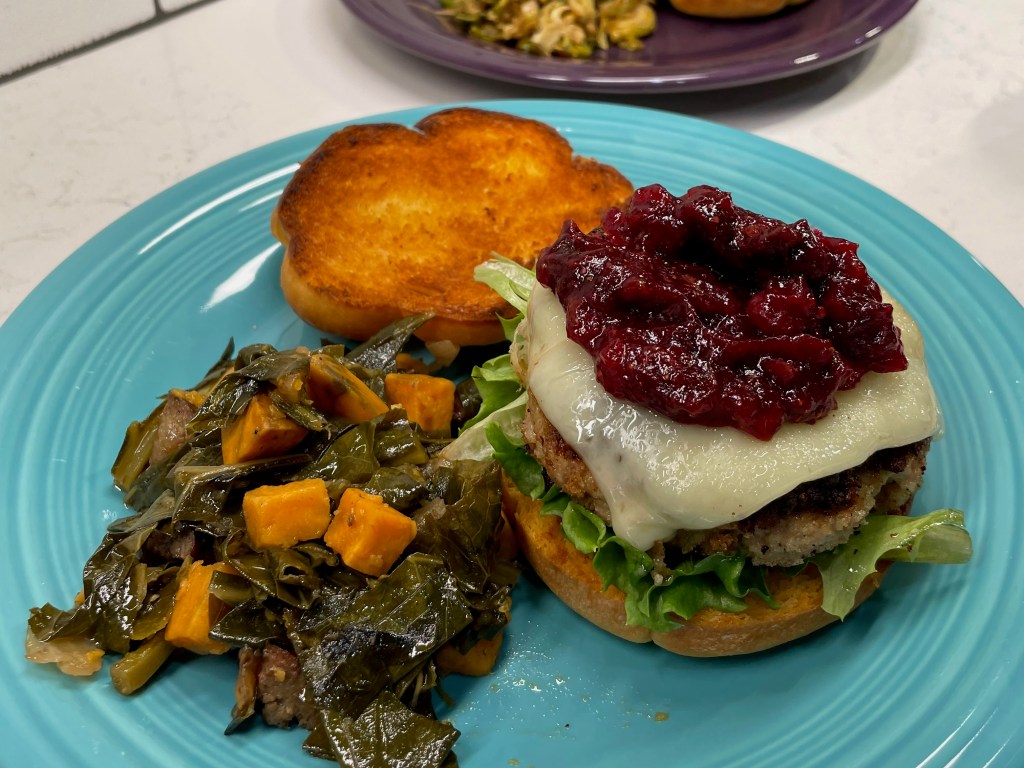
Chutney is a condiment that I only experienced in my adult years, and I appreciate it for many reasons. In addition to the warm spice flavors of India and competing notes of sweet and tart, there’s a texture element to chutney that I find most addictive. It certainly doesn’t hurt that chutney is a lovely complement to meat and vegetable dishes, and with cranberry in the spotlight, this one feels perfect for all the food holidays barreling down on us. I’m always on the lookout for an interesting twist on classic foods, and I can promise you this ruby-colored condiment will be on our Thanksgiving table, but it was also really dang good last week on my second go-round of Thanksgiving burgers.


Let’s go ahead and talk about the adjustments I made to the magazine recipe (I can’t help myself), and if you enjoy chutney as I do, I bet you’ll agree that these were necessary. 

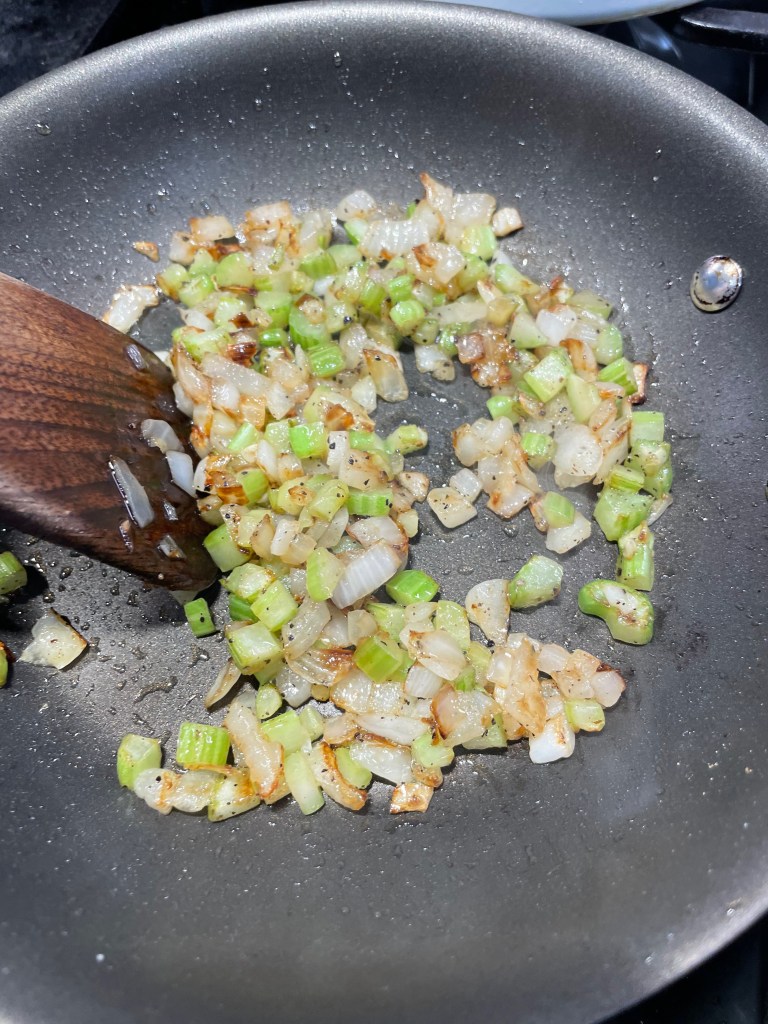
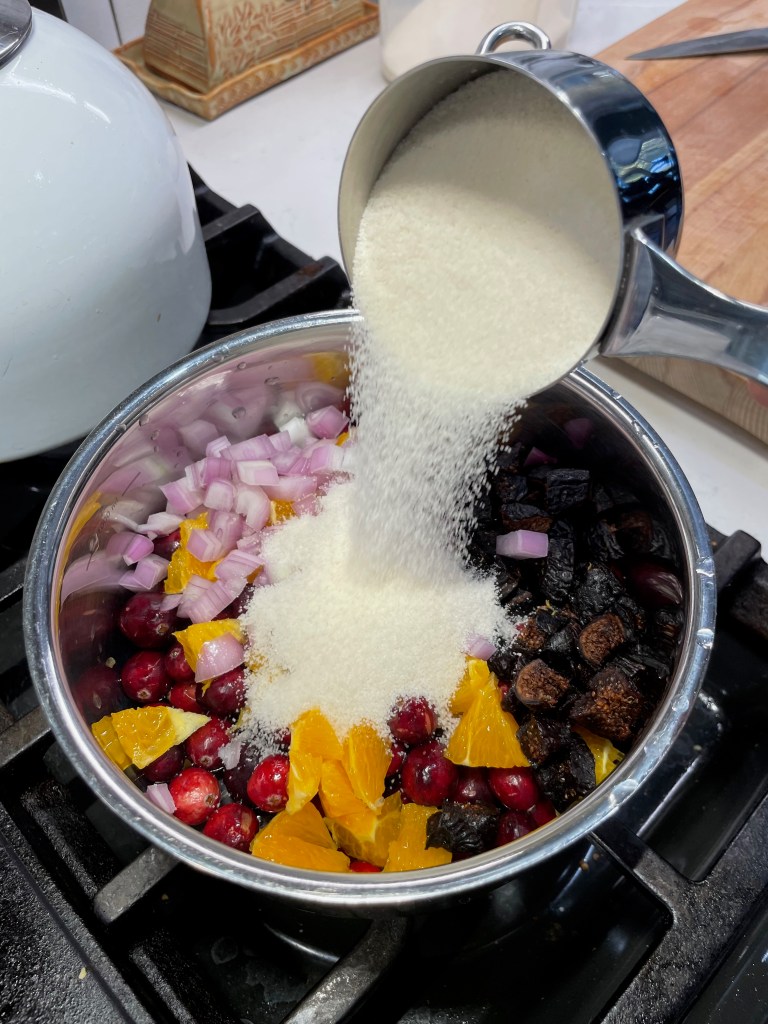
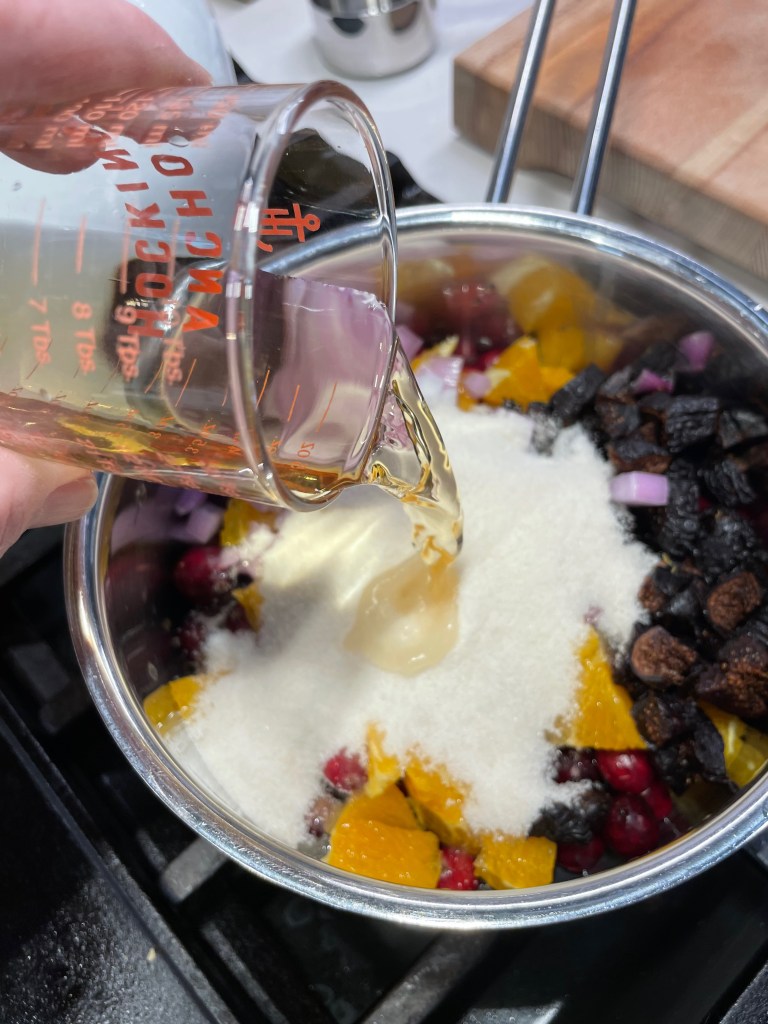
First, I knew straightaway that I would add onions to my version of this chutney, because I love the little crunch next to the tender cooked fruit and I wanted a gentle push-pull of sweet and savory in one bite. Every chutney I’ve ever loved had onions, and though sweet or even red onion would have worked fine, I chopped up a medium shallot for this. The magazine recipe had plenty of sweetness with dried figs and chopped oranges plus sugar. The fresh cranberries contributed a tart contrast, and cider vinegar gave it a slightly “pickled” flavor. The recipe called for sherry, and since I do not buy “cooking wines,” I used a generous splash of a high quality Spanish drinking sherry. It’s the holidays, why not?


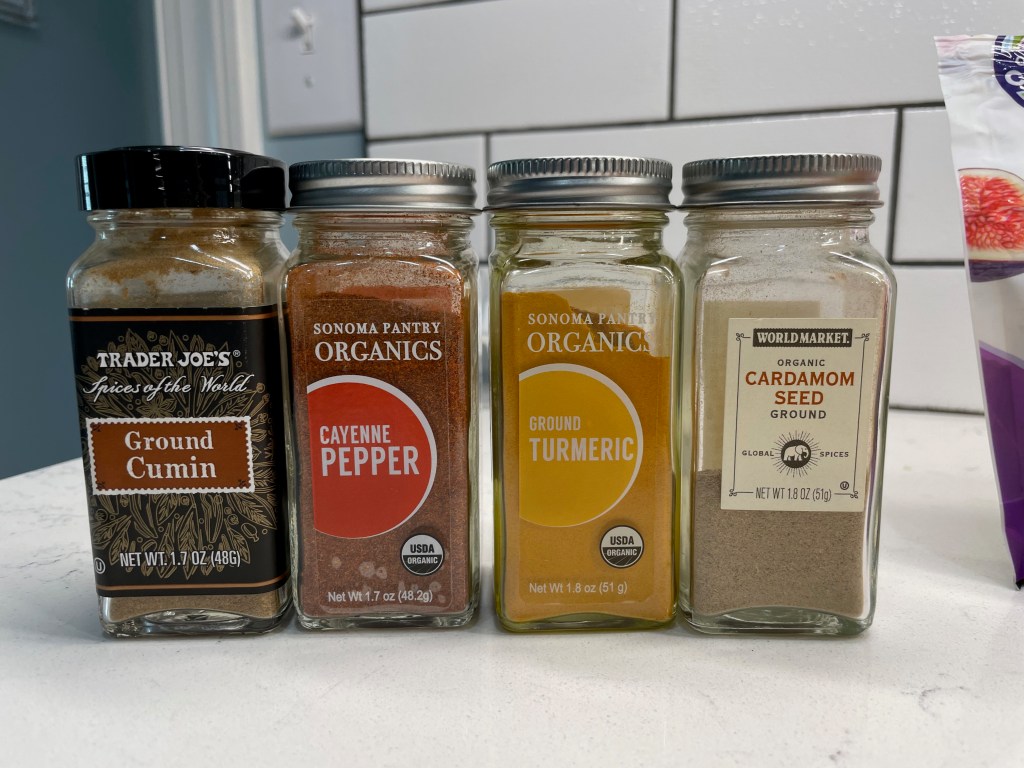
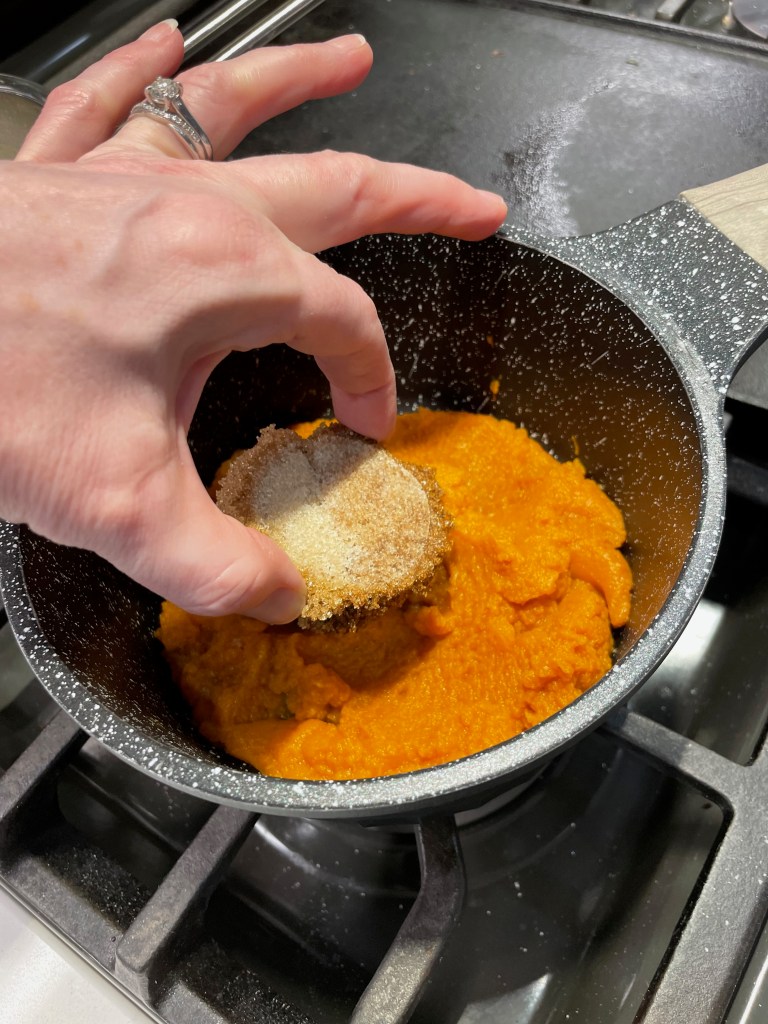
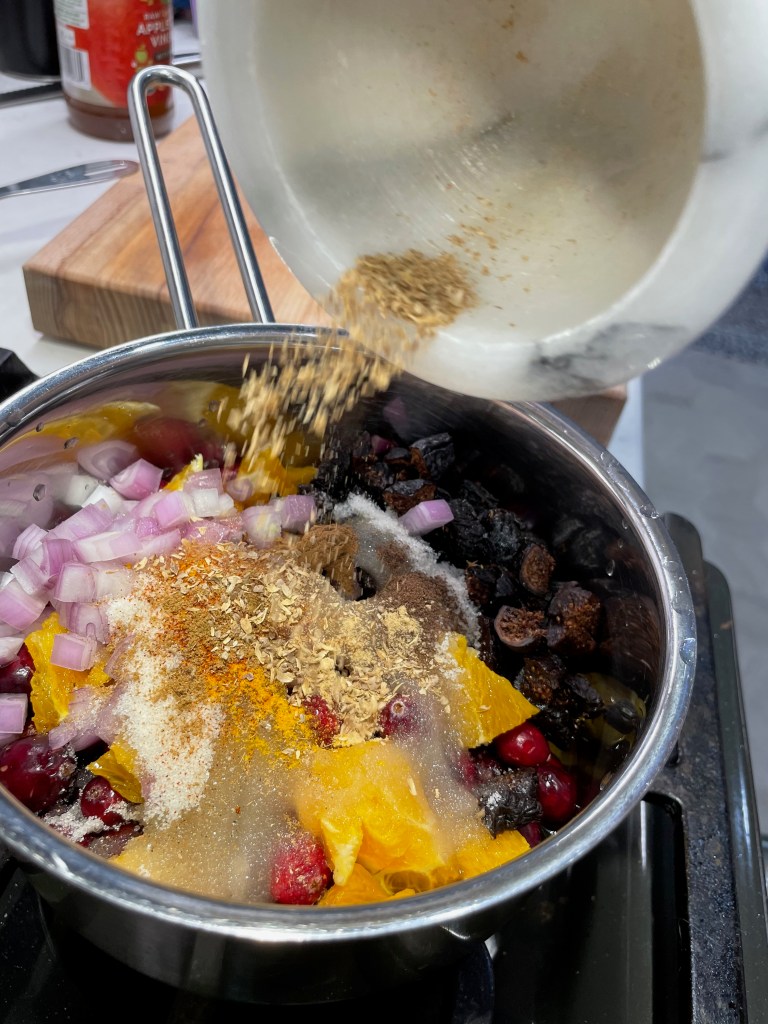
Then came the spices, and I had to improvise a bit here because I also don’t buy curry powder. It’s one of those blends that is different from one brand to the next, but I know enough about Indian flavors to estimate which ones belonged in this recipe. So I made up my own “curry” blend on the spot, with a few shakes each of cumin, turmeric, cardamom and cayenne, plus some freshly crushed coriander seed for a citrusy complexity. The recipe also suggested cinnamon and allspice, and those were easy. Ground ginger also stepped up in place of fresh, which I never seem to have when I need it.


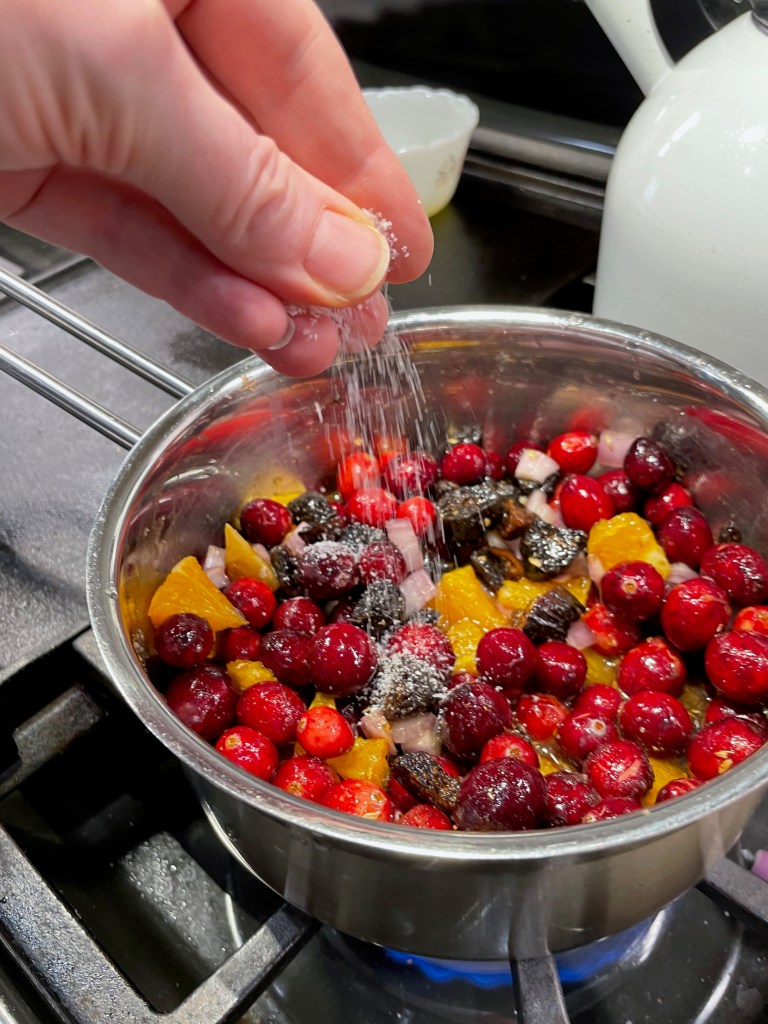
The aroma of this concoction was instantly intoxicating, and as I began to stir, it hit me that I didn’t notice on the magazine recipe one very important ingredient. I had to look again to be sure— do you see what’s missing?


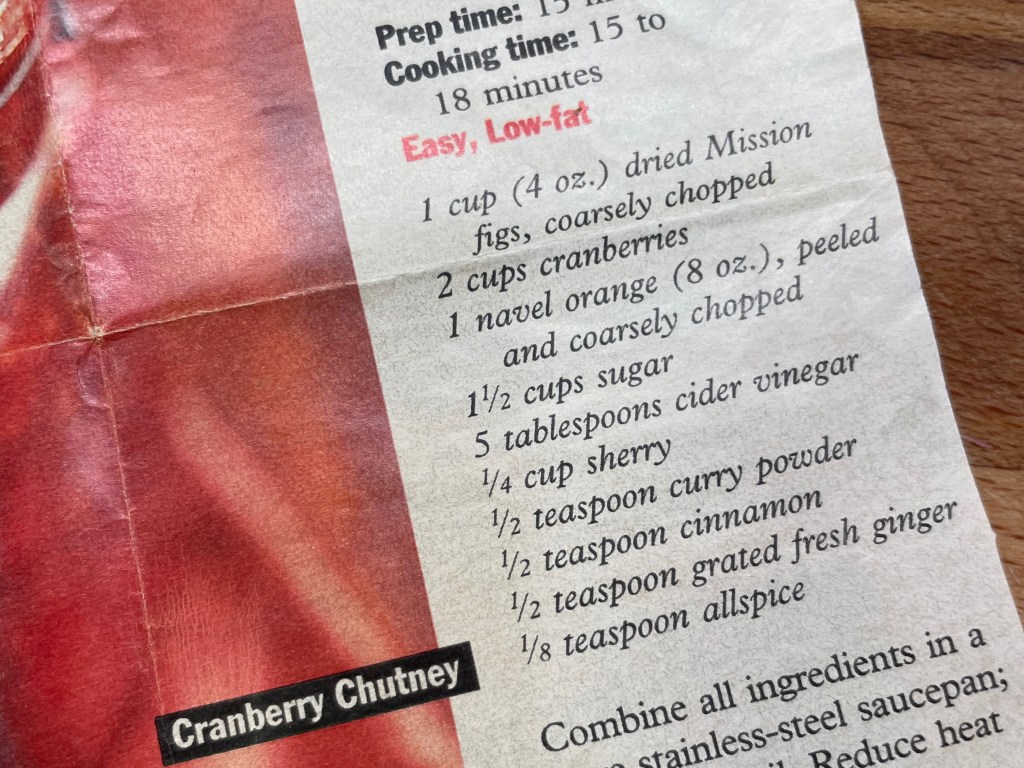
Salt, of course! Now, this may have been an oversight, or perhaps the author assumed that the reader would know to include it. This is one of the things I griped about in my post about the problem with recipes, and why I insisted that one still must know how to cook even when following a recipe. Even if this was meant to be just a “sweet” chutney, it should still have at least a pinch of salt to highlight the amazing flavors of the other ingredients. So, salt it I did.


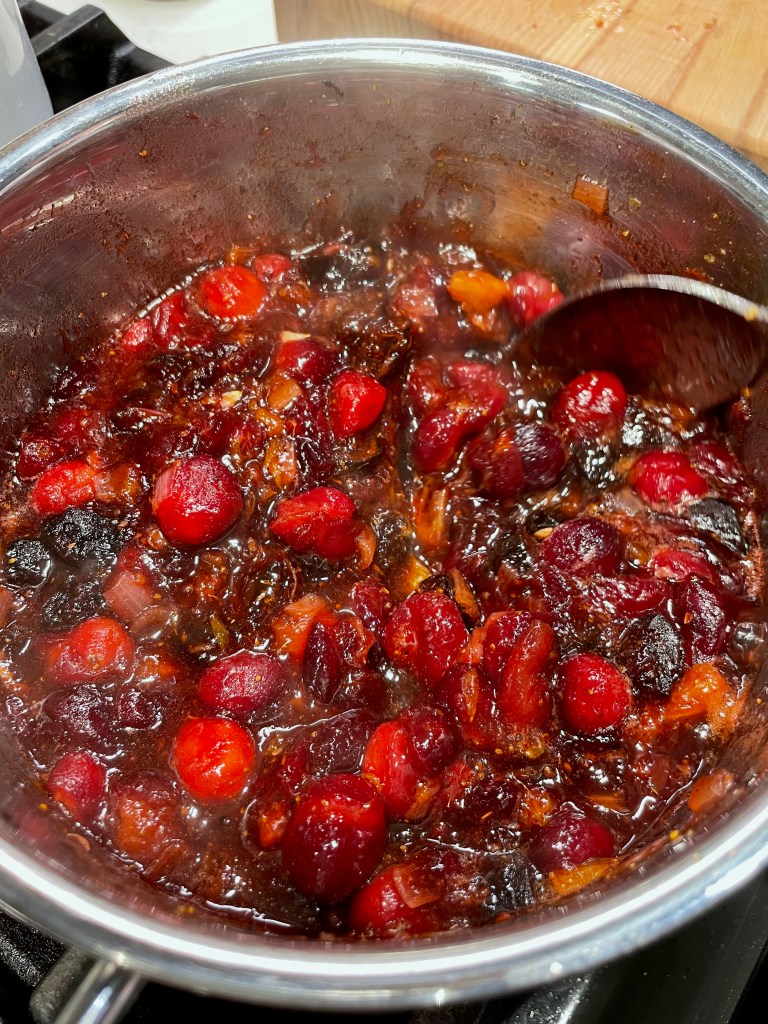
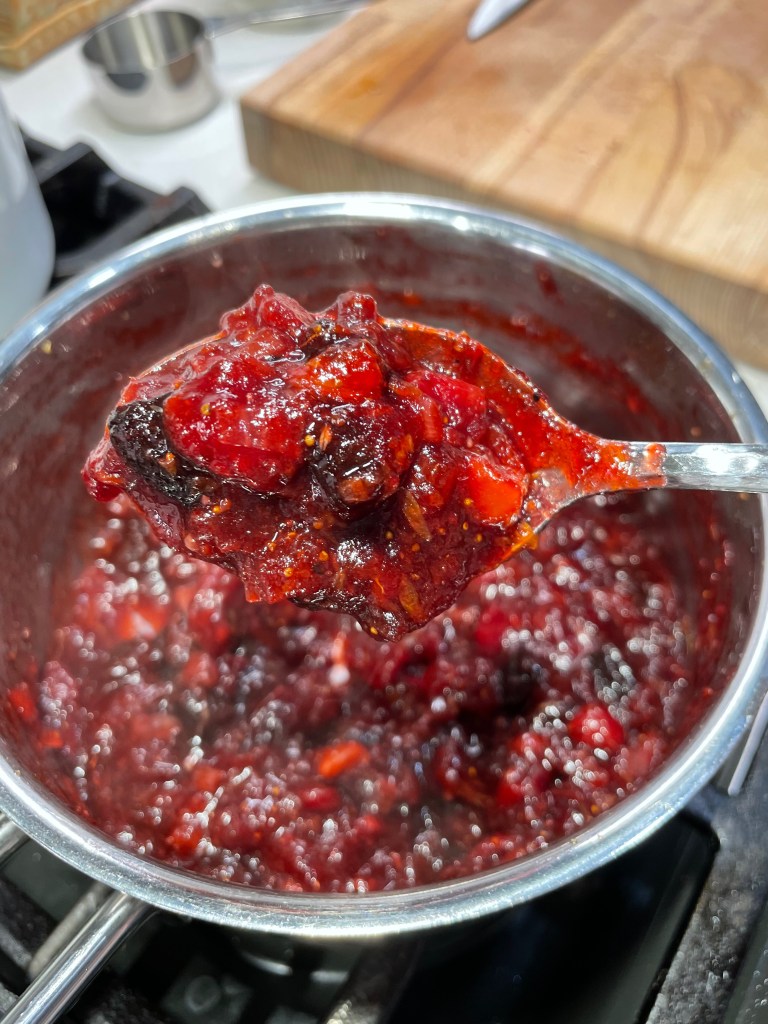
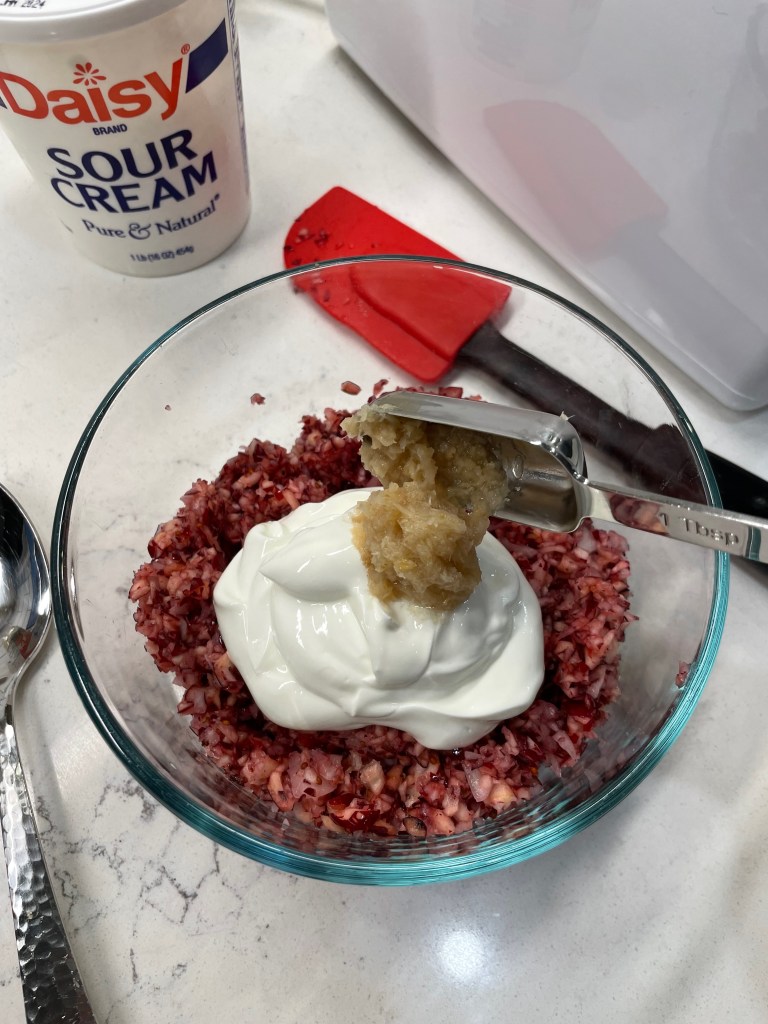
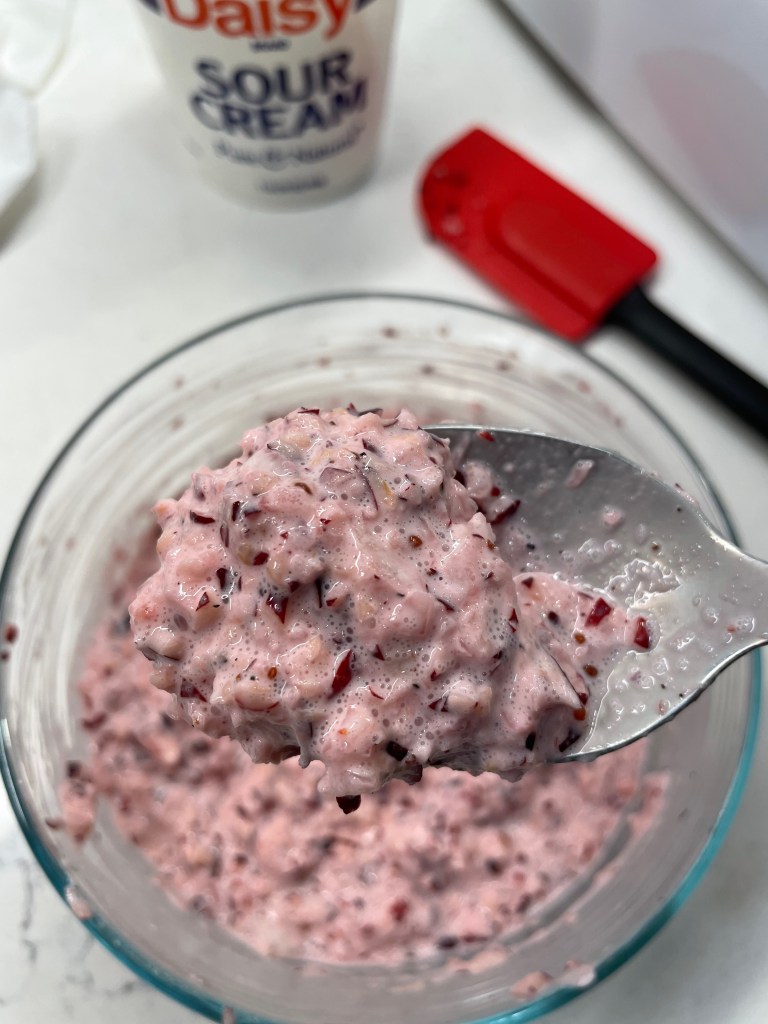
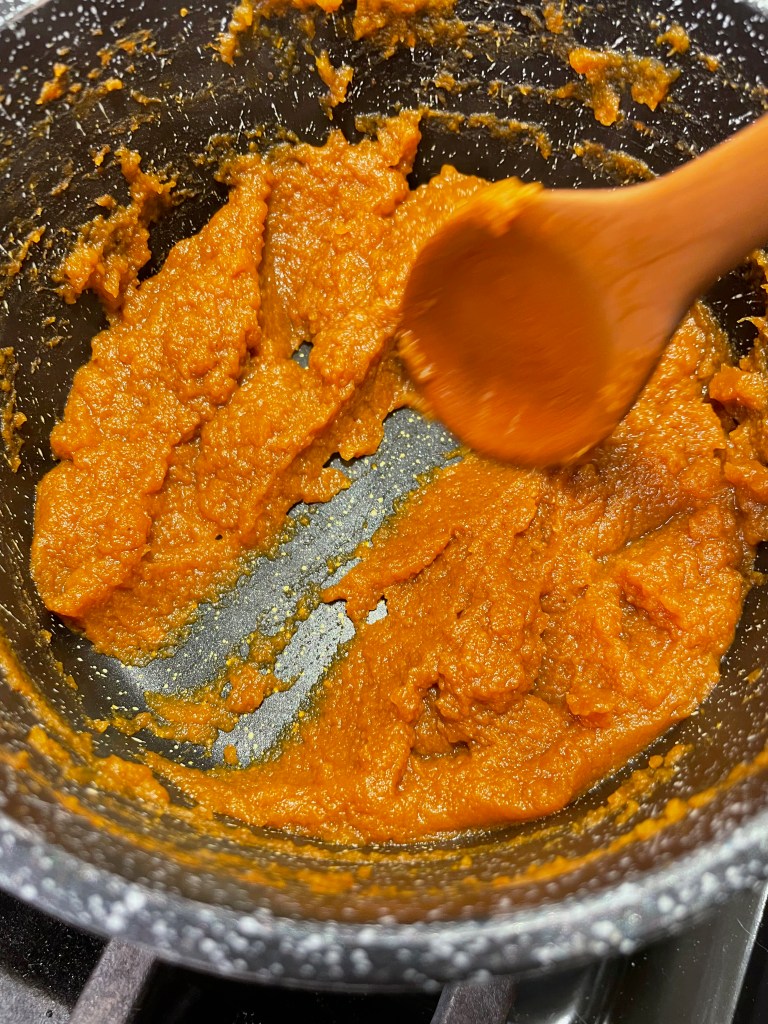
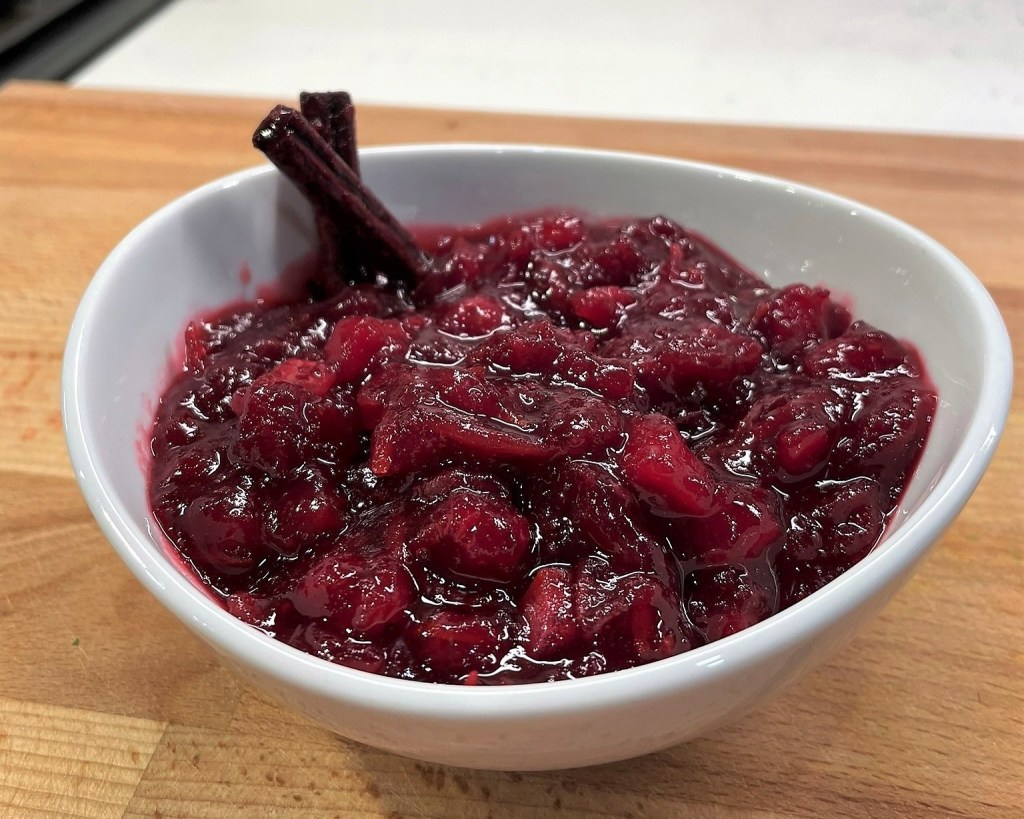
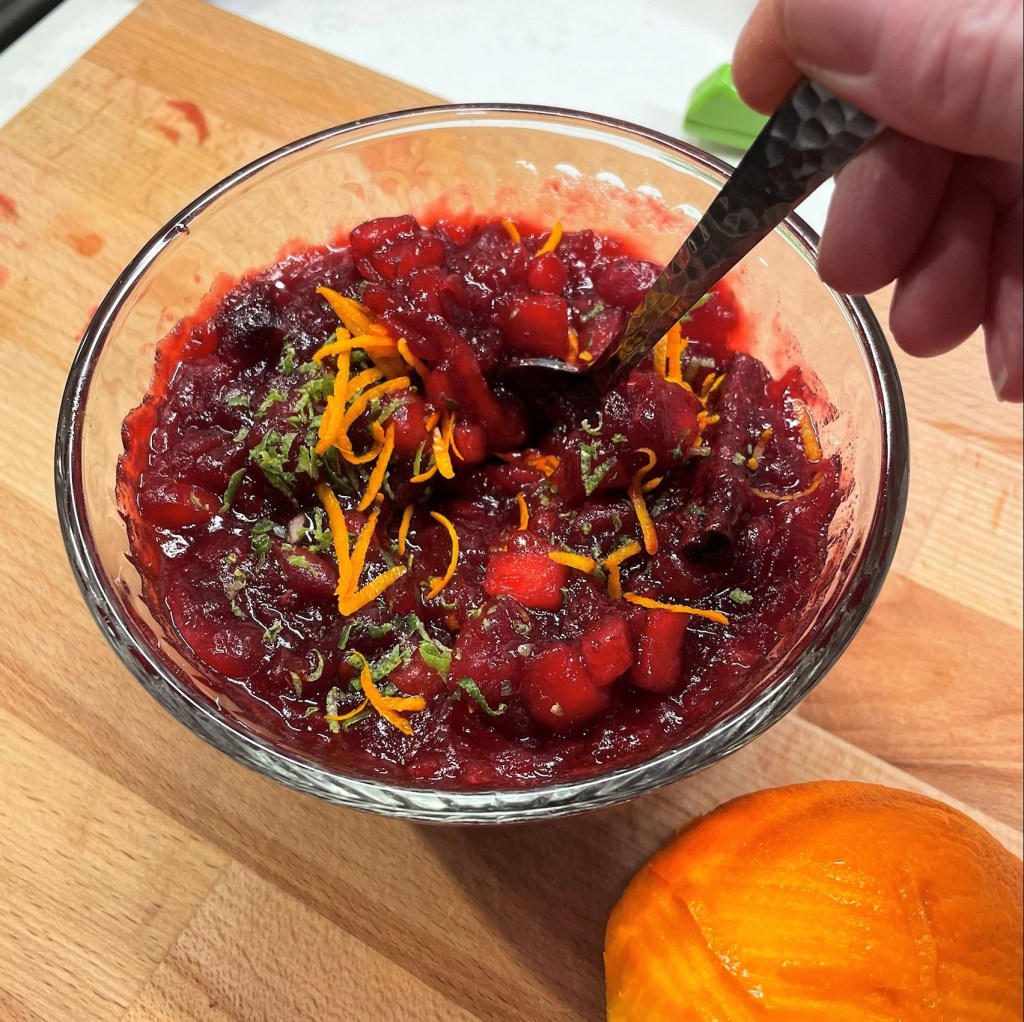
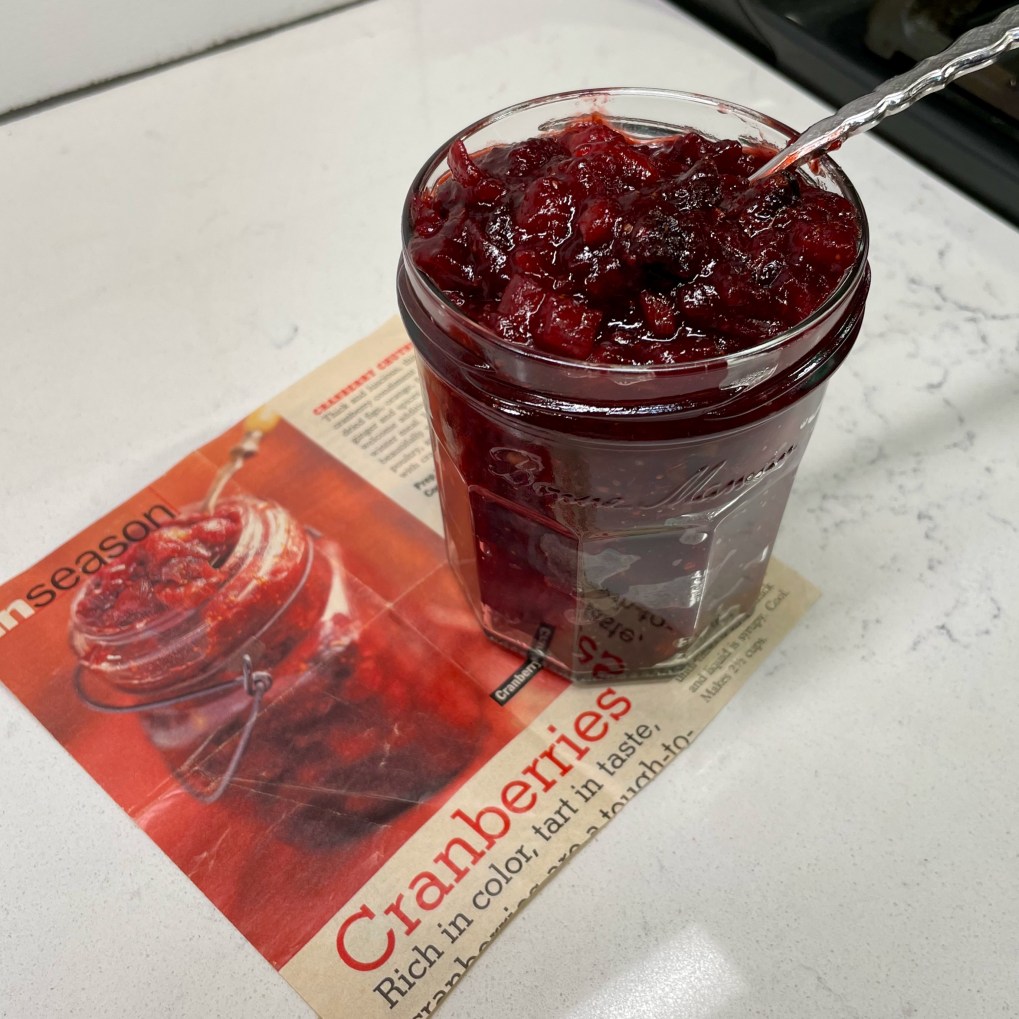
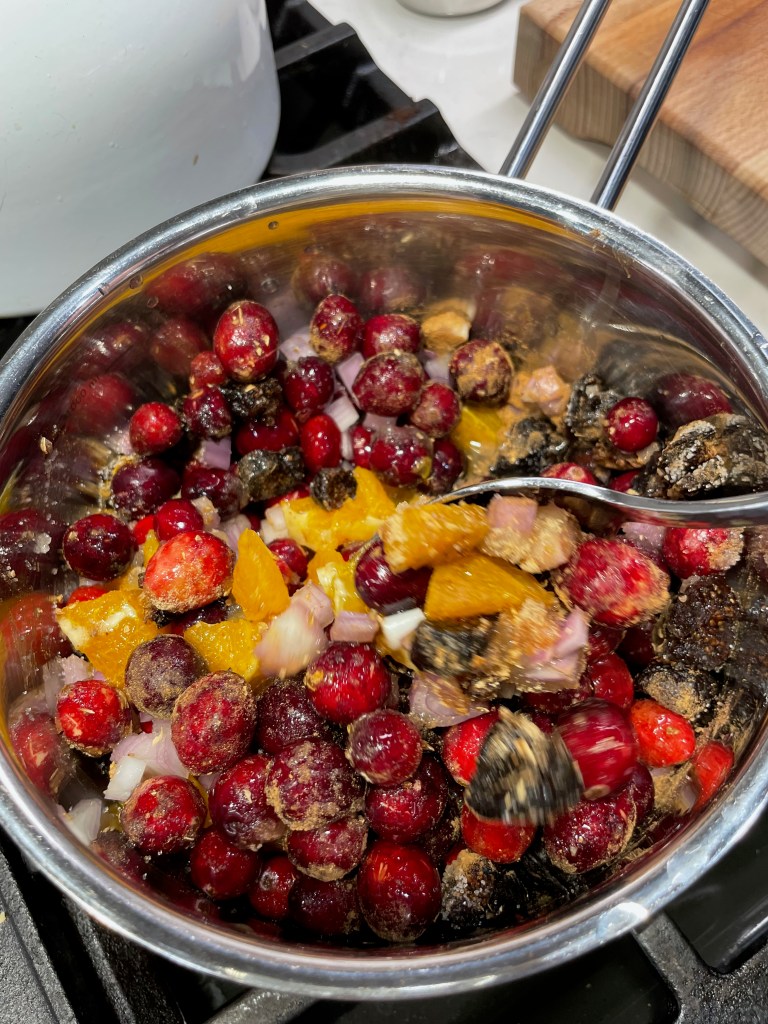
Twenty minutes later, I had this gorgeous, sweet and savory cranberry chutney. The oranges cooked down and took on the red color of the cranberries. The shallots were still a bit crunchy, the figs were delicate and chewy, and the spice aroma was just perfect. 

I’m glad I didn’t put this one off another year. It’ll be great with my roast turkey, and my taste buds want it with pork chops, salmon and chicken, too. Will you be throwing a twist onto any Thanksgiving classics this year? Let’s hear about it in the comments, just below the click-to-print recipe card. As always, feel free to adjust to taste. 😉


Sweet & Savory Cranberry Chutney

  • Servings: About 8
  • Difficulty: Easy
  • Print

This mouthwatering chutney brings a Thanksgiving classic together with warm Indian spices and crunchy bits of onion, making it a fantastic sidekick to pork, chicken, fish and (of course) roasted turkey!


Ingredients

  • 1 cup fresh cranberries, rinsed and picked over for duds
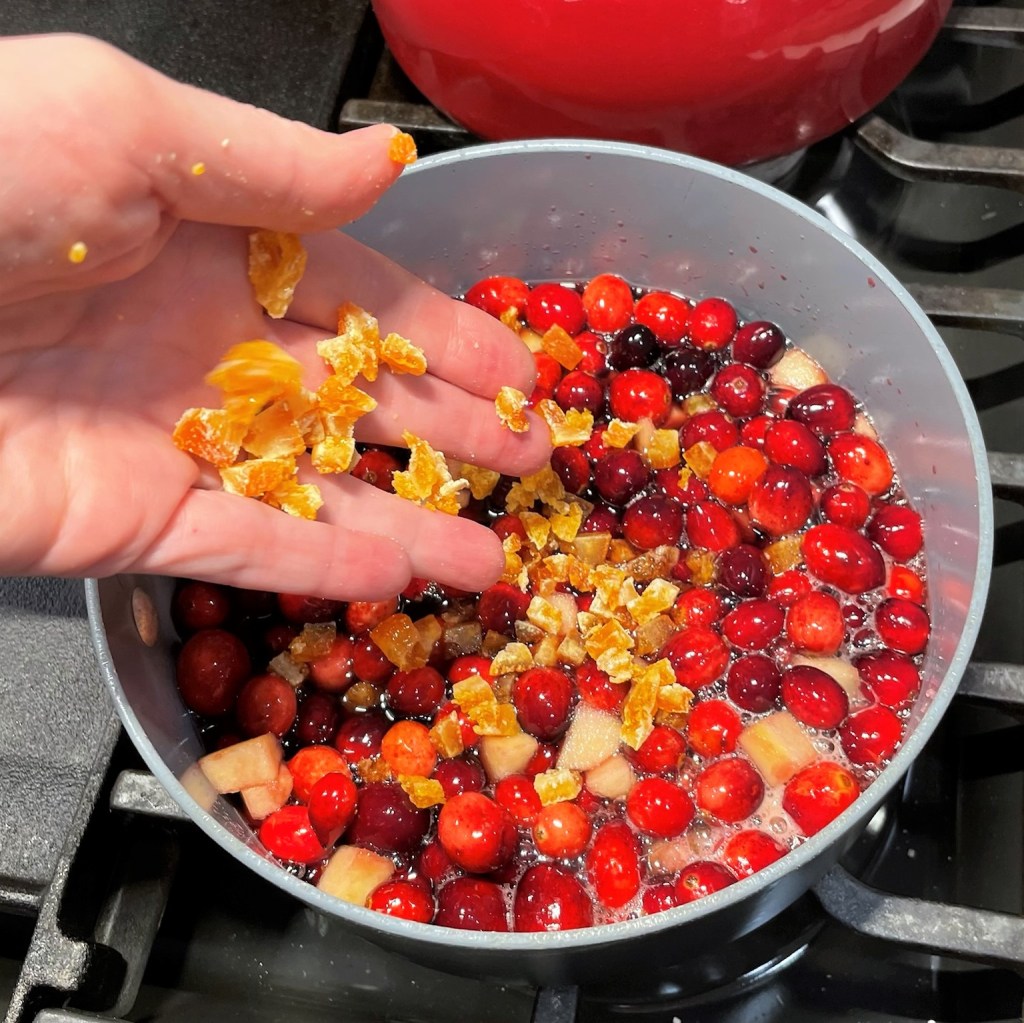
  • 1/2 cup dried mission figs, stems removed and coarsely chopped
  • 1/2 fresh navel orange, peeled and chopped
  • 1 medium shallot, minced
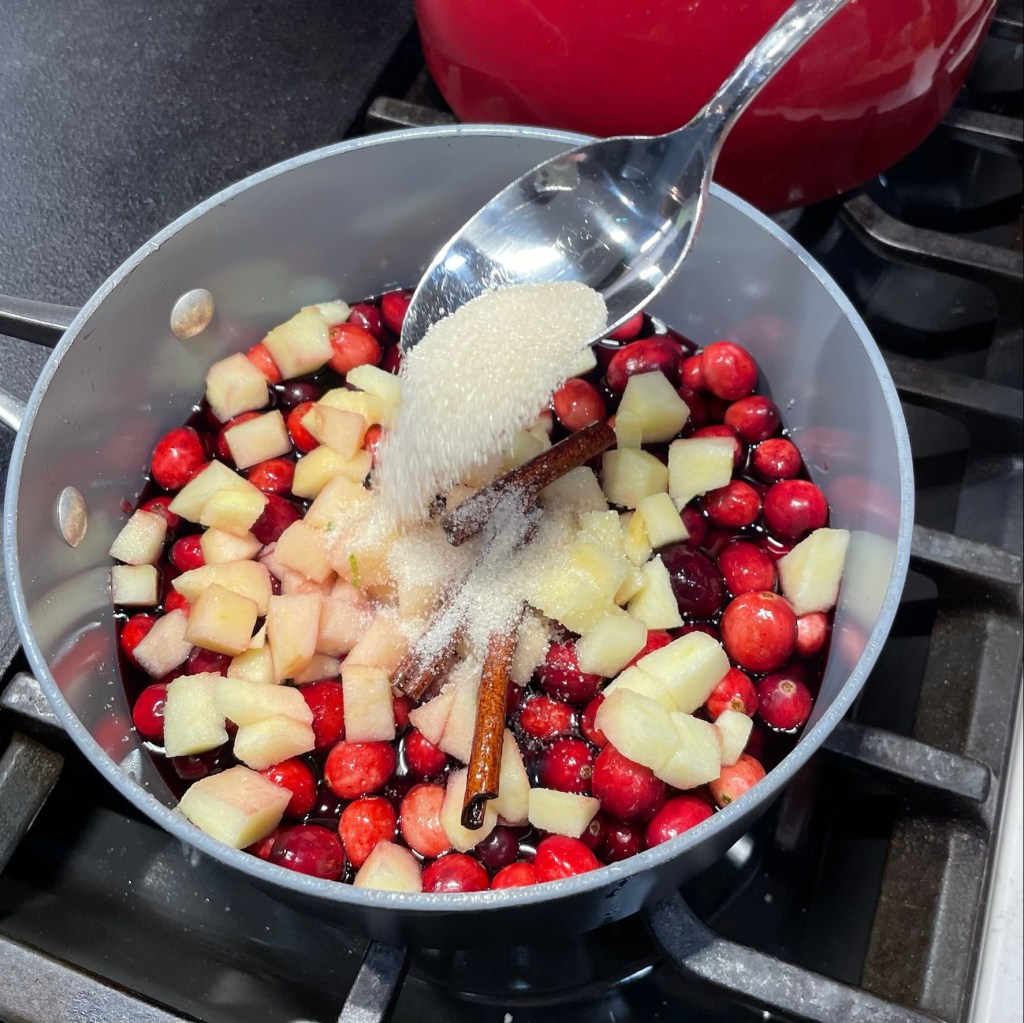
  • 2/3 cup granulated sugar
  • 2 1/2 Tablespoons cider vinegar
  • 2 Tablespoons sherry (optional)
  • 1/4 teaspoon ground cinnamon (mine was smoked)
  • 1/4 teaspoon ground ginger
  • 1/8 teaspoon ground coriander (a similar amount of crushed seeds)
  • two shakes each ground cumin, cardamom, turmeric and cayenne* (see recipe notes)
  • two or three shakes ground allspice
  • a generous pinch of kosher salt

Notes: If you have a curry powder blend, 1/4 teaspoon of it will suffice in place of the cumin, cardamom, turmeric and cayenne listed above.

This was my first time making this wonderful chutney, so my ingredients represent a half-batch, which was enough to fill a jelly jar. Next time, you can bet I’ll make a whole batch!

Directions

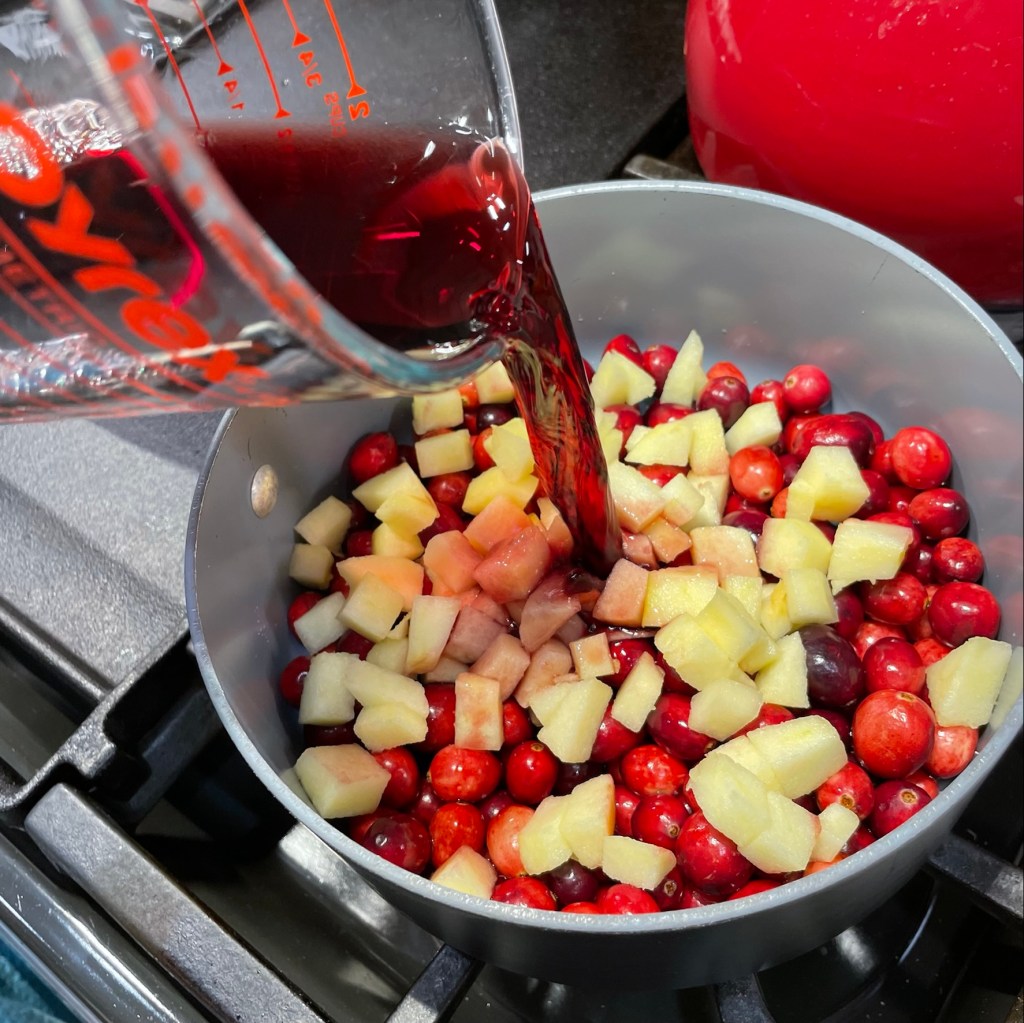
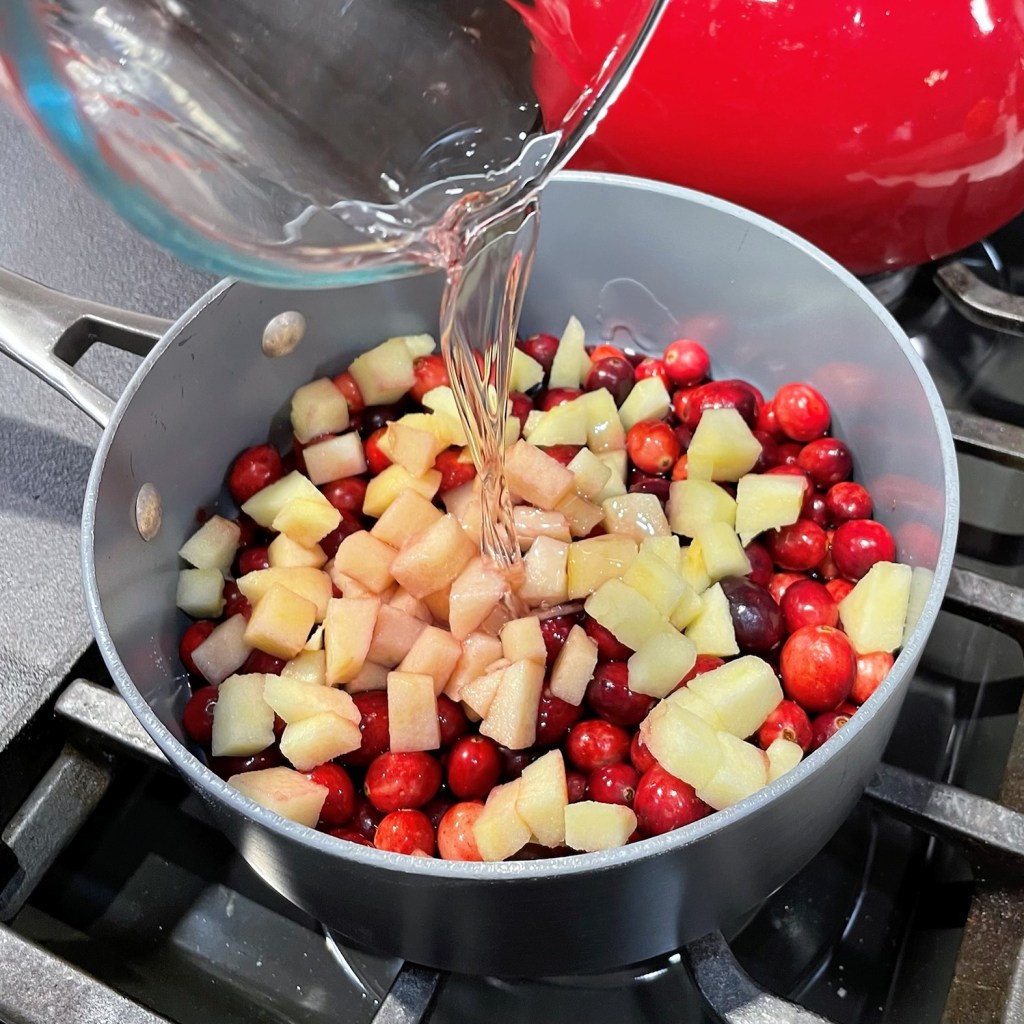
  1. Combine cranberries, oranges, figs and shallots in a small saucepan.
  2. Add sugar, vinegar, sherry and spices (plus salt) and toss to distribute the spices. Cook over medium heat until the mixture comes to a boil, then reduce heat and simmer for about 20 minutes. As the cranberries soften, use the back of your mixing spoon to gently smash them.
  3. Allow chutney to cool to room temperature (it will thicken as it cools), and then transfer it to a clean jar to store in the refrigerator.


The Thanksgiving Burger

Now and then, my smartphone surprises me with an unsolicited trip down memory lane, in the form of a fully animated slide show recapping a theme, an occasion or a season from my past. The most recent of these was a reminder of “Thanksgiving through the years,” and the images from 2020 and 2021 struck me because those years were so different when we were all sidelined by the Covid-19 pandemic. 

As the past-years’ photos scrolled to an indiscernible soundtrack, I noticed that in addition to the more adventurous dishes my husband and I created in 2020 (we figured a dinner without guests was a good time to experiment), I also created some meals that were scaled way back from the usual spread, in a way that might ease the expectation of a full-blown Thanksgiving but still satisfy the yearning for its traditional flavors. These two were delicious enough to make again one day.


Thankfully, Covid has evolved to become more a nuisance than cause for panic (for most of us), and gathering with loved ones is fun again. At our house, we are counting the days until Thanksgiving (14 to go)! But some people still have neither the time nor inclination to produce an entire spread for Thanksgiving, and that has me thinking again about ways to capture the essence of the occasion in a single, simple bite. This is my first— but not last— attempt at making a Thanksgiving burger.

Pretty, isn’t it? 🙂

The Plan

I started this recipe with the bun, and though I considered a store-bought potato bun, I went instead with a recipe I found on King Arthur Baking website for sweet potato sandwich rolls They were very easy to make, and I followed the KA recipe to the letter. The recipe is linked, if you’d like to try them.

My burger is made from ground turkey, with sautéed celery and onions, plus an egg and a panade of herb stuffing mix blended in for structure and traditional flavor. The “burgers,” which were really more like meatloaf patties, were embellished with a spoonful of poultry seasoning to amplify the familiar Thanksgiving flavor. 


I thought, for a change of pace, this would be a good time to try the famous “NPR cranberry relish” that I’ve read about over the years. It uses fresh cranberries, sour cream and horseradish, if you can believe it. I made an only a half batch because Les tolerates horseradish but doesn’t love it as much as I do. More on this in a moment.


Sausage is a core ingredient of my usual holiday dressing, so I flattened some maple sausage patties and cooked them up to layer with my burgers. I buttered and griddled the sweet potato rolls, melted a slice of apple-smoked gruyère over the burgers, topped them with the thin sausage patties and loaded them onto the buns with some baby romaine for freshness.


My first Thanksgiving burger, with a side of shaved Brussels sprouts, sautéed with onions, salt and pepper.

The Verdict

I had covered all the flavor bases with my plan— sweet potato, turkey, stuffing and cranberry— and overall it was a very tasty burger, but it didn’t exactly scream “Thanksgiving” to me and my husband, and so there will be other efforts. The sweet potato rolls (which I made exactly as written on the KA site) were wonderful, but very subtle in sweet potato flavor and too tall for this sandwich, and that made taking a bite a little tricky (and messy). The herb-seasoned turkey patties were moist and tasty and their crunchy exterior was spot-on. They could have carried a bit more of the savory herb flavor, but otherwise they were excellent and I’ll make them again, for sure.

What about that unusual cranberry relish? This “famous” recipe was the biggest surprise for me, and not in a good way. As someone who really loves the zing of horseradish, I found this stuff—which has oodles of rave reviews online, by the way— to be rather plain, runny and uninteresting, even with the extra hot horseradish. My husband thought the sandwich would be better with a more traditional cooked cranberry topping, and I agreed.

As luck and leftovers would have it, I did have a chance to try again with a few changes! On my second run, I skipped the sausage altogether, and I tried a different cranberry concoction that was so delicious, I will be super excited to share it with you in a post of its own later this week!

Les also requested cheddar rather than the fancy schmancy gruyère. 😉

What about next time?

There’s still room for improvement on this idea and I’m keeping it in the “in-progress” column of my bucket list until I get it right. I’ll share below the recipe I created for the turkey patties because that part of the recipe was great, Thanksgiving or not. But I’d really like to hear from you, too, so that I might incorporate your ideas into a future iteration of the burger. How would you bring your favorite traditional flavors into this “Thanksgiving-in-a-bite challenge?” Please share your ideas in the comments section, and let’s see what we can come up with together!

The Thanksgiving Burger 1.0

  • Servings: About 5
  • Difficulty: Average
  • Print

The rest of the burger is a work in progress, but this recipe for Thanksgiving-flavored turkey burger patties is a keeper!


Ingredients

  • 1/2 cup Pepperidge Farm herb seasoned stuffing mix, crushed
  • 1/3 cup milk, to moisten the stuffing mix
  • 1/2 sweet onion, minced
  • 1 rib celery heart, strings removed and minced
  • 1 Tbsp. extra virgin olive oil
  • Salt and pepper
  • 1 pound ground turkey (I used 90% lean, but turkey breast would be great, too)
  • 1 large egg
  • 1 teaspoon ground poultry seasoning (I used Bell’s brand)
  • Additional 1/2 cup herb stuffing mix, crushed for coating the burgers before frying
  • Olive oil for frying

This ground turkey mixture is much leaner and softer than a typical burger mixture. For easy shaping of the patties, spoon dollops of the meat mixture onto a sheet of parchment paper that is sprinkled with the additional herb stuffing crumbs. Scatter more crumbs on top of the meat dollops and fold the parchment over them to flatten with your palm or a spatula. Be gentle with them, and keep them on the parchment until the skillet is ready.

Directions

  1. Combine herb stuffing crumbs and milk in a small bowl and let rest for at least 15 minutes to soften into a panade. This mixture will help bind together the other ingredients into patties.
  2. Heat a small skillet over medium heat. Add first measure of olive oil and sauté onions and celery until softened. Season with salt and pepper.
  3. In a medium mixing bowl, combine ground turkey, panade, sautéed vegetables, egg and poultry seasoning. Season with salt and pepper. Use a heavy wooden spoon or your hands to fully blend the burger ingredients. Cover bowl and refrigerate a few hours so that the mixture will firm up.
  4. When ready to cook, heat a large, non-stick skillet over medium heat with 2 tablespoons of olive oil. Shape the meat mixture into patties and coat them on both sides with the second measure of crushed stuffing mix.
  5. Carefully arrange burger patties into the skillet, keeping enough room between them for easy turning. Leave them undisturbed for 5 minutes, or until the first side is nicely crusted. Turn the patties to cook the other side. If using cheese on your Thanksgiving burgers, lay the slices over the burgers immediately after turning so that it will melt.
  6. Dress up patties with your favorite toppings.


Pumpkin Chai Blondies

Is it fair to call these autumn-hued bar cookies “blondies?” Unlike classic blondies, which have a light golden color and are basically just chocolate chip bar cookies, these stunningly brilliant treats practically scream fall, with a deep orange color born from half a can of pumpkin puree. What else shall we call them— russets? Auburns? 

They are still in essence a “blondie,” which is meant to have all the delightfully chewy texture of brownies, just without the cocoa. But these have a lot more going on, with add-ins of white and dark chocolate chips and crunchy pecan bits on top (well, half of it, anyway). There’s a lot to love here, and I have no doubt there are many other add-ins that would be great.

What do you think— maybe dried cranberries or butterscotch chips?

Let’s start with the fact that they satisfy any craving for pumpkin and spice— though this recipe does incorporate a more assertive spice blend than most “pumpkin spice” foods. To kick these up a few notches, I used equal parts Vietnamese cinnamon and chai spice, an Indian-inspired blend of cinnamon, ginger, cardamom, anise and black pepper (yes, really). The bold spices gave these blondies an edge over some of the too-sweet, ordinary desserts you find in a supermarket bakery, and the flavor is still familiar but with a little special something.

I’ve been looking for ways to sneak pumpkin into so many things.

The downside of baking with pumpkin puree is that most recipes I’ve tried tend to be more cake-like than chewy— which is great when you want a cupcake, but not so much if you crave a cookie or blondie— and this is because of the high moisture content of the canned pumpkin. To counter this, I pulled a trick from the King Arthur Baking playbook, which is to cook the pumpkin puree until it is somewhat caramelized. The result is a thicker, more concentrated pumpkin flavor and a denser, more fudge-like texture of the finished auburns— er, blondies. I cooked mine with a bit of the brown sugar from the recipe, and the result was almost like pumpkin butter. So good! 


For additional autumn-inspired flavor, this recipe leans on browned butter, which is very easy to make though I don’t recommend trying to do it while multitasking the other components of the recipe. Browning butter takes very little effort but quite a bit of attention. Look away long enough to measure out your flour or caramelize your pumpkin, for example, and you may just find that the butter has turned to a charred, blackish liquid. I guess you can tell that I’m speaking from experience! 🤷🏻‍♀️


My second attempt went much better!

Other than that, it’s a typical dessert recipe— flour (I used part whole wheat), baking powder, egg, sugar (light brown, in this case), splash of vanilla and some white and dark chocolate chips just for fun. For a little extra something, I also scattered pecan bits over half of the blondies after spreading it out into the baking pan. This is optional, and if you have any guests who cannot digest nuts, follow my lead and sprinkle the nuts on half. Everyone wins!


This was a fun fall dessert that would be nice for a casual Thanksgiving meal, the kids’ table, a brunch with friends, a treat for a special teacher or perhaps a snack for visiting grandkids that’s a bit healthier without them knowing it! As for us, we enjoyed it warmed 30 seconds in the microwave with a small scoop of ice cream. Delish!

It’s one more reason to love autumn!

Pumpkin Chai Blondies

  • Servings: 12
  • Difficulty: Average
  • Print

Cooking the pumpkin puree before mixing the batter keeps this autumn-hued blondies nice and chewy, and the flavor will make you wish for fall to linger a little longer.


Ingredients

  • 2 sticks unsalted butter
  • 1 cup pumpkin puree
  • 1 cup light brown sugar, packed
  • 1 large egg, room temperature
  • 2 teaspoons vanilla extract
  • 1 1/4 cup all-purpose flour
  • 1 cup white whole wheat flour
  • 1 tsp. ground cinnamon
  • 1 tsp. ground chai spice blend
  • 1 tsp. kosher salt (I used Diamond crystals)
  • 3/4 tsp. baking powder
  • 1 cup white chocolate chips
  • 1 cup dark chocolate chips
  • 1/2 cup pecan bits (optional, or 1/4 cup for half the blondies)


Directions

  1. Melt the butter in a saucepan, swirling frequently and watching carefully to prevent burning. Cook melted butter until it takes on a deep golden color and has a nutty aroma. Allow it to cool for about half an hour.
  2. Meanwhile, add pumpkin puree and a few tablespoons of the brown sugar to a second saucepan. Cook over medium heat, stirring almost constantly, until sugar is dissolved and pumpkin puree has reduced slightly. Cool completely before proceeding.
  3. Preheat oven to 350° F, with oven rack in center position. Line a 9 x 13 baking pan with parchment paper, keeping a little extra to overhang for easy lifting of the blondies from the pan after baking.
  4. In a large mixing bowl (or the bowl of a stand mixer fitted with paddle), stir together browned butter and remaining brown sugar until evenly combined. Add reduced pumpkin puree and egg. Beat until combined.
  5. In a medium bowl, whisk together flours with spices, baking powder and salt. Add half the flour mixture to the butter mixture, folding just until all the dry ingredients are incorporated. Repeat with remaining flour blend. Gently fold in chocolate chips. The batter will be very thick and dense.
  6. Spread batter evenly over parchment-lined baking pan. Sprinkle pecan chips over all or half the blondies, if desired. Bake for 30 minutes, or until blondies are set but not overly dry. Remember that they will continue to cook for a few minutes after removal. As with brownies, the type of pan may affect the outcome. For a glass pan, add a few extra minutes to the baking time.
  7. Cool for about 30 minutes before using parchment to lift blondies from the pan. Cut into squares for serving. Keep leftover blondies wrapped or in a sealed container, at room temperature for up to three days.
  8. These warm up beautifully in the microwave (give them 30 to 45 seconds on high), and they are delicious served with a scoop of ice cream.


Leftover Turkey & Black Bean Enchiladas

There is so much anticipation and planning at our house for Thanksgiving that I can honestly say by the time we get to Friday, I’m over it. After that glorious day of gluttony, and the satisfying knowledge that we managed to pull off another successful Thanksgiving, I find that I’m craving anything but turkey and trimmings. Yes, we always make more than we need for the big meal, because we do enjoy having the leftovers. Of course, I love a perfect turkey sandwich on Saturday complete with cranberry mayo (who doesn’t?) and I look forward to plopping leftover stuffing into the waffle iron for Sunday breakfast, because yum.

What shall we call this…Post-Thanksgiving Benedict, maybe? 🙂

But for many reasons that only my taste buds truly understand, all I want on Friday is something with spice and heat, and that usually means Mexican flavors.

No doubt, I was influenced during the formative years spent with my mother in southern Colorado, where I first learned to love Mexican food in all its forms (especially homemade). My craving could also be caused by palate exhaustion; after the richness of the heavy Thanksgiving Day meal, it needs a reboot and a cleansing with bold, zesty ingredients. Regardless of the reason, a bite of these turkey and black bean enchiladas feels like a homecoming right about now.

You can make these as spicy or mild as you want.

Unsurprisingly, most of the flavors associated with the Mexican foods I love can be traced to Native American culture, so this recipe seems especially appropriate on this day after Thanksgiving. Today is Native American Heritage Day, an opportunity to reflect on the true roots of our land and all its beautiful bounty. To commemorate the occasion, I thought it would be fun to test our knowledge about the history of truly American foods, and to see how well everyone’s brain is working after that heavy dose of tryptophan yesterday.

Ready? Tap on an ingredient below to reveal the answer.

Which ingredients in today’s enchilada recipe were indigenous to the Americas, and did not exist outside these parts until after first contact by European explorers?
Black Beans
Yes! Most varieties of beans originated in South America (Peru, mainly) and they remain an integral source of protein and nutrients in American culture.
Cheese
Nope. Cows were introduced to the Americas by the Europeans, so there was no dairy here. Interestingly, many people of Native American descent are lactose-intolerant. Genetics!
Turkey
Yes, the ubiquitous Thanksgiving bird is a descendant of the wild turkeys that were domesticated by the Aztecs around 2,000 years ago.
Jalapenos & Green Chiles
All chile peppers were native only to the Americas, but today their popularity extends all the way through Europe and Asia.
Tomatoes
Correct, tomatoes were here first. Can you imagine what Italian food would look like if early explorers had not taken tomatoes back to Europe??
Onions
Sorry, but onions are not among the native crops, and were introduced to the Americas later by European explorers who brought some of their foods here.
Corn Tortillas
Absolutely! Corn did not exist outside of the Americas until after explorers “discovered” this land and all its bountiful maize.

There are plenty of resources for information about the native origin of foods, but I found this recent article very interesting, for its discussion how modern Native American chefs and home cooks are taking indigenous foods in new directions.

The article confirms that most of the typical Thanksgiving dishes served up each November really do have their roots in America—not in the same preparation, of course, loaded up with sugar and dumbed down with butter as many of us are accustomed to seeing. I can promise you that the first Thanksgiving did not include marshmallow topping, but the sweet potatoes? Of course.

That point brings me back to my post-Thanksgiving desire for something more natural with less embellishment. These homemade turkey and black bean enchiladas are a particularly good and easy way to knock out two dilemmas at once—my craving for spicy Mexican flavors, and dealing with the mountain of leftover turkey that has taken over the fridge. This recipe uses up all the random loose bits of turkey that won’t work in sandwiches or anything else where presentation matters. Dark meat, white meat, any of it is good here. Just be careful not to include any bones!

Chop up the turkey into small bite-size bits.

To make this deliciousness happen, I bring out a can of black beans, a fresh jalapeno, some onions and cheese, a small can of spicy Rotel tomatoes and my trusty cast-iron press to make a batch of handmade corn tortillas. I shared a few tips and tricks for success making tortillas last year, so check that out if you want to give it a go (I even offer a tip for making them without a press).


If you don’t have the desire to make one more thing from scratch, then of course store-bought corn tortillas will do just fine. Choose a brand with wholesome ingredients and look for larger ones; the tortillas designed for “street tacos” will be too small. I begin by sautéing the onions and jalapeno until they’re soft, then adding the turkey, Rotel and black beans, seasoning it up with a little salt and black pepper. Lay a spoonful of this mixture into a fresh, soft tortilla and top it with some shredded cheese. Roll it up into a cylinder and place it, seam side-down, into a casserole dish. Repeat until the dish is filled. You should have 10 to 12 enchiladas, depending on amount of filling in each.


Next, make a sauce to smother your enchiladas before the bake. You can use a canned enchilada sauce if you wish, but it’s easy to make at home. For this batch, I went with a green chile sauce, which begins with sautéed onions (I used leeks) and some canned green chiles, seasoned with salt and pepper, a bit of cumin and garlic powder. Transfer the mixture to a smoothie blender and whirr it up with some veggie or chicken broth until smooth. Make a simple roux in the sauce pan and pour the pureed green sauce back into the pot, stirring until thickened.


Pour it over the enchiladas, top with more cheese and bake for half an hour, until bubbly. I like to garnish the enchiladas with cilantro for serving, for a little burst of freshness in each comforting bite. Sour cream is optional, but a nice touch for cooling down any spicy bits in your enchiladas.


Leftover Turkey & Black Bean Enchiladas

  • Servings: 4 to 6
  • Difficulty: Average
  • Print

These homemade turkey and black bean enchiladas are a particularly good and easy way to knock out two dilemmas at once—my craving for spicy Mexican flavors, and dealing with the mountain of leftover turkey that has taken over the fridge after Thanksgiving.


Ingredients

  • 12 good-sized corn tortillas (homemade or store-bought)
  • 8 oz. medium cheddar cheese (Monterey jack or pepper jack work great, too)
  • 1 large sweet or Spanish onion, chopped (half will be used in the filling and half in the sauce)
  • 1 red or green jalapeno, seeded and minced
  • 1 can black beans, drained and rinsed
  • 1 can Rotel spicy tomatoes, drained
  • 2 cups leftover roasted turkey, chopped (any combo of white or dark meat)
  • 2 cans chopped or diced green chiles
  • 1 cup vegetable or chicken broth
  • 2 Tbsp. salted butter
  • 1 Tbsp. flour
  • Fresh cilantro and sour cream, for serving

Directions

  1. Preheat oven to 350° F. Shred the cheese and make the tortillas, keeping them covered in a clean kitchen towel so they don’t become dry.
  2. Heat a tablespoon of oil in a skillet over medium heat. Sauté half of the chopped onions and jalapeno just until softened. Add turkey, beans and Rotel tomatoes. Season to taste with salt and pepper.
  3. Hold a tortilla in the palm of your hand and add a generous spoonful of the filling. Add a pinch of the shredded cheese. Gently roll the tortilla into a cylinder and place it, seam side-down, into a 9 by 13-inch casserole dish. Repeat with remaining tortillas until the filling is gone and the dish is full.
  4. In a saucepan, sauté remaining onions in a tablespoon of oil. Add the cans of green chiles and season to taste with salt, pepper and ground cumin. Transfer the mixture to a blender container, add vegetable or chicken stock, and then blend until smooth.
  5. In the same saucepan, melt butter and cook the flour until fragrant and foamy. Whisk in the green chile puree and cook until thickened.
  6. Pour the green chile sauce all over the enchiladas. Top with remaining cheese, sprinkle it with salt and pepper and bake about 30 minutes, until hot and bubbly. Serve at once.


Spiced Sangria Cranberry Sauce

It’s been ages since I last bought cranberry sauce in a can. That high-fructose corn syrup-laden jellied stuff that goes schhhluuuup onto the plate, retaining the shape of the can, right down to the rings that I once thought were meant to help you slice it into portions. What in the world was I thinking?

Sure, I know the canned stuff is kind of a standard and it’s certainly convenient. But real, fresh cranberry sauce is so simple to make at home, and I love jazzing it up with unexpected ingredients for a different take on the classic. I have made it relish-style with chopped raw cranberries and pecans. I’ve flavored it with citrus and pomegranate. Heck, I’ve even made cranberry sauce with jalapeno and orange (that was 2020, and it was awesome).

This year, I’m sharing a version that is just for the grown-up table, marrying the tangy flavors of traditional cranberry sauce with the spicy, fruity notes of red wine sangria. It’s a little bit boozy, a touch cinnamon-y and altogether yummy.

This smells exactly like sangria!

Any red wine will work for this recipe (and it doesn’t have to be expensive), but I would recommend choosing a pinot noir or other dry wine that is described with flavors of red berries and cherries. Steer clear of heavier wines such as cabernet sauvignon, which will overpower the brightness of the cranberry. Here’s a good rule of thumb—if the wine would make a good base for sangria, it’s perfect for this cranberry sauce.

Begin by rinsing the cranberries and plucking out any bad ones. Combine them with chopped apple in a medium saucepan. Add wine, orange liqueur, cinnamon sticks and cane sugar, and cook over medium heat until the mixture begins to bubble.

When the mixture reaches a light boil, add minced sweetened orange and stir to combine. Reduce the heat and simmer for about a half hour, until berries are easily mashed and mixture is bright red. Remove it from the heat and transfer it to a bowl to cool. As the cranberry sauce cools, the natural pectins in the berries will cause it to thicken. Stir the zest of an orange and a lime into the cranberry sauce. As the cranberry sauce rests in the fridge, the red wine will stain everything deep red, but that isn’t exactly a problem for me. 😉

If your Thanksgiving day isn’t too hectic, hold the zest until serving time for a bright pop of color.


Sangria Cranberry Sauce

  • Servings: 6 to 8
  • Difficulty: Average
  • Print

Decked out with red wine, orange liqueur and warm, festive spices, this one should be served strictly on the grownup table!


Ingredients

  • 12 oz. package organic cranberries, sorted and rinsed
  • 3/4 cup turbinado sugar
  • 1 crisp apple, such as Granny Smith, Fuji or Gala
  • 1/2 cup dry red wine
  • 1/4 cup orange liqueur (I used Cointreau)
  • 2 pieces stick cinnamon, about 3 inches each
  • 1/4 cup minced sweetened, dried oranges (such as Trader Joe’s)
  • Zest of one orange (organic is best when the zest is eaten)
  • Zest of one lime (organic)

If you wish, sprinkle additional orange and lime zests on top of the cranberry sauce at serving time for a bright pop of color.

Directions

  1. Combine the cranberries and apples with the red wine, orange liqueur, sugar and cinnamon sticks in a medium saucepan.
  2. Stir and cook over medium heat until the mixture begins to bubble. Add dried orange bits. Reduce heat and simmer until berries pop easily and sauce is reduced to a syrup-like consistency (anywhere from 20-30 minutes).
  3. Remove from heat. Stir in orange and lime zests and allow the mixture to cool to room temperature. The natural pectin in the cranberries will cause the mixture to thicken more as it cools.
  4. Refrigerate at least overnight, and up to two weeks. Remove cinnamon stick before serving.

Southern Biscuit & Cornbread Dressing

There is no recipe that reminds me more of my time at A Pinch of Thyme catering in Greensboro, N.C. than this Thanksgiving standard. I look forward to the aromas of each stage of this dish to this day, and about the time I start chopping celery, the memories come flooding back. 

It was November 1994 and I was in the Pinch kitchen, elbow-deep in a humongous Cambro, mixing up the familiar flavors of Thanksgiving dressing — sausage, sage, onions, celery and fresh herbs. (You have probably seen a Cambro; it’s a plastic food pan about the size of a carry-on suitcase, used widely in restaurant and catering kitchens. Sometimes, when I’m in the throes of holiday food prep, I wish I had a stack of ‘em.) Chef Rodney had scribbled out some notes to remind me how to put this dressing together, but after making so much of it for the umpteen in-home holiday parties we catered, I didn’t need them anymore. Nope, I knew that recipe like the back of my hand:

Crumble up the flaky buttermilk biscuits and honey-sweetened cornbread that Kathleen, the pastry chef, had made the day before. They needed to be stale, but not dry. Pull the strings off the celery, then chop it with the onions and cook them in the drippings left in the pan after browning the crumbled sausage. Add fresh herbs, including the signature pinch of thyme and toss it all together in the Cambro. Beat the eggs in one of the large stainless mixing bowls from the side shelf and add it to the dressing mix with enough chicken stock to moisten it all the way through. Pour it into a couple of greased, stainless steel hotel pans and over-wrap them with plastic film and then foil. Label the order with the client’s name and date of their event and move it to the walk-in. The service team would handle it from there, baking it and serving it up for the happy holiday hosts.

Then, wash up and repeat the whole thing for another party. 

Today, wearing the very same apron (which I wore home one night and never returned), I make a scaled-down version of this dressing for my own Thanksgiving meals and it is my all-time favorite. I still don’t need a recipe to make it, but I had to write it down several years ago because everyone I ever made it for wanted the recipe. Even my ex-husband asked me to leave a copy for him when we parted ways (and yes, I did). What makes it so addictively good?

Biscuits and cornbread.

The official breads of the South!

Though the flavors of the dressing are all familiar, the texture of the flaky biscuits and grainy cornbread—the two most popular breads of the American South—make it different from a typical dressing made with seasoned yeast bread cubes. And it doesn’t really matter what recipe you use for the biscuits and cornbread. It only comes down to how much time and baking skill you have, and whether you have a sweet tooth.

The cornbread can be more or less sweet, depending on your taste.

For this version, which I made last year when it was my year for the turkey — my husband, Les, and I alternate years, just as we declared in our wedding vows — I used Bob’s Red Mill whole grain cornbread mix (which is less sweet) and I made my own biscuits, using a partial amount of whole wheat flour.

Over the years, I’ve made it with everything from supermarket bakery cornbread to Jiffy mix (the sweetest option). My only suggestion is to stick with a cornbread that has some amount of flour in it; the kind made with only cornmeal will be too grainy for this dressing. I’ve used frozen biscuits, bakery biscuits and even biscuits from a fast food drive-thru. Other than the twist-can variety (which don’t have quite the right texture), any biscuit will work as long as you pay attention to the sodium factor. The best sausage is a bulk breakfast-style pork sausage (such as Jimmy Dean’s), and I like vegetable broth but chicken broth is also great. For the most authentic Southern version, put your hands on a Vidalia onion from Georgia; otherwise, any sweet onion will do (or you can even use leeks, as I did for this version). The fresh herbs are up to you; in the Pinch kitchen, we added fresh sage and thyme, but you know what your people like so go with that.


Now, I suppose you could technically use this mixture to stuff your turkey, if you do that sort of thing. As in most commercial kitchens, the policy at Pinch was to never stuff the bird because of the risk of food borne illness, and that’s a battle that I still face every other year when my hubby takes his turn with the turkey (yep, he stuffs it). My at-home version relies on the same clean and easy method we used back in the day— only, at home I’m baking it in a buttered casserole dish rather than a greased hotel pan. Sometimes I even “accidentally” make more dressing than my baking dish can accommodate and I wind up with a second dish that gets baked the day after Thanksgiving. That way, I can savor it twice for its lightly crunchy topping and the warm and fluffy insides.

Happy Thanksgiving, y’all!

Just as we did back in the day, you can easily prep this dressing the day before and bake it on Thanksgiving morning, then just warm it when it’s time for dinner. It travels well, too, if you happen to be going to someone else’s house for the big feast. However you go about it, please take my advice and make a large batch. You’ll be thankful for the leftovers! 

Southern Biscuit & Cornbread Dressing

  • Servings: 8 to 10
  • Difficulty: Average
  • Print

I used to make this dressing by the busload when I worked holiday season at a catering company. This scaled-for-home version brings together two beloved breads of the American South into a perfect dressing for Thanksgiving.


Ingredients

  • 1 batch cornbread (see recipe notes for suggestions)*
  • 8 buttermilk biscuits (see recipe notes)*
  • 1 pound bulk breakfast sausage
  • 1 medium sweet onion, chopped (or 1 leek, white and light green parts)
  • 3 ribs celery heart, strings removed and chopped
  • Kosher salt and freshly ground black pepper
  • Leaves from two sprigs of fresh thyme
  • A few leaves of fresh sage, finely minced (optional, depending on how sage-y the sausage is)
  • 2 cups chicken stock (or more, if breads are very dry)
  • 1 large egg

Batch size for the cornbread should be for an 8 by 8-inch pan. A Jiffy mix works great, but it’s a little on the sweet side. Try pre-made cornbread from your favorite bakery or use your own recipe. My favorite is Bob’s Red Mill whole grain cornbread mix. The only cornbread I do not recommend is a recipe that uses only cornmeal without flour; it would be too gritty for this dressing recipe.

Almost any biscuits will work here, and they certainly don’t have to be perfect. If you make a good drop biscuit, go with that. Rolled-out biscuits are great, and you don’t have to fuss over cutting them into rounds. Frozen biscuits work well (baked, obviously), but the twist-can biscuits don’t have quite the right texture. I have even used biscuits from a fast-food joint, but be mindful of the extra salt they contain.

Directions

  1. Cube or tear cornbread and biscuits into a large, open bowl or onto a parchment-lined cookie sheet. The pieces should be about 1-inch square; don’t make them too small or the dressing will be more like mush. Let the bread pieces sit out overnight to stale. Alternatively, you may choose to toast them lightly in the oven, but only long enough to stale them.
  2. Place a cast iron skillet over medium heat and cook the sausage until most of the fat has rendered and sausage is lightly browned, but not crusted. Transfer sausage to a large bowl and keep the drippings in the skillet.
  3. Saute the onions and celery bits in the sausage drippings until they are soft and slightly caramelized. If the drippings are skimpy, add a tablespoon or so of butter. Season this mixture with salt and pepper to taste. Transfer entire skillet contents to the sausage bowl. Sprinkle thyme leaves (and minced sage, if using) over the mixture and toss to blend.
  4. While the sausage mixture is still warm, gently fold in the cornbread and biscuit pieces so that the lingering sausage grease will be evenly dispersed. Set this aside to cool slightly.
  5. Whisk egg and broth together in a large glass measuring cup. Pour half of it evenly over the dressing mixture and fold to combine, and then pour in the remaining broth-egg mixture. The dressing should be wet but not dripping. After the breads soak up the liquid, feel free to add a little more broth if the mixture seems too dry.
  6. Bake at 350° F for 35 to 40 minutes. If you want a very moist, soft dressing, bake it with a foil covering. For a firmer dressing with slightly crunchy top, bake uncovered. I usually split the difference, covering it with foil for the first 15 minutes then removing foil to finish it.


Flavor Bomb Brussels Sprouts

There is no rule that says you have to serve your favorite Thanksgiving vegetables exactly the same way every year, and if there was, I promise I’d be the first to break it. Last year, my husband and I had a very small get together for Thanksgiving—just the two of us and a dear friend who loves big flavor as much as we do. It was my year for the turkey, and I broke the biggest rule of all about not experimenting on Thanksgiving. I dry-brined my bird for the first time ever and I have no regrets (more on that later). We also took a few liberties with the usual sides, and came up with winners in several categories, including these bursting-with-flavor Brussels sprouts.

If you’re ready to inject some serious flavor into one of your standard holiday sides— I’m talking scallions, capers, garlic, jalapeno peppers, anchovies and walnuts—then you’re going to love this recipe, with inspiration from a dish I enjoyed in one of Michael Symon’s restaurants in Cleveland, Ohio.

A dozen years ago, I had occasion to visit Cleveland while on a two-week getaway that also included a stop in Buffalo to the original home of hot wings. Ooh yeah, I was really living it up that summer! To be fair, there was purpose to my trip beyond my foodie cravings. Most of my crazy family lives in the Buffalo area, so that was my eventual destination and I went by way of Cleveland. I had scored tickets to the Rock and Roll Hall of Fame, where I spent—count ‘em—9½ hours walking around and gazing at the musical exhibits. It was a damn fun day for this former disc jockey, and I hope to get back there soon with my music-loving husband. But I digress.

This place alone is worth the trip to Cleveland!

The next evening after my Rock Hall adventure, I stopped for dinner at another Cleveland landmark—a neighborhood bar and restaurant called Lolita. It was opened by Chef Symon before he became famous as an Iron Chef on Food Network, and it still felt like a place for locals.


Sadly, a fire broke out in Lolita’s kitchen in 2016 and the restaurant is now permanently closed, but I’m still enjoying my memory of the dish that inspired today’s recipe. As I recall, when the server approached the table with a cheerful greeting, she asked, “Can I bring you a beverage to enjoy with your Brussels sprouts appetizer?” Apparently, it was a given that we would be ordering them, as nearly every guest did. They were that popular, and they were truly amazing with crispy, deep-fried edges and a feisty, umami-bomb vinaigrette dressing. I later tried making them at home, Symon-style, but I’m not proficient with deep frying and don’t care for the odor it leaves in the house.

If you want to give it a go in the deep fryer, you can still find Symon’s original recipe for them here. But if you’d rather try my lighter, healthier approach of roasting, then meet me in the kitchen!


I started by toasting a handful of walnuts for the dressing, then prepping the sprouts. For even roasting, be sure the sprouts are completely dry before you slice and drizzle them with oil. Lingering water from rinsing will effectively steam the sprouts, giving them more of a soft, mushy texture and you’ll miss out on the caramelization that happens when they roast.

Test doneness with a fork, and stop when the sprouts are al dente with some caramelized edges.

After roasting, I cooled the sprouts and set them aside while I finished a few other things for our Turkey Day feast. If you need to multi-task, as we usually do on Thanksgiving, par-cooking vegetables is a good way to go, as they only need a few quick minutes to finish them at serving time. You could even prep these Brussels sprouts a day before, and then take them from the fridge a half hour before dinner. They’ll finish better if they are room temperature rather than ice cold.

Now, let’s talk about the big flavor happening in this dressing! If you can’t tolerate the jalapeno heat, you could omit them or substitute a spoonful of pimientos, but I can assure you that the flavor gets dispersed so evenly, it is not all that hot. The red wine vinegar and honey do a lovely little contra dance in the background, and the garlic, scallions and anchovies keep the dish firmly grounded in savory flavor land. In other words, the dressing is the real star of this dish.


Whisk it together while the sprouts are roasting, and again just before dressing them. I kept the scallions a bit on the chunky side, so I stirred them in with the walnuts right at the end. I missed getting a picture of the final, important step (multi-tasking—sorry!) but it’s a simple one. Give the par-roasted Brussels sprouts a quick spin through a hot skillet for about two minutes, then toss them in the mouthwatering vinaigrette and serve them hot.

Flavor Bomb Brussels Sprouts

  • Servings: 6 sides
  • Difficulty: Average
  • Print

If your Thanksgiving table needs an injection of big flavor, the feisty vinaigrette on these Brussels sprouts will get the job done! You can prep these ahead somewhat by roasting and then chilling, and give them a few minutes in a hot skillet just before you toss them in the dressing to serve.


Ingredients

  • 1 lb. Brussels sprouts, washed and trimmed
  • A drizzle of extra virgin olive oil for roasting
  • 1/2 cup walnuts, toasted in oven for 8 minutes, then cooled and chopped
  • 2 Tbsp. red wine vinegar
  • 1/2 red jalapeno, seeded and finely minced
  • 2 cloves garlic, finely minced
  • 1 Tbsp. honey
  • 4 anchovy fillets, finely minced (mine were packed in chili oil, and the heat was great!)
  • 2 tsp. capers
  • Freshly ground black pepper
  • 2 scallions, white and green parts cut on bias
  • 1/4 cup extra virgin olive oil (mine was infused with lemon, but any bright variety will do)

Directions

  1. Preheat oven to 400° F, with rack in center position. Spread walnuts out onto a parchment-lined baking sheet and roast for about 6 minutes, until they are just fragrant. Cool completely and then break into pieces.
  2. Wrap the washed Brussels sprouts in a clean kitchen towel and roll them around to completely remove excess water. Carefully slice the sprouts into 1/4-inch slices. Wick away any residual moisture with a paper towel. Transfer the sprouts to a medium bowl and drizzle olive oil over them. Spread them out onto the parchment-lined pan and give them a quick seasoning with salt and pepper. Roast for about 20 minutes, until softened but still al dente and bright green. If you are working ahead, let the sprouts cool and then wrap them up and send them to the fridge until 30 minutes before serving time.
  3. While the sprouts are roasting, prepare the vinaigrette by stirring together vinegar, jalapeno, garlic, honey, and anchovies. Season with a few twists of ground pepper, but skip the salt because the capers and anchovies have plenty. Whisk in the olive oil and stir in the capers. and scallions.
  4. When you’re ready to serve, give the Brussels sprouts a quick spin through a hot skillet dashed with oil or bacon drippings. Let them get a few crispy edges. Toss in dressing with broken walnuts and serve immediately.


Jamaican-inspired Sticky Sweet Potatoes

I’m all for tradition—Thanksgiving, after all, is my all-time favorite holiday and also happens to be the most traditional meal most Americans enjoy together—but for me, some of the meal traditions are tired. So I’m here to shake things up in the flavor department, starting with these sweet potatoes.

For many years, I made a sweet potato casserole that had brown sugar and eggs and cream and buttery layers of pecan crumble and everyone loved it. But it was so sweet that one year when I took it to a potluck, the organizer peeked under the cover and put it on the dessert table. True story. And no wonder, with 2/3 cup sugar in the sweet potato mixture and 3/4 cup sugar in the topping. In an 8-serving side dish?! Let’s not even discuss the amount of butter because it’s clogging my arteries just thinking about it.

Still, I made this over-the-top dish year after year after year because the people I was feeding at the time expected it. “Tradition,” and all that jazz. After some time, I got bored and started zhuzhing it up with a splash of booze, mainly to amuse myself. I incorporated a shot of Grand Marnier at first, because orange is a natural pairing with sweet potato. And then I tried it with bourbon because, well, bourbon. As you can imagine, neither did much to tamp down the cloying richness of that dish, which has since been banished to the darkest depths of my recipe box.

Yes, it is tradition to indulge on Thanksgiving, but what did fiber-rich, perfectly nutritious sweet potatoes ever do to deserve being drowned in a sea of saturated fat and then crusted up with so much sugar?

In recent years— and especially since the launch of Comfort du Jour— I have enjoyed twisting up the classics and traditional foods, and I’m thrilled to be married to a man who enjoys the variations as much as I do. For last year’s table, I presented these sticky sweet potatoes for Thanksgiving, and they were a hit! Yes, there is some brown sugar in the recipe, but a far cry from the amount in my old standard. And this one has zero saturated fat from butter, milk, eggs or cream.


These beauties are spiced up with flavors that remind me of Jamaica—bold and balanced with sweet, spicy, savory and herbal notes—a combination I loved when I visited the island many years ago. The flavors play up the natural goodness of sweet potato without overwhelming. I created a blend of brown sugar (only 1/3 cup for this 8-serving batch, but you could use as little as 1/4 cup), kosher salt, sweet Spanish paprika, allspice, cinnamon and freshly ground black pepper. In place of butter, extra virgin olive oil; specifically, I used a specialty oil that is whole-fruit fused with blood orange. You can find this at one of the olive oil and balsamic boutiques that have popped up everywhere.


I arranged them in a single layer and roasted them at 350° for about 30 minutes, then turned them over, sprinkled more of the spice blend and roasted 15 more minutes. By this time, the sweet potatoes were tender and essentially done, but dinner wasn’t. So I left the baking sheet on the countertop, covered loosely with foil. When I was ready to serve them, the sweet potatoes got sprinkled with the last pinches of the spice blend and went under the broiler for about one minute, just enough to heat them through and caramelize that sticky spicy coating.


The timing worked out perfectly, as they only needed a quick blast of high heat at the end, and then a quick transfer to a serving platter where I decorated them with fresh thyme leaves and sent them to the table.

These Jamaican-inspired sweet potatoes are a nice change of pace with a big punch of flavor and no guilt. Yes, I’ll take these any day—Thanksgiving or otherwise!


Jamaican-inspired Sticky Sweet Potatoes

  • Servings: 8
  • Difficulty: Average
  • Print

These are no ordinary candied sweet potatoes! The island-inspired seasonings, especially the allspice, lend an unexpected flair to a Thanksgiving day standard.


Ingredients

  • 3 pounds fresh sweet potatoes, peeled and sliced into 1/2-inch thick rounds
  • 2 Tbsp. extra virgin olive oil (see recipe notes below)
  • 1/4 to 1/3 cup brown sugar, depending on your sweet tooth
  • 1 tsp. sweet (Spanish) paprika
  • 1/2 tsp. ground allspice
  • 1/2 tsp. ground cinnamon
  • About 20 twists of freshly ground black pepper
  • 1 tsp. kosher salt
  • 1 tsp. fresh thyme leaves, for garnish

Note: If you have a specialty olive oil store, I like the blood orange-fused oil for this recipe. The citrus essence makes the island-inspired spices even more aromatic and addictive.

Directions

  1. Preheat oven to 375 F, with rack in center position. Line a large, rimmed cookie sheet with parchment paper.
  2. Combine brown sugar and seasonings in a small bowl and set it aside.
  3. Put thick slices of sweet potato in a large bowl and drizzle olive oil over them, tossing to coat evenly. Sprinkle half of the seasoning blend over the sweet potatoes and toss again. Arrange the slices in a single layer on the parchment-lined sheet.
  4. Roast for 30 minutes. Remove pan from oven and carefully turn each sweet potato slice. Sprinkle half of the remaining spice mix over the second side of the sweet potatoes and roast 15 more minutes, or until potatoes are tender enough to pierce with a fork.
  5. Remove from oven and let the sweet potatoes rest a few minutes; tent loosely with foil and set aside as long as needed while you prepare other dinner items. If you need to refrigerate them overnight, put remaining spice mixture in a bowl and set it aside; pick up with Step 6. If you plan to finish the sweet potatoes now, skip to Step 7.
  6. Remove chilled sweet potatoes from refrigerator at least one hour before proceeding with the recipe.
  7. Remove foil and turn sweet potatoes over. Sprinkle with remaining amount of spice mixture and broil on high for 1 to 2 minutes (watch so it doesn’t burn!), to re-heat the potatoes and caramelize the sticky spice coating. Transfer sweet potatoes to a serving platter and sprinkle with thyme leaves. Serve warm.


Pumpkin-Lentil Stew

For me, the scariest thing about learning to cook plant-based food was accepting that it’s more than ingredient swaps, it’s a new process. Learning vegan cooking forced me out of my comfort zone of using what I call “crutch” foods—the easy things we were all taught to reach for—like cheese, eggs, cream and chicken broth. The only way to overcome this hurdle of making foods in new ways is to practice, and if you have vegetarians or vegans coming for Thanksgiving, the time to practice is now. There are plenty of plant-based convenience foods out there today, but they aren’t always an even swap and it’s important to also know how to cook real, whole foods without needing those processed substitutes.

A couple of years ago, when Comfort du Jour was new, I went over the top with a Savory Sausage Mac & Cheese (baked in a pumpkin). It was fun to serve and tasted as good as you’d imagine. This year, I decided to do something visually similar but with all plant-based ingredients, and this is that dish.

Loaded with nutrients, satisfying and perfectly festive for fall!

Unlike my earlier creation, which was stuffed with rich, decadent cheese, heavy carbs and calorie-laden pork sausage, today’s recipe is entirely plant-based. It also happens to be free of gluten and nuts, so it’s suitable for people with those dietary restrictions, too. I start thinking about dishes like this around mid-October, because my husband’s daughter is a committed vegan, and as I see it, we can dread cooking for loved ones with dietary restrictions (and believe me, they will feel it at the table), or we can adjust in a way that is as fun as it is nutritious.

Who needs a bread bowl when you can have a pumpkin bowl?

This effort was also a reminder that a meal doesn’t have to be heavy to be satisfying; after we finished our pretty pumpkin supper, both my bacon cheeseburger-loving husband and I acknowledged that we were “stuffed” (in a good way). We didn’t miss what wasn’t in it, and no wonder, because what was in it was hearty and full of texture.  

There are three main components of this dish: roasted pumpkin (which did double duty as a serving vessel), creamy pumpkin bisque (without actual cream, to keep it vegan) and a mixture of cooked lentils and rice with sautéed mushrooms and aromatics.


If you prefer, you could swap in another sturdy winter squash, such as buttercup or acorn. If you wish to serve the stew inside the roasted squash, be sure to choose one that will sit flat on a plate. Or you could simply serve the soup in a bowl and save time by using canned pumpkin. I found it comforting to roast the pumpkin. My mini pumpkins were small—about six inches across—and I roasted them at 350° F for 45 minutes, then scraped out some of the soft pumpkin pulp when they were cool enough to handle. I was careful to keep enough pulp in the bottom of the gourd to prevent my soup from leaking, and enough along the top cut edge to keep the carved top from falling inside


The pumpkin bisque was the simplest part of this, made with the scooped-out roasted pumpkin, enough vegetable broth to blend smoothly, and a couple of other ingredients to punch up the flavor a bit. Roasted garlic adds a depth of flavor. The carrot-turmeric juice is something I bought for smoothies, and it worked great here for spice and color. And the smoked maple syrup is a fall/winter staple in my smoked maple old fashioned cocktails, and I liked it here for a slight touch of sweetness but mostly the smoke. I might have added some plant-based creamer here as well, but I never have it on hand unless I have a vegan guest coming. Honestly, the soup was great without it. If you have some almond milk, go for it!


Finally, a mixture of cooked lentils, kale, sautéed mushrooms and aromatics gave my dish all the texture and fiber it needed to satisfy our hungry bellies. I also added a portion of wild rice blend to my stew, but next time I would sub roasted Yukon potatoes for extra chunkiness. If gluten isn’t a concern, I think cooked wheat berries would also be great in this, for a little snappy texture.

This was a time-consuming project, partly because I was multi-tasking and making it up as I went along. Next time, it’ll be a breeze, especially since I’ve made a click-to-print recipe card below to guide me (yes, I make those for sharing, but I also use them myself)! Please, don’t be intimidated. Cooking is as fun as you make it. By the way, every part of this dish can be prepared in advance. Simply warm the stew and pumpkins before assembling and serving.

We scooped a little pumpkin flesh with each bite of the stew.

A word to the wise, though—if you decide to make this for a vegan guest at Thanksgiving, you might want to make enough for everyone. This is exactly the kind of dish to make the meat eaters jealous. 😉

Pumpkin-Lentil Stew

  • Servings: 4
  • Difficulty: Intermediate
  • Print

This is a satisfying, autumn-themed dish that also happens to be vegan, gluten-free and nut-free. It would make an excellent main course for a vegan Thanksgiving.


Ingredients

  • 4 mini pumpkins, tops removed and cleaned (see ingredient notes below)
  • 1 bulb roasted garlic
  • About 1-1/2 cups cooked lentils (see notes)
  • 1 cup cooked wild rice blend (substitute cooked wheat berries or cubed and roasted Yukon potatoes, if you wish)
  • 4 Tbsp. extra virgin olive oil, divided (you’ll use a little for each thing you saute)
  • 1 medium sweet onion, chopped
  • 8 oz. carton cremini mushrooms, cleaned and cut into chunks
  • 1 rib celery, strings removed and chopped
  • 1 jalapeno pepper, seeded and minced (I used a red one for color)
  • Kosher salt and black pepper
  • A fat handful of kale (substitute with double the amount of spinach, if you prefer)
  • 1/2 cup vegetable broth
  • 1/4 cup carrot-turmeric juice (or substitute more broth)
  • 1 Tbsp. smoked maple syrup (substitute with regular maple syrup or omit)
  • Roasted, shelled pumpkin seeds for garnish

Ingredient notes: The pumpkins I used were about 6-inches across and more squatty than round, primarily because I intended to use them as serving dishes. If you only find pie pumpkins, you may want to cut the tops a little deeper so it isn’t awkward to reach a spoon down into it at serving time. If you prefer to serve in bowls, any roasted pumpkin or winter squash will be fine, and you’ll need about 2-1/2 cups of pumpkin pulp. You could even use canned pumpkin puree, and one standard can should cover it.

I used dried brown lentils for this dish, and cooked them in veggie broth for extra flavor. To save time, purchase lentils already cooked, such as canned, or those sold by Trader Joe’s.

Directions

  1. If using canned pumpkin puree, skip to Step 3. If roasting the pumpkins, pre-heat oven to 375° F, with rack in center position. Spray or brush a small amount of olive oil inside the pumpkins and sprinkle the flesh with salt and pepper. Replace the tops, capping the stems with a piece of foil to prevent burning them.
  2. Roast pumpkins for 45 minutes, until flesh can easily be scraped with a fork. Let them rest until cool enough to handle, and then use a small spoon to gently scrape out some of the flesh, keeping about 1/2-inch intact on the bottom and sides of the pumpkins’ interiors so they hold their shape. Transfer the scooped flesh to a blender container, and set the roasted pumpkin bowls aside at room temperature.
  3. Combine pumpkin with roasted garlic (squeezed from it’s paper shell) in the blender container. Add veggie broth, carrot juice (if using) and maple syrup. Pulse a few times to combine, then puree until completely smooth. Transfer to a bowl and set it aside.
  4. Place a skillet or wide pot over medium heat and swirl in a tablespoon or more olive oil. When the oil shimmers, add onions, celery and jalapeno. Season with salt and pepper, and saute until slightly softened. Push the vegetables to one side of the pan. Swirl in another tablespoon of oil and cook the mushrooms until they become soft and give off most of their moisture. Transfer the vegetables to a bowl and set it aside. Add a final tablespoon of oil to the pot and saute the chopped kale until it has wilted and softened. Adjust salt to taste. Transfer the kale to the same bowl with the other vegetables. Add lentils to the vegetable bowl and fold gently to combine.
  5. Transfer the pureed pumpkin base to the same pot used for cooking the vegetables, and place it over medium-low heat. Gently stir in about half of the lentil-vegetable mixture, then add more until the stew seems balanced to you. Add more vegetable broth if you wish, and adjust salt and pepper to taste.
  6. If the pumpkin bowls have cooled completely, slide them into a warm oven on a cookie sheet for about 15 minutes. Ladle the pumpkin-lentil stew into the bowls, sprinkle with roasted pepitas and serve.


Ultimate Thanksgiving Leftover Pizza

“Live, from Leftover Land!” Wouldn’t that be a fun name for a game show featuring contestants presenting their most creative effort with post-Thanksgiving overflow? At our house, we tend to go all out on Thanksgiving, regardless of whether we have a houseful or a handful of guests. This year, it was the latter, but that did not stop us from cooking a 17-pound bird. It was my year for the turkey, and I broke one of my own cardinal rules in my decision to try a new method, dry brining. My leap of faith paid off, big time, with a juicy, extremely flavorful bird. And now, there’s a bunch left over.

They say “don’t experiment on Thanksgiving,” but this risk paid off in a BIG flavor kind of way.

No matter who cooks the turkey (we alternate years, as part of our pre-marital agreement), the question of how to use the leftovers is always a big one at our house. I adore a good turkey sandwich on homemade bread, but I hardly ever have fresh bread at Thanksgiving, which probably seems strange to anyone who knows my love for sourdough. Despite my best intentions, I did not even save enough time to make the soft dinner rolls that I thought would be so perfect for miniature turkey sandwiches. But I am working today on a loaf of my favorite sourdough sandwich bread to remedy that situation. And Les is pitching in, too. He has all the ingredients he needs for one of his favorite Thanksgiving leftovers—a turkey shepherd’s pie, which also makes excellent use of our leftover garlic mashed potatoes (another of his recipes, and one that we don’t ever seem to make in small quantity). I intend to use up more of the leftover bird in some spicy turkey enchiladas, using handmade corn tortillas, at some point over the next two days before the leftover police come knocking. Food safety experts recommend using the leftovers within a few days, so time’s a ticking and I’ll be on top of it.

In the meantime, we brainstormed ways to bring all the favored flavors of Thanksgiving to a pizza, and this was our result—a deep-dish crust that tastes like sage and onion dressing, with sausage, turkey, sweet potatoes and green bean casserole, all topped off with a quick drizzle of spiced cranberry mayonnaise. The best thing about this pizza (other than the fact we enjoyed it with friends we haven’t spent quality, sit-down time with since before COVID began), was that prep was minimal. Everything was already done on Thanksgiving itself, so it gave us more time to relax over cocktails and simply enjoy the company.

Whether your favorite thing is the turkey or the sides, it’s in there!

If you are struggling with leftovers, give this a try, even if your leftovers look different from ours. This pizza does not rely on traditional Italian ingredients, so you can skip the mozzarella. We used shredded gouda cheese in the base of the pizza, then arranged the other toppings in a way that afforded us a good, balanced bite in every thick, delicious slice.

The holidays are coming at me fast this year, as Hanukkah began last evening and that can only mean one thing. Latkes! Stay tuned…

Coming soon…

Ingredients

1 batch deep dish pizza dough* (see notes)

8 oz. gouda cheese, shredded

1/2 lb. bulk breakfast sausage, crumbled and cooked just until no longer pink

3 stalks celery, cleaned and chopped

1/2 sweet onion or leek, trimmed and chopped

1 generous cup leftover cooked turkey (we used mostly dark meat)

3 spinach balls, torn into bite-sized pieces

A few dollops of leftover garlic mashed potatoes

1 generous cup roasted sweet potato cubes

1 cup cut green beans, drenched in vegan mushroom gravy

Several spoonfuls leftover turkey gravy

1 handful French-fried crispy onions

Cranberry mayo:

Combine 1/2 cup leftover cranberry sauce and 3 Tbsp. mayonnaise in a smoothie blender. Or flip the ratio if you want it creamier and less tangy. What you don’t use on the pizza will be fantastic on sandwiches!

I considered putting cranberries on the pizza, but decided a cranberry mayo was a better way to go. Whip it up in a smoothie blender.

*Notes

For the dough this time, I used the basic recipe from my post for Chicago-Style Deep-Dish Pizza, but with a few Thanksgiving flavor additions—I added a teaspoon Bell’s seasoning (similar to poultry seasoning) to the flour ingredients and kneaded in about two tablespoons re-hydrated minced onion. These simple adjustments gave us a crust that had all the flavors of Thanksgiving stuffing, a great base for our pizza.


Instructions

Preheat oven to 450° F with rack in center position of the oven.

Stretch the risen dough into a 14-inch deep dish pan. If it springs back too much, cover and rest it 15 minutes, then proceed.

Scatter cheese over the entire bottom of the dough, then layer on the sausage, celery and onions. Follow that with a scattering of leftover turkey, sweet potatoes and a few dollops of leftover mashed potatoes. Top it off with the green bean casserole mixture and a few spoons of turkey gravy here and there.

Bake for 25 minutes, then sprinkle the fried onions on top and bake 10 minutes more. Allow the pizza to rest for 10 minutes before transferring to a flat pizza pan and slicing. Drizzle with the cranberry mayonnaise just before serving.

Do you notice how Nilla is never far away when the food is being served? ❤