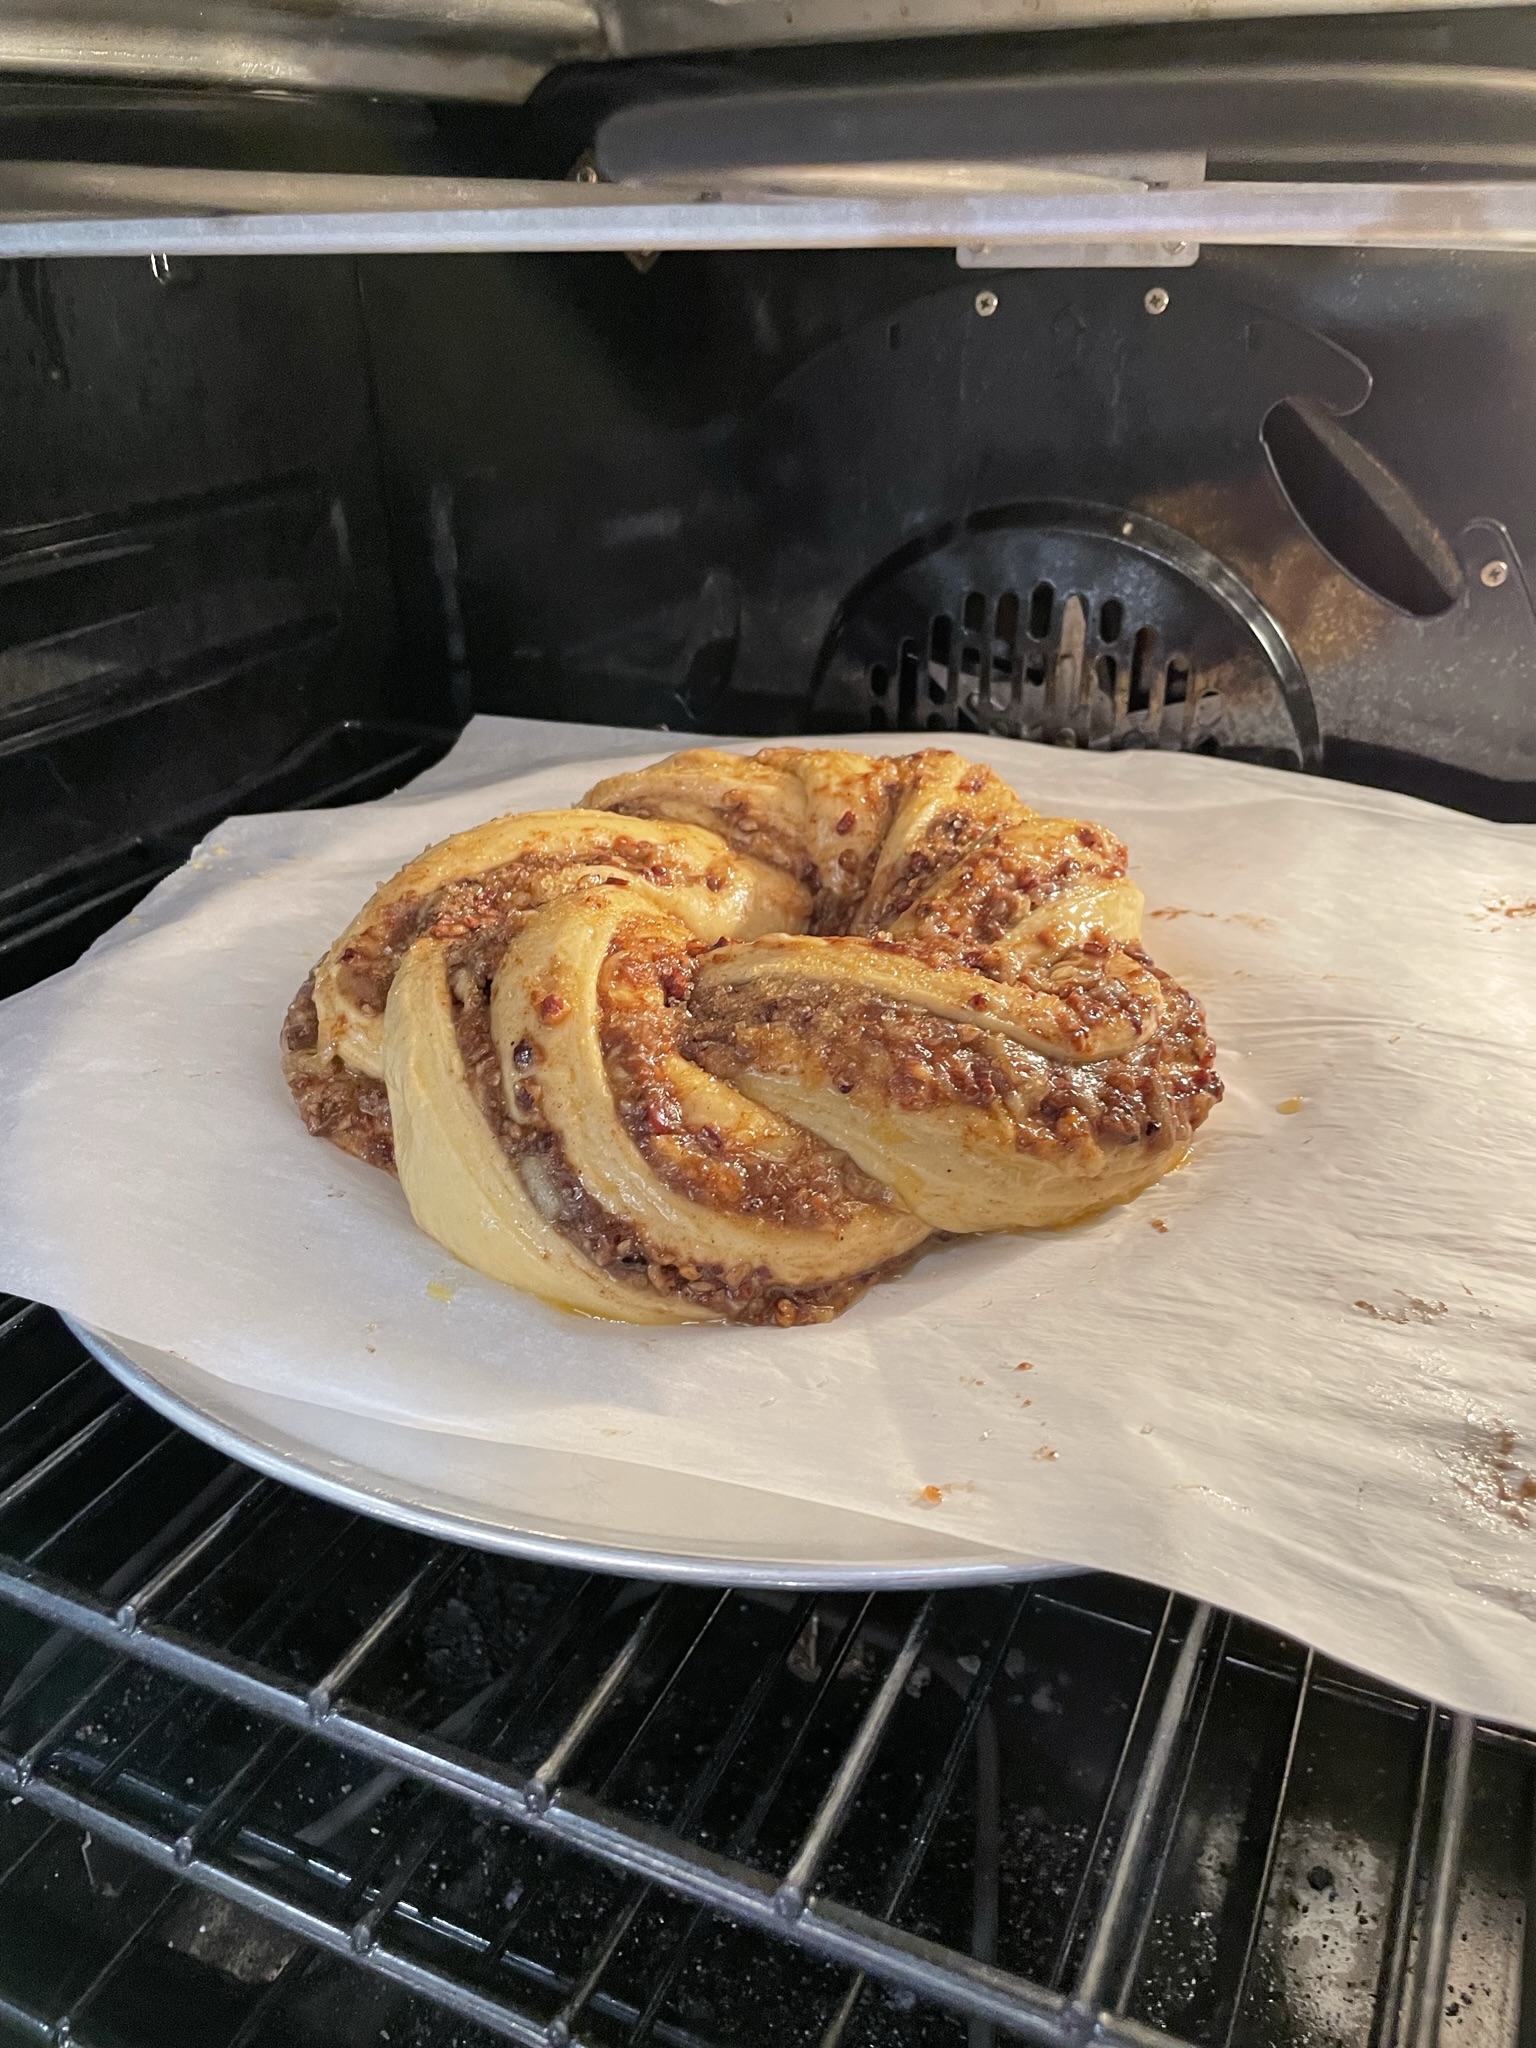
Happy New Year, dear readers! The past two weeks have been a blur, what with holiday gatherings and meal prep and “Christmukkah” tree dismantling. Thankfully, our newest fluffy family member, Nadia, did not climb or cause damage to the tree, and she only briefly took to biting at the blue and white lights. And now, we are into a new year. A clean slate!
My one resolution this year is to not set goals. Or, at least, not in the traditional sense. In my decades of experience with New Year’s resolutions, I’ve come to recognize a pattern— a tendency to overshoot what is reasonably achievable, thereby setting myself up for near-certain failure and disappointment (with myself, always). Whether it’s diet and wellness, personal growth or my never-shrinking/always-growing project list, I simply cannot keep pace with my aspirations. Apparently, I am not alone in this phenomenon.
Researchers say that most Americans give up on their New Year’s resolutions by the middle of January, and only 9% succeed in keeping them. This is either poor planning or out-of-reach expectations, I suppose. Rather than stating any particulars that I will set out to accomplish this year, I decided to check the rearview mirror and recognize all that I did accomplish in 2023. What I saw there surprised and empowered me. And I dove deep to discover the common link among those achievements; in all of them, I was outside my comfort zone.
What an odd realization for someone whose blog literally has “comfort” in its name.
Even the act of starting my blog was a huge leap of faith for me, though. There were many “what ifs” on the tip of my tongue back then: What if I can’t figure out how to run the website? What if nobody cares about my food or my stories? Would I even have enough time to commit to regular posting and engagement with readers? Won’t I run out of recipes eventually? Today I cannot imagine not having this special place of connection, creativity and curiosity.
Taking that first step out of my comfort zone is what unlocks the “what ifs” and transforms them into victories, large and small. Turns out, I did a lot of it in 2023, without really thinking about it.
Here’s a short list of what I achieved last year in personal, professional and culinary categories:
Reconnected with a dear high school friend, despite some fears that maybe she wouldn’t respond or have time to get back in touch
Took a chance on a solo vacation to Vermont, during a historic flooding event that made travel terrifying
Met two of my blog buddies in person— one on that trip to Vermont and the other on a family vacation to California
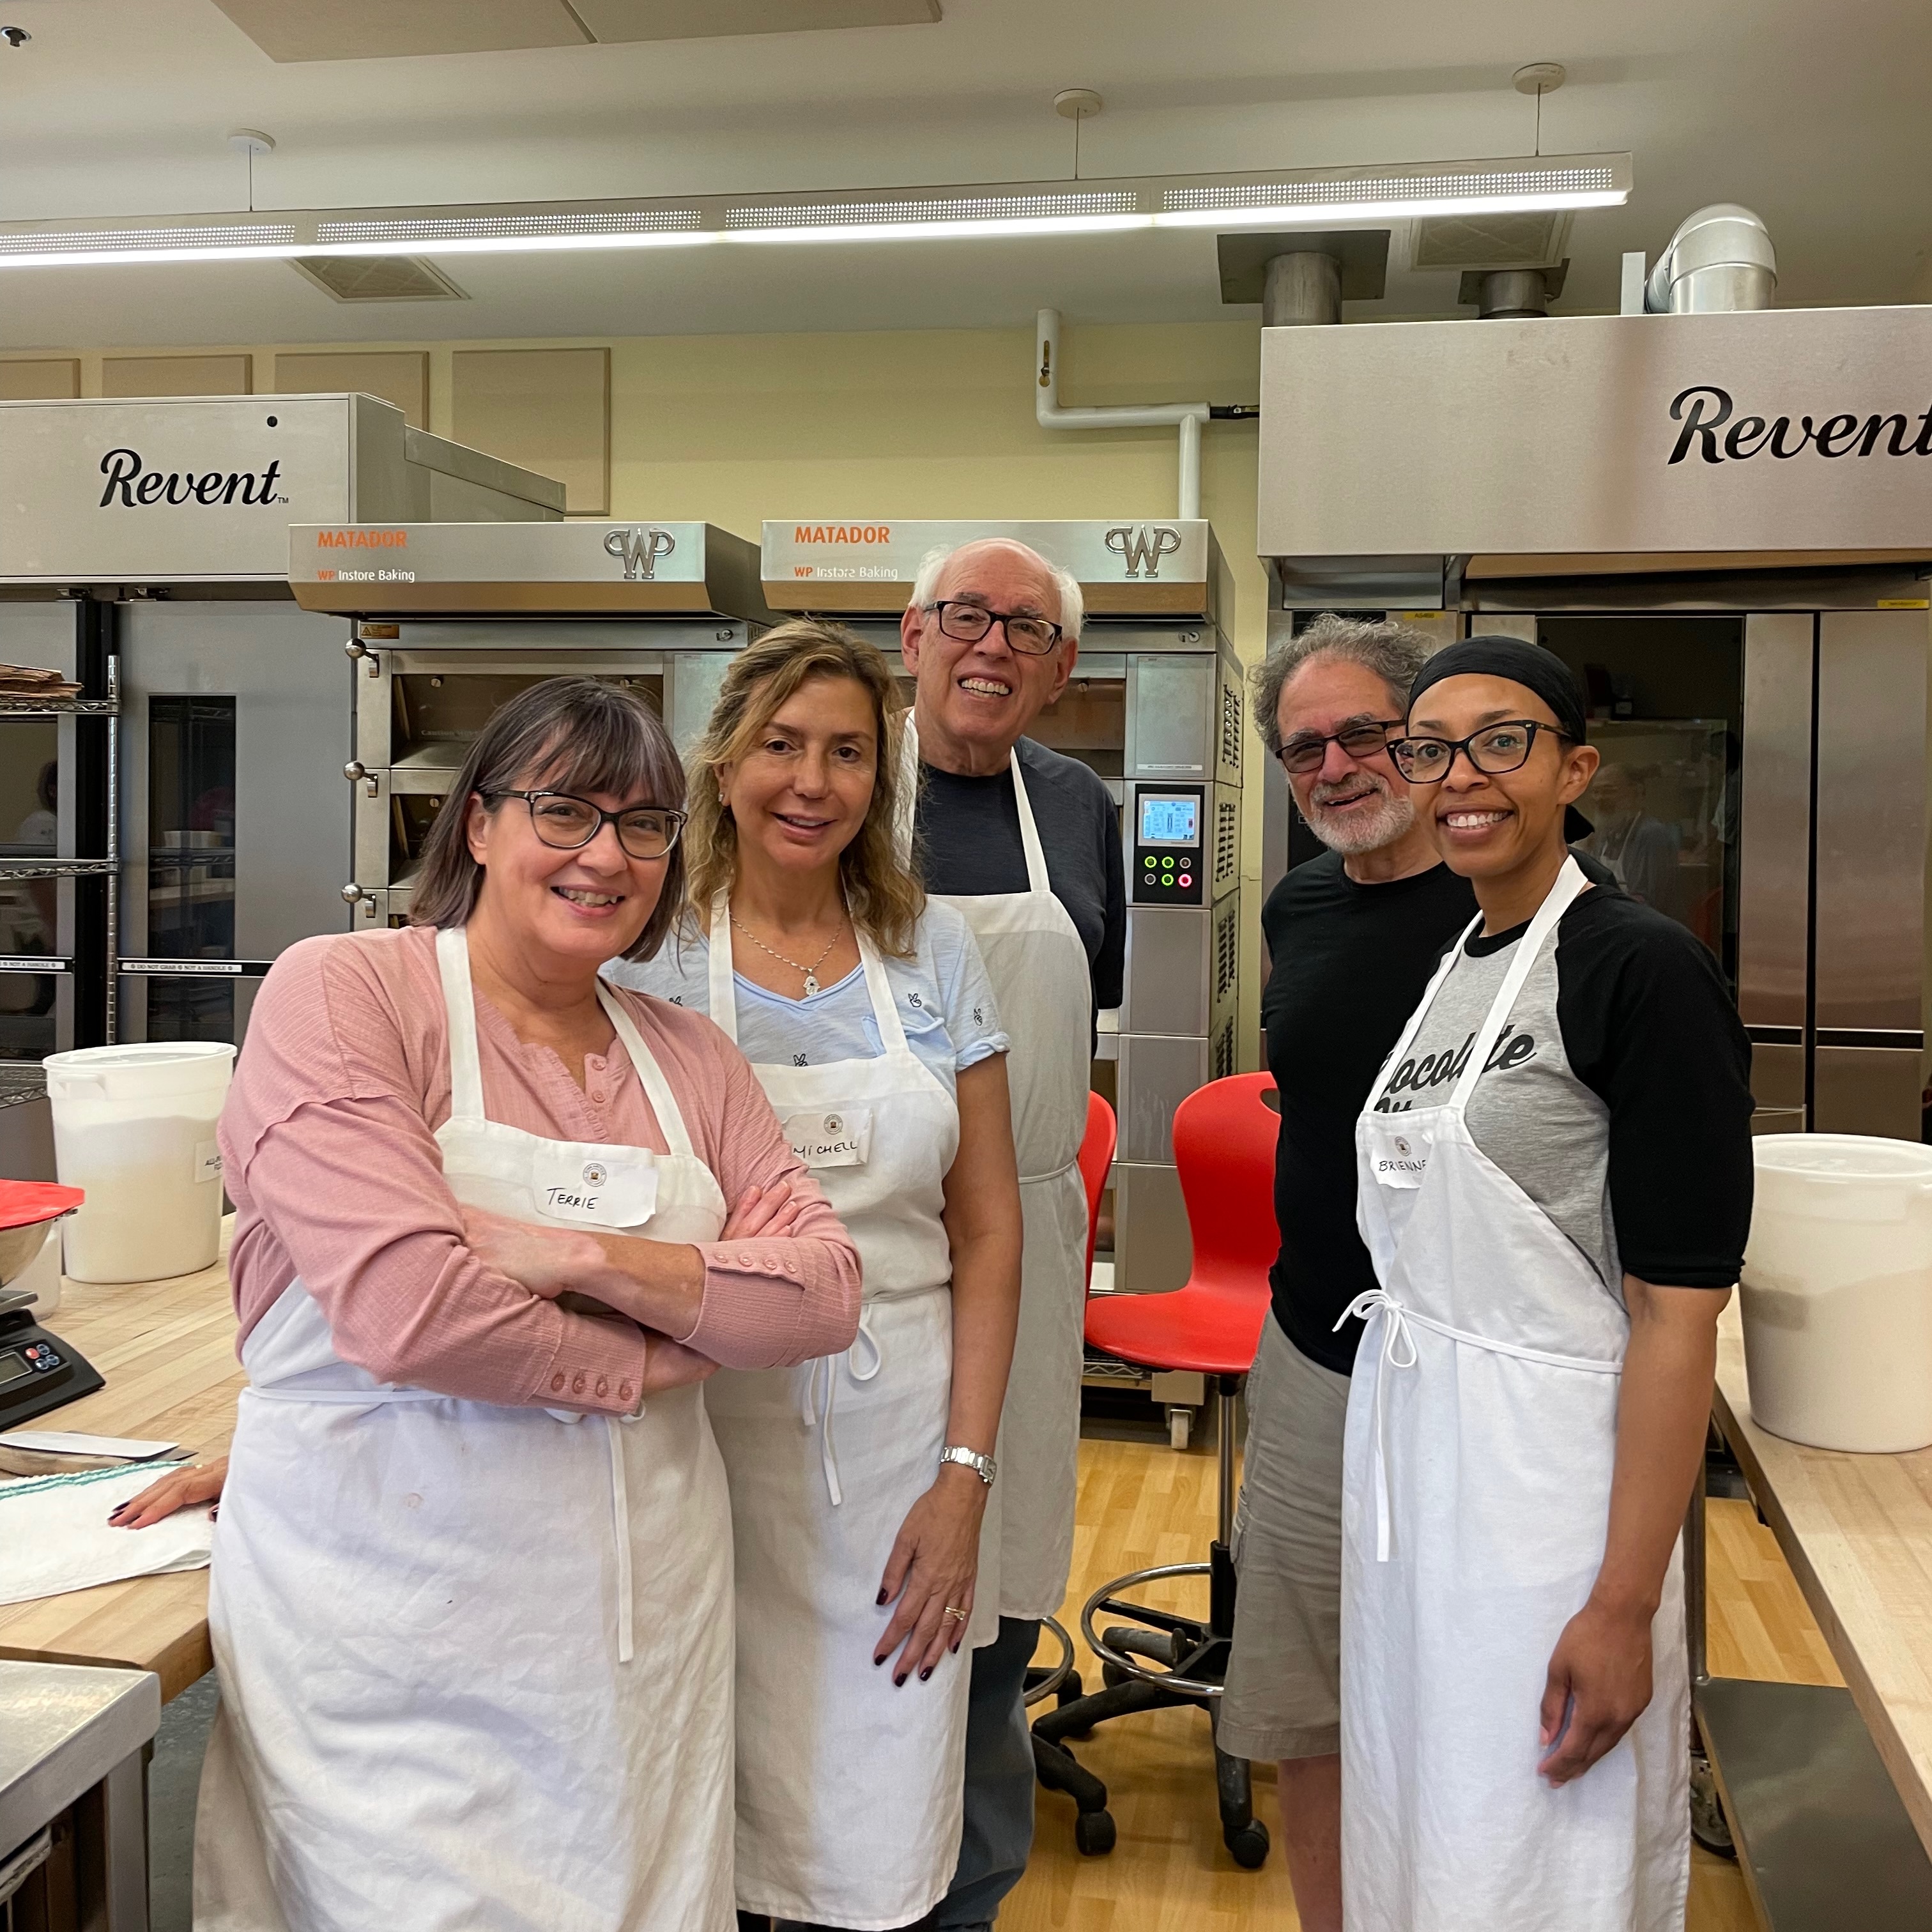
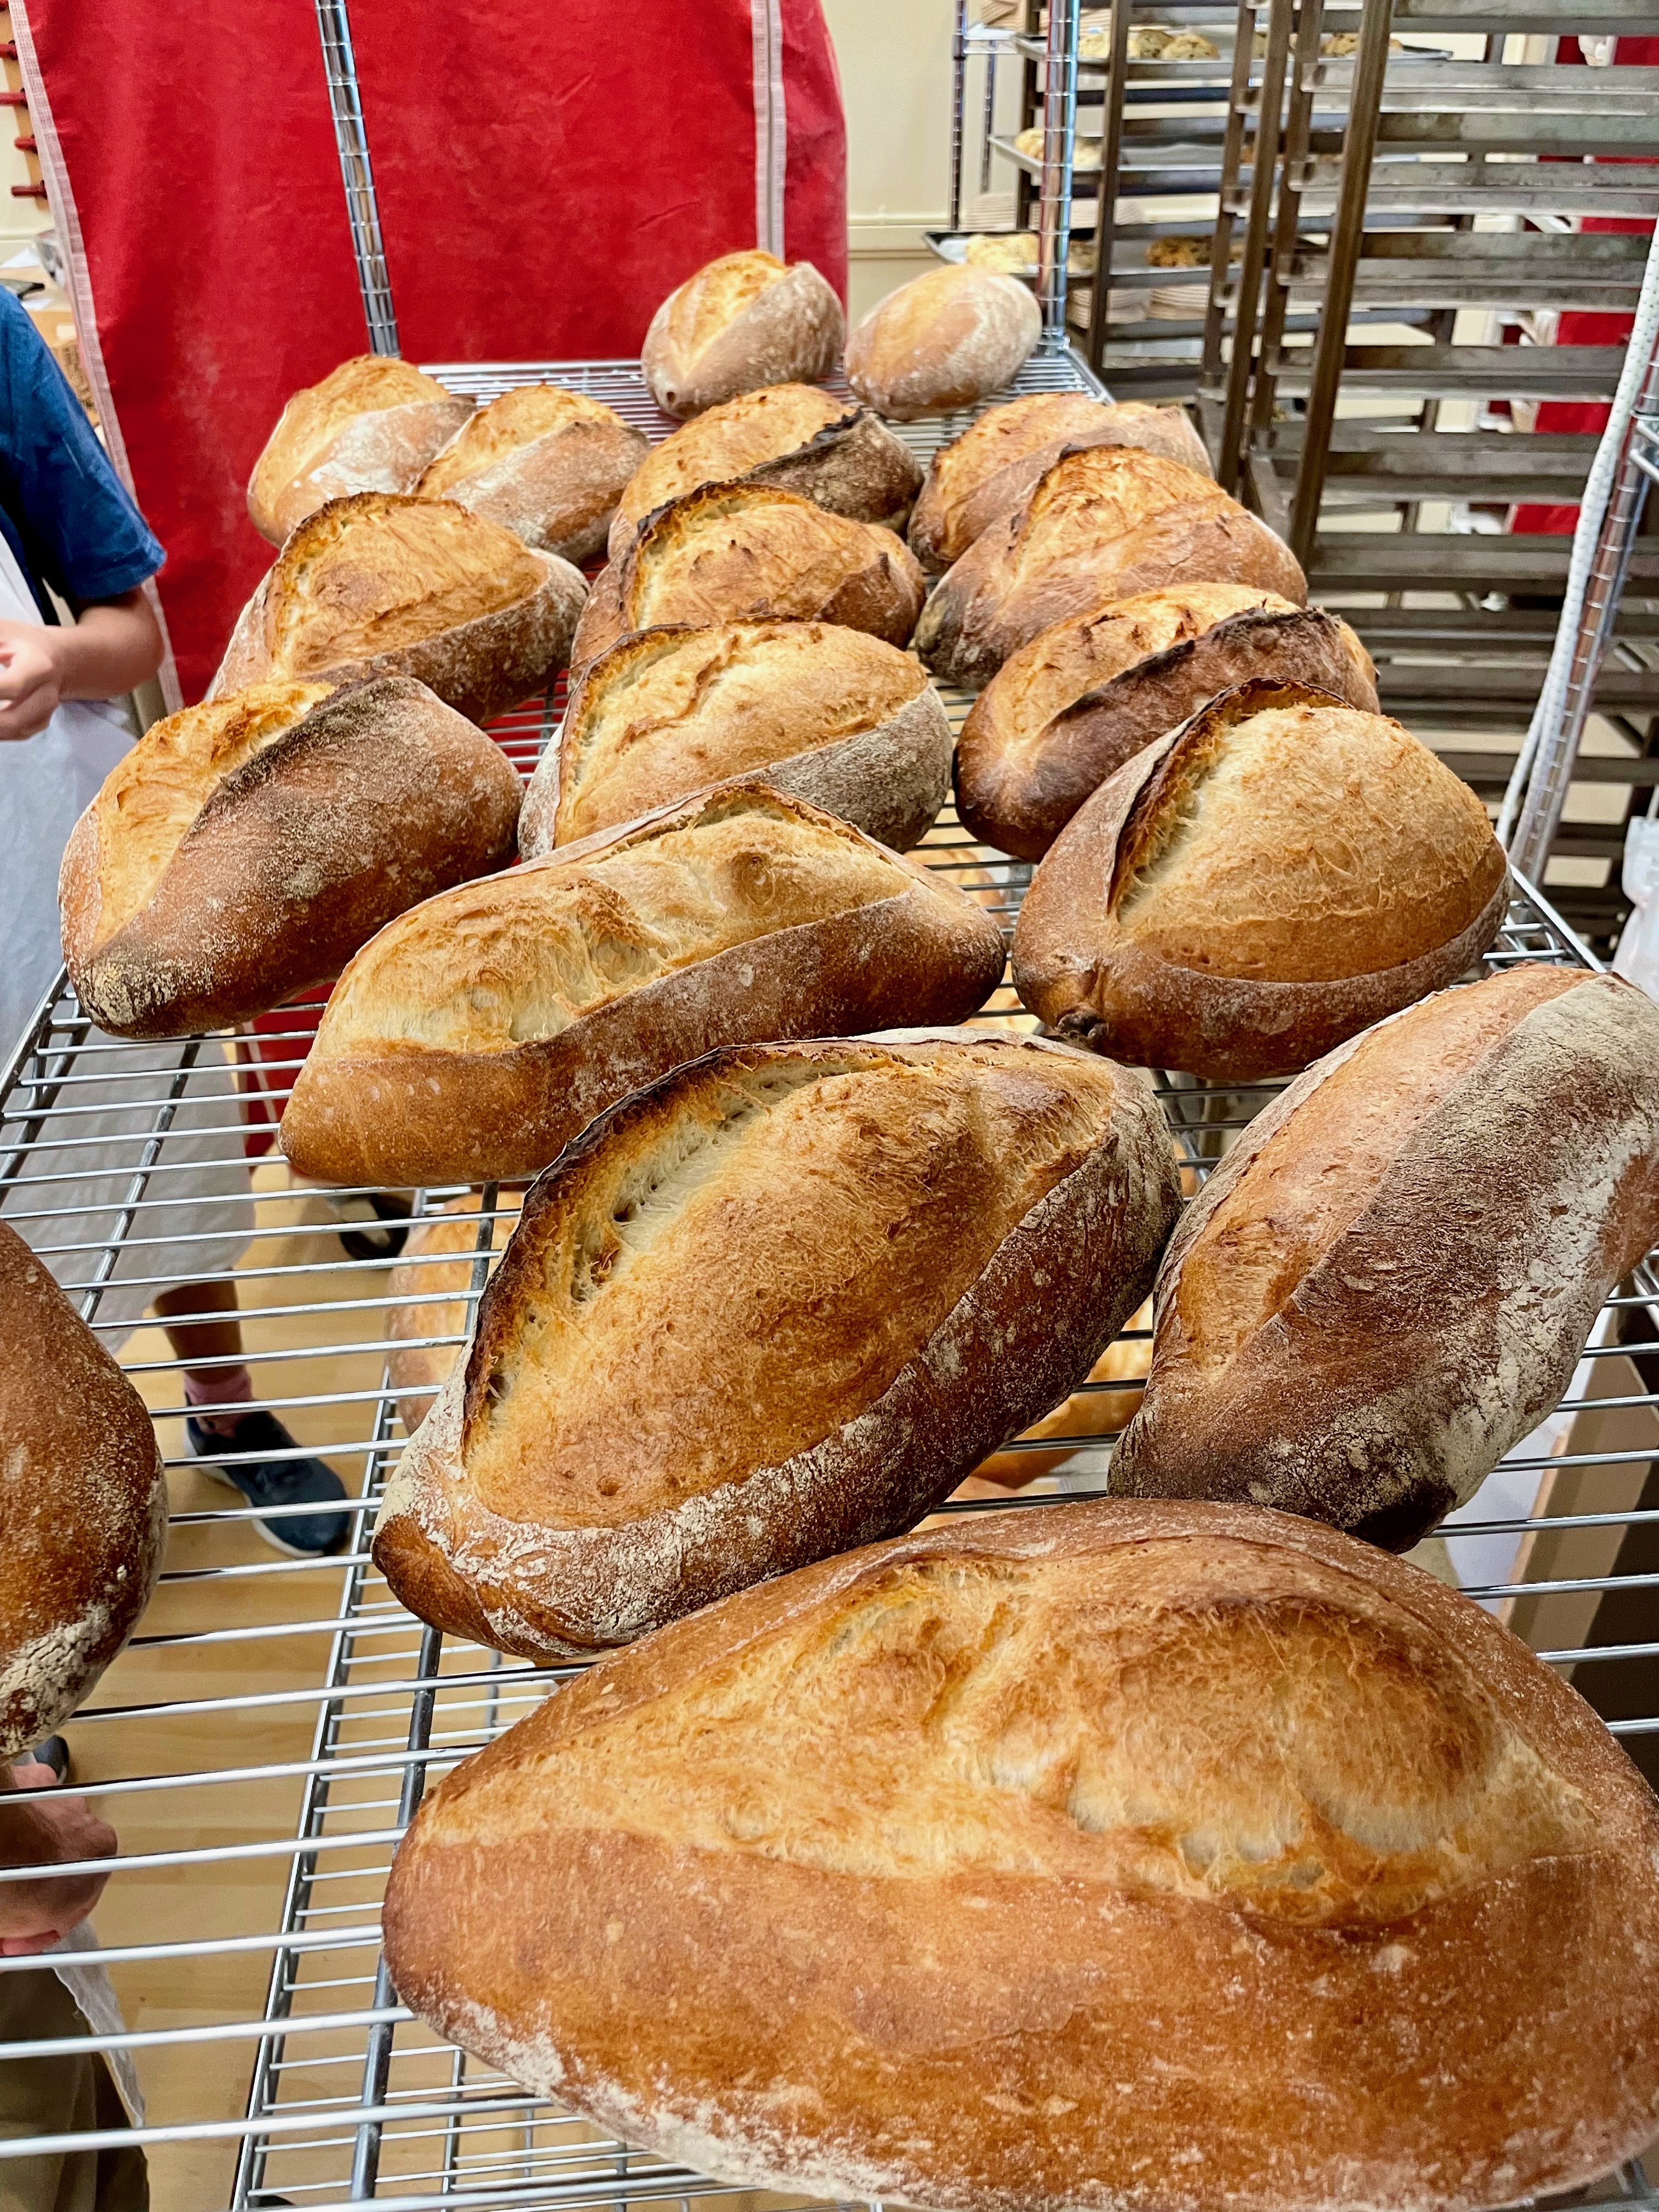
Spent four days in the baking lab at King Arthur Baking School, where I met wonderful people and learned new skills and techniques
Embraced big changes at my job, including a promotion that has stretched me more than I imagined (in a good way)
Adopted a kitten— okay, this may seem easy, but it is a multi-year commitment to the care and well-being of a small, utterly dependent creature, and this relationship always ends with tears at the gate of the Rainbow Bridge (it’s a big deal and I’m all in)
Volunteered for a two-year term on our HOA’s board of directors, just in time for a very challenging situation of having squatters in one of the homes
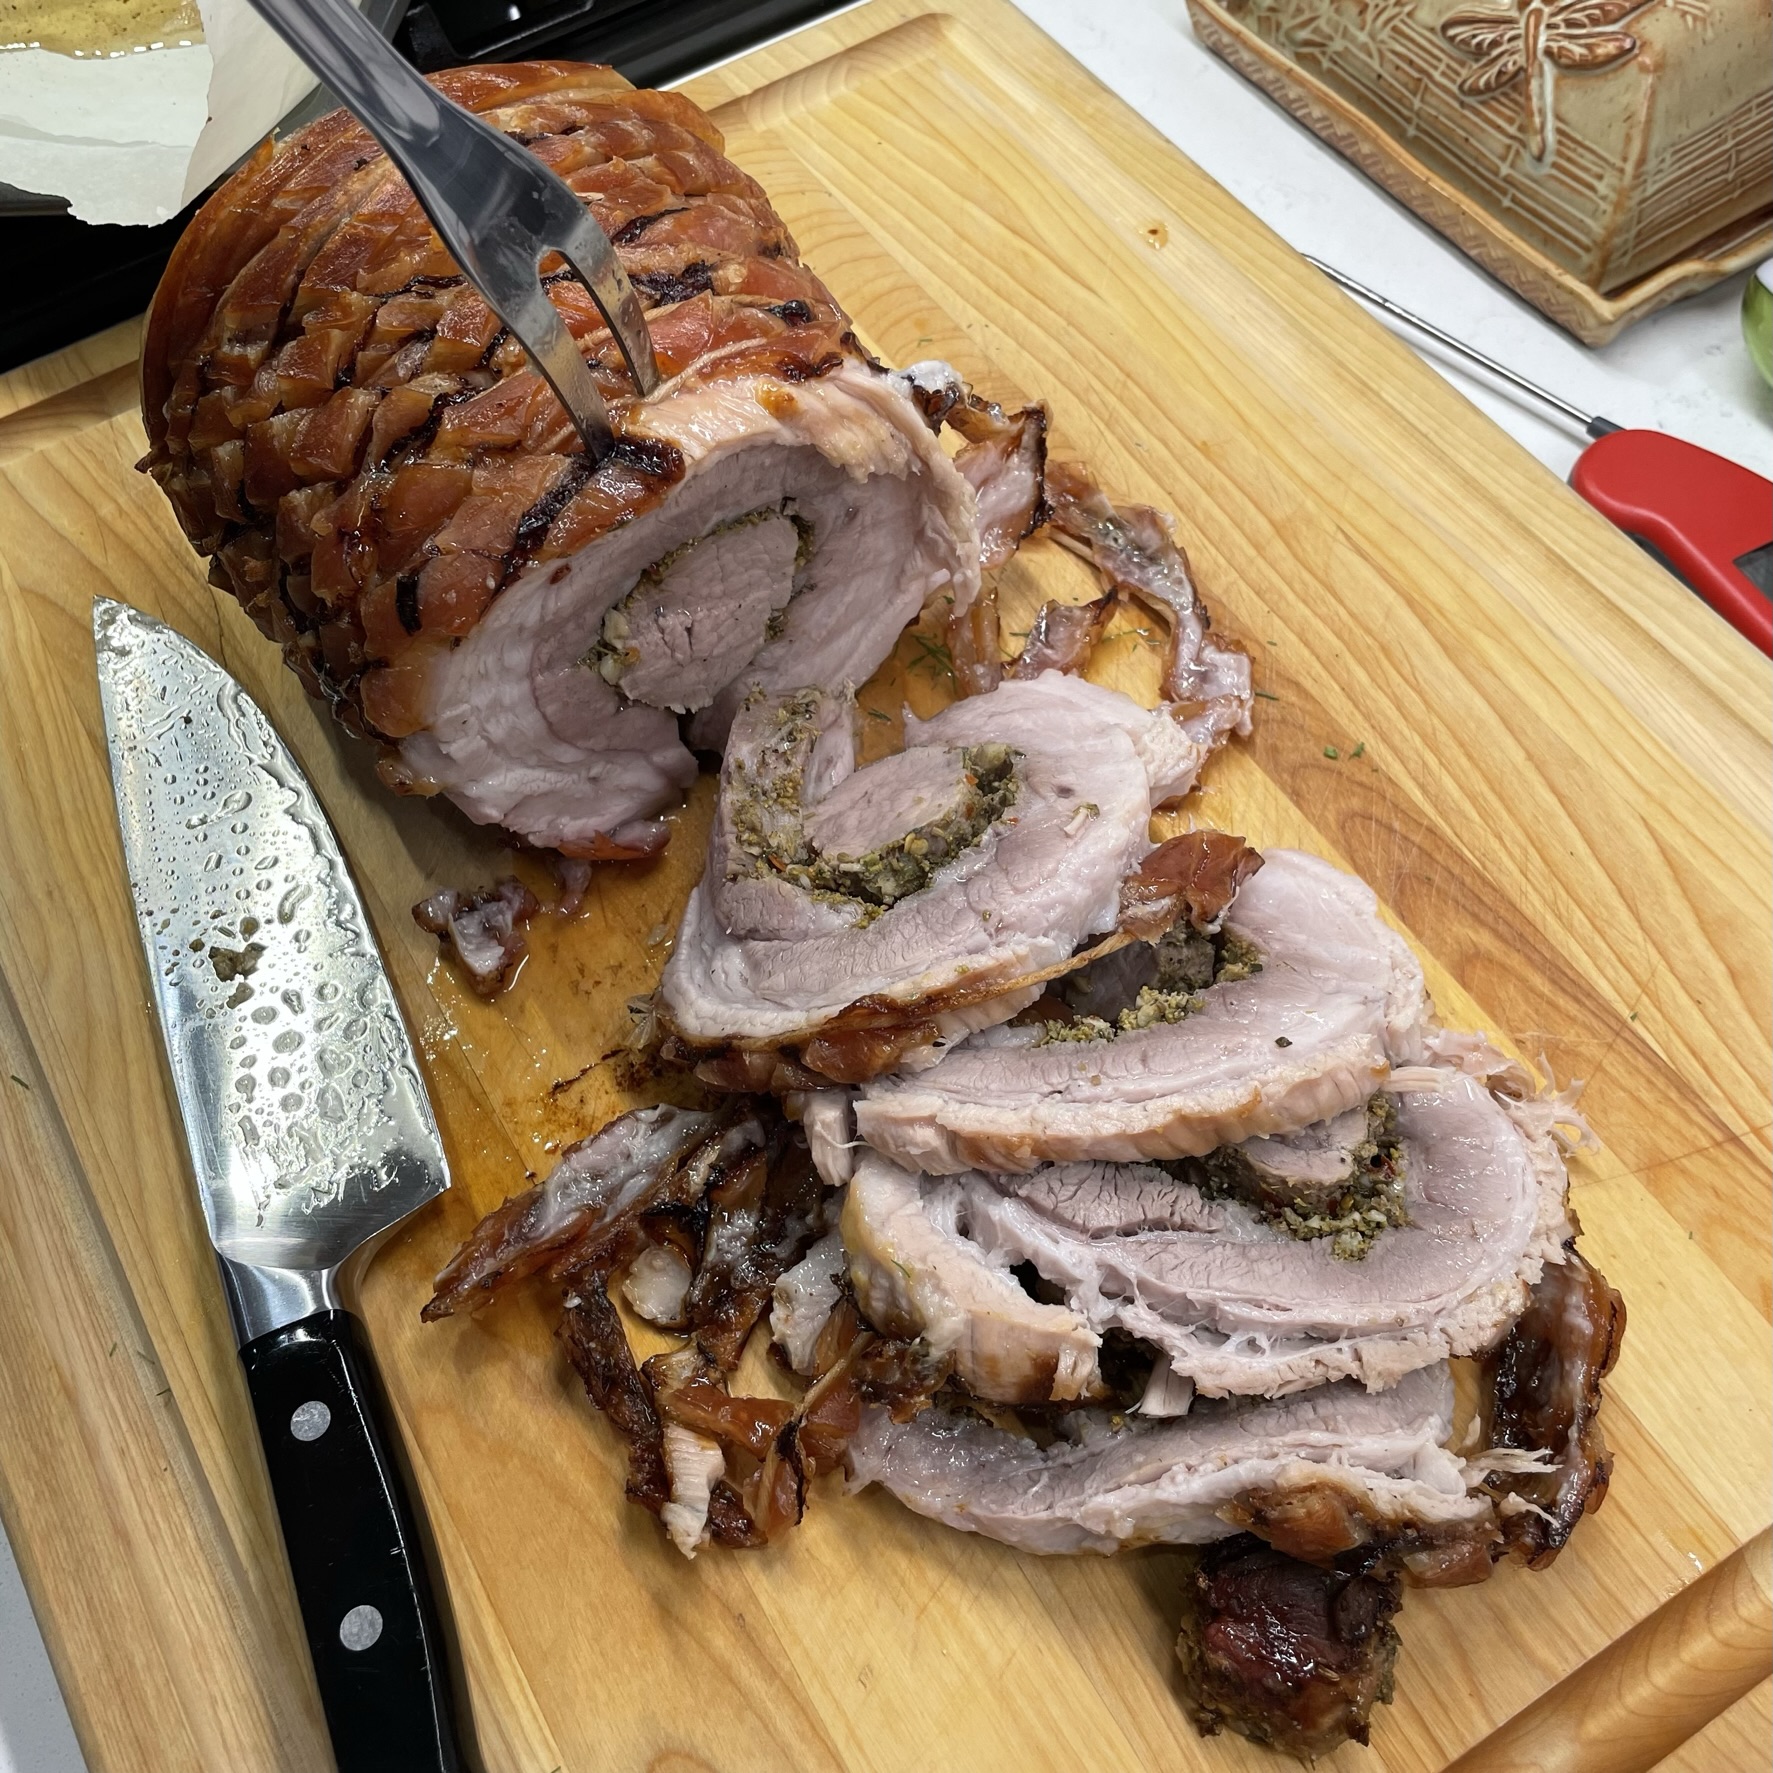
Participated in a butcher class, where I learned technique for breaking down a whole hog
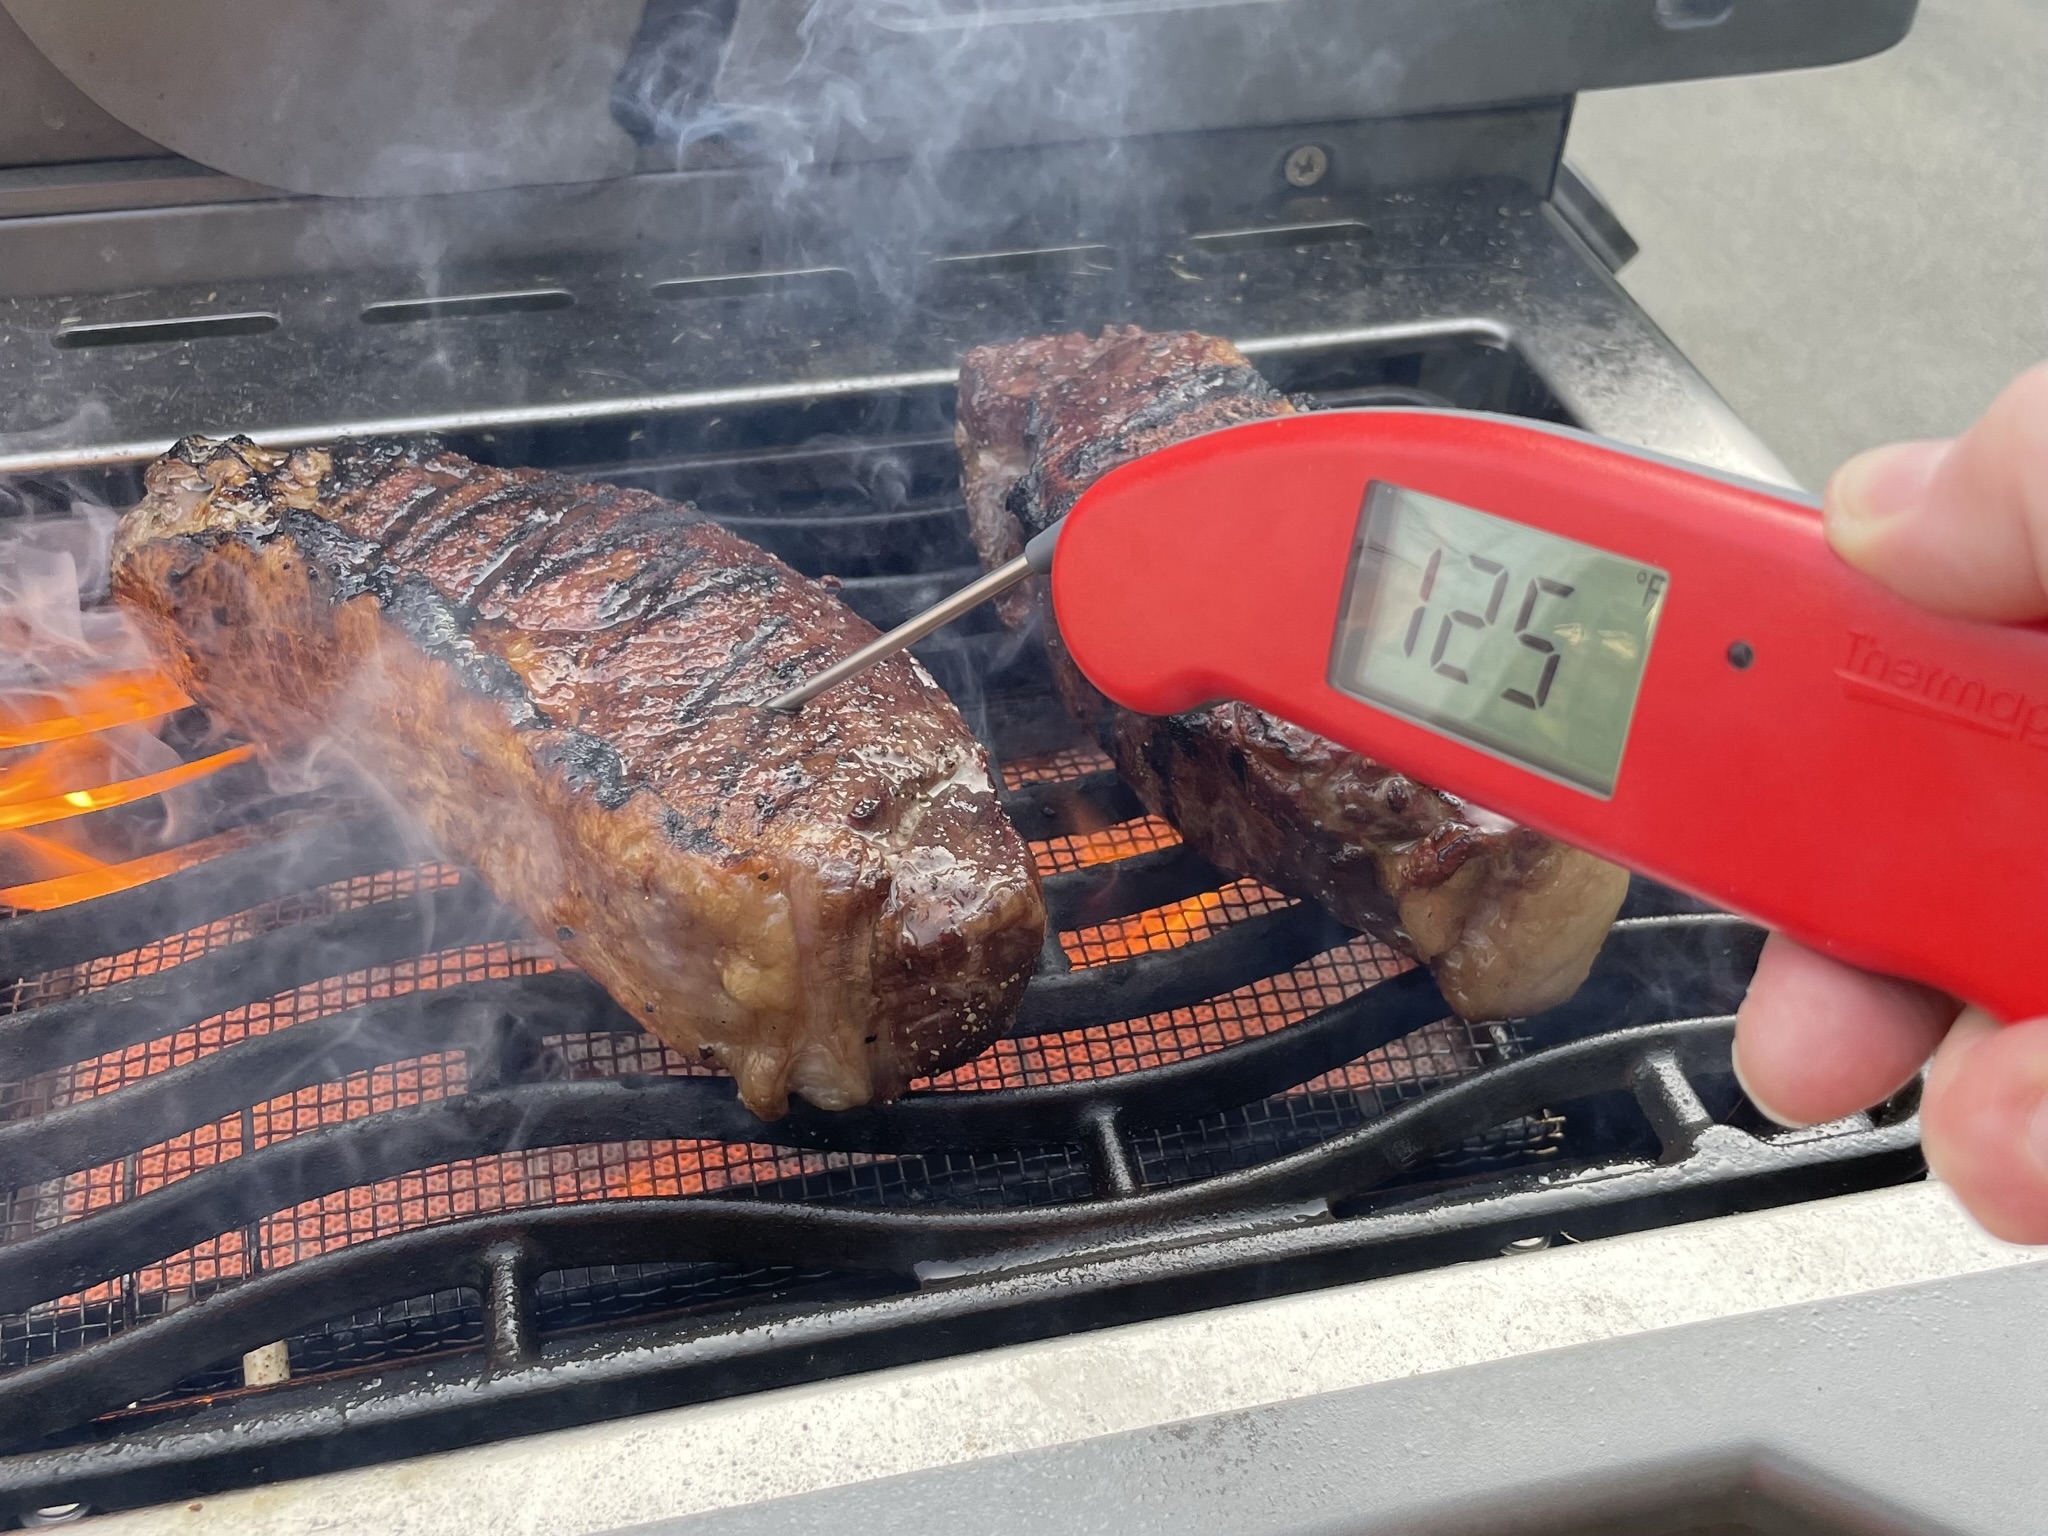
Tackled several of my culinary bucket list items, including porchetta, blue moon ice cream, homemade matzo, reverse-seared steak, babka and s’mores cupcakes (to name a few)
Yes, all of these 2023 highlights were the result of the same thing— stepping out of my comfort zone. Resolutions don’t stick, but if I stay curious and commit myself to taking chances and putting the “what ifs” out to pasture, 2024 may turn out to be my best year ever!
There is a special meal tradition at our house on New Year’s Eve. Our annual celebration of fancy pizzas began in 2018, right around the time that I was working to perfect my sourdough pizza crust. Les had shared his memories of the amazing White Clam Pizza he enjoyed while living near New Haven, Connecticut, and we decided to try one at home for New Year’s Eve. It turned out so good that we repeated it the next two years, and in 2020, we added a second specialty flavor to our repertoire— the Oysters Rockefeller Pizza. Last year, we tweaked tradition yet again, trading in the white clam pie with this creative twist on the classic Italian pasta dish, shrimp scampi. Why wouldn’t the flavors of garlic, shrimp, parsley and lemon be amazing on a blistered sourdough crust? Turns out, they most definitely are.
As with most of my specialty pizzas, this one takes a little time to prepare, but the good news is that you’ll do most of it in advance so that you have plenty of time to relax with a cocktail or mingle with guests (or both). There are three components to this pizza, and I’ll break down the details in photos ahead of the click-to-print recipe card at the end. You’re going to love this pizza!
My method for pizza baking
First things first, we bake all our pizzas in a regular home oven, preheated to 550° F with a baking steel on the rack. This combination of slab steel and maximum temperature helps us replicate the effect of a brick oven. If you don’t have a steel, you can get similar results with a pizza stone, but be sure to follow the manufacturer’s guidelines so that you don’t accidentally crack your stone under this extreme heat. With this method, you also need a pizza peel, which looks like a long-handled paddle. It’s helpful for easy transfer of the pizza into and out of the oven.
Our pizza stone doesn’t get much action since we invested in the baking steel. Whichever you choose, you’ll need a peel for easy transfer of the pizza.
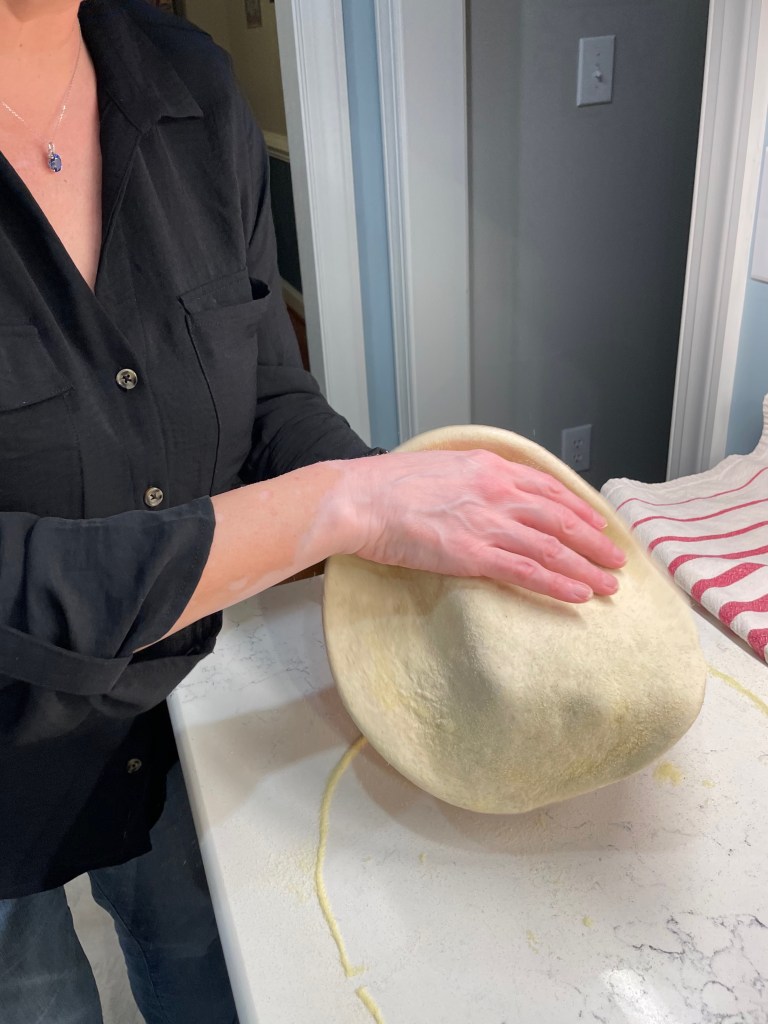
About the pizza dough
Second, my pizza dough is homemade from sourdough starter, and the shaping method is crucial to the kind of texture you see in my photos. We never use a rolling pin on the dough, as this deflates all the lovely air pockets. If you aren’t on the sourdough train, it’s no problem— you can use a yeasted dough or even a store-bought dough if you have a favorite that you trust. The link for my pizza dough also includes a yeast option, if you want to make your own without sourdough. Bring the dough to room temperature when you’re ready to bake.
Semolina flour works great to prevent dough from sticking while shaping. Fine cornmeal works well, too.
Cheez, Louise
Traditional scampi— the kind that’s piled onto a dome of angel hair— would not have any kind of cheese. But for my pizza, which does not have a base sauce, I’ve opted to scatter a bit of freshly grated mozzarella over the dough so that the shrimp curls have something to rest on. This is the firm variety of mozz, not the soft variety that is common for Caprese salad. Skip the pre-shredded stuff from the grocery store, as it is packed with an anti-caking agent that also prevents even melting.
My recipe also calls for parm-romano blend cheese, which we make in bulk at home because we use so darn much of it. A good Italian-made Parmesan is acceptable here, but again, do not use the pre-grated stuff. A special occasion pizza deserves the freshest cheese, and a few flicks of a microplane grater will bring big results, I promise.
The star of the show— shrimp
Finally, choose the right shrimp and for the love of flavor, don’t use pre-cooked. Choose fresh large shrimp— somewhere in the 20 pieces-per-pound range is just right— and buy them with the shells and tails on, as you’ll use those parts for the scampi sauce. Be sure to remove the “vein” from the curled back of the shrimp, and take note of the steps below for marinating them a few minutes before baking.
Let’s get cooking!
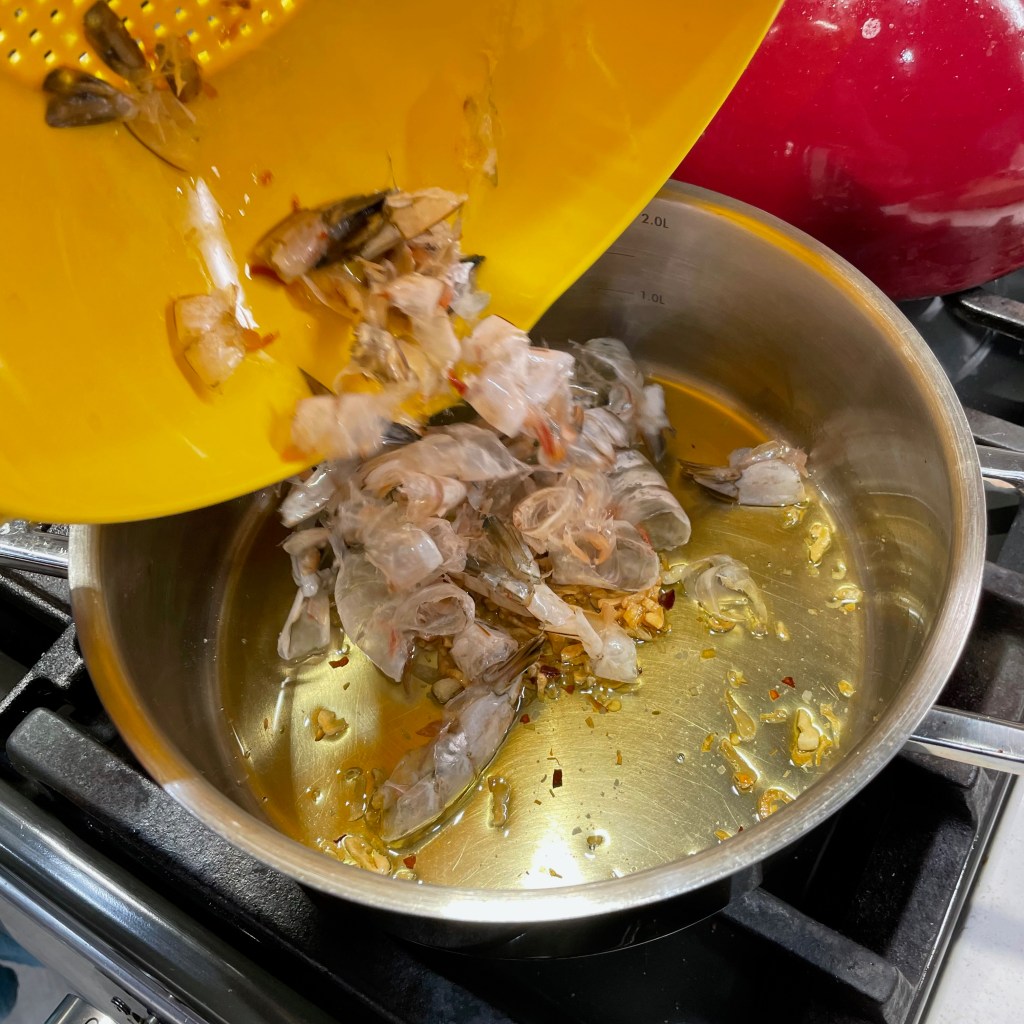
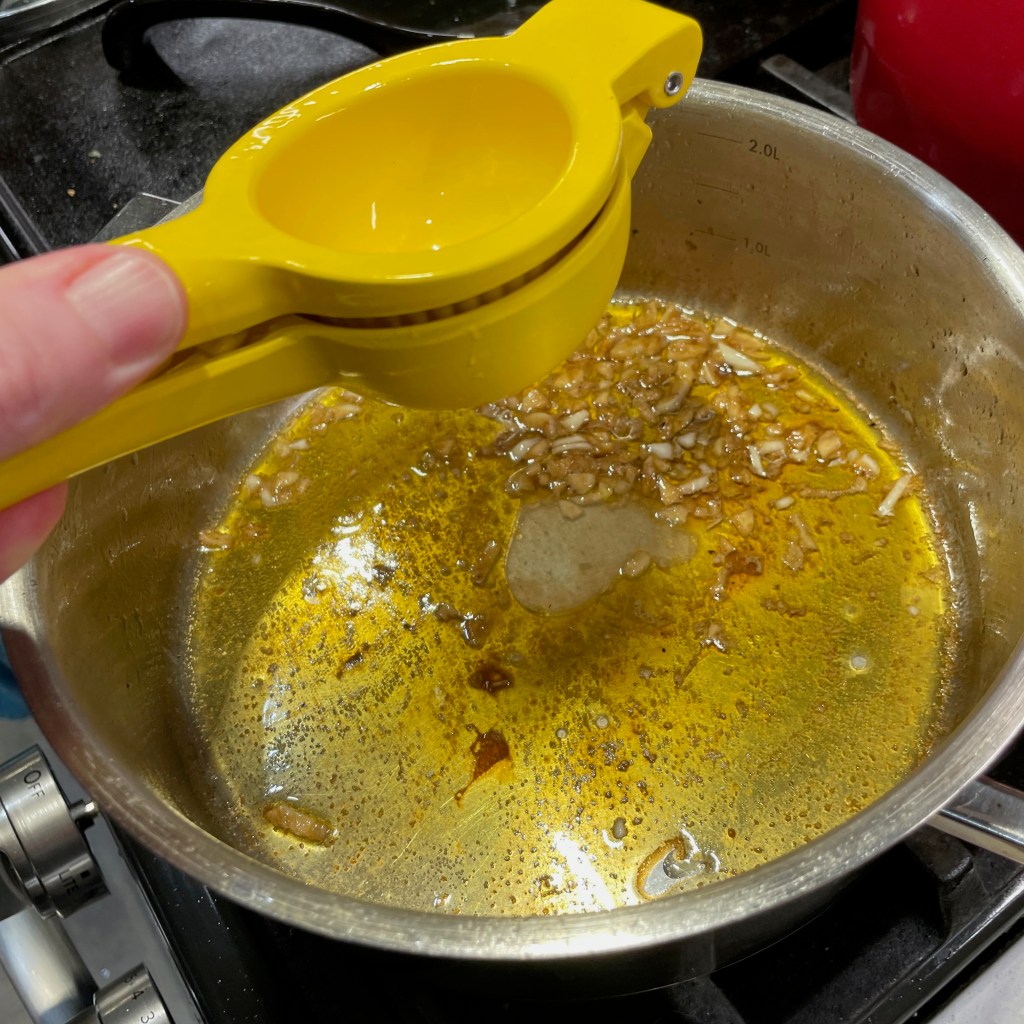
The sauce happens in two stages, beginning with what will seem like a ton of garlic and the parts and pieces that remain after you clean and set aside the shrimp. You’ll sauté the garlic at very low temperature for about 20 minutes, and then you’ll toss in the shrimp shells and tails for a gentle braising in dry vermouth.
This seems like a ton of garlic, but trust this. If you avoid alcohol, use a seafood stock rather than wine.
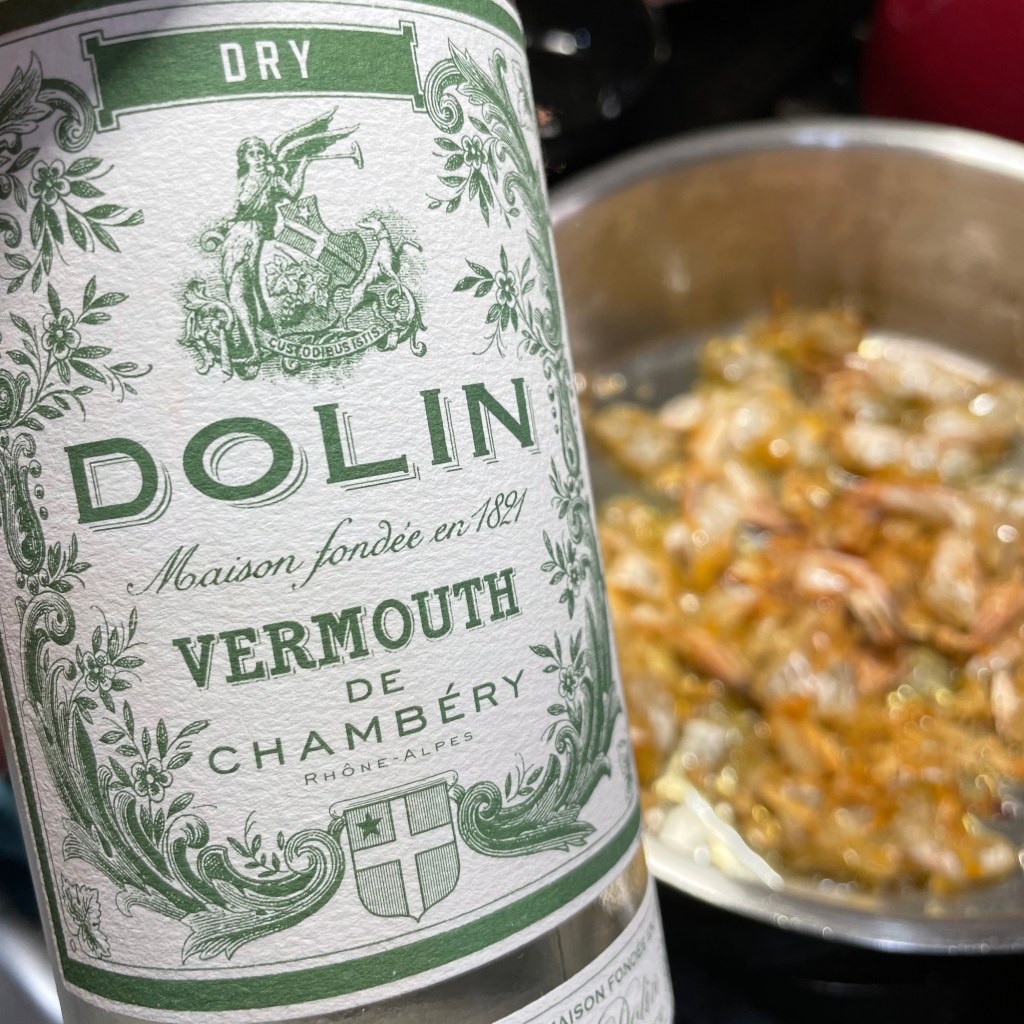
Vermouth— one of the primary ingredients in a martini— is what I always have open, but you are welcome to use a dry white wine such as pinot grigio if that’s more your style. Either way, add only enough to cover the bottom of the pot, and be sure that each shell is at least partially submerged. This will go for about 30 minutes at low heat, until most of the liquid has evaporated. Strain out and discard the solids, and you’ll be left with a small amount of deeply flavored, shrimpy-garlicky oil.
Gently press to extract all the juices and flavor from the shells.
Next, transfer the strained base back to the pan over medium heat and add more minced garlic to it. Squeeze in the juice of half a lemon and simmer this until the garlic is softened (don’t let it burn!), and then turn off the heat. Add finely chopped parsley and swirl in a tablespoon of butter. Transfer to a straight-sided jar and use an immersion blender to whiz this mixture up into a smooth, garlicky butter sauce that you’ll drizzle onto the pizza when it’s hot from the oven. If you’re working ahead, this can be refrigerated and then brought to room temperature just before pizza baking.
Blending the sauce isn’t crucial, but it makes for a fully emulsified sauce that is super silky.
Marinate the shrimp
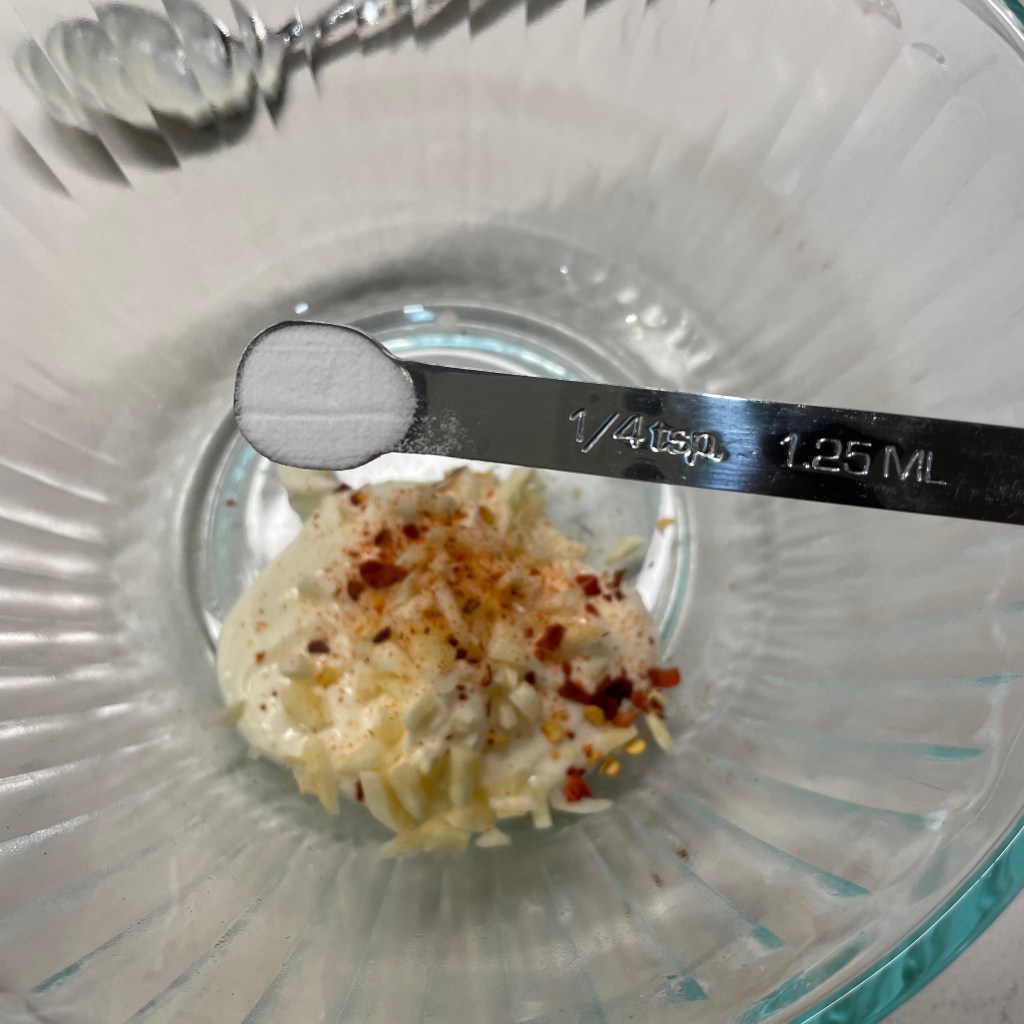
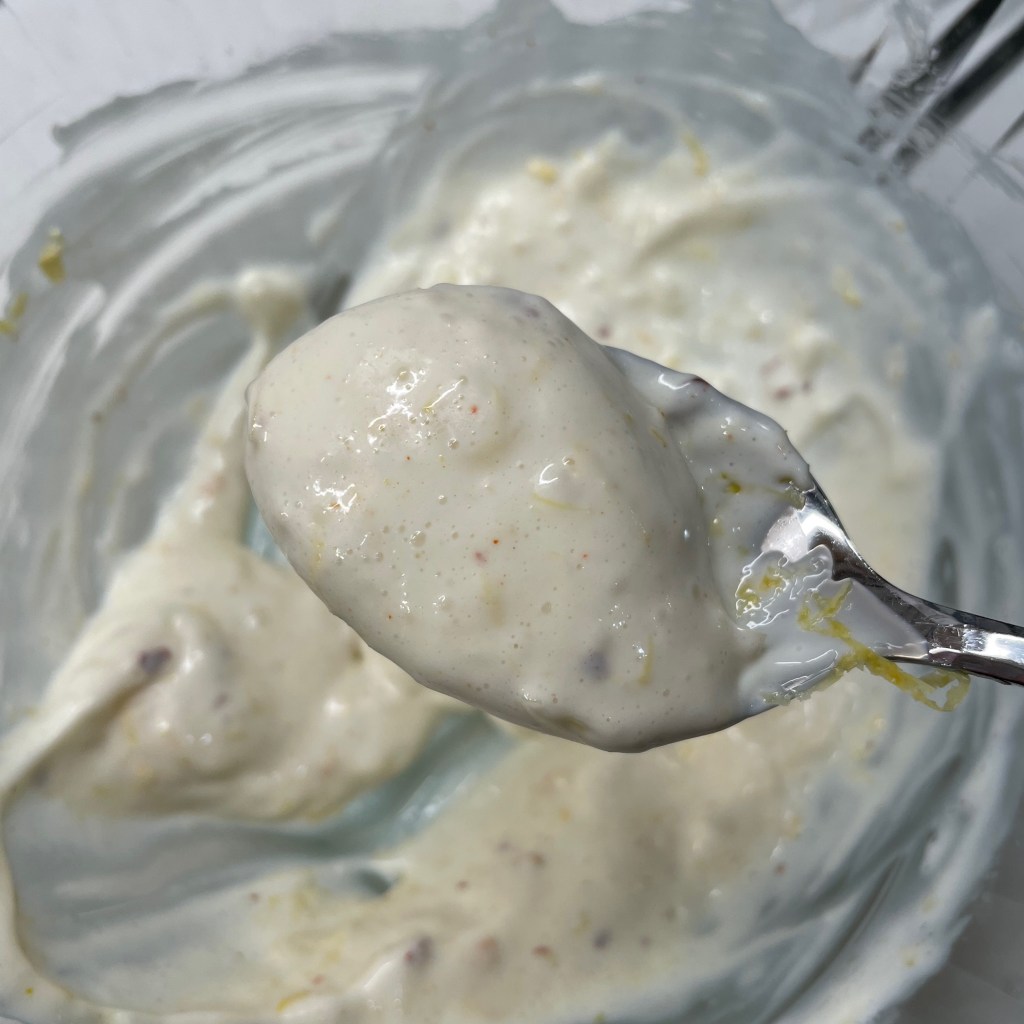
Now, do you remember the temperature this pizza will bake? Five hundred, fifty degrees! Under such extremes, the delicate shrimp needs a little protection, and I’m treating it with the mayonnaise trick I learned from rock star chef Kenji Lopéz-Alt. There is yet another clove of minced garlic in here, plus the zest of a small lemon and a shake of red pepper flakes. And then, the magic ingredient— baking soda! You can read all about my discovery of this technique here, if you wish, but suffice to say that it transforms the marinade to flavor the shrimp and protect it from the high heat. Twenty minutes will do it, but wait until just before pizza time for this step.
The baking soda changes the pH of the mayonnaise and accelerates the flavor into the protein.
Time to build the pizza!
Prep a pizza peel by rubbing in flour and then medium grind cornmeal, and hand-shape the pizza dough into a 14-inch round. Drizzle it with olive oil and season with salt and pepper. Next, scatter a sparse amount of the freshly grated mozzarella onto the dough as a base for the shrimp, and a quick shake of red pepper flakes. Arrange the shrimp (including that mayo marinade) onto the pizza. Give the whole thing a dusting of parm-romano cheese and slide it into the oven. Set a timer for 6 minutes (or longer, if using a pizza stone).
Have all your toppings lined up and ready, because this part goes quickly!
The preheated baking steel retains a great deal of heat, and the high temp of the oven ensures that the crust as well as the toppings will be perfectly browned in this time. Drizzle on the garlic-shrimp butter sauce, toss on more fresh parsley and one more dose of parm-romano blend cheese.
YUM!
The cheese and garlic butter will melt into the pizza, creating a perfect bite of tender shrimp, intensely flavored butter and garlicky goodness! This will be one of the two pizzas on our table this year as we count down to 2024.
Now, care to guess what other pizza I’ll be trying thisNew Year’s Eve? Hint: it’s more seafood. Stay tuned! 😉
Don't let the number of steps scare you away from making this insanely delicious pizza. None of them are difficult, and you'll be greatly rewarded for your effort!
Ingredients
1/4 cup extra virgin olive oil
5 to 6 cloves fresh garlic, peeled and sliced thin
Kosher salt
A few shakes red pepper flakes
Shells and tails of 3/4 pound uncooked shrimp
1/4 cup dry white wine (or vermouth, as I prefer)
2 additional cloves garlic, minced
Juice of 1/2 lemon
2 Tbsp. fresh parsley leaves, finely chopped
1 Tbsp. butter
Notes: Don’t skimp on the garlic in this component! It plays a prominent role in scampi, and though it may seem like too much, you’ll end up straining most of it out of the sauce base, so use enough to give it plenty of flavor.
Directions
Add olive oil to a heavy-bottomed pot placed over very low heat. Add first amount of garlic, salt and red pepper flakes and steep for about 20 minutes. Watch this carefully to be sure the garlic doesn’t burn; it should just barely simmer around the edges of the garlic.
Add shrimp shells and tails to the pot and toss until shells begin to turn pink. Raise heat slightly to medium-low. Add dry vermouth and simmer until liquid is mostly evaporated. Cool to room temperature and then strain out solids through a mesh strainer.
Wipe out the pot and add strained shrimp stock, minced garlic and lemon juice. Cook over low heat until garlic softens. Turn off heat, stir in parsley and whisk in butter.
Transfer sauce to a straight-sided jar and use an immersion blender to puree until smooth. Set aside or refrigerate and bring to room temperature before baking pizza.
Next, marinate the shrimp. If you make the marinade ahead, wait until last minute to add the baking soda.
Ingredients
1/3 cup mayonnaise
1 clove garlic, peeled and minced
1 or 2 shakes red pepper flakes
1/4 tsp. baking soda
Zest of 1 small lemon
3/4 pound wild-caught shrimp, peeled and deveined
Directions
Combine mayo, garlic, red pepper and baking soda in a bowl large enough to hold the shrimp.
Stir in lemon zest and toss shrimp in the mixture. Set aside for 20 minutes before assembling the pizza.
Time to bake: The oven should be preheated to 550° F for one hour with pizza steel placed about 8 inches from the top heating element of the oven. Dust pizza peel with flour and medium grind corn meal for easy transfer of the pizza to and from the oven. If you don’t have a peel, use the back of a cookie sheet to slide the pizza in, and grab the crust with tongs to pull it out when it’s finished.
Ingredients
11 oz. pizza dough ball, at room temperature
Drizzle of olive oil
Salt and pepper
1/3 cup freshly shredded hard mozzarella
A few shakes red pepper flakes
2 Tbsp. parm-romano blend cheese
Additional parm-romano and chopped Italian parsley (for final garnish)
Directions
Shape dough by hand into a 14-inch round and place it on prepared peel. Drizzle oil all over dough and give it a quick seasoning of salt and pepper.
Scatter mozzarella over pizza and shake on red pepper flakes. Arrange shrimp over mozzarella. Sprinkle parm-romano cheese all over pizza.
Slide pizza onto hot steel and bake for 6 minutes. Remove from oven and spoon over the garlic sauce, concentrating on the shrimp (don’t worry, it will melt and ooze everywhere). Sprinkle with parsley and additional parm-romano cheese. Serve immediately.
In all my working days— even those that I spent pitching in for a catering company— I never had a work assignment that involved developing a cocktail. Until now!
The second half of this year has been a wild ride for me, as I assumed a management role of sorts in the company where I’ve been working for the past decade. I’ve been busy since July learning new processes and data systems, tackling the billing records and helping other departments in our parent company learn more about my lesser-known branch of the business. It’s been exciting, exhausting and rewarding all at once.
With these new responsibilities came introduction to new people in the company, including my new direct supervisor, John. We’ve only met online, as he is based in northern California and I’m in central North Carolina, but we connect regularly for one-on-one updates, and he perked up in one of our early, get-acquainted conversations when he learned that I do a food blog. At the end of each monthly meeting, we usually squeeze in a little banter about the most interesting thing I’ve been cooking or shaking up that month. The rest of the department has not met me, though, and I’m told that John has been subject to some teasing by the team. They call me his “imaginary friend!” 😂
That will change this afternoon when I join an online holiday-themed meeting with the whole gang. To help with introductions, John gave me an assignment— spend a few minutes describing my branch of the business, and a few more minutes instructing the team in making a holiday cocktail. So it’s true— my reputation as an amateur mixologist precedes me. I’m good with that!
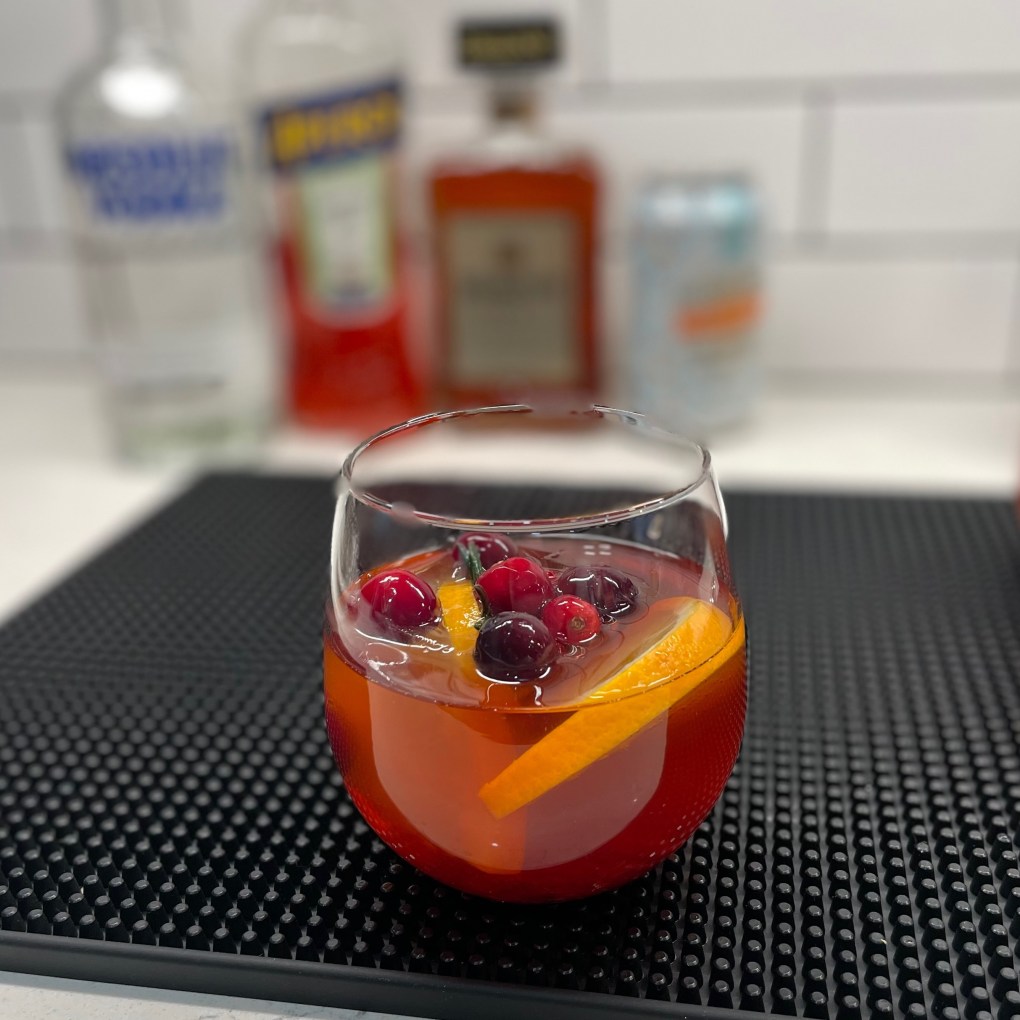
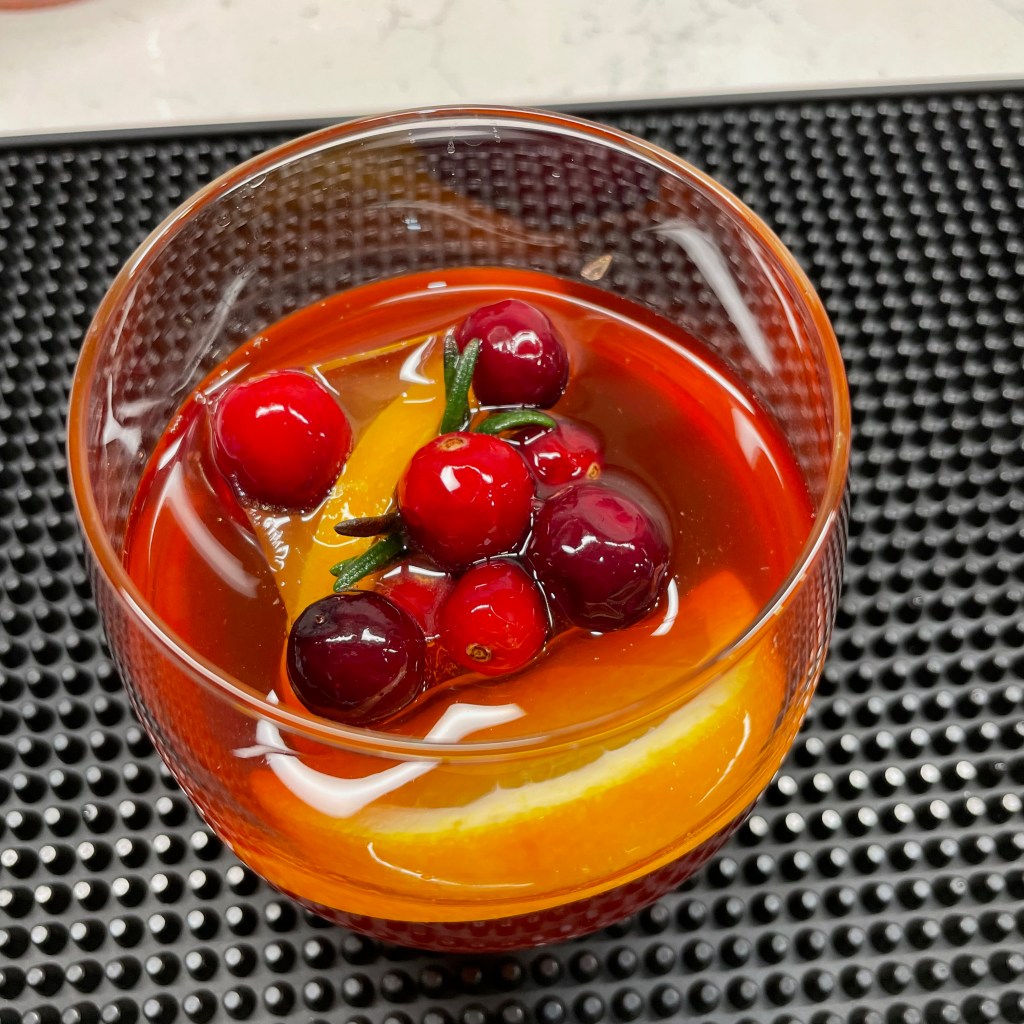
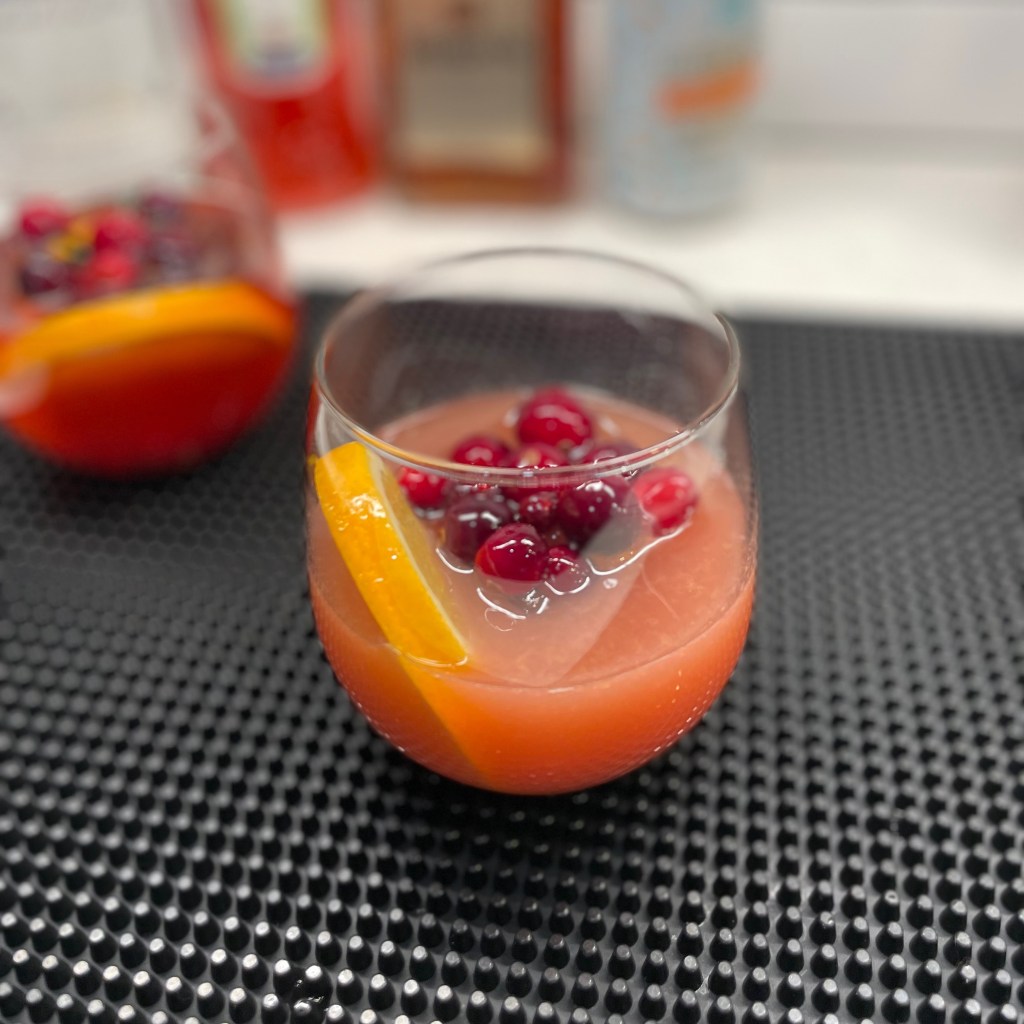
This cocktail even looks like Christmas!
The drink I’ve prepared is a fun and festive twist on a classic Italian Spritz, and I chose this approach for a few reasons:
It’s easy, made with widely available ingredients for a global audience.
It’s a good balanced drink— not too sweet or strong.
You don’t need fancy bartender tools, as this drink is built right in the glass.
It’s simple to sub in lighter ingredients for an alcohol-free version that is every bit as festive and sure to please the non-drinkers at your holiday gatherings.
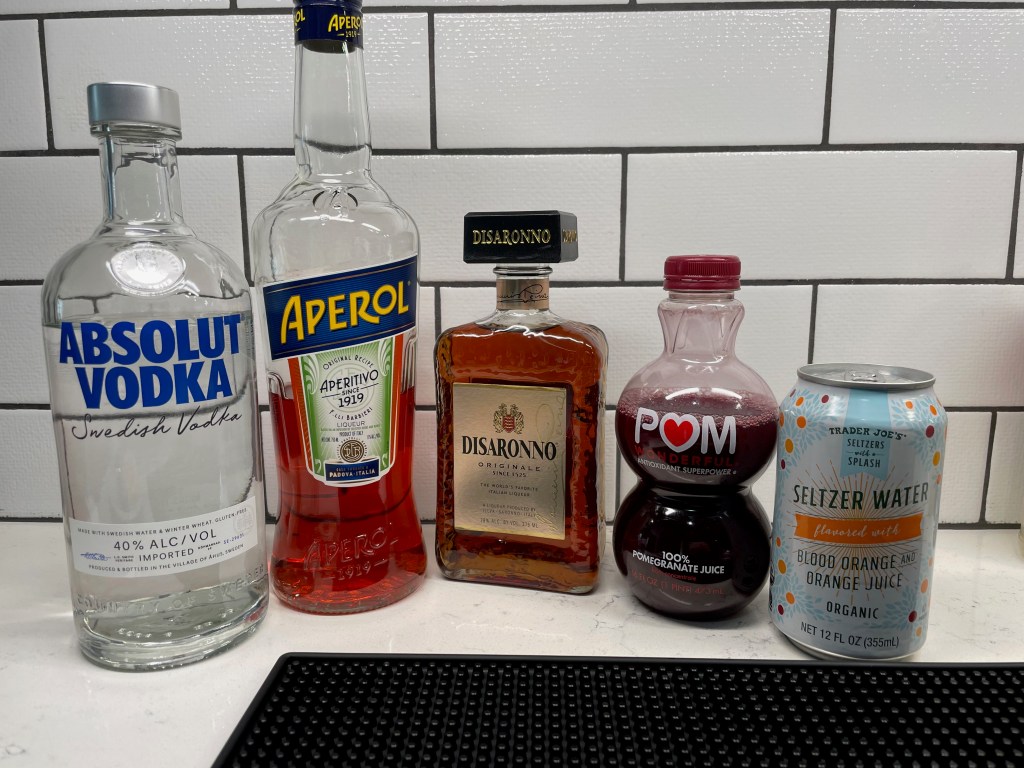
So, what’s in this cocktail?
The almond and pomegranate flavors give a traditional Spritz a holiday flair.
The flavors in my Spritz are seasonal— tart pomegranate and sweet almond— paired with Aperol, the slightly bitter Italian aperitivo that hits the taste buds like a marriage of grapefruit peel and orange LifeSavers candy. If you are already a fan of Aperol, you’ll love this drink. If Aperol feels a little too bitter for you, then you’ll appreciate the way the amaretto and pomegranate calm it down. Vodka is the primary spirit of the drink, but if you want something lighter, the drink won’t suffer without it.
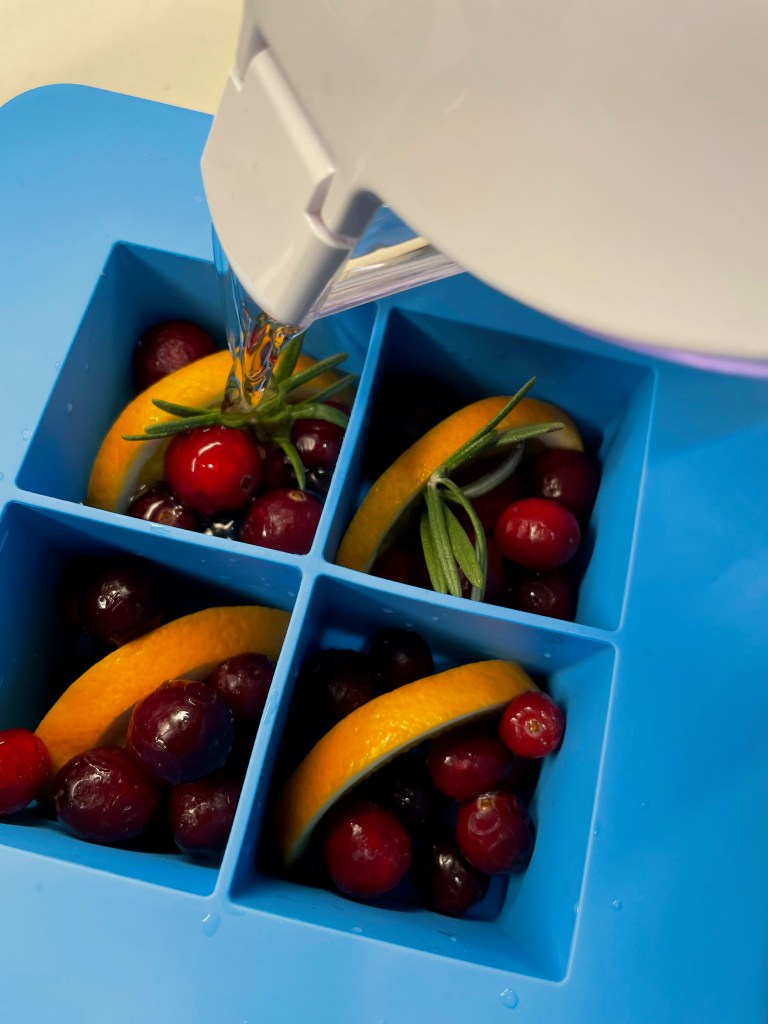
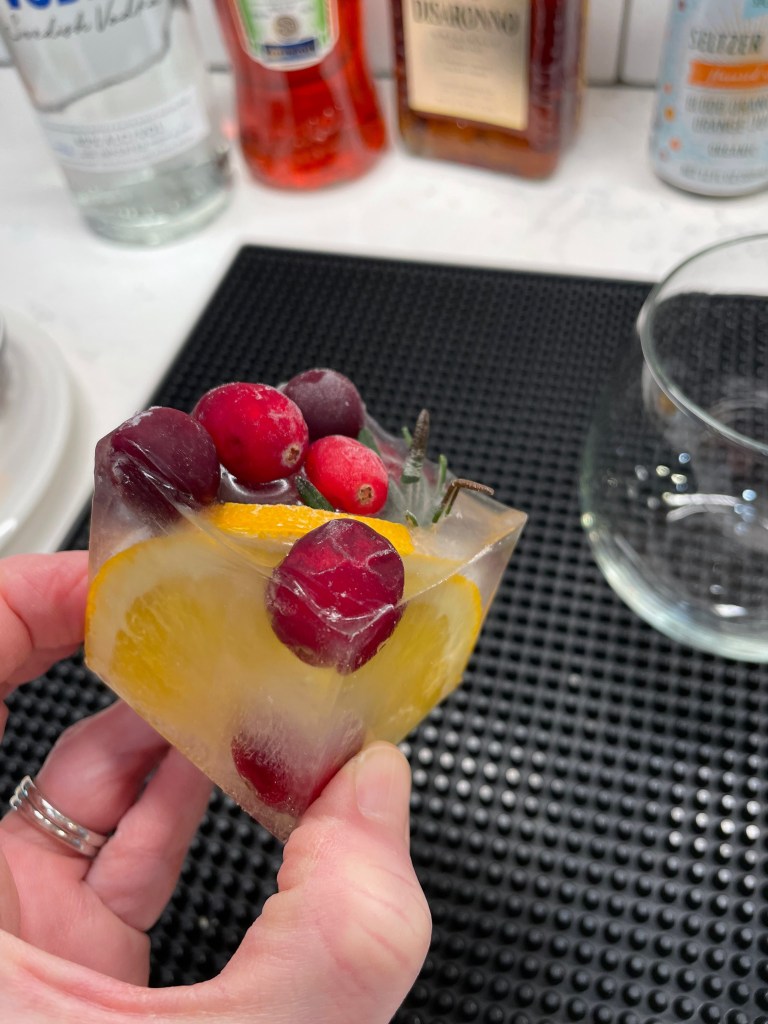
Don’t forget to garnish! A few pomegranate arils and a slice of orange in the glass will dress it up beautifully for the holidays and make a great impression! You know that I’m obsessed with fancy ice, too, and here I’ve found an easy way to make them extra festive, with orange slices, whole cranberries and a rosemary sprig frozen inside! My ice mold is made by True Cubes, but this trick should work with any silicone ice mold.
Don’t underestimate the wow factor of a thoughtful garnish!
Finally, this drink is topped off with sparkling water or seltzer because everything feels fancier with bubbles. If you’re in the mood for a stronger topper, go with Prosecco, as with the classic Spritz. I personally think it’s just right with seltzer, especially one flavored with blood orange. 😋
Can I get a no-booze version of this pretty drink?
Absolutely! The great thing about a drink made with fruit flavors is that it’s very adaptable to a no-alcohol or “zero proof” version.
This drink received rave reviews from non-drinkers at our house!
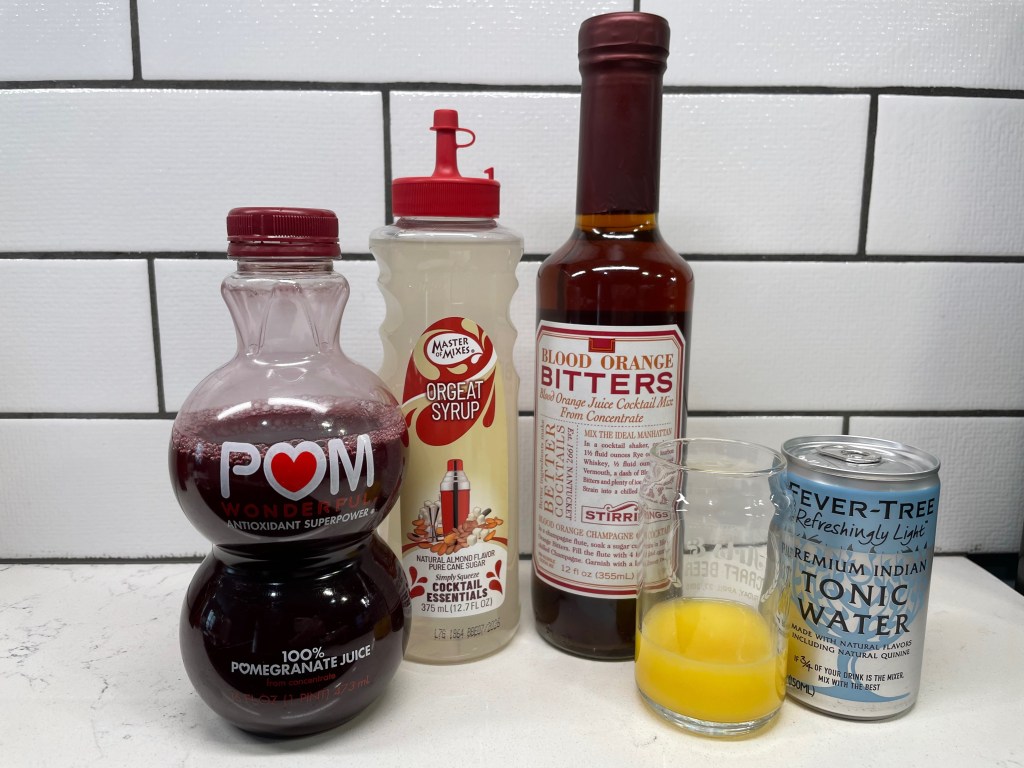
To maintain the good balance of sweet, tart and bitter, I’ll shift the ratio of ingredients slightly. Use non-alcoholic orange bitters to replace the Aperol and orgeat, an almond cordial syrup, as a stand-in for the sweetness of Amaretto. Freshly squeezed citrus is perfect here, and the pomegranate juice brings a little tartness. There’s no need to “replace” the vodka, which doesn’t have much flavor on its own. But if you’d like a little bite or tingle on the tongue, I have a trick for that, too. Tonic water!
The same flavors, but rearranged for a zero-ABV drink.
These alcohol-free ingredients are easy to find online or in the mixers section of a larger supermarket. You might also amp up the bitter orange flavor by crushing a piece of orange peel in the bottom of the glass. To give the drink a little “bite’ that you would otherwise have in a spirited cocktail, top it off with tonic water rather than seltzer.
Cheers!
For your holiday enjoyment, two click-to-print recipe cards are available below, one for each version of my holiday Spritz. For readers abroad, I’ve estimated the measure amounts in milliliters. Feel free to adjust to taste!
This cocktail is a festive, seasonal twist on a classic Aperol Spritz. The drink can be built right in the glass, and a garnish of fresh fruit is a beautiful finish!
Ingredients
1.5 oz vodka (40ml)
1 oz Aperol (25ml)
.5 oz pure pomegranate juice (15ml)
.25 oz amaretto or other nut liqueur (10ml)
2 oz. seltzer (or Prosecco, for a stronger drink)(50ml)
Pomegranate arils and fresh orange slice for garnish
Note: Hazelnut or pistachio liqueur would be an interesting substitute for the amaretto in this cocktail. If nut allergies are a concern, consider adding something with a touch of vanilla or ginger for an extra little something.
Directions
Measure vodka, Aperol, pomegranate juice and amaretto into a large cocktail or wine glass. Stir gently to mix.
Add ice and top off the drink with seltzer. Give it a quick little stir to activate the bubbles. Add garnish as desired.
The seasonal flavors of pomegranate and almond give this drink a festive feel without any of the consequences of alcohol! Look for orgeat and alcohol-free orange bitters online or in the mixers section of a larger supermarket.
Ingredients
1.5 oz. freshly squeezed orange juice (40ml)
.75 oz. pomegranate juice (20ml)
.25 oz. orgeat (almond cordial syrup)(10ml)
.25 oz. non-alcoholic blood orange bitters (10ml)
2 oz. seltzer (or tonic water, for a drink with more “bite”)(50ml)
Pomegranate arils and fresh orange slice for garnish
Note: If you cannot find the orgeat, consider using almond syrup, similar to what is used in fancy coffee shops. In a pinch, you can replicate the orange bitters by crushing a piece of fresh orange peel in the bottom of the glass before mixing the other ingredients.
Directions
Measure orange juice, pomegranate juice, orgeat and bitters into a large cocktail or wine glass. Stir gently to mix.
Add ice and top off the drink with seltzer or tonic water. Give it a quick little stir to activate the bubbles. Add garnish as desired.
While out shopping yesterday, I bumped into some friends who asked whether my husband and I would be staying close to home for Christmas. I jokingly told them that yes, our holiday would be easy and simple again this year for one good reason: Les is Jewish. 😂
Our friends know this of course, and they also know that we do celebrate Christmas, just as we celebrate and observe Hanukkah, Rosh Hashanah, Easter and Passover. Even when it is just the two of us, we enjoy making a special dinner for Christmas night— one that usually begins with a fancy appetizer and ends with a nice dessert.
The holidays are a great time to pull out all the stops and splurge a little— calorie- and money-wise—and we relish this little bit of indulgence regardless of whether we are serving guests or just ourselves. Les informed me recently that his favorite “special” dish that I make is duck (funny that I didn’t know that!), and so I’ve decided to share my tips for making a perfectly crispy seared duck breast and a cherry-pinot noir sauce that sounds complicated but is actually so easy.
Let’s start at the beginning. At first impression, you might think that duck is similar to chicken, but in flavor and preparation, it is actually closer to red meat. There is a generous layer of fatty skin on duck, and it takes extra care to crisp it without overcooking or drying out the meat. This is the technique that works best for me, and I’m sharing it with a recipe I made for my sweetheart on Valentine’s Day this year. If you already have your Christmas meal planned, save this for February (and make something with chocolate and cherries for dessert).
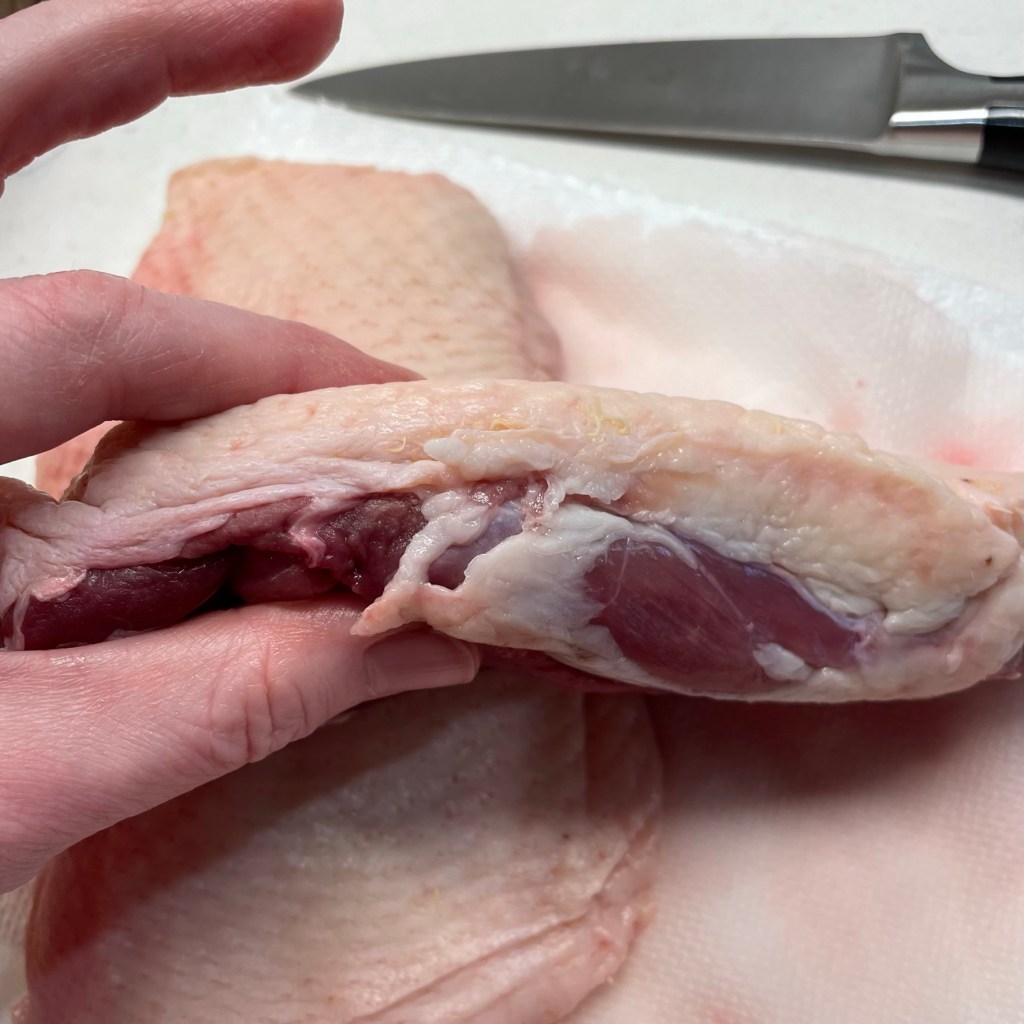
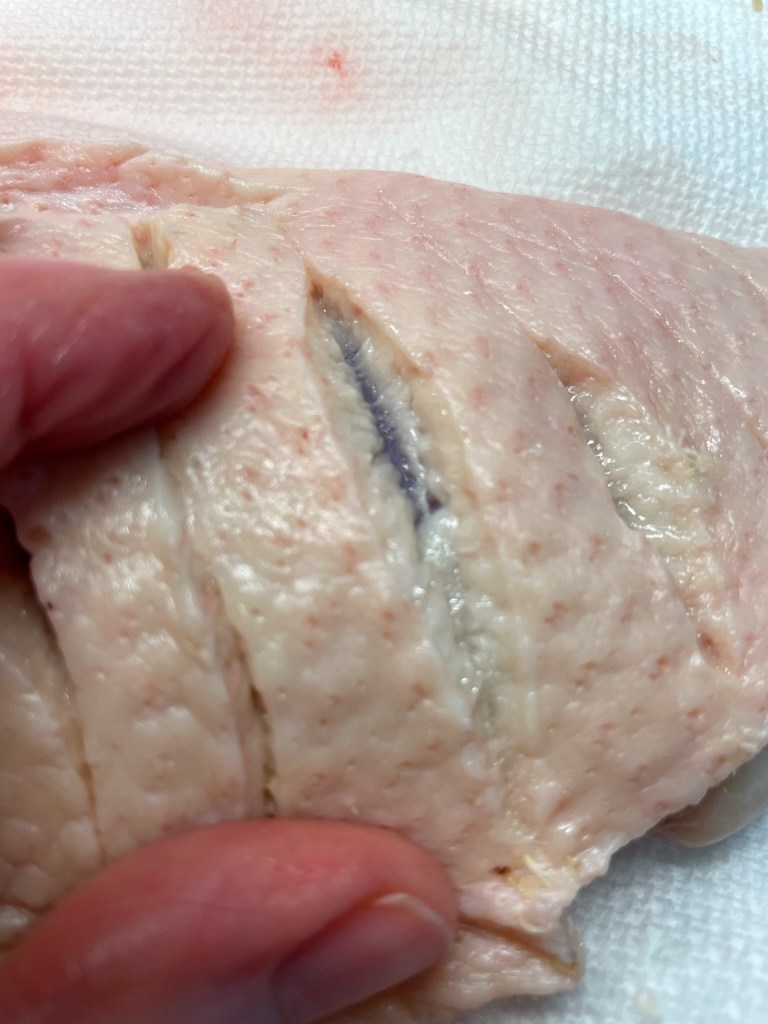
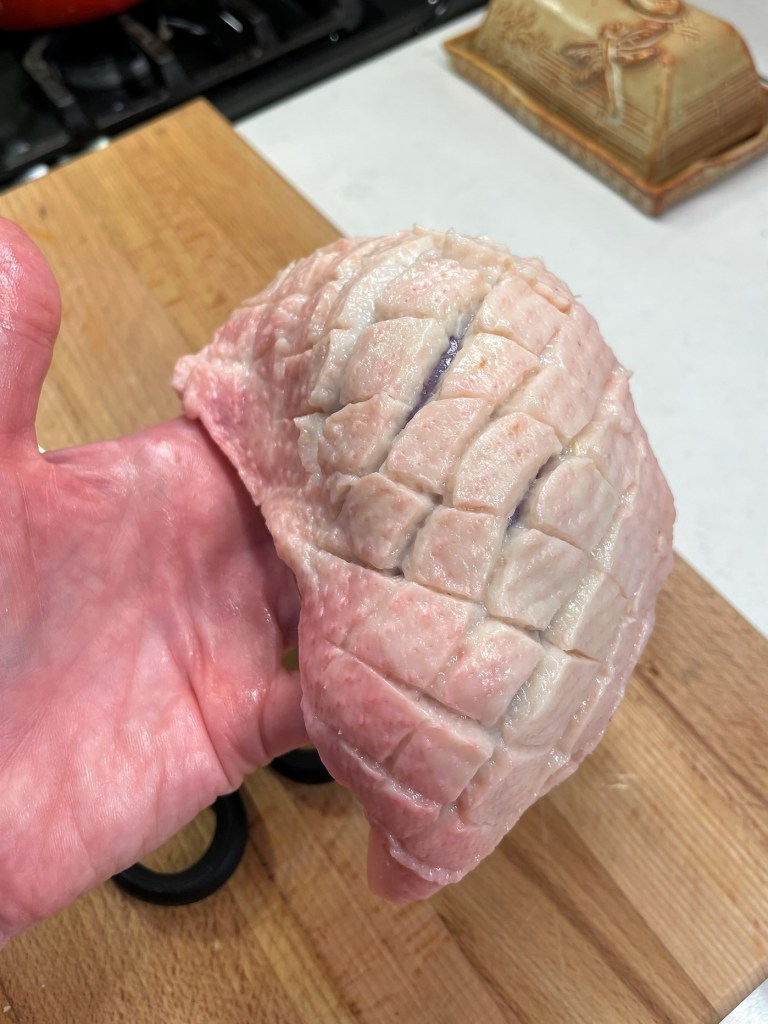
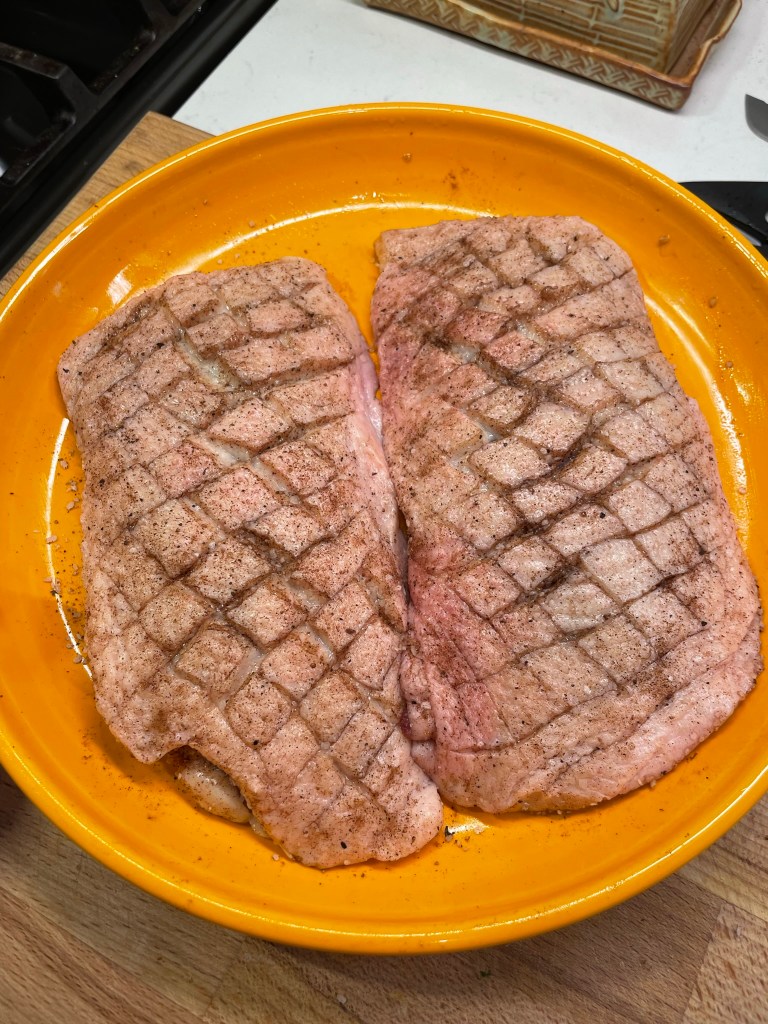
Tip #1: Score the meat for better rendering
Take care not to cut into the duck meat, as I did in the third picture above. You want your cuts to only break the fat.
To efficiently render the thick, fatty skin on duck breast, use a very sharp knife to score it with a crosshatch design, with cuts that spread about 1/2-inch apart and only through the skin, not into the meat. This scoring allows more of the fat to render when you fry it in a skillet.
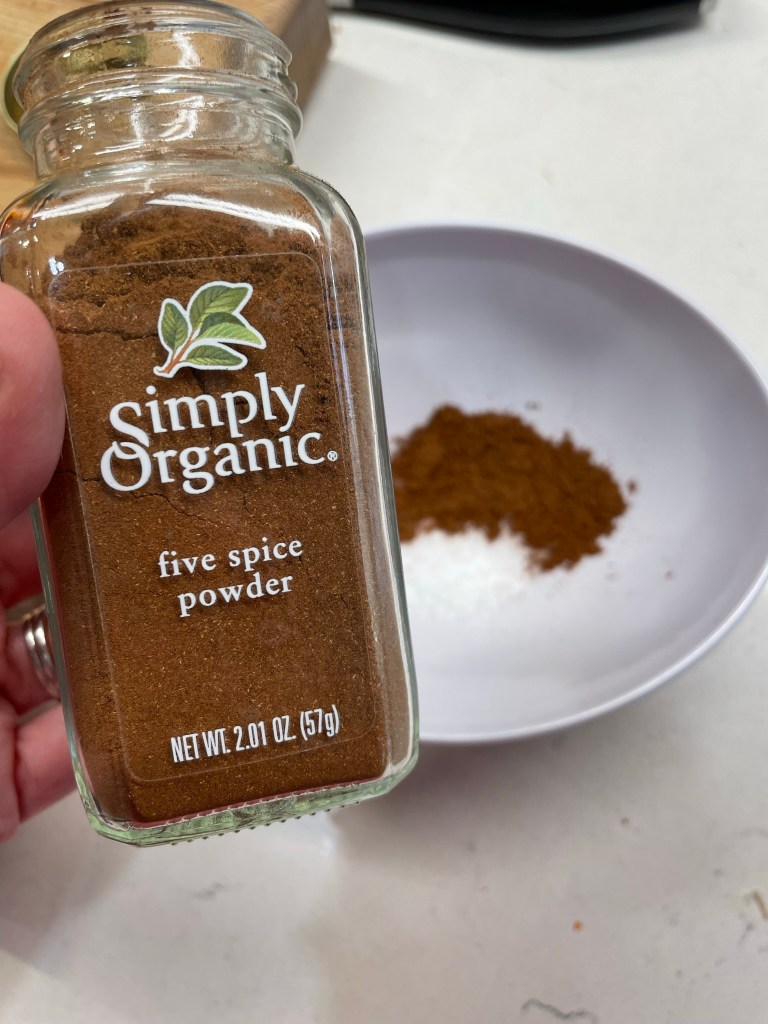
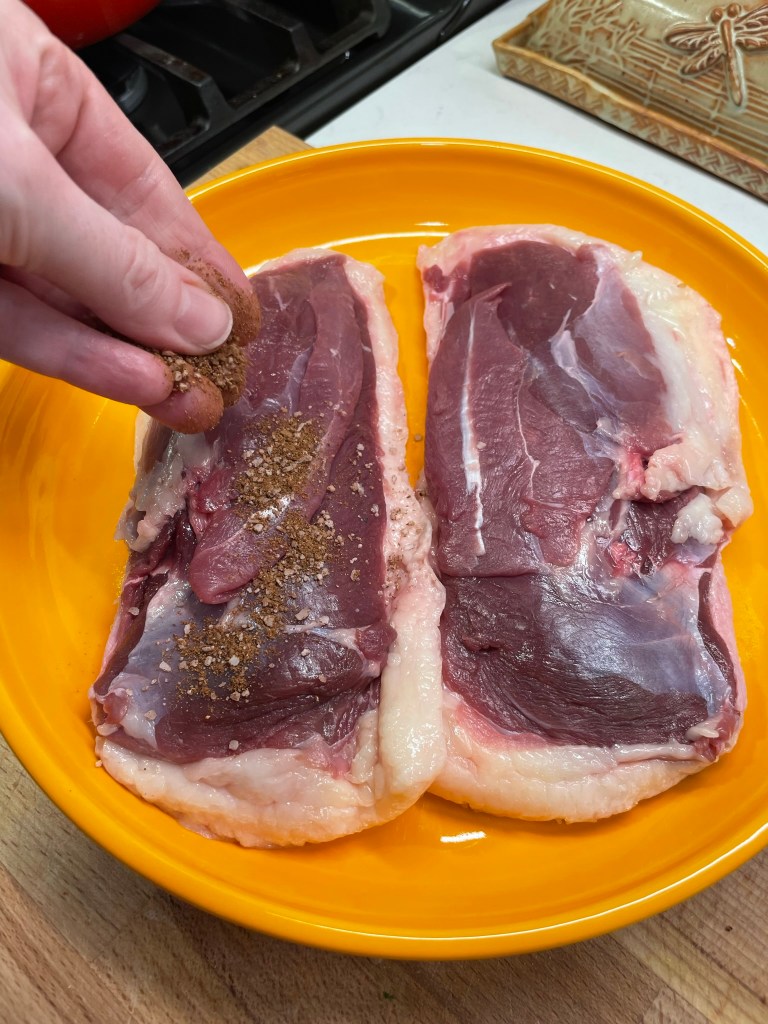
Tip #2: Dry brine the duck breast
The five spice was delicious with the cherries. If you’re not a fan, simply salt the duck.
I’ve become a big fan of the dry brine, though I had to wrestle with my own sensibilities the first few times I tried it because at first glance, a dry-brined meat looks like it has dried out. Not so! There’s a whole science behind how this works— reverse osmosis of some sort, I guess— but the upshot is that salting and resting meat uncovered in the fridge allows better infusion of the seasoning into the meat and juicier results in the end. Here, I added five spice powder to the kosher salt. It was excellent with the flavors in my sauce. Another advantage of doing this step is that it does dry out the fatty skin a bit, and that greatly reduces spattering in the next step.
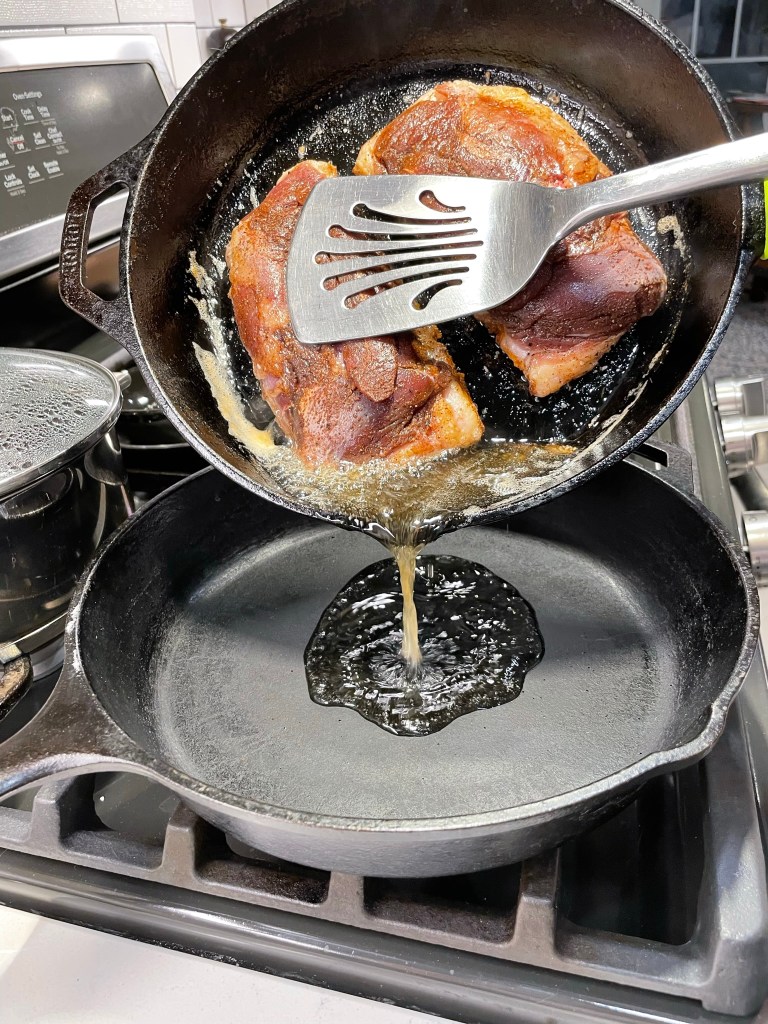
Tip #3: Begin with a stone-cold skillet
When melted fat accumulates around the duck breasts, carefully drain it off.
And preferably cast iron! If you were to place a duck breast in a hot skillet, the skin would sear, but the fat would not render very neatly. You’d likely be left with an oily mess, as I did the first couple of times I made duck. A non-stick skillet is not ideal either because the coating is a barrier to getting crispy skin. Invest in a quality cast-iron skillet and it will reward you with exceptional results for any meat you sear. Mine is a 10-inch Lodge skillet, made in the USA and built to last a lifetime. As the fat renders, carefully drain it off.
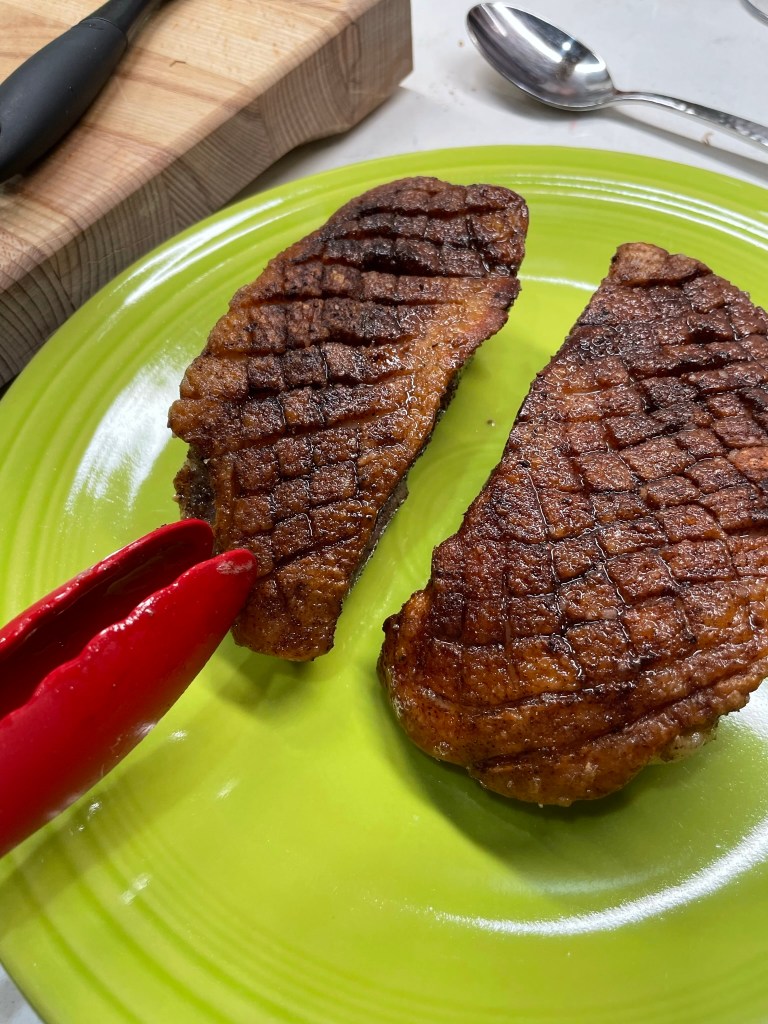
Tip #4: Do most of the cooking on the skin side
The fatty side should be completely crisp after about 11 minutes. Turn and cook the other side briefly, then transfer to a warm plate.
Duck is best served medium rare (like red meat), and the best way to achieve this together with crispy skin is to leave the breast skin-side down for most of the cooking time. Residual heat from the pan will bring it to temperature, and you only need to turn it to the flesh side for a minute or two to seal in the juices.
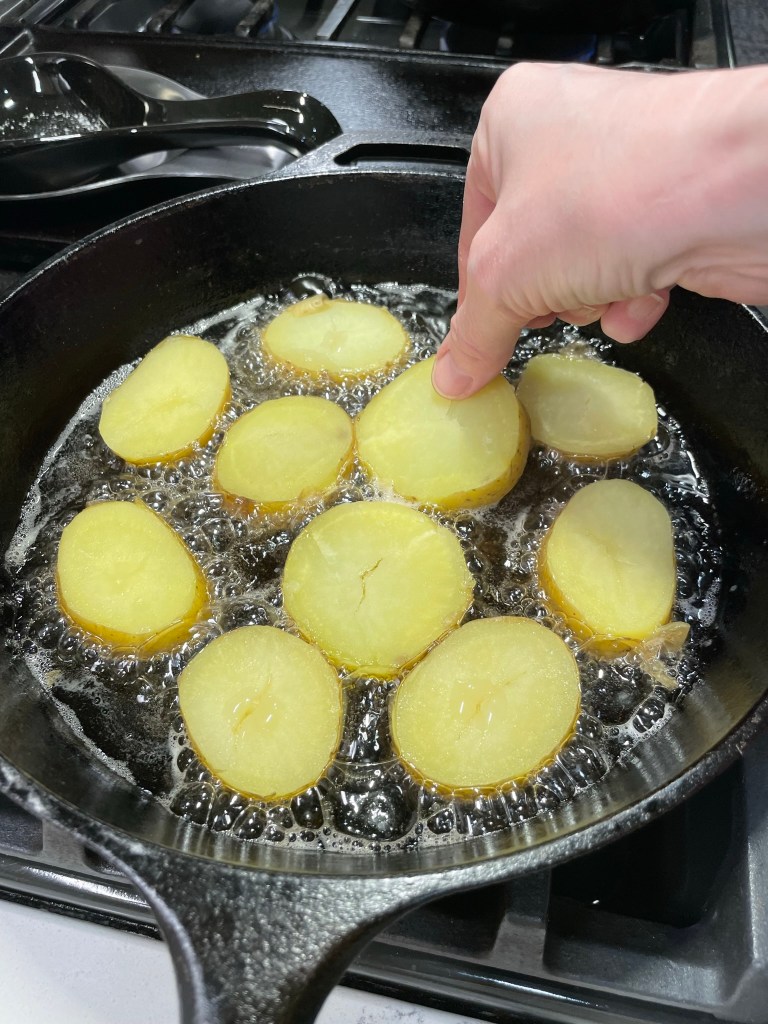
Tip #5: Don’t waste the extra duck fat!
A great deal of fat will be released as you render the duck breasts, but this is decidedly not a bad thing! If you plan to make potatoes to accompany your duck, do yourself a favor and fry them in the duck fat! The flavor is incomparable and I am always thrilled to find the crispiest, non-greasy texture on the potatoes. If you don’t need the fat for this meal, drain it off into a jar, let it cool and store it in the fridge until you do make potatoes.
My tips for making these decadent, duck fat-fried potatoes are included at the end of the click-to-print recipe card below.
Yes, it’s saturated fat, and of course, you shouldn’t eat like this very often. But these are the holidays, and this meal is a worthwhile occasional indulgence. Especially with cherry-pinot noir sauce!
Let’s talk about that sauce!
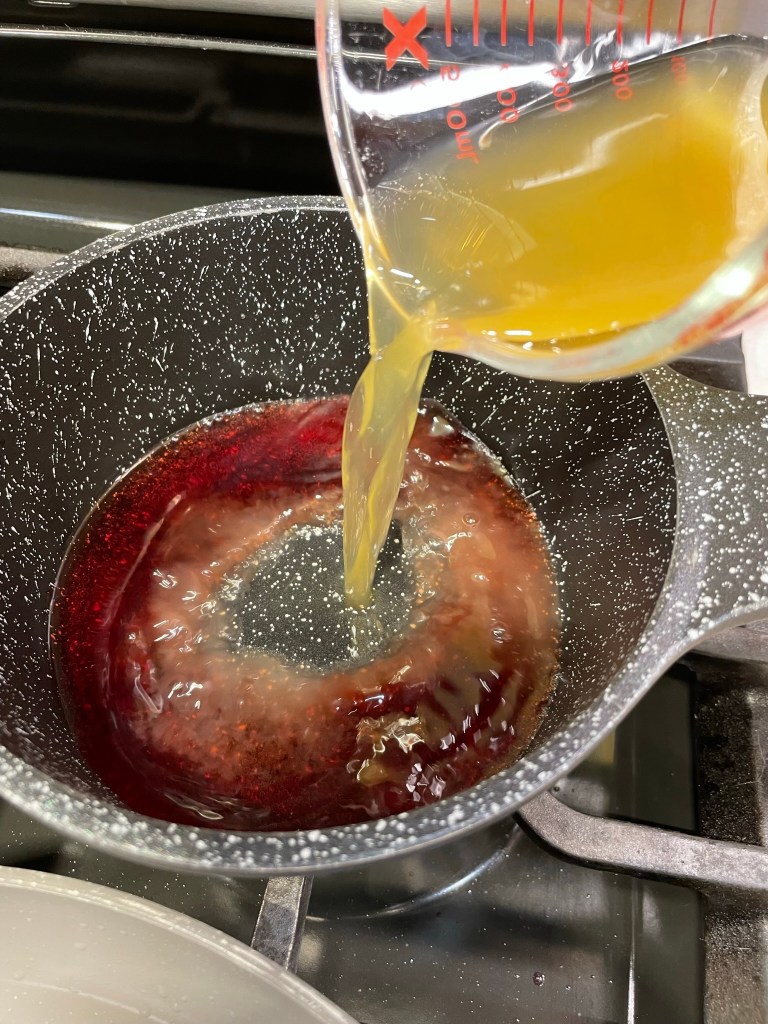
Now that you’re feeling confident about achieving the perfectly crispy duck breast skin, take a look at this flavorful, sweet and savory sauce, made from dark cherries, shallots, chicken stock and Pinot noir. Though we are definitely not in cherry season, this recipe is great because it uses frozen dark cherries. Pinot noir is the perfect complement to this, and the shallot, chicken stock and red wine vinegar provide a savory backdrop to keep this from feeling too sweet.
As you will see, this recipe makes quite a bit of sauce and each duck breast is about half a pound, so the whole thing is really suited to serving four people. Les and I got a little carried away because the flavors were so mouthwatering and we knew it would lose that perfect, crispy texture as leftovers. Get the base of the sauce started while the duck is cooking and just keep it warm on the back burner until serving time.
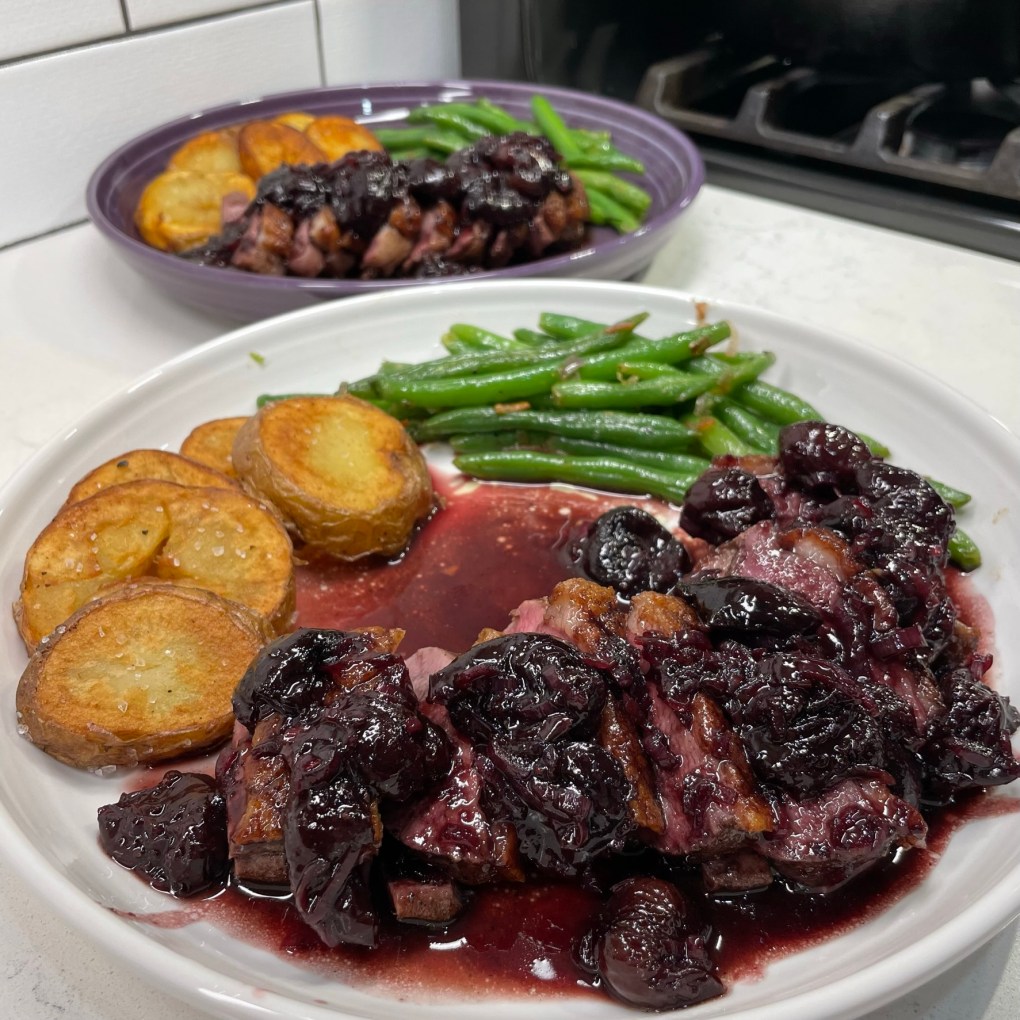
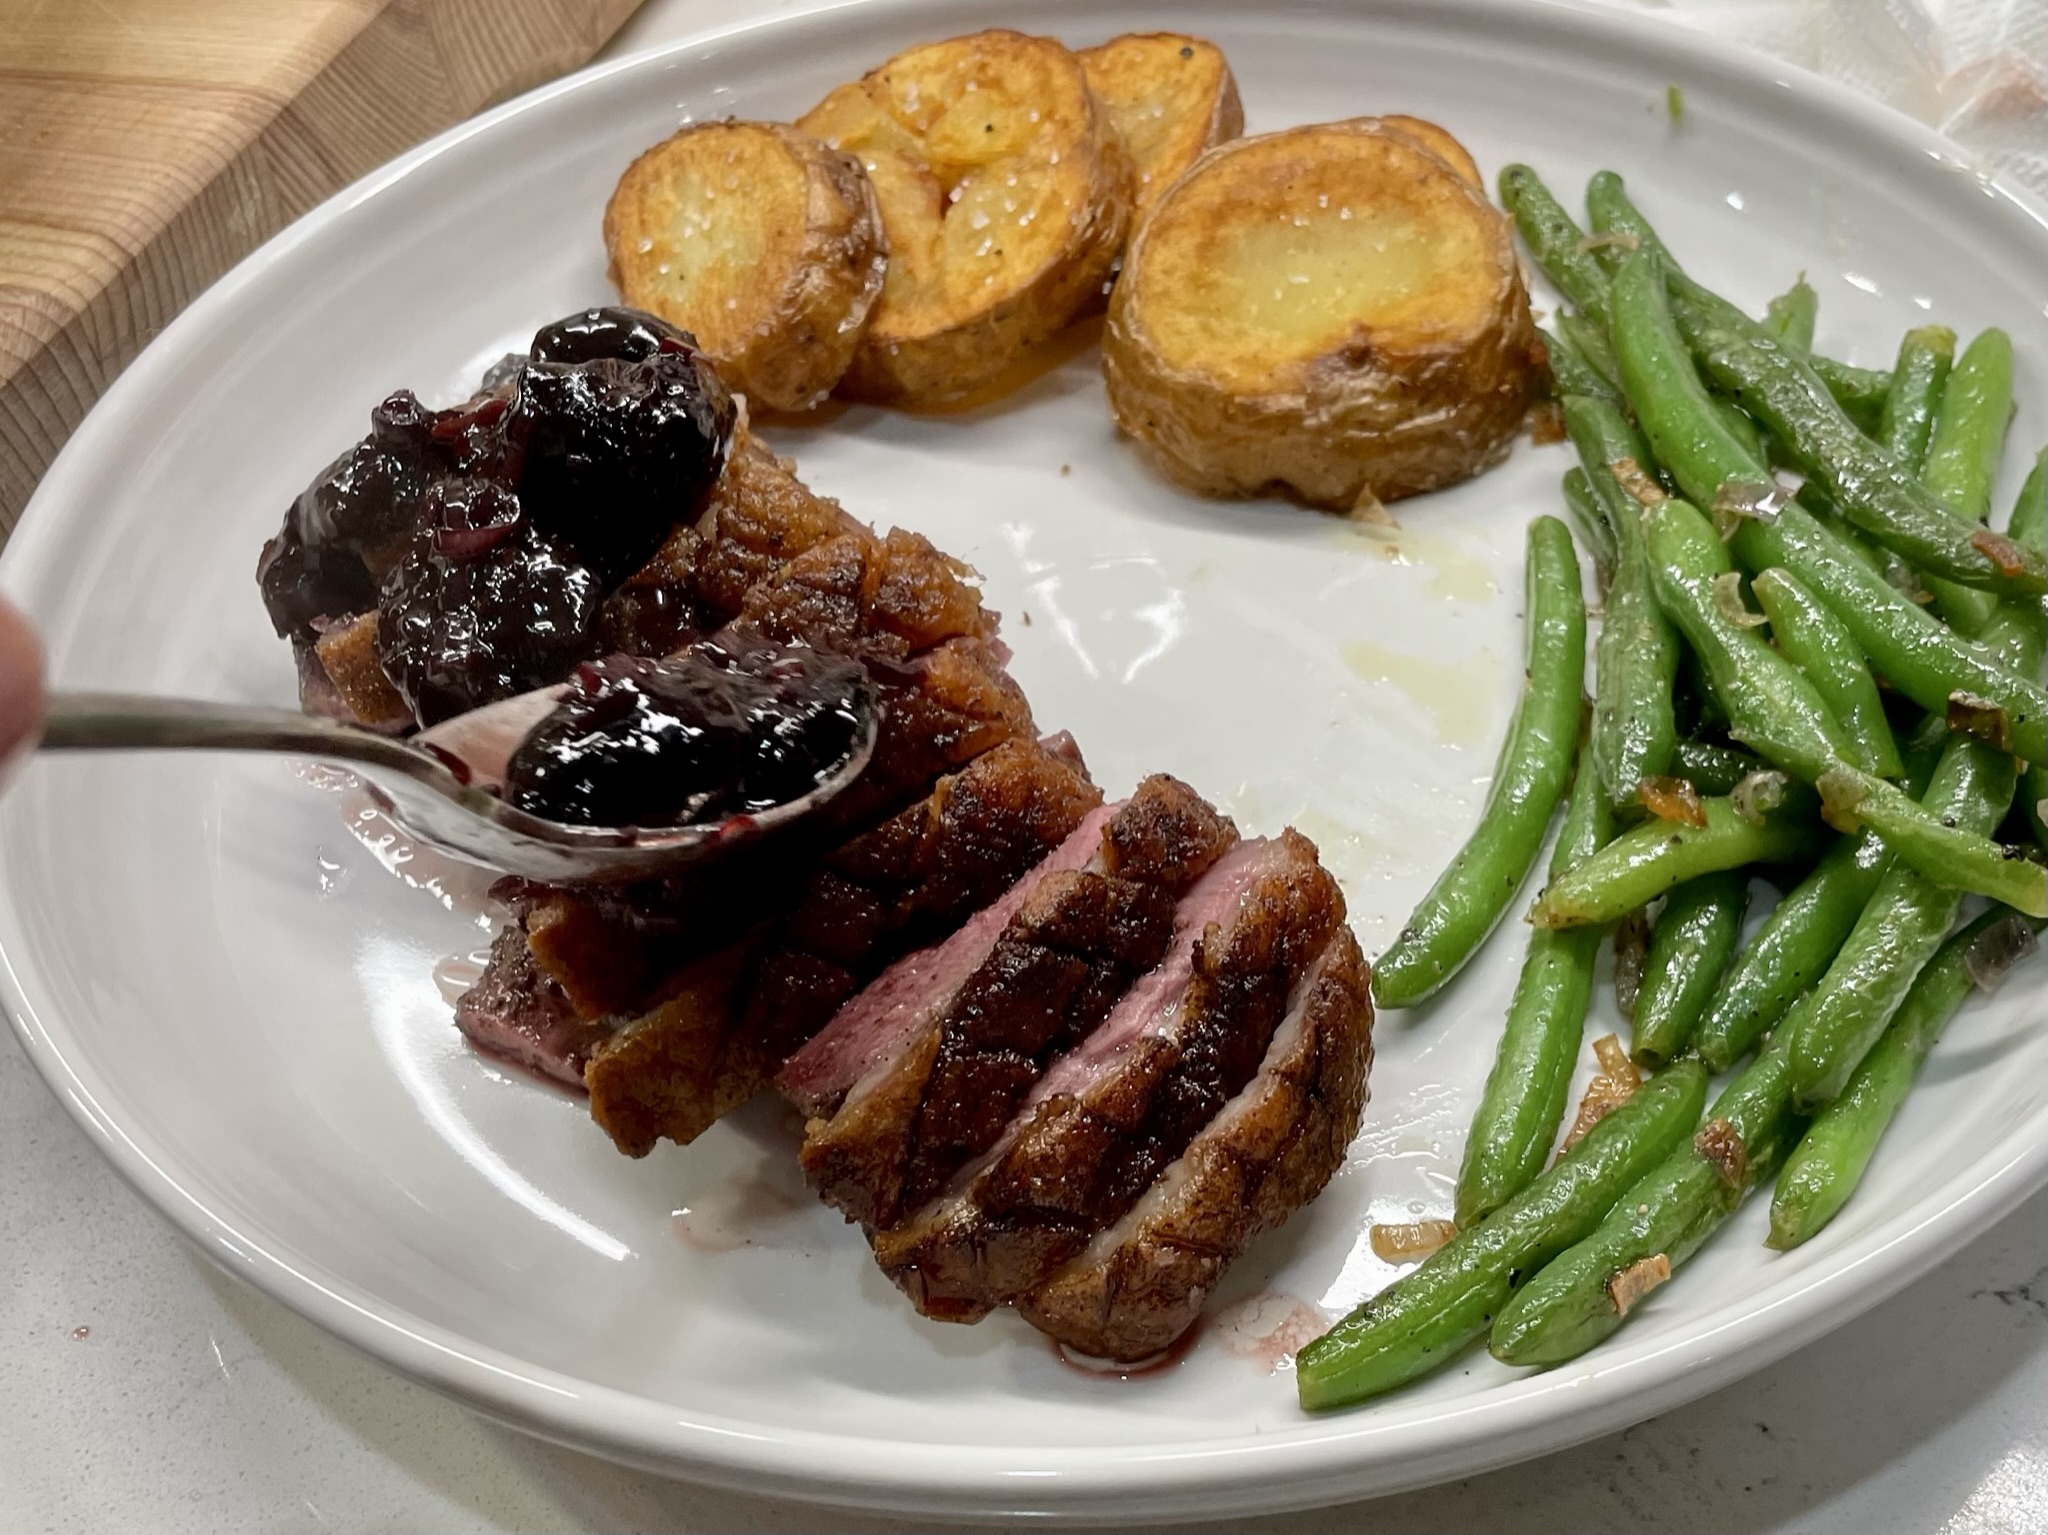
Time to plate this gorgeous meal!
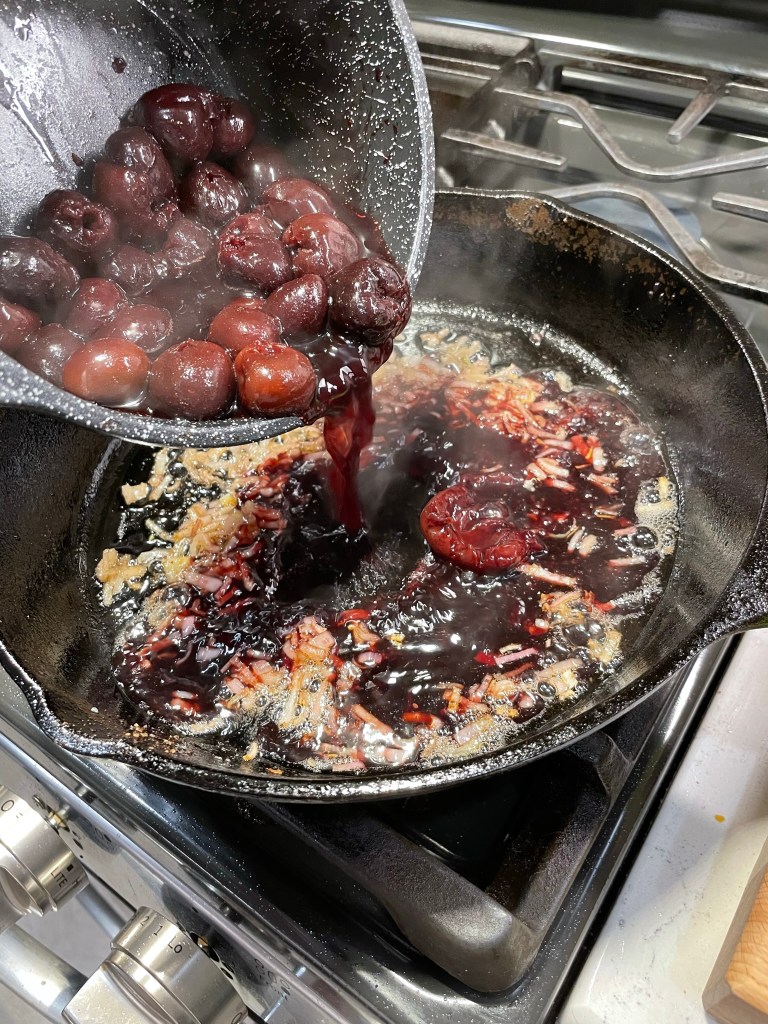
The sauce finishes quickly in the same skillet used to cook the duck, and you’ll get to enjoy all the little fond bits of flavor that were left behind in the pan.
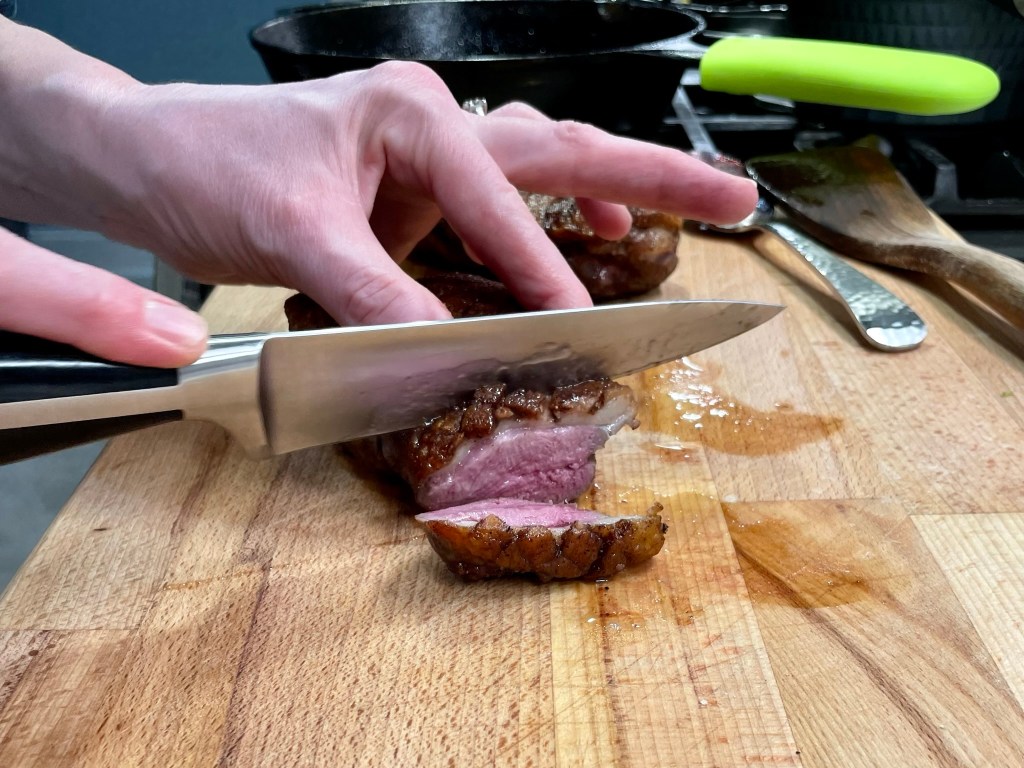
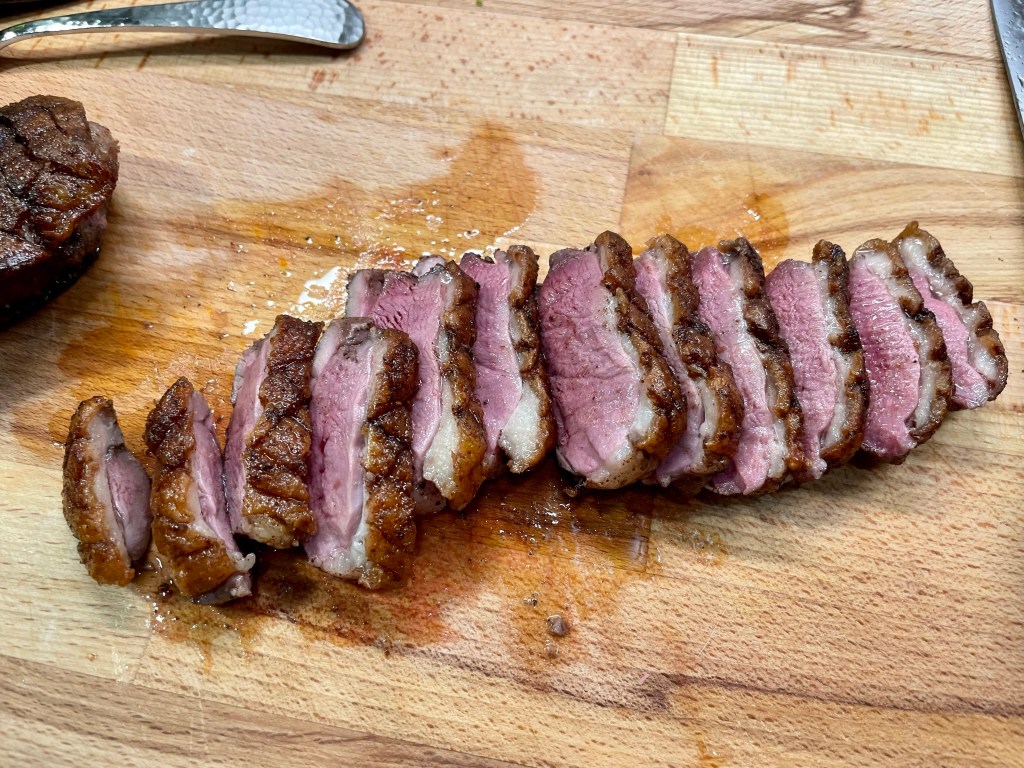
Place each breast on a cutting board and use a sharp knife to cut 1/2-inch slices. The meat should be bright pink and juicy with a thin layer of succulent fat under the crispy skin.
If I could go back in time to one step of this recipe, I’d plate the sauce before the duck breast, just to show off that incredible crispy skin. I do recommend sauce underneath the duck breast if you’re serving company, as we all know people eat with their eyes first. But we can confirm that it was just as delicious with the sauce on top, and if nothing else, it helped keep the duck warm as we savored every last delicious, cherry-kissed bite.
Crispy Five Spice Duck with Cherry-Pinot Noir Sauce
There's a lot to love about this dish, from the crispy skin to the flavorful sauce. It is definitely special occasion-worthy!
Ingredients
2 individual duck breasts, about 8 oz. each
1 tsp. kosher salt
1 tsp. five spice powder
2 Tbsp. turbinado sugar
1/4 cup good quality Pinot Noir (save the rest for dinner)
2 Tbsp. red wine vinegar
1/2 cup good chicken stock
Kosher salt and freshly ground black pepper to taste
1 heaping cup frozen dark sweet cherries
1 medium shallot, minced
The trick to getting the crispiest skin begins with a dry brine on the duck breasts and a stone-cold skillet at the start of cooking. Render the fat slowly and drain off the excess as it accumulates, saving the fat to fry up the most delicious potatoes your taste buds will ever enjoy.
If you wish to make this dish without alcohol, substitute tart cherry juice for the Pinot Noir and reduce or omit the red wine vinegar.
Directions
Pat the duck breasts dry with paper towels. Use a sharp knife to score the fatty skin only of the duck breast pieces. Make your cuts about 1/2-inch apart, in a crosshatch pattern. Take care not to cut the meat.
Combine the salt and five spice powder and sprinkle all over both sides of the duck breasts, rubbing it into the scored fat side. Place the breasts on a plate and rest, uncovered, in the fridge for about six hours.
Begin the flavor base for the sauce by combining sugar, wine, vinegar and chicken stock in a small saucepan. Bring to a slight boil then add the frozen cherries and simmer until cherries are softened. Keep warm.
Place a COLD cast iron skillet onto a burner over medium heat. Immediately place the duck breasts, skin side-down, into the skillet. Don’t disturb the breasts until the fat begins to render. Carefully drain off excess fat by holding the breasts in place with a spatula or tongs and pouring off the fat into a bowl, jar or a second skillet. This helps reduce the amount of spattering. You’ll likely need to do this twice during the rendering process.
Cook the skin side of the duck breasts for about 11 minutes, or until the bottom is deep golden in color and very crispy. Gently turn the breasts to cook the second side for only about two minutes. Transfer the breasts to a warm plate while you finish the sauce.
Drain off all but a tablespoon of the duck fat and add the minced shallots to the skillet, tossing until slightly tender. Pour in the reserved Pinot Noir-cherry mixture and bring to a boil, scraping up any bits that are stuck to the pan. Allow this to simmer for a few minutes until some of the liquid evaporates and the sauce is slightly thickened.
Slice the crispy duck breasts into 1/2-inch thick slices and serve immediately with the sauce.
If you’ll be frying up the potatoes, boil Yukon golds in advance (skin-on) until they are about half-cooked. Cool them to room temperature and slice into 1/2-inch rounds. Fry in hot duck fat until both sides are crispy, and season with salt immediately.
Just for fun…
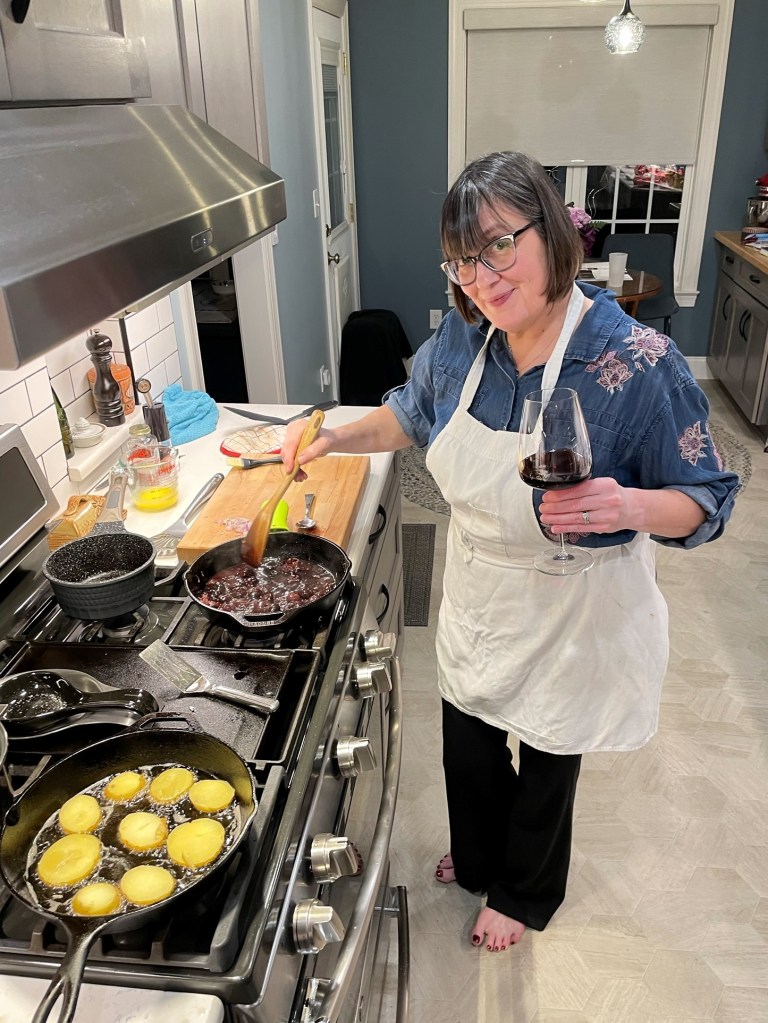
Les and I had some flashbacks during the making of this recipe, because I had first prepared it on Valentine’s Day three years earlier, just one month before Covid disrupted everything known to mankind. He had snapped a picture of me at the stove, wine glass in-hand, stirring the sauce. I was oblivious to what he was doing at the time, but he recognized my passion for cooking and has been my biggest supporter since I started my food blog two months later. When I made the dish again this year, we tried to replicate that photo, but with our beautiful new kitchen and a perfected crispy duck technique. Cheers!
My husband and I just returned home after a 10-day visit to Southern California, in case you’ve been wondering why I’ve been so quiet online. I packed my laptop for the journey— foolishly imagining that I’d carve out time to blog— but our planned (and unplanned) adventures took over every waking moment. This long trip was arranged months ago, timed around Les’s great-niece’s Bat Mitzvah in Los Angeles. But it also included a lunch meeting with one of my new managers at my day job, an impromptu drive-by to the beach in Malibu, a side trip to visit a cousin in San Diego and a three-day stay at my in-laws’ second home in the Coachella Valley. Whew!
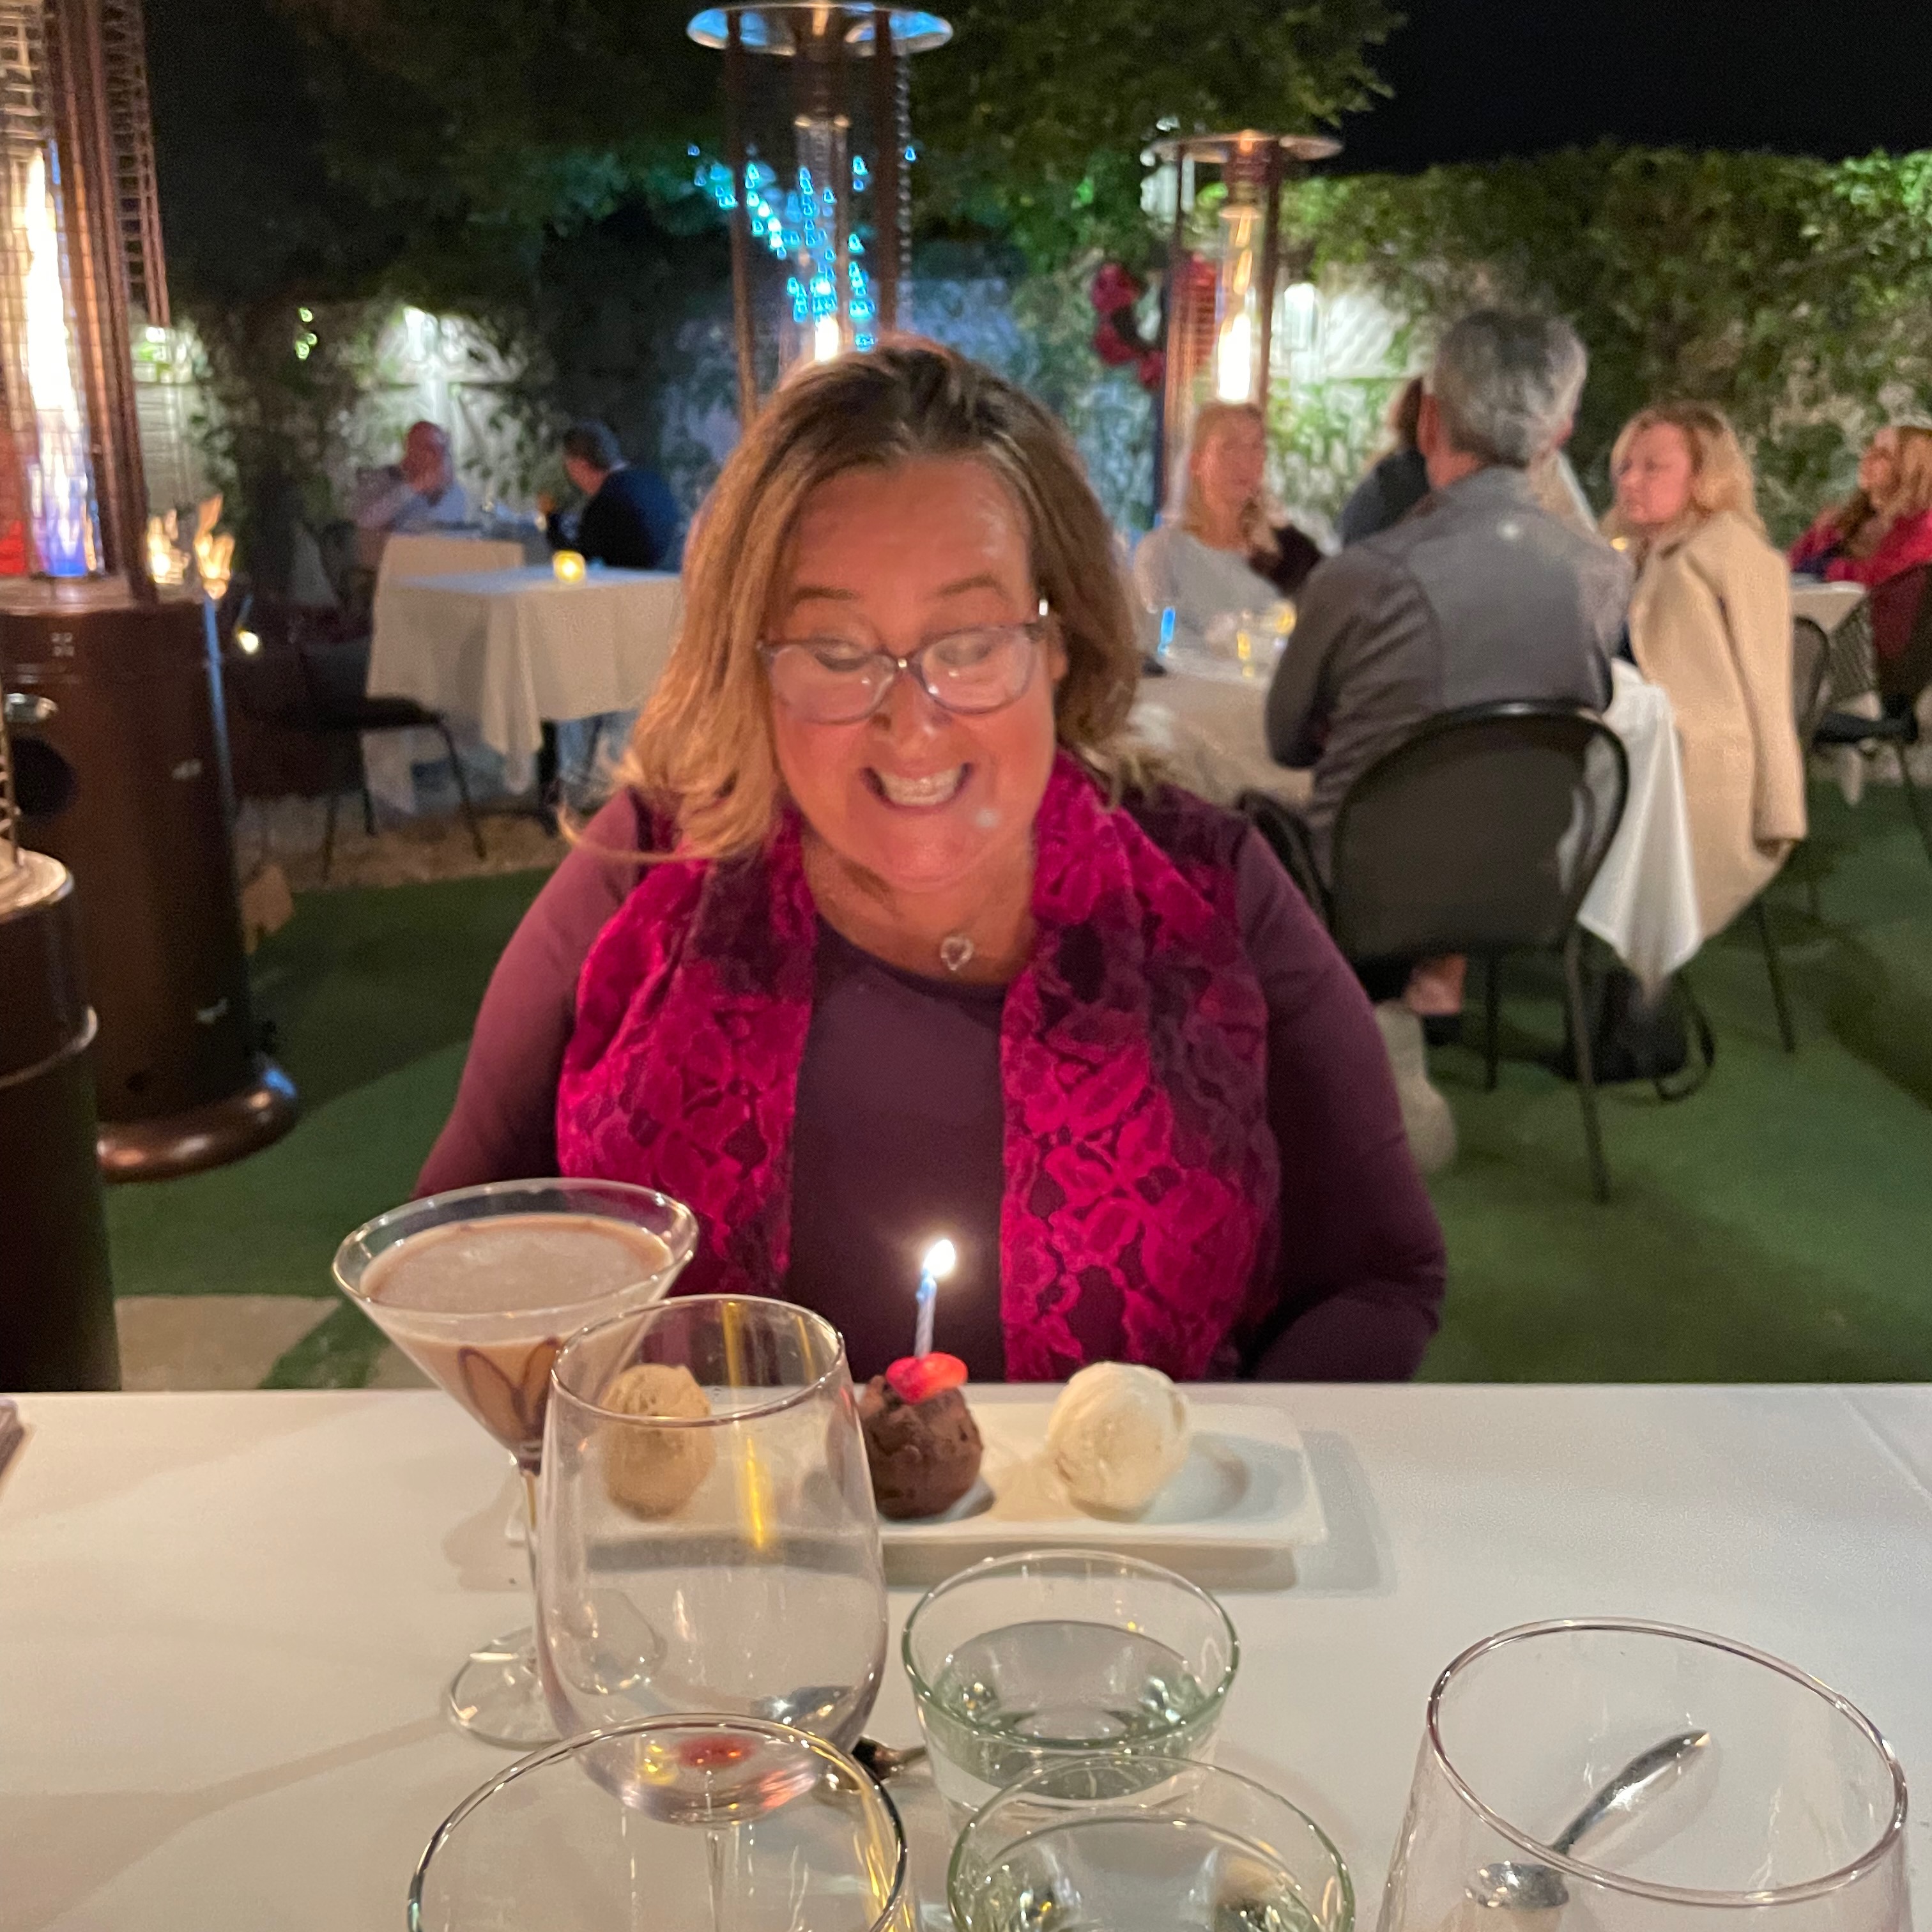
We had some crazy fun times, ate incredible food, enjoyed sampling the goods at a winery and stood witness to some truly breathtaking scenery. We also got to celebrate with Les’s sister and her husband at her birthday dinner. For the occasion, Andrea chose a lovely, upscale restaurant that used to be Cary Grant’s home! It was great fun, but after all the excitement, the various family gatherings, five plane rides and spanning three time zones, I need a vacation from our vacation! I’m sure you can relate.
Though most of our trip was mapped out in advance, we did have a pleasant surprise on our drive to Palm Desert last Tuesday; we got a phone call from Jess, the girlfriend of Les’s nephew, Ethan. It turns out that Jess’s uncle schedules the acts at a new venue in the Coachella Valley, and when he caught wind that we’d be in town, he generously offered up tickets to a concert with fantastic seats that we couldn’t refuse! Press play on the video below— I’m pretty sure you’ll know very quickly who we were lucky to see.
She’s still got it!
As exciting as the Stevie Nicks show was (she flawlessly performed every song you’d expect, plus a few surprises), I was even more thrilled about an event the next day, when I finally got to meet in person one of my favorite online buddies, Michelle from Art of the Beat. Michelle and I started following each other on WordPress a few years ago— my recipes caught her eye, and I found myself drawn to her music-oriented photography and artwork— and our banter in the comments led to email chats and texts, which led to calls and FaceTime. Now I consider her my West Coast bestie!
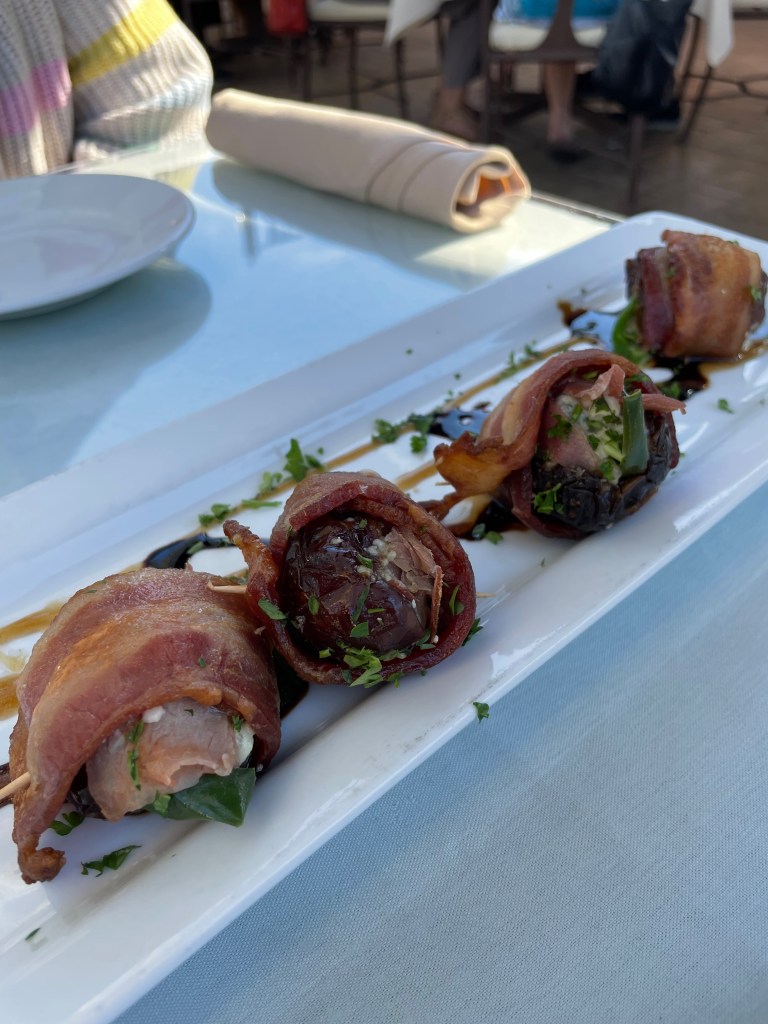
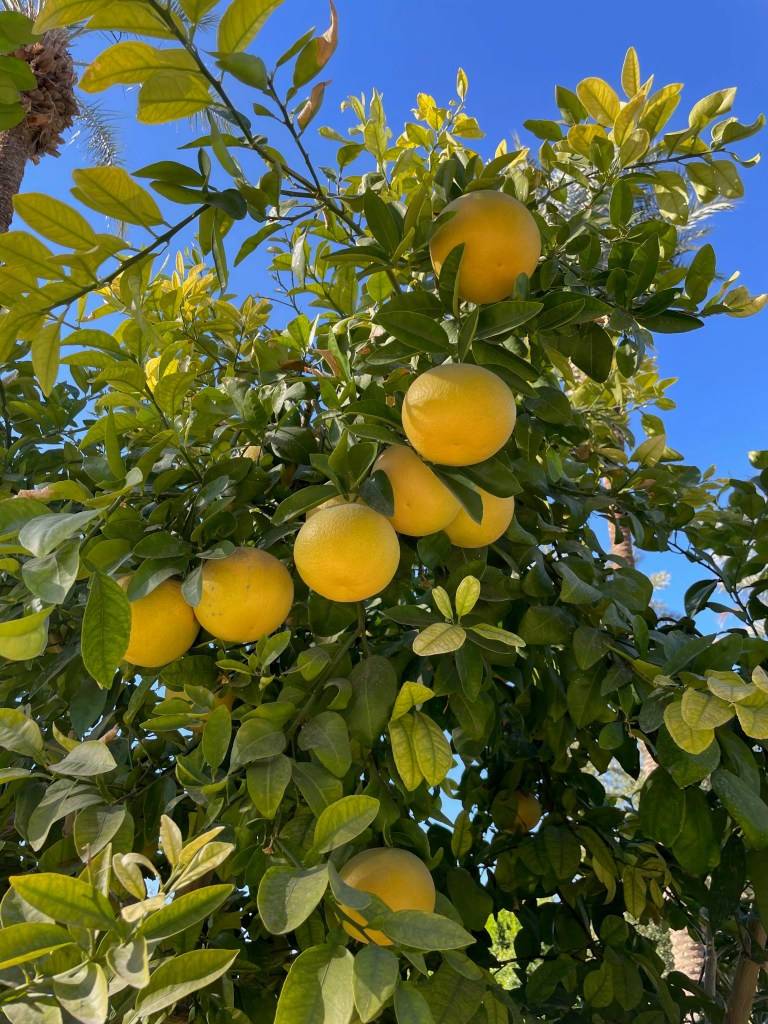
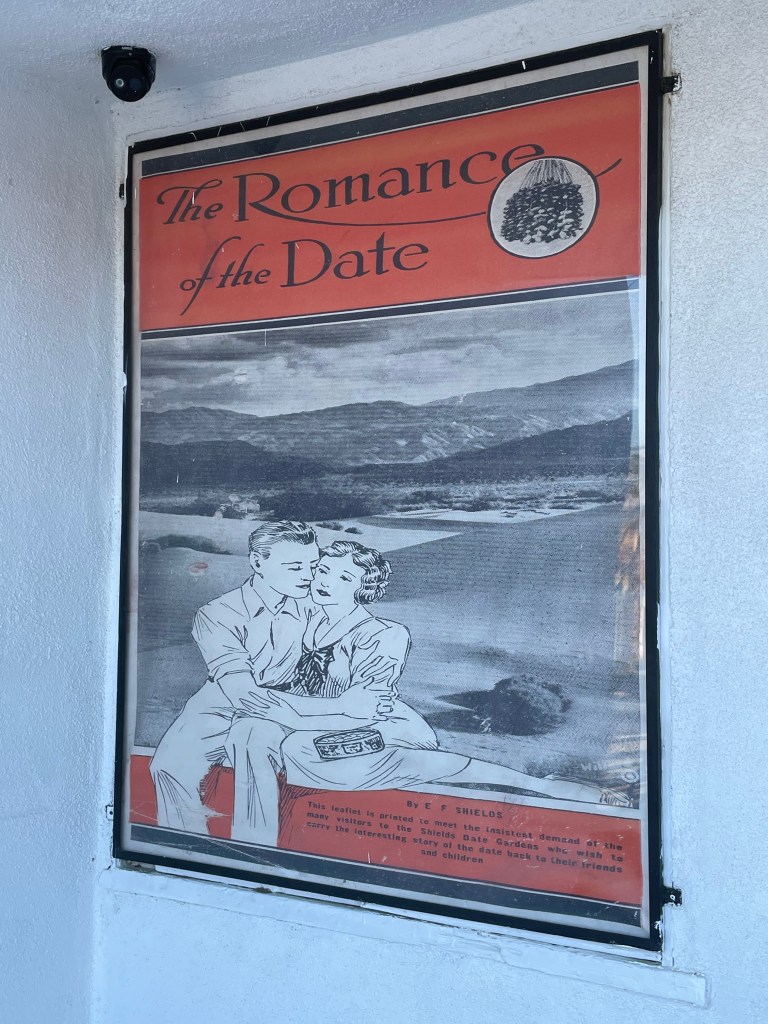
I ditched the family for a few hours to spend a fun afternoon with Michelle at Shields Date Garden in Indio, which included lunch (check out the jalapeño-stuffed, bacon-wrapped dates, yum) and a leisurely stroll through the gardens where we received an education on various citrus trees and (gasp!) the sex life of date palm trees. Scandalous!
The other interesting thing about the garden walk was that it featured various statues and stories about the life of Jesus— something I would not have expected at a date farm, but OK. If you’re familiar with the concept of “stations of the cross,” this is essentially what we encountered, and it gave us more fodder for conversation. Sadly, negative past experiences with religion are yet another thing Michelle and I have in common. Most of our discussion took place on a bench in the shade, directly in front of a statue of Jesus. It was very affirming, and we left the place as soulmate-level friends.
I’m pretty sure we were separated at birth.
I also bought some mouthwatering soft Medjool dates to smuggle into my carry-on for the trip home. If I can resist eating every last one of them like candy, I will try to recreate those tasty jalapeño-stuffed bites!
It’s great to be home after our travel adventures, and the excitement continues at our house this week with the arrival of Nadia’s first Christmas tree. Our 7-month-old kitten has been batting at the lower branches, and I think we will wait a few days before stringing lights and ornaments— just in case!
A new recipe is coming your way this weekend, so stay tuned and come back hungry. 😉
Just for fun…
As my hubby noted in the comments, there were some cute moments with wild critters, as we visited The Living Desert Zoo and Gardens on our final day in Palm Desert. The park provides great information about the animals, their habits and endangered status, and I highly recommend a visit if you’re in the area. There was a whole section of the park dedicated to animals from Down Under. We never saw a kangaroo, but in “Africa,” it was feeding time for the giraffes! The park was selling romaine lettuce leaves at a concession stand, and some children near us got to feed the gentle giants. This one wanted to be my buddy. 🙂
The best thing about Thanksgiving leftovers— for me, anyway— is when they are gone. For all the excitement leading up to the biggest food holiday of the year, I’m usually over it after two rounds of leftovers. Yes, I look forward to a good turkey sandwich, usually with a thin layer of leftover dressing and a smear of tangy cranberry sauce, plus a dab of mayo and perhaps a piece of lettuce in a ridiculous effort to offset all those carbs. And obviously, I enjoy transforming the turkey bits into spicy dishes, such as my turkey and black bean enchiladas or a delicious, comforting bowl of leftover turkey gumbo.
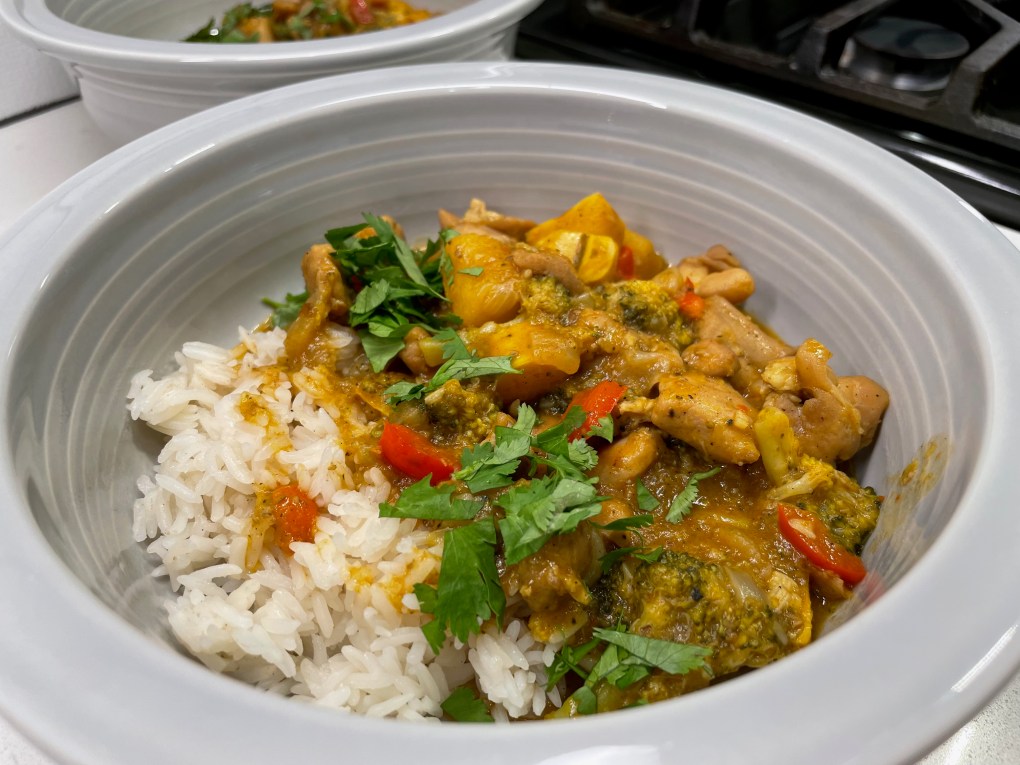
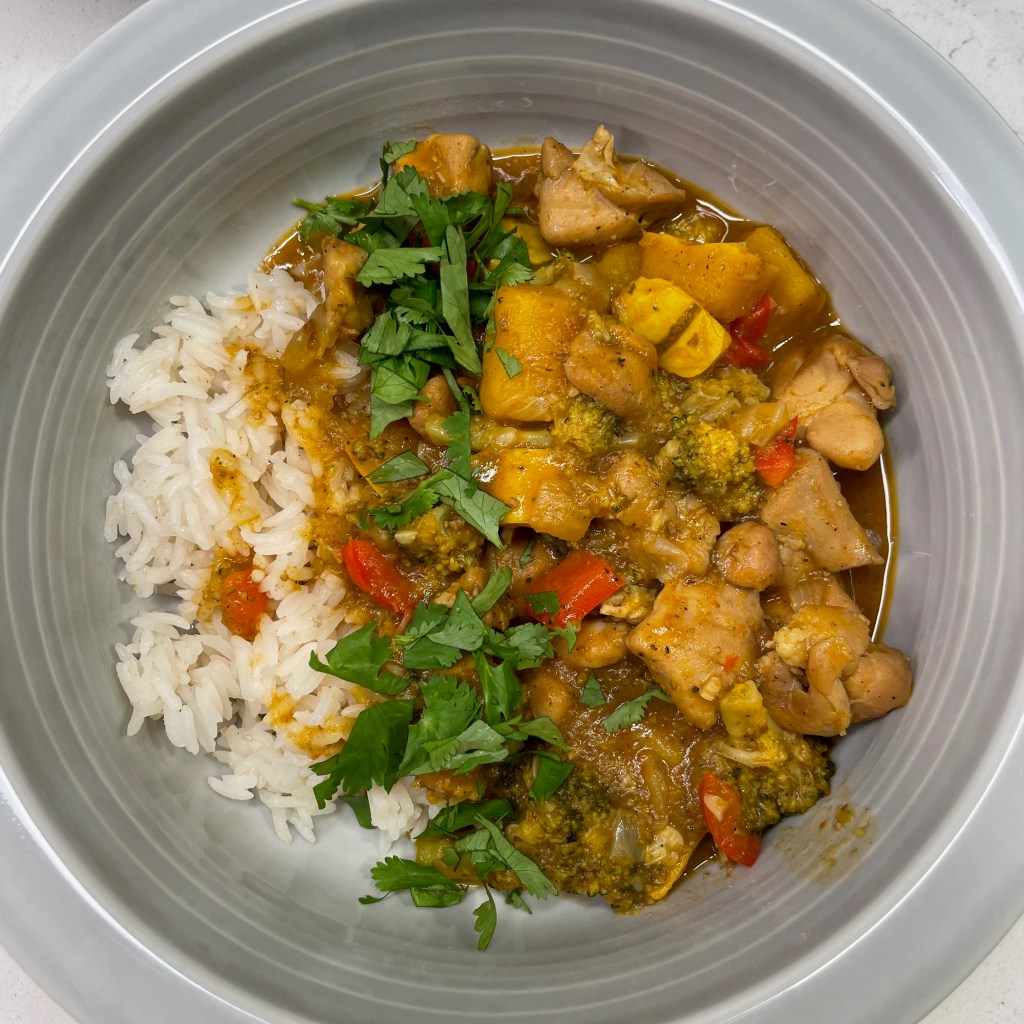
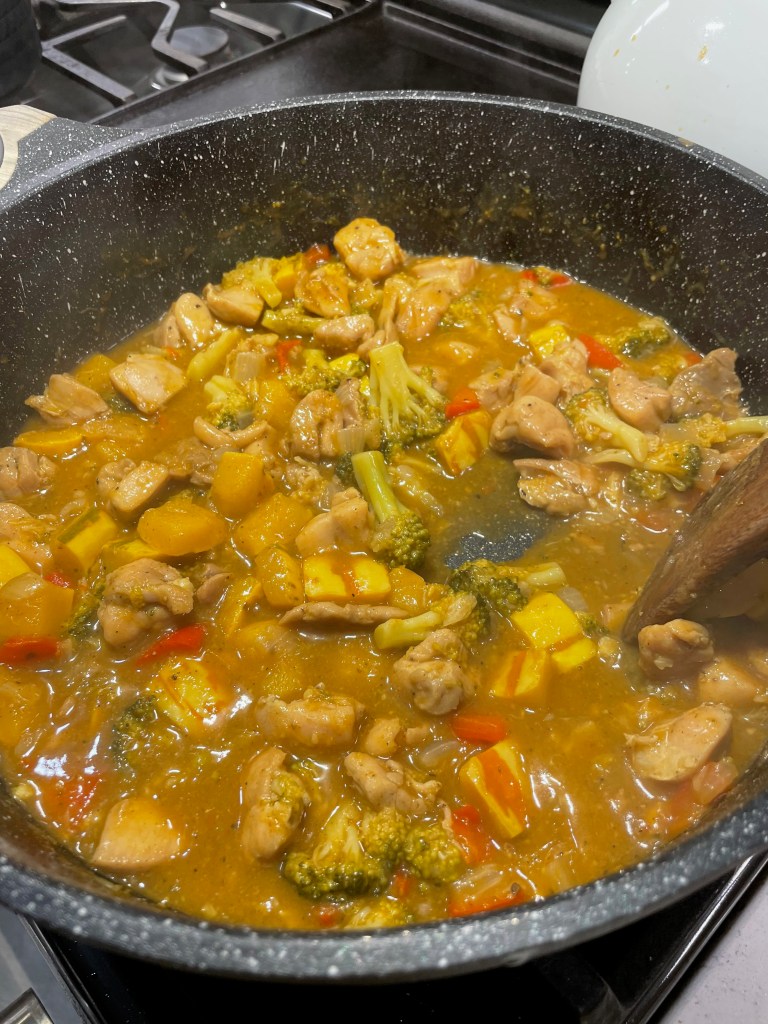
But my taste buds get weary after all that butter and gravy, and I start craving something with more pizzazz, and (for reasons I cannot explain) preferably from a culture other than my own. This impromptu Indian-inspired meal gave me not only delicious, warm spicy flavors, but also a generous dose of comfort on a dreary November night. My chicken curry came together more quickly than you might imagine, and it was a great way to incorporate some nutritious autumn vegetables and use up a package of skinless chicken thighs that I had stashed in the freezer.
There’s flavor, color and loads of nutrients. What more could I ask?
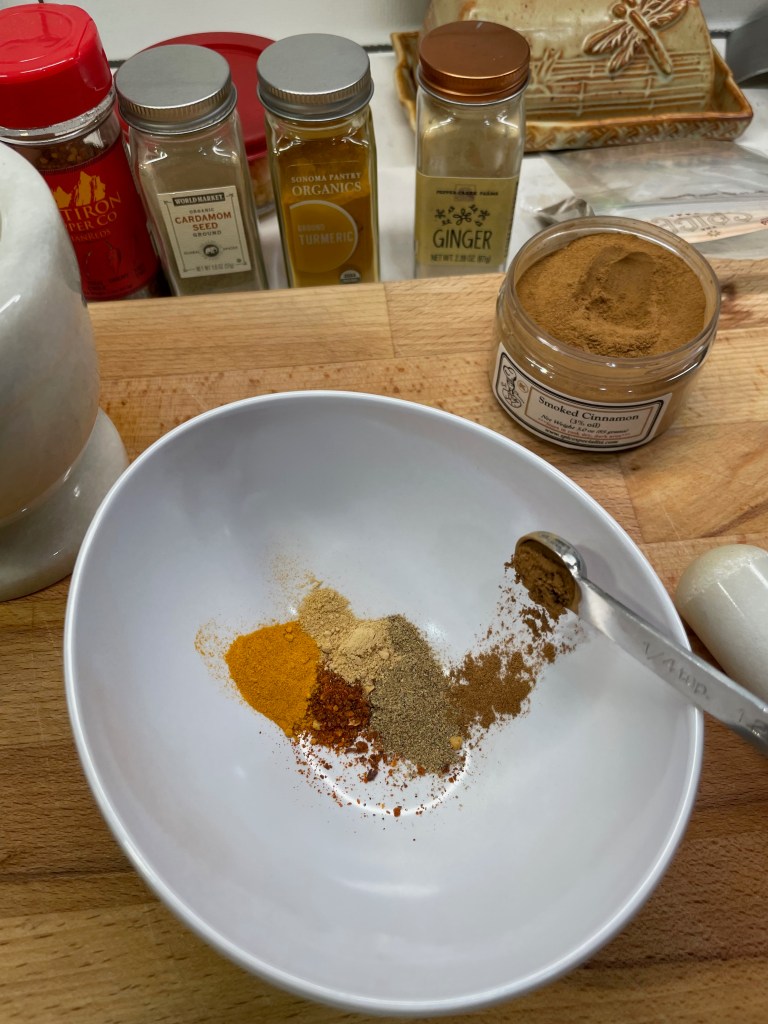
Curry is not a cuisine of my youth; I first learned to enjoy it about 15 years ago in a local Thai restaurant, and I finally got brave enough to try making it at home within the past few years. There are many varieties and styles (or colors, if you will) of curry, and it has taken me some time to learn which ones I like best. In Thailand, a green curry might include lemongrass, garlic, kaffir lime and hot chile spices, and those flavors are spectacular with seafood in a broth softened with coconut milk. In nearby India, a curry looks altogether different and usually gets its flavor from a blend of dry spices, including cardamom, coriander, ginger, cumin and turmeric. If you purchase a jar or can of “curry powder,” it may contain any combination of those pre-ground ingredients, but it’s easy enough to mix and match your own flavors if you already have the individual spices.
A pre-made curry blend would work great, but I make my own for better control of our favorite flavors.
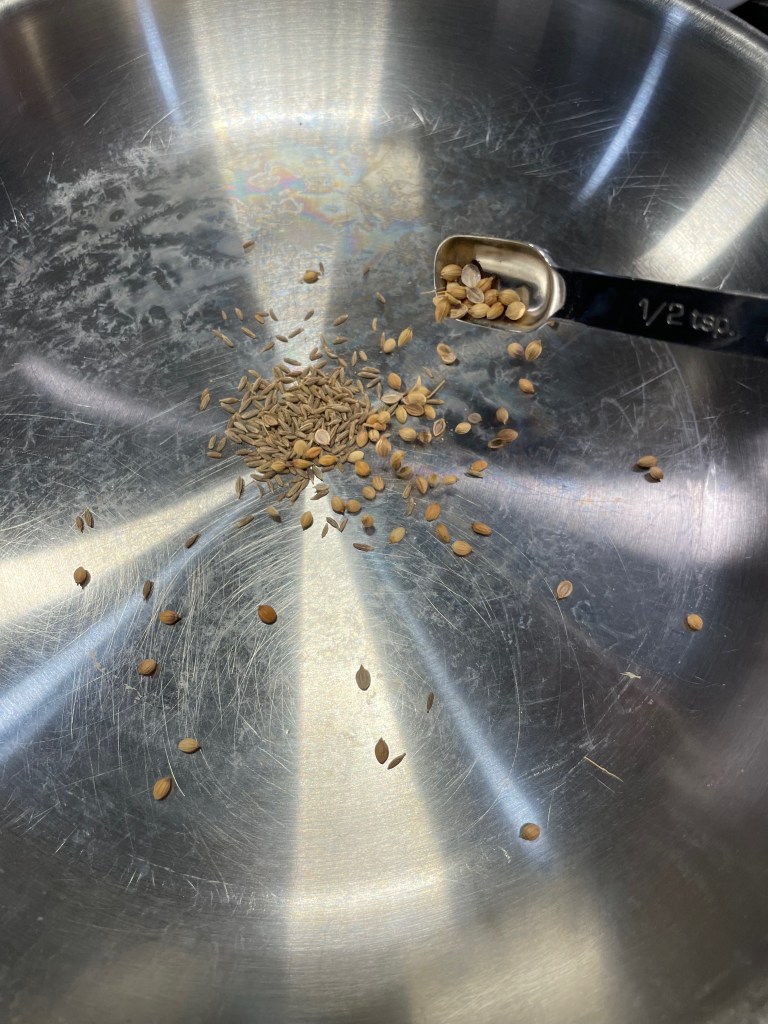
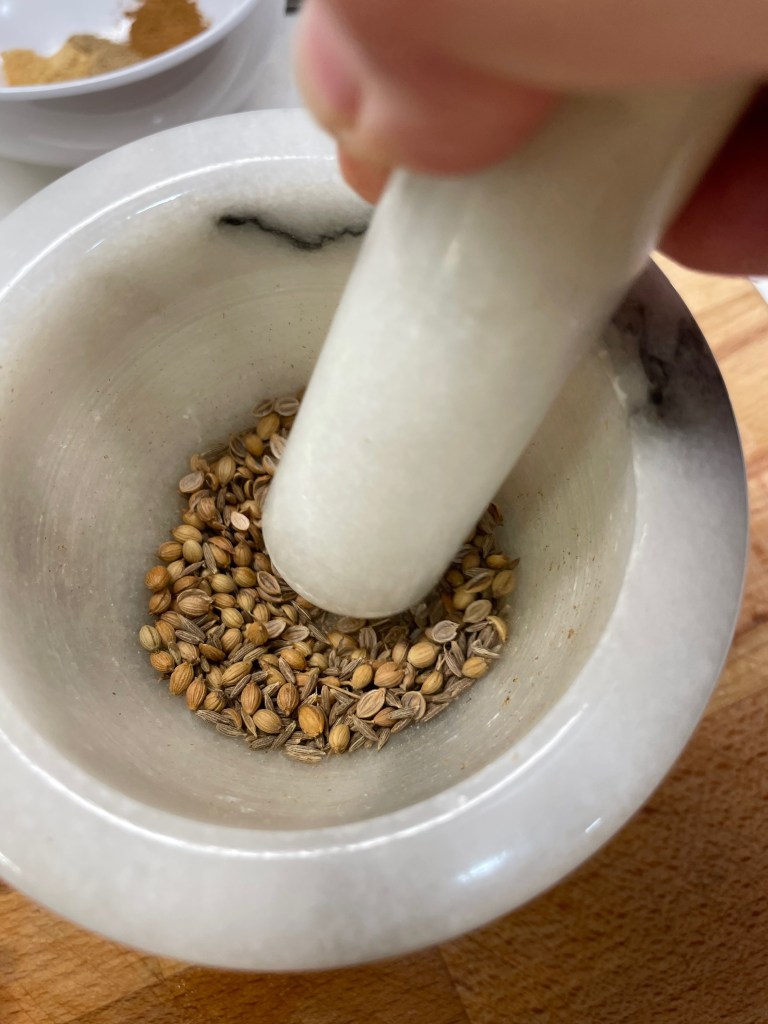
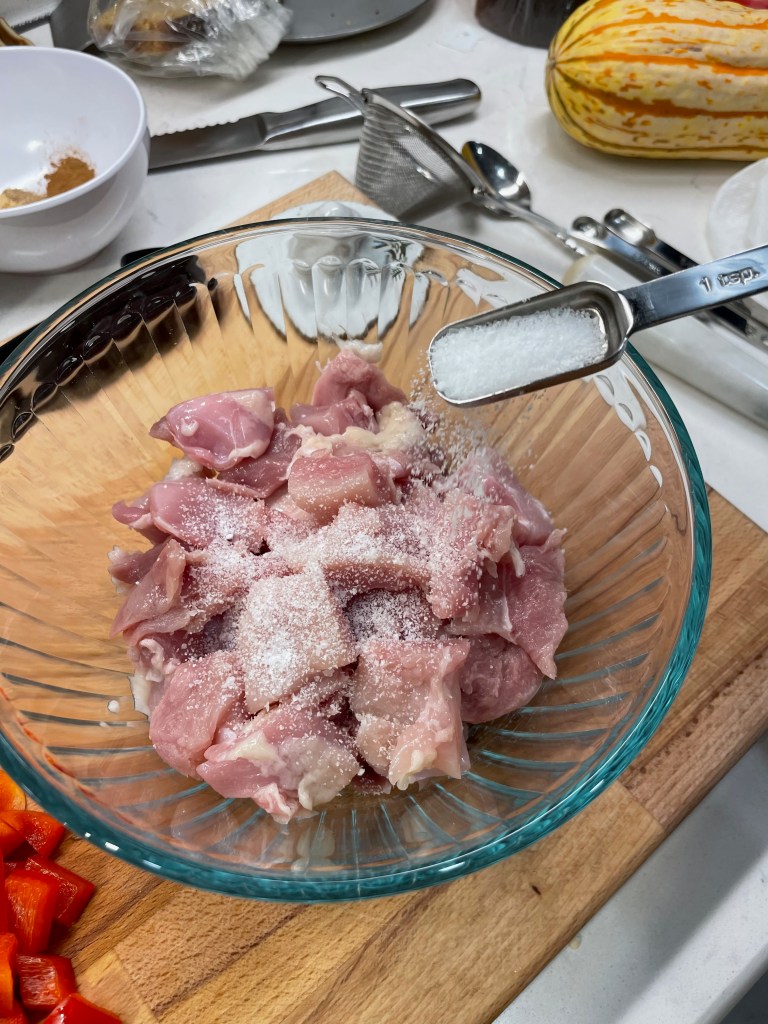
My chicken and autumn veggies dish is more similar to an Indian curry, and I started my blend with a quick toasting of whole cumin and coriander seeds. Heat brings forth the intense flavors, whether by toasting whole spices or by adding ground spices to hot oil in the pan. The technical term for this is “blooming,” and you don’t want to miss this easy step for the extra flavor it imparts to your final dish. I toasted the seeds in a hot, dry skillet— swirling the whole time for about 45 seconds until they were intensely fragrant— and then let them cool before crushing them in a mortar and pestle. Next up, I assembled my other dry, pre-ground spices, including ginger, cardamom, turmeric, cinnamon and hot chile flakes.
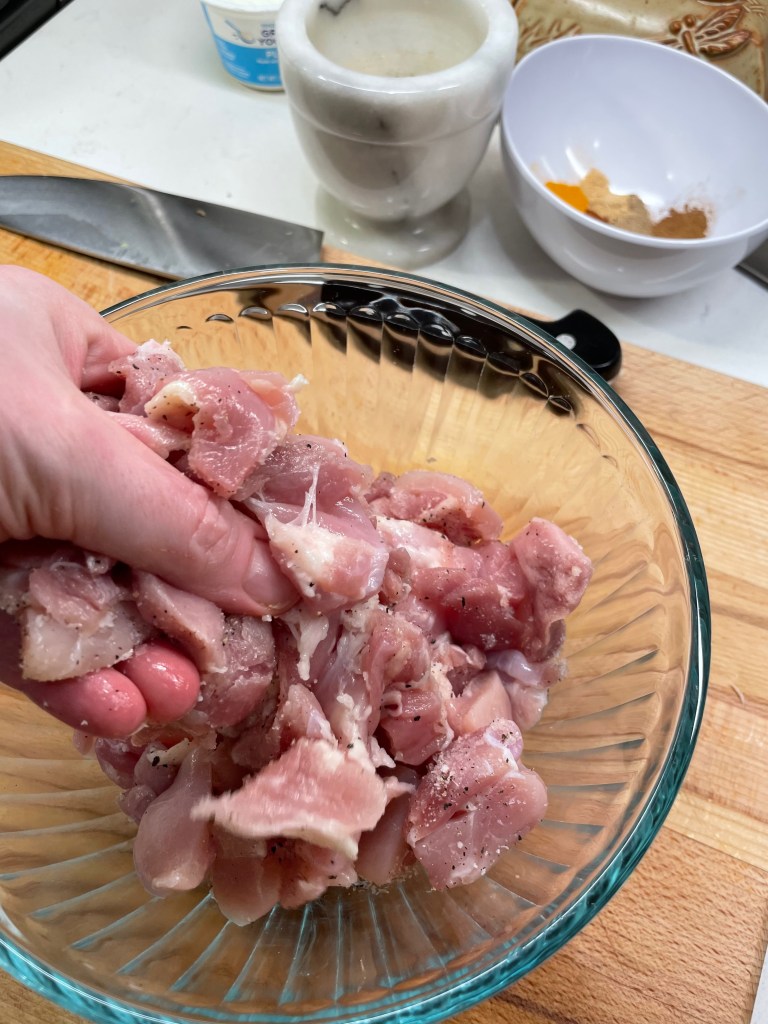
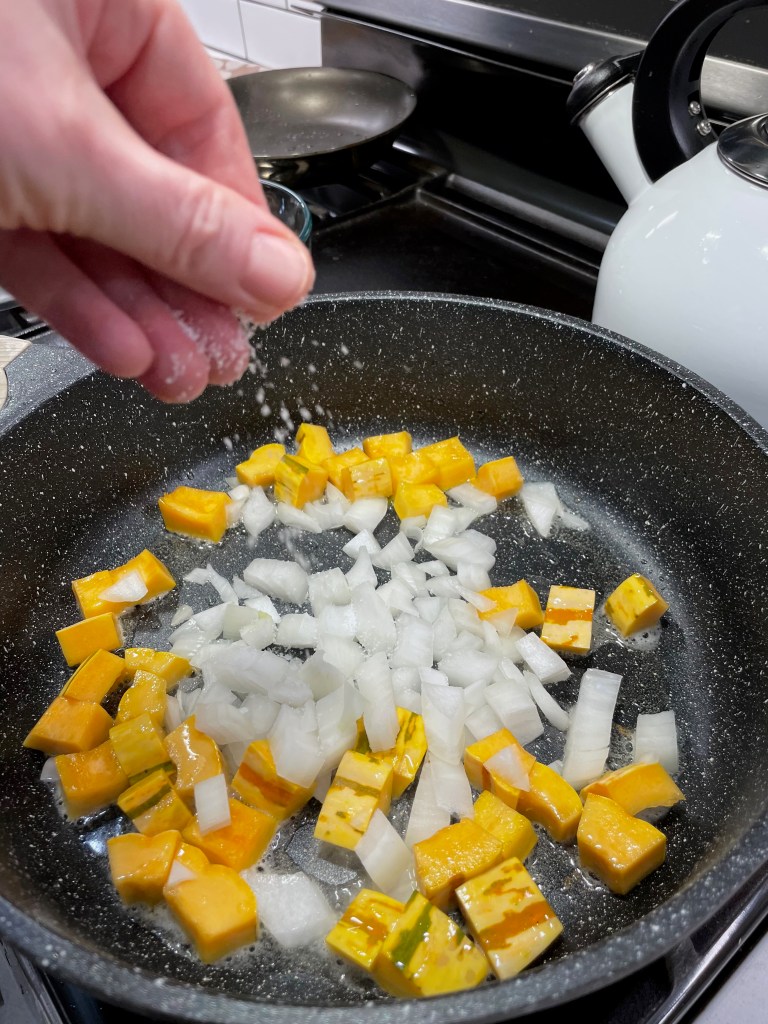
Toss the chicken chunks with salt and pepper and let it rest while you prep the veggies.
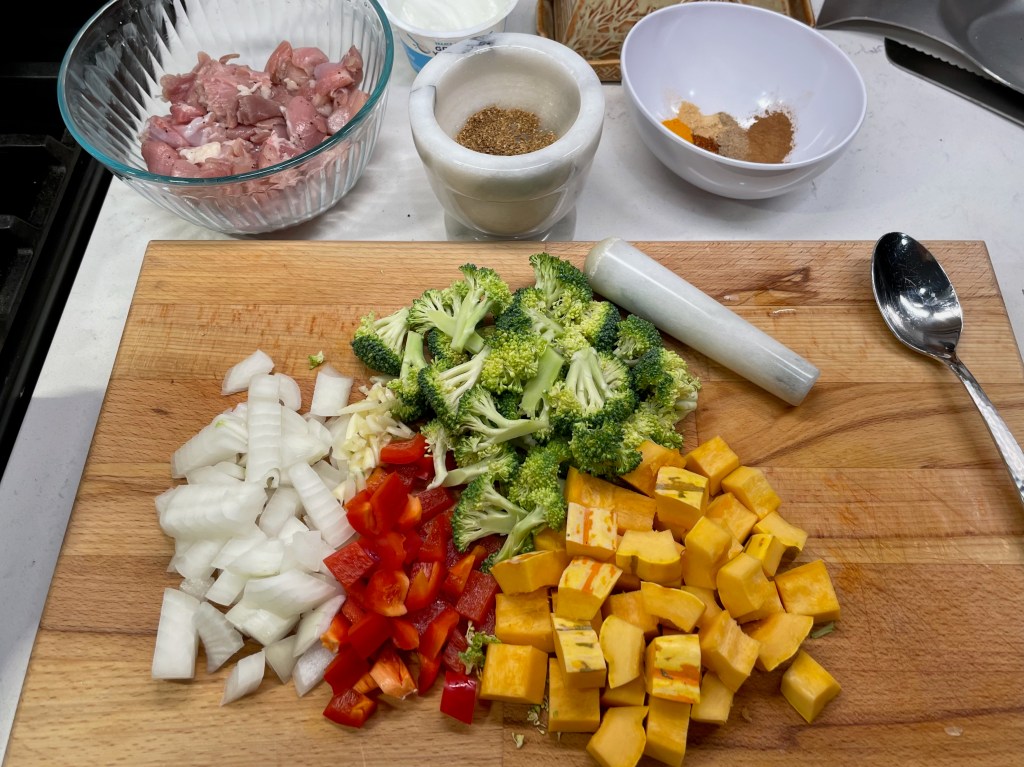
I chose boneless chicken thighs for their texture and flavor, but chicken breast or tenderloins would also be delicious here. I cut them into one-inch chunks, seasoned them with salt and pepper and let them rest while I cut up onions, red bell peppers, fresh broccoli and delicata squash. For this dish, I highly recommend getting all your components lined up and ready, as the cooking goes quickly once it begins.
Behold all the vitamins and fiber on that cutting board!
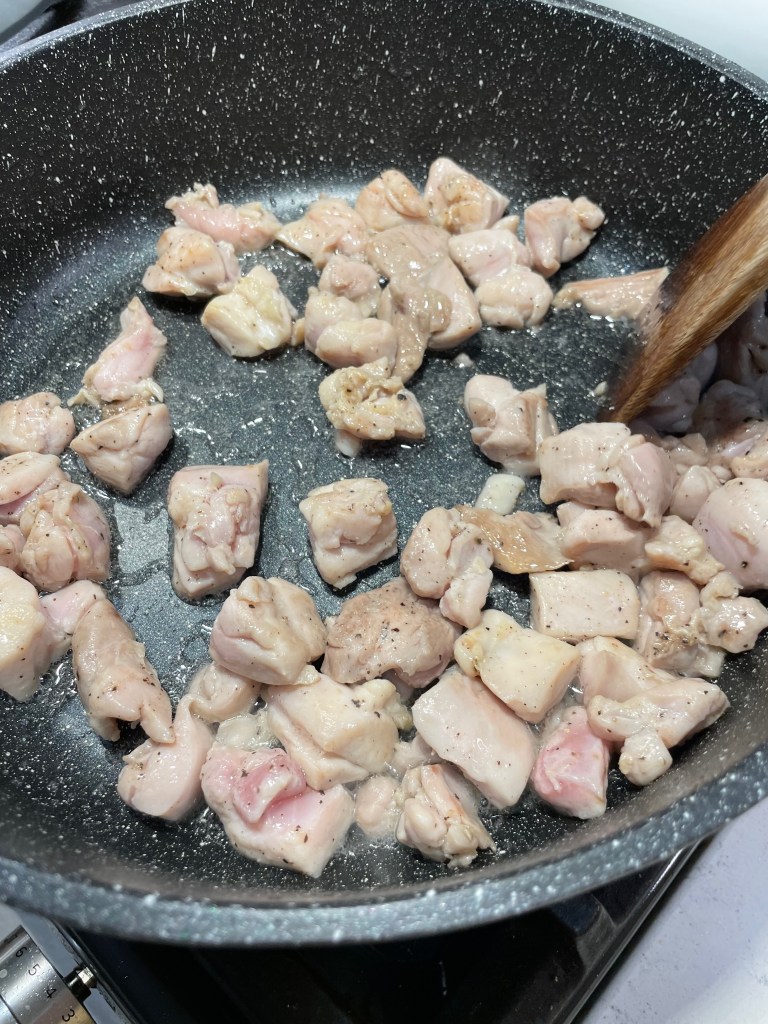
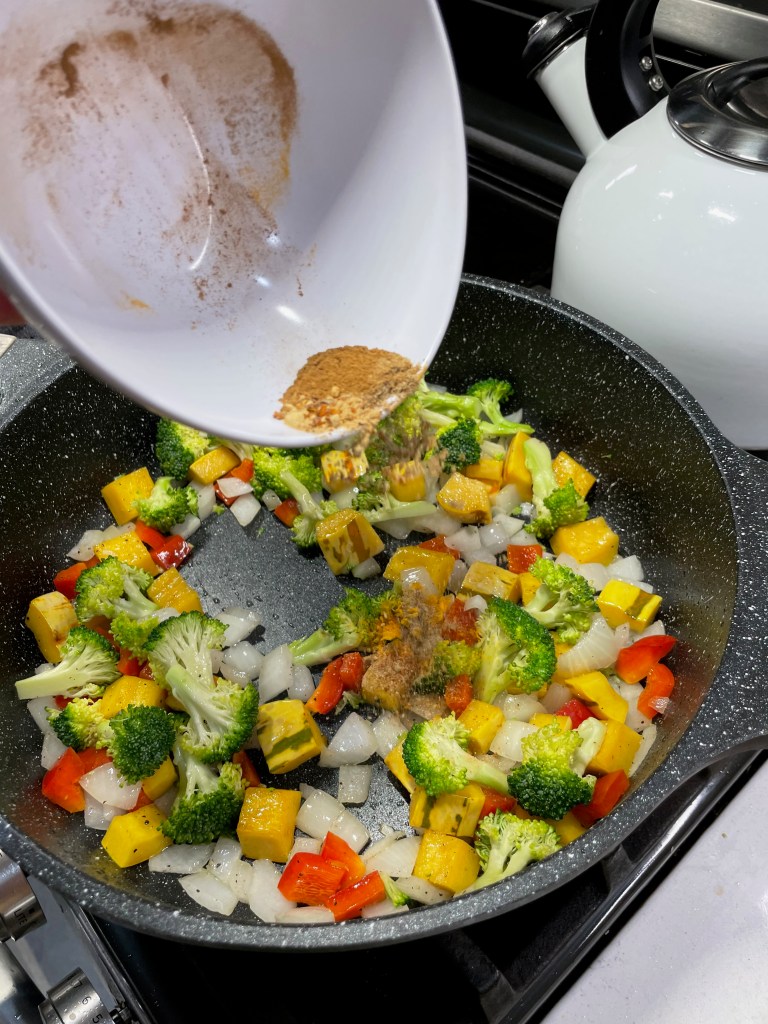
You’ll also need a bit of oil to get things started. Choose an oil that performs well over high heat, such as canola, peanut or coconut oil. I cooked the chicken first, just until the bits were no longer pink, and then transferred them to a separate bowl while I sautéed the vegetables. When I’m cooking veggies of varying textures, I usually begin with the firmer ones, adding the rest in descending order of necessary cooking time. The best time to add the spices is just before adding more vegetables— this allows them to bloom in the hot oil that coats the veggies. Season along the way, of course, with salt and pepper as well. This does more than add salty flavor; salting during cooking helps to draw moisture out of the ingredients for better texture.
With every ingredient addition, my kitchen smelled more and more amazing!
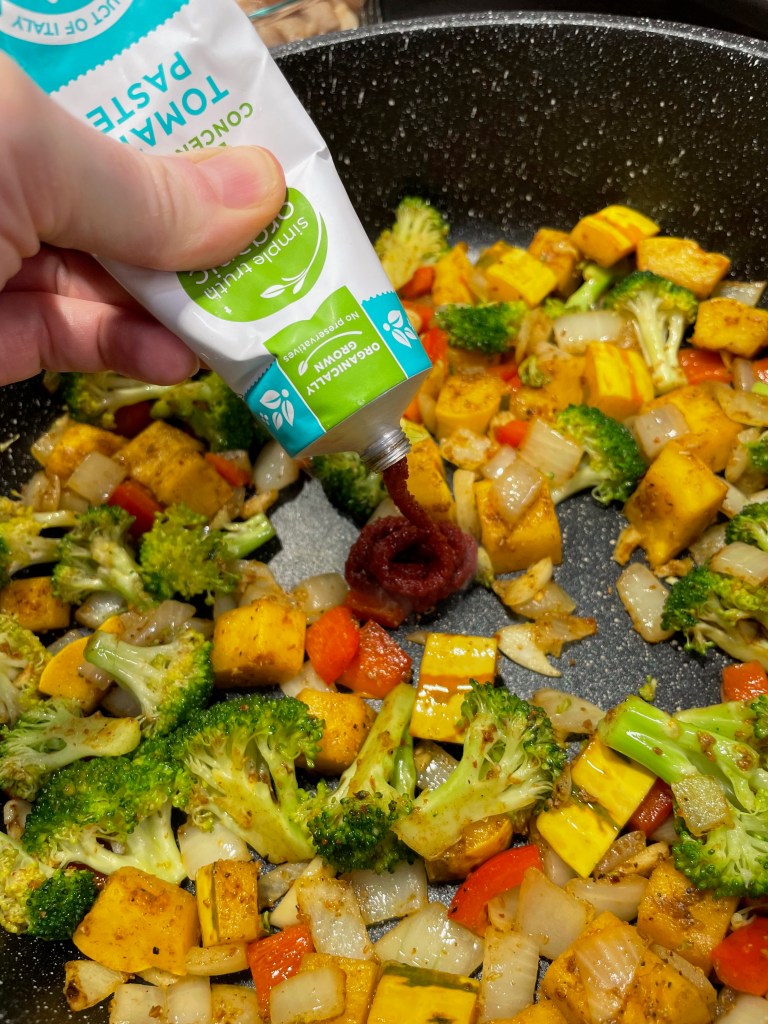
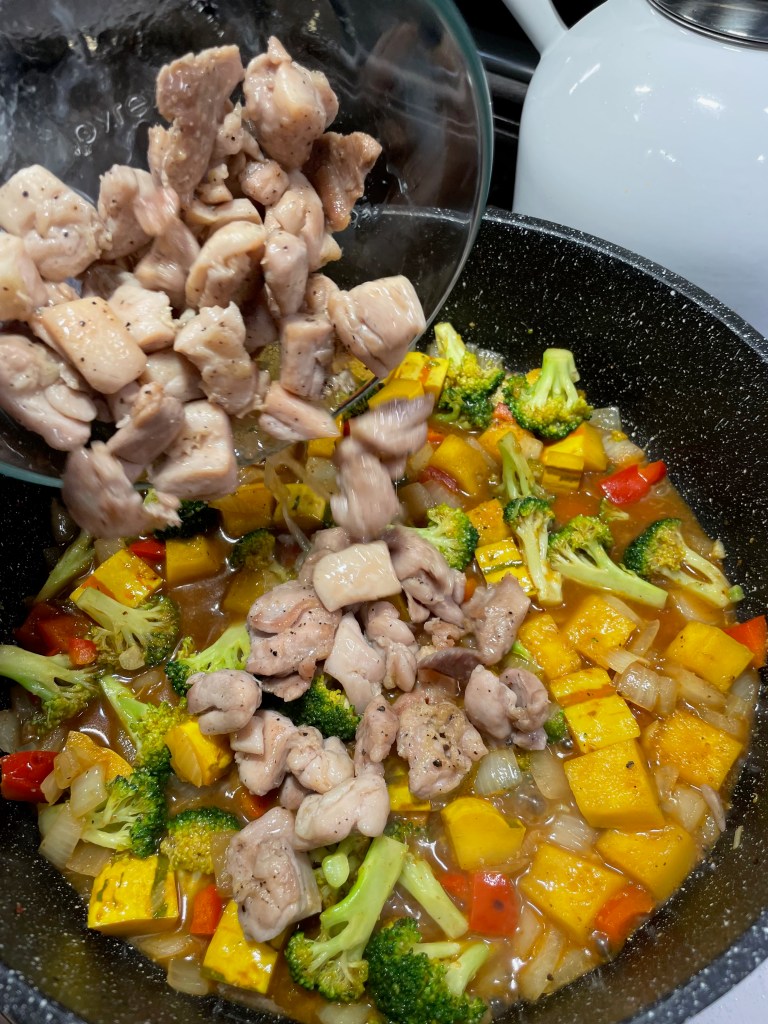
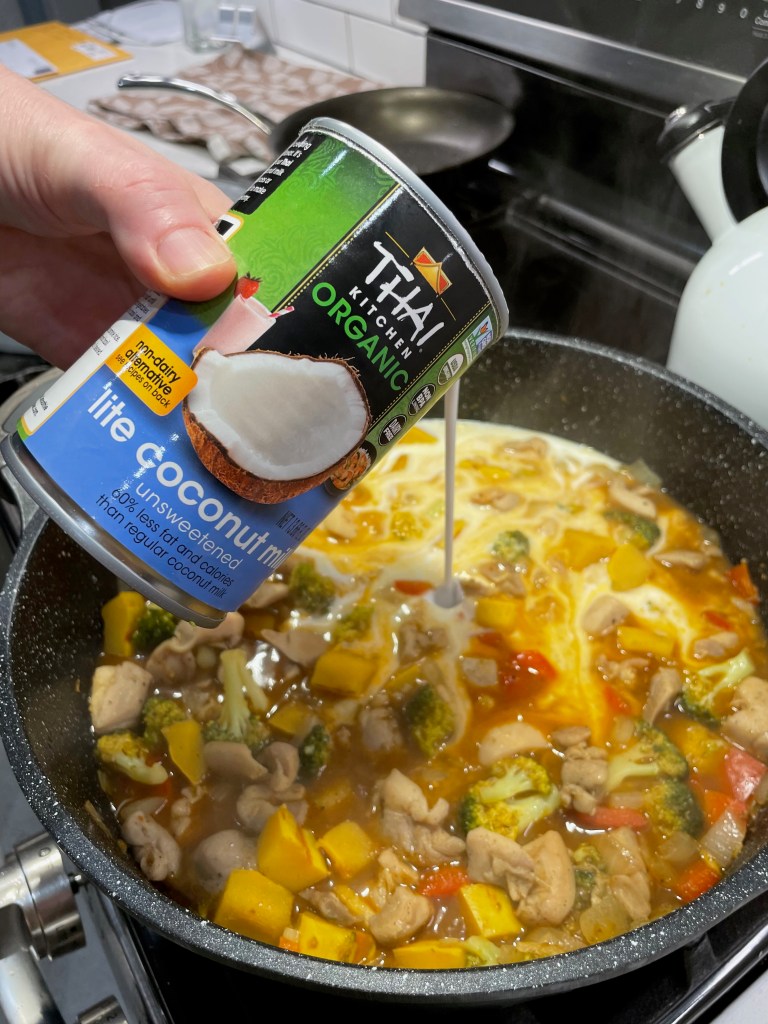
A dab of tomato paste in the center of the pot adds a rich, warm color and also a burst of umami flavor from the concentrated glutamates in the tomatoes. A little broth to thin it out, and then the chicken goes back into the pan with half a can of light coconut milk to simmer until everything is nice and tender. This took about 30 minutes, long enough to cook up a pan of basmati rice, perfect for soaking up the flavorful curry.
The coconut milk is a perfect complement to the warm Indian spices, and it helps all the flavors meld during the simmer.
This kind of meal hits the spot after so much gravy, dressing and mashed potatoes, and the heavy load of vegetables does the body good, too!
This dish ticks all the boxes with big flavor, warming comfort and exceptional nutrition. It's easy enough for a busy weeknight and rich with autumn comfort.
Ingredients
1 pound boneless, skinless chicken thighs, patted dry and cut into 1-inch chunks
Kosher salt and black pepper
1/2 tsp. whole cumin seeds
1/2 tsp. whole coriander seeds
1/4 tsp. EACH cardamom, cinnamon, red pepper flakes, ginger, turmeric (see recipe note below)
1/2 sweet or yellow onion, chopped
1 small delicata squash, cleaned and cut into 1-inch chunks
1/2 bunch fresh broccoli, cut into small florets
1/2 red bell pepper, chopped
2 Tbsp. high-heat cooking oil (I used coconut, but canola or peanut would be good)
1 to 2 Tbsp. tomato paste
1/2 cup low sodium broth (chicken or vegetable)
1/2 can light coconut milk
Basmati or brown rice for serving
Fresh cilantro for serving (optional)
Recipe Notes: I created my own curry spice blend because I have the individual ingredients, and 1/4 teaspoon each was a good starting point for my adjustments. This is a good way to control the heat and balance the blend with the spices you like best, but there’s no harm in buying a pre-made curry powder. Use 1 to 2 teaspoons, depending on how intense you’d like the flavors to be.
Because this dish moves quickly once cooking begins, I recommend having all ingredients prepped and on standby before you turn on the burner.
Directions
Season the chicken chunks with about 3/4 teaspoon salt and a few twists of black pepper. Toss to coat, and allow it to rest at room temperature while you prep the spices and vegetables.
Heat a small dry skillet over medium-high heat. Add seed spices and toast, swirling the pan constantly until the spices are very fragrant. Transfer to a bowl to cool, and then grind in a mortar and pestle or electric spice grinder.
Measure remaining spices into a bowl and set aside.
Place a wide, heavy-bottomed pot over medium-high heat. Add oil and heat until shimmering, then toss the chicken pieces just until all sides are no longer pink. Transfer chicken to a bowl and keep warm.
Add vegetables to the pot, beginning with the firmest and adding the others in descending order of time needed to soften. Season with a pinch or two of salt to help draw out the moisture. Add spice blend and ground seed spices to the hot vegetables and toss to coat.
Stir in tomato paste for rich color and burst of umami flavor. Add broth and cook until the liquid begins to simmer.
Return chicken to pan. Stir in coconut milk. Cover pan and reduce heat to simmer the curry for about 25 minutes. Serve with basmati rice and sprinkle with chopped cilantro, if desired.
If there’s one aspect of Thanksgiving dinner that is a conundrum for me, it’s dessert. As much as I love to cook and entertain and shake up interesting cocktails, I have an irrational fear around making pastry dough. And wouldn’t you know it? All the classic Thanksgiving desserts are pies.
My personal preference for dessert leans toward the fruity, nutty crumble or cobbler kinds of things or lighter, citrusy things, such as key lime pie, with a crumb crust that doesn’t require rolling out a flaky dough.
But certain flavors and textures are expected on Thanksgiving, so when I bumped into this sweet potato cheesecake recipe last year, I found it to be a perfect mashup of holiday tradition and ease of preparation. It was pretty darn delicious, too.
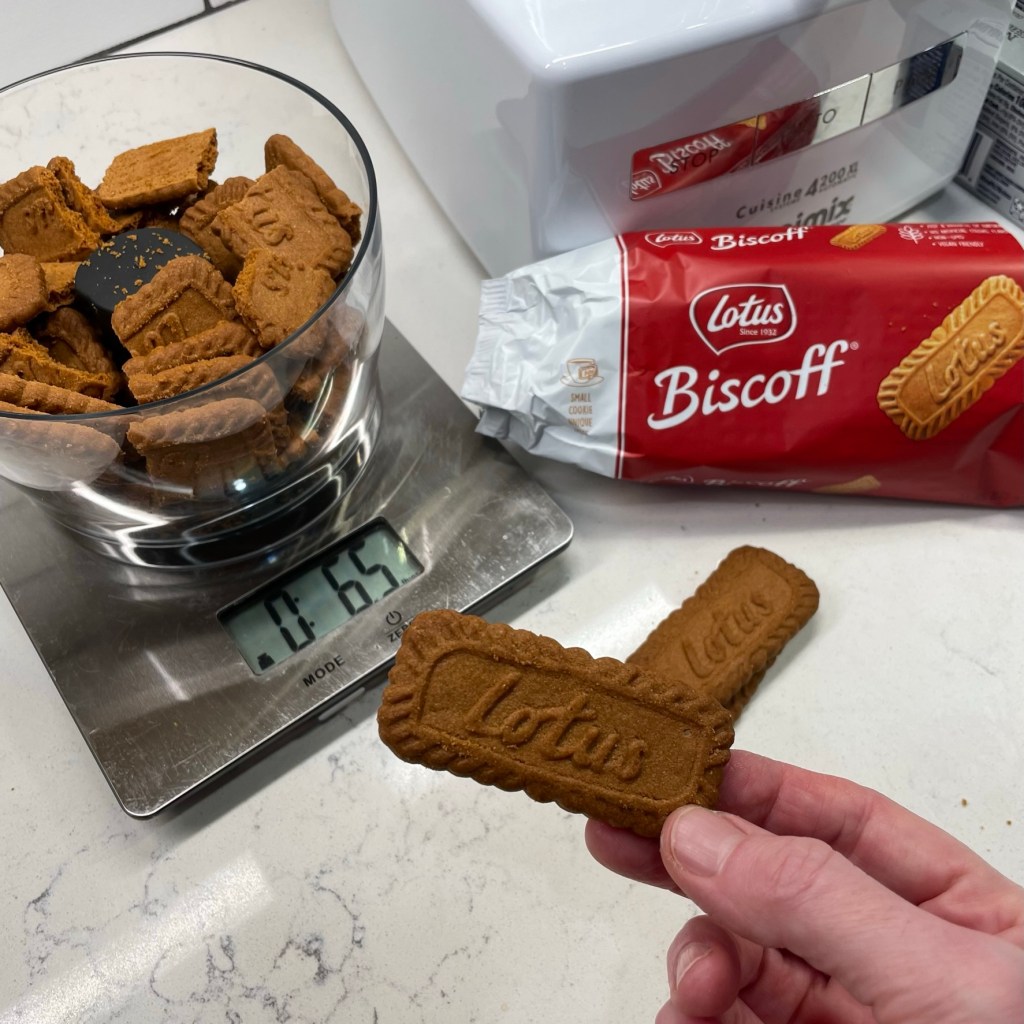
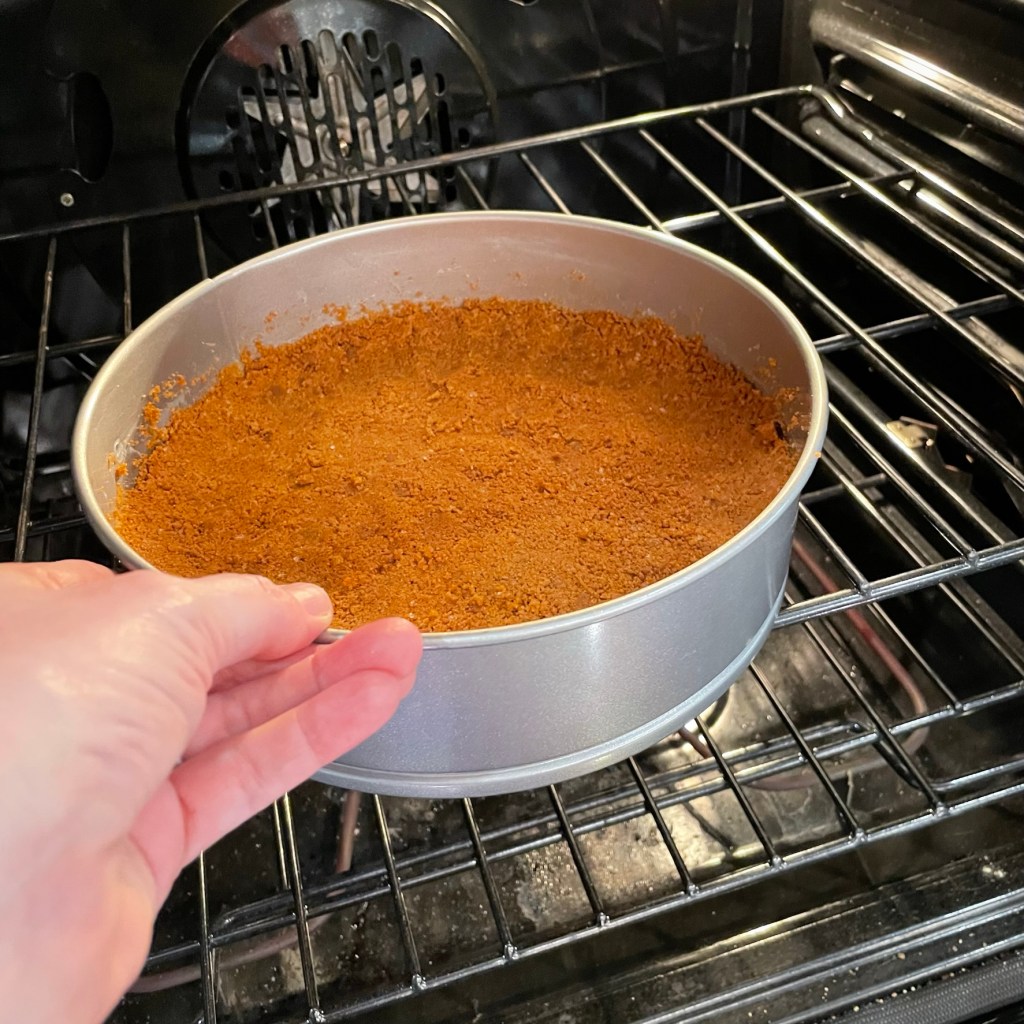
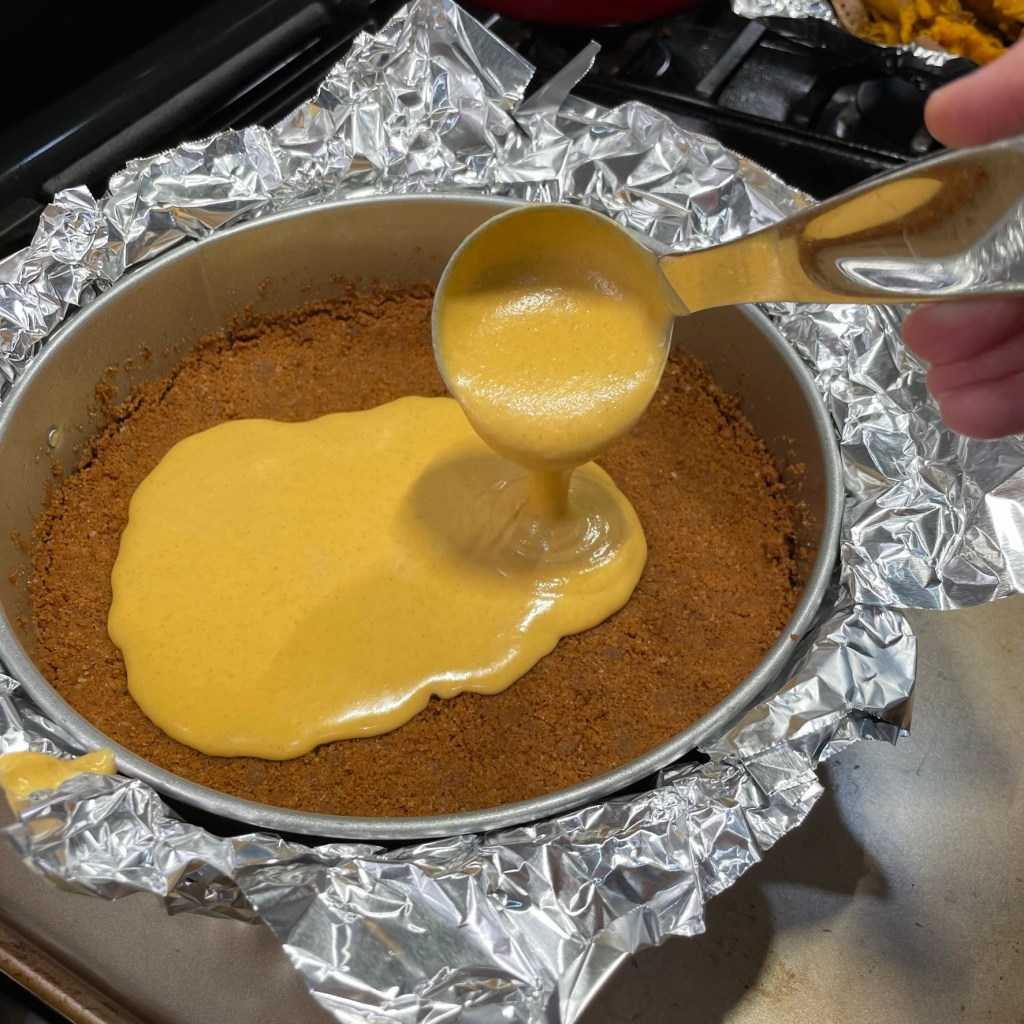
Rather than graham crackers in the base, I used Biscoff cookies— you know, the ones they give you on the airplane? They are crispy, buttery (though there’s no butter in them) and very cinnamon-y, a nice backdrop to the creamy sweet potato filling in the cheesecake. The cookies were sweet enough that I also reduced the sugar called for in the crust, and I skipped the extra cinnamon altogether.
You know what else would be great here? Ginger snaps!
Another favorite seasonal flavor
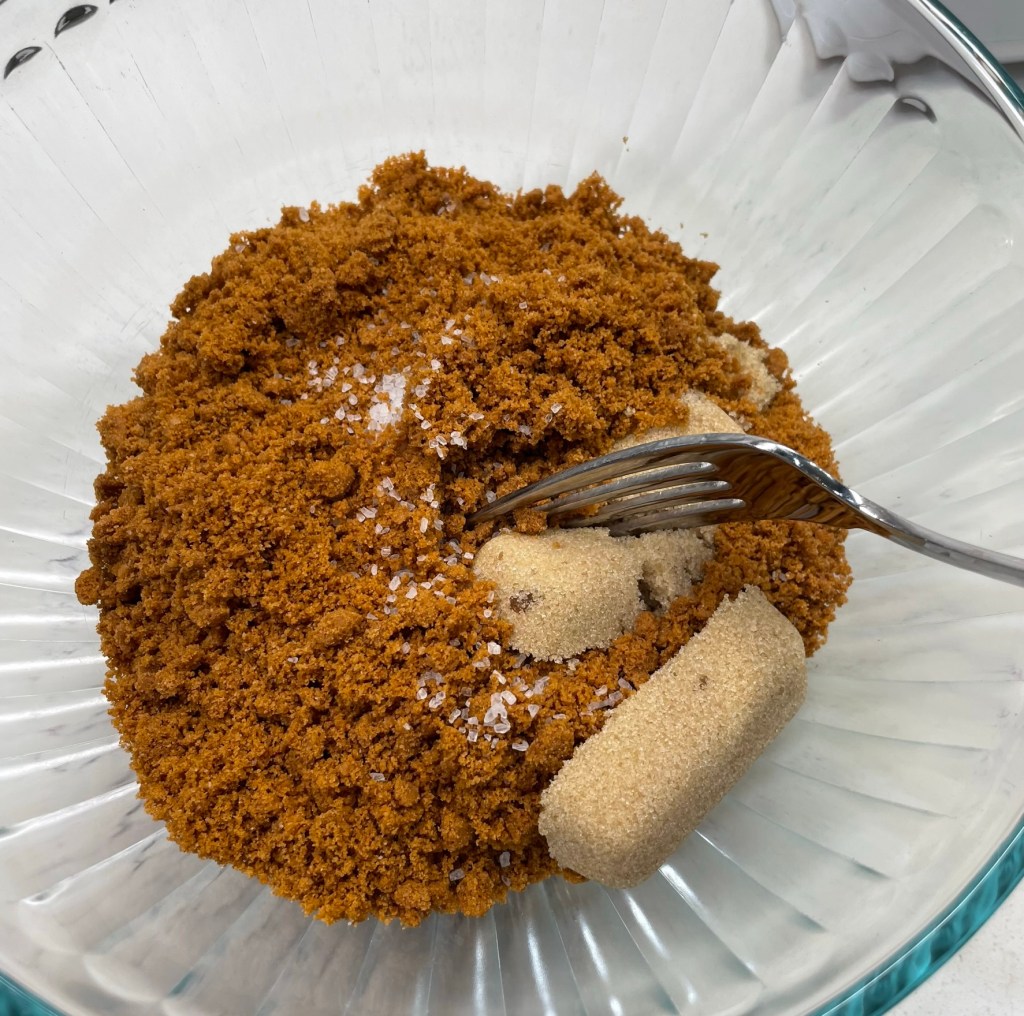
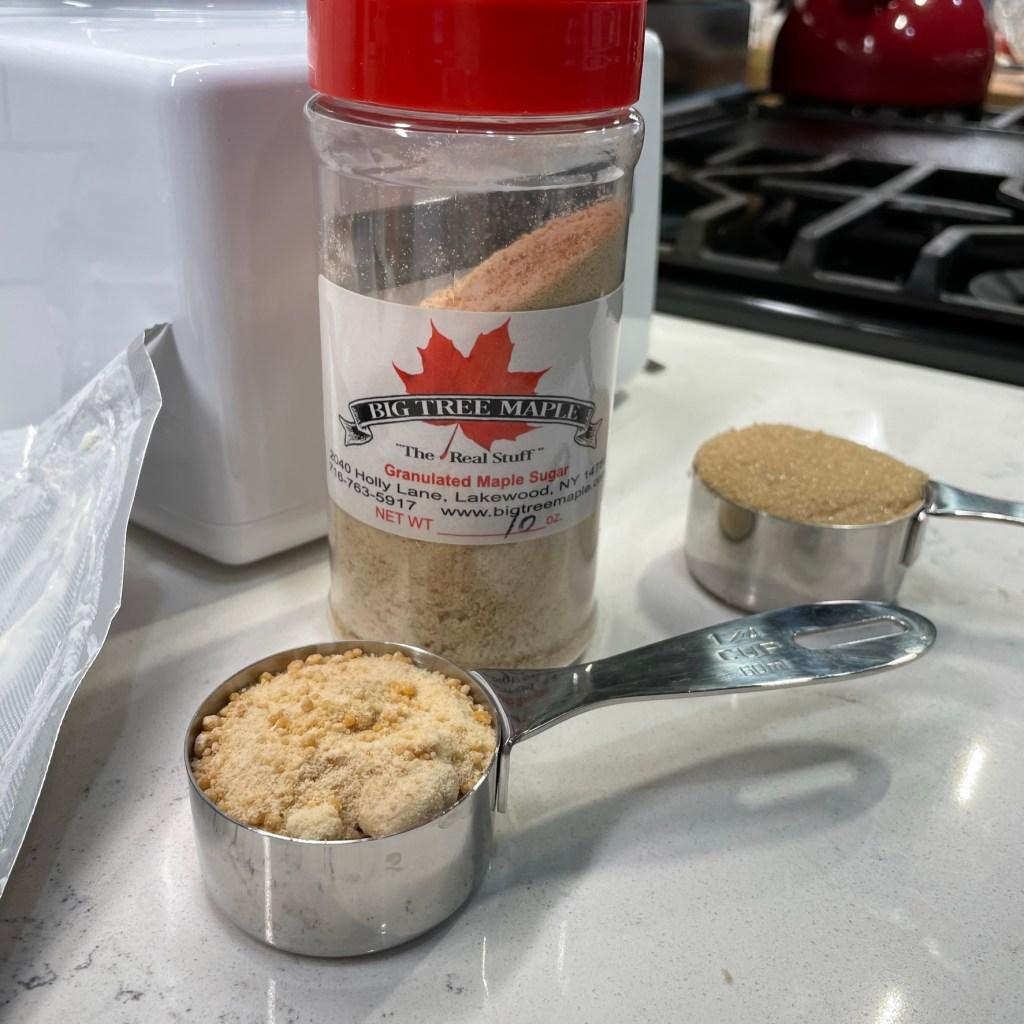
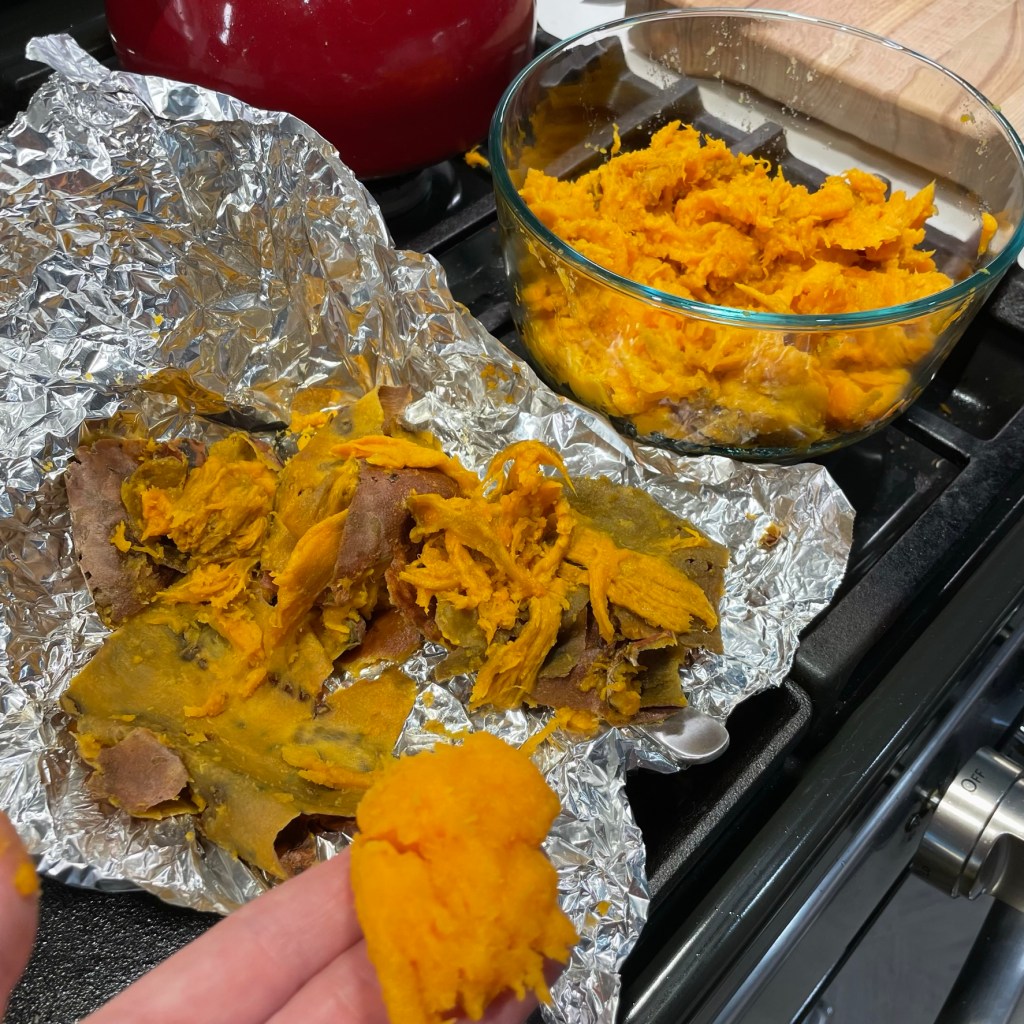
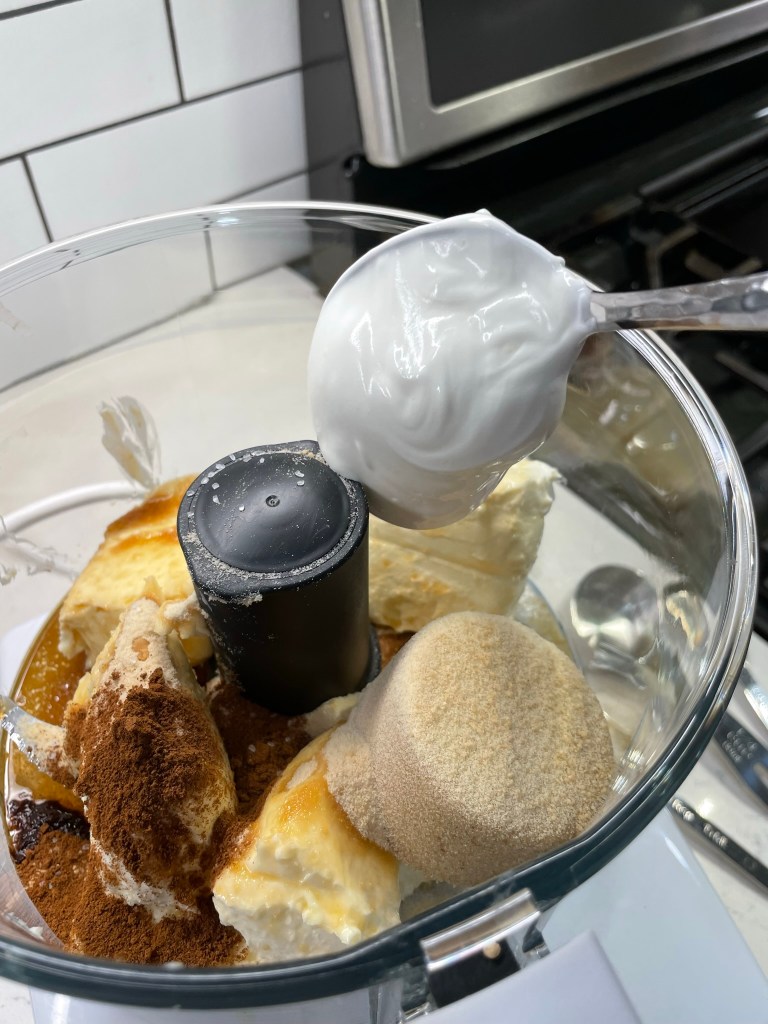
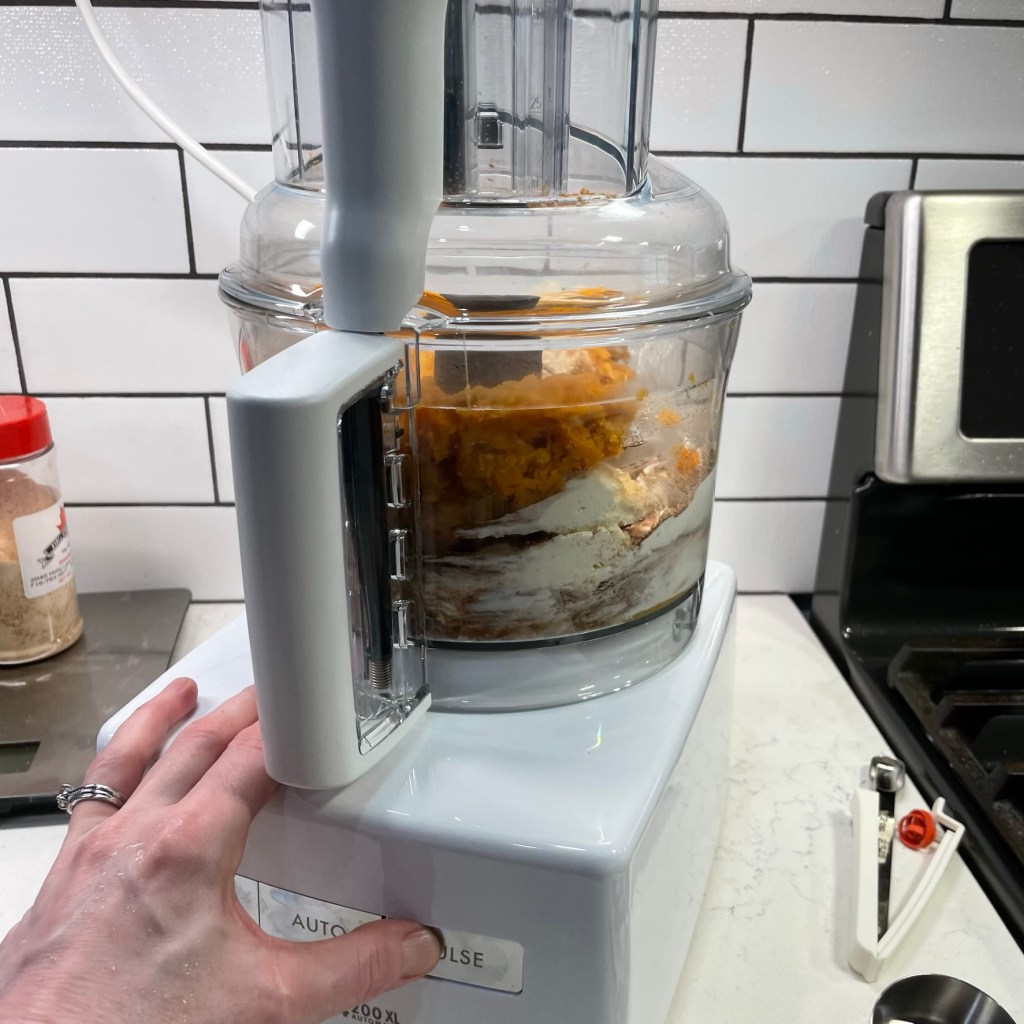
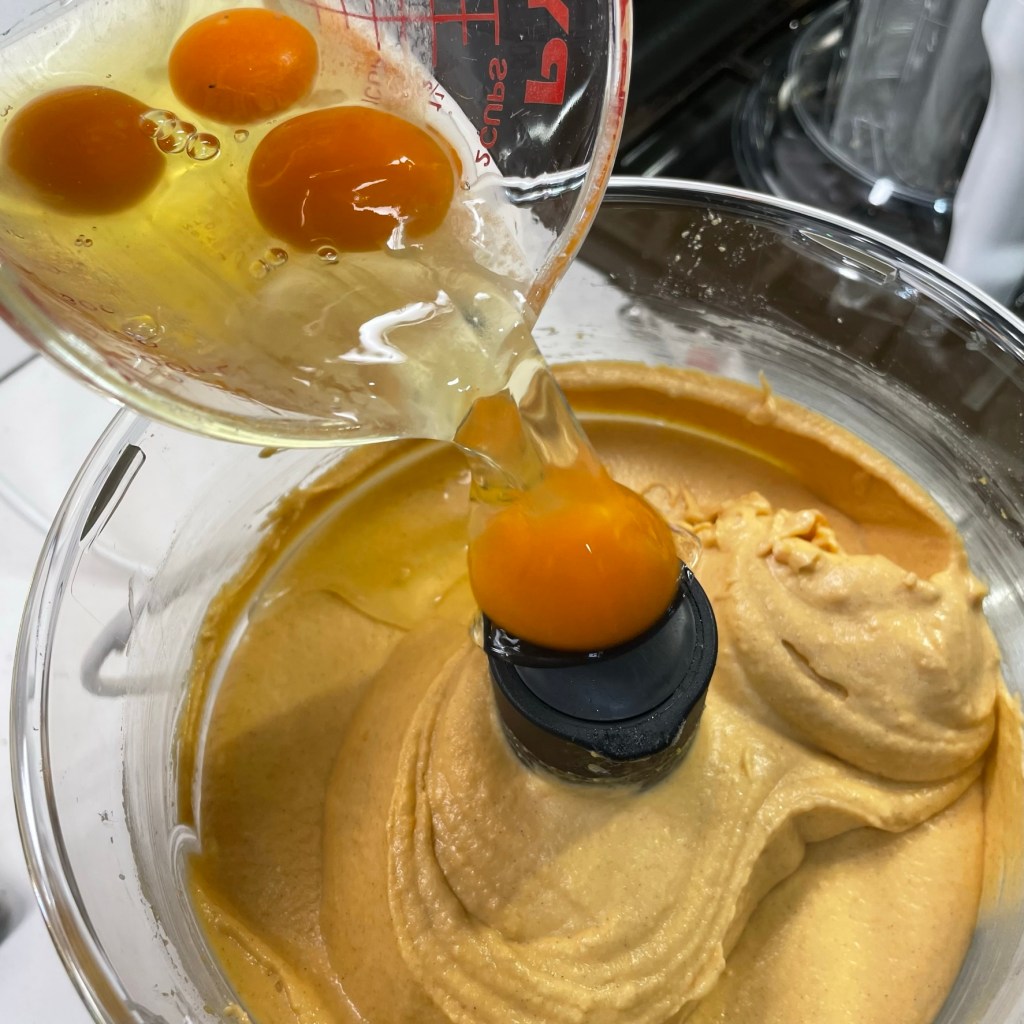
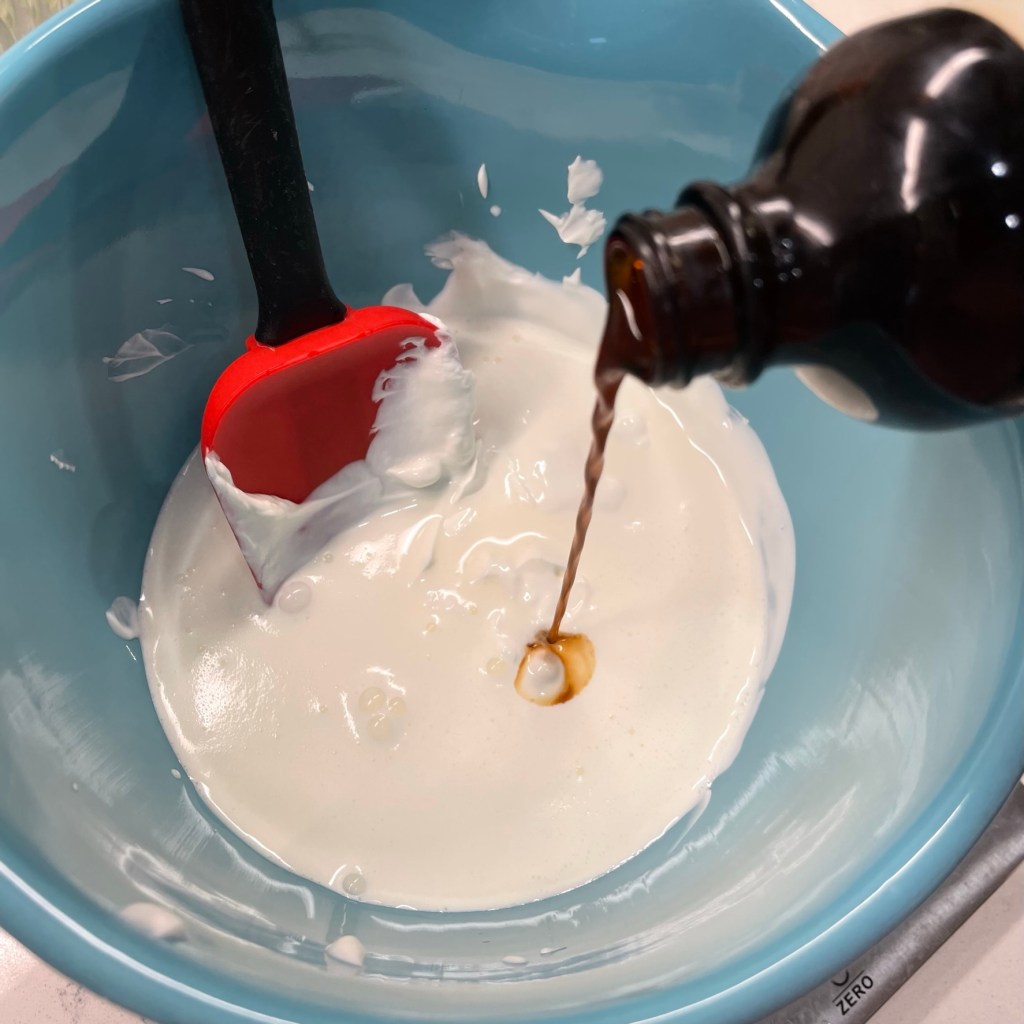
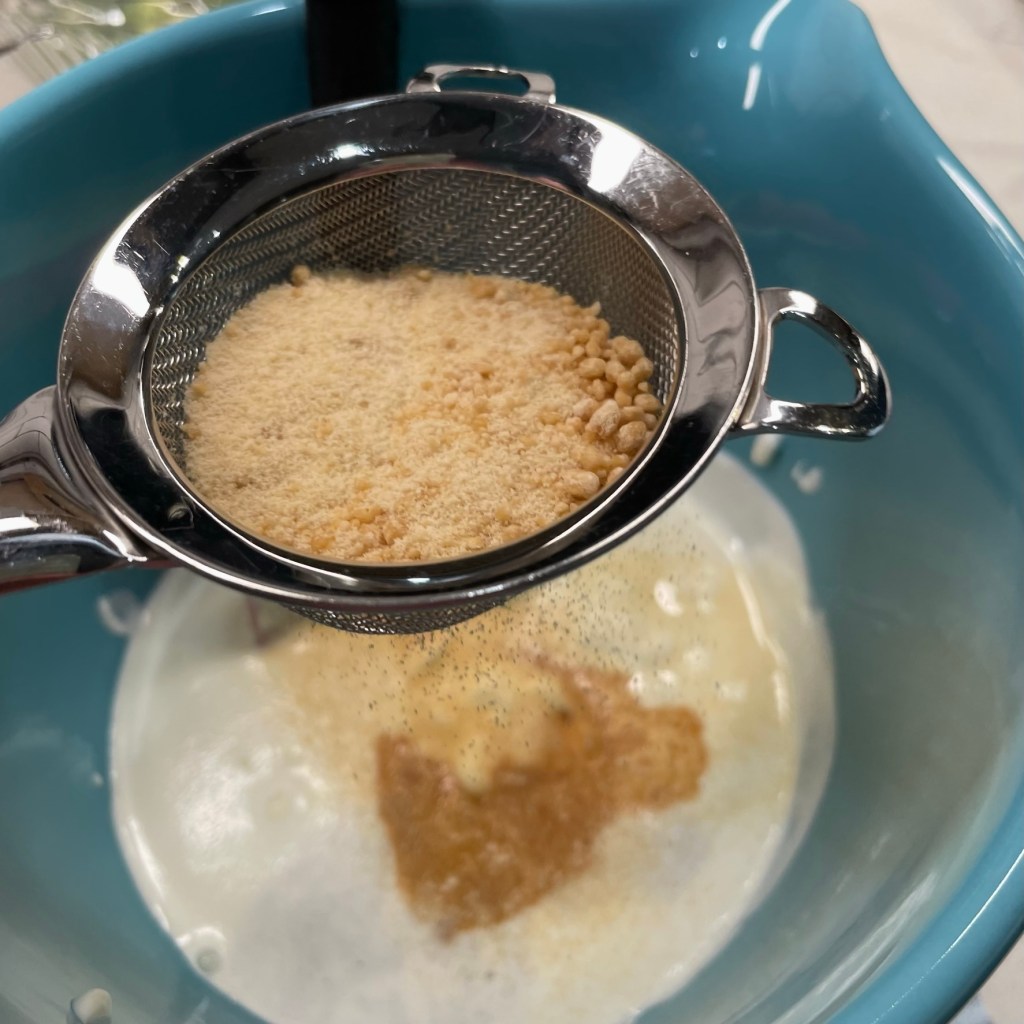
I also substituted real maple sugar in place of the regular sugar called for in the recipe, in keeping with the season and also because I happen to love the maple flavor. Everything else about the recipe was the same— roasted sweet potato, cream cheese, sour cream, vanilla and warm spices. Then free-range eggs, one at a time, and into the pre-baked crust— gently, of course, so as to not disturb the no-fuss crust.
A food processor makes the filling a breeze!
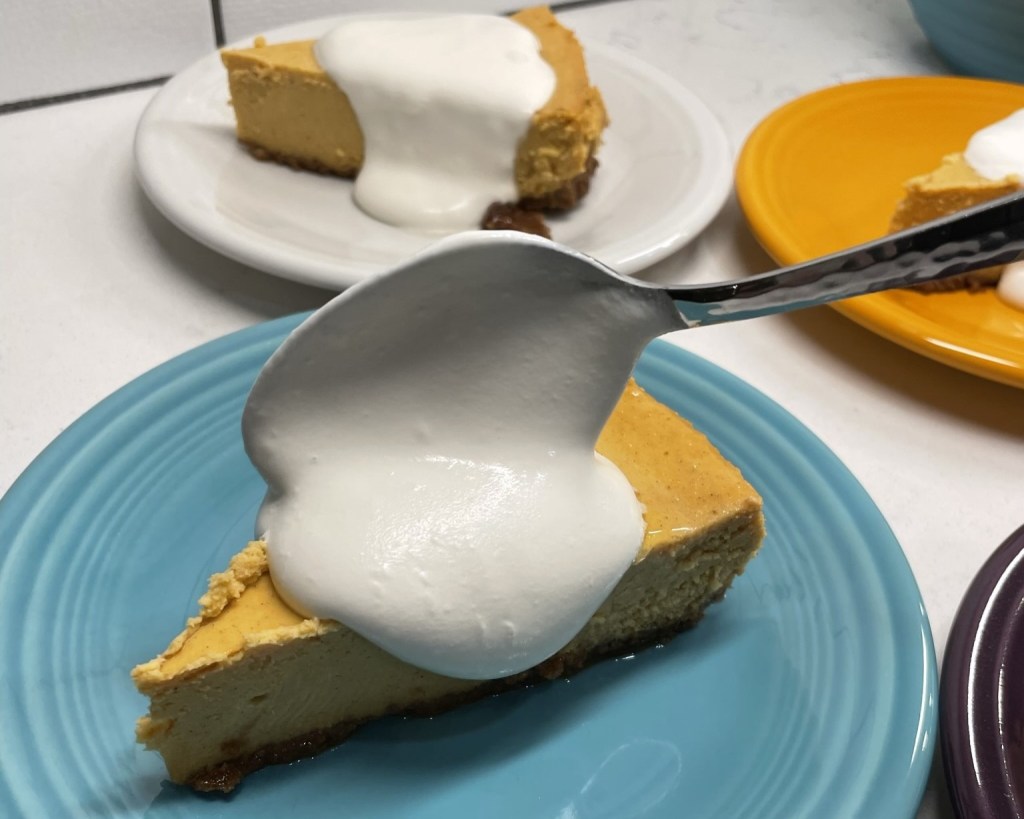
Topping on the side, please
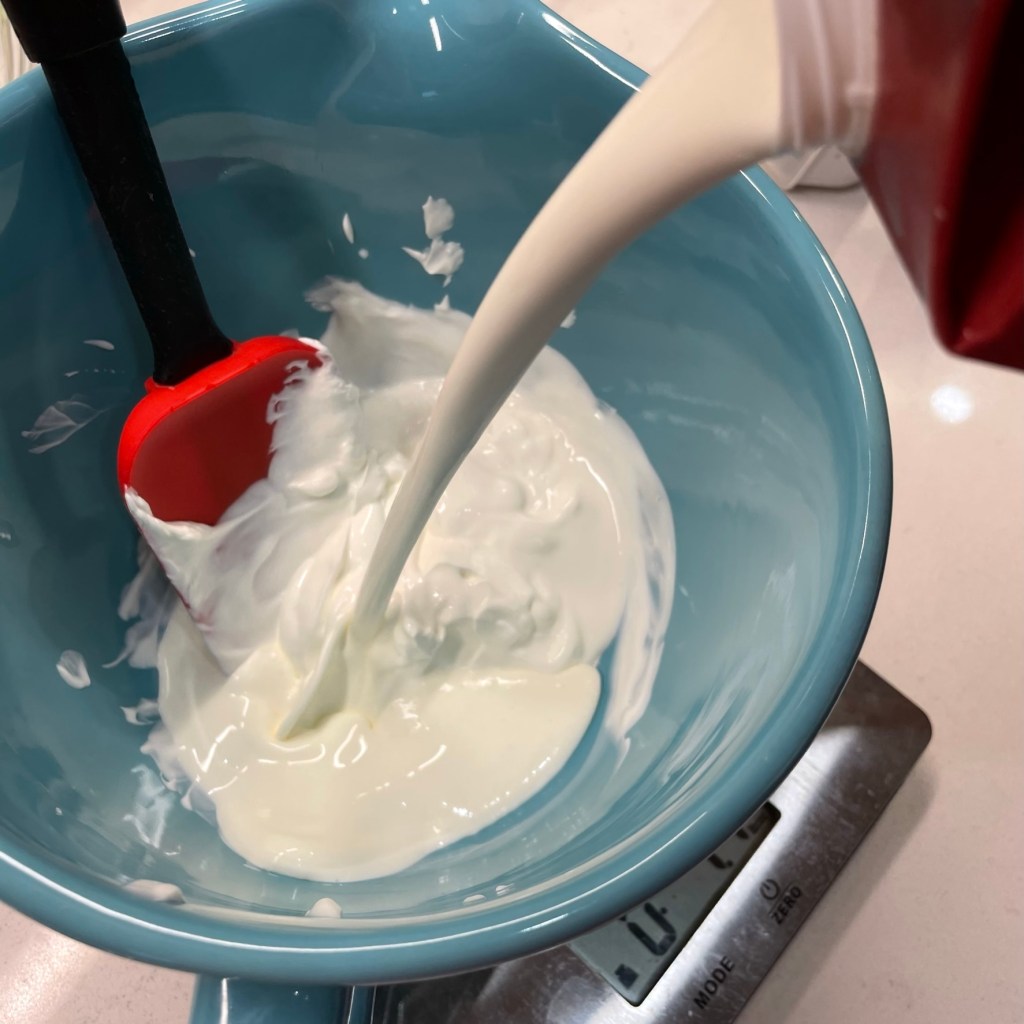
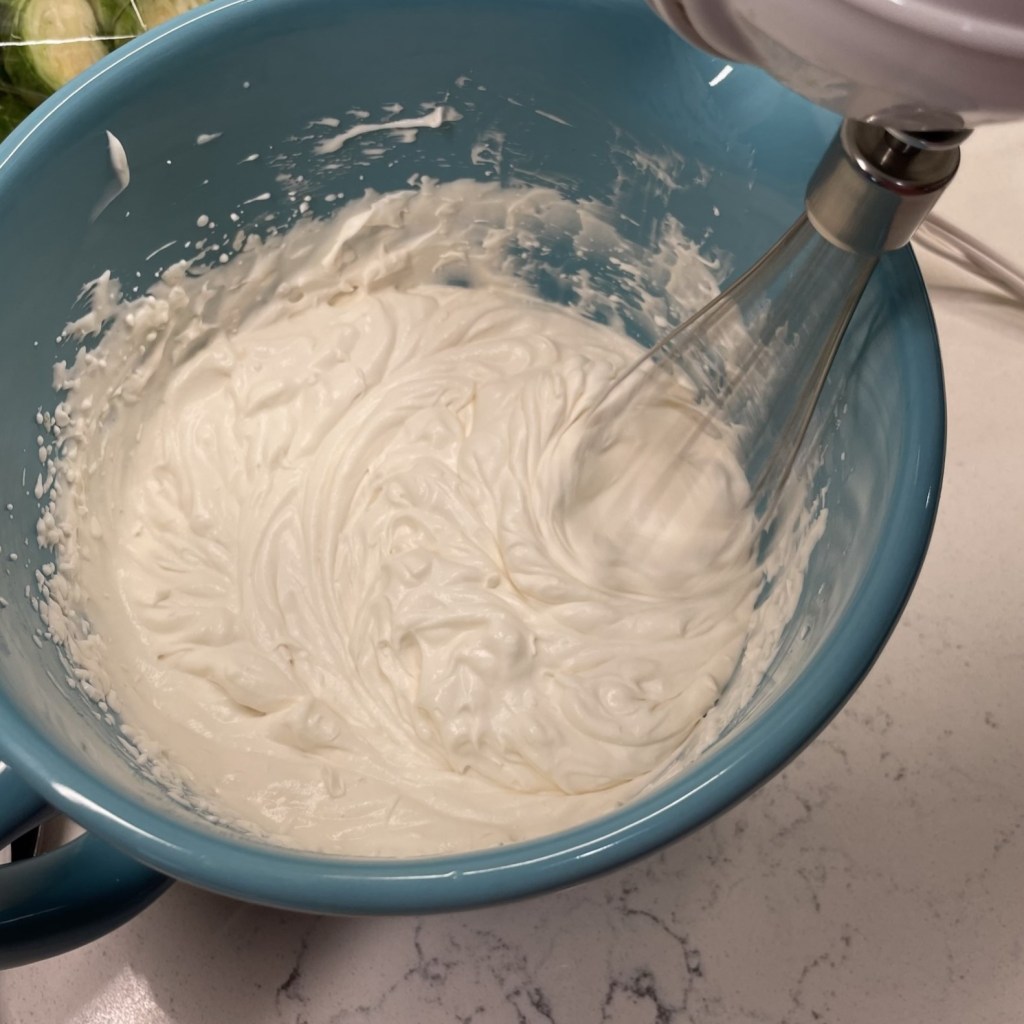
Next, I did not spread the sweetened sour cream topping over the entire cake before serving. The Kitchn version of this cheesecake was gorgeous, but we had a small gathering and I knew we would need to store the leftovers in the fridge. I made the topping— also with maple sugar— and saved it to dollop onto the individual pieces at serving time.
Sour cream keeps the topping from being too sweet, and it holds its shape beautifully in the fridge until serving time!
The dreaded water bath!
Finally, and this was the big one for me, I found a way around the usual “water bath” that is recommended for baking cheesecake. The process of wrapping up a springform pan with layers and layers of aluminum foil so that it can be surrounded with two to three inches of hot water in the oven is nothing but a big fat hassle. If even a small tear happens in that foil, water gets in and ruins the whole expensive thing. I wonder why, after so many years of springform pan baking, hasn’t someone developed a leak-proof version? Can we bring in the engineers who figured out the walk-in bathtub? That’s the technology we need here.
If they can do this, WHY can’t they make a leak-proof springform pan?
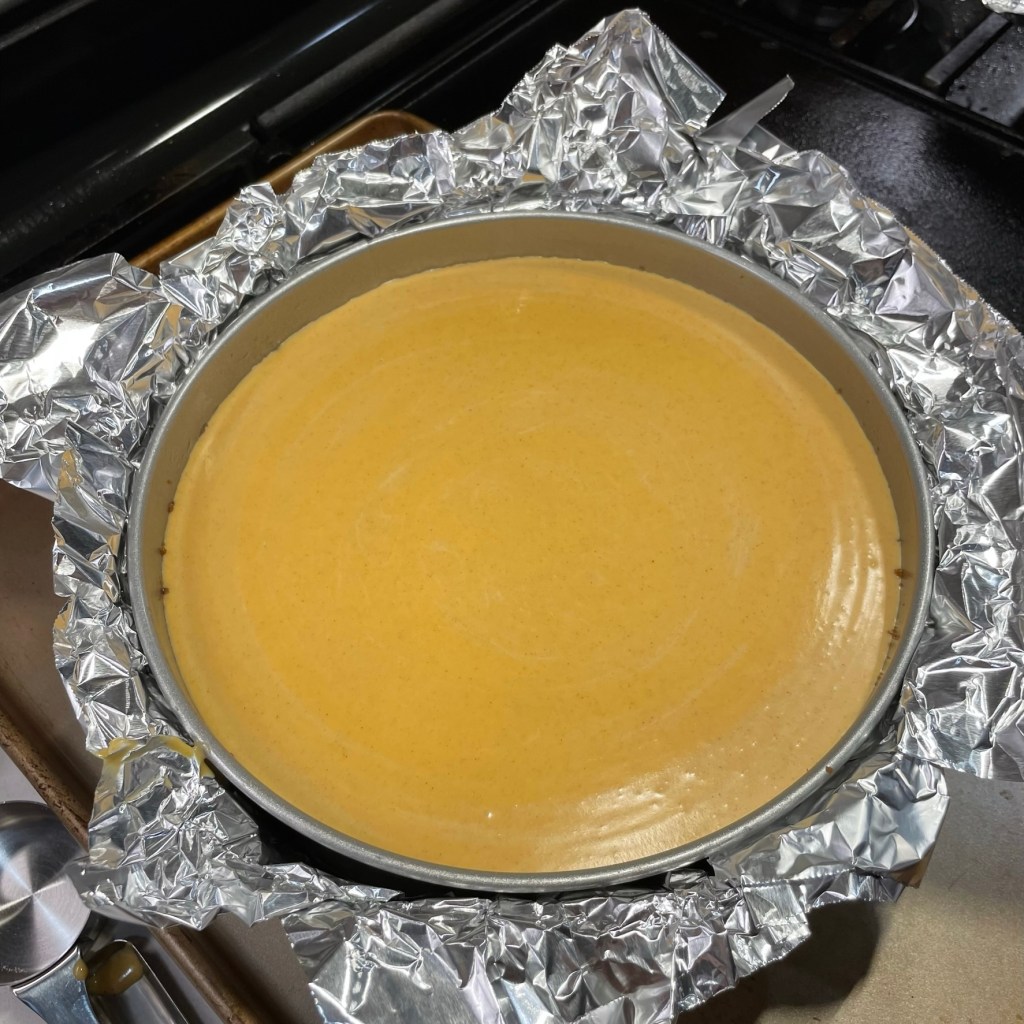
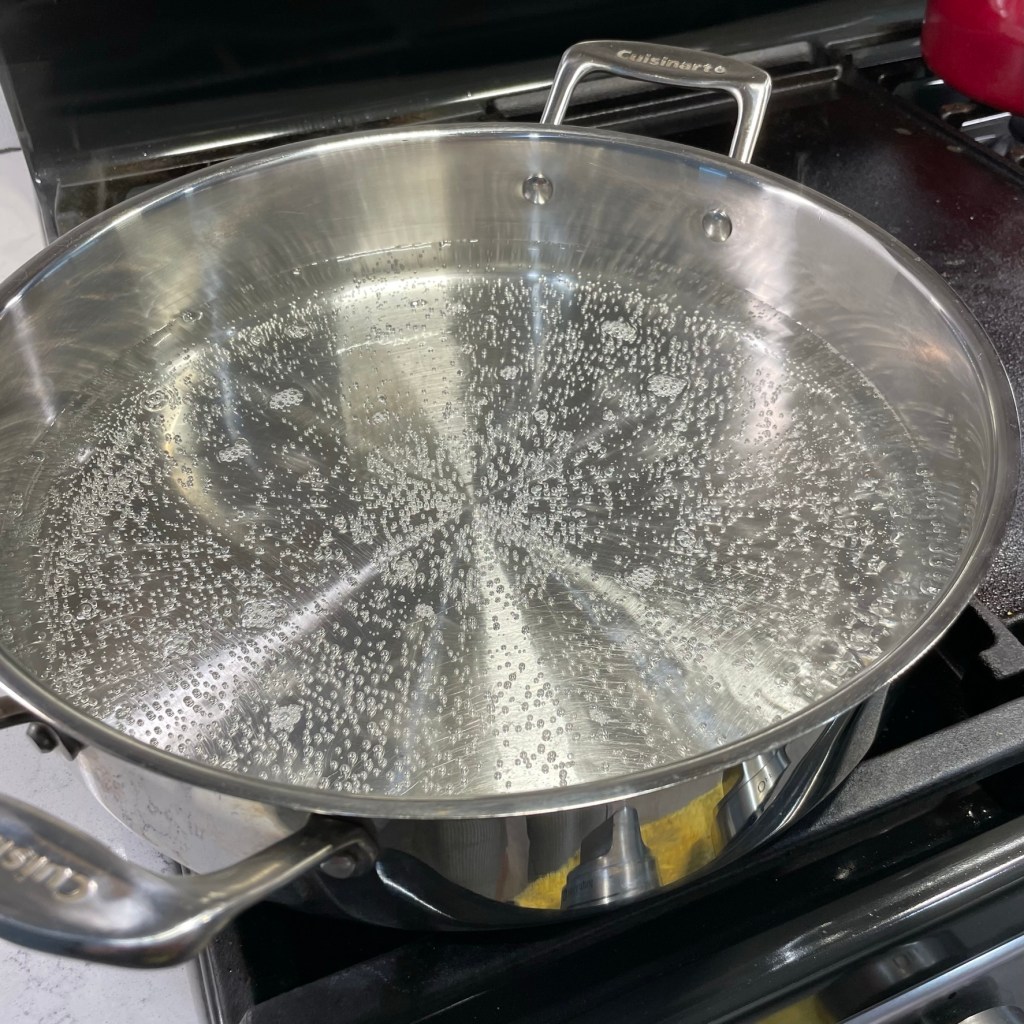
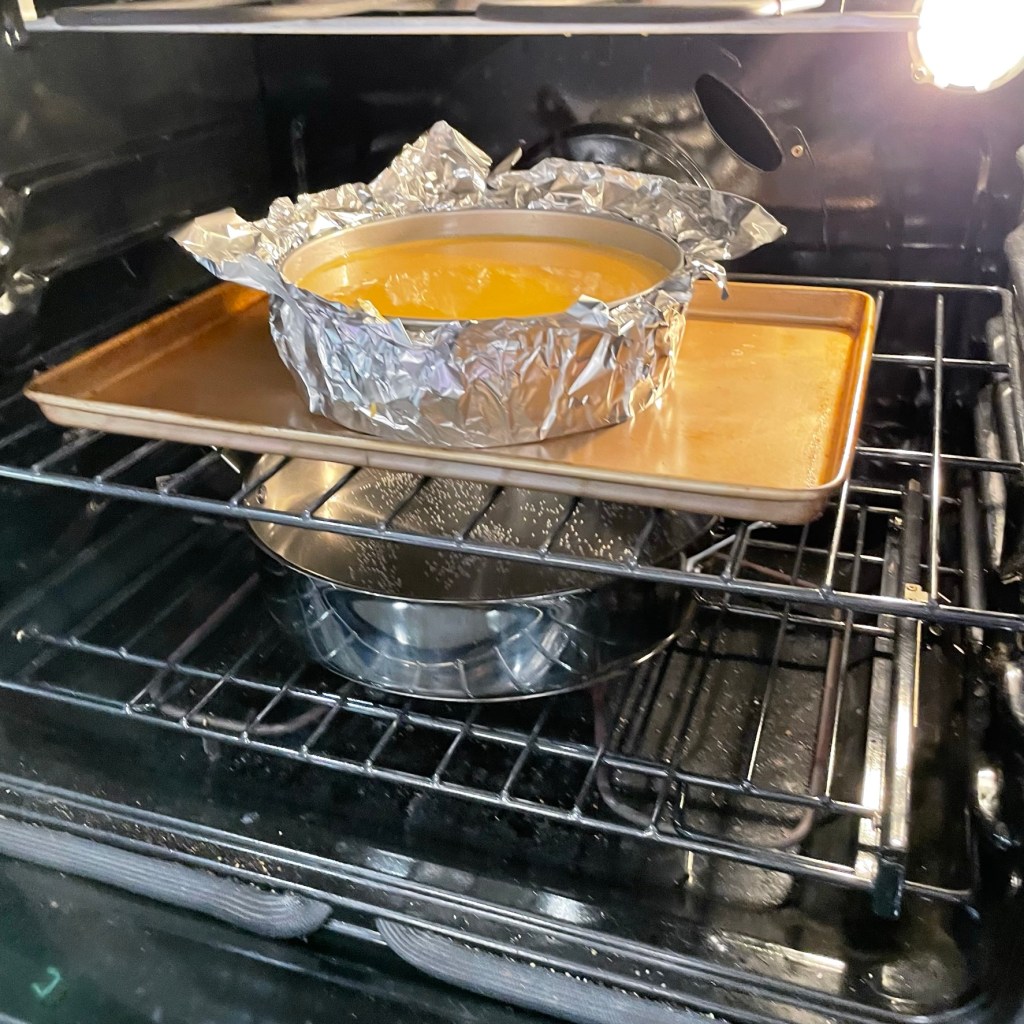
So, in my frustration, I did some research on the water bath method for cheesecakes and here’s what I learned: it isn’t the hot water that keeps the cheesecake from splitting or overbaking, it’s the steam! The cheesecake needs a very humid environment for slow and gentle cooking, but the cheesecake doesn’t need to actually be in the water for the steam to work. Though I had already wrapped my pan in foil, I went rogue at the last minute with a gigantic steam pan underneath my cheesecake, and watch what happened.
I was thrilled with the results of my last-minute decision!
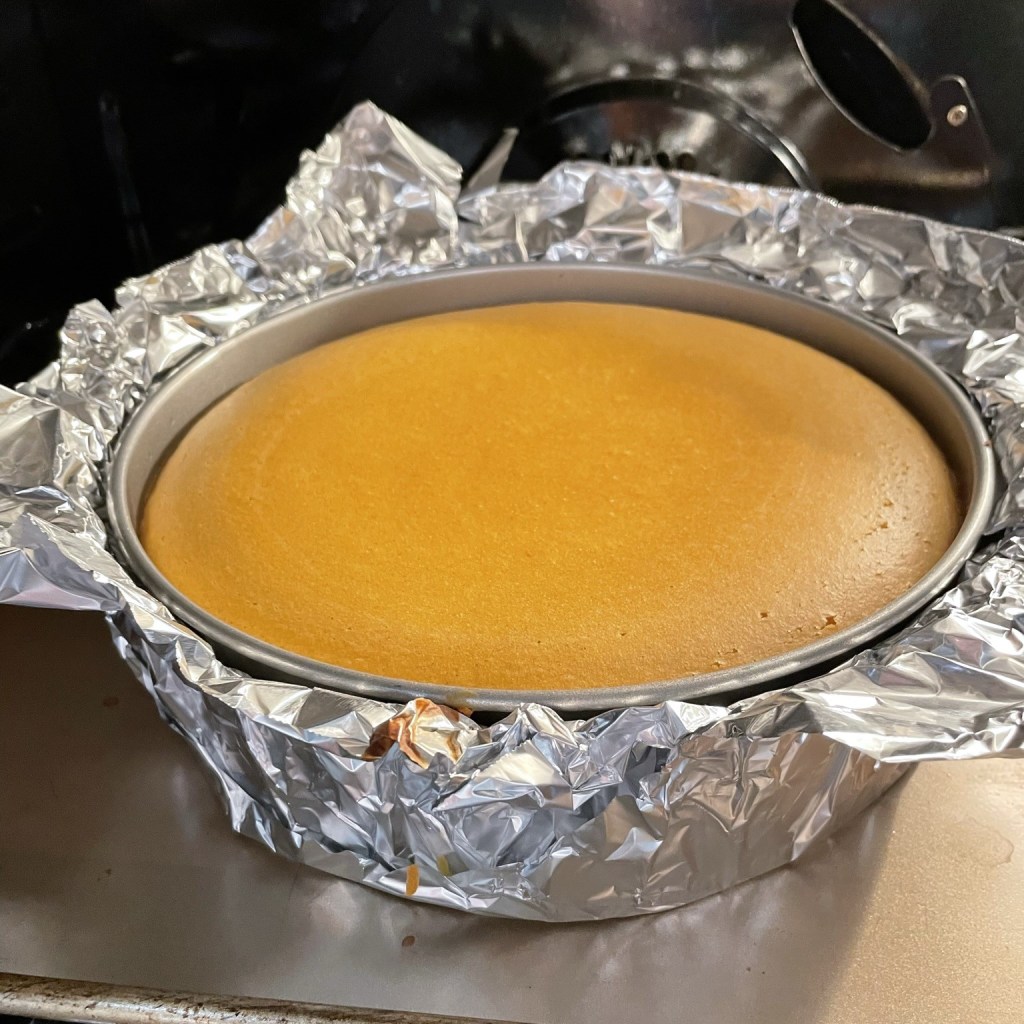
My cheesecake was perfect! As with any cheesecake recipe, the instructions said to bake it until the filling was set but the center was “still slightly wobbly,” and I cooled it in the oven for about an hour before taking the thing out. There was no water in my cake, no drama trying to lift it from the water bath, and no cracks on top.
All in all for me? A Thanksgiving dessert that was, dare I say, a piece of (cheese)cake.
Where’s the recipe?
This is where you’d usually find a click-to-print recipe on my blog, but today I’m comfortable redirecting you to the original source. My adjustments, though meaningful to me, were slight, and I found the tips and instructions on The Kitchn to be clear and helpful. If you’re feeling inspired, go get it!
Happy Thanksgiving to my friends, followers and visitors!
I’ll bet I know what you’re thinking. She did what?! 😂
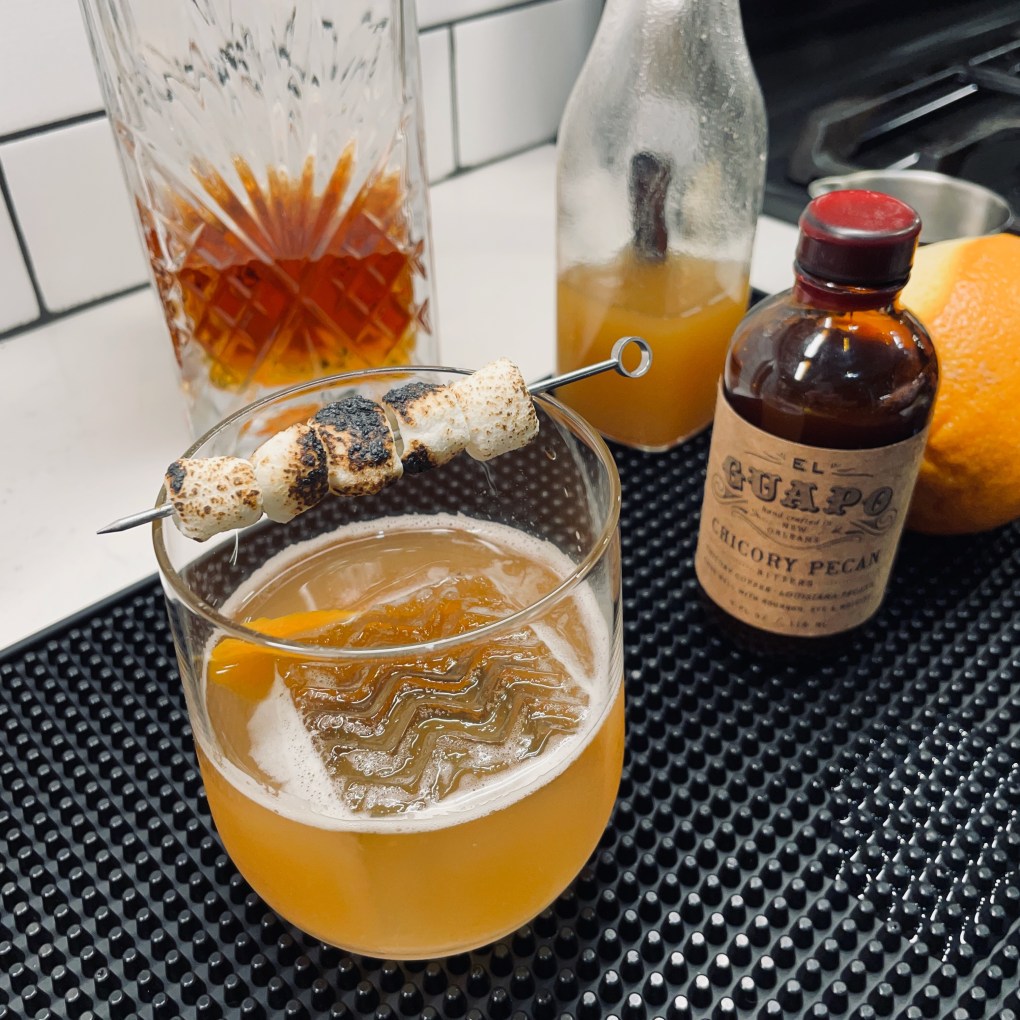
The matter of a signature cocktail for Thanksgiving is always a priority for me. I want guests at our table to immediately feel welcome and for the signature drink to set the mood for the occasion. And though I don’t especially like the old-school sweet potato casserole— you know the one, topped with sticky browned marshmallows— when the idea rose of putting those nostalgic flavors into a cocktail? Well, that’s quite a different story!
This discussion of a sweet potato casserole cocktail came about several months ago, as my blog buddy, Maylee over at Beyond Gumbo, and I were e-chatting about a New Orleans-based company that makes cocktail ingredients. El Guapo is the brand, and I had recently purchased a bottle of its chicory pecan bitters. I’m always on lookout for unusual cocktail ingredients, and this one struck my fancy for making holiday themed drinks.
Chicory has a slight bitter flavor that is reminiscent of roast coffee.
As so often happens, though, the bitters sat on my bar for a while as I pondered how to build a drink that would benefit from the interesting combination of flavors. I’ve used it to make a pecan pie old-fashioned, and then it got left behind until recently, when Maylee posted a wonderful recipe for a homemade pumpkin spice latte that sounds way better than anything I could buy at Starbucks. For her latte, she made a pumpkin spice syrup and she reminded me in the comments section about the sweet potato cocktail we’d discussed months earlier. Thank goodness she remembered!
And here we are! My friend’s pumpkin spice syrup inspired me to try my own version of sweet potato syrup, which was not only simple to make, but literally makes this bourbon drink taste like a tipsy liquid version of a retro sweet potato casserole. This is one of the things I love most about food blogging, the way my online friends and I are always inspiring one another to try and succeed at new things, and we keep going until we all run out of ideas.
I hope that’s a very long time. Cheers! 😁
What you’ll need
If you want to try this yourself, take a moment right now to purchase the chicory pecan bitters, as they are essential to the drink. You can buy them directly from El Guapo’s site or take advantage of speedy shipping from Amazon. Don’t worry about how to use the rest of the bottle, as I’ll be experimenting and sharing other recipes as I develop or discover them.
The other ingredients you’ll need are bourbon (a sweet one, such as Maker’s Mark or Elijah Craig), a good-sized sweet potato, a bit of turbinado or brown sugar and a cinnamon stick, plus the mini marshmallows to garnish the drink, vintage style.
Once the syrup is ready, the rest of the drink is easy peasy!
Make-ahead sweet potato syrup
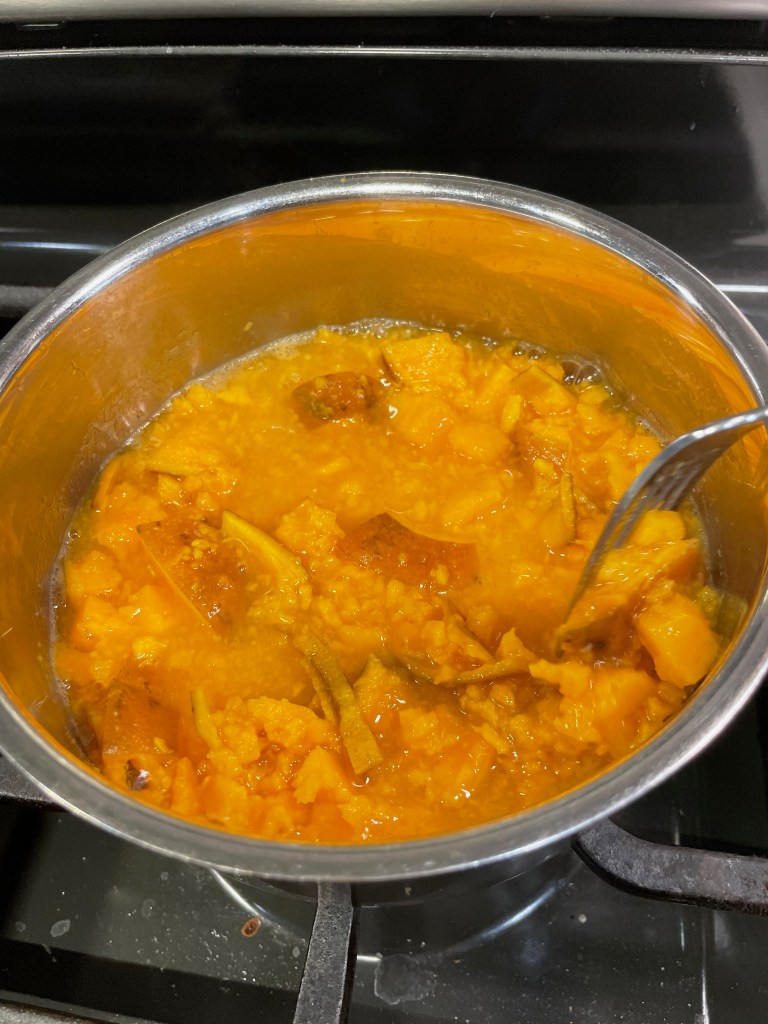
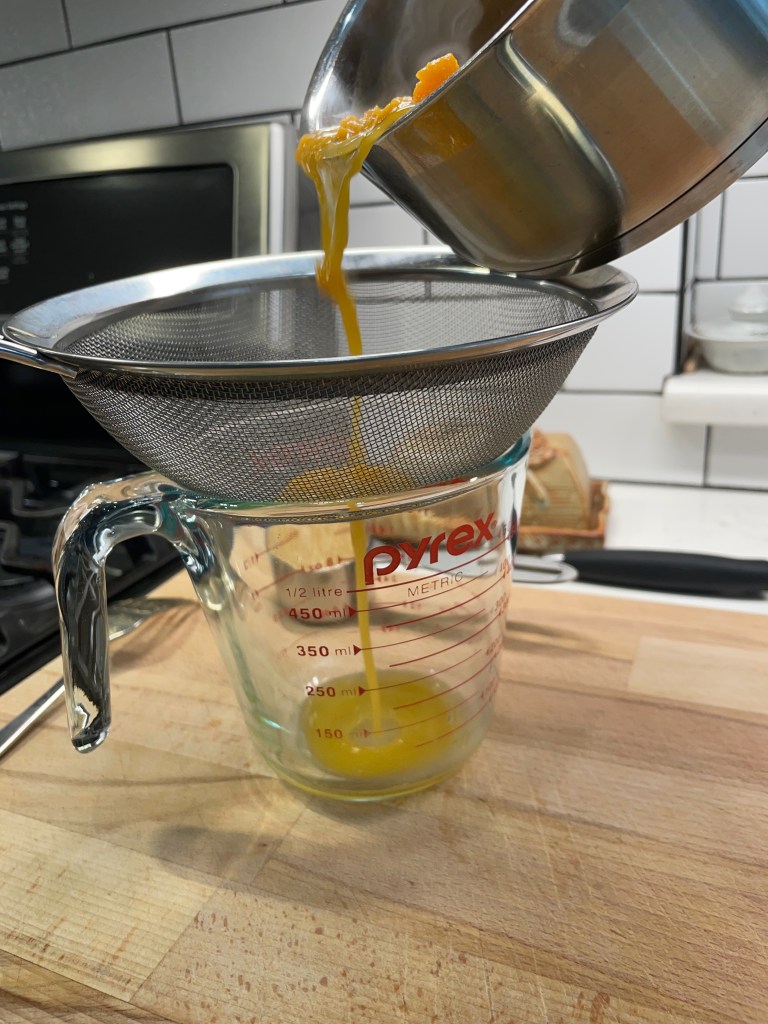
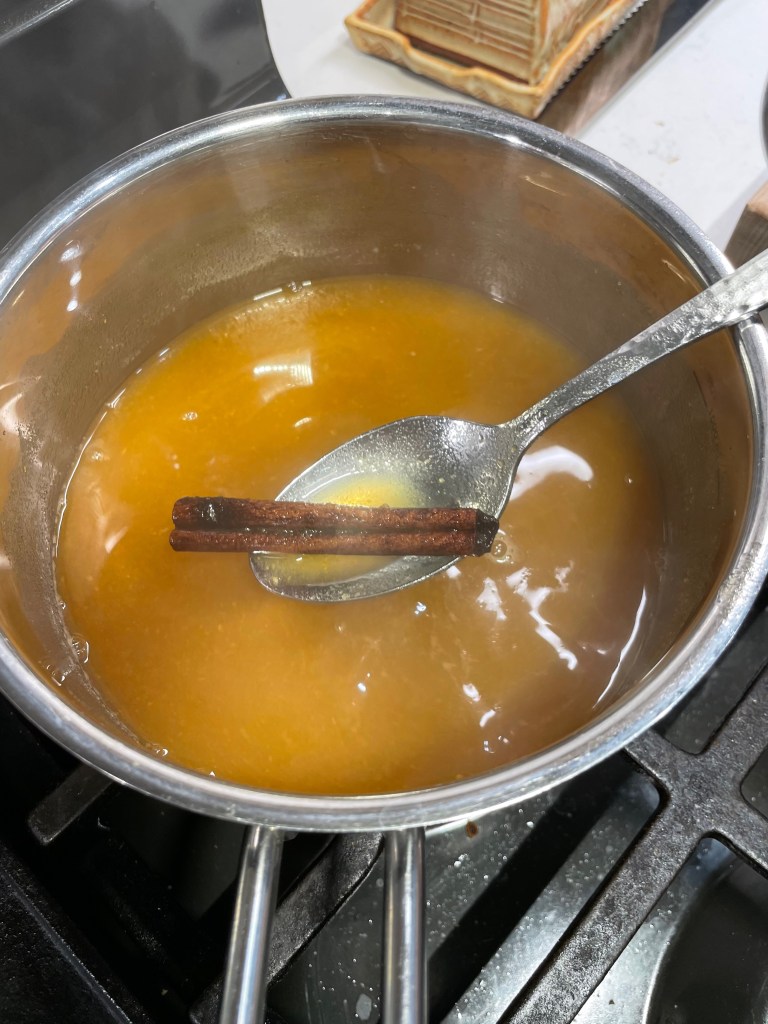
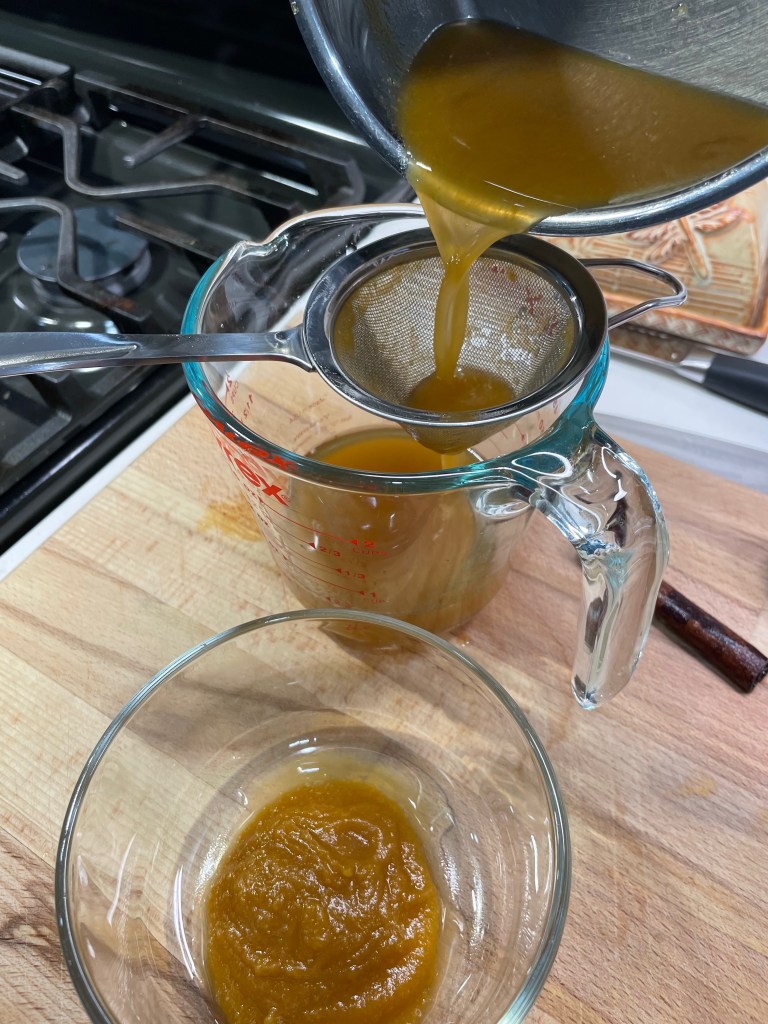
The sweet potato syrup is easy to make ahead, and I’d recommend doing it this weekend so you’ll be ready when guests arrive next Thursday. Simmer the sweet potato chunks until tender, then gently mash and strain the liquid into a measuring glass. Add enough water to total 1 1/4 cups. Pour the strained liquid back into the pan with the sugar and cinnamon stick. Bring to a slight boil, then simmer for about 15 minutes. Cool to room temperature, and then strain again— this time through a very fine mesh strainer to filter the solids as much as possible. Transfer it to a bottle and chill until you’re ready for cocktails.
When my syrup was finished, it measured 3/4 cup, exactly enough for 8 cocktails. If you’ll be making more drinks, my click-to-print recipe below is easy enough to double.
Time for a cocktail!
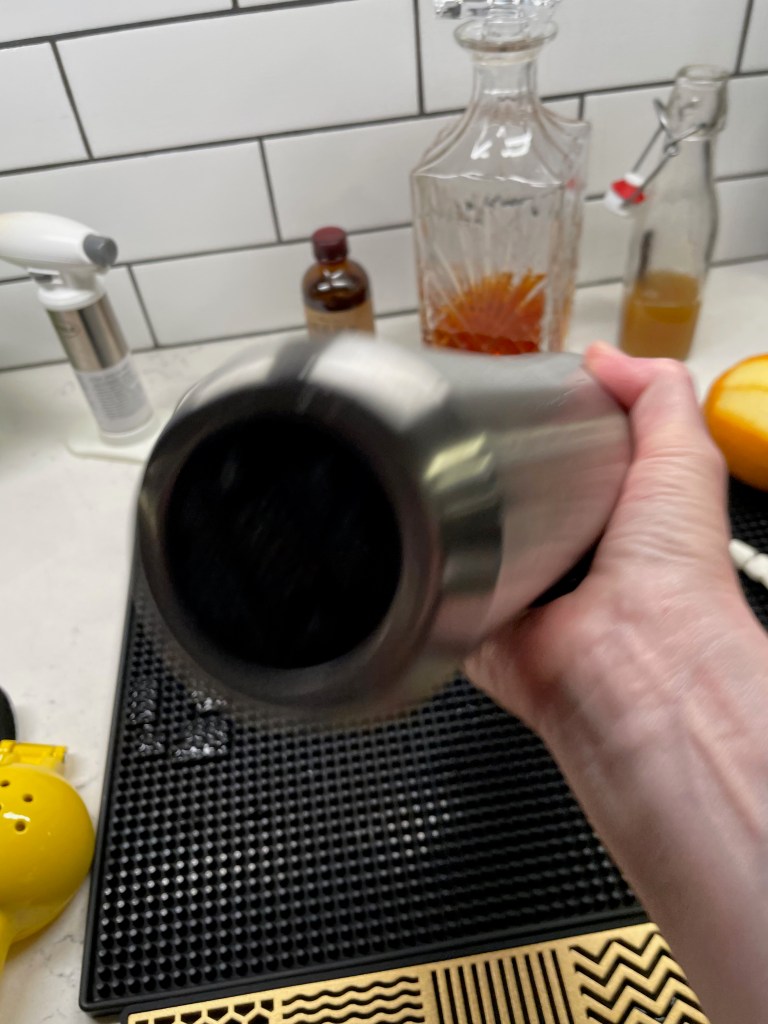
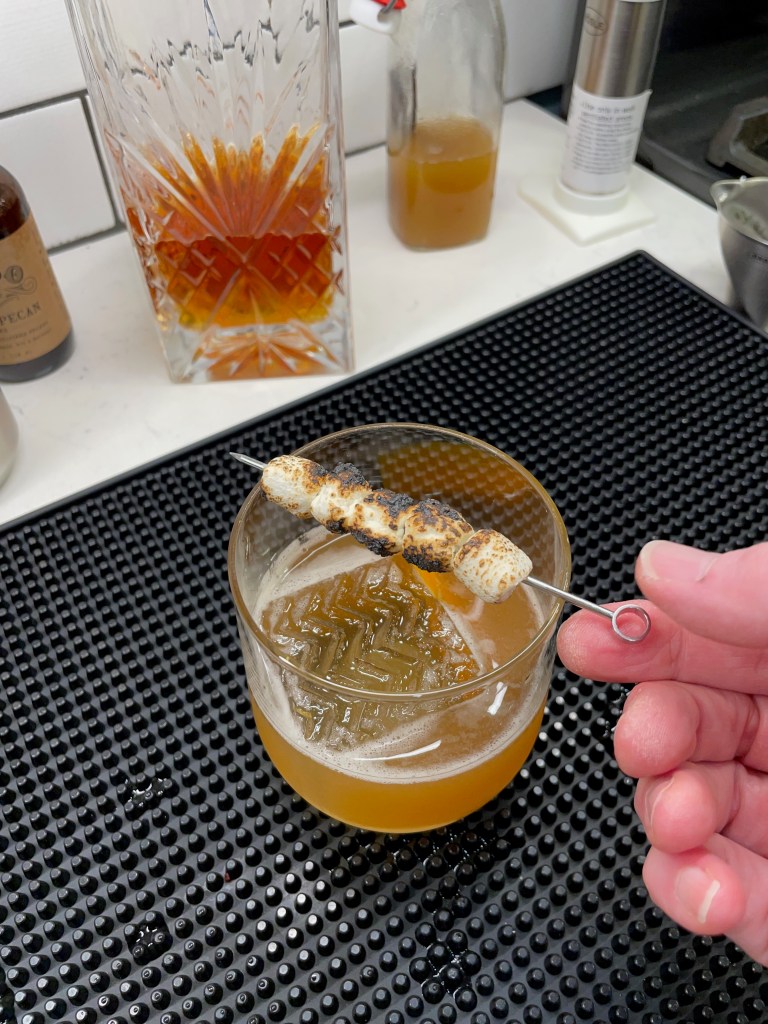
When the bell rings for happy hour, get your cocktail tools and ingredients ready to go. You’ll need a shaker (this is best when mixing ingredients of different viscosity), a measuring tool for the ingredients, ice for shaking, heatproof cocktail picks and a culinary torch or lighter to toast the marshmallows.
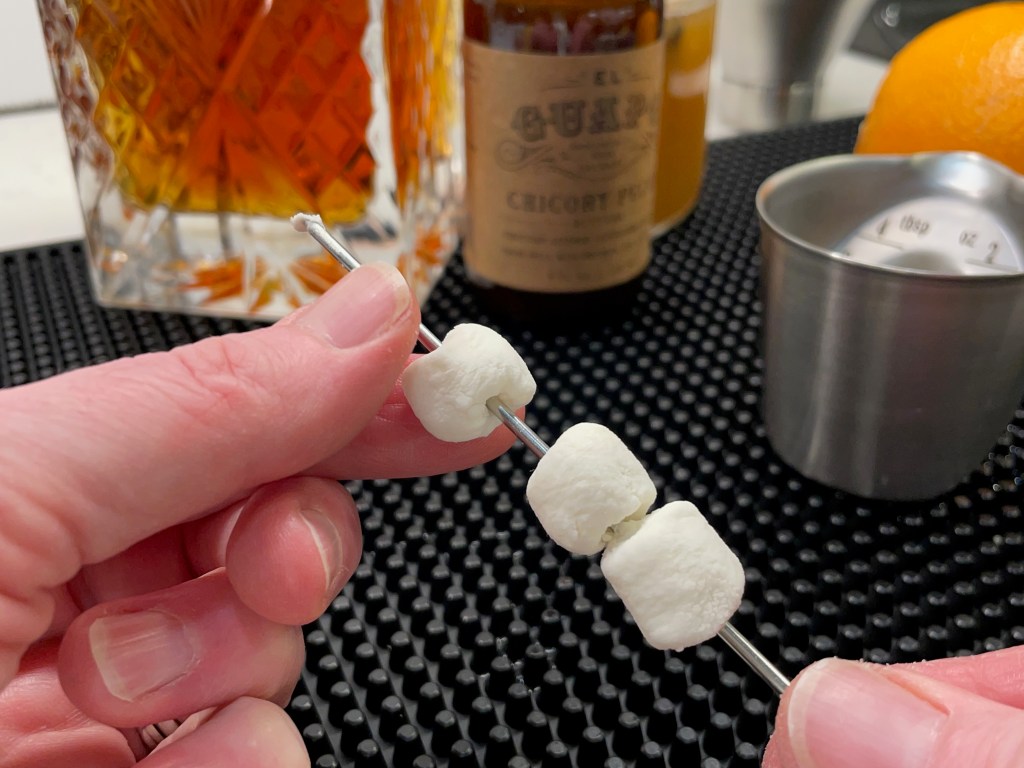
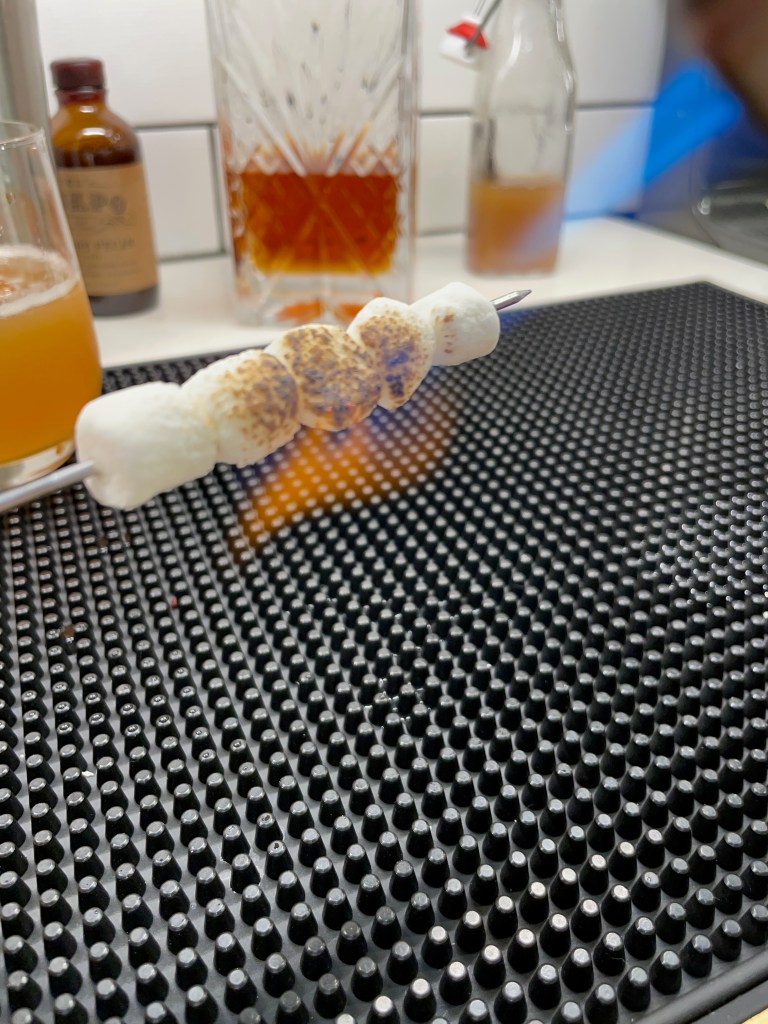
The toasted marshmallows are a whimsical nod to the sweet potato casserole of my childhood!
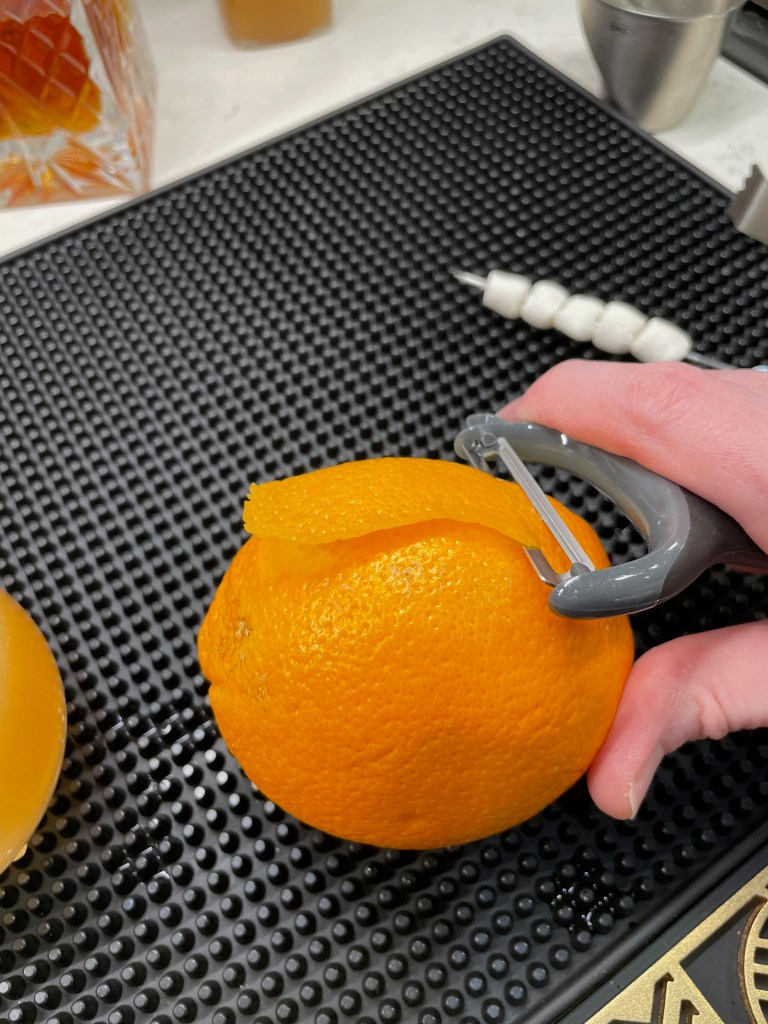
I recommend threading the marshmallows onto the cocktail pick first so you can get straight to enjoying this delicious drink as soon as it’s poured. To reduce the stickiness, I smeared the cocktail picks with a bit of butter before adding the marshmallows. I like a little orange peel expressed over my drink, so this is good time to strip that off a washed orange, too.
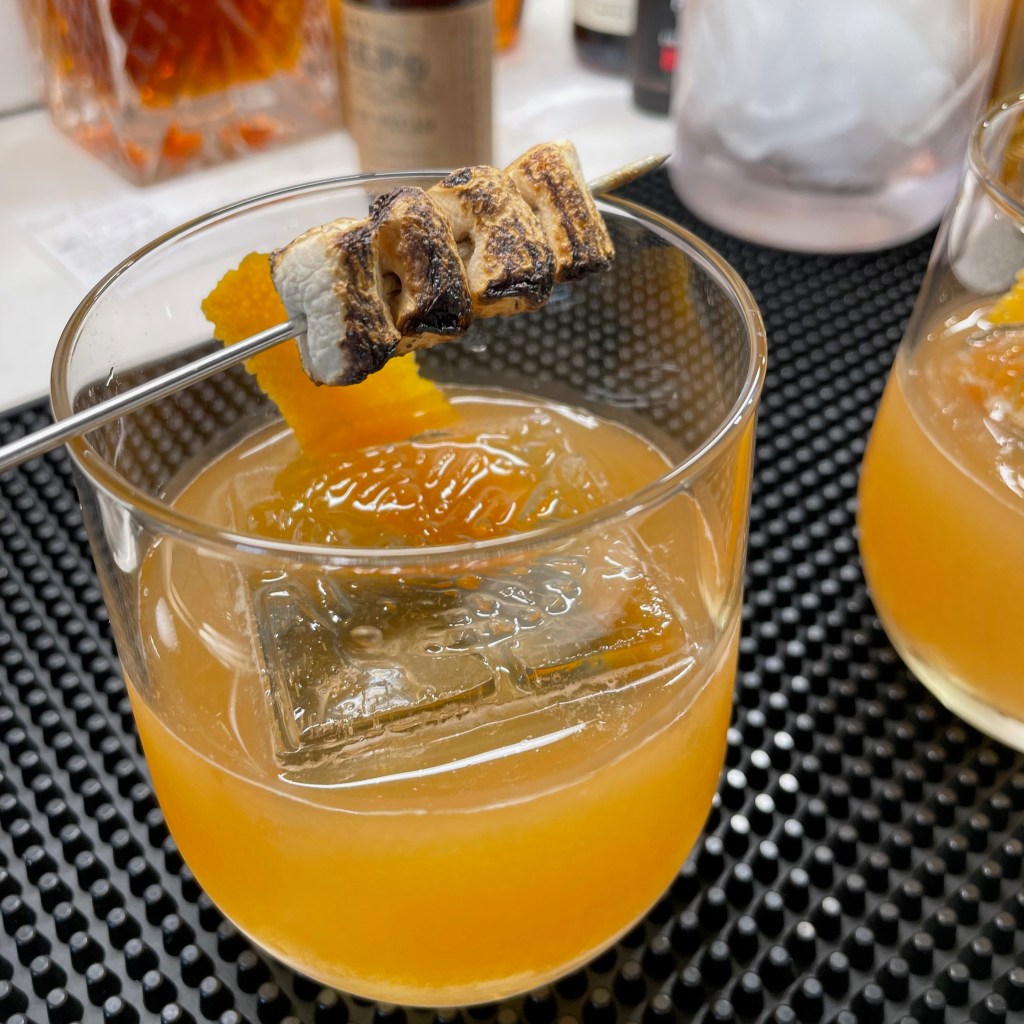
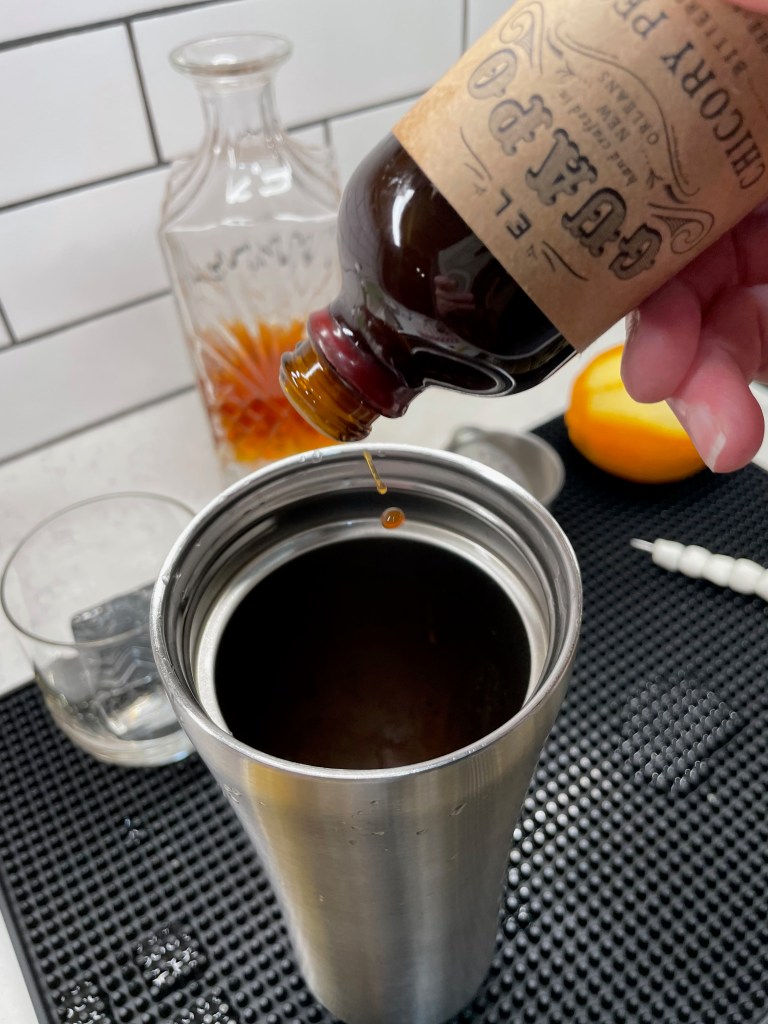
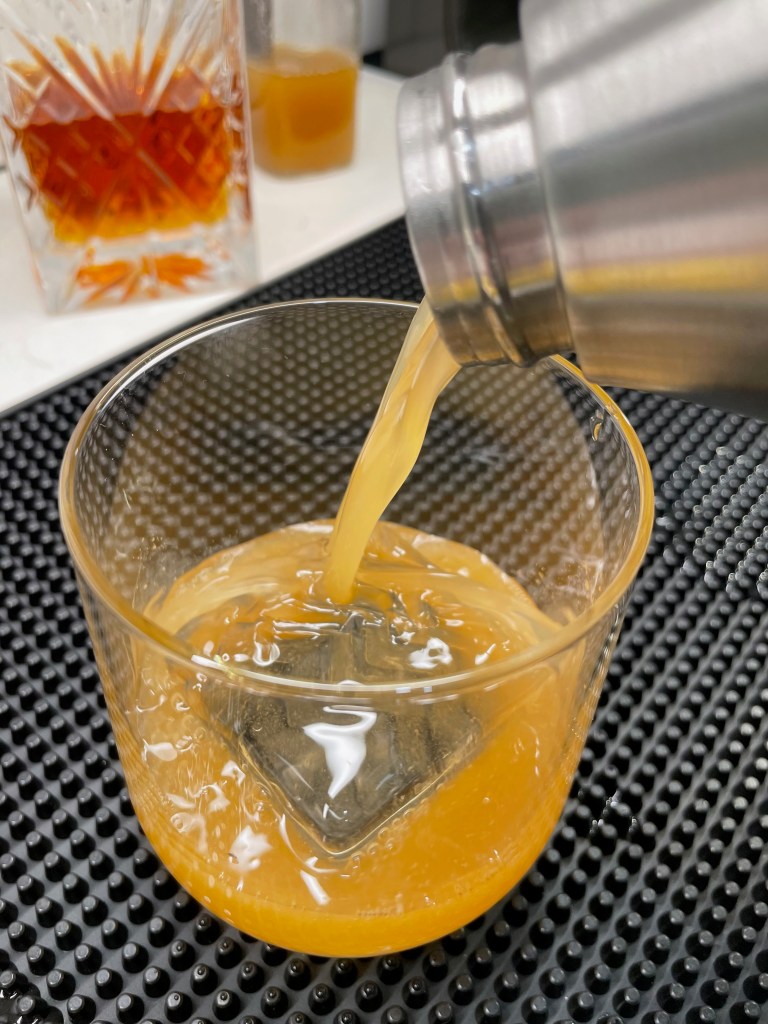
Here comes the mixing! Combine the bourbon, syrup and chicory pecan bitters in a shaker with about a cup of ice. Shake for 20 seconds, or until the outside of the shaker is cold and frosty. Strain over new ice. Express the orange peel (if using) over the drink and toast the marshmallows to garnish the glass.
Yes, this fun recipe is exactly what you imagine; the flavors of a classic Thanksgiving side, transformed into a delicious holiday cocktail.
Ingredients
1 1/2 ounces bourbon (a sweet one, such as Maker’s Mark or Elijah Craig)
3/4 ounce sweet potato syrup (recipe and directions below)
3 shakes El Guapo chicory pecan bitters
miniature marshmallows, threaded onto a heatproof cocktail pick
3-inch strip of orange peel, optional for expressing over cocktail
Directions
Combine bourbon, sweet potato syrup and chicory pecan bitters in a cocktail shaker with a cup of ice. Shake for 20 seconds, or until shaker is frosty.
Strain over a large ice cube in a double rocks glass. Espresso orange peel over drink, if desired. Toast marshmallows and garnish the cocktail.
Cheers!
The only fussy element of this drink is the sweet potato syrup. Plan to make this ahead, and keep it in the fridge for up to two weeks. The recipe below makes enough syrup for 8 cocktails.
Ingredients
1 large sweet potato, peeled and cut into chunks
1/3 cup turbinado or brown sugar
4-inch piece of cinnamon stick
Directions
Cover sweet potato chunks with cold water in a medium saucepan. Cook over medium heat until potatoes are fork-tender, about 35 minutes. Gently mash the potatoes, still in the water, with the back of the fork. Strain through a wire mesh strainer into a glass measuring cup. Add enough water if needed to total 1 1/4 cups. Rinse any solids out of the pan.
Pour sweet potato liquid back into the saucepan. Add sugar and cinnamon stick and simmer over medium-low heat for about 10 minutes until sugar is fully dissolved and mixture takes on a syrupy consistency. Remove from heat and cool to room temperature.
Strain again, this time through a fine mesh strainer or coffee filter. Finished syrup should measure approximately 3/4 cup. Transfer syrup to a jar or sealable bottle and refrigerate for up to two weeks.
Elevate it even further!
Want to take this drink a flavor step further in the direction of a sweet potato casserole? Try this trick of “fat-washing” your bourbon with browned, unsalted butter. It’s easy to do, and as a bonus, you’ll have a small bowlful of bourbon-infused butter left over to flavor something else on the table. The actual sweet potato casserole, perhaps? 😉
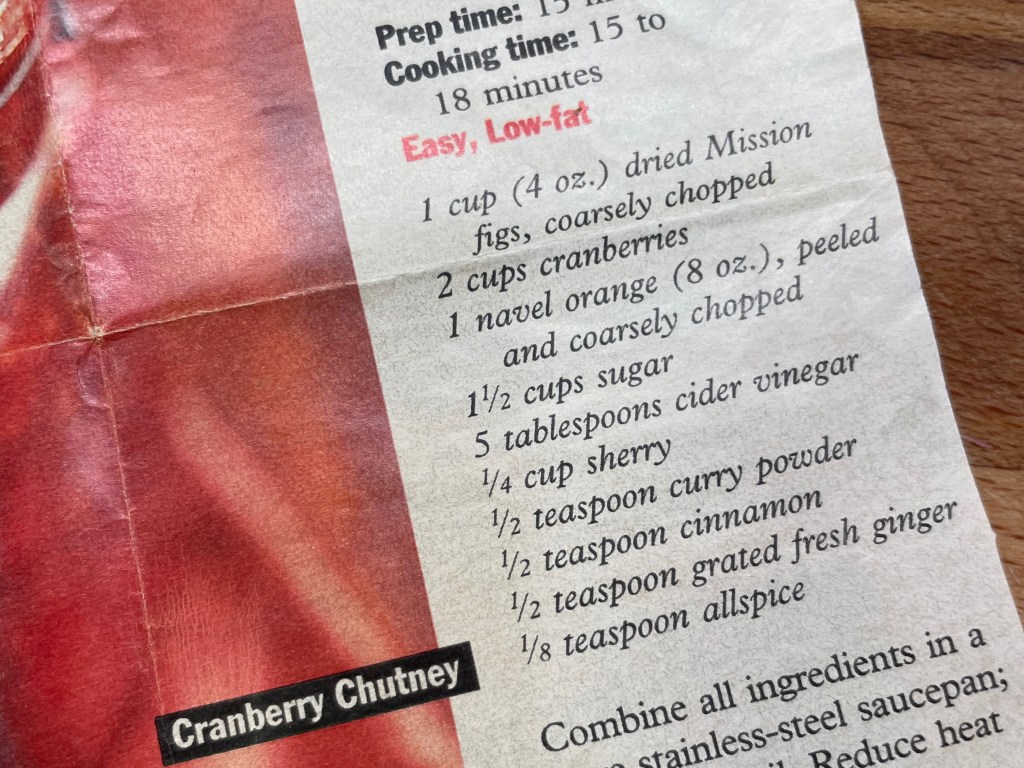
A few weeks ago, as I was rummaging through my little black recipe box, I ran across a yellowed snippet I cut out years ago from one of those old-school women’s magazines perched at the grocery store checkout. This is a long-time habit of mine— hoarding recipes— and I’m only slightly embarrassed to admit that I frequently don’t get around to making the things that intrigue me enough to impulse-buy a magazine or cookbook. Or if I do make one of these recipes, I change it up so much that it barely resembles the thing that caught my eye in the first place. Blogging has changed me for the better, though, and I’ve been revisiting my box full of clippings, even creating a culinary bucket list of things to try.
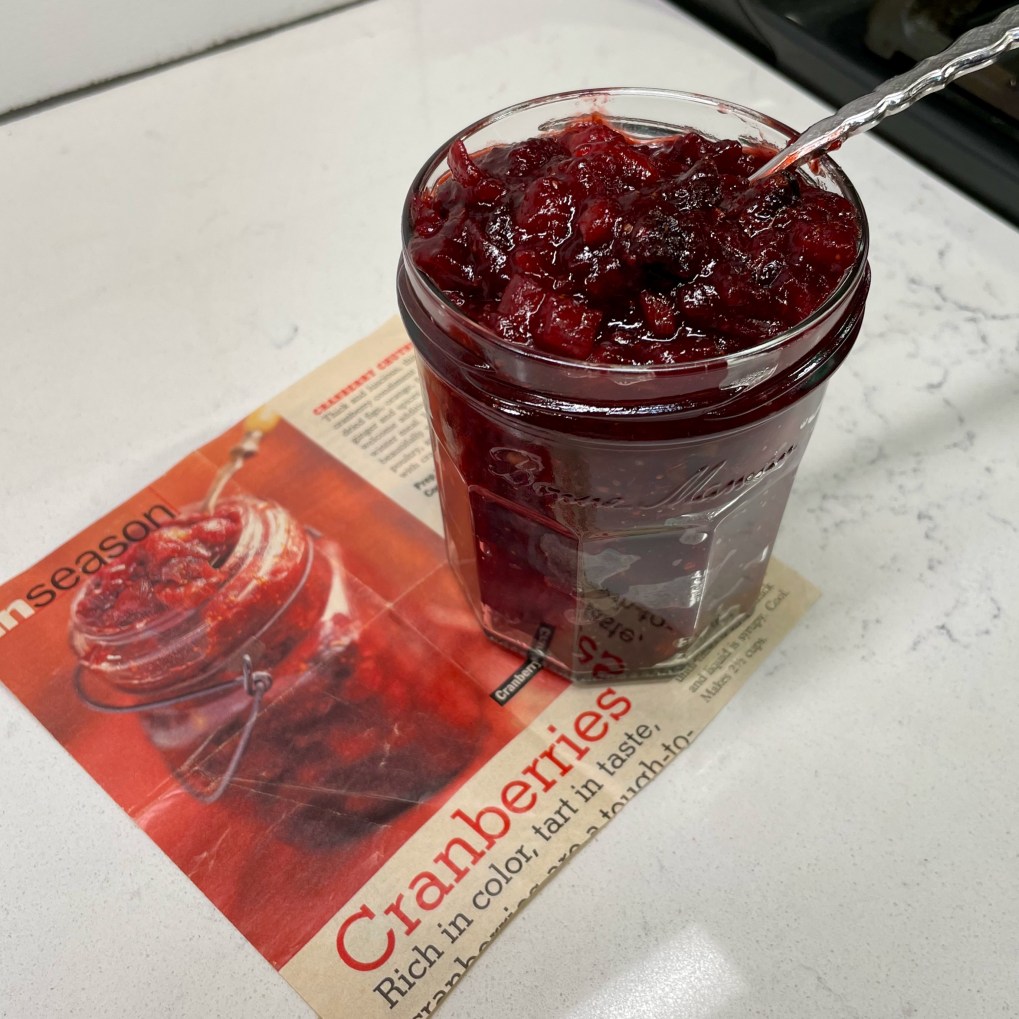
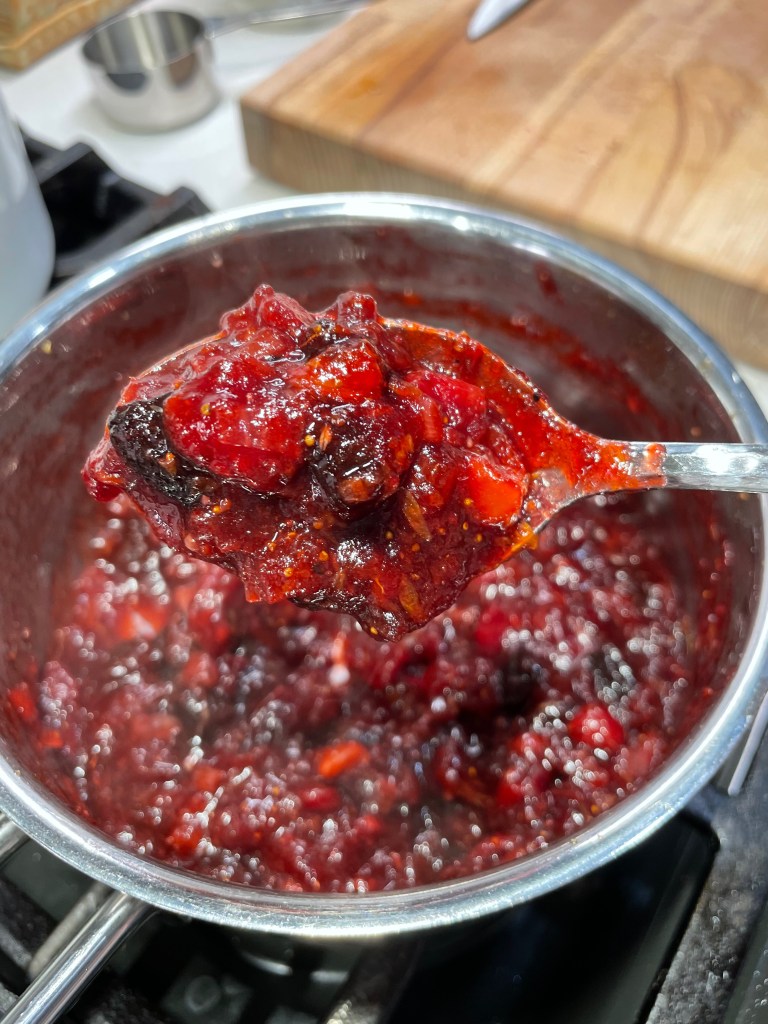
I have finally gotten around to this cranberry chutney, and for the life of me, I don’t know why I waited so long. It’s absolutely delicious! With a few adjustments (of course).
Chutney is a condiment that I only experienced in my adult years, and I appreciate it for many reasons. In addition to the warm spice flavors of India and competing notes of sweet and tart, there’s a texture element to chutney that I find most addictive. It certainly doesn’t hurt that chutney is a lovely complement to meat and vegetable dishes, and with cranberry in the spotlight, this one feels perfect for all the food holidays barreling down on us. I’m always on the lookout for an interesting twist on classic foods, and I can promise you this ruby-colored condiment will be on our Thanksgiving table, but it was also really dang good last week on my second go-round of Thanksgiving burgers.
Let’s go ahead and talk about the adjustments I made to the magazine recipe (I can’t help myself), and if you enjoy chutney as I do, I bet you’ll agree that these were necessary.
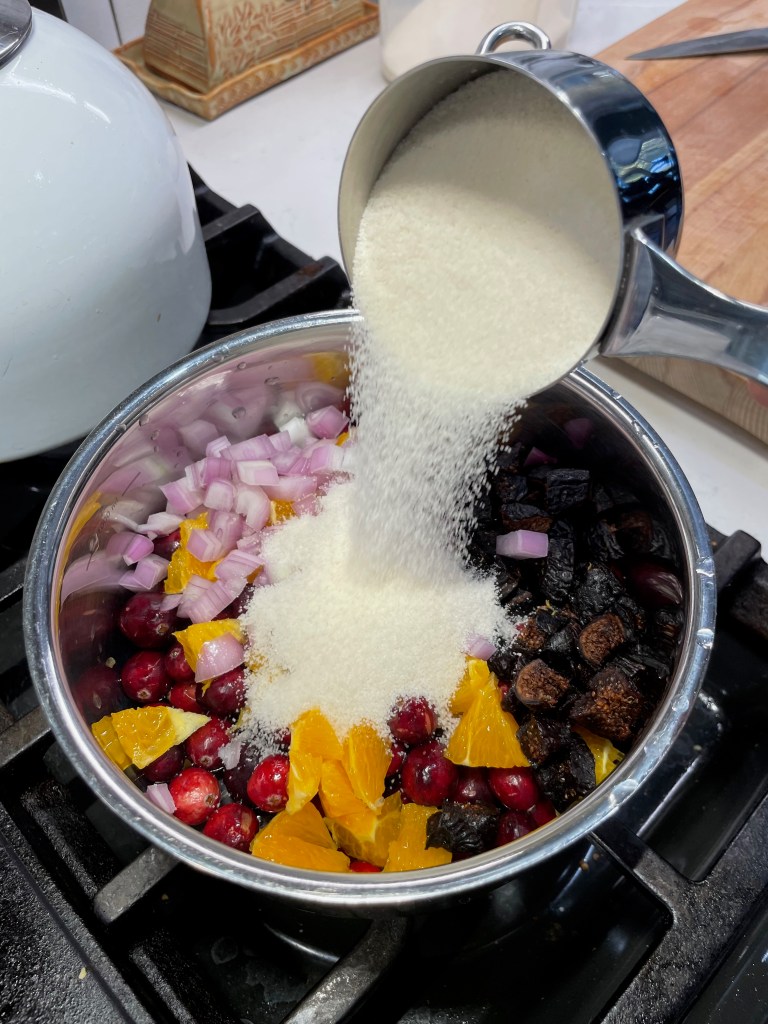
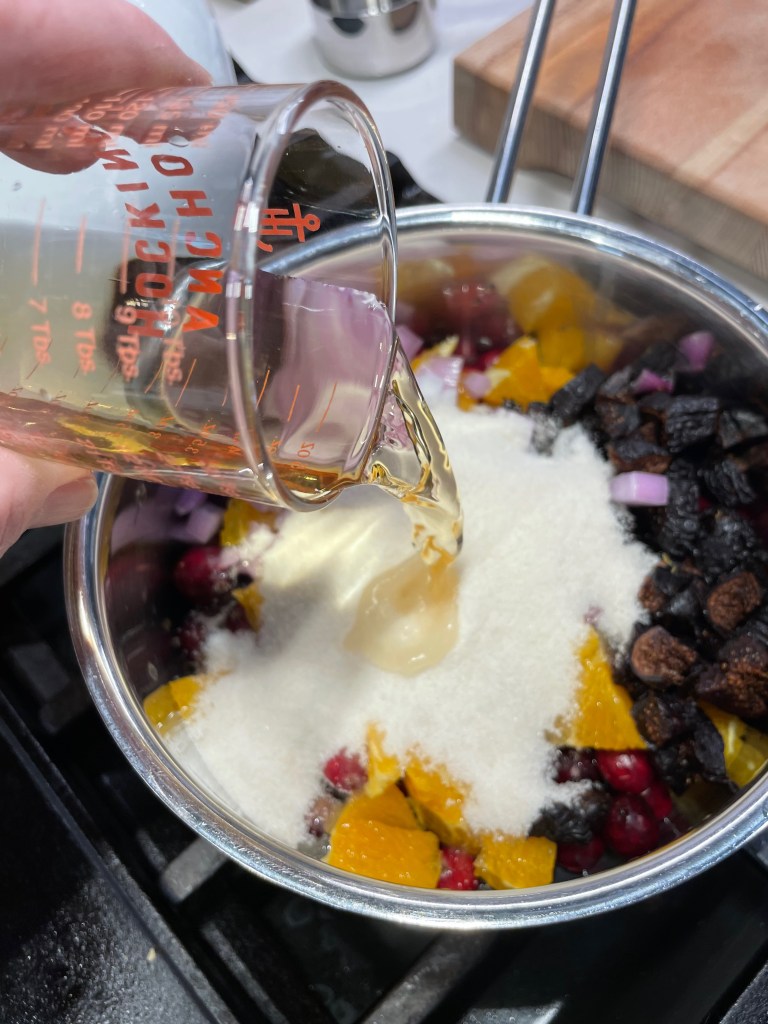
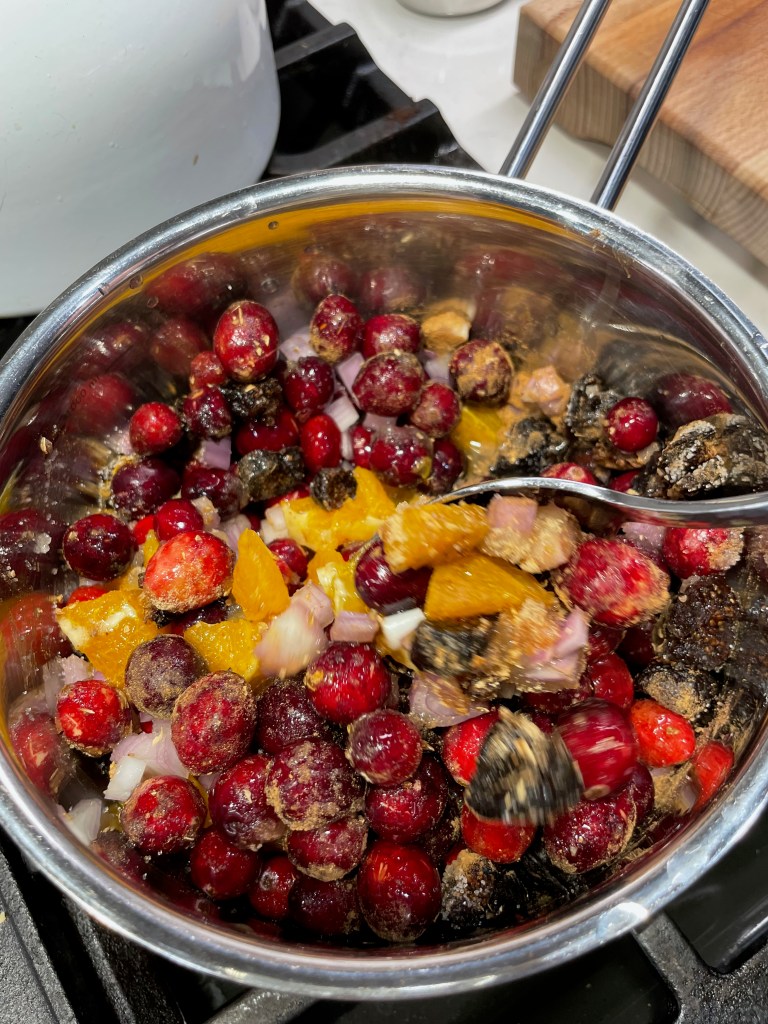
First, I knew straightaway that I would add onions to my version of this chutney, because I love the little crunch next to the tender cooked fruit and I wanted a gentle push-pull of sweet and savory in one bite. Every chutney I’ve ever loved had onions, and though sweet or even red onion would have worked fine, I chopped up a medium shallot for this. The magazine recipe had plenty of sweetness with dried figs and chopped oranges plus sugar. The fresh cranberries contributed a tart contrast, and cider vinegar gave it a slightly “pickled” flavor. The recipe called for sherry, and since I do not buy “cooking wines,” I used a generous splash of a high quality Spanish drinking sherry. It’s the holidays, why not?
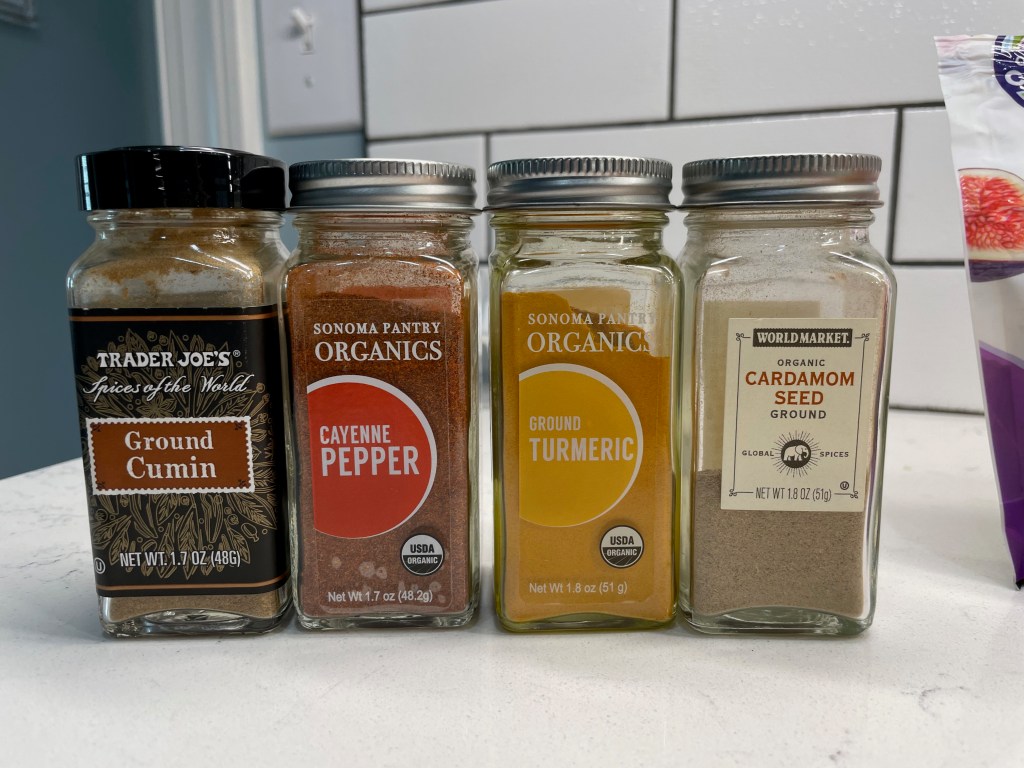
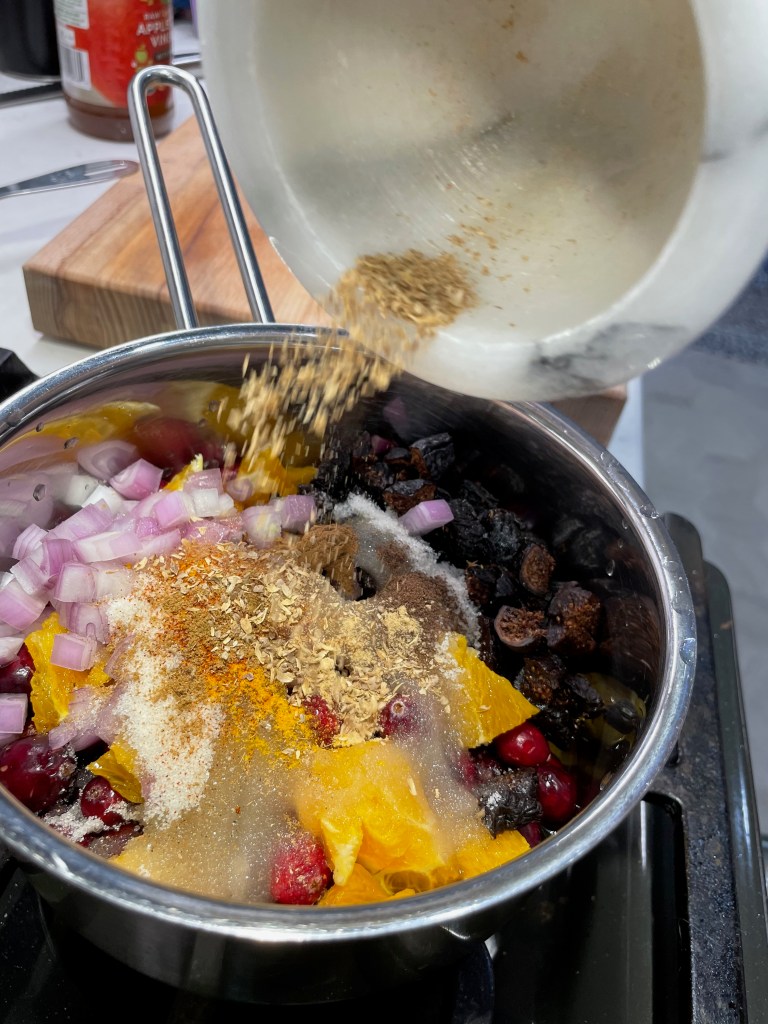
Then came the spices, and I had to improvise a bit here because I also don’t buy curry powder. It’s one of those blends that is different from one brand to the next, but I know enough about Indian flavors to estimate which ones belonged in this recipe. So I made up my own “curry” blend on the spot, with a few shakes each of cumin, turmeric, cardamom and cayenne, plus some freshly crushed coriander seed for a citrusy complexity. The recipe also suggested cinnamon and allspice, and those were easy. Ground ginger also stepped up in place of fresh, which I never seem to have when I need it.
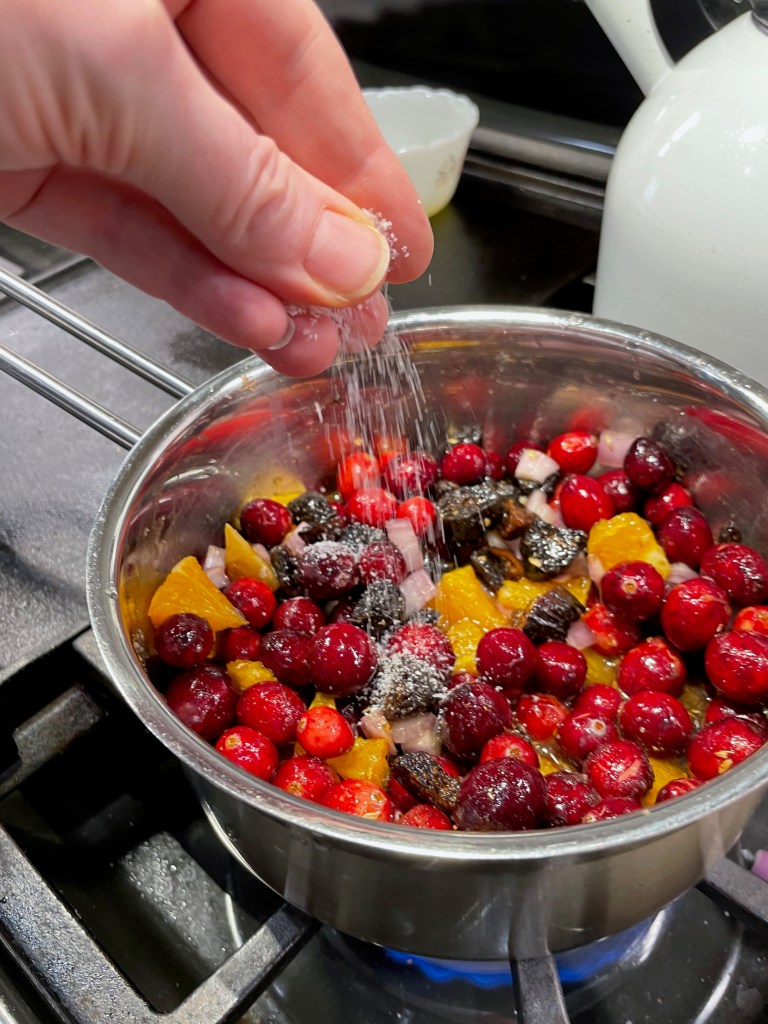
The aroma of this concoction was instantly intoxicating, and as I began to stir, it hit me that I didn’t notice on the magazine recipe one very important ingredient. I had to look again to be sure— do you see what’s missing?
Salt, of course! Now, this may have been an oversight, or perhaps the author assumed that the reader would know to include it. This is one of the things I griped about in my post about the problem with recipes, and why I insisted that one still must know how to cook even when following a recipe. Even if this was meant to be just a “sweet” chutney, it should still have at least a pinch of salt to highlight the amazing flavors of the other ingredients. So, salt it I did.
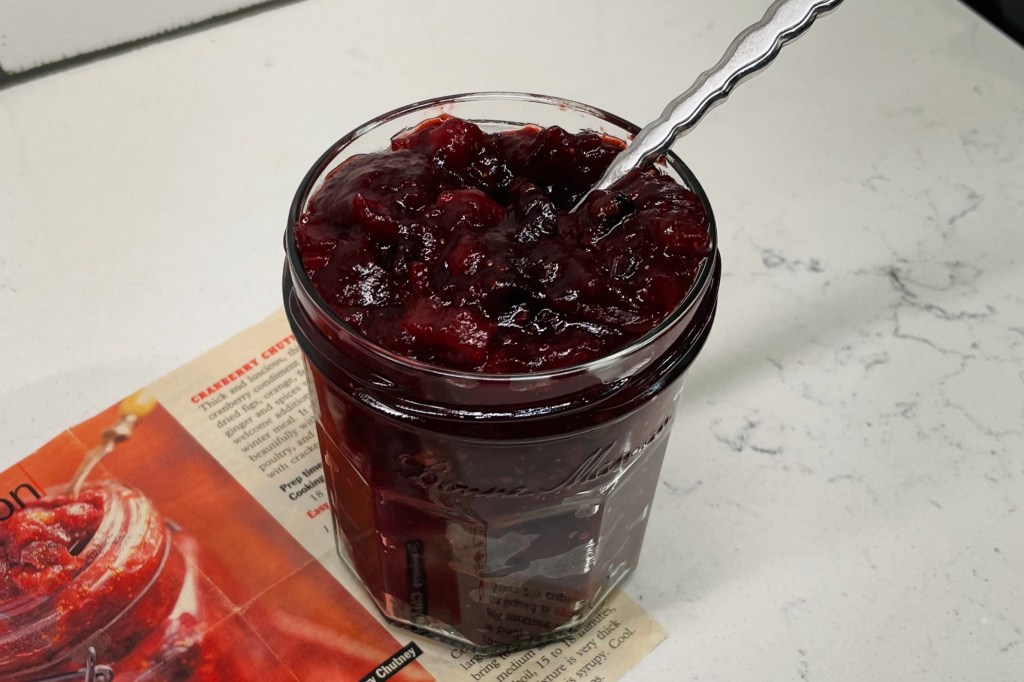
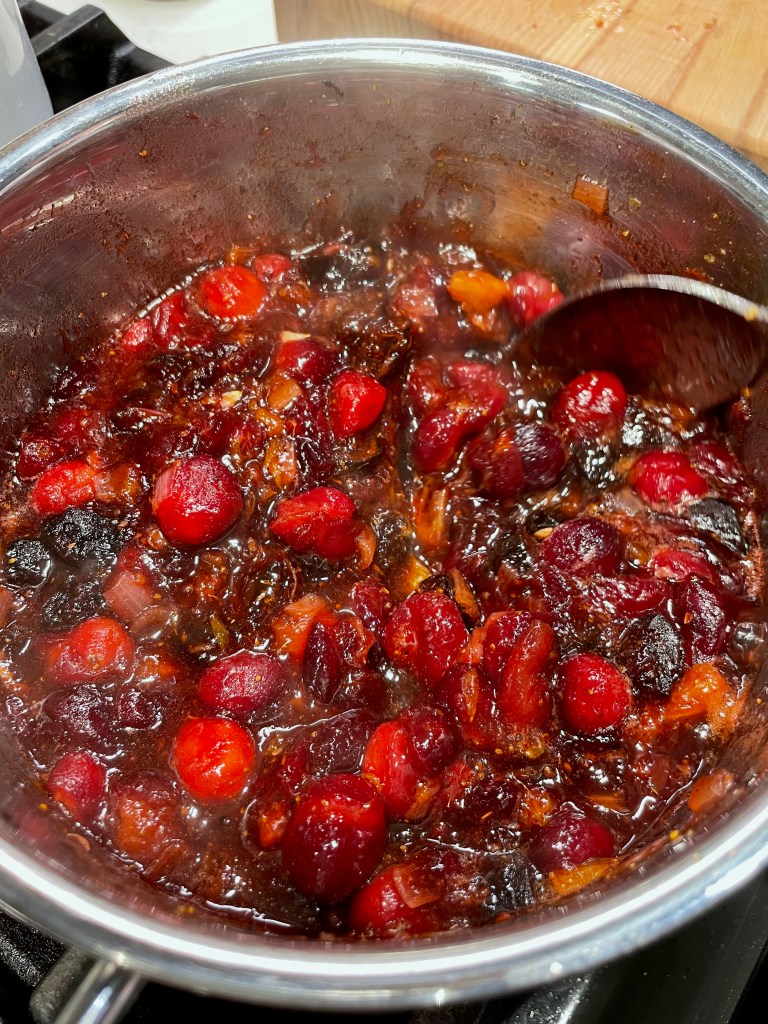
Twenty minutes later, I had this gorgeous, sweet and savory cranberry chutney. The oranges cooked down and took on the red color of the cranberries. The shallots were still a bit crunchy, the figs were delicate and chewy, and the spice aroma was just perfect.
I’m glad I didn’t put this one off another year. It’ll be great with my roast turkey, and my taste buds want it with pork chops, salmon and chicken, too. Will you be throwing a twist onto any Thanksgiving classics this year? Let’s hear about it in the comments, just below the click-to-print recipe card. As always, feel free to adjust to taste. 😉
This mouthwatering chutney brings a Thanksgiving classic together with warm Indian spices and crunchy bits of onion, making it a fantastic sidekick to pork, chicken, fish and (of course) roasted turkey!
Ingredients
1 cup fresh cranberries, rinsed and picked over for duds
1/2 cup dried mission figs, stems removed and coarsely chopped
1/2 fresh navel orange, peeled and chopped
1 medium shallot, minced
2/3 cup granulated sugar
2 1/2 Tablespoons cider vinegar
2 Tablespoons sherry (optional)
1/4 teaspoon ground cinnamon (mine was smoked)
1/4 teaspoon ground ginger
1/8 teaspoon ground coriander (a similar amount of crushed seeds)
two shakes each ground cumin, cardamom, turmeric and cayenne* (see recipe notes)
two or three shakes ground allspice
a generous pinch of kosher salt
Notes: If you have a curry powder blend, 1/4 teaspoon of it will suffice in place of the cumin, cardamom, turmeric and cayenne listed above.
This was my first time making this wonderful chutney, so my ingredients represent a half-batch, which was enough to fill a jelly jar. Next time, you can bet I’ll make a whole batch!
Directions
Combine cranberries, oranges, figs and shallots in a small saucepan.
Add sugar, vinegar, sherry and spices (plus salt) and toss to distribute the spices. Cook over medium heat until the mixture comes to a boil, then reduce heat and simmer for about 20 minutes. As the cranberries soften, use the back of your mixing spoon to gently smash them.
Allow chutney to cool to room temperature (it will thicken as it cools), and then transfer it to a clean jar to store in the refrigerator.
Now and then, my smartphone surprises me with an unsolicited trip down memory lane, in the form of a fully animated slide show recapping a theme, an occasion or a season from my past. The most recent of these was a reminder of “Thanksgiving through the years,” and the images from 2020 and 2021 struck me because those years were so different when we were all sidelined by the Covid-19 pandemic.
As the past-years’ photos scrolled to an indiscernible soundtrack, I noticed that in addition to the more adventurous dishes my husband and I created in 2020 (we figured a dinner without guests was a good time to experiment), I also created some meals that were scaled way back from the usual spread, in a way that might ease the expectation of a full-blown Thanksgiving but still satisfy the yearning for its traditional flavors. These two were delicious enough to make again one day.
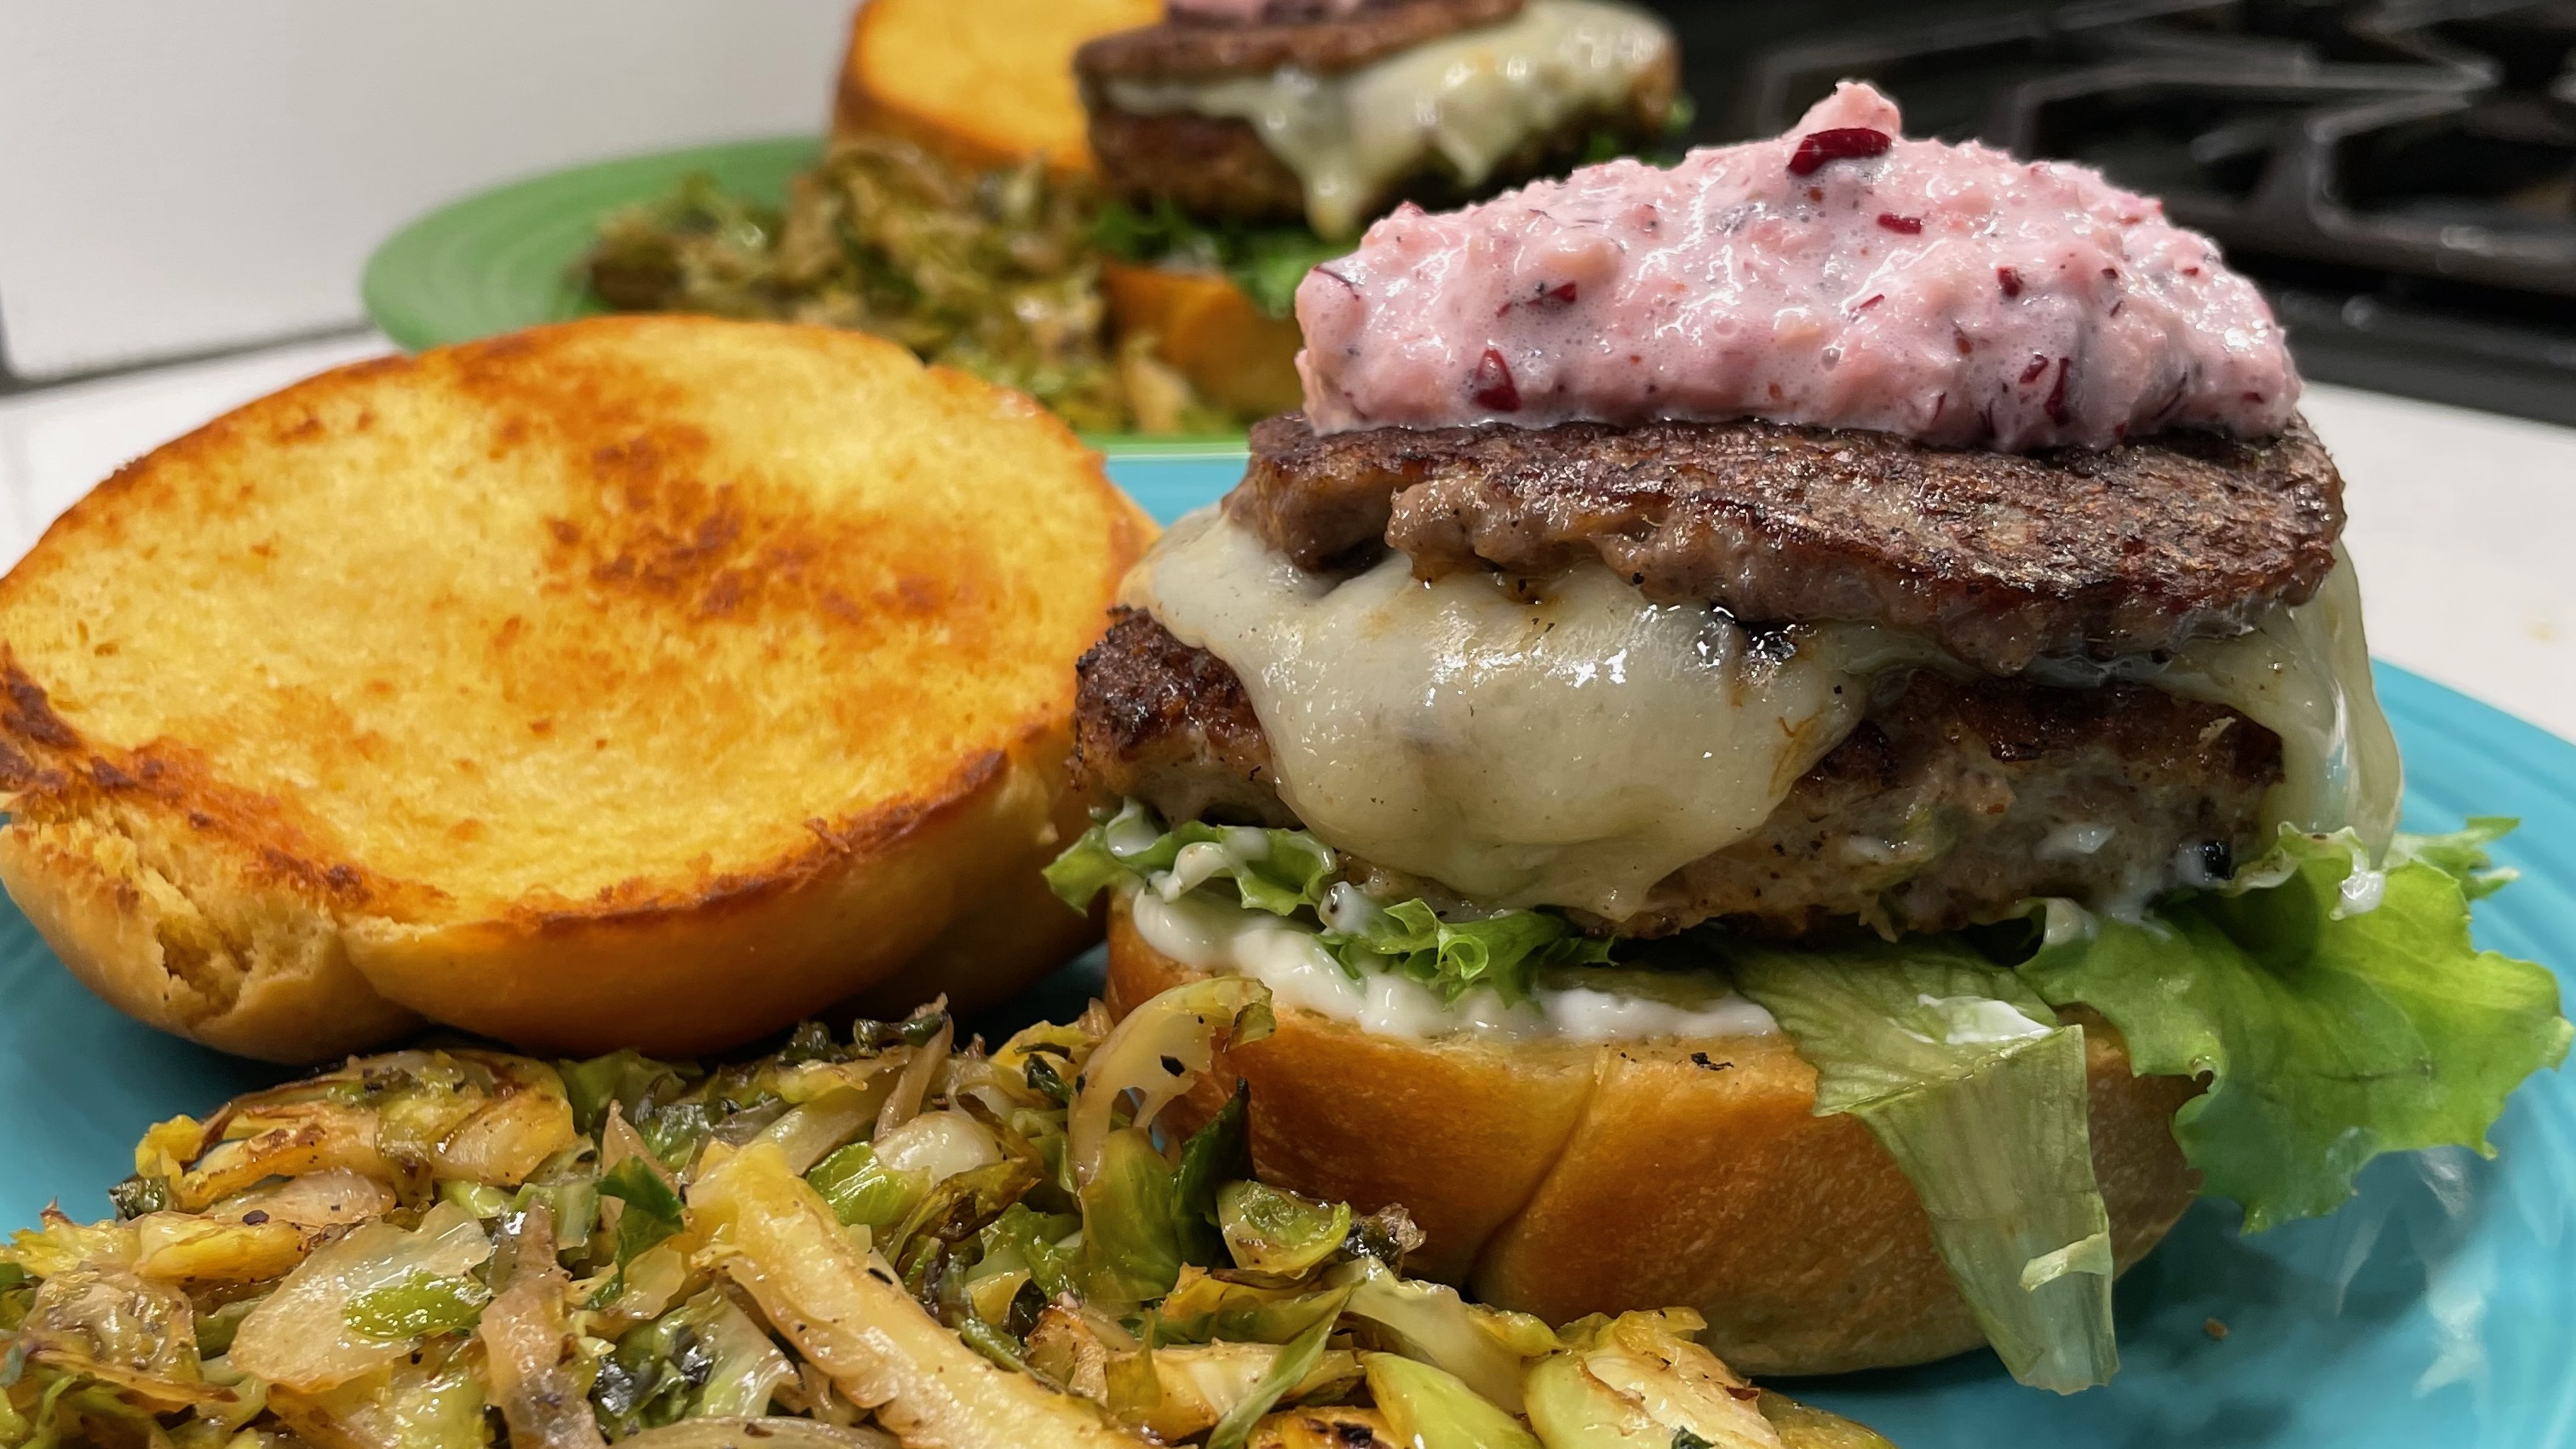
Thankfully, Covid has evolved to become more a nuisance than cause for panic (for most of us), and gathering with loved ones is fun again. At our house, we are counting the days until Thanksgiving (14 to go)! But some people still have neither the time nor inclination to produce an entire spread for Thanksgiving, and that has me thinking again about ways to capture the essence of the occasion in a single, simple bite. This is my first— but not last— attempt at making a Thanksgiving burger.
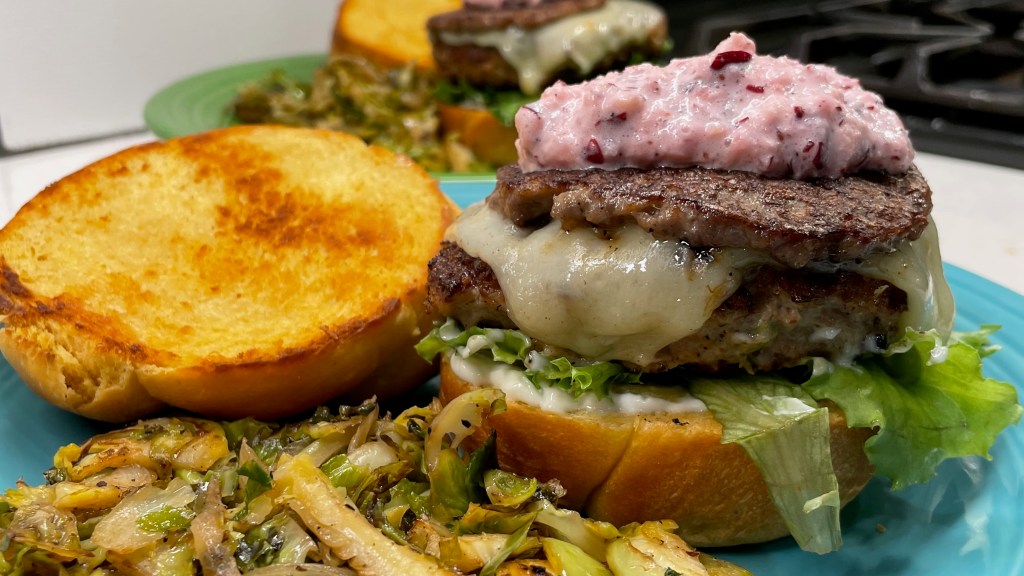
Pretty, isn’t it? 🙂
The Plan
I started this recipe with the bun, and though I considered a store-bought potato bun, I went instead with a recipe I found on King Arthur Baking website for sweet potato sandwich rolls They were very easy to make, and I followed the KA recipe to the letter. The recipe is linked, if you’d like to try them.
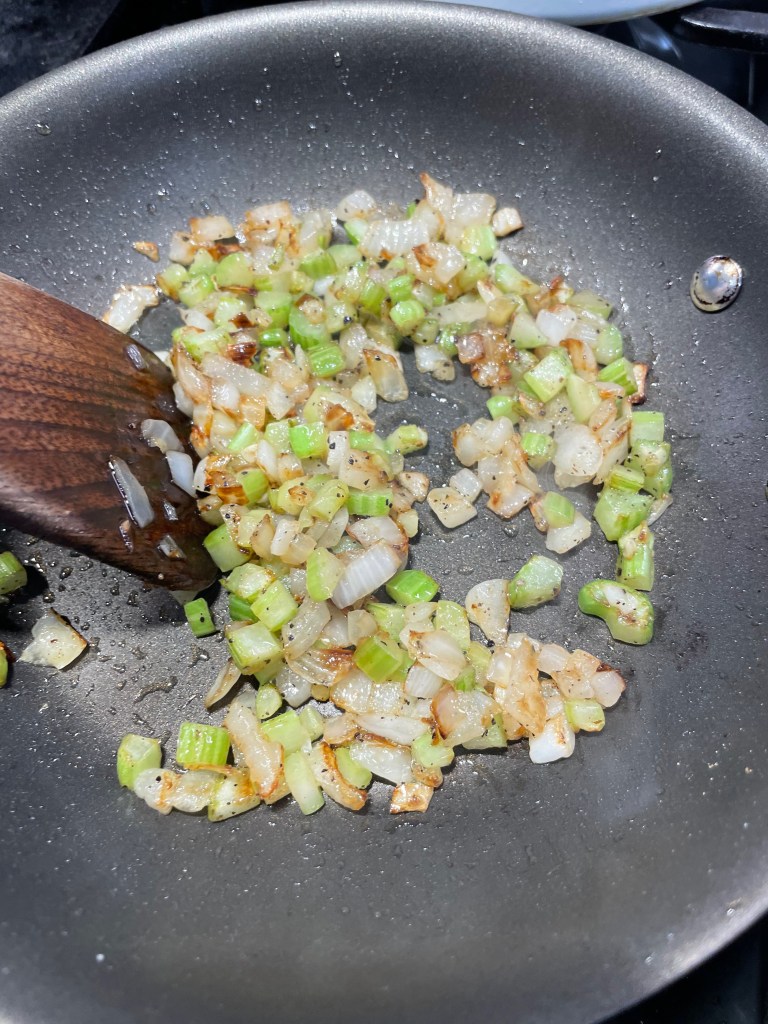
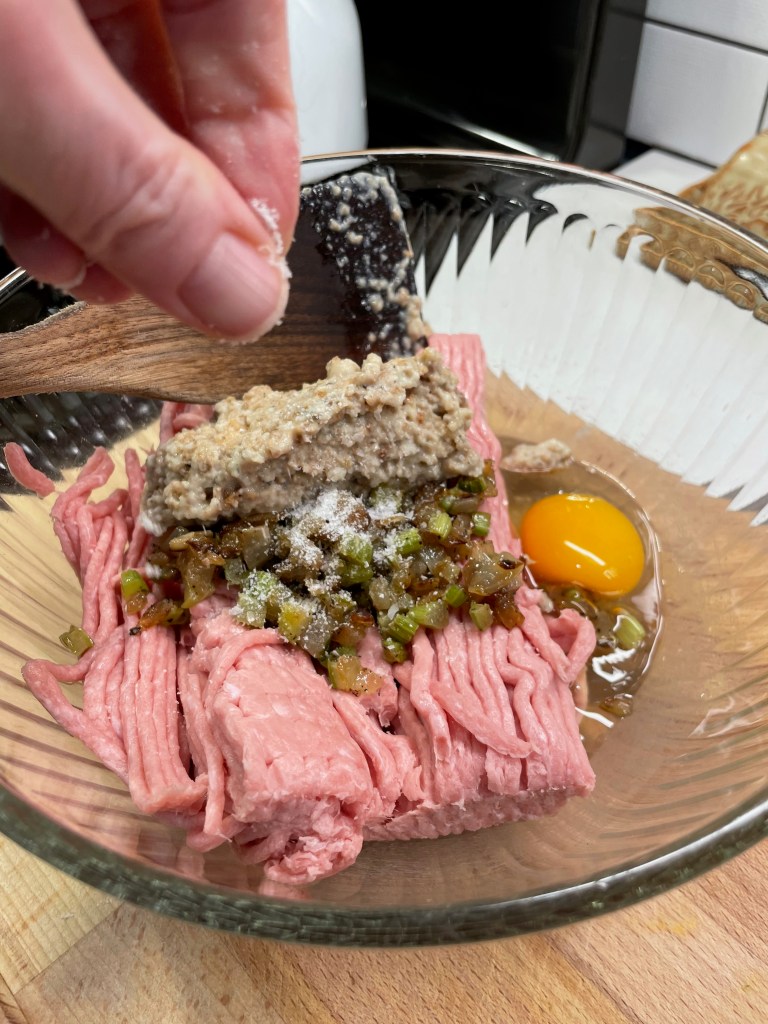
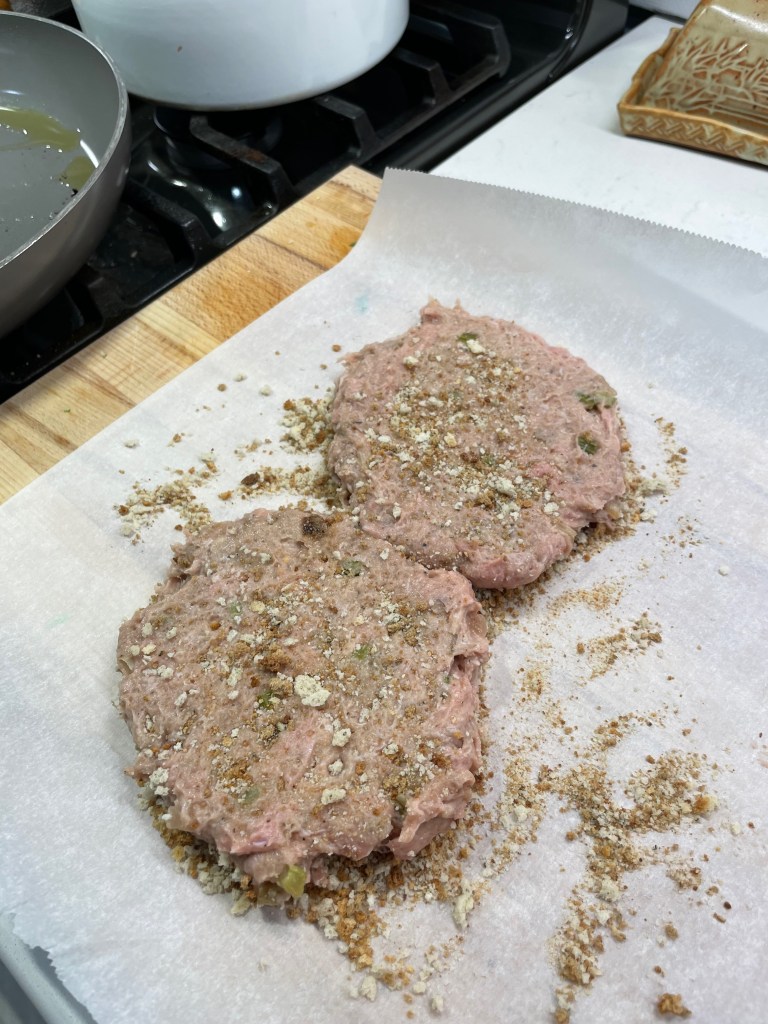
My burger is made from ground turkey, with sautéed celery and onions, plus an egg and a panade of herb stuffing mix blended in for structure and traditional flavor. The “burgers,” which were really more like meatloaf patties, were embellished with a spoonful of poultry seasoning to amplify the familiar Thanksgiving flavor.
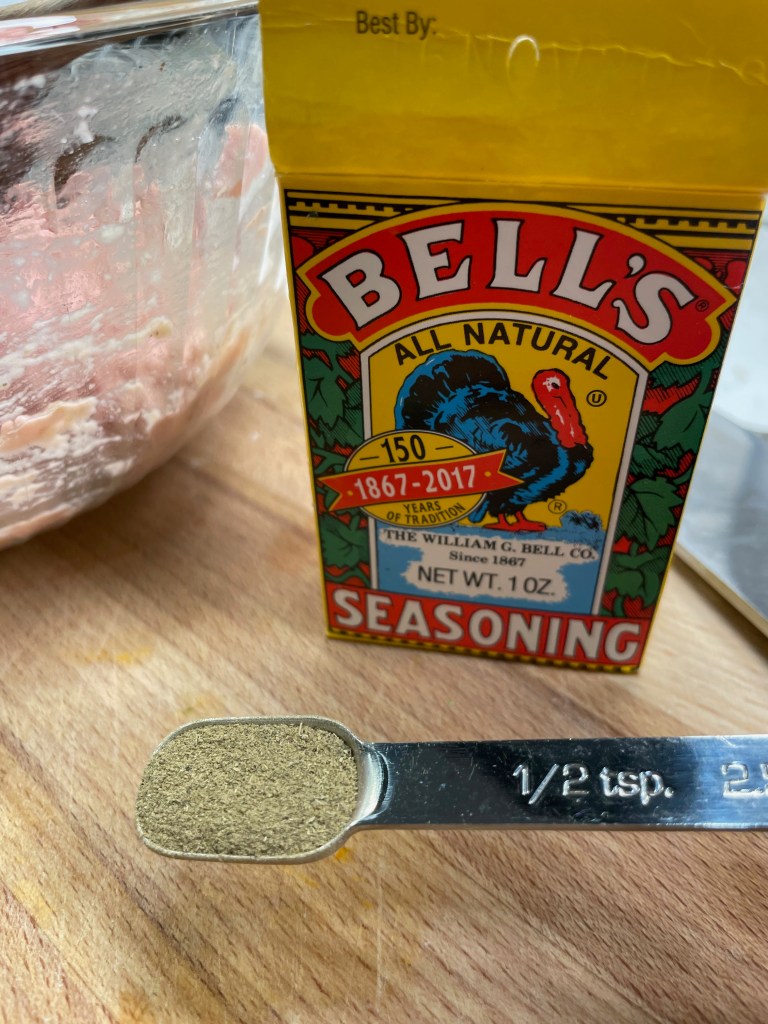
I made a basic turkey meatloaf recipe, with herb stuffing mix in the binder and Bell’s poultry seasoning for Thanksgiving flavor.
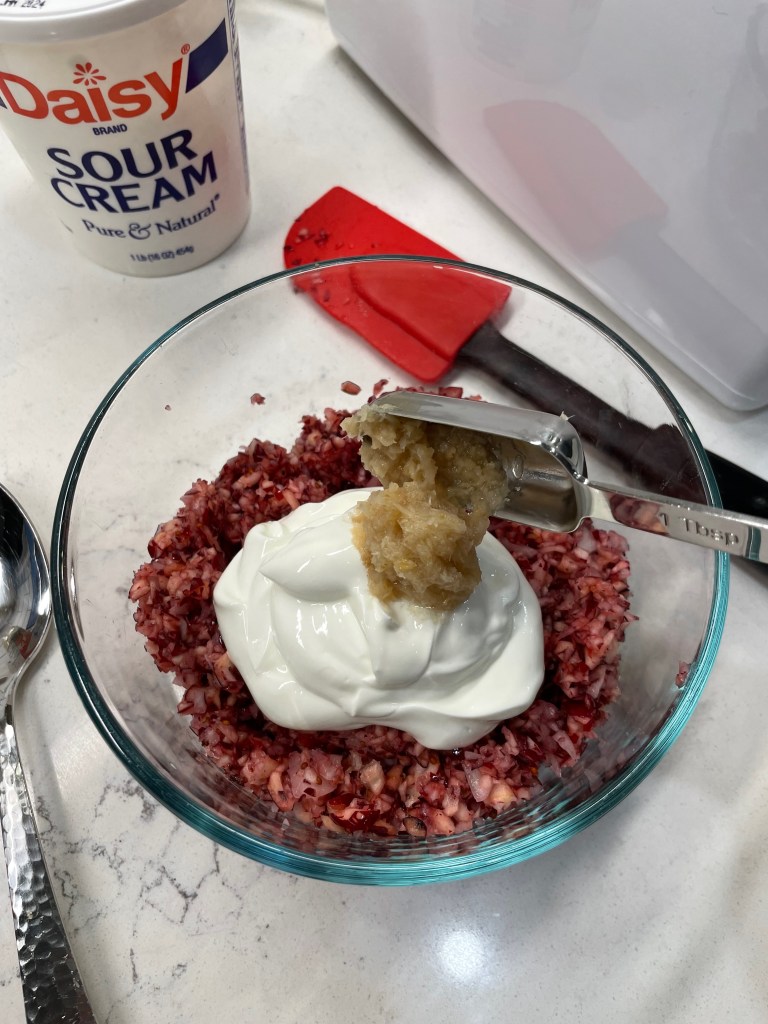
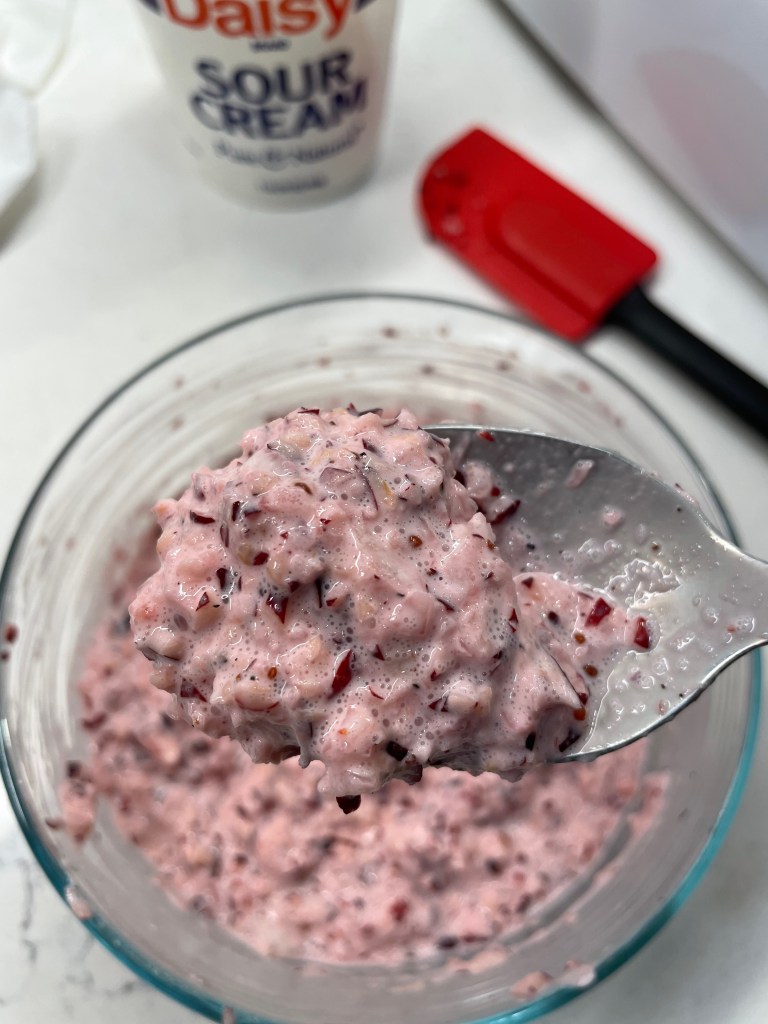
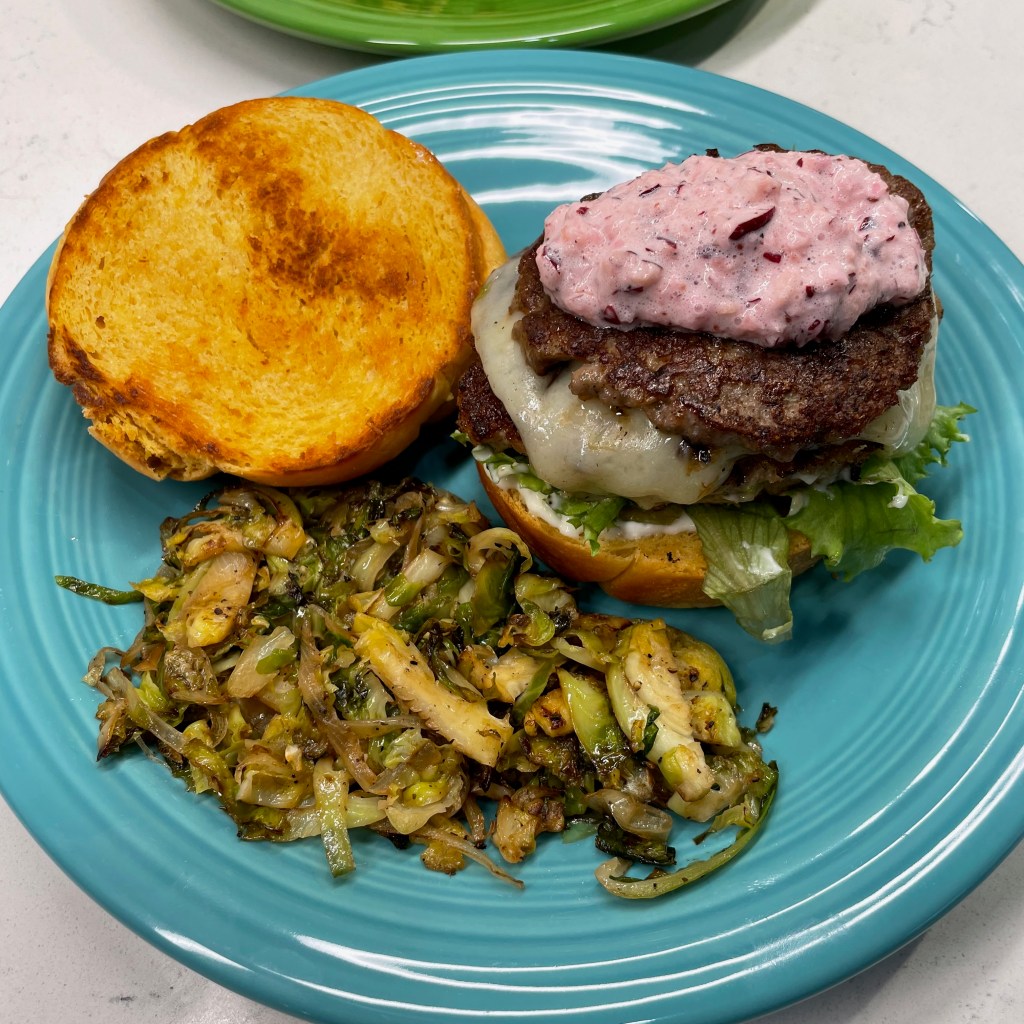
I thought, for a change of pace, this would be a good time to try the famous “NPR cranberry relish” that I’ve read about over the years. It uses fresh cranberries, sour cream and horseradish, if you can believe it. I made an only a half batch because Les tolerates horseradish but doesn’t love it as much as I do. More on this in a moment.
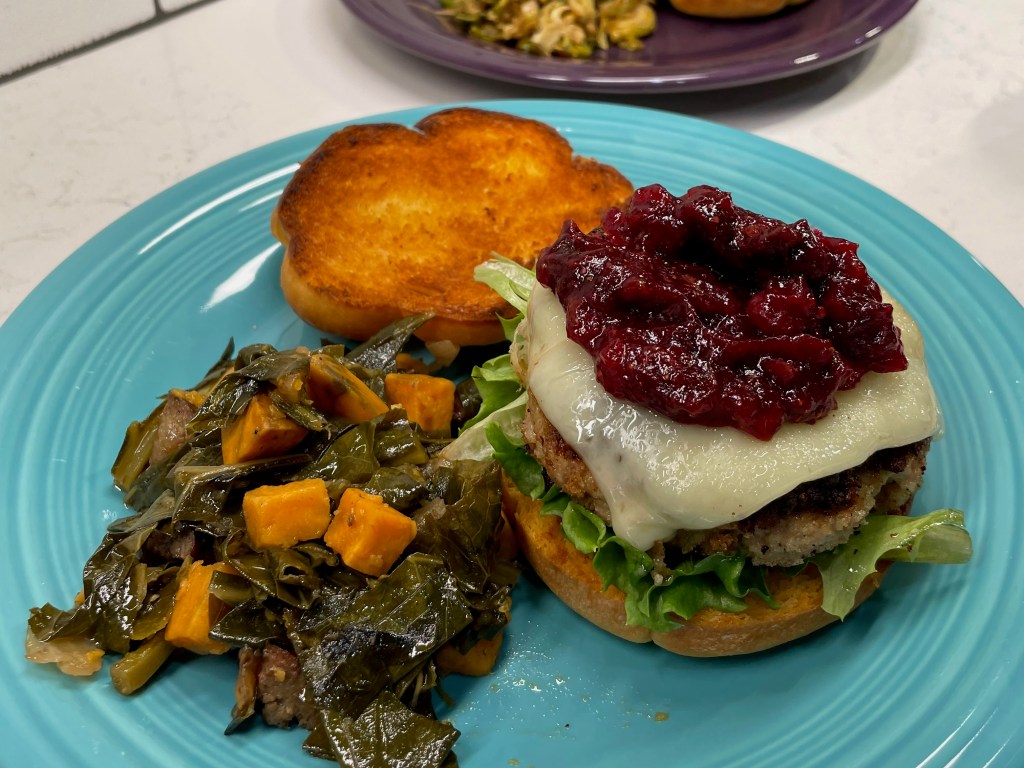
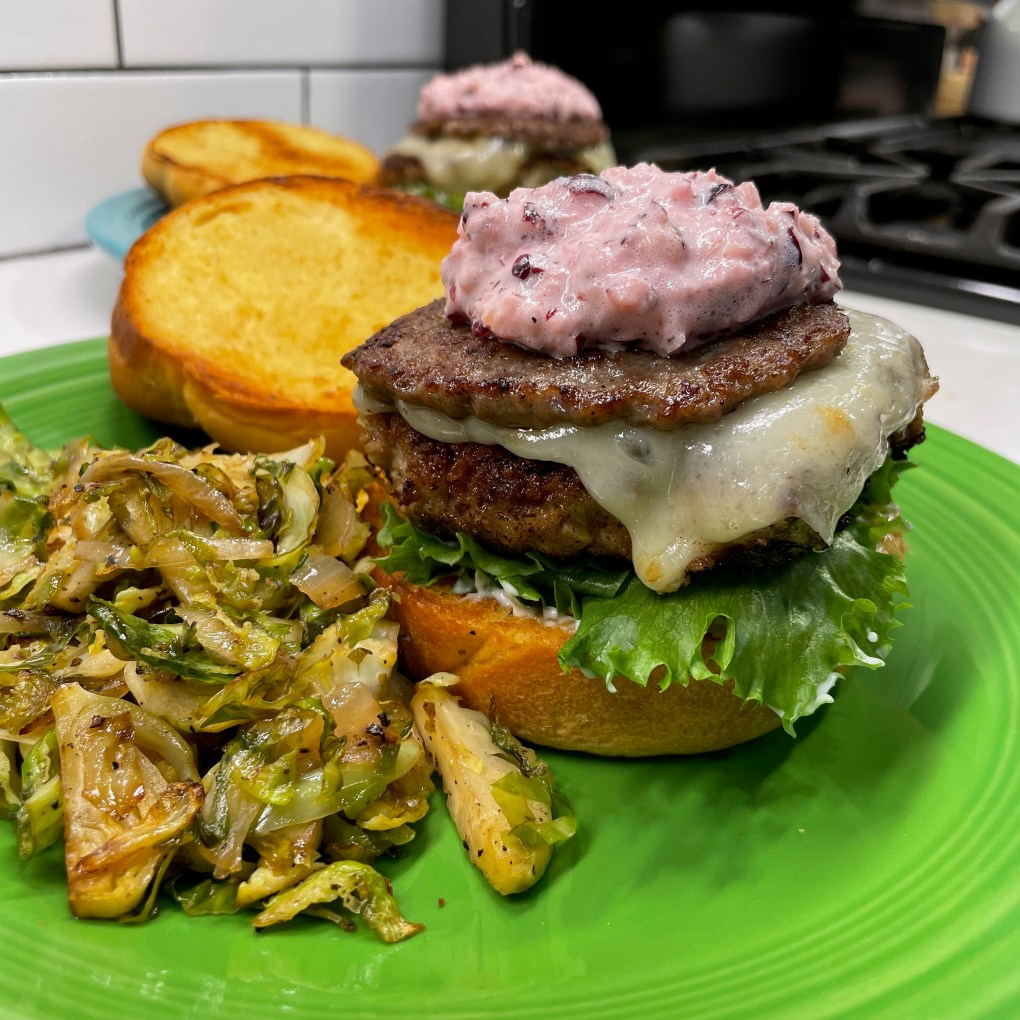
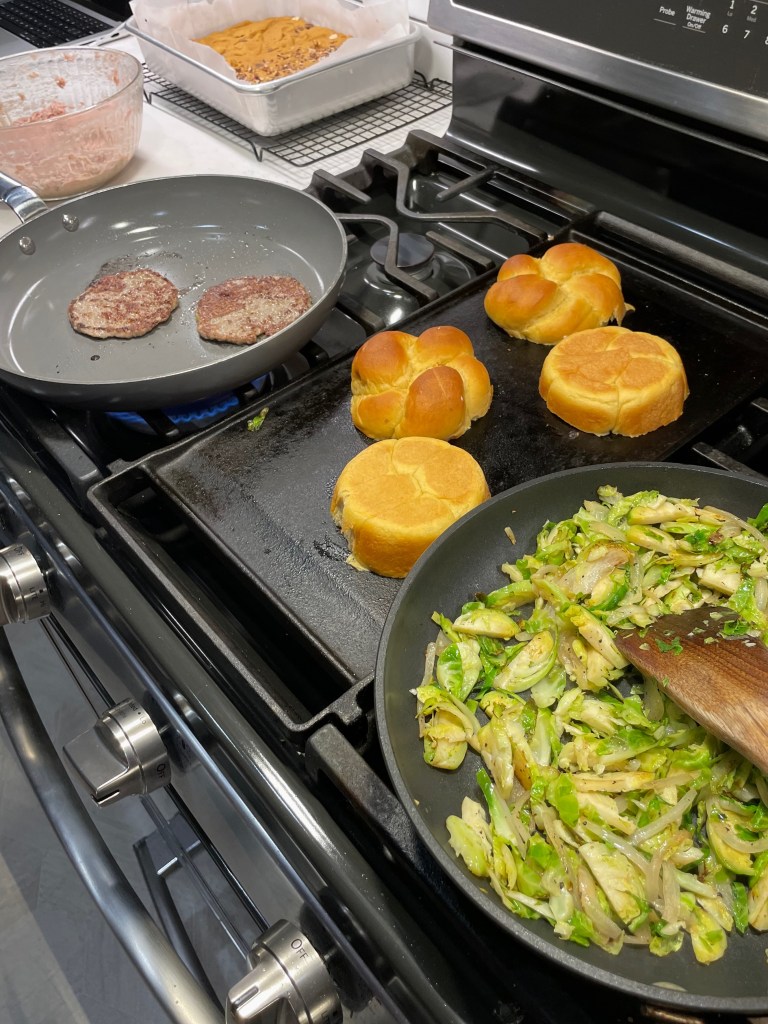
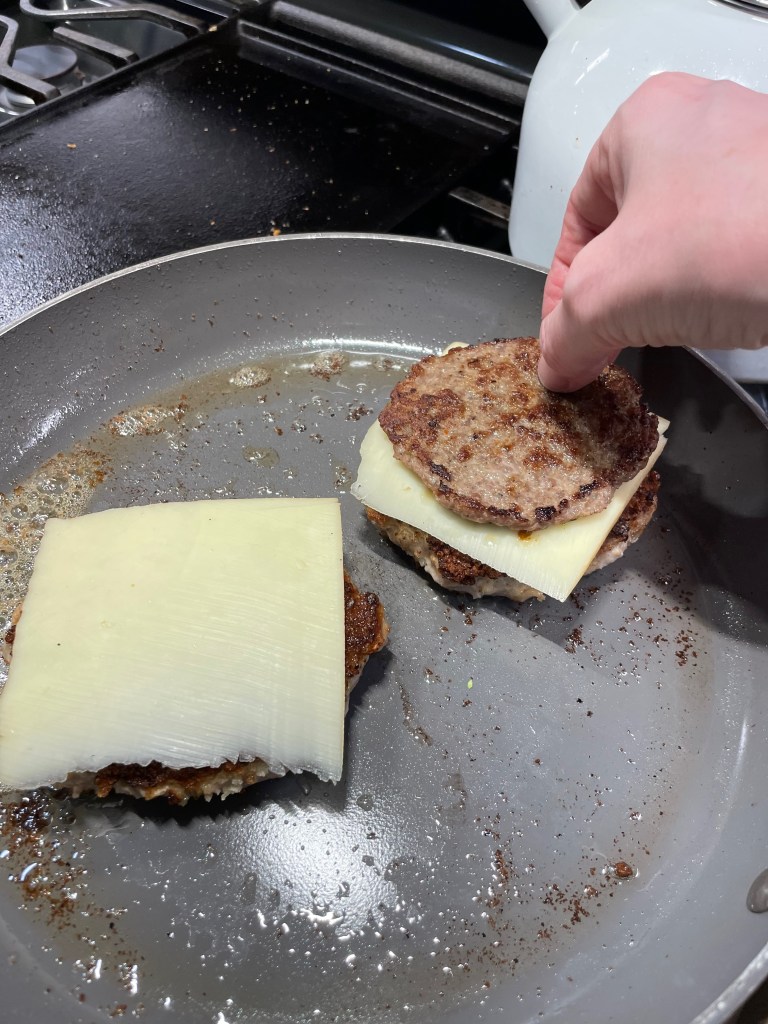
Sausage is a core ingredient of my usual holiday dressing, so I flattened some maple sausage patties and cooked them up to layer with my burgers. I buttered and griddled the sweet potato rolls, melted a slice of apple-smoked gruyère over the burgers, topped them with the thin sausage patties and loaded them onto the buns with some baby romaine for freshness.
The extra stuffing mix coating the patties was key to getting the crunchy surface I wanted on the burgers.
My first Thanksgiving burger, with a side of shaved Brussels sprouts, sautéed with onions, salt and pepper.
The Verdict
I had covered all the flavor bases with my plan— sweet potato, turkey, stuffing and cranberry— and overall it was a very tasty burger, but it didn’t exactly scream “Thanksgiving” to me and my husband, and so there will be other efforts. The sweet potato rolls (which I made exactly as written on the KA site) were wonderful, but very subtle in sweet potato flavor and too tall for this sandwich, and that made taking a bite a little tricky (and messy). The herb-seasoned turkey patties were moist and tasty and their crunchy exterior was spot-on. They could have carried a bit more of the savory herb flavor, but otherwise they were excellent and I’ll make them again, for sure.
What about that unusual cranberry relish? This “famous” recipe was the biggest surprise for me, and not in a good way. As someone who really loves the zing of horseradish, I found this stuff—which has oodles of rave reviews online, by the way— to be rather plain, runny and uninteresting, even with the extra hot horseradish. My husband thought the sandwich would be better with a more traditional cooked cranberry topping, and I agreed.
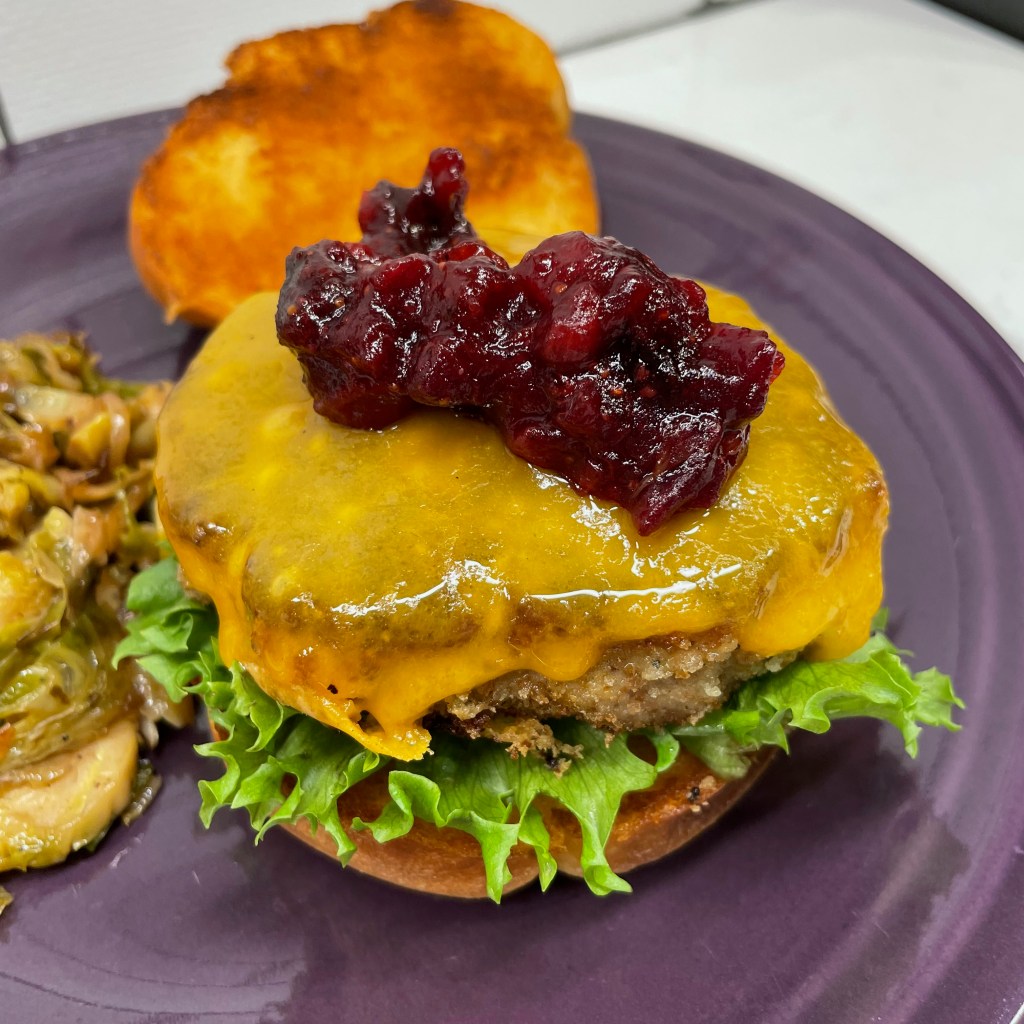
As luck and leftovers would have it, I did have a chance to try again with a few changes! On my second run, I skipped the sausage altogether, and I tried a different cranberry concoction that was so delicious, I will be super excited to share it with you in a post of its own later this week!
Les also requested cheddar rather than the fancy schmancy gruyère. 😉
What about next time?
There’s still room for improvement on this idea and I’m keeping it in the “in-progress” column of my bucket list until I get it right. I’ll share below the recipe I created for the turkey patties because that part of the recipe was great, Thanksgiving or not. But I’d really like to hear from you, too, so that I might incorporate your ideas into a future iteration of the burger. How would you bring your favorite traditional flavors into this “Thanksgiving-in-a-bite challenge?” Please share your ideas in the comments section, and let’s see what we can come up with together!
The rest of the burger is a work in progress, but this recipe for Thanksgiving-flavored turkey burger patties is a keeper!
Ingredients
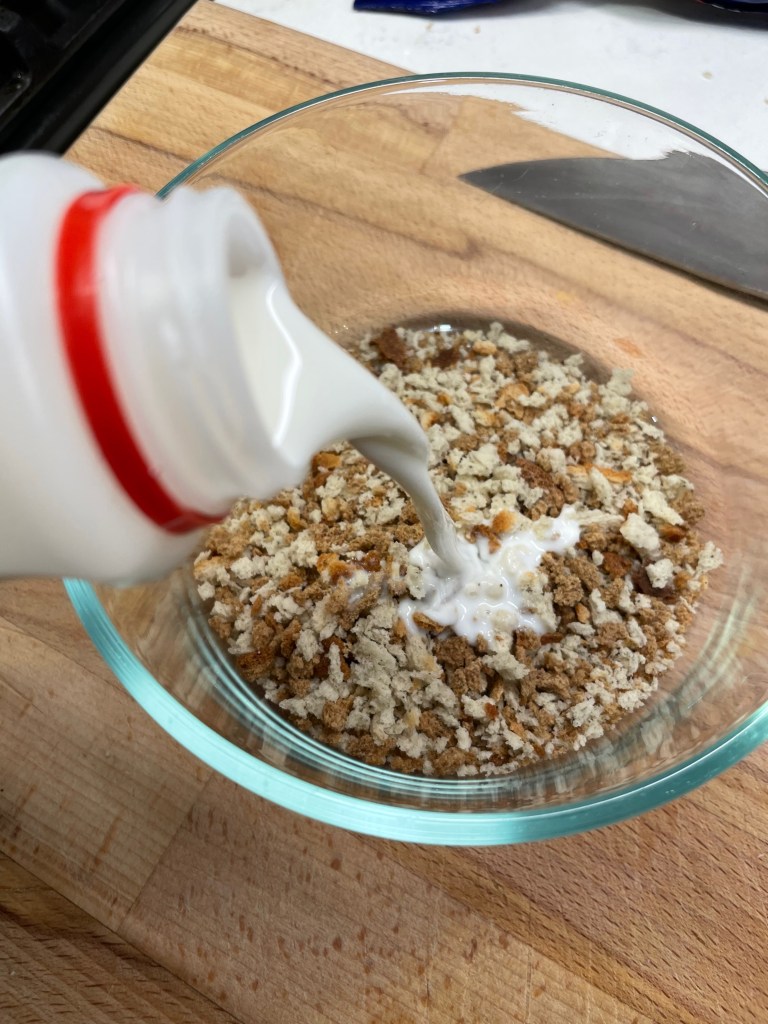
1/2 cup Pepperidge Farm herb seasoned stuffing mix, crushed
1/3 cup milk, to moisten the stuffing mix
1/2 sweet onion, minced
1 rib celery heart, strings removed and minced
1 Tbsp. extra virgin olive oil
Salt and pepper
1 pound ground turkey (I used 90% lean, but turkey breast would be great, too)
1 large egg
1 teaspoon ground poultry seasoning (I used Bell’s brand)
Additional 1/2 cup herb stuffing mix, crushed for coating the burgers before frying
Olive oil for frying
This ground turkey mixture is much leaner and softer than a typical burger mixture. For easy shaping of the patties, spoon dollops of the meat mixture onto a sheet of parchment paper that is sprinkled with the additional herb stuffing crumbs. Scatter more crumbs on top of the meat dollops and fold the parchment over them to flatten with your palm or a spatula. Be gentle with them, and keep them on the parchment until the skillet is ready.
Directions
Combine herb stuffing crumbs and milk in a small bowl and let rest for at least 15 minutes to soften into a panade. This mixture will help bind together the other ingredients into patties.
Heat a small skillet over medium heat. Add first measure of olive oil and sauté onions and celery until softened. Season with salt and pepper.
In a medium mixing bowl, combine ground turkey, panade, sautéed vegetables, egg and poultry seasoning. Season with salt and pepper. Use a heavy wooden spoon or your hands to fully blend the burger ingredients. Cover bowl and refrigerate a few hours so that the mixture will firm up.
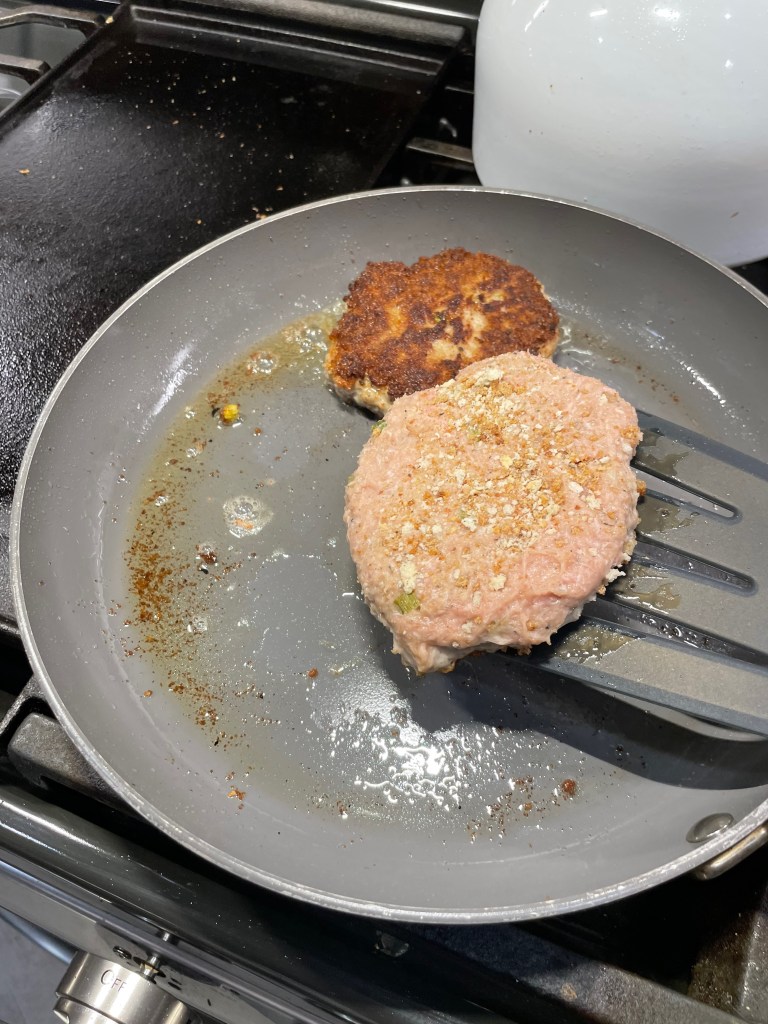
When ready to cook, heat a large, non-stick skillet over medium heat with 2 tablespoons of olive oil. Shape the meat mixture into patties and coat them on both sides with the second measure of crushed stuffing mix.
Carefully arrange burger patties into the skillet, keeping enough room between them for easy turning. Leave them undisturbed for 5 minutes, or until the first side is nicely crusted. Turn the patties to cook the other side. If using cheese on your Thanksgiving burgers, lay the slices over the burgers immediately after turning so that it will melt.