
I went through some crazy mental calisthenics to perfect our pizza at home. Over a period of two years, I pored over countless books and online articles, viewed more YouTube videos than I care to remember (one of them was narrated entirely in Italian and I could only learn by watching his hands move), and swung back and forth like a pendulum, enjoying small successes, a few near misses and more than enough total disasters that left me cursing like a sailor.
Luckily, you don’t have to go through all that because I’ve done the heavy lifting for you, and I’m happy to share what I’ve learned. This pizza dough, says my dear husband, is as close as he’s ever had (at home) to a real New York pie. And he should know.
If you’ll be using dry yeast, please check to see if it’s “instant.” There are differences between instant dry yeast and active dry yeast, and you might need to adjust the process to be successful. I’ll explain more in the “Getting Technical” section, where I’ll also demonstrate the most accurate way to measure your flour.
If you’re a sourdough nerd like me, follow the sourdough instructions, beginning with a “fed” 100% hydration starter. Otherwise, use a small portion of an envelope of instant dry yeast, and the flour and water measurements that accompany it.
Here we go!
Standard Yeast Version
2 1/2 cups bread flour or all-purpose flour (see slides for measuring tips)
3/4 cup white whole wheat flour (look for King Arthur brand orange bag)
1 cup + 2 Tbsp. cold filtered water
1/2 tsp. instant dry yeast (or yeast marketed for pizza dough)
1 tsp. sugar
1 1/4 tsp. fine sea salt
1 1/2 tsp. extra virgin olive oil
Combine all dry ingredients in a mixing bowl. Add cold water all at once and blend until all flour is incorporated and mixture becomes a cohesive mass. Drizzle the oil on top but do not mix yet. Cover and rest for about 20 minutes,* then proceed to “next steps.”
Sourdough Version
280g (approx. 2 1/4 cups) bread or all-purpose flour
70g (approx. 2/3 cup) white whole wheat flour (King Arthur brand in orange bag)
200g (just shy of 1 cup) cold filtered water
100g (almost 1/2 cup) ripe sourdough starter (mine is 100% hydration)
1 tsp. sugar
1 1/4 tsp. fine sea salt
1 1/2 tsp. extra virgin olive oil
Combine ripe starter and cold water in your mixing bowl until fully blended. Stir together dry ingredients in a separate bowl, and add them all at once to the mixing bowl. Mix on low until all flour is incorporated and mixture becomes a cohesive mass. Drizzle the oil on top but do not mix yet. Cover and rest for about 20 minutes,* then proceed to “next steps.”
Next Steps
After the 20-minute rest, switch to a dough hook (if using a stand mixer) or turn dough out onto a clean, lightly floured countertop (if you’re kneading by hand) and work that dough. This step is crucial, because it is here that the gluten will begin to develop. Gluten is the web-like structure that allows bread dough to rise when the yeast does its job. If you haven’t already drizzled in the olive oil, do it now. Your recipe won’t be ruined without it, but the oil helps to condition the dough, which makes it a bit easier to manage for shaping later.
After 6 minutes of kneading by mixer or 8 minutes by hand, you should have a smooth, supple dough that is soft and slightly tacky, but not sticky. If you pinch a small piece from the ball and stretch it between your fingers, you should be able to see the light through it. If it tears easily, knead a few more minutes until it reaches this point. If it feels dry and tight, wet your hands and knead another minute. If it is very sticky, try to knead another tablespoon or two of flour into it.
Lightly flour your countertop and use a bench scraper or sharp serrated knife to divide the dough into two equal pieces. Shape each into a ball by repeatedly tucking the edges under and turning the dough in quarter circles. When it’s smooth and round, slip the dough ball into an oiled quart-size zip top bag. Use a spray oil to mist the inside of the bag first. Repeat with the other dough ball. Seal the bags, keeping a small amount of extra air inside.

If you’re using starter, it should float on top of the cold water. Looks like it’s active, so we’re good to go! 
I’ve used Himalayan pink salt for extra mineral content, and added a few shakes of onion powder for additional flavor. 
Mix to combine the dry ingredients and add them all at once to the liquid. 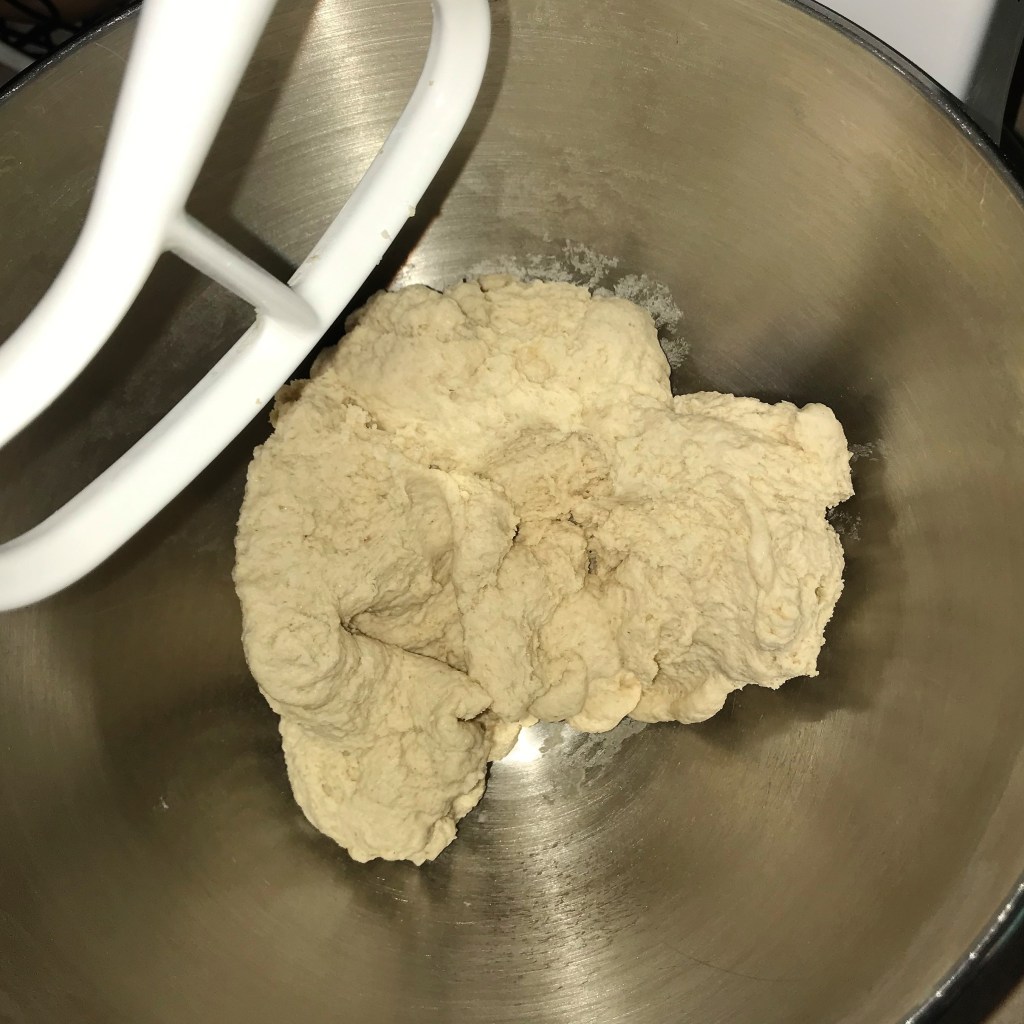
The dough should come together in kind of a shaggy mess, but should be dry enough to pull away from the beater blade cleanly. 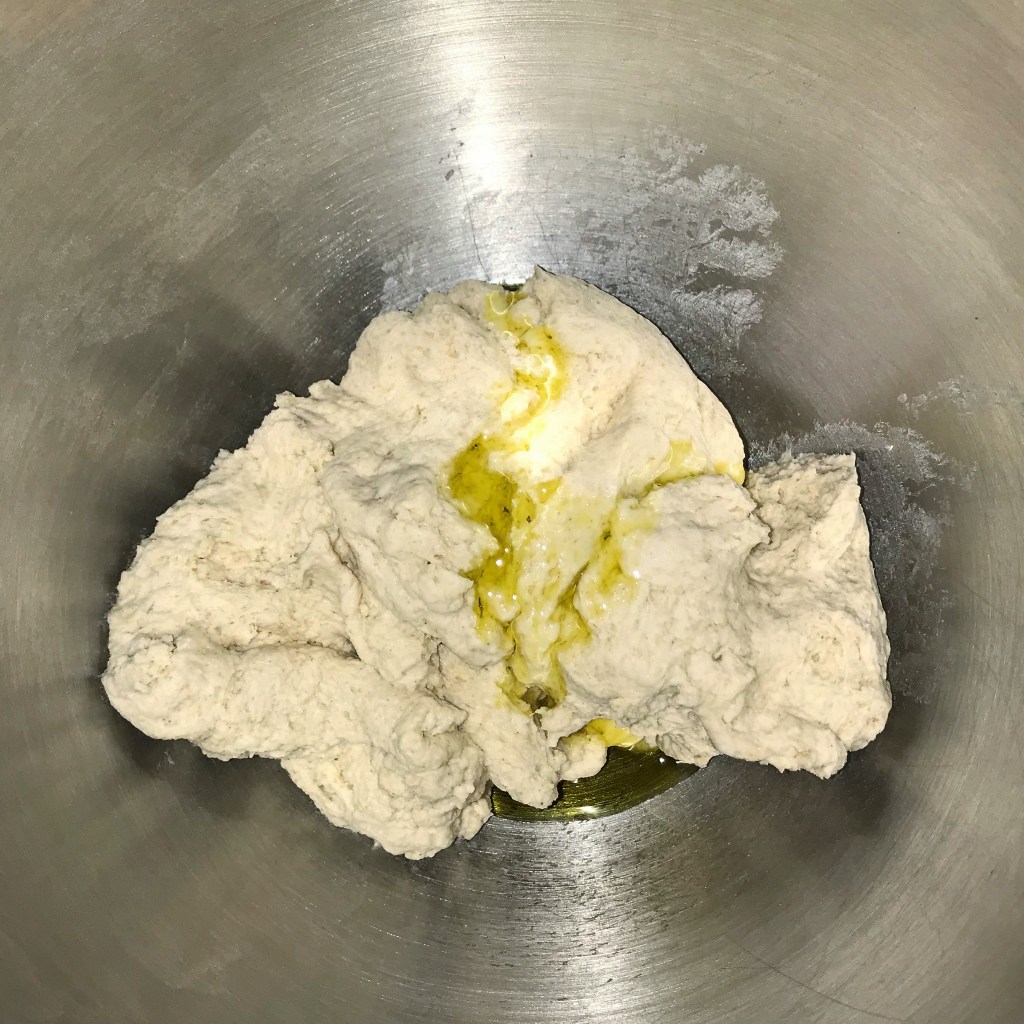
Drizzle the oil over the shaggy dough and cover to rest about 20 minutes before proceeding with the kneading step. 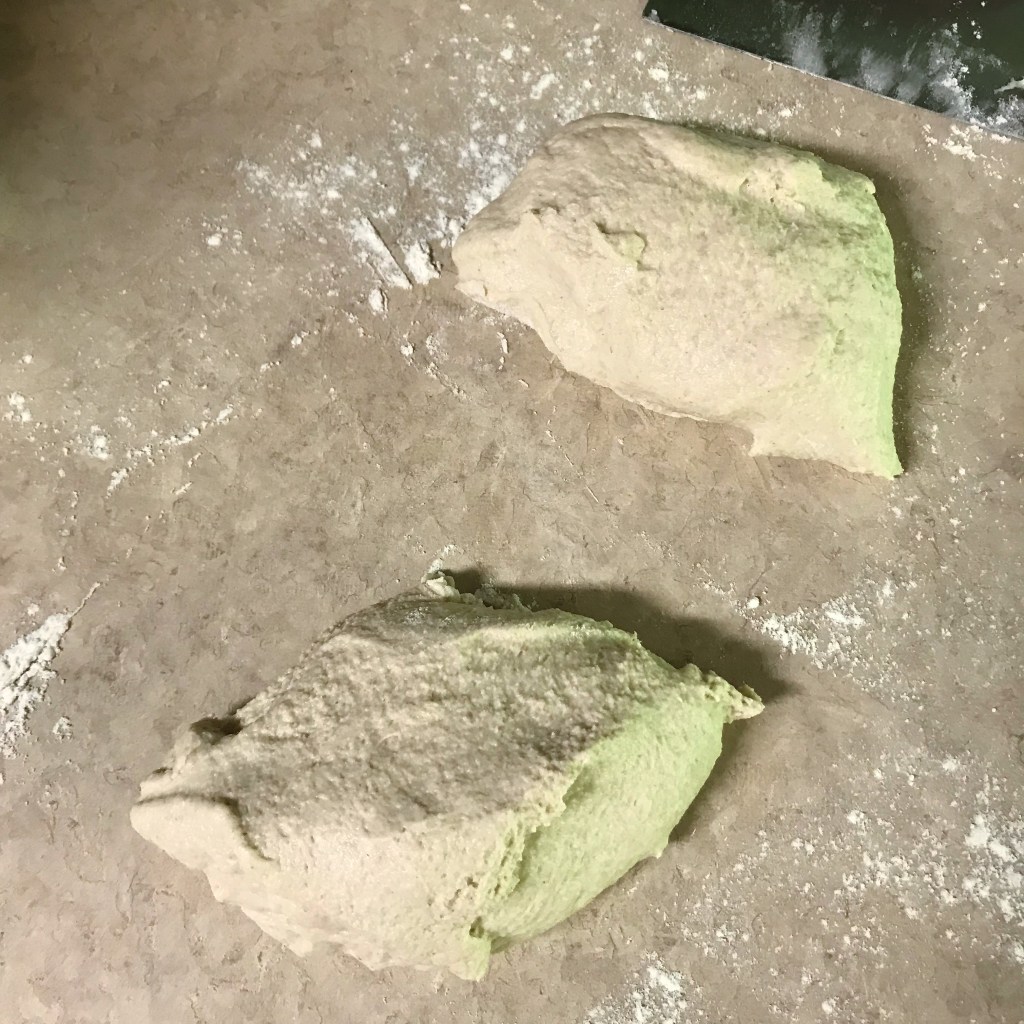
When the dough is smooth and supple, after about 8 minutes of kneading, use a bench scraper or sharp knife to divide into two equal pieces. 
Shape the dough into balls and place inside oil-spritzed zip top bags. Do not rest or “rise” the dough. It goes directly into the fridge for a couple of days.
Put the dough balls in a protected spot in your refrigerator (we pop it into the deli drawer) for at least 36 hours, and up to 3 days before your pizza party.
On pizza day, remove the dough from the refrigerator about 2 hours ahead of your meal time. Follow instructions in the “Tips” section regarding preheating of the oven because the temperature and rack placement varies based on whether you’re using a steel, a stone or a pan . While the dough is still cold, take it out of the bag and dust it generously with flour, then cover loosely with oiled plastic wrap or a clean dish towel.
When it reaches room temperature, shape the dough into 12 to 14 inch circles. Please, for the love of all things pizza, do not use a rolling pin!

Press gently to create a “lip,” making quarter turns with the dough all the way around. This lip will become airy pockets in your crust. 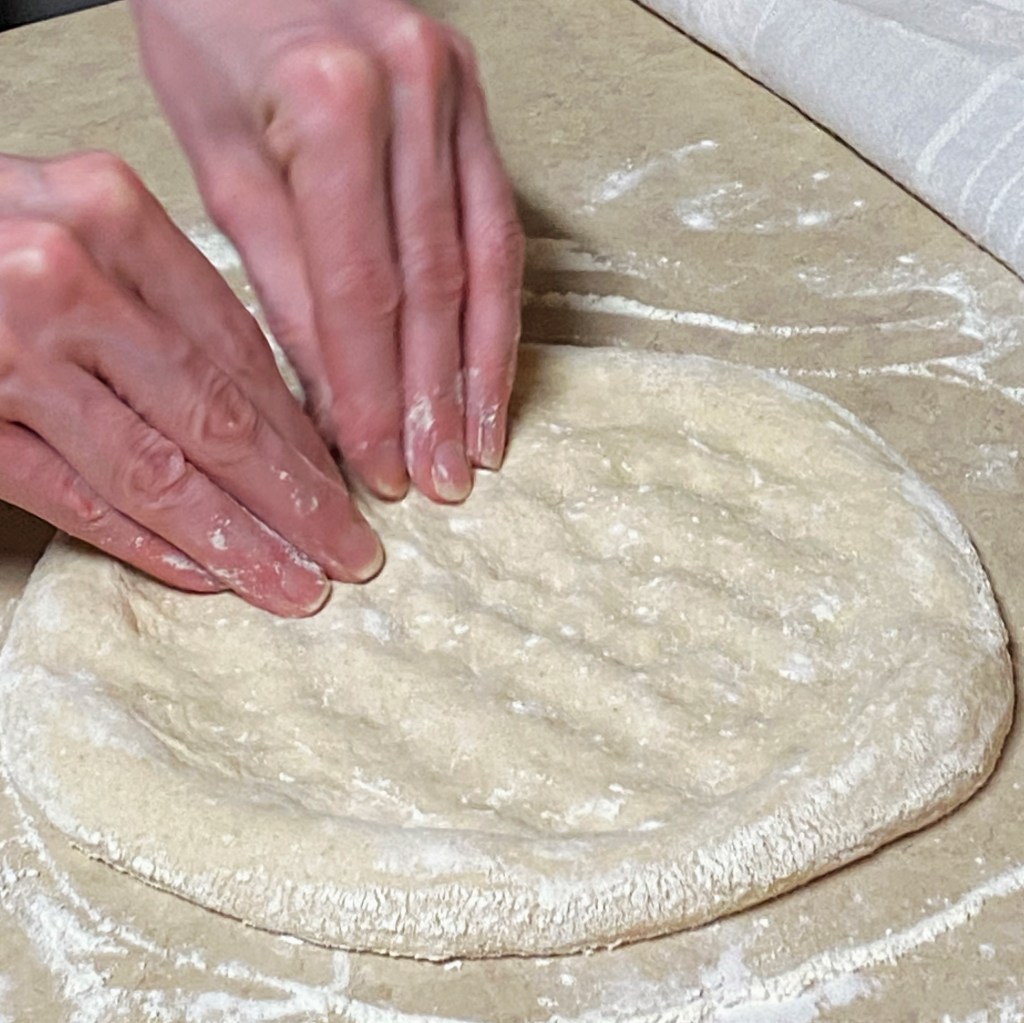
Use your finger tips to “tap” the dough straight down the center. This stretches the dough while keeping air pockets inside. 
Gently turn the dough over, and repeat the pressing steps on the second side. Dust the counter with more flour if needed to prevent sticking. 
That’s me hiding behind the dough! When you’ve stretched it about 14″ across, it’s ready to be placed on the peel. 
Rub flour into the wooden peel, then dust generously with cornmeal before placing the dough on it. This will make it easier to slide into the oven after topping.
Want to print this recipe?
Getting Technical
One of the things that makes this pizza crust special is the cold fermentation of the dough. It might seem strange that we are using cold water, not giving the dough time to rise, and especially stuffing it straight into the fridge. But trust me, it works!
Yeast does not need warmth to do its work, it only makes it work faster. In a typical bread recipe, warm water and rising time in a warm spot of the kitchen allows you to make bread (or whatever) in a couple of hours, but what you gain in time, you lose exponentially in flavor and health benefit, which is even more technical.
Despite the wait time, this is a quick recipe. You can make this dough in 30 minutes, including the 20-minute rest.
Speaking of which, the technical term for the rest period is “autolyze,” though there’s dispute on whether the yeast and salt should even be present at this point. Purists would say no, and in artisan bread making, the autolyze might go as long as an hour. Whether or not this is a “true” autolyze, the down time gives the flour a chance to fully absorb the water before you begin the more strenuous work of kneading. At any point during the rest, you may drizzle the olive oil over the dough—I usually do this simply so I don’t forget to add it. But don’t begin mixing it into the dough until the rest period is finished.
This recipe suggests “instant dry yeast,” which isn’t instant in terms of how quickly it works, but in the fact that you can add it from the start of the recipe without “proving” it first. “Active dry yeast” requires pre-dissolving in warm water before it will do its job. If you have this “active” type of yeast, you might be able to make this dough with a simple adjustment. Measure your total water, but remove about 1/3 cup of it to a bowl. Warm it in the microwave to bathwater temperature, sprinkle the yeast over and wait 5 minutes until it’s foamy. Then proceed with your recipe. If it doesn’t get foamy, it’s no longer active (bummer). If your yeast is labeled “quick-rise” or “rapid-rise,” both are forms of instant yeast and you’re good to go.
For any baking recipe, it is important to measure your flour correctly. I highly recommend a kitchen scale if you intend to take up bread making, but for now, if you rely on volume measurements, trust the “fluff, sprinkle, level” method described in these slides. Digging your scoop directly into the flour bin is going to ruin your recipe, and even spooning straight from the bin to the scoop can yield a crummy result. Proper measuring does make a difference. The flour I’m using for this demonstration should weigh 125 g per cup. Let’s see how it goes.

Yikes. Scooped straight from the flour container with the measuring cup, and leveled with the back of a knife, our “cup” of flour weighs 155 g. 
Spooned directly from the flour container into the measuring cup, then leveled with the back of a knife, our “cup” weighs in at 142 g. 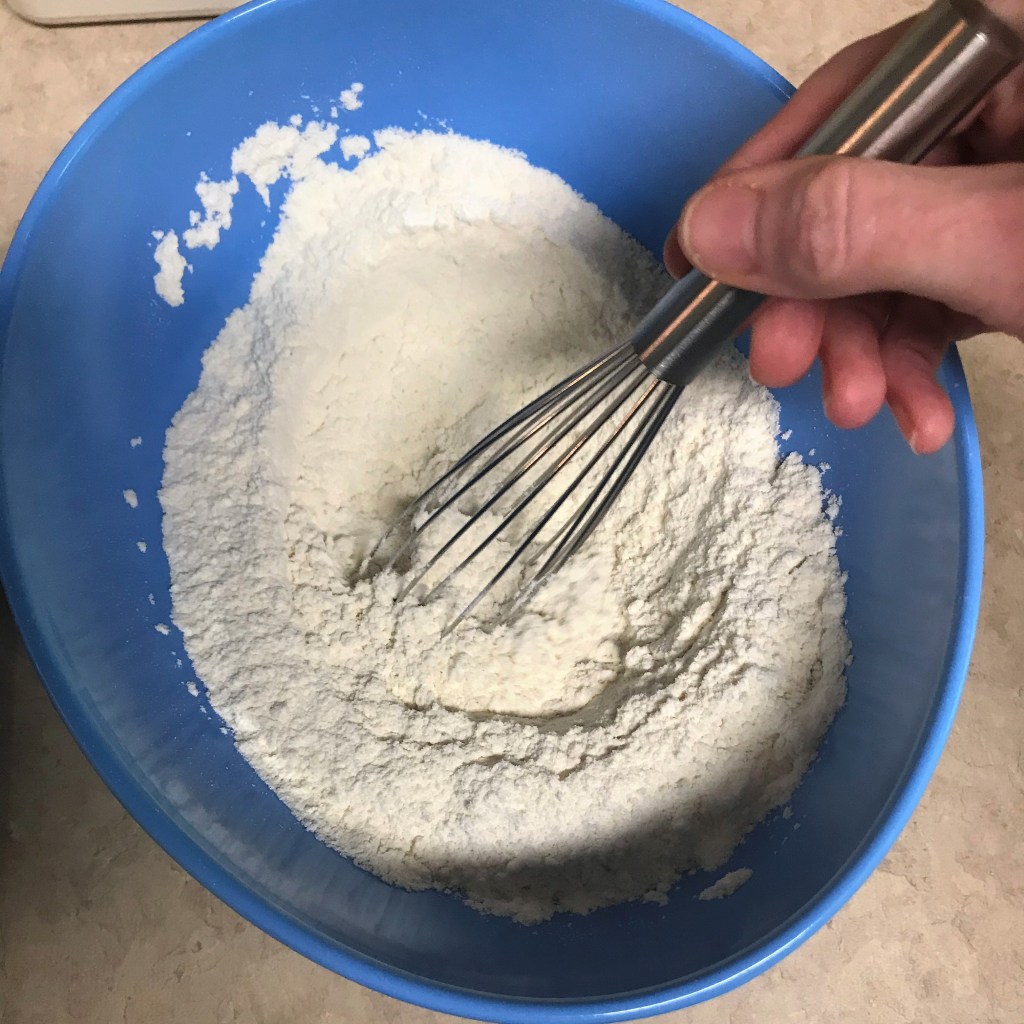
Use a whisk or a pair of forks to “fluff” and aerate the flour before measuring. 
Sprinkle the flour over the cup until it’s overflowing, THEN level with the back of a knife. 
Properly fluffed, sprinkled and leveled, our “cup” of flour weighs a perfect 125 g. 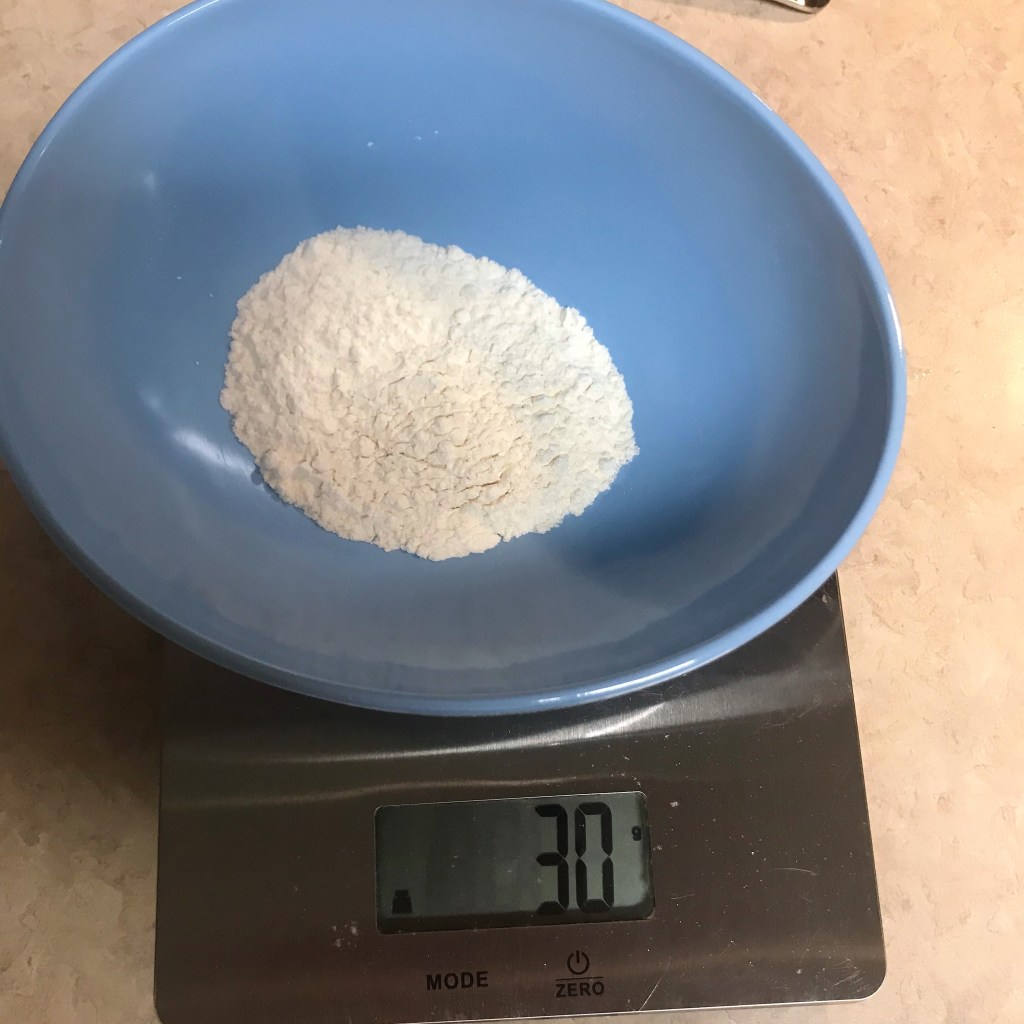
Yes, the extra 30 g of flour would make a difference.
Tips for Success
This dough is for thin crust pizza, which means it does not “rise” after you shape it. Simply add sauce, toppings and bake.
Take it easy on the toppings. You should be able to see the dough through the sauce, and the sauce through your toppings. Your pie will be much more evenly cooked if it isn’t piled high with too many ingredients. Pre-cook and cool meats and vegetables for best results, and use cold shredded cheese.
If you’re using a stone or steel, you must preheat it the proper amount of time. This means set a timer for one hour, from the time your oven reaches the set temperature. These tools will absorb a great deal of heat, which will then be transferred back to your pizza. We bought our steel from this company, and it is freaking awesome. You can also find them on Amazon.
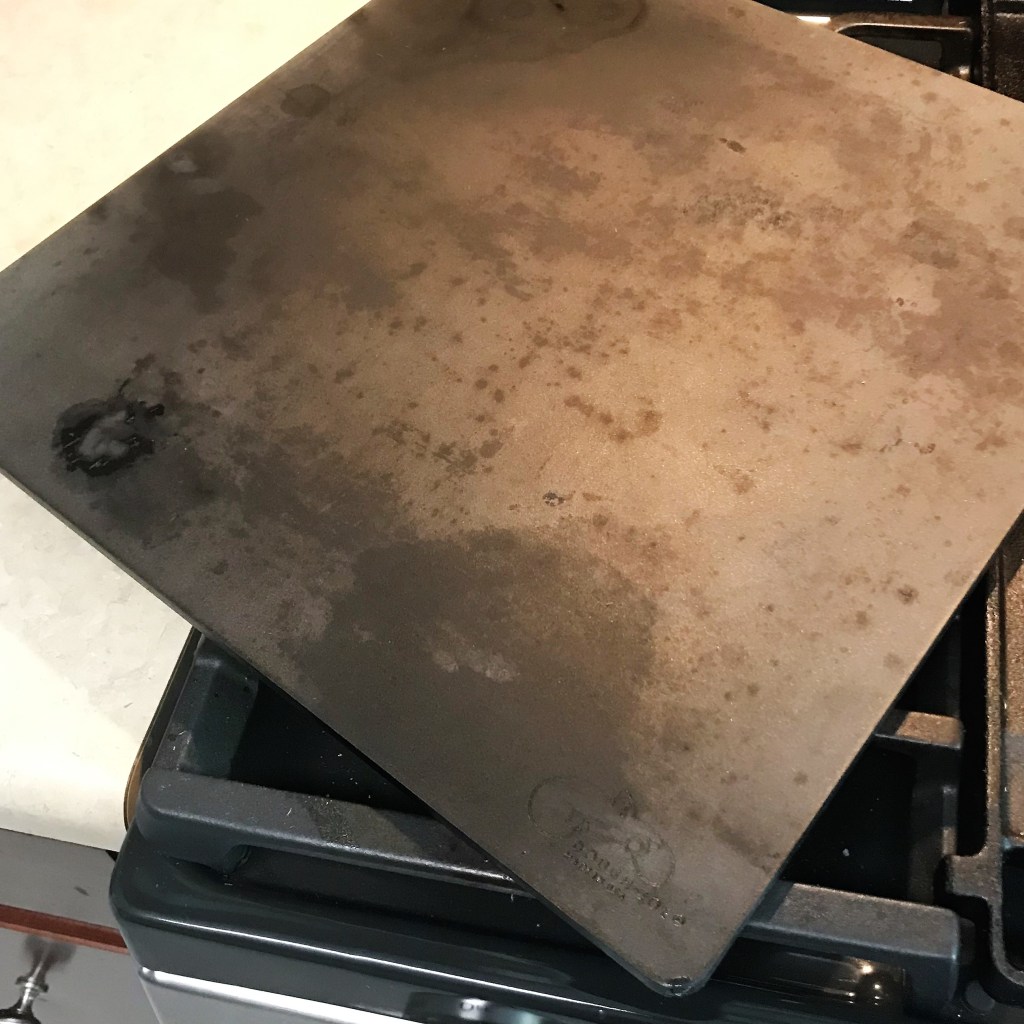
Oven temperature should be HOT. Les and I shake our heads at the Papa John’s commercial, boasting about its 450° F oven. This is absurd. For best results (at least, with this recipe), bake your pizza at 550° F, which is the max for most home ovens. To bake on a pan, place the rack in the center to lower third of the oven. If using a pizza steel, set the rack about 8 inches from the top heating element. Some pizza stones have specific temperature limits, so please follow the instructions on yours and allow extra time accordingly. I would hate for you to lose the whole pizza if the stone breaks under the heat.

Let me say this loud and clear: gluten is not everyone’s enemy. So many people are convinced today that they have issues with gluten. And some really do, including people diagnosed with celiac disease, and I hate it for them. But plenty of others are simply buying into the idea that gluten is solely to blame for their bloating, discomfort and other digestive issues. I’m not a doctor, but I understand enough about bread chemistry to suspect that the sudden widespread clamoring over gluten sensitivity is much more likely related to the speed with which modern high-volume bakeries are churning out bread. Hear me out.
Time is our friend when it comes to yeast breads. More time allowed for fermentation improves not only the flavor of the end product, but also its digestibility. During fermentation, the yeast coaxes the sugars out of the grain, which results in complexity of flavor (this is particularly true when using whole grains in baking), and many of the “anti-nutrients” in the grain get broken down, which means your body doesn’t have to do the work. Anti-nutrients are not bad components, but they block absorption of the good ones. Speed up or skip through this fermentation step and—well, it pretty much spells disaster for sensitive bellies. It’s like putting green wood in your fireplace or microwaving a steak. You wreck the whole thing.
The cold fermentation on this pizza dough will take 36 to 72 hours (depending on how quickly you’re planning to make your pizza). When commercial bakeries speed up the process, it’s for the end result of getting more loaves to market shelves faster—not for quality and certainly not for flavor. Just one of many reasons I’m in love with sourdough.
All of this to say, if you’re not allergic to wheat, and not officially diagnosed with celiac disease, your sensitivity issues may be related to cheap bread. Please talk to your doctor. Real sourdough bread (naturally leavened, not just “sour flavor” added to commercial yeast bread) may be the miracle you’ve hoped for.


Pingback: Shrimp Scampi Pizza | Comfort du Jour
Pingback: Spanakopizza! | Comfort du Jour
Pingback: Jalapeño Popper Pizza | Comfort du Jour