Green Chili Burritos

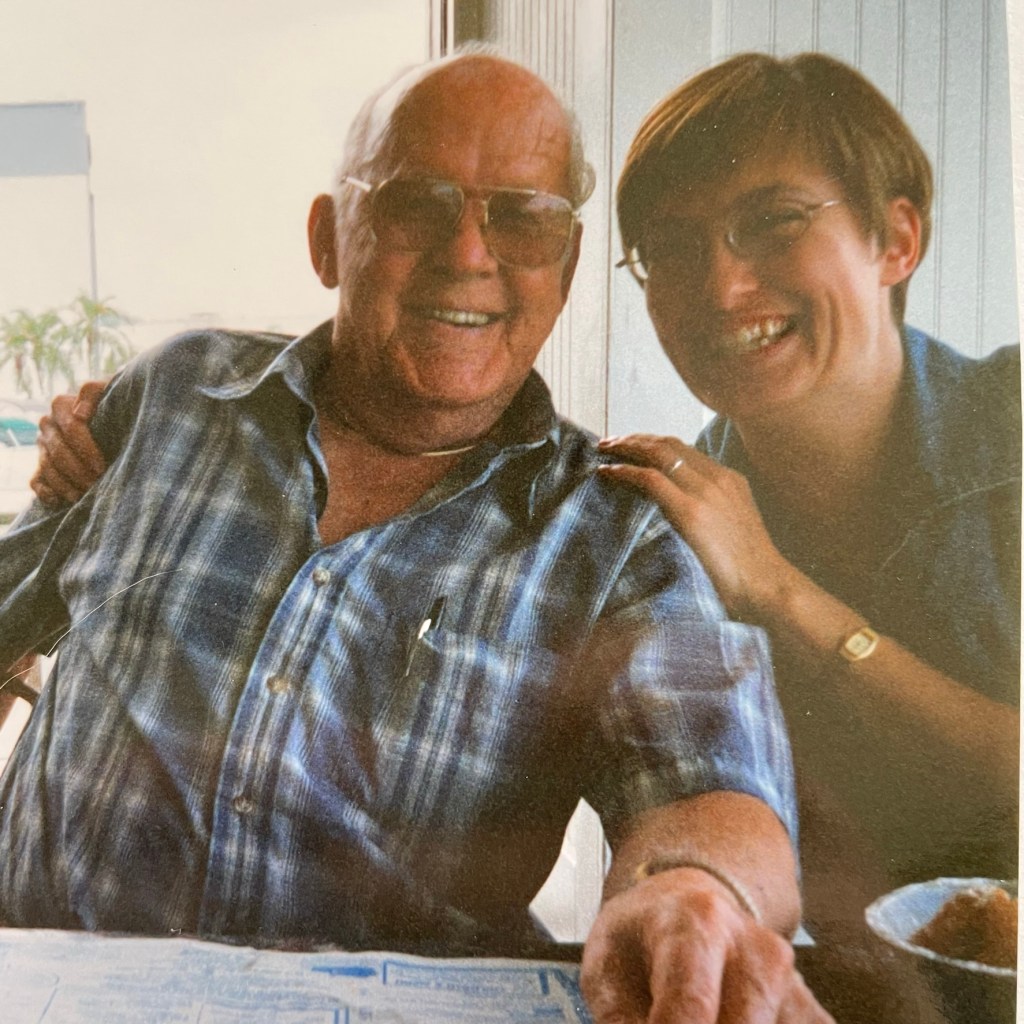
This is not a fancy dish by any means, but it is one of the oldest comfort foods from my childhood. My mother began making a ground beef version of this flavorful chili when I was about 6. It’s easy to estimate my age at the time because we moved around a lot, and I can recall where we lived when certain memories were made. My mom was newly remarried and we had moved out west from upstate New York for my stepfather’s job as a truck driver. I loved my stepdad, but he was gone a lot, so it was frequently just my mom and me taking up space in a single-wide mobile home in rural southern Colorado, where Mexican flavors reign supreme.

You could barely see our little box of a house from the main road, which ran a straight line through the tiny town of about 350 people. There was a long, dusty driveway leading from the school bus stop, over some railroad tracks and past the big white propane tank that provided us fuel for heating and cooking. Occasionally, during deer season, I’d see a carcass hung up from a tree near our house, and that meant my new daddy had a good hunting trip and venison would soon be on the menu. Most days after school, our sweet little dog, Ginger, would meet me halfway on my walk from the bus, and on the days that I’d catch a whiff of my mom’s green chili when I opened the door—well, that’s a very happy memory.

A short time after, many things changed in my world. For the second time in my young life, my parents split. We moved again and the relationship with my mom began a sad but steady decline. I shuttled back and forth between parents (and states) until high school graduation, and then made the decision to move away on my own. Visits with my mother became few and far between, and eventually when I visited as an adult and requested the green chili, I learned that her recipe had shifted from the familiar ground beef to cubed pork. It was tasty, but I longed for the texture of the tender ground meat.

What I really wanted was a taste of happy childhood. Isn’t that what comfort food is?

I can taste my childhood in this chili.

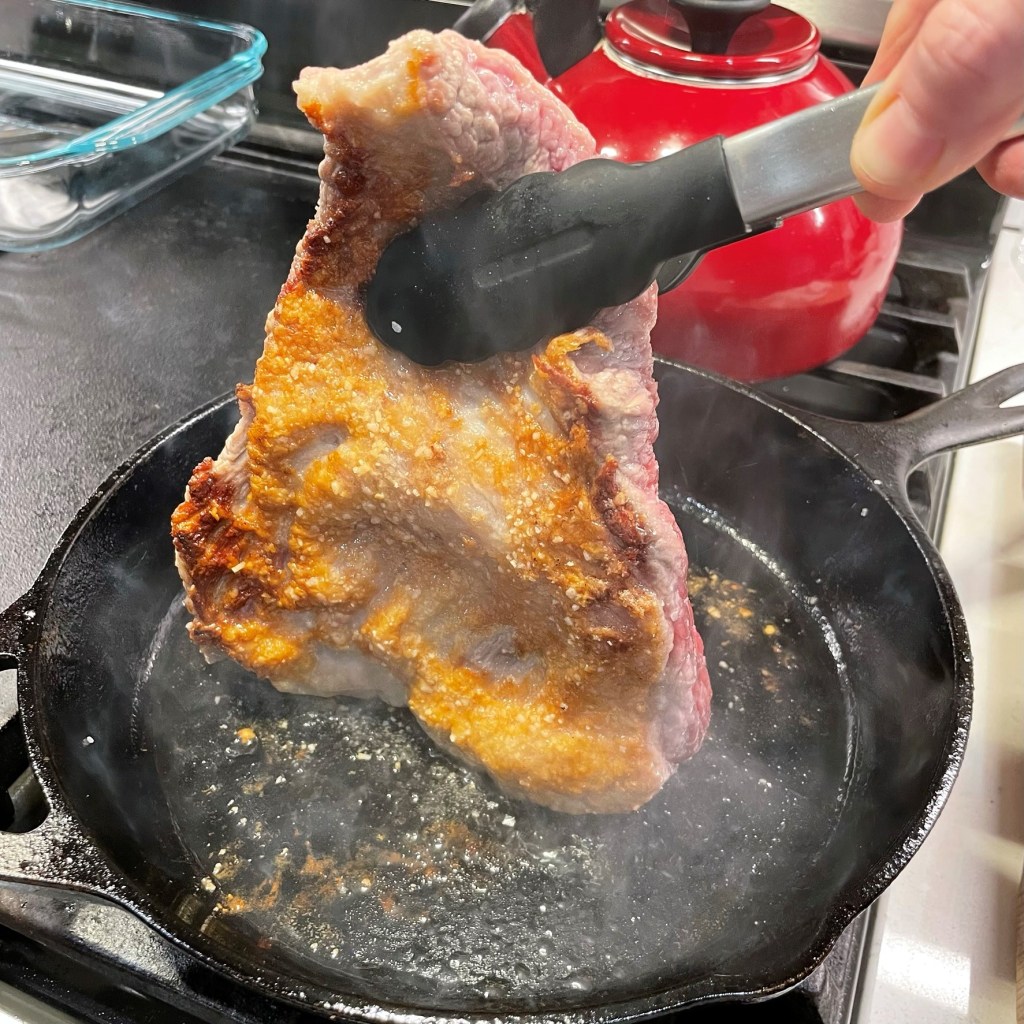
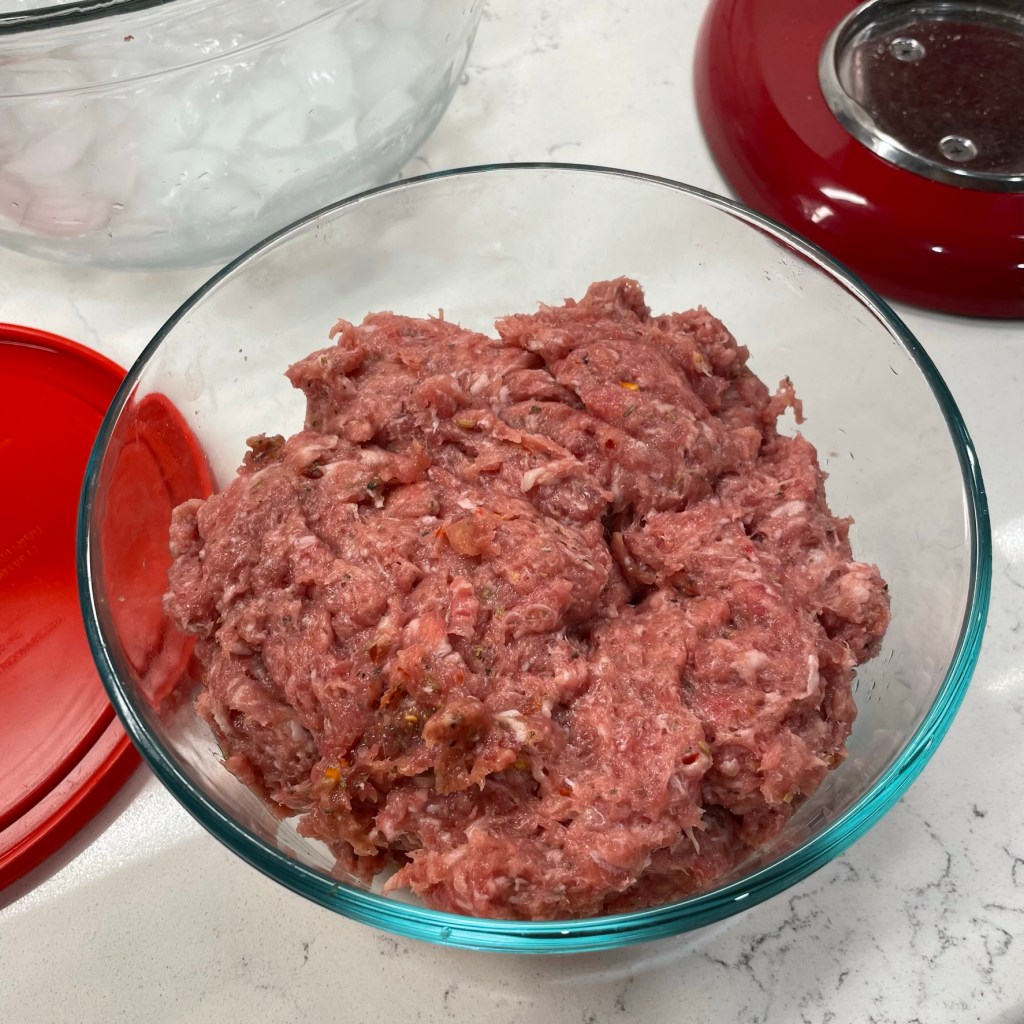
The first time I made my own green chili, about 15 years ago, I used a flavorful pork sausage I had discovered at Whole Foods. The sausage was made in-house and was utterly addictive with its mild, smoky green chiles and spicy habanero peppers, and I found it a happy medium to provide the soft meat texture I loved about the first version of green chili I ever had and the rich, savory flavor of pork. When my local Whole Foods stopped making it, I was beyond disappointed. I figured I’d have to settle for plain ground pork going forward.

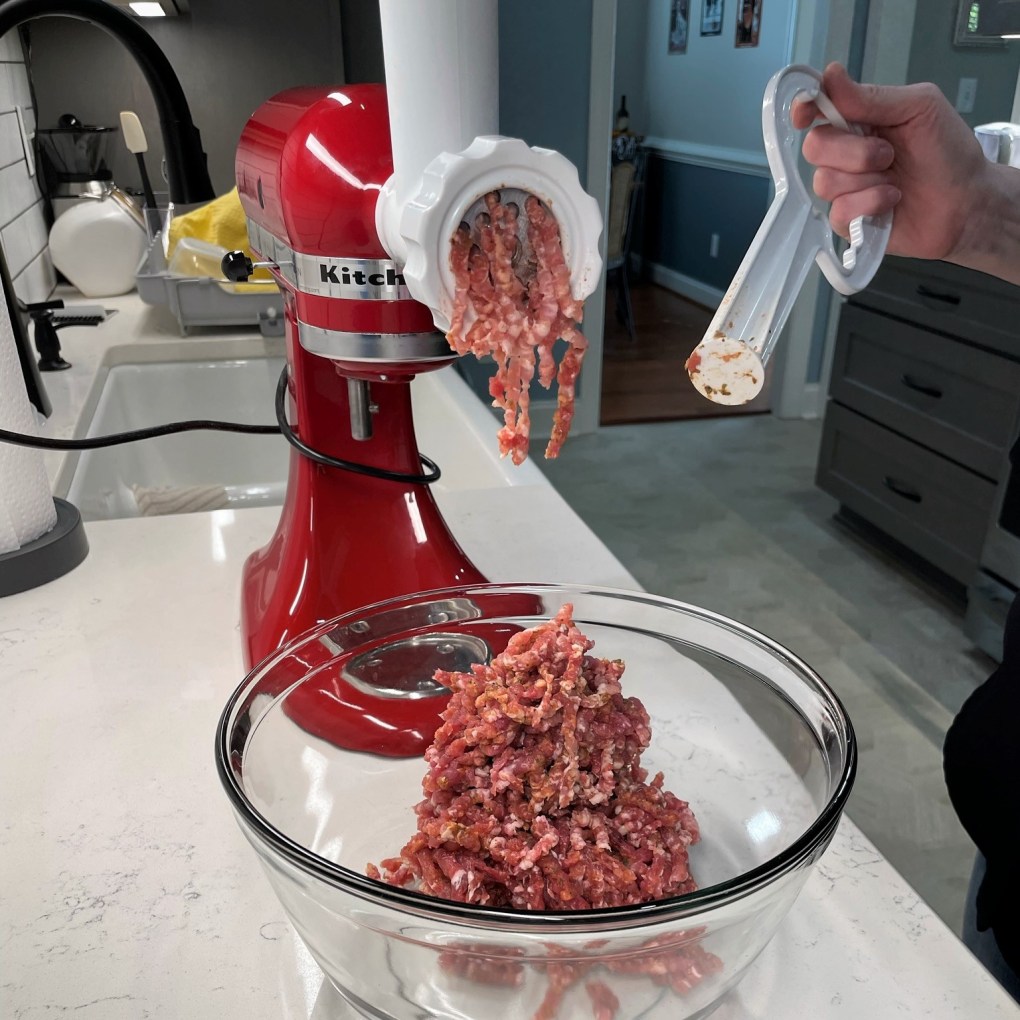
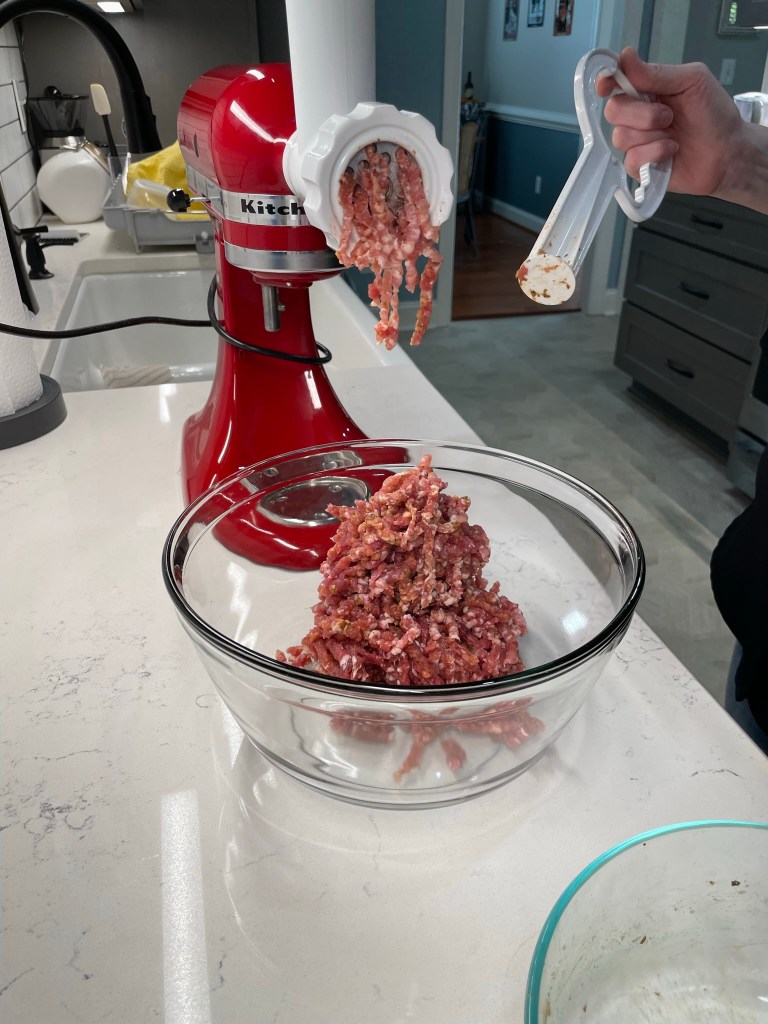
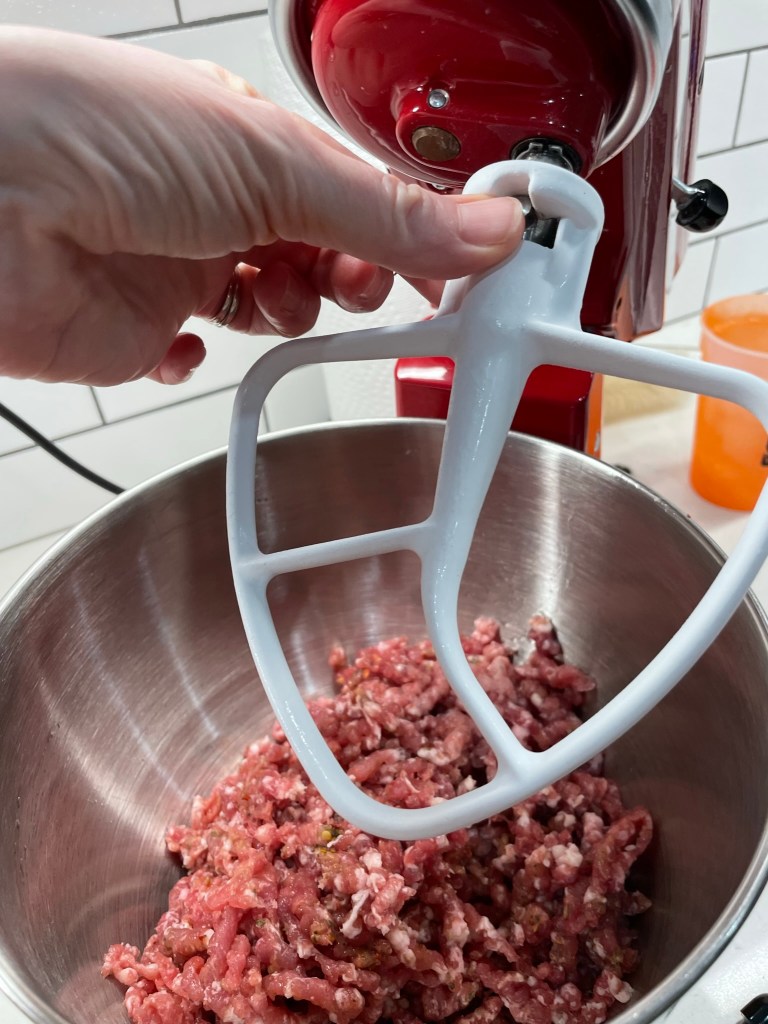
But recently, necessity being the mother of invention and all, I learned how to make my own spicy sausage and baby, I’m back!


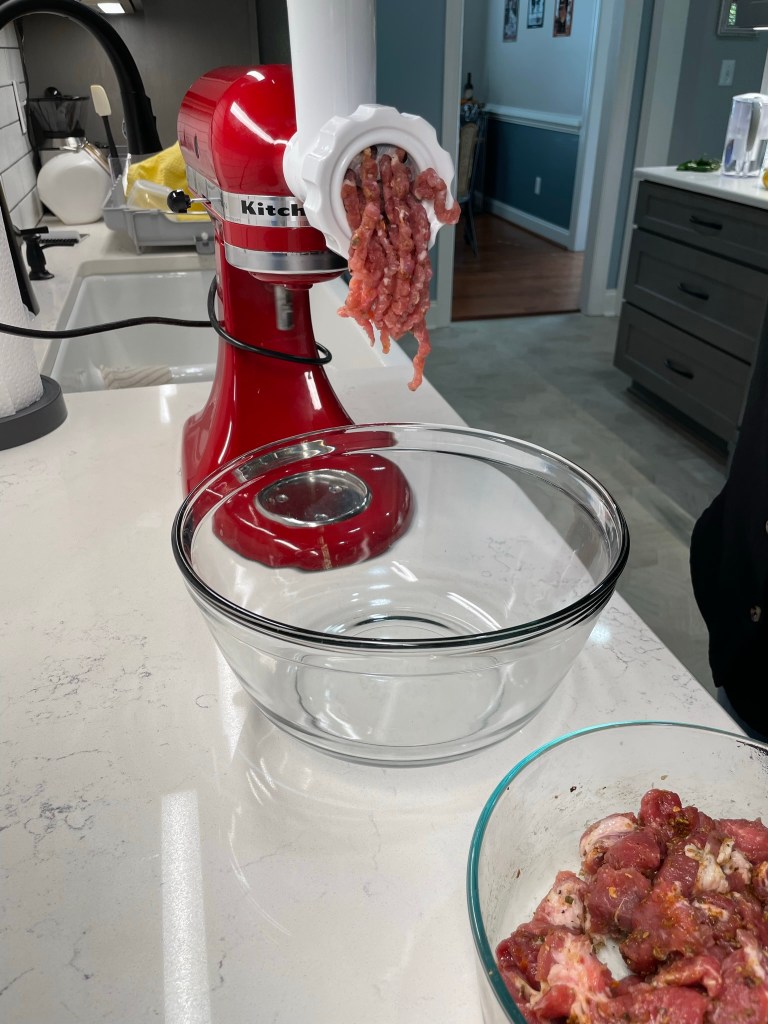
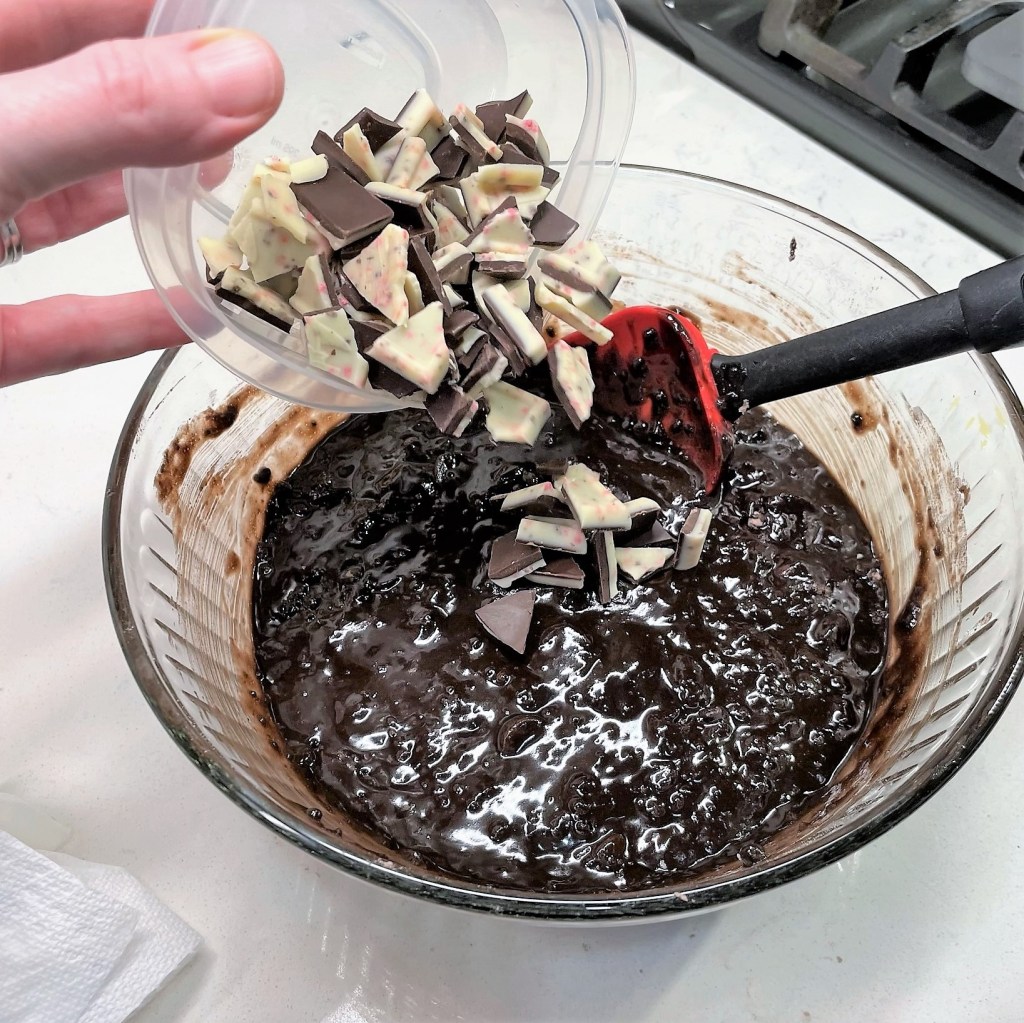
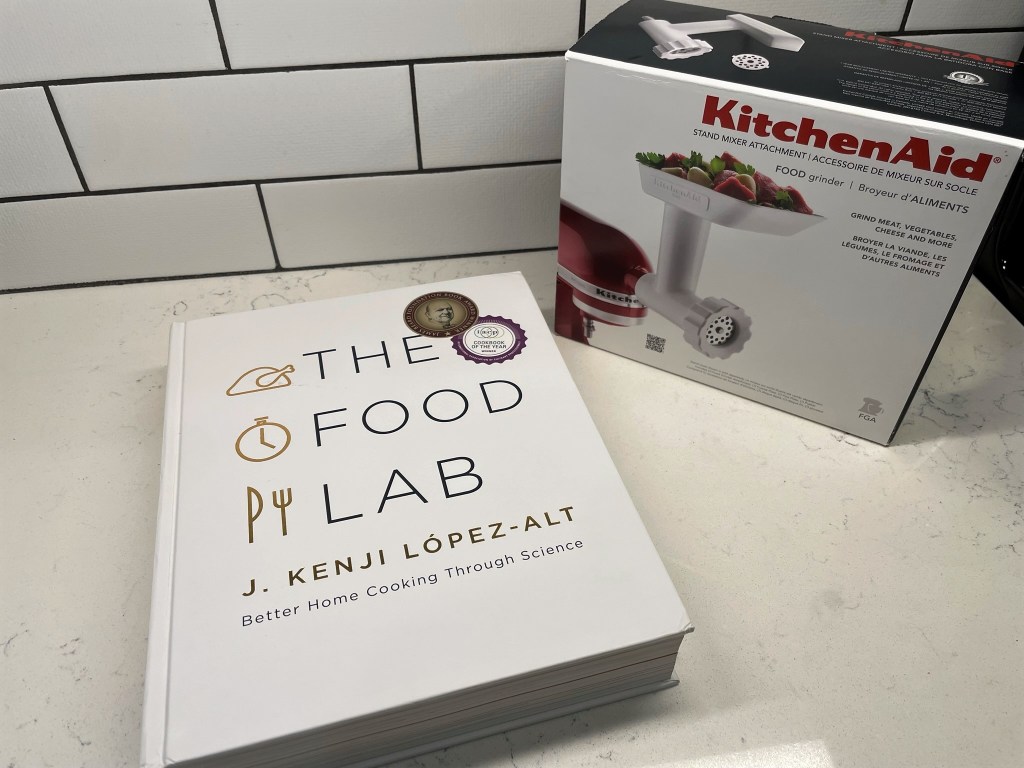
I’m still in the learning stages of sausage production, but my imagination has run pretty wild, considering all the unique flavor possibilities before me. I have delved into a few other flavor combinations already, but I know it won’t be long before this one comes up in rotation again. It’s because the green chili burritos I made from the sausage was just that delicious—even better than any of the versions I made before. Link back to the homemade pork sausage post for the particulars on this sausage, or choose a store-bought sausage that has green chile flavors if you want a shortcut. Heck, maybe your Whole Foods still sells that sausage, and you’ll be in business.

This is my happy place. 🙂

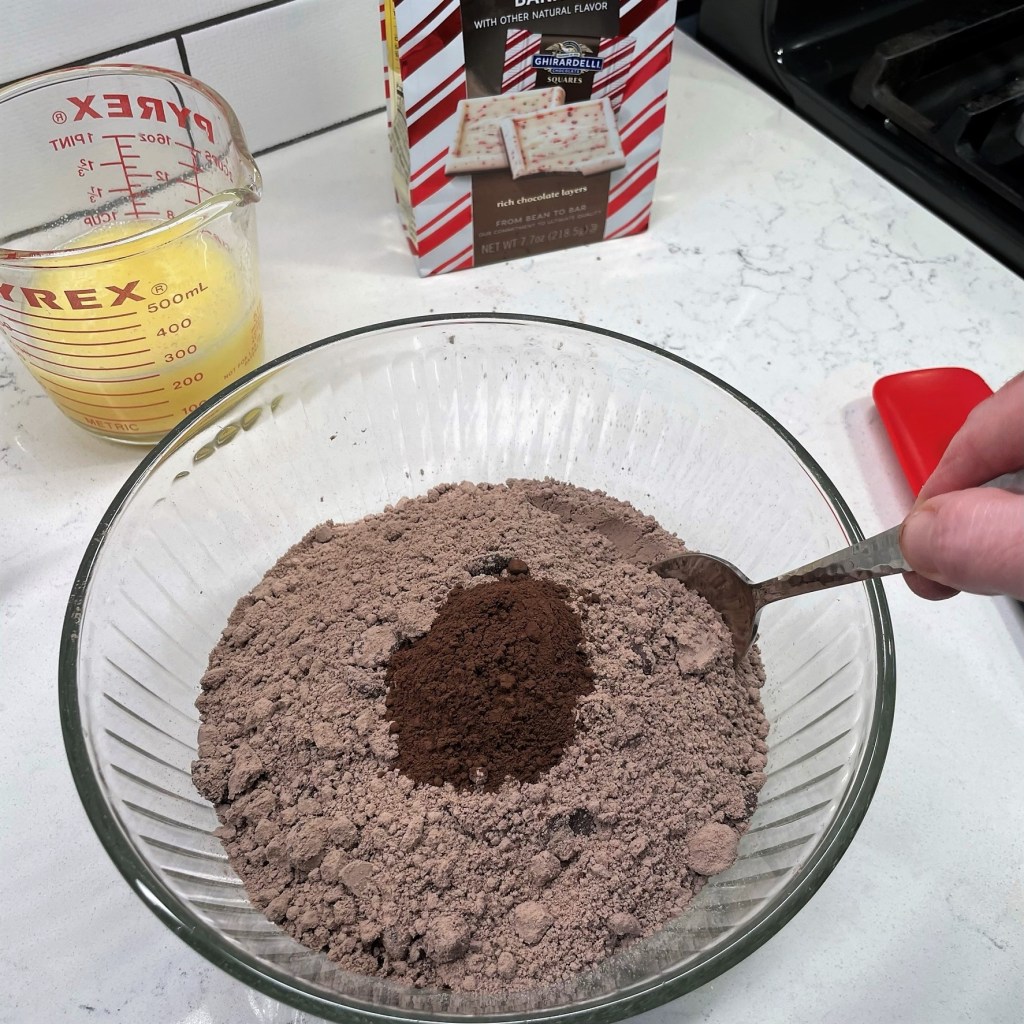
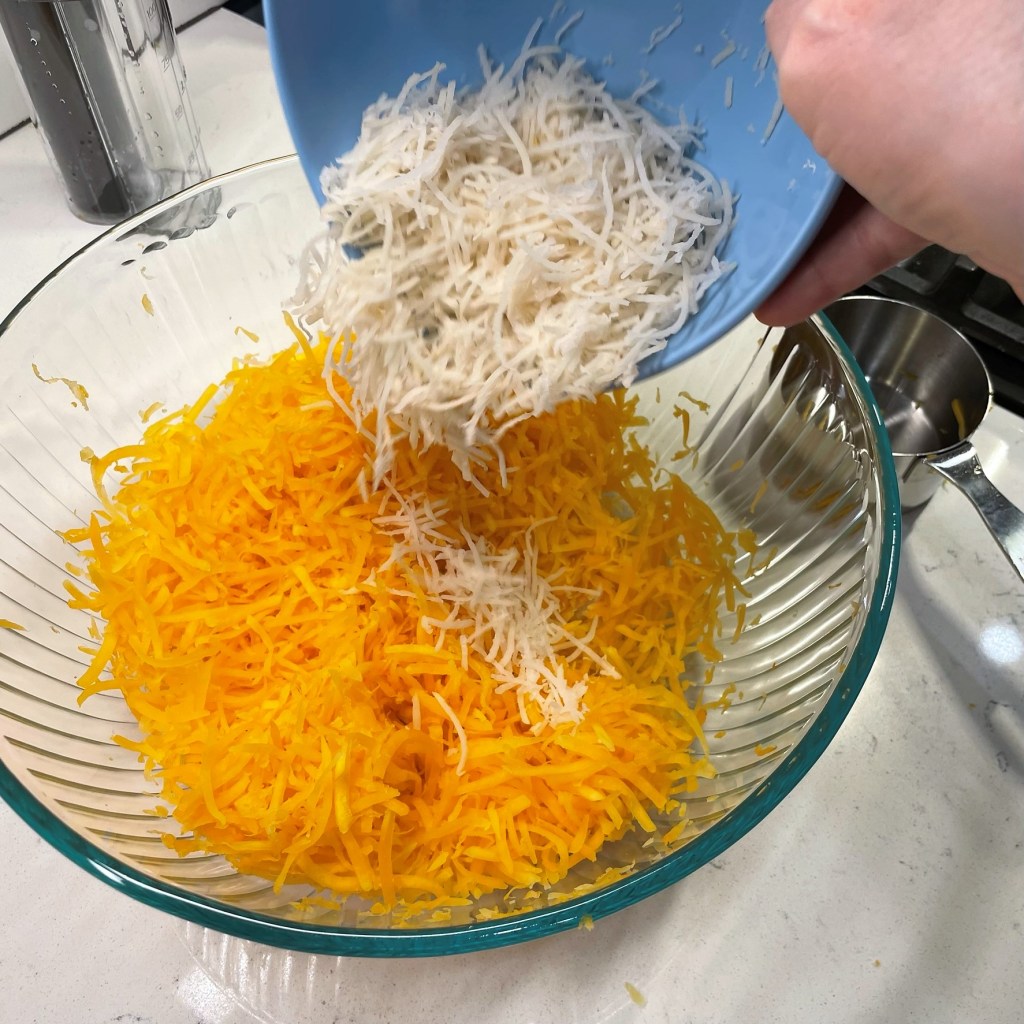
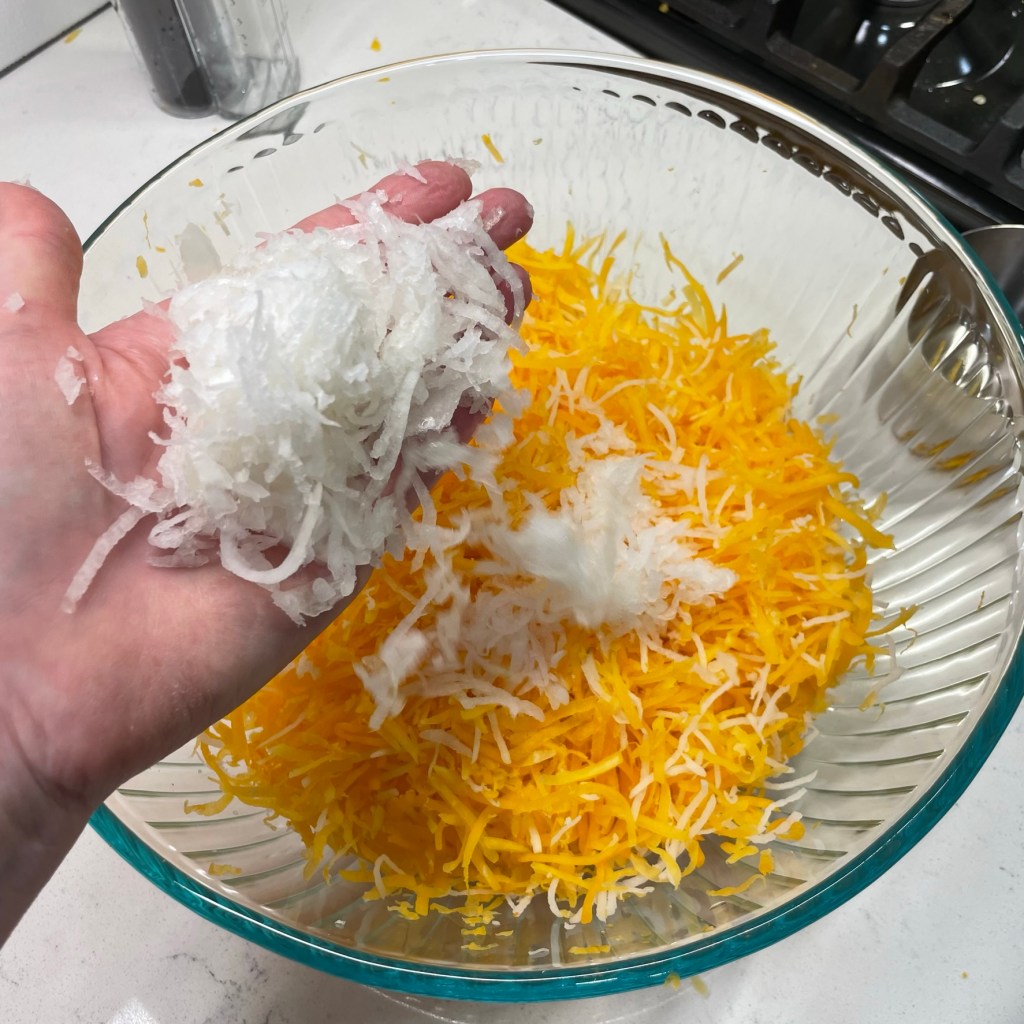
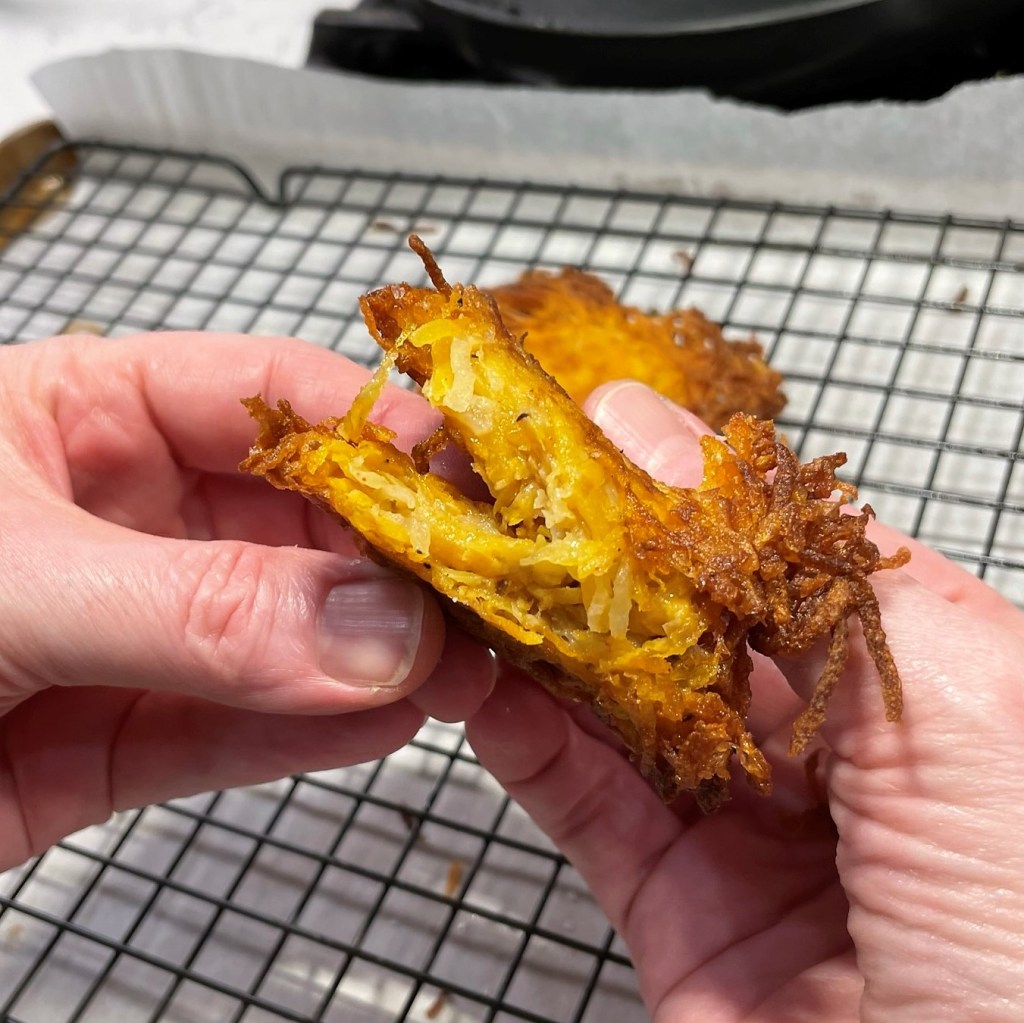
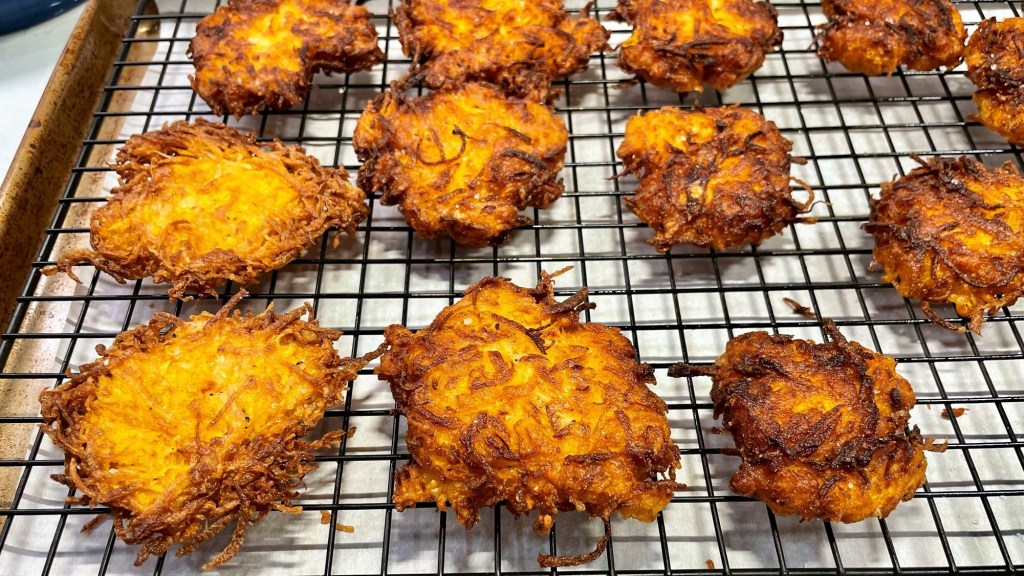
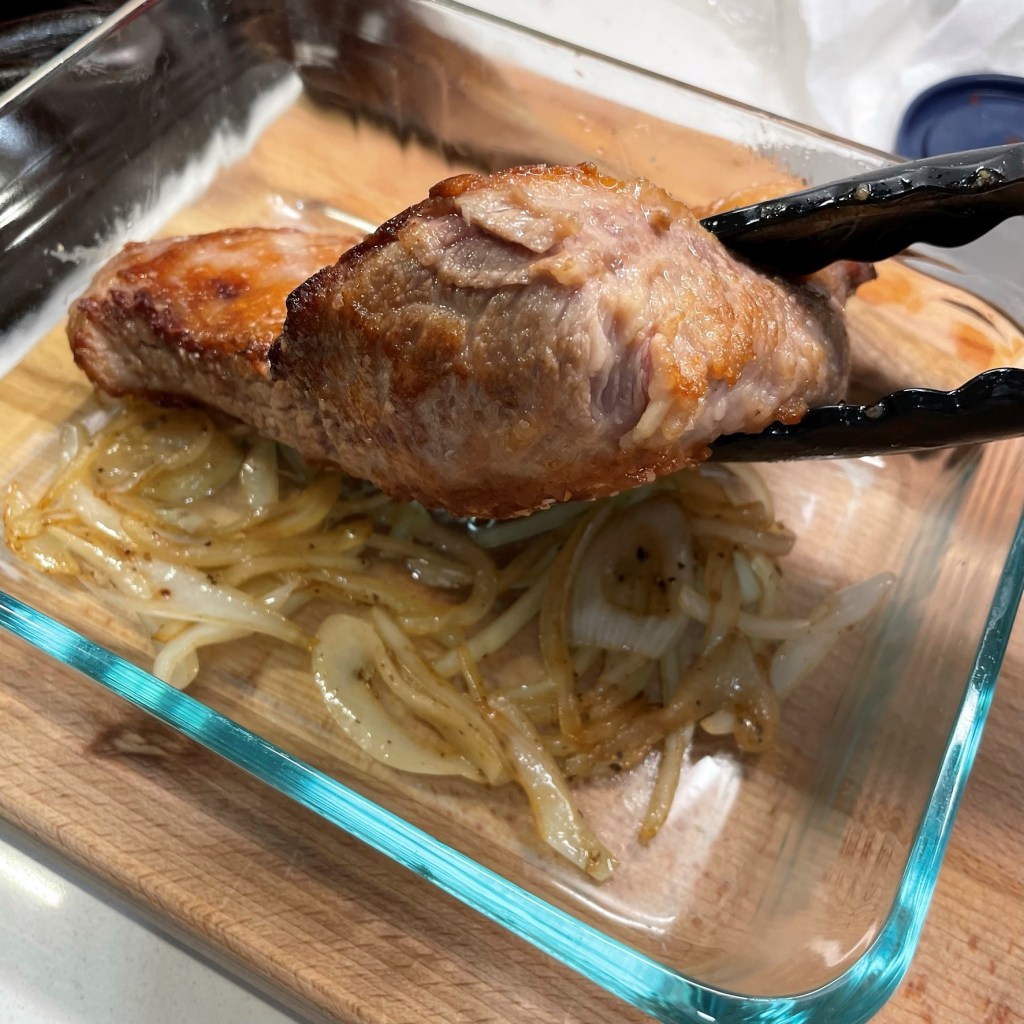
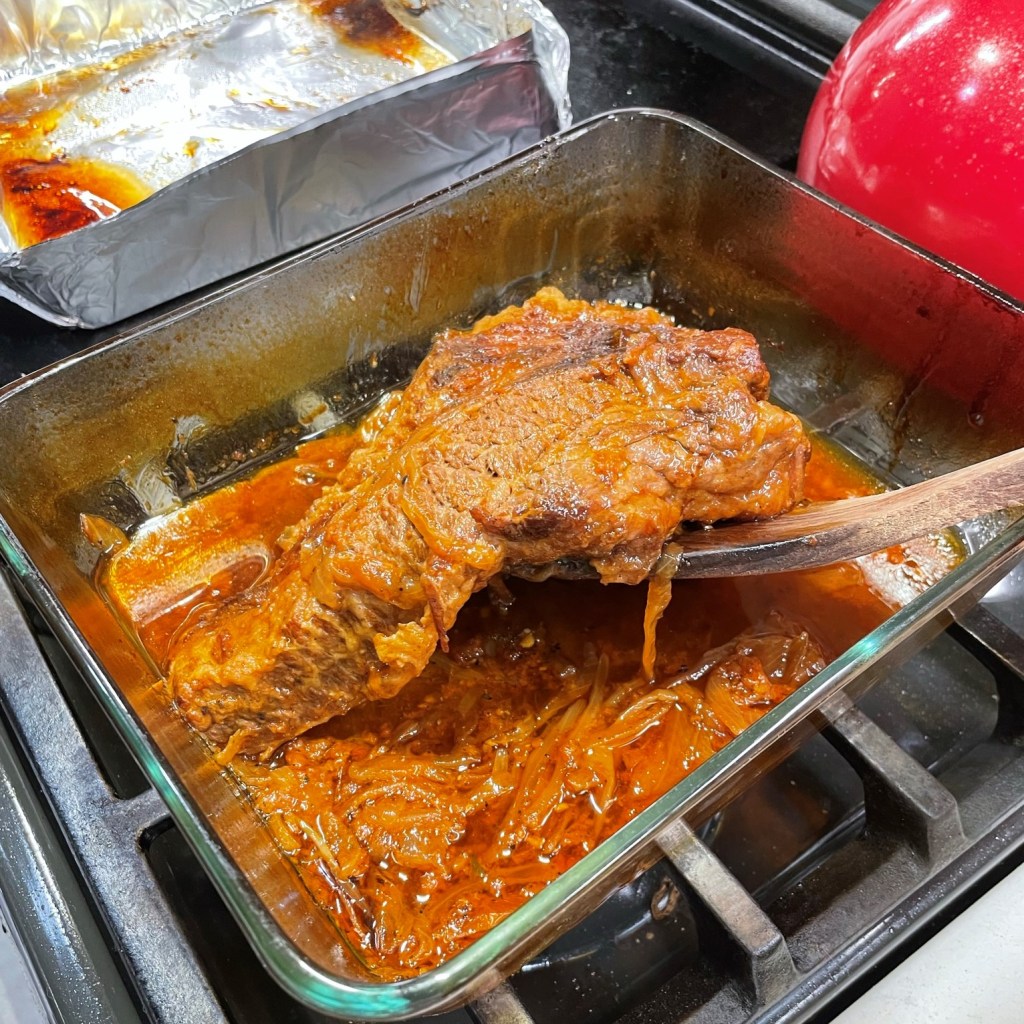
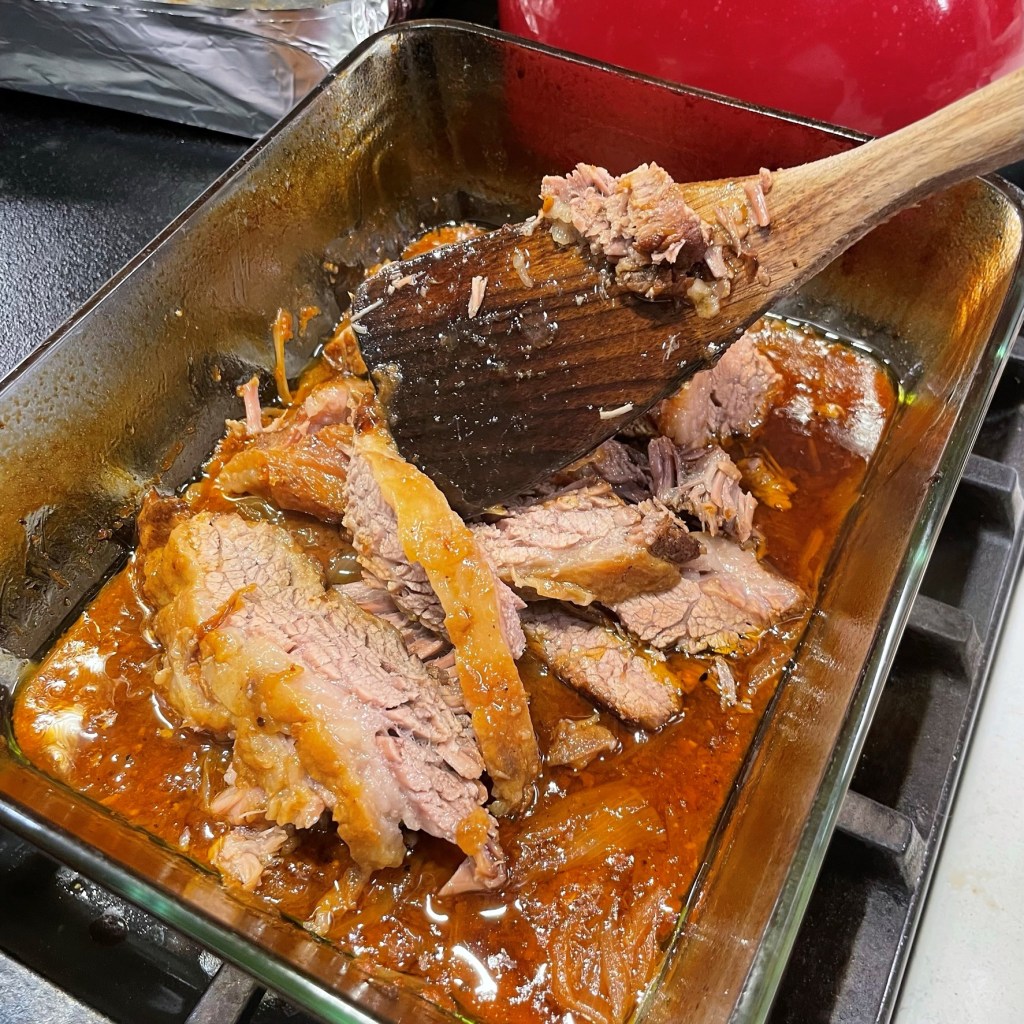
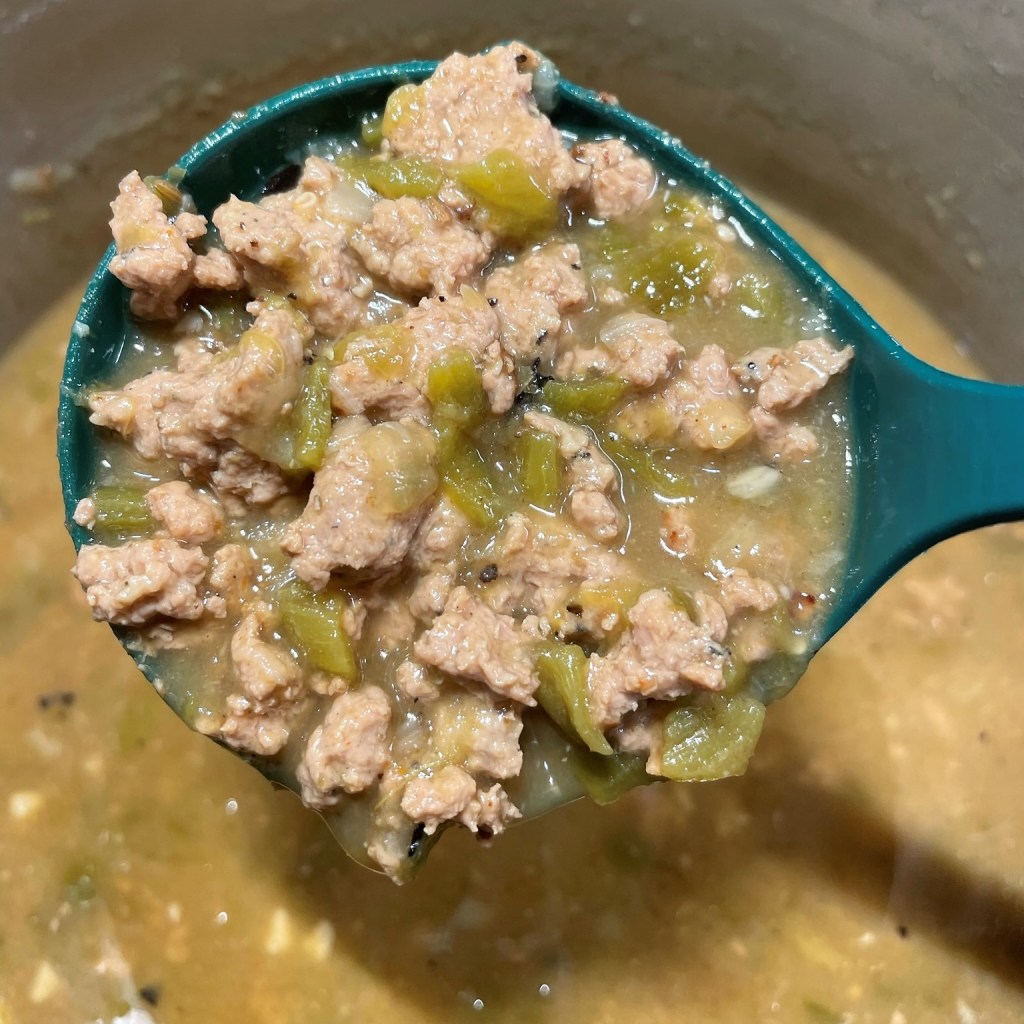
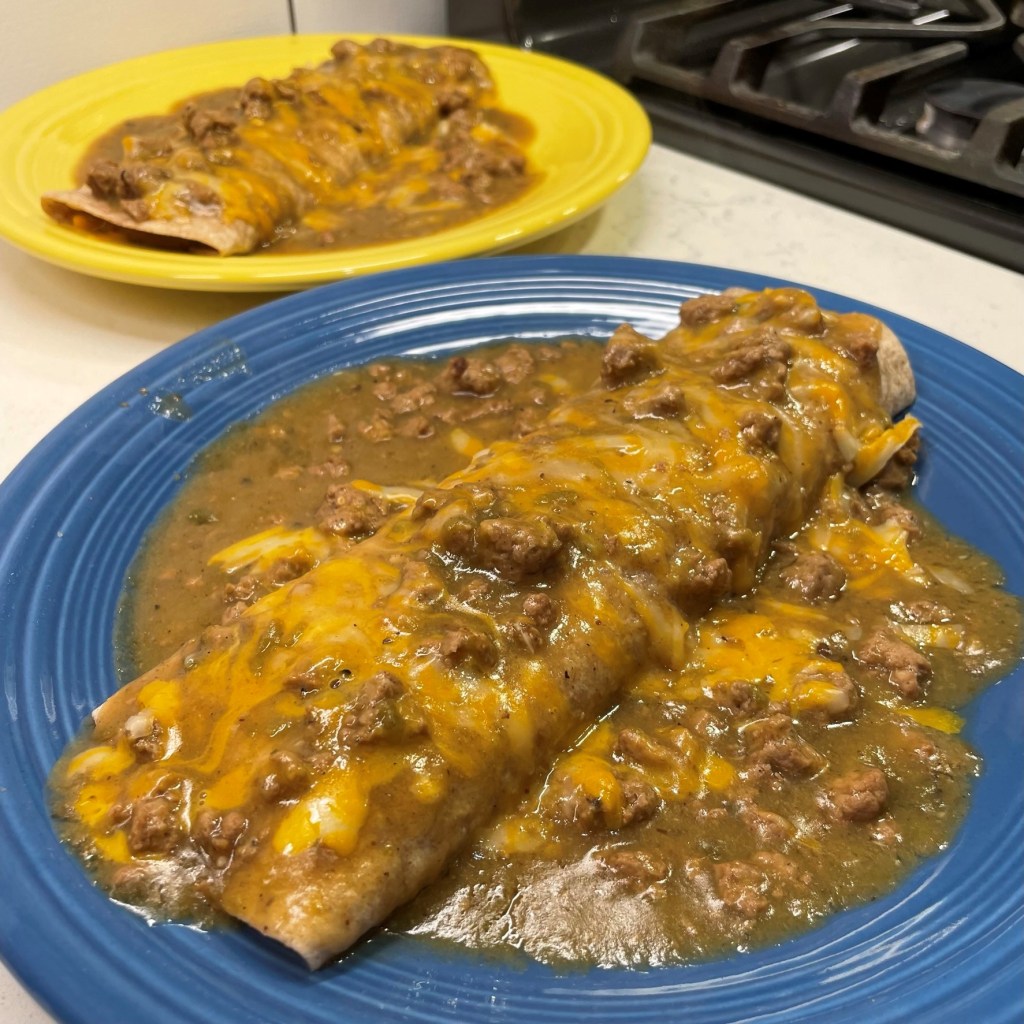
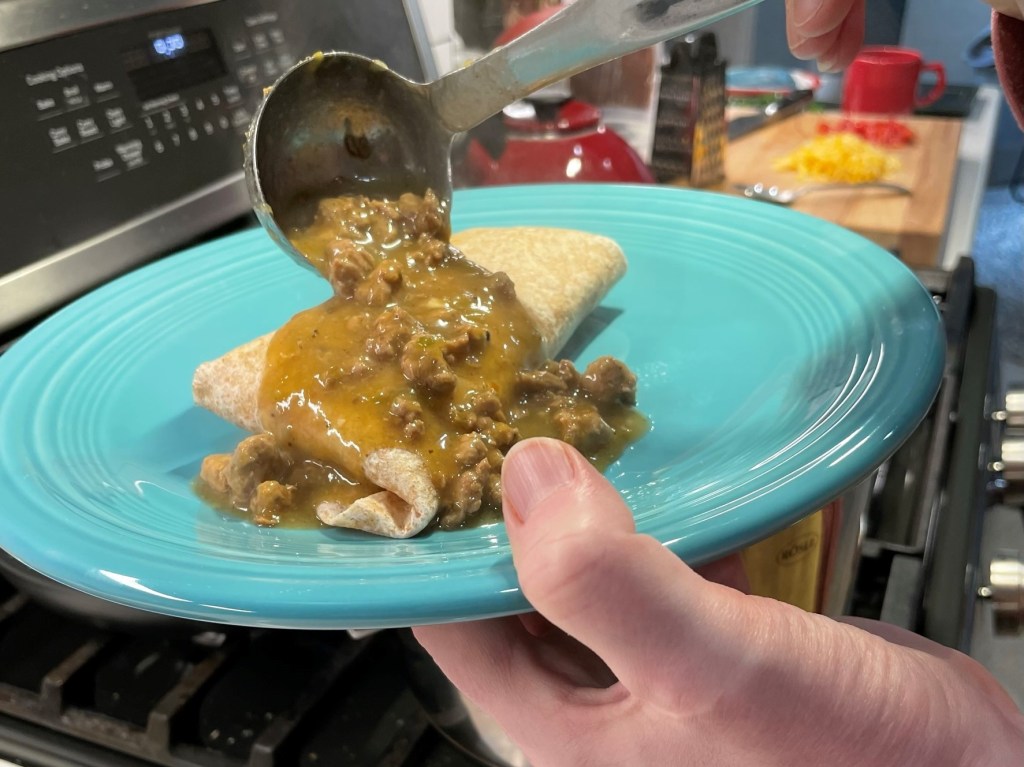
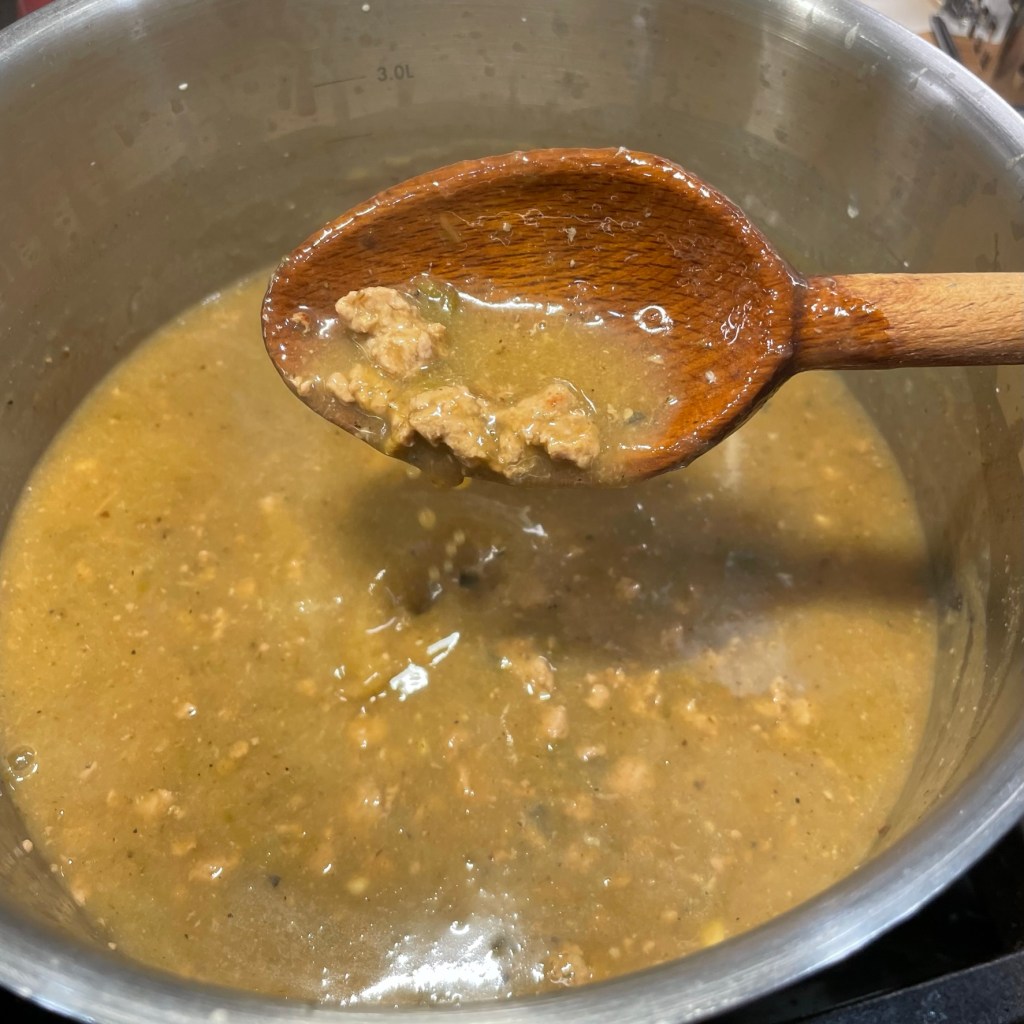
The chili itself is the star of these burritos; the rest is just a tortilla rolled around seasoned beans and cheese. Accompanying the sausage were onions, garlic, flour and masa flour (for thickening), canned green chiles, fresh jalapeno (if you love the heat, as we do), a few simple seasonings, and broth (I used both veggie and chicken). Putting the chili together is easy, and then it settles in for a long, low simmer. If you have an extra day, let it sit in the fridge overnight because the flavors mingle even more for better flavor.


If you like, you can serve the finished chili just as it is—either by the steaming bowlful with a handful of shredded cheese or by ladling it over a burrito—but if it thins out more than you prefer during the cooking, whip up a bit of corn starch slurry and stream it in over medium heat. When it’s thickened and glossy, it’s ready to go.


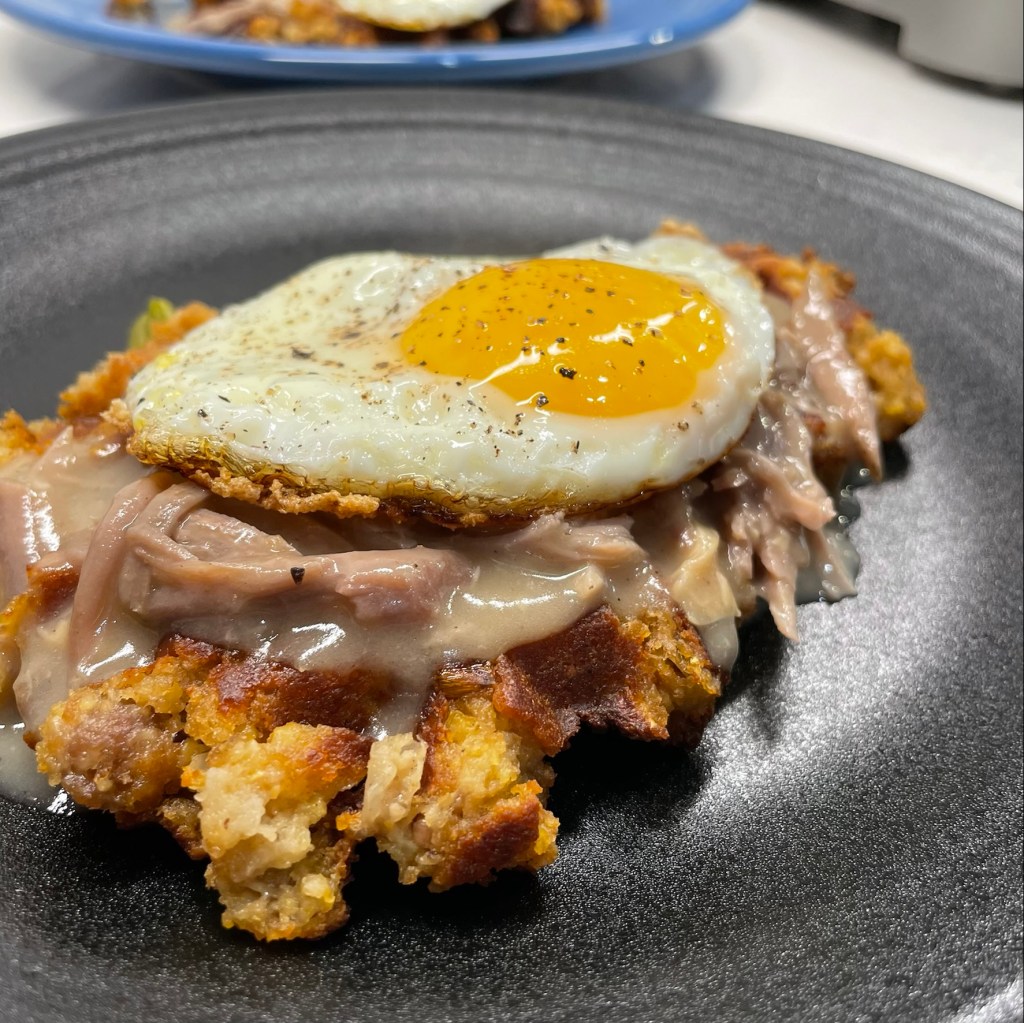
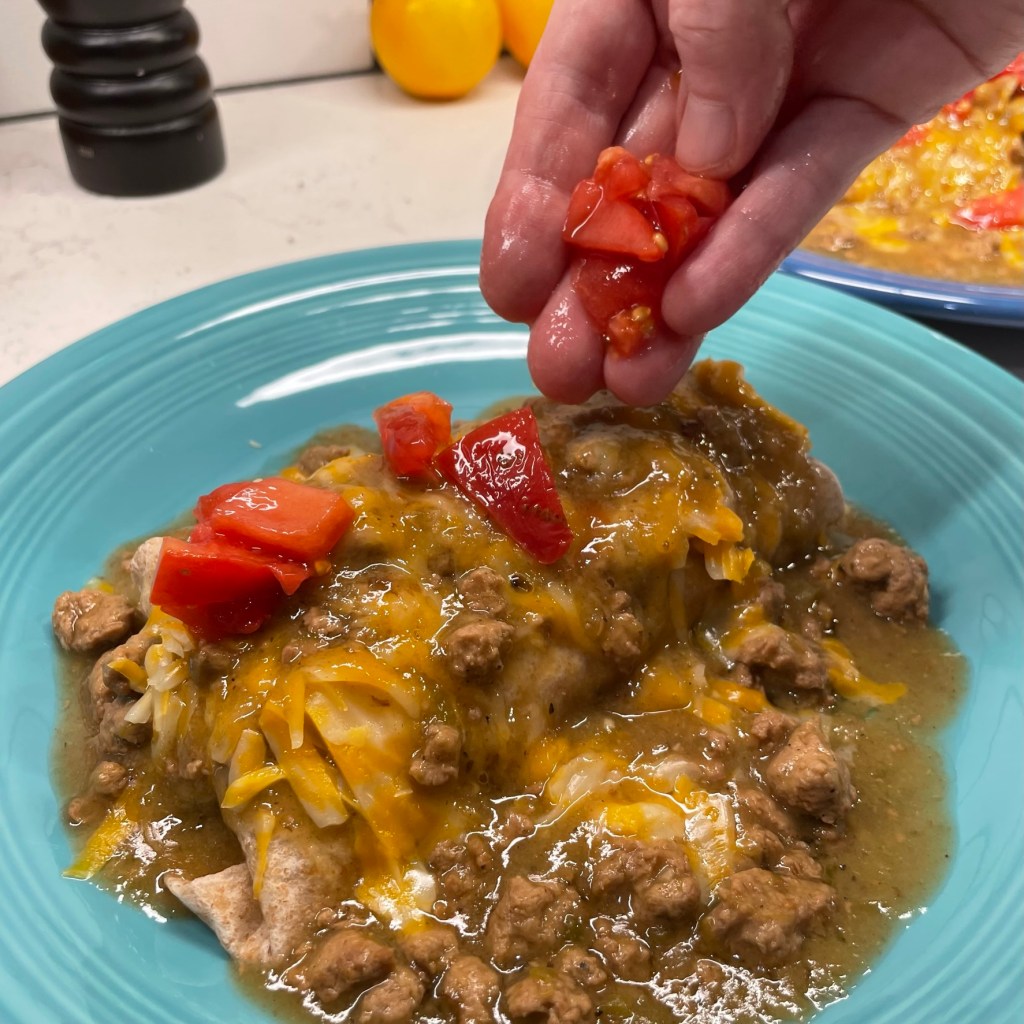
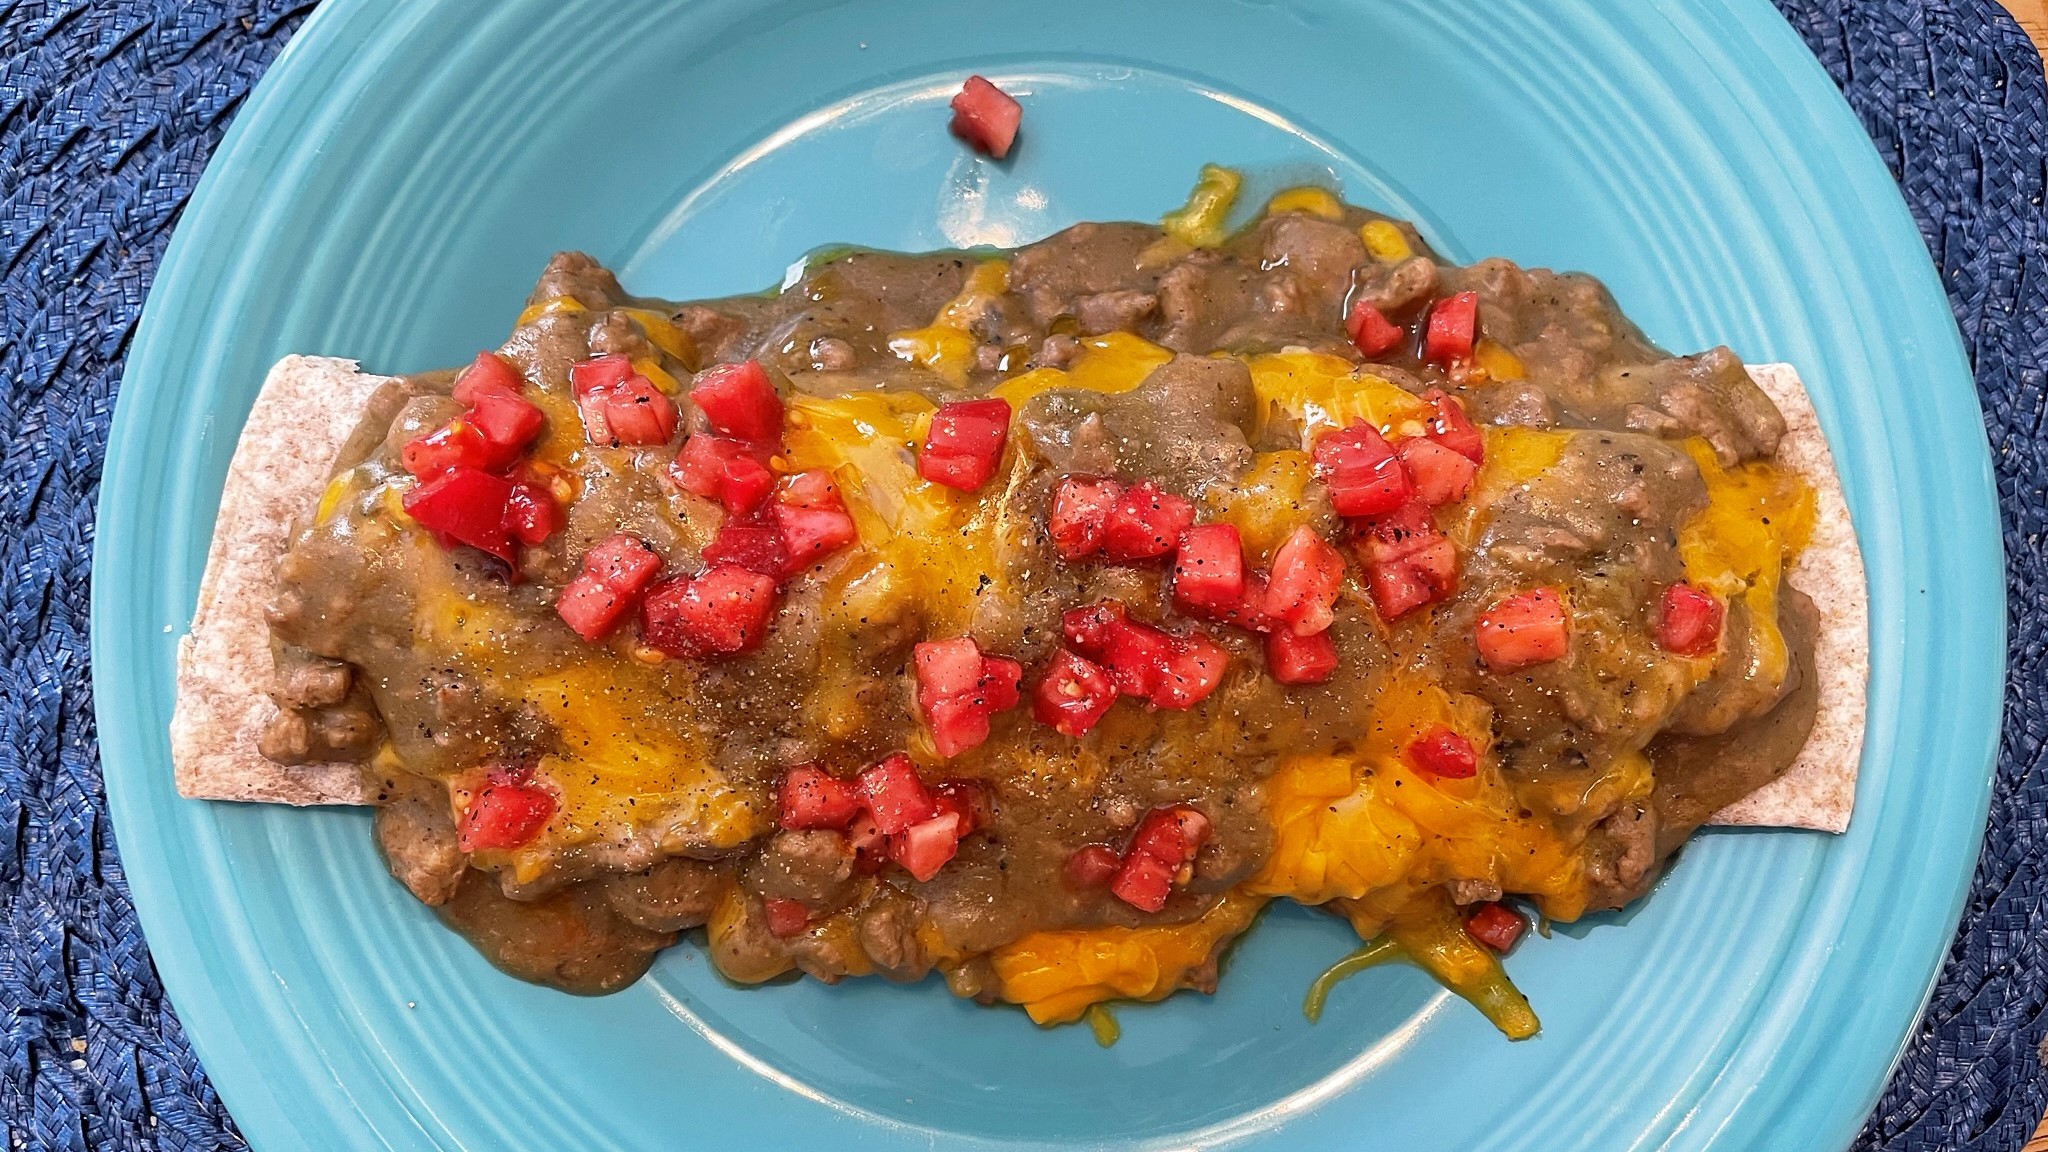
At our house, we enjoyed this at dinner, lazily draped over bean and cheese burritos. And we enjoyed it again for a weekend breakfast, stuffing our tortillas with black beans, scrambled eggs and cheese, plus a scatter of fresh chopped tomatoes.


Green Chili Burritos

  • Servings: About 8
  • Difficulty: Average
  • Print

This dish speaks the language of my childhood, with comforting chili made from ground pork and all that beautiful, melty cheese.


Ingredients

  • 1 large yellow onion, chopped
  • 3 or 4 cloves garlic, minced
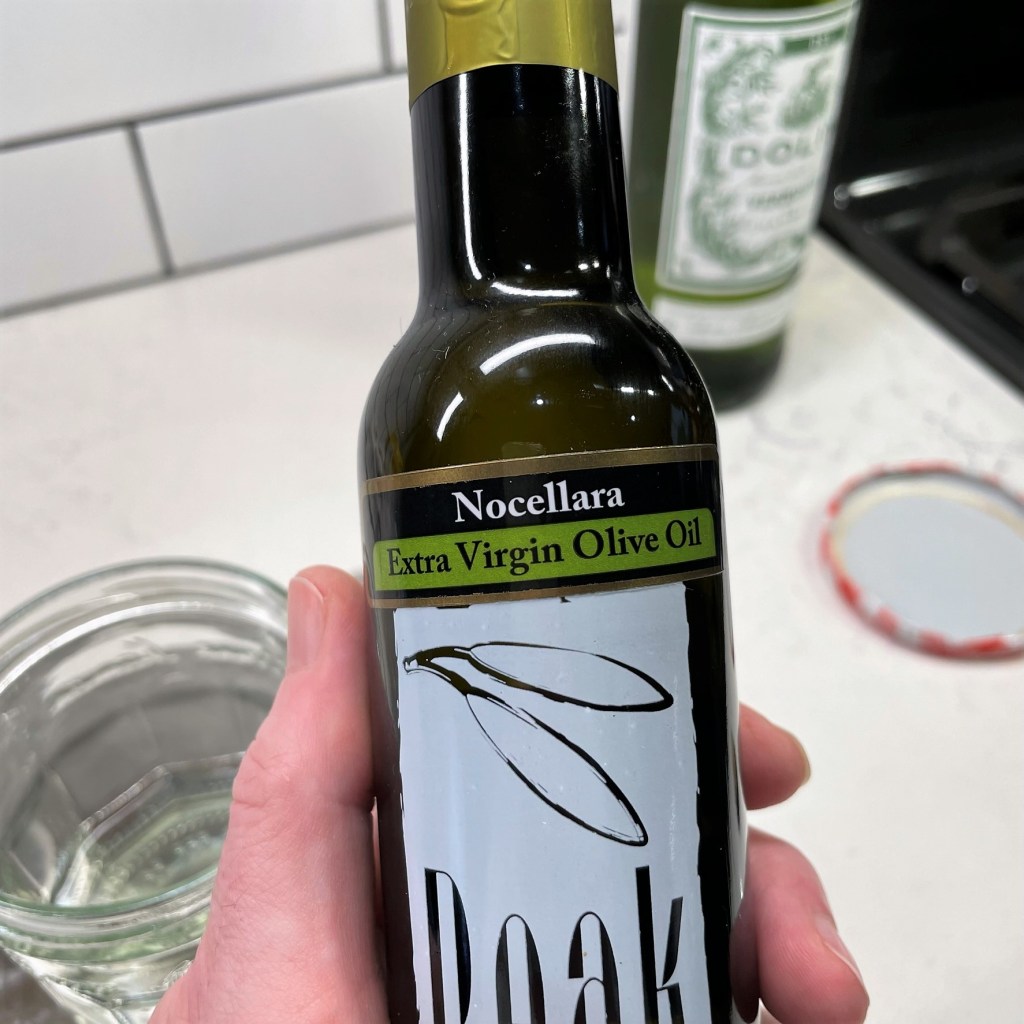
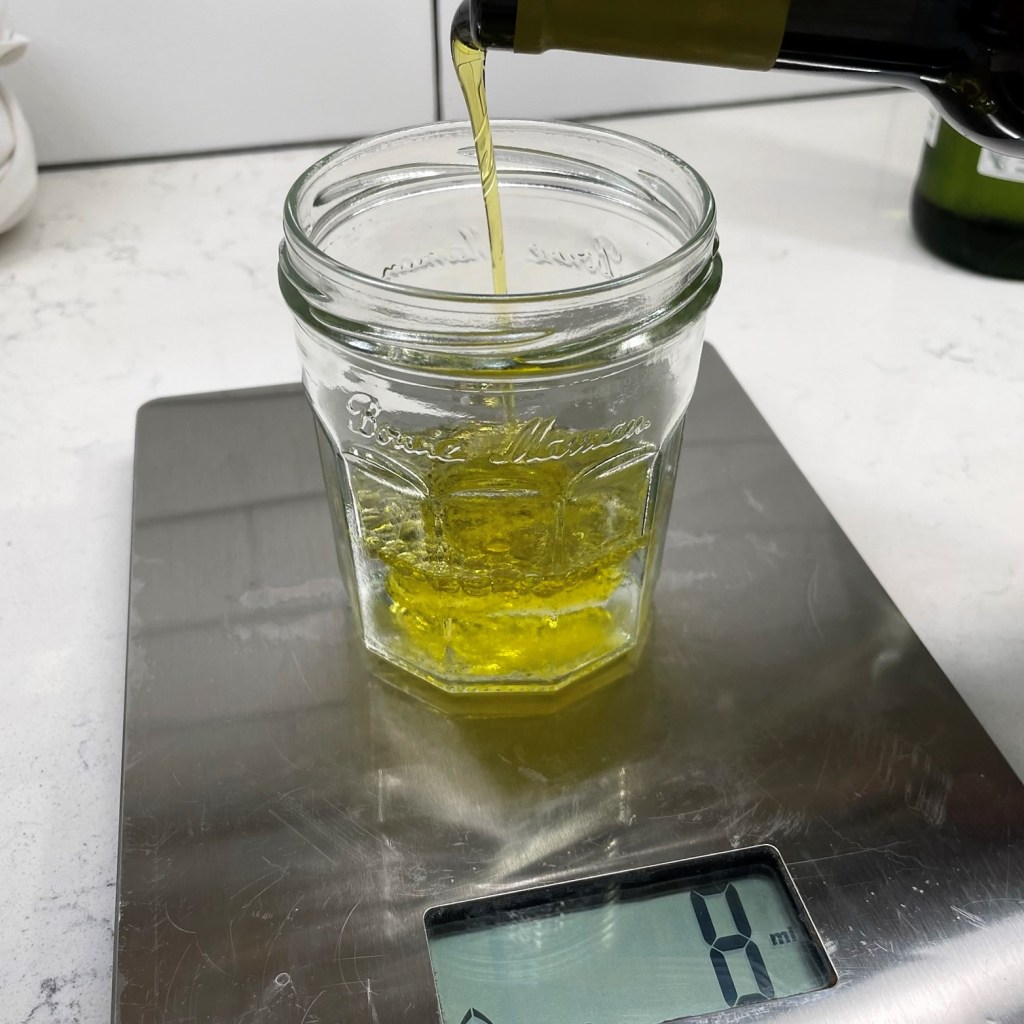
  • 1 Tbsp. EVOO
  • Kosher salt and freshly ground black pepper
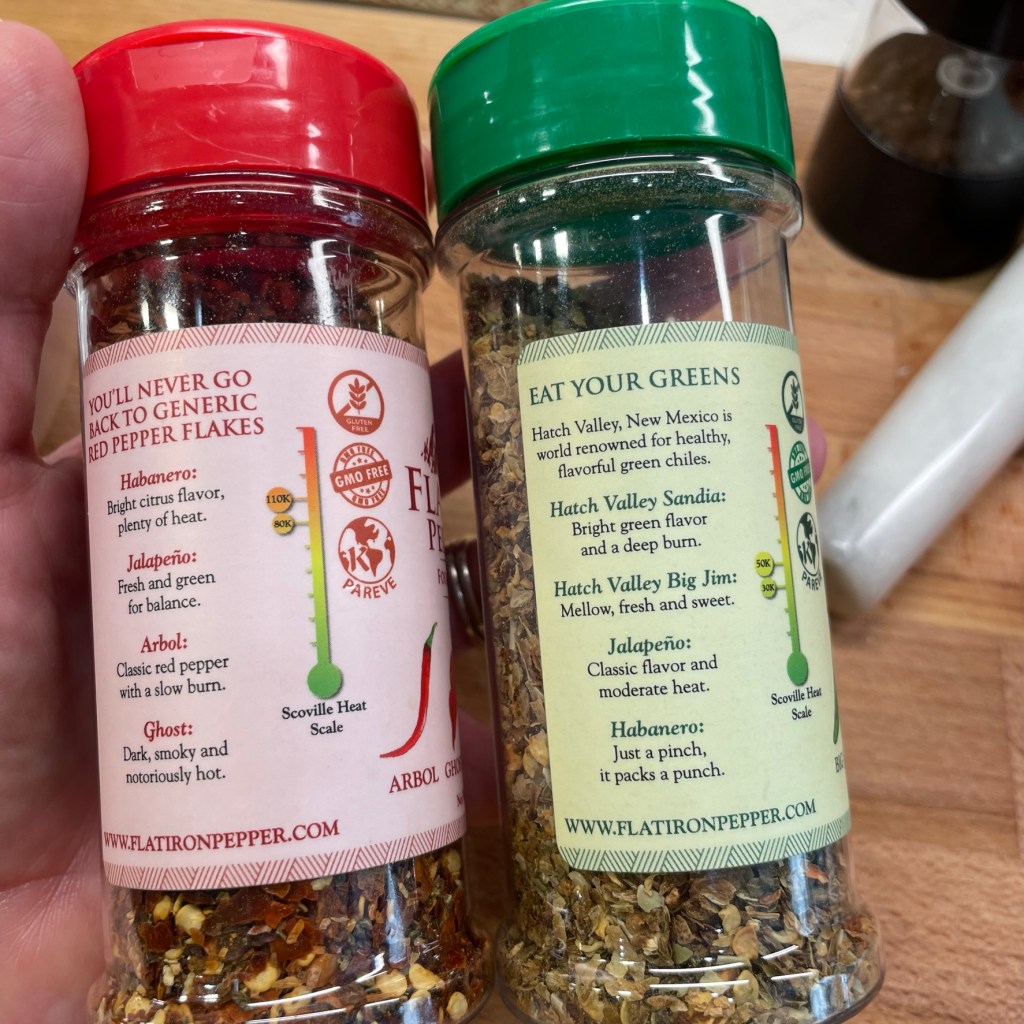
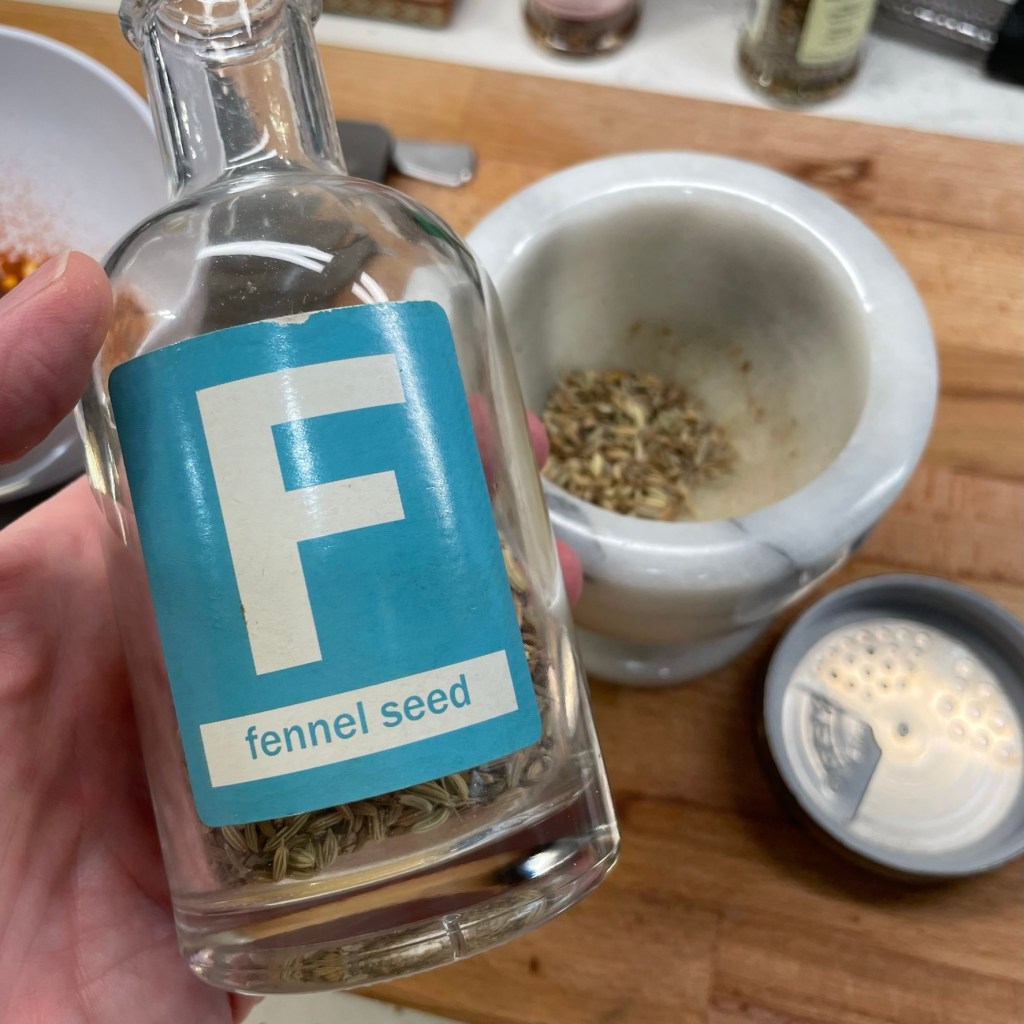
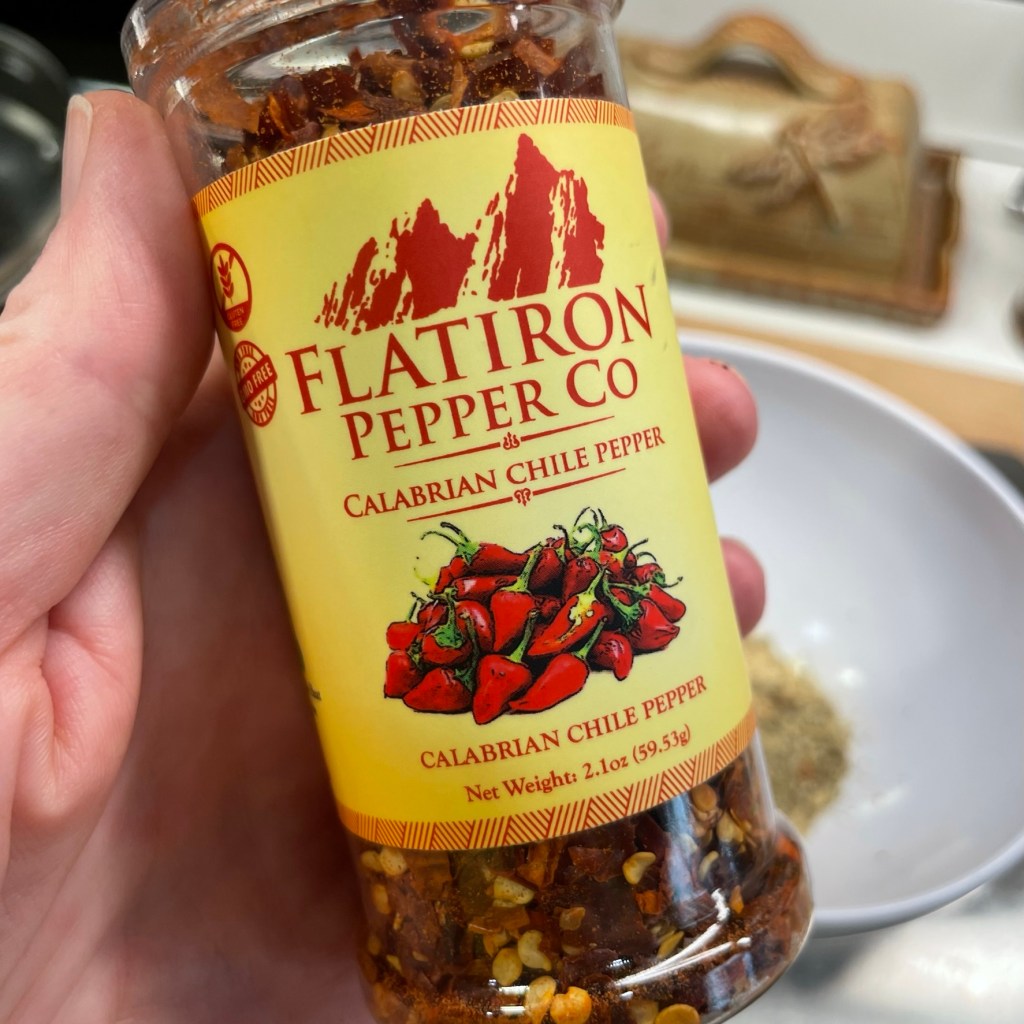
  • 2 tsp. dried green chile flakes (mine were from Flatiron Pepper Co., available online)
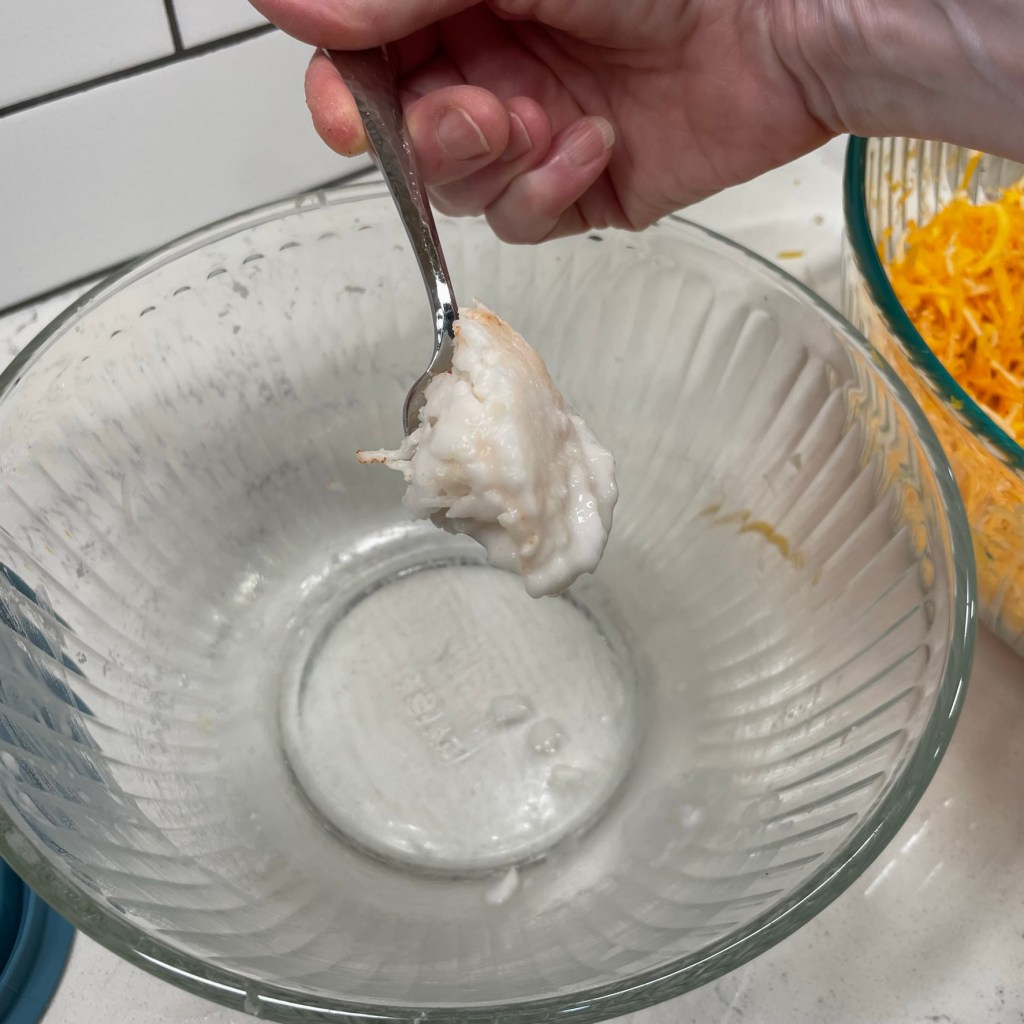
  • 1.5 lbs. green chile pork sausage (store-bought, or my recipe which is included below)
  • 1 whole fresh jalapeno, seeded and chopped (keep some of the seeds if you like it hot)
  • 2 or 3 Tbsp. additional EVOO to provide fat for roux
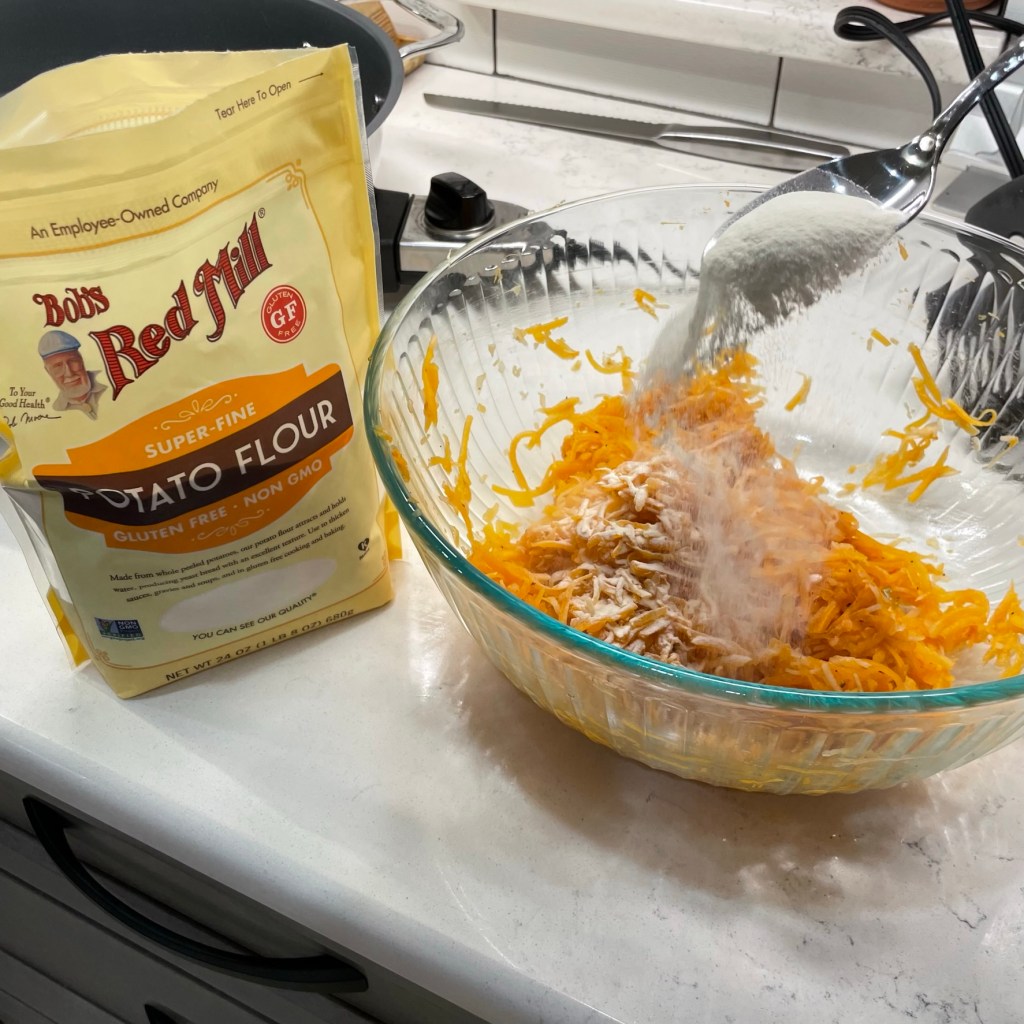
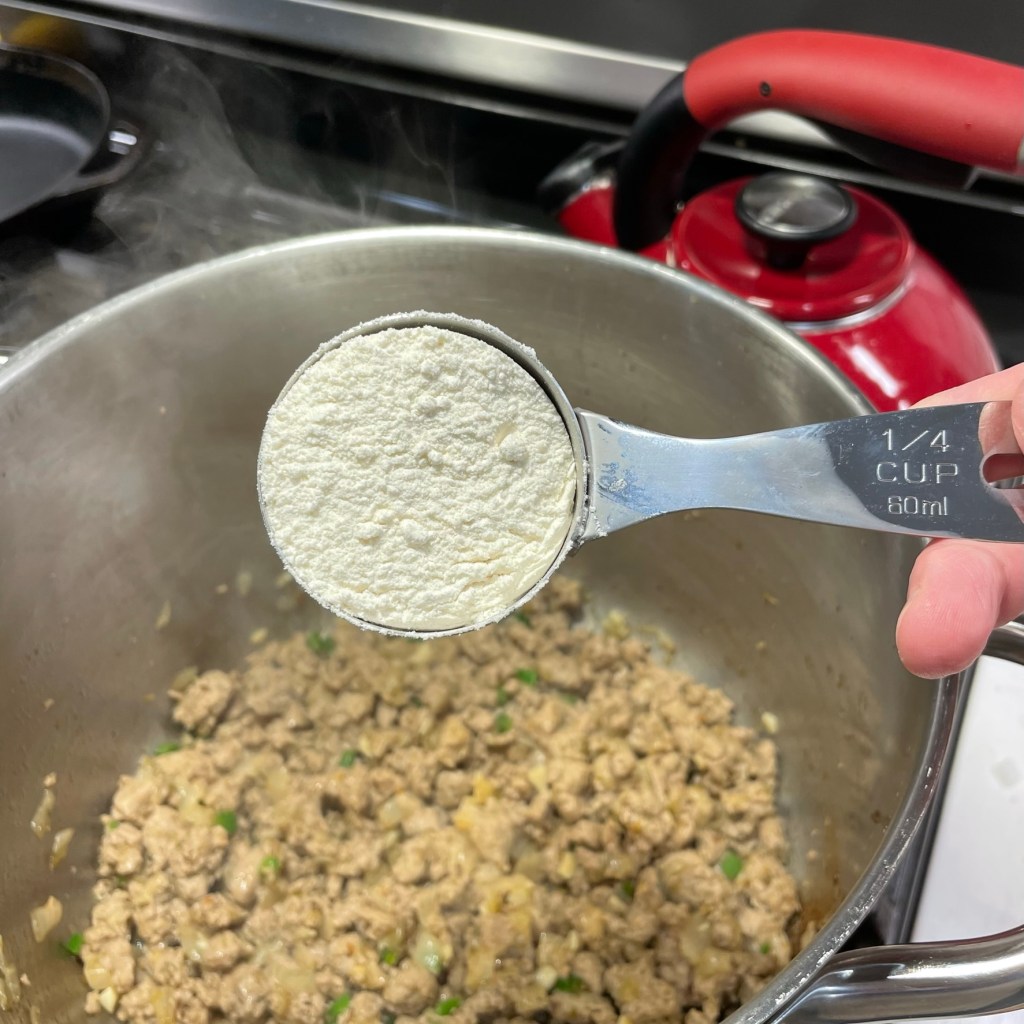
  • 1/4 cup all-purpose flour
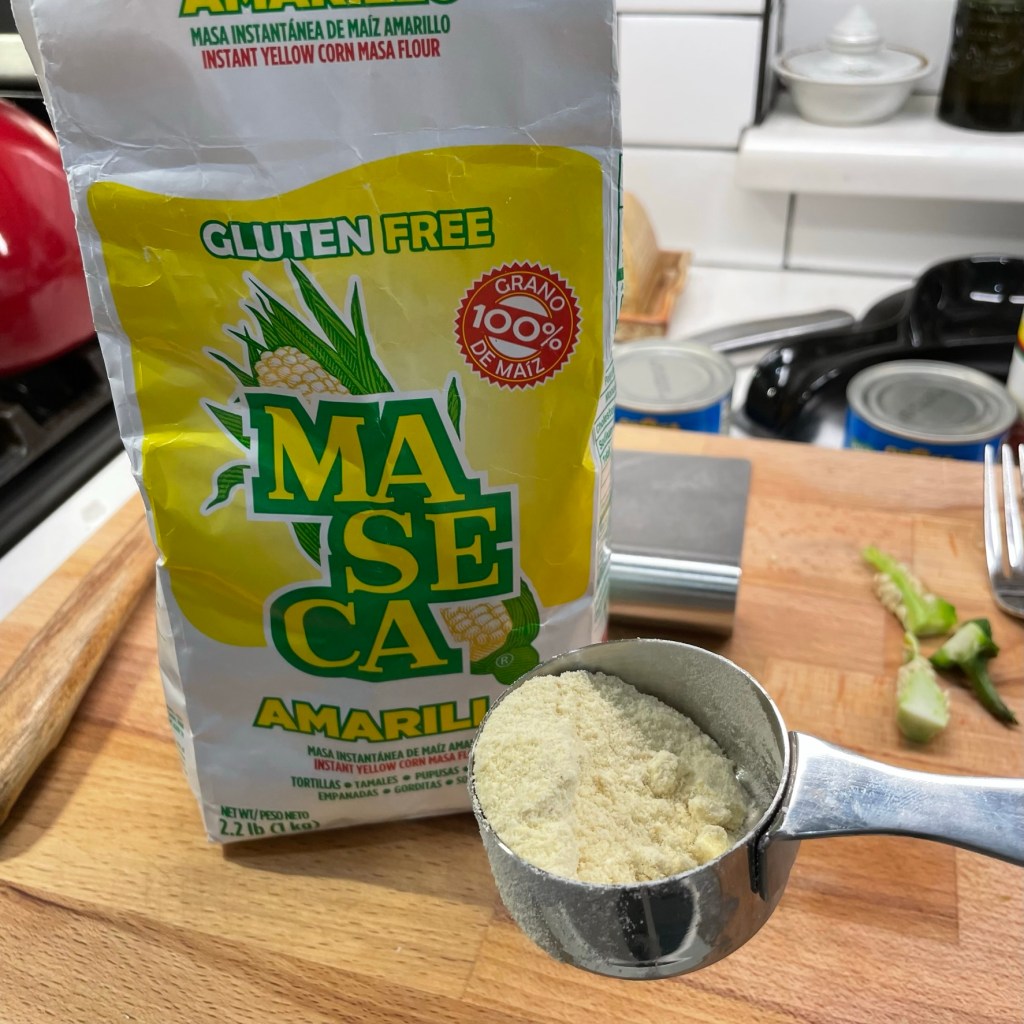
  • 3 Tbsp. masa flour (Maseca)
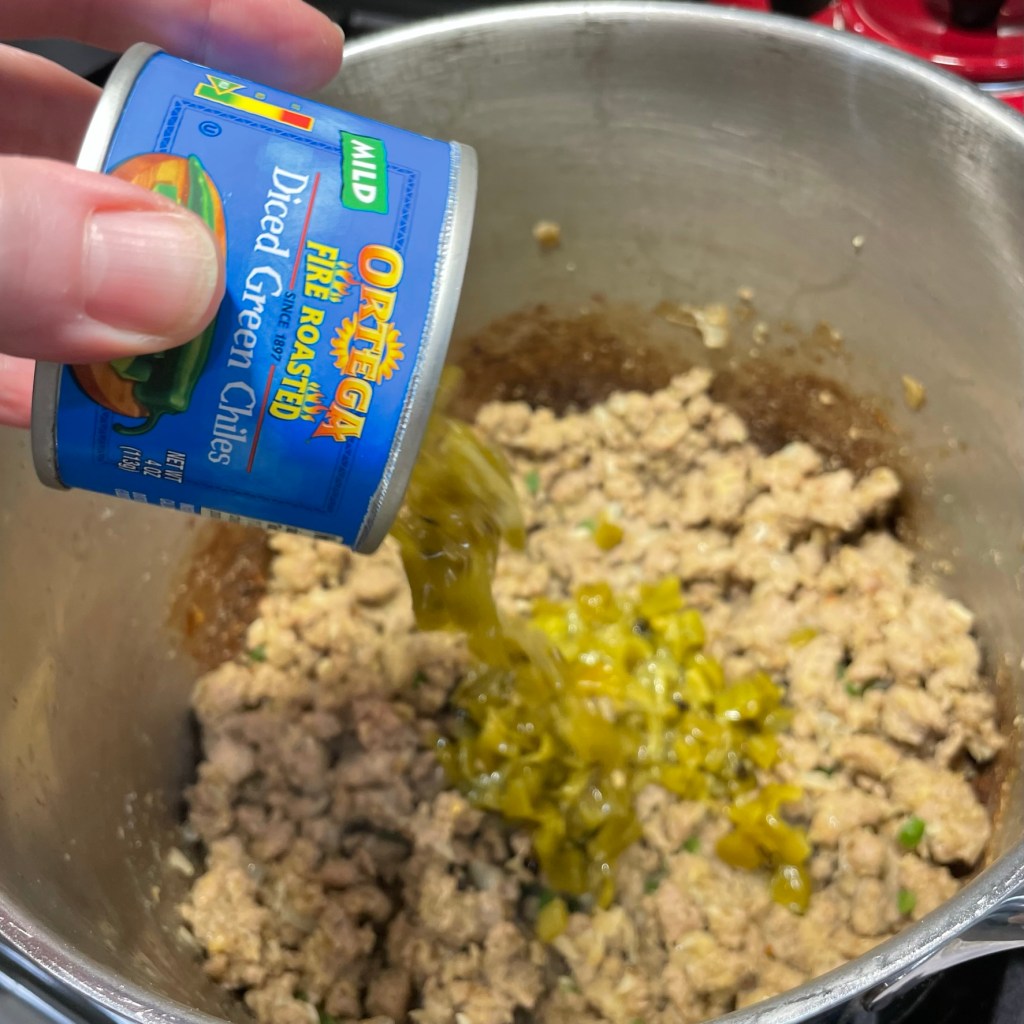
  • 2 small cans (4 oz.) fire roasted diced green chiles
  • 1 1/2 tsp. ground cumin (from toasted seeds if possible)
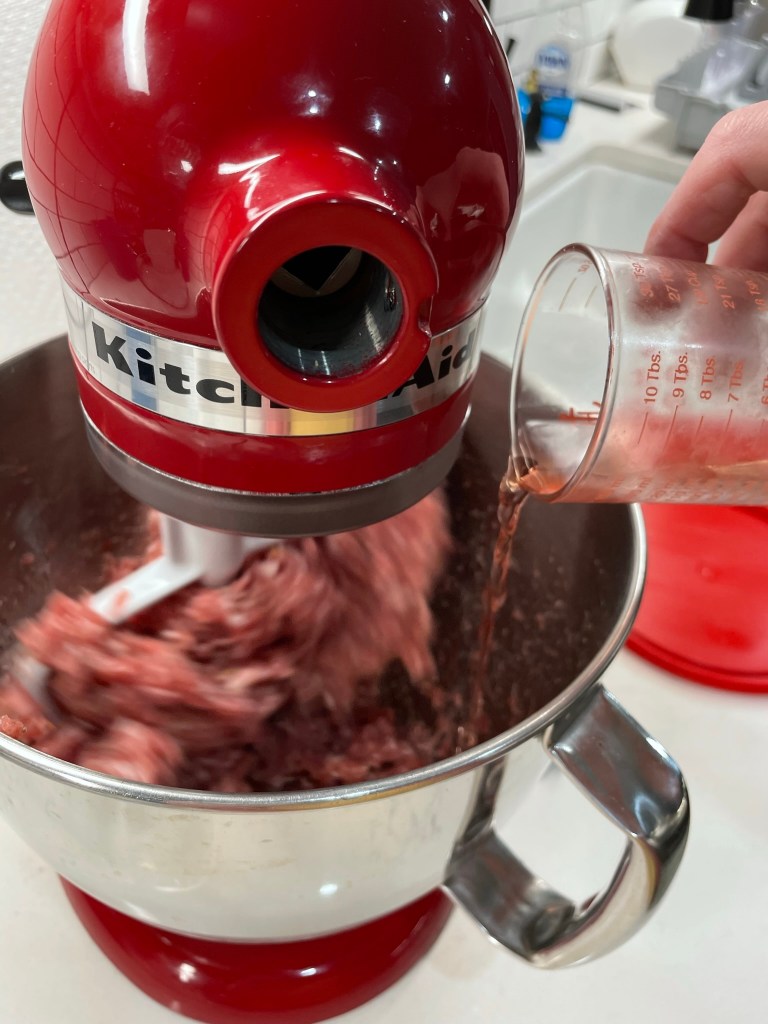
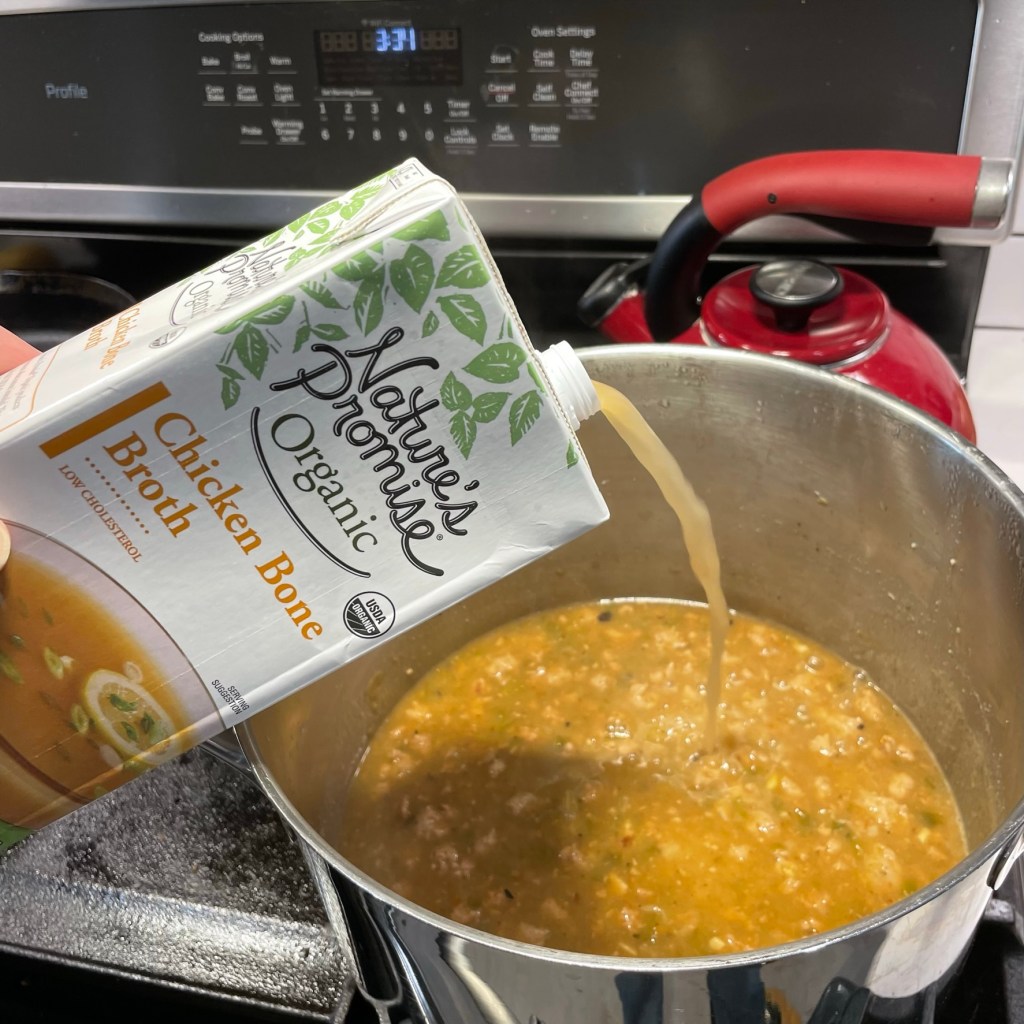
  • 4 cups low-sodium veggie or chicken broth (I used 2 cups of each)
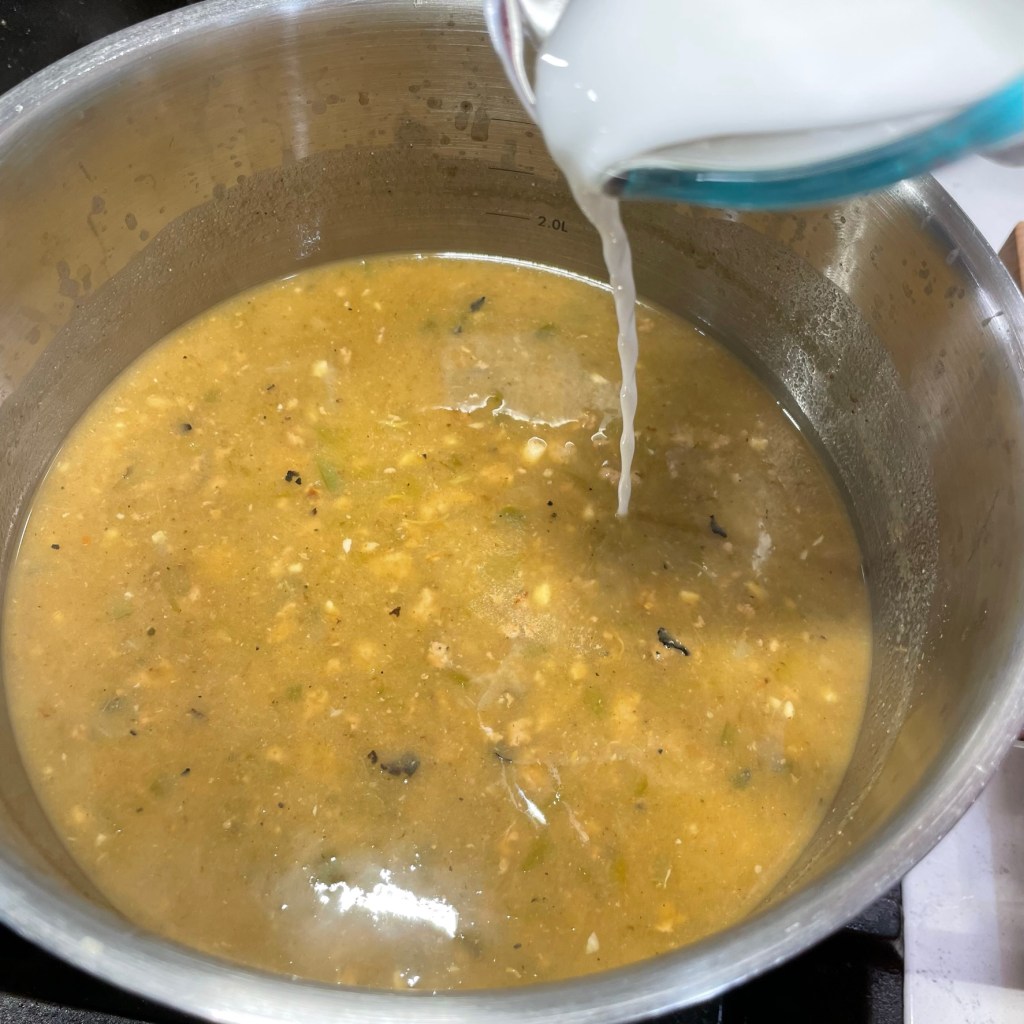
  • Corn starch slurry with equal parts corn starch and ice water (About 1/3 cup total)
  • 2 cans refried beans, warmed with oil and onions (for serving burritos)
  • Large flour tortillas (for burritos)
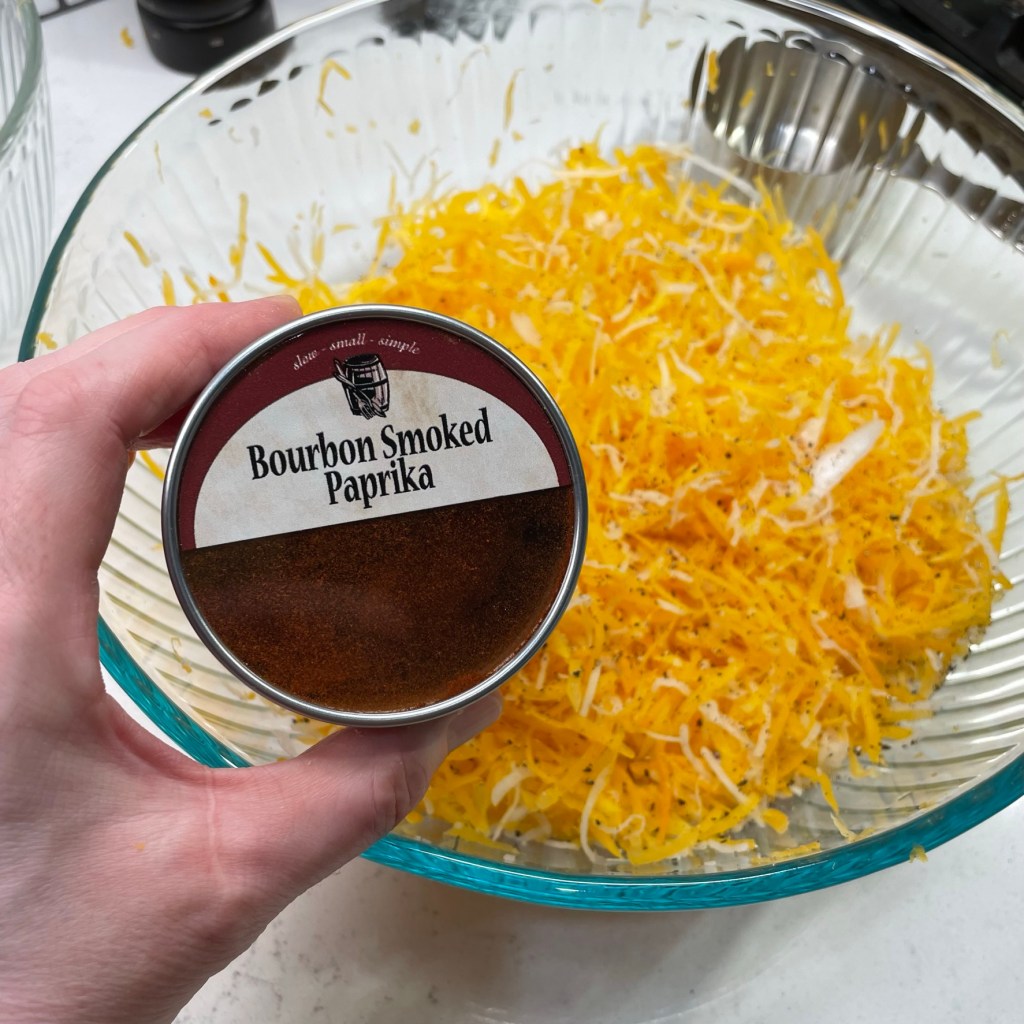
  • 8 oz. block cheddar, colby jack or pepperjack cheese, shredded
  • Fresh tomatoes, chopped (optional)

Directions

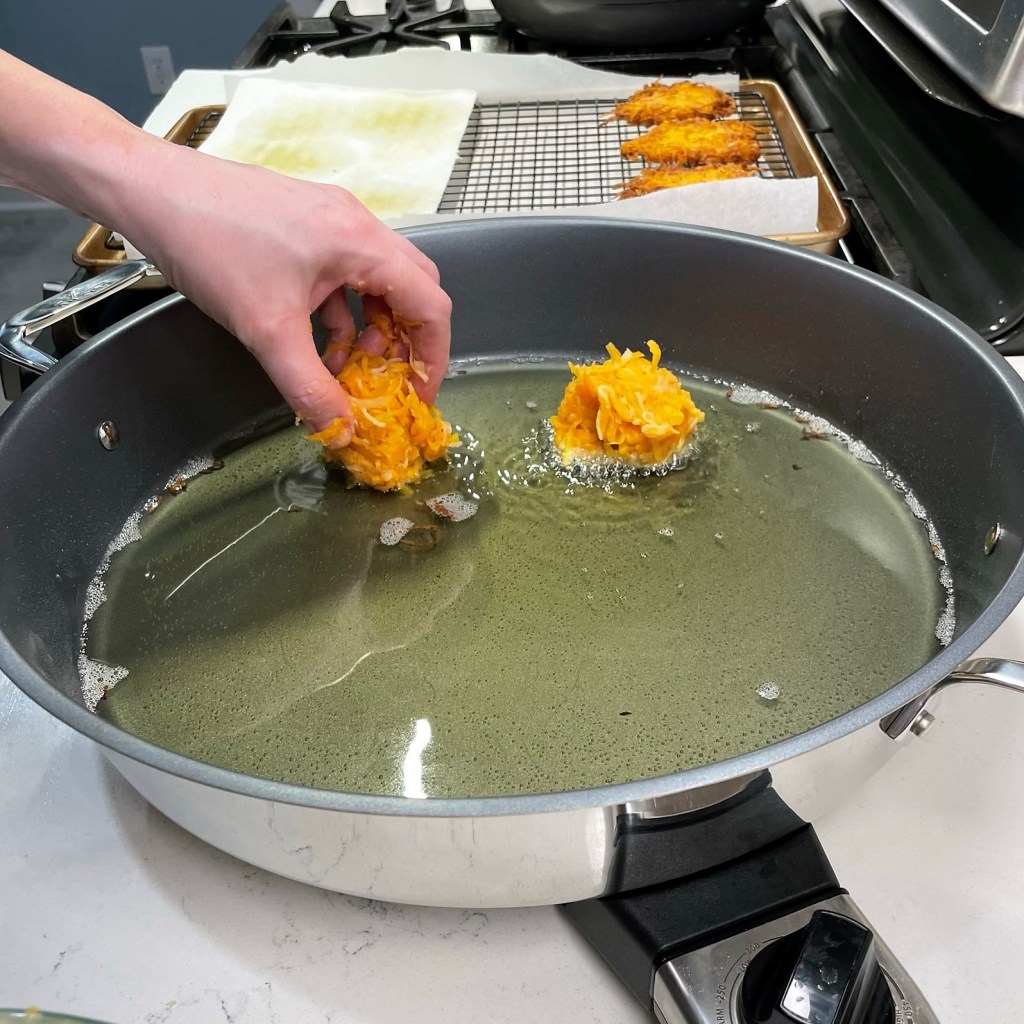
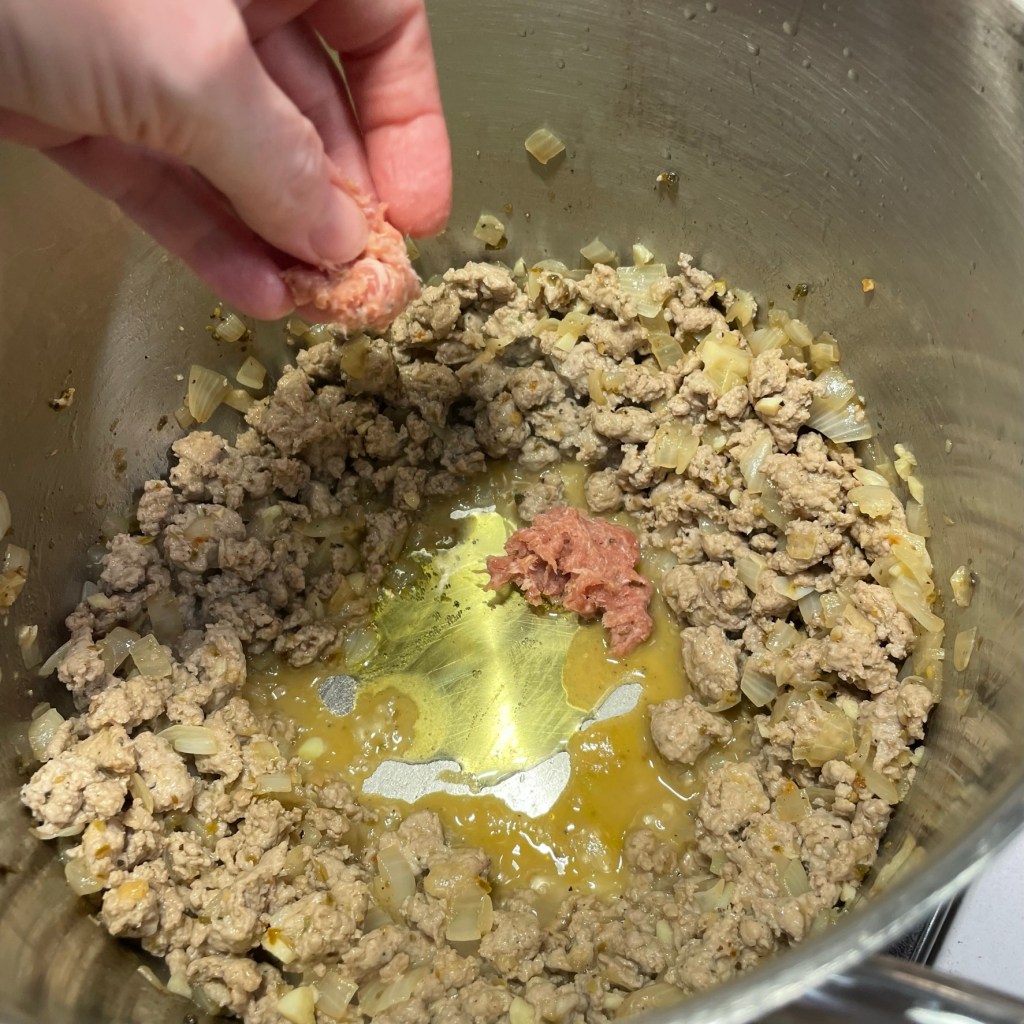
  1. Saute onions and garlic in olive oil, season with salt and pepper.
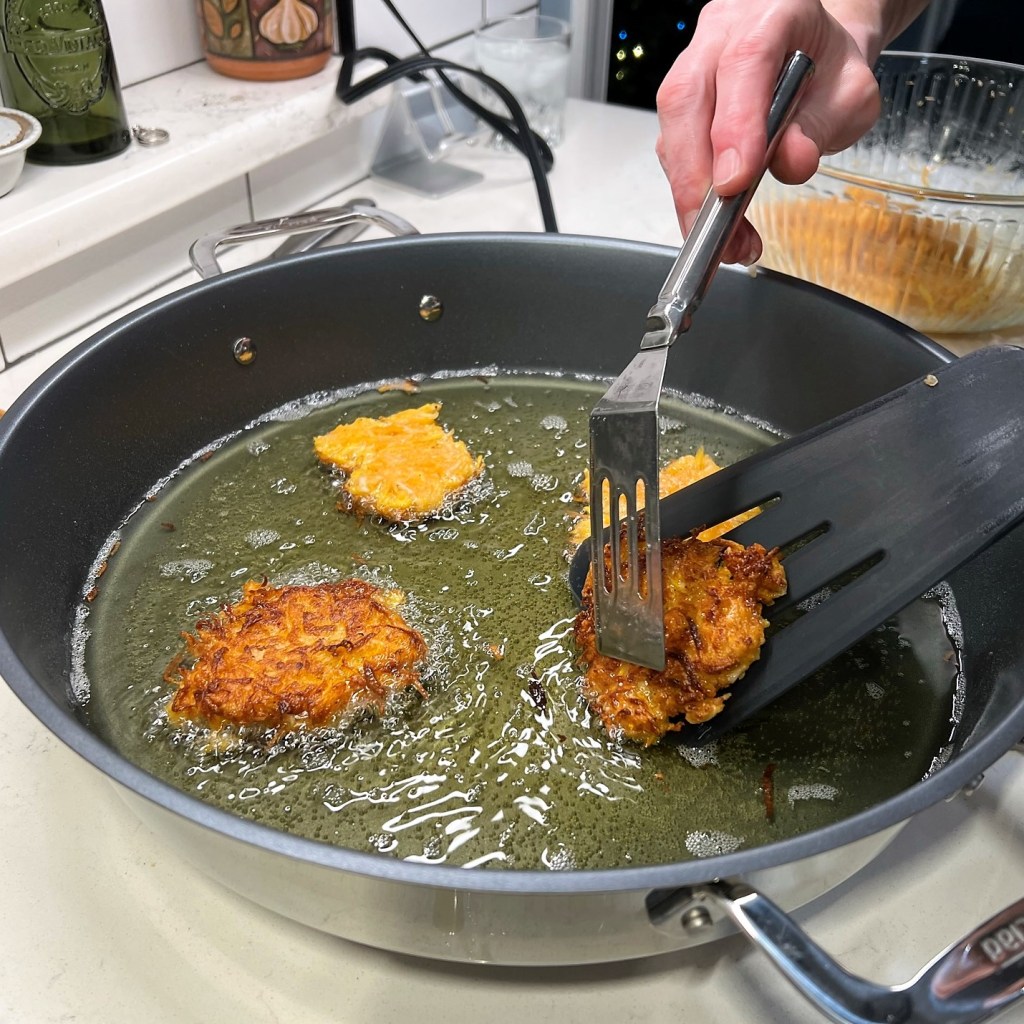
  2. Add sausage, a bit at a time, to brown it without overcrowding the pan.
  3. Add jalapeno and drizzle with olive oil to provide fat for the roux. Stir in ground cumin.
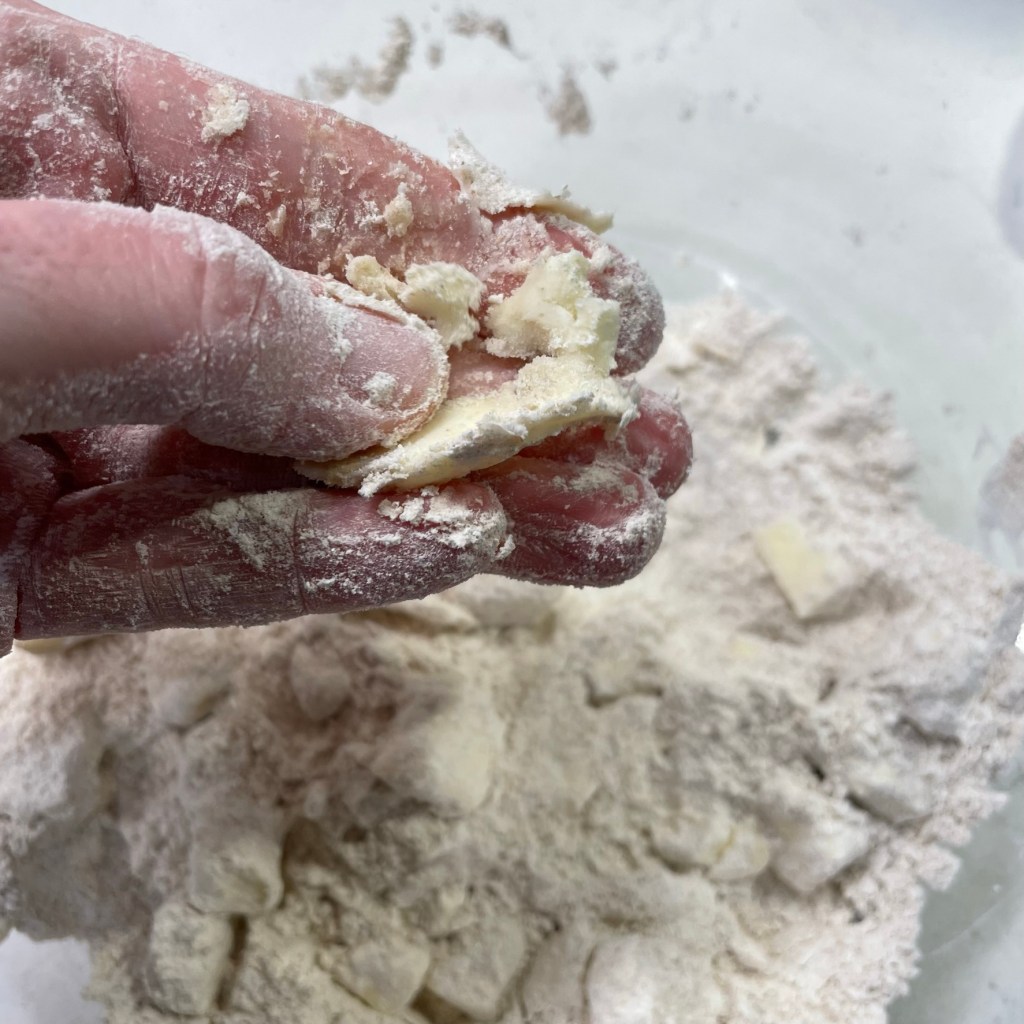
  4. Sprinkle flour and masa all over the meat mixture and toss to coat, adding more oil if needed to make it sticky and evenly coated.
  5. Add veg or chicken broth, half at a time, stirring each to blend and thicken.
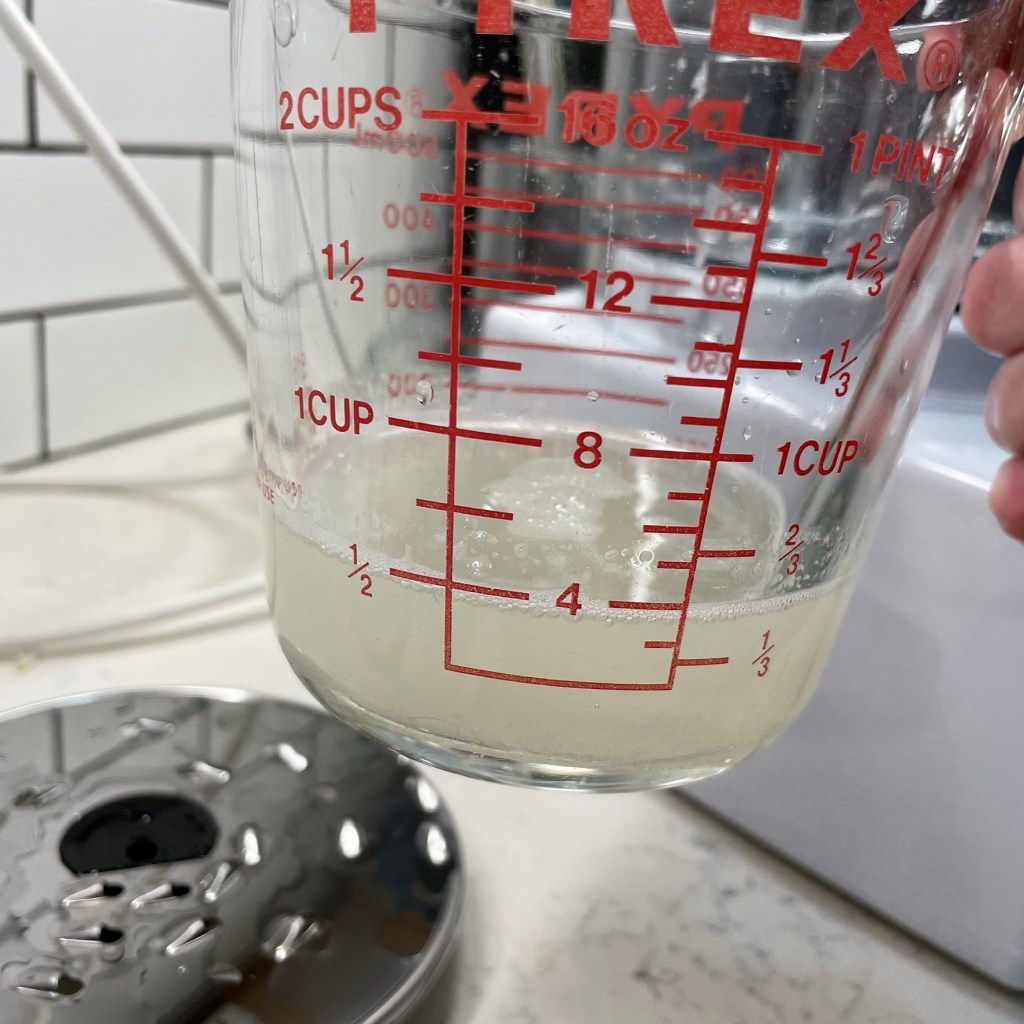
  6. Cover the pot, reduce heat and cook at a low simmer for a couple of hours. Aim to keep it below the boiling point so that the thickening doesn’t cook off. If the chili seems “thin” after its simmer, use the corn starch slurry to thicken it back up. Be sure to let it simmer vigorously for a few minutes to cook off the starchy flavor.
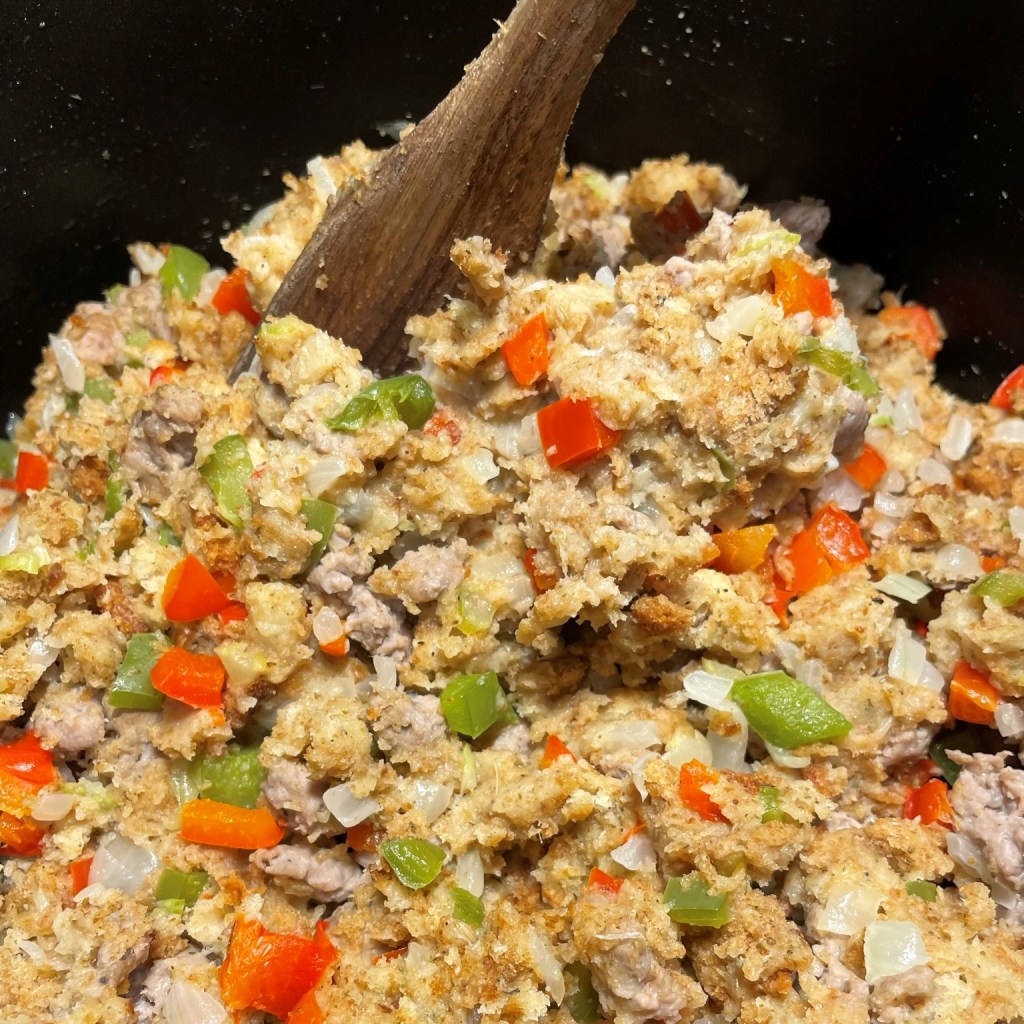
  7. To serve the chili over burritos, warm the refried beans in a skillet or deep saucepan with some sautéed onions. Add a generous spoonful of the beans onto the center of a large flour tortilla. Add a small handful of shredded cheese and roll it up, placing it seam side-down on an oven-safe plate. Ladle chili over the burrito, sprinkle on more shredded cheese and just a small amount of extra chili. Place in the hot oven or microwave to melt the cheese.
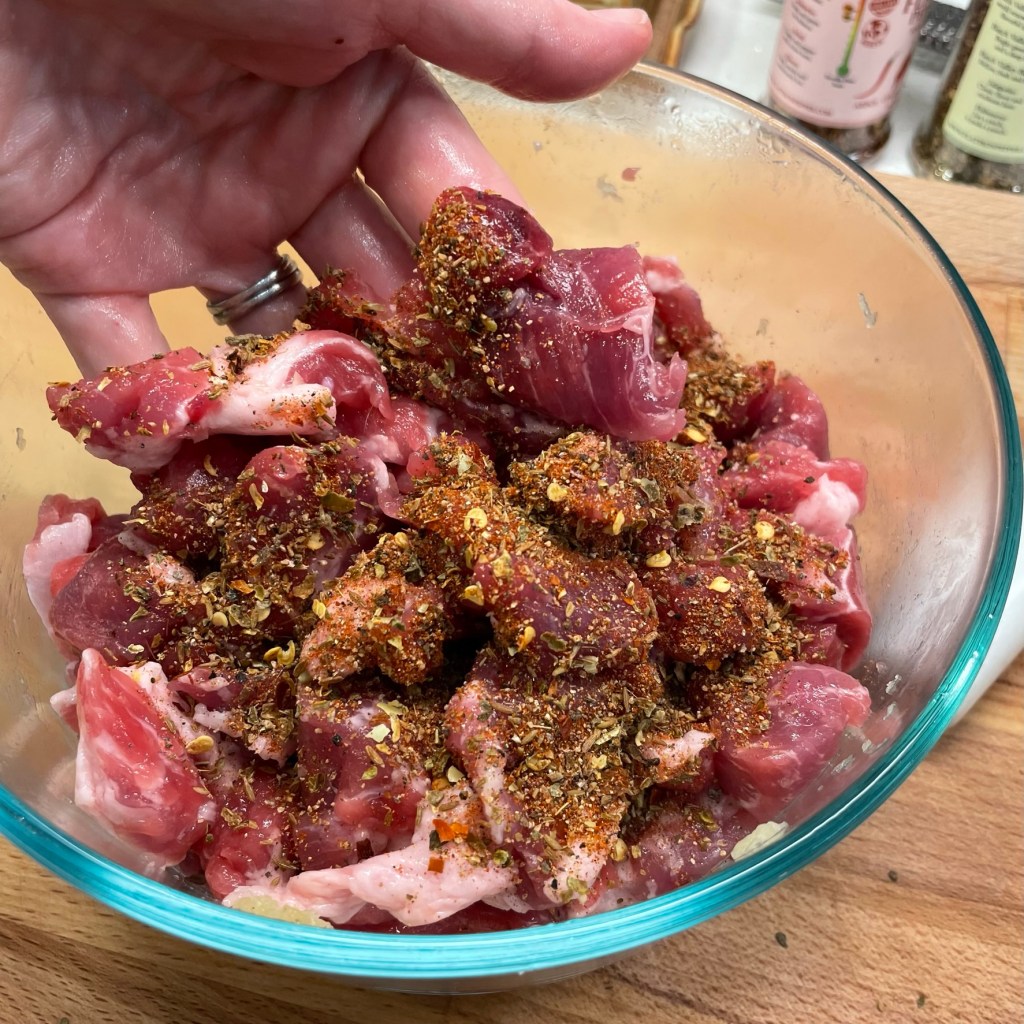
Below are the ingredients I used in the green chile sausage. Full instruction for making the sausage can be found in my previous post for homemade pork sausage.

Ingredients

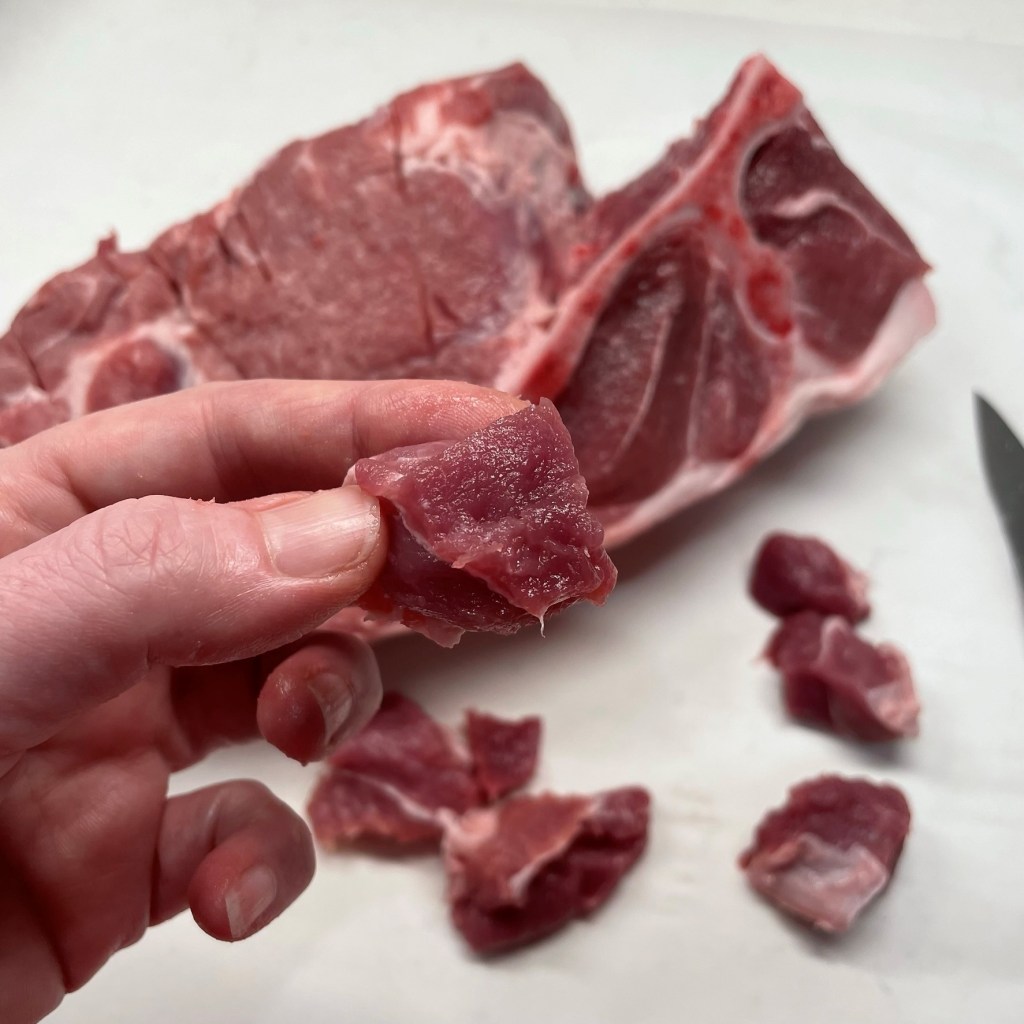
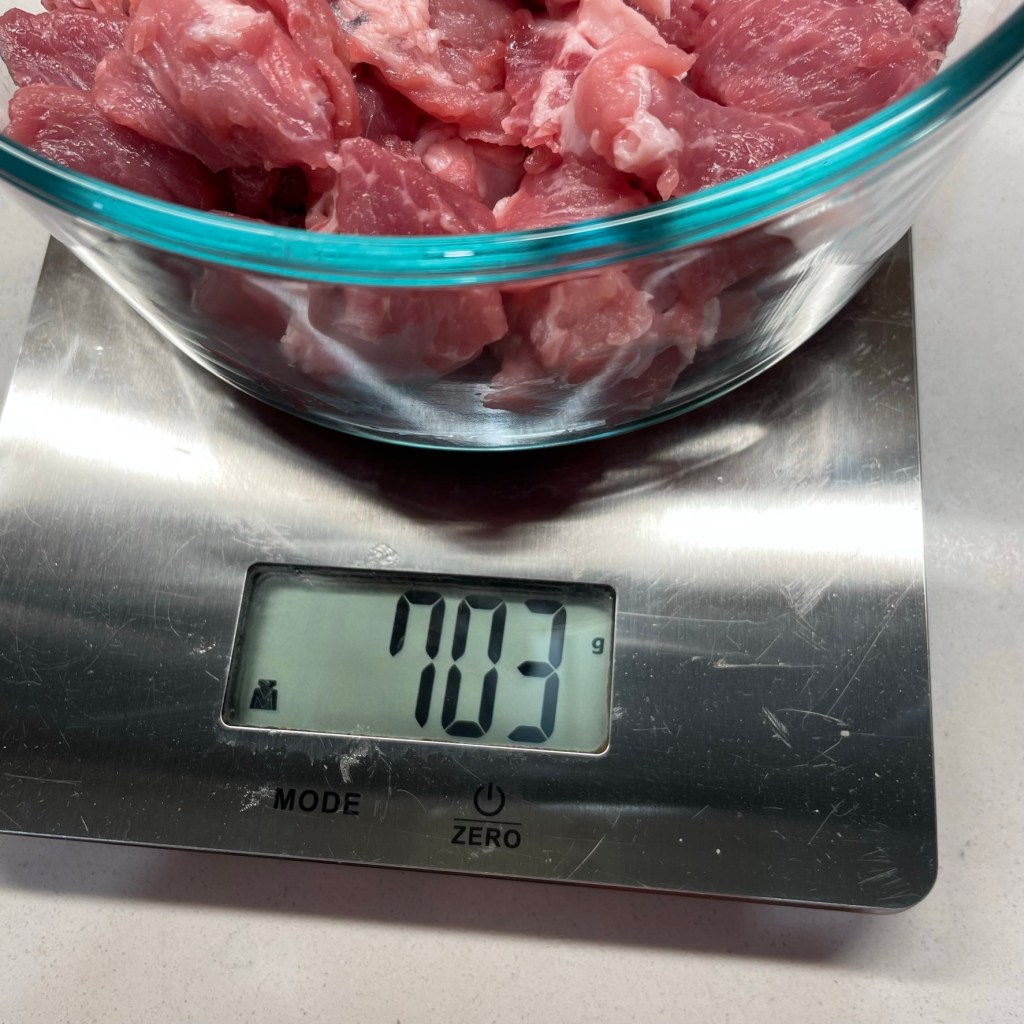
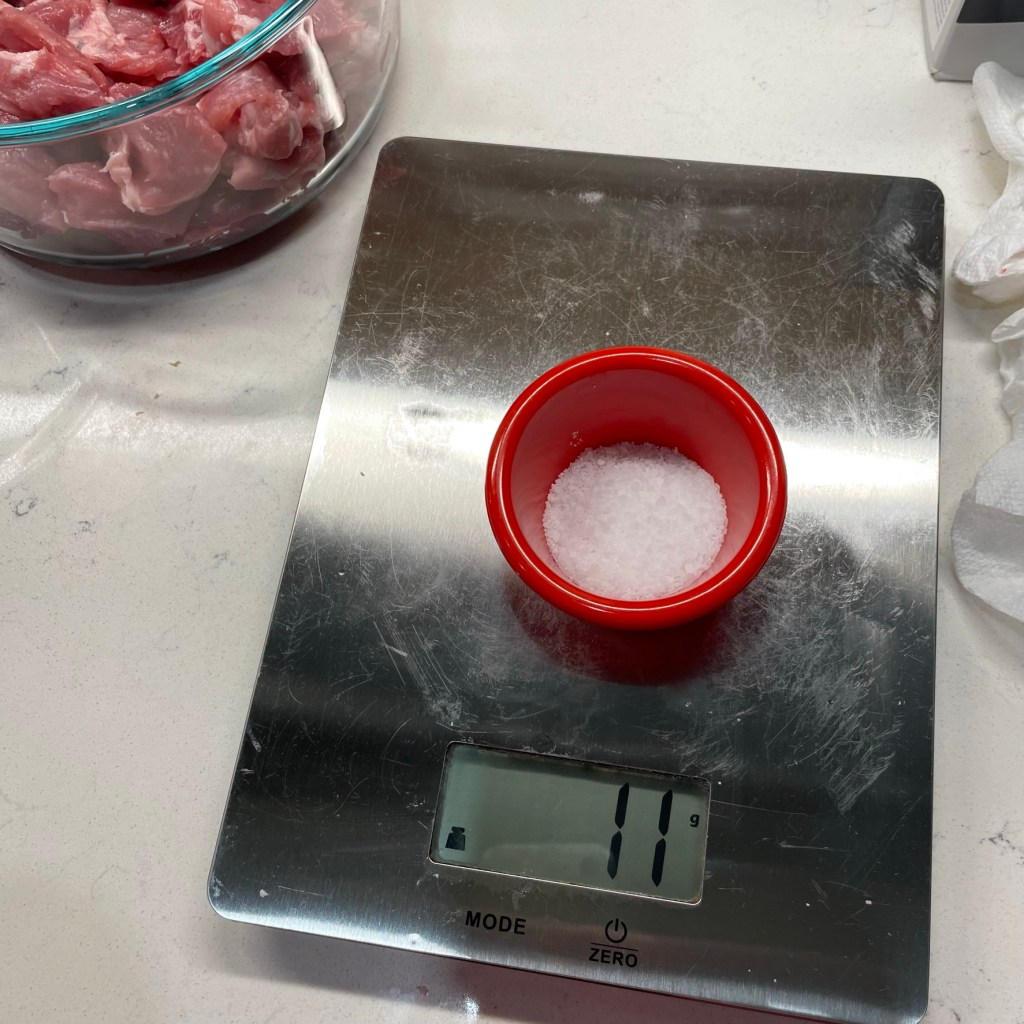
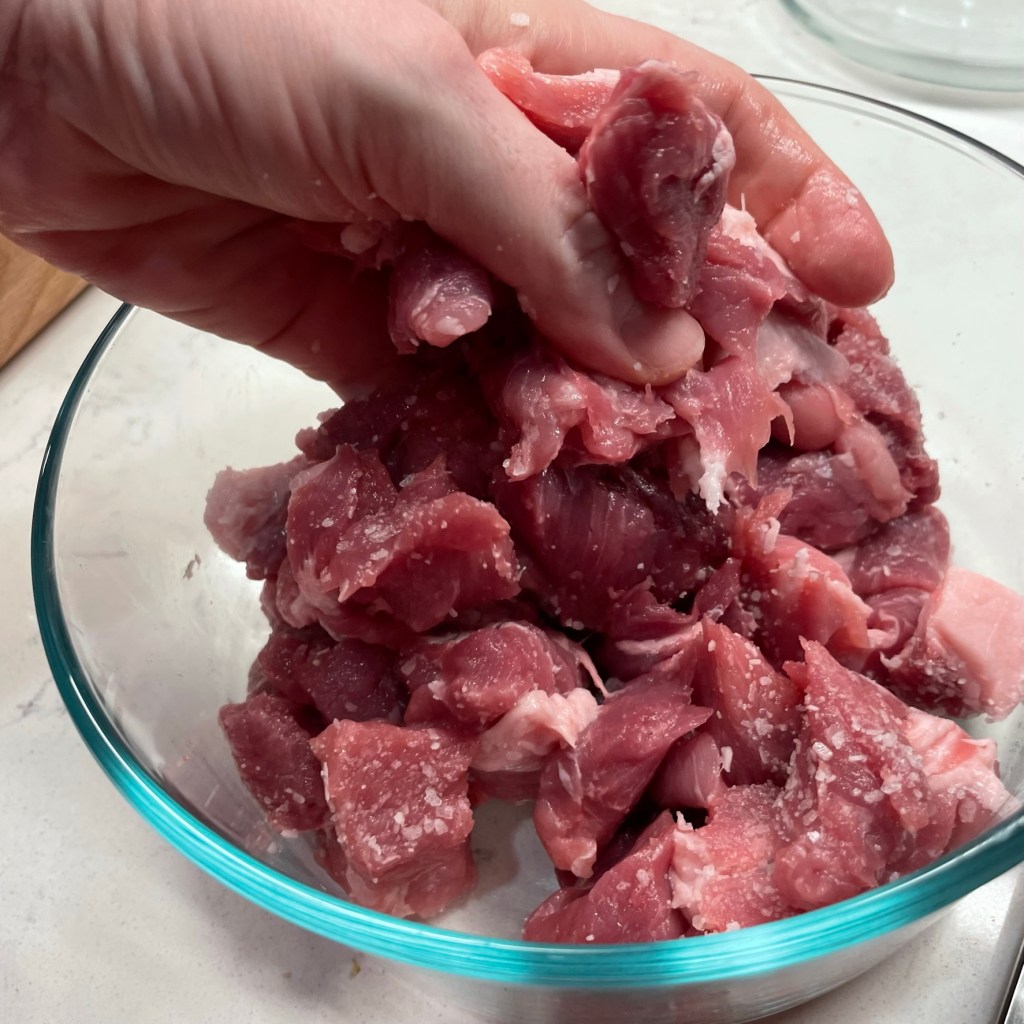
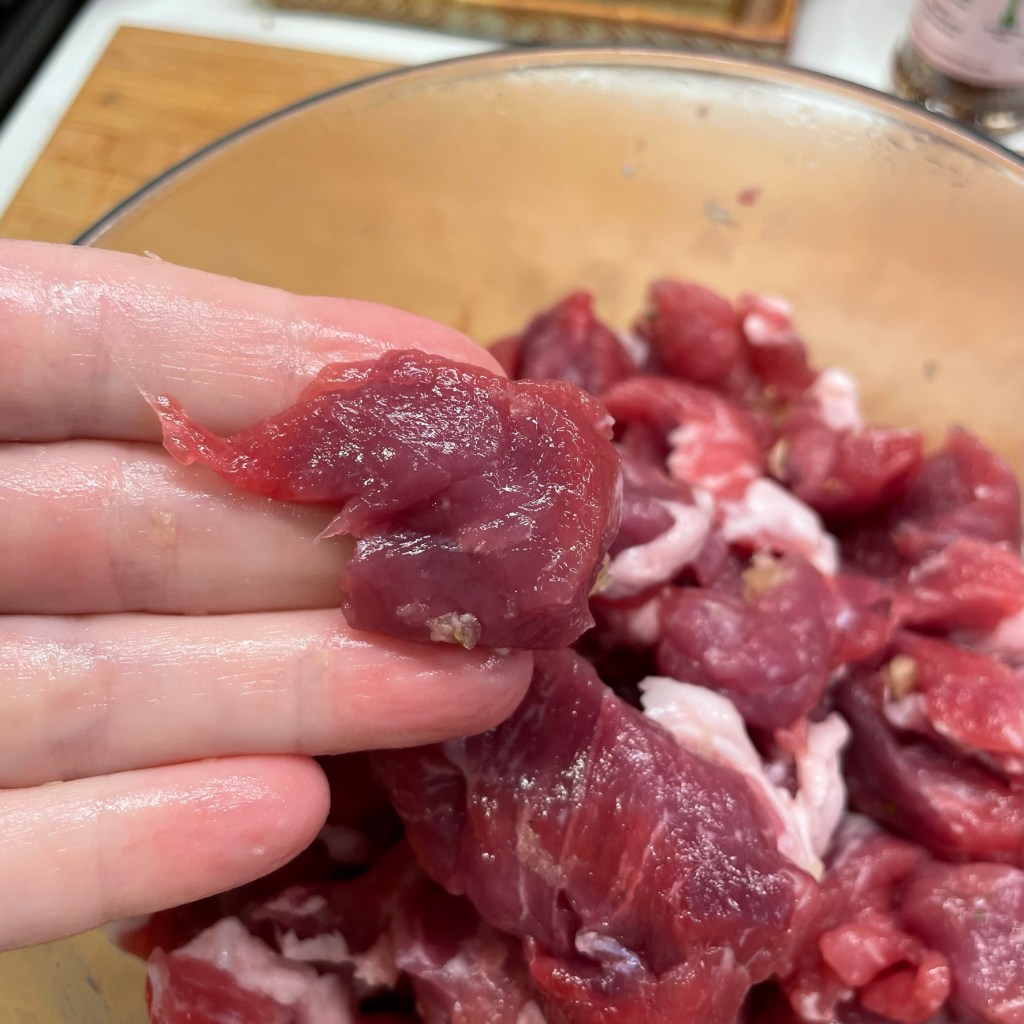
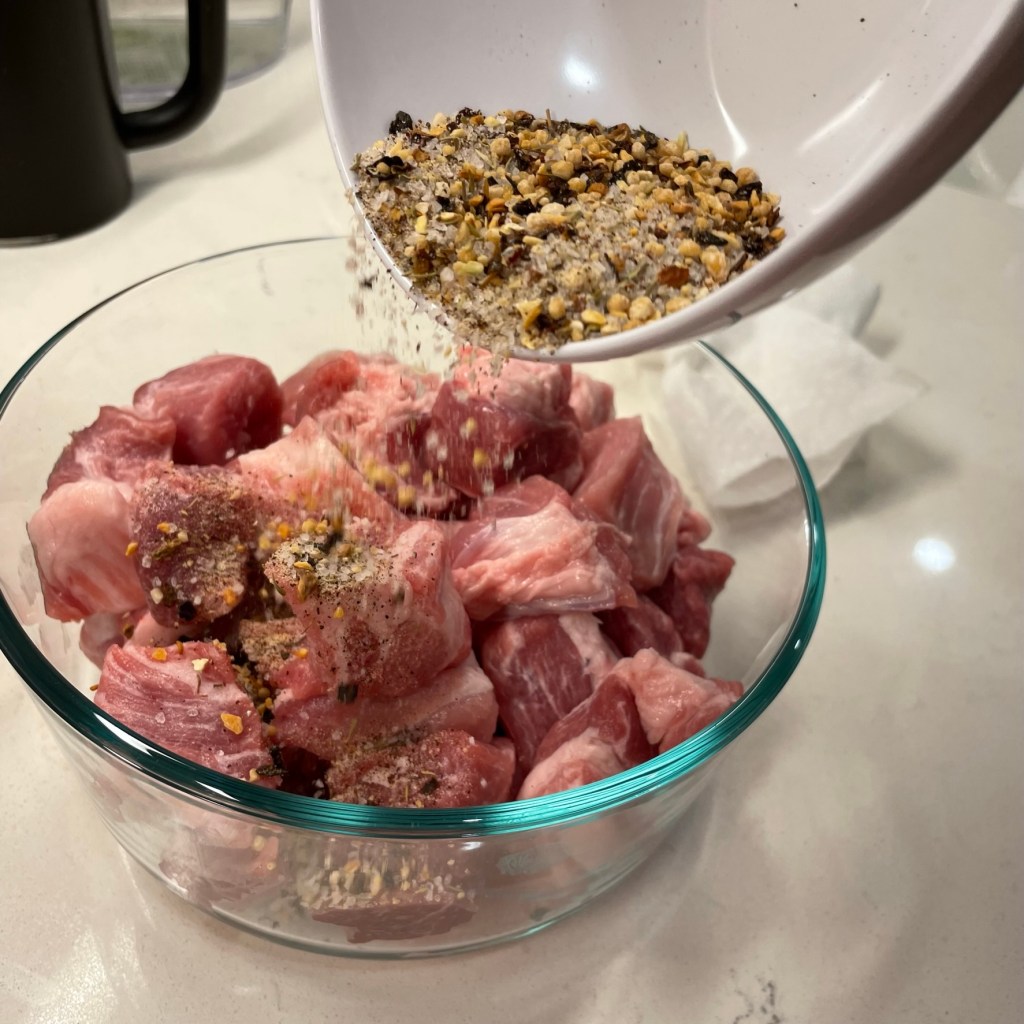
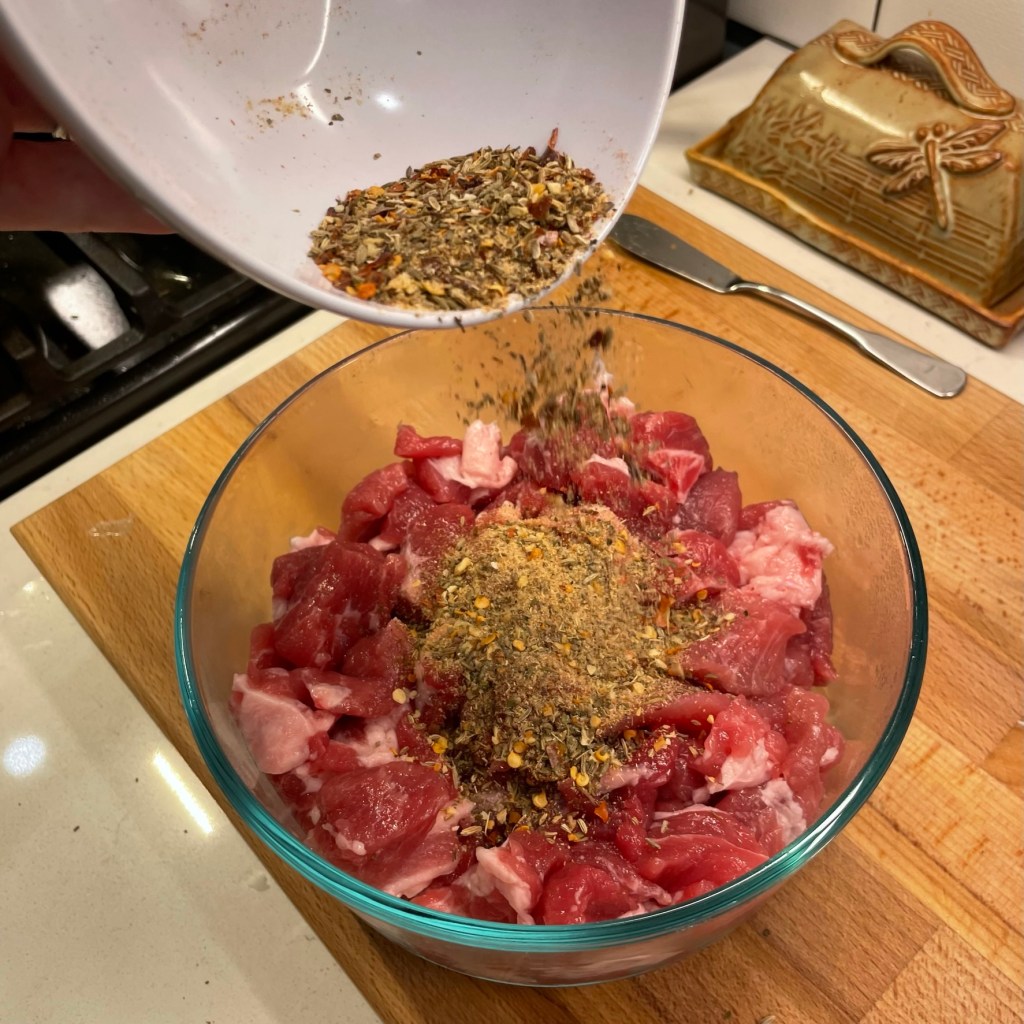
  • Pork shoulder cubes (gram weight of pork determines how much seasoning blend to use)
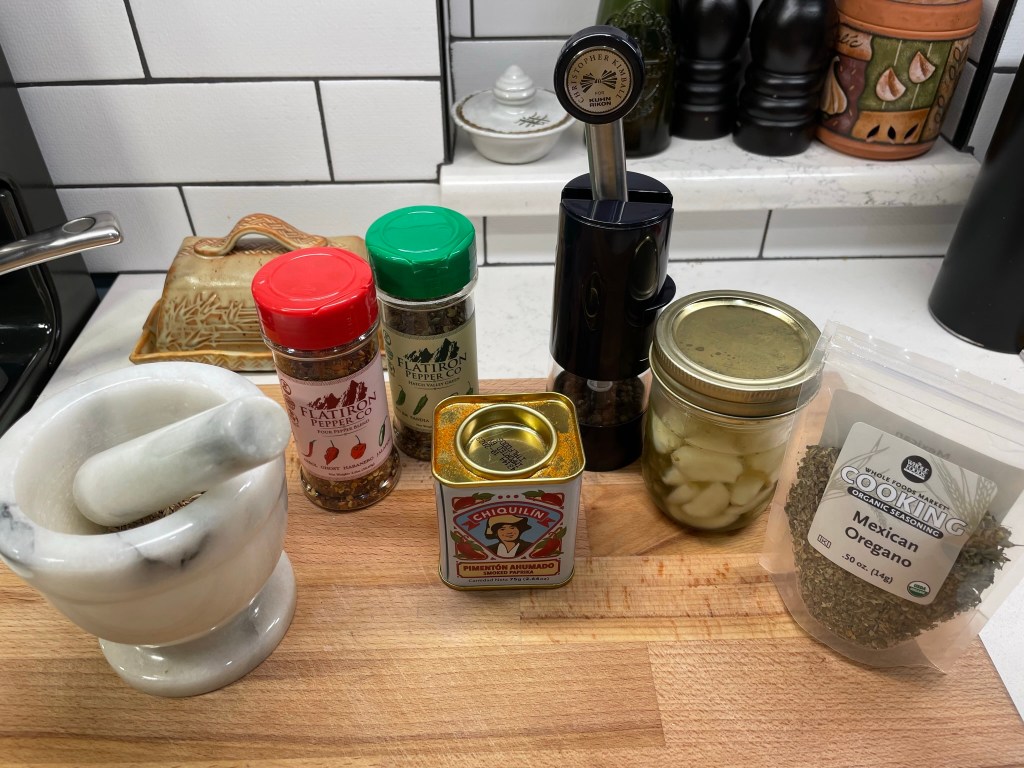
  • 1 tsp. Flatiron Pepper Co. hatch green chile blend (for mild, smoky flavor)
  • 1 tsp. Flatiron Pepper Co. four pepper blend (includes chiles de arbol, ghost and habanero for lots of heat)
  • 2 cloves garlic, grated on a microplane
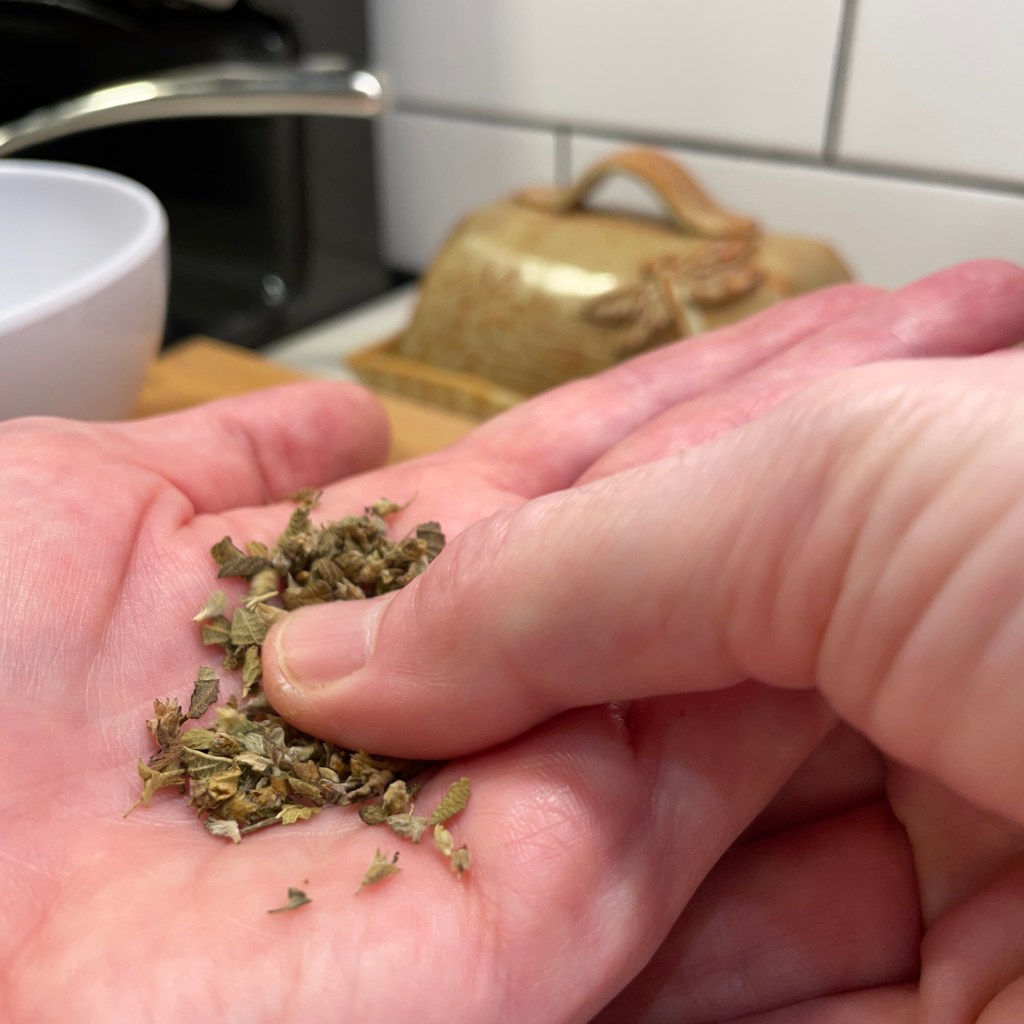
  • 1 tsp. dried Mexican oregano
  • 1/2 tsp. ground cumin
  • 1/2 tsp. freshly ground black pepper


My Big Fat Olive Martini

When the world shut down for COVID nearly three years ago, I had extra time for cocktail experimentation because, well, there wasn’t much else to do. I made some really fun ones, but what seems ironic to me is that the more I experimented with new and unusual spirit ingredients (not to mention bitters and simple syrup infusions), the more I eventually “came home” to the familiar pleasure of a classic gin martini.

As we have inched closer to New Year’s Eve, I reached an impasse with myself about what kind of tipple I might share with you. Would it be another twist on a Manhattan, like the Pom-Pom-Hattan I posted two years ago, featuring pomegranate liqueur and real grenadine? Or maybe a fun riff on an Old Fashioned, like the smoked maple that is my hubby’s all-time favorite? No, this year, I dismissed all the fancy ideas I had for New Year’s Eve in favor of a cocktail that I’ve enjoyed multiple times over the past year. Rather than a wild new drink with hard-to-find ingredients, I bring you this simple but fabulous elevation of the timeless martini cocktail— I call it My Big Fat Olive Martini!

Peace out, 2022!

No, it is not named for the size of the olive on the pick (but that is a plus). What makes this drink special is that it leverages a technique called “fat washing,” which is essentially the temporary blending of a spirit ingredient with some kind of fat— be it bacon grease, browned butter or even duck fat. By shaking the spirit with the fat and then chilling it to solidify and strain off the fat, you end up with the essence of that fat ingredient in the drink, but without any actual fat in it. The effect of the fat washing is a luscious, well-rounded mouthfeel in the cocktail that is distinctly different, though the spirit’s own character is still front and center. It’s exquisite!

About a year ago, I became a subscriber to Imbibe magazine, which is intended for pro bartenders (but bored home mixologists can order it, too). In this magazine, as well as its digital counterpart, I’ve learned some new tricks of the trade in a way that puts my home mixology skills a step or two ahead of most cocktail bars in our city. Imbibe presented a version of this cocktail several months ago, and though I could not find the exact gin its creator used to make the drink, I knew I had to try it anyway. Fellow martini lovers, you are going to love this.

The dry vermouth you’ll use for the martini is first “washed” with a good quality, extra virgin olive oil, and the olive variety you choose will lend its specific character to the vermouth, even after it’s strained out after the chill-down. If you like fruity or grassy olive oil, you can expect those notes to carry over into your martini accordingly. Isn’t that fun? 


The oil I like best for this is Nocellara, an Italian olive variety known more widely as Castelvetrano. This oil has a mild and creamy, almost artichoke-y flavor, and it is outstanding for washing the vermouth, though other varieties I’ve tried were perfectly acceptable. The big thing that matters here is the quality and purity of the oil. It should be 100% extra virgin and cold-pressed, and you may have to leave the supermarket to find a good one. If you have a specialty oil and vinegar shop in your area, start there.

Combine the vermouth and oil (in a 5:1 ratio) in a wide-mouthed jar and shake it for about 30 seconds. Tuck it into the coldest spot of your fridge for about 24 hours (or up to about three days—after that, it loses something).


The pure olive oil solidifies in the fridge, so it’s usually easy to separate it from the vermouth after washing; I did this by poking the solid oil with a chopstick, then lifting it out and draining the vermouth out from under it into a new jar and then into a small bottle, ready to go for mixing cocktails. If the oil doesn’t solidify, it could be that it isn’t pure extra virgin, or it could be that the alcohol in the protecting the oil a bit. It’s not a lost cause though, just stick the jar in the freezer for a couple of hours and check again.


From that point, make your martini as usual. If you want a little extra olive flavor, go dirty with a little splash of olive brine, too. And of course, garnish it with a gorgeous olive— a big fat one, if you wish. These are castelvetranos, stuffed with a chunk of feta, which pairs perfectly.


Oh, and don’t throw out that solid slab of olive oil. Let it melt and use it in a snazzy vinaigrette dressing!

My Big Fat Olive Martini

  • Servings: 1 cocktail, easy to scale up
  • Difficulty: Easy
  • Print

A pro technique called 'fat-washing' transforms dry vermouth, putting a luscious twist on a classic cocktail!


Ingredients

  • 2 oz. London dry gin (or vodka, if you prefer it for martinis)
  • 1/2 oz. olive oil-washed dry vermouth (see below)
  • A splash of briny olive brine (optional, for a “dirty” martini)

Directions

  1. Combine gin, dry vermouth and olive brine (if using) in a shaker or mixing glass.
  2. Add a cup of ice and shake or stir about 30 seconds, until outside of container is frosty. Strain into a chilled martini or coupe glass. Garnish with a big fat olive, or twist of lemon peel (or both).

It is essential that you choose a 100% extra virgin olive oil for the fat-washing step. Inferior oils will not solidify during chilling and are difficult to strain from the vermouth. You’ll find a plethora of good options in a specialty oil and vinegar shop.

Ingredients

  • 75 ml (2.5 oz.) dry vermouth; I like Dolin brand for this
  • 15 ml (1/2 oz.) good quality, extra virgin olive oil

Directions

  1. Combine vermouth and olive oil in a wide-mouthed jar (it’s easier to poke through for straining later).
  2. Shake vigorously for about 30 seconds, and then place jar in a very cold spot in the fridge, undisturbed, for about 24 hours or up to three days.
  3. Remove jar from fridge. If the oil is not fully solid on top of the vermouth, place the jar in the freezer for a couple of hours to firm it up more.
  4. Use a chopstick or small spoon to loosen and lift the solid olive oil disk. Gently drain the vermouth through a fine mesh strainer to remove residual olive oil. Transfer the strained vermouth to a small bottle and keep chilled. This amount is good for five martinis. Scale up as needed.


“Clear Out the Pantry” Cookies for Santa

Most bloggers post their yummy cookie recipes before Christmas, because that’s when everyone is getting ready for Santa’s visit. But I’ve intentionally saved mine for this week for a specific reason, and it has everything to do with my family’s unusual relationship with Santa Claus. So I will get to the cookie recipe, but I beg your indulgence because the family connection is, well, compelling, don’t you think?

And yes, you read that right. My family knows Santa personally, and he’s more like the rest of us than you may have imagined.

When I was a little girl, I was fortunate to live near enough my maternal great-grandparents that I visited them regularly in our small town. When I was a teenager, my visits remained frequent, as their house was within easy walking distance of the high school and I could visit during senior free time. I think it’s possible that my Grandma J actually invented the “grandma pizza,” as that was a regular lunch treat she made for my school day visits. 

On occasion, I would also catch the lingering aroma of Grandpa J’s homemade cake donuts, and that was a sure giveaway that Santa had been to their house that morning. Apparently, cake donuts were Santa’s favorite, and he made a point to stop and sit a spell whenever he pulled his 18-wheeler into the parking lot of the grocery store across the street from my relatives’ humble home. You didn’t think a sleigh was his only mode of transport, did you? Santa also has a motorcycle, and he sometimes rolled into town on that, especially in the summer.

Santa visited my great-grandpa quite often, and my one regret is that I always arrived at their home just moments after Santa had left. My timing was terrible, but Grandpa told me the stories, and I remember them all as if I had met Santa myself.


The history of the friendship

It’s hard to say exactly how or when this personal friendship between my great grandpa and Santa began, but it could go back a few generations. Grandpa’s people came from Norway, which is basically a stone’s throw from the North Pole, and because Santa is multilingual, he and Grandpa J usually conversed in Norwegian. Their discussions didn’t focus on Christmas unless it was on the calendar that month, but those visits were rare because Santa was so busy. The rest of the year, Santa’s life is quite different and, well, normal, so they talked about ordinary things like the weather and family and how things were going up at Santa’s place, which is much more than just a toy shop.

Santa has more going on than toys

There is a small working farm at the North Pole, so Santa stays busy keeping things in order there, but with plenty of help. There are farm hands to tend the livestock and the crops, and Santa always had children staying with him, too. It was never clear to me whether they were his own kids or perhaps adopted or even fostered— and it doesn’t really matter because Santa loves all children the same. I most remember the stories about the two teenage boys and the girl, and how they spent a lot of time outdoors, especially around Buttermilk Lake (which isn’t actually filled with buttermilk, despite its name) and reporting to Santa the chaotic incidents perpetrated by two particular animals.

The monkey and the billy goat

My great-grandpa relayed many stories of Santa’s life at the North Pole, but the most memorable ones were about a billy goat, which doesn’t initially seem unusual on the grounds of a working farm. But this was a rambunctious billy goat who was less part of the farm and more part of the family. He minded his own business for the most part, but regularly found himself the target of pranks by a mischievous monkey. The monkey was a real terror, and he’d often use a long wheat straw to tickle the billy goat’s ear as he napped. Sometimes he’d annoy the goat so badly that a chase would ensue around the outside of the house. Santa’s wife (her name is Mary Christmas, in case you’re wondering) would be interrupted from her work in the kitchen as the pair whipped past the window again and again, until finally she only saw one figure. That darn monkey was so clever, he’d jump up and land on the billy goat’s back, just riding along as the billy goat basically chased himself. It must have been a sight!

Santa’s wife

And lest anyone assume that the relationship between Santa and Mary Christmas is misogynistic, I can assure that it isn’t. Mary Christmas was not just washing dishes or making supper in those stories; she is a very resourceful woman who also helps on the farm, especially planting and tending the garden. She does a lot of canning and pickling to ensure that the family and farm hands have ample supplies throughout the year. Some of Santa’s visits to my great-grandpa were the result of him being in town to purchase canning supplies and other things that Mary Christmas had put on his “honey-do” list. 

The night everyone talks about

So what about all the magical effort that goes into delivering presents on Christmas Eve? Well, it’s not a big deal for Santa because he’s been doing it so long and he also has his own logistics team. He doesn’t depend on airlines or commercial freight carriers; he handles the details himself and gets the job done well every time. As for the ability to visit all the world’s children in a single night, there is a very simple explanation. Time stands still at the North Pole and most of the travel happens at very high altitude so everything goes faster than it does down here at ground level. You know how it is when you’re in an airplane, moving at approximately 550 mph, but not feeling plastered against your seat? Same principle.

The other 364

During the rest of the year, and especially after Christmas, Santa lives a lot like the rest of us— keeping his business and home in order, taking care of his family and workers and catching up with old friends, like my late great-grandfather. Because time stands still at the North Pole, though, Santa doesn’t age at the same rate as the rest of us. Keeping fit is an ongoing effort and Santa knows that children love to prepare cookies for him, so he never complains about the sugary treats he finds while delivering gifts. But he also eats other foods, and he appreciates finding cheese and crackers, sandwiches, a veggie tray or even a little nip of whiskey (the reindeer are the ones driving, after all). Santa is good with all of that, so don’t stress yourself next Christmas to get the cookies ready. And if you feel like putting out cake donuts, well, he’d be pleased as punch (especially if they’re rolled in cinnamon sugar).

About these cookies

As much as I love the idea of Christmas cookies, I rarely make them and I don’t get too excited about the sugary toppings and decorations. I was always the weird kid who chose homemade oatmeal raisin over iced with sprinkles. This is the kind of cookie I would make for a last minute, mid-year visit from Santa. Without weeks to plan, I’d go to the pantry and clear out every this-and-that ingredient I could find—oats, puffed rice cereal, nuts, dried cherries, coconut flakes and dark chocolate— and turn them into a cookie that satisfies with all its contrasting textures.

I made a batch of these “clear out the pantry” cookies recently, and I’m happy to share how it went!

These ingredients bring in great texture, and some of them are even good for you!

The cookie dough itself is akin to a chocolate chip cookie dough, but with a swap-in of some whole wheat flour for extra flavor and nutrition. I used a combination of brown and cane sugars, wholesome egg, creamy butter and real vanilla extract. The dough begins as most, by creaming together the butter and sugars, then blending in the egg and vanilla.


I mixed in the old fashioned oats first, because I can beat them vigorously without worry of gluten development. Next, the whole wheat flour mixed with the baking soda, salt and cream of tartar. Then, the rest of the flour, mixing just enough to work it into the creamed mixture.


When you’re mixing any cookie dough, you want to avoid stirring too much after you add the flour, or the dough may get tough rather than soft. So for the mix-ins, I began with the really firm ones— chocolate chips, dried cherries and chopped pecans— and I used a hard spatula to essentially “press” them through the dough. Finally, I did the same with the toasted coconut and crispy brown rice cereal.


I used a small cookie scoop to divvy out the dough, pressing a really full scoop against the inside of the bowl to ensure that every cookie is full and round, and spacing them two inches apart onto a parchment-lined baking sheet. If you don’t have a scoop, use a teaspoon to measure out the dough into pecan size mounds. Try to avoid rolling the dough with your hands, as the warmth will change the nature of the cookie.


Into the preheated oven for 10 minutes, and these cookies emerge perfectly soft, with crispy edges and all that lovely texture. The pantry is a bit lighter after making these, and if Santa should happen to stop in for coffee (or sweet tea, or whiskey) on his way to pick up supplies, I’ll be ready!


Clear Out the Pantry Cookies

  • Servings: 55 to 60 small cookies
  • Difficulty: Average
  • Print

These cookies have crispy edges, chewy dried fruit, crunchy nuts and flaky coconut. In other words, ALL the texture I crave!


Ingredients

  • 2 sticks (1 cup) unsalted butter, slightly softened from refrigerator
  • 1/2 cup light brown sugar
  • 1/3 cup granulated cane sugar
  • 1 large egg
  • 1 tsp. real vanilla extract
  • 1/2 cup old fashioned oats
  • 3/4 cup white whole wheat flour
  • 3/4 tsp. salt
  • 1/2 tsp. baking soda
  • 1/2 tsp. cream of tartar
  • 1 cup all-purpose flour
  • 6 oz. semi-sweet or dark chocolate chips
  • 1/2 cup candied (or plain) pecans, broken into small pieces
  • 1/2 cup crispy rice cereal, lightly toasted
  • 1/2 cup dried cranberries, cherries or raisins
  • 1/2 cup sweetened coconut flakes, lightly toasted

Directions

  1. Preheat oven to 350 F, with rack in center position. Line two baking sheets with parchment paper.
  2. Using the paddle attachment of a stand mixer, or the double blades of an electric handheld mixer, beat butter until creamed and airy. Add cane sugar, a few tablespoons at a time, until fluffy. Add brown sugar the same way.
  3. Add egg and vanilla to bowl and beat until mixture is smooth.
  4. Add oats and mix until evenly blended. In a small bowl, combine whole wheat flour with the salt, soda and cream of tartar. Add this flour mixture to the creamed butter mixture and beat only long enough to incorporate the dry ingredients. Next, add the all-purpose flour to the bowl and mix just to incorporate. Avoid overmixing so that your cookies will remain soft.
  5. Remove bowl from stand mixer. All remaining ingredients should be folded in by hand to avoid overheating. An easy way to incorporate the add-ins is to use a firm spatula or wooden spoon to try to “press” them down through the dough, beginning with the firmer ingredients (chips, dried fruit and pecans) and ending with the delicate ones (coconut and rice cereal).
  6. Place by rounded teaspoonfuls (or use a small size dough scoop), 2 inches apart on the parchment-lined sheets.
  7. Bake 9 to 11 minutes (depending on oven), until dough is set and edges are lightly golden brown.
  8. Cool on sheet a couple of minutes, then transfer to a cooling rack to cool completely.


Peppermint Bark Brownies & Candy Cane Whipped Cream

When it comes to holiday goodies, decadent doesn’t have to be complicated, and simple doesn’t have to be ordinary. These brownies—amped up with an extra dose of double dark cocoa and embellished with pieces of peppermint bark—are delightful as they are. But then, because I can’t leave well enough alone, I topped them with a dollop of candy cane-infused whipped cream.

Decadent, simple and way beyond ordinary!

I chose the Dr. Seuss colors for my plates (on purpose).

The best part about it (besides the fact that it’s delicious and oh-so-Christmas-y) is that I didn’t have to make a scratch recipe. I used my favorite Ghirardelli dark chocolate brownie mix as the base, and folded broken up Ghirardelli dark chocolate peppermint bark squares into the batter before baking, along with a generous spoonful of double dark cocoa blend from King Arthur Baking Company (but any dark cocoa powder works fine).

Extra chocolate, anyone? 🙂

Make the brownies as directed, using water and canola oil plus egg to moisten the batter. Gently fold in the broken pieces of peppermint bark and spread it out into a buttered brownie pan.


I considered using the chunkier peppermint bark, with actual bits of candy cane sprinkled on top, but decided on the Ghirardelli-style bark for its smooth, meltable qualities and so that we didn’t accidentally chip a tooth biting into a hidden piece of candy cane. They melted completely into the baked brownies, and offered gooey pockets of pepperminty flavor in each bite. If you don’t mind a little crunchy surprise, there’d be no harm in trying these brownies with the chunky style of bark. The contrast of chewy and crunchy would probably be especially popular with kids. No adjustment is needed to the baking time, and be sure to let them cool completely so they set up for easier cutting and serving.

This candy cane whipped cream makes me so happy!

The candy cane whipped cream is much easier than it sounds—I simply warmed heavy whipping cream in a small saucepan and melted two broken candy canes into the cream. This took about 20 minutes, and I kept a close eye on them to avoid letting the cream reach a boiling point. The candy canes did all the work, providing the sweetness, the minty flavor and the pretty pink color. After a thorough chilling, I used the whisk attachment of my electric mixer to whip it into a creamy emulsion.


Ready to make them? Use the “click to print” card below to save this for your recipe files. Merry Christmas!

Peppermint Bark Brownies & Candy Cane Whipped Cream

  • Servings: 9 or 16, depending on desired size
  • Difficulty: Average
  • Print

These Christmas-y brownies bring together two favorite flavors for a 'simple meets special' holiday treat.


Ingredients

  • 1 box Ghirardelli dark chocolate brownie mix (or your favorite, plus oil, egg and water as directed)
  • 1 heaping tablespoon dark cocoa (I used King Arthur Baking Double Dark Blend)
  • 8 squares Ghirardelli dark chocolate peppermint bark, broken into pieces
  • 1 1/2 cups heavy whipping cream
  • 2 standard size candy canes

It’s best to make this ahead, so that the candy cane-infused cream has plenty of time to chill before whipping and serving. Brownies should also be cooled for easier cutting.

Directions

  1. Preheat oven as directed on brownie mix package, with rack in center position. Generously butter your brownie pan.
  2. Combine dry brownie mix and dark cocoa in a bowl and whisk together. Add ingredients as instructed on brownie mix (this is usually some combination of egg, oil and water).
  3. Gently fold in broken pieces of peppermint bark, and then transfer brownie batter to the prepared pan. Smooth the top with a spatula.
  4. Bake as instructed and allow plenty of time for brownies to cool.
  5. Pour cream into a small saucepan with broken candy canes, and place pan over medium-low heat. Stir gently and watch this closely to ensure cream does not boil. It should remain at a gentle simmer with steam floating above the pan. When candy canes have fully melted, transfer the cream to a bowl and refrigerate until fully chilled.
  6. Use a handheld mixer (or a whisk, if you have really strong arms) to whip the cream to desired fluffiness. Spoon a dollop of the candy cane whipped cream onto each brownie square and serve immediately.


Butternut Squash Latkes

One of the emails I received last week from The New York Times Cooking carried the heading, “The Veggie: Will It Latke?” This tickled my funny bone because it seems to be a play on a question I asked many years ago when I bought my first waffle iron. Will it Waffle was the title and subject of a creative little cookbook that challenged other foods, such as falafel, s’mores, spaghetti and pizza to become “waffled.” Personally, I love this idea because I like playing with my food, especially when it involves something unexpected. Here are a few things we have waffled at our house:


When it comes to latkes, however, there are a few limits to what can be turned into a latke, and this is largely based on the starch content of the ingredients you wish to “latke.” When you start leaning toward less starchy vegetables, you may run into trouble getting the well-composed patties and delicate, crispy edges that make latkes so irresistible— not only during Hanukkah (which started last evening), but anytime you get a hankering for tasty fried nuggets.

This post is the result of my experiment making latkes with butternut squash— botanically, it’s classified as a starchy vegetable, but clearly less so than a potato— and I’ll confess now that I did not follow a recipe from the email that raised this “will it latke” question. Rather, I decided to wing it, trusting my instincts and knowledge of starch and frying, plus my past experience with making my “regular” Classic Crispy Latkes.

I held firmly to the handful of immutable rules for making latkes, including making the “batter” as dry as possible so that the latkes hold together and fry up crispy, heating the oil to a fairly high temperature so the latkes don’t soak up too much of the oil, and seasoning the latkes the moment they emerge from the frying pan to make them even more delicious.

The rest of my effort was learn-as-you-go, and I’ll walk you through the lessons this experiment taught me, with a printable recipe at the end, laying out the roadmap to the best outcome. Ready to make these?

We served our butternut squash latkes with braised brisket and Les’s overnight applesauce!

First, I chose my flavor profile, and I kept it simple with onion— to keep them more savory than sweet, as squash tends to be— and smoked paprika for a little bit of spice without heat.

I bought my smoked paprika from a site called Bourbon Barrel Foods.

I fitted my food processor with the small hole shredder plate to shred up the onions, then pressed them through a fine mesh strainer to squeeze out every bit of juice. 


I knew that additional starch would be needed to make up for what the butternut squash lacked, and I went with a peeled russet potato (the starchiest variety), which I also shredded with the fine hole plate. Shredding it fine helped me to coax out as much starch as possible to aid in binding the squash shreds. I covered the russet shreds with ice water and let them soak for about 45 minutes. After soaking, I scooped the potato shreds out of the bowl and squeezed them dry in a clean towel. Then I carefully poured off the water, preserving the valuable starch that had settled to the bottom of the bowl. A quick, light blotting with a paper towel removed the remaining moisture without losing the starch.


If there was any doubt about whether the squash has enough of its own starch to make latkes, this next part of my experiment settled it. I switched to the large hole plate for shredding the squash and applied the same ice water trick I used on the russet. Unfortunately, this was futile— almost no starch was visible in the bowl, so I’m pretty sure this could have been skipped altogether. Next time, I’ll simply shred the squash and blot it dry on a clean towel. This will also save me from having to wash so many dishes; to this point, I had every large glass bowl in my kitchen involved in this latke project.


With everything shredded and prepped, I was finally ready to make the latkes! As with my regular recipe, I heated grapeseed oil (about 1-inch deep) in my large electric skillet. Figuring that the winter squash might take longer to cook than potatoes, I set the temperature at 350 rather than my usual 375. This turned out to be the wrong thing, as you’ll see in a moment. I mixed that beautiful, sticky russet potato starch with a beaten egg and blended it into the big bowl of squash, potato and onion shreds. The whole thing got a seasoning of salt and pepper, and with a quick test of the hot oil, I was in business.


My first batch didn’t sizzle much when the batter hit the oil (the first sign that it wasn’t hot enough), they were tricky to turn (a sign of poor binding), and sure enough, these first few latkes turned out really greasy (strike three)! The patties had soaked up so much oil they were unpleasant to eat.


I had a couple of problems to be solved, so I adjusted both my ingredients and my technique. For better binding, I sprinkled in a generous spoonful of potato flour to stiffen up the batter. I also turned up the temperature to 375 F, and they were better but still a bit fragile and difficult to turn.


With only a third of my batter remaining, I had time to make one more adjustment and it was a simple one. For easier turning, I made the latkes a little bit smaller. This turned out to be a game changer, and the final two batches of smaller latkes came out crispy outside, tender inside and flavorful through and through! 

From the left: Batch 1 (too greasy), Batch 2 (better but fragile), Batch 3 (smaller, crispy and just right!)

So this settles it— butternut squash does indeed make a delicious latke, and next time I want to make them, I’ll keep these simple takeaways in mind and I’ll follow the recipe below to make them right from the start!

Latke Lessons

  1. Incorporate extra potato starch to make up for what your alternate ingredients might be missing.
  2. Keep the oil temperature hot to ensure crispy edges and prevent greasy latkes.
  3. Make the latkes a bit smaller for easier turning and faster cooking.

Butternut Squash Latkes

  • Servings: 4 to 6
  • Difficulty: Intermediate
  • Print

I learned a few things along the way to making butternut squash latkes, and this recipe will help you get to success without all the lessons!


Ingredients

  • 1 large russet potato, peeled
  • 1 medium sweet onion, trimmed and peeled
  • 1 medium butternut squash, peeled and seeded (enough to measure 3 packed cups of shreds)
  • 1 egg
  • 1 tsp. kosher salt, plus extra for seasoning after frying
  • 1/2 tsp. freshly ground black pepper
  • 3/4 tsp. smoked paprika (I used “bourbon smoked” from Bourbon Barrel Foods)
  • 1 Tbsp. potato flour (or potato starch or dried potato flakes)
  • Grapeseed oil for frying (enough to fill frying pan to 1-inch deep)

Salt draws moisture out of ingredients. For best results, have everything lined up in advance, and wait to add salt until just before you fry the latkes, so the batter doesn’t get liquidy.

Directions

  1. Grate onion with fine shred plate. Press shreds through a fine mesh strainer placed over a measuring cup. Discard onion juice or save it for another use (I usually add it to a meat marinade).
  2. Grate potato with fine shred plate. Transfer potato shreds to a medium sized bowl and cover with ice water. Set aside for 45 minutes, and then scoop out shreds and squeeze dry in a clean towel. Carefully pour off water, preserving the starch that settles to the bottom of the bowl.
  3. Grate butternut squash with large shred plate. Transfer squash to a clean towel and squeeze dry. Add squash shreds to a large bowl. Add potato and onion shreds. Sprinkle in smoked paprika and black pepper. Use a fork, tongs or your hands to mix everything evenly. Sprinkle on potato flour and mix again.
  4. Heat grapeseed oil to 375 F, with oil about 1-inch deep in a cast iron or electric skillet.
  5. Whisk the reserved potato starch and potato flour into the egg in a small bowl. Stir in salt.
  6. When the oil reaches temperature, blend the egg mixture into the squash and potato shreds. Shape the latke “batter” into small clumps approximately the size of walnuts. Shape one at a time and place them immediately into the hot oil. After about 1 minute, use the back of a flat metal spatula to lightly press the latkes flat.
  7. Turn the latkes to cook the other side after 3 to 4 minutes, when they are crispy and golden brown on the first side. Cook the second side until done to match, for a total of about 7 minutes for each batch.
  8. Transfer finished latkes to a paper towel-lined baking sheet or rack. Sprinkle them immediately with a pinch of salt.
  9. Repeat with remaining latke batter. Serve immediately.

Latkes don’t reheat particularly well, so it’s best to make only as many as you intend to eat right away.

A helpful word to the wise: the towels you use to squeeze the potato and squash dry will be starchy and/or stained. It’s best to rinse them right away before adding them to your laundry.


Spicy Beer-braised Brisket

Hanukkah, the Jewish Festival of Lights, begins this year on Sunday evening and runs through the day after Christmas. This occasion comes with its own food traditions, mainly those cooked in oil in a nod to the miraculous oil that “kept the lights on” for eight days.

Classic Crispy Latkes will be on the menu at our house at some point next week, and we enjoy serving them with a flavorful brisket and some of Les’s 3-Variety Overnight Applesauce, which is a traditional accompaniment to latkes. This year, I got a jump start on my brisket so that I could share a recipe with you. There are two primary ways to prepare a brisket. One is to smoke it over wood chips, and it is arguably my favorite preparation but it takes a considerable amount of planning and watching— neither of which I have time for during this month with its back-to-back holidays. The other method is a slow braise of the meat, which affords a lot of flexibility for flavor and much less fussing and tending because once it goes into the oven or slow cooker, it pretty much takes care of itself until dinner time. 

The second method is what I’m sharing today and despite its low effort, it produces a crazy tender bite— I’m talking, twist a fork into it and pull out a mouthwatering morsel that just about melts in your mouth. It’s that kind of tender.

This is like meat candy!

For this recipe, I’ve used what is called the “point cut” of the brisket, which is a small triangle-shaped piece that is attached to one end of the larger, flat brisket. This cut is usually about three pounds, which is plenty for two people for dinner and leftovers to boot. If you have a butcher shop, ask for a brisket point or check the supermarket meat case for a small piece of brisket that’s shaped like an irregular triangle. You’ll save some time and mess that way.

Otherwise, you’ll need to separate the point from the larger brisket— an undertaking that I did myself for the first time last week. It’s not difficult, especially with some help from all the YouTube videos out there (plus I had my smoke master cousin, Brad, on a text chat for moral support), but it does take some effort, patience and a really sharp utility knife.

It took some whittling (see all that fat in the bag?), but I’m pretty sure I got it right!

However you procure your brisket point, season it well on both sides with kosher salt and let it hang out at room temperature while you prepare the braising sauce, which is made from common ingredients that you probably already have in the pantry and refrigerator door.


From this stage, the brisket only needs your full-on attention for about 15 minutes for browning all sides and sautéing up an onion (right in the same skillet) for braising. If you prefer, you could use a small-ish slow cooker for the braising step, but it’s important for the brisket to be mostly submerged in the sauce. For this reason, you’ll see that I’m using an oven-save glass baking dish. I placed the brisket on top of half the onions, then covered it with the rest of the onions. Next, mix up the sauce ingredients— chili-garlic sauce, spicy mustard, horseradish, Worcestershire sauce, brown sugar, black pepper and tomato paste— then gently stir about a half bottle of beer into it.


Pour that all over the brisket and onions, seal it up super tight with a double layer of aluminum foil and tuck it into the oven at 325° F. Using a slow cooker? Set it on high until the liquid reaches a low boil, then drop it to low setting for the remainder of cooking time.


Then, ignore it. Take the dog for a walk, finish up some laundry, make a grocery list, binge watch a couple episodes of “The White Lotus,” do some online shopping, whatever. My point is that the brisket doesn’t need your attention at all. In fact, fussing over it or checking on it too much may mess up the cooking time or limit the tenderness. The sauce and the steam will get the job done. You don’t need to turn it or baste it or test it for doneness until at least three hours later. I let mine go for three and a half.

It’s almost falling apart with this gentle lifting!

This brisket was insanely tender and the sauce had melded into a delicious, syrupy glaze. I removed it from the baking dish to a plate until it was cool enough to handle, then laid it on the cutting board for some cross-grain slices. A properly cooked brisket will virtually cut like butter, and when it is warm from the oven, your slices will be a bit thicker. If you want really thin slices, refrigerate the brisket overnight and slice it cold, then warm it up in the sauce.


We couldn’t wait that long at our house, and we enjoyed this on the spot with the braising sauce and some easy, oven-roasted russet potato wedges and a salad. It was so delicious, I can hardly wait for the leftovers!

And yes, I cooked the other part of the brisket— the large, flat part— also. Similar cooking method but different flavors; don’t worry, I’ll share it another day. 😉

Spicy Beer-braised Brisket

  • Servings: About 6
  • Difficulty: Average
  • Print

A few pantry and fridge door items provide the flavorful braising sauce for this oh-so-tender, point-cut brisket.


Ingredients

  • Point cut brisket, 3 to 4 pounds (preferably grass-fed)
  • Kosher salt to season both sides of the raw meat
  • 2 tsp. chili-garlic paste (find it in the Asian foods aisle)
  • 2 tsp. tomato paste
  • 1 tsp. grainy mustard
  • 1 tsp. prepared horseradish (mine was labeled “extra hot”)
  • 1 Tbsp. brown sugar
  • 1 tsp. Worcestershire sauce
  • 15 twists freshly ground black pepper (about 1/2 tsp.)
  • 6 oz. lager beer (a dark beer would also be good here; nothing too “hoppy”)
  • 1 medium yellow onion, cut into slivers or slices

I used a skillet for searing my brisket, and an oven-safe glass baking dish for the braising step. A small, lidded Dutch oven would be great for this recipe, so use that if you have one.

Directions

  1. Preheat oven to 325° F, with oven rack in center position. Season both sides of the brisket with kosher salt and let it rest it room temperature for about 30 minutes before searing.
  2. Prepare the sauce: Whisk together all ingredients, except beer, adjusting to taste. Gently stir in the half-bottle of beer, so that it doesn’t bubble over out of the bowl. Set the braising sauce aside.
  3. Heat a 12-inch cast iron skillet over medium-high heat. When the pan is hot, carefully place the brisket into it, fat side-down. Let it sear until a golden crust is evident on the first side, then use kitchen tongs to carefully turn it so that every side (including the end) is seared. This should take a total of 7 to 10 minutes. Set the seared brisket on a plate. Spoon out some of the excess fat, if you wish, but keep enough to saute the onion slivers.
  4. Transfer the sauteed onion slivers to a baking dish that is deep enough for liquid to cover the brisket. Place the brisket atop the onions. Pour the braising sauce over the whole thing, and then cover the dish with a double layer of aluminum foil. Take care to seal up all edges really well so that steam remains completely inside the dish during braising.
  5. Put the brisket pan into the oven and set a timer for 3 hours. No peeking, and do not remove the brisket to turn it, baste it or otherwise disturb it.
  6. At the 3 hour mark—or later if you’re in the middle of something; this recipe is forgiving—remove the brisket pan and carefully peel back the foil cover. If the meat pulls easily with the twist of a fork, it’s ready. Let it cool a few minutes, then transfer the brisket to a cutting board. Use a sharp slicing knife to cut against the grain of the meat into slices as thin as you can manage. Transfer the slices back into the braising sauce so they can soak up the delicious flavors.

This recipe may be prepared a day or two ahead of serving, if you wish. Cool the finished brisket as a whole piece and refrigerate it overnight. It’s easier to make super-thin slices when the meat is cold and firm. Reheat the slices with the braising sauce, either over low heat in a covered skillet, or in a covered baking dish in the oven at about 325° F until it reaches desired serving temperature.


Fig Butter Cranberry Apple Galette

I am good at a few things in the kitchen, but pie crust is not one of them. I can make the pastry dough, no problem, and I usually use the food processor to speed things along. Getting the thing inside the pan in one piece, especially for a deep dish pie, is quite another story. Yes, I have seen all the tricks, from folding it into quadrants and then unfolding it into the pan, to rolling it up around the rolling pin and transferring it that way. The problem is, by the time I finish monkeying around with patching cracks and moving it (especially if it sticks to my roll-out surface and it always does), I have usually either let it get too warm so that it loses its flakiness or I have overworked the dough to the point that it becomes tough rather than tender.

Thank goodness for this easy-peasy alternative— the galette!


At first glance, a galette might seem like a fancy-schmancy dessert. Not quite a tart, which usually has egg in the pastry dough and requires a special shallow, fluted pan. Also not quite a pie because it only has one piece of pastry, there’s no blind baking involved and it doesn’t require a pie pan at all. Just a cookie sheet or pizza pan, and almost everyone has one of those. 

This rustic dessert has all the familiar comfort factor of a pie, but without the fuss. You roll the dough out directly onto parchment, then add your filling, fold up the edges and slide the whole thing right onto your baking sheet. I would not recommend trying a galette for a pie that requires any kind of loose, wet filling, but for uncooked apple slices and raw cranberries, the stars of this dessert, it was perfect.

I ended up using only three of the apples and still had a few slices left over.

My recipe is adapted from one that King Arthur Baking Company released just before Thanksgiving. Their version was called Apple Butter Apple Galette, and it did not include cranberries or the tiny flecks of fresh rosemary that I added to adorn the outside of the pastry. I swapped out cinnamon for cardamom because I love the flavor with apples, and I didn’t have apple butter on hand (nor the time to make my own), so I subbed in pre-made fig butter from Trader Joe’s. King Arthur’s recipe already calls for mostly whole wheat flour in the pastry, which makes the dessert feel even more rustic and fall-like.


The pastry dough itself is somewhat unusual as there is no water in the mix; rather, the typical cold butter-and-flour mixture is moistened with sour cream, of all things. That inclusion lent a tangy note that was a nice contrast to the slight sweetness of the apple-cranberry filling. The dough needs a good long rest in the fridge, so it’s best to make it the night before and then shape it up when you have the filling ready.


Shaping the dough goes about the same as any pie crust. It helps to use the end of a rolling pin to slightly beat the dough disk into a slightly flattened shape first, then roll it out onto parchment paper for final assembly of the galette.


The fig butter is spread out onto the rolled pastry, serving as a base for the apple filling. The apples, which I didn’t even bother to peel, were halved top to bottom, then sliced into half-rings for even appearance and easy arranging. A little lemon juice preserved the color and a good sprinkling with maple sugar and a bit of cardamom added warmth and sweetness. I tucked in the cranberries here and there, including up under a few edges of the folded-up pastry dough, and dotted it with butter, just as you would with an apple pie. A little egg wash and the sugar-rosemary embellishment, and off it went into the oven!


This was a terrific dessert that would work for any meal during the rest of the holiday season. The fig butter, apples and cranberries were a great combination. The sparkling sugar and rosemary made it festive enough to serve for a special meal, but it would be equally nice for a casual weeknight dinner.


Fig Butter Cranberry Apple Galette

  • Servings: 8
  • Difficulty: Average
  • Print

Not quite a tart and not quite a pie, a galette is a quick and simple, rustic dessert, and this fig-apple-cranberry combo is just right for the holidays!


Ingredients

  • 1 cup (113g) King Arthur White Whole Wheat Flour
  • 1/2 cup (60g) King Arthur Unbleached All-Purpose Flour
  • 2 Tbsp. granulated sugar
  • 3/4 teaspoon salt
  • 12 tablespoons (170g) unsalted butter, cold; cut into 1/2″ cubes
  • 6 tablespoons (85g) sour cream

Ingredients

  • 3 medium apples, peeled (or not) and sliced about 1/8″ thick
  • juice of 1/2 lemon (about 1 tablespoon)
  • 2 Tbsp. light brown sugar or maple sugar (see ingredient note below)
  • 1/4 tsp. ground cardamom
  • pinch of salt
  • 1/2 cup prepared fig butter
  • 1/2 cup fresh (or frozen) cranberries
  • 1 tablespoon cold butter, cubed
  • 1 large egg, beaten with 1 tsp. cold water (egg wash)
  • coarse sparkling sugar
  • 1 tsp. finely chopped fresh rosemary

Ingredient note: Adjust sugar to taste, depending on the sweetness of your apples. I used Granny Smith and Arkansas Black, both of which are crisp and tart, so I amped up the sugar a bit. If you are using sweeter apples, feel free to back off the sugar accordingly.

Directions

  1. For the pastry dough, combine flours, sugar and salt in a bowl. Pinch cold butter cubes into the flour mix until the whole bowl is filled with crumbs ranging from pea-size to almond-size. Add cold sour cream and blend with a fork just until evenly blended. Shape the pastry dough into a composed disk and wrap tightly in plastic wrap. Roll the edges along the counter to seal it for easier rolling later. Refrigerate overnight.
  2. Preheat oven to 425 F, with oven rack in center position. Prepare apples and squeeze lemon juice over them, tossing to help prevent browning. Sprinkle with brown sugar, salt and ground cardamom. Toss to distribute.
  3. Unwrap pastry dough and place it on a lightly floured countertop. Use the end of a rolling pin to gently “pound” the disk so that it flattens slightly. Transfer pastry to parchment paper and roll it out to about 1/8″ inch thickness, approximately 14″ across.
  4. Spread fig butter evenly over pastry dough, to about 1 inch from the edges of pastry dough. Arrange sugared apple slices in concentric circles over the fig butter, approximately 3 inches from the edges. Make radial cuts, about 3 inches apart, from the outer edge of the pastry dough toward the apple filling.
  5. Fold up cut edges of the galette, overlapping as needed to close up the pastry over the filling. Tuck fresh cranberries into layers of apple and under edges of the pastry. Place galette in freezer for 10 minutes to re-chill pastry dough.
  6. Arrange dots of cold butter over the sliced apples. Brush egg wash all over exposed pastry. Sprinkle with sparkling sugar and minced rosemary.
  7. Bake for 30 to 35 minutes, until pastry is deep golden brown all over and apples are tender when pierced with a fork.
  8. Cool to room temperature. Cut into wedges and serve with ice cream or whipped cream.


Homemade Pork Sausage

If I were able to physically load my stress onto the pages of a calendar, December would be the heaviest, but it has nothing to do with holiday anxiety or preparing to entertain. For me, the stress comes with realization of all that I didn’t accomplish during the year, despite my intentions and wishes. I have tried to shift my attention to the things I’ve finished rather than not but, sadly, this seems to be my default. It is heavy on my mind this week as I have reviewed my culinary bucket list, and the ever-growing “I want to try” column.

My most frequent lamentation to my husband is that “I want to do everything at once!” Most of the time, I’m doing good to just break even on my get-it-done list, and the biggest obstacle I face is my own lofty expectation, especially in the kitchen. I don’t want to throw proverbial spaghetti at the wall, hoping something will stick. I research unfamiliar techniques and recipes carefully and if they seem complex, I research some more until I feel at least somewhat equipped for the task. Sometimes, I just keep researching until I flat-out scare myself away from it.

But once in a while I give in and try something that surprises me with its simplicity, and this homemade sausage is one of those things. Turning a chunk of pork shoulder into a flavorful, composed ground meat mixture is not at all the challenge I imagined it to be, thanks in large part to this book by J. Kenji López-Alt and an easy-to-use attachment for my stand mixer.


I was gifted this fascinating book a couple of years ago for my birthday, and I love the science that its author lays out on every page. If you want the full scoop and Kenji’s brilliant approach to things in the kitchen, get the book. You won’t regret it. But not everyone cares to know the backstory details of a recipe and why it works (what can I say? I’m a nerd), so rather than echo the 13 pages of detailed, scientific information Kenji has provided on this subject, I’m grinding it down into three takeaway points and then I’ll share my own adventure in sausage-making. Here goes!


  1. Use a digital scale to determine how much salt and seasoning to use in your sausage; don’t make yourself crazy trying to do the math using cups or teaspoons.
  2. Let the meat chill in the fridge with the proper amount of salt and seasonings for about 24 hours before grinding; it changes the texture of the meat so it’s optimal when you grind.
  3. Keep it cold, cold, cold for best results; this means putting your grinding tools (and the meat, for a time) in the freezer, and working quickly to avoid a big mess.

I should disclose here that I did not go “all in” to the point of using casings for link sausages. Frankly, I’m not sure where to even buy them, though I might talk with our favorite local butcher about that in the future, especially before next summer’s grilling and smoking season rolls around. This experiment has been all about bulk sausage, and I have not had a bad batch yet!

If you have a Kitchen Aid stand mixer, there’s a simple attachment that allows for grinding of food with a propeller-type blade that cuts the food chunks as they pass through a feeder tube. It takes practice, but works great. If you don’t have this device, I think you could probably begin with smaller chunks of meat and use the pulse function of a food processor to achieve a similar result. Kenji even discusses that in The Food Lab.

Here’s the basic technique that I learned from Kenji. Cut up the pork shoulder (best quality you have available, of course) into chunks about the size of walnuts. Weigh the raw meat, using the grams setting of a digital scale. Next, grab a calculator to determine what is 1.5% of the meat weight—that’s how much kosher salt you need. Not that this is kosher, mind you. It’s pork, so of course not. But un-iodized salt is recommended here, and kosher is what I use in the kitchen anyway. Sea salt would probably be fine.


Toss the meat chunks to evenly distribute the salt, cover the bowl and refrigerate it for 24 hours. After the rest time, you can see the difference in the texture of the meat. It looks darker, smooth and glossy, and is noticeably smaller in volume. This consistency change is what makes sausage different from regular ground meat, and it’s as easy as “salt and wait.”


My interest in making homemade sausage stems largely from repeated disappointment at the Whole Foods meat counter, where I used to buy a fantastic green chile and habanero pork sausage that was wonderfully spicy and perfect for my favorite green chili recipe. But, as with most “big box” retailers, Whole Foods only appeals to the masses now (even more so since they were bought by Amazon) and after hearing for the umpteenth time that “nobody wants to buy that spicy sausage,” I finally decided to get on with things and make my own.

Kenji’s tutorial in The Food Lab did not include suggested seasonings for a green chile-habanero version, but I trusted my instinct and put the flavors together myself. Two kinds of Flatiron Pepper Co. chile flakes, smoked paprika, cumin seeds, pickled garlic (which I ended up not using because I couldn’t get the darn lid off), Mexican oregano and black pepper.


For this batch, I waited to add the seasonings (2% of the original meat weight, per Kenji), but I discovered later that I could have added it at the same time as the salt. In subsequent batches, I’ve added my spices at the same time as the 1.5% of kosher salt.


I spread the meat out into a single layer on a baking sheet and slipped it into the freezer for 15 minutes while I set up the meat grinder attachment for my stand mixer. The meat and all the parts that touch the meat should be really cold, so I also put the cutter blade, the large-hole cutter plate and my mixer’s beater blade into the freezer. I took Kenji’s advice about this to heart and it paid off with an easy grinding process. I also put ice in my stainless steel mixing bowl to chill it down for the next step.


This part of sausage production moved quickly, and I couldn’t take pictures from every angle as I pulverized the very cold meat, but the action shots here tell the story pretty well. As soon as it was ground, I transferred it to my chilled mixing bowl and used the beater blade to whip it around for about 2 minutes. During this mixing stage, which essentially serves to make the meat mixture sticky and cohesive, I poured in roughly 2 tablespoons of red wine vinegar. That acidity makes all the difference in flavor!


For my first batch of sausage, I passed the meat through the grinder a second time before mixing it, using the small-hole cutter plate included with my food grinder. This proved to be tedious and unnecessary, and my later batches were all done in one pass, using only the large-hole cutter plate. Sometimes the lesson is about what you don’t need to do, right?

My first batch of homemade sausage! 🙂

The green chile sausage was fantastic, and I used it make a pot of this oh-so-comforting green chili for burritos. This is a favorite dish from my childhood, and I’ll share the recipe in January.


I also made a chipotle, ancho chile and maple sausage, which I used in a stuffing blend for a rolled pork loin roast that we enjoyed with friends a few weeks ahead of Thanksgiving. I’ll share the recipe for that lovely roast sometime in the next couple of weeks.


And I made an Italian fennel and Calabrian chile sausage, which became the big flavor enhancer for the sausage used in Les’s amazing Thanksgiving stuffing. It was his year for the bird, and though I said it was his best turkey ever, he declared the sausage made it his best-ever stuffing. We are a darn good team!


We have used up all the sausage I’ve made so far, but I already have a dozen ideas for flavors I want to make next. Here I go again, wanting to do everything at once! I can’t, of course. But homemade sausage is now definitively in the “done” column, with more variations coming your way soon. 🙂


Homemade Pork Sausage

  • Difficulty: Average
  • Print

Making your own sausage is not as intimidating as it may seem. All you need is the right meat-to-salt ratio, a good imagination for flavor, and a device to grind the meat. Use a digital scale to measure the ingredients and keep the meat and grinding device as cold as possible through the entire process.


Ingredients

  • Good quality pork shoulder meat, with a decent amount of fat
  • Kosher (or other non-iodized) salt, in 1.5% proportion to meat weight
  • Non-salt seasonings of your choice, in 2% proportion to meat weight
  • 1 to 2 Tbsp. vinegar for each pound of meat

Use the “grams” setting of a digital scale for the easiest ratio calculation. Weigh the meat, then use a calculator to determine percentages. If your calculator doesn’t have a percentage button, convert it to decimal value. 1.5% = .015 and 2% = .02.

Directions

  1. Cut the pork shoulder into chunks about the size of walnuts. Place a bowl on the digital scale and zero the tare weight. Add the pork and take note of the gram total weight.
  2. Calculate salt and seasoning measurements, using the notes above as a guide. Sprinkle both over the pork chunks and toss to combine. Refrigerate overnight, preferably 24 hours.
  3. Arrange meat in a single layer on a parchment-lined baking sheet. Place the sheet pan into a flat space in the freezer for about 15 minutes to partially freeze the pork chunks. Also place the metal grinder parts into the freezer for this time, as the meat grinds best when it is perfectly cold. Measure the vinegar into a glass or cup and put it in the fridge to chill.
  4. Grind according to manufacturer’s instructions for your grinder. Place ground meat immediately into the fridge again to chill it down.
  5. Add 2 cups of ice to the bowl of stand mixer (or bowl you’ll be using to blend ground meat) and swirl it around to chill the bowl. Dry the inside with paper towels.
  6. Add chilled ground meat to the cold bowl and beat for 1 to 2 minutes, adding vinegar a bit at a time until blended in.


The Most Important Meal

One of the most important dishes I made on Thanksgiving Day had nothing to do with the people at our table, and everything to do with one of the furry members of our family. Our senior husky mix, Nilla, has begun playing a new mealtime game with us, called “maybe I’ll eat and maybe I won’t.” We have been trying since September to figure out the rules of this new game, and for the most part, I believe we are winning. But she changes the rules just often enough to keep us humble.

Amid the excitement for our traditional turkey-and-sides meal, my husband and I were also celebrating Nilla’s 14th birthday, and this very good dog deserved a special treat of her very own, complete with ground turkey, sweet potatoes, green beans, carrots and peas. So yes, right in the middle of Thanksgiving day, I stopped everything else I was doing and made this for her. She is not spoiled, mind you, just really loved.

I even mixed in some chopped dried cranberries. 🙂

Nilla entered Les’s life with a heartbreaking and all-too-common backstory. When he and his then-teenage daughter fell in love with this little fluff ball at the county shelter, the workers explained that the blonde pup and her 11 littermates had been abandoned in a box beside the road. I hope to never encounter a person who is so heartless to do such a thing, but in Nilla’s case, there is obviously a happy ending (for her siblings, too, as Nilla was one of the last pups adopted).

Look at those HUGE puppy paws! ❤

I first met this girl in 2015, when my friendship with Les had developed to the point of me visiting him in his home, and it didn’t take long for Nilla to capture my heart, too. Her daddy would casually mention that “Terrie’s going to be coming over,” and Nilla would stand watch at the front door. It was obvious that she was as happy to see me as her daddy was.

Nilla, teaching me how to give “high paw.”

Nilla is the perfect dog. She doesn’t jump or chew or dig or bark incessantly as some dogs do. She doesn’t roll around in stinky things and she hardly ever needs to be brushed. She is gentle, sweet and playful. I inform Les regularly that he will never again have a dog with so many desirable traits. Some of that can be credited to her training— Les started Nilla with a pro trainer when she was still a pup— but the rest is just her. She has an underlying personality that can best be described as “chill,” and we bonded even more when my cats and I moved in at Thanksgiving 2016. Nilla has been a fixture in the kitchen, always waiting, hoping, expecting a bite of whatever vegetable her mommy has on the cutting board.

She still loves her zucchini!

When Nilla was diagnosed with Cushing’s disease in the summer of 2020, we were told that the average survival time is two years, which we figured would have been great for a large-breed dog that was already approaching 12.

Cushing’s is an adrenal dysfunction, caused by a tumor on the pituitary gland, and though Nilla did not exhibit any of the typical early clinical signs— excessive thirst and appetite, pot belly or panting— she did show signs of heavy anxiety that resulted from overproduction of cortisol. That anxiety, combined with some funky blood work, led to her diagnosis. Cushing’s can’t be cured, and treatment doesn’t slow down or stop its progression, but it does help relieve some of the symptoms. It has been tough for us to see our happy-go-lucky girl in various states of restlessness. She has always been afraid of thunder and fireworks but now, even an innocent sneeze by one of us will send her scrambling in sheer panic. We adjust.

Two and a half years later, she’s slowing down but still with us, and we know that love has a whole lot to do with that.  

Our St. Patty’s Day family outing to her favorite dog-friendly brewpub.

I’ve shared here many times the wide array of vegetables Nilla has enjoyed, and I have always been thrilled to watch her catch bites of them in mid-air. Until recently, that is. Her eyesight doesn’t seem to be what it once was, and her timing and depth perception are not as sharp, either. At her last dental cleaning, she lost a couple of teeth and doesn’t enjoy the hard, crunchy vegetables that were once her favorites, but she sure does love them cooked up in a mix with fresh meat and grains, and I am more than happy to oblige.

What can you do for the very best dog, but your very best in return? As Nilla’s appetite has become less predictable, I’ve been working to develop some new culinary creations just for her. Whatever it takes to entice her, make her hungry for more, give her energy to carry on, that’s what I’ll do. The most important meal is the one she will eat. And so far, so good!


All of the blends I’ve made for Nilla have started with lean ground turkey, chicken or (occasionally) beef. I gently brown the meat with a little bit of olive oil— skip the seasoning— and then I toss in a variety of chopped or shredded vegetables, plus a little bit of water to simmer and steam it until the veggies are nice and soft. She loves it.

Those eyelashes!

If you’re going to cook for your dog, here are a few recommendations: 

Check with your vet

This is the most important thing, even if you think you know what foods are OK for your dog. Some conditions or medications may not play nice with certain foods and you need that insight from your dog’s veterinarian. Also, note that a cup of fresh, homemade food may not have the same caloric and nutrition value as a cup of dry dog food. Generally, we mix the two to ensure she is getting enough of everything her body needs to be strong. Nilla’s vet, known at our house simply as Dr. Eric, is all in favor of the special effort we are making for her, and he sees the benefit at each follow-up visit.


Make balanced foods

A good diet for a dog consists of more than just protein, so aim to include fresh vegetables and fruits, but steer clear of the things that are universally bad for dogs, such as onions, chocolate, grapes and anything with a lot of seeds. This has been a little bit tricky for me, because Nilla has begun to turn her nose up at some of the vegetables she used to love. She’s all done with raw broccoli and cabbage, but cooked is acceptable, and mild-flavored potatoes and green beans are still favorites. She also enjoys apples, as long as they aren’t tart and the pieces are small. Grains help provide a balance as well, and Nilla has especially been enjoying cooked oats and rice mixed in with her food.


Keep it easy on the belly

Dogs are lactose-sensitive, so steer clear of dairy ingredients as much as possible. A bite of cheese here and there is probably OK, but keep it few and far between. And table scraps that include a lot of fat or bones should be completely off limits. Many years ago, I had a dog who developed pancreatitis after finding fat scraps in the kitchen trash, and he wound up in the doggy hospital for several days. Trust me, you don’t want to go there. Oh, and skip the salt because it’s murder on their kidneys.


Scrambled egg for the win!

When all else fails at mealtime, we have found that a warm, a scrambled egg does wonders to spur our girl on to eat. It’s also quick to prepare and easy to blend with the other things in her bowl. Eggs are easy to digest and metabolize, and I believe Nilla’s favorite thing about them is that we serve them to her warm.


Cook small batches or freeze the extra

Depending on how much homemade food your dog is eating, you may want to keep your batches small so the food stays fresh and nutritious. If you need to make a larger batch to save time later, divide it into bags or containers for the freezer and thaw when you’re ready for it. 


Make a healthy broth for your pets

If you plan to cook rice or potatoes in broth, do not use store-bought varieties because every one of them contains onions! Make your own simple broth by simmering chicken or beef bones, and let them reduce to the concentration you need. It’s OK to add carrots to the pot, but skip onions, garlic, salt and spices. Skim off excess fats and strain out the solids before using it in your pet’s food.

Miss Nilla is a grateful dog, and we feel so lucky to be her pet parents. If all of this seems like a lot of effort for a dog, I’ll leave you with this thought: 

One day, far sooner than we’d choose, this beautiful girl will go to the Rainbow Bridge. And on that day, I will not regret the effort. ❤


Cooking Fresh Food for Dogs

Consult with your pet's veterinarian before making any homemade food recipe.


Ingredients

  • 2 tsp. extra virgin olive oil (optional)
  • 1 pound lean ground meat, such as turkey, chicken, beef or lamb
  • 2 cups fresh chopped vegetables, including any combination of carrots, green beans, sweet potatoes, broccoli, Yukon potatoes, cabbage or green peas
  • Up to 1 cup fresh chopped apples (excluding seeds)
  • 1 Tbsp. milled flax seeds, optional but so good for them (you can buy pre-milled or use a grinder or mortar and pestle)
  • Water or SAFE broth for simmering (make your own or use one formulated for pets; NO ONIONS)

Directions

  1. Heat olive oil in a skillet over medium-low heat. Add ground meat, using a utensil to break it up into very fine bits as it cooks.
  2. When meat loses its pink color, add vegetables, beginning with firm ones that need more time to soften. Reduce heat and cover the pan, allowing the steam to soften the veggies.
  3. Add softer veggies and apples. Add water or onion-free broth as needed to keep the steam going. Cover and steam until ingredients are softened to your best friend’s liking.
  4. Remove from heat and sprinkle flax meal all over the mixture. Let it cool before serving to your pet, either alone or combined with their other dog food. Promptly refrigerate extra food or divide and freeze it for later.


My Grandpa’s Cranberry Jell-O Salad

I know, I know— Jell-O? 

This is exactly the kind of recipe I swore that I would never post on Comfort du Jour. Its use of pre-packaged, artificially flavored and colored gelatin goes against every culinary instinct in my being and I hope you don’t see me as a food snob for saying so. After more than two decades of avoiding highly processed foods (like, um, Jell-O), my body gets raging mad over even a taste of artificial ingredients— usually with a display of symptoms ranging from inflammation and painful joints to headaches and digestive upset. It’s frustrating and kind of weird. But I am the unlucky bearer of an autoimmune disorder, and I just have to deal with it.

They’re trying really hard to make this seem like a health food. News flash: it ain’t!

Despite all of that, I made this recipe and I am sharing it for one reason only: nostalgia.

I ran across this stained, crumpled note in the depths of my recipe box when I was looking for something else last week, and it gave me “all the feels.” You see, my grandpa on my dad’s side shared this recipe with me on one of my visits to see him in his post-retired days in Florida, back when I was oblivious to the effect of the aforementioned highly processed foods. Grandpa was a real character, and I enjoyed visiting him at his home in Cocoa, visiting interesting places such as Cape Canaveral and Ron Jon (the beach shop, which he assured me was the only one of its kind). I loved touring his beautiful rose garden that he tended with fierce dedication, and getting dressed up for dinner with him at some really, ahem, “fancy” establishments.   

This neon-colored, congealed mess of a “salad” is something you’d expect to see in a cafeteria line-up, and that makes a lot of sense if you knew my grandpa. He loved cafeterias and buffets, and I chuckle when I remember the time he was so excited to take me out to eat at a place that he said “serves everything you could ever imagine— steak, pasta, fried chicken, salads, ice cream— all in one restaurant!” He raved about it during the entire car ride, and then he turned into the parking lot for Golden Corral. Thank goodness some high school prom kids came in for dinner that night or I might have felt overdressed!

Sincerely, I miss his fun-loving spirit, and when I shared this recipe with my husband, he commented that it was the first time I’d mentioned my grandpa as a culinary influence. But he wasn’t, really. During the years that my passion for cooking was developing, Grandpa owned and worked on a dairy farm and in his free time (that’s a joke), he also delivered mail on a rural route. As far as I could tell, he wasn’t in the kitchen much at all, except to bring in a fresh pitcher of milk to serve with dinner. He simply didn’t have much extra time, and when he did, we enjoyed fun things like picking peaches and riding in his boat. I was his first grandchild (daughter of his eldest son), and I like to believe I was his favorite. He sure treated me like it, and I suspect that my cousins all felt the same way.

I topped my Jell-O “salad” with sweetened cream mixed with sour cream.
But if you’re fancy like my grandpa, you could use Cool Whip. 😉

It wasn’t until I was a young adult and Grandpa was retired that we started to bond over food. He had made banana bread one morning when I visited, and when I commented on the cranberry Jell-O salad in his recipe box, he told me to write down a copy. This recipe, he said, was a great way to use up leftover cranberry sauce from Thanksgiving. 

I’m sure glad we had some this week. 🙂


My Grandpa's Cranberry Jell-O Salad

  • Servings: About 6
  • Difficulty: So Easy!
  • Print

This recipe is pure nostalgia for me, shared a long time ago by my paternal grandfather. It's an easy, fun way to use up leftover cranberry sauce after Thanksgiving.


Ingredients

  • 1 small box flavored gelatin (see ingredient note for suggestions)
  • 1 cup boiling water
  • 1 cup miniature marshmallows (Grandpa used the pastel multicolored ones)
  • 1 cup ice cubes
  • 1 cup leftover cranberry sauce (the whole berry kind)
  • 1/2 cup chopped pecan pieces
  • Whipped cream for serving (optional)

Choose a gelatin flavor that will complement your cranberry sauce. If your leftover sauce is on the sweet side, raspberry gelatin works well. For pairing with a tart cranberry sauce, consider cherry, strawberry or orange.

Directions

  1. Stir boiling water into gelatin in a medium size bowl until dissolved. Add miniature marshmallows and stir until they have melted to about half their original size. Add ice and stir to melt. Chill the mixture for about 30 minutes, until partially set.
  2. Stir partially set gelatin to loosen it up. Fold in leftover cranberry sauce and pecans. Transfer mixture to a small square or rectangle glass dish. Smooth the top, place a cover on it and refrigerate until firm.
  3. Cut into squares and top with a dollop of whipped cream.

Grandpa and me, sometime in the 90s. I miss him so much! ❤