Smoked Pulled Pork

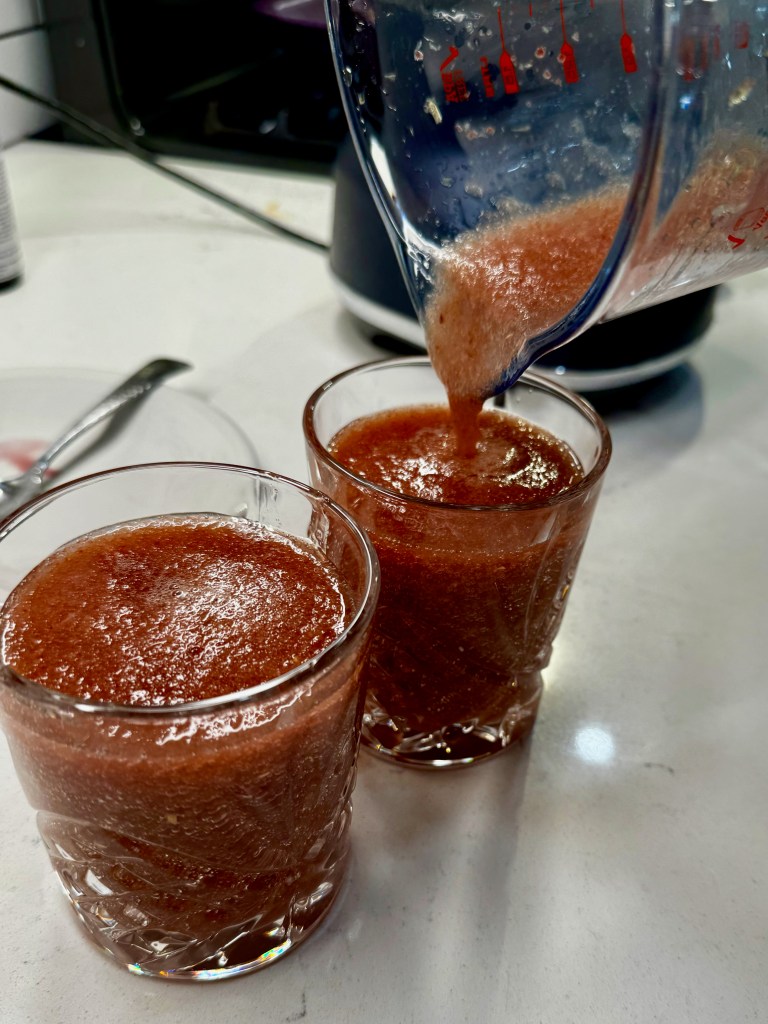
There’s no getting around it, this has been a brutal summer. Crazy hot days, nights as muggy as they were buggy, and no relief from all the drama of the world around us. I need a three day weekend just to catch my breath. Under normal circumstances, my husband and I would be firing up the grill for Labor Day, raising a glass to say, “peace out, Summer,” and looking ahead to my favorite season— fall!

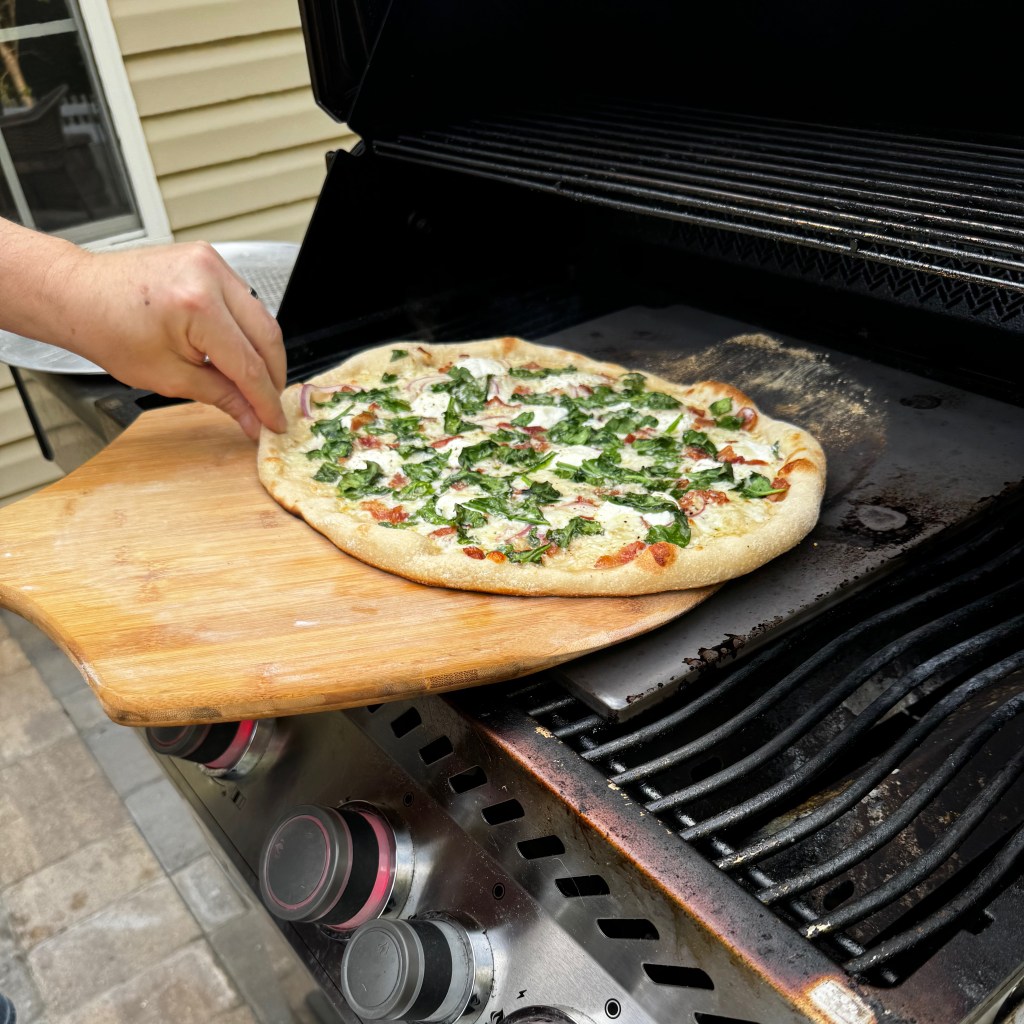
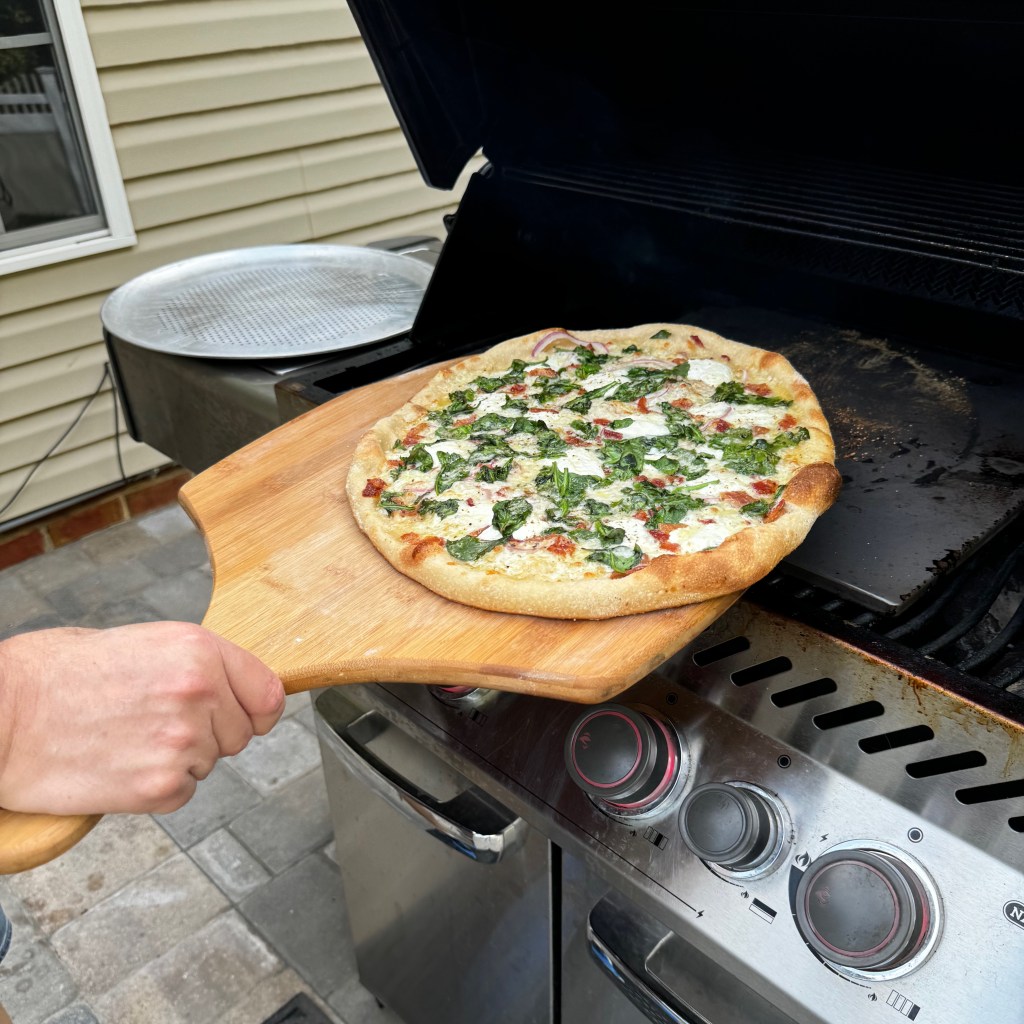
We will cover the raising the glass part, but the first activity on that list isn’t possible this year because our grill has decided to opt out of participation. If it isn’t the burned out igniter switch or a clog in one of the tiny burner holes, it’s something else. The latest issue is apparently a faulty regulator. Yep, the fancy-ass Napoleon gas grill that we researched half to death and practically took out a second mortgage to pay for has been slowly but surely stealing my soul.

Rather than shove the thing down the embankment into the woods behind our house (I’ve been tempted, trust me), I can be thankful for our charcoal smoker. A three-day weekend feels like a great time for Les to throw a variety of meats onto the racks over some hickory (or cherry or apple) wood.

We’re headed for the smoke zone!

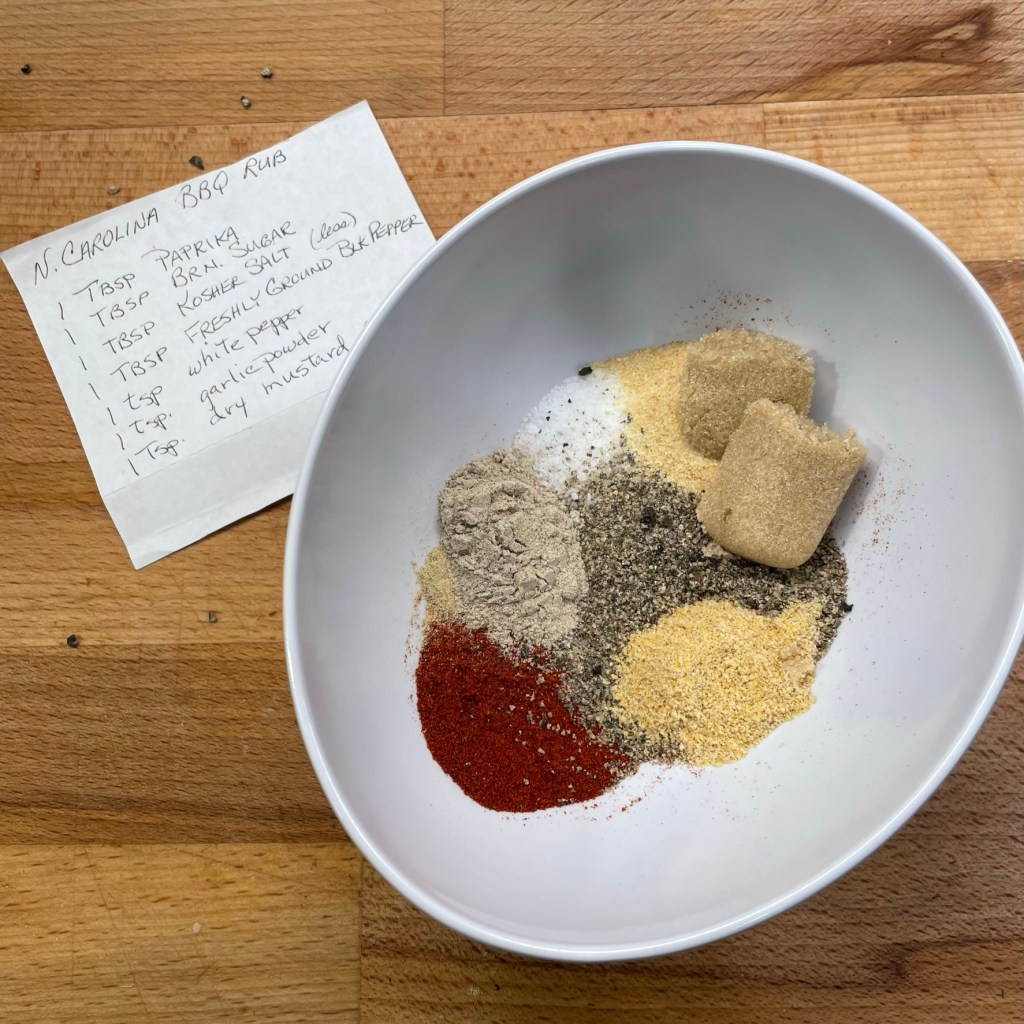
This pulled pork recipe is a favorite for a few reasons. First, the end of August is the anniversary of my arrival in North Carolina— it was 37 years ago this week that I rolled into town in my 1982 Pontiac, and one of the first foods I was introduced to was (you guessed it) pulled pork “barbecue.” Krispy Kreme was another, as they were born in Winston-Salem, and a staple here before the rest of the world knew about them. Another reason I love this pulled pork is the spice blend, and the recipe we use was given to me by my Aunt Joy. It’s a terrific balance of sweet, smoky, spicy and salty, and it gets bonus points for bringing great flavor to pork in a slow cooker, too!


Finally, I love this pulled pork because of my husband, Les, who happens to be celebrating a milestone birthday today. 🥰

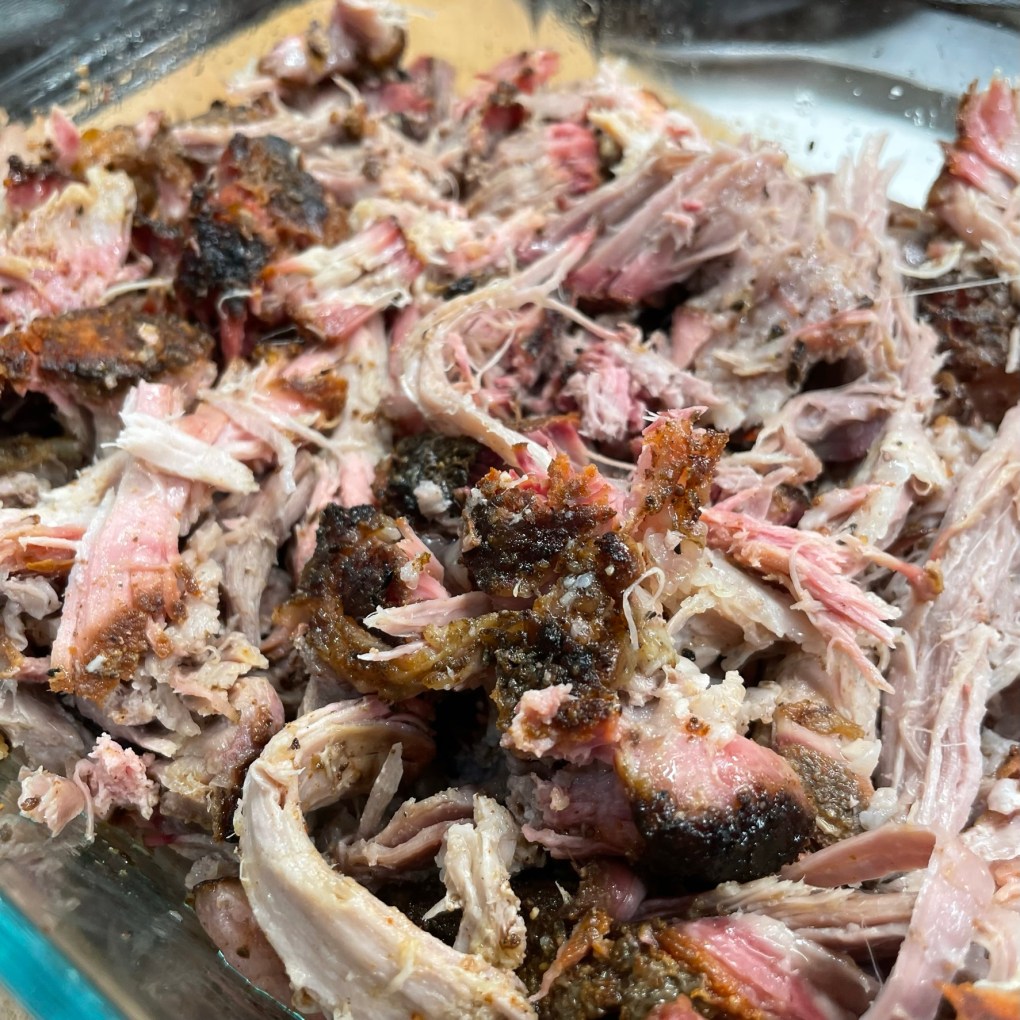
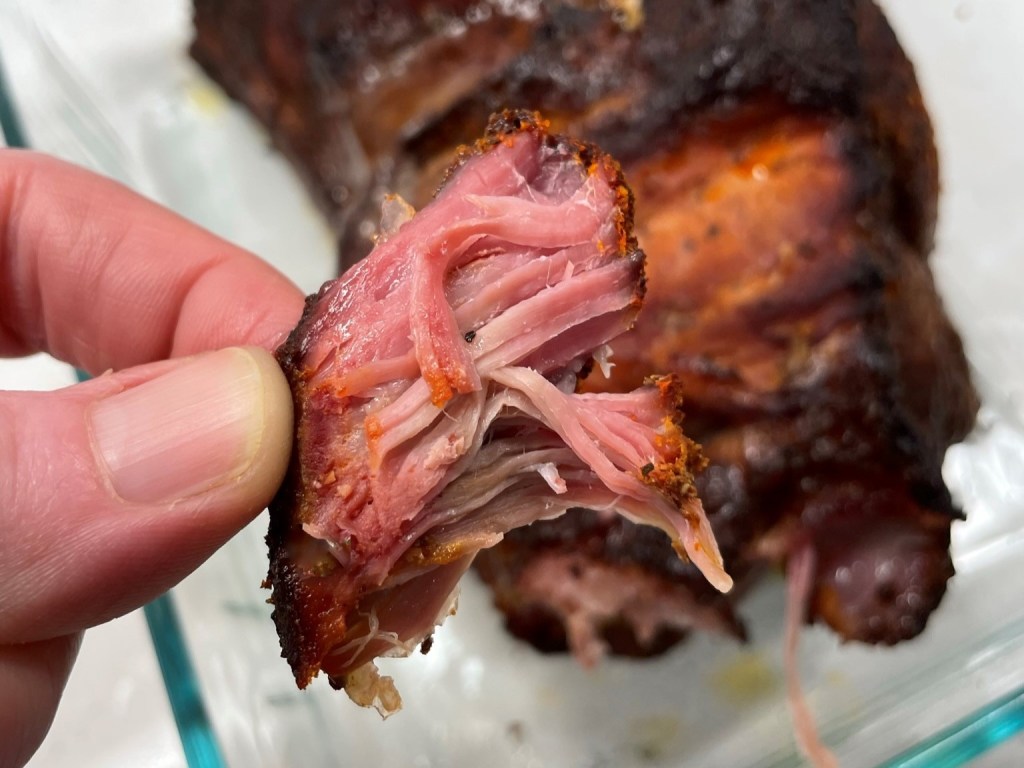
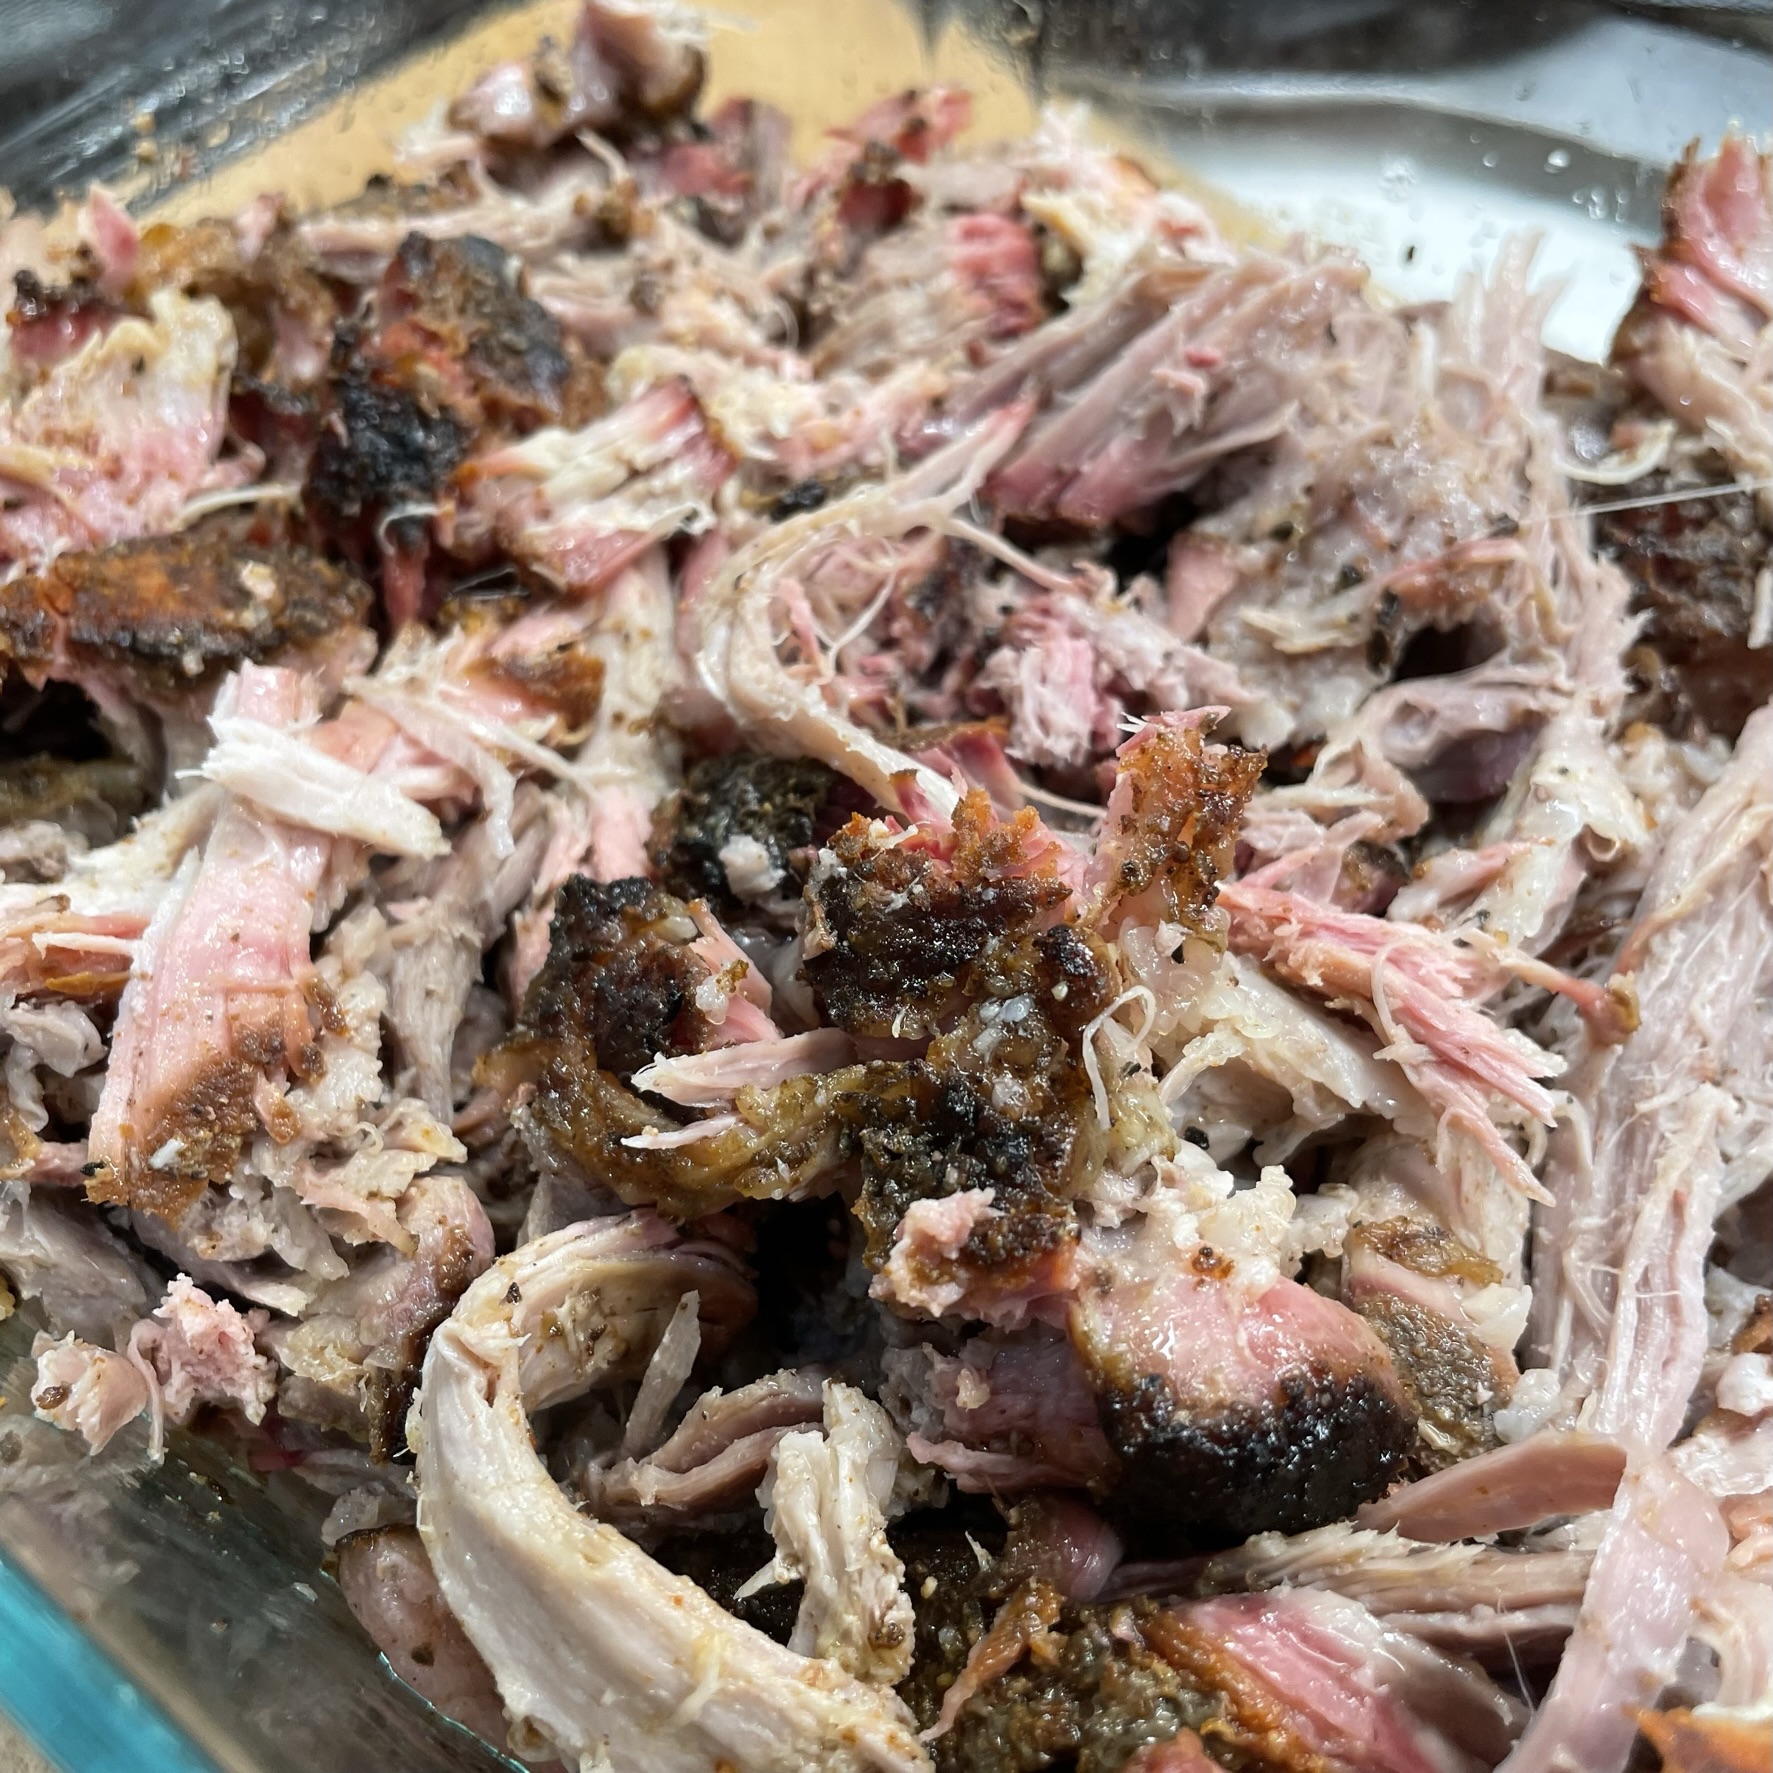
OK, I’ll admit that this post is really more about him. Les handles the smoker with great finesse, and his pulled pork barbecue is just about the best I’ve ever eaten—evenly seasoned, succulent and tender, and with a perfect smoke ring.

Perfect little piece of bark!

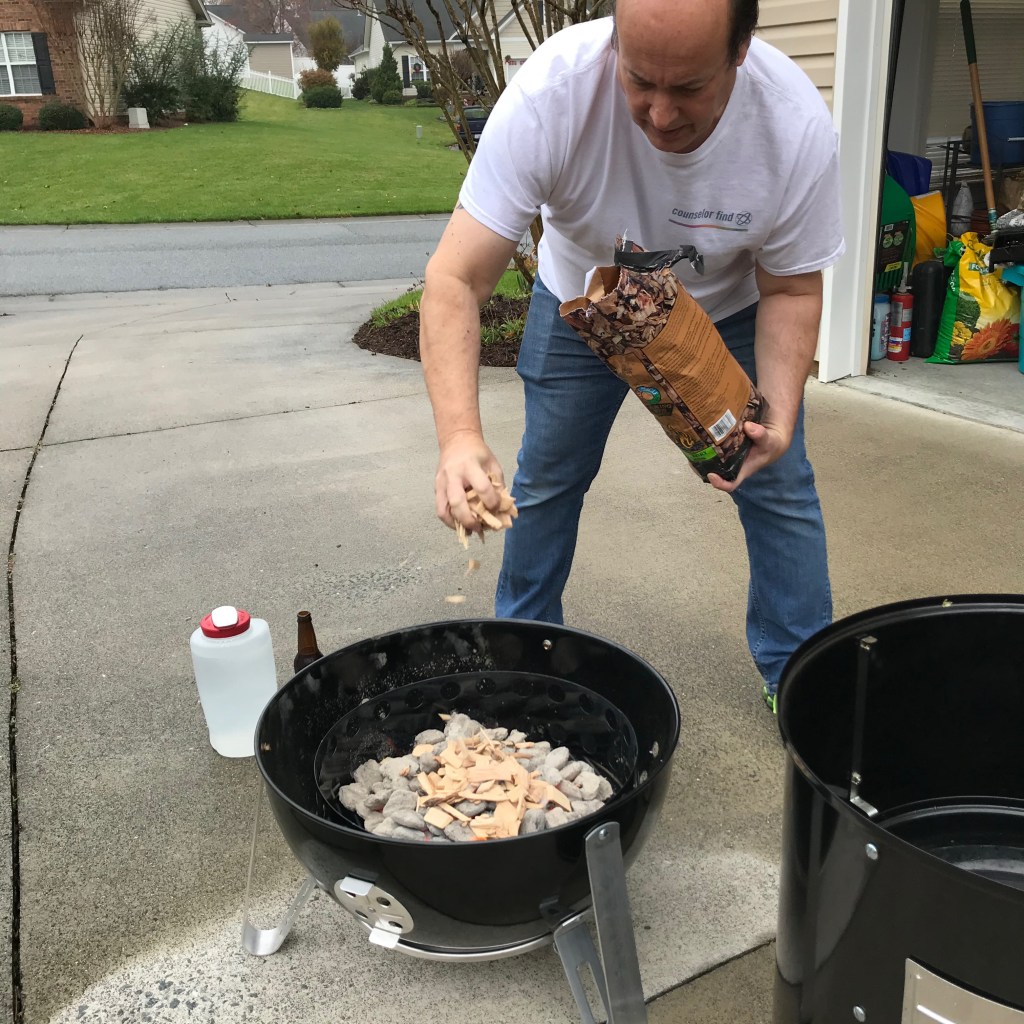
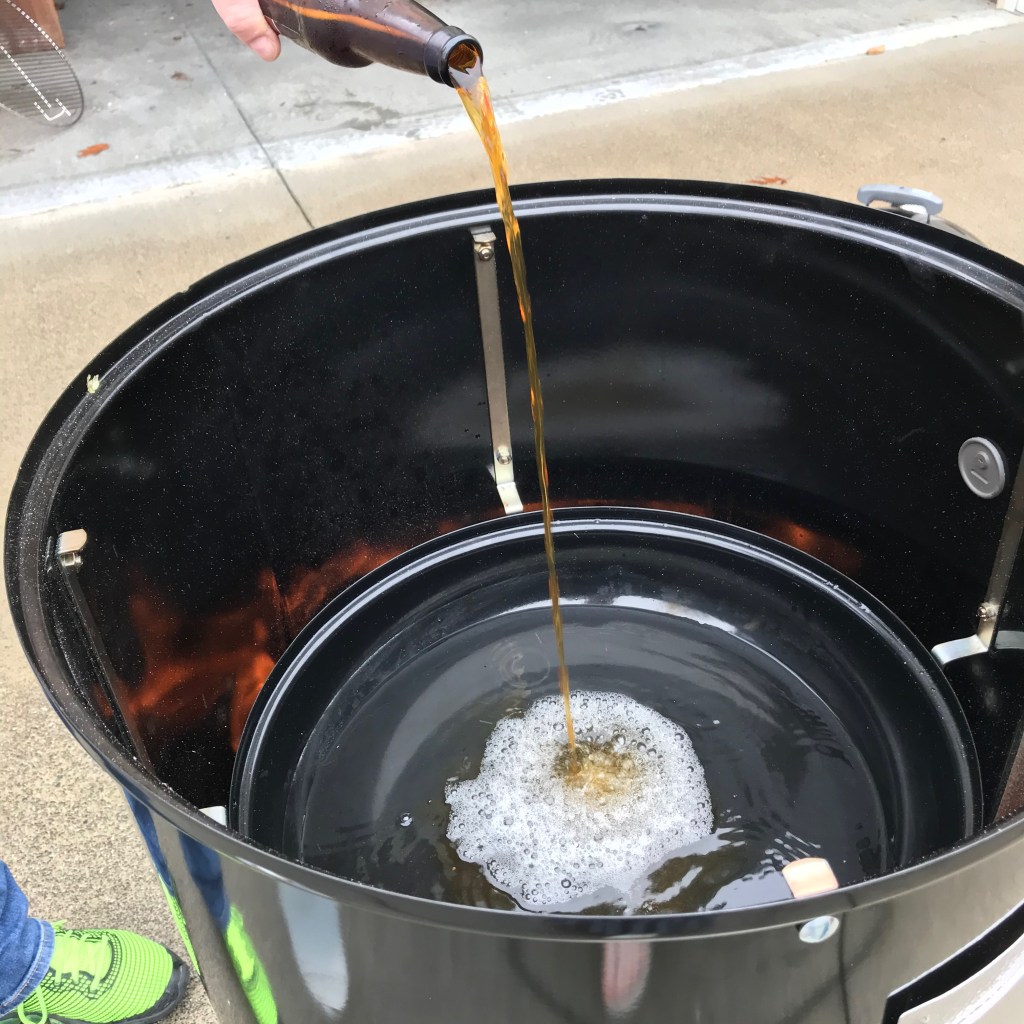
Les begins with a hardwood charcoal fire in the base of the smoker, and he adds wood chips when the coals are nice and hot. There’s usually some kind of special liquid added to the water in the drip pan— could be beer, hard cider, root beer or cola— to lend an extra hint of flavor to whatever he’s smoking.


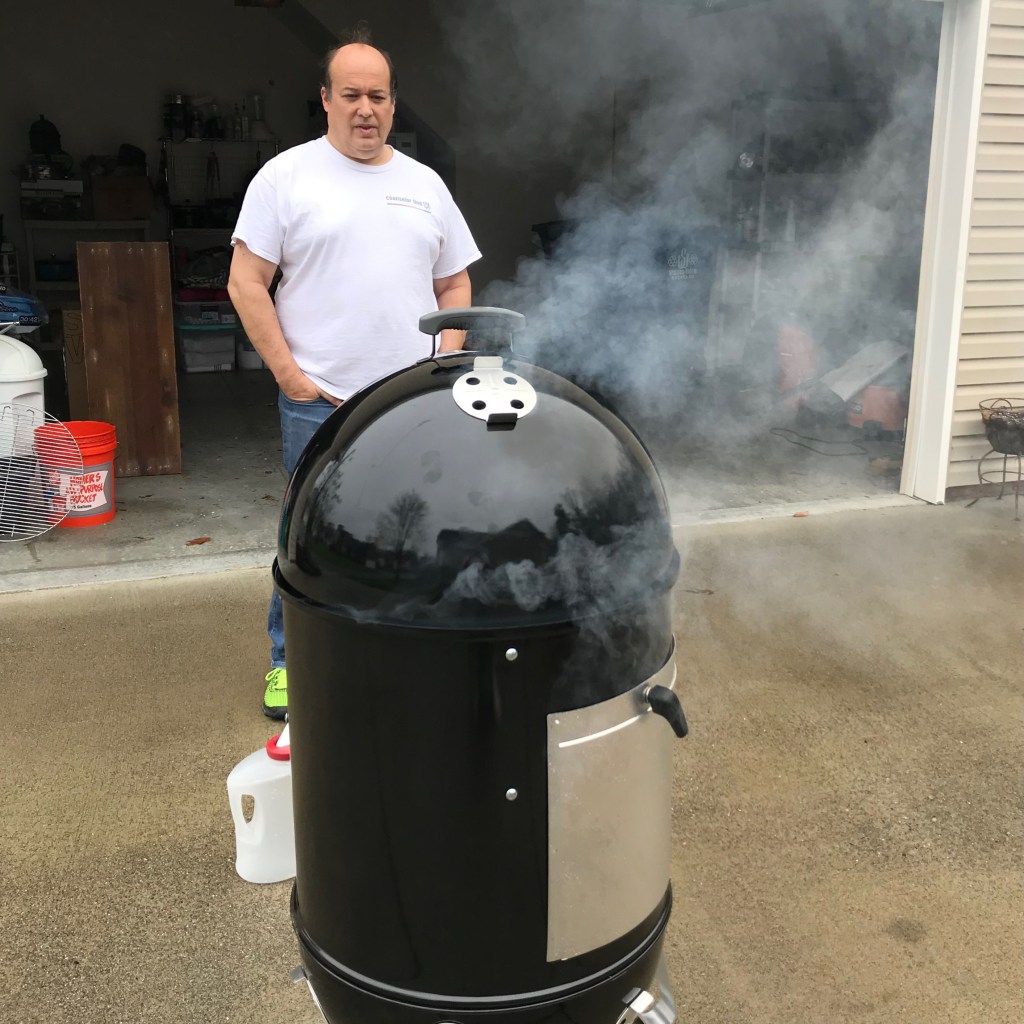
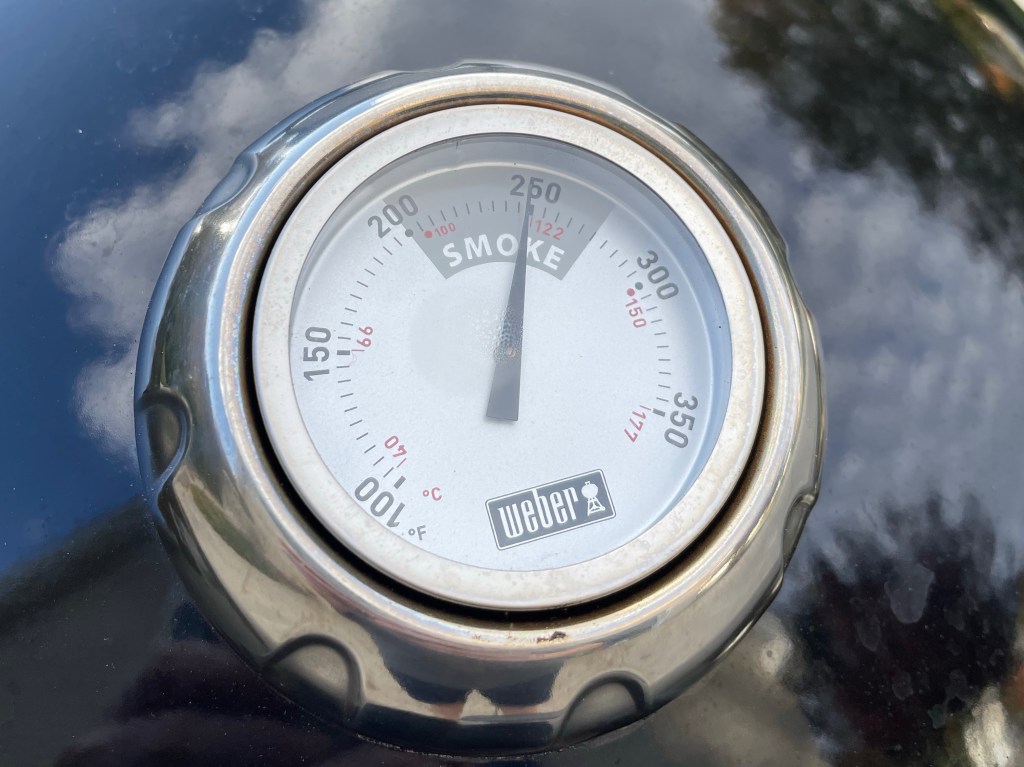
He masterfully opens and closes the vents to maintain the “smoke zone” of 225 to 250° F for as long as it takes to finish the meat. As with oven roasting, the smoke time varies depending on the size of the shoulder, and if you remain in that smoke zone, you’ll need about two hours per pound. If you run out of smoke before your target time, you can do what Les does; simply wrap the pork shoulder tightly in foil, and finish it in the oven at about 300° F until it pulls apart easily with a dinner fork.

When it comes to sauce, there’s a clear line in the North Carolina sand and it runs straight down the state where east meets west. The easterners prefer a sharp, vinegar-based sauce, and the other group likes “Lexington-style” sauce, which is a sweet and spicy, tomato-based bbq sauce. At our house, we frequently forgo the sauce altogether because the spice rub lends so much flavor to the pork on its own.


Smoked Pulled Pork

  • Servings: About 12
  • Difficulty: Average
  • Print

The big secret to good North Carolina barbecue isn't in the sauce, but the smoke! But if you don't have a smoker, this rub recipe is darn delicious over a pork shoulder in the slow cooker, too.


Ingredients

  • 3 to 4 pound bone-in pork shoulder (see notes)
  • 1 Tbsp. paprika (see notes)
  • 1 Tbsp. light brown sugar (packed)
  • 1 Tbsp. kosher salt
  • 1 Tbsp. black pepper (see notes)
  • 1 tsp. ground white pepper
  • 1 tsp. granulated garlic
  • 1 1/2 tsp. dry ground mustard

Notes: Choose the best quality pork you can find. We have a terrific butcher in town whose suppliers offer pasture-raised local pork. The best end result will come from the best meat, so splurge a little if you can.

I’ve found a great bourbon smoked paprika from Bourbon Barrel Foods. It’s worth chasing, and you may find it online or in a gourmet shop. For additional smoke flavor, I use McCormick smoked black pepper. Look for it in a larger, well-stocked supermarket.

Directions

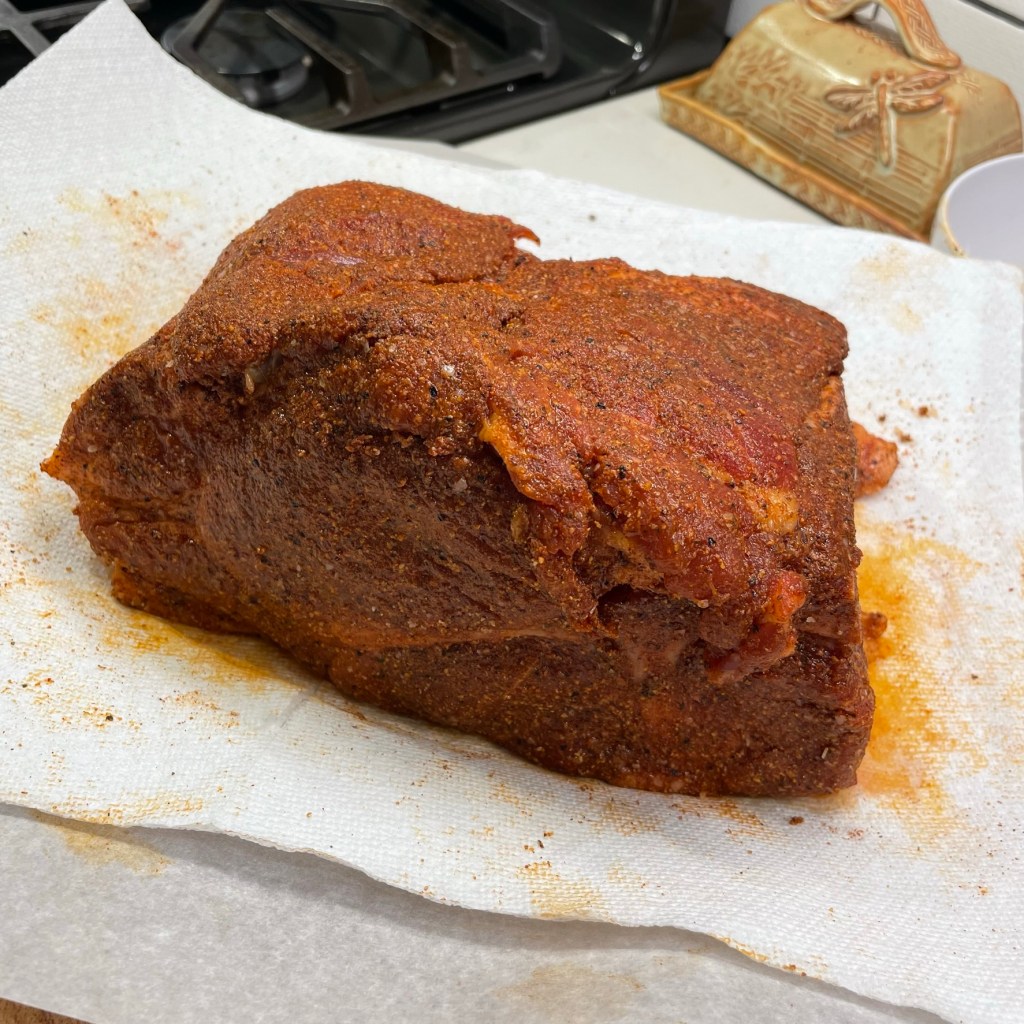
  1. Rinse the pork shoulder and wipe dry with a paper towel to remove any bone shards from the butcher.
  2. Combine all dry rub ingredients together in a small bowl. Sprinkle the rub mixture liberally over all sides of the pork shoulder roast, and then rub it in so that adheres evenly. Cover and refrigerate the roast overnight or up to 24 hours ahead of smoking.
  3. Take the rubbed shoulder out of the fridge about 90 minutes before you begin to smoke. Create your smoke setup with hickory, apple or cherry wood chips (Les usually soaks them in water or beer for about an hour ahead of time).
  4. Place the shoulder on the lower rack of the smoker and maintain a temperature in the 225 to 250° F range for roughly two hours per pound of shoulder. If you’ll be smoking smaller items at the same time, place them on a top rack for easy removal without disturbing the shoulder.
  5. If you run out of smoke before the shoulder is finished, carefully transfer it to a glass or aluminum baking dish. Wrap it tightly in aluminum foil and place in a 300° F oven until it reaches desired tenderness. The meat should easily pull with a twist of a dinner fork.


Sweet Corn Ice Cream 2.0 (with a boozy blueberry ribbon)

It was only a matter of time before I would begin revisiting recipes that I’ve already shared here on Comfort du Jour. And it’s not because I’m out of ideas. Rather, it’s because I cannot leave well enough alone, and I am always fiddling with successful recipes— even my own. When I first gave you the scoop on this sweet corn ice cream with a blueberry whiskey ribbon (it was July 2020 if you missed it), I was stuck in a rut of making a custard base that required whipping egg yolks with sugar and then tempering them with hot milk and cooking until thick. Those days, however, are gone. More gone than National Ice Cream month (July) and more gone than the so-called dog days of summer (which ended last week).

My discovery of the sweetened condensed milk variety of ice cream has changed everything, and as most of the United States enters peak sweet corn harvest season, I can’t find any reason to postpone sharing my 2.0 experience with this delightful, unexpected flavor combination. That’s right, I’m not going to make you wait until next July (you’re welcome)!

Ice cream month is over, but this flavor is still worth celebrating!

Like my custard-based version, this ice cream gets its flavor from real corn, simmered in milk and then pulsed and strained to coax every bit of flavor from the plump kernels. But replacing the rich, eggy custard with a flip-top can of sweetened condensed milk is not only easier and quicker, it’s a better outcome, texture-wise. Why bother with custard when this turns out so good? The ice cream base gets layered (after freezing, of course) with a sweet and boozy fresh blueberry compote, and I am officially going on record to say this is my favorite summer flavor combination. Come along, let’s make some!

It’s easier than it looks!

What are the ingredients for sweet corn ice cream?

The ingredient list for this ice cream is almost too simple. My usual base formula is one can sweetened condensed milk, one cup whole milk and one cup heavy cream (keep it simple, sweetheart). But on the day I made this, I messed up. I had only a splash each of milk and heavy cream, so I made a quick pivot and subbed half and half for most of the dairy. The fat content ended up being about the same as my go-to, and guess what? This was not a dealbreaker. Sometimes you just have to go with what you’ve got. The rest of the ingredients are fresh sweet corn, cane sugar and the blueberry compote, which is also a short list: fresh berries, sugar, corn syrup and this blueberry-infused whiskey.

This is excellent for sipping, too!

My recommendation for readers outside of North Carolina, where this “Smashing Violet” whiskey is available in ABC stores, would be to seek out a distiller near you that might offer a similar whiskey with blueberry infusion. Or, if that is a no-go, choose a lower proof sweet-variety bourbon and supplement with pure blueberry juice. Or skip the booze altogether (if you must), and add pure blueberry juice and a squeeze of lemon for a bit of acidity.

Let me pause for a quick sec to call out what I didn’t add to this recipe. Did you notice? As much as I adore vanilla, and especially after I was recently gifted a gorgeous bottle of homemade vanilla extract from a sweet foodie friend (thank you, Dorothy!), I didn’t want anything competing with the flavor of the corn. Not even vanilla. So it is a rare but intentional omission for this batch of ice cream.

Do I need any special tools to make sweet corn ice cream?

There are a few things you’ll need for best results— first, an ice cream machine, which I highly recommend for anyone interested in making ice cream at home. Sure, there are a million “no churn” recipes on the internet, but to me, this is equal to trying to make toast without a toaster. It can be done, but why would you want to MacGyver it? The second item you’ll need is some kind of tool to process the corn after it simmers in the slightly sweetened milk. This might be an immersion blender, or perhaps a regular blender, but definitely one that you can “pulse” rather than just puree. Finally, have a stainless mesh strainer for separating the processed corn solids out of the milk mixture, and it should be large enough to hold about three cups of mixture. A smaller one will work if you’re willing to do it in batches. I don’t have that kind of patience. I just want to get to eating this ice cream!

The first scoop always tastes the best!

Tips for success

Use the sweetest, freshest corn you can find. Farmers’ market or homegrown is ideal; pre-husked and shrink-wrapped at the grocery store, not so much. I can’t say for sure how many ears you’ll need because corn varies in size. After cutting the kernels off the three large ears I used, I had roughly two and a half cups of corn, so let that be your guideline.


Also, don’t toss the cobs! Trim the ends and cut them into chunks that will fit in your pot. It can be difficult to cut through uncooked corn, so here’s another tip: Cut down about a half-inch into the cob, and then use your hands to snap the cob where you’ve scored it. No sense chopping off a finger.

Use a heavy-bottomed pot to prevent scorching while you simmer the corn in the half and half. Use a medium-low temperature at first, and then when you begin to see a few bubbles around the edges, turn it down to low. Do not let the mixture boil, as this will curdle the proteins and burn the sugars. This will simmer— or steep, really— for almost an hour. Cool it to room temp before blending.

Use an immersion blender right in the pot, or transfer in batches to a regular blender, and only pulse to chop up the tender kernels so that they release the flavor inside. Do not puree it, as this will leave you with a weird texture that will be impossible to strain. Don’t use a food processor unless you have plenty of time to clean up the mess it will make. You know what would be great here, and probably what my grandmother would have used? An old-school food mill. Oh, how I wish I had hers! 🥹


Don’t discard the solids after straining! Even though they’ve given up the ghost for this ice cream, they still have quite a bit of flavor themselves. Add half of them to a batch of corn muffins or pancakes (I love this recipe from King Arthur Baking, if you happen to also be a sourdough baker), and throw the rest into a chowder. Blend in the condensed milk and heavy cream to the corn-infused half and half and chill it at least several hours, preferably overnight.


No fresh blueberries? No problem! I have made this ice cream several times with frozen blueberries— I’m especially fond of the “wild” ones— and it works absolutely fine.

For the most intense blueberry flavor in your compote, especially if you don’t have the blueberry whiskey, add some bottled blueberry juice to the fresh or frozen berries as they simmer with the sugar. Find it in the juice aisle, and verify the ingredient list to ensure that it is only blueberry juice. Don’t be misled by claims of “100%” juice, which might just mean that it has an apple or pear juice base with enough blueberry to color it. Also, the juice should not have added sugar (or if it does, reduce what you add to the compote).

On the subject of the compote, for goodness sake, don’t rush it. The berries need to be softened to the point of being mushy, and the liquid must evaporate so that the added sugar creates a syrup. Add a bit of light corn syrup to prevent the sugar from crystallizing when it cools. Cook this over medium-low heat until it is very bubbly all over. Add the whiskey and simmer again until it reaches the same stage. Then, turn it off and cool to room temp before transferring it to a bowl. Expect this to take at least 30 minutes from start to whiskey.


Be sure the ice cream bowl for your machine has been in the deep freeze for a minimum of 24 hours before churning. When it finishes in the churn cycle, consider adding a tablespoon or two of vodka during the final minute. This is not essential, but it improves the texture of the ice cream so that you can scoop it out straight from the freezer without waiting. If you choose to skip this, plan to remove the ice cream 10 to 15 minutes before serving time.


Layering the ice cream with compote is as easy as it sounds, and I discourage any attempt to “swirl’ it during this stage, as you may end up with a muddy look when you scoop it. Trust the process. The swirl will happen like magic later when it’s ready to scoop and serve.

Finally— and this is so important— put this ice cream in the freezer and do your best to forget about it for a full day. You’ll be tempted to dig right in, especially if you have tasted things along the way as I always do. But homemade ice cream needs time to “ripen” in the deep freeze, and with the layer of sticky compote, scooping this one too soon would be nothing short of disaster. Go read a book, shampoo the carpets, binge-watch another bad HBO series. Do anything, but give this ice cream 24 hours to set up properly before you scoop and enjoy. You won’t be disappointed!


Sweet Corn Ice Cream with Blueberry Whiskey Ribbon

  • Servings: About 8
  • Difficulty: Intermediate
  • Print

This is my custard-free version of one of my favorite summer ice creams, using sweetened condensed milk for the silkiest, creamiest texture you can imagine. Take your time with this one; I promise it's worth the trouble and the wait!


Ingredients

  • 3 large ears ripe sweet corn, husked and cleaned
  • 1 1/2 cups half n half
  • 1/4 cup organic cane sugar
  • pinch of salt
  • 14 oz. can sweetened condensed milk
  • 1/2 cup heavy cream
  • 1 Tbsp. vodka (optional, added during final minute of churning for improved texture)

Note: Use a heavy-bottomed pot for simmering the corn and cobs, to prevent scorching. Take care not to boil the milk mixture, and wait until after the corn is processed and strained to add the sweetened condensed milk and cream. You will need an immersion blender, regular blender or food mill to process the corn-milk mixture and a stainless mesh strainer to filter out the solids.

Directions

  1. Using a sharp knife, stand each ear of corn on end and cut off all the kernels. Cut the cobs into pieces that will fit in your cooking pot.
  2. Combine corn, half and half, sugar and salt in the pot over medium heat. Watch it closely, and reduce the heat to very low once it begins to barely bubble around the sides of the pot. Steep without allowing it to boil for almost one hour, until the kernels are very soft. Remove from heat and set aside for a few minutes.
  3. Use tongs to remove the spent corn cobs, allowing excess milk to drip into the pot. Pulse the mixture with an immersion blender to break up the softened kernels, but do not try to process smooth. There should be plenty of shredded bits of corn visible in the mixture.
  4. Strain through a mesh strainer into a clean pitcher bowl. Gently stir in sweetened condensed milk and heavy cream. Cover and refrigerate several hours to thoroughly chill before freezing.
  5. Make the blueberry compote while the ice cream base is chilling.

Ingredients

  • 1 cup fresh (or frozen) blueberries
  • scant 1/2 cup organic cane sugar
  • 2 Tbsp. water
  • 1 Tbsp. corn syrup (to prevent crystallization)
  • 3 Tbsp. Broad Branch Distillery Smashing Violet blueberry-infused whiskey (see notes for substitute)

Note: If you cannot find this whiskey (or a similar local product), substitute with two tablespoons of a low-proof bourbon, and swap in pure blueberry juice for the water used for simmering the berries. If you prefer a no-alcohol recipe, omit the whiskey entirely and swap in double amount of blueberry juice for water, plus a squeeze of fresh lemon. You may need to slightly increase the cooking time of the compote to get a proper reduction.

Directions

  1. Combine berries, sugar and water in a heavy-bottomed pot over medium-low heat. Stir frequently to ensure that the mixture doesn’t scorch. After sugar dissolves, stir in the corn syrup to prevent crystallization of the sugar when the mixture cools later.
  2. When the mixture is syrupy and reduced by about half, it should be bubbly all over even when stirred. Add the whiskey and allow it to boil again, but only for about 30 seconds. Remove from heat and cool to room temperature before transferring to a bowl to be chilled in the fridge.

Note: Be sure your ice cream maker’s freezer bowl has been frozen for at least 24 hours for best results.

Directions


1. Gently stir the ice cream base just before churning to reincorporate any ingredients that may have settled. Pour into the ice cream machine and freeze according to manufacturer’s instructions. During the final minute of churning, add optional vodka.
2. When ice cream base has finished freezing, spread one-third of it into an insulated ice cream container. Carefully spoon on a zigzag of the blueberry compote, about a quarter cup worth. Do not attempt to swirl it into the ice cream as this will lead to a muddy appearance (the swirls happen naturally during scooping).
3. Repeat with another layer of ice cream and another zigzag of compote, and then finish with the remaining ice cream. Smooth the top, cover it and place it in the freezer for 24 hours before enjoying.


S’mores Cookie Bars

It’s National S’mores Day, and I’ve been thinking about what makes this treat so special to deserve its own day of honor. The first written recipe for “s’mores” appeared in a Girl Scout handbook in 1927, when Calvin Coolidge was President of the United States— 16 presidents and almost 100 years ago. Amid a sea of other snack trends and fads that have come and gone (I’m lookin’ at you, Hostess pudding pies!), the s’more has stood the test of time. And no wonder! A melty morsel of milk chocolate and campfire-toasted gooey marshmallow, bookended by a sweet and simple whole grain cookie, what’s not to love? 

Like most of you, I’ve enjoyed s’mores since I was a kid in rural upstate New York. But our weather in the South is hot as hell in August, not particularly conducive to a campfire, and I’m sorry to say that the oven and microwave versions of s’mores just don’t cut it. There are appliances out there now for making s’mores indoors, like this one sold through Williams-Sonoma, but who has room for another gadget that only serves one purpose? 

Luckily, I’ve found many other ways to capture the essence of s’mores (along with all the happy feelings they invoke), twisting the ingredients of this summer classic into ice cream, brownies, cocktails and even dessert pizza! When I made s’mores cupcakes last year, I mused that perhaps I could have used up the leftover homemade marshmallow topping by making rice krispie treats, and I considered a s’mores version of those this year, except for one problem— my husband doesn’t like the krispie treats, and I would have been left to eat the entire batch! These s’mores cookie bars are my compromise, and I have no regrets.

I’d like s’more, please.

They are part s’more, part blondie, part cereal treat and 100% yummy!

What goes into s’mores cookie bars?

The base of my s’mores bars is essentially a blondie dough, with softened butter, brown sugar, egg, vanilla, baking powder and flour. But to emulate the s’mores more distinctly, I used whole wheat pastry flour and also added in honey for additional sweetness and some finely crushed graham crackers, which my hubby was happy to prepare for me. I used two of the little sleeves of Honey Maid “stackers,” which measured out to a little more than one cup of crumbs.


For the ooey-gooey goodness, I went with marshmallow creme, which holds its shape much better than actual marshmallows. When I made my s’mores pizza in 2020, I was disappointed at how much the mini marshmallows deteriorated after they cooled from the oven. Knowing that we would not devour this entire batch of cookie bars right away (though believe me, it was tempting!), I wanted a better, more stable option. Marshmallow creme, made with dried egg whites, is the way to go here, and I used almost an entire jar spread over two-thirds of the blondie dough. It may seem excessive, but isn’t that kind of the point with s’mores? 😏


You could, naturally, whip up a batch of seven-minute frosting in its place if you have the time, but I was getting impatient for my cookie bars. Real Hershey bars were layered over the marshmallow creme (because milk chocolate rules when it comes to s’mores), and then I mixed darker, semi-sweet chocolate chips and crispy Golden Grahams cereal into the remaining blondie dough, lending a cookie-meets-cereal bar vibe to my sticky, delicious treats.


I baked the bars for about 35 minutes, and then let them cool a few hours before removing them from the pan. The result? 

Ooey-gooey perfection!

Deliciously sticky, utterly addictive and every bit as ooey-gooey as I wanted them to be, and they have kept on the counter nicely so we can enjoy them for several days. Plus, no campfire required. 😋

Tips for success

As with all baking recipes, it’s best to have all your ingredients lined up, measured and ready to go before you begin. Take your butter out of the fridge an hour ahead so that it isn’t rock solid, and let your egg come to room temperature. Use extra bowls if that’s what it takes to have everything ready for mixing as the recipe indicates. For years, I considered myself to be a mediocre baker, but I’ve come to learn that my failing was mostly in preparation. Get your ducks in a row, and watch your baking game improve!

Following the steps in order does make a difference. If you don’t cream together the butter and sugar before adding in the other ingredients, the texture of your cookie bars may be quite crumbly. When you mix in the flour, do so only long enough to fully incorporate it. Overmixing will lead to gluten development, and you don’t want that. Use the paddle attachment on your mixer, or use a firm spatula to press the ingredients together by hand.

When layering the marshmallow creme, try to keep it about an inch away from the edges of the pan so that it doesn’t stick and burn. Keep in mind that when you press the chocolate bars and cookie dough topping, the creme will smoosh and spread. Give it room to do so.

If possible, use a metal pan to bake these cookie bars. You can see in my photos that I used a ceramic baking dish (it’s all I have in this size), and these simply do not heat as quickly or evenly as a metal pan.

After baking, give these cookie bars plenty of time to cool before you attempt to lift out the parchment sling. The marshmallow and chocolate will be very hot, and thin enough to ooze out everywhere, making a mess and potentially burning your hands. They will still be delicious when cool, and if you wish, you can pop your cookie bar into the microwave for a few seconds to recapture the ooey-gooey stretch of the marshmallow.

S'mores Cookie Bars

  • Servings: 9 or 16, depending on how you cut
  • Difficulty: Average
  • Print

These are part s'mores, part blondie, part cereal bar and 100% ooey-gooey delicious!


Ingredients

  • 1 stick salted butter, softened
  • 1/2 stick unsalted butter, softened
  • 3/4 cup light brown sugar, packed
  • 3 Tbsp. honey
  • 1 egg, room temperature
  • 2 tsp. real vanilla extract
  • 1 cup whole wheat pastry flour (sub regular or white whole wheat, or use all a-p if desired)
  • 1/2 cup all-purpose flour
  • 1 tsp. baking powder
  • 1/2 tsp. salt
  • 2 pouches Honey Maid “stackers” graham crackers, crushed fine
  • 2/3 cup semi-sweet chocolate chips
  • 2/3 cup Golden Grahams cereal
  • Most of a 7 oz. jar marshmallow creme
  • 3 standard size Hershey milk chocolate bars

Note: For easy removal of cookie bars, layer ingredients over criss-crossed parchment laid inside a 9-inch square baking pan. Overlap the paper so that you can use it as “handles” for lifting the cookie bars out after they’ve cooled.
If possible, use a metal baking pan, as glass or ceramic (as I used) tends to heat more slowly, causing the bottom to be slightly underdone.

Directions

  1. Preheat oven to 350° F, with oven rack in the center position. Prepare 9” square baking dish by lining with crossed pieces of parchment paper, overlapping the sides of the dish.
  2. In a stand mixer fitted with paddle blade, beat butter on medium high speed until fluffy. Add honey and then brown sugar a little at a time, beating until fluffy again. Add egg and vanilla, beating until evenly blended.
  3. Whisk together flours, baking powder and salt in a medium bowl. With mixer running, add flour by the spoonful until all is incorporated. Turn off mixer and scrape dough off beater. Add crushed graham crumbs and use a silicone spatula to press and blend them into the dough. Do not overmix.
  4. Transfer about 2/3 of the cookie dough to the parchment lined baking dish. Butter hands and press evenly over parchment. The dough will be very soft and sticky. Add the semi-sweet chips and cereal to the remaining dough, pressing firmly with the spatula to mix them in completely. Set aside for topping.
  5. Butter an offset spatula (or dip into hot water) and spread the marshmallow creme evenly over the cookie dough, keeping it about one inch away from the edges.
  6. Break the Hershey bars into four sections each and arrange them evenly over the marshmallow layer, gently pressing so that the marshmallow oozes up between the chocolate pieces.
  7. Use a scoop, spoon or your fingers to place dollops of the remaining cookie dough over the chocolate pieces, taking care to leave only small gaps for the marshmallow to bubble through.
  8. Bake 30 to 35 minutes (depending on your oven), until cookie batter is just barely baked through and the peekaboo marshmallow creme is lightly browned. Remove from oven and cool on a rack for a few hours before lifting out the parchment and cutting into squares.


Double Dark Chocolate Ice Cream

It’s funny how things change after marriage. When we were dating, my husband, Les, and I spent weekends going to shows, visiting antique stores, shooting pool or walking the trails at nearby parks. Now, our Saturdays are more likely to involve cleaning out the garage and hitting up the sample tables at Costco.  Who said romance is dead?

Last weekend, we loaded all our goodies into the trunk of the car after a Costco run— the bulk package of paper towels, a two-liter bottle of extra virgin olive oil, tower of canned tuna— everything except some irresistible dark chocolate peanut butter cups that caught my eye at checkout. That item rode shotgun with me in the front seat because we didn’t get to sample them inside and we are always starving when we finish shopping. By the time we got home, I said, “you know, these peanut butter cups would be great in a dark chocolate ice cream. I guess it’s time I made some.”

It’s possibly the creamiest ice cream I’ve ever made.

So, where are the peanut butter cups?

Your eyes don’t deceive; the peanut butter cups aren’t in there and I can explain. Our impression of the peanut butter cups changed after we got home, as we found them to be oddly gritty, especially after I chilled them. This is one of the hazards of Costco, as we now have a humongous bag of an impulse item that lost its shine on the way home. I didn’t want to risk sabotaging the perfect texture of the ice cream before me, so I changed my plan. The candy inspired me, and for that, I give thanks.

Without ice cream, there would be darkness and chaos.

Don Kardong (1976 Olympic runner, serious ice cream lover)

Let’s be honest, the world is full of darkness and chaos, even with ice cream. But summer’s favorite treat at least provides a most pleasant distraction, and this one deserves to be shared for its deep, dark chocolate flavor and silky smooth consistency. Here’s a fun fact: I’m not even particularly fond of chocolate ice cream, but this one? This one is awesome.


Most of my homemade ice creams these days begin, as this one does, with a can of sweetened condensed milk. I used to rely on custard as a base, and I still think it’s delicious and luxurious. But it gives me a headache trying to whip the egg yolks and sugar just right, then tempering with hot milk and especially cooking the custard to the proper thickness without crossing the line into scrambled egg territory. You can probably tell that I’ve had my share of issues here. 😏

The first time I made sweetened condensed milk ice cream, the clouds parted and I heard angels singing. I’m pretty sure it was the s’mores ice cream that I made for National S’mores Day three years ago, and I’ve hardly looked back. Condensed milk is thick, rich and exactly the right amount of sweetness for ice cream. It is an amazing substitute for custard, without the fuss or the saturated fat of several egg yolks. I learned later that the fat-free version of condensed milk works just as well as the regular kind (as long as you eat the ice cream within a few days), and isn’t this just the greatest news? 

The ingredient list is surprisingly simple.

So, I decided that sweetened condensed milk was the way to go, along with a few other things— whole milk, cream, dark cocoa powder and vanilla. As my recipe progressed, I also stirred in a bit of brown sugar to offset the sharpness of the cocoa and a teaspoon of espresso powder to accentuate the deep chocolate flavor. We are already more than halfway through National Ice Cream Month— let’s get this done!

Chocolate lovers, pay serious attention

Do you remember, as a kid, stirring Nestlé Quik into a glass of ice cold milk, and how you could never quite get all the chocolatey powder to dissolve, no matter how long you stirred? It’s tough to mix a powder into a liquid, and even more so when the powder is cocoa. For starters, the density of cocoa powder is greater than the density of milk— it’s mostly fat and fiber, so it’s kind of like me expecting my middle-aged body to squeeze into my favorite old jeans shorts. It ain’t happening (especially after so much ice cream)! But there is a way to force the cocoa to dissolve, with a side effect of also releasing its full flavor potential. You have to cook it.

Sorry, but even with a non-custard base ice cream, we must turn on the stove for this one, at least long enough to coax the cocoa into dissolving. As I began whisking my cocoa into the condensed milk, I remembered that my condensed milk was fat-free, and I needed a little fat content to help this along. So I whisked in a half cup of the cream from my recipe and realized that I had another problem. My cocoa was lumpy, and it hadn’t occurred to me to sift it first (I was too excited, I guess). This, my friends, is exactly why my immersion blender lives in the cabinet above the range hood. I was back in business!


The condensed milk base was so deep and rich, I worried that the cream and milk would flatten the flavor, but that definitely was not the case. Vanilla did its part as well, accenting the depth of the cocoa. It was smooth, creamy and exploding with chocolate flavor.

But what does the resident chocolate lover think?

As much as possible, I include Les in my process of making new recipes, especially when it comes to sweets because my own sweet tooth is underdeveloped. He licked the tasting spoon and declared it “very chocolatey, but not sweet enough.” The double dark cocoa blend from King Arthur Baking is a fantastic blend of Dutch-processed and black cocoas. It’s more intense even than Hershey’s dark cocoa, and that intensity registers as a touch bitter. So one cup of the ice cream base went back into the pan so that I could melt in a quarter cup of brown sugar to soften that sharpness, and this is when I decided to also add a touch of espresso powder to enhance the chocolate flavor without more cocoa. It was a bold move because Les despises coffee flavor, but trust me, he would never know it’s in there.


Second taste test was a winner, and I chilled and churned as usual, trusting my Cuisinart 2-quart ice maker that is going strong after 15 years. I know that the internet is full of “no churn” recipes, but if you enjoy homemade ice cream, I wholeheartedly recommend that you purchase a good quality machine. Mine has paid for itself many times over.


One could certainly make an argument for adding any variety of candies or other goodies to this dark chocolate ice cream. It would be a terrific base for a rocky road, a mint chip—or yes, a peanut butter cup blend. But I don’t regret enjoying it just as it is, in all its deep, dark chocolatey goodness.

Still twelve days left of National Ice Cream Month. What flavor do you want next?


Double Dark Chocolate Ice Cream

  • Servings: About 8
  • Difficulty: Average
  • Print

If you love chocolate ice cream, do yourself a favor and make this no-egg recipe. It would be a terrific base for any number of add-ins, but its creamy, indulgent texture makes it perfect on its own!


Ingredients

  • 1 can sweetened condensed milk (fat-free works great)
  • 1/2 cup dark cocoa powder
  • 1 1/4 cups heavy cream, divided
  • 1/4 cup brown sugar
  • 1 tsp. espresso powder (optional, to accentuate the chocolate flavor)
  • 1 cup whole milk
  • 2 tsp. real vanilla extract
  • 1 Tbsp. vodka (optional, added in the final minute of churning)

Note: The vodka addition is optional, and I recommend omitting it if you will be serving children or others who avoid alcohol. It’s a very small amount, and if you choose to add it during the final minute of churning in the ice cream maker, you’ll find that the ice cream is easy to scoop straight out of the freezer. If you do not use the vodka, simply take the ice cream out five minutes before serving.

Directions

  1. Combine condensed milk, cocoa, brown sugar, espresso powder and 1/2 cup of the heavy cream in a small, heavy-bottomed sauce pan. Whisk over medium low heat for 6 to 7 minutes, until sugar is completely dissolved and the mixture is very hot to the touch. Remove from heat and continue whisking for one minute.
  2. Transfer hot cocoa mixture to a large, heatproof bowl. Whisk in whole milk, vanilla and remaining heavy cream. Cover with a tight-fitting lid and refrigerate several hours until thoroughly chilled.
  3. Prepare ice cream machine and churn mixture according to manufacturer’s instructions. Add vodka during the final minute of churning, if desired.
  4. Transfer to an insulated ice cream container. Freeze several hours or overnight until firm.


My New Garden

Nobody ever accused me of having a green thumb, and when I made the decision last fall to rip out what was left of my sad, deer-raided vegetable garden, I knew that I would miss a few things. There is a certain joy in taking twenty steps out the door and returning with zucchini so fresh that the stem is still oozing its sap, or tomatoes that are perfectly ripe and juicy, ready to be sliced up for a sandwich or salad. But for me, the bad things about gardening outweighed the good, and I just got too frustrated with the weather, the weeds, the vine-boring pests and the resident deer. I don’t regret leveling the thing and planting grass. I can buy myself flowers (and vegetables) at the farmers’ market for a lot less hassle. 

You can’t even tell a garden used to be here!

The thing I miss, though, is the satisfaction of watching something grow under my watch, and for a fix in that department, I present to you my chair garden!


When I dragged this abandoned chair to the checkout of a local consignment store a few years ago, my husband, Les, thought I was nuts. What was I gonna do with just one chair, especially with the hideous striped fabric on the padded seat. But it was a steal at seven dollars, and I had a special plan to turn it into something that was part art, part garden.


What I realized as I was looking back through my photos is that during the height of COVID, I didn’t bother to put my garden chair together, and that coincides with the years I was trying so hard to keep a vegetable garden. But I’m back to it this year, and I thought it would be fun to walk you through how I made it. You know, if you’re feeing creative and by some chance you happen upon a single, seven dollar wrought iron chair at your nearest consignment shop.

Prepping the chair

If you’re going to do this as an outdoor piece, be sure you use a very solid chair that won’t easily topple in wind or be otherwise ruined in bad weather. This chair is really heavy, especially when fitted with a few pounds of potting soil and plants. Remove the seat cushion by loosening the screws on the bottom. Next, you need something to serve as a sling or hammock to hold a plant liner and soil. We had a scrap piece of chicken wire in the garage (from what, I don’t know), and I hooked that around the iron frame of the chair to serve as support.

My chair’s makeover began last summer, when I applied a solid coat of Rustoleum spray paint, for a protective coating against the harsh and humid southern summers. I washed and dried the chair first and used a bit of sandpaper to knock off random rust buildup, and then I sprayed paint onto the chair from every angle to ensure good coverage. After it dried, I looked at it in different light and retouched a few areas that I had missed the first time.


My vision for the chair this year was to complement the theme we are building for our newly remodeled patio and backyard space. Since last July, we’ve upgraded our patio with a paver border, round seating area and sidewalk. We also installed a new fence that matches the house, plus professional lighting and numerous shrubs and plants to pretty up the space. We love it!


There’s one bummer spot near the garage end of the house where the utility lines all run underground, so planting there is not an option. I thought, why not make use of my garden chair to add dimension and interest to that corner? So I gathered up supplies and handed Les my phone for pictures. Here we go!

The basics for container gardening

For a small container such as this, no fillers are necessary in the bottom of the planting vessel. Even with the chicken wire hanging below the seat level, there’s only room for about six inches of soil. For a very deep container, it’s recommended to put some kind of filler material in the bottom, both for drainage and to limit the expense and weight of so much potting soil. Rocks are not a great option, unless it’s a smaller container. Use styrofoam packing peanuts, empty starter pots, smashed soda cans or any other lightweight material that allows air and water to move through. If you will be planting herbs or any other edible plant, be sure all your materials are non-toxic. Whatever you’re using as a container for a garden, it’s important to have some method of drainage at the bottom; without a place for water to escape, your plants could succumb to fungus. 

I got mise en place, just like in the kitchen! 😉

Speaking of soil, you definitely want potting soil designed for containers, as this variety contains small granules of absorbent material for moisture retention. A container garden can dry up quicker than something planted in the ground, so this is important. You might even consider cutting up a cellulose kitchen sponge into pieces and mix them into the bottom layer of soil for the same purpose. The sponge pieces would take in extra water for slow release into the soil later when the plants need it. For a “container” as small as my chair, this wasn’t necessary.

I fortified the chicken wire sling this year with zip ties, to ensure that things stay put, and I cut off the excess length of the ties. Next, I cut a piece of brightly colored burlap fabric to complement the color of our patio umbrella and laid it over the chicken wire. This alone would not be enough to hold the potting soil, though, so the next layer was a flexible cut coco liner that I found online. In previous years, I had only found the ready-made round liners that are designed for hanging baskets, but they never quite covered the full chicken wire. I found these pre-cut liners a better option for the shape of my chair seat. I added potting soil, mixing in water from the hose after every few handfuls to give my plants a good start.


Choosing the plants

There’s a simple rule of thumb for a striking container garden; you need a thriller (one or two plants to stand tall and steal the spotlight), a spiller (one that trails or falls out of the container) and a filler (one that spreads throughout the garden as it grows). Choose colors and textures that contrast, but complement one another. Most nursery plants come with a tag that indicates sun or shade needs, mature height and watering requirements. Pay attention to those as you select your plants. The corner where my chair will go gets a few hours of late morning sun, and is in the shade by 1:30 in the afternoon, so I had plenty of options.

Almost every year, a coleus has been the thriller plant of my chair garden. I love the rich hues of coleus, and I’ve been lucky to find many varieties of it at my local nursery. My spillers have been everything from creeping Jenny to wandering Jew and variegated thyme. For fillers, I’ve chosen mostly flowers and herbs, including petunias, sage and calibrachoa, which is a favorite because it comes in a variety of colors, the blooms are small and plentiful, and it also trails a little bit. I used three coleus of different sizes this time around, filling the space with an asparagus fern, and using a white calibrachoa as my spiller (still waiting for it to spill, though).

Arranging your container garden

It’s fairly obvious that you want your thriller plant to be the center of attention, but that may not mean the center of the container garden. Consider the shape of your container, and whether it will be seen from all sides or only from one angle. For my chair, which will be positioned in a corner, it makes sense to place the thriller near the back; Asparagus fern, which I’ve never grown before, went in the center, a smaller variegated coleus in the front corner, and the white calibrachoa in front on the other side. Position them a few different ways until you achieve the look you want, and then make a large enough hole for the plants, watering thoroughly for each one.


As a final touch, spread extra potting soil over and around all the plant bases, even to the point of heaping, as after some time (and rain), the soil will settle. Our garden chair looks great in its new corner spot. Now, who has ideas for hiding all those ugly utility boxes? 😂


Tips for success

My chair garden has had varying degrees of success, determined by my choice of plants, location of the chair, attention to watering and, in general, the weather. Do your best to keep the soil watered as needed— gently, so that you don’t displace the soil— and if it gets very dry, don’t give it a flood of water all at once. Place ice cubes across the top of the soil and allow them to melt, giving the garden a slow watering before you pour water onto it. 

If you are reusing a container from last year, give it a thorough cleaning with soap, scrubbing with a brush as needed to remove debris and any fungus that might be lingering from previous plants. Let them dry in the sun before prepping and planting for the new season. 

Choose your garden’s location carefully before you begin, especially if your container is heavy to lift, as it may be best to build the garden in place. 

Most of all, enjoy your handiwork! Keep good notes for what you’d do differently next time. As with cooking, there’s always something new to learn and experience is the best teacher! 


Low Country Boil

I laughed out loud Friday when I opened my email from NYT Cooking. Before me was an image of “Cajun shrimp boil,” a messy montage of down-home deliciousness, with chunks of sausage, potatoes, corn and shrimp. It’s a casual meal, the kind you make once a summer when the multitudes gather for a holiday or a family reunion. Why was I laughing? Because I made a small batch of this dish just a couple of weeks ago, but mine has a different name, and I took a weird approach to making it— I used my slow cooker!

Pardon my steam.

Given the extended periods of heat we’ve had already this summer, I didn’t want to have a huge pot simmering on the stove for an hour, heating up what we were already paying good money to cool down. And it was a weeknight, not practical for attempting to do it outside on a propane burner pot, like the ones people use to deep fry turkeys. Though our slow cooker usually only comes out to play in the winter months for stews, roasts and braises, it turned out to be the perfect tool for slow-simmering this southern coastal classic. 

A name is just a name…

Until he met me, my husband had never heard of low country boil, one of many names given to this dish that is common among southern coastal communities from the Carolinas down through Georgia and cutting across to Louisiana. But it came up in conversation recently after Les and I visited Charleston, South Carolina, and I decided it was time for him to try it. Some folks in these parts call it Frogmore stew, and that’s how I was introduced to it half a lifetime ago. Other names for this crowd-pleasing summer meal include tidewater boil, Beaufort stew (pronounced “BO-fert” if you’re in North Carolina, and “BYOU-fert” down the coast in South Carolina) and—according to NYT Cooking— it’s apparently also known as Cajun shrimp boil.


Whatever the name, it’s the same ingredients, and they should be added to the pot in order of cooking time, with the shrimp entering the mix at the very end, lest they come out like pencil erasers. The corn and potatoes take the longest time to cook, but you’ll want to add the sausage in the beginning as well, for the smoky, savory flavor it adds to the cooking liquid. Most people add onions and garlic, and red peppers are good if you like a little heat. The seasonings are quite simple; just a generous sprinkle of Old Bay, seasoned salt or Cajun spice, a bay leaf and some ground pepper.


To beer or not to beer?

My introduction to this dish came in the late 1990s, on a weekend retreat with other volunteer youth ministry leaders. One of the organization’s board members was making his famous “Frogmore stew” for our group, and he visibly cringed when someone suggested he should make it without beer. Having had it both ways, I definitely agree. The beer lends a certain depth to the otherwise simple ingredients, but it can certainly be boiled in seasoned water or even chicken or shrimp stock if you prefer. We used Peroni, a light Italian lager, because it’s what we had in the fridge. I’d steer clear of dark or very hoppy beers, which would overwhelm the food.


Part of the charm of this dish (if you want to call it that), is the ceremony of dumping it out onto newspaper or cut-open paper grocery sacks, so everyone can grab exactly what they want and nobody has to do the dishes. Call me paranoid, but I don’t trust the chemicals in newsprint, and I’ve seen with my own eyes what crawls out of paper bag bundles in supermarket backrooms, so I’ll be doing absolutely none of that. I scooped my low country boil out onto a parchment-lined baking sheet, and drizzled Old Bay-infused melted butter all over the potatoes and corn just as the dinner bell rang. 

So, what was the verdict from my New York-born hubby? Les found low country boil to be a good, but not extraordinary meal, and that’s a fair assessment for a dish with such common ingredients. One thing to note is that it doesn’t reheat particularly well (especially the shrimp), so even a small batch is best suited to a gathering large enough that none will be left over.


Have you ever had this dish, in the low country or elsewhere, and what name do you call it?

Slow Cooker Low Country Boil

  • Servings: 4 servings
  • Difficulty: Easy
  • Print

You might have seen this dish called Beaufort boil, Frogmore stew or something else, but whatever the name, it's a southern coastal classic that's great for summer!


Ingredients

  • 4 ears sweet corn, shucked and cut into 3-inch pieces
  • 1 1/2 pounds small red potatoes, scrubbed and cut into chunks
  • 1 medium Vidalia (or other sweet) onion
  • 1 package smoked sausage (we used turkey sausage, but kielbasa is traditional and Andouille would be great)
  • 3 or 4 cloves garlic, smashed but not chopped
  • 1 tsp. red pepper flakes (optional for heat)
  • Several shakes Old Bay seasoning (or seasoned salt or Cajun seasoning, as you wish)
  • 2 dried bay leaves
  • 12 oz. light lager beer (or equal amount water or low-sodium broth)
  • 3/4 pound large fresh shrimp, deveined and peeled
  • 4 Tbsp. melted butter with Old Bay or other seasoning (drizzled on at serving time)

Note: Be mindful of the sodium content of the seasonings and broth you use. The smoked sausage already has a fair amount of sodium, and it’s easy to overdo it.

My low country boil was done in a slow cooker, which was a very convenient way to make this dish. If you wish to use a pot on the stove (or outside), cook it covered at a low boil for 35 to 45 minutes, adding the shrimp in the final minutes.

Directions

  1. Add corn, potatoes, sausage, onions and garlic to a slow cooker. Add seasonings and beer. Cook on high setting for two and a half hours, then switch to low setting for one hour.
  2. When potatoes are fork-tender, bring the cooker back to high heat until the liquid is near-boiling. If your cooker doesn’t have a high enough setting, transfer a few ladles of the cooking liquid to a saucepan for steaming the shrimp.
  3. Scoop out all ingredients (discard the bay leaves), and pour the seasoned melted butter over the corn and potatoes. Serve immediately with plenty of napkins.


Apple Pie Ice Cream

The kid in me comes out to play in July. It’s my birthday month, and so my memories call me back to childhood more than in other months. But I also think it’s because I learned a few years ago that July is National Ice Cream month. And what kid (even a grownup one) doesn’t love ice cream in the summer?

There’s a saying out there, attributed to President Harry Truman, that “there is nothing new in the world except the history that you do not know,” and though most U.S. citizens grew up believing that apple pie is an all-American dish— right alongside baseball, hot dogs and Chevrolet, remember?— the backstory of apple pie is much older. I found this article in Southern Living interesting; if you like rabbit holes (as I do), then dig into this after we finish this ice cream.

We may not have invented it, but we do indeed love apple pie in this country, and I have many fond childhood memories of my grandmother making pies and applesauce from the tart green apples produced by a tree next to the side of her house in Western New York. My cousins and I would go out there to pick them (sometimes off the ground), and Gram would spin a few other ingredients around like magic, and just like that, a pie would appear. A slice of that pie, alongside a scoop of vanilla ice cream and a wedge of sharp New York cheddar— oh, it was like heaven.

This year, the kid in me was craving something a little simpler, and so for our July Fourth celebration this year, it’ll be this apple pie ice cream. Two summer favorites in one scrumptious scoop!

It’s apple pie and à la mode, all in one!

There’s no magic to it, and only a little bit of cooking to get the chopped apples softened and syrupy with cinnamon, sugar and cardamom flavors. I used two small Gala apples, which cooked down to approximately one half cup of syrupy deliciousness. I was on the fence whether to blend those bits into the ice cream base itself or merely layer with the base at the end. Ultimately, I layered them because I love the visual appeal of all the tasty flavors swirled into each scoop.

These flavors were begging to be worked into an ice cream!

The “pie” part of my recipe comes not from pie crust, but from buttery, flaky apple turnovers. I took a shortcut by using store-bought pastries, but it was a relief to not turn on the oven. If you make the turnovers yourself, you are officially the apple of my eye! 🤩


The ice cream base I used is my go-to, with sweetened condensed milk, cream, whole milk and a touch more cinnamon. This time, though, I got a notion to swap in a portion of dulce de leche sweetened condensed milk. It’s a thicker, caramelized version of condensed milk, and its rich, caramel-y flavor gave my ice cream even more of an apple pie vibe. Notice that I did not include vanilla? I wanted no distraction from the apples, caramel and spices.


After churning the ice cream in my handy Cuisinart machine, which has paid for itself dozens of times over since I bought it more than 15 years ago, I layered the sweet base with those syrupy apples and some torn up bits of apple turnovers.


My inner kid is grinning ear to ear for this one, and it feels like a perfect way to kick off National Ice Cream Month. Don’t be surprised to see a few other fun flavors pop up here in the weeks to come. Hello, July! 😎


Apple Pie Ice Cream

  • Servings: About 12 scoops
  • Difficulty: Average
  • Print

This is my adaptation of two favorite summer treats, all layered together into one scrumptious scoop!


Ingredients

  • 14 oz. sweetened condensed milk (or swap in a small amount of dulce de leche)
  • 1/2 tsp. cinnamon
  • 1 cup whole milk
  • 1 cup light cream
  • 2 small gala apples, peeled and chopped into bits
  • 1/4 cup sugar
  • 1/4 tsp. cinnamon
  • 1/8 tsp. ground cardamom
  • pinch of salt
  • 2 tsp. pie filling enhancer (a King Arthur product, or sub a teaspoon corn starch)
  • 2 Tbsp. water
  • 1 large baked apple turnover, torn into small pieces

Notes: Do your prep ahead so that everything has time to chill thoroughly in the fridge before churning and layering the ice cream. For easy scooping straight from the freezer, add a tablespoon of vodka during the final minute of churning. This ice cream is best after ripening in the freezer at least 8 hours or preferably overnight.

Directions

  1. Whisk together sweetened condensed milk and cinnamon. Add milk and cream, and whisk until smooth. Refrigerate until mixture is completely cold.
  2. Toss apple bits with sugar, cinnamon, cardamom, salt and pie filling enhancer (or corn starch). Add to a small saucepan with water and cook over low heat until mixture is thickened and apples are soft with only a light resistance to the bite. Transfer to a small bowl to cool and refrigerate until chilled.
  3. Chop or tear the apple turnover into small pieces. Spread the pieces out on a parchment lined plate or small baking sheet and place in the freezer for at least one hour.
  4. Churn the dairy base in ice cream machine, following manufacturer’s instructions. If using vodka for texture, only add it during the final minute of churning. Transfer ice cream to an insulated freezer container, layering with stewed spiced apples and torn bits of frozen turnover. Ripen in freezer several hours (overnight is best).


Grilled Salad with Parmesan-Peppercorn Dressing

As much as possible this summer, I’m avoiding unnecessary use of the stove or oven. Our energy costs are high enough just knocking down the heat that’s outside. No sense producing more heat indoors. What this means for mealtime is a combination of solutions: cooking extra things in one oven session, eating more cold foods, bringing food in from other places and (you guessed it) grilling our food outside, where you don’t notice the heat because it’s already so damn hot. 

We love the flavors of grilled foods any time of year; summer just happens to be the more practical time of year to do grilling, and we are fortunate that by dinnertime, most of our backyard is in the shade. It’s not unusual, especially on weekends, for my husband and me to relax with a cocktail out there (maybe a frozen old fashioned?) while he tends to dinner on our big Napoleon gas grill. And when I say that he grills dinner, sometimes I mean the whole dinner, including a main meat, a side veg and the salad. Wait— he grills the salad??

Don’t knock it ’til you’ve tried it!

It may seem unconventional to make a salad on the grill, but hear me out. What the grill does for meat and vegetables— you know, searing, adding smoky notes and caramelizing surface sugars— well, it does the same for leafy greens. Some of the leaves will wilt and even char a little bit, and some of the sturdier, inside leaves will hang onto a little crunch. This makes for a very pleasant bite that you should try, if you haven’t already.

This salad of romaine hearts, scallions and bitter radicchio is elevated by a quick turn on the grill, and I’ve made a smoky, garlicky Parmesan-peppercorn dressing to go with it.

Grilling is a sophisticated approach to salads.

Let’s do this!

Begin by prepping the greens earlier in the day. You must have whole lettuce heads, as the delicate leaves would wilt and burn far too quickly if placed on the grill individually. I’ve chosen hearts of Romaine and radicchio, a small bitter green that isn’t green at all, but purplish crimson in color. Trim any rusted bottoms, then cut them in half lengthwise and give them a good rinse under cold running water. Gently shake out the excess water and place them upside down on a towel-lined baking sheet. Cover with another paper towel and send it to the fridge to crisp up for a few hours as the lettuces continue to drain. 


The smoky Parmesan-peppercorn dressing is easy to make, and it’s best to do this ahead as well, so that the flavors have time to mingle. The dressing includes everything you see here— plus a little milk to thin out the consistency.

Greek yogurt, mayo, grated Parmesan (or our beloved Parm-Romano blend, which is in the tall square container), roasted garlic, fresh lemon juice, salt and coarsely ground black pepper.

Equal parts mayo and Greek yogurt provide the base for this dressing, and a if you can get your hands on this oak wood smoked pepper, you won’t regret it for the smoky notes it contributes. Squeeze in the juice of half the lemon, then whisk in the roasted garlic and a couple spoonfuls of grated Parmesan. The dressing will be quite thick, so whisk in a bit of milk (or buttermilk) at a time, until the consistency is to your liking. The click-to-print recipe card below makes more dressing than you’ll need for this salad, so plan to enjoy it again later with another meal.


Grilling the salad

When the rest of your meal is almost ready, flip over the chilled lettuce halves and give them a drizzle of extra virgin olive oil, plus a quick hit of salt and pepper. Place them, face down, on the hot grill alongside your scallions, and watch closely for signs of wilting and charring. Give them a turn after a few minutes, and take them off the heat when both sides have softened and show signs of grill marks and charred edges.


Transfer the grilled lettuces to a clean cutting board and chop them up for serving. Toss with a bit of the smoky Parmesan-peppercorn dressing and an extra sprinkle of Parmesan if desired.


Grilled Salad with Parmesan-Peppercorn Dressing

  • Servings: 4
  • Difficulty: Easy
  • Print

If you've never had grilled salad, this is an easy one to try, with a delicious homemade dressing that you'll want to enjoy year round.


Ingredients

  • 2 hearts of Romaine lettuce, trimmed, split and rinsed
  • 1 medium head radicchio, trimmed, split and rinsed
  • 2 or 3 scallions, cleaned and trimmed
  • 3 Tbsp. light mayonnaise
  • 3 Tbsp. nonfat Greek yogurt (sour cream works, too)
  • About 1/4 tsp. kosher salt
  • Several twists freshly ground black pepper (or combination with smoked black pepper, which is so good!)
  • Juice of 1/2 lemon
  • 1 whole bulb roasted garlic
  • 2 Tbsp. freshly grated Parmesan or Parm-Romano blend cheese
  • 1 to 2 Tbsp. milk or buttermilk, as desired, to thin the dressing consistency


It is best to make the dressing several hours before grilling, so that the flavors have plenty of time to mingle. Prep the lettuce ahead as well, to ensure the excess water can drain out.

Directions

  1. Place rinsed lettuce halves on paper towel-lined baking sheet, cut sides down. Cover with a damp paper towel and refrigerate a few hours, allowing excess water to drain.
  2. Make dressing by combining mayo, yogurt, salt and pepper in a small bowl. Squeeze in lemon juice and whisk to combine.
  3. Squeeze roasted garlic cloves from the bulb and whisk them into the dressing mixture, along with grated Parmesan.
  4. Add small amounts of milk at a time, whisking after each, until desired consistency is achieved.
  5. Refrigerate dressing until time to serve. Extra dressing will keep in the fridge for about one week.
  6. Heat grill to medium-high heat. Turn prepped lettuces upright and drizzle with olive oil. Season with salt and pepper. Place on the grill, cut side down, along with the scallions. Turn after a few minutes, when lettuce has slight charring. Remove from heat when both sides show grill marks.
  7. Transfer lettuces and scallions to a cutting board and rough chop. Toss lightly with dressing and sprinkle with additional Parmesan, if desired.


Bacon & Spinach Pizza— on the grill!

If you’ve been following my blog for any amount of time, you know that I love to make pizza at home. Beginning with my favorite sourdough crust, I mix and match ingredients to discover new favorites and I’ve also had a lot of fun transforming other classic dishes into pizza, as I did with jambalaya, queso fundido, spanakopita, ratatouille, shrimp scampi and even Thanksgiving (you can check them all out on my Pizza Party page). My husband, Les, and I truly love a good pizza, and it’s in pretty hot rotation at our house, even in the summer months. 

There’s only one problem now. This god-awful heat!

Most of my pizzas (excluding the deep dish versions) are baked on what I lovingly refer to as our “screaming hot pizza steel,” which is preheated at 550° F for one hour. This summer, with outdoor temperatures holding steady in the 90s, we had a choice to make, lest we face similar temps inside. And the solution turned out to be simple— pizza on the grill!

I think we can expect a lot more of these!

Two summers ago, Les and I invested in a Napoleon four-burner gas grill. Part of the reason we chose this grill (besides the fact it was made in Canada, not China) is that the model can support some amazing accessories, including a rotisserie basket and a charcoal smoker insert (both of which we bought but have yet to use). What it didn’t have was a great solution for pizza.

We considered getting an outdoor pizza oven— they’re all the rage now, after all— but having one would require having a place to set it and store it, and then there’s all the accessories for it. And have you seen the price tags? Having just dropped a hefty chunk of change on our fancy grill, we couldn’t justify spending another grand on a device that would only be used for pizza.

Fortunately, we are not easily deterred, and some quick research led us to a pizza stone made by Weber that is suitable for really high temperatures. The stone is coated with a glaze that gives it an easy-release finish, and although the Weber site says you must use it with their special frame kit on select Weber grills, I’m here to report that it also works great on our Napoleon— we just set it right on top of the grates, and crank up the heat!

This is even hotter than our oven!

The first couple of pizzas we tried on the grill last summer turned out good, with melty toppings and crispy crust. But we missed the usual top-of-pie blistering that we love from our oven-baked pies, so this year, we’ve figured out a compromise. After our pizza bakes for roughly six minutes on the grill, it hits a perforated pizza pan for a spin under the oven broiler for exactly one minute. Yes, the broiler gets hot, but only very briefly compared to multiple hours at 550° F. It’s a solution that ticks all the boxes for these two pizza snobs!

Hungry for something different?

My pizza dough recipe makes enough for two pies, so I have plenty of opportunity for experimenting. I usually do something classic for one pizza, and the other becomes a blank canvas for new ideas. I’ve been tuned into Les’s suggestions quite a bit lately, and he asked last week whether we’ve ever done a pizza with bacon as a topping. I had to search my own blog to discover that, yes, I did put bacon on the jalapeño popper pizza, the Kentucky hot brown pizza and the oysters Rockefeller pizza (they are also on the Pizza Party page). 

But Les wanted something a little different, using bacon as a salty accent, plus fresh spinach (his favorite), red onions and some gruyere cheese he thought he’d spotted in the fridge. I contributed a topping of my own, ricotta, and this new pizza was born. 

A very tasty experiment, if we do say so.

I cut up the bacon into pieces and cooked it until most of the fat was rendered and it was just shy of crispy, knowing that it would cook further in the heat of the grill. The cheese we thought was gruyere turned out to be white cheddar with “gruyere notes” (whatever that means), and we mixed it about 50-50 with freshly shredded hard mozzarella to be sure there was a good melt. This pizza would not have sauce, so it needed something else with a bit of moisture. Ricotta to the rescue, though next time I would spike it with some garlic to punch up the flavor a bit.


Our six minutes on the grill stone, plus one minute under the broiler method is a winner. This is very good news for us pizza lovers, especially with an entire hot summer ahead of us. The moral of this story? Where there’s a grill, there’s a way! 😉


Bacon & Spinach Pizza— on the grill!

  • Servings: One 14-inch pizza
  • Difficulty: Average
  • Print

This is a fun and different flavor combination for pizza, whether you bake it in the oven or (as we did with this one) on the grill!


Ingredients

  • Pizza dough ball, roughly 11 ounces
  • 1/3 cup freshly grated hard mozzarella
  • 1/3 cup white cheddar (or gruyere blend)
  • 3 thin slices red onion, separated
  • 4 slices uncured smoked bacon, cut up and cooked until shy of crispy
  • 3 sprigs fresh thyme leaves
  • 1/4 cup whole milk ricotta (seasoned with some garlic powder, if you like)
  • Medium handful fresh baby spinach leaves, torn into smaller pieces
  • 2 Tbsp. grated Parm-Romano blend cheese
  • Drizzle of extra virgin olive oil

Baking notes: If you are baking indoors, preheat a pizza steel at 550° F for one hour; for the grill method, heat to high temperature with a stone or steel pan, following manufacturer’s instructions.

Directions

  1. Shape pizza dough into 14-inch round; transfer to a flour- and cornmeal-rubbed pizza peel. Drizzle a bit of olive oil over the dough and season it with salt and pepper.
  2. Scatter both mozzarella and white cheddar/gruyere all over pizza dough, then arrange onion slices, par cooked bacon and thyme leaves over the cheese.
  3. Carefully spoon small dollops of ricotta on the pizza, keeping a bit of distance between.
  4. Scatter spinach leaves all over, then sprinkle with Parm-Romano blend cheese and give it one last drizzle of olive oil.
  5. Slide pizza onto preheated stone or steel; bake about six minutes. If grilling, transfer finished pizza to a perforated pan and slide it under a hot broiler for one minute to achieve a blistered, oven-like finish.


Frozen Old Fashioned

When life gets busy— and boy, has it been lately— we do a lot of repeats at our house because I don’t have as much time (or energy) to be creative. But I’m discovering that an easy way to keep things interesting is to change up just one little thing here or there, so that it seems like we’re having something new, but with minimal extra effort involved. When this clever twist on a classic cocktail jumped out at me from my Instagram feed, I was all for it! What could be better in the blazing heat of summer than a frosty cold adult beverage? 

Hello, Summer! 😎

Love at first sip!

This drink is like a grown-up, boozy version of the 7-Eleven Slurpees I loved as a teenager. There was one year of high school that my stepbrother, one year my junior, lived with me, my mother and her boyfriend (his dad). Our favorite thing to do in those days was get the hell out of the house, and it was incredibly convenient that we had a 7-Eleven just down the street. Cary and I would skip down there together to play video games— I slayed at Ms. PacMan and Asteroids back in the day, thank you very much— and we almost always came home with snacks and Slurpees. My favorite was cherry (though I know it was fake). 

Fast forward 40+ years. The sweet cherry flavor is still a favorite, and a real-fruit version of it shines through prominently in this cocktail. Big cheers to The G & M Kitchen for this idea that had me asking, “Why in the world didn’t I think of this one?” It’s all the flavors of a bourbon old-fashioned, zhuzhed up with frozen orange wedges, cherries, brown sugar syrup and cocktail bitters.

Same flavors you’d expect in an old fashioned, but extra fruit!

All that, plus a cup of ice whizzed together in the blender until the mixture is frothy, frosty and way beyond refreshing. With the added fruit and all that ice mixed in, there’s also a hydrating element to this cocktail which isn’t a bad thing when the heat gets intense. Plus, it’s easy to whip up several drinks at once for summer entertaining. Yep, this little number will be in hot rotation at our house!


This whole situation has me thinking about throwing other favorite cocktails in the blender. After all, frozen margaritas, daiquiris and piña coladas have been a thing for decades. Now, I’ve got my eye on Manhattans, Negronis and Moscow Mules, to name a few, and summer is just getting started.

What favorite cocktail would you like to see frozen? Let me know in the comments, and until next time, “cheers!”


Frozen Old Fashioned

  • Servings: 2 cocktails
  • Difficulty: Easy
  • Print

The slushy texture of this classic cocktail makes it the ultimate refresher for the summer ahead!


Ingredients

  • 4 oz. favorite bourbon
  • Frozen segments from 1/2 seedless orange (membranes are OK, but no peels)
  • 5 or 6 frozen cherries or cocktail cherries, plus juice if you wish (NO PITS!)
  • 1 oz. brown sugar simple syrup (see note below)
  • 4 quick shakes cocktail bitters (Angostura, orange or ginger work nicely)
  • 2 cups ice (preferably crushed or pellet)
  • Orange slices and/or cocktail cherries to garnish

Note: For the brown sugar syrup, combine equal parts (by weight) brown sugar and water in a saucepan over medium heat. Stir until sugar is dissolved, then cool and transfer to a jar or bottle. Keep refrigerated for up to two weeks. Wanna save time? Swap in maple syrup for the brown sugar syrup. You won’t regret it!

Directions

  1. Combine bourbon, oranges, cherries, syrup and bitters in the container of a blender. Add ice and pulse a few times to break down the frozen fruit and ice. If your blender has a crushed ice setting, that would be perfect here.
  2. Blend continuously once the ice is broken down, until the drink is nice and slushy to your liking.
  3. Pour into chilled rocks glasses and garnish each drink with an orange slice and a fancy cherry.
  4. Repeat as desired to beat the summer heat!