Southwest Wedge Salad

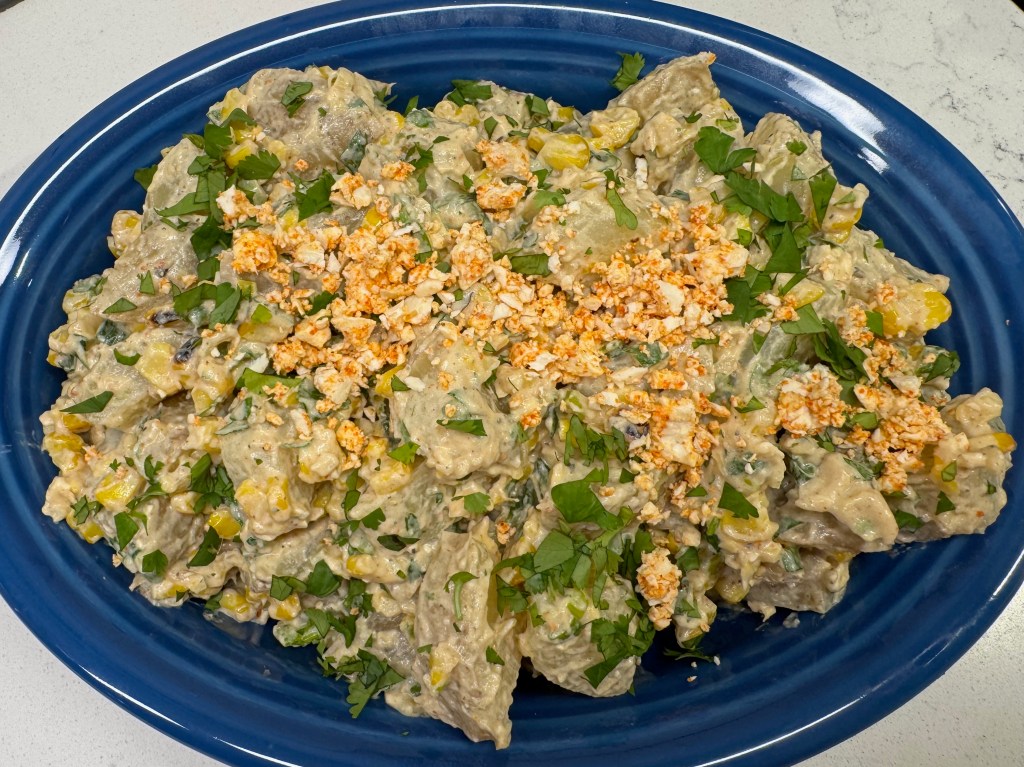
Sometimes a food captures me in such a way that I can’t think about much of anything else. I just want more of it, and I call up all the possibilities for enjoying that food. It’s like falling in love, I suppose, and I’ll be the first to admit I have become somewhat obsessed with the flavors of Mexican street corn. I’ve been daydreaming about new ways to incorporate the sweet kernels of corn, creamy spicy mayo, Tajin, tangy lime and fresh cilantro into our menu plan, as I did when I made the Mexican street corn potato salad a couple of months ago. Today’s salad is not specifically a Mexican street corn dish, but it was definitely inspired by its flavors. Expect a few more “street corn” creations in the weeks ahead, as I am undeniably head over heels.

All my cravings are covered here, from crunchy to creamy and cool to spicy!

Keeping meals cool in the hot summer

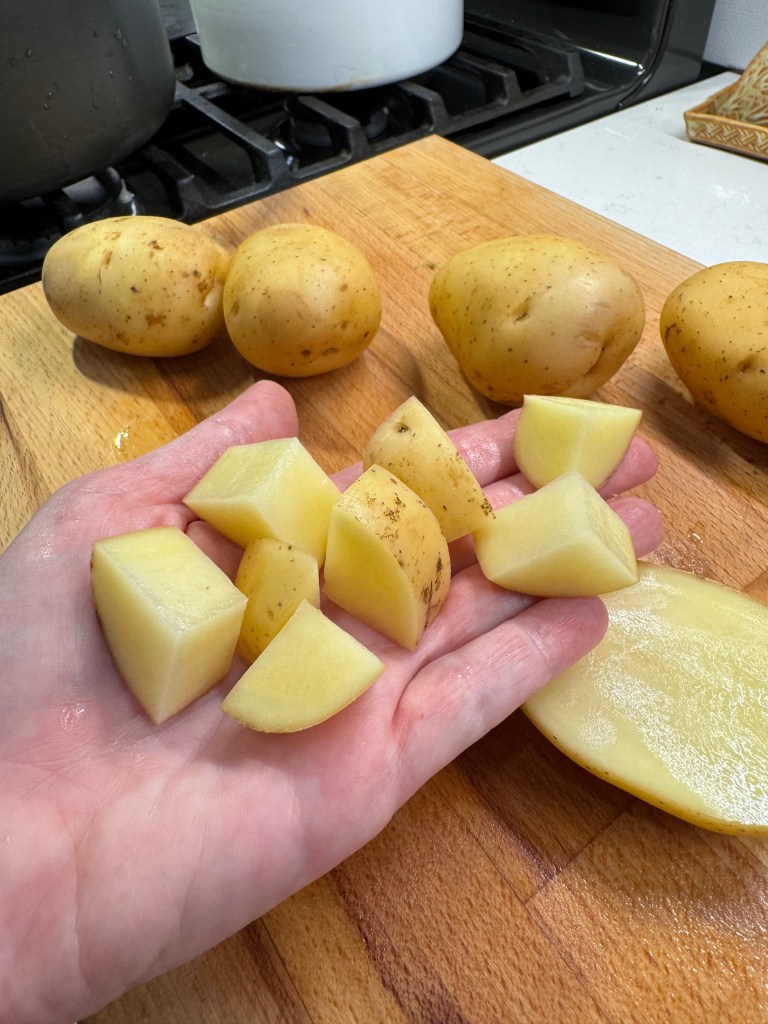
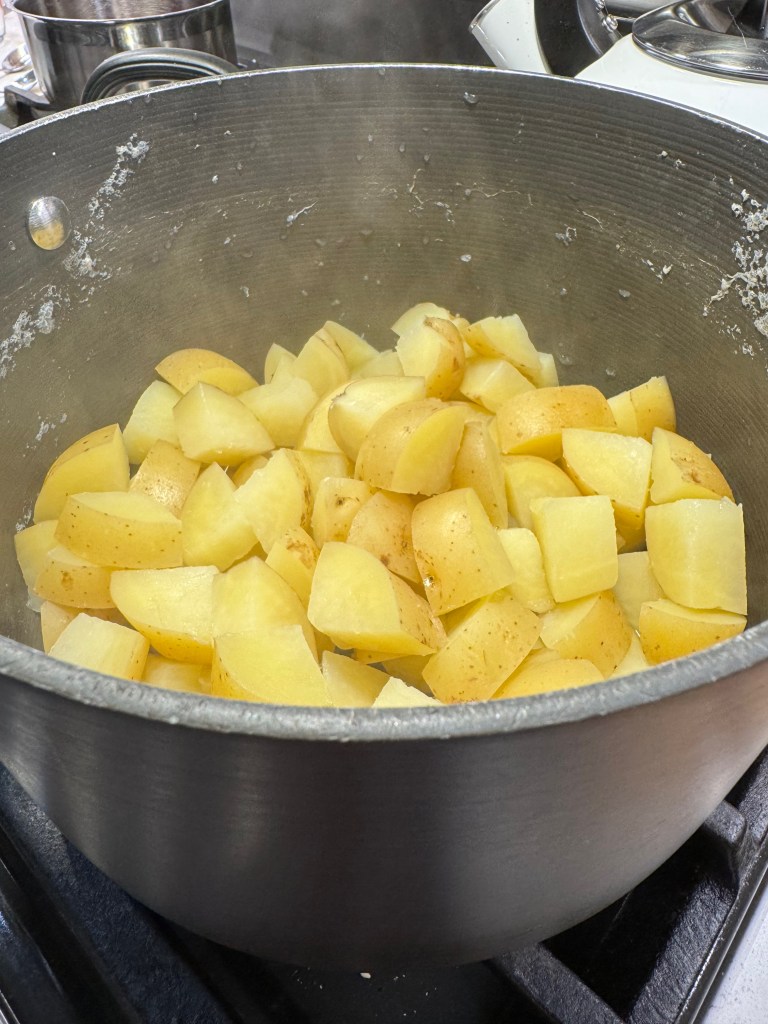
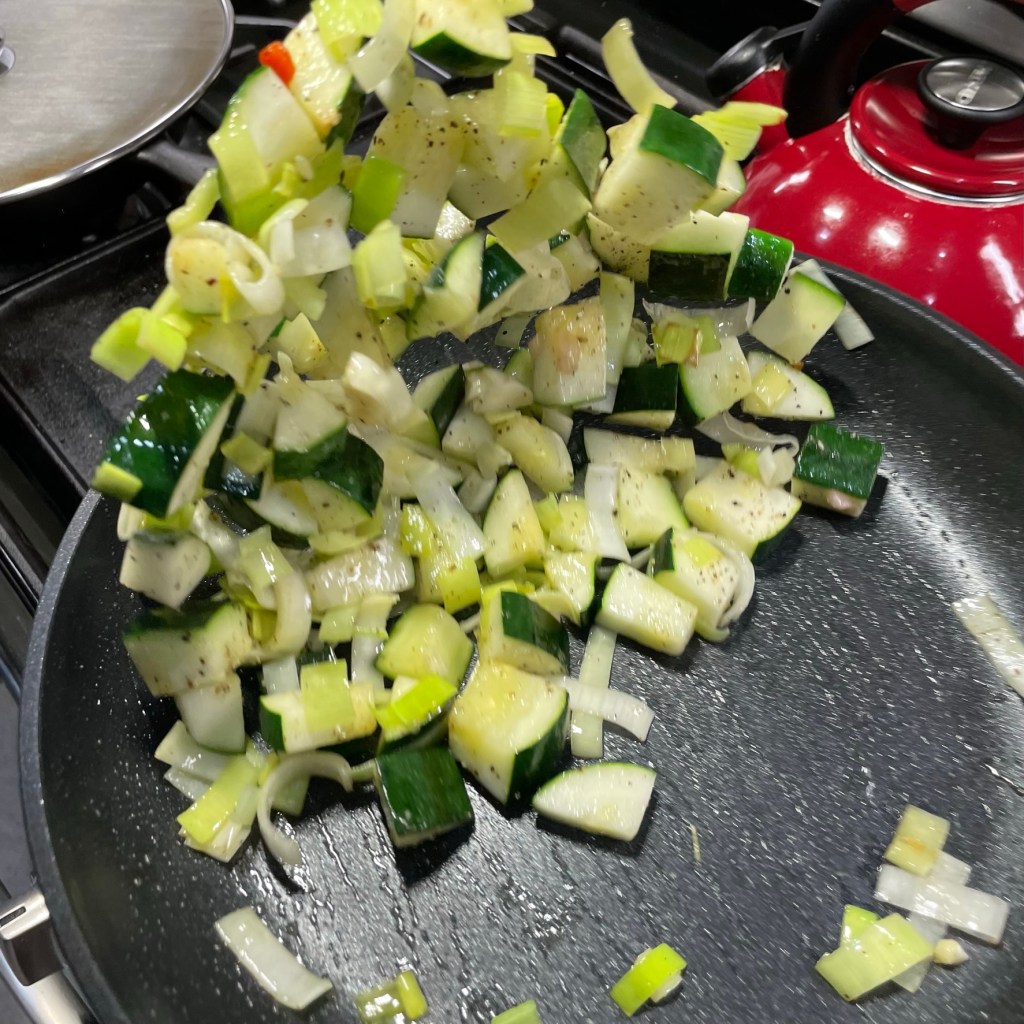
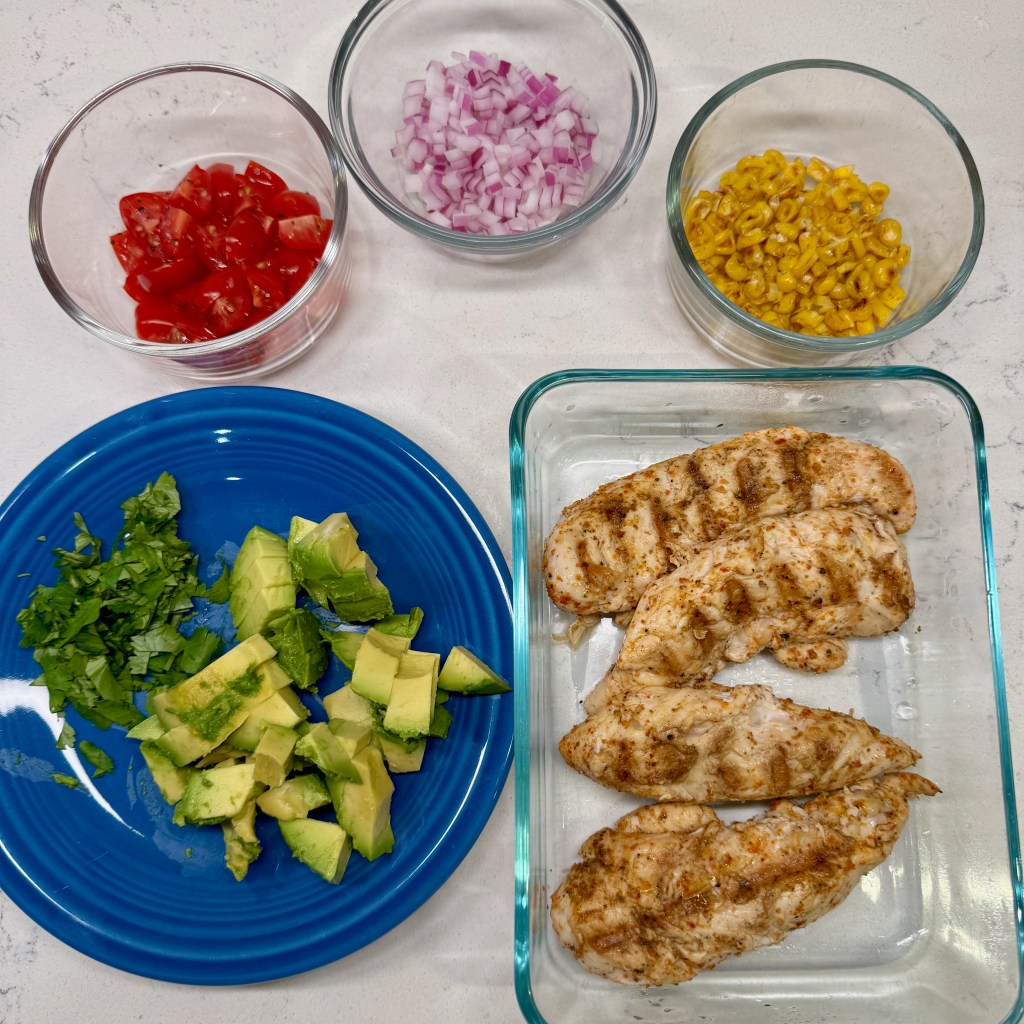
It’s been a brutal summer in North Carolina, with temperatures far exceeding the typical, plus too much humidity. This week has been more tolerable, but all of July and the better part of August were sweltering. When it’s too hot, we try to make the most of our outdoor cooking by grilling up extra proteins (and sometimes vegetables) to use later in the week. Chicken is the simplest, and I love the ease and flexibility of tenders, which can be seasoned any number of ways for sandwiches, wraps and salads. This time, we had grilled our tenders with Tajin, and that was quite on purpose because my muse was already busy developing this salad. Here’s how the rest of it came to be, starting with the lettuce.

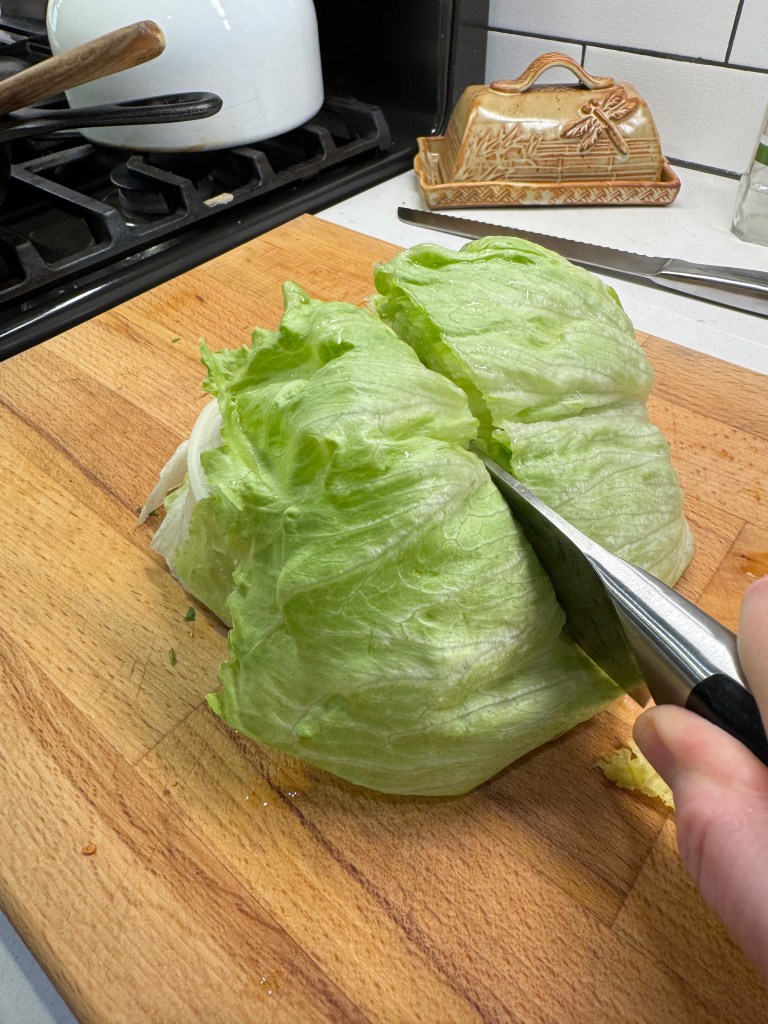
During most months of the year, I am a lettuce snob, opting for romaine over less-expensive varieties. Plus, I generally prefer the substantial texture of romaine for a Caesar or garden salad. But in the summertime, there’s something irresistible about iceberg— that crispy, hydrating crunch and refreshing, slightly bitter flavor— and it is obviously the star of any wedge salad.


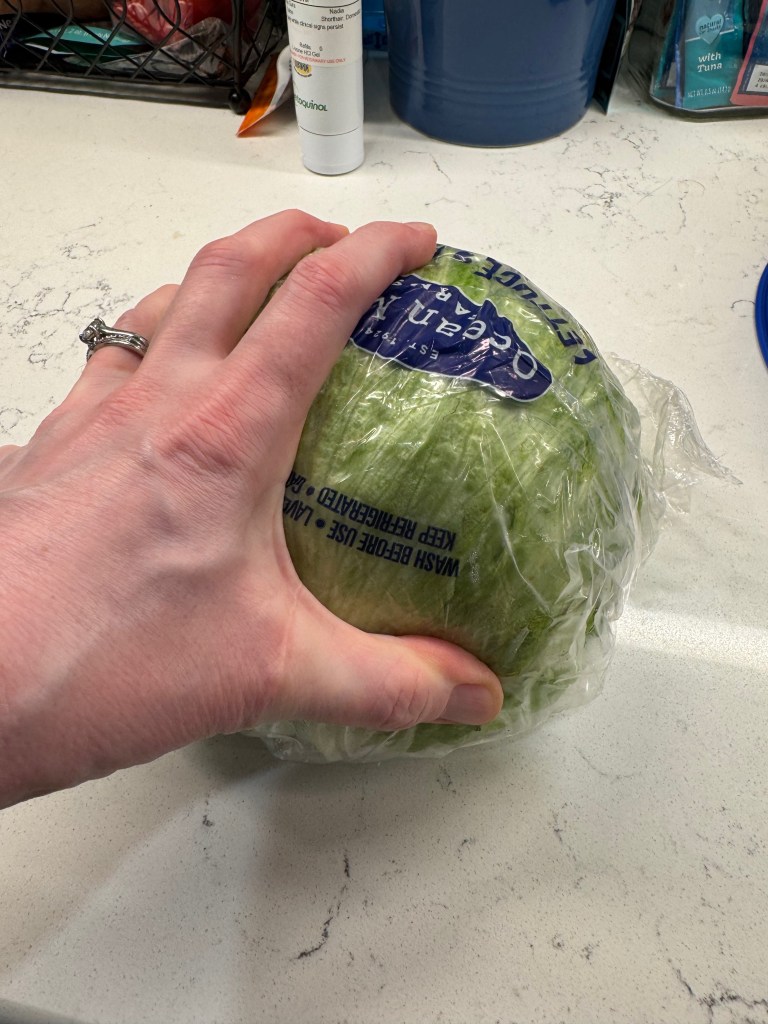
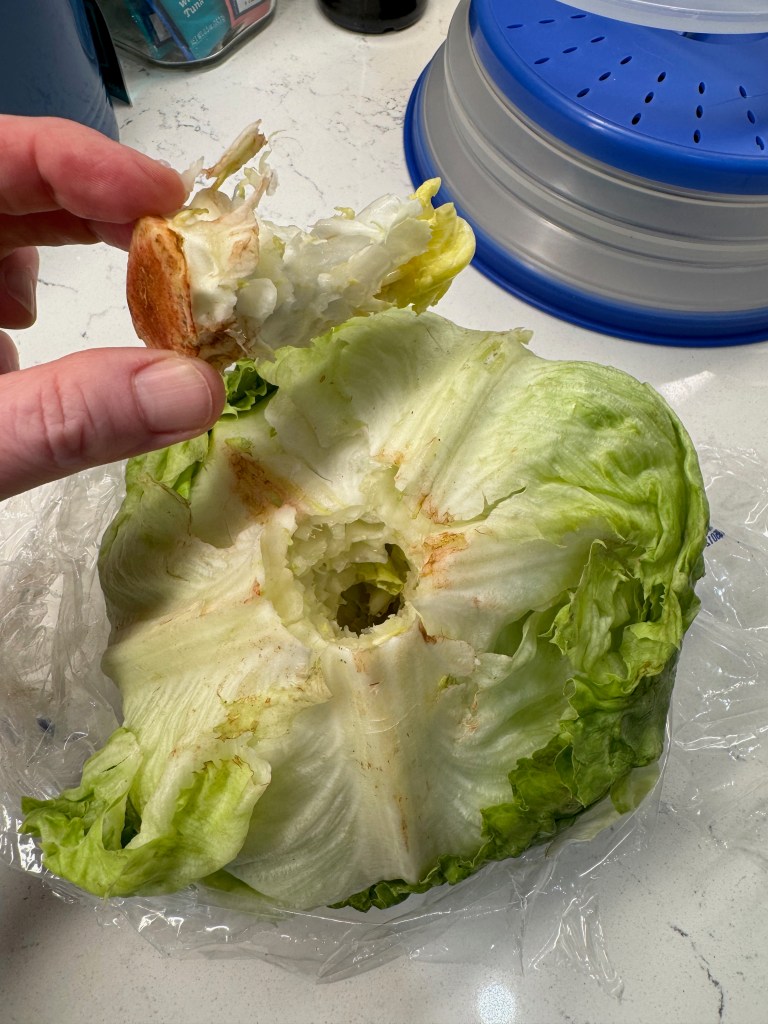
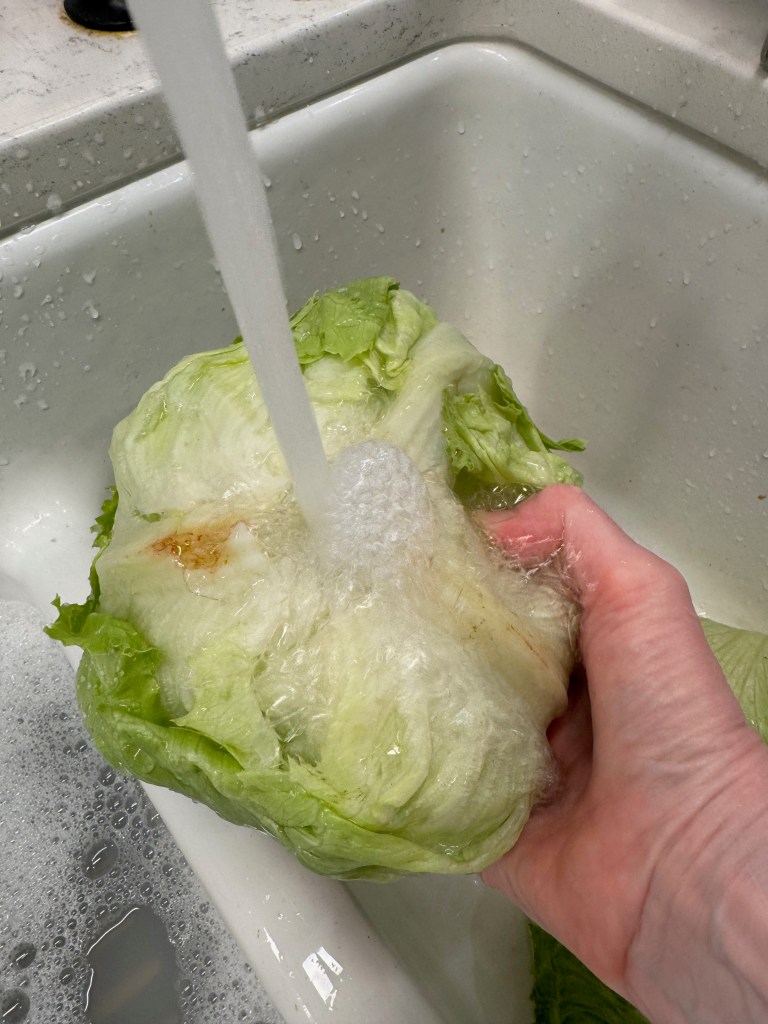
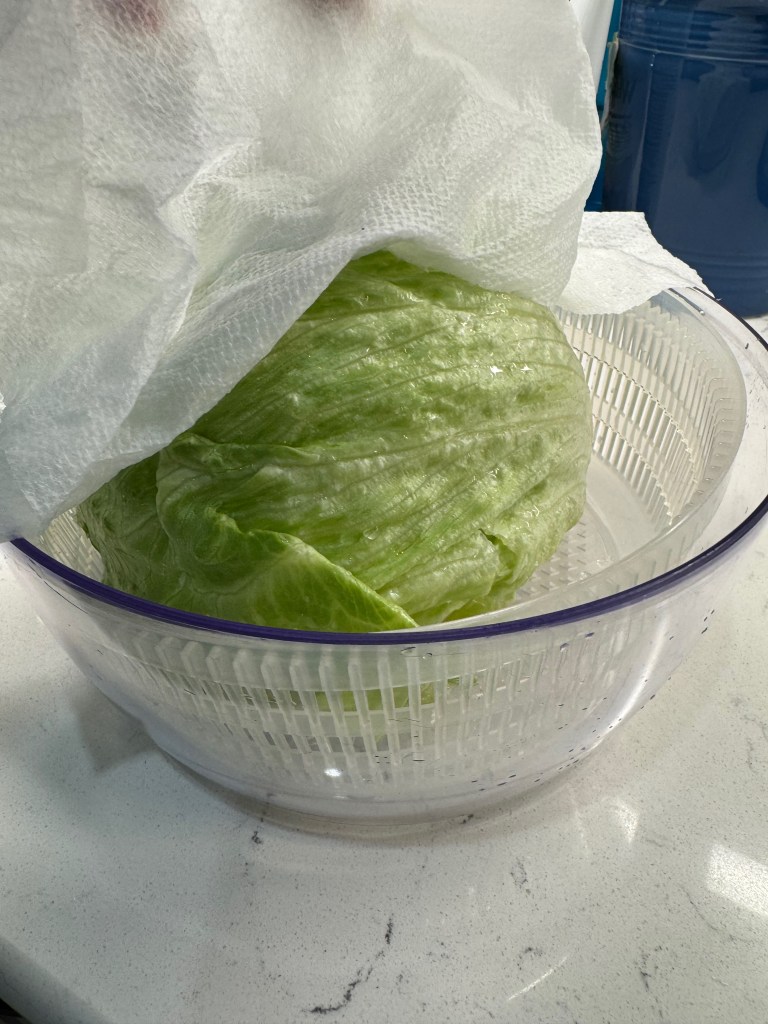
The simplest way to clean iceberg lettuce is from the inside out, and that requires removing the core. You could carve it out with a knife, I suppose, but I rely on a simpler trick of smacking the head on the counter to break the core from the leaves, then the core just pulls right out. This makes it easy to rinse the lettuce head, and then shake out the excess water and let it drain in the fridge for a few hours.

A shortcut to flavor

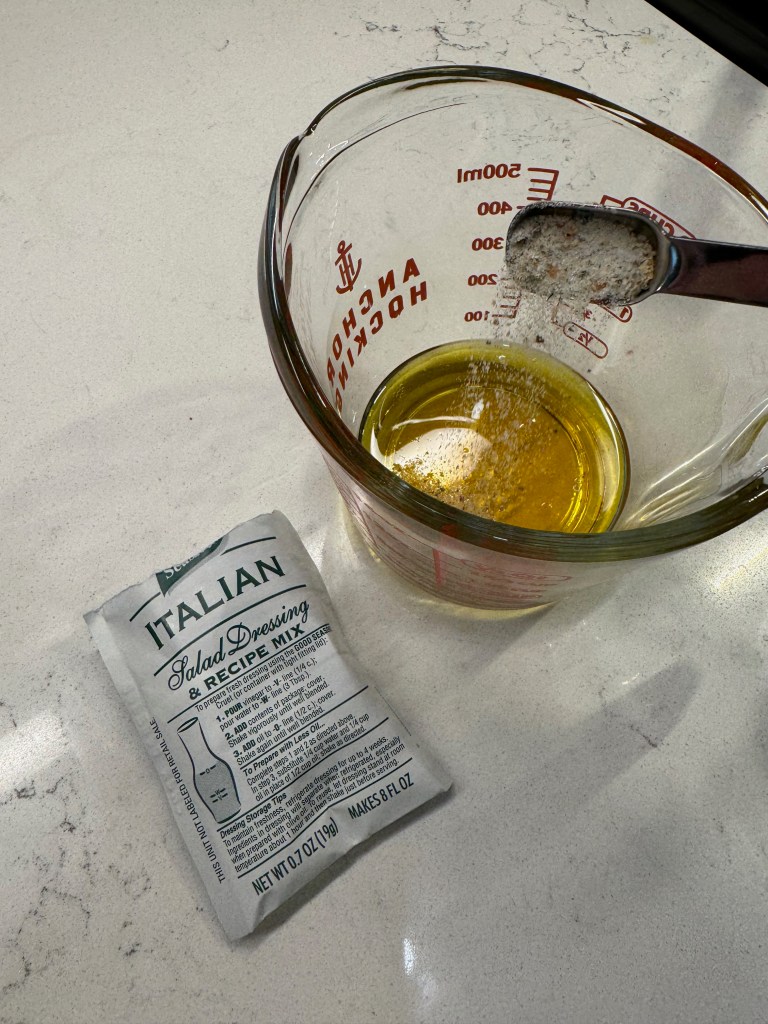
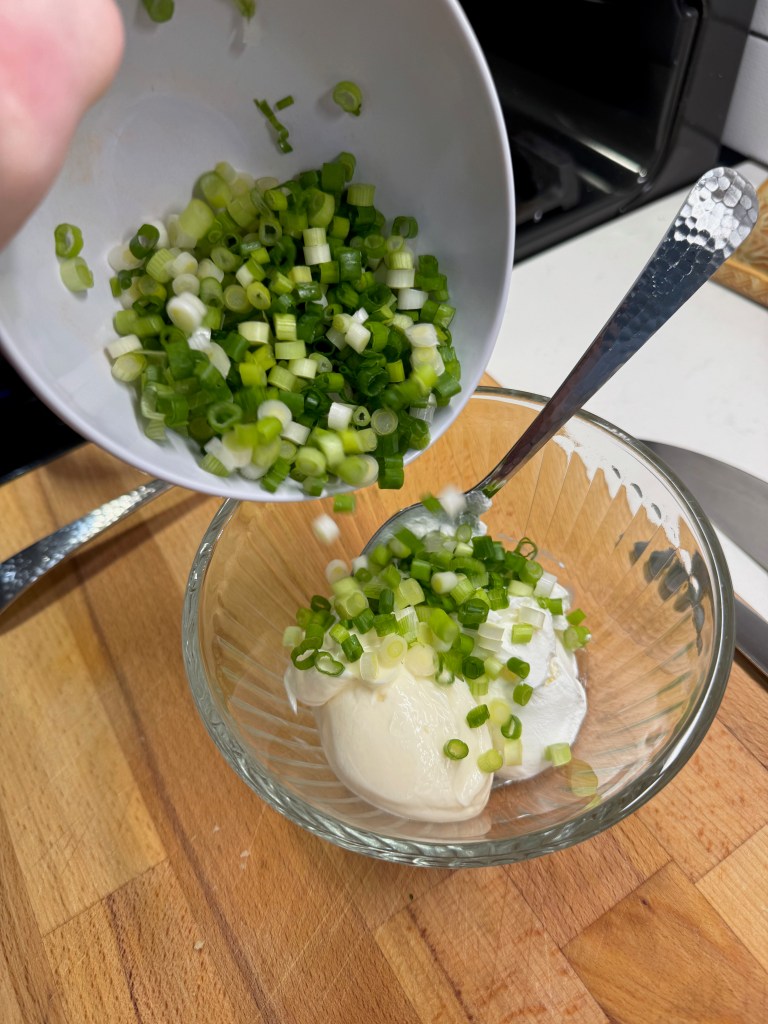
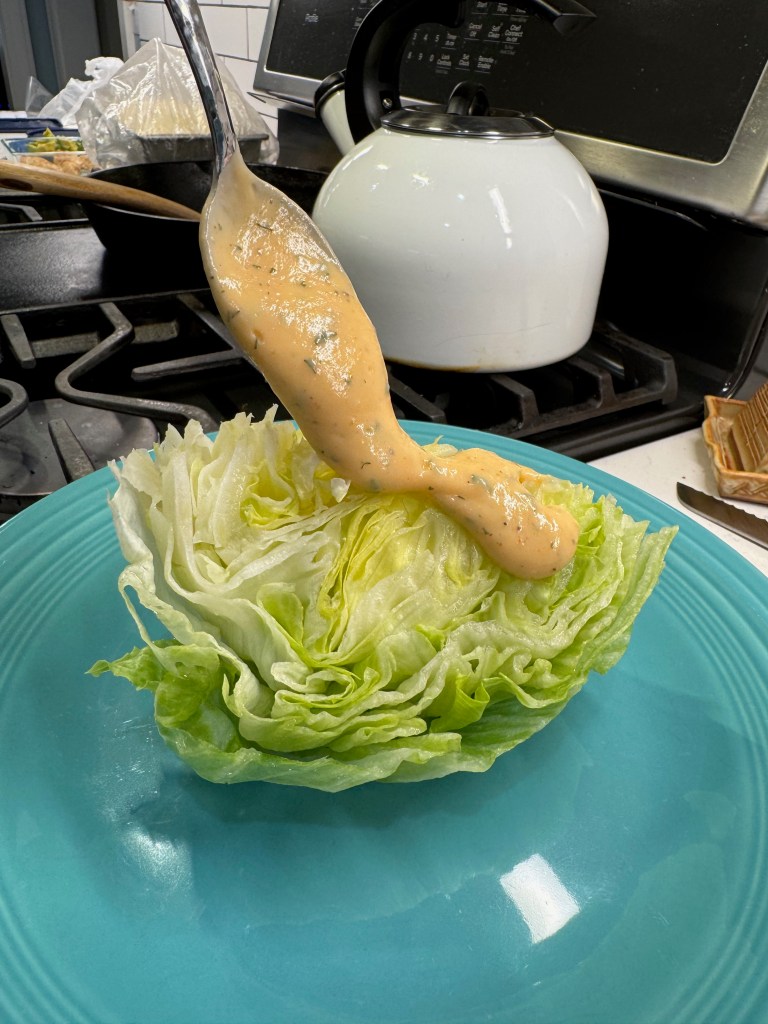
I made the dressing early in the day so that the flavors had a chance to meld before dinner. I knew that I wanted a creamy, ranch-style dressing, and I considered making it from scratch before I found a packet mix with simple, clean ingredients. For southwestern flair, I subbed in a spicy mayo along with the buttermilk. It was perfect for this salad, and saved a bunch of time.


The street corn inspiration is evident here, but I wanted more pop and color, so I also prepped a handful of baby tomatoes, some diced red onion and cubed avocado. The only thing left to do was build this salad!

I love when the simplest of ingredients become something special.

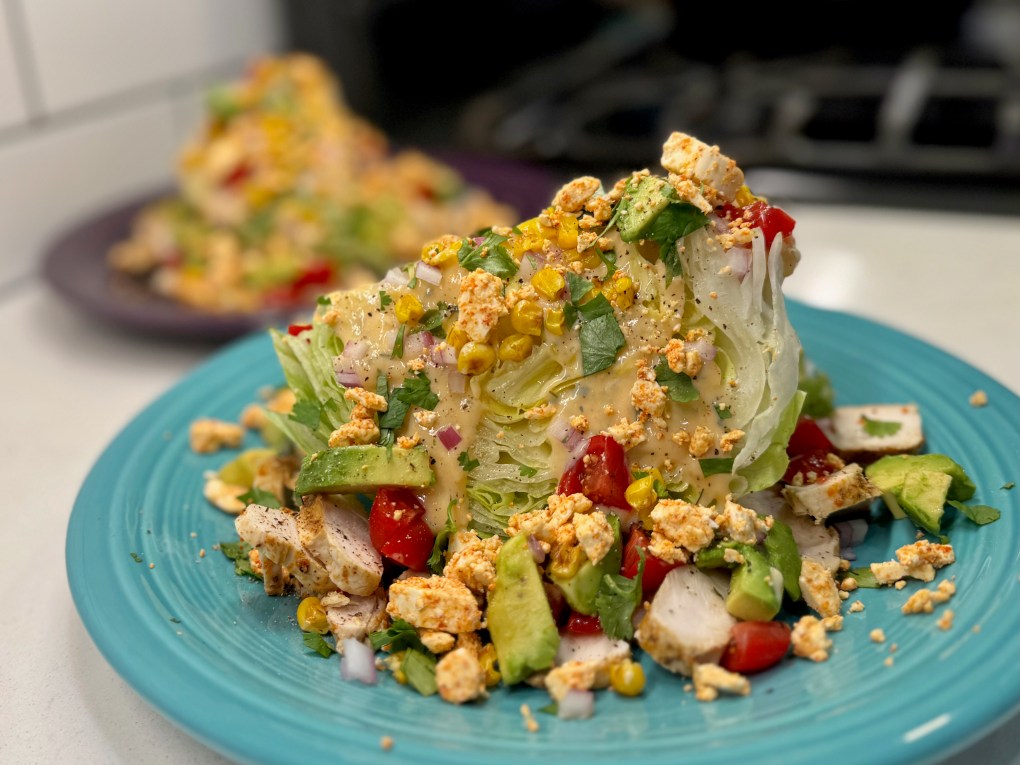
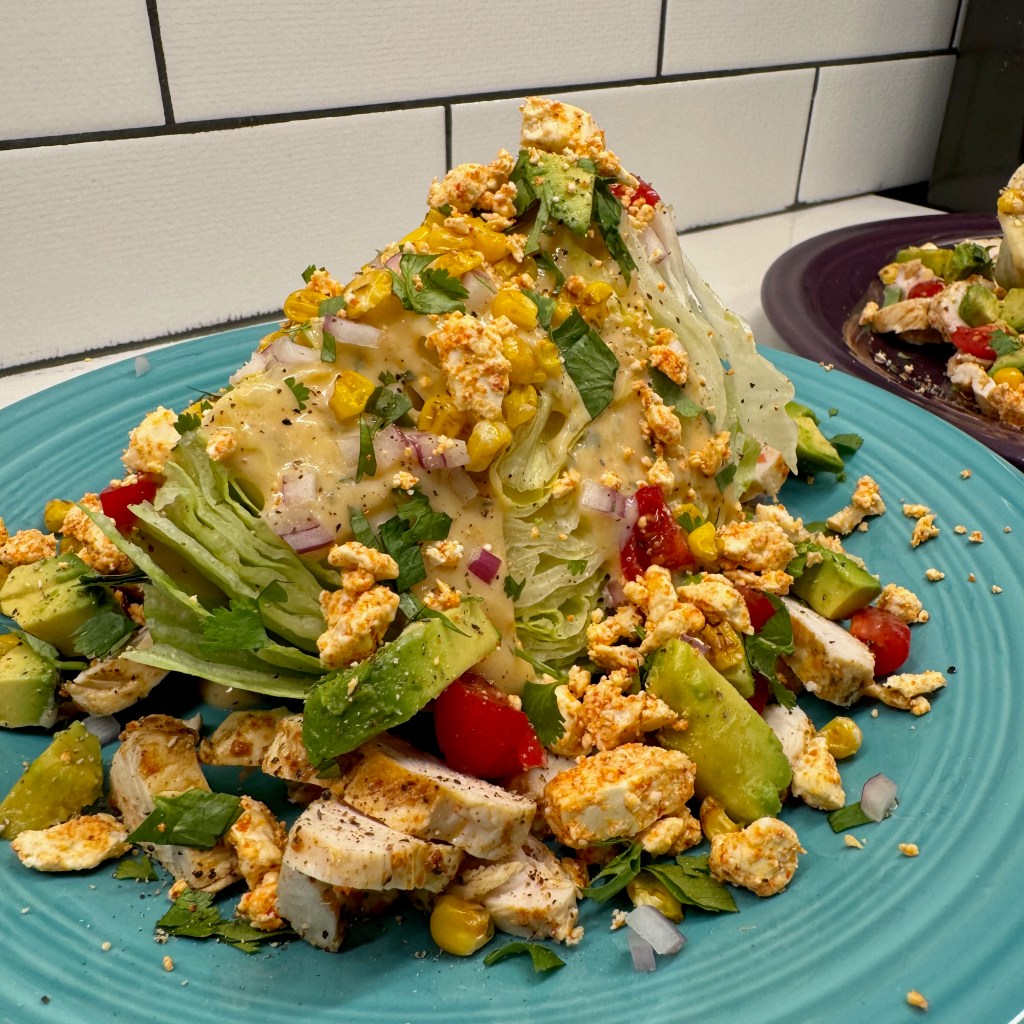
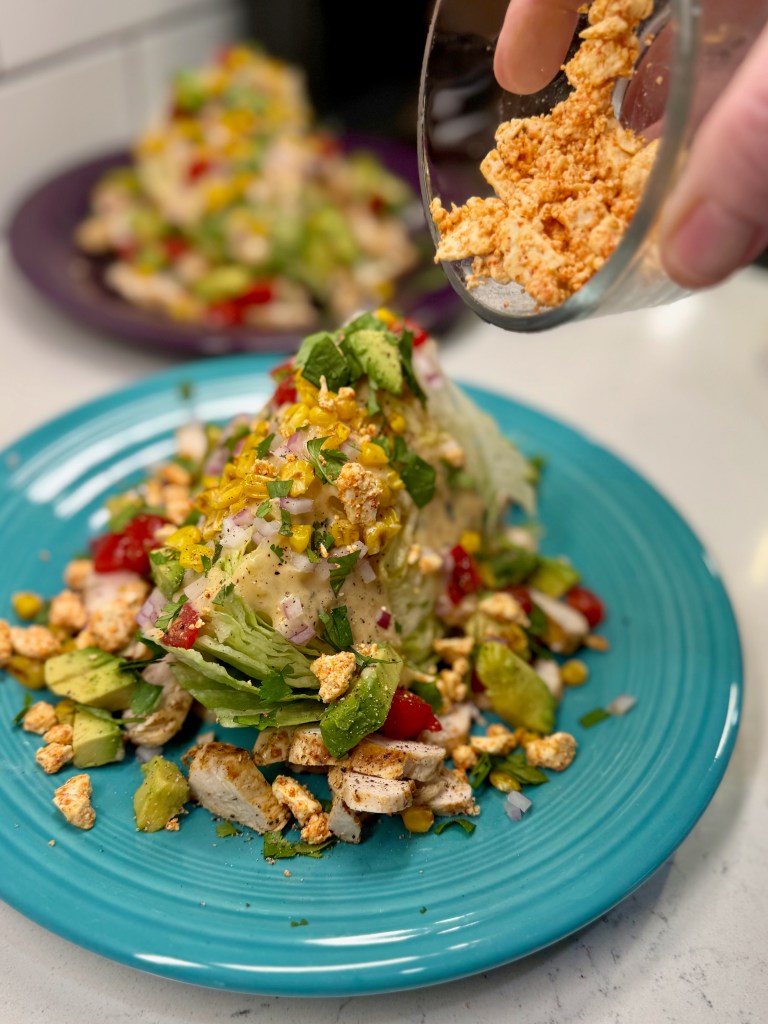
A south-of-the-border twist on a classic wedge

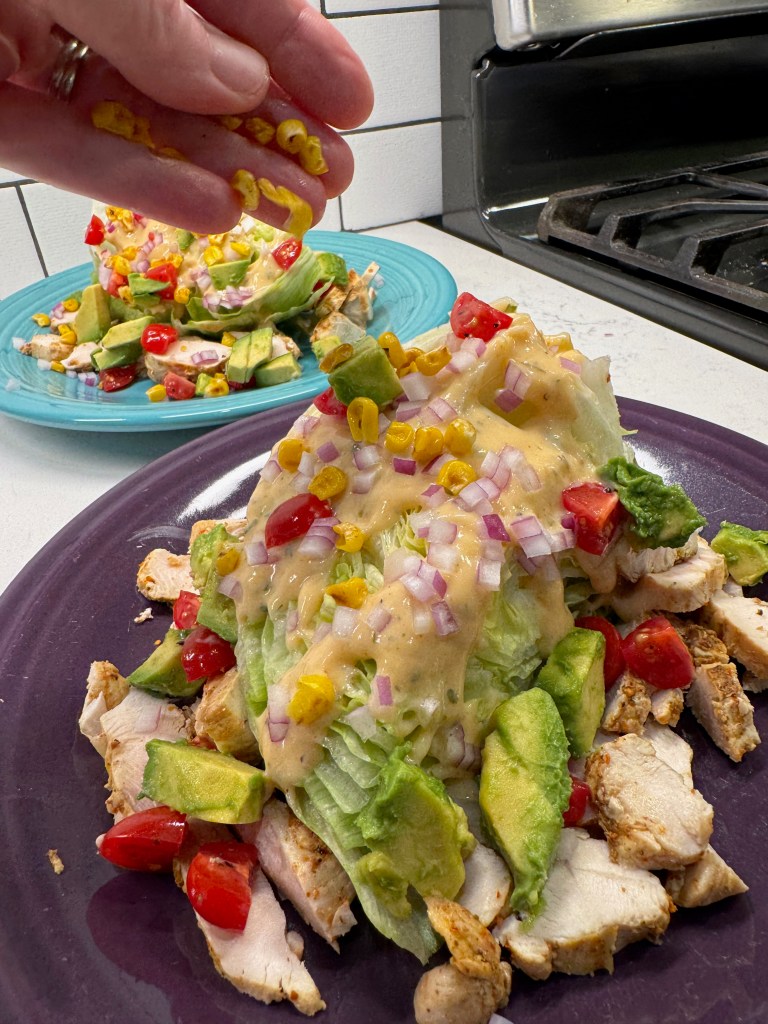
A wedge salad is exactly that— a wedge of the lettuce head— and so I cut this crunchy iceberg in half, then halved one side again for our two portions. The dressing is spooned over the cut edge so that it runs down the sides, and then it was simply a matter of piling the other ingredients on and around it, finishing the salad with all those lovely Mexican street corn flavors. We used the Tajin-flavored feta that Les had found for the potato salad, and it was a perfect stand-in for the bleu cheese you’d normally find on a wedge. 


Delicious as this was, I doubt that it has satisfied my fervor for Mexican street corn, and I’ll be dreaming up other ways to incorporate the flavors again very soon. I’m open to ideas, of course! And I’m curious whether you have a similar experience with being obsessed about particular foods. What can’t you get enough of that you want to present in new and interesting ways? Let’s chat about it in the comments!

Southwest Wedge Salad

  • Servings: 2
  • Difficulty: Easy
  • Print

The wedge salad, classic though it is, can also be a blank canvas for interesting flavor twists, such as this one with vibrant southwestern flavors and a hint of Mexican street corn.


Ingredients

  • 1/2 large head iceberg lettuce (rinsed and chilled)
  • Southwest ranch dressing (choose bottled or make your own from a packet, using spicy mayo in place of regular)
  • 4 large grilled chicken tenders, pre-seasoned with Tajin spice blend (see notes)
  • 1/2 ripe avocado, cubed and dressed with a squeeze of fresh lime to preserve color
  • 1/3 cup leftover grilled corn (we seasoned ours with Trader Joe’s “Everything But the Elote” seasoning)
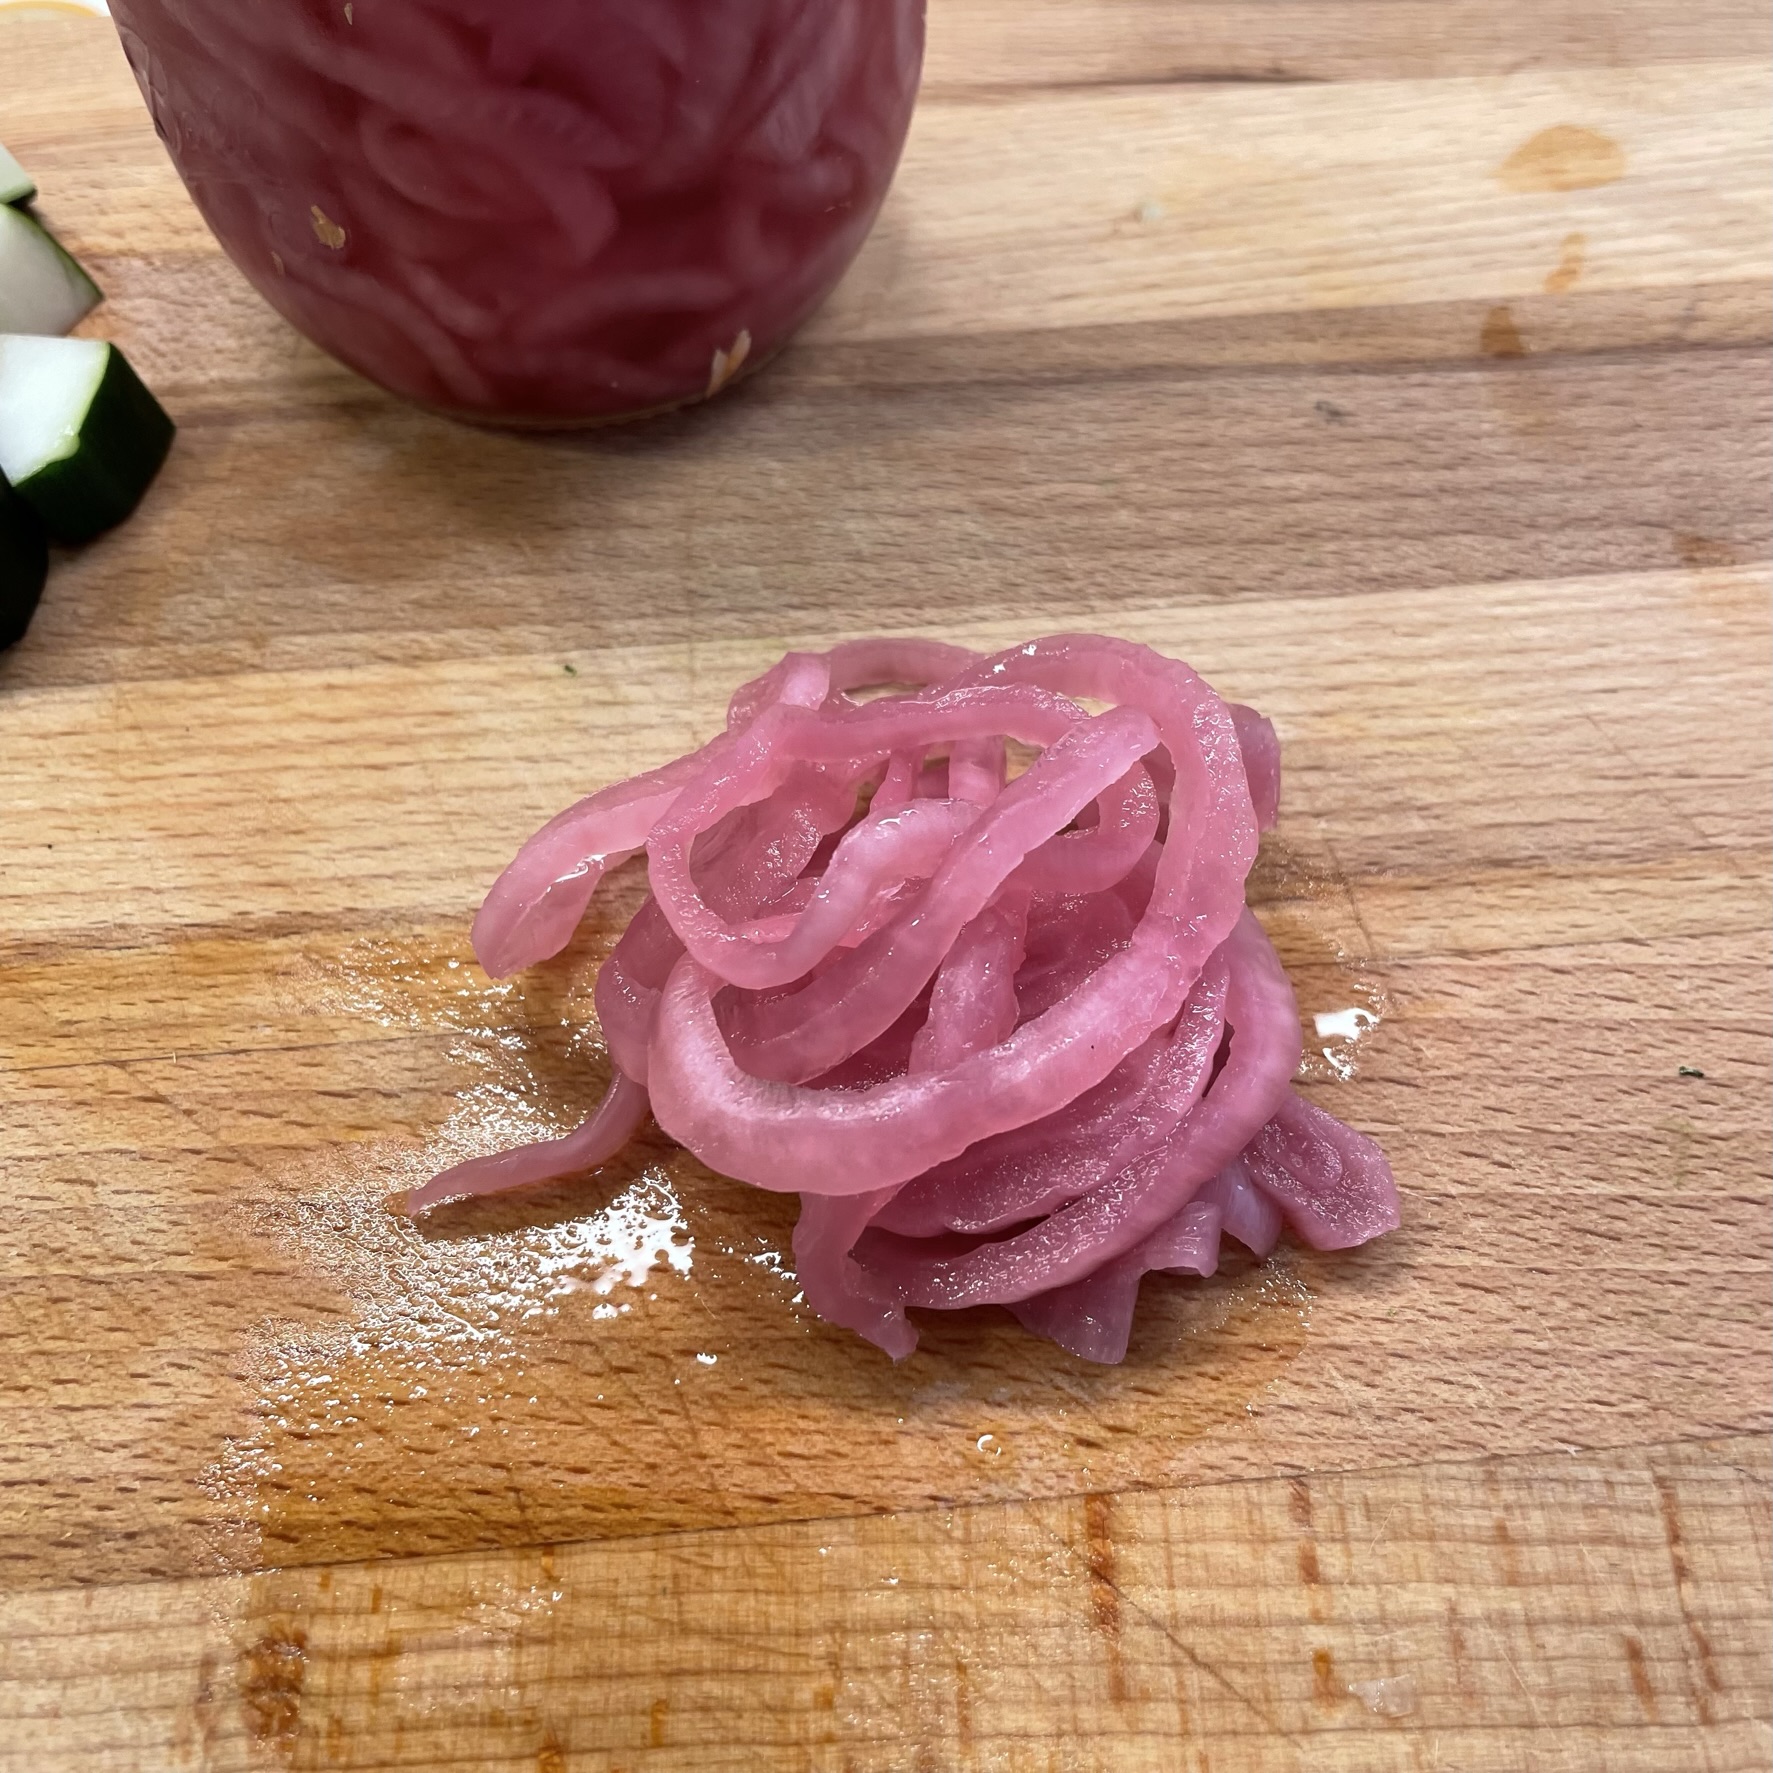
  • 1/4 cup minced red onion
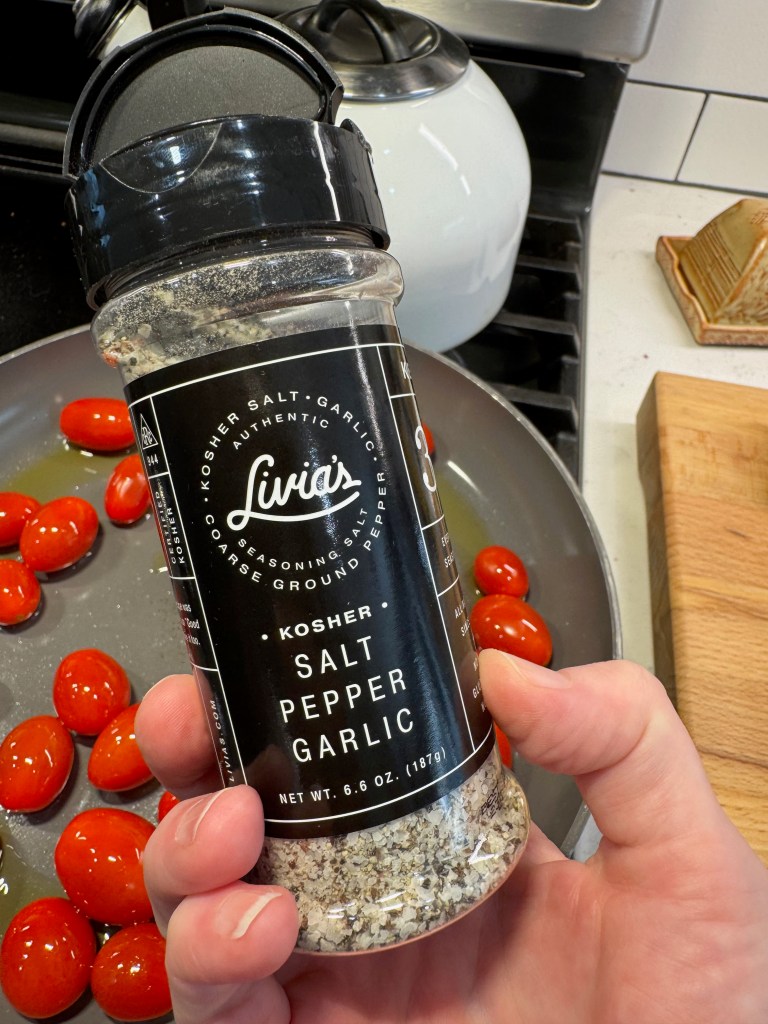
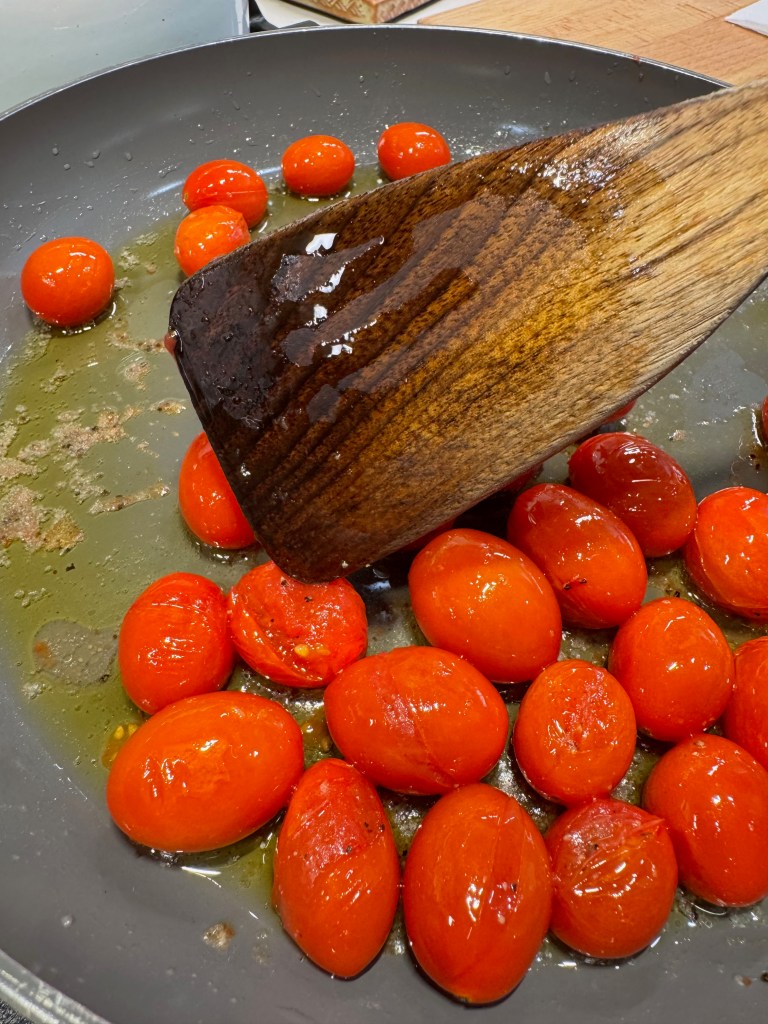
  • Handful of cherry or grape tomatoes, quartered and seasoned with salt and pepper
  • Handful of fresh cilantro leaves, rough-chopped
  • 1/4 cup Tajin-seasoned feta crumbles (see notes for substitution ideas)

Notes: For a tasty seafood option, consider spice-grilled shrimp or cubes of grilled firm fish, such as halibut or tuna.

If your specialty cheese section doesn’t have the Tajin-seasoned feta, make your own by crumbling a handful of feta into a small bowl with a spoonful of Tajin. Shake gently to coat, and perhaps do this a few hours ahead so that the seasoning melds into the feta. Alternatively, if you want less spice, use plain feta or cotija, which is the traditional Mexican hard cheese used in street corn.

Directions

  1. Using a large knife, cut the iceberg into equal wedges and place them, curved side-down, onto a chilled plate. Spoon about two tablespoons of the dressing over the top, allowing it to run down both sides.
  2. Scatter sliced pieces of chicken around the wedge, and top the wedge with the corn, tomatoes, red onions and avocado cubes. Sprinkle with cilantro and feta.
  3. Enjoy!


Caprese-inspired Pasta Salad

I’ve been ruminating lately about my grandmother’s ways in the kitchen. How she fed everyone on scraps— not because she had to but because she could— and realizing that I don’t employ her tactics as often as I have opportunity. Pinching pennies doesn’t have to be a necessity; it can be a strategy for ensuring that we always have enough. And in times of financial uncertainty (which lately seems to be always), that strategy can keep us fed, not only physically, but also emotionally. 

My grandmother knew this, and it’s why she used up all the bread heels and stale sweet rolls to make her amazing bread pudding, which we all loved. It’s why 10-year-old me could sit at her dinner table, puzzled at her claim that we were having leftovers, not recognizing the food before me as something we’d already eaten that week. She was terrific at transforming, and I have that spirit in my bones, too— I just don’t always realize when I’m doing it.

We are about to enter an era where many ingredients we take for granted will be less available or more expensive than we’ve come to expect, thanks to climate change, tariffs, supply chain chaos and farm worker shortages. I thought it timely to share one of my favorite ways to stretch expensive ingredients: a pasta salad. My offering is a Caprese-inspired summer side dish that uses half a bag of pasta bowties, a small container of cherry tomatoes, fresh summer basil and mozzarella. None of these items is particularly expensive— especially if you happen to have a little garden at home— but I hope to provide a template that might help you stretch out other ingredients that lean toward the pricey side.

Summer in a bowl! 😎

Classic caprese— sort of

The flavors (and 🇮🇹 colors) of Caprese are all present here, but I’ve taken a few liberties to amplify the key ingredients. For starters, I poached the tomatoes in a bit of extra virgin olive oil to concentrate their sweetness and to reduce some of the moisture, and then I scooped the cooked tomatoes into a bowl to cool, reserving the flavorful oil for later. This is a simple trick for getting the most flavor out of the tomato and, as a bonus, it’s easier to eat them without the juice bursting out everywhere.


Next, I had a ball of sliced soft mozzarella, as well as a small package of the more expensive mozzarella pearls. I blotted all of it with paper towels and cut the slices into bite-sized pieces. I saved the prettier pearls for the top of the salad. Same flavor, a few pennies cheaper.

My mozzarella was pre-sliced, so this was quick work.

Dark balsamic vinegar, typical for Caprese,  leaves splotchy stains on mozzarella, and that’s not a good look when you’re tossing the salad rather than drizzling it. I opted instead for a white balsamic-based dressing, jazzed up with fresh lemon, olive oil and a spoonful of Italian dressing mix. I had a plan to include a touch of dark balsamic, but not yet.


Rule #1 – Season every layer!

As always, I recommend plenty of salt in the pasta water. You only get one shot to add flavor, so be generous and remember that most of that sodium goes down the drain— you’re not eating it all. When the pasta was al dente, I scooped out a little bit of the starchy water and whisked it into my dressing to help it cling to the pasta.


Finally, remember the tomato-scented oil that was left over after poaching the cherry tomatoes? I whisked that cooled oil into the dressing, too, extending the sweet tomato flavor throughout my salad in the process. I poured the dressing over the pasta while it was hot, ensuring that it would soak into every bow tie. Toss this for a couple of minutes to distribute the dressing evenly.


Bring on the Caprese

A few minutes later, when the pasta was cooled to room temperature, I gently tossed in the poached tomatoes and the pieces of sliced mozzarella, and sent it to the fridge until we were ready to pack up for dinner with some friends.


For serving a pasta salad, I love to line the bowl or platter with leafy lettuce greens. It looks pretty, and it also gives excess dressing a place to run so that the salad doesn’t get too drippy. If you are entertaining a larger crowd, a deep platter with extra spoons is nice because it allows more people to self-serve at once. For a small crowd, or if you have limited space on the table, a bowl works great.

Final touches on this Caprese-inspired salad

A good quality bottle of balsamic is a secret weapon in the kitchen!

I scattered the mozzarella pearls on top, and then it was finally time for a touch of classic dark balsamic. Just a few drizzles over the pasta bowties, and I used a reduction that was thick and syrupy, so it stayed in perfect little puddles. Fresh basil is classic on a Caprese, and it’s easy to find this time of year, especially in my patio container garden. If basil isn’t your thing, I think fresh Italian parsley would be a good substitute here.

Caprese-inspired Pasta Salad

  • Servings: 6 to 8
  • Difficulty: Average
  • Print

It's summer salad season, and this Caprese-inspired dish is a great way to highlight the classic flavors when serving a crowd.


Ingredients

  • 8 oz. semolina bowtie pasta (see recipe notes)
  • 1 dry pint cherry or grape tomatoes, washed and patted dry
  • 2 Tbsp. extra virgin olive oil
  • Salt and pepper to taste
  • 2 to 3 Tbsp. white balsamic vinegar
  • 1 tsp. fresh lemon juice
  • 1 tsp. dry Italian salad dressing mix (see recipe notes)
  • 2 Tbsp. extra virgin olive oil
  • 2 Tbsp. hot pasta cooking water
  • 1 lb. fresh soft mozzarella (cut into cubes or pearls)
  • 2 Tbsp. dark balsamic glaze
  • 1 handful fresh torn basil leaves

Recipe Notes: Whenever possible, seek out pasta that is made with durum (semolina) flour, and labeled as bronze-cut. This method of cutting leaves a slightly rough texture, better for sauce or dressing to cling.

I used Good Seasons brand dressing mix, but you could easily substitute a pinch of garlic powder and some dry Italian herbs.

Directions

  1. Prepare a pot to boil the pasta, and season it generously with kosher salt. Begin cooking pasta when tomatoes are nearly finished cooking.
  2. Heat a medium-size skillet or sauté pan over low heat, and swirl in extra virgin olive oil. Add tomatoes, season with salt and pepper and roll to coat them in the oil. Cook the tomatoes very slowly until the tomatoes are softened and easily smashed with a utensil (about 25 minutes). Press each of them when they reach this softened stage to release the juice inside. Cool slightly, and then spoon out the oil into a measuring glass. Reserve this for the dressing.
  3. In a second measuring glass, combine white balsamic, lemon juice, Italian dressing mix and olive oil. Whisk to combine and set aside.
  4. When pasta reaches al denté stage, spoon out about two tablespoons of the hot pasta water. Whisk it into the dressing mixture, along with the reserved tomato cooking oil.
  5. Drain pasta thoroughly and transfer to a large bowl. Pour dressing over the pasta while it is still hot, and toss gently a few times to coat evenly. Toss again after a minute or two, and then allow the pasta to cool to room temperature.
  6. Gently toss cooled tomatoes and half of the mozzarella into the pasta. Refrigerate until serving time.
  7. Transfer chilled pasta salad to a serving bowl. Top with remaining mozzarella, drizzle dark balsamic over salad, and scatter fresh basil leaves just before serving.


Dilly-dilly Three Bean Salad

When the heat goes up, my appetite goes down. Like, waaaay down. And that means I’ve barely been hungry at all this week, as the afternoon highs got stuck around 97° F for five days in a row with 70% humidity as the norm. It has been too hot to weed my flower beds, too hot to walk the dog, and definitely too hot to cook. It’s brutal, and I know that much of the U.S. has been dealing with the same as climate change has altered what summer looks like— probably forever.

But at some point, we’ve gotta eat, right? I’ve put some new ideas into practice to ensure that we have something of substance, without me having to stand at a hot stove. Taking a cue from my blog buddy, Michelle, who endured the vicious summer heat of California’s Coachella Valley for too many years, I have found it helpful to do my cooking in the morning hours and then serve up the food as cool meals in the evenings. This has proven to be beneficial for more than one reason, as I often find myself less motivated at the end of the workday; my brain has run dry of decision-making ability. Getting meals done early has saved my sanity!

I love every single thing about this!

This variation on three-bean salad has even more texture than my usual, with crunchy bits of celery, bell pepper and red onion, the zesty bite of minced garlic, creamy kidney and cannellini beans, and a big punch of dilly-dilly flavor, courtesy of chopped spicy pickles and fresh summer dill. The fresh green beans have a nice “snap,” and the canned beans provide terrific fiber for a healthy gut, along with enough protein to carry me through this god-awful heat spell. Let’s get into it!


Par for the course, my inspiration for this recipe came from a desire to get rid of random jars in my refrigerator. We have had a bevy of leftover pickles taking up space after my husband’s son, Alex, visited a few months ago from Hungary. Alex loves dill pickles (especially spicy ones), and I always pick up a few options for easy snacking when he’s with us. Alex is very polite and doesn’t like to consume the whole contents of the jars, so he leaves them for us, which means that they get shoved to the back of the fridge until I get tired of moving them around. For this salad, I chopped up the remains of two kinds of pickles and I also used the kosher dill liquid in the dressing. 

This dressing would be terrific on a greens-based salad, too.

The balance of the dressing recipe is Dijon mustard, a spoonful of sugar, dill and celery seeds, and a healthy drizzle of extra virgin olive oil. Salt and pepper to taste, plus a splash of water, and that’s done. 


The green beans were the only ingredient in this salad that required cooking— thankfully, we only needed to have the stove on for about 10 minutes— so I got that going with a pinch of baking soda in a pot of barely-boiling water. The alkaline nature of the soda helps preserve the color of the green beans, and a shock of ice water at the end of cooking also helps with color retention.


This process, called “blanching,” takes me back to my grandmother’s kitchen, where I learned so many basic lessons of cooking— including blanching vegetables for freezing and canning— when I was barely tall enough to reach the stove. Gram would have loved this three-bean salad, especially the use of the leftover pickle liquid. Like so many people who lived through the Great Depression, she used every scrap, drop, peeling, stem and leaf that could be used. These are still important lessons today, and I aim to make her proud every time I step into my own kitchen.


Assembling the salad is easy. Give the dressing another good whisking before you pour it over the main ingredients, and fold it gently to avoid breaking up the canned beans. Add more fresh dill than you think is necessary, as the fine fronds will disperse a great deal when you fold it in. This freshness adds something special to the salad, but if you cannot find it in your supermarket or farm stand, a teaspoon of dried dill leaves will work in a pinch; add them to the dressing ingredients instead.

So there you have it— a three-bean salad, inspired by Alex’s leftover pickles, bringing loads of flavor to the table with ingredients that will satisfy, even when it feels too damn hot to eat. Make this early in the day and let the salad chill in the fridge several hours before enjoying. It keeps well for about a week, and you’ll want to remove it from the fridge for about 20 minutes when you’re ready to serve so that the olive oil softens from its chilled state.

Dilly-dilly Three Bean Salad

  • Servings: 8
  • Difficulty: Average
  • Print

Spicy dill pickles and fresh dill lend a tangy twist to classic three bean salad. Use the pickle juice in the dressing, and make it early in the day so that the flavors have time to mingle in the fridge.


Ingredients

  • 3/4 pound fresh green beans, trimmed and cut into uniform small pieces
  • 1 tsp. kosher salt
  • 1/4 tsp. baking soda (optional, for color retention)
  • 1 can light red kidney beans, drained and rinsed
  • 1 can cannellini beans, drained and rinsed
  • 1/2 cup chopped red bell pepper
  • 1/2 cup chopped celery
  • 1/2 cup diced red onion
  • 1/2 cup chopped dill pickles
  • 2 cloves garlic, finely minced
  • 3 Tbsp. dill pickle juice
  • 1 Tbsp. apple cider vinegar
  • 1 Tbsp. cold water
  • About 2 tsp. Dijon mustard
  • 1 tsp. cane sugar
  • 1/2 tsp. celery seed (or combo with dill seed, if you have it)
  • Salt and pepper to taste
  • 1/4 cup extra virgin olive oil
  • 1/4 cup fresh dill, chopped

Note: I used a combination of pickles in my salad. Be as creative as you dare, subbing in spicy pickles or even other pickled vegetables as the mood strikes! Take note of the sodium in your pickled ingredients so that you can adjust salt to taste without overdoing it.

Directions

  1. Prepare an ice bath in a large bowl. Bring a pot of water to low boil over medium-high heat. Stir in salt and baking soda, then add green beans. Simmer for 6 to 7 minutes, until beans are slightly tender but still bright green. Transfer beans to the ice bath and rest at least 5 minutes, then drain in a colander.
  2. Make the dressing while the beans are blanching. Combine pickle juice, vinegar, cold water, Dijon, sugar and celery seed in a measuring glass. Whisk vigorously while drizzling olive oil into the glass, creating an emulsion. Season to taste with salt and pepper.
  3. Blot the green beans with a towel to remove excess moisture. Combine in a large bowl with the drained canned beans, vegetables and chopped pickles.
  4. Pour dressing over the salad ingredients, and fold gently with a spatula or wooden spoon to avoid breaking the tender canned beans. Add salt and pepper as needed. Fold in dill and refrigerate until ready to serve. This keeps well for up to a week.


Mexican Street Corn Potato Salad

Summer officially hit last night at 10:42pm ET, and you know what that means. Millions of backyard barbecues, picnics, family reunions and summer parties are straight ahead! Some of my fondest memories are closely tied to the foods served at such occasions, and I’m a firm believer in the notion that one can never have too many recipes for summer side salads.

For the past couple of summers, I’ve steered away from mayonnaise-based salads, mainly because they don’t hold up well in the summer heat, at least for outdoor parties. So my husband’s special request last weekend should not have been any surprise when I mentioned whipping up a potato salad to serve with our grilled coffee-rubbed tri-tip.

“Can you make more of a mayonnaise-y dressing this time? Not one of those vinegar things you’ve been doing.”

Well, okey-dokey! We have a running joke at our house about how long it takes for foods to come back around in “rotation,” so I’m happy to oblige a sincere requst.

I think I satisfied his craving with this creamy, mayo-dressed potato salad that conveys all the flavors of Mexican street corn, also known as eloté. The textures were great, and the dressing and seasonings were unmistakably eloté— creamy, sweet bite on the corn, tangy from the mayo and lime, a sharp saltiness from the crumbled cheese, and just spicy enough to be interesting. It was fantastic with the tri-tip he grilled for us, and we enjoyed this salad again with lunches during the week as well as with spicy grilled chicken tenders a couple nights ago. I’m sad that it’s gone!

This recipe makes enough for eight servings (unless you do excessive taste-testing like I did).

Ingredients for my Mexican street corn potato salad

Any finished dish is only as good as what goes into it, and given that this is a bit of a twist, I’ll break down the role that each ingredient played in this salad. Note that some ingredients may be tricky to find, so I’ve offered reasonable substitutions for those. Here we go!

Yukon gold potatoes – these are a perfect balance of creamy and starchy, and because the skin is so tender, I don’t bother peeling them. Choose potatoes on the smallish side if possible, so that every chunk has a bit of skin on it. You’ll cook them gently in salted water until fork tender, then drain and let the steam roll off before chilling.


Mayonnaise and sour cream – My dressing is made with equal parts of these two, and if you can get your hands on Mexican crema, use that in place of sour cream. 

Roasted corn – we love grilling corn in the summer time, and we sometimes make extra ears so that we have them for dressing up another dish. If you don’t have a grill (or the time to mess with grilling corn), pick up a bag of frozen fire-roasted corn, which will work just as well. We like the one that’s available from Trader Joe’s.


Eloté spices – traditionally, Mexican street corn is seasoned with any number of ground chile powders, including chipotle, cumin, cayenne, ancho or pasilla. I used ground ancho and cumin in my dressing, but if you don’t have the individual chile powders, don’t sweat it! Just pick up a bottle of Tajin seasoning, either in the spice aisle or the International aisle. Trader Joe’s chili-lime seasoning is very similar, and I also love their “Everything But the Eloté,” to season my corn before grilling. It also happens to be excellent on popcorn!

Three terrific options for flavoring this salad, from hottest to mild.
Check out the saltiness ahead of time so you know what to expect.

Scallions – this is not traditional for Mexican street corn, but I can’t make potato salad without some variety of onions, and this one works well with the other ingredients. Use the white and green parts, and slice them thin.

Lime – the lime zest and juice are what really make the flavors of this salad pop. Purchase organic citrus because you’ll be using the peel, and choose heavy fruit with a smooth skin for the most juice and brightest flavor.

Sugar – every Mexican street corn I’ve ever tasted had a slightly sweet flavor, and a small spoonful of sugar in the dressing made this perfect. Don’t skip it. 

Fresh cilantro – authentic for Mexican street corn, but if you are among the 20% who find that it tastes like dish soap, then just skip it. There isn’t another herb similar enough, and the dish won’t suffer without it.

Crumbled cheese – ah, I saved the best for last! Mexican street corn is traditionally slathered with mayonnaise dressing and sprinkled liberally with cotija, a Mexican hard cheese that is reminiscent of parmesan, but less pungent. Cotija can be a little tricky to find outside of a specialty cheese section, but not to worry— feta, the dry crumbly kind, is a lovely substitute. And that leads me to a funny story…

A side note, on “sending the husband to the grocery store”

I love my husband dearly, and his sensibilities in the kitchen are usually right on target, but sometimes, I still make specific and detailed notes on the list when I send him to the store by himself, and I might even text him a picture of an exact item I need. For this recipe, I was very clear that if cotija cheese was not available, he should get “dry crumbled feta,” and in the margin, I wrote, “PLAIN, NO FLAVORS!” So you can imagine the stink-eye he received when he returned with a “flavored feta that sounded interesting.” My dramatic Leo side went bonkers as I yelled, “Geezus, can you not read???” But then I saw what he found, and of course, it was literally perfect for this recipe! Gotta trust my man sometimes, ya know?

You NAILED it, Babe! 😘

Making this Mexican street corn potato salad

From this point, it’s a pretty standard potato salad in terms of mixing, so I’ll let my photos do the talking while you imagine this deliciousness coming to life in your own kitchen. Find full instructions below in an easy, click-to-print recipe card that you can save for your files. Welcome back, summer! 😎


Mexican Street Corn Potato Salad

  • Servings: About 8
  • Difficulty: Average
  • Print

This is two of my all-time favorite carbs, together in one really flavorful salad! Plenty of seasoning options, so you can make it as spicy (or not) as you like it!


Ingredients

  • 2 lbs. Yukon gold potatoes, skin-on and cut into 1-inch chunks
  • 1/4 cup mayonnaise
  • 1/4 cup Mexican crema (or sour cream)
  • 3/4 cup finely sliced scallions
  • 3/4 tsp. ancho chile powder
  • 1/4 tsp. ground cumin
  • Salt and pepper
  • Zest and juice of one lime
  • 1 tsp. cane sugar
  • 2 ears fresh yellow sweet corn, roasted or grilled until charred but tender
  • 1/3 cup cotija cheese, divided (you’ll mix some into the salad and sprinkle the rest on top)
  • fresh cilantro

Substitution notes: If you don’t have the means to roast or grill the fresh corn, don’t hesitate to pick up a bag of frozen fire-roasted corn. We love the one from Trader Joe’s, and it would work terrific here. If you cannot find cotija cheese, dry crumbled feta is a reasonable substitute; consider chopping it finer if the crumbles are larger than peas. Ancho chile powder is a spice unto itself, without salt or other ingredients. If you can’t find it, or if you want flavor without heat, swap in smoked paprika.

Directions

  1. Place the potatoes in a pot with cold water, and heat over medium-low until they are fork tender. Drain gently and return to the hot pot with the lid off, so that excess moisture can escape through the steam. Sprinkle 1/2 tsp. salt over the hot potatoes and cool them to room temperature, then transfer to a large mixing bowl and refrigerate for an hour or longer.
  2. In a medium bowl, combine mayo, crema, scallions, spices, lime and sugar. Adjust to taste with salt and pepper. Put the dressing in the fridge to chill until you’re ready to assemble the salad.
  3. Stand the corn on end and use a sharp knife to cut the roasted kernels off. Add them to the potatoes and fold in gently with the dressing until the salad is consistently coated. Fold in about half of the cotija cheese and a bit of the chopped cilantro, reserving the rest for garnish.
  4. Transfer the potato salad to a serving dish, and sprinkle the top with remaining cheese and cilantro.


Zucchini Citrus Pasta

The best thing about summer, besides the sunshine, is all the light and easy food coming our way. From backyard cookouts to easy breezy friend gatherings, there’s always room for one more light and tasty side dish. This colorful platter has refreshing citrusy flavors on top of tender, sautéed zucchini and carrots, chewy-to-the-tooth pasta and a sprinkle of vibrant herbs and crunchy, slightly bitter radicchio. In other words, perfect for summer!

For a lighter appetite, this could be dinner on its own.

I know, of course, that we are still almost two weeks from the summer solstice when the season becomes “official,” whatever that means. But I also know that we’ve had a good number of days tipping toward 90° F, so it feels like summer is already here! Zucchini is one of my favorite summer foods, and though it may be a while before our local farmers start picking zucchini, we’ve seen plenty of it in the supermarket grown in Florida and Georgia, just a couple states away.

My introduction to this zucchini-forward recipe came about 18 years ago, when I was a faithful fan of Rachael Ray’s “30-Minute Meals” on Food Network. You do remember when the channel actually had shows that demonstrated regular people recipes, rather than just over-the-top competition shows, right? Those were the days! 😏

Rachael ruled Food Network in the 2000s (along with Emeril), and I found her casual, not-so-cheflike approach absolutely charming. Her skill was honed not in a culinary institute, but in her Nonna’s kitchen (I can relate) and in an upstate New York grocery store where she did cooking demos. Her food always looked delicious, it was made with common ingredients, and her instruction made even the most gorgeous meals seem approachable. For sure, she’s one of my culinary mentors, and I still love this recipe. Let’s make it!

Mise en place

I won’t say that Rachael taught me about mise en place— a French culinary term that means loosely, “get your ducks in a row.” No, I learned that in the 1990s when I worked in a catering kitchen. But Rachael frequently emphasized the importance of organizing ingredients and tools before starting a dish and it’s good advice here, as the recipe goes pretty quickly once it starts.


Multi-tasking for the win

When I made this pretty dish for my husband, Les, I served it with baked halibut, which I seasoned up with the miraculous mayo marinade that I learned a couple of years ago. I mixed up the mayo with some lemon and orange zest, grated garlic and smoked paprika, and then added the pinch of baking soda that gives the marinade a turbo charge. This trick guarantees moist fish every time, so check it out when you have a chance!

This was a true “30-minute meal,” as I prepped all the veggies while I waited for the fish to marinate, and then cooked the dish while the fish was in the oven. Everything was ready at exactly the right time.


On one burner, get a pot boiling for spaghetti, which will be tossed into the dish at the end. Salt that water generously and keep half an eye on it while you work on the veggie part of the dish.

A big swirl of EVOO (as Rachael would say) goes into a large sauté pan for cooking the zucchini, carrots and onions— seasoned, of course— and then you’ll add garlic plus the juice and zest of a lemon and an orange. When the veggies are somewhat tender and the citrus juice has reduced a bit, use tongs to move the cooked spaghetti straight from the hot water to the pan, and toss the whole thing with the fresh parsley and mint. Transfer to a serving platter and scatter the chopped radicchio on top. Yes, it is as easy as it sounds and as delicious as it looks.


I went with my usual whole grain spaghetti for extra nutrition and a slightly chewier bite. As I was tossing the spaghetti with the veggies, it occurred to me that I’d never tried using another pasta shape, but I definitely will next time. Whole grain fusilli or bow ties would both work great, and might even make the dish easier to serve than with spaghetti.

Color, meet flavor. 😋

You’ll find this dish terrific served warm with a lean protein or, if your appetite is light, by itself. And it’s also tasty left over, cold from the fridge or at room temperature. That makes it ideal for taking along to a summer potluck as well as serving up on a busy weeknight. I could not find Rachael’s original recipe on the internet, but I have managed to remember the ingredients and the process over the years, and that’s a testament to the friend-next-door presentation of her cooking shows.

Do you have a favorite TV chef or cook— past or present— who inspires you to this day? Let’s talk about it in the comments!

Zucchini Citrus Pasta

  • Servings: About 6
  • Difficulty: Average
  • Print

This colorful side dish covers all the bases, with bright, fresh flavors and plenty of texture. Cutting the zucchini and carrots into matchstick-sized pieces allows them to cook quickly without turning mushy. Perfect for a busy summer weeknight or a backyard potluck.


Ingredients

  • 2 medium or 3 small zucchini, julienned
  • 2 or 3 medium carrots, julienned
  • 1/2 sweet onion, sliced into crescents
  • 2 cloves garlic, chopped
  • Extra virgin olive oil
  • Kosher salt and freshly ground black pepper
  • Zest and juice of 1 lemon
  • Zest and juice of 1 orange
  • About 1/3 package hot cooked spaghetti or favorite small pasta shape
  • Handful of fresh Italian (flat leaf) parsley, rough chopped
  • Handful of fresh mint, rough chopped
  • 1/2 small head radicchio, rough chopped

Note: This dish is extremely versatile, as it can be served hot, room temperature or chilled. I used whole wheat spaghetti, but any small pasta shape, such as fusilli or farfalle would be great. If you don’t care for mint, fresh dill would also be delicious.

Directions

  1. Place a large, deep sauté pan over medium heat and swirl EVOO around twice (about 2 tablespoons). Add zucchini, carrots and onions to the pan, and season with salt and pepper. Toss and cook a few minutes until the onions are translucent and the carrots begin to soften.
  2. Add garlic, citrus zest and juices, and reduce heat to a simmer so that the liquid doesn’t evaporate too quickly.
  3. Add hot pasta straight to the pan, along with any cooking water that’s clinging to it, as the starchy water will help the citrus sauce cling. Toss to combine.
  4. Add chopped fresh parsley and mint. Toss lightly and then transfer the mixture to a serving platter. Scatter radicchio on top and serve immediately.


Romesco Potato Salad

Well, here we are, staring down the unofficial end of summer. Labor Day weekend is upon us in the U.S., and though it signifies the waning days of summer, we are hardly ready to trade in our shorts and flip flops for boots and cozy sweaters. It’s still plenty hot, and we still have weeks— if not months— of good grilling weather remaining.

If you’ll be grilling out this weekend, and perhaps looking for a different take on potato salad, I have a fun one for you. This salad was the result of wracking my brain for another mayo-free potato side, not unlike the potato salad with chive and parsley pesto that I shared at the start of summer. That was a NY Times Cooking Recipe, and this one happens to be inspired by another recipe from the same site.  

It had already occurred to me that romesco sauce would be a delicious flavor to apply to potato salad, when lo and behold, a recipe appeared in my inbox for a “romesco egg salad.” There was confirmation for my inspiration, and I was off and running.


Romesco, in case you are not familiar, is a Spanish-inspired sauce made of pureed roasted red pepper, almonds and paprika. Typically, it would include roasted tomatoes, but I omitted those to keep my sauce thicker. It is sometimes also blended with stale bread to give the sauce more body, but I didn’t want carbs on carbs, so I skipped that, too, which also kept it gluten free. My romesco is spiked with garlic, vinegar, sherry and capers for extra bright flavor, and a peppery extra virgin olive oil holds the whole thing together. The sauce was delicious and substantial for dressing a potato salad.


What I like about this salad, besides it being free of greasy mayonnaise that separates at the first hint of heat, is that it packs a ton of flavor that you might not expect on a potato salad. The roasted red pepper lends more than enough moisture to keep the tender boiled potatoes from feeling sticky or dry, and the smoked paprika, capers and hard boiled egg give it an unmistakable flair of Spanish cuisine.


It comes together easily, especially if you use jarred roasted red peppers, as I did for this one. Simply process together the romesco ingredients, seasoning as you go, and then fold it into tender cooked baby potatoes. A few hours to chill it down is all you need, then top it with chopped eggs, onions, capers and parsley, and this is potluck-ready! 

We enjoyed this romesco potato salad at our house on Fourth of July weekend, but it would be a perfect way to celebrate the end of summer while also welcoming in some of the bolder flavors of fall. It would be excellent alongside a grilled skirt steak or zesty marinated chicken breasts, or keep it light and healthy— as we did, by serving it alongside a grilled whole branzino. 


This recipe made enough romesco to dress the salad plus a little extra to serve on the side with the grilled fish. If you don’t want the extra, simply prepare an extra half-pound of potatoes. But trust me on this, you’re going to want the extra. 😁


Romesco Potato Salad

  • Servings: About 6
  • Difficulty: Average
  • Print

The Spanish-inspired flavors of roasted red pepper, paprika, sherry and almond lend a zesty flair to this mayo-free potato salad!


Ingredients

  • 1 pound itty bitty red potatoes
  • 3 eggs, hard boiled, cooled and peeled
  • 1/2 cup roasted red peppers
  • 1/3 cup almonds
  • 1 Tbsp red wine vinegar
  • 1 Tbsp sherry (see recipe notes)
  • 3/4 tsp smoked paprika
  • 2 cloves garlic
  • 1/3 cup evoo; add 2 Tbsp at first, drizzle remaining in while processor runs
  • Kosher salt and freshly ground black pepper, to taste
  • Additional roasted red bell pepper, chopped
  • 1/4 cup parsley leaves and stems, chopped
  • 1 Tbsp capers, rough chopped
  • 1/4 cup diced Spanish onion

Recipe Notes: Sherry vinegar is traditional for romesco, but I substituted a 50/50 mix of red wine vinegar and good quality drinking sherry. Odd, isn’t it, that I had sherry but not the vinegar? You will likely only need about 2/3 of the romesco to dress the potato salad. Save the rest for another purpose (it’s great on sandwiches or with grilled fish), or do an extra 1/2 pound of potatoes.

Directions

  1. Add baby potatoes and water to a medium pot. Bring to a gentle boil, then reduce slightly to simmer until potatoes are tender. Drain immediately and let them relax in the colander to dissipate the steam. Lightly smash the potatoes, not to the point of mashing them, but enough to break them open just a bit.
  2. In the bowl of a food processor, combine roasted red pepper, garlic, almonds, vinegar, sherry and paprika. Season with salt and pepper. Pulse a few quick times to roughly blend the sauce. Add one yolk of hard boiled egg if desired. Add two tablespoons of the olive oil and pulse again, then run the machine continuously while you slowly drizzle in the remaining oil.
  3. When potatoes are warm but no longer hot, gently fold in the romesco sauce. You’ll probably want to use a little more sauce than you initially think it needs, as the warm potatoes will absorb some of the moisture in the sauce.
  4. At serving time, top with additional red pepper, onion, chopped hard-boiled egg, capers and parsley. Add one last drizzle of olive oil, if desired.


Potato Salad with Chive & Parsley Pesto

The official start of summer is still a couple of weeks off, but it seems safe to assume that, for most of us, Memorial Day has already ushered in the season. My husband, Les, and I were invited to join some of his old work friends for a backyard cookout that weekend, and our contribution was to be a side dish or dessert. We couldn’t choose, of course, so we made both! Les brought his nearly world famous chocolate chip cookies—one of these days I’ll convince him to share them here— and I picked this salad, which had arrived in my inbox from NYTimes Cooking just a few days before the cookout.

This was a flavorful twist on a typical summer potato salad!

I picked this one for a few reasons. First, I knew that there would probably already be plenty of macaroni salads and mayonnaise-based potato salads, so this would be a change of pace. The dressing here is essentially a pesto, but made with parsley and chives rather than basil. It’s a bright, vibrant salad that looks great on the plate and it “ages” well at a potluck without that greasy, broken mayo coating. There was also the matter of the large bag of baby potatoes Les had picked up at Costco the week before, and we had almost exactly the 2 pounds I needed for this salad! Green beans added a little bit of crunch that was just right, though I can imagine cut spears of asparagus would have been tasty, too. I cut the potatoes into quarters to get more surface area  to hold the pesto, and boiled them until fork tender, tossing in the green beans for the final two minutes. So easy, and all in one pot!


The recipe sounded great as written, but I tweaked it just a bit to satisfy our love for extra garlic. I didn’t have pine nuts but found that toasted pepitas worked great in the pesto and added even more pretty green color. Our parm-romano blend provided a deep savory flavor, and I used a nice peppery olive oil for even more zing.


There was quite a lot of pesto dressing, and I’m glad that I added it gradually, as the potatoes and green beans didn’t need the whole amount. But who minds having a little leftover pesto on hand? It will be delicious on some grilled fish or maybe tossed with shrimp and hot cooked pasta. Oh wait, on grilled vegetables! Mmm.


Just one more thing I’d add about this salad— serve it right away, and make it on a day that you have plenty of people around to eat it. We had a bit left over and found that it fell kind of flat after a couple of days in the fridge.

Potato Salad with Chive & Parsley Pesto

  • Servings: About 8
  • Difficulty: Average
  • Print

I only made a few minor tweaks to this NYT Cooking recipe, and it has already won a coveted spot in my summer side rotation!


Ingredients

  • 2 pounds baby potatoes, scrubbed and halved or quartered
  • 1 Tbsp. kosher salt (for cooking water)
  • 1/2 pound green beans, trimmed and cut into short pieces
  • 1/4 cup roasted pepitas (hulled pumpkin seeds)
  • 3 cloves garlic, rough chopped
  • 1 cup packed Italian parsley leaves
  • 1/2 to 3/4 cup extra virgin olive oil (a bright, peppery one is perfect here)
  • 1/2 cup freshly grated Parmesan or Parm-Romano blend
  • 1 small bunch chives, snipped
  • Juice of 1/2 large lemon
  • Salt and pepper to taste

Directions

  1. Add potatoes to a large pot and cover with cold water. Bring to a boil over high heat, then add salt and reduce heat to a constant simmer. Cook potatoes about 15 minutes, until they are easily pierced with a fork or knife tip. Add green beans only for the last minute or two, so they remain bright green and tender-crisp.
  2. Drain potatoes and return them to the hot pot to allow excess moisture to evaporate.
  3. Make the pesto while the potatoes and beans cook. In the small bowl of a food processor, pulse together the pepitas and garlic. Add parsley and pulse several times. Use a small spatula to scrape down the sides of the bowl. Run the processor continuously while you drizzle in the olive oil, and puree until it is an even paste. Transfer the mixture to a large bowl and stir in the Parm-Romano, lemon juice, chives and salt/pepper to taste.
  4. In a large bowl, combine the warm potatoes with about half of the pesto. Fold gently to coat and add more pesto to your liking. Season to taste with salt and pepper. Reserve any leftover pesto and enjoy tossed with pasta or roasted vegetables. It will keep better with a thin layer of extra virgin olive oil floated on top.


Copper Pennies

As much as I love experimenting in the kitchen, there are times that I crave a classic. These copper pennies were a dish that I learned to make during my short stint at A Pinch of Thyme, an upscale catering business in Greensboro, North Carolina, during the 1990s. I suppose if they were to have given me a title, I might have been a “food prep specialist” or some such thing, but I basically just did a whole lot of chopping of fresh vegetables for crudité, salads and other recipes.

One of the most important lessons I learned in the “Pinch kitchen,” as we called it, was that simple dishes tend to be everyone’s favorites. You didn’t have to make grand gestures to impress people with food—it just had to hit their palates with balance and sometimes a bit of nostalgia. No wonder these copper pennies were popular with our clients for catered lunches—they cover both!

Copper pennies started appearing on American tables in the 1940s or so (the history on this is tough to track down), and most vintage cookbooks I’ve seen call for Campbell’s condensed tomato soup in the marinade. That’s the nostalgia part, I suppose, but we were having none of that in the Pinch kitchen. Our clients expected the food to be prepared from scratch, and that’s how I’ve made them here as well. In the spirit of full disclosure, the recipe I’m sharing today did not come from Pinch, but from a Junior League cookbook that was gifted to me many years earlier.

When I ran across the recipe, my mouth instantly began to water, as I recalled the tasty and vibrant copper pennies I had made so many years ago. The recipe builds on a small can of tomato sauce, and I tweaked it a bit for my own taste, cooking the marinade to deepen its flavor as well as cook off the tinny taste from the can. Here’s a glimpse of the rest of the ingredients. See? simple.


The onions and green bell pepper are standard, and I backed off the sugar in the Junior League recipe and added a splash of dry vermouth to elevate the marinade flavors. Dry white wine would be a perfect substitute, but I never have a bottle of that open and, after reaching for vermouth in its place one day, I found the complexity so appealing that I never looked back. If you’re a fellow martini lover, with a bottle of dry vermouth in the fridge, give it a try in a few recipes and let me know what you think about it in place of wine. I whisked in olive oil when the marinade was nearly finished, and sprinkled in celery seed for an herbal note.


While the sauce simmered, I got to work slicing my carrots, and I purposely selected larger, fatter carrots for this recipe. My mandoline came in handy for this, as I was able to get perfectly round, even slices, but you must be careful using a mandoline. You see the large carrot “heels” I had leftover after slicing? That was because I stopped when my hands were getting too close to the blade. If you have never used a mandoline before, may I suggest you circle back to my post from two years ago, A Quick Flick of the Wrist, to see firsthand how dangerous it can be to ignore the safety features of this versatile kitchen gadget. If you’re more comfortable slicing by hand, that’s fine, too.


The only thing left to do was steam the carrots, which I did for 8 or 9 minutes, until a carrot slice tested to al dente firmness. I transferred them directly into the tangy tomato marinade, along with the onions and peppers, then tossed it all together before cooling it down in the fridge. 


This is a great option for make-ahead side, when you want a chilled salad that isn’t carb-heavy the way pasta or potato salad might be. You can serve it as is, or dress it up a bit by serving it over a bed of greens. One of the tricks I learned in catering is that serving a marinated salad over greens allows for the excess liquid to run underneath, keeping the main part of the dish nice and crisp.


Copper Pennies

  • Servings: 8 to 10
  • Difficulty: Average
  • Print

Tender-crisp steamed carrots and a tangy tomato marinade make this vintage recipe a keeper! It's perfect to make ahead for any kind of summer gathering.


Ingredients

  • 2 pounds fresh carrots, peeled and sliced into 1/4-inch rounds
  • 8 oz. can tomato sauce
  • 1 medium sweet onion, sliced thin from top to bottom
  • 1/2 medium green bell pepper, cut into thin strips and then cut into 1-inch pieces
  • Kosher salt and black pepper
  • 1/3 cup cane sugar
  • 1/4 cup apple cider vinegar
  • 1 tsp. worcestershire sauce
  • 1 tsp. prepared Dijon mustard
  • 2 Tbsp. dry white wine (or vermouth)
  • 3 Tbsp. extra virgin olive oil
  • 1 tsp. celery seed
  • A few handfuls washed baby greens, for serving

Directions

  1. Combine tomato sauce, vinegar, Dijon, sugar and worcestershire a medium saucepan over medium heat. Cook until sugar is dissolved.
  2. Add white wine (or vermouth) and cook until mixture begins to thicken slightly. Stir in celery seeds and adjust salt and pepper to taste. Remove from heat and allow sauce to cool to room temperature.
  3. Prepare to steam carrots by placing a steamer basket or pot over a pot with approximately one inch of water. Heat until water maintains a consistent gentle boil. Add carrots to basket and steam for 8 or 9 minutes, until tender-crisp. No stirring is necessary during steaming.
  4. Transfer carrots directly into cooled tomato sauce. Add onions and bell peppers and toss gently to combine. Cool and then refrigerate overnight to meld the flavors. Serve copper pennies over a bed of baby greens, if desired.


Easy Pickled Shrimp

Every region has its favorite foods. You know, the things that you can expect to find multiple variations of at a potluck, family picnic or church social. In the South, that would be a relatively short list of ham biscuits, pimiento cheese, collard greens, deviled eggs, pulled pork bbq, banana pudding and sweet tea. 

If I could add one item to that list, it would be this pickled shrimp. It’s a quick and easy way to serve up everyone’s favorite shellfish, without frying it or burying it in sauce. If you can boil water and slice an onion, you can make this, and you’ll find it incredibly versatile.


I found this recipe on Pinterest when I was looking for— wait, what was I looking for? Who cares, because I stopped scrolling when my eyes caught the name on this recipe clipping: Pat Conroy.


The name Pat Conroy may not ring a bell for you, but I’ll bet you know some of his work. The late American novelist wrote numerous books, fiction and non-fiction, including The Prince of Tides, which he adapted into a screenplay for a Barbra Streisand-produced film that earned seven Oscar nominations.

Pat Conroy had a thing for the South, especially South Carolina, where he is buried. I first learned about him when I visited Hilton Head many years ago and dined at a restaurant that carried his name. Conroy’s—now permanently closed— was an elegant-meets-coastal-casual place inside the Marriott hotel, and its she crab soup made such an impression that I dined there three times over the course of a week, even though I was not a guest at the hotel. The rich and creamy seafood bisque was said to be one of Pat Conroy’s favorites, and I decided then and there that he was my kinda guy.

So when I saw this recipe for pickled shrimp, straight from Conroy himself, I knew it would be a winner. The ingredients are straightforward— onions, garlic, capers, crushed red pepper, spices, vinegar, lemon juice and olive oil— and as I blended these things together, it occurred to me that you could substitute any number of things for variations of this delicious mix. Why not use pimientos instead of capers, or jalapenos instead of crushed red pepper? Couldn’t you put a Greek spin on it with some oregano and chopped kalamata olives? Oh, the possibilities!


I added a spoonful of sugar, just because it’s the South and well, it’s what we do here. That little touch of sweet is a nice balance to the acidity of vinegar and lemon. Then, I dipped the shrimp ever-so-briefly into simmering water before spilling them into the pickling liquid. The prep and cook time are minimal in this dish, and the rest of the magic happens in the fridge when the mixture melds and mingles overnight. I doubled the weight of shrimp in my recipe and found that the marinade was sufficient. If you do the same, plan to give the mixture a stir every few hours.


This pickled shrimp is tangy, briny, fresh, herbal, spicy and altogether perfect for spring or summer. For sure, it’s a Southern thing that I have only made twice myself, but that is going to change, especially now that my mind is set on swapping in other flavors. We served this shrimp on the hors d’oeuvres table for Kentucky Derby, in a large bowl tucked inside an even larger bowl filled with crushed ice— so easy! Our guests raved about it, and what little bit was left over turned a simple pile of arugula into a weeknight dinner salad that was as delicious as it was effortless.

Now, if you’ll excuse me, I’m off to begin my search for the perfect she crab soup recipe. I’m sure Conroy has one out there somewhere!


Easy Pickled Shrimp

  • Servings: About 10
  • Difficulty: So Easy!
  • Print

This easy recipe is a good one to have in your pocket for a brunch, potluck or any summer gathering. For best results, use fresh, never frozen shrimp.


Ingredients

  • 1 medium sweet onion (preferably Vidalia), cut into thin, lengthwise slices
  • 3 garlic cloves, finely chopped
  • 3 ounces non-pareil capers, drained and lightly chopped
  • 4 dried bay leaves, crushed into small pieces
  • 1 cup apple cider vinegar
  • 1/4 cup freshly squeezed lemon juice (zest, too)
  • 1 tsp. kosher salt
  • Several twists of freshly cracked pepper
  • 1 tsp. celery seed
  • 1 tsp. crushed red pepper flakes
  • 1 Tbsp. sugar
  • 1/2 cup good quality, extra virgin olive oil
  • 2 pounds fresh large shrimp, peeled and de-veined

Directions

  1. Combine all ingredients except shrimp in a large bowl fitted with a lid.
  2. Bring a large pot of water to boil. Add 1 tablespoon kosher salt to the pot and stir to dissolve. Reduce heat to medium to keep water at a consistent simmer.
  3. Using a spider strainer or other mesh-style scoop, add shrimp, about 1/2 pound at a time, and cook only until shrimp is bright pink and slightly curled (60 to 90 seconds). Transfer immediately to the bowl of pickling liquid and toss gently to coat the shrimp in the liquid. Repeat until all shrimp are cooked.
  4. Let the shrimp cool for about 20 minutes, then cover bowl and transfer to the fridge to chill for 6 to 8 hours. Give it a gentle stir every few hours and just before serving.
  5. Serve in a large bowl, with pickling liquid, inside a larger bowl filled with crushed ice to keep it cold.


Late Summer Succotash with Chicken & Waffles

Something about the change of seasons makes me happy, and this is especially true when we can see Labor Day just up ahead. This time last year, my husband, Les, and I were gallivanting all over New Jersey, Connecticut and New York, visiting old friends, meeting new ones and satisfying our culinary curiosity with so many delicious foods. Our plans this year have kept us mostly at home, and so the transition to fall doesn’t feel nearly as dramatic, but we have at least fulfilled the delicious food requirement. The big food news of our week occurred when we celebrated my hubby’s birthday with a fantastic veal and eggplant Parmesan dish, which he will be proud to share on Comfort du Jour soon (it will be an excellent way to re-welcome the Sunday Supper category).

Yes, the countdown to autumn has begun, and I’ll be at the front of the line to greet it. For now, I’d like to share this colorful, late-summer dish that I whipped up last month, just before our garden tomatoes started coming in. It’s a “healthy-ish” play on chicken and waffles, and a great way to hang onto the lingering days of summer as we prepare to roll out the welcome mat for the glorious comfort foods of autumn.


It may seem that “chicken and waffles” could not qualify as healthy-ish, but I did lighten this up in a number of ways. First, I used skinless chicken tenders (rather than skin-on, bone-in pieces), which were drenched in flavor after a two-hour bath in buttermilk, seasoned with plenty of hot sauce and a bit of Bell’s poultry seasoning. Never miss an opportunity to add flavor—that’s one of my key approaches to cooking. Rather than deep frying the tenders, I dipped them in seasoned flour and crisped them up lightly in a cast-iron skillet. And with a high volume of vegetables in the succotash, each serving only included two of the fried tenders. Portion control is one of the simplest ways to reduce calorie intake. 🙂


The waffles for this dish were on the healthy side of things, too, and based on a sourdough pancake recipe from my favorite baking site, King Arthur Baking Company.

I followed the King Arthur recipe as written, except that I halved it, swapped in white whole wheat flour with a little cornmeal, and bumped up the oil just enough to prevent them from sticking to the waffle iron. The scallions and leftover grilled corn folded into the batter made the waffles extra hearty, and sourdough can’t be beat for this application because of the amazing crispy texture it puts on the waffle exterior. If you aren’t riding the sourdough train, there’s no reason in the world you couldn’t substitute another waffle recipe you like and add the corn and scallions to it.


The succotash (technically this isn’t one because it doesn’t have beans) has everything that I love—zucchini (still plenty of it at the farmers’ market), grilled corn, leeks, ripe baby tomatoes, pickled onions and half of a tiny jar of pimentos we had in the fridge. I used one of my favorite prep-ahead techniques for this meal, which is layering the cut-up ingredients in reverse order in a single prep bowl that I can tuck into the fridge until I’m ready to start cooking.


This recipe gave me a first chance to use the new non-stick skillets we bought this summer; Les and I had looked high and low for replacements that didn’t feel chintzy and weren’t made in some factory overseas. Les learned via online research that the only pair of American-made non-stick skillets were a specific set of Calphalon pans that were sold by Williams-Sonoma (most of Calphalon’s products are made in China, but this set is made in Ohio). They are available online if you don’t have a store near you.

The non-stick coating is great, and I love the sturdiness of our new pans, but for me the real test of a new skillet is “how easily can I flip my ingredients?” Sometimes when I have a lot going on at once, I don’t want to take time to pick up a utensil so I’ll employ the flipping technique I learned during my catering days. It worked fine, though the pan was a bit heavy, so I’m counting it as upper-body exercise (and I only lost a few pieces of onion to the floor).


Having one prep bowl filled with vegetables makes cooking a snap, as I simply empty them into the skillet as I need them, and there’s no jumbling around in the fridge to find what I need or washing extra prep dishes. When the zucchini started to become tender, I moved deeper into the bowl for the other ingredients until I had everything in the pan.


All three components of this dish—the waffles, the chicken and the succotash—happen simultaneously, but you could certainly make the succotash ahead and simply rewarm it when you’re ready to serve. Keep the waffles warm on your oven’s low setting if needed, and aim to make the chicken the last thing you prepare. Remember to season it with a light touch of salt from the skillet!

Pile it onto a plate, with the succotash underneath and over top of the crispy waffles, and the chicken tenders leaned against it. Finish the dish with a scattering of fresh chopped basil leaves, and dinner is served!

Not only does this presentation look beautiful, it serves the purpose of keeping everything warm until you make it to the last delicious bite!


Late Summer Succotash with Chicken & Waffles

  • Servings: About 3
  • Difficulty: Intermediate
  • Print

This meal takes some time to prepare, but the combination of sauteed summer ingredients and lightened-up chicken & waffles is well worth the effort! Prepare the three components of this dish at your own pace; if time is limited, the succotash can be made ahead and warmed at serving time. If you plan to make everything concurrently, consider setting the oven to warm and tuck away the waffles or chicken tenders on a rack placed over a baking sheet.

Ingredients

  • 1 pound boneless, skinless chicken tenders, patted dry
  • 1/2 cup cultured buttermilk
  • Up to 1 Tbsp. bottled hot sauce
  • 1/2 tsp. poultry seasoning
  • Salt and pepper
  • 1 cup neutral oil (for skillet frying]
  • 1/4 cup all-purpose flour
  • 2 Tbsp. medium-grind corn meal
  • 1/2 tsp. garlic powder

Directions

  1. In a medium bowl, combine buttermilk, hot sauce, poultry seasoning, salt and pepper. Add chicken tenders to the bowl, tossing to coat. Allow this to rest at room temperature at least 30 minutes, or refrigerate up to a few hours if working ahead. Take them from the fridge 30 minutes before pan-frying them.
  2. In a small bowl, combine flour, corn meal and garlic powder, plus a few shakes each salt and pepper. Set this aside for breading the chicken tenders.
  3. Heat a cast iron skillet over medium heat, with 1/2-inch oil.
  4. When oil is hot, remove tenders from buttermilk mixture, allowing all liquid to run off. Dip the tenders into the breading mixture; coat evenly without dredging too heavily. Carefully place each tender into the hot oil, taking care to not crowd the pan too quickly, as this will drop the temperature of the oil and result in greasy chicken. Turn tenders when the first side is golden brown; transfer them to a paper towel-lined plate when done. Season immediately with a light sprinkle of salt.

Ingredients

  • 1/4 cup fed sourdough starter
  • 1/2 cup cultured buttermilk
  • 1/2 cup white whole wheat flour
  • 3 Tbsp. medium-grind cornmeal
  • 1/2 tsp. baking soda
  • 1/4 tsp. salt
  • 1 large egg
  • 1 Tbsp. extra virgin olive oil
  • 1/2 cup leftover grilled corn kernels
  • 3 chopped green onions (scallions), white and green parts

Directions

  1. In a medium batter bowl, combine sourdough starter and buttermilk. Add flour and cornmeal. Stir until smooth; cover and leave at room temperature at least 30 minutes, up to about 2 hours.
  2. In a small bowl, combine flour, cornmeal, baking soda and salt. Set aside.
  3. Set waffle iron to medium heat. While it preheats, add egg, oil, soda and salt to the sourdough batter. Stir until smooth. Fold in corn and scallions.
  4. Brush waffle iron with oil. Add a scoop of batter and bake until crispy, following manufacturer’s instructions. As a visual cue, watch for steam to dissipate from the iron. Generally, if the waffles are sticking, they aren’t finished baking. If working ahead, place finished waffles on a rack over a cookie sheet and keep them in a warm (250° F) oven.

Ingredients

  • 1 medium zucchini, chopped into chunks
  • 1 small leek or onion, chopped
  • 1 cup leftover grilled corn kernels
  • 1/4 cup pickled onions, chopped (I like the “pickled” flavor here; substitute anything pickled, such as okra, green beans, cucumber)
  • 2 Tbsp. jarred pimento, drained
  • 2 Tbsp. extra virgin olive oil
  • 1 cup ripe baby tomatoes, halved
  • Salt and pepper
  • Fresh basil or parsley, to garnish

Directions

  1. Heat a large, non-stick skillet over medium flame. Add olive oil and saute zucchini with leeks or onions until slightly tender.
  2. Add remaining vegetables, except tomatoes, and toss until evenly combined. Reduce heat to low and cover skillet with a lid so that the pan ingredients can heat through without much more cooking.
  3. Add tomatoes at the end, tossing just to combine.

To assemble the dish, spoon out some of the succotash, and then place a waffle section, topped with additional succotash. Arrange the chicken tenders by leaning them up against the waffles. Sprinkle with chopped, fresh basil or parsley.