It’s that time of year again, and I don’t mean Christmas in July. I’m completing another trip around the sun this weekend, and what better way to celebrate than with a signature cocktail for the birthday girl?
My husband, Les, is throwing me a party, and though many of the party details are a secret (including most of the guest list), I do at least know what will be on the drink menu because the venue gave us the option to request a special cocktail—yay! I love a theme for a party, and I’ve decided that my signature birthday drink should be reminiscent of the one that was in my hand back in the days when I was first “of age” to imbibe. Oops, did I just give away my age?!
How is it possible that it was soooo long ago??
DeKuyper had just released its Peachtree™️ schnapps, and everyone who was anyone— at least among the girls— was sipping on fuzzy navels, a blend of this syrupy sweet schnapps and equally sweet orange juice. The drink gave us a fun little buzz, and it was perfectly simple for all the bridal showers that my girlfriends were having.
Fast forward, ahem, a few decades and I’m still fond of the “idea” of the fuzzy navel, though I could never stomach the sweetness of it today. So I did what I always do— a modern makeover of an old favorite into a cocktail that is familiar but fresh— this one is easy to make, easy to drink, easy on the alcohol and yes, easy on the eyes.
Hello, Gorgeous!
What’s fun about a fuzzy navel spritz?
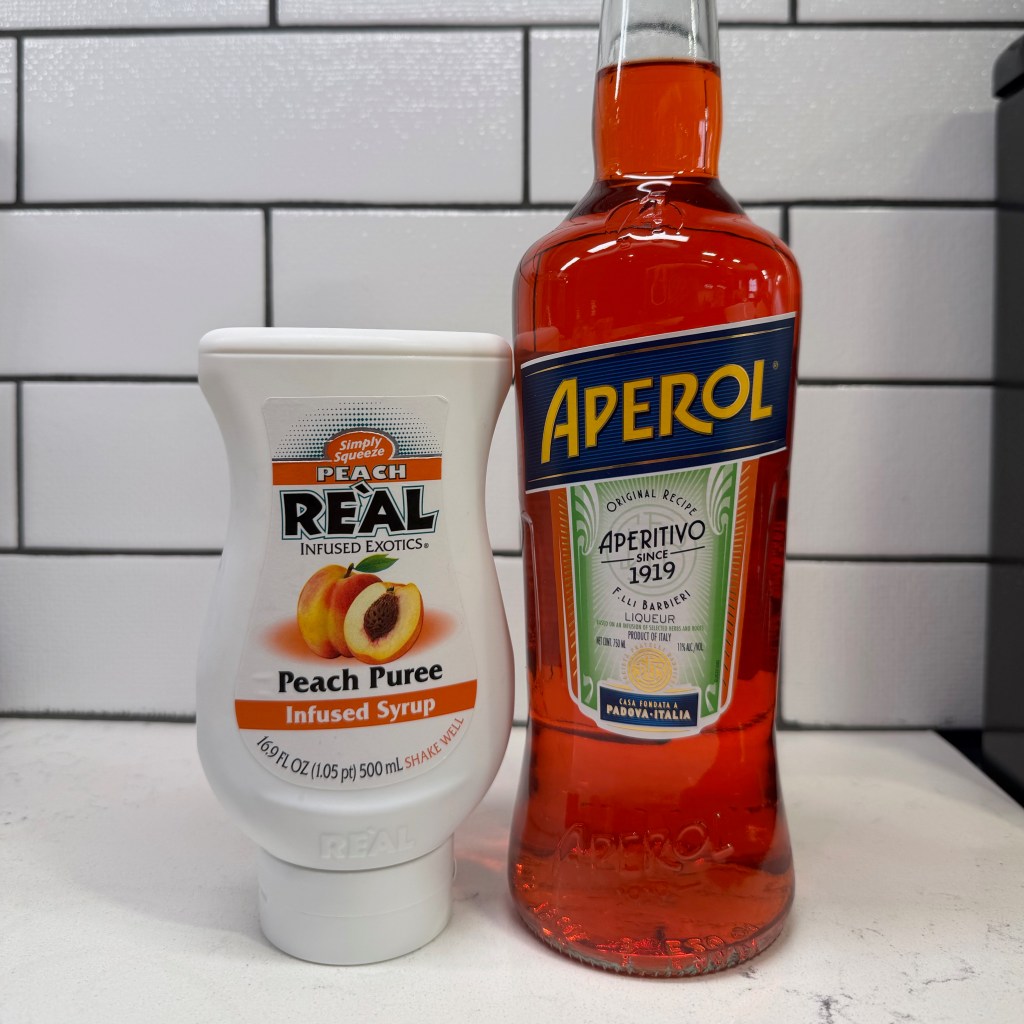
First of all, there’s no peach schnapps! The last time I tasted that stuff, I cringed at the artificial aftertaste. No, this glow-up gets its “fuzzy” flavor from a peach puree that concentrates real peaches into a thick syrup that plays nice with a number of alcoholic spirits— vodka, bourbon, blanco tequila, need I go on? It’s sweet (but naturally so), and a little goes a long way. You can find this product in the mixers section of a larger supermarket, or in the same aisle of a wine or spirits store.
The “navel” aspect of my upscale drink comes from Aperol. This slightly bitter, orange-meets-herbal aperitivo from Italy brings an instant citrusy balance to the sweetness of the peach puree. Aperol is having more than a fleeting moment of popularity, and I decided to ride that wave for my birthday.
The peach and orange flavors are covered here!
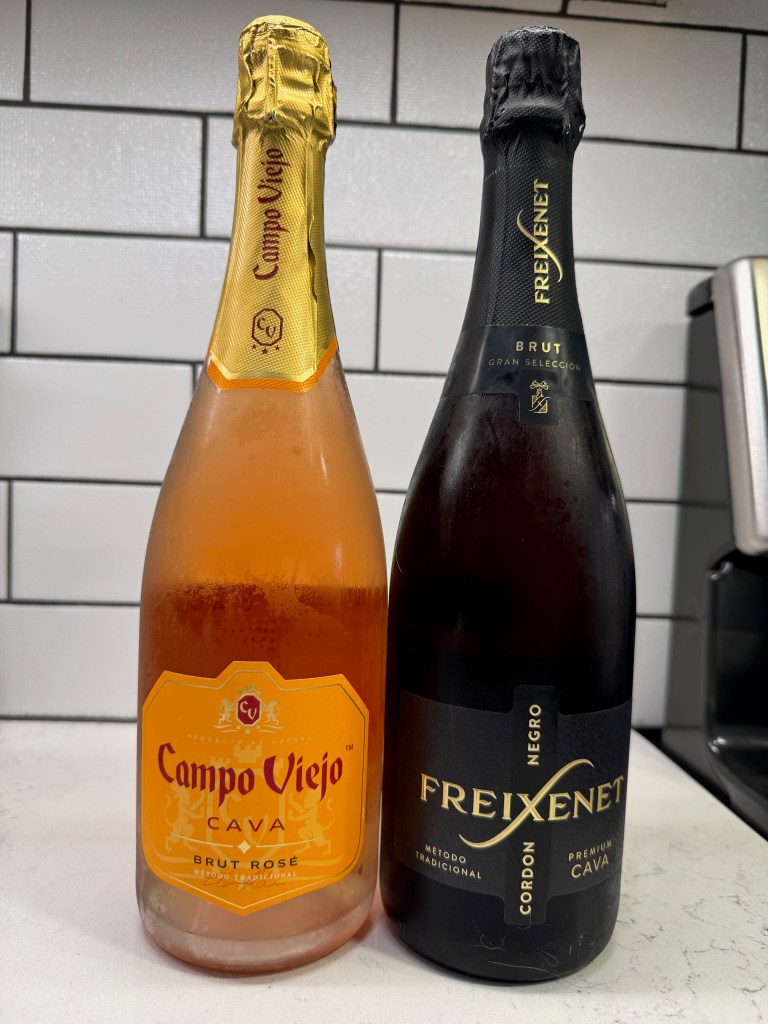
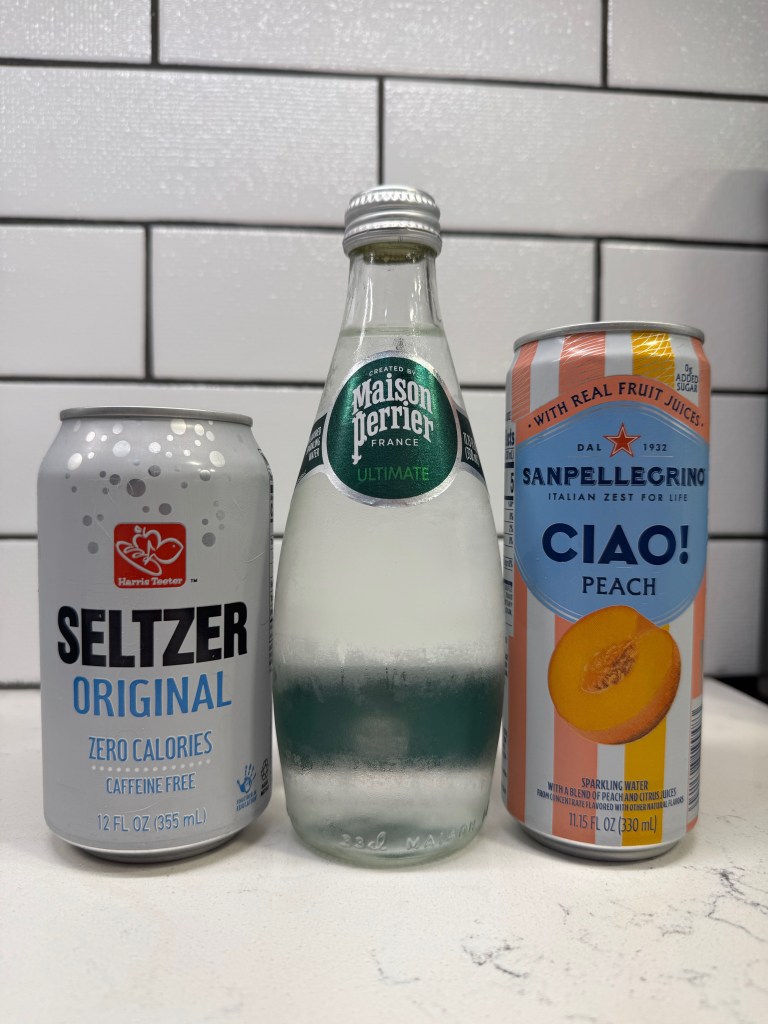
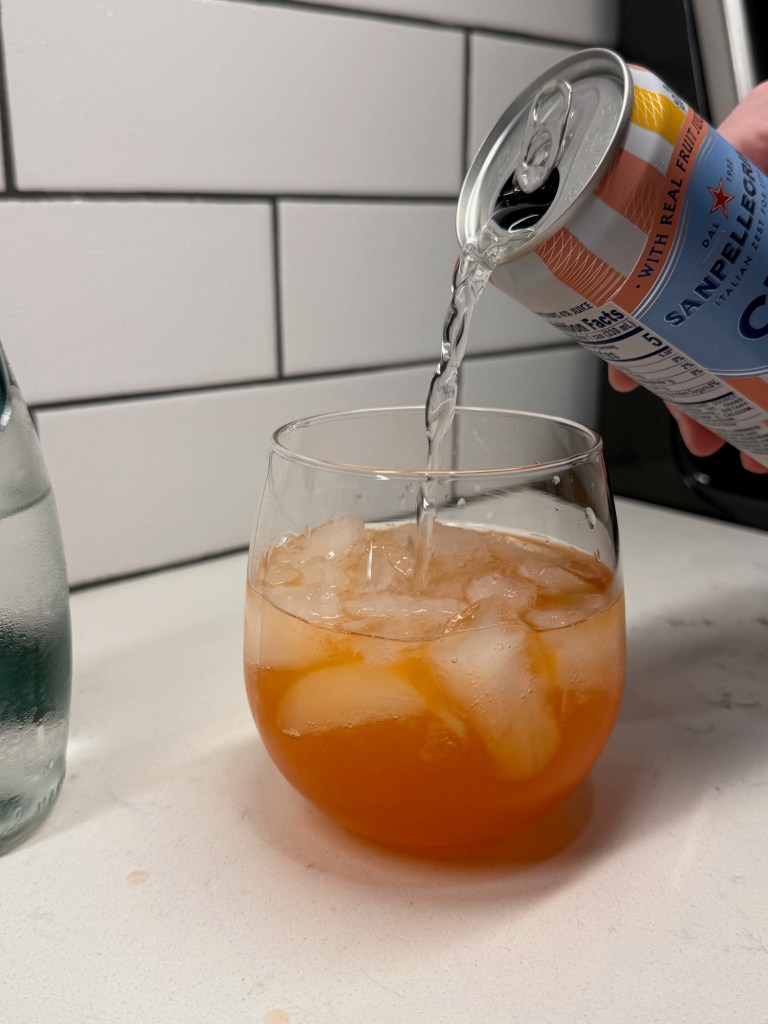
Finally, the base of the drink is Cava, Spain’s counterpart to champagne, bringing a little “fizzy” to my “fuzzy,” and a splash of sparkling water on top softens the drink for superb sipability. Any sparkling will do, whether club soda, seltzer or one of the fancy European options. If you happen to find one scented with orange or peach, even better!
Pick your poison! Any sparkling wine will work, but choose something dry.Please try to find the Ciao! peach. It’s awesome, even on its own.
If at first I don’t succeed, and I didn’t
This cocktail idea has been floating in my mind since at least my last birthday, but it was only in the past few weeks that I got serious about making it work. My first effort looked nothing like what you see here. It included vodka, peach nectar (which is not as peach-forward as it sounds), orange juice, Aperol and prosecco. It was too boozy, too sweet, not very peachy, not pretty and not refreshing at all. In other words, it needed a lot of work!
The peach flavor needed to be concentrated. I considered cooking peaches down into a puree to replace that so-called nectar, but would my birthday venue be willing to do that when I handed them the recipe? Relying on a pre-made mixer felt like cheating, but I am so glad that I checked out this peach puree. It’s just sugar, peaches, citric acid and a preservative—not so bad after all! Did I mention that it is great with bourbon, too? I’ll save that for another post. 😉
The vodka got 86’d because I wanted this to be a lower proof drink for easy summer sipping. Prosecco wasn’t right because the peach puree makes this drink sweet enough. Cava feels like the perfect choice, but a California brut would be great as well.
In the name of research and development, I’ve made quite a few iterations of this drink, fiddling with the ratios to balance the flavor. A traditional Aperol spritz follows a 3-2-1 ratio of bubbly, Aperol and sparkling water. But two ounces of Aperol was overwhelming to the peach, so I’ve cut it almost in half. The ratios you see in the click-to-print recipe below are my final decision, and I think it’s perfect.
Just one more thing…
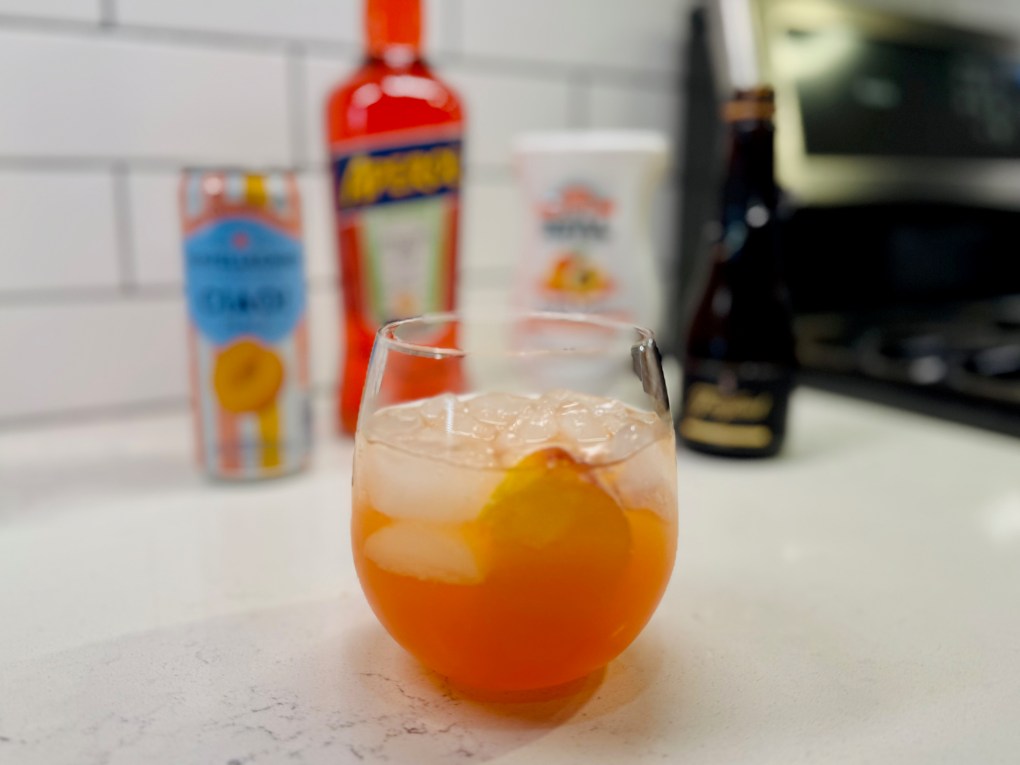
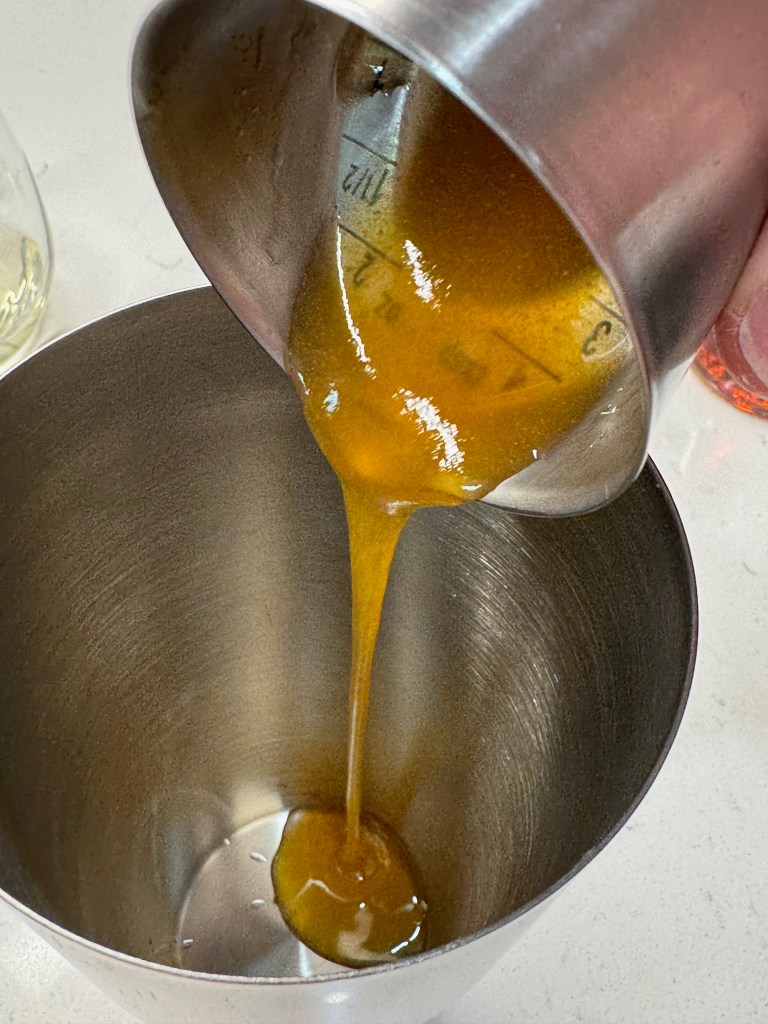
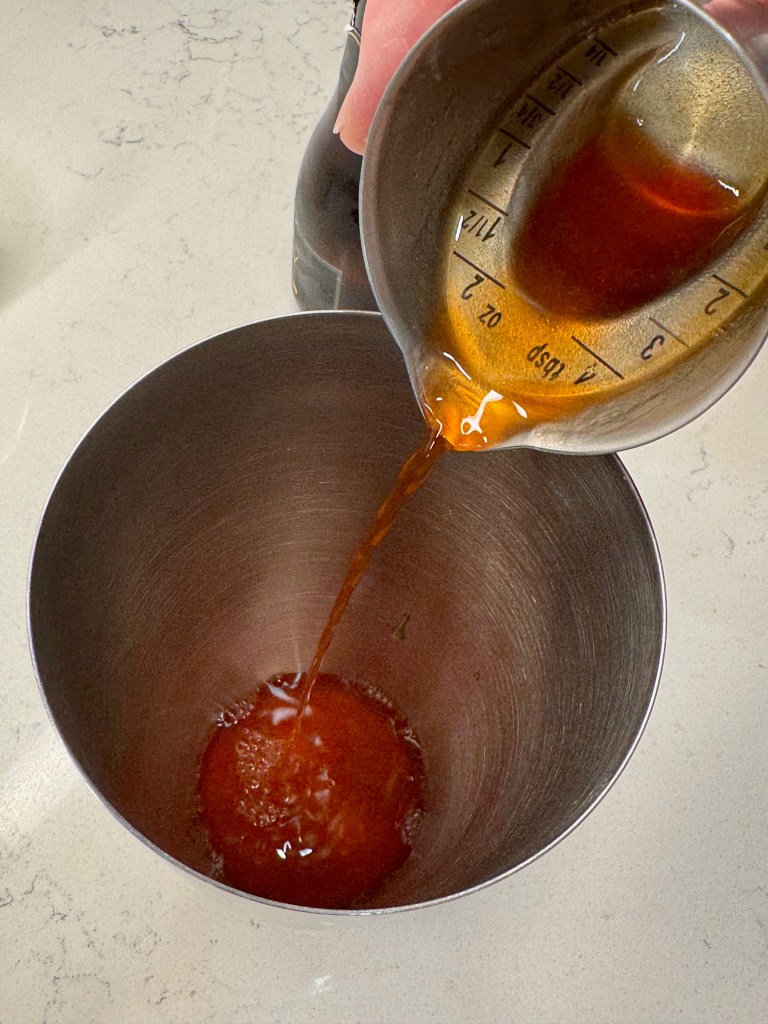
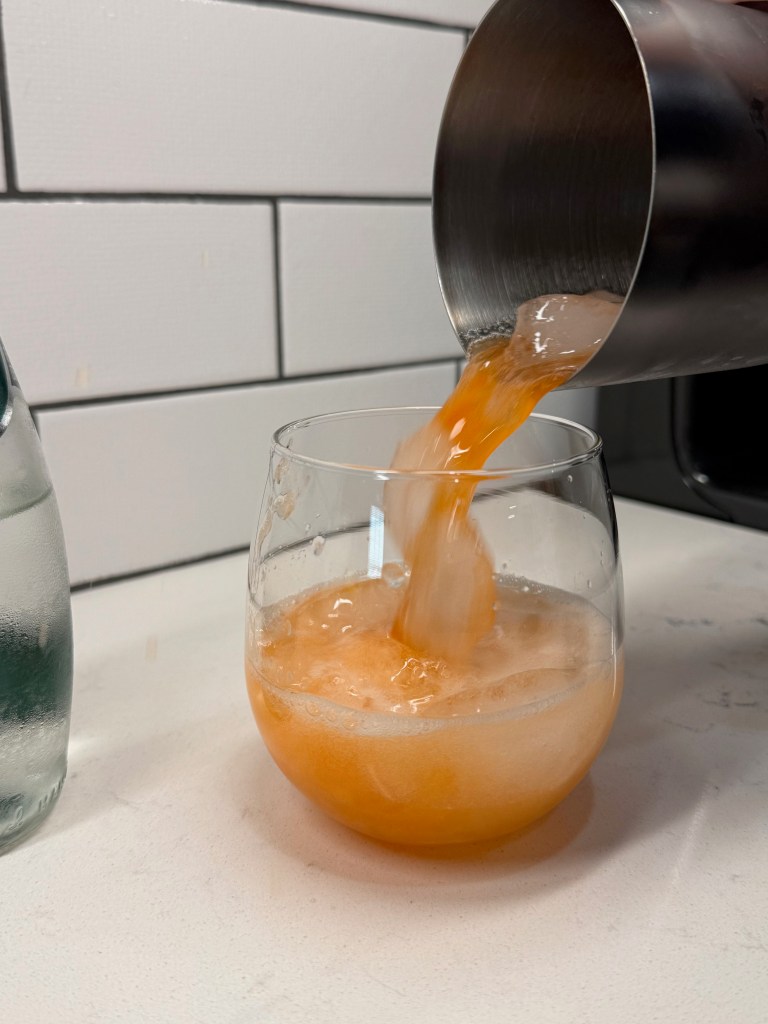
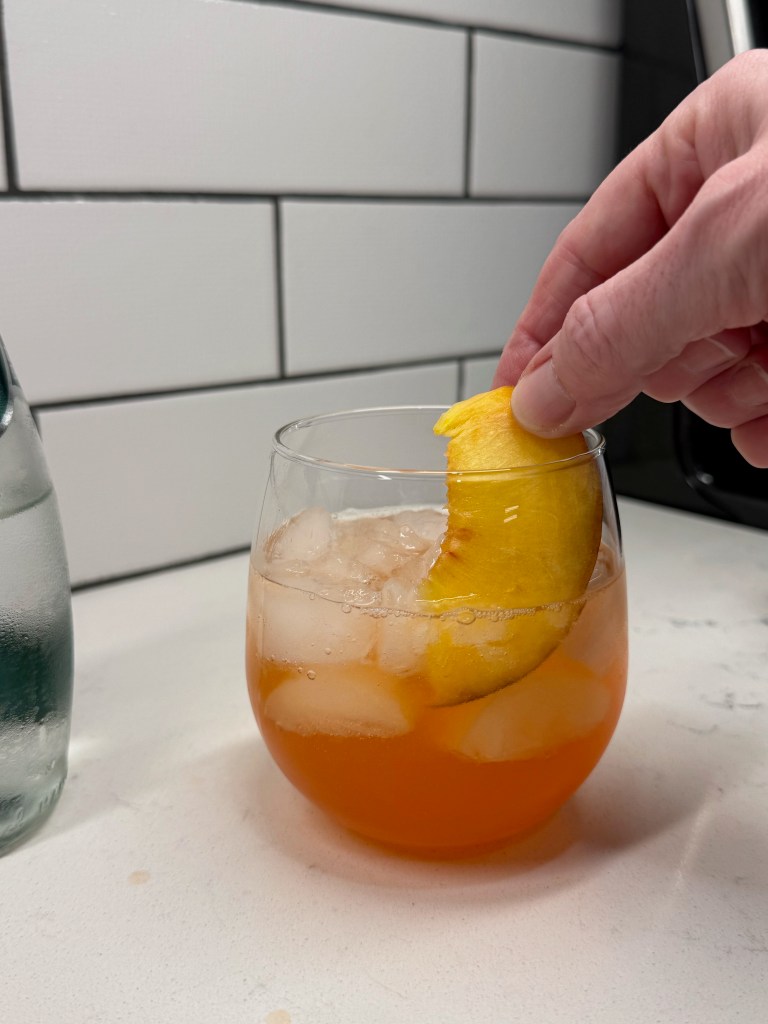
Though a spritz is typically mixed directly in the glass, this one does require a shaker to mix the Aperol and the peach puree, which is very thick. The bubbly ingredients should not go into the shaker, unless you want to clean the whole kitchen when it bubbles over! My method is to measure the chilled Cava into the glass first, shake up the Aperol and peach puree with a decent amount of ice, and then do what pro bartenders call a “dirty pour,” ice and all, into the glass with the Cava. A final splash of sparkling water at the end, and a wedge of fresh, juicy peach finishes this drink.
This is my modernized interpretation of a drink I loved back in the 1980s. It's less sweet than the fuzzy navels of my youth, but still light and very refreshing!
Ingredients
3 oz. Cava or other dry, sparkling wine
3/4 oz. peach puree syrup (Reàl brand)
1 1/4 oz. Aperol
1 or 2 oz. sparkling water, seltzer or club soda
Slice of fresh peach or orange, to garnish
Note: Most spritz cocktails are built directly in the glass, but this one requires a shaker for mixing the thick peach puree. Use a balloon glass, such as a red wine glass, that will hold all of the ice you use for mixing the drink.
Directions
Pour Cava into the serving glass.
Add peach puree and Aperol to a cocktail shaker. Add about one cup ice cubes and shake for several seconds until the shaker is frosty and very cold.
Pour the entire contents of the shaker (ice and all) into the glass with the Cava. Top with sparkling water. Garnish with a fresh fruit slice.
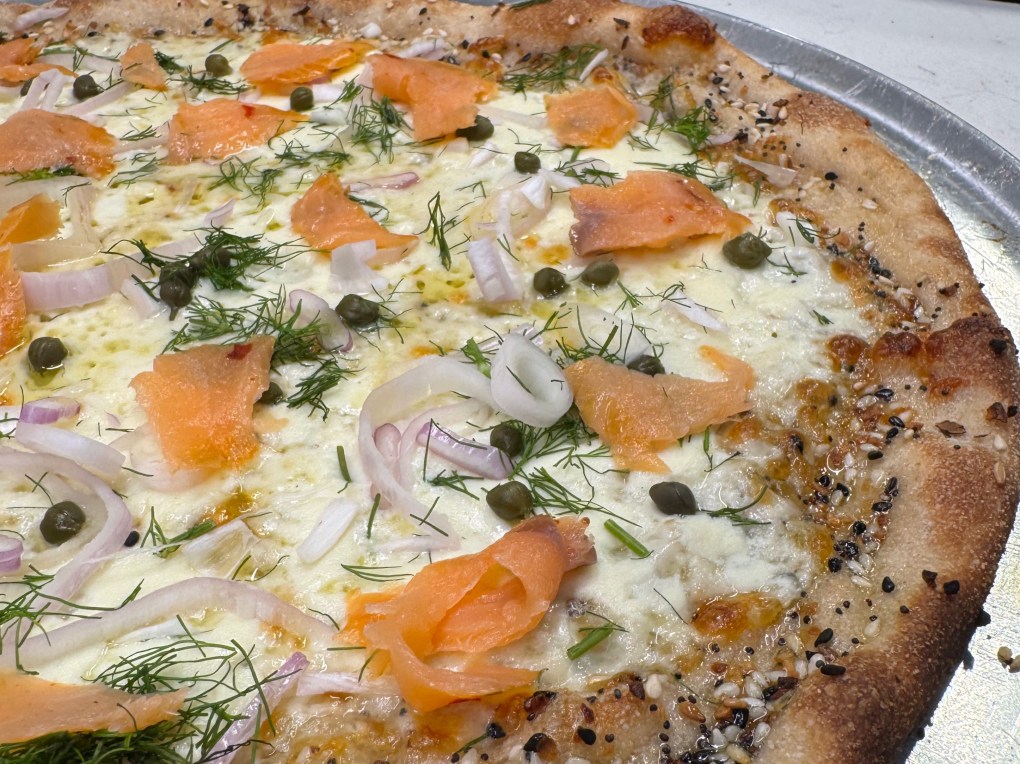
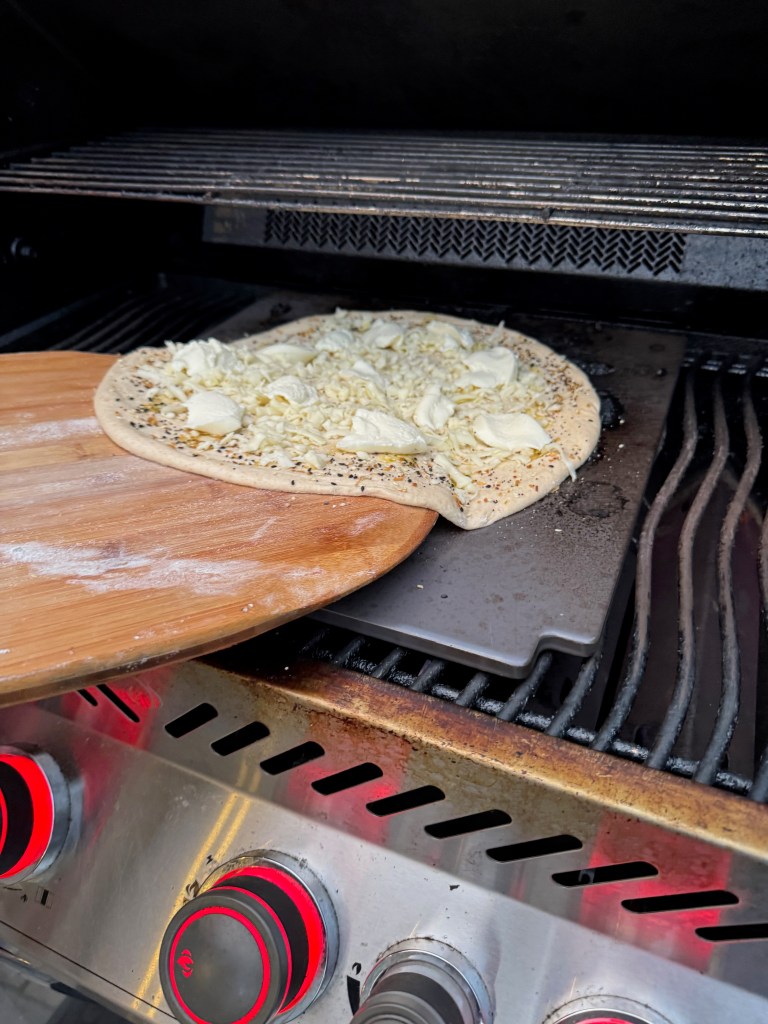
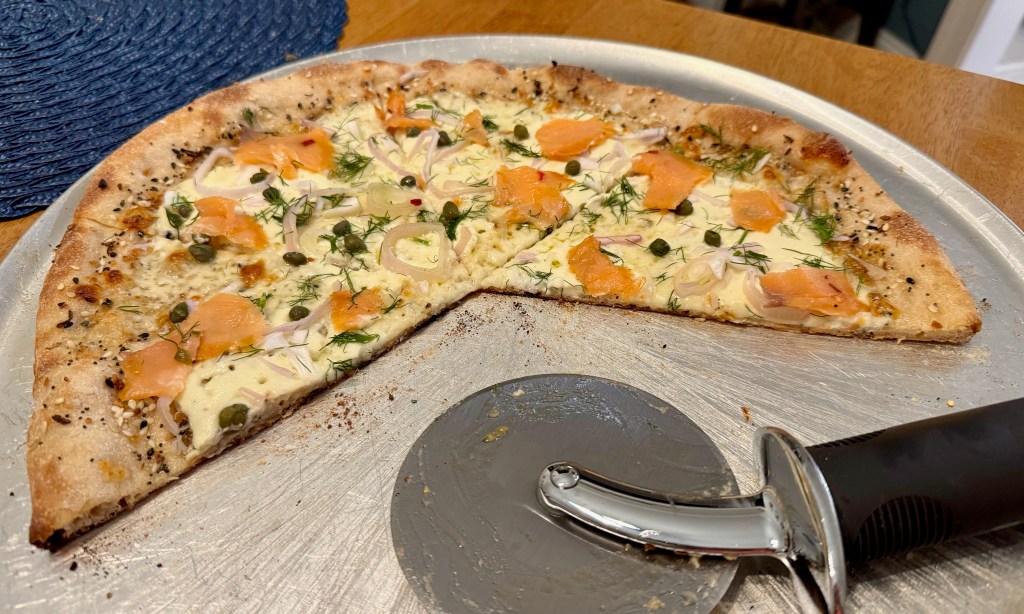
There’s almost no limit to what can be put on a pizza. The question is whether you should. And in this case of Jewish bagel toppings, I’m saying that the answer is yes! It’s a no-sauce, creamy cheese topping on an “everything” seasoned sourdough crust, finished with all the fixings you’d find on a Jewish deli bagel— onions, capers, dill and lox.
Think of it as a really big bagel!
Before I met my husband, who is Jewish, I could count on one hand the number of times I’d eaten bagels with lox. But this has become very much a staple in our home, and Les and I enjoy it for breakfast at least once a week. I love the flavors (especially when fresh dill is in season), and we’ve adapted it to dips and cheese spreads for parties, but I was eager to apply the unique flavors and textures to something else.
It wasn’t until we finally had a date on the calendar to have Rabbi Charlie and his family over for pizza that I decided to test it. You see, the rabbi keeps kosher rules, and that means meat and cheese cannot co-exist on the table. This regulation stems back to verses in Leviticus that declare you “shall not cook the kid in its mother’s milk,” and over time, the rule has expanded to include any kind of meat with any kind of dairy. Pizza without cheese is a sin in my book, so it would have to be the meat that would be kicked to the curb when we hosted them.
But isn’t fish meat?
Nope. In Jewish kosher regulations, fish—or at least those fish with both fins and scales— are given a pass; they are considered “pareve,” neither meat nor dairy. The only fish (other than anchovies) that sounds evenly remotely good to me on a pizza is salmon, and this is how I decided to go for it. We used a lox-type of salmon, and it was not cooked but added to the pizza after the crust emerged from the oven. In fact, most of the toppings were added after baking, the same as we would dress a bagel after toasting it.
Now, before I get too far ahead of myself, I want to clarify that we actually did not serve this everything bagel pizza when we hosted the rabbi because I felt it needed some tweaking. When the time came, we opted for all-veggie pizzas for our guests. But this test was tasty and fun, and I learned at least two things that will make it better next time. Ready to see how we made it?
How to make everything bagel pizza
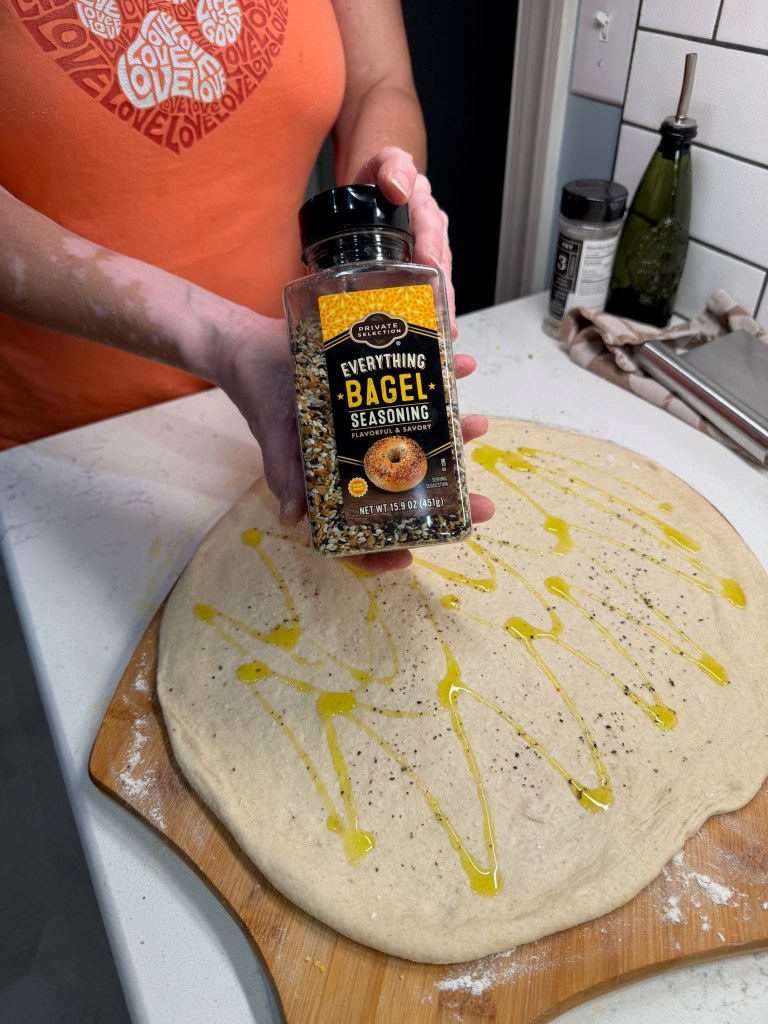
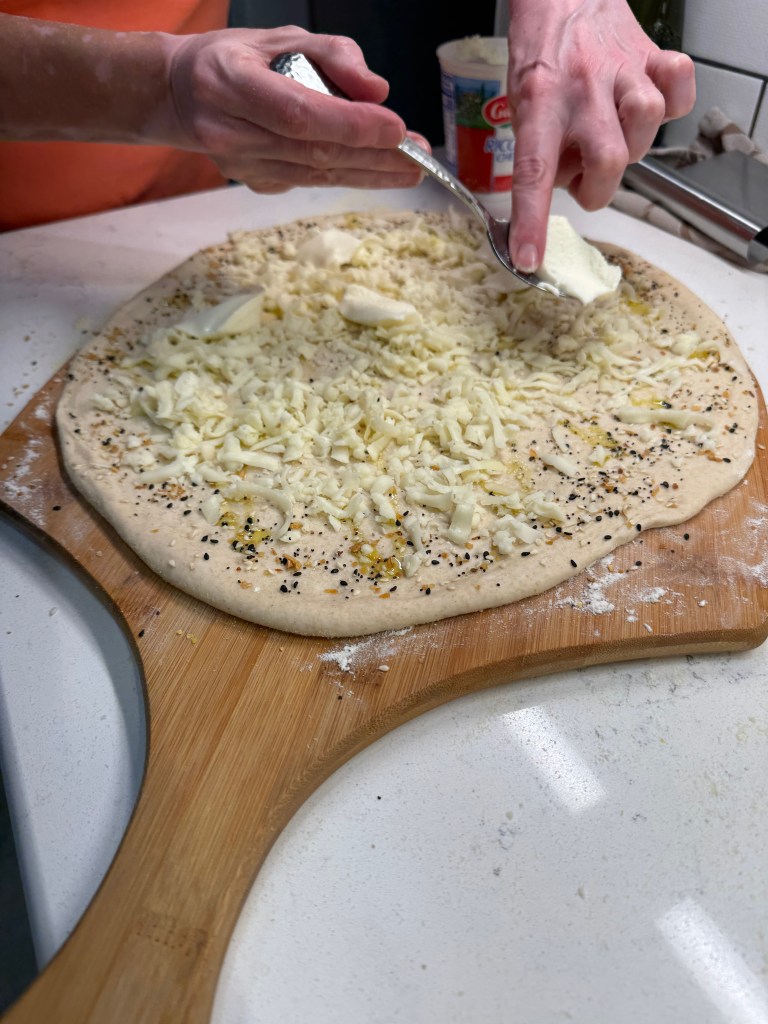
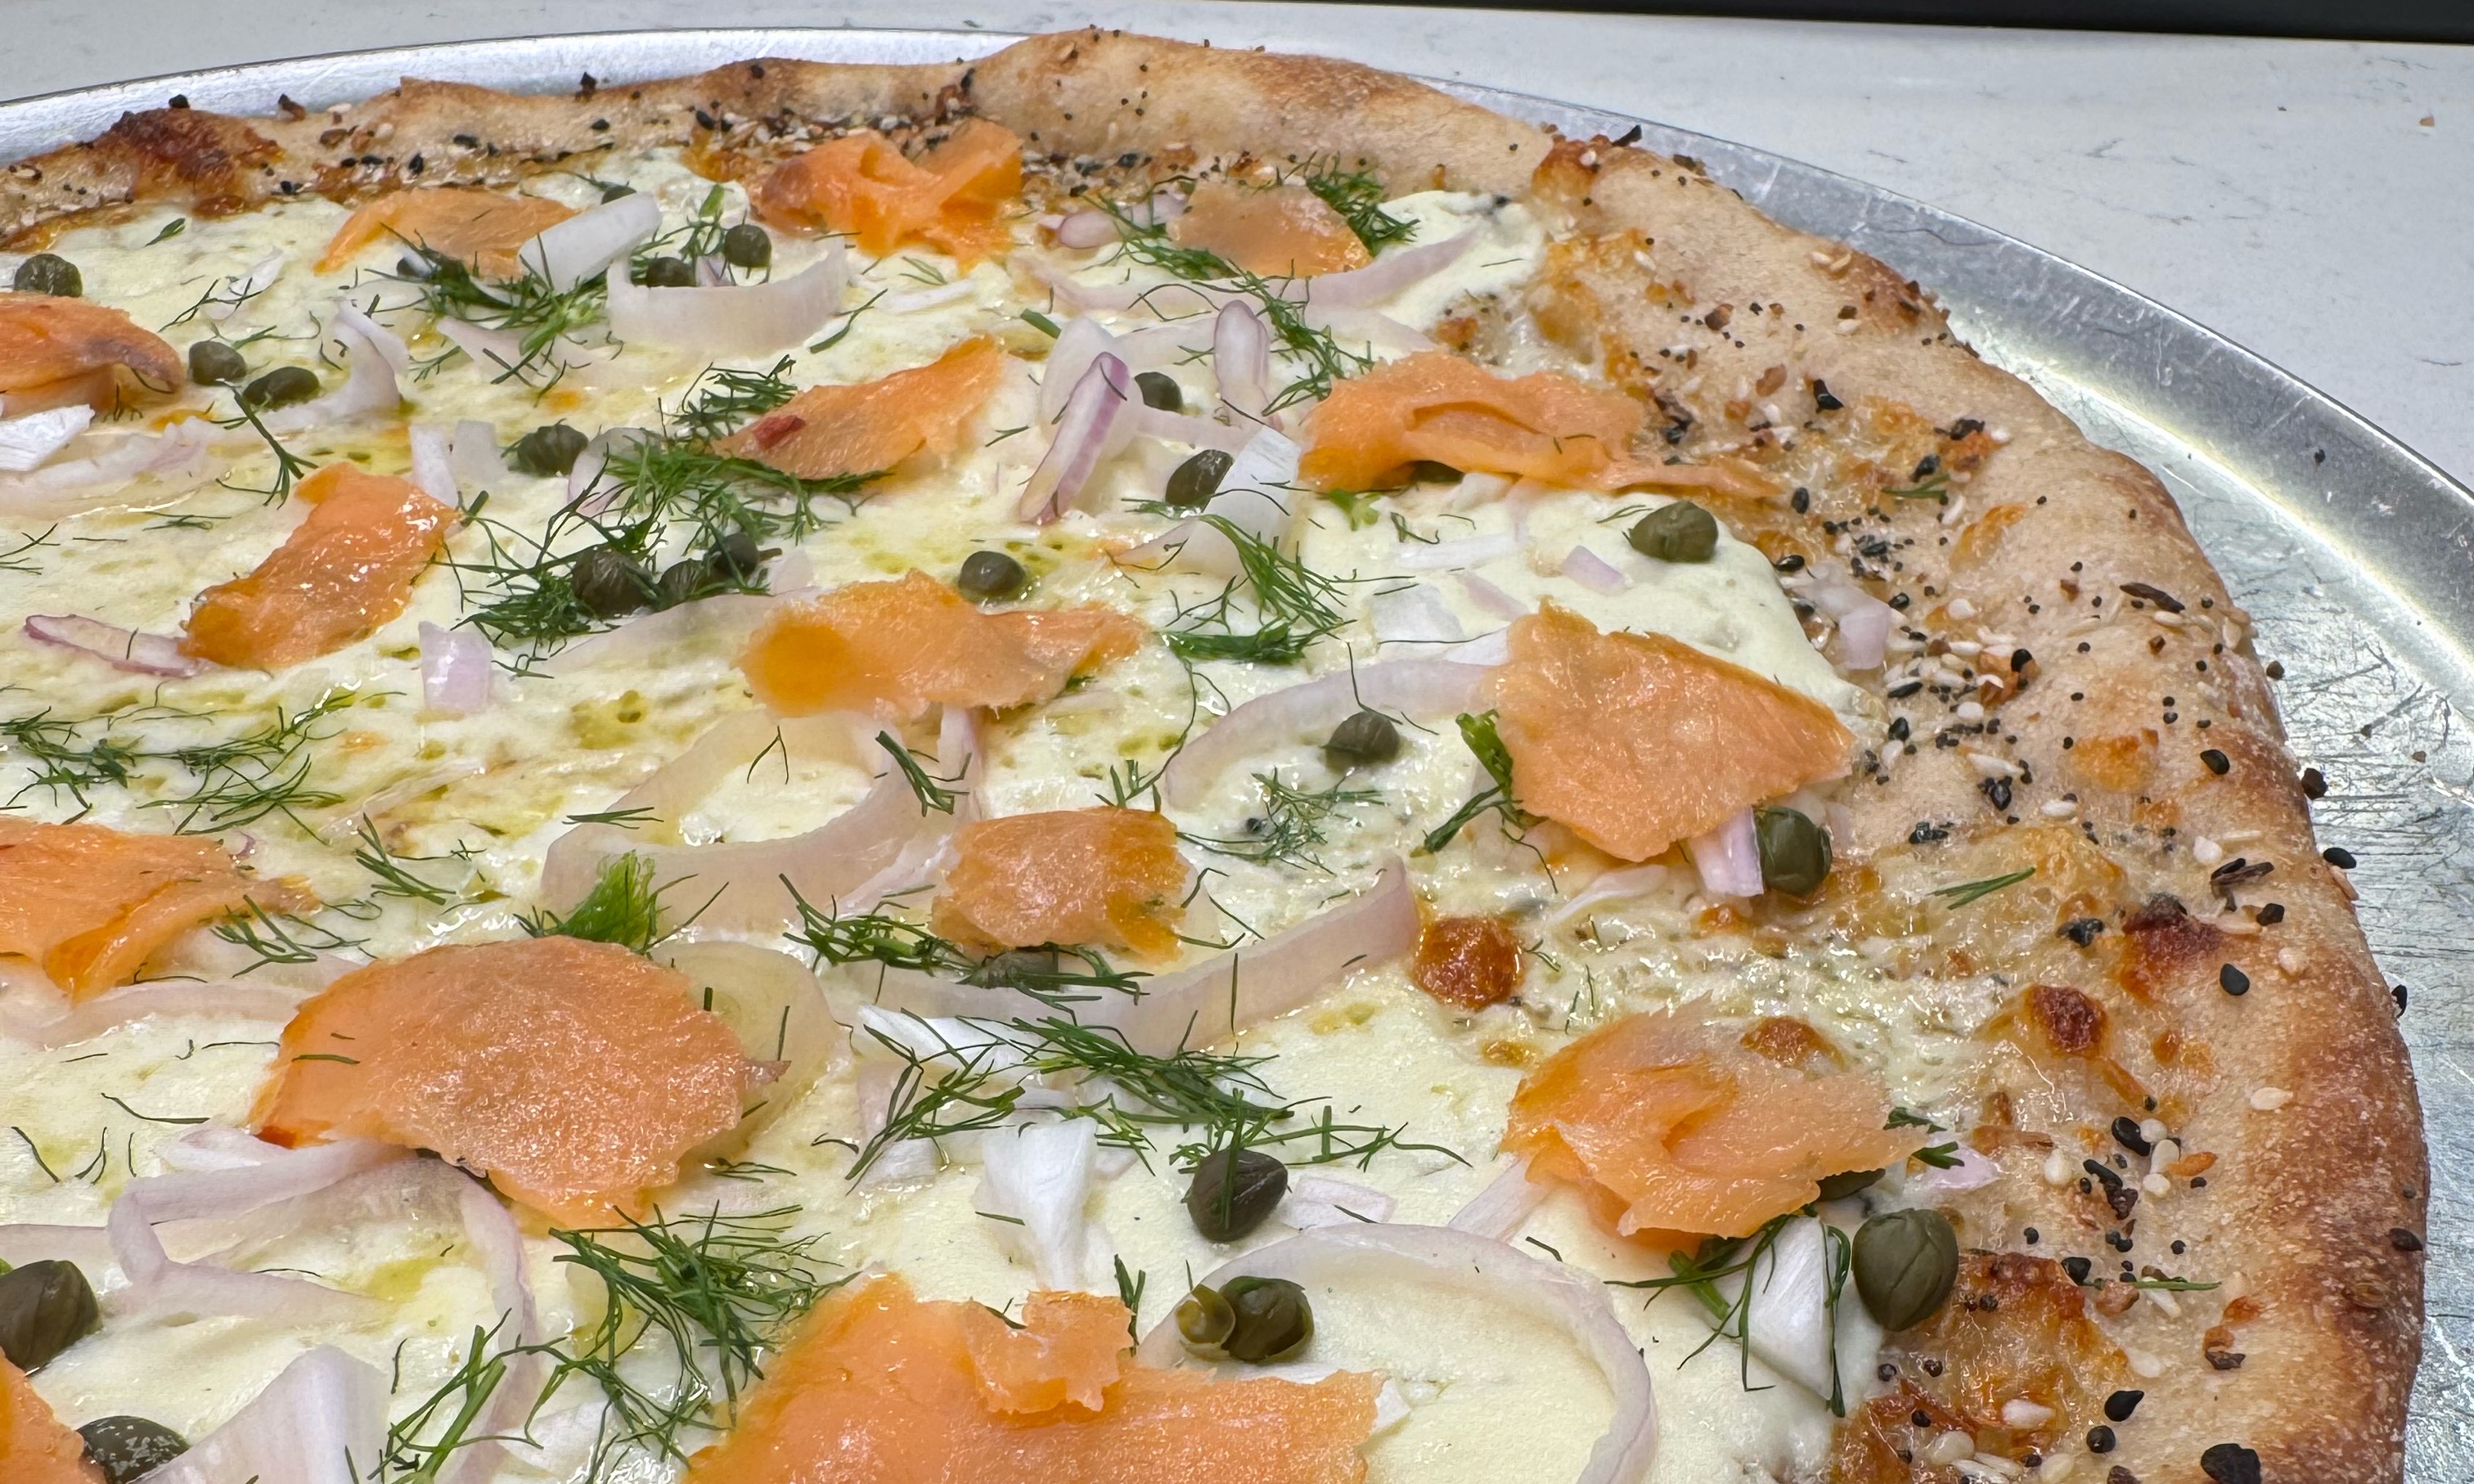
The crust for my pizza is the same as always: sourdough from scratch, made two days ahead and kept in the fridge for a cold ferment until pizza time. There was no sauce on this pizza. I sprinkled the dough generously, especially on the edges, with everything bagel seasoning and then spread a light layer of freshly grated mozzarella and a few dollops of ricotta cheese before we slid it onto the preheated stone on our outdoor grill.
I always dress my dough with olive oil, salt and pepper before I add toppings.
I know what you’re thinking—“doesn’t a bagel get spread with cream cheese?”— and you’d be correct. But I wasn’t sure how well cream cheese would hold up under the intense heat we use for pizza, so I substituted ricotta, which I’ve used successfully on other pies in the past. In hindsight, this is one thing I’ll do differently next time. There was nothing wrong with the ricotta, but I missed the smooth texture of cream cheese. I think if the cream cheese was very cold, straight from the fridge, it would do just fine and would provide a more expected flavor.
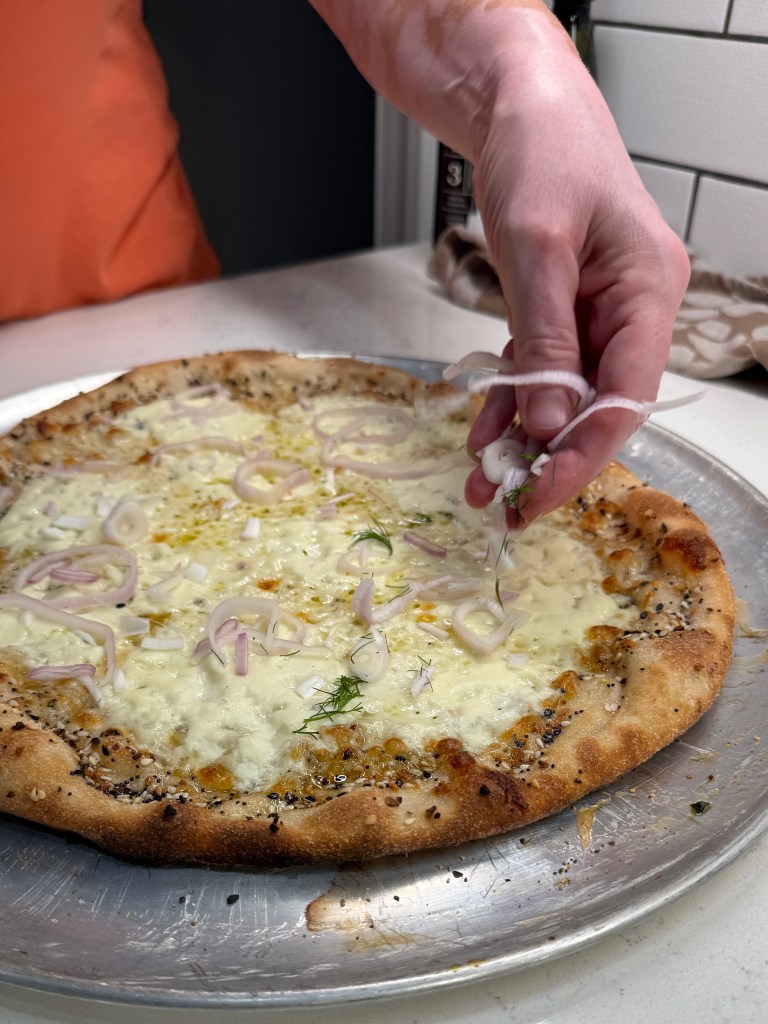
We use red onion on our bagels, but I thought shallots were slightly more refined for my pizza.
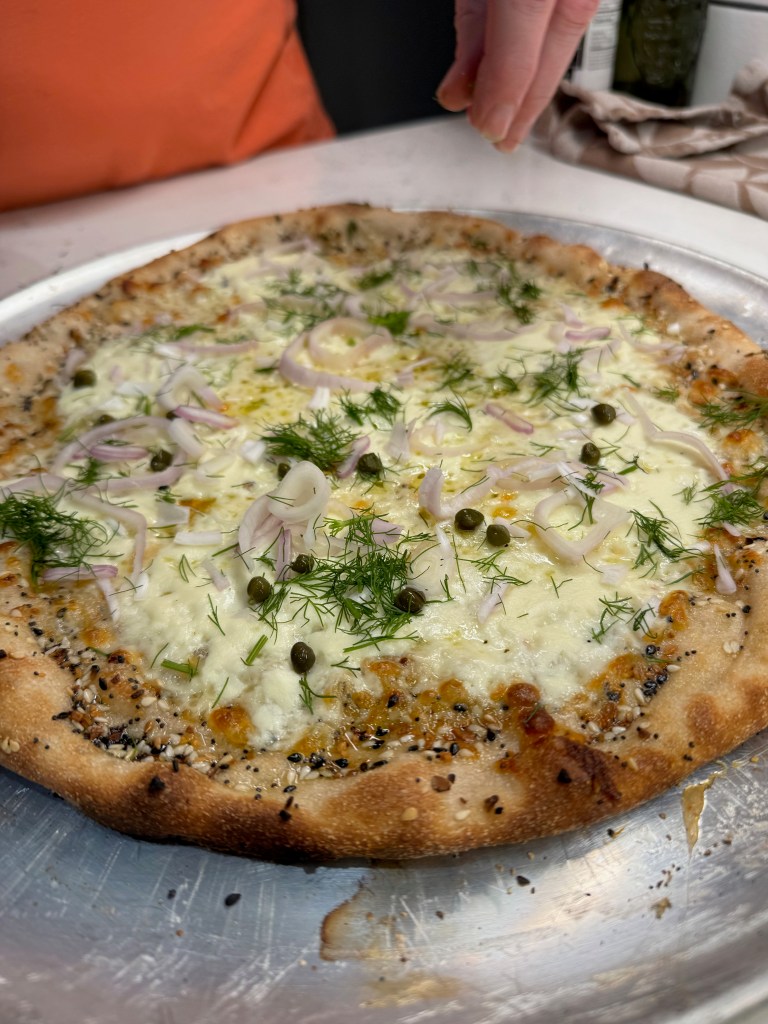
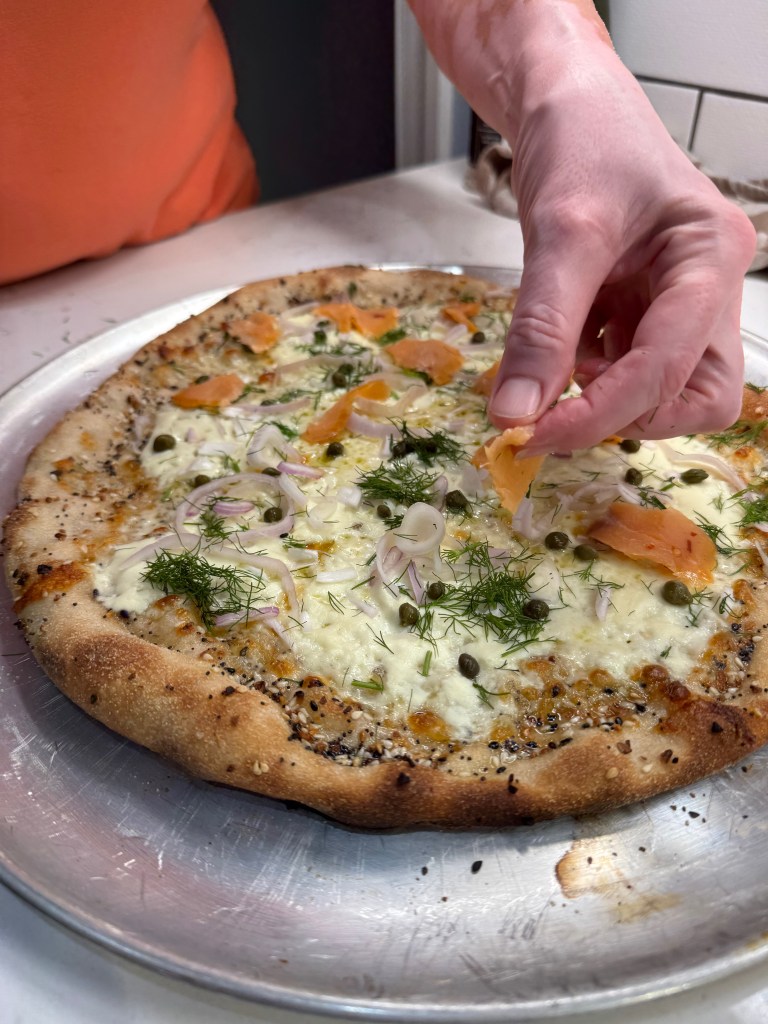
The ricotta oozed out into thin puddles, which gave every bite a nice even base. I scattered thinly sliced shallots, small capers and fresh dill over the hot pizza, and then arranged bite-sized bits of our smoked salmon all over just before serving. This kind of salmon would have shriveled terribly in the oven, so I believe this was the way to go. But here’s the other thing I’ll do differently next time—and there will be a next time—I’ll double the amount of salmon. It looked pretty in pictures to have a sparse amount of salmon, but when sliced and served, it felt a little skimpy. The salmon I used was supposedly a “hot honey” variety, but neither Les nor I found it to taste any different from a regular smoked salmon. I won’t spend extra next time for the fancy flavor (given that it didn’t have any).
So what did we serve the rabbi and his family?
Pizza without meat is easy-peasy, and we managed just fine with a variety of veggie-forward pies for our kosher-keeping guests. One pizza was half classic veggie (peppers, onions, mushrooms and spinach) and half plain cheese. Here are the other two, and I promise that nobody ended the evening hungry. Especially after the ice cream, which is coming later this week. 😉
I learned only within the past few years that traditional Italian hard cheeses, such as Parmigiano-Reggiano and Pecorino-Romano, are made with animal rennet and therefore not generally regarded as vegetarian. This is important to consider when serving guests who steer clear of meat for any reason, and I called this out when we were prepping pizzas, assuring our kosher guests that I had found a Wisconsin-made parmesan that used plant-based enzymes rather than rennet. The rabbi shared the good news that there is a kosher (though not vegetarian) exception, using rennet from kosher-slaughtered lambs. This would not exonerate parmesan for vegetarian diets, but for religious purposes, it has been deemed acceptable.
If you know me at all, you know that I can’t resist a good rabbit hole, so I dug in a bit and found this interesting article to explain more about it, in case you’d like to check it out.
This is a unique twist on an everything bagel, topped with all the ingredients we enjoy at breakfast. But this time, it's on a sourdough pizza crust!
Ingredients
11 oz. pizza dough ball, at room temperature
Extra virgin olive oil
2 Tbsp. “everything bagel” seasoning (a combination of sesame seed, coarse salt, poppy seed and dried garlic)
1/2 cup freshly shredded firm mozzarella
About 1/3 cup whole milk ricotta, cold from the fridge
1/4 cup thinly sliced shallots (or red onion)
1 Tbsp. small capers, drained but not rinsed
Small handful fresh dill, chopped
3 oz. cold smoked salmon (lox)
Note: We make most of our pizzas on a steel that has been pre-heated for one hour at 550° F, or sometimes on a specialty stone on our outdoor grill, also at least 550° F. This very closely replicates a brick oven-style pizza that is finished in about seven minutes. If you are using an oven pizza stone or a pizza pan, you will need to adjust your temperature and cooking time accordingly.
Directions
Preheat your oven or grill, and bring the pizza dough to room temperature.
Shape pizza dough by hand into a 14-inch round and place on a flour- and cornmeal-dusted wooden peel for easy transfer to and from the oven or grill.
Drizzle dough with olive oil and sprinkle salt and pepper over the surface. Generously scatter the everything bagel seasoning over the crust, concentrating mostly on the outer edges.
Spread mozzarella evenly over the center of the dough, and use a large spoon to arrange dollops of the ricotta around the pizza.
Transfer to the pizza steel or stone and bake for 6 to 7 minutes, rotating the pizza after about four minutes.
Transfer hot pizza to a serving pan. Quickly scatter shallots, capers and dill over the pizza, and then arrange the smoked salmon so that every slice has an equal amount.
I’ve been ruminating lately about my grandmother’s ways in the kitchen. How she fed everyone on scraps— not because she had to but because she could— and realizing that I don’t employ her tactics as often as I have opportunity. Pinching pennies doesn’t have to be a necessity; it can be a strategy for ensuring that we always have enough. And in times of financial uncertainty (which lately seems to be always), that strategy can keep us fed, not only physically, but also emotionally.
My grandmother knew this, and it’s why she used up all the bread heels and stale sweet rolls to make her amazing bread pudding, which we all loved. It’s why 10-year-old me could sit at her dinner table, puzzled at her claim that we were having leftovers, not recognizing the food before me as something we’d already eaten that week. She was terrific at transforming, and I have that spirit in my bones, too— I just don’t always realize when I’m doing it.
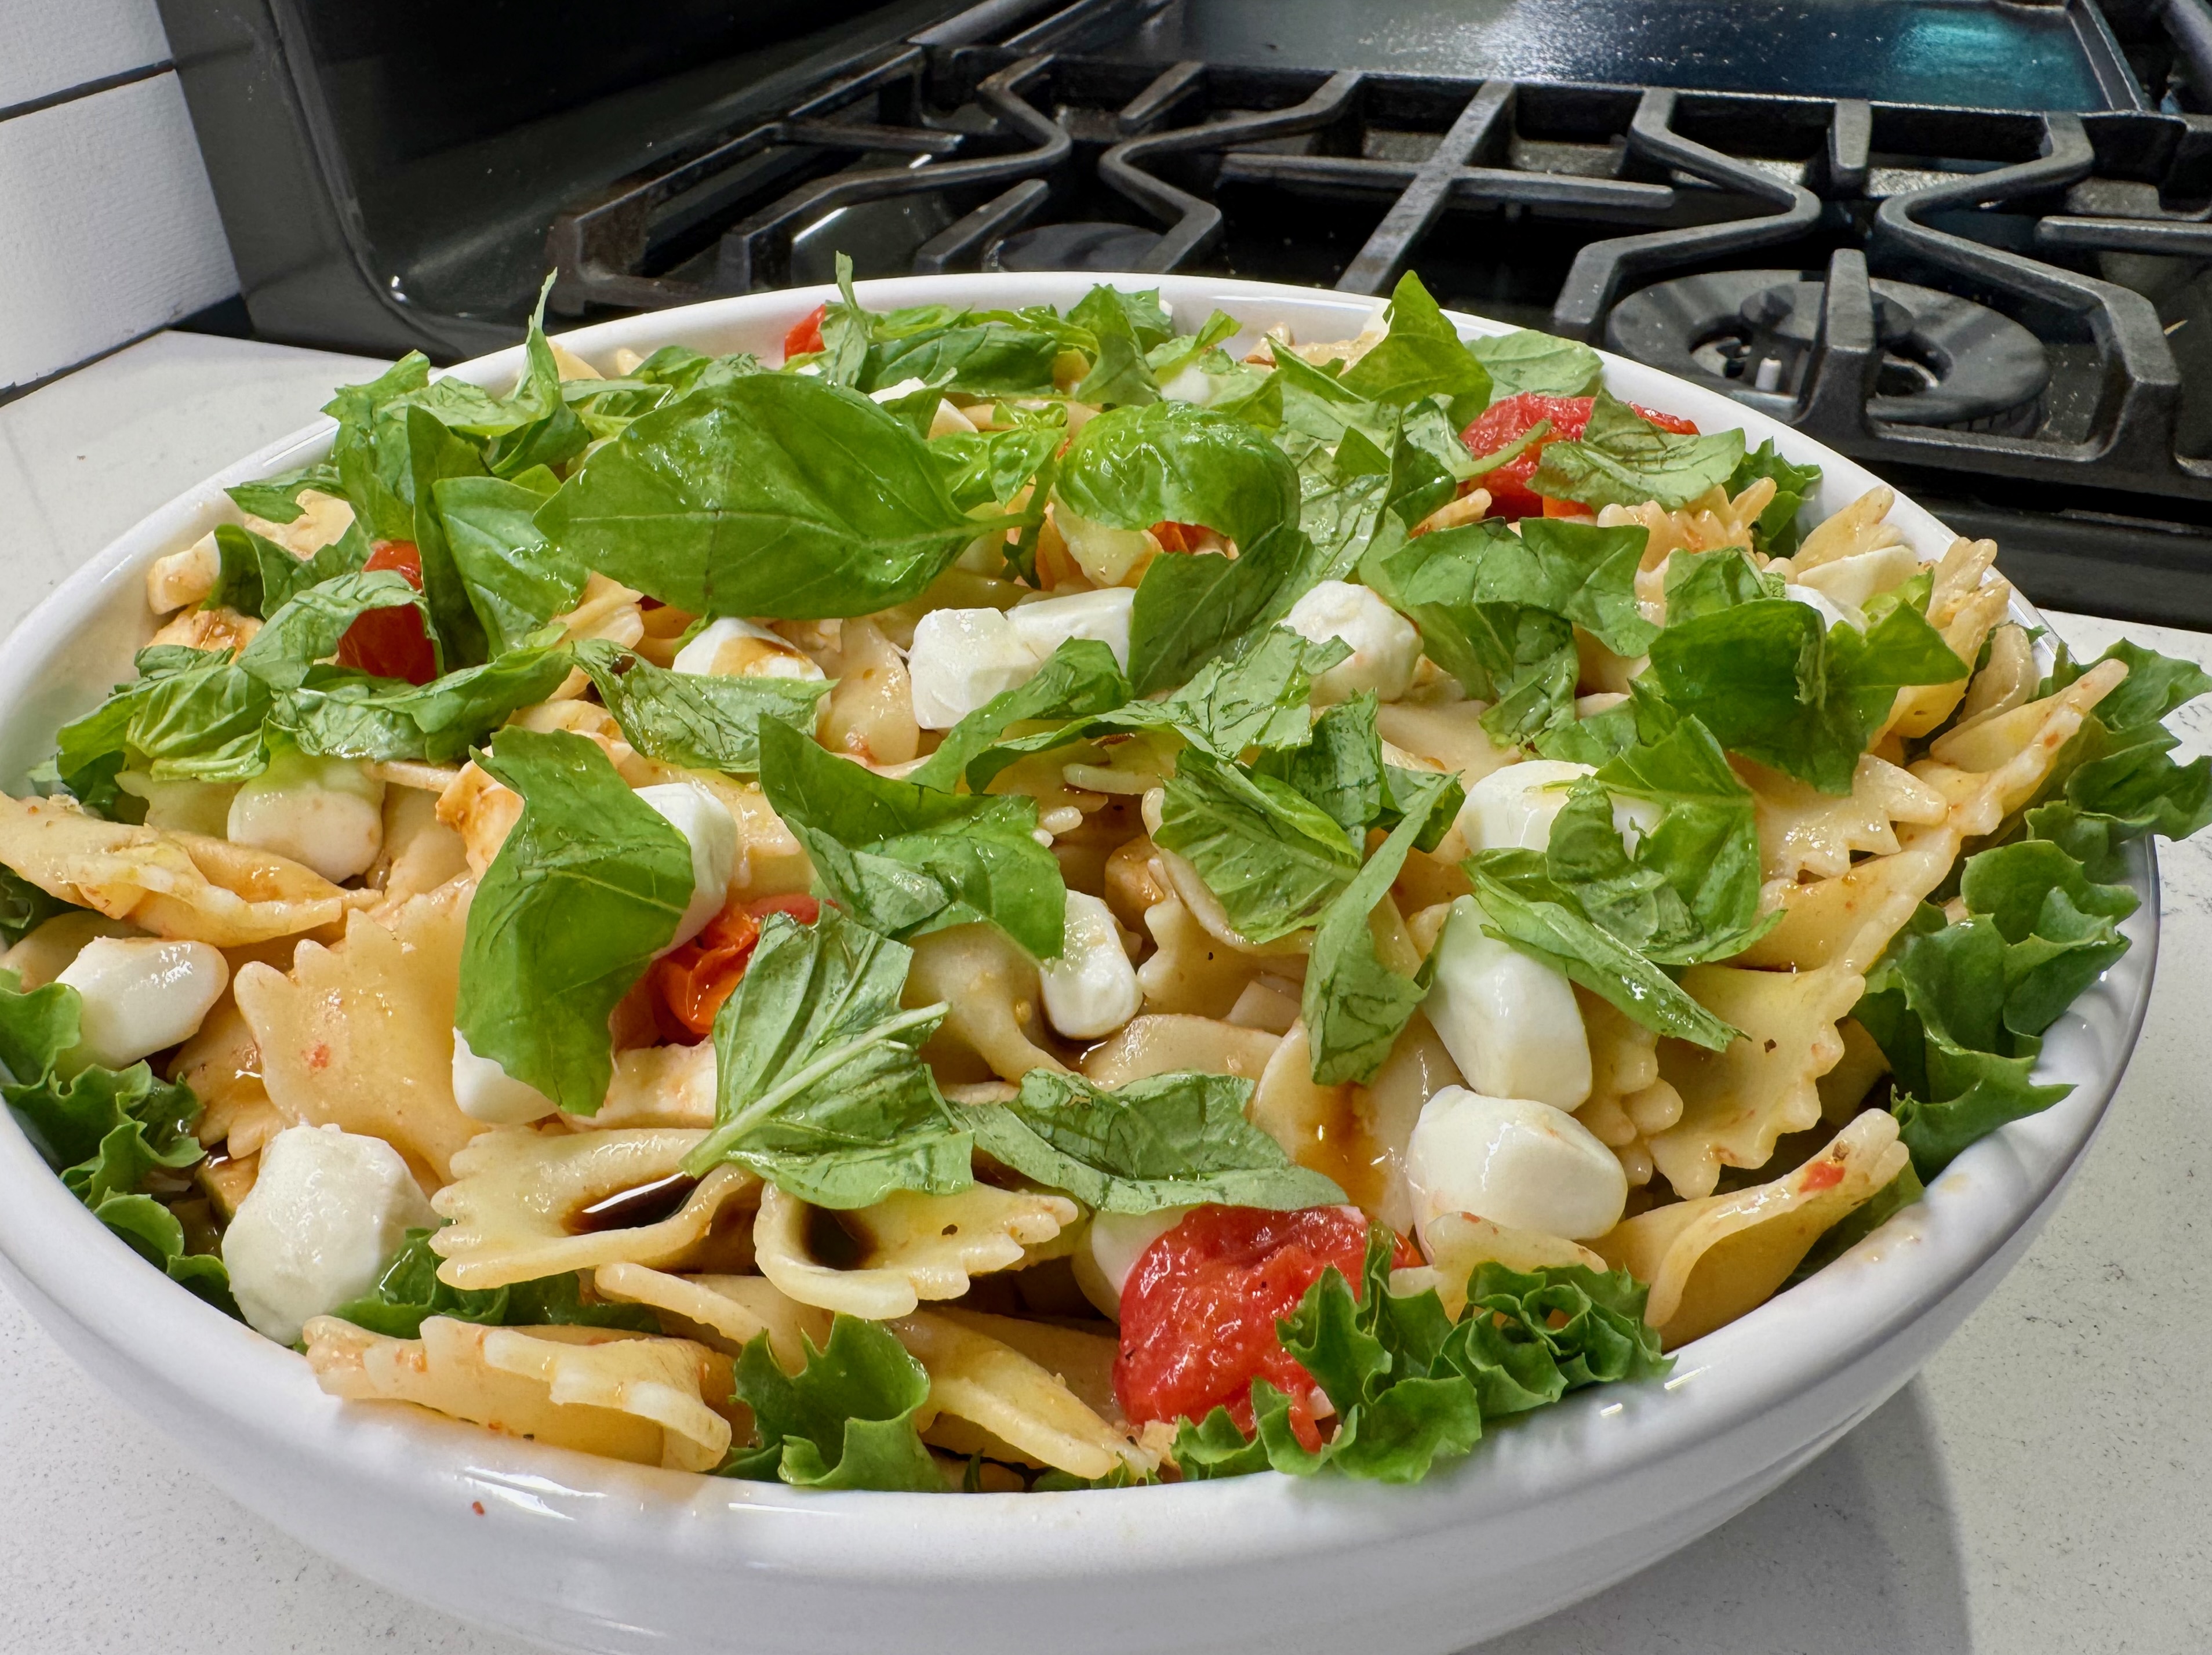
We are about to enter an era where many ingredients we take for granted will be less available or more expensive than we’ve come to expect, thanks to climate change, tariffs, supply chain chaos and farm worker shortages. I thought it timely to share one of my favorite ways to stretch expensive ingredients: a pasta salad. My offering is a Caprese-inspired summer side dish that uses half a bag of pasta bowties, a small container of cherry tomatoes, fresh summer basil and mozzarella. None of these items is particularly expensive— especially if you happen to have a little garden at home— but I hope to provide a template that might help you stretch out other ingredients that lean toward the pricey side.
Summer in a bowl! 😎
Classic caprese— sort of
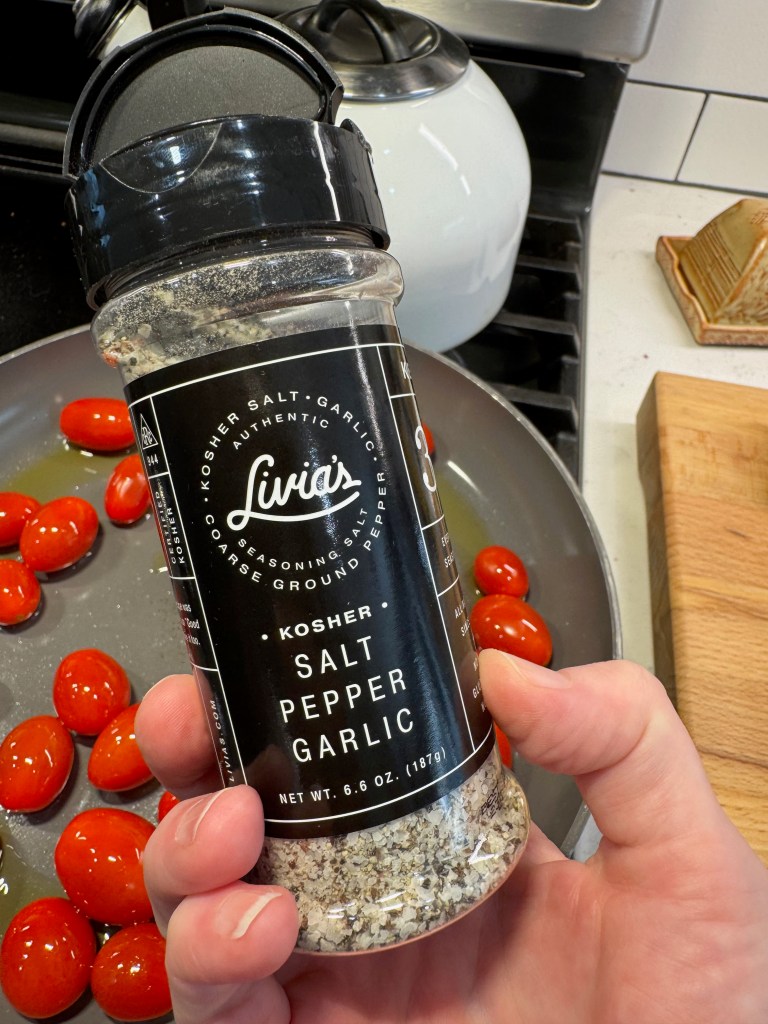
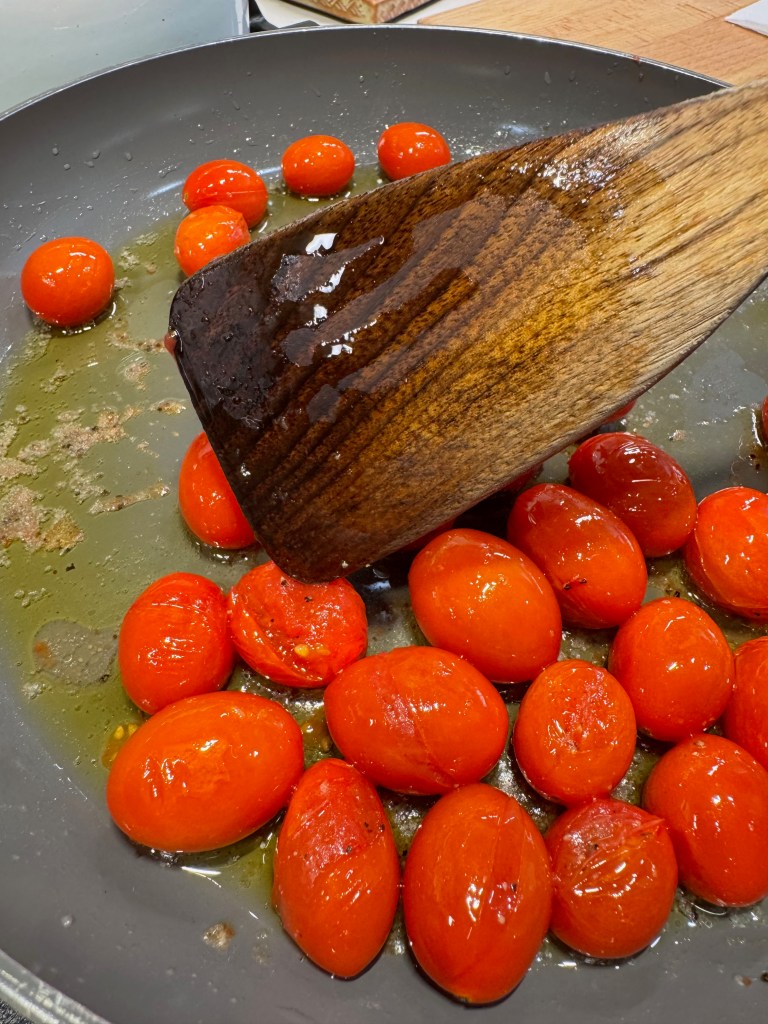
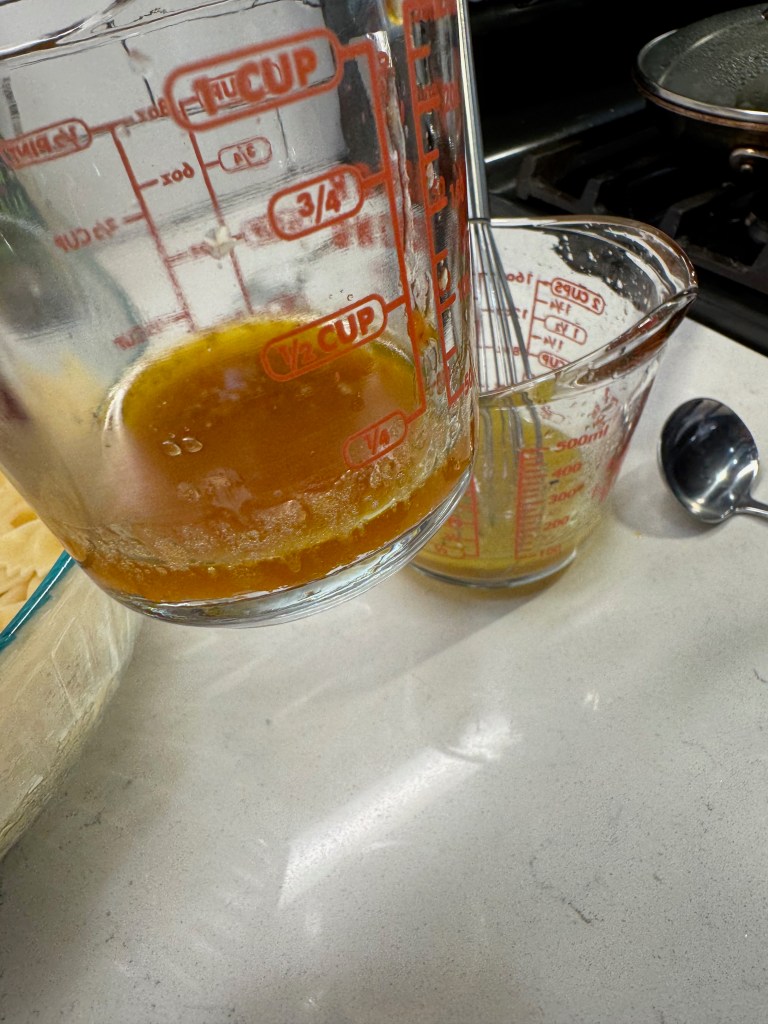
The flavors (and 🇮🇹 colors) of Caprese are all present here, but I’ve taken a few liberties to amplify the key ingredients. For starters, I poached the tomatoes in a bit of extra virgin olive oil to concentrate their sweetness and to reduce some of the moisture, and then I scooped the cooked tomatoes into a bowl to cool, reserving the flavorful oil for later. This is a simple trick for getting the most flavor out of the tomato and, as a bonus, it’s easier to eat them without the juice bursting out everywhere.
Slow poaching concentrates the tomato flavor. Don’t toss that beautiful oil!
Next, I had a ball of sliced soft mozzarella, as well as a small package of the more expensive mozzarella pearls. I blotted all of it with paper towels and cut the slices into bite-sized pieces. I saved the prettier pearls for the top of the salad. Same flavor, a few pennies cheaper.
My mozzarella was pre-sliced, so this was quick work.
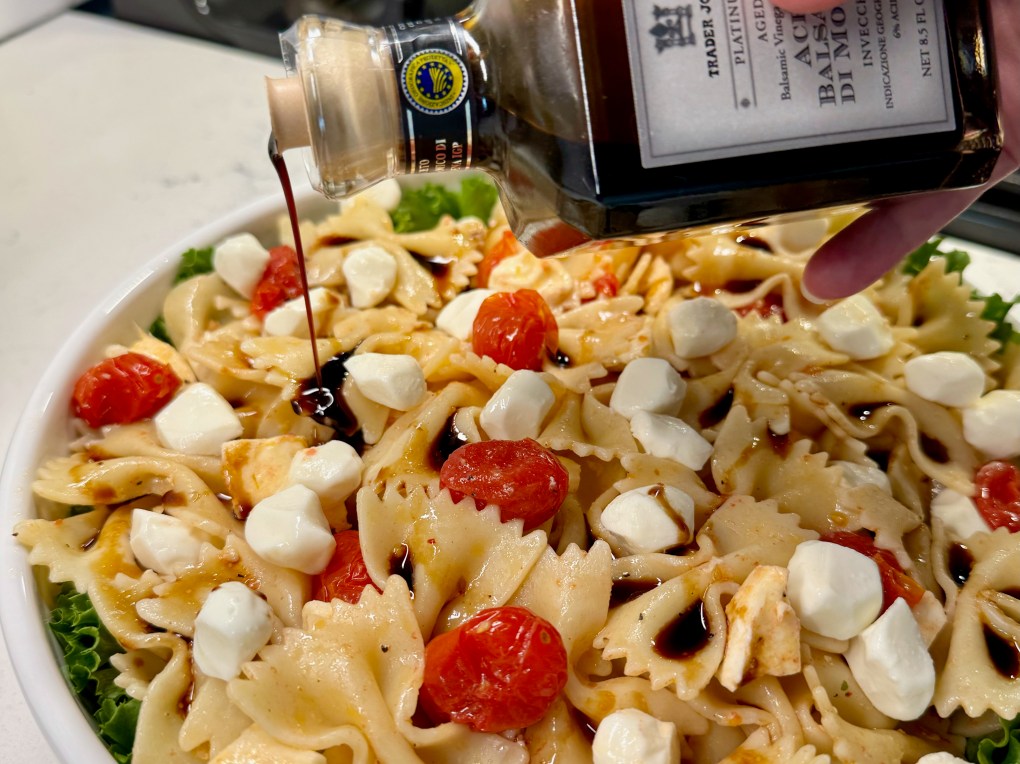
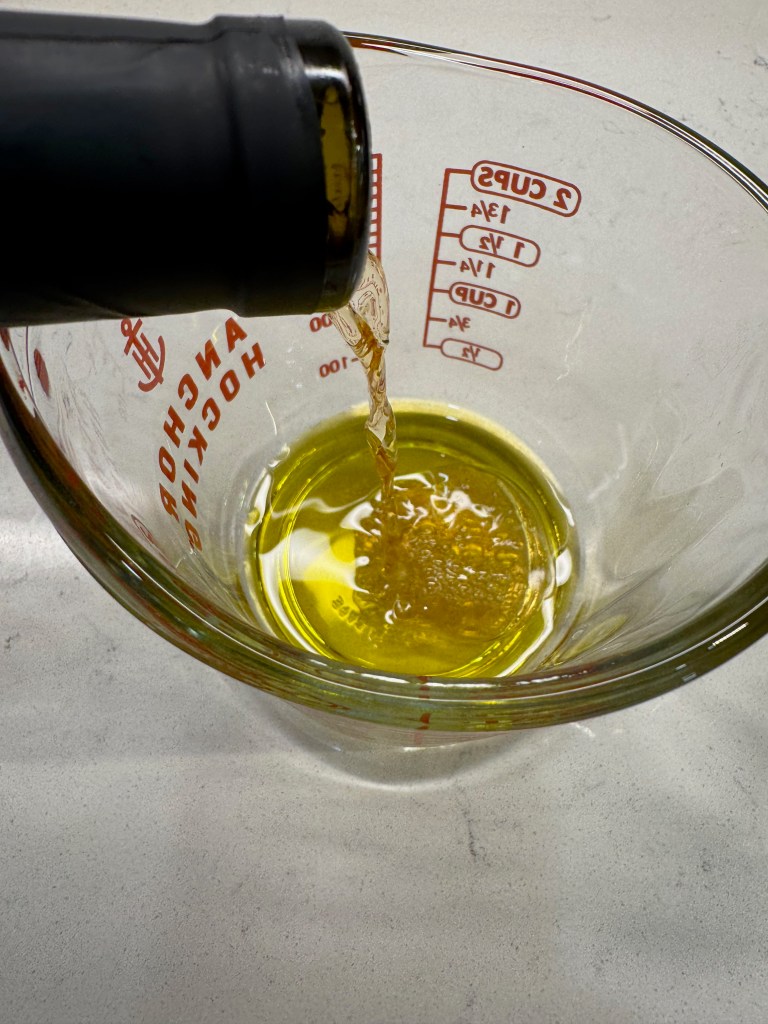
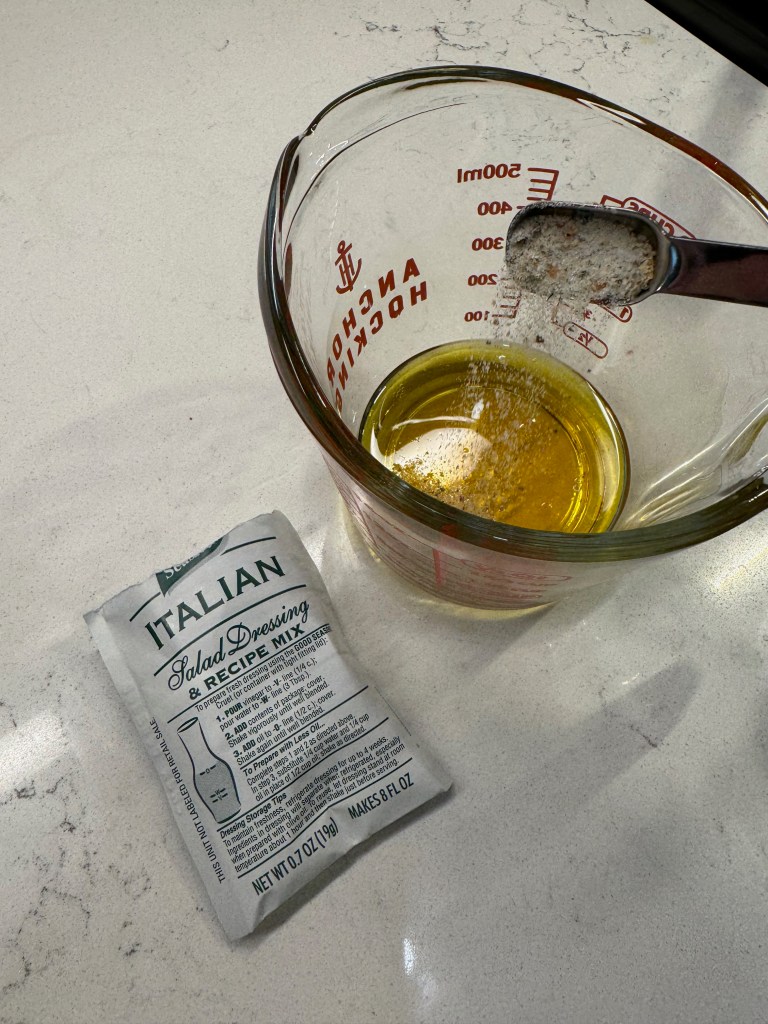
Dark balsamic vinegar, typical for Caprese, leaves splotchy stains on mozzarella, and that’s not a good look when you’re tossing the salad rather than drizzling it. I opted instead for a white balsamic-based dressing, jazzed up with fresh lemon, olive oil and a spoonful of Italian dressing mix. I had a plan to include a touch of dark balsamic, but not yet.
Keep the remaining dry dressing mix to jazz up other recipes!
Rule #1 – Season every layer!
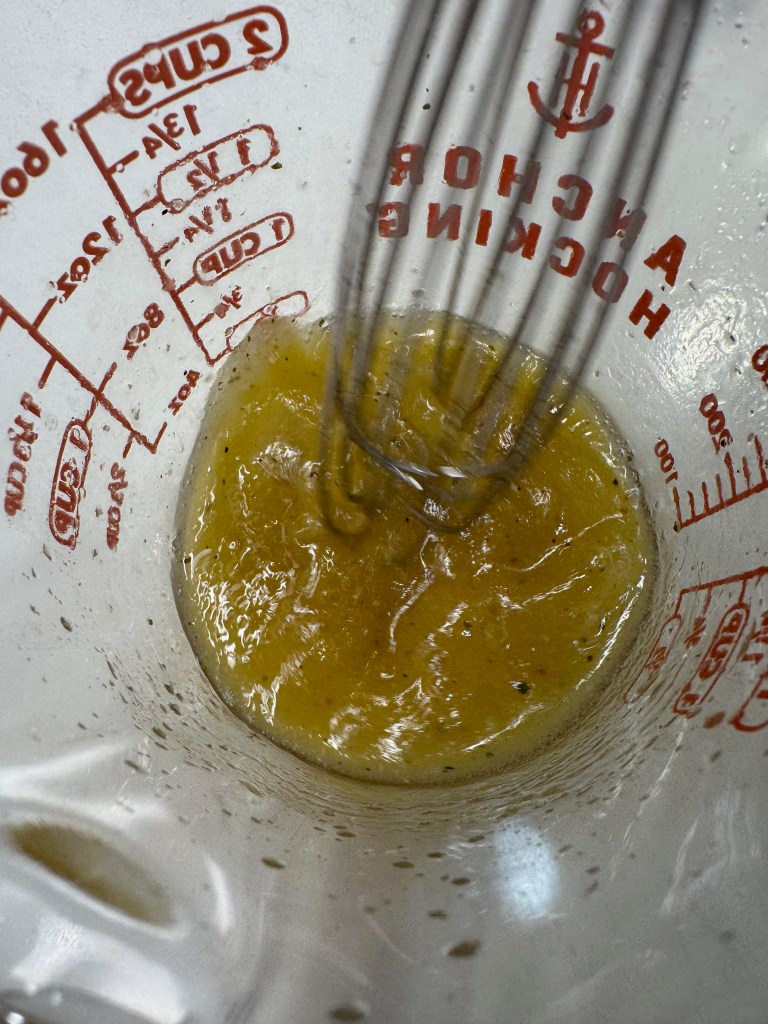
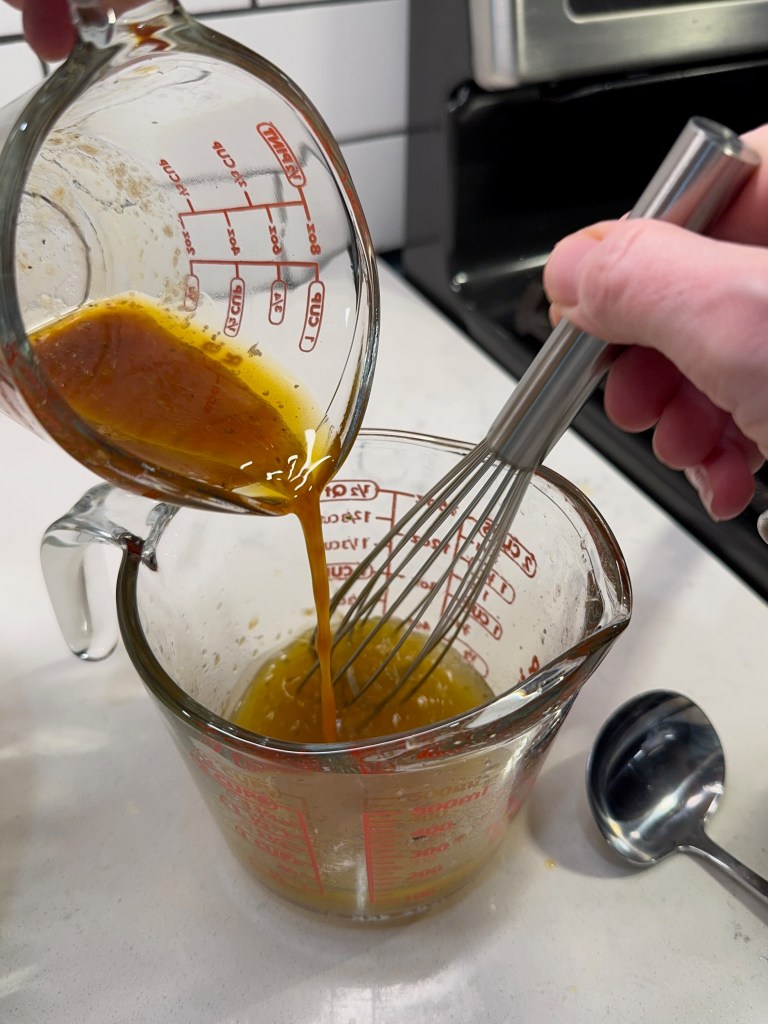
As always, I recommend plenty of salt in the pasta water. You only get one shot to add flavor, so be generous and remember that most of that sodium goes down the drain— you’re not eating it all. When the pasta was al dente, I scooped out a little bit of the starchy water and whisked it into my dressing to help it cling to the pasta.
Yes, this works for chilled dishes as well as hot ones. ✔️
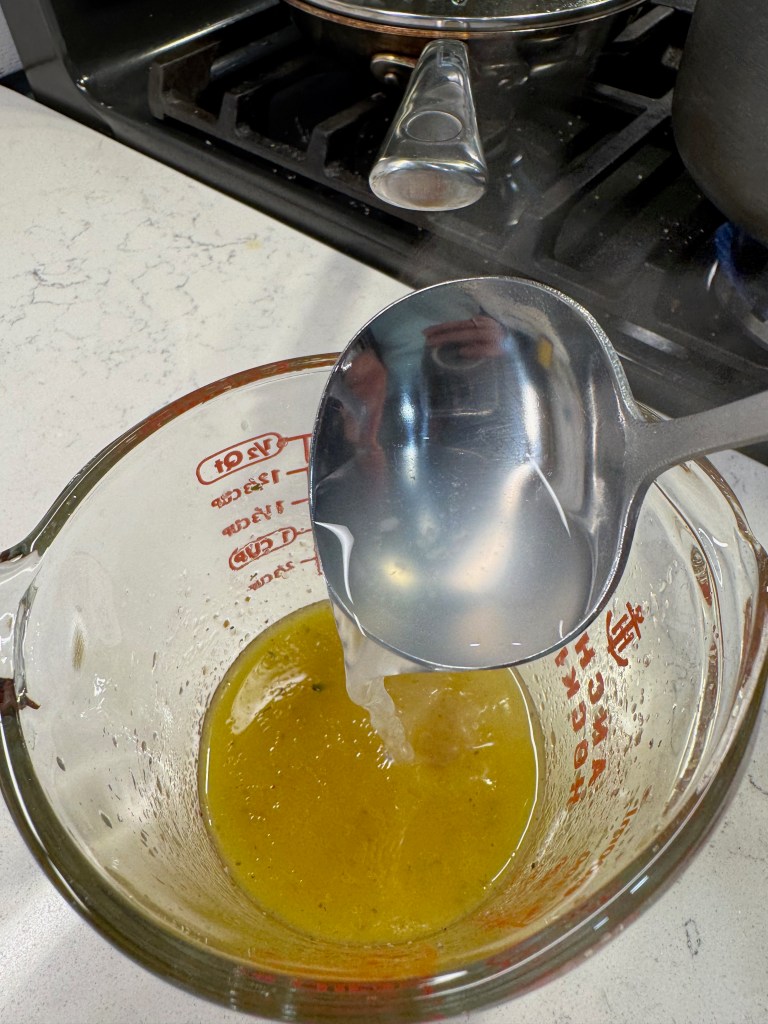
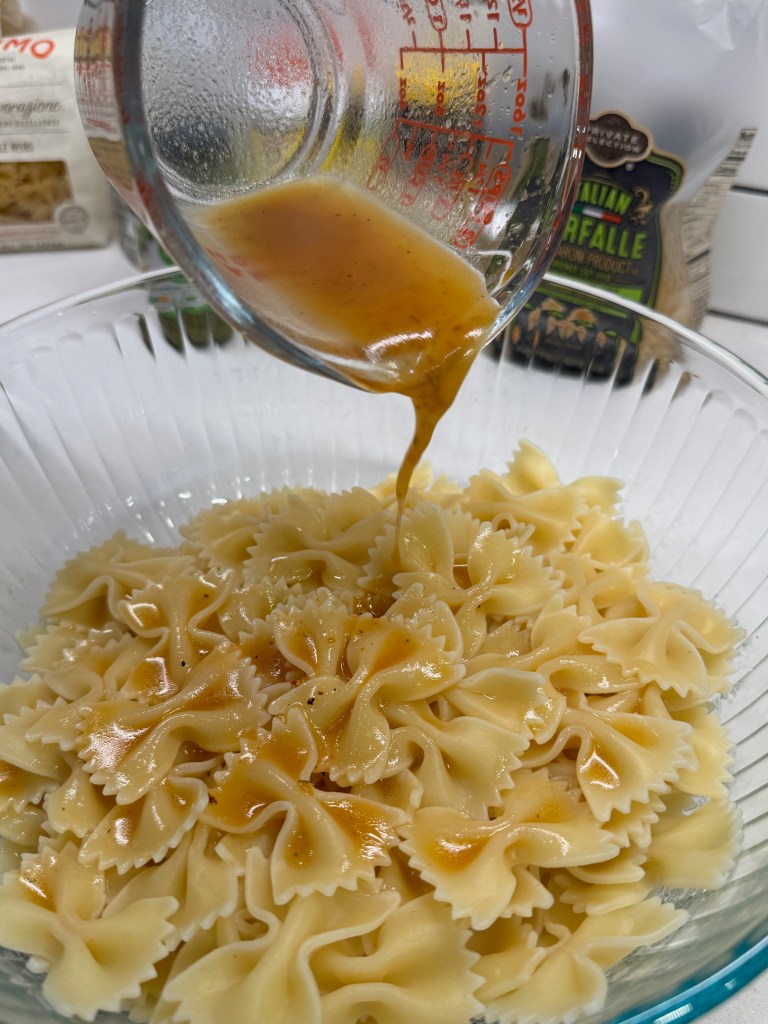
Finally, remember the tomato-scented oil that was left over after poaching the cherry tomatoes? I whisked that cooled oil into the dressing, too, extending the sweet tomato flavor throughout my salad in the process. I poured the dressing over the pasta while it was hot, ensuring that it would soak into every bow tie. Toss this for a couple of minutes to distribute the dressing evenly.
The pasta bowties should be slightly firm to the tooth, and you want to dress it while it’s HOT.
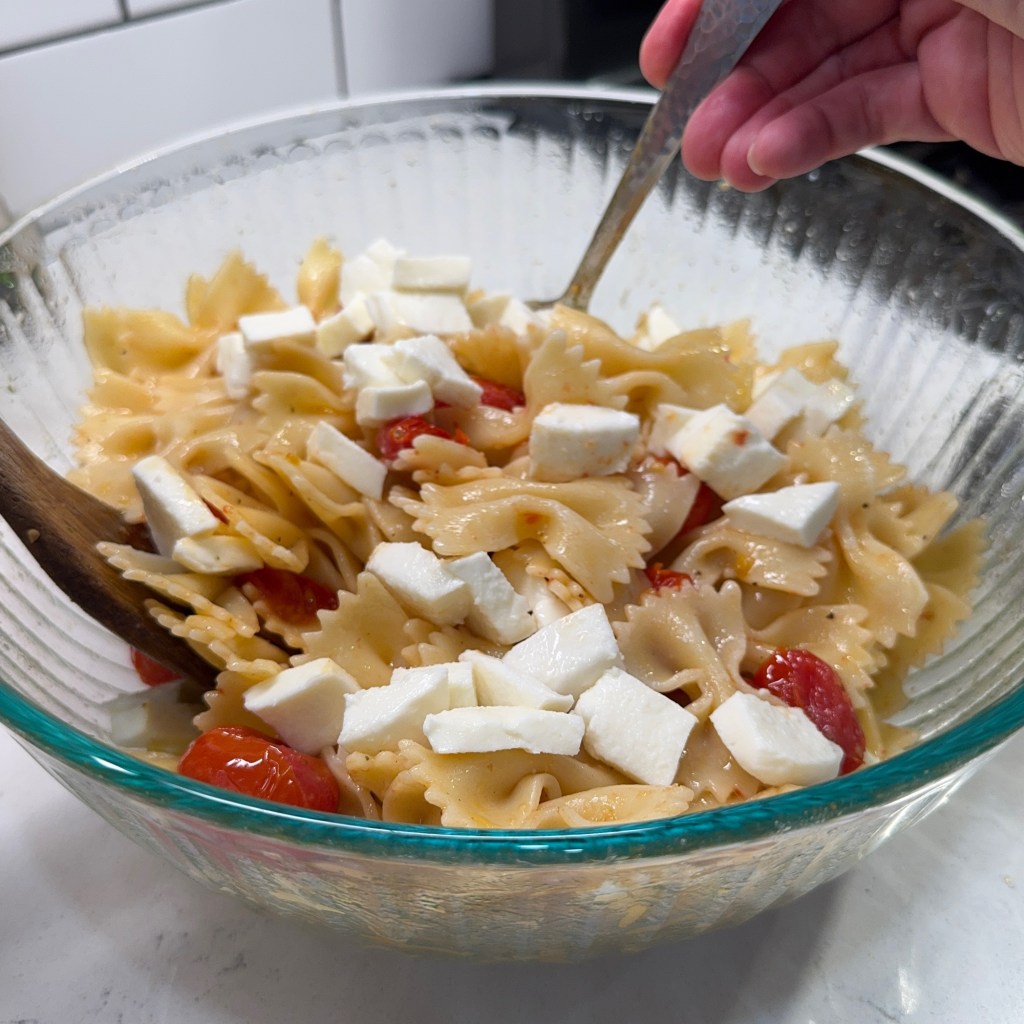
Bring on the Caprese
A few minutes later, when the pasta was cooled to room temperature, I gently tossed in the poached tomatoes and the pieces of sliced mozzarella, and sent it to the fridge until we were ready to pack up for dinner with some friends.
You can almost taste it, right?
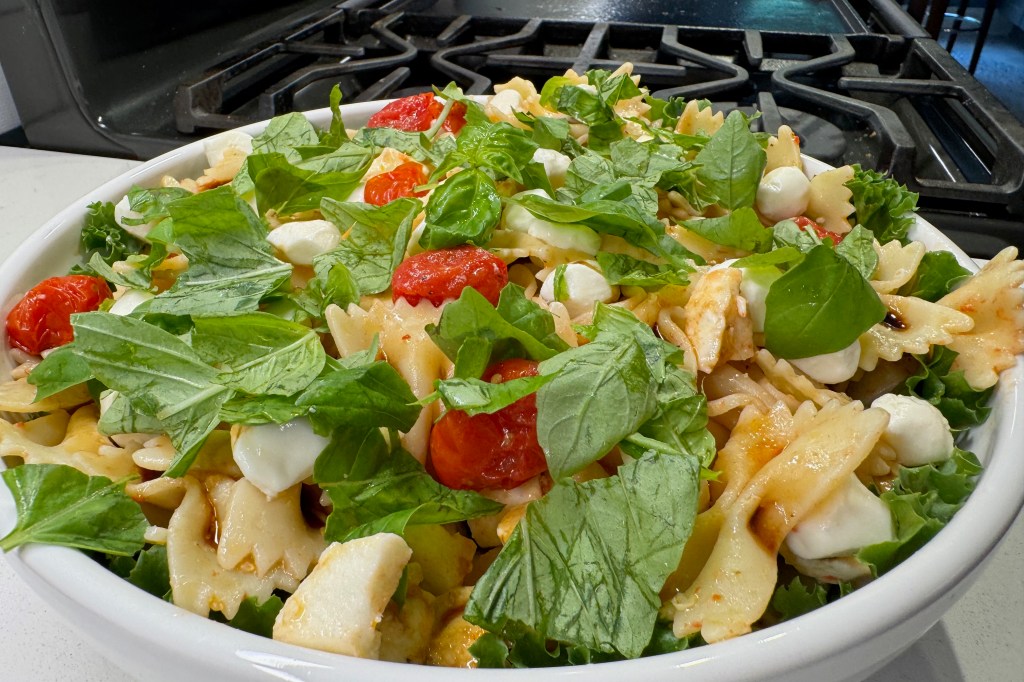
For serving a pasta salad, I love to line the bowl or platter with leafy lettuce greens. It looks pretty, and it also gives excess dressing a place to run so that the salad doesn’t get too drippy. If you are entertaining a larger crowd, a deep platter with extra spoons is nice because it allows more people to self-serve at once. For a small crowd, or if you have limited space on the table, a bowl works great.
Final touches on this Caprese-inspired salad
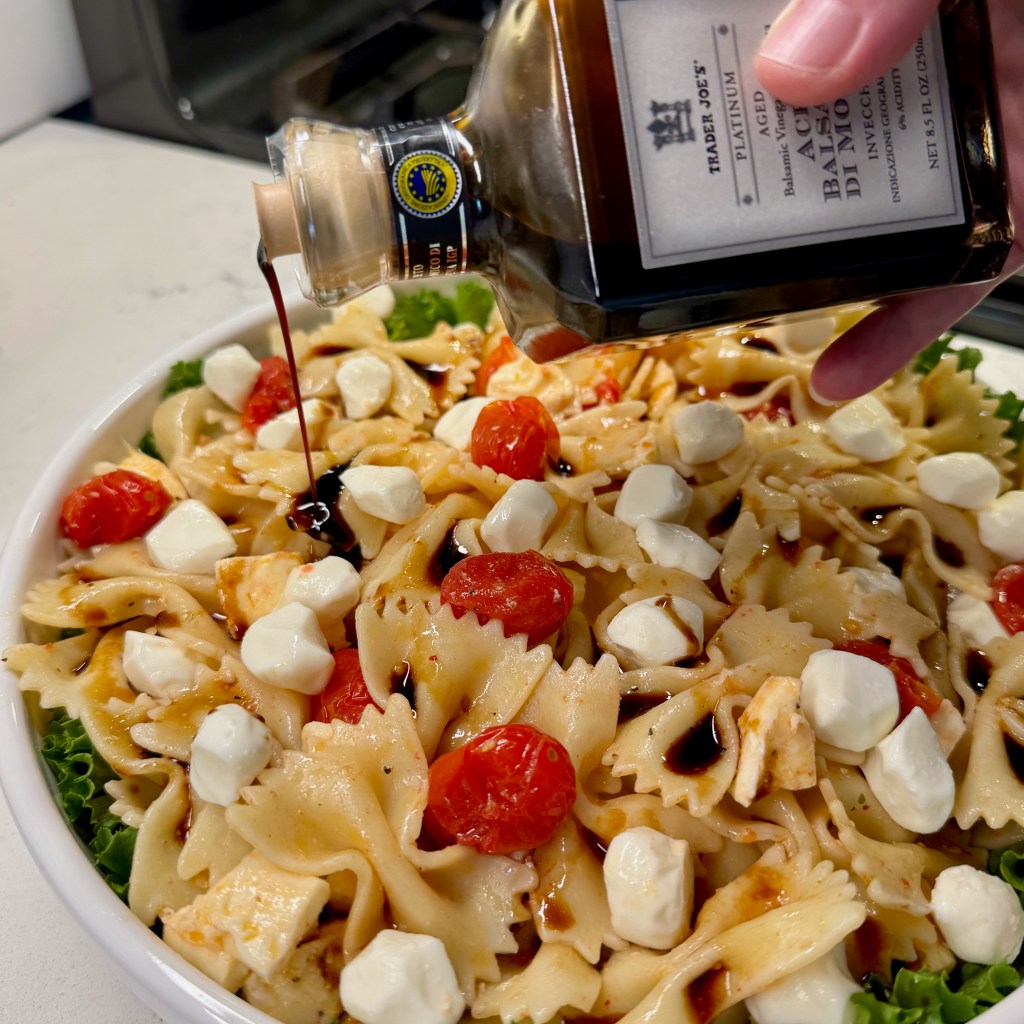
A good quality bottle of balsamic is a secret weapon in the kitchen!
I scattered the mozzarella pearls on top, and then it was finally time for a touch of classic dark balsamic. Just a few drizzles over the pasta bowties, and I used a reduction that was thick and syrupy, so it stayed in perfect little puddles. Fresh basil is classic on a Caprese, and it’s easy to find this time of year, especially in my patio container garden. If basil isn’t your thing, I think fresh Italian parsley would be a good substitute here.
It's summer salad season, and this Caprese-inspired dish is a great way to highlight the classic flavors when serving a crowd.
Ingredients
8 oz. semolina bowtie pasta (see recipe notes)
1 dry pint cherry or grape tomatoes, washed and patted dry
2 Tbsp. extra virgin olive oil
Salt and pepper to taste
2 to 3 Tbsp. white balsamic vinegar
1 tsp. fresh lemon juice
1 tsp. dry Italian salad dressing mix (see recipe notes)
2 Tbsp. extra virgin olive oil
2 Tbsp. hot pasta cooking water
1 lb. fresh soft mozzarella (cut into cubes or pearls)
2 Tbsp. dark balsamic glaze
1 handful fresh torn basil leaves
Recipe Notes: Whenever possible, seek out pasta that is made with durum (semolina) flour, and labeled as bronze-cut. This method of cutting leaves a slightly rough texture, better for sauce or dressing to cling.
I used Good Seasons brand dressing mix, but you could easily substitute a pinch of garlic powder and some dry Italian herbs.
Directions
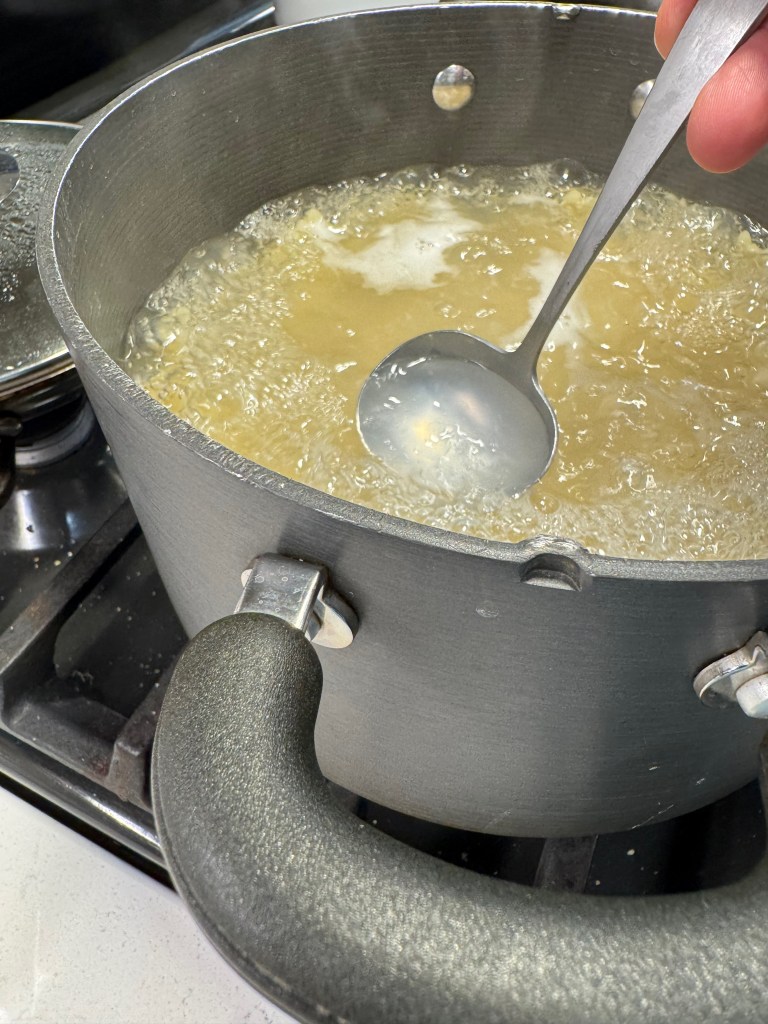
Prepare a pot to boil the pasta, and season it generously with kosher salt. Begin cooking pasta when tomatoes are nearly finished cooking.
Heat a medium-size skillet or sauté pan over low heat, and swirl in extra virgin olive oil. Add tomatoes, season with salt and pepper and roll to coat them in the oil. Cook the tomatoes very slowly until the tomatoes are softened and easily smashed with a utensil (about 25 minutes). Press each of them when they reach this softened stage to release the juice inside. Cool slightly, and then spoon out the oil into a measuring glass. Reserve this for the dressing.
In a second measuring glass, combine white balsamic, lemon juice, Italian dressing mix and olive oil. Whisk to combine and set aside.
When pasta reaches al denté stage, spoon out about two tablespoons of the hot pasta water. Whisk it into the dressing mixture, along with the reserved tomato cooking oil.
Drain pasta thoroughly and transfer to a large bowl. Pour dressing over the pasta while it is still hot, and toss gently a few times to coat evenly. Toss again after a minute or two, and then allow the pasta to cool to room temperature.
Gently toss cooled tomatoes and half of the mozzarella into the pasta. Refrigerate until serving time.
Transfer chilled pasta salad to a serving bowl. Top with remaining mozzarella, drizzle dark balsamic over salad, and scatter fresh basil leaves just before serving.
When the heat goes up, my appetite goes down. Like, waaaay down. And that means I’ve barely been hungry at all this week, as the afternoon highs got stuck around 97° F for five days in a row with 70% humidity as the norm. It has been too hot to weed my flower beds, too hot to walk the dog, and definitely too hot to cook. It’s brutal, and I know that much of the U.S. has been dealing with the same as climate change has altered what summer looks like— probably forever.
But at some point, we’ve gotta eat, right? I’ve put some new ideas into practice to ensure that we have something of substance, without me having to stand at a hot stove. Taking a cue from my blog buddy, Michelle, who endured the vicious summer heat of California’s Coachella Valley for too many years, I have found it helpful to do my cooking in the morning hours and then serve up the food as cool meals in the evenings. This has proven to be beneficial for more than one reason, as I often find myself less motivated at the end of the workday; my brain has run dry of decision-making ability. Getting meals done early has saved my sanity!
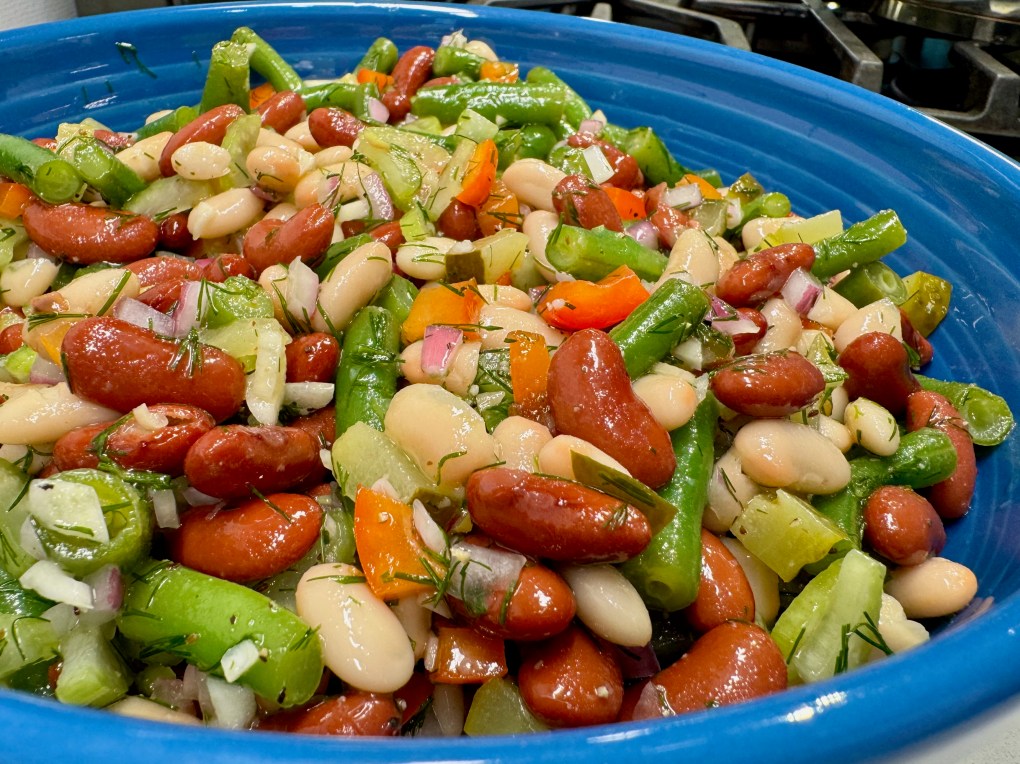
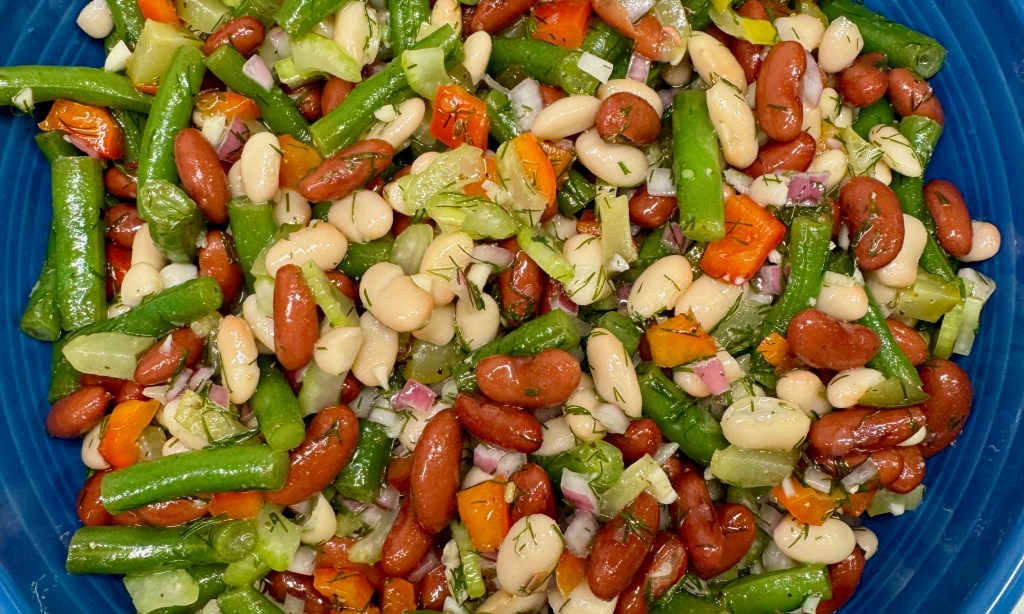
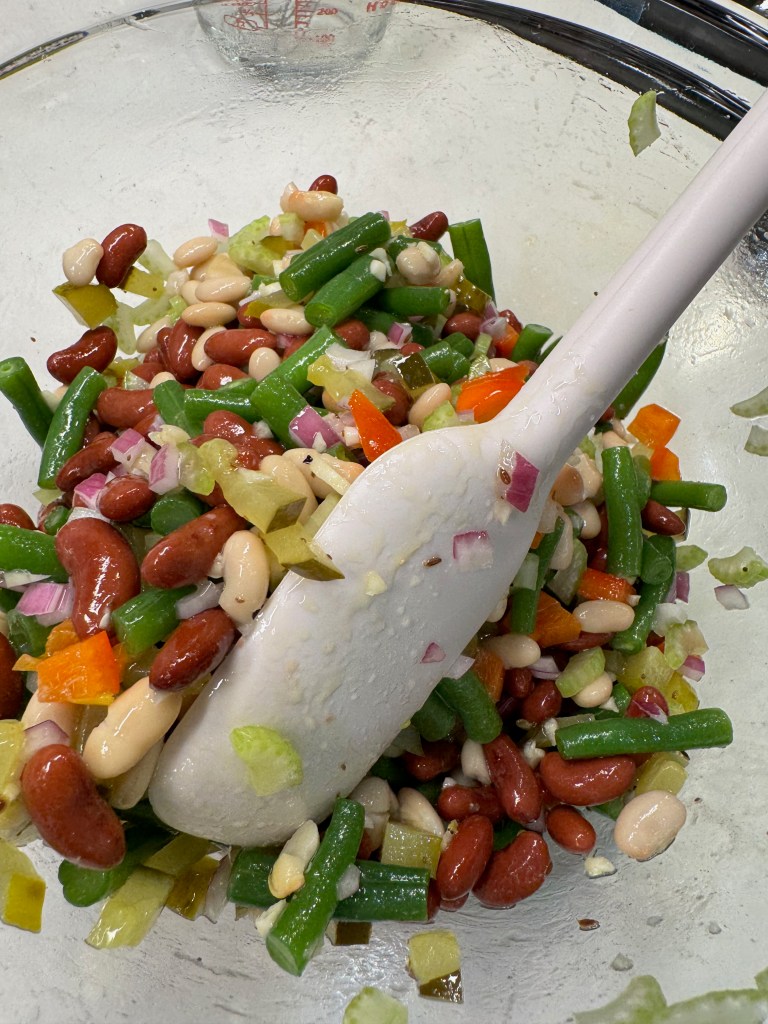
I love every single thing about this!
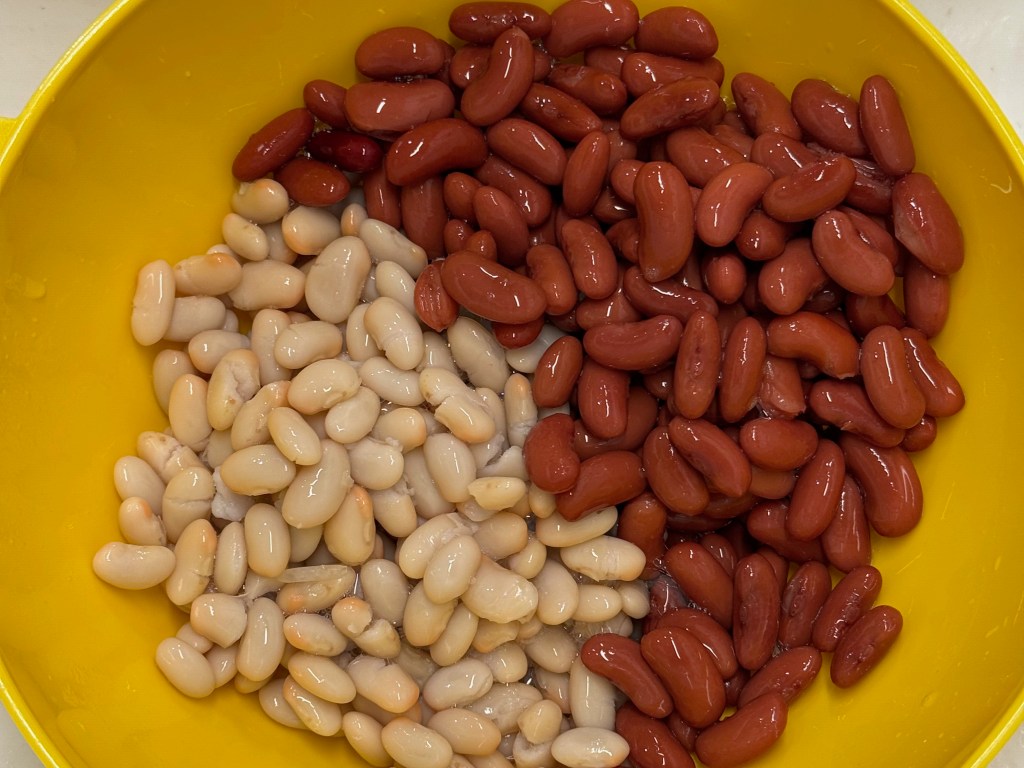
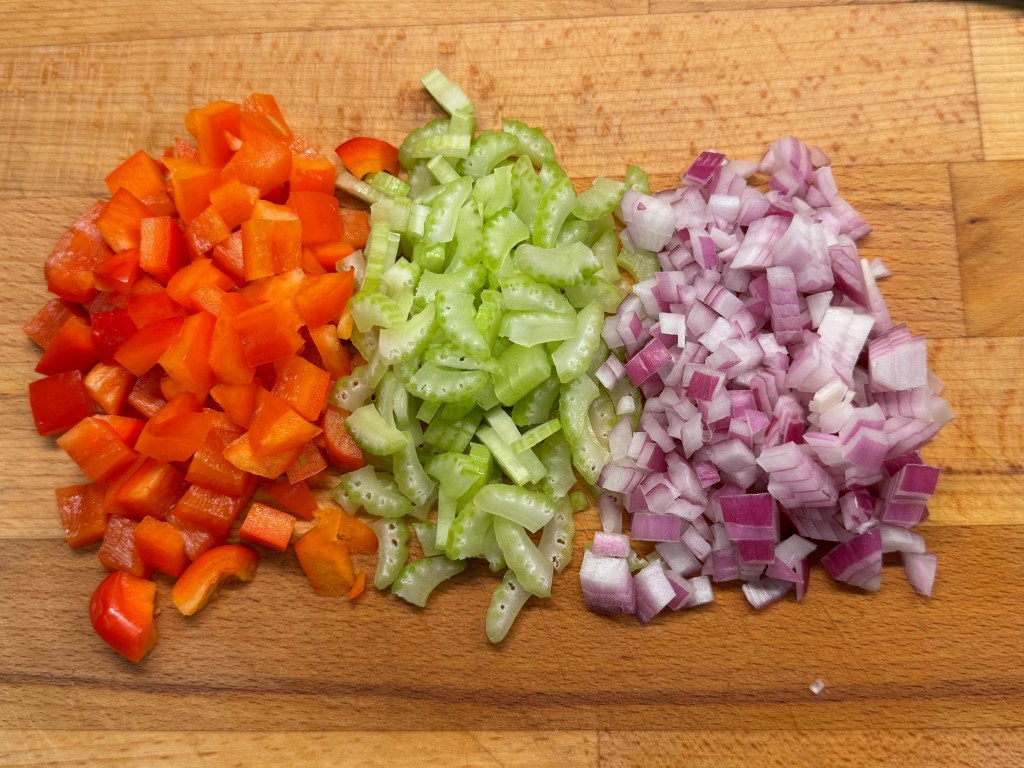
This variation on three-bean salad has even more texture than my usual, with crunchy bits of celery, bell pepper and red onion, the zesty bite of minced garlic, creamy kidney and cannellini beans, and a big punch of dilly-dilly flavor, courtesy of chopped spicy pickles and fresh summer dill. The fresh green beans have a nice “snap,” and the canned beans provide terrific fiber for a healthy gut, along with enough protein to carry me through this god-awful heat spell. Let’s get into it!
This recipe also happens to be easy on the grocery budget.
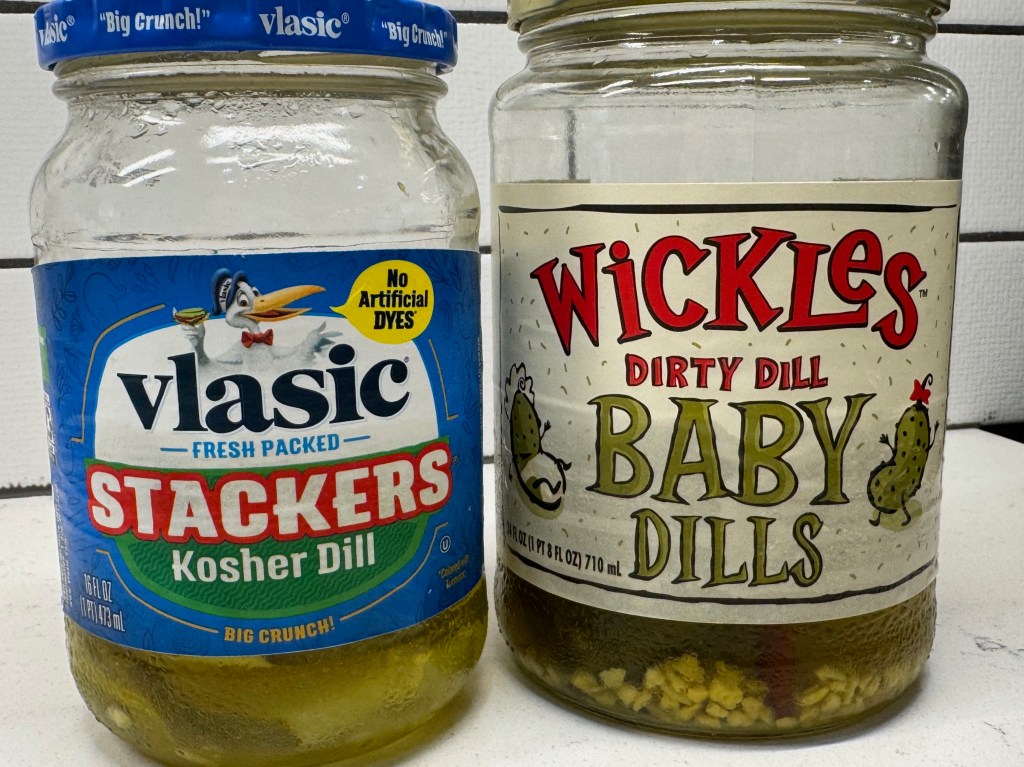
Par for the course, my inspiration for this recipe came from a desire to get rid of random jars in my refrigerator. We have had a bevy of leftover pickles taking up space after my husband’s son, Alex, visited a few months ago from Hungary. Alex loves dill pickles (especially spicy ones), and I always pick up a few options for easy snacking when he’s with us. Alex is very polite and doesn’t like to consume the whole contents of the jars, so he leaves them for us, which means that they get shoved to the back of the fridge until I get tired of moving them around. For this salad, I chopped up the remains of two kinds of pickles and I also used the kosher dill liquid in the dressing.
This dressing would be terrific on a greens-based salad, too.
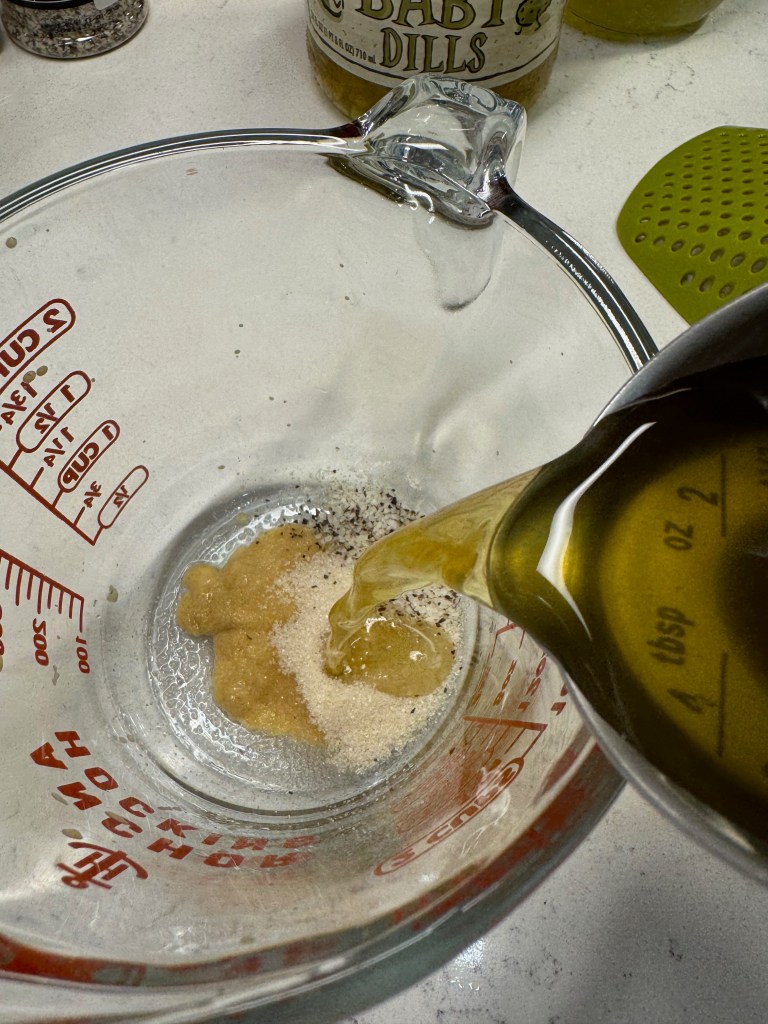
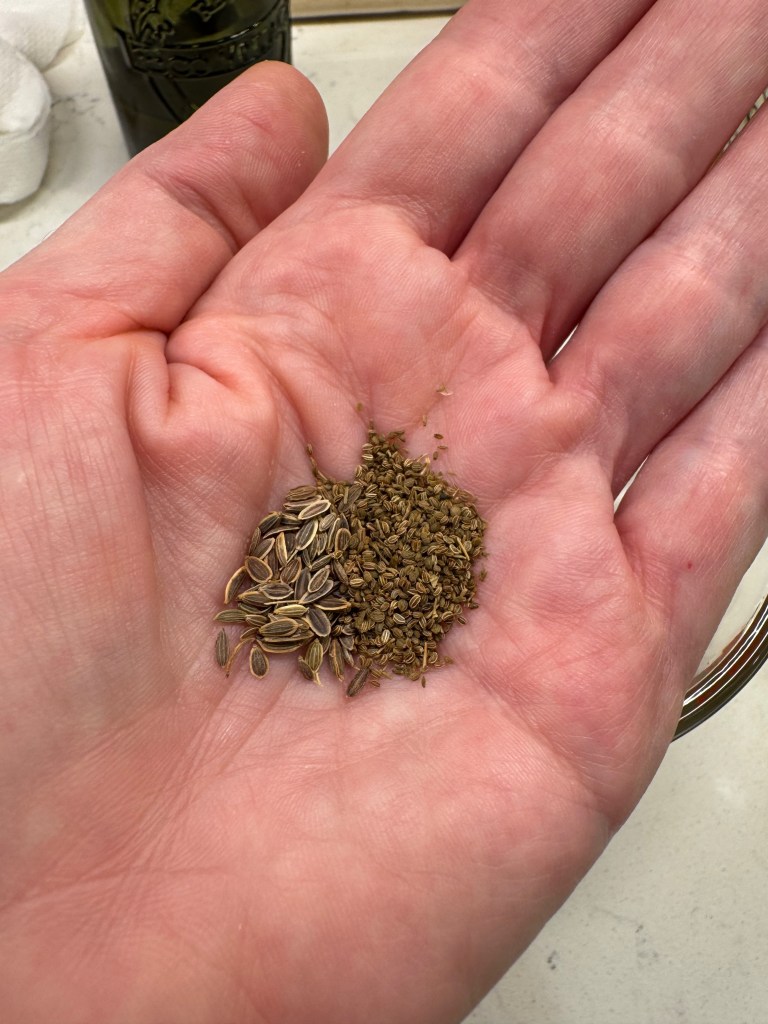
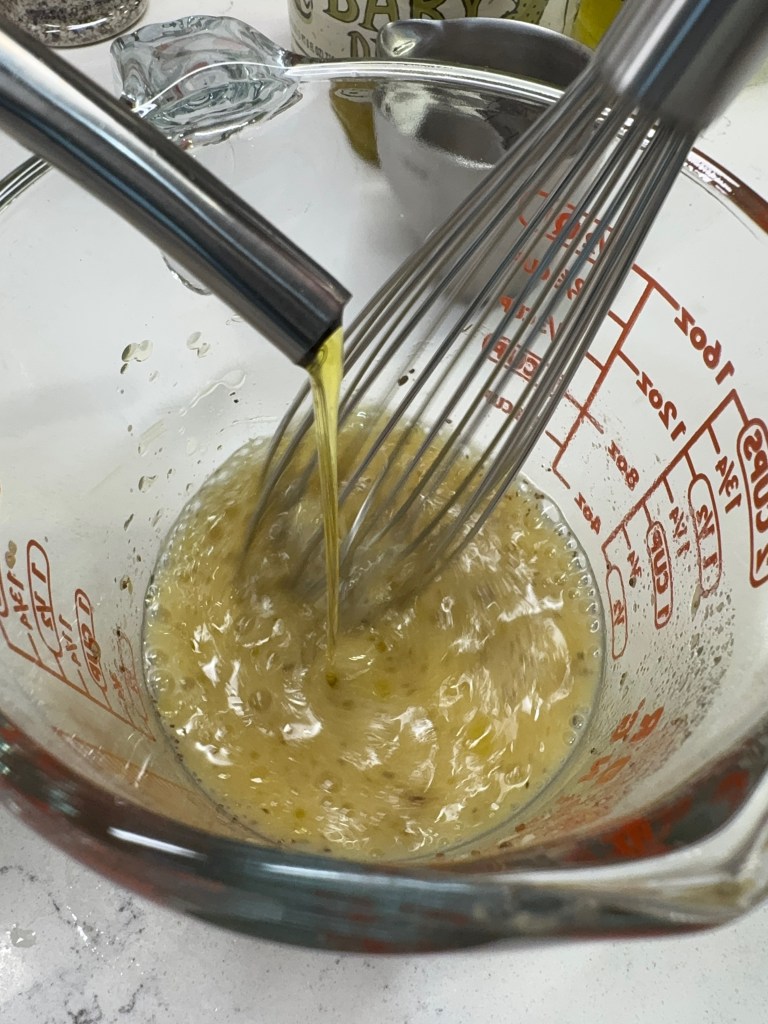
The balance of the dressing recipe is Dijon mustard, a spoonful of sugar, dill and celery seeds, and a healthy drizzle of extra virgin olive oil. Salt and pepper to taste, plus a splash of water, and that’s done.
The dill and celery seeds release more flavor after soaking in the dressing.
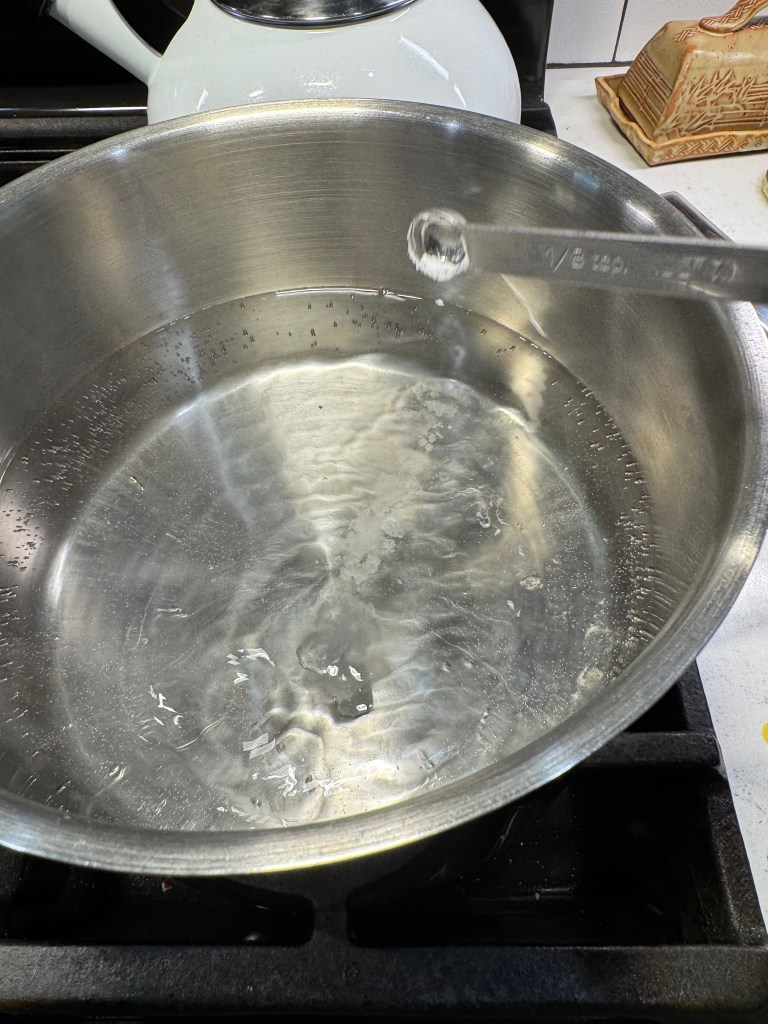
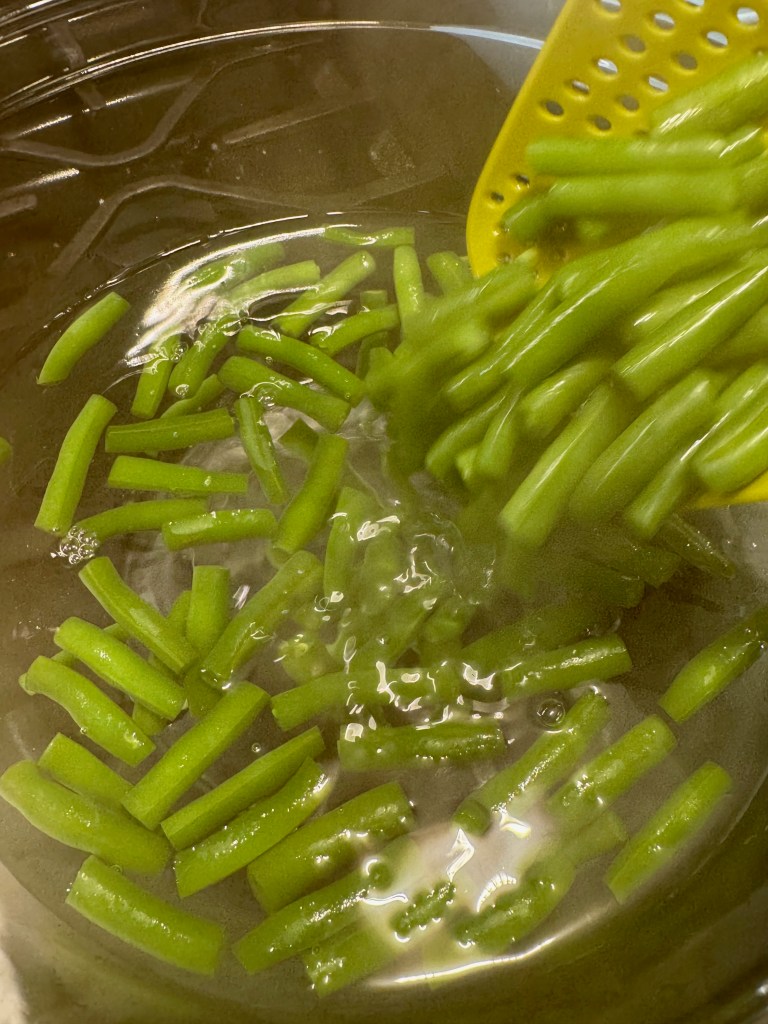
The green beans were the only ingredient in this salad that required cooking— thankfully, we only needed to have the stove on for about 10 minutes— so I got that going with a pinch of baking soda in a pot of barely-boiling water. The alkaline nature of the soda helps preserve the color of the green beans, and a shock of ice water at the end of cooking also helps with color retention.
Test a bean or two for doneness after about five minutes. They should be tender but still give a little resistance to the bite.
This process, called “blanching,” takes me back to my grandmother’s kitchen, where I learned so many basic lessons of cooking— including blanching vegetables for freezing and canning— when I was barely tall enough to reach the stove. Gram would have loved this three-bean salad, especially the use of the leftover pickle liquid. Like so many people who lived through the Great Depression, she used every scrap, drop, peeling, stem and leaf that could be used. These are still important lessons today, and I aim to make her proud every time I step into my own kitchen.
I’m not embarrassed to admit that I tasted this 13 times while making it. 😁
Assembling the salad is easy. Give the dressing another good whisking before you pour it over the main ingredients, and fold it gently to avoid breaking up the canned beans. Add more fresh dill than you think is necessary, as the fine fronds will disperse a great deal when you fold it in. This freshness adds something special to the salad, but if you cannot find it in your supermarket or farm stand, a teaspoon of dried dill leaves will work in a pinch; add them to the dressing ingredients instead.
So there you have it— a three-bean salad, inspired by Alex’s leftover pickles, bringing loads of flavor to the table with ingredients that will satisfy, even when it feels too damn hot to eat. Make this early in the day and let the salad chill in the fridge several hours before enjoying. It keeps well for about a week, and you’ll want to remove it from the fridge for about 20 minutes when you’re ready to serve so that the olive oil softens from its chilled state.
Spicy dill pickles and fresh dill lend a tangy twist to classic three bean salad. Use the pickle juice in the dressing, and make it early in the day so that the flavors have time to mingle in the fridge.
Ingredients
3/4 pound fresh green beans, trimmed and cut into uniform small pieces
1 tsp. kosher salt
1/4 tsp. baking soda (optional, for color retention)
1 can light red kidney beans, drained and rinsed
1 can cannellini beans, drained and rinsed
1/2 cup chopped red bell pepper
1/2 cup chopped celery
1/2 cup diced red onion
1/2 cup chopped dill pickles
2 cloves garlic, finely minced
3 Tbsp. dill pickle juice
1 Tbsp. apple cider vinegar
1 Tbsp. cold water
About 2 tsp. Dijon mustard
1 tsp. cane sugar
1/2 tsp. celery seed (or combo with dill seed, if you have it)
Salt and pepper to taste
1/4 cup extra virgin olive oil
1/4 cup fresh dill, chopped
Note: I used a combination of pickles in my salad. Be as creative as you dare, subbing in spicy pickles or even other pickled vegetables as the mood strikes! Take note of the sodium in your pickled ingredients so that you can adjust salt to taste without overdoing it.
Directions
Prepare an ice bath in a large bowl. Bring a pot of water to low boil over medium-high heat. Stir in salt and baking soda, then add green beans. Simmer for 6 to 7 minutes, until beans are slightly tender but still bright green. Transfer beans to the ice bath and rest at least 5 minutes, then drain in a colander.
Make the dressing while the beans are blanching. Combine pickle juice, vinegar, cold water, Dijon, sugar and celery seed in a measuring glass. Whisk vigorously while drizzling olive oil into the glass, creating an emulsion. Season to taste with salt and pepper.
Blot the green beans with a towel to remove excess moisture. Combine in a large bowl with the drained canned beans, vegetables and chopped pickles.
Pour dressing over the salad ingredients, and fold gently with a spatula or wooden spoon to avoid breaking the tender canned beans. Add salt and pepper as needed. Fold in dill and refrigerate until ready to serve. This keeps well for up to a week.
Summer officially hit last night at 10:42pm ET, and you know what that means. Millions of backyard barbecues, picnics, family reunions and summer parties are straight ahead! Some of my fondest memories are closely tied to the foods served at such occasions, and I’m a firm believer in the notion that one can never have too many recipes for summer side salads.
For the past couple of summers, I’ve steered away from mayonnaise-based salads, mainly because they don’t hold up well in the summer heat, at least for outdoor parties. So my husband’s special request last weekend should not have been any surprise when I mentioned whipping up a potato salad to serve with our grilled coffee-rubbed tri-tip.
“Can you make more of a mayonnaise-y dressing this time? Not one of those vinegar things you’ve been doing.”
Well, okey-dokey! We have a running joke at our house about how long it takes for foods to come back around in “rotation,” so I’m happy to oblige a sincere requst.
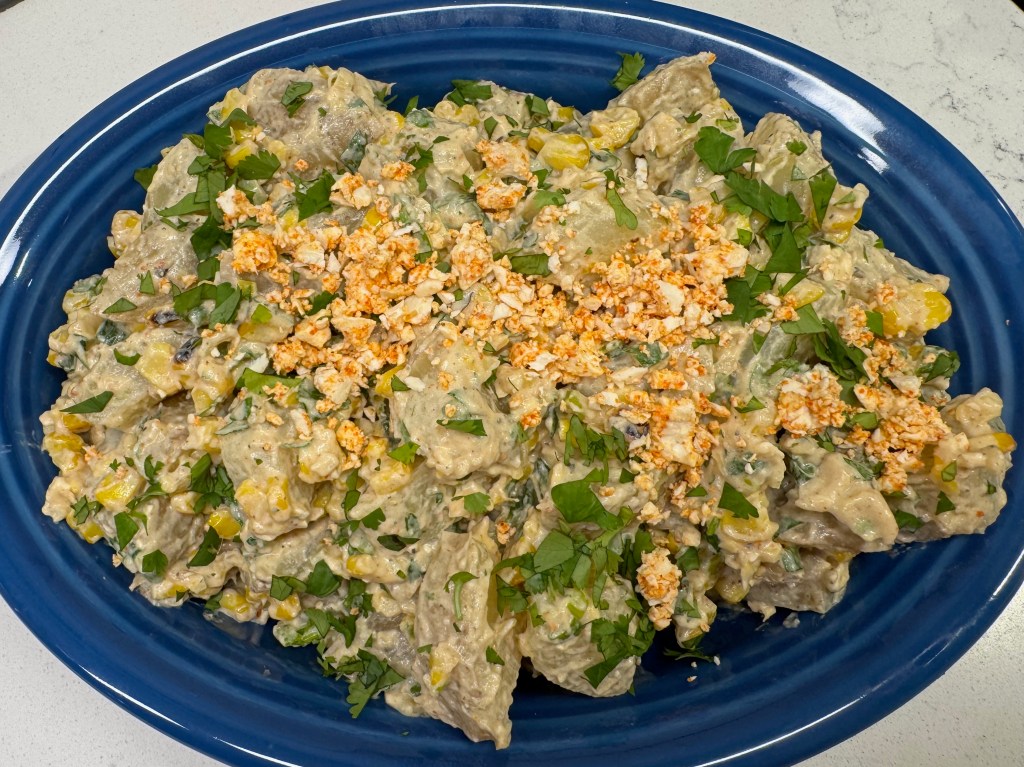
I think I satisfied his craving with this creamy, mayo-dressed potato salad that conveys all the flavors of Mexican street corn, also known as eloté. The textures were great, and the dressing and seasonings were unmistakably eloté— creamy, sweet bite on the corn, tangy from the mayo and lime, a sharp saltiness from the crumbled cheese, and just spicy enough to be interesting. It was fantastic with the tri-tip he grilled for us, and we enjoyed this salad again with lunches during the week as well as with spicy grilled chicken tenders a couple nights ago. I’m sad that it’s gone!
This recipe makes enough for eight servings (unless you do excessive taste-testing like I did).
Ingredients for my Mexican street corn potato salad
Any finished dish is only as good as what goes into it, and given that this is a bit of a twist, I’ll break down the role that each ingredient played in this salad. Note that some ingredients may be tricky to find, so I’ve offered reasonable substitutions for those. Here we go!
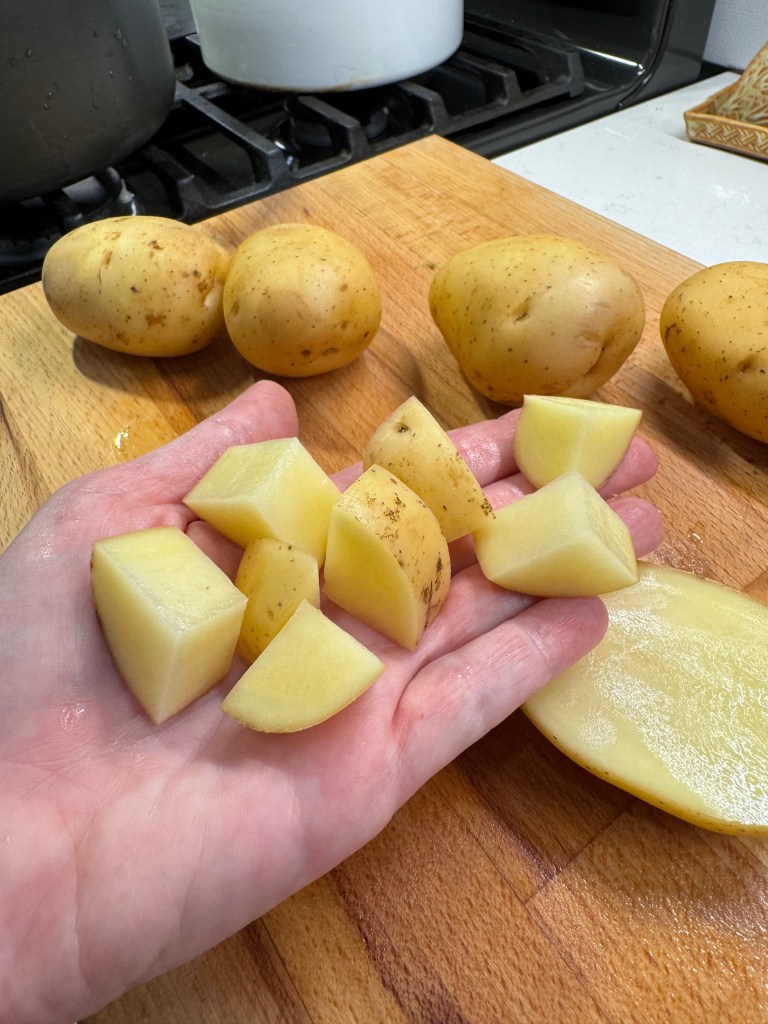
Yukon gold potatoes – these are a perfect balance of creamy and starchy, and because the skin is so tender, I don’t bother peeling them. Choose potatoes on the smallish side if possible, so that every chunk has a bit of skin on it. You’ll cook them gently in salted water until fork tender, then drain and let the steam roll off before chilling.
Yukons are perfect here, but if you must substitute, use baby reds.
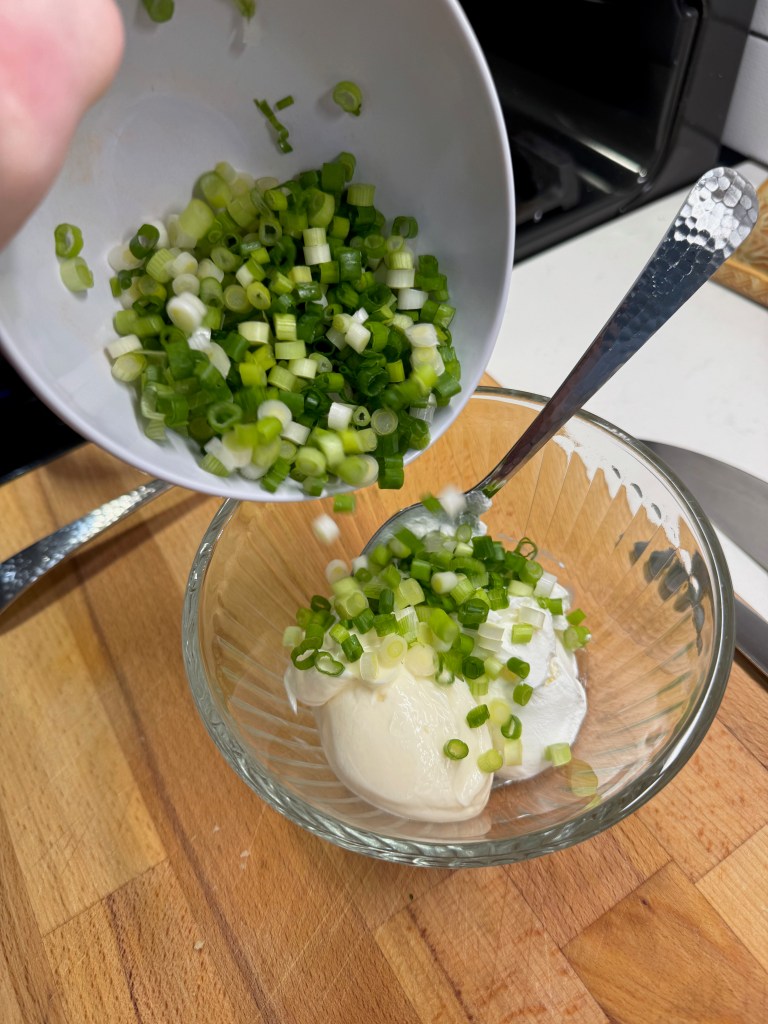
Mayonnaise and sour cream – My dressing is made with equal parts of these two, and if you can get your hands on Mexican crema, use that in place of sour cream.
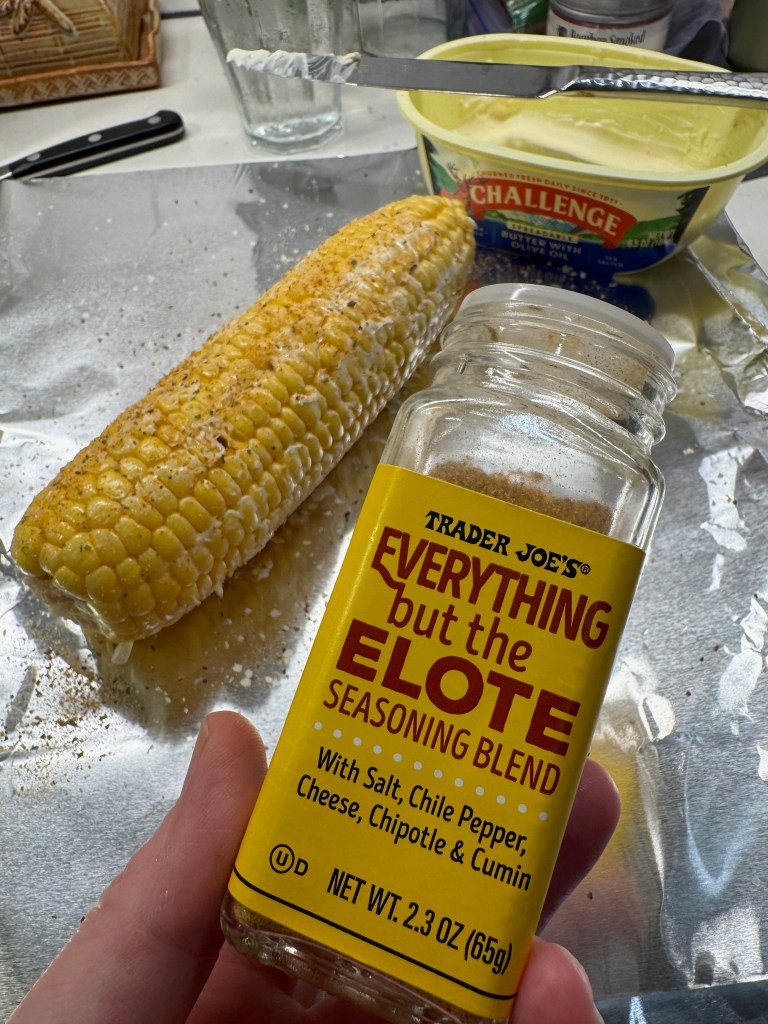
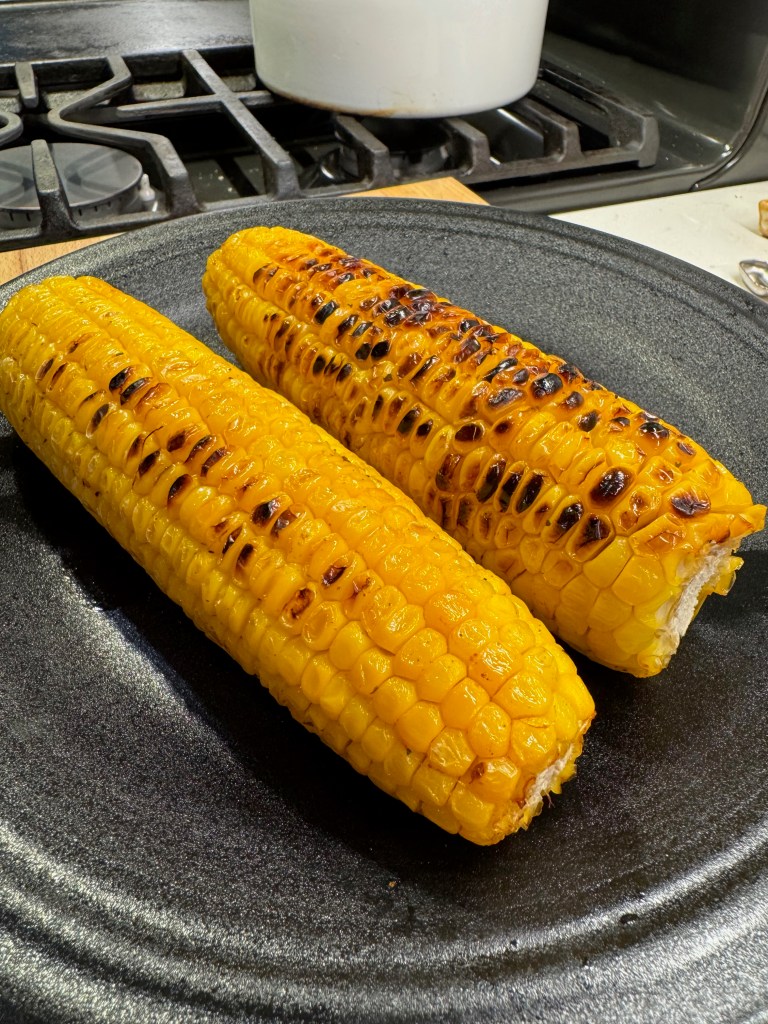
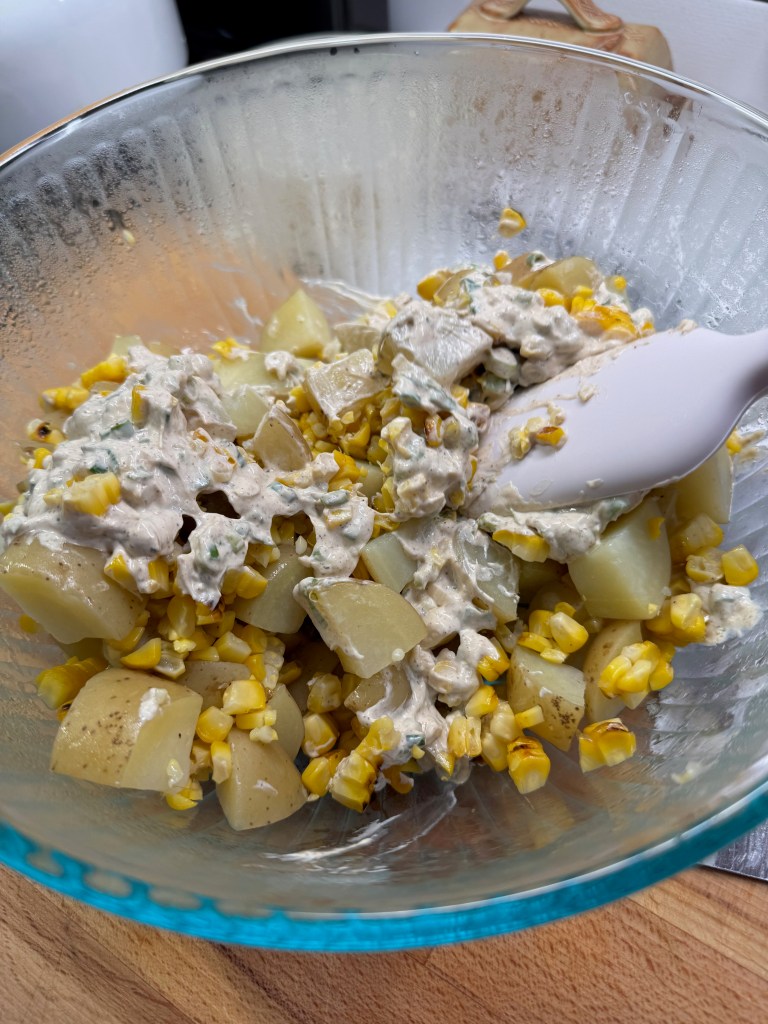
Roasted corn – we love grilling corn in the summer time, and we sometimes make extra ears so that we have them for dressing up another dish. If you don’t have a grill (or the time to mess with grilling corn), pick up a bag of frozen fire-roasted corn, which will work just as well. We like the one that’s available from Trader Joe’s.
Grilled corn is one of my favorite foods of summer!
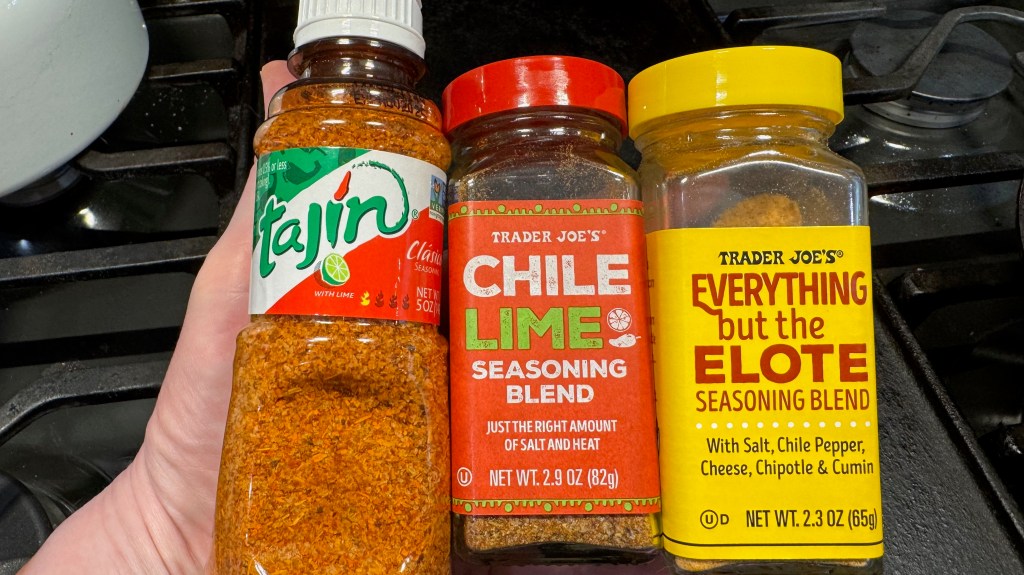
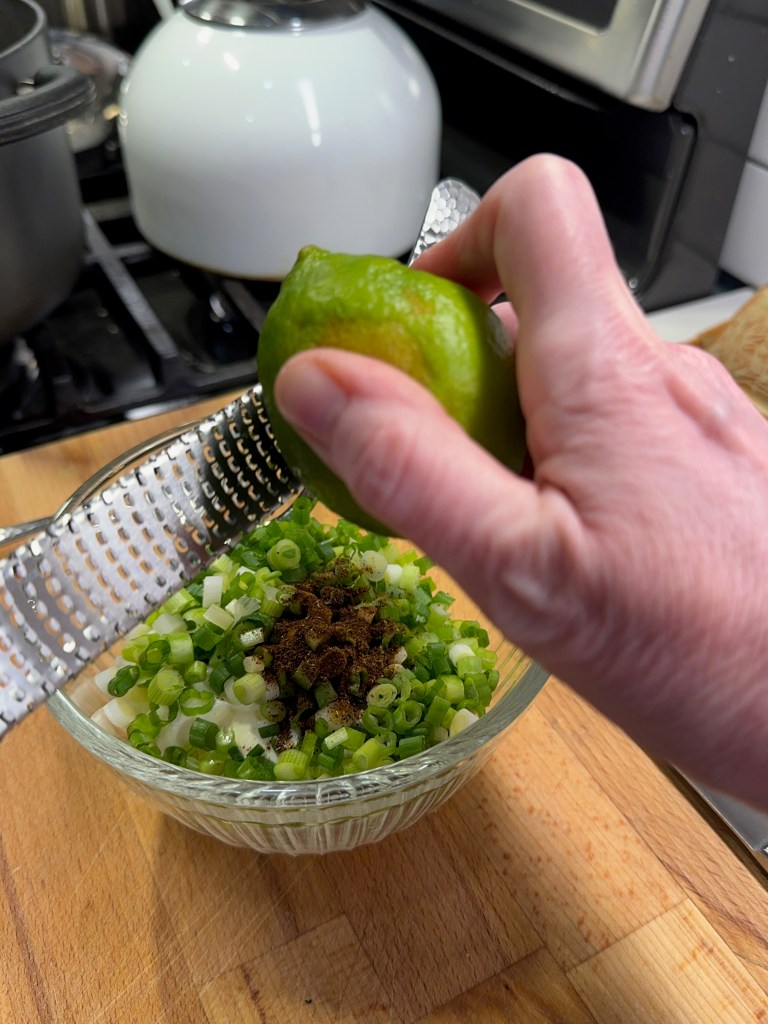
Eloté spices – traditionally, Mexican street corn is seasoned with any number of ground chile powders, including chipotle, cumin, cayenne, ancho or pasilla. I used ground ancho and cumin in my dressing, but if you don’t have the individual chile powders, don’t sweat it! Just pick up a bottle of Tajin seasoning, either in the spice aisle or the International aisle. Trader Joe’s chili-lime seasoning is very similar, and I also love their “Everything But the Eloté,” to season my corn before grilling. It also happens to be excellent on popcorn!
Three terrific options for flavoring this salad, from hottest to mild. Check out the saltiness ahead of time so you know what to expect.
Scallions – this is not traditional for Mexican street corn, but I can’t make potato salad without some variety of onions, and this one works well with the other ingredients. Use the white and green parts, and slice them thin.
Lime – the lime zest and juice are what really make the flavors of this salad pop. Purchase organic citrus because you’ll be using the peel, and choose heavy fruit with a smooth skin for the most juice and brightest flavor.
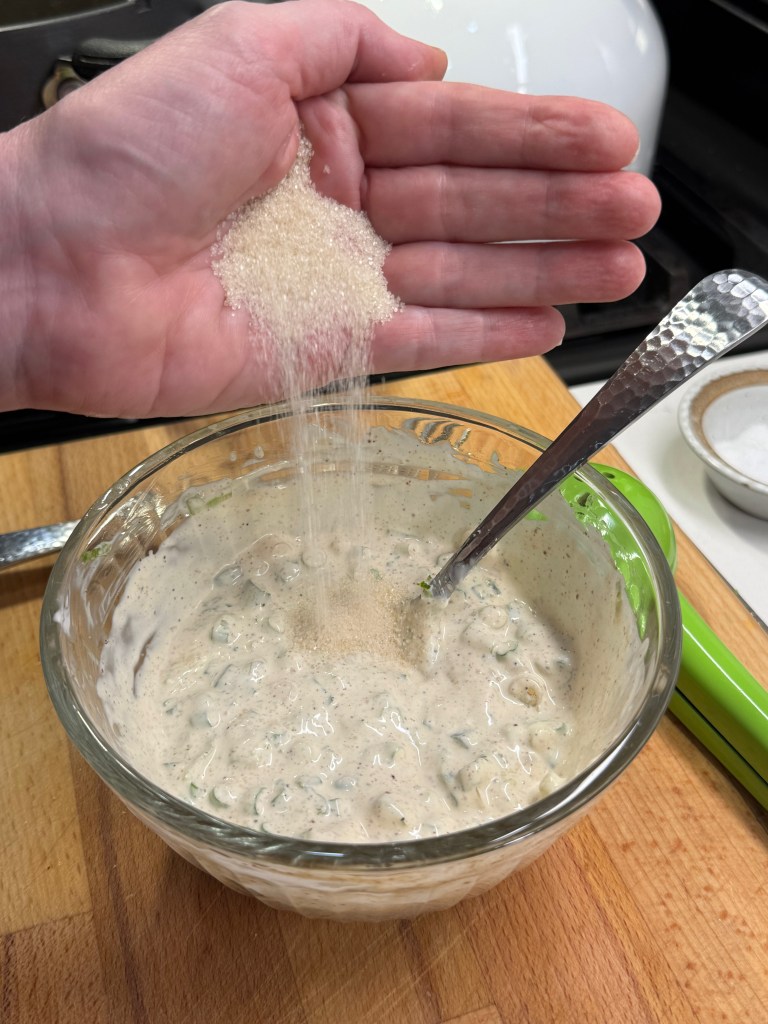
Sugar – every Mexican street corn I’ve ever tasted had a slightly sweet flavor, and a small spoonful of sugar in the dressing made this perfect. Don’t skip it.
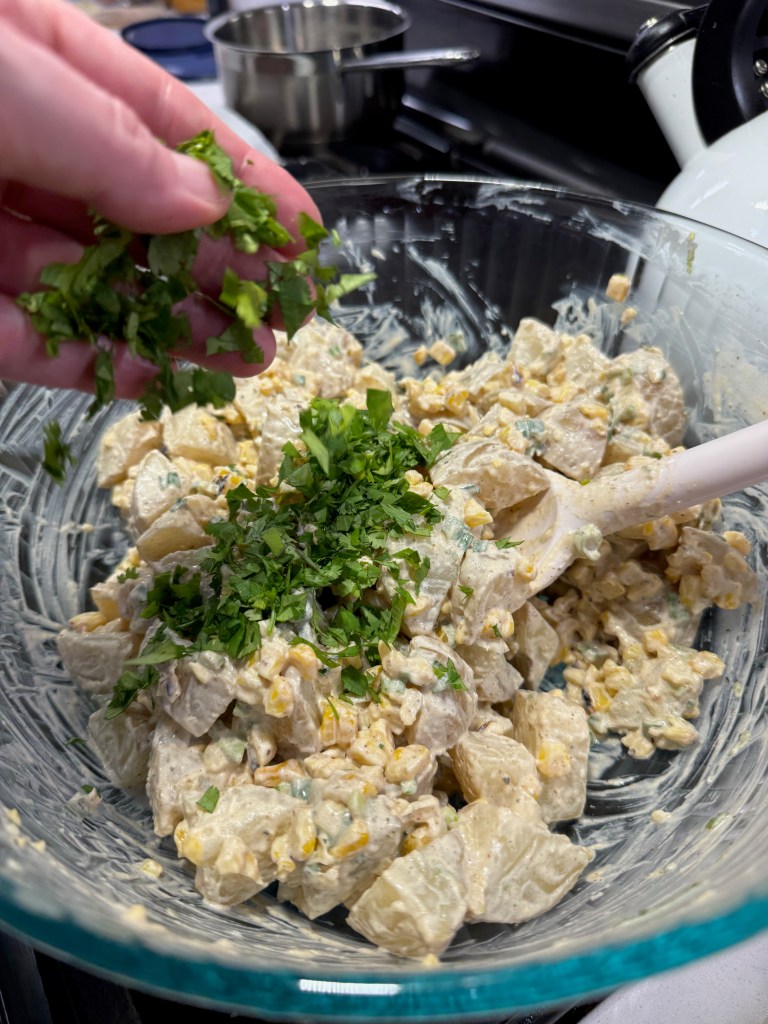
Fresh cilantro – authentic for Mexican street corn, but if you are among the 20% who find that it tastes like dish soap, then just skip it. There isn’t another herb similar enough, and the dish won’t suffer without it.
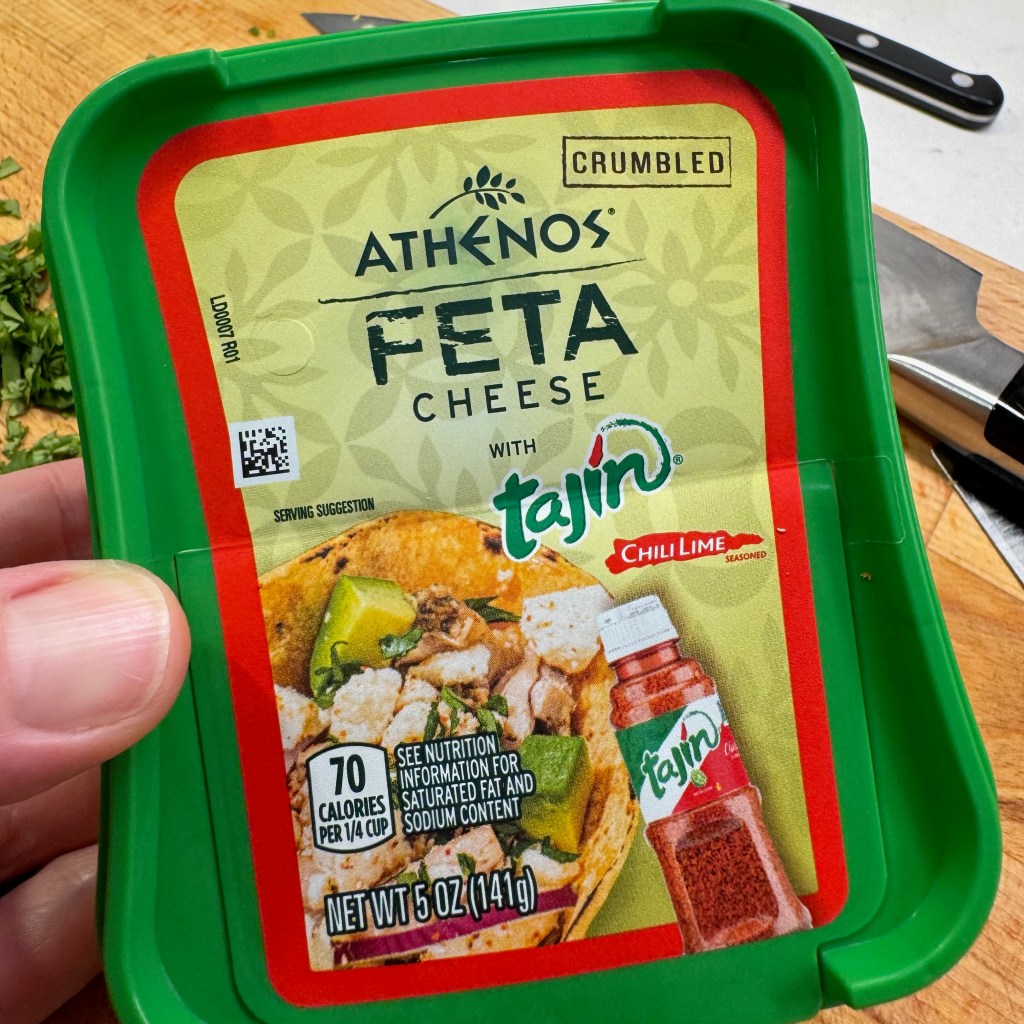
Crumbled cheese – ah, I saved the best for last! Mexican street corn is traditionally slathered with mayonnaise dressing and sprinkled liberally with cotija, a Mexican hard cheese that is reminiscent of parmesan, but less pungent. Cotija can be a little tricky to find outside of a specialty cheese section, but not to worry— feta, the dry crumbly kind, is a lovely substitute. And that leads me to a funny story…
A side note, on “sending the husband to the grocery store”
I love my husband dearly, and his sensibilities in the kitchen are usually right on target, but sometimes, I still make specific and detailed notes on the list when I send him to the store by himself, and I might even text him a picture of an exact item I need. For this recipe, I was very clear that if cotija cheese was not available, he should get “dry crumbled feta,” and in the margin, I wrote, “PLAIN, NO FLAVORS!” So you can imagine the stink-eye he received when he returned with a “flavored feta that sounded interesting.” My dramatic Leo side went bonkers as I yelled, “Geezus, can you not read???” But then I saw what he found, and of course, it was literally perfect for this recipe! Gotta trust my man sometimes, ya know?
You NAILED it, Babe! 😘
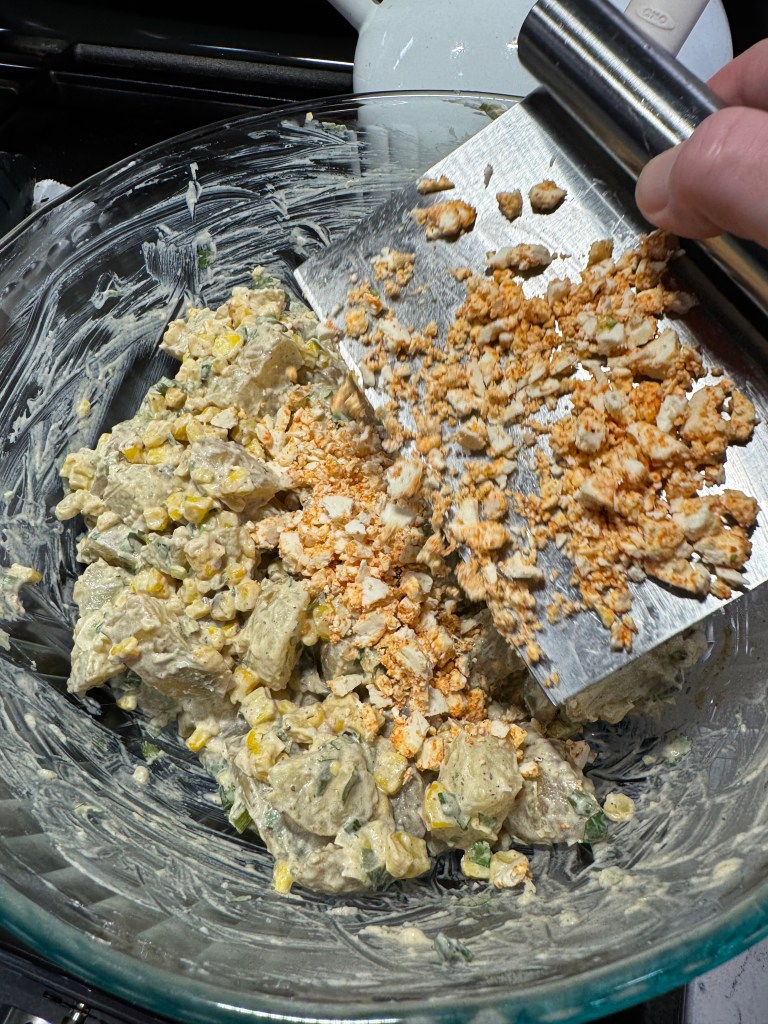
Making this Mexican street corn potato salad
From this point, it’s a pretty standard potato salad in terms of mixing, so I’ll let my photos do the talking while you imagine this deliciousness coming to life in your own kitchen. Find full instructions below in an easy, click-to-print recipe card that you can save for your files. Welcome back, summer! 😎
Save enough of the feta and cilantro to dress the top of the salad. Enjoy!
This is two of my all-time favorite carbs, together in one really flavorful salad! Plenty of seasoning options, so you can make it as spicy (or not) as you like it!
Ingredients
2 lbs. Yukon gold potatoes, skin-on and cut into 1-inch chunks
1/4 cup mayonnaise
1/4 cup Mexican crema (or sour cream)
3/4 cup finely sliced scallions
3/4 tsp. ancho chile powder
1/4 tsp. ground cumin
Salt and pepper
Zest and juice of one lime
1 tsp. cane sugar
2 ears fresh yellow sweet corn, roasted or grilled until charred but tender
1/3 cup cotija cheese, divided (you’ll mix some into the salad and sprinkle the rest on top)
fresh cilantro
Substitution notes: If you don’t have the means to roast or grill the fresh corn, don’t hesitate to pick up a bag of frozen fire-roasted corn. We love the one from Trader Joe’s, and it would work terrific here. If you cannot find cotija cheese, dry crumbled feta is a reasonable substitute; consider chopping it finer if the crumbles are larger than peas. Ancho chile powder is a spice unto itself, without salt or other ingredients. If you can’t find it, or if you want flavor without heat, swap in smoked paprika.
Directions
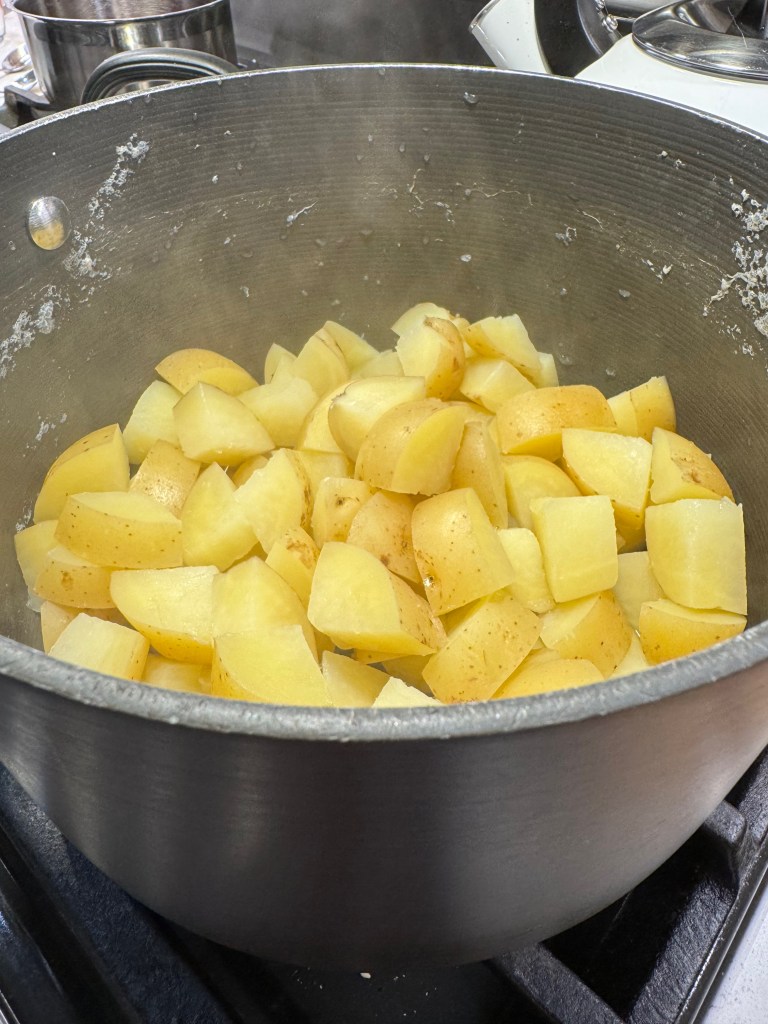
Place the potatoes in a pot with cold water, and heat over medium-low until they are fork tender. Drain gently and return to the hot pot with the lid off, so that excess moisture can escape through the steam. Sprinkle 1/2 tsp. salt over the hot potatoes and cool them to room temperature, then transfer to a large mixing bowl and refrigerate for an hour or longer.
In a medium bowl, combine mayo, crema, scallions, spices, lime and sugar. Adjust to taste with salt and pepper. Put the dressing in the fridge to chill until you’re ready to assemble the salad.
Stand the corn on end and use a sharp knife to cut the roasted kernels off. Add them to the potatoes and fold in gently with the dressing until the salad is consistently coated. Fold in about half of the cotija cheese and a bit of the chopped cilantro, reserving the rest for garnish.
Transfer the potato salad to a serving dish, and sprinkle the top with remaining cheese and cilantro.
The saying goes that there’s nothing new under the sun, and though I generally believe it to be true with food and drink, I do think that sometimes a twist on a classic is different enough to warrant calling it “new.” Case in point, this tart and sassy summer cocktail.
It’s refreshing, balanced and beautiful!
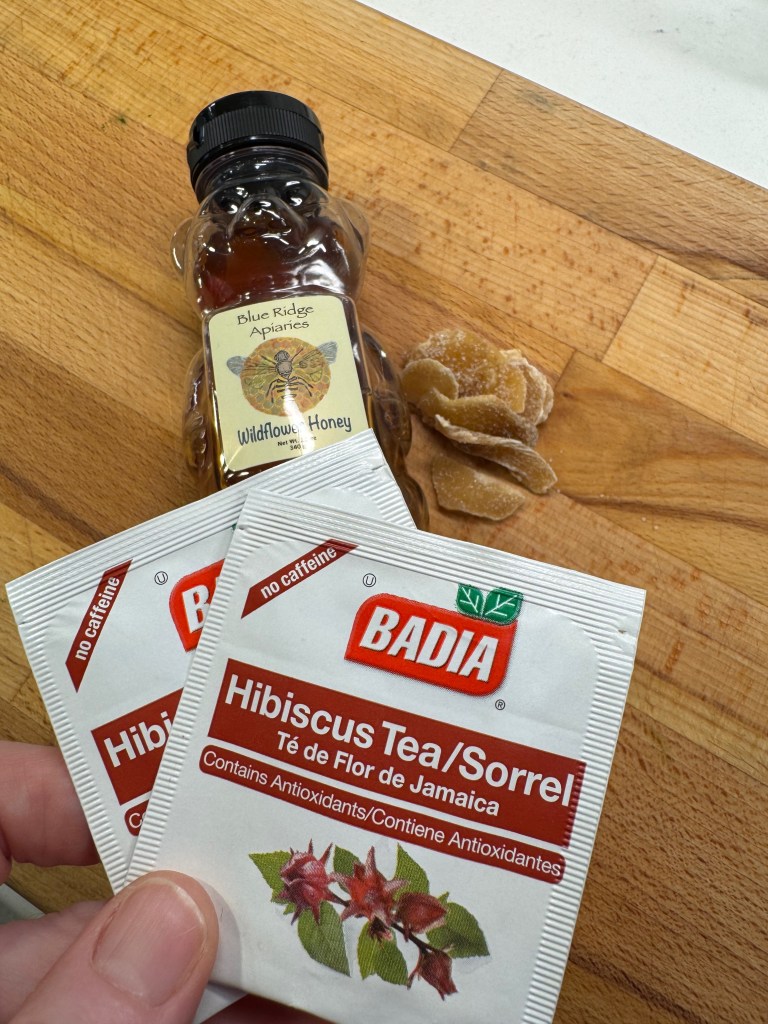
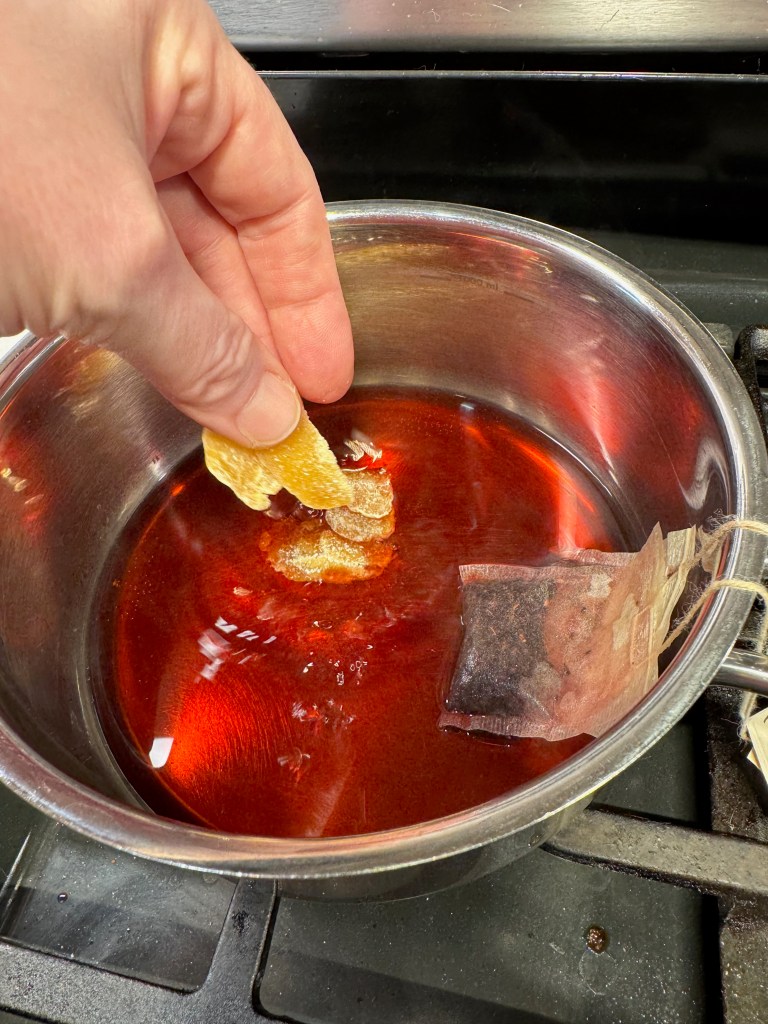
Mine is a two-ingredient update to a Prohibition-era cocktail, and it pushes a classic into the modern, with a vibrant reddish hue that is perfect for Juneteenth or the summer solstice. The key difference is hibiscus, in the form of pure hibiscus tea bags, which I simmered in boiling water long enough to draw out the tart, floral flavors. A few pieces of crystallized ginger added a subtle zing of spice, and I think it would be even better with fresh ginger if you like the flavor.
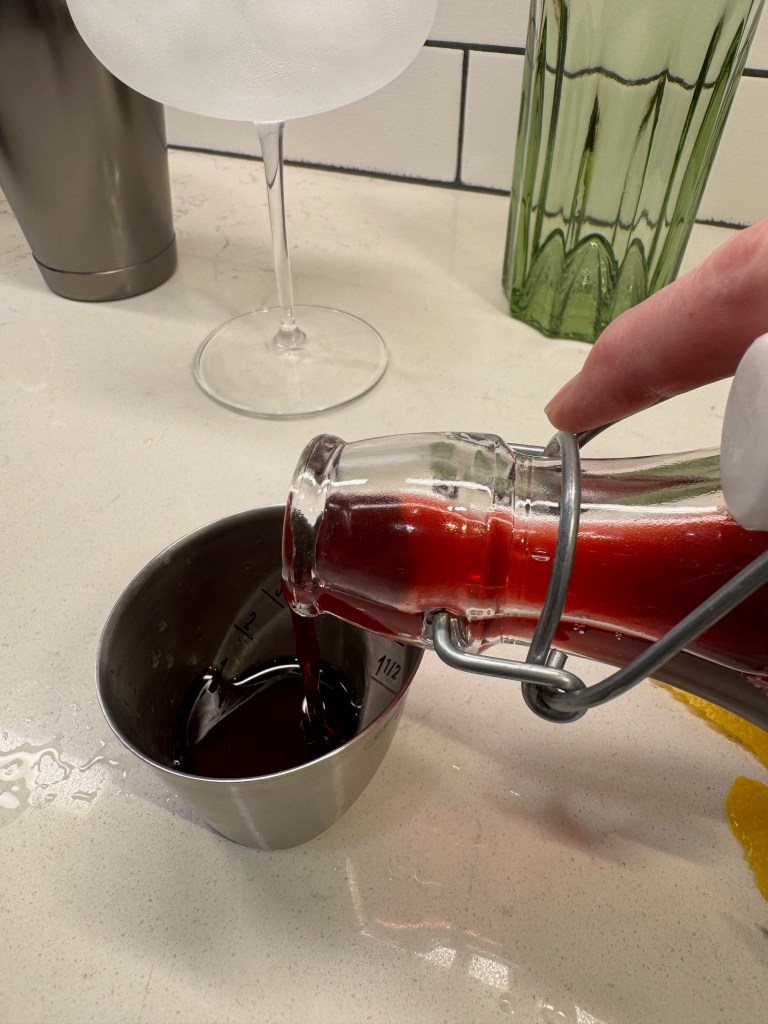
The resulting strong tea was sweetened with a generous squeeze of local honey, for a syrup that is thin enough to blend well with the cocktail ingredients in a shaker filled with ice. I do not recommend adding honey straight, as it would remain heavy and thick. But in an equal parts syrup, it’s perfect.
Mine was wildflower honey, but orange blossom or another variety would be interesting, too.
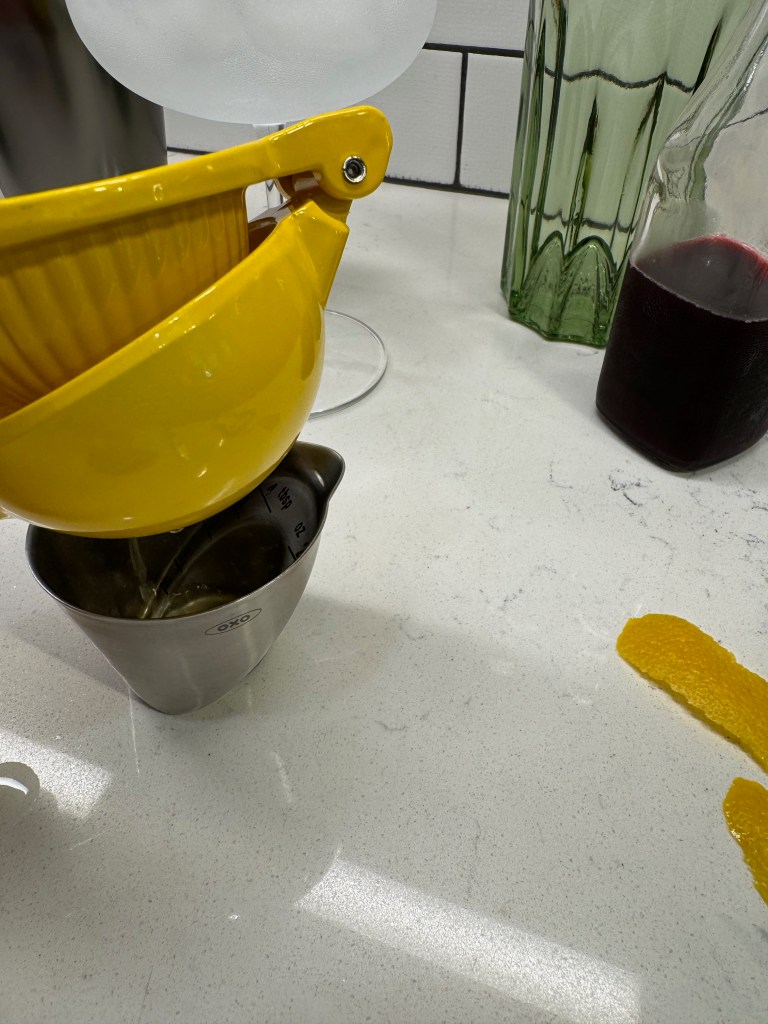
This hibiscus-ginger syrup will keep in the fridge for about two weeks, and I have no doubt that it would be great in other cocktails or even as a flavor enhancer for sparkling water or tonic on a hot summer day. But for this featured cocktail, we need gin— the traditional spirit for bee’s knees— and fresh lemon. Grab a cocktail shaker, a lemon squeezer and a peeler to strip a bit of peel for garnish, and chill down a cocktail glass with ice water.
Once the syrup is made, it’s quite a simple drink.
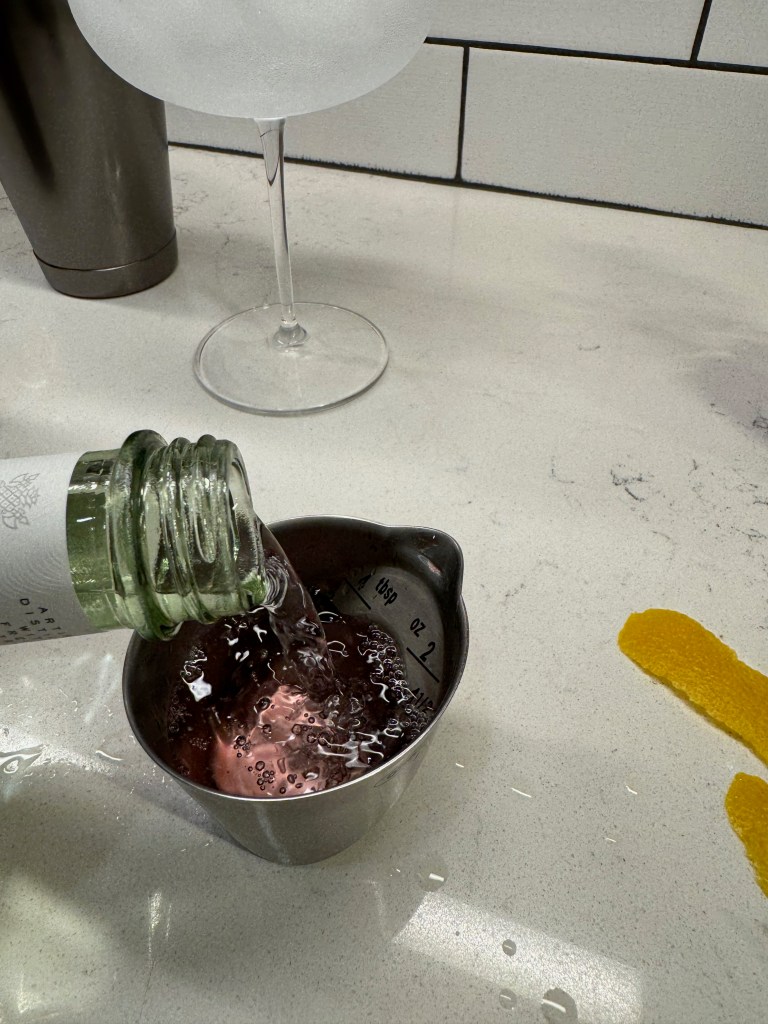
Get your lemon strip first, then cut the lemon in half for easy squeezing into the shaker. Add an equal amount of hibiscus-ginger honey syrup and then two ounces of your favorite gin. While you enjoy these refreshing images, let’s take a trip down nostalgia lane to learn more about the original “bee’s knees.”
Fresh lemon is essential here, and choose organic if possible, as you’ll be using the peel.
How did the bees knees come about?
Back in the days of Prohibition, otherwise known as “the U.S. Government’s 13-year attempt at controlling its citizens,” grown adults had to get creative to find ways to cover up the questionable flavors of crappy liquor, the only kind they could get their hands on at the time. There were bootleggers, of course, who smuggled booze into the cities. And there were also people making their own at home, and the term “bathtub gin” arose from that era, a fair description of what was likely not very palatable.
Honey and lemon juice, both strong flavors on their own, did a terrific job of hiding the paltry gin enough for them to choke it down and get their buzz on. People enjoyed the combination so much that the the drink became known by a phrase that everyone was using at the time to describe what was “the best.” The bee’s knees!
Early recipes for bee’s knees were in the “equal parts” category, meaning that they used the same amounts of gin, lemon and honey. Yikes. For modern times, the recipe is adjusted to a more standard ratio of 2 ounces gin and 3/4 ounce each of the other two ingredients. It’s nicely balanced, not too sweet and not too acidic.
I found a fun and informative article that delves deeper into the history of the bee’s knees, including its possible connection to “the Unsinkable Molly Brown,” as well as some interesting variations that I’d love to try sometime. Check it out here if you’re curious.
Back to our cocktail!
Today, of course, we have plenty of options for quality gin, and I imagine that your favorite would work just fine in this drink. I’ll also say that if you have always considered yourself to be a non-gin drinker, the bee’s knees might be the cocktail to change your mind.
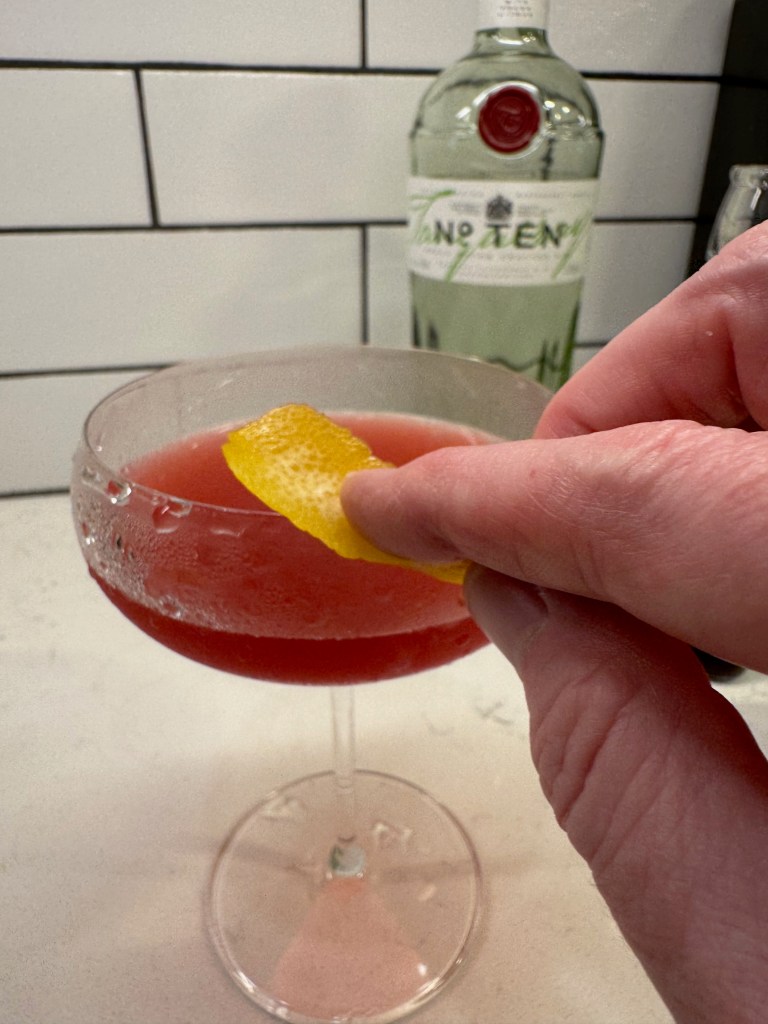
I’ve chosen Tanqueray No. 10 this time, for no other reason than the store was sold out of my usual Ford’s gin. Actor Stanley Tucci recently collaborated with Tanqueray No. 10 in an ad campaign, where he discussed the proper way to order a martini, and his description of the spirit won me over. Or maybe it was his voice. Either way, there’s a distinctive citrus note running through this gin, making it a nice anchor for the lemon and hibiscus.
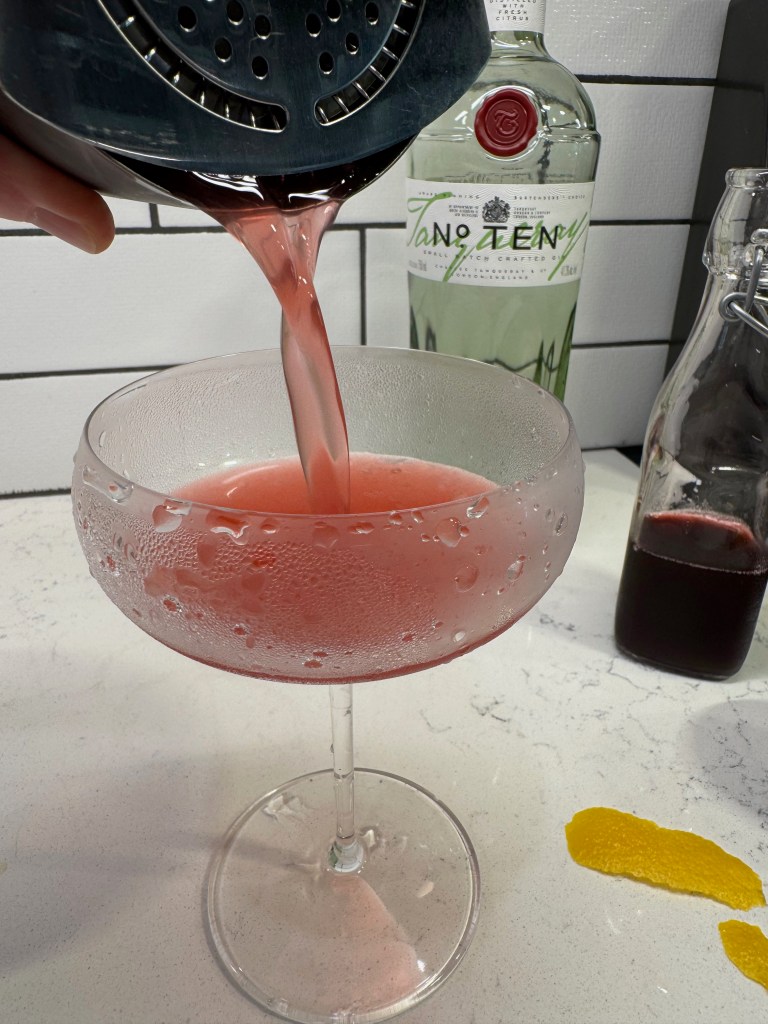
Shake your cocktail ingredients with plenty of ice until the outside of the shaker is uncomfortable to hold. Strain it into the chilled glass and express the lemon peel over the drink, finishing with a wipe of the oily side of the peel all around the edge.
The expressed lemon peel makes every sip fresh and citrusy!
The pretty, bright reddish hue of this drink makes it suitable for a Juneteenth celebration, where the color red symbolizes strength and resilience. And I can’t think of a more appropriate drink for summer than one made with fresh citrus and bright florals. This one deserves to be on repeat for the whole season!
This two-ingredient twist on a classic cocktail is bright, beautiful and delicious enough to deserve a spot in the rotation all summer long. Use pure hibiscus tea bags, or seek out dried hibiscus flowers to make the syrup.
Ingredients
2 oz. citrus-forward gin
3/4 oz. fresh lemon juice
3/4 oz. hibiscus-ginger honey syrup (see below for recipe)
A strip of lemon peel, for garnish
Directions
Add a generous amount of ice, plus water, to a cocktail glass to chill it down. Set aside while you prepare the cocktail.
Combine gin, lemon juice and hibiscus-ginger honey syrup in a cocktail shaker.
Add at least one cup of ice and shake vigorously for about 20 seconds. Strain into the chilled glass. Squeeze the outside curve of lemon peel over the drink, swiping the peel all around the edge of the glass. Drop peel in glass or cut a slit in it to balance it on the edge.
Note: Make the hibiscus-ginger honey syrup early enough to allow it to fully cool before using in cocktails. Strain the syrup into a sealable bottle or jar, and keep it in the fridge for up to two weeks. This recipe will make enough syrup for about six cocktails or cocktails.
Ingredients
1/2 cup cold water
2 pure hibiscus tea bags
About 6 pieces crystallized ginger (or half as much fresh sliced ginger)
1/2 cup local honey
Directions
Bring water to a gentle boil in a small saucepan. Turn off heat and add tea bags and ginger, swirling and steeping for about five minutes. Remove tea bags. Stir honey into the tea and continue to steep with the ginger until cooled to room temperature.
Strain out solids and transfer syrup to a jar or bottle.
Thank goodness for frozen shrimp. I mean this sincerely, as there are many times when life is too busy and even the best-laid plans can’t be pulled together in time to feed the hungry faces in my house.
We have a weekly ritual here that begins around Sunday morning, when my husband, Les, and I sit down with our respective calendars, the long-range forecast displayed on one of our phones, and we do our best to map out what we are going to do about dinner in the week ahead. This includes a quick inventory of what we already have in the fridge and freezer, consideration of what nights might be good for cooking outdoors, acknowledgement of whether one of us has a hellish workday that week, and— last but not least— how much time we can allot to said meals and which of us will be cooking them.
It’s a lot of moving parts and sometimes, our meal game falls apart and we need to punt.
On such an occasion recently, I postponed a more-involved food plan in favor of this ad hoc dish, which turned out so good that I wrote down the ingredients to share it here. It’s something of a mashup of Italian shrimp scampi and Greek spanakopita, and it met all the requirements for a busy weeknight: quick, easy, flavorful and relatively healthful.
Not too shabby for a last minute improvisation.
What ingredients do you need for spanakopita scampi?
My dish features peeled shrimp (fresh or thawed), garlic and plenty of olive oil, onions, spinach, feta, lemon, parsley and dill. And though I had both angel hair and linguine pastas— two options I’d typically reach for when making scampi, I decided to use the whole wheat orzo that was feeling ignored in the pantry. Orzo is a staple pantry ingredient in Greek cuisine, so it seemed a logical stand in for the spanakopita element of the dish, but almost any small pasta shape you like would work fine.
The most time-consuming part of this meal was thawing and prepping the shrimp, a task that I almost always hand off to Les’s capable hands. If you’re in a hurry, purchase shrimp that is already peeled and deveined to save valuable time.
How to make spanakopita scampi
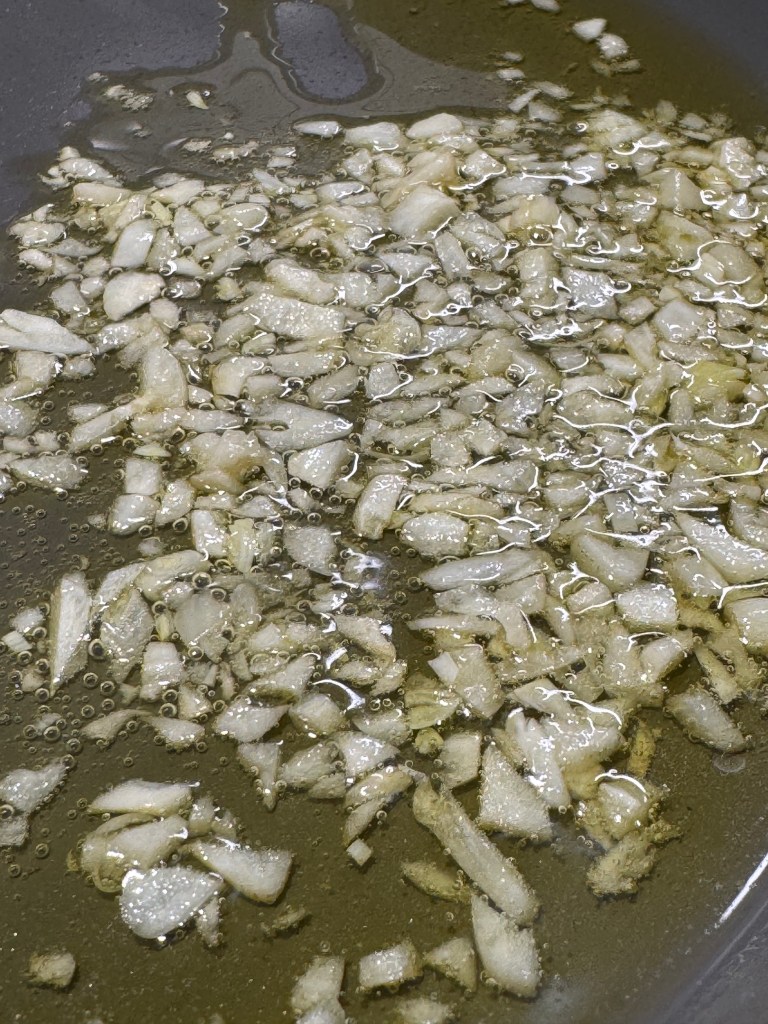
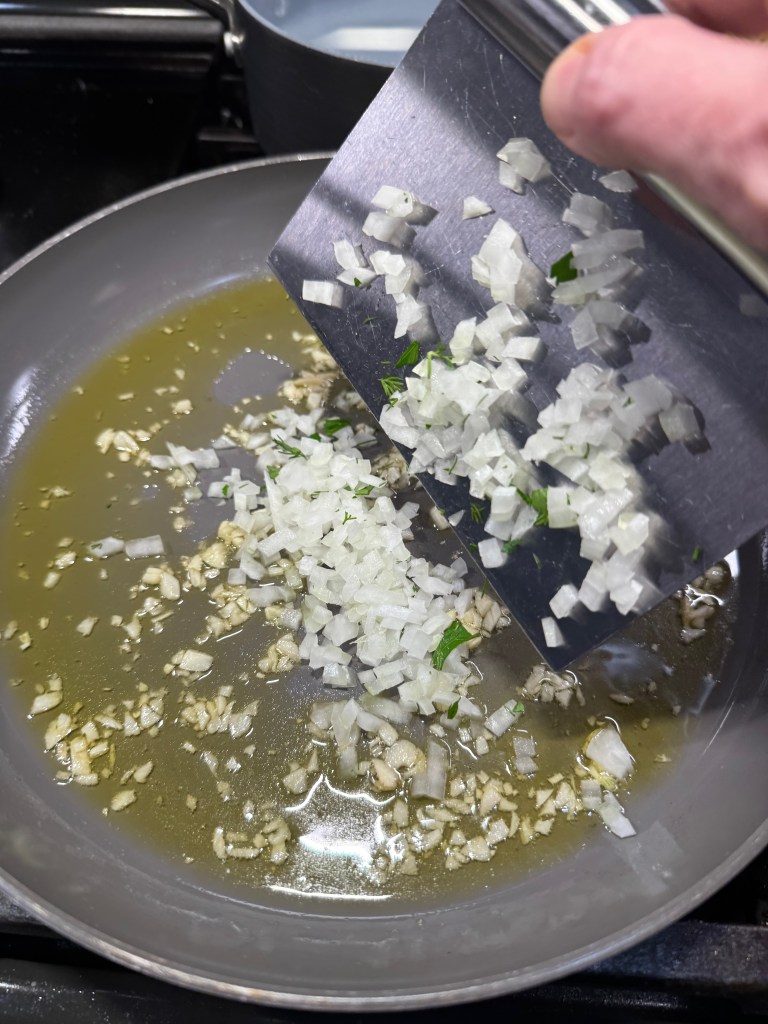
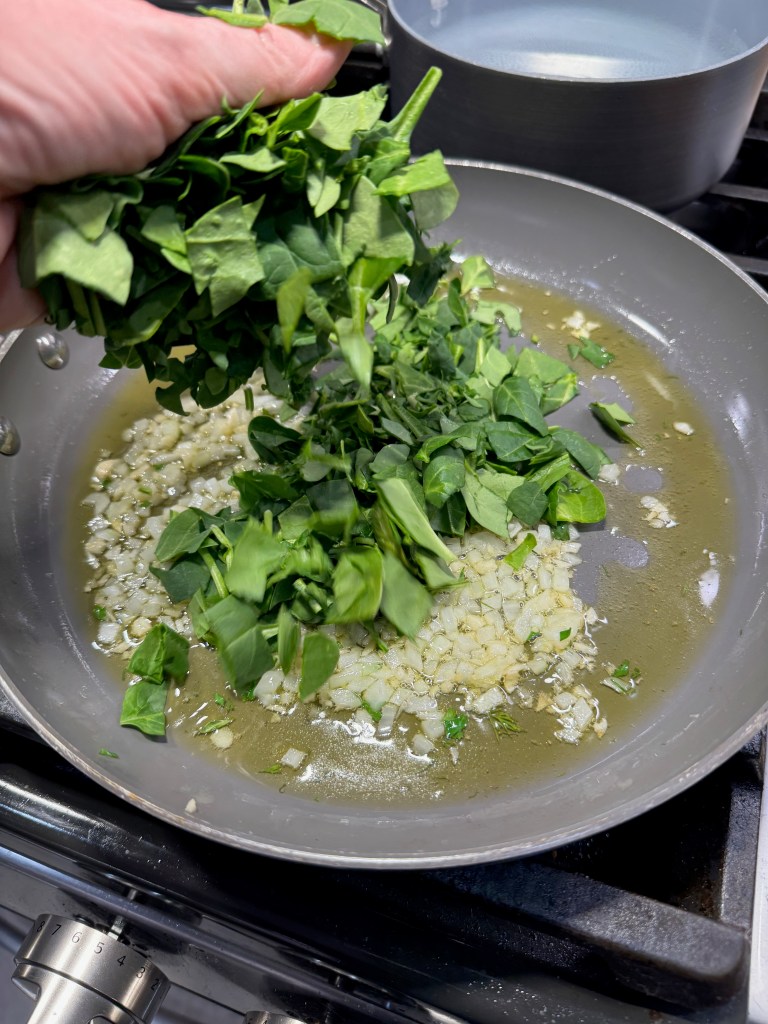
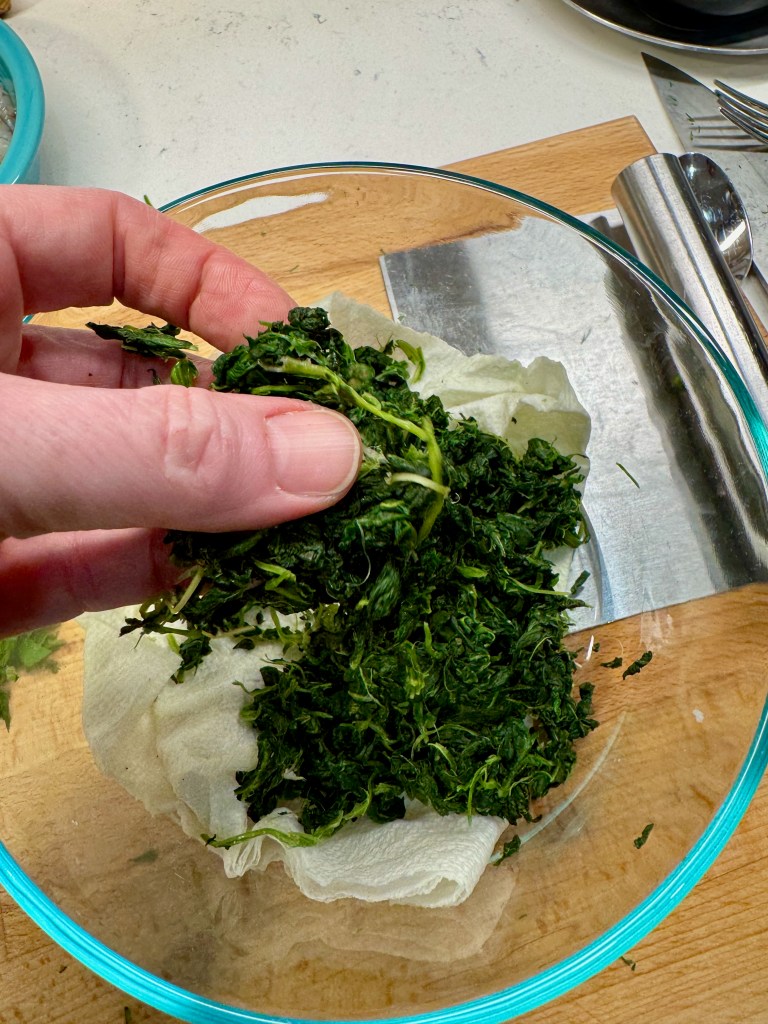
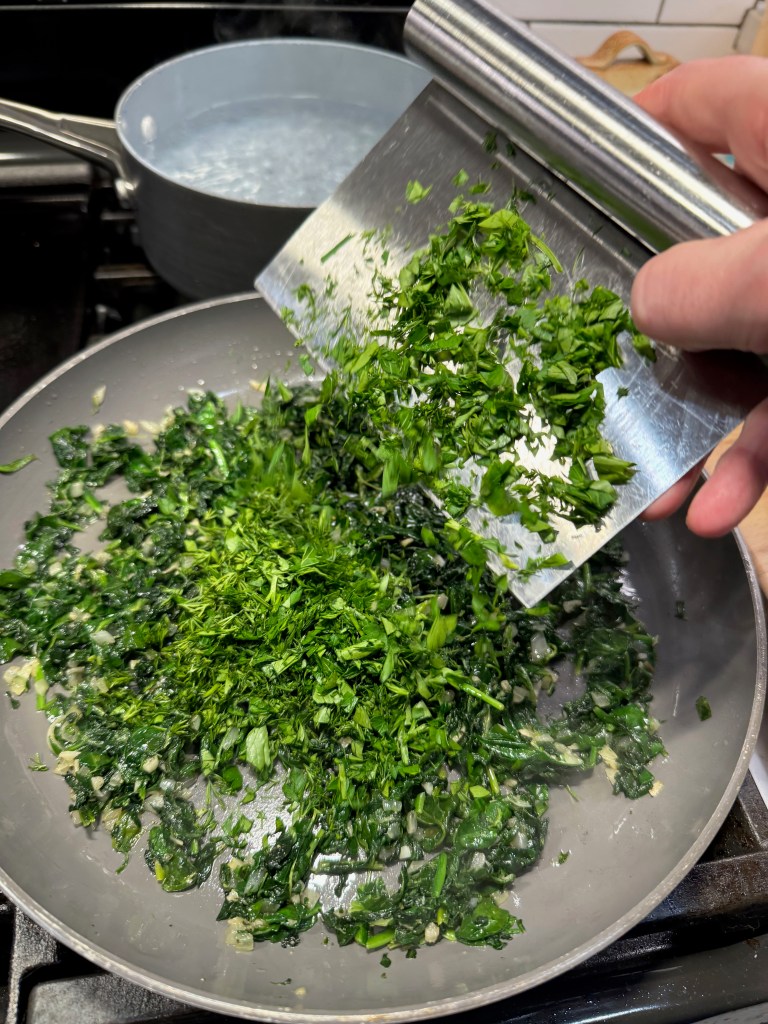
Everything else comes together quickly, beginning with a patient poaching of minced garlic in a large sauté pan. This should be done at a very low temperature, with almost no bubbles evident, so that you don’t burn the garlic. After about 10 minutes, increase the heat and add the diced onions, tossing to soften them in the warm, garlicky oil. Add the chopped spinach (I didn’t have enough so I supplemented with some thawed and squeezed frozen spinach), and then the fresh herbs.
This was the “spanakopita” part of the dish!
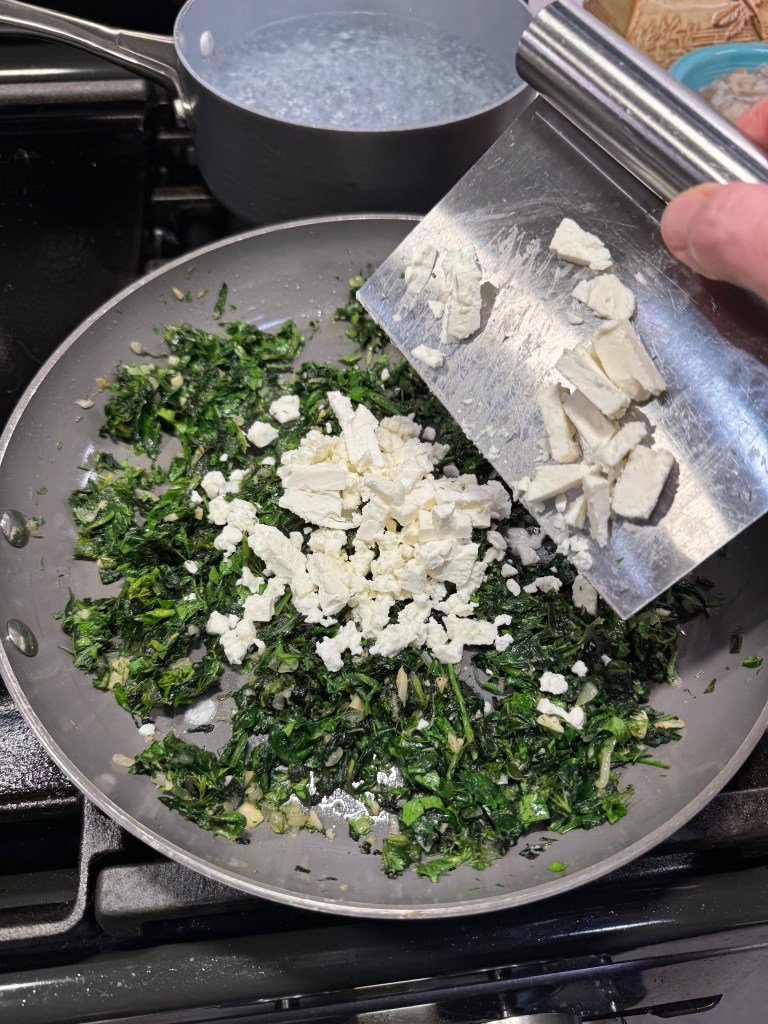
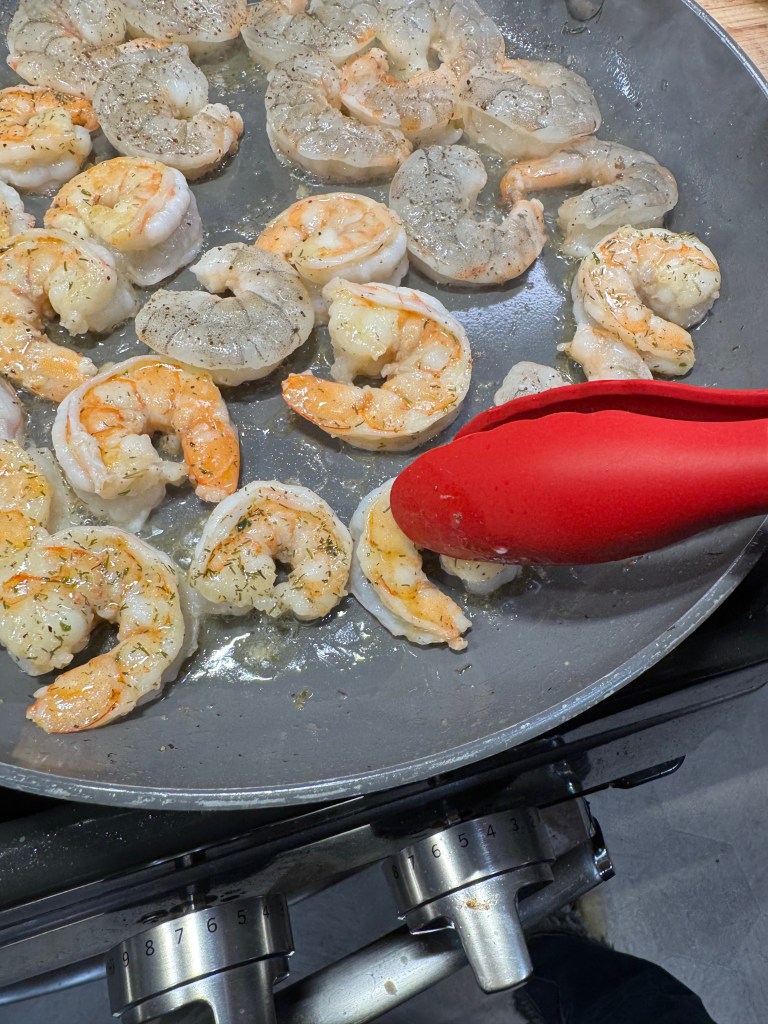
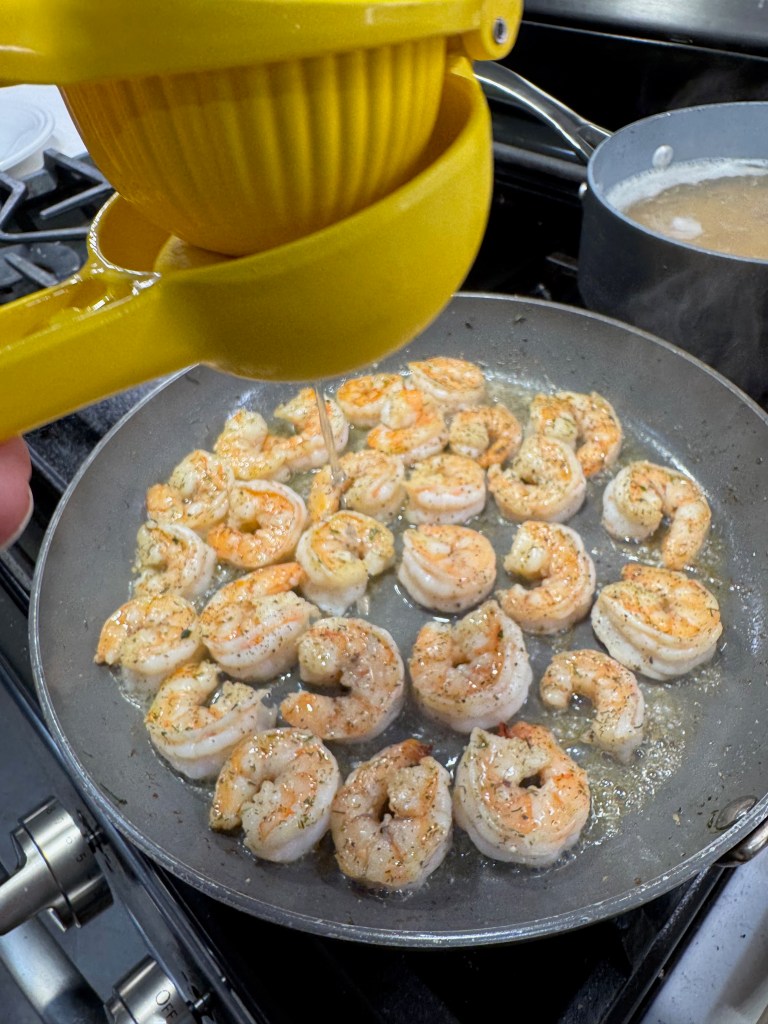
Get the orzo going and toss the feta into the spinach mixture, then transfer that to a bowl and keep it warm. Heat some more olive oil in the same pan, or a bit of butter (or both), and cook the shrimp until it’s just barely a pink/coral color. Always use a delicate touch when cooking shrimp, as it only takes one extra minute to overdo it. My method is to place the shrimp into the hot pan one at a time in concentric circles, and by the time the last shrimp goes in, the first is ready to turn. If you can see a bit of color on the inside curl of the shrimp, that’s your sign to turn it over and cook the other side. The smaller ones will usually cook faster, and if your burner has a hot spot (as mine does), then check the ones there first.
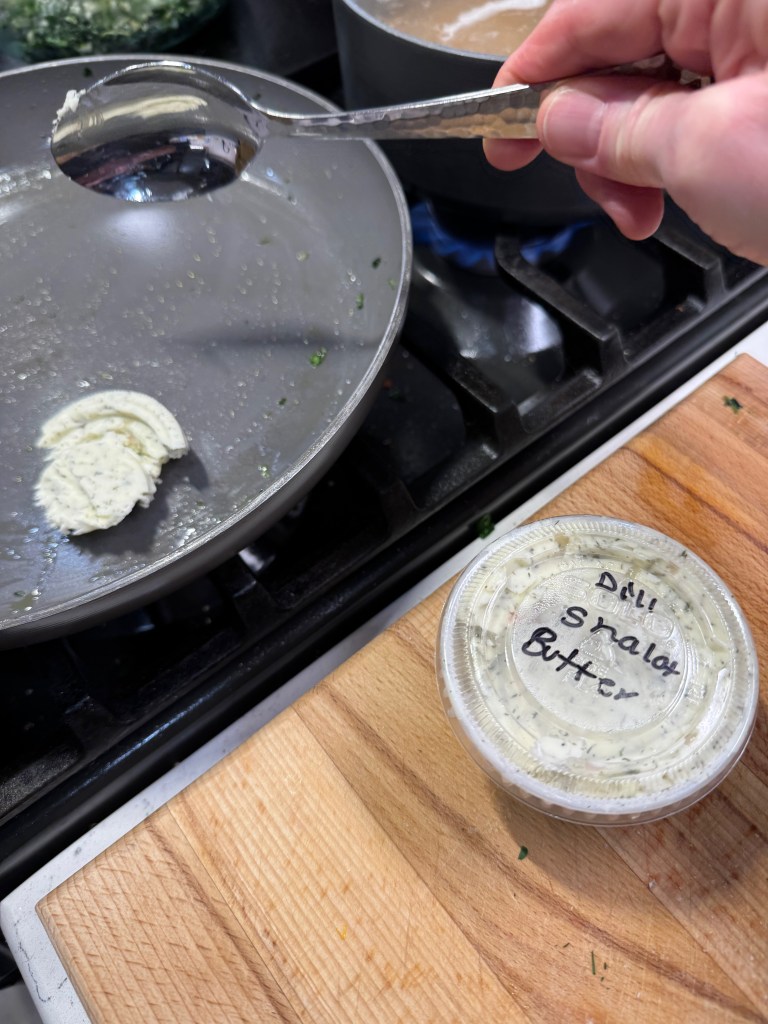
I had some dill-shallot compound butter left over from another dish, and it was perfect for cooking the shrimp!
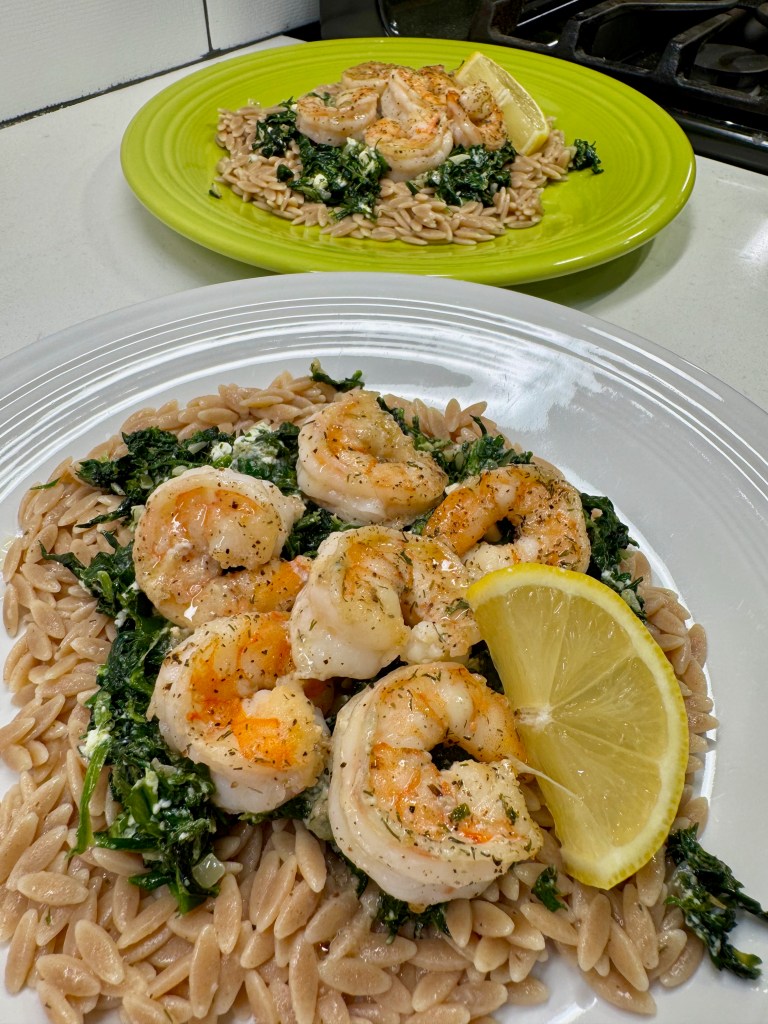
When all the shrimp have been turned over, squeeze fresh lemon over them and turn off the heat. Drain the orzo and toss it in a bit more of butter. Plate it up with the warm spinach-feta mixture and shrimp. Enjoy!
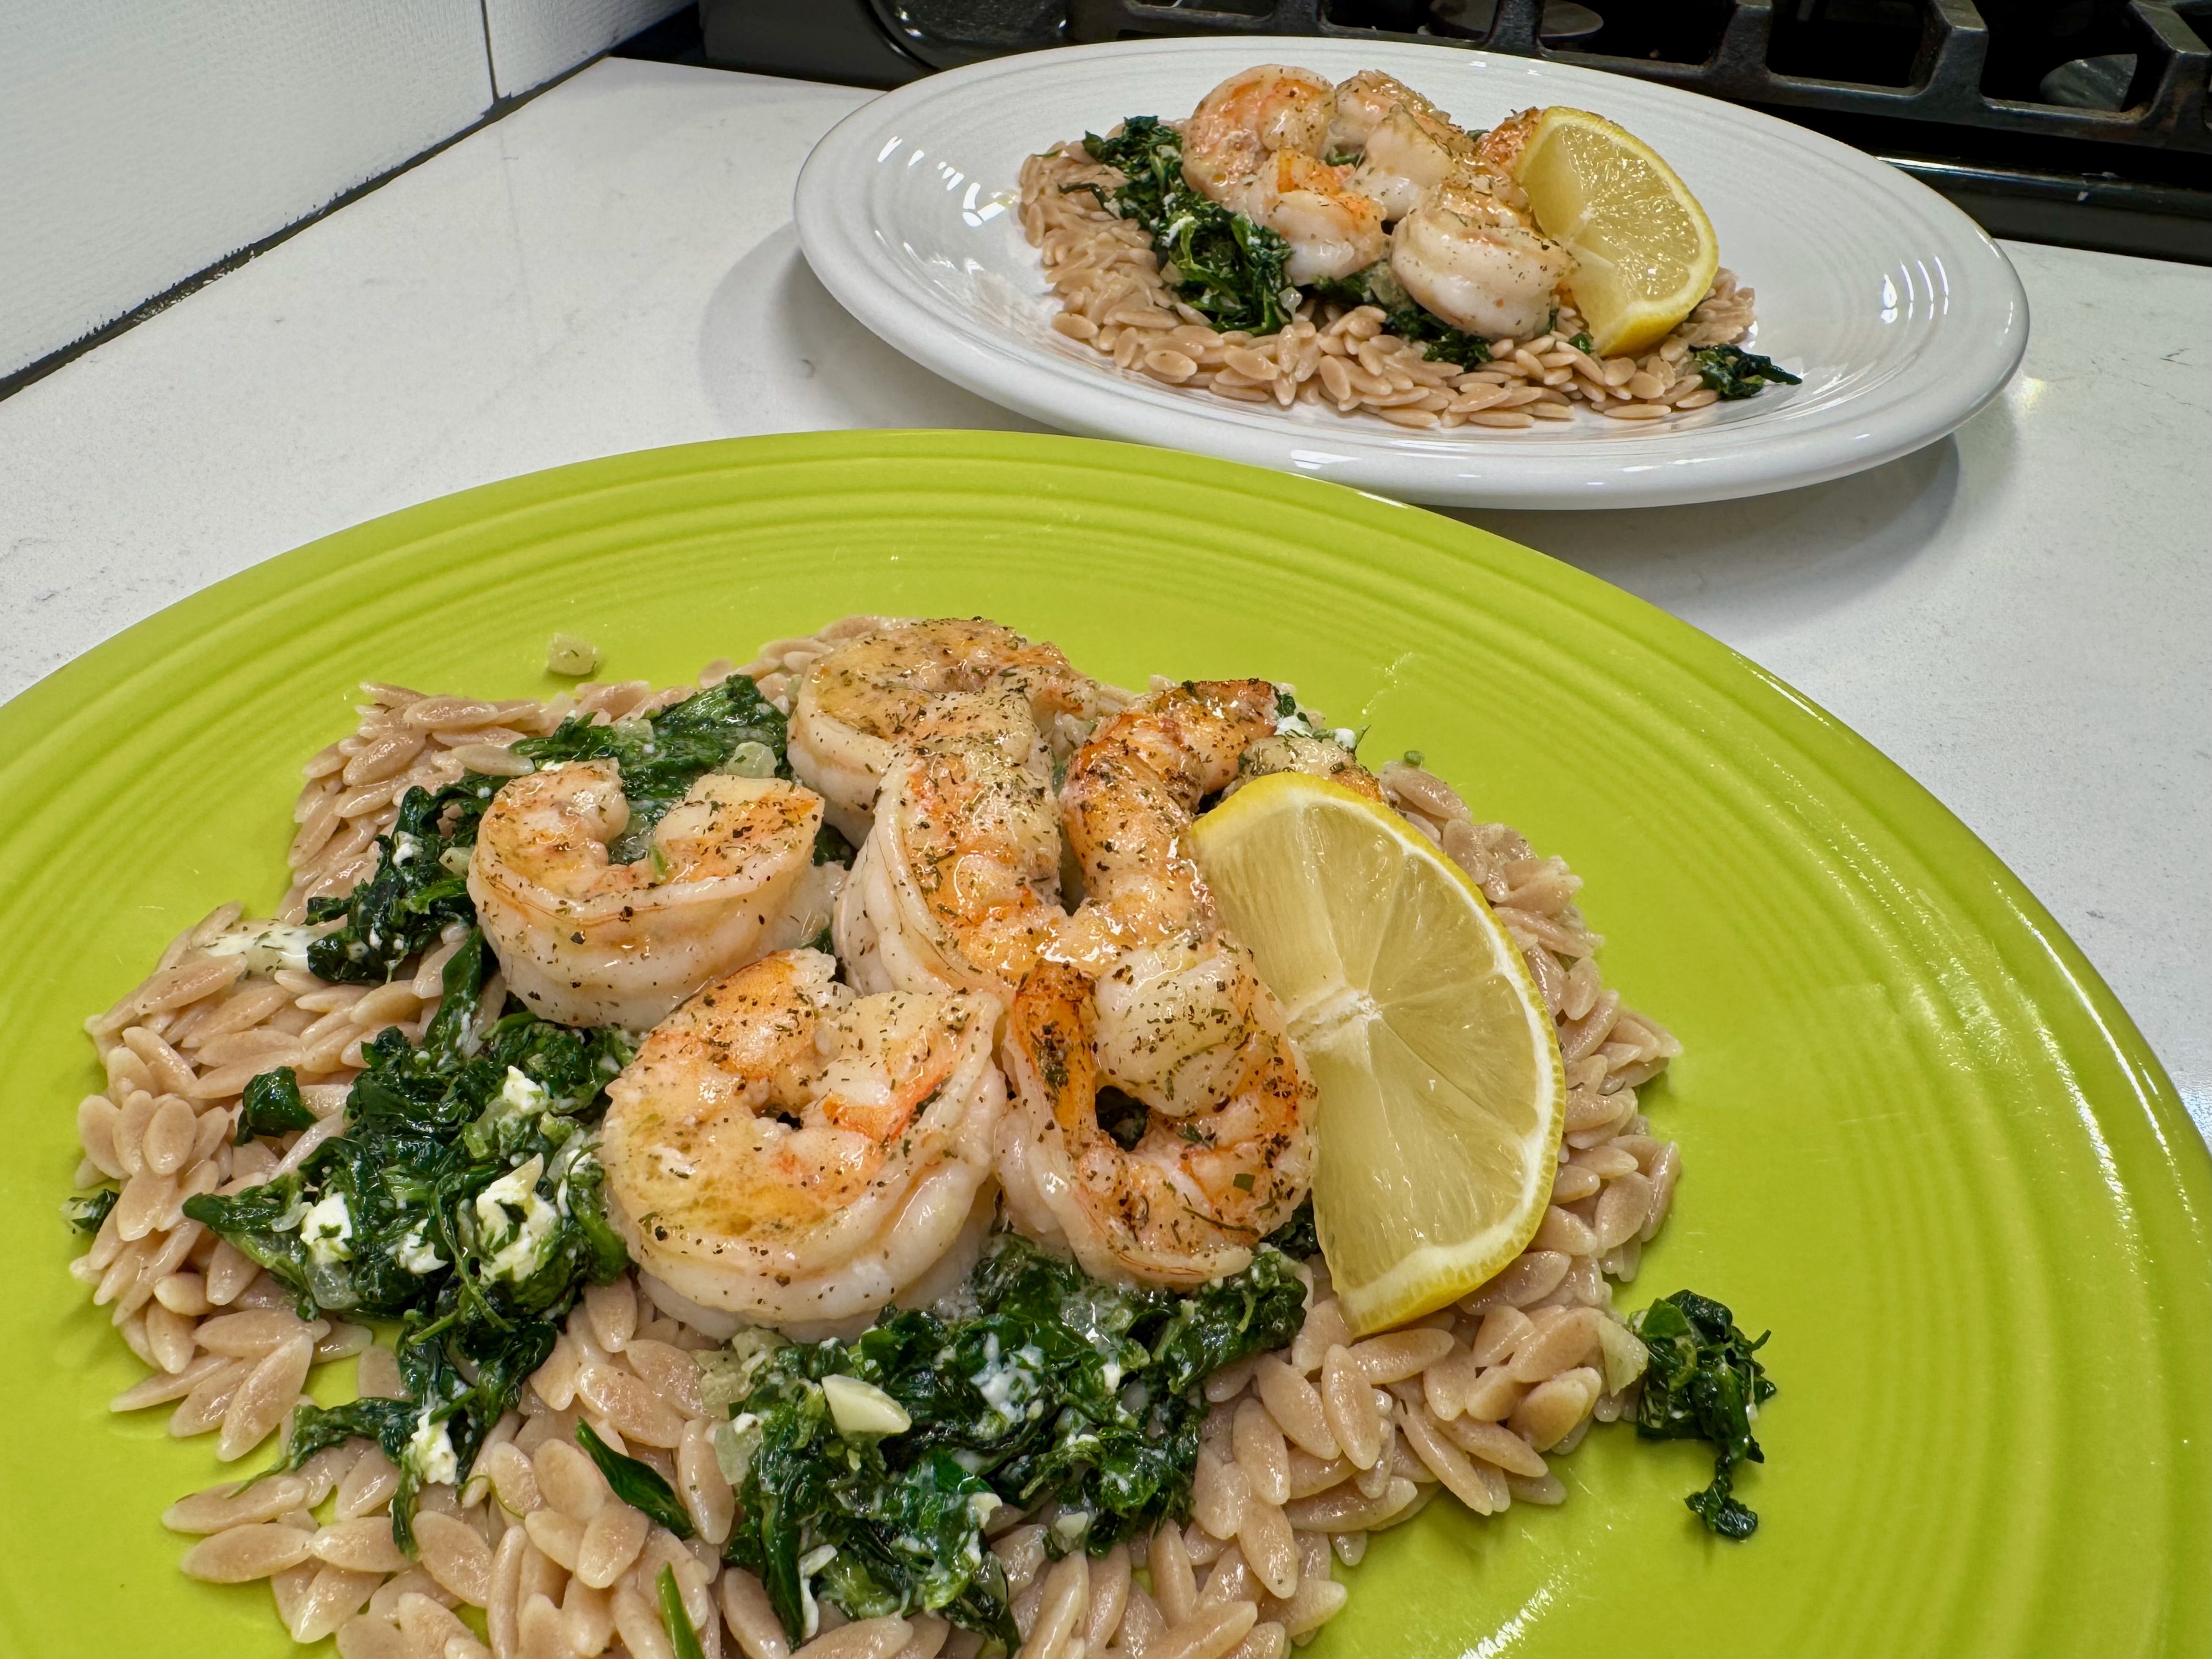
I love to serve meals in a “pile.” It keeps everything warm and seems more like a restaurant meal. 🙂
This is a quick and easy weeknight dinner that combines two of my all-time favorite Mediterranean classics. If you don't have orzo, use any kind of small pasta shape that you have on hand.
Ingredients
2 Tbsp. extra virgin olive oil (possibly more for cooking shrimp)
2 cloves garlic, minced
1/3 cup diced sweet or yellow onion
Kosher salt and freshly ground black pepper
4 fat handfuls baby spinach leaves, rough chopped* (see notes)
A handful each of fresh dill and flat-leaf parsley, chopped
1/3 cup feta, drained and cubed or crumbled
1 Tbsp. butter* (see notes)
1 pound fresh wild-caught shrimp, peeled and deveined
Juice of 1/2 fresh lemon
Cooked orzo and fresh lemon slices, for serving
Note: Fresh spinach is best, but if you don’t have enough, you can supplement with some frozen chopped spinach. Microwave it in a glass dish until thawed, then press out as much water as possible and add it to the onions after they’re already softened. Proceed with the rest of the recipe as usual.
I was fortunate to have a bit of “dill and shallot” compound butter left over from another recipe, and it was perfect for cooking the shrimp! If using regular butter or oil, consider adding a few shakes of dried dill weed at this step, or reserve a bit of fresh dill for sprinkling over the top of the finished dish.
Directions
Please a large skillet over low heat and add two generous swirls of olive oil with the garlic. Cook this very low and slow, with almost no bubbling action in the pan, so that the garlic become very soft and fragrant. It should take about 10 minutes, and this mellows the flavor of the garlic. Too much heat will give the garlic a burned and acrid taste.
When the garlic is softened, increase the heat to medium and add the onions. Season with salt and pepper and toss to sauté until onions are translucent. Add spinach by the handful, tossing until each handful has wilted before adding the next. If supplementing with frozen spinach, wait until the fresh spinach has fully cooked.
Add fresh herbs and toss for about 30 seconds, then add feta and remove the pan from heat. You may either transfer this mixture to a bowl (keep it warm) and use the same pan for the shrimp, or use a second pan for the shrimp.
Add butter (or oil) to the skillet over medium heat. Place shrimp down in the hot butter and season with salt and pepper, and a quick shake of dried dill if you have it. Watch the shrimp closely, and turn them when you notice the color changing on the inside curl. Depending on the size of your shrimp, two to three minutes total should do it. After the shrimp has cooked on the second side, squeeze the fresh lemon juice into the pan and toss to coat.
Toss cooked orzo with a bit of butter or oil, and serve it with the spinach mixture and shrimp piled on top. Add a lemon slice on the side for one last burst of freshness.
Every year for our annual Kentucky Derby gathering, my husband and I include pimento cheese in some form or fashion. It’s a classic Southern thing. But you know that I get bored making the same things over and over, and finding new ways to incorporate the classics is what makes me (and my guests) happy.
In past years, Les has contributed with crowd-pleasing homemade pimento cheese, and our table has also been graced by our spicy pimento cheese deviled eggs, which are so addictive, and an unexpected twist. This year, pimento cheese made its mark in these soft and savory cookies that pay homage to yet another Southern finger food, the “cheese straw.”
A Southern party feels incomplete without pimento cheese.
If you’ve ever attended a wedding reception, bridal shower, funeral or other family gathering in the American South, you’ve probably seen some squiggly little cheese cracker-looking things served alongside the sweet tea and ham biscuits. They resemble pieces of straw, having been squeezed out onto a baking sheet through the star plate of a cookie press. Cheese straws are crispy and wispy, made with three simple ingredients— butter, finely shredded cheddar and flour, though some folks add cayenne to shake things up. These were my inspiration for the pimento cheese puffs I’m sharing today.
The idea for subbing in pimento cheese struck me when Les and I were packing up to leave after a weekend at our favorite North Carolina beach a couple of weeks ago. We had hardly touched the tub of spicy pimento cheese that we’d bought for seaside snacking, and my mind was on the Derby Day party that was coming up the next weekend. I thought, why couldn’t I do an ingredient swap? Mayo has enough fat to sub for butter, but also a bit of vinegar and of course, egg yolks, and I imagined that the resulting “cookies” might be a bit softer than a typical cheese straw. I was correct.
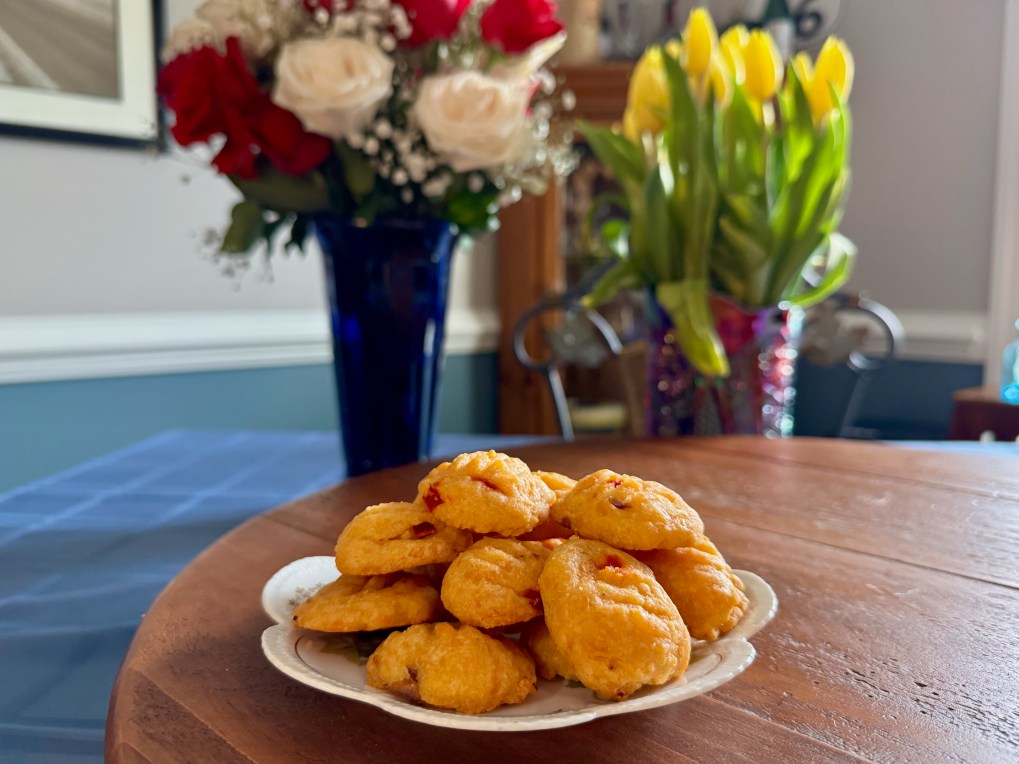
I loved how soft and spongy these cookies turned out!
These were delicate and puffy, but also deeply flavorful from the ingredients in the pimento cheese, including a few finely diced onions. I highly recommend this twist for any “share-a-snack” event that you may have coming up this summer!
How to make pimento cheese puffs
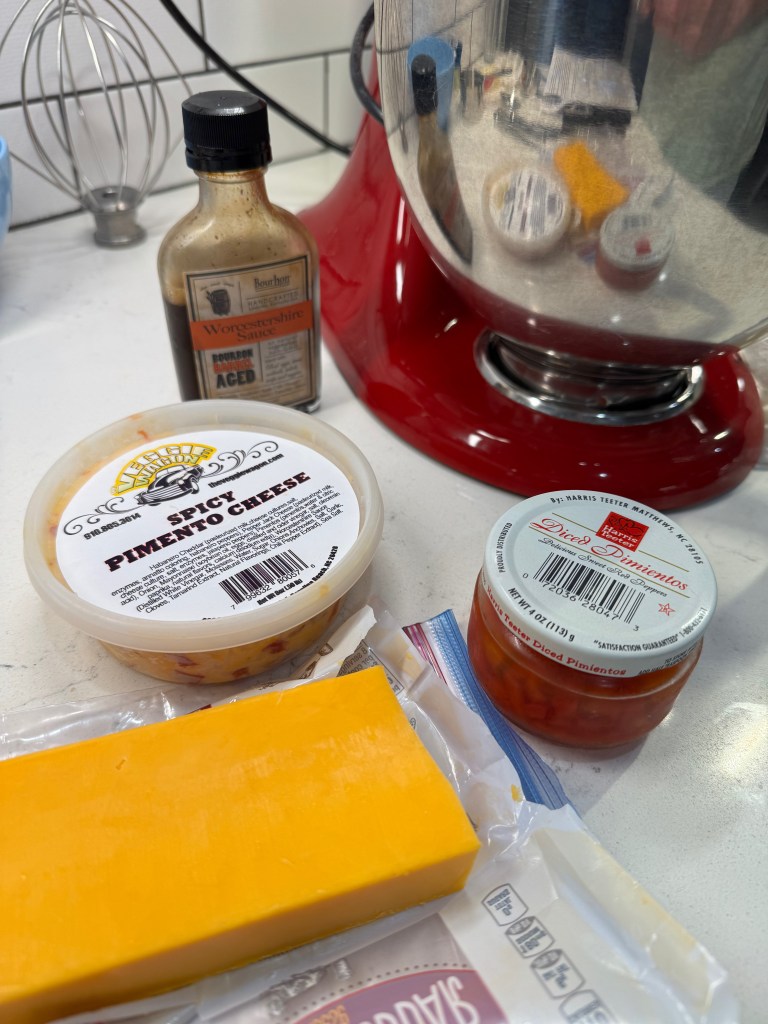
I’m going to be intentionally vague about the exact amounts of each ingredient I used because the consistency of the pimento cheese can vary widely from one brand to another. I’ll focus instead on the ideal outcome of the “dough,” which should be dense, heavy on cheese, with just enough of the mayonnaise and/or butter to bind the mixture together. For the size of our Derby Day crowd, I mixed in additional sharp cheddar, and I figured that I may as well also mix in some extra pimentos for good measure.
I ended up shredding about one third of my extra cheese block for this mixture.
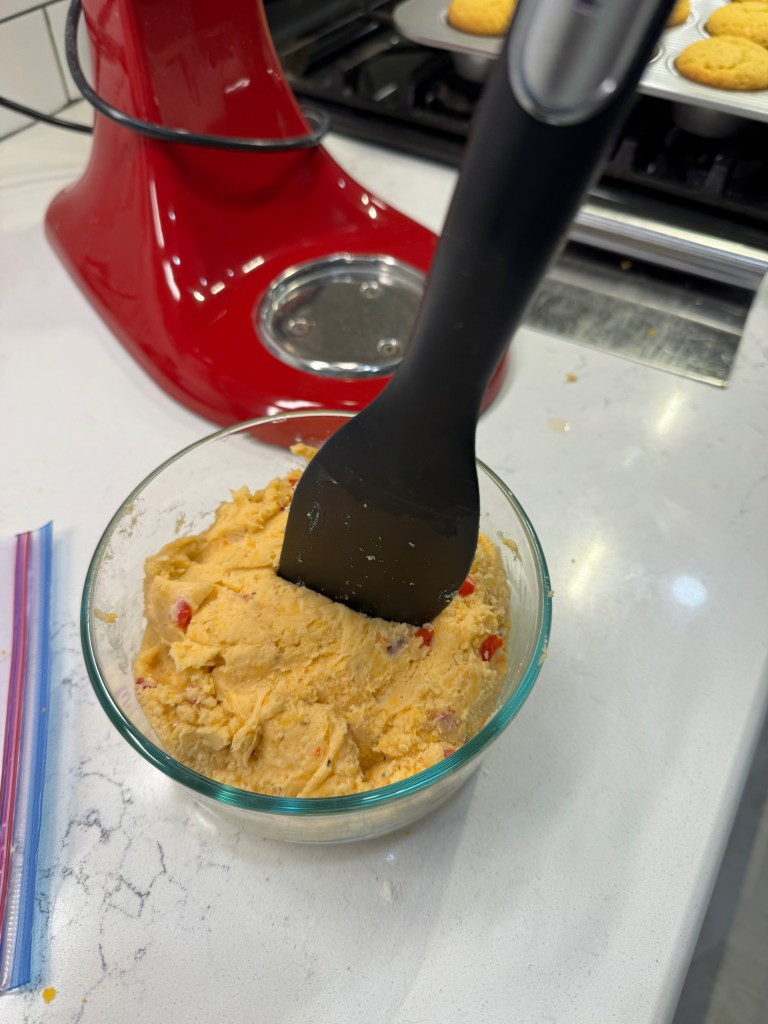
The spicy pimento cheese we bought at the beach was low on mayonnaise (just the way we like it), and for this reason I added a dollop of mayo to my mixing bowl, along with a couple tablespoons of softened salted butter plus a splash of Worcestershire sauce. The pimento cheese, additional cheddar and pimentos went into the mixing bowl and I blended it until it was evenly combined. Next came the flour, and I followed the rule of thumb from my Kentucky bourbon pecan cheese biscuits here, blending in about one cup of all-purpose flour for the combined volume of the other ingredients. Again, give or take as needed, depending on the overall consistency of your mixture. The dough should be firm enough so that you can stand a spoon or spatula straight up in the bowl. Chill the mixture in the fridge for a few hours or overnight before baking.
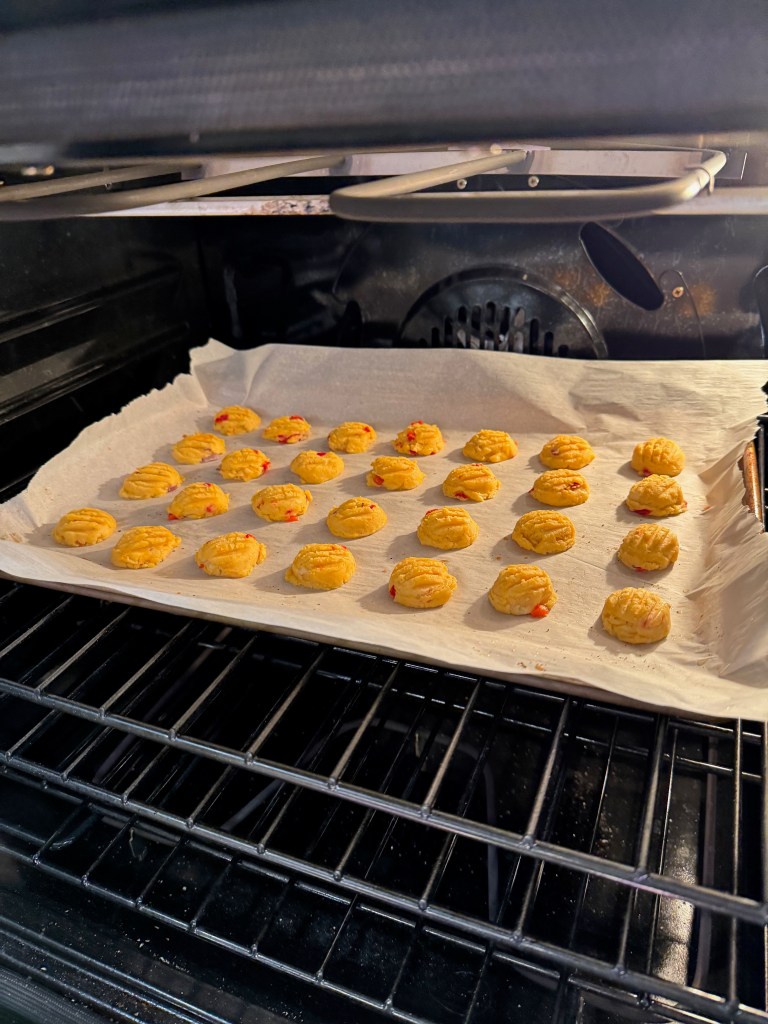
A cookie scoop ensures equal-size snacks, and a quick press with the fork helped flatten them.
My teaspoon-size cookie scoop made quick work of this task, resulting in puffs that measured about an inch and a half across— perfect for our appetizer spread. I have ordered several sizes of these quality scoops from King Arthur Baking Company, and I find that I reach for them for many things other than cookies.
For texture, I lightly pressed each cookie with a fork before baking, though it didn’t have much impact as the cookies puffed a lot as they baked. The cookies are best served the same day, but any leftovers may be stored at room temperature in a covered container.
Any self-respecting Southern hostess will find a way to include pimento cheese on the party table. These soft and flavorful bites were my creation for our latest Kentucky Derby bash, and they turned out terrific.
Ingredients
A dollop of mayonnaise
2 Tbsp. softened salted butter
2 tsp. Worcestershire sauce
About one cup prepared pimento cheese* (see notes)
Up to one cup finely shredded cheddar cheese (sharp or extra sharp for best flavor)
2 Tbsp. jarred pimentos, drained and patted dry
1 cup all-purpose flour
Note: My recipe was made with a low-mayonnaise pimento cheese. Some prepared spreads are very loose and almost runny, and I do not recommend that consistency.
Directions
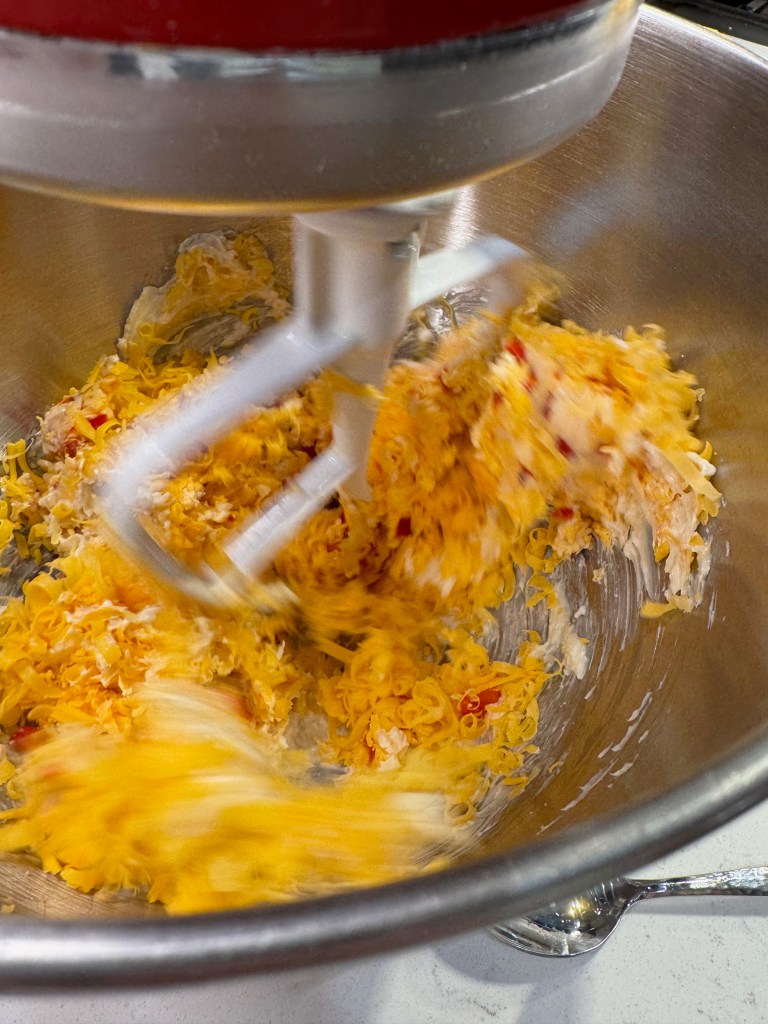
In the bowl of a stand mixer, stir together the mayonnaise, butter and Worcestershire sauce.
Add pimento cheese, additional cheddar and pimentos, and mix with beater blade until evenly combined.
Add the flour, half at a time, blending with the beater blade just until incorporated. Chill dough in the refrigerator for at least a few hours (up to overnight) before baking.
Heat oven to 350° F, with rack in center position. Line a baking sheet with parchment paper or a silicone mat.
Portion cheese cookie dough onto the parchment in rounded teaspoons. Press lightly with a fork. Bake for 18 to 20 minutes, until cookies are puffy and slightly browned on the edges. Transfer right away to a cooling rack.
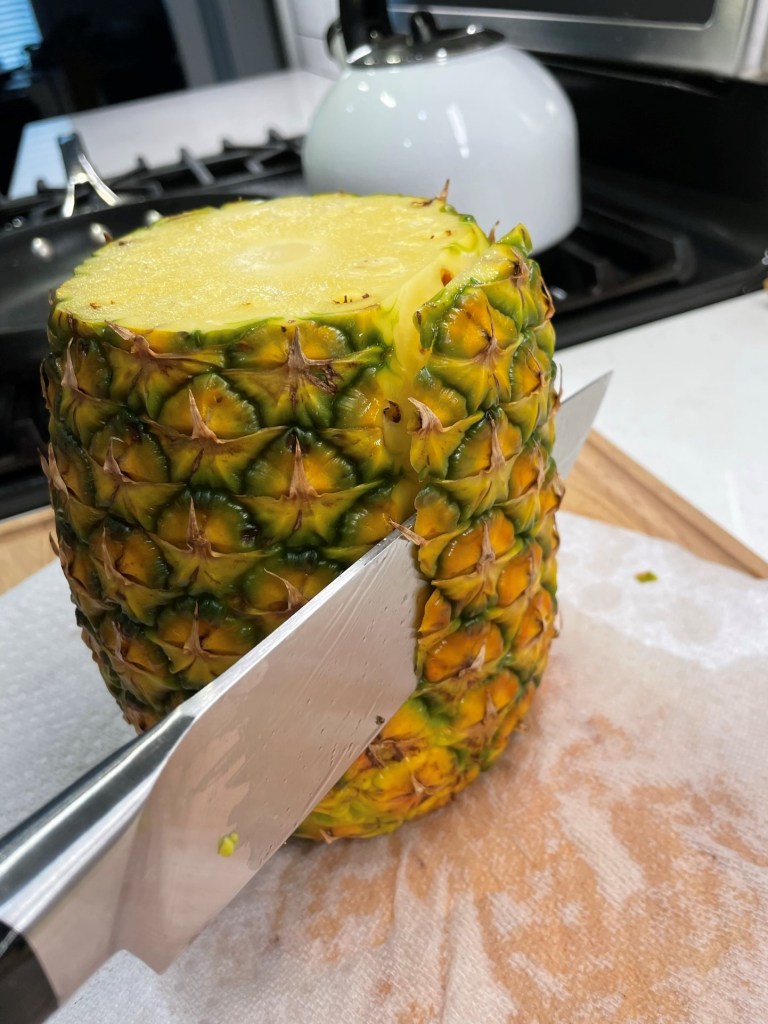
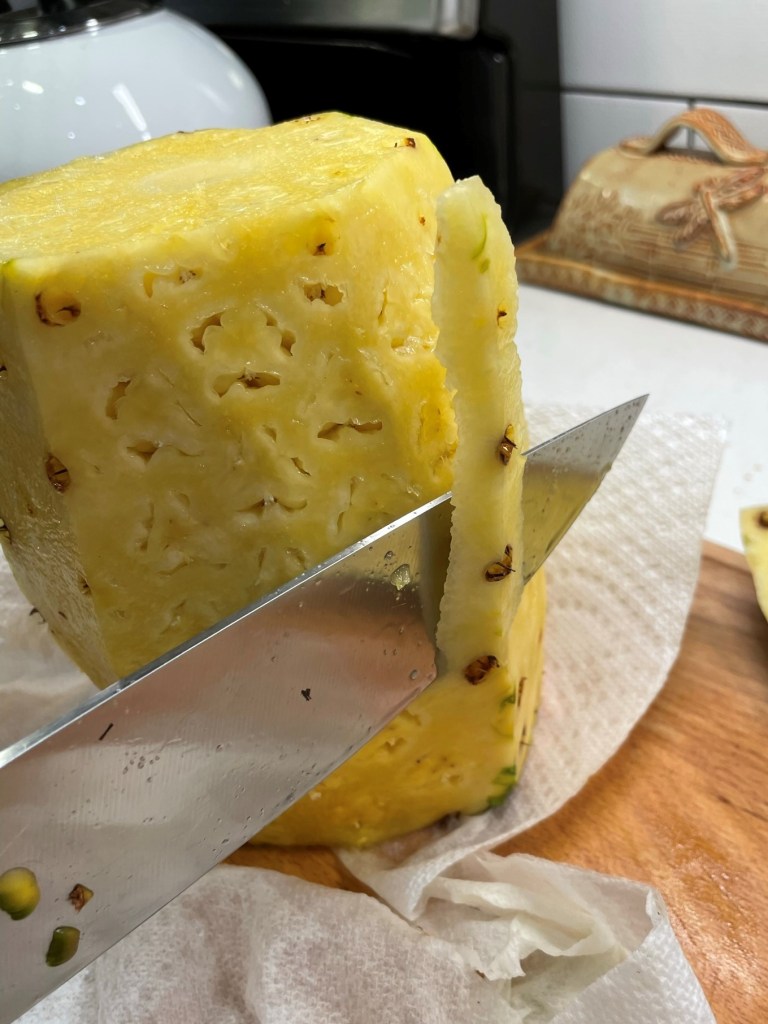
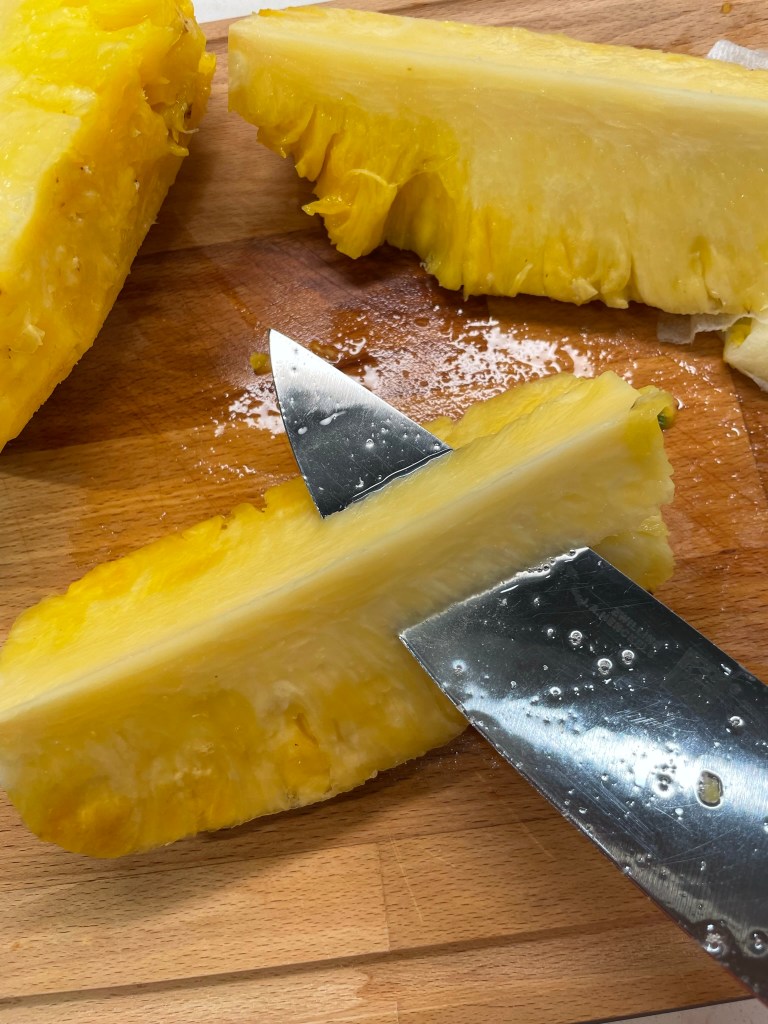
You’d think after so many years of creating in the kitchen, that it might take a really innovative technique or recipe to wow me. And that would be incorrect. Sometimes, it’s the simplest of things. Take for instance, my recent decision to “do something, anything” with the scraps of rind and core that I trimmed from a perfectly ripe, fresh golden pineapple.
It seems like such a waste to discard the pieces that aren’t edible.
Was I channeling my pal, Dorothy from New Vintage Kitchen, and following along with her “Scrap Happy Planet” series of ideas about reducing food waste? Sure, I was. And did I feel a sense of pride in knowing that my frugal grandmother would also be giddy at my effort to use up every bit of the pineapple? Of course. What I didn’t see coming was the flood of ideas I would conjure for using the glorious syrup that resulted from this experiment, and I’m eager to hear your ideas as well.
I’ll admit that I did not entirely come up with this “pineapple syrup” idea on my own; rather, it struck me when I received an email from Imbibe magazine. I’ve been subscribed to this publication (print and digital) since Covid began, and I’m always inspired by the innovative approaches of top bartenders across the country. Check out their site for even just a few clicks and you’ll see what I mean.
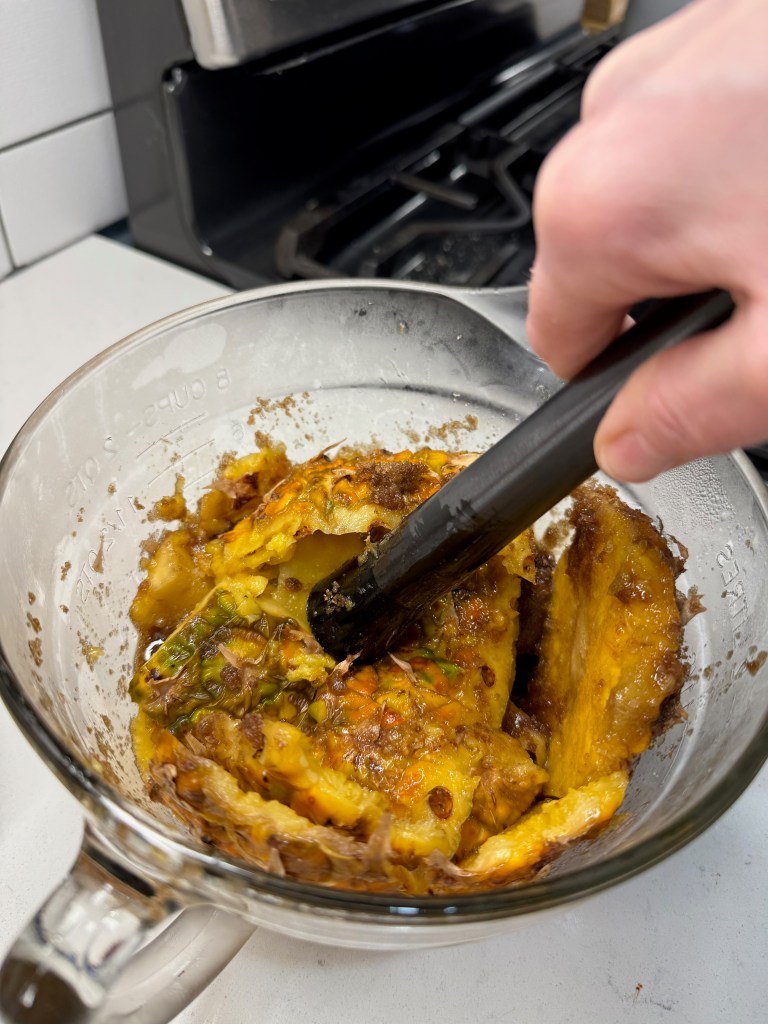
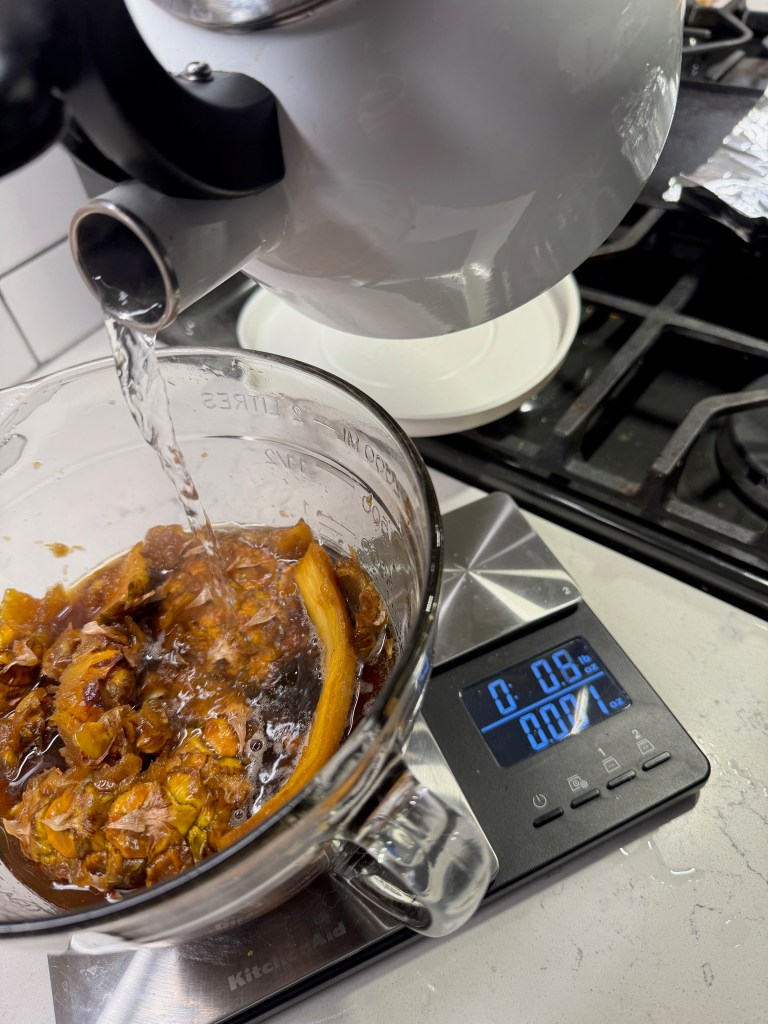
What dropped in my inbox was a recipe for a cocktail called “Pineapple Old Fashioned Du Jour,” and I couldn’t leave that alone because it already had half of my blog’s name on it. My husband, Les, and I both adore old fashioned cocktails and this one sounded sweet, tropical and perfect. Most of all, it gave me inspiration for the pineapple scraps that were staring at me from the fridge. A sweet syrup is created when Demerara sugar (or a mix of light and dark brown sugars, which is what I had in the pantry) is muddled with the leavings of the pineapple, drawing out all that beautiful sweetness. After several hours of macerating, you add a splash of boiling water to thin it out a bit and then strain out the solids.
Oooh, we are gettin’ “scrap happy” over here, indeed! 😂
It was so easy, and a great way to eke out every last bit of flavor from my pineapple. The only problem now is that I have almost too many ideas for this pineapple syrup, which tastes exactly like the sticky sweet part of pineapple upside-down cake. I mean, exactly.
Pretend you didn’t catch me enjoying this! 😂
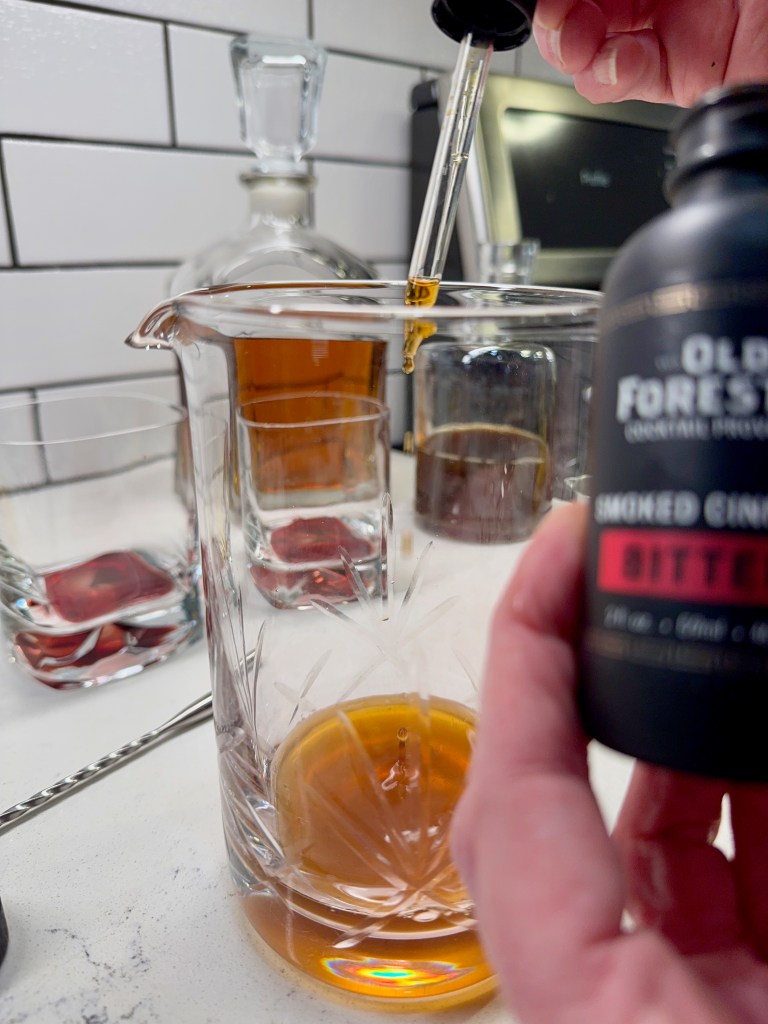
For the sake of follow-through, I tried the pineapple old fashioned du jour that Imbibe had dropped in my inbox. It was tasty, but didn’t hit all the notes I expected after nibbling on that syrupy pineapple core. Call me greedy— I wanted the whole dessert at that point, so I came up with a twist that incorporated a bit of vanilla-scented Tuaca, an Italian brandy liqueur that seems to make everything taste a little bit like cake. I increased the amount of pineapple syrup for my drink and used smoked cinnamon bitters to further emphasize the dessert flavors.
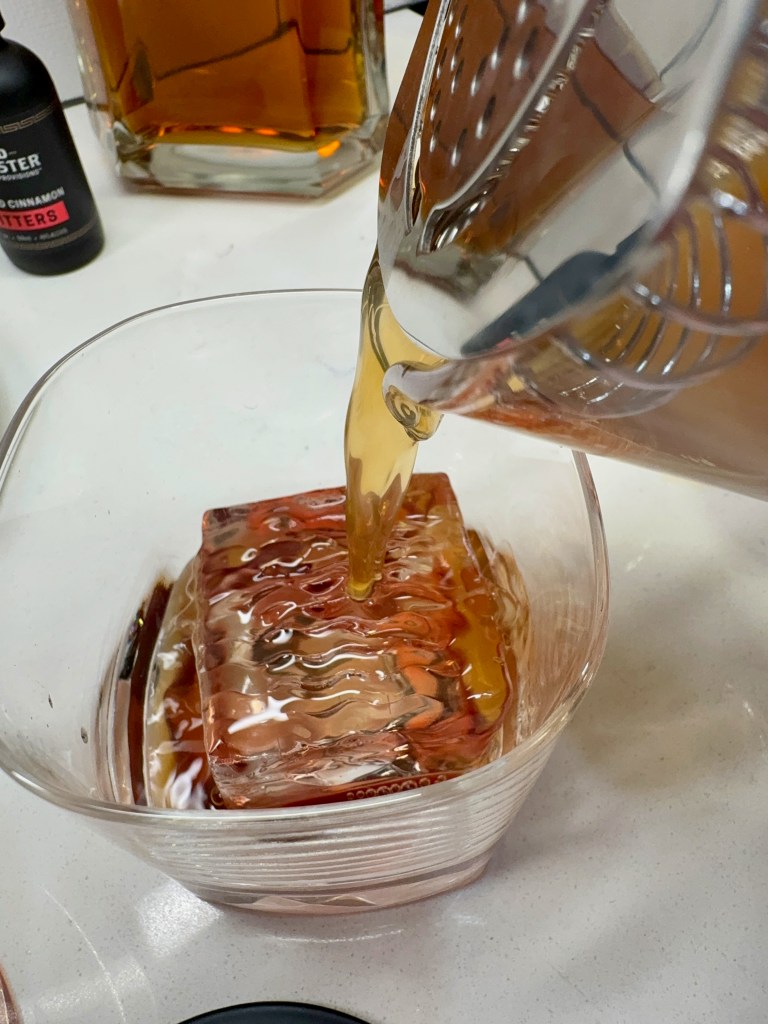
In case you’re wondering, the drink does benefit from having fancy ice!
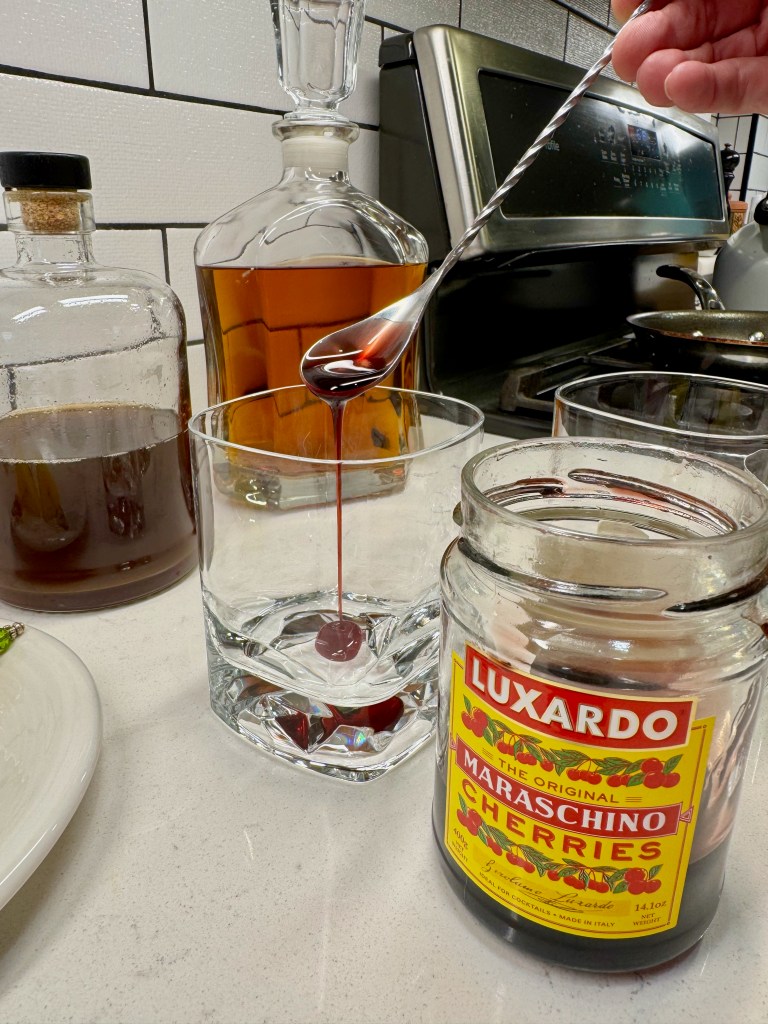
A drizzle of Luxardo cherry syrup syrup into the bottom of the glass gave it an “upside-down” vibe, and a classic pineapple and cherry garnish was just too obvious.
Cheers to having your cake and drinking it, too!
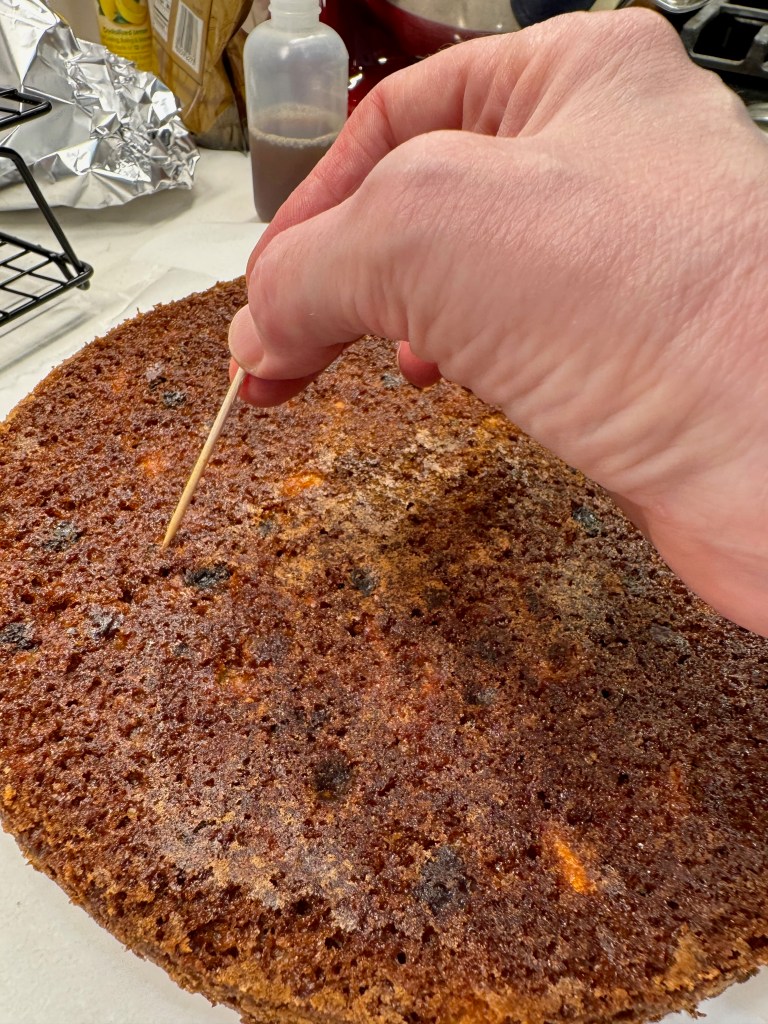
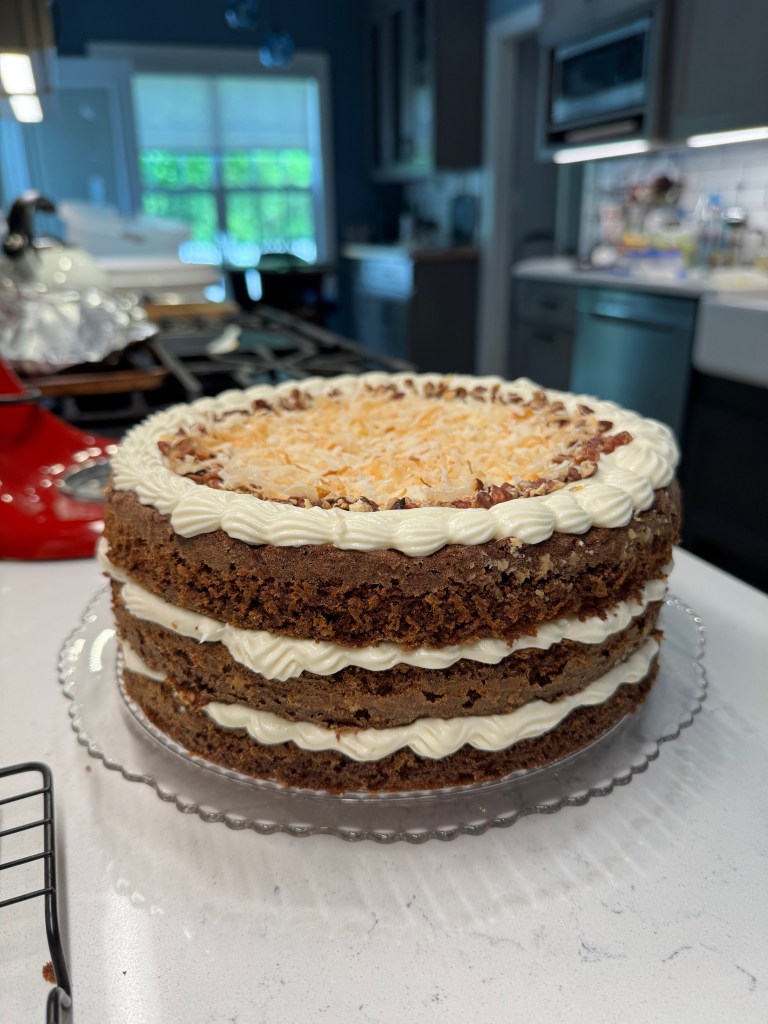
This process creates quite a large amount of syrup, and it only keeps for a couple of weeks in the fridge. We love the old fashioned drinks, but we couldn’t finish this in drinks alone. So I went for broke and made a carrot cake for Easter, using up a generous glug of this intense pineapple syrup to drench the layers before slathering on the lemony cream cheese icing. Dorothy loved this idea as well, especially with crushed pineapple in the cake itself. Here’s how it turned out.
Piercing the cake with a toothpick coaxes the syrup deep into the layers. Let it absorb before icing.
The syrup would also be delicious drizzled over vanilla ice cream— or, better yet, my easy cinnamon ice cream! With a cherry on top, of course! My hairstylist had another easy idea (she and I always share foodie stories), and she asked, why couldn’t you even just drizzle that syrup on a slice of pound cake and top it with some whipped cream? Yes, Julie, why the heck not?!
What would you want to do with this delicious idea?
This deliciously dessert-y cocktail makes use of all the scraps trimmed from a fresh pineapple, and I highly recommend seeking out the Tuaca liqueur for the cake-like notes it brings to the glass. Cheers!
Ingredients
3 oz. bourbon (I used Elijah Craig small batch, which is 94 proof)
1 oz. Tuaca liqueur (Italian brandy with notes of vanilla)
2 oz. pineapple syrup (recipe below)
2 dropper tips smoked cinnamon bitters
2 bar spoons Luxardo cherry syrup for the bottom of the glass
Pineapple chunks and Luxardo cherries to garnish
Notes: Amarena cherries or another high-end cocktail cherry brand would be a fine substitute for Luxardo. The important thing is that the syrup should be thick so that it remains at the bottom of the glass rather than blending into the drink. If you only have maraschino cherries, I’d recommend omit the syrup layer or perhaps use a syrupy grenadine for the aesthetic.
My smoked cinnamon bitters are Old Forester brand, and I found them online at Bourbon Barrel Foods. They are excellent!
Directions
Drizzle Luxardo syrup into the bottom of the glass and place a large ice rock on top of it.
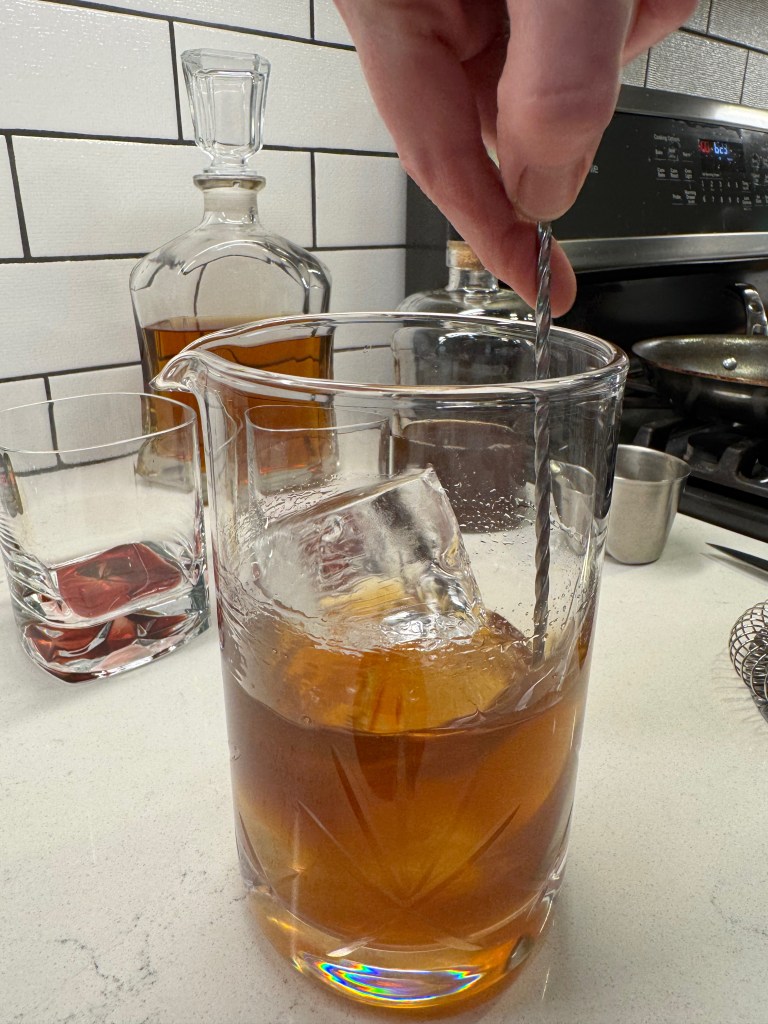
Combine bourbon, Tuaca, pineapple syrup and bitters in a cocktail glass. Add a generous amount of ice and stir to mix until the outside of the mixing glass is frosty.
Strain slowly over the ice so that the cherry syrup does not incorporate. Garnish and enjoy!
Note: This cocktail recipe does require a fair amount of advance prep. Make the pineapple syrup the day before, and be sure to select a pineapple that is fully ripe for best results. Clean it really well and rinse with white vinegar solution before you begin breaking it down. This process yields about two cups of syrup, and it will keep in the refrigerator for two weeks.
Ingredients
All the rind and core pieces of a large, ripe pineapple
1 1/2 cups brown sugar (I used a combination of dark and light; Demerara sugar was suggested by my inspiration recipe)
1/2 cup boiling water
Directions
Place all the pineapple parts in a sealable bowl (break or cut them into smaller chunks if needed). Sprinkle brown sugar over the scraps and use a cocktail muddler or heavy wooden spoon to smash the sugar into the pineapple. After a few minutes, the juices will begin to soften things up. Cover and let it rest for several hours to overnight. Stir a few times as needed to keep things macerating evenly.
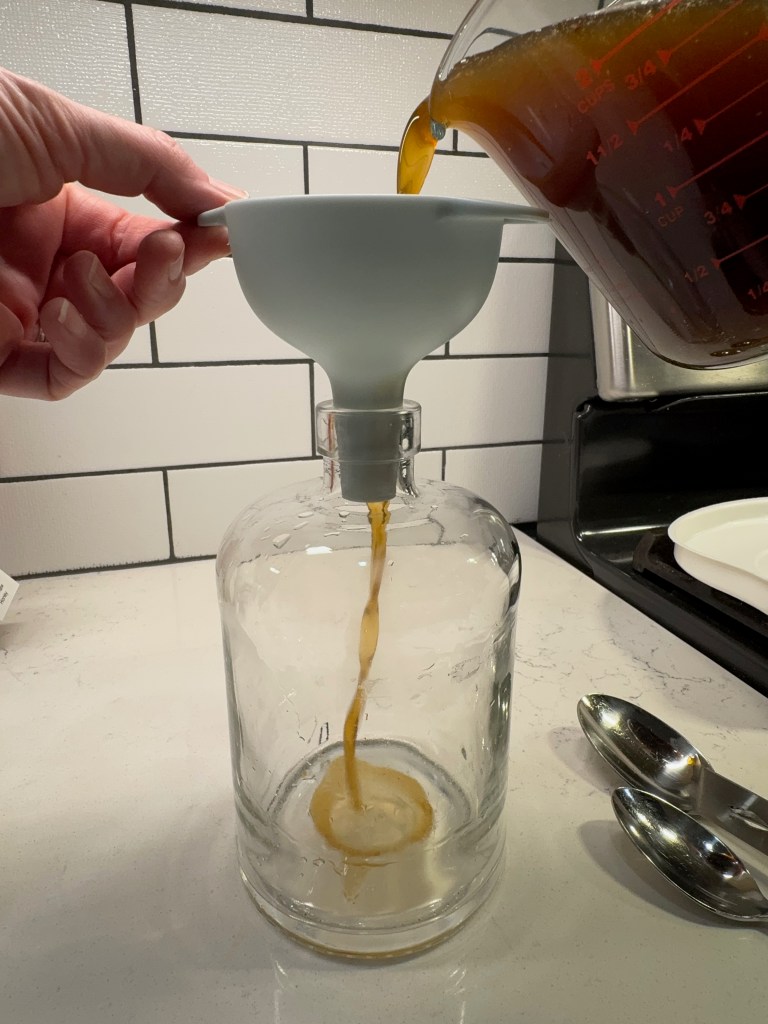
Pour boiling water over the macerated pineapple and stir gently to loosen up and dissolve any remaining sugar. Carefully remove the solid pieces and then strain the syrup through a fine mesh strainer. Transfer to a sealable jar or bottle and keep it in the fridge.
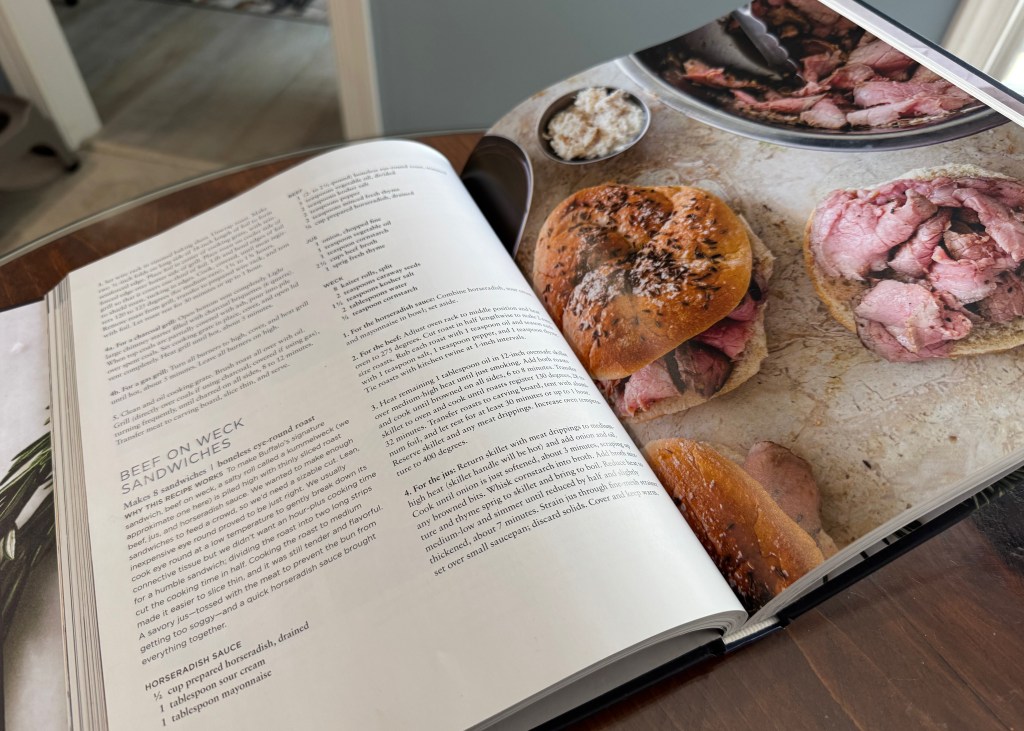
Saturday marks the fifth anniversary of Comfort du Jour. I am 448 blog entries into the story of my life through food, and that boggles my mind a bit. I cannot reflect on my culinary passions without thinking of my maternal grandmother, and thinking about her makes me long for the flavors of “home.” This simple yet iconic sandwich of my old neck of the woods has been pushed around on my culinary bucket list since 2020, and I am aware that my procrastination in making it has nothing to do with ingredients or complexity. It has everything to do with my own expectation and the same old, six-word worry:
What if I mess it up?
Fear is a weird phenomenon, isn’t it? And for people who’ve been raised by perfectionists and other hard-to-please grown-ups, it becomes a normal state of mind that lingers long after the initial disappointees have faded into the background. Fear has kept me from a million things in this life, culinary challenges among them. But I threw caution to the wind last week and tried my hand at beef on weck, figuring, seriously, what’s the worst that could happen?
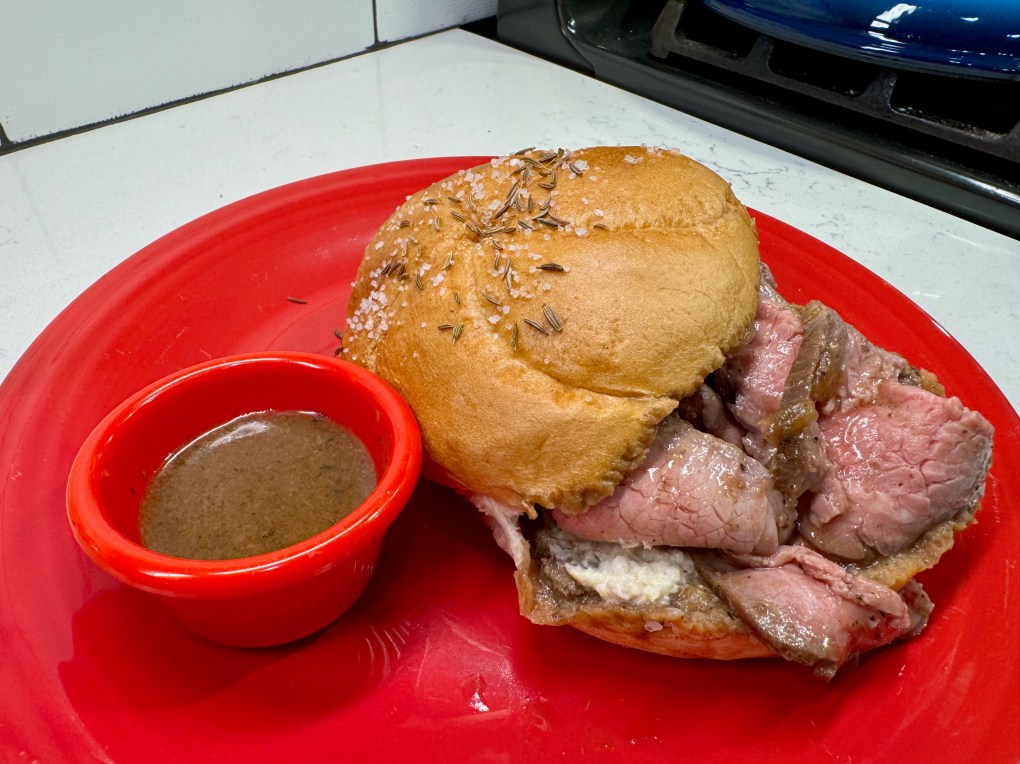
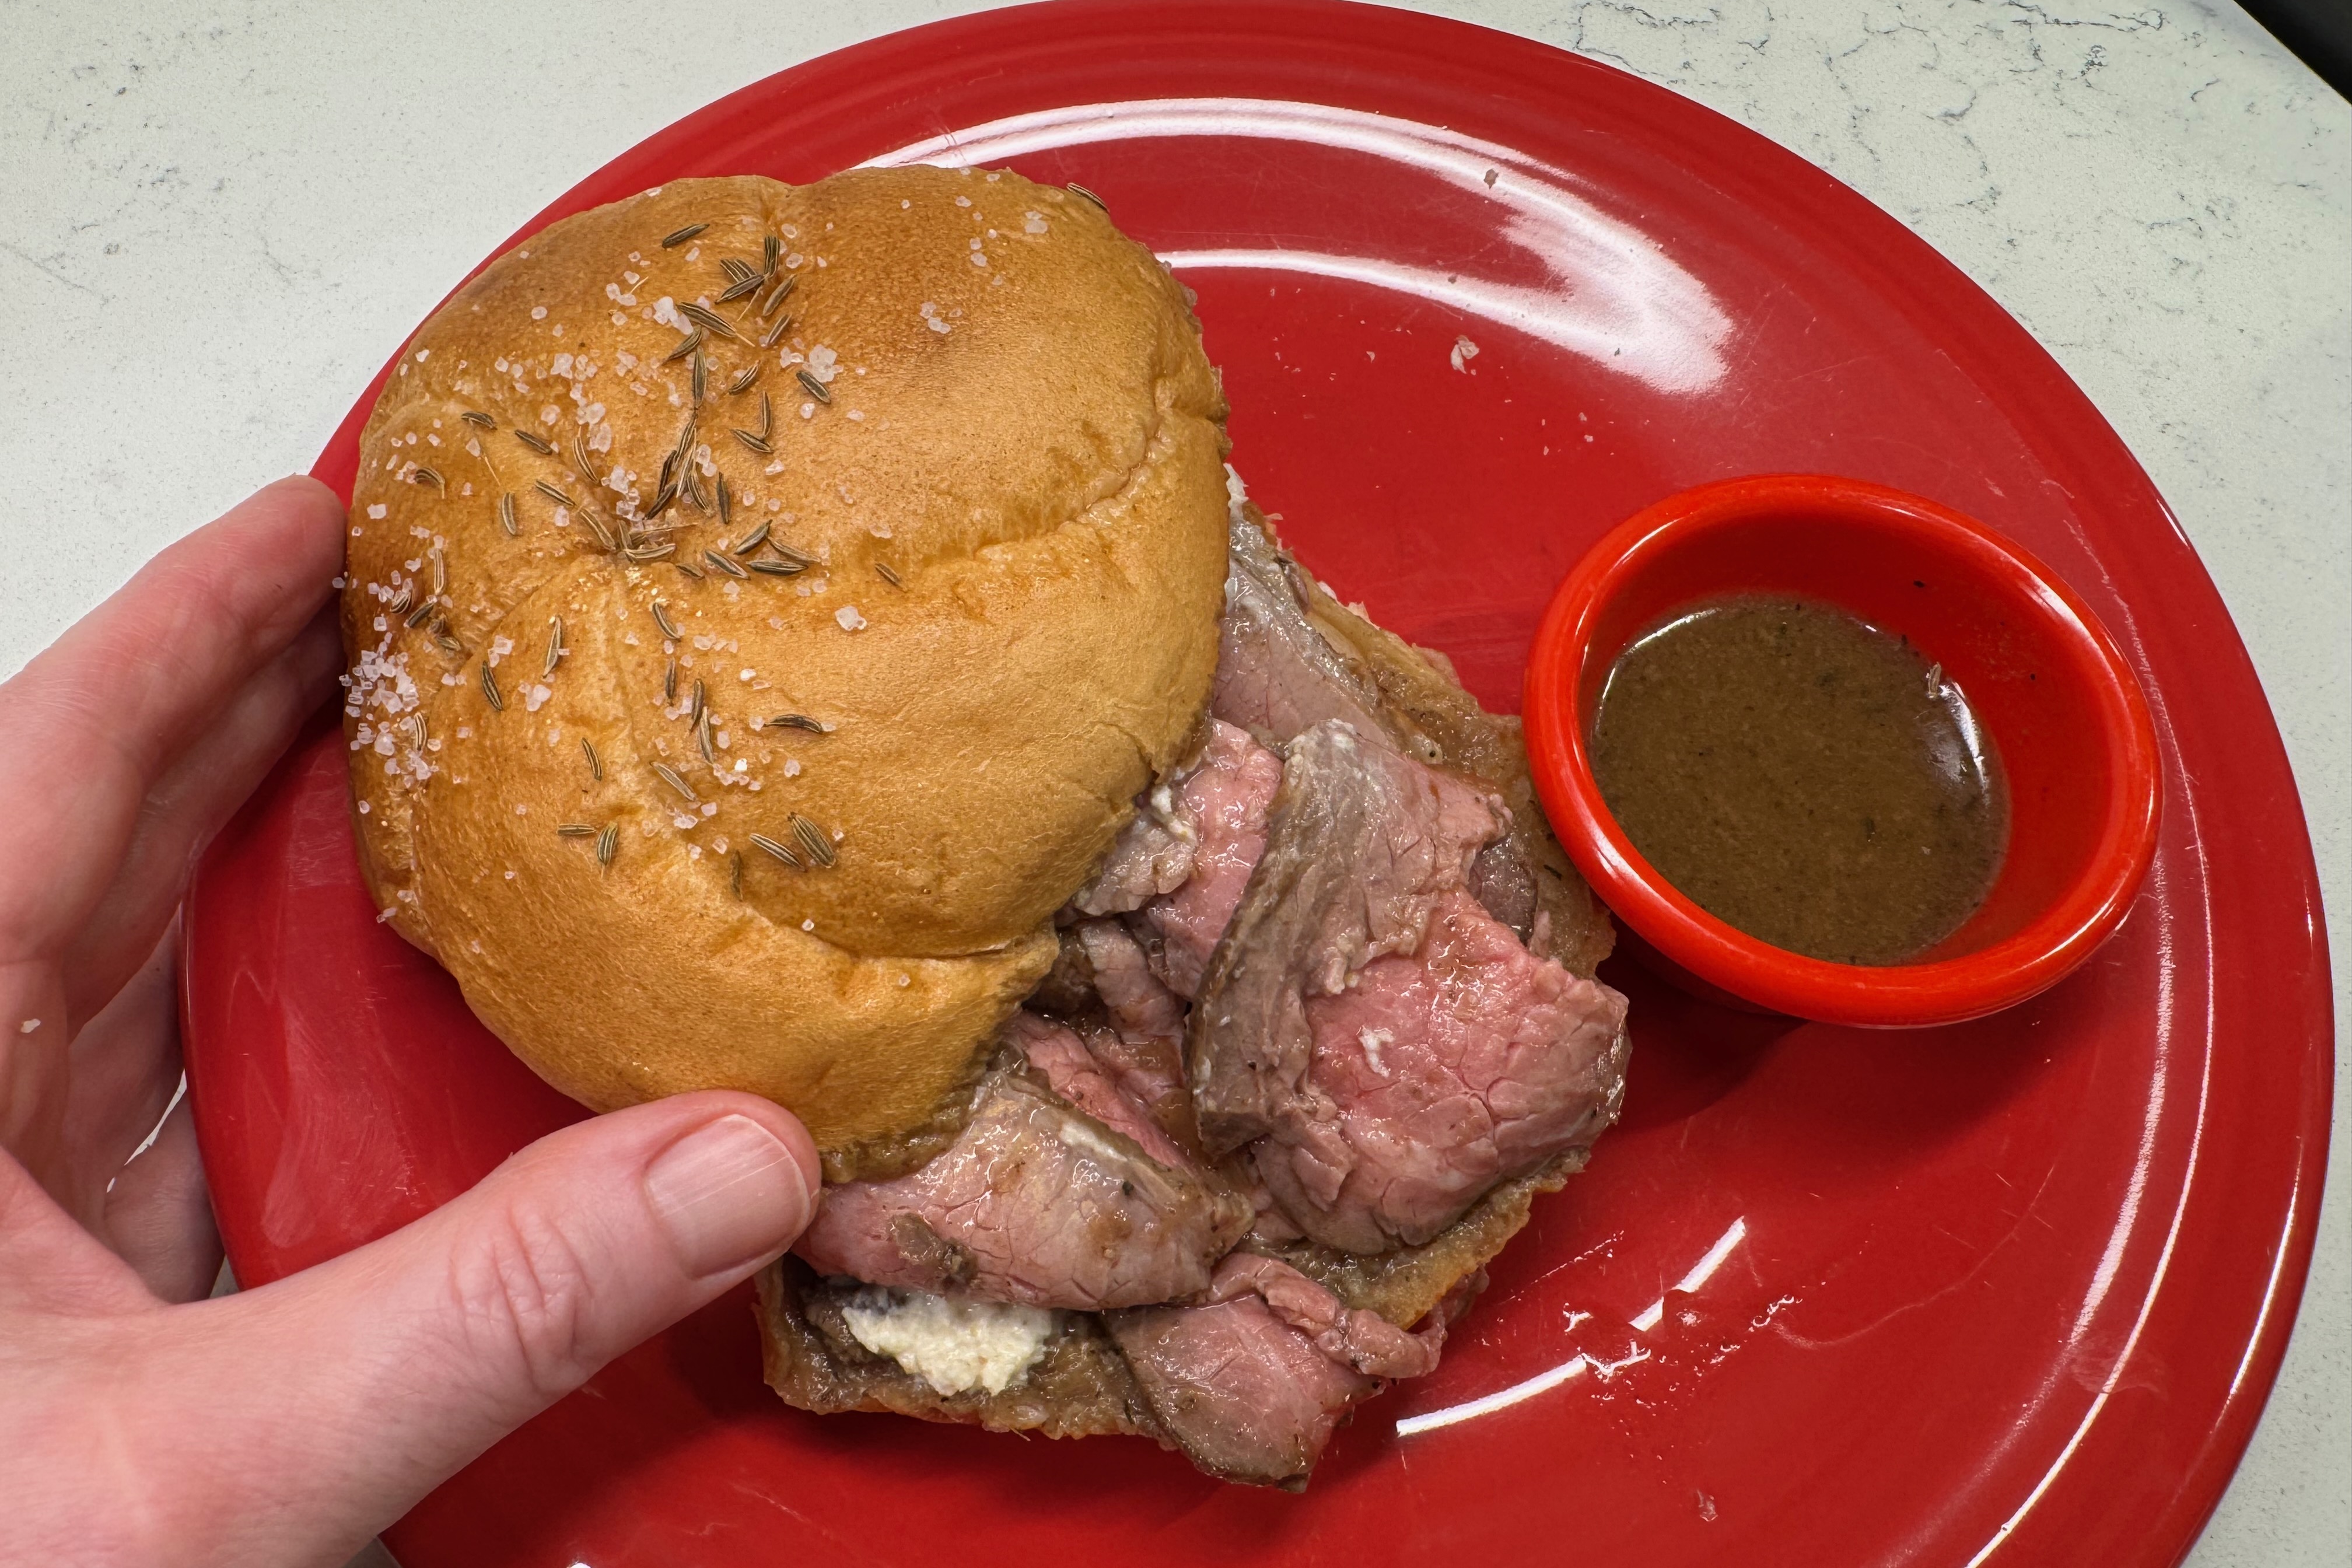
Yes, it was as delish as it looks!
This experiment was not without lessons, mind you, but the outcome was so delicious and so well received at my house (I made it while my husband’s son, Alex, was visiting from his home in Hungary), that you can bet I’ll be making it again and again, with these notes as my template.
Whattya mean, no sandwiches?!
I am always happy to see Alex arrive for a visit. He’s a cool millennial kid who, like his dad, never met a stranger. His knack for making friends quickly is a great asset for someone who co-owns and operates a hostel in Budapest. In the quiet breaks in my work-from-home schedule, Alex and I had some great conversations, including several around food. When I asked him what kind of sandwiches are popular in Budapest, he hesitated a few beats and then admitted, “none, really.” Despite the constant stream of international tourists, the Hungarian capital is oddly bereft of good sandwich shops amid all the Asian and Italian hot spots aimed at visitors.
This, I thought, was a tragedy, and it was the final push I needed to get on top of making beef on weck. What American-born man doesn’t want a good, medium-rare roast beef on a bun? The bun, in this case, being a kummelweck roll (or kimmelweck, depending on who you ask), which is essentially a kaiser roll that has been adorned with aromatic caraway seeds and coarse salt. I wanted so much to make my own rolls for this, but I cheated a bit and gussied up plain kaiser rolls from my supermarket bakery. It worked perfectly.
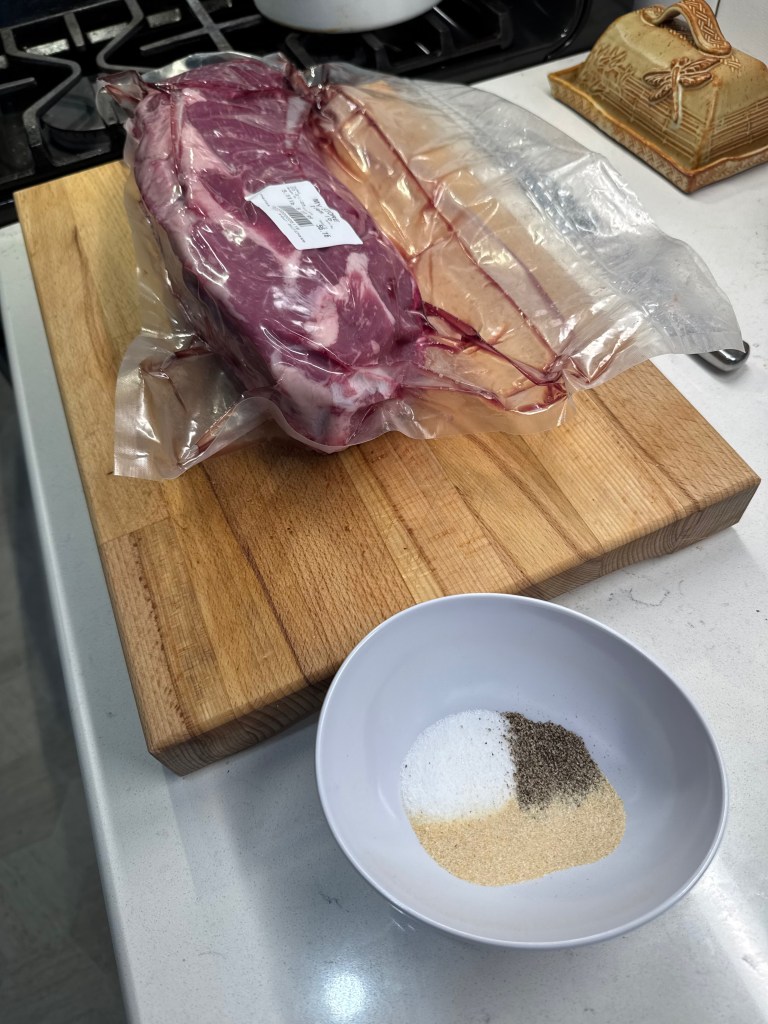
The butcher always knows…
We are very fortunate to have a high quality, local-sourcing, independent butcher in our city. The guys at @SmokeCityMeats in Winston-Salem always set me up for success. When I asked Matt about getting an eye of round roast for beef on weck for three people with plenty of leftovers, Matt replied that he may as well set aside a whole one for me, and this cut was a little over five pounds. It seemed like A LOT, but it turned out to be exactly what we needed for our meal plan. This is why I trust my butchers, the same guys who hooked me up with the pork belly and tenderloin that became my fabulous porchetta, and the lamb for my tasty grilled lamb burgers and the duck breasts for my crispy five spice duck with cherry-pinot noir sauce, and the strip steaks I used in my reverse-sear experiment. They always know best, and I’m grateful for their expert suggestions.
I know it probably sounds like a commercial, but I swear that they are not paying me to promote their shop. I’m genuinely a happy customer who is proud to support local, and in return, we get to enjoy responsibly raised, incredibly flavorful local meats. It’s truly a win-win.
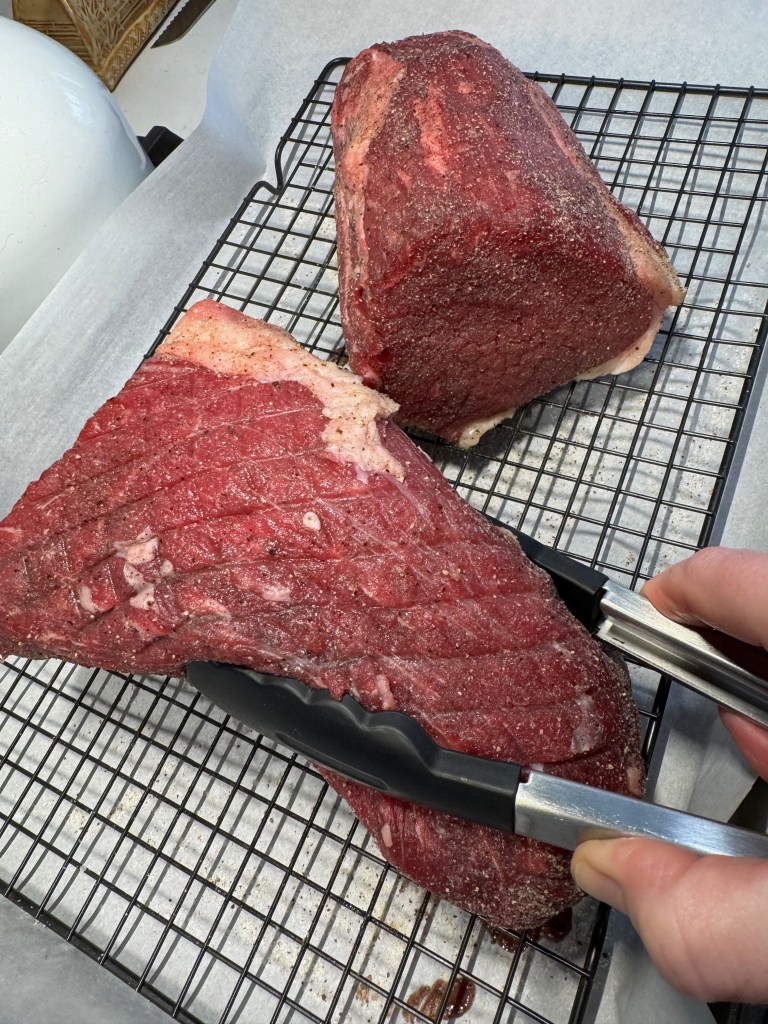
A method to my madness
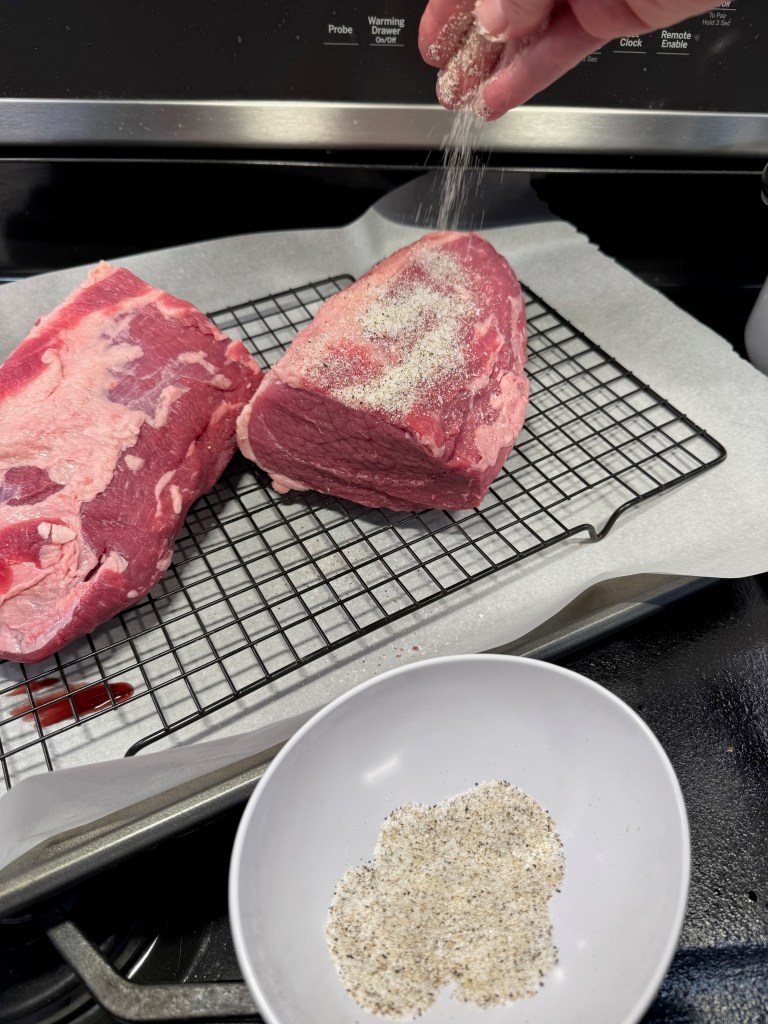
It isn’t enough to have an incredible cut of meat— one also needs to know the best technique for preparing it, and for that, I’m trusting J. Kenji Lopez-Alt, the science-y chef whose method for dry brining has become my standard. Whether I’m prepping duck breasts, a Thanksgiving turkey or a pulled pork shoulder, you can bet I’ll be sprinkling it with salt and stuffing it into the fridge overnight. I cannot overstate how much this technique has elevated my cooking. The key is to place the meat in the fridge uncovered, so that the salt draws out moisture, dissolves into a brine and then soaks back into the meat. For my beef on weck, my salt was also peppered and spiked with onion powder.
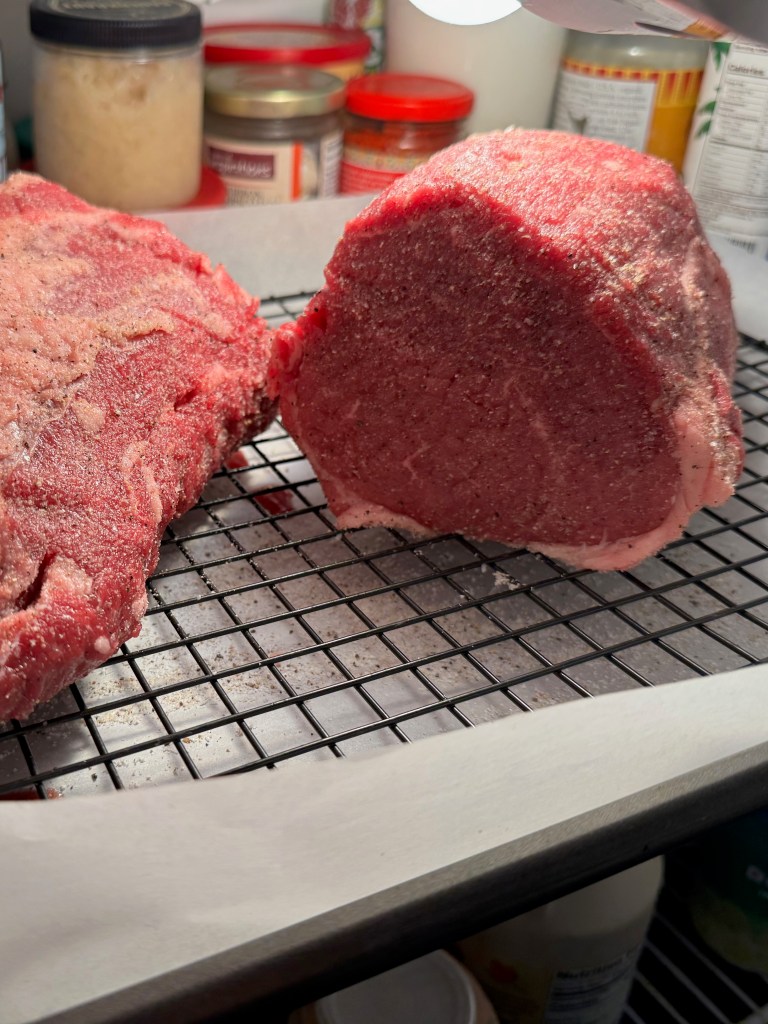
This is scary the first time, because when you open the fridge the next day, the meat will look dry, tight and somewhat shriveled. The level of panic you feel will be directly related to the price you paid for the meat in question. My first time dry brining was a heritage-breed Thanksgiving turkey, and the price tag was about $100, so it was a huge amount of faith placed in Kenji’s knowledge and experience. It was also one of the most delicious turkeys I’ve ever done. This time, it was a $56 eye of round roast, and I was confident as could be. Try it once, and I promise you won’t be disappointed.
Horseradish and kummelweck(the signature flavors)
The horseradish sauce is merely a small bowlful of drained, prepared horseradish mixed with a spoonful each of sour cream and mayonnaise. It is quite pungent, and if you are not a fan of horseradish, you may want to skip this. But it is a key component in an authentic beef on weck. The important thing is keeping the horseradish flavor front and center, with only enough of the creamy ingredients to make it somewhat spreadable. You can make this ahead and keep it in the fridge until ready to serve.
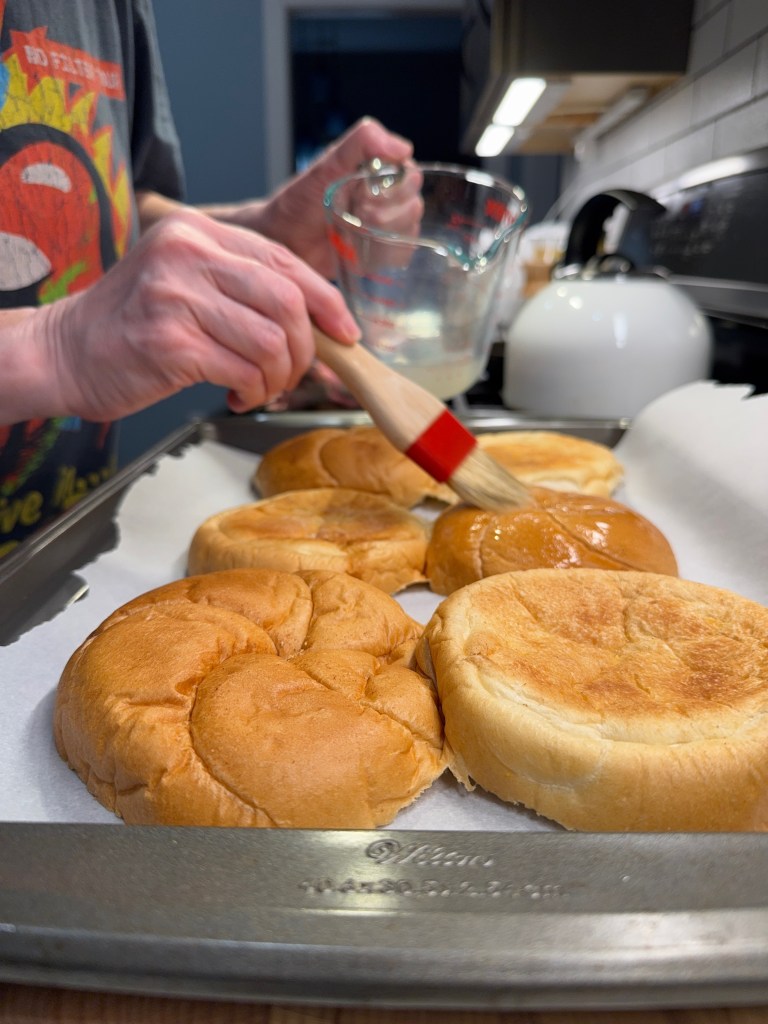
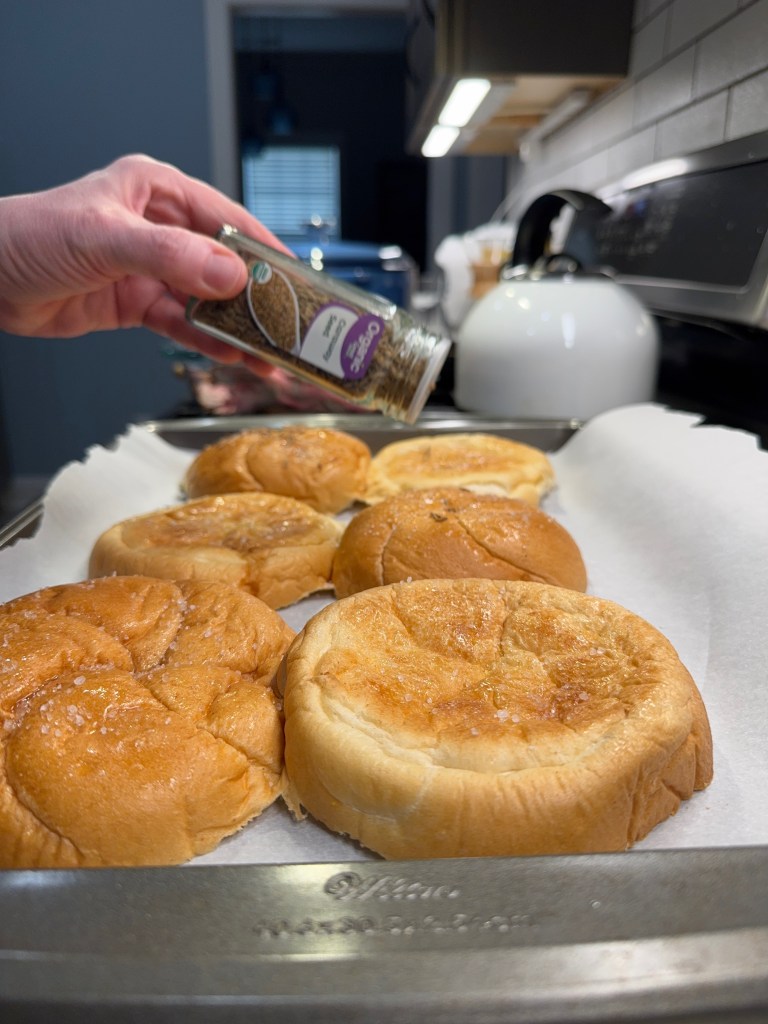
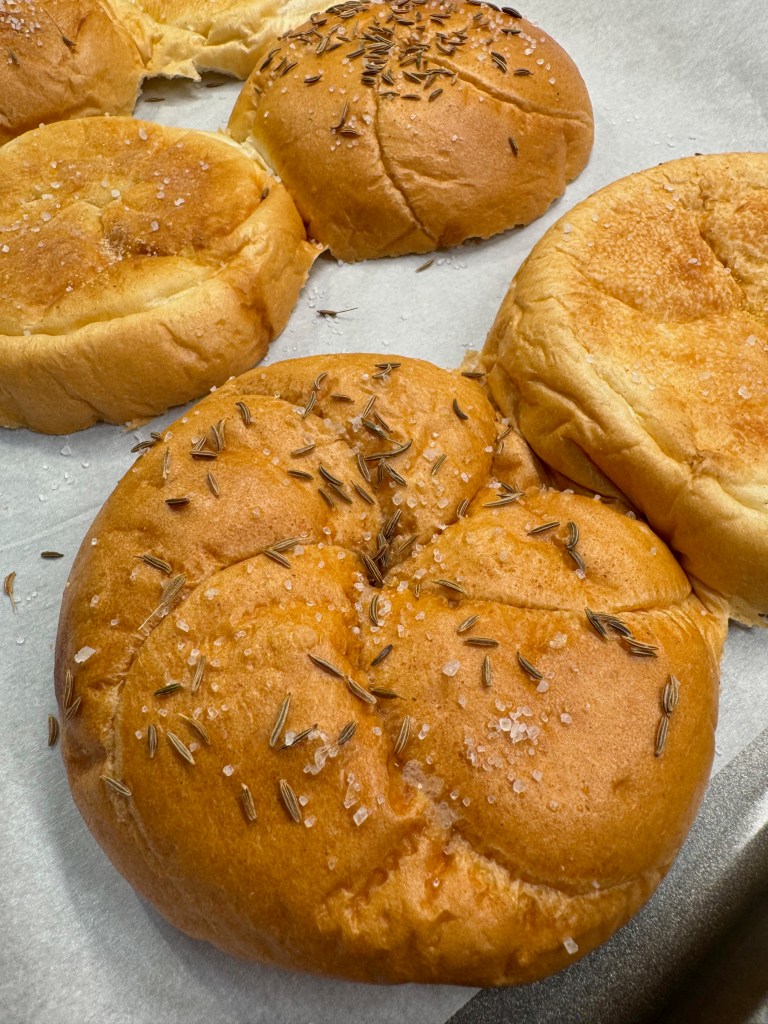
For the kummelweck rolls, you may not find them ready-made if you are outside the Western New York area. Fortunately, it is easy to transform more readily available kaiser rolls simply by brushing them with a cornstarch slurry, sprinkling with coarse salt and caraway seeds, and baking until the seeds are set and the rolls are crispy again. The caraway, like the horseradish, is also very traditional for this sandwich. If you don’t care for the flavor, go with a sesame-topped kaiser instead. But if you skip both the horseradish and the caraway bun, you’re basically just eating a roast beef sandwich.
In hindsight, I believe these buns were more authentic than my homemade would have been.
Achieving the perfect roast beef
This is not in my wheelhouse (hence my hesitation making beef on weck in the first place), but as luck would have it, a book that I gave Les at Christmukkah happened to have instructions for roasting eye of round— for beef on weck— right there on page 134!
I didn’t follow every part of this recipe, but the roasting instructions were very helpful!
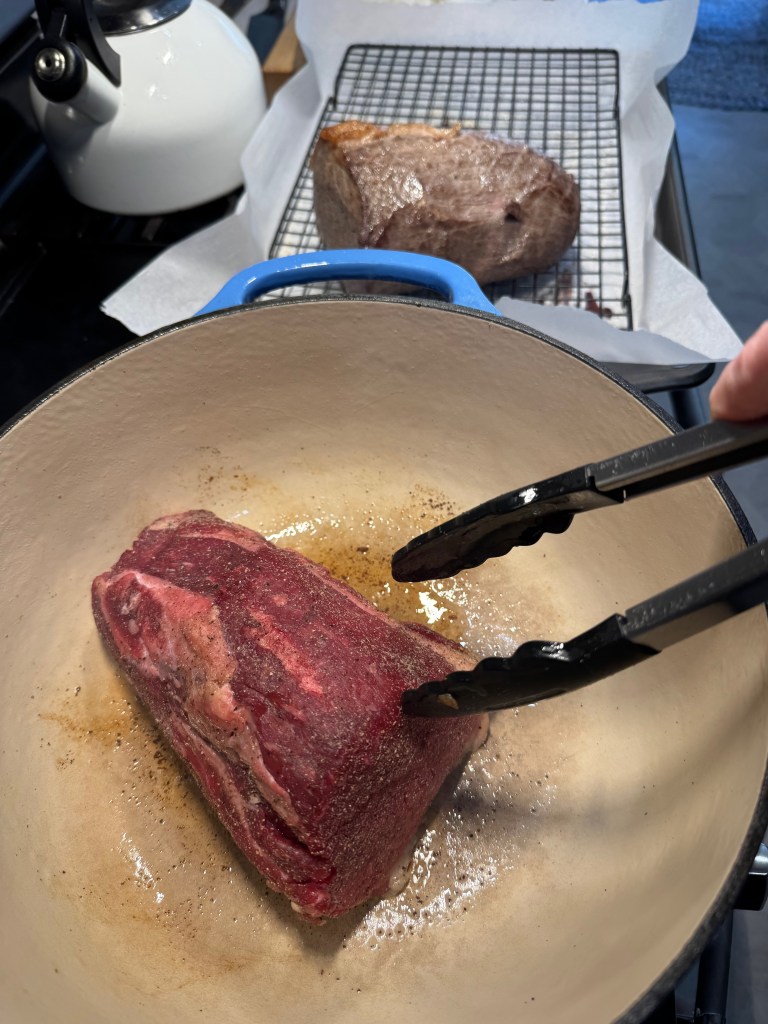
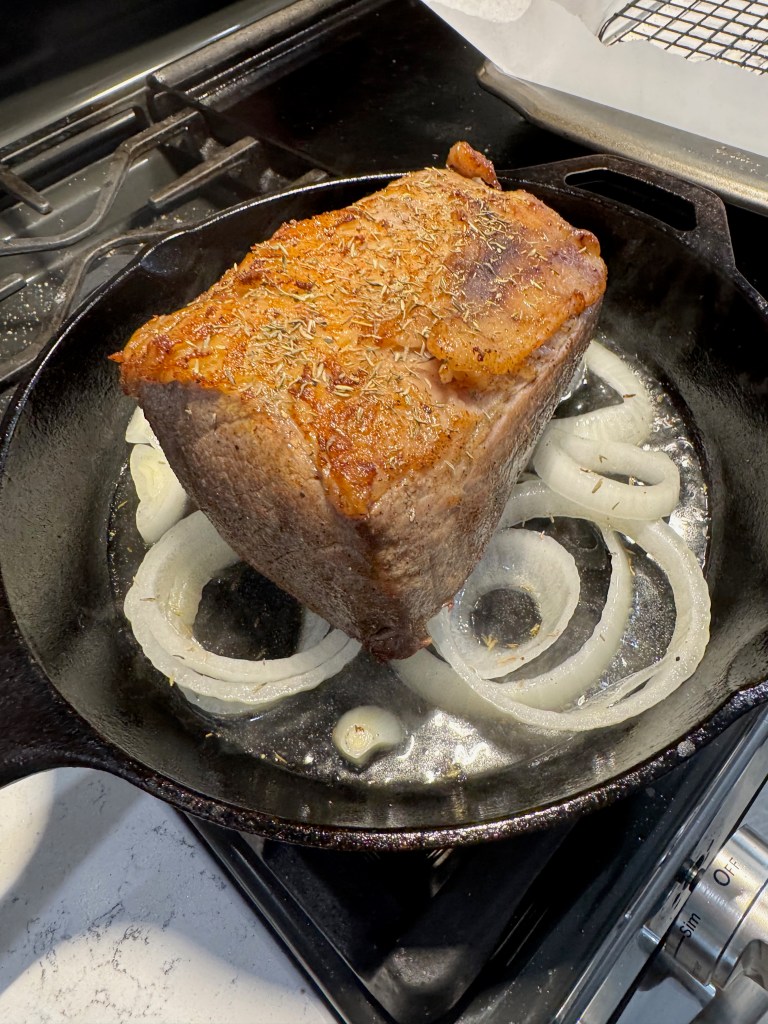
To this point, the only thing my recipe had in common with the one I found in Meat Illustrated was the specific cut, eye of round. Mine was twice the size called for, and I had already done the 20+ hour dry brine, which was not outlined in the book. But I needed a solid method for cooking said roast, and this one was perfect. It prescribed a low oven (275° F), a couple of heavy skillets (I went with a cast iron and my enameled Dutch oven) and a bit of oil for searing all the sides of the meat. My own instinct told me to placed the seared roasts onto beds of sliced onions, as I really wanted that flavor in the final mix.
After a quick browning on all sides, the meat goes into the oven on top of the onions.
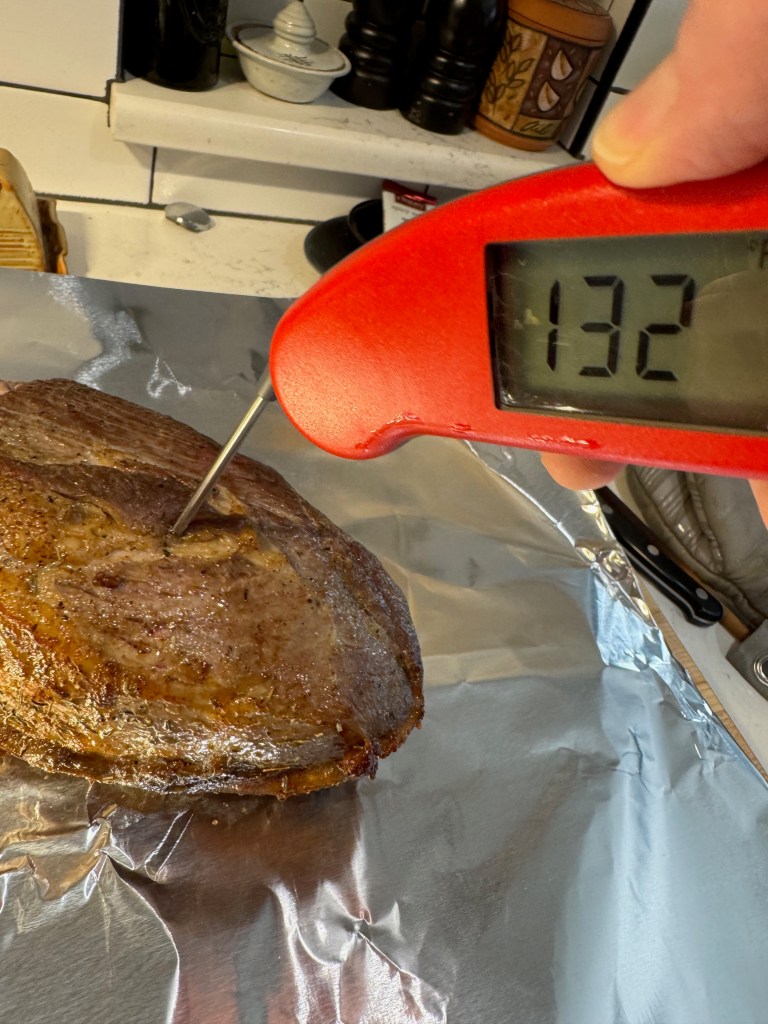
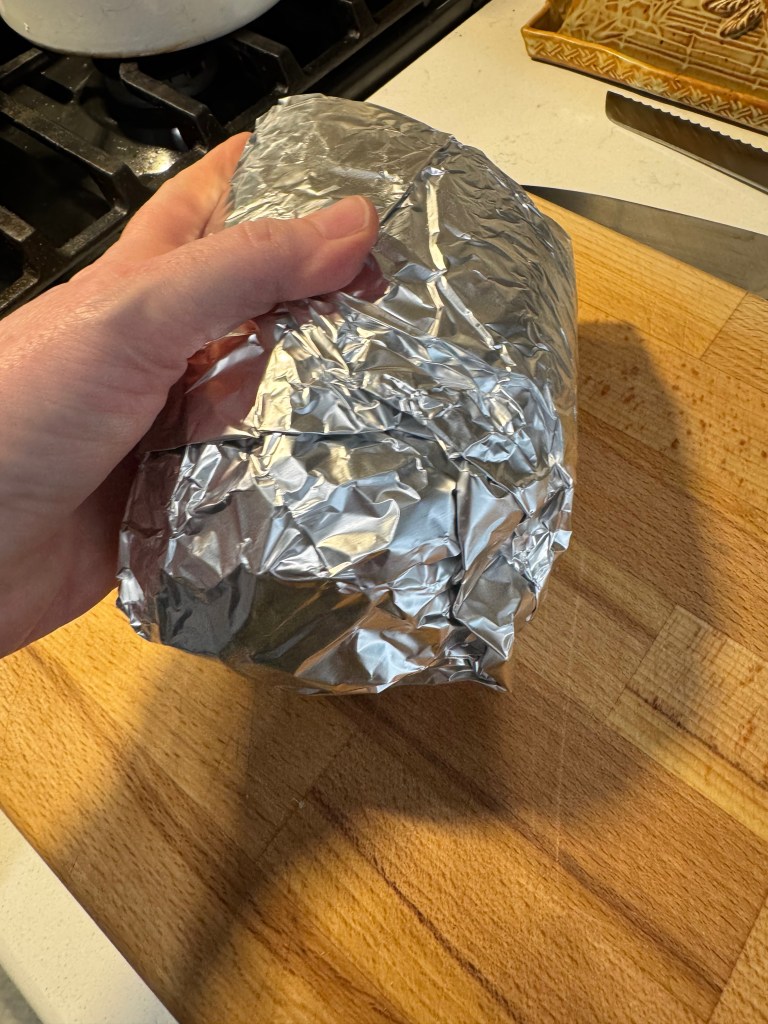
The first roast (in the Dutch oven) reached optimal temperature within 45 minutes, significantly less time than the second (in the skillet), which took an hour and 20 minutes. They were roughly the same size and went into the oven at the same time, so my best guess on this difference is that the ambient heat from the high sides of the Dutch oven get credit for the quicker result. Because the time cannot be trusted for consistency, I strongly recommend using an internal thermometer to gauge doneness. I followed instructions to wrap the finished roasts snugly in foil, which ensures that the juices redistribute evenly through the meat.
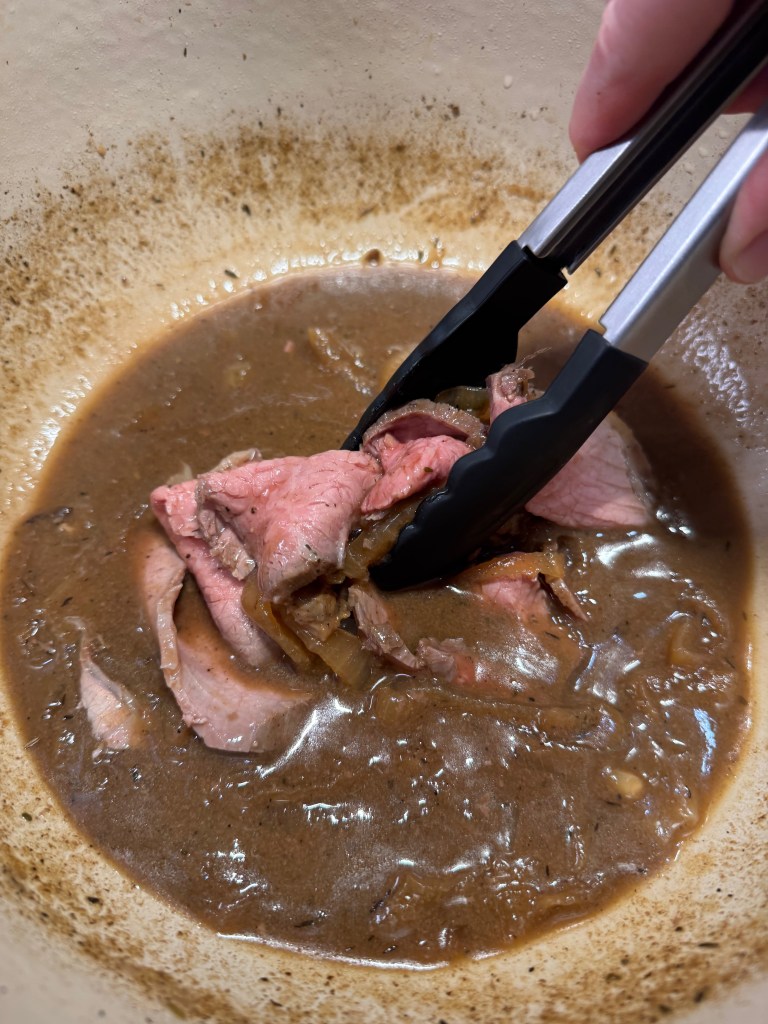
I could not resist carving the first roast as soon as it had finished resting, but my recommendation is to chill the meat overnight so that it can be sliced super thin for these iconic sandwiches.
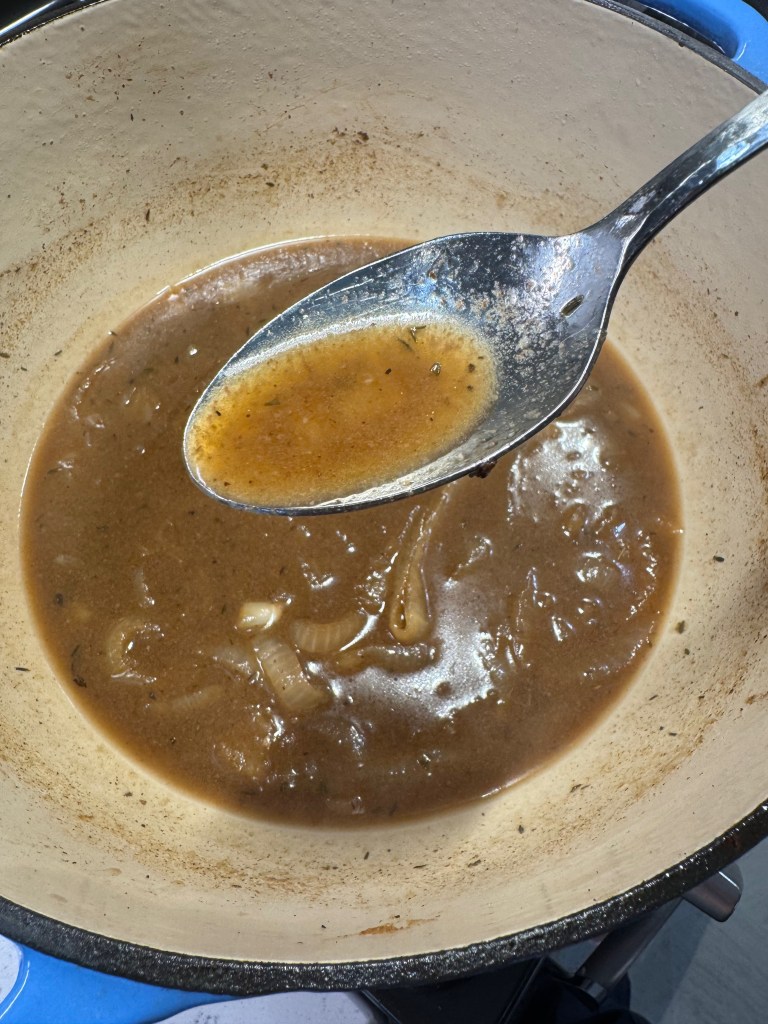
Last but not least, the jus!
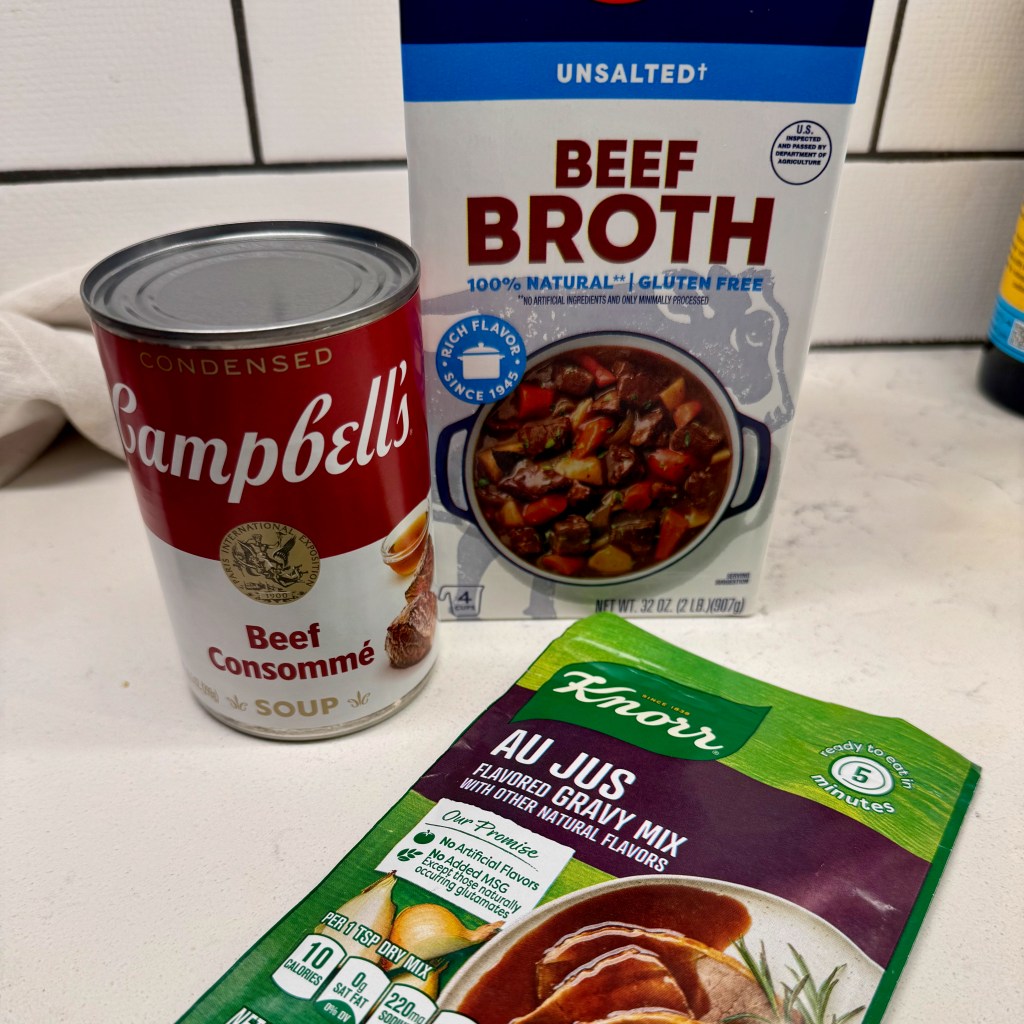
This part of the sandwich gave me the most pause, as I struggled to remember how the side sauce tasted. It was beefy, but not gravy-like. It was similar to au jus that one might find alongside a French Dip sandwich, but not as salty. I waffled quite a bit on how to achieve this traditional flavor, and of the three options I purchased, there was a very clear winner.
This decision threw me for a loop, but the answer was so obvious in the end.
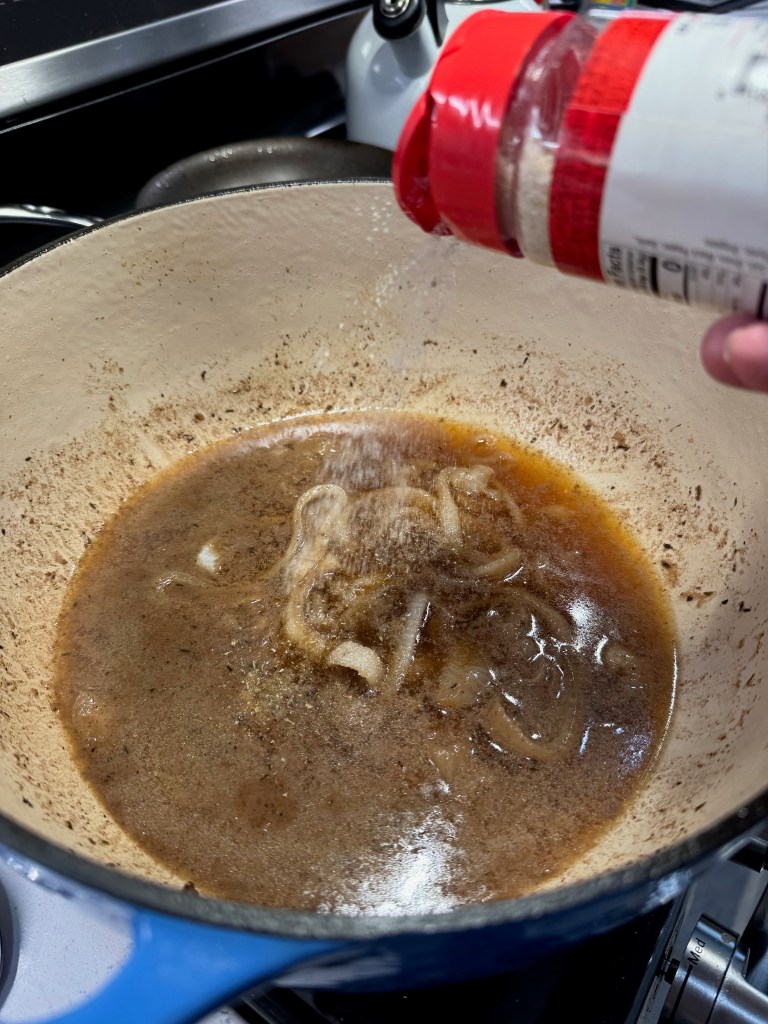
Let me cut to the chase and tell you that the beef broth won this battle. The consommé had a heavy soy flavor that was not working, and the dry jus packet (which I didn’t think to inspect until I was home with it) had exactly zero beef ingredients, so that was a hard no. My hungry husband, who had never had beef on weck in his life, made the winning suggestion to add a half packet of dry French onion soup mix to the sodium-free beef broth. It was perfect!
A slight amount of cornstarch lends a nice texture to the jus, but you don’t want it to be like gravy.
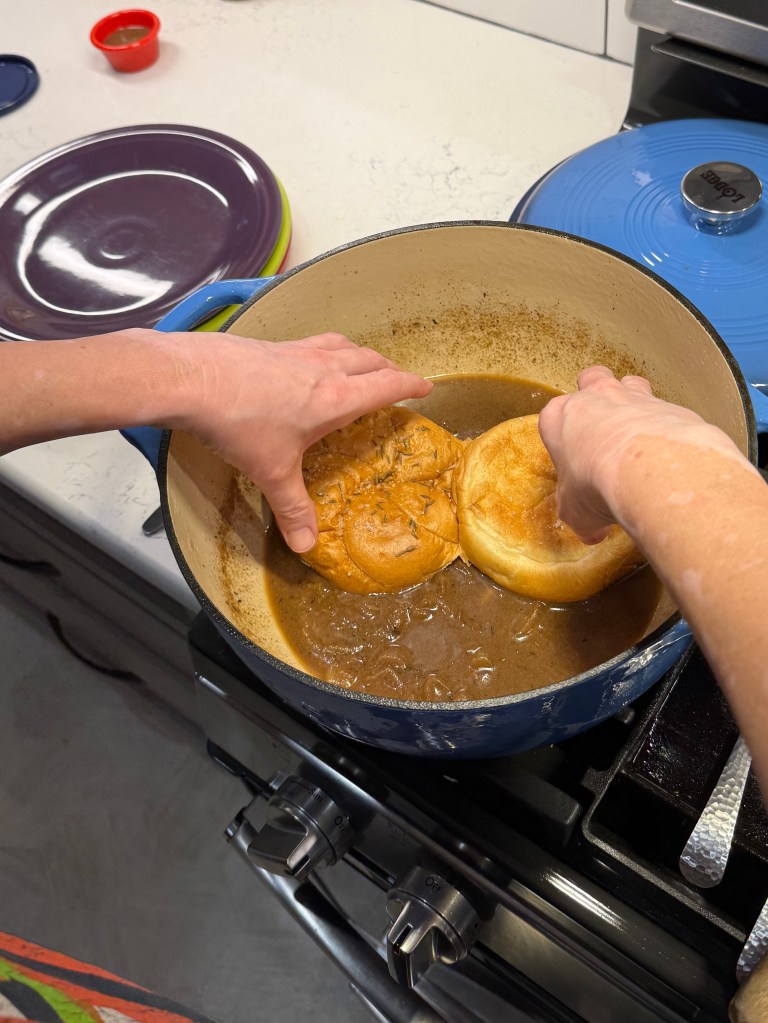
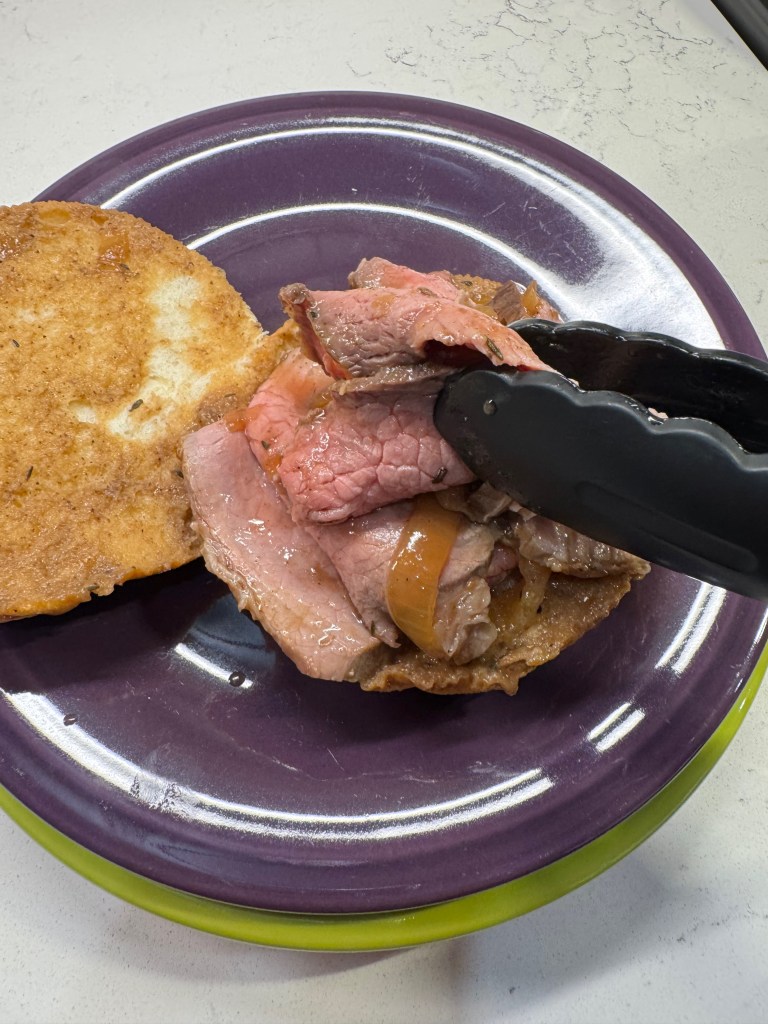
Assembling the beef on weck
The traditional, Western New York way to serve this sandwich is to first dip the cut sides of the kummelweck roll into the jus, then smear on a little horseradish spread and pile on the meat. I warmed the thinly sliced beef in the hot jus, and so I grabbed a few of the soft onions in the process, and this was not a problem at all. Extra jus and/or horseradish may be served on the side.
My beef on weck was authentic in aroma and flavor!
I've been craving this taste of home for a very long time, and a few trusted tricks helped me move this into the done column of my culinary bucket list!
Ingredients
5 lb. eye of round roast, locally sourced if possible
4 tsp. kosher salt
25 twists freshly ground black pepper
1/2 tsp. onion powder
2 Tbsp. extra virgin olive oil
1 large sweet onion, cut into thick slices
1/2 cup water
2 1/2 cups no-salt beef broth, combined with a teaspoon of cornstarch
1/2 packet French onion soup mix
Horseradish sauce (recipe in notes)
Kummelweck rolls (see notes for instruction)
Note: For most tender, flavorful results, apply the dry brine ingredients to the meat and refrigerate at least overnight (up to 24 hours) before roasting. This will allow the salt to dissolve into the meat, creating a brine that ultimately absorbs back into the meat. You will need either a very large Dutch oven or perhaps two cast iron skillets for the roasting. If you only have one vessel, consider roasting only one piece of meat at at time. Rest meat at room temperature for one hour before roasting!
This roast is best sliced when very cold. If time allows, roast it the day before you intend to serve so that it can chill completely in the refrigerator after roasting.
For horseradish sauce, combine 1/2 cup drained prepared horseradish with 1 tablespoon each sour cream and mayonnaise.
Plain kaiser rolls are easily transformed into kummelweck rolls with a few simple ingredients. Heat oven to 400° F. Combine 2 tablespoons cold water with 1/2 teaspoon corn starch. Microwave the mixture until it thickens slightly. Brush onto tops and bottoms of sliced kaiser rolls, then generously sprinkle kosher salt and caraway seeds onto the rolls. Bake for about six minutes until seeds are set and rolls are slightly crispy.
Directions
Trim eye of round of excess fat and cut crosswise into two equal-ish chunks. Place meat on a rack over a parchment-lined baking sheet.
Combine salt, pepper and onion powder in a small bowl. Sprinkle dry brine mixture generously over the entire surface of both roasts. Gently pat the mixture so that it adheres well. Place the sheet, uncovered, into the fridge for up to 24 hours.
Preheat oven to 275° F, with oven rack in lower third of the oven. Place Dutch oven or oven-safe skillet over medium heat with olive oil. When oil is glistening, Use tongs to sear every side of the eye of round until browned. Set aside.
Add onion slices to the pot and toss to cook for about one minute. Add 1/4 cup water and scrape up any browned bits stuck to the pot. Place browned roast on top of onions and transfer to oven, roasting until meat is 130 to 135° F internal temp for medium rare doneness. Remove from pot and wrap tightly in heavy duty foil, resting at room temperature for at least 30 minutes (longer is better, chilling is best) before slicing.
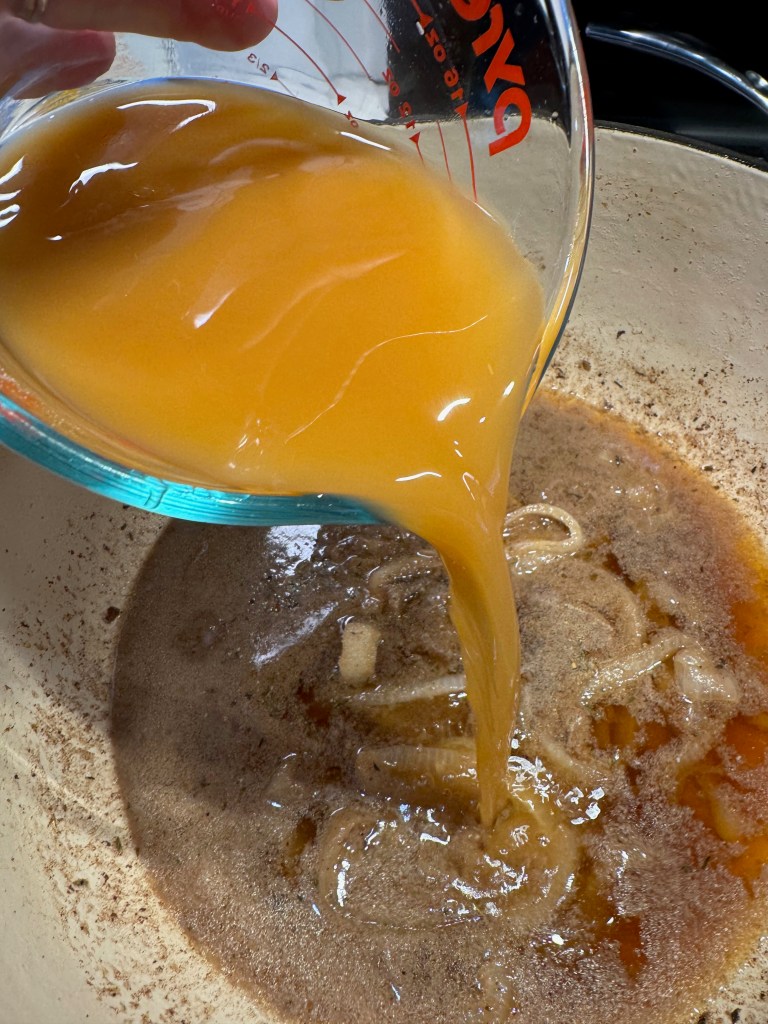
Add French onion soup mix to the softened onions left in the roasting pan. Dissolve cornstarch into beef broth and add the liquid to the pot, stirring and cooking until bubbly and slightly thickened.
To assemble sandwiches, dip cut sides of kummelweck rolls into the beef jus and then swirl a handful of sliced beef at a time in the hot jus. Pile the meat onto the buns and serve immediately with horseradish sauce and a cup of jus.