Jambalaya-stuffed Chicken Roulades

One of my favorite tricks for eating healthier without feeling deprived is switching up the ratio of ingredients or components in a dish. I’m relying on this premise a great deal since my husband, Les, has decided that now is the time to drop a few pounds and eat better. Am I still resentful that he laid this news on me just hours before the Super Bowl, when I was still in the throes of preparing the fat-heavy foods he specifically requested for that day? Perhaps, but I’m distracting myself by getting creative in the kitchen! 😉

I must have still had Mardi Gras and New Orleans on my mind last weekend when I dreamed up this idea to flip the script on jambalaya, which is usually a one-pot stew, heavy with chicken, sausage and shrimp. I decided to skip the shrimp, wrap the andouille sausage inside a skinless chicken breast with a bunch of Cajun-seasoned veggies, and bake it with a quick and easy Creole-inspired sauce. My little roulades (just a fancy French word for something rolled and stuffed) have the spirit of jambalaya, but with a snazzier presentation and a bit lighter on the components that add fat and calories.

The color of that sauce! 😎

As I was working on this dish, and especially the Creole sauce, an old memory hit me that may explain my fascination with the foods of New Orleans, despite having never had the chance to visit. When I was a teenager living in Colorado with my mother, I bused tables for Sunday breakfast and early lunch at a Best Western dining room. My job, in addition to clearing dirty dishes and resetting the tables with white tablecloths, included running hotel pans of hot food from the kitchen to replenish the buffet. I can still picture how I learned to carry the terribly hot stainless steel pans, balancing two opposite corners on the heels of my hands so that I didn’t get burned. One of the dishes that was served frequently as my shift turned toward lunch was “veal Creole,” and I was mesmerized by the sauce. It was tomato-forward, but decidedly not Italian as most sauces I was familiar with. There was something special about it, and I’m certain that it added color to my imagination about other New Orleans cuisine. For sure, I have to put NOLA on the short list of places to visit soon!

Turning jambalaya inside-out (or outside-in)

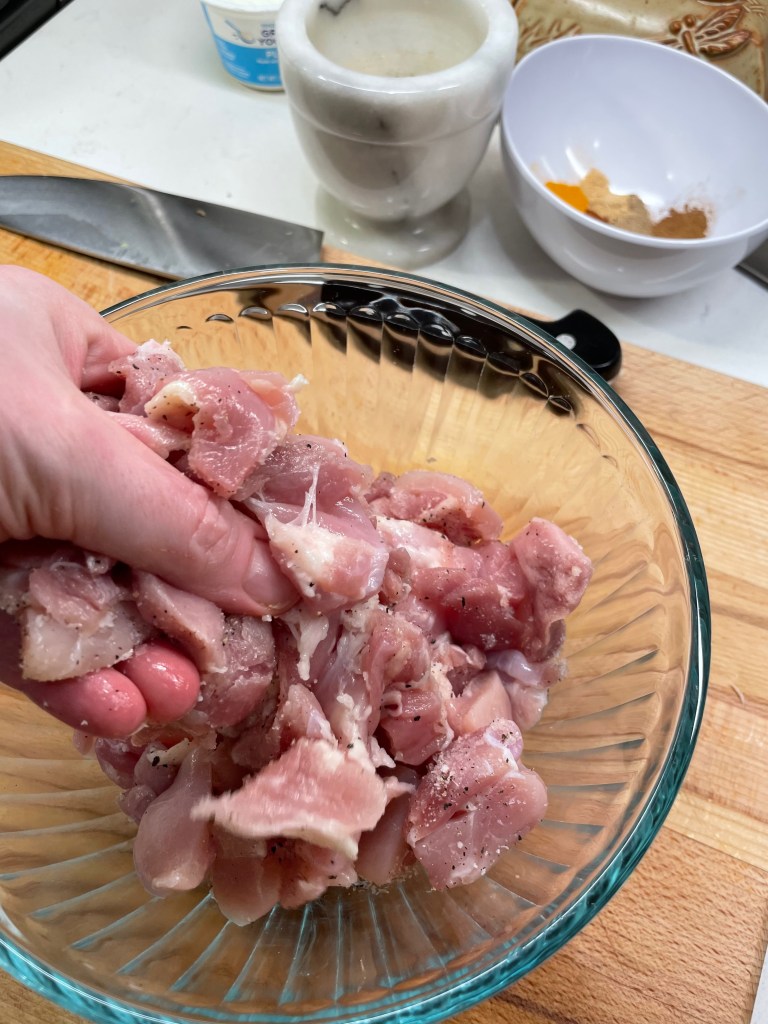
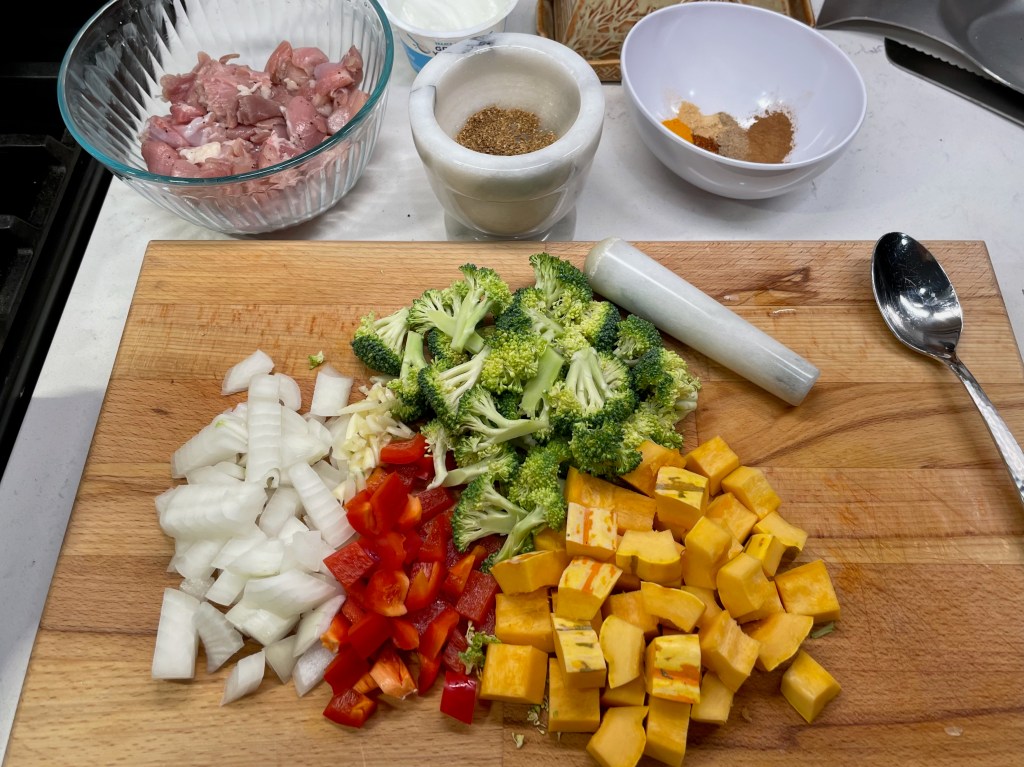
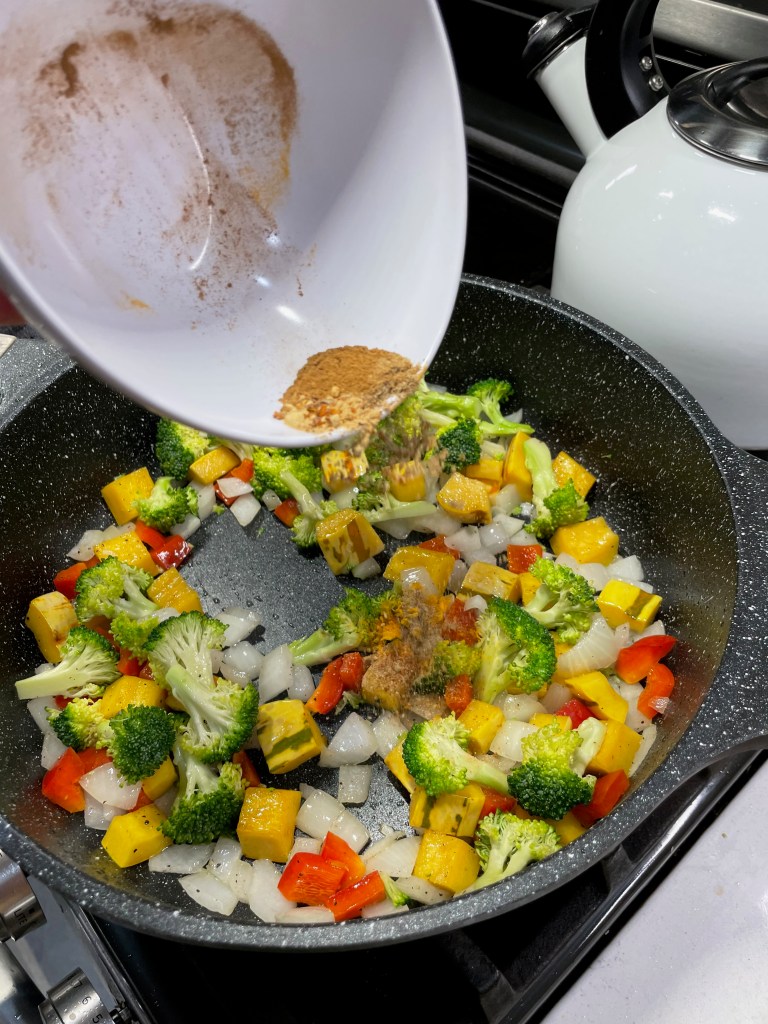
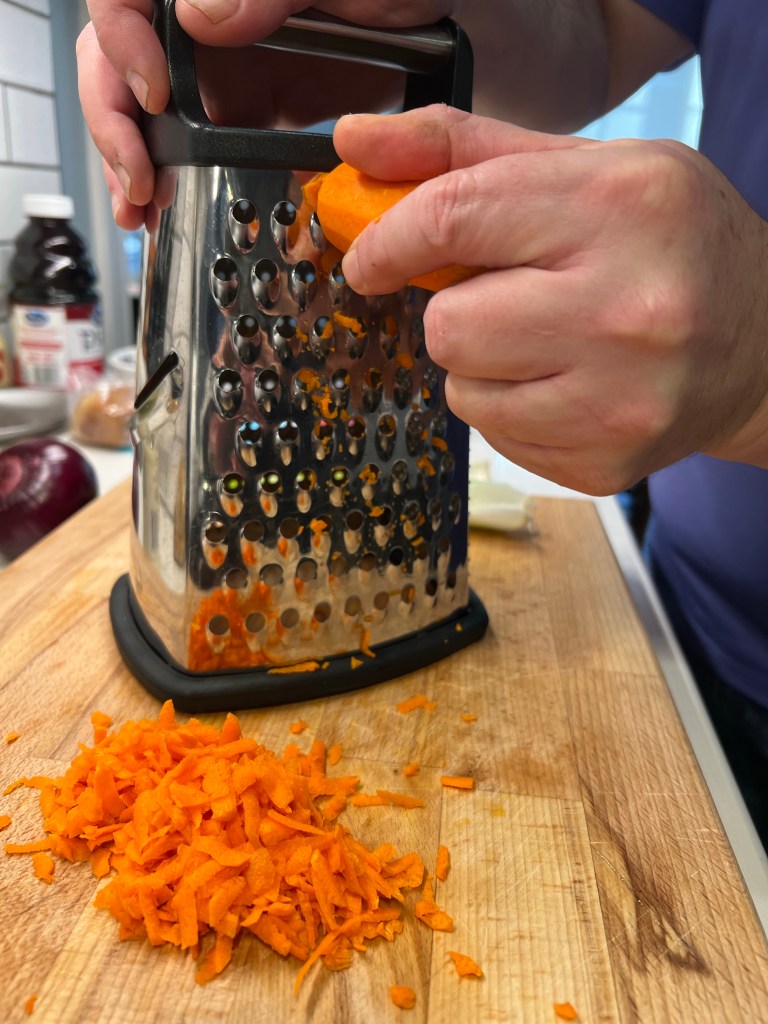
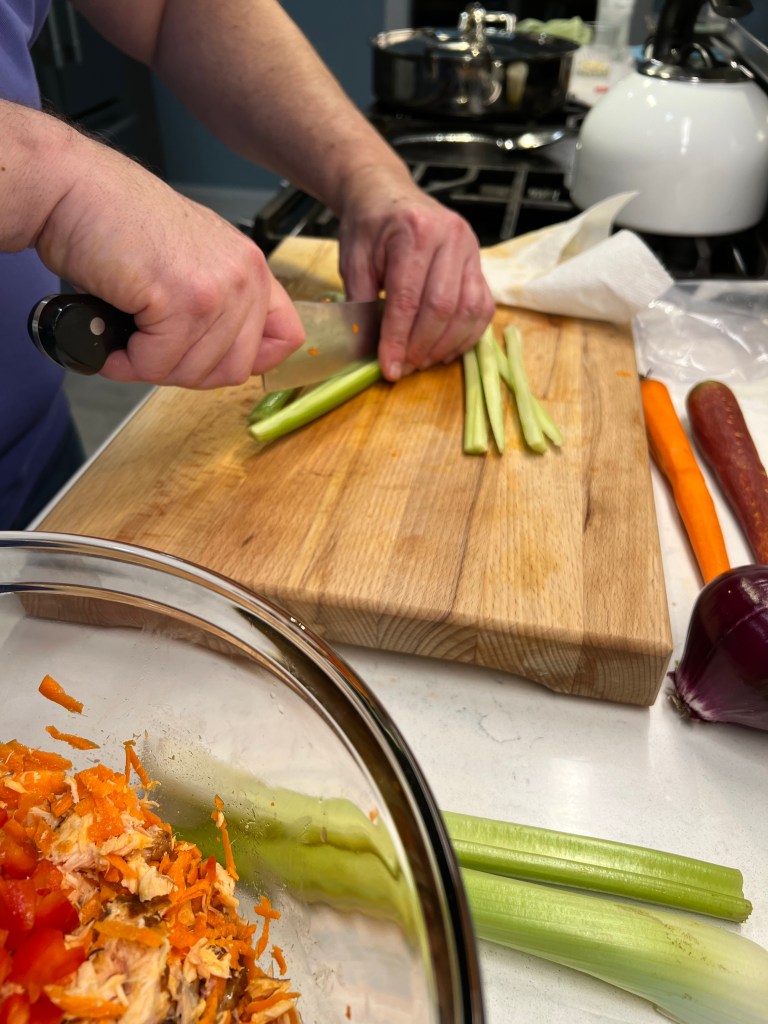
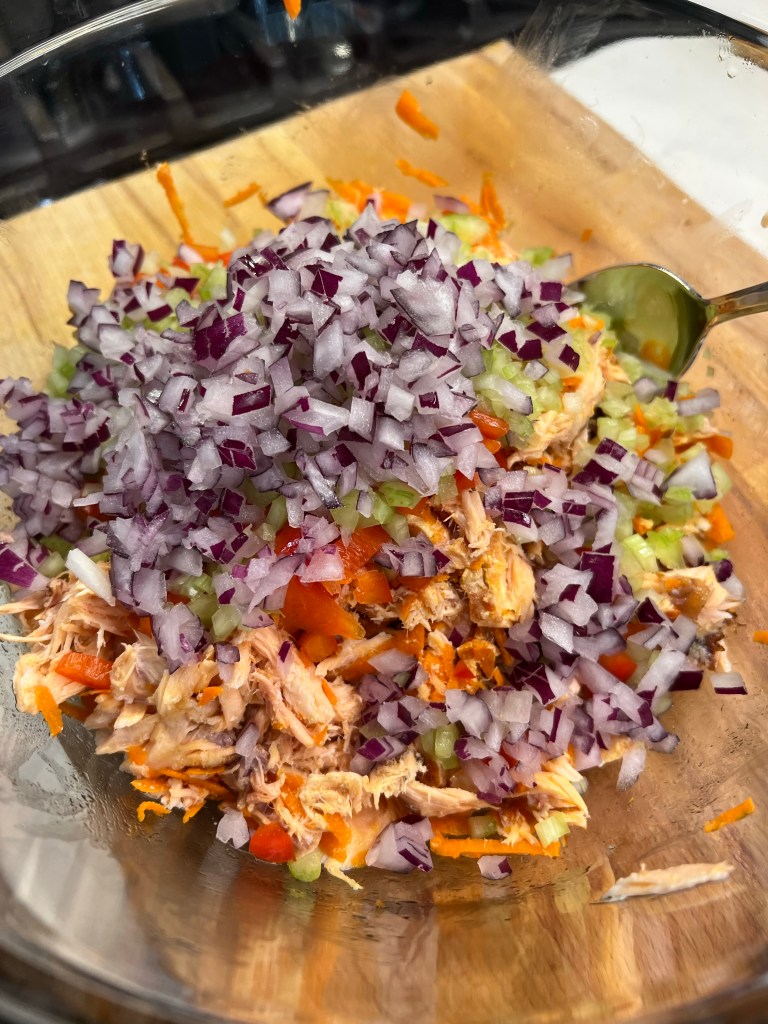
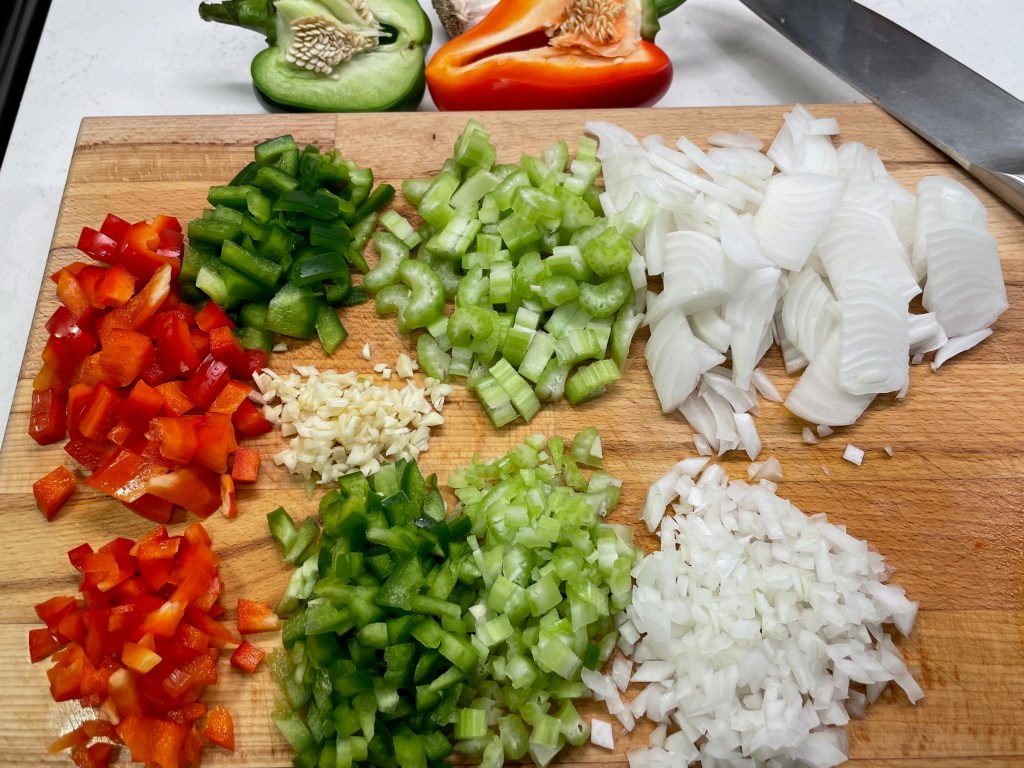
The prep work is my least favorite step of cooking, but it is so important to have things lined up and ready to go. The French call this principle mise en place, and it seems especially apropos to apply here, given that Creole food is drawn from French inspiration. You’ll see that I’ve packed a ton of vegetables into this dish— bell peppers, onions and celery (known in Louisiana kitchens simply as “the holy trinity”), plus a few cloves of minced garlic. The chopped veggie bits will end up in a Creole sauce, and the diced pieces will fortify the andouille filling of my roulades.

A dish with this many veggies must be good for us!

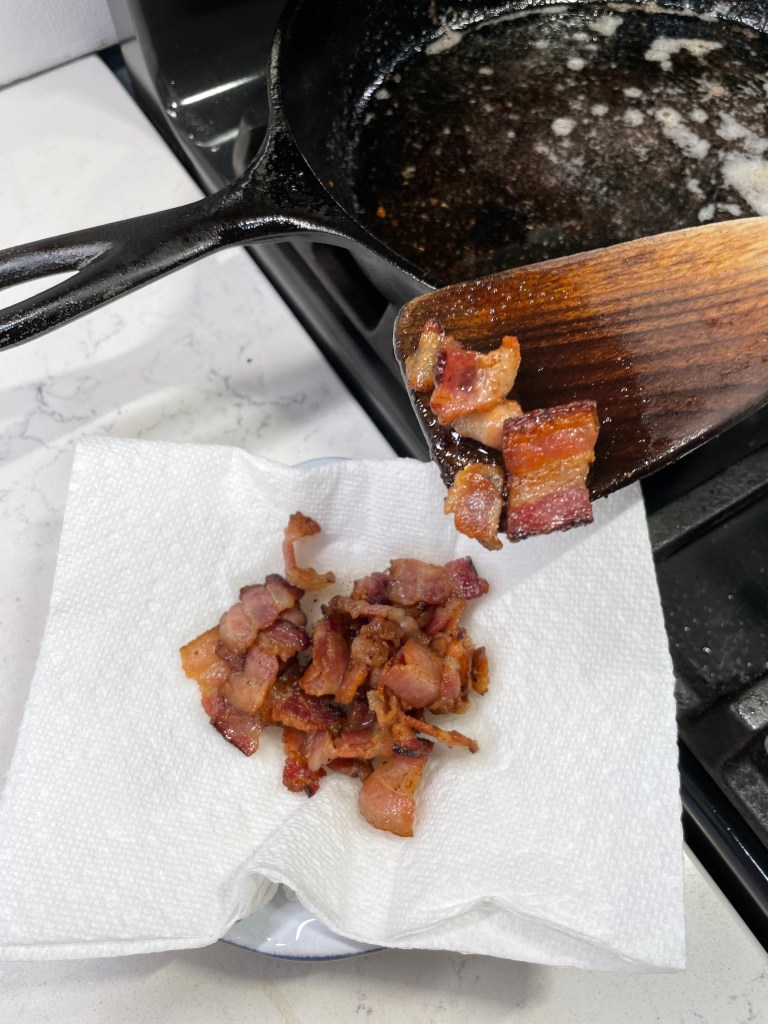
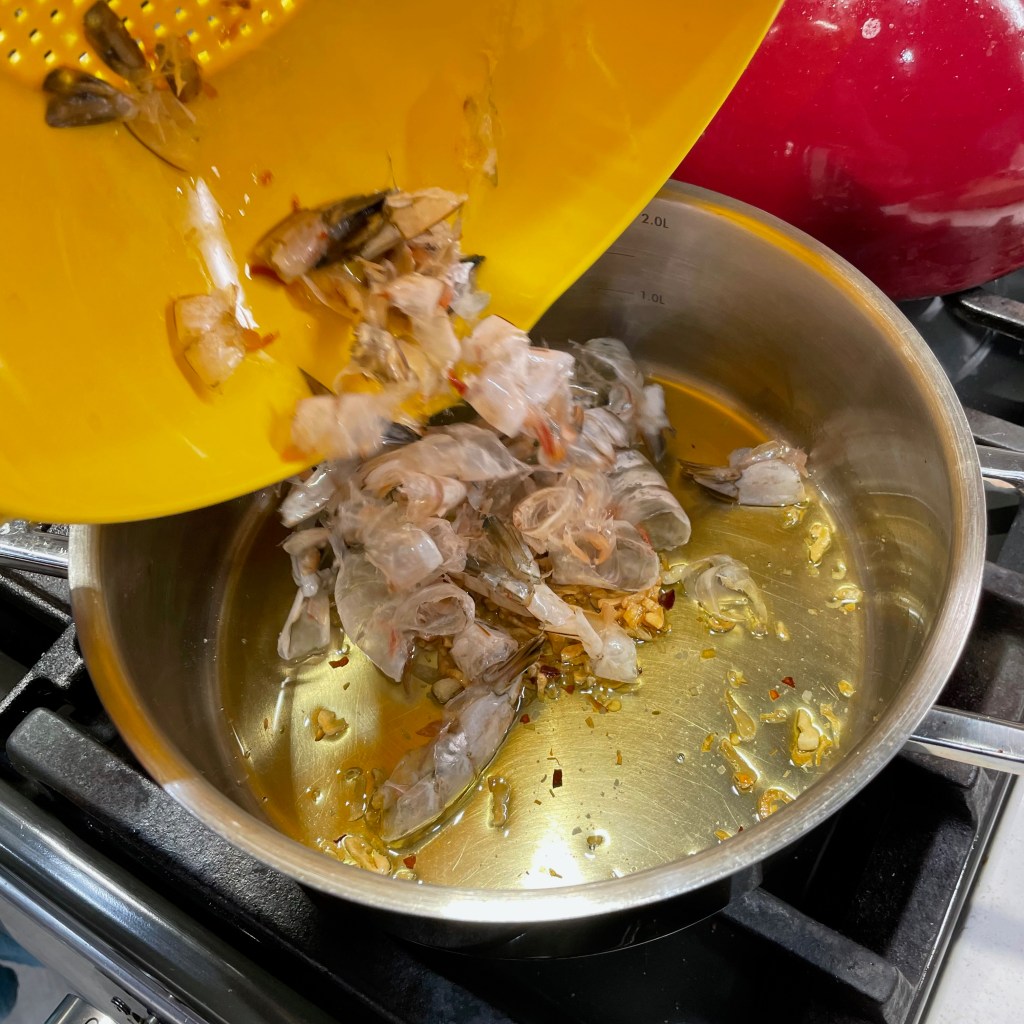
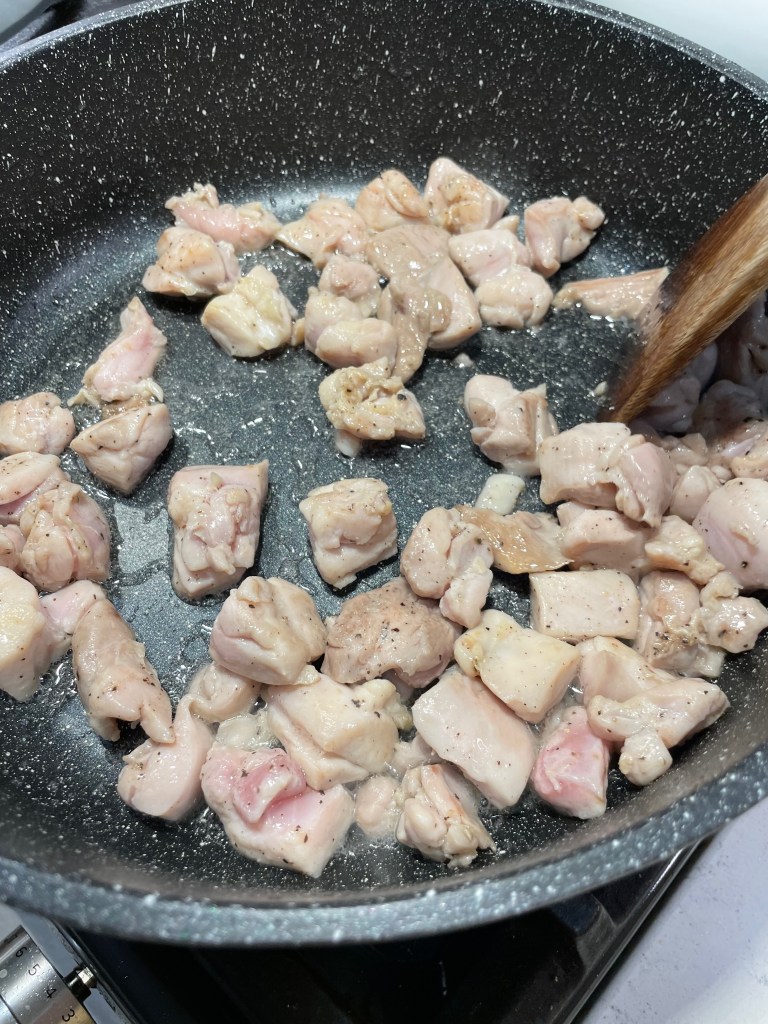
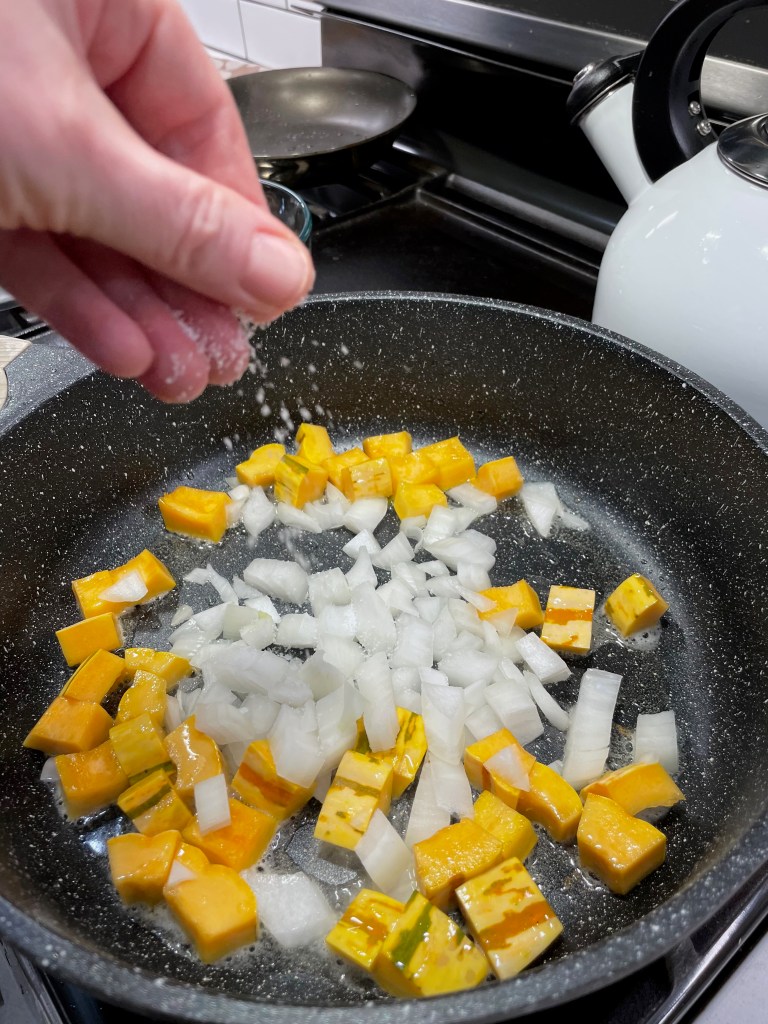
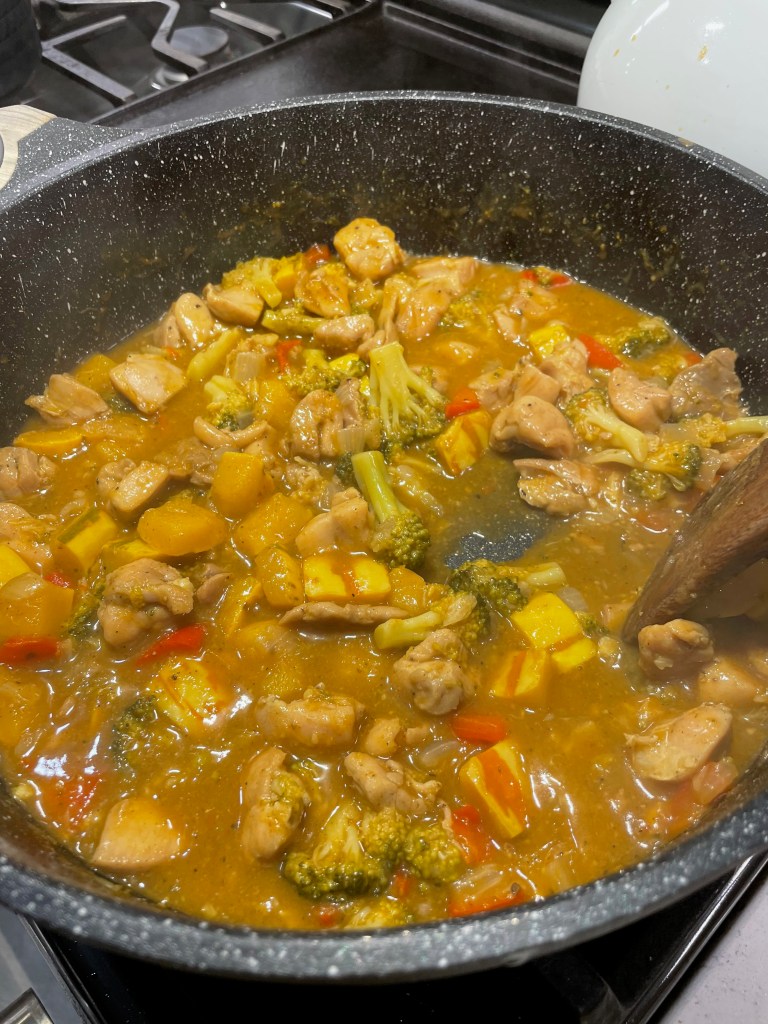
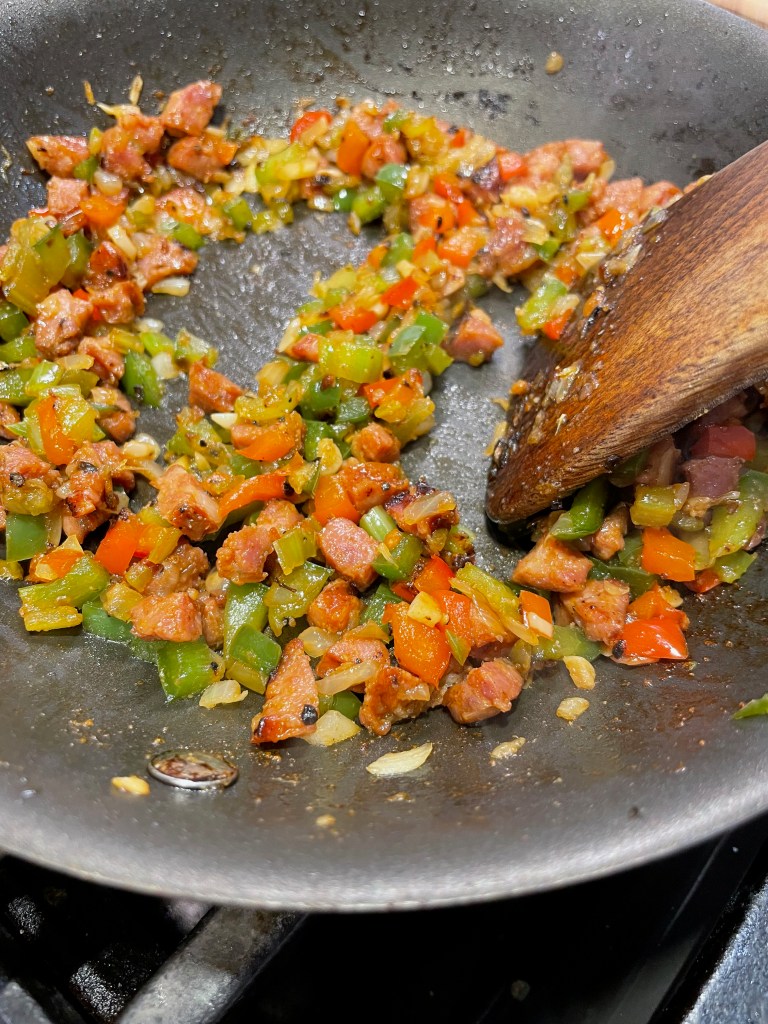
Andouille, a smoked sausage seasoned with garlic, cayenne, onions and wine, is crucial to jambalaya, in my opinion, but it is also pretty high up there on the saturated fats scale because it’s made from pork. In a typical, four-serving batch of jambalaya, I might cut up a full pound of andouille. But here, I’ve cut a single sausage into small cubes, which I crisped up in a pan before adding my aromatic veggies and cooking them until tender. Yes, I cooked the veggies in the rendered sausage fat rather than in oil, and this was intentional to maximize the flavor of my minimal amount of sausage. Had I drained off that grease and used oil to sauté the trinity, we would have missed some of that andouille goodness, and I only would have spared us 1 gram of saturated fat per serving. It was a fair trade.


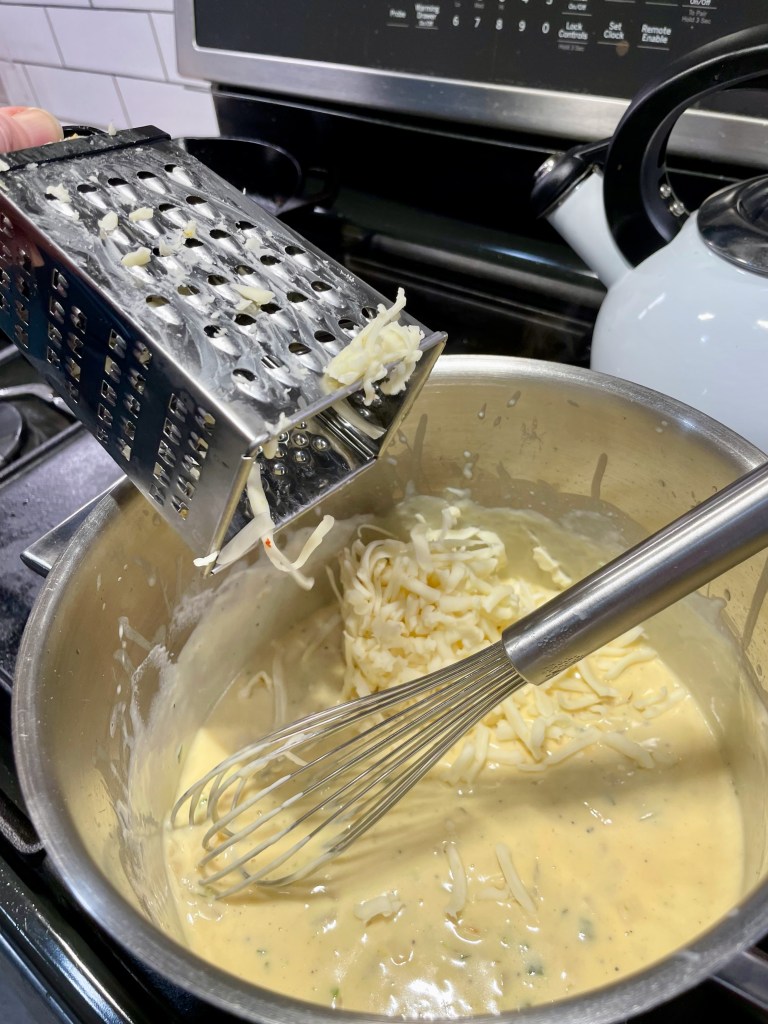
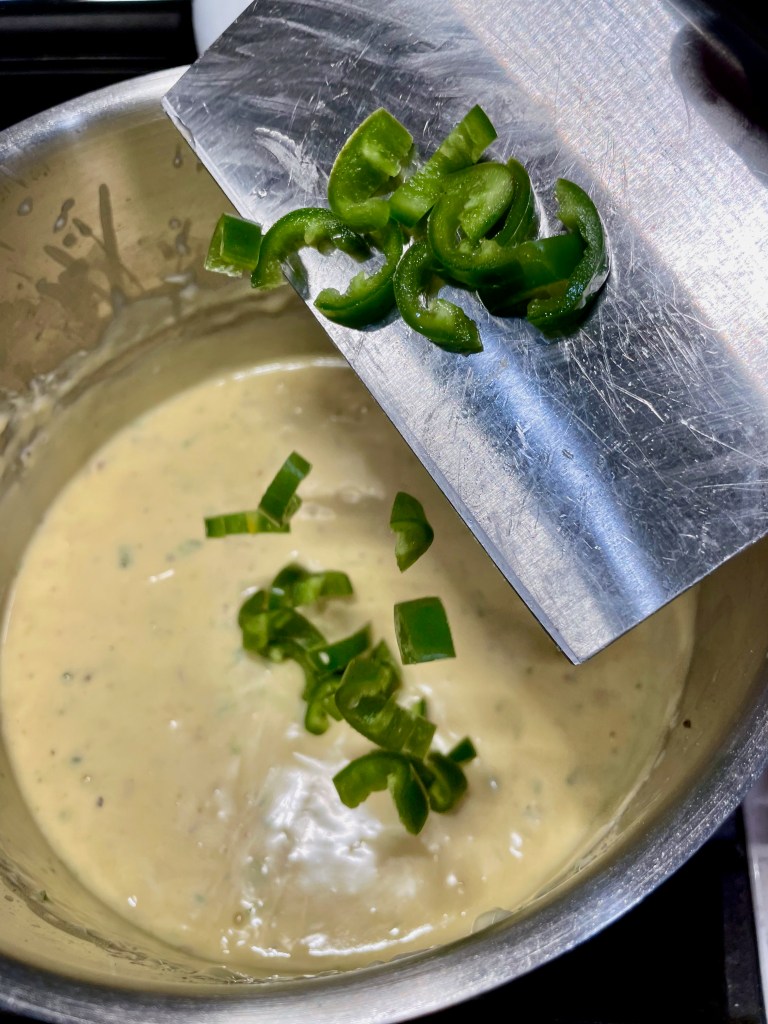
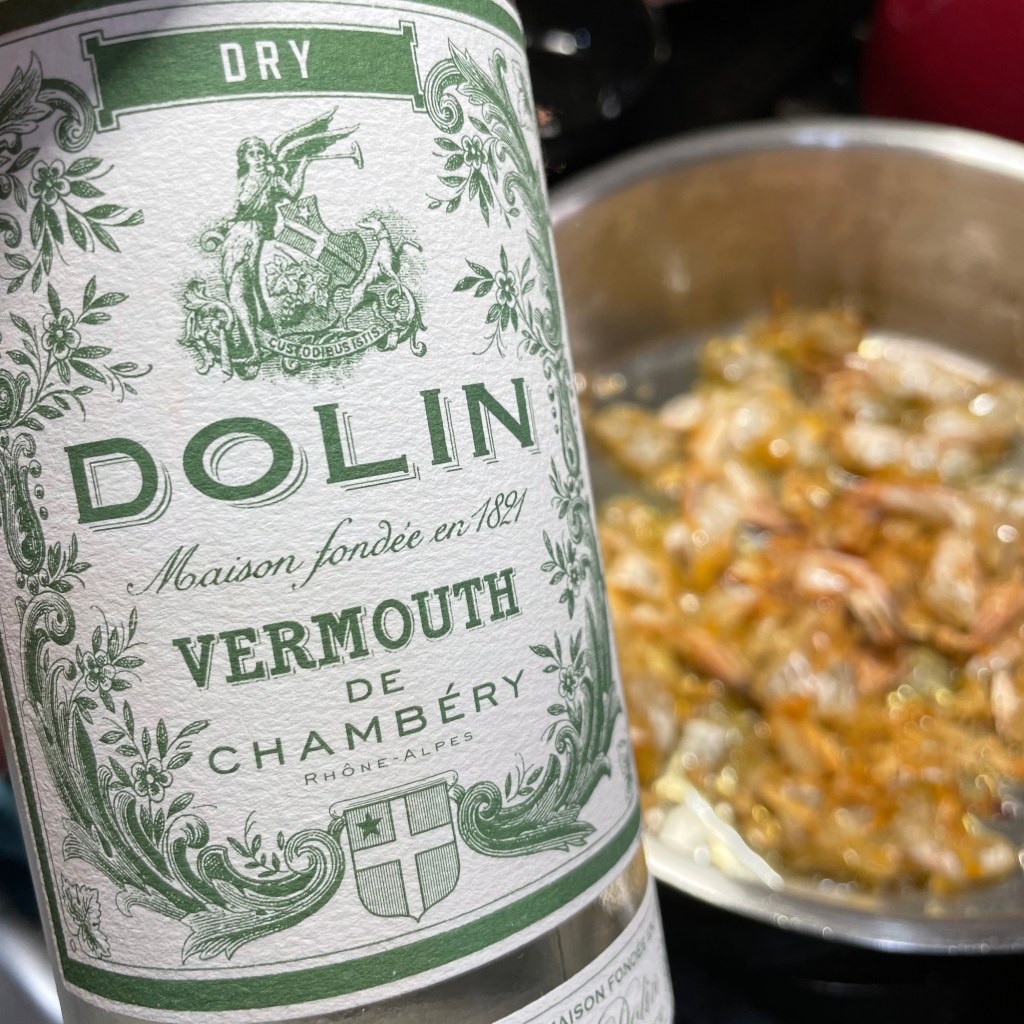
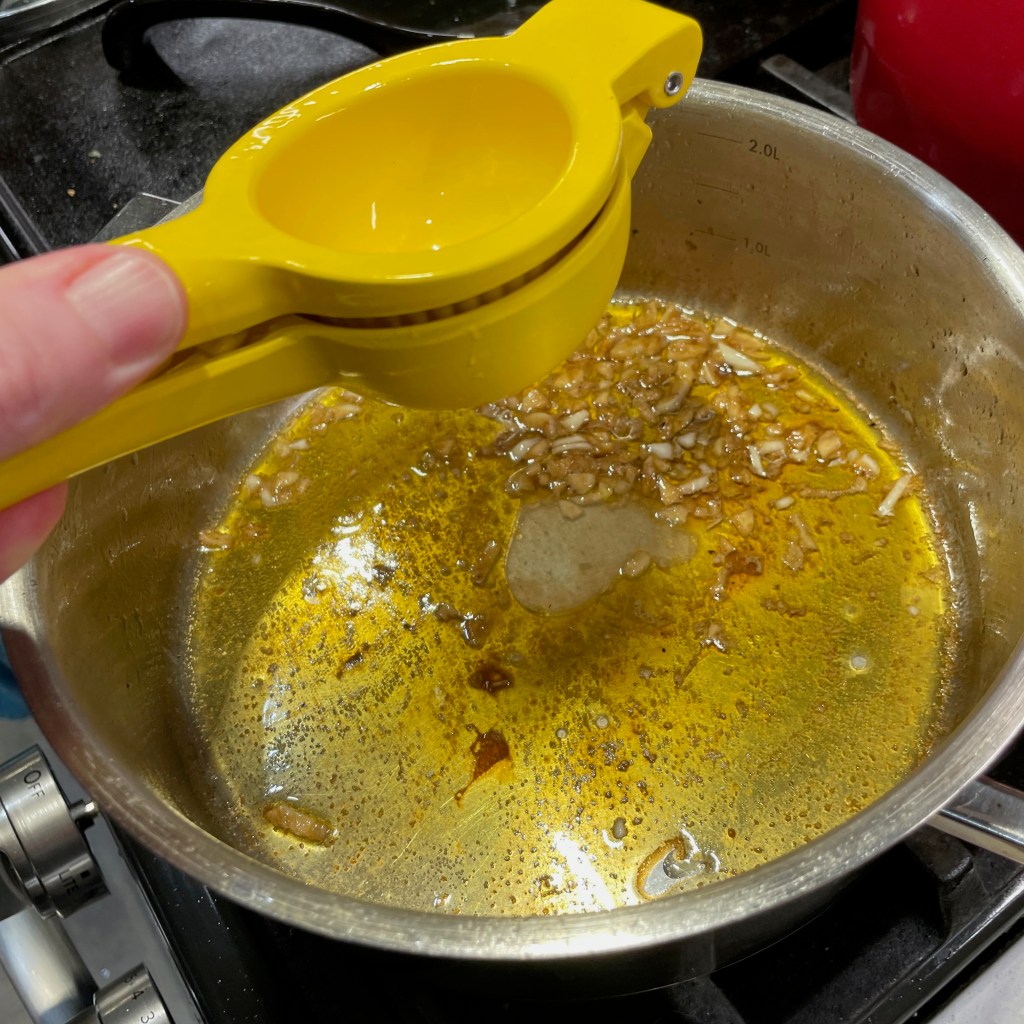
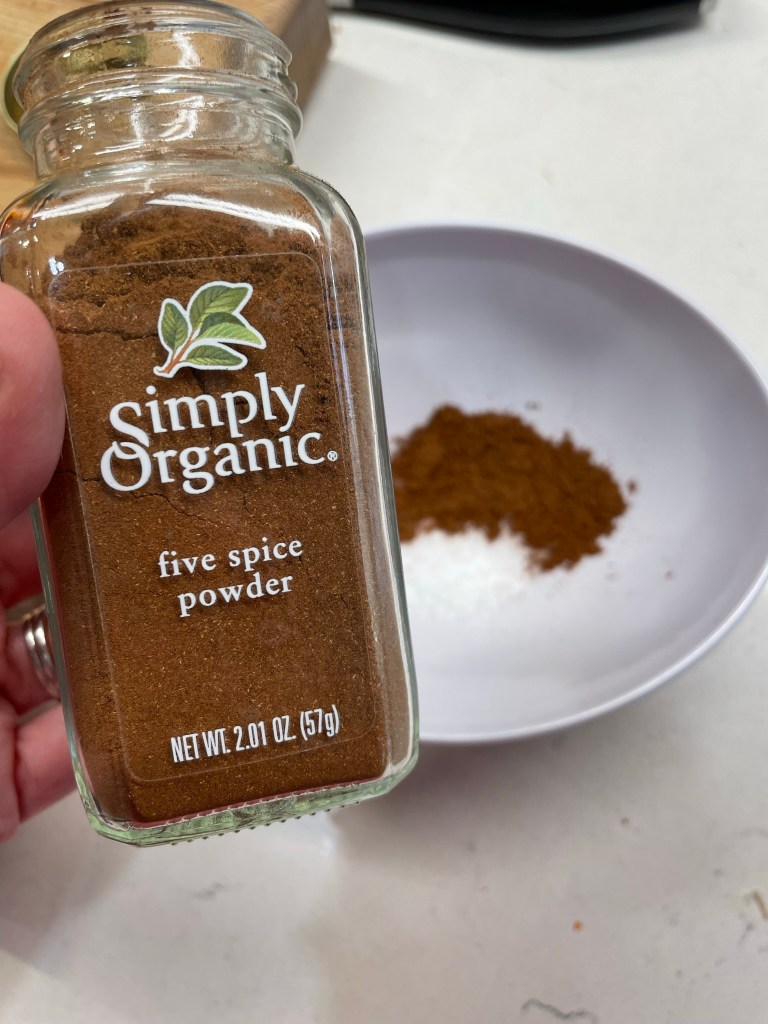
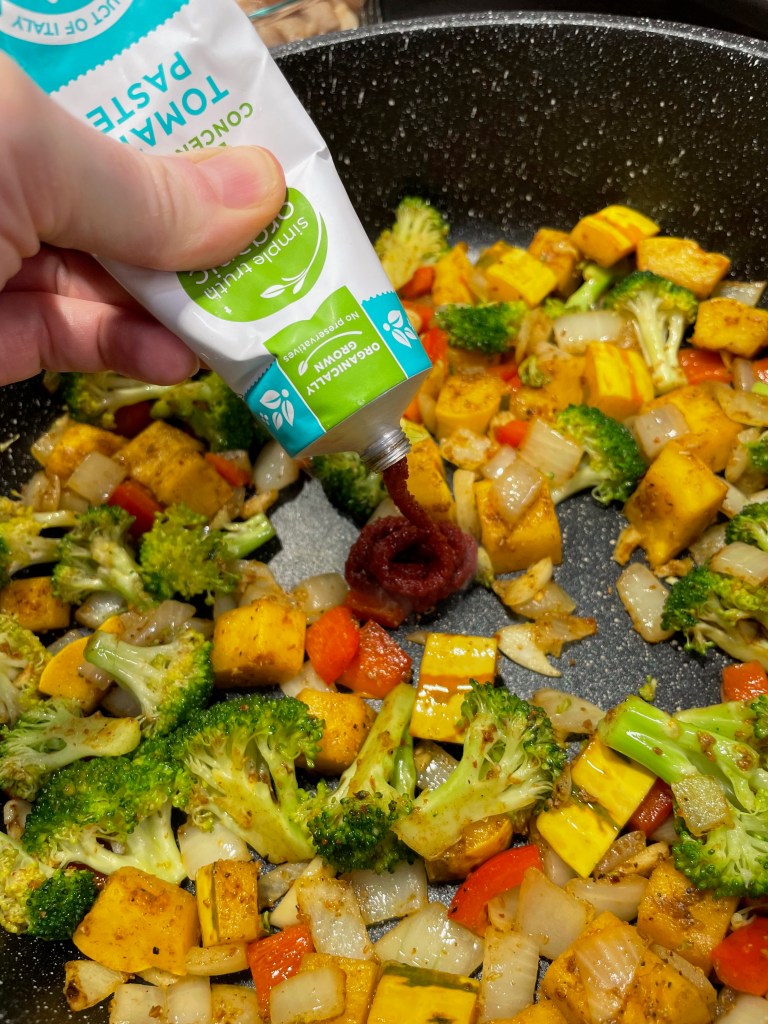
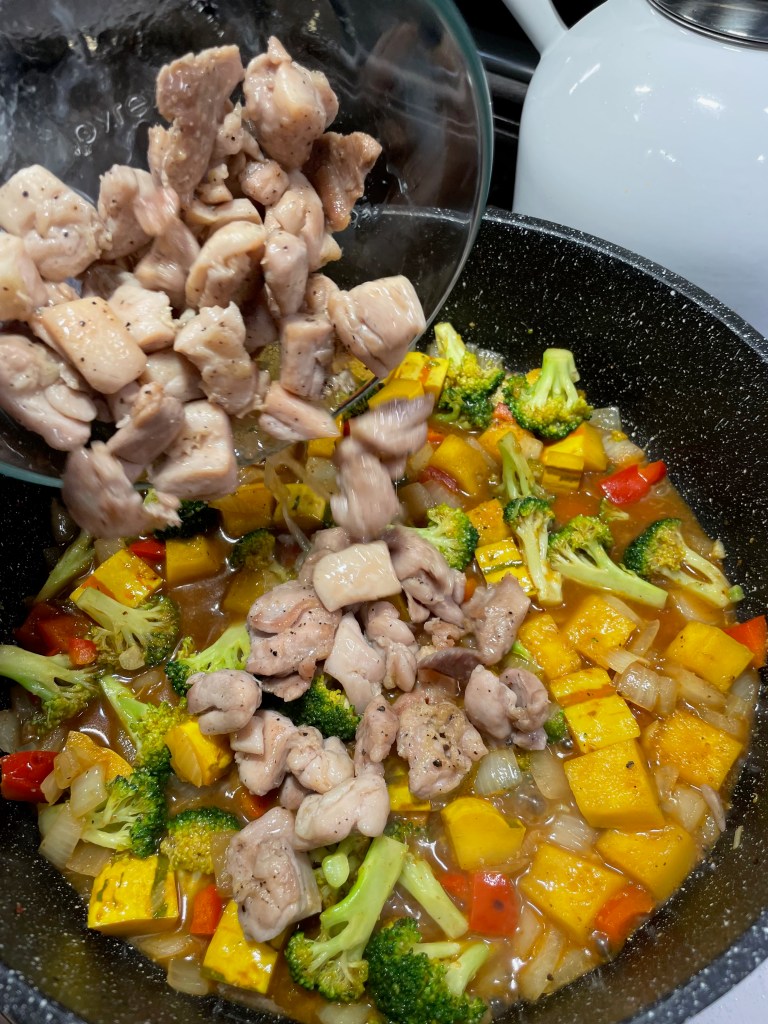
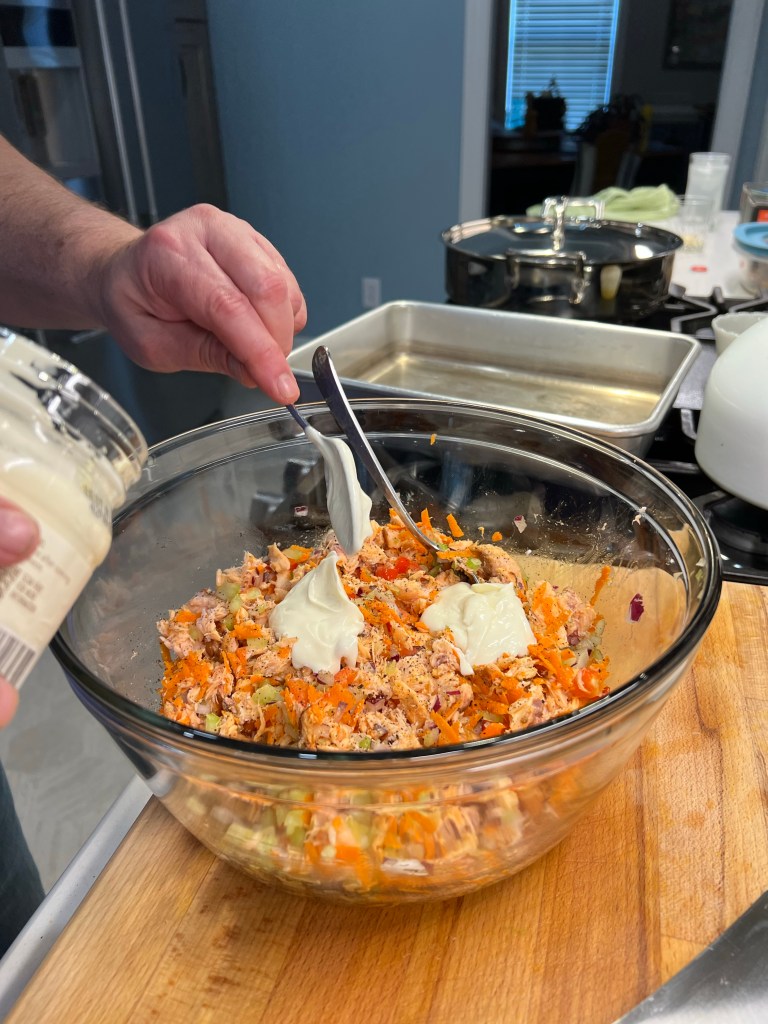
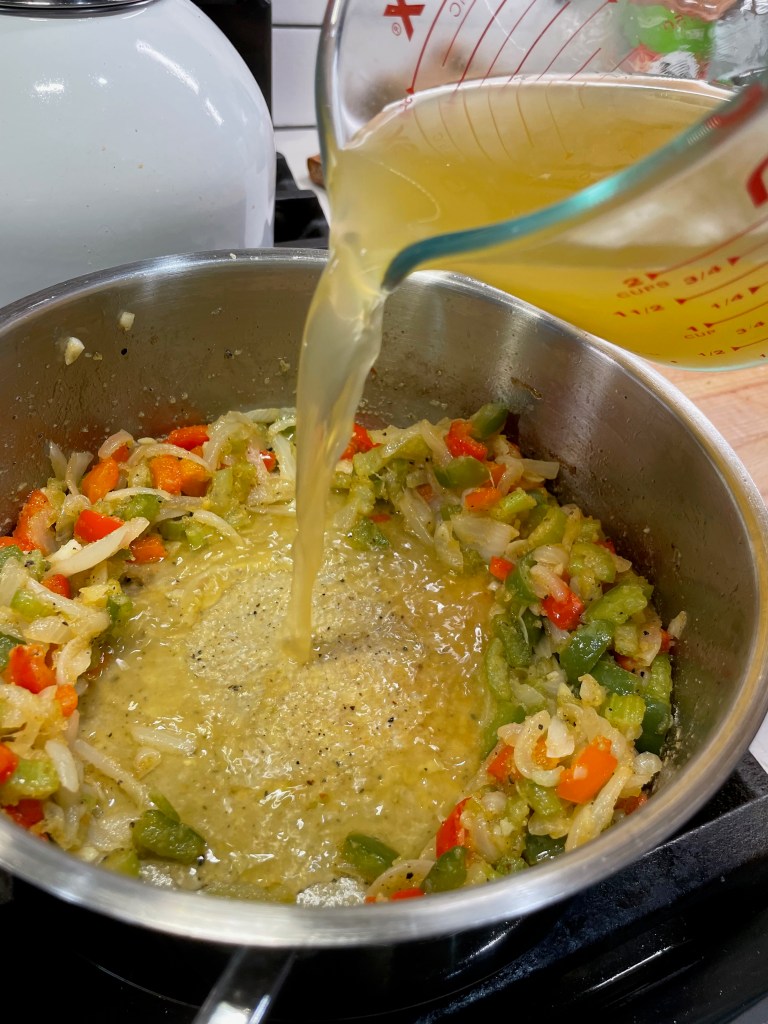
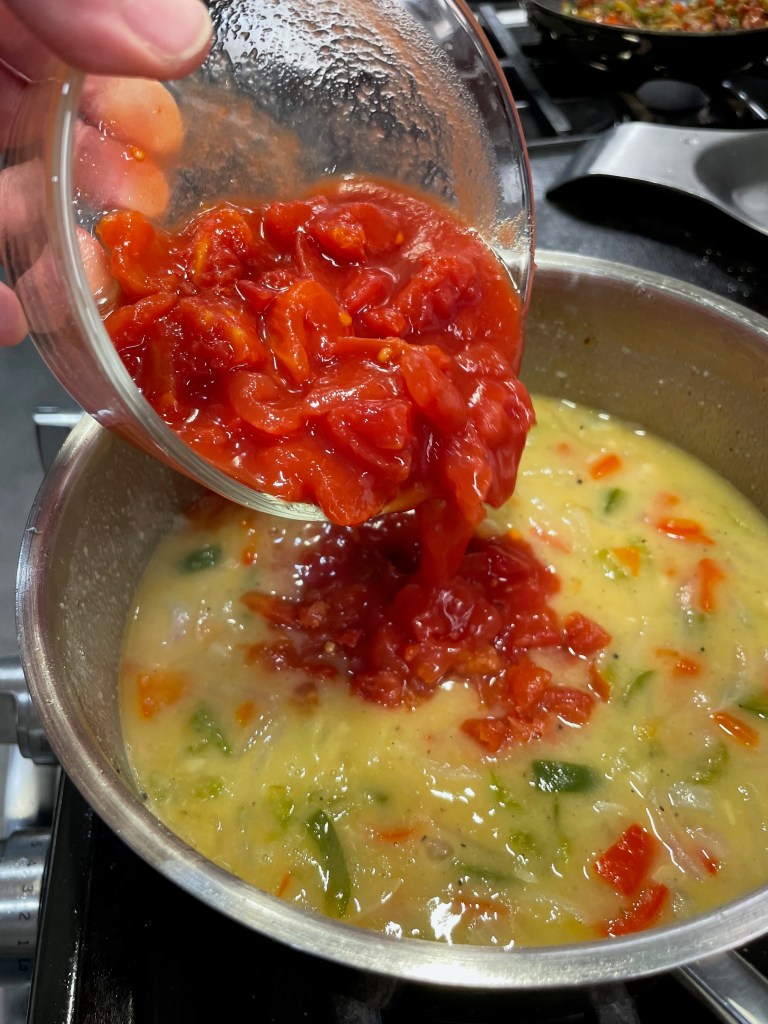
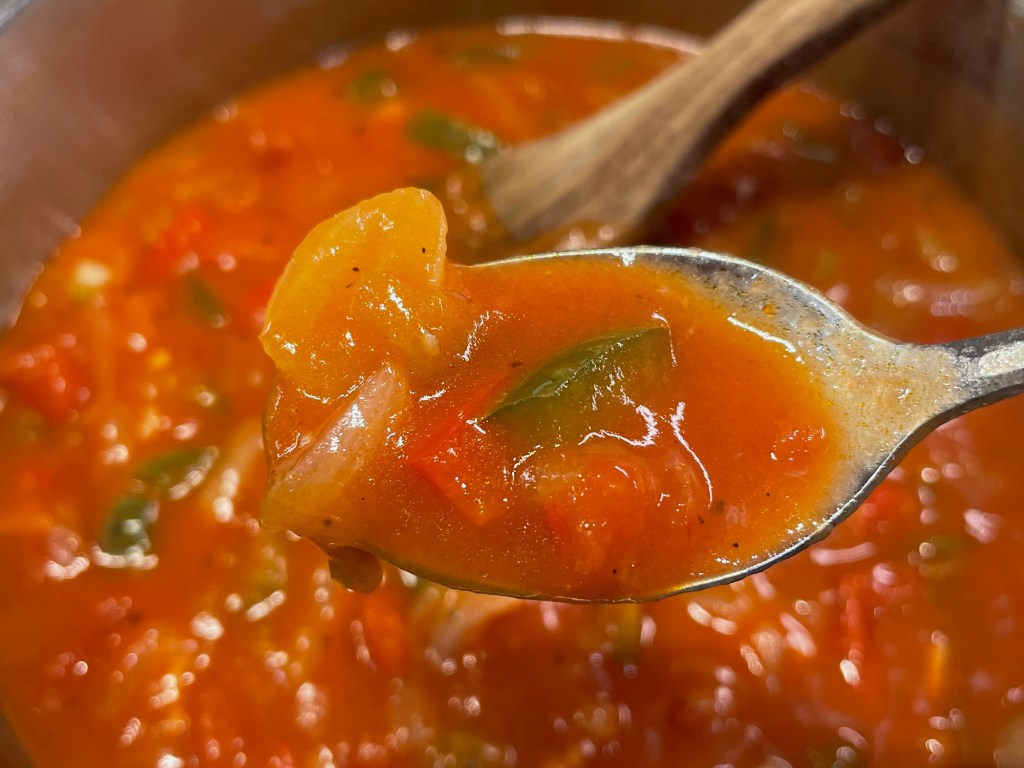
The Creole sauce I made here was spicy and flavorful, thanks to Cajun seasoning and fresh garlic that echo the andouille flavors. Flour thickens up the chicken broth-based sauce, and I was able to use up half a can of spicy Rotel tomatoes (left from the queso dip I made for Super Bowl), half a can of regular diced tomatoes (left from a salmon dish I made earlier in the week) plus tomato paste for added depth. This sauce was flavor on top of flavor, and I knew it would be even better after some simmer time in the oven over the roulades.

This is very close to what I remember from my first taste of Creole sauce.

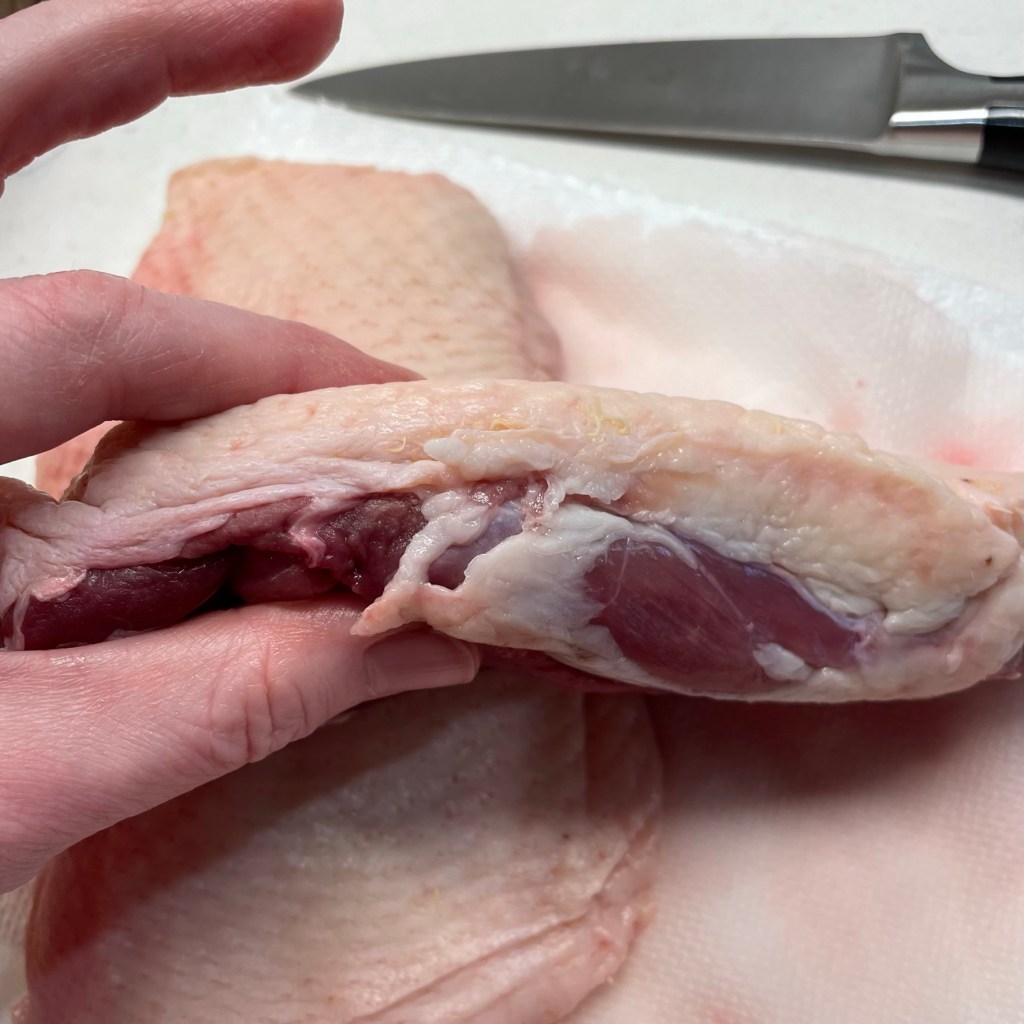
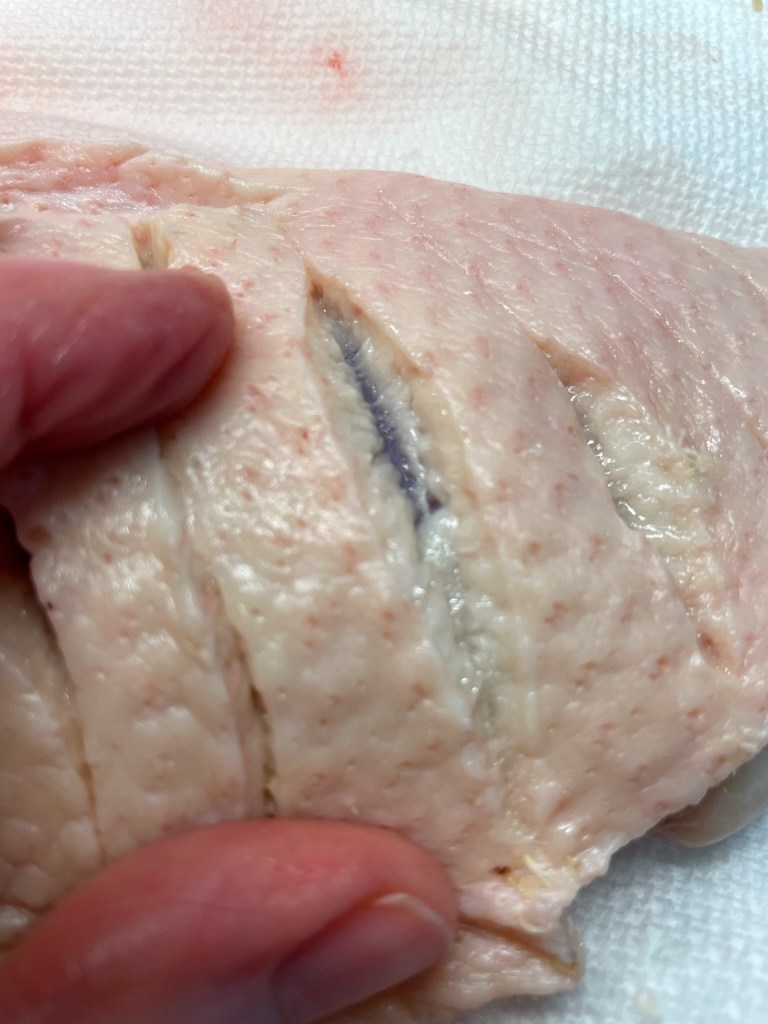
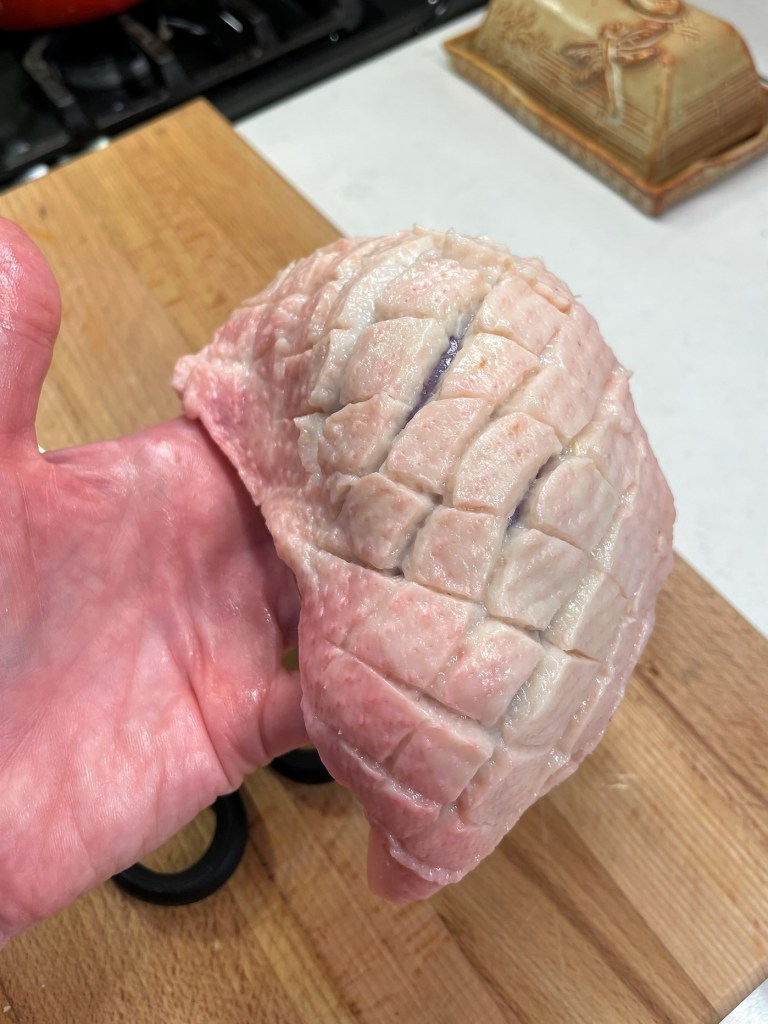
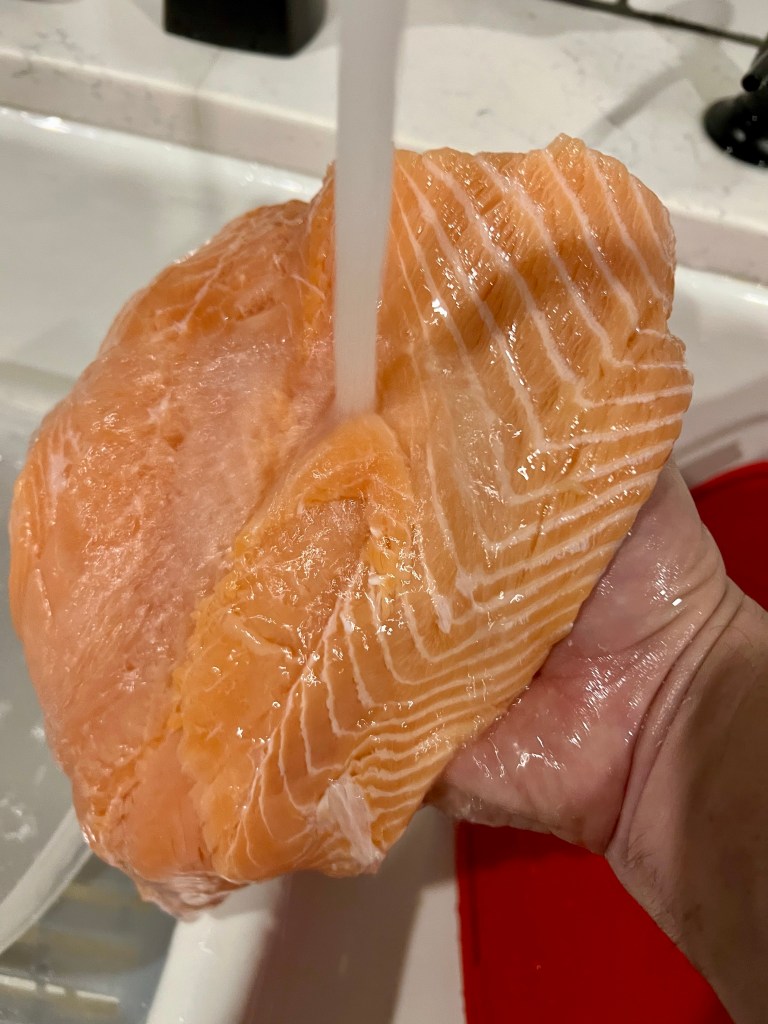
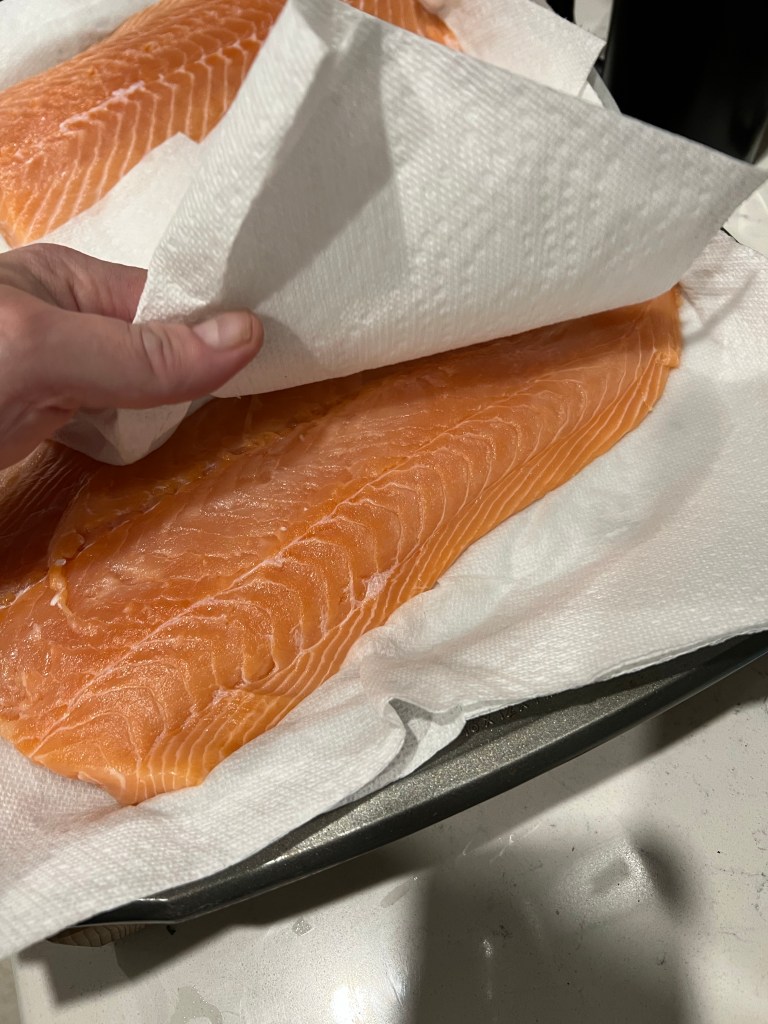
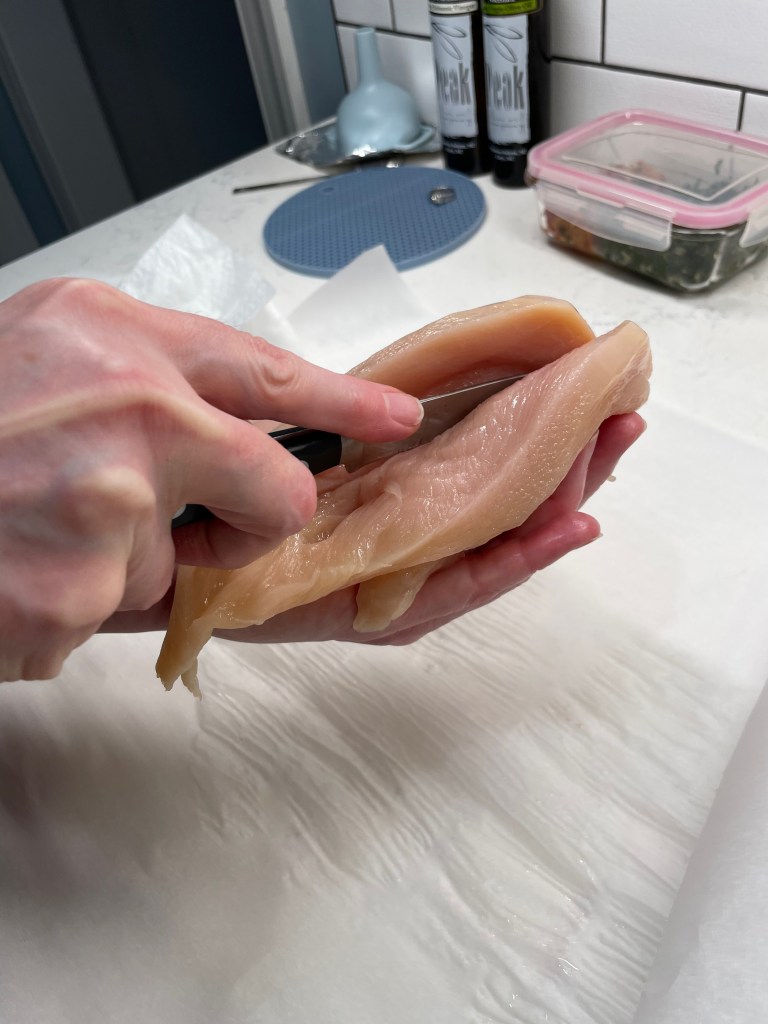
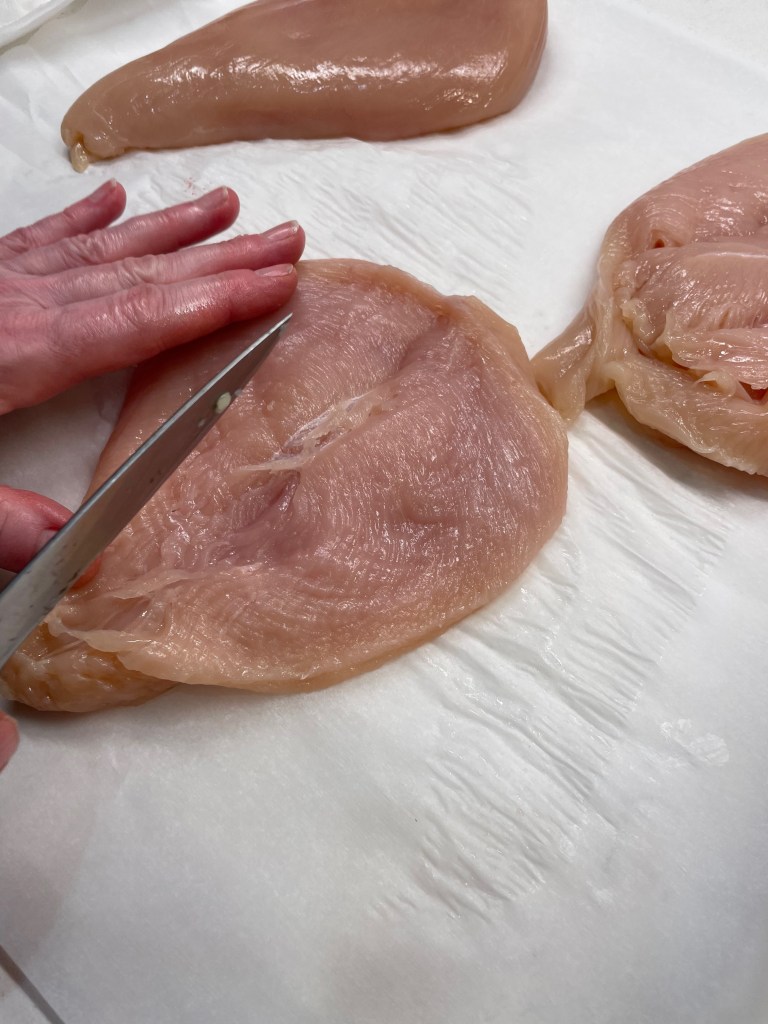
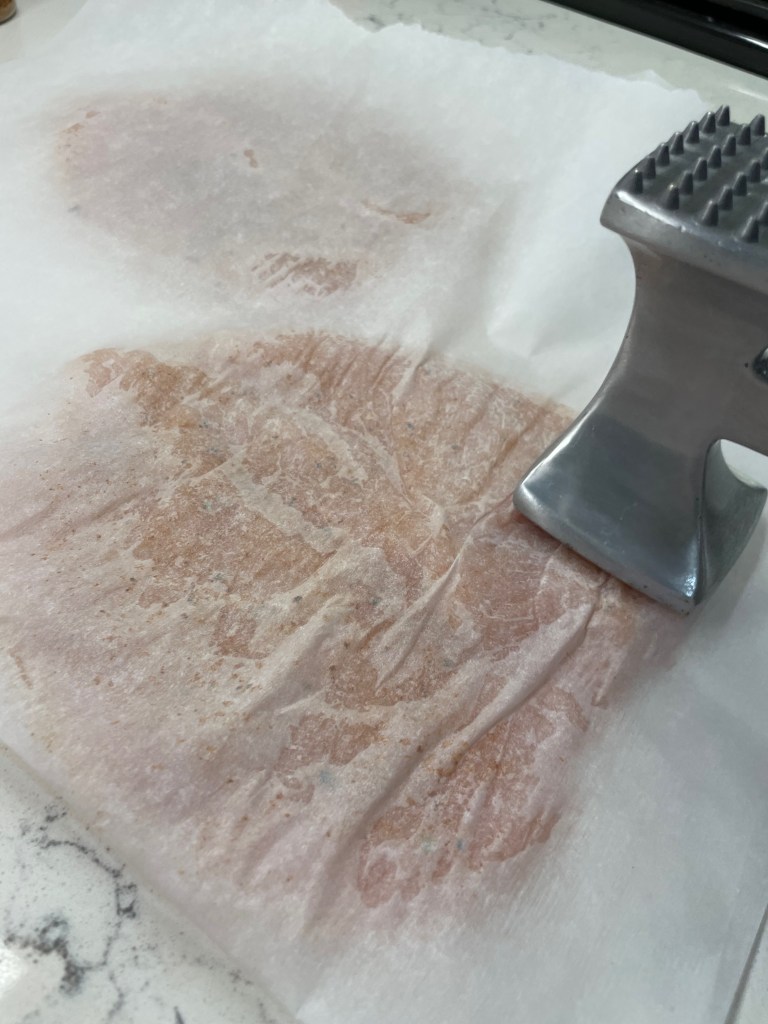
Stuffed chicken breasts are easy to do, but there are a few steps involved for easy rolling. First, you want the chicken to lay flat, so use a sharp paring knife and a slow, gentle touch to gradually open up the long side of the breast like a book. Next, place them between layers of parchment or waxed paper and pound them with the flat side of a meat mallet until the chicken is about 3/8-inch thick. It should look similar to a heart shape. 


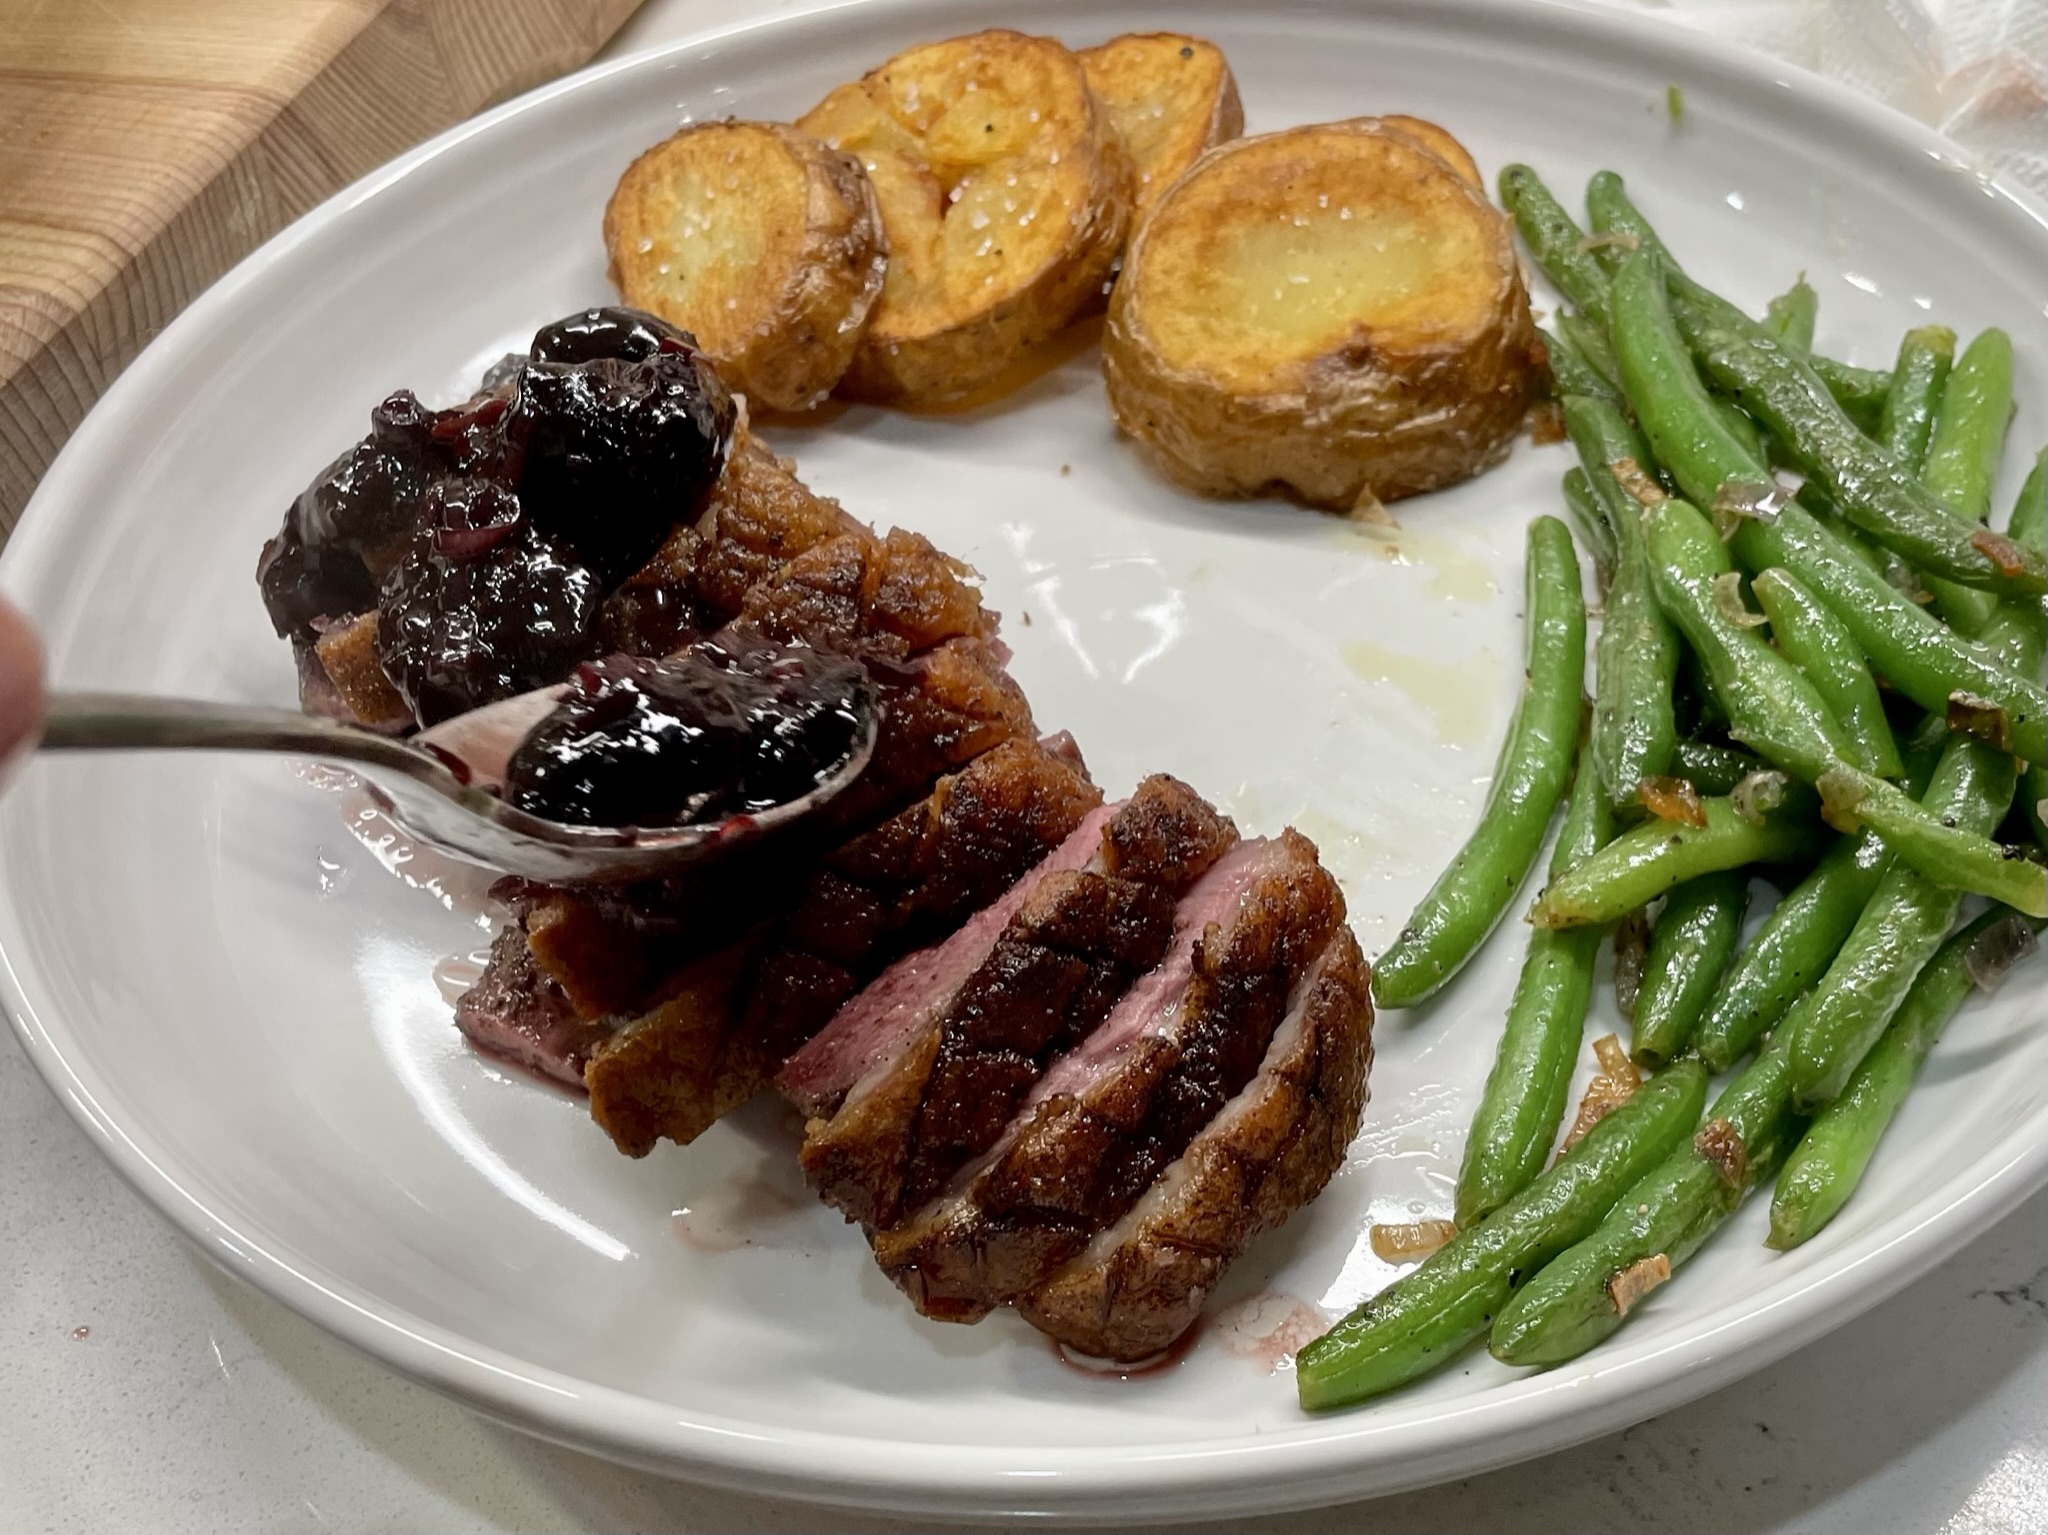
Letting the good times roll!

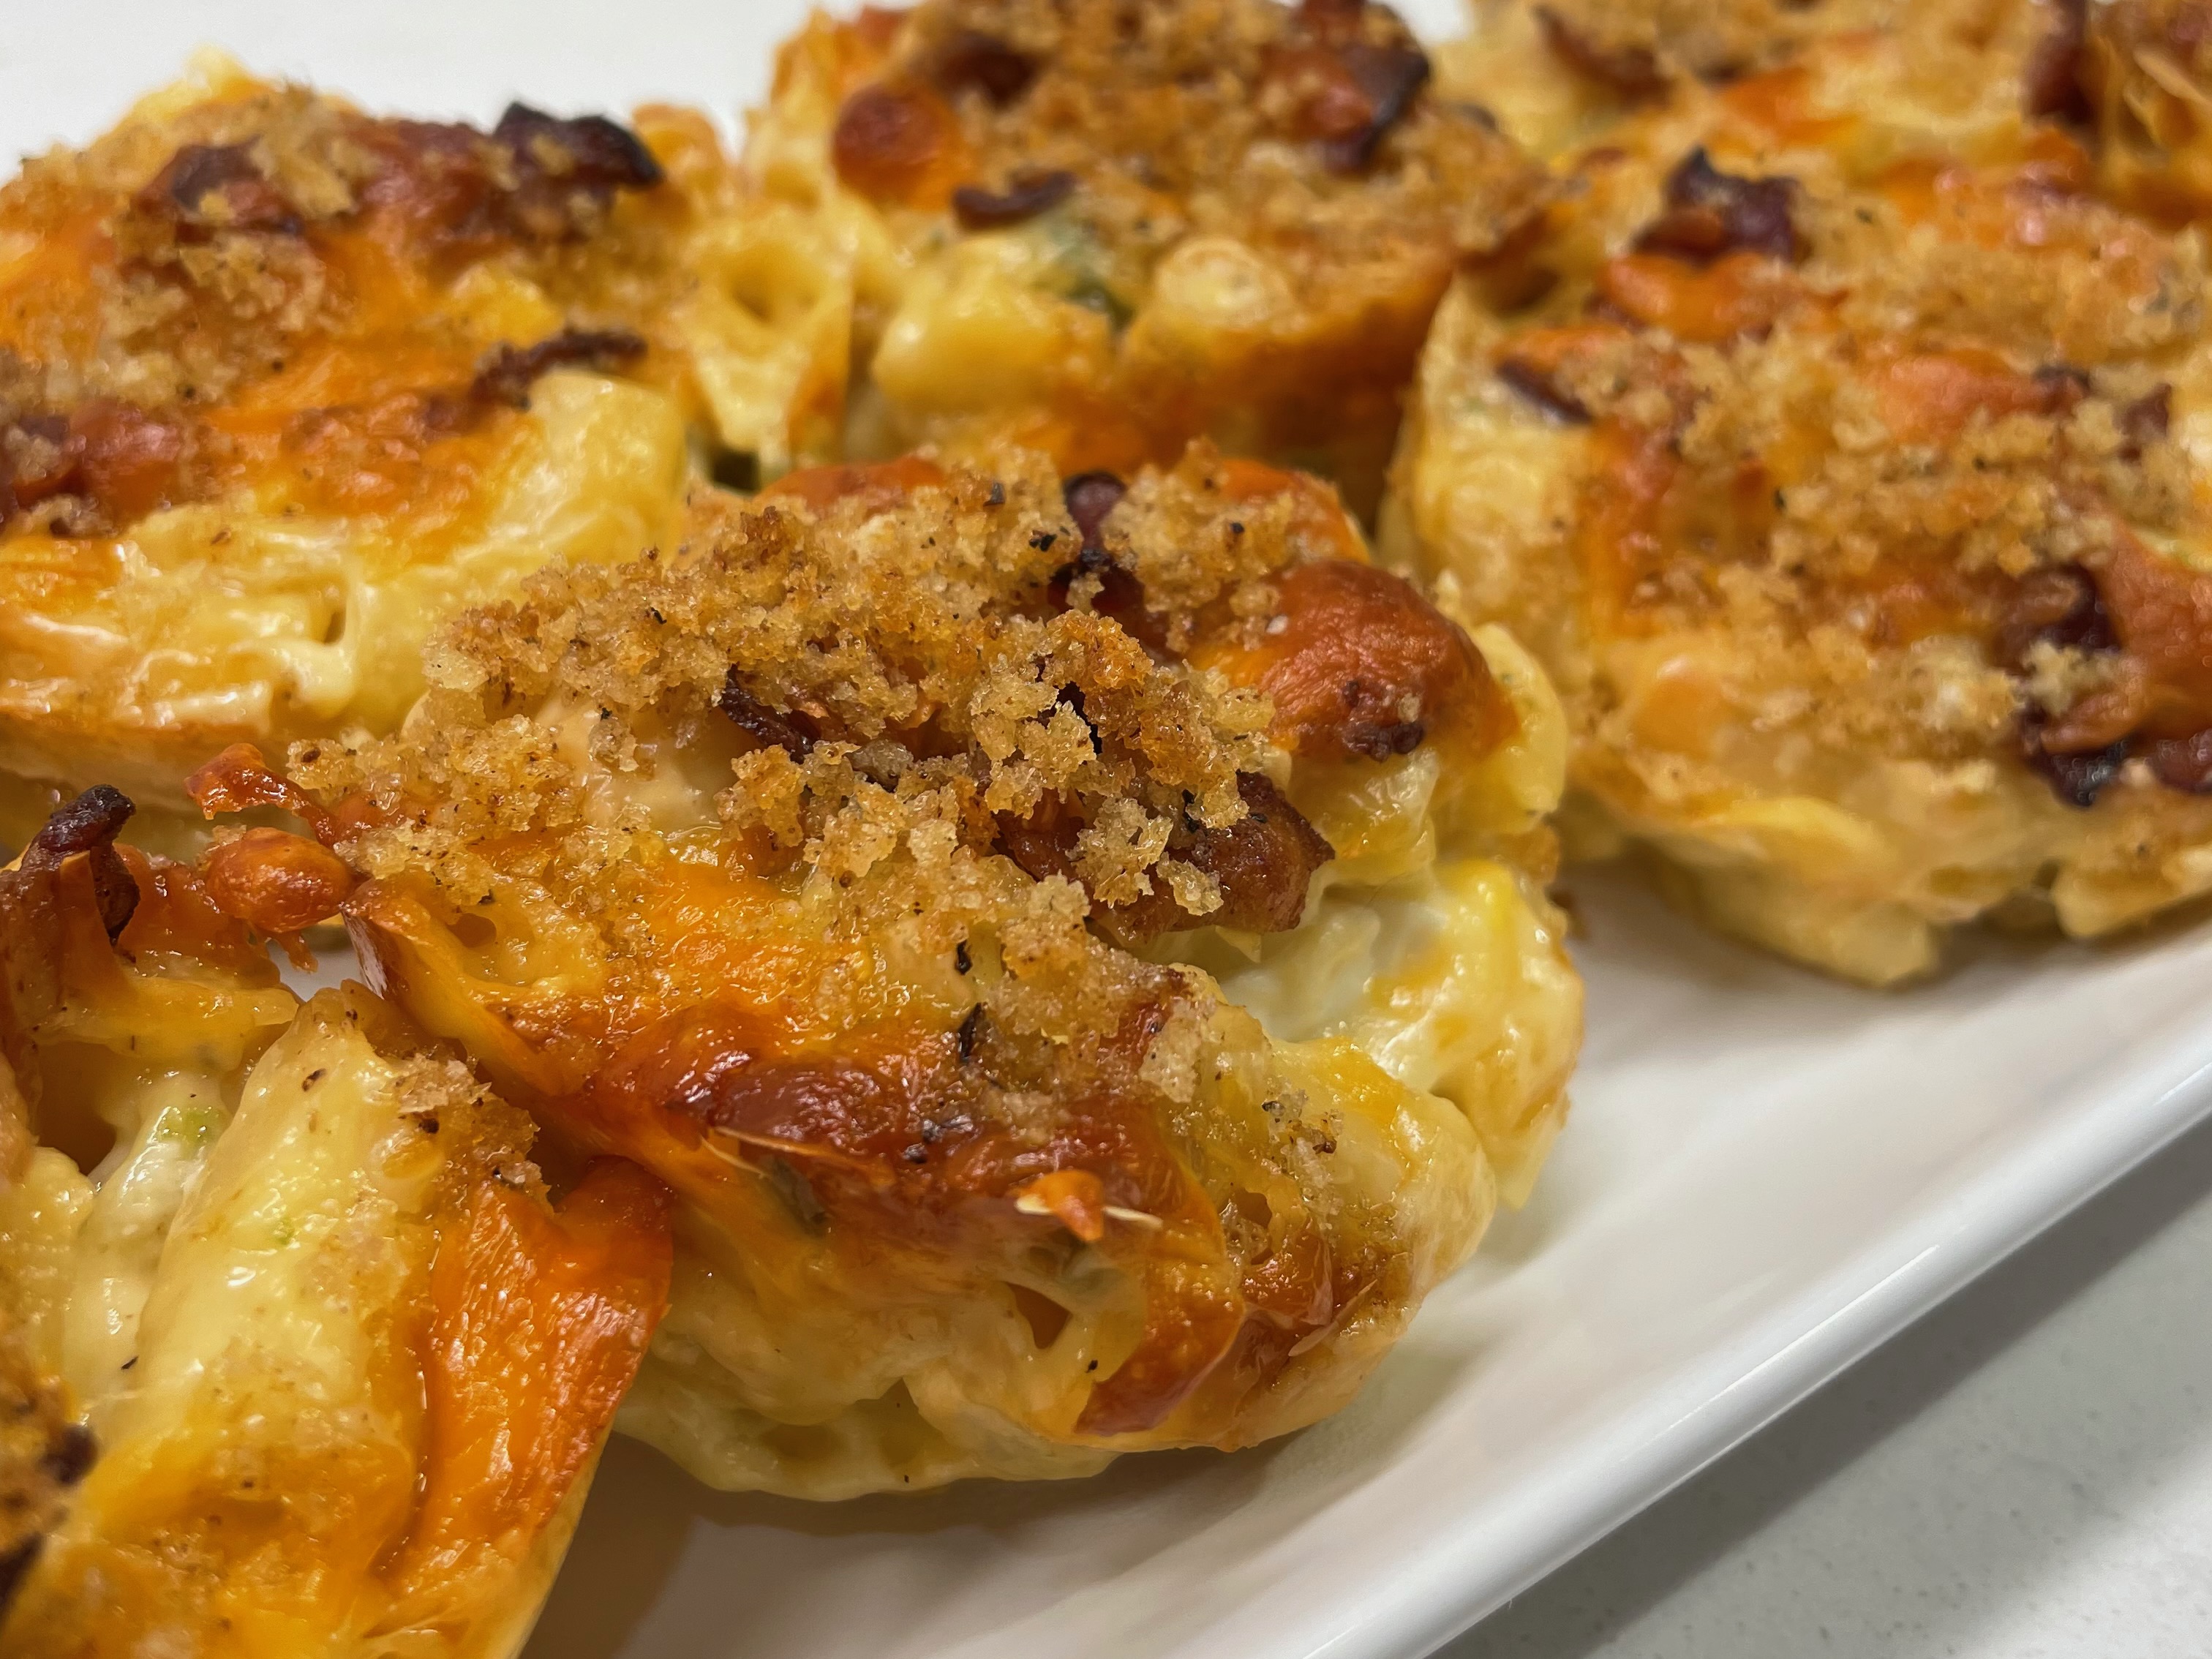
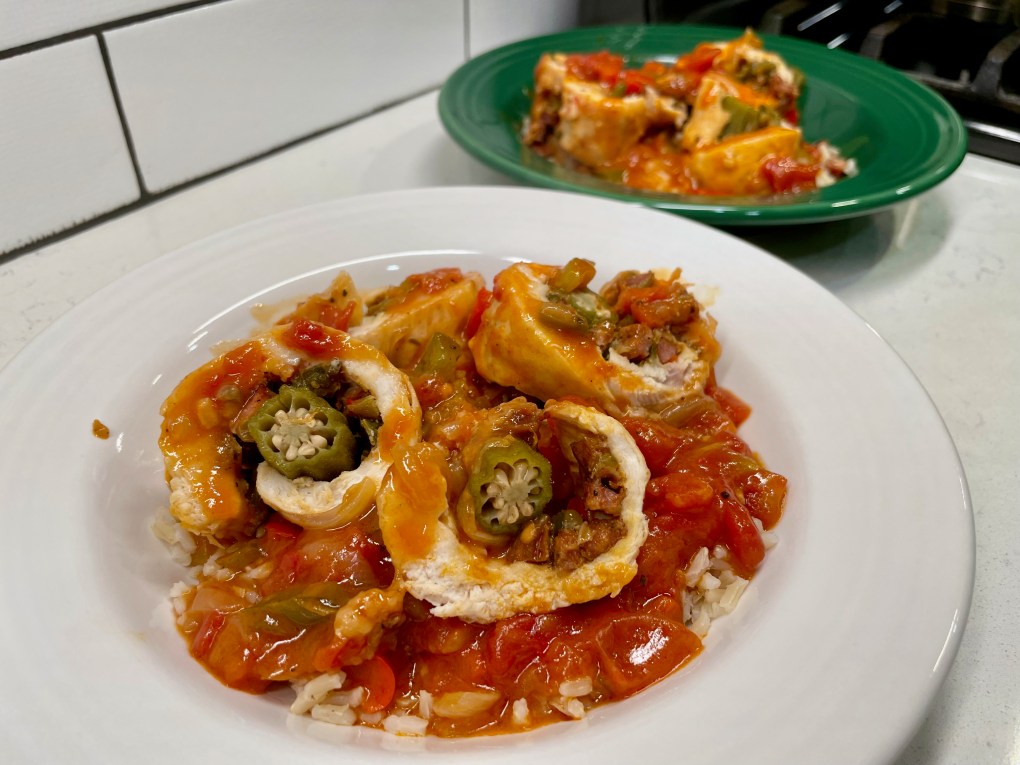
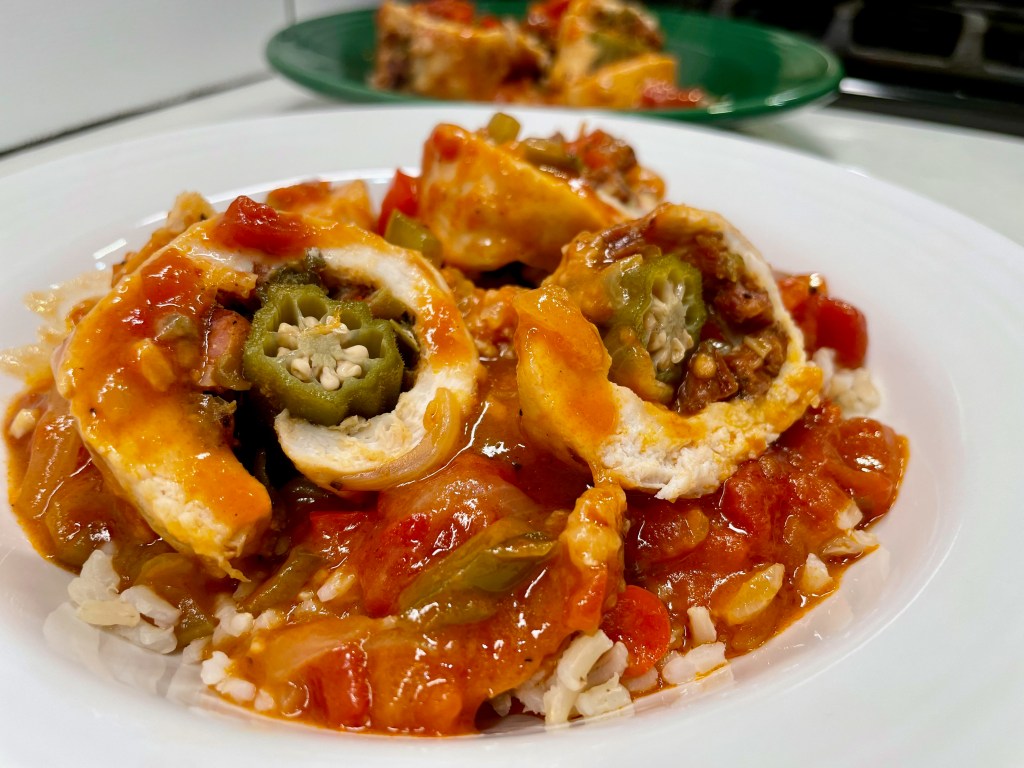
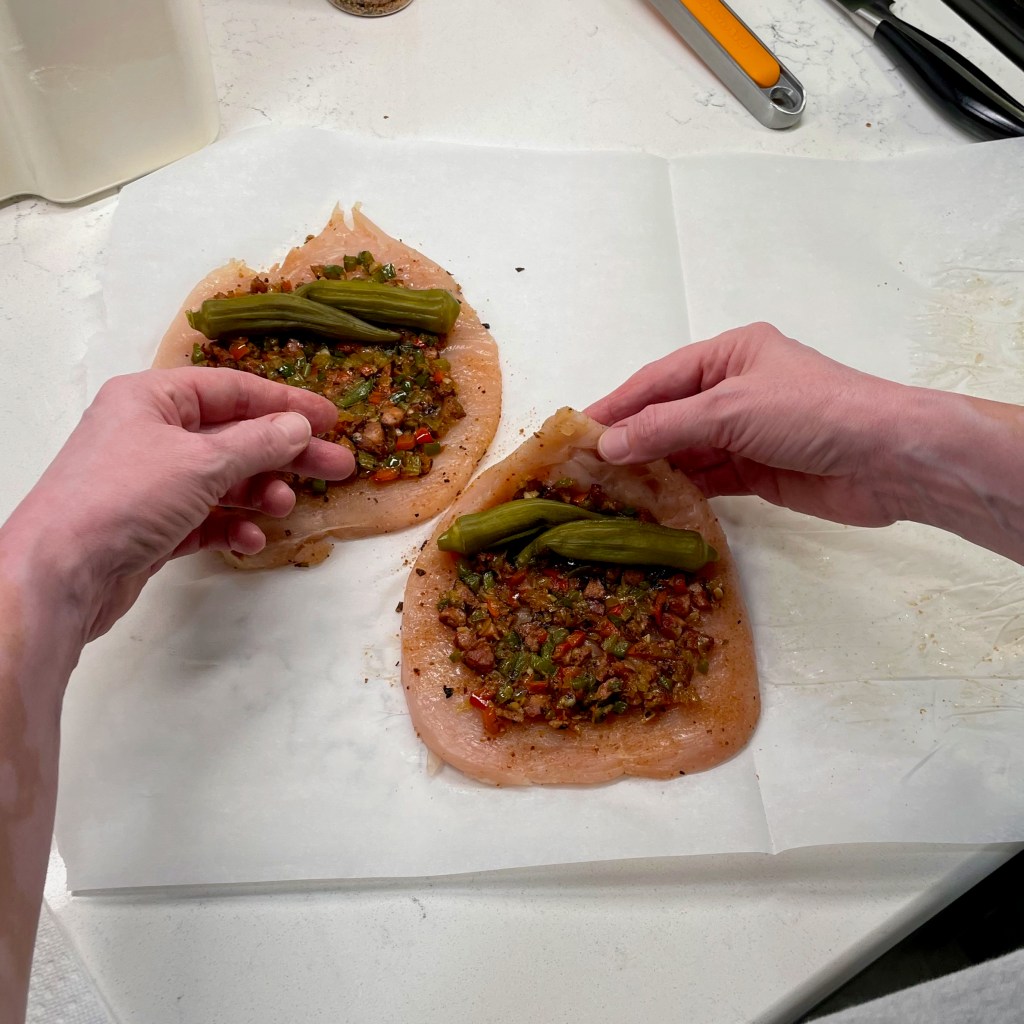
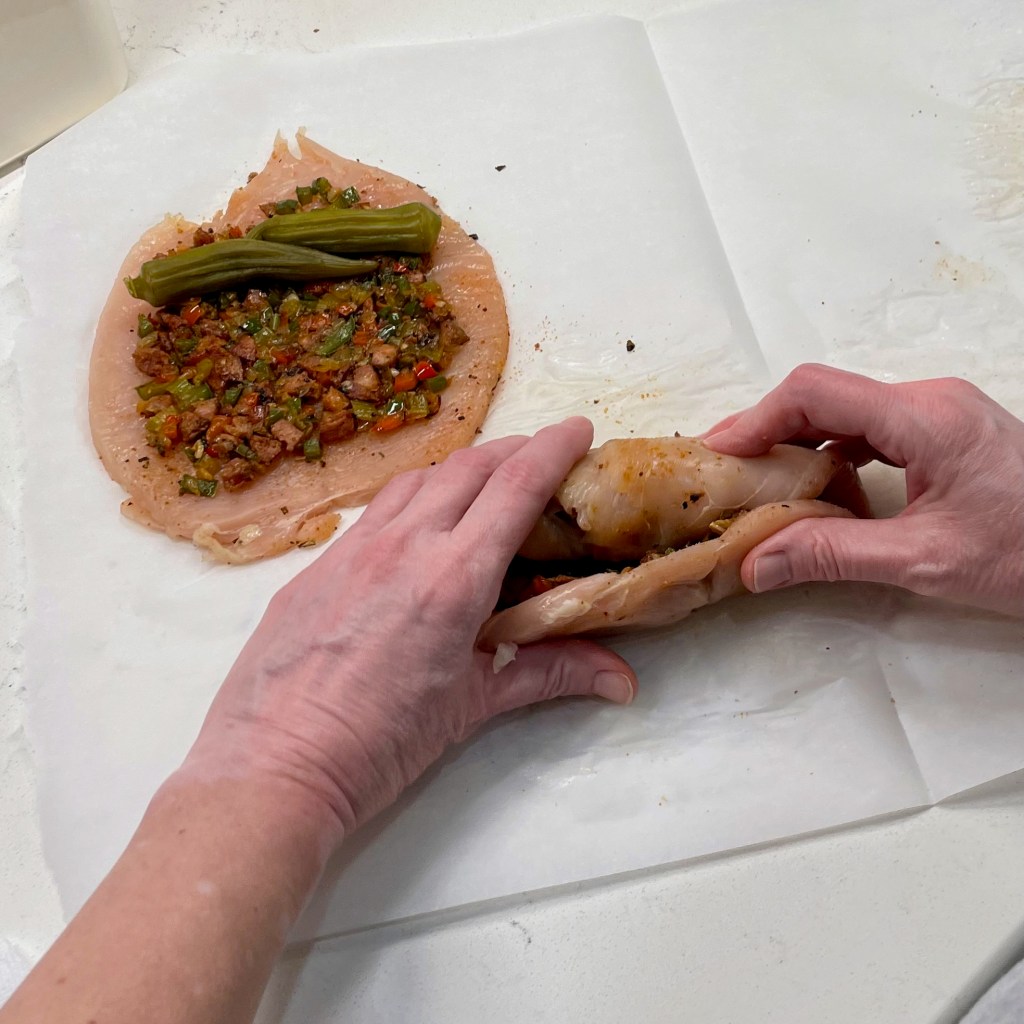
Finally, it was time to assemble and bake my roulades! There was one more flavor element that I wanted in my “rearranged” jambalaya, and that was okra. My husband is not a fan of this much-maligned southern staple vegetable, which can sometimes be slimy when cooked. Here’s how I got around that unpleasant trait— I used spicy pickled okra! The process of pickling keeps the okra firm and sturdy, and the sweet-sour pickling added a nice flavor accent to my roulades. I cut lengthwise slits in each okra pod so that I could release the excess liquid onto paper towels, and then I rolled up my andouille-layered cutlets with the okra inside and tucked in a few toothpicks to hold them together.


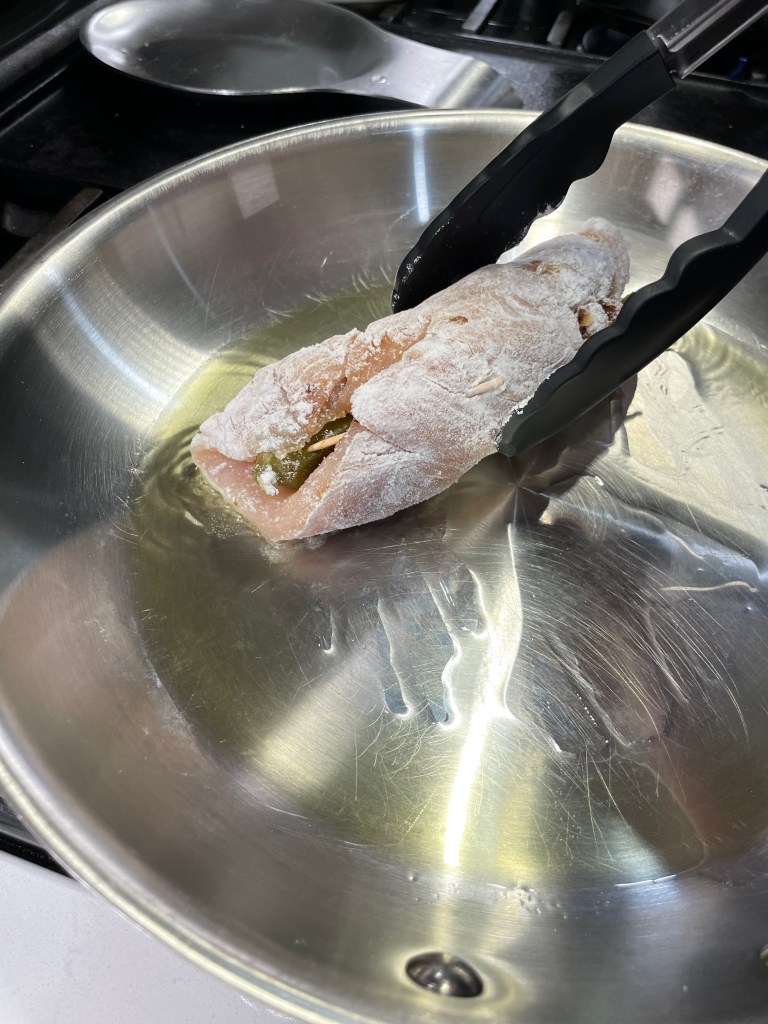
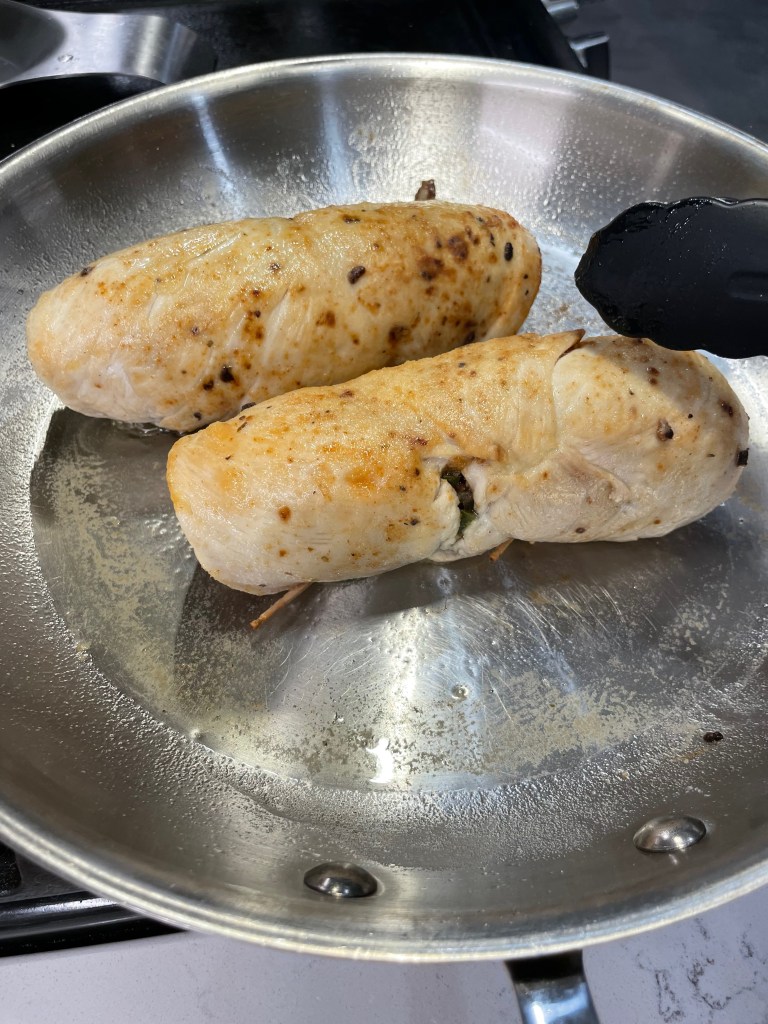
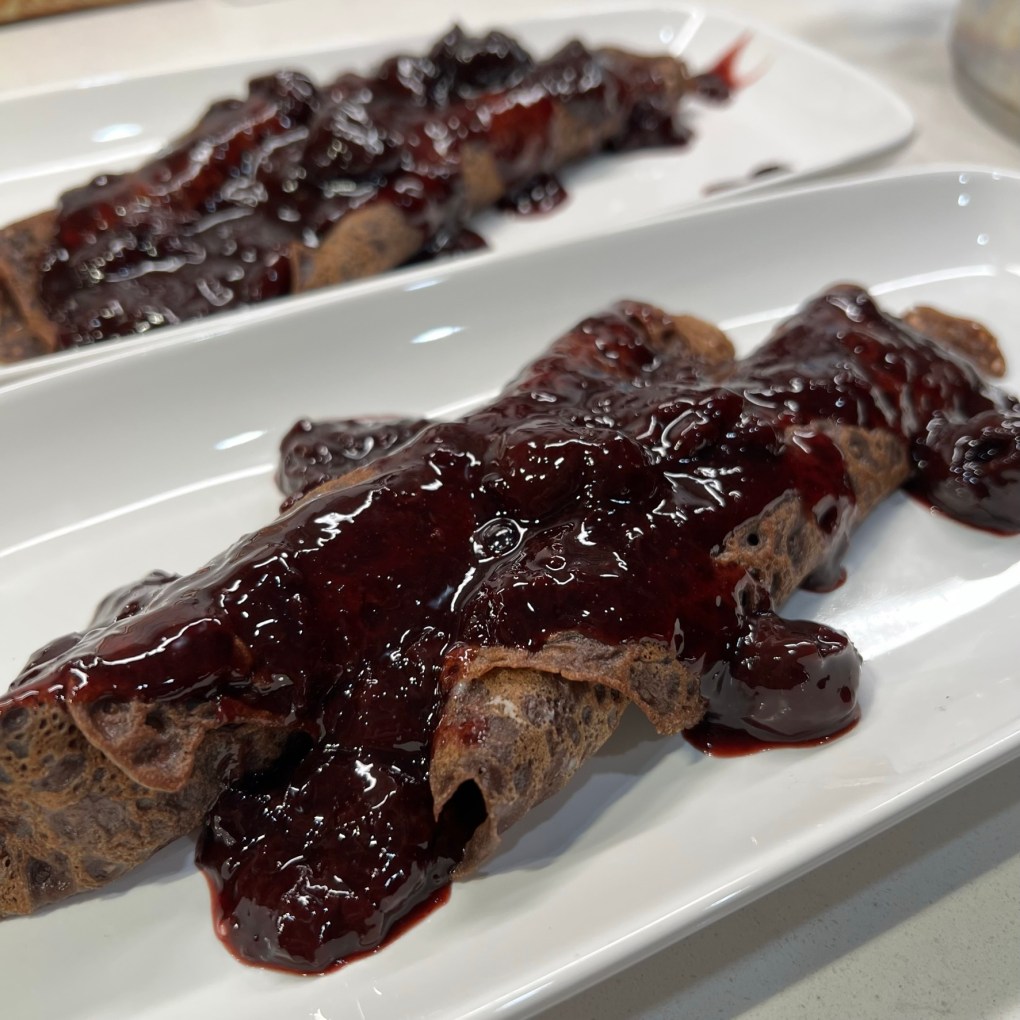
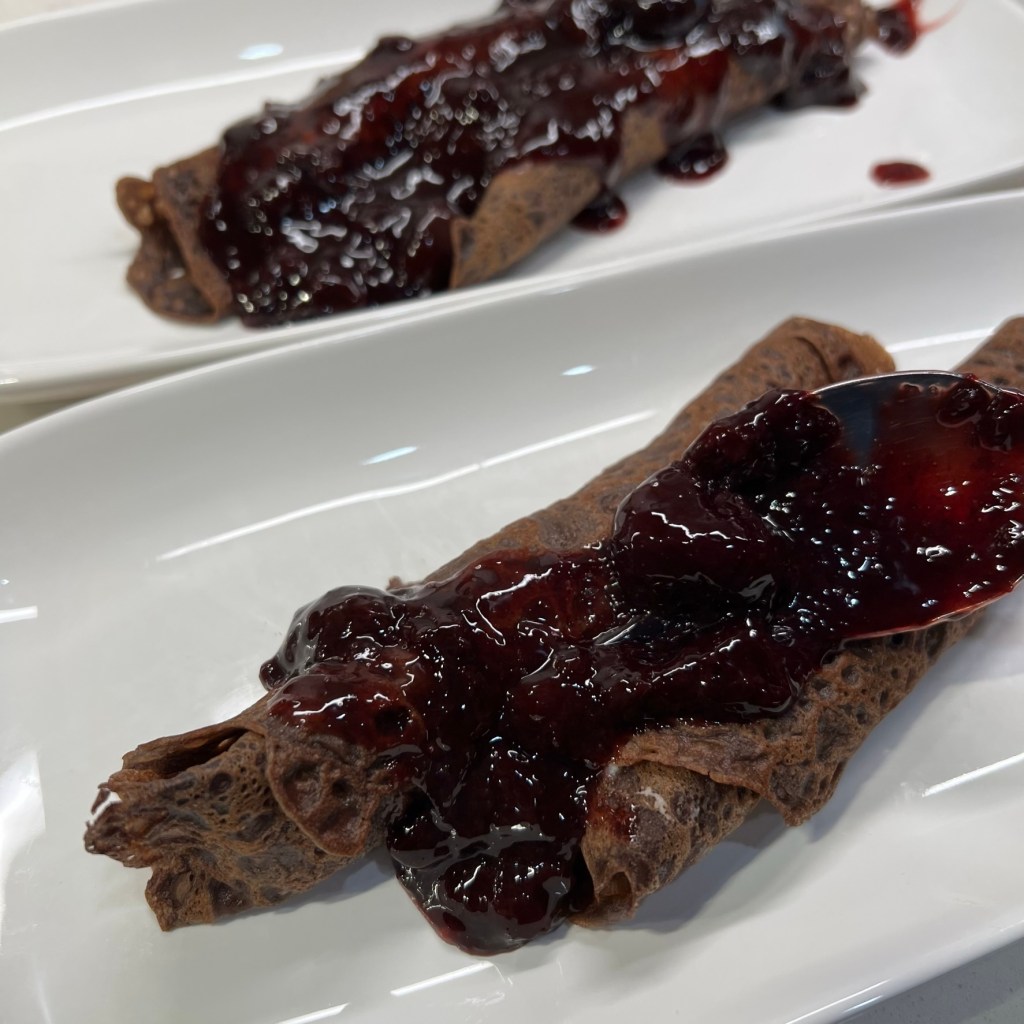
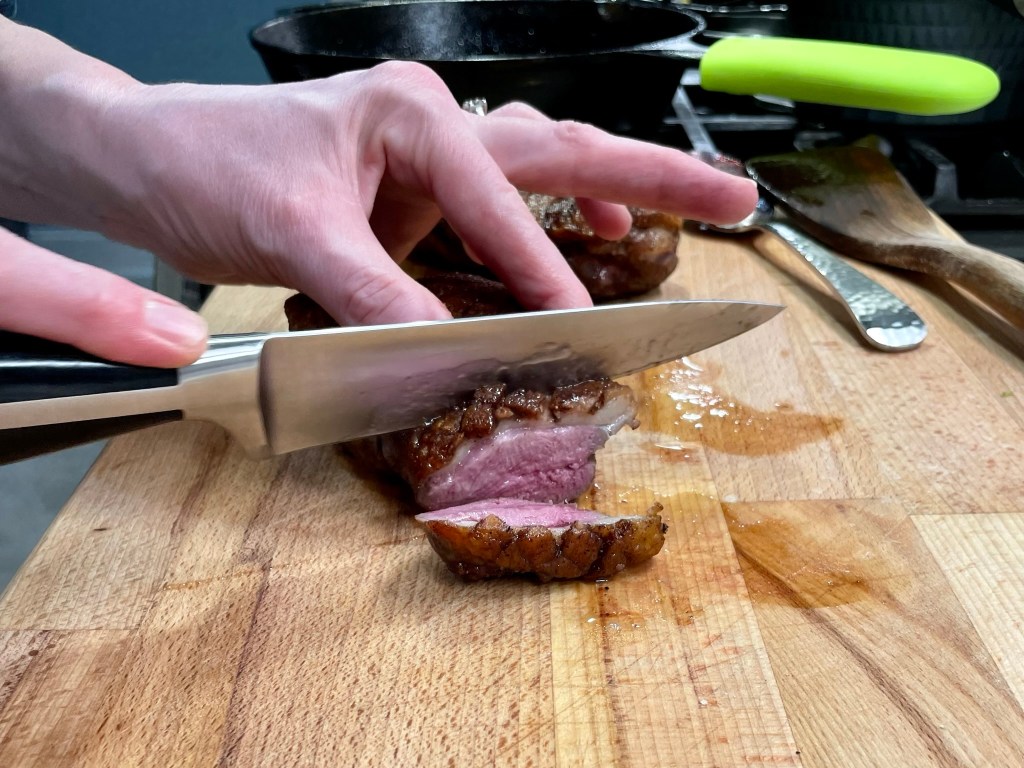
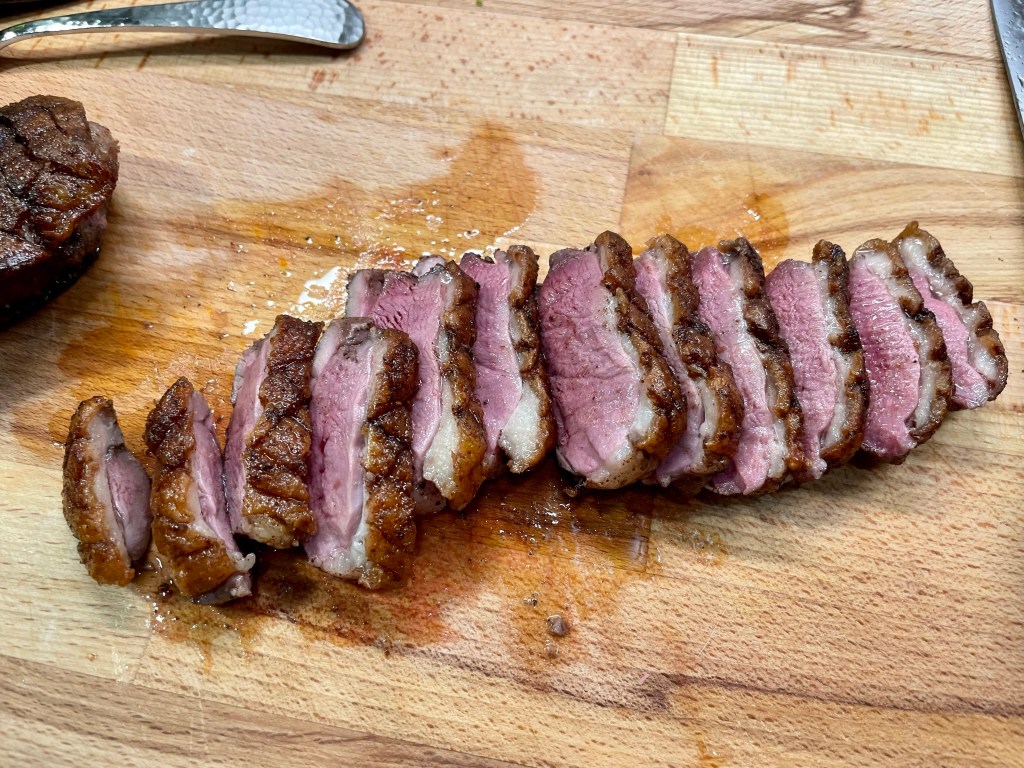
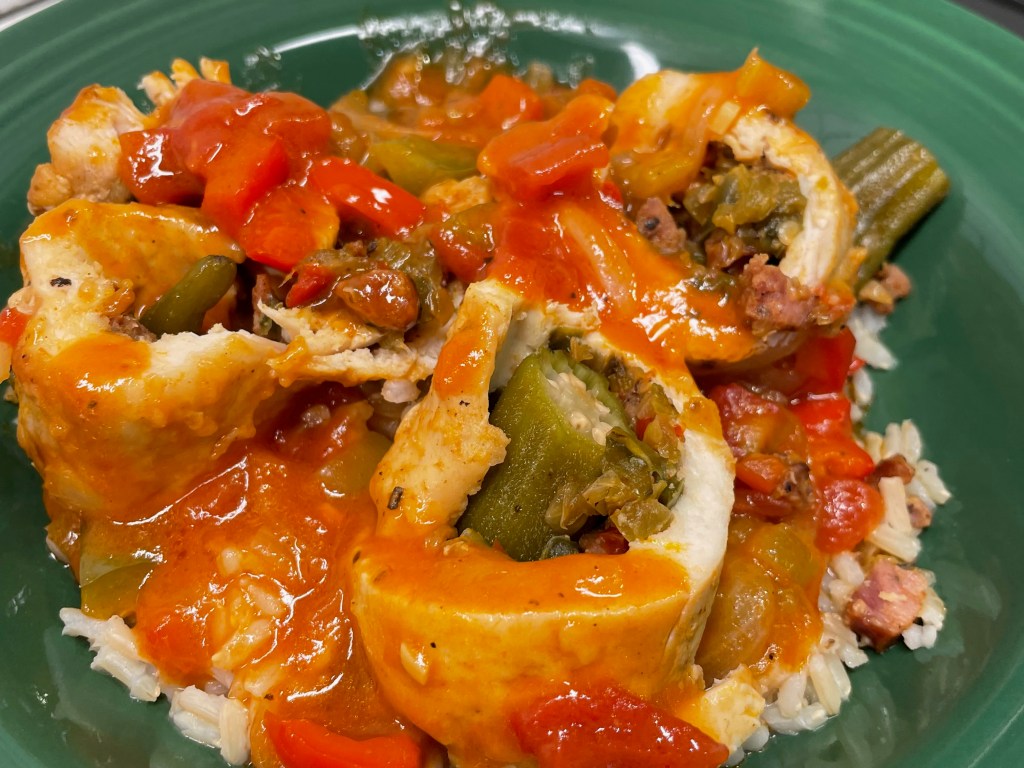
A quick dusting of flour ensured even browning on my roulades, and then I covered and smothered them with the Creole sauce, baking it with a foil cover for about 40 minutes. My kitchen smelled amazing! I carefully lifted the roulades to a cutting board, sliced them up and served on brown rice with the Creole sauce.

Delish!

This little adventure gave us some big, bold flavor, and we didn’t miss the extra andouille or its extra calories. Based on my lookup, by the way, each serving of this meal was roughly 420 calories. Probably a little less, actually, as I had two servings of the Creole sauce left over. I used it up two nights later, with Cajun seared shrimp.

Jambalaya-stuffed Chicken Roulades

  • Servings: 4
  • Difficulty: Average
  • Print

This is a playful reinvention of classic jambalaya, made a bit healthier by reducing the amount of high-fat sausage and emphasizing lean chicken and vegetables.


Ingredients

  • 1 link smoked andouille sausage, diced into small bits
  • 1 medium sweet onion, divided; 2/3 chopped and the rest diced
  • 2 stalks celery, divided; 2/3 chopped and the rest diced
  • 1/2 each red and green bell peppers, divided; 2/3 chopped and the rest diced
  • 3 large cloves garlic, minced
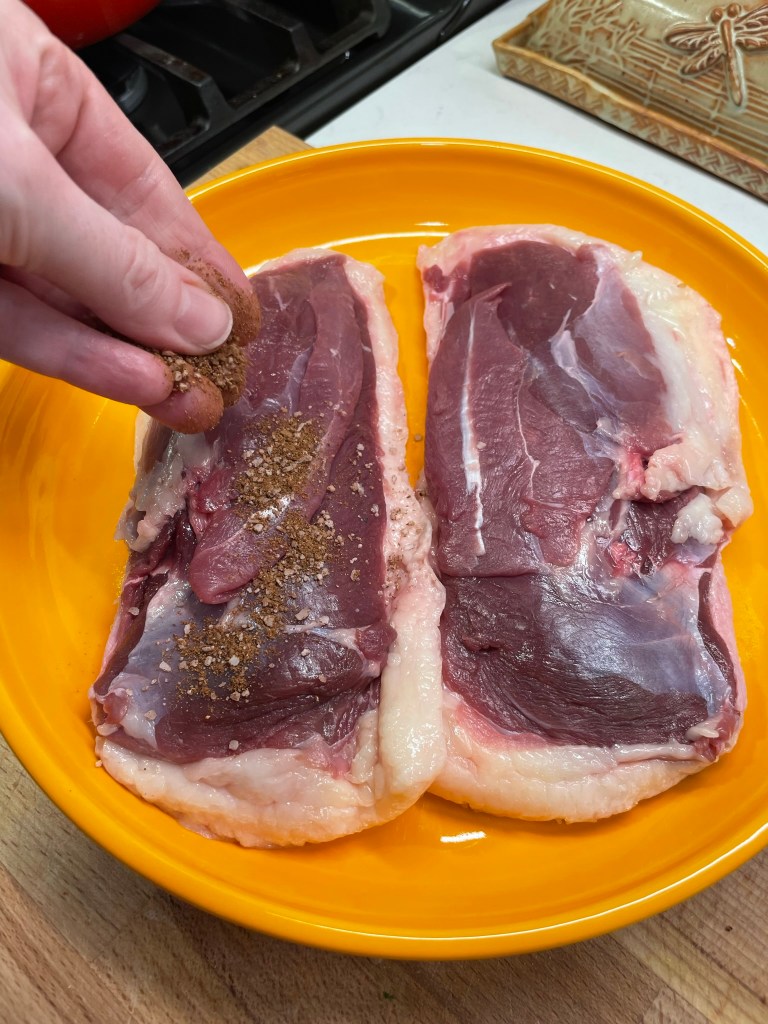
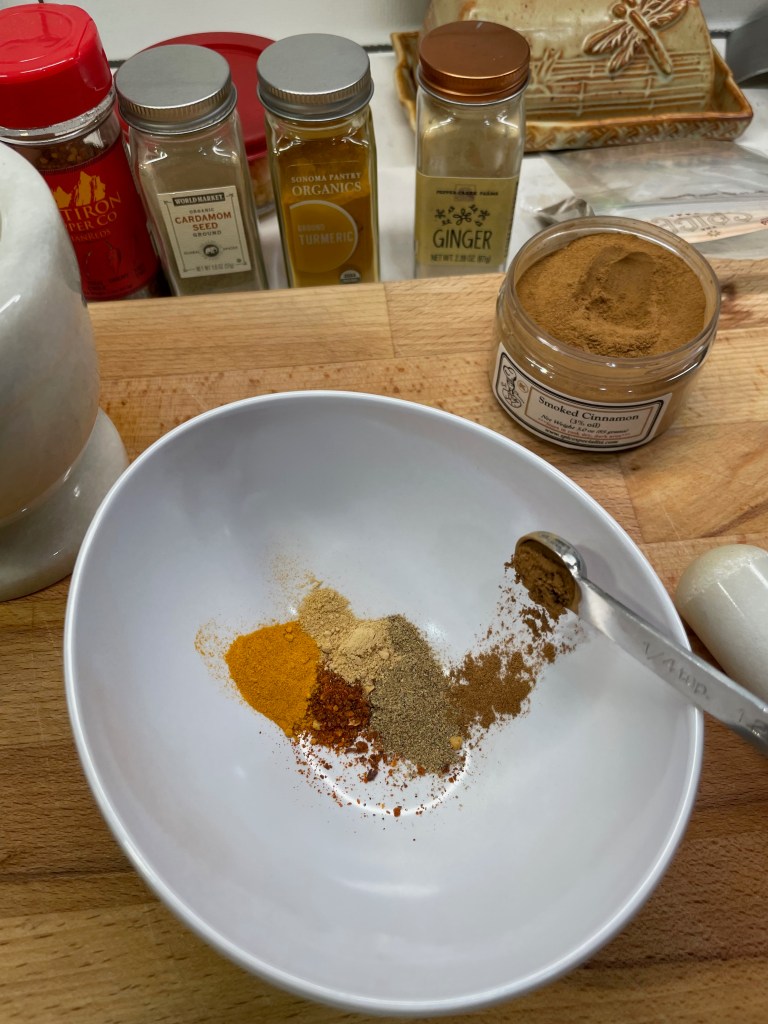
  • Several shakes Cajun garlic seasoning (use it to season every layer)
  • 2 Tbsp. extra virgin olive oil
  • 2 Tbsp. all-purpose flour
  • 2 cups chicken stock
  • 1 can diced tomatoes (I used a combination of “hot” Rotel and regular diced tomatoes)
  • 2 Tbsp. tomato paste
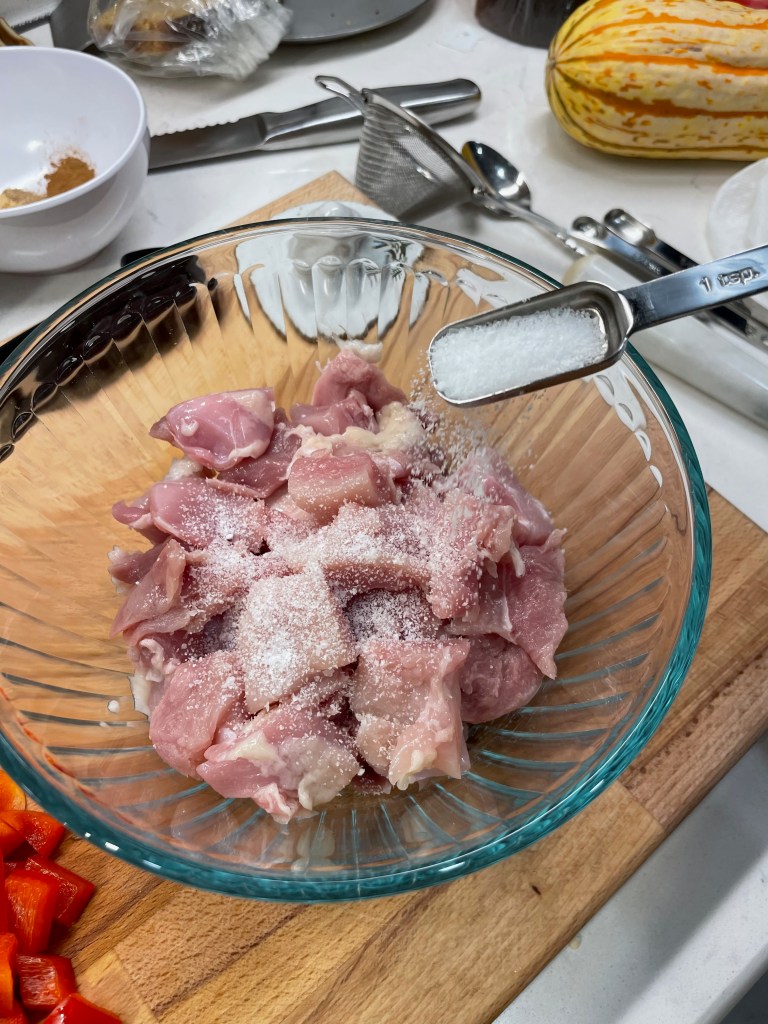
  • 2 large boneless, skinless chicken breasts, butterflied and pounded to 3/8″ thickness
  • 4 pods pickled okra, slit lengthwise to drain and blotted dry with paper towels
  • Salt and pepper to taste
  • Cooked brown rice for serving


Directions

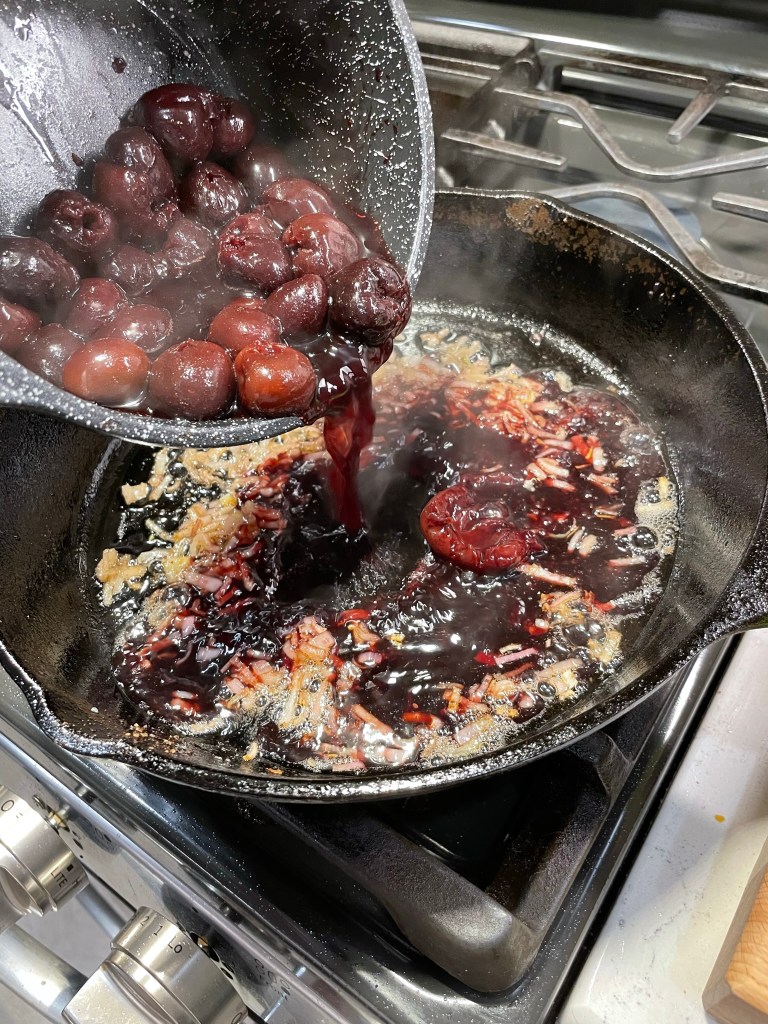
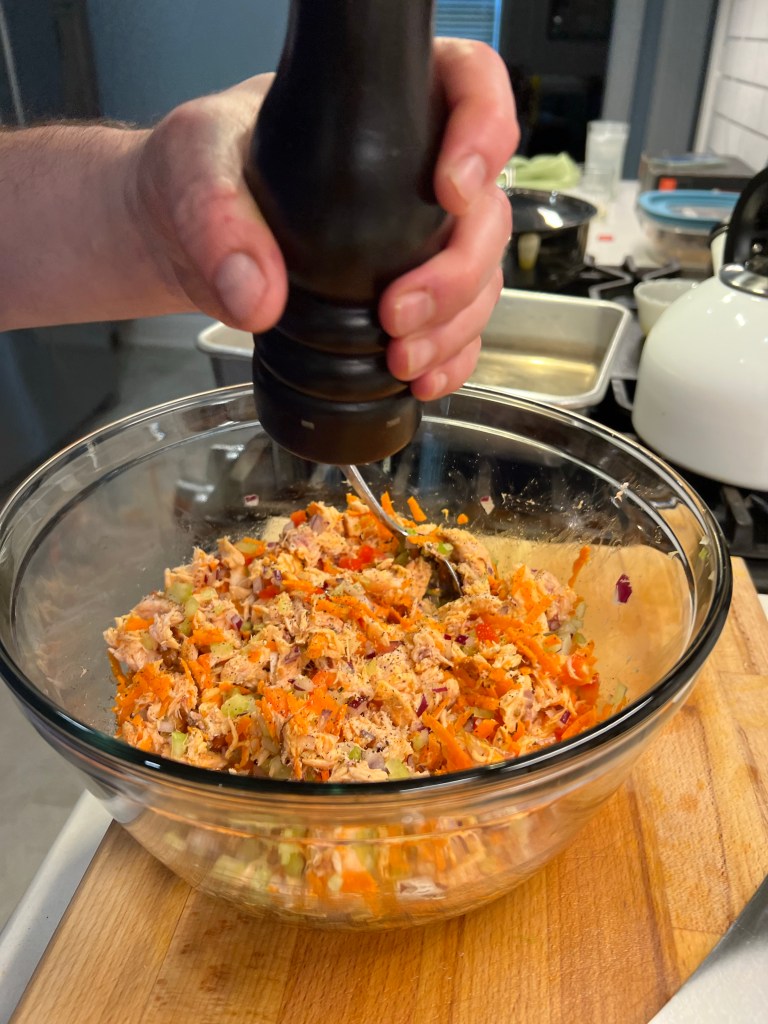
  1. Heat a small skillet over medium heat. Add the diced andouille sausage and cook until the edges are crisped and fat is rendered. Add the diced onions, peppers and celery and sprinkle with Cajun garlic seasoning. Cook until vegetables are tender and reduced, adding half of the garlic in the last couple of minutes. Set aside to cool.
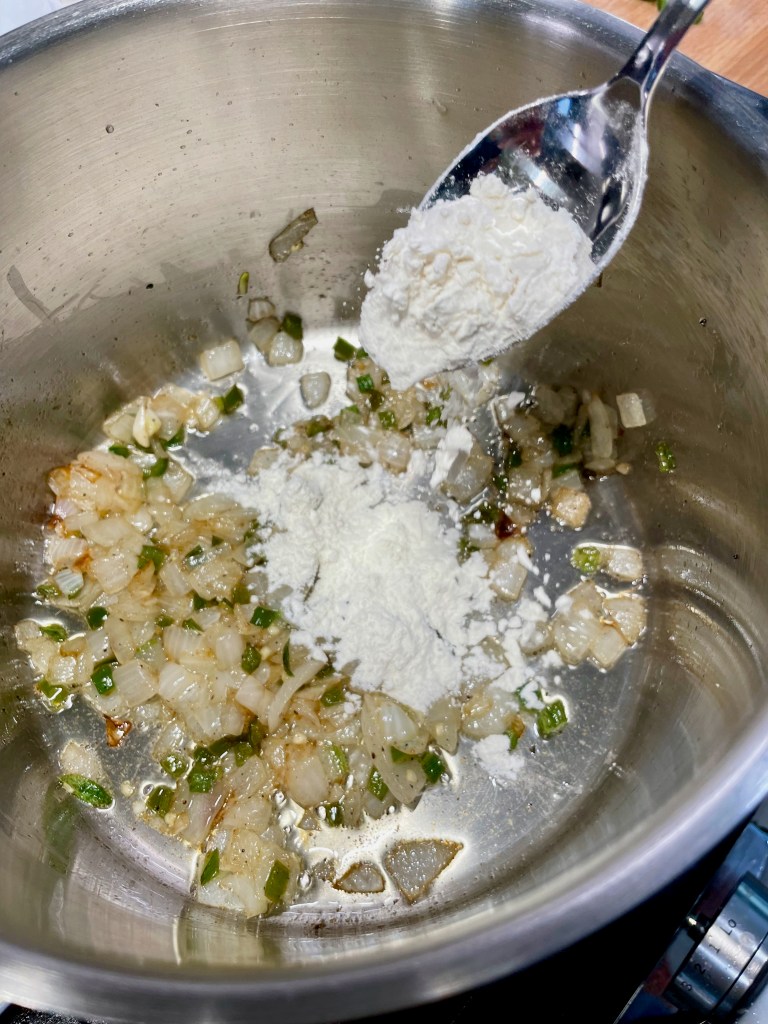
  2. While the diced veggies are cooking, heat a medium sauce pot over medium heat. Add olive oil and chopped vegetables. Season with Cajun garlic seasoning and cook until softened, adding garlic near the end of cooking. Spoon flour over the vegetables and toss to cook until the roux coats and sticks to the pot.
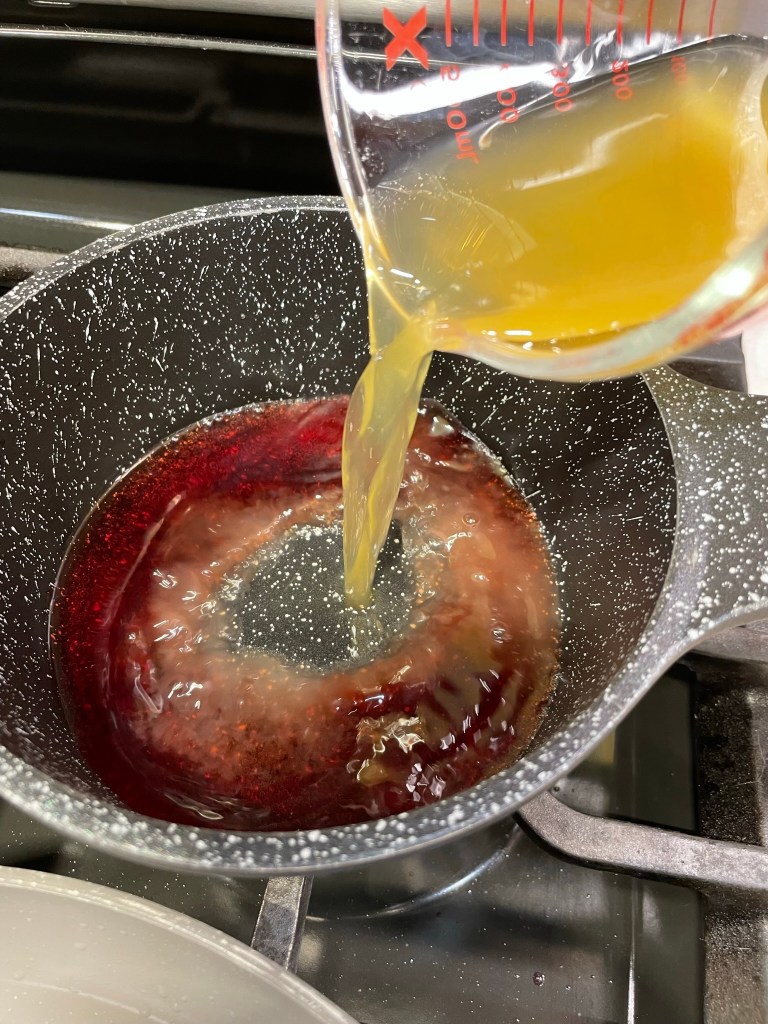
  3. Add chicken stock, whisking to release any browned bits in the pot. Add tomatoes and tomato paste and stir, bringing the pot to a slight boil to thicken sauce. Reduce heat and cook for a few more minutes while you prep the chicken.
  4. Preheat oven to 350° F. Assemble the roulades by dividing the andouille-trinity mixture evenly over the butterflied chicken breasts. Place two okra pods at the narrow tip of the cutlet and roll snugly toward the larger end. Secure the loose ends with toothpicks.
  5. Dust each roulade lightly with flour. Place a skillet over medium heat with a tablespoon of olive oil. Gently brown the roulades on all sides and then transfer to a baking dish. Spoon the creole sauce over the roulades, cover with foil and bake for 35 minutes. Carefully transfer each roulade to a cutting board to slice them into rounds.
  6. Serve roulade slices over brown rice with Creole sauce.


Pineapple-Coconut Margarita

Does it seem odd that the first recipe I post after the announcement of my husband’s “get healthier” initiative is a cocktail? Yes, of course it does. This is one of those awkward food blogging moments where things seem out of order. But Thursday is National Margarita Day, and I’ve been planning this post since before Les saw the light. With tequila being one of the lowest calorie spirits, I figure that a margarita is a reasonable, if only occasional, splurge. Besides, if you’re cutting back on cocktails while implementing a new eating plan, it’s best to make that once-in-a-while drink a good one, and make it at home for Margarita Day or any other day you’re craving refreshment.

I think I can see warmer weather just ahead!

The margarita is one of the easiest drinks to modify with fun, flavorful twists, and this one is working a tropical vibe with pineapple and coconut, without being overly sweet. What makes it a “margarita” (which translates to “daisy” in Spanish) is tequila, orange liqueur, fresh lime and a touch of sweetener. The rest is up for grabs; just don’t go too crazy mixing in other flavors or you’ll have yourself a boozy mess and probably feel terrible in the morning (especially if the add-ins are sweet). If you generally associate margaritas with hangovers, here’s my theory: you probably had too many, made with cheap tequila (it didn’t have a worm, did it?) and a crappy mixer, and possibly in a chain restaurant.

My personal rules for margaritas are simple— use good quality tequila, freshly squeezed citrus (never a bottled mix!) and give it a fresh garnish. We eat and drink with our eyes, and when my husband and I entertain, it seems that the garnish is what always makes guests ooh and aah, so I consider it as crucial as the other ingredients. For this drink, I’m keeping it simple with a lime slice on the edge of the glass.

This is the beginning of a beautiful relationship.

I love this 1800 Coconut, a blanco tequila first recommended to me by my cousin-in-law, Will. The differences between this and some other “flavored” spirits are that the coconut is subtle and natural, it has no added sugars, and— at 70 proof— it still has a nice little kick. It’s mellow enough to sip with just an ice rock (as Will does), but it is also terrific paired with another tropical flavor, especially pineapple.

This time of year, bottled pineapple juice is likely to be tastier than any fresh pineapple you’d pick up at the supermarket, and I typically choose a large bottle over the individual cans because my sensitive tastebuds pick up that tinny flavor. Choose a juice with minimal ingredients, and preferably one that is made from fresh-pressed pineapple rather than concentrate. Be sure to give it a good shake, as the heavier pulp of the juice settles to the bottom, and that’s where most of the flavor is.


Triple sec is a standard ingredient in a margarita, but I prefer the higher end, more intense orange flavor of Cointreau. Fresh lime is a must (please don’t use the bottled stuff) and to keep the drink lightly sweet, just a quick squeeze of agave syrup— paying respect to the plant that gave us tequila in the first place.


I know that some people have strong feelings about the salt rim, and I’m here to represent those who love it. But I don’t care for the commercial stuff that is “made” for margaritas, because it tends to have a slight chemical flavor and I truly hate when those gigantic chunks of salt fall into my drink. My preference is for a delicate rim of fine sea salt, which is easily adhered only to the outside of the rim after a quick swipe of fresh lime.

It’s great if you have time to do this ahead so the salt has time to set.

Finally, the ice! If you don’t already know that you can purchase a large bag of perfect pellet ice from Sonic, the drive-in fast food joint— well, now you do! This is a far cry from the crushed ice your refrigerator door will give you. Each pellet is a crystal clear chunk of flaky ice, and a scoop of this ice keeps a cocktail cold much longer than you might expect. If you’re only making a couple of drinks, a large cup of Sonic ice will probably cover it; I’ve been buying the 10-pound bags for just $3.50 and have found that it will keep in the freezer (double-bagged) for a few weeks. 


So there you have it— a tropical twist for National Margarita Day! Shake it up with plenty of ice, pour it into the icy glass, add more ice to top off the glass, garnish and enjoy. For those on a calorie budget, this tasty cocktail checks in at 211 calories, made exactly as written.


Pineapple Coconut Margarita

  • Servings: 1 cocktail
  • Difficulty: Average
  • Print

Here's a fun tropical twist on a classic margarita! Use the best ingredients you can find for a memorable cocktail at home.


Ingredients

  • 1 1/2 oz. 1800 Coconut tequila
  • 1 1/2 oz. fresh pineapple juice
  • 1/2 oz. Cointreau
  • 1/2 oz. freshly squeezed lime juice
  • 1/2 oz. agave or simple syrup
  • Sea salt to rim the glass and a lime slice to garnish

Note: To salt the rim of the glass, swipe a fresh lime slice around the outer edge of the glass, and then roll it on salt poured out onto a plate or paper towel. Do this in advance, if possible, so that the salt has time to set as the lime juice dries.

Directions

  1. Combine tequila, pineapple juice, Cointreau, lime juice and agave in a cocktail shaker. Add plenty of ice and shake for about 20 seconds.
  2. Strain into a prepared cocktail glass. Top off with additional ice, if necessary, and garnish with a lime.


Chocolate & Cherry Crepes

I have mixed feelings about special occasions that fall in the middle of the workweek, and with Valentine’s Day on a Wednesday this year— not to mention in the same week as Super Bowl and Mardi Gras— I’m both frustrated and relieved that it won’t be as big a deal. 

I’m not one to go nuts over this “holiday,” which smacks of overdone commercialism and sky-high expectations for everything to be perfect. My husband and I usually stay home and either cook for each other or, as will likely be the case this year, keep it low key and simple. I don’t need roses, wine and chocolate to know that I’m loved.

But this year, the easiest time to make a lovely homemade meal for Valentine’s Day would be this Saturday; unfortunately, it’s getting crowded out at our house by the Super Bowl. I’m reminding myself that I don’t need grand gestures, but the truth is I’m disappointed. My husband will feel loved if the table is loaded with spicy queso dip, Buffalo wings and cold beer, but I will genuinely miss preparing an elegant, more “fancy” meal. 

If nothing else, I will find a way to throw a little romance onto the scene this weekend, probably in the form of dessert. And I know exactly what he craves— chocolate and cherries!

I can’t go wrong with this flavor combination!

For Valentine’s Day last year (which was a Tuesday, also not ideal), I re-created our 2020 sweetheart meal of crispy duck breast with cherry-pinot noir sauce, and Les was thrilled. For dessert, it was an encore performance of chocolate and cherry crepes. My iPhone camera did not capture good photos of the dish itself that first time— it was before I began blogging— but I believe you can see the bliss in my lover’s eye as he enjoyed his special dessert. 

Even with crappy lighting, it’s easy to see that this dessert made him happy!

These are homemade chocolate crêpes, created with double dark cocoa powder and rolled up with an almond-kissed, sweetened mascarpone filling, and then topped with a simple-to-make sweet cherry sauce. And though I’m still a novice when it comes to making crêpes (try not to laugh when you see my photos), I can confirm that after you roll them up and bury them in cherry sauce, nobody will notice if they aren’t perfect.


The best thing about these crêpes— besides the fact that the flavors are divine— is that you can make every part of them in advance and assemble them when you’re ready to sweep your lover off his or her feet. The crêpe batter actually benefits from some fridge time, so you can even make it the day before. One of these days, I’ll get the hang of cooking them pretty, but for now, the advice I’ll offer is to make extra batter (in case your first ones are duds) and cook them ahead of your occasion. The crepes can be layered with parchment or waxed paper and stored in a zip top bag in the fridge until you’re ready to assemble them with the filling and sauce.


The mascarpone is super simple and the cherry sauce, which is conveniently made with frozen dark cherries, can be made ahead and warmed in time for dessert.


The cherry sauce is so delicious, even if you don’t want to mess with the crêpes, you might find this a perfect topper for ice cream or a brownie or pound cake or anything else you and your Valentine enjoy. I flavored mine up with a splash of amaretto because I love the combination of cherry and almond, but you could skip this or swap in a splash of rum or brandy if you’d like. Assembly of the crêpes is a snap.


Chocolate & Cherry Crêpes

  • Servings: 4
  • Difficulty: Average
  • Print

The best thing about this dessert, besides the marvelous flavor combo, is that you can make every part of it ahead and simply assemble the crêpes at serving time.


The crêpe batter should be made ahead and left to rest in the refrigerator for several hours, up to a full day. Give it a gentle whisking just before cooking to reincorporate any ingredients that have settled to the bottom of the bowl.

Ingredients

  • 1/2 cup milk
  • 1/4 cup water
  • 1 cup all-purpose flour
  • 1 Tbsp. double dark cocoa
  • Pinch salt
  • 1 Tbsp. cane sugar
  • 1 egg
  • 2 Tbsp. melted butter
  • ½ tsp. vanilla
  • Additional butter, used for cooking the crêpes (about 1 tablespoon)

Directions

  1. Combine all ingredients in a blender container and blend until completely smooth.
  2. Transfer to a bowl, cover and refrigerate at least an hour or up to one day.
  3. When ready to cook, heat a small pat of butter in a large, non-stick skillet over medium-low heat. When butter begins to brown slightly, ladle 1/4 cup of the crêpe batter into the center of the pan. Swirl the pan gently to spread the batter around into a shape as close to a circle as you can. Cook one minute, then gently turn the crêpe (a silicone spatula is useful here) to cook the other side.
  4. Stack the cooked crêpes between layers of parchment paper and store them in the fridge until you’re ready to assemble.

The mascarpone filling is lightly sweetened and kissed with a touch of vanilla and almond. This is a lovely complement to the dark chocolate crêpes and the sweet cherry topping. Make it ahead and refrigerate until ready to assemble.

Ingredients

  • 8 oz. mascarpone, at room temperature
  • 2 oz. cream cheese (full-fat recommended; this is approximately 1/4 of a standard block)
  • 3 Tbsp. powdered sugar
  • 1/2 tsp. vanilla extract
  • 1/2 tsp. almond extract

Directions

  1. Use a sturdy spoon to blend the mascarpone and cream cheese together in a medium bowl.
  2. Add powdered sugar and extracts. Blend until fully combined and smooth. Refrigerate until ready to assemble the crêpes.

This dark cherry sauce is so easy to make, and provides most of the sweetness in this dessert. It’s delicious when served slightly warm over the crêpes.

Ingredients

  • 3 heaping cups frozen dark sweet cherries
  • 1/4 cup cane sugar
  • 3-inch stick whole cinnamon
  • Pinch of salt
  • Juice of 1/2 lemon
  • 1/4 cup cherry juice
  • 2 Tbsp. amaretto
  • 2 Tbsp. corn starch, mixed with 2 Tbsp. cold water (used to thicken sauce)

Directions

  1. Combine cherries, sugar, cinnamon stick, salt, lemon juice and cherry juice in a large sauce pan over medium heat. Bring to a boil, and then reduce heat to a simmer until cherries are completely softened. Remove from heat and cool to room temperature.
  2. Bring cherry mixture back to a simmer and stir in amaretto. Remove cinnamon stick and blend corn starch slurry in to thicken. Let the mixture cool slightly before topping crêpes.
  3. Assemble crêpes: Lay a single crepe on a plate or piece of parchment. Add spoonfuls of the mascarpone mixture across the center. Roll up the crêpe and arrange on a dessert plate. Repeat with a second crêpe for each serving. Spoon the cherry sauce over and prepare to swoon.


One last note: Remember that store-bought frozen cherries are pitted mechanically, and every once in a while, the machines miss one. Inspect the cooked sauce thoroughly, just in case!


Muffuletta Pizza

As we near the end of this year’s Mardi Gras celebration, which wraps up on Feb.13, I’m presenting a pizza twist on the muffuletta, a sandwich that has its origin in New Orleans. You may recall from some of my previous Mardi Gras posts that my travels have not led me to The Big Easy (yet), though it is certainly on my bucket list of foodie places to visit. Still, I love a theme party, and I have a vivid memory of muffuletta, thanks to a part-time job I had more than two decades ago.

Allow me to back up a bit to explain about muffuletta for those who may not be familiar, and why it ties to New Orleans, which we usually associate with Creole-inspired and French cuisine. One glimpse of the muffuletta ingredients list— cured salami, mortadella, ham, provolone and a chopped giardiniera-olive spread— would make one think of Italian food, and rightly so. The muffuletta is said to have been created by a Sicilian immigrant who settled in New Orleans about the turn of the previous century. It is usually presented with loads of layers on a large, round, focaccia-like bread topped with sesame seeds.


My first experience of muffuletta came during my two-year stint in a catering kitchen in Greensboro, N.C., where a friend had recruited me to be a kitchen helper during busy periods. The kitchen was jamming during wedding season, the winter holidays and the twice-a-year High Point Furniture Market, and I was happy to jump in to help fulfill orders. 

At some point in those two years, one of our regular customers must have hosted a Mardi Gras-themed event, because I was charged with making approximately four quarts of the chopped olive and vegetable mix that was to be used for muffuletta sandwiches. Not knowing anything at all about that sandwich, I followed the instructions on the recipe card I’d been given. Green olives, black olives, capers, pickled vegetables, olive oil, vinegar and dried Italian herbs— what in the world was this concoction? And then Rodney, our smart-ass head chef, labeled the giant plastic jar “Muff Stuff.” You can imagine the chaos that ensued over the nickname in our kitchen of mostly immature amateurs.

“Muff stuff” was the briny, pickled relish for muffuletta, and you can easily make this condiment in just a few minutes with a food processor, though my task was to chop up the ingredients by hand. It was delicious on its own, though not very pretty to look at, and it wasn’t until Rodney whipped up a miniature version of muffuletta for the kitchen crew to sample that I understood the importance of what I had made. 

It was like an Italian sub on steroids. A salty flavor explosion that is both rich and fatty, and only makes you feel guilty until you go in for another bite. It’s so good! I’ve wanted to put these flavors on a pizza for a long time, and here you go. Mardi Gras is all about indulgence and excess, and this meat-and-cheese lover’s pizza is doing its part, in the spirit of New Orleans!

You could just call it an Italian meat lover’s dream pizza.

For my muffuletta pizza, I did not delve into making the muff stuff from scratch. Rather, I took advantage of the Trader Joe’s product that pushed me over the finish line to tackle this culinary bucket list item. They call it “cracked olive salad,” and yes, I checked to be sure that TJ’s still sells it, given the store’s tendency to cancel items without notice. Having said that, if you cannot find the cracked olive salad or don’t have a TJ’s nearby, there are similar products in other supermarkets—check the pickle section. If you still can’t find it, check out this recipe on Serious Eats, where my culinary idol Kenji López-Alt will be happy to walk you through making the olive salad, or indeed, the entire muffuletta.


I wanted my muffuletta pizza to have as many authentic flavors as possible, so I considered the three categories of meat recommended by Kenji in the aforementioned article. Mortadella, a fatty, emulsified deli meat, is hard to come by in my city, and bologna was out of the question for me, so I went with three of our favorites from the other two categories— Genoa salami, spicy soppressata and thinly sliced prosciutto. Provolone was in the package alongside the salami, and I rolled them up together for an impression of layers, like on the sandwich. I wrapped the rolls snugly in plastic wrap and stuck them in the freezer for an hour or so to help them keep their spiraled shape after slicing. The soppressata was cut into cubes, and the prosciutto into thin strips, so that my pizza would have plenty of interesting texture. I also bumped up the flavor of the olive salad with a few shakes of dried Italian seasoning.


All my pizzas are made with sourdough crust and baked on a screaming hot pizza steel for a brick oven-like finish, but you could replicate the idea of this pizza on any crust you like, perhaps even fresh dough you pick up at the deli. I sprinkled sesame seeds all over the dough, which was more symbolic than anything because we couldn’t detect them on the finished pizza. Sauce went down next, followed by copious amounts of freshly shredded mozzarella, the cubed soppressata, fresh sliced onions and Calabrian chile flakes. Then, the rest of my muffuletta-inspired flavors!


A sprinkle of Parm-Romano blend was a finishing touch, and then into the oven for six minutes— oh, how I love our Dough Joe pizza steel!— and this was possibly one of the most delicious pizzas I’ve ever made. I had some jitters about having “too much meat” on this pizza (my husband would say there’s no such thing), but the flavors worked really well together and the pickled vegetables in the cracked olive salad kept the richness in check.

One of these days, I’m going to get down to New Orleans. Maybe next year. But for now, I’m satisfied to let the good times roll with as many Mardi Gras-inspired foods as I can dream up. What should I make next?

Muffuletta Pizza

  • Servings: 8 slices
  • Difficulty: Average
  • Print

It's an Italian meat lover's dream come true, and with special ties to New Orleans, a fun pizza for Mardi Gras!


Ingredients

  • 3 large slices Genoa salami
  • 3 thin slices smoked provolone
  • 1/3 cup Trader Joe’s “cracked olive salad,” or something similar
  • A few shakes of dried Italian herb blend
  • 1 pizza dough ball, at room temperature
  • Extra virgin olive oil, for drizzling
  • 1 Tbsp. sesame seeds (optional, for effect)
  • 1/4 to 1/3 cup favorite pizza sauce (mine was Dei Fratelli fire-roasted)
  • 1 cup freshly shredded, low-moisture mozzarella
  • 1/3 cup cubed spicy soppressata
  • 1/2 sweet or yellow onion, sliced into crescents
  • A few shakes crushed red pepper, if desired for extra spice
  • 2 slices prosciutto, cut into ribbons
  • About 1/4 cup grated Parm-Romano blend cheese

Note: All my thin-crust pizzas are made with sourdough and baked quickly on a pizza steel, preheated on the center rack of a 550° F oven for one hour. This is an extreme temperature, and the results are very similar to what you would achieve in a brick oven. If you don’t have a steel, a pizza stone works great; follow manufacturer’s recommendations for temperature and adjust baking time accordingly.

Directions

  1. While the oven preheats, layer each slice of salami with a slice of provolone. Roll up into cigar shapes and wrap tightly together in plastic wrap. Tuck this into the freezer for an hour before slicing, so that the twirls keep their shape on top of the pizza. Add a few shakes of Italian seasoning to the olive salad and set aside.
  2. Shape dough into a 14-inch round and place on a flour and cornmeal-dusted pizza peel for easy transfer into and out of the oven. Drizzle the dough with olive oil and season with salt and pepper. Sprinkle all over with sesame seeds, if desired.
  3. Spread sauce over dough to within one inch of the edges; you should be able to see the dough through it. Layer mozzarella generously over the sauce, then scatter the soppressata cubes and onion slices. Shake on crushed red pepper.
  4. Distribute the olive salad evenly over the pizza toppings, then top with the prosciutto and swirls of salami-provolone. Scatter Parm-Romano lightly over the entire pie and slide it into the oven.
  5. Turn pizza 180° after about four minutes to ensure crust is evenly blistered. Remove from oven and transfer to a pizza tray. Serve immediately.


Jalapeño Popper Mac & Cheese Bites

We are fast approaching a foodie trifecta— Super Bowl, Mardi Gras and Valentine’s Day will all happen in the same week this year, and I’m in a bit of a tizzy about it. My schedule has been so busy lately that I’m struggling to put up even one post a week, let alone three, and with delicious recipes standing by for all of these occasions, I’m feeling the pressure. 

So I’m getting a jump on things with this recipe for mac and cheese bites, which will be every bit as enjoyable for this weekend’s conference championships as it will for the big game on Feb. 11. Heck, you might enjoy them so much, you’ll make them twice!

One of my great joys for Comfort du Jour is twisting favorite foods together, and these little handheld bites might be one of my tastiest mashups ever. My husband and I love the spicy, cheesy bite of jalapeño popper appetizers, and who doesn’t love mac and cheese? This was a no brainer. And though my initial plan was to simply make mac and cheese with the popper flavors, I pivoted to my muffin tin to keep the snack in handheld form. For any game day watch party, the less you have to mess with utensils, the better.


This recipe begins with crisped up bacon, which is reserved for the top. I drained off the excess bacon grease and then tossed panko crumbs into the skillet to soak up the smoky bacon flavor. This would be a topper for my mac and cheese bites, because every game day snack is better with a little crunch.


The drained-off bacon grease becomes the backdrop of the jalapeño-studded cheese sauce for the mac and cheese. I followed my usual formula for the sauce: first the roux, then milk for the base, followed by American cheese and shredded cheese (I opted for pepper jack). More fresh jalapeños went into the sauce, and then the cooked elbows.


To capture all the components of poppers, I buried a nugget of cream cheese inside layers of the mac and cheese, then topped the “muffin” bites with the crispy bacon, more shredded cheddar and those bacon-scented panko crumbs. The recipe can be made ahead to this point and refrigerated, then baked on game day right before kickoff, but I would recommend adding the toppings just before baking so the bacon and crumbs remain crispy.


Half an hour at 350° F, and these are ready for the big game or any other snacking occasion coming our way. Next up, Mardi Gras! ⚜️


Jalepeño Popper Mac & Cheese Bites

  • Servings: 12 muffin sized bites
  • Difficulty: Average
  • Print

What better time than Super Bowl for a snack that marries the spicy flavors of a favorite appetizer and the down home comfort of mac and cheese?


Ingredients

  • 4 thin slices uncured smoked bacon, cut into 1-inch pieces
  • 1/2 cup panko crumbs
  • 1/2 sweet or yellow onion, rough chopped
  • 3 jalapeno peppers, divided (dice one, slice the other two)
  • Salt and pepper
  • 2 Tablespoons all-purpose flour
  • 1 1/2 cups whole milk
  • 5 oz. American cheese, cubed (I usually purchase a chunk from the supermarket deli)
  • 4 oz. pepper jack or Monterey Jack cheese, shredded (fresh is better than the pre-shredded stuff in a bag)
  • 1/2 lb. cooked elbow macaroni
  • 2 oz. cream cheese, divided among cups
  • 2 oz. sharp cheddar, shredded and divided among cups

Note: This game day snack can be made in advance and refrigerated overnight. For best results, add bacon pieces and panko just before baking. Oven time may be extended if the bites are baked cold from the fridge.

Directions

  1. Cook bacon pieces in a cast iron skillet until lightly crispy; reserve 3 tablespoons of bacon fat for making the cheese sauce.
  2. Add the panko crumbs to the warm skillet and toss to soak up the residual bacon grease. Set the crumbs aside for topping the mac and cheese bites.
  3. Heat the reserved bacon fat over medium heat in a good sized pot. Add the onions and diced jalapeño and season with salt and pepper. Sauté the vegetables until softened.
  4. Sprinkle in flour and cook a few minutes until the mixture is bubbly and begins to brown. Add milk all at once and cooking, whisking constantly, until the mixture thickens into a sauce. Add American cheese cubes and then pepper jack shreds, melting completely after each addition.
  5. Add the cooked elbow macaroni and remaining jalapeño slices and stir to coat completely. Allow this to cool several minutes.
  6. Spray the cups of a 12-cup muffin tin with oil to prevent sticking. Divide half of the mac and cheese among the cups, then place a bit of cream cheese in the center of each cup and cover with the rest of the mac and cheese. Divide the bacon pieces over the top of the cups, and then top each with the shredded cheddar and bacon-moistened panko crumbs.
  7. Bake at 350° F for about 30 minutes, until cheese is bubbly and crumbs are crispy.
  8. Let the mac and cheese bites cool a few minutes to firm up the cheese, then run a knife around the outside of each muffin cup to release the bites from the pan. Transfer to a serving dish and enjoy watching them fly off the plate.


Shrimp Scampi Pizza

There is a special meal tradition at our house on New Year’s Eve. Our annual celebration of fancy pizzas began in 2018, right around the time that I was working to perfect my sourdough pizza crust. Les had shared his memories of the amazing White Clam Pizza he enjoyed while living near New Haven, Connecticut, and we decided to try one at home for New Year’s Eve. It turned out so good that we repeated it the next two years, and in 2020, we added a second specialty flavor to our repertoire— the Oysters Rockefeller Pizza. Last year, we tweaked tradition yet again, trading in the white clam pie with this creative twist on the classic Italian pasta dish, shrimp scampi. Why wouldn’t the flavors of garlic, shrimp, parsley and lemon be amazing on a blistered sourdough crust? Turns out, they most definitely are.


As with most of my specialty pizzas, this one takes a little time to prepare, but the good news is that you’ll do most of it in advance so that you have plenty of time to relax with a cocktail or mingle with guests (or both). There are three components to this pizza, and I’ll break down the details in photos ahead of the click-to-print recipe card at the end. You’re going to love this pizza!

My method for pizza baking

First things first, we bake all our pizzas in a regular home oven, preheated to 550° F with a baking steel on the rack. This combination of slab steel and maximum temperature helps us replicate the effect of a brick oven. If you don’t have a steel, you can get similar results with a pizza stone, but be sure to follow the manufacturer’s guidelines so that you don’t accidentally crack your stone under this extreme heat. With this method, you also need a pizza peel, which looks like a long-handled paddle. It’s helpful for easy transfer of the pizza into and out of the oven.

Our pizza stone doesn’t get much action since we invested in the baking steel.
Whichever you choose, you’ll need a peel for easy transfer of the pizza.

About the pizza dough

Second, my pizza dough is homemade from sourdough starter, and the shaping method is crucial to the kind of texture you see in my photos. We never use a rolling pin on the dough, as this deflates all the lovely air pockets. If you aren’t on the sourdough train, it’s no problem— you can use a yeasted dough or even a store-bought dough if you have a favorite that you trust. The link for my pizza dough also includes a yeast option, if you want to make your own without sourdough. Bring the dough to room temperature when you’re ready to bake.


Cheez, Louise

Traditional scampi— the kind that’s piled onto a dome of angel hair— would not have any kind of cheese. But for my pizza, which does not have a base sauce, I’ve opted to scatter a bit of freshly grated mozzarella over the dough so that the shrimp curls have something to rest on. This is the firm variety of mozz, not the soft variety that is common for Caprese salad. Skip the pre-shredded stuff from the grocery store, as it is packed with an anti-caking agent that also prevents even melting.

My recipe also calls for parm-romano blend cheese, which we make in bulk at home because we use so darn much of it. A good Italian-made Parmesan is acceptable here, but again, do not use the pre-grated stuff. A special occasion pizza deserves the freshest cheese, and a few flicks of a microplane grater will bring big results, I promise.

The star of the show— shrimp

Finally, choose the right shrimp and for the love of flavor, don’t use pre-cooked. Choose fresh large shrimp— somewhere in the 20 pieces-per-pound range is just right— and buy them with the shells and tails on, as you’ll use those parts for the scampi sauce. Be sure to remove the “vein” from the curled back of the shrimp, and take note of the steps below for marinating them a few minutes before baking.

Let’s get cooking!

The sauce happens in two stages, beginning with what will seem like a ton of garlic and the parts and pieces that remain after you clean and set aside the shrimp. You’ll sauté the garlic at very low temperature for about 20 minutes, and then you’ll toss in the shrimp shells and tails for a gentle braising in dry vermouth. 


Vermouth— one of the primary ingredients in a martini— is what I always have open, but you are welcome to use a dry white wine such as pinot grigio if that’s more your style. Either way, add only enough to cover the bottom of the pot, and be sure that each shell is at least partially submerged. This will go for about 30 minutes at low heat, until most of the liquid has evaporated. Strain out and discard the solids, and you’ll be left with a small amount of deeply flavored, shrimpy-garlicky oil.


Next, transfer the strained base back to the pan over medium heat and add more minced garlic to it. Squeeze in the juice of half a lemon and simmer this until the garlic is softened (don’t let it burn!), and then turn off the heat. Add finely chopped parsley and swirl in a tablespoon of butter. Transfer to a straight-sided jar and use an immersion blender to whiz this mixture up into a smooth, garlicky butter sauce that you’ll drizzle onto the pizza when it’s hot from the oven. If you’re working ahead, this can be refrigerated and then brought to room temperature just before pizza baking.


Marinate the shrimp

Now, do you remember the temperature this pizza will bake? Five hundred, fifty degrees! Under such extremes, the delicate shrimp needs a little protection, and I’m treating it with the mayonnaise trick I learned from rock star chef Kenji Lopéz-Alt. There is yet another clove of minced garlic in here, plus the zest of a small lemon and a shake of red pepper flakes. And then, the magic ingredient— baking soda! You can read all about my discovery of this technique here, if you wish, but suffice to say that it transforms the marinade to flavor the shrimp and protect it from the high heat. Twenty minutes will do it, but wait until just before pizza time for this step.


Time to build the pizza!

Prep a pizza peel by rubbing in flour and then medium grind cornmeal, and hand-shape the pizza dough into a 14-inch round. Drizzle it with olive oil and season with salt and pepper. Next, scatter a sparse amount of the freshly grated mozzarella onto the dough as a base for the shrimp, and a quick shake of red pepper flakes. Arrange the shrimp (including that mayo marinade) onto the pizza. Give the whole thing a dusting of parm-romano cheese and slide it into the oven. Set a timer for 6 minutes (or longer, if using a pizza stone).


The preheated baking steel retains a great deal of heat, and the high temp of the oven ensures that the crust as well as the toppings will be perfectly browned in this time. Drizzle on the garlic-shrimp butter sauce, toss on more fresh parsley and one more dose of parm-romano blend cheese.


The cheese and garlic butter will melt into the pizza, creating a perfect bite of tender shrimp, intensely flavored butter and garlicky goodness! This will be one of the two pizzas on our table this year as we count down to 2024. 

Now, care to guess what other pizza I’ll be trying this New Year’s Eve? Hint: it’s more seafood. Stay tuned! 😉

Shrimp Scampi Pizza

  • Servings: 14-inch pizza
  • Difficulty: Intermediate
  • Print

Don't let the number of steps scare you away from making this insanely delicious pizza. None of them are difficult, and you'll be greatly rewarded for your effort!


Ingredients

  • 1/4 cup extra virgin olive oil
  • 5 to 6 cloves fresh garlic, peeled and sliced thin
  • Kosher salt
  • A few shakes red pepper flakes
  • Shells and tails of 3/4 pound uncooked shrimp
  • 1/4 cup dry white wine (or vermouth, as I prefer)
  • 2 additional cloves garlic, minced
  • Juice of 1/2 lemon
  • 2 Tbsp. fresh parsley leaves, finely chopped
  • 1 Tbsp. butter

Notes: Don’t skimp on the garlic in this component! It plays a prominent role in scampi, and though it may seem like too much, you’ll end up straining most of it out of the sauce base, so use enough to give it plenty of flavor.

Directions

  1. Add olive oil to a heavy-bottomed pot placed over very low heat. Add first amount of garlic, salt and red pepper flakes and steep for about 20 minutes. Watch this carefully to be sure the garlic doesn’t burn; it should just barely simmer around the edges of the garlic.
  2. Add shrimp shells and tails to the pot and toss until shells begin to turn pink. Raise heat slightly to medium-low. Add dry vermouth and simmer until liquid is mostly evaporated. Cool to room temperature and then strain out solids through a mesh strainer.
  3. Wipe out the pot and add strained shrimp stock, minced garlic and lemon juice. Cook over low heat until garlic softens. Turn off heat, stir in parsley and whisk in butter.
  4. Transfer sauce to a straight-sided jar and use an immersion blender to puree until smooth. Set aside or refrigerate and bring to room temperature before baking pizza.

Next, marinate the shrimp. If you make the marinade ahead, wait until last minute to add the baking soda.

Ingredients

  • 1/3 cup mayonnaise
  • 1 clove garlic, peeled and minced
  • 1 or 2 shakes red pepper flakes
  • 1/4 tsp. baking soda
  • Zest of 1 small lemon
  • 3/4 pound wild-caught shrimp, peeled and deveined

Directions

  1. Combine mayo, garlic, red pepper and baking soda in a bowl large enough to hold the shrimp.
  2. Stir in lemon zest and toss shrimp in the mixture. Set aside for 20 minutes before assembling the pizza.

Time to bake: The oven should be preheated to 550° F for one hour with pizza steel placed about 8 inches from the top heating element of the oven. Dust pizza peel with flour and medium grind corn meal for easy transfer of the pizza to and from the oven. If you don’t have a peel, use the back of a cookie sheet to slide the pizza in, and grab the crust with tongs to pull it out when it’s finished.

Ingredients

  • 11 oz. pizza dough ball, at room temperature
  • Drizzle of olive oil
  • Salt and pepper
  • 1/3 cup freshly shredded hard mozzarella
  • A few shakes red pepper flakes
  • 2 Tbsp. parm-romano blend cheese
  • Additional parm-romano and chopped Italian parsley (for final garnish)

Directions

  1. Shape dough by hand into a 14-inch round and place it on prepared peel. Drizzle oil all over dough and give it a quick seasoning of salt and pepper.
  2. Scatter mozzarella over pizza and shake on red pepper flakes. Arrange shrimp over mozzarella. Sprinkle parm-romano cheese all over pizza.
  3. Slide pizza onto hot steel and bake for 6 minutes. Remove from oven and spoon over the garlic sauce, concentrating on the shrimp (don’t worry, it will melt and ooze everywhere). Sprinkle with parsley and additional parm-romano cheese. Serve immediately.


Pomegranate-Amaretto Holiday Spritz

In all my working days— even those that I spent pitching in for a catering company— I never had a work assignment that involved developing a cocktail. Until now!

The second half of this year has been a wild ride for me, as I assumed a management role of sorts in the company where I’ve been working for the past decade. I’ve been busy since July learning new processes and data systems, tackling the billing records and helping other departments in our parent company learn more about my lesser-known branch of the business. It’s been exciting, exhausting and rewarding all at once.

With these new responsibilities came introduction to new people in the company, including my new direct supervisor, John. We’ve only met online, as he is based in northern California and I’m in central North Carolina, but we connect regularly for one-on-one updates, and he perked up in one of our early, get-acquainted conversations when he learned that I do a food blog. At the end of each monthly meeting, we usually squeeze in a little banter about the most interesting thing I’ve been cooking or shaking up that month. The rest of the department has not met me, though, and I’m told that John has been subject to some teasing by the team. They call me his “imaginary friend!” 😂

That will change this afternoon when I join an online holiday-themed meeting with the whole gang. To help with introductions, John gave me an assignment— spend a few minutes describing my branch of the business, and a few more minutes instructing the team in making a holiday cocktail. So it’s true— my reputation as an amateur mixologist precedes me. I’m good with that!

This cocktail even looks like Christmas!

The drink I’ve prepared is a fun and festive twist on a classic Italian Spritz, and I chose this approach for a few reasons:

  • It’s easy, made with widely available ingredients for a global audience.
  • It’s a good balanced drink— not too sweet or strong.
  • You don’t need fancy bartender tools, as this drink is built right in the glass.
  • It’s simple to sub in lighter ingredients for an alcohol-free version that is every bit as festive and sure to please the non-drinkers at your holiday gatherings.

So, what’s in this cocktail?

The almond and pomegranate flavors give a traditional Spritz a holiday flair.

The flavors in my Spritz are seasonal— tart pomegranate and sweet almond— paired with Aperol, the slightly bitter Italian aperitivo that hits the taste buds like a marriage of grapefruit peel and orange LifeSavers candy. If you are already a fan of Aperol, you’ll love this drink. If Aperol feels a little too bitter for you, then you’ll appreciate the way the amaretto and pomegranate calm it down. Vodka is the primary spirit of the drink, but if you want something lighter, the drink won’t suffer without it.


Don’t forget to garnish! A few pomegranate arils and a slice of orange in the glass will dress it up beautifully for the holidays and make a great impression! You know that I’m obsessed with fancy ice, too, and here I’ve found an easy way to make them extra festive, with orange slices, whole cranberries and a rosemary sprig frozen inside! My ice mold is made by True Cubes, but this trick should work with any silicone ice mold.


Finally, this drink is topped off with sparkling water or seltzer because everything feels fancier with bubbles. If you’re in the mood for a stronger topper, go with Prosecco, as with the classic Spritz. I personally think it’s just right with seltzer, especially one flavored with blood orange. 😋


Can I get a no-booze version of this pretty drink?

Absolutely! The great thing about a drink made with fruit flavors is that it’s very adaptable to a no-alcohol or “zero proof” version. 

This drink received rave reviews from non-drinkers at our house!

To maintain the good balance of sweet, tart and bitter, I’ll shift the ratio of ingredients slightly. Use non-alcoholic orange bitters to replace the Aperol and orgeat, an almond cordial syrup, as a stand-in for the sweetness of Amaretto. Freshly squeezed citrus is perfect here, and the pomegranate juice brings a little tartness. There’s no need to “replace” the vodka, which doesn’t have much flavor on its own. But if you’d like a little bite or tingle on the tongue, I have a trick for that, too. Tonic water!

The same flavors, but rearranged for a zero-ABV drink.

These alcohol-free ingredients are easy to find online or in the mixers section of a larger supermarket. You might also amp up the bitter orange flavor by crushing a piece of orange peel in the bottom of the glass. To give the drink a little “bite’ that you would otherwise have in a spirited cocktail, top it off with tonic water rather than seltzer.

Cheers!

For your holiday enjoyment, two click-to-print recipe cards are available below, one for each version of my holiday Spritz. For readers abroad, I’ve estimated the measure amounts in milliliters. Feel free to adjust to taste!

Pomegranate-Amaretto Holiday Spritz

  • Servings: 1 cocktail
  • Difficulty: Easy
  • Print

This cocktail is a festive, seasonal twist on a classic Aperol Spritz. The drink can be built right in the glass, and a garnish of fresh fruit is a beautiful finish!


Ingredients

  • 1.5 oz vodka (40ml)
  • 1 oz Aperol (25ml)
  • .5 oz pure pomegranate juice (15ml)
  • .25 oz amaretto or other nut liqueur (10ml)
  • 2 oz. seltzer (or Prosecco, for a stronger drink)(50ml)
  • Pomegranate arils and fresh orange slice for garnish

Note: Hazelnut or pistachio liqueur would be an interesting substitute for the amaretto in this cocktail. If nut allergies are a concern, consider adding something with a touch of vanilla or ginger for an extra little something.

Directions

  1. Measure vodka, Aperol, pomegranate juice and amaretto into a large cocktail or wine glass. Stir gently to mix.
  2. Add ice and top off the drink with seltzer. Give it a quick little stir to activate the bubbles. Add garnish as desired.


No-alcohol Pomegranate-Almond Holiday Spritz

  • Servings: 1 drink
  • Difficulty: Easy
  • Print

The seasonal flavors of pomegranate and almond give this drink a festive feel without any of the consequences of alcohol! Look for orgeat and alcohol-free orange bitters online or in the mixers section of a larger supermarket.


Ingredients

  • 1.5 oz. freshly squeezed orange juice (40ml)
  • .75 oz. pomegranate juice (20ml)
  • .25 oz. orgeat (almond cordial syrup)(10ml)
  • .25 oz. non-alcoholic blood orange bitters (10ml)
  • 2 oz. seltzer (or tonic water, for a drink with more “bite”)(50ml)
  • Pomegranate arils and fresh orange slice for garnish

Note: If you cannot find the orgeat, consider using almond syrup, similar to what is used in fancy coffee shops. In a pinch, you can replicate the orange bitters by crushing a piece of fresh orange peel in the bottom of the glass before mixing the other ingredients.

Directions

  1. Measure orange juice, pomegranate juice, orgeat and bitters into a large cocktail or wine glass. Stir gently to mix.
  2. Add ice and top off the drink with seltzer or tonic water. Give it a quick little stir to activate the bubbles. Add garnish as desired.


Crispy Five Spice Duck with Cherry-Pinot Noir Sauce

While out shopping yesterday, I bumped into some friends who asked whether my husband and I would be staying close to home for Christmas. I jokingly told them that yes, our holiday would be easy and simple again this year for one good reason: Les is Jewish. 😂

Our friends know this of course, and they also know that we do celebrate Christmas, just as we celebrate and observe Hanukkah, Rosh Hashanah, Easter and Passover. Even when it is just the two of us, we enjoy making a special dinner for Christmas night— one that usually begins with a fancy appetizer and ends with a nice dessert.

The holidays are a great time to pull out all the stops and splurge a little— calorie- and money-wise—and we relish this little bit of indulgence regardless of whether we are serving guests or just ourselves. Les informed me recently that his favorite “special” dish that I make is duck (funny that I didn’t know that!), and so I’ve decided to share my tips for making a perfectly crispy seared duck breast and a cherry-pinot noir sauce that sounds complicated but is actually so easy.

Let’s start at the beginning. At first impression, you might think that duck is similar to chicken, but in flavor and preparation, it is actually closer to red meat. There is a generous layer of fatty skin on duck, and it takes extra care to crisp it without overcooking or drying out the meat. This is the technique that works best for me, and I’m sharing it with a recipe I made for my sweetheart on Valentine’s Day this year. If you already have your Christmas meal planned, save this for February (and make something with chocolate and cherries for dessert).

Tip #1: Score the meat for better rendering


To efficiently render the thick, fatty skin on duck breast, use a very sharp knife to score it with a crosshatch design, with cuts that spread about 1/2-inch apart and only through the skin, not into the meat. This scoring allows more of the fat to render when you fry it in a skillet.

Tip #2: Dry brine the duck breast


I’ve become a big fan of the dry brine, though I had to wrestle with my own sensibilities the first few times I tried it because at first glance, a dry-brined meat looks like it has dried out. Not so! There’s a whole science behind how this works— reverse osmosis of some sort, I guess— but the upshot is that salting and resting meat uncovered in the fridge allows better infusion of the seasoning into the meat and juicier results in the end. Here, I added five spice powder to the kosher salt. It was excellent with the flavors in my sauce. Another advantage of doing this step is that it does dry out the fatty skin a bit, and that greatly reduces spattering in the next step.

Tip #3: Begin with a stone-cold skillet


And preferably cast iron! If you were to place a duck breast in a hot skillet, the skin would sear, but the fat would not render very neatly. You’d likely be left with an oily mess, as I did the first couple of times I made duck. A non-stick skillet is not ideal either because the coating is a barrier to getting crispy skin. Invest in a quality cast-iron skillet and it will reward you with exceptional results for any meat you sear. Mine is a 10-inch Lodge skillet, made in the USA and built to last a lifetime. As the fat renders, carefully drain it off.

Tip #4: Do most of the cooking on the skin side


Duck is best served medium rare (like red meat), and the best way to achieve this together with crispy skin is to leave the breast skin-side down for most of the cooking time. Residual heat from the pan will bring it to temperature, and you only need to turn it to the flesh side for a minute or two to seal in the juices.

Tip #5: Don’t waste the extra duck fat!

A great deal of fat will be released as you render the duck breasts, but this is decidedly not a bad thing! If you plan to make potatoes to accompany your duck, do yourself a favor and fry them in the duck fat! The flavor is incomparable and I am always thrilled to find the crispiest, non-greasy texture on the potatoes. If you don’t need the fat for this meal, drain it off into a jar, let it cool and store it in the fridge until you do make potatoes. 


Yes, it’s saturated fat, and of course, you shouldn’t eat like this very often. But these are the holidays, and this meal is a worthwhile occasional indulgence. Especially with cherry-pinot noir sauce!

Let’s talk about that sauce!


Now that you’re feeling confident about achieving the perfectly crispy duck breast skin, take a look at this flavorful, sweet and savory sauce, made from dark cherries, shallots, chicken stock and Pinot noir. Though we are definitely not in cherry season, this recipe is great because it uses frozen dark cherries. Pinot noir is the perfect complement to this, and the shallot, chicken stock and red wine vinegar provide a savory backdrop to keep this from feeling too sweet. 


As you will see, this recipe makes quite a bit of sauce and each duck breast is about half a pound, so the whole thing is really suited to serving four people. Les and I got a little carried away because the flavors were so mouthwatering and we knew it would lose that perfect, crispy texture as leftovers. Get the base of the sauce started while the duck is cooking and just keep it warm on the back burner until serving time.

Time to plate this gorgeous meal!


The sauce finishes quickly in the same skillet used to cook the duck, and you’ll get to enjoy all the little fond bits of flavor that were left behind in the pan.


Place each breast on a cutting board and use a sharp knife to cut 1/2-inch slices. The meat should be bright pink and juicy with a thin layer of succulent fat under the crispy skin.


If I could go back in time to one step of this recipe, I’d plate the sauce before the duck breast, just to show off that incredible crispy skin. I do recommend sauce underneath the duck breast if you’re serving company, as we all know people eat with their eyes first. But we can confirm that it was just as delicious with the sauce on top, and if nothing else, it helped keep the duck warm as we savored every last delicious, cherry-kissed bite.

Crispy Five Spice Duck with Cherry-Pinot Noir Sauce

  • Servings: 4
  • Difficulty: Intermediate
  • Print

There's a lot to love about this dish, from the crispy skin to the flavorful sauce. It is definitely special occasion-worthy!


Ingredients

  • 2 individual duck breasts, about 8 oz. each
  • 1 tsp. kosher salt
  • 1 tsp. five spice powder
  • 2 Tbsp. turbinado sugar
  • 1/4 cup good quality Pinot Noir (save the rest for dinner)
  • 2 Tbsp. red wine vinegar
  • 1/2 cup good chicken stock
  • Kosher salt and freshly ground black pepper to taste
  • 1 heaping cup frozen dark sweet cherries
  • 1 medium shallot, minced

The trick to getting the crispiest skin begins with a dry brine on the duck breasts and a stone-cold skillet at the start of cooking. Render the fat slowly and drain off the excess as it accumulates, saving the fat to fry up the most delicious potatoes your taste buds will ever enjoy.

If you wish to make this dish without alcohol, substitute tart cherry juice for the Pinot Noir and reduce or omit the red wine vinegar.

Directions

  1. Pat the duck breasts dry with paper towels. Use a sharp knife to score the fatty skin only of the duck breast pieces. Make your cuts about 1/2-inch apart, in a crosshatch pattern. Take care not to cut the meat.
  2. Combine the salt and five spice powder and sprinkle all over both sides of the duck breasts, rubbing it into the scored fat side. Place the breasts on a plate and rest, uncovered, in the fridge for about six hours.
  3. Begin the flavor base for the sauce by combining sugar, wine, vinegar and chicken stock in a small saucepan. Bring to a slight boil then add the frozen cherries and simmer until cherries are softened. Keep warm.
  4. Place a COLD cast iron skillet onto a burner over medium heat. Immediately place the duck breasts, skin side-down, into the skillet. Don’t disturb the breasts until the fat begins to render. Carefully drain off excess fat by holding the breasts in place with a spatula or tongs and pouring off the fat into a bowl, jar or a second skillet. This helps reduce the amount of spattering. You’ll likely need to do this twice during the rendering process.
  5. Cook the skin side of the duck breasts for about 11 minutes, or until the bottom is deep golden in color and very crispy. Gently turn the breasts to cook the second side for only about two minutes. Transfer the breasts to a warm plate while you finish the sauce.
  6. Drain off all but a tablespoon of the duck fat and add the minced shallots to the skillet, tossing until slightly tender. Pour in the reserved Pinot Noir-cherry mixture and bring to a boil, scraping up any bits that are stuck to the pan. Allow this to simmer for a few minutes until some of the liquid evaporates and the sauce is slightly thickened.
  7. Slice the crispy duck breasts into 1/2-inch thick slices and serve immediately with the sauce.

If you’ll be frying up the potatoes, boil Yukon golds in advance (skin-on) until they are about half-cooked. Cool them to room temperature and slice into 1/2-inch rounds. Fry in hot duck fat until both sides are crispy, and season with salt immediately.


Just for fun…

Les and I had some flashbacks during the making of this recipe, because I had first prepared it on Valentine’s Day three years earlier, just one month before Covid disrupted everything known to mankind. He had snapped a picture of me at the stove, wine glass in-hand, stirring the sauce. I was oblivious to what he was doing at the time, but he recognized my passion for cooking and has been my biggest supporter since I started my food blog two months later. When I made the dish again this year, we tried to replicate that photo, but with our beautiful new kitchen and a perfected crispy duck technique. Cheers!


Chicken Curry with Autumn Vegetables

The best thing about Thanksgiving leftovers— for me, anyway— is when they are gone. For all the excitement leading up to the biggest food holiday of the year, I’m usually over it after two rounds of leftovers. Yes, I look forward to a good turkey sandwich, usually with a thin layer of leftover dressing and a smear of tangy cranberry sauce, plus a dab of mayo and perhaps a piece of lettuce in a ridiculous effort to offset all those carbs. And obviously, I enjoy transforming the turkey bits into spicy dishes, such as my turkey and black bean enchiladas or a delicious, comforting bowl of leftover turkey gumbo.

But my taste buds get weary after all that butter and gravy, and I start craving something with more pizzazz, and (for reasons I cannot explain) preferably from a culture other than my own. This impromptu Indian-inspired meal gave me not only delicious, warm spicy flavors, but also a generous dose of comfort on a dreary November night. My chicken curry came together more quickly than you might imagine, and it was a great way to incorporate some nutritious autumn vegetables and use up a package of skinless chicken thighs that I had stashed in the freezer.

There’s flavor, color and loads of nutrients. What more could I ask?

Curry is not a cuisine of my youth; I first learned to enjoy it about 15 years ago in a local Thai restaurant, and I finally got brave enough to try making it at home within the past few years.  There are many varieties and styles (or colors, if you will) of curry, and it has taken me some time to learn which ones I like best. In Thailand, a green curry might include lemongrass, garlic, kaffir lime and hot chile spices, and those flavors are spectacular with seafood in a broth softened with coconut milk. In nearby India, a curry looks altogether different and usually gets its flavor from a blend of dry spices, including cardamom, coriander, ginger, cumin and turmeric. If you purchase a jar or can of “curry powder,” it may contain any combination of those pre-ground ingredients, but it’s easy enough to mix and match your own flavors if you already have the individual spices.


My chicken and autumn veggies dish is more similar to an Indian curry, and I started my blend with a quick toasting of whole cumin and coriander seeds. Heat brings forth the intense flavors, whether by toasting whole spices or by adding ground spices to hot oil in the pan. The technical term for this is “blooming,” and you don’t want to miss this easy step for the extra flavor it imparts to your final dish. I toasted the seeds in a hot, dry skillet— swirling the whole time for about 45 seconds until they were intensely fragrant— and then let them cool before crushing them in a mortar and pestle. Next up, I assembled my other dry, pre-ground spices, including ginger, cardamom, turmeric, cinnamon and hot chile flakes.


I chose boneless chicken thighs for their texture and flavor, but chicken breast or tenderloins would also be delicious here. I cut them into one-inch chunks, seasoned them with salt and pepper and let them rest while I cut up onions, red bell peppers, fresh broccoli and delicata squash. For this dish, I highly recommend getting all your components lined up and ready, as the cooking goes quickly once it begins.

Behold all the vitamins and fiber on that cutting board!

You’ll also need a bit of oil to get things started. Choose an oil that performs well over high heat, such as canola, peanut or coconut oil. I cooked the chicken first, just until the bits were no longer pink, and then transferred them to a separate bowl while I sautéed the vegetables. When I’m cooking veggies of varying textures, I usually begin with the firmer ones, adding the rest in descending order of necessary cooking time. The best time to add the spices is just before adding more vegetables— this allows them to bloom in the hot oil that coats the veggies. Season along the way, of course, with salt and pepper as well. This does more than add salty flavor; salting during cooking helps to draw moisture out of the ingredients for better texture.


A dab of tomato paste in the center of the pot adds a rich, warm color and also a burst of umami flavor from the concentrated glutamates in the tomatoes. A little broth to thin it out, and then the chicken goes back into the pan with half a can of light coconut milk to simmer until everything is nice and tender. This took about 30 minutes, long enough to cook up a pan of basmati rice, perfect for soaking up the flavorful curry.


This kind of meal hits the spot after so much gravy, dressing and mashed potatoes, and the heavy load of vegetables does the body good, too! 

Chicken Curry with Autumn Vegetables

  • Servings: 4
  • Difficulty: Average
  • Print

This dish ticks all the boxes with big flavor, warming comfort and exceptional nutrition. It's easy enough for a busy weeknight and rich with autumn comfort.


Ingredients

  • 1 pound boneless, skinless chicken thighs, patted dry and cut into 1-inch chunks
  • Kosher salt and black pepper
  • 1/2 tsp. whole cumin seeds
  • 1/2 tsp. whole coriander seeds
  • 1/4 tsp. EACH cardamom, cinnamon, red pepper flakes, ginger, turmeric (see recipe note below)
  • 1/2 sweet or yellow onion, chopped
  • 1 small delicata squash, cleaned and cut into 1-inch chunks
  • 1/2 bunch fresh broccoli, cut into small florets
  • 1/2 red bell pepper, chopped
  • 2 Tbsp. high-heat cooking oil (I used coconut, but canola or peanut would be good)
  • 1 to 2 Tbsp. tomato paste
  • 1/2 cup low sodium broth (chicken or vegetable)
  • 1/2 can light coconut milk
  • Basmati or brown rice for serving
  • Fresh cilantro for serving (optional)

Recipe Notes: I created my own curry spice blend because I have the individual ingredients, and 1/4 teaspoon each was a good starting point for my adjustments. This is a good way to control the heat and balance the blend with the spices you like best, but there’s no harm in buying a pre-made curry powder. Use 1 to 2 teaspoons, depending on how intense you’d like the flavors to be.

Because this dish moves quickly once cooking begins, I recommend having all ingredients prepped and on standby before you turn on the burner.

Directions

  1. Season the chicken chunks with about 3/4 teaspoon salt and a few twists of black pepper. Toss to coat, and allow it to rest at room temperature while you prep the spices and vegetables.
  2. Heat a small dry skillet over medium-high heat. Add seed spices and toast, swirling the pan constantly until the spices are very fragrant. Transfer to a bowl to cool, and then grind in a mortar and pestle or electric spice grinder.
  3. Measure remaining spices into a bowl and set aside.
  4. Place a wide, heavy-bottomed pot over medium-high heat. Add oil and heat until shimmering, then toss the chicken pieces just until all sides are no longer pink. Transfer chicken to a bowl and keep warm.
  5. Add vegetables to the pot, beginning with the firmest and adding the others in descending order of time needed to soften. Season with a pinch or two of salt to help draw out the moisture. Add spice blend and ground seed spices to the hot vegetables and toss to coat.
  6. Stir in tomato paste for rich color and burst of umami flavor. Add broth and cook until the liquid begins to simmer.
  7. Return chicken to pan. Stir in coconut milk. Cover pan and reduce heat to simmer the curry for about 25 minutes. Serve with basmati rice and sprinkle with chopped cilantro, if desired.


Smoked Salmon (and a bonus recipe!)

Back when I got my first bullet smoker in the late 1990s in Connecticut, the first food I ever tried was salmon.

Why? Heritage, of course. 

I’m Jewish and grew up in New York with lox (a cold-smoked, cured salmon) and bagels most Sunday mornings, a little weekly splurge in the Gura household. On rare occasions of extended family gatherings, someone may have picked up smoked salmon salad, which we all salivated over, probably based on the fact that our parents had splurged even more for this delicacy (more expensive than lox). We spread it over cream cheese on a bagel or bialy in place of lox, or sometimes with lox on top for a double-salmon shot.

Now that I’ve had years of experience smoking salmon myself, I can definitely say that the “delicacy” salmon spread of my youth was meh, a mayonnaise-laden, salmon-light blend that, compared to the dish I’m about to share, may well have been created in a blender. Mine is fresh and flavorful, with bits of fresh vegetables and only enough mayo to serve a purpose. It’s always a hit when we serve it at summer parties or holiday gatherings, and it’s easy to make.


It’s all about the salmon

But let’s start with the basics. Smoking salmon is remarkably easy and the process brings out salmon’s textured, salty flavor in a smooth, delicious bite, more nuanced than grilled or baked salmon.

So how does one smoke a salmon? It starts with a nice fillet of salmon; although we typically buy wild caught fish, farm-raised salmon works fine when smoking. We purchase ours from a local seafood shop that emphasizes sustainability, and it is well worth the extra cost. The salmon should be brined overnight in saltwater; I use about 1/3 cup of kosher salt in two quarts water, warm enough to dissolve the salt. I add a little ice to cool the water before placing it in a large glass or plastic container so that the fish is completely covered. Give it an overnight if possible, or at least eight hours refrigerated in the brine.


The next morning, remove the fish and rinse it thoroughly under cold water, gently massaging it for as long as five minutes to remove the bulk of the salt. Pat the fish dry with paper towels, then season to your taste. Because the brining inevitably leaves a good salt within, even after rinsing, I don’t use a heavy season. I give it just a light sprinkle of Old Bay.


Fire up the smoker

Smokers can be gas, electric or charcoal; I’ve always had charcoal smokers. I thoroughly spray the cooking grates with oil. The night before, I soak wood chips in water; this time it was apple wood, but other varieties work well, too. The wetness, I believe, helps to create more “flavored” steam in the cylinder. Though there is quite a bit of internet debate about the need to soak the chips.

I fill my Weber smoker with enough lump charcoal to last for hours, not so much for the salmon, which can take as little as 90 minutes to 2½ hours depending on the thickness of the fillet, but for the additional food I put on the lower of the two cooking grates. Typically, I will smoke a pork shoulder, though I’ve done turkey, brisket, or pastrami in previous smokes. Next to the salmon on the top grate, we usually smoke sausages to serve as appetizers. Yes, this is one big smoker Terrie bought me for my birthday three years ago.

My new smoker is almost three times the size of my old one!

When the charcoal lumps have turned ash gray, I work quickly by adding the soaked wood chips on top, and then pouring a gallon of water into the pan below that, in effect, steams the foods as they smoke. For interesting flavor, I also add a half gallon of some other liquid— beer is my go-to, but this time, it was fresh-pressed apple cider. I put the pork shoulder on the lower grate, add the top grate and the salmon and sausages, and cover it. The smoker has a temperature gauge and several vents to control air flow and temperature. My smoker has a “smoke range” of 200° to 275° F, and the ideal is smack in the middle. I’ve learned to work the vents regularly through the cooking, and can typically now keep the smoker “in the range” for six hours, enough to cook most things through.

The sweet spot.

Occasionally, if I lose temperature before a pork shoulder or brisket are finished, we finish it in the oven at 300° F, wrapped tightly in heavy duty foil and roasted to desired tenderness. Salmon (and sausages) fortunately don’t take anywhere near that long. You know the fish and sausages are done just by sight. After an hour and 45 minutes with this cook, they were both ready.

Who’s hungry?

So many options for smoked salmon

When it’s freshly cooked, Terrie and I could eat a whole salmon between us, it’s so delicious. But we refrain to a few nibbles because we usually have other good things in store for it. The smoked salmon is great on top of a mixed greens salad, and sometimes Terrie will incorporate it into a pasta dish with sautéed spinach and sun-dried tomatoes. But my personal favorite use for smoked salmon is right here in this bowl.

This salmon spread is so addictive.

It starts with a nice chunk of the freshly smoked salmon, about a pound. Then, I dice up some red pepper, red onion and celery, and grate some carrot. Pepper to taste (salt usually isn’t necessary) and fold in just enough mayonnaise to moisten it. Mix it all together and refrigerate until ready to serve. We love it as a spread on crackers or pita chips, and it is fantastic (of course) on a bagel.


This salmon salad puts the store-bought variety of my youth to shame because it is chunky and not too laden with mayonnaise. Mainly, though, the difference is being able to smoke a fresh salmon rather than consuming a processed version. Of course, growing up in a New York City apartment building, I have to remind myself, it wasn’t like you could “fire up the smoker.” So if you have the space, the inclination and the smoker, have at it, friends.


Smoked Salmon Spread

  • Servings: About 12
  • Difficulty: Easy
  • Print

This salmon spread is a real crowd pleaser! It is very easy to make, and especially delicious when made from your own smoked salmon.


Ingredients


About 1 pound freshly smoked salmon (see note below)
1/2 red bell pepper, diced
1/2 medium red onion, diced
1 good sized carrot, peeled and grated
2 stalks celery heart, strings removed and diced
About 1/3 cup mayonnaise, just enough to moisten the mixture
A few twists of freshly ground black pepper

Note: This spread is made with “hot” smoked salmon that is cooked, not the lox-style cured salmon. If you do not smoke your own, consider purchasing this from a good delicatessen or check the packaging to be sure the salmon is fully cooked.

Directions

  1. Flake the salmon into a medium size mixing bowl. Add vegetables and toss gently.
  2. Fold in mayonnaise, a little at a time, until the mixture is moistened enough to hold together. Season to taste.