Terrie and I enjoy surprising each other with gifts that we know the other will appreciate and play to our sense of adventure in the kitchen. So it was a few Christmases back when I opened one of my gifts and unveiled the book Buenos Nachos! by Gina Hamadey. Terrie knew that I already enjoyed making different kinds of nachos and had come to recognize herself how enjoyable nachos could be as a dinner, and relatively healthy, too, if you plan for it. The book is, as the title indicates, a treasure trove of nacho recipes, many of which come from restaurants whose owners shared their secrets. The part of the book I’ve put most to use, though, is in the smaller section on accoutrements such as salsa, guacamole, queso and “refreshments.”
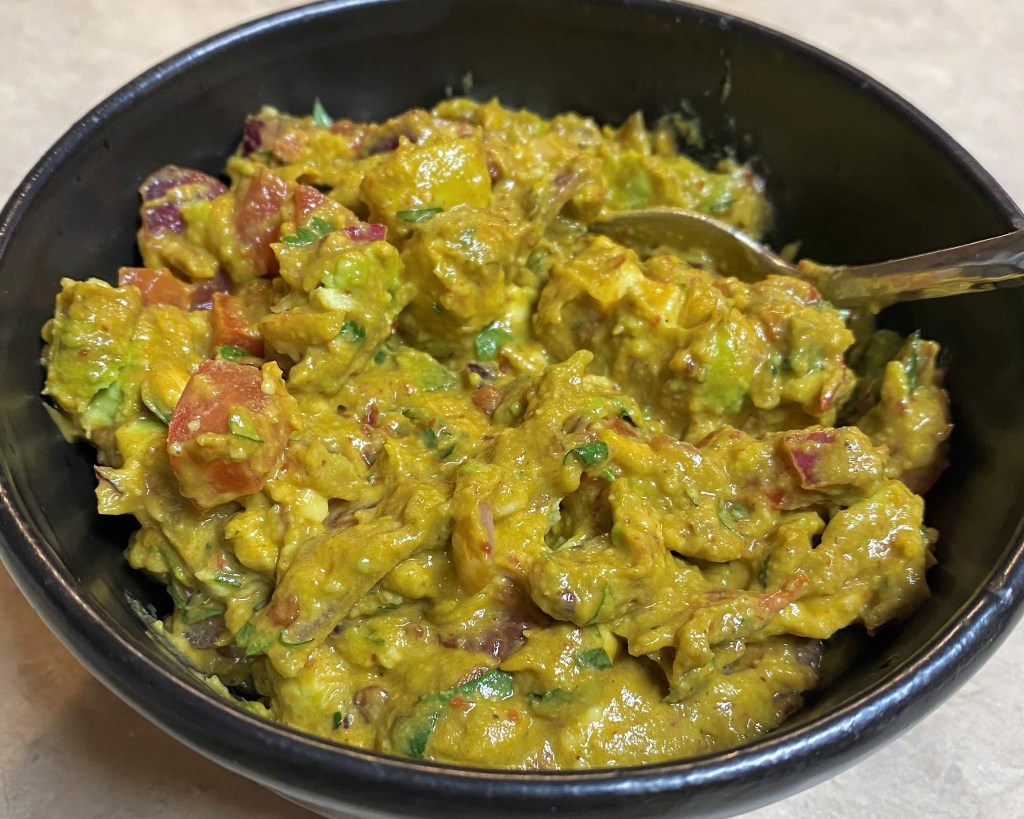
Specifically, I’ve latched onto “Smoky Guacamole” as a go-to offering at parties or pre-dinner snacks at our house. I was a latecomer to guacamole, I have to admit. I moved to Southern California after college and refused to get into the chill, SoCal swing of things and eat a disgusting-looking condiment with a questionable consistency. Instead, I simply expanded George Carlin’s skepticism about “blue foods” to include pasty green stuff. I don’t remember exactly when I gave in and tried guacamole, but I cannot imagine life without it now. The freshness of the lime and cilantro added to chunks of avocado and tomatoes was made for a nacho chip. Or, in the recent case in our household, as a side/add-on to homemade barbacoa tacos.
The reason I like this particular recipe—the very first one I tried from Buenos Nachos!—is the boost guacamole gets by simply adding in a couple of tablespoons (or more, as I like to do) of chipotles in adobo sauce. The smoky spice of the adobo sauce gives guac exactly the kind of “elevate your happy” that my better half talks about so often.
Coincidentally, smoky guacamole also serves as a fine topping or side for any of the nacho dinners I put together. Next up for me out of Buenos Nachos! will be liberating and enhancing a savory cheese sauce from one of the nacho recipes. But for now, I hope you enjoy this smoky guacamole as much as we do.
The usual guac suspects are all here, but the chipotles in adobo is the standout ingredient that puts the smoke in Smoky Guacamole.
Ingredients
3 avocados, halved and cubed
2 Roma tomatoes, seeded and chopped
Juice of half a lime
1/2 medium red onion, chopped
2 Tbsp. or more pureed chipotles in adobo sauce* (see notes)
3 Tbsp. chopped fresh cilantro
Salt and pepper
*Notes
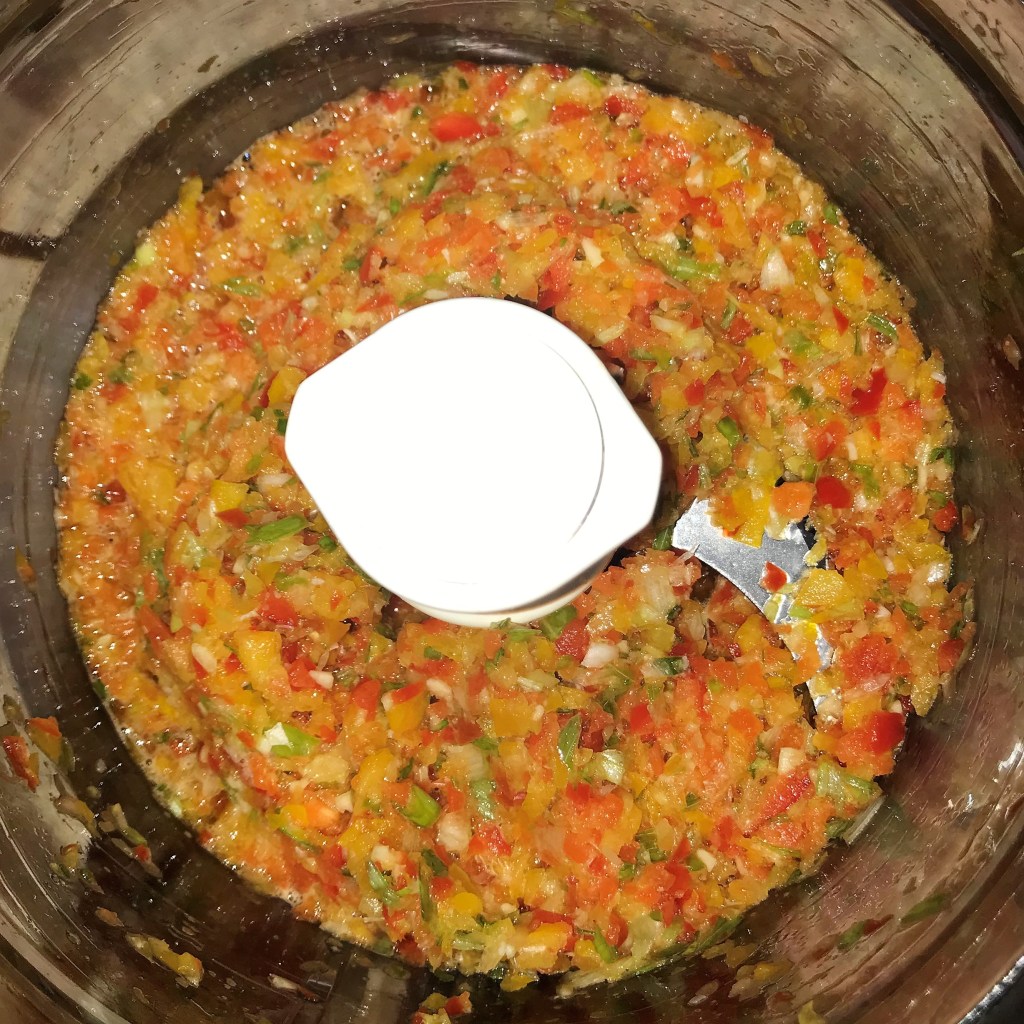
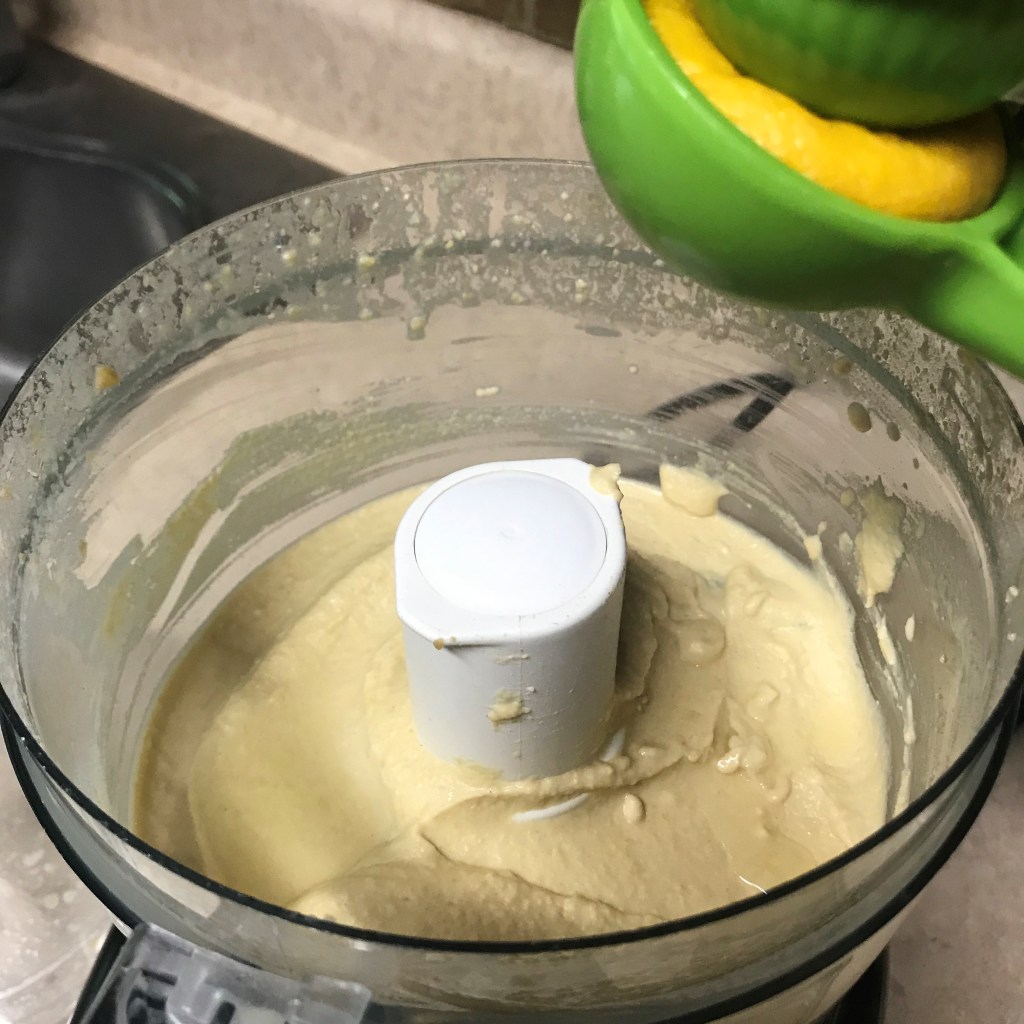
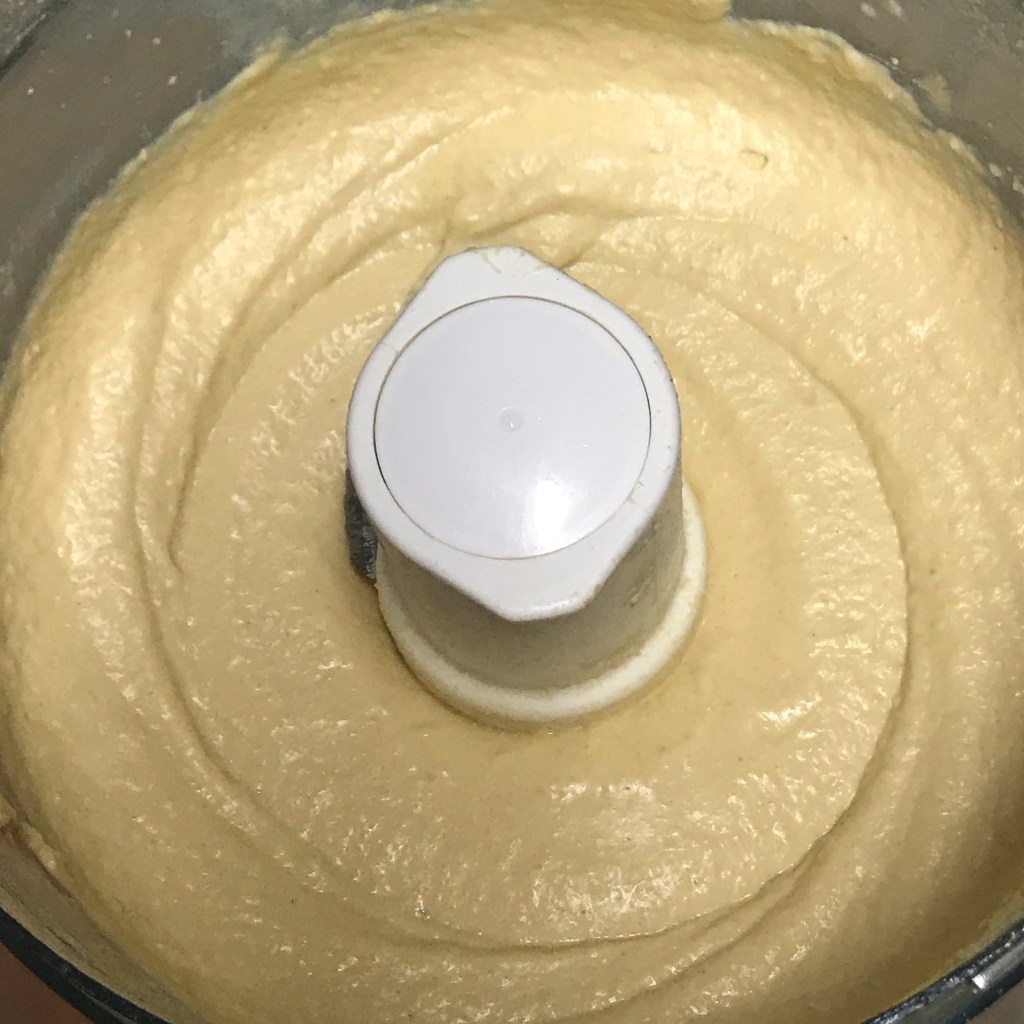
To make the chipotle puree, empty an entire 7 oz. can of chipotle peppers with adobo sauce into a food processor. Pulse several times until mixture is mostly smooth. Transfer mixture to a bowl and keep in the fridge for about two weeks. In this recipe, use as much adobo as your spice meter desires. Add some to your next batch of chili, or use it to kick up a homemade bbq sauce.
Instructions
Empty the whole can of chipotles, including adobo sauce, into the processor. Blend until it’s a pureed consistency.
Choose avocados that are ripe but not super soft. Scoop them from their shells and cut into cubes.
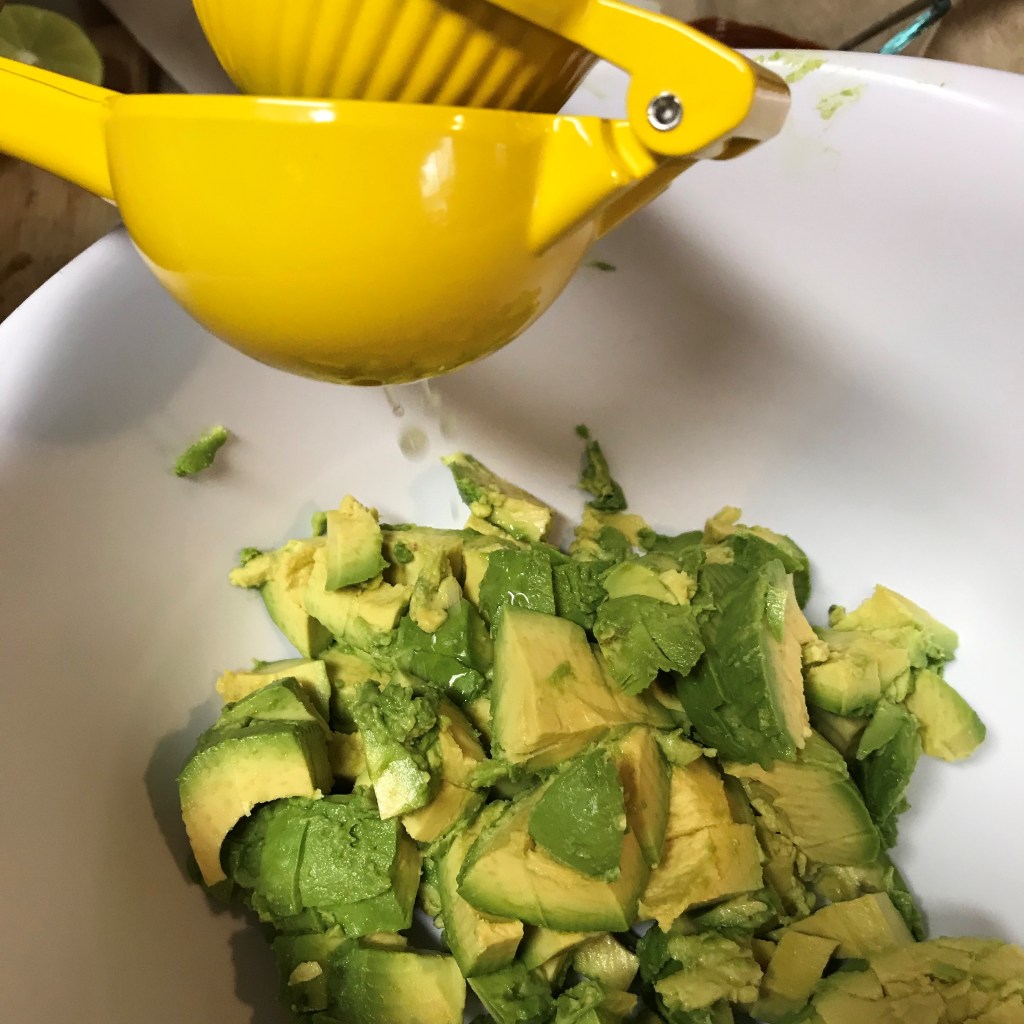
The acid in lime juice prevents browning, so toss the avocados with it before proceeding with the other ingredients.
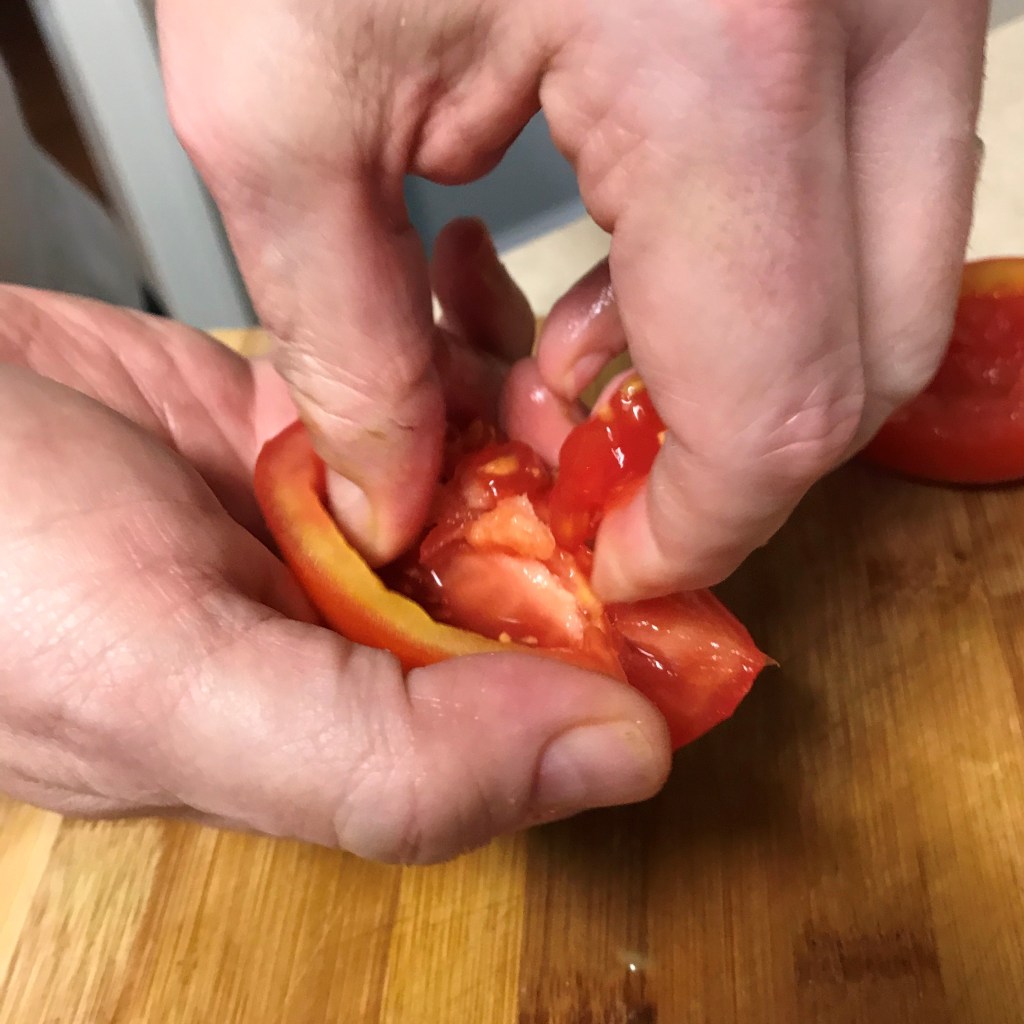
Roma tomatoes are meaty, but you may still need to remove the wet seeds. Cut them in half lengthwise and scoop them with your fingers.
Chop the tomatoes whatever size you like. I’m keeping them chunky for this batch of guac.
Each ingredient brings its own flavor and texture to the tortilla chip.
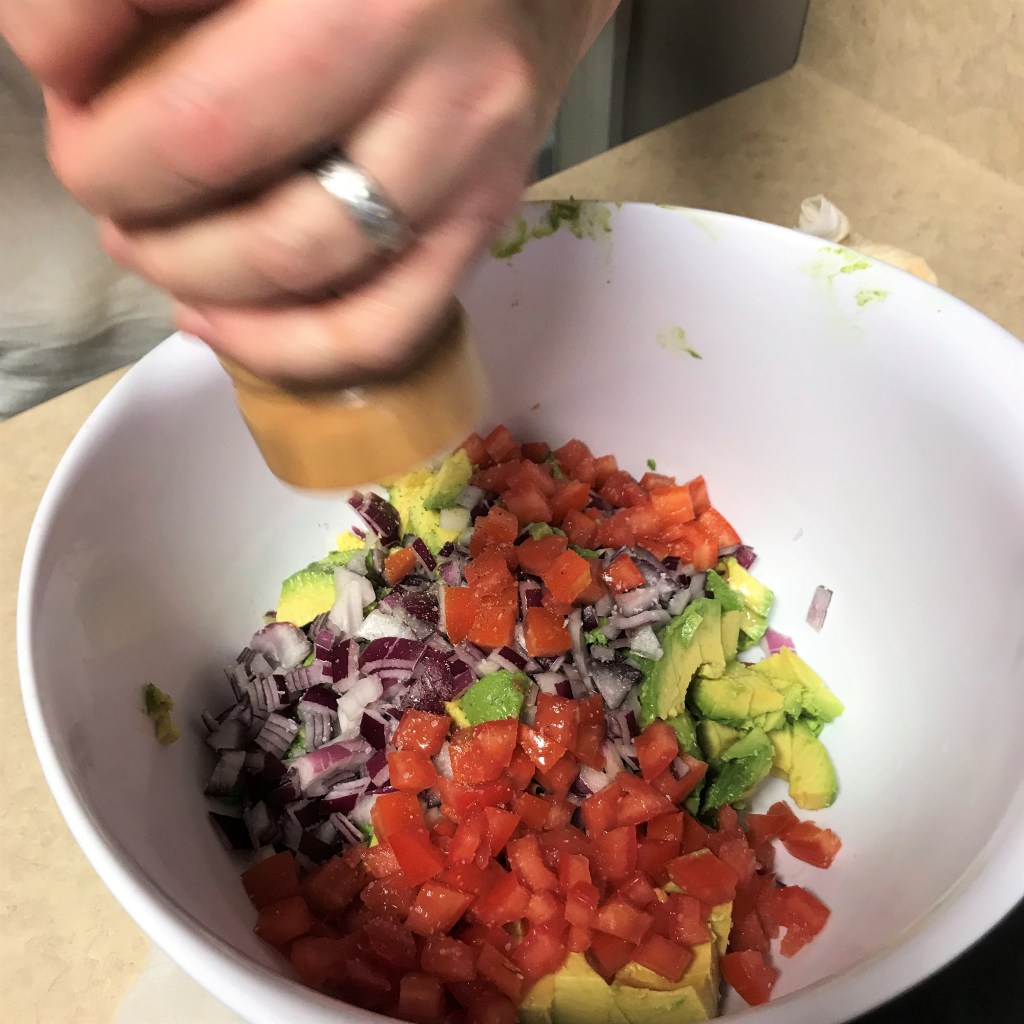
Give the whole mix a few pinches of salt and twists of fresh cracked pepper.
Bring on the smoke, by adding as much (or little) chipotle-adobo puree as your heat meter desires.
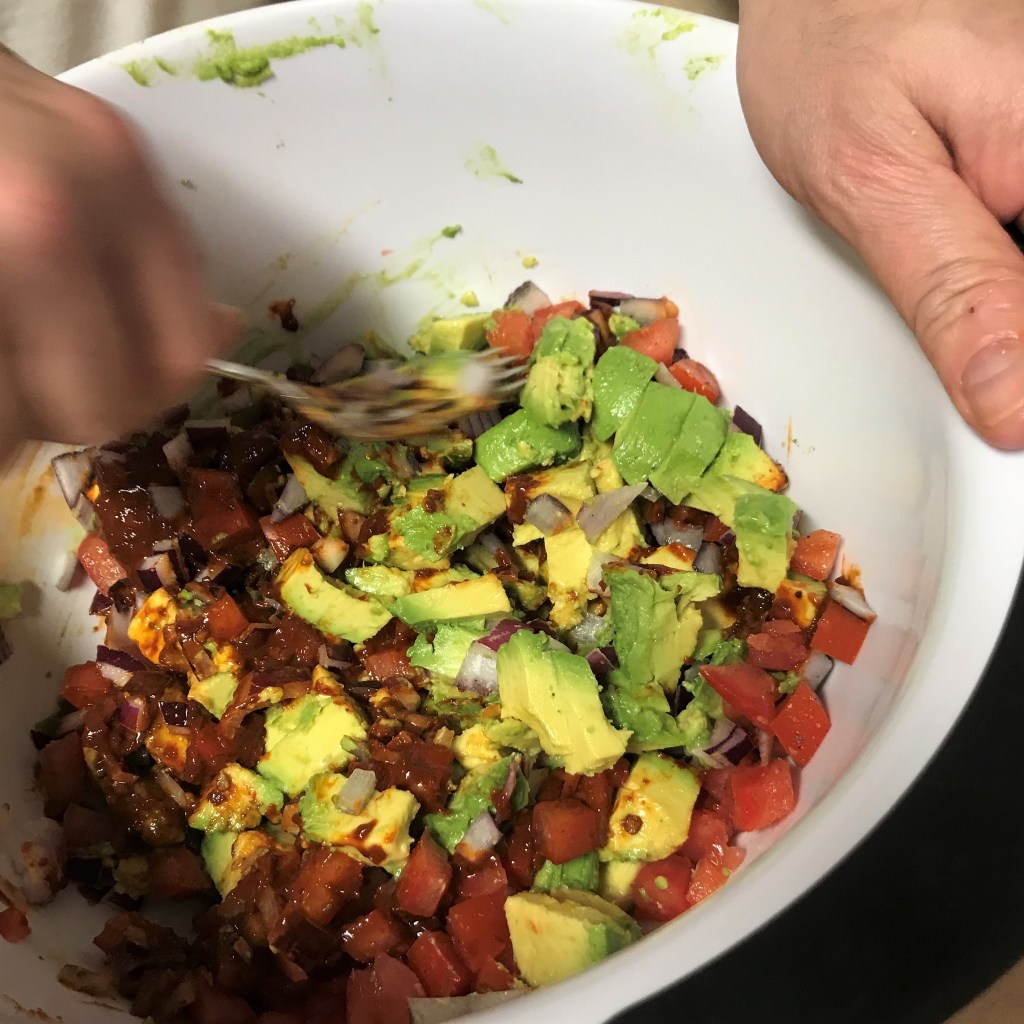
I use a fork to mash the ingredients together. Some of the avocado pieces will stay intact. If you prefer a smoother guac, try smashing up the avocado first, then fold in the other ingredients.
Cilantro is traditional in guacamole. You can either sprinkle it on at serving time, or mix it in as I do.
If you’re making the guac ahead of time, layer plastic wrap directly onto the surface. This prevents air from turning the avocados brown.
Yeah, baby.
Put the diced avocado in a large bowl and add the lime juice. Toss lightly to prevent the avocado browning.
Add in the tomatoes, onion and chipotle-adobo puree. Stir with a large spoon or mash with a fork; if you prefer a smoother guacamole, you can mash the avocados first, but fans of chunky texture can settle for just mixing up the ingredients.
Season with salt and pepper to taste. Finally, add the cilantro and fold again.
I’m learning more about the Jewish traditions that are part of the tapestry of life for my husband, Les, and this week I was surprised to learn that there are multiple new year occasions worth celebrating. We had the big one, Rosh Hashanah, back in the fall, which we celebrated at our house with a twist on beer can chicken, oven-roasted with a honey glaze. This week marks another “new year,” called Tu Bishvat, an environmentally themed observance that centers on trees and all the good things we enjoy because of them. If you’ve ever sat beneath a tree to escape the high-noon heat, you know how protective they can be. And if you’re fortunate enough to have a fruit-bearing tree, you know the joy of anticipation as you watch the fragrant blossoms turn into sweet, juicy edibles.
Our local temple recently held an online celebration for Tu Bishvat, and it included a fun food challenge, which yours truly could not resist. Participants were charged with creating and virtually sharing a dish made with one of the “seven species” highlighted during this occasion—wheat, barley, grapes, figs, pomegranate, olives and dates.
The title of this recipe gives away my assignment (pomegranate), and I’m happy to share it as my latest food adventure.
It smells so good from the oven!
What I love about focaccia is that it is an easy bread to make, as long as you aren’t bothered by the sticky, loose consistency of the dough. It’s a high hydration recipe, which is a bread nerd’s way of saying it’s a really wet dough. Kneading by hand isn’t really an option, but there’s an easy technique of stretching and folding the dough, which builds strength and makes it more workable. My focaccia is sourdough-based, because that’s what I do, but you can find easy yeast-risen focaccia recipes online using commercial yeast if you prefer (try this quick and easy recipe from King Arthur Baking Company).
Enjoy!
Sourdough Focaccia with Pomegranate and Walnuts
Adapted from Maurizio Leo’s recipe for Simple Sourdough Focaccia Makes one 9” x 13” rectangle or two 9” round bread loaves
Ingredients
115g ripe sourdough starter, 100% hydration* (see notes)
460g filtered water, at room temperature
350g all-purpose flour
180g bread flour*
75g white whole wheat flour
11g salt
12g mild-flavored extra virgin olive oil + extra oil for topping
Toppings*
About 1/2 cup walnut pieces, toasted at 400° F until lightly browned and fragrant
1/2 cup pomegranate arils*
Several sprigs fresh thyme, washed and leaves removed
Coarse or flaky sea salt (I used a specialty salt flavored with chocolate!)
*Notes
My recipe is described with weight measurements because this is how I bake. If you prefer to measure by volume in cups, please consider following the recipe on King Arthur Baking site, where ingredients are listed by weight or volume. If you decide to delve into the world of sourdough, I highly recommend purchase of a digital kitchen scale, as measuring by weight ensures precision and consistent results. You don’t have to spend a bundle for a digital scale. Mine is adjustable for ounces, grams and milliliters, and I picked it up at Walmart for only about $20.
Sourdough starter is considered “ripe” a few hours after feeding, when it has nearly tripled in volume, then begins to fall. It will have a very bubbly surface appearance and a fruity, slightly sour aroma. My starter is 100% hydration, which means it is equal parts flour and water.
Bread flour is higher in protein than regular, all-purpose flour. The protein content gives more strength to bread dough, a benefit that is particularly important with a wet dough. I prefer the King Arthur brand, which is sold in a blue and white bag at most well-stocked supermarkets.
My focaccia is topped with pomegranate arils (which I purchased ready-to-go in the produce department), toasted walnuts and fresh thyme, but there are many other terrific combinations, so use what you like—olives, figs, sun-dried tomatoes, garlic, caramelized onions are all fantastic. Try it sometime with roasted grapes and feta cheese. Yum!
If you want to “fancy up” your focaccia, try drizzling it with a reduction of pomegranate juice and balsamic vinegar. Instructions below!
Instructions
Making bread can seem a little intimidating. I know, because it used to be scary for me. But as with any relationship, it takes some time and experience, trial and error to find your comfort with dough. If you want to learn to make bread, focaccia is a great place to begin. There’s no kneading, and it doesn’t punish you if you mess up your timing. I love a forgiving recipe! Have a look at the slides to get the idea, then give it a go with the instructions below. Keep scrolling for a downloadable PDF for your recipe files. You’ve got this! 🙂
This is what ripe starter looks like. It was fed about 12 hours ago, then refrigerated to suspend the fermentation. For this recipe, it’s fine to use the starter cold from the fridge.
Combine the flours and salt in a bowl, then add it all at once to the starter mixture.
After only a couple minutes, you can see the dough is getting stretchy. That’s a good sign!
After a few minutes, the dough will be completely clumped onto the beater blade. Scrape it off and let the dough rest before switching to the dough hook.
Look at that gluten developing already! Use the dough hook to knead in the olive oil.
The dough seems less organized with the oil kneaded in, but that will change after a rest, and multiple stretch and folds. I know it’s tempting to add more flour, but don’t.
You will probably think, “there’s no way this will become bread!” Trust the process. Cover and let it rest 30 minutes before the first stretch.
Use wet hands to grab the dough on one side. Stretch it up and over, then turn the bowl and repeat on each side for a total of four stretches.
Stretching the dough at this stage feels awkward and messy, but after some time, it will gain strength and structure. Don’t worry.
By the final stretch, you’ll feel much more elasticity and strength, like the dough is tugging back.
For easier dividing, use one of these tools called a bench scraper. I’m oiling mine so the dough doesn’t stick to it.
I’m making two round focaccia loaves, but you could also make one large one, measuring about 9 x 13″.
The dough is tight and elastic, but I’ll cover and rest it 30 minutes, then I’ll be able to stretch it to the edges.
Use a generous amount of olive oil for dimpling the top of the dough. Only use your fingertips, and press all the way to the bottom.
Who has time to break open a fresh pomegranate? This is a welcome convenience!
It’s OK to press the toppings down into the dimples, and the oil prevents them drying out.
Sprinkle the top of the focaccia with flaky sea salt. I decided to top one of them with this specialty chocolate sea salt. Good call!
The dimpled dough bakes up puffy, and some of the toppings are baked deep into the dimples.
Combine starter and water in the bowl of a stand mixer. Mix together into a slurry.
Whisk together flours and salt in a separate bowl. Add flour all at once to the starter mixture. Using the mixer’s lowest speed, beat until all flour is absorbed into the starter, which should only take 1 to 2 minutes. Increase to the next speed and beat for about 5 minutes. The dough will be wet and sticky, but gathered up around the beater blade. Remove beater blade, cover the bowl and let it rest for about 15 minutes.
Using the dough hook, and with mixer on low speed, slowly pour in the olive oil and mix until oil is fully blended into the dough, plus about 2 more minutes. The dough will seem impossibly wet and heavy, but don’t give in to the temptation to add more flour.
Transfer the dough to a large, wide bowl and cover, resting it in a warm, draft-free spot in the kitchen for a total of 2 hours. Don’t wander off though, because you’ll need to do some stretching and folding over the course of the first couple hours.
After 30 minutes, using wet hands, grab hold of one side of the dough, keeping it in the bowl. Pull it up and over the rest of the dough. Turn the bowl halfway around and repeat with the other side of the dough, then turn it a quarter way, and repeat with the other two sides, for a total of four stretches.
Repeat the stretch and folds at 60 minutes, 90 minutes, and the 2-hour mark. This intermittent stretching makes a big difference in the strength and condition of the dough, so don’t skip it.
Prepare a pan (or two) for baking by drizzling olive oil into the pan. Transfer focaccia dough to the pan(s) and spread as best you can to fill the pan. Don’t worry if it doesn’t stretch all the way at first. Cover the pan and rest dough for 30 minutes, then spread it again. Use wet hands (or spray them with oil) to avoid sticking to the dough. Give the dough about 4 hours to proof. During this time, you’ll notice quite a bit of puffiness develop—this is good!
Near the end of proofing time, preheat oven to 450° F with a rack in the lower third of the oven.
Using wet (or oiled) hands, gently press your fingertips straight down in a wide pattern all over the focaccia dough. The goal is to make deep dimples in the dough but leave large air pockets in between. Drizzle a couple of tablespoons of additional olive oil over the surface, and sprinkle toppings evenly over the dough. It helps to arrange the toppings into the dimples so they are not sitting high on the surface of the bread. You can press them into the dough to accomplish this, but take care to only use your fingertips to keep the bubbly texture going.
Sprinkle top of bread with flaky sea salt. Bake at 450 for about 30 minutes, turning bread at the halfway time for even baking. Use a loose foil tent if needed to prevent over-browning.
Cool the focaccia in the pan for a few minutes, then transfer to a cooling rack. Enjoy it warm or cool completely before wrapping and storing.
The focaccia is about 2 inches high, and you can see the pomegranate seeds and walnuts are deeply embedded into the bread.
Les teases me all the time about my use of “balsamic reduction,” which is nothing more than quality balsamic vinegar simmered until it’s reduced to half volume. This is not rocket science, but it sure does seem to impress people! For this focaccia, I combined about 1/2 cup pure pomegranate juice (easy to find in the produce section) with a couple tablespoons of real balsamic vinegar from Modena. I happened to have a bottle that is also infused with pomegranate, and you can find it at one of the specialty oil & vinegar shops that have popped up all over the U.S. A reduction can vary in flavor from tart to sweet, depending on the ingredients, and it adds a nice final pizzazz to even a simple dish.
A “reduction” only sounds fancy. It’s nothing more than juice simmered down to a more concentrated form.
A couple tablespoons of pomegranate infused balsamic vinegar will add depth to the reduction.
At the beginning, I have about 5 ounces of pom juice and balsamic mixture. Let’s give it 20 minutes.
Watch your reduction closely, and turn off the heat when it starts to bubble and foam like crazy. It will thicken more as it cools.
The reduction has a more intense color and flavor. This will be terrific drizzled on the focaccia at serving time.
At our house, the Thanksgiving “pre-feast” is almost as traditional as the feast itself. Even in this weird pandemic year, which finds us home alone for Turkey Day, we will have an eclectic spread of snacks and finger foods that will serve as sustenance until dinner.
We always have deviled eggs in the mix; they are a perfect little bite, savory and delicious, and packing enough protein to fill our bellies in a healthy way rather than just scarfing on carbs. As I mentioned back in the spring when I shared an egg-stravaganza, deviled eggs are a blank canvas for any flavor that strikes your fancy. This time, it’s the savory side of pumpkin, highlighted with a little garlic and ground chipotle powder.
By the way, this recipe would also work great with equal substitution of pureed sweet potato, if you prefer.
The pumpkin and chipotle flavors are a savory surprise with these deviled eggs.
Ingredients
6 hard-boiled eggs
3 Tbsp. pure pumpkin puree (not pie filling)
2 Tbsp. canola mayonnaise
1/4 tsp. ground chipotle powder
Sprinkle of garlic powder
Kosher sea salt and freshly ground black pepper
Instructions
The pictures tell the story, but you’ll also find written steps below, and a link for a downloadable PDF for your recipe files.
I place my peeled hard-boiled eggs into a low, flat Pyrex dish with a snug cover. When I slice them in half, they are flat on both sides. No sliding around on the plate!
Add the pumpkin, mayo and spices to the cooked egg yolks, and then blend until smooth and uniform.
Place a zip-top bag inside a drinking glass for a quick piping bag that makes filling the eggs a snap.
Snip a small corner of the bag to create an easy, disposable piping bag.
Squeeze the bag evenly while filling the cavities of the egg whites.
I love the rich autumn-like color the pumpkin lends to the deviled egg filling.
Cut hard-boiled eggs in half lengthwise and drop the yolks into a small bowl (I used the small bowl of my food processor, but this is not essential).
Add pumpkin puree, mayonnaise and spices to the cooked yolks.
Process or mash together until the mixture is completely uniform. Add another small spoonful of mayonnaise if needed for creamy consistency.
Fill the cavities of the egg whites with the yolk mixture. You can spoon this in for a quick finish, or take a simple shortcut for a more polished presentation by using a small zip top bag with a snipped corner.
Hi, everyone! I’m bustling about this week, putting together plans for Thanksgiving, so my awesome husband is stepping into the Comfort du Jour kitchen to share one of his fabulous appetizer recipes! I hope you enjoy it as much as I do. 🙂
Terrie
Water logged, salt bloated, mushy.
I think we can all agree that canned vegetables suck. I grew up on them, though, force fed night after night by my mom, who was trying to make a thin budget stretch enough to feed three hungry kids.
Perhaps my mother was worn down by the time I came around after my two sisters, but mom did let me get away with complete rejection of canned peas and asparagus. I choked down string beans and carrots. Grudgingly. I actually liked two types of canned veggies. Corn and, somewhat inexplicably, spinach.
Maybe it was the Popeye cartoons. You remember how Popeye always was getting whaled on by Bluto until, miraculously, he discovered a can of spinach, opened it with a variety of odd devices he would somehow pull out of thin air and, voila, POW! Bluto was punched off the planet.
Maybe it was the fact I could mix spinach, with a liberal amount of margarine, into the baked potato we had every night. The spinach-potato glop was my favorite—until I discovered frozen creamed spinach in early adulthood in the supermarkets of Southern California, where I moved after college.
It was only a matter of time until I discovered fresh spinach. Tasted good in a salad. Tasted even better sauteed in butter. In short, I discovered the world beyond the can. Years later, I had the good fortune to be invited to a restaurant in Boca Raton, Florida, the Ke’e Grill, where “Spinach Maria” achieved the rank of “best spinach dish ever.” Even more fortunate for me, I have a wife, the inspired, genius founder of Comfort du Jour, who loves the challenge of creating dishes even better than we have out. Hence, I’ve enjoyed Terrie’s Spinach Maria and consider it better than the original. Not unlike her version of New York-style pizza.
But I digress. My point is that tastes change and grow over the years, but I still love spinach, and love using it in dishes that I can do, too. Like spinach balls.
These spinach balls are great as appetizers, or just snacking in general.
I first made these by searching recipes when I was tasked with creating an appetizer dish for an annual holiday potluck at work. First time out of the box, they drew raves, especially from one of the office vegetarians. I guess he enjoyed the savory taste, a blend of seasoned bread crumbs, butter, eggs, cheese and spices. They were clean and neat, easy to just keep popping in your mouth. I’ve been making them, especially around the holidays, ever since, and Terrie has done one of her “elevate” tricks by making use of leftover spinach balls and recasting them as an ingredient, in, say, breakfast waffles. She’s working on a way to incorporate them in some form (Crumbled, sliced? Who knows? That’s the joy of living with a creative kitchen mind) one of her specialty pizzas. I can’t wait.
Enjoy!
Spinach Ball Ingredients
1 10-ounce package of frozen spinach*
2 cups seasoned herb mix*
2/3 cup grated Italian cheese*
1/2 cup (1 stick) of salted butter, melted and cooled
3 eggs, beaten
2 tsp. garlic powder
1 tsp. Italian seasoning
½ tsp. black pepper
*Notes
Some frozen bagged spinach comes in 12-ounce size, and the extra will not harm the final outcome.
I use a combination of Pepperidge Farm herbed turkey stuffing mix (about 2 parts) and panko bread crumbs (1 part).
I used a potato masher to crush the larger stuffing crumbs.
On a whim, I decided to add a tablespoon of Trader Joe’s chili onion crunch along with the spices. You could substitute a little crushed red pepper if you like some heat.
You can wrap and squeeze the spinach in paper towels as Terrie usually does, but I like to press it with layered towels to absorb the excess liquid.
Go on, get your hands in there. It’s the easiest way to mix these ingredients.
Pour the egg and butter and mix.
Scoop about a heaping tablespoon of the mixture to begin shaping.
Press and pinch to get the shape started and to prevent the spinach balls from falling apart.
Finish the shape by rolling between your palms. Aim for golf ball size.
Looks like Daddy has an audience!
Bake them at 350 for 20-25 minutes, turning once halfway through baking time.
First time making the red pepper sauce to accompany these, and it was fantastic!
Heat oven to 350° F. Line a cookie sheet with parchment paper.
Defrost spinach and dry as thoroughly as possible with paper towels.
Blend dry ingredients, grinding the bread crumbs so they are largely fine in texture. Add spinach, then eggs and butter, mixing until thoroughly blended and dough-like in consistency.
Take 1 to 2 tablespoons worth of the spinach mixture between your palms, pressing it together to help it take an oval form, then gently roll it between your palms to form golf ball-sized bites, spacing each about an inch apart on the cookie sheet. Be careful to ensure the mixture is pressed initially and to roll it gently to avoid crumbling. If the mix itself is too crumbly, add an egg and another tablespoon of butter, remix and start again.
Spinach balls should cook 20 to 25 minutes, depending on the oven. Turn them once midway when one side has a slightly brown coloring.
The red pepper sauce is something new, and it came about quite coincidentally. Except I don’t believe in coincidences. So here’s the story. One Monday, Terrie asked me to make the spinach balls for the coming weekend. The next day, I peeked at my email and there was one of The New York Times’ 12 emails a day (Yes, I have an online subscription. Sue me; I’m a former journalist.) that crowd my inbox. This one said “Giant couscous cake with red pepper sauce.” I didn’t give a hoot about the couscous cake, but “red pepper sauce” caught my attention. I love sauces. Love to try them, love to create my own. I looked at the recipe and immediately thought it would be perfect for the spinach balls, which we typically serve with a marinara. So we tried it. And like Mikey in the old Life cereal ads, “we liked it.”
Pepper Sauce Ingredients
2 medium red bell peppers, quartered and seeds removed
1 medium tomato, halved and seeded
2 full heads of garlic
1 1/2 Tbsp. red wine vinegar
4 Tbsp. olive oil
Salt and pepper
Instructions
Line a cookie sheet with parchment paper and preheat oven to 425° F.
Toss peppers and tomato in 1 Tbsp. of olive oil and the kosher salt and arrange skin side up on the cookie sheet.
Cut off ends of garlic heads, drizzle with olive oil and place in foil either on the same cookie sheet if there is room or alongside.
Place the cookie sheet in the oven to roast. After 35 minutes, the peppers and tomatoes should show a nice brown. Remove them from oven and allow to cool slightly; let the garlic continue to roast another 15 minutes until the individual cloves are deep golden color.
Once slightly cooled, remove skins from peppers and tomato and put in a food processor. Remove garlic and squeeze bulbs into the processor as well, taking care not to drop the garlic paper in.
Add red wine vinegar, a good pinch of salt and solid shake of pepper.
Pulse the processor several times to begin the blend, then leave it on and slowly drizzle in remaining 3 Tbs. of olive oil until mixture is smooth. Additional olive oil can be drizzled on top of the sauce upon serving.
Thanks for letting me share these with you. I hope you enjoy them.
Once upon a time, I cooked these fun and colorful meatballs for a little girl…
OK, it wasn’t that long ago, and it wasn’t “once” upon a time—rather, multiple times over the better part of a decade. During a previous marriage, I had the joy of cooking for (and eventually, with) a bright and sassy, food-loving child who was my stepdaughter. From a distance, it was clear that this blue-eyed towhead was not a blood relative. Up close, however, one might swear that she must have been mine, given that she swooned over cooking shows such as Emeril Live, Good Eats and The Next Food Network Star. The child was obsessed, even, and she always had something intelligent to say about whatever food was being prepared on our TV screen.
“I’ll bet Emeril’s gonna put that skillet into the oven to finish it.” And, sure enough, that’s what he would do.
To nurture her curiosity and passion for food, I did the only thing that made sense to me—I bought her a junior-sized denim apron and put her to work alongside me in the kitchen. I passed down to her the food lessons and techniques that had been passed down to me, and it wasn’t long before she was the most excellent sous chef. I could ask her to “julienne those two carrots over there” and she’d return in short order with perfectly uniform little matchsticks. She knew what it meant to “chiffonade” fresh basil or “caramelize” onions without burning them. Her palate became even more sophisticated as she continued to help in the kitchen, and by the time she left home for college, she requested written copies of some of her favorite recipes that we had made together.
Whether this recipe was included in the request I cannot recall, but it was undoubtedly one of her favorites. I’ve tweaked it recently, opting to make my own dressing rather than depending on a bottled version from the supermarket, though we’d have no objection to anyone taking that shortcut. I’ve also discovered that coconut sugar produces a better glaze on the meatballs than my original method of rolling them in regular sugar. Coconut sugar is richer, both in color and flavor, and it’s lower on the glycemic index, so probably a better choice anyway.
This dish is similar to my copycat chicken lettuce wraps, but only in the fact that both contain ground chicken and Asian-inspired flavors. Although the “copycat” version is distinctly spicy and savory, this dish is more of a mixed bag of flavors and textures. The chicken is shaped into firm meatballs, each one carrying its own little confetti explosion of sweet bell pepper and sharp garlic and scallion, but softened on the outside by a sweet, sticky glaze. The sesame ginger dressing permeates the senses from the moment it reaches the table, and no wonder—it’s inside the meatballs, too.
The coconut sugar produces a lightly sticky glaze, boosting the flavors over the top and complementing the barely spicy, tangy dressing.
Serve this on its own or with steaming hot jasmine rice. As a meal, it’s good for 4 servings. If serving as appetizers, the recipe makes 18.
Ingredients
1 lb. ground chicken (not chicken breast)
3 scallions (white and green parts)
2 or 3 cloves garlic, chopped
1/2 large red bell pepper
1/2 large yellow bell pepper
1 egg
1/2 cup unseasoned panko bread crumbs
1 tsp. sesame seeds
About 1 Tbsp. Sesame Ginger dressing (recipe below)
1/2 cup coconut sugar (to “frost” the meatballs before baking)
For Serving
1 large romaine heart, rinsed, dried and separated into individual leaves
1/2 medium red onion, cut into thin slices
A handful of fresh cilantro leaves (optional, but recommended for serving)
Additional sesame seeds to sprinkle (optional, or serving)
Jasmine rice, if desired, for serving
Sesame Ginger Dressing
2 Tbsp. rice vinegar
2 Tbsp. low sodium soy sauce (or Tamari)
1 Tbsp. coconut sugar
1 tsp. sriracha (optional, if you like a little heat)
1 tsp. fish sauce
3 Tbsp. canola or peanut oil
1 or 2 tsp. toasted sesame oil (depending on taste)
Instructions
First, the visuals:
Freshness and flavor getting ready to happen.
Just the right amount of chop here will keep all the vibrant colors of the vegetables. Drain all excess moisture before mixing with the chicken.
Easy to see why I named this dish “Confetti Chicken Meatballs,” isn’t it?
Shape the mixture into meatballs, then roll them lightly in the coconut sugar for an amazing glazing.
All glazed up and ready to go…into the oven!
These meatballs would also be perfectly comfortable as an appetizer.
Combine the garlic, peppers and scallions in the bowl of a food processor. Pulse 10 times, for 1 second each, until the mixture looks like colorful confetti. Sprinkle a generous pinch of kosher salt over the pepper mixture.
Line a colander with double thickness paper towels and transfer the processed pepper mixture to it. Allow it to rest in the colander long enough to absorb the excess moisture from the mixture, about 10 minutes.
In a glass measuring cup, whisk together the first five dressing ingredients. Slowly drizzle in the canola or peanut oil while whisking constantly. This will help to emulsify the ingredients. Whisk in 1 teaspoon of the toasted sesame oil and give it a taste. Add more if you like. This oil is very pungent, so generally speaking, a little goes a long way.
Season ground chicken with kosher or sea salt and fresh ground black pepper. Combine confetti veggies with chicken, egg, a splash of sesame ginger dressing, sesame seeds and panko crumbs. Mix with a wooden spoon or your hands. It will be a gooey mix, but if it’s too wet to hold together, add an extra sprinkle of bread crumbs. If it seems dry, add another splash of sesame ginger dressing.
Add coconut sugar to a shallow dish or small bowl. Shape the mixture into meatballs about 1 1/2” diameter. Working quickly, roll the meatballs through the sugar, just enough to frost each one, and roll again in your hands to fully adhere the sugar, which will become a glaze on the baked meatballs. Place meatballs into a 9×13 glass baking dish, allowing space between them. Bake at 350° for 25 to 30 minutes.
Arrange romaine leaves on a platter, then bed your meatballs on them. Whisk the dressing ingredients again. Scatter red onion slices over the top and drizzle with the sesame ginger dressing. Sprinkle with cilantro leaves and sesame seeds and serve (with rice, if desired).
What happened to the 18th meatball? And why am I licking my lips right now?
A couple of unexpected things have begun to happen since I first started this blog back in April. The first is that I’m getting more serious about using up foods from the freezer and the other is that I’m finally tackling some of the foods on my culinary “bucket list.” I keep a running list of dishes I’d like to try one day—either because I’ve seen it in a magazine or cooking show or because I’ve tasted it somewhere. And when I taste something and love it, my instinct is “I’ve got to make that!” As of now, the list includes (among other things) pierogis, handmade mozzarella, and black-and-white cookies, a childhood favorite of Les, my NYC-raised husband.
Today, I can scratch off a dish that I only added to the list as a “maybe someday” item—fried squash blossoms. I’d never dared even think about what was involved in making these lovely delicacies, but I knew how delicious they are from a wine dinner menu years ago at one of our city’s authentic Italian restaurants. So I added them to the list even though they intimidated me.
Last week, once the shock of discovering life in my raised-bed garden wore off, I got serious about trying them for real. After all, I had a hearty handful of these perfect little blossoms, and what’s the worst that could happen—I’d fail?
The thing is, it was not a failure at all. Quite the contrary. They were surprisingly simple (yes, really) and perfectly delicious. I scanned a few internet recipes for suggestions of what they should be stuffed with and to learn how to fry them without overwhelming their delicate structure, and then I got to work. When I launched Comfort du Jour, I had two goals, but I’ve put most of my effort toward only one of them—taking a classic comfort food to new levels. This project is a delicious example of my second goal—finding a way to make a complex or intimidating dish more approachable.
Before you shake your head and decide you could never make these, let me put this out there—if you can pick a flower and if you can squeeze ricotta cheese from a corner-cut zip top bag, you can make these. Yes, it’s really that simple. Grab an apron and let’s get started.
Ingredients
Handful of freshly picked squash blossoms* (see notes below)
3/4 cup whole milk ricotta cheese
Handful of fresh basil leaves*
1/4 cup grated parm-romano cheese
Sea salt and freshly cracked black pepper
3/4 cup all-purpose flour
1/2 can chilled, unflavored seltzer water (or club soda or very mild beer)
1/2 cup canola oil for frying*
*Notes
In my First Fruits post earlier this week, I pointed out what I’d learned about squash plants having “male” and “female” blossoms. For this recipe, I used only male blossoms. It’s easy to identify them because they don’t show the beginnings of any tiny squash fruit. Once the female blossoms have been pollinated (as mine were), the male flowers are basically just decoration.
Basil is one of those polarizing herbs. Some people swear it tastes like dish soap, and I’d hate for that to stop anyone from trying these special treats. Swap the basil out for thyme, parsley or oregano as you like.
Another neutral oil would be fine for frying. Be sure it is an oil with a high smoke point, such as avocado, coconut or grapeseed oil.
Instructions
The male flower has this, um, thing inside that isn’t very appetizing. I need to reach in there and pinch to remove it.
A couple of my blossoms look sad and limp, but I think they’ll be okay stuffed and flash-fried.
I strained excess moisture from the ricotta, and seasoned it only with parmesan, basil, salt and pepper. Keeping it really simple.
The petals expanded as I piped in about 1 fat tablespoon of the ricotta mixture.
I did my best to close up the petals around the ricotta mixture, and gently twisted the tops to seal it inside. Notice the bag of potato chips trying to photobomb my demonstration?
Stuffed and ready!
Most of the blossoms had stems, which made it easier to dip into the batter.
Giving the blossoms some space in the hot oil, so they don’t stick together.
Place the ricotta in a mesh strainer over a measuring cup to drain excess moisture.
Carefully reach inside the squash blossoms and remove the stamen, which is a bulbous yellow thing inside. It’s the, um—how shall I say it?—male part of the blossom. Don’t worry if the petals tear a little bit. And may I suggest that you consider doing this step outside at the garden. I made a first-timer’s mistake of doing this at the kitchen sink and scared the bejeezus out of a pollinator bee inside a blossom. Sadly, I had to smash it in the sink because Les is terribly allergic to bee stings. I felt awful about it, but I went through a lot to find this wonderful man, and it was him or the bee.
Rinse the blossoms under cold running water, and gently shake them to empty out excess water. Lay them on a couple layers of paper towel to drain.
Rinse and blot dry the fresh basil leaves, then stack and chop them into small pieces. Mix the basil leaves into the strained ricotta, along with the parm-romano cheese, salt and pepper. Spoon the ricotta mixture into a small zip top bag and seal it.
Snip a small corner off one end of the zip top bag, and gently squeeze a heaping tablespoon of the ricotta mixture inside each blossom. The blossoms will “give” a little bit as you go, and it will feel obvious that you’ve filled them enough. Stretch the blossom petals around to fully cover the filling and twist the tops very gently to seal them up. They don’t have to be perfect, but the goal is to keep the filling from spilling out during frying. Rest the filled blossoms on a paper towel while you prepare the batter and frying oil.
Place a cast-iron skillet over medium heat and add the canola oil. This is not a lot of oil, so it will heat up fairly quickly. It should be about 1/2″ deep in your skillet.
In a medium-size bowl, mix some salt and pepper into the flour, and stir in enough seltzer water to make a thin batter. It will bubble quite a bit, and that’s a good thing. It should be thinner than pancake batter, but not quite as thin as heavy cream. When I dipped the blossoms into the batter, they were coated, but I could still see them through the batter.
Very gently lay the blossoms into the hot oil and be careful not to crowd them or they will stick together. When the bottom side is lightly golden and crisp, turn them to cook the other side. Drain the fried blossoms on fresh paper towels, sprinkle immediately with sea salt and serve.
They were so pretty, and remarkably easy to make. I’m proud of myself for this elegant appetizer!
Oh yes.
So light and crispy, and they didn’t need any kind of dipping sauce or other accoutrements. To keep our dinner easy and light that evening, I put together a simple tomato sauce (thank you, leftovers) with bucatini pasta. These three pictures describe how easy that was, and it really needs no additional explanation. Simple is good, right?
If this is how they eat in Italy, I want to move there tomorrow!
My “bucket list” experiment of making fried squash blossoms ended very, very well. It was also Les’s first experience tasting them, and though skeptical at first, he declared during dinner that he was a fan.
These were Les’s first ever squash blossoms, and he really enjoyed them.
Do you have foods on a bucket list? Tell me about it in the comments, and then go cook them. Be brave in your kitchen!
Of all the recipes I stashed away in my mind during the time I spent working in a catering kitchen, the hot artichoke dip takes the gold as my most durable. During my two years as a kitchen assistant, I probably made this dip more than 100 times. It was a favorite among clients, and for good reason. It’s easy to make ahead, easy to serve in large quantity and an undeniable crowd pleaser. It also happens to be extremely adaptable to other ingredients, as we learned with the Kentucky Hot Brown Dip a few weeks ago. By keeping the base recipe the same, I’m able to adjust the other ingredients to create whatever impression I wish, and I encourage you to do the same with ingredients that sound good to you.
What I haven’t confessed is that the cream cheese part of the recipe I share today is technically my own adjustment to the original, which (I’m sorry to say) was completely off the charts in fat content. If you spend even a little bit of time in a commercial kitchen, you will quickly come to realize the overwhelming dependence on mayonnaise. I’m not kidding—pro chefs use that stuff for everything—from dips and dressings (which makes sense) to spreading on fish before rolling in bread crumbs (why not eggs or Dijon?) and replacing butter for grilling sandwiches (I’m sorry—what’s wrong with butter?). As crazy as it seems, the solution presented in the catering kitchen to the oiliness that would appear when the artichoke dip was drowning in melted mayonnaise was, “add more bread crumbs.” Yowza. When I decided to make it at home, this recipe got an easy makeover.
For any creamy hot dip, light cream cheese fits the bill as a substitute for so much mayonnaise. It maintains the silky creamy texture, gives better structure and (in my humble opinion) improves the overall experience of the dip because it doesn’t separate or become greasy. I don’t need to create an infographic to describe to you the nutritional comparison. (Spoiler—the cream cheese wins.)
And although the original recipe is for artichoke dip, the base is a neutral canvas for whatever you want in the dip. This time, I kept the marinated artichoke hearts, added cooked crab, swapped out cheddar in favor of cheeses that paired better with the delicate crab, and topped the whole thing with garlic-buttered (not mayonnaise-laden) panko crumbs. We wanted something on the “heavy hors d’oeuvres” side for a backyard happy hour, and this was perfectly transportable and an absolute winner. As you can see, the ingredient list is short and sweet, just like our time spent laughing and relaxing with our friends on a beautiful spring evening. Charlotte was convinced this must be difficult to make—just wait until she sees the simplicity of this recipe! 🙂
Whether you’re gathering safely with friends as we did or hoarding the whole batch for yourself (I’m not judging), I hope you’ll feel free to swap ingredients to suit your palate for your next “happy hour.”
This dip is really, really easy to make with only a handful of ingredients. The crab is already cooked, so it comes together quickly. If you’re pressed for time, it’s OK to use pre-shredded cheese.
Ingredients
8 oz. brick light cream cheese (Neufchatel), softened
1/3 cup canola oil mayonnaise
2 tsp. dried chopped onion (or 1/4 cup sauteed onion)
Sea salt and freshly ground black pepper
A few shakes of Old Bay seasoning (optional, but so good with crab)
1 cup shredded Swiss cheese (to save time, I used a pre-shredded blend from Trader Joe’s)*
4 oz. prepared crab meat*
3/4 cup marinated artichoke hearts, chopped into bite-sized pieces
2 Tbsp. salted butter
1 clove garlic, minced
1/2 cup panko bread crumbs
1/4 cup parmesan-romano cheese
*Notes
I’m eating my words from other posts regarding the use of pre-shredded cheese. Normally, I cringe at their use because of the no-clump coating that generally prevents even mixing or melting. The truth is, I was pressed for time on the day I made this scrumptious dip, because my stylist was able to squeeze me in for my first hair appointment in more than 90 days! As always, my tips are only suggestions. If it comes down to taking a shortcut or missing the opportunity, please always take the shortcut!
Use any cooked crab meat you prefer. In some dishes, fresh is crucial—but in this hot dip, I’ve found that the prepared blue crab available in my supermarket’s seafood section is perfectly suitable.
Instructions
Using either a stand mixer or handheld mixer, beat the cream cheese and mayonnaise together until smooth and creamy. Add the dried onion, plus salt and pepper to taste, and mix to combine. This is the base recipe, and you can use it as a backdrop for any other ingredients you wish, provided you follow the general ratio of added ingredients, and none of them are excessively wet.
To continue with the crab artichoke dip recipe, add the Old Bay seasoning and shredded cheese and stir or mix on low until it’s evenly incorporated. Use a rubber spatula or spoon to gently fold in the crab meat and artichoke hearts. You want these ingredients to keep their shape, so easy does it here.
For serving at home, transfer the mixture to a 9-inch pie plate. Because we were planning to share the dip at a safely-distanced backyard happy hour, I divided it among three smaller oven-safe ramekins—one for us, one for our friends, and a third to leave behind for them to enjoy later in the weekend.
Melt butter in a small skillet and sauté the garlic over medium-low heat. Stir in the panko crumbs and toss them around until all are coated evenly. (Want to save a bit of time here? While the butter is melting, put the panko crumbs in a small Rubbermaid-style bowl. After sautéing the garlic, pour the butter mixture over the crumbs then seal the bowl and shake the heck out of it. It’s one more dish to wash, but you will make quick work of blending the butter with the crumbs more evenly.)
Gently fold in the artichoke hearts and crab meat into the blended dip base mixture. This ensures great texture of the finished dip.
The recipe will be enough to fill a regular pie plate, but I’ve divided it into separate ramekins for easier sharing during our backyard happy hour. Each couple will have their own!
Top the dip with buttered garlic panko crumbs and a little parmesan cheese. The light crunch will be a nice contrast to the smooth, creamy dip.
Sprinkle the buttered crumbs evenly over the crab-artichoke mixture, then sprinkle with parm-romano blend and cover with foil and tuck it into the fridge until you’re ready to bake.
Bake at 350° F for 35-40 minutes, or until dip is bubbly and parm-romano crumb mixture is lightly browned. Serve warm with crackers, pita or toasted baguettes. Wouldn’t you know?—we were in a rush to get over to our backyard happy hour, and I was so excited about seeing our friends in person, I forgot to snap a picture of the bubbly dip while it was hot from the oven. I guess I’ll have to make it again, and then I’ll update the post. 🙂
If you love hummus, but not the price of a small container, this recipe is for you. With only a few simple ingredients, and a processor or blender, you can make delicious hummus at home. I’m finding this a great way to use some of the extra garbanzo beans I purchased when the shelter-in-place rules went into effect.
The biggest difference I’ve found between grocery store hummus and the homemade variety is the texture; my homemade always leaned toward the grainy side. I searched on Pinterest and found the guaranteedbest method for creating smooth, silky hummus (because literally everyone on Pinterest makes claims like that). It involved heating the beans with a small amount of baking soda to loosen the skins so they could be removed. I love little tips like that! So I tried it. An hour and a half later:
The pile of peels was almost as large as the pile of beans!
Seriously. So we’re not doing that today. I dug deeper and tried a few other tricks, and I have some good news to share: the trick to making silky smooth hummus is heating the beans in their liquid before processing them, and having patience with the processing. Follow along, and you’ll be successful. This recipe makes about 2 cups of hummus; flavor variations are suggested at the end.
Ingredients & Tools:
1 can (15 oz.) garbanzo beans, with minimal additives (ideally, just beans, water and salt) 2 Tbsp. tahini* (see note below) 1 to 2 cloves chopped fresh garlic (should measure about 1 Tbsp.) 2 to 3 Tbsp. extra virgin olive oil (if you have some of the premium stuff, this is a good recipe to use it!) Juice of half a small lemon Kosher or sea salt to taste
Food processor or blender (you need one or the other to make this) Small saucepan for heating beans Measuring cup with spout for drizzling liquid into processor Citrus squeeze juicer (helpful, but not necessary)
*Notes
Tahini is essentially a paste made of ground sesame seeds. It has a mild nutty flavor and sticky texture, like a thin peanut butter. In a pinch, if you don’t have tahini, you could use a natural, unsweetened peanut butter as a substitute. But if you pick up tahini on your next essentials run, I promise I’ll help you use it!
Instructions:
Warm beans and liquid in small saucepan over medium-low, until simmering and heated through.
Drain beans, reserving the liquid in a measuring cup with pour spout.
Empty all the beans, tahini, chopped garlic and about 1 Tbsp. bean liquid into the processor bowl, and pulse 5 times for about 3 seconds each time. The mixture will be sticky and clumpy, but that’s OK.
Add another tablespoon of liquid and pulse 5 times again. Use a rubber spatula to scrape the mixture down into the processor bowl, then replace the cover and turn on the processor to run continuously.
With the processor running, slowly drizzle 2 Tbsp. of the olive oil into the mixture (or more if you like a more intense olive oil flavor). Stop and scrape down again, and then process again, slowly streaming more of the warm bean liquid into the garbanzo mixture until you achieve the desired smoothness and consistency. Keep in mind the mixture will firm up a bit when chilled.
When you’ve reached the desired consistency, turn off processor, squeeze lemon juice into the hummus and pulse a few times to blend; add sea salt to taste. Transfer the mixture to a covered container and chill a few hours until ready to serve.
A food processor is one of the most helpful tools in my kitchen. And as you can see, the ingredients for making easy hummus at home are pretty basic.
With minimal liquid, the processed bean mixture will look rough like this; it’s okay though, because you’re just getting started.
A steady, slow drizzle is what you’re going for in this stage of mixing. You’ll do this with both the olive oil and the warm bean liquid. Keep watch as you go, and stop as needed to scrape down the hummus mixture from the sides of the bowl.
I love these citrus squeezers; it’s the best way to extract the most juice without dropping seeds into your recipe. Here’s another tip: press and roll your lemon on the counter or cutting board before halving and squeezing.
Perfectly smooth and delicious; remember that the hummus will firm up a bit in the refrigerator, so if it seems little thin, don’t worry.
Hummus is a healthful and versatile snack. Enjoy it as a dip with fresh cut vegetables, crackers or pita bread, and even as a sandwich spread in place of mayo. Below are some of our favorite hummus flavor variations. Each recipe begins the same as the simple recipe above; for smooth texture, add mix-ins earlier in the recipe. For more distinct chunks, add them later.
Hummus Flavor Variations
Artichoke and garlic
Use about 5 to 6 artichoke heart quarters with the base recipe; I usually do a rough chop on them before adding to the garbanzo mixture. If your artichoke hearts are marinated in oil and herbs, use less olive oil in the blending step of the recipe.
Roasted red pepper
Use amount equivalent to one bell pepper, either roasted at home or purchased. If they’re packed in oil, use less olive oil in the blending step of the recipe. I like to add sweet or hot smoked paprika for an extra flavor punch.
Sun-dried tomato
Use 5 or 6 pieces of tomato, rough chopped before adding. If they’re packed in oil, they’re good to go. If dried, plump them first in hot water or in the bean liquid you’ve drained. A little dried basil would be a nice complement to the flavor of the tomatoes.
Spinach
Sauté a generous handful of fresh spinach until fully wilted, or thaw (and squeeze dry) about 1/2 cup frozen spinach; add to bean mixture early to blend very smoothly.
Caramelized onion (slightly sweet)
Sauté a small onion in olive oil until very soft and golden in color; add to bean mixture at any point of the recipe (I like to add it later to retain some of the onion shapes).
Roasted beet (slightly sweet)
Purchase the roasted beets ready-to-go from the produce section. I usually buy them at Trader Joe’s, but have seen them in other stores as well. I don’t recommend canned beets because of the water content. About 3 small beets will be good; rough chop and add them early to the bean mixture. Finished hummus will be a lovely pink color.
White bean hummus
Use cannellini beans instead of garbanzos. Add fresh chopped or dried oregano; use slightly less bean liquid and oil. Cannellini beans have a creamy texture, and this hummus is very elegant and silky. Sprinkle with toasted pine nuts just before serving.
Black bean hummus
Use black beans instead of garbanzos. I like to throw lots of spice into this one; think chili and cumin spices, maybe even a small can of roasted green chiles. Rather than lemon juice, use red wine vinegar.