Caramel Apple Blondies

What is it about Autumn that everyone finds so appealing? It is easy to imagine that I’m among the majority when it comes to fall being my favorite season. Everyone I know seems to mention that it’s theirs also, so I did a little investigating to see if this is just confirmation bias or a birds-of-a-feather situation. Let’s see what the data says.

A survey reported by CBS says as many as 45% of Americans favor fall over the other three seasons combined. And another poll by Morning Consult—a business intelligence company that specializes in survey data— breaks it down into deeper demographics to reveal that Autumn is the clear favorite, especially among women, especially Gen Xers, and especially in the South. That’s me, on all three counts!

No wonder I get so excited about cooler temperatures, boots, sweaters and pumpkin spice. Indeed, this is my favorite time of year, and I’ve put a new spin on one of my own recipes to highlight one of the season’s best flavors, apple. And, in honor of all the state and county fairs that are happening this time of year, I thought it fitting to wrap a little caramel around the apple for even more nostalgia.

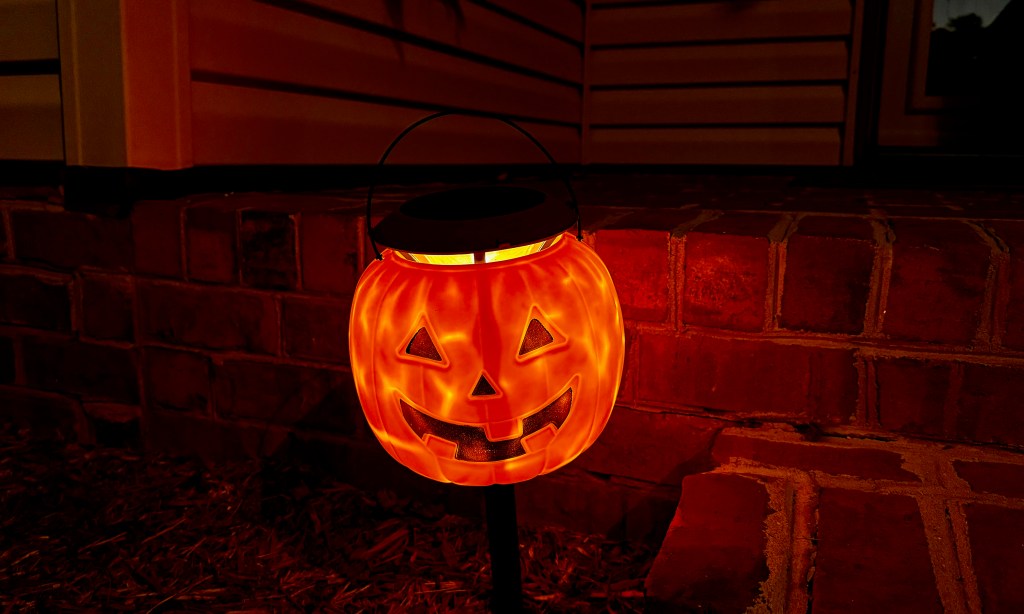
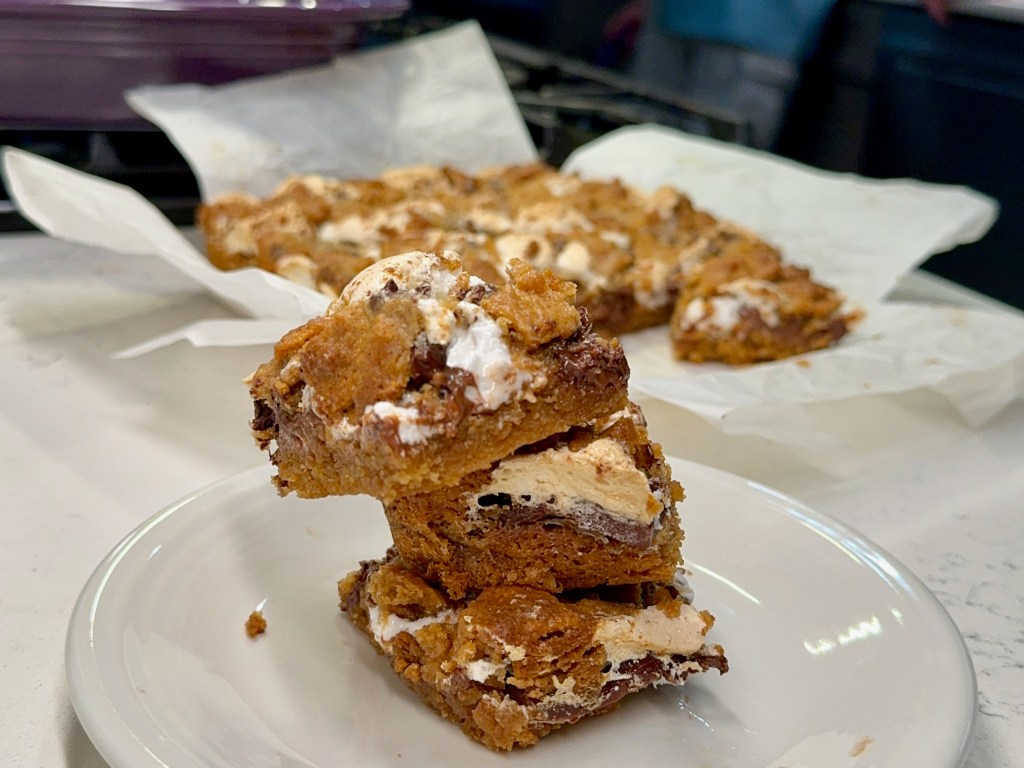
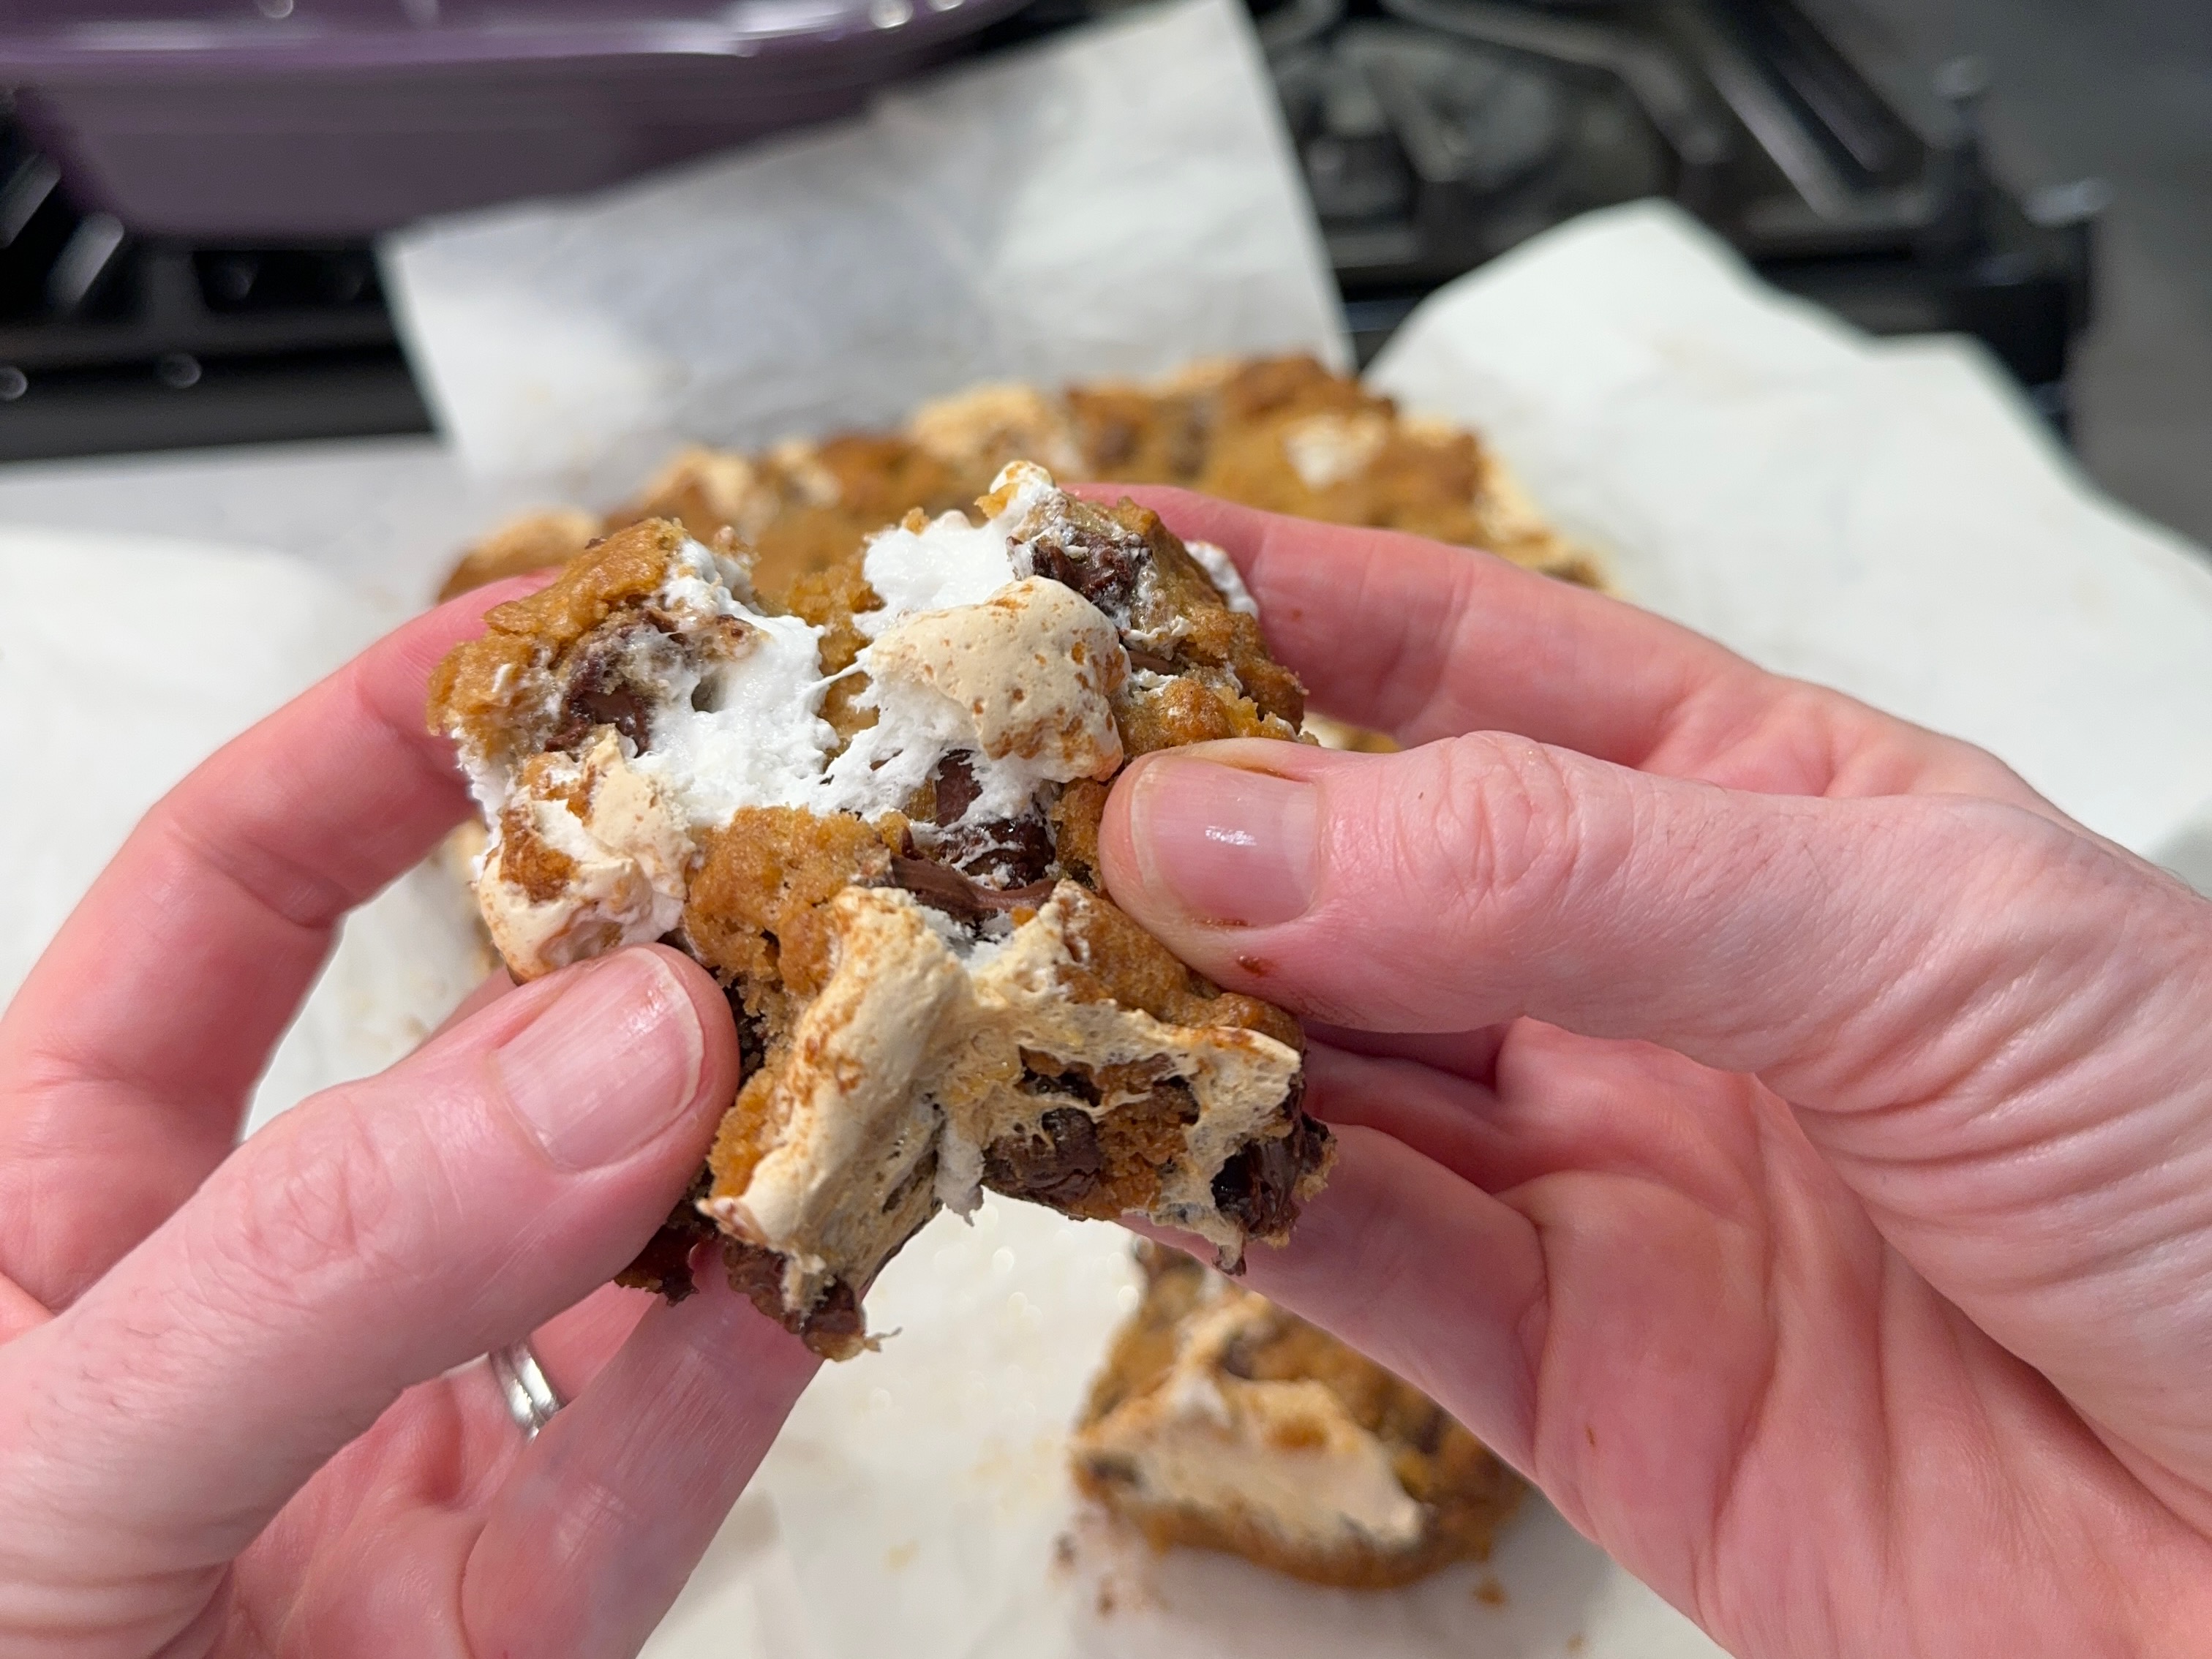
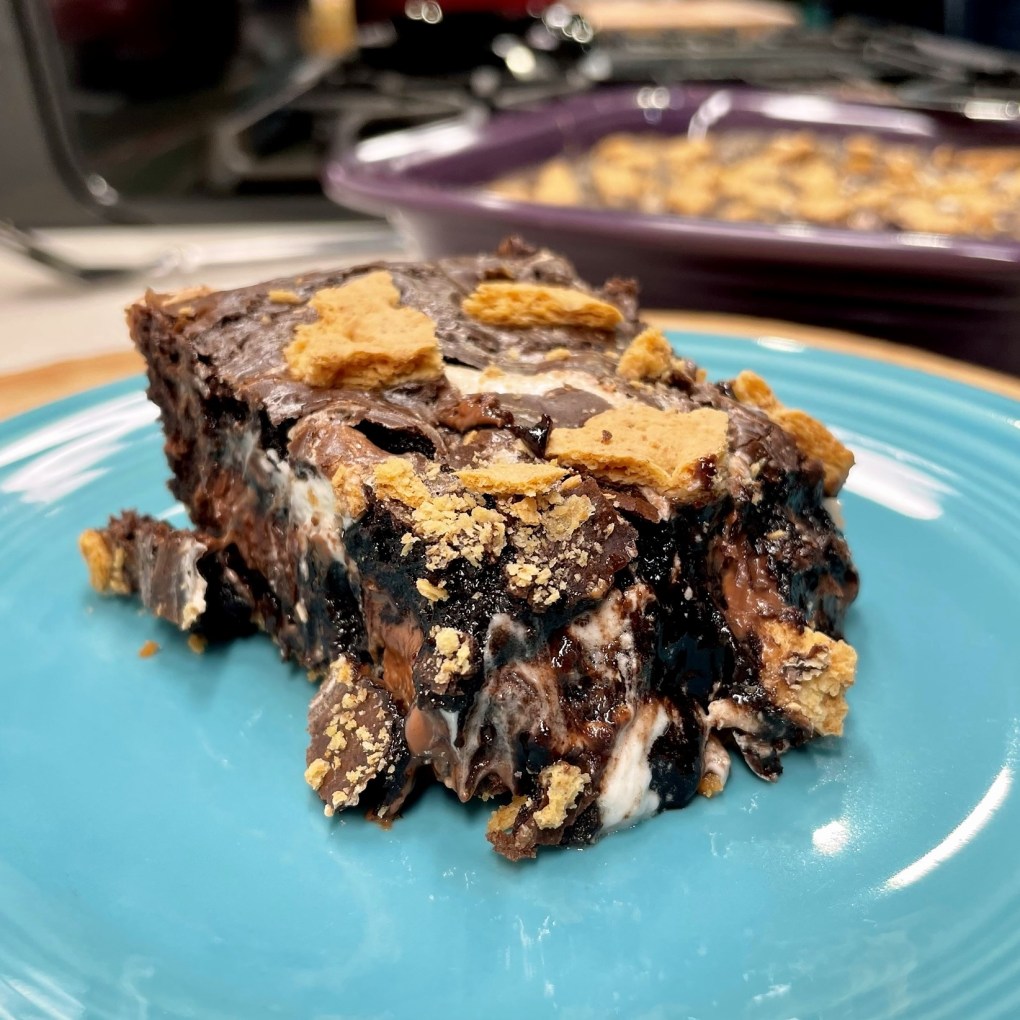
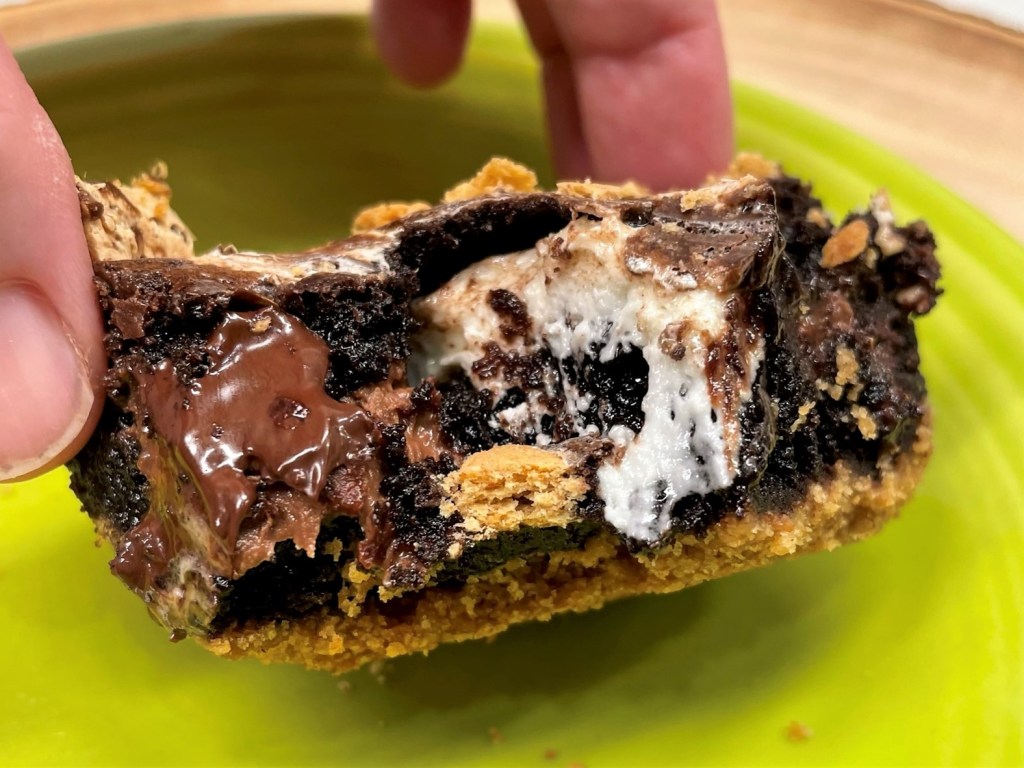
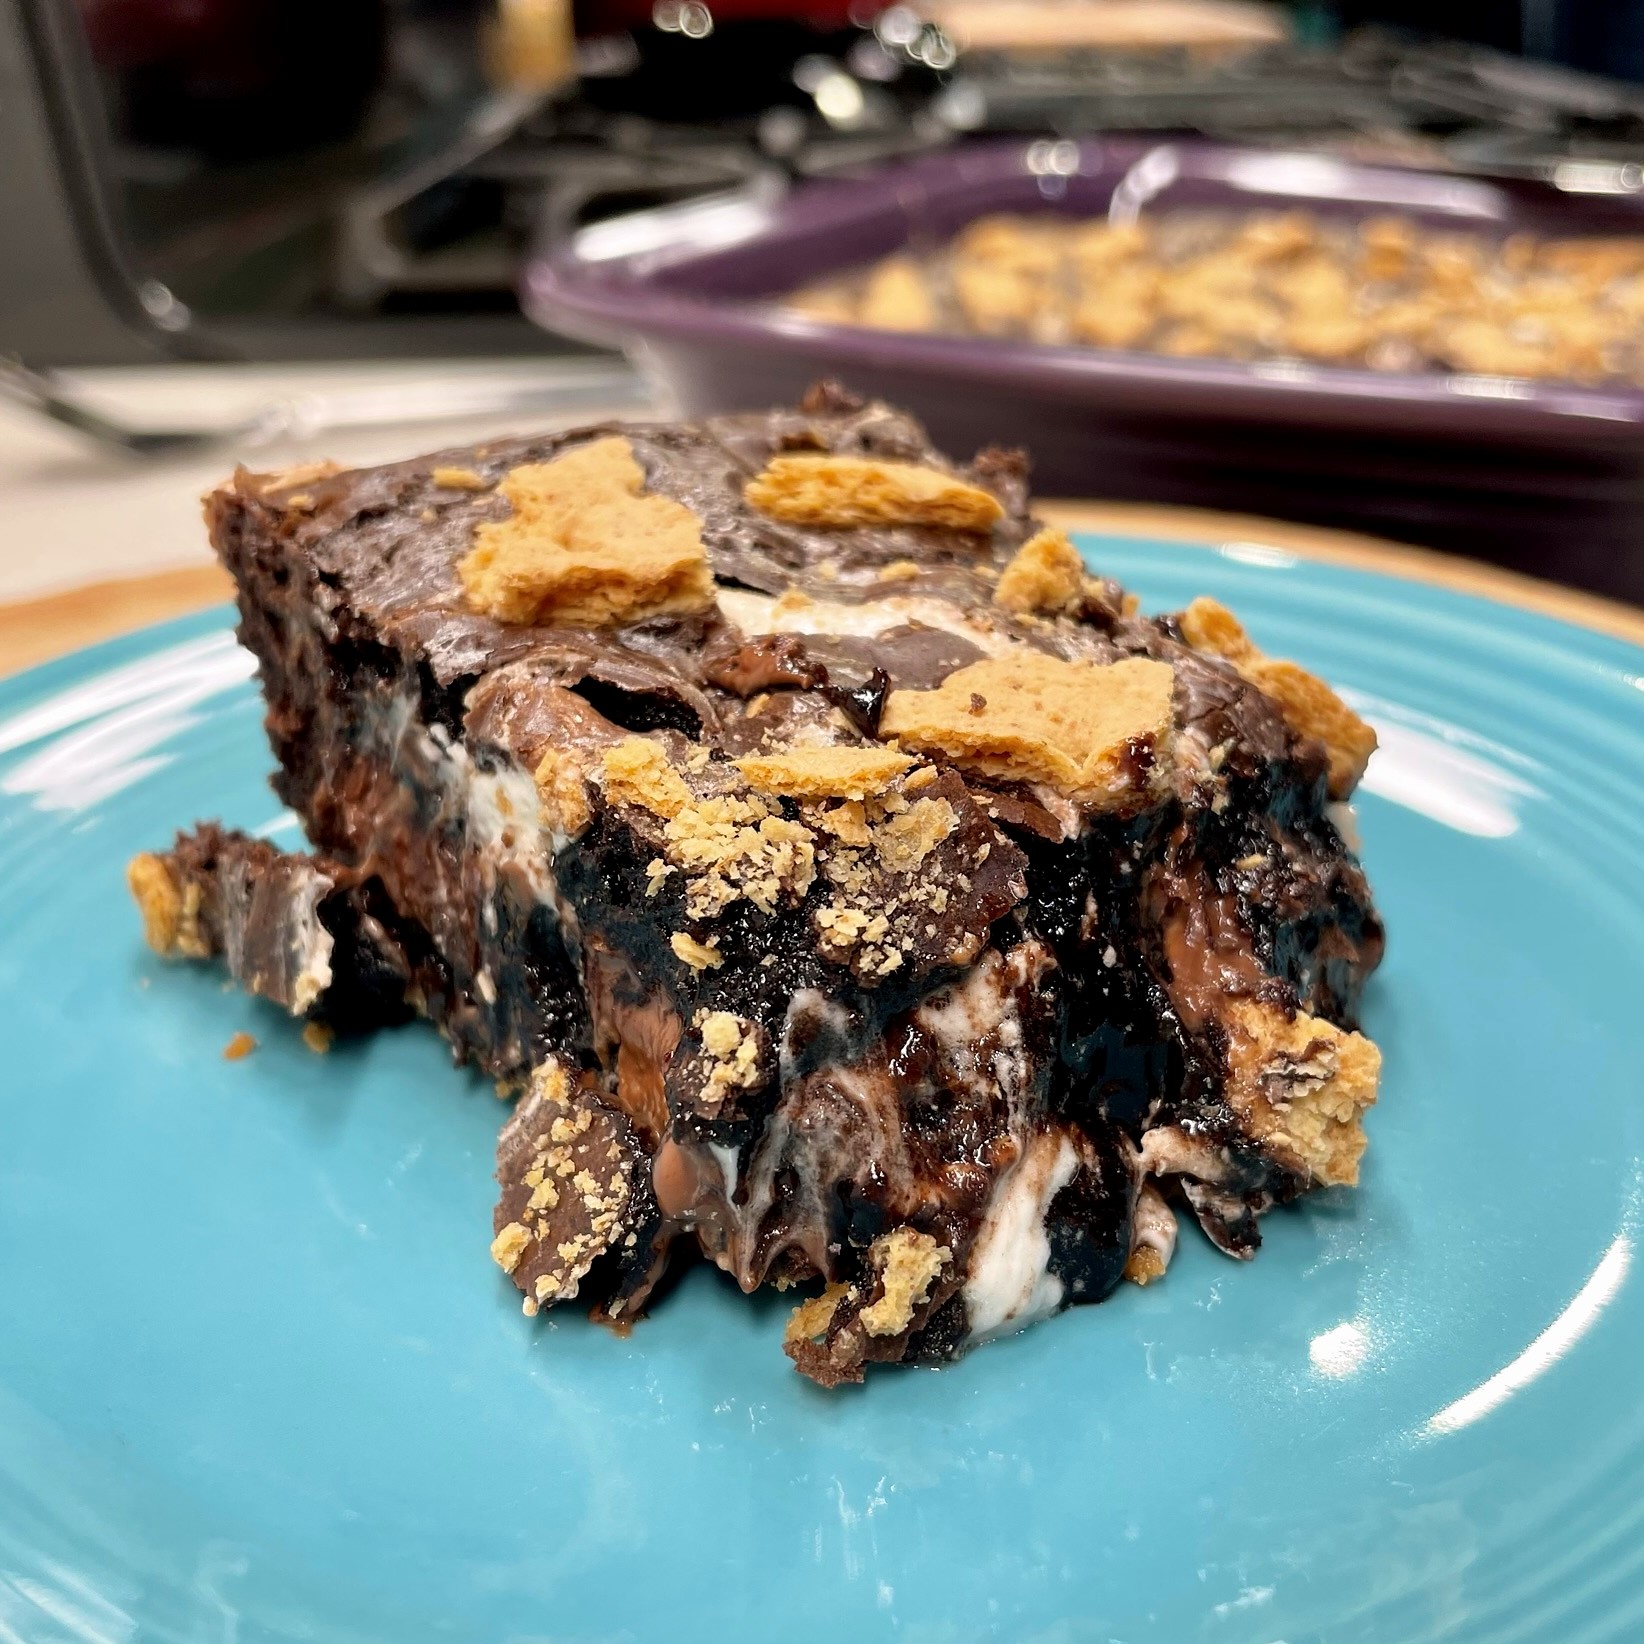
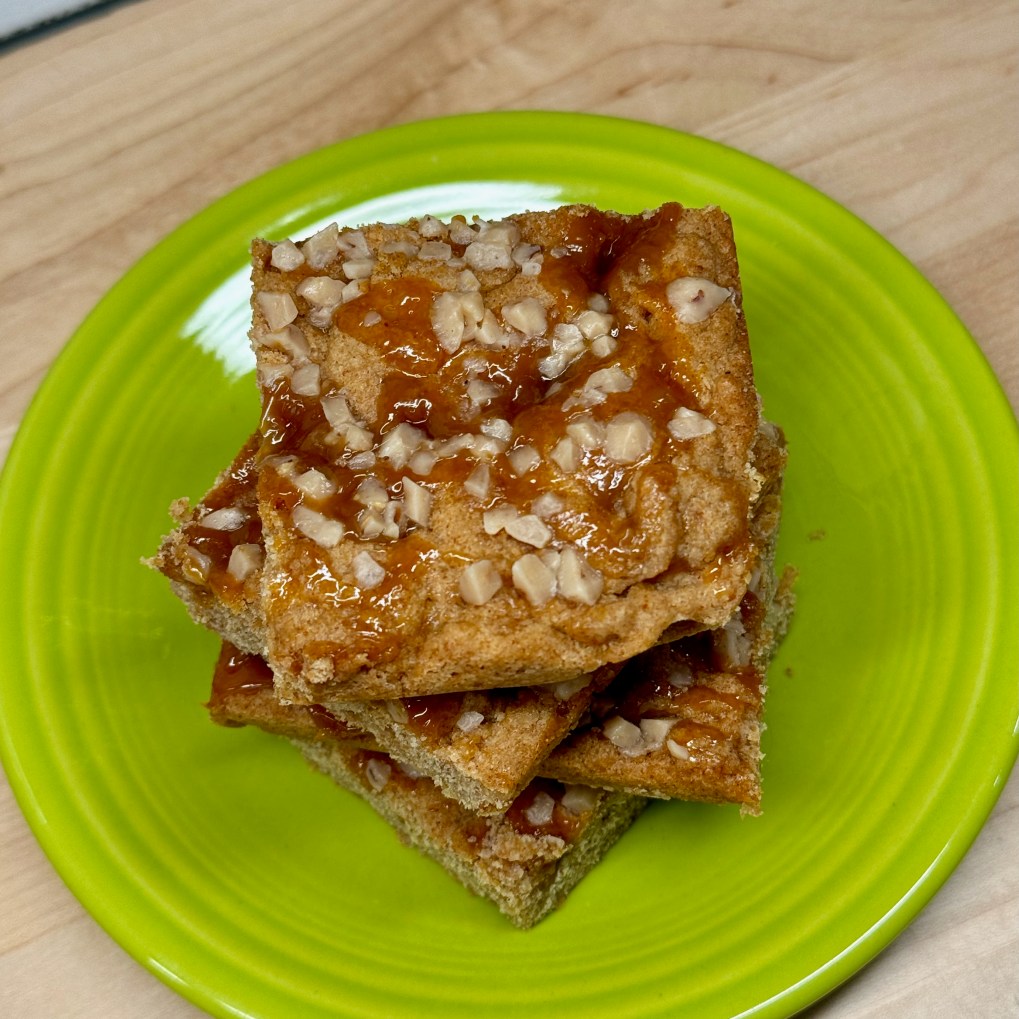
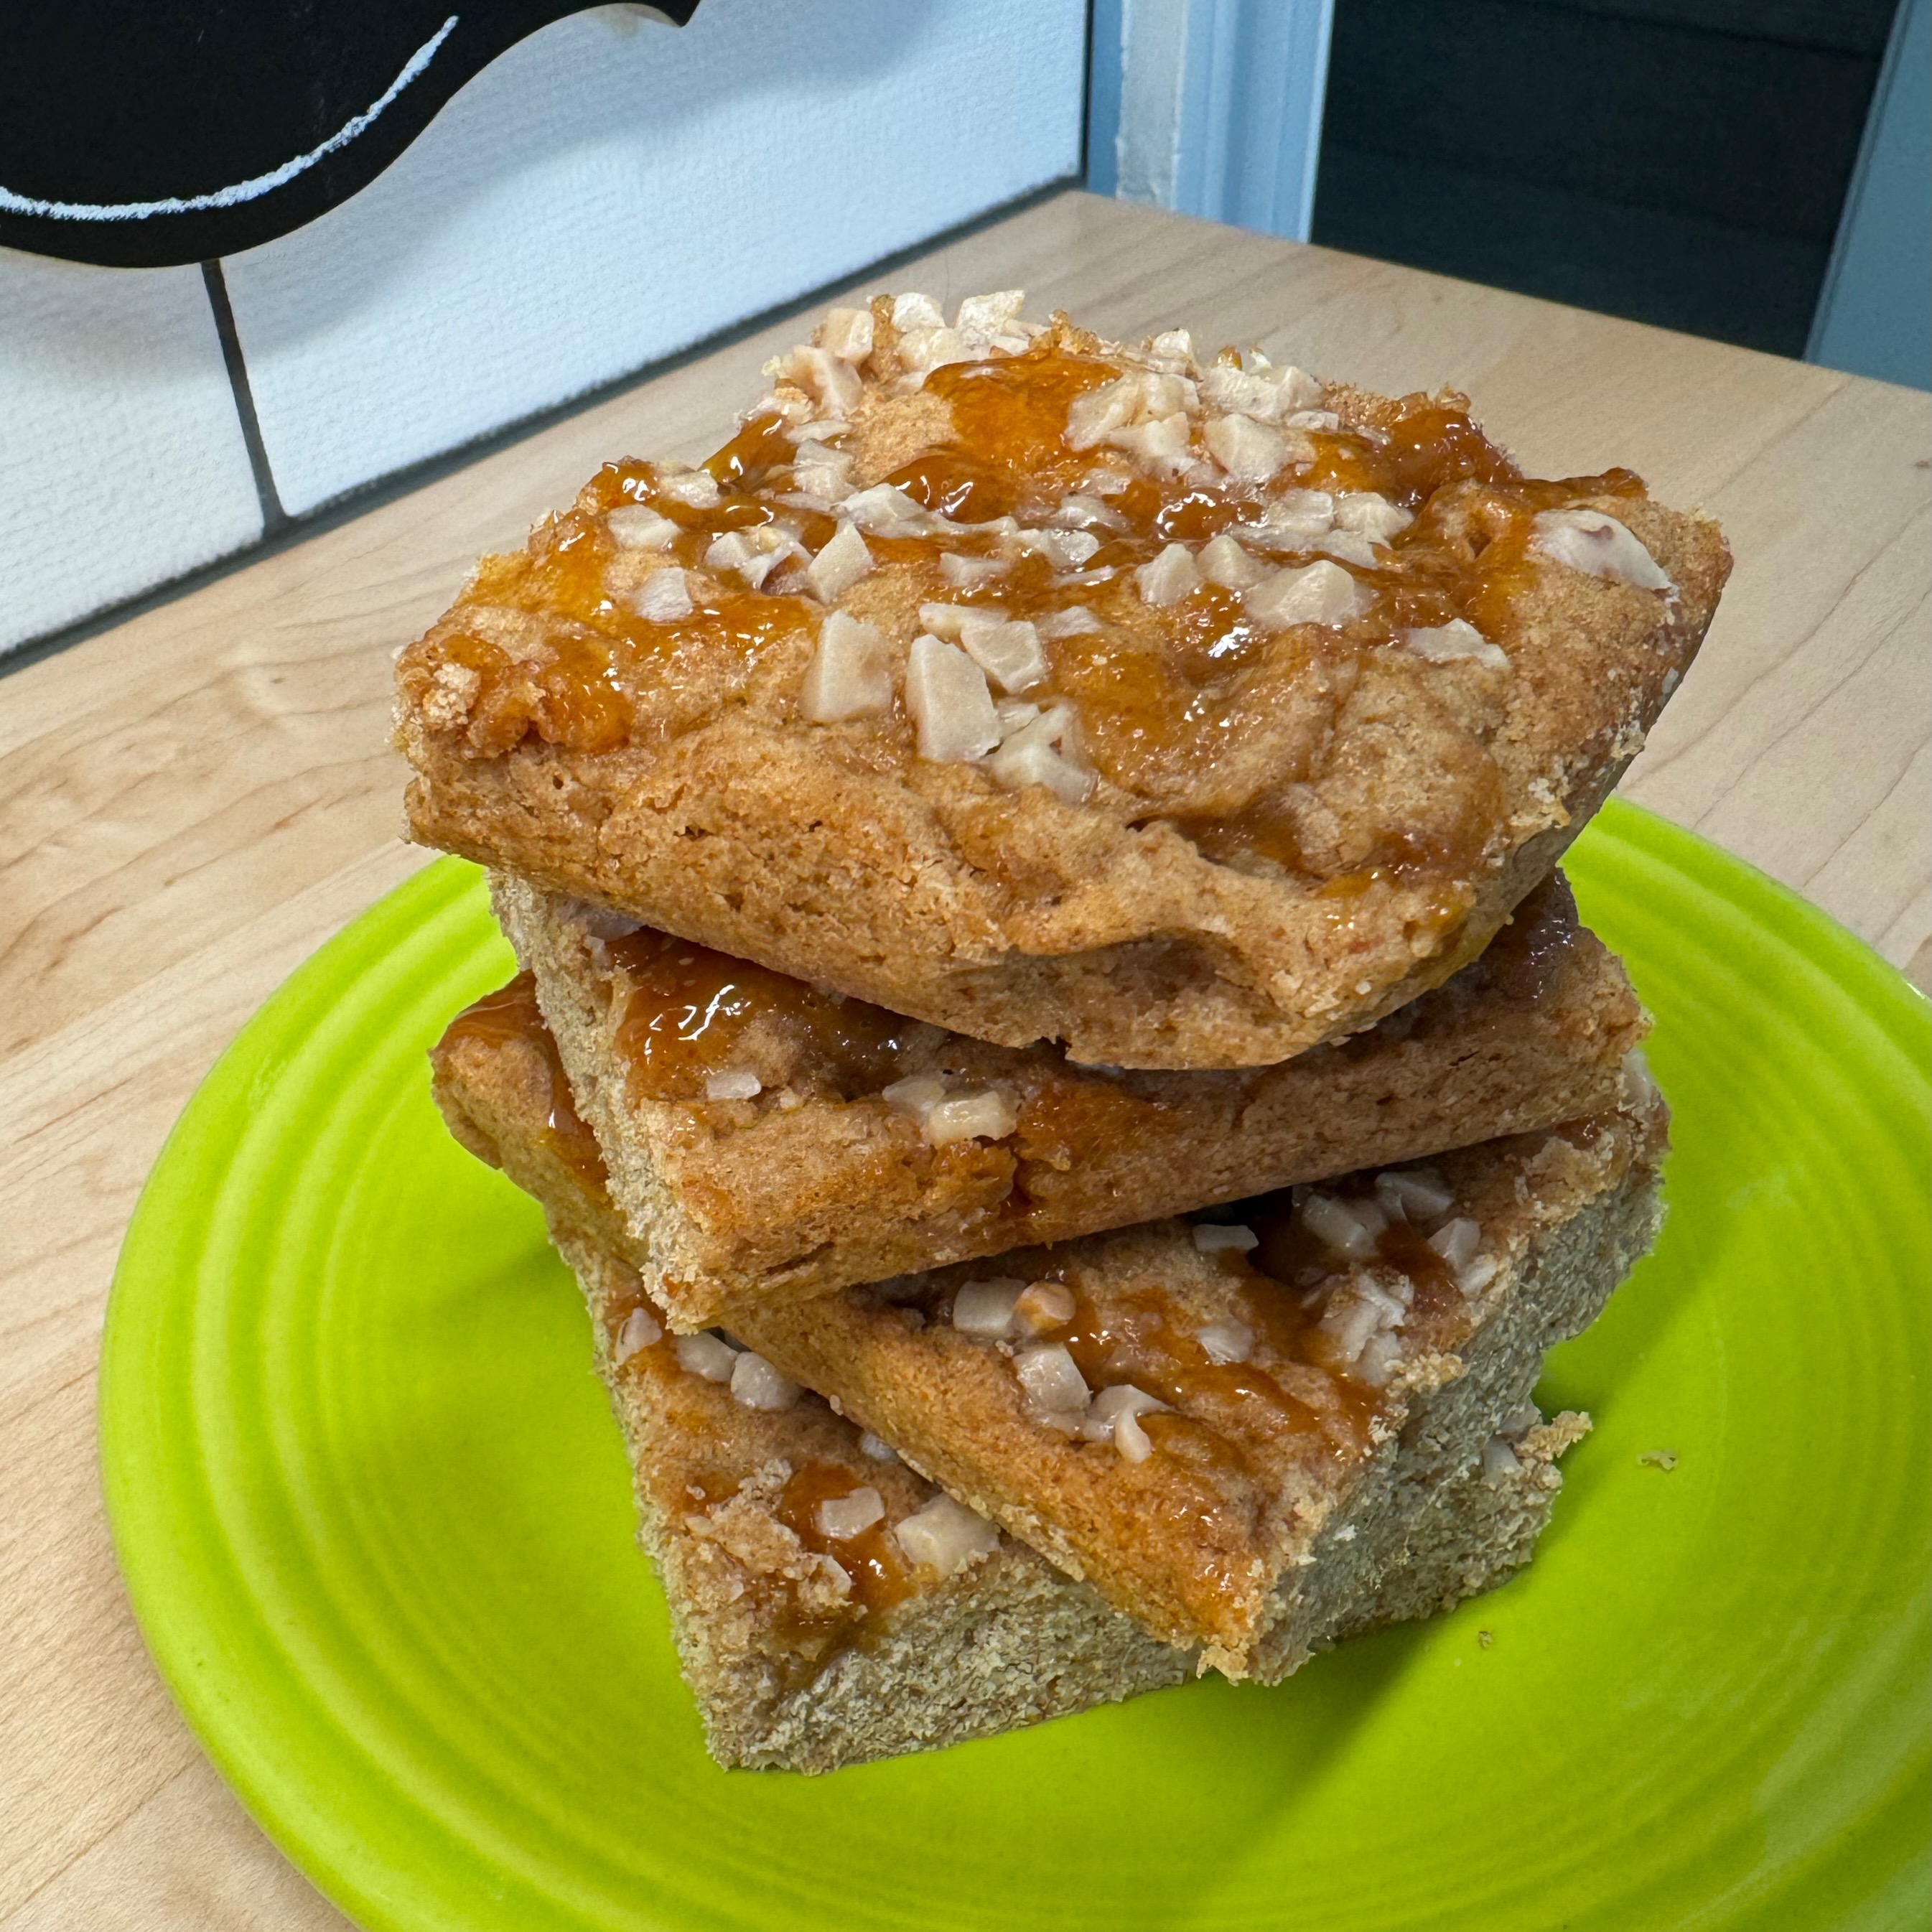
My caramel apple blondies are a deliciously sweet, caramel apple-y treat that’s perfect for a Halloween party, a gift for a favorite teacher or new neighbor, or just tucked into your grandkid’s lunch box.

It took great restraint not to cut into them straight from the oven!

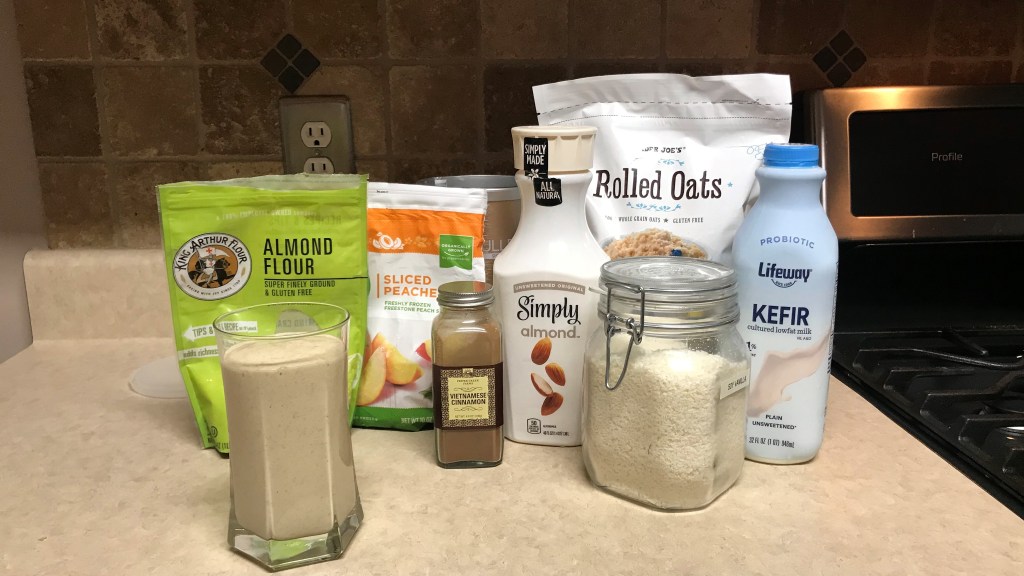
What ingredients are in caramel apple blondies?

A blondie is essentially a cookie bar, with a dense, chewy texture and often includes some kind of fun mix-in, such as chocolate chips or nuts. Similar to a brownie, but without chocolate, a blondie is made from a dough that resembles the base of a chocolate chip cookie, with plenty of butter, brown sugar, egg, vanilla, flour and leavening, such as baking powder.

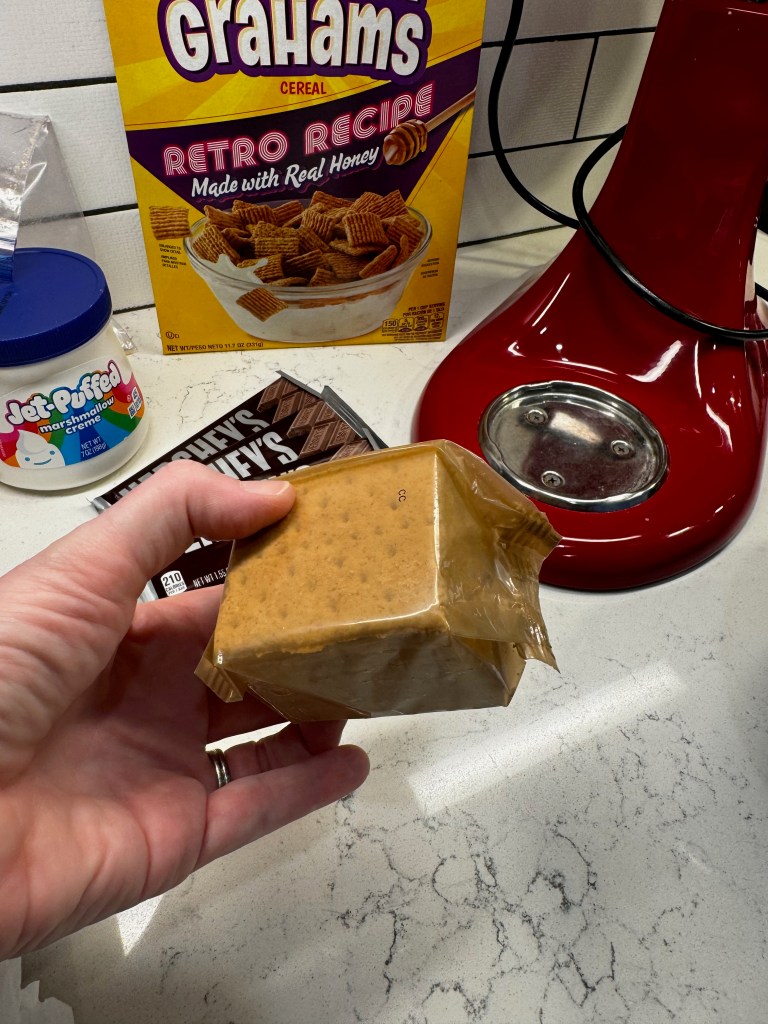
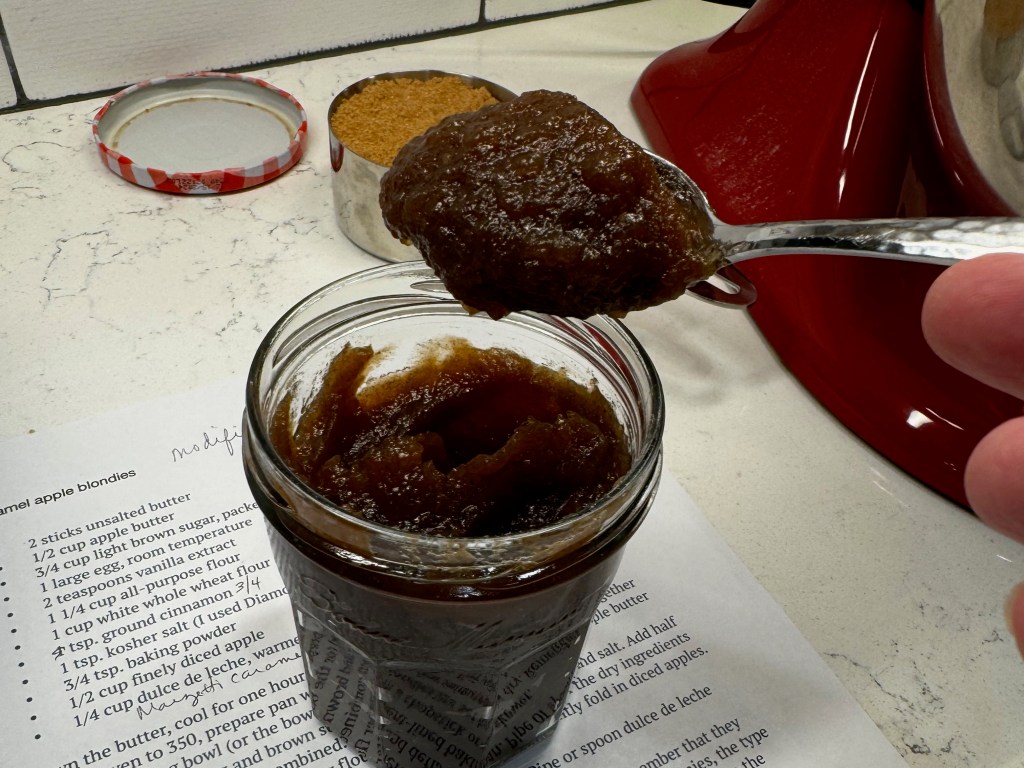
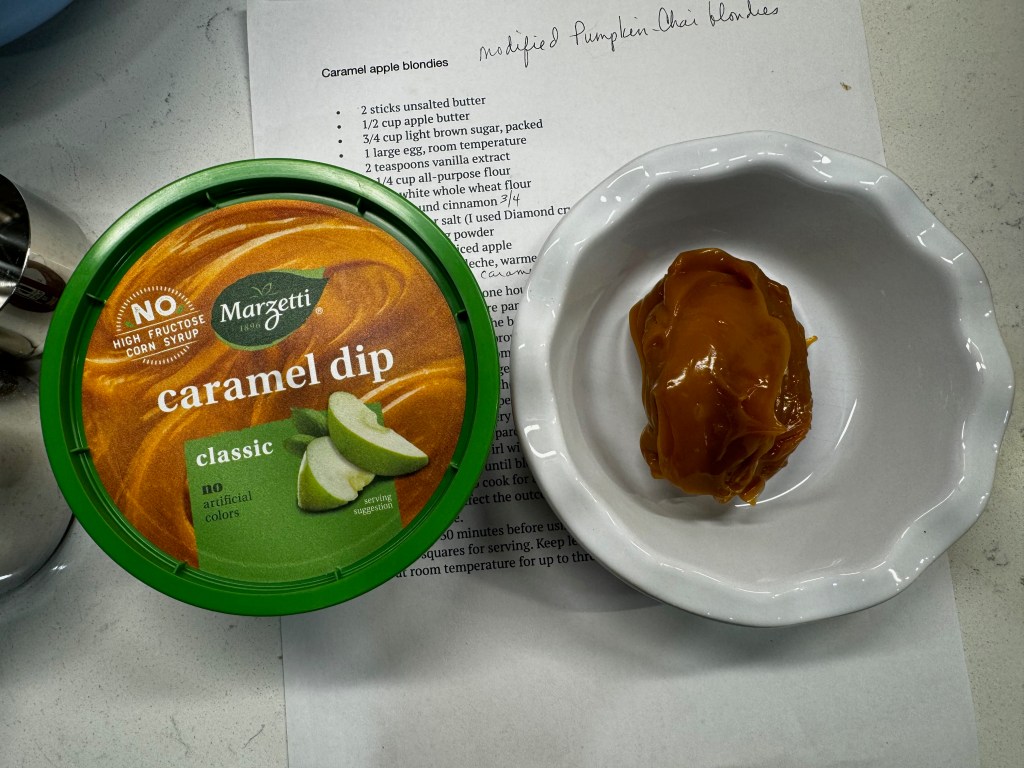
For this recipe, I’ve leveraged the same technique as in last year’s pumpkin chai blondies, using a concentrated paste of cooked down apples this time— otherwise known as apple butter— to give a distinct apple flavor without the high amount of moisture that would have been in fresh chopped apples. The caramel element is an easy grocery store item, the same stuff you pick up in the produce department for dipping apple slices. 


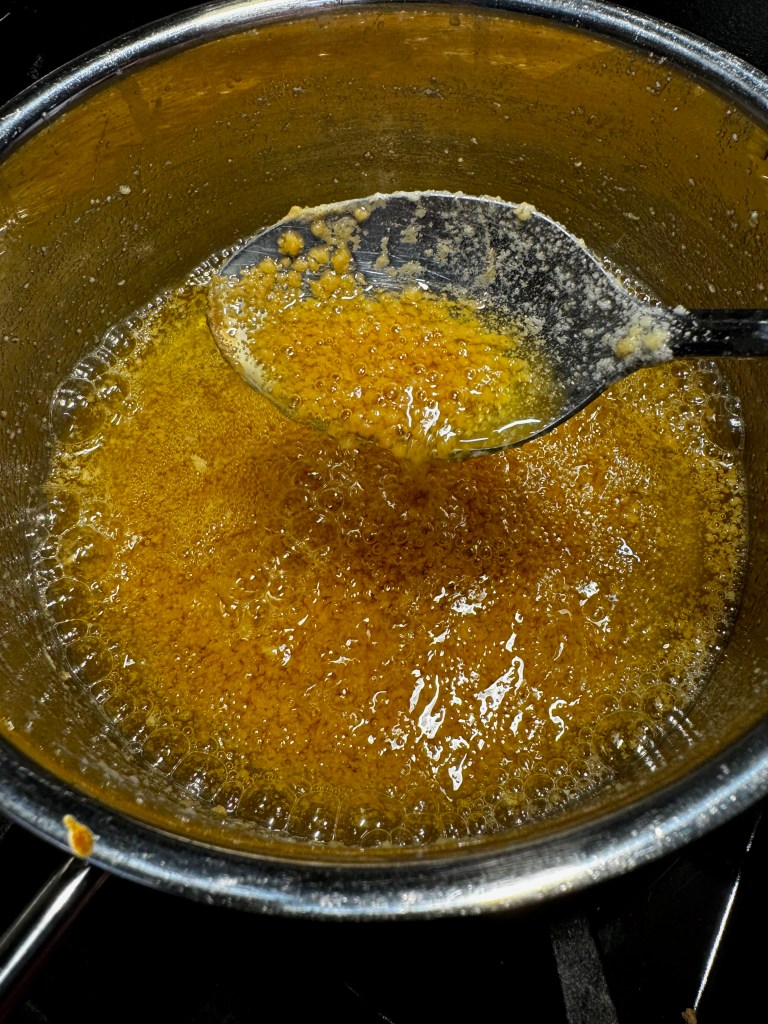
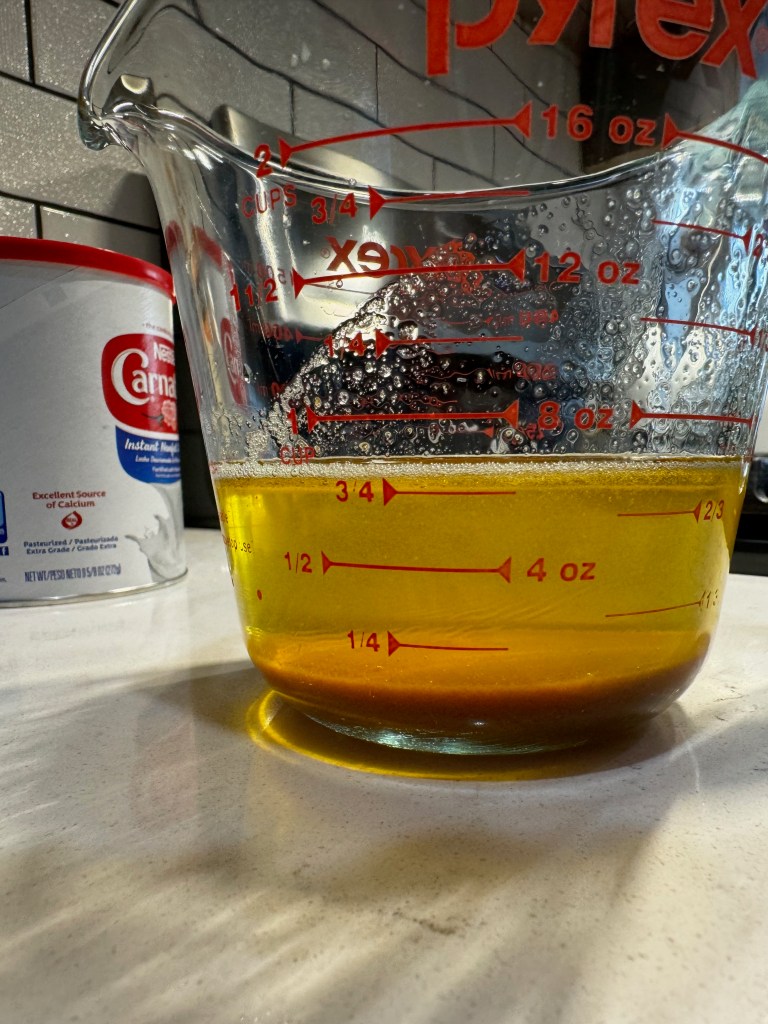
To keep these blondies a bit “healthy-ish,” I subbed in a half amount of whole wheat pastry flour. And in case you wonder why the melted butter is soooo dark in the pan in my ingredients photo, it’s because I tried a new (and very flavorful) trick when I made my browned butter.

Check out that very browned butter!

How to make browned butter even better

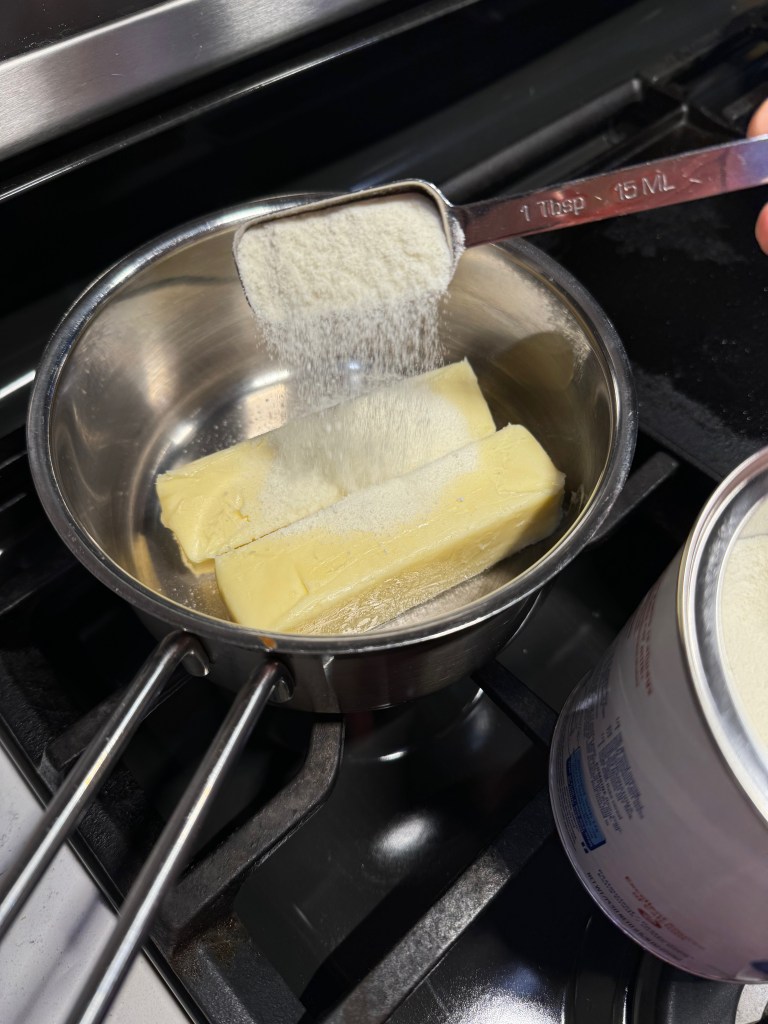
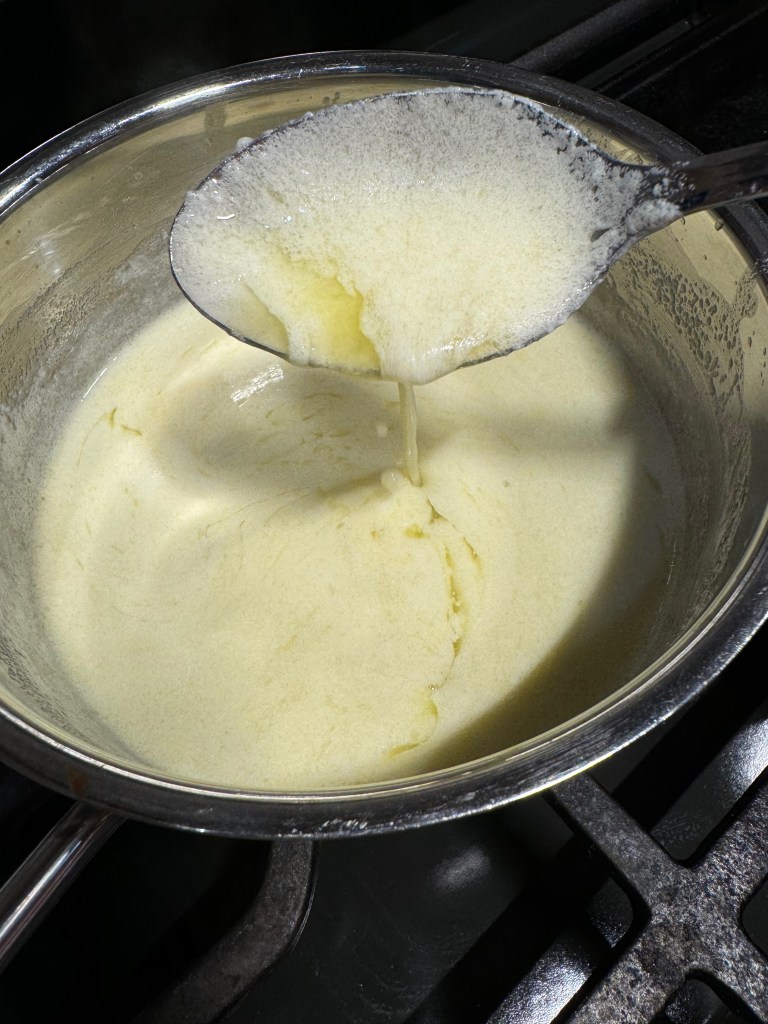
If you spend any time at all on social media or the internet, you may have seen this new trend of adding powdered milk to the butter as it browns. Given that it’s the milk solids that actually brown, it stands to reason that increasing the milk solids will amp up the flavor. And holy moly, it sure did! I used salted butter, by the way, though most baking recipes call for unsalted. Why? Because salt in desserts does the same thing as salt in savory dishes— it shoves the most important flavors to the forefront.


How do you make caramel apple blondies?

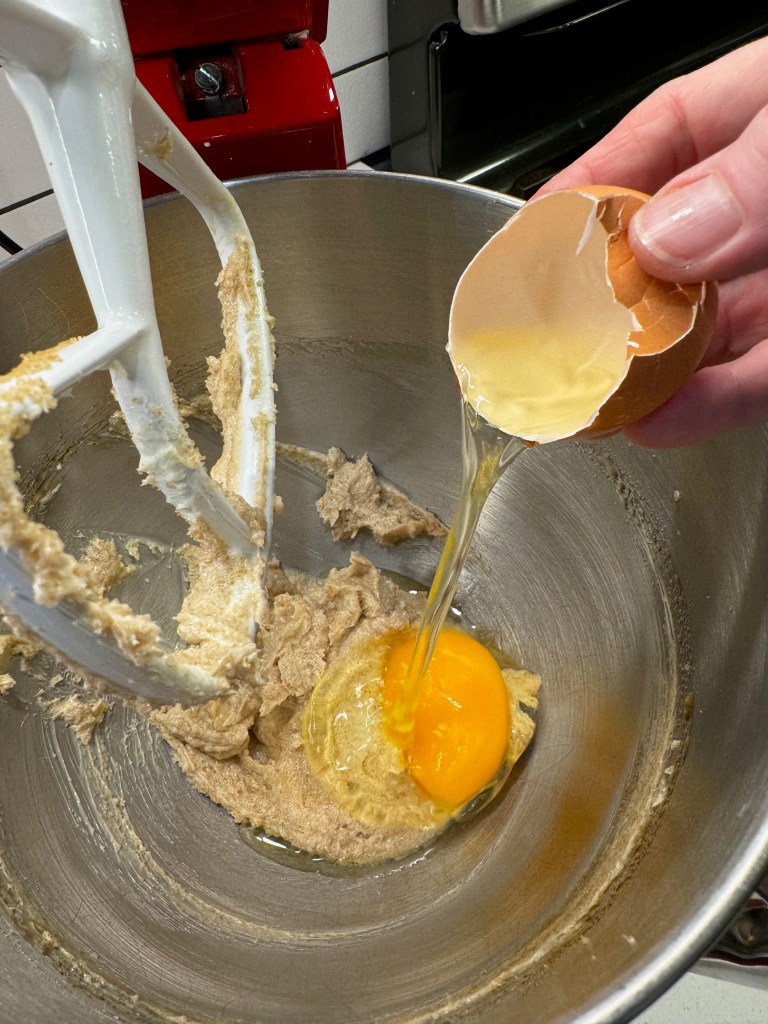
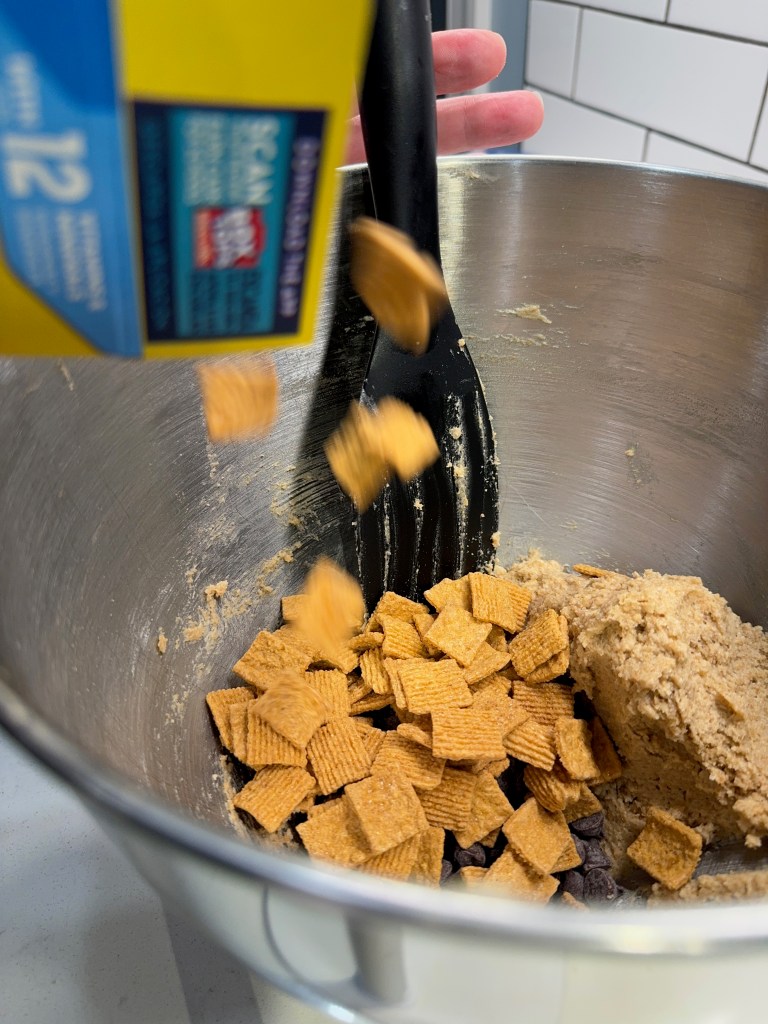
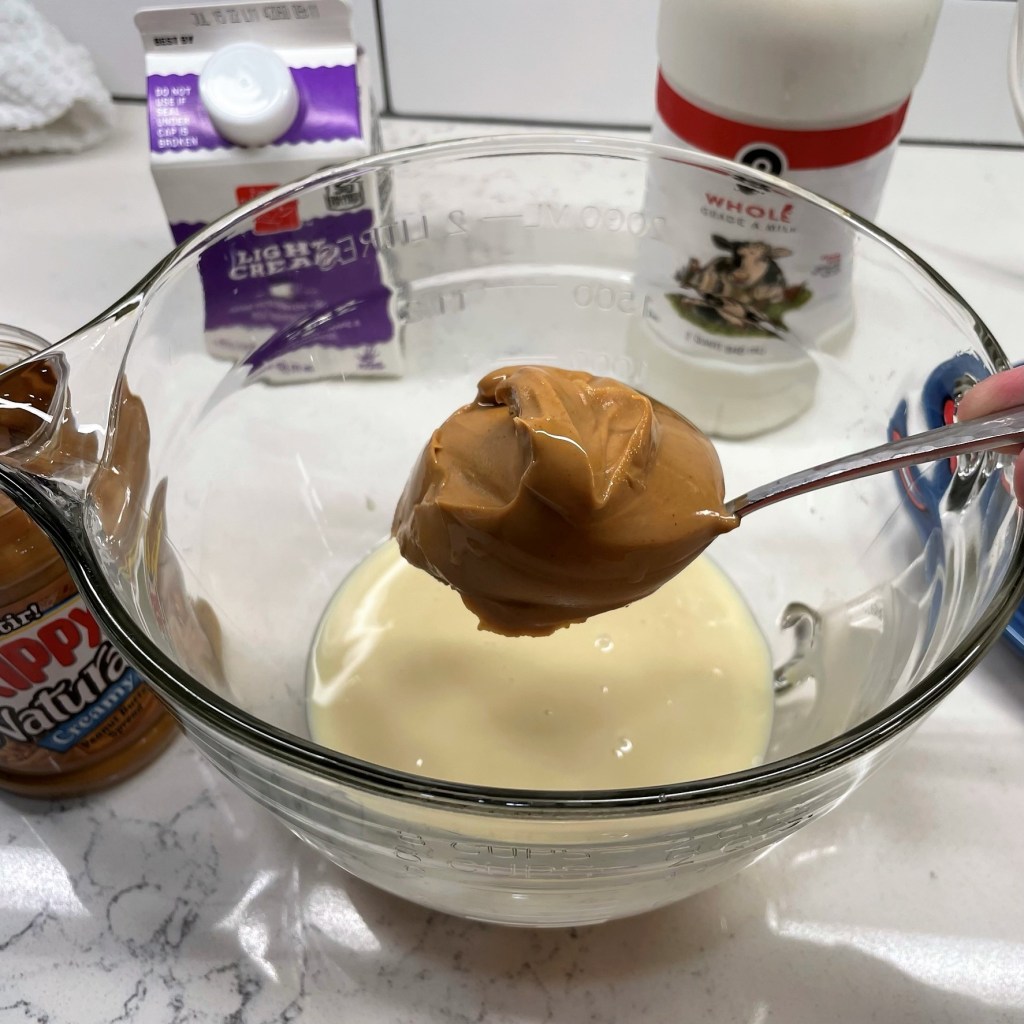
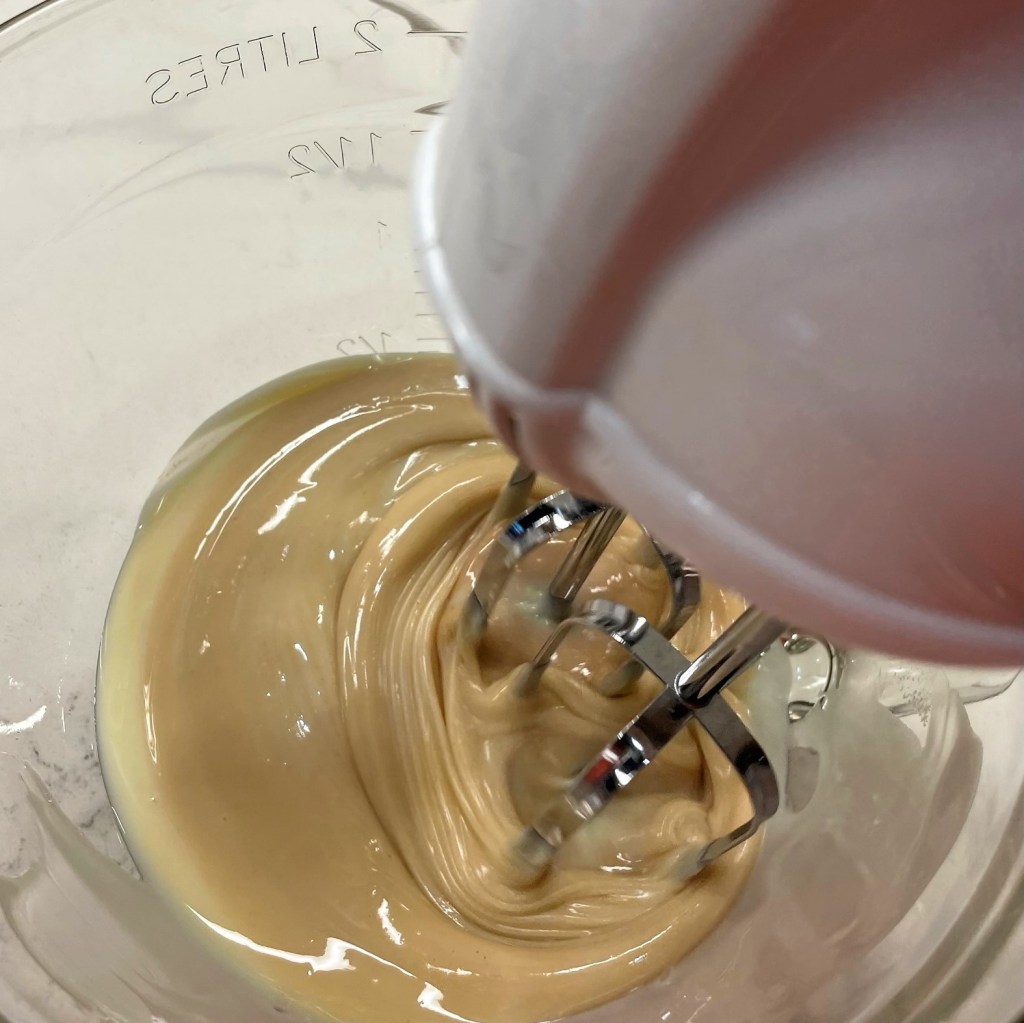
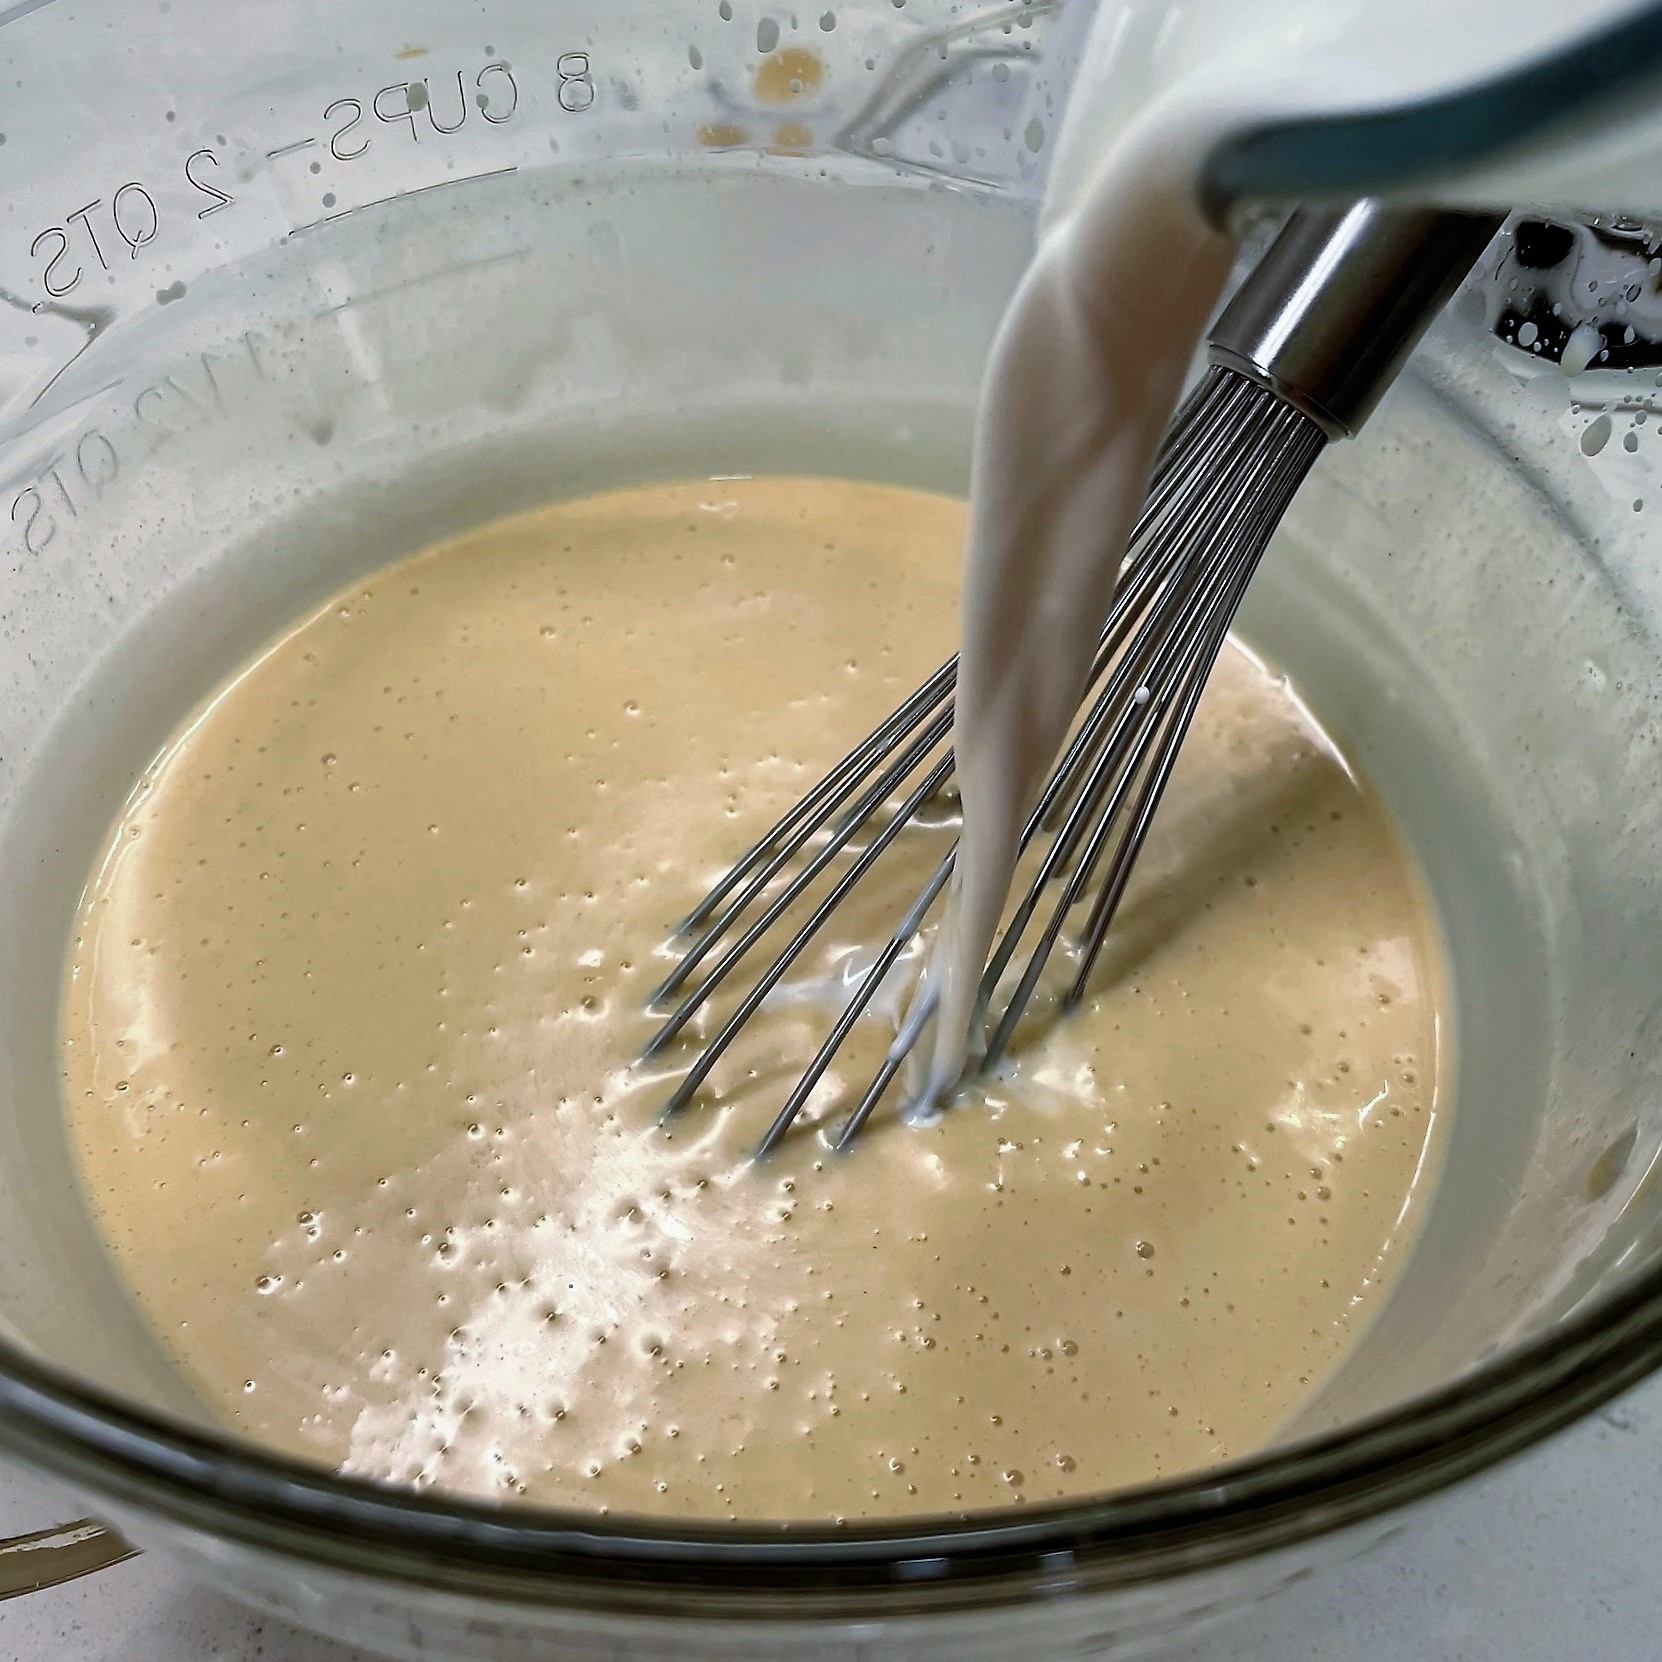
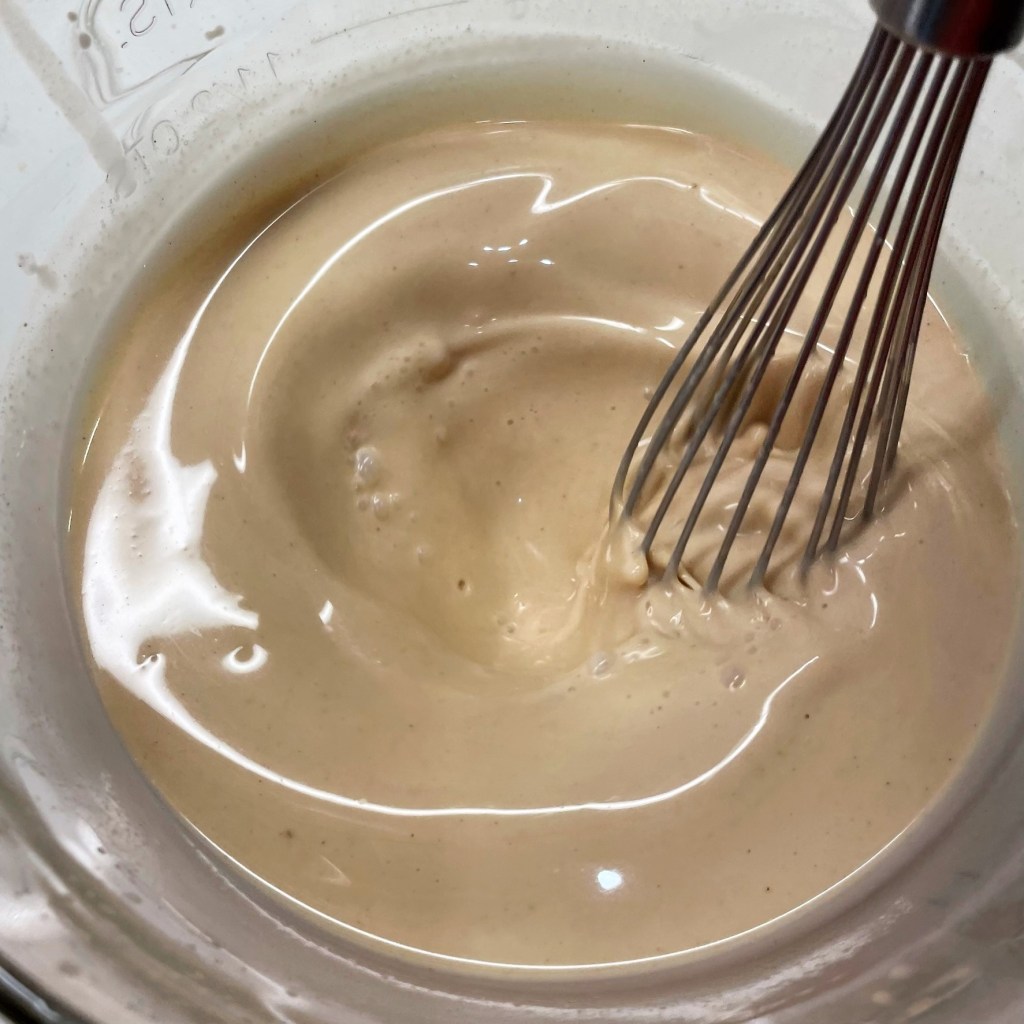
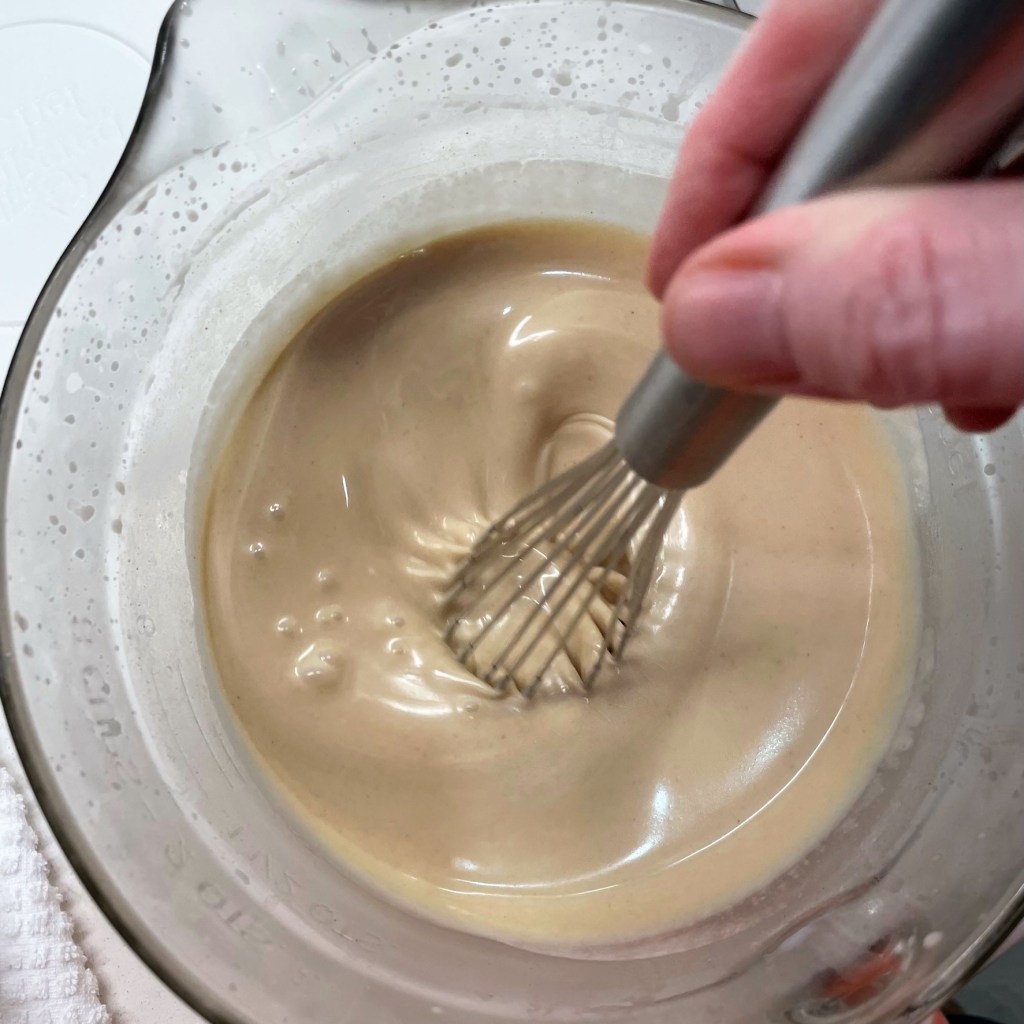
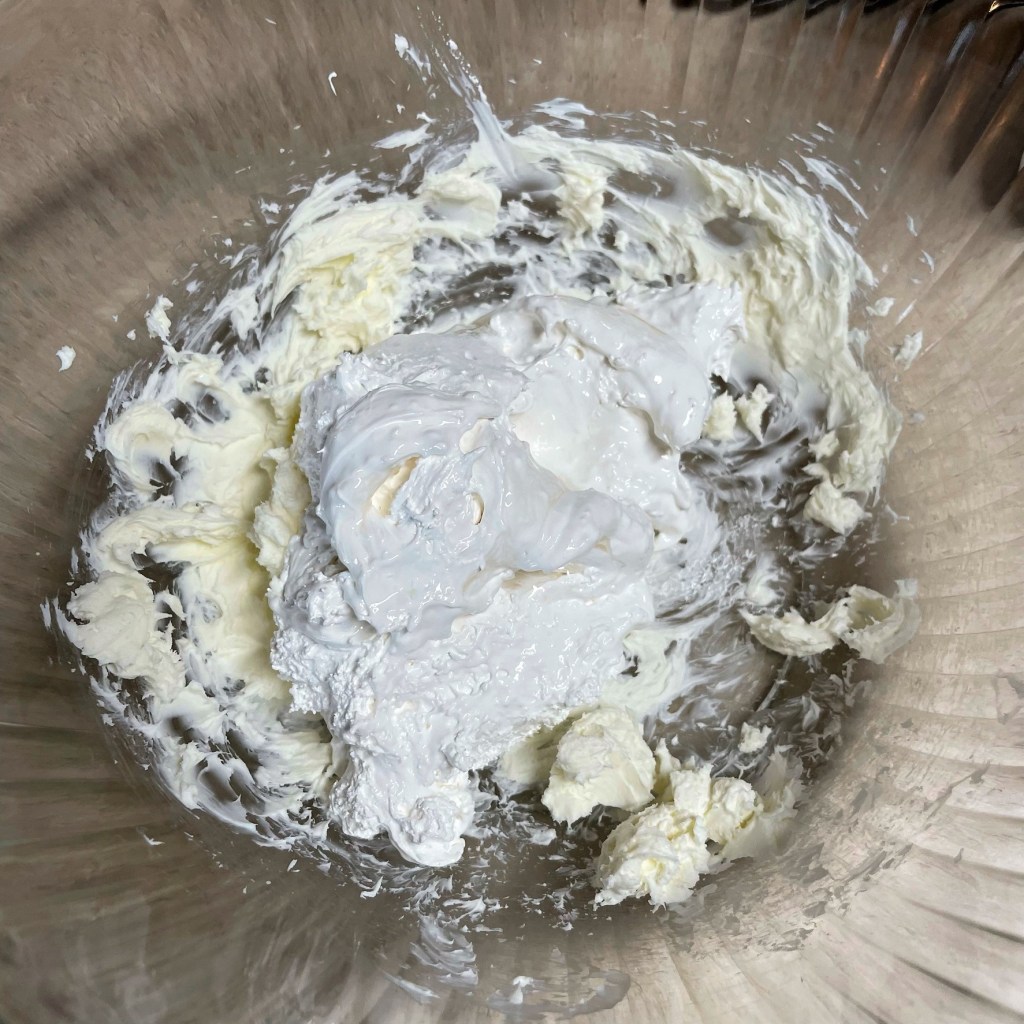
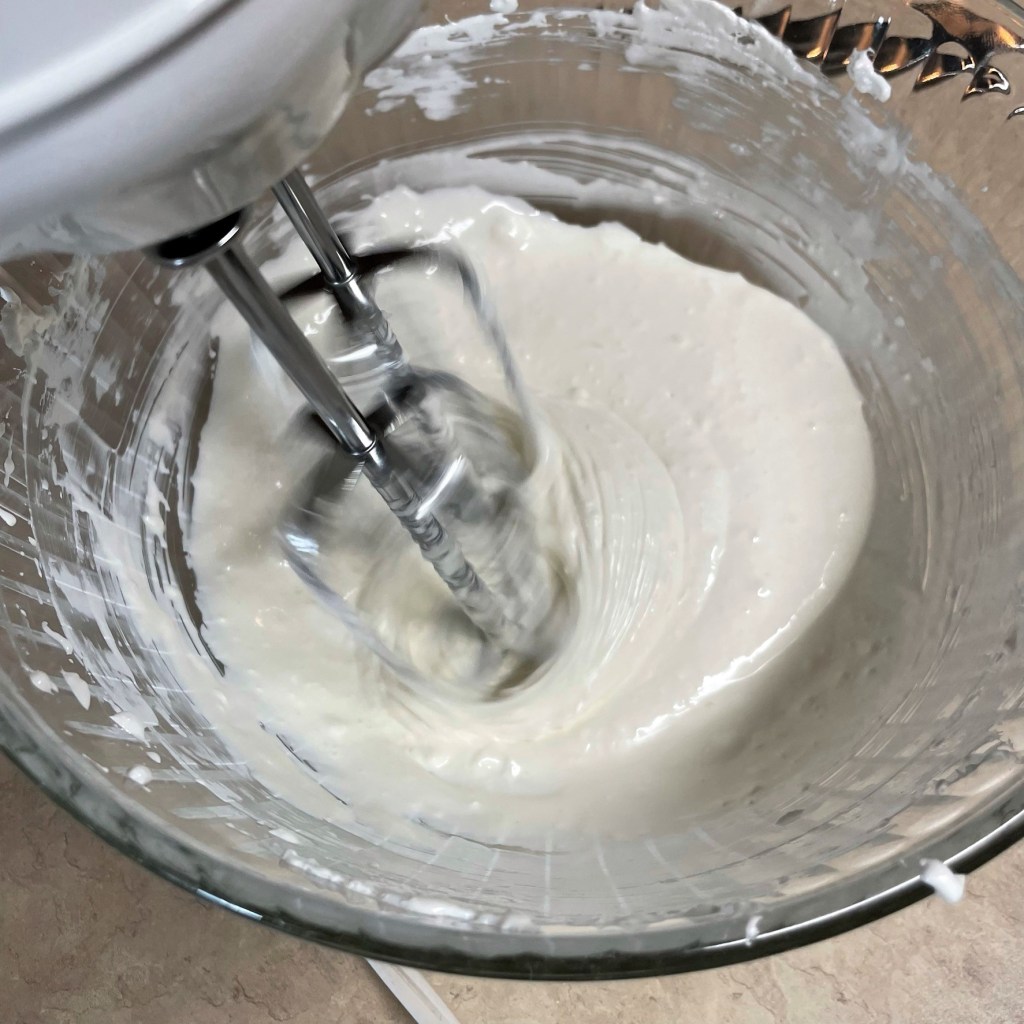
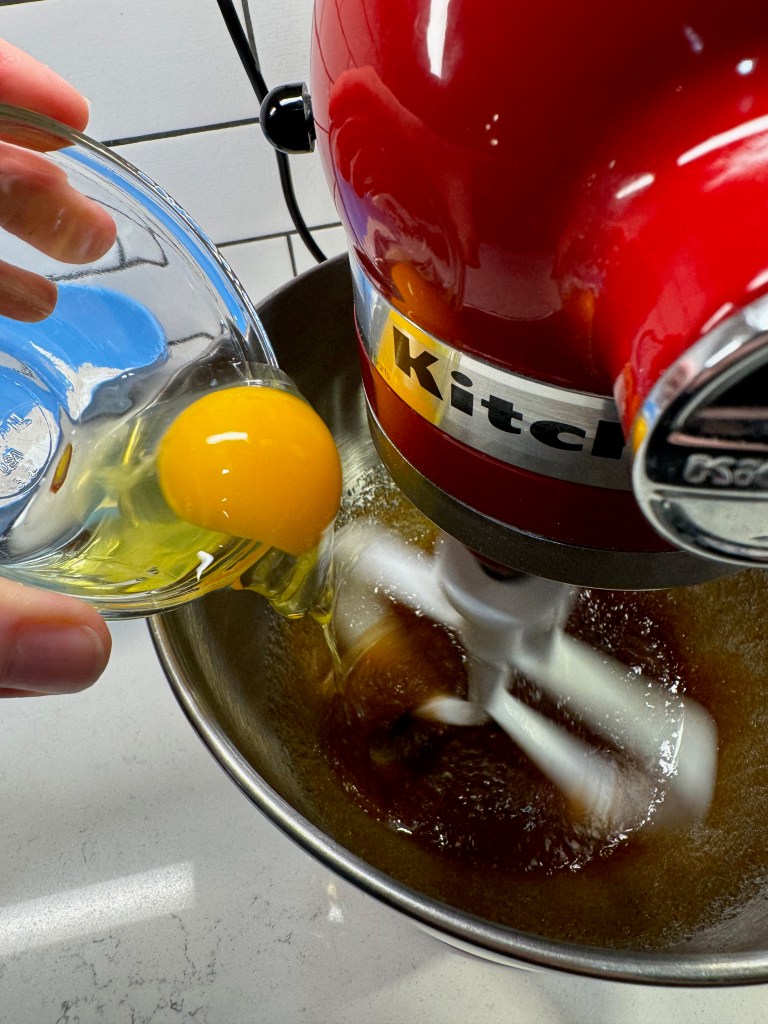
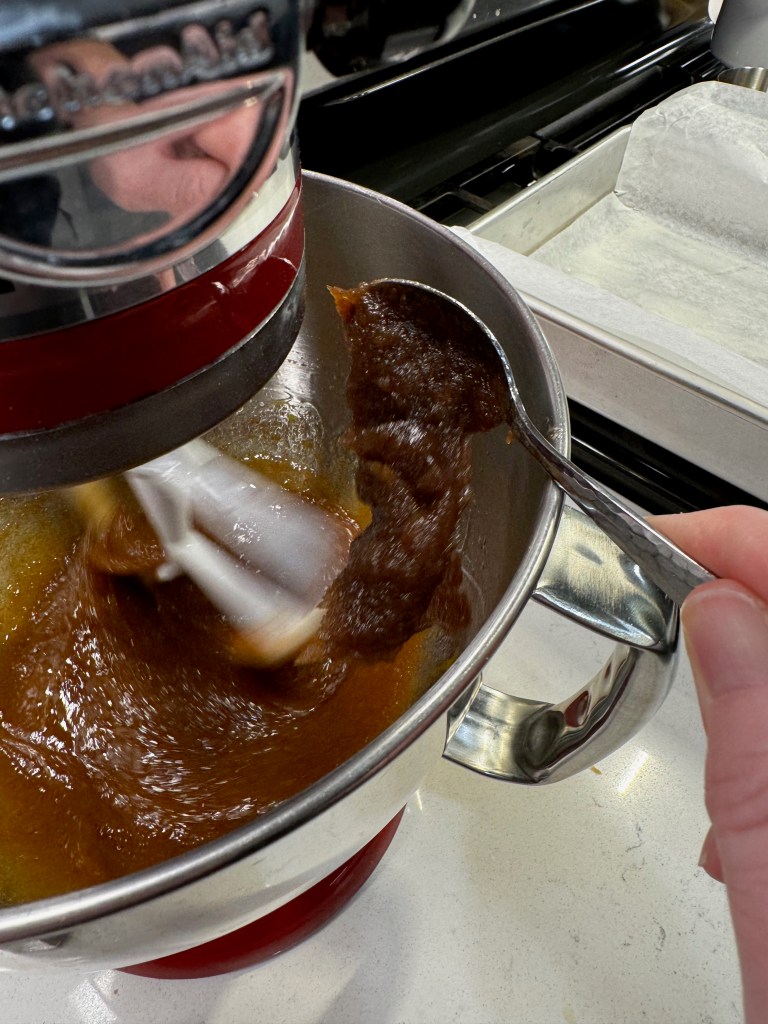
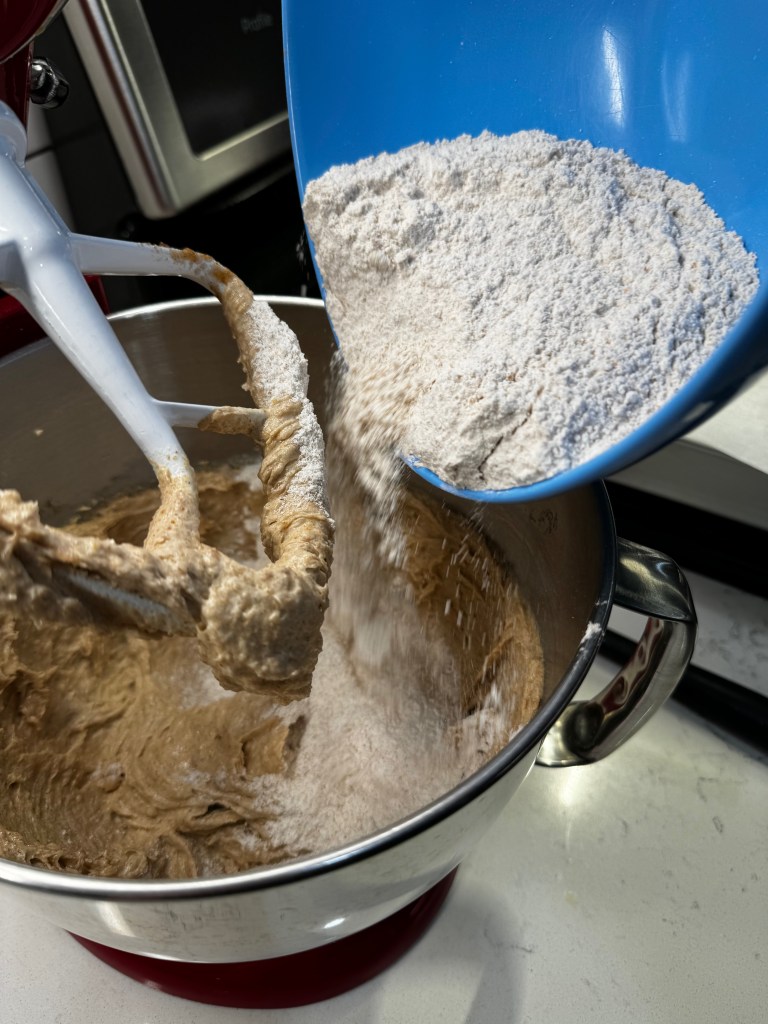
The rest of the recipe is very simple. Mix together the melted butter and brown sugar, then add the egg, apple butter and vanilla. Add the dry ingredients, half at a time, mixing only until all the flour is incorporated. 


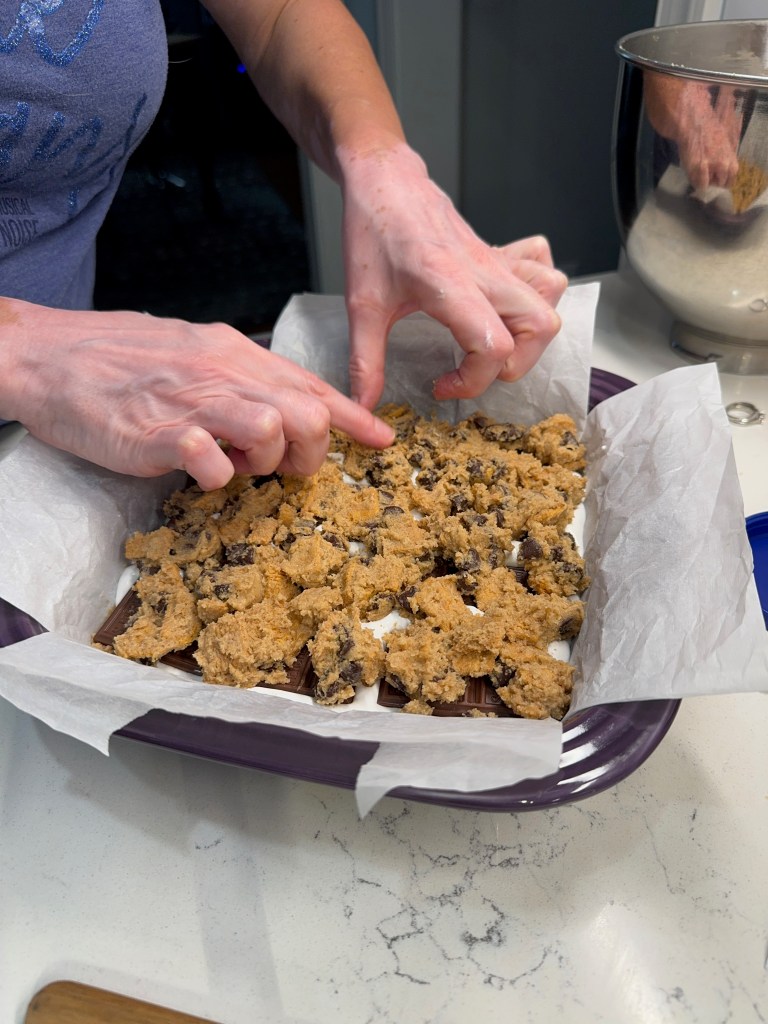
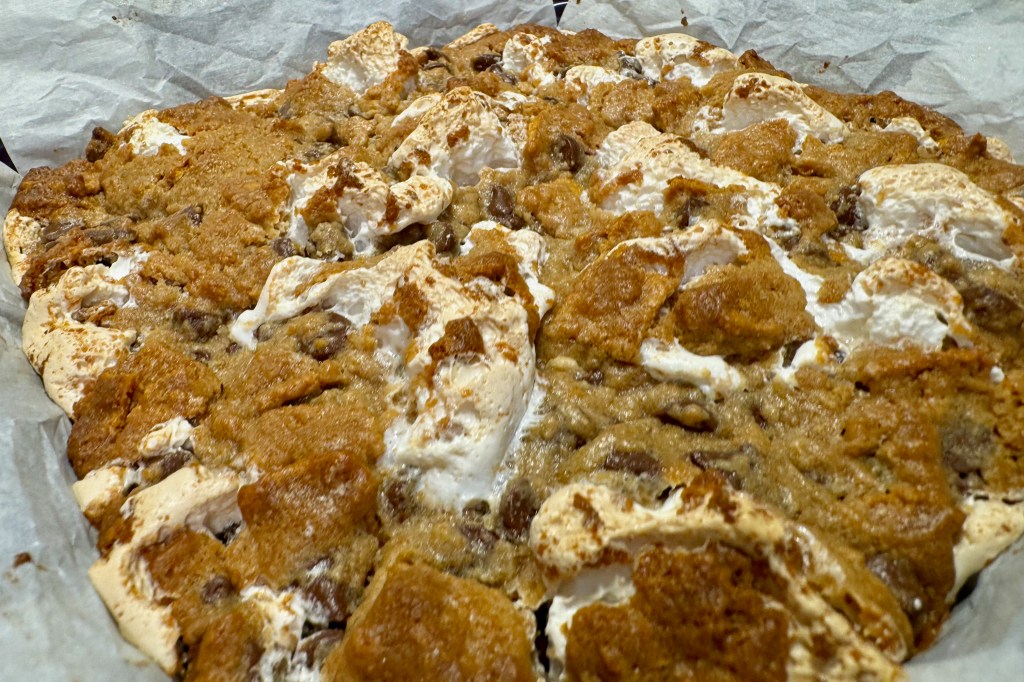
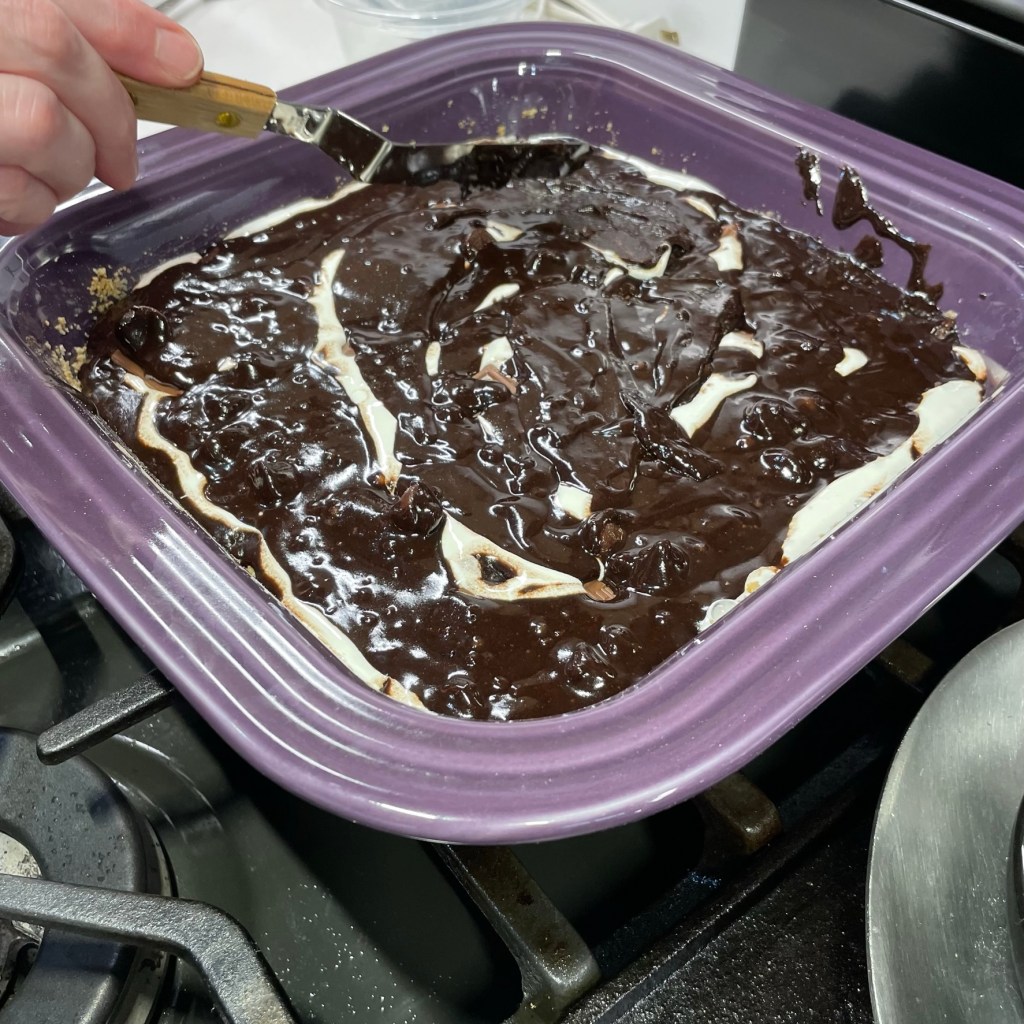
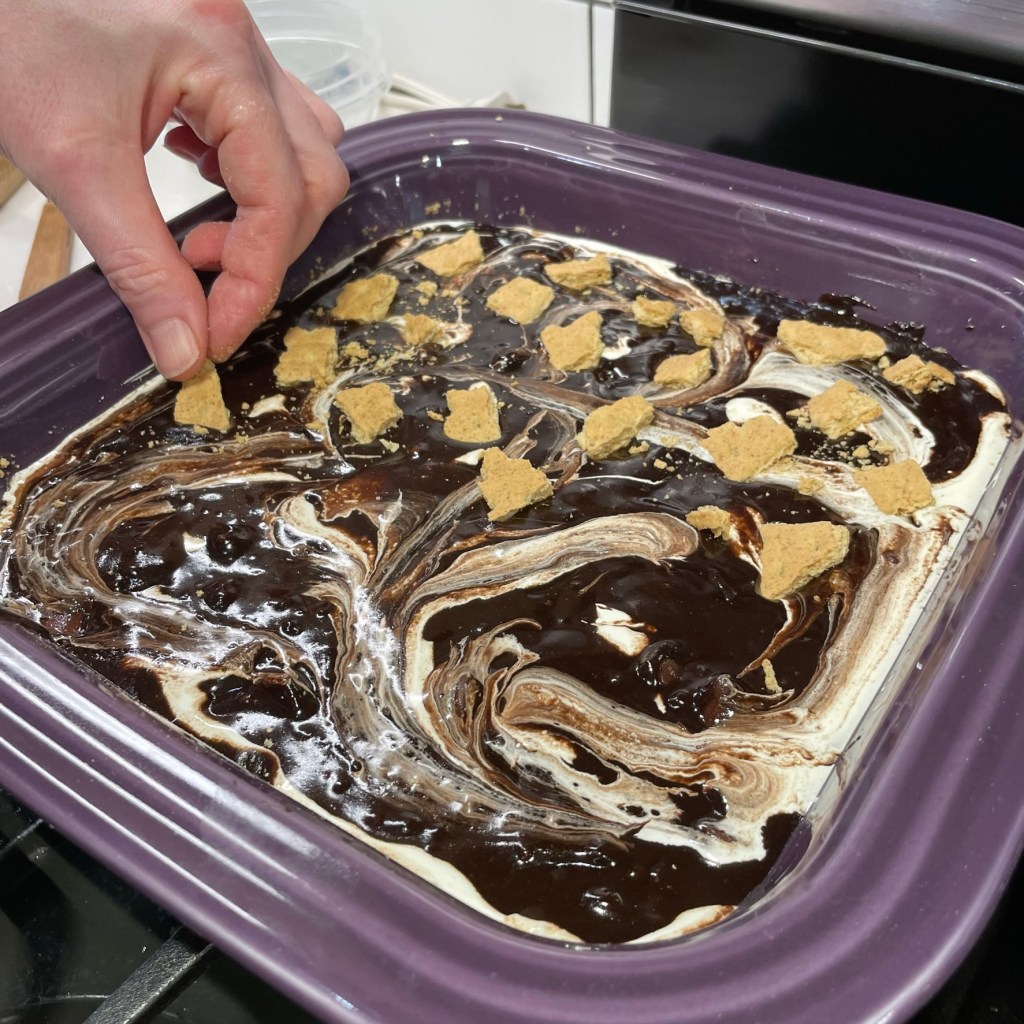
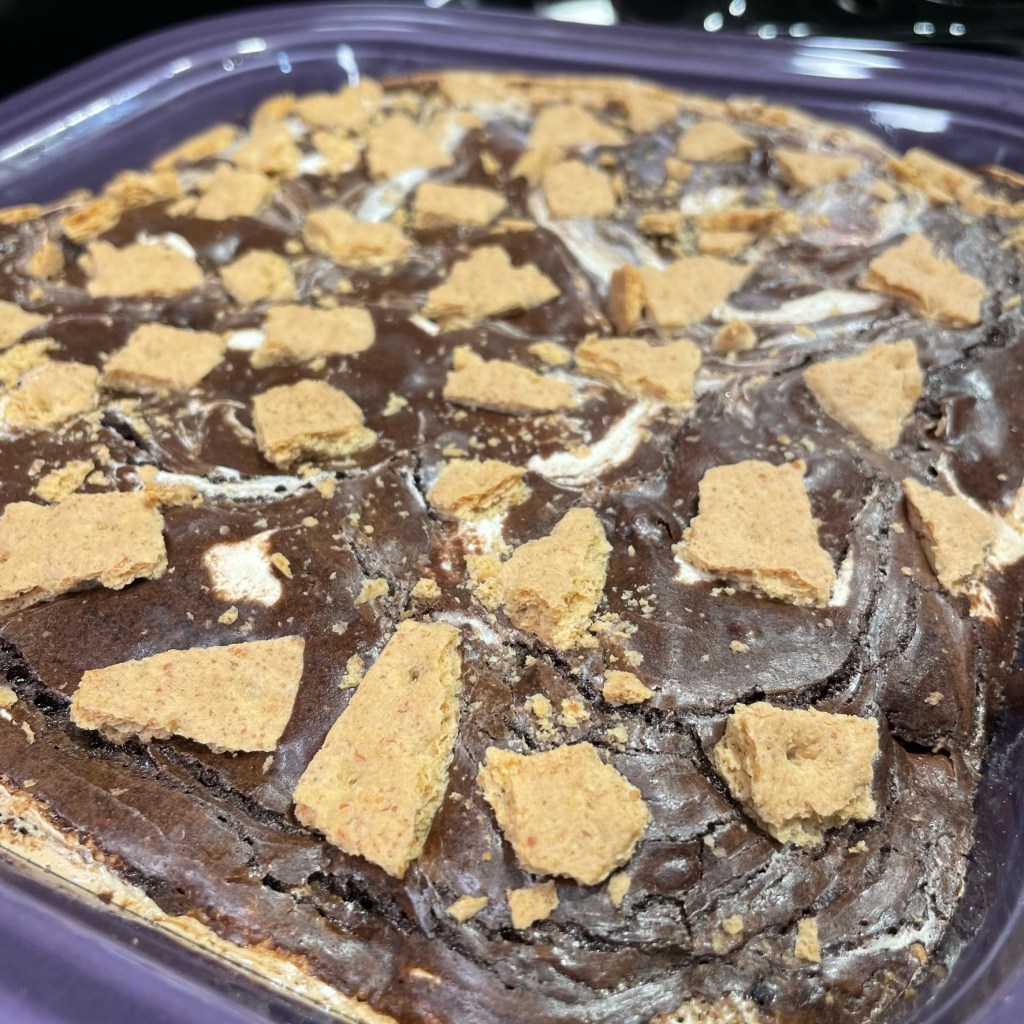
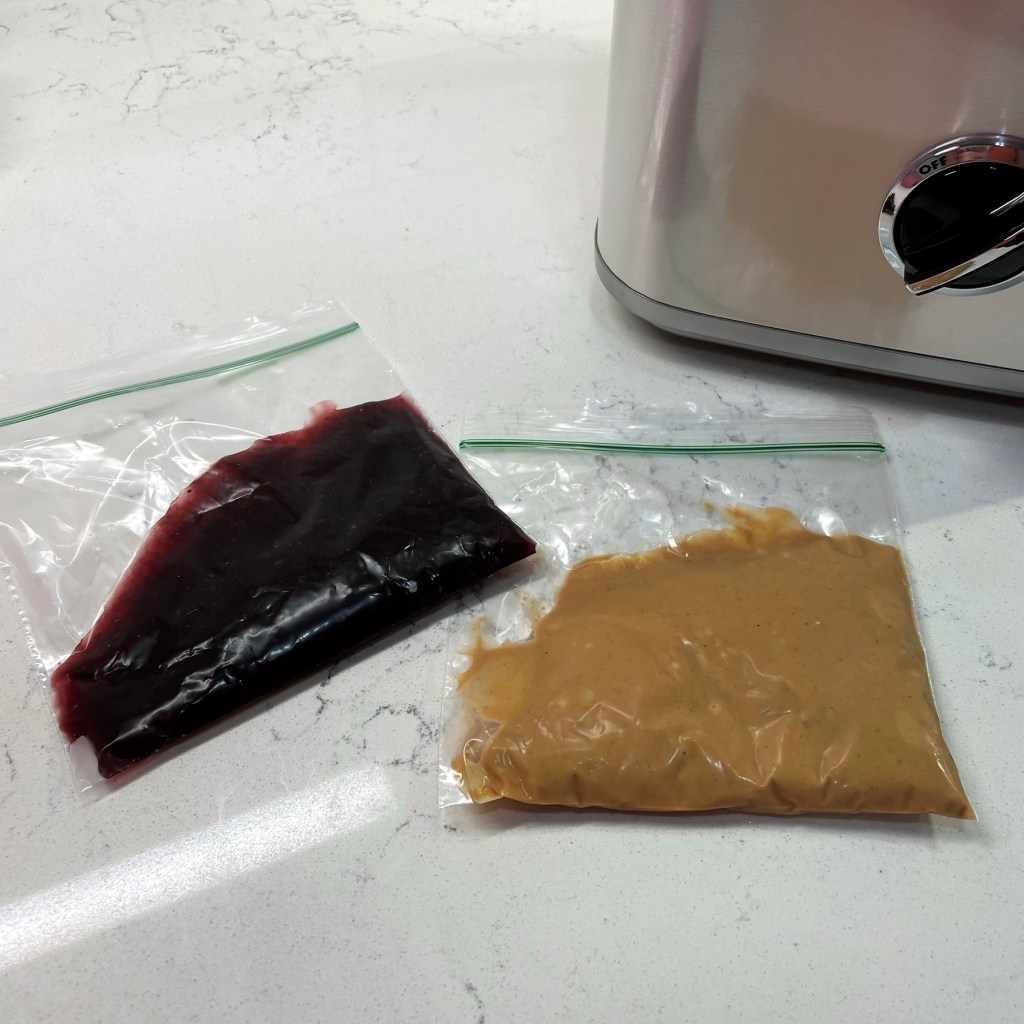
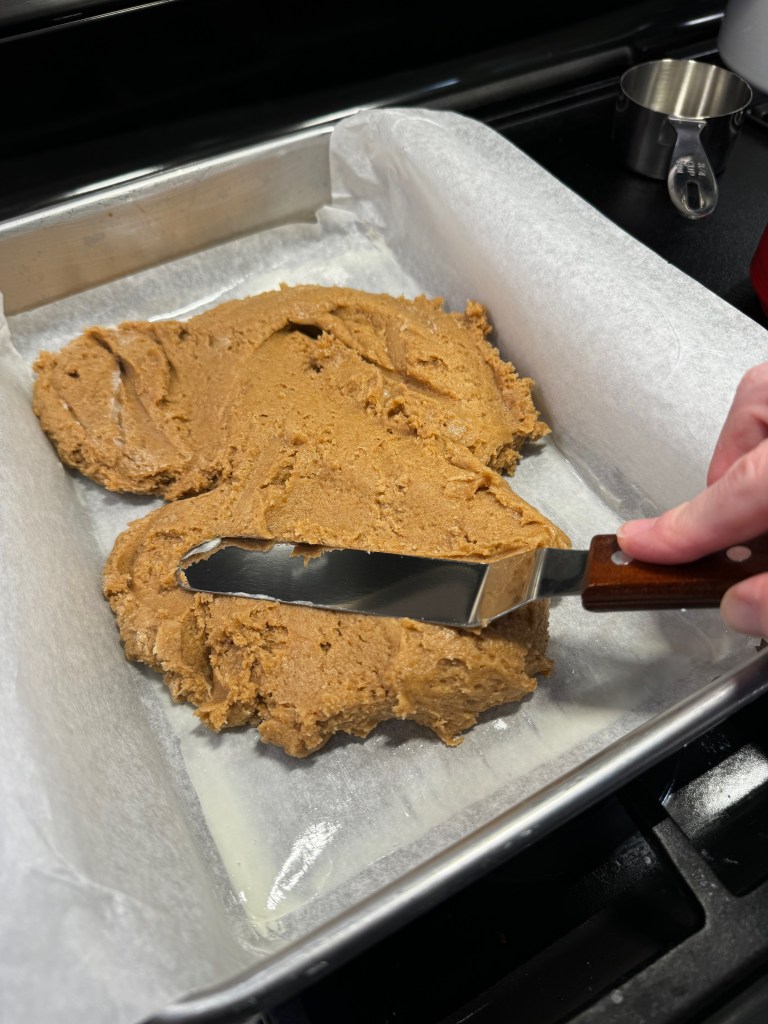
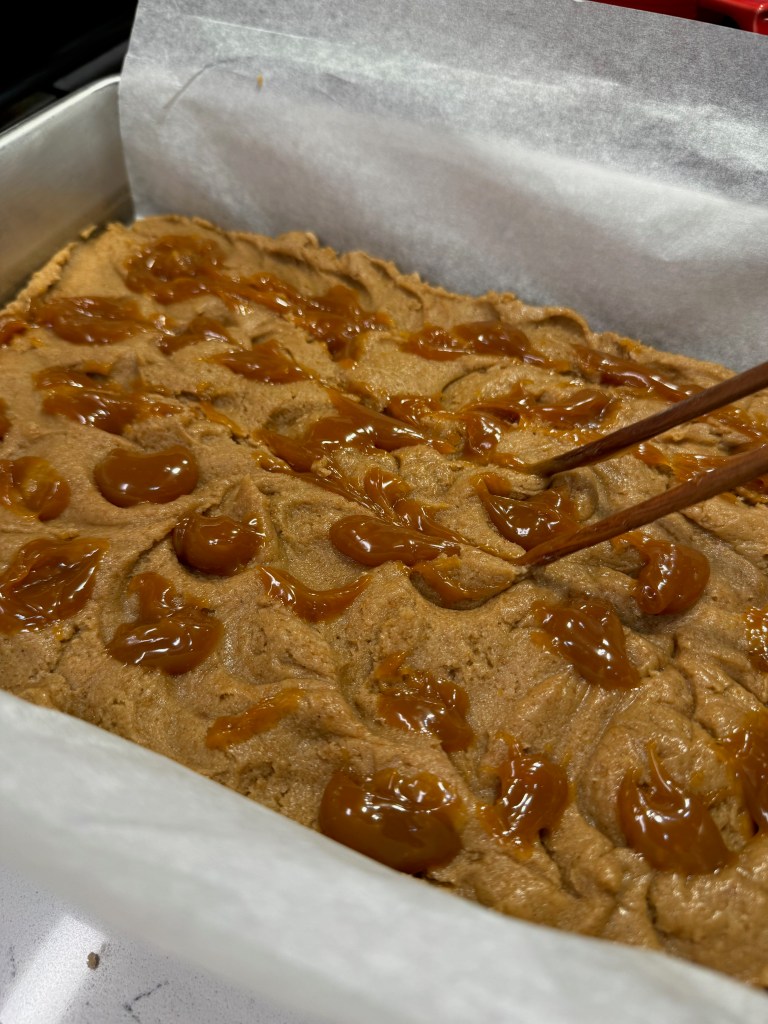
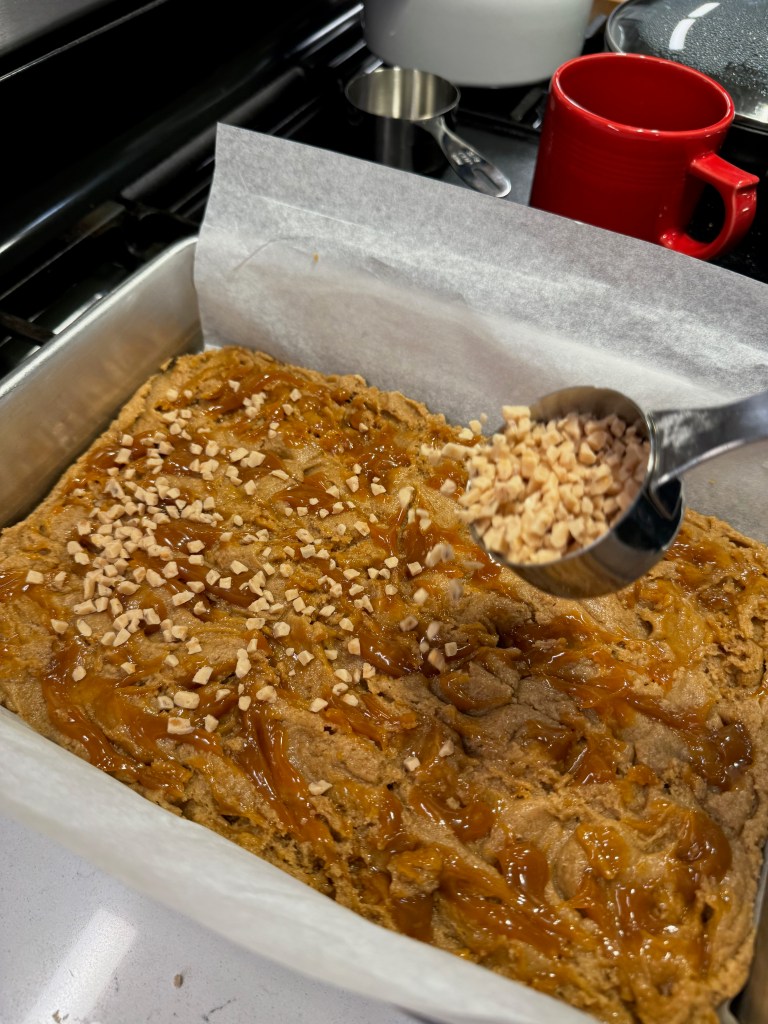
Spread the batter evenly into a buttered, parchment-lined pan, then spoon and swirl a bit of warmed caramel dip over the top. Scatter a few tablespoons of Heath candy bits on top and bake until the blondies test done with a clean toothpick.


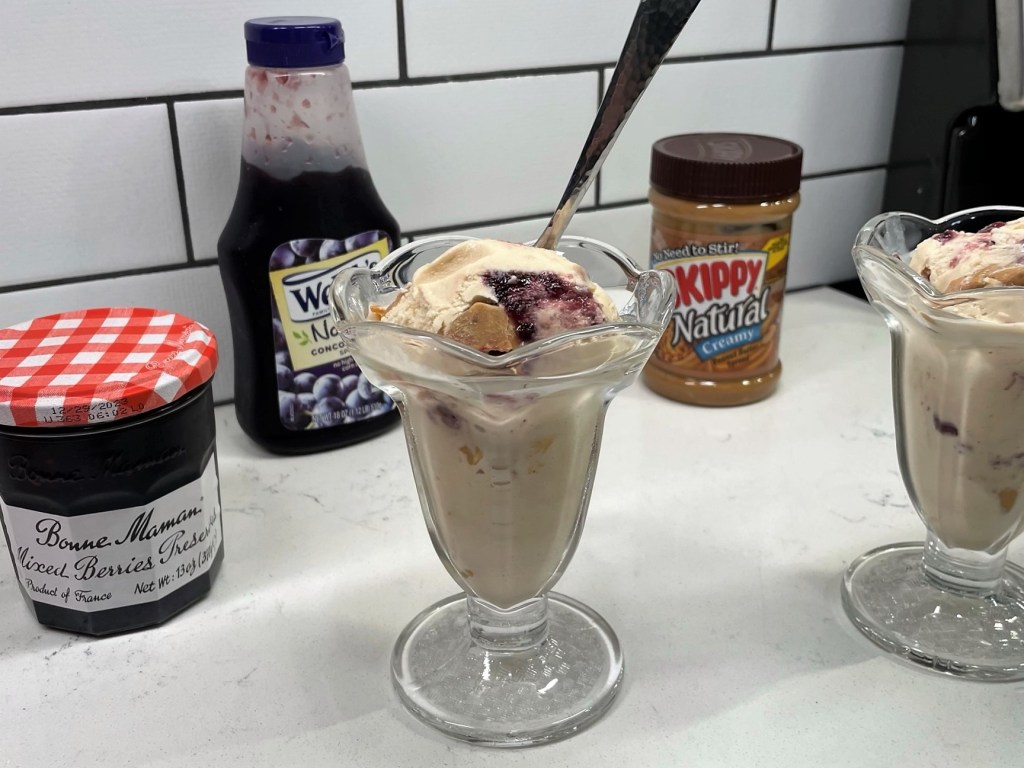
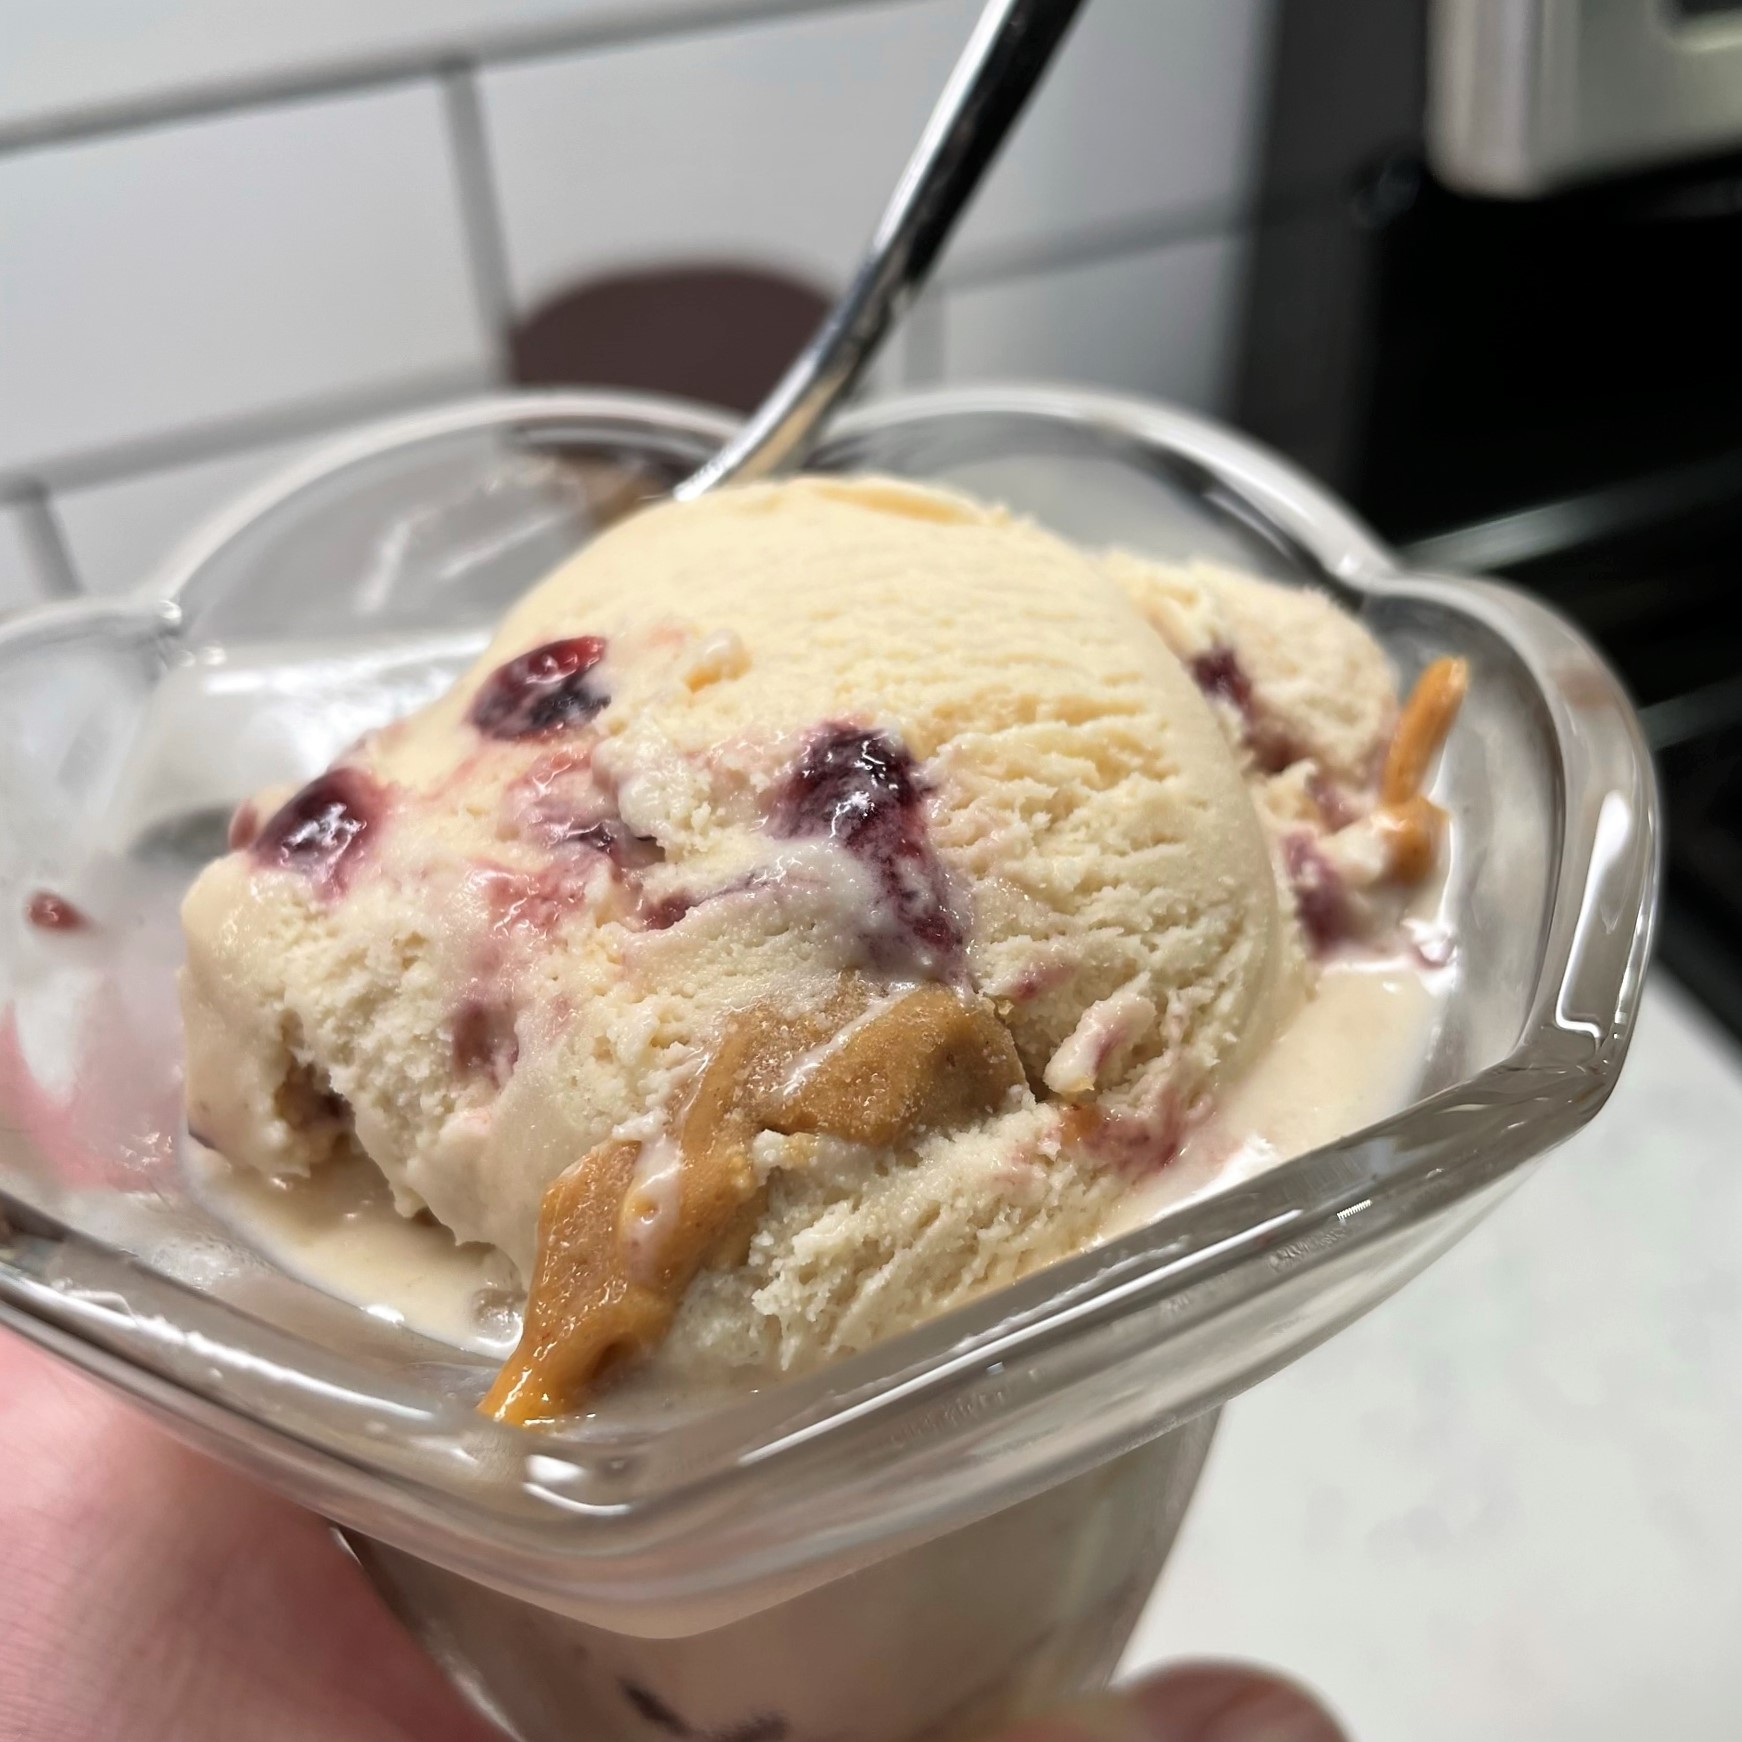
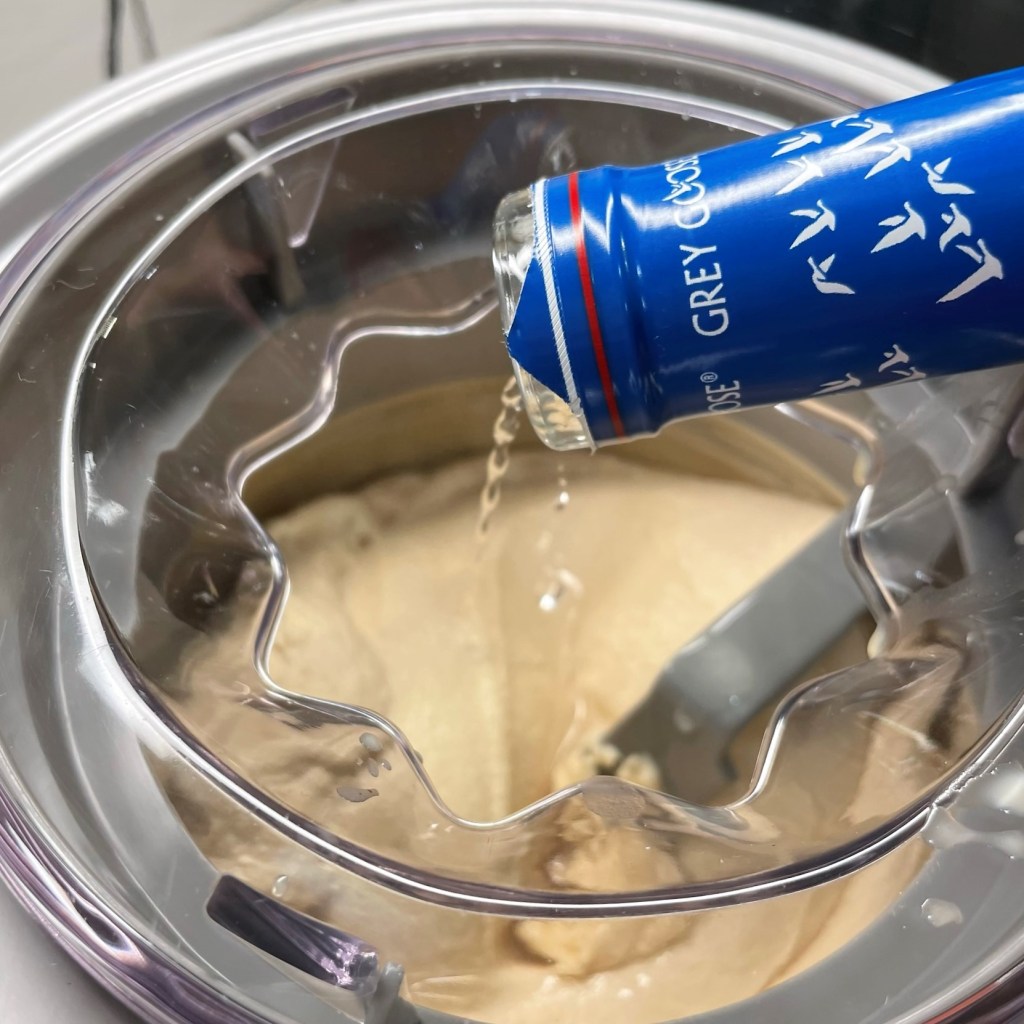
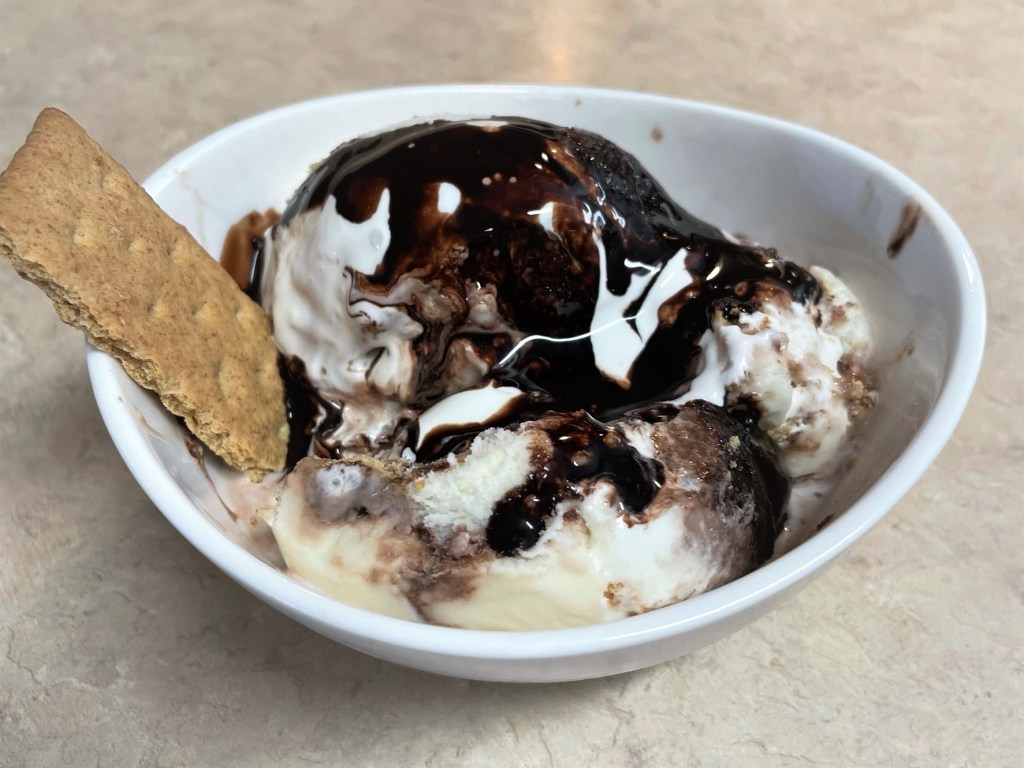
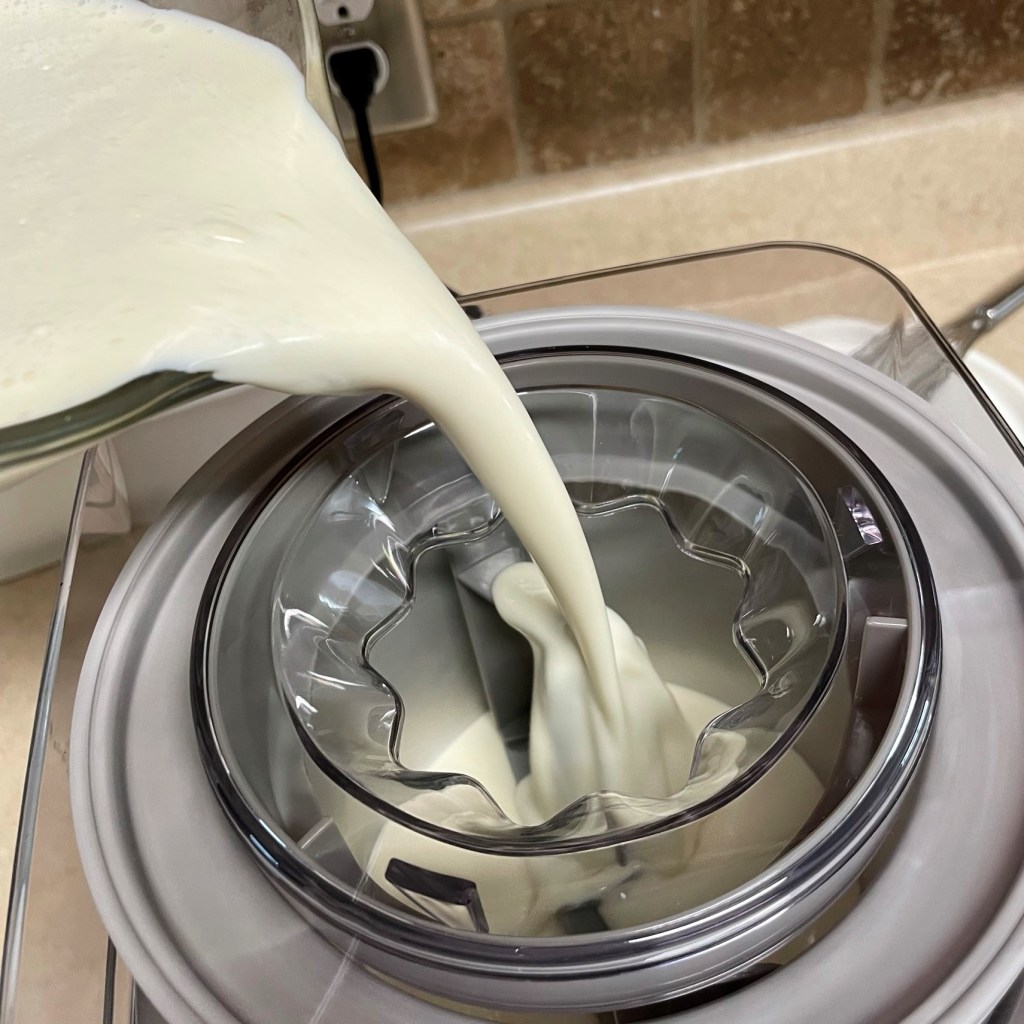
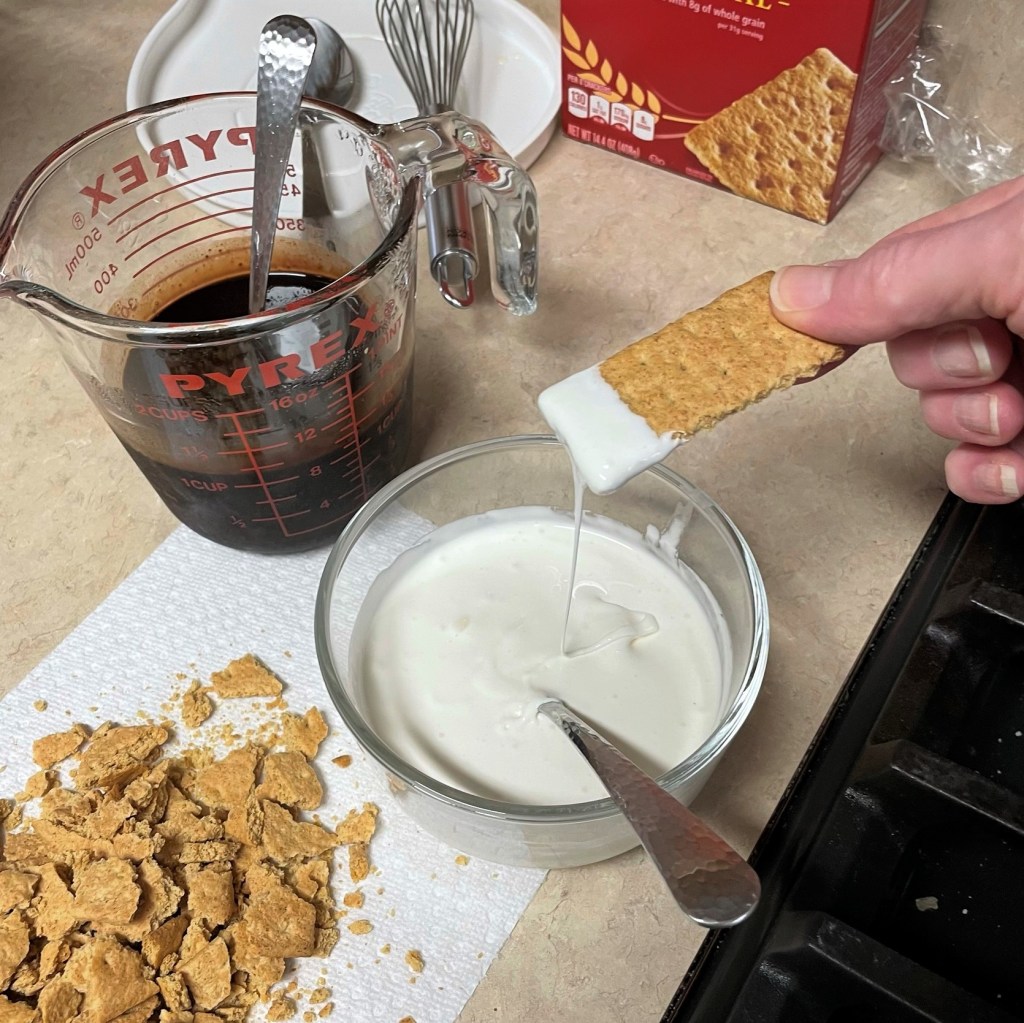
Cool the blondies completely before cutting them, and if you really want to push them over the top, serve them with a scoop of my easy cinnamon ice cream. We enjoyed them this way, and I got so excited, I completely forgot to take a picture. But you can imagine, right? 😉

Caramel Apple Blondies

  • Servings: 12 or 16
  • Difficulty: Average
  • Print

Caramel and apples reminds me of the treats I used to look forward to at the county fair. These blondies are just one of many reasons I'm excited about fall.
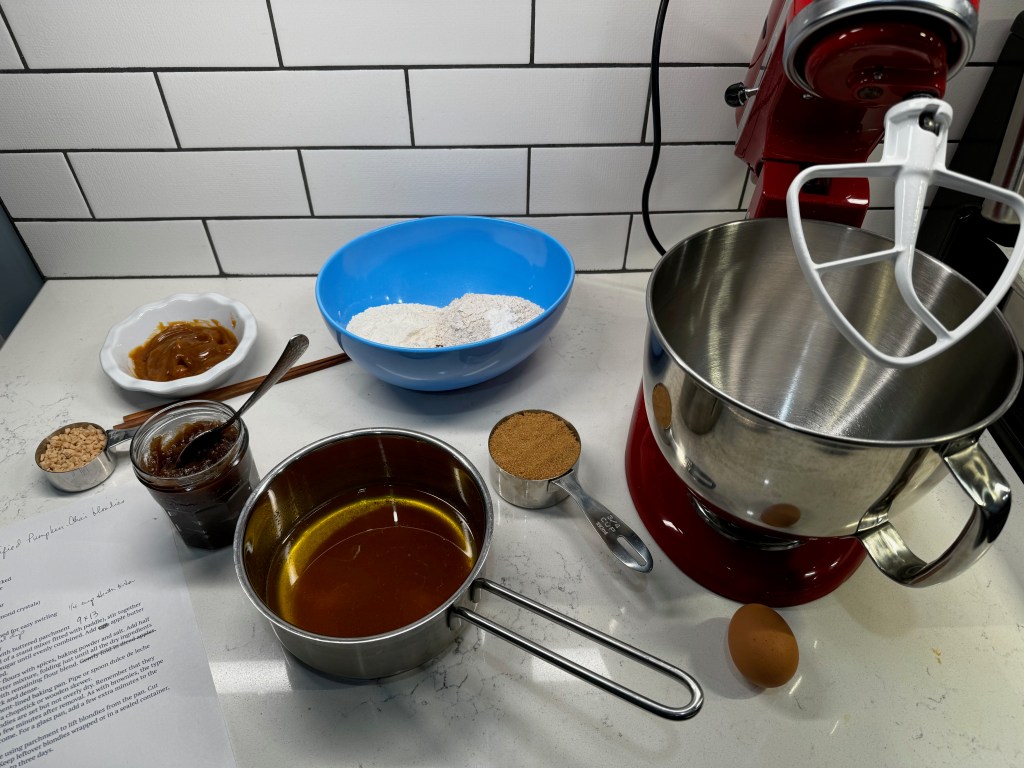

Ingredients

  • 2 sticks salted butter
  • 2 Tbsp. nonfat dry milk powder
  • 3/4 cup light brown sugar, packed
  • 1 large egg (room temperature)
  • 1 cup apple butter (homemade or store bought)
  • 2 tsp. real vanilla extract
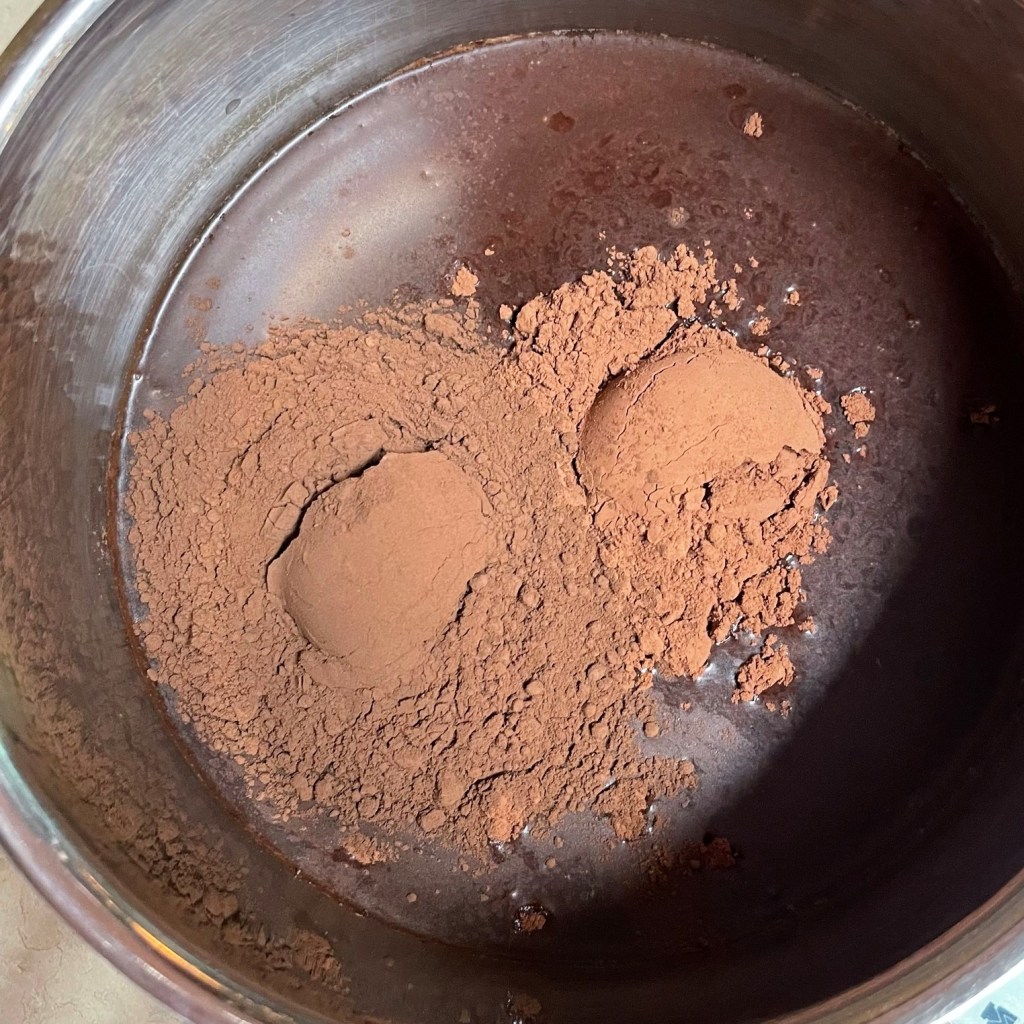
  • 1 1/4 cups all-purpose flour (see notes for measure instructions)
  • 1 cup whole wheat pastry flour (or sub in regular all-purpose flour if desired)
  • 3/4 tsp. ground cinnamon
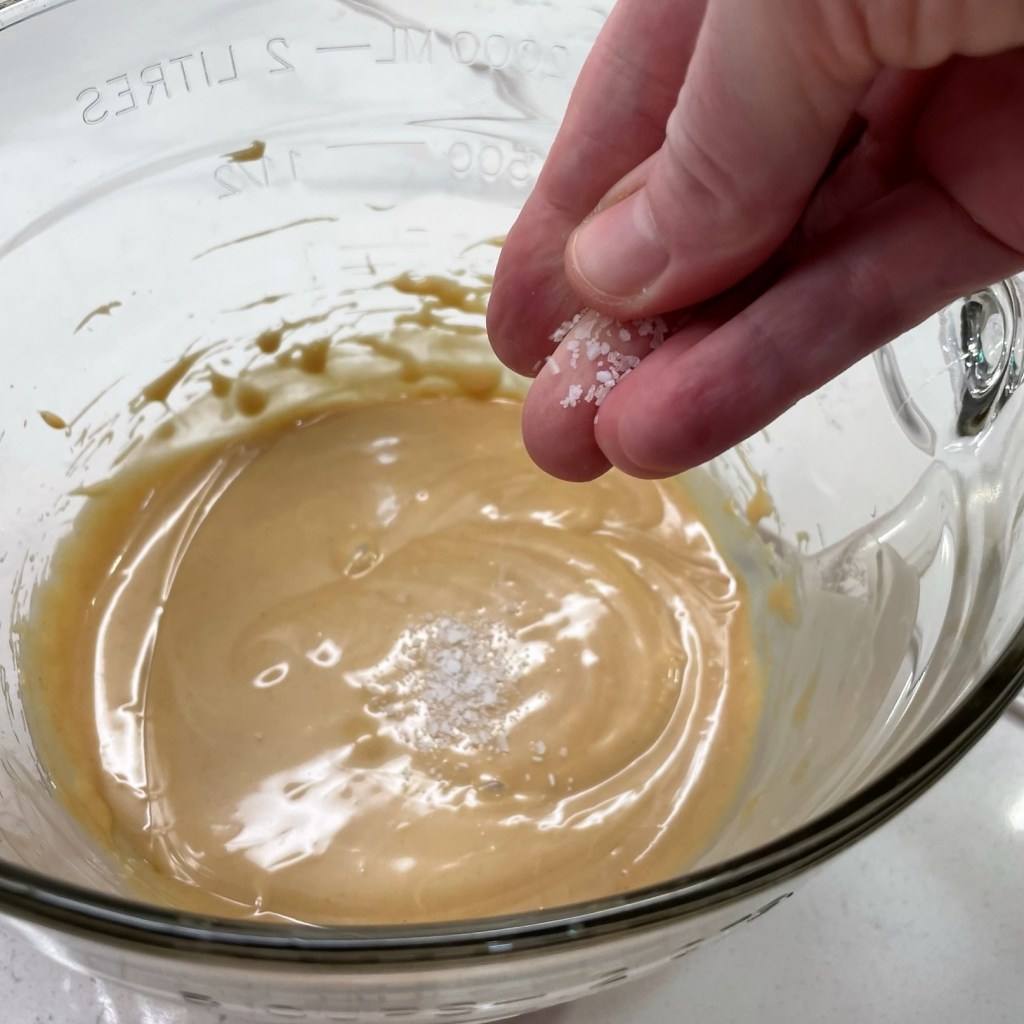
  • 1/2 tsp. kosher salt
  • 3/4 tsp. baking powder
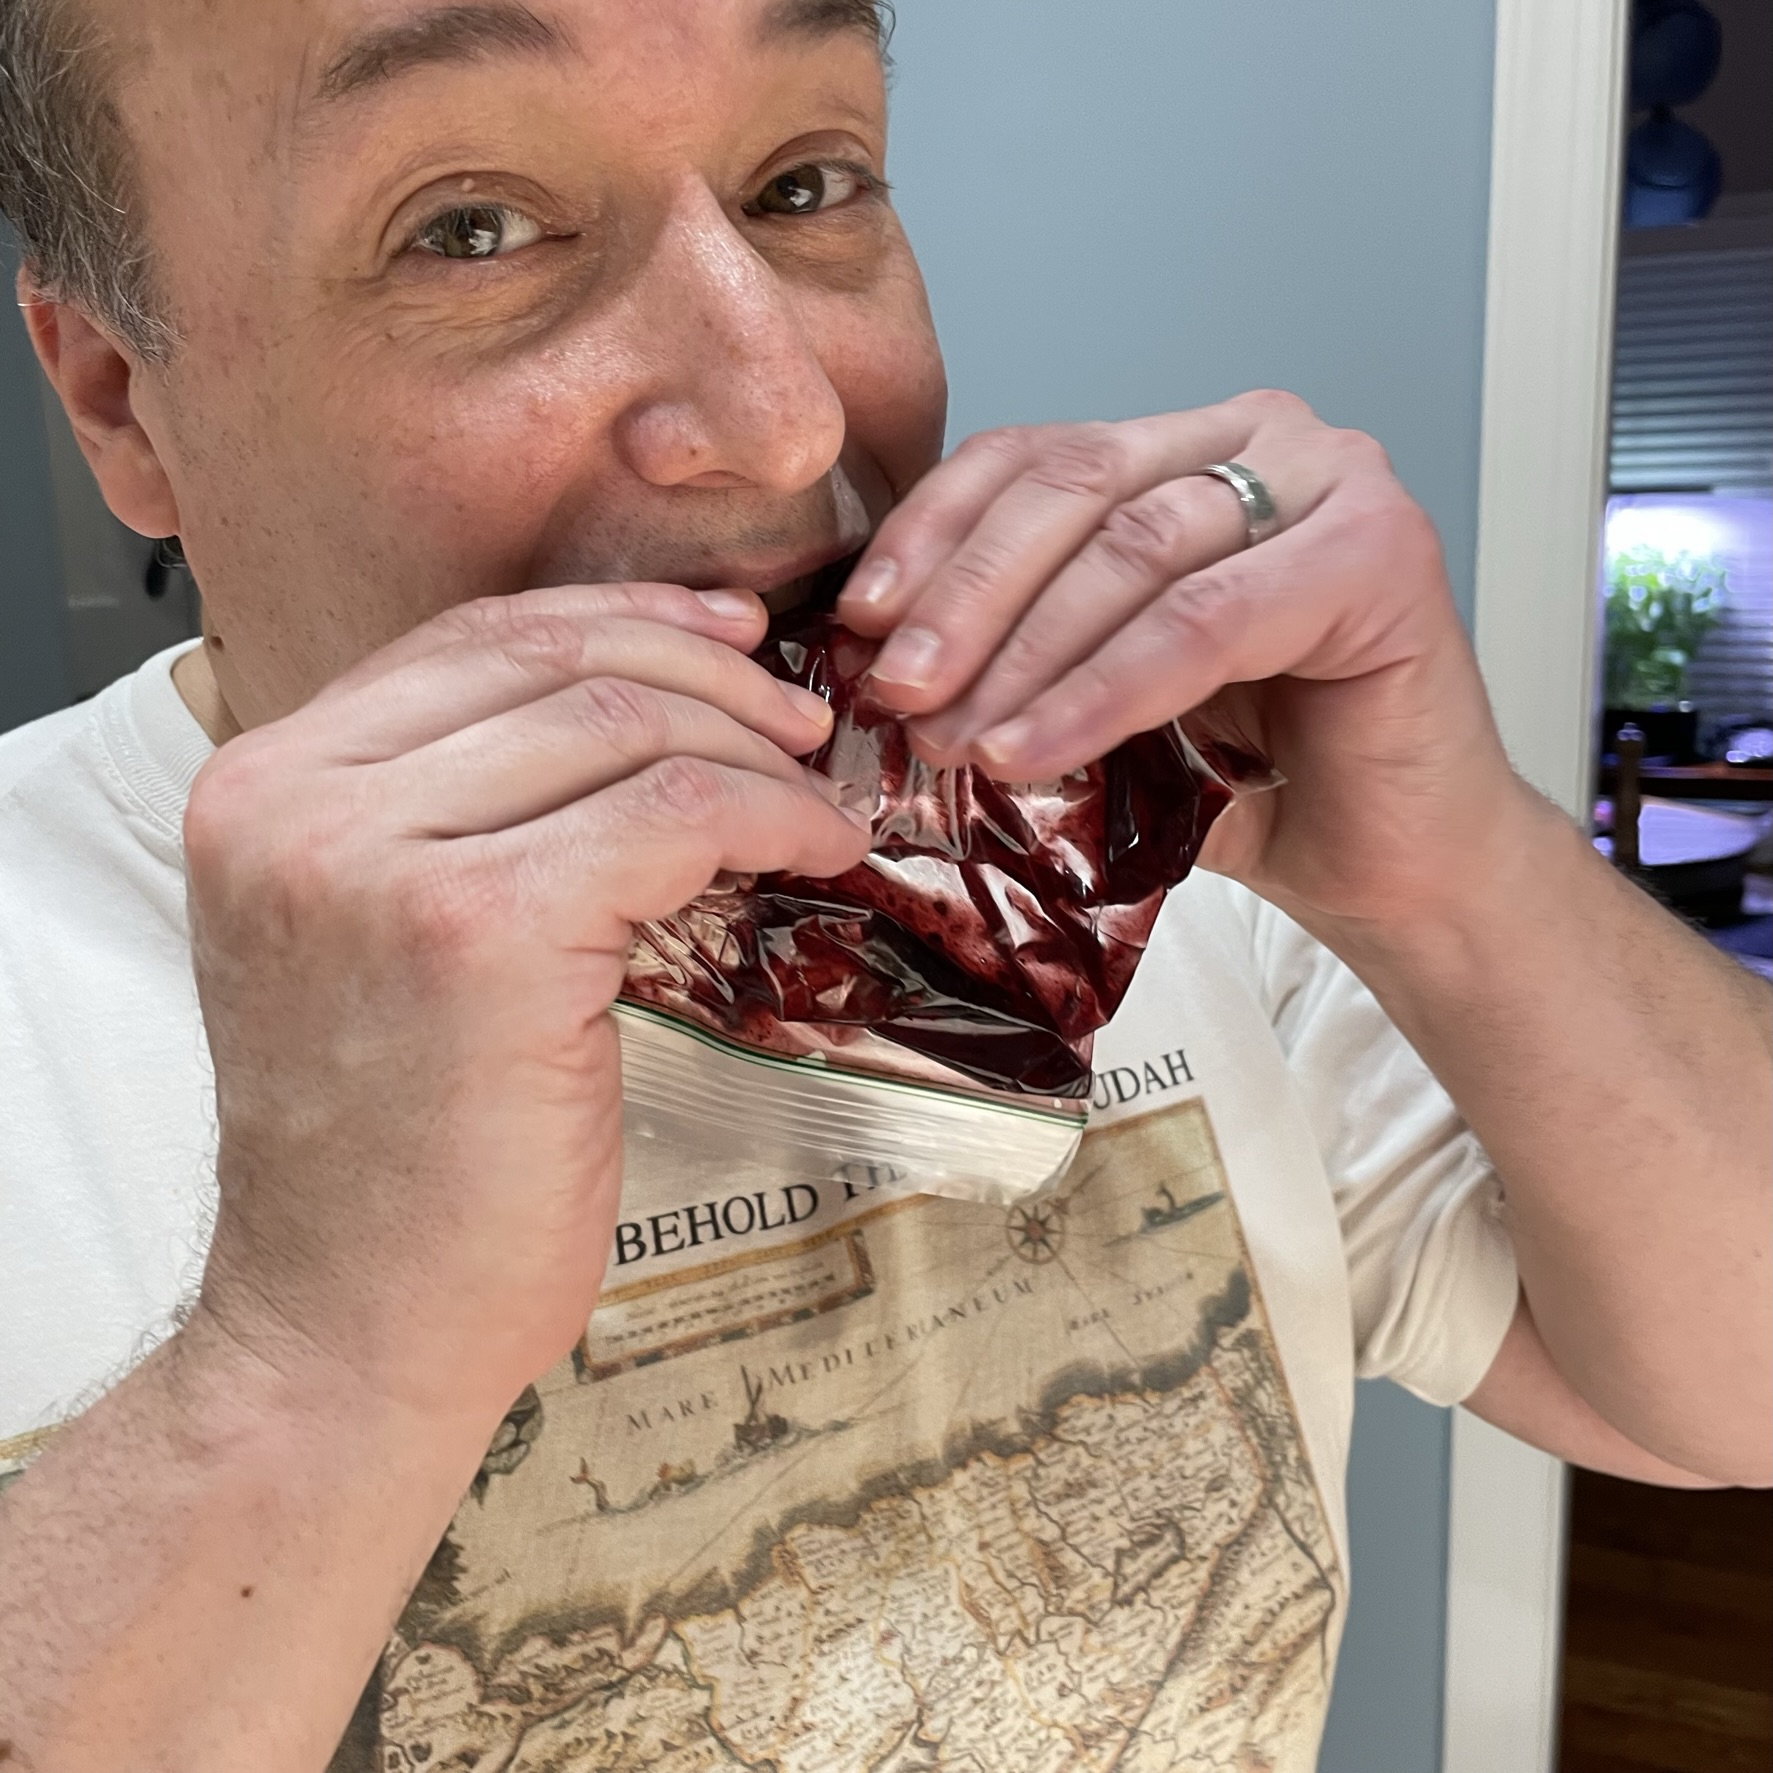
  • 1/4 cup caramel dip (find in the produce section, near the apples)
  • 1/4 cup Heath candy bits (optional, sub chopped pecans if desired)

Notes: Unsalted butter can be used, if that’s what you have on hand; double the kosher salt if you go this route.

When measuring flour, use the “fluff, sprinkle, level” method rather than scooping directly into the bag or container.

Directions

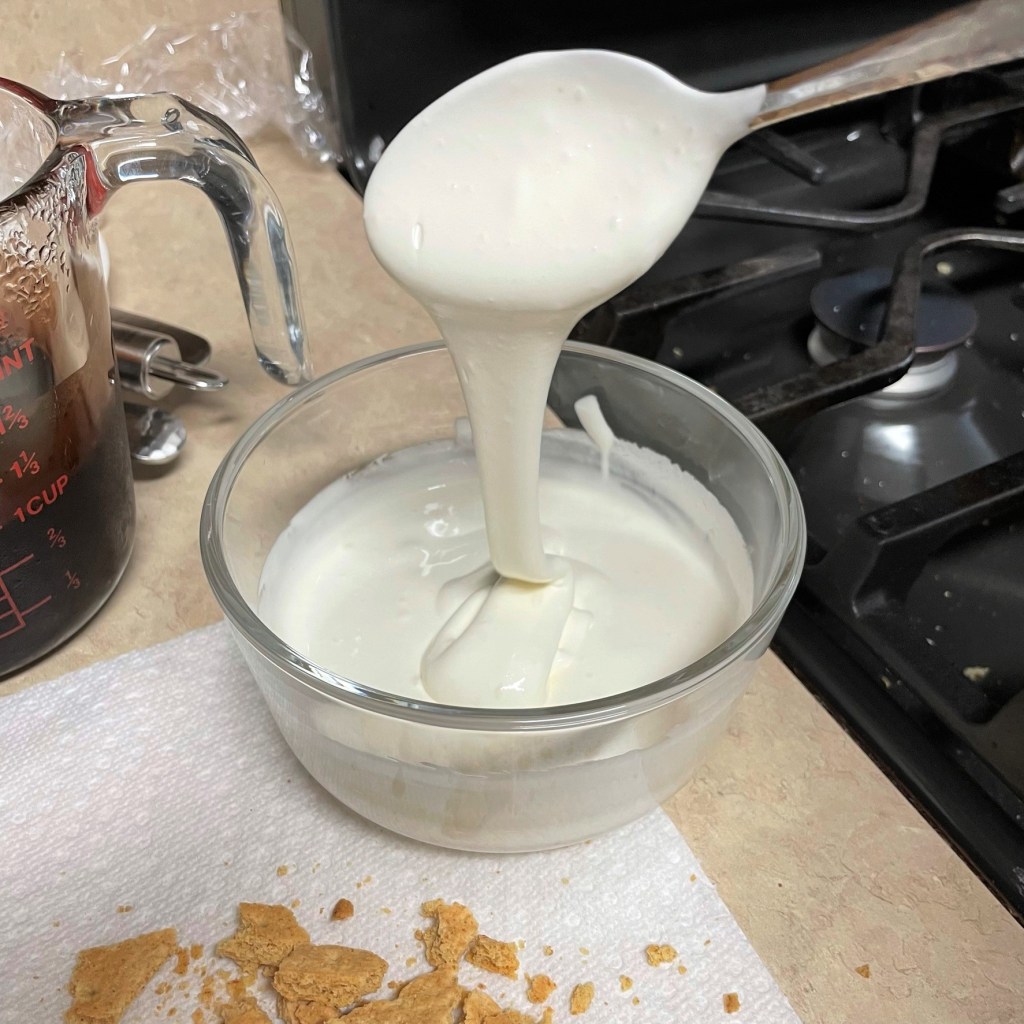
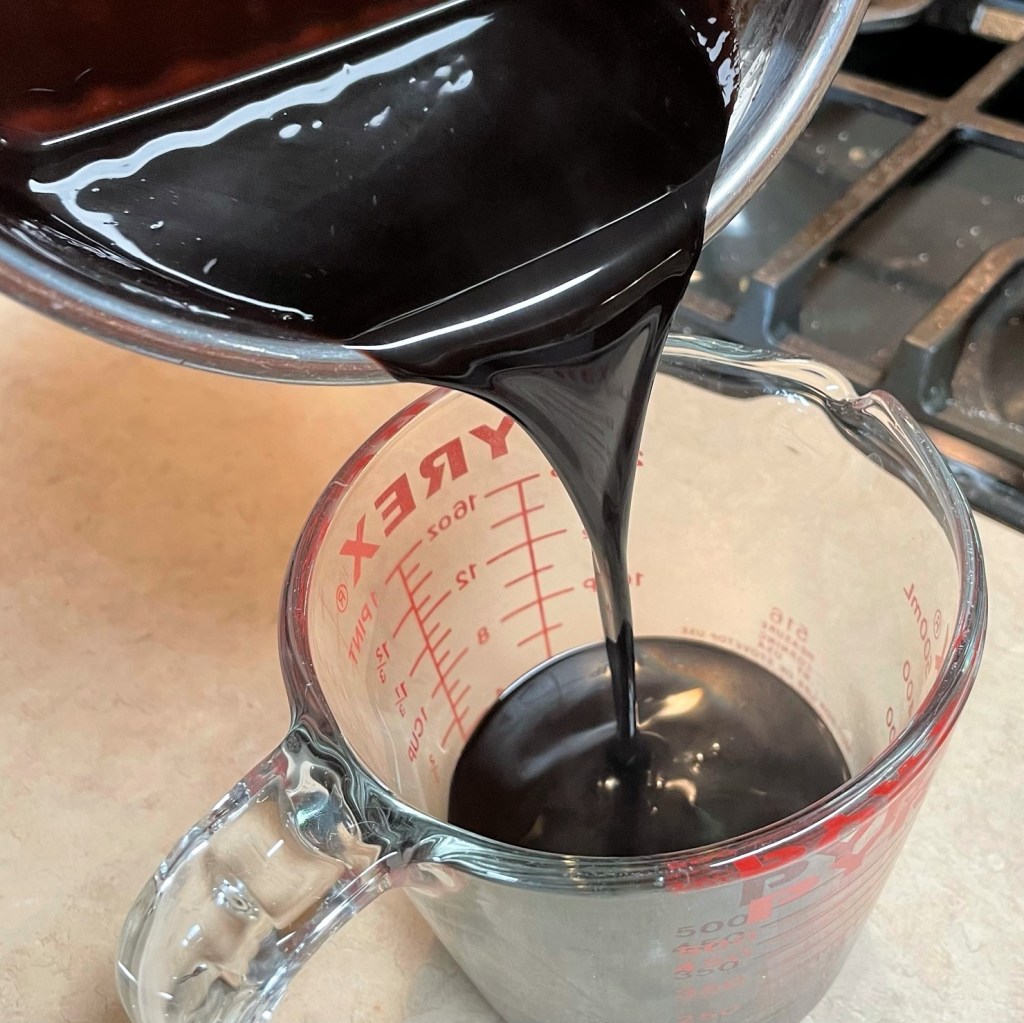
  1. Place the butter in a heavy-bottomed sauce pan over medium heat. Stir frequently, and when melted butter begins to brown, add the dry milk powder. Stir constantly, as the browning will happen quickly at that point. Remove from heat as soon as the butter reaches a copper color. Transfer to a measuring cup to cool.
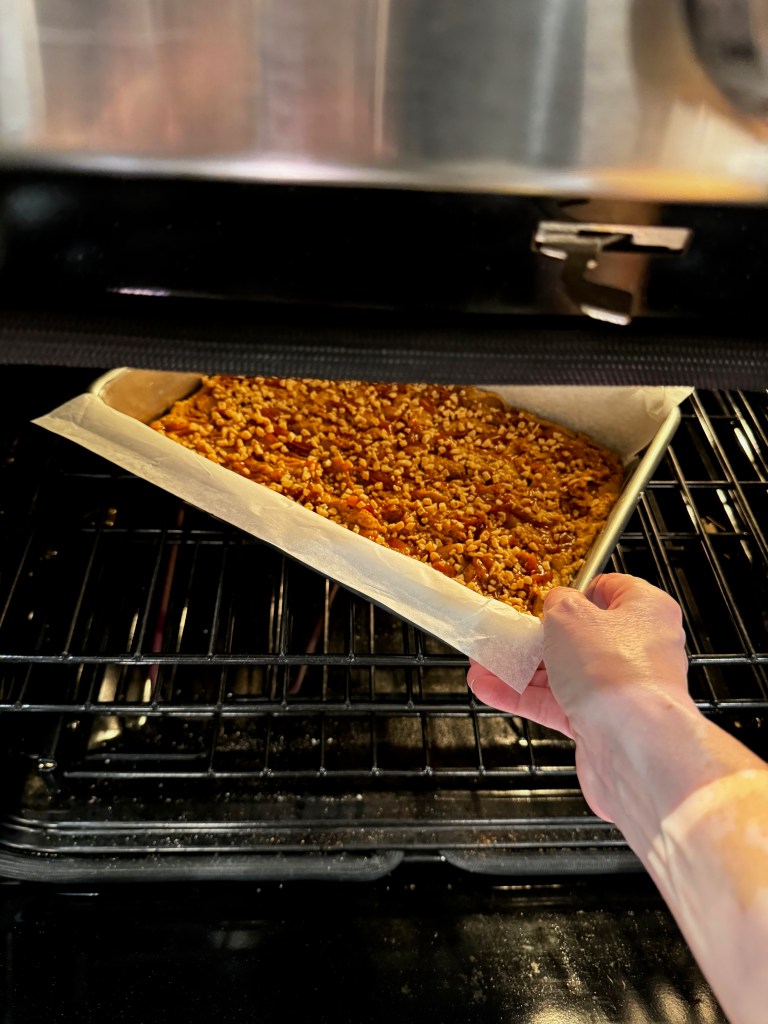
  2. Preheat oven to 350° F, with oven rack in center position. Prepare a 9 x 13″ baking pan with a buttered parchment liner, leaving flaps on the long sides for easy lifting of baked blondies.
  3. In a large mixing bowl (or the bowl of a stand mixer fitted with paddle), stir together browned butter and brown sugar until evenly blended. Add apple butter and egg. Beat until combined and somewhat fluffy.
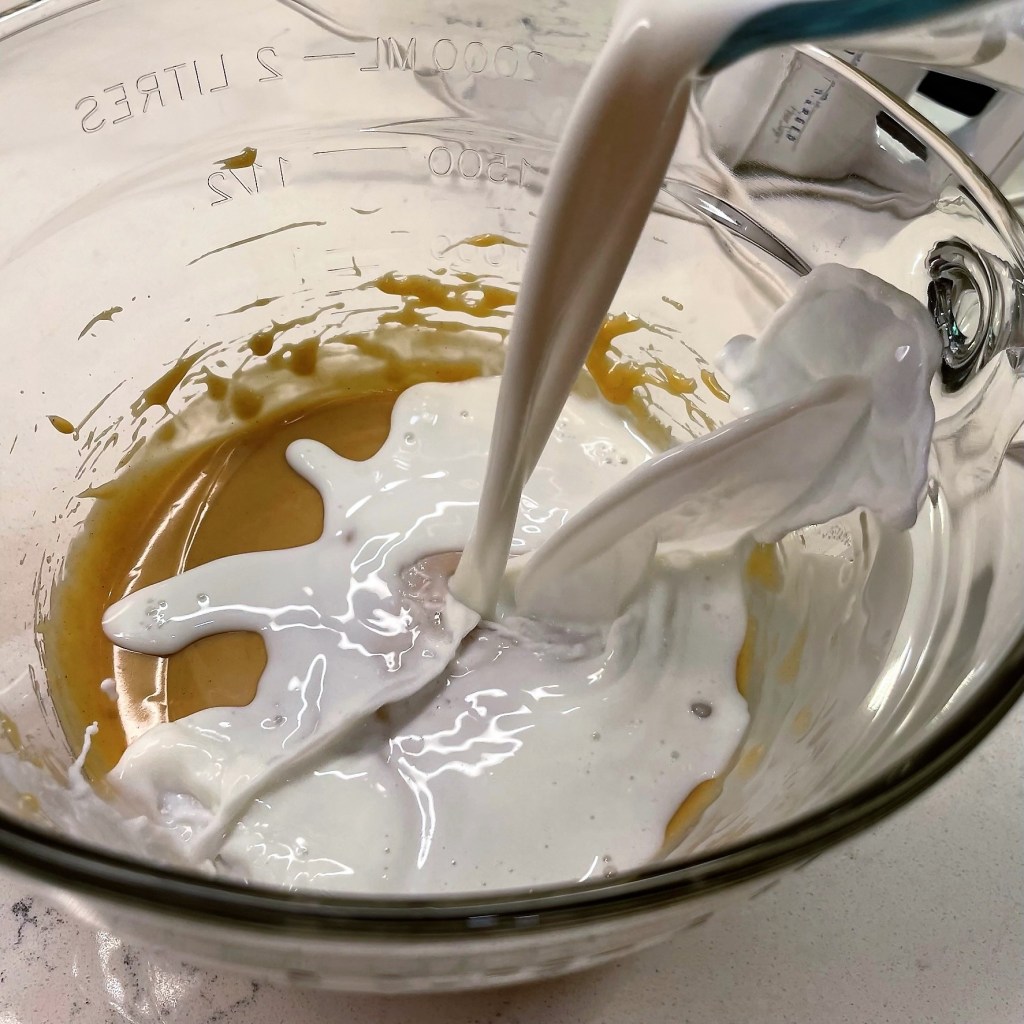
  4. In a medium bowl, whisk together flours with cinnamon, baking powder and salt. Add half the flour mixture to the apple mixture, folding just until all the dry ingredients are incorporated. Repeat with remaining flour blend. The batter will be very thick and dense.
  5. Spread batter evenly over parchment. Warm the caramel dip slightly in the microwave for easier swirling. Pipe or spoon caramel dip over batter and swirl with a chopstick or spoon handle. Sprinkle on Heath candy bits.
  6. Bake for 25 minutes, or until blondies are set but not overly dry. Remember that they will continue to cook for a few minutes after removal. As with brownies, the type of pan may affect the outcome. For a glass pan, add a few extra minutes to the baking time.
  7. Cool for at least 30 minutes before using parchment flaps to lift blondies from the pan. Cut into squares for serving. Keep leftover blondies wrapped or in a sealed container at room temperature for up to three days.


DIY Solar Jack O’Lanterns 🎃

It’s October, and that means that my front door is now being guarded (or is it watched?) by Mr. Bones, the spooky, gauzy dude that my husband has placed on our porch every October since 2007. He gives me the major creeps because every time I open the front door, he’s staring at me. It doesn’t matter which way we hang him on the nail of our entry, either. He turns on the breeze to stare me down. But in his defense, he was here long before me, so I adjust. 💀

Could you not, Mr. Bones?!

Last year, in my attempt to entice more than five trick-or-treaters to our house for Halloween, I added to the theme with the fun DIY project that I’m sharing today. This cute little decoration was inspired by something I saw on Pinterest, but it was unclear who actually made and posted the lanterns. That’s one of the things about social media— a great idea can be shared by someone who doesn’t understand the settings of their account, and sometimes it ends up being just a photo with no accompanying information. What can you do? 

But in this case, it was clear to me that the project involved plastic pumpkin candy buckets and solar lights, and I figured, “how hard could it be?” Turns out, it wasn’t difficult at all. 

The pumpkins make Mr. Bones look even more creepy.

What materials do you need for a DIY solar jack o’lantern?

This kid-friendly project requires only the plastic pumpkins and some solar yard lights sized to match the top opening of the bucket. My lights were nothing special, just some off-the-shelf items I picked up at Lowes, and I found the pumpkins in the seasonal section at Walmart. Naturally, you want to be sure that some light will shine through the pumpkin buckets before you cut them, and you can easily test this by holding a bucket upside down over a lamp bulb in your home. If the bucket is translucent enough to let the light shine through, you’re good to go!

A couple of easy tools are necessary for this project, including a pen (for tracing around the solar light stem onto the bottom of the pumpkin) and either a utility knife or a cordless drill fitted with a hole drill bit the size of your circle. For safety sake, only an adult should tackle this part of the project. I used a utility knife, and to minimize risk of injury, I adjusted the knife so that only a small point of the blade was exposed. 


The first pass with the knife was only to “score” the plastic, and I made subsequent passes to make a deeper cut until the circle could be punched out. A quick test with the solar light stem, and adjustment if needed, and then reassembly of the solar light. 


The solar light cap should be slightly larger than the top opening of the pumpkin bucket, so that rain water does not collect inside. Mine look like the pumpkins have a little hat! The pumpkin buckets wanted to slide down the lamp stems after a few minutes, so I used a couple of heavy rubber bands— the thick kind that grocery stores use on broccoli— to snug around the stems, keeping the pumpkin in place all month long. Another fun thing about this decoration is that you can remove the pumpkins from the solar lights after Halloween and set them aside for next year.

Please ring our bell. Plenty of candy inside!

My solar lights have a slight “bubble” texture to them, so the pumpkins also have a dappled glow. I can’t say that the solar jack o’lanterns made a difference in our trick-or-treater turnout— we still ended up with a mountain of leftover candy, as usual— but I guess changing neighborhood habits can’t be as easy as this little project. 

Maybe this year!


S’mores Cookie Bars

It’s National S’mores Day, and I’ve been thinking about what makes this treat so special to deserve its own day of honor. The first written recipe for “s’mores” appeared in a Girl Scout handbook in 1927, when Calvin Coolidge was President of the United States— 16 presidents and almost 100 years ago. Amid a sea of other snack trends and fads that have come and gone (I’m lookin’ at you, Hostess pudding pies!), the s’more has stood the test of time. And no wonder! A melty morsel of milk chocolate and campfire-toasted gooey marshmallow, bookended by a sweet and simple whole grain cookie, what’s not to love? 

Like most of you, I’ve enjoyed s’mores since I was a kid in rural upstate New York. But our weather in the South is hot as hell in August, not particularly conducive to a campfire, and I’m sorry to say that the oven and microwave versions of s’mores just don’t cut it. There are appliances out there now for making s’mores indoors, like this one sold through Williams-Sonoma, but who has room for another gadget that only serves one purpose? 

Luckily, I’ve found many other ways to capture the essence of s’mores (along with all the happy feelings they invoke), twisting the ingredients of this summer classic into ice cream, brownies, cocktails and even dessert pizza! When I made s’mores cupcakes last year, I mused that perhaps I could have used up the leftover homemade marshmallow topping by making rice krispie treats, and I considered a s’mores version of those this year, except for one problem— my husband doesn’t like the krispie treats, and I would have been left to eat the entire batch! These s’mores cookie bars are my compromise, and I have no regrets.

I’d like s’more, please.

They are part s’more, part blondie, part cereal treat and 100% yummy!

What goes into s’mores cookie bars?

The base of my s’mores bars is essentially a blondie dough, with softened butter, brown sugar, egg, vanilla, baking powder and flour. But to emulate the s’mores more distinctly, I used whole wheat pastry flour and also added in honey for additional sweetness and some finely crushed graham crackers, which my hubby was happy to prepare for me. I used two of the little sleeves of Honey Maid “stackers,” which measured out to a little more than one cup of crumbs.


For the ooey-gooey goodness, I went with marshmallow creme, which holds its shape much better than actual marshmallows. When I made my s’mores pizza in 2020, I was disappointed at how much the mini marshmallows deteriorated after they cooled from the oven. Knowing that we would not devour this entire batch of cookie bars right away (though believe me, it was tempting!), I wanted a better, more stable option. Marshmallow creme, made with dried egg whites, is the way to go here, and I used almost an entire jar spread over two-thirds of the blondie dough. It may seem excessive, but isn’t that kind of the point with s’mores? 😏


You could, naturally, whip up a batch of seven-minute frosting in its place if you have the time, but I was getting impatient for my cookie bars. Real Hershey bars were layered over the marshmallow creme (because milk chocolate rules when it comes to s’mores), and then I mixed darker, semi-sweet chocolate chips and crispy Golden Grahams cereal into the remaining blondie dough, lending a cookie-meets-cereal bar vibe to my sticky, delicious treats.


I baked the bars for about 35 minutes, and then let them cool a few hours before removing them from the pan. The result? 

Ooey-gooey perfection!

Deliciously sticky, utterly addictive and every bit as ooey-gooey as I wanted them to be, and they have kept on the counter nicely so we can enjoy them for several days. Plus, no campfire required. 😋

Tips for success

As with all baking recipes, it’s best to have all your ingredients lined up, measured and ready to go before you begin. Take your butter out of the fridge an hour ahead so that it isn’t rock solid, and let your egg come to room temperature. Use extra bowls if that’s what it takes to have everything ready for mixing as the recipe indicates. For years, I considered myself to be a mediocre baker, but I’ve come to learn that my failing was mostly in preparation. Get your ducks in a row, and watch your baking game improve!

Following the steps in order does make a difference. If you don’t cream together the butter and sugar before adding in the other ingredients, the texture of your cookie bars may be quite crumbly. When you mix in the flour, do so only long enough to fully incorporate it. Overmixing will lead to gluten development, and you don’t want that. Use the paddle attachment on your mixer, or use a firm spatula to press the ingredients together by hand.

When layering the marshmallow creme, try to keep it about an inch away from the edges of the pan so that it doesn’t stick and burn. Keep in mind that when you press the chocolate bars and cookie dough topping, the creme will smoosh and spread. Give it room to do so.

If possible, use a metal pan to bake these cookie bars. You can see in my photos that I used a ceramic baking dish (it’s all I have in this size), and these simply do not heat as quickly or evenly as a metal pan.

After baking, give these cookie bars plenty of time to cool before you attempt to lift out the parchment sling. The marshmallow and chocolate will be very hot, and thin enough to ooze out everywhere, making a mess and potentially burning your hands. They will still be delicious when cool, and if you wish, you can pop your cookie bar into the microwave for a few seconds to recapture the ooey-gooey stretch of the marshmallow.

S'mores Cookie Bars

  • Servings: 9 or 16, depending on how you cut
  • Difficulty: Average
  • Print

These are part s'mores, part blondie, part cereal bar and 100% ooey-gooey delicious!


Ingredients

  • 1 stick salted butter, softened
  • 1/2 stick unsalted butter, softened
  • 3/4 cup light brown sugar, packed
  • 3 Tbsp. honey
  • 1 egg, room temperature
  • 2 tsp. real vanilla extract
  • 1 cup whole wheat pastry flour (sub regular or white whole wheat, or use all a-p if desired)
  • 1/2 cup all-purpose flour
  • 1 tsp. baking powder
  • 1/2 tsp. salt
  • 2 pouches Honey Maid “stackers” graham crackers, crushed fine
  • 2/3 cup semi-sweet chocolate chips
  • 2/3 cup Golden Grahams cereal
  • Most of a 7 oz. jar marshmallow creme
  • 3 standard size Hershey milk chocolate bars

Note: For easy removal of cookie bars, layer ingredients over criss-crossed parchment laid inside a 9-inch square baking pan. Overlap the paper so that you can use it as “handles” for lifting the cookie bars out after they’ve cooled.
If possible, use a metal baking pan, as glass or ceramic (as I used) tends to heat more slowly, causing the bottom to be slightly underdone.

Directions

  1. Preheat oven to 350° F, with oven rack in the center position. Prepare 9” square baking dish by lining with crossed pieces of parchment paper, overlapping the sides of the dish.
  2. In a stand mixer fitted with paddle blade, beat butter on medium high speed until fluffy. Add honey and then brown sugar a little at a time, beating until fluffy again. Add egg and vanilla, beating until evenly blended.
  3. Whisk together flours, baking powder and salt in a medium bowl. With mixer running, add flour by the spoonful until all is incorporated. Turn off mixer and scrape dough off beater. Add crushed graham crumbs and use a silicone spatula to press and blend them into the dough. Do not overmix.
  4. Transfer about 2/3 of the cookie dough to the parchment lined baking dish. Butter hands and press evenly over parchment. The dough will be very soft and sticky. Add the semi-sweet chips and cereal to the remaining dough, pressing firmly with the spatula to mix them in completely. Set aside for topping.
  5. Butter an offset spatula (or dip into hot water) and spread the marshmallow creme evenly over the cookie dough, keeping it about one inch away from the edges.
  6. Break the Hershey bars into four sections each and arrange them evenly over the marshmallow layer, gently pressing so that the marshmallow oozes up between the chocolate pieces.
  7. Use a scoop, spoon or your fingers to place dollops of the remaining cookie dough over the chocolate pieces, taking care to leave only small gaps for the marshmallow to bubble through.
  8. Bake 30 to 35 minutes (depending on your oven), until cookie batter is just barely baked through and the peekaboo marshmallow creme is lightly browned. Remove from oven and cool on a rack for a few hours before lifting out the parchment and cutting into squares.


Spooky Stuffed Peppers

Before the kiddos head out for trick or treating on Monday night, parents hope that they have a decent, balanced meal in their little bellies. You know, so that they aren’t just chowing down on sugar from all those Snickers, Reeses and Skittles that they get in their trick-or-treat bags.

In my limited experience with children, I learned one lesson loud and clear—a simple way to get kids interested in eating good-for-them food is to make it FUN.


With a little imagination, you can turn an ordinary bell pepper into a fun Halloween supper, and you can fill it with whatever your kids (or grandkids, great-grandkids, neighbor kids, friends’ kids, etc.) like to eat. Mine are stuffed with cooked ground turkey in a Mexican-ish flavor profile—a combination of onions, green bell peppers, celery, garlic and Rotel tomatoes, spiffed up with chili powder and tomato paste—but there’s no reason you couldn’t change it up and make it Italian. Or Greek. Or vegan with a kale and quinoa kind of thing. Or any other combination you think the kids would like to eat. For the big kids at our house (that would be me and my husband), I went in big for veggies and lean protein.

Use any combination of vegetables that makes sense for the flavors you like.

You could use another color of bell pepper if you’d like, but the orange ones are good here, not only for their impersonation of a jack o’lantern, but also because hungry trick or treaters may be more receptive to their flavor, which is sweeter than a typical green bell pepper.

Choose peppers with a good stem, and peppers that will stand up on their own.

To prep the peppers, carefully slice the tops off, taking note of how far down the stem extends so that you keep the top of the pepper intact. Clean out the seeds and excess membranes, and then place the peppers, upside-down, into a glass baking dish with about one inch of water. Put the pepper tops in there, too, and microwave them on high for about five minutes. This will steam and soften the peppers so that they don’t need as much time in the oven after they are stuffed.

When they are cool enough to handle, use the top of a sharp paring knife to cut out triangle eyes and a nose into each bell pepper body. If you’re feeling extra creative, you could also cut a toothy smile into the peppers, too, but be careful because you don’t want the filling to seep out of its whole face.


Preheat the oven, with a rack in the center position. Heat a little olive oil in a skillet and sauté the vegetables until they are just softened. Remember to season with salt and pepper, and then add the spice seasonings to bloom their flavors. Crumble in the ground turkey, a little at a time, and toss to stir until no pink color remains. Add the Rotel and a little tomato paste to intensify the tomato flavor, and a pinch of dried Mexican oregano.


Spoon the filling into the peppers, lay a slice of sharp cheddar over the filling, and then reposition the pepper tops before sliding it into the oven. At this point, all the ingredients are fully cooked, so the peppers only need to be in the oven long enough to heat through, finish softening and melt the cheese.


Serve the peppers right away with a few spoonfuls of cooked rice, and get those kids costumed up for their night of fun!

Spooky Stuffed Peppers

  • Servings: 4 peppers
  • Difficulty: Average
  • Print

This is a fun way to feed the little ones something on the healthy side before they go trick-or-treating for all that candy. Mix and match ingredients based on what the kids like.


Ingredients

  • 4 orange bell peppers (choose them for shape and size, plus strong stems)
  • 2 Tbsp. extra virgin olive oil
  • 1/2 sweet onion, chopped
  • 2 ribs celery, trimmed and chopped
  • 1/2 green bell pepper, chopped
  • 2 cloves garlic, smashed and minced
  • Salt and pepper to taste
  • 1 tsp. salt-free seasoning (I used a combination of chili powder, cumin and paprika)
  • 1 lb. fresh ground turkey (or other lean ground meat)
  • 10 oz. can Rotel diced tomatoes (there are many heat levels; choose what’s right for you)
  • 2 Tbsp. tomato paste
  • A pinch or two of dried oregano
  • 4 slices sharp cheddar or other favorite melting cheese
  • Brown rice, for serving

Directions

  1. Preheat oven to 350 F, with oven rack in center position.
  2. Wash the bell peppers. Carefully cut the tops off the peppers, low enough to keep the stems intact. Remove seeds and membranes and place the peppers upside down in a microwave-safe dish. Add about an inch of water to the dish and microwave on high for 5 minutes, or longer if needed until peppers are somewhat softened. Set aside until cool enough to handle.
  3. While the peppers are cooling, heat a large skillet over medium heat. Add oil to the pan and sauté onions, green bell pepper and celery for about 5 minutes, until softened. Add garlic, salt and pepper, plus salt-free seasoning of your choice. Cook another minute.
  4. Crumble ground meat into the skillet, about half at a time so it doesn’t overcrowd the pan. When meat is no longer pink, add the Rotel tomatoes, tomato paste and dried oregano. Cook until mixture is bubbly, then turn off heat and cover the pan.
  5. Use a sharp paring knife to carefully cut out triangle eyes and noses in each of the bell peppers (toss the bits into the pan with the rest of the filling).
  6. Spoon the filling into the peppers. Arrange a slice of cheddar over each pepper, positioning the slices so that they will not melt to cover the eyes on the peppers. Replace the pepper tops and bake (uncovered) for 25 minutes, until heated through and cheese is melted. Serve immediately with brown rice.


S’mores Brownies

Ooey-gooey. It’s the only honest way to describe a s’more—with its melty, oozing richness of milk chocolate, warmed and softened by a fresh-from-the-campfire toasted marshmallow and squished between two delicately crispy, honey-sweetened graham crackers. It is a little dessert sandwich that says, “come on, be a kid again!” This beautifully sticky, utterly sweet nostalgic treat is fantastic on its own, but now I’ve just gone and made it even more sinful by baking it into a rich, dark, fudgy brownie.

Why in the world would I do such a thing, when I’m supposed to be watching my calories? One reason: National S’mores Day!

You probably think these are ridiculous, and you’re absolutely right!

What Goes Into S’mores Brownies?

There’s no campfire required to make these, and you don’t have to get carried away making them from scratch, either. My s’mores brownie recipe (like all my brownie riffs) is based on my favorite brownie box mix, and I am confident that it would work well with your favorite, too. All you need (besides whatever the brownie box says) is a sleeve of graham crackers, a little melted butter, a jar of marshmallow cream, two Hershey’s milk chocolate bars and a smidge of cream cheese.

The main ingredients are exactly what you’d expect. You’ll also need a little butter, a dab of cream cheese and whatever is required for making the brownie batter.

This would be a fun and tasty activity with the kids, the grandkids, the neighbor kids, the big kid you married or perhaps just the kid in you! There is playfulness in making them, and my hubby even joined the action during assembly—it’s funny how quick he is to lend a hand when dessert is involved, and he was definitely excited about these.

S’mores brownies are excellent when served in their just-cooled state after baking, but (as my husband discovered) they are also great cold from the fridge. My neighbor reports that they are awesome warmed up for a few seconds in the microwave—you know, bringing that melty gooiness back to life. We even tried them warmed with a small scoop of ice cream on top. I think it’s safe to say that there is not a bad way to enjoy a s’mores brownie.

The cold, creamy ice cream was a nice complement to the ultra-rich s’mores brownie.

How to Make S’mores Brownies

Did I mention that making them is easy? You’ll find an easy click-to-print recipe at the end of the post. It includes all the measurements and directions I used. But first, some eye candy!

I started with a graham cracker base—the same as I would make for a cheesecake or key lime pie. My graham crackers were packaged in “stacks,” which are basically just pre-halved graham squares for quick and easy s’more making. I used two stacks for the crumb base. Prepare your baking pan with a few swipes of cold butter along the bottom and sides to ensure easy removal of the ooey-gooey brownies, with all its sticky sweet fillings. Add graham crackers to the bowl of a food processor, and pulse several times to break them up into rough crumbs. Then add the melted butter and pulse again several times, until the mixture resembles coarse, wet sand. Transfer the crumbs into the buttered pan and press firmly onto the bottom, but not up the sides. Bake a few minutes to set the crumbs and then let it cool.


For the marshmallow layer, I used the same trick as in my S’mores Ice Cream last year—I used an electric mixer to combine the entire jar of marshmallow cream with a small amount of cream cheese. This knocks out the airy bubbles, making it more manageable for layering inside the brownies. Scoop this mixture into a zip top bag, seal it and set it aside.


Make the brownie batter according to package instructions. If you are obsessed with dark chocolate (ahem, like me), feel free to add a tablespoon of dark cocoa powder to the dry mix first. I planned to use Hershey milk chocolate in the layers (for its ooey-gooey properties), so the addition of cocoa is how I got my dark chocolate fix. Spoon roughly half of the brownie mixture as evenly as possible over the baked graham crust. Don’t try to spread it, as this will dislodge those beautiful crumbs. Just spoon it and let it ooze into place.


Next, snip a small corner off the bag holding the marshmallow cream and gently pipe it all over the first layer of brownie batter. I did my best to keep this layer from seeping to the edges, because marshmallow tends to turn hard and chewy if it cooks too much. My hubby jumped in to help at this point, as he had opened up the Hershey bars and broken them into individual pieces for layering onto the marshmallow cream. He may also have been doing a little quality control for me—a.k.a. taste testing the chocolate bars—and it was fun hearing him describe how he broke the bars into little pieces like that when he was a kid. You know, to make the chocolate bar last longer. 🙂

We arranged the chocolate with a little space in between so the marshmallow had plenty of room to ooze.


The rest of the brownie batter was layered on, and it was tricky to spoon it on evenly without creating a muddy swirl. Next time, I might use a zip top bag to pipe that on as well, but the swirls were not too pronounced. A few broken pieces of extra graham cracker, and our brownies were ready for the oven! My box mix suggested 45 to 50 minutes, and I gave it the full 50. My s’mores brownies were a bit on the “fudgy” side, and I think a few extra minutes in the oven would have been just fine.

Now, the hard part. Waiting for them to cool!

As much as I’d love to claim that the calories fell out when we cut them into squares (spoiler alert—they didn’t), I think I’ll just declare that I’m glad National S’mores Day only comes once a year!


S'mores Brownies

  • Servings: 9 or 16, depending on how you cut them
  • Difficulty: average
  • Print

There’s no campfire required to make these, and you don’t have to get carried away making them from scratch, either. My s’mores brownie recipe (like all my brownie riffs) is based on my favorite brownie box mix, and I am confident that it would work well with your favorite, too.

Ingredients

  • 1 box brownie mix, plus ingredients listed to make them (usually oil, water and egg)
  • 1 Tbsp. dark cocoa, optional for extra rich chocolate flavor
  • 1 sleeve honey graham crackers (or two “stacks,” if your package is like mine)
  • 3 Tbsp. salted butter, melted
  • 7 oz. jar marshmallow cream (or fluff)
  • 2 Tbsp. plain cream cheese
  • 2 full-size Hershey milk chocolate bars, broken into individual pieces
  • 1 or 2 additional graham crackers, broken into pieces for top of brownies

Directions

  1. Preheat oven to 325° F, or temperature recommended on the brownie mix. Place rack in center of oven. Butter the bottom and sides of an 8-inch square baking dish.
  2. Break up a sleeve of graham crackers (or two stacks) into the bowl of a food processor. Pulse several times to break them into coarse crumbs. Add melted butter and pulse several more times, until mixture resembles wet sand.
  3. Transfer crumbs to buttered baking dish and press firmly onto the bottom but not up the sides. Use a small, flat-bottomed dish to make this easy. Bake graham crust for about 7 minutes, enough to set the crumbs. Cool to room temperature.
  4. In a small bowl, use an electric mixer or sturdy whisk to beat cream cheese and marshmallow fluff together. Spoon mixture into a quart size, zip top bag. Seal and set the bag aside for now.
  5. Make brownie batter according to package instructions. If using dark cocoa, add it to the dry ingredients before blending.
  6. Carefully spoon about half of the brownie batter onto the cooled graham crust. Do not spread the batter, as this will disturb the delicate crumbs.
  7. Snip a corner of the zip top bag and use it as a piping bag to distribute the marshmallow cream over the brownie batter. Try to keep the cream about an inch away from the side edges of the dish.
  8. Arrange the individual Hershey pieces all over the marshmallow cream. It doesn’t have to be perfect; just aim for uniform coverage with a bit of space in between each piece.
  9. Carefully spoon the remaining batter over the layers of marshmallow and chocolate pieces. I found this easiest by using small spoonfuls, beginning around the edges of the dish first, to keep the chocolate pieces from being pushed to the outside.
  10. Break up about two additional graham crackers (or four, if using the stacks); arrange them randomly over the top of the brownies.
  11. Bake for the full time recommended on the brownie package, until the top of brownies is done to its usual state. (If you’re using a favorite brand, you’ll know what they should look like on top)
  12. Cool to room temperature before cutting and serving.


PB&J Ice Cream

Of all the foods I loved as a kid, few were as simple and pleasing as a peanut butter and jelly sandwich. The combination of protein-rich, salty, sticky peanut butter and sweet, cool, fruity jelly (or jam) is so satisfying, and I still love it today. My personal favorite way to enjoy this kid-friendly classic is fried, exactly like a grilled cheese sandwich—this preparation seems to elevate a PB&J sandwich into something more suitable for, ahem, grownups. I guess I’m still trying to be one. And, as I learned last week, the flavor combo also translates nicely to summer’s favorite dessert.

The kid in you will go crazy for this ice cream!

When National Ice Cream Month rolled around this year, I already had a long list of flavor ideas to try, but some of them will have to wait because July is slipping away. This one, however, is too fun to let slide, and I’m even willing to make an exception to my “trying-to-eat-healthier” summer. After all, what could be more fun than PB&J ice cream???

It’s smooth and peanut butter-y, with little dots of fruity sweet jelly throughout. Mmmm!

The ice cream base is literally one of the simplest I have ever made. It is only four ingredients, including the fat-free version of sweetened condensed milk that I discovered when I made my Reduced-Guilt Vanilla Ice Cream at the start of this month. This was such an exciting discovery, because the fat-free condensed milk still provides the texture that makes ice cream so addictive. The rest of the base is whole milk, a slight amount of light cream and a smooth, natural peanut butter.

Choose a smooth natural peanut butter, not one with a grainy texture.

For full disclosure, I confess that this is not my usual go-to style of peanut butter; I prefer the type that is nothing more than ground peanuts and sea salt—you know, the kind you have to stir and keep in the fridge—but most of those have a slight grittiness that would not play well in this smooth ice cream base. After much label perusing, I went with this Skippy brand “natural” peanut butter, which is smooth like the Jif of my childhood. It does not contain partially hydrogenated oils, but it does have some amount of palm oil, a somewhat lesser crime. It keeps the peanut butter mixed, silky and spreadable—exactly what I needed for this recipe. I also considered one of the peanut butter powders that have become widely available, but I’ll save that experiment for another day. Though it may not be my favorite peanut butter for sandwiches, we can always use it up by making a batch of Dark Chocolate Peanut Butter Pretzel Brownies!

My base has plenty of peanut butter flavor on its own, and with addition of a pinch of sea salt, the contrast of salty-to-sweet is exactly what I wanted. But then I went wild and added more peanut butter, in the form of a ribbon made of salted, crunchy peanut butter. I layered it with the frozen base, and after some time in the freezer, the ribbon has a texture that is almost like peanut butter chips. Finally, the “J” part of this PB&J ice cream—and for this, I brought my childhood favorite flavor of Welch’s grape together with my current-day favorite of French mixed berry preserves. Together, they were soooo good!

Past favorite, meet present favorite. This jelly is my JAM! 🙂

Mixing up this ice cream was so easy, and I’m honestly starting to wonder why I ever went through the trouble of making a custard base. Besides being crazy creamy and having fewer steps, this egg-free type of ice cream base is also ready for freezing in less than half the time as custard ice creams. Just whisk together the condensed milk and smooth peanut butter (I used my handheld mixer for this task), then add the milk and cream. I did not add vanilla because I wanted a pure peanut butter flavor. Chill it down in the fridge for an hour or two.


When you’re ready to churn, give the ice cream base a quick whisking to reincorporate any ingredients that may have settled. Pour the base into the ice cream maker and follow manufacturer’s instructions for freezing. Measure out the chunky peanut butter and the preserves-jelly mixture into separate, small zip-top bags. This will make it easier to layer them in ribbons throughout the frozen base. Put both bags on standby in the fridge until the freezing is completed.


When the ice cream reaches the desired consistency, splash in a tablespoon of vodka (assuming only grownups will be eating it), to ensure a smooth scooping texture, straight from the freezer. Transfer the ice cream into an insulated freezer container and snip the corners of the peanut butter and jelly bags, making it easy to squeeze ribbons of PB&J into layers of peanut butter ice cream.


Don’t worry about swirling the ribbons—doing so will only make the ice cream look muddy. Just lay the ribbons down in a criss-cross kind of way, and trust that the swirls will happen on their own when you scoop out the finished ice cream.

Swirly and delicious.

And don’t worry if you have a little extra PB&J in the squeeze bags because—wait, what are you doing, Love?

I guess a recipe like this brings out the kid in everyone! 🙂

PB&J Ice Cream

  • Servings: 8
  • Difficulty: average
  • Print


This ice cream is the very best of two childhood favorites, all swirled together in one easy, creamy bite!

Ingredients

  • 14 oz. can fat-free sweetened condensed milk
  • 1/2 cup smooth natural peanut butter
  • Pinch of sea salt
  • 1 1/2 cups whole milk
  • 1/2 cup light cream
  • 1 Tbsp. vodka (optional, mixed in at the end for improved texture)
  • 3 Tbsp. crunchy natural peanut butter
  • 2 Tbsp. each grape jelly and mixed berry preserves

Directions

  1. In a large pitcher bowl, whisk together condensed milk and smooth peanut butter until completely smooth. Stir in sea salt to boost the salty peanut flavor.
  2. Whisk or stir in milk and light cream. Cover the bowl and refrigerate for an hour or two, until fully chilled.
  3. Set up the ice cream maker and give the base mixture a quick whisking to re-blend any ingredients that have settled. Pour into the ice cream machine and churn according to manufacturer’s instructions. During the last minute of churning, blend in the vodka (unless serving kids or non-drinkers, of course).
  4. While the ice cream is churning, measure out the chunky peanut butter and the jelly combination into separate, small zip-top bags. Refrigerate until ready to layer.
  5. Transfer the frozen ice cream to an insulated freezer container, about one-third at a time. Snip a small corner off each swirl bag. After each partial layer, squeeze a ribbon of peanut butter, alternating with a ribbon of jelly/preserves.
  6. Finish the ice cream with a final layer of ice cream base. Cover and freeze several hours for best scooping texture.


S’mores Ice Cream

There is something very special and nostalgic about s’mores, the delightfully sugary campfire treat that I first learned of when I was a young girl. I cannot say for sure that my first experience of s’mores was during my time as a Girl Scout, though legend has it a troop leader named Loretta Scott Crew first dreamed them up to feed 16 hungry girl campers in 1927. But I do know that my first taste of this wonderful confection—toasted marshmallow and Hershey’s chocolate square, melted between two graham crackers—was like a seductive symphony of ooey-gooey summer heaven. The only cooking involved in making s’mores is toasting a marshmallow to golden perfection, and then allowing the contained heat within the marshmallow to melt the piece of chocolate bar when you squish the graham cracker cookies together.

Truth be told, I was prone to wreck my marshmallows by over-toasting them. I’d position my marshmallow stick (and yes, where I come from, we used actual sticks) directly into the hottest part of the campfire until my puffy marshmallows blazed with a blue light around them. I’d blow out the fire, only to skim off and eat the scorched sugary jacket and plunge them back into the fire for another round of overcooking. I’m quite sure that was not the intention behind the “toasted” marshmallow portion of s’mores, but nobody ever accused me of following the rules—I like what I like.

Now that I’m all grown up, I still love the idea of s’mores, but I cannot fathom the notion of sitting around a campfire in the dead heat of summer, and we don’t usually fire up our patio chiminea until at least October. Not even for a sticky-sweet s’more—sorry.

Luckily, I have other plans for those delicious flavors, and just in the nick of time, it seems, given that today is National S’mores Day. Why, I wondered, couldn’t I represent the same s’mores flavors in a cold treat form that was more suitable for the middle of August?

No campfire required!

And that was my approach to this yummy spectacle of summer sweetness. For a change of pace, I skipped the eggs in my ice cream base and used sweetened condensed milk instead. I wanted the vanilla ice cream to be a pure palate of white, but I was also trying to avoid cooking as much as possible. It’s been pretty dang hot here in the South, and if I have the option to keep the stove turned off, I’m taking it. The marshmallow swirl was also a no-cook step, and for this, I relied on a tried-and-true fruit dip recipe that fuses marshmallow fluff with cream cheese. The dairy ingredient gave the fluff just enough body to take away the ultra-sticky consistency but retain the marshmallow flavor.

See how the cream cheese mellowed out the sticky marshmallow fluff? And it still tastes exactly like marshmallow (but creamier).

I did turn on the stove briefly to make the fudgy swirl that represents the melted chocolate square of a traditional s’more, but that was a small price to pay for this delicious final result.

Looks like delicious black gold, doesn’t it?

Happy S’mores Day, everyone!

Yes, please, may I have s’more?!

Ingredients


Ice Cream Base

14.5 oz. can sweetened condensed milk

1 cup whole milk

1 cup heavy cream

1 tsp. real vanilla extract

1 Tbsp. vanilla flavored vodka (optional, for improved texture)


Gooey Marshmallow Swirl

2 oz. full-fat cream cheese (this is 1/4 of a regular brick)

1 cup marshmallow fluff (give or take, as this stuff is difficult to scoop and measure)


Chocolate Fudge Ripple

1/2 cup cane sugar

1/3 cup light corn syrup

1/2 cup water

3 Tbsp. Hershey’s Special Dark cocoa

3 Tbsp. King Arthur Double Dutch Dark cocoa

1/2 tsp. real vanilla extract

Pinch sea salt

and…

Of course, you will also need graham crackers, about 6 cookie sheets, broken into pieces


Instructions

For the base of the ice cream, whisk together the condensed milk, whole milk and heavy cream. When the mixture is smooth and even, stir in vanilla extract. Cover and refrigerate until all other ingredients are cold and ready for layering.

For the marshmallow swirl, use an electric mixer to whip the cream cheese and marshmallow fluff together. Allow enough time for the mixture to settle into a smooth consistency. Cover and refrigerate.

For the fudge ripple, combine sugar, corn syrup, water and cocoa powders in a small saucepan over medium-low heat. Whisk constantly until mixture reaches a just-barely-boiling point. Remove from heat and stir in sea salt and vanilla extract. Transfer to a bowl, cool several minutes, then cover and refrigerate until fully chilled.  

To make the layered ice cream: Freeze the base ice cream according to manufacturer’s instructions; my Cuisinart machine takes about 20 minutes. During the final minute, add the vanilla flavored vodka. This ingredient is not essential, but it helps make the ice cream scoopable immediately upon removal from the freezer. If you avoid alcohol—no problem; simply remove the ice cream about 15 minutes before serving to slightly soften.

When ice cream is finished churning, add a slight ribbon of fudgy ripple to the bottom of an insulated ice cream container. Spoon in a few dollops of the ice cream base, followed by the graham cracker pieces and a generous drizzling of the marshmallow fluff mixture. Swirl on more fudge ripple, then repeat with ice cream, graham pieces and marshmallow fluff mixture. Be generous with the s’mores ingredients for best results. Any remaining fluff or fudge swirl mixture can be used to “dress up” your ice cream at serving time.


Transfer ice cream container to the freezer for several hours (preferably overnight) to firm up. Serve with additional topping ingredients.


My Favorite PB&J

Throughout my childhood, I took for granted that everyone enjoyed peanut butter and jelly sandwiches the way my family made them. Not every time (but a good percentage of the time) I had this quintessential kid favorite, it was fried. You read that correctly—a fried peanut butter and jelly. 😋

I don’t mean greasy, county fair-style of battered-and-fried. This PB&J sandwich is assembled as usual, and then buttered on both sides and placed on a pan or griddle like a grilled cheese sandwich. The reward for patience while it cooked was a golden and crispy crust, with peanut butter and jelly melted together inside—a sticky, gooey, delicious mess of flavor.

You make me so very happy!

I was at least halfway into my 20s before I realized that a fried PB&J was not a standard sandwich for everyone else, and I’m thrilled to have been let in on this flavorful secret sandwich at such a young age. This sandwich is helping me wrap up Better Breakfast Month, and I believe it qualifies as a “better” breakfast item for a few reasons:

  1. It’s quick and easy to make
  2. Kids and grownups alike will enjoy it
  3. It’s a fun and elegant twist on an ordinary PB&J
  4. It has whole grains, fiber, protein and fruit, which makes it nutritious (that’s my story and I’m sticking with it)
…and utterly DELICIOUS!

Making a fried PB&J is really as simple as I just described, and you certainly don’t need a recipe to do it. What I will offer instead is my guide to making the most memorable fried PB&J, because the ingredients you choose can make or break your first taste impression of this sandwich, which is, quite frankly, dangling right on the edge of the dessert category. Let’s begin with the foundation of any good sandwich:

The Bread

In my (trying to be) humble opinion, a homemade artisan-style bread will yield the best results. You guys know I’m all about sourdough, and this is the bread I’ll be using here, but I know not everyone has time to invest in learning or making naturally leavened bread. You can use store-bought bread to make a top-notch fried PB&J, provided you choose a suitable type. Hopefully, you are not still purchasing the long, skinny, plastic-wrapped loaves that are found in aisle 12 of the supermarket—but if you are, please stop. Cheap packaged breads are made of cheap, stripped-down ingredients, and the  texture is all wrong for sandwiches, toast—well for anything, really.

I love Maurizio Leo’s sourdough recipe that I’ve linked above because it makes the best sandwiches (and the best toast). It uses a simple but unusual step of pre-cooking a portion of the flour, which enhances the final texture into something that is gelatinized and chewy yet tender, and 100% perfect for sandwiches. To be fair, the recipe is not for beginners, but if you have some experience with sourdough, I hope you’ll try it. Maurizio’s recipe makes two loaves, but I usually halve the recipe, and I bake it in a covered Pullman pan, which gives me perfectly square slices.

If you’re not yet a baker, pick up a good, simple artisan loaf from your supermarket bakery—preferably something partially whole grain, with a soft “crumb” (that’s a bread-nerd term for the interior texture of the bread) and a firm, slightly chewy crust. No nuts or seeds or anything extra—just a classic bread is fine. All your sandwiches henceforth will thank you.

The Peanut Butter

Every PB&J (fried or otherwise) I had as a kid was made with conventional supermarket peanut butter, namely the brand that the (allegedly) choosy mothers chose. But I have not bought that stuff in years because it contains sugar, plus hydrogenated oils that are blended in to keep the natural oils of the peanuts from separating. I discovered long ago the simple pleasure of a natural peanut butter, made from only peanuts and salt. Sure, you’ll have to stir it (but only once) and keep it in the refrigerator, but it’s only 90 extra seconds spent to protect your body from the hazards of trans fats. There’s the question of smooth vs. crunchy, and I’m going with crunchy because I love the added texture of the little peanut pieces. You decide.

The Jelly

The PB&J of my childhood was usually made with grape jelly, and I’ll admit that I still have a special place in my heart for the flavor of good old Welch’s. It may have something to do with the fact that I grew up a few miles down the road from their original headquarters in Westfield, New York. Concord grapes are a native grape, and they were everywhere in my neck of the woods—my best friend’s family even had concord vines growing on a pergola over their backyard patio. Sandy and I used to pick the grapes straight off the vine in late summer and squish the seedy insides into our mouths, tossing aside the bitter, astringent skins and then spitting out the seeds. I can still taste those grapes!

Today, it’s all but impossible to find a grape jelly that doesn’t list high fructose corn syrup in the first two ingredients, and that is a huge problem for me. This is an ingredient that did not exist at all in previous generations, but food manufacturers lean on it heavily today because it’s cheaper and easier to use than sugar. But it’s fake, and I’m not having it on my sandwich. Pick up a jar of handmade jelly at the farmer’s market or diligently inspect the ingredient labels in the supermarket if you’re as concerned about this issue as I am.

As an adult, I’ve developed a fondness for other flavors of jams and preserves, my favorites being raspberry, fig and cherry. For this fried PB&J, seedless is best, so I’m going with cherry preserves, and I’ve carefully selected a brand that is sweetened with real sugar. There are chunks of cherry in these preserves, too, so I know it will be delicious.

The Butter

To grill the sandwich, you’ll need to lightly butter both sides, and I do not recommend margarine or any other kind of butter substitute, unless you are dairy restricted. The milk solids in butter contribute to the lovely browning on the crust and, unfortunately, a substitute will not have the same crispy result. But if your only choice is plant-based butter, you will still enjoy this sandwich for the flavor and the incredible ooey-gooey texture that results from heating the peanut butter and jelly together.

I can’t stand the suspense, and my laptop can’t stand my drooling, so let’s get to it.

For best results, use modest amounts of both peanut butter and jelly. They will marry together so well under the gentle heat of the griddle, but too much of either will cause the filling to seep out everywhere. Keep the griddle level on a medium-low heat, for slow and even browning. This gives the filling time to properly warm so the peanut butter and jelly become like one. Turn the sandwich carefully so it doesn’t slide apart. And for sure, allow it to cool a couple of minutes, so the sandwich is “set up” properly when you cut into it. Plus, if you give into temptation and bite into it too quickly, you’ll burn the roof of your mouth. Trust me on this; warm is good, hot is painful.

This fried PB&J makes me so very happy, with each buttery crisp bite, and the warm nutty, fruity filling makes me feel like I’m nine years old again. In a good way. 😉 Each time I make one, I try to eat it slowly so I can hang onto that feeling. The other beauty of this sandwich is that it works for breakfast, lunch, dinner, late-night snack or any other time your sweet tooth and hunger collide.

Please let me know if you try it, and feel free to share in the comments any fun twists your family made on a classic comfort food!


Healthy Breakfast Fruit Smoothies

We all need options when it comes to breakfast, and so I’m sharing my tips for making a quick and healthy smoothie, regardless of the fruit and other fixings you have on hand.

What makes these smoothies “better” for better breakfast month?

  • They work two servings of fruit into the most important meal of the day.
  • They bend and flex to accommodate your favorite fruit, fresh or frozen.
  • You can easily swap out dairy for plant-based milk.
  • Your favorite protein powder will feel right at home in them.
  • They are quick, easy and portable for rushed-out-the-door mornings.
  • They satisfy your morning hunger and are friendly to a weight-loss diet.
  • They are super kid-friendly.

My magic formula for delicious and healthy fruit smoothies goes like this—something creamy, something packed with protein, some kind of fruit, maybe a juice, and optional special touches, such as coconut or spices. See what I mean? Flexible! I’ll give the full rundown of how I mix and match ingredients (and in what quantity), then I’ll share specifics of my favorites. Here we go!


Something Creamy

about 3/4 cup

I usually choose plain Greek yogurt or kefir, a cultured dairy drink that is similar to buttermilk but tastes more like a drinkable yogurt. Regular yogurt is also an option, but I avoid the flavored ones and their crazy-high sugar content. Skyr is another good option—a yogurt-like product from Scandinavia. Two popular brands are Siggi’s and Icelandic Provisions. For a plant-based option, choose your favorite non-dairy yogurt substitute, but lean into the low-sugar or plain options. The fruit you add will bring plenty of sweetness to the party.


Something Protein-y

about 1/2 “scoop,” or approximately 1 heaping tablespoon

Choose your favorite powdered form—I like soy protein, but whey works very well in smoothies, and so does hemp or pea protein. Almost every protein powder I’ve purchased comes with a small scoop that is roughly 2 tablespoons, and I fill it halfway for a smoothie. I recommend a plain or unsweetened vanilla option. My husband, Les, likes the chocolate protein powder, but we have found it can be less versatile for matching with fruit. Chocolate and raspberry is great, but chocolate and peaches?—not so much. Vanilla helps us keep our options open.


Something Fruity

total of about 1 cup

Yay—my favorite part! I like my smoothies to be icy cold and shake-like, so I almost always use frozen fruit, and especially bananas because of the creamy texture they provide. The greatest benefit to using frozen is that I don’t have to wait until the fruit is in season. It also saves multiple trips to the market for fresh fruit, or throwing away fruit that has gone bad. The fruits that work best for my homemade smoothies are peaches, bananas, pineapple, mango, cherries and any kind of berry (as long as you don’t mind their seeds). Fresh fruit works fine, of course. I don’t recommend citrus fruits, apples, melons or grapes, as their texture and water content would prevent them from blending well.


Juice or other liquid

1/4 to 1/2 cup, depending on other ingredients

This is helpful for blending the smoothie, but it may not be necessary if you use kefir, which is pourable. Greek yogurt is much thicker and would benefit from addition of juice, especially if you are using mostly frozen fruit in the smoothie. Other suitable liquids include milk, almond milk, coconut water or coconut milk.


Special mix-ins

small amounts of each

The mix-ins can be anything you like, but my favorites are unsweetened coconut (for texture and fiber), chia seed (for fiber and additional protein) and ginger (good for digestion) or another powdered spice, such as cinnamon. Sweeteners are not necessary, but if you must, may I recommend a teaspoon of honey or maple syrup? Anything but sugar, if you are aiming to keep them in the healthy column.


Ordering the layers:

It may seem inconsequential, given that the ingredients will be whirred into one mixture in the blender, but your smoothies will come together faster and more evenly if you layer the ingredients in a way that your blender can best mix them. You want the liquids and powders closest to the blender blade, so they can get a head start on mixing before the frozen stuff enters the game. The heavier ingredients, such as frozen fruit or ice, should be at the top, providing weight to keep the mixture moving downward for thorough blending. For a standard base blender, it might look like this:

My smoothie appliance is a bullet blender, which of course goes upside-down for mixing. So I layer my ingredients in reverse order, beginning with frozen fruit. When I flip the sealed blender cup onto the machine, I give it a minute to allow the liquids to run back to the blade area for more even mixing, leaving the frozen fruit at the top, where it should be.

Enough talk—let’s make a smoothie! Below are some of my favorite blends, and a list of ingredients I use for each of them. I’ve given the ingredients in order for a conventional blender. If you use a bullet-style blender, reverse the list order. Each combination yields a 12 oz. (340 g) smoothie.


Kefir, pineapple and spinach

I think of this smoothie as a power breakfast for all the nutritional benefit I get from it. Plus, the flavor is so delicious, it is a treat at the same time.

Ingredients: 3/4 cup kefir, 1/4 cup orange juice, 1/2 scoop soy protein powder, 1/2 teaspoon ground ginger, 1 tablespoon chia seed, 2 tablespoons unsweetened coconut, 1 medium handful baby spinach leaves, 1/2 cup banana chunks, 1/2 cup frozen pineapple bits.


Yogurt and banana-berry blend

This one feels very protective, with lots of antioxidant benefit in the red and blue berries.

Ingredients: 1 serving cup yogurt (I used coconut flavor skyr for this one), 1/4 cup blueberry juice (any juice or milk will do), 1/2 scoop protein powder, 1 tablespoon chia seed, 2 tablespoons unsweetened coconut, 1/2 cup frozen banana chunks, 1/2 cup frozen berry blend (with blueberry, raspberry, strawberry and blackberry).


Plant-based yogurt and mango

There are many great flavors of plant-based yogurt available, and this one was mango, so I played up the tropical flavors throughout the smoothie.

Ingredients: 1 serving cup plant-based yogurt, 1/4 cup orange juice, 1/2 scoop protein powder, 1 tablespoon chia seed, 2 tablespoons unsweetened coconut, 1/2 cup frozen banana chunks, 1/2 cup frozen mango chunks.


Peach cobbler smoothie

For this one, I soaked 1/4 cup rolled oats in 1/2 cup kefir overnight (in the fridge) and then built the smoothie in the morning. It’s an easy way to work some whole grains into your breakfast drink (because September is also “whole grains month”). From that point, the process was the same for layering and blending. You get the idea, right?

Ingredients: 1/2 cup almond milk, 1/2 scoop protein powder, 1 tablespoon chia seed, kefir-soaked oats, 1 tablespoon almond flour, 1 tablespoon unsweetened coconut, 1/2 teaspoon ground cinnamon, 1/4 cup frozen banana chunks, 1/2 cup frozen peaches.


Want to print these “better breakfast” recipes?