Bacon & Spinach Pizza— on the grill!

If you’ve been following my blog for any amount of time, you know that I love to make pizza at home. Beginning with my favorite sourdough crust, I mix and match ingredients to discover new favorites and I’ve also had a lot of fun transforming other classic dishes into pizza, as I did with jambalaya, queso fundido, spanakopita, ratatouille, shrimp scampi and even Thanksgiving (you can check them all out on my Pizza Party page). My husband, Les, and I truly love a good pizza, and it’s in pretty hot rotation at our house, even in the summer months. 

There’s only one problem now. This god-awful heat!

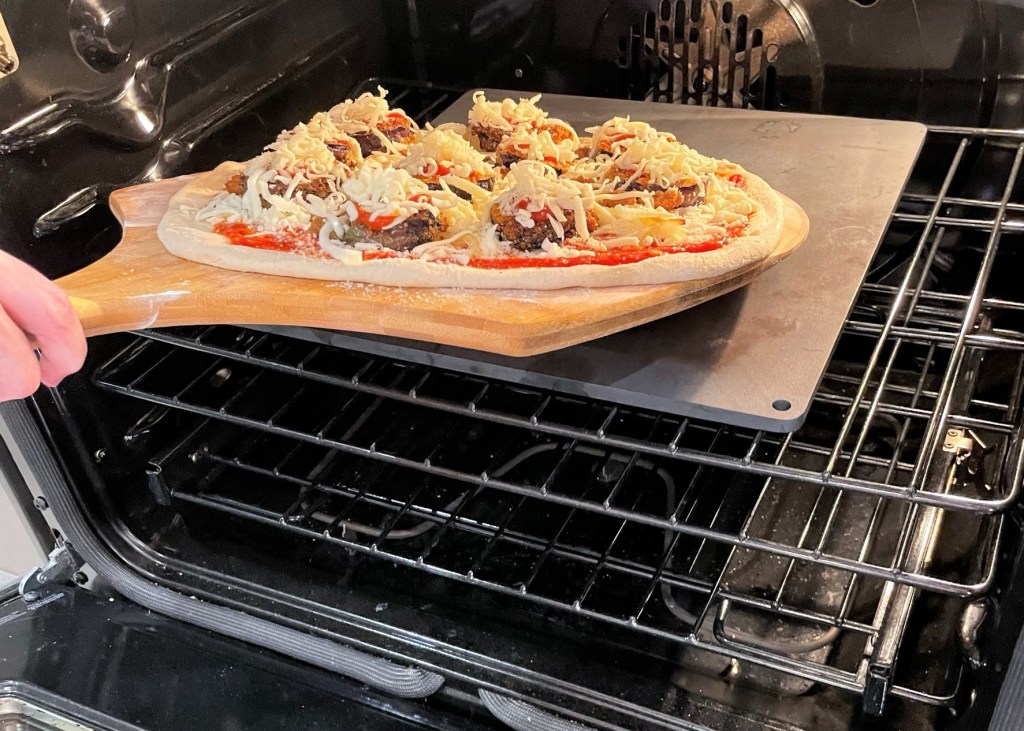
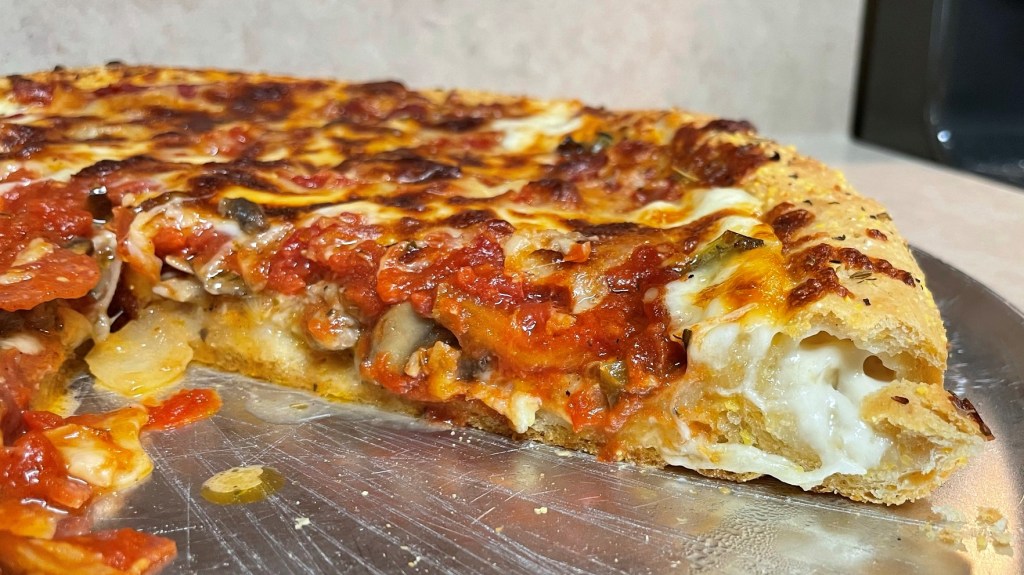
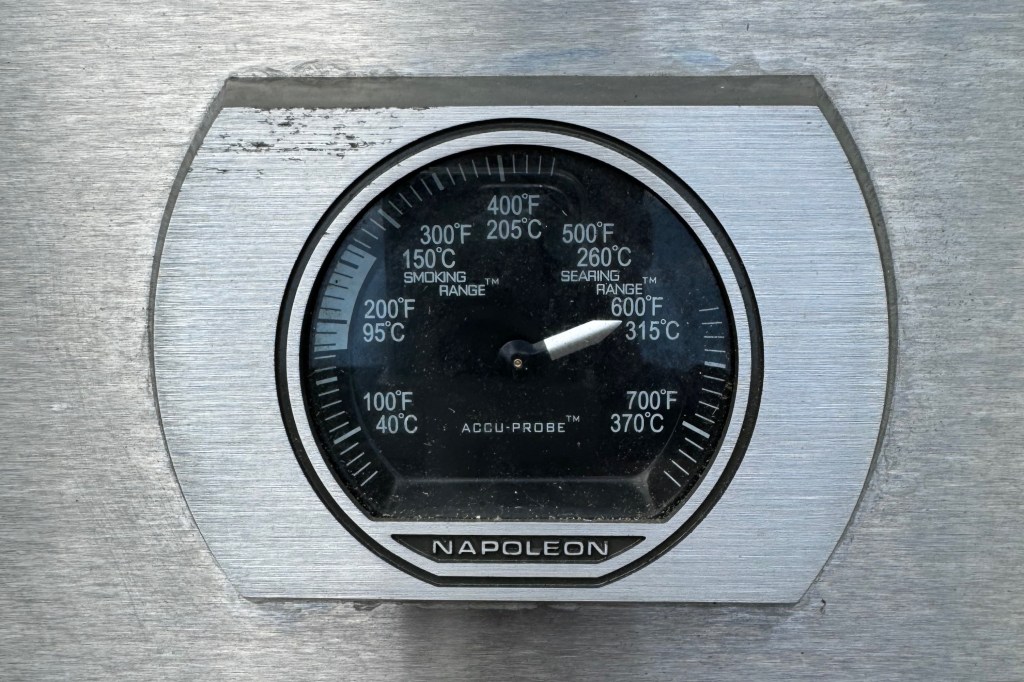
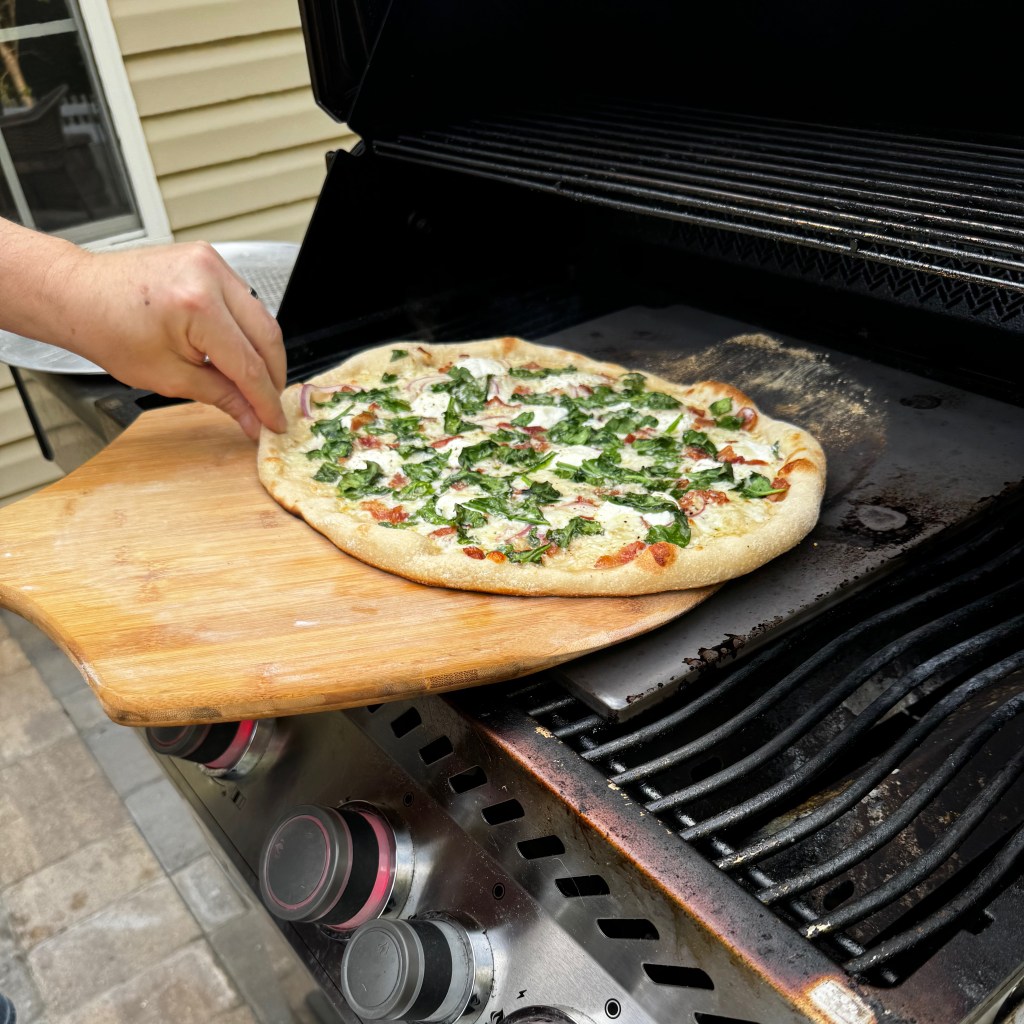
Most of my pizzas (excluding the deep dish versions) are baked on what I lovingly refer to as our “screaming hot pizza steel,” which is preheated at 550° F for one hour. This summer, with outdoor temperatures holding steady in the 90s, we had a choice to make, lest we face similar temps inside. And the solution turned out to be simple— pizza on the grill!

I think we can expect a lot more of these!

Two summers ago, Les and I invested in a Napoleon four-burner gas grill. Part of the reason we chose this grill (besides the fact it was made in Canada, not China) is that the model can support some amazing accessories, including a rotisserie basket and a charcoal smoker insert (both of which we bought but have yet to use). What it didn’t have was a great solution for pizza.

We considered getting an outdoor pizza oven— they’re all the rage now, after all— but having one would require having a place to set it and store it, and then there’s all the accessories for it. And have you seen the price tags? Having just dropped a hefty chunk of change on our fancy grill, we couldn’t justify spending another grand on a device that would only be used for pizza.

Fortunately, we are not easily deterred, and some quick research led us to a pizza stone made by Weber that is suitable for really high temperatures. The stone is coated with a glaze that gives it an easy-release finish, and although the Weber site says you must use it with their special frame kit on select Weber grills, I’m here to report that it also works great on our Napoleon— we just set it right on top of the grates, and crank up the heat!

This is even hotter than our oven!

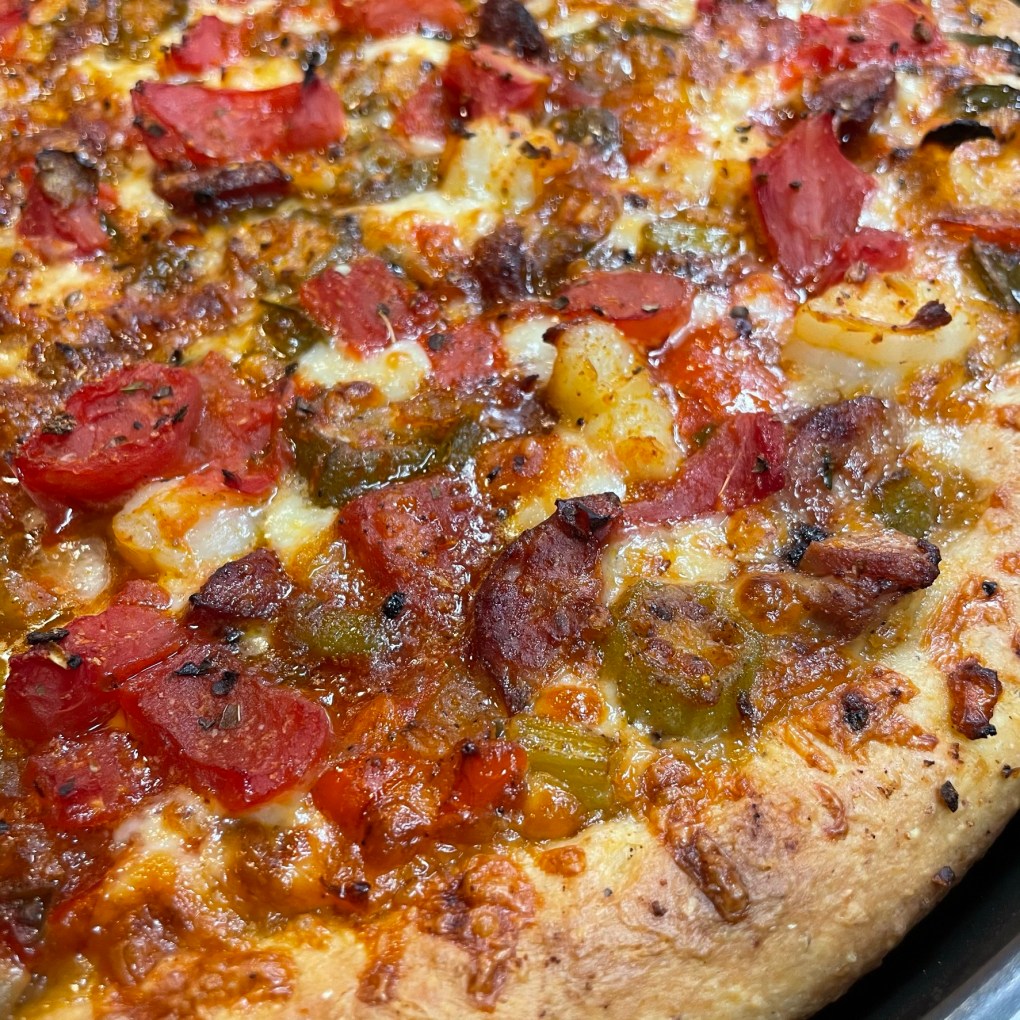
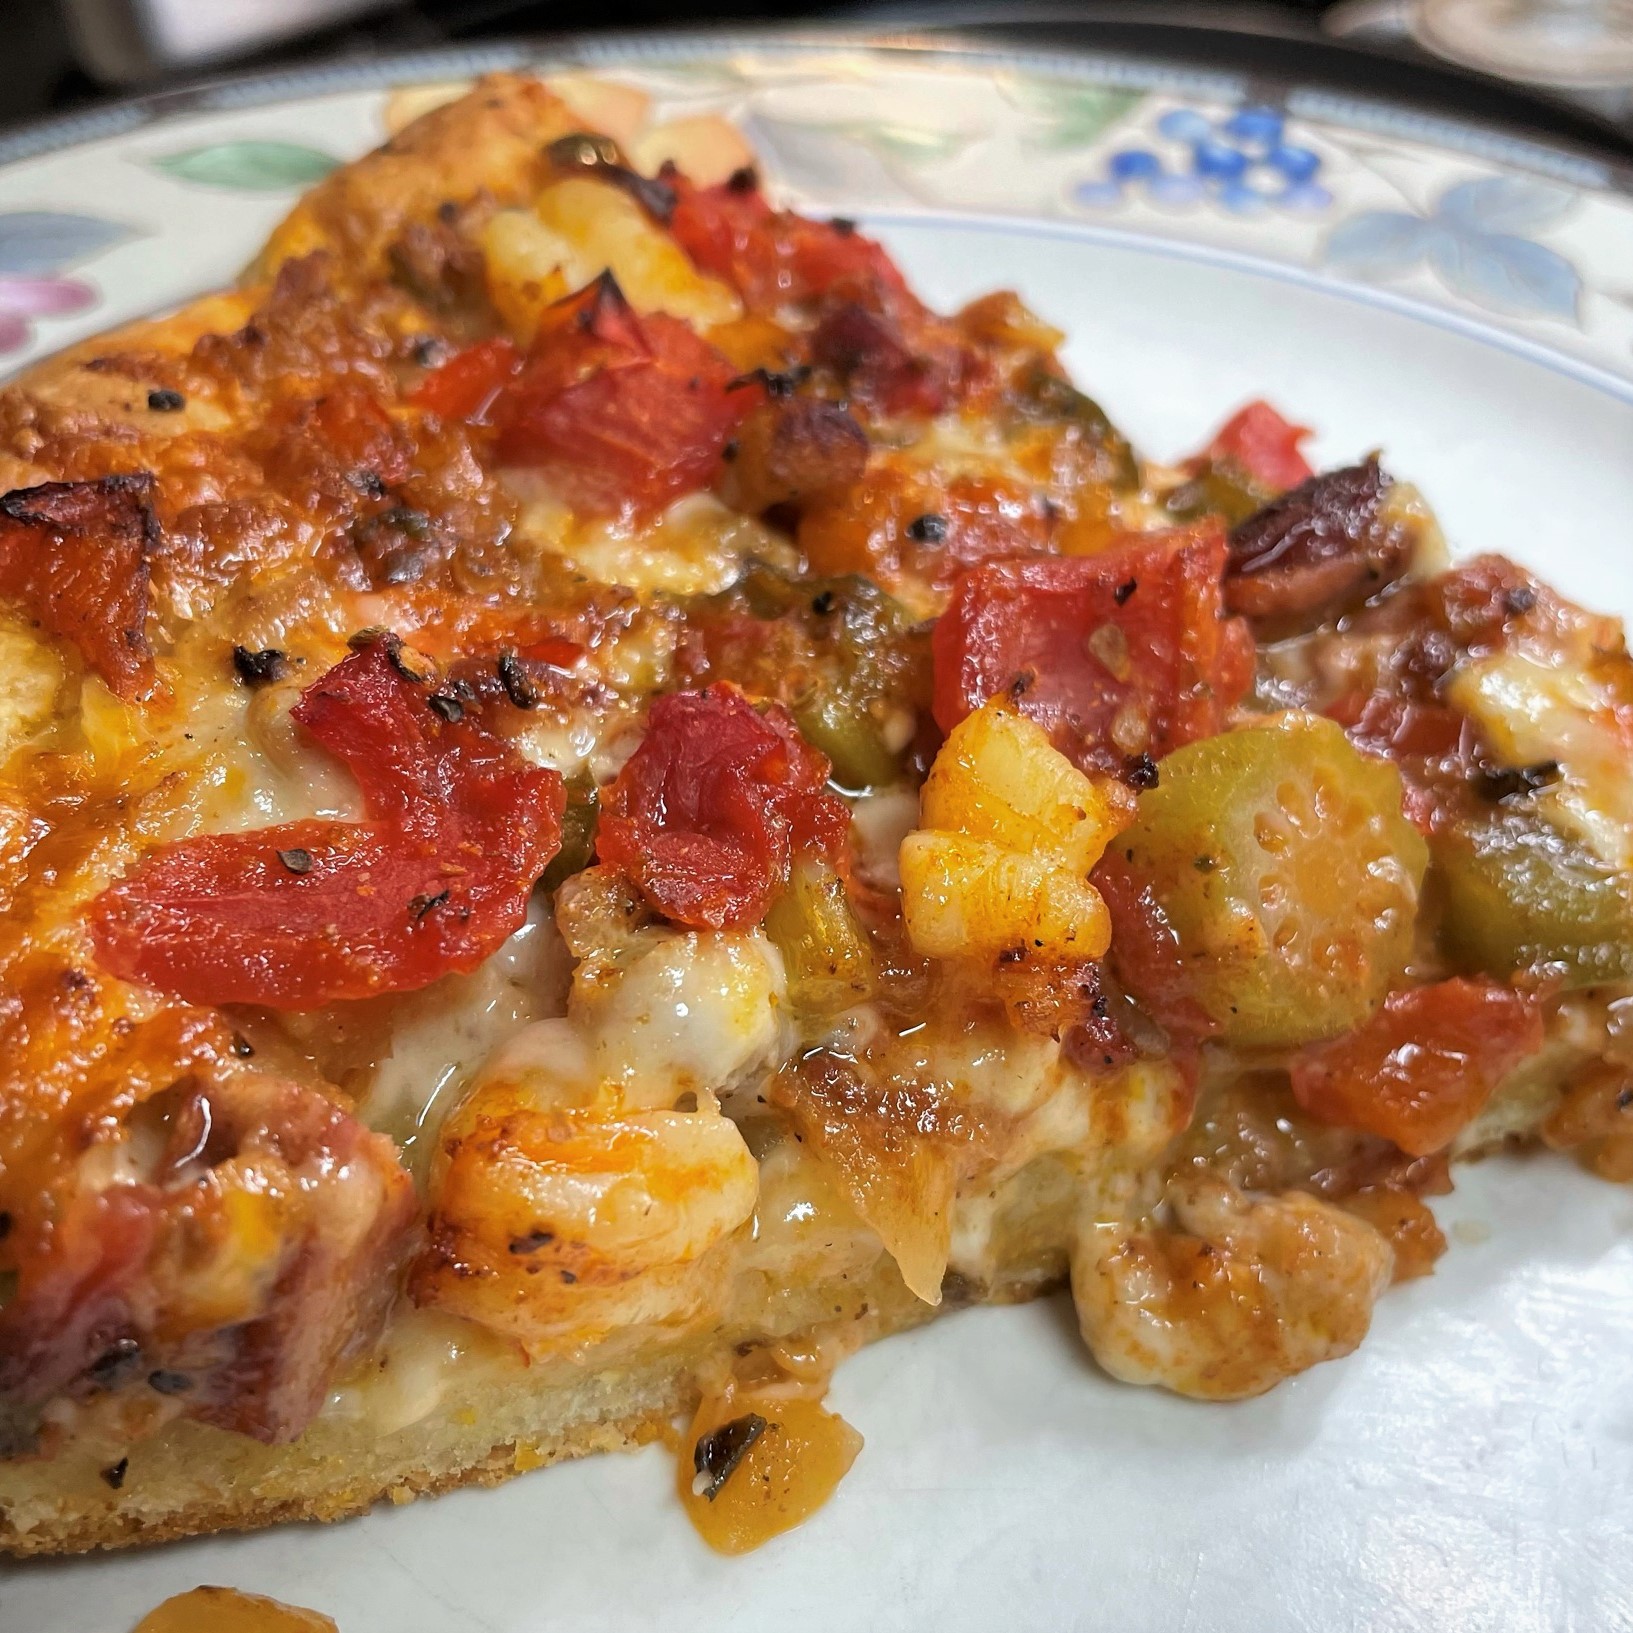
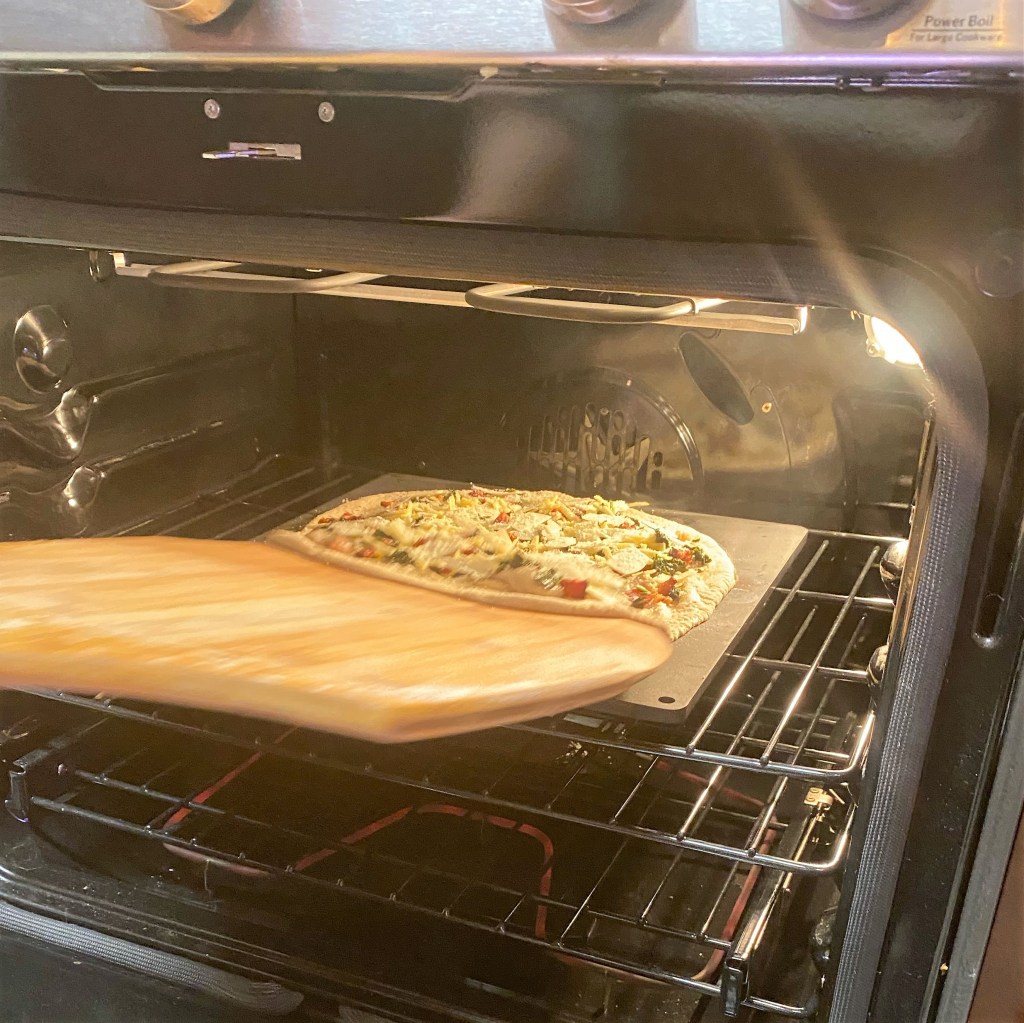
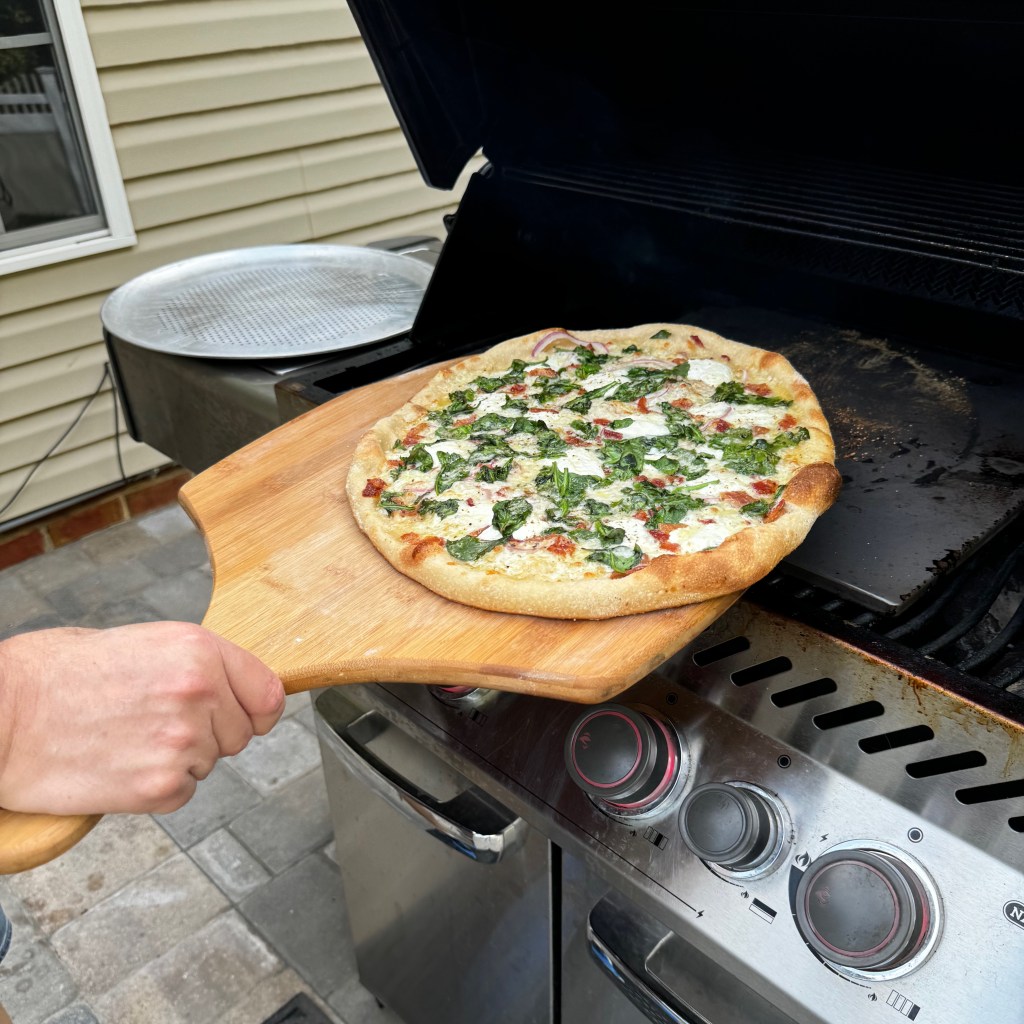
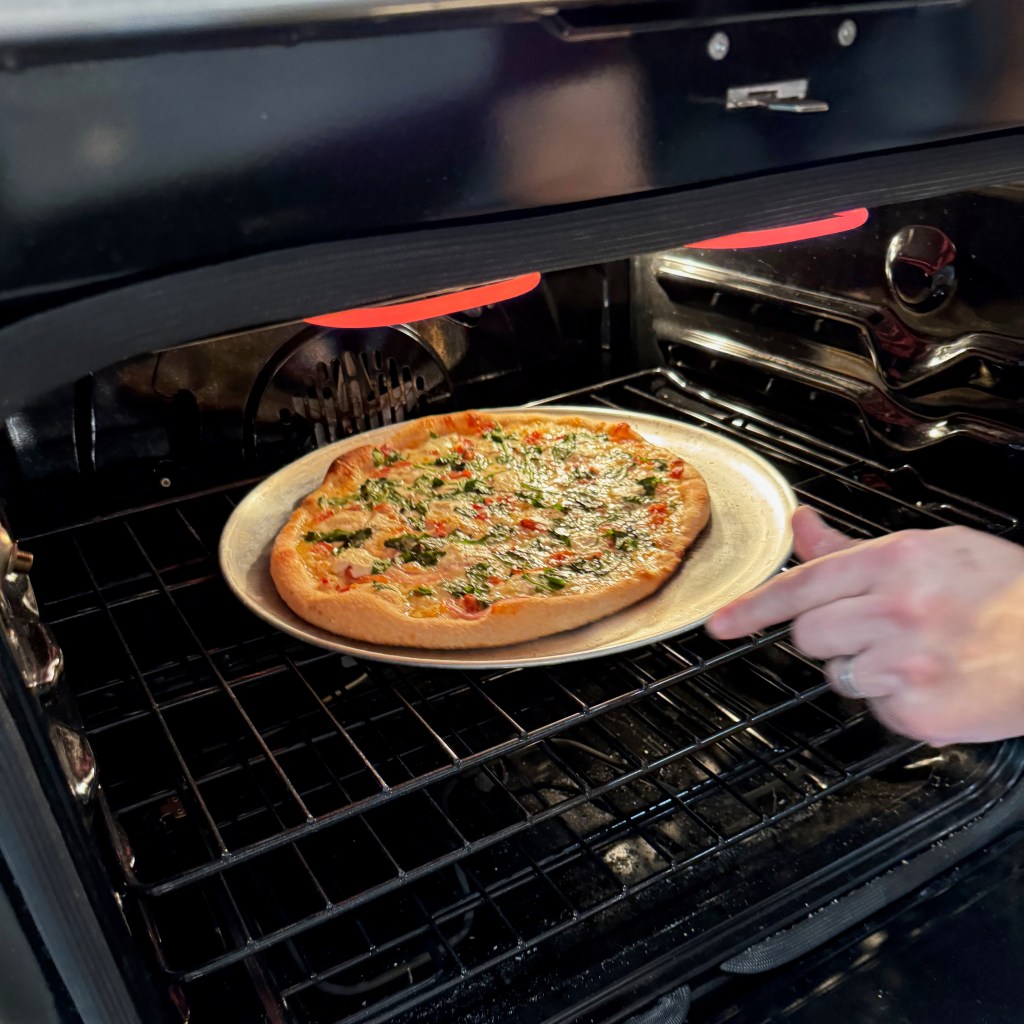
The first couple of pizzas we tried on the grill last summer turned out good, with melty toppings and crispy crust. But we missed the usual top-of-pie blistering that we love from our oven-baked pies, so this year, we’ve figured out a compromise. After our pizza bakes for roughly six minutes on the grill, it hits a perforated pizza pan for a spin under the oven broiler for exactly one minute. Yes, the broiler gets hot, but only very briefly compared to multiple hours at 550° F. It’s a solution that ticks all the boxes for these two pizza snobs!

Hungry for something different?

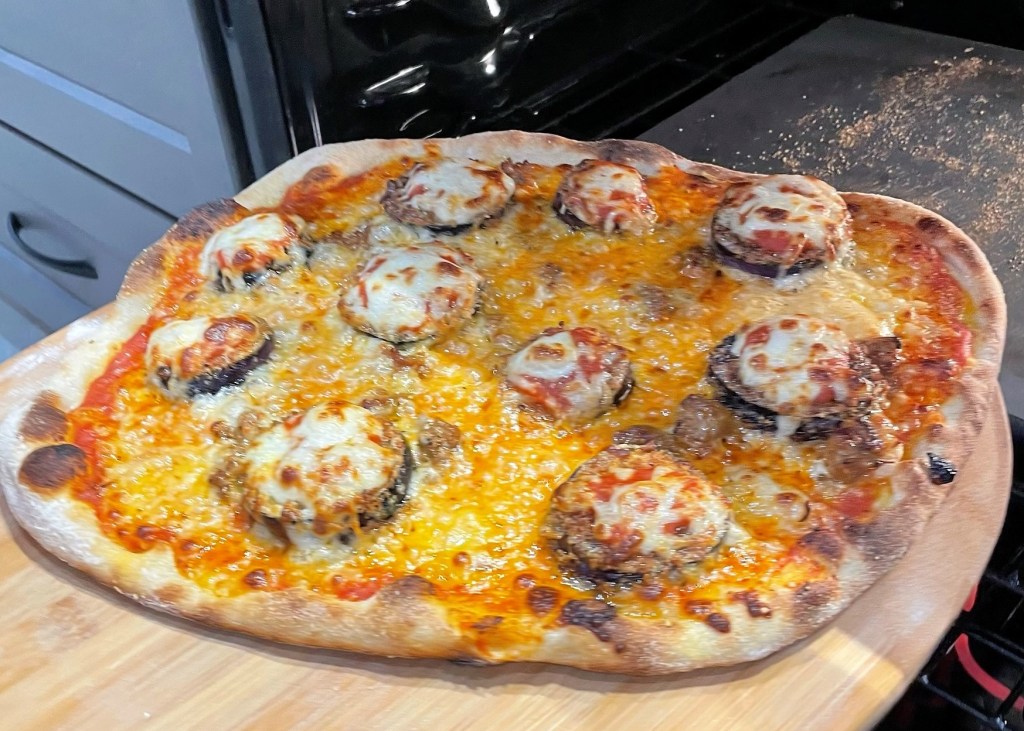
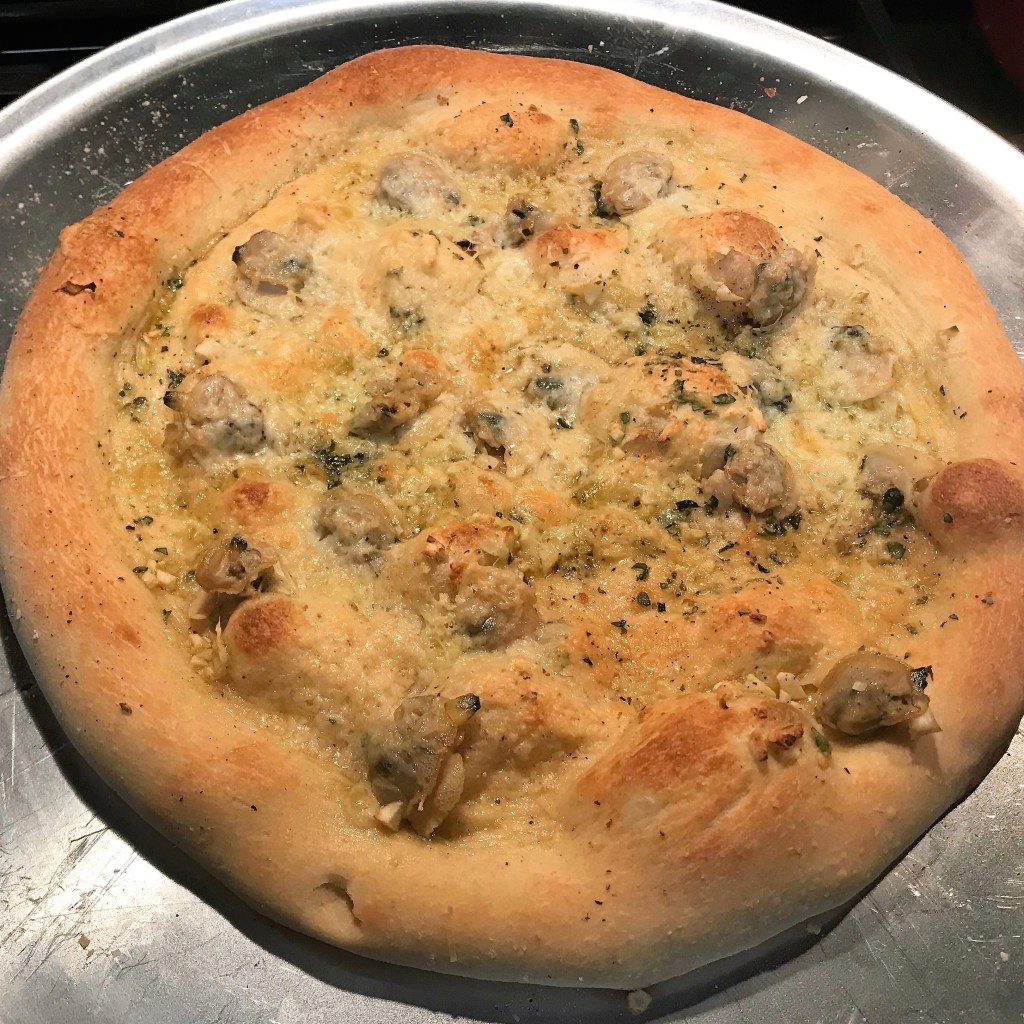
My pizza dough recipe makes enough for two pies, so I have plenty of opportunity for experimenting. I usually do something classic for one pizza, and the other becomes a blank canvas for new ideas. I’ve been tuned into Les’s suggestions quite a bit lately, and he asked last week whether we’ve ever done a pizza with bacon as a topping. I had to search my own blog to discover that, yes, I did put bacon on the jalapeño popper pizza, the Kentucky hot brown pizza and the oysters Rockefeller pizza (they are also on the Pizza Party page). 

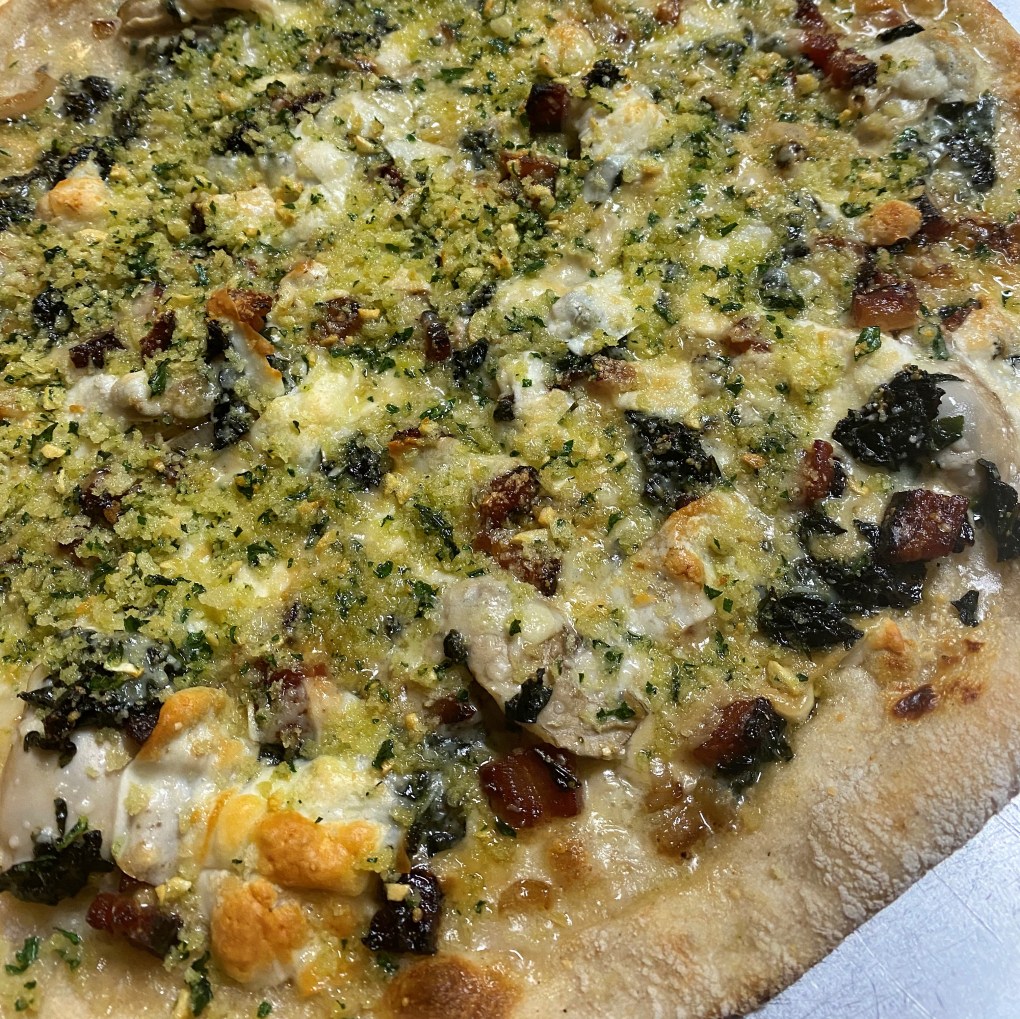
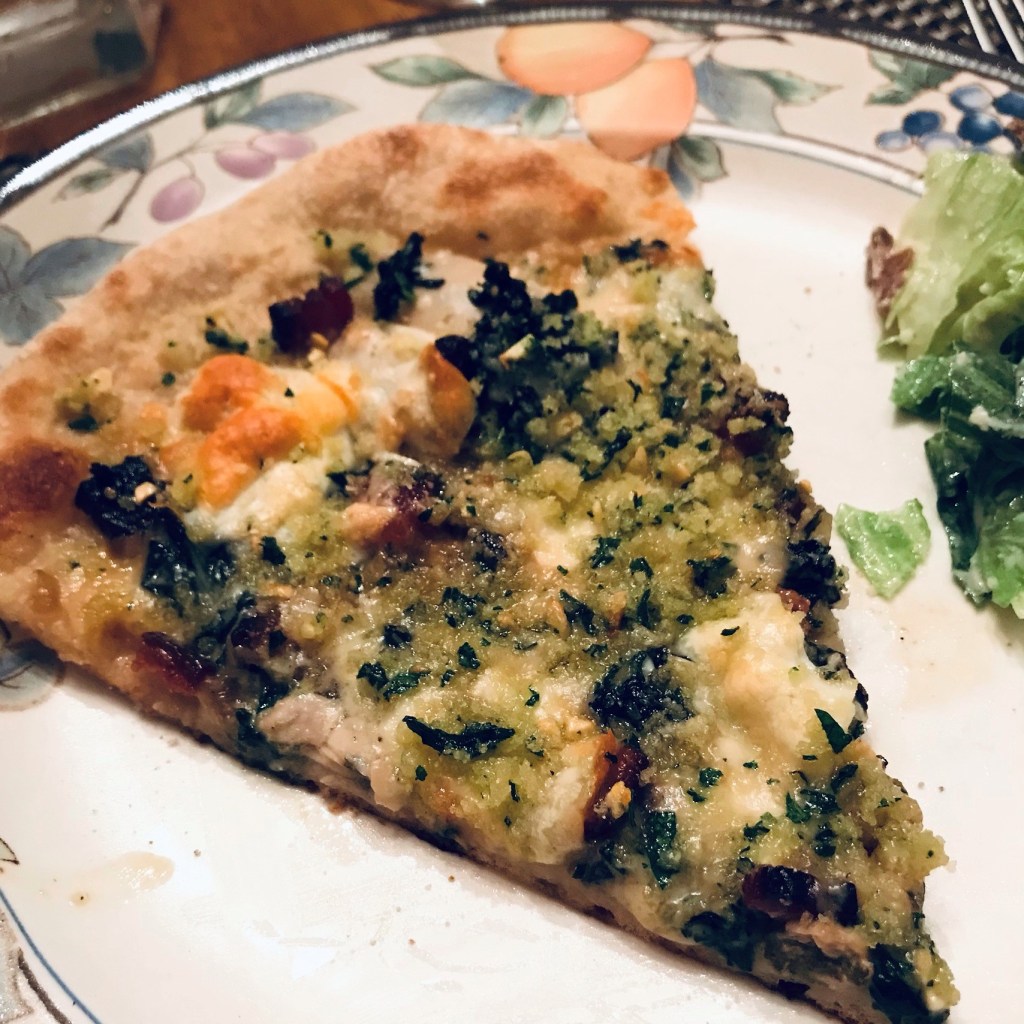
But Les wanted something a little different, using bacon as a salty accent, plus fresh spinach (his favorite), red onions and some gruyere cheese he thought he’d spotted in the fridge. I contributed a topping of my own, ricotta, and this new pizza was born. 

A very tasty experiment, if we do say so.

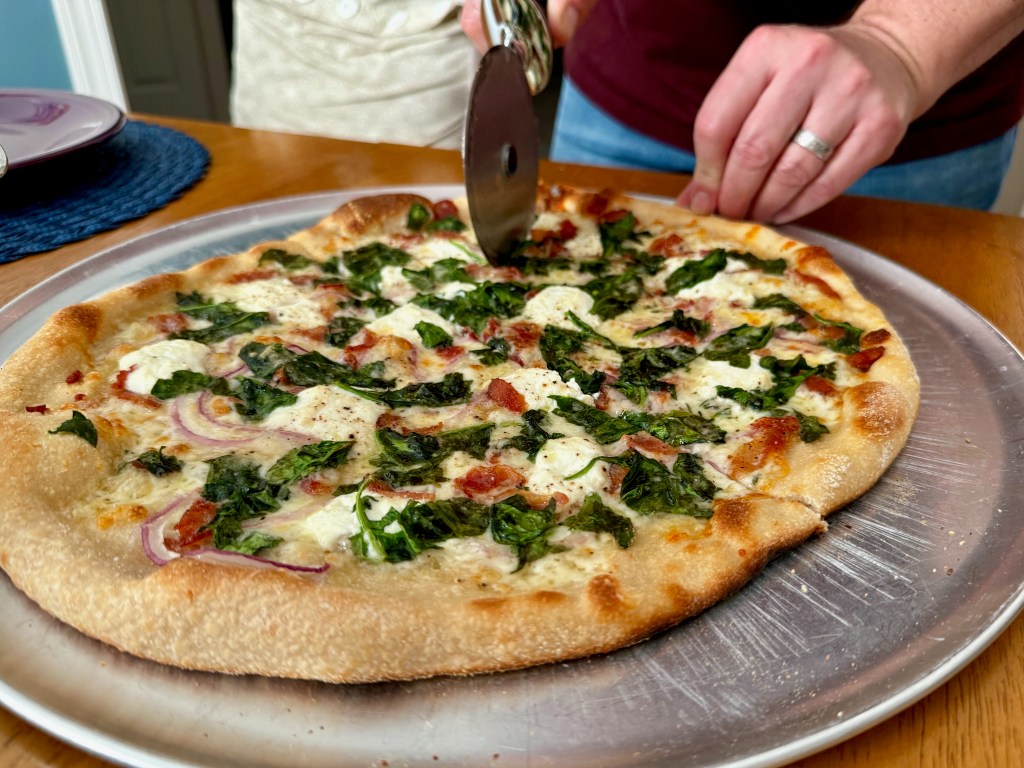
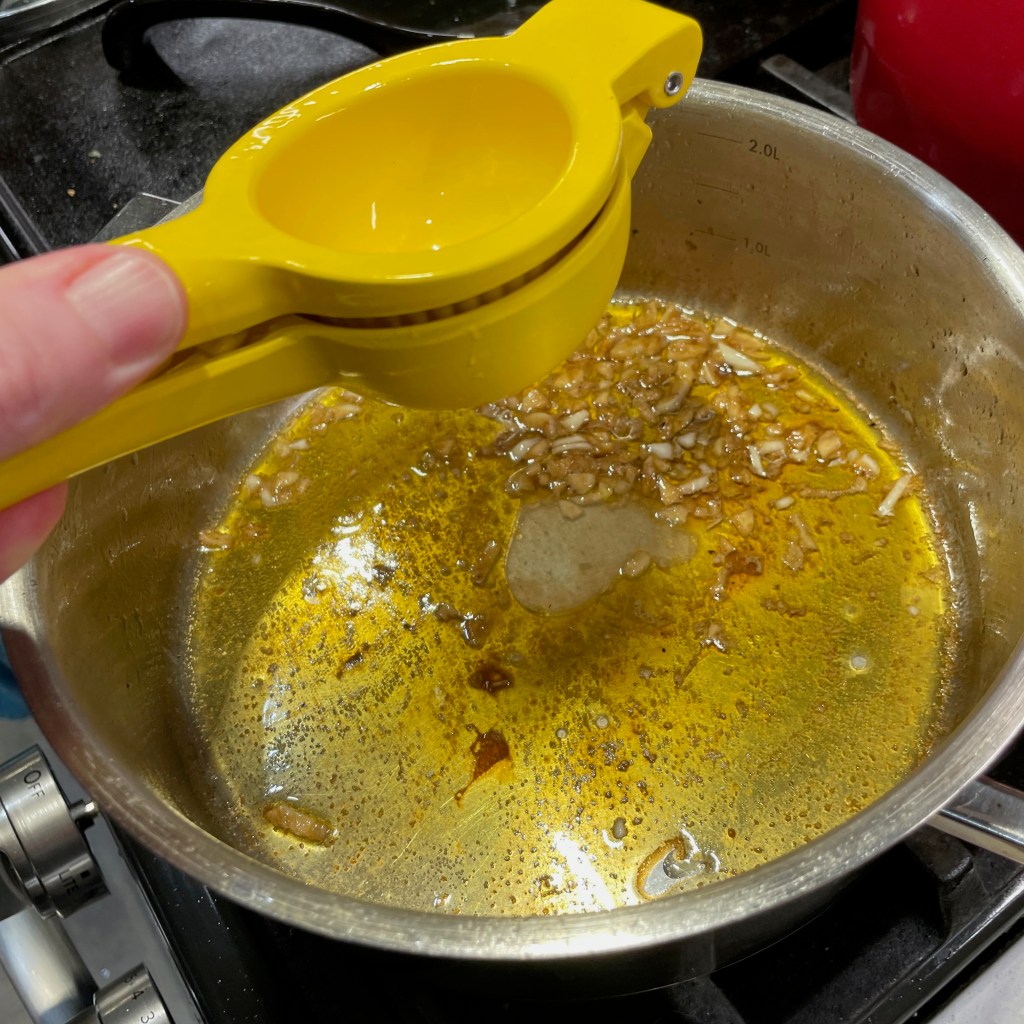
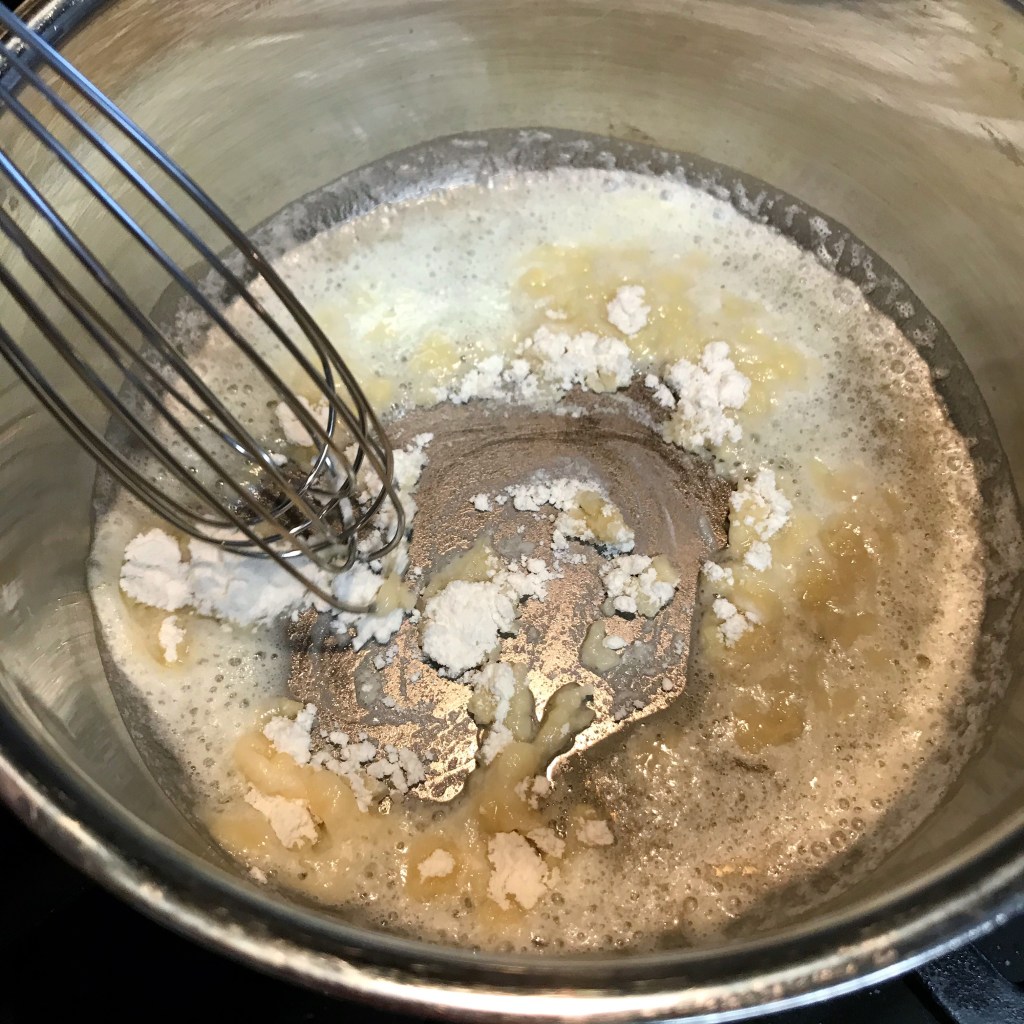
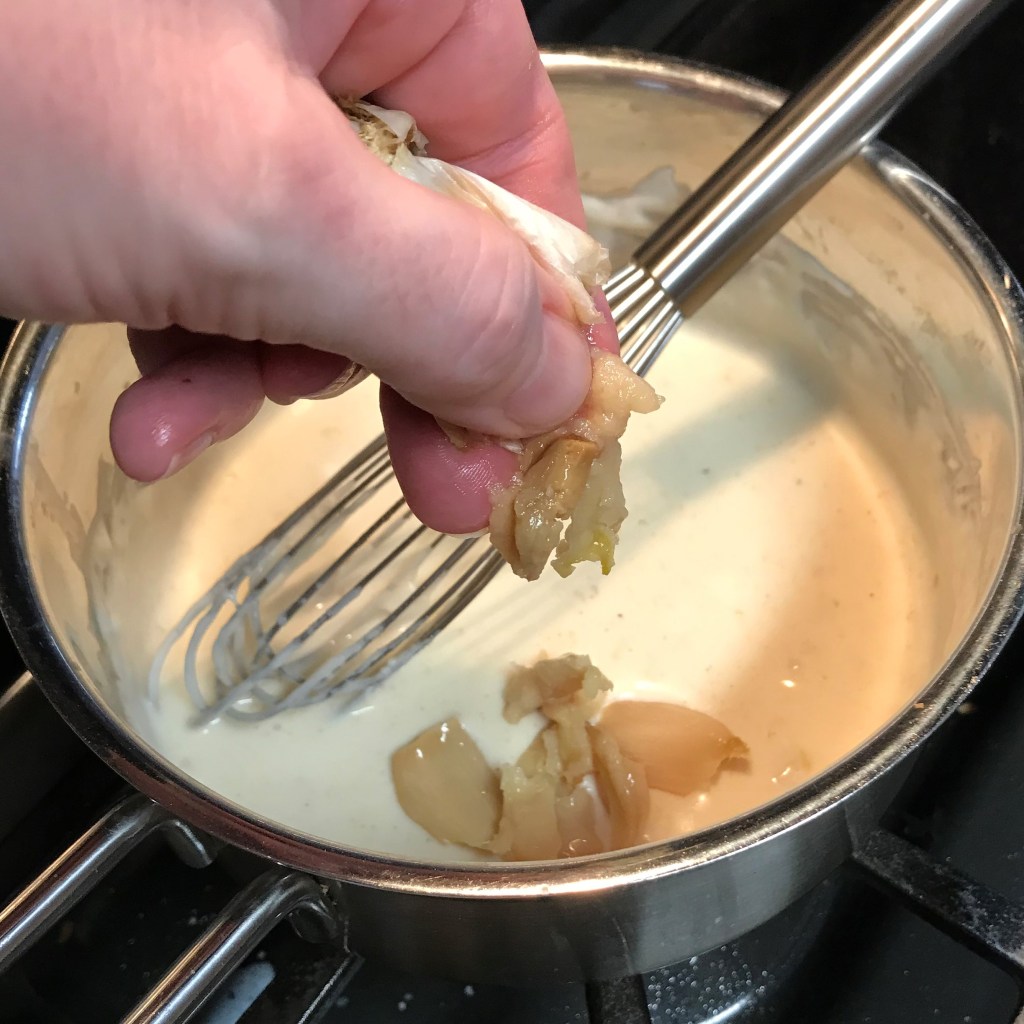
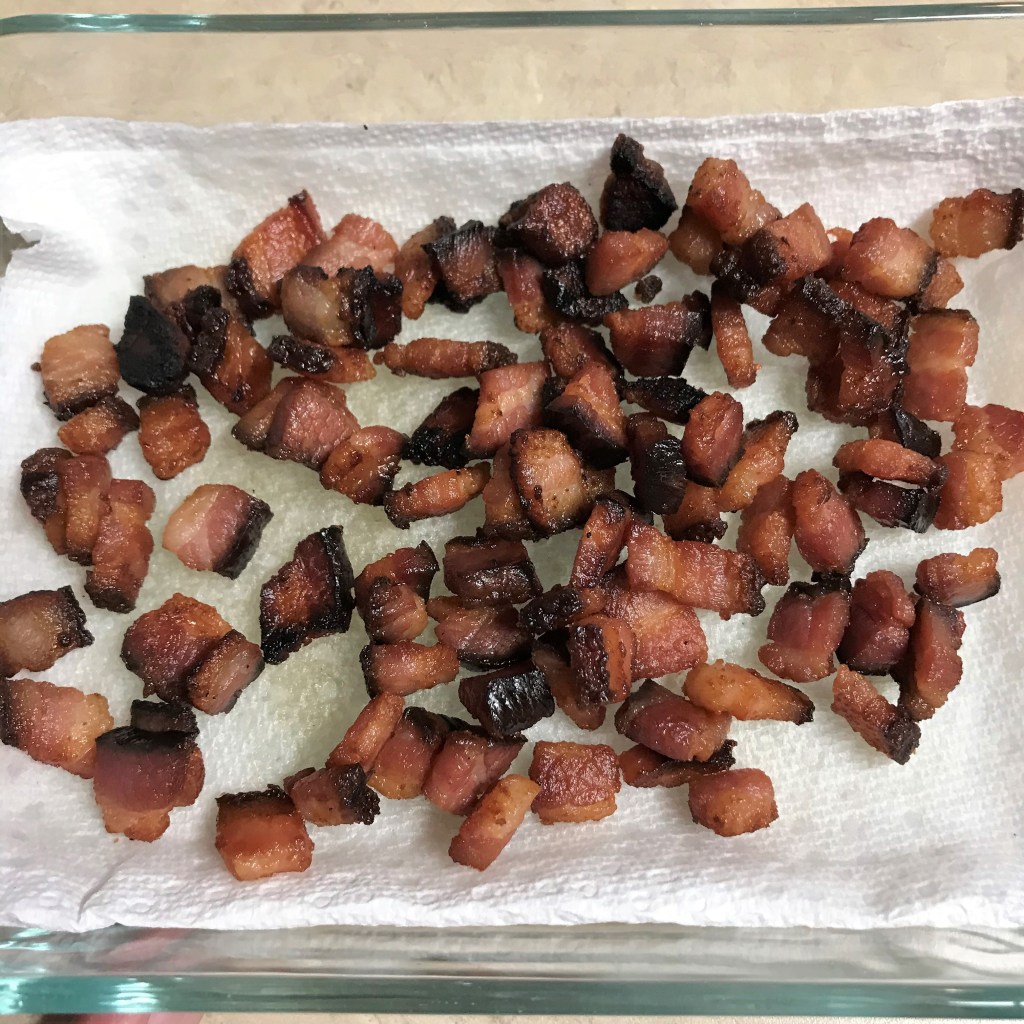
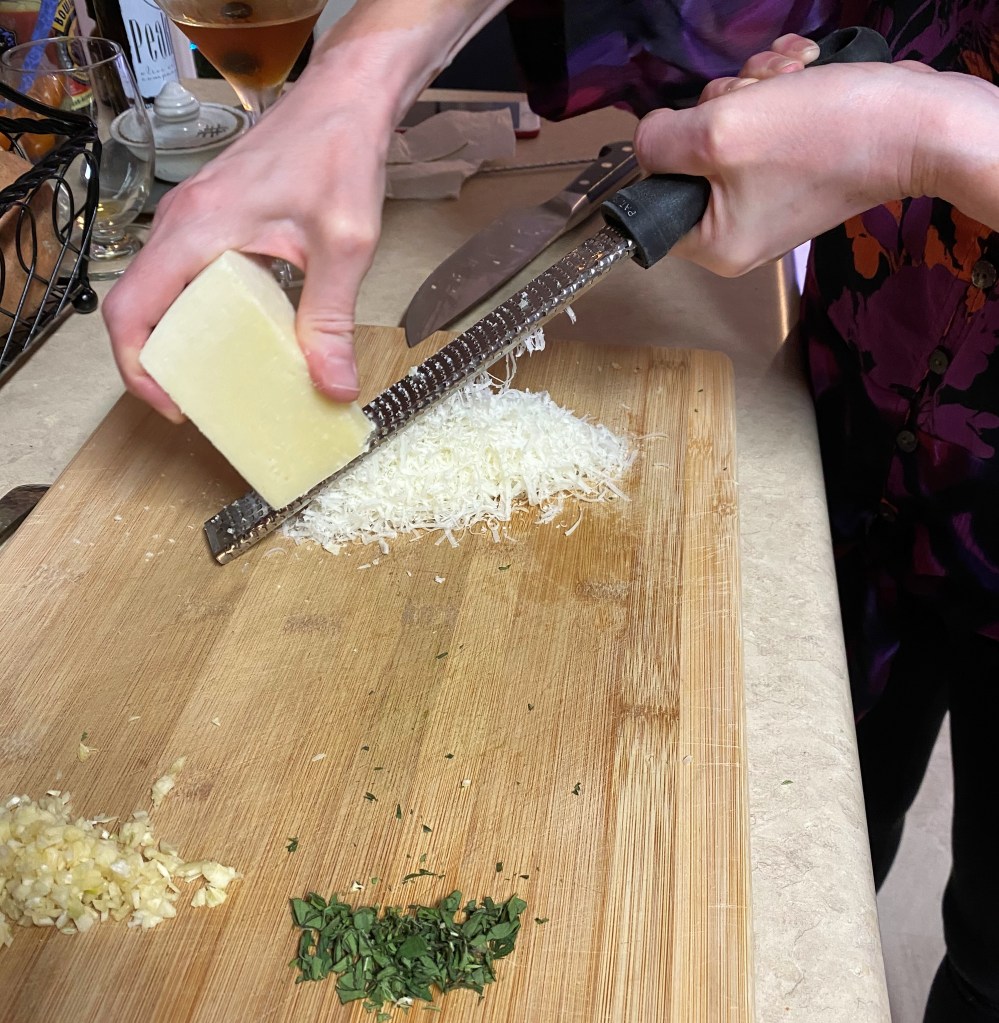
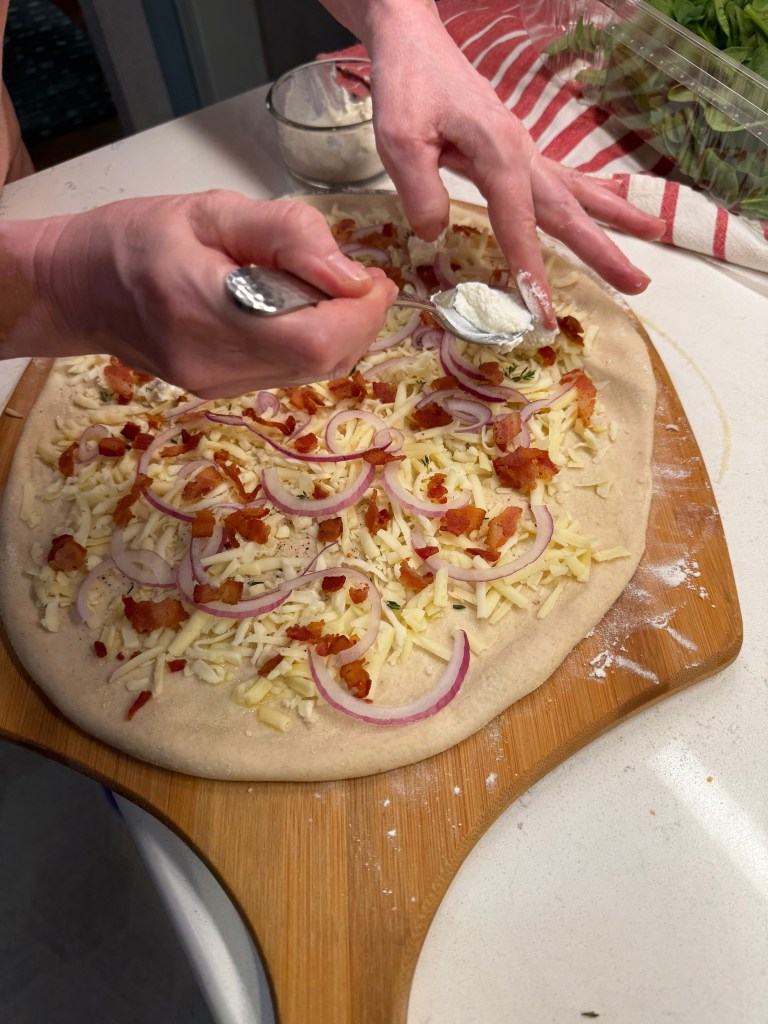
I cut up the bacon into pieces and cooked it until most of the fat was rendered and it was just shy of crispy, knowing that it would cook further in the heat of the grill. The cheese we thought was gruyere turned out to be white cheddar with “gruyere notes” (whatever that means), and we mixed it about 50-50 with freshly shredded hard mozzarella to be sure there was a good melt. This pizza would not have sauce, so it needed something else with a bit of moisture. Ricotta to the rescue, though next time I would spike it with some garlic to punch up the flavor a bit.


Our six minutes on the grill stone, plus one minute under the broiler method is a winner. This is very good news for us pizza lovers, especially with an entire hot summer ahead of us. The moral of this story? Where there’s a grill, there’s a way! 😉


Bacon & Spinach Pizza— on the grill!

  • Servings: One 14-inch pizza
  • Difficulty: Average
  • Print

This is a fun and different flavor combination for pizza, whether you bake it in the oven or (as we did with this one) on the grill!


Ingredients

  • Pizza dough ball, roughly 11 ounces
  • 1/3 cup freshly grated hard mozzarella
  • 1/3 cup white cheddar (or gruyere blend)
  • 3 thin slices red onion, separated
  • 4 slices uncured smoked bacon, cut up and cooked until shy of crispy
  • 3 sprigs fresh thyme leaves
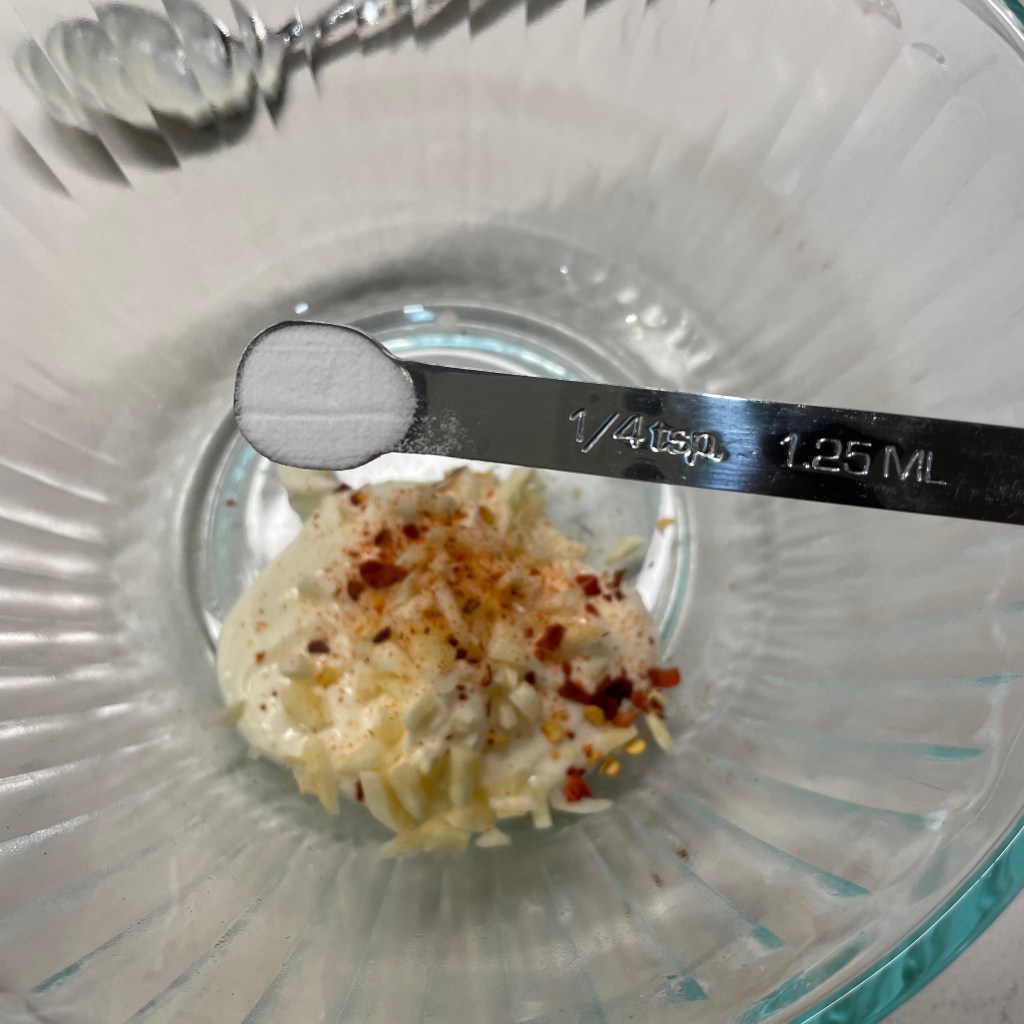
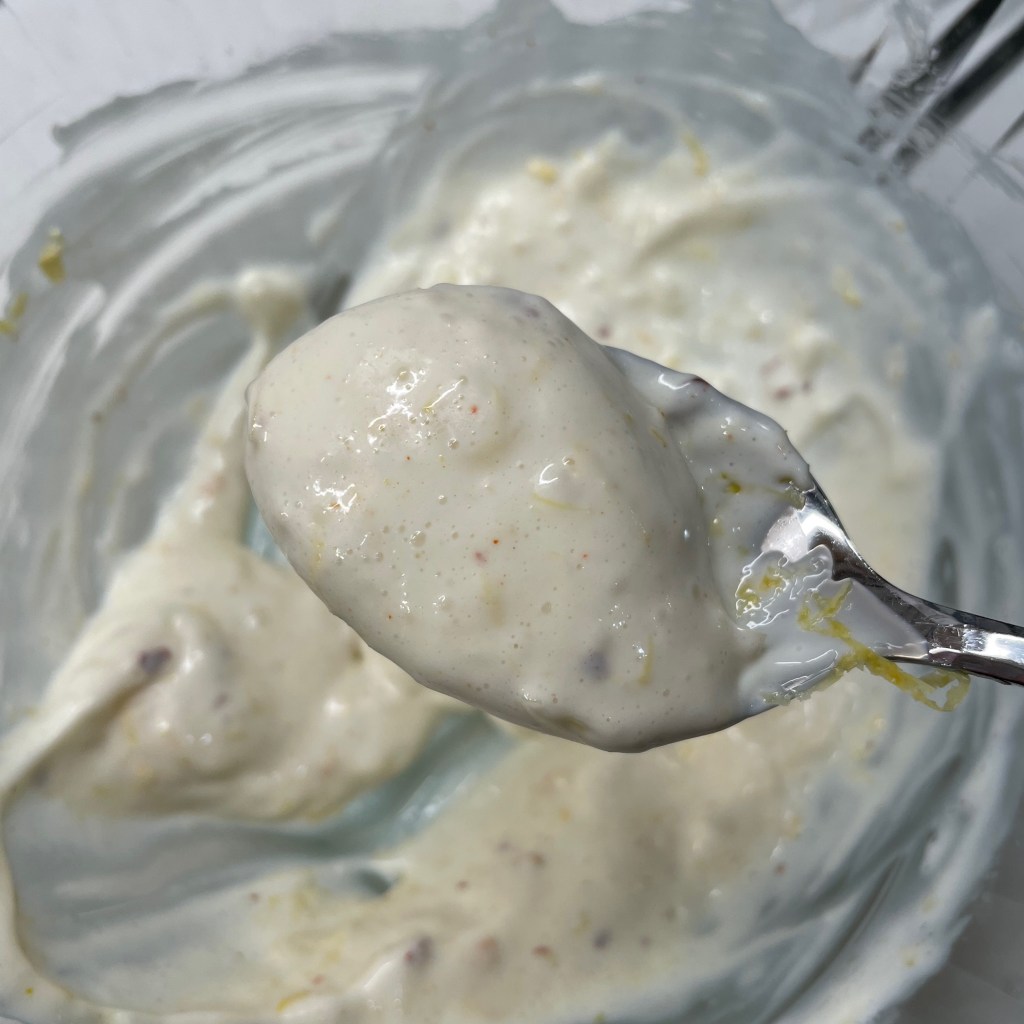
  • 1/4 cup whole milk ricotta (seasoned with some garlic powder, if you like)
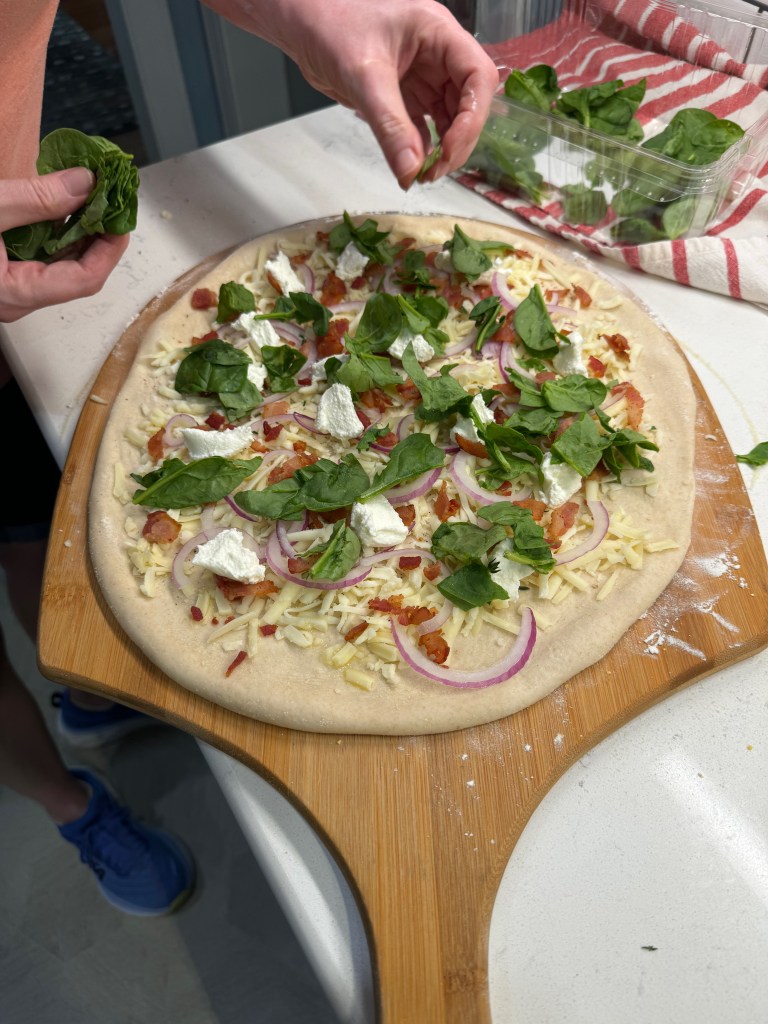
  • Medium handful fresh baby spinach leaves, torn into smaller pieces
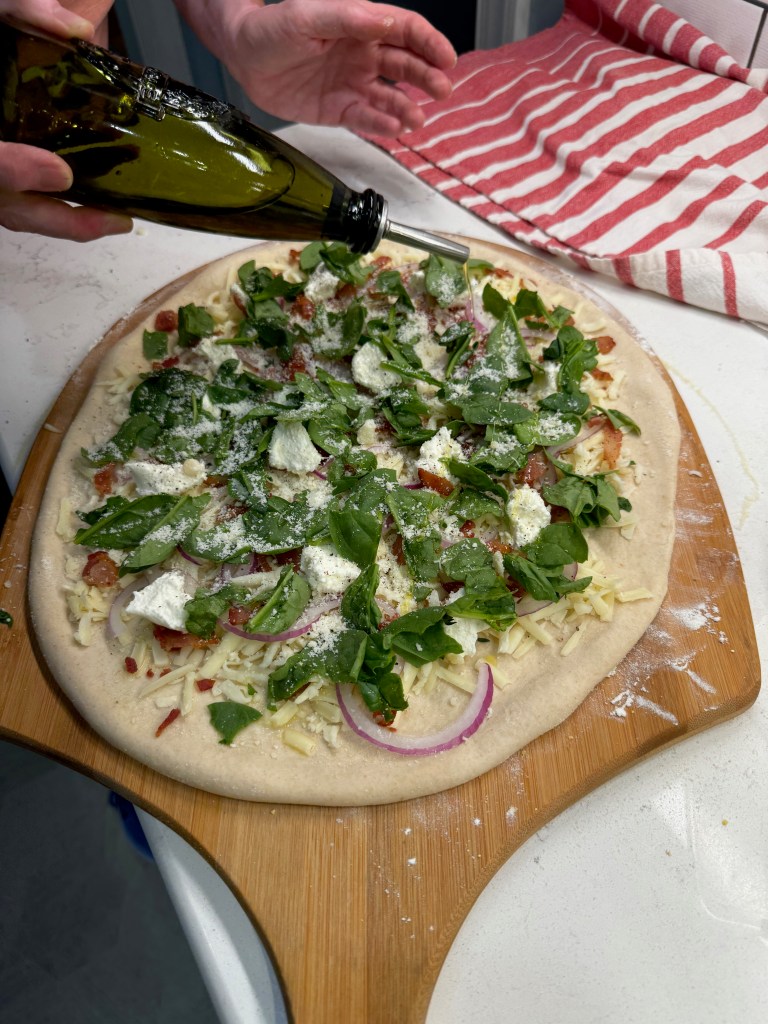
  • 2 Tbsp. grated Parm-Romano blend cheese
  • Drizzle of extra virgin olive oil

Baking notes: If you are baking indoors, preheat a pizza steel at 550° F for one hour; for the grill method, heat to high temperature with a stone or steel pan, following manufacturer’s instructions.

Directions

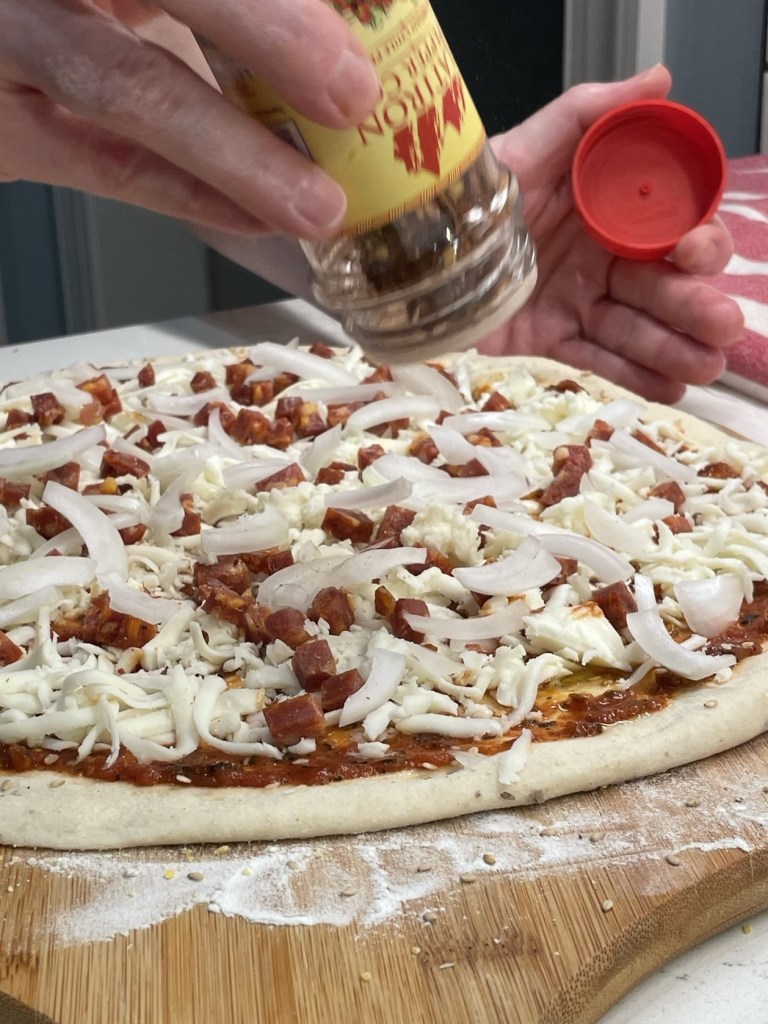
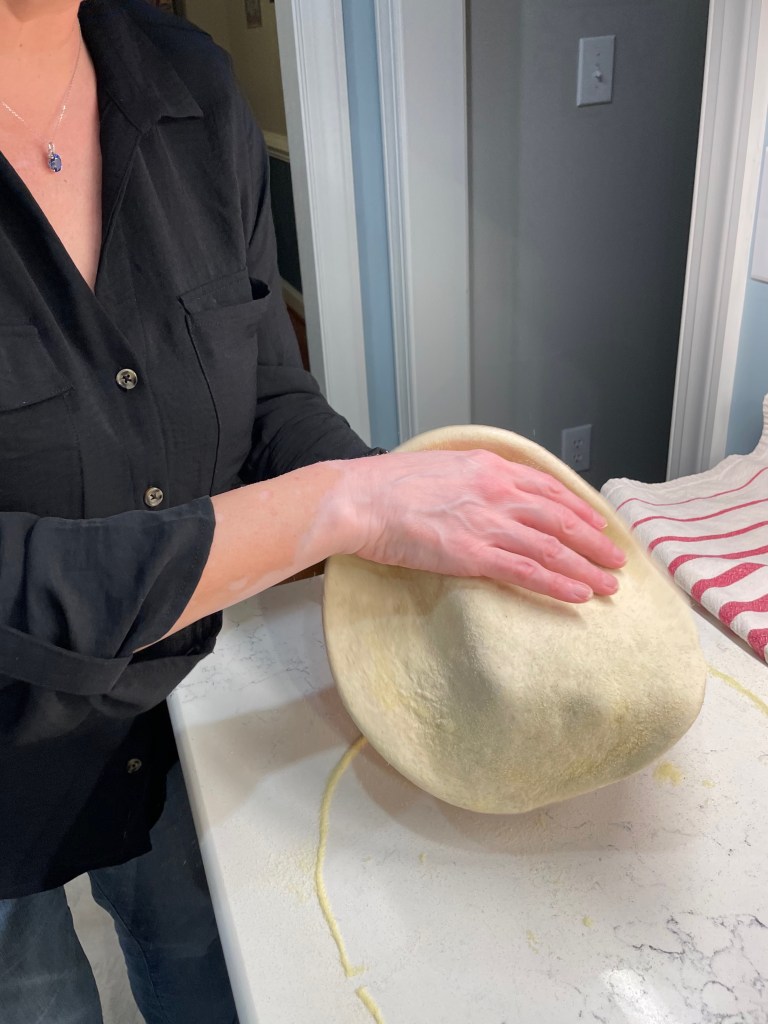
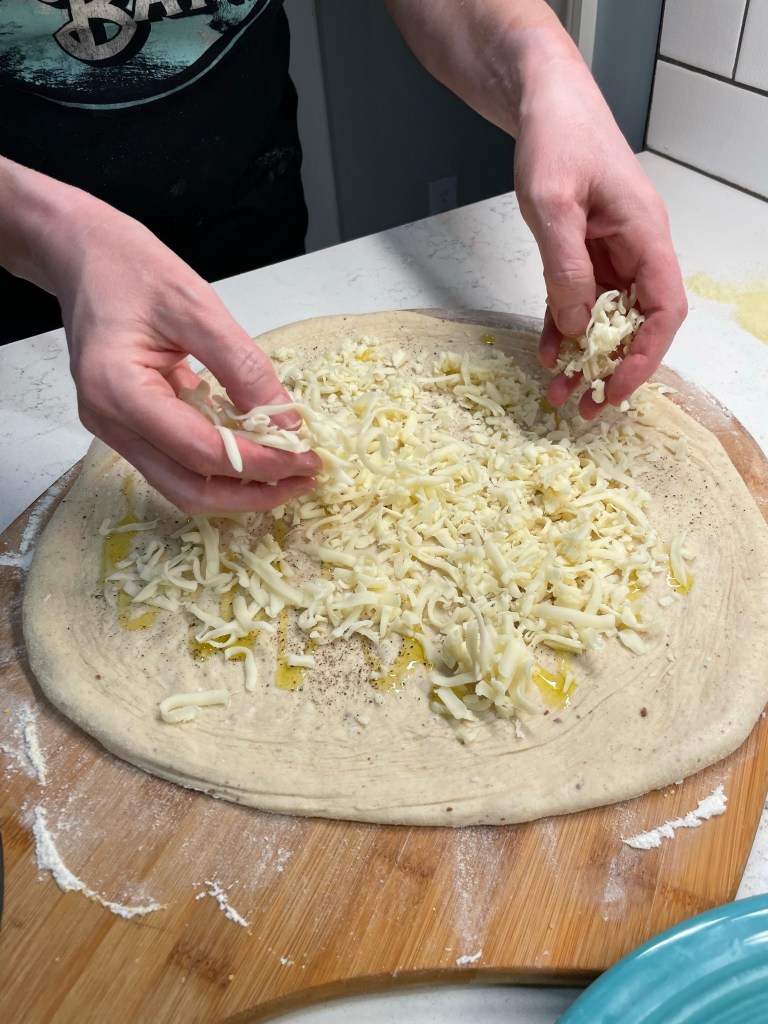
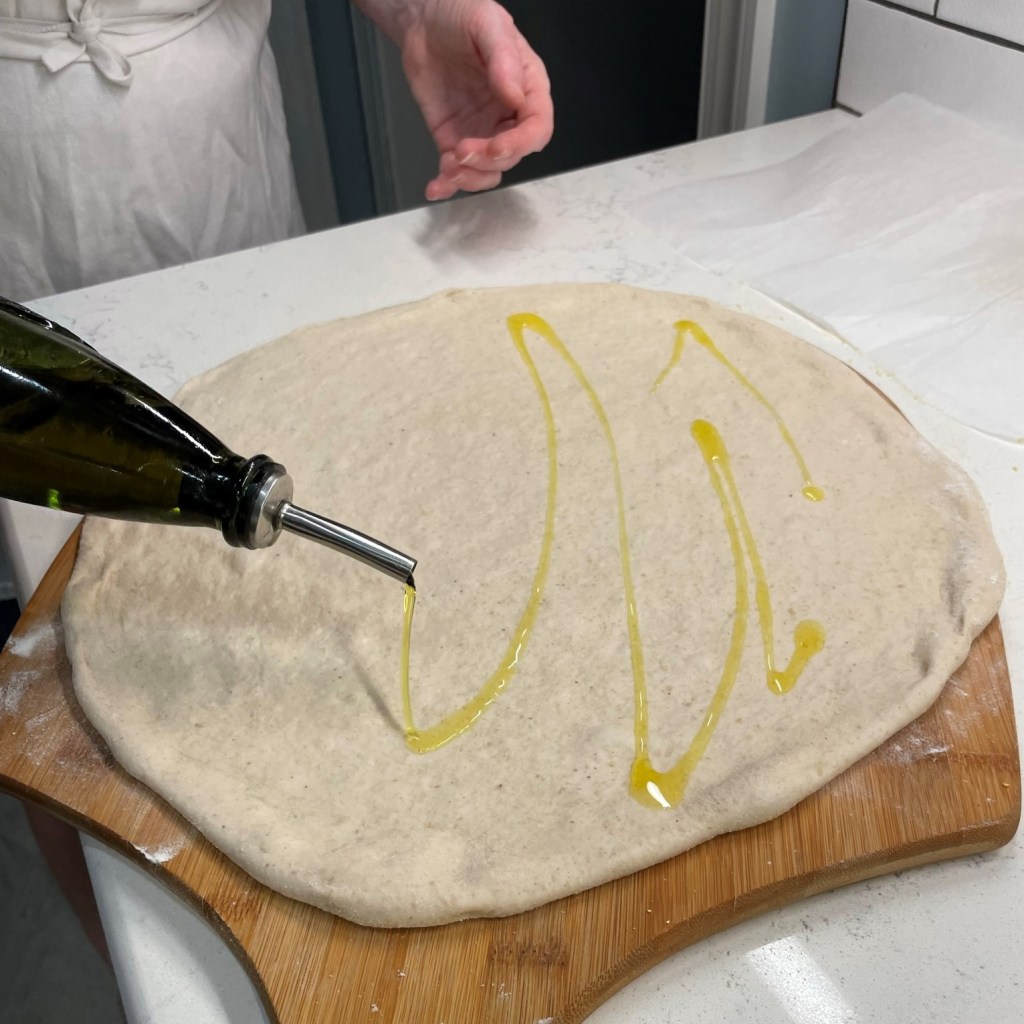
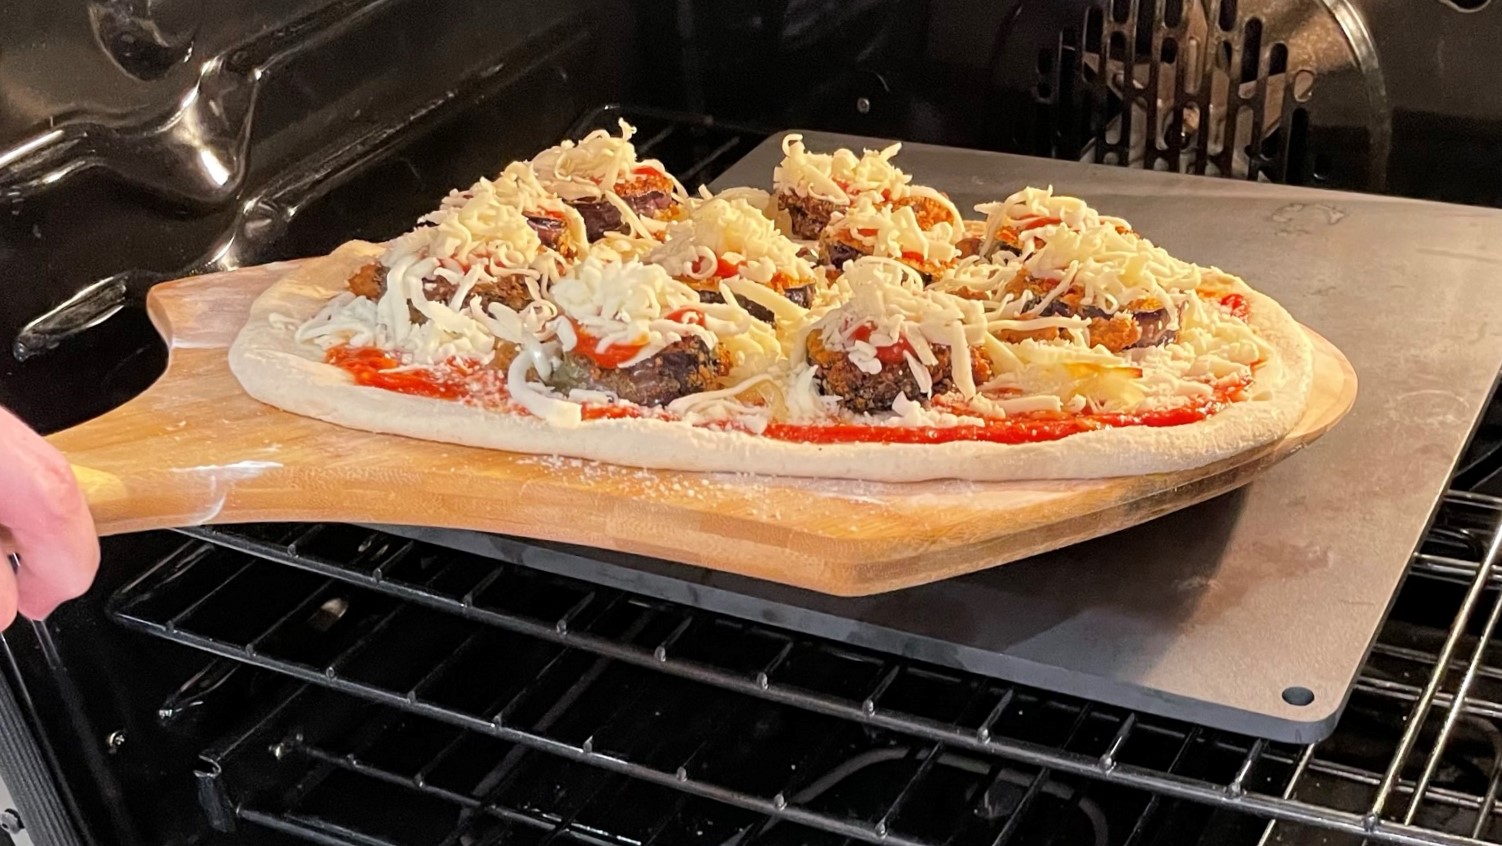
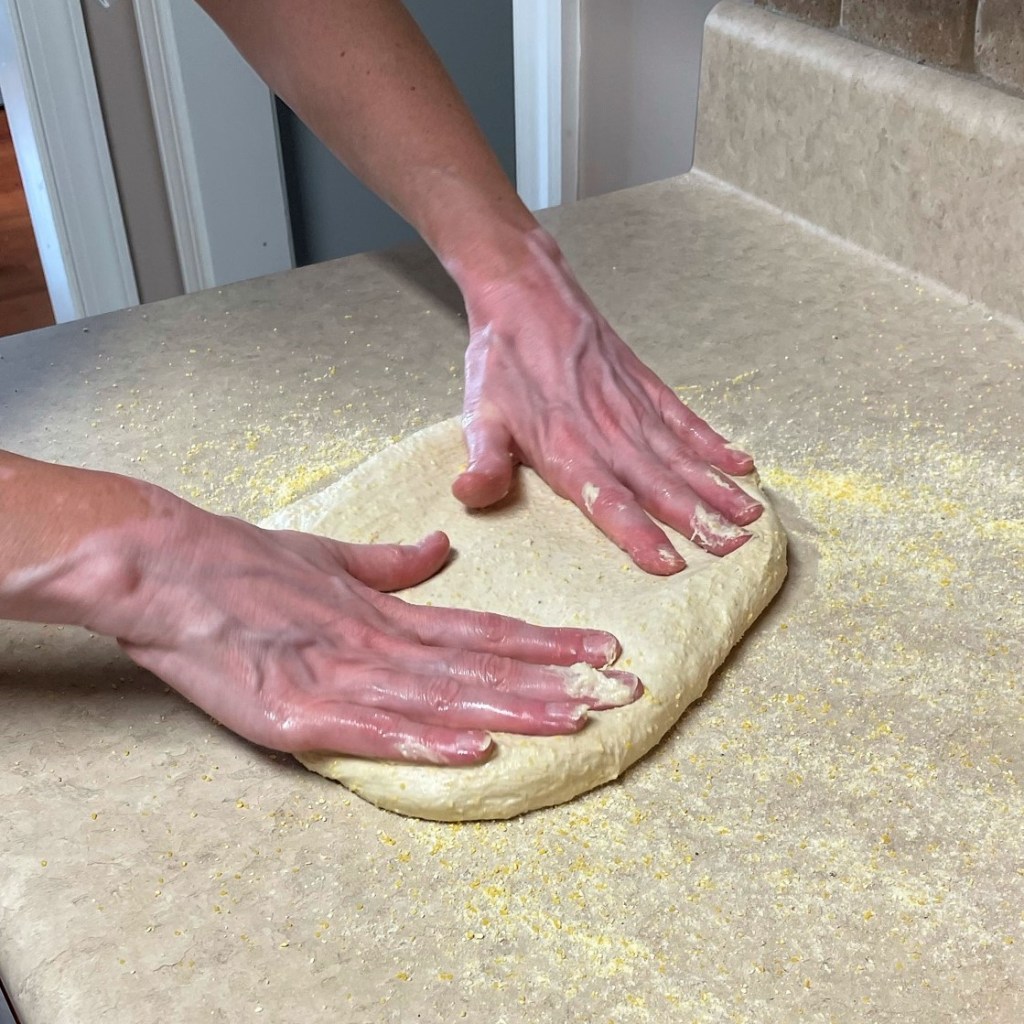
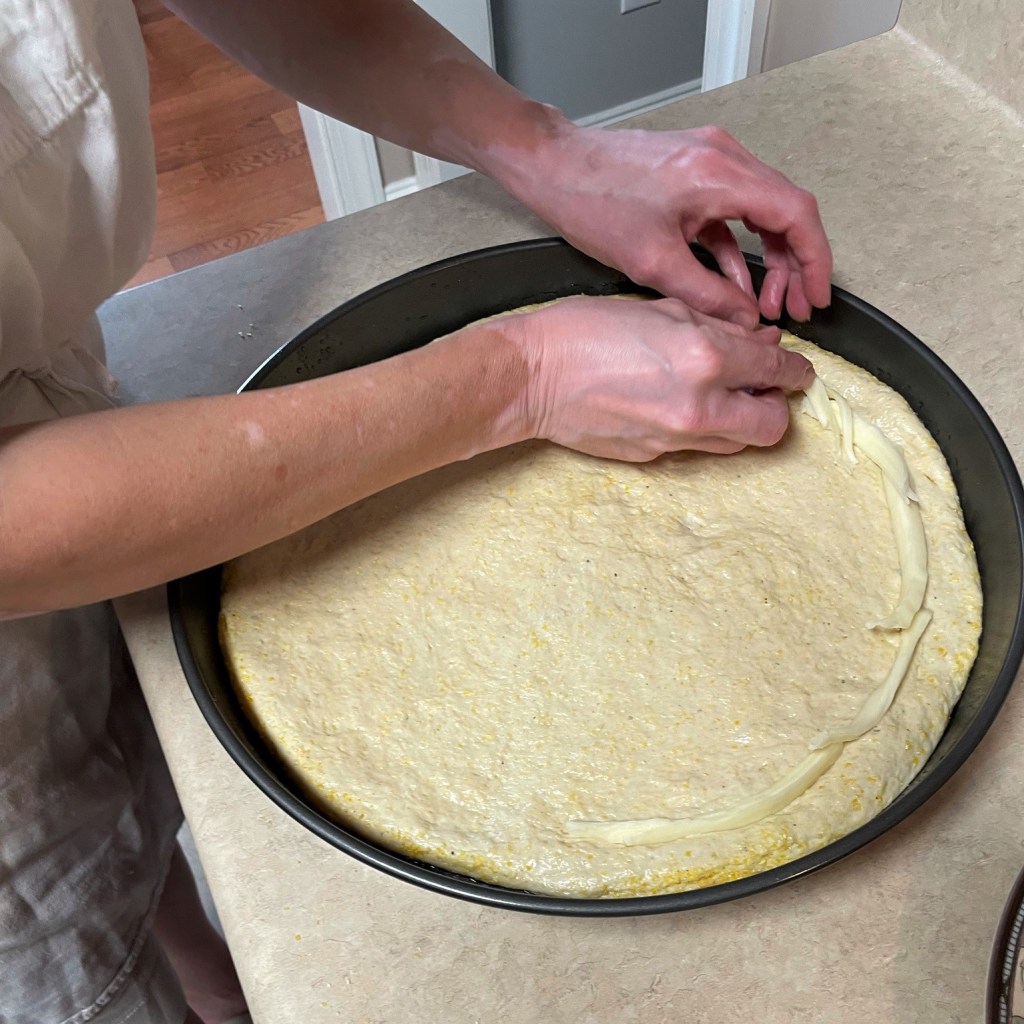
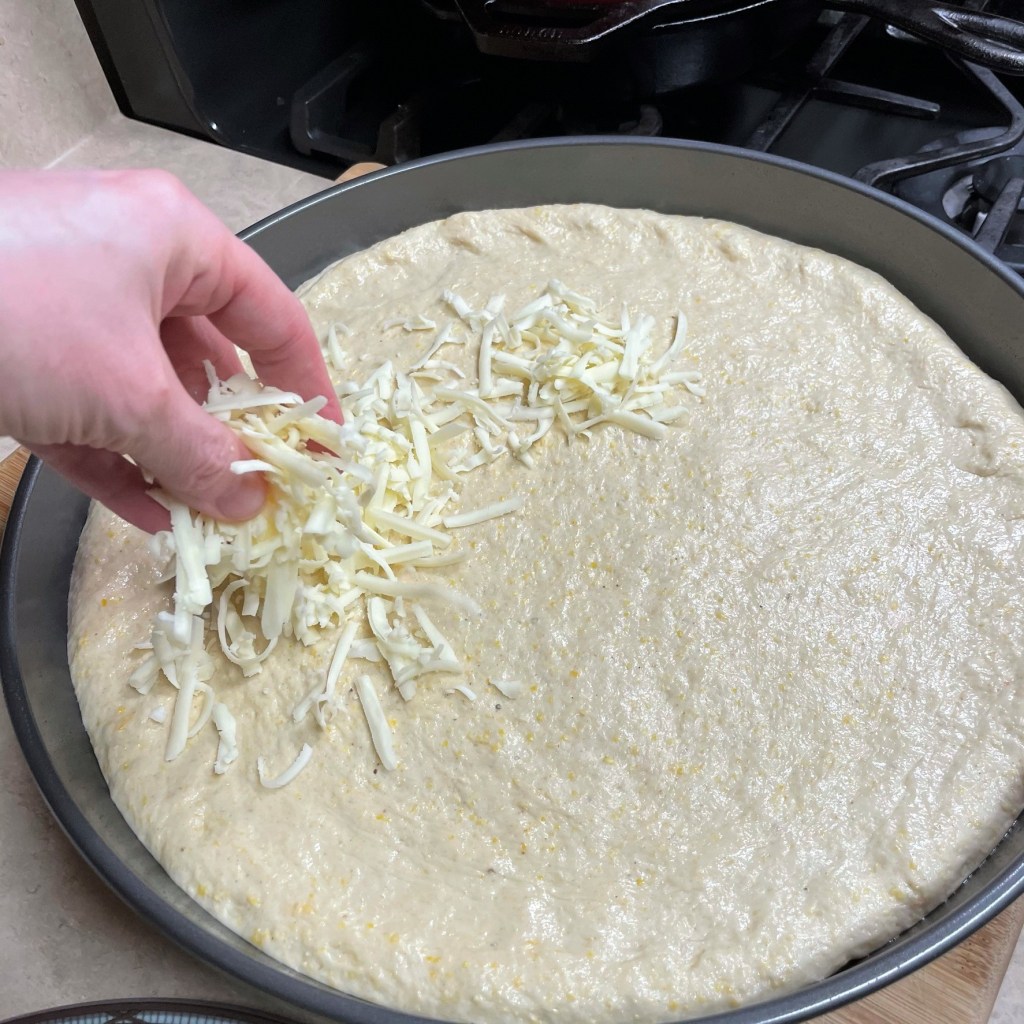
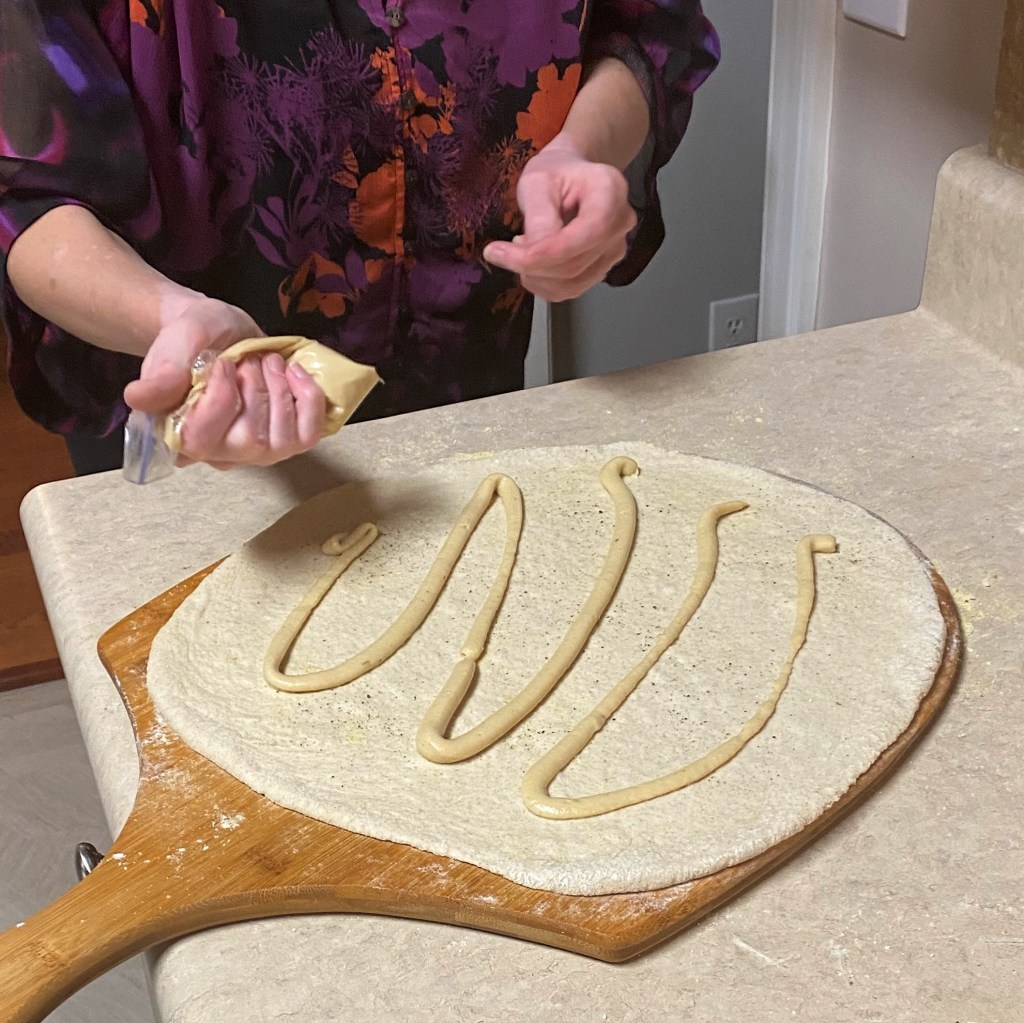
  1. Shape pizza dough into 14-inch round; transfer to a flour- and cornmeal-rubbed pizza peel. Drizzle a bit of olive oil over the dough and season it with salt and pepper.
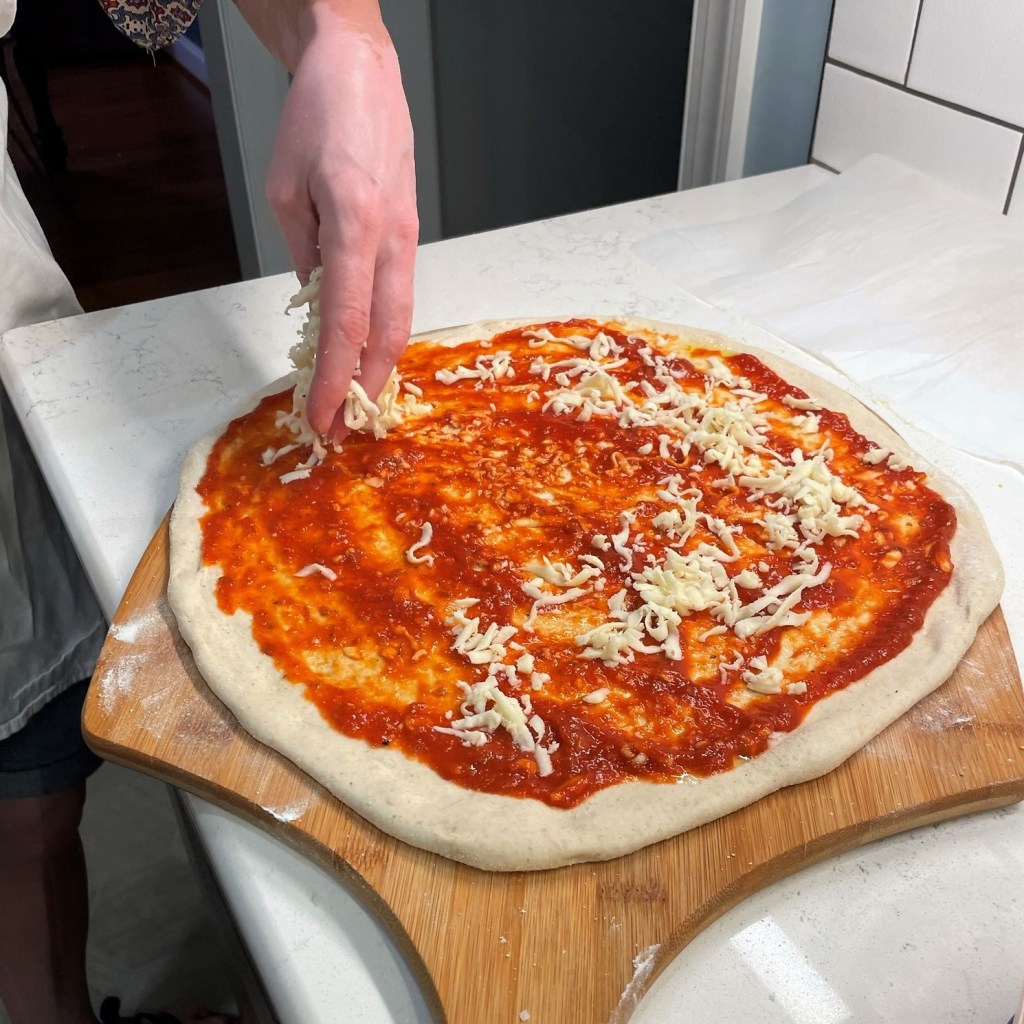
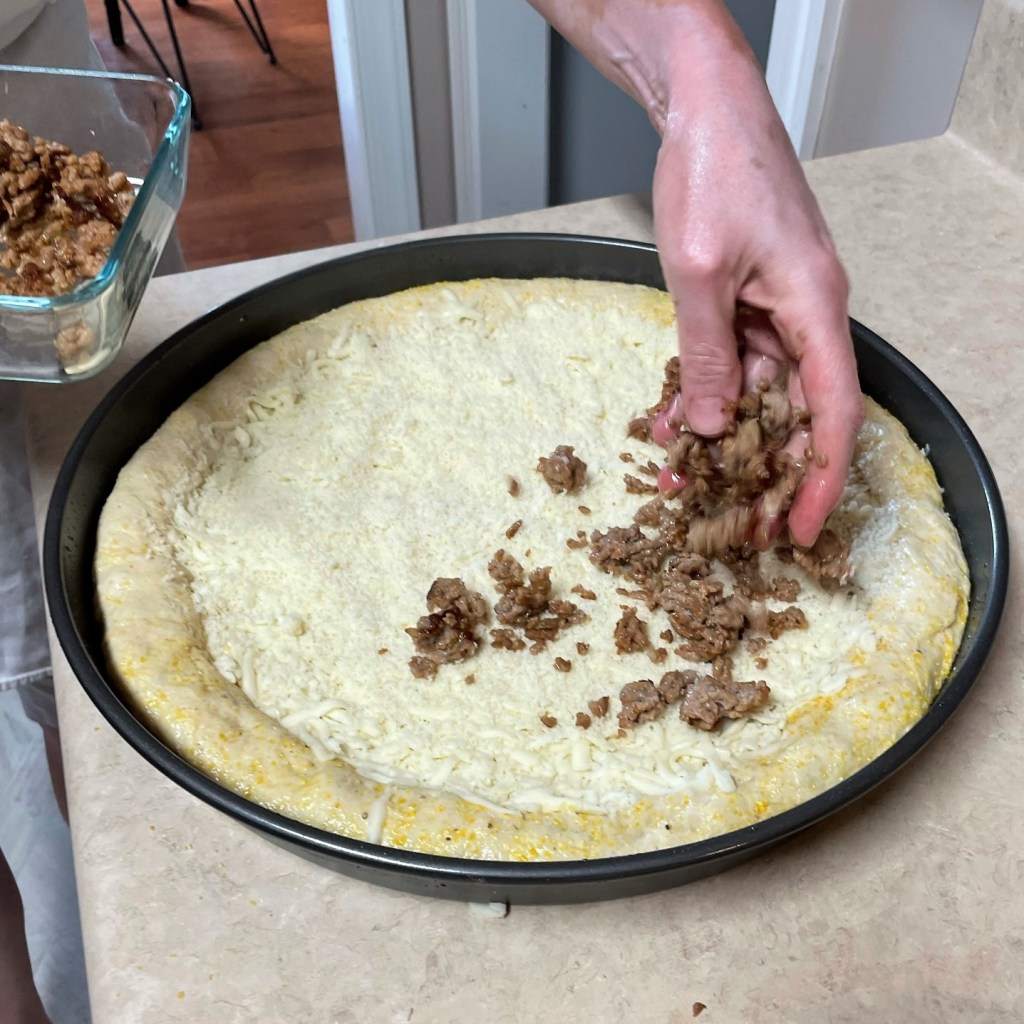
  2. Scatter both mozzarella and white cheddar/gruyere all over pizza dough, then arrange onion slices, par cooked bacon and thyme leaves over the cheese.
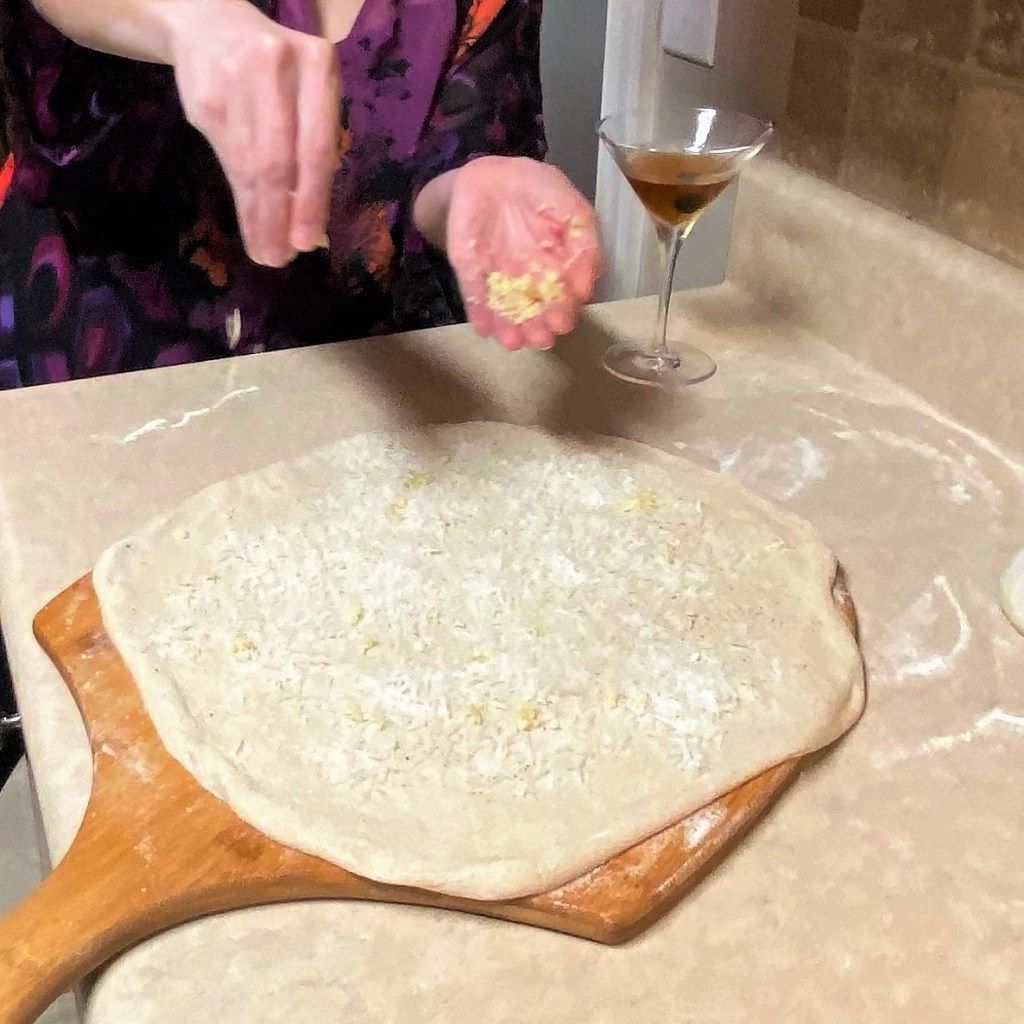
  3. Carefully spoon small dollops of ricotta on the pizza, keeping a bit of distance between.
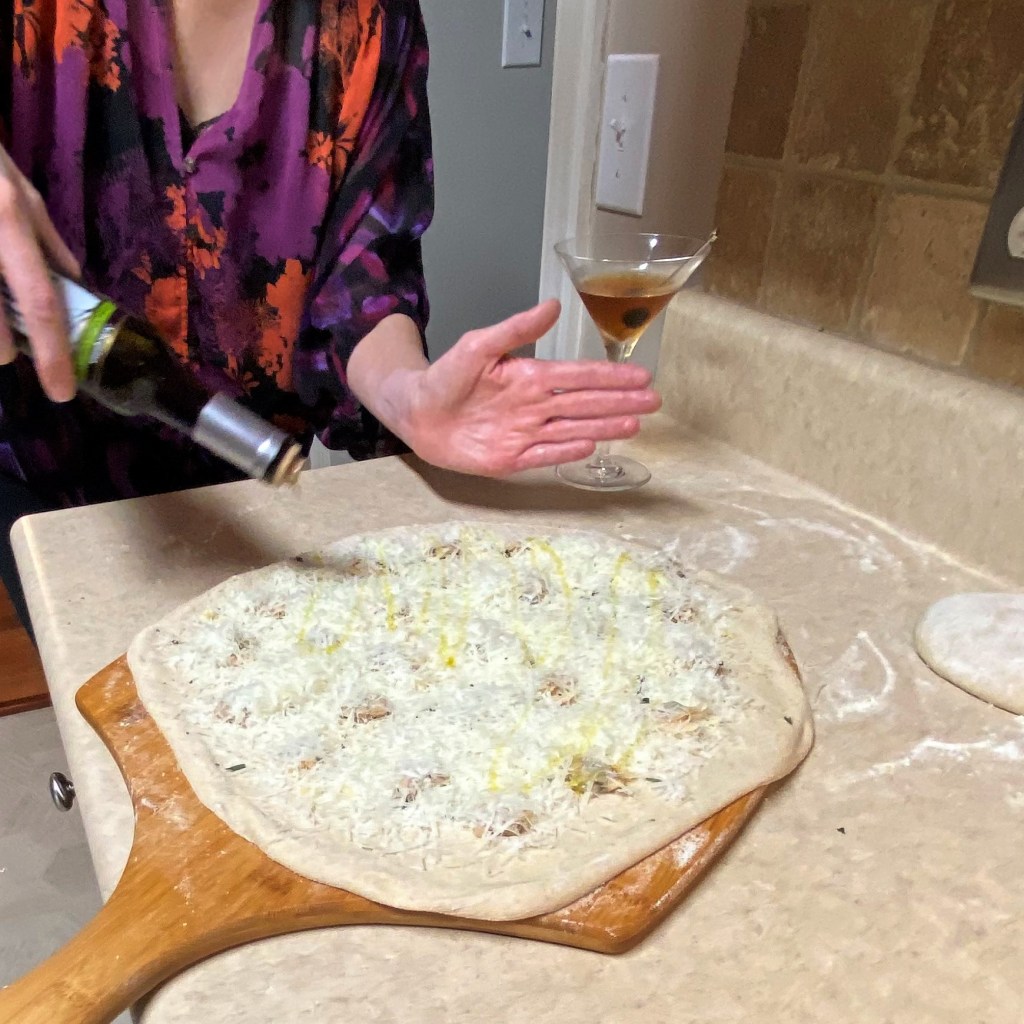
  4. Scatter spinach leaves all over, then sprinkle with Parm-Romano blend cheese and give it one last drizzle of olive oil.
  5. Slide pizza onto preheated stone or steel; bake about six minutes. If grilling, transfer finished pizza to a perforated pan and slide it under a hot broiler for one minute to achieve a blistered, oven-like finish.


Muffuletta Pizza

As we near the end of this year’s Mardi Gras celebration, which wraps up on Feb.13, I’m presenting a pizza twist on the muffuletta, a sandwich that has its origin in New Orleans. You may recall from some of my previous Mardi Gras posts that my travels have not led me to The Big Easy (yet), though it is certainly on my bucket list of foodie places to visit. Still, I love a theme party, and I have a vivid memory of muffuletta, thanks to a part-time job I had more than two decades ago.

Allow me to back up a bit to explain about muffuletta for those who may not be familiar, and why it ties to New Orleans, which we usually associate with Creole-inspired and French cuisine. One glimpse of the muffuletta ingredients list— cured salami, mortadella, ham, provolone and a chopped giardiniera-olive spread— would make one think of Italian food, and rightly so. The muffuletta is said to have been created by a Sicilian immigrant who settled in New Orleans about the turn of the previous century. It is usually presented with loads of layers on a large, round, focaccia-like bread topped with sesame seeds.


My first experience of muffuletta came during my two-year stint in a catering kitchen in Greensboro, N.C., where a friend had recruited me to be a kitchen helper during busy periods. The kitchen was jamming during wedding season, the winter holidays and the twice-a-year High Point Furniture Market, and I was happy to jump in to help fulfill orders. 

At some point in those two years, one of our regular customers must have hosted a Mardi Gras-themed event, because I was charged with making approximately four quarts of the chopped olive and vegetable mix that was to be used for muffuletta sandwiches. Not knowing anything at all about that sandwich, I followed the instructions on the recipe card I’d been given. Green olives, black olives, capers, pickled vegetables, olive oil, vinegar and dried Italian herbs— what in the world was this concoction? And then Rodney, our smart-ass head chef, labeled the giant plastic jar “Muff Stuff.” You can imagine the chaos that ensued over the nickname in our kitchen of mostly immature amateurs.

“Muff stuff” was the briny, pickled relish for muffuletta, and you can easily make this condiment in just a few minutes with a food processor, though my task was to chop up the ingredients by hand. It was delicious on its own, though not very pretty to look at, and it wasn’t until Rodney whipped up a miniature version of muffuletta for the kitchen crew to sample that I understood the importance of what I had made. 

It was like an Italian sub on steroids. A salty flavor explosion that is both rich and fatty, and only makes you feel guilty until you go in for another bite. It’s so good! I’ve wanted to put these flavors on a pizza for a long time, and here you go. Mardi Gras is all about indulgence and excess, and this meat-and-cheese lover’s pizza is doing its part, in the spirit of New Orleans!

You could just call it an Italian meat lover’s dream pizza.

For my muffuletta pizza, I did not delve into making the muff stuff from scratch. Rather, I took advantage of the Trader Joe’s product that pushed me over the finish line to tackle this culinary bucket list item. They call it “cracked olive salad,” and yes, I checked to be sure that TJ’s still sells it, given the store’s tendency to cancel items without notice. Having said that, if you cannot find the cracked olive salad or don’t have a TJ’s nearby, there are similar products in other supermarkets—check the pickle section. If you still can’t find it, check out this recipe on Serious Eats, where my culinary idol Kenji López-Alt will be happy to walk you through making the olive salad, or indeed, the entire muffuletta.


I wanted my muffuletta pizza to have as many authentic flavors as possible, so I considered the three categories of meat recommended by Kenji in the aforementioned article. Mortadella, a fatty, emulsified deli meat, is hard to come by in my city, and bologna was out of the question for me, so I went with three of our favorites from the other two categories— Genoa salami, spicy soppressata and thinly sliced prosciutto. Provolone was in the package alongside the salami, and I rolled them up together for an impression of layers, like on the sandwich. I wrapped the rolls snugly in plastic wrap and stuck them in the freezer for an hour or so to help them keep their spiraled shape after slicing. The soppressata was cut into cubes, and the prosciutto into thin strips, so that my pizza would have plenty of interesting texture. I also bumped up the flavor of the olive salad with a few shakes of dried Italian seasoning.


All my pizzas are made with sourdough crust and baked on a screaming hot pizza steel for a brick oven-like finish, but you could replicate the idea of this pizza on any crust you like, perhaps even fresh dough you pick up at the deli. I sprinkled sesame seeds all over the dough, which was more symbolic than anything because we couldn’t detect them on the finished pizza. Sauce went down next, followed by copious amounts of freshly shredded mozzarella, the cubed soppressata, fresh sliced onions and Calabrian chile flakes. Then, the rest of my muffuletta-inspired flavors!


A sprinkle of Parm-Romano blend was a finishing touch, and then into the oven for six minutes— oh, how I love our Dough Joe pizza steel!— and this was possibly one of the most delicious pizzas I’ve ever made. I had some jitters about having “too much meat” on this pizza (my husband would say there’s no such thing), but the flavors worked really well together and the pickled vegetables in the cracked olive salad kept the richness in check.

One of these days, I’m going to get down to New Orleans. Maybe next year. But for now, I’m satisfied to let the good times roll with as many Mardi Gras-inspired foods as I can dream up. What should I make next?

Muffuletta Pizza

  • Servings: 8 slices
  • Difficulty: Average
  • Print

It's an Italian meat lover's dream come true, and with special ties to New Orleans, a fun pizza for Mardi Gras!


Ingredients

  • 3 large slices Genoa salami
  • 3 thin slices smoked provolone
  • 1/3 cup Trader Joe’s “cracked olive salad,” or something similar
  • A few shakes of dried Italian herb blend
  • 1 pizza dough ball, at room temperature
  • Extra virgin olive oil, for drizzling
  • 1 Tbsp. sesame seeds (optional, for effect)
  • 1/4 to 1/3 cup favorite pizza sauce (mine was Dei Fratelli fire-roasted)
  • 1 cup freshly shredded, low-moisture mozzarella
  • 1/3 cup cubed spicy soppressata
  • 1/2 sweet or yellow onion, sliced into crescents
  • A few shakes crushed red pepper, if desired for extra spice
  • 2 slices prosciutto, cut into ribbons
  • About 1/4 cup grated Parm-Romano blend cheese

Note: All my thin-crust pizzas are made with sourdough and baked quickly on a pizza steel, preheated on the center rack of a 550° F oven for one hour. This is an extreme temperature, and the results are very similar to what you would achieve in a brick oven. If you don’t have a steel, a pizza stone works great; follow manufacturer’s recommendations for temperature and adjust baking time accordingly.

Directions

  1. While the oven preheats, layer each slice of salami with a slice of provolone. Roll up into cigar shapes and wrap tightly together in plastic wrap. Tuck this into the freezer for an hour before slicing, so that the twirls keep their shape on top of the pizza. Add a few shakes of Italian seasoning to the olive salad and set aside.
  2. Shape dough into a 14-inch round and place on a flour and cornmeal-dusted pizza peel for easy transfer into and out of the oven. Drizzle the dough with olive oil and season with salt and pepper. Sprinkle all over with sesame seeds, if desired.
  3. Spread sauce over dough to within one inch of the edges; you should be able to see the dough through it. Layer mozzarella generously over the sauce, then scatter the soppressata cubes and onion slices. Shake on crushed red pepper.
  4. Distribute the olive salad evenly over the pizza toppings, then top with the prosciutto and swirls of salami-provolone. Scatter Parm-Romano lightly over the entire pie and slide it into the oven.
  5. Turn pizza 180° after about four minutes to ensure crust is evenly blistered. Remove from oven and transfer to a pizza tray. Serve immediately.


Shrimp Scampi Pizza

There is a special meal tradition at our house on New Year’s Eve. Our annual celebration of fancy pizzas began in 2018, right around the time that I was working to perfect my sourdough pizza crust. Les had shared his memories of the amazing White Clam Pizza he enjoyed while living near New Haven, Connecticut, and we decided to try one at home for New Year’s Eve. It turned out so good that we repeated it the next two years, and in 2020, we added a second specialty flavor to our repertoire— the Oysters Rockefeller Pizza. Last year, we tweaked tradition yet again, trading in the white clam pie with this creative twist on the classic Italian pasta dish, shrimp scampi. Why wouldn’t the flavors of garlic, shrimp, parsley and lemon be amazing on a blistered sourdough crust? Turns out, they most definitely are.


As with most of my specialty pizzas, this one takes a little time to prepare, but the good news is that you’ll do most of it in advance so that you have plenty of time to relax with a cocktail or mingle with guests (or both). There are three components to this pizza, and I’ll break down the details in photos ahead of the click-to-print recipe card at the end. You’re going to love this pizza!

My method for pizza baking

First things first, we bake all our pizzas in a regular home oven, preheated to 550° F with a baking steel on the rack. This combination of slab steel and maximum temperature helps us replicate the effect of a brick oven. If you don’t have a steel, you can get similar results with a pizza stone, but be sure to follow the manufacturer’s guidelines so that you don’t accidentally crack your stone under this extreme heat. With this method, you also need a pizza peel, which looks like a long-handled paddle. It’s helpful for easy transfer of the pizza into and out of the oven.

Our pizza stone doesn’t get much action since we invested in the baking steel.
Whichever you choose, you’ll need a peel for easy transfer of the pizza.

About the pizza dough

Second, my pizza dough is homemade from sourdough starter, and the shaping method is crucial to the kind of texture you see in my photos. We never use a rolling pin on the dough, as this deflates all the lovely air pockets. If you aren’t on the sourdough train, it’s no problem— you can use a yeasted dough or even a store-bought dough if you have a favorite that you trust. The link for my pizza dough also includes a yeast option, if you want to make your own without sourdough. Bring the dough to room temperature when you’re ready to bake.


Cheez, Louise

Traditional scampi— the kind that’s piled onto a dome of angel hair— would not have any kind of cheese. But for my pizza, which does not have a base sauce, I’ve opted to scatter a bit of freshly grated mozzarella over the dough so that the shrimp curls have something to rest on. This is the firm variety of mozz, not the soft variety that is common for Caprese salad. Skip the pre-shredded stuff from the grocery store, as it is packed with an anti-caking agent that also prevents even melting.

My recipe also calls for parm-romano blend cheese, which we make in bulk at home because we use so darn much of it. A good Italian-made Parmesan is acceptable here, but again, do not use the pre-grated stuff. A special occasion pizza deserves the freshest cheese, and a few flicks of a microplane grater will bring big results, I promise.

The star of the show— shrimp

Finally, choose the right shrimp and for the love of flavor, don’t use pre-cooked. Choose fresh large shrimp— somewhere in the 20 pieces-per-pound range is just right— and buy them with the shells and tails on, as you’ll use those parts for the scampi sauce. Be sure to remove the “vein” from the curled back of the shrimp, and take note of the steps below for marinating them a few minutes before baking.

Let’s get cooking!

The sauce happens in two stages, beginning with what will seem like a ton of garlic and the parts and pieces that remain after you clean and set aside the shrimp. You’ll sauté the garlic at very low temperature for about 20 minutes, and then you’ll toss in the shrimp shells and tails for a gentle braising in dry vermouth. 


Vermouth— one of the primary ingredients in a martini— is what I always have open, but you are welcome to use a dry white wine such as pinot grigio if that’s more your style. Either way, add only enough to cover the bottom of the pot, and be sure that each shell is at least partially submerged. This will go for about 30 minutes at low heat, until most of the liquid has evaporated. Strain out and discard the solids, and you’ll be left with a small amount of deeply flavored, shrimpy-garlicky oil.


Next, transfer the strained base back to the pan over medium heat and add more minced garlic to it. Squeeze in the juice of half a lemon and simmer this until the garlic is softened (don’t let it burn!), and then turn off the heat. Add finely chopped parsley and swirl in a tablespoon of butter. Transfer to a straight-sided jar and use an immersion blender to whiz this mixture up into a smooth, garlicky butter sauce that you’ll drizzle onto the pizza when it’s hot from the oven. If you’re working ahead, this can be refrigerated and then brought to room temperature just before pizza baking.


Marinate the shrimp

Now, do you remember the temperature this pizza will bake? Five hundred, fifty degrees! Under such extremes, the delicate shrimp needs a little protection, and I’m treating it with the mayonnaise trick I learned from rock star chef Kenji Lopéz-Alt. There is yet another clove of minced garlic in here, plus the zest of a small lemon and a shake of red pepper flakes. And then, the magic ingredient— baking soda! You can read all about my discovery of this technique here, if you wish, but suffice to say that it transforms the marinade to flavor the shrimp and protect it from the high heat. Twenty minutes will do it, but wait until just before pizza time for this step.


Time to build the pizza!

Prep a pizza peel by rubbing in flour and then medium grind cornmeal, and hand-shape the pizza dough into a 14-inch round. Drizzle it with olive oil and season with salt and pepper. Next, scatter a sparse amount of the freshly grated mozzarella onto the dough as a base for the shrimp, and a quick shake of red pepper flakes. Arrange the shrimp (including that mayo marinade) onto the pizza. Give the whole thing a dusting of parm-romano cheese and slide it into the oven. Set a timer for 6 minutes (or longer, if using a pizza stone).


The preheated baking steel retains a great deal of heat, and the high temp of the oven ensures that the crust as well as the toppings will be perfectly browned in this time. Drizzle on the garlic-shrimp butter sauce, toss on more fresh parsley and one more dose of parm-romano blend cheese.


The cheese and garlic butter will melt into the pizza, creating a perfect bite of tender shrimp, intensely flavored butter and garlicky goodness! This will be one of the two pizzas on our table this year as we count down to 2024. 

Now, care to guess what other pizza I’ll be trying this New Year’s Eve? Hint: it’s more seafood. Stay tuned! 😉

Shrimp Scampi Pizza

  • Servings: 14-inch pizza
  • Difficulty: Intermediate
  • Print

Don't let the number of steps scare you away from making this insanely delicious pizza. None of them are difficult, and you'll be greatly rewarded for your effort!


Ingredients

  • 1/4 cup extra virgin olive oil
  • 5 to 6 cloves fresh garlic, peeled and sliced thin
  • Kosher salt
  • A few shakes red pepper flakes
  • Shells and tails of 3/4 pound uncooked shrimp
  • 1/4 cup dry white wine (or vermouth, as I prefer)
  • 2 additional cloves garlic, minced
  • Juice of 1/2 lemon
  • 2 Tbsp. fresh parsley leaves, finely chopped
  • 1 Tbsp. butter

Notes: Don’t skimp on the garlic in this component! It plays a prominent role in scampi, and though it may seem like too much, you’ll end up straining most of it out of the sauce base, so use enough to give it plenty of flavor.

Directions

  1. Add olive oil to a heavy-bottomed pot placed over very low heat. Add first amount of garlic, salt and red pepper flakes and steep for about 20 minutes. Watch this carefully to be sure the garlic doesn’t burn; it should just barely simmer around the edges of the garlic.
  2. Add shrimp shells and tails to the pot and toss until shells begin to turn pink. Raise heat slightly to medium-low. Add dry vermouth and simmer until liquid is mostly evaporated. Cool to room temperature and then strain out solids through a mesh strainer.
  3. Wipe out the pot and add strained shrimp stock, minced garlic and lemon juice. Cook over low heat until garlic softens. Turn off heat, stir in parsley and whisk in butter.
  4. Transfer sauce to a straight-sided jar and use an immersion blender to puree until smooth. Set aside or refrigerate and bring to room temperature before baking pizza.

Next, marinate the shrimp. If you make the marinade ahead, wait until last minute to add the baking soda.

Ingredients

  • 1/3 cup mayonnaise
  • 1 clove garlic, peeled and minced
  • 1 or 2 shakes red pepper flakes
  • 1/4 tsp. baking soda
  • Zest of 1 small lemon
  • 3/4 pound wild-caught shrimp, peeled and deveined

Directions

  1. Combine mayo, garlic, red pepper and baking soda in a bowl large enough to hold the shrimp.
  2. Stir in lemon zest and toss shrimp in the mixture. Set aside for 20 minutes before assembling the pizza.

Time to bake: The oven should be preheated to 550° F for one hour with pizza steel placed about 8 inches from the top heating element of the oven. Dust pizza peel with flour and medium grind corn meal for easy transfer of the pizza to and from the oven. If you don’t have a peel, use the back of a cookie sheet to slide the pizza in, and grab the crust with tongs to pull it out when it’s finished.

Ingredients

  • 11 oz. pizza dough ball, at room temperature
  • Drizzle of olive oil
  • Salt and pepper
  • 1/3 cup freshly shredded hard mozzarella
  • A few shakes red pepper flakes
  • 2 Tbsp. parm-romano blend cheese
  • Additional parm-romano and chopped Italian parsley (for final garnish)

Directions

  1. Shape dough by hand into a 14-inch round and place it on prepared peel. Drizzle oil all over dough and give it a quick seasoning of salt and pepper.
  2. Scatter mozzarella over pizza and shake on red pepper flakes. Arrange shrimp over mozzarella. Sprinkle parm-romano cheese all over pizza.
  3. Slide pizza onto hot steel and bake for 6 minutes. Remove from oven and spoon over the garlic sauce, concentrating on the shrimp (don’t worry, it will melt and ooze everywhere). Sprinkle with parsley and additional parm-romano cheese. Serve immediately.


Spanakopizza!

Today is National Spinach Day, and I would be remiss if I did not share this pizza that I pulled from the oven on Friday. It is absolutely packed with the nutritional powerhouse that is spinach, and a few other key ingredients like feta and dill that give it the signature flavor of Greek spanakopita.

In a roundabout way, this meatless, sauceless pizza brings me full circle to the launching of my blog back in 2020. I have been known at times to take inspiration from the idea of “national” food days, and on this date in that year, I surprised my husband with a batch of spanakopita— the real kind, made with layered phyllo— and served it alongside a Greek salad and easy chicken souvlaki. With spinach being Les’s favorite vegetable, he took a picture of that meal and posted it (along with my national day inspiration) on his Facebook page. 

That’s when it occurred to me that I should probably be doing that myself, not on Facebook but on my own platform. About 10 days later, I started Comfort du Jour.

Pizza, as many of my blog followers already know, is one of my favorite “blank canvas” foods,  and for this tasty pie, I took inspiration from a different kind of recipe made by another food blogger, Diane Kochilas. She is an amazing chef who shares her passion for Greek food not only through her blog (linked here), but also several award-winning cookbooks and her PBS-aired television show, “My Greek Table.” It just so happens that Diane also went to grade school with my hubby back in the day in Queens, N.Y., and the only reason I mention that is because Les follows Diane’s culinary adventures on Facebook and recreates some of her recipes when he takes his turn in our kitchen.

Diane’s “warm spanakopita dip” has become a big-time favorite at our house. When I scanned the ingredients list on the recipe Les had printed— mozzarella, feta, fresh spinach, onions, leeks, dill— I began to imagine them rearranged on a pizza, and I finally brought that idea to life this past Friday. It wasn’t until this morning, when that picture of my spanakopita popped up in Les’s Facebook memories, that we realized the significance of the date. I decided to hustle and get this post ready to mark the occasion. So that’s the story of this pizza— inspired by a dip that was inspired by a Greek specialty— and it was delicious. A delightful way indeed to recognize National Spinach Day, even if it was not intentional!

So. Much. Spinach!

As with most of my pizza creations, this one begins with my own sourdough pizza dough, but any pizza dough you like is probably fine because it’s the toppings that makes this one special. I bake in a very hot oven (550 F) on a pre-heated slab of steel, and the pie is done in only 6 minutes with that arrangement. On a pizza pan, it will take longer. If you have at least a pizza stone, I recommend using it for even baking of the crust. There is a fair amount of moisture in the toppings, and your crust will thank you for the extra bit of heat.

I like to shape the dough by hand, as it results in the light, airy crust we love. A little drizzle of olive oil, and then I layered on freshly grated mozzarella— no sauce is needed for this pie.


Next was a handful of fresh baby spinach, because I wanted to present the ingredient a couple of different ways. I crumbled up two ounces of feta (the kind packed in brine) and mixed it with chopped fresh dill. This was scattered over the spinach and then buried under a generous amount of spinach that had been sautéed with sweet onions and chopped leeks. A little more mozzarella, and I slid it into the oven!


Spanakopizza!

  • Servings: 6 slices
  • Difficulty: Average
  • Print

This pizza is packed with nutritious spinach and carries all the flavors of the Greek specialty, spanakopita.


Ingredients

  • 1 pizza dough ball (about 11 ounces), at room temperature
  • 3 fat handfuls (about 3/4 pound) fresh baby spinach, divided (you’ll cook most of it, and keep a small handful fresh)
  • 1/2 cup sweet onion, chopped
  • 1/2 cup chopped leeks, white and very light green parts only
  • 1 cup freshly shredded whole-milk mozzarella, divided
  • 1/3 cup brine-packed feta, patted dry and crumbled
  • 2 Tbsp. chopped fresh dill leaves
  • Extra virgin olive oil, salt and pepper

I bake all my pizzas at very high oven temperature (550 F) on a pizza steel that is preheated for one hour. If you have a baking stone or only a pizza pan, you may need to adjust temperature and baking time accordingly. Use a flour- and cornmeal-dusted pizza peel for easy transfer into and out of the oven.

Directions

  1. Preheat oven (and steel or stone) to 550 F, with rack placed about eight inches from the upper heating element.
  2. Heat a non-stick skillet over medium heat with a generous swirl of olive oil in the pan. When the oil begins to shimmer, add onions and leeks and sauté a few minutes until they are softened and translucent. Add two-thirds of the baby spinach (give it a rough-chop first if you’d like) and sauté until most of the moisture is evaporated and spinach is greatly wilted. Transfer the mixture to a bowl and cool to room temperature.
  3. In a small bowl, combine crumbled feta and fresh dill. Set this aside.
  4. Lightly dust a counter or board with flour. Shape dough into a 14-inch round, taking care to keep some airy bubbles in the outer edges of the dough. Transfer to the prepared peel.
  5. Drizzle olive oil onto the dough and sprinkle it with salt and pepper. Arrange most of the mozzarella evenly over the dough, reserving about 1/4 cup for the final layer. Scatter reserved handful of fresh spinach over the mozzarella.
  6. Sprinkle the feta-dill mixture over the spinach. Use a spoon to evenly distribute the sautéed spinach and onion mixture all over the pizza, and be careful not to leave large clumps of it near the pizza’s edges. Top with the remaining bit of mozzarella.
  7. Slide the pizza onto the preheated steel (or stone) and bake 6 minutes, or until cheese is bubbly and edges of crust are puffy and golden brown.


Eggplant Parm Pizza!

It’s been a long time since we’ve talked about pizza here on Comfort du Jour, but this one deserves a mention because it is a beautiful marriage of two classic Italian foods we love in this house. Every bite had a little bit of everything we love about eggplant parm—the crispy coating, meaty eggplant and gooey cheese—and a little bit of everything we love about pizza, especially the blistery crust and tangy tomato sauce.

This mouthwatering pie also deserves a mention because its star ingredient was grown in the first genuinely successful garden we have had in several summers. I shared a lot of tomato recipes this year but didn’t get in as many raves about the beautiful Japanese eggplant we enjoyed.

Homegrown produce rarely looks perfect. This one had a funny shape because it grew against the trellis that supported the plant! 🙂

Japanese eggplant tastes virtually the same as a typical “Italian” eggplant you’d see in the supermarket or farm stands, but its long, slender shape is distinctive and makes it suitable for smaller versions of things. My husband, Les, and I nibbled on miniature eggplant parm bites as an appetizer at least twice over the summer until he finally said, “hey, why don’t we put these on a pizza?”

Well, heck, yeah!


If you saw Les’s Veal & Eggplant Parm post a couple of weeks ago, you know that we achieved the perfectly crispy, cheesy exterior on the eggplant rounds with a careful breading—first flour, then egg wash and finally a seasoned panko crumb and Parm-Romano mixture before a dunk in hot oil. We did exactly the same with these mini eggplant slices, beginning with a 20 minute salt-and-rest time.


The crispy eggplant had plenty of flavor on its own, but we wanted to pair it with some complementary flavors, including soft, sauteed onions and a little bit of spicy sausage that I had left over from another recipe. I laid those down on a layer of shredded mozzarella, over our usual pizza sauce, with a few sprinkles of our Parm-Romano blend.

Then, the eggplant parm layer, and I spooned a bit more sauce right on top of each little medallion, then another good pinch of mozzarella to keep it nice and cheesy.


Into the 550° F oven on our beloved pizza steel, and six minutes later, we had this delicious Italian hybrid masterpiece!


This week, the temperatures in our area finally dipped below the frost point, and what was left of my summer garden is now history. I went out yesterday and plucked all the remaining green tomatoes (yep, we still had them coming in) and a whole bunch of jalapenos. This was a banner year for us in the garden department.

I can’t wait until next year! 😊


Eggplant Parm Pizza

  • Servings: One 14-inch pizza
  • Difficulty: Intermediate
  • Print

This pizza was very fun to make, and a delicious marriage of two of our favorite classic Italian comfort foods.


Ingredients

  • 1 Japanese-style “millionaire” eggplant, sliced into 1/2-inch rounds
  • Kosher salt (for sweating excess moisture from the eggplant)
  • 1/2 cup all-purpose flour, seasoned with black pepper and garlic powder
  • 2 large eggs, beaten with a pinch of salt
  • 1/2 cup Italian seasoned panko bread crumbs
  • 1/4 cup Parm-Romano blend cheese (or regular, grated Parmesan)
  • Neutral vegetable oil, such as canola (for frying eggplant)
  • 1 ball pizza dough, at room temperature
  • Extra virgin olive oil, for drizzling on dough
  • 2/3 cup favorite pizza sauce, divided
  • 1/2 small onion, sliced and sauteed until soft
  • 1/2 cup cooked, crumbled Italian sausage
  • 1 cup shredded mozzarella, divided

We bake all of our pizzas on a heavy pizza steel, pre-heated in a 550° F oven for one hour. If you bake on a pizza stone, use the highest temperature recommended for your stone, and adjust baking time accordingly.

Directions

  1. Arrange the eggplant slices on layers of paper towel. Sprinkle with salt and let them rest for 20 minutes, then use clean paper towels to wipe off the salt.
  2. Heat oil in a cast iron skillet over medium heat. Set up breading station, with one container of seasoned flour, a second with beaten eggs and a third with the panko crumbs, mixed with Parm-Romano.
  3. Dip each eggplant slice into the flour, then shake off excess and dip into the egg. Let excess egg drip from the slices and lay them into the panko crumb mixture, pressing panko onto each side for full coverage.
  4. Carefully place the breaded eggplant slices into the hot oil, taking care not to crowd the pan. Turn the eggplant when the first side is golden and crispy. When both sides are done, transfer the eggplant to a paper towel-lined plate to absorb excess oil.
  5. Shape pizza dough into a 14-inch round. Drizzle with olive oil, then swirl half of the pizza sauce onto the dough. Top with 1/2 cup of the shredded mozzarella, reserving the rest for the top of the eggplant rounds. Scatter the sauteed onions and cooked sausage crumbles over the cheese layer.
  6. Arrange the crispy eggplant rounds onto the pizza, then divide the remaining pizza sauce and mozzarella over each round.
  7. Bake on pre-heated pizza steel for about 6 minutes, until crust edges are golden and blistered and cheese is melted and bubbling.


Cheesy Stuffed Crust Supreme Deep-Dish Pizza

Every so often, I get a kick out of looking at the National Day calendar, which reminds me of the non-official occasions I can choose to celebrate on a given day. For example, yesterday was Talk Like a Pirate Day, but I didn’t mark the occasion because that felt ridiculous.

Perhaps it is a bit of serendipity, or just coincidence (which my husband, Les, does not believe exists) that I discovered today, Sept. 20, is both National Pepperoni Pizza Day and National String Cheese Day. The two seemingly separate “events” are both going to be recognized with this insanely over-the-top deep-dish pizza that we made at our house a full three months ago. Sometimes, in the rush to get something else posted on the blog, I end up putting some delicious thing on the back burner. In this instance, it worked out, because this pizza, which I dubbed “Go Big or Go Home,” happens to be perfect for this day. The toppings included pepperoni, but also sausage, peppers, onions, mushrooms, tomatoes and a ton of cheese, and the Chicago-style crust had a circle of string cheese strips enclosed all around the edges.

So much Italian flavor in here and soooo much cheese!

We had been dreaming about a cheesy stuffed crust pizza for a while, but I had a hard time imagining how to keep thick mozzarella sticks secured inside the dough without making a square pie. My solution was to tear the string cheese into strips and then overlap the strings in layers all the way around. Why didn’t that occur to me sooner? It resulted in a perfectly cheesy, ooey-gooey pizza experience, and made it one of the most fun versions of a deep dish that we have made (so far 😉).


Ingredients

1 recipe deep dish pizza dough (see my previous post for Chicago Deep Dish or use your own)

3 Tbsp. extra virgin olive oil

5 sticks of mozzarella string cheese, pulled apart into about four strips for each

1 packed cup shredded whole milk mozzarella, divided

1/2 cup cooked Italian sausage (we used a spicy variety)

1/2 green bell pepper, chopped and sauteed

1/2 medium yellow onion, chopped and sauteed

About 20 pieces thinly sliced pepperoni

1/2 can San Marzano tomatoes, drained and squeezed by hand

A few spoonfuls of your favorite prepared pizza sauce

Several shakes of your favorite Italian seasoning blend


Instructions

  1. Preheat oven to 450° F, with oven rack in center position.
  2. Add olive oil to a 14-inch, deep dish pizza pan and swirl it around. Shape the pizza dough, leaving as much extra dough around the edges as possible.
  3. Arrange the strips of string cheese, overlapped so there is plenty of cheese thickness all the way around the edges of the pizza dough. Gently stretch and pull the edges of dough over the string cheese strips and press to seal it to the base of the dough. Portion half of the shredded mozzarella onto the base and use your hands to press it firmly into the base of the pizza and also to cover the stuffed crust seam.
  4. Layer on the cooked Italian sausage, then the peppers, onions and mushrooms. Arrange slices of pepperoni generously all over the pizza. Scatter the crushed canned tomatoes randomly over the pepperoni, and then drop a few spoons of pizza sauce in-between the tomatoes and spread it lightly.
  5. Sprinkle the pizza, including the dough around the edges, with your favorite Italian seasoning blend. Sprinkle the rest of the shredded mozzarella, along with any remaining strips of string cheese, on top of the pizza.
  6. Bake for 25 to 30 minutes, until crust is golden brown and filling is bubbling. The cheese will be lightly browned and bubbling also. Let the pizza cool in the pan for 8 minutes before transferring it to a pizza tray. We use a large pancake turner and a wide fish spatula to get under the pizza to move it. Alternatively, cut the pizza right in the pan and serve up the wedges.

See? Go big or go home!


Jambalaya Deep-Dish Pizza

For such a short month, February has a lot going on, holiday- and event-wise. There’s Super Bowl, which is traditionally the first Sunday of the month; Valentine’s Day, which is fixed on the 14th; and Mardi Gras, which floats on the lunar calendar in tandem with Ash Wednesday. It’s enough to make even the most adept party planner a little dizzy, and for the average person at home, it isn’t easy to celebrate all three (at least, not when you’re hosting others). I’ve wanted to do some kind of Mardi Gras dish for a while, and with Super Bowl and Valentine’s Day behind us, here’s what I’ve come up with for our small celebration—all the exciting flavors of jambalaya piled into a deep-dish pizza.

The only thing missing from this jambalaya-inspired pizza is the rice, and guess what? We didn’t miss it!

As with the other two February events, it is just the two of us celebrating, and that makes it less intimidating for me. Les and I both love Cajun and Creole flavors, and he brought home some authentic spice blends from a work-related trip to “N’awlins” a couple of years ago, so I already have the right accent. We have some fabulous jazzy blues music to help us get in the mood, and I’m sure we have some beads around here somewhere. Weeknights are always great for a casual meal, and pizza has become one of my “blank canvas” foods, begging for interesting flavor twists. I’m going deep dish on this one because you cannot skimp on Mardi Gras (which translates from French to “fat Tuesday”), and I’m not sure that our usual N.Y.-style crust can handle all this excitement. 

Most of the fillings are obviously traditional, from the zesty smoked andouille sausage, through the holy trinity aromatic vegetables and spices, and the plump and juicy Gulf shrimp. I omitted rice because we have quite enough carbs in my part-cornmeal deep dish pizza dough. Creole foods have tomato, so that’s an easy crossover ingredient for pizza. But what about cheese? I wracked my brain and could not think of a single regional dish that includes cheese, but on a deep-dish pie, the cheese on the bottom seems to shield the tender crust from wet filling ingredients, so I didn’t feel right skipping it.

In the end, I opted for the mildest firm cheese I could think of—one that would not clash with all these great Louisiana flavors. Monterey Jack is sturdy enough to line the pizza dough, but it melts well, and it kept my deep-dish dinner from singing the soggy-bottom blues.

Speaking of the blues, we can’t celebrate Mardi Gras without music, so go put on your favorite New Orleans jazz, or enjoy what I listened to while making this pizza:


Ingredients

1 prepared deep-dish pizza dough (recipe and instructions in my post for Chicago-style Deep-dish Pizza)

2 Tbsp. extra virgin olive oil (mine was infused with cayenne)

2 links smoked andouille sausage, sliced or chopped (I used Aidell’s)

1 boneless chicken thigh, cut into bite-sized bits

2 ribs celery, finely chopped

1/2 yellow onion, chopped

1/2 cup each red and green bell pepper, chopped

4 cloves garlic, chopped

Cajun or Creole seasoning (as much as you can stand)

3 sprigs of fresh thyme, leaves removed

1 1/2 cups canned diced tomatoes, divided (see instructions)

Handful of fresh okra, sliced (or about 3/4 cup frozen sliced okra)

2 Tbsp. red wine vinegar

Splash of veggie or chicken broth (optional, for deglazing the skillet)

4 large gulf shrimp (about 1/4 pound), peeled and deveined)

4 oz. shredded or sliced Monterey jack cheese


Instructions

Let’s run through it together in pictures while you enjoy the Bluesiana Triangle, then keep scrolling for written instructions and a downloadable PDF for your recipe files.


  1. Place a large non-stick skillet over medium heat and swirl in olive oil. When oil is hot enough to shimmer, add cut up andouille sausage and toss until edges are crispy. Use a slotted spoon to transfer the sausage to a bowl and set aside.
  2. Add the chicken pieces to the remaining oil and toss them about until no longer pink. Transfer chicken to the bowl with the sausage.
  3. Add trinity plus garlic to the skillet and toss in the hot oil. Shake on Cajun or creole seasoning to suit your spicy preferences. Grind some black pepper into the pan and sauté vegetables until they are soft and translucent. Scatter the fresh thyme leaves over the vegetables.
  4. Add diced tomatoes, okra and red wine vinegar. Toss and cook until okra is heated through, about five minutes. Turn off heat and allow vegetables to rest a few minutes, then transfer to a bowl and set aside.
  5. If your skillet has any browned bits on the bottom, swirl in a splash of veggie broth and heat to a simmer. Cut the shrimp into bite-sized pieces and toss them into the simmering broth. Cook only long enough for the shrimp to be barely done, which may only be about two minutes. Transfer the shrimp to the bowl with sausage and chicken and set aside.

At this point, if you’re working ahead, you can refrigerate all cooked ingredients, and then bring them to near-room temperature when you are ready to assemble the pizza.

Ready to bake:

  1. Preheat oven to 450° F, with rack in center of oven.
  2. Spread prepared dough into pan, with edges creeping up the side a bit.
  3. Layer ingredients in the following order: Monterey jack, most of the andouille sausage, chicken, vegetables, shrimp, remaining sausage, additional diced tomatoes. Sprinkle with Cajun seasoning.
  4. Bake 25 minutes, rotating pizza halfway through baking time. Rest pizza 5 minutes, then carefully lift and transfer pizza to a flat pizza pan or serving platter. Cut into wedges.

Want to save this recipe?


Sausage and Eggplant Leftovers Pizza

“I’ve got leftovers on my leftovers!”

This is what I shouted as I was assembling this patchwork pizza, which had all the classic Italian flavors of eggplant parmesan, lasagna and spicy pepperonata. Yep, all that on a crust. But make no mistake, I did not plan it this way.

The end-of-weekend fridge clearing ritual at our house took an interesting turn last night when my husband, Les, who will never, ever turn his nose up to anything pizza or anything eggplant, suggested that we take the remnants of a sausage and eggplant noodle casserole (which was already a leftover creation), and chop it all up to top some fresh N.Y. pizza dough. After all, he reasoned, the flavors were right for pizza and we knew from experience that cooked macaroni on a thin crust pie was next level comfort food—we had tried it last summer with some leftover mac and cheese and it was awesome—plus, we had just enough scraps of pepperoni and shredded mozzarella to hold it all together. Why not?

I wish I had taken just one photo of the “original” leftover creation, which was sort of a poor man’s lasagna, made of layered cooked elbow macaroni, two leftover grilled spicy Italian sausage links, the sautéed peppers and onions that had topped the sausages on sandwiches earlier in the week, a can of diced tomatoes, ricotta mixed with Italian herbs and our favorite parm-romano blend, plus an eggplant that I had sliced, sweated and quick-roasted, and every last random slice of provolone and thin-sliced mozzarella that had been taking up space in the deli drawer. Unfortunately, I didn’t bother cataloguing the details of the casserole at the time because I hadn’t planned to share it here on Comfort du Jour, and I also hadn’t really planned on sharing this pizza. I have no specific measurements of ingredients or step-by-step photos to share. Sometimes I need to just focus on feeding us, you know? But the end result—this I must share, because it underscores the fact that one should never underestimate the power of leftovers. It’s one of the essential kitchen rules I learned from my grandmother.

Les was proud of the success of this leftover creation, and it just happened to have all his favorite flavors. 🙂

Not every idea in the kitchen has to be new and interesting, nor should everything be same old, same old. But sometimes, if you play it just right, the two collide and become something unexpectedly delicious, as we learned with this pizza. We had three slices leftover, naturally, and they will warm up nicely for lunch as leftovers of the leftover leftovers.

What crazy good thing have you made with leftovers recently? Drop it in the comments section so we can all be inspired!


Oysters Rockefeller Pizza

One of my favorite things to do with food is twist up a classic, and this effort is a big-time winner! When my husband, Les, and I began talking about making our annual White Clam Pizza for New Year’s Eve (these conversations begin in October because we are obsessed that way), the gears of my foodie brain started spinning. What would happen, I wondered to myself, if we put all the incredible, decadent, special occasion flavors of Oysters Rockefeller—on a pizza?

Oysters Rockefeller has always been a favorite of mine, an appetizer dish that feels so classic and ritzy and special. So what about a crispy New York-style pizza crust with a creamy base, briny oysters, smoky cooked bacon, earthy spinach, pungent garlic and sharp salty cheeses—oh my goodness, yes—why wouldn’t this be a thing?

Kinda makes you want to bite right into it, huh?

Unlike the white clam pie, which is cooked sans sauce, I felt that this one needed something creamy as a base. Tomato sauce won’t do, because that isn’t a flavor I associate with oysters. It had to be creamy, but not too cheesy. One thing I have learned about fish in general is that most “melty” cheeses do not pair well, but hard, salty cheeses such as Parmesan are perfect. We remembered how tasty the roasted garlic béchamel was on the creamy garlic and mushroom pizza I developed last year—so that’s where I started for the base. Next came some homework to discern the exact right flavors that make Oysters Rockefeller so exquisite. The bacon must be crisp, but not too crunchy. The cheese should be decadent and nutty, but not stringy or heavy the way mozzarella would be. Gruyere is common in the classic appetizer, so that’s a go, and Romano has that nice salty punch. Spinach—obviously a must, and I embellished the flavor of that with a splash of dry vermouth. Finally, a generous scattering of buttery, crunchy garlic panko crumbs when the pie emerged from the oven.

This pizza is a winner. We can hardly wait until next New Year’s Eve!

All the fancy flavors of Oysters Rockefeller, on a fun and casual pizza. Served with Caesar salad and champagne, of course.

This is how traditions are born, friends. Enjoy!


Ingredients

1 ball N.Y. pizza dough (or your favorite store-bought dough, about 11 oz.)


The béchamel base

1 Tbsp. salted butter

1 Tbsp. all-purpose flour

3/4 cup whole milk

1 whole bulb roasted garlic

2 oz. gruyere cheese*


The cooked toppings

3 very thick slices uncured smoked bacon* (see notes)

1 small shallot, minced fine*

1 fat handful fresh baby spinach leaves

A pinch of ground cayenne pepper (optional)

2 Tbsp. dry white wine (or dry vermouth)


The cheese toppings

1/2 cup grated gruyere cheese

1/4 cup grated or shaved Pecorino-Romano cheese

A few tablespoons of our favorite parm-romano blend cheese


The garlic crumb topper

2 Tbsp. salted butter

2 cloves garlic, finely minced

1/3 cup panko bread crumbs

1 small handful fresh flat-leaf parsley, finely chopped


The oysters

1 dozen large Blue Point (or similar) oysters, shucked*


*Notes

Gruyere is a nutty, semi-hard cheese that is similar to Swiss cheese. It is a typical ingredient in the topping for Oysters Rockefeller, and I used it twice for this pizza—in the béchamel and also grated on top of the pie. Substitute with Swiss or mild white cheddar if you cannot get it.

The bacon we used was possibly the best bacon I’ve ever tasted. I wish I could give you a brand, but this was a locally produced, heritage pork we found at Whole Foods. It was uncured (nitrite-free, which is a standard in this house) and smoked with peach wood—wow. So, so good. You may not be able to find this exact kind of bacon, but substitute a good quality, thick-cut bacon with smoky flavor and not too much sweetness. This bacon was also hand-cut by the butcher and therefore very thick slices. Once cubed, it measured a total of about 1 1/2 dry cups.

Please remember that shallots are not the same as scallions, but more similar to red or sweet onion.

We agonized for weeks about the oysters, wondering whether we could purchase them fresh in the shell from a local restaurant that specializes in them, but we kept bumping into the same issue—for food safety reasons, no purveyor would sell them shucked but still in the shell. We had two options—either shuck them ourselves at cooking time (this is not for novices, which we are) or buying them already shucked, by the pint. We opted for the latter and they were fantastic. The container had more oysters than we needed for our creation, but don’t you worry—the extras will pop up on a salad or something very soon.


Instructions

I have learned (the hard way), when it comes to special recipes that I’ve never made before, that it is best to work ahead so that stress is minimized at cooking time. For this reason, I have broken the instructions down into segments, beginning with the béchamel base and the cooked toppings. It’s nice to have them done, out of the way and the kitchen cleaned up before the real cooking begins. The pictures tell most of the story, but keep scrolling for a downloadable PDF version of the instructions for your recipe files. I hope you’ll make it!

Béchamel and cooked toppings

This is the same base I made for the creamy garlic and mushroom pizza I introduced back in the summer. A béchamel is one of the simplest and most adaptable things you can make in the kitchen—master this, and you’ll find yourself whipping up all kinds of creations. I only needed a small amount for this Oysters Rockefeller pizza, and I ended up not using all of it. When cooled, the béchamel is somewhat thick and difficult to spread, so check the photos to see how I managed to get it evenly onto the dough.

If you’d like, you can make the béchamel and cooked toppings a couple of days ahead. Be sure to bring all ingredients to room temperature when you’re ready to build the pizza.


This pizza has all the character of Oysters Rockefeller. Truly, a special occasion pie.

Ready to assemble this masterpiece?

There’s a downloadable PDF at the bottom of this post, but I always think the pictures are more interesting. 🙂


Want to make this recipe?


White Clam Pizza

Of all the New Year’s Eve traditions my husband, Les, and I have established together, this pizza is the most eagerly anticipated. We start talking about it weeks in advance of the holidays, and build our entire holiday meal plan around it. Our recipe is drawn from Les’s memories of living nearly two decades in the New Haven, Connecticut area, where Modern Apizza and Frank Pepe’s reign supreme. The region is home to great pizza as well as fresh seafood, and the white clam pie is a terrific mashup of the two.

Topped with salty, slightly chewy littleneck clams and accented with fresh oregano, garlic and a copious amount of fluffy shredded Pecorino-Romano cheese, the white clam pizza meets every expectation for a casual meal, but with special ingredients and festive occasion flavor.


Les and I began this ritual of serving white clam pizza on New Year’s Eve 2018, only three years after we officially became “a couple.” Although we had been dating seven months by the end of 2015, I had been in stubborn denial about my feelings and held onto deep fears about being in this (or any) relationship. I’ll spare you the personal drama (which feels a little silly to me in hindsight) but share that it was a “When Harry Met Sally” movie finale kind of moment that turned it all around for me on the afternoon of New Year’s Eve. I had broken up with Les, for at least the fifth time, and when I came to my senses—only about 15 hours later—he had already committed to plans with a friend for New Year’s Eve. It was too late for us to spend the holiday together, but there was great comfort in knowing that the first day of 2016 would be a real and new beginning. He proposed the next summer, and the rest is our history in the making.

Today, New Year’s Eve still feels more like an anniversary to us than our actual wedding anniversary, and because we both enjoy being creative with food, it makes perfect sense that we would build that into our annual celebration. We love pizza in all shapes and forms, so much so that I gave Les a pizza ornament this year for our “Christmukkah” tree, which is also decorated with ornaments representing wine, Star of David, bourbon, bacon and a chocolate-covered strawberry. Oh, and billiard balls. What else can I say? This is us. 😊

Why wouldn’t we have pizza on our tree? ❤

This pizza does not have a red sauce, nor mozzarella or sausage. It is an amazingly short and simple list of ingredients that amounts to spectacular flavor. Use deli-quality cheese and shred it yourself. Get the freshest littleneck clams you can find, or choose another quahog type of clam, as close to littleneck size as possible. Follow the fishmonger’s recommendations for keeping them fresh, and the rest is easy.

As with any good pizza, the crust is crucial. If you don’t already make your own dough, I hope you’ll give my recipe a try, not just for this pizza but for all your pizzas. There is something very satisfying about making the dough by hand, and mine is achieved with the help of my beloved sourdough starter though I offer a yeasted option, too. Either way, the dough is easy enough to make but does require a few days advance, as the ferment takes place in the refrigerator. Let the dough come to room temperature before proceeding and have fun with it!


Ingredients

1 ball of N.Y. pizza dough (or use your favorite store-bought dough)

About 20 littleneck clams (fresh, in-shell)

2 cloves garlic, finely chopped

1 Tbsp. fresh oregano leaves, chopped (or 1/2 tsp. dried oregano leaves)

2 cups very finely shredded Pecorino-Romano cheese (preferably grated at home)

Extra virgin olive oil, for drizzling before baking


Instructions

The photos tell the story, or keep scrolling for written steps as well as a downloadable PDF for your recipe files.


  1. Preheat oven and pizza stone or steel to 550° F for at least one hour. Place rack about 8 inches from the top heat element.
  2. Bring a medium-sized pot of water to boil over medium-high heat. You don’t need a lot of water in the pot; enough to just cover the clams.
  3. When water boils, carefully add clams to the pot. Boil 2 to 3 minutes, until clams pop open. Immediately drain clams into a colander, rinse with cold water and cool until shells are easy to handle.
  4. Use the tip of a sturdy knife to pry the clams all the way open and remove them from the shells. Drain clam meats on a paper towel until ready to make the pizza. If you’re working ahead, I’d recommend covering the clams on a plate in the fridge.
  5. Shape pizza dough to a 14-inch round and place it on a floured pizza peel.
  6. Spray or brush pizza dough with olive oil, then season it with salt and freshly ground pepper. Scatter a small handful of Pecorino-Romano on the dough, and then sprinkle the garlic and oregano over the entire dough.
  7. Arrange the drained clam meats over the dough. Toss the remaining Pecorino-Romano over the entire pie, covering the clams and allowing the cheese to get right up on the edges of the dough.
  8. Drizzle the pizza with extra virgin olive oil.
  9. Slide the pizza onto the preheated stone or steel and bake about 6 minutes, until crust is golden brown on the edges and cheese is bubbling.
The crust was very thin in the center of this pizza, so the cheese was more golden in those spots. But oh, those perfectly chewy edges!

Want to make this recipe?