As far as I am concerned, the best thing about winter is the soup. When the weather is cold, damp or just generally crummy, a piping hot mug of soup is like a reset button for my winter-weary soul. And you know what makes soup even better? An easy recipe that doesn’t take all day, uses the simplest of ingredients (so I don’t have to run to the store to make it), and can be customized with almost any extra flavors one could imagine. This creamy potato soup is ticking all those boxes for me.
Soup is one of my favorite comfort foods ever, and that probably dates back to days that I stayed home sick from school. On those rare occasions, I would get dropped off at my grandmother’s house, where I’d spend the day napping to the soothing sound of her cuckoo clock, sipping some variety of last-minute, homemade soup and watching TV under a soft afghan from the big, upholstered wing-back chair in her den. My Gram could whip up a soup from thin air, it seemed, and to this day, a “what’s-in-the-fridge” soup is my favorite kind. Is it possible that I may have feigned illness on occasion, just to enjoy that kind of day? Why, yes, that is certainly possible. Sometimes a kid just needs a little extra comfort—the kind only a grandma and a warm cup of soup can deliver.
I have outgrown the days of pretending to be sick, but I still yearn for the cozy comfort of a warm mug of soup, especially when gloomy weather has me down. I’ll take any kind of soup; chowders, stews, bisques, broth with noodles, minestrone—they are all on equal footing for me. My husband loves soup, too, but his preference is specifically for cream-style soups, so this one was a double win at our house.
Sour cream, shredded cheddar, bacon and chives makes this easy soup a satisfying meal!
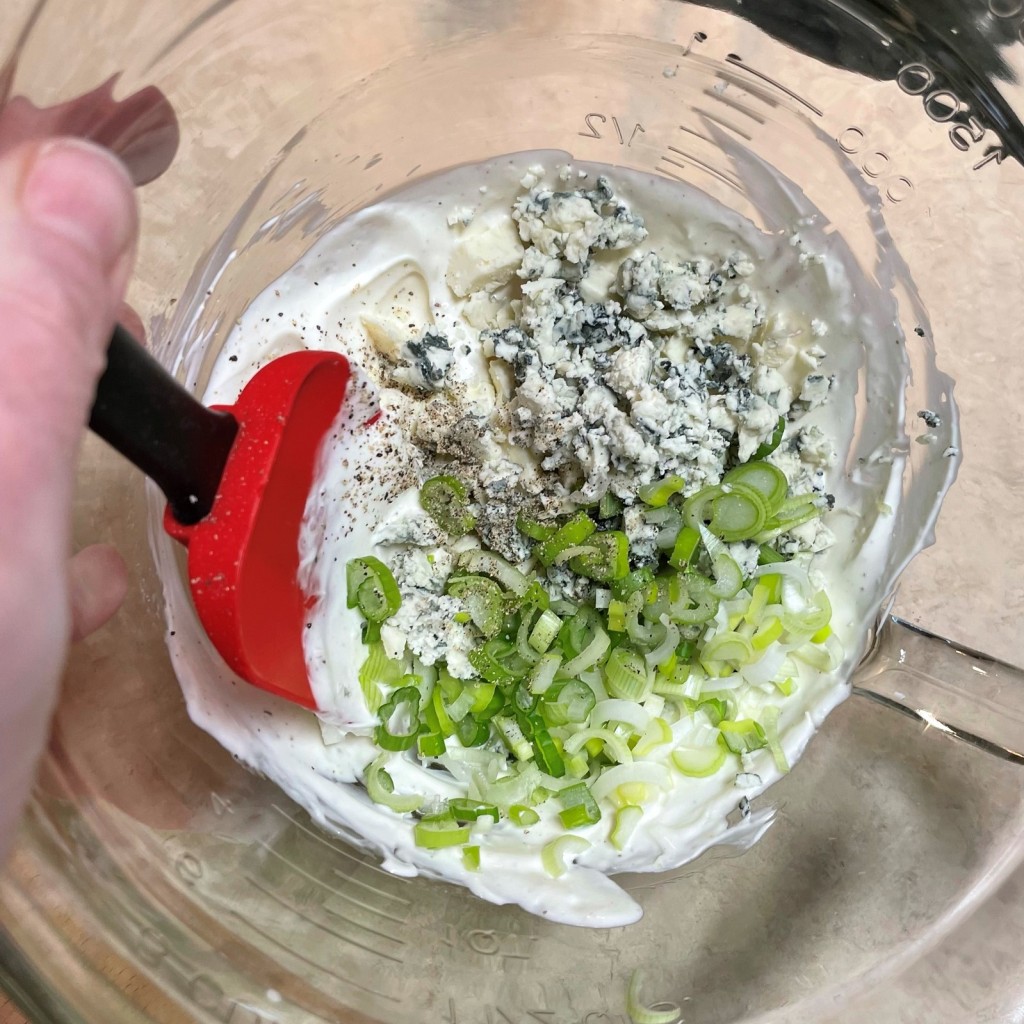
We had fun dressing up our creamy potato soup like a loaded baked potato—with sour cream, chives, cheddar cheese and crispy bacon pieces on top. But it would be very easy to keep the base of the soup and swap in different enhancers, such as roasted broccoli florets, sautéed mushrooms, frozen corn, cubes of ham or whatever else takes you to your happy place.
This potato soup is very easy to make, and despite the ultra-creamy, silky appearance, it has no heavy cream whatsoever. Buttery Yukon gold potatoes were the key element for my recipe, but you could use any combination of gold, red or russet potatoes, as long as some of them will hold their shape after simmering. Peel or don’t—whatever works for you. I thickened the soup with a slight amount of roux, made from the drippings I had from crisping up the bacon (but you could swap in butter or olive oil), and a combination of low-sodium vegetable broth and milk, then I used my trusty immersion blender to puree it halfway. It was every bit as luxurious and comforting as a cream-based soup, but with far less guilt!
We still have almost four weeks ’til the official arrival of Spring. As luck would have it, there is at least a pound of potatoes remaining in the kitchen, so I’m pretty sure this one will be on the menu again by the weekend, just in time for another round of colder temperatures.
This recipe makes 4 entrée servings or 6 appetizer servings
Ingredients
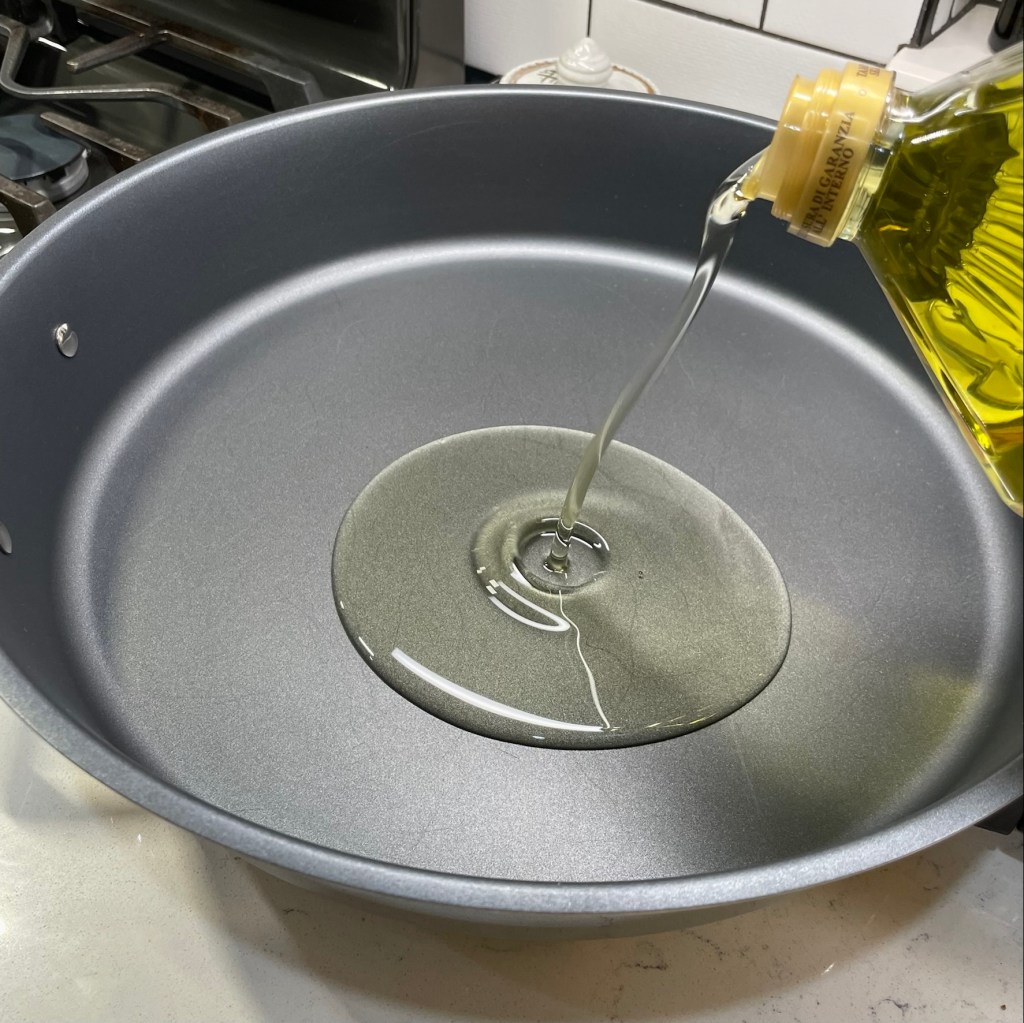
3 Tbsp. bacon drippings, butter or olive oil
1/2 large onion (about 1 cup), chopped
3 ribs celery hearts, trimmed and chopped
Salt and pepper
2 Tbsp. all-purpose flour (gluten-free 1:1 flour works for this also)
2 cups low-sodium vegetable broth* (see notes)
2 cups milk*
About 1/2 tsp. ground cumin
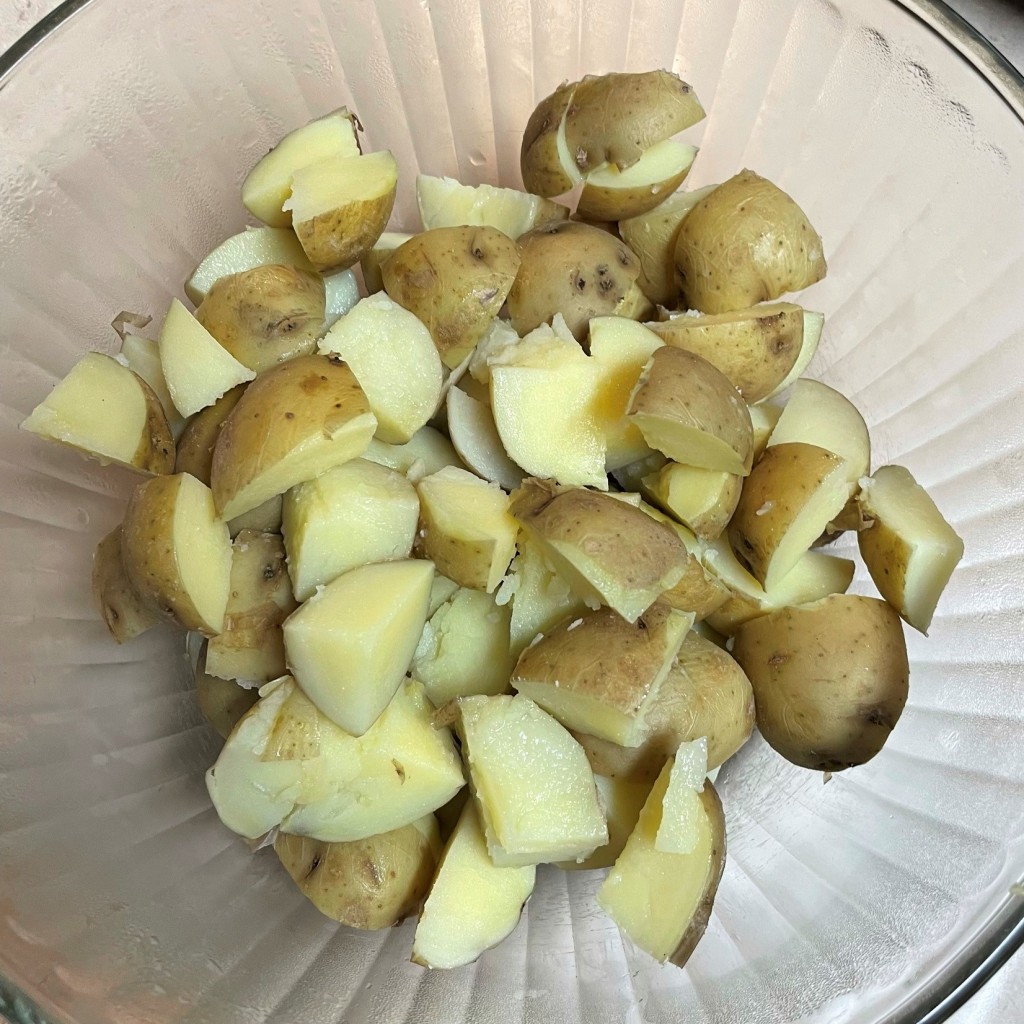
About 1 lb. Yukon gold potatoes, scrubbed and cubed (peel if you wish)
Toppings and stir-ins of your choice
*Notes
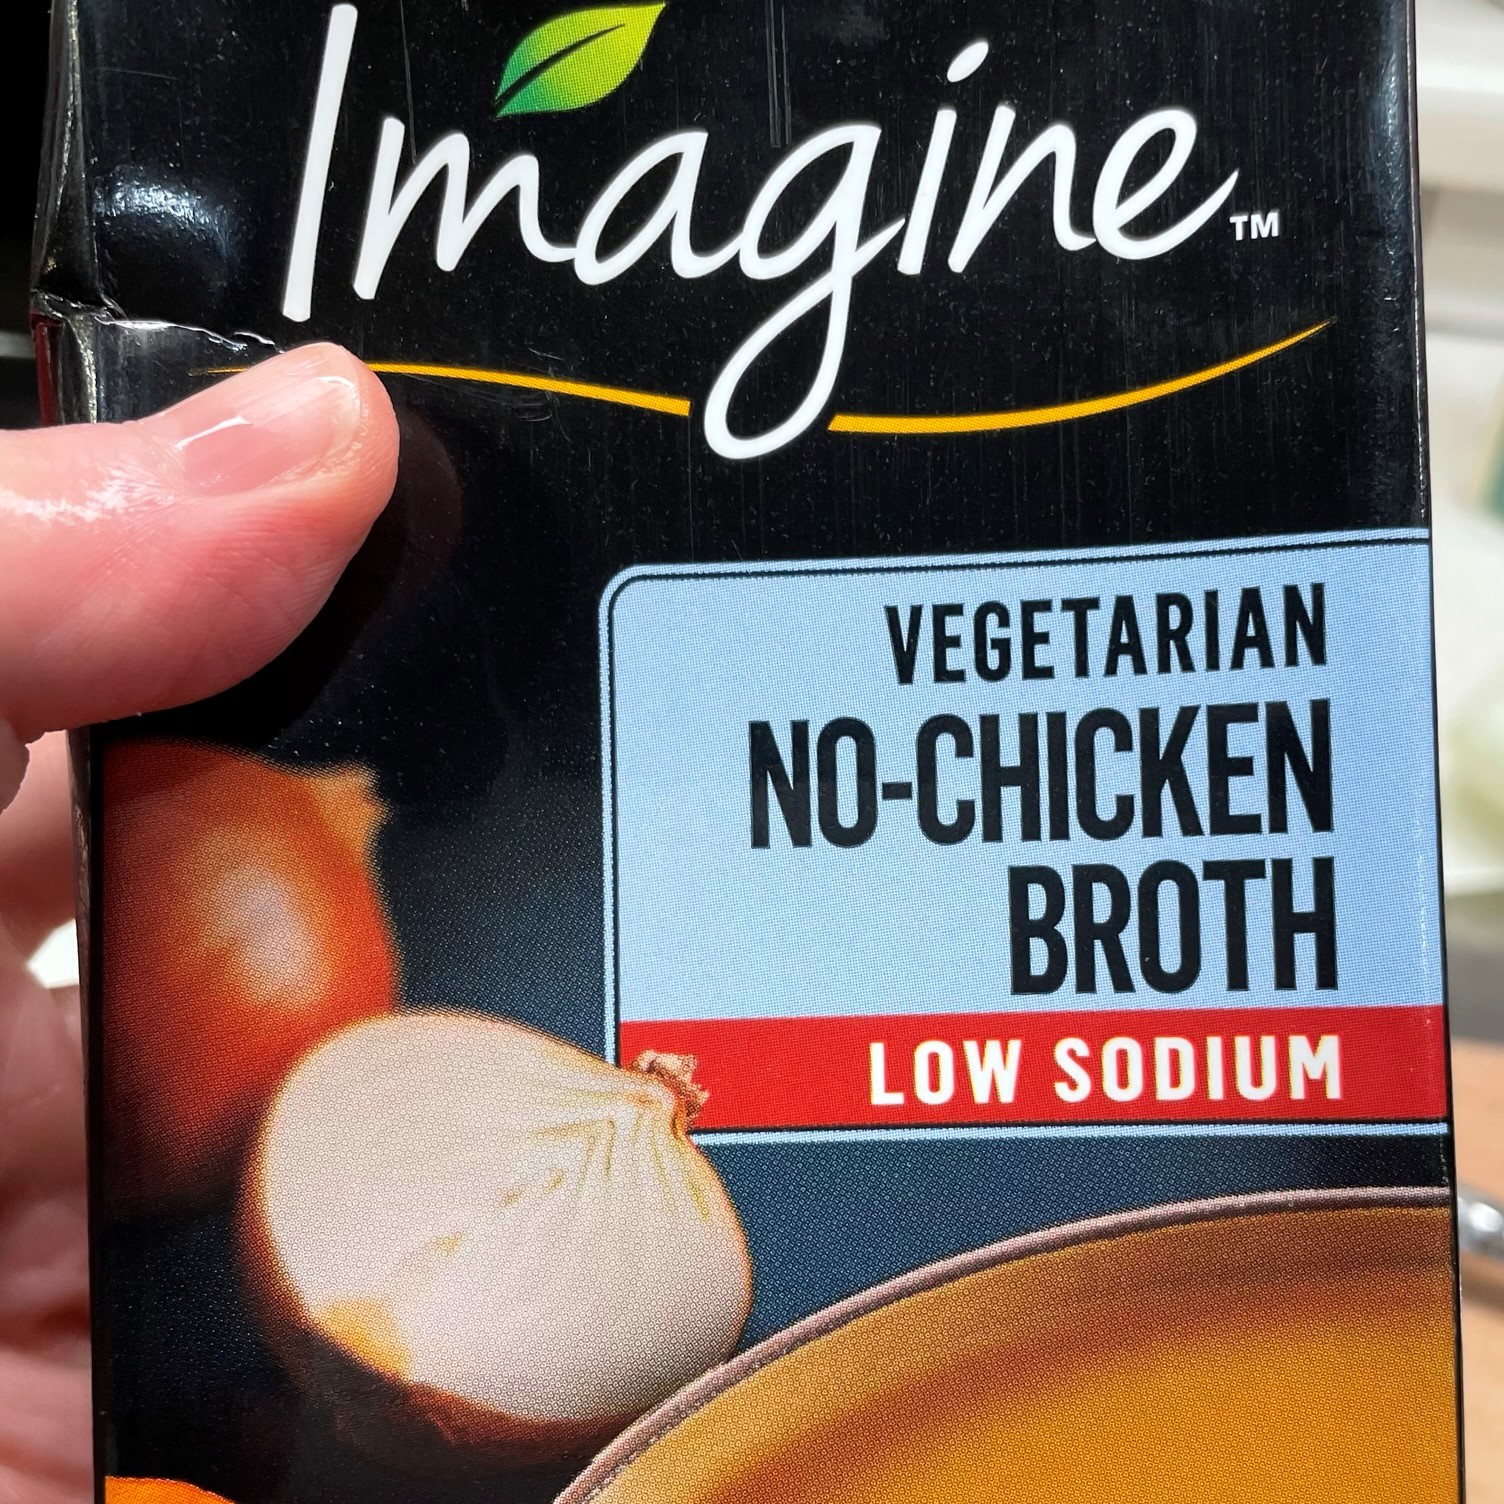
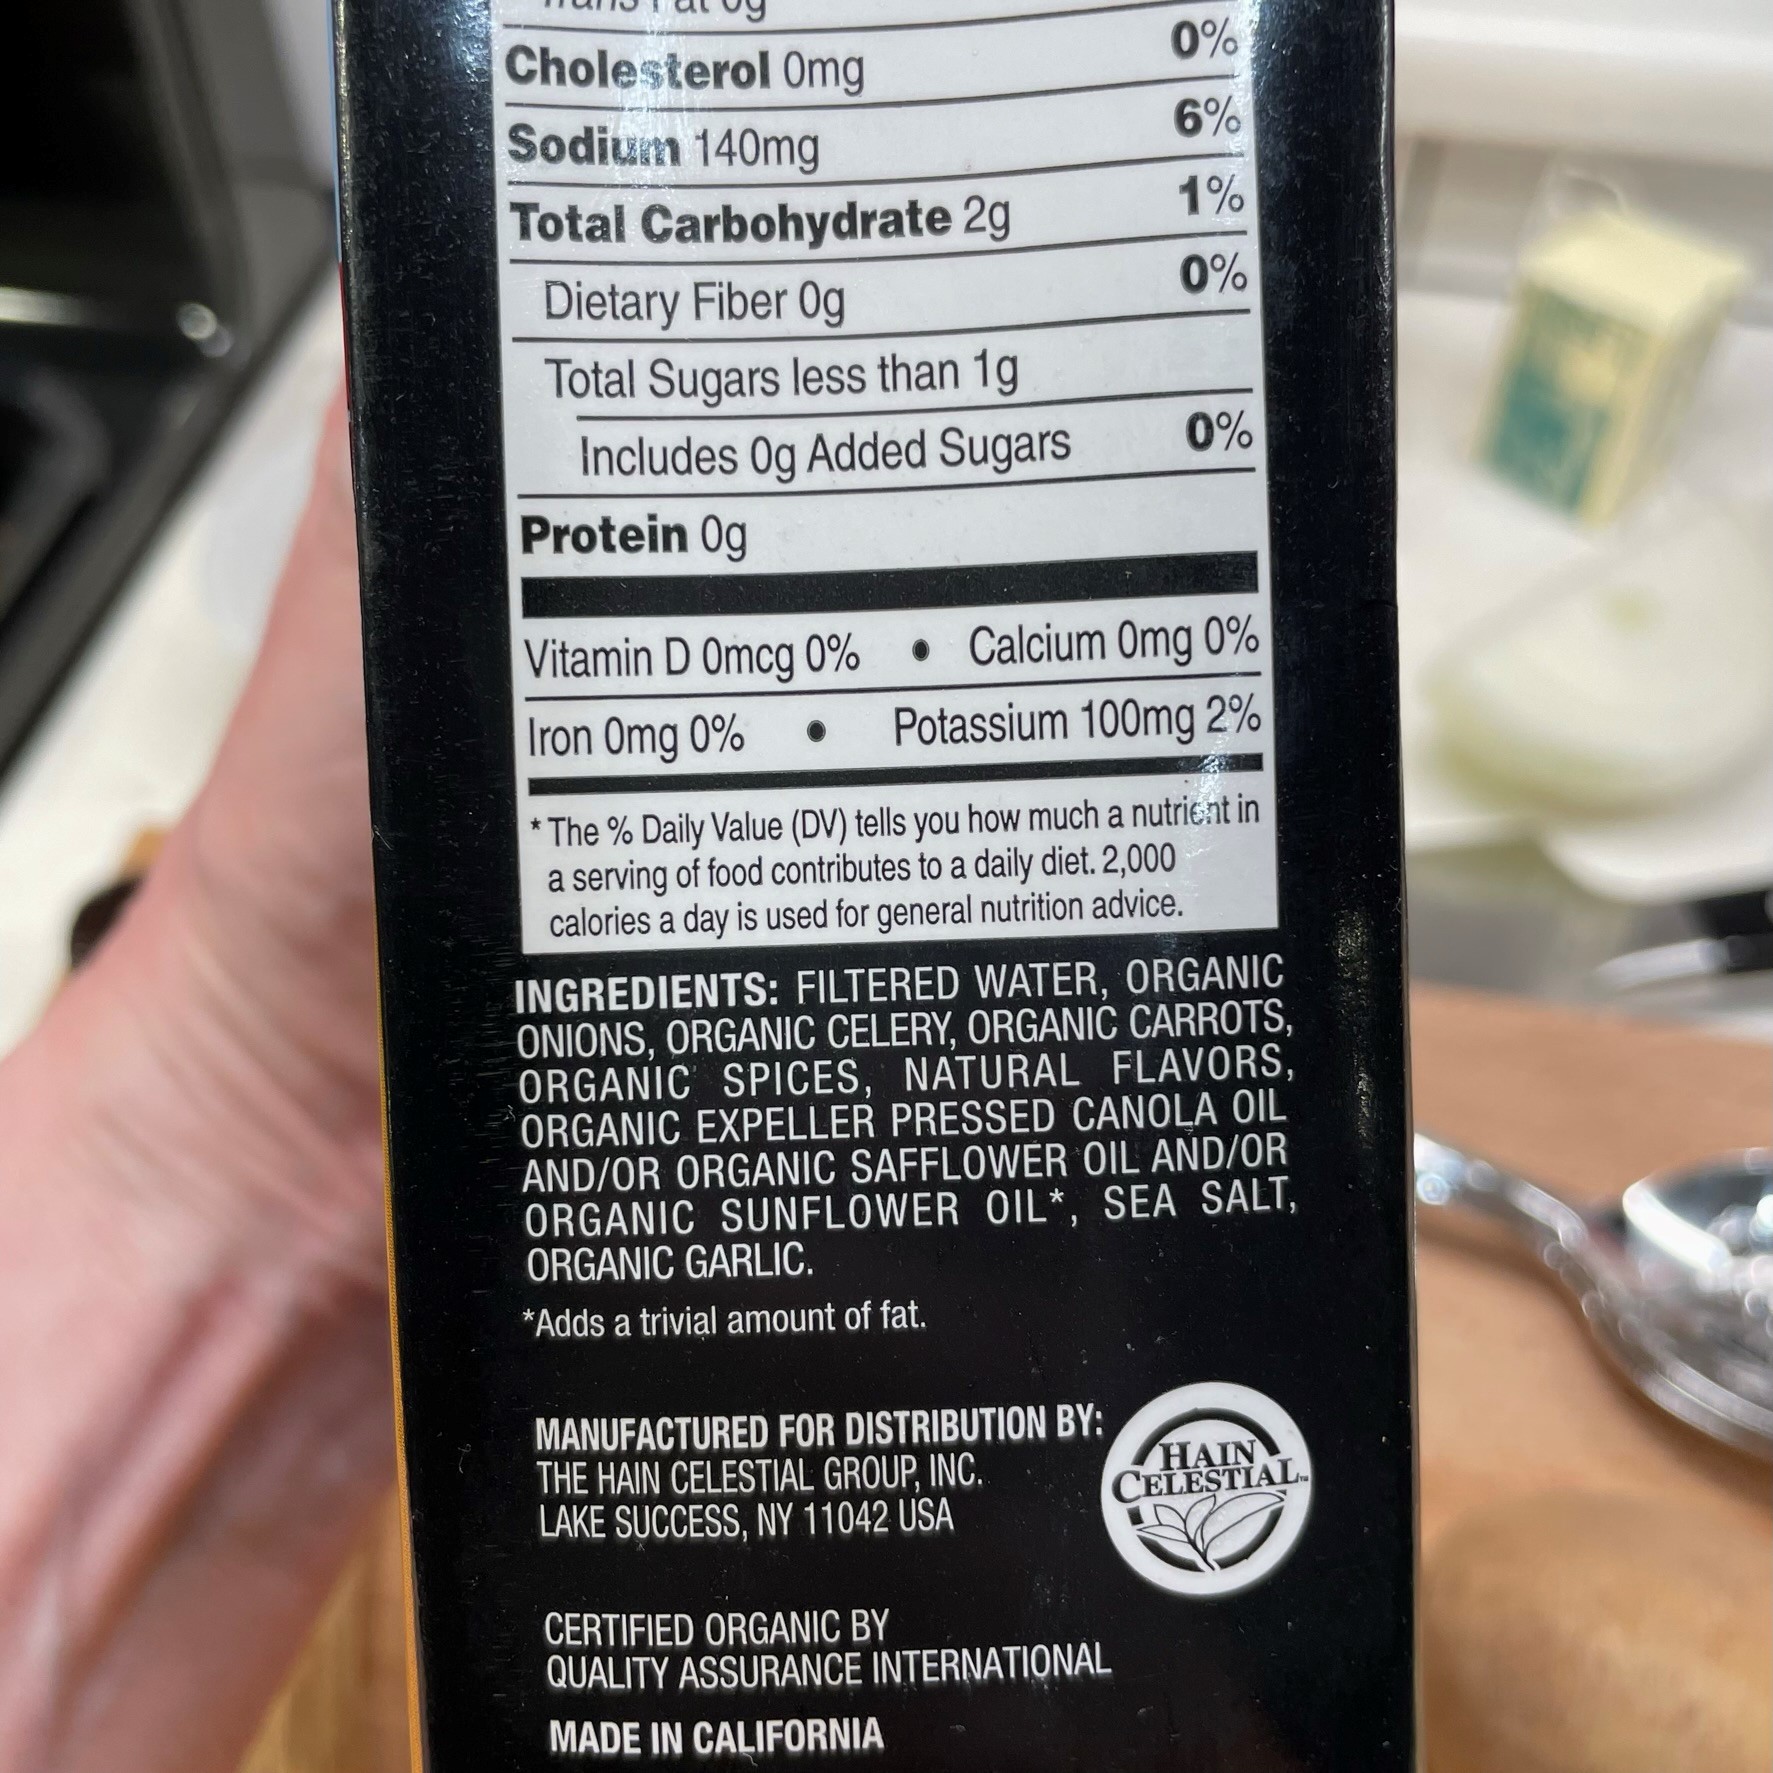
Vegetable broths vary widely in ingredients; for best results, choose a broth that does not contain tomatoes. The brand I like for this is Imagine vegetarian “no-chicken” broth. It has a rich golden color and seasonings that are very reminiscent of chicken broth.
I’m not a paid endorser, but I recommend this brand for any soup recipe. It is tricky to find, so when I spot it, I usually buy two or three cartons for the pantry.This broth (Imagine brand) is the closest to chicken broth I have ever tried. I am certain that the “organic spices” includes turmeric, because it has that yummy golden taste of real chicken soup.
I used a combination of whole milk and canned evaporated milk in my recipe, primarily because I only had 1 1/2 cups of fresh milk. Feel free to substitute 2% or skim milk if you’d like; the flavor will be less rich overall, but the roux will still give the soup a thick and creamy consistency, and you can also achieve creaminess with the immersion blender technique.
Instructions
Step up to the stove with me and I’ll walk you through this easy recipe. Keep scrolling for a downloadable recipe that you can save or print for a rainy, gloomy day. 🙂
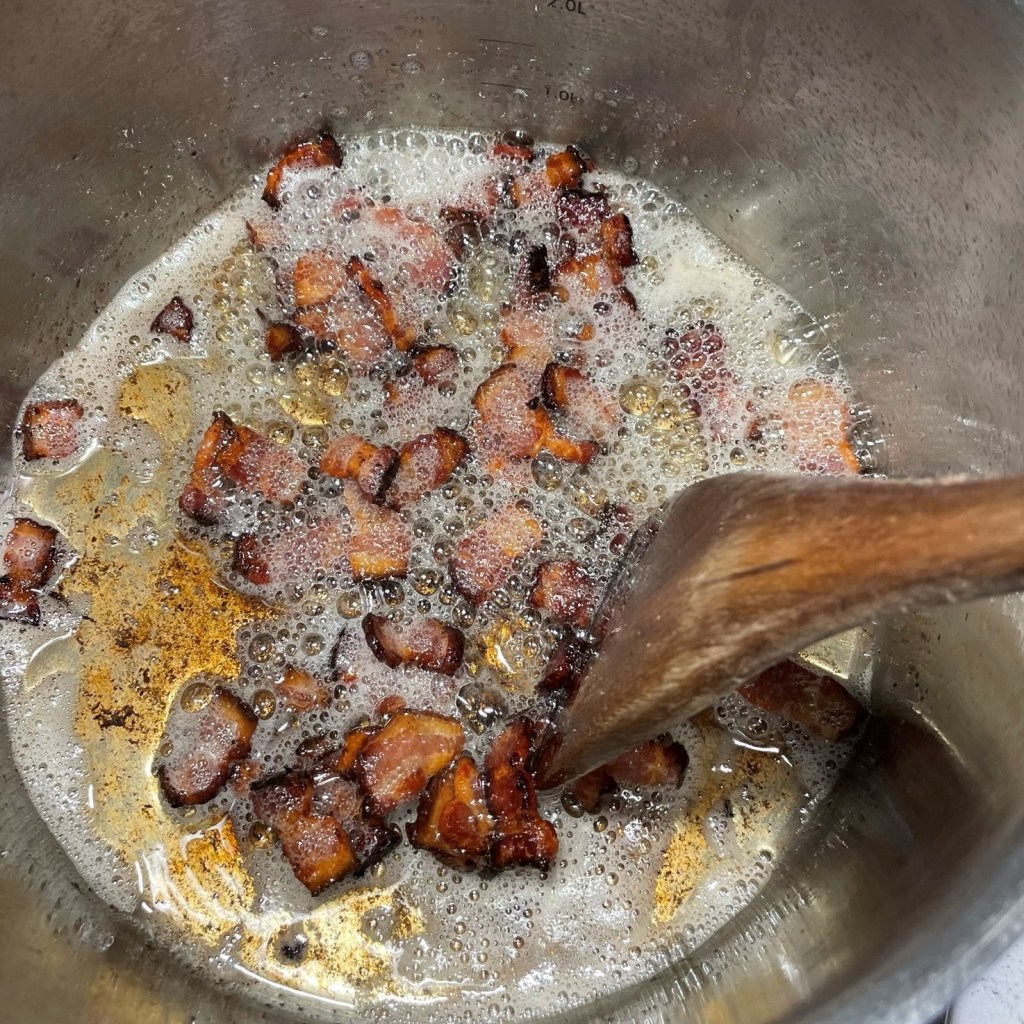
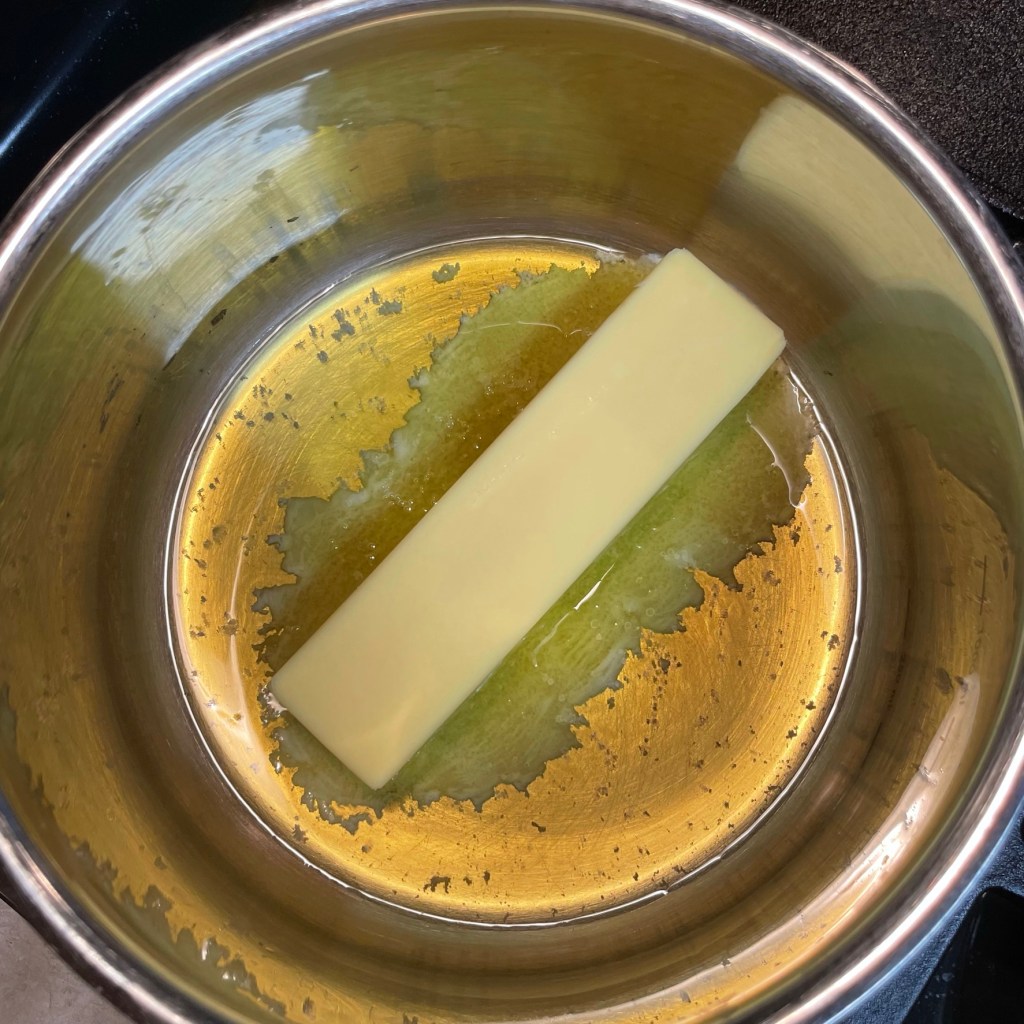
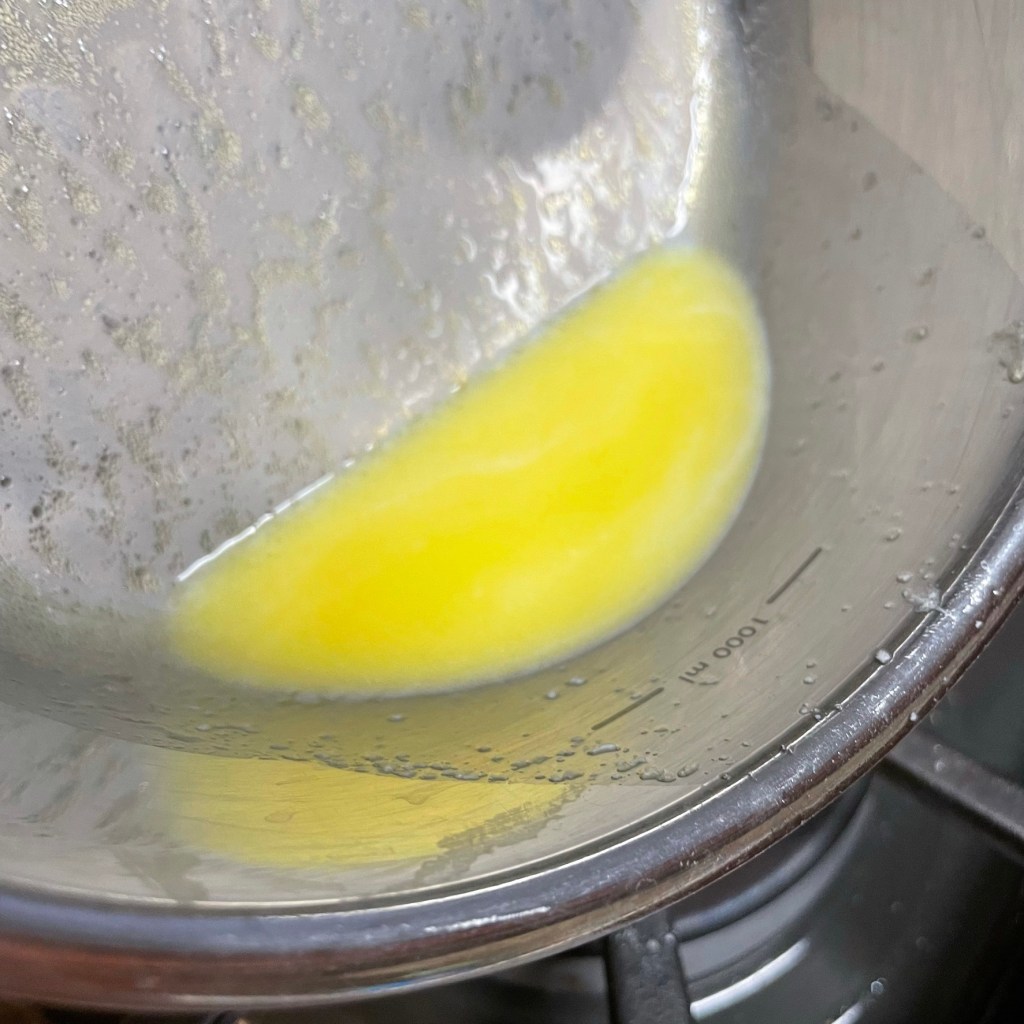
My intention was to top the potato soup with bacon, so I crisped that up first in my pot so I could use the drippings in the roux.
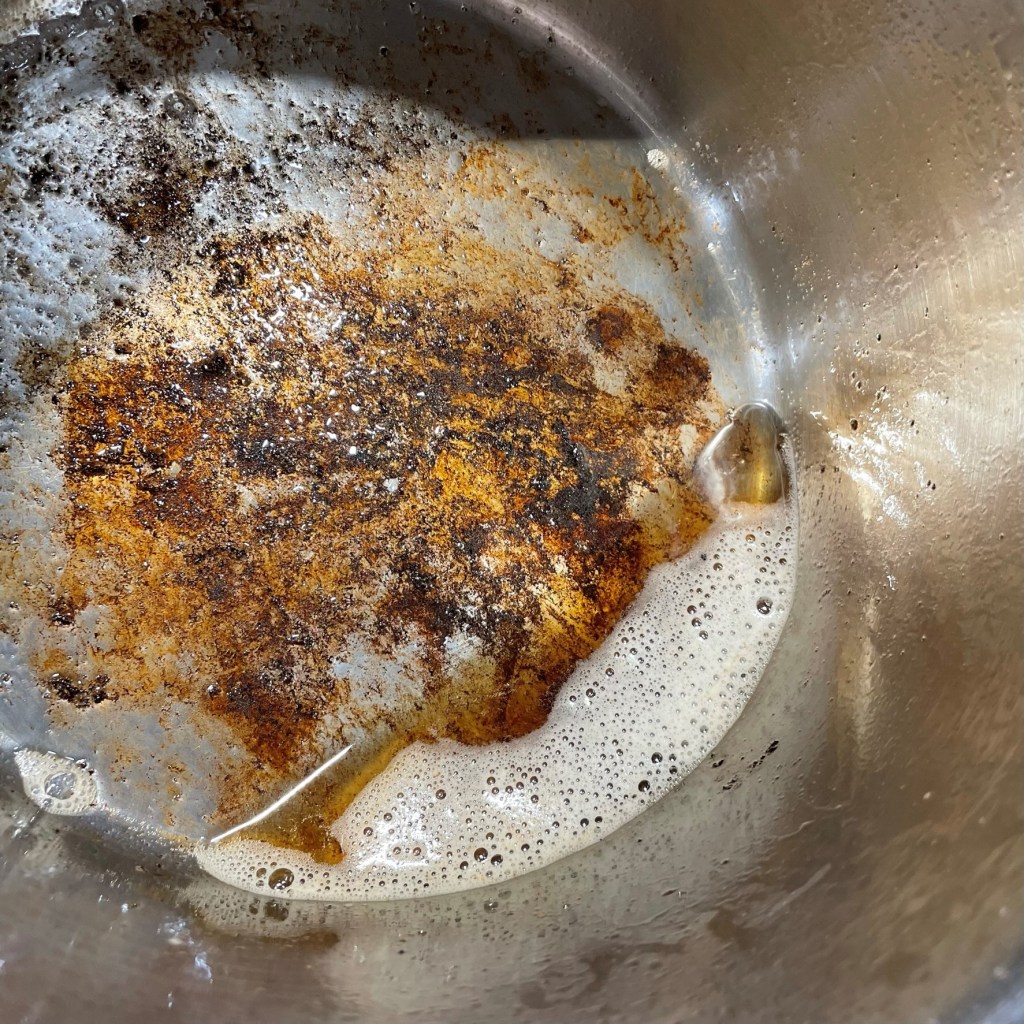
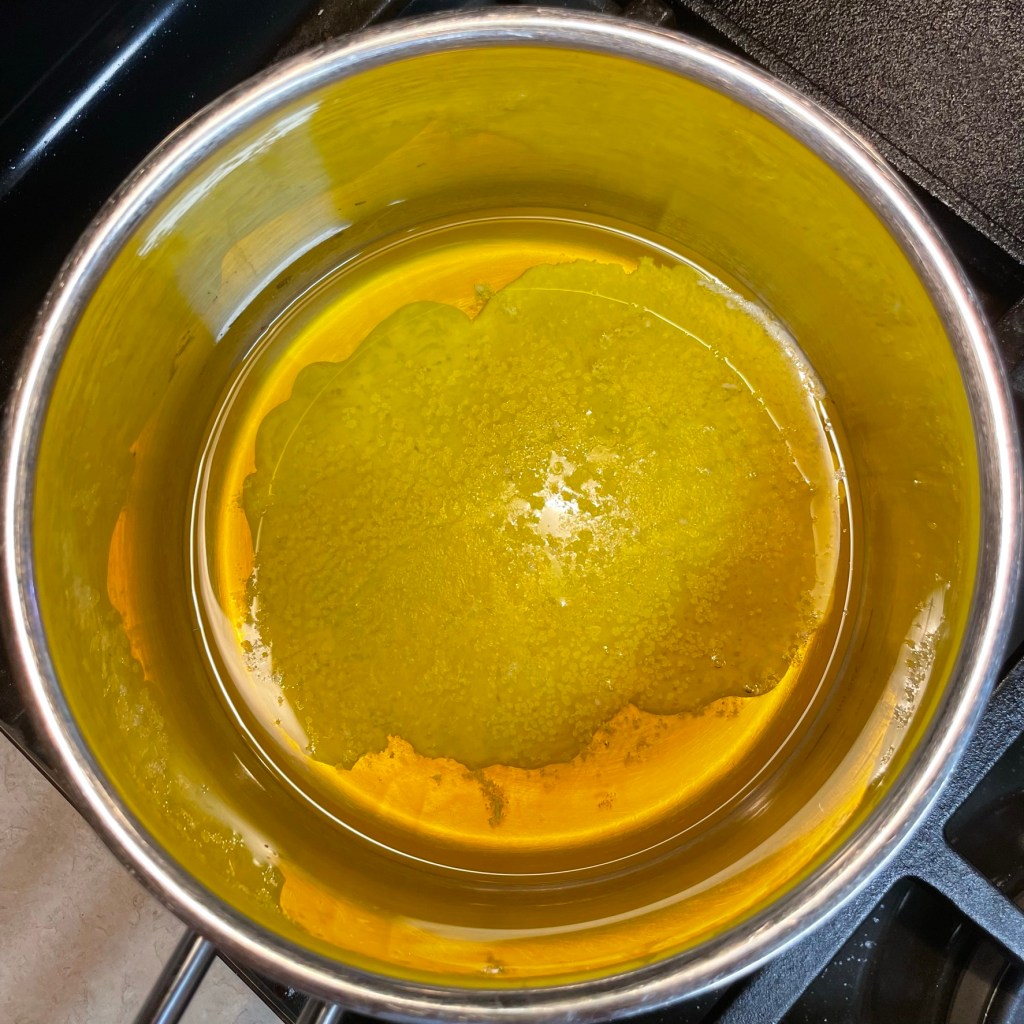
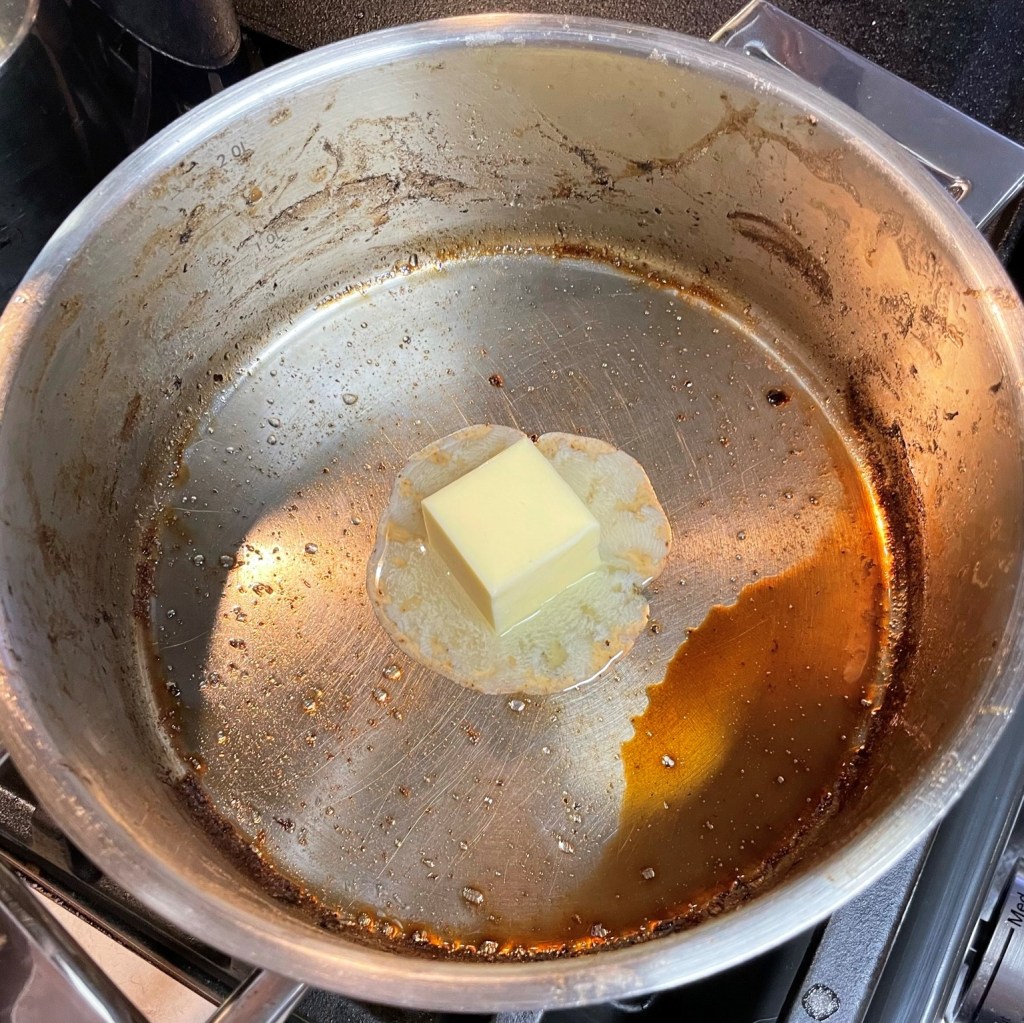
I had more drippings than I needed. I drained off all but two tablespoons.
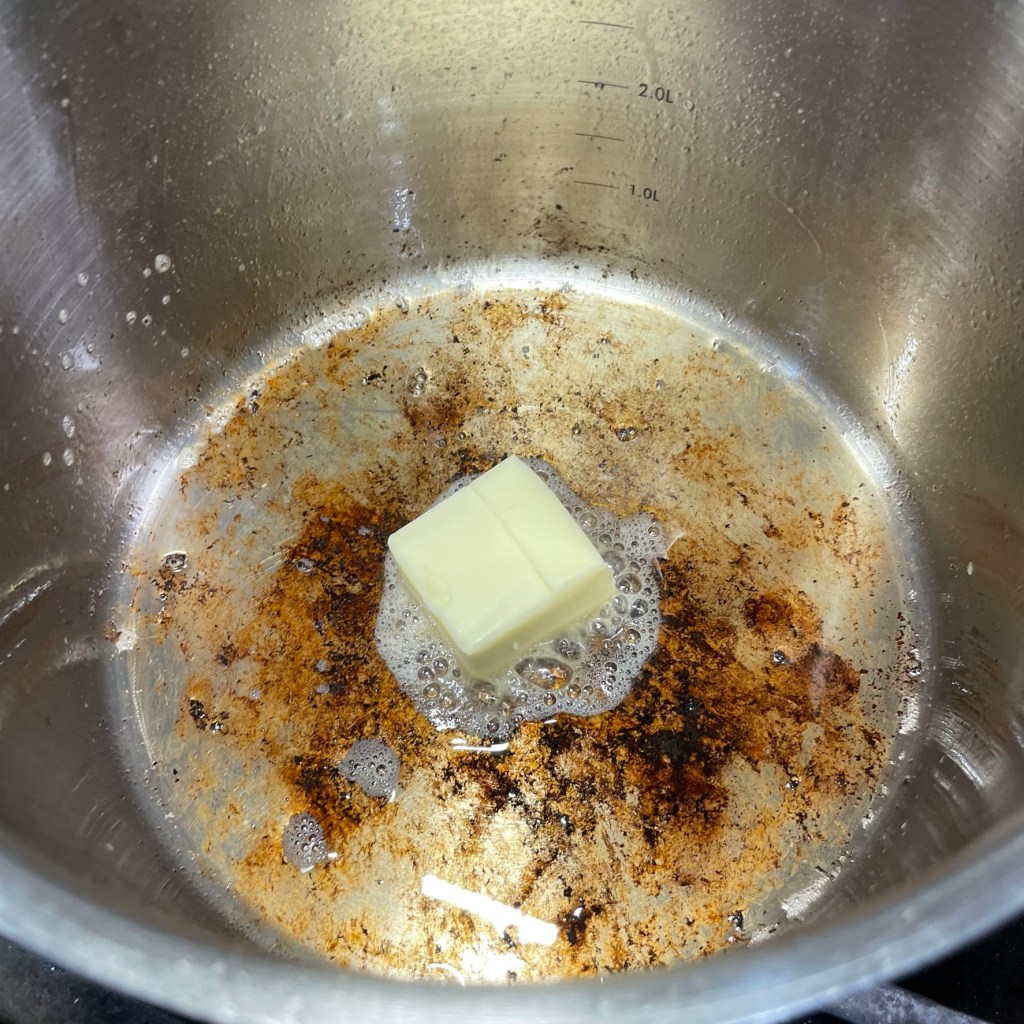
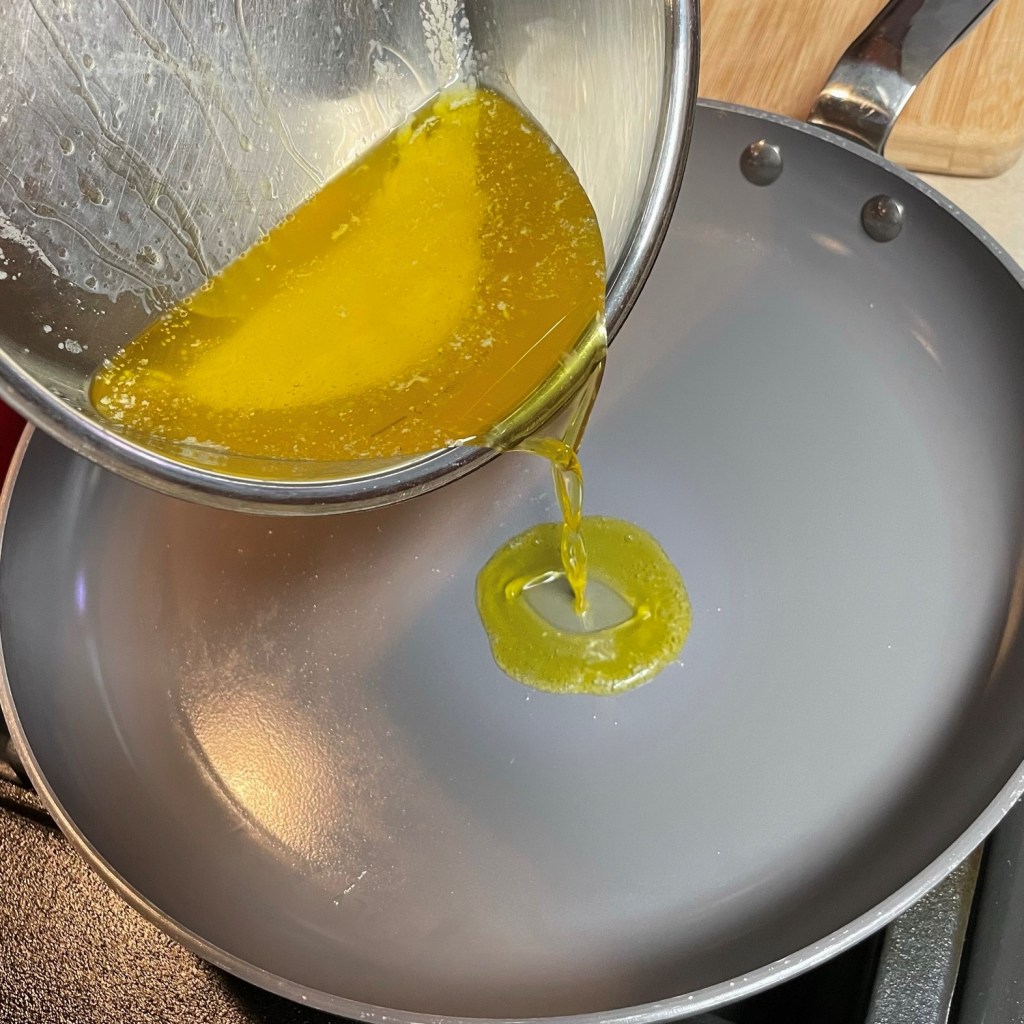
And I added a tablespoon of butter to offset some of the smoky flavor of the drippings.
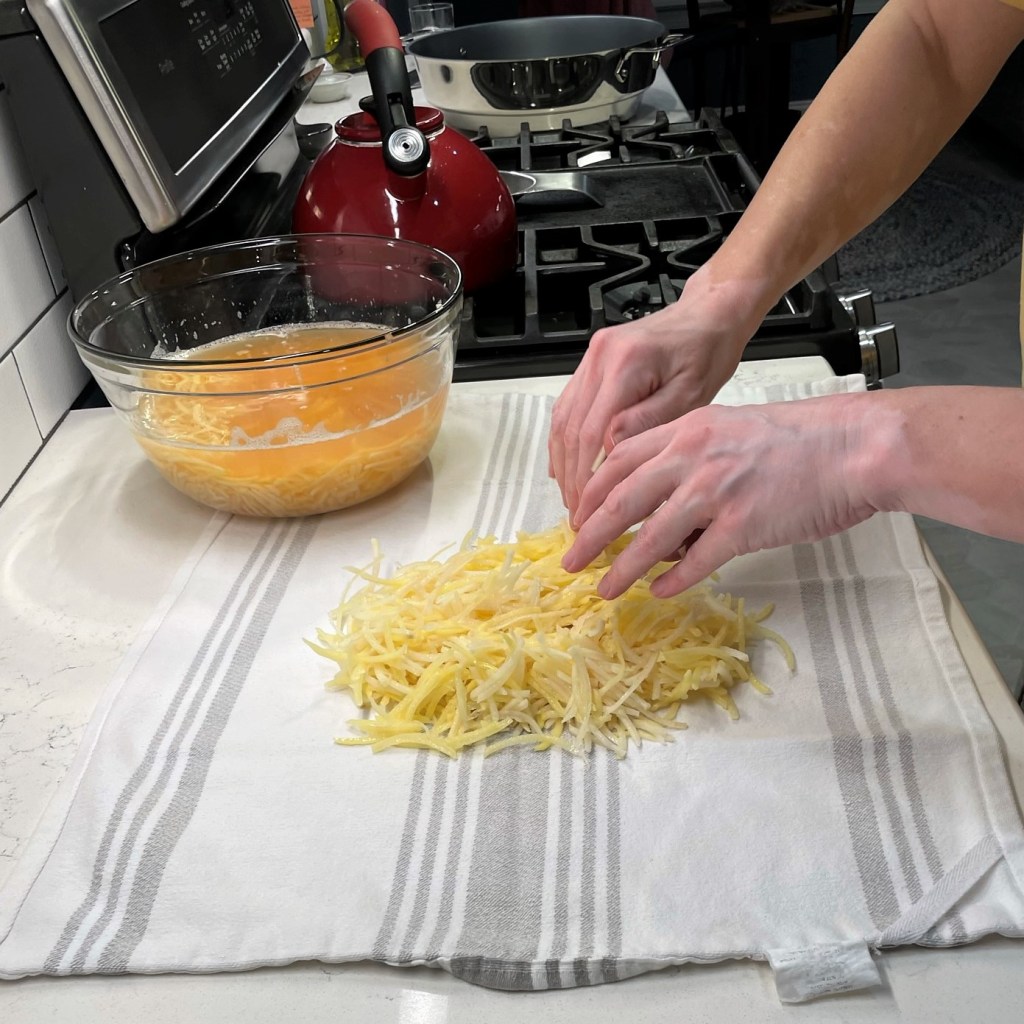
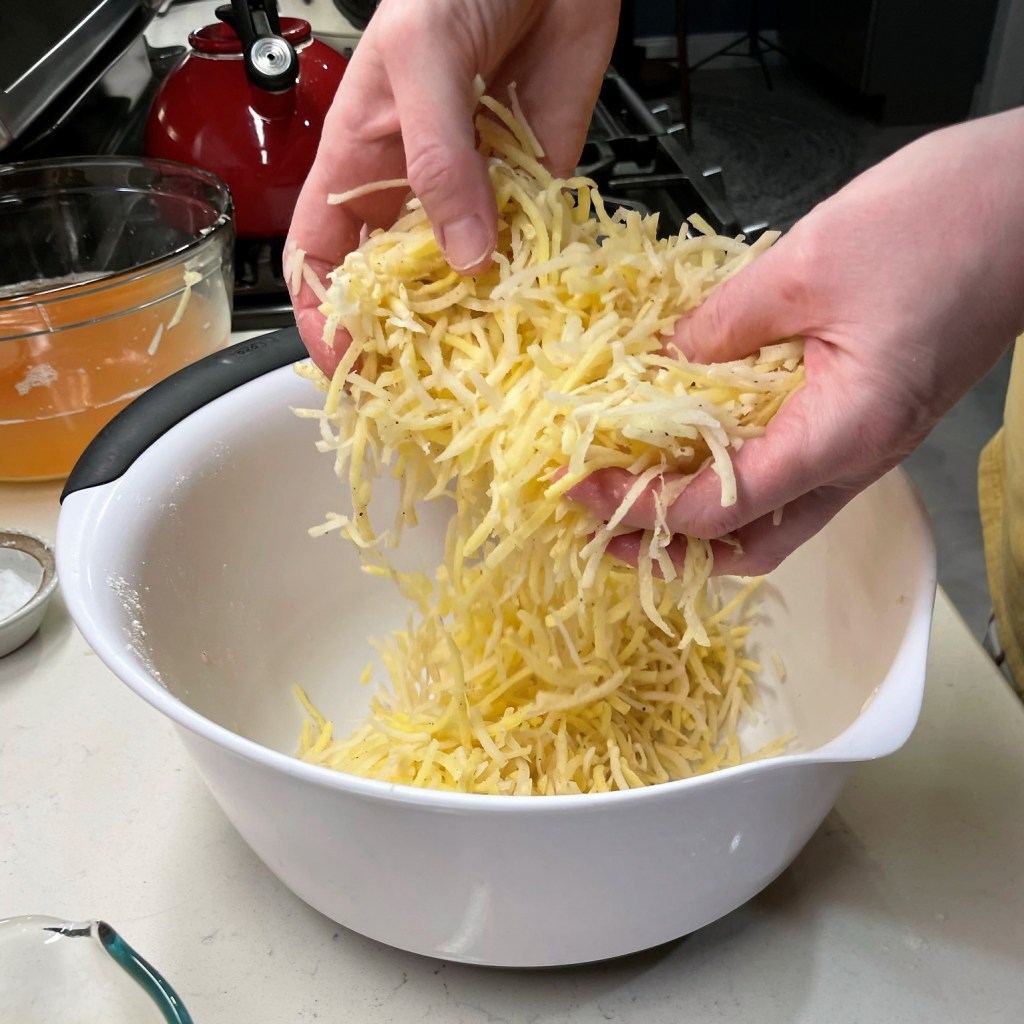
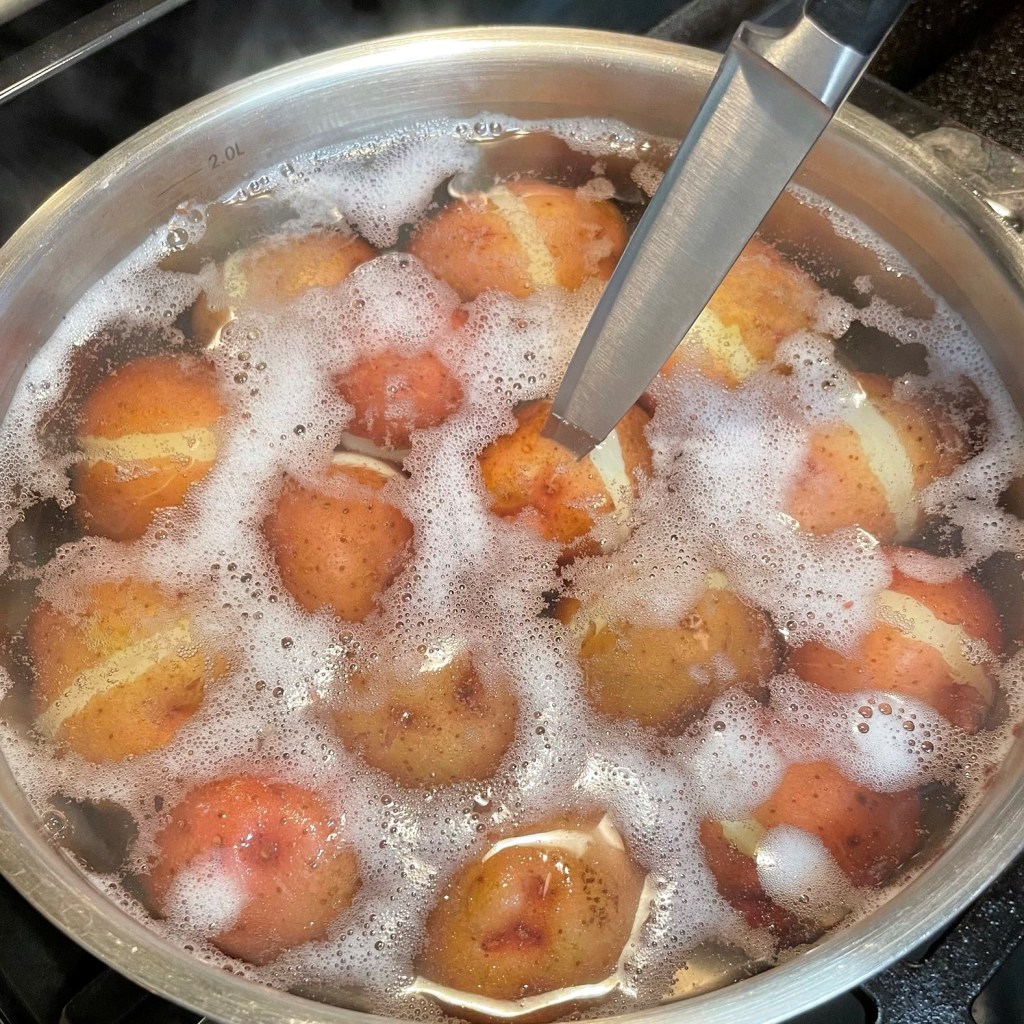
Yukon golds are great for soup because of their creamy flesh and easily edible skin. I used all but the two smallest potatoes you see here, about 1.5 pounds worth.
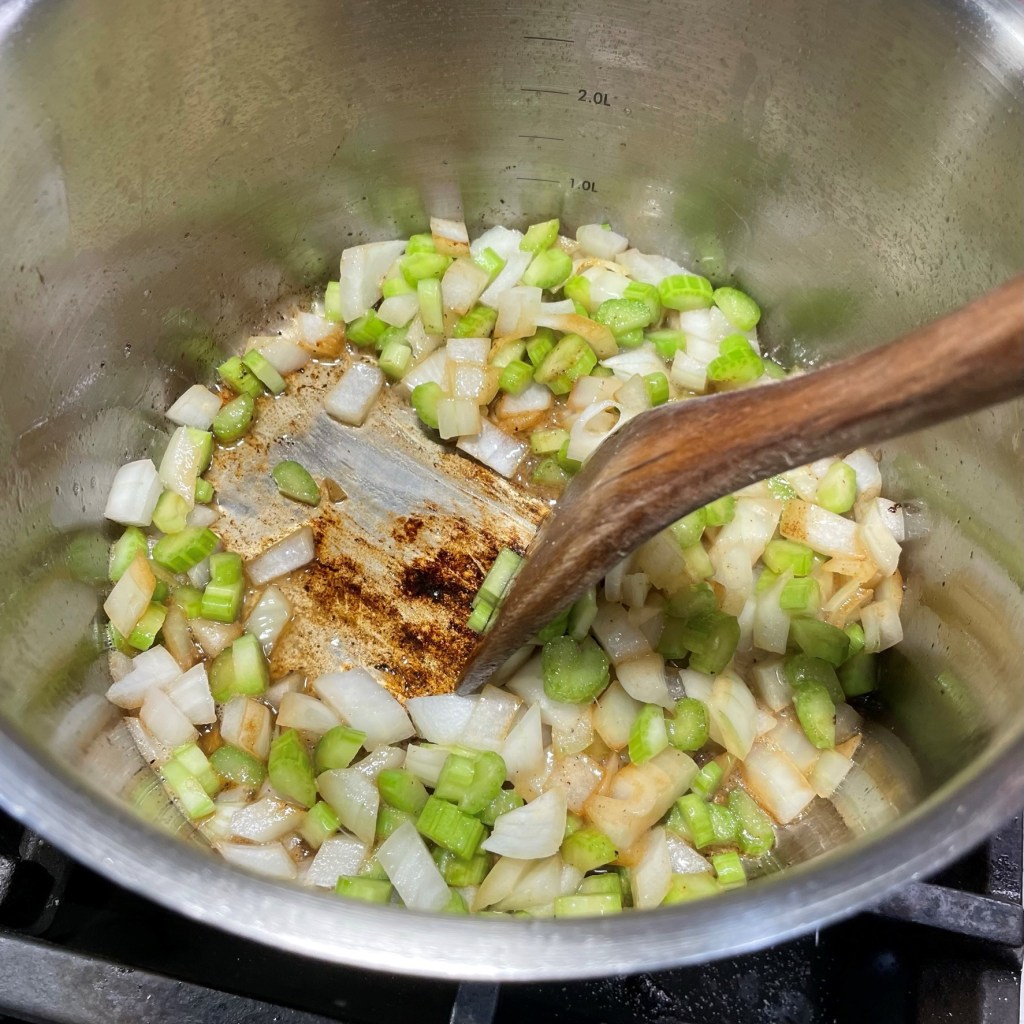
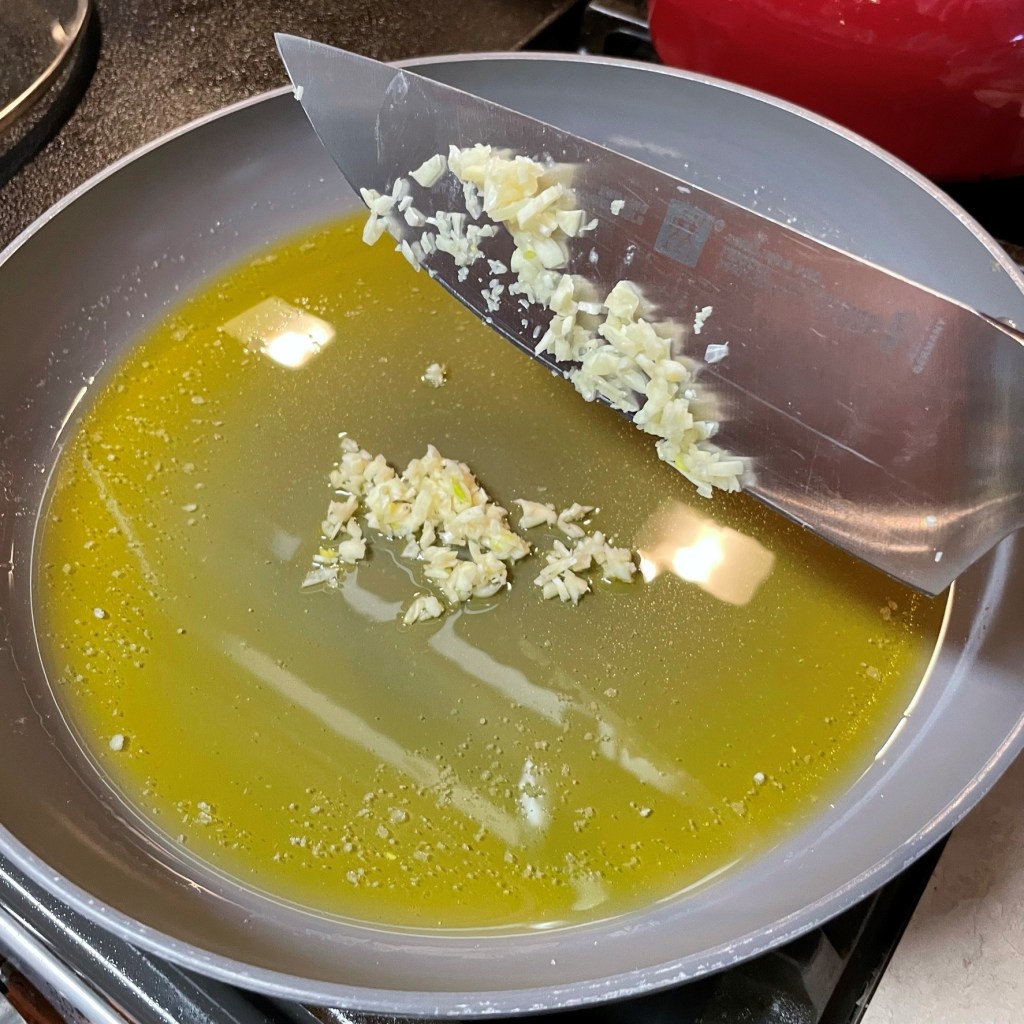
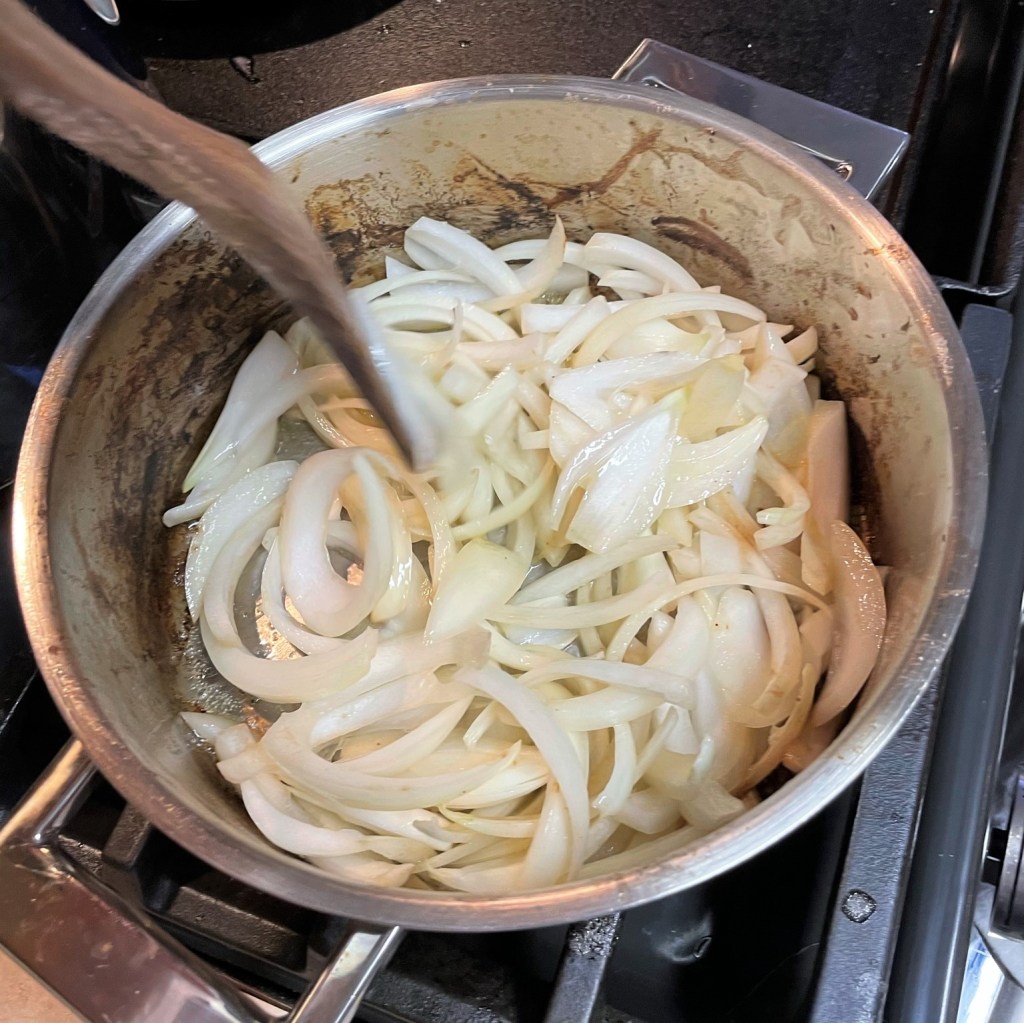
Saute the onions and celery until they are softened and translucent.
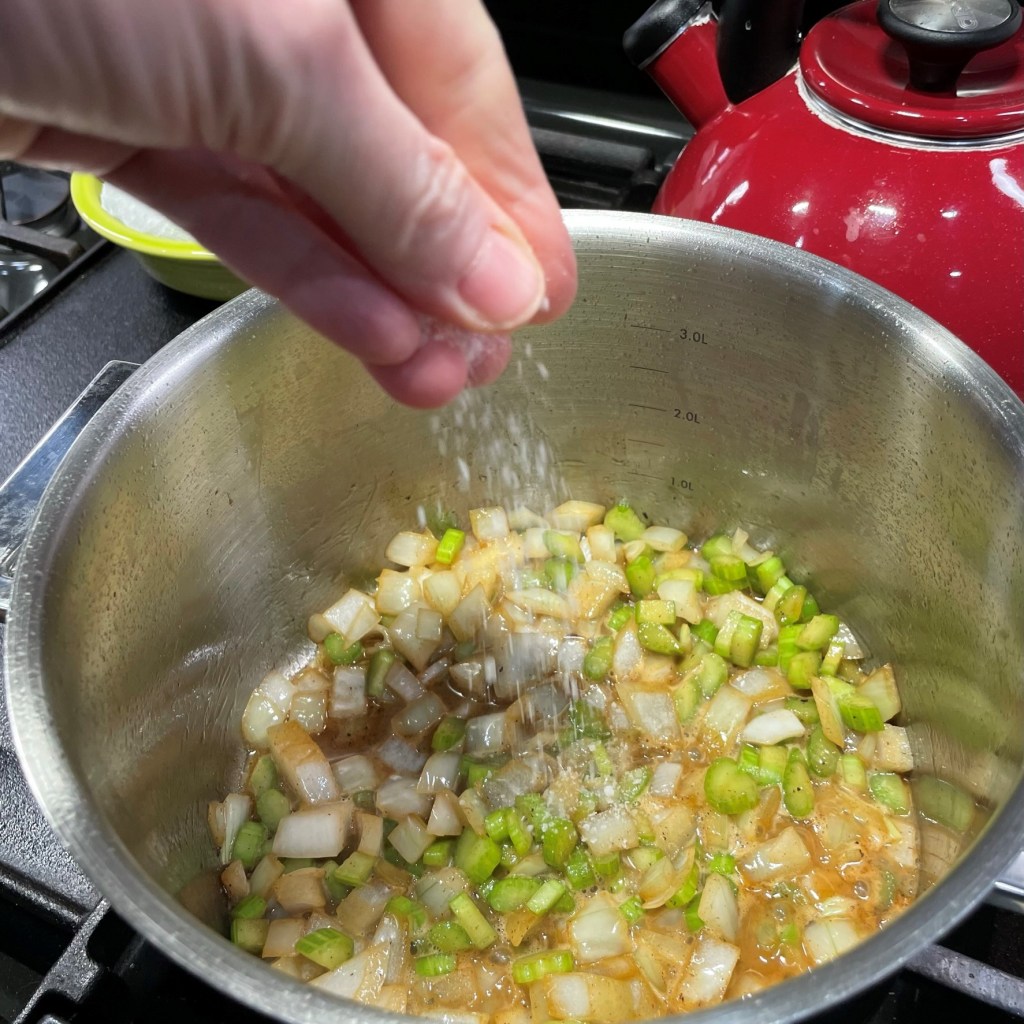
One of my important kitchen rules is “season every layer!” In this case, salting the vegetables draws out moisture, so they cook up soft rather than crisp.
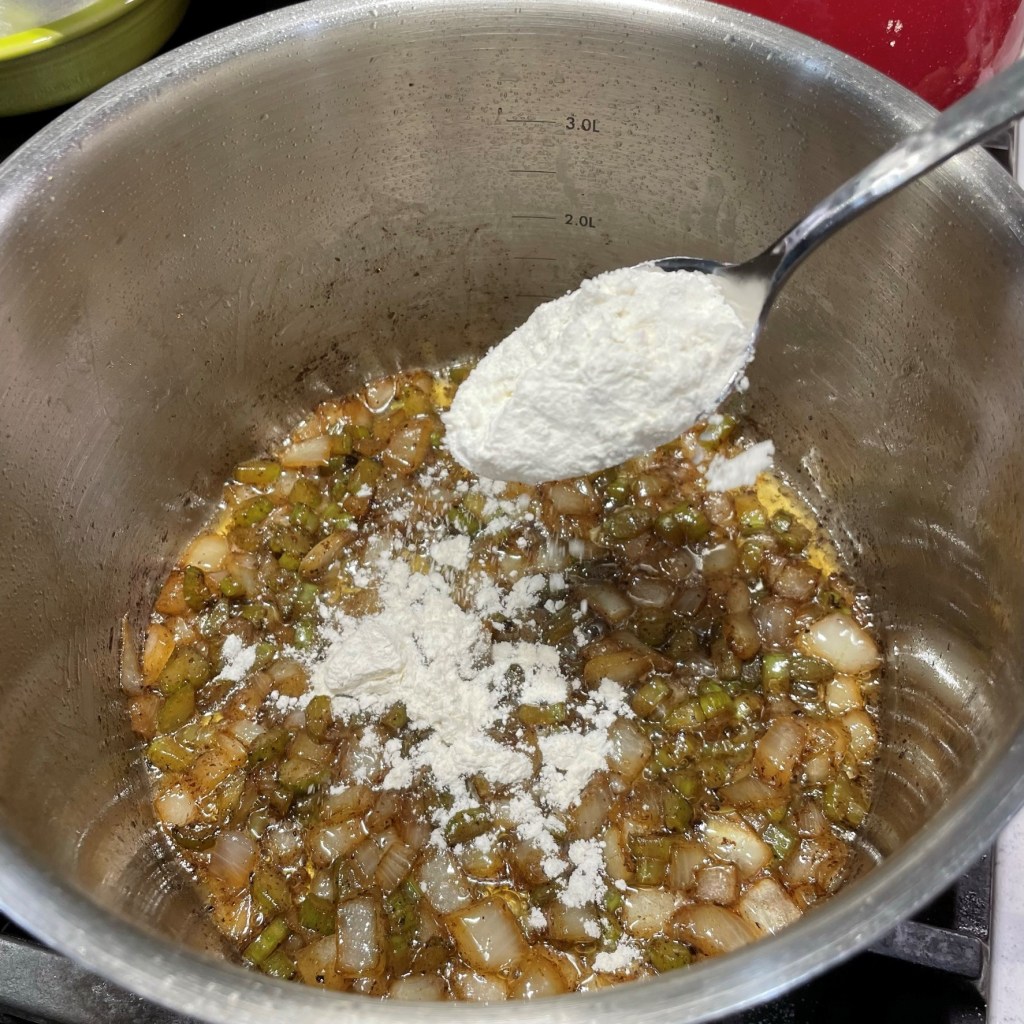
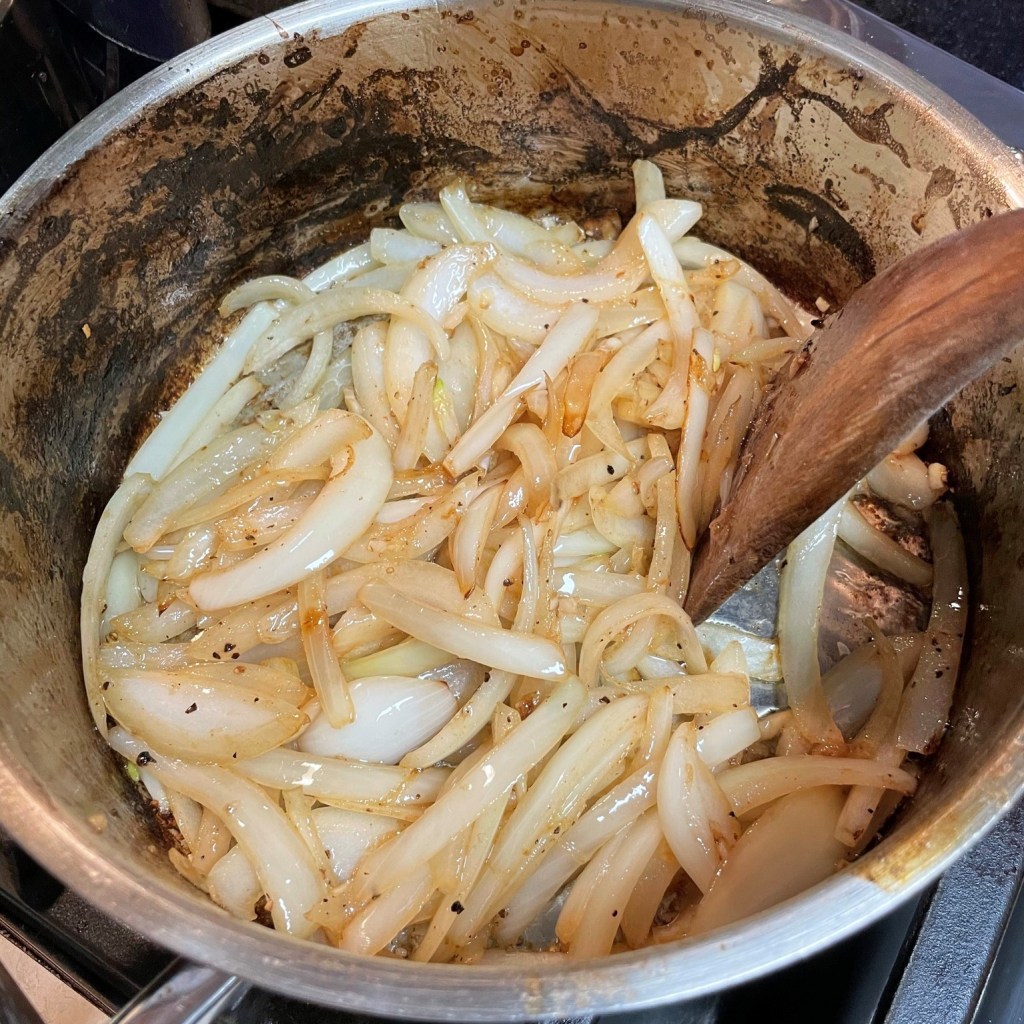
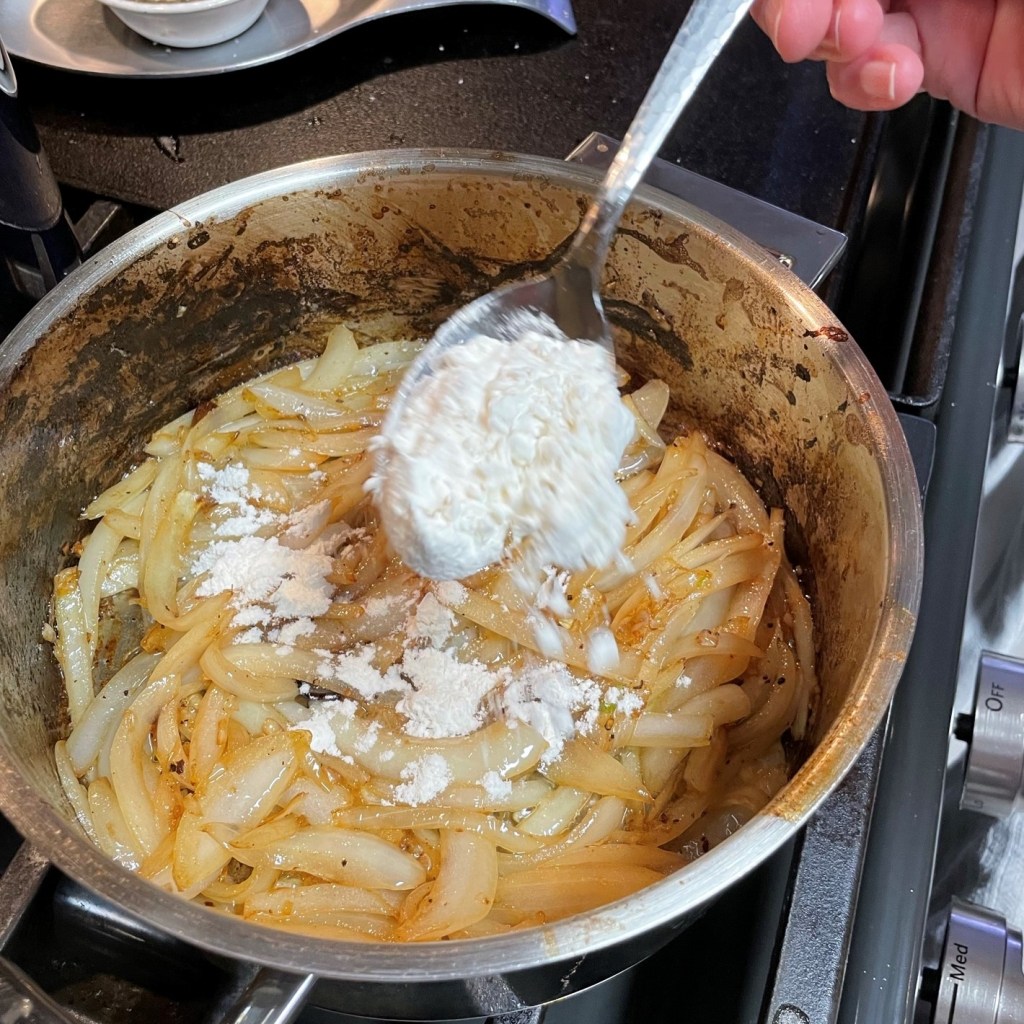
Sprinkle in the flour when the vegetables are fully softened. All-purpose flour is my go-to, but I have also had success using a gluten-free flour blend as a thickener.
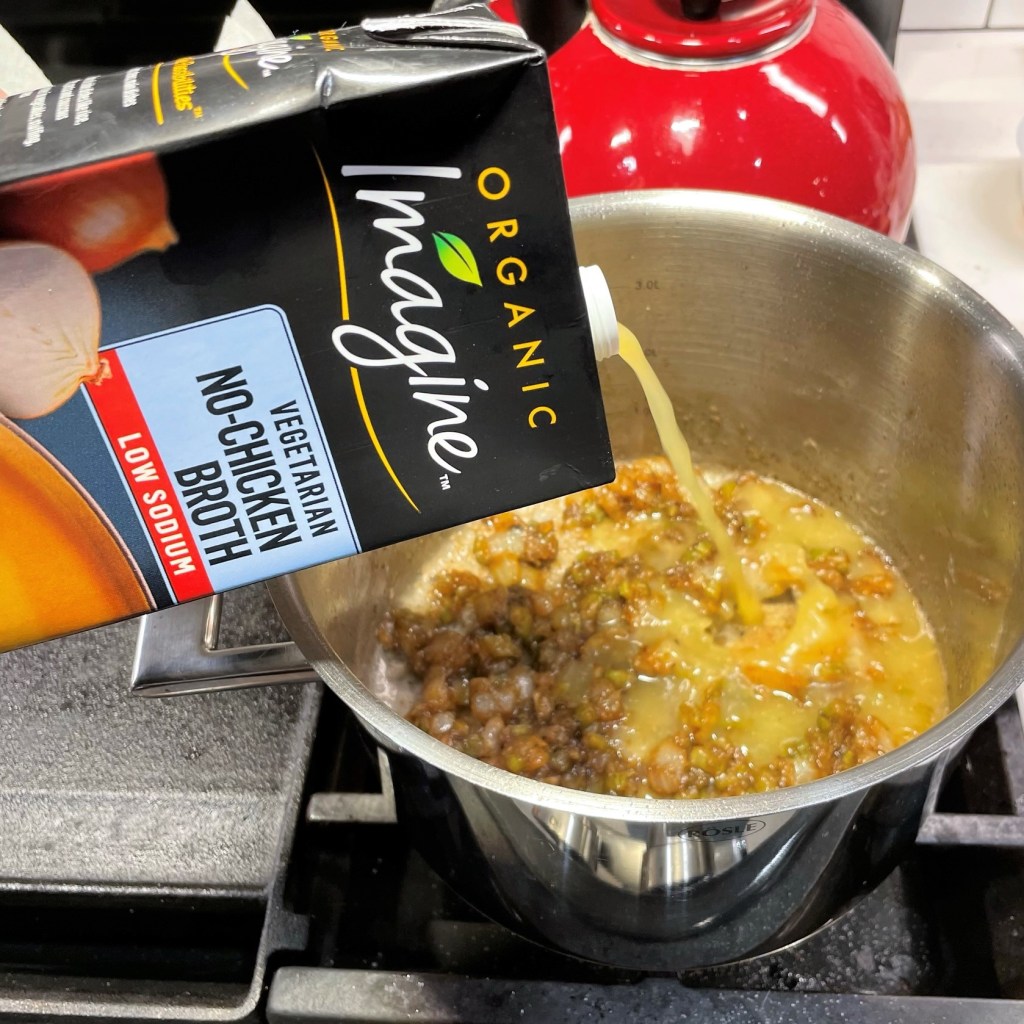
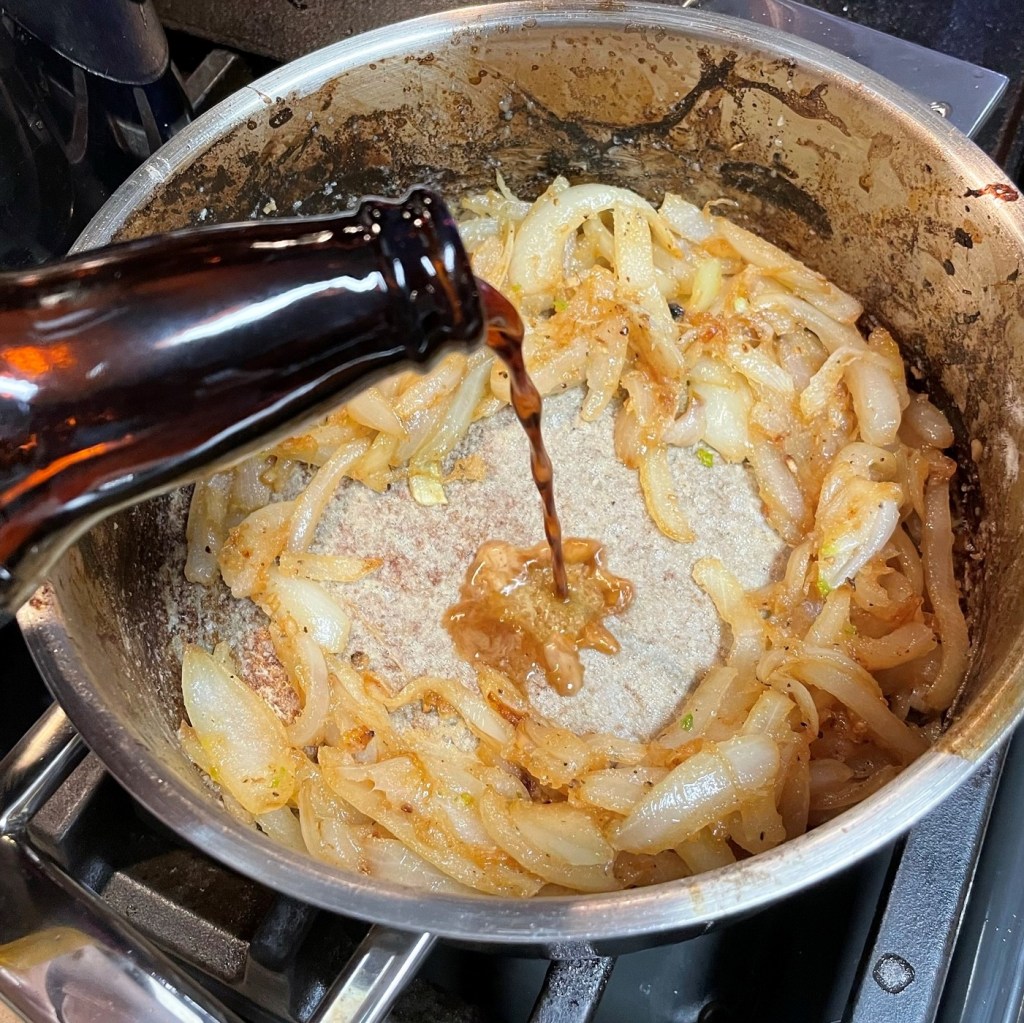
Add the low-sodium veggie stock, or use real chicken stock if you prefer.
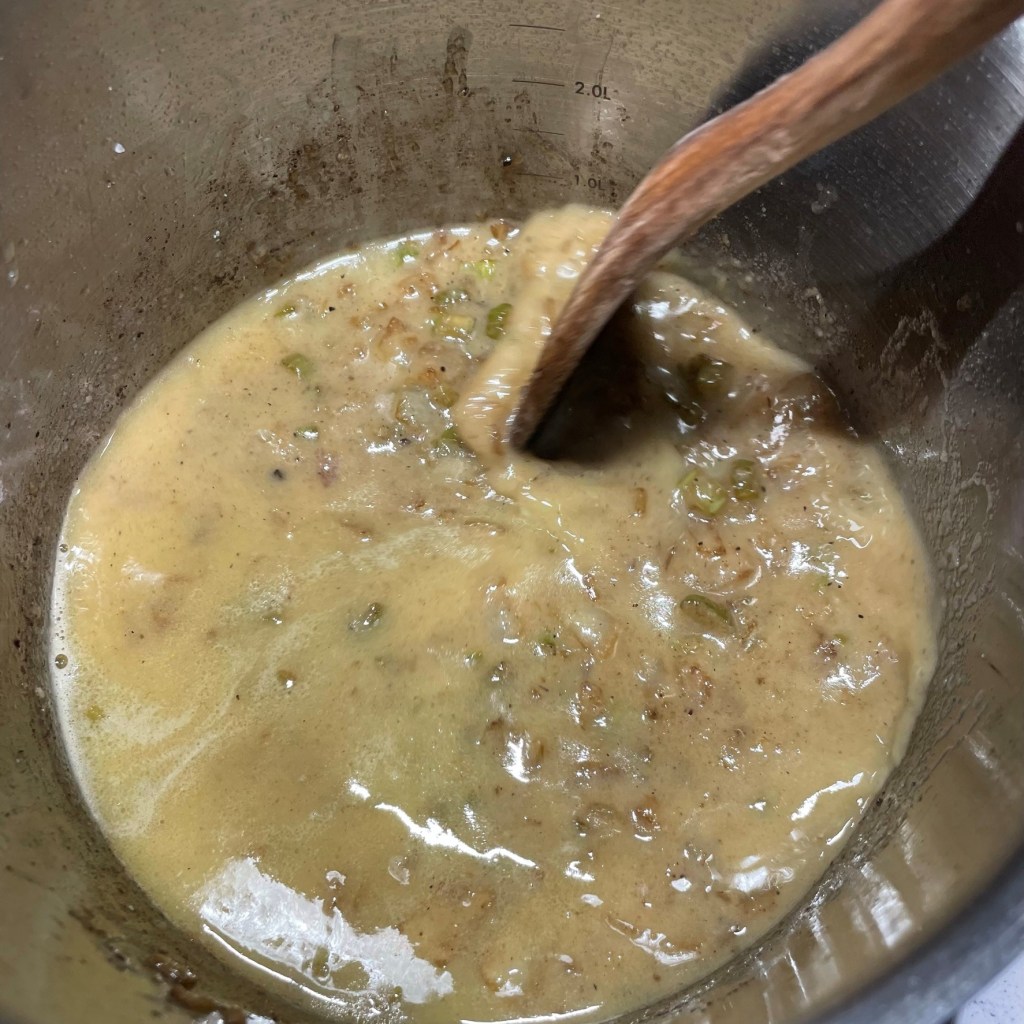
The stock addition will make it easy to scrape up any browned bits on the bottom of the pot.
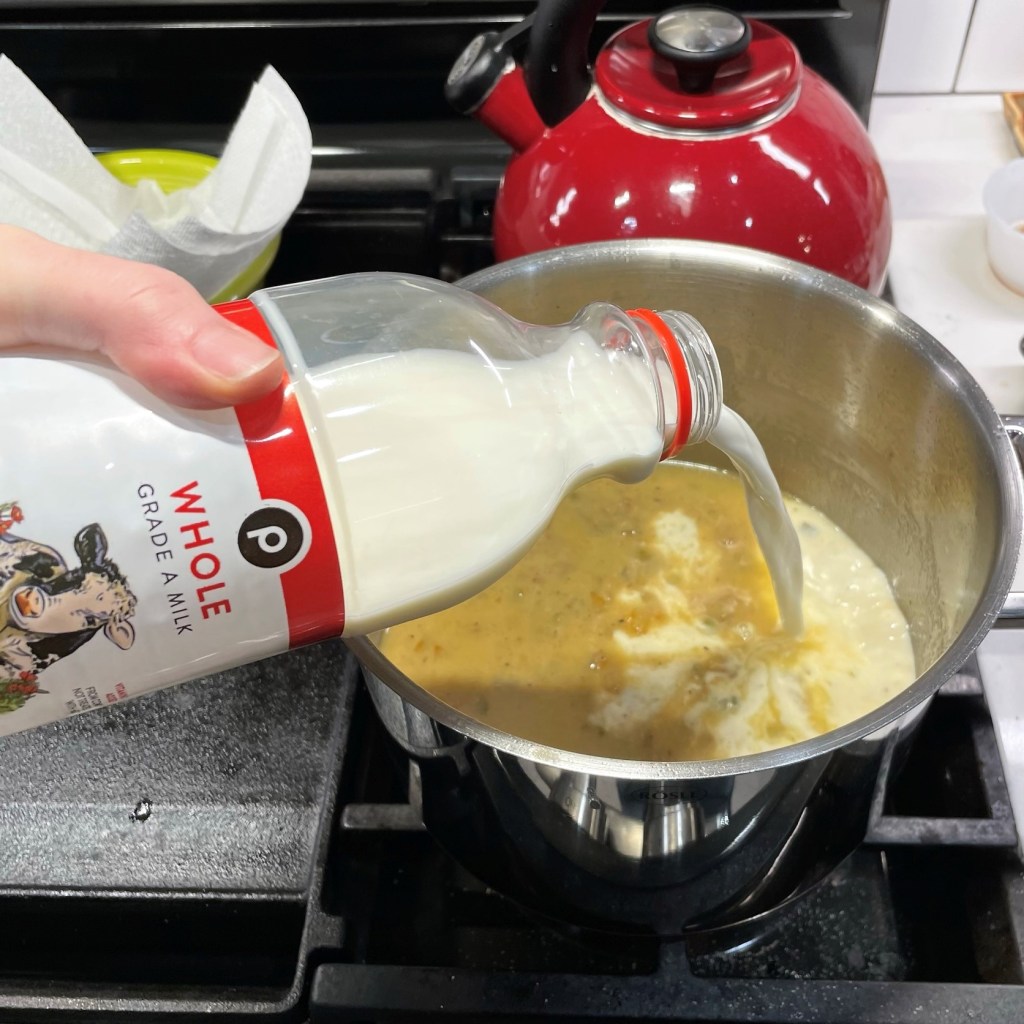
I used whole milk, but I only had 1 1/2 cups, and expected that it might not be enough, but I had a backup plan.
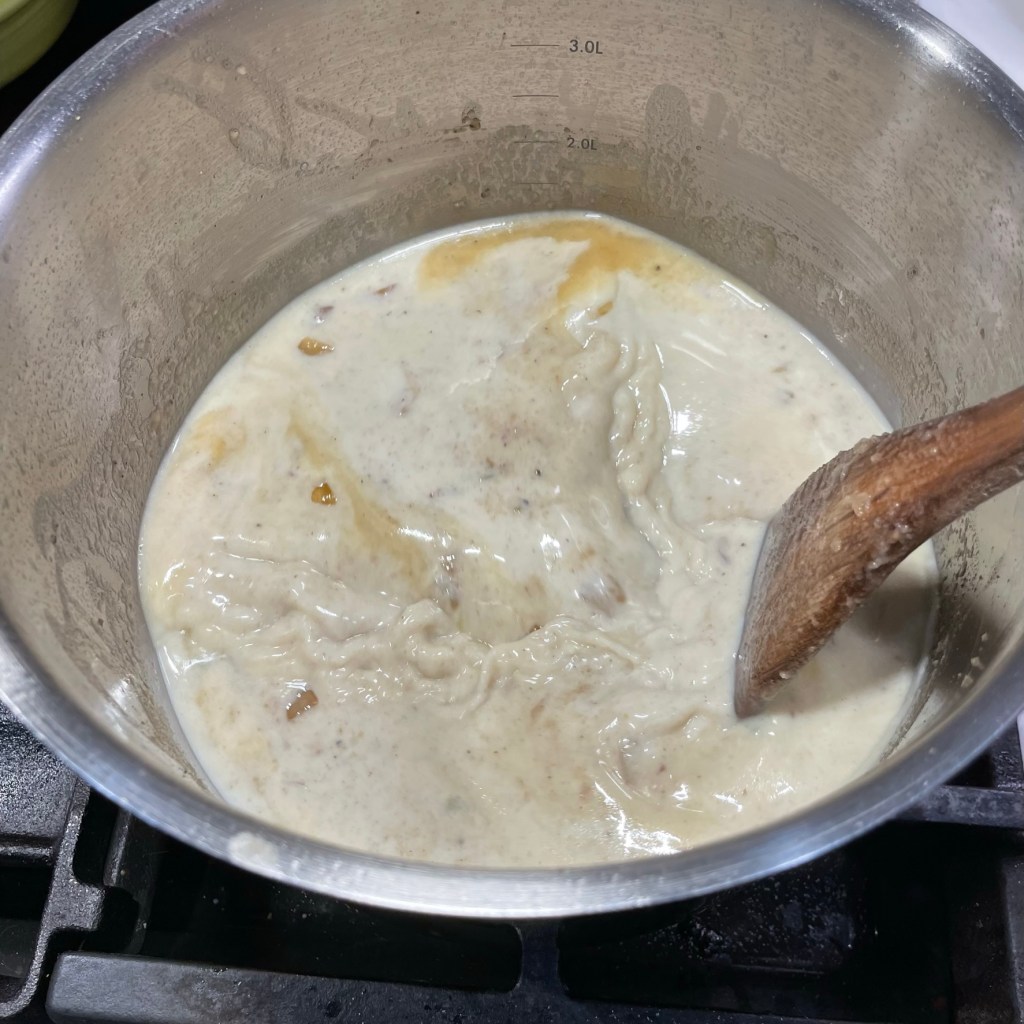
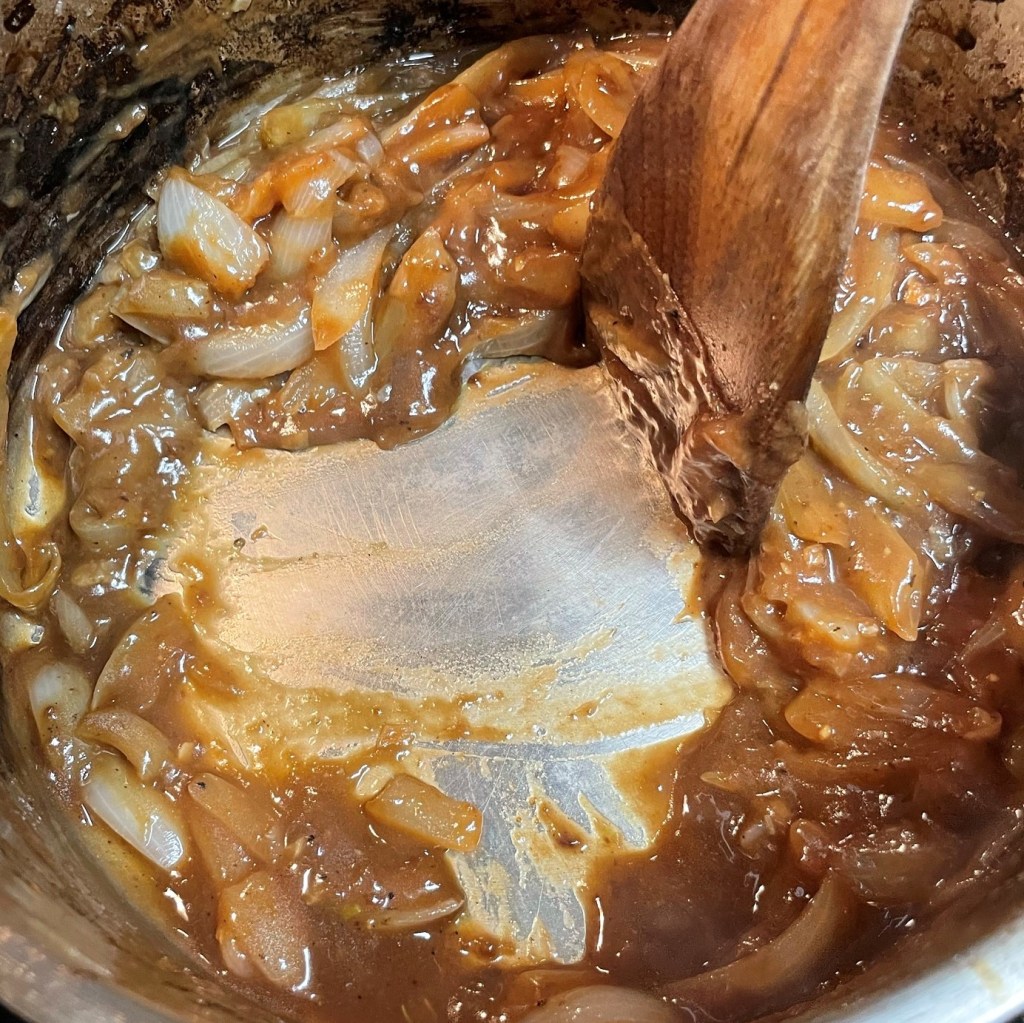
Blend the milk into the mixture until the color is even, but don’t let it boil. When it gets hot enough to steam, drop the heat to low.
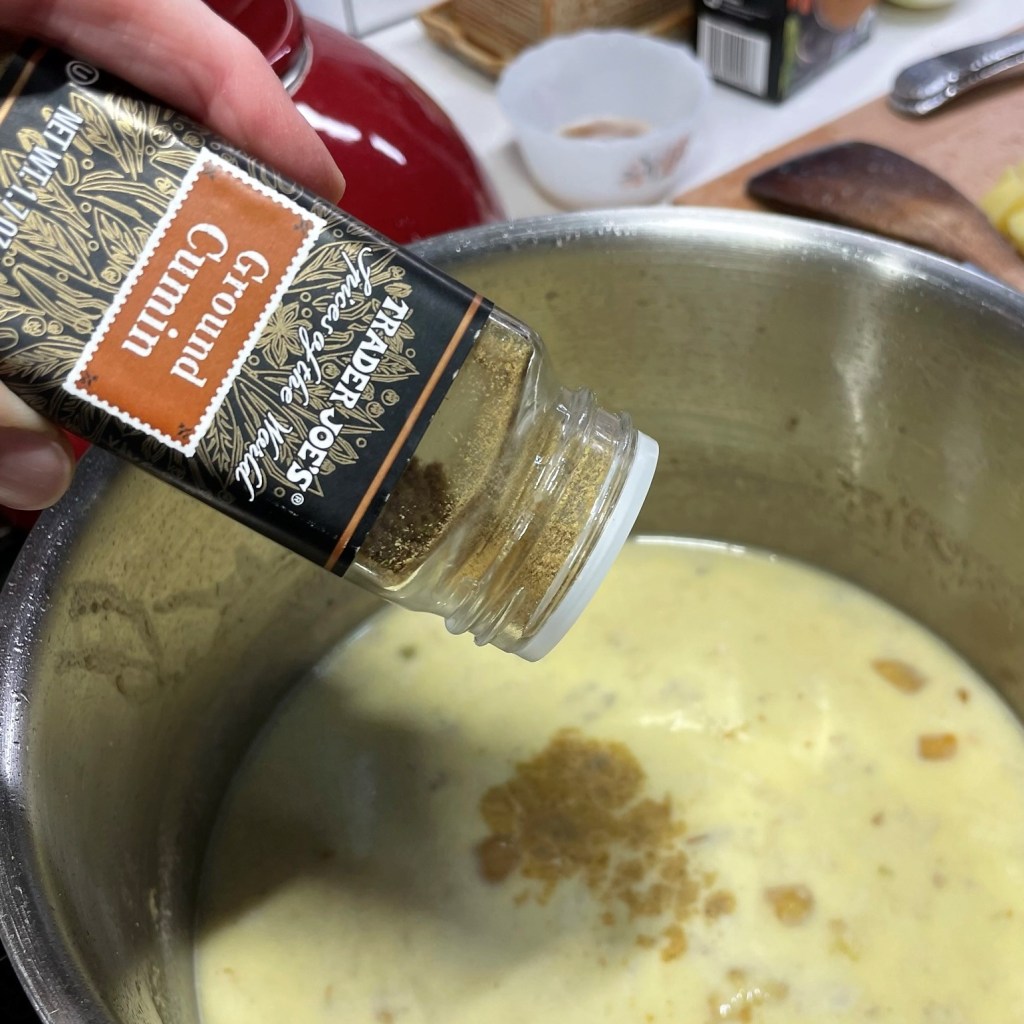
I love the flavor of cumin with any potato recipe. It adds depth and warmth.
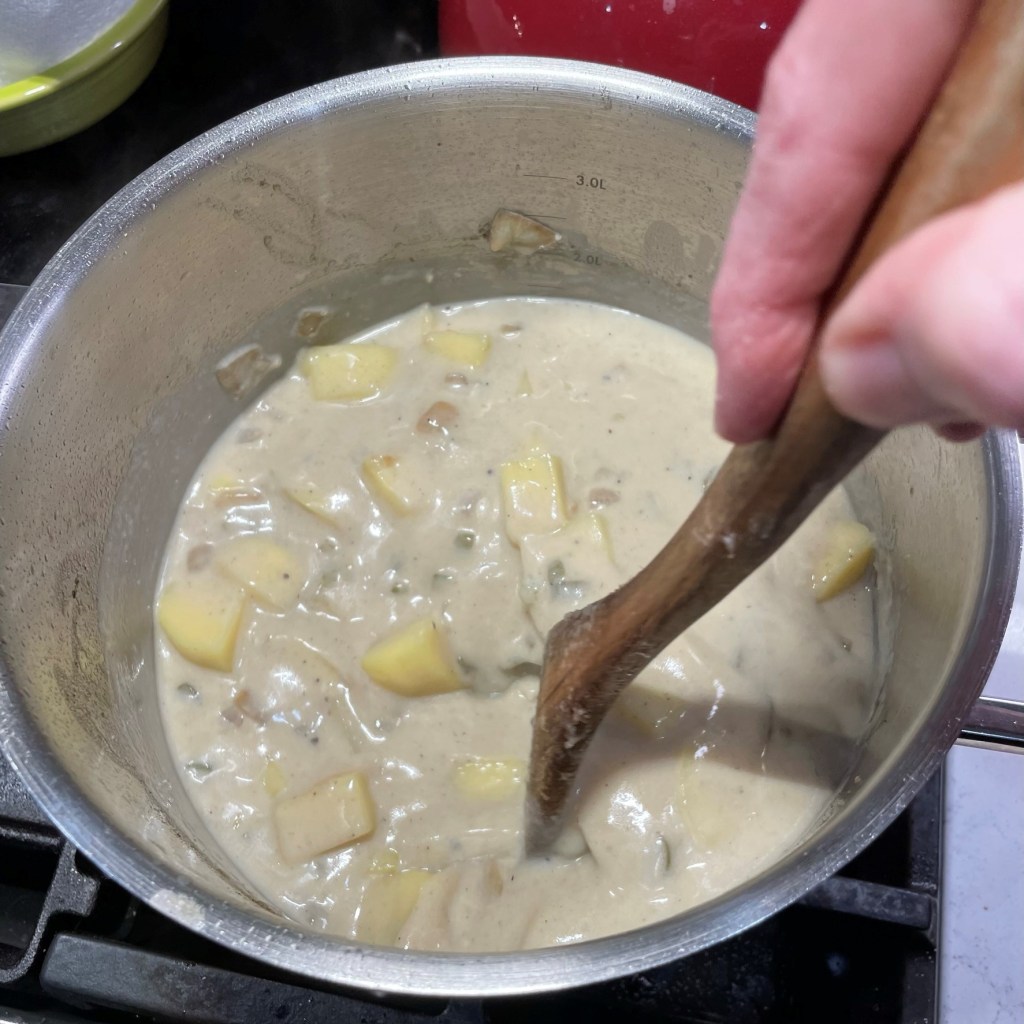
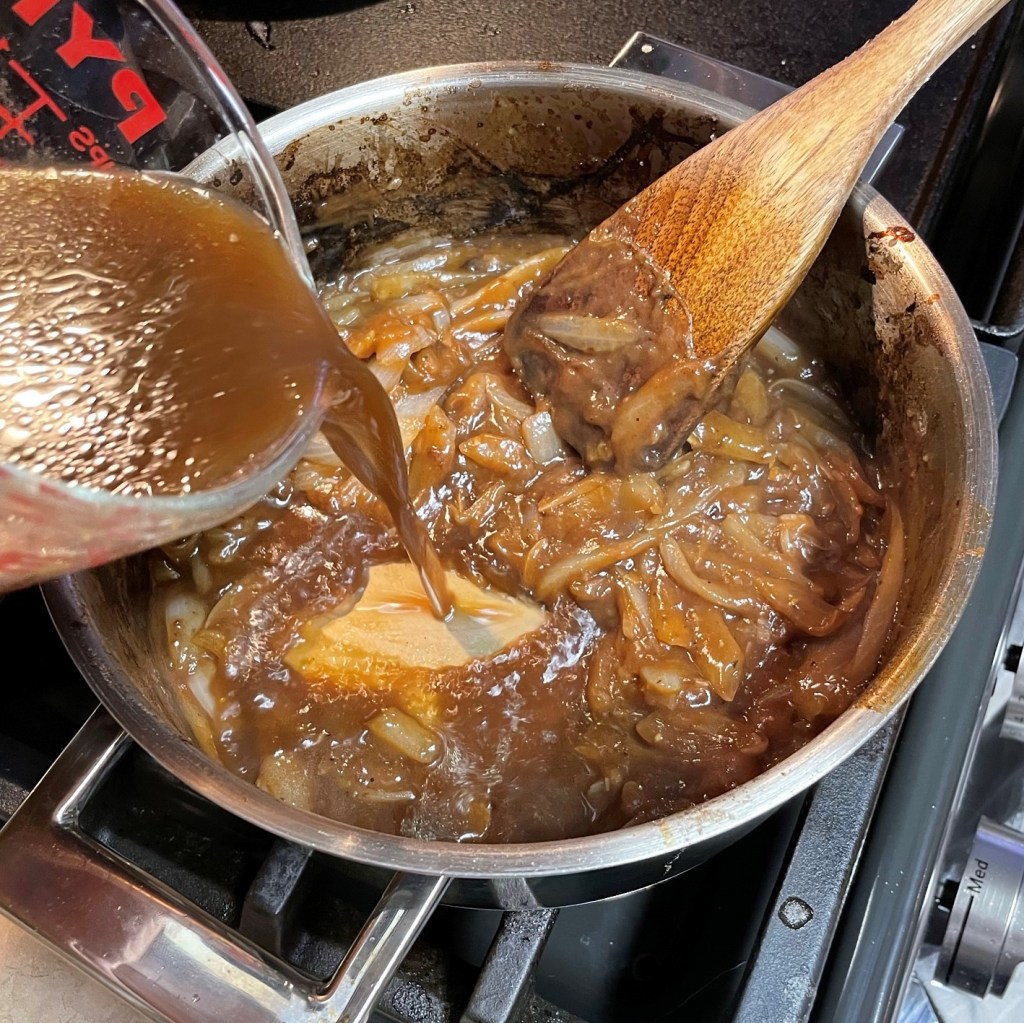
Add the potatoes to the pot and give it a good stir. I realized at this point that my slight amount of milk was not enough.
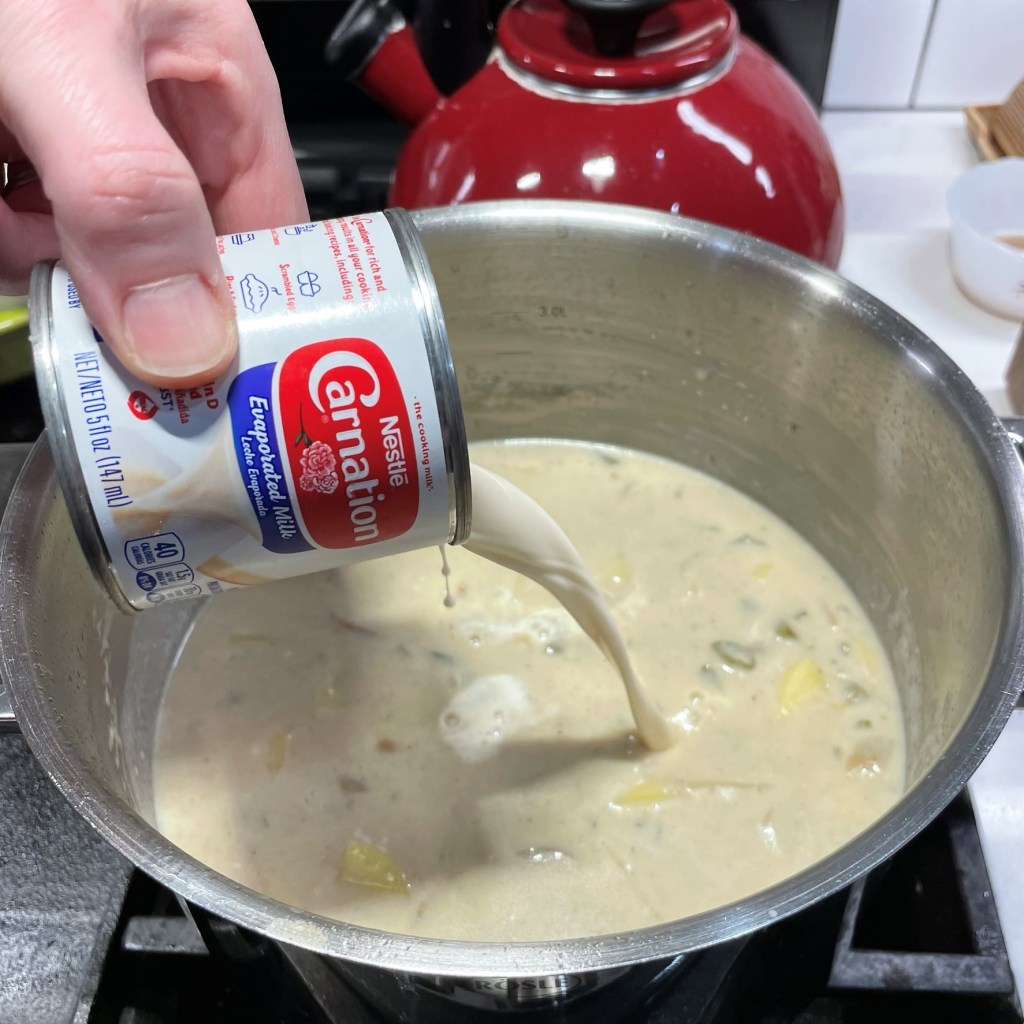
Fortunately, I keep small cans of evaporated milk in the pantry cabinet, for just such an emergency. 😉
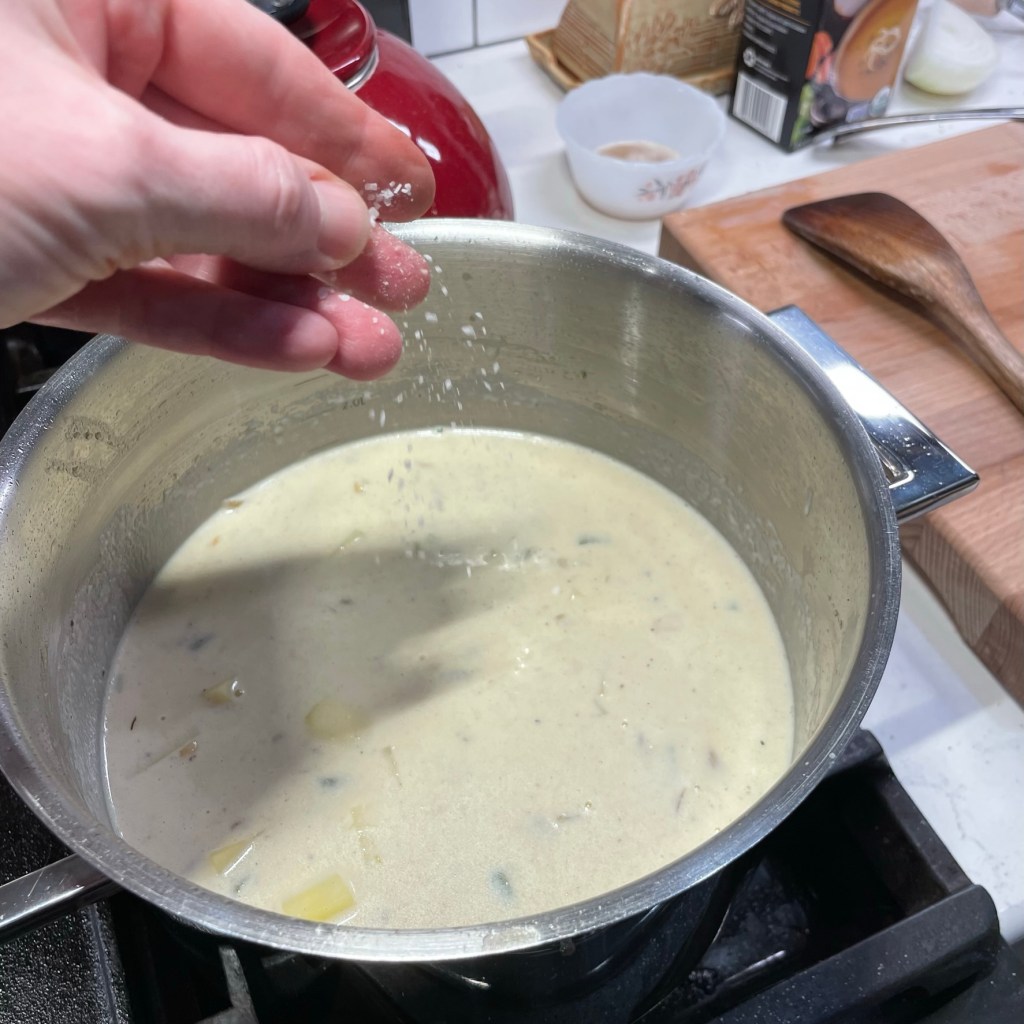
Here again, season every layer. When you use low-sodium broth, you are in control of the salt in your overall dish. Adjust to taste.
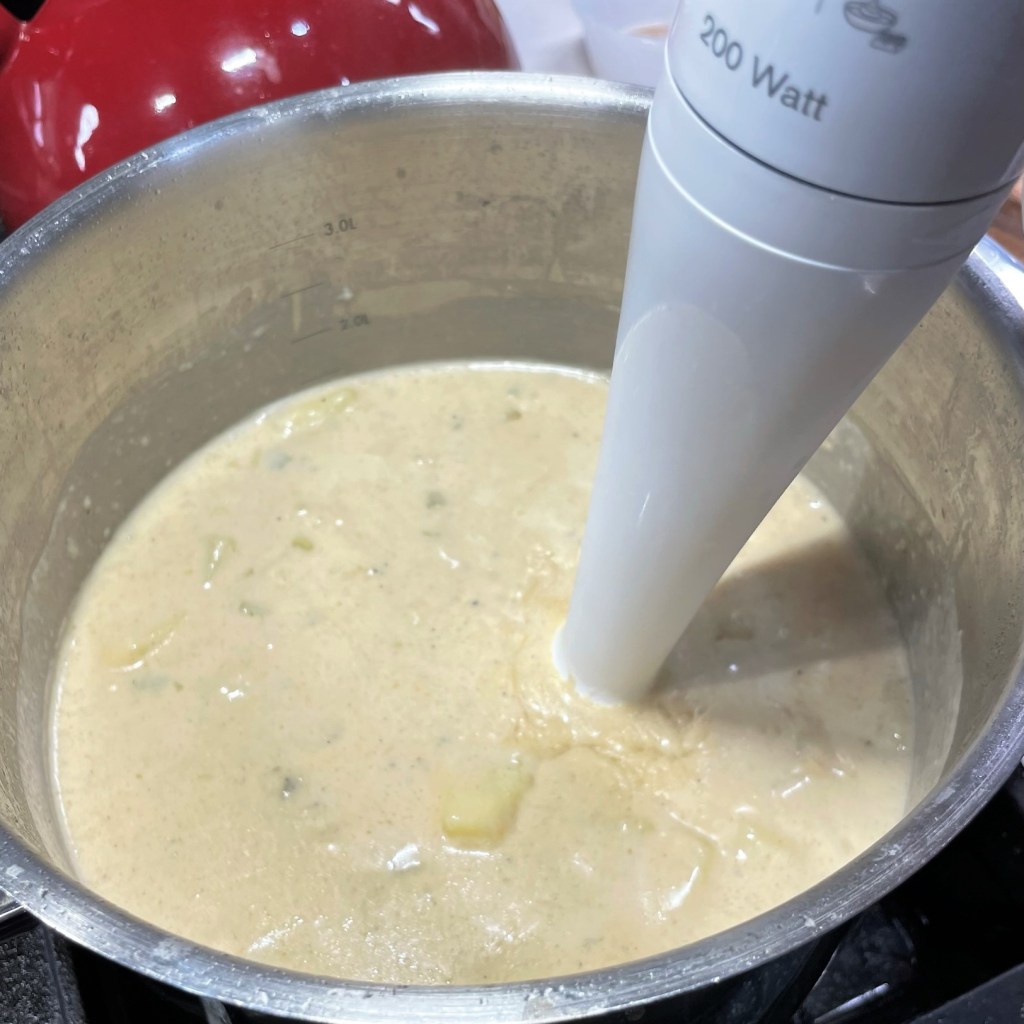
After a nice long simmer (at least 30 minutes, but mine went an hour), use an immersion blender if you’d like to increase the smooth, creamy texture of the soup.
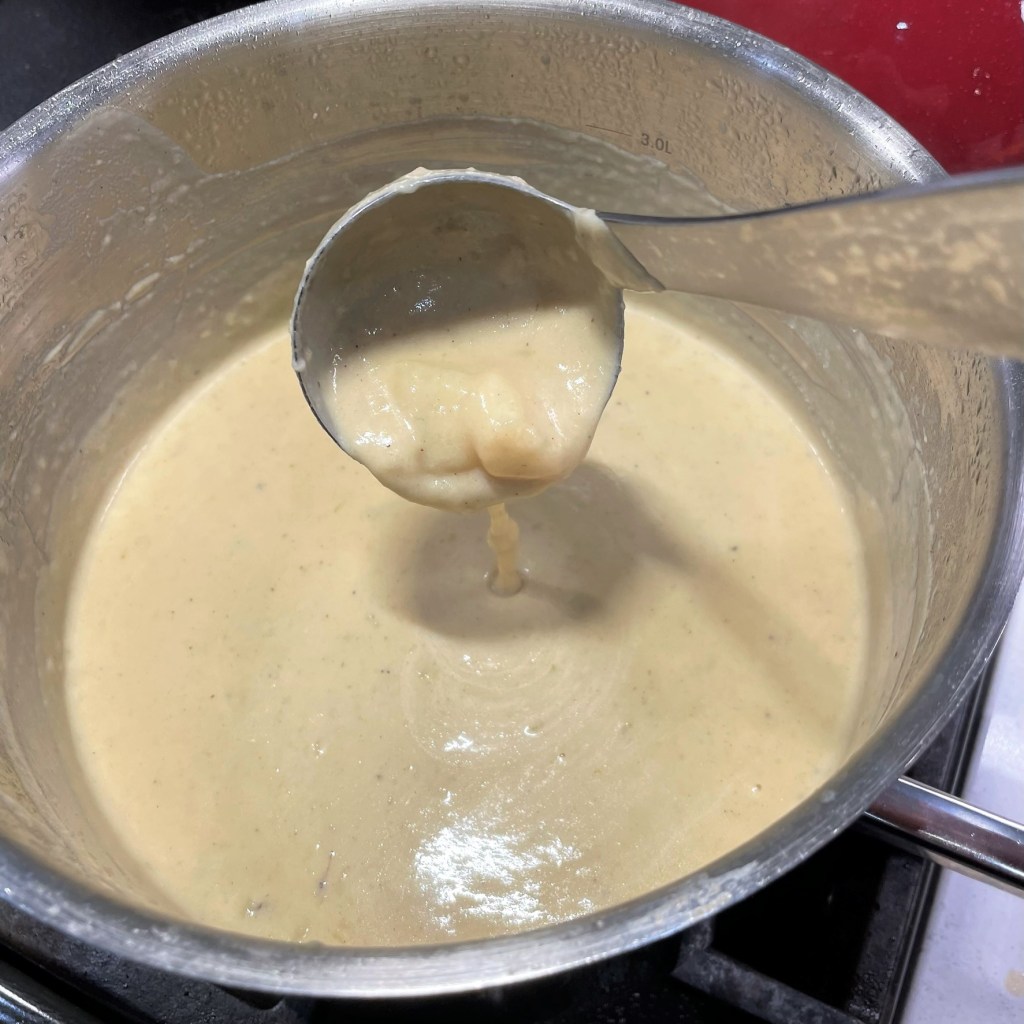
I blended my soup about halfway, striking a perfect balance of creamy and chunky. This soup is ready to serve!
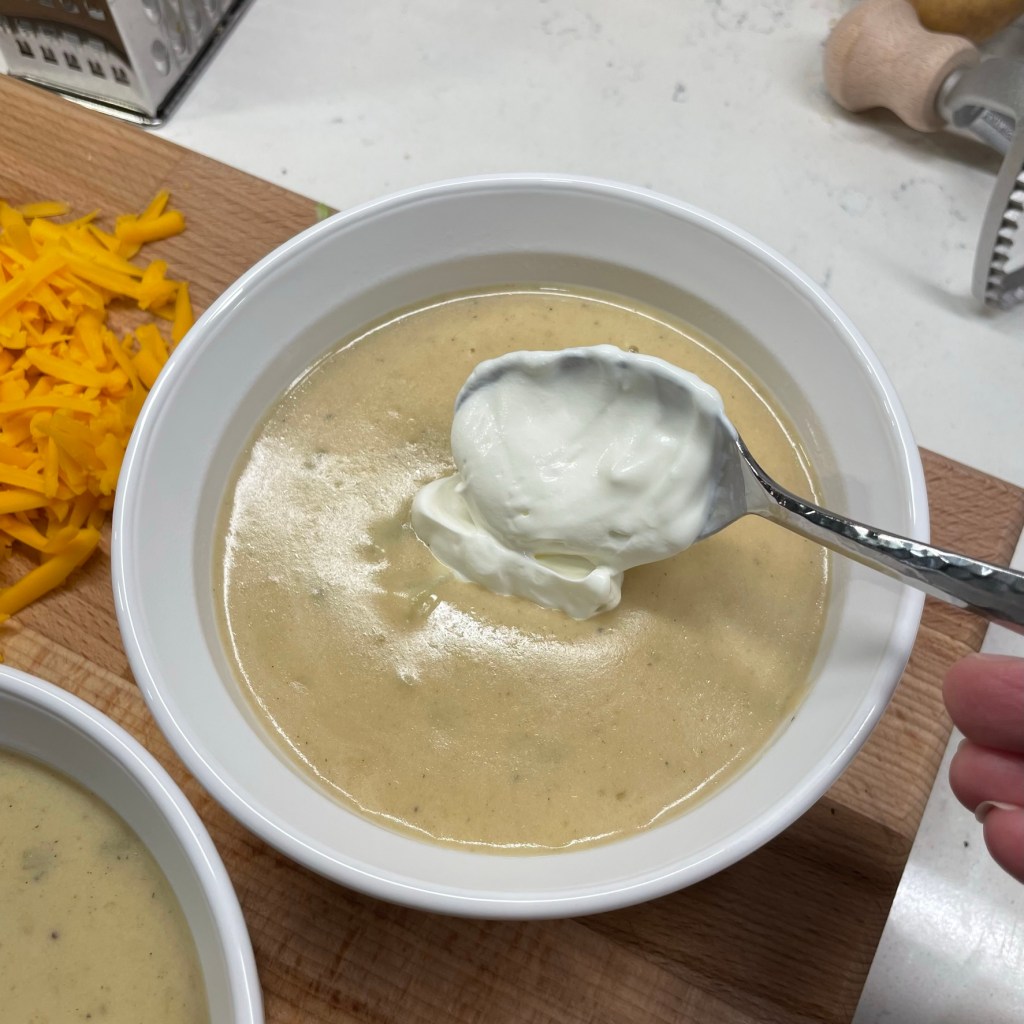
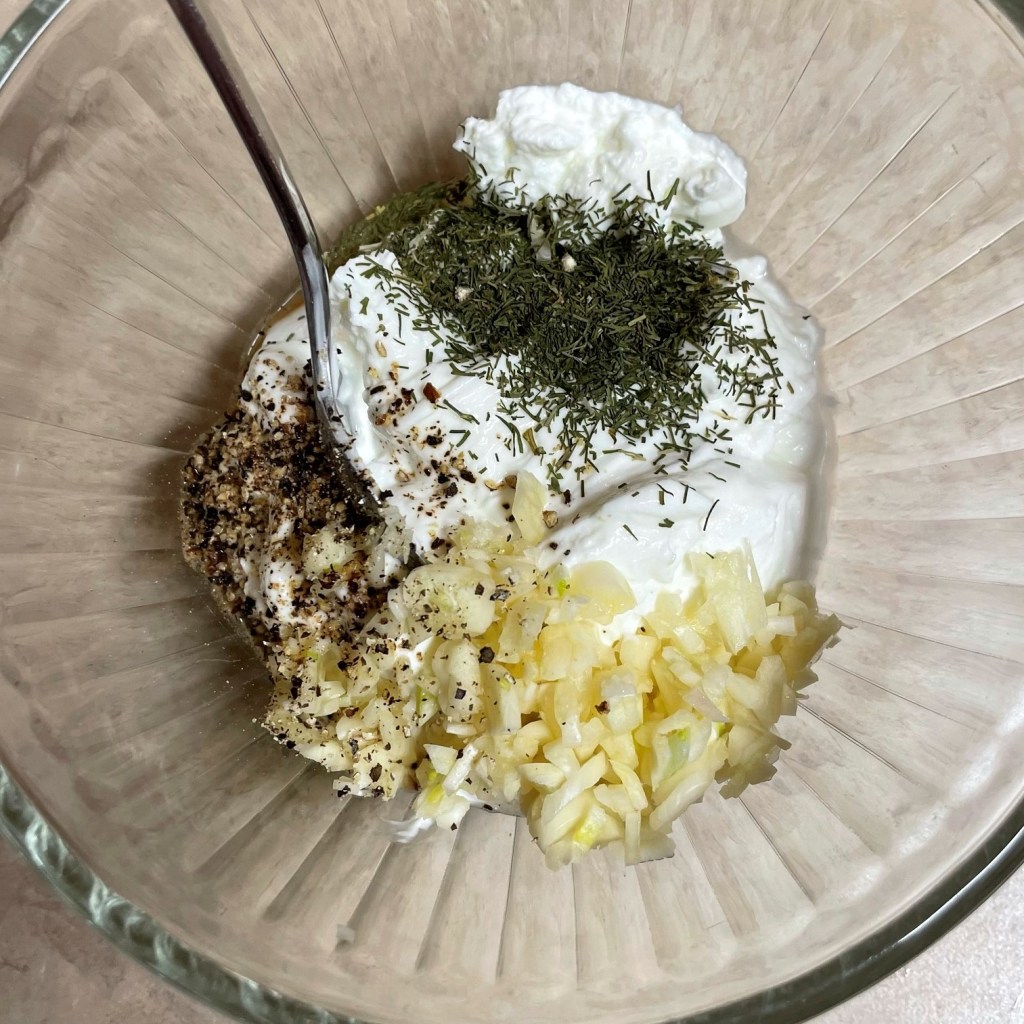
We topped our soup with everything you’d need for a loaded baked potato, including a dollop of real sour cream.
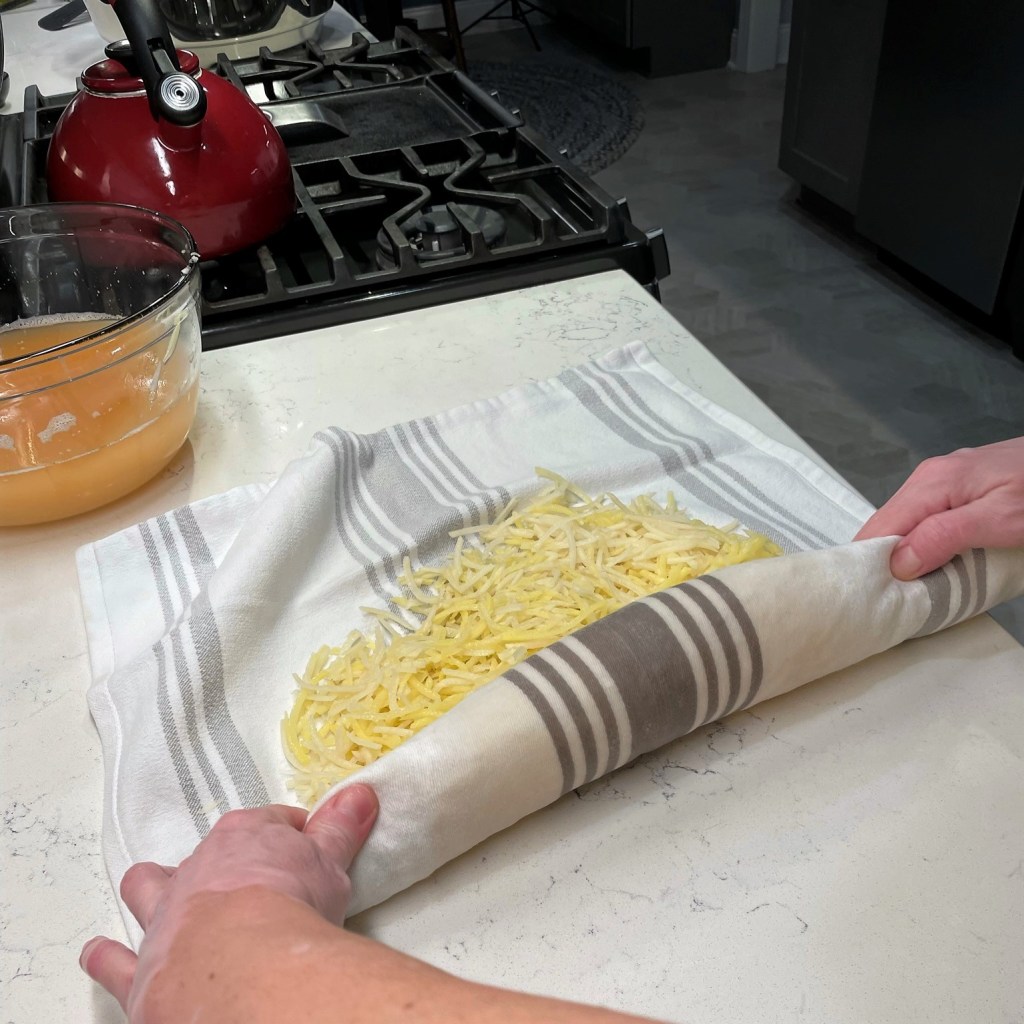
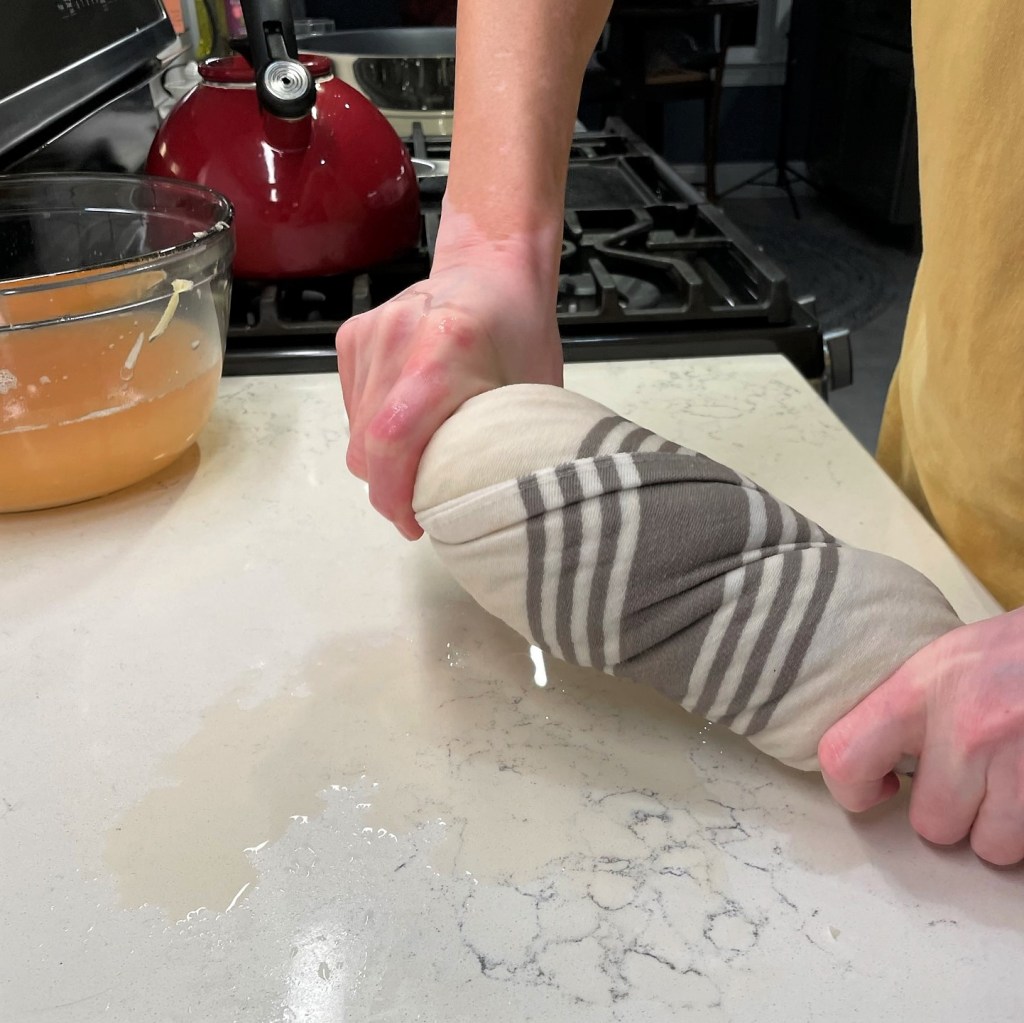
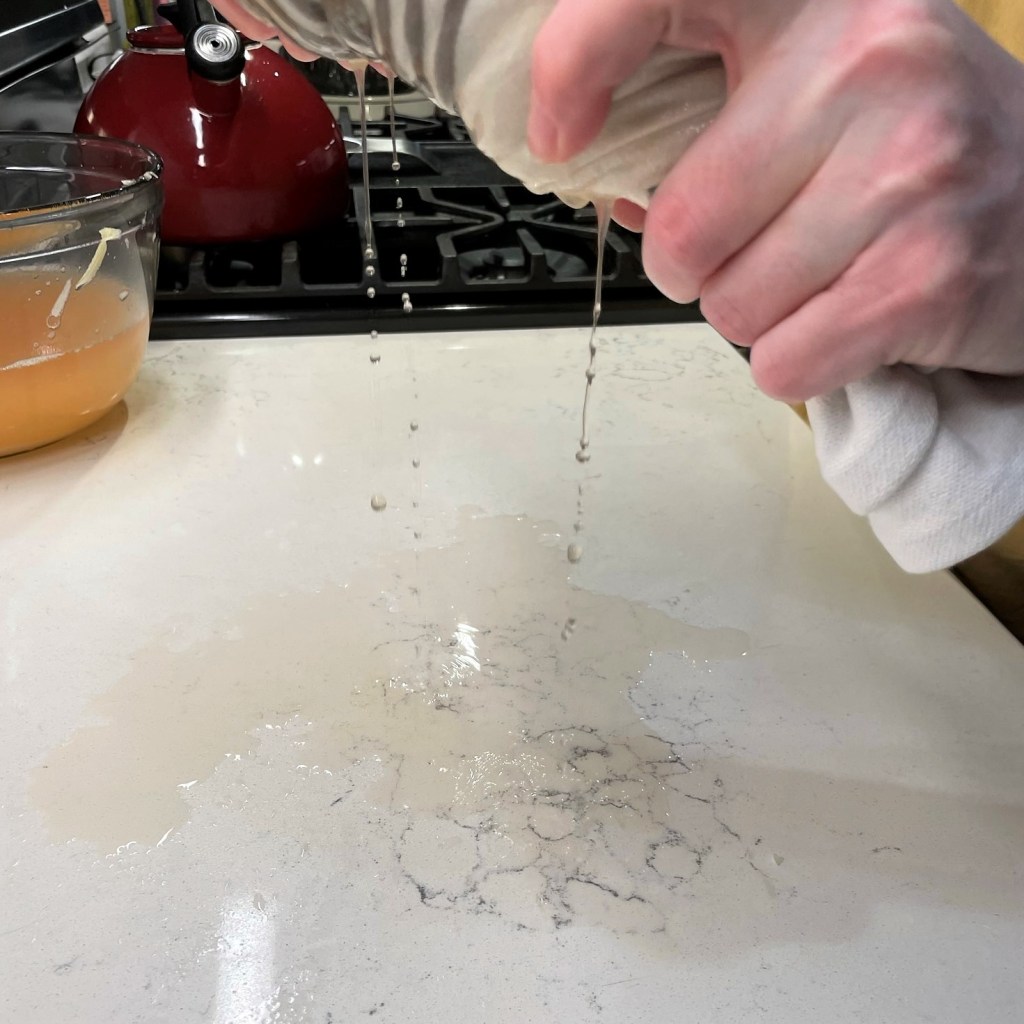
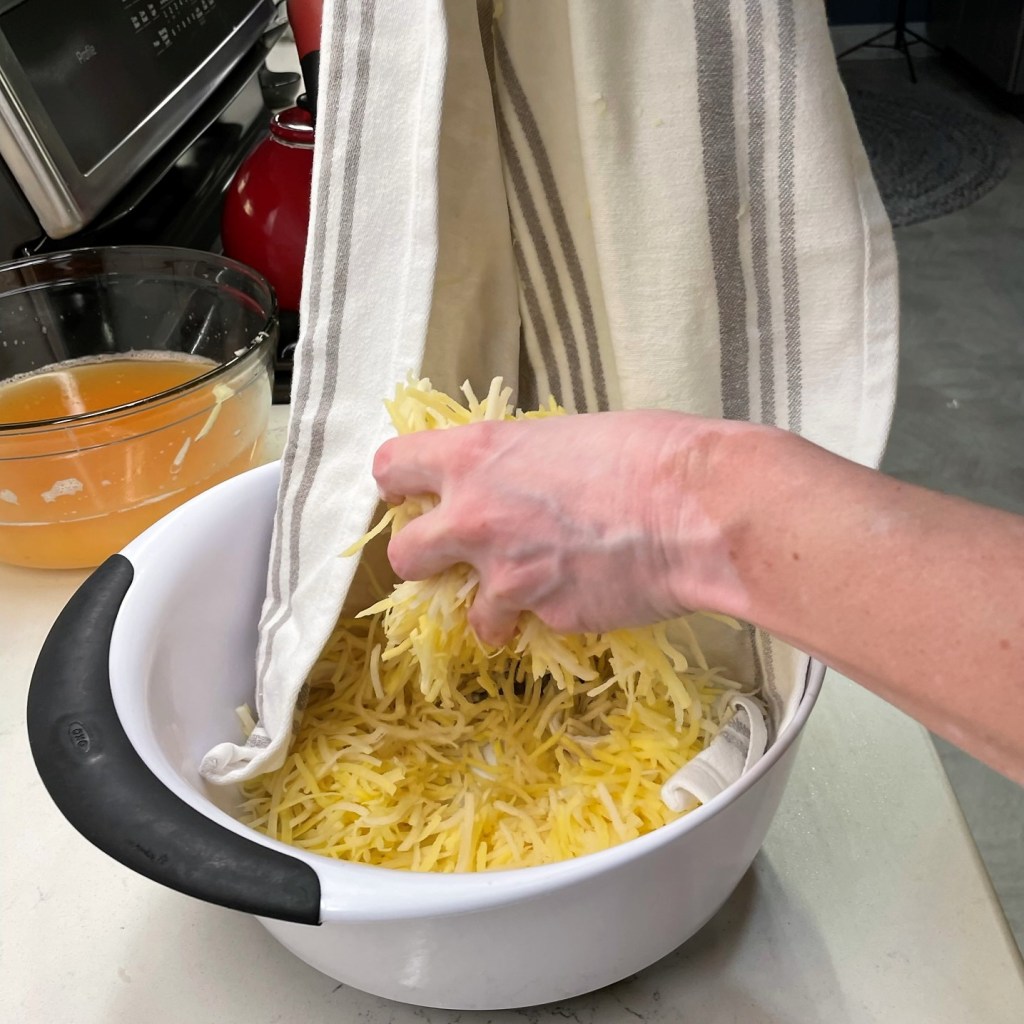
With shredded cheddar, bits of bacon and snipped chives, this easy soup was a very satisfying meal!
Crispy outside, soft and chewy inside. A hint of onion and just enough salt. That’s what you want in a classic latke, the delightfully simple, traditional food of Hanukkah. Getting them just right takes practice, and what I lack in personal heritage, I hope to make up for in effort. When I started dating my husband in 2015, I found myself intrigued by the foods that are central to the Jewish holidays, and latkes have been on the menu every year since then. Let’s review:
My recipe has evolved, as has my technique. I’m not sure what I was thinking in my first couple of efforts, except that I wasn’t giving enough attention to the oil. And that means I was missing the point, because Hanukkah is all about the oil.
Hanukkah, nicknamed the “festival of lights,” is an eight-day observance of an ancient miracle. The story is multi-layered and, frankly, hard for me to fully understand, let alone explain. But the gist of the story is that God came through for the faithful, and a small jar of oil that was only enough for one night’s lighting of the eternal lamps at the Temple, somehow (miraculously) lasted for eight nights.
In observant Jewish homes, families still mark the occasion by lighting candles on a menorah for eight nights during Hanukkah, and foods are fried in oil in remembrance of the miracle. Traditional fried foods served during this eight-night celebration include jelly-filled doughnuts and, of course, latkes!
Those crispy, golden latkes make me wish Hanukkah lasted for more than eight nights!
The secret is in the starch
The key to crispy latkes is removing the excess liquid from the shredded potatoes, while simultaneously preserving the starches that aid in holding those shreds together. After you shred the potatoes, which you can do either by hand on a box grater or (the easy way) in a food processor, simply soak them in ice water long enough to draw the starch out of the shreds. Next, squeeze as much moisture as possible out of the shredded potatoes, then reunite them with the sticky starch that has settled at the bottom of the soaking bowl. Add in some shredded onions (also squeezed dry), a beaten egg and a few sprinkles of flour, and you’re good to go!
The miracle of the oil
Frying latkes is the traditional way, and I don’t recommend trying to fry them in a thin film of oil as I did those first couple of years. You may get a nice crispness on the outside, but the inside won’t be done. You need about a half-inch of oil in a hot skillet to make a crispy latke, and the type of oil can make a difference as well. As much as I love and rely on unfiltered, extra virgin olive oil for most of my cooking, its smoke point is about the same temperature as you need for frying the latkes, so it is not the best choice. For this kind of frying, I’ve chosen grapeseed oil, which has a higher smoke point and produces a nice crispy exterior with a neutral flavor.
Grapeseed oil is a good bet for frying at high temperature. I’m pretty sure this bottle will last well beyond the eight nights of Hanukkah!
Enjoy latkes your own way
Not all latkes are the crisp-textured, straw-colored wafers that I am sharing today. Some cooks make their latkes with a soft, almost mashed potato-like texture, and those are delicious also. Onions are usually included in the mix for flavor, but I have seen latke recipes that lean toward the sweet side and there are plenty of other vegetables that can be substituted for potatoes, if you don’t mind a less-than-traditional treat.
Not all spuds are created equal
Although it is true that you can use different ingredients to make latkes, it’s important to recognize the strengths and weaknesses of certain potatoes. For best results and crispy latkes, choose a starchy potato, such as russet or Yukon gold. Potatoes that are described as “waxy,” such as red potatoes, are higher in moisture and lower in starch. That isn’t to say you can’t use them, but you would need to give extra attention to the step of moisture reduction and supplement the starch a bit to hold them together. Also, be prepared for a slightly less crispy latke when using waxy potatoes, or any other substitute that doesn’t measure up in the starch department.
Use starchy potatoes for best results, such as russet and Yukon gold. It isn’t necessary to peel them, but I usually do for presentation sake.
What to serve with latkes
Traditionally, latkes are served with applesauce and sour cream, and therefore I asked Les to cook up a batch of his mouthwatering overnight applesauce for Thanksgiving. With Hanukkah falling so close behind this year, I hoped to carry over some of that delicious, chunky applesauce as a side for what has turned out to be one of my best batches of latkes to date.
Ingredients
2 pounds potatoes (I used a combination of russet and Yukon gold)
1 smallish sweet onion
1 egg
2 Tbsp. all-purpose flour
Kosher salt and black pepper
A few shakes ground cumin (if you are not keeping strict kosher)
Grapeseed oil (or other neutral cooking oil with high smoke point, such as canola)
The large shredder blade on my food processor gets this job done quickly, and my knuckles are grateful. Use a box grater if you wish.
However you shred, transfer your potatoes immediately to ice water to help prevent discoloration and to draw out the starch.
I use my processor for the onions too. Sweet, yellow or Spanish are recommended. Red onions are too strong and, well, too red.
Wrap the onion shreds in layers of paper towel and squeeze to remove the excess liquid. Set aside for later.
I’ve used my trusty cast iron skillet in the past, but found this year that my electric skillet offers foolproof temperature control. Heat about 1/2″ oil to 375° F.
Carefully scoop out the potato shreds onto a clean towel. Try not to disturb the starch that has settled to the bottom of the bowl. You’ll need it.
Roll up the towel to absorb the excess moisture. This is a good time to mention that I never use scented detergent or fabric softener. I just haven’t found a scent that works with latkes! Haha
Twist the towel until you think you have all the moisture out.
And then, twist it some more.
Transfer the shreds to a clean bowl. May I recommend that you immediately rinse the towel? Trust me, you don’t want that starch moving through your entire laundry load.
Add the shredded, drained onion to a beaten egg for easy mixing.
I love the flavor of cumin with potatoes. Apparently, there is a concern about whether cumin (and some other spices) meet Kosher standards. Omit it if your conscience requires.
Some recipes suggest using matzo meal in place of flour, but we only have that in the house during Passover. A couple tablespoons of all-purpose flour will aid with binding the latkes.
Use your hands to toss the shreds, fully incorporating the flour. You should also add salt and pepper at this stage.
Exposure to oxygen causes a chemical reaction that makes the potatoes (or in this case, the water) turn pinkish. There’s no harm. Drain carefully to preserve the starch that has settled.
There it is! The magical potato starch that lends stickiness to our latke batter. Do your best to empty the water without losing that beautiful starch.
Add the starch to the bowl of shredded potatoes and toss again to fully mix it into a batter.
Add the egg and onion and toss again.
Shaping the latkes is not complicated, but don’t expect them to hold firmly together. Aim to have a manageable mass of sticky potato. You can shape them further in the frying oil.
Always do a small test latke, as mine on the left there. If the oil does not immediately go crazy with bubbles, it isn’t ready. Gently place the latkes in the oil, but don’t press them.
When you begin to see the bottoms turn golden, use the back of a firm spatula to gently press the tops of the latkes flat.
Yes, Nilla, we see you watching! ❤
Turn the latkes only once, when the edges and bottom are completely golden brown. Use two utensils to keep them stable so you can turn them without splashing hot oil.
Don’t forget to season the latkes, and do this the second they come out of the oil. Place them on a rack over paper towels and rest them in a warm oven while you prepare the rest.
The last dregs of the latke batter is likely to feel wet. Squeeze out as much of that moisture as possible when you shape your final latkes.
Happy Hanukkah!
Peel and rinse the potatoes. Shred them by whatever means is easiest for you and transfer the shreds immediately to a bowl filled with ice water. Allow them to soak for about 45 minutes.
Trim, peel and shred the onion. Use paper towels to wick away the excess moisture from the onions.
Beat the egg lightly in a measuring cup. Add the shredded onion and mix to combine evenly. I have found this easier for even mixing of the onion into the potato mixture.
Pour enough grapeseed oil into a large skillet or electric frying pan to measure about 1/2″ deep. Heat oil to 375° F.
Use your hands to carefully scoop the soaked potatoes from the bowl and onto a clean kitchen towel. Try to avoid stirring up the starch from the bottom of the bowl. Spread the potato shreds out over the towel. Roll up the towel and twist to extract as much moisture as possible from the potatoes. Empty the shreds into a large, new bowl.
Sprinkle the cumin and flour over the shreds and toss with your hands to evenly distribute.
Pour out the water from the soaking bowl, and take it slow enough to keep the powdery white starch in the bottom of the bowl. Scoop the starch into the bowl with the dried potato shreds and toss again with your hands to combine. Finally, add the egg-onion mixture and toss until evenly combined.
Form a clump of potato mixture in the palm of your hand, pressing to shape it as best you can into a flattened ball. Do not try to shape it as a disc at this point. Carefully lay the ball of potato mixture into the hot oil and repeat until you have three or four clumps in the oil. When the edges begin to turn golden, use the back of a small spatula to gently flatten the balls of mixture into more of a disc shape. Turn the latkes after all edges (and the bottom) are golden brown. Fry the second side until golden. Transfer to a rack over layers of paper towel and repeat until all latkes are fried. Season the latkes with kosher salt as soon as they come out of the hot oil.
There are as many ways to make potato salad as there are grandmothers, and although my own Gram never made this version, I know she would have liked it. Gram introduced me to yogurt when I was a young girl, and it’s a good thing she did, for a couple of reasons. First, I love it in all its forms—plain, Greek, drinkable, etc.—and second, I likely would not have tried yogurt at all because my mother hates it.
If the passion for food and cooking is passed down genetically, then all I can say is that it skipped a generation in my branch of the family tree. My mom is not a bad cook, just a basic (and infrequent) cook, and the meals she served when I was young never strayed from what she herself liked to eat. My friends, that was a short list. On the good side of things, this allowed me to experience Mexican food at an early age, and it is still a favorite. On the flip side, I nearly missed out growing up on so many things I love today, including cream cheese, eggplant, bleu cheese and, well, I could go on for days. Not only did my mom not enjoy those foods, but she would make disgusted faces about the very idea of them, and I might have grown up believing they were poisonous, if not for my grandmother’s influence.
Yogurt is about as far from poison as you can get; it’s rich with protein and gut-nourishing probiotics, and I learned to love the little cups of it that my grandmother always seemed to have in the fridge when I visited. My favorite flavors, as I recall, were lemon and the ones with blueberry or peaches that you stirred up from the bottom. These tasty treats paved the way for me to love Greek yogurt in my adult years, and most often with no fruit or sugar added. This powerhouse food is strained to a thicker texture than regular yogurt, so that the protein is concentrated, making it a fantastic base for healthy breakfast smoothies. In our house, we regularly reach for Greek yogurt as an even exchange for sour cream, and we whip it into our scallion cream cheese to make it more spreadable.
As summer inches toward its end this year, I had been considering ways to liven up my basic potato salad recipe, and it occurred to me that tzatziki—the bold and zesty, Greek yogurt and cucumber sauce—could be a terrific addition to a potato salad. I am not crazy about having a lot of mayonnaise in my salads, and the idea of refreshing tzatziki sounded pretty darn good. I was right.
Cool, creamy, refreshing!
While you cook the potatoes, make the tzatziki. Begin by chopping or shredding a peeled and seeded cucumber, then use salt to strip it of excess moisture and blend it together with a healthy dose of Greek yogurt, garlic and dill. Combine that with a touch of mayonnaise and fold it into cold, boiled potatoes, and you will have a side salad that’s perfectly cool and fresh, served with burgers or any kind of meat kebab on the grill.
Ingredients
About 1 1/2 pounds red or yellow potatoes
1/2 good sized slicing cucumber, peeled
Kosher salt and black pepper
2 cloves fresh garlic, finely minced
2/3 cup Greek yogurt
Fresh or dried dill leaves
1/4 cup mayonnaise (I used canola mayo from Trader Joe’s)
Instructions
This is my method for prepping the cucumber: Cut it into spears, remove seeds, then cut into strips, then dice.
Removing the seeds ensures the tzatziki dressing doesn’t get watery.
Sprinkle a couple of generous pinches of kosher salt on the diced cucumber, and wrap in paper towels to absorb excess moisture.
For the base tzatziki, combine Greek yogurt, garlic, dill and pepper. Salt will be covered by the cucumber.
Fold in the cucumber bits until the mixture is even.
In a larger bowl, combine the tzatziki with a dollop of mayo and blend.
Give it a taste and adjust seasonings to your liking. I did not have fresh dill, but dried works just as well.
Fold in the chilled, cooked potatoes. As you can see, I left the skin on my baby reds because they remain nice and tender. I hate to miss that extra fiber!
To serve, sprinkle a little more dill on top and garnish with cucumber wheels.
Scrub the potatoes but leave the peel on. Cut the potatoes into large chunks and cook them in salted water at a low boil until they are just tender enough to pierce with a knife. Drain, cool and chill them at least two hours.
Cut the cucumber lengthwise into quarters (like pickle spears). Use a paring knife to carefully slice off the center strip that contains the seeds. Discard them. Slice, then dice the remaining parts of cucumber into very small bits. Alternatively, you may cut the cuke in half lengthwise, use a spoon to scoop/scrape out the seeds, and then grate it on the large holes of a box grater.
Transfer the cucumber bits or shreds to a paper towel-lined bowl and sprinkle with two generous pinches of kosher salt. Toss the cucumber in the salt, fold the paper towel over it and put the bowl in the refrigerator. After about 30 minutes, gently press the cucumber between layers of clean paper towel to remove the excess moisture.
In a medium bowl, combine the Greek yogurt, minced garlic, black pepper and dill. It is unlikely that you will need additional salt, as the cucumber will bring that flavor to the dip. Fold in the salted, drained cucumber bits.
Combine the tzatziki with mayonnaise. Adjust pepper and dill to taste.
Fold the dressing into the chilled cut-up potatoes. Garnish salad with additional sprinkles of dill and a few cucumber slices.
Here’s a truth I have learned in the past couple of weeks: you don’t realize how much you use all of your fingers until one of them is out of commission. It has been almost two weeks since my little accident with the mandoline slicer, and I’m constantly reminded of my limitations in the kitchen. I am not in any kind of pain, mind you, but the urgent care doctor was specific to instruct that I should not let my injured right ring finger get wet during the healing process. That means asking for help (not one of my strong points) with washing dishes, prepping vegetables and moving hot pots. Everything takes longer than usual, and my husband, Les, has done half (or all) of the cooking, or we have ordered takeout.
I am pleased to report that on Thursday, the two-week mark after my second COVID jab, we ventured out to a real, honest-to-goodness restaurant—one of our favorite casual, but delicious, places in our city. We sat inside (gasp!) and enjoyed a lovely dinner that included this incredible plate:
This plate was a work of art, and as delicious as it was beautiful!
OMG, it was sooo delicious! The grilled shrimp accompanied a salad of arugula with candied bacon and vinaigrette, flanked by walnut-crusted goat cheese medallions, chilled, roasted carrots and dollops of fresh pesto with microgreens, artfully arranged on a roasted carrot puree. We even ordered an appetizer and a glass of wine, and I literally wanted to lick my plate. It was a real treat, and so good to see the friendly, familiar staff at West End Cafe after such a long separation.
At the same time, with the CDC announcement last week that vaccinated people can relax a bit, we are eagerly anticipating some in-person time with friends, and excited that our social re-entry will coincide perfectly with the start of summer grilling season. For practice, we prepared one of our favorite grilled items—the coffee-rubbed grilled tri-tip steak that Les shared yesterday, and an easy side that takes a favorite steakhouse combination down into casual mode. This bleu cheese potato salad was Les’s idea, as we were pondering what to make as a side for the bold and spicy tri-tip. Think of it as a bleu cheese-stuffed baked potato, but cold. And creamy.
The slight funk of bleu cheese is such a great complement to grilled steak, and it worked out great in this easy potato salad.
The bleu cheese flavor is assertive, which is exactly what we wanted, but the combination of mayo with sour cream gives the salad a creamy texture without the slick greasiness of too much mayonnaise. This potato salad was a perfect complement to the tri-tip, and equally good over the next couple of days with sandwiches. I love that his creative flavor idea and my kitchen instincts made it such a winner on the first effort. Yeah, this teamwork thing is working out pretty well.
Makes about 6 servings
Ingredients
1 1/2 pounds small Yukon gold potatoes, boiled tender and chilled
1/3 cup mayonnaise
1/3 cup sour cream
A few shakes granulated garlic
Kosher salt and black pepper
1/2 cup bleu cheese crumbles
2 large scallions, cleaned and sliced (white and green parts)
Small handful of fresh flat-leaf parsley, chopped
Romaine or leaf lettuce leaves, for plating (optional)
Instructions
Cook the potatoes in salted water until tender to the center, then chill them and cut into bite-sized pieces.
The base of the dressing is simple; equal parts mayo and sour cream, plus a little garlic powder, salt and pepper.
Use the type of bleu cheese you like best. Mine has lots of blue veins, for extra funky flavor! Crumble it right into the bowl, or cut it into chunks if it is extra firm.
Fold in the bleu cheese and about half of the scallions, reserving the rest for serving. I also added a few more twists of black pepper, just because.
Fold in a couple of tablespoons of fresh, chopped parsley. Next, fold in the chilled, cut potatoes.
Top potato salad with the remaining scallion slices. Serve chilled.
Cut up the chilled cooked potatoes into bite sized chunks.
In a large mixing bowl, combine mayonnaise and sour cream, plus granulated garlic, salt and pepper. Fold in bleu cheese crumbles and half of the scallions. Fold in chopped parsley.
Add the chilled, cut-up potatoes and gently fold to combine with the dressing mixture. Adjust salt and pepper to taste.
Plate onto a lettuce-lined platter and sprinkle with remaining sliced scallions.
Easy to notice that I was working with one good hand. My lettuce-lined plate is a little lopsided!
Catering tip: When serving any kind of side or salad for a group, present it on a platter rather than in a bowl. It allows guests to serve themselves from both sides of the table, and it looks prettier and larger!
My friend, Tammy, was accustomed to bossing people around—politely, of course, because this is the South.
“We need you in the kitchen on Friday,” she declared. “Can you be there around noon?”
Her proposal, more like marching orders, was nonetheless music to my foodie ears. It is not a stretch to say that meeting Tammy, events manager for a local catering company, was a pivotal point in my culinary experience.
As I have mentioned many times, I learned all the basic, important cooking skills from my grandmother. In Gram’s kitchen, I learned to sear meat before roasting, to blanch vegetables before freezing and to sift flour before measuring. I learned plenty about cooking safety, too—including proper use of an old-school pressure cooker and how to not blow up the kitchen when lighting the gas oven. That second lesson was temporarily forgotten when I was 9 and I was “teaching” the babysitter how to make cinnamon rolls. I was lucky that I only lost my eyebrows that day.
My finer culinary skills, however, were honed in a different place and time, when I was all grown up and living in Greensboro, North Carolina, hundreds of miles away from Gram. At 28, I was already a pretty good cook (said my friends), and I was well on my way to becoming a full-fledged foodie. Being a disc jockey had led to delectable restaurant experiences, as record company reps were always wining and dining us at the nicest places in town. Plus, we frequently had the unbearable responsibility of accompanying contest winners on fabulous vacations and getaways, including cruises, week-long events at Walt Disney World (where I met Alex Trebek) and even a live broadcast from Jamaica. It was rough, but someone had to do it, and the food was always incredible.
Meeting our listeners was one of the best parts of the job for me, and I had plenty of occasions to do so. Tammy and another friend, Lee, were regular, loyal listeners of our morning show (P-1 is what we called them in the biz), and they started “stalking” me at my live-on-location visits to car dealerships and retail stores. After several of these visits, Tammy and Lee (or “Lee-Lee,” as we all called her) invited me to join them for after-work drinks at their favorite Friday hangout, which happened to be exactly three blocks from the radio station. In no time, we became “The Three Amigos,” and as it became obvious to Tammy that I knew my way around the kitchen, she decided that I could be an asset to the crew in the catering kitchen.
A Pinch of Thyme was one of the premiere caterers in the area during that time, and the kitchen was slammed during the spring and fall “furniture markets.” That was the International Home Furnishings Market in nearby High Point—it drew upward of 70,000 buyers, dealers, designers and manufacturers from all over the world—and it was an all-hands-on-deck situation for caterers, who scrambled to meet the crushing demand for fancy foods. There were many cocktail parties, receptions, box lunches and fully catered dinners to be prepped, and Tammy’s invitation was my cue to get in there and help them get it all done.
I showed up on Friday, donned my white apron and got to work, following whatever instructions Chef Rodney barked out. Tammy stopped by the kitchen periodically to check on things, and she was well-known for telling us, as she handed over yet another client order, “y’all can handle it.” And we always did, despite some near-disasters that I’ll save for another day.
The stories in my head are many, but what I’d like to share today is one of the first, most essential lessons I learned during my time in the “Pinch” kitchen: simple is always best, and it is usually the smallest “tweak” that makes the most important impact on a dish, whether that is a squeeze of lemon, a quick scatter of finishing salt or, yes, a pinch of fresh herbs. There is no need for grand gestures, and the client requests proved that time and again.
We served up all varieties of side dishes, but it was always the buttered red bliss potatoes that made our clients swoon. That’s what I’m serving up today. The presentation of these humble early potatoes is elevated, with a distinctive, thin strip of peel removed from each perfect little spud. But the ingredients list is short and sweet: new potatoes, butter, garlic, salt and pepper.
Also, obviously, a pinch of thyme. 😉
Catering trick: If you want your food to make a statement, put a frame around it. These buttered red bliss beauties are escorted by a bed of simple sauteed spinach.
These potatoes are cooked twice—simmered to produce a tender, creamy interior, and then lightly pan roasted in clarified butter, infused with garlic and herbs, for a perfect finishing touch. The delicate flavors do not overpower the potato, and the result complements any main dish on your table. If you wish to make it vegan, substitute a mild-flavored, extra virgin olive oil for the butter.
This post for simple, but elegant, buttered red bliss potatoes is dedicated to the memory of my friend. We would be celebrating Tammy’s birthday today, and you can bet there would be some amazing food on the table, and Tammy’s favorite chardonnay would flow freely, as would the reminiscing and giggling over inside jokes. Sadly, we lost her three summers ago, following her very brave (second) battle with cancer. I think about Tammy every time I put on my white apron, though today it is a bit tattered and stained. It is still my favorite. 🙂
(L to R) Tammy, Terrie and Lee-Lee, back in the day!
We were, as they say, thick as thieves! ❤
Makes about 6 servings
Ingredients
2 lbs. red baby (new) potatoes* (see notes)
6 Tbsp. clarified butter*
2 cloves fresh garlic, finely minced
Kosher salt and freshly ground black pepper
About 4 sprigs fresh thyme, leaves removed (you will measure about 1 tsp. leaves)
*Notes
Choose the most uniform, small, round potatoes possible. Ideally, they should be no larger than 2 inches across. Other small, waxy potatoes, and even the medium-starchy Yukon gold, will also be delicious in this recipe, but the contrast of color provided by the red ones is perfect for visual appeal. Russet potatoes are not recommended here; their skins are too thick and the interior too starchy.
To clarify butter, melt an entire stick (8 tablespoons) in a small saucepan over very low heat. Allow the milk solids to settle to the bottom of the pan, and carefully pour off the clear butter. Discard the solids or save them for another use later. You may clarify the butter ahead of time and refrigerate until you are ready to use it. Reheat it on the stove over medium-low heat or microwave, about 15 seconds at a time, until melted. To save time, you could also use purchased ghee, which is essentially the same thing, but more expensive than making your own.
Use the lowest heat setting to gradually melt an entire stick of salted butter.
It took a little over 20 minutes for the butter to melt, and you can see the milk solids have settled at the bottom of the pan.
Gently tip the saucepan to pour off the liquid butter. I love the golden color of the Irish butter I’m using this time!
What remains in the saucepan is about 2 tablespoons of milk fat solids. I’ll save it for my next batch of cornbread.
Here’s an interesting tidbit about clarified butter (or ghee): The casein proteins in butter are concentrated in the milk fat solids, so melting to separate them, and straining them from your final product reduces or removes the lactose, making it more easily digestible.
Instructions
I’m trying to take it easy after slicing my finger last week, so I’m appreciating the convenience of these “ready to go” baby potatoes!
If you have a channel knife, use it to strip off a band of peel. Otherwise, use a peeler or even a paring knife.
Always start potatoes in cold water. Bring it to a gentle boil and add salt to ensure the potatoes are well-seasoned.
While the potatoes cook, clarify your butter and add the minced garlic. Simmer this on the lowest heat setting until the garlic is fragrant and softened.
Keep the potatoes simmering on low until they can easily be pierced. Be sure they are tender to the center.
Draining the potatoes in a colander is best because the excess moisture has a chance to evaporate.
Add the baby reds to the warm garlic butter and swirl or turn to coat them. Increase the heat to medium for this stage, but keep watch so the garlic does not burn.
Add a quick snap of kosher salt and some freshly ground black pepper. Turn the potatoes occasionally for even pan roasting.
The potatoes have taken on a roasted appearance and it’s time for the all-important pinch of thyme. Fresh is best, but dried thyme leaves can be substituted.
Plate the red bliss potatoes, and pour the melted butter evenly over them to serve.
By the end of the recipe, the garlic bits will be golden and crispy, and they add another element of texture along with the flavor.
Here’s why I love using my channel knife to peel the strip of skin away. It leaves a ridge on each potato, perfect for collecting more of the buttery flavor.
Rinse the potatoes, rubbing gently to clean, and keep skin intact. Use a sharp vegetable peeler or channel knife to carefully remove one thin strip of peel, all the way around the potato, like a band.
Cover potatoes with cold water and bring potatoes to a gentle boil. Cook until easily pierced by the tip of a paring knife. Be sure potatoes are tender to the center.
While potatoes cook, make the clarified butter. Pour off the clear butter into a large, non-stick skillet and place it over low heat. Add garlic to the butter, season with a pinch of kosher salt and slow-cook on very low heat, just until garlic is softened and plump.
Drain potatoes gently in a large colander, taking care not to tear off the skins. Transfer the potatoes to the butter skillet and swirl the pan to coat the potatoes. Season with kosher salt and black pepper and cook until potatoes take on a slight “roasted” appearance. Keep the temperature in the medium-low range.
Sprinkle the fresh thyme leaves over the potatoes, give the pan another swirl to distribute the thyme, and transfer to a platter for serving.
If any doctor ever tells me that I’m allergic to potatoes, I’m all done. Just put me in the ground. Something in me is completely hard-wired to crave the starchy goodness of a potato, and the more texture I can experience in one bite, the happier I’ll be.
There are as many great ways to cook potatoes as there are varieties of potato. And I love them every which way—soft and creamy, as my hubby’s ultra-decadent roasted garlic mashed; firm, cold and toothsome, as my dilly-dilly, double-heat potato salad; or crunchy, cheesy and slightly greasy, as the easy hash brown waffles that we enjoy so much for our big breakfasts on the weekends. Above all, it’s pure crispiness and simple saltiness on potatoes that really wrecks me. My favorite potato chips are the ones that are kettle-cooked with the skin on, and if they happen to be folded over, bubbled up and wrapped around each other, maybe burned a little bit—even better. Yes, give me some of that crunch, please!
Everybody should have at least one really simple potato dish that is easy to make at home, yet still delivers all the goods on texture and flavor, and this, for me, is that dish. These crispy, pan-roasted potatoes are crispy and salty on the outside, but soft, fluffy and tender on the inside. The dual texture that I find so satisfying is the result of cooking them twice, though neither method requires much effort, and they can usually be done in the background of whatever you are serving with them. You will want to choose small, thin-skinned potatoes for this recipe—my usual go-to is baby reds because they are waxy and firm enough to hold their shape through both cooking processes. Small gold or yellow potatoes also work, but russets are a no-go for this one, both for their crumbly nature and the thicker skin.
Begin by scrubbing the potatoes thoroughly, removing any little eye sprouts or dark spots, but keeping as much skin on as possible. Next, boil the potatoes gently until they are just tender enough to pierce with the tip of a paring knife. Drain and cool until they can be easily handled, then carefully press them under a flat dish to create thick potato disks. Then (here comes the best part) fry them over medium low heat in a mixture of butter and olive oil. Salt and pepper, nothing else. Oh. My. Goodness.
If loving you is wrong, I don’t wanna be right!
Ingredients
1 1/2 lbs. baby red potatoes, scrubbed clean (keep the peels on)
Kosher salt for boiling potatoes
3 Tbsp. salted butter (maybe more)
2 Tbsp. extra virgin olive oil
Salt and pepper for serving
Instructions
Let’s run through it in pictures first, shall we? I’m sure you know how to boil the potatoes, so we are picking up from the point they are fork-tender and drained.
Cool down the boiled potatoes until you can easily handle them.
Use a flat-bottomed dish to gently press each potato. Easy does it! Keep them about 1/2″ thick.
Give them a moment to rest while you prepare a large stainless or cast-iron skillet.
Add some of the butter and all of the oil, and heat until melted.
Arrange the potatoes evenly. Salt and pepper them, and tuck a few additional slices of cold butter in between.
When the bottoms are golden and crispy, gently turn them over. Add more slivers of cold butter between the spuds, or a drizzle of olive oil.
Turn them once more before serving to put a second crisp on the first side.
Cover potatoes with cold water in a medium heavy-bottomed pot. Bring to a low boil, add a good amount of salt (about a teaspoon), then reduce the heat and simmer gently until potatoes pierce easily with the tip of a paring knife or a fork.
Drain the potatoes in a colander until they are cool enough to handle.
Place one potato at a time on a cutting board and press it gently, using a flat-bottomed dish or bowl. Use a clear bowl if possible, to help you see how much the potato is flattening. It should burst slightly open on the sides, but you want to keep it intact as much as possible. Easy does it. After flattening, each potato should be about 1/2 inch thick.
Heat a heavy stainless or cast-iron skillet over medium heat. Add 1 tablespoon of the butter and all of the olive oil. When the butter-oil mixture begins to bubble at the edges, arrange the potatoes in a single layer in the pan. It’s fine if they are touching, but leave enough room to insert a spatula when it’s time to turn them. Reduce the heat to medium-low once all the potatoes are in the pan.
As the potatoes begin to cook, they will soak up much of the butter-oil mixture. Slice off a couple dabs of cold butter and insert them between potatoes here and there in the pan. Give them about 8 minutes, then begin checking the bottom for doneness.
When the potatoes begin to get browned and crispy on the bottom, use a small spatula to gently turn them over, one at a time. If you get over-ambitious, the potatoes may break, so take it slow. Sprinkle with salt and pepper. As with the first side, if the potatoes seem to soak up the butter right away, add a couple slivers more butter, or a thin drizzle of olive oil around and between the potatoes.
When second side is browned, turn the potatoes over once more, for a quick “re-crisping” of the first side. This ensures that your potatoes are perfectly crispy and hot on both sides. Give them one last sprinkle of salt and pepper, and serve them hot.
These crispy, pan-fried potatoes are easy and done in the background while you work on whatever else you’re serving for dinner. We had them this time with our Easter dinner of roasted leg of lamb and asparagus. But wouldn’t they be great alongside a roast chicken, or meatloaf, or burgers, or just about anything?
These potatoes made our simple Easter dinner complete.
There is a common thread that runs through the culinary fabric of the U.S. South. And that thread, in a word, is sweet. Whether it’s beverages, desserts, BBQ sauces or even potato salad, the foods you find on a southern menu will surely satisfy your sweet tooth. That’s a bit of a challenge for people like me, who prefer more savory flavors. In a salad, I want freshness, with tangy, herbal and briny flavors.
When I spotted an online recipe for potato salad with dill and horseradish recently, I got excited about the brightness of flavors and especially the absence of sugar. I found inspiration in that recipe, so I made it (with my own tweaks, of course), and my husband and I enjoyed it so much I’ve made another batch and it will make its way into our recipe rotation. Me being me, though, and always pushing the envelope on flavors, I’ve adjusted it yet again. This time, I doubled down on the dill, adding chopped dill pickles to the original idea of fresh chopped dill. I heaped jalapeno heat on top of the horseradish and crowned the finished salad with chopped hard-boiled egg. Oh, happy Spring! 🙂
This salad is fresh, bright, herbal and zesty!
Best of all, for me, is that there is no sugar in sight. The salad is very dill-forward, and that freshness makes me eager for all the other light foods on the way for Spring. The heat, though doubled, is subtle in the background. The yogurt (or sour cream, if you prefer) contributes a creaminess that isn’t all mayonnaise. And the capers and chopped egg provide a little something extra, as a salad you might expect to find in a good delicatessen.
The result is this dilly-dilly, double heat potato salad, delicious as a cool, savory side to sandwiches, hot foods off the grill or anything you might be serving as a casual meal for Passover or Easter.
The best potatoes for this recipe are those that do not fall apart too easily. Red, yellow or white potatoes are all good options. Russets, not so much. Their starchy fluffiness makes them more prone to mashing.
If you do prefer a slightly sweet flavor, substitute bread and butter pickles for the dills. The dill flavor will still be present, but the sweetness will help to soften the savory edges of this salad.
This is the right time of year to find fresh dill in the supermarket, but if you do not have access to it, substitute dried dill leaves, but only about a teaspoon. Remember that dried herbs are much more potent than fresh.
Can’t stand the jalapeno heat? I promise it is subtle, but if you don’t want or like jalapenos, leave them out. This is my recipe, but you are always in charge of the decisions in your own kitchen, so make it the way you like. Want it hotter? Well, now you sound like my husband. Go ahead, add more. 😊
Instructions
This is one of the simplest recipes, but I’ll share the steps in pictures anyway. Keep scrolling for written instructions and a downloadable PDF for your recipe files.
Surrounding the mayo and yogurt, from top right: fresh dill, chopped dill pickles, diced red onion, horseradish, pickled jalapenos and capers in the center.
When I make any kind of salad, I like to blend together the dressing ingredients first, to help evenly distribute the flavors through the rest of the salad.
The cut-up potatoes are cold, so it’s easier to fold them into the dressing without breaking them, and without warming up the mayonnaise.
Always taste, of course, so you can adjust salt and pepper to your liking.
Cut up the potatoes into large, “three-bite” size. Boil gently until potatoes are easily pierced with a fork. Drain them and cool completely before cutting them into smaller pieces. If you wish, cook them a day ahead and refrigerate overnight. Cut the cooked potatoes into cubes about the size of croutons.
Combine all remaining ingredients, except eggs, in a large bowl, seasoning the dressing with salt and pepper to taste.
Fold the cut-up potatoes into the dressing. Chill in the refrigerator for several hours.
Serve with chopped hard-boiled eggs scattered on top of the salad.
Our first batch was made with russet and Yukon gold potatoes, and we liked it so much, I made a few adjustments and whipped up another batch.
For my second batch, I doubled the heat, used white potatoes and added chopped egg. All winners!
Often regarded in the U.S. to be a food for St. Patrick’s Day, colcannon is traditionally enjoyed at Halloween in the old country of Ireland. Cooks there would hide coins or trinkets or charms inside, and legend said that what you found in your hearty spoonful was an omen for the coming season—be it riches or poverty, marriage or singlehood. The exact origin of the dish is disputed, but historians are certain that it has been enjoyed in Ireland since at least the mid-1700s, and there’s no arguing that it is creamy, satisfying comfort food at its best.
Well, did you ever make colcannon made with lovely pickled cream With the greens and scallions mingled like a picture in a dream Did you ever make a hole on top to hold the ‘melting’ flake Of the creamy flavoured butter that our mothers used to make
Oh you did, so you did, so did he and so did I And the more I think about it, sure the nearer I’m to cry Oh weren’t them the happy days when troubles we knew not And our mother made colcannon in the little skillet pot
Excerpt from The Auld Skillet Pot – Mac Con Iomaire
Who doesn’t love the little “melting flake” of butter? 🙂
With fiber-rich potatoes, cabbage, onions and butter, colcannon could seriously stand on its own as a meal. My version subs in cooked kale and leeks for the cabbage and onions, and it is a gorgeous addition to our homemade corned beef and cabbage dinner.
Ingredients
2 1/2 pounds potatoes (mix of russet and golds), peeled and boiled until tender
2 fat handfuls fresh curly kale, washed and chopped
1 leek (white and light green parts), cleaned and sliced
8 Tbsp. good Irish butter (divided)
1 cup light cream, room temperature
Salt and pepper
Instructions
Add a handful of the chopped kale to the melted butter and toss to wilt.
Add the leeks and another tablespoon of butter and cook again, until kale and onions are softened.
Add light cream and a good chunk of the butter to the hot potatoes, and mash together. The rich Irish butter is almost the same color as my Yukon gold potatoes. 🙂
Season with salt and pepper, and add more butter if desired.
Fold in the sauteed kale and leek mixture.
Love those beautiful swirls of green in the soft, fluffy potatoes!
While potatoes are cooking, melt 2 Tbsp. of butter in a skillet or small pot. Sauté chopped kale and sliced leeks until wilted and tender. Season with salt and pepper.
Drain potatoes, return to pot and add 4 Tbsp. of butter and light cream. Mash until soft and fluffy. Season with salt and pepper.
Add kale and leeks to the potatoes and fold to blend. Serve family style with remaining butter on top.
There cannot possibly be a food more deserving of the title “pub grub” than bangers and mash. This hearty, stick-to-your-ribs dish is original to Ireland and other parts of the U.K., and a real treat on St. Patrick’s Day, but its history reflects hard times for the Irish people. During W.W. I meat shortages, sausage makers resorted to stuffing the links with lesser amounts of pork or lamb, substituting fillers and higher-than-usual water concentration. As they cooked, the sausages exploded from their casings with a banging sound. Thus, “bangers.”
Today, you don’t have to look very hard to find a more meat-centric version of the sausages, and I found this delicious variety made by Johnsonville. They are slightly sweet, but with plenty of garlic flavor that I think holds up nicely to the dark stout beer used in the thick onion gravy. If you can’t find sausage that is labeled specifically as “Irish,” I would recommend any bratwurst-type of sausage as a fine substitute.
These Johnsonville sausages were delicious! If you do not find sausage labeled as “Irish,” I think bratwurst would be a good substitute.
The Irish, especially peasant populations, have always relied heavily on the nutrient-dense potato, for its fiber, antioxidants and minerals (especially potassium). Potatoes contain a resistant starch that is not absorbed by the body, but provides a vehicle to deliver nutrients to feed our gut bacteria, which is crucial for overall good health. Isn’t it nice to know that a favorite comfort food can actually be good for you? At our house, it’s a rare occasion to have any kind of potatoes other than my beloved’s fabulous garlic mashed, but their richness, and especially the parm-romano flavor, is not quite right for this meal. I’ve taken a different direction, using buttermilk and a moderate amount of butter to cream them up a bit, and a couple of spoons of horseradish, which gives them legs to stand under the intensely flavored Guinness onion gravy.
My version of the gravy begins with sautéed onions, and is finished with a very generous glug of Guinness stout, plus some broth. This gravy is big and bold, and if you wish, you can shift the ratio of stout or leave it out altogether in favor of beef broth—that’s up to you.
Garlicky sausages, simmered in Guinness and then piled onto hearty potatoes with the Guinness-onion gravy. This is some serious Irish pub grub!
The preparation of these three components (bangers, mash and gravy) will happen concurrently; if you are working ahead, the whole meal heats up nicely as leftovers.
Ingredients
Package of Irish banger sausages (or similar substitute)
1/2 cup Guinness stout ale*
2 1/2 lbs. starchy potatoes (I used a combination of russet and golds)
4 Tbsp. salted butter
1/2 cup thick buttermilk
1 1/2 tsp. prepared horseradish
Salt and pepper
It’s surprising to get so much flavor from so few ingredients. The scotch cocktail in the back is for the cook, not the gravy. 🙂
Guinness Onion Gravy
3 Tbsp. salted butter
1 large yellow onion, sliced (mine was about the size of a softball)
2 cloves garlic, minced
3 Tbsp. all-purpose flour
1 cup Guinness stout ale
1 cup low-sodium vegetable broth
2 tsp. beef bouillon base*
2 tsp. dark brown sugar
Salt and pepper
*Notes
The Guinness stout ale is very strong, and carries a somewhat bitter note. I believe the secret to making delicious gravy with the stout is cooking it slowly, so the malty flavors remain but the alcohol cooks out and mellows in flavor. If you are averse to the bitter flavor, or avoiding alcohol, substitute a hearty beef stock for similar results. This recipe calls for a 12 oz. bottle; you will use part of it to simmer the sausages and the rest to finish the onion gravy. I purchased the “Foreign Extra” stout, but for less intense flavor, use a Guinness draught stout.
I use vegetable broth regularly for the nutrients and flavors, and I have amped up the flavor with a hearty spoon of beef bouillon base. If you prefer, skip the base and use beef broth.
Instructions
Let’s run through it together in pictures, then scroll to find written instructions, and a downloadable version you can print for your recipe files.
Get the potatoes cooking. Simmer the sausages in about 1/2 cup of the Guinness, until they are plump and stout is nearly gone. I used an extra bold version of Guinness, but for less intense flavor, regular Guinness draught is good.
Melt the butter with buttermilk while the potatoes are draining.
I used a combination of starchy russet potatoes and creamy Yukon golds, and the result was a soft, fluffy mash.
Set the sausages aside while you make the gravy in the same pot. Pour off any remaining stout into the broth mixture.
Season as desired with salt and pepper. These potatoes are decidedly less rich and creamy than the recipe we usually make at our house, but they are right for this traditional recipe.
On a whim, I decided to add horseradish to my mashed potatoes, and it was a great addition alongside the intense gravy.
Melt the butter in the same pot used for plumping the sausages.
Add the sliced onions and garlic and toss to coat. Season with salt and pepper and cook until they are soft and translucent.
Do you notice how the Guinness residue is blackening my pot as this recipe progresses? It was a mess by the time I finished! 🙂
When onions are soft and caramelized, sprinkle in the flour to create a roux for thickening the gravy.
Cook the onions and flour until the mixture sticks to the bottom of the pot, then add half of the remaining Guinness right to the center of the pot.
The Guinness will de-glaze the pan in a jiffy, and the roux will thicken. Add the rest of the Guinness and continue to cook.
Add in the broth-beef base mixture and cook, stirring frequently, for at least 25 minutes. Do not rush this step, as the simmering helps to cook off the bitterness of the Guinness.
A generous spoonful of dark brown sugar softens any remaining bitter flavors of the gravy.
When the gravy is ready, brown the simmered sausages in a lightly oiled cast-iron skillet.
Plate a heap of the mashed potatoes, then spoon on a bit of gravy. Top with the browned bangers and more Guinness gravy.
Peel the potatoes and cut them into large chunks. Cook in salted water over medium-low heat until fork tender.
Drain potatoes in a colander (reserve the water, if you wish, to make a batch of my sourdough potato bread with onions and dill). While potatoes drain, add butter and buttermilk to the cooking pot over medium heat until butter is mostly melted.
Return hot potatoes to the pot and mash, seasoning with salt and pepper. Stir in horseradish and additional butter, if desired.
While the potatoes are cooking, place a medium, heavy-bottomed pot over medium heat and pour in 1/2 cup of the Guinness stout. Add sausages to the stout and simmer, turning sausages a few times, until sausage is plump and stout is reduced to a couple of tablespoons. This should be about 25 minutes. Transfer sausages to a separate dish and set aside to make the gravy.
Pour any reduced stout into a glass measuring cup, along with vegetable broth and beef base.
Add butter to the same pot used to simmer the sausages, and add onions and garlic. Season with salt and pepper and sauté over medium heat until onions are soft and translucent, at least 10 minutes.
Sprinkle flour over onions in butter and stir until onions are coated and flour begins to cook. This is a roux that will be the thickener for your gravy. When the bottom of the pan begins to accumulate cooked, stuck-on flour, move the onions aside and pour in about half of the remaining Guinness stout. Stir, scraping up the cooked flour from the bottom.
When the pan is de-glazed, pour in the remaining stout and the broth mixture, and cook over medium heat, stirring occasionally, until mixture is thickened and reduced. You should take about 25 minutes for this step; don’t rush it, as simmering is necessary to blend the flavors and reduce the bitterness of the stout. Give it a taste and adjust salt and pepper as desired. If the gravy is overly bitter, stir in the brown sugar and simmer a few more minutes.
Heat a cast-iron skillet over medium heat. Swirl in a small amount of olive oil and add the plump banger sausages. Cook and turn until sausages are fully reheated and nicely browned.
Plate the mashed potatoes, spoon on a bit of Guinness gravy, then top with bangers and a generous ladle of the onion gravy.
The joy of baking homemade bread, for me, is second only to the bliss of eating it. Or is it the other way around? When I established my sourdough culture in early 2016, I wasn’t sure how successful the adventure would be or if I would tire of eating “only” sourdough. As I’ve declared here several times, though, sourdough is not exclusively a flavor of bread, but a method of giving rise to the dough, and I rarely use commercial yeast in any form of bread anymore—whether it’s pizza dough, English muffins, waffles, soft pita breads, challah or focaccia. For me, there’s no turning back, and I cannot imagine tiring of it. Sourdough rules!
The potato bread I’m sharing today is my adaptation of a sandwich bread recipe I’ve grown to love by King Arthur Baking Company. KA’s version of this bread uses dry active yeast, but I’ve converted it by conjuring my math skills; I’ve swapped out equal amounts of liquid and flour (by grams, of course) for the appropriate percentage of my ripe-and-ready starter (sourdough nerds understand me). The result is terrific on its own, but I’ve recently taken the recipe a bit further with the addition of minced onions and a dill swirl and—well, wow.
The dill swirl lends a nice touch to your favorite sandwiches. My hubby especially loves it with his tuna salad and a fresh leaf of lettuce.
The recipe itself is unusual, in that the mixed dough does not have an initial rise at room temperature; it moves directly to the refrigerator for cold overnight fermentation. It’s very sticky dough that is not easily kneaded, so I recommend use of a stand mixer if you have one. After chilling overnight, the cold dough is easier to handle and shape into a loaf to proof at warm room temperature until it’s ready to bake. Words don’t adequately describe the aroma that wafts from the oven.
The cooked Yukon gold potato and softened butter lend a soft texture and lovely gold color, and the onion and dill I’ve added make it a great choice for all kinds of sandwiches. My hubby declared a few mornings ago that this sourdough potato bread may be his favorite bread ever for breakfast toast. Of course, he has said that about my soft sourdough rye, too (I’ll share that one soon).
My ingredients are measured by weight, because that’s how I bake. I highly recommend a digital scale for consistent results in any kind of baking, but especially for bread. If you’re not ready to get on the sourdough train, you can still enjoy this bread. Follow the original instructions offered by King Arthur, but halve the ingredients, as KA’s recipe makes two loaves. The onion and dill flavors are my own Comfort du Jour twist.
1 large Yukon gold potato, peeled and cut into large chunks (boil and mash the potato, then measure out 100g for use in this recipe)
100g ripe sourdough starter (fed 8 to10 hours earlier; my starter is 100% hydration)
100g lukewarm water* (include the potato cooking water in this total)
40g (about 3 tablespoons) sugar
260g unbleached all-purpose flour*
80g white whole wheat flour*
1 large egg (room temperature)
1 1/4 tsp. fine sea salt
6 Tbsp. unsalted butter, cut into pieces and softened to room temperature.
2 Tbsp. dried minced onion, rehydrated 15 minutes in 2 Tbsp. warm water (optional)
2 tsp. dried dill leaves (or 2 Tbsp. fresh dill if you have it)
*Notes
Reserve the water used in cooking the potato, and add more water to total the amount needed for the recipe. The potato starch in the cooking water will add to the fine texture of the bread.
The original KA recipe calls for only all-purpose flour, but I always swap in at least some amount of whole grain flour. Make it as you like, but don’t swap more than 25% of the total flour without also adjusting the ratio of liquid. My swap is within that suggested limit, and it works great.
Instructions – Day One
Use all white flour if you prefer, but I like to swap in about 25% whole grain. I used pink Himalayan salt here, mostly so it’s easy to see in a picture.
Sourdough starter is considered ripe when it looks bubbly and active like this, about 8 hours after a feeding.
The warm color and creamy texture of Yukon gold potatoes makes them my favorite for this bread recipe. I’ve used my potato ricer to get a soft, fine texture.
Add barely enough warm water to cover 2 tablespoons of dehydrated minced onion, and then give it about a half hour or more to soak in.
Everything but the butter gets mixed together first. I always allow the flour to hydrate in the wet ingredients before adding butter or oil.
When the flour is fully incorporated into the initial dough, cover it and rest 20 minutes. Then use the dough hook to knead about 2 minutes before adding butter.
It may seem that the butter doesn’t incorporate well, but it helps to knead it in a little at a time. The butter adds flavor, but also makes a soft, tender texture.
Combine all ingredients, except butter and dill, in the bowl of a stand mixer. Mix on low speed until ingredients come together and form a shaggy ball on the beater blade, and all flour is incorporated. Scrape dough from beater blade. Cover and allow dough to rest 20 minutes.
Switch to the dough hook and knead the dough on low speed for about 2 minutes.
Add the pieces of softened butter, one or two at a time, and mix on speed 2 until each addition of butter is worked into the dough. Continue to knead at this speed for about six more minutes. The dough will be very soft and sticky.
Transfer the dough to a lightly oiled bowl. Cover it with plastic wrap or elastic cover and transfer immediately to the refrigerator at least overnight or up to 24 hours.
On Baking Day
After a night in the fridge, the dough is much easier to handle. Turn it out onto a counter sprayed with oil.
Use your fingers to gently press the dough into a long skinny rectangle shape. Use a rolling pin if it’s easier.
Sprinkle dill leaves all over the surface of the dough.
Use a bench scraper or spatula to help lift one short end to begin the rolling up process.
Roll the dough tightly, tucking in the ends of the roll as needed to keep it in a neat cylinder shape.
Pinch the end of the roll tightly to the shaped loaf. This helps create tension on the surface of the bread for a nice rise in the oven.
Pinch and tuck the ends as needed, so that the roll is a perfect fit in the greased 9 x 4″ bread pan.
The dough should go into the pan, seam side-down. Cover with plastic wrap or shower cap-style covering. Proof at room temperature until dough rises slightly above the top of the pan.
The dough may seem somewhat jiggly when it’s ready for the oven. Bake at 350 for about 45 minutes, turning and tenting with foil halfway through baking time.
This color is not retouched! Cool the bread about 5 minutes on a rack, then carefully turn it out onto the rack to cool completely.
The bread will feel very soft straight from the oven. Resist the temptation to cut into it too soon! The inside needs time to set up, and cutting too early will collapse the loaf.
The soft texture of this bread makes it ideal for eating just with butter, but it also makes terrific sandwiches and breakfast toast!
Lightly spray a clean countertop (and a 9 x 4” bread pan) with olive oil spray. Remove the refrigerated dough to the counter and use your fingers to spread it out into a rectangle shape, about 6 x 18”. Sprinkle the dough with the dill leaves.
Beginning at one of the short ends, roll the dough up tightly, tucking in the ends as you go to keep the dough in a smooth cylinder shape. Use a bench scraper if needed to release the sticky dough from the counter. When you get to the end, pinch the seam closed. Tuck the ends as needed to fit the dough into the greased bread pan. Cover with plastic wrap or elastic “shower cap” cover and proof at warm room temperature until the dough rises above the top of the pan. This may take anywhere from 4 to 6 hours, depending on the strength of your starter and the temperature of the room.
Near the end of rising time, preheat oven to 350° F, with baking rack in center position.
Remove plastic wrap from pan and gently transfer the loaf to the oven. At this point, the dough may appear “jiggly;” you don’t want to cause it to collapse, so try not to jostle it too much. Bake at 350 for a total of 45 to 50 minutes, turning halfway through baking time to ensure even browning. At the halfway point, cover the loaf loosely with a foil tent to prevent over-browning. Bread is fully baked when it reaches 190° internal temperature. Cool in the pan for about 5 minutes, then carefully turn it out onto a cooling rack. You may need to run a clean knife or plastic scraper along the edges of the bread for easier release. Cool at least two hours before cutting, and completely (this may mean overnight) before wrapping it up in a plastic bag.
The dill makes a pretty swirl in this loaf, but you could easily substitute another favorite dried herb.