Dilly-dilly Three Bean Salad

When the heat goes up, my appetite goes down. Like, waaaay down. And that means I’ve barely been hungry at all this week, as the afternoon highs got stuck around 97° F for five days in a row with 70% humidity as the norm. It has been too hot to weed my flower beds, too hot to walk the dog, and definitely too hot to cook. It’s brutal, and I know that much of the U.S. has been dealing with the same as climate change has altered what summer looks like— probably forever.

But at some point, we’ve gotta eat, right? I’ve put some new ideas into practice to ensure that we have something of substance, without me having to stand at a hot stove. Taking a cue from my blog buddy, Michelle, who endured the vicious summer heat of California’s Coachella Valley for too many years, I have found it helpful to do my cooking in the morning hours and then serve up the food as cool meals in the evenings. This has proven to be beneficial for more than one reason, as I often find myself less motivated at the end of the workday; my brain has run dry of decision-making ability. Getting meals done early has saved my sanity!

I love every single thing about this!

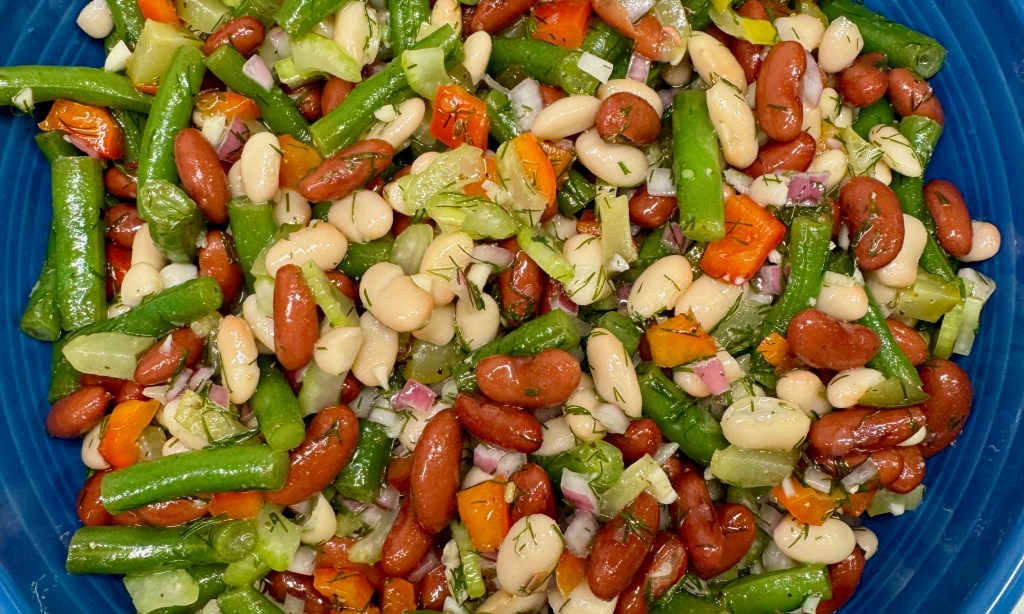
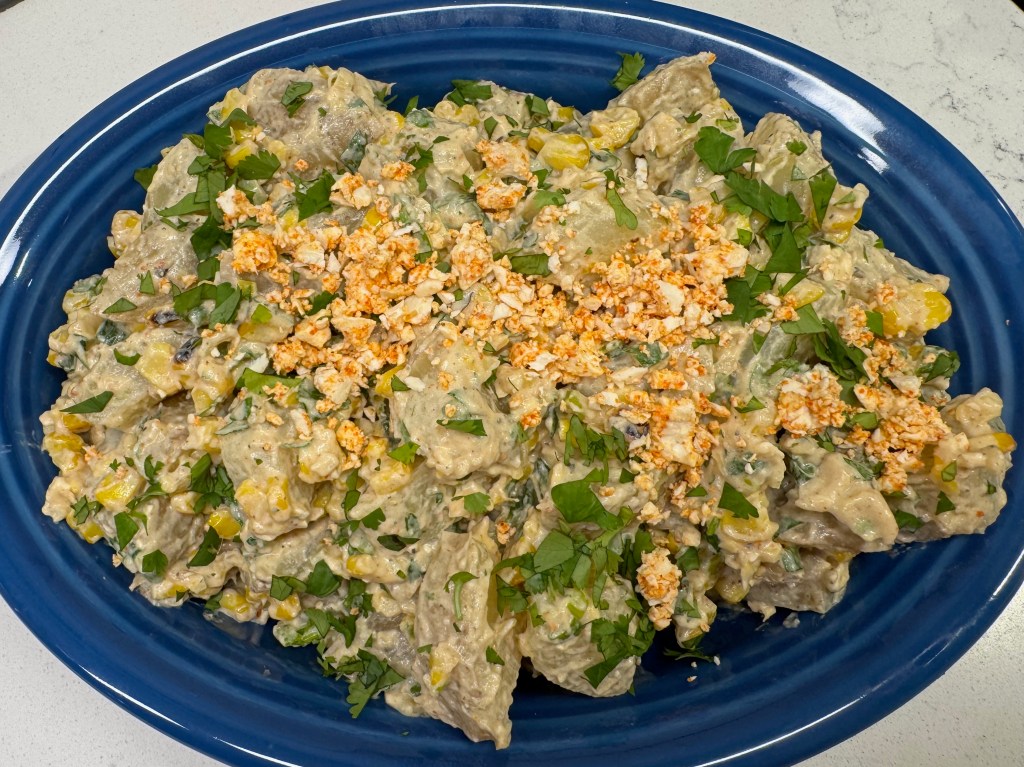
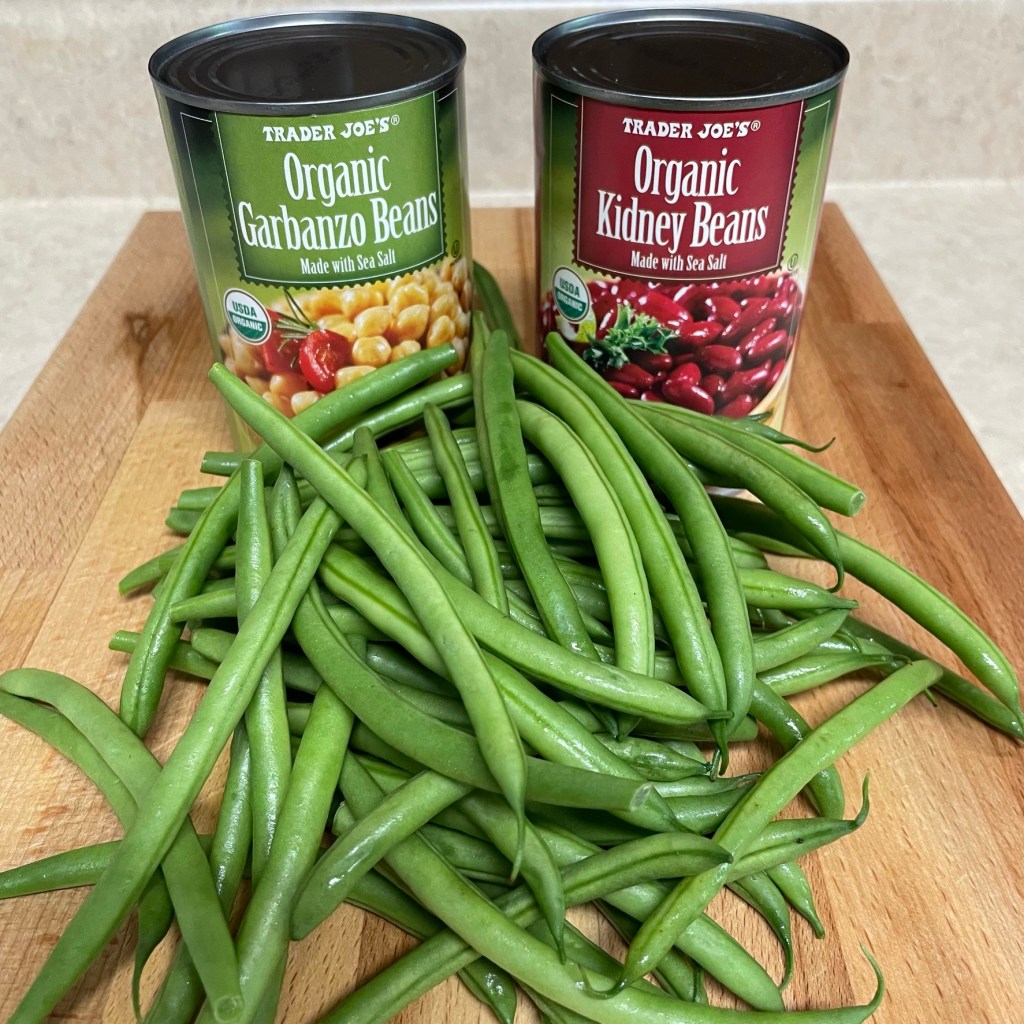
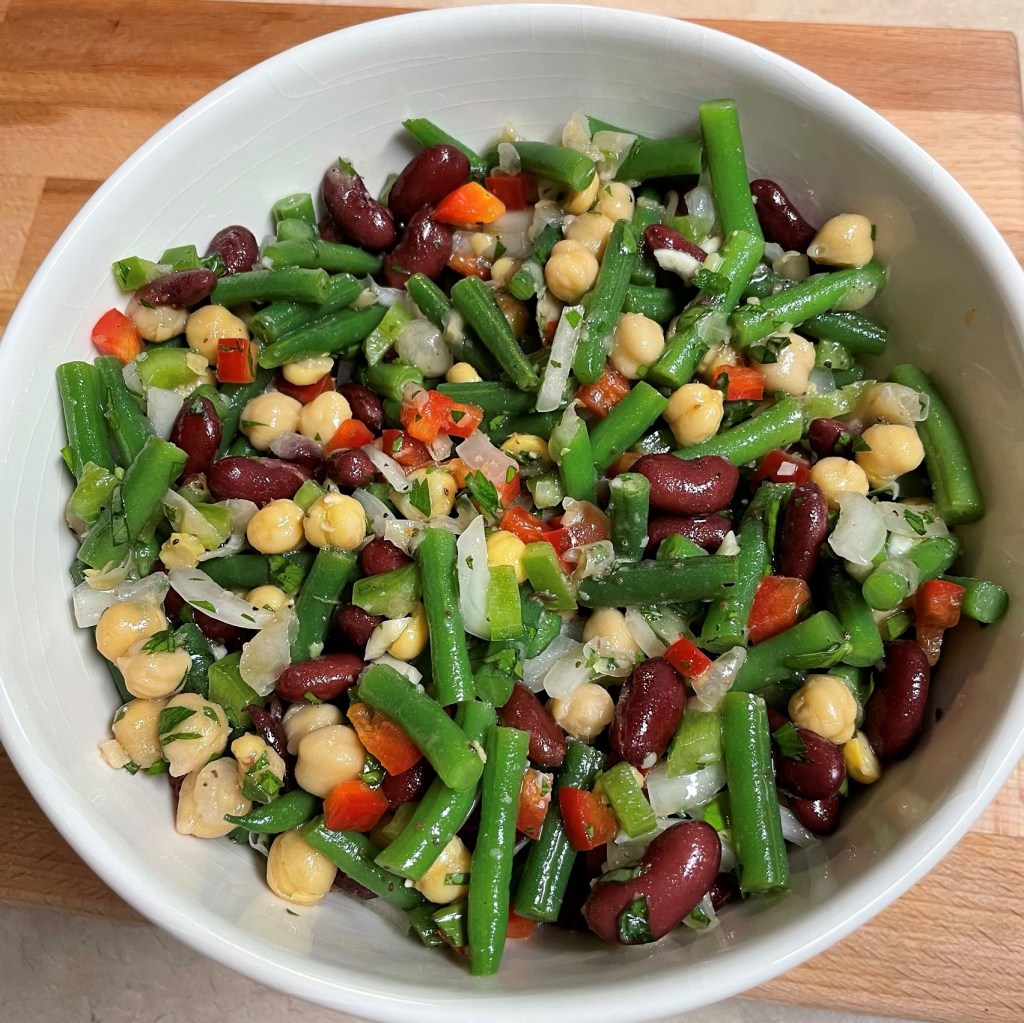
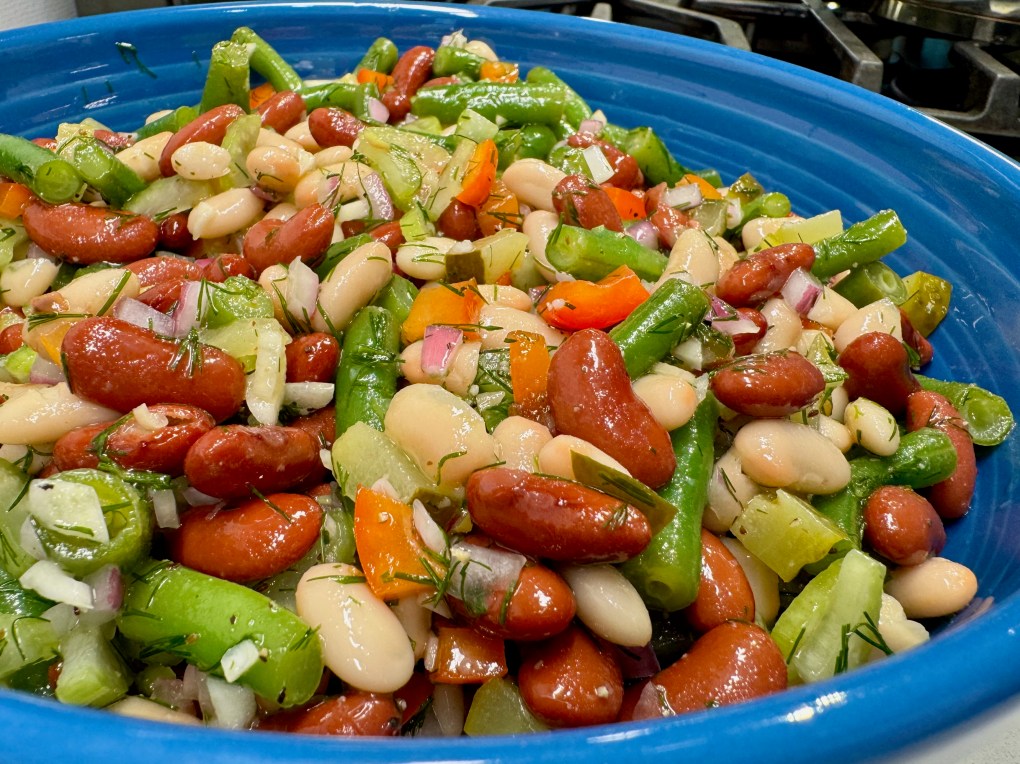
This variation on three-bean salad has even more texture than my usual, with crunchy bits of celery, bell pepper and red onion, the zesty bite of minced garlic, creamy kidney and cannellini beans, and a big punch of dilly-dilly flavor, courtesy of chopped spicy pickles and fresh summer dill. The fresh green beans have a nice “snap,” and the canned beans provide terrific fiber for a healthy gut, along with enough protein to carry me through this god-awful heat spell. Let’s get into it!


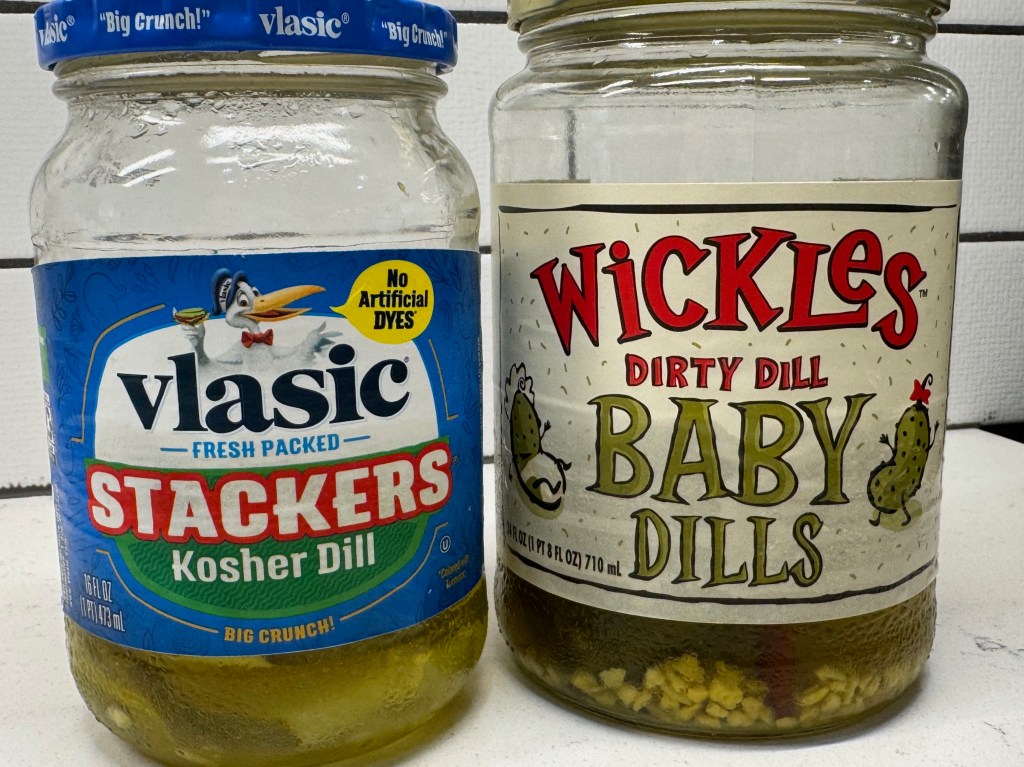
Par for the course, my inspiration for this recipe came from a desire to get rid of random jars in my refrigerator. We have had a bevy of leftover pickles taking up space after my husband’s son, Alex, visited a few months ago from Hungary. Alex loves dill pickles (especially spicy ones), and I always pick up a few options for easy snacking when he’s with us. Alex is very polite and doesn’t like to consume the whole contents of the jars, so he leaves them for us, which means that they get shoved to the back of the fridge until I get tired of moving them around. For this salad, I chopped up the remains of two kinds of pickles and I also used the kosher dill liquid in the dressing. 

This dressing would be terrific on a greens-based salad, too.

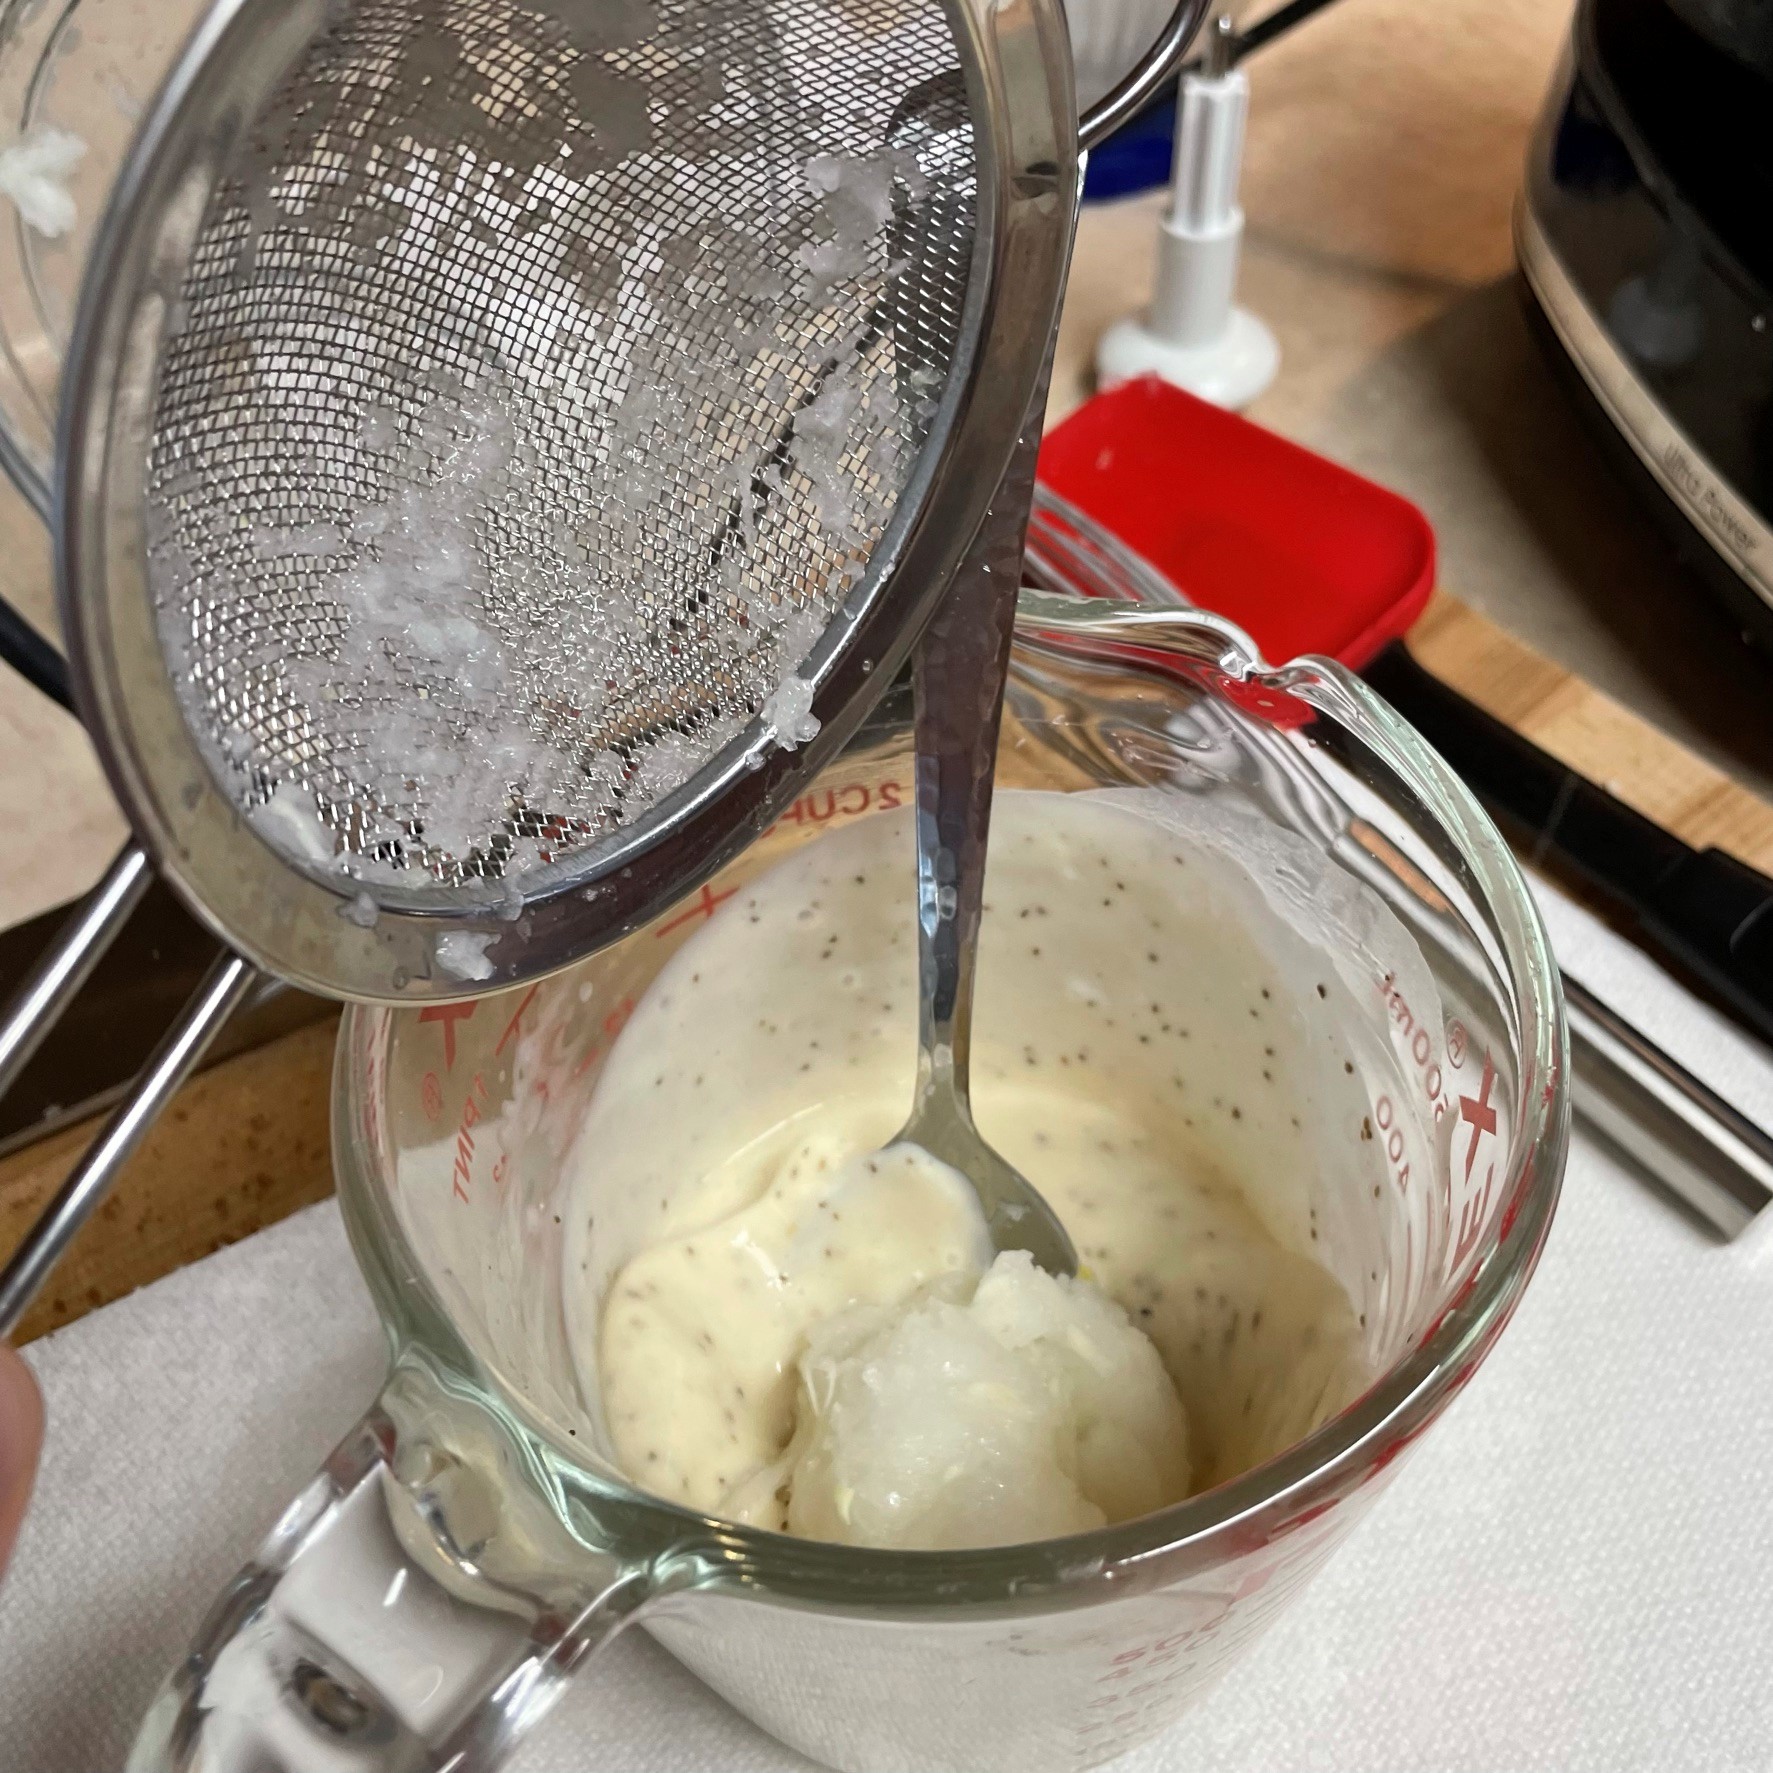
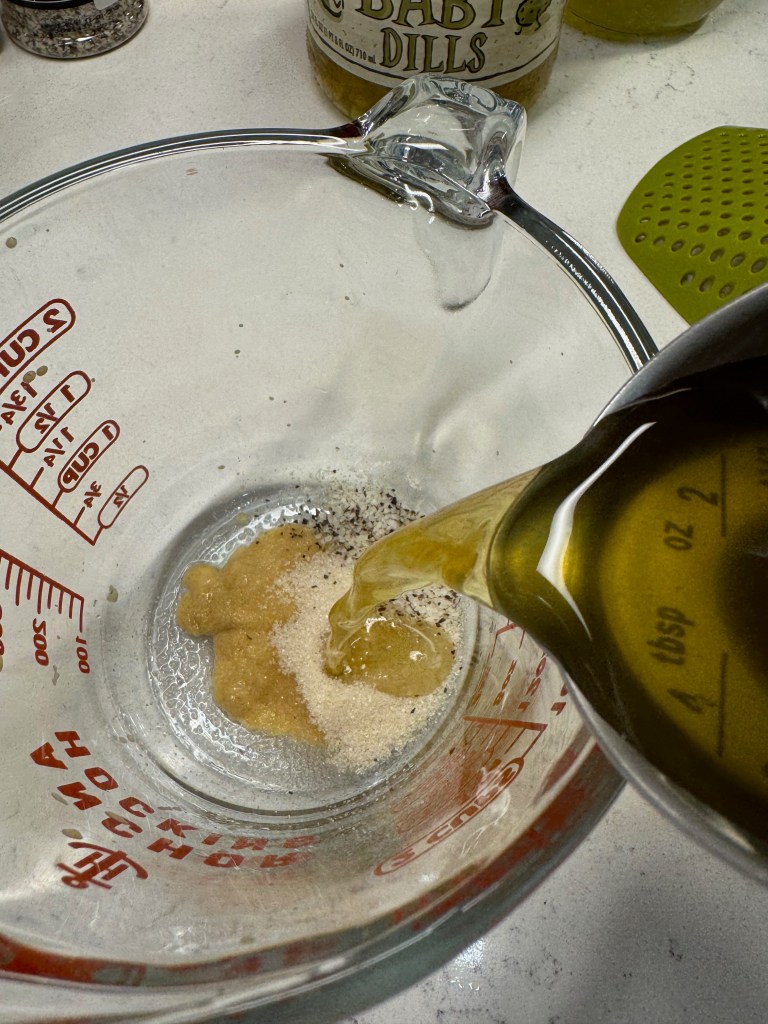
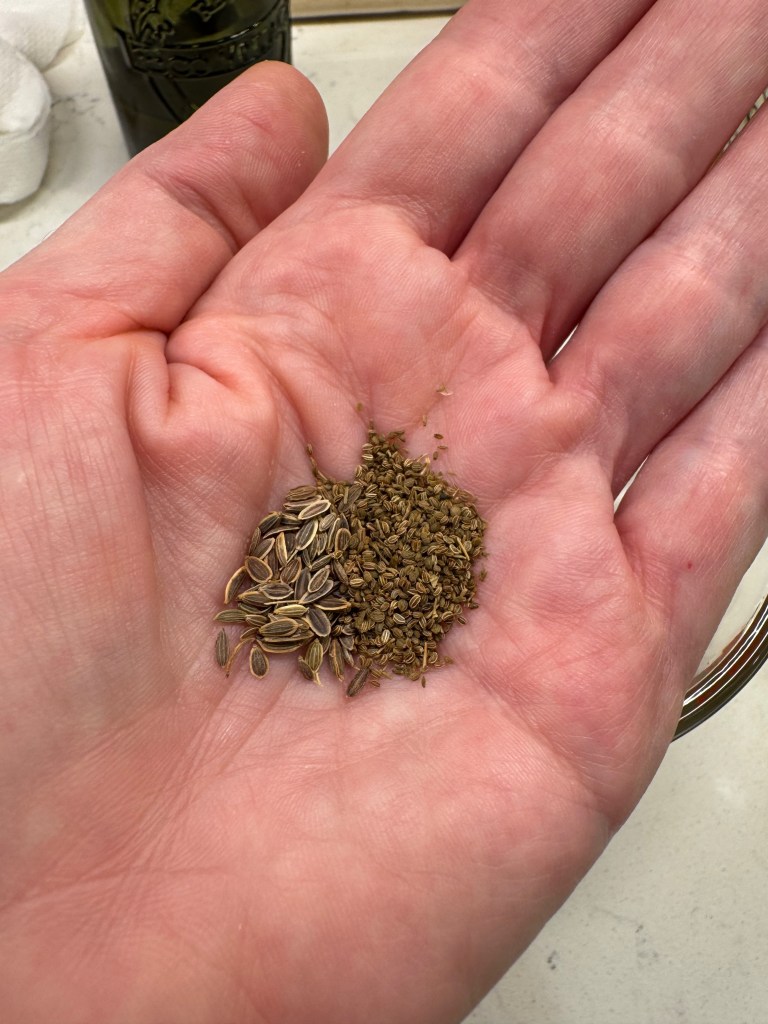
The balance of the dressing recipe is Dijon mustard, a spoonful of sugar, dill and celery seeds, and a healthy drizzle of extra virgin olive oil. Salt and pepper to taste, plus a splash of water, and that’s done. 


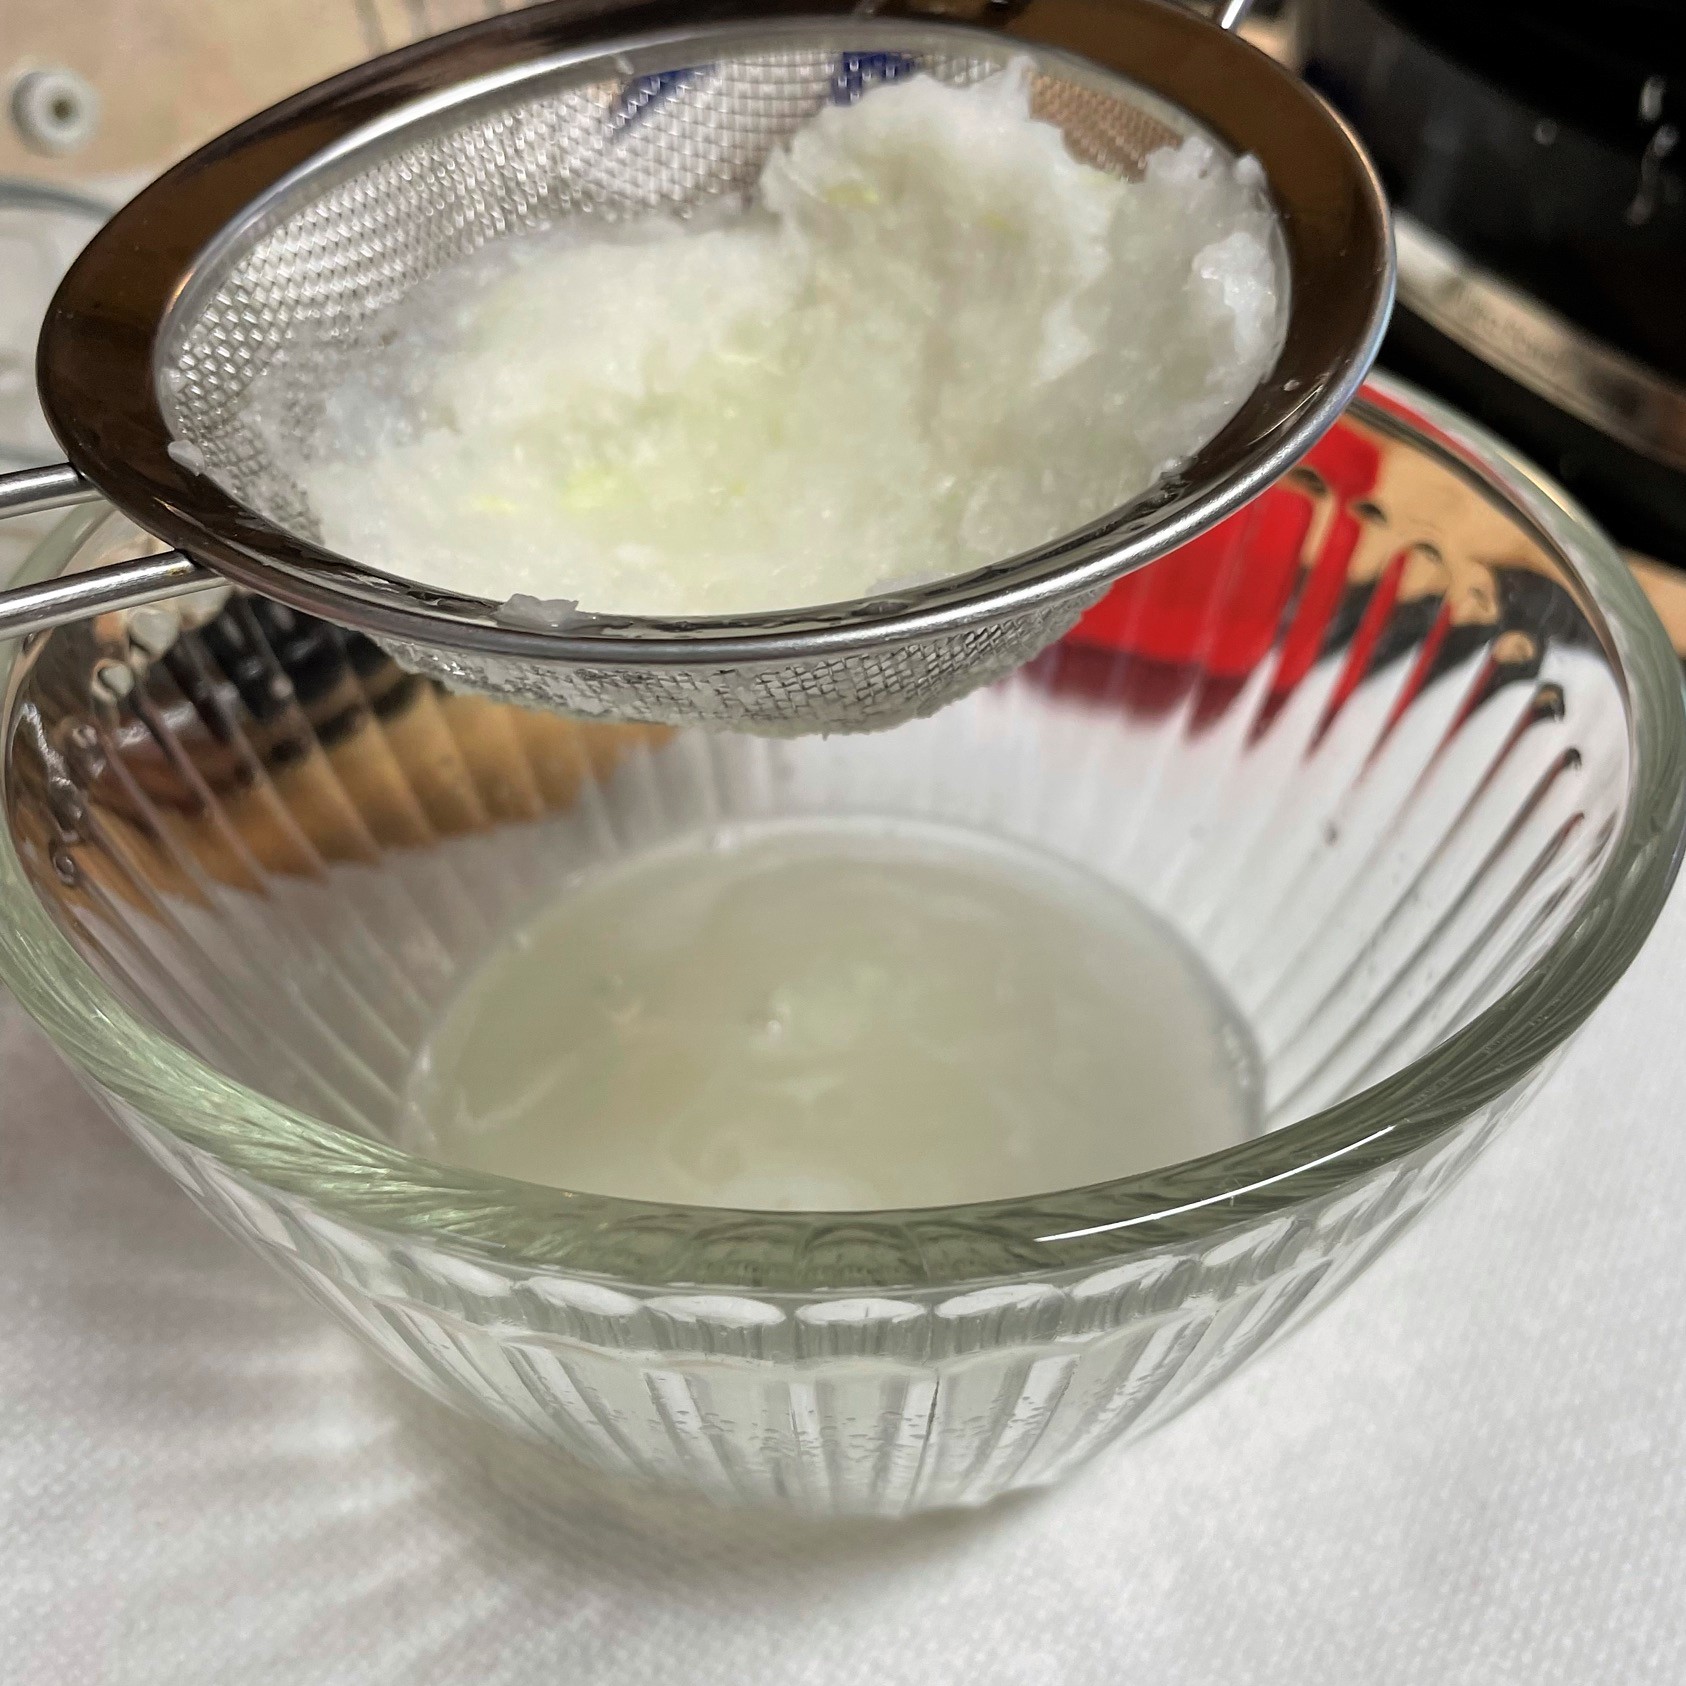
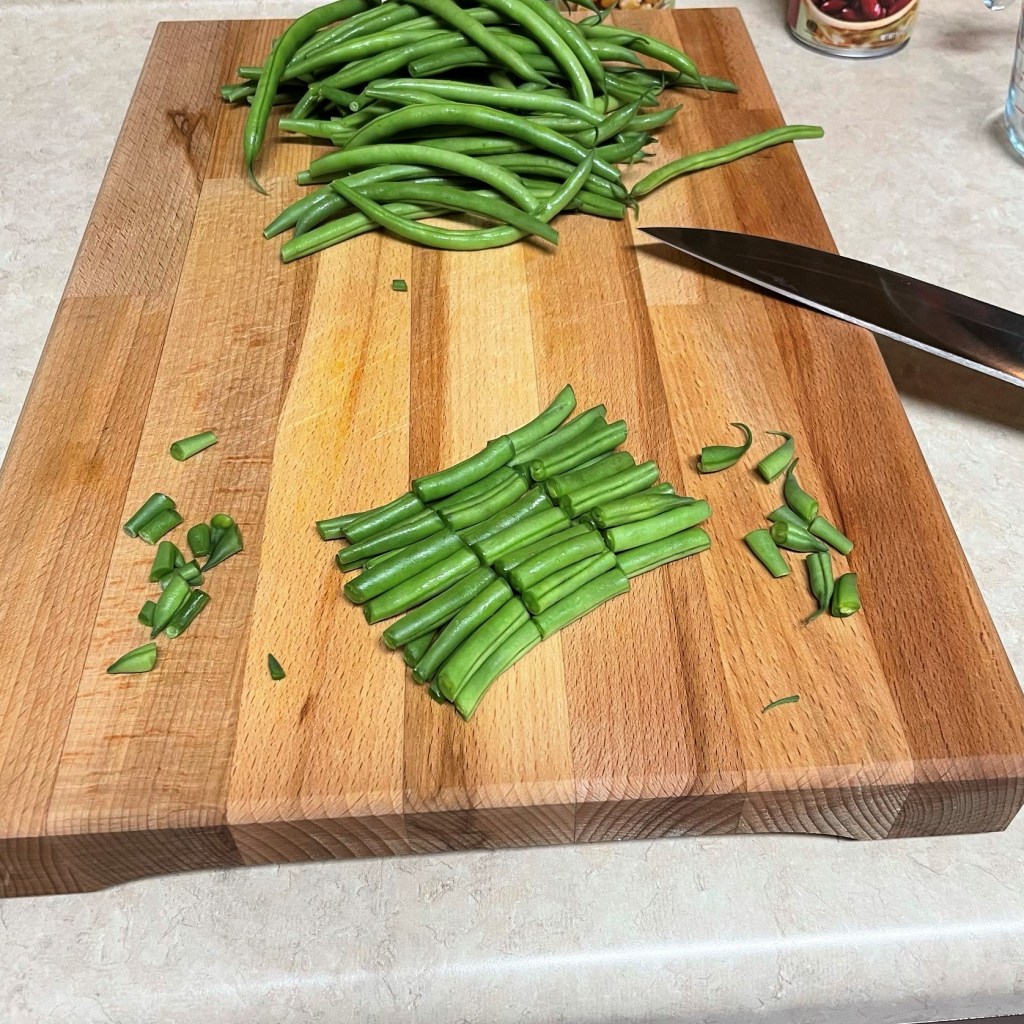
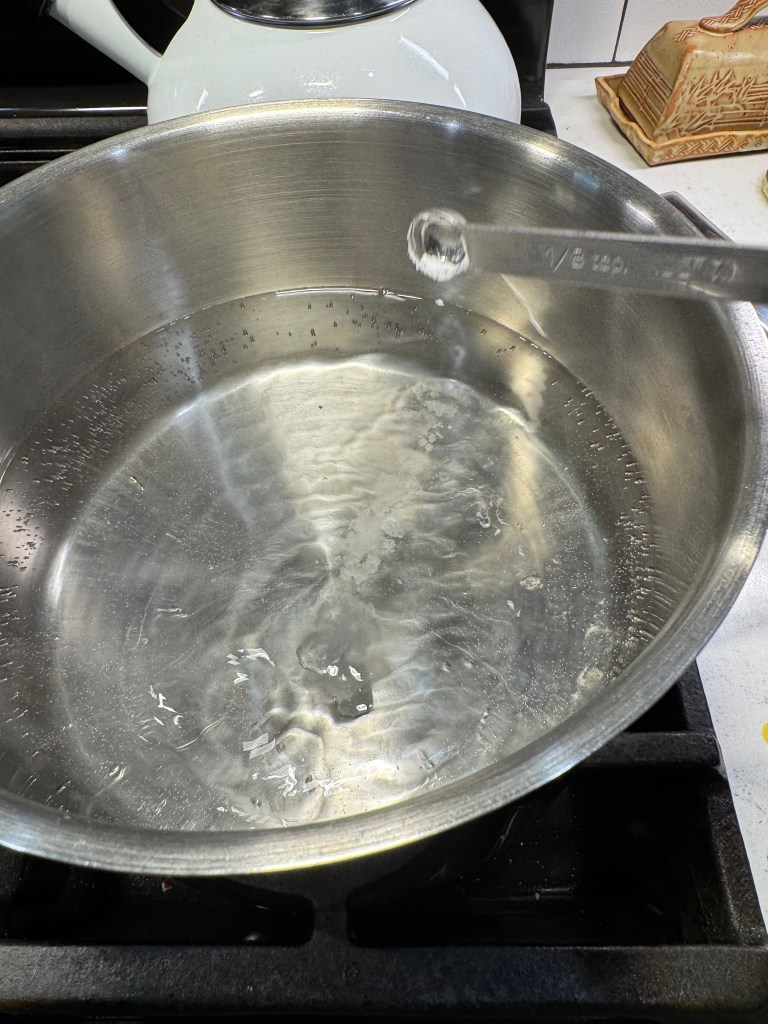
The green beans were the only ingredient in this salad that required cooking— thankfully, we only needed to have the stove on for about 10 minutes— so I got that going with a pinch of baking soda in a pot of barely-boiling water. The alkaline nature of the soda helps preserve the color of the green beans, and a shock of ice water at the end of cooking also helps with color retention.


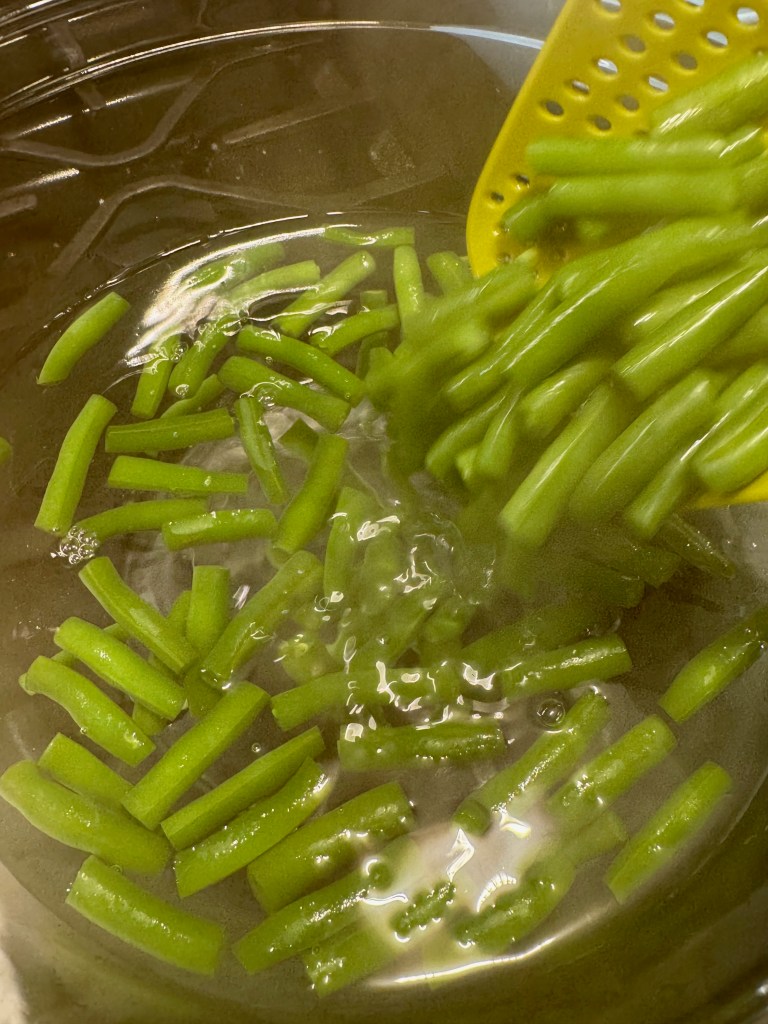
This process, called “blanching,” takes me back to my grandmother’s kitchen, where I learned so many basic lessons of cooking— including blanching vegetables for freezing and canning— when I was barely tall enough to reach the stove. Gram would have loved this three-bean salad, especially the use of the leftover pickle liquid. Like so many people who lived through the Great Depression, she used every scrap, drop, peeling, stem and leaf that could be used. These are still important lessons today, and I aim to make her proud every time I step into my own kitchen.


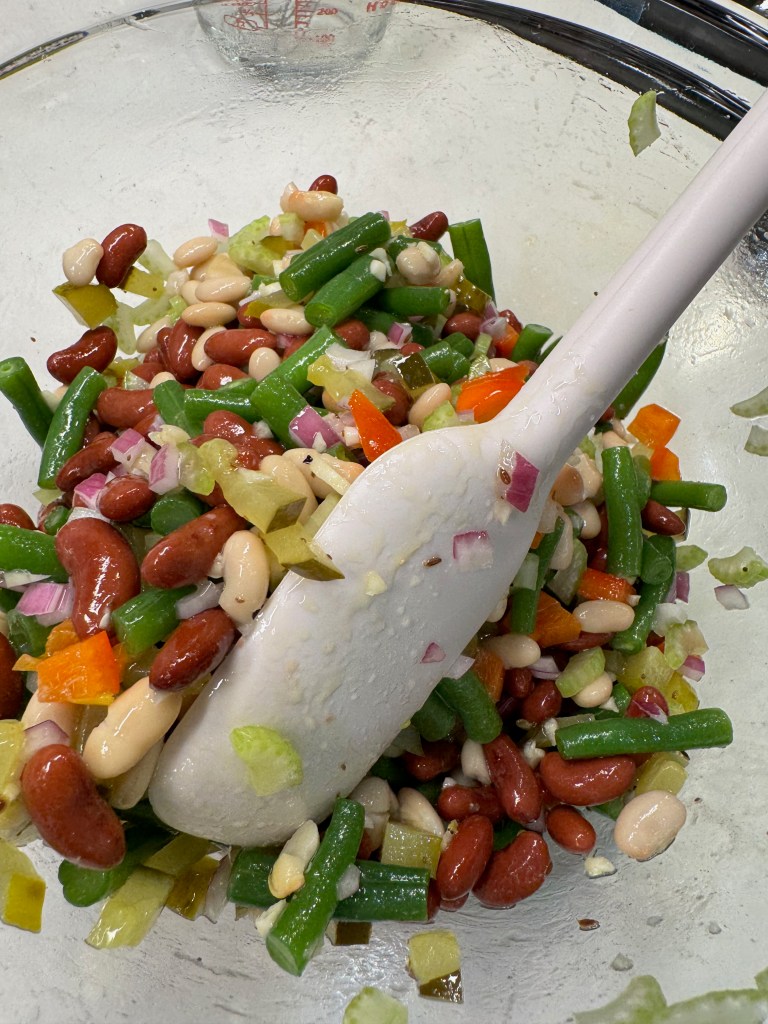
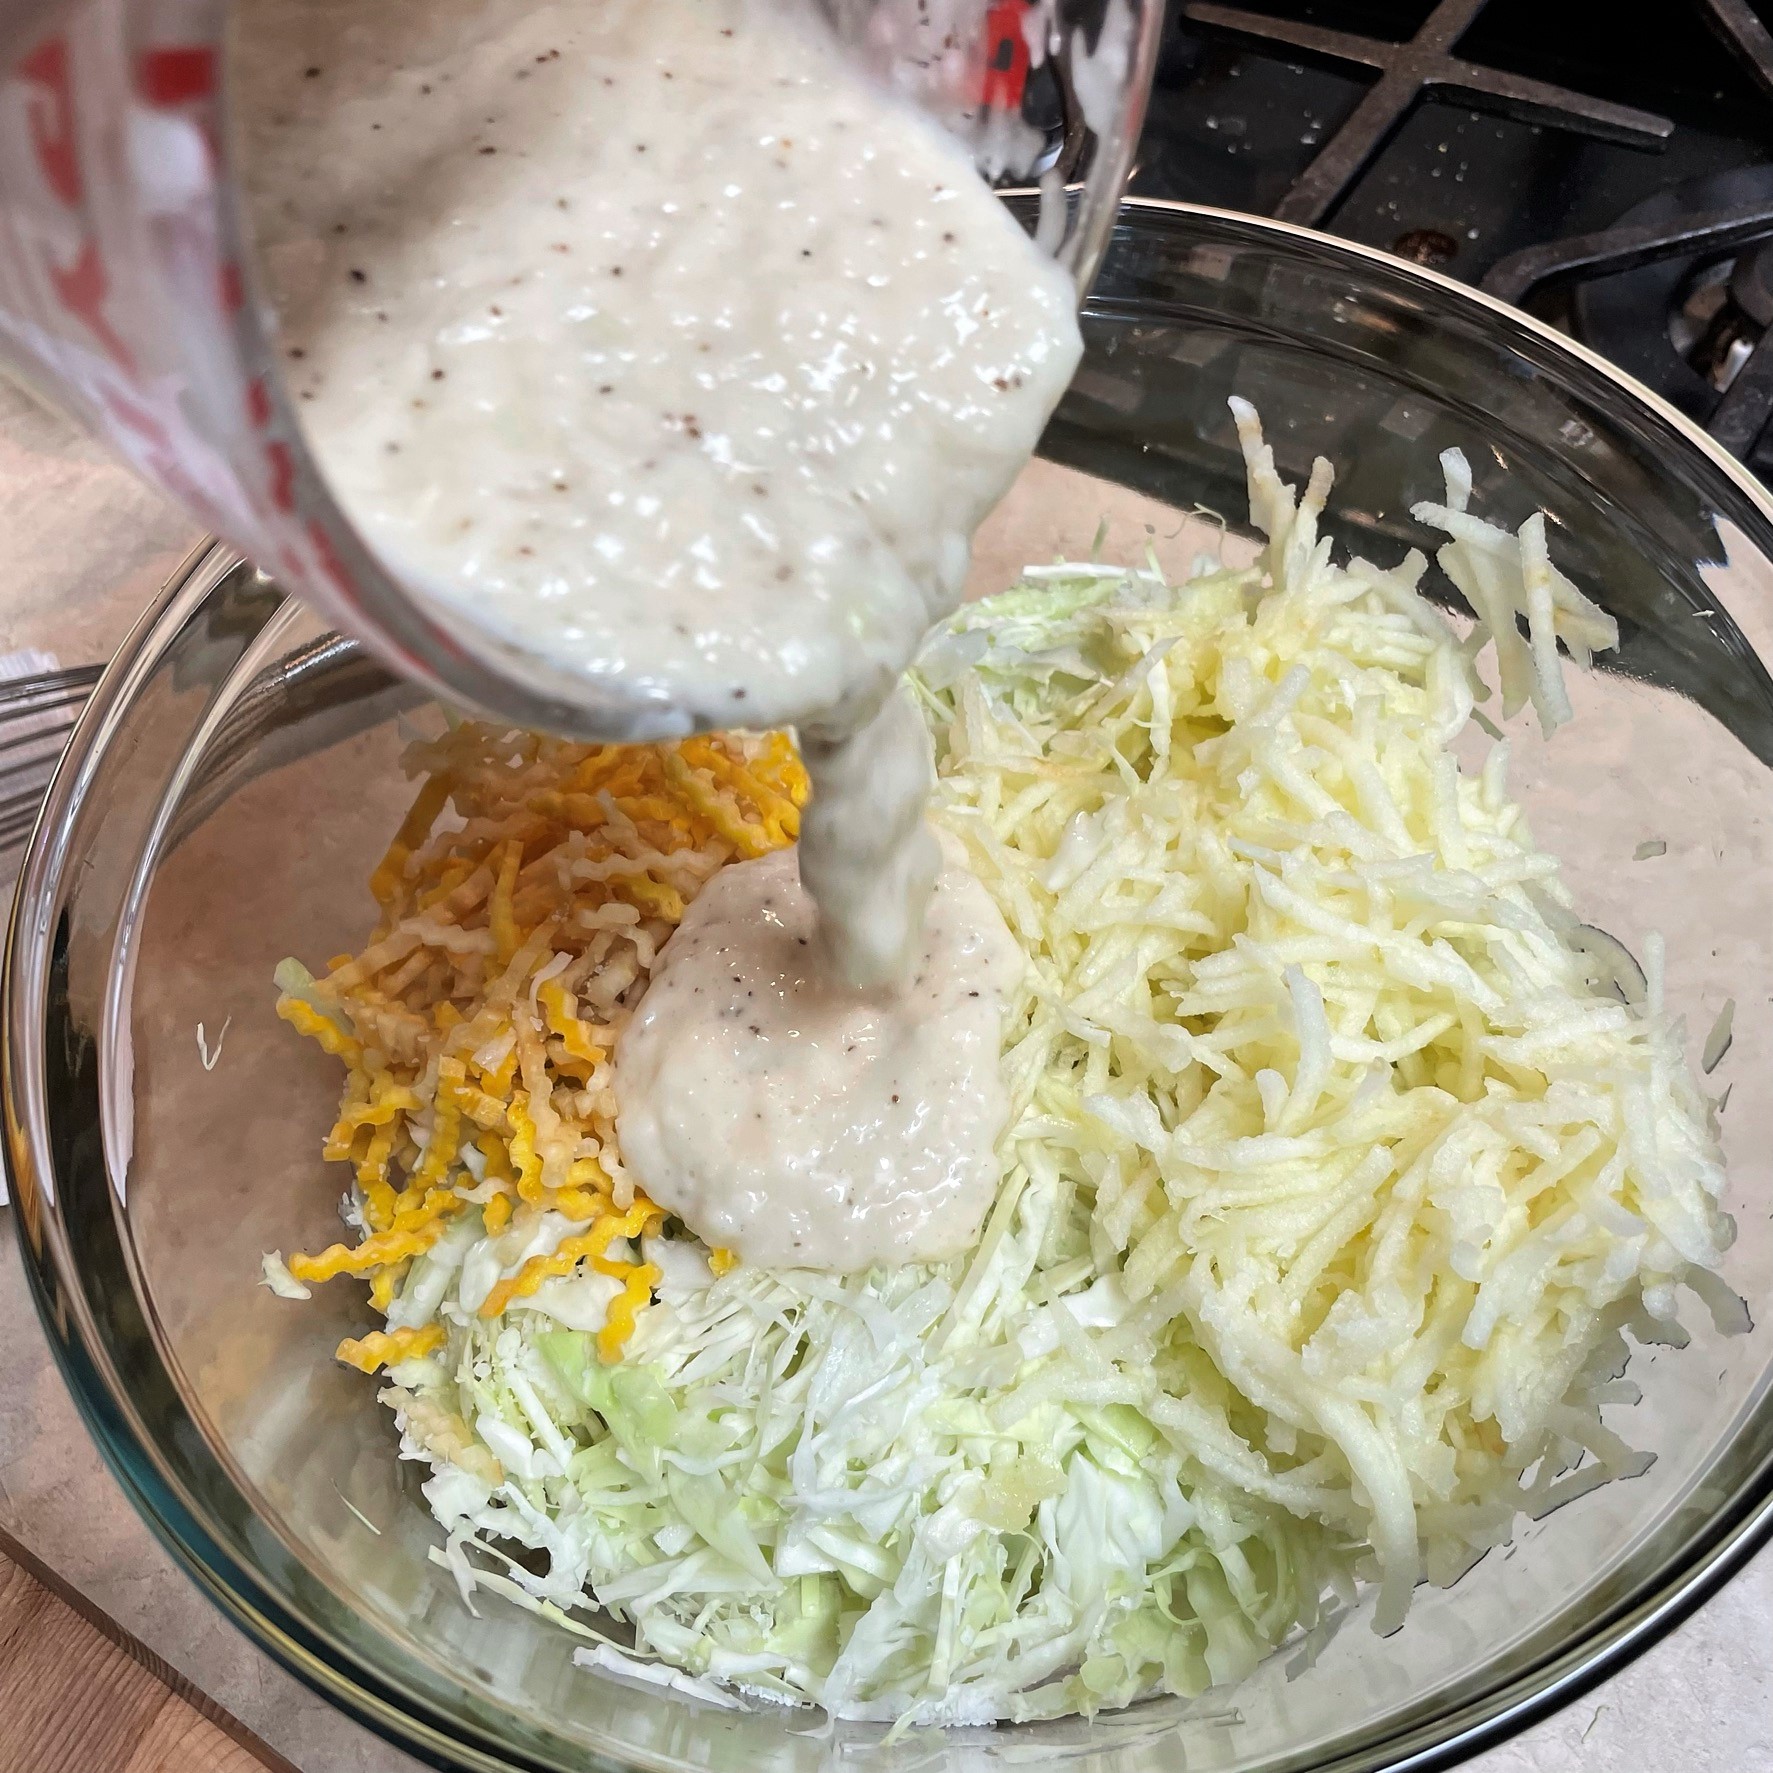
Assembling the salad is easy. Give the dressing another good whisking before you pour it over the main ingredients, and fold it gently to avoid breaking up the canned beans. Add more fresh dill than you think is necessary, as the fine fronds will disperse a great deal when you fold it in. This freshness adds something special to the salad, but if you cannot find it in your supermarket or farm stand, a teaspoon of dried dill leaves will work in a pinch; add them to the dressing ingredients instead.

So there you have it— a three-bean salad, inspired by Alex’s leftover pickles, bringing loads of flavor to the table with ingredients that will satisfy, even when it feels too damn hot to eat. Make this early in the day and let the salad chill in the fridge several hours before enjoying. It keeps well for about a week, and you’ll want to remove it from the fridge for about 20 minutes when you’re ready to serve so that the olive oil softens from its chilled state.

Dilly-dilly Three Bean Salad

  • Servings: 8
  • Difficulty: Average
  • Print

Spicy dill pickles and fresh dill lend a tangy twist to classic three bean salad. Use the pickle juice in the dressing, and make it early in the day so that the flavors have time to mingle in the fridge.


Ingredients

  • 3/4 pound fresh green beans, trimmed and cut into uniform small pieces
  • 1 tsp. kosher salt
  • 1/4 tsp. baking soda (optional, for color retention)
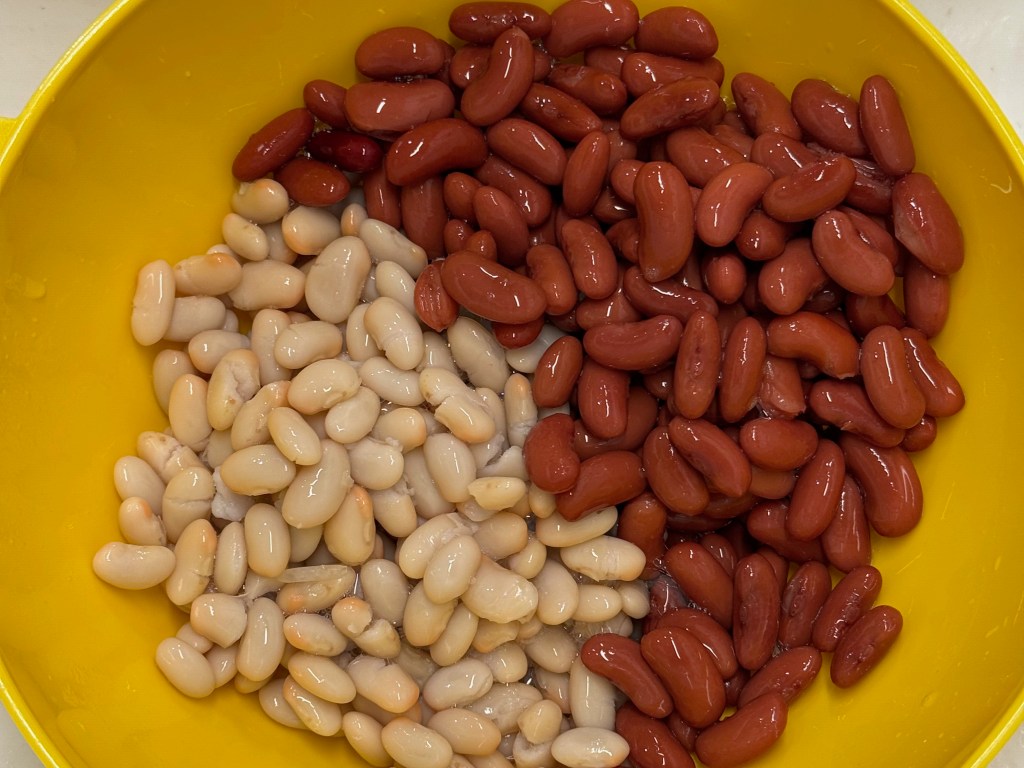
  • 1 can light red kidney beans, drained and rinsed
  • 1 can cannellini beans, drained and rinsed
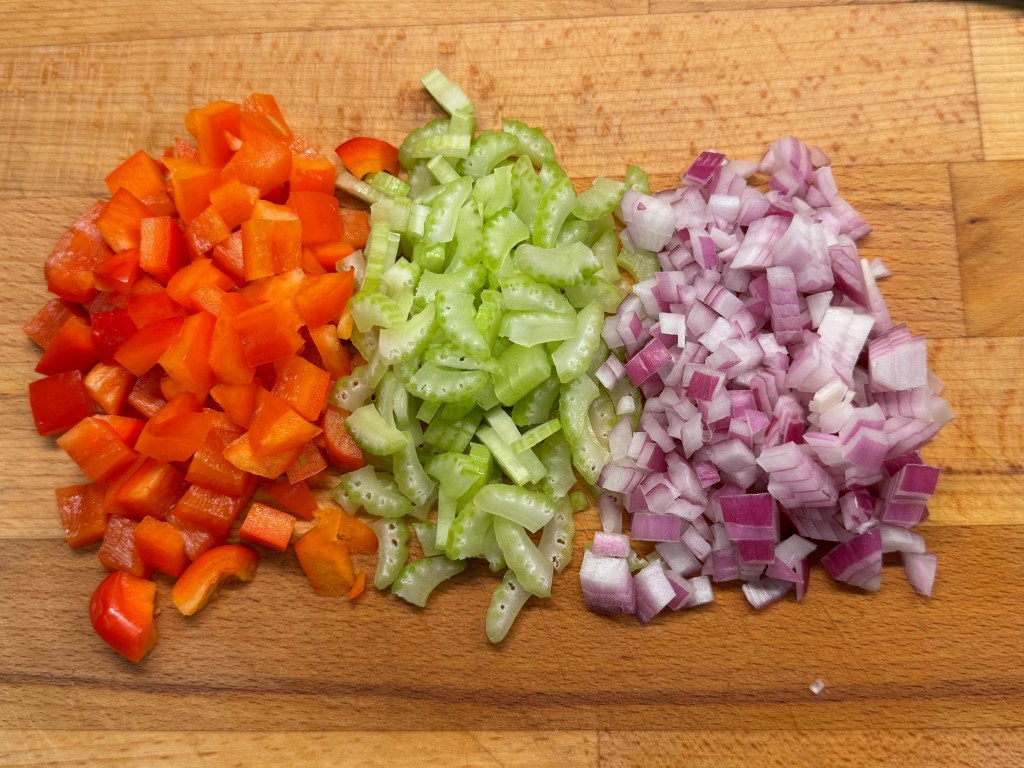
  • 1/2 cup chopped red bell pepper
  • 1/2 cup chopped celery
  • 1/2 cup diced red onion
  • 1/2 cup chopped dill pickles
  • 2 cloves garlic, finely minced
  • 3 Tbsp. dill pickle juice
  • 1 Tbsp. apple cider vinegar
  • 1 Tbsp. cold water
  • About 2 tsp. Dijon mustard
  • 1 tsp. cane sugar
  • 1/2 tsp. celery seed (or combo with dill seed, if you have it)
  • Salt and pepper to taste
  • 1/4 cup extra virgin olive oil
  • 1/4 cup fresh dill, chopped

Note: I used a combination of pickles in my salad. Be as creative as you dare, subbing in spicy pickles or even other pickled vegetables as the mood strikes! Take note of the sodium in your pickled ingredients so that you can adjust salt to taste without overdoing it.

Directions

  1. Prepare an ice bath in a large bowl. Bring a pot of water to low boil over medium-high heat. Stir in salt and baking soda, then add green beans. Simmer for 6 to 7 minutes, until beans are slightly tender but still bright green. Transfer beans to the ice bath and rest at least 5 minutes, then drain in a colander.
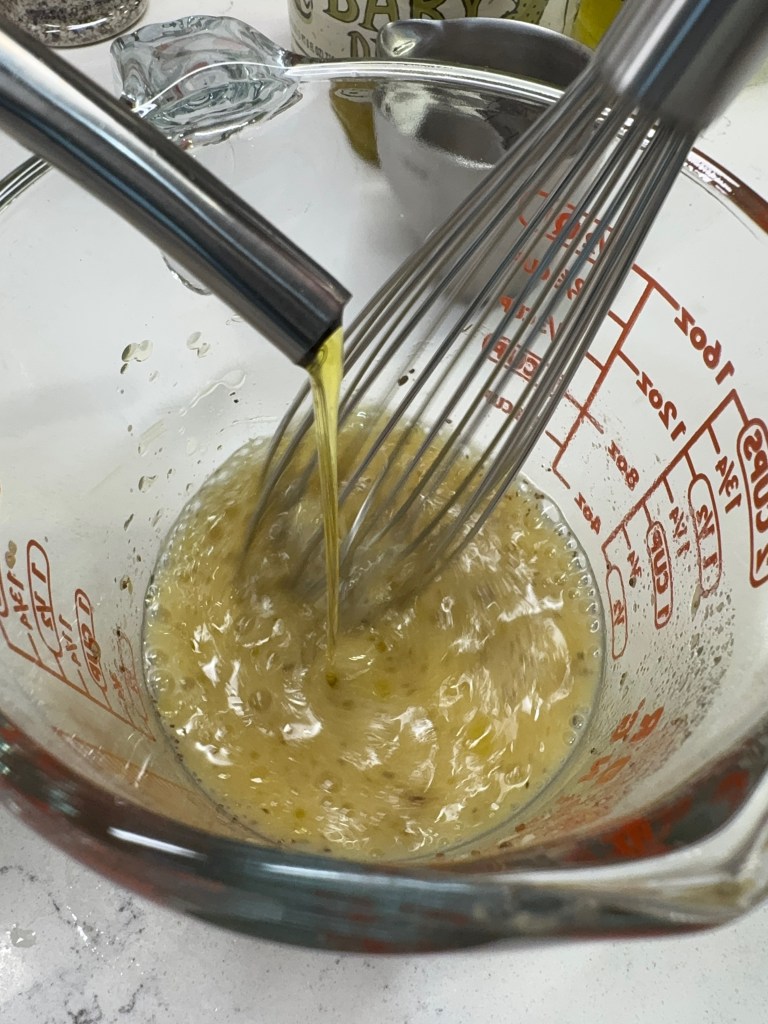
  2. Make the dressing while the beans are blanching. Combine pickle juice, vinegar, cold water, Dijon, sugar and celery seed in a measuring glass. Whisk vigorously while drizzling olive oil into the glass, creating an emulsion. Season to taste with salt and pepper.
  3. Blot the green beans with a towel to remove excess moisture. Combine in a large bowl with the drained canned beans, vegetables and chopped pickles.
  4. Pour dressing over the salad ingredients, and fold gently with a spatula or wooden spoon to avoid breaking the tender canned beans. Add salt and pepper as needed. Fold in dill and refrigerate until ready to serve. This keeps well for up to a week.


Mexican Street Corn Potato Salad

Summer officially hit last night at 10:42pm ET, and you know what that means. Millions of backyard barbecues, picnics, family reunions and summer parties are straight ahead! Some of my fondest memories are closely tied to the foods served at such occasions, and I’m a firm believer in the notion that one can never have too many recipes for summer side salads.

For the past couple of summers, I’ve steered away from mayonnaise-based salads, mainly because they don’t hold up well in the summer heat, at least for outdoor parties. So my husband’s special request last weekend should not have been any surprise when I mentioned whipping up a potato salad to serve with our grilled coffee-rubbed tri-tip.

“Can you make more of a mayonnaise-y dressing this time? Not one of those vinegar things you’ve been doing.”

Well, okey-dokey! We have a running joke at our house about how long it takes for foods to come back around in “rotation,” so I’m happy to oblige a sincere requst.

I think I satisfied his craving with this creamy, mayo-dressed potato salad that conveys all the flavors of Mexican street corn, also known as eloté. The textures were great, and the dressing and seasonings were unmistakably eloté— creamy, sweet bite on the corn, tangy from the mayo and lime, a sharp saltiness from the crumbled cheese, and just spicy enough to be interesting. It was fantastic with the tri-tip he grilled for us, and we enjoyed this salad again with lunches during the week as well as with spicy grilled chicken tenders a couple nights ago. I’m sad that it’s gone!

This recipe makes enough for eight servings (unless you do excessive taste-testing like I did).

Ingredients for my Mexican street corn potato salad

Any finished dish is only as good as what goes into it, and given that this is a bit of a twist, I’ll break down the role that each ingredient played in this salad. Note that some ingredients may be tricky to find, so I’ve offered reasonable substitutions for those. Here we go!

Yukon gold potatoes – these are a perfect balance of creamy and starchy, and because the skin is so tender, I don’t bother peeling them. Choose potatoes on the smallish side if possible, so that every chunk has a bit of skin on it. You’ll cook them gently in salted water until fork tender, then drain and let the steam roll off before chilling.


Mayonnaise and sour cream – My dressing is made with equal parts of these two, and if you can get your hands on Mexican crema, use that in place of sour cream. 

Roasted corn – we love grilling corn in the summer time, and we sometimes make extra ears so that we have them for dressing up another dish. If you don’t have a grill (or the time to mess with grilling corn), pick up a bag of frozen fire-roasted corn, which will work just as well. We like the one that’s available from Trader Joe’s.


Eloté spices – traditionally, Mexican street corn is seasoned with any number of ground chile powders, including chipotle, cumin, cayenne, ancho or pasilla. I used ground ancho and cumin in my dressing, but if you don’t have the individual chile powders, don’t sweat it! Just pick up a bottle of Tajin seasoning, either in the spice aisle or the International aisle. Trader Joe’s chili-lime seasoning is very similar, and I also love their “Everything But the Eloté,” to season my corn before grilling. It also happens to be excellent on popcorn!

Three terrific options for flavoring this salad, from hottest to mild.
Check out the saltiness ahead of time so you know what to expect.

Scallions – this is not traditional for Mexican street corn, but I can’t make potato salad without some variety of onions, and this one works well with the other ingredients. Use the white and green parts, and slice them thin.

Lime – the lime zest and juice are what really make the flavors of this salad pop. Purchase organic citrus because you’ll be using the peel, and choose heavy fruit with a smooth skin for the most juice and brightest flavor.

Sugar – every Mexican street corn I’ve ever tasted had a slightly sweet flavor, and a small spoonful of sugar in the dressing made this perfect. Don’t skip it. 

Fresh cilantro – authentic for Mexican street corn, but if you are among the 20% who find that it tastes like dish soap, then just skip it. There isn’t another herb similar enough, and the dish won’t suffer without it.

Crumbled cheese – ah, I saved the best for last! Mexican street corn is traditionally slathered with mayonnaise dressing and sprinkled liberally with cotija, a Mexican hard cheese that is reminiscent of parmesan, but less pungent. Cotija can be a little tricky to find outside of a specialty cheese section, but not to worry— feta, the dry crumbly kind, is a lovely substitute. And that leads me to a funny story…

A side note, on “sending the husband to the grocery store”

I love my husband dearly, and his sensibilities in the kitchen are usually right on target, but sometimes, I still make specific and detailed notes on the list when I send him to the store by himself, and I might even text him a picture of an exact item I need. For this recipe, I was very clear that if cotija cheese was not available, he should get “dry crumbled feta,” and in the margin, I wrote, “PLAIN, NO FLAVORS!” So you can imagine the stink-eye he received when he returned with a “flavored feta that sounded interesting.” My dramatic Leo side went bonkers as I yelled, “Geezus, can you not read???” But then I saw what he found, and of course, it was literally perfect for this recipe! Gotta trust my man sometimes, ya know?

You NAILED it, Babe! 😘

Making this Mexican street corn potato salad

From this point, it’s a pretty standard potato salad in terms of mixing, so I’ll let my photos do the talking while you imagine this deliciousness coming to life in your own kitchen. Find full instructions below in an easy, click-to-print recipe card that you can save for your files. Welcome back, summer! 😎


Mexican Street Corn Potato Salad

  • Servings: About 8
  • Difficulty: Average
  • Print

This is two of my all-time favorite carbs, together in one really flavorful salad! Plenty of seasoning options, so you can make it as spicy (or not) as you like it!


Ingredients

  • 2 lbs. Yukon gold potatoes, skin-on and cut into 1-inch chunks
  • 1/4 cup mayonnaise
  • 1/4 cup Mexican crema (or sour cream)
  • 3/4 cup finely sliced scallions
  • 3/4 tsp. ancho chile powder
  • 1/4 tsp. ground cumin
  • Salt and pepper
  • Zest and juice of one lime
  • 1 tsp. cane sugar
  • 2 ears fresh yellow sweet corn, roasted or grilled until charred but tender
  • 1/3 cup cotija cheese, divided (you’ll mix some into the salad and sprinkle the rest on top)
  • fresh cilantro

Substitution notes: If you don’t have the means to roast or grill the fresh corn, don’t hesitate to pick up a bag of frozen fire-roasted corn. We love the one from Trader Joe’s, and it would work terrific here. If you cannot find cotija cheese, dry crumbled feta is a reasonable substitute; consider chopping it finer if the crumbles are larger than peas. Ancho chile powder is a spice unto itself, without salt or other ingredients. If you can’t find it, or if you want flavor without heat, swap in smoked paprika.

Directions

  1. Place the potatoes in a pot with cold water, and heat over medium-low until they are fork tender. Drain gently and return to the hot pot with the lid off, so that excess moisture can escape through the steam. Sprinkle 1/2 tsp. salt over the hot potatoes and cool them to room temperature, then transfer to a large mixing bowl and refrigerate for an hour or longer.
  2. In a medium bowl, combine mayo, crema, scallions, spices, lime and sugar. Adjust to taste with salt and pepper. Put the dressing in the fridge to chill until you’re ready to assemble the salad.
  3. Stand the corn on end and use a sharp knife to cut the roasted kernels off. Add them to the potatoes and fold in gently with the dressing until the salad is consistently coated. Fold in about half of the cotija cheese and a bit of the chopped cilantro, reserving the rest for garnish.
  4. Transfer the potato salad to a serving dish, and sprinkle the top with remaining cheese and cilantro.


Hot Artichoke-Cheddar Dip

When you make a recipe so many times, you no longer need to review the ingredients list or even bother measuring, and that is the case for me with this hot artichoke cheddar dip, which I made umpteen dozen times during my stint as a prep cook for a catering company called A Pinch of Thyme.

The holiday season was wild in the “Pinch” kitchen, as many of our regular, affluent clients planned and hosted extravagant parties and, naturally, they did not prepare the food themselves. My friend, Tammy, was the events manager for Pinch, and she often shared colorful stories about some of the luxurious homes where our food was delivered (like the one with copper pipes running hot water underneath the marble floors to keep everyone’s tootsies warm), and I often wondered if those hosts supposed the food came from an equally posh kitchen and was prepared by consummate culinary professionals donning crisp, white chef coats and hats.

If they only knew.

My day job at the radio station usually had me out the door by noon, which gave me plenty of time to change into my most worn-out jeans and a WKZL T-shirt before tackling the party menus at the kitchen. The rock music would be blaring, Chef Rodney would be barking orders to everyone, the dishwasher would start running full-steam ahead and, somehow, we’d get it all done in time for the serving crew to load the truck and shuttle our delicacies to the client. The menu for such a shindig might have included a whole roasted beef tenderloin and buttered red bliss potatoes, some exquisite pastry dessert that I probably can’t even pronounce, bacon-wrapped dates stuffed with bleu cheese and, more often than not, this artichoke cheddar dip. Because, simple though it was, everyone loved it.

Warm and bubbly from the oven, this artichoke cheddar dip is delicious served with pita chips or crostini!

No matter how elaborate (or not) you intend your holiday get-togethers to be this year, I promise this dip will bring rave reviews. From memory, I scaled down the recipe to make it at home and, over time, I have modified it to reduce the ratio of mayonnaise in favor of smooth cream cheese; I think it endures better, especially when guests will be mingling for a while. The cream cheese keeps this dip silky, the cheddar gives a little sharpness and the artichoke hearts are satisfying and tart with their lemony zing.

If you want to go overboard, as we usually did in the Pinch kitchen, you might serve the dip in a silver chafing dish with handmade toasted herbed pita chips, which we typically made in quantity to fill up a hotel laundry cart. We would cut pita breads into wedges, split them to expose the shaggy insides, brush them with melted butter and then toss them with dried oregano, basil and garlic powder before baking them to perfect crispness. It was delicious, for sure, but at our house this year, we simply baked the dip in a pie plate, opened a bag of Stacy’s multigrain pita chips and had ourselves a party!


Ingredients

8 oz. brick of cream cheese (full fat or Neufchatel)

1/3 cup mayonnaise

1/4 cup sour cream or plain Greek yogurt

A few shakes hot sauce, such as Tabasco or Texas Pete

2 cloves fresh garlic, finely minced

8 oz. brick cheddar cheese (medium or sharp), freshly shredded* (see notes)

Freshly ground black pepper

1 cup marinated artichoke hearts, finely chopped*

1/2 tsp. dried oregano

A pinch of dried thyme (of course)

1/4 cup parm-romano blend*


*Notes

I know that it’s tempting to use pre-shredded cheese from a bag, but don’t. The stuff is coated with a powdery substance that keeps it from clumping, which may be great for the purpose of packaging, but not great for cooking because it does not melt well. Break out the box grater and shred the cheese yourself. You’ll be glad you did!

I use artichoke hearts that are marinated in spices and oil, and I usually scoop them out of the jar with a slotted spoon without draining them. The herbs and oil add a pleasant layer of flavor. If you use artichoke hearts packed in water, drain them thoroughly and also drizzle them with a bit of olive oil before mixing into the dip. If they are plain, consider increasing the dried herbs slightly.

I use oil-marinated artichoke hearts. There is no need to rinse or drain them, and the herbs add flavor.

We make our own parm-romano blend, which is easy to do and super convenient, because we love the piquant flavor in so many dishes. If you don’t care to do this (or if you just don’t have the time), substitute a good quality grated parmesan from the supermarket.

Before we get into the making of this recipe, I have a confession (as you’ll see in the photos). To satisfy our shopping list on the day I made the dip, my husband had to visit four grocery stores. I decided not to wait for the new package of cream cheese, and I dipped into our fresh batch of spreadable scallion cream cheese, which we make regularly as a bagel schmear. The spread has a bit of sour cream in it, plus chopped scallions and a touch of dill. I scooped out a heaping cup of it for this recipe and it worked great. Improvisation has led me to some of my favorite flavor discoveries, and I’ve learned to not be strictly bound to a recipe.


Instructions

Using an electric mixer, blend the cream cheese, mayonnaise and sour cream together. Add garlic and hot sauce and mix until smooth. Give it a taste and adjust hot sauce to your liking. Add about 2/3 of the shredded cheddar and mix again. Season with about 15 twists of freshly ground black pepper. Blend in the chopped artichoke hearts until evenly distributed. Add oregano and, in keeping with the original recipe, a pinch of thyme.

Pile the mixture into a deep pie plate or 8 x 8 glass baking dish. Sprinkle on the parm-romano blend. Top with remaining shredded cheddar.

Bake at 375° F for about 25 minutes, until dip is heated through and cheese is bubbly. Serve warm with pita chips, sturdy crackers or crostini.


Tangy Apple Cole Slaw

It seems funny to me that the three most popular summer salads are based on the most economical ingredients—macaroni, potatoes or cabbage. Nothing fancy and yet we love them! As we wind down summer (which I can hardly believe is happening, even as I write this), I will share a few of my own twists on these three summer classic salads, beginning with the easiest—cole slaw.

The most obvious benefit of cole slaw is that you don’t have to cook anything to make it. This easy summer side comes together lickety-split (especially if you buy the pre-shredded bagged cabbage), it pairs nicely with everything from grilled chicken to pulled pork to burgers and beyond, and with cabbage as the primary ingredient, it packs a pretty hefty nutritional punch, with loads of fiber, vitamins and minerals. If you don’t drown it in mayonnaise or sugary dressing, it’s pretty darn good for you.

I’ve taken my standby “KFC-style” slaw in a slightly different direction with this recipe, keeping the cabbage and carrots (though I used yellow and white ones this time) and adding shredded Granny Smith apple for a little extra tartness. For my creamy-style dressing (which does have some mayonnaise but also cultured buttermilk and regular milk), I’ve swapped in a specialty white balsamic vinegar that echoes the flavors of the Granny Smith apple. The result is a tangier offering than usual, perfect as a side for anything rich or meaty that you might be pulling off the grill through the last days of summer.


Ingredients


About 6 cups finely shredded green cabbage

1 cup carrots, finely shredded or cut into thin matchstick pieces

1 large Granny Smith apple, peeled (or not), cored and shredded

Juice of 1/2 small lemon (to prevent apple browning)

1/2 medium sweet onion, shredded and squeezed dry of juice* (see notes)

1/3 cup mayonnaise (I used canola mayo from Trader Joe’s)

3 Tbsp. whole milk

3 Tbsp. buttermilk*

3 Tbsp. green apple white balsamic vinegar*

1 tsp. kosher salt

1/2 tsp. white pepper

1/2 tsp. celery seed


*Notes

It is important that you press out as much of the onion juice as possible; otherwise the dressing will break down and become watery. I shredded the onion in my food processor and then pressed it through a mesh strainer. When assembling the salad, add the onion to the dressing rather than the cabbage blend.

Real cultured buttermilk works best, but you could have similar results with the same amount of plain,  low-fat yogurt or Greek yogurt.

The green apple white balsamic vinegar is a specialty item that my husband picked up on a trip to California a few years ago. Check with a balsamic and olive oil shop in your area to see if it carries “Gravenstein apple” balsamic, as that would be a perfect substitution. Otherwise, use 2 Tbsp. apple cider vinegar and 2 Tbsp. sugar to mimic the balanced sweetness of the balsamic.


Instructions

Combine the shredded cabbage and carrots in a large bowl. Add the shredded apple to the bowl, immediately squeeze the fresh lemon juice over the apple and then toss the apple to distribute the lemon juice. This will help prevent the apple from browning while you mix the dressing.

In a large glass measuring cup, whisk together mayonnaise, buttermilk and milk until the mixture is smooth. Add vinegar, salt, pepper and celery seed, and stir to blend. Add the shredded onion to the dressing and stir until it’s evenly distributed.

Adjust the dressing to your taste; if you find it too tart, add a teaspoon of sugar at a time until it is to your liking. Remember that sugar (or salt) needs a few minutes to dissolve in a dressing, so you may want to let it rest a few minutes to be sure you have adjusted correctly.

Pour the dressing over the cole slaw mix and toss to combine. Refrigerate at least an hour for best flavor, but this salad will also keep in the fridge for several days.


Zesty Three Bean Salad

There is nothing new under the sun, as they say, and when I start to feel flummoxed over what side dishes to make for summer meals, one of the best things I can do is revisit a classic and modernize it for my grown-up palate.

About the same period of time I became enthralled with the immense variety of baked beans at my great grandmother’s Fourth of July celebrations, there was a popular salad showing up on everyone’s dinner table. It might have been called a three-bean salad, including cut green beans, dark red kidney beans and little round garbanzo beans, which my dad always called “ceci beans.” But once in a while, yellow wax beans would also be in the mix, technically making it a four-bean salad but with generally the same flavors. This salad was often purchased ready-made, and as I recall, it was a popular item in the deli department of the grocery store where I worked as a young adult. The main thing I remember about it, besides its ubiquitous presence, is that it was sweet. Too sweet, in my opinion. I have no problem with a touch of sweetness in a salad dressing, but if it’s too sweet, it counters the benefit of eating vegetables.

Why diminish the goodness of these ingredients with a bunch of sugar?

So this summer, I have created an updated version of this otherwise good-for-you salad, shifting the flavor profile from sweet to zesty and herbaceous. The sugar in the recipe is nominal, and I’ve amped up the other side of the salad flavors with a hefty addition of minced garlic and a good bit of chopped fresh parsley and basil. The salad is quick and easy to make, as it relies somewhat on canned beans, and I’ve used ready-to-go fresh green beans to save time. If you’re lucky enough to have garden-fresh green beans, well, that would be awesome.


Ingredients

3/4 lb. fresh green beans, trimmed and cut into 1 1/2 inch pieces

15 oz. can dark red kidney beans, drained and rinsed

15 oz. can garbanzo (ceci) beans, drained and rinsed

1/2 cup sweet onion, finely diced

1/2 cup green bell pepper, finely diced

1/2 cup red bell pepper, finely diced

3 large cloves garlic, finely minced

1 handful fresh Italian parsley, chopped

Small handful fresh basil leaves, chopped


Dressing ingredients

1/4 cup red wine vinegar

2 tsp. Dijon mustard* (see notes)

2 tsp. cane sugar

1/2 tsp. celery seed

1/2 tsp. garlic pepper seasoning

2 Tbsp. cold water

1/4 cup extra virgin olive oil


*Notes

In lieu of regular Dijon mustard, I used the recently-discontinued Honey Pale Ale mustard from Trader Joe’s. Does anyone besides me have a gripe about how they pick and choose which products to keep? If you happen to have a jar of it, I think it’s terrific in salad dressings. Otherwise, just use regular Dijon.

Why, Trader Joe’s? I love this mustard. 😦

Instructions


  1. Heat a pot of water to a gentle boil. Add a generous pinch of kosher salt to the water, along with a half teaspoon of baking soda, which will help the beans retain their bright color.
  2. Make dressing for the salad; combine all ingredients except the olive oil. Whisk in olive oil gradually to create an emulsion. Salt and pepper to taste.
  3. Spoon the trimmed green beans into the simmering water and cook for about 6 minutes, or just until beans are tender enough to bite. Immediately spoon the cooked beans into a bowl of ice water to stop the cooking process. Drain beans to remove excess water.
  4. Combine green beans, canned beans, peppers, onions and garlic in a large mixing bowl.
  5. Pour in dressing and toss gently to combine. Adjust salt and pepper to taste. Add fresh herbs and toss again. Chill salad several hours and toss lightly to redistribute dressing just before serving. The olive oil in the dressing will solidify in the fridge, so plan to remove the salad at least ten minutes before serving for best presentation.
This zesty salad is loaded up with bright color, texture and flavor!


Apropos of nothing


Mac and Pimiento Cheese

Show up at any family reunion or church potluck in the South, and you can bet your sweet tea you’ll find at least three kinds of mac and cheese on the table, plus a couple of pimiento cheese appetizers (probably layered thinly in little white bread finger sandwiches). I love doing mashups of classic foods, and so it seemed obvious to me that pimiento cheese should be paired with mac and cheese. It’s a beautiful, diet-be-danged casserole collision, if I do say so myself.

If you have made any of my other mac and cheese recipes, you know that American cheese is usually the standard in my cheese sauce base. The special salts and enzymes in American cheese are what gives it that ultra-creamy, ooey-gooey meltability, and isn’t that the best thing about mac and cheese?


But pimiento cheese has its own character (namely, it’s mayonnaise-y) and I didn’t want it to feel overshadowed in this mashup. Last summer, I shared the recipe that my husband, Les, uses for pimiento cheese, and it is awesome but not a classic “Southern” style (mainly because it was not drenched in enough greasy mayonnaise). My own pimiento cheese recipe is also shy-of-classic, because I blend together mayonnaise and cream cheese for the base, and it’s probably no surprise that I usually add unexpected ingredients such as jalapeno or chopped pickles. I just can’t leave well enough alone.

For this “mac and pimiento cheese,” which just happens to be my 200th post here on Comfort du Jour, I leaned on cream cheese rather than American in the base for my cheese sauce. I really wanted the smooth, velvety texture of the mild cream cheese to anchor all the cheddar that’s happening throughout the rest of the dish. For the pimiento cheese accents, I used a whole jar of roasted red peppers, drained and chopped into small pieces. Some of them went into the cheese sauce, but the rest found their way into a quick mayo-based pimiento cheese that was layered in with the cooked noodles and cheese sauce before baking. All those dollops gave this mac and cheese that distinctive mayonnaise-y tang that is so signature to a good, classic Southern pimiento cheese.

Oh mercy me, look at that pimiento cheese dripping through that mac and cheese!

Disclaimer warning on this one—there’s a lot of richness in this recipe, and the chance is fair to middlin’ this mac and pimiento cheese will crush your calorie count, so you would do well to consider it dinner all on its own or with a fresh side salad. Here we go, y’all!


Ingredients

Cheese sauce

1/2 medium onion, diced small

4 Tbsp. salted butter

4 Tbsp. all-purpose flour

2 cups whole milk

6 oz. cream cheese, softened to room temp* (this was most of a standard brick)

8 oz. brick sharp cheddar, shredded* (see notes)

About half of a 7 oz. jar of pimientos or roasted red peppers, drained and chopped


Pimiento cheese dollops

2 oz. cream cheese, softened to room temp (the rest of the brick)

1/4 cup mayonnaise

A few shakes sweet paprika

The other half of the 7 oz. jar of pimientos or roasted red peppers, drained and chopped

4 oz. sharp cheddar, shredded (this was roughly a cup)


For assembling the casserole

Most of a 1 lb. package of macaroni or other pasta*

1/4 cup panko bread crumbs

1 Tbsp. salted butter, melted

1/4 cup parm-romano blend (ours was seasoned with “chili onion crunch” from Trader Joe’s)


*Notes

I recommend regular, full-fat cream cheese for this recipe. I have found that the light version does not maintain the creamy texture in a heated sauce. For the complete recipe, I used an entire 8 oz. brick of cream cheese, but it was divided nearly evenly between the cheese sauce and the pimiento cheese mixture.

Two kinds of cheddar went into my mac and pimiento cheese, because we like spicy stuff at our house. I used an entire 8 oz. brick of sharp cheddar and half a brick of habanero cheddar. Mix and match to your liking, but reserve about a cup of shredded cheese for the pimiento cheese mixture.

Pimientos are a variety of pepper, and though it is easy to find jars of pimientos at the market, I used a large jar of roasted red peppers because that is what I had in the cabinet. You might even choose to roast fresh peppers yourself—that’s what I usually do when I make my own version of pimiento cheese. If you choose jarred peppers or pimientos, be sure to drain them well and use a paper towel to wick away excess moisture.

I held back about 1/4 of the box of pasta for this recipe, because I wanted it to be extra “saucy.” Classic elbow macaroni works great in a mac and cheese, and I always encourage choosing pasta that is labeled “bronze die cut,” because the surface of the pasta is rougher and holds a sauce extremely well. Cook your pasta just barely to the “al dente” stage, or a bit underdone than you would prefer. When you bake the mac and cheese, it will soften further from the heat and the cheese sauce.


Instructions

  1. Make the béchamel: melt butter in a heavy-bottomed saucepan. Saute the onions until soft. Sprinkle in the flour and stir to combine. Cook until flour is absorbed and bubbly. Add milk and whisk until smooth.
  2. Add the first amount of cream cheese to the béchamel and whisk until smooth and creamy. Add the shredded cheddar, a handful at a time, and whisk until smooth. Use immersion blender (optional) to amplify the creamy texture of the cheese sauce.
  3. Pat dry the first amount of pimientos or roasted red peppers, and stir them into the cheese sauce.
  4. Preheat the oven to 350° F, with oven rack in center position.
  5. Cook the elbow macaroni or pasta according to package instructions until just al dente. Slightly undercooked is better than overcooked, as the pasta will absorb moisture form the cheese sauce during baking. Drain the pasta and cool slightly.
  6. Combine the remaining cream cheese and mayo, whisking as needed to create a smooth-textured spread. Add the remaining pimientos (pat them dry first), paprika and remaining shredded cheddar.
  7. Fold the cooked pasta into the cheese sauce and layer about half of it into a glass 8 x 8 inch casserole. Spoon dollops of pimiento cheese mixture randomly over the mac and cheese, then layer on the rest of the pasta mixture. Spoon remaining pimiento cheese over the surface of the mac and cheese, but do not spread it.
  8. Bake the mac and cheese, uncovered, for about 30 minutes. Remove from oven and sprinkle the cheesy panko crumbs all over the top of the mac and cheese. Slide it back into the oven for 15 more minutes. Cool 5 to 10 minutes before serving.
Life is good, y’all!


Sassy Succotash

All’s well that ends well, and after a few unexpected issues with the ingredients in this dish, I’m pleased to deliver the end result. It’s a colorful mix of healthful ingredients, with a little bit of crispy bacon on top, just because.

In case you aren’t familiar, succotash is a very popular dish in the southeast U.S., one that I first met when I dated a guy who was born and raised in rural North Carolina. His mother made succotash with sweet corn and lima beans as a regular part of her Sunday supper, which was immediately followed by three hours of gazing at a NASCAR race (yawn). They were nice people and she made juicy fried chicken (and the best coconut cake I’ve ever had the pleasure of eating). When I dared to make Thanksgiving dinner for them, I was admonished by boyfriend’s dad, who informed me that I needed to learn how to cook green beans. In the South, this would customarily involve a pressure cooker and a pound of “fatback,” a pretty dramatic contrast to my “upstate” green beans, which were delicately blanched and served with butter and almonds. Yep, they were still actually green. My bad.

I’m quite sure his family would not have approved all the liberties I’ve taken today with this succotash, adding all this crazy color and bold flavor, but what can I say—you can’t fix sassy.

For my version of succotash, I changed course for a moment with an idea to use golden hominy rather than corn because the hominy matched the size of the butter beans and roasted squash pieces. But as they say about the best-laid plans, things didn’t work out when the canned hominy proved to have texture equal to hog slop—it would have looked even worse in pictures than it did in the bowl. That’ll teach me second-guessing myself (this time, anyway).

I suspended preparation of the dish, long enough for my super-efficient husband to pick up a bag of our favorite frozen roasted corn, which brought me back to my Plan A. The roasted corn is pretty and rustic, and with addition of the big pieces of red onion and dark, earthy poblano pepper, my sassy succotash is a bona fide hit for Thanksgiving this year.

The finished dish has so many different colors and textures. It’s flavorful, and full of nutrients, too!

Oh, and I married the right guy, too—born and raised in NYC, and couldn’t care less about NASCAR. All’s well that ends well. ❤


Ingredients

2 cups butternut squash cubes (roasting instructions below)

2 cups frozen butter beans*, cooked according to package

3 slices uncured, smoked bacon, cut into 1” pieces

1/2 medium red onion, chopped

1/2 large poblano pepper, chopped*

1/4 tsp. ancho chile powder* (see notes)

1 1/2 cups frozen roasted corn*

*Notes

Butter beans are usually a bit larger than lima beans, although I’m not sure it was the case with the bag I purchased. Either will work fine in this dish, so don’t sweat it.

I chose poblano for this dish because of its dark green color and mildly smoky flavor. It’s not as hot as jalapeno, but does have a little kick to it, though the heat dissipates during cooking. You could substitute a dark green bell pepper if you prefer.

Ancho chile is the dried, smoked version of poblano peppers. If you cannot find it, substitute any chili powder—it’s a small amount, so you won’t compromise or alter the flavor much.

We love the roasted corn from Trader Joe’s in so many things. I have seen other brands occasionally, but it would also be fine to use regular frozen corn, or, of course, you could upstage me and grill fresh corn!

The hominy setback turned out to be a blessing, because everything was prepped and ready to go for assembling the dish. Here’s how it goes, and you’ll find written instructions below, along with a downloadable version for your recipe files. Enjoy!


Instructions

  1. Preheat oven to 400° F. Line a rimmed baking sheet with parchment paper.
  2. Toss the butternut squash pieces in olive oil, just enough to coat all sides. Season with salt and pepper and roast them for about 25 minutes, or until fork tender, but firm.
  3. Prepare the frozen lima beans according to package instructions, and then shock them in cold water to halt the cooking so they don’t get mushy. Drain and set aside.
  4. Heat a large, nonstick skillet over medium heat. Add the bacon pieces and toss to cook until they are done and crispy; remove to a drain on a paper towel. Do not drain the bacon grease.
  5. Add the red onion and poblano peppers to the skillet and sauté in bacon grease until they are very slightly soft. Sprinkle ancho chile powder over the mix and toss to coat.
  6. Add the frozen corn to the skillet and toss until heated through. Add the cooked butter beans and toss again.
  7. Just before serving, toss the butternut squash into the pan and toss the mixture to reheat the squash and combine everything evenly. Transfer the succotash to a serving bowl, and sprinkle with the reserved crispy bacon pieces.

About that extra squash…I had a sweet patient girl waiting for just such an occasion. Good catch, Nilla! ❤
(She is lightning fast!)

Want to make this dish vegan?

Omit the bacon, and saute the onions and peppers in a tablespoon of olive oil rather than bacon grease. No other adjustments will be necessary. I love an adaptable recipe!

Get the recipe!