Spanakopita Scampi

Thank goodness for frozen shrimp. I mean this sincerely, as there are many times when life is too busy and even the best-laid plans can’t be pulled together in time to feed the hungry faces in my house. 

We have a weekly ritual here that begins around Sunday morning, when my husband, Les, and I sit down with our respective calendars, the long-range forecast displayed on one of our phones, and we do our best to map out what we are going to do about dinner in the week ahead. This includes a quick inventory of what we already have in the fridge and freezer, consideration of what nights might be good for cooking outdoors, acknowledgement of whether one of us has a hellish workday that week, and— last but not least— how much time we can allot to said meals and which of us will be cooking them.  

It’s a lot of moving parts and sometimes, our meal game falls apart and we need to punt. 

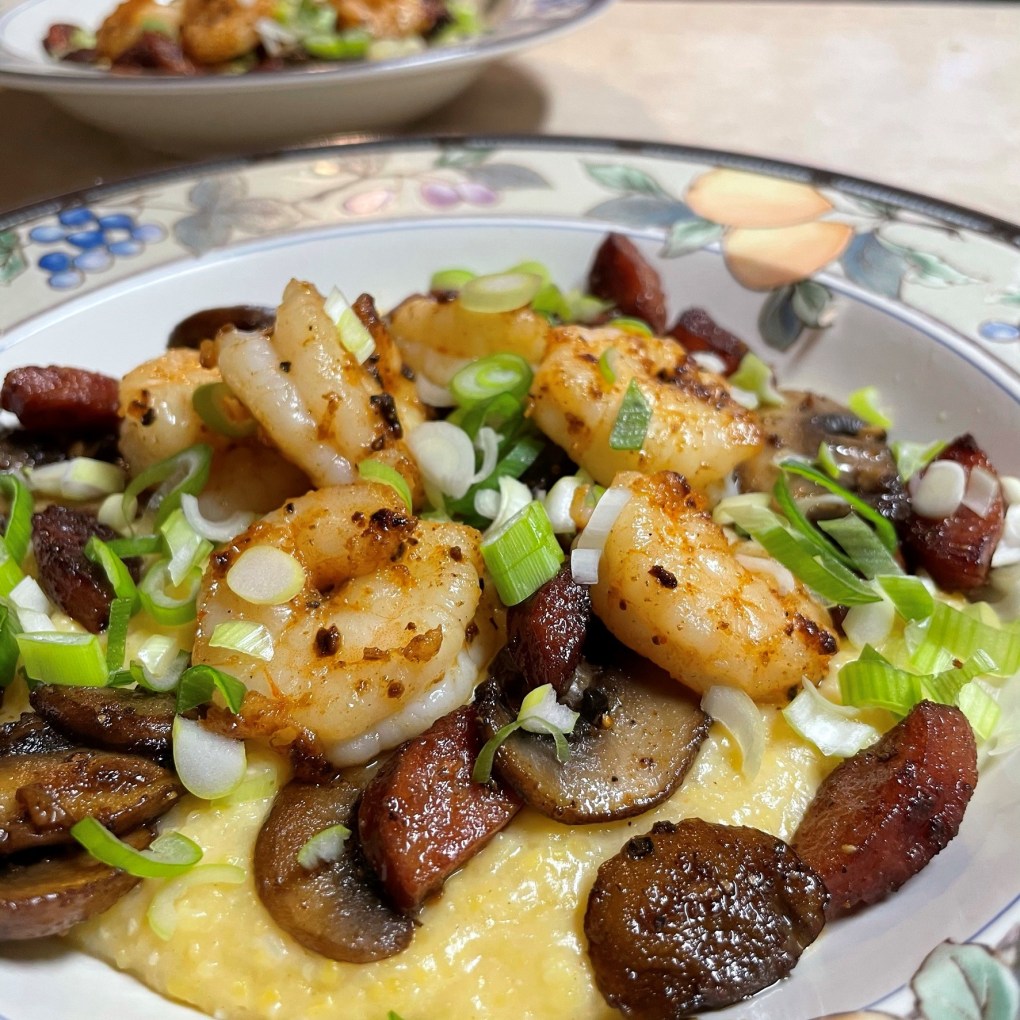
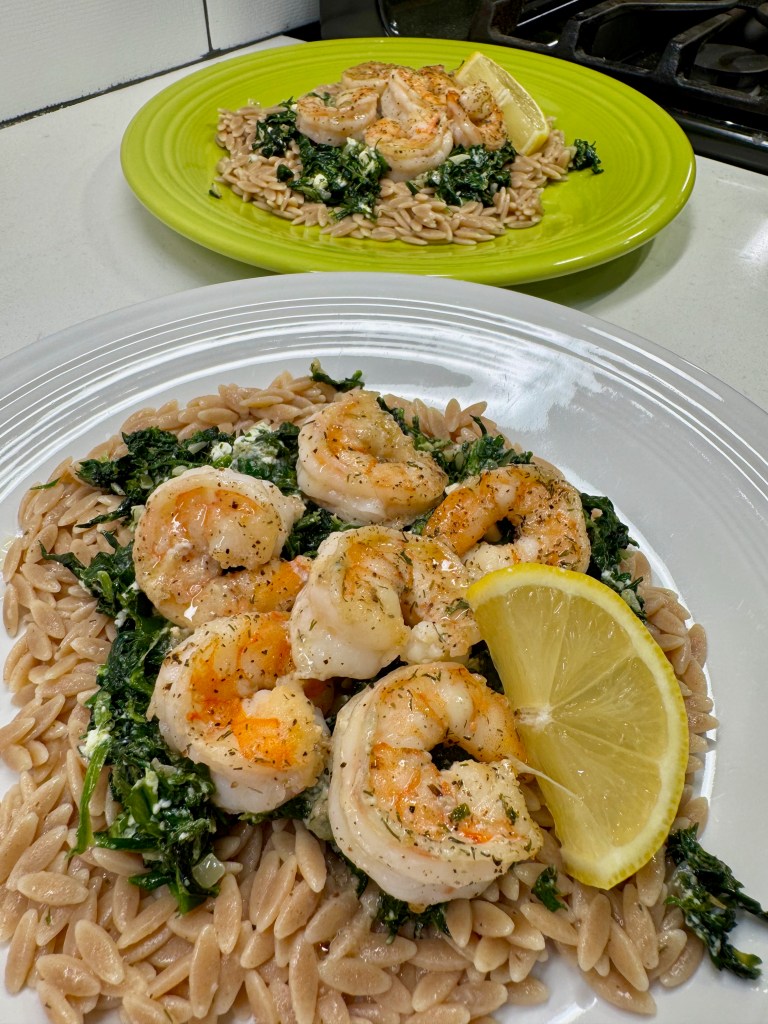
On such an occasion recently, I postponed a more-involved food plan in favor of this ad hoc dish, which turned out so good that I wrote down the ingredients to share it here. It’s something of a mashup of Italian shrimp scampi and Greek spanakopita, and it met all the requirements for a busy weeknight: quick, easy, flavorful and relatively healthful. 

Not too shabby for a last minute improvisation.

What ingredients do you need for spanakopita scampi?

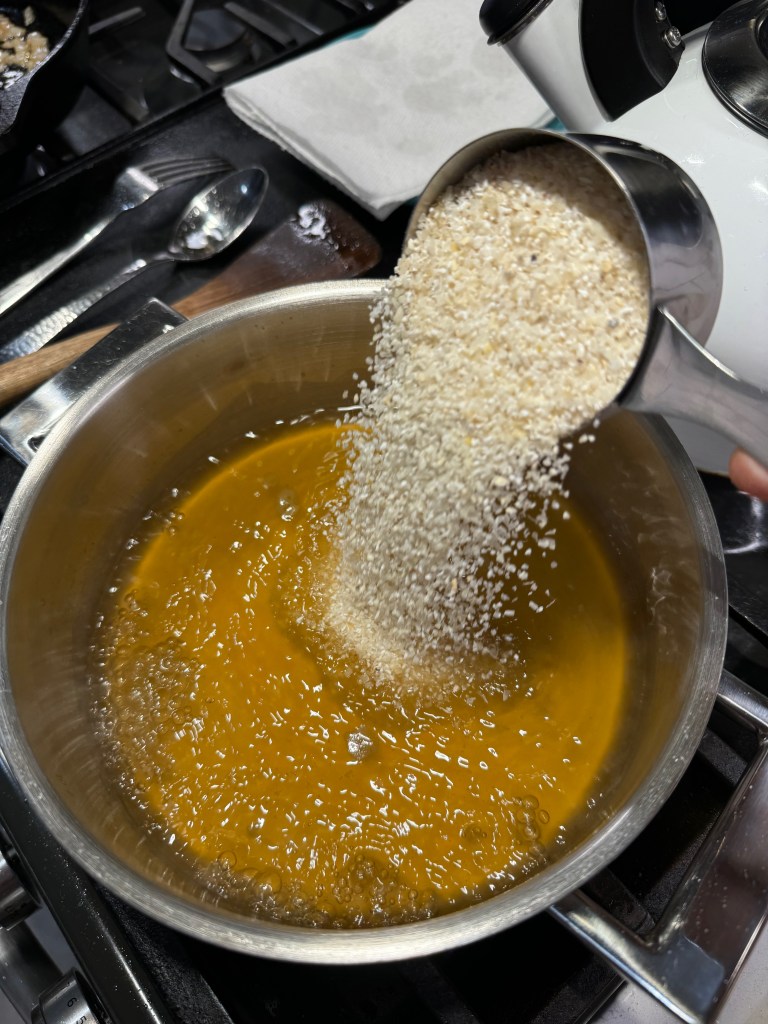
My dish features peeled shrimp (fresh or thawed), garlic and plenty of olive oil, onions, spinach, feta, lemon, parsley and dill. And though I had both angel hair and linguine pastas— two options I’d typically reach for when making scampi, I decided to use the whole wheat orzo that was feeling ignored in the pantry. Orzo is a staple pantry ingredient in Greek cuisine, so it seemed a logical stand in for the spanakopita element of the dish, but almost any small pasta shape you like would work fine.

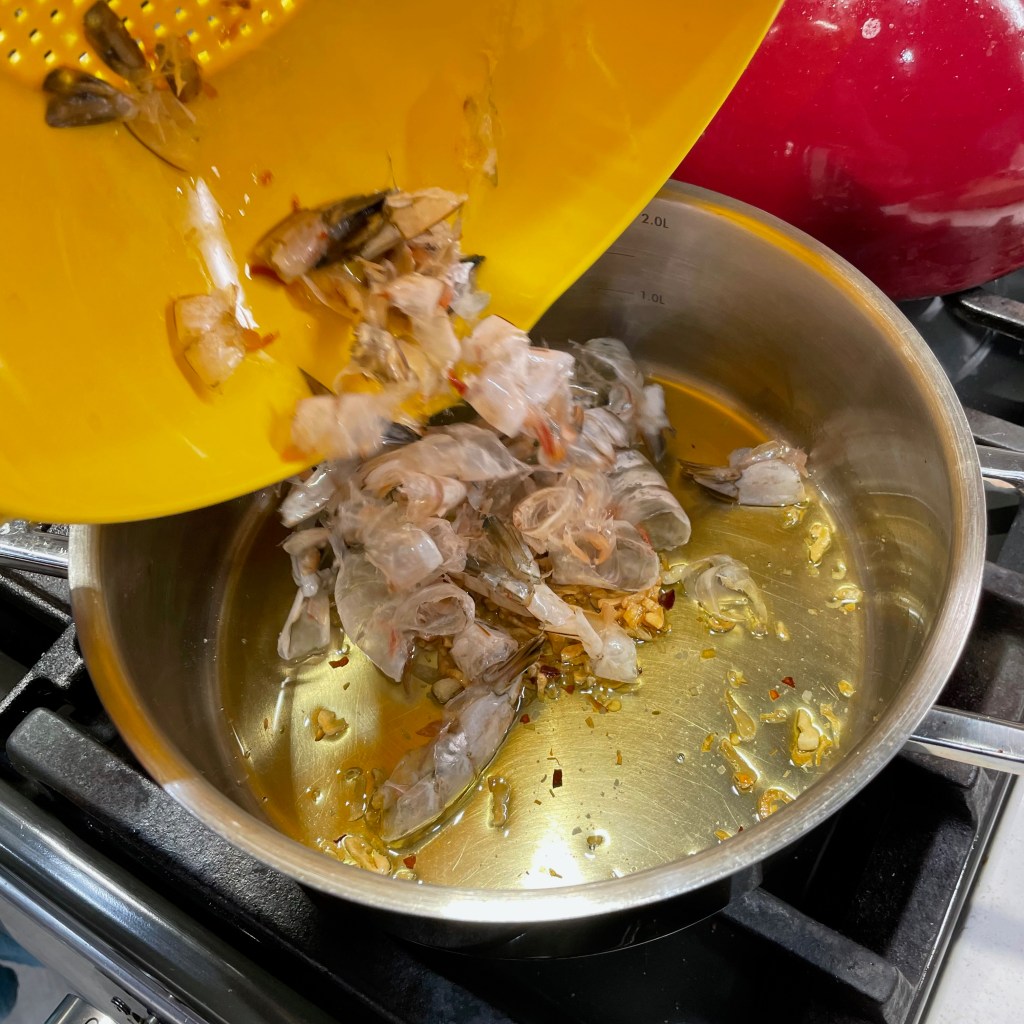
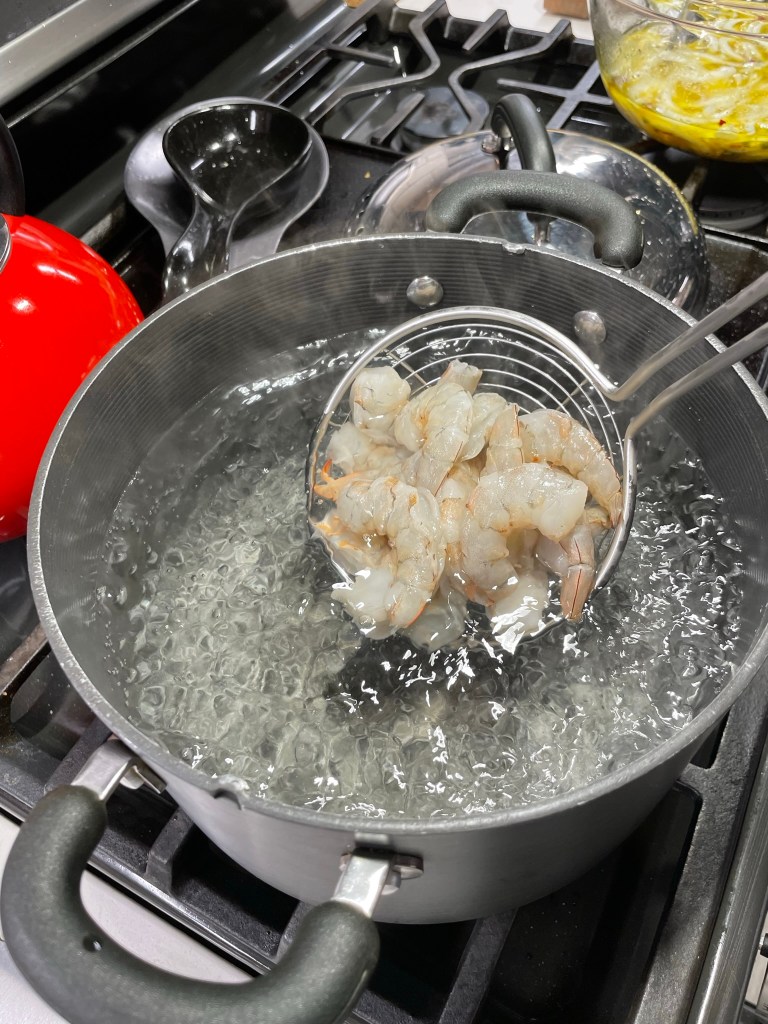
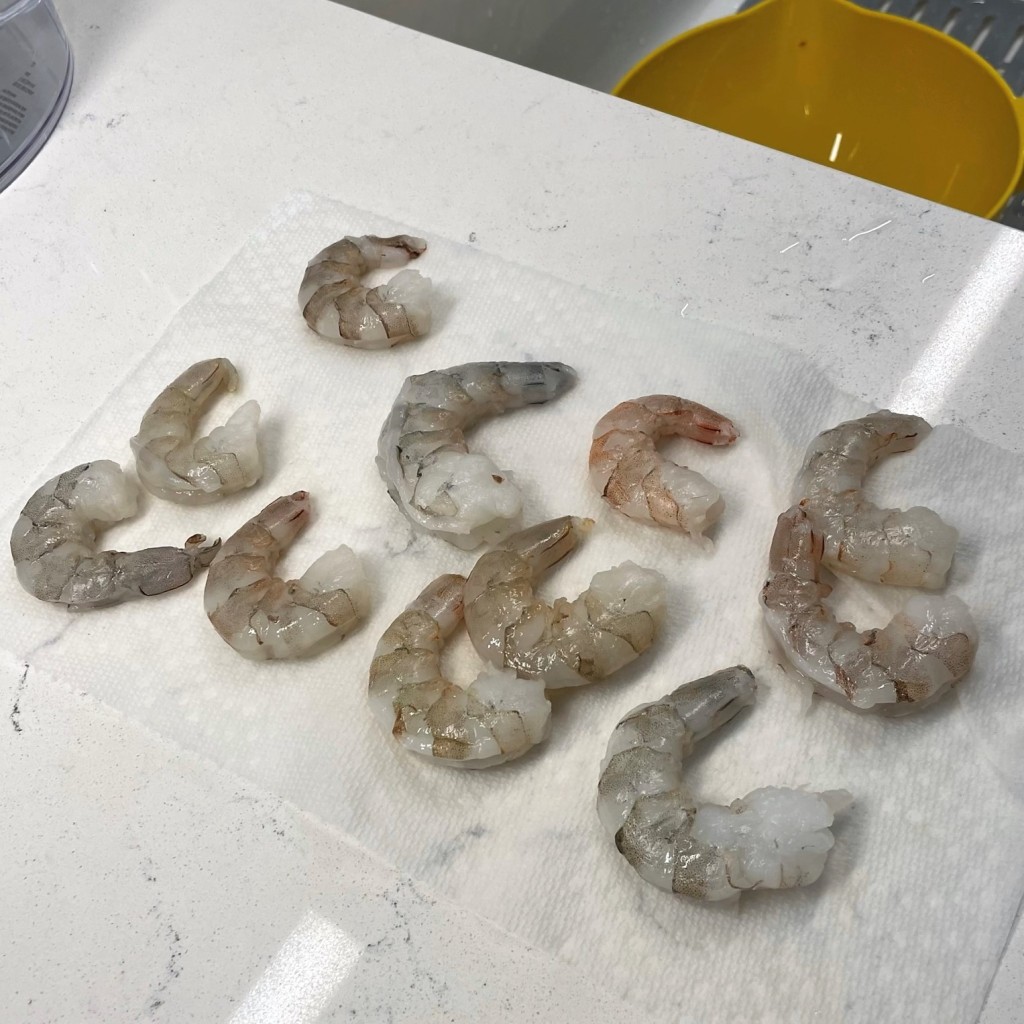
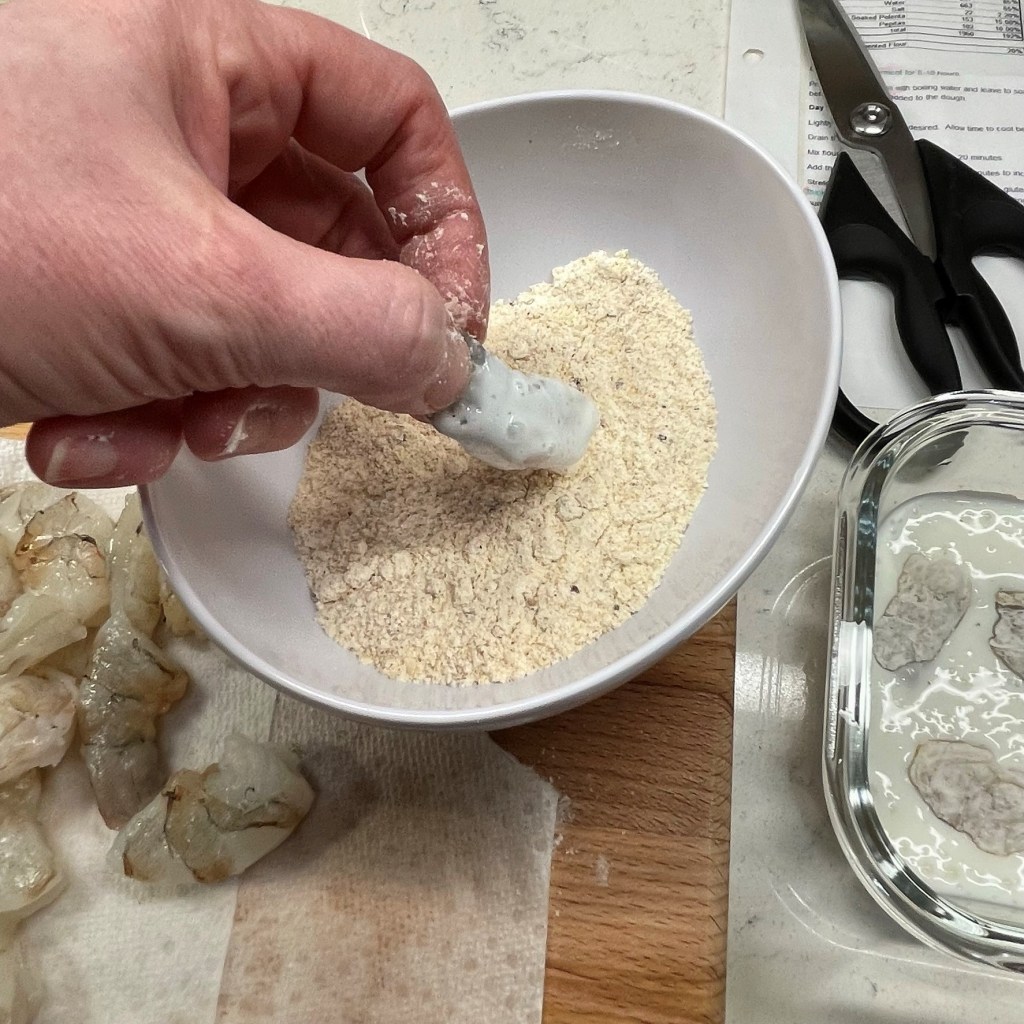
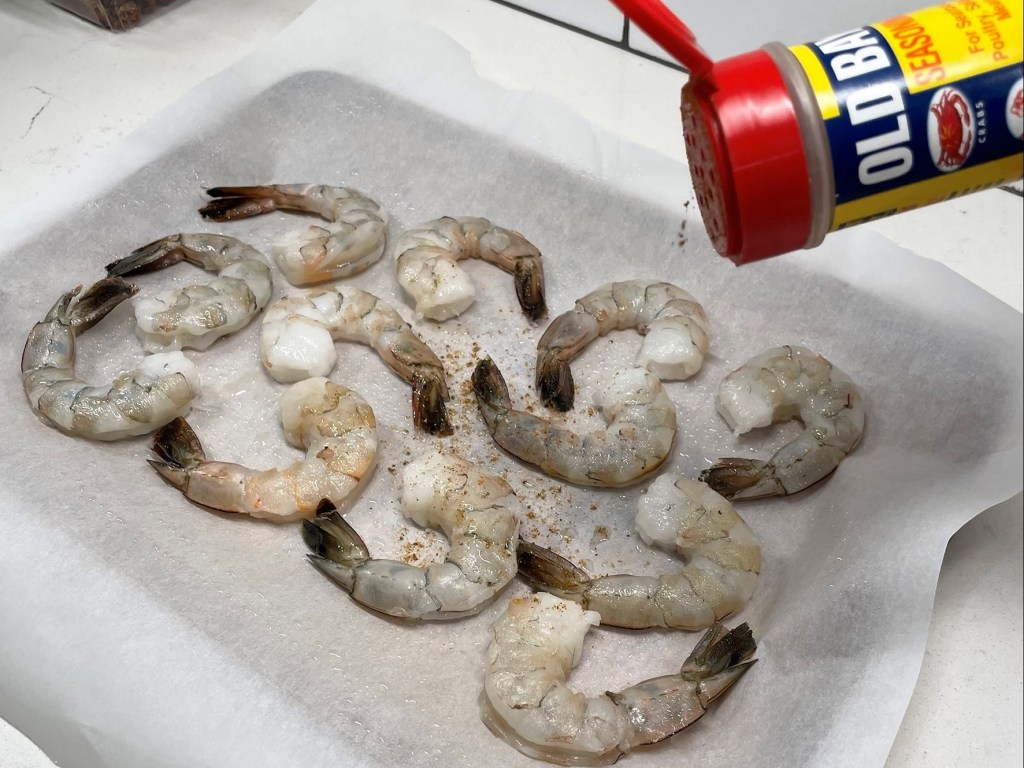
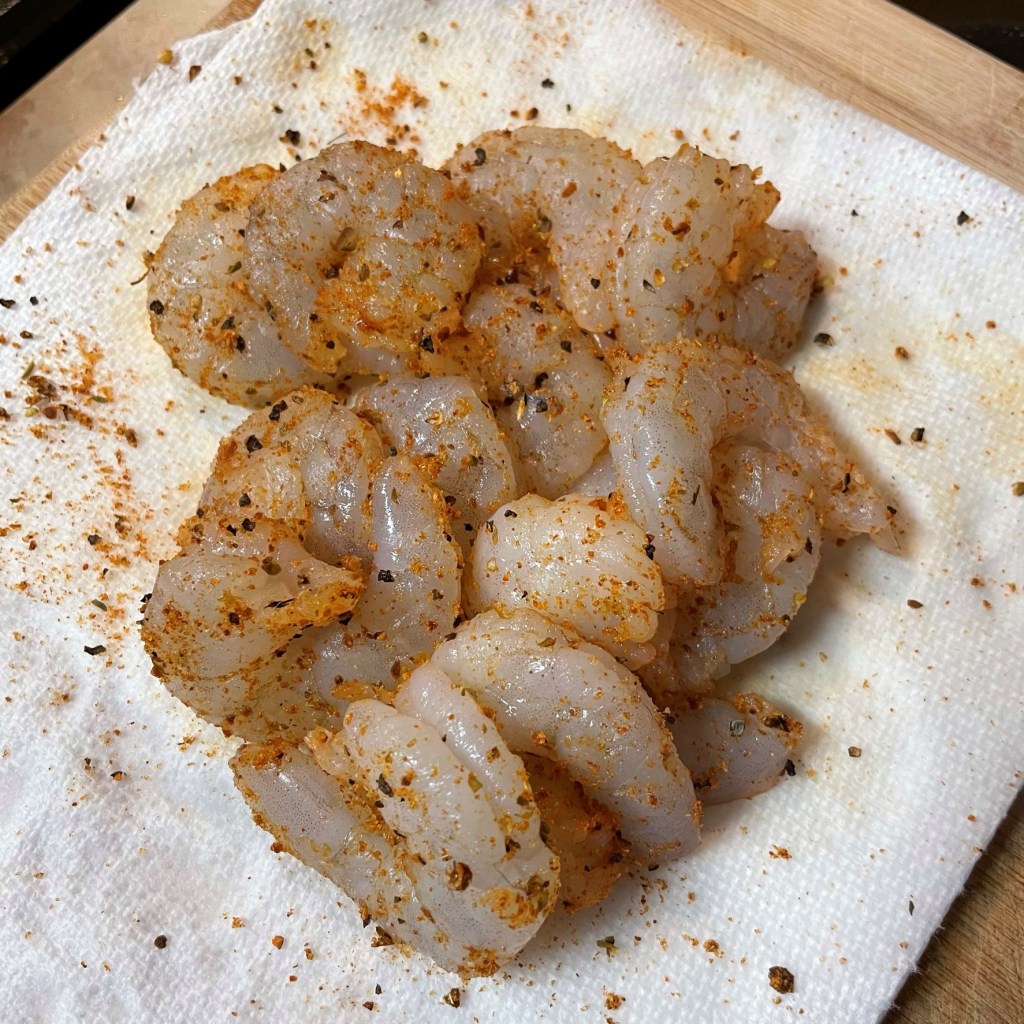
The most time-consuming part of this meal was thawing and prepping the shrimp, a task that I almost always hand off to Les’s capable hands. If you’re in a hurry, purchase shrimp that is already peeled and deveined to save valuable time. 

How to make spanakopita scampi

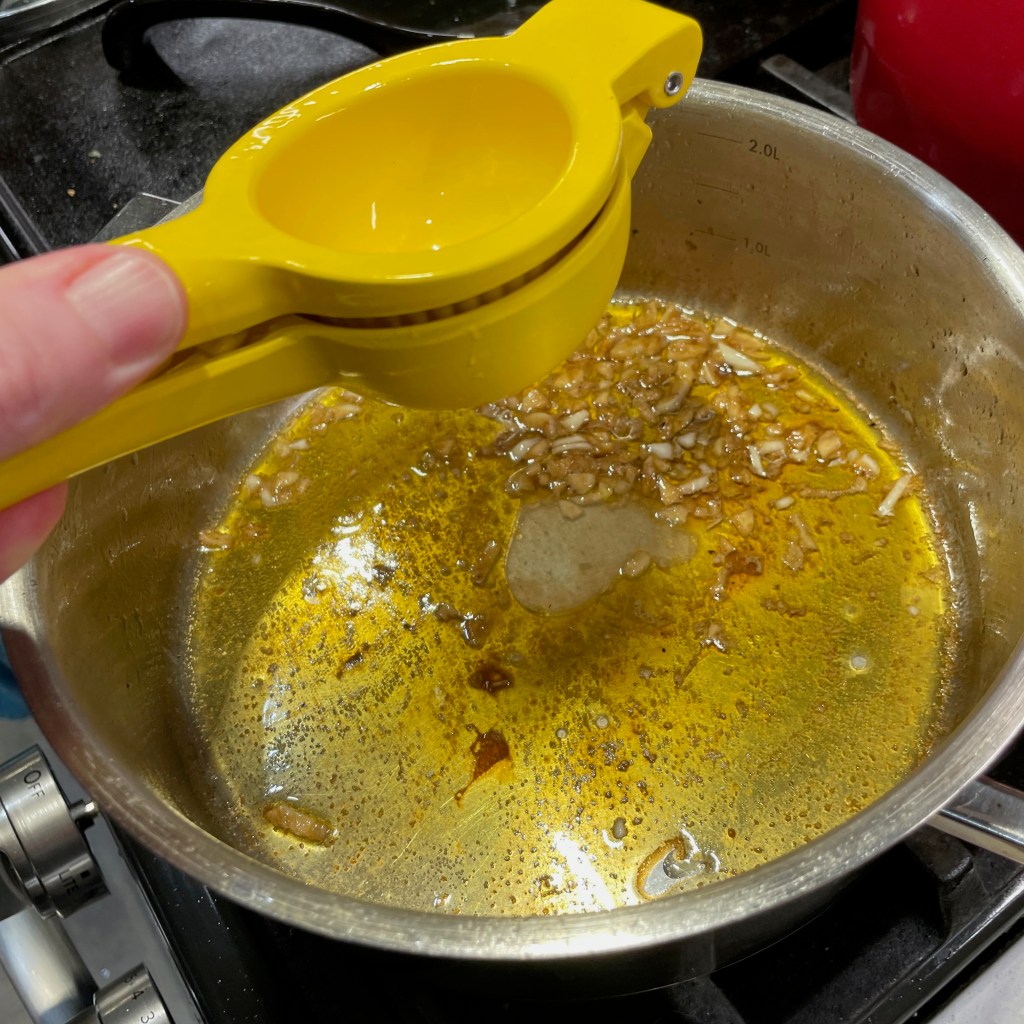
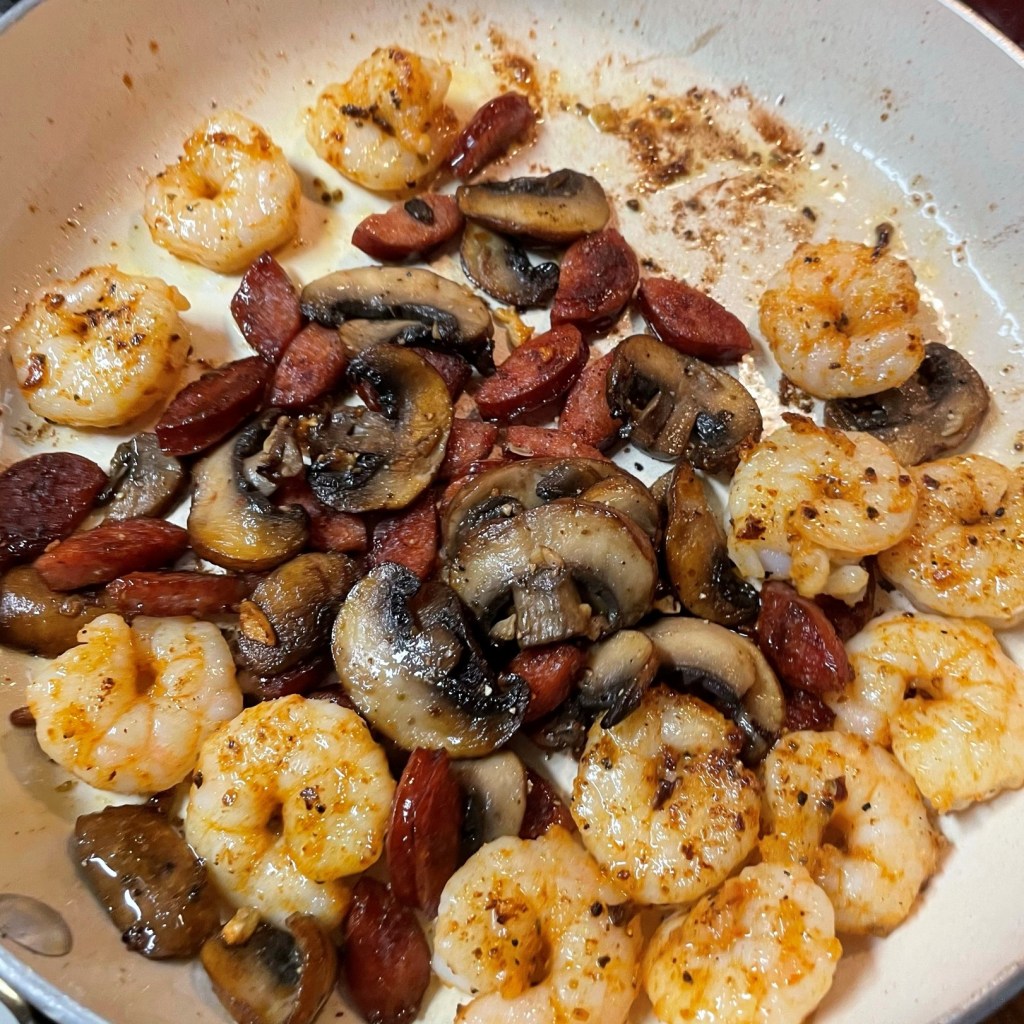
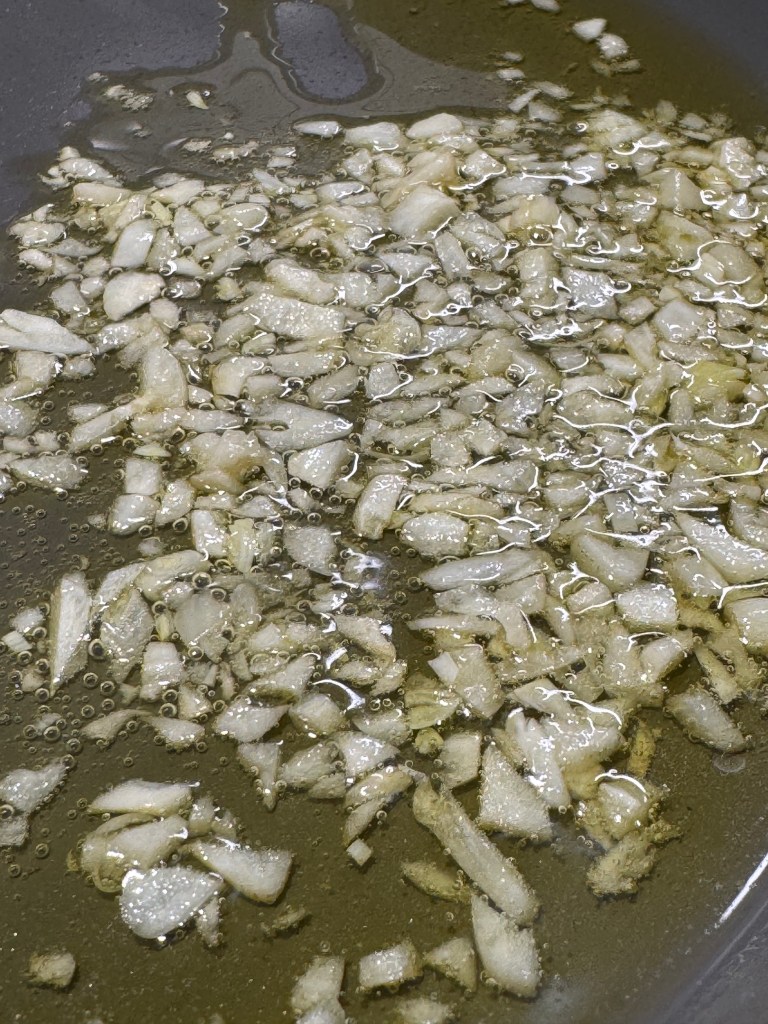
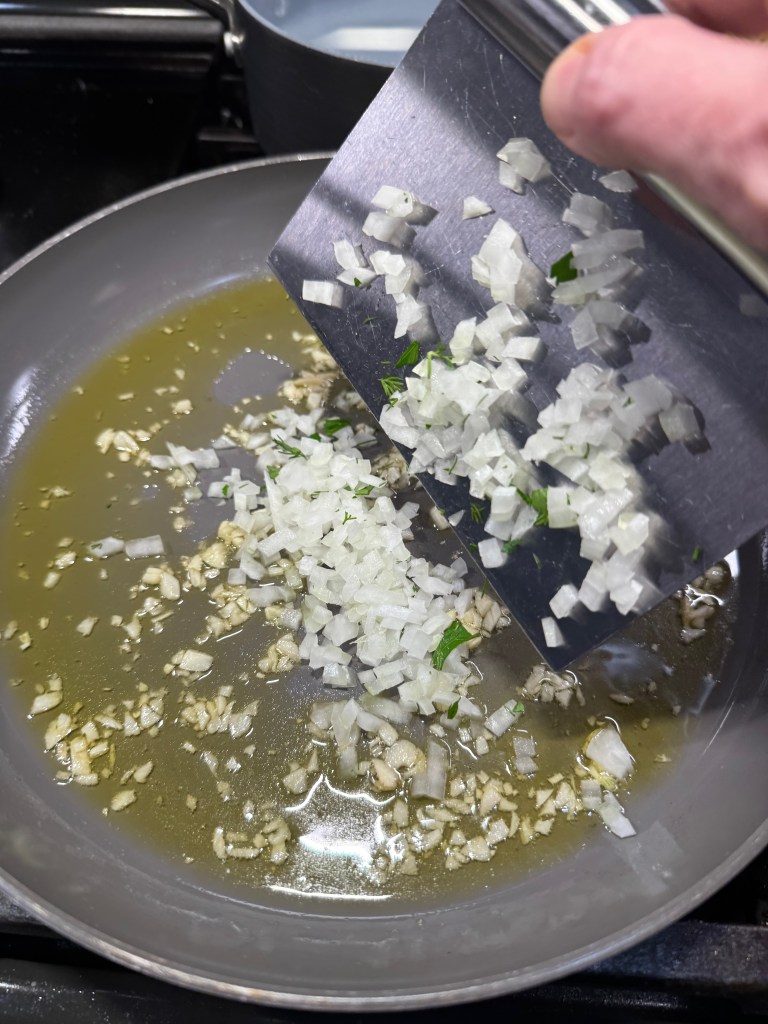
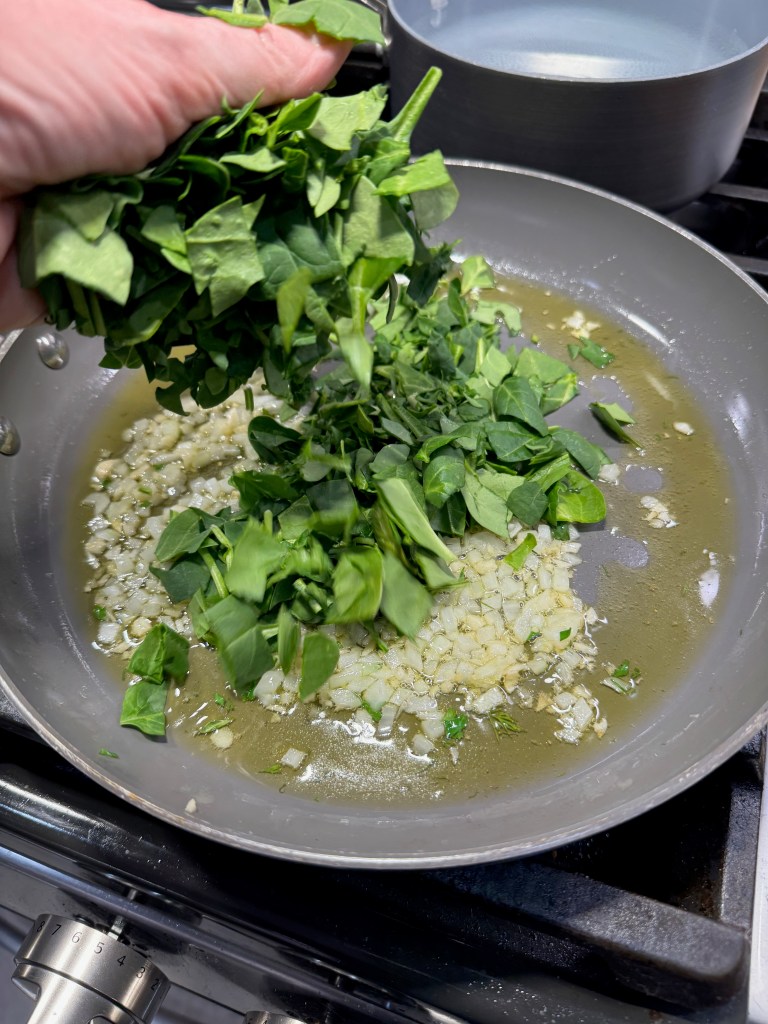
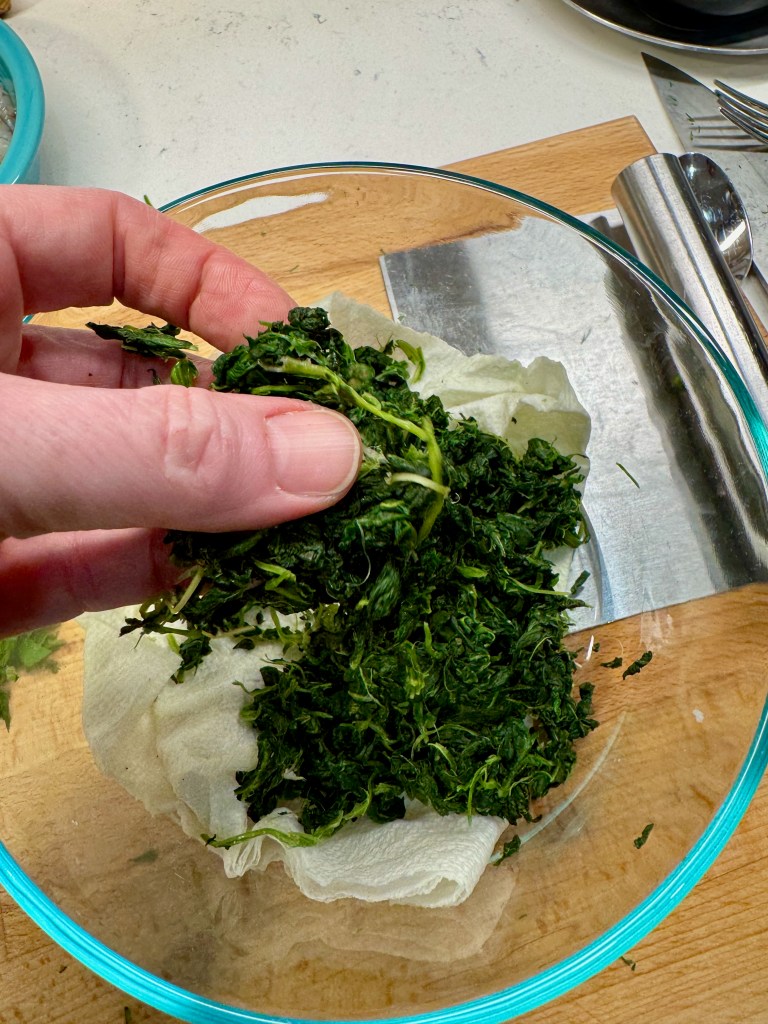
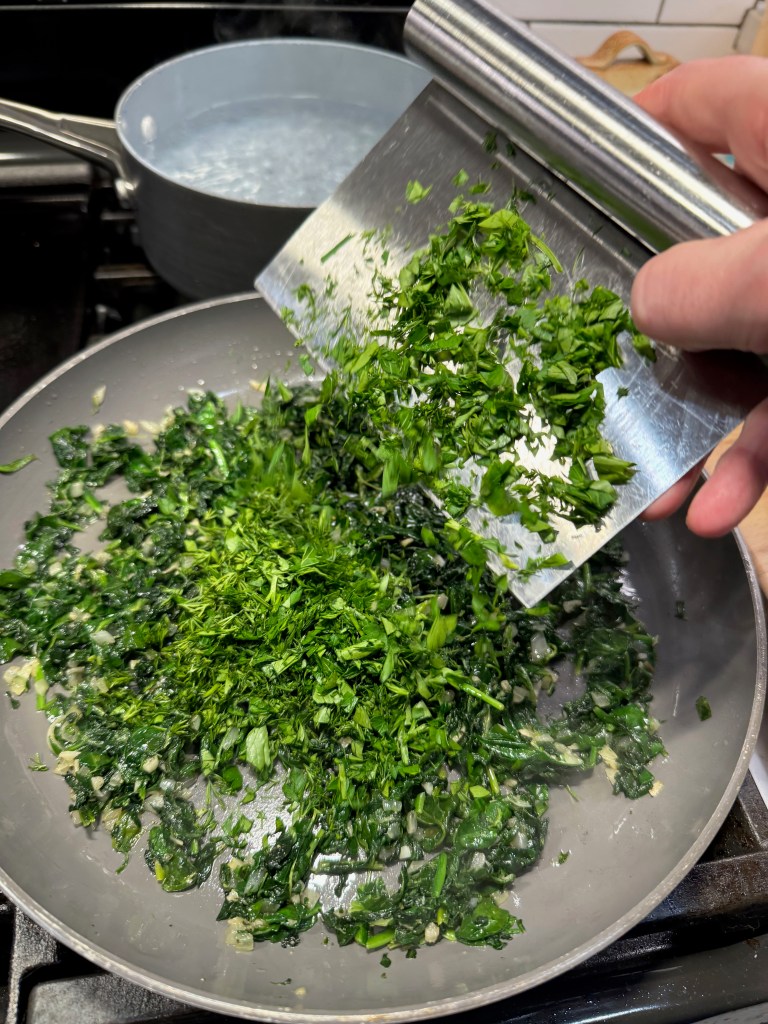
Everything else comes together quickly, beginning with a patient poaching of minced garlic in a large sauté pan. This should be done at a very low temperature, with almost no bubbles evident, so that you don’t burn the garlic. After about 10 minutes, increase the heat and add the diced onions, tossing to soften them in the warm, garlicky oil. Add the chopped spinach (I didn’t have enough so I supplemented with some thawed and squeezed frozen spinach), and then the fresh herbs.


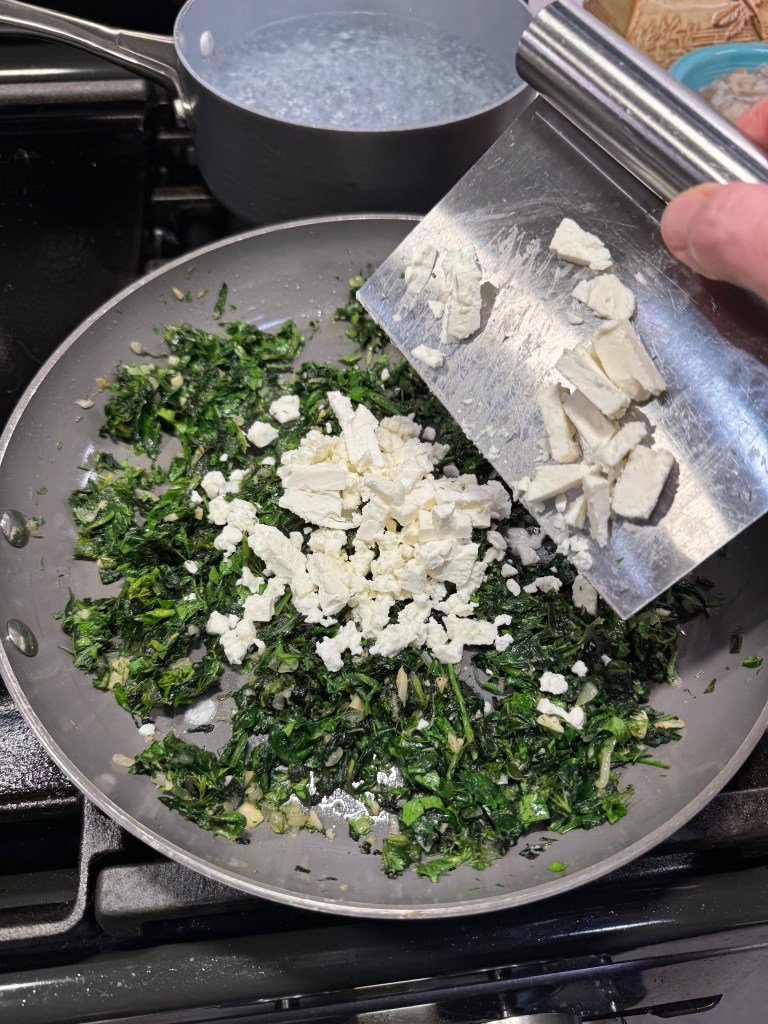
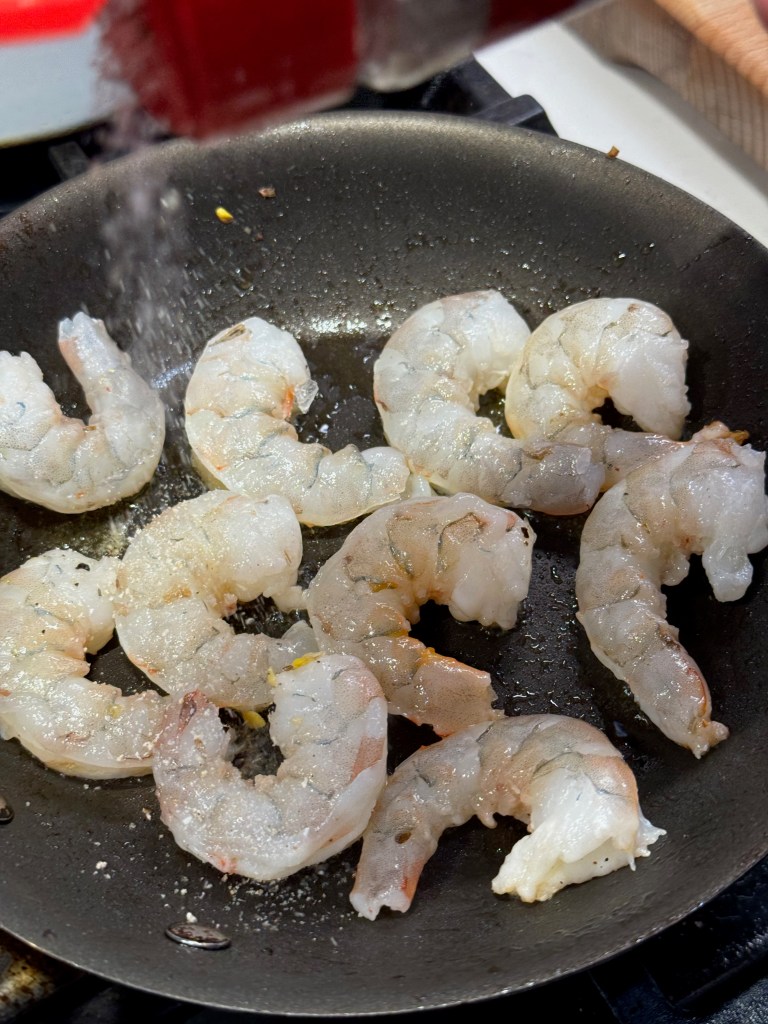
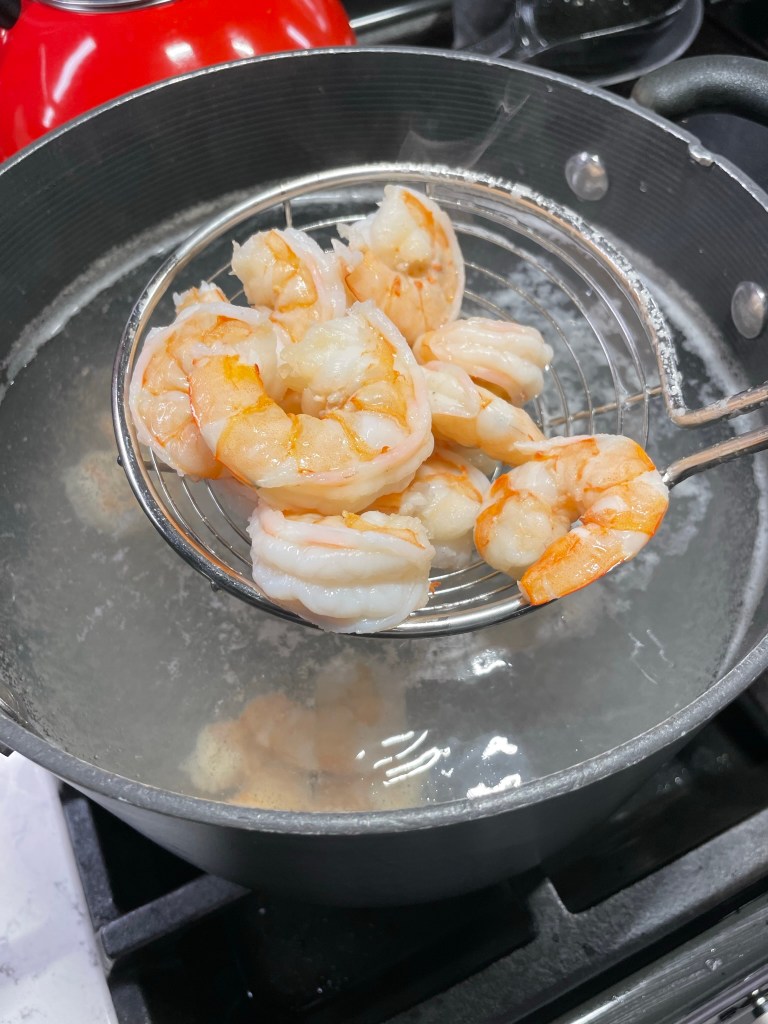
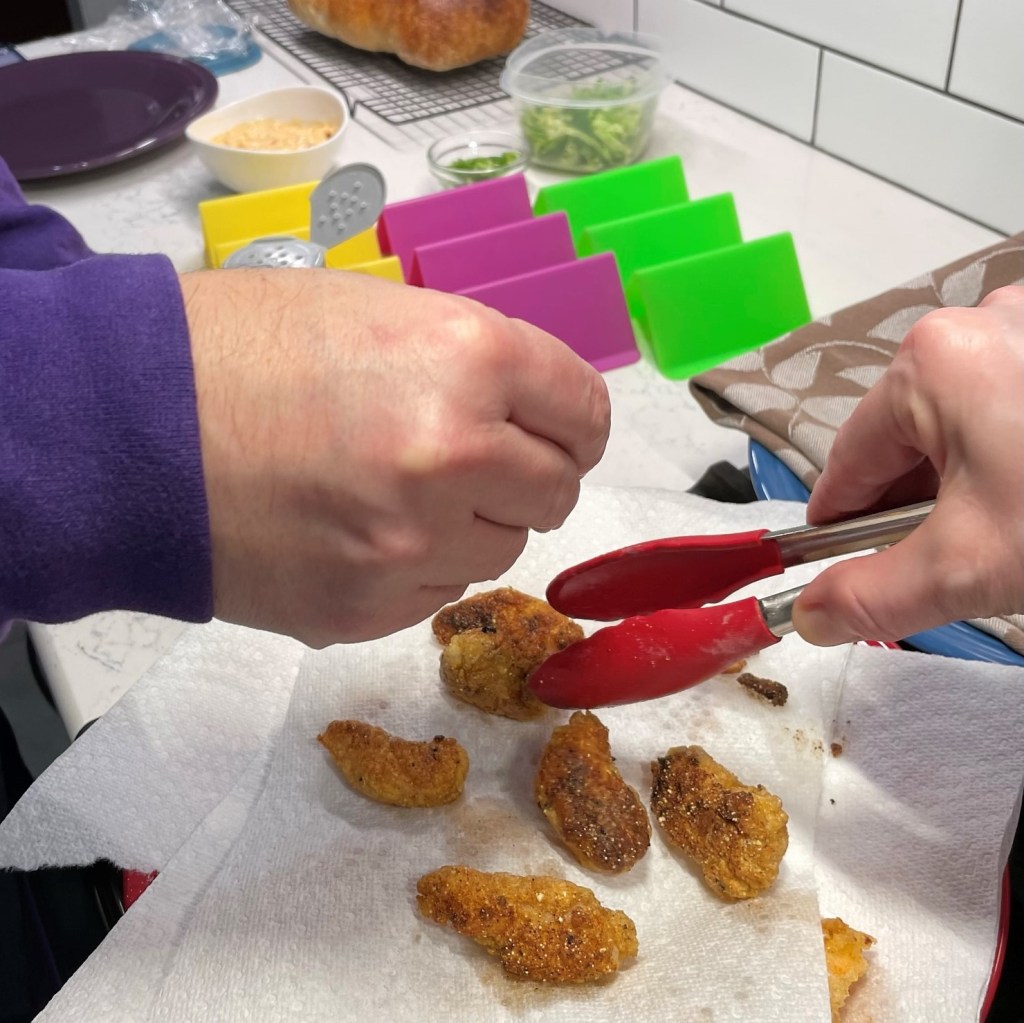
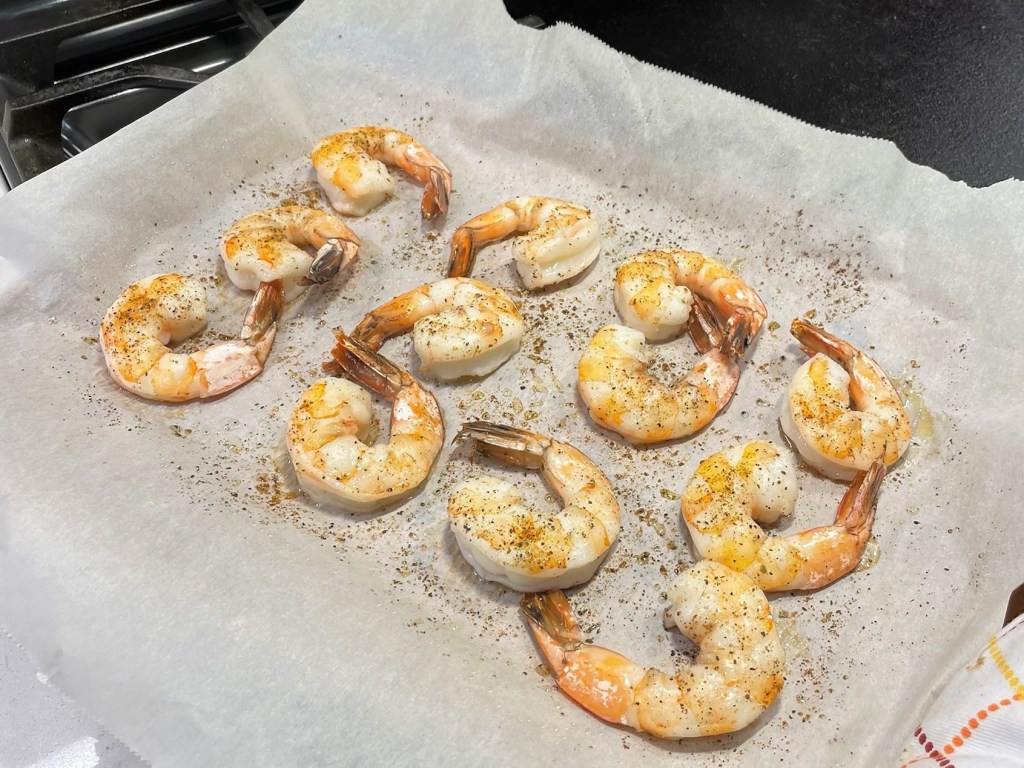
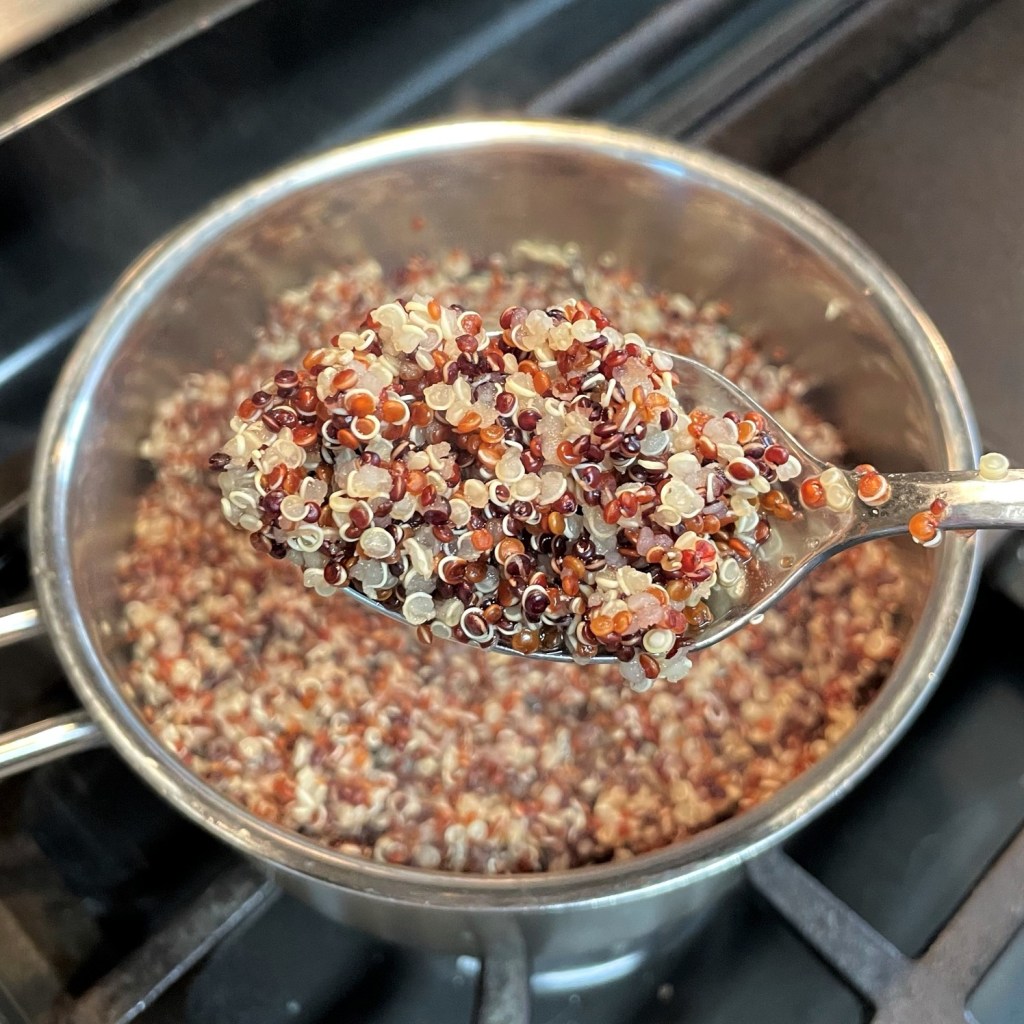
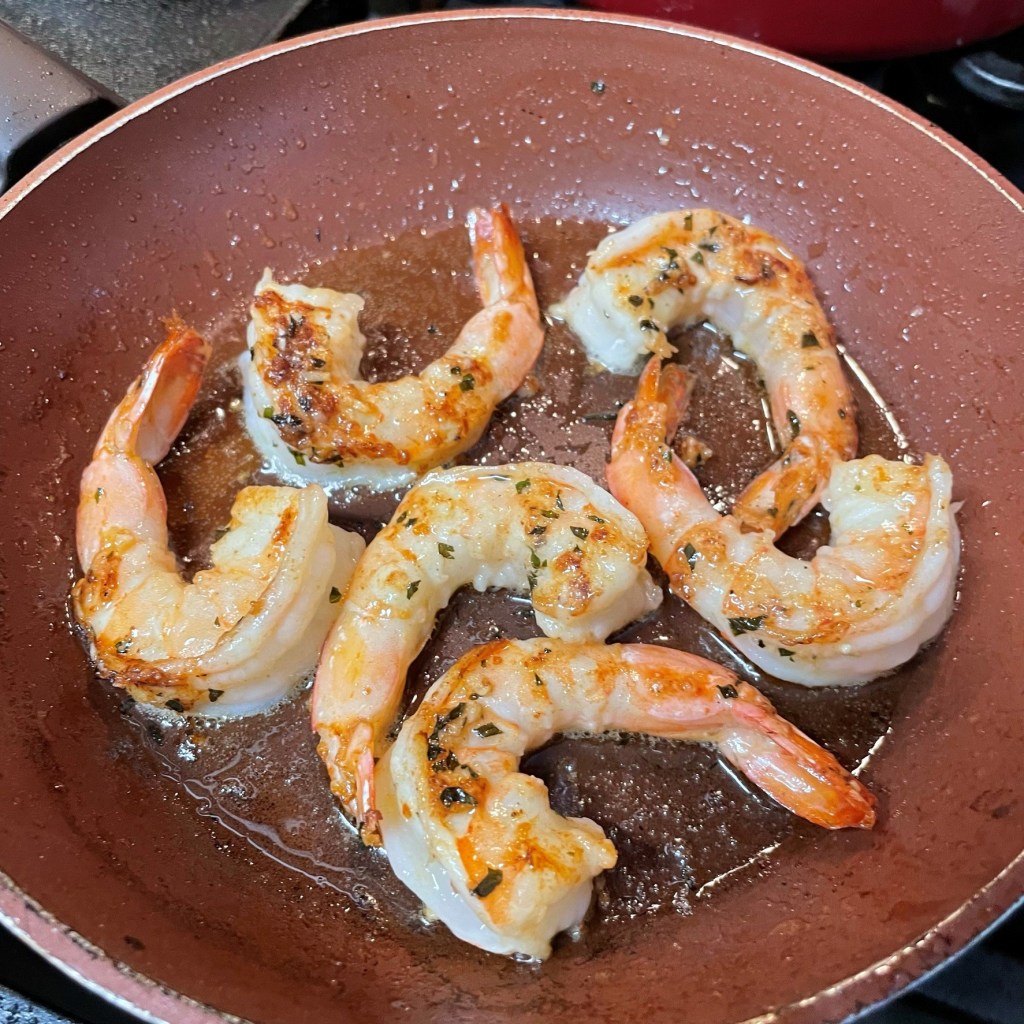
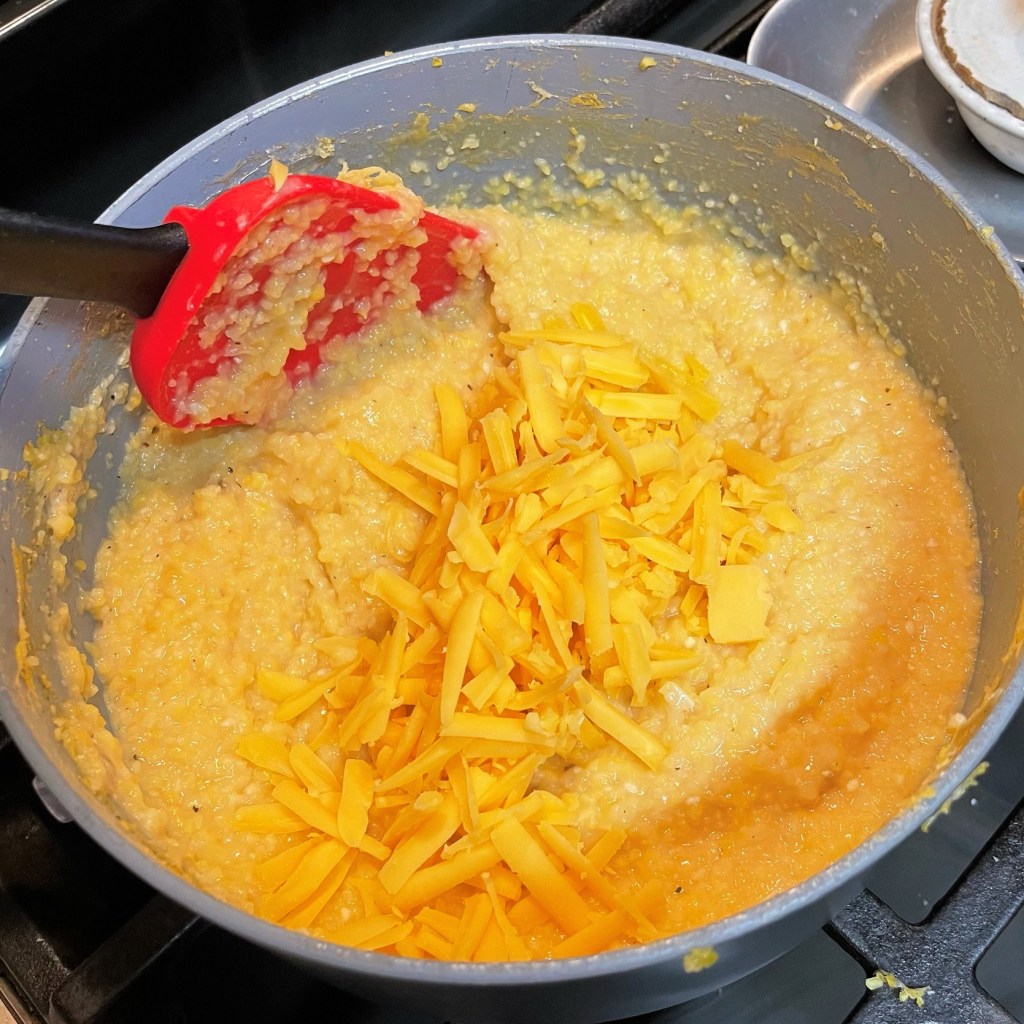
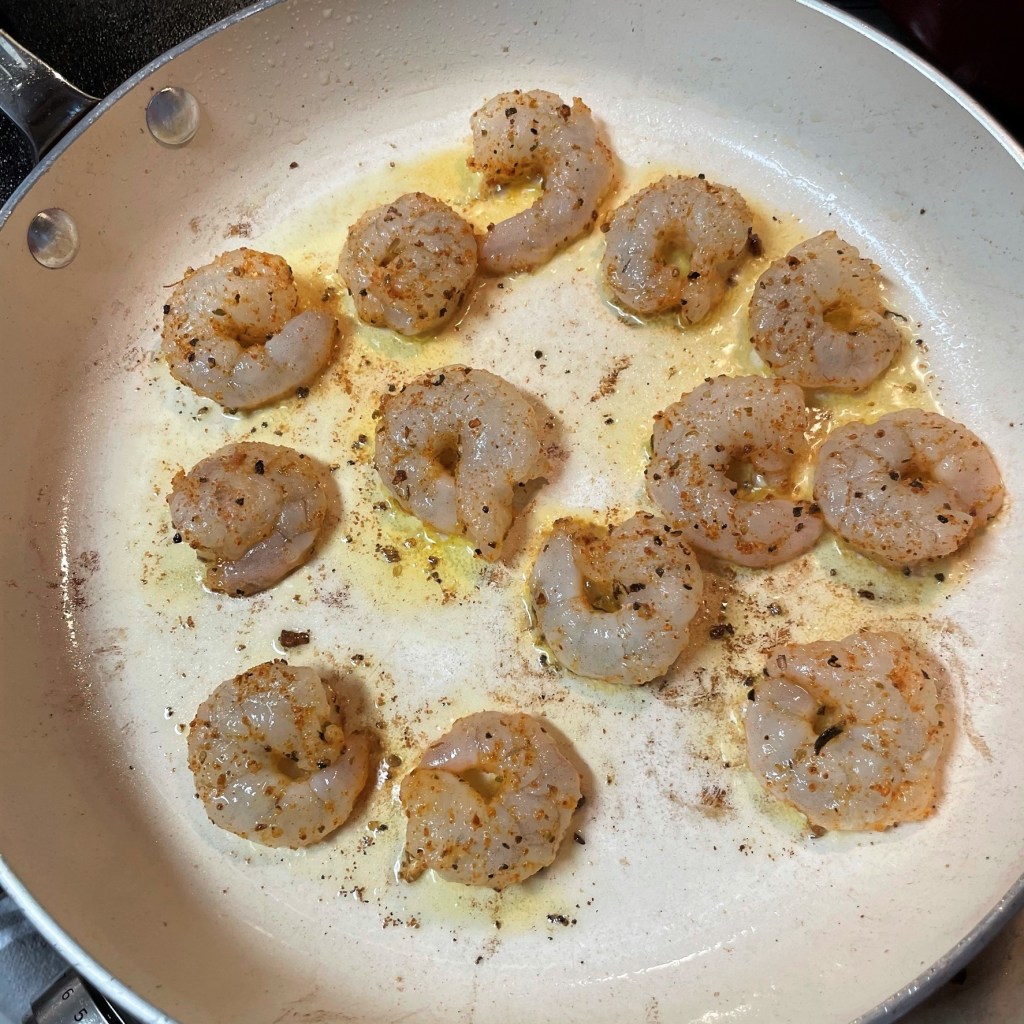
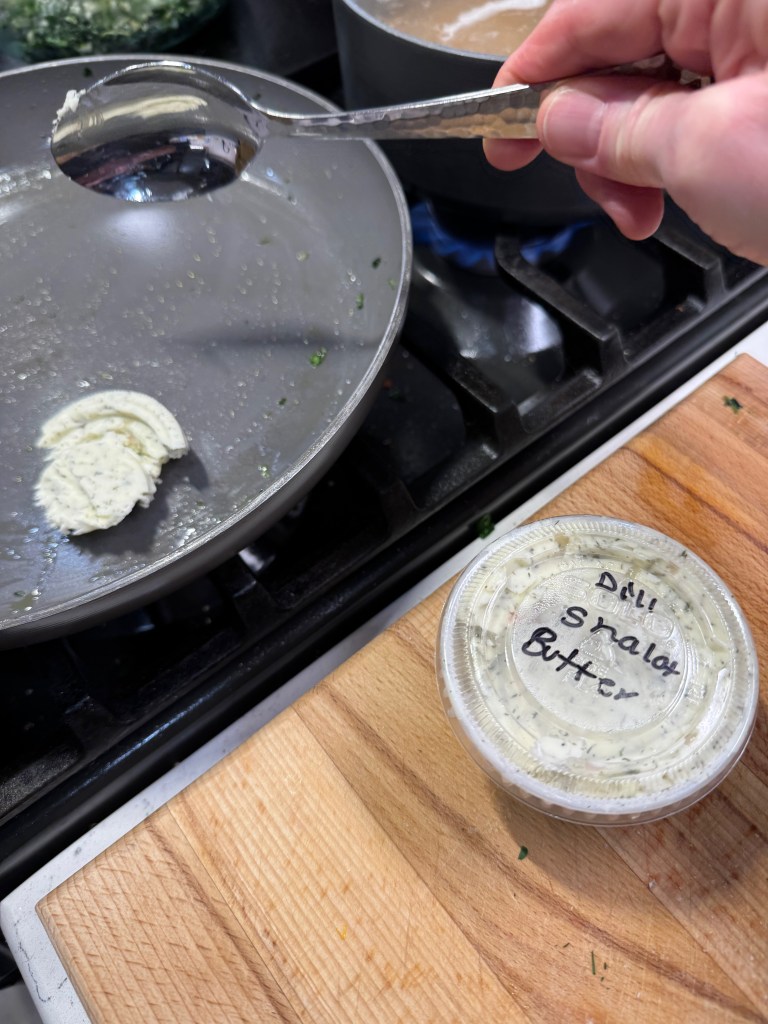
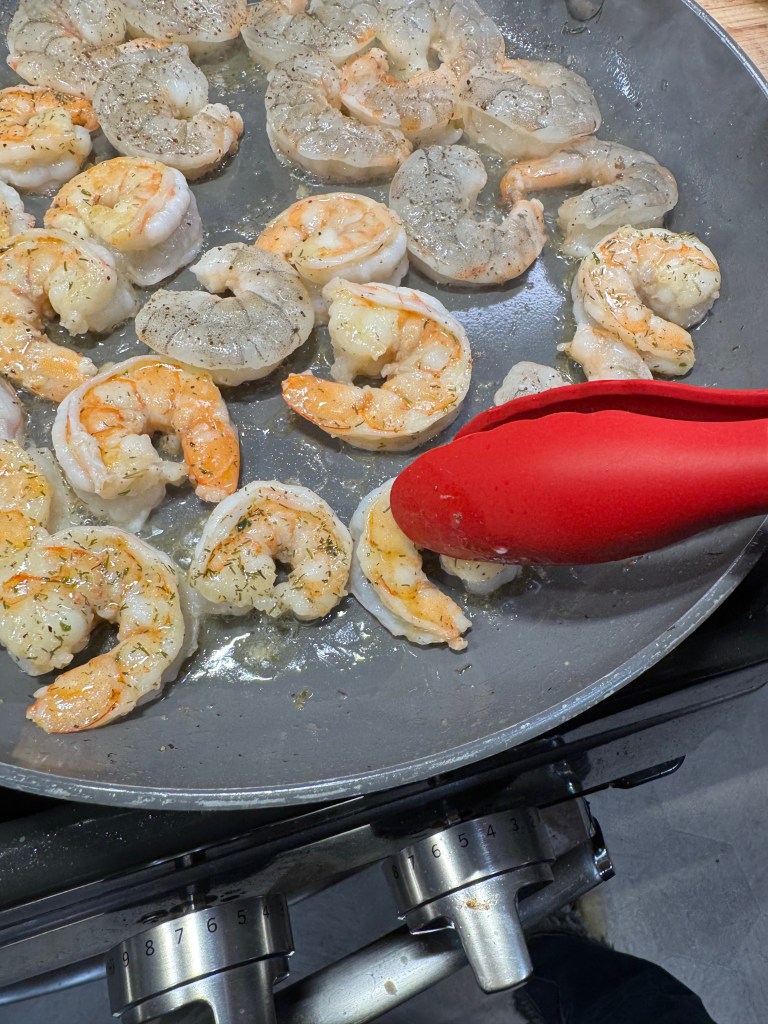
Get the orzo going and toss the feta into the spinach mixture, then transfer that to a bowl and keep it warm. Heat some more olive oil in the same pan, or a bit of butter (or both), and cook the shrimp until it’s just barely a pink/coral color. Always use a delicate touch when cooking shrimp, as it only takes one extra minute to overdo it. My method is to place the shrimp into the hot pan one at a time in concentric circles, and by the time the last shrimp goes in, the first is ready to turn. If you can see a bit of color on the inside curl of the shrimp, that’s your sign to turn it over and cook the other side. The smaller ones will usually cook faster, and if your burner has a hot spot (as mine does), then check the ones there first.


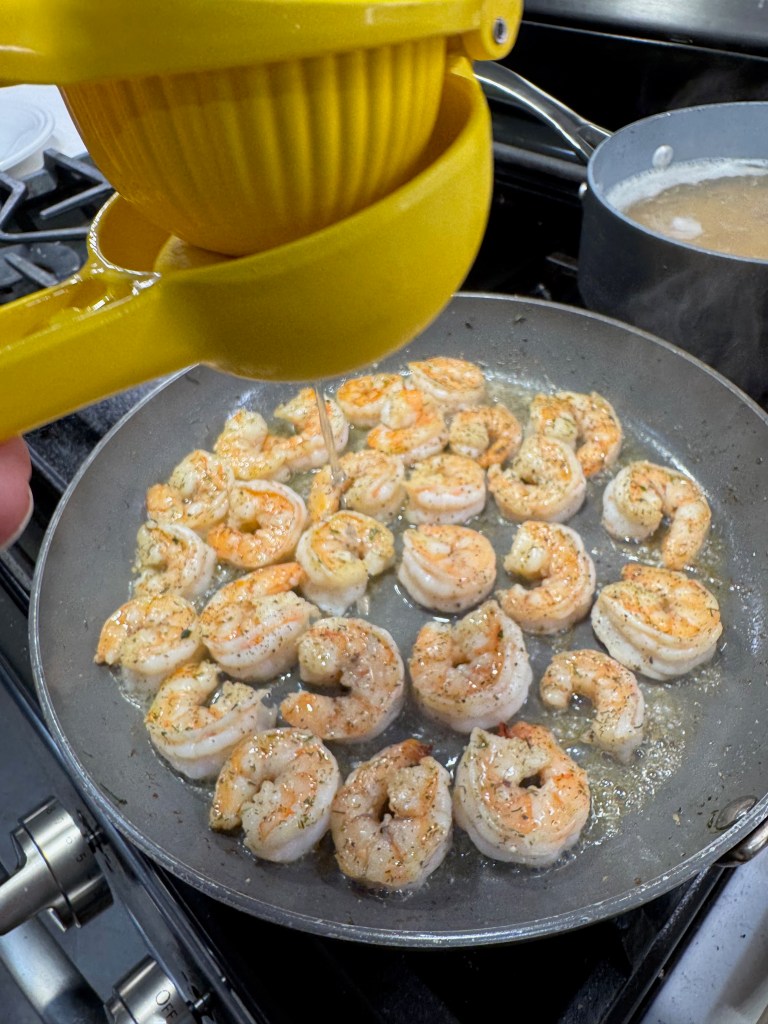
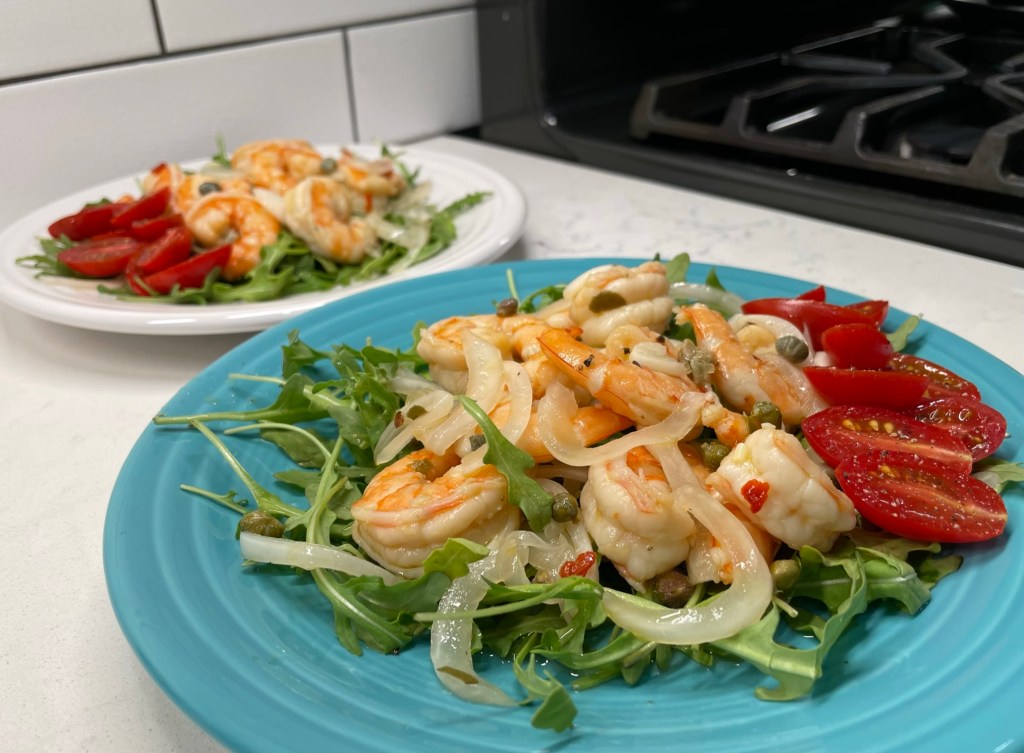
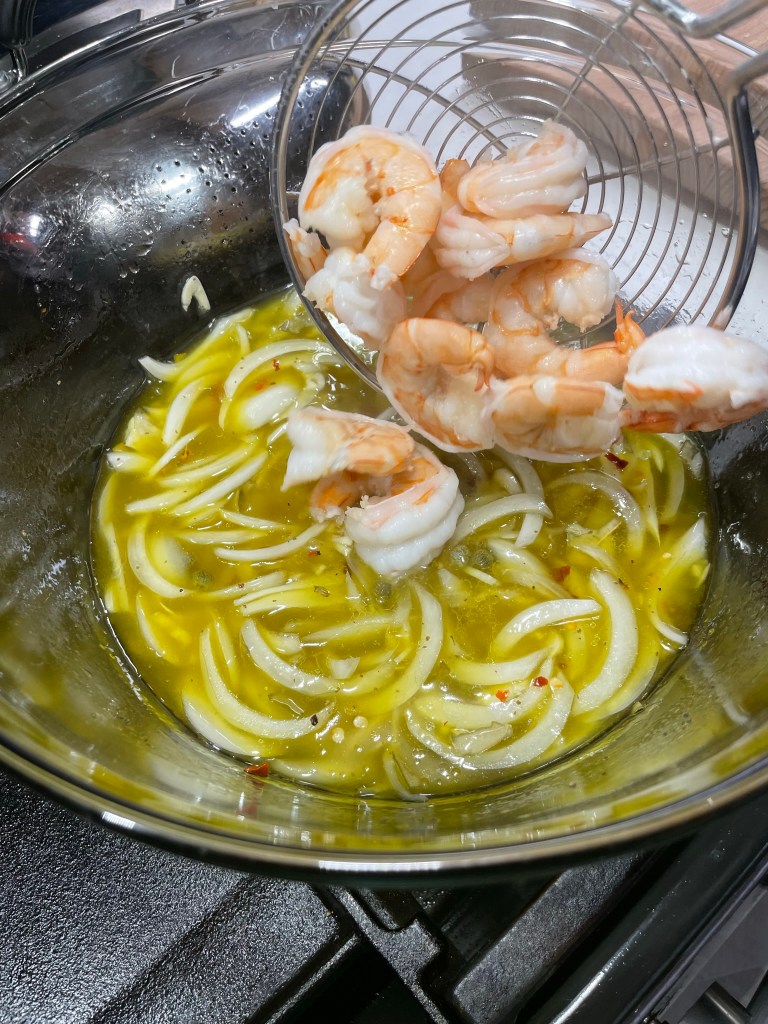
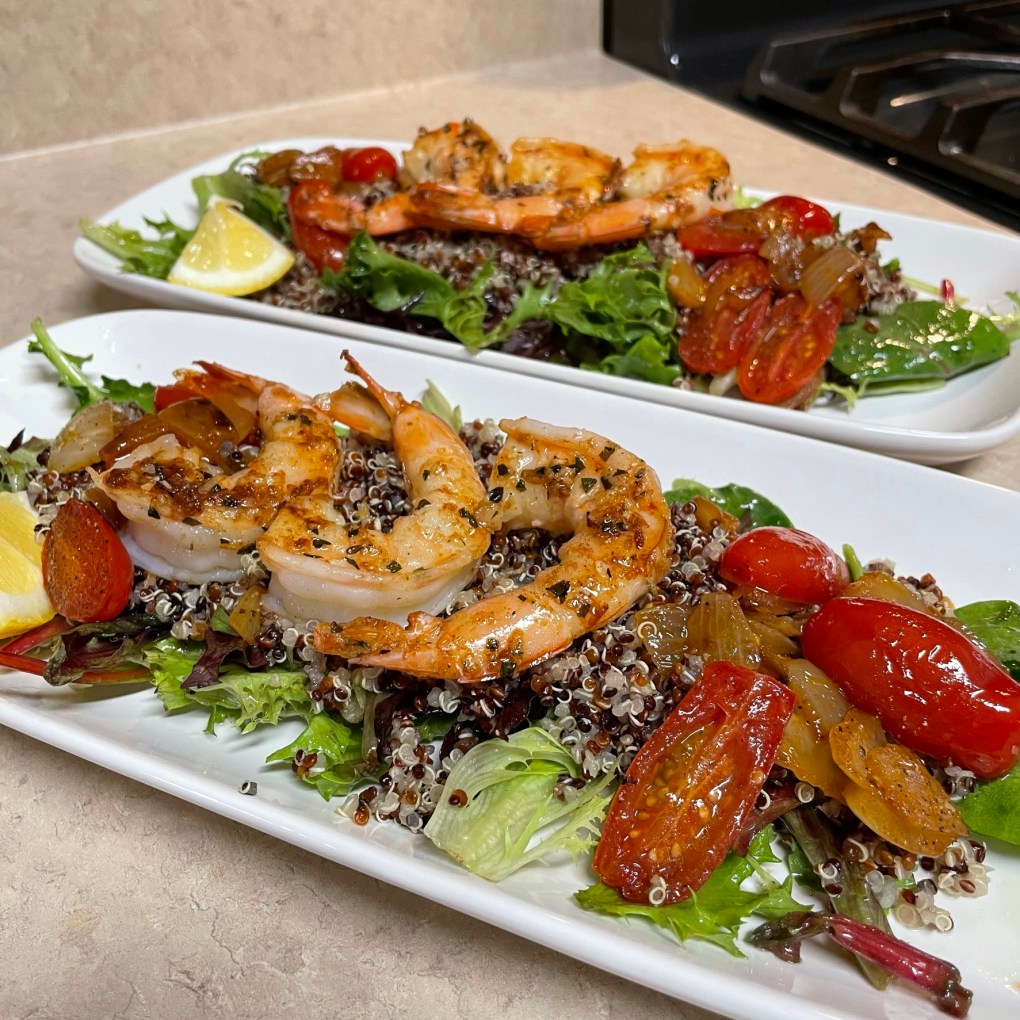
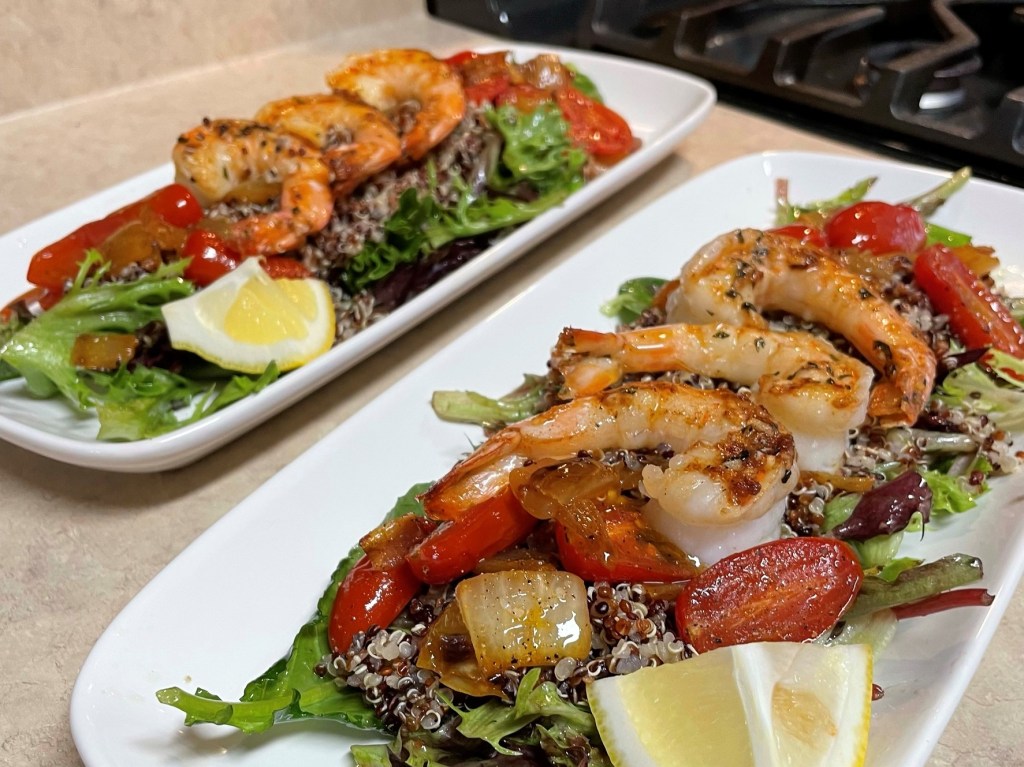
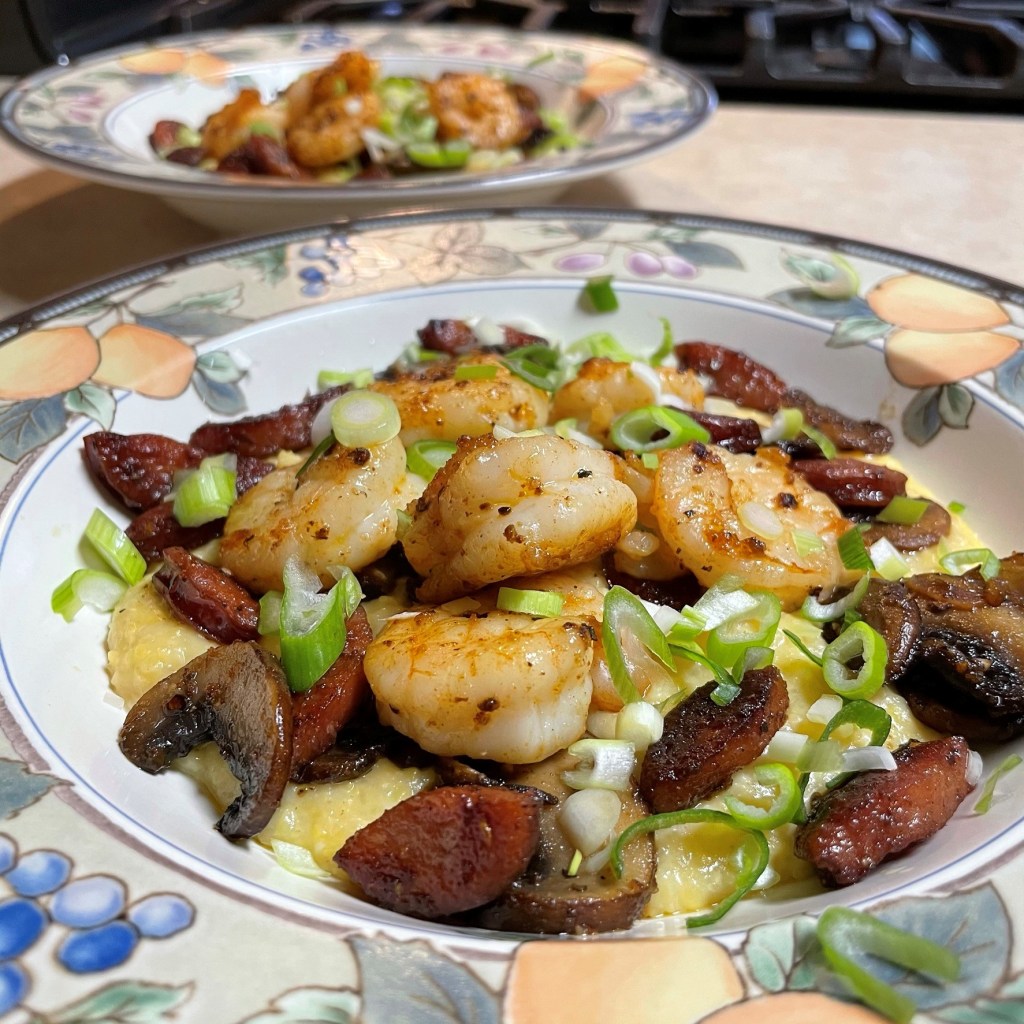
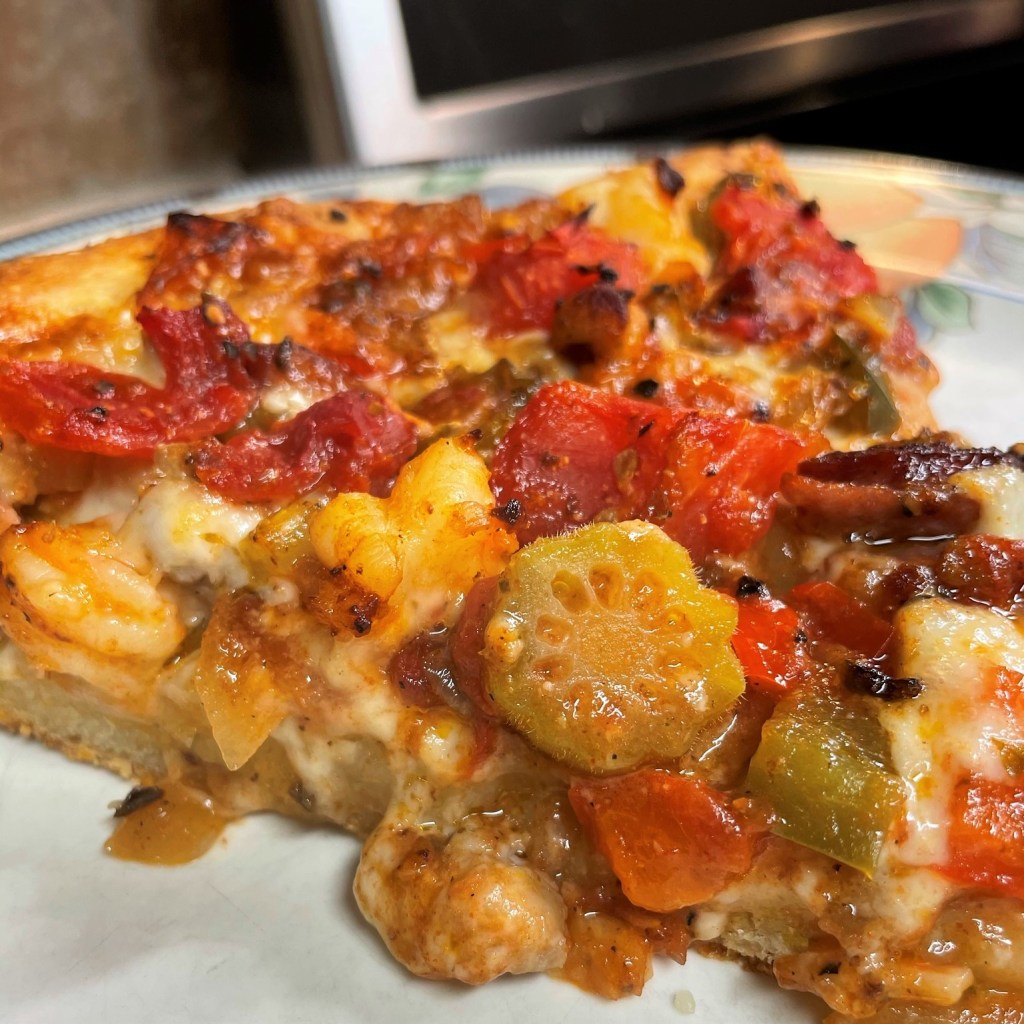
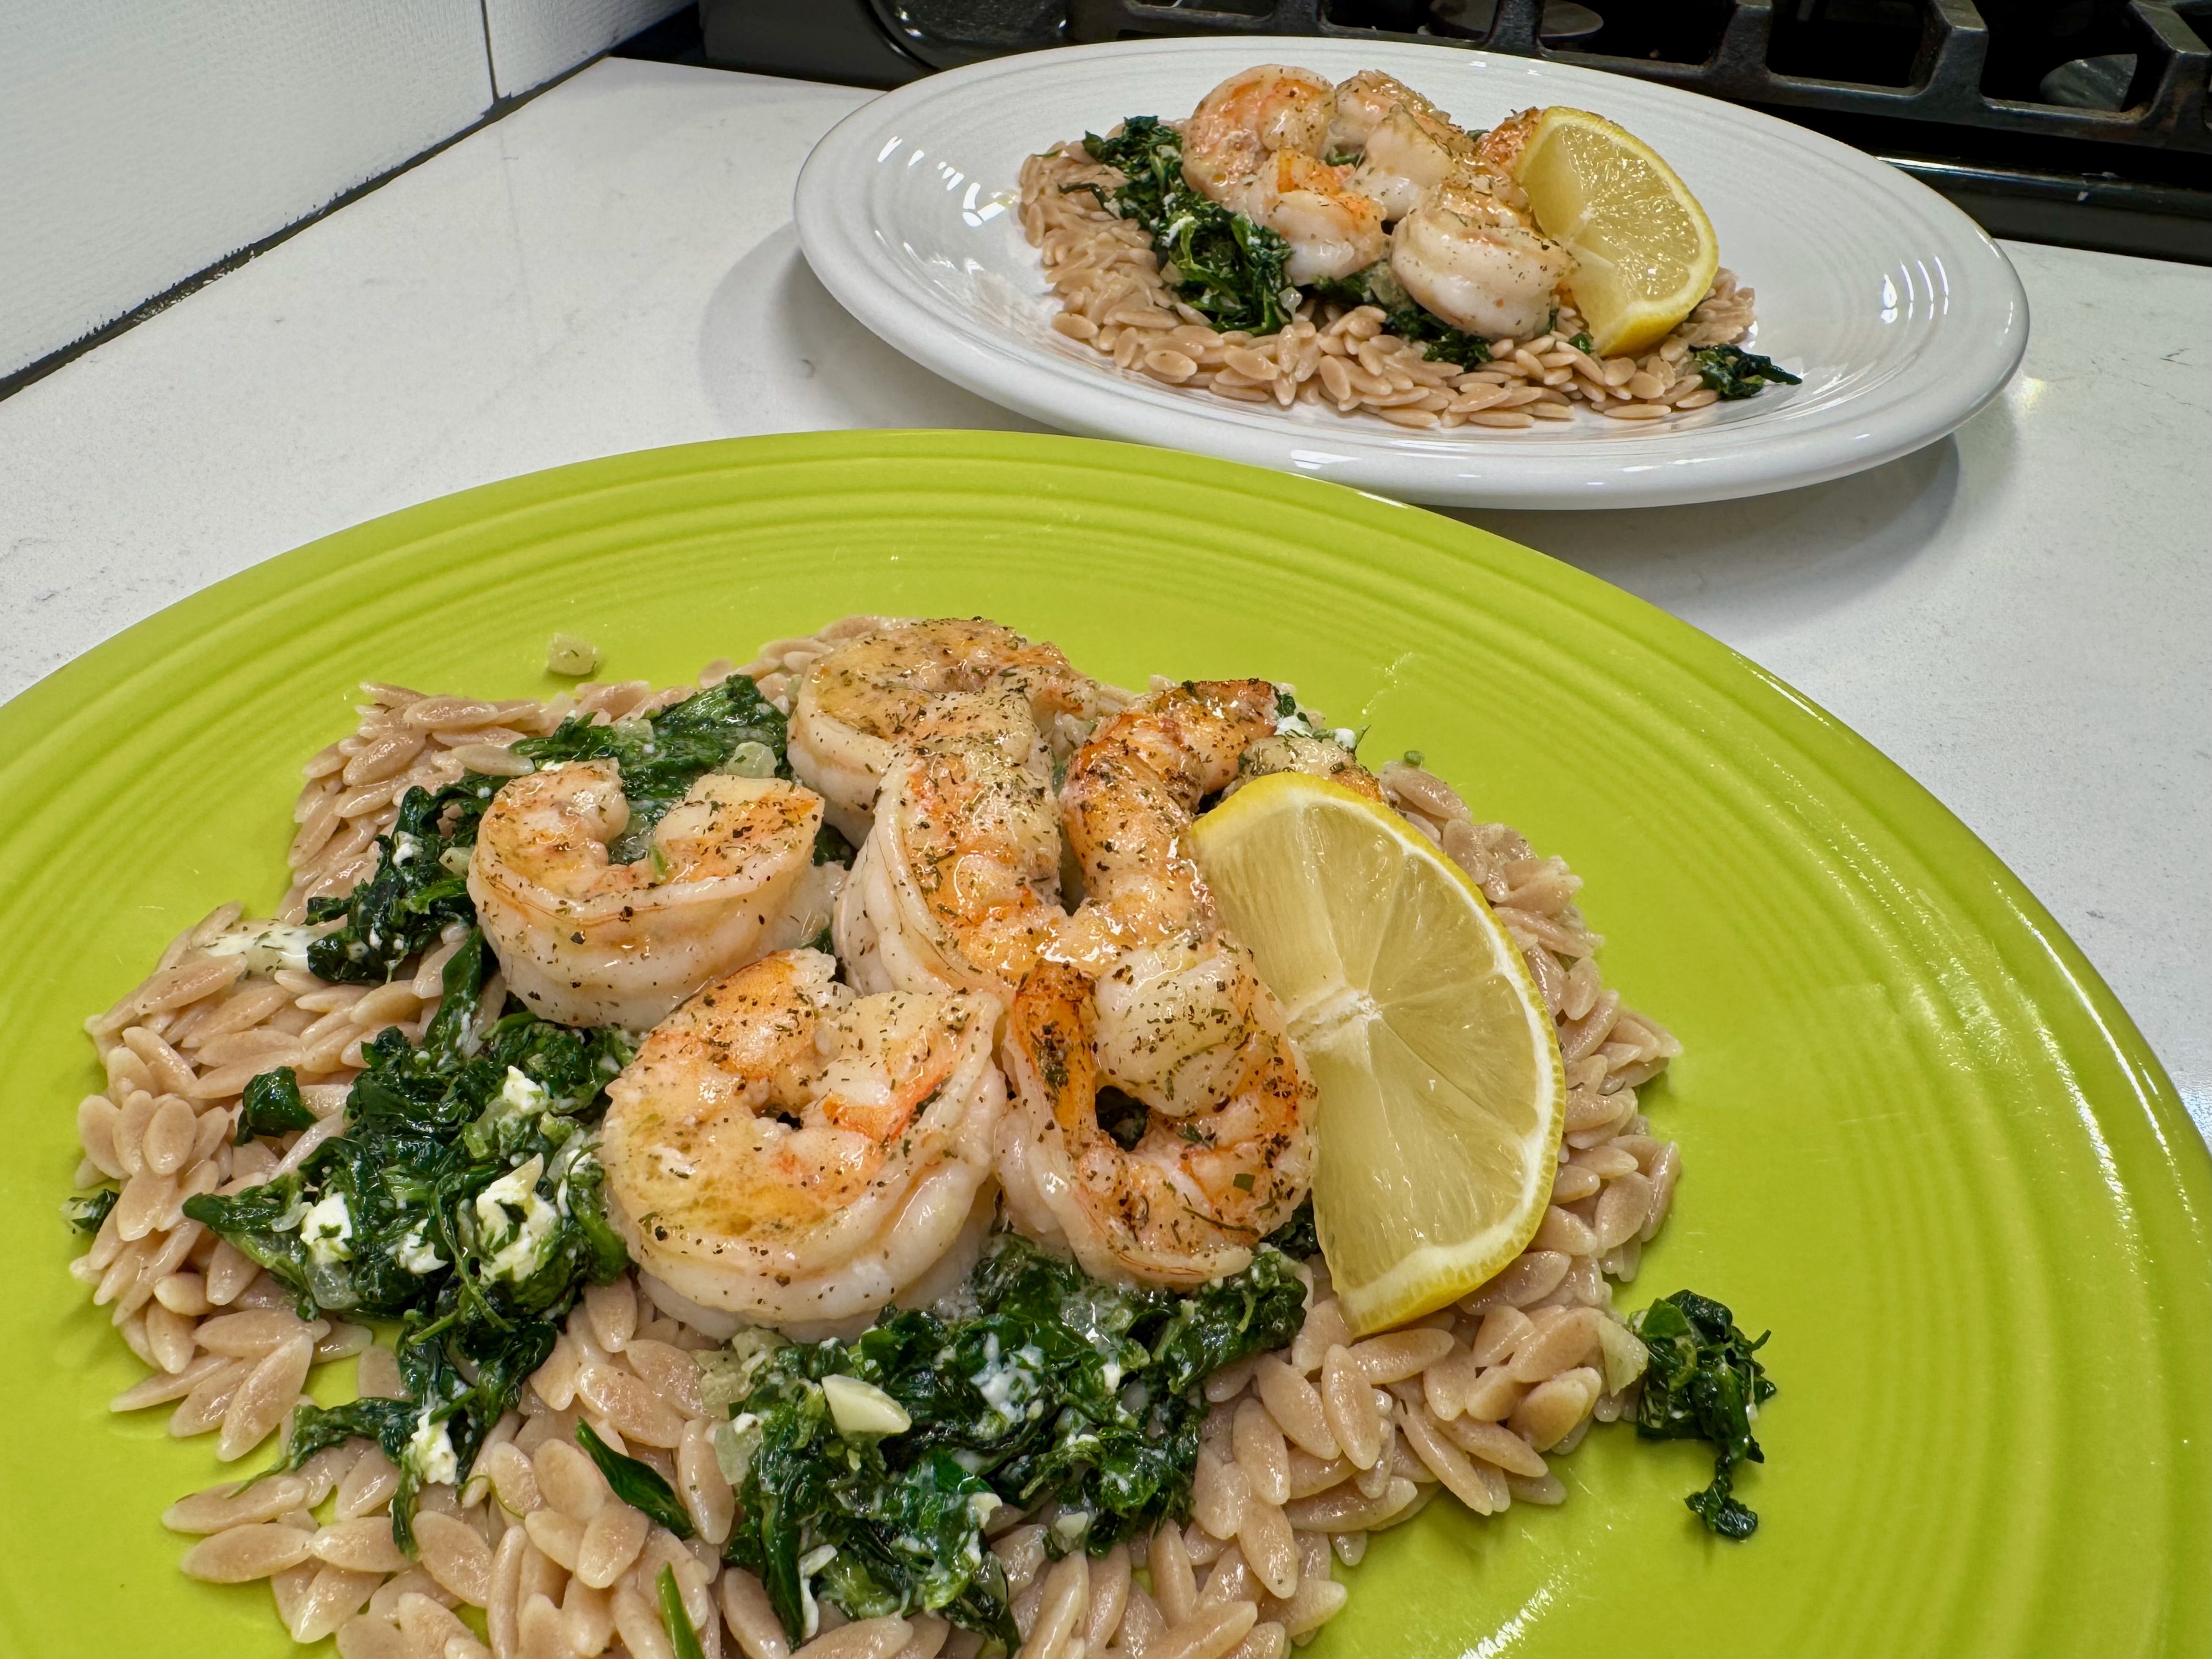
When all the shrimp have been turned over, squeeze fresh lemon over them and turn off the heat. Drain the orzo and toss it in a bit more of butter. Plate it up with the warm spinach-feta mixture and shrimp. Enjoy!

Spanakopita Scampi

  • Servings: 4
  • Difficulty: Average
  • Print

This is a quick and easy weeknight dinner that combines two of my all-time favorite Mediterranean classics. If you don't have orzo, use any kind of small pasta shape that you have on hand.


Ingredients

  • 2 Tbsp. extra virgin olive oil (possibly more for cooking shrimp)
  • 2 cloves garlic, minced
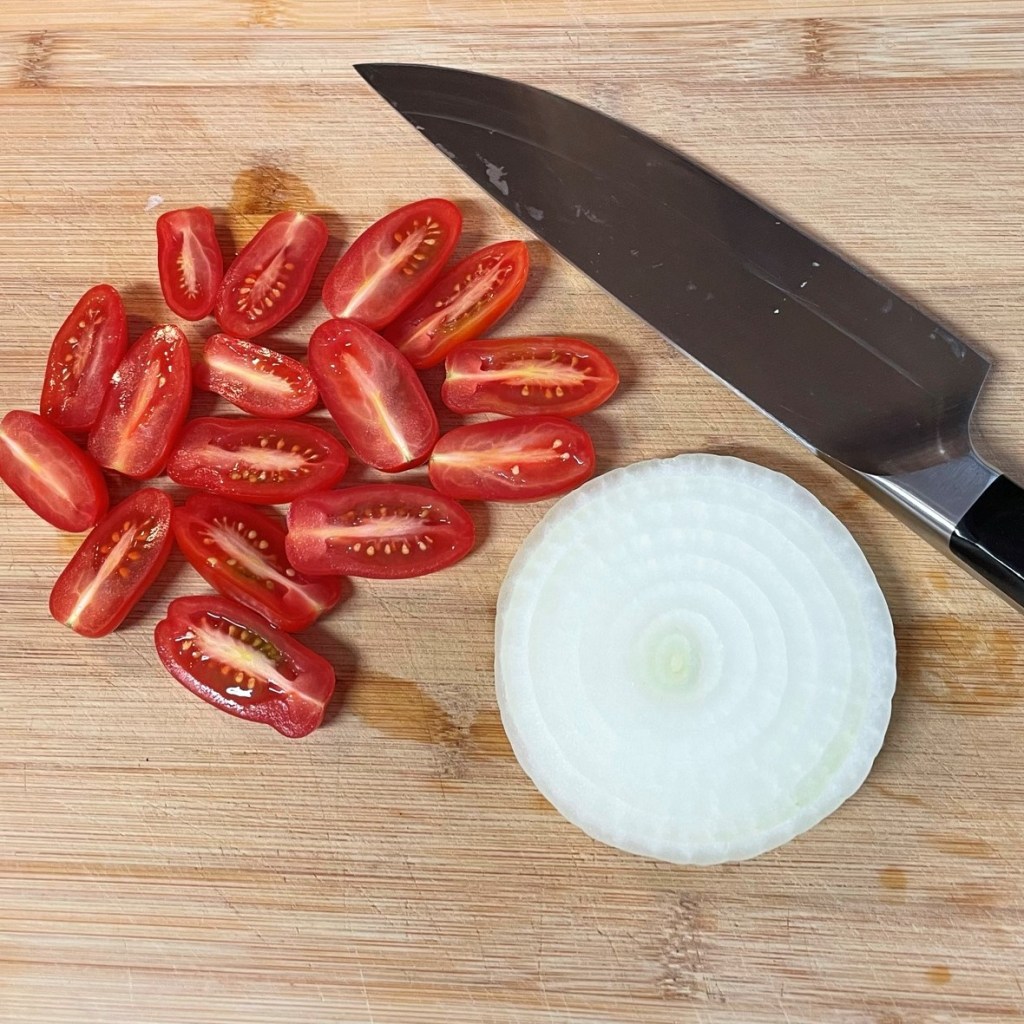
  • 1/3 cup diced sweet or yellow onion
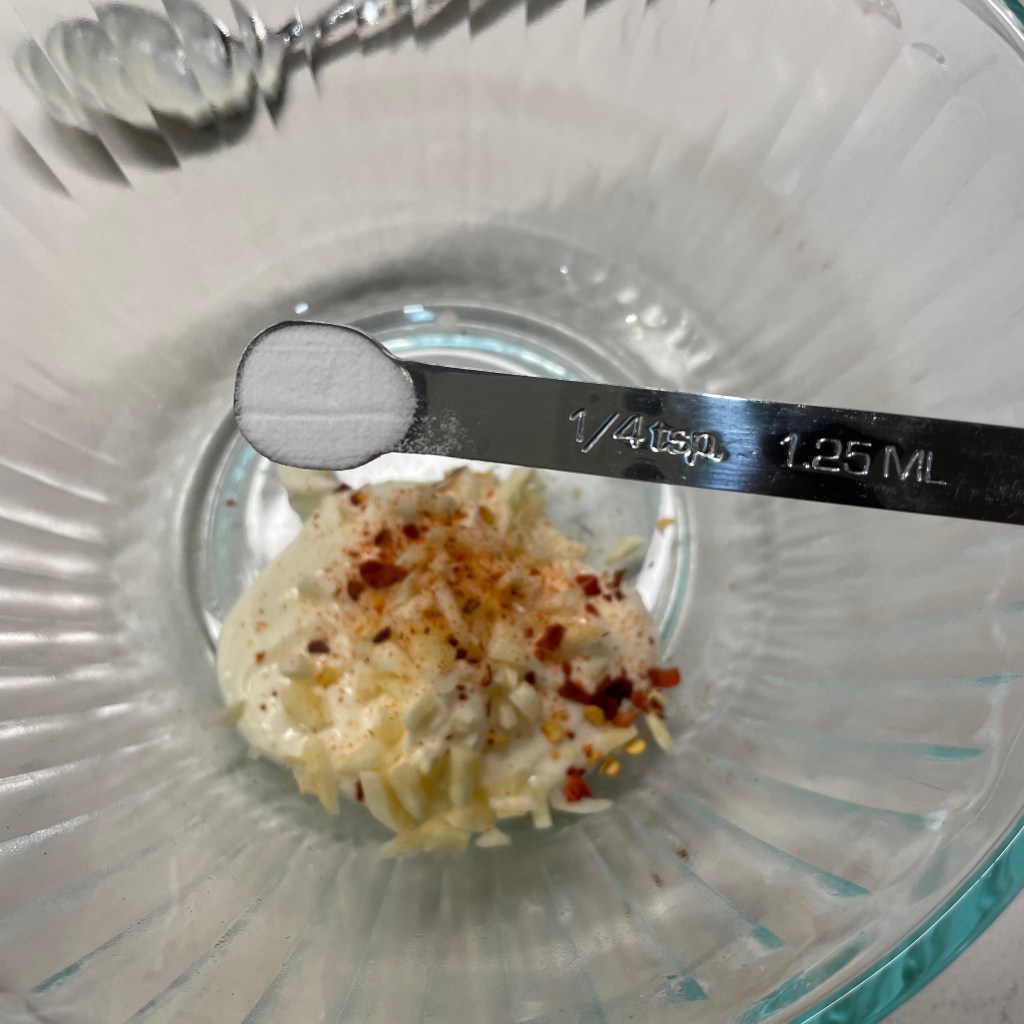
  • Kosher salt and freshly ground black pepper
  • 4 fat handfuls baby spinach leaves, rough chopped* (see notes)
  • A handful each of fresh dill and flat-leaf parsley, chopped
  • 1/3 cup feta, drained and cubed or crumbled
  • 1 Tbsp. butter* (see notes)
  • 1 pound fresh wild-caught shrimp, peeled and deveined
  • Juice of 1/2 fresh lemon
  • Cooked orzo and fresh lemon slices, for serving

Note: Fresh spinach is best, but if you don’t have enough, you can supplement with some frozen chopped spinach. Microwave it in a glass dish until thawed, then press out as much water as possible and add it to the onions after they’re already softened. Proceed with the rest of the recipe as usual.

I was fortunate to have a bit of “dill and shallot” compound butter left over from another recipe, and it was perfect for cooking the shrimp! If using regular butter or oil, consider adding a few shakes of dried dill weed at this step, or reserve a bit of fresh dill for sprinkling over the top of the finished dish.

Directions

  1. Please a large skillet over low heat and add two generous swirls of olive oil with the garlic. Cook this very low and slow, with almost no bubbling action in the pan, so that the garlic become very soft and fragrant. It should take about 10 minutes, and this mellows the flavor of the garlic. Too much heat will give the garlic a burned and acrid taste.
  2. When the garlic is softened, increase the heat to medium and add the onions. Season with salt and pepper and toss to sauté until onions are translucent. Add spinach by the handful, tossing until each handful has wilted before adding the next. If supplementing with frozen spinach, wait until the fresh spinach has fully cooked.
  3. Add fresh herbs and toss for about 30 seconds, then add feta and remove the pan from heat. You may either transfer this mixture to a bowl (keep it warm) and use the same pan for the shrimp, or use a second pan for the shrimp.
  4. Add butter (or oil) to the skillet over medium heat. Place shrimp down in the hot butter and season with salt and pepper, and a quick shake of dried dill if you have it. Watch the shrimp closely, and turn them when you notice the color changing on the inside curl. Depending on the size of your shrimp, two to three minutes total should do it. After the shrimp has cooked on the second side, squeeze the fresh lemon juice into the pan and toss to coat.
  5. Toss cooked orzo with a bit of butter or oil, and serve it with the spinach mixture and shrimp piled on top. Add a lemon slice on the side for one last burst of freshness.


Shrimp & Grits with Too Much Going On!

No matter where you go in the coastal region stretching across the Carolinas, you’ll find shrimp and grits. It’ll be different in each place, naturally, but delicious however it’s served. Some folks make it Cajun spicy, others use a gravy base, and a few take liberty with the grits, adding cheese or turning them into little fried cakes with the shrimp piled on top. Everyone has their favorite, and all of them are favorites for me. But I learned an important lesson when I tried to recreate a restaurant dish, and it can be summed up in a phrase that my husband hates: less is more.

When Les swept me away to Hotlanta for the Rolling Stones concert back in June (it was awesome), he went the extra mile (300 of them, actually) to extend our adventure for three days in Charleston, South Carolina. The city is a lovely place to visit, with a rich history, incredible food and beautiful architecture, and it’s also the unofficial shrimp and grits capital of the world.

Cheers, Charleston! 🍸

On our first night in Charleston, we had reservations at Hank’s, well-known by locals and visitors for its delectable seafood. We got there early to enjoy a cocktail at the bar, and then feasted on appetizers—oysters casino and she crab soup (another Charleston classic)—at the table. Finally, dinner arrived! Notice the crispy grit cake on Les’s scallop and crab dish? And I couldn’t resist the shrimp and grits with smoked andouille and tomato jus, which I promptly declared to be my favorite shrimp and grits to date. My goodness, it was delicious!


The shrimp were plump and juicy, and I love that Hank’s serves them with the tail on. The grits were cooked to creamy perfection with only a slight firmness to the bite. But the real star of the show was the incredible tomato jus— it was light and delicate, almost too refined for this low country classic, but so, so good.

Pardon me while I lick my bowl!

I left Charleston knowing that I had to try to recreate this delectable dish, or something similar, at home. This was my first attempt, and it wasn’t perfect but it won’t be my last.

My late summer shrimp & grits with kale, corn and tomato gravy

Plenty of flavor here, but maybe too much.

There would be four elements to prepare for my dish (Coco Chanel would say one accessory too many, and I’ll get to that later). First, the fresh North Carolina shrimp, which I sautéed at the last minute with only salt and pepper; the grits, a stone-ground white corn that I cooked low and slow in chicken broth until creamy; the kale, which I roasted for a crispy contrast on top of the other textures; and the tomato gravy, with fresh ripe tomatoes gifted to us by a generous neighbor. The ear of corn, left over from a previous meal, was a bonus ingredient that gave a friendly howdy to its cousin, the grits.


The tomato gravy was the big learning experience for me, and there isn’t much about this that I would repeat. I used bacon fat to sauté the onions, then cooked in some flour to thicken it when I added chicken broth. The result was a heavy gravy that overwhelmed the bright acidity of the ripe summer tomatoes. Edible, but not remarkable.


Here’s what I’ll do next time— and what I’d encourage you to try if you choose to make your own version of this dish— use a bit of olive oil to sauté the onions, skip the flour thickener, and use a splash of white wine to loosen up all those tomatoes. After reducing the liquid, I’ll take it off the heat and quickly whisk in a few pats of cold butter— sort of a beurre blanc treatment, if you will— to add body to the sauce without crushing the spirit of the tomatoes. A thinner consistency would also allow the “gravy” to weep over and around the grits so that you get a bit of it all the way to the last bite.


Finally, I’d kick the kale to the curb. Honestly, it was a distraction from the best parts of this dish, like a chunky statement necklace with an elegantly tailored suit. This is an important reminder for me in the kitchen, because most of the time, it’s the simple dishes that make everyone happiest. Find one thing about a classic, and elevate that one thing into something extraordinary— we live and learn, don’t we? 😉

And yes, the Stones were as amazing as ever. Great show!

Shrimp & Grits with Kale, Corn and Tomato Gravy

  • Servings: 2
  • Difficulty: Average
  • Print

This dish has a little too much going on, but it made use of some great late summer ingredients I had on hand. In the notes, I've added suggestions that would probably make this dish even better.


Ingredients

  • 1/2 medium onion, chopped
  • 2 Tbsp. bacon fat
  • 1 Tbsp. all-purpose flour
  • 1/2 cup low-sodium chicken broth
  • 2 medium ripe tomatoes, peeled and chopped
  • 1 small bunch fresh kale, roasted (see notes)
  • kernels from one ear grilled corn
  • 2/3 cup stone-ground white grits
  • 2 cups chicken broth, water or some combination of both
  • 2/3 lb. fresh shrimp, peeled and deveined
  • Salt and pepper
  • 1 Tbsp. olive oil, divided (use half to warm corn, half to cook shrimp)

The kale was an unnecessary distraction in this dish and I wouldn’t use it again. If you wish to try it, wash and tear up the leaves and massage them in a large bowl with a drizzle of olive oil and a pinch of salt. Roast on a baking sheet for about 20 minutes until fragrant and crispy.

For a lighter flavor that keeps the attention on the tomatoes, swap in olive oil for the bacon fat, omit the flour thickener and use 1/4 cup white wine in place of chicken broth used for the tomato gravy. When the tomatoes are cooked and liquid has reduced, remove from heat and swirl in two cold pats of butter, about 1 Tbsp. each.

Directions

  1. Place a non-stick skillet over medium heat and sauté onions in bacon fat until softened. Stir in flour and cook until bubbly. Add chicken broth, whisking until mixture is even and bubbly. Add chopped tomatoes and cook, stirring frequently, until tomatoes are broken down and mixture is bubbly all over. Season to taste with salt and pepper. Add another splash of liquid if needed to thin the gravy.
  2. Cook the grits in a heavy-bottomed pot. Bring broth or salted water to boil, then reduce heat and stir in grits thoroughly to prevent clumping. The key to good, creamy grits is to keep the temperature low and stir frequently. Keep a tea kettle of hot water nearby, and add as needed to maintain a creamy consistency.
  3. Heat a swirl of the olive oil in a small skillet, and cook a few leaves of kale (if using) with the corn kernels, just until heated through. Transfer to a separate bowl and use the same skillet to sauté the shrimp in remaining olive oil.
  4. Plate the grits, ladle the tomato gravy over each portion, and then top with the corn/kale mixture and the sautéed shrimp. Scatter roasted kale over the top and serve immediately.


Shrimp Scampi Pizza

There is a special meal tradition at our house on New Year’s Eve. Our annual celebration of fancy pizzas began in 2018, right around the time that I was working to perfect my sourdough pizza crust. Les had shared his memories of the amazing White Clam Pizza he enjoyed while living near New Haven, Connecticut, and we decided to try one at home for New Year’s Eve. It turned out so good that we repeated it the next two years, and in 2020, we added a second specialty flavor to our repertoire— the Oysters Rockefeller Pizza. Last year, we tweaked tradition yet again, trading in the white clam pie with this creative twist on the classic Italian pasta dish, shrimp scampi. Why wouldn’t the flavors of garlic, shrimp, parsley and lemon be amazing on a blistered sourdough crust? Turns out, they most definitely are.


As with most of my specialty pizzas, this one takes a little time to prepare, but the good news is that you’ll do most of it in advance so that you have plenty of time to relax with a cocktail or mingle with guests (or both). There are three components to this pizza, and I’ll break down the details in photos ahead of the click-to-print recipe card at the end. You’re going to love this pizza!

My method for pizza baking

First things first, we bake all our pizzas in a regular home oven, preheated to 550° F with a baking steel on the rack. This combination of slab steel and maximum temperature helps us replicate the effect of a brick oven. If you don’t have a steel, you can get similar results with a pizza stone, but be sure to follow the manufacturer’s guidelines so that you don’t accidentally crack your stone under this extreme heat. With this method, you also need a pizza peel, which looks like a long-handled paddle. It’s helpful for easy transfer of the pizza into and out of the oven.

Our pizza stone doesn’t get much action since we invested in the baking steel.
Whichever you choose, you’ll need a peel for easy transfer of the pizza.

About the pizza dough

Second, my pizza dough is homemade from sourdough starter, and the shaping method is crucial to the kind of texture you see in my photos. We never use a rolling pin on the dough, as this deflates all the lovely air pockets. If you aren’t on the sourdough train, it’s no problem— you can use a yeasted dough or even a store-bought dough if you have a favorite that you trust. The link for my pizza dough also includes a yeast option, if you want to make your own without sourdough. Bring the dough to room temperature when you’re ready to bake.


Cheez, Louise

Traditional scampi— the kind that’s piled onto a dome of angel hair— would not have any kind of cheese. But for my pizza, which does not have a base sauce, I’ve opted to scatter a bit of freshly grated mozzarella over the dough so that the shrimp curls have something to rest on. This is the firm variety of mozz, not the soft variety that is common for Caprese salad. Skip the pre-shredded stuff from the grocery store, as it is packed with an anti-caking agent that also prevents even melting.

My recipe also calls for parm-romano blend cheese, which we make in bulk at home because we use so darn much of it. A good Italian-made Parmesan is acceptable here, but again, do not use the pre-grated stuff. A special occasion pizza deserves the freshest cheese, and a few flicks of a microplane grater will bring big results, I promise.

The star of the show— shrimp

Finally, choose the right shrimp and for the love of flavor, don’t use pre-cooked. Choose fresh large shrimp— somewhere in the 20 pieces-per-pound range is just right— and buy them with the shells and tails on, as you’ll use those parts for the scampi sauce. Be sure to remove the “vein” from the curled back of the shrimp, and take note of the steps below for marinating them a few minutes before baking.

Let’s get cooking!

The sauce happens in two stages, beginning with what will seem like a ton of garlic and the parts and pieces that remain after you clean and set aside the shrimp. You’ll sauté the garlic at very low temperature for about 20 minutes, and then you’ll toss in the shrimp shells and tails for a gentle braising in dry vermouth. 


Vermouth— one of the primary ingredients in a martini— is what I always have open, but you are welcome to use a dry white wine such as pinot grigio if that’s more your style. Either way, add only enough to cover the bottom of the pot, and be sure that each shell is at least partially submerged. This will go for about 30 minutes at low heat, until most of the liquid has evaporated. Strain out and discard the solids, and you’ll be left with a small amount of deeply flavored, shrimpy-garlicky oil.


Next, transfer the strained base back to the pan over medium heat and add more minced garlic to it. Squeeze in the juice of half a lemon and simmer this until the garlic is softened (don’t let it burn!), and then turn off the heat. Add finely chopped parsley and swirl in a tablespoon of butter. Transfer to a straight-sided jar and use an immersion blender to whiz this mixture up into a smooth, garlicky butter sauce that you’ll drizzle onto the pizza when it’s hot from the oven. If you’re working ahead, this can be refrigerated and then brought to room temperature just before pizza baking.


Marinate the shrimp

Now, do you remember the temperature this pizza will bake? Five hundred, fifty degrees! Under such extremes, the delicate shrimp needs a little protection, and I’m treating it with the mayonnaise trick I learned from rock star chef Kenji Lopéz-Alt. There is yet another clove of minced garlic in here, plus the zest of a small lemon and a shake of red pepper flakes. And then, the magic ingredient— baking soda! You can read all about my discovery of this technique here, if you wish, but suffice to say that it transforms the marinade to flavor the shrimp and protect it from the high heat. Twenty minutes will do it, but wait until just before pizza time for this step.


Time to build the pizza!

Prep a pizza peel by rubbing in flour and then medium grind cornmeal, and hand-shape the pizza dough into a 14-inch round. Drizzle it with olive oil and season with salt and pepper. Next, scatter a sparse amount of the freshly grated mozzarella onto the dough as a base for the shrimp, and a quick shake of red pepper flakes. Arrange the shrimp (including that mayo marinade) onto the pizza. Give the whole thing a dusting of parm-romano cheese and slide it into the oven. Set a timer for 6 minutes (or longer, if using a pizza stone).


The preheated baking steel retains a great deal of heat, and the high temp of the oven ensures that the crust as well as the toppings will be perfectly browned in this time. Drizzle on the garlic-shrimp butter sauce, toss on more fresh parsley and one more dose of parm-romano blend cheese.


The cheese and garlic butter will melt into the pizza, creating a perfect bite of tender shrimp, intensely flavored butter and garlicky goodness! This will be one of the two pizzas on our table this year as we count down to 2024. 

Now, care to guess what other pizza I’ll be trying this New Year’s Eve? Hint: it’s more seafood. Stay tuned! 😉

Shrimp Scampi Pizza

  • Servings: 14-inch pizza
  • Difficulty: Intermediate
  • Print

Don't let the number of steps scare you away from making this insanely delicious pizza. None of them are difficult, and you'll be greatly rewarded for your effort!


Ingredients

  • 1/4 cup extra virgin olive oil
  • 5 to 6 cloves fresh garlic, peeled and sliced thin
  • Kosher salt
  • A few shakes red pepper flakes
  • Shells and tails of 3/4 pound uncooked shrimp
  • 1/4 cup dry white wine (or vermouth, as I prefer)
  • 2 additional cloves garlic, minced
  • Juice of 1/2 lemon
  • 2 Tbsp. fresh parsley leaves, finely chopped
  • 1 Tbsp. butter

Notes: Don’t skimp on the garlic in this component! It plays a prominent role in scampi, and though it may seem like too much, you’ll end up straining most of it out of the sauce base, so use enough to give it plenty of flavor.

Directions

  1. Add olive oil to a heavy-bottomed pot placed over very low heat. Add first amount of garlic, salt and red pepper flakes and steep for about 20 minutes. Watch this carefully to be sure the garlic doesn’t burn; it should just barely simmer around the edges of the garlic.
  2. Add shrimp shells and tails to the pot and toss until shells begin to turn pink. Raise heat slightly to medium-low. Add dry vermouth and simmer until liquid is mostly evaporated. Cool to room temperature and then strain out solids through a mesh strainer.
  3. Wipe out the pot and add strained shrimp stock, minced garlic and lemon juice. Cook over low heat until garlic softens. Turn off heat, stir in parsley and whisk in butter.
  4. Transfer sauce to a straight-sided jar and use an immersion blender to puree until smooth. Set aside or refrigerate and bring to room temperature before baking pizza.

Next, marinate the shrimp. If you make the marinade ahead, wait until last minute to add the baking soda.

Ingredients

  • 1/3 cup mayonnaise
  • 1 clove garlic, peeled and minced
  • 1 or 2 shakes red pepper flakes
  • 1/4 tsp. baking soda
  • Zest of 1 small lemon
  • 3/4 pound wild-caught shrimp, peeled and deveined

Directions

  1. Combine mayo, garlic, red pepper and baking soda in a bowl large enough to hold the shrimp.
  2. Stir in lemon zest and toss shrimp in the mixture. Set aside for 20 minutes before assembling the pizza.

Time to bake: The oven should be preheated to 550° F for one hour with pizza steel placed about 8 inches from the top heating element of the oven. Dust pizza peel with flour and medium grind corn meal for easy transfer of the pizza to and from the oven. If you don’t have a peel, use the back of a cookie sheet to slide the pizza in, and grab the crust with tongs to pull it out when it’s finished.

Ingredients

  • 11 oz. pizza dough ball, at room temperature
  • Drizzle of olive oil
  • Salt and pepper
  • 1/3 cup freshly shredded hard mozzarella
  • A few shakes red pepper flakes
  • 2 Tbsp. parm-romano blend cheese
  • Additional parm-romano and chopped Italian parsley (for final garnish)

Directions

  1. Shape dough by hand into a 14-inch round and place it on prepared peel. Drizzle oil all over dough and give it a quick seasoning of salt and pepper.
  2. Scatter mozzarella over pizza and shake on red pepper flakes. Arrange shrimp over mozzarella. Sprinkle parm-romano cheese all over pizza.
  3. Slide pizza onto hot steel and bake for 6 minutes. Remove from oven and spoon over the garlic sauce, concentrating on the shrimp (don’t worry, it will melt and ooze everywhere). Sprinkle with parsley and additional parm-romano cheese. Serve immediately.


Easy Pickled Shrimp

Every region has its favorite foods. You know, the things that you can expect to find multiple variations of at a potluck, family picnic or church social. In the South, that would be a relatively short list of ham biscuits, pimiento cheese, collard greens, deviled eggs, pulled pork bbq, banana pudding and sweet tea. 

If I could add one item to that list, it would be this pickled shrimp. It’s a quick and easy way to serve up everyone’s favorite shellfish, without frying it or burying it in sauce. If you can boil water and slice an onion, you can make this, and you’ll find it incredibly versatile.


I found this recipe on Pinterest when I was looking for— wait, what was I looking for? Who cares, because I stopped scrolling when my eyes caught the name on this recipe clipping: Pat Conroy.


The name Pat Conroy may not ring a bell for you, but I’ll bet you know some of his work. The late American novelist wrote numerous books, fiction and non-fiction, including The Prince of Tides, which he adapted into a screenplay for a Barbra Streisand-produced film that earned seven Oscar nominations.

Pat Conroy had a thing for the South, especially South Carolina, where he is buried. I first learned about him when I visited Hilton Head many years ago and dined at a restaurant that carried his name. Conroy’s—now permanently closed— was an elegant-meets-coastal-casual place inside the Marriott hotel, and its she crab soup made such an impression that I dined there three times over the course of a week, even though I was not a guest at the hotel. The rich and creamy seafood bisque was said to be one of Pat Conroy’s favorites, and I decided then and there that he was my kinda guy.

So when I saw this recipe for pickled shrimp, straight from Conroy himself, I knew it would be a winner. The ingredients are straightforward— onions, garlic, capers, crushed red pepper, spices, vinegar, lemon juice and olive oil— and as I blended these things together, it occurred to me that you could substitute any number of things for variations of this delicious mix. Why not use pimientos instead of capers, or jalapenos instead of crushed red pepper? Couldn’t you put a Greek spin on it with some oregano and chopped kalamata olives? Oh, the possibilities!


I added a spoonful of sugar, just because it’s the South and well, it’s what we do here. That little touch of sweet is a nice balance to the acidity of vinegar and lemon. Then, I dipped the shrimp ever-so-briefly into simmering water before spilling them into the pickling liquid. The prep and cook time are minimal in this dish, and the rest of the magic happens in the fridge when the mixture melds and mingles overnight. I doubled the weight of shrimp in my recipe and found that the marinade was sufficient. If you do the same, plan to give the mixture a stir every few hours.


This pickled shrimp is tangy, briny, fresh, herbal, spicy and altogether perfect for spring or summer. For sure, it’s a Southern thing that I have only made twice myself, but that is going to change, especially now that my mind is set on swapping in other flavors. We served this shrimp on the hors d’oeuvres table for Kentucky Derby, in a large bowl tucked inside an even larger bowl filled with crushed ice— so easy! Our guests raved about it, and what little bit was left over turned a simple pile of arugula into a weeknight dinner salad that was as delicious as it was effortless.

Now, if you’ll excuse me, I’m off to begin my search for the perfect she crab soup recipe. I’m sure Conroy has one out there somewhere!


Easy Pickled Shrimp

  • Servings: About 10
  • Difficulty: So Easy!
  • Print

This easy recipe is a good one to have in your pocket for a brunch, potluck or any summer gathering. For best results, use fresh, never frozen shrimp.


Ingredients

  • 1 medium sweet onion (preferably Vidalia), cut into thin, lengthwise slices
  • 3 garlic cloves, finely chopped
  • 3 ounces non-pareil capers, drained and lightly chopped
  • 4 dried bay leaves, crushed into small pieces
  • 1 cup apple cider vinegar
  • 1/4 cup freshly squeezed lemon juice (zest, too)
  • 1 tsp. kosher salt
  • Several twists of freshly cracked pepper
  • 1 tsp. celery seed
  • 1 tsp. crushed red pepper flakes
  • 1 Tbsp. sugar
  • 1/2 cup good quality, extra virgin olive oil
  • 2 pounds fresh large shrimp, peeled and de-veined

Directions

  1. Combine all ingredients except shrimp in a large bowl fitted with a lid.
  2. Bring a large pot of water to boil. Add 1 tablespoon kosher salt to the pot and stir to dissolve. Reduce heat to medium to keep water at a consistent simmer.
  3. Using a spider strainer or other mesh-style scoop, add shrimp, about 1/2 pound at a time, and cook only until shrimp is bright pink and slightly curled (60 to 90 seconds). Transfer immediately to the bowl of pickling liquid and toss gently to coat the shrimp in the liquid. Repeat until all shrimp are cooked.
  4. Let the shrimp cool for about 20 minutes, then cover bowl and transfer to the fridge to chill for 6 to 8 hours. Give it a gentle stir every few hours and just before serving.
  5. Serve in a large bowl, with pickling liquid, inside a larger bowl filled with crushed ice to keep it cold.


Green Curry Shrimp

It has been an interesting week at our house, between the saga of our bathroom remodel, which included some high drama that nearly wrecked me (more on that another day), and an unfortunate, middle-of-the-night accident that occurred in the rear corner of our raised bed garden. It’s been going gangbusters, thanks to the vigilant security provided by this little fella:

The Yard Defender!!!

The “Yard Defender” has restored my hope for a vegetable garden, after several (literally) fruitless years of battle against the herd of deer that resides in the woods behind our cul-de-sac. We’ve tried all the home remedy stuff—Irish Spring soap, garlic hung on strings that spanned the tomato cages, human hair, commercial potions with a nasty rotten egg odor, ALL of it—and last year, well, I didn’t even bother. But with grocery prices soaring, I wanted to try again and so I splurged on this motion sensor device, advertised with the slogan, “don’t hurt ‘em, just squirt ‘em!”

The thing has peripheral vision to spot deer (or other critters, or unsuspecting neighbors) when they approach the garden, and launches a hearty spray of water to chase them off. My garden looks better than ever! Yesterday morning, though, our neighbor texted to tell me that “something had happened” to one of my zucchini plants, and when I went out to investigate, I discovered what appears to be a hit-and-run.

YIKES!

First of all, this trellis is heavy duty, so this was a serious accident. I was trying to train my zucchini to grow upward on both sides of it, to make more space in the garden and encourage more fruit. It was looking so healthy and I’ve just begun to see blossoms forming. My assumption is that a good-sized deer was already standing in the garden when the sensor detected its movement, and the precious thing got so spooked by the abrupt noise and spray, it panicked and fell onto the trellis. I have since moved the Yard Defender to the rear of the garden, where the tomatoes grow (it’s what they are after anyway), and hopefully we can avoid another dangerous incident. For sure, at least one of my zucchini plants is doomed (it was crushed, along with the trellis), but I hope that the other three endure so I can join the chorus of those who are sick to death of zucchini recipes, come August. Until then, I will continue to harvest what is growing out of control on the inside of my house, in the Aerogarden.

Here we go again, with the Thai basil!


I’ve been scrambling to come up with interesting ways to work this herb into “the rotation,” which is an inside joke for me and my husband, who swears we have not eaten the same thing twice since 2016. This is his fault, I say, for marrying a woman who loves to experiment in the kitchen. But using what is local and plentiful is part of what I do, and it doesn’t get more “local” than the dining room. I have in mind to substitute it for mint in a Mojito this weekend, and I’ll let you know how that goes. For now, let’s talk about what went into this bowlful of goodness.


Some of the vegetables in this recipe were the same as in the Thai Basil Chicken I shared last week, but there were plenty of swaps that make this dish different. I used carrots and red bell pepper again, swapped in scallions for regular onions, and cut up the first fruit of my 2022 garden, a wonky eggplant!


Shrimp was my protein and I shifted the sauce to a green curry-coconut vibe. Green curry is a vibrant blend of warm spices mixed with lemongrass, kaffir lime, green Thai chile and galangal, a rhizome that looks like ginger but tastes more herbal. It would be quite complex to make green curry from scratch, but a store-bought paste makes this recipe very simple. The aroma of the paste is pleasantly intoxicating, especially when it first hits the oil in your pan. Coconut milk is a natural companion for the flavor of any curry, and for this recipe, I used a “light” version to reduce the overall fat, but a full-fat coconut milk is fine and would lend more of the coconut flavor.


My first taste of green curry (circa 2005) was a pleasant surprise, and I was introduced to it by an unexpected culinary expert—my then-quite-young stepdaughter. She became a foodie at an early age, in part by my influence, but also that of her mother, who introduced her to Thai food when she was still in elementary school. Yes, when other kiddos were clamoring for fried chicken fingers at chain restaurants, our global flavor-savvy girl was scouting out the nearest sushi joint or Indian restaurant. When I had mentioned to her on a family dinner out in a Thai restaurant that I didn’t care for curry, she asked, incredulously, “not even green curry?” She offered me a taste of her favorite green curry chicken, and I was hooked. I’ve made it at home a few times in recent years, but this was my first time with shrimp. Delicious!


There is a bit of heat in my rendition of this dish, not only from the green curry paste, which leans spicier than red and yellow curries, but amped up by a few shakes of another fun ingredient in my pantry—Asian Reds hot chile blend, available online from the Flatiron Pepper Co. website. To be clear, I don’t get paid to brag about them, but I probably should, given that we own a bottle of darn-near every variety they make. What sets this company apart from others is that it offers region-specific blends of peppers that are otherwise hard to find. The Asian Reds includes Thai chile and ghost pepper, both of which are damn hot. I heartily recommend it for adding heat to any Asian-inspired dish, but a quick shake of the red pepper flakes you probably already have will work in a pinch for this recipe, or you could mince up half of a red jalapeno into the veggie mix for similar heat effect.

You won’t find these varieties of peppers just anywhere. Use it sparingly because it is HOT.

My advice for making this dish is the same as most every Asian-inspired recipe, and that is to get all your ingredients lined up and ready before you begin because things move quickly once the oil hits the pan. That means chop up your vegetables, clean and de-vein your shrimp and get your rice cooking (you’ll want that, for soaking up every last drop of the flavorful green curry sauce). Place a heavy bottomed pan over medium-high heat and add a couple of tablespoons of high-heat oil, such as canola, peanut or coconut. Give a quick stir-fry to the carrots and peppers first, because they take longer to cook. Then, add the scallions and garlic and toss long enough for the initial steam to dissipate. Move the vegetables to the outer edges the pan, drop another tablespoon of oil to the center and plop the green curry paste onto it. Prepare to be entranced by the aroma!


When the oil sizzles around the green curry paste, use a utensil to break it up and toss it with all the vegetable ingredients, so that everything is covered in a light film of the curry paste. The eggplant should go in last, given its tendency to instantly absorb oil. Toss everything just enough to coat the pieces, then add the entire can of coconut milk and stir to blend. Sprinkle in hot pepper flakes (if you want the extra heat), reduce the heat to low and cover the pan to simmer for 3 minutes. This gives the vegetables time to soften, and allows the green curry flavor to permeate everything.


Add the shrimp to the pan and stir to submerge them beneath the simmering liquid. Depending on the size of your shrimp, it should only take 3 to 5 minutes for them to lose their pink color, so watch them closely. Add a handful of Thai basil and stir to wilt it into the dish. Serve immediately with a portion of jasmine rice.

Garnish with a pretty Thai basil leaf if you want to be fancy. 😉


Green Curry Shrimp

  • Servings: 2, plus leftovers for one lunch
  • Difficulty: average
  • Print

This recipe comes together quickly and with ease, thanks to a store-bought paste that captures all the important flavors of Thai green curry. Substitute chicken or tofu if you wish. If you don’t have Thai basil, you could substitute regular basil or omit it altogether.

Ingredients

  • 3 Tbsp. high-heat cooking oil, such as canola, peanut or coconut (you will divide this for cooking the vegetables and blooming the curry paste)
  • 1 red bell pepper, sliced and halved
  • 2 medium carrots, peeled and cut on a bias
  • 3 scallions, cut on bias (white and green parts)
  • 3 cloves garlic, chopped
  • 1 medium Japanese eggplant, cut into bite sized chunks
  • 2 Tbsp. prepared green curry paste
  • 1 can light coconut milk (this is the culinary variety, not cartons for drinking)
  • a few shakes hot red pepper flakes, for extra heat
  • 1/2 pound fresh shrimp, peeled and deveined
  • a handful of fresh Thai basil leaves (optional but delicious); substitute regular basil if desired
  • hot cooked jasmine rice, for serving (I used brown jasmine rice for extra flavor and nutrition)

Directions

  1. Heat a large, heavy-bottomed pot over medium-high heat. Add 2 tablespoons of oil and stir-fry the carrots and red peppers for about two minutes to give them a head start. Season with salt and pepper to taste. Add scallions and garlic and toss to coat and wilt the scallions.
  2. Move the vegetables to the outer edge of the pot. Add 1 tablespoon of oil to the center and spoon the green curry paste onto the oil. This will “bloom” all the flavors of the paste. Break it up a bit with your cooking utensil, then stir it together with the cooked vegetables. Add the eggplant and toss to coat.
  3. Pour the entire can of light coconut milk into the pot and gently stir to blend. Sprinkle on hot pepper flakes (if using) and adjust salt and pepper to taste. Reduce heat to low and cover the pot, simmering for about three minutes, or until the mixture reaches a slight boil.
  4. Add the shrimp pieces. tossing lightly to submerge them beneath the simmering liquid. Keep a close eye on them, as they will cook in as few as 3 minutes, depending on their size and original temperature.
  5. Stir in Thai basil leaves until wilted. Serve immediately with hot cooked jasmine rice.


Po’ Boy Shrimp Tacos

Being creative in the kitchen is often little more than playing a game of mix and match. You take a dish you already know, apply another style of cuisine or a few ingredient swaps, and you’re on your way. That’s what happened in my kitchen when I decided to twist together Mardi Gras and Taco Tuesday.

Having never been to New Orleans myself, I already knew something about its foods (well, I mean, who doesn’t?) from friends and internet research. The po’ boy, a classic of New Orleans, is a simple sandwich of inexpensive ingredients—usually local, in-season seafood—fried up and served on French bread with lettuce, tomato and pickles. These humble yet tasty handhelds were slipped out the back door to out-of-work streetcar drivers who were on strike at the end of the Roaring ‘20s (now that we’re here, I suppose I should specify, 1920s). As the locals tell it, a kitchen worker would see one of the hungry drivers coming up for a handout, and shout, “here comes another po’ boy!”

My taco-esque spin on the po’ boy is not necessarily original, given that you have probably seen plenty of shrimp tacos. But the New Orleans flavors are purposely prominent here, from the savory dry spices I added to my handmade corn tortillas, to the Cajun spices in the shrimp breading, to the bold and zesty remoulade that topped it all off. There is no cheese or salsa on these tacos; rather, I swapped in the fresh toppings that you would expect on a po’ boy sandwich—thinly shredded lettuce and tomato. But I did want to keep it in taco territory, so I also layered in some thinly sliced jalapeno, which didn’t bother my heat-loving husband one bit. If it bothers you, leave ‘em off.

If I could hit the rewind button on one thing, I would be the preparation of the shrimp. The shrimp or fish on a true po’ boy would be deep fried in a cornmeal crust, so I went along with tradition on that, but my juicy shrimp did get a bit lost in the density of a buttermilk bath and all that breading, and the whole frying process made a mess of the kitchen and had me frustrated in the end. It was delicious but I doubt all that was necessary. My Plan B was to simply season the shrimp straight in the Cajun spices and give them a quick sauté, same as I do for my go-to Cajun shrimp & garlicky cheese grits. The flavors would have been the same and the overall dish would have been lighter, both in heft and calorie count, so I’ll try it that way next time. 

But then again, it’s Fat Tuesday, so anything goes!


Ingredients

6 corn tortillas* (see ingredient notes)

1/2 lb. Gulf shrimp*, peeled and de-veined

2 tsp. spicy Cajun or Creole seasoning*

Canola or peanut oil for frying (amount depends on whether you use breading)


Breading (optional)

1/2 cup all-purpose flour, divided

1/2 cup cultured buttermilk

1/4 cup fine or medium cornmeal (seasoned with the Cajun spices)


Toppings

About 1/2 cup finely shredded lettuce (I used romaine)

1/2 cup chopped fresh tomato

A few thin slices fresh jalapeno (optional)

5 or 6 slices chopped sweet and spicy pickles (we love “Wickles” brand)


Remoulade

4 Tbsp. mayonnaise

1 Tbsp. Frank’s RedHot Sauce* (original variety)

1 Tbsp. minced fresh garlic

2 Tbsp. finely minced red onion

1/4 tsp. paprika (sweet or smoked)

1 Tbsp. sour cream

Salt and pepper


*Ingredient Notes

You could certainly use store-bought corn tortillas for your po’ boy tacos, and perhaps give them a quick flip through a dry cast-iron skillet to warm and slightly char them just before serving. We love handmade corn tortillas, and I added about 1/2 teaspoon each of smoked paprika and onion powder to my masa dough, to lend a little more flair. See my previous post on handmade corn tortillas for more detail about the technique.

I used large shrimp, 16 to 20 count per pound, but I cut them in half for easier divvying among our tacos. My recommendation for Gulf coast shrimp is not merely for authenticity (it is, after all, intended to be a tribute to New Orleans), but also for the integrity of the product. Be wary of seafood from other countries, especially the stuff that comes out of Southeast Asia, as the industry there is prone to problems ranging from over-fishing and contamination to heinous human rights violations. Is the domestic shrimp more expensive? I suppose it depends on who you ask.

If you don’t have a local fishmonger you trust, look for evidence of standards on the supermarket packaging, and don’t hesitate to ask questions at the fish counter.

To clarify, Cajun and Creole seasonings are not the same, but both are prominent in Louisiana cooking, and I believe they are interchangeable in this recipe, mostly based on your tolerance for heat. Cajun cuisine leans more toward spicy pepper heat and Creole is more about the dried herbs. I used a chile and garlic Cajun powdered seasoning, added to the cornmeal breading. If you skip the breading, simply toss the shrimp directly in the seasoning before sautéing—and don’t skimp!

Frank’s RedHot is the sauce I used, but if you can get your hands on a bottle of Crystal brand hot sauce (the preferred brand in Louisiana), by all means go with that.


Instructions

Make the remoulade ahead, so the flavors have time to meld in the fridge. Stir together all ingredients and adjust heat, salt and pepper to taste. Cover and refrigerate until serving time.

If you are making your own tortillas, make those next, keeping them warm on a towel-lined plate as you prepare the shrimp.

For a sautéed version, pat the shrimp dry on paper towels. Spritz them with spray oil and then toss in the Cajun seasoning until well coated. Heat a small amount of oil in a skillet and saute, turning once, until shrimp are no longer pink. Total cooking time should be two to four minutes, depending on the size of the shrimp.

For fried shrimp, heat canola or peanut oil over medium heat in a cast iron skillet, about 1/2” deep. Pat the shrimp dry on paper towels. Set up a breading station, with half the flour in one dish, buttermilk in the second, and remaining flour mixed with cornmeal, Cajun seasoning and cayenne (if using) in a third.

When the oil is ready (toss a bread cube in to see if it bubbles immediately), toss the shrimp lightly in the plain flour, then dip into the buttermilk and finally the cornmeal mixture. Add the shrimp pieces to the skillet one at a time, keeping room between them. Don’t try to do the shrimp all at once because you will cause the oil temperature to drop too quickly. Turn the shrimp pieces when they are golden on the bottom, and salt immediately upon transfer to a paper towel-lined plate. If you need to add oil, do it between batches and allow time for it to return to proper temperature.

Assemble the po’ boy tacos, beginning with shredded lettuce, tomato and jalapeno (if using). Divide the shrimp among the tacos, dress with remoulade and garnish with chopped spicy pickles.


Bloody Mary Shrimp Cocktail

If you are a child of the ‘70s, as I am, you have seen your fair share of shrimp cocktails. It is a classic, but I am waking it up with a fun flavor twist in the cocktail sauce. You’ll find the flavors familiar—from a brunch standard, the bloody Mary—and it’s bringing a zesty jolt of flavor to the chilled freshness of sweet juicy shrimp, which never goes out of style.

If you’re entertaining for New Year’s, this is an easy way to elevate a classic and please any palate. Begin with your favorite ketchup and dress it up with the ingredients you’d enjoy in a bloody Mary; think crunchy pickles, zippy horseradish, herbaceous celery seed, a shake or two of hot sauce or Worcestershire (or both) and, yes, a shot of vodka.

We like our flavors hot at our house, so I used a “hotter” variety of Texas Pete hot sauce, plus spicy Wickles brand pickles and “extra hot” horseradish. But if you prefer milder flavors, adjust accordingly. You could swap any flavors to suit your fancy. Pretty much anything that would work in a bloody Mary will work here. Same with your garnish.

For the shrimp, do what’s best or easy for you, whether purchasing already cooked, steaming them or perhaps trying the roasting method I’ll demonstrate below. Whichever method you choose, be sure the shrimp have plenty of time to chill. Serve them in individual cocktail glasses for an impressive presentation and garnish as you would a bloody Mary!


Ingredients (serves 6)

18 jumbo shrimp* (see notes)

6 Tbsp. ketchup

2 Tbsp. finely minced onion or shallot

2 Tbsp. finely minced sweet, spicy or dill pickle

1 Tbsp. prepared horseradish

2 tsp. Worcestershire sauce

1 tsp. cayenne hot sauce, such as Texas Pete or Tabasco

1/2 tsp. celery seed

Splash or two of pickle juice

1 shot good quality vodka


*Notes

Take time to notice where your shrimp has been sourced, as some farming methods are bad for the environment and the seafood processing standards in some parts of the world are rife with human rights violations. Whenever possible, choose domestic (U.S. produced) shrimp that is either wild caught or sustainably farmed. Clean, peel and devein the shrimp, but keep the tails on for best presentation.

I used 16-20 count shrimp, which means there are 16-20 per pound. If you are serving the cocktail as an appetizer, three shrimp per person is a good starting point.

As a side note, it occurs to me that this zesty cocktail sauce would also be terrific with raw or steamed oysters.


Instructions

Cook the shrimp, using your preferred method. Chill it thoroughly in the refrigerator before serving.

Stir all sauce ingredients together in a bowl and chill until ready to serve. For presentation, spoon about 2 tablespoons of sauce into a shallow cocktail glass and hang the chilled shrimp on the edge of the glass. Garnish with a wedge of fresh lemon and a cocktail olive, onion, pepperoncini, etc.

Happy New Year!

Easy Roasted Shrimp

The roasting method may seem fussy, but it is actually easier than boiling or steaming, because it doesn’t move so quickly. It’s so frustrating to accidentally overcook something as delicate and expensive as shrimp.

Preheat the oven to 400° F, with oven rack in center position. Peel and de-vein shrimp and arrange them on a parchment-lined baking sheet. Give them a quick spray of olive oil (or toss them lightly in olive oil) and sprinkle both sides lightly with Old Bay seasoning or (more simply) salt and pepper.

Roast for 7 minutes, until shrimp are just opaque. Immediately transfer shrimp to a bowl and chill them down quickly in the freezer for several minutes or plunge the bowl into a larger bowl filled with ice. The goal is to bring down the temperature quickly so that the shrimp don’t overcook to become tough.


Shrimp & Quinoa Salad

One of the benefits of working from home is the flexibility to carry out personal tasks during my workday. It is not unusual, even during my job’s “busy” seasons, for me to be working on a loaf of sourdough bread or some other dinner prep amid online conference calls or in between answering emails. So when my friend, Ruthanne, texted a few weeks ago to ask if she could come to my house for an online job interview, I instantly answered, “of course!”  

Her own home was more than 45 minutes away, and she needed a quiet place to land where she could conduct her meeting without attracting suspicion from management at her current job. My place was an easy solution, being just a few minutes down the parkway, and (obviously) I also promised her a tasty lunch.

Ruthanne has a fit, healthy lifestyle that is usually along low-carb lines with an emphasis on clean, whole food ingredients, and I took that into consideration when I planned this simple lunch. It was mostly made in advance—I cooked up the quinoa and sauteed the onions and tomatoes before she arrived, then I set her up in the loft space in our home, where she connected to our wi-fi, took a few deep breaths, shook off her nerves and started her call.

The irony of the situation is that my friend was hoping to land a position with a company that exclusively employs remote workers, and that was their practice even before the COVID-19 pandemic forced so many companies to create a remote plan. Job interviews are stressful under the best of circumstances, but this one was a high-stakes situation. After 15 months of pandemic-forced remote work, her existing employer had mandated an immediate return to the office. Like so many other people, my friend had adjusted to working productively in the quiet environment of her own home, and despite her pleas to continue the arrangement for a few more weeks so that she could manage new family obligations, it was a no go. She needed this new job.

When she descended from the loft with a huge smile and an expression of relief, I popped the top on a bottle of blood orange seltzer for a quick workday-friendly mocktail. We had to celebrate what she said felt like a sure thing. With the pressure of the interview behind her, we had just enough time left for lunch. I did a super-quick sauté on the shrimp (using the pesto compound butter I already had in the fridge) and arranged this tasty plate.

So much to love about a lunch that is quick, easy, satisfying and good for you!

This was a light, clean bite with a good, healthy dose of protein. Quinoa is the only plant-based food that satisfies all nine of the amino acids our bodies need, yet it doesn’t feel heavy or too filling. Mixed salad greens in vinaigrette were a fresh backdrop to the quinoa and the gently sauteed tomatoes provided a juicy pop of acid against the sweetness of the shrimp. It was exactly what we needed, and my BFF was able to scoot back to work on time.

It’s exciting to see how quickly things can happen when you are courageous enough to put yourself out there. Ruthanne begins her new job today, and I’m so proud of her! 😀


Serves 2 for lunch

Ingredients

1 cup cooked red, white or mixed quinoa* (see notes)

1 Tbsp. extra virgin olive oil

2 sweet onion slices, chopped

Small handful organic baby tomatoes, halved

2 handfuls mixed baby greens

4 Tbsp. vinaigrette (I used the last bit of some Good Seasons dressing, but any vinaigrette would work)

6 jumbo shrimp, peeled and deveined*

2 Tbsp. pesto compound butter*

Lemon wedges for serving


*Notes

Cook the quinoa ahead to allow time for chilling it. If you have found quinoa to have a bitter taste, you may have missed the step of rinsing it before cooking. Give these instructions a quick review to see how I prepped the quinoa. I made a large batch and used up the rest in other dishes.


The shrimp I used for this dish were “16-20” size, which means a pound of the shrimp would include 16 to 20 individual shrimp. Each portion of this salad included about 4 ounces of shrimp.

This recipe makes use of the compound butter I shared in my previous post, or you could swap in regular butter or extra virgin olive oil, but add a little minced garlic and herbs to the pan when you cook the shrimp.


Instructions


  1. Place a small, non-stick skillet over medium heat. Swirl in olive oil and heat until shimmering. Sauté onions and baby tomatoes just long enough to soften them. Season with salt and pepper and transfer to a bowl until you’re ready to assemble the salad.
  2. Toss the mixed greens in vinaigrette until lightly coated. Arrange the greens on the plate, reserving leftover dressing.
  3. Add the quinoa to the bowl with dressing and toss it around to absorb it. Mound the quinoa on top of the dressed greens, then scatter the onions and tomatoes over it.
  4. Heat the compound butter in the same skillet used for cooking the onions. When it is melted and the skillet is hot, lay the shrimp into the pan, taking note of the order you added them. After about one minute, turn each shrimp over, following the same order, to cook the second side.
  5. Arrange the shrimp on top of the salad. Drizzle any remaining melted butter over the top of the shrimp.


Cajun Shrimp & Garlicky Cheese Grits

Take a road trip across the Southeast, and you’ll find a wide array of flavors and presentation in dishes that all claim to be “shrimp and grits.”

And they all are.

There is no right-or-wrong when it comes to this classic southern dish. Whether served with a lush and savory gravy, or piled high with onions, peppers and tomatoes, or spiked with spicy andouille or tasso ham, cheese or no cheese, you are guaranteed a flavorful experience. Over the 34 years that I’ve lived in N.C., I’ve developed my own recipe into what I believe captures the best of all the varieties I’ve tasted around these parts, though I can’t claim to make it the same every time. My “comfort du jour” usually depends on what ingredients are in the fridge, and many times, my decision to make shrimp and grits is a last-minute one.

I almost always have good quality, wild American shrimp in the freezer. I’m guaranteed to have some kind of pork product—ham, bacon, sausage or chorizo—and just about any kind of onion or pepper works, so whatever I have on hand can slide into place. I may or may not incorporate cheese, depending on the other ingredients. One thing that remains constant is my method of cooking the grits. You cannot rush them, and for goodness sake, don’t cheat yourself by using instant. It should take a minimum of 20 minutes on the stove, unless you have, you know, “magic grits.” I think we all remember how that played out in My Cousin Vinny.

If you have ever eaten grits and thought they were, well, gritty—the simple explanation is that they were not cooked long enough or with enough liquid. Grits (or polenta, which is nearly the same thing) are made of broken-down, dried corn. They are tooth-cracking hard straight from the package, and I have found that it takes a good bit longer than the package instructions suggest to get them right. They are kind of like oatmeal in that regard—you can have creamy, soft oatmeal that drips off the spoon, or sticky, gloppy oatmeal that sticks to everything it touches. The difference is all in the cooking process.

The other complaint some people have about grits is a common one—“they’re so bland.” And if you use only water to cook them, they certainly are. Grits do not have much flavor on their own, but you can coax the flavor out of those dry little kernels with the right technique and the right stuff. In other words, ignore the package instructions and use your own cooking instincts. There is no magic to it. 😉

Here’s my secret for perfect, creamy grits every time: treat them like risotto. Cook them low and slow, with plenty of broth additions and plenty of stirring, and finish them with a little cream or half and half. You’ll be rewarded with a silky, luxurious base for whatever you choose to pile on top of them.

These grits are perfectly creamy, with no clumps and no gritty texture.

For this batch of shrimp and grits, I used smoked andouille sausage, cut up and lightly fried until the edges were crispy, sautéed cremini mushrooms, a sprinkle of Cajun seasoning on the shrimp, and scallions on top to finish the dish. The grits, as always, were creamy and delicious, with a few cloves of chopped garlic in the broth and just enough cheddar cheese at the end, to give them some extra body, and a few shakes of RedHot sauce for tangy-spicy flavor.

This recipe serves 2, with a scoop of grits left over to go under your weekend eggs.

There’s so much texture here, beginning with the juicy shrimp and crispy sausage, and down to the creamy, cheesy grits. This is one of our faves!

Ingredients

1 cup yellow grits, a.k.a. polenta* (see notes)

2 cups low-sodium vegetable broth

About 2 cups hot water, as needed for cooking the grits*

2 cloves garlic, finely chopped

Salt and pepper

Frank’s RedHot Original sauce, to taste*

2 Tbsp. light cream or half and half*

1/3 cup shredded sharp cheddar cheese

Extra virgin olive oil for sautéing

2 links smoked andouille sausage, cut into bite-size pieces

Handful of cremini mushrooms, cleaned and sliced

About 2/3 pound of wild-caught shrimp, peeled and de-veined

A few shakes of your favorite Cajun seasoning*

2 scallions (green onions), trimmed and sliced

*Notes

For the best results, and creamy grits, do not use anything packaged as “instant.” My preferred brand is Bob’s Red Mill polenta, which you can find in well-stocked supermarkets, including Super Walmart.

It’s helpful to heat the water in a teakettle or the microwave ahead of time and keep it on standby. When you add liquid to polenta or risotto that is already cooking, you want the liquid to be warm.

As always, you will need to adjust the salt amount to work with your other ingredients. I lean toward low-sodium versions of broth and seasonings so that I have more control of the overall salt in my recipes. Check your labels and taste as you go.

I love the flavor of RedHot sauce, but Texas Pete or Tabasco would also be good for a spike of flavor in the grits.

For readers abroad, “half and half” is a term used to describe a popular dairy product in the U.S. It is essentially equal parts light cream and whole milk, with about 12% milkfat.

We use a dry Cajun seasoning that my husband picked up in New Orleans, but there are plenty of options available in your supermarket. You could also make up your own, with some combination of garlic powder, onion powder, cayenne, black pepper and thyme.

Instructions

I’m a visual learner. If you are, too, then follow along with my slideshow or keep scrolling for written instructions and a pdf you can download for your recipe files.

  1. Place a heavy saucepan over medium heat. Add vegetable broth, garlic, salt and pepper, and heat to nearly boiling. Add polenta, stirring constantly until it is fully mixed with the broth and no visible clumps appear. Reduce heat to medium low and cook, stirring frequently, until most of the liquid is absorbed.
  2. Add hot water, 1/2 cup at a time, and continue with frequent stirring until each addition is absorbed and grits take on a smooth, creamy appearance. This may be up to 2 cups of additional liquid, and may take as long as 40 minutes.
  3. When grits achieve desired consistency, add a few shakes of RedHot sauce and stir in the light cream. Stir in shredded cheddar until melted and smooth. Remove grits from heat and cover to keep warm until you are ready to assemble the dish with the shrimp and other ingredients.
  4. Season the prepared shrimp with a few shakes of Cajun dry seasoning, and toss to let the flavor meld with the shrimp.
  5. Place a large skillet over medium heat. Add a tablespoon of olive oil and brown the andouille sausage bits until they have slightly crispy edges. Add the sliced mushrooms to the pan, tossing to brown them on both sides. Transfer sausage and mushrooms to a bowl.
  6. In the same skillet, again over medium heat, swirl in another tablespoon of olive oil. When oil is shimmering, place shrimp into the pan, one at a time. Allow them to cook, undisturbed, about one minute, then begin turning them, following the same order, to cook the other side.
  7. Add the cooked sausage and mushrooms back to the skillet and give the whole thing a few quick tosses to heat everything through.
  8. Spoon a generous amount of grits onto your serving bowls or plates, top with sausage, shrimp and mushrooms. Sprinkle dish with scallions and serve.

Time for dinner!


Jambalaya Deep-Dish Pizza

For such a short month, February has a lot going on, holiday- and event-wise. There’s Super Bowl, which is traditionally the first Sunday of the month; Valentine’s Day, which is fixed on the 14th; and Mardi Gras, which floats on the lunar calendar in tandem with Ash Wednesday. It’s enough to make even the most adept party planner a little dizzy, and for the average person at home, it isn’t easy to celebrate all three (at least, not when you’re hosting others). I’ve wanted to do some kind of Mardi Gras dish for a while, and with Super Bowl and Valentine’s Day behind us, here’s what I’ve come up with for our small celebration—all the exciting flavors of jambalaya piled into a deep-dish pizza.

The only thing missing from this jambalaya-inspired pizza is the rice, and guess what? We didn’t miss it!

As with the other two February events, it is just the two of us celebrating, and that makes it less intimidating for me. Les and I both love Cajun and Creole flavors, and he brought home some authentic spice blends from a work-related trip to “N’awlins” a couple of years ago, so I already have the right accent. We have some fabulous jazzy blues music to help us get in the mood, and I’m sure we have some beads around here somewhere. Weeknights are always great for a casual meal, and pizza has become one of my “blank canvas” foods, begging for interesting flavor twists. I’m going deep dish on this one because you cannot skimp on Mardi Gras (which translates from French to “fat Tuesday”), and I’m not sure that our usual N.Y.-style crust can handle all this excitement. 

Most of the fillings are obviously traditional, from the zesty smoked andouille sausage, through the holy trinity aromatic vegetables and spices, and the plump and juicy Gulf shrimp. I omitted rice because we have quite enough carbs in my part-cornmeal deep dish pizza dough. Creole foods have tomato, so that’s an easy crossover ingredient for pizza. But what about cheese? I wracked my brain and could not think of a single regional dish that includes cheese, but on a deep-dish pie, the cheese on the bottom seems to shield the tender crust from wet filling ingredients, so I didn’t feel right skipping it.

In the end, I opted for the mildest firm cheese I could think of—one that would not clash with all these great Louisiana flavors. Monterey Jack is sturdy enough to line the pizza dough, but it melts well, and it kept my deep-dish dinner from singing the soggy-bottom blues.

Speaking of the blues, we can’t celebrate Mardi Gras without music, so go put on your favorite New Orleans jazz, or enjoy what I listened to while making this pizza:


Ingredients

1 prepared deep-dish pizza dough (recipe and instructions in my post for Chicago-style Deep-dish Pizza)

2 Tbsp. extra virgin olive oil (mine was infused with cayenne)

2 links smoked andouille sausage, sliced or chopped (I used Aidell’s)

1 boneless chicken thigh, cut into bite-sized bits

2 ribs celery, finely chopped

1/2 yellow onion, chopped

1/2 cup each red and green bell pepper, chopped

4 cloves garlic, chopped

Cajun or Creole seasoning (as much as you can stand)

3 sprigs of fresh thyme, leaves removed

1 1/2 cups canned diced tomatoes, divided (see instructions)

Handful of fresh okra, sliced (or about 3/4 cup frozen sliced okra)

2 Tbsp. red wine vinegar

Splash of veggie or chicken broth (optional, for deglazing the skillet)

4 large gulf shrimp (about 1/4 pound), peeled and deveined)

4 oz. shredded or sliced Monterey jack cheese


Instructions

Let’s run through it together in pictures while you enjoy the Bluesiana Triangle, then keep scrolling for written instructions and a downloadable PDF for your recipe files.


  1. Place a large non-stick skillet over medium heat and swirl in olive oil. When oil is hot enough to shimmer, add cut up andouille sausage and toss until edges are crispy. Use a slotted spoon to transfer the sausage to a bowl and set aside.
  2. Add the chicken pieces to the remaining oil and toss them about until no longer pink. Transfer chicken to the bowl with the sausage.
  3. Add trinity plus garlic to the skillet and toss in the hot oil. Shake on Cajun or creole seasoning to suit your spicy preferences. Grind some black pepper into the pan and sauté vegetables until they are soft and translucent. Scatter the fresh thyme leaves over the vegetables.
  4. Add diced tomatoes, okra and red wine vinegar. Toss and cook until okra is heated through, about five minutes. Turn off heat and allow vegetables to rest a few minutes, then transfer to a bowl and set aside.
  5. If your skillet has any browned bits on the bottom, swirl in a splash of veggie broth and heat to a simmer. Cut the shrimp into bite-sized pieces and toss them into the simmering broth. Cook only long enough for the shrimp to be barely done, which may only be about two minutes. Transfer the shrimp to the bowl with sausage and chicken and set aside.

At this point, if you’re working ahead, you can refrigerate all cooked ingredients, and then bring them to near-room temperature when you are ready to assemble the pizza.

Ready to bake:

  1. Preheat oven to 450° F, with rack in center of oven.
  2. Spread prepared dough into pan, with edges creeping up the side a bit.
  3. Layer ingredients in the following order: Monterey jack, most of the andouille sausage, chicken, vegetables, shrimp, remaining sausage, additional diced tomatoes. Sprinkle with Cajun seasoning.
  4. Bake 25 minutes, rotating pizza halfway through baking time. Rest pizza 5 minutes, then carefully lift and transfer pizza to a flat pizza pan or serving platter. Cut into wedges.

Want to save this recipe?