Les’s Nachos for Dinner

One of the things I like about my marriage is how Terrie and I respect each other’s kitchen capabilities. I certainly know and trust in her judgment, but she also respects the way I can surprise her once in a while with a “guy” food. Like, say, nachos.

As with many guys, I like nachos from days in the sports bars. Great eats while grabbing a beer and watching a game. Somewhere along in my adulting—and I believe it began with thinking of new uses for leftover chili, but I can’t say for sure—I decided I could do nachos every bit as good as a sports bar, whose chips were typically stale and plentiful, while toppings were bland and sparse.

Over the years, I refined my approach to use a block of cheddar or Monterey jack or something similar (a suggestion from Terrie, who, as regular readers of this blog know, abhors shredded cheese in a bag), a fun protein and any of a number of complementary items before the oven or after: fire-roasted corn, onions, black beans, refried beans, pickled jalapenos (or fresh if you slice them thinly), scallions, avocados, guacamole, sour cream, salsa.

Lots of flavor and texture here.

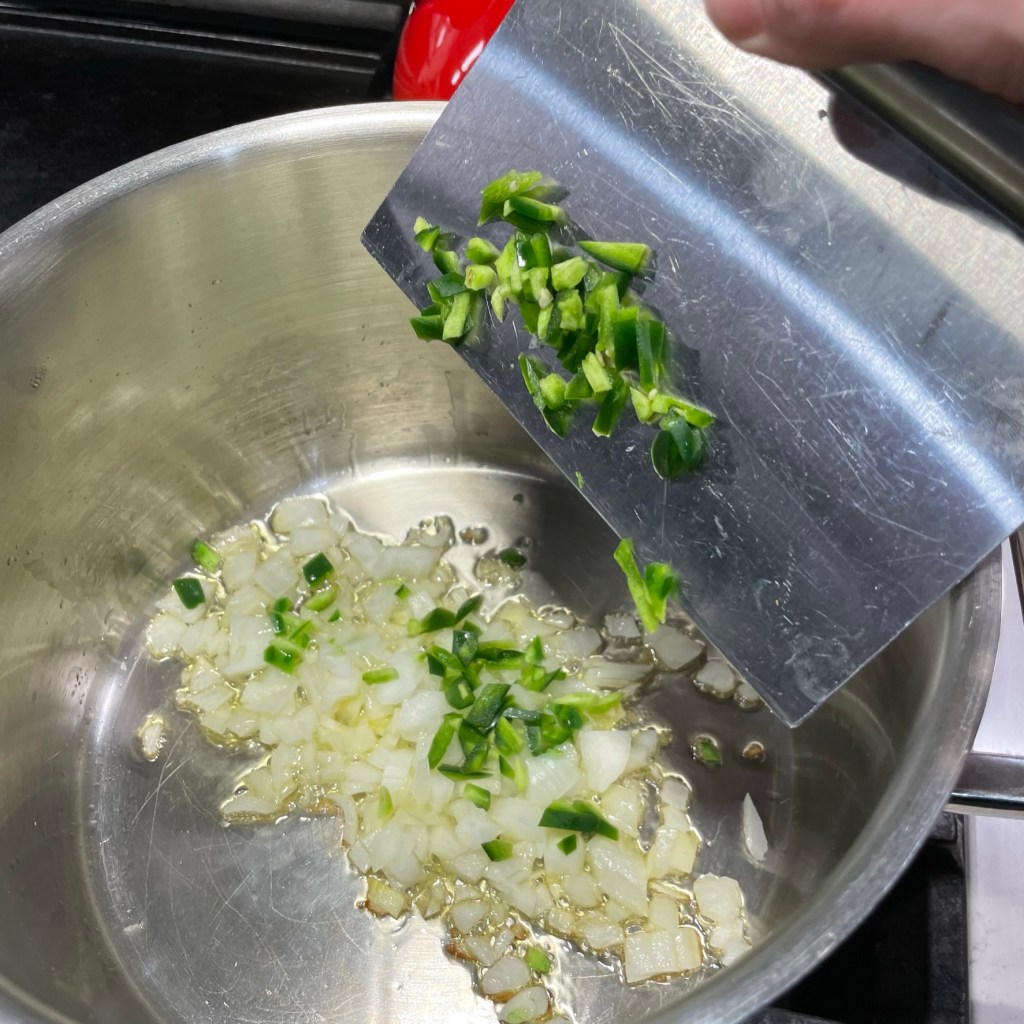
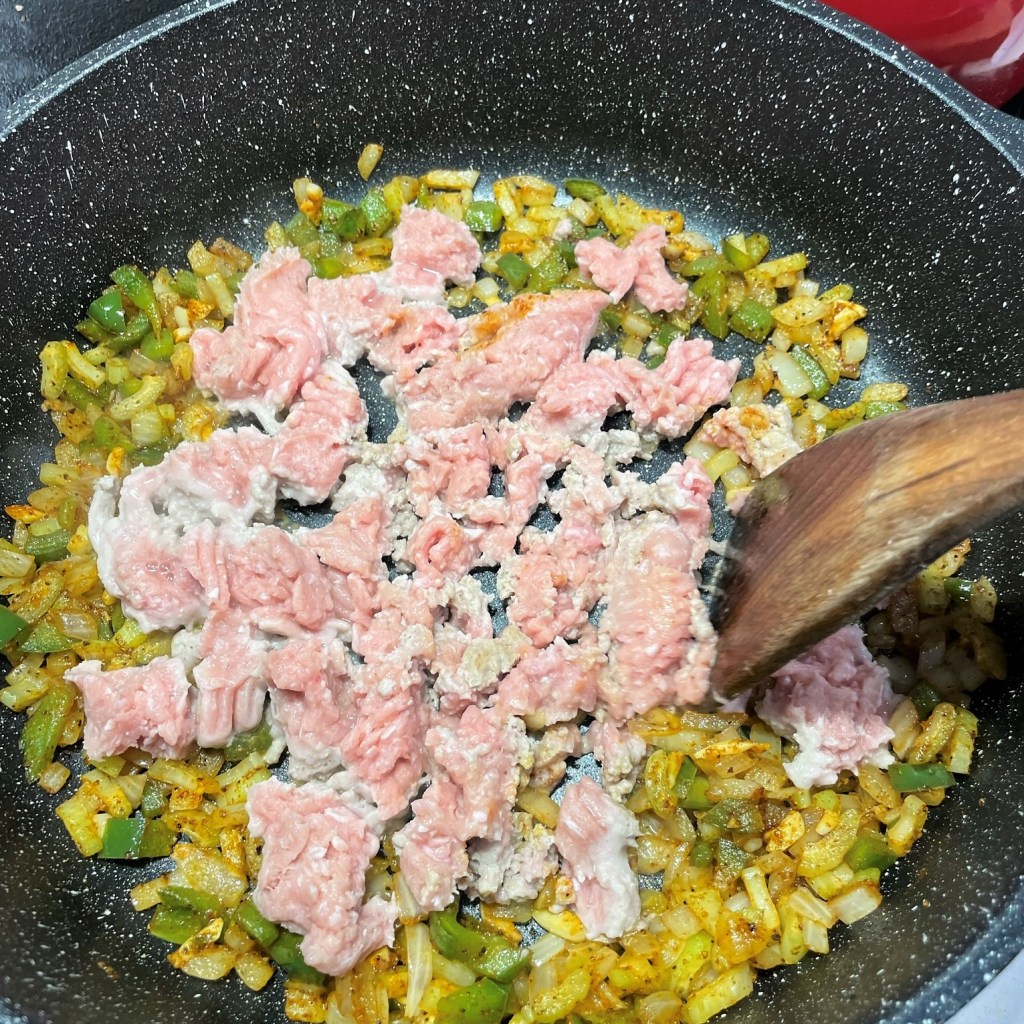
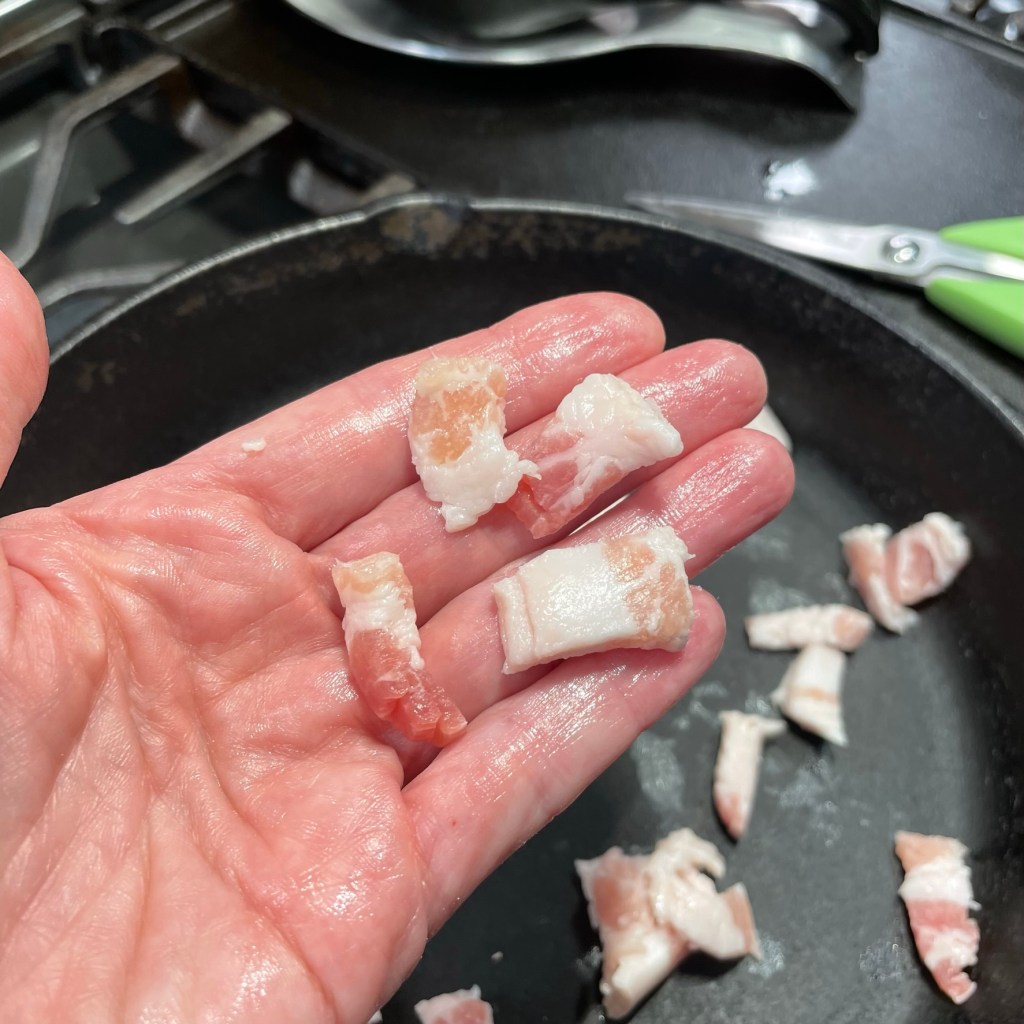
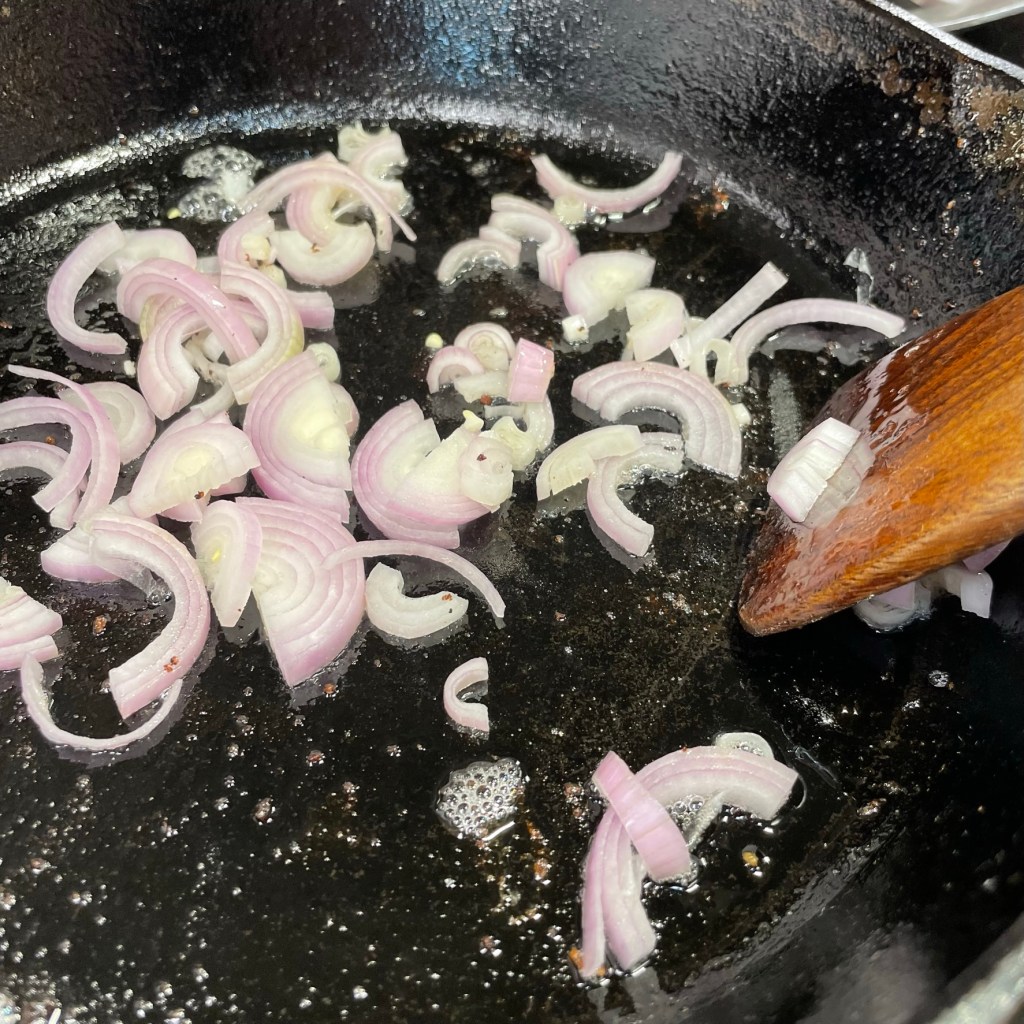
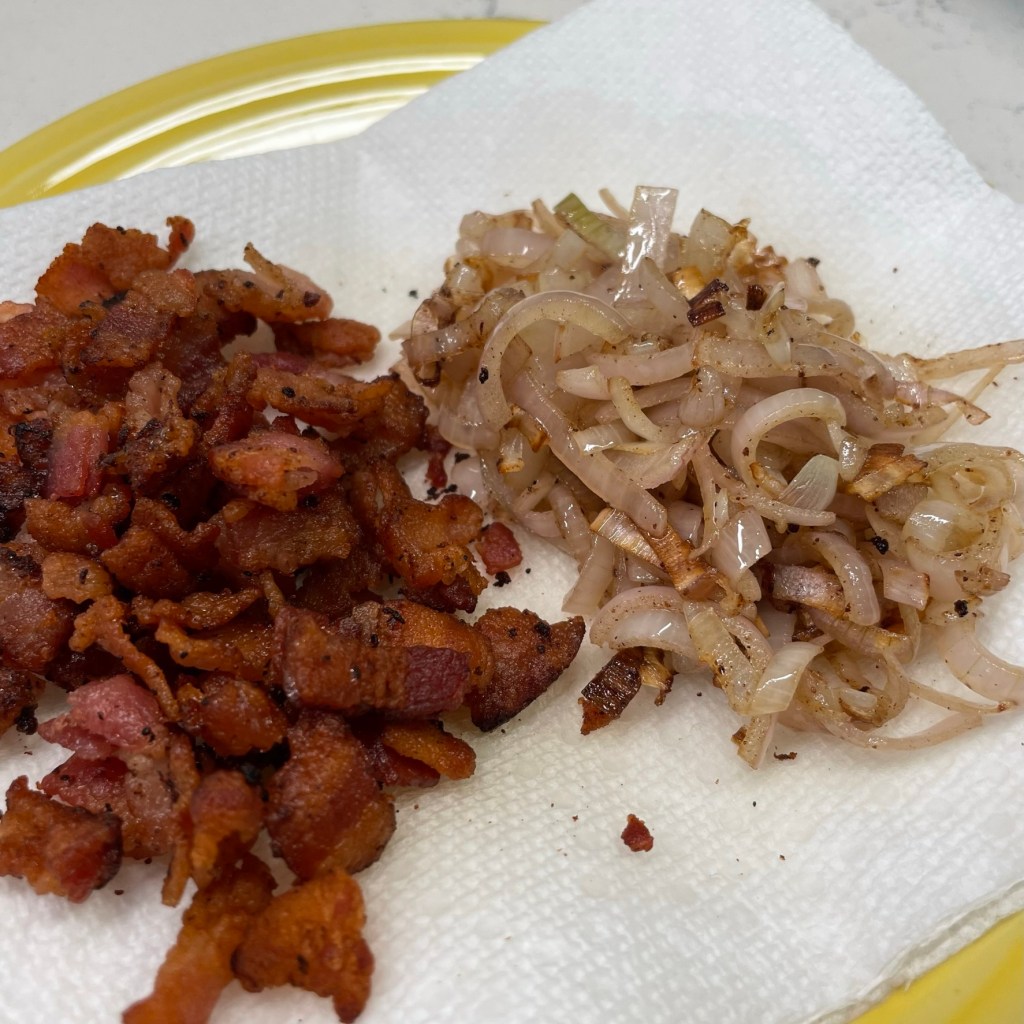
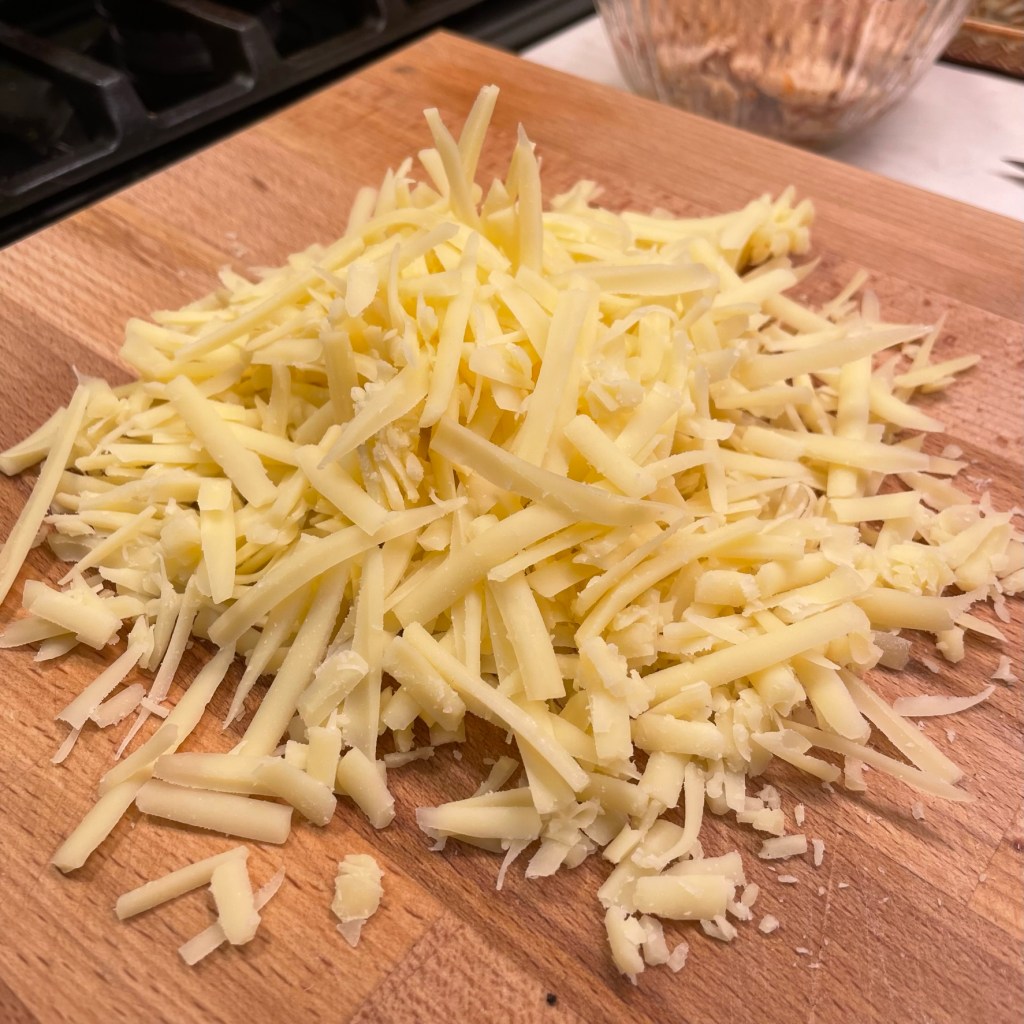
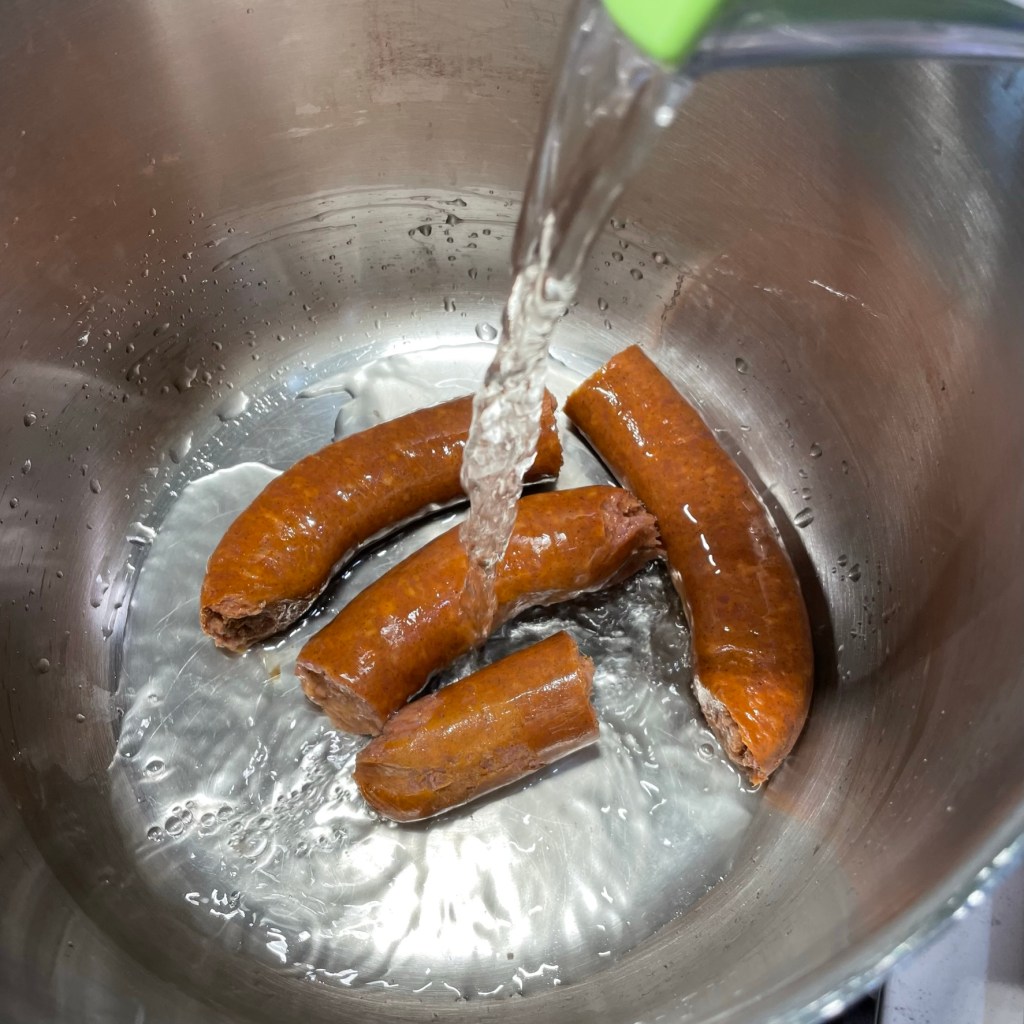
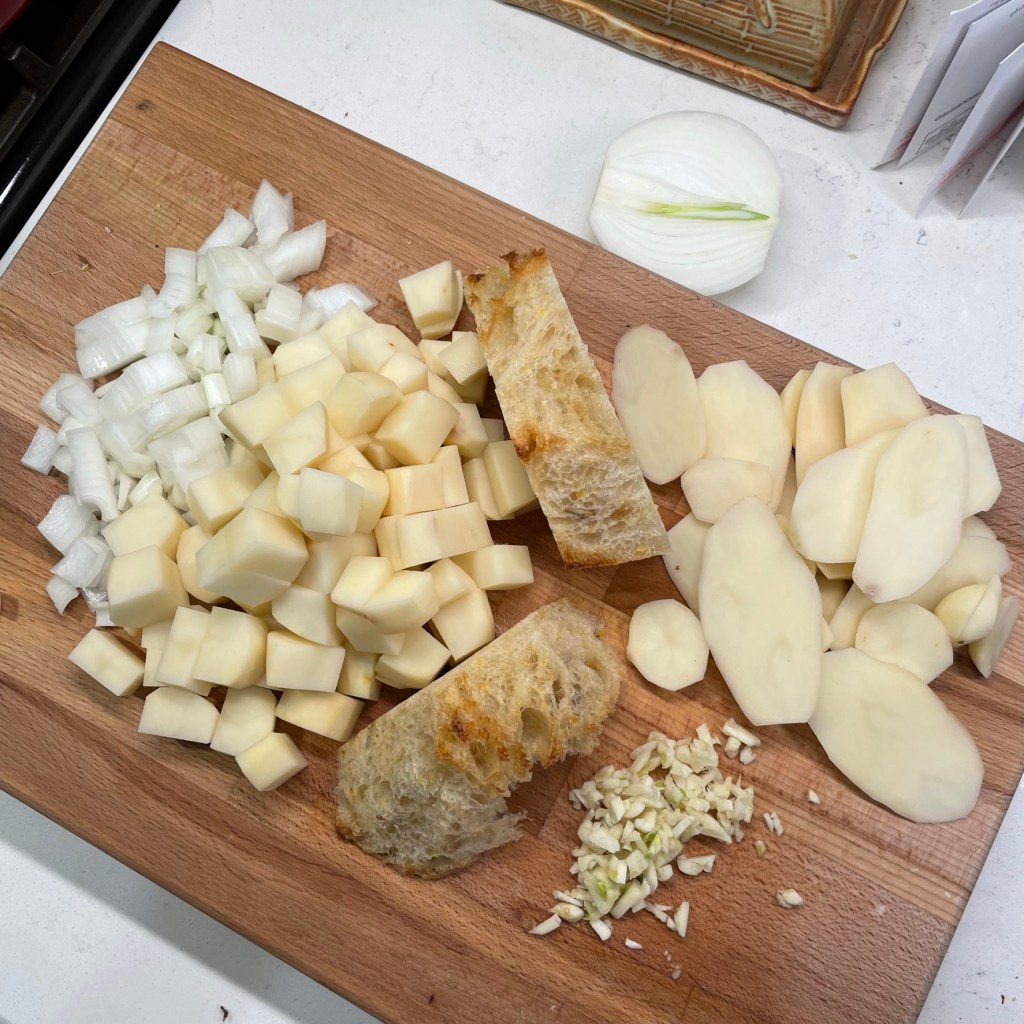
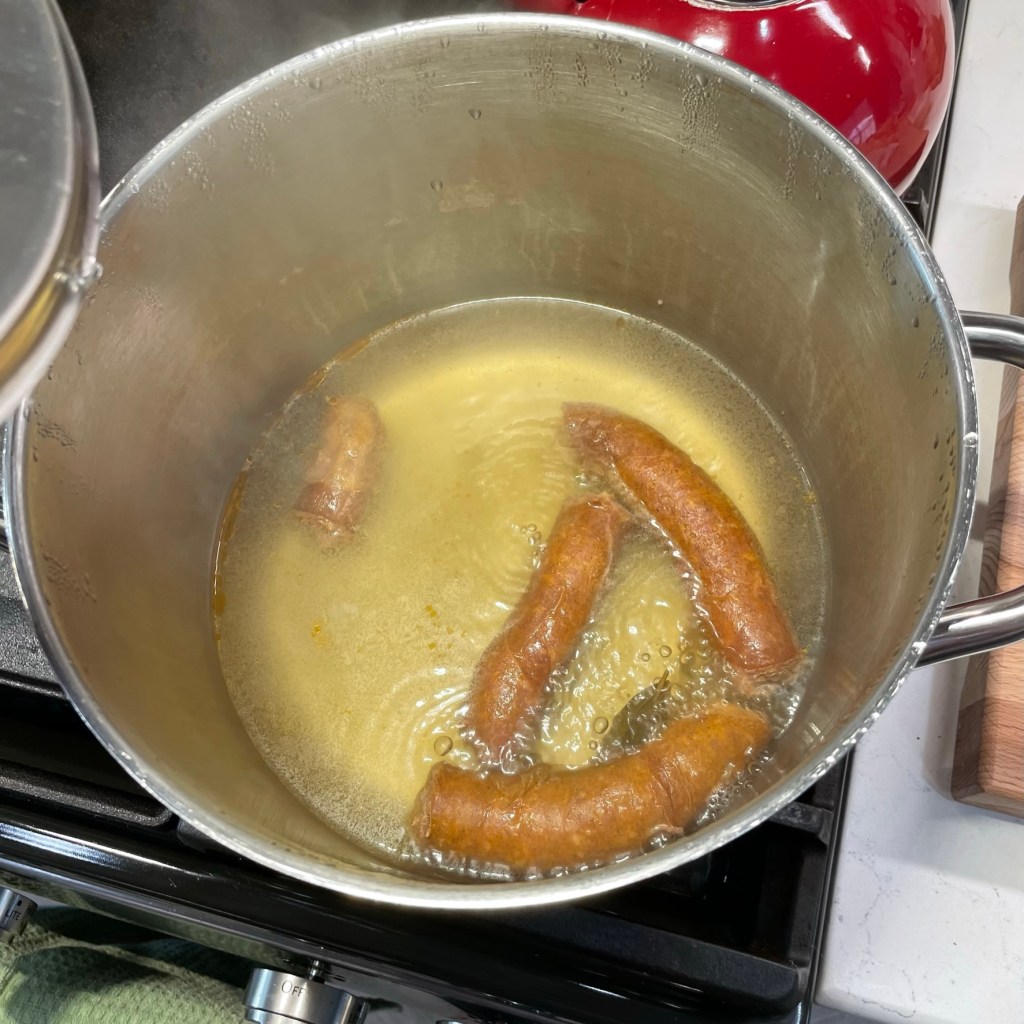
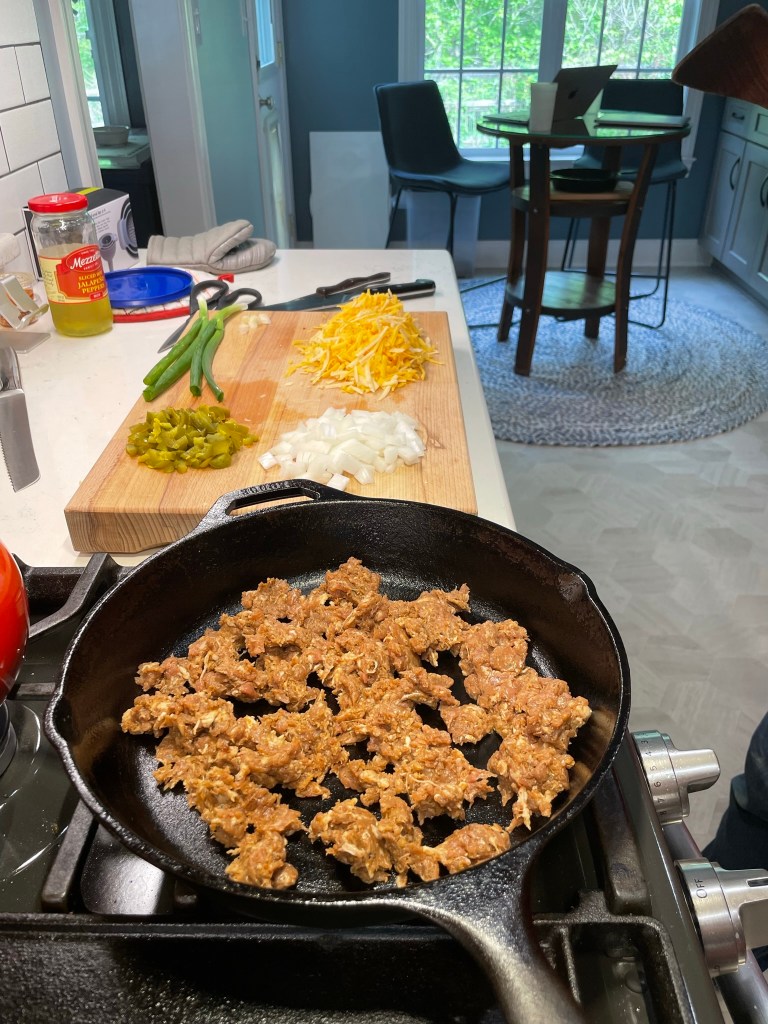
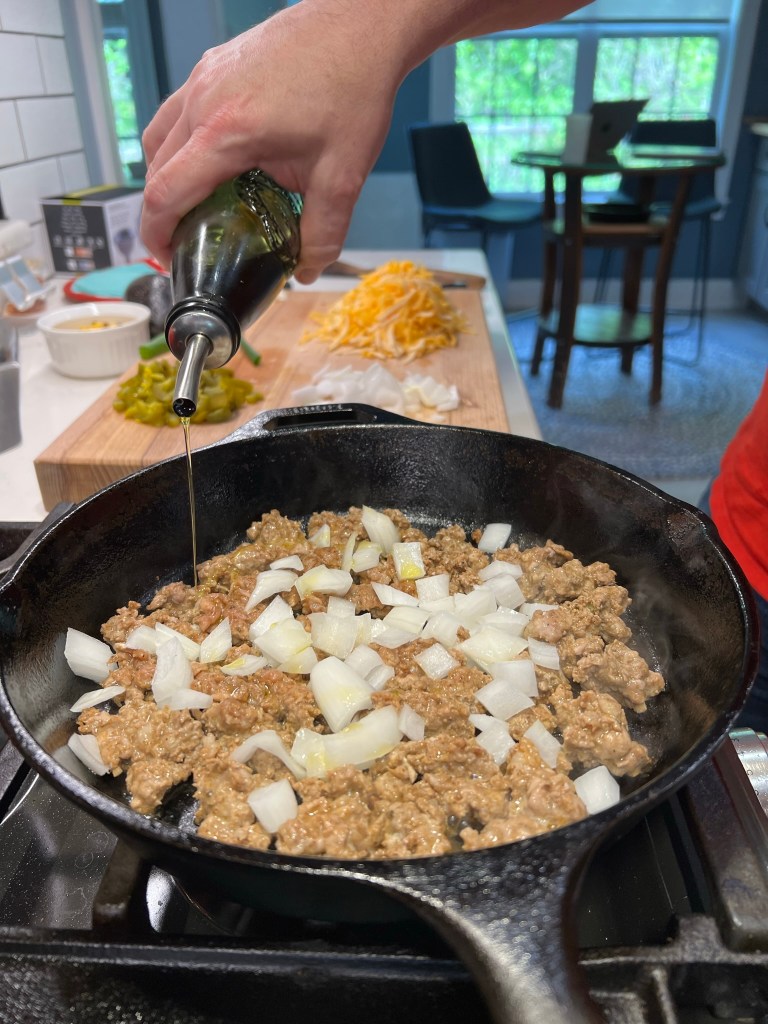
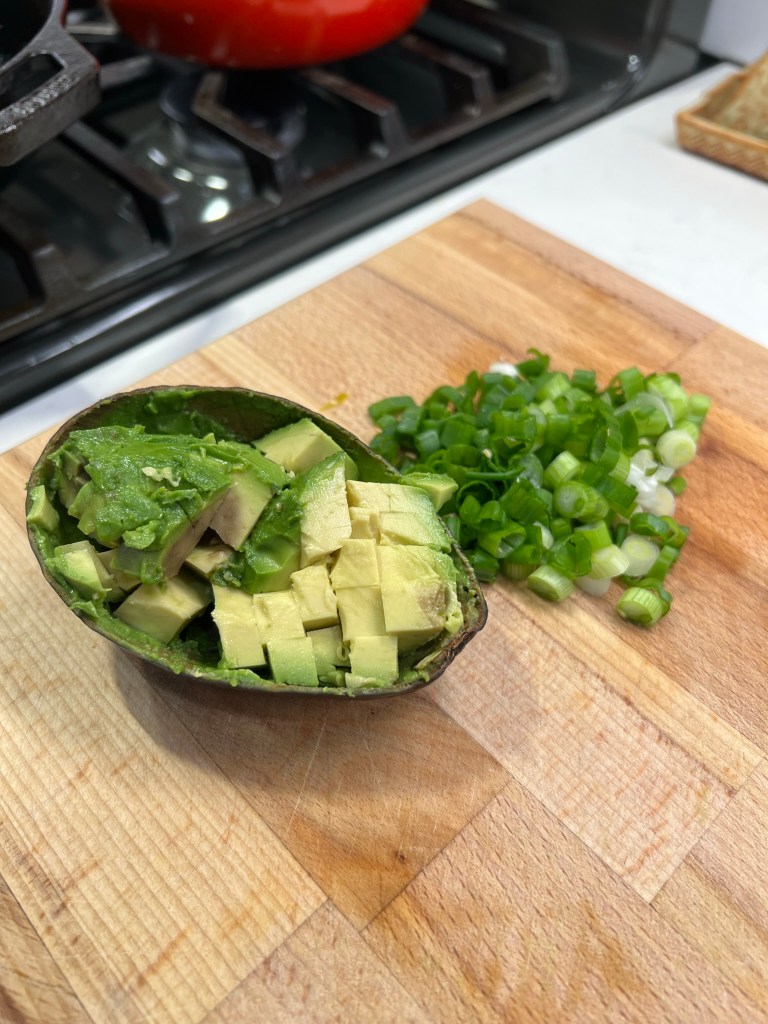
The nachos I’m sharing here feature Terrie’s homemade chorizo, which I fried in a cast-iron pan along with some diced onions and then set aside. We prepped (Terrie contributed here, serving as my sous chef, a definite change of pace for us!) by chopping up some pickled jalapeno peppers (dry them first), avocado and scallions, while I shredded a little better than a cup combined of sharp cheddar and habanero cheddar. The fun part is putting this bad boy together. OK, I kid you all. It’s incredibly simple.


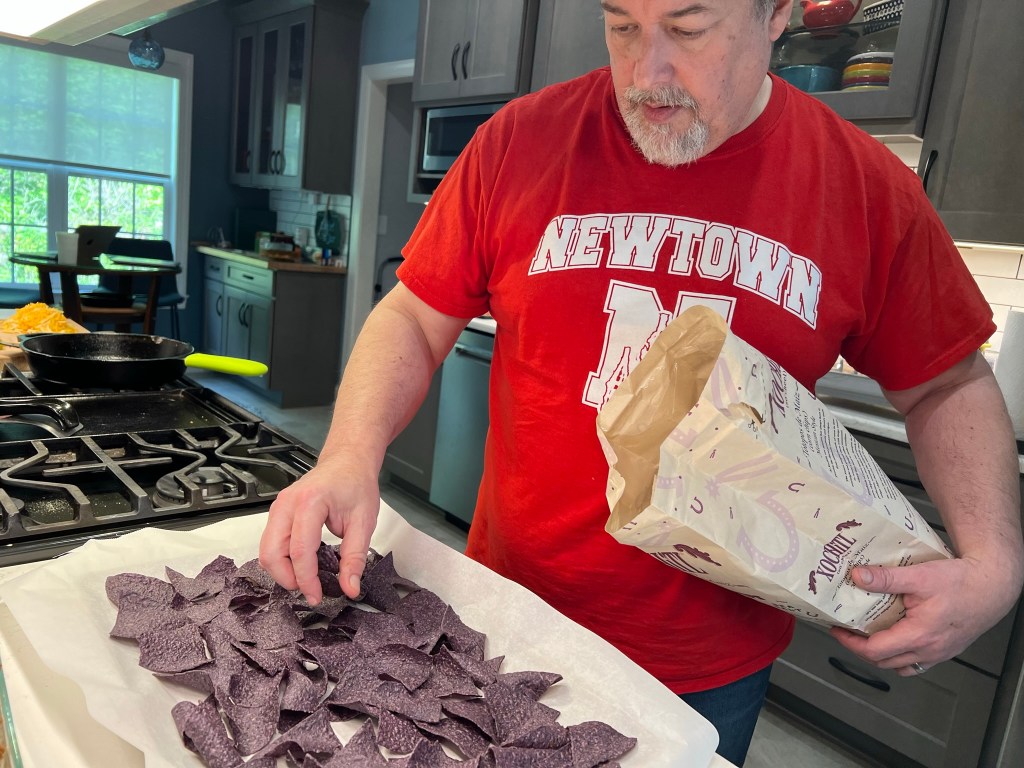
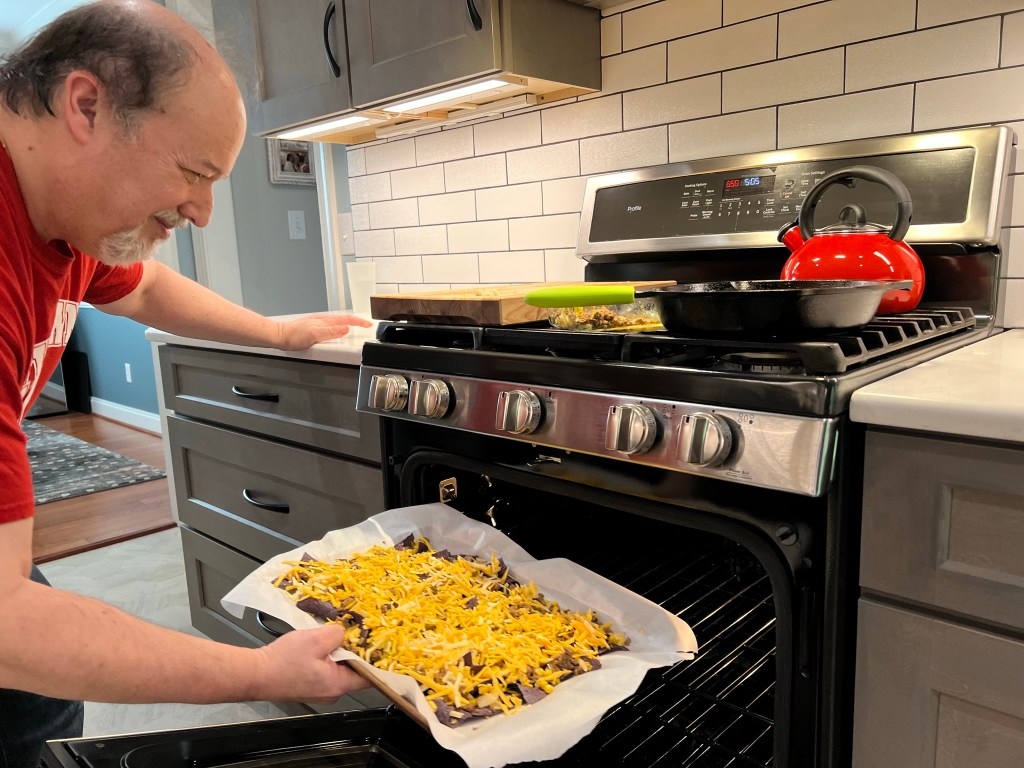
Preheat your oven to 350 F. Put a piece of parchment over a cookie sheet and then lay your favorite tortilla chips on to cover the surface. We used a blue corn chip put out by a company called Xochitl. They were very good, but if you can find a local restaurant with an awesome, homemade fresh chip, so much the better. A moment here to lament the loss of Tijuana Flats, a small national chain that was our “go-to” place for chips, which were freshly made, thin and perfectly seasoned. We used to buy bags of them for just $1.25 to complement any Southwestern or Mexican dish we made; these chips were the flagship of our annual Super Bowl party. Alas, the local restaurant closed at the start of the pandemic and we still miss it. The Xochitl brand is as close as we’ve found.


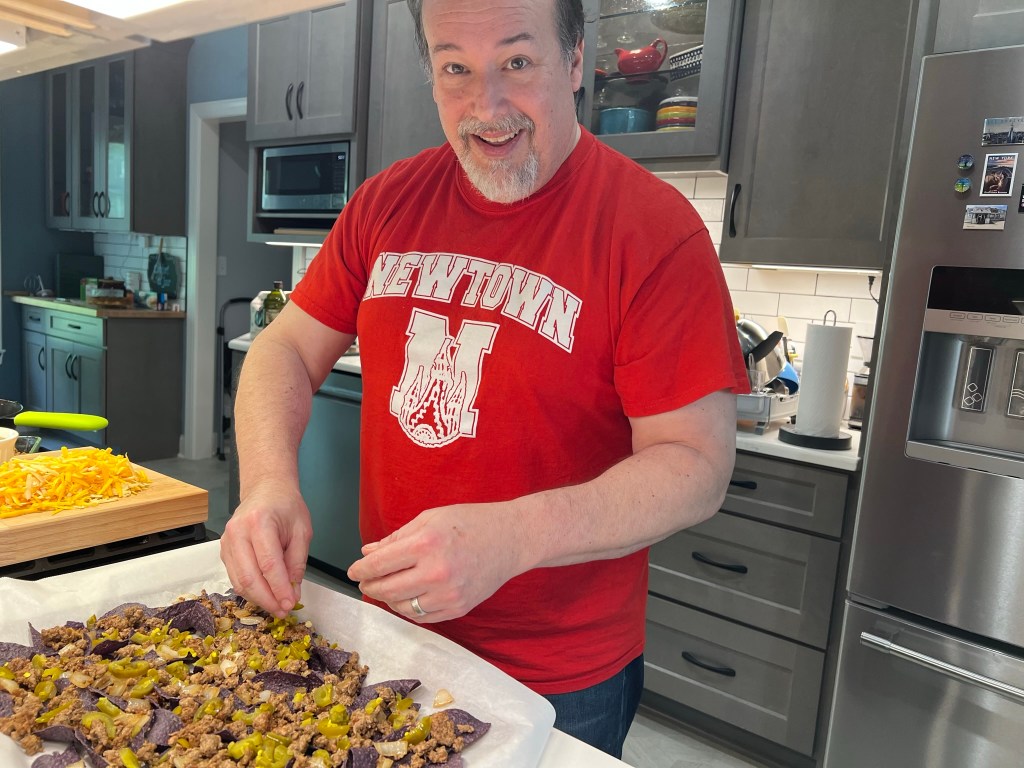
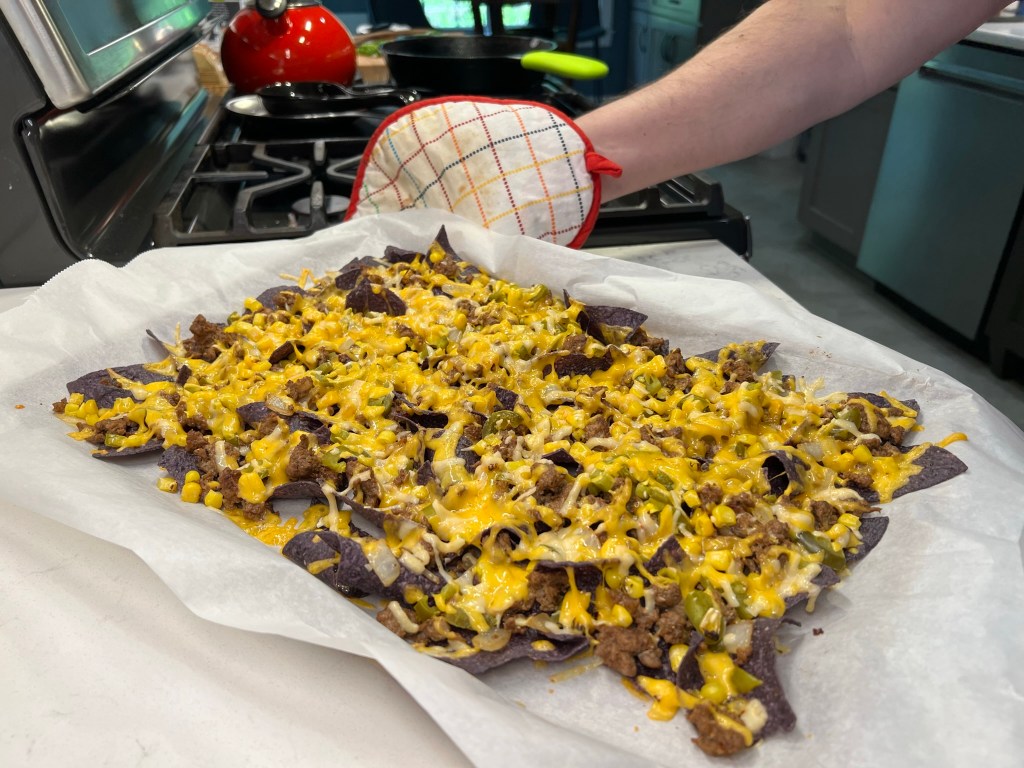
Anyway, with your chips nicely arranged (you shouldn’t see any big parchment peeking through), top first with your protein, which today was the chorizo-onion mix. I then sprinkled on a generous amount of chopped jalapenos and fire-roasted corn, and then the cheese. Off to the oven it went for 10 minutes. The nachos are done when the cheese is nice and melted. A side note here: We had believed a pre-made queso would work great rather than grated cheese, but it doesn’t. The heat of the oven breaks up the queso, and it runs underneath the chips, which makes them soggy. Freshly grated cheese is the way to go.


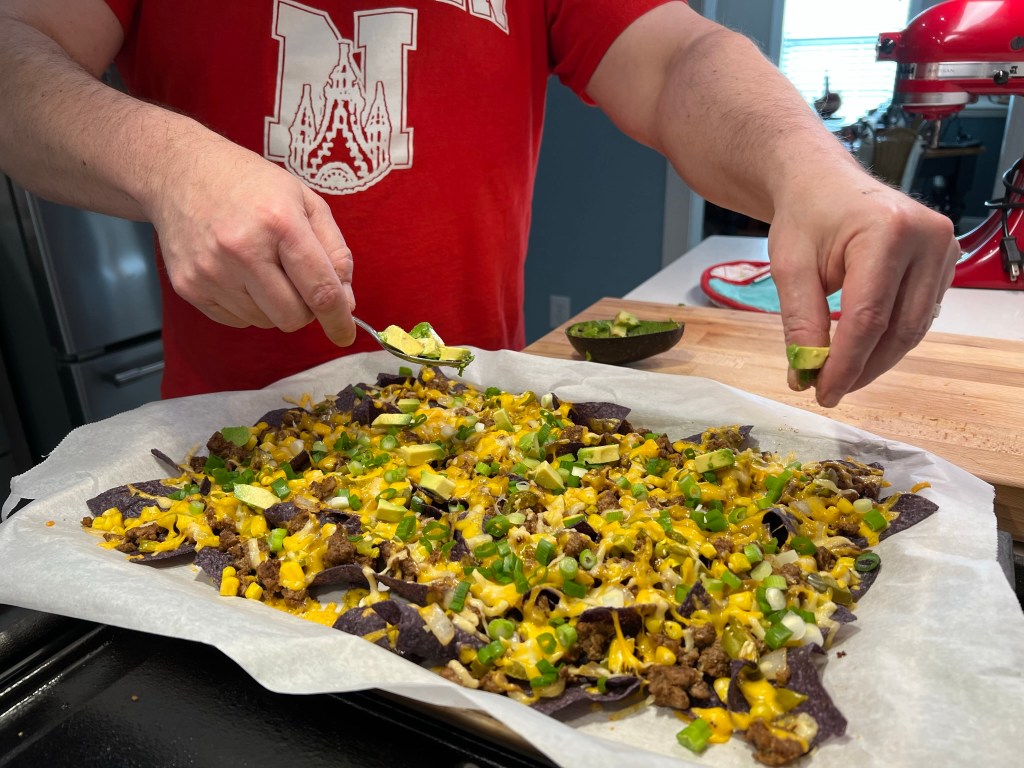
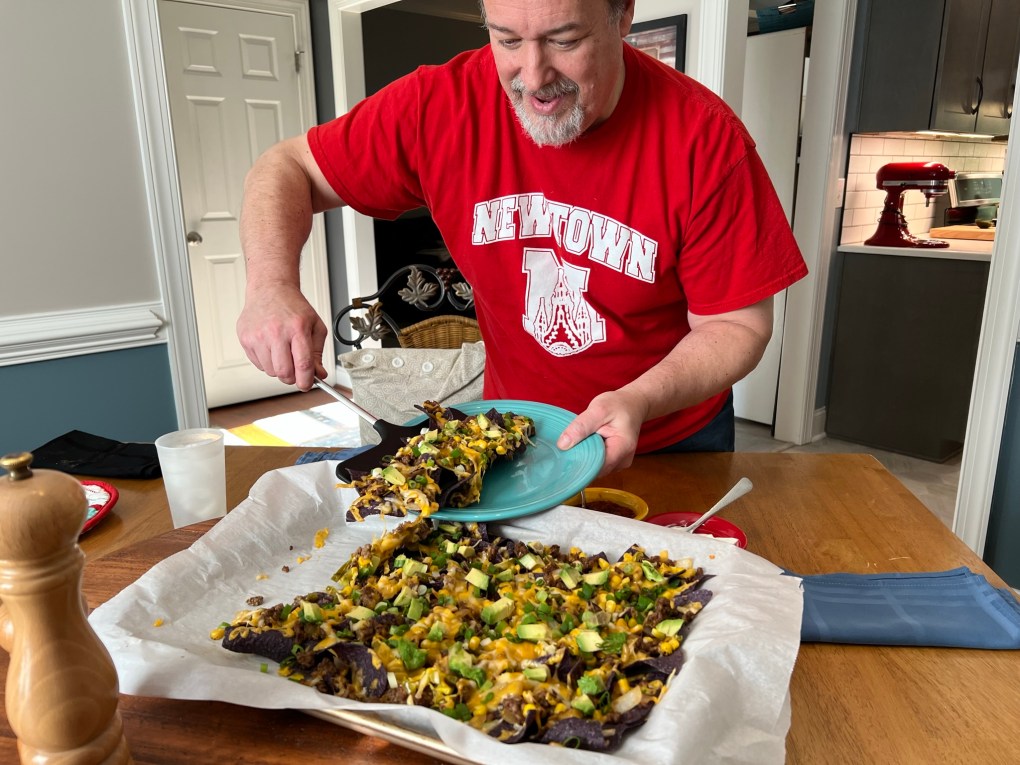
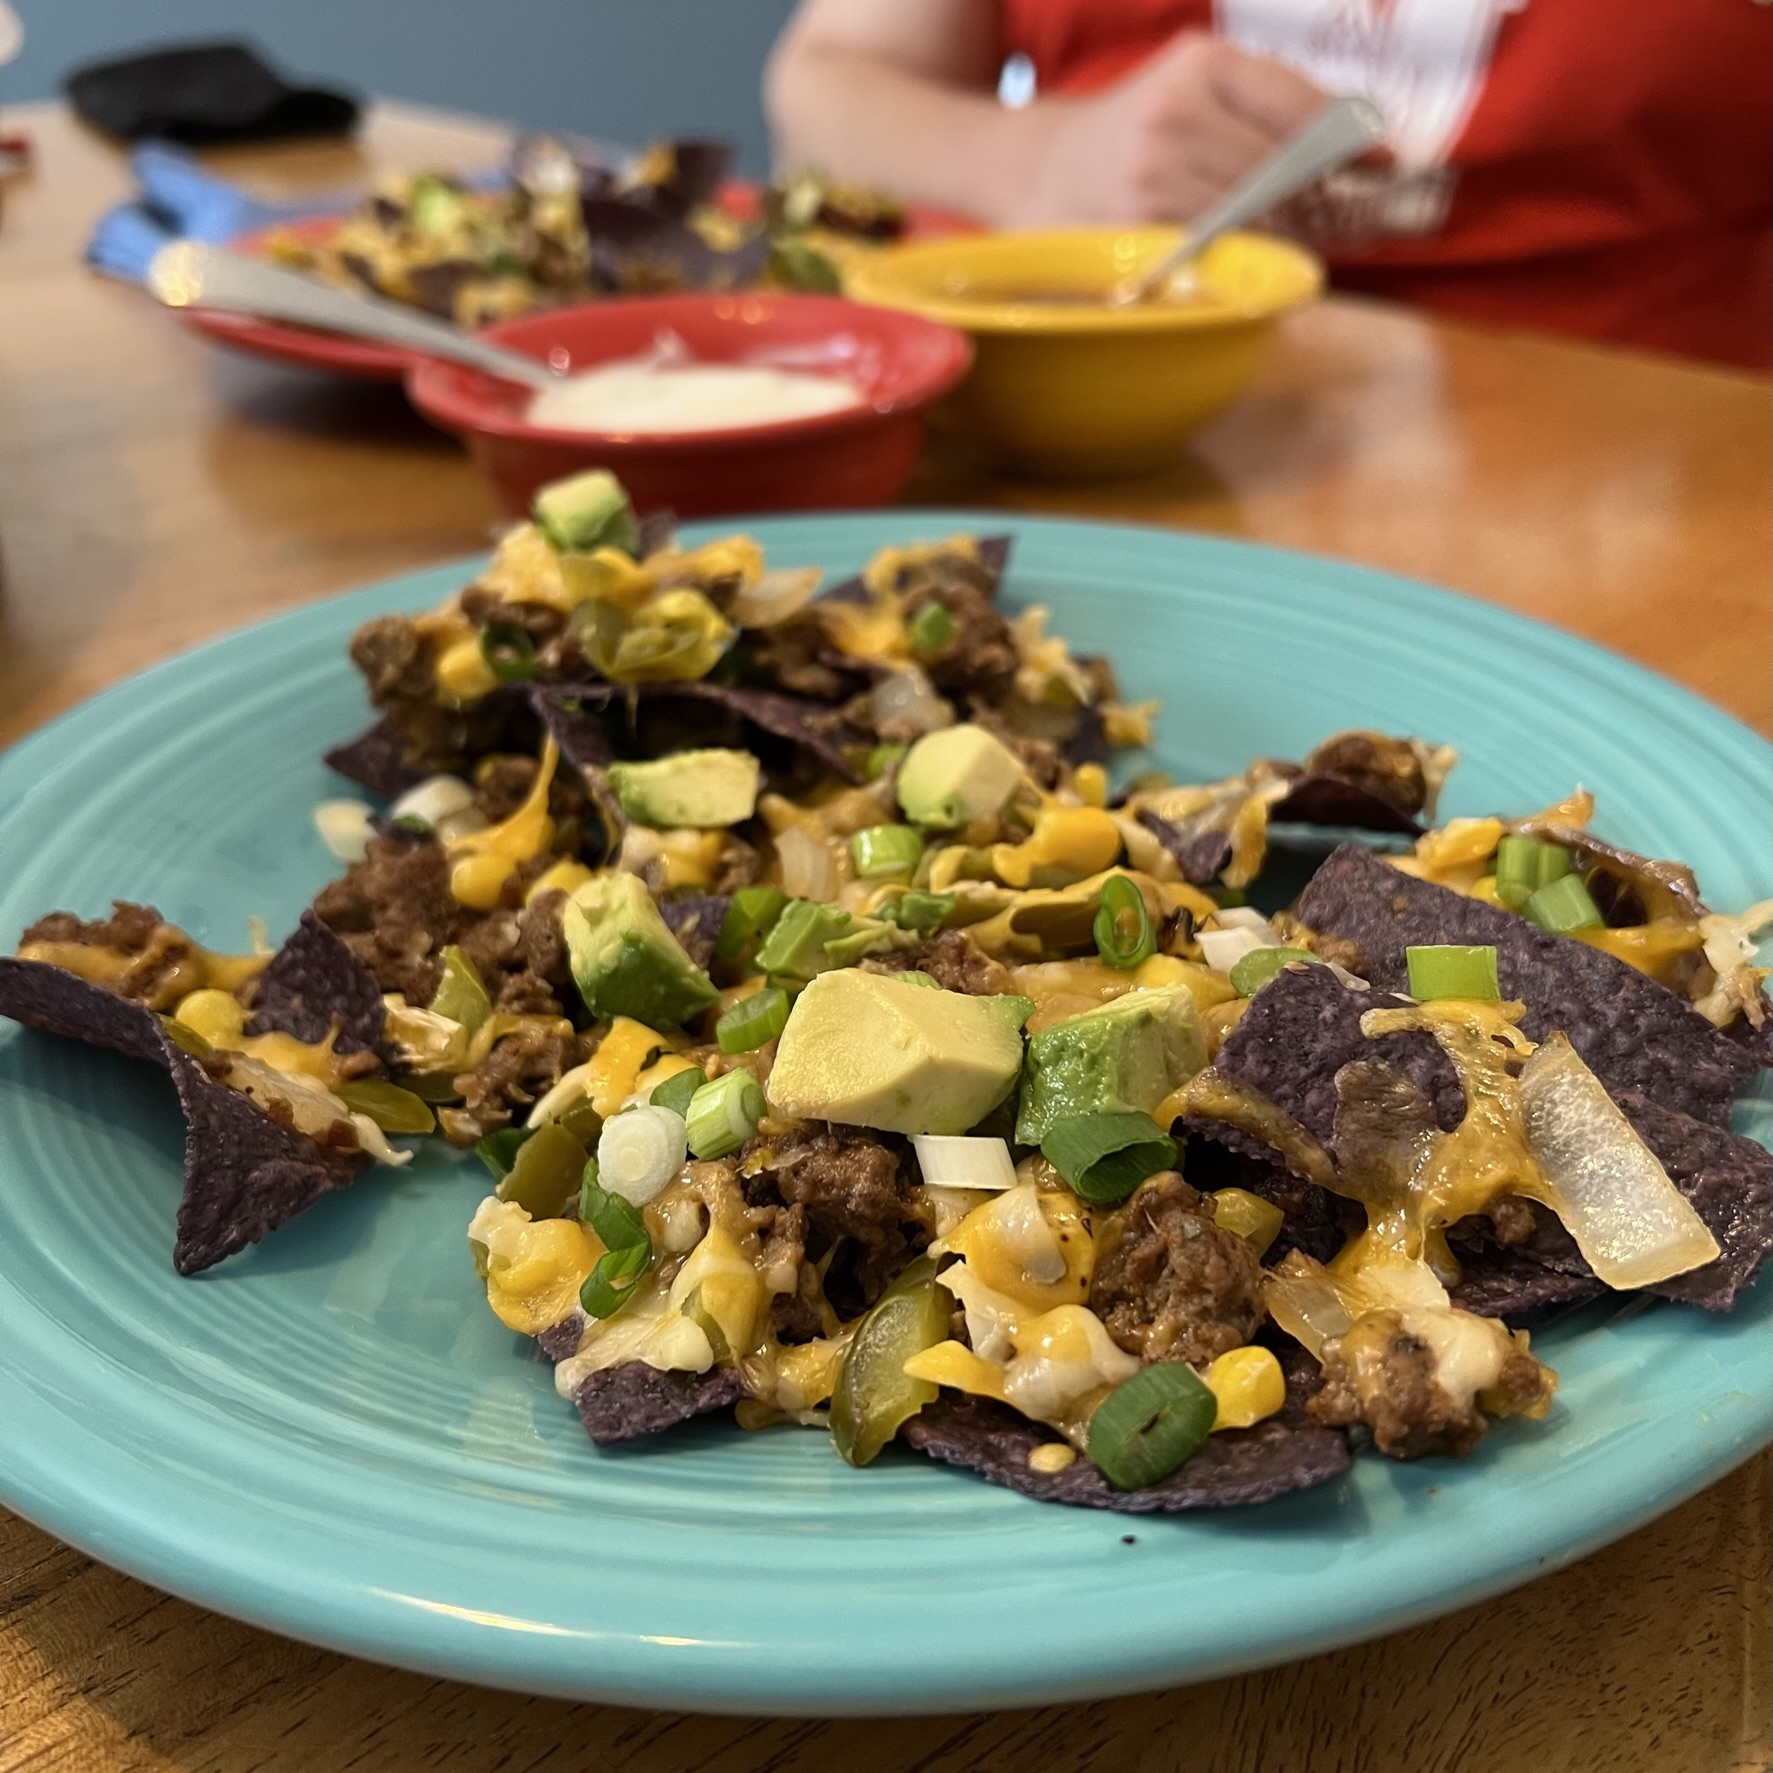
I topped this batch of nachos with scallions and diced avocado, and we served salsa and sour cream on the table. Probably a dozen or more years ago, I found this very wide spatula for handling fish and, wouldn’t you know, it works great for portioning out a generous mound of hot nachos.

Just call me Nacho Daddy!

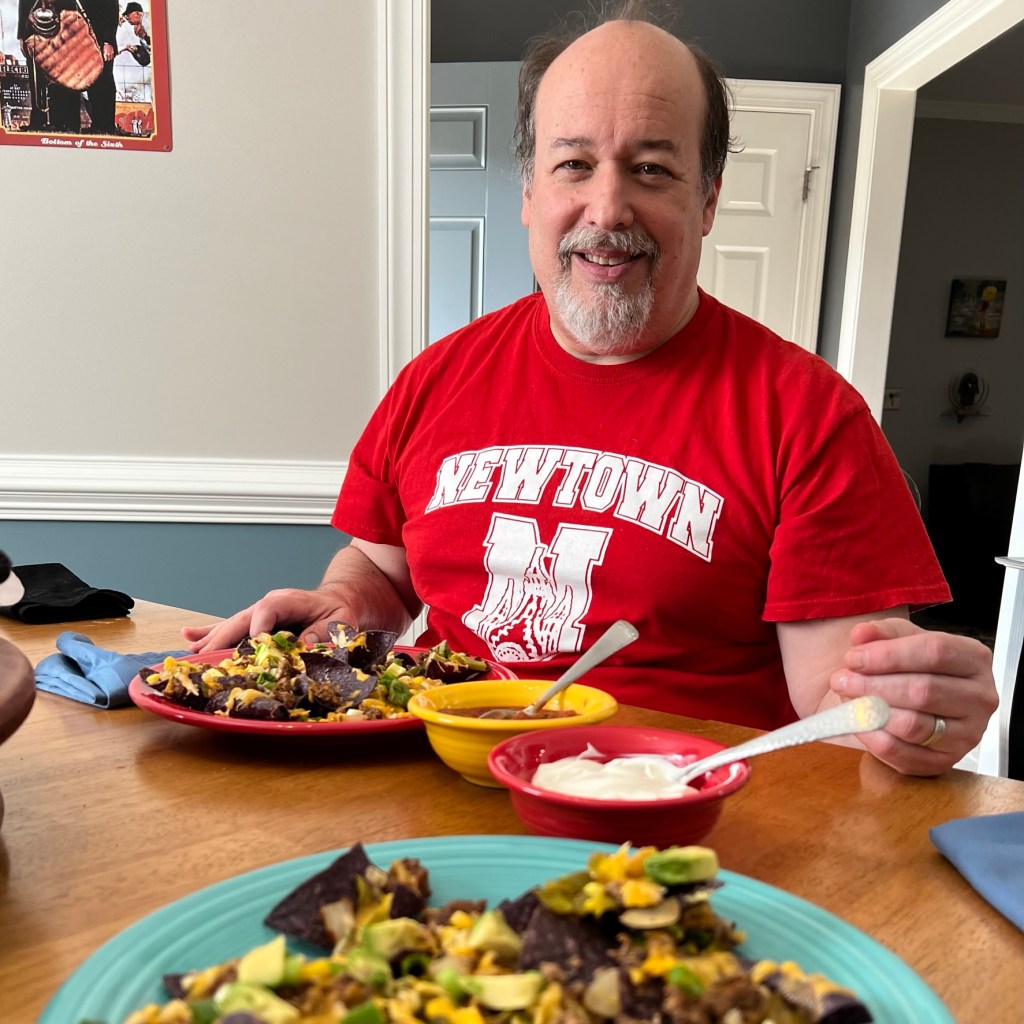
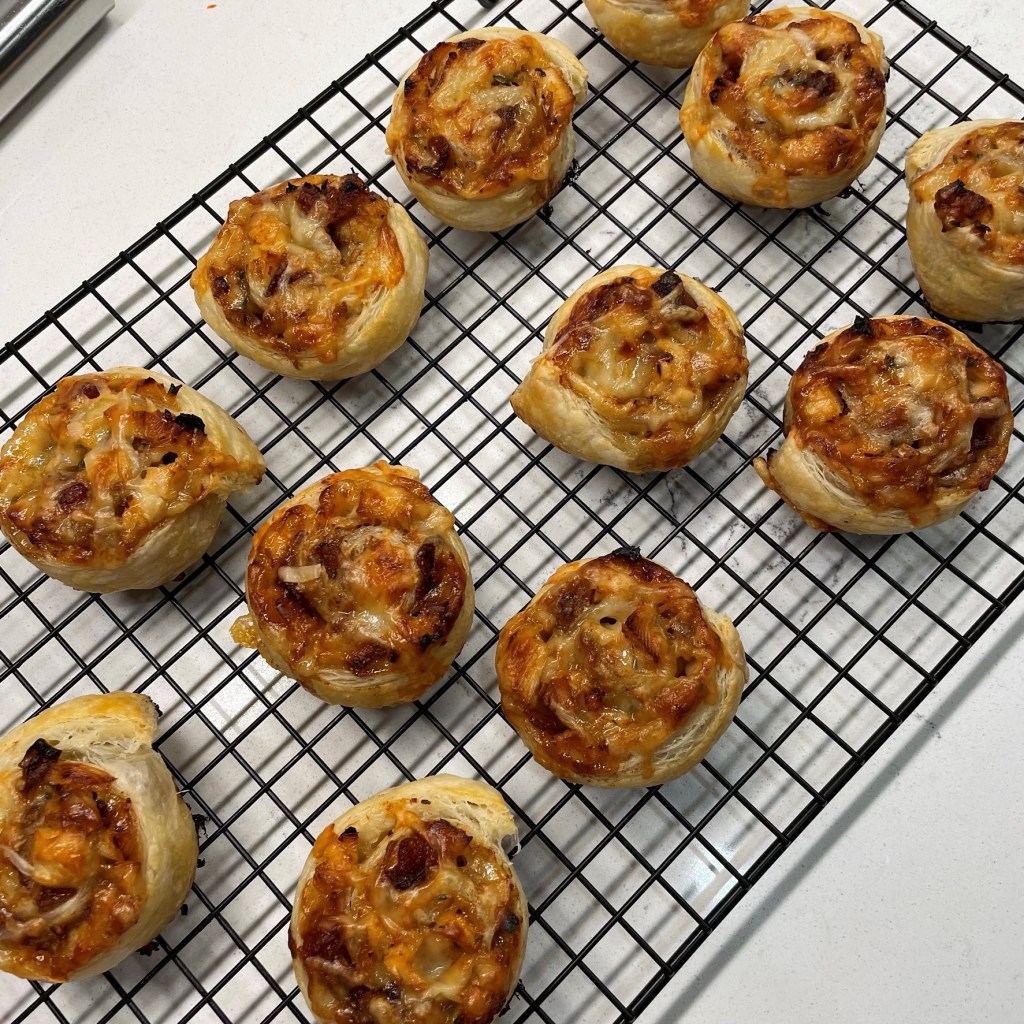
Les's Nachos for Dinner

  • Servings: About 4
  • Difficulty: Easy
  • Print

Somewhere along in my adulting, I decided I could do nachos every bit as good as a sports bar. Here is my latest iteration of this 'guy food' served up as a meal at home.


Ingredients

  • About 1/2 pound bulk chorizo sausage (or other protein)
  • 1/2 medium sweet or yellow onion, chopped
  • Salt and pepper as needed (use your judgment, based on the flavor of your protein)
  • Enough corn tortilla chips to evenly cover a baking pan (about 1/2 standard bag)
  • 1/4 cup sliced pickled jalapenos, blotted on paper towels
  • 1/2 cup fire-roasted corn kernels (frozen is fine)
  • 1 cup grated cheddar cheese (or other variety, such as Monterey Jack or colby; preferably not pre-shredded from a bag)
  • 2 scallions, white and green parts thinly sliced
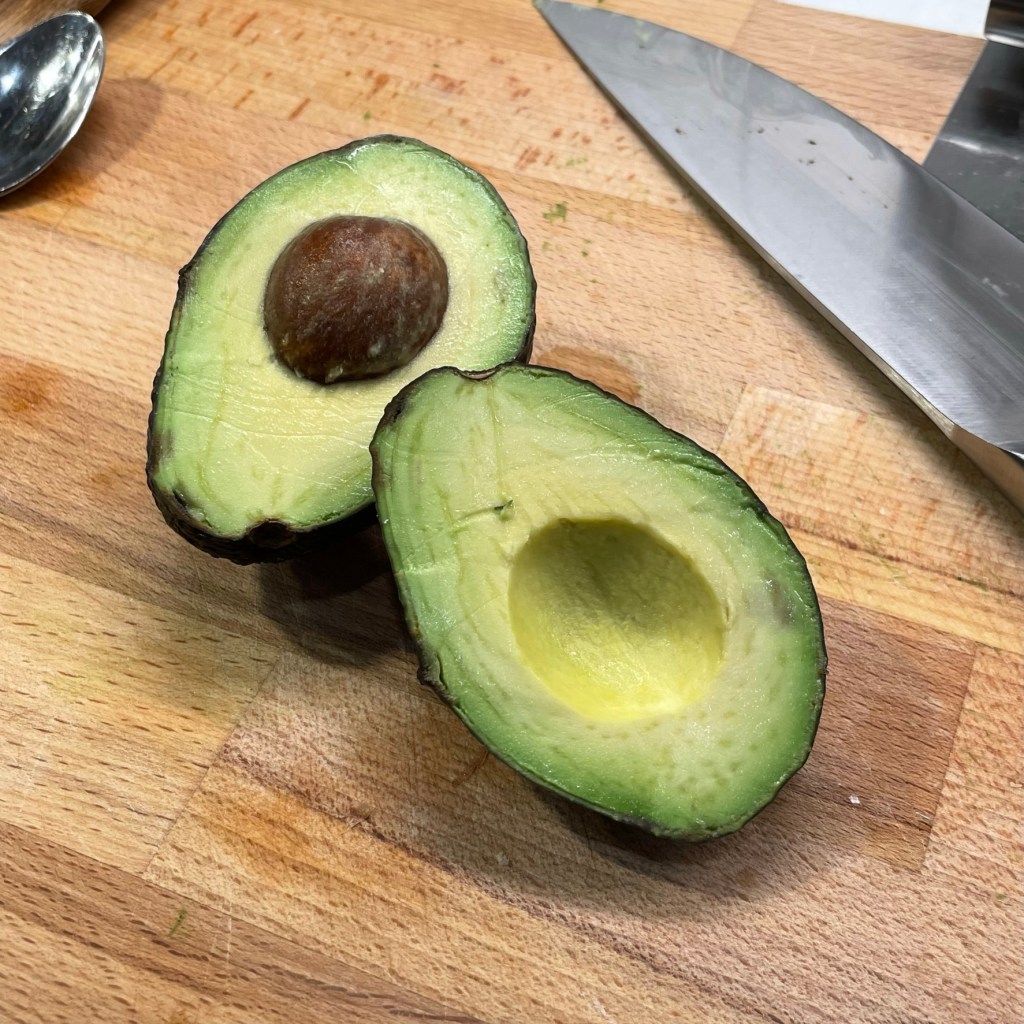
  • 1/2 large avocado, cubed
  • Sour cream and salsa, for serving

Feel free to substitute any favorite protein you have on hand. I’ve used cut-up chicken, ground turkey, ground beef and even black beans; it all works! If your chosen protein is unseasoned, consider adding some chili powder or other Southwest seasoning to the meat as it cooks. If you prefer less heat, swap in bell pepper for the jalapenos and saute them with the meat and onions.

Directions

  1. Preheat oven to 350 F, with rack in center position. Line a rimmed baking sheet with parchment paper.
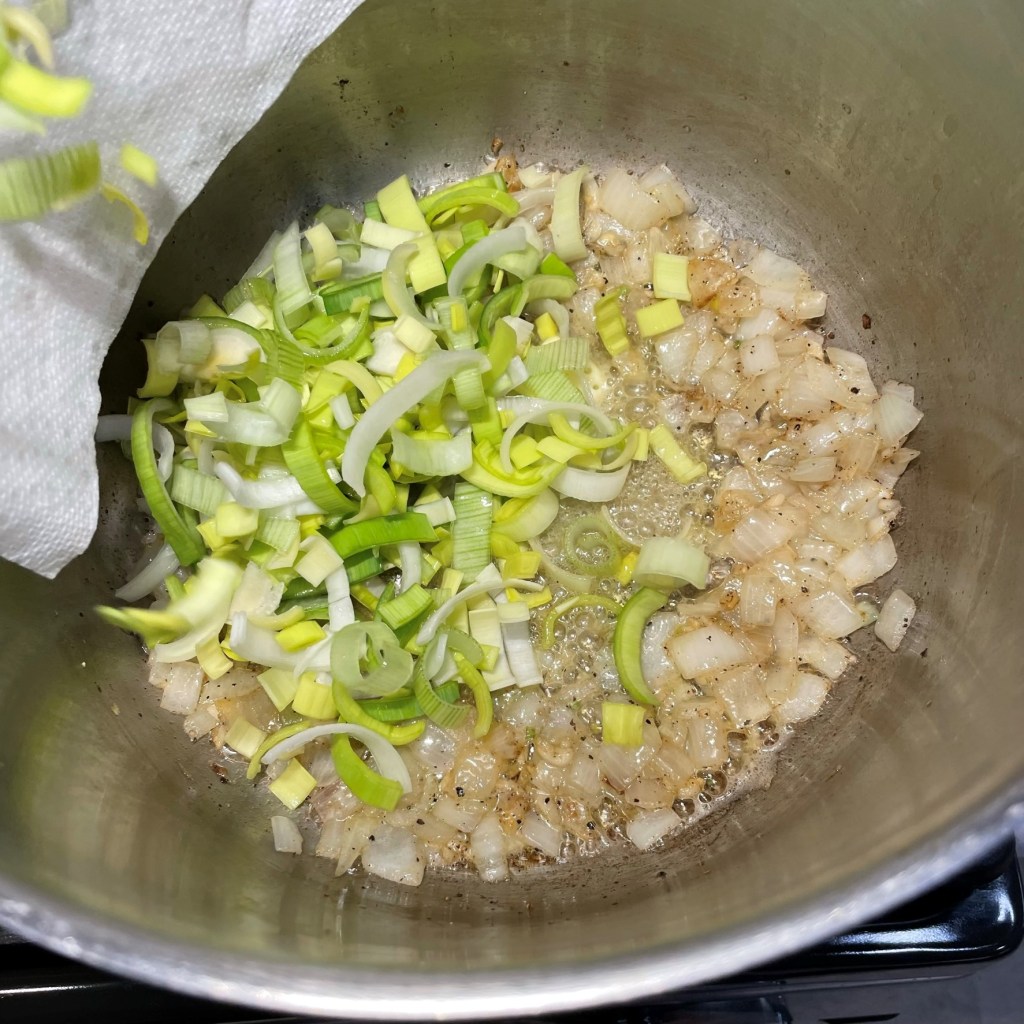
  2. Heat a cast iron skillet over medium heat and cook sausage with onions until the meat is browned and onions are softened.
  3. Arrange tortilla chips over parchment paper. It’s OK for the chips to overlap, but aim for a single layer so that each chip gets some toppings. Scatter the cooked sausage-onion mixture evenly over the chips, followed by the jalapenos, roasted corn and grated cheese.
  4. Bake at 350 F for about 10 minutes, until cheese is melted all over. Immediately top nachos with scallions and avocado. Serve with sour cream and salsa at the table.


Simple Citrus-Soy Baked Salmon

My husband and I have a regular game we like to play, and it usually starts about 2 pm when I text to ask whether he has any particular cravings for that evening’s dinner. And then I cross my fingers in hope that he doesn’t give me the dreaded response.

“Something simple,” he’ll frequently say. 

And then I really don’t know what to feed him, because what does that even mean? My experimentation in the kitchen more often leads me into complex outcomes rather than simple ones. I would rather he ask for soup and salad or grilled cheese or takeout than the nebulous “something simple.” I don’t know why this throws me for a loop, but I usually stand befuddled, the same as when I ask him what Friday night cocktail he wants, and he says, “surprise me.”

I’m trying to get better about this, and occasionally I find inspiration amid the ingredients I already have in the fridge. And that’s what happened with this vibrant dish that turned out to be simple not only in ingredients but also preparation.


What makes this recipe simple is that the marinade— which ultimately becomes a glaze in the oven— is made from common ingredients that I found in the refrigerator: freshly squeezed orange juice (thanks to a navel I forgot was in there), a bit of marmalade, horseradish, soy sauce and honey. To add a little extra something without extra effort, I decided to add a spoonful of dried onion to the marinade. The bits plumped up quite a bit during the 45 minutes the salmon soaked in its flavor bath, and it added onion flavor without the bite of fresh onions.


I’m struggling to find something else to explain about this dish, but that’s honestly it. Mix the marinade, soak it and then bake it. The oven takes care of the rest, turning the marinade into a somewhat sticky glaze that pairs well with just about anything. The flavors of the marinade do a balancing act between sweet, savory and salty. I served our salmon on a bed of basmati rice (leftovers from Indian takeout), with a sprinkling of sliced scallions and sesame seeds, plus a fresh and pretty side salad.


Hubby was right, as usual— simple is good!

Easy Citrus-Soy Baked Salmon

  • Servings: 2 or 4, depending on weight of salmon
  • Difficulty: So easy!
  • Print

From the prep to the ingredients to the cooking, everything about this dish is simple but the flavors are fantastic! The marinade is enough for a pound of fresh salmon, but please use the same amount even for a lesser weight of fish.


Ingredients

  • Up to 1 pound fresh salmon fillets, skin removed
  • Juice and zest of navel orange
  • 1 Tbsp. low-sodium soy sauce (or tamari for gluten free)
  • 2 Tbsp. orange marmalade
  • 2 tsp. horseradish
  • 1 Tbsp. honey
  • 1/2 tsp. minced, dried onion
  • Kosher salt and black pepper
  • Cooked rice, for serving
  • 2 scallions (white and green parts), thinly sliced
  • Sesame seeds for serving

I removed the skin from our salmon before cooking, but this really was not necessary; it was just me trying to make it “not simple.” After baking, the fillets will easily pull away from the skin, so it’s cook’s choice.

Directions

  1. Whisk together all marinade ingredients. Pat salmon fillets dry with paper towels. Sprinkle them with salt and pepper.
  2. Pour marinade into a shallow dish that is large enough to hold the salmon fillets. Add salmon, turning a few times to ensure even coverage. If preferred, marinate in a plastic zip-top bag for easy turning. Allow salmon to marinate at least 30 minutes, or up to 45 minutes.
  3. Preheat oven to 350F, with oven rack in center position. Line a baking sheet with parchment.
  4. Transfer salmon fillets to parchment, spooning the marinade (especially marmalade peels and onions) over the top of the fish. Bake for 20 to 25 minutes, depending on thickness of salmon and preference for doneness.
  5. Arrange fillets on plates with desired sides and sprinkle with scallions and sesame seeds. Serve at once.


Southwest Chicken Soup

There’s never a wrong time for chicken soup, and winter seems especially appropriate, given that it is also cold and flu season. In the middle of January, my husband and I both found ourselves stuck at home with Covid. I had started experiencing symptoms on a Thursday night, and I was quick to blame the just-completed replacement of our entire HVAC system as the culprit for the sore throat and sneezing that had suddenly walloped me. Dust and bits of insulation had been falling out of all the vents in the house for two days, so of course I felt lousy. At least, with the new system, I’d be warm.

But two nights later, as I sat shivering on the sofa, despite wearing a bulky sweatshirt, fuzzy jammie pants, two pairs of socks, my Land’s End shearling-lined slippers and curling up under a big ass blanket, I knew I was in trouble. The lines on my at-home rapid Covid test were not only pink— they were bright magenta! Les tested positive the next day, and we settled in for a week of being bored out of our ever-loving minds. Thank God we have every TV streaming service known to man, and some of the kindest neighbors around who did front porch drop-offs of soup, orange juice and other sick-at-home necessities. We are grateful.

That first night of symptoms, I had made this southwest-themed chicken soup, and it was exactly what I needed, though I wish I had made a double batch. Next time, I will do exactly that and I’ll stash some in the freezer— just in case!

The soup is quick to make because it relies on a supermarket deli roast chicken and a few easy pantry ingredients. The chicken I selected was labeled “Peruvian,” which includes seasonings like paprika, cumin and oregano— all perfectly compatible for a southwest-themed soup. I used almost exactly half of the chicken, including the shredded meat from a thigh, breast and drumstick, plus the skin (I’ll explain in a moment). The remaining chicken meat went into a very tasty chicken salad that Les made, using some of his fabulous pimiento cheese. It was so good on sandwiches, and I’ll try to sweet talk him into making that again to share on the blog.

Once in a while, these deli roast chickens come in really handy!

I started the soup with a quick saute of chopped onions and diced jalapeno— just long enough to soften them up. A few shakes of chili powder added a layer of flavor, and then I poured in a whole carton (4 cups) of chicken stock, the shredded chicken and several pieces of skin from the chicken, and I heated it to the point of a low boil before dropping it to a simmer. The skin released extra flavor into the soup, and I pulled them out before serving the soup.


While the soup simmered, I prepped the fresh toppings which included diced avocado and torn cilantro leaves, plus wedges of fresh lime to squeeze over at serving. A small can of hot salsa added a big punch of flavor. Pre-cooked brown rice saved precious minutes and added a little whole grain to the soup.


The only thing my soup still needed was a little bit of crunch on top. Any other day, I would have just served it with a few tortilla chips on the side. But on that day, when I was already feeling crummy and didn’t want to run to the store, I found instead a package of corn tortillas shoved into the back of our deli drawer. So I heated some peanut oil, cut up the corn tortillas into small strips and fried them crispy. It took only about 4 minutes, and it was the perfect finishing touch!


Southwest Chicken Soup

  • Servings: About 6
  • Difficulty: Easy
  • Print

A deli roast chicken and a few easy pantry ingredients make this flavorful twist on a classic comfort food perfect for chasing away the mid-winter blahs!


Ingredients

  • 1 small onion, chopped
  • 1/2 jalapeño, seeded and minced
  • Kosher salt and freshly ground black pepper
  • 2 Tbsp. extra virgin olive oil
  • A few shakes of prepared chili powder
  • 4 cups chicken stock or broth
  • About 2 cups shredded or chopped roast chicken (and skin, optional)
  • 10 oz. can spicy salsa (I used Herdez brand)
  • About 1/2 cup cooked brown rice (I used pre-cooked Minute Rice)
  • 1 ripe avocado, peeled and cubed
  • 1/2 fresh lime, cut into wedges for serving
  • Small handful of fresh cilantro leaves
  • Crispy tortilla strips (store bought or homemade, for serving; my recipe is below)

Directions

  1. Heat olive oil in a medium sized soup pot, over medium heat. Add onions and jalapeños, season with salt and pepper and sauté until softened. Sprinkle with a few shakes (about 1/2 tsp) chili powder.
  2. Add chicken stock and shredded chicken. Drop any crispy roasted chicken skin into the soup pot to extract the extra flavor.
  3. Stir salsa into the soup and heat until it comes to a low boil. Reduce heat and simmer for about 30 minutes.
  4. Prepare crispy tortilla strips while soup simmers, or skip this step if you’re using pre-made chips.
  5. Add brown rice and heat through. Serve soup in shallow bowls, topped with chopped avocado and torn cilantro.
  6. Top each bowl with a few crispy tortilla strips and serve immediately.

If you have a few extra minutes, it’s worth the little bit of trouble to make the crispy tortilla strips from scratch. Be sure to season them immediately upon removal from the hot oil. I used Trader Joe’s “Everything But the Elote” seasoning, but chili powder, season salt or simple salt and pepper would also be delicious.

Ingredients

  • 4 to 6 corn tortillas, cut in half, then stacked and cut into strips about 1/2-inch wide
  • 1 cup neutral cooking oil, such as grapeseed, canola or peanut oil
  • Salty seasoning of your choice

Directions

  1. Heat oil in a shallow pot over medium-high heat; it should measure about 1-inch deep in the pot.
  2. Add a few test strips of tortilla to the oil to test the temperature. They should immediately bubble all over.
  3. Fry tortilla strips for about 4 minutes, until light and crispy. Use a slotted spoon to remove the strips. Drain them on layers of paper towel, and sprinkle right away with salt or seasonings.


Easy Buttermilk Dessert Sauce

The next time you make a dessert that needs a sauce, but you aren’t quite sure what sauce is right, it’s this one. This is the sauce.

It is sweet and slightly salty like caramel, but without the fuss. It’s rich and elegant like an anglaise, but without cream or eggs. And it has the warm color of butterscotch, but it isn’t that either. This easy buttermilk sauce is neutral in flavor, so you can turn it any number of directions with a splash of vanilla, a sprinkle of cinnamon or pie spice—hey, even a shot of booze! You can pour it warm right over a baked dessert or ice cream sundae, or chill it to drizzle over fresh berries. It’s oozing with possibilities!

Any extra sauce keeps nicely in the fridge, and can either be warmed in a saucepan or the microwave.

There are no complicated ingredients, and the sauce comes together in under 15 minutes, so you can even make it last minute if you discover too late that your dessert needs a little help (we’ve all been there). Most recently, I made this with vanilla bean paste and a half-shot of vanilla whiskey to accompany a batch of bread pudding, made from cardamom-scented cinnamon rolls and dried cherries. The combo of bread pudding and sauce was sooo good!

You take both bread puddings. I’m just gonna drink this extra sauce.

Begin with a cup of buttermilk, the good, thick kind. Put it on medium heat with 3/4 cup of cane sugar and half a stick of salted butter. Most dessert recipes call for unsalted butter, but here, the salted butter is just right to complement the sweetness of the sauce. I whisk a little bit of corn syrup into the sauce as well, as it helps to prevent the sauce from crystallizing when it cools.


After the butter has melted and the sugar is dissolved, it’s time for the magic ingredient, which is a miniscule amount of (drumroll, please) baking soda! Remember, the miraculous ingredient I posted about in September that makes grilled shrimp so juicy and delicious? The baking soda works wonders in this buttermilk dessert sauce, too, and for the same scientific reason. Watch and see.


The alkaline properties of baking soda launch a chemical reaction with the acidic buttermilk, so you want to use a saucepan that is large enough to hold three times the volume of the buttermilk. Almost immediately after you whisk in the soda, the mixture will froth and foam like crazy, and as you whisk and cook for 5 or 6 minutes, the buttermilk will transform into a semi-translucent, golden sweet syrup.


Turn off the heat, stir in vanilla and any other flavor enhancer that sounds good to you. As it cools, the buttermilk glaze will thicken slightly into a sauce consistency. It’s so delicious, you may find yourself coming up with new dessert recipes just to make another batch! What will you use it on this weekend?


Oh, and in case you’re wondering about the bread pudding, just follow my Gram’s basic recipe outline which is, in my opinion, the best bread pudding ever! Use your imagination to flavor the sauce to suit your own dessert, and let me know in the comments what you think of it!

Easy Buttermilk Dessert Sauce

  • Servings: About 8
  • Difficulty: Easy
  • Print

The next time you have a baked dessert that needs a sauce, but you aren’t quite sure what sauce is right, it’s this one. This is the sauce.


Ingredients

  • 1 cup real cultured buttermilk (lowfat is fine)
  • 3/4 cup cane sugar
  • 1/4 cup butter (4 Tbsp.)
  • 1/2 tsp. baking soda
  • 1 Tbsp. corn syrup
  • 1 Tbsp. Crown vanilla whiskey (optional, but yum)
  • 1 tsp. vanilla bean paste (or vanilla extract)

Be sure to use a saucepan that is three times larger than you expect you’ll need. When the buttermilk and baking soda collide, things get big and foamy in a hurry! Feel free to swap out the vanilla for almond, a smidge of cinnamon or another flavor to suit whatever dessert you’ll be dressing up with this sauce.

Directions

  1. Combine buttermilk, sugar and butter in a large saucepan. Whisk over medium heat until sugar is dissolved and butter is fully melted.
  2. Whisk in the baking soda and get ready for some dramatic foaminess. Continue to cook and whisk the mixture for about 6 minutes after it reaches a boil. You will notice that the color of the sauce deepens to a warm, golden color.
  3. Turn off heat and whisk or stir until the foaminess subsides. Stir in vanilla and any other flavor enhancer you like. For ground spices such as cinnamon, 1/4 teaspoon is probably about right. Add whiskey or other liquor, if desired.
  4. Allow the sauce to rest for a few minutes. Serve right away or refrigerate if making it ahead. This sauce warms up nicely in a saucepan or in the microwave.


Spooky Stuffed Peppers

Before the kiddos head out for trick or treating on Monday night, parents hope that they have a decent, balanced meal in their little bellies. You know, so that they aren’t just chowing down on sugar from all those Snickers, Reeses and Skittles that they get in their trick-or-treat bags.

In my limited experience with children, I learned one lesson loud and clear—a simple way to get kids interested in eating good-for-them food is to make it FUN.


With a little imagination, you can turn an ordinary bell pepper into a fun Halloween supper, and you can fill it with whatever your kids (or grandkids, great-grandkids, neighbor kids, friends’ kids, etc.) like to eat. Mine are stuffed with cooked ground turkey in a Mexican-ish flavor profile—a combination of onions, green bell peppers, celery, garlic and Rotel tomatoes, spiffed up with chili powder and tomato paste—but there’s no reason you couldn’t change it up and make it Italian. Or Greek. Or vegan with a kale and quinoa kind of thing. Or any other combination you think the kids would like to eat. For the big kids at our house (that would be me and my husband), I went in big for veggies and lean protein.

Use any combination of vegetables that makes sense for the flavors you like.

You could use another color of bell pepper if you’d like, but the orange ones are good here, not only for their impersonation of a jack o’lantern, but also because hungry trick or treaters may be more receptive to their flavor, which is sweeter than a typical green bell pepper.

Choose peppers with a good stem, and peppers that will stand up on their own.

To prep the peppers, carefully slice the tops off, taking note of how far down the stem extends so that you keep the top of the pepper intact. Clean out the seeds and excess membranes, and then place the peppers, upside-down, into a glass baking dish with about one inch of water. Put the pepper tops in there, too, and microwave them on high for about five minutes. This will steam and soften the peppers so that they don’t need as much time in the oven after they are stuffed.

When they are cool enough to handle, use the top of a sharp paring knife to cut out triangle eyes and a nose into each bell pepper body. If you’re feeling extra creative, you could also cut a toothy smile into the peppers, too, but be careful because you don’t want the filling to seep out of its whole face.


Preheat the oven, with a rack in the center position. Heat a little olive oil in a skillet and sauté the vegetables until they are just softened. Remember to season with salt and pepper, and then add the spice seasonings to bloom their flavors. Crumble in the ground turkey, a little at a time, and toss to stir until no pink color remains. Add the Rotel and a little tomato paste to intensify the tomato flavor, and a pinch of dried Mexican oregano.


Spoon the filling into the peppers, lay a slice of sharp cheddar over the filling, and then reposition the pepper tops before sliding it into the oven. At this point, all the ingredients are fully cooked, so the peppers only need to be in the oven long enough to heat through, finish softening and melt the cheese.


Serve the peppers right away with a few spoonfuls of cooked rice, and get those kids costumed up for their night of fun!

Spooky Stuffed Peppers

  • Servings: 4 peppers
  • Difficulty: Average
  • Print

This is a fun way to feed the little ones something on the healthy side before they go trick-or-treating for all that candy. Mix and match ingredients based on what the kids like.


Ingredients

  • 4 orange bell peppers (choose them for shape and size, plus strong stems)
  • 2 Tbsp. extra virgin olive oil
  • 1/2 sweet onion, chopped
  • 2 ribs celery, trimmed and chopped
  • 1/2 green bell pepper, chopped
  • 2 cloves garlic, smashed and minced
  • Salt and pepper to taste
  • 1 tsp. salt-free seasoning (I used a combination of chili powder, cumin and paprika)
  • 1 lb. fresh ground turkey (or other lean ground meat)
  • 10 oz. can Rotel diced tomatoes (there are many heat levels; choose what’s right for you)
  • 2 Tbsp. tomato paste
  • A pinch or two of dried oregano
  • 4 slices sharp cheddar or other favorite melting cheese
  • Brown rice, for serving

Directions

  1. Preheat oven to 350 F, with oven rack in center position.
  2. Wash the bell peppers. Carefully cut the tops off the peppers, low enough to keep the stems intact. Remove seeds and membranes and place the peppers upside down in a microwave-safe dish. Add about an inch of water to the dish and microwave on high for 5 minutes, or longer if needed until peppers are somewhat softened. Set aside until cool enough to handle.
  3. While the peppers are cooling, heat a large skillet over medium heat. Add oil to the pan and sauté onions, green bell pepper and celery for about 5 minutes, until softened. Add garlic, salt and pepper, plus salt-free seasoning of your choice. Cook another minute.
  4. Crumble ground meat into the skillet, about half at a time so it doesn’t overcrowd the pan. When meat is no longer pink, add the Rotel tomatoes, tomato paste and dried oregano. Cook until mixture is bubbly, then turn off heat and cover the pan.
  5. Use a sharp paring knife to carefully cut out triangle eyes and noses in each of the bell peppers (toss the bits into the pan with the rest of the filling).
  6. Spoon the filling into the peppers. Arrange a slice of cheddar over each pepper, positioning the slices so that they will not melt to cover the eyes on the peppers. Replace the pepper tops and bake (uncovered) for 25 minutes, until heated through and cheese is melted. Serve immediately with brown rice.


Easy Slow Cooker Beef Stew

There is nothing earth-shattering or revelatory about beef stew in the fall, is there? The ingredients in my version are as one would expect—big chunks of vegetables, potatoes, beefy morsels and a thick, rich braising gravy—yet this is exactly the kind of comforting, satisfying, rib-sticking classic fall food I’ve been dreaming about since the temperatures first began to drop. So, even though I expect you may have your own recipe for beef stew, I’m going to share mine visually, just to make you hungry and ready to celebrate the season in comfort (you’re welcome).


Under less busy life circumstances, I might have made this one-pot stew right on the stovetop in our enamel-coated Dutch oven. But when I’m upside down with my day job, busy with home updates and wrangling our pets, I really appreciate the versatility of our slow cooker. Ours has extra options, including a setting for browning meat, so I was able to get this done without shifting ingredients from one pot to another. If your slow cooker has more simple settings, just brown the meat first in a skillet on the stove and transfer it to your slow cooker when it’s ready to braise.

I selected grass-fed, locally raised beef for my stew. It’s easier on my digestive system than conventional beef, and we feel strongly about supporting local suppliers. Choose the best beef you can find, and a cut that is mostly lean, but with some marbling for flavor. I tossed the beef chunks with a few generous pinches of kosher salt and let them rest 15 minutes while I prepped my other ingredients and got my slow cooker up to speed.


For no special reason, I decided that I would use fancy onions for my beef stew. I chose cippolini onions, which are small and squatty—kind of like miniature vidalias—and they need to be peeled before cooking. This was easy to do, with a quick bath in simmering water, then a shock in an ice bath. For the sake of uniformity, I cut my other vegetables to match the size of the cippolinis. If you wish, use a large sweet or yellow onion, cut into large chunks. 


Browning the meat encourages more flavor because of something called the Maillard reaction, and if you want to geek out on food science, you could read this article to understand what that’s all about, or you could simply trust the process and brown the meat (your taste buds will thank you). When the oil in my slow cooker was ready, I added the salted meat a few pieces at a time to avoid a sudden temperature drop and turned them frequently to ensure even browning.


As soon as the meat was browned, I added a pat of butter and a few cloves of chopped garlic. A dusting of flour coated the meat and set the stage for gentle thickening, and then I splashed in about 1/4 cup of dry red wine. This adds depth of flavor to braising liquid, but if you don’t care for wine in food, you could substitute a splash of red wine vinegar or apple cider vinegar for a similar effect.


This is the time to transfer the browned meat to the slow cooker if your appliance only has heat settings, and it helps to have the cooker set on high heat setting when you do so. Add two cups of broth to the meat and stir it around until it begins to thicken slightly. Add the cut-up vegetables and cippolini onions, then add enough additional broth to just cover the cooker ingredients. Drop the temperature to low setting, add a couple of bay leaves into the stew, cover it and let it simmer for about six hours.


By that time, the beef will be very tender and the vegetables will be soft to the bite. If you like your stew a little thicker, a corn starch slurry will do the trick without giving an off taste. Turn the cooker heat back up to high and remove the bay leaves. Whisk together corn starch with equal amount of very cold water until smooth, and drizzle a stream of the slurry into the stew. When the braising liquid reaches a gentle boil, it will thicken to perfection.


We served our beef stew with some homemade, warm-from-the-oven dinner rolls. Now, aren’t you glad it’s autumn? What comfort food have you been craving?


Easy Slow Cooker Beef Stew

  • Servings: About 8
  • Difficulty: average
  • Print

There's an easy way to enjoy an all-day stew without giving it all-day attention. Grab your slow cooker and let's get cooking!


Ingredients

  • 1 1/2 pounds grass fed stewing beef, or chuck roast cut into pieces
  • 3 Tbsp. extra virgin olive oil
  • 4 to 5 cloves garlic, smashed and chopped
  • 1 Tbsp. salted butter
  • 1/4 cup all-purpose flour
  • 1/3 cup dry red wine
  • 4 cups low-sodium beef broth, divided
  • 7 oz. cippolini onions, blanched for easy peeling
  • 2 cups fresh carrot chunks
  • 2 cups Yukon gold potato chunks (skin-on is OK)
  • 1 cup chopped celery, ribs removed
  • Kosher salt and freshly ground black pepper
  • 2 dried bay leaves
  • 2 Tbsp. corn starch blended with 2 Tbsp. ice water (optional, for additional thickening)

Directions

  1. Blot stewing meat (or chunks) dry with paper towels. Sprinkle with one heaping teaspoon kosher salt and black pepper to taste. Rest meat at room temperature for about 30 minutes.
  2. Heat olive oil in a cast iron skillet, Dutch oven or slow cooker (if yours has a browning function). Brown meat on all sides over medium heat. Add garlic and cook about 2 minutes, taking care to avoid burning it. Sprinkle flour over meat and garlic, and toss until it appears absorbed onto the browned meat.
  3. Pour wine over meat and quickly toss, scraping up any browned bits from the surface of the pot. The wine should thicken quickly, creating a sticky coating all over the meat. Transfer the meat (if using a separate pot) to the slow cooker on high setting.
  4. Add 2 cups of the beef broth and stir meat around until the broth begins to thicken slightly. Add onions, carrots, potatoes and celery and toss to combine. Add remaining broth and stir. Place bay leaves and thyme sprigs on top of the stew mixture. Reduce slow cooker to low setting and cook for about 6 hours, until beef pieces and vegetables are tender.
  5. If desired, stir in corn starch slurry during the last 30 minutes of cooking time (use high heat). Serve with crusty rolls to sop up all the delicious gravy!


Green Gazpacho Shooters

It isn’t easy being green—unless you happen to be this gazpacho! I know, you’ve probably only seen gazpacho in shades of red, and perhaps with a few green bits of pepper or scallion on top. But when I visited our farmers’ market last weekend, I discovered that most of the tomato vendors had sold out. That is, until I spotted these beauties at a booth near the back.

In the end, I was glad that all the red ones were sold out!

The grower assured me that these little gems were indeed ripe, and as sweet as any other baby tomatoes. I don’t remember the variety of the tomato (artisan-something-or-other), but I figured it would be, at the very least, a fun twist on the chilled summer soup I planned to serve at our 3rd of July shindig. I picked up some fresh spring onions and a few yellow tomatoes, too, figuring they would help supplement my gazpacho with garden-fresh goods. The soup wouldn’t be red, but it would be interesting, and I was committed to using farmers’ market ingredients as much as possible.

That raises an important point about shopping local and eating with the seasons—it puts you at the mercy of the harvest, and you either go with the flow or go hungry!

I consider every trip to the farmers’ market to be a treasure hunt!

Fortunately, nobody went hungry at our house that evening, and this easy appetizer was the first thing we shared to get the party started. My instinct was to serve the gazpacho as “shooters,” a quick and simple starter that could be prepped ahead and served, sans silverware, as guests arrived. And I could have served them that way, if I had left off the delicate cubes of yellow tomato, cucumber and avocado, but those made the cups so much prettier, even if we did need to hand out spoons! An additional “garnish” of roasted paprika-dusted shrimp made the shooters substantial enough to hold everyone over for the feast that would come off the grill later.

This was a fun way to welcome guests with a fresh taste of summer!

This recipe was very easy to make (gazpacho always is), and I prepped everything but the shrimp a day ahead, which worked well because gazpacho flavors really develop overnight. Step one was to strip the skins off the tiny tomatoes—you don’t want to put those in the processor, unless you like little bits of peel sticking to your teeth. For this task, I did a quick blanch-and-shock treatment. Bring water to a boil in a pot, and prepare a separate bowl filled with ice water. Cut an “x” on the bottom of each tomato to give the peel an easy place to break. Gently lower the tomatoes into the boiling water, a few at a time, and only for about a minute, and then immediately scoop and transfer them into the ice water. This immediately stops the cooking process, shocking the tomatoes so that the peels can be easily stripped away.


I repeated the process with the larger, yellow tomatoes, which I took time to de-seed first (I kept the seeds for another purpose). I held back the flesh of about half a yellow tomato to use later for garnish, and the rest went into the large bowl of my food processor with the little green tomatoes. A few of them had tougher stems, which I cut off, but most of them were tender enough to toss into the mix.

I haven’t shared much about my processor yet, as I’m still learning all the bells and whistles, but I promise I’ll give it a proper introduction soon. For now, I’ll say that it is quite large (14-cup capacity) and it has a cool “Blendermix” ring that is designed to keep the bowl contents in check when you puree ingredients. I love this because it eliminates the need to stop and scrape down the bowl during mixing. Less work for me is never a bad thing!


When I was satisfied with the smoothness of the tomatoes, I tossed in most of a peeled and seeded, cut-up cucumber (I reserved part of it for a topping), a chopped spring onion and about half of a chopped jalapeno. If you like heat, you can leave the seeds in the jalapeno for a bigger bite. I stripped them out to accommodate guests who may not enjoy heat as much. It’s always easier to add spice than to take it away! Depending on how much texture you want in your gazpacho, you could either pulse in these extra goodies or puree the dickens out of them. I went with plan B and whizzed it up nice and smooth, then transferred the soup to a pitcher bowl and stirred in a splash of red wine vinegar and a quick swirl of good, extra virgin olive oil (Spanish, of course).


Gazpacho is best when it has had some time to “relax” in the refrigerator, so at that point, I covered the pitcher bowl and chilled it overnight. Remember the yellow tomato I set aside earlier, and the last bit of cucumber that didn’t get pureed? My intention was to use them as a garnish/topper on the gazpacho at serving time, so I sprinkled them with salt and combined them in a small bowl that also went into the refrigerator. A little bit of texture on top of the gazpacho would add visual interest and something to tantalize the taste buds on those first few bites.

Even the yellow tomato was so juicy! I reserved the seeds and excess juice for another purpose.

To serve the gazpacho, divvy it up into cute little cups or glasses. We did this an hour or so ahead of our friends’ arrival to save time and last-minute fussing, then tucked them back into the fridge. Top each cup with a few cubes of the reserved tomato-cucumber mixture, and a few cubes of fresh avocado. If you wish to garnish with the roasted shrimp, check out my previous post for Bloody Mary Shrimp Cocktail—the process was the same, but for this gazpacho recipe, I tossed the shrimp with a little bit of salt, garlic powder and sweet Spanish paprika.


This green gazpacho was a perfect starter for the summer meal to come from the grill. It was light, flavorful and very refreshing, and though it was a simple course—from its short list of ingredients to its ease of preparation—everyone loved it so much, they were still talking about it as we hugged our goodbyes.

It doesn’t get much sweeter than that!

Green Gazpacho Shooters

  • Difficulty: average
  • Print

This easy green gazpacho can be made ahead in half an hour and is terrific as a starter course for a summer meal off the grill! This recipe requires a food processor, or it can be made in a blender, though you may need to process the tomatoes in batches.

Ingredients

  • 2 dry pints of ripe baby tomatoes (green or otherwise)
  • 3 smallish yellow tomatoes (one will be reserved to chop for topping gazpacho)
  • 1 spring onion or small sweet onion, rough chopped
  • 1 large cucumber, peeled and quartered with seeds removed (reserve a chunk of this for topping)
  • 1/2 medium jalapeno, rough chopped (use the seeds if you like it hot)
  • Kosher salt and freshly ground black pepper
  • 1 Tbsp. red wine vinegar
  • 1 Tbsp. good quality, extra virgin olive oil (preferably a Spanish, fruity variety)
  • 1/2 ripe avocado, cubed (this will be a garnish at serving time; do not add it to the blended gazpacho)
  • Roasted paprika-dusted shrimp, optional for garnish (cooking instructions included in note below)

Directions

  1. Bring a pot of water to boil and fill a separate, large bowl with ice water.
  2. Wash all tomatoes and use a paring knife to cut a small “x” on the bottom of each.
  3. Carefully lower the tomatoes (a few at a time) into boiling water, and turn them a few times until the peels begin to loosen. This will only take about one minute, unless the tomatoes are less ripe. Scoop them out and immediately transfer them to the ice water bowl, taking care to fully submerge them. Repeat until all tomatoes have been blanched and shocked.
  4. Drain the tomatoes of excess water and transfer them to the bowl of a food processor, fitted with the large blade. Season with salt and pepper. Pulse a few times to break up the large pieces, and then process continuously until the tomatoes are pureed to a smooth consistency.
  5. Add the cut-up onion, cucumber, and jalapeno to the processor. Pulse, then puree continuously to desired consistency.
  6. Stir in the vinegar and olive oil. Adjust salt and pepper to taste. Transfer gazpacho to a pitcher bowl and refrigerate several hours or overnight.
  7. Dice the reserved yellow tomato and cucumber into bite-sized bits. Sprinkle with salt and pepper. Combine these in a bowl and refrigerate to use as a garnish on the soup.
  8. To serve, divide the gazpacho into cups and top with reserved tomato and cuke bits, plus roasted and chilled paprika shrimp (below).

These paprika-spiced shrimp are very simple to make, and you may prep these up to a day ahead. Be sure to give them enough time to chill completely in the fridge before serving time.

Ingredients

  • 12 to 16 shrimp (enough for two shrimp per gazpacho serving)
  • 1 Tbsp. extra virgin olive oil
  • 1 tsp. Spanish sweet paprika
  • 1/2 tsp. garlic powder
  • 1/2 tsp. kosher salt
  • several twists freshly ground black pepper

Directions

  1. Preheat oven to 400 F, and line a baking sheet with parchment paper.
  2. Peel and de-vein shrimp, keeping tails intact for presentation. Pat dry with paper towels.
  3. Add shrimp to a zip-top freezer bag. Drizzle in olive oil and add seasonings. Seal and shake to evenly coat the shrimp with seasonings.
  4. Arrange shrimp on baking sheet. Roast for about 6 minutes, or until shrimp are just barely opaque. Remove from oven and arrange in one layer on a plate. Place the plate directly into the fridge or freezer for a few minutes to stop the cooking process. Transfer to a covered container and keep chilled until ready to serve.


Kentucky Hot Brown Swirls

The funnest thing about doing a food blog is putting all the new spins on the old dishes. Wait, did I just write “funnest?” Well, a word like that fits the situation, given that I am feeling playful about twisting up a classic. If I’m taking all kinds of liberties with the flavors so beloved for Kentucky Derby, I may as well do it with my words, too.

My celebration of the Kentucky Derby—which is Saturday, by the way, in case time has gotten away from you—is purely vicarious. I’ve never been to the Derby and honestly don’t know how I feel about the way they pressure the horses to perform for profit, but I know that I like the pomp and circumstance, the food traditions, the fancy hats and especially the bourbon! The Kentucky Hot Brown is the most classic dish associated with the Kentucky Derby, and I have twisted it up in several ways already, including a Kentucky Hot Brown Benedict, a Kentucky Hot Brown Pizza and a super simple Kentucky Hot Brown Dip. When Derby time rolled around this year, I wanted to make a fun, crowd-ready food that’s easy to pick up and enjoy in just a few bites because, honestly, who wants to sit down in the middle of a party with a knife and fork and eat a messy, traditional Kentucky Hot Brown open-faced sandwich, with all its oozing Mornay sauce? Yeah, these are much easier!

It’s no coincidence that these Kentucky Hot Brown swirls are delicious with bourbon.

If you’re entertaining friends for the afternoon leading up to the “most exciting two minutes in sports,” may I suggest these adorable little puff pastry swirls? They have all the flavors of the beloved Kentucky Hot Brown, including roast turkey, bacon, tomatoes and gruyere, plus a touch of sauteed shallot and (in a nod to the catering kitchen where I worked so long ago) “A Pinch of Thyme.”

I expected a few obstacles along the way to these tasty rollups, mostly because puff pastry can be fussy to work with. It bakes up best if it goes into the oven cold, so the first thing I planned was to work quickly. Get all your filling ingredients ready first, and refrigerate the ones that are cooked, such as the bacon and shallots. Cook the bacon long enough to render as much fat as possible, so the lingering fat doesn’t make the pastry soggy, but not so much that hard edges will tear the pastry. Shred the cheese and keep that in the fridge until assembly time, too. Fresh roast turkey is probably better than deli turkey (mainly for keeping the sodium in check), and I confess that I used leftover turkey that we had stashed in the freezer after Thanksgiving. As for the tomato, I knew that my sweet and savory tomato jam would not spread neatly onto the puff pastry without tearing it, and I didn’t want to heat it (see the first point about baking puff pastry cold), so here’s how I overcame that challenge—I added a few tablespoons of tomato jam to the bowl with chopped turkey and stirred it together. Problem solved!

You can put these two-bite treats together in the morning or afternoon, even the night before, all the way up to slicing them into swirls, and then refrigerate them until about a half hour before your guests arrive. A quick egg wash and some extra sprinkles of gruyere just before they hit the oven, and, well—riders up!


This recipe makes 12 swirls, just about right as appetizers for 6 people.

Ingredients

3 slices smoked bacon, cut into pieces no larger than a postage stamp

1 smallish shallot, peeled, halved and cut into half-moons

1 cup chopped, cooked leftover roast turkey breast

3 Tbsp. tomato jam (store-bought or homemade, if you have it!)

1 heaping cup shredded gruyere cheese (or Swiss), divided

A few sprigs fresh thyme, leaves stripped

1 sheet store-bought puff pastry, thawed according to package instructions

1 egg, whisked with a teaspoon of water, for egg wash just before baking


Instructions

Ready to make them?


Pollo Chipotle

There’s a time and place for the numbered dishes on a Mexican restaurant menu—you know what I mean, the #11 combo platter of one crunchy taco, one burrito and one enchilada, with a side of rice and flavorless refried beans. For me, the time was in my younger years, before I learned to appreciate the Mexican specialty dishes as I do today, and the place was (obviously) an actual restaurant, which I don’t frequent as much as I did in those days because, frankly, we prefer the food we make at home. It has only been recently that I started considering how to make some of our favorite Mexican meals, and those favorites seldom include items from the numbered combo section, and never any crunchy, from-a-box taco shells that I used to associate with Mexican “cuisine.” It’s funny how much has changed.

At one of our favorite local places, called Señor Bravo, the pollo chipotle is the special menu item that always wins over my husband, Les. The chicken (or pollo, if you wish) is tender and bite sized, and it’s drenched in a spicy sauce that has enough smoky chipotle to warrant being part of the dish’s name, but also enough rich cream to soften the edges and give the dish a special flair. I have tried several times to make this dish at home, and on previous attempts found it difficult to replicate the flavor and texture. It seemed something was missing so I fiddled with the cooking process, added ingredients and spices, tried different types of cream—from half and half to heavy cream—and every addition made it less and less like the restaurant dish. Finally, I dialed it all back and kept it simple. Turns out, simplicity was exactly and only what it needed.


Besides being simple and delicious, this dish is also relatively healthy, as I used cream cheese rather than heavy cream to thicken the spicy sauce. This eliminated the need for flour as a thickening agent. And for our at-home pollo chipotle, I jazzed up a simple pot of brown rice with a shake of cumin and a small handful of chopped cilantro and served it alongside a simple salad with fresh tomato and slices of ripe avocado.


Ingredients

1 lb. boneless, skinless chicken breasts

2 Tbsp. expeller-pressed canola oil

1/2 large yellow onion, chopped

2 cloves fresh garlic, smashed and sliced

3/4 tsp. kosher salt

1/4 tsp. sweet Spanish paprika

1/2 tsp. ground cumin

Several twists of freshly ground black pepper

1 or 2 Tbsp. pureed chipotle with adobo sauce* (see recipe notes)

1 cup low-sodium vegetable broth*

A couple of pinches of dried Mexican oregano*

4 Tbsp. cream cheese, room temperature


*Recipe Notes

The chipotle puree is best prepared in advance, and you may want to start with one tablespoon and adjust up to taste. To make the puree, empty the entire contents of a small can of chipotles in adobo sauce into a food processor or blender. If your processor has a small bowl insert, that will be the perfect size. Pulse a few times, then run the machine continuously until the sauce is completely smooth.


I prefer the more complex flavor of vegetable broth in most recipes, but for this dish, you could certainly use chicken broth. I would still recommend a low-sodium version, as this helps with controlling the overall amount of sodium in the dish.

Low-sodium vegetable broth is one of the most versatile ingredients in my pantry. If you prefer, use chicken broth.

Mexican oregano is very different from the easier-to-find Mediterranean oregano you are probably accustomed to using. It’s part of the verbena family, with a citrusy, slightly floral flavor. Search it out in an ethnic supermarket, at Whole Foods or the international spice section of World Market. If you can’t get Mexican oregano, dried marjoram would be a better substitute than regular oregano.

To make the cilantro rice, simply cook a batch of your favorite brown rice according to package instructions. Use vegetable broth rather than water for more flavor. Stir in salt, pepper, a few shakes of ground cumin and a small handful of fresh, chopped cilantro leaves before serving.

Why serve ordinary rice, if you can make it more flavorful with so little effort?

Instructions


Looking for ways to use the rest of the chipotle puree?


White Borscht

Like many of you, I have been filled with agony over Russia’s violent aggression against Ukraine, disgusted by the flippant and cavalier attitudes presented by deniers and Putin sympathizers, and worried that there is little I can do to make a tangible difference in the lives of the Ukrainian people. And yet I feel a kinship with them and want to do something, anything, to show my support.

One of the primary reasons I started Comfort du Jour was to build community with others who, like me, feel deeply connected to the world through food. It is the most universal need of humanity, yet very personal because of the customs and traditions woven into our individual and collective heritage.

Last week, a message from Sam Sifton, the founding editor of New York Times Cooking, arrived in my email inbox and it confirmed that I am not alone in this desire to use food to demonstrate solidarity. Sifton described being inundated with reader requests for recipes for borscht, a traditional sour soup that is common across all of Eastern Europe, most notably with Ukraine. I could not resist digging into the variety of recipes he offered in response to his readers, and this one in particular caught my eye.

Most borscht recipes are based on red beets, and though I adore their earthy flavor, my husband (whose Hungarian mother used to make beet borscht for herself) does not. This version, named “white borscht” by chef and author Gabrielle Hamilton, features potatoes and kielbasa, and seemed more in line with my husband’s palate. The original recipe suggests using real pork kielbasa, but I have substituted a lower fat turkey kielbasa. I also cut the butter amount in half and stirred in a little sour cream at the end rather than the crème fraiche suggested by the recipe’s author.

The sour cream and dill add a touch of freshness to this hearty, humble soup.

As always, my exploration into other cultures’ cuisine has taught me some lessons, and one thing about this soup surprised me. I have long assumed that Eastern European soups are “sour” because of fermentation or added vinegar (and sometimes they are), but this soup is both soured and thickened with a hefty chunk of sourdough bread, which I always happen to have on hand. This method of soaking and pureeing the bread was a genius move by the author, as it gave the soup a sturdy, almost creamy, texture, as well as a distinctive sour flavor. Always more to learn in the world of food, isn’t there?

My only regret is that I cannot make an enormous vessel of this soup to feed and comfort all of Ukraine, but I hope that somehow, sharing this experience will ripple across time and space to ensure the courageous people of that nation that they do not stand alone. 🇺🇦


Adapted from https://cooking.nytimes.com/recipes/1021711-white-borscht

Note: The original recipe linked above is only available to paid subscribers of New York Times Cooking (which I am), but my adaptation is very close to the original, except for the aforementioned substitutions and the fact that I halved the recipe for our family of two.


Ingredients

1 lb. smoked turkey kielbasa, cut into three or four pieces

6 cups filtered water

2 dried bay leaves

4 Tbsp. salted butter, divided

1 medium yellow onion, chopped

3 cloves garlic, smashed and minced

1 large leek, cleaned and cut into thin half-moon slices

Kosher salt and about 1 tsp. ground black pepper

A large piece of dense sourdough bread*, crusts trimmed (see notes)

1 1/2 lbs. russet potatoes, peeled

About 1 cup chicken or vegetable broth*

Sour cream and fresh dill for serving


*Notes

Note that real sourdough bread is made from a sourdough starter. Some grocery bakeries take a shortcut that embellishes yeast bread with citric acid, and it is not the same. If you don’t have sourdough bread, consider picking up a loaf from an authentic bakery or use a (seedless) rye. I confess that the sourdough loaf I had on hand was dotted with pumpkin seeds, but after pureeing, this did not have a bad effect on the finished borscht.

The recipe that inspired me did not call for broth, other than the one created by simmering the kielbasa, but in my first-attempt jitters, I accidentally simmered my soup longer than I should have and needed more liquid to keep it from becoming mashed potatoes. It isn’t a bad idea to have some broth at the ready for this purpose. I used a version of vegetable broth called “No-Chicken” broth, and it was perfect for making up the difference in liquid without affecting flavor.


Instructions

  1. Place the kielbasa chunks in a large soup pot and cover it with the filtered water. Add the bay leaves and bring to a boil, then reduce heat to a simmer for about 20 minutes.
  2. Prep the potatoes by cutting off the sides and ends, creating mostly flat sides on the potato. Keep the potato scraps in one pile and cube up the rest into a separate pile.
  3. After simmering, the kielbasa should be noticeably swollen, and small droplets of fat from the kielbasa will be swirled throughout the broth. Use tongs to transfer the kielbasa to a cutting board. Pour the broth into a large bowl or measuring pitcher.
  4. Into the same pot, melt two tablespoons of the butter and sauté the yellow onions and garlic with salt and pepper for about five minutes, until tender. Add the remaining butter and leeks to the pot and sauté two more minutes, until those are also tender.
  5. Add the scraps of potato and the large chunks of sourdough bread to the pot. Pour about 2/3 of the reserved broth into the pot and simmer until the bread looks completely bloated, about 10 minutes. Use a large, slotted spoon or tongs to pull out the sopping bread into the measuring pitcher with the remaining reserved broth. It’s OK if some of the leeks and onions tag along. Set the pitcher aside to cool for a few minutes.
  6. Add the potato cubes to the pot, along with enough broth or water to just cover them. Heat to a boil and then simmer for about 15 minutes until potatoes are slightly tender. While that simmers, use an immersion blender to puree the sopping sourdough with the liquid in the bowl or pitcher.
  7. Stir the puree mixture back into the pot, along with the kielbasa. Adjust salt and pepper to taste. Simmer just until heated through, as continued cooking will cause the potatoes to turn mushy.
  8. Serve the white borscht with a dollop of sour cream and a sprinkling of fresh dill.