My first taste of Greek food came when I was in my early 20s, shortly after I arrived in Winston-Salem, N.C. Unlike the places I’d lived before—upstate N.Y. and a few places in Colorado—this southern city is home to a large community of Greek-Americans. One of my first jobs here was waiting tables at a Greek-owned casual seafood restaurant, where our most popular (though not inherently “Greek”) menu items included breaded and deep-fried flounder and crunchy little seafood nuggets known as “popcorn shrimp.”
It didn’t take long though before I discovered some of the other Greek-owned eateries in town that offered an authentic, mouthwatering specialty called souvlaki, a lemon and herb-seasoned marinated meat, grilled on skewers and served with any number of authentic sides. Depending on the time of day, you might be served souvlaki with seasoned rice or lemon-herb potatoes, or with Greek feta salad and pita. But always on the side with souvlaki is tzatziki, a Greek yogurt-based condiment with shredded cucumber, garlic and dill.
Some of the new words associated with these delectable foods were hard for me to say at first, but it didn’t take long for me to fall in love with the incredible flavors of Greek food. This fall, perhaps when our new kitchen is completed, I look forward to making a classic pastitsio or moussaka, both of which are baked comfort to the nth degree, rich with warm spices and creamy béchamel.
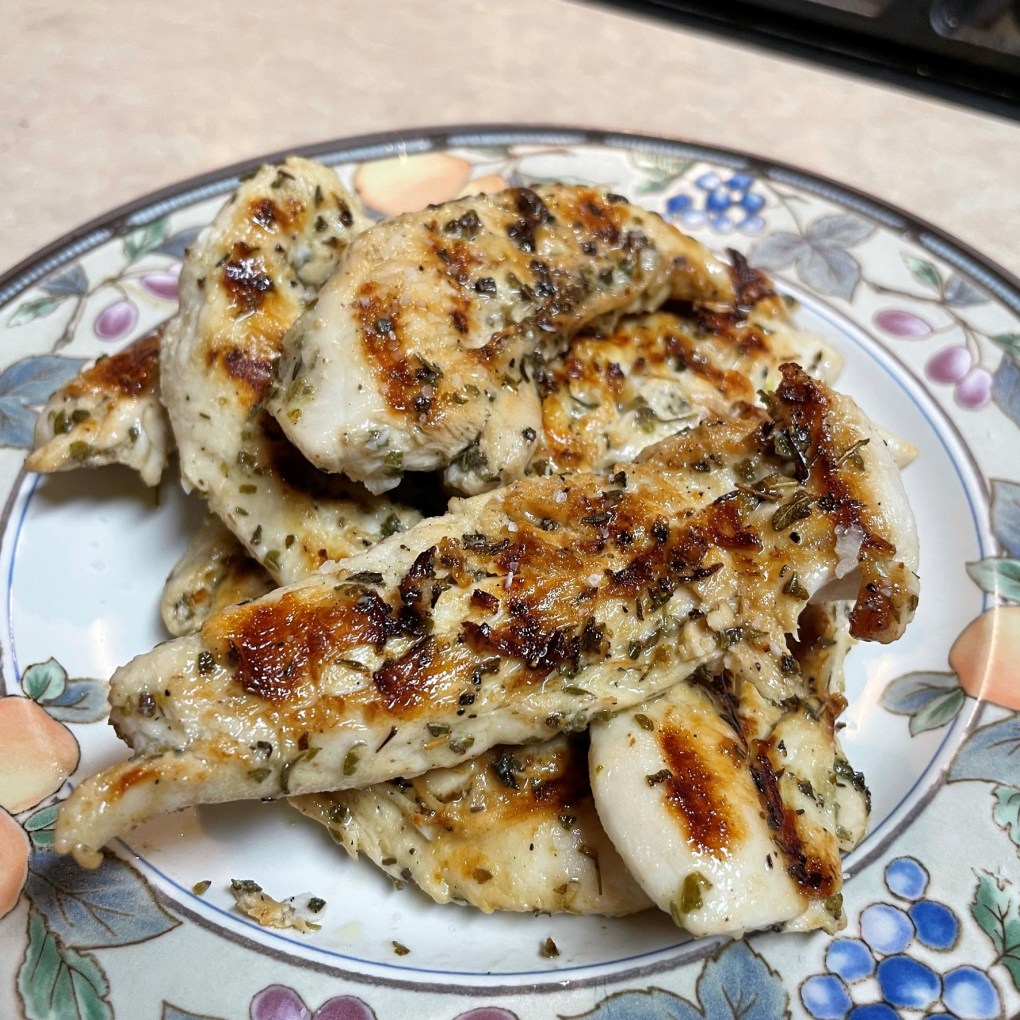
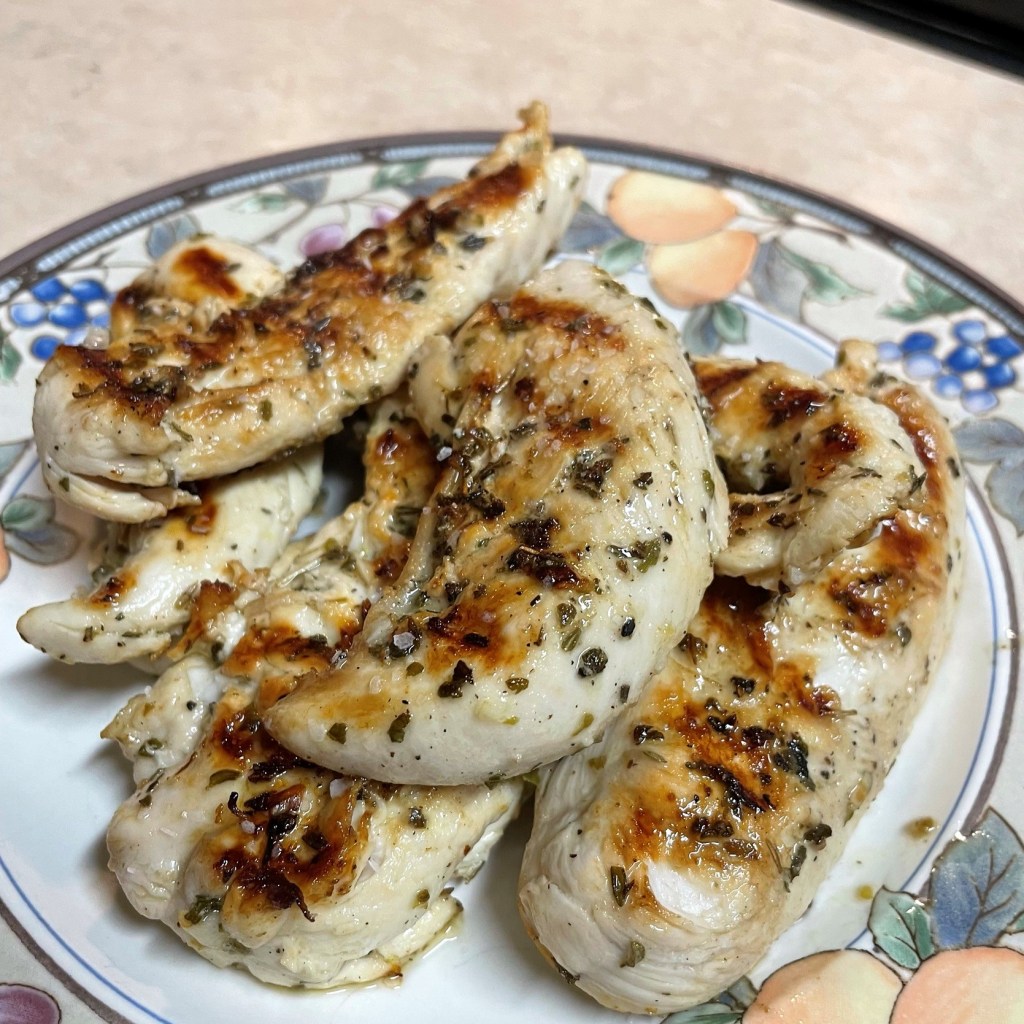
But today, I’m focused on the food to work best with summer grilling, and that is souvlaki. Traditionally, souvlaki would be made with chunks of lean pork, but there are just as many restaurants around here that put the same flavors and treatment on pieces of chicken breast, and it is positively delicious. Feel free to cut boneless chicken breasts into chunks for your souvlaki—that would be the more traditional way, after all—or you can take the easy way, as I have, and marinate whole chicken tenders, skip the skewers and toss the tenders right onto the grill.
Souvlaki is delicious with warm, soft pita breads and zesty tzatziki sauce, which is easy to make while you wait for the marinade magic to happen. You might also serve your souvlaki up with a batch of the cool tzatziki potato salad I shared a few days ago. Before long, you’ll join me in shouting the traditional Greek celebration exclamation—OPA!
Ingredients
1 1/2 pounds chicken tenders
1 whole organic lemon, juiced (plus the zest)
1 Tbsp. red wine vinegar
About 4 cloves garlic, finely minced
1/2 tsp. dried oregano
1 tsp. Kosher salt
1/2 tsp. freshly ground black pepper
About 1/3 cup extra virgin olive oil
Instructions
I usually blend the marinade in a large, deep bowl that will hold the whole amount of chicken.
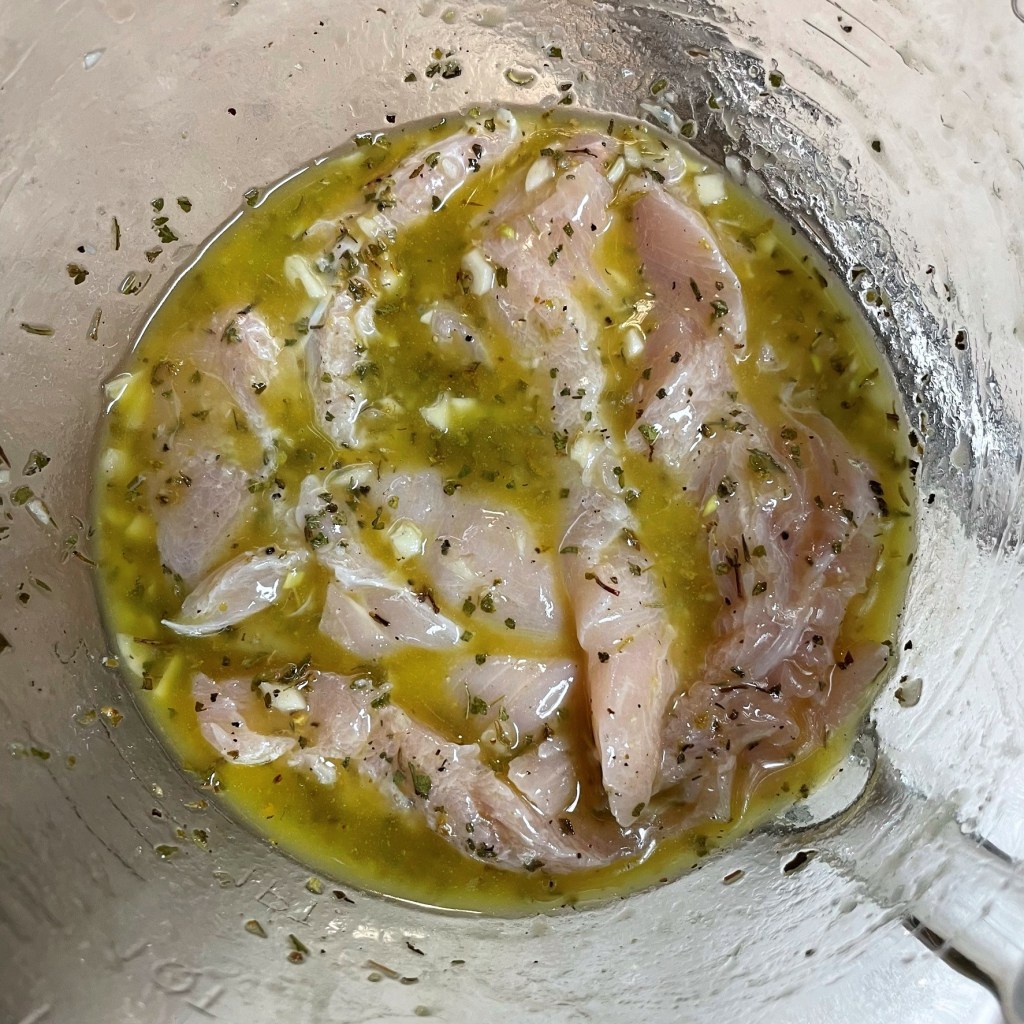
Toss the chicken pieces or tenders so that every piece is coated with the lemon-herb marinade.
Try to press the pieces under the surface of the marinade, and then cover the bowl and send it to the fridge for at least six hours.
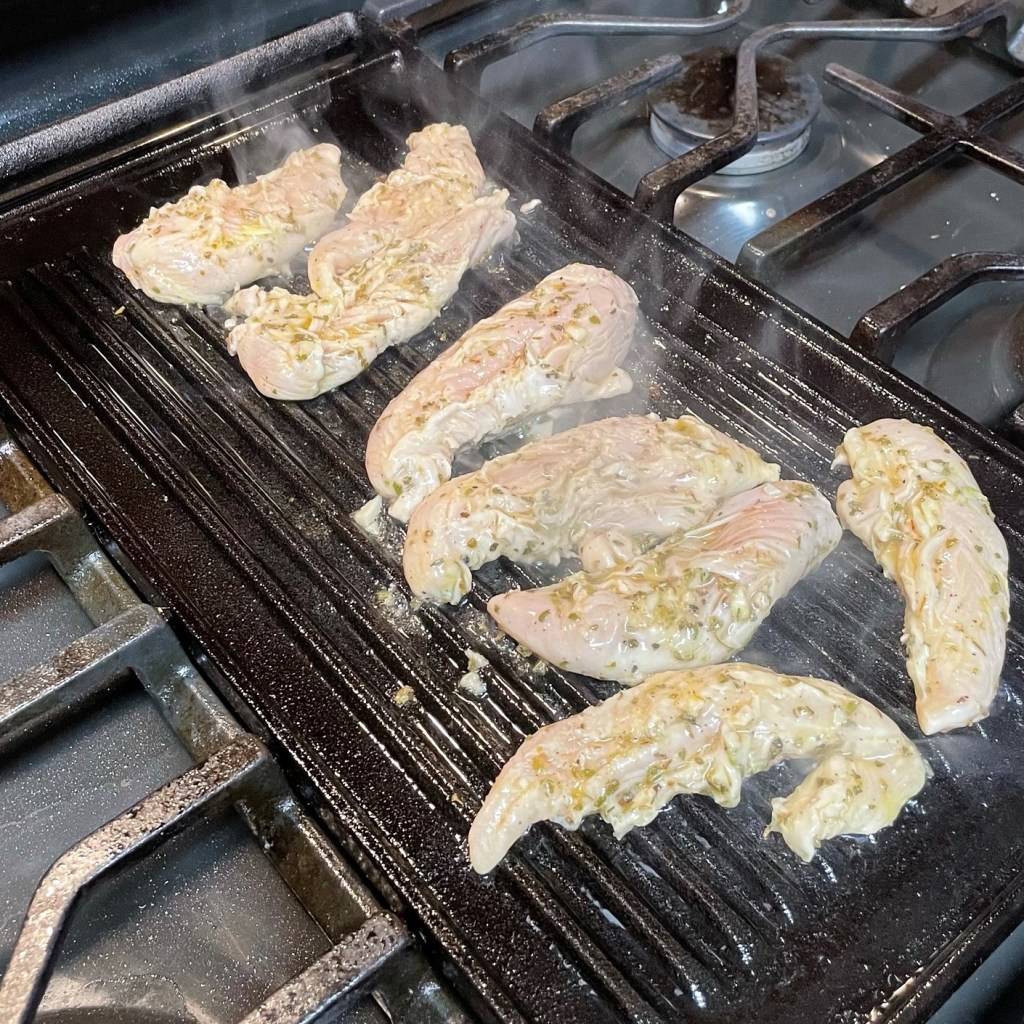
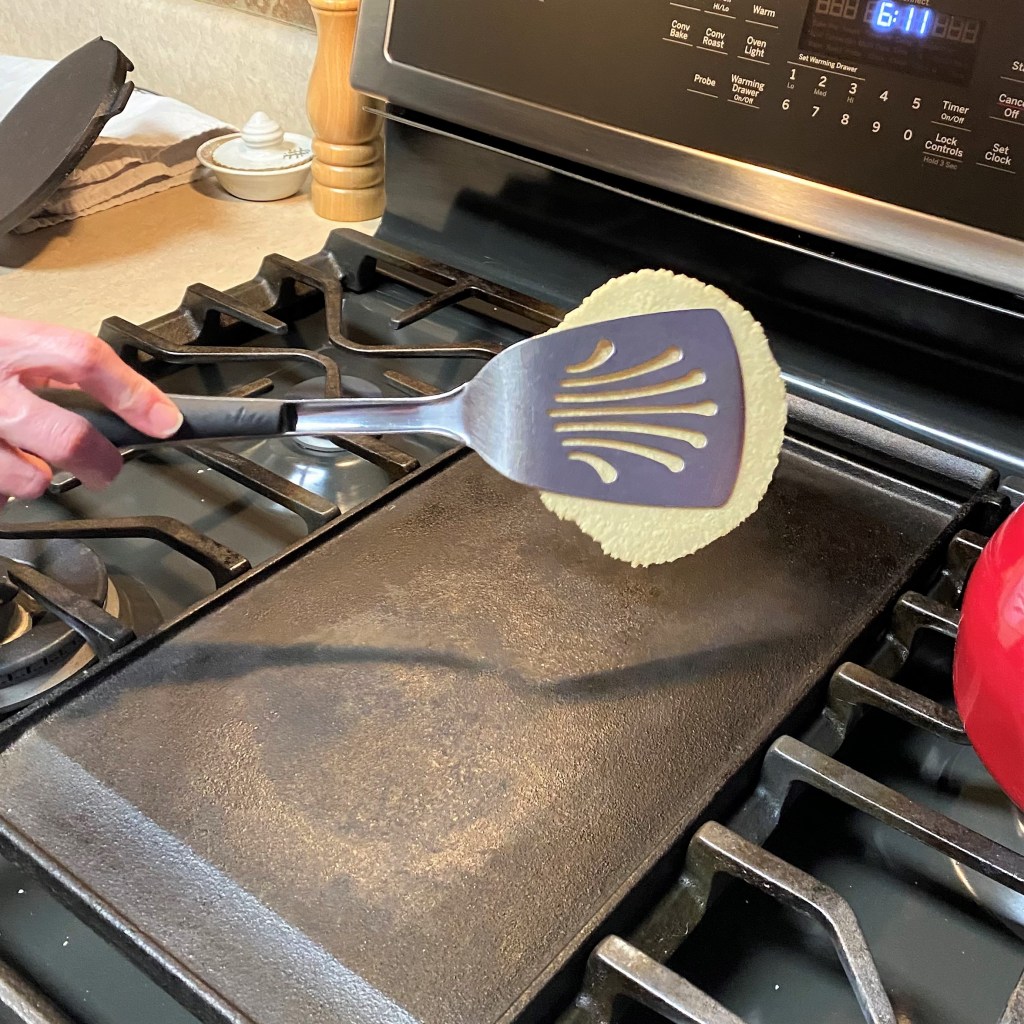
On the day I planned to make these, we had thunderstorms so I had to grill them indoors. I love a flexible recipe!
Medium heat is best, and do not turn them until the first side is golden and opaque. Total grilling time won’t be more than about 8 minutes.
The lengthy marinade time seals in the juices and flavor. Just add tzatziki and a pita wrap, or put the souvlaki tenders right on top of a salad!
Pat the chicken tenders dry, but do not rinse them. Lightly sprinkle with kosher salt and toss to coat.
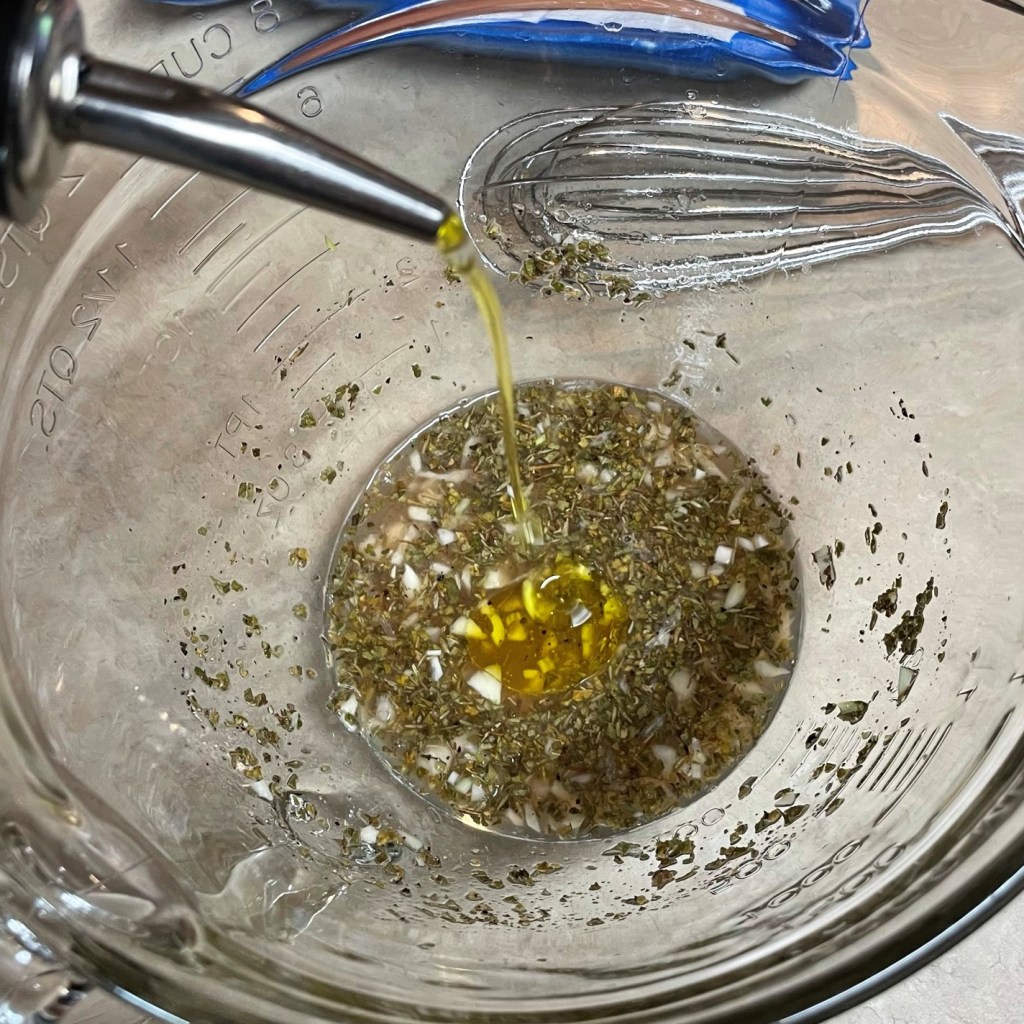
In a large glass (or other non-reactive) bowl, combine lemon juice, zest, vinegar, garlic, oregano, salt and pepper. Take note of the volume this mixture has in the bowl. Whisk the marinade mixture while streaming in enough olive oil to roughly double the volume of the marinade.
Add the chicken tenders to the marinade and use tongs to thoroughly toss and coat them. As much as possible, press the tenders to be fully submerged in the marinade. Cover the bowl and refrigerate at least six hours.
When you are ready to cook the tenders, simply remove them from the marinade and place them directly onto the pre-heated grill. There is no need to rinse them or even to scrape the marinade from the tenders.
Tzatziki
1 Persian cucumber (or 1/2 medium slicing cucumber), peeled, seeded and finely chopped or grated
A couple pinches of kosher salt
1 cup plain Greek yogurt (or substitute sour cream if you must)
Line a small custard cup with a paper towel. Add the chopped or grated cucumber and stir with salt. Wrap the paper towel over the cucumbers and allow this to sit in the fridge 30 minutes to release and absorb excess moisture.
Combine cucumbers with yogurt, garlic and dill. Cover and refrigerate until ready to serve.
There are as many ways to make potato salad as there are grandmothers, and although my own Gram never made this version, I know she would have liked it. Gram introduced me to yogurt when I was a young girl, and it’s a good thing she did, for a couple of reasons. First, I love it in all its forms—plain, Greek, drinkable, etc.—and second, I likely would not have tried yogurt at all because my mother hates it.
If the passion for food and cooking is passed down genetically, then all I can say is that it skipped a generation in my branch of the family tree. My mom is not a bad cook, just a basic (and infrequent) cook, and the meals she served when I was young never strayed from what she herself liked to eat. My friends, that was a short list. On the good side of things, this allowed me to experience Mexican food at an early age, and it is still a favorite. On the flip side, I nearly missed out growing up on so many things I love today, including cream cheese, eggplant, bleu cheese and, well, I could go on for days. Not only did my mom not enjoy those foods, but she would make disgusted faces about the very idea of them, and I might have grown up believing they were poisonous, if not for my grandmother’s influence.
Yogurt is about as far from poison as you can get; it’s rich with protein and gut-nourishing probiotics, and I learned to love the little cups of it that my grandmother always seemed to have in the fridge when I visited. My favorite flavors, as I recall, were lemon and the ones with blueberry or peaches that you stirred up from the bottom. These tasty treats paved the way for me to love Greek yogurt in my adult years, and most often with no fruit or sugar added. This powerhouse food is strained to a thicker texture than regular yogurt, so that the protein is concentrated, making it a fantastic base for healthy breakfast smoothies. In our house, we regularly reach for Greek yogurt as an even exchange for sour cream, and we whip it into our scallion cream cheese to make it more spreadable.
As summer inches toward its end this year, I had been considering ways to liven up my basic potato salad recipe, and it occurred to me that tzatziki—the bold and zesty, Greek yogurt and cucumber sauce—could be a terrific addition to a potato salad. I am not crazy about having a lot of mayonnaise in my salads, and the idea of refreshing tzatziki sounded pretty darn good. I was right.
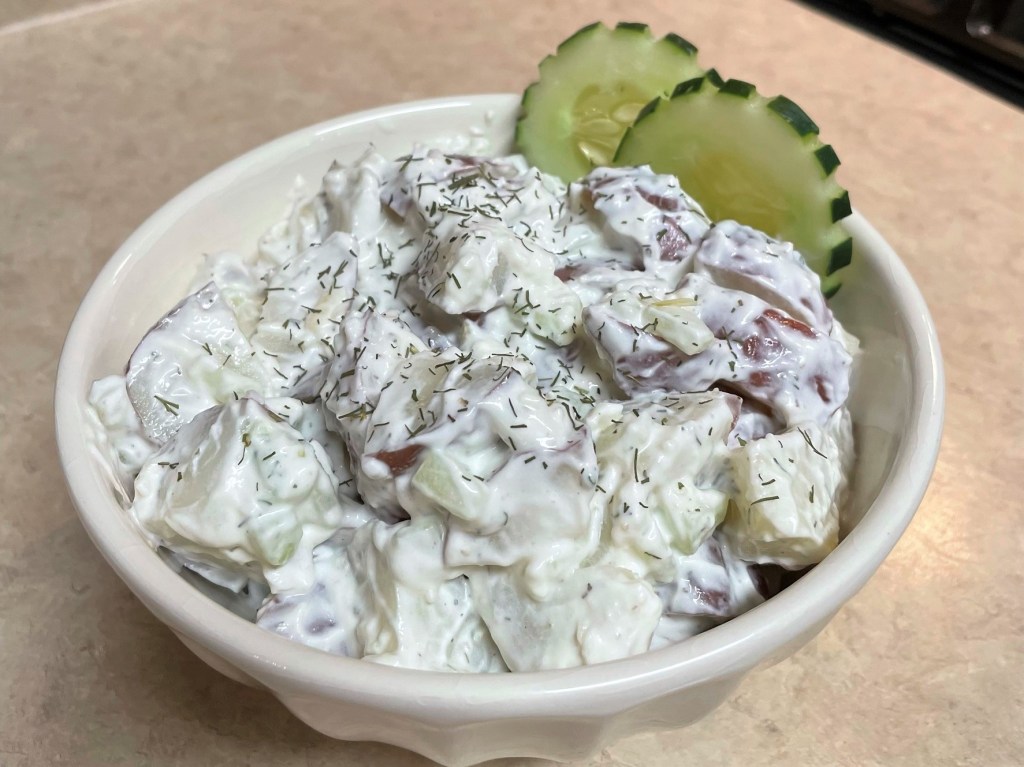
Cool, creamy, refreshing!
While you cook the potatoes, make the tzatziki. Begin by chopping or shredding a peeled and seeded cucumber, then use salt to strip it of excess moisture and blend it together with a healthy dose of Greek yogurt, garlic and dill. Combine that with a touch of mayonnaise and fold it into cold, boiled potatoes, and you will have a side salad that’s perfectly cool and fresh, served with burgers or any kind of meat kebab on the grill.
Ingredients
About 1 1/2 pounds red or yellow potatoes
1/2 good sized slicing cucumber, peeled
Kosher salt and black pepper
2 cloves fresh garlic, finely minced
2/3 cup Greek yogurt
Fresh or dried dill leaves
1/4 cup mayonnaise (I used canola mayo from Trader Joe’s)
Instructions
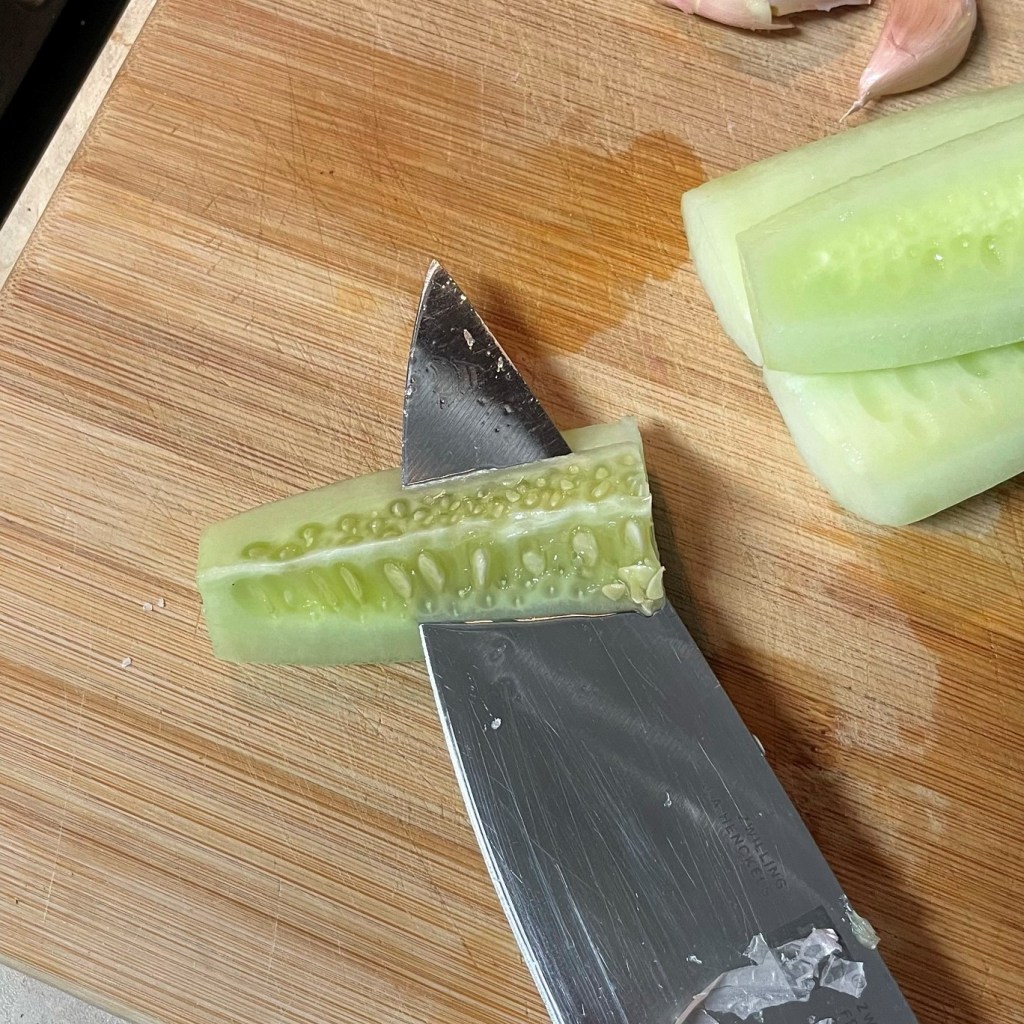
This is my method for prepping the cucumber: Cut it into spears, remove seeds, then cut into strips, then dice.
Removing the seeds ensures the tzatziki dressing doesn’t get watery.
Sprinkle a couple of generous pinches of kosher salt on the diced cucumber, and wrap in paper towels to absorb excess moisture.
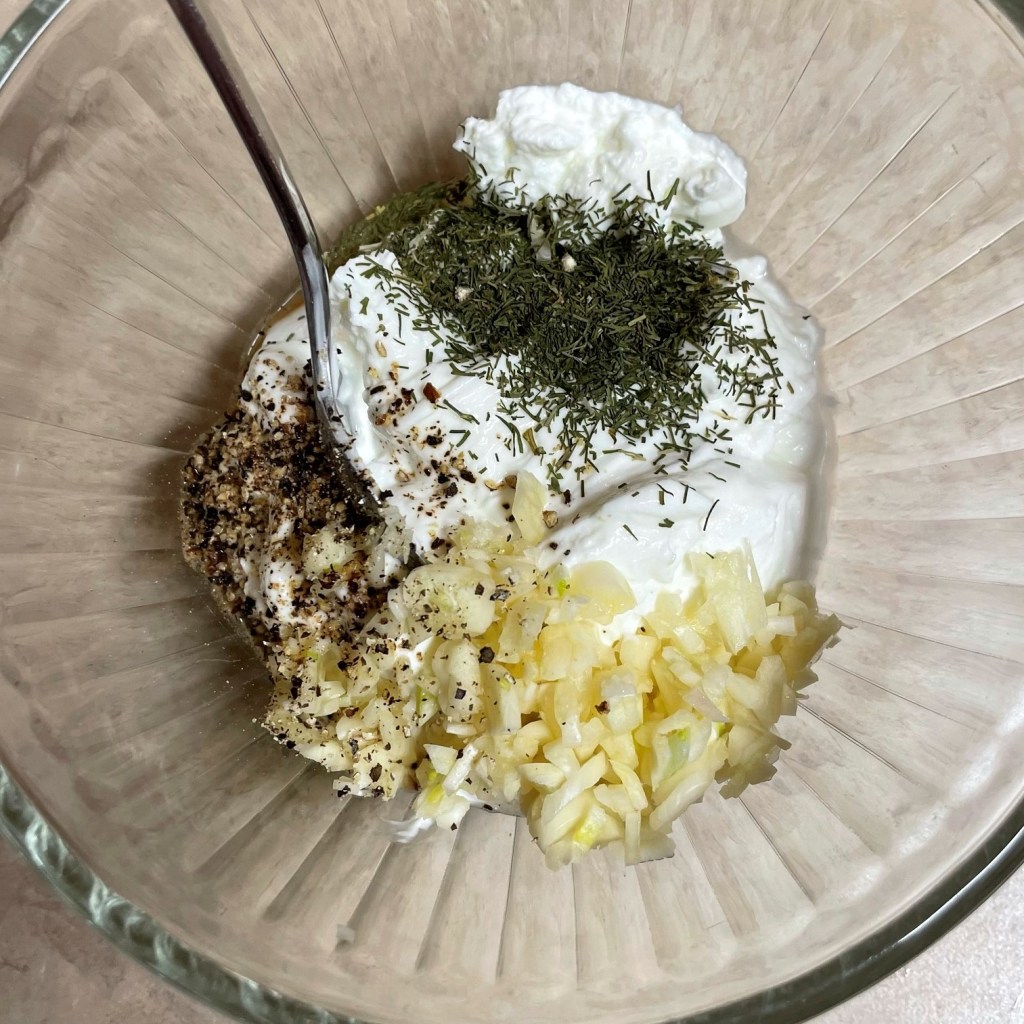
For the base tzatziki, combine Greek yogurt, garlic, dill and pepper. Salt will be covered by the cucumber.
Fold in the cucumber bits until the mixture is even.
In a larger bowl, combine the tzatziki with a dollop of mayo and blend.
Give it a taste and adjust seasonings to your liking. I did not have fresh dill, but dried works just as well.
Fold in the chilled, cooked potatoes. As you can see, I left the skin on my baby reds because they remain nice and tender. I hate to miss that extra fiber!
To serve, sprinkle a little more dill on top and garnish with cucumber wheels.
Scrub the potatoes but leave the peel on. Cut the potatoes into large chunks and cook them in salted water at a low boil until they are just tender enough to pierce with a knife. Drain, cool and chill them at least two hours.
Cut the cucumber lengthwise into quarters (like pickle spears). Use a paring knife to carefully slice off the center strip that contains the seeds. Discard them. Slice, then dice the remaining parts of cucumber into very small bits. Alternatively, you may cut the cuke in half lengthwise, use a spoon to scoop/scrape out the seeds, and then grate it on the large holes of a box grater.
Transfer the cucumber bits or shreds to a paper towel-lined bowl and sprinkle with two generous pinches of kosher salt. Toss the cucumber in the salt, fold the paper towel over it and put the bowl in the refrigerator. After about 30 minutes, gently press the cucumber between layers of clean paper towel to remove the excess moisture.
In a medium bowl, combine the Greek yogurt, minced garlic, black pepper and dill. It is unlikely that you will need additional salt, as the cucumber will bring that flavor to the dip. Fold in the salted, drained cucumber bits.
Combine the tzatziki with mayonnaise. Adjust pepper and dill to taste.
Fold the dressing into the chilled cut-up potatoes. Garnish salad with additional sprinkles of dill and a few cucumber slices.
Once upon a time, a busy woman ran out of creative ideas for the package of chicken tenders she pulled from the freezer, and the only thing that could save her from a boring dinner was a spark of inspiration. The woman, of course, was me, and it happened on Friday. It happens more often than I’d like, truth be told.
Isn’t that a familiar tale? Even people who love to cook have creativity blocks, especially when pressed for time, and we all need a boost to pull out of a menu rut. If I had stuck with my ho-hum plan to fry the chicken tenders and plop them on a salad—well, it would have been edible, but uninspired. It certainly would not have been remarkable or interesting enough to share here on Comfort du Jour. Luckily, I had the presence of mind to check my email that morning before heading out for a full day of errands. Right there at the top of my inbox was a cheerful message from my West Coast blogging buddy, Michelle, and her casual sharing of a personal story about “tequila-lime chicken” arrived just in time to twist this plot and save our supper.
What I love most about food and recipes is the rich stories they tell about our lives. It’s one of the main reasons I started a food blog last year, a decision that I did not expect would lead to meaningful new friendships with other bloggers. Recent email conversations between me and Michelle brought us around to the joy of cooking on the grill (or the “BBQ,” as many West Coasters call it), and on Friday, she described this idea that she had invented to serve as a late-night patio bar snack at a restaurant where she once worked. Tequila-lime chicken is the kind of recipe you make by instinct, not by following specific amounts or ratios, and I love that she described the recipe that way—you know, with a little of this and a touch of that and a couple of those. It made perfect sense to me because 99 percent of the time, that’s exactly the way I cook, adding ingredients that fit the flavor profile until it looks and tastes “right.” It sounded perfect, and I couldn’t help but see my boring package of chicken tenders in a new light.
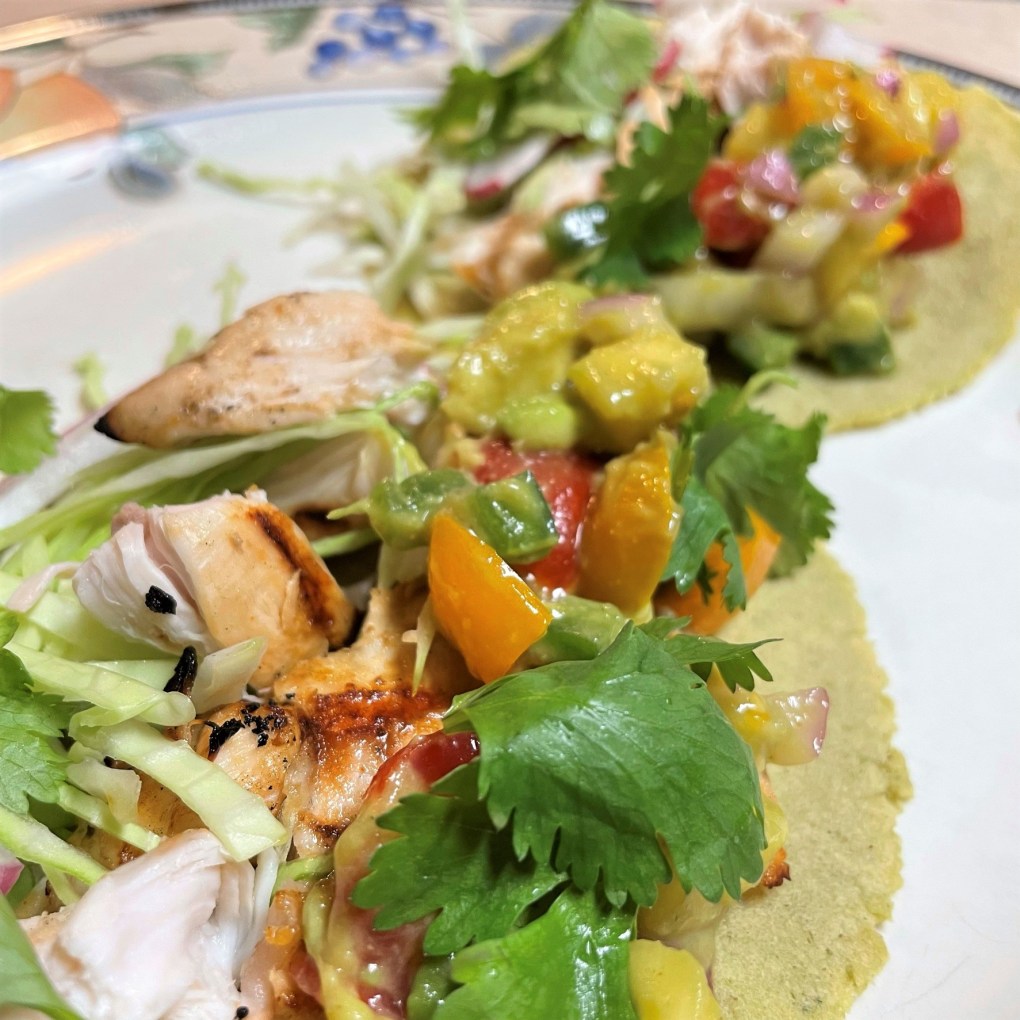
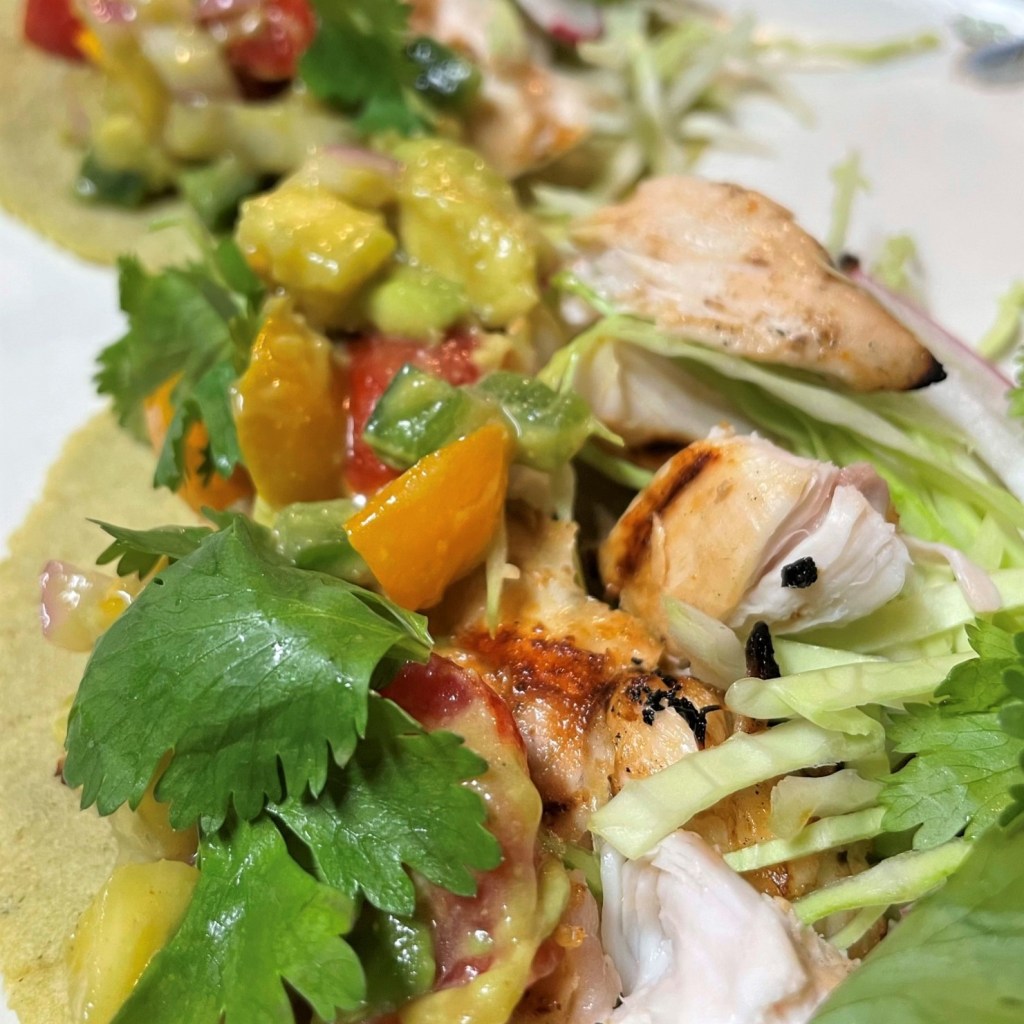
The ingredient list for the marinade was short and easy—tequila, citrus juice, fresh garlic and simple spices, such as cumin and chile seasoning, and it tenderized the chicken beautifully. My ingredient makeup wasn’t identical to Michelle’s recipe—she adds slices of onion to the marinade and I saved that for the pico topping—but the chicken turned out every bit as tender and flavorful as she described it, and I can totally see why her tequila-lime chicken tacos were a frequent “sellout” at the patio bar. We liked them so much at our house, I want to run out and buy a taco truck!
Tender, tequila-marinated chicken with the tropical pineapple pico and fresh cilantro.
This was a fabulous twist of events!
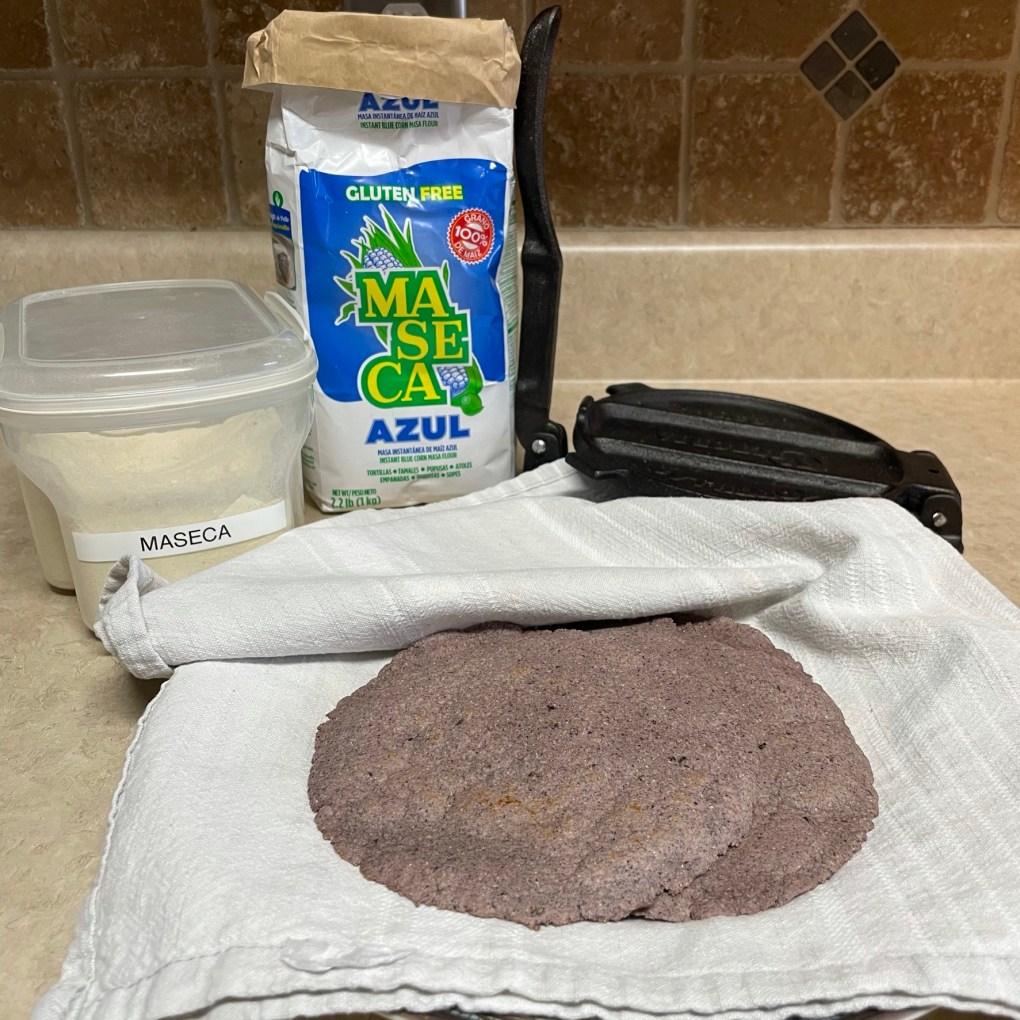
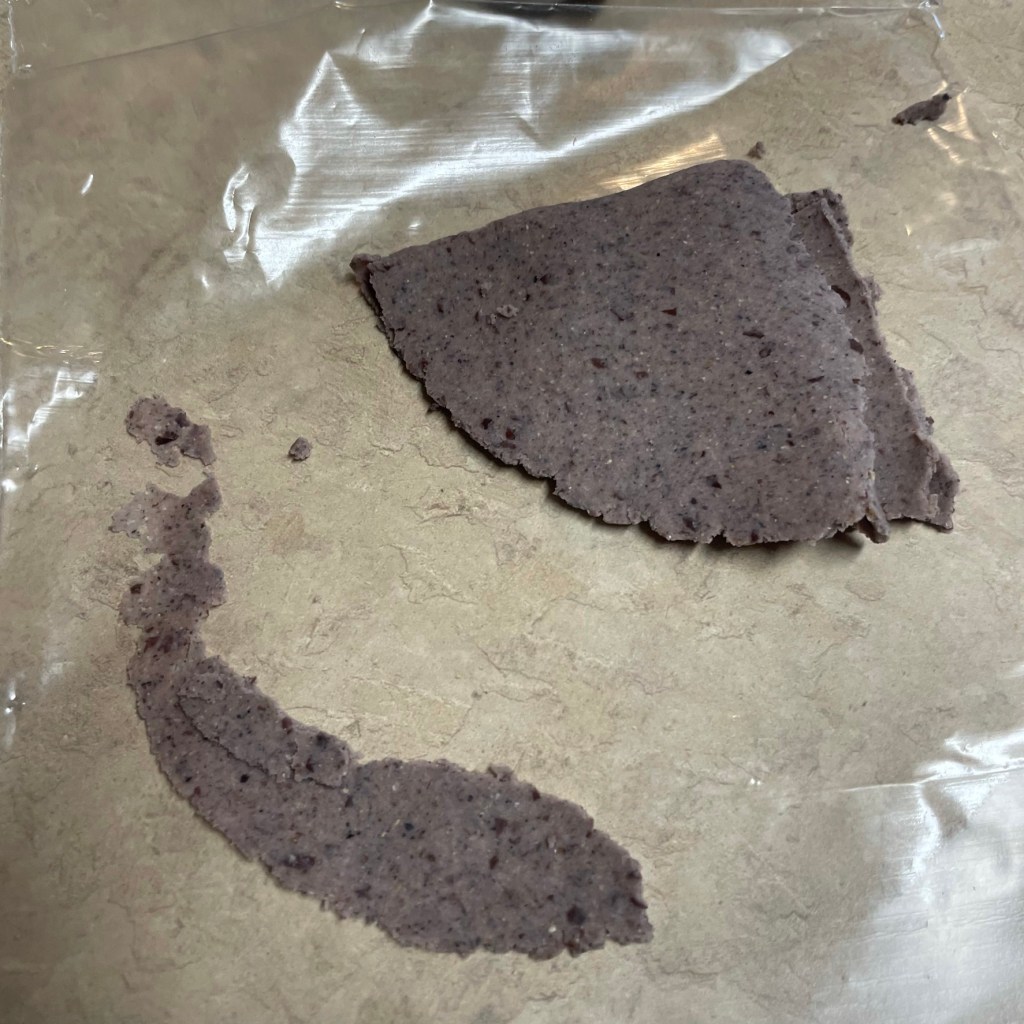
The idea for tequila-lime chicken also gave me another excuse to make another batch of easy handmade corn tortillas, and this time I spiffed them up with cilantro puree, which accounts for the slight green tint to the shells. And I topped these “last-minute” tacos with a condiment concoction that I’m calling “pineapple pico,” a super-fresh, spicy, tropical mashup of pico de gallo and guacamole. I’ll share my notes for both at the end. 😊
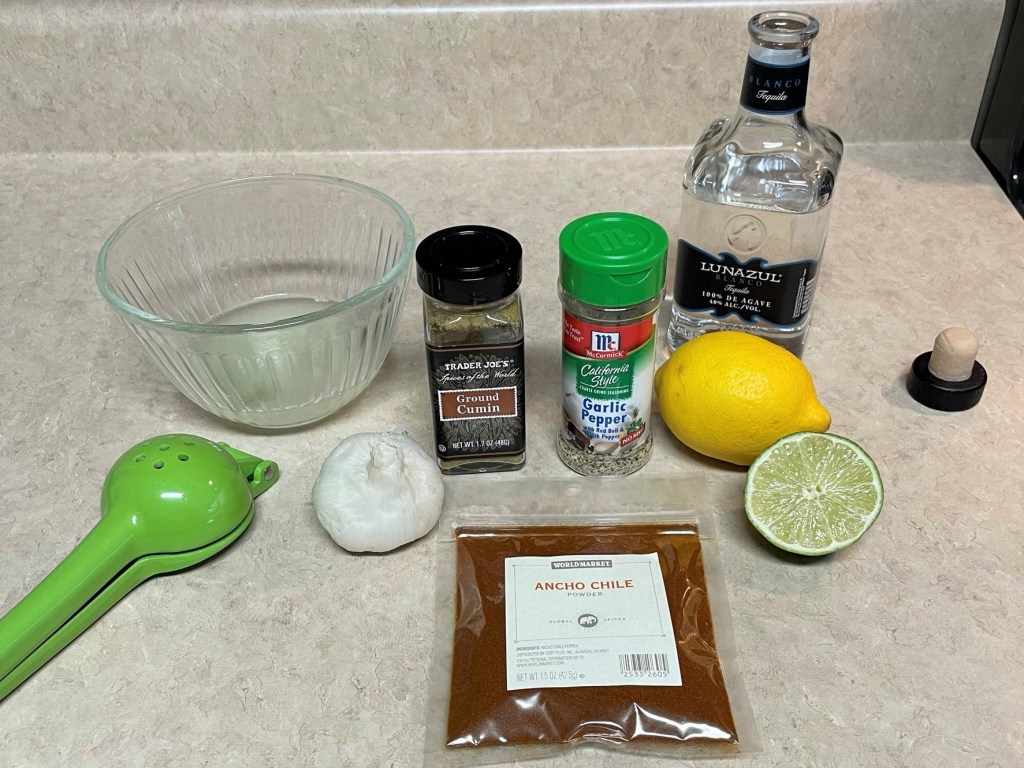
Ingredients
About 1 1/4 pounds of chicken tenders, patted dry
1/4 cup silver tequila (I’m sure gold would work just as well)
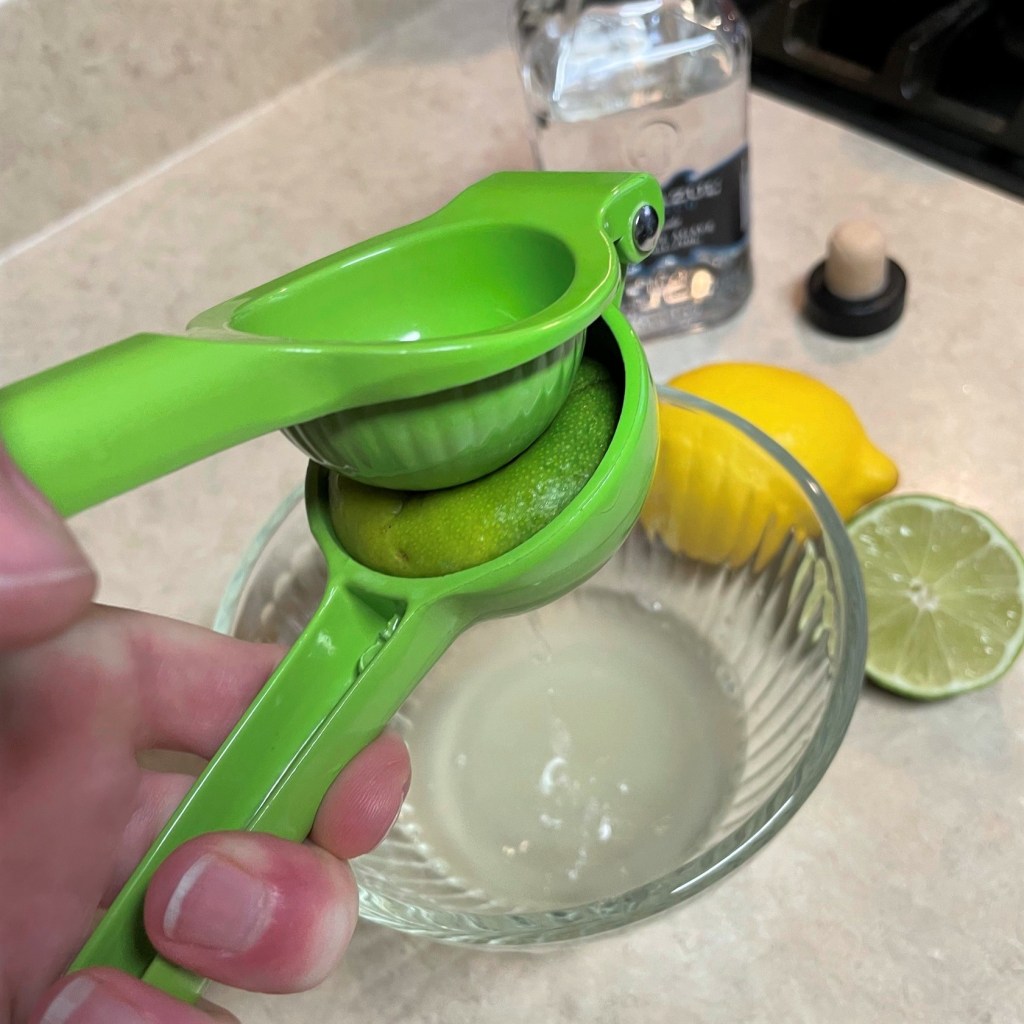
Juice of 1 lime
Juice of 1/2 lemon
About 1/2 tsp. each of cumin, garlic pepper, ancho chile powder and kosher salt* (see notes)
2 or 3 cloves garlic, minced
2 to 3 Tbsp. extra virgin olive oil*
*Notes
I used spices that were within easy reach in my cabinet, and I chose ancho chile powder because we love the bright, fruity flavor of it. You could just as easily use chipotle powder or any kind of bottled chile powder or, as my friend pointed out in her email, even some kind of pre-made taco seasoning. Keep it simple and southwestern, and let the tequila and lime work their flavor magic.
A little oil helps in a marinade, especially when using a very lean meat. My hubby runs the grill pretty hot and I wanted to help protect the chicken tenders from burning or getting dried out. Olive oil is my go-to, but avocado or canola oil would work just as well.
Instructions
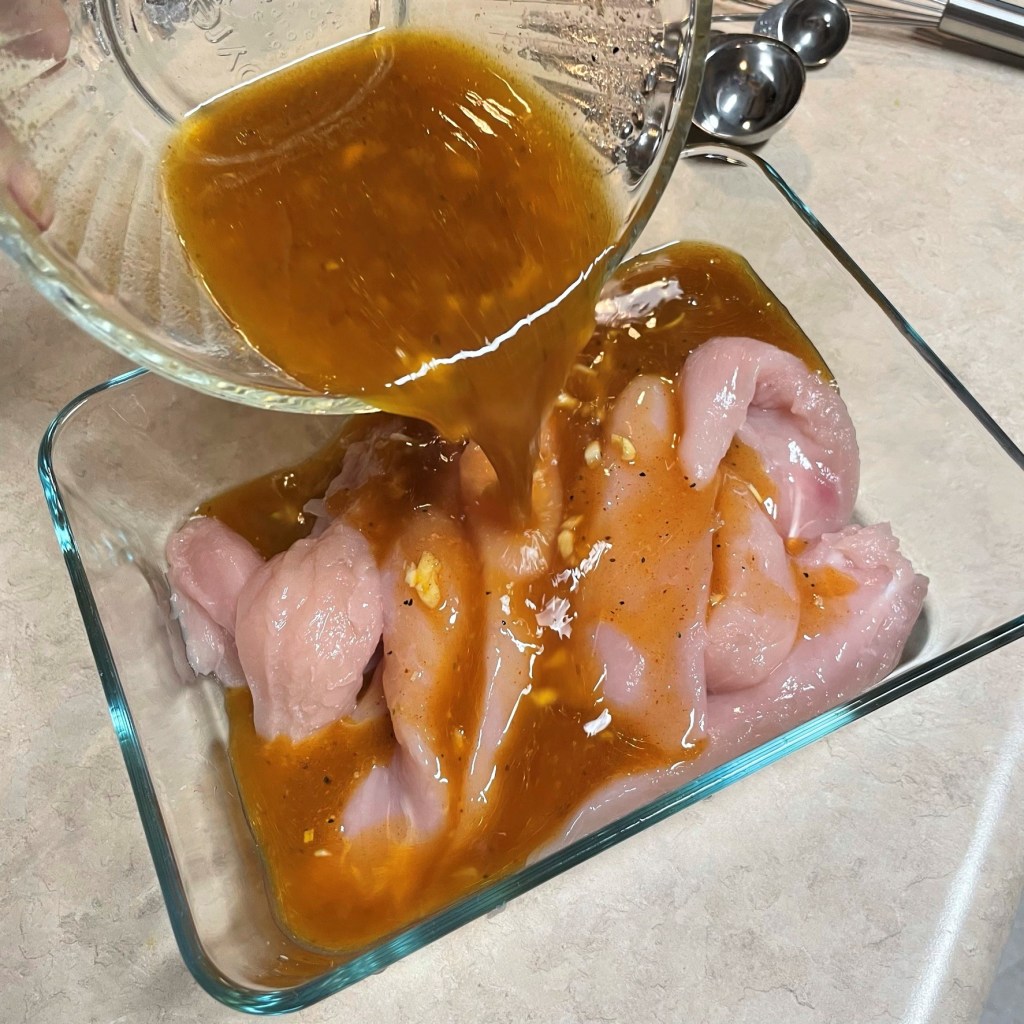
Make the marinade first and give the chicken several hours to overnight in the fridge to soak up all the delicious, south-of-the-border flavors. It goes like this:
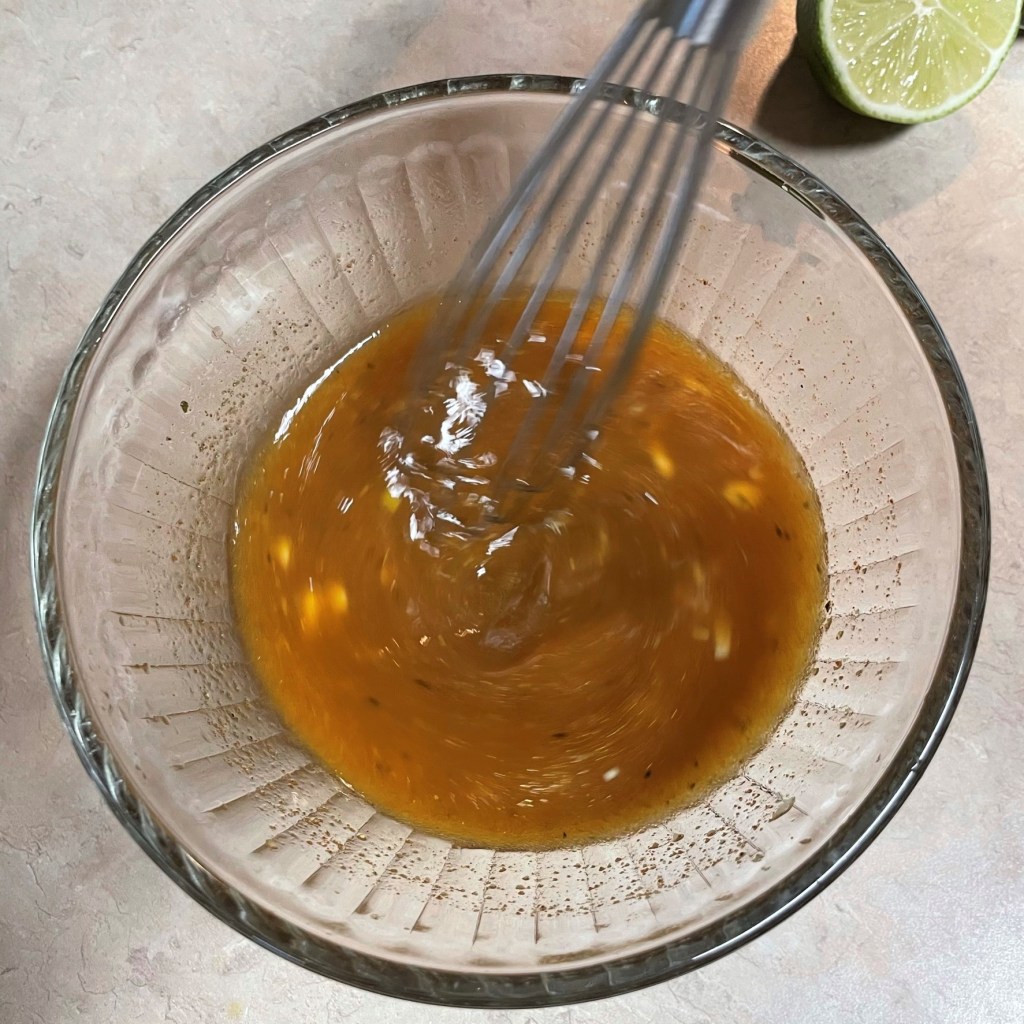
The first two ingredients are the most crucial; the tequila and the fresh lime juice!
The other ingredients were simple, and you could easily substitute to your preference, but stick with a southwestern flavor profile.
Give it a stir and a taste, and add anything you think it needs. I whisked in a pinch of coconut sugar to soften the tart lime and lemon juice.
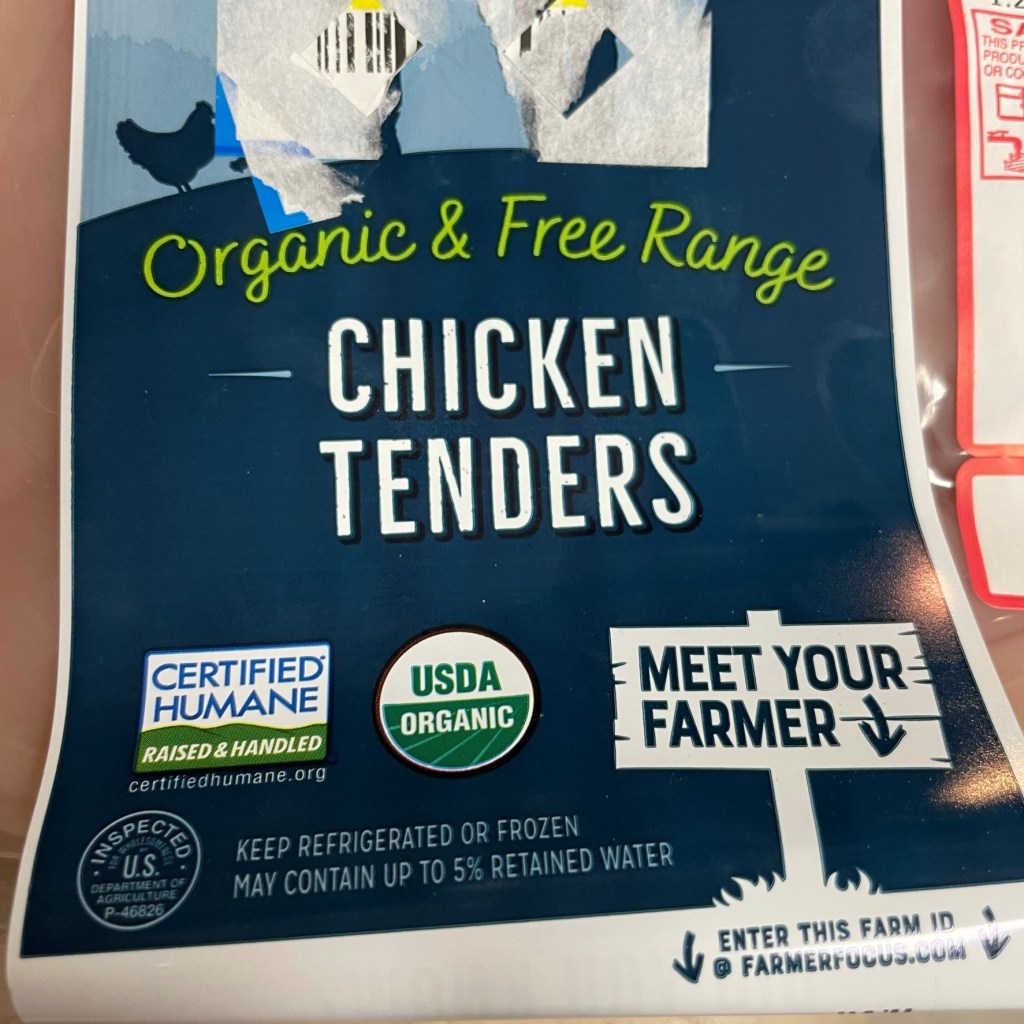
These chicken tenders won me over with all the “right” labels!
I only made enough marinade to cover the amount of chicken I had. The measurements I offer here are good for up to 1.5 pounds.
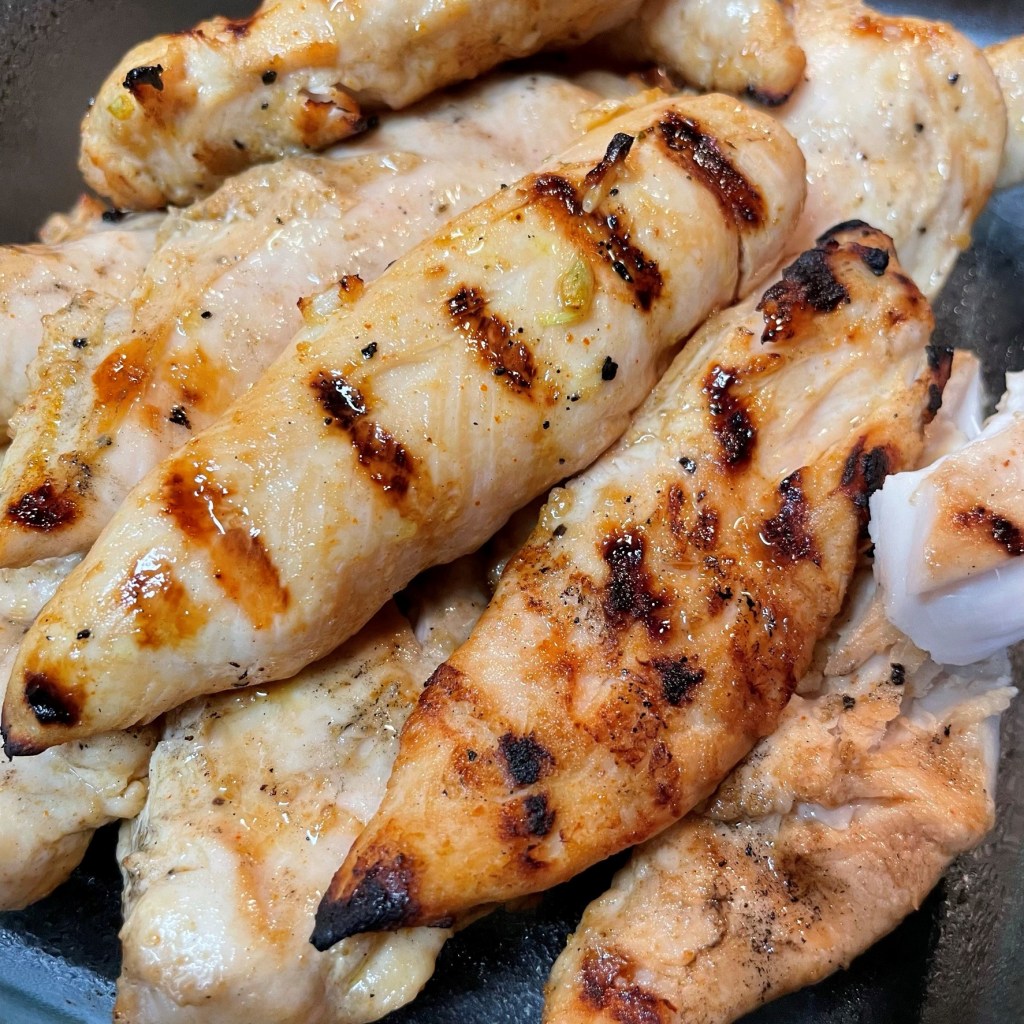
Grill the chicken on a hot grill (500° F at first, my hubby says), then reduce heat to 350° once you get the grill marks. Chicken tenders are smaller than whole breasts, of course, so they will cook more quickly. Watch them closely and pull them off the grill as soon as the juices run clear.
Hubby gets those perfect grill marks every time! The chicken was so tender, it practically melted in our mouths!
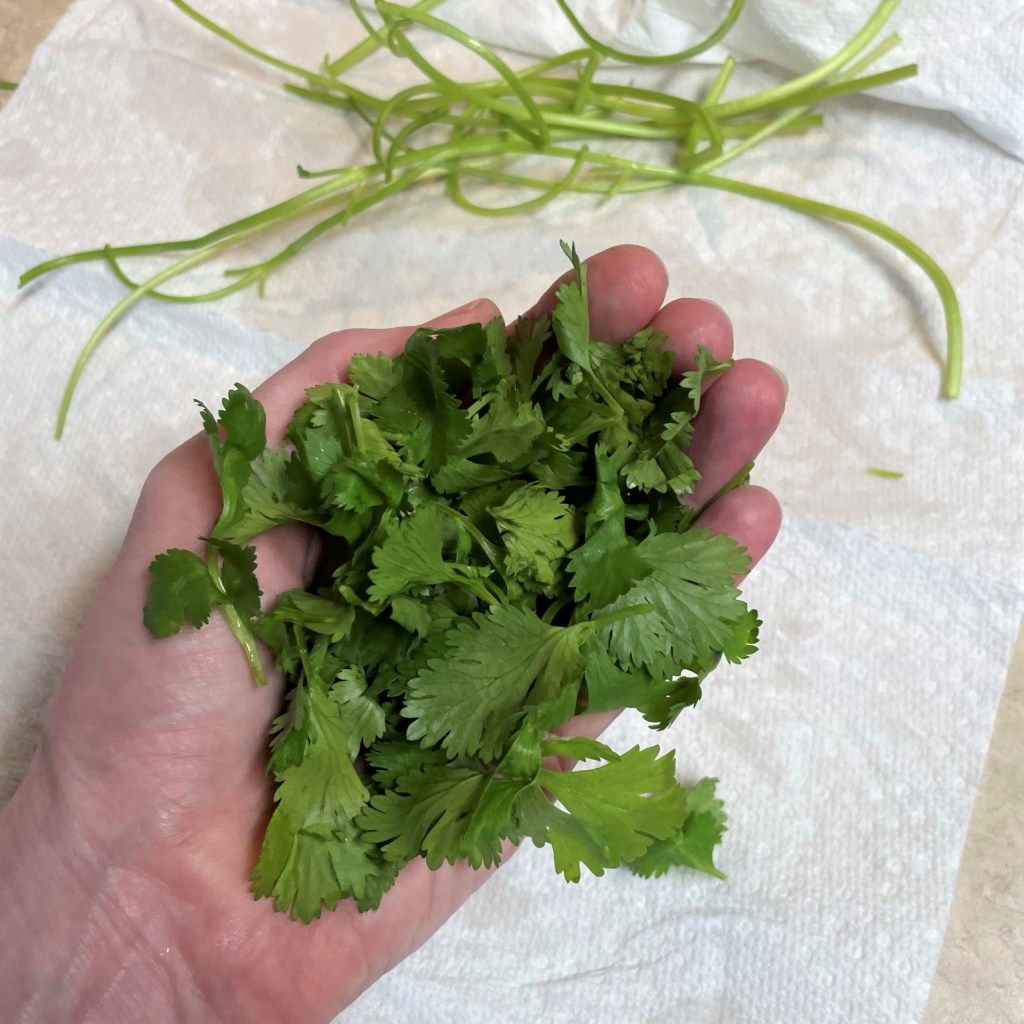
Cut up or shred the chicken tenders (you’ll be shocked at how tender they are!) and serve as desired. We perched them atop cilantro-flavored corn tortillas with crunchy cabbage, radishes, pineapple pico and fresh cilantro.
I wanted my handmade corn tortillas to have a hint of flavor, so I pureed fresh cilantro leaves into the mixing water.
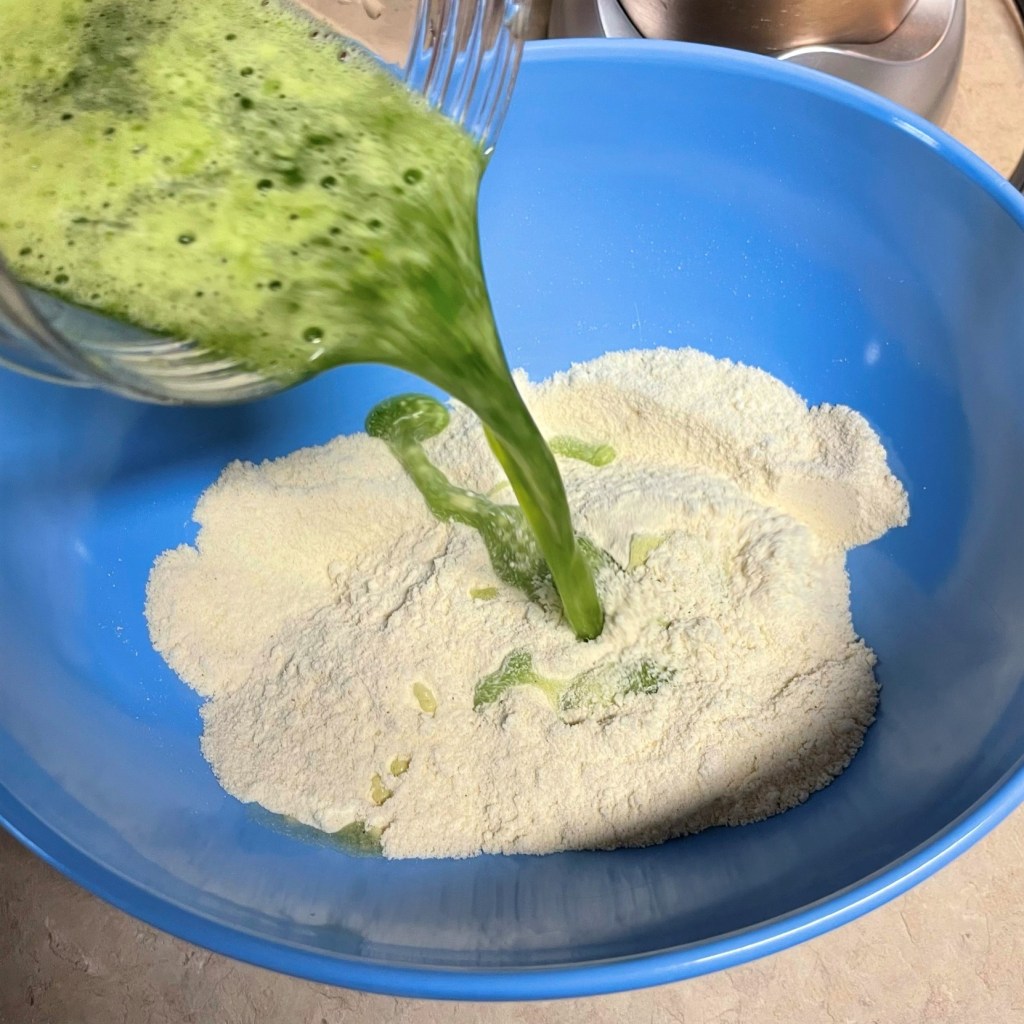
My smoothie blender does a great job on even a small amount of liquid.
The pureed cilantro water went into the masa harina, and I proceeded as usual with making the tortillas.
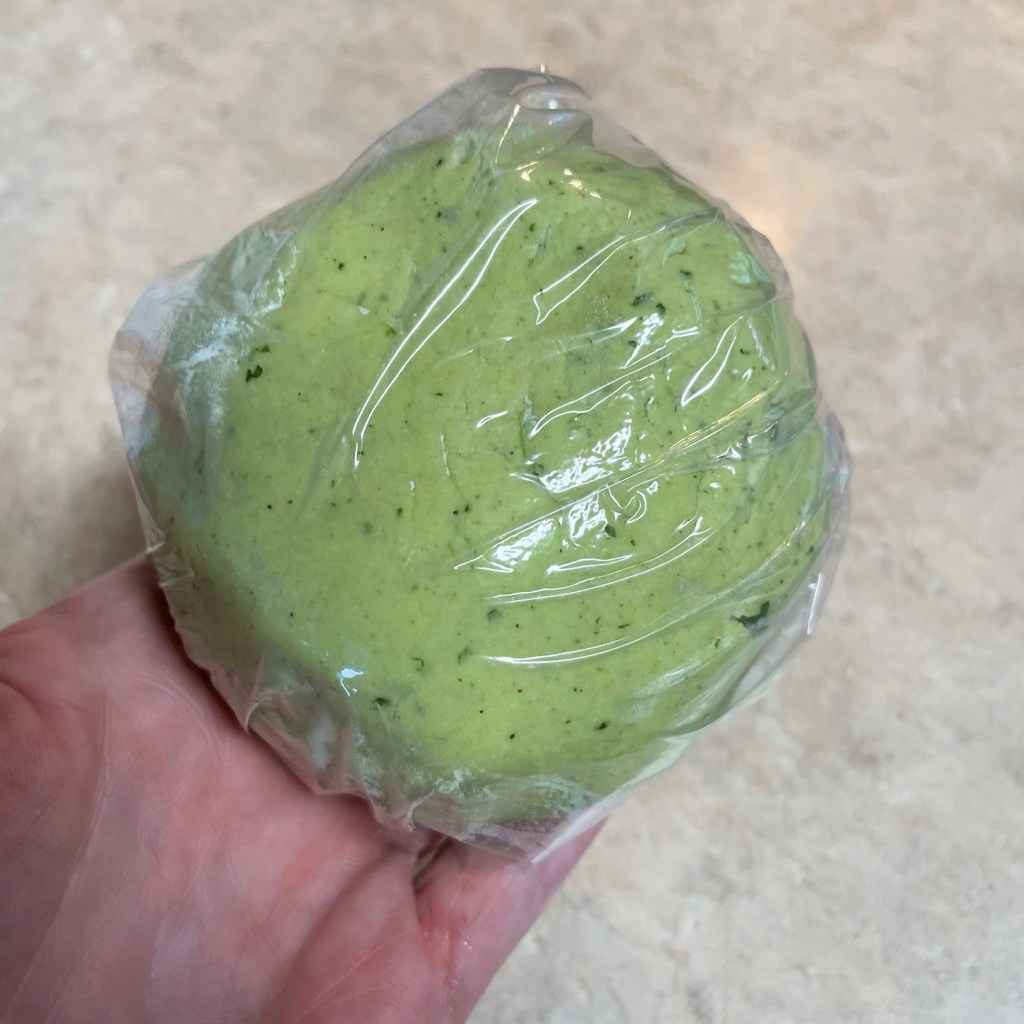
The green color is so pretty, and the cilantro adds a nice little extra “something!”
If you missed my recent post on handmade corn tortillas, follow the link to check that out. I include full instructions and all my best tips for turning out successful tortillas, with or without a tortilla press!
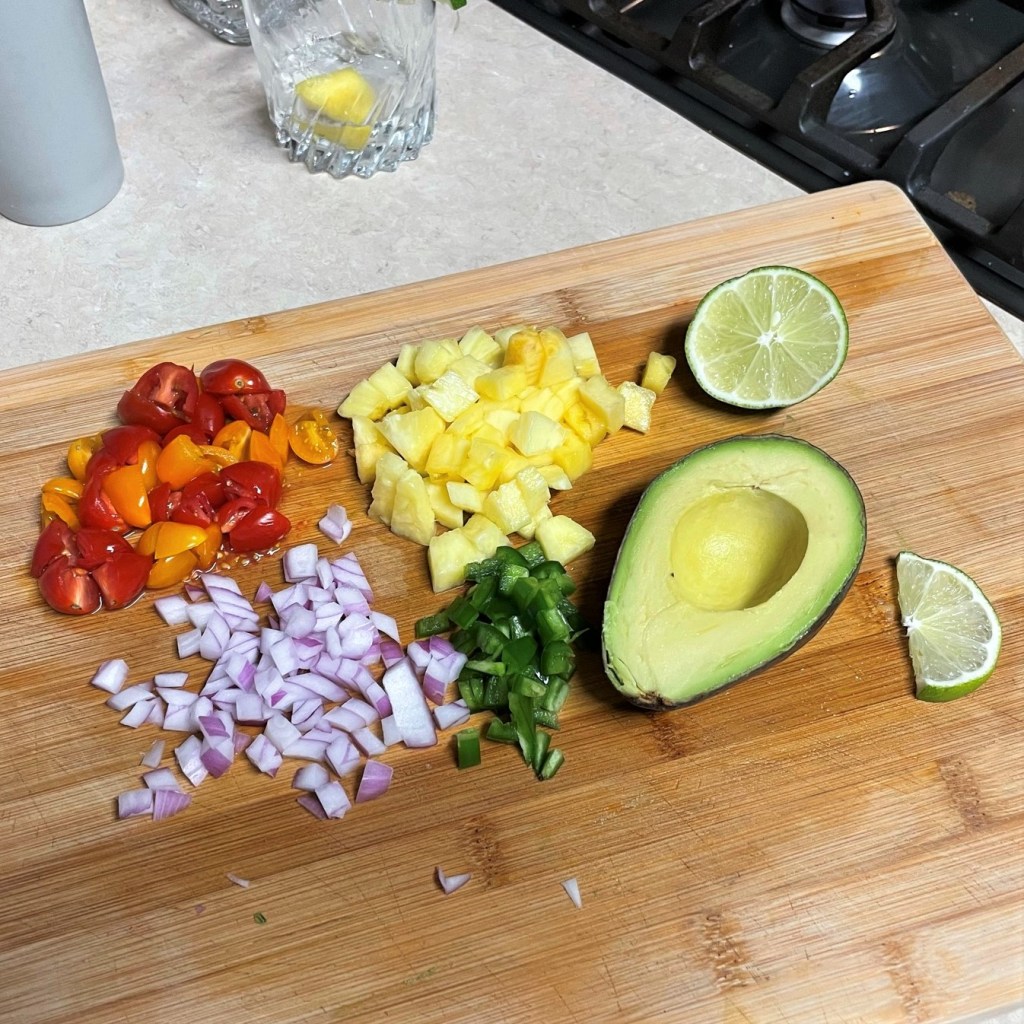
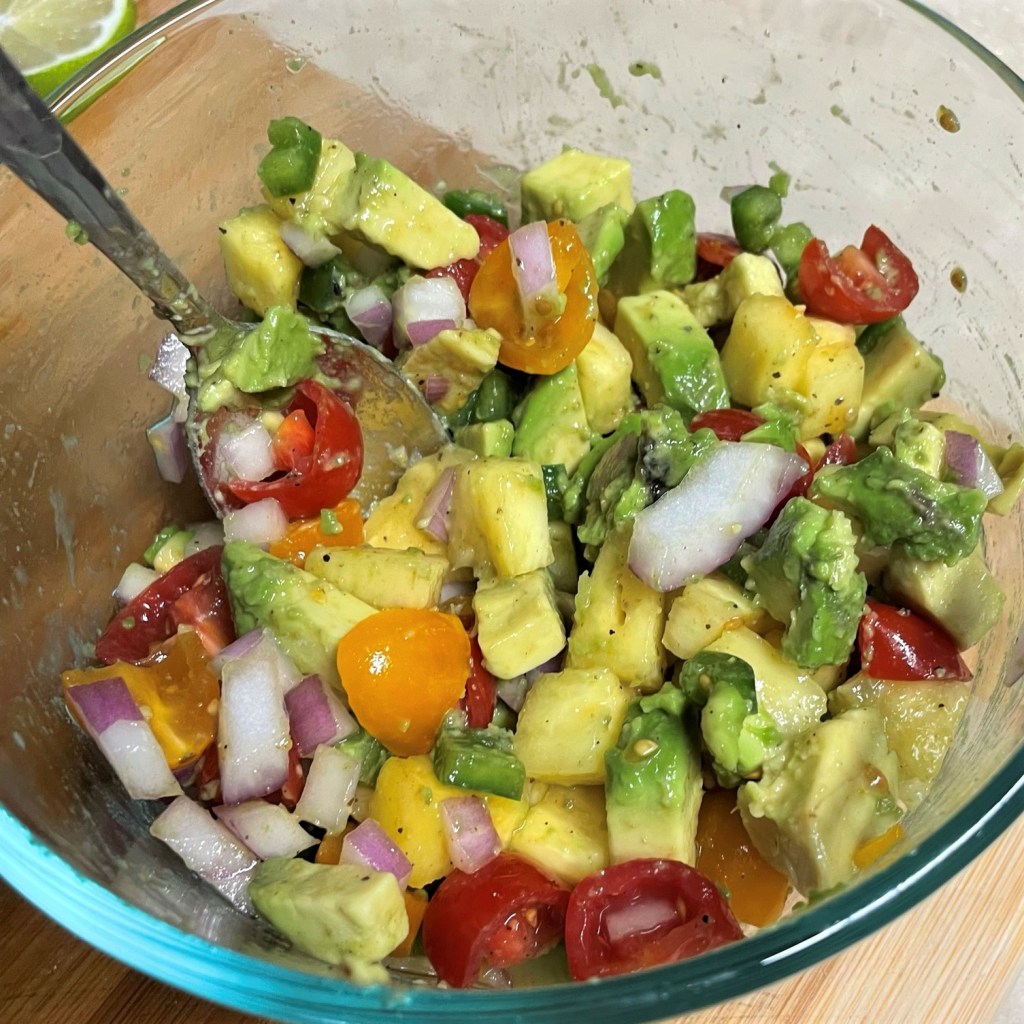
Pineapple Pico
1/2 cup fresh pineapple, cut into tidbit-sized pieces
1/2 cup baby tomatoes, halved or quartered to tidbit-size
2 Tbsp. red onion, chopped
1/2 medium fresh jalapeno, chopped
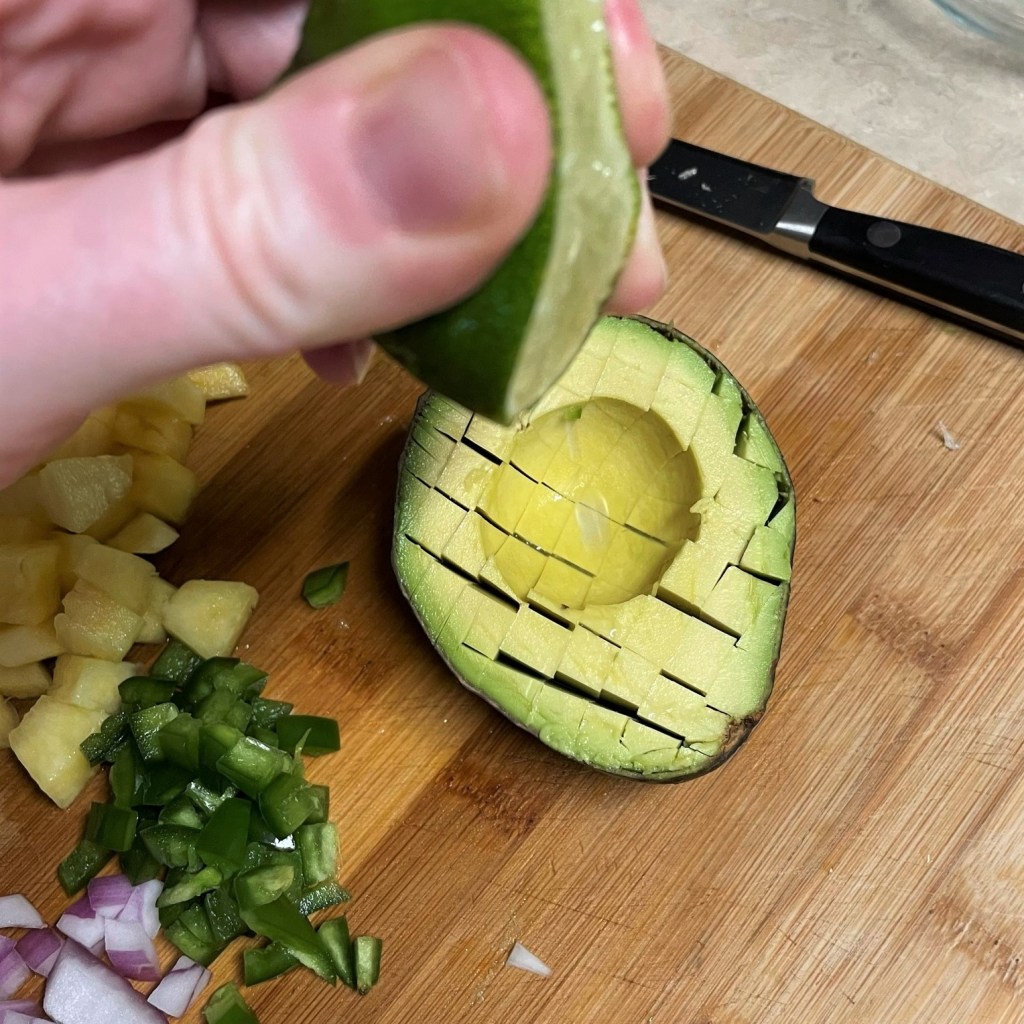
1/2 ripe avocado, cut into cubes
Juice of 1/2 lime, plus salt and pepper
My first plan was to make guacamole, but I couldn’t resist using the fresh pineapple!
Fresh lime juice helps prevent the avocado from browning, so I did that first.
Then combine with the remaining ingredients and chill.
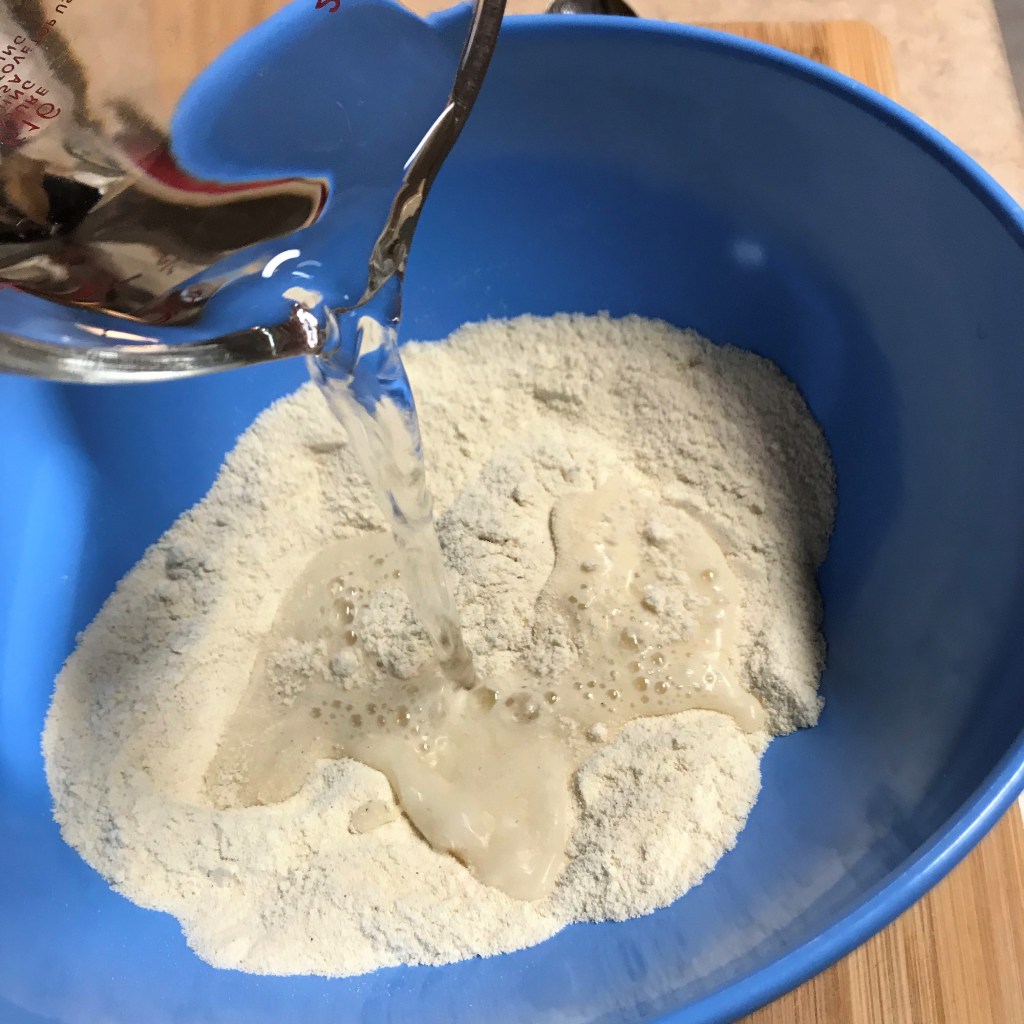
There are plenty of things I don’t buy pre-made anymore—bread, salad dressing, pizza dough, ice cream, pasta—but corn tortillas are among the simplest, and the flavor is far superior to the ones I find in the supermarket. Even the “authentic” corn tortillas at the grocery are mass-produced with all kinds of processed ingredients, conditioners, preservatives and heaven knows what else. When you make them from scratch, you only need two ingredients—masa harina, which is finely ground corn that has been alkalized with lime (the mineral, not the citrus), and water. The dough rests for a short time, then it is rolled into balls and flattened into discs. Cook them on a hot griddle or cast-iron skillet, and you’ll enjoy tortillas that will make you skip store bought forever.
Flavoring the tortillas is simple, also. I like to put a couple of shakes of onion powder into a basic batch, for a quick little savory “something.” But if you want more noticeable flavor—spinach, for example—simply puree a small amount of cooked spinach with some water and measure it out in the same measurement as water in the recipe. You could do the same with cilantro, pumpkin, garlic, tomato or black beans. If you can imagine it, you can make it. Experimenting in the kitchen has resulted in some of my favorite foods!
I use a tortilla press to create the perfect round shape, but you can also use the flat bottom of a large glass bowl to do this. Once cooked, the tortillas can be used for soft tacos or enchiladas, fried crisp for hard-shell tacos or tostadas (one of my faves), or cut into wedges and fried to become homemade tortilla chips, perfect for dips and salsas.
Making tortillas can be a little challenging at first. The ratio of ingredients is printed on the masa flour bag, but your technique can only be developed with practice. See my tips for success at the end of the instructions. No reason you should go through all the frustrating mistakes I’ve made. One of these days, I’ll make a list of all the cuss words I’ve made up in the kitchen. 😊
Ingredients for Basic Tortillas
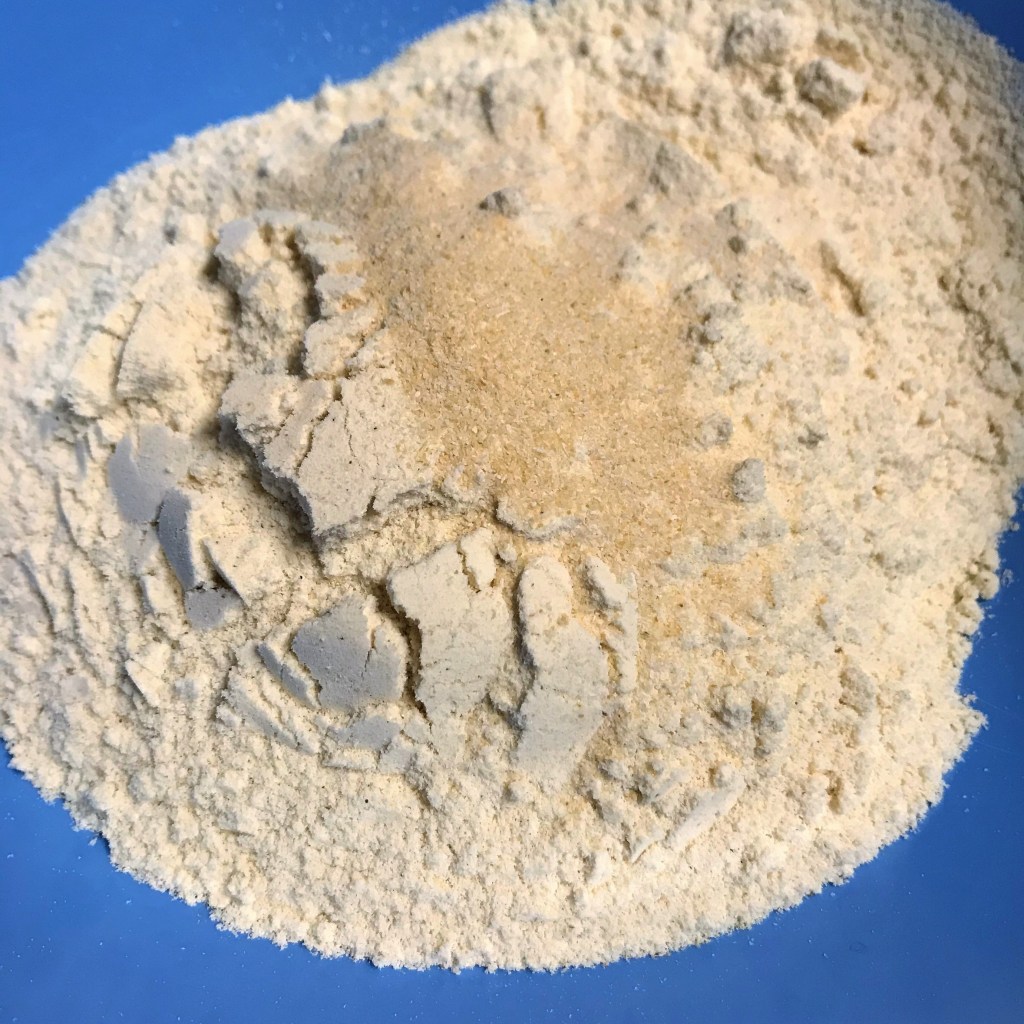
1 cup masa harina (I like Maseca brand, white, yellow or blue)
2/3 cup very warm water (or 50/50 mix of water and puree of choice)
A pinch of kosher salt
Instructions
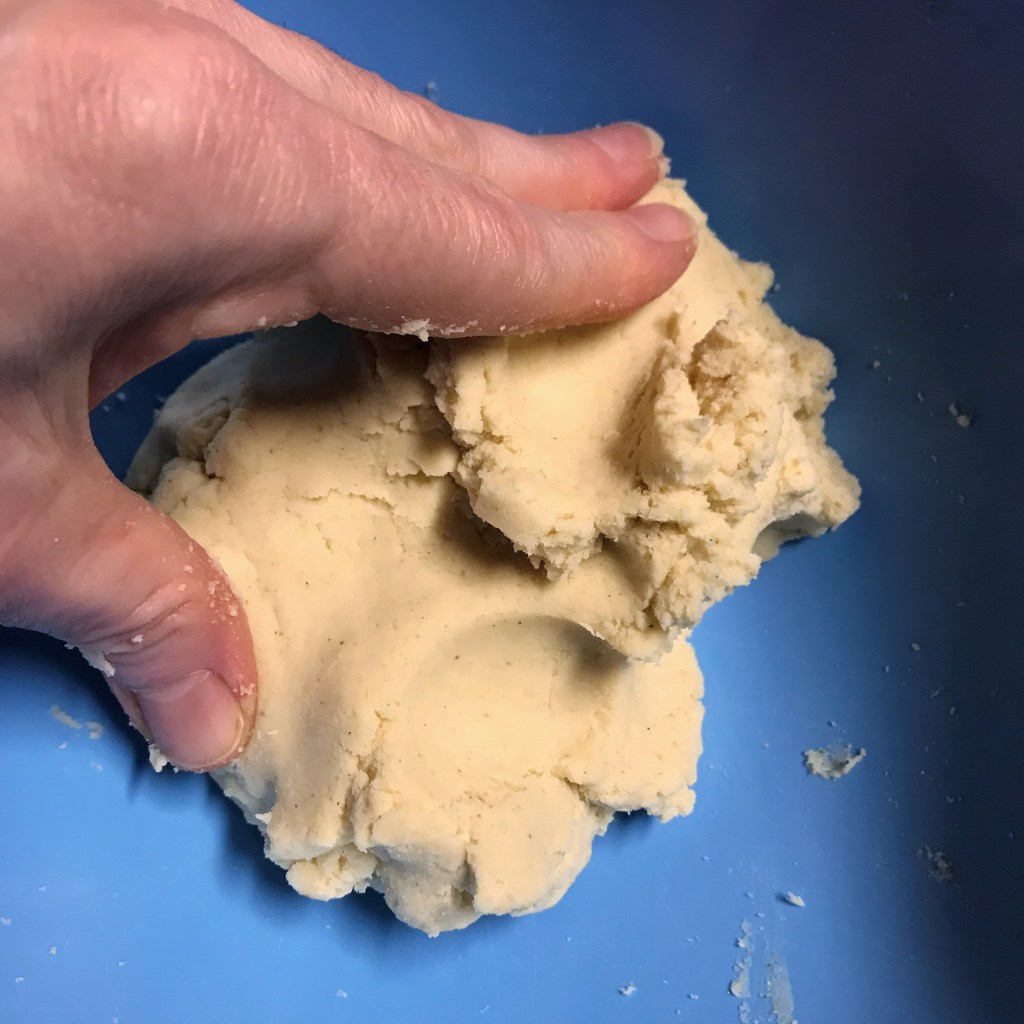
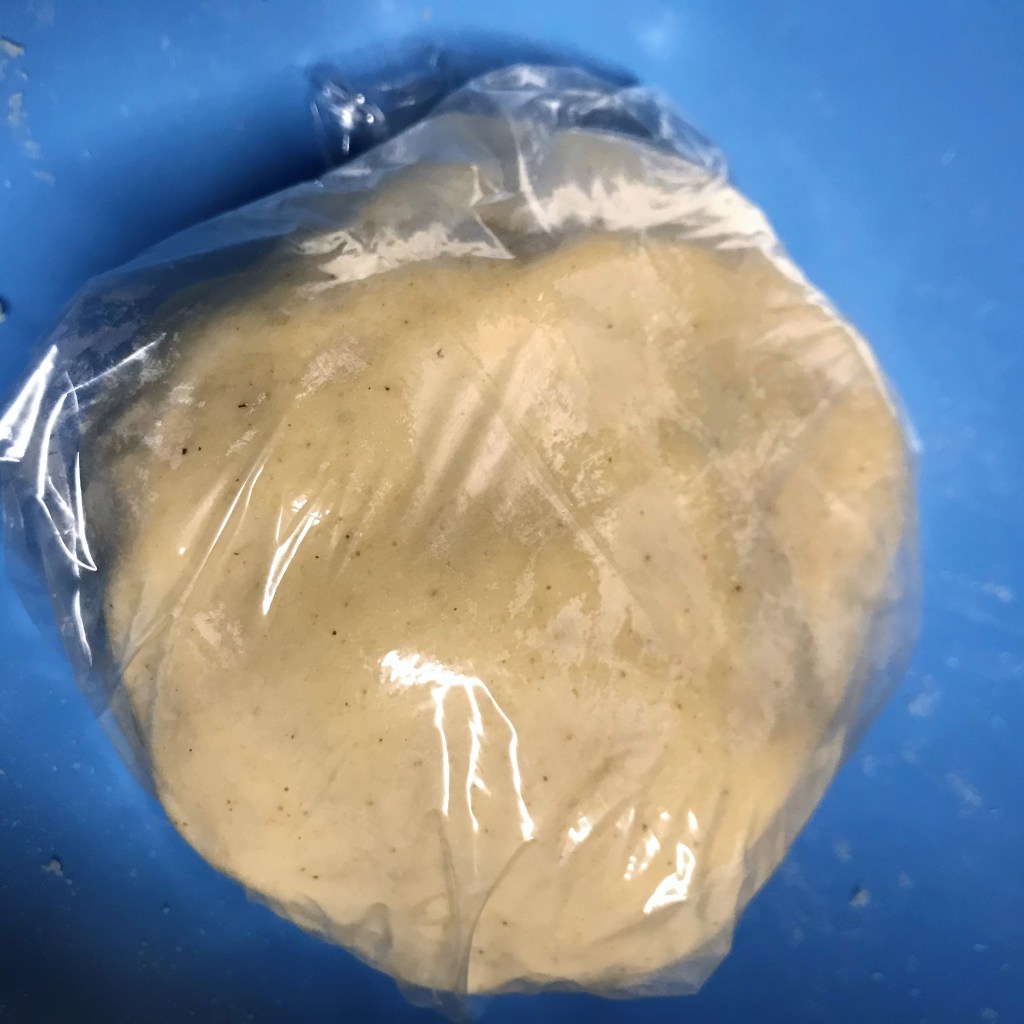
Combine all ingredients in a bowl and stir until liquid is absorbed. Knead the dough ball a few times until mixture is smooth, soft and uniform in texture. Cover the dough ball snugly with plastic wrap and allow it to rest at least 20 minutes.
Preheat a cast-iron skillet or griddle over medium-high heat, about 375° F.
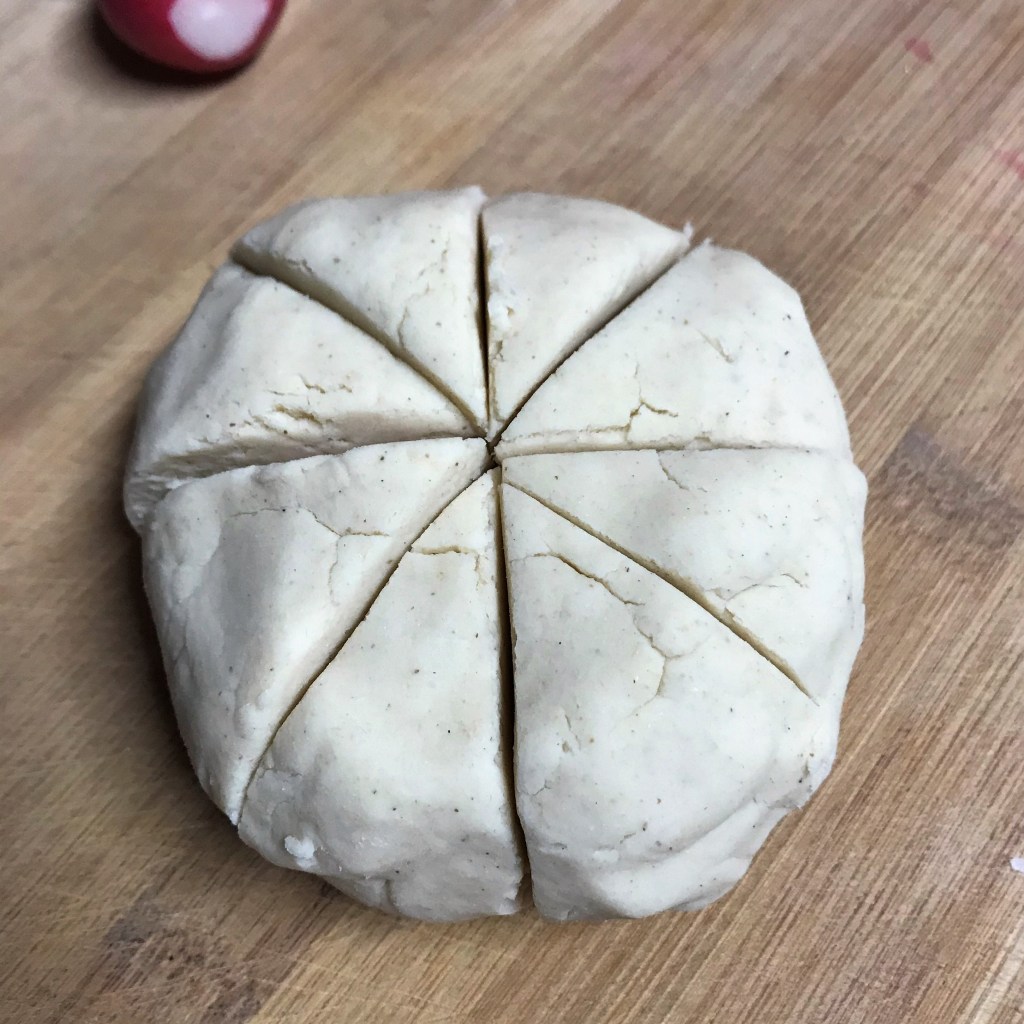
Divide masa dough into 8 equal pieces, then roll each piece into a smooth ball. Keep the dough balls covered to prevent drying out as you shape and press them into flat tortillas.
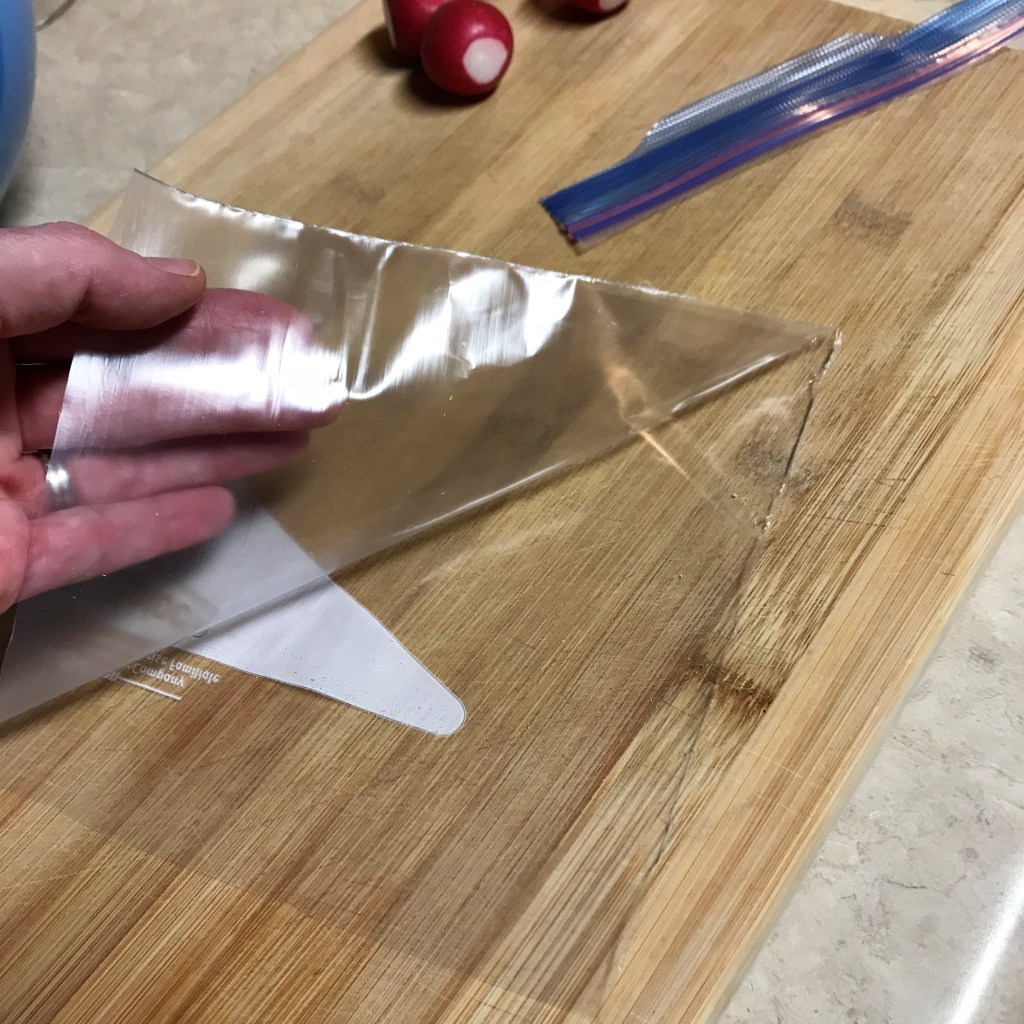
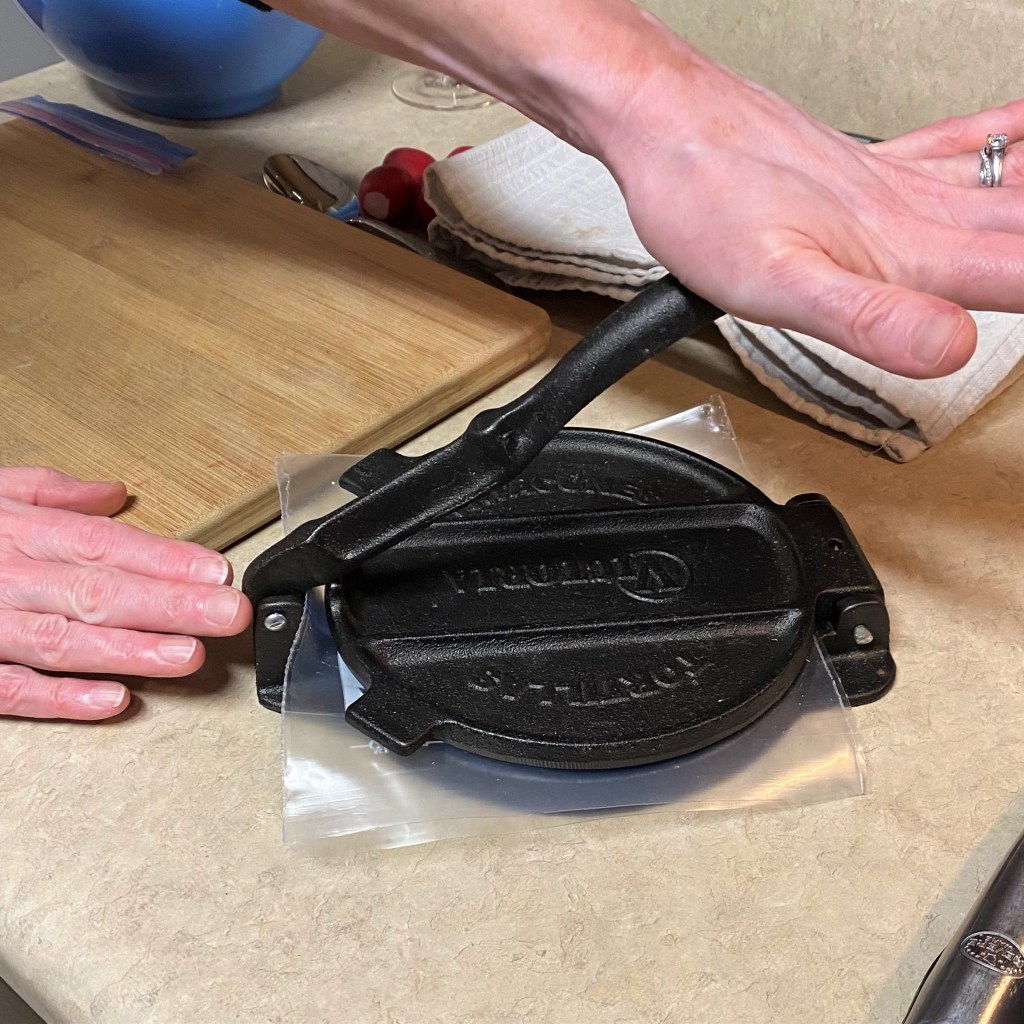
Place a dough ball between two squares of plastic wrap, or cut apart a zip-top bag. The thicker plastic gives better results. Use the tortilla press to slowly flatten the dough to a disc that is about 5 to 6 inches across. Alternatively, press the flat bottom of a clear glass bowl evenly over the surface of the dough ball until the tortilla is about 5 to 6 inches across.
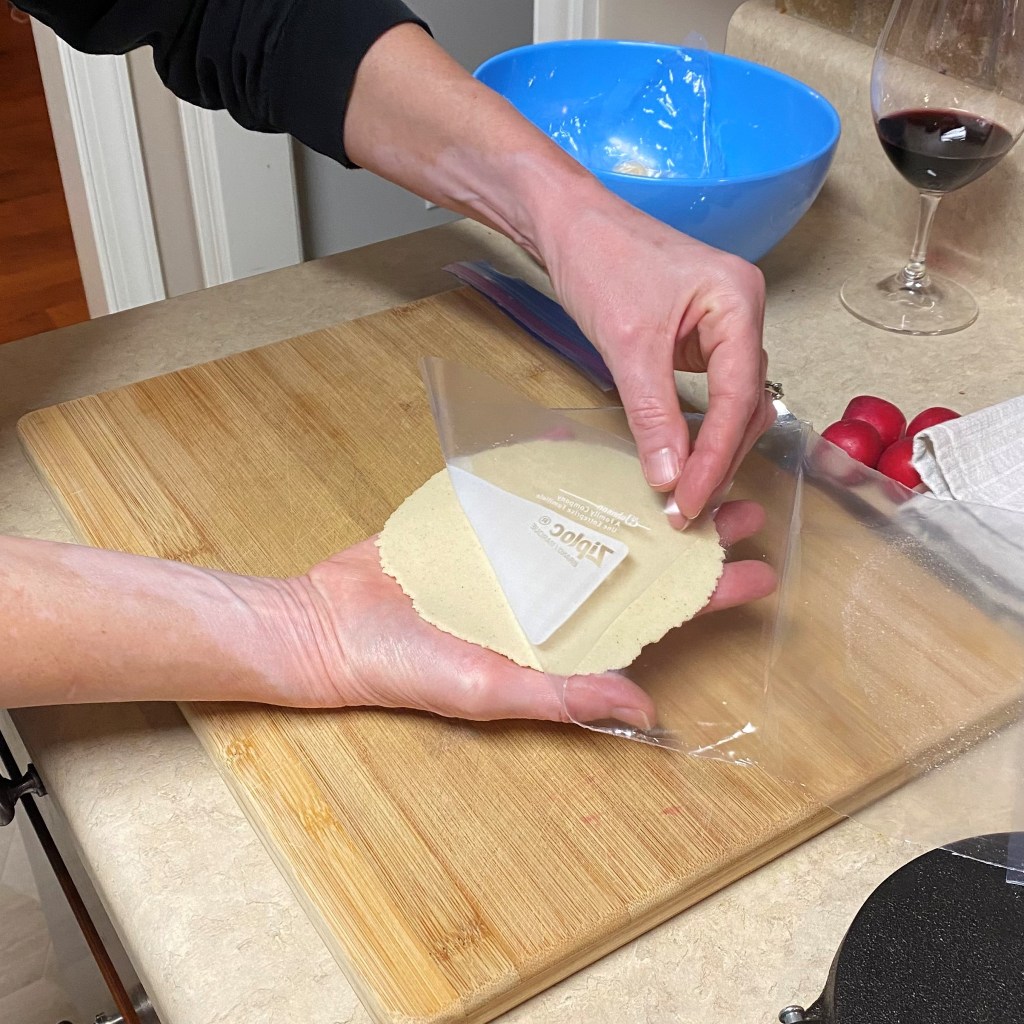
Carefully peel one side of the plastic away from the tortilla, then turn the tortilla out into your hand and peel away the second piece of plastic. Be prepared to ruin a few, but don’t panic if you do (see Tips below)!
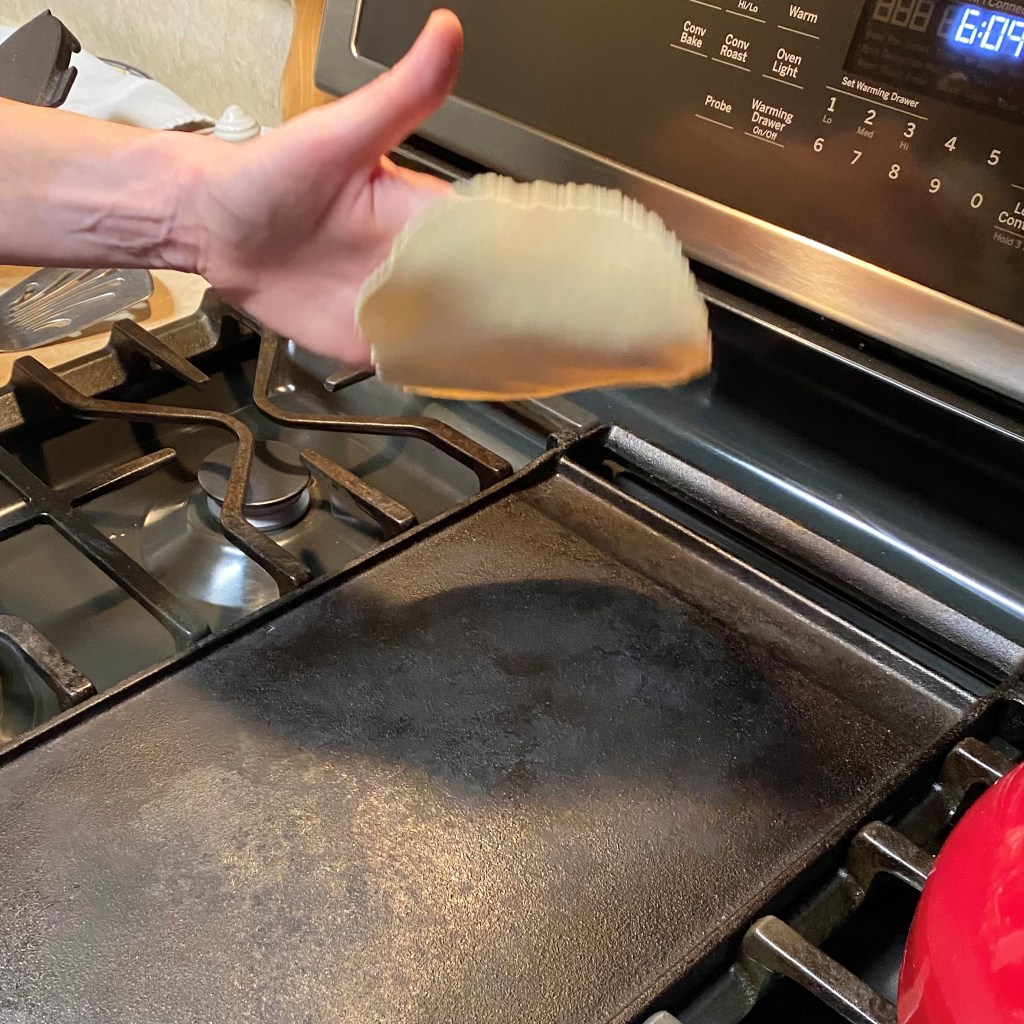
Turn the tortilla onto the preheated griddle and cook the first side 60 to 90 seconds, until the edges look dry and steam is emerging from underneath. Use a spatula to flip the tortilla over and cook the second side about 60 seconds.
Transfer the hot tortilla to a plate lined with a clean kitchen towel and fold the towel over to keep them warm as you finish the remaining tortillas.
For basic tortillas, you can embellish the flavor with a slight sprinkling of spice. Here, I’ve used white corn masa, with a few shakes of onion powder and a pinch or two of salt.
In my experience, warm water does a better job hydrating the masa. Add all at once, then stir and knead a minute or so, until the dough is smooth.
The masa should feel soft but not sticky. If it seems dry, wet your hands and knead a few more times. Too wet? sprinkle with masa and knead again.
Cover or wrap the masa dough, and rest 20 minutes for the grain to fully hydrate. This will improve the texture of the dough for pressing into tortillas.
This is the easiest way to divide the dough into relatively equal portions, then roll the sections into dough balls. They will be about the size of ping pong balls.
A zip top bag is heavier and more effective than regular plastic wrap. Cut the zipper side off completely, and then cut down both sides, leaving only the bottom attached.
Keep the dough balls covered to prevent drying as you work through flattening and cooking them. It’s OK if they are not exactly the same size.
Have your griddle or cast iron pan heated and ready before you begin. Place a dough ball roughly in the center of the plastic sleeve.
Gently close the lid on the tortilla press. I find it works best to have the dough ball slightly off center, closer to the hinge than the front.
Easy does it on the pressing. If you go too hard and squish the dough too thin, simply scrape it off with your hands and ball it up again. There is no gluten here, so the tortillas will not get tough when reworked.
Check the tortilla. If it seems drastically thinner on one edge, turn the plastic to face the other way and press lightly again to even it out. If it’s paper thin, roll into a ball and start over.
Peel the plastic sleeve away from the tortilla, then turn it into your hand to peel away the other side. I find it helpful to keep a tight angle on the plastic. It’s also helpful (for me) to have a glass of wine nearby. 😉
Working quickly, turn the tortilla over onto the preheated (dry) griddle or skillet. Don’t try to lay it down, just flip it.
Whoa, my hubby was quick with the camera to catch that in mid-air! It doesn’t need to be dramatic, you just want to do it quickly so the tortilla doesn’t stick to your hand.
Cook the first side about 60 seconds, up to 90 seconds. Watch for the edges to lift away, and steam to emerge from below.
Then, flip it! Again, nice camera work, Babe! 🙂
If you love corn tortillas and want to make them at home more regularly, I recommend investment in a tortilla press because it makes it so simple. I picked mine up in a specialty market that carries a wide array of foods and products for Mexican cuisine, and you can easily find them online, too. But what if you’re jonesing to make them right now? Here’s one easy way to do it, using a flat-bottomed glass dish as your “press.” For this batch, I used the blue corn masa harina, and I demonstrate how to incorporate another ingredient: black beans!
To spice up the black bean tortillas, I have added a few shakes of onion powder and ground cumin, plus my pink sea salt.
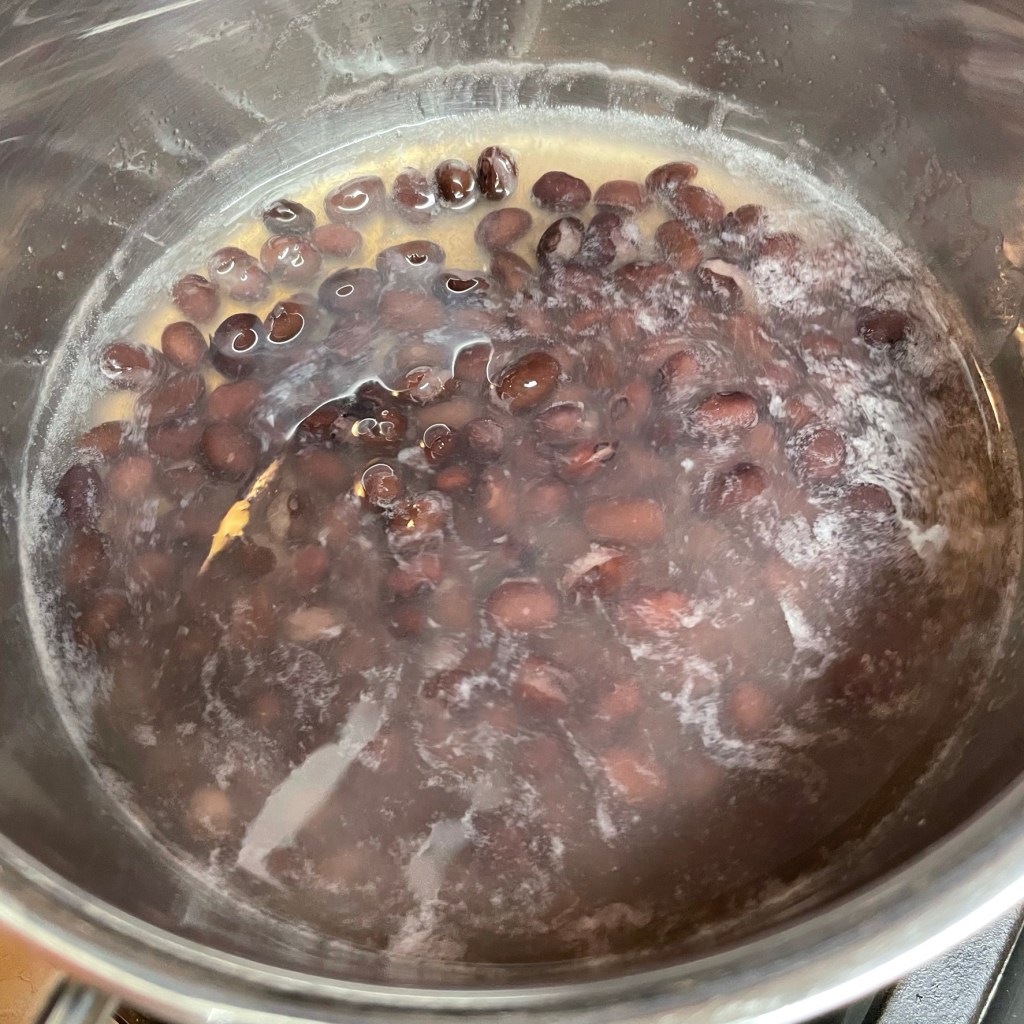
Heating the beans and water together ensures I have enough of both, and the beans will puree more easily. I’ll whip it up in my smoothie blender, then measure the amount of liquid needed for the tortillas.
From this point, the recipe is the same as for basic tortillas. Mix the liquid into the masa, knead and rest 20 minutes.
You can see little flecks of black bean in the dough, which I love. 🙂
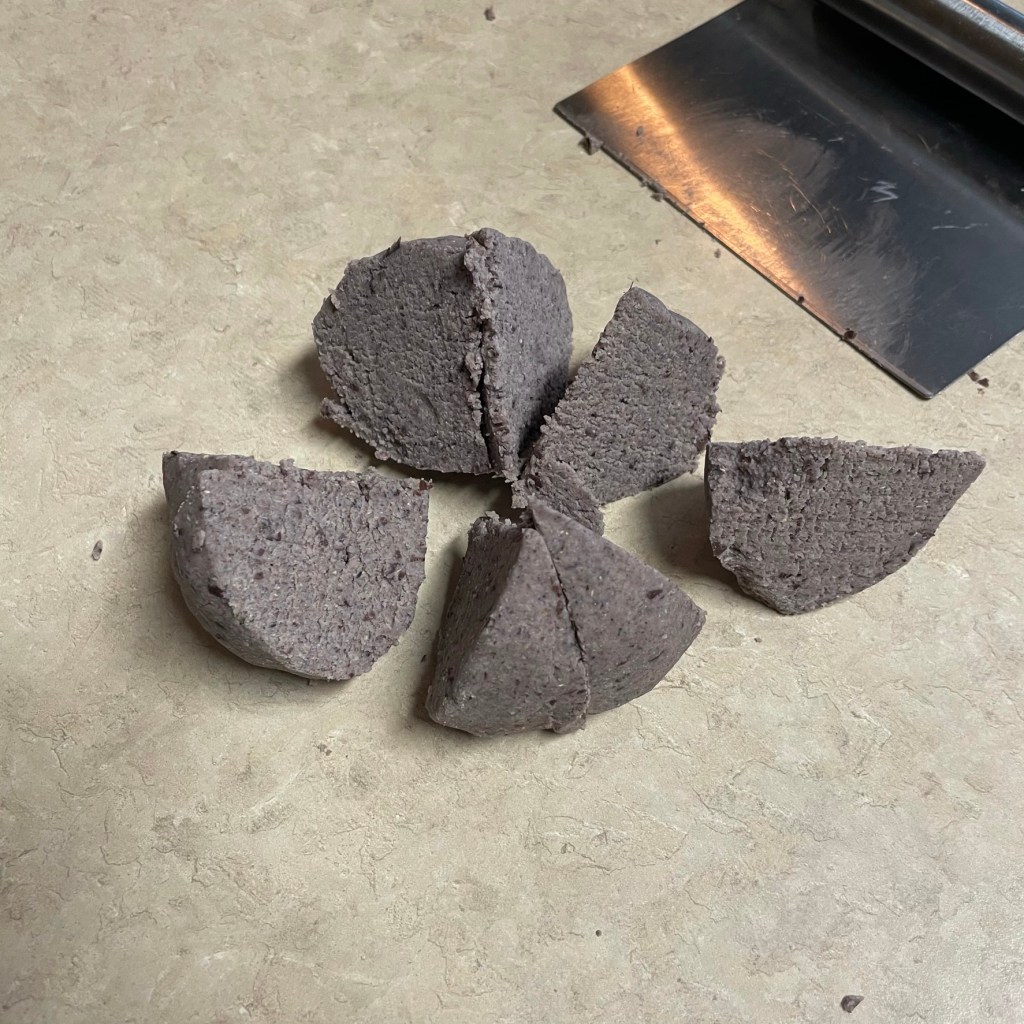
Cut equal wedges and roll each into a ball. Keep the extras covered as you shape them.
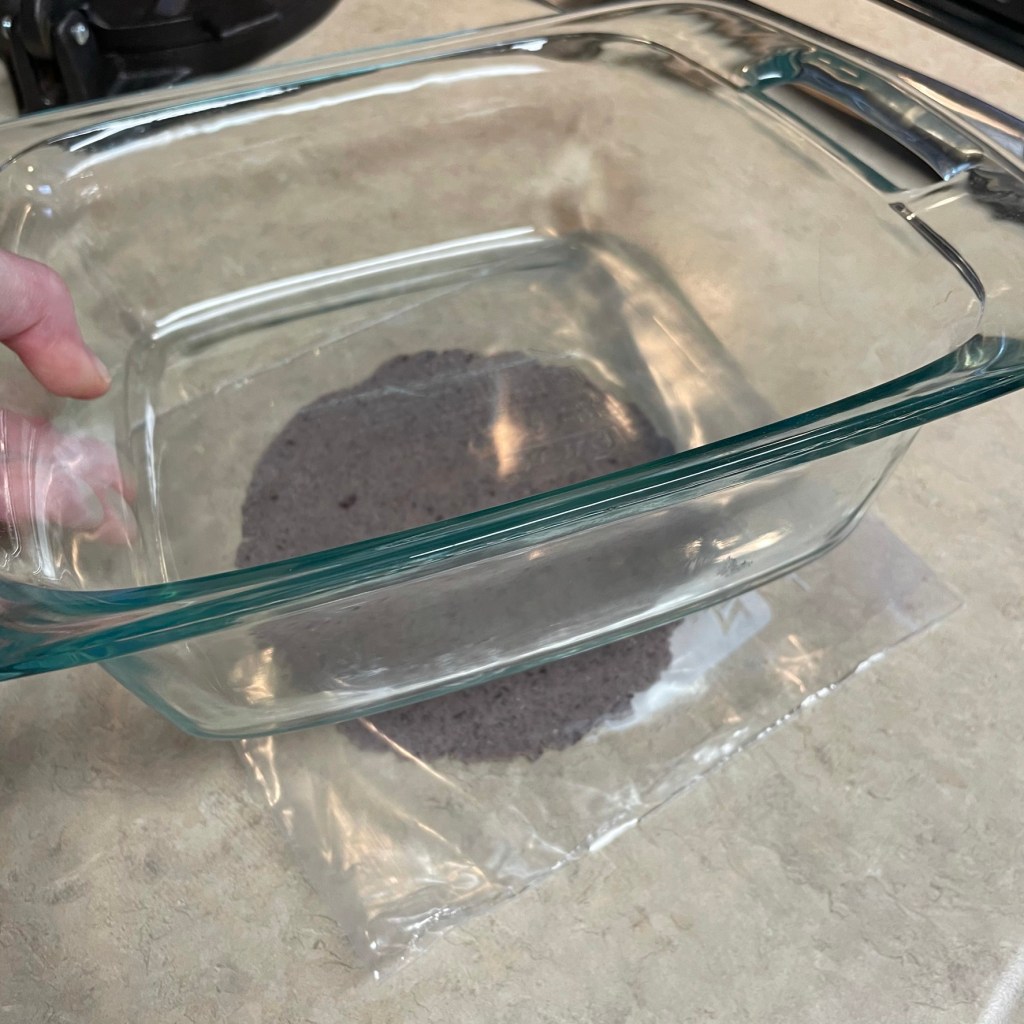
Here’s the fun part! Use a flat-bottomed pot or baking dish to press the tortilla. The masa dough is inside the zip top bag as before. Using a clear dish allows me to see how it’s going.
This dish is perfect because the center of the bottom is slightly recessed from the edges. I can press all the way down and still have even thickness.
It’s no big deal if you make a mistake, Just scrape it off the plastic and reshape it into a ball.
Peel the plastic as before and cook on the dry skillet. Place finished tortillas inside a folded clean towel so they remain soft as you cook the others.
Follow the same guidelines for measuring the masa harina as I offer for measuring flour—fluff it up, sprinkle over the measuring cup to overflowing, and then level it off. If you dig a measuring cup directly into the masa bag, you’ll end up with too much and the dough will be dry. The masa should be soft and loose in the measuring cup, not packed tight.
Use warm water, not cold, to mix with the masa flour. I’ve found that the warm water is more easily absorbed and helps to create better dough. Knead the dough until it is soft and smooth, which is usually only a minute or two, though longer kneading will not cause any harm.
Don’t skip the rest time after mixing the masa. This gives enough time for the masa to hydrate fully. If you rush this step, you may find the dough crumbly or sticky (or both) during pressing.
When you roll the dough into balls, it should hold together easily without sticking to your hands, and only showing slight cracks. Trust your instinct; if it feels too dry, wet your hands and knead a few more times. If it’s sticky, lightly dust it with additional masa flour, then knead and rest it again.
I have found a modified zip-top bag more useful than plastic wrap for pressing the tortillas. Use a freezer bag if possible, as it is thicker than a sandwich bag. Cut off the zipper top entirely, and cut down the sides, leaving only the bottom of the bag attached.
Shape the sections of dough into balls all at once, and then place one dough ball inside the zip top bag layers. Keep the other dough balls covered with a damp paper towel or plastic wrap so they don’t dry out. When placing the dough ball in the tortilla press, arrange it slightly off center toward the hinge side. Close the press and use the lever to apply gentle pressure. If the tortilla is noticeably thinner on one edge, turn it and gently press again to even it out. Until you get used to this process, it may help to make slightly thicker tortillas. If you are using a flat-bottomed dish to press them, press your hands on it in a rocking motion all the way around until the tortilla is about 5 inches across. It’s helpful to have a clear dish so you can see the progress.
Focus on peeling the plastic away from the dough, not the other way around, and accept that you may find the first few tries unsuccessful. Hold the plastic bag flat in one hand, and use the other hand to peel, keeping the plastic at a sharp angle to the tortilla. Don’t peel straight up or the tortilla will tear. If the tortilla falls apart, just scrape it into a ball and try again. There is no gluten in corn tortillas, so they will not get tough from extra handling. If the dough feels dry after a few failed attempts, wet your hands and knead it a bit.
The initial cooking of the tortillas should be on a dry skillet or pancake griddle. If you want to fry them later to suit a dish you are making, that will be a separate process. Think of it as a form of bread, which must be baked before it can be toasted or grilled.
Give your griddle or cast-iron skillet enough time to pre-heat, and plan to let your first tortilla be a test. It may take some practice to get the right temperature on your stove or griddle. Be ready to flip them when they look “right,” not by the clock, but aim for somewhere between 60 and 90 seconds.
Have a plate ready, lined with a clean kitchen towel. You’ll want to keep the freshly cooked tortillas wrapped as you complete the rest of the batch—for warmth and also for softness.
If you decide to use pureed vegetables to make flavored tortillas, start with a liquid mixture that is at least 50% water. Pureed vegetables such as spinach or pumpkin are wet, but there is also fiber in them that may change the consistency of the masa. I recommend making basic tortillas a few times to get used to it. As you gain experience making them, you will instinctively know what the dough should feel like, and how to best adjust ratios of other ingredients to produce fun colors and flavors. Here are a few of my favorites: spinach, black bean, pumpkin, cilantro, roasted garlic.
If any doctor ever tells me that I’m allergic to potatoes, I’m all done. Just put me in the ground. Something in me is completely hard-wired to crave the starchy goodness of a potato, and the more texture I can experience in one bite, the happier I’ll be.
There are as many great ways to cook potatoes as there are varieties of potato. And I love them every which way—soft and creamy, as my hubby’s ultra-decadent roasted garlic mashed; firm, cold and toothsome, as my dilly-dilly, double-heat potato salad; or crunchy, cheesy and slightly greasy, as the easy hash brown waffles that we enjoy so much for our big breakfasts on the weekends. Above all, it’s pure crispiness and simple saltiness on potatoes that really wrecks me. My favorite potato chips are the ones that are kettle-cooked with the skin on, and if they happen to be folded over, bubbled up and wrapped around each other, maybe burned a little bit—even better. Yes, give me some of that crunch, please!
Everybody should have at least one really simple potato dish that is easy to make at home, yet still delivers all the goods on texture and flavor, and this, for me, is that dish. These crispy, pan-roasted potatoes are crispy and salty on the outside, but soft, fluffy and tender on the inside. The dual texture that I find so satisfying is the result of cooking them twice, though neither method requires much effort, and they can usually be done in the background of whatever you are serving with them. You will want to choose small, thin-skinned potatoes for this recipe—my usual go-to is baby reds because they are waxy and firm enough to hold their shape through both cooking processes. Small gold or yellow potatoes also work, but russets are a no-go for this one, both for their crumbly nature and the thicker skin.
Begin by scrubbing the potatoes thoroughly, removing any little eye sprouts or dark spots, but keeping as much skin on as possible. Next, boil the potatoes gently until they are just tender enough to pierce with the tip of a paring knife. Drain and cool until they can be easily handled, then carefully press them under a flat dish to create thick potato disks. Then (here comes the best part) fry them over medium low heat in a mixture of butter and olive oil. Salt and pepper, nothing else. Oh. My. Goodness.
If loving you is wrong, I don’t wanna be right!
Ingredients
1 1/2 lbs. baby red potatoes, scrubbed clean (keep the peels on)
Kosher salt for boiling potatoes
3 Tbsp. salted butter (maybe more)
2 Tbsp. extra virgin olive oil
Salt and pepper for serving
Instructions
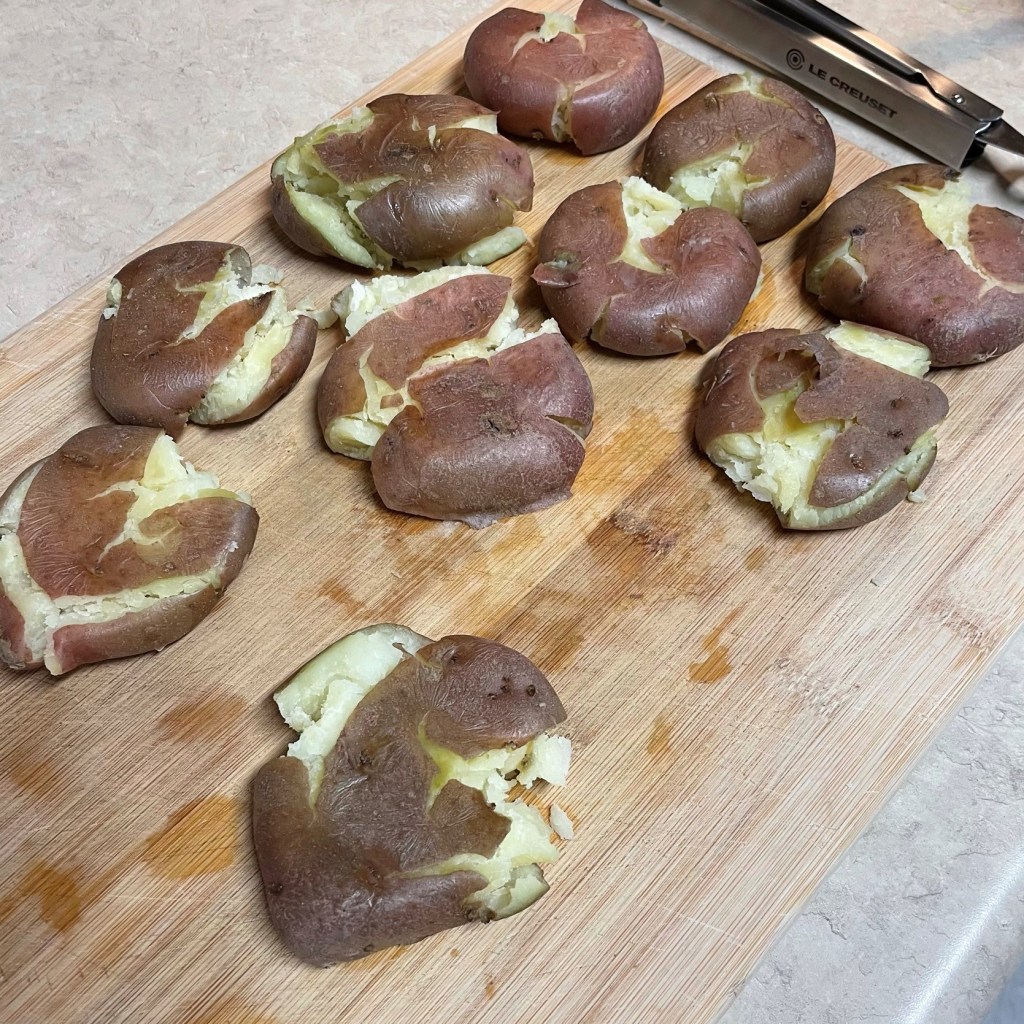
Let’s run through it in pictures first, shall we? I’m sure you know how to boil the potatoes, so we are picking up from the point they are fork-tender and drained.
Cool down the boiled potatoes until you can easily handle them.
Use a flat-bottomed dish to gently press each potato. Easy does it! Keep them about 1/2″ thick.
Give them a moment to rest while you prepare a large stainless or cast-iron skillet.
Add some of the butter and all of the oil, and heat until melted.
Arrange the potatoes evenly. Salt and pepper them, and tuck a few additional slices of cold butter in between.
When the bottoms are golden and crispy, gently turn them over. Add more slivers of cold butter between the spuds, or a drizzle of olive oil.
Turn them once more before serving to put a second crisp on the first side.
Cover potatoes with cold water in a medium heavy-bottomed pot. Bring to a low boil, add a good amount of salt (about a teaspoon), then reduce the heat and simmer gently until potatoes pierce easily with the tip of a paring knife or a fork.
Drain the potatoes in a colander until they are cool enough to handle.
Place one potato at a time on a cutting board and press it gently, using a flat-bottomed dish or bowl. Use a clear bowl if possible, to help you see how much the potato is flattening. It should burst slightly open on the sides, but you want to keep it intact as much as possible. Easy does it. After flattening, each potato should be about 1/2 inch thick.
Heat a heavy stainless or cast-iron skillet over medium heat. Add 1 tablespoon of the butter and all of the olive oil. When the butter-oil mixture begins to bubble at the edges, arrange the potatoes in a single layer in the pan. It’s fine if they are touching, but leave enough room to insert a spatula when it’s time to turn them. Reduce the heat to medium-low once all the potatoes are in the pan.
As the potatoes begin to cook, they will soak up much of the butter-oil mixture. Slice off a couple dabs of cold butter and insert them between potatoes here and there in the pan. Give them about 8 minutes, then begin checking the bottom for doneness.
When the potatoes begin to get browned and crispy on the bottom, use a small spatula to gently turn them over, one at a time. If you get over-ambitious, the potatoes may break, so take it slow. Sprinkle with salt and pepper. As with the first side, if the potatoes seem to soak up the butter right away, add a couple slivers more butter, or a thin drizzle of olive oil around and between the potatoes.
When second side is browned, turn the potatoes over once more, for a quick “re-crisping” of the first side. This ensures that your potatoes are perfectly crispy and hot on both sides. Give them one last sprinkle of salt and pepper, and serve them hot.
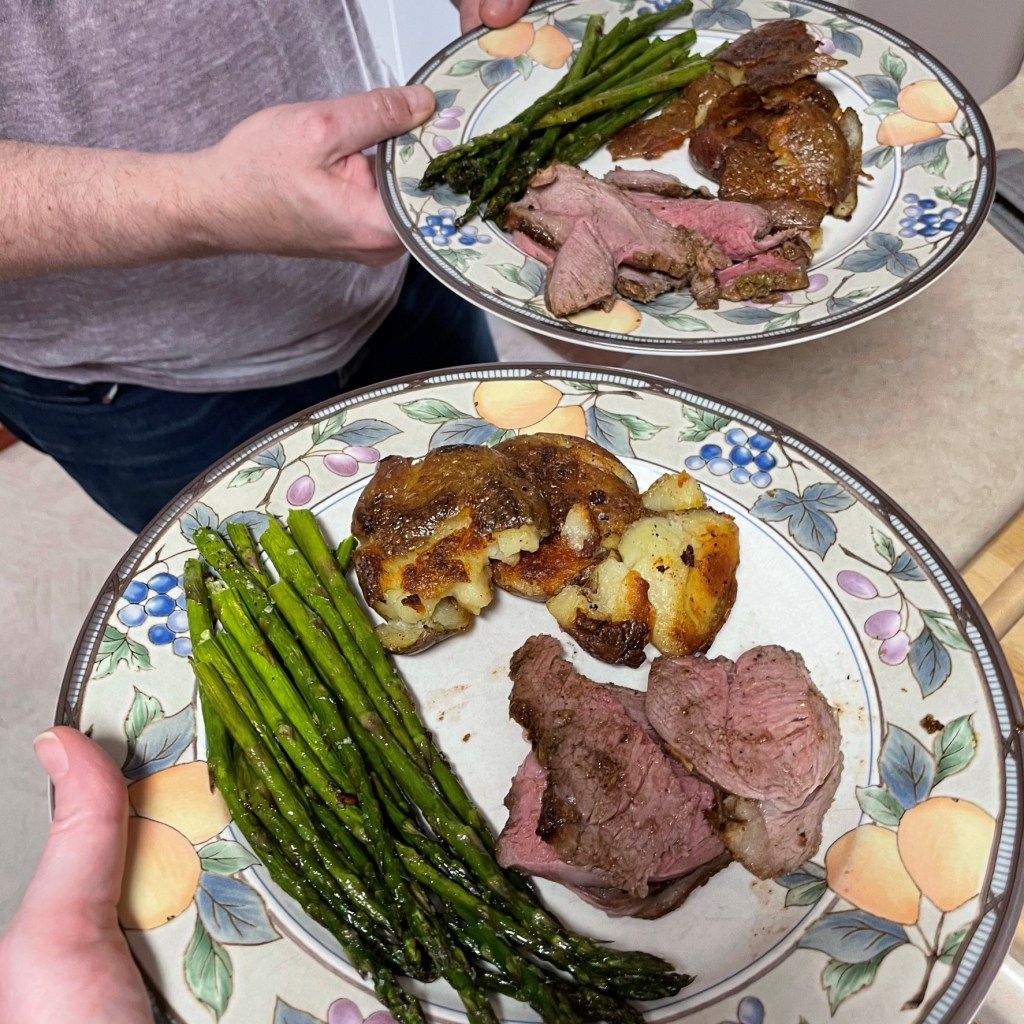
These crispy, pan-fried potatoes are easy and done in the background while you work on whatever else you’re serving for dinner. We had them this time with our Easter dinner of roasted leg of lamb and asparagus. But wouldn’t they be great alongside a roast chicken, or meatloaf, or burgers, or just about anything?
These potatoes made our simple Easter dinner complete.
If you were to scroll through your collection of recipes, I wonder which ones are most overlooked, and I wonder why. We all have recipe cards that hang out in the back of the box—either because they no longer suit our taste (which makes them ripe for a makeover), or they are specific to a season or holiday, or the ingredients are too pricy or difficult to find. Sometimes, though, I believe recipes get passed over because they seem complicated or intimidating.
My own “bucket list” of culinary challenges includes items from all those categories, but after recent conversation with various friends and acquaintances, I have noticed one standout category of food that seems to hold an air of mystery to a lot of people: seafood. It seems that most people enjoy seafood, but many are reluctant to make it at home. It’s no wonder seafood restaurant prices are what they are, and that’s a darn shame when some of those dishes are perfectly manageable for a home cook.
Every week or so, I peek at the activity insights offered by WordPress, where Comfort du Jour is hosted, and this helps guide me in deciding what to make next, and what to share with my foodie friends. I can see at-a-glance the number of views and downloads each page has had to date, and overwhelmingly, the recipe with the highest numbers of both is this one:
Really? Mahi Hemingway is the most popular recipe on Comfort du Jour.
It surprises me to see that Mahi Hemingway is so interesting to others, because it happens to be one of the simplest recipes to make, both from an ingredient standpoint and one of skill level. I developed my own version of that recipe because I couldn’t make sense of the $30 price tag on a similar dish in a local restaurant, which I expect points to another reason home cooks shy away from making their own seafood. If it’s so expensive in restaurants, it must be expensive and hard to make, right? Wrong! 😉
Most seafood is surprisingly easy to make, and I’m about to prove it again with this easy-and-done recipe that is cooked on the grill. The salmon fillet portions, which are easily found in most larger supermarkets, take an afternoon bath in a simple marinade of real maple syrup, bourbon and Dijon mustard. The marinade infuses flavor into the fish during this phase, and becomes a flavorful glaze later, when the fish is grilled. If you prefer, you can also make this in the oven, and the cedar wrap is entirely optional, but I believe it is worth the extra expense. I found these in the grilling section of the supermarket , but you might also check your hardware store, Walmart or Target. Cedar wraps impart an aromatic smokiness to the fish, without the extra time and fuss of cedar planks. The wraps are also less expensive than planks (only $10 for eight of them), and they don’t take up much storage space.
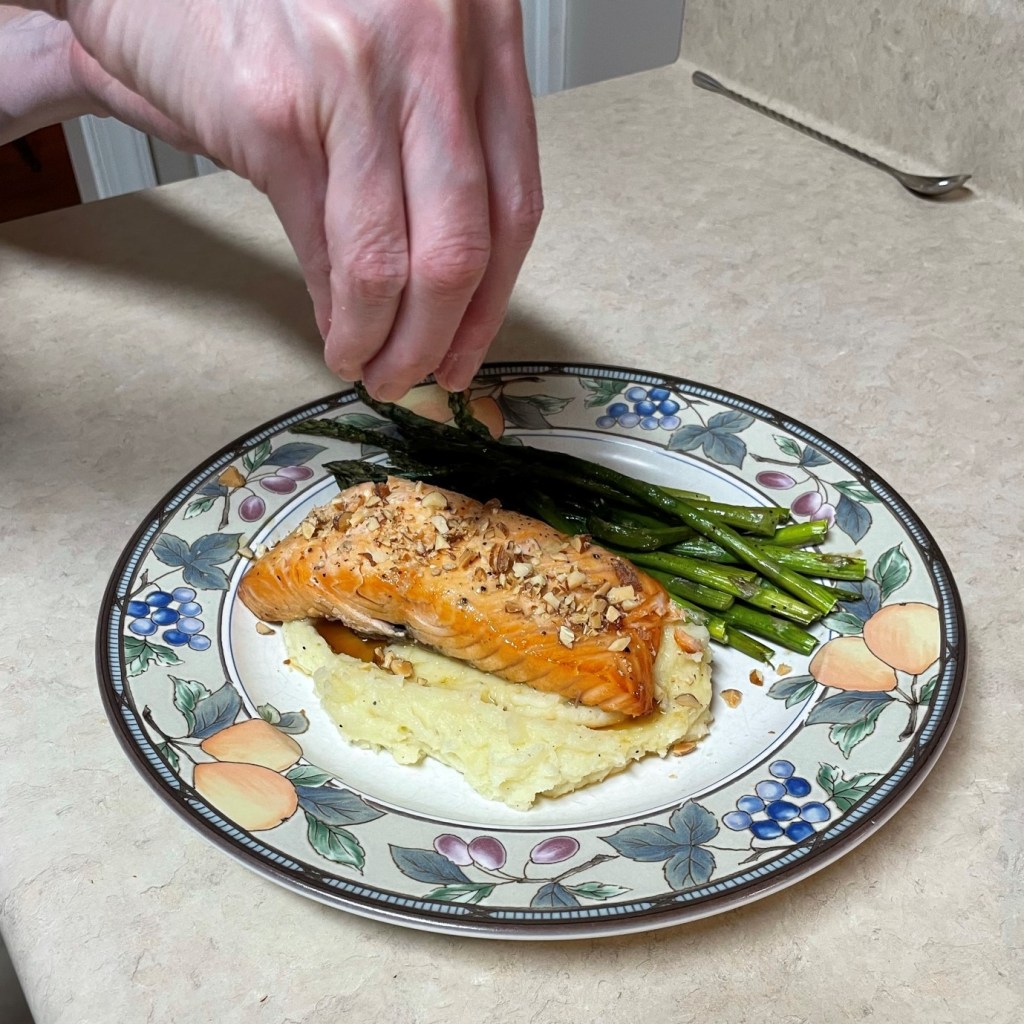
I have garnished the salmon with chopped soy-wasabi almonds, which is a great complement to the maple and bourbon flavors, and the wasabi echoes the horseradish that spikes the easy buttermilk mashed potatoes underneath, the same potatoes I made at St. Patrick’s Day for the Bangers & Mash.
You can begin prep for this meal a few hours ahead, and cooking time is less than half an hour, including the mashed potatoes and roasted asparagus. This meal is beautiful, tasty, quick and easy—collectively giving it a good chance at moving to the front of the recipe box.
I’ll bet this plate would be at least $24 in a seafood restaurant.
Two servings, easy to double.
Ingredients
I cut two portions from this whole fillet of salmon for this recipe. A larger chunk went on the smoker when we made our pastrami, and the rest went to the freezer.
2 Atlantic salmon fillets, about 6 oz. each* (see notes)
3 Tbsp. real maple syrup, preferably dark*
3 Tbsp. bourbon
1 tsp. Dijon mustard
Salt and pepper
1 Tbsp. extra virgin olive oil
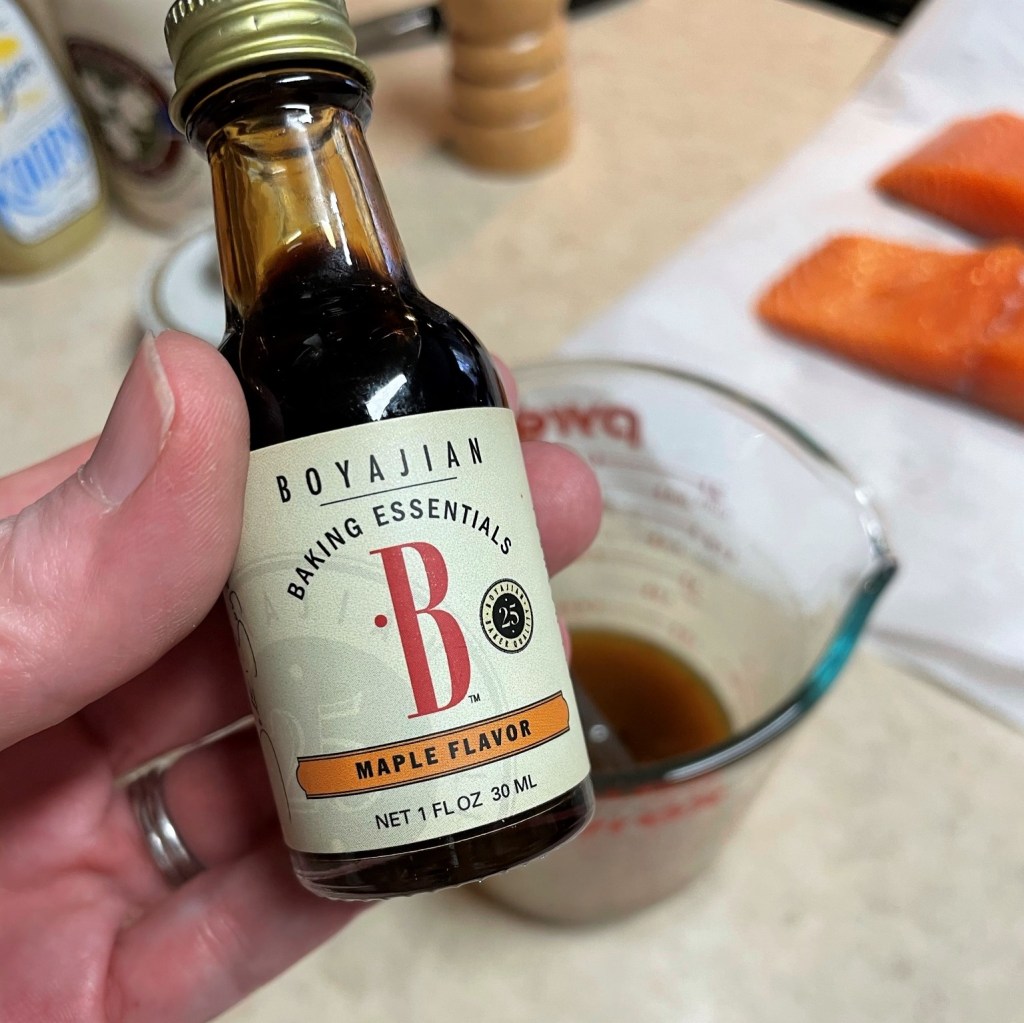
1/8 tsp. Boyajian maple extract*
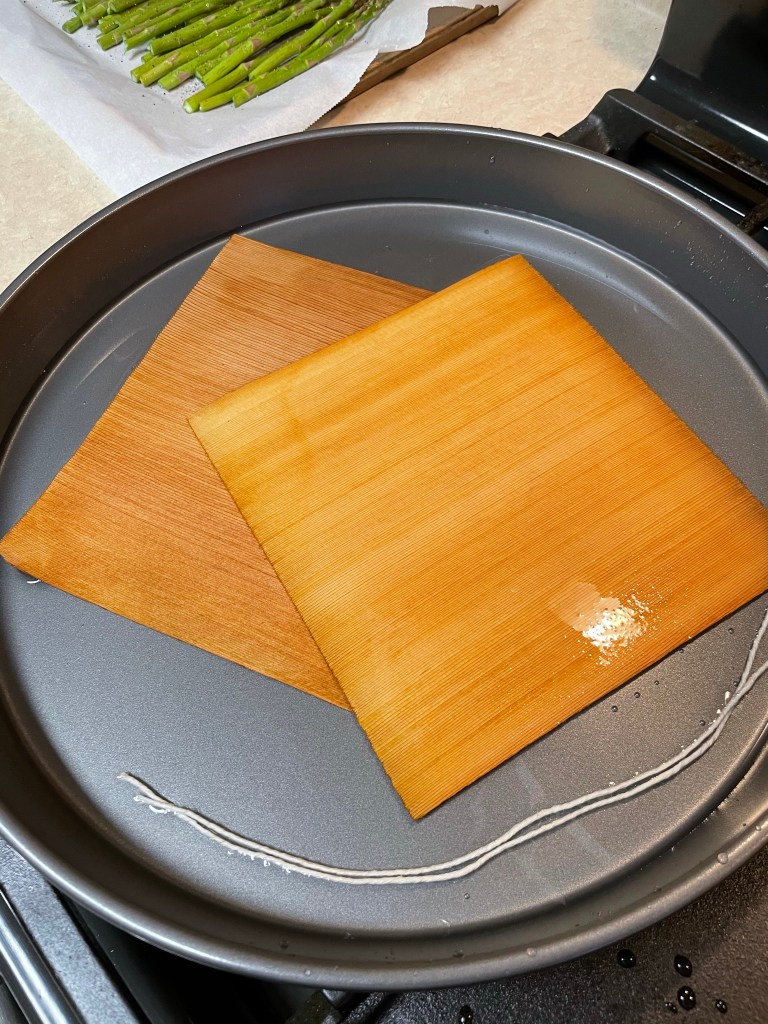
2 cedar wraps, soaked at least 5 minutes* (optional, see notes)
Small handful of wasabi & soy sauce almonds*
*Notes
The salmon fillets may be skinless or skin-on; it doesn’t matter because the skin will remain on the cedar wrap after grilling, which makes plating this dish super simple. If your seafood market has steelhead trout or arctic char, they would also be delicious in this recipe, but adjust your grilling time. Both are usually thinner and would cook more quickly.
For the love of good taste, please do not use a fake “maple-ish” syrup from the grocery store. Real maple is the best, and totally worth the expense. There are plenty of resources for good quality maple products; I order mine online from Big Tree Maple in Lakewood, N.Y. Why? Because I grew up under the shade of those lovely trees and they know me.
The maple extract, which is optional, amplifies the flavor of the syrup without adding sweetness. Look for it in gourmet specialty stores, or online at King Arthur Baking Company. Another product I like for this purpose is maple-infused balsamic vinegar, which is easy to find in one of the specialty balsamic shops that have popped up all over the U.S. If you substitute with the balsamic, use about 1/2 teaspoon.
Cedar wood, when soaked and grilled, lends a phenomenal flavor to salmon. If you choose planks, be certain they are designed for culinary use. Cedar grilling planks should be submerged fully underwater for at least an hour, but I like the wraps because they only require soaking a few minutes. You could probably also use soaked cedar chips in a smoker box, alongside the salmon on your grill.
The wasabi & soy sauce almonds are a Blue Diamond product, and you’ll find them in the small cans in the snack aisle of your supermarket, alongside cans of peanuts and mixed nuts. I’m crazy about the horseradish-y flavor, and it is remarkably good against the sweetness of maple and bourbon.
Buttermilk Mashed Potatoes
1 lb. potatoes (I used a combination of russet and golds)
2 Tbsp. salted butter (extra if you’d like)
1/4 cup thick buttermilk
1 tsp. prepared horseradish
Salt and pepper
Asparagus
1 average bundle fresh asparagus
Extra virgin olive oil
Salt and pepper
Zest of 1/2 fresh lemon (optional)
Instructions
You will want to marinate the salmon fillets a couple of hours, so plan this quick prep for mid-afternoon. I’ll run through the easy steps for the salmon here. For visual direction on the buttermilk mashed potatoes, check out my recent post for Bangers & Mash; it is the same recipe, though ingredient amounts are adjusted here for this dish.
Equal parts real maple syrup and bourbon, plus Dijon with salt and pepper. Please do not use fake syrup for this recipe!
Drizzle the olive oil into the marinade, and whisk as you go to create an emulsion. This ensures the marinade evenly flavors the fish.
If you can find it, this maple extract delivers a big punch of maple flavor to the marinade, but use it sparingly! I ordered mine from King Arthur Baking Company, or watch for it in gourmet specialty stores.
Pour the marinade over the fillets, then turn them flesh side-down for a nice long soaking. Hold back a small amount of marinade to drizzle on the salmon at serving time.
The cedar wraps are larger than most of my baking dishes, so I soaked them (and the tying twine) in my deep dish pizza pan. Unlike planks, these thin wraps only require a few minutes of soaking.
Lay out the cedar wrap, with the twine underneath, and angle it in the direction it wants to bend.
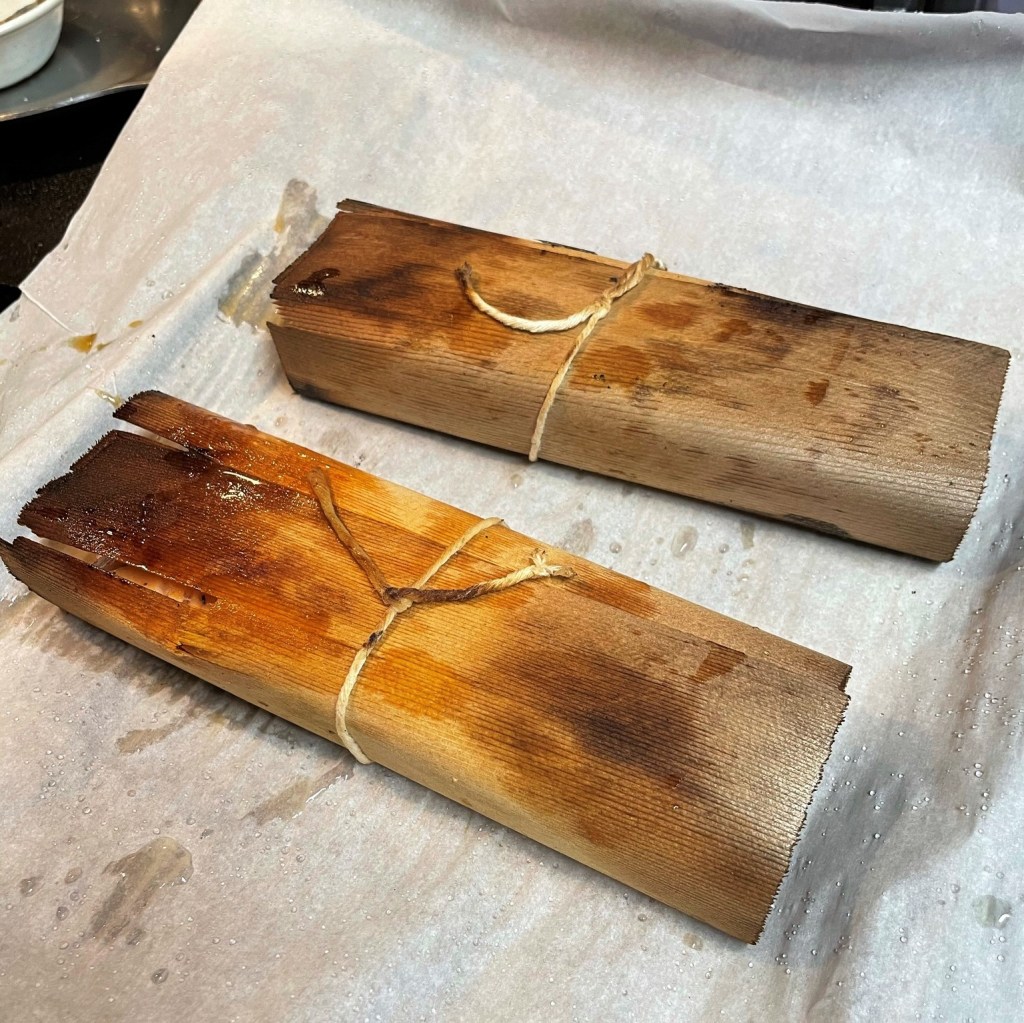
Place the marinated fillets on the wraps, fold them up and tie the twine.
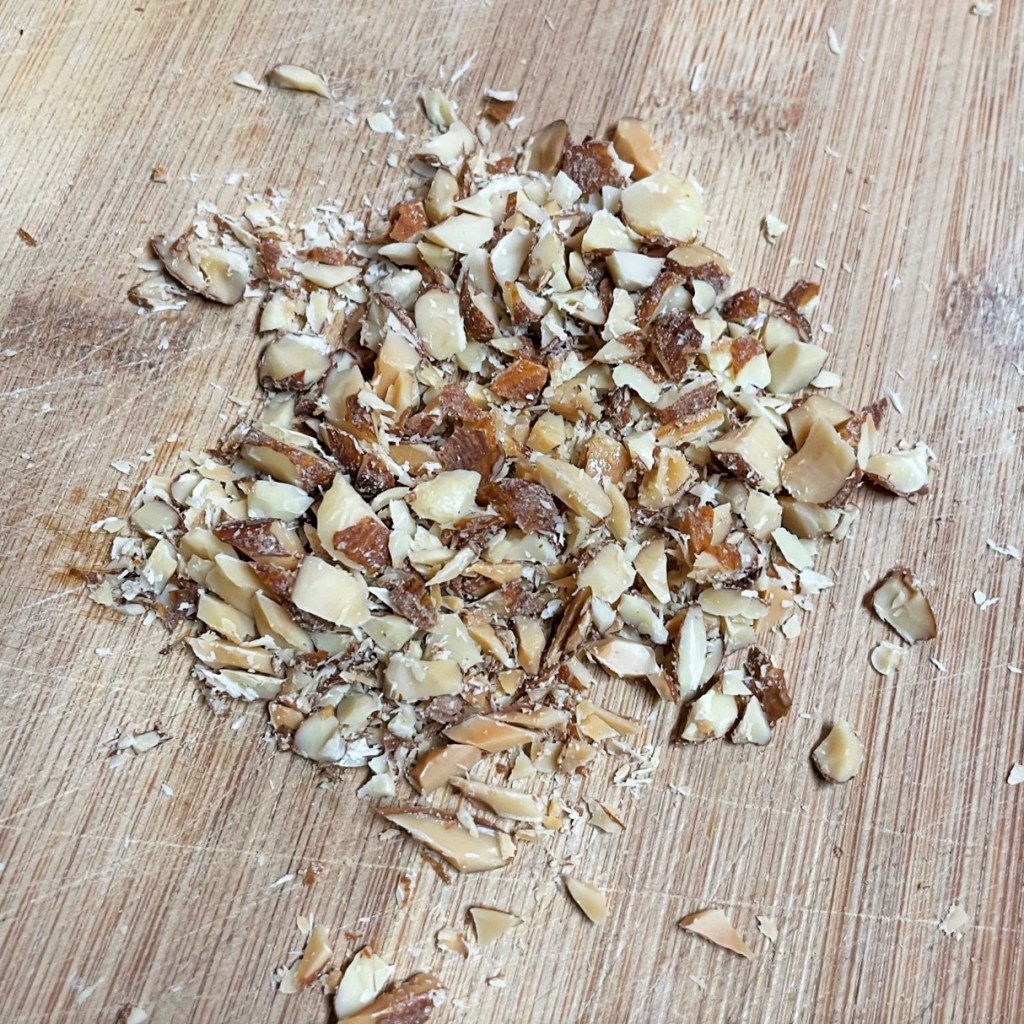
The almond garnish is optional, but I love the way the wasabi and soy sauce complement the sweetness of the maple and bourbon. A small handful of almonds is plenty.
Chop them up into rough pieces, either with a knife or a few quick pulses of a food processor. The little bit of texture is nice with the soft, delicate fish.
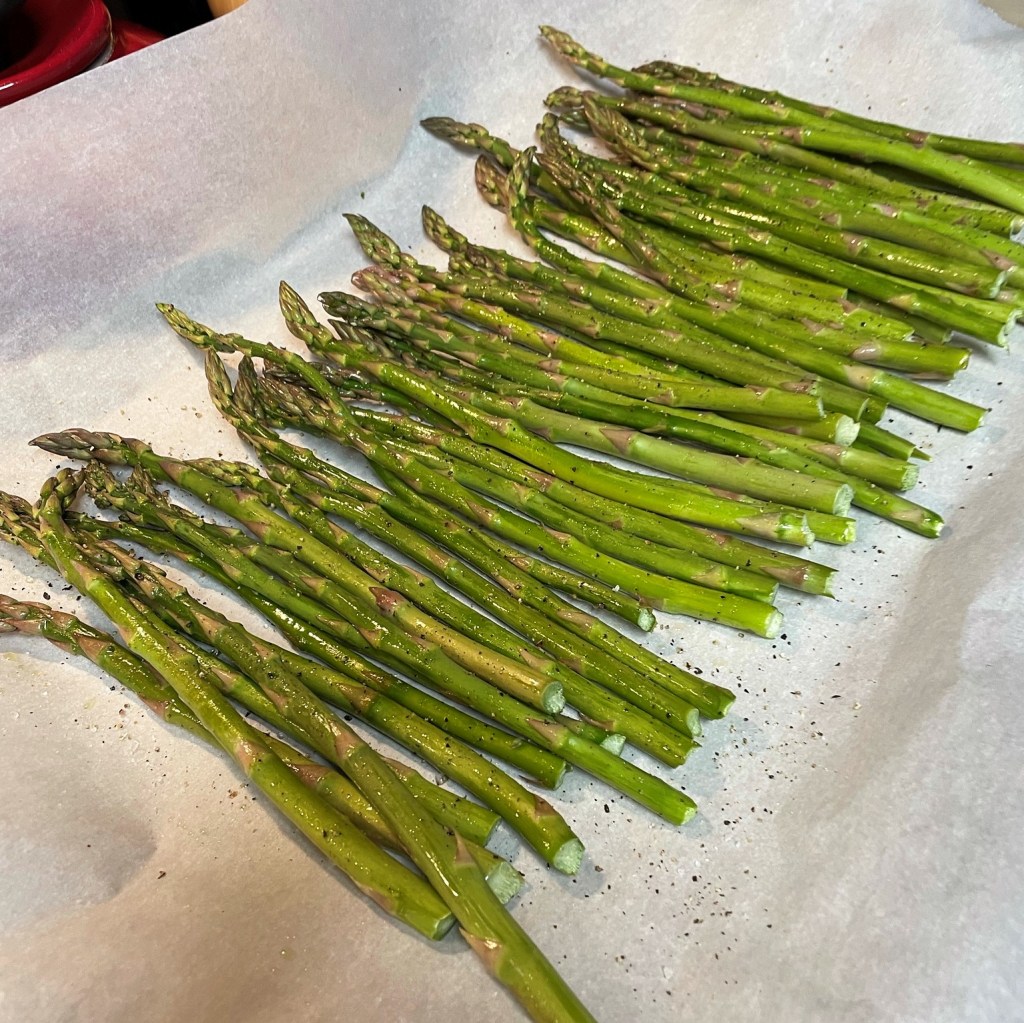
Yippee for asparagus season! I popped these trimmed spears into the 400° F oven just before the cedar-wrapped salmon hit the grill. 15 minutes is just the way we like it.
I could not resist making our favorite Smoked Maple Old Fashioned cocktails as my husband, Les, and I prepared dinner. I’ll share this recipe soon!
Les tended the salmon, which spent about 13 minutes on the grill at 350° F (direct heat). You can see where he peeled back one edge of the cedar to test the fish for flakiness.
Oh my gosh, I wish you could smell this! Maple, bourbon, cedar… mmm.
The salmon skin gets stuck to the cedar, which makes plating a snap. Lay the fillet over a mound of buttermilk-horseradish potatoes, drizzle with the reserved maple marinade and sprinkle on the almonds.
Time for dinner!
Season the salmon fillets with kosher salt and black pepper. Place them, skin side down, in a glass baking dish.
Combine the maple syrup, bourbon and Dijon mustard in a measuring cup with a pour spout, Whisk in olive oil and maple extract (if using). Pour most of the marinade evenly over the salmon fillets, reserving about a tablespoon of it to drizzle over at serving. Turn the fillets over, so that the fleshy side rests in the marinade, and wiggle them around to be sure the marinade coats the exposed sides of the fish. Cover and refrigerate at least one hour, preferably about two hours.
Peel and cut up the potatoes. Boil gently until they are easily pierced with a fork, then drain over a colander.
Add butter and buttermilk to the cooking pot and stir until butter is melted. Transfer drained potatoes back to the pot and mash to desired consistency. Season with salt and pepper to taste. Stir in horseradish and more butter, if desired. Keep potatoes warm until serving time.
While the potatoes cook, prepare your grill, with temperature at 350° F. Soak cedar wraps and tying twine for at least five minutes.
Remove salmon fillets from marinade. Center them, skin side-down, on the soaked wraps and fold up the sides to enclose them, tying snugly with twine.
Place the cedar-wrapped salmon onto a grilling rack, and cook over direct heat for about 12 minutes, or until fish flakes easily with the twist of a fork. You may need to peel back a piece of the cedar wrap to test the flakiness.
Cut the twine to unwrap the cedar and serve the fish atop a mound of the buttermilk-horseradish potatoes alongside your favorite vegetable. Chop the soy-wasabi almonds into crumb-sized pieces. Drizzle salmon with reserved marinade and sprinkle with almonds.
Make the asparagus concurrently with the potatoes and salmon
Preheat the oven to 400°F. Prep the asparagus by snapping off the trimmed ends. Rinse under running water and roll them around on a paper towel to dry them.
Arrange the asparagus in a single layer on a parchment-lined baking sheet. Drizzle lightly with olive oil and roll them to coat evenly. Season with salt and pepper and roast for about 15 minutes. Finish with a sprinkle of lemon zest. If you slide the asparagus into the oven just before the salmon goes on the grill, it will be done right on time!
You may be wondering if I’m a paid endorser for the brands and products I spotlight on Comfort du Jour, and the answer is “no.” I do not receive money or merchandise for my recommendations, and what that means for you is that you can count on me to give an honest opinion. If something changes, I will update my disclosures. Either way, you can still count on me to be honest in my recommendations, as I will only stand behind services and products I believe in. Fair enough? 😀
There is a common thread that runs through the culinary fabric of the U.S. South. And that thread, in a word, is sweet. Whether it’s beverages, desserts, BBQ sauces or even potato salad, the foods you find on a southern menu will surely satisfy your sweet tooth. That’s a bit of a challenge for people like me, who prefer more savory flavors. In a salad, I want freshness, with tangy, herbal and briny flavors.
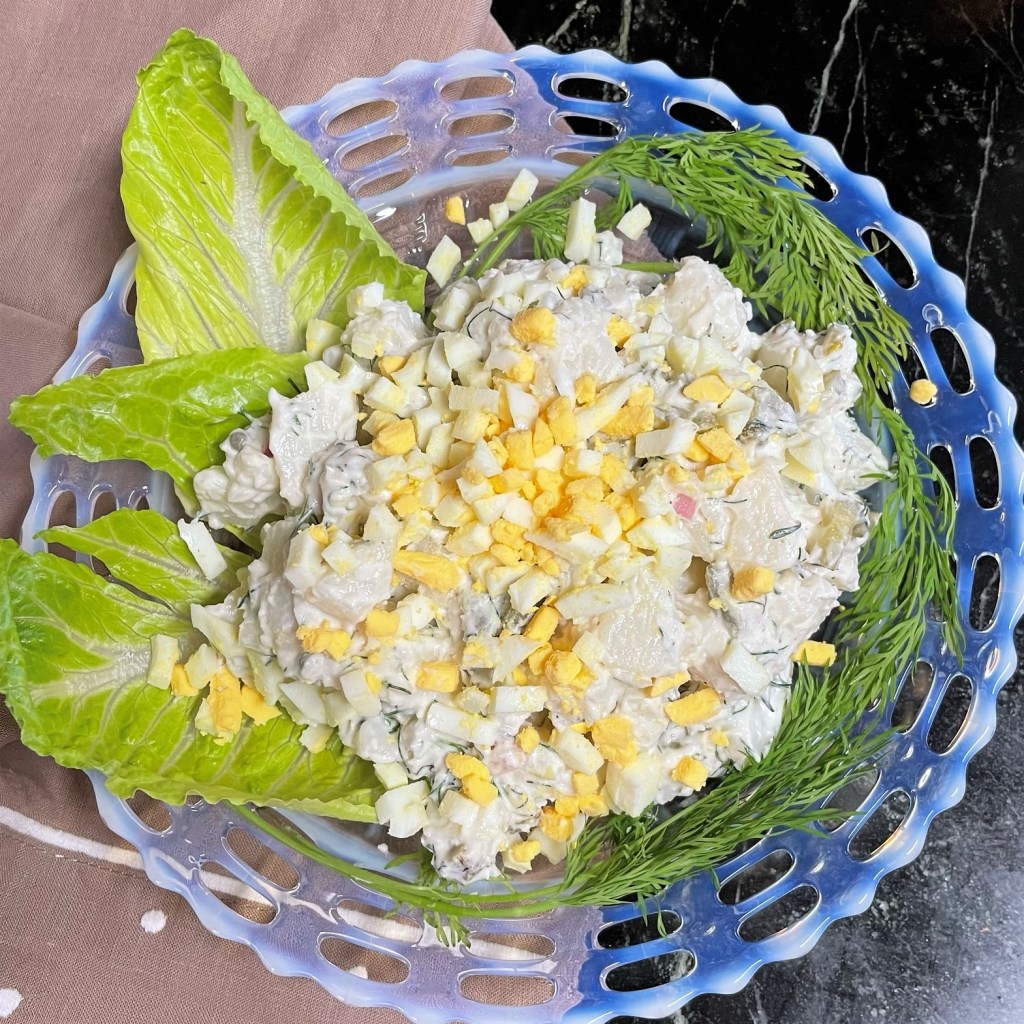
When I spotted an online recipe for potato salad with dill and horseradish recently, I got excited about the brightness of flavors and especially the absence of sugar. I found inspiration in that recipe, so I made it (with my own tweaks, of course), and my husband and I enjoyed it so much I’ve made another batch and it will make its way into our recipe rotation. Me being me, though, and always pushing the envelope on flavors, I’ve adjusted it yet again. This time, I doubled down on the dill, adding chopped dill pickles to the original idea of fresh chopped dill. I heaped jalapeno heat on top of the horseradish and crowned the finished salad with chopped hard-boiled egg. Oh, happy Spring! 🙂
This salad is fresh, bright, herbal and zesty!
Best of all, for me, is that there is no sugar in sight. The salad is very dill-forward, and that freshness makes me eager for all the other light foods on the way for Spring. The heat, though doubled, is subtle in the background. The yogurt (or sour cream, if you prefer) contributes a creaminess that isn’t all mayonnaise. And the capers and chopped egg provide a little something extra, as a salad you might expect to find in a good delicatessen.
The result is this dilly-dilly, double heat potato salad, delicious as a cool, savory side to sandwiches, hot foods off the grill or anything you might be serving as a casual meal for Passover or Easter.
The best potatoes for this recipe are those that do not fall apart too easily. Red, yellow or white potatoes are all good options. Russets, not so much. Their starchy fluffiness makes them more prone to mashing.
If you do prefer a slightly sweet flavor, substitute bread and butter pickles for the dills. The dill flavor will still be present, but the sweetness will help to soften the savory edges of this salad.
This is the right time of year to find fresh dill in the supermarket, but if you do not have access to it, substitute dried dill leaves, but only about a teaspoon. Remember that dried herbs are much more potent than fresh.
Can’t stand the jalapeno heat? I promise it is subtle, but if you don’t want or like jalapenos, leave them out. This is my recipe, but you are always in charge of the decisions in your own kitchen, so make it the way you like. Want it hotter? Well, now you sound like my husband. Go ahead, add more. 😊
Instructions
This is one of the simplest recipes, but I’ll share the steps in pictures anyway. Keep scrolling for written instructions and a downloadable PDF for your recipe files.
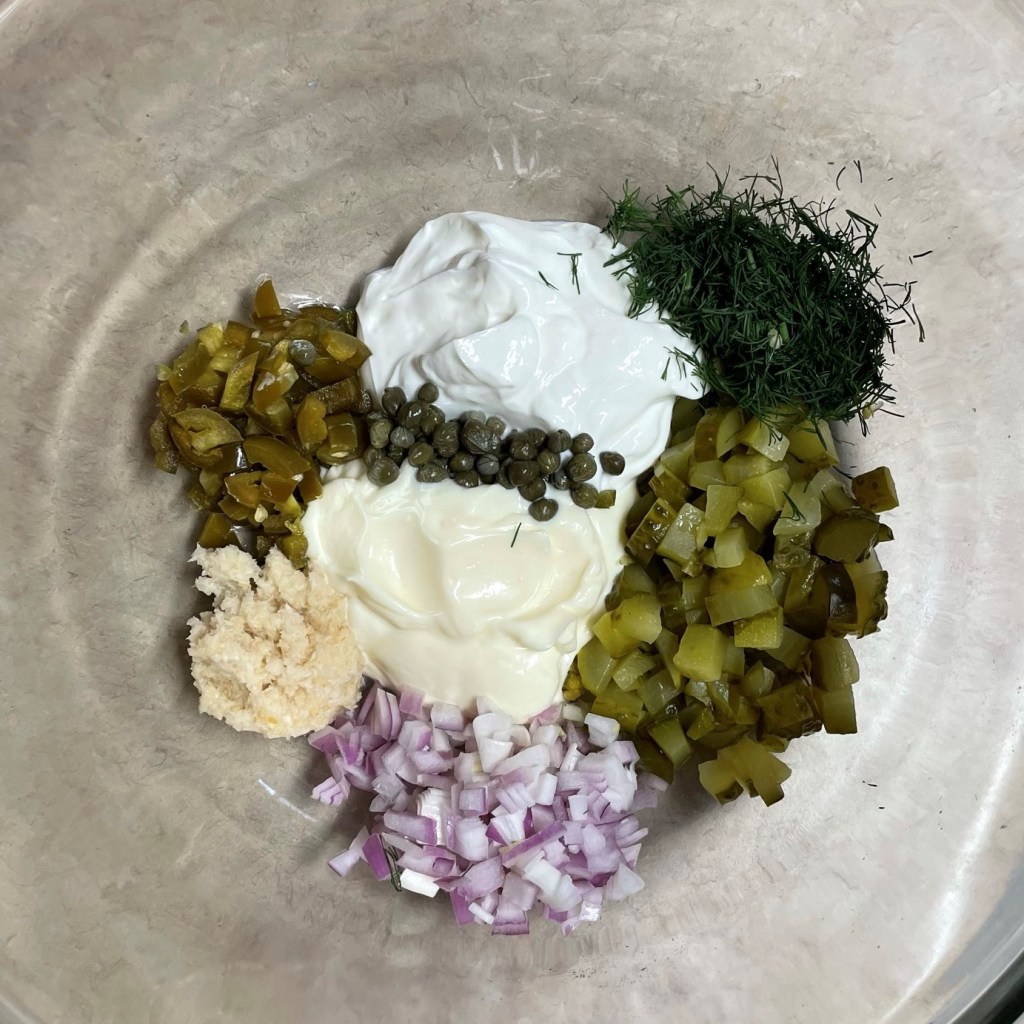
Surrounding the mayo and yogurt, from top right: fresh dill, chopped dill pickles, diced red onion, horseradish, pickled jalapenos and capers in the center.
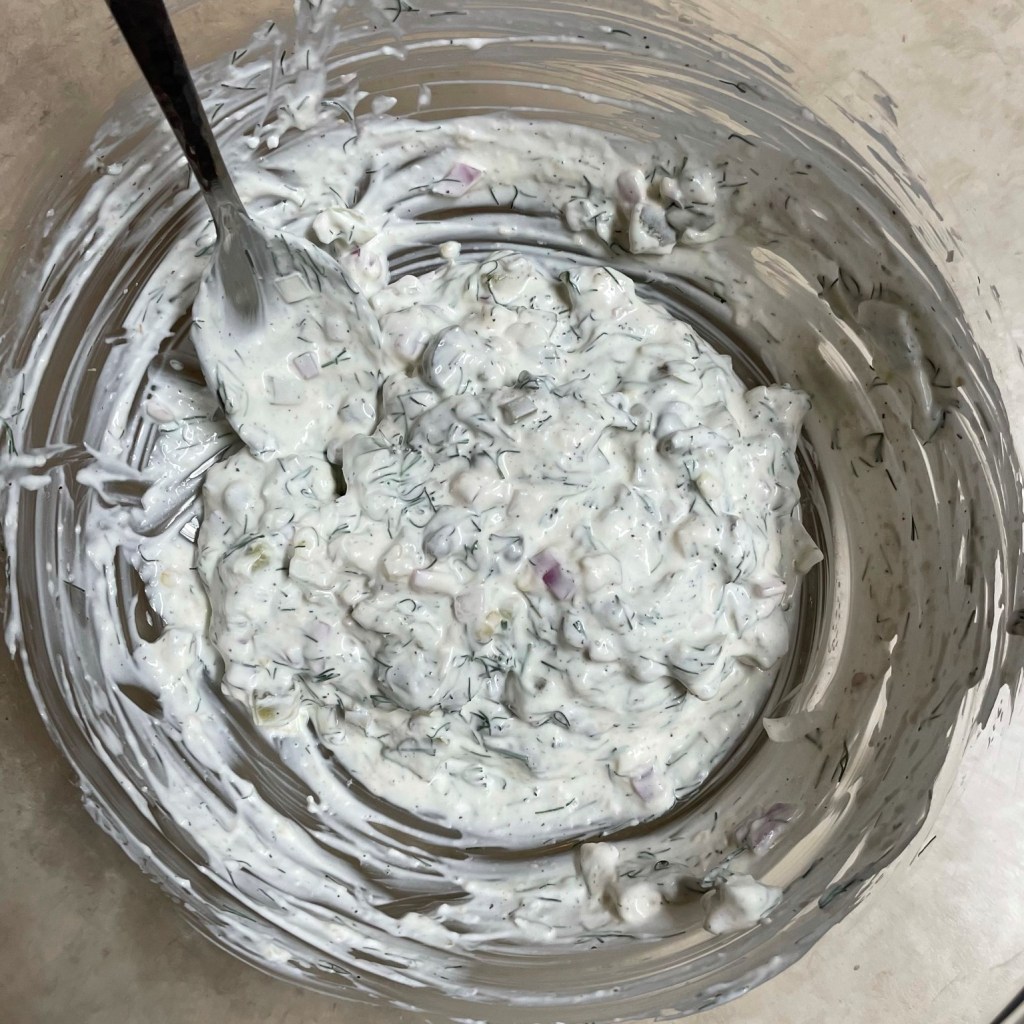
When I make any kind of salad, I like to blend together the dressing ingredients first, to help evenly distribute the flavors through the rest of the salad.
The cut-up potatoes are cold, so it’s easier to fold them into the dressing without breaking them, and without warming up the mayonnaise.
Always taste, of course, so you can adjust salt and pepper to your liking.
Cut up the potatoes into large, “three-bite” size. Boil gently until potatoes are easily pierced with a fork. Drain them and cool completely before cutting them into smaller pieces. If you wish, cook them a day ahead and refrigerate overnight. Cut the cooked potatoes into cubes about the size of croutons.
Combine all remaining ingredients, except eggs, in a large bowl, seasoning the dressing with salt and pepper to taste.
Fold the cut-up potatoes into the dressing. Chill in the refrigerator for several hours.
Serve with chopped hard-boiled eggs scattered on top of the salad.
Our first batch was made with russet and Yukon gold potatoes, and we liked it so much, I made a few adjustments and whipped up another batch.
For my second batch, I doubled the heat, used white potatoes and added chopped egg. All winners!
Most every night for the past few months, I have awakened around 3 a.m., for no apparent reason. My insomnia usually lasts at least an hour and a half, during which time I ponder all of the good and evil in the world, or play mindless word games on my smartphone, or venture into the dark corners of our house to find and snuggle our sleeping pets. I’d like to make one suggestion for others who have experienced this phenomenon of waking at 3 a.m.—do not pick up your phone and begin Googling possible causes for said awakenings. The search results are grim, and in a matter of moments, you will begin to question everything from your diet (am I eating sugar too close to bedtime?) to your spiritual condition (what do you mean, exactly, by ‘witching hour?’). My therapist believes I am probably flummoxed over a combination of things, related mostly to work-from-home stress and general pandemic fatigue. Whatever the case, I’m exhausted. Every once in a while though, these sleep interruptions result in something good, and this recipe is a fine example of that.
Out of the blue two weeks ago, I awakened with a start and asked myself why I had never made fish cakes with sriracha and scallions. You might be thinking this is a bizarre question to ask oneself so urgently at 3 in the freakin’ morning, and you’d be correct, but this is my life now. Once I go down that rabbit hole, it isn’t long before I begin dreaming up ideas of just how such a dream dish should be completed, right down to the garnish. Sometimes I pick up my phone and make record of my ideas—and that’s a smart thing, because if I don’t jot it down, my next successful 40 winks may wipe it clean out of my brain. From this particular wide-awake culinary epiphany, I made these exact notes, because I didn’t want to forget what sounded like a great recipe.
I mean, isn’t this the kind of thing that wakes everyone up at 3 a.m.??
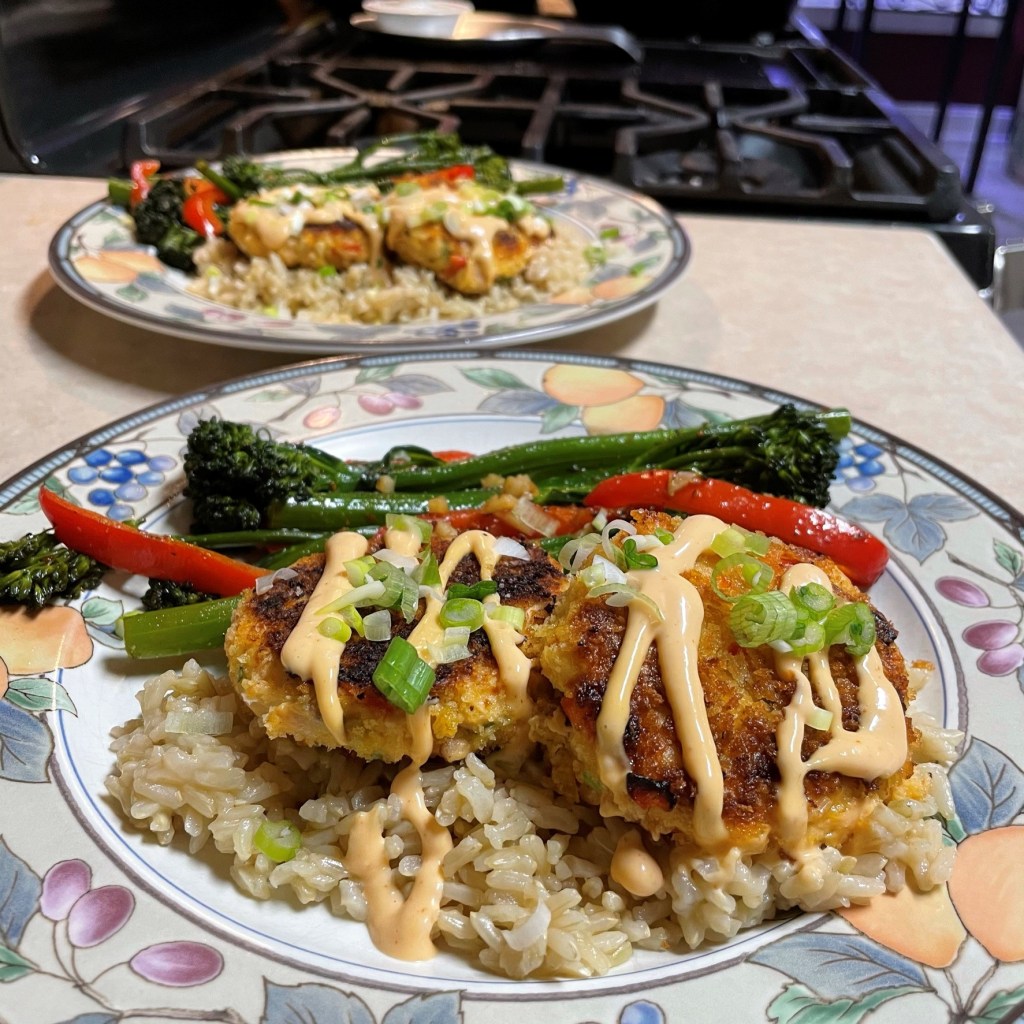
It took me a few days to round up my ingredients, and when I got down to it last week, with a few tweaks to my original plan, the result was delicious! These scallion-sriracha salmon cakes were light and fresh, low calorie and easy as could be to make, with just enough heat to make your tongue tingle. I modeled the ratio of ingredients after my favorite crab cake recipe, using only enough mayonnaise and panko crumbs to hold the flaky salmon together with the finely minced garlic and red bell pepper. A little extra panko on the outside before pan frying gave the cakes a terrific crispiness to offset the moist and tender interior.
And the flavor was exactly as I dreamed.
Crispy coating, tender inside, spicy and delicious; these turned out just as I imagined!
1/4 cup panko crumbs, plus extra for shaping cakes
2 Tbsp. peanut oil
*Notes
Fish sauce is a pungent, fermented condiment found in the Asian section of most supermarkets. If you cannot find it, substitute with soy sauce.
The Asian Reds hot pepper flakes are a specialty item that popped up a while back in my hubby’s Facebook feed, and we could not resist ordering a variety of products from this company, though we have no financial incentive from doing so. I like this pepper seasoning because it includes the hard-to-find varieties of pepper that play so well with other Asian flavors, including the sriracha in this recipe. If you don’t want to spring for them, substitute any crushed red pepper flakes, or omit them for less heat.
We are loving these Asian Reds pepper flakes. They offer a different variety of hot pepper flavors that is a perfect highlight with other Asian ingredients.
Instructions
Here we go with pictures, and keep scrolling for written steps and a downloadable copy for your recipe files!
Quick-cook the salmon fillet until it’s just done enough to flake easily. Better to have it underdone than overdone, because it will be cooked again.
Combine the mayo, sriracha and fish sauce in a medium bowl.
Measure out about 3 tablespoons of the mayo mixture to dress up the finished salmon cakes. I used a zip-top snack bag as a makeshift piping bag for this purpose.
To the remaining mayo mixture, add minced peppers, garlic and half of the chopped scallions, reserving the other half for garnish.
I made a very small batch, so only used about half of my beaten egg. Save the rest for your next omelet. 🙂
Gently fold in the flaked salmon with a spatula to avoid shredding it too much.
To help me visually plan for even portions, I used my spatula to divide the salmon mixture into fourths.
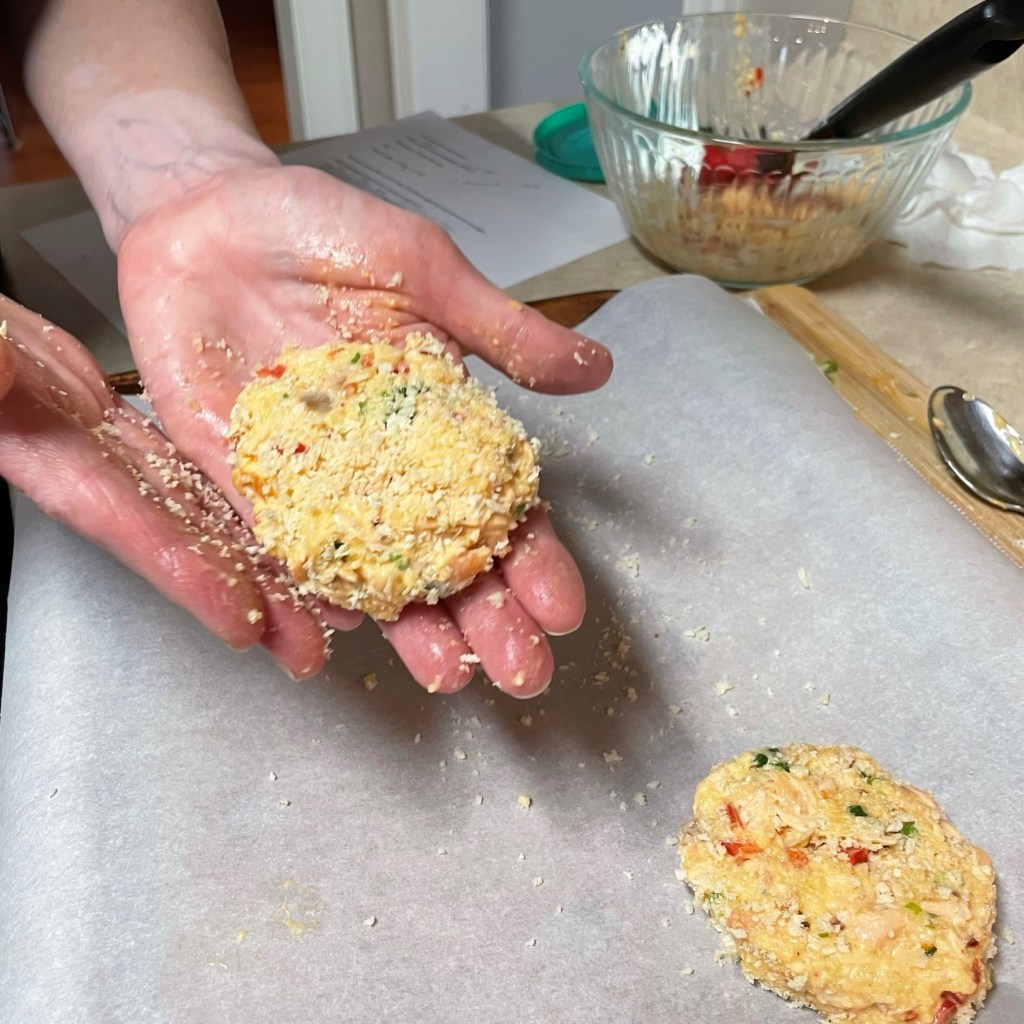
Use a sprinkling of additional panko in your hand to help shape the salmon cakes, and to leave a light panko coating on them for crispy frying.
Shape the salmon cakes into a patty shape about three inches across, and about 3/4 inch thick.
After shaping, place the salmon cakes on a parchment lined cookie sheet or plate. Cover and refrigerate them at least a couple of hours.
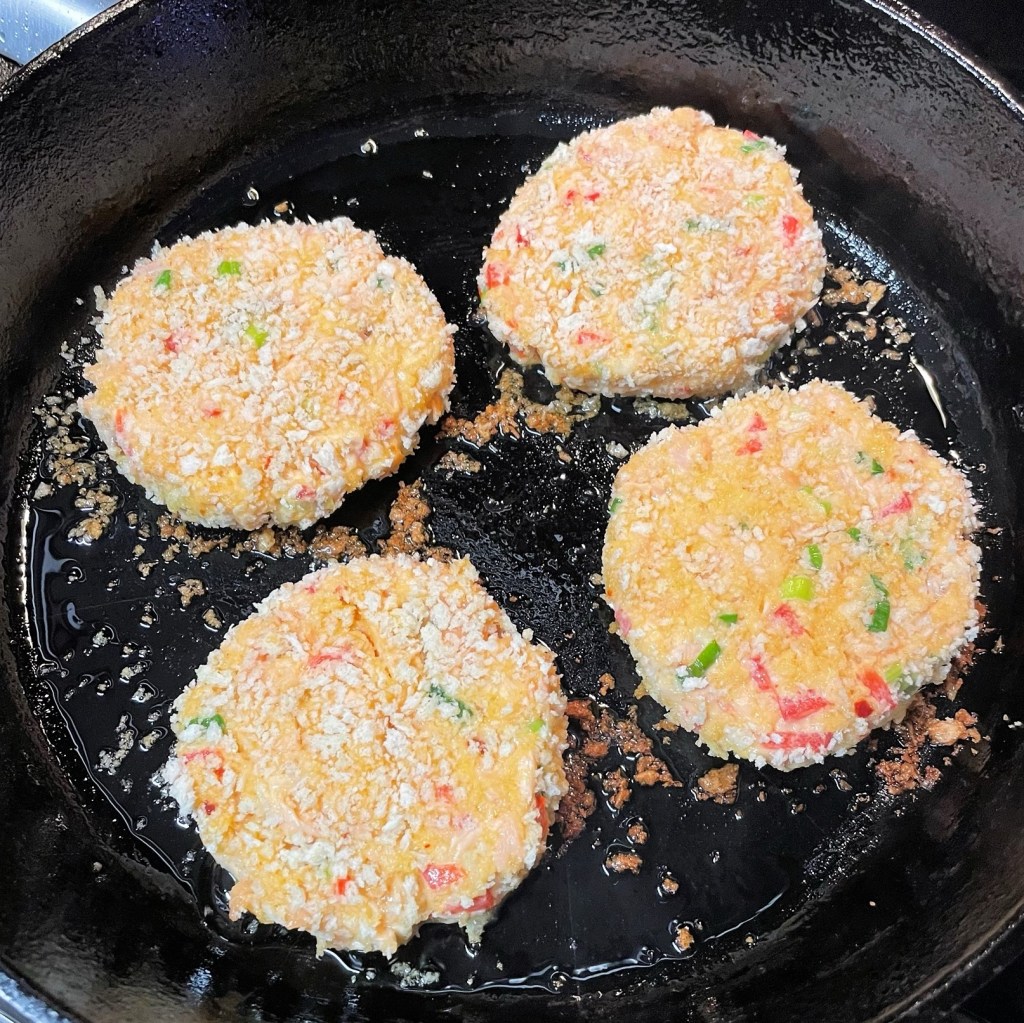
In a non-stick or cast-iron skillet, heat the peanut oil and cook the salmon cakes, 3 to 4 minutes on each side.
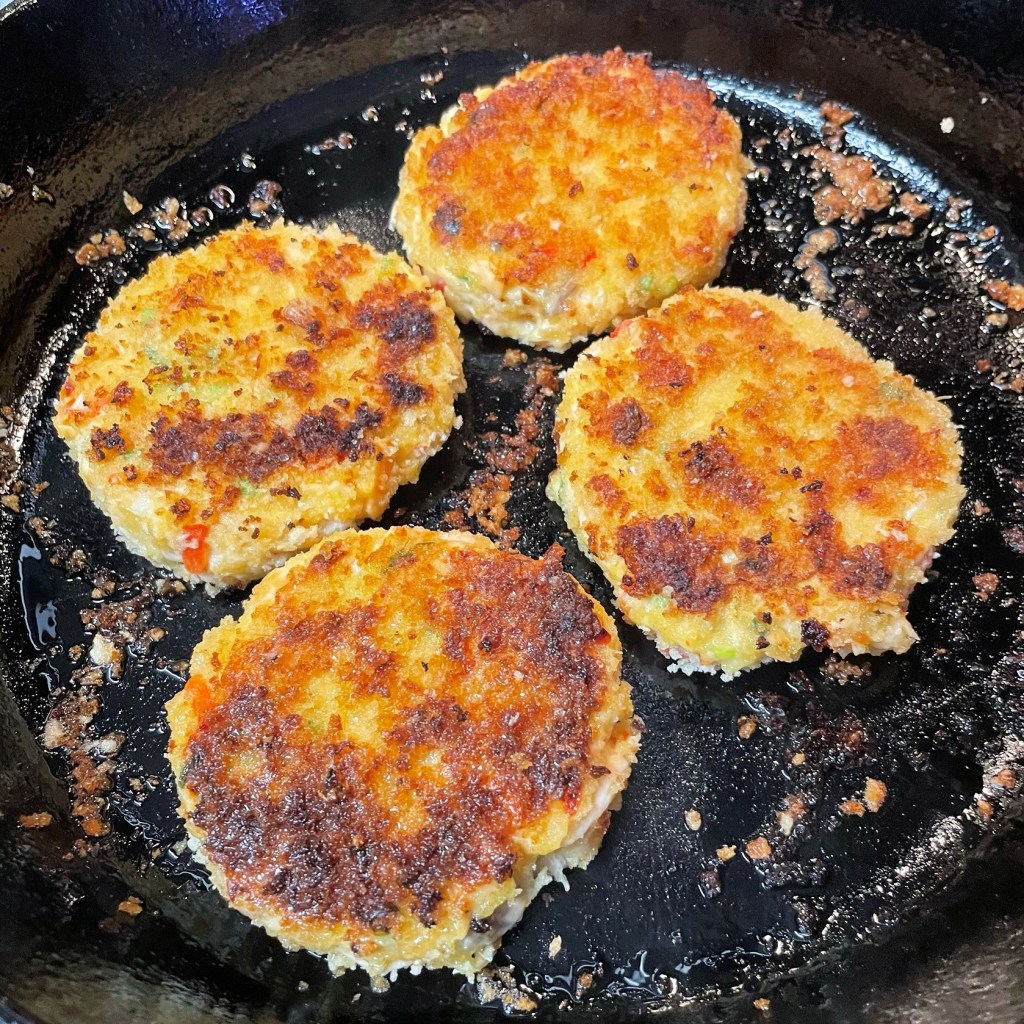
Turn them when the first side is lightly browned and crispy.
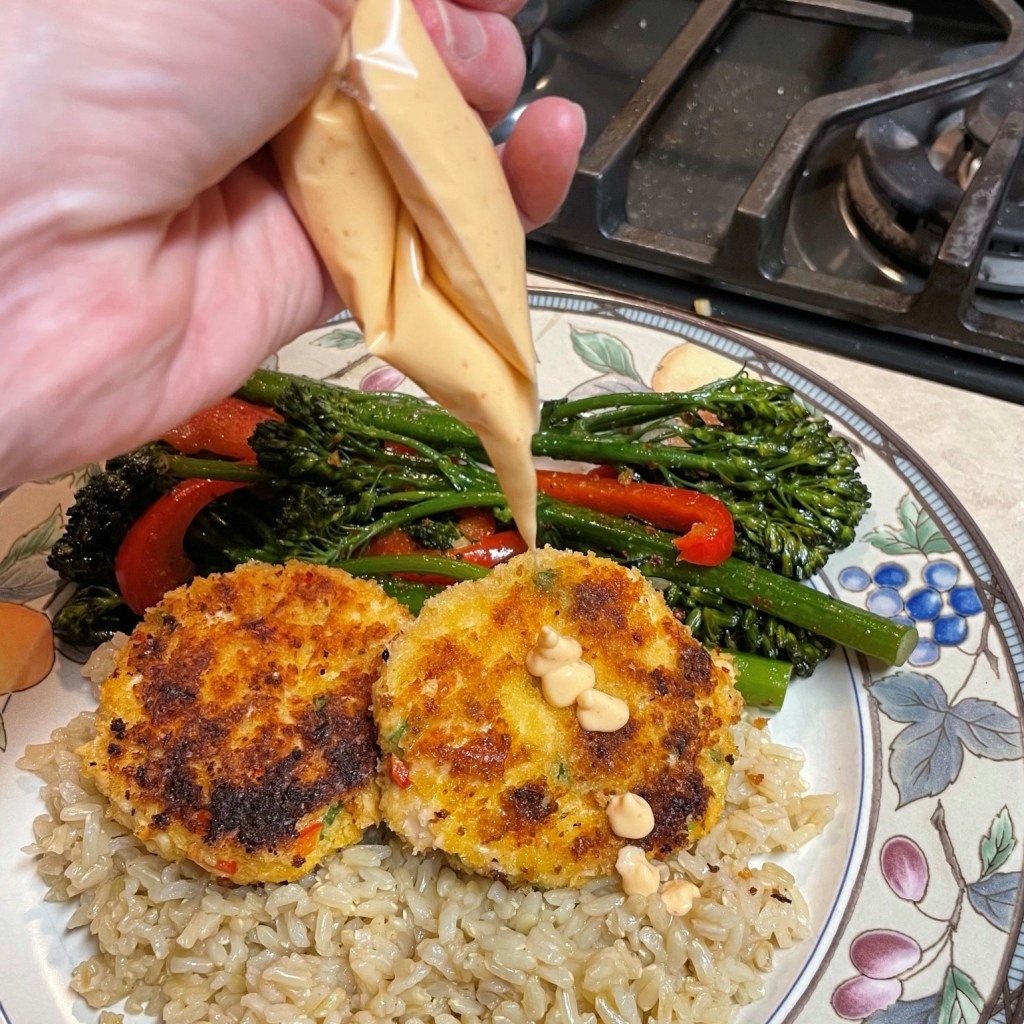
Arrange the cakes over rice, and snip a corner in the zip-top bag to pipe on the remaining sriracha mayo. This is one of my favorite plating tricks. 🙂
Sprinkle with reserved scallions and serve with your favorite vegetable.
Heat a small, non-stick skillet over medium heat. Pan steam or lightly sauté salmon fillet until just flaky (better slightly underdone than overdone). Cool then refrigerate several hours or overnight.
Combine mayo with sriracha and fish sauce; measure out about 3 Tbsp. for finishing the cakes at serving. I put the reserved portion into a zip-top snack bag (sort of a makeshift piping bag).
Add half of the chopped scallions, red pepper, garlic and spicy Asian Reds seasoning to remaining mayo mixture. Fold in beaten egg and panko crumbs.
Flake fish into large-ish pieces and gently fold into mayo mixture, taking care not to break up the fish pieces too much. Sprinkle additional panko crumbs into your hand and shape mixture into four patties, about the size of hockey pucks, with a light coating of panko on both sides. Place each fish cake onto a parchment lined plate or small baking sheet.
Cover the fish cakes with plastic wrap and chill at least two hours. This gives the mixture time to firm up, and the panko will absorb some of the moisture to better bind the cakes.
Heat peanut oil in a medium, non-stick skillet over medium heat. Cook salmon cakes 3 or 4 minutes per side, until browned and crisp. Serve over rice with your favorite vegetables, top salmon cakes with reserved sriracha mayo drizzle and reserved scallion slices.
If you have ever thought, “I can’t make bread,” then this is one recipe I hope you will try. Not only are the ingredients simple, but the method is also very different from a yeasted bread. Baking soda and buttermilk react quickly to give rise to the bread, so you don’t have to wait around for the dough to double in size. No kneading is required or even desired, as the delicate nature of the dough can be toughened with too much handling. Heck, you don’t even need an oven, because soda bread can be “baked” inside a cast-iron Dutch oven, right over an open fire if necessary.
This quick bread, long believed to be original to Ireland, is actually drawn from the history of Native Americans, who were first on record to use soda ash to leaven breads. Early Irish immigrants to the new country took notice of the chemical reaction the soda had with sour milk, and with the eventual advent of modern baking soda, the recipe found its way into a cookbook, which launched soda bread into popularity all over Europe. Today, it is closely linked to Irish-American culture, and very much associated with St. Patrick’s Day.
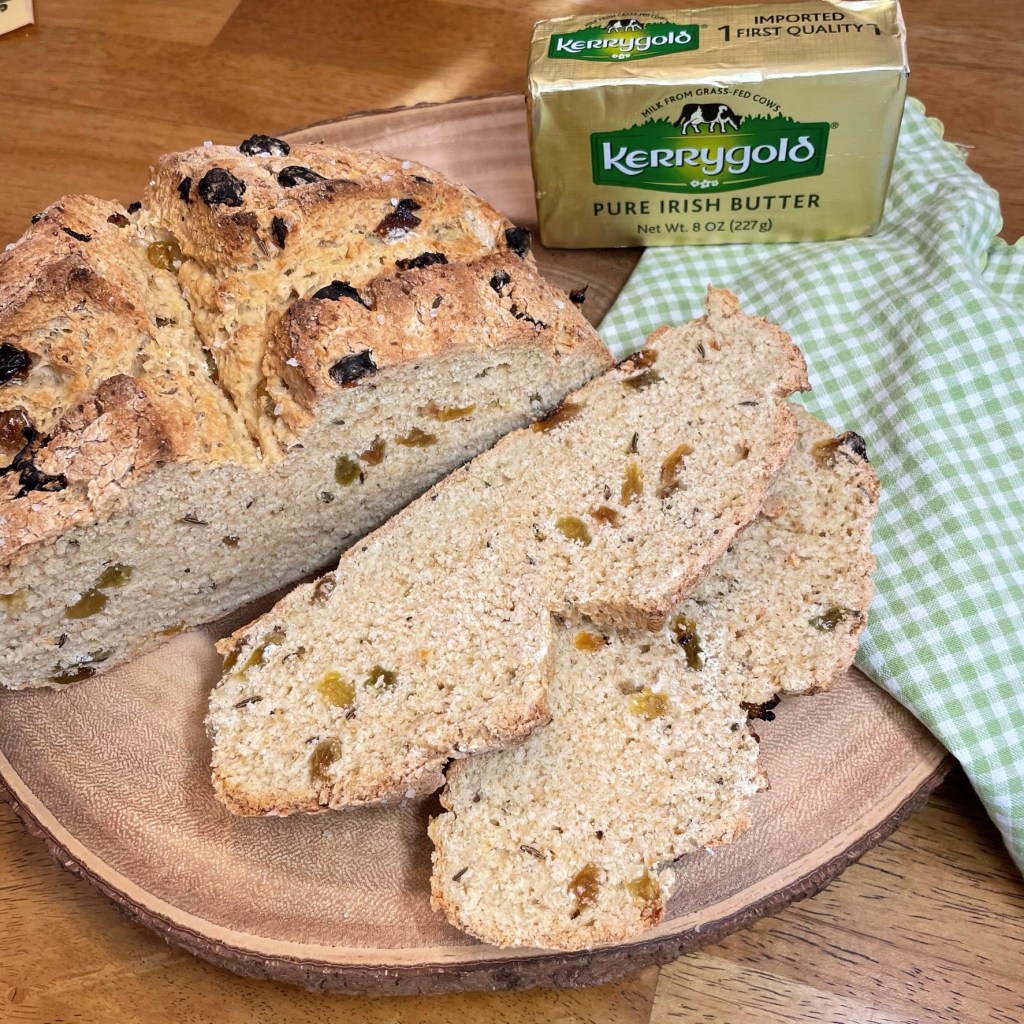
As if the ease of making it wasn’t attractive enough on its own, this easy-breezy soda bread is also remarkably flexible, and it can take you on a flavor journey to either end of the spectrum of sweet-to-savory. You can make it plain and simple, or dress it up with herbs, oat grains, spice seeds, dried fruit, honey or just about anything else that makes you happy. Other quick breads usually have a moist, tender interior. But soda bread, which has no eggs, butter or oil, is better described as soft and somewhat crumbly. My favorite flavor combination—and the one I’m sharing today—is golden raisins and caraway seeds. It may sound unusual, but it is delicious, especially toasted at breakfast with a generous smear of good Irish butter. I cannot wait to taste it again! 😊
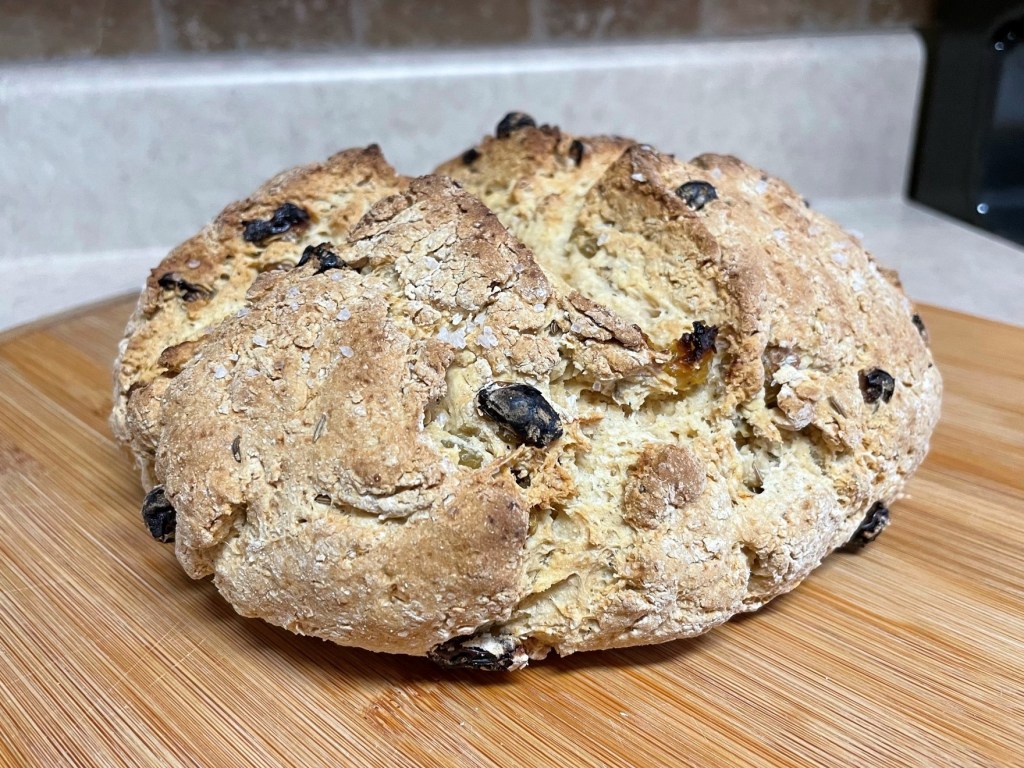
Fresh from the oven, and smells so good!
Ingredients
2 1/2 cups all-purpose flour, plus some extra for dusting
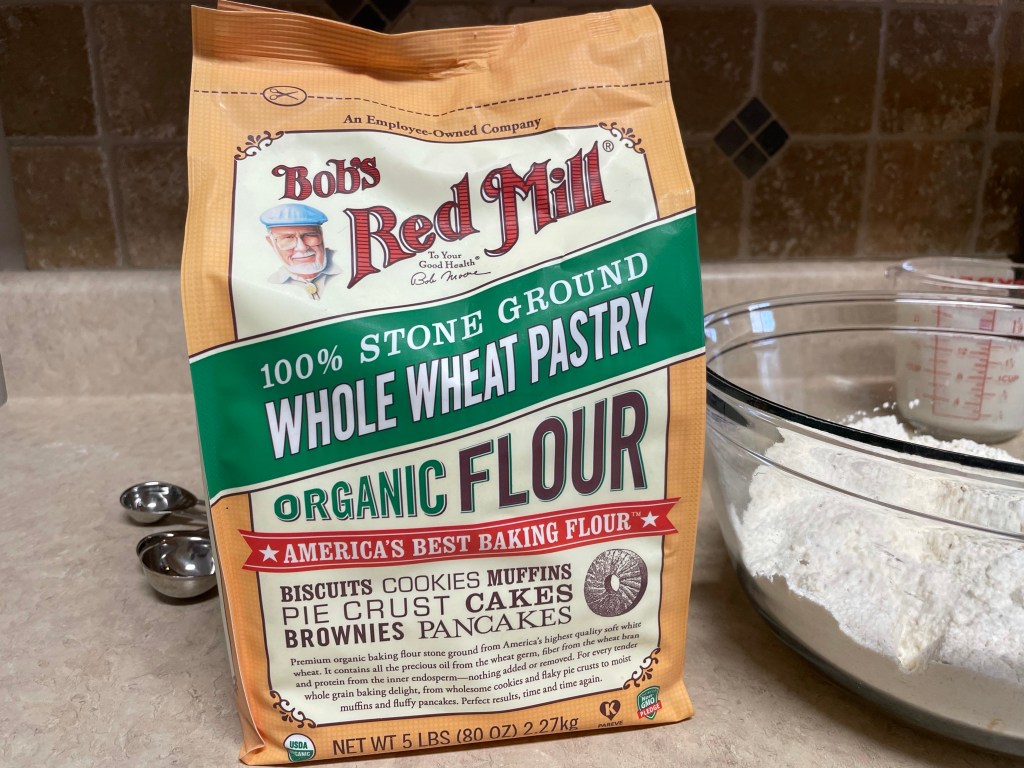
1 1/2 cups whole wheat pastry flour* (see notes)
1 Tbsp. sugar
1 tsp. salt
1 tsp. baking soda (not baking powder)
1/2 cup golden raisins
1 tsp. caraway seeds
1 3/4 cups thick cultured buttermilk*, at room temperature
*Notes
Whole wheat pastry flour is lighter in protein (and texture) than regular whole wheat flour, so it is perfect for a quick bread such as this one. I love this brand, which is available online but sometimes difficult to find in stores. If you cannot find it, don’t worry—just substitute for a total of 4 cups all-purpose flour.
Made from soft white wheat, this type of flour is lower in protein. It’s less suitable for yeast-risen breads, but perfect for pancakes, biscuits, cookies or quick breads.
Buttermilk is an important ingredient for this recipe because its acidity activates the baking soda to leaven the bread. Regular dairy or plant-based milks will not work on their own, but if you must substitute, add about 1 tablespoon of lemon juice or white vinegar for each cup of other milk to achieve similar results. You only need enough buttermilk to sufficiently moisten the dry ingredients, so you may not use it all, but have it ready just in case.
Before we begin, do you remember doing this in science class, back in the day? I still love to have fun in the kitchen, so here’s a little reminder of what happens when baking soda and vinegar come together. The reaction between soda and buttermilk is very similar, and helps explain what makes this simple bread rise.
I’ve put about 1/4 teaspoon of baking soda in my measuring glass.
And pouring in about two ounces of white vinegar.
Whoooweeee! 😀
Instructions
Mix together the dry ingredients first, so that the baking soda is evenly distributed throughout.
Additional ingredients are optional, but I love the combination of golden raisins and caraway seeds. These are the same seeds that give deli rye bread a distinct flavor.
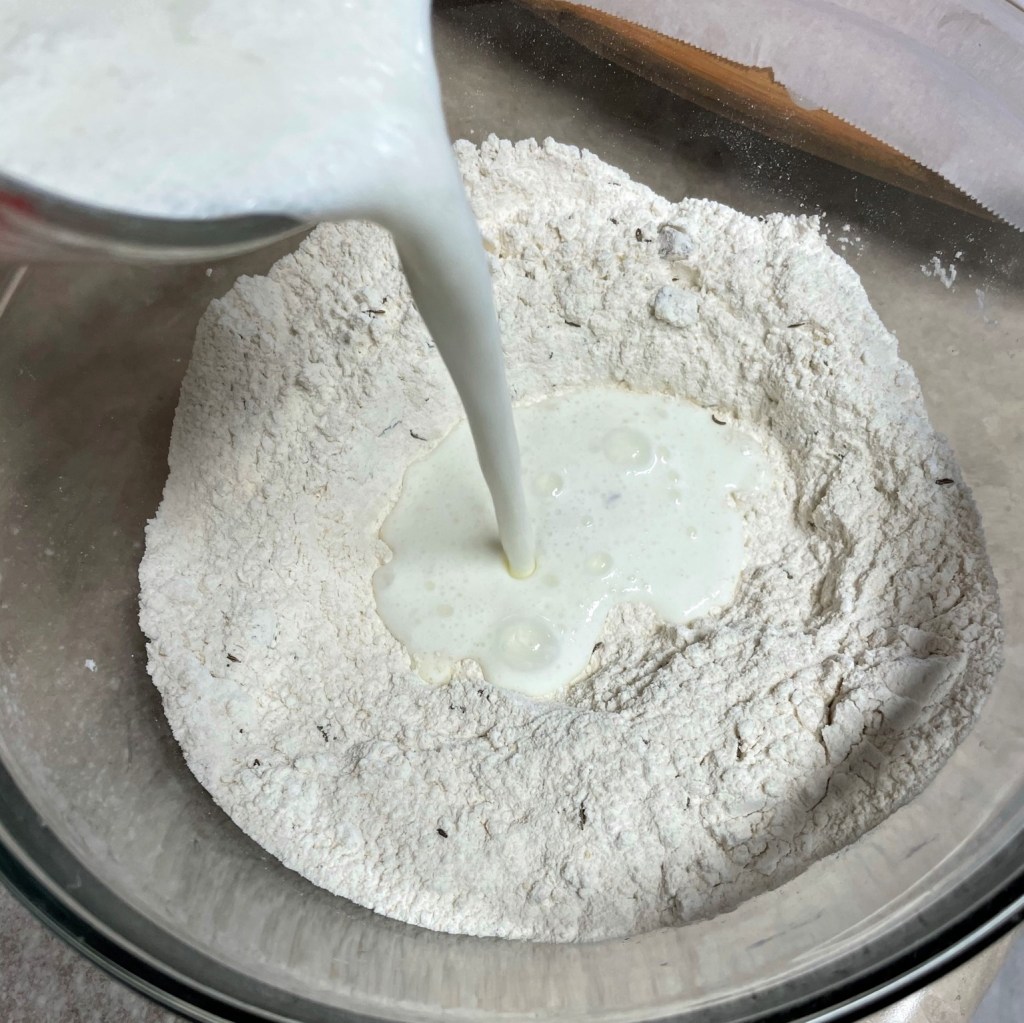
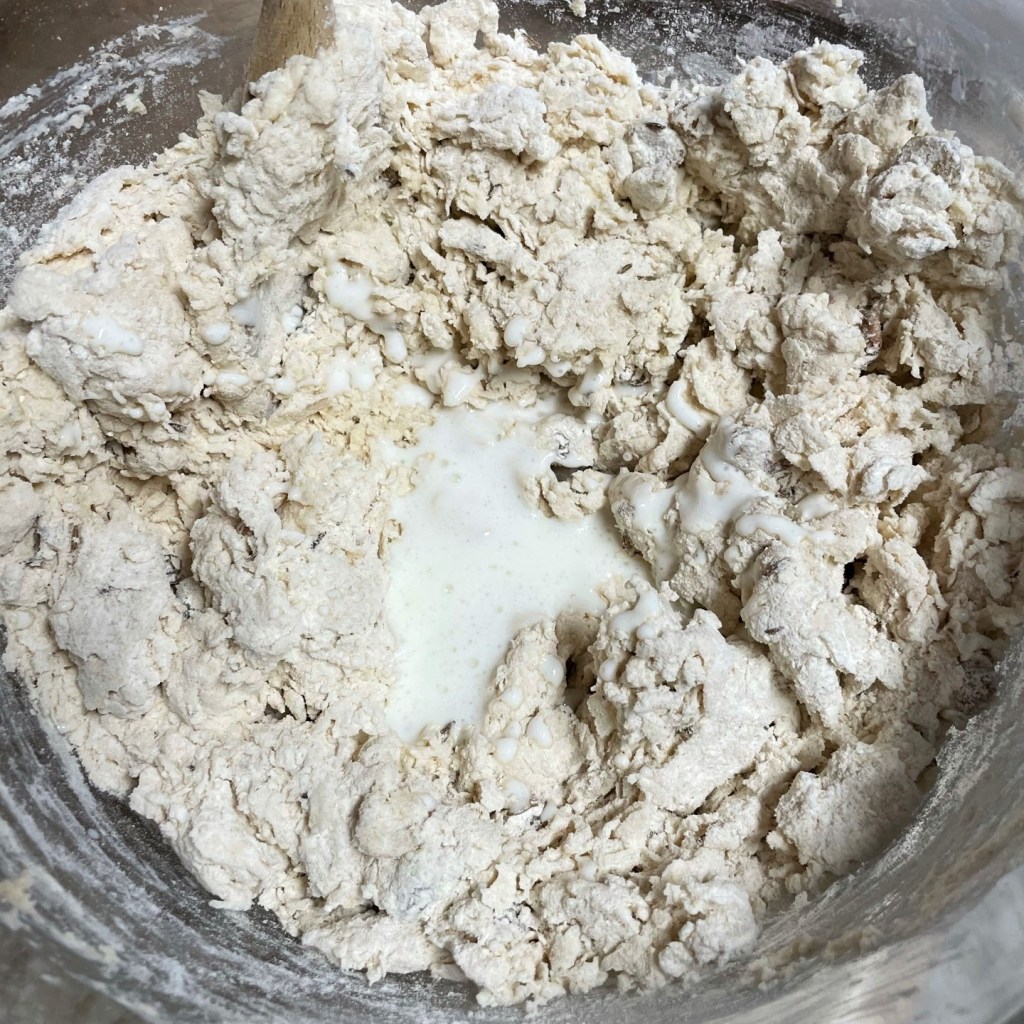
Pour in most of the buttermilk, and keep the rest ready in case you need more to moisten the dry ingredients.
Several variables can affect how much buttermilk is needed. Age and type of flour, humidity, temperature in your kitchen are all factors, so you need to play it by ear. This is too dry.
The rest of the buttermilk should do it. I don’t want the dough to be wet, but I should not see large dry spots of flour, and the dough needs to be cohesive enough to shape into a round.
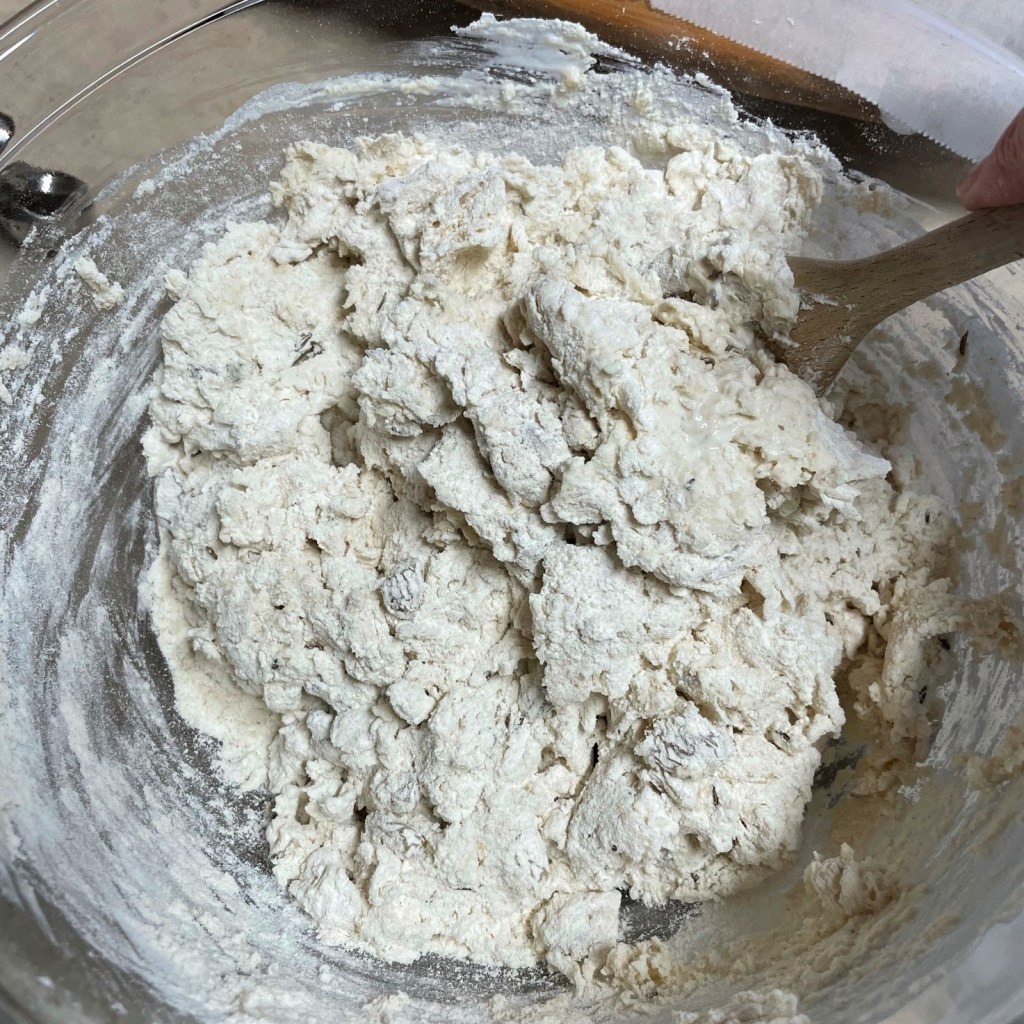
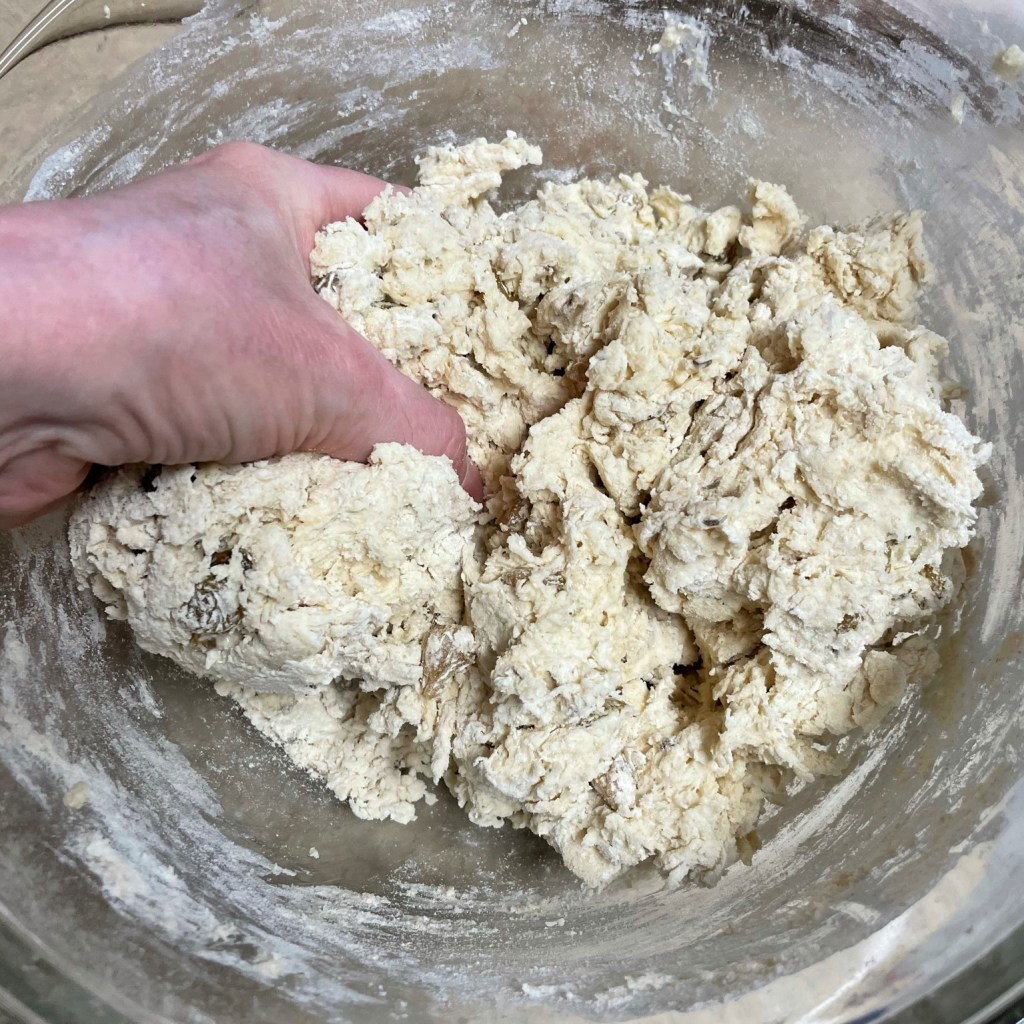
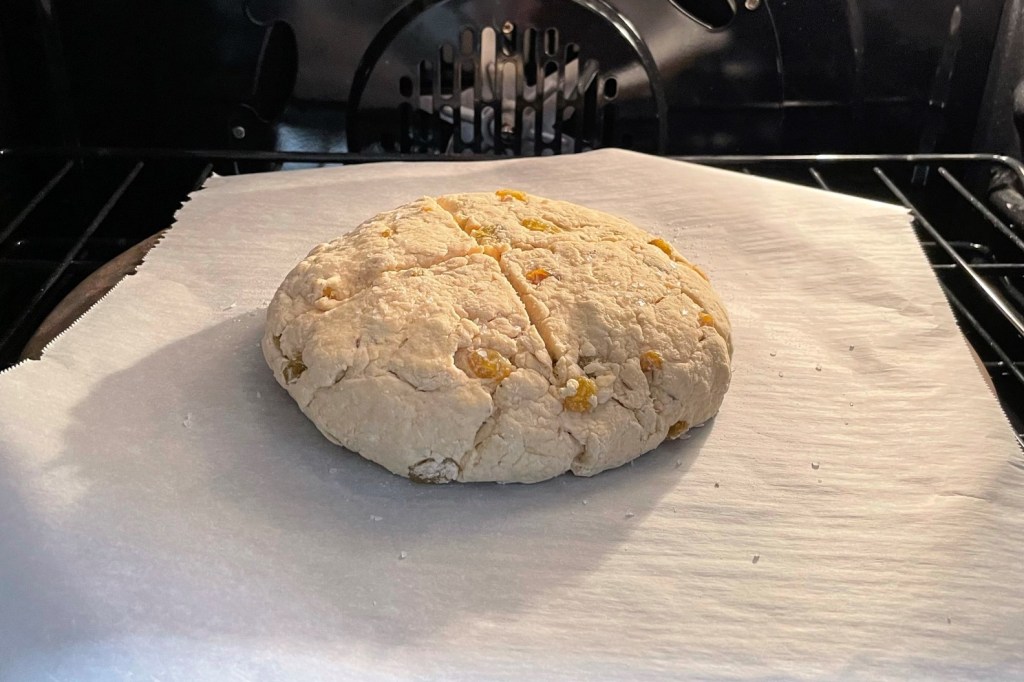
It feels a little like biscuit dough, and I’m going to work it the rest of the way with my hands. Light, quick mixing will do it, then I’ll shape it into a round, about 8 inches across.
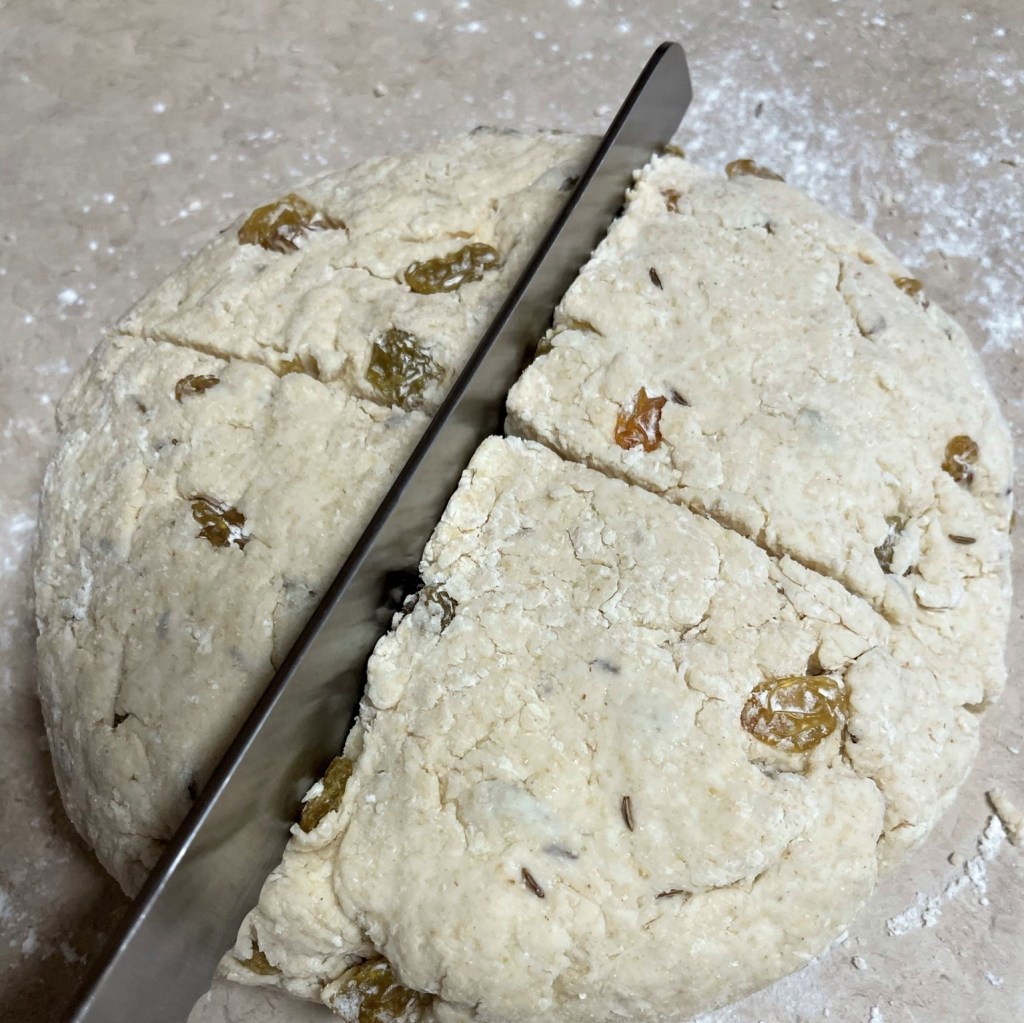
Use a sharp, serrated knife to cut a deep “X” on top. A baking expert might tell you this allows the oven heat to cook the dense dough more evenly, but Irish folklore explains the real reason is to “let the faeries out.” 🙂
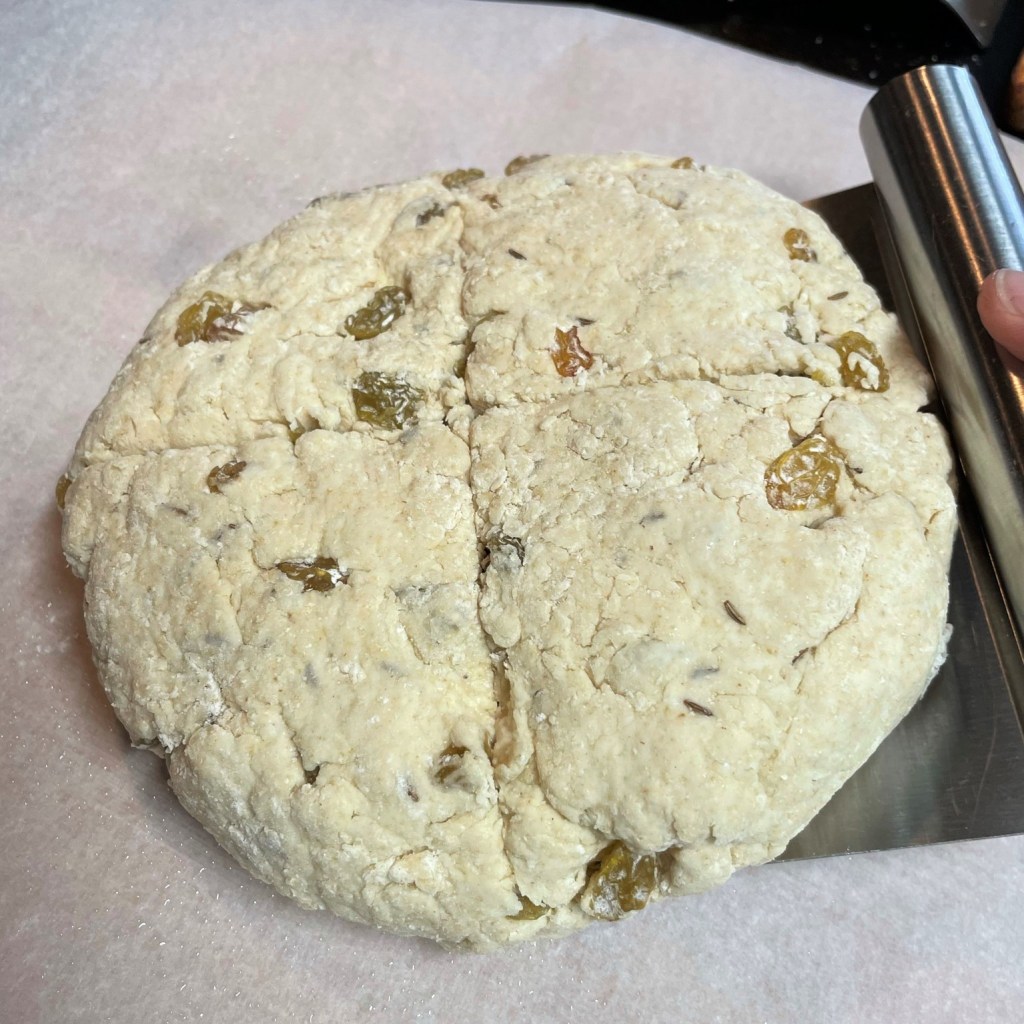
Transfer the dough to a parchment lined baking sheet and it’s ready for the oven!
I’m baking mine on a preheated bread stone, which should give a really nice bottom crust. Give it 25-30 minutes.
Perfect. The bread looks a little craggy, but it has a crisp exterior and sounds hollow when I tap the bottom.
Preheat oven to 425°F, with rack in the center of the oven. I’m baking my soda bread on a baking stone, so that gets preheated with the oven.
Combine flours, sugar, salt, baking soda, raisins and caraway seeds in a large bowl.
Make a well in the dry ingredients and pour in most of the buttermilk. Use a wooden or heavy spoon to mix at first, then switch to mixing with your hands when the dough begins to feel stiff. If needed, add the remaining buttermilk, but only enough to moisten and incorporate all the flour.
Turn the dough out onto a lightly floured countertop or board and knead very briefly, until dough is cohesive but still “shaggy” in appearance. Shape dough into a round ball, about eight inches across. Transfer the dough to a parchment lined (or oiled) baking sheet.
Use a sharp, serrated knife to make deep cuts in the shape of an X or cross on top of the dough.
Bake 25-30 minutes, until golden brown and crunchy on the edges. If you tap the bottom of the loaf, it should sound a bit hollow.
Transfer soda bread to a cooling rack for a few minutes. Enjoy warm or room temperature.
After 30-plus years in the Southeast, I’ve come to appreciate many of the traditions, especially the ones related to food. There’s a particularly tasty tradition that occurs here in the fall, when churches, civic groups and Boy Scout troops set up giant, outdoor cast-iron kettles for their Brunswick stew fundraisers. They sign up volunteers, who take turns stirring the simplest of ingredients into a delicious aromatic stew, and folks arrive in droves to enjoy it by the bowl, and to take home quarts for freezing. It’s tradition and it’s delicious.
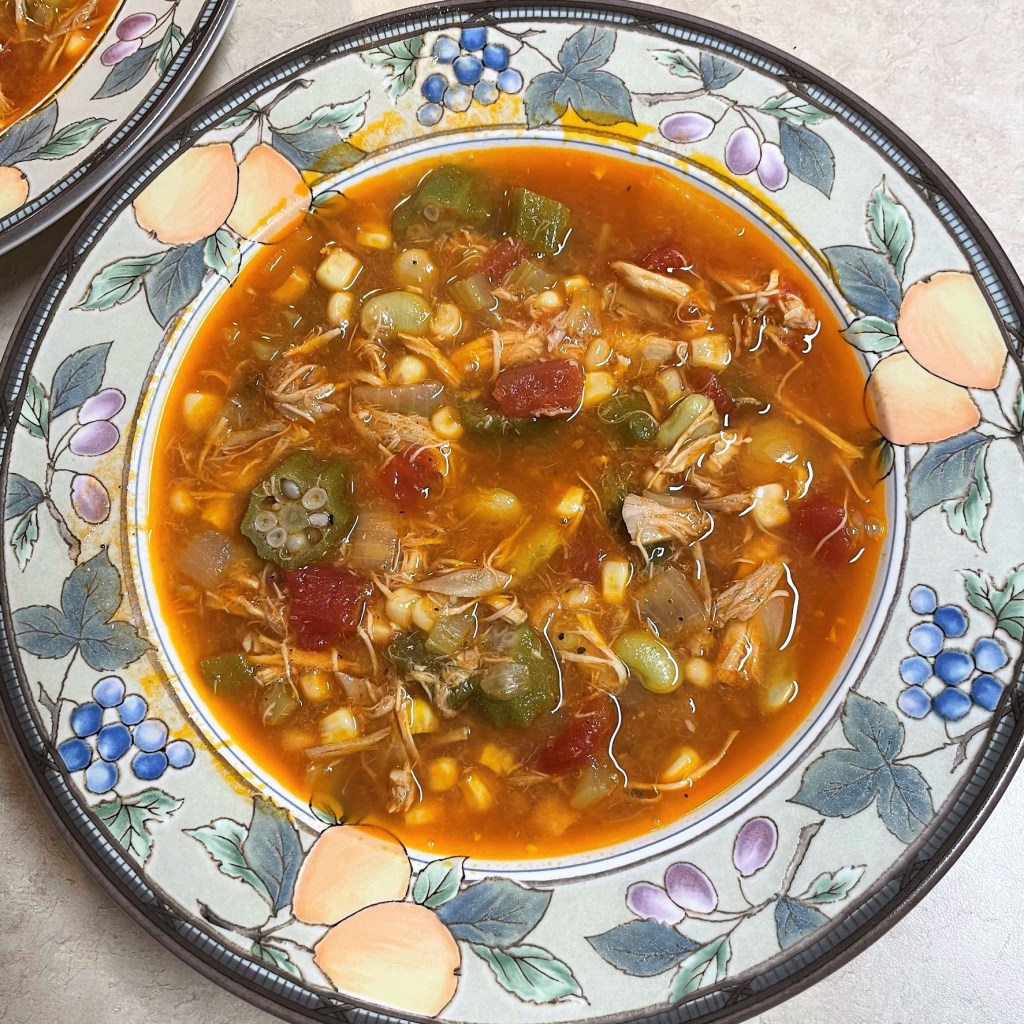
If you look into some of the old-time church cookbooks, you’d likely find Brunswick stew recipes that begin with fresh-caught rabbits or even squirrels, but (thankfully) my introduction to this homey, comforting soup was a chicken version, and that’s what I’m sharing today.
Brunswick stew is one of those comfort foods that tastes rich and hearty, but checks in on the low end of the fat-and-calories scale. Feel free to swap in other vegetables that suit your fancy—it’s what folks do in different parts of the South and depending on where you are, you might find potatoes, green beans or carrots in the bowl.
You can roast your own chicken if you’d like (overnight in the slow cooker makes amazing broth at the same time), but to keep it quick and simple, I’m using a rotisserie chicken this time, plus packaged broth, a few simple fresh and frozen vegetables, and a can of tomatoes. Whip up some corn muffins while it simmers, and dinner is served.
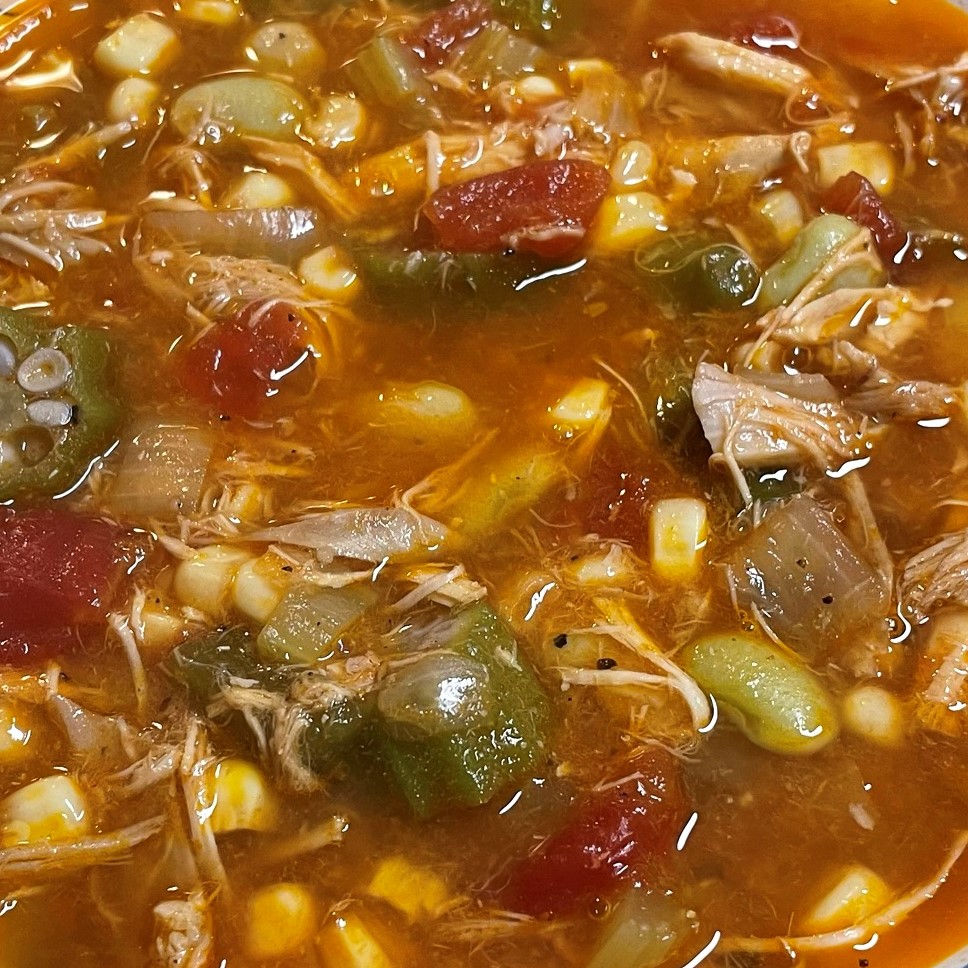
Can you taste the comfort?
Ingredients
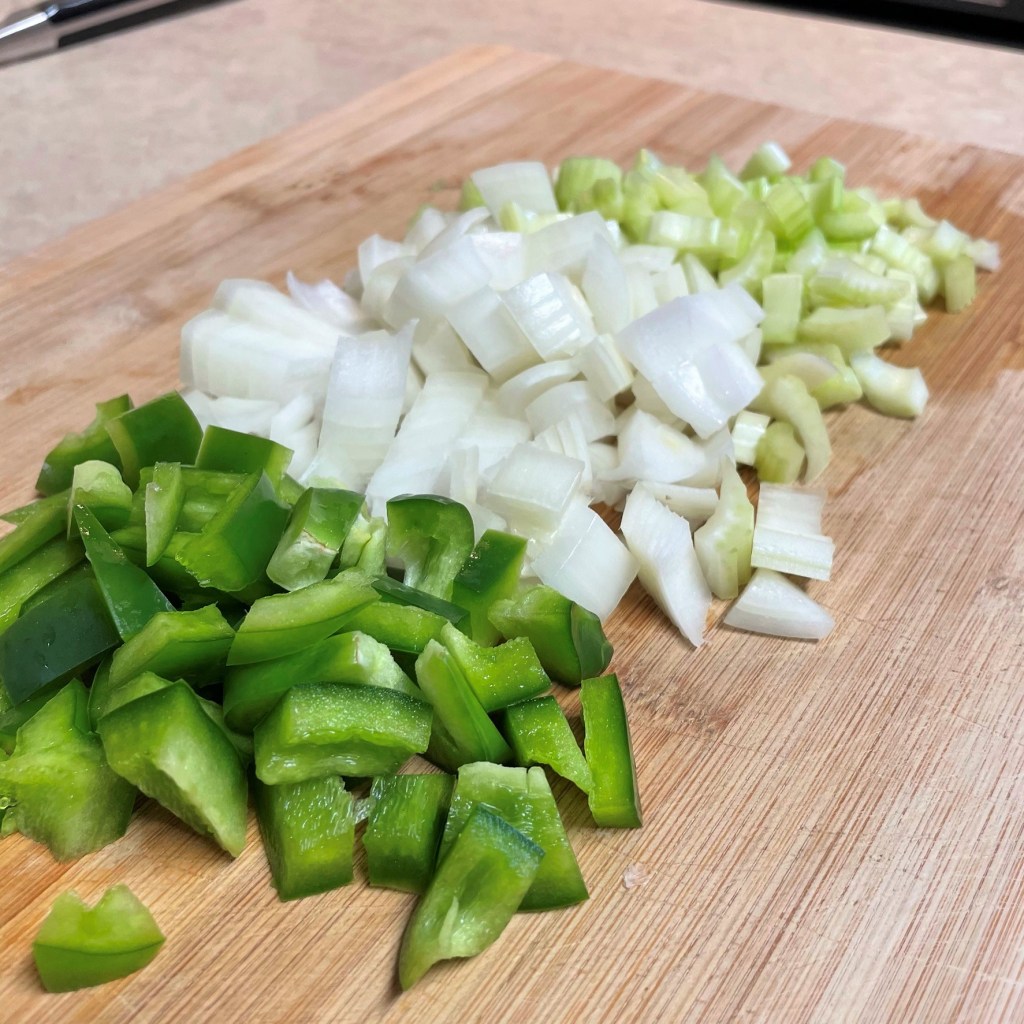
First, the essentials. This is a Southern classic comfort food, so the “holy trinity” of peppers, onions and celery is the foundation of the recipe. Any color bell pepper is fine for Brunswick stew, but I personally find the red and orange bells to be a bit on the sweet side, so I’m using a green bell.
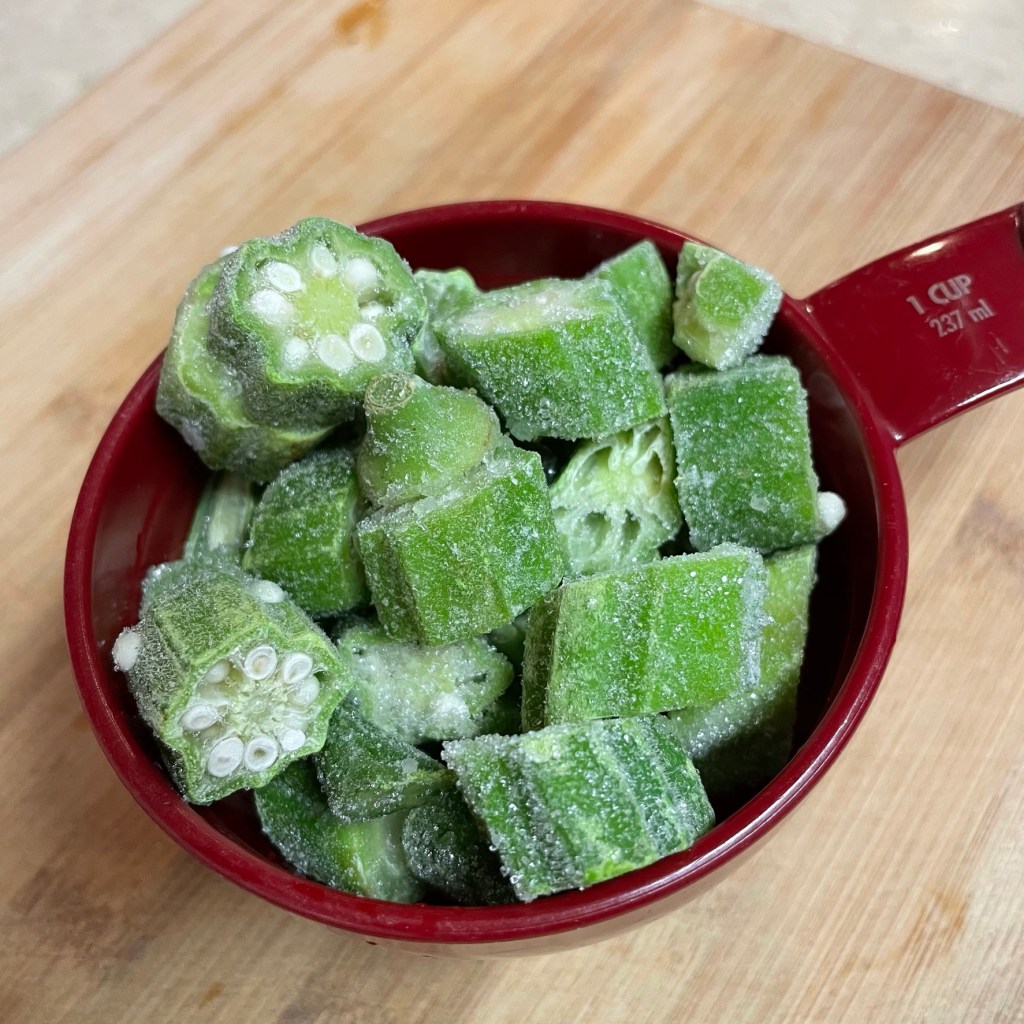
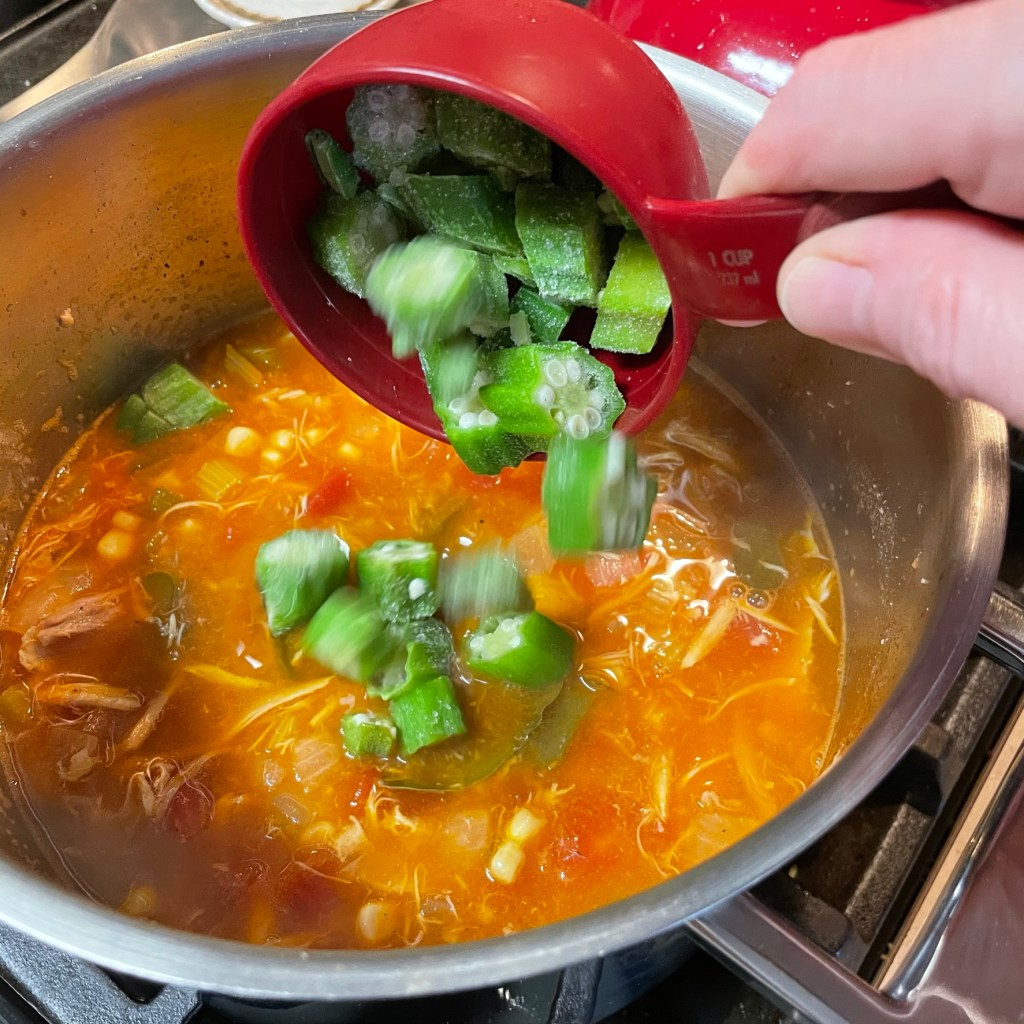
Okra came to the Americas from Africa in the 1600s, and it remains a staple of Southern cooking. You’ll find it in many Cajun and Creole recipes in Louisiana, and it’s not unusual to see it breaded and fried, or even pickled, which I love in a Southern-style potato salad or on deviled eggs. The pectin in okra gives it some thickening power when it’s cooked in liquid, but some people are turned off by the slightly slimy texture. Two things can minimize this: don’t overcook it (for this recipe, it’s added at the end), and cook it in combination with tomatoes, which is what’s happening in this Brunswick stew.
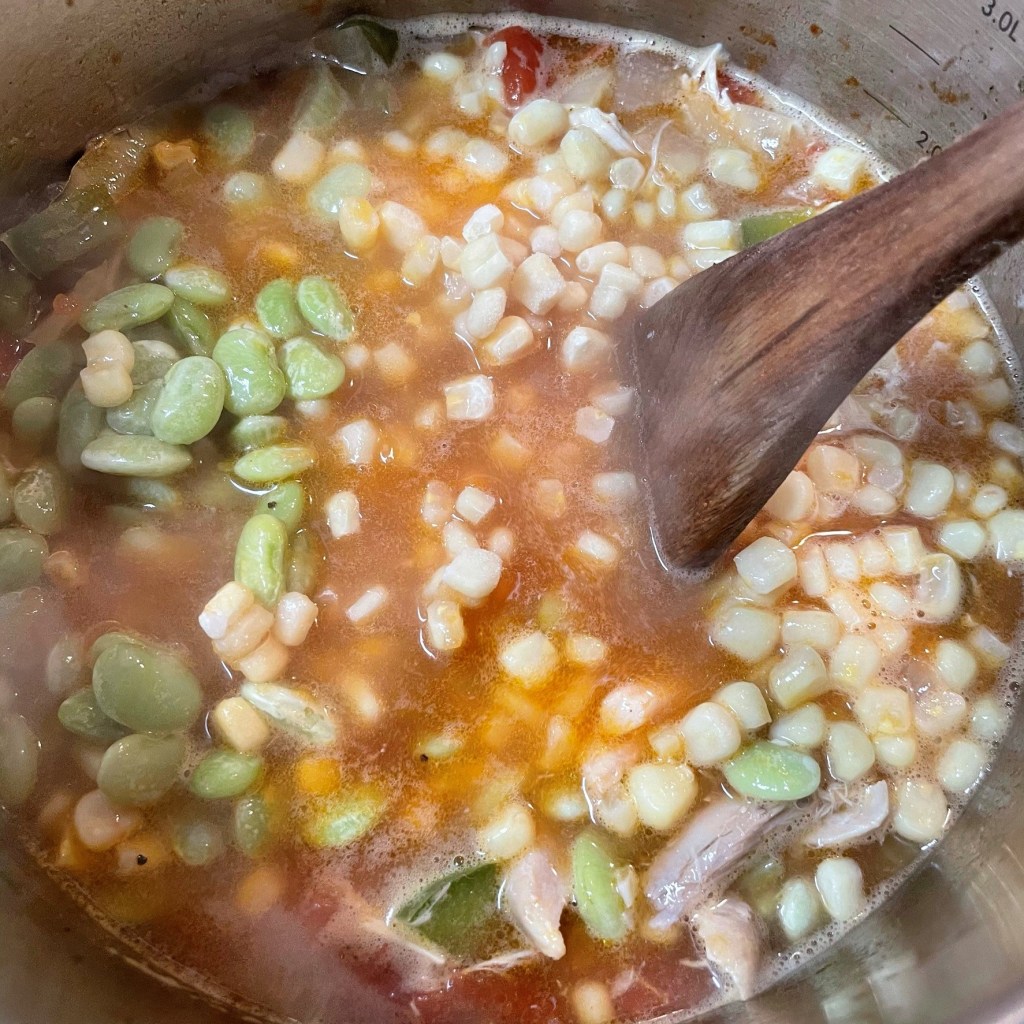
If you make this stew in the late summer or fall, of course you would want to use fresh corn, lima beans and okra.
For this recipe, I like the trinity to be a bit on the chunky side.
Did I mention that okra is rich in folate, B vitamins and fiber?
1 deli roasted chicken, dark and white meat shredded* (see notes)
2 Tbsp. extra virgin olive oil
1 yellow onion, chopped
4 stalks celery, trimmed and chopped
1 green bell pepper, seeded and chopped
3 large cloves garlic, chopped
15 oz. can diced tomatoes
2 quarts chicken or vegetable broth
1 bay leaf
2 cups frozen corn
2 cups frozen lima beans
2 cups frozen sliced okra
1/4 cup BBQ sauce
2 to 3 Tbsp. tomato paste
A few shakes hot sauce (optional, Frank’s RedHot or Texas Pete recommended)
Salt and pepper, of course
*Notes
If you prefer to roast your own chicken, more power to you! If you have time to work ahead, you might also want to make your own stock. Or you could make your own stock from the frame of the rotisserie chicken. After de-boning and shredding the meat, toss the bones and skin into a pot with cut-up onions, celery, carrots and just enough water to cover it all. Simmer a few hours then strain out the solids, and you’d have a great alternative to the packaged broth (or, at least, some of it).
Instructions
If the pictures here seem to defy the ingredient amounts listed, there’s good reason for it—on this particular day, I only had half a rotisserie chicken, so I halved the entire recipe. The ratios are the same, and this stew is so satisfying and delicious, I’m already regretting that I didn’t run to the store for another chicken!
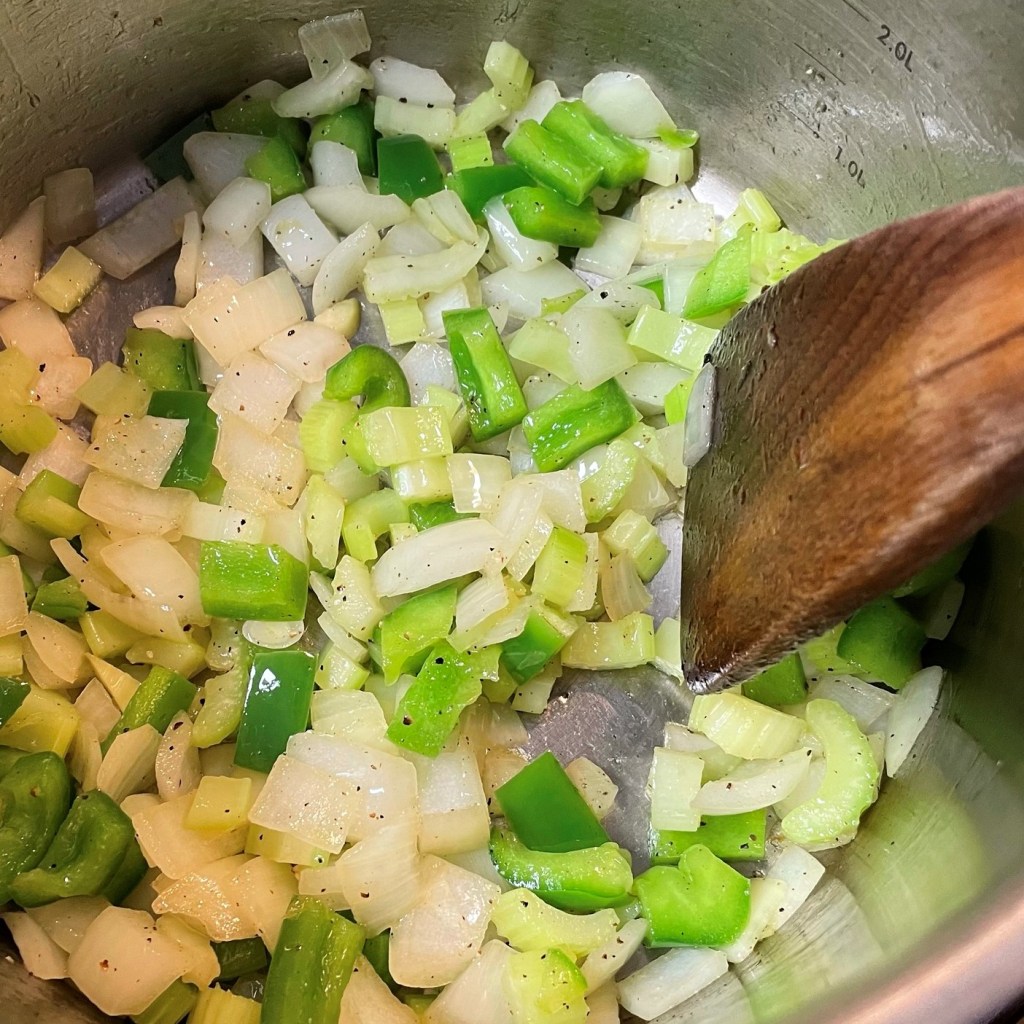
Sauteing the vegetables isn’t absolutely necessary, but I always do it. If you’re making the stew in a slow cooker, feel free to add them as they are.
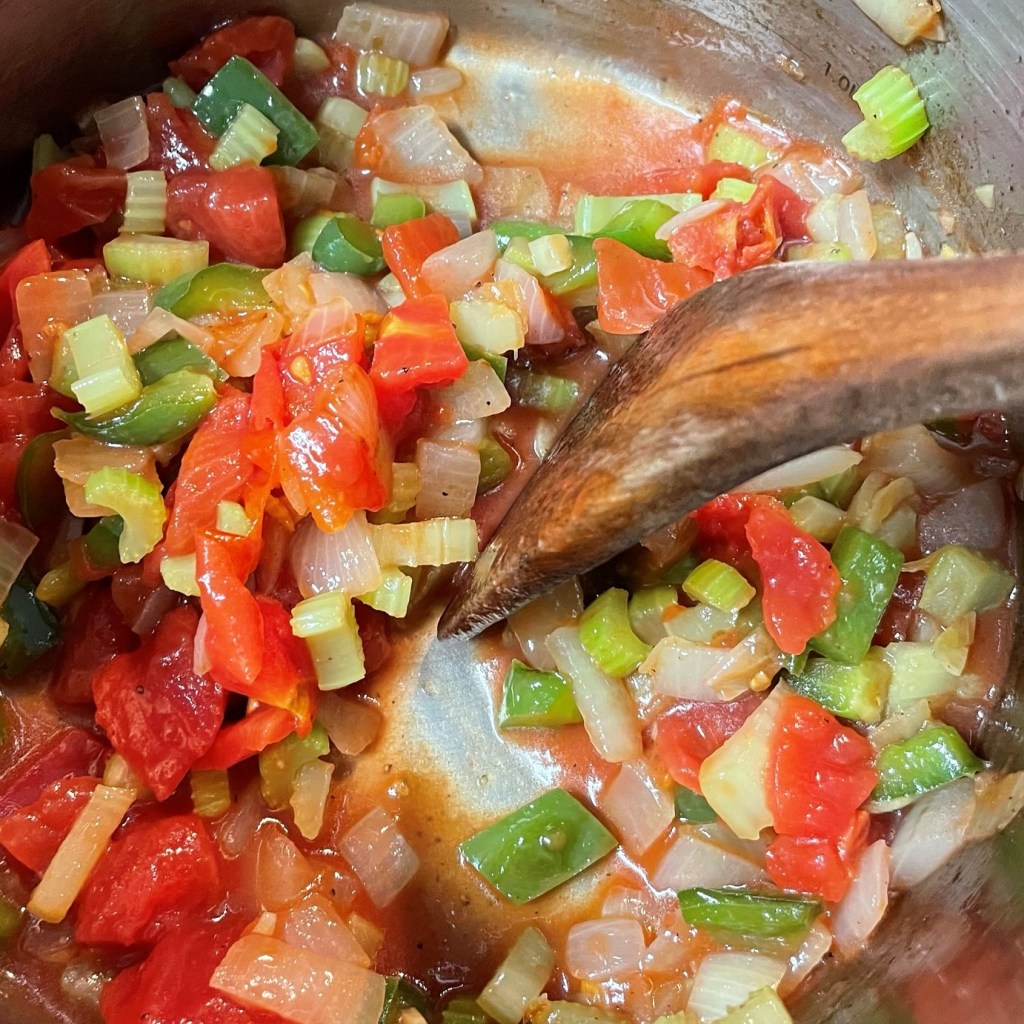
Tomatoes can take over this dish, so I keep the ratio fairly low, with only one can in a batch, and I boost their flavor with a little tomato paste.
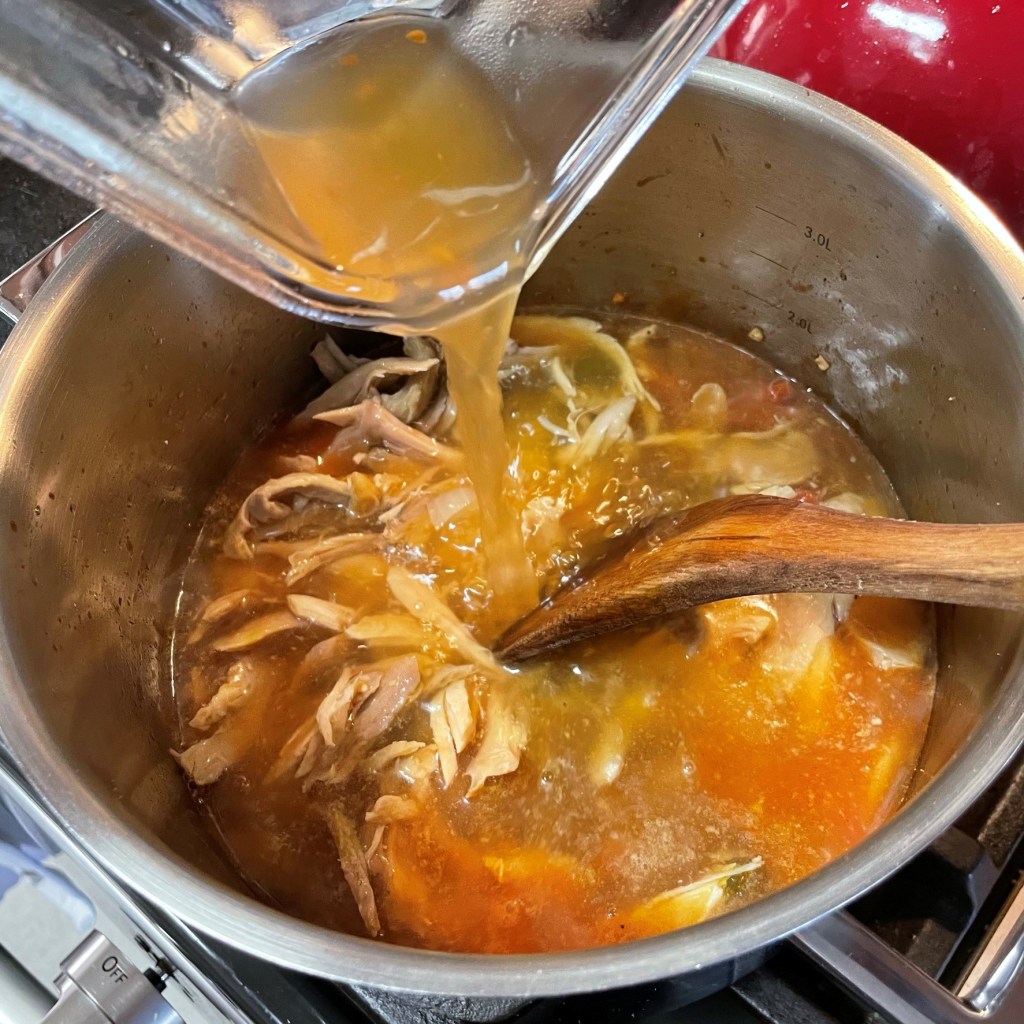
The best Brunswick stew I’ve ever made included an overnight slow-cooked chicken stock, but packaged chicken or vegetable broth works just fine, and it’s easy!
If your pantry includes canned corn or lima beans, they are perfectly welcome in this stew, but I’d recommend taking note of the sodium content and adjust your seasoning accordingly.
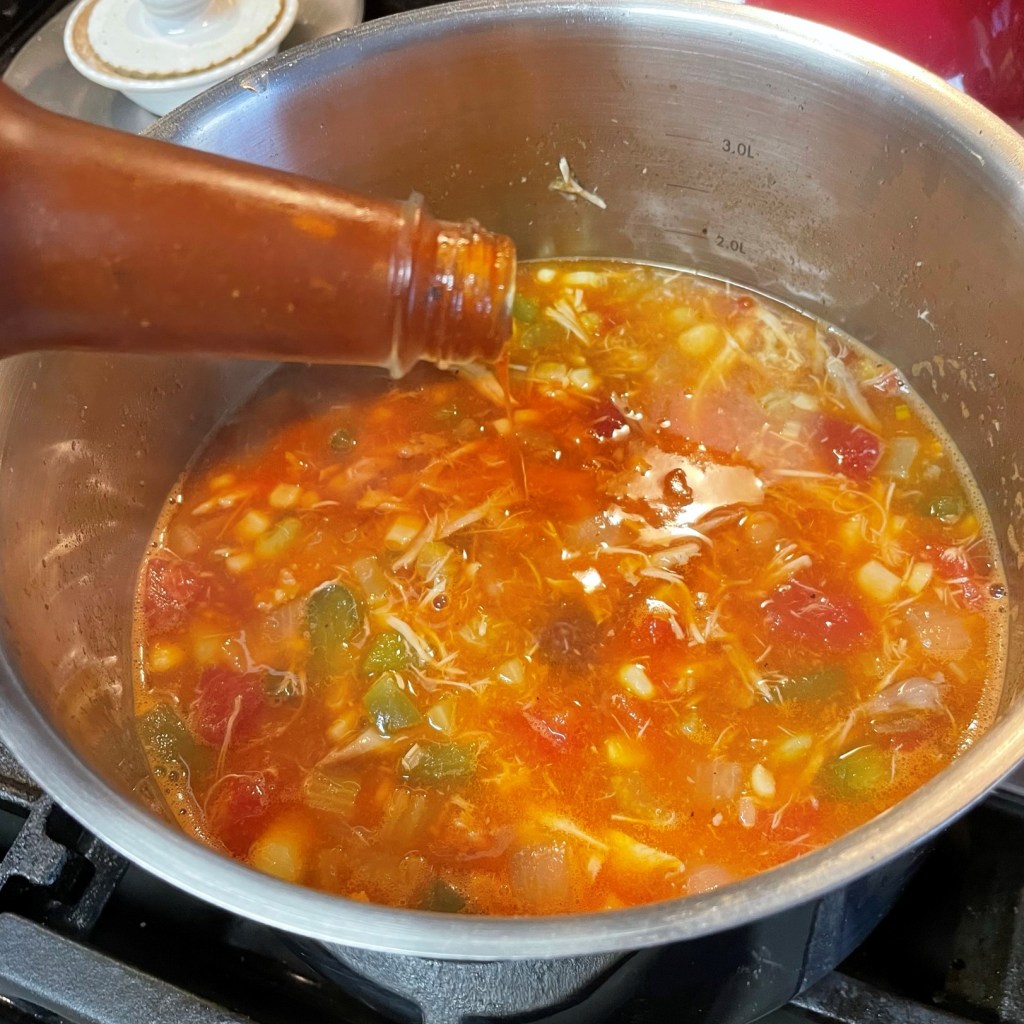
Any BBQ sauce you like is appropriate. this time, I used a bottled steak sauce that we find a little too sweet for steak. It was perfect!
The okra goes in at the end, and it will act as a slight thickener for the stew. Simmer just until the bright green begins to fade.
Brunswick stew is packed with nutrients, fiber and goodness. This is real, down-home Southern comfort food!
Place a large, heavy-bottomed pot over medium heat. Swirl in olive oil. Sauté onion, celery, bell pepper and garlic until vegetables are soft and onions are translucent. Season with salt and pepper.
Stir in tomatoes, tomato paste, shredded chicken and broth. Add bay leaf, reduce heat and simmer up to an hour.
Add frozen corn and lima beans, but reserve frozen okra until about 20 minutes before serving, to prevent the okra from breaking down too much. Give it a taste and add salt and pepper to your preference.
Stir in BBQ sauce (and hot sauce, if using), and add the okra to the pot. When the bright green color of the okra begins to fade a bit, it’s ready to serve!