Smoky Spicy ‘Ghoul’-ash 🎃

Here’s an easy, kid-friendly main dish that brings back a lot of memories from my childhood. There were just a few foods that my mother made on repeat, including some of the Mexican-themed meals I’ve shared here. Ground beef tacos were in hot rotation, as was tuna noodle casserole, green chili burritos and something she called “Swiss steak.” Once in a while, she also whipped up a pot of good old American goulash, but not quite the way I’ve prepared this batch. My single mom was all about shortcuts in the kitchen, so her version of goulash usually involved a jar of store-bought spaghetti sauce, probably Ragú, given that there weren’t many other brands available in the 1970s when I lived with her.

In the traditional sense, goulash— which has its roots in Hungarian cuisine— would not have the Italian flavors found in spaghetti sauce, and I’ve come around to making it my own way in my adult years. I do use ground beef, as my mom did, and this is a distinct Americanization of goulash, which would traditionally be made with stewed cuts of meat, plus vegetables and probably potatoes.

Not a Hungarian goulash, but so delish!
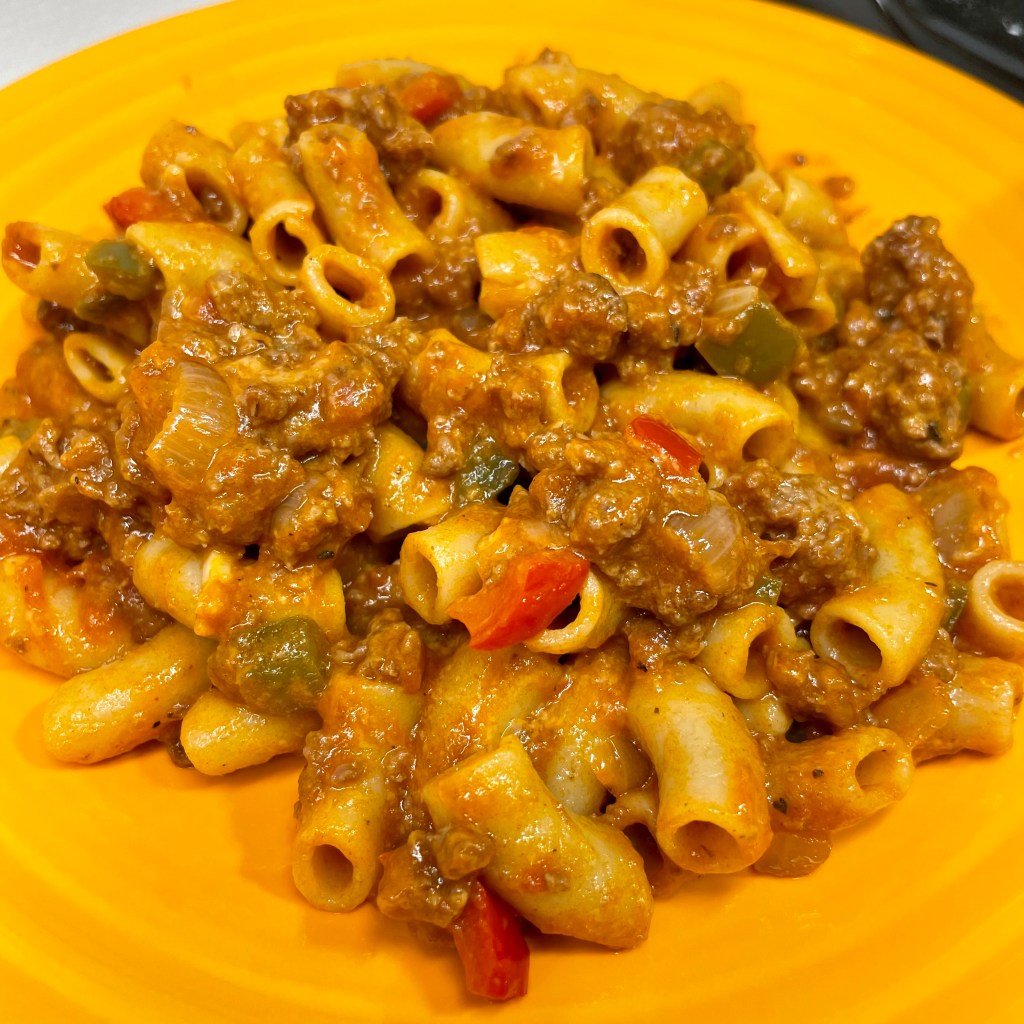
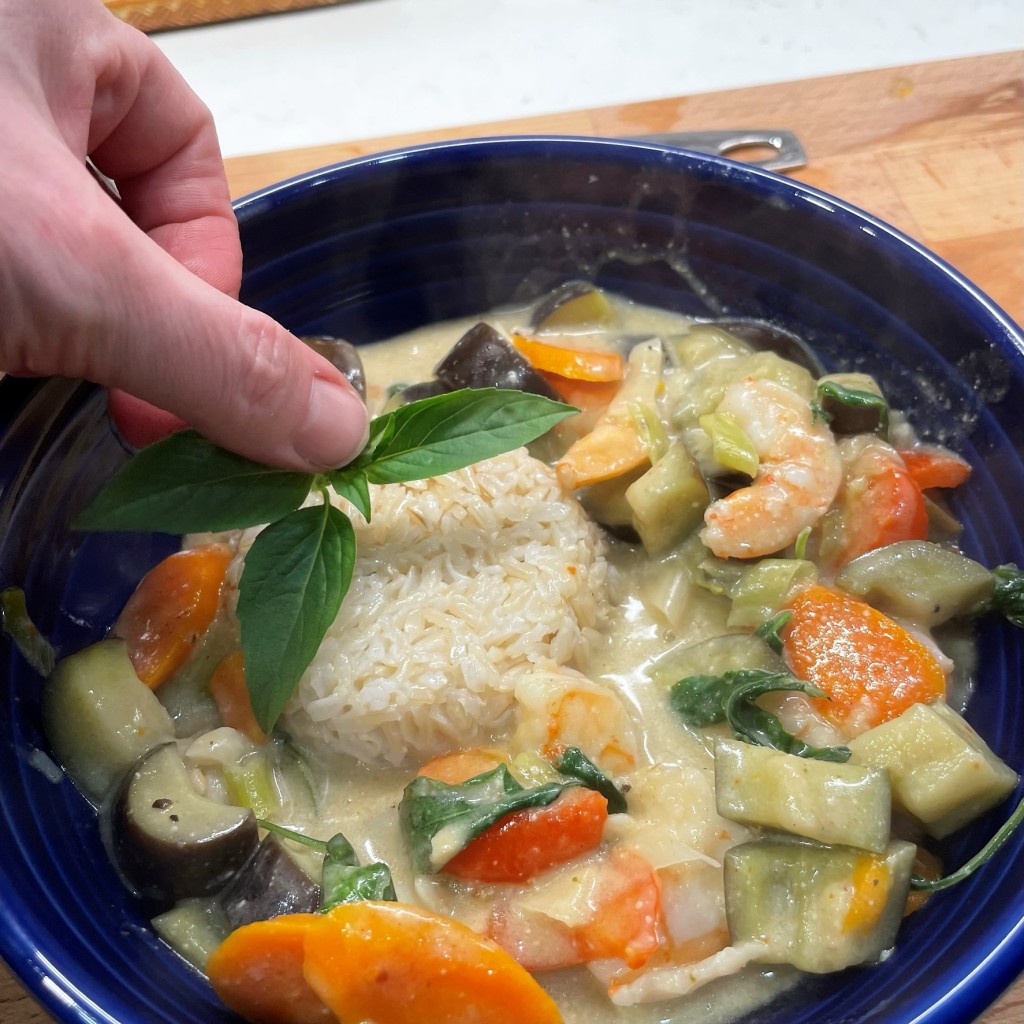
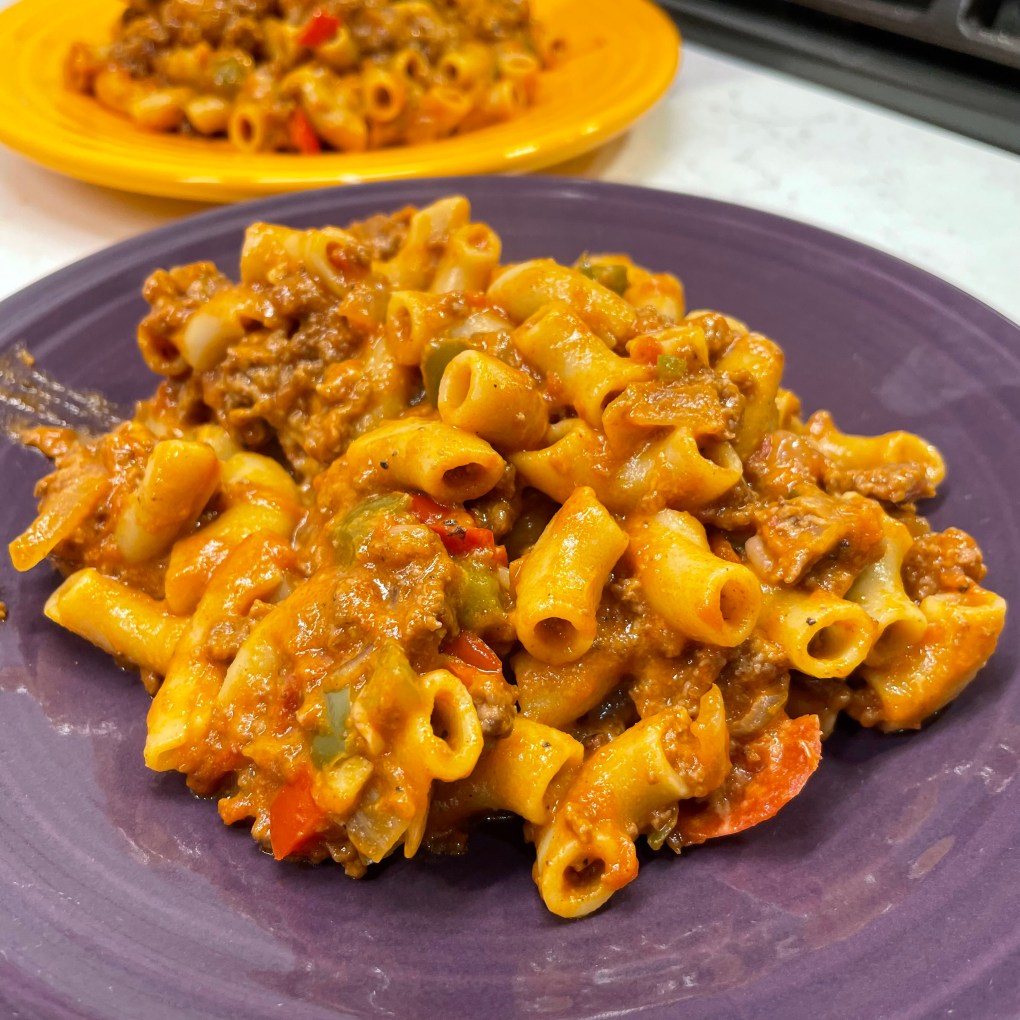
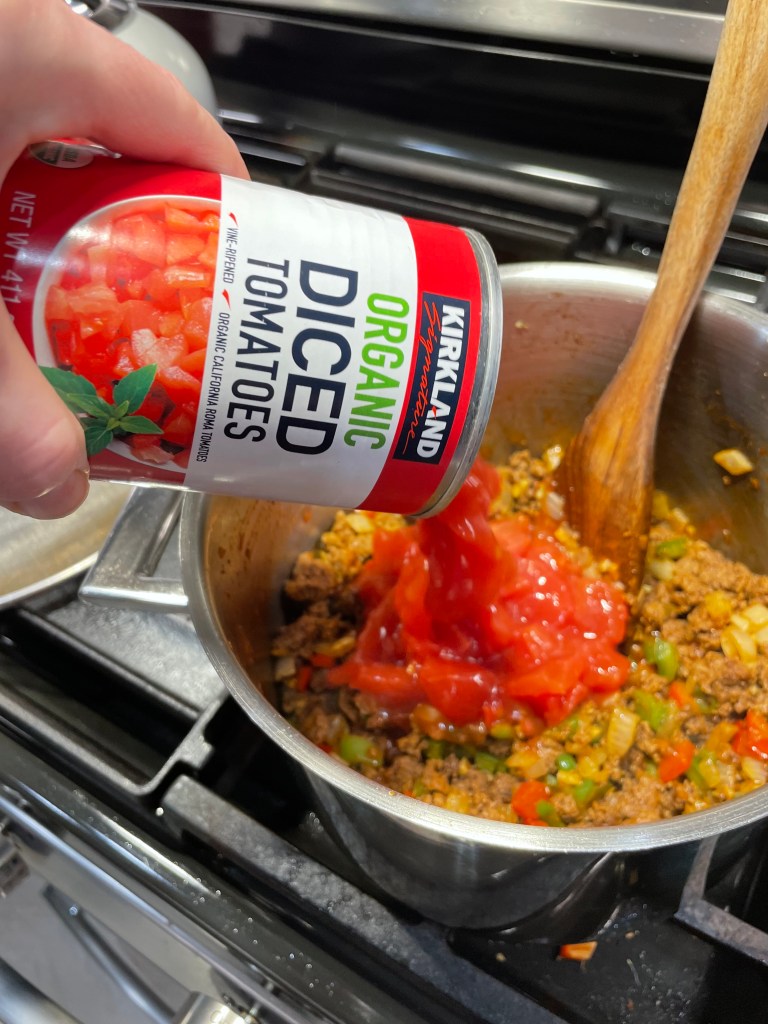
And look at that brilliant Halloween color.

My version brings back some of the traditional goulash flavor, seasoned with plenty of smoked paprika, canned whole tomatoes, bell peppers, onions and garlic. In the devilish spirit of Halloween, I have also taken the liberty of adding some fiery heat in the form of a fresh jalapeño, chopped up with seeds and all. Even when I was a kid, I loved spicy flavors, and that was my mother’s influence, especially during the years we lived in southern Colorado.


If you’re not feeling it for the fire, or if you’re feeding little goblins whose taste buds aren’t quite there yet, feel free to omit the jalapeño, and maybe pull back on the smoked paprika a bit, too. Cooked pasta is another “American” twist on goulash, and I like large elbows for this because the shape is open to grab up plenty of that flavorful sauce, and it’s also easy to pick up with your fork, along with the tasty bits of meat, onion and pepper.


One last thing, and this is also a departure from my mom’s old standby recipe but is very popular in my house today. Just before serving, I stir in a half cup or so of shredded sharp cheddar. It’s a tangy little twist that makes this an even heartier meal, or perhaps even a graveyard smash. 👻


Smoky Spicy 'Ghoul'-ash

  • Servings: About 6
  • Difficulty: Average
  • Print

This is my adaptation of a dish I had countless times during my childhood. It makes good use of simple pantry ingredients and it is economical, using ground meat of your choice. I prefer it served from the stovetop, but it easy to adapt to a baked dish if you prefer to make it ahead.


Ingredients

  • Extra virgin olive oil
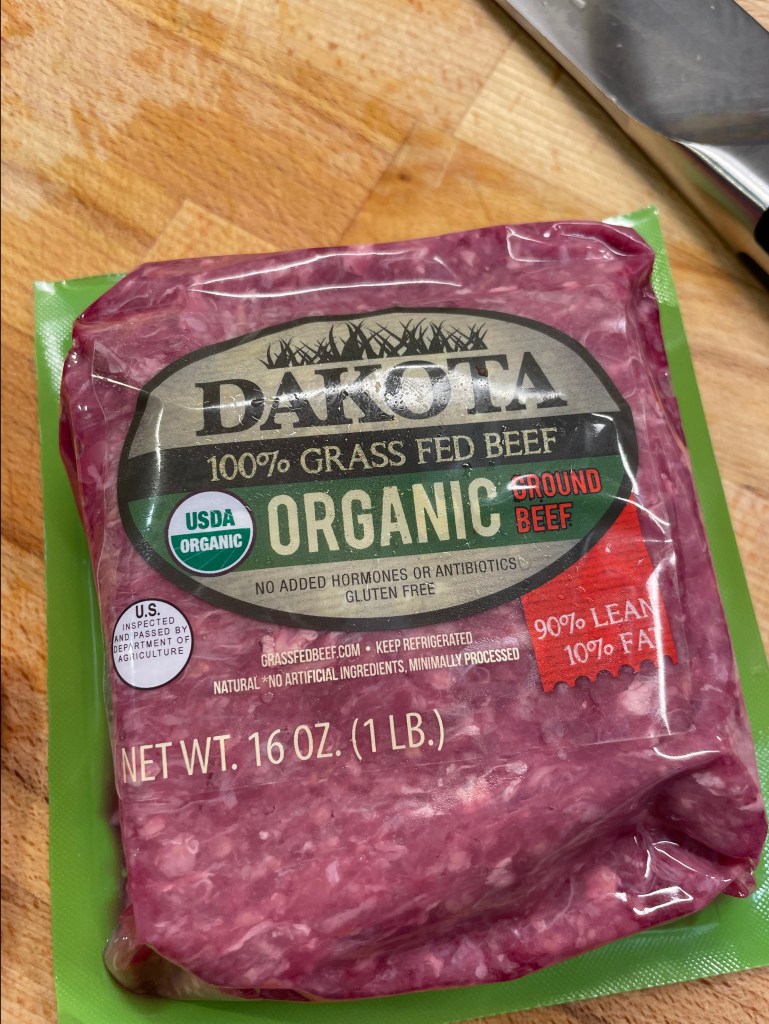
  • 1 pound lean ground meat (beef, bison or turkey work well)
  • 1/2 sweet or yellow onion, chopped
  • 1 bell pepper, chopped (use green, red or a combination)
  • 2 cloves garlic, minced
  • 1 fresh jalapeño (optional), minced with or without seeds
  • Salt and pepper
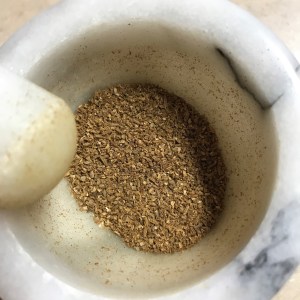
  • 1 teaspoon smoked paprika (Hungarian is traditional, but Spanish works nicely)
  • 15 oz. can diced tomatoes, including juice
  • 8 oz. can low-sodium tomato sauce
  • 1/2 pound large elbow macaroni
  • About 1/2 cup shredded sharp or medium cheddar cheese

You can adjust the smoke and spice of this dish to your liking. For less heat, discard the seeds and membranes of the jalapeño or omit it entirely. For extra “smoke,” use two teaspoons of the paprika. For less smoke, substitute sweet paprika.

Directions

  1. Bring a pot of salted water to boil for cooking the pasta. Heat a medium size, heavy-bottomed pot over medium heat. Swirl in a tablespoon or so of olive oil and add the ground meat, a little bit at a time, cooking until most of the pink color is gone.
  2. Add chopped and minced vegetables and season with salt and pepper. Cook and stir until vegetables are softened and onions are slightly translucent.
  3. Stir in paprika and then add tomatoes and tomato sauce. Reduce heat and cook at low temperature, stirring occasionally to prevent burning.
  4. While the goulash mixture simmers, cook the pasta to al dente or desired doneness for serving from the stovetop. If you intend to bake the dish after mixing, undercook the pasta slightly as it will continue to absorb moisture and cook during baking.
  5. Add cooked pasta and a few tablespoons of the pasta water to the meat mixture. Gently fold to combine. Stir in shredded cheddar and serve. If baking, transfer the mixture to a casserole dish and bake at 350° F for about 40 minutes. Consider topping the casserole with extra cheese before baking.


Buffalo Chicken Salad

One of things I love about food blogging is participating in the “National Days” that are related to popular comfort foods. I’m not sure who is responsible for deciding what day is right for celebrating chocolate chip cookies or fried chicken or pepperoni pizza, but I know it’s fun! Here on Comfort du Jour, I have paid particular attention to National S’mores Day, and this year will be no exception (watch for that on August 10th).

This Friday is National Chicken Wing Day, proclaimed as such in 1977 by then-mayor of Buffalo, N.Y., Stan Makowski—and for this gal, who was born and raised just south of Buffalo, that’s a big deal! But I’m torn, because I have really been trying to dial it back on the heavy foods to get my health back on the right track. As much I love Buffalo wings (oh, how I do), I can’t justify deep frying tiny, skin-on chicken pieces, drenching them in sauce and then dragging them through bleu cheese dressing, just because it’s a “National Day.” Talk about a calorie explosion! I wanted to see if I could find a lighter way to enjoy the flavors associated with this “taste of home.” Here it is—Buffalo chicken salad.

This has all the flavors of Buffalo wings, without the deep-fried calories!

All the flavors are represented: tender chicken (obviously), spicy Buffalo wing sauce, bleu cheese, even celery—but at a fraction of the fat and calories of the usual preparation. The chicken here is lean, skinless breast meat, and you can make that part super easy by picking up a deli-roasted chicken (you can use the rest for another meal), or you can poach them at home with a few aromatics and some chicken or veggie broth, as I did:


The dressing that wraps around the chicken shreds carries all the other flavors, beginning with mayonnaise and sour cream—just enough to hold it all together—and ending with however much Franks RedHot sauce tickles your fancy. To give it a really good kick, add a few pinches of cayenne pepper or keep it colorful with less heat by adding a spoonful of sweet paprika. This recipe is totally flexible to match your heat tolerance.


This recipe made four generous servings of chicken salad. I served it on leaves of soft butter lettuce as dinner, alongside an impromptu slab of garlic toast; the latter was my husband’s genius creation made from leftover hot dog buns and a few sprinkles of our favorite parm-romano blend cheese. It was a great meal, both for the flavor and the satisfaction of throwing a low-calorie twist on a classic comfort food.


Buffalo Chicken Salad

  • Servings: about 4
  • Difficulty: average
  • Print

This is an easy way to enjoy the flavors of Buffalo wings, but without the high fat and calories. Adjust the amount of Frank’s RedHot sauce to match your desire for heat.

Ingredients

  • 2 cooked chicken breasts, shredded
  • 1/4 cup mayonnaise
  • 2 Tbsp. sour cream
  • 3 Tbsp. Frank’s RedHot sauce (give or take, depending on your heat preference)
  • Juice of 1/2 lemon
  • 3/4 tsp. ground black pepper
  • 1/2 tsp. garlic powder
  • 1/3 cup bleu cheese crumbles
  • 2 ribs celery, finely chopped
  • 1/2 cup finely chopped onion
  • 1 scallion, thinly sliced (white and green parts)
  • 1/2 tsp. sweet Spanish paprika, optional for color
  • A sprinkle of fresh, chopped parsley for garnish, if you’re feeling fancy

Directions

  1. In a medium bowl, combine mayonnaise, sour cream, RedHot sauce, lemon juice, pepper and garlic powder. Whisk until evenly combined. Adjust hot sauce to taste.
  2. Add shredded chicken, onions and celery to the dressing bowl. Fold gently to combine ingredients. Taste the mixture and adjust seasonings to taste.
  3. Fold in bleu cheese crumbles and sliced scallions, plus paprika if desired for extra color.
  4. Cover and refrigerate Buffalo chicken salad until ready to serve.

If you prefer, you can poach the chicken breasts yourself. Simply place them in a shallow pot with aromatics, such as celery, onion, fresh herbs and black peppercorns. Pour in enough chicken or vegetable broth to cover the chicken about halfway. Bring to a slight boil, then cover and simmer about 20-30 minutes until chicken is cooked through and tender.


When I got to the bottom of the bowl of Buffalo chicken salad, I lost my way a little bit on the whole “light and healthy” thing. I couldn’t resist putting an over-the-top spin on it. I know, but it sure was delicious, and still not as heavy as chicken wings! 🙂


Green Curry Shrimp

It has been an interesting week at our house, between the saga of our bathroom remodel, which included some high drama that nearly wrecked me (more on that another day), and an unfortunate, middle-of-the-night accident that occurred in the rear corner of our raised bed garden. It’s been going gangbusters, thanks to the vigilant security provided by this little fella:

The Yard Defender!!!

The “Yard Defender” has restored my hope for a vegetable garden, after several (literally) fruitless years of battle against the herd of deer that resides in the woods behind our cul-de-sac. We’ve tried all the home remedy stuff—Irish Spring soap, garlic hung on strings that spanned the tomato cages, human hair, commercial potions with a nasty rotten egg odor, ALL of it—and last year, well, I didn’t even bother. But with grocery prices soaring, I wanted to try again and so I splurged on this motion sensor device, advertised with the slogan, “don’t hurt ‘em, just squirt ‘em!”

The thing has peripheral vision to spot deer (or other critters, or unsuspecting neighbors) when they approach the garden, and launches a hearty spray of water to chase them off. My garden looks better than ever! Yesterday morning, though, our neighbor texted to tell me that “something had happened” to one of my zucchini plants, and when I went out to investigate, I discovered what appears to be a hit-and-run.

YIKES!

First of all, this trellis is heavy duty, so this was a serious accident. I was trying to train my zucchini to grow upward on both sides of it, to make more space in the garden and encourage more fruit. It was looking so healthy and I’ve just begun to see blossoms forming. My assumption is that a good-sized deer was already standing in the garden when the sensor detected its movement, and the precious thing got so spooked by the abrupt noise and spray, it panicked and fell onto the trellis. I have since moved the Yard Defender to the rear of the garden, where the tomatoes grow (it’s what they are after anyway), and hopefully we can avoid another dangerous incident. For sure, at least one of my zucchini plants is doomed (it was crushed, along with the trellis), but I hope that the other three endure so I can join the chorus of those who are sick to death of zucchini recipes, come August. Until then, I will continue to harvest what is growing out of control on the inside of my house, in the Aerogarden.

Here we go again, with the Thai basil!


I’ve been scrambling to come up with interesting ways to work this herb into “the rotation,” which is an inside joke for me and my husband, who swears we have not eaten the same thing twice since 2016. This is his fault, I say, for marrying a woman who loves to experiment in the kitchen. But using what is local and plentiful is part of what I do, and it doesn’t get more “local” than the dining room. I have in mind to substitute it for mint in a Mojito this weekend, and I’ll let you know how that goes. For now, let’s talk about what went into this bowlful of goodness.


Some of the vegetables in this recipe were the same as in the Thai Basil Chicken I shared last week, but there were plenty of swaps that make this dish different. I used carrots and red bell pepper again, swapped in scallions for regular onions, and cut up the first fruit of my 2022 garden, a wonky eggplant!


Shrimp was my protein and I shifted the sauce to a green curry-coconut vibe. Green curry is a vibrant blend of warm spices mixed with lemongrass, kaffir lime, green Thai chile and galangal, a rhizome that looks like ginger but tastes more herbal. It would be quite complex to make green curry from scratch, but a store-bought paste makes this recipe very simple. The aroma of the paste is pleasantly intoxicating, especially when it first hits the oil in your pan. Coconut milk is a natural companion for the flavor of any curry, and for this recipe, I used a “light” version to reduce the overall fat, but a full-fat coconut milk is fine and would lend more of the coconut flavor.


My first taste of green curry (circa 2005) was a pleasant surprise, and I was introduced to it by an unexpected culinary expert—my then-quite-young stepdaughter. She became a foodie at an early age, in part by my influence, but also that of her mother, who introduced her to Thai food when she was still in elementary school. Yes, when other kiddos were clamoring for fried chicken fingers at chain restaurants, our global flavor-savvy girl was scouting out the nearest sushi joint or Indian restaurant. When I had mentioned to her on a family dinner out in a Thai restaurant that I didn’t care for curry, she asked, incredulously, “not even green curry?” She offered me a taste of her favorite green curry chicken, and I was hooked. I’ve made it at home a few times in recent years, but this was my first time with shrimp. Delicious!


There is a bit of heat in my rendition of this dish, not only from the green curry paste, which leans spicier than red and yellow curries, but amped up by a few shakes of another fun ingredient in my pantry—Asian Reds hot chile blend, available online from the Flatiron Pepper Co. website. To be clear, I don’t get paid to brag about them, but I probably should, given that we own a bottle of darn-near every variety they make. What sets this company apart from others is that it offers region-specific blends of peppers that are otherwise hard to find. The Asian Reds includes Thai chile and ghost pepper, both of which are damn hot. I heartily recommend it for adding heat to any Asian-inspired dish, but a quick shake of the red pepper flakes you probably already have will work in a pinch for this recipe, or you could mince up half of a red jalapeno into the veggie mix for similar heat effect.

You won’t find these varieties of peppers just anywhere. Use it sparingly because it is HOT.

My advice for making this dish is the same as most every Asian-inspired recipe, and that is to get all your ingredients lined up and ready before you begin because things move quickly once the oil hits the pan. That means chop up your vegetables, clean and de-vein your shrimp and get your rice cooking (you’ll want that, for soaking up every last drop of the flavorful green curry sauce). Place a heavy bottomed pan over medium-high heat and add a couple of tablespoons of high-heat oil, such as canola, peanut or coconut. Give a quick stir-fry to the carrots and peppers first, because they take longer to cook. Then, add the scallions and garlic and toss long enough for the initial steam to dissipate. Move the vegetables to the outer edges the pan, drop another tablespoon of oil to the center and plop the green curry paste onto it. Prepare to be entranced by the aroma!


When the oil sizzles around the green curry paste, use a utensil to break it up and toss it with all the vegetable ingredients, so that everything is covered in a light film of the curry paste. The eggplant should go in last, given its tendency to instantly absorb oil. Toss everything just enough to coat the pieces, then add the entire can of coconut milk and stir to blend. Sprinkle in hot pepper flakes (if you want the extra heat), reduce the heat to low and cover the pan to simmer for 3 minutes. This gives the vegetables time to soften, and allows the green curry flavor to permeate everything.


Add the shrimp to the pan and stir to submerge them beneath the simmering liquid. Depending on the size of your shrimp, it should only take 3 to 5 minutes for them to lose their pink color, so watch them closely. Add a handful of Thai basil and stir to wilt it into the dish. Serve immediately with a portion of jasmine rice.

Garnish with a pretty Thai basil leaf if you want to be fancy. 😉


Green Curry Shrimp

  • Servings: 2, plus leftovers for one lunch
  • Difficulty: average
  • Print

This recipe comes together quickly and with ease, thanks to a store-bought paste that captures all the important flavors of Thai green curry. Substitute chicken or tofu if you wish. If you don’t have Thai basil, you could substitute regular basil or omit it altogether.

Ingredients

  • 3 Tbsp. high-heat cooking oil, such as canola, peanut or coconut (you will divide this for cooking the vegetables and blooming the curry paste)
  • 1 red bell pepper, sliced and halved
  • 2 medium carrots, peeled and cut on a bias
  • 3 scallions, cut on bias (white and green parts)
  • 3 cloves garlic, chopped
  • 1 medium Japanese eggplant, cut into bite sized chunks
  • 2 Tbsp. prepared green curry paste
  • 1 can light coconut milk (this is the culinary variety, not cartons for drinking)
  • a few shakes hot red pepper flakes, for extra heat
  • 1/2 pound fresh shrimp, peeled and deveined
  • a handful of fresh Thai basil leaves (optional but delicious); substitute regular basil if desired
  • hot cooked jasmine rice, for serving (I used brown jasmine rice for extra flavor and nutrition)

Directions

  1. Heat a large, heavy-bottomed pot over medium-high heat. Add 2 tablespoons of oil and stir-fry the carrots and red peppers for about two minutes to give them a head start. Season with salt and pepper to taste. Add scallions and garlic and toss to coat and wilt the scallions.
  2. Move the vegetables to the outer edge of the pot. Add 1 tablespoon of oil to the center and spoon the green curry paste onto the oil. This will “bloom” all the flavors of the paste. Break it up a bit with your cooking utensil, then stir it together with the cooked vegetables. Add the eggplant and toss to coat.
  3. Pour the entire can of light coconut milk into the pot and gently stir to blend. Sprinkle on hot pepper flakes (if using) and adjust salt and pepper to taste. Reduce heat to low and cover the pot, simmering for about three minutes, or until the mixture reaches a slight boil.
  4. Add the shrimp pieces. tossing lightly to submerge them beneath the simmering liquid. Keep a close eye on them, as they will cook in as few as 3 minutes, depending on their size and original temperature.
  5. Stir in Thai basil leaves until wilted. Serve immediately with hot cooked jasmine rice.


Po’ Boy Shrimp Tacos

Being creative in the kitchen is often little more than playing a game of mix and match. You take a dish you already know, apply another style of cuisine or a few ingredient swaps, and you’re on your way. That’s what happened in my kitchen when I decided to twist together Mardi Gras and Taco Tuesday.

Having never been to New Orleans myself, I already knew something about its foods (well, I mean, who doesn’t?) from friends and internet research. The po’ boy, a classic of New Orleans, is a simple sandwich of inexpensive ingredients—usually local, in-season seafood—fried up and served on French bread with lettuce, tomato and pickles. These humble yet tasty handhelds were slipped out the back door to out-of-work streetcar drivers who were on strike at the end of the Roaring ‘20s (now that we’re here, I suppose I should specify, 1920s). As the locals tell it, a kitchen worker would see one of the hungry drivers coming up for a handout, and shout, “here comes another po’ boy!”

My taco-esque spin on the po’ boy is not necessarily original, given that you have probably seen plenty of shrimp tacos. But the New Orleans flavors are purposely prominent here, from the savory dry spices I added to my handmade corn tortillas, to the Cajun spices in the shrimp breading, to the bold and zesty remoulade that topped it all off. There is no cheese or salsa on these tacos; rather, I swapped in the fresh toppings that you would expect on a po’ boy sandwich—thinly shredded lettuce and tomato. But I did want to keep it in taco territory, so I also layered in some thinly sliced jalapeno, which didn’t bother my heat-loving husband one bit. If it bothers you, leave ‘em off.

If I could hit the rewind button on one thing, I would be the preparation of the shrimp. The shrimp or fish on a true po’ boy would be deep fried in a cornmeal crust, so I went along with tradition on that, but my juicy shrimp did get a bit lost in the density of a buttermilk bath and all that breading, and the whole frying process made a mess of the kitchen and had me frustrated in the end. It was delicious but I doubt all that was necessary. My Plan B was to simply season the shrimp straight in the Cajun spices and give them a quick sauté, same as I do for my go-to Cajun shrimp & garlicky cheese grits. The flavors would have been the same and the overall dish would have been lighter, both in heft and calorie count, so I’ll try it that way next time. 

But then again, it’s Fat Tuesday, so anything goes!


Ingredients

6 corn tortillas* (see ingredient notes)

1/2 lb. Gulf shrimp*, peeled and de-veined

2 tsp. spicy Cajun or Creole seasoning*

Canola or peanut oil for frying (amount depends on whether you use breading)


Breading (optional)

1/2 cup all-purpose flour, divided

1/2 cup cultured buttermilk

1/4 cup fine or medium cornmeal (seasoned with the Cajun spices)


Toppings

About 1/2 cup finely shredded lettuce (I used romaine)

1/2 cup chopped fresh tomato

A few thin slices fresh jalapeno (optional)

5 or 6 slices chopped sweet and spicy pickles (we love “Wickles” brand)


Remoulade

4 Tbsp. mayonnaise

1 Tbsp. Frank’s RedHot Sauce* (original variety)

1 Tbsp. minced fresh garlic

2 Tbsp. finely minced red onion

1/4 tsp. paprika (sweet or smoked)

1 Tbsp. sour cream

Salt and pepper


*Ingredient Notes

You could certainly use store-bought corn tortillas for your po’ boy tacos, and perhaps give them a quick flip through a dry cast-iron skillet to warm and slightly char them just before serving. We love handmade corn tortillas, and I added about 1/2 teaspoon each of smoked paprika and onion powder to my masa dough, to lend a little more flair. See my previous post on handmade corn tortillas for more detail about the technique.

I used large shrimp, 16 to 20 count per pound, but I cut them in half for easier divvying among our tacos. My recommendation for Gulf coast shrimp is not merely for authenticity (it is, after all, intended to be a tribute to New Orleans), but also for the integrity of the product. Be wary of seafood from other countries, especially the stuff that comes out of Southeast Asia, as the industry there is prone to problems ranging from over-fishing and contamination to heinous human rights violations. Is the domestic shrimp more expensive? I suppose it depends on who you ask.

If you don’t have a local fishmonger you trust, look for evidence of standards on the supermarket packaging, and don’t hesitate to ask questions at the fish counter.

To clarify, Cajun and Creole seasonings are not the same, but both are prominent in Louisiana cooking, and I believe they are interchangeable in this recipe, mostly based on your tolerance for heat. Cajun cuisine leans more toward spicy pepper heat and Creole is more about the dried herbs. I used a chile and garlic Cajun powdered seasoning, added to the cornmeal breading. If you skip the breading, simply toss the shrimp directly in the seasoning before sautéing—and don’t skimp!

Frank’s RedHot is the sauce I used, but if you can get your hands on a bottle of Crystal brand hot sauce (the preferred brand in Louisiana), by all means go with that.


Instructions

Make the remoulade ahead, so the flavors have time to meld in the fridge. Stir together all ingredients and adjust heat, salt and pepper to taste. Cover and refrigerate until serving time.

If you are making your own tortillas, make those next, keeping them warm on a towel-lined plate as you prepare the shrimp.

For a sautéed version, pat the shrimp dry on paper towels. Spritz them with spray oil and then toss in the Cajun seasoning until well coated. Heat a small amount of oil in a skillet and saute, turning once, until shrimp are no longer pink. Total cooking time should be two to four minutes, depending on the size of the shrimp.

For fried shrimp, heat canola or peanut oil over medium heat in a cast iron skillet, about 1/2” deep. Pat the shrimp dry on paper towels. Set up a breading station, with half the flour in one dish, buttermilk in the second, and remaining flour mixed with cornmeal, Cajun seasoning and cayenne (if using) in a third.

When the oil is ready (toss a bread cube in to see if it bubbles immediately), toss the shrimp lightly in the plain flour, then dip into the buttermilk and finally the cornmeal mixture. Add the shrimp pieces to the skillet one at a time, keeping room between them. Don’t try to do the shrimp all at once because you will cause the oil temperature to drop too quickly. Turn the shrimp pieces when they are golden on the bottom, and salt immediately upon transfer to a paper towel-lined plate. If you need to add oil, do it between batches and allow time for it to return to proper temperature.

Assemble the po’ boy tacos, beginning with shredded lettuce, tomato and jalapeno (if using). Divide the shrimp among the tacos, dress with remoulade and garnish with chopped spicy pickles.


“Air Fryer” Jerk Chicken Wings

After much discussion, and consideration of all the newfound extra space in our remodeled kitchen, my husband and I have finally decided for certain on the matter of an air fryer.

Several of our friends with air fryers have extolled the virtues of their machines and enticed us with descriptions of the ultra-crispy and mouthwatering dishes they have produced with them. We got the rundown on the various styles and sizes and functions, and even made a special trip to Williams-Sonoma to compare the features for ourselves and measure and imagine exactly where we’d put such a device in our newly remodeled kitchen.

And after all that planning and considering, our final decision was that, well, we didn’t need one after all.

Most of the foods our friends described were not the kind of things we imagined we’d really make at home (though crispy French fries with minimal oil sounds pretty darn good), and when we really dug in to learn how air fryers work, we realized that we already have a version of an air fryer in our full-sized electric convection oven. If we use the convect-roast or convect-bake setting, in combination with a higher temperature, the effect is nearly the same as in an air fryer, at least for the foods we expected we would actually make. And to prove it (to ourselves as much as anyone else), we made these crispy chicken wings, using a tried-and-true method I learned from Food Network’s Alton Brown.

Tons of spicy flavor, without all the grease or drippy sauce of the usual Buffalo wings.

This method differs from others because it involves first steaming and chilling the wings, a process which renders excess skin fat so that better crisping can take place in the oven. No oil is required because there is plenty of natural fat remaining in the chicken skin. Roasting them at high temperature further tightens the skin, and you are left with a crispy-crunchy exterior and tender, juicy meat inside.

With football’s biggest game only days away, I thought it would be appropriate to share a different kind of wing recipe—one that packs plenty of flavor and as much heat as you want, but without the same old “Buffalo” flavors. These wings are covered in Jamaican jerk seasoning, featuring allspice, scallions, scotch bonnet peppers and brown sugar, which may sound complex, but I used a ready-made jerk rub that is easy to find in stores. The flavors are intense but not overpoweringly hot, and because we like to dip our wings into a dip or sauce, I made an easy mango and red pepper chutney to go with them.

I’ve made steamed and roasted wings before, but without convection and usually for my Just South of Buffalo Wings (which are still a favorite at our house). We also have done the jerk flavor wings many times, but usually on the grill during the summer months. This time, we combined methods and flavors and put the convection method to the test. As you’ll see, it passed with flying colors, and the convection chopped nearly 15 minutes off the previous steamed-and-roasted recipe. No need for one more appliance here!

This recipe is written for 16 pieces, but it should be very easy to double or triple as needed.


Ingredients

8 whole chicken wings (trimmed and cut into flats and drummettes if desired)

4 Tbsp. prepared jerk rub (a wet version from a jar)

2 Tbsp. canola, avocado or peanut oil (to thin the jerk rub)

1 Tbsp. light brown sugar

1 Tbsp. dark rum (preferably Jamaican)


Mango-Red Pepper Chutney

1/2 red bell pepper, diced

2 scallions, chopped (white and green parts)

Kosher salt and black pepper

1/2 cup mango, chopped (fresh or frozen, thawed)

2 Tbsp. brown sugar

1 Tbsp. red wine vinegar

2 Tbsp. dark Jamaican rum


Instructions

  1. Set a lidded steamer basket over a pot with about two inches of water and bring it to a low boil.
  2. Spray the basket with oil and arrange the chicken wings in it, overlapping them so that the rising steam can permeate the whole batch. Cover the steamer and keep at a low boil for about 10 minutes.
  3. Transfer the steamed wings to a parchment-lined baking sheet and rest until they are cooled to near-room temperature. Cover and refrigerate the wings for at least one hour or up to overnight.
  4. Preheat oven to 425° F on a convection setting, with oven rack in the center position. Spray a cookie cooling rack with oil and set over a foil-lined cookie sheet. Arrange wings on rack, with space between the pieces to allow easy air flow.
  5. Convect-roast for 15 minutes (or regular roast for 20 minutes). While wings are roasting, make the mango-pepper chutney.
  6. After 15 minutes, turn wings to roast the other side 15 more minutes (or 20 for regular roast setting). The wings should be nicely browned all over and the skin on the wings should appear tight but not too dry.
  7. During the second half of roasting, combine jerk wet rub seasoning, canola oil, brown sugar and rum in a large bowl. Whisk until evenly combined.
  8. Toss wings in the bowl of jerk rub, spooning the seasoning over any unglazed areas. Return the wings to the rack on the cookie sheet and roast about 3 more minutes to set the glaze in the oven.
  9. Serve immediately with the mango-pepper chutney.

Mango-Red Pepper Chutney Instructions

  1. Place a small saucepan over medium heat. Swirl in oil and saute peppers and scallions, just long enough to soften them. Season with salt and pepper.
  2. Add the cut-up mango pieces and stir until the mixture is heated through. Stir in brown sugar, vinegar and rum. When mixture begins to bubble, reduce heat and cover, simmering until thickened. Remove from heat and cool to room temperature.


Scallion-Sriracha Salmon Cakes

Most every night for the past few months, I have awakened around 3 a.m., for no apparent reason. My insomnia usually lasts at least an hour and a half, during which time I ponder all of the good and evil in the world, or play mindless word games on my smartphone, or venture into the dark corners of our house to find and snuggle our sleeping pets. I’d like to make one suggestion for others who have experienced this phenomenon of waking at 3 a.m.—do not pick up your phone and begin Googling possible causes for said awakenings. The search results are grim, and in a matter of moments, you will begin to question everything from your diet (am I eating sugar too close to bedtime?) to your spiritual condition (what do you mean, exactly, by ‘witching hour?’). My therapist believes I am probably flummoxed over a combination of things, related mostly to work-from-home stress and general pandemic fatigue. Whatever the case, I’m exhausted. Every once in a while though, these sleep interruptions result in something good, and this recipe is a fine example of that.

Out of the blue two weeks ago, I awakened with a start and asked myself why I had never made fish cakes with sriracha and scallions. You might be thinking this is a bizarre question to ask oneself so urgently at 3 in the freakin’ morning, and you’d be correct, but this is my life now. Once I go down that rabbit hole, it isn’t long before I begin dreaming up ideas of just how such a dream dish should be completed, right down to the garnish. Sometimes I pick up my phone and make record of my ideas—and that’s a smart thing, because if I don’t jot it down, my next successful 40 winks may wipe it clean out of my brain. From this particular wide-awake culinary epiphany, I made these exact notes, because I didn’t want to forget what sounded like a great recipe.

I mean, isn’t this the kind of thing that wakes everyone up at 3 a.m.??

It took me a few days to round up my ingredients, and when I got down to it last week, with a few tweaks to my original plan, the result was delicious! These scallion-sriracha salmon cakes were light and fresh, low calorie and easy as could be to make, with just enough heat to make your tongue tingle. I modeled the ratio of ingredients after my favorite crab cake recipe, using only enough mayonnaise and panko crumbs to hold the flaky salmon together with the finely minced garlic and red bell pepper. A little extra panko on the outside before pan frying gave the cakes a terrific crispiness to offset the moist and tender interior.

And the flavor was exactly as I dreamed.

Crispy coating, tender inside, spicy and delicious; these turned out just as I imagined!

Ingredients
Makes 2 servings

6 oz. fresh salmon portion (skinless)

1/3 cup mayonnaise

1 Tbsp. sriracha

1/2 tsp. fish sauce* (see notes)

2 Tbsp. minced red bell pepper

2 scallions, thinly sliced (divided)

1 clove garlic, minced

1/2 beaten egg

A few shakes Asian Reds hot pepper flakes*

1/4 cup panko crumbs, plus extra for shaping cakes

2 Tbsp. peanut oil

*Notes

Fish sauce is a pungent, fermented condiment found in the Asian section of most supermarkets. If you cannot find it, substitute with soy sauce.

The Asian Reds hot pepper flakes are a specialty item that popped up a while back in my hubby’s Facebook feed, and we could not resist ordering a variety of products from this company, though we have no financial incentive from doing so. I like this pepper seasoning because it includes the hard-to-find varieties of pepper that play so well with other Asian flavors, including the sriracha in this recipe. If you don’t want to spring for them, substitute any crushed red pepper flakes, or omit them for less heat.

We are loving these Asian Reds pepper flakes. They offer a different variety of hot pepper flavors that is a perfect highlight with other Asian ingredients.

Instructions

Here we go with pictures, and keep scrolling for written steps and a downloadable copy for your recipe files!

  1. Heat a small, non-stick skillet over medium heat. Pan steam or lightly sauté salmon fillet until just flaky (better slightly underdone than overdone). Cool then refrigerate several hours or overnight.
  2. Combine mayo with sriracha and fish sauce; measure out about 3 Tbsp. for finishing the cakes at serving. I put the reserved portion into a zip-top snack bag (sort of a makeshift piping bag).
  3. Add half of the chopped scallions, red pepper, garlic and spicy Asian Reds seasoning to remaining mayo mixture. Fold in beaten egg and panko crumbs.
  4. Flake fish into large-ish pieces and gently fold into mayo mixture, taking care not to break up the fish pieces too much. Sprinkle additional panko crumbs into your hand and shape mixture into four patties, about the size of hockey pucks, with a light coating of panko on both sides. Place each fish cake onto a parchment lined plate or small baking sheet.
  5. Cover the fish cakes with plastic wrap and chill at least two hours. This gives the mixture time to firm up, and the panko will absorb some of the moisture to better bind the cakes.
  6. Heat peanut oil in a medium, non-stick skillet over medium heat. Cook salmon cakes 3 or 4 minutes per side, until browned and crisp. Serve over rice with your favorite vegetables, top salmon cakes with reserved sriracha mayo drizzle and reserved scallion slices.

If you can dream it, you can make it. 😀

Want to make this recipe?


Jambalaya Deep-Dish Pizza

For such a short month, February has a lot going on, holiday- and event-wise. There’s Super Bowl, which is traditionally the first Sunday of the month; Valentine’s Day, which is fixed on the 14th; and Mardi Gras, which floats on the lunar calendar in tandem with Ash Wednesday. It’s enough to make even the most adept party planner a little dizzy, and for the average person at home, it isn’t easy to celebrate all three (at least, not when you’re hosting others). I’ve wanted to do some kind of Mardi Gras dish for a while, and with Super Bowl and Valentine’s Day behind us, here’s what I’ve come up with for our small celebration—all the exciting flavors of jambalaya piled into a deep-dish pizza.

The only thing missing from this jambalaya-inspired pizza is the rice, and guess what? We didn’t miss it!

As with the other two February events, it is just the two of us celebrating, and that makes it less intimidating for me. Les and I both love Cajun and Creole flavors, and he brought home some authentic spice blends from a work-related trip to “N’awlins” a couple of years ago, so I already have the right accent. We have some fabulous jazzy blues music to help us get in the mood, and I’m sure we have some beads around here somewhere. Weeknights are always great for a casual meal, and pizza has become one of my “blank canvas” foods, begging for interesting flavor twists. I’m going deep dish on this one because you cannot skimp on Mardi Gras (which translates from French to “fat Tuesday”), and I’m not sure that our usual N.Y.-style crust can handle all this excitement. 

Most of the fillings are obviously traditional, from the zesty smoked andouille sausage, through the holy trinity aromatic vegetables and spices, and the plump and juicy Gulf shrimp. I omitted rice because we have quite enough carbs in my part-cornmeal deep dish pizza dough. Creole foods have tomato, so that’s an easy crossover ingredient for pizza. But what about cheese? I wracked my brain and could not think of a single regional dish that includes cheese, but on a deep-dish pie, the cheese on the bottom seems to shield the tender crust from wet filling ingredients, so I didn’t feel right skipping it.

In the end, I opted for the mildest firm cheese I could think of—one that would not clash with all these great Louisiana flavors. Monterey Jack is sturdy enough to line the pizza dough, but it melts well, and it kept my deep-dish dinner from singing the soggy-bottom blues.

Speaking of the blues, we can’t celebrate Mardi Gras without music, so go put on your favorite New Orleans jazz, or enjoy what I listened to while making this pizza:


Ingredients

1 prepared deep-dish pizza dough (recipe and instructions in my post for Chicago-style Deep-dish Pizza)

2 Tbsp. extra virgin olive oil (mine was infused with cayenne)

2 links smoked andouille sausage, sliced or chopped (I used Aidell’s)

1 boneless chicken thigh, cut into bite-sized bits

2 ribs celery, finely chopped

1/2 yellow onion, chopped

1/2 cup each red and green bell pepper, chopped

4 cloves garlic, chopped

Cajun or Creole seasoning (as much as you can stand)

3 sprigs of fresh thyme, leaves removed

1 1/2 cups canned diced tomatoes, divided (see instructions)

Handful of fresh okra, sliced (or about 3/4 cup frozen sliced okra)

2 Tbsp. red wine vinegar

Splash of veggie or chicken broth (optional, for deglazing the skillet)

4 large gulf shrimp (about 1/4 pound), peeled and deveined)

4 oz. shredded or sliced Monterey jack cheese


Instructions

Let’s run through it together in pictures while you enjoy the Bluesiana Triangle, then keep scrolling for written instructions and a downloadable PDF for your recipe files.


  1. Place a large non-stick skillet over medium heat and swirl in olive oil. When oil is hot enough to shimmer, add cut up andouille sausage and toss until edges are crispy. Use a slotted spoon to transfer the sausage to a bowl and set aside.
  2. Add the chicken pieces to the remaining oil and toss them about until no longer pink. Transfer chicken to the bowl with the sausage.
  3. Add trinity plus garlic to the skillet and toss in the hot oil. Shake on Cajun or creole seasoning to suit your spicy preferences. Grind some black pepper into the pan and sauté vegetables until they are soft and translucent. Scatter the fresh thyme leaves over the vegetables.
  4. Add diced tomatoes, okra and red wine vinegar. Toss and cook until okra is heated through, about five minutes. Turn off heat and allow vegetables to rest a few minutes, then transfer to a bowl and set aside.
  5. If your skillet has any browned bits on the bottom, swirl in a splash of veggie broth and heat to a simmer. Cut the shrimp into bite-sized pieces and toss them into the simmering broth. Cook only long enough for the shrimp to be barely done, which may only be about two minutes. Transfer the shrimp to the bowl with sausage and chicken and set aside.

At this point, if you’re working ahead, you can refrigerate all cooked ingredients, and then bring them to near-room temperature when you are ready to assemble the pizza.

Ready to bake:

  1. Preheat oven to 450° F, with rack in center of oven.
  2. Spread prepared dough into pan, with edges creeping up the side a bit.
  3. Layer ingredients in the following order: Monterey jack, most of the andouille sausage, chicken, vegetables, shrimp, remaining sausage, additional diced tomatoes. Sprinkle with Cajun seasoning.
  4. Bake 25 minutes, rotating pizza halfway through baking time. Rest pizza 5 minutes, then carefully lift and transfer pizza to a flat pizza pan or serving platter. Cut into wedges.

Want to save this recipe?


Barbacoa

You have heard of the concept of a “bucket list,” tracking the experiences you want to have during your lifetime? Well, rather than making commitment to go skydiving or backpack through Europe (no thanks to either for me), I’ve narrowed down my bucket list to focus on foods. Cooking is a joyful adventure for me, but I am prone to become overwhelmed with too many new ideas in a way that, ironically, puts me in a cooking rut. What better way, I thought, to expand my culinary knowledge and have the satisfaction of accomplishment, than to put my wish list foods on a schedule? I wrote about this in October, when I finally tackled pierogi, the delicious potato and spinach-filled dumplings that were easier to make than I expected. Today, I’m making good on a promise from that post. I’ve moved barbacoa to the “done” column.

Despite having spent at least half of my growing-up years in southern Colorado, where I lived part-time with my mom, I had never heard of barbacoa until the Chipotle chain of restaurants popped up in my current city. Most of the “Mexican” food I knew was the standard Americanized fare, which is odd, given the demographics in Colorado. Who doesn’t love fajitas and burritos and such? But there are so many more interesting Mexican foods, and this is undeniably one of them. Barbacoa is beef, but it’s not the same as steak, as you might have in fajitas. It is rich and savory, tender and spicy, and super-versatile as a filling for a variety of casual dishes. And you know what I learned this week? It is ridiculously simple to make.

You need a good-size (preferably grass-fed) chuck roast, which is essentially the same thing you would use to make a pot roast. It’s full of marbling, which renders down into the most succulent texture in a slow cooker. Add a few spices or Mexican rub of some sort, onions and garlic, some hot peppers if you’d like, and just enough liquid with some smoky and acidic tones to tenderize and give balance to the meat. Put it in the slow cooker and wait for the magic.


For my husband, Les, and me, this mouthwatering magic could not come at a better time. The Super Bowl is just days away, and in a normal year, that would put our kitchen skills into preparation overdrive for the arrival of guests at our annual big game party. As strange as it was to have only the two of us at the table for Thanksgiving, it will be even weirder to not have a houseful for the Super Bowl. We are making the best of this pandemic reality the same way we did for Thanksgiving—by trying out a few new foods. Les will no doubt make his pimiento cheese and—spoiler alert—his amazing smoky guacamole. I may not be able to resist whipping up at least a half dozen deviled eggs and maybe a batch of hummus to snack on. But our main dish item for this year’s scaled-down celebration is this barbacoa. Delicious. Done.


Ingredients


3-4 lb. beef chuck roast

Kosher salt and black pepper

2 Tbsp. smoky pepper BBQ rub* (see notes)

2 Tbsp. oil (olive, canola or avocado are all good here)

1 medium onion

5 cloves garlic

1/2 fresh poblano pepper*

1/2 red jalapeno*

1 small can mild chopped green chiles

2 Tbsp. Worcestershire

2 Tbsp. brown sugar

2 Tbsp. apple cider vinegar

1 Tbsp. chipotle puree with adobo*

2 tsp. liquid smoke

Juice of 1 lime

About 1/2 cup water or beef broth

2 dried bay leaves


*Notes

An ideal smoky BBQ rub for this dish would include some type of smoked pepper (ancho or chipotle, for example), some garlic, onion and herbs. The main thing I recommend when choosing a pre-made rub is to pay attention to the sodium content. Ingredients are listed in order of their ratio, so if salt is listed early, the blend has a lot of it. Les and I recently ordered some fantastic blends from a company called Flatiron Pepper Company. I respect the fact that they do not include salt in their blends—it means I have more control of the sodium that goes into my dishes, and I’m also not paying a premium for a cheap ingredient. If you want to make your own rub, you might try my “Fire & Brimstone” seasoning, which is detailed in this week’s post for Tex-Mex Stuffed Sweet Potatoes.

We enjoy spicy foods at our house, and I used a couple of fresh peppers that we already had on hand. Poblanos have some mild heat, but primarily a smoky flavor. Red jalapeno is hotter. Use what you’re comfortable with, or leave them out altogether in favor of an extra onion. This is what’s great about cooking at home—you get exactly what you like. 😊

For the chipotle puree, we dump a can of chipotles with adobo directly into the food processor. The result is a thick, smoky sauce that has heat but also some fruitiness and a big dose of smoke. It keeps well in the fridge for several weeks and is a good addition to any type of Mexican dish or chili.


Instructions

As always, I’ll get you started with a visual walk-through of how I made it. You’ll find written instructions below, and keep scrolling for a downloadable PDF for your recipe files.


  1. Cut the chuck roast into equal, baseball-sized chunks. Sprinkle them all over with kosher salt and black pepper (unless your spice blend already has both).
  2. Combine the BBQ rub and oil in a large bowl. Toss the roast chunks in the oil until all sides are evenly covered. Cover the bowl and rest it at room temperature for at least 30 minutes, or up to an hour.
  3. Chop up the onion, garlic and any fresh peppers you are using, and set them aside, along with the canned green chiles.
  4. In a measuring cup, combine the remaining ingredients and whisk until blended.
  5. Heat a large pot or skillet over medium-high heat. Drizzle a small amount of oil into the pot and add the roast chunks, a few at a time to avoid crowding the pan. Remember that a quick drop in temperature will prevent good searing. Turn the pieces over when the bottom is browned, and continue this until all sides are browned. Our slow cooker has a browning feature, so I was able to do this directly. A cast-iron skillet would be perfect for this, if your slow cooker has a ceramic crock. Transfer the meat chunks to the slow cooker when they are browned all over.
  6. Scatter the onions, garlic, peppers and green chiles over the top of the meat.
  7. Pour the liquid ingredients into the cooker. If you used a separate skillet for browning, you may first want to swirl some of the liquid into it to deglaze and gather up all the tasty browned bits, so that you don’t miss any of that fabulous flavor.
  8. Tuck the bay leaves down into the liquid. Cover and cook on low setting for about 10 hours. We set this up at bedtime and woke up to the most amazing aromas.
  9. When the meat is nice and tender, remove it with tongs to a cutting board or glass baking dish and shred it. We found that undisturbed overnight cooking left the submerged bottom of the meat chunks tender, but the exposed parts were still firm. We simply turned the meat over and gave it another hour or so. To shred the meat, use two forks to pull it apart in opposite directions.
  10. Return the shredded meat to the flavorful liquid and keep it warm until ready to serve. If you plan to serve it later, refrigerate the meat and liquid together, and re-heat the amount for your recipe in a saucepan over low heat, or return it to the slow cooker if you plan to serve the whole amount.


Barbacoa is so good as a filling for street-style tacos, with fresh crunchy radishes and cilantro, plus a squeeze of lime. Or wrap it up in a larger flour tortilla with rice and peppers. Or serve it in a bowl with black beans, rice, lettuce, avocado and pico de gallo or salsa. If you’re like me, you probably won’t be able to resist having “just one more taste” straight from the slow cooker.

Want to print this recipe?


Smoky Guacamole

Terrie and I enjoy surprising each other with gifts that we know the other will appreciate and play to our sense of adventure in the kitchen. So it was a few Christmases back when I opened one of my gifts and unveiled the book Buenos Nachos! by Gina Hamadey. Terrie knew that I already enjoyed making different kinds of nachos and had come to recognize herself how enjoyable nachos could be as a dinner, and relatively healthy, too, if you plan for it. The book is, as the title indicates, a treasure trove of nacho recipes, many of which come from restaurants whose owners shared their secrets. The part of the book I’ve put most to use, though, is in the smaller section on accoutrements such as salsa, guacamole, queso and “refreshments.”

Specifically, I’ve latched onto “Smoky Guacamole” as a go-to offering at parties or pre-dinner snacks at our house. I was a latecomer to guacamole, I have to admit. I moved to Southern California after college and refused to get into the chill, SoCal swing of things and eat a disgusting-looking condiment with a questionable consistency. Instead, I simply expanded George Carlin’s skepticism about “blue foods” to include pasty green stuff. I don’t remember exactly when I gave in and tried guacamole, but I cannot imagine life without it now. The freshness of the lime and cilantro added to chunks of avocado and tomatoes was made for a nacho chip. Or, in the recent case in our household, as a side/add-on to homemade barbacoa tacos.


The reason I like this particular recipe—the very first one I tried from Buenos Nachos!—is the boost guacamole gets by simply adding in a couple of tablespoons (or more, as I like to do) of chipotles in adobo sauce. The smoky spice of the adobo sauce gives guac exactly the kind of “elevate your happy” that my better half talks about so often.

Coincidentally, smoky guacamole also serves as a fine topping or side for any of the nacho dinners I put together. Next up for me out of Buenos Nachos! will be liberating and enhancing a savory cheese sauce from one of the nacho recipes. But for now, I hope you enjoy this smoky guacamole as much as we do.


The usual guac suspects are all here, but the chipotles in adobo is the standout ingredient that puts the smoke in Smoky Guacamole.

Ingredients

3 avocados, halved and cubed

2 Roma tomatoes, seeded and chopped

Juice of half a lime

1/2 medium red onion, chopped

2 Tbsp. or more pureed chipotles in adobo sauce* (see notes)

3 Tbsp. chopped fresh cilantro

Salt and pepper


*Notes

To make the chipotle puree, empty an entire 7 oz. can of chipotle peppers with adobo sauce into a food processor. Pulse several times until mixture is mostly smooth. Transfer mixture to a bowl and keep in the fridge for about two weeks. In this recipe, use as much adobo as your spice meter desires. Add some to your next batch of chili, or use it to kick up a homemade bbq sauce.


Instructions


  1. Put the diced avocado in a large bowl and add the lime juice. Toss lightly to prevent the avocado browning.
  2. Add in the tomatoes, onion and chipotle-adobo puree. Stir with a large spoon or mash with a fork; if you prefer a smoother guacamole, you can mash the avocados first, but fans of chunky texture can settle for just mixing up the ingredients.
  3. Season with salt and pepper to taste. Finally, add the cilantro and fold again.

Buenos nachos!

Heaven on a chip.

Want to make this recipe?


Moroccan Chicken

During earlier years of Food Network, the contestants vying to become “the next Food Network star” were actually given a contract to host their own cooking show, usually slotted for Sunday mornings. That was before the network became its entirely competition-based format, where everything has to be done in 20 minutes and somebody always “wins.” I still watch, but I miss the days when more of the chefs (or cooks, in the case of ever-popular Rachael Ray) walked you through the steps of making a meal in what looked like a real home kitchen. They still have some weekend morning “how-to” shows, but the rest of the time, it’s either a big ol’ showdown, or a bunch of chefs talking in bold color about the food at places they visit (I’m looking at you, Guy Fieri). 😉

Speaking of bold color, I’ve been working on restoring some color to things around here in the tail end of a very gray January. The recipe I’m sharing today has been a favorite of mine since the third season of said “Food Network Star,” and I learned it by watching an episode of the show hosted by Amy Finley, the first woman to win the network’s competition.

Amy’s show, endearingly named “The Gourmet Next Door,” showcased elegantly simple French cooking methods, and Amy exuded confidence in the kitchen. I was disappointed, along with everyone at Food Network, when Amy decided not to return for a second season. During her six episodes of TV fame, she managed to get through to me with this simple and really flavorful recipe, which she said was inspired by the foods of French Morocco, on the northern coast of Africa. The bone-in chicken thighs are marinated in a spicy blend of chiles and seed spices—known in those parts as “harissa”—and surrounded by tender and colorful vegetables, plus dried fruit and fried almonds. If it sounds like a weird combination, trust me, you will change your mind after you taste it. It’s spicy and savory, yet sweet with fruit and wholly satisfying.

For now, the tagine will remain purely decorative. I’ll be on the lookout for a real one that I can actually put in the oven.

Traditionally, a Moroccan dish such as this would be prepared in a clayware vessel called a tagine, which looks like the red pot above. The shape of the tagine keeps moisture inside for perfectly tender roasts and stews. I’ve had this tagine on display for several years, but have only recently considered cooking in it, at the urging of my husband, Les. However, after much discussion with my aunt, who spent decades as a clay potter, we concluded that the finish on this one probably makes it purely decorative and unsuitable for cooking. No worries, I’ve prepared the dish today as I always have, in a simple cast-iron skillet.

This dish is pretty and delicious, as spicy as you want it to be, easy to make and a welcome flavor change-up from the usual weeknight chicken dinner. I hope you like it!

Colorful veggies, dried fruit and nuts make this a satisfying, healthful meal.

Serves 4

Ingredients

2 Tbsp. neutral oil, such as canola

2 tsp. harissa blend spices* (see notes)

4 large bone-in, skin-on chicken thighs

1 small sweet onion, chopped into large pieces

1 small zucchini, cut into uniform chunks

1 small yellow squash, cut into uniform chunks

Handful of fresh baby tomatoes, whole

Small handful each dried plums (prunes) and apricots

1/2 cup low-sodium vegetable or chicken broth

1 tsp. neutral oil, such as canola

1/4 cup whole, raw almonds, unsalted

Cooked couscous for serving


*Notes

Traditionally, harissa is presented as a paste made from fresh whole chiles, and it really tips the scale on Scoville heat units. My dry blend of harissa spices allows for some flexibility in the heat department and includes red chile, garlic, black pepper, cayenne, and what I call the “three C spices,” which are caraway, coriander and cumin. The seeds should be slightly toasted and then ground into a rough powder before blending with the other ingredients. If you prefer, substitute a ready-made harissa blend, or use the harissa paste seasoning available at Trader Joe’s (brace yourself, it’s hot). My harissa dry spice blend recipe is listed at the end of this post.

You will need an oven safe skillet with a tight-fitting lid for this recipe. Alternatively, you could make it in an electric skillet with a lid. Or a tagine, if yours is safe to cook in. 🙂


Instructions

Let’s walk through it together in pictures first. You’ll find written instructions below, and keep scrolling for a downloadable PDF version for your recipe files.


  1. Combine the oil and spice blend in a large, deep bowl that is large enough to hold the chicken thighs for marinating. Season the chicken pieces on both sides with kosher salt. Add them to the spice marinade and turn several times to coat evenly. Cover and refrigerate at least two hours.
  2. Preheat oven to 350° F, with oven rack in the center.
  3. Heat a 10-inch cast-iron skillet over medium heat. When skillet is warm (but not hot), add chicken pieces, skin side-down. Do not move or turn the pieces for about 10 minutes, until the fat is rendered and skin is golden and crispy. Cook the second side about 5 minutes, until browned. Remove pieces to a plate and keep warm.
  4. Add the chopped onions, then zucchini and squash to the remaining oil in the skillet, tossing briefly to coat and lightly sauté them. Salt to taste. Remove skillet from heat.
  5. Arrange the baby tomatoes among the skillet vegetables, then tuck in the dried fruit pieces evenly throughout the skillet. Place the chicken thighs on top of the mixture.
  6. Swirl broth in the bowl that held the chicken pieces, to grab all the flavors lingering there. Pour the broth down the sides of the skillet, so that it flows underneath to the vegetables.
  7. Cover the skillet and transfer to the preheated oven. Bake for 45-60 minutes, until vegetables and fruit are soft and chicken pieces are tender. Prep the couscous near the end of the cooking time.
  8. Heat teaspoon of oil in a small skillet until it’s quite hot and shimmery. Add raw almonds and toss them about for about two minutes. They will pop and sputter a bit, so be careful. When they are toasty and fragrant, use a slotted spoon to remove them.
  9. Serve the vegetables and chicken over cooked couscous, and spoon the fried almonds over the top.
We’ll keep the tagine in the background, just for effect. 😉

Want to print this recipe?


Harissa Dry Spice Blend

1 Tbsp. crushed red pepper flakes (more or less to your heat preference)

1 Tbsp. granulated dried garlic

1 1/2 tsp. ground black pepper (adds bite with minimal heat)

1 1/2 tsp. whole coriander seed, toasted and ground

1 tsp. cumin seed, toasted and ground

1 tsp. caraway seed, toasted and ground

2 or 3 shakes ground cayenne pepper (adjust to your heat preference)