Clambake pizza — a delight for Leos!

My interest in astrology has always been one of curiosity. I’ve never been fully invested in the idea that my personality was pre-determined by the stars or whatever phase the moon was in when I took my first breath at the exact latitude and longitude where I was born. I mean, for starters, if I were to ask all-knowing AI for a general description of Leo, this is what I get. Honestly, does this sound like me? 

OK, I’m guilty as charged. 😂

I want to say that it’s all a bunch of hooey, but the Leo description is very much on point. Ahead of my milestone birthday recently, I looked up Leo traits and another related prompt came up in my search: “the best foods for Leos.” This oughta be good, I thought, given that I can count on one hand the foods that I don’t like. The first site that popped up was Harry & David— you know, the mail order fruit basket company— and here’s what it suggested:

Leo (July 23–August 22)

Corn, clams, spinach, and mozzarella are some of the foods to which this fire sign is drawn. This is due in part to some — such as tomatoes — being in season during the sunny summer months when Leos are born.

The moment I read that, I knew exactly what to do.

Behold, the clambake pizza!

The clambake connection

Clambakes are not exactly “native” to North Carolina, but we did have a fun one associated with the Crosby pro-am golf tournaments that used to be held around here. This was a charity tournament that Bing Crosby started at Pebble Beach many moons ago, and his widow, Kathryn, moved it in the mid-1980s to Bermuda Run just outside Winston-Salem, where it stayed for 15 years. 

The golf tournament was unsanctioned, so we didn’t always see big-name pros, but there were plenty of stars from the stage and screen and it was always an exciting week in our small city. Anyone could go to the tournament, but tickets to the clambake were highly coveted— I was only able to get in because I dated a guy who worked for Cadillac, one of the sponsors.  It’s where I first fell in love with the music of a barely known country artist named Vince Gill, and everyone who saw him at Groves Stadium knew in an instant that he would become a huge star. Let’s enjoy his breakout song while we talk about this pizza, shall we?

Press play for an enjoyable musical accompaniment!

Ingredients for a clambake pizza

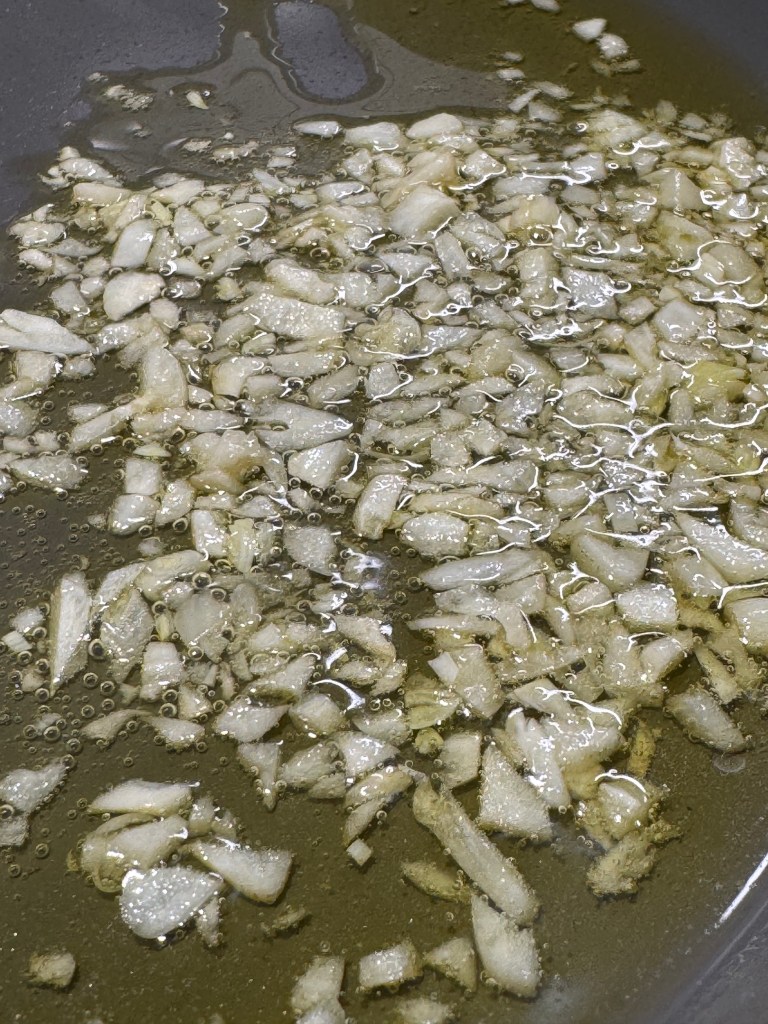
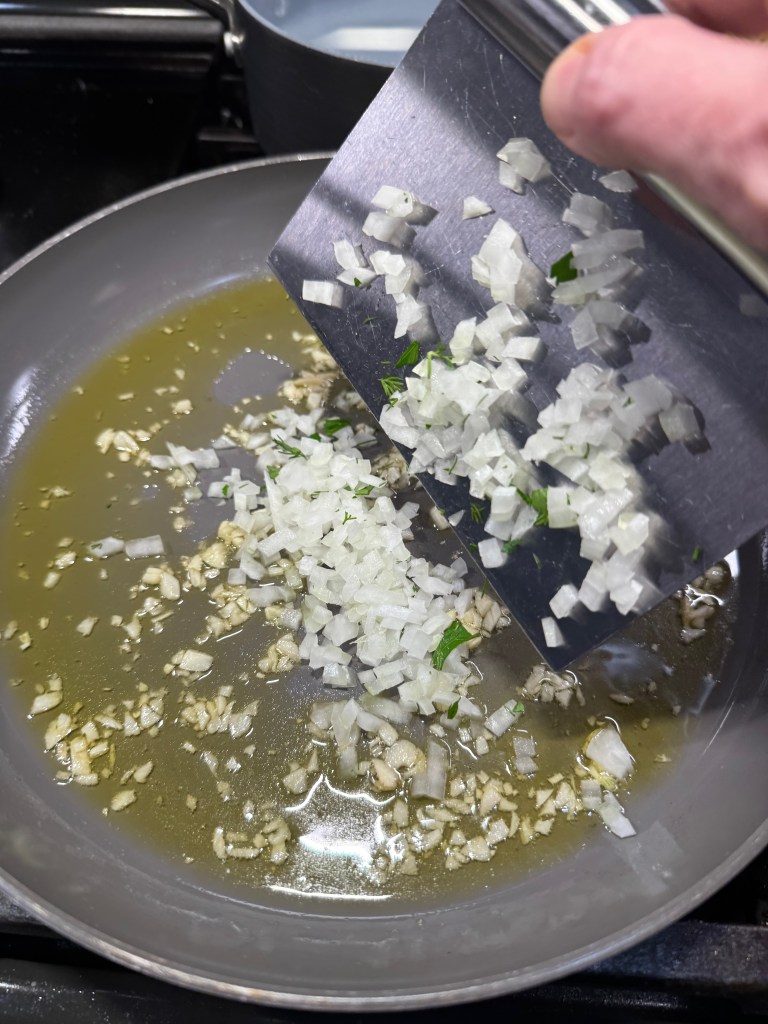
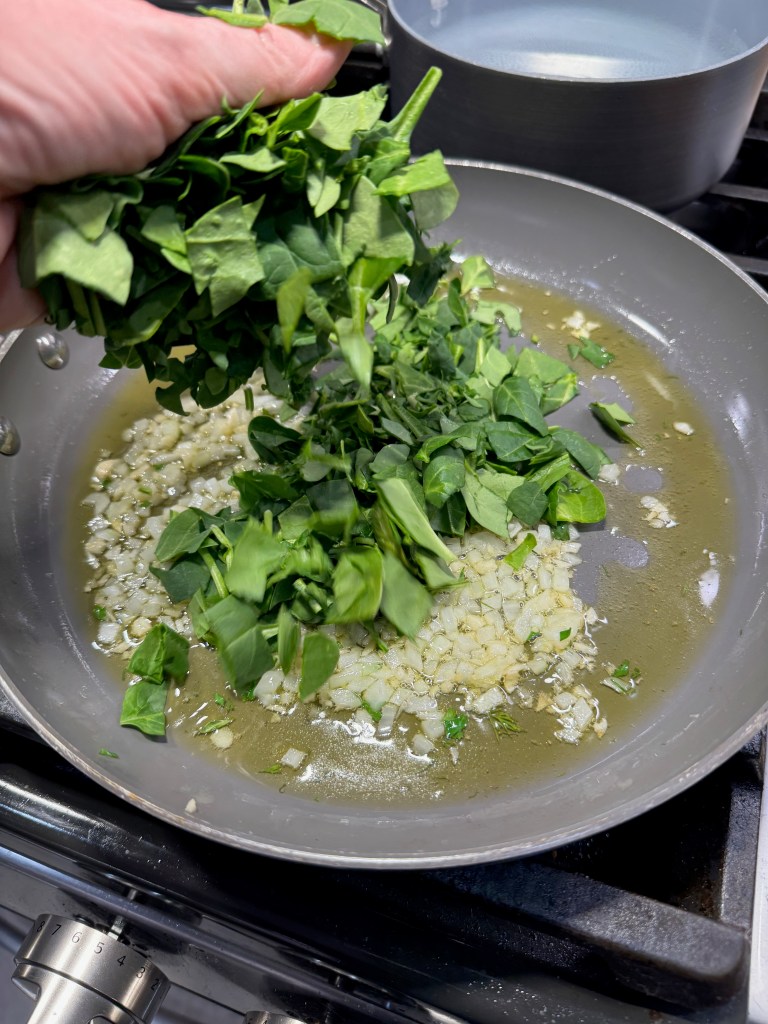
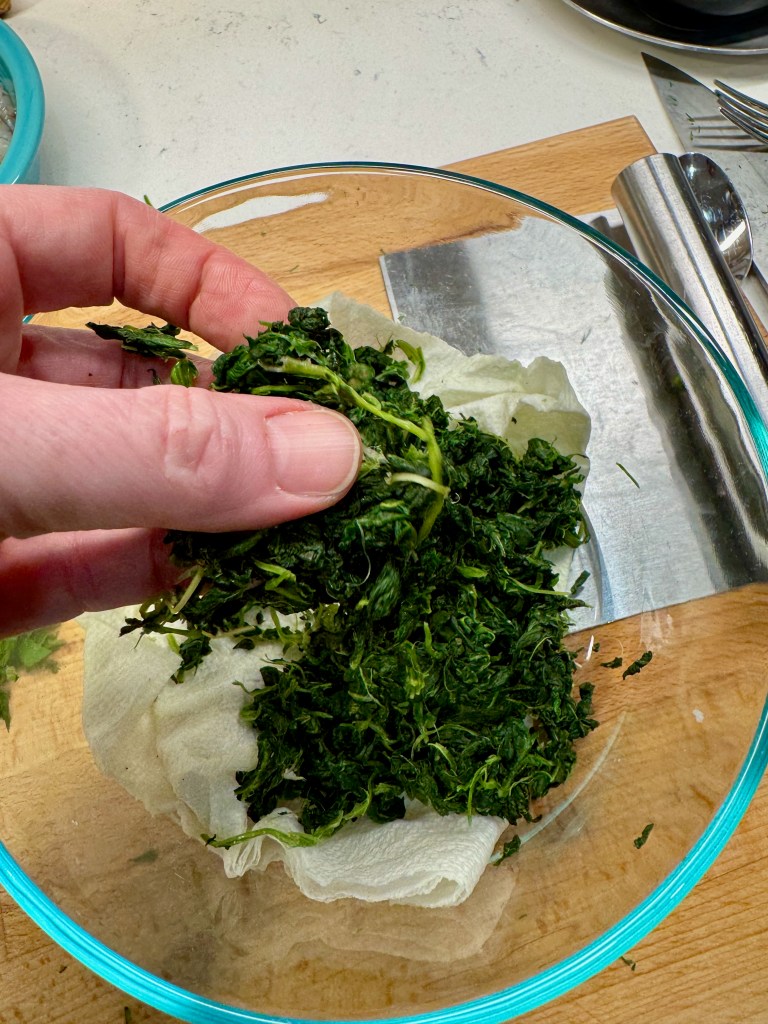
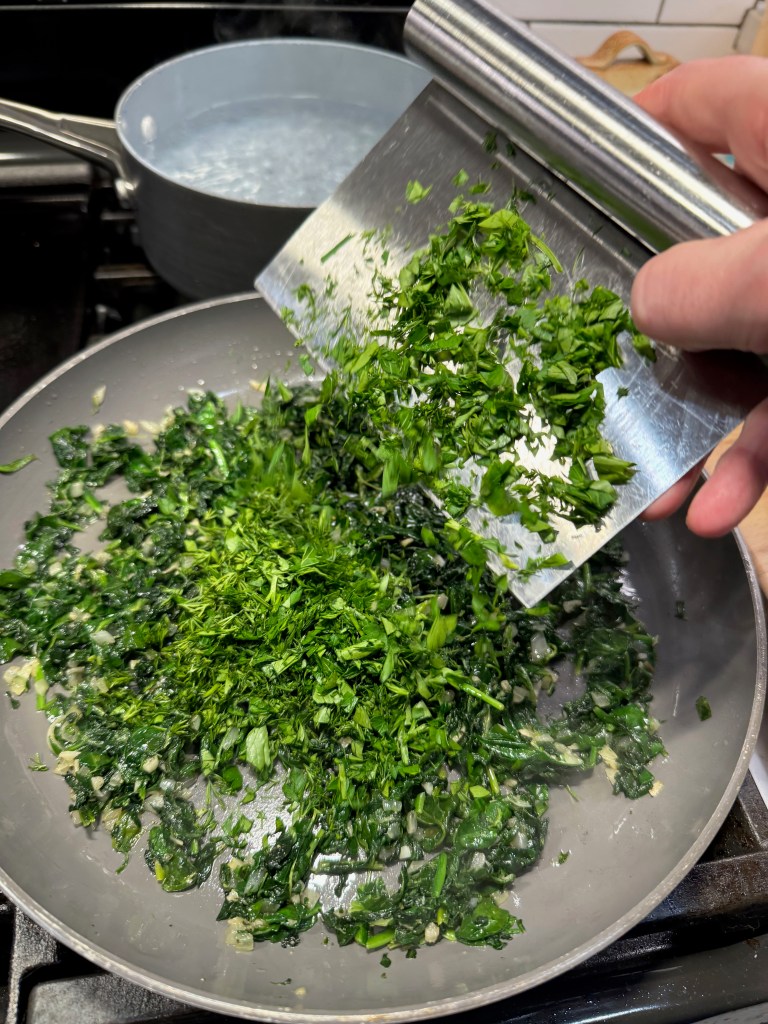
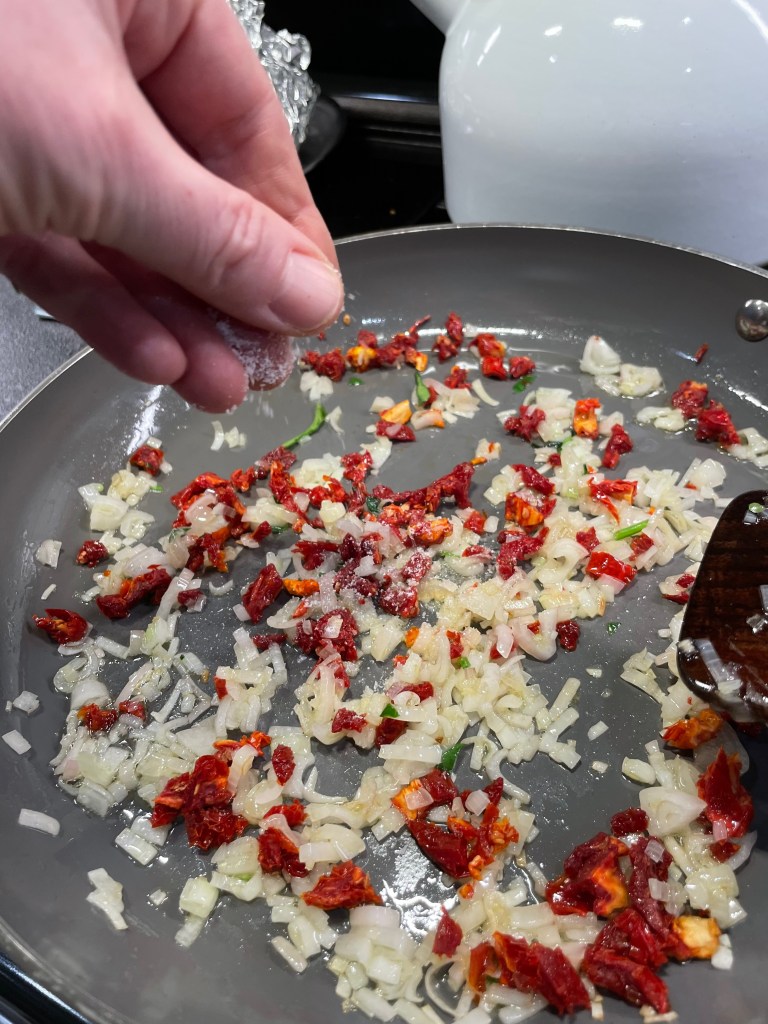
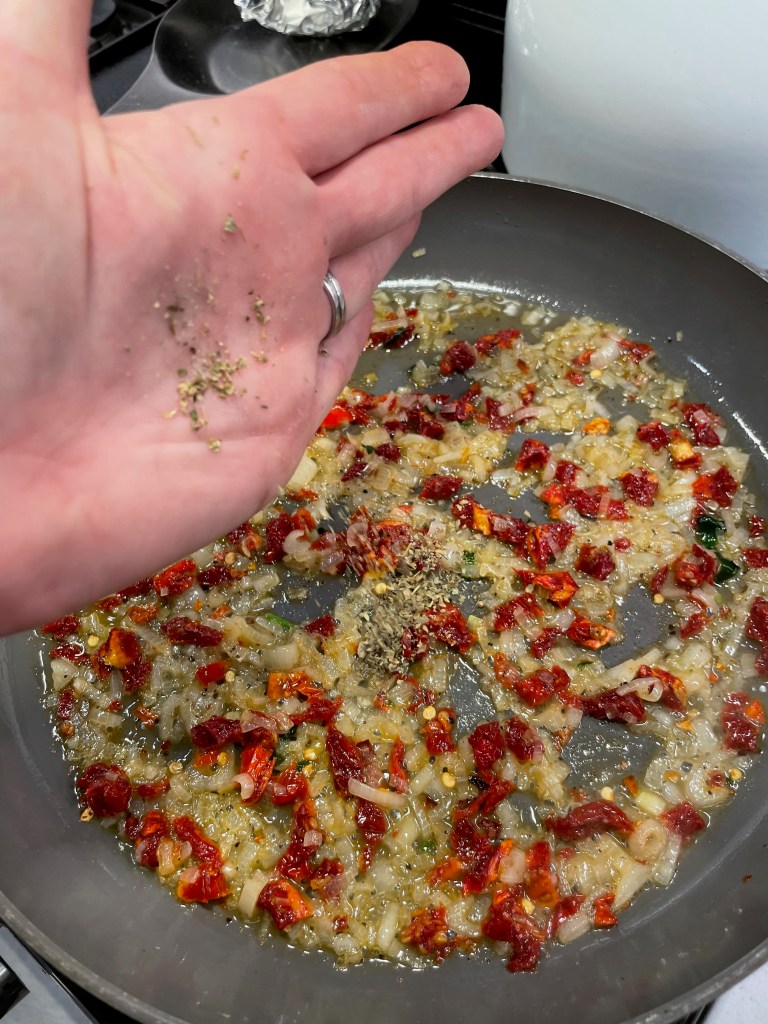
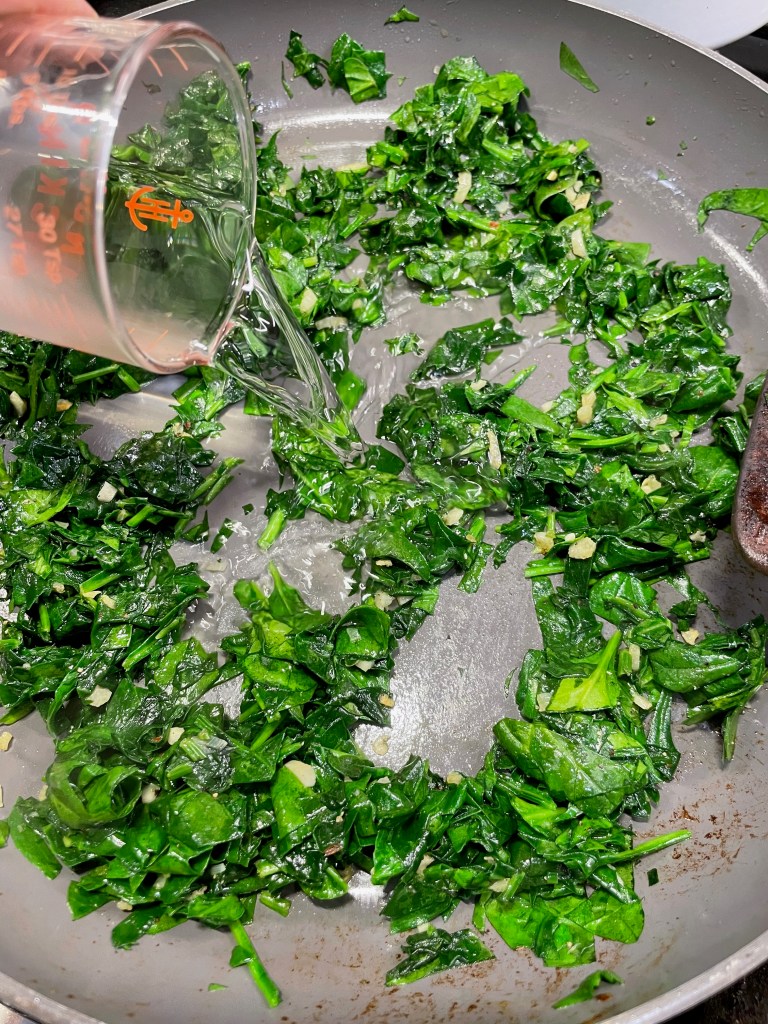
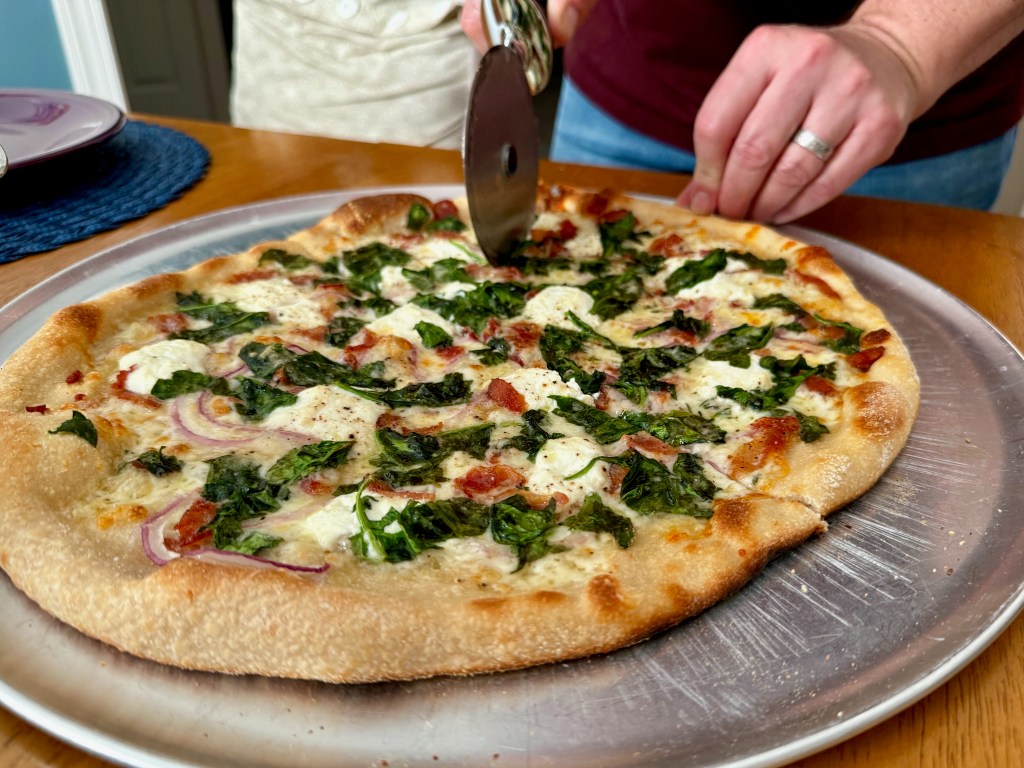
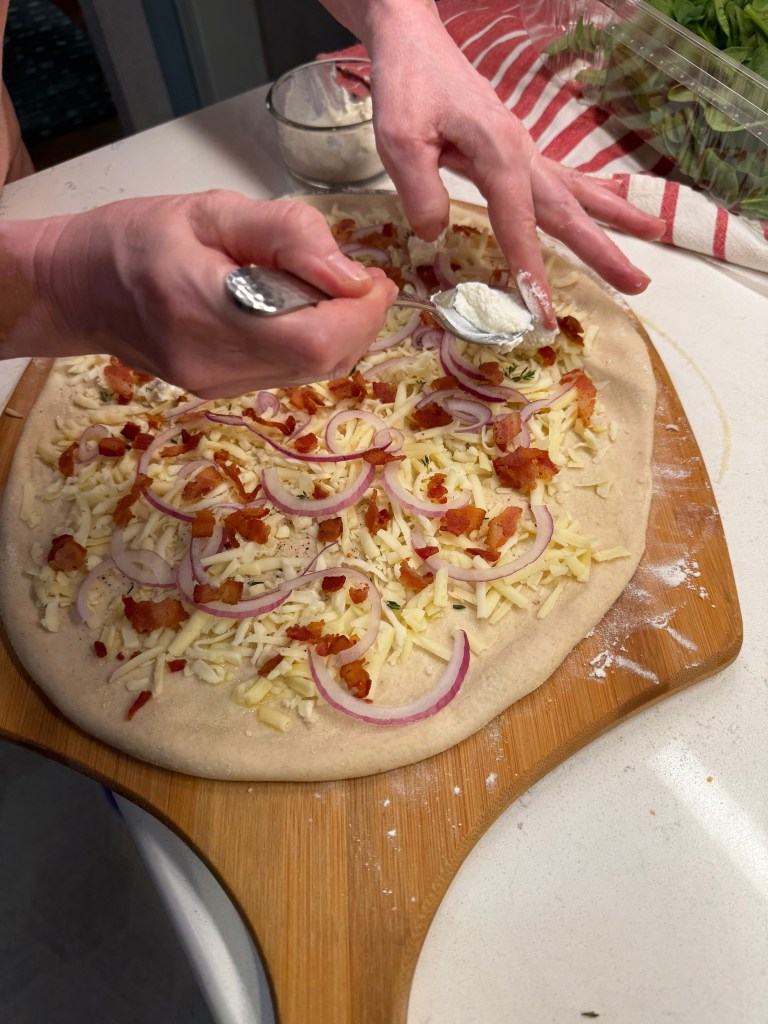
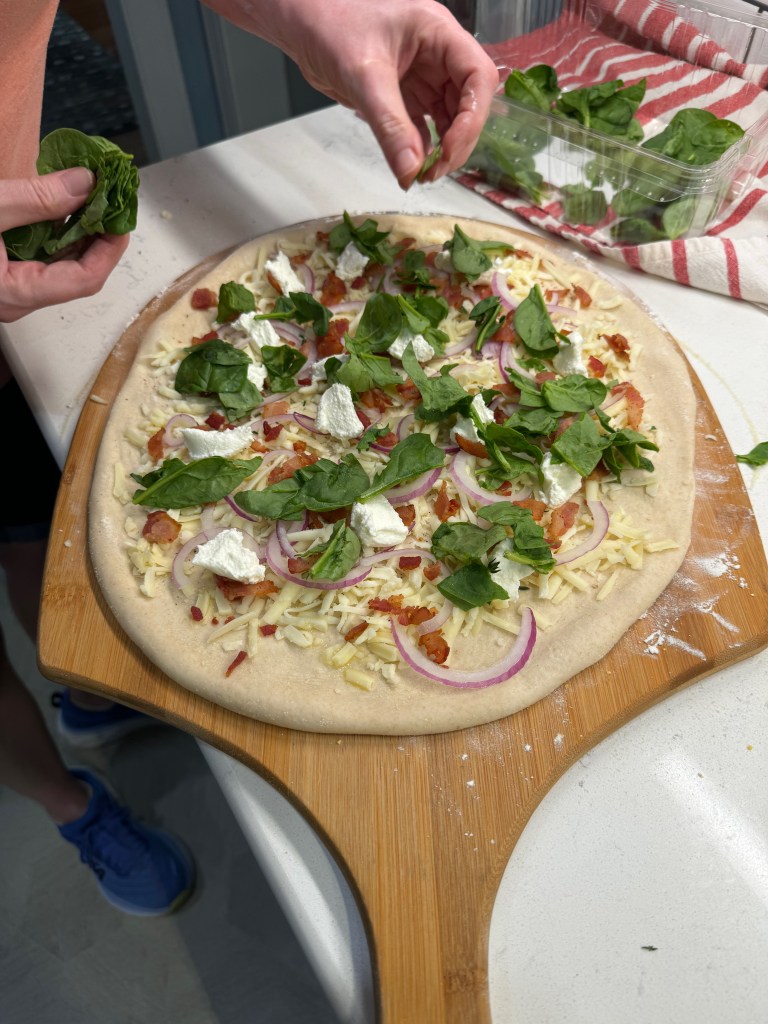
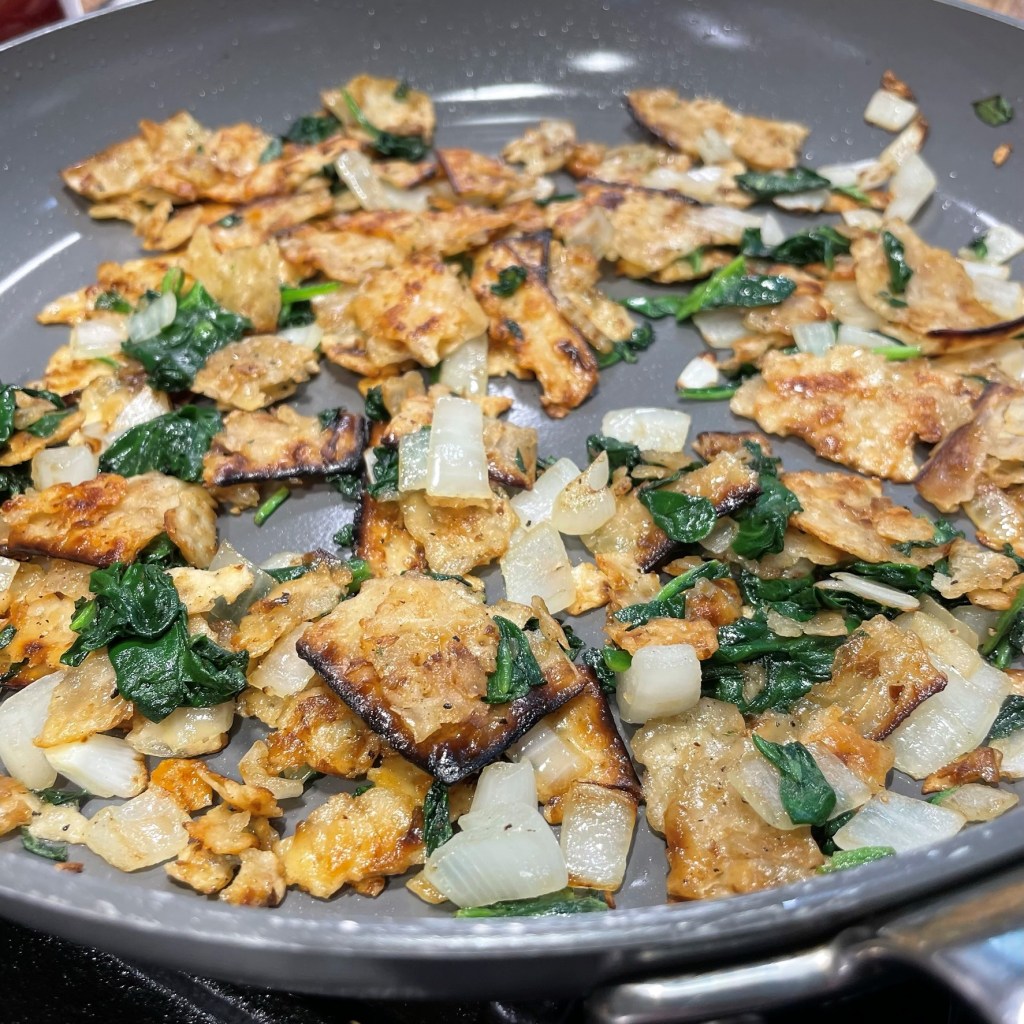
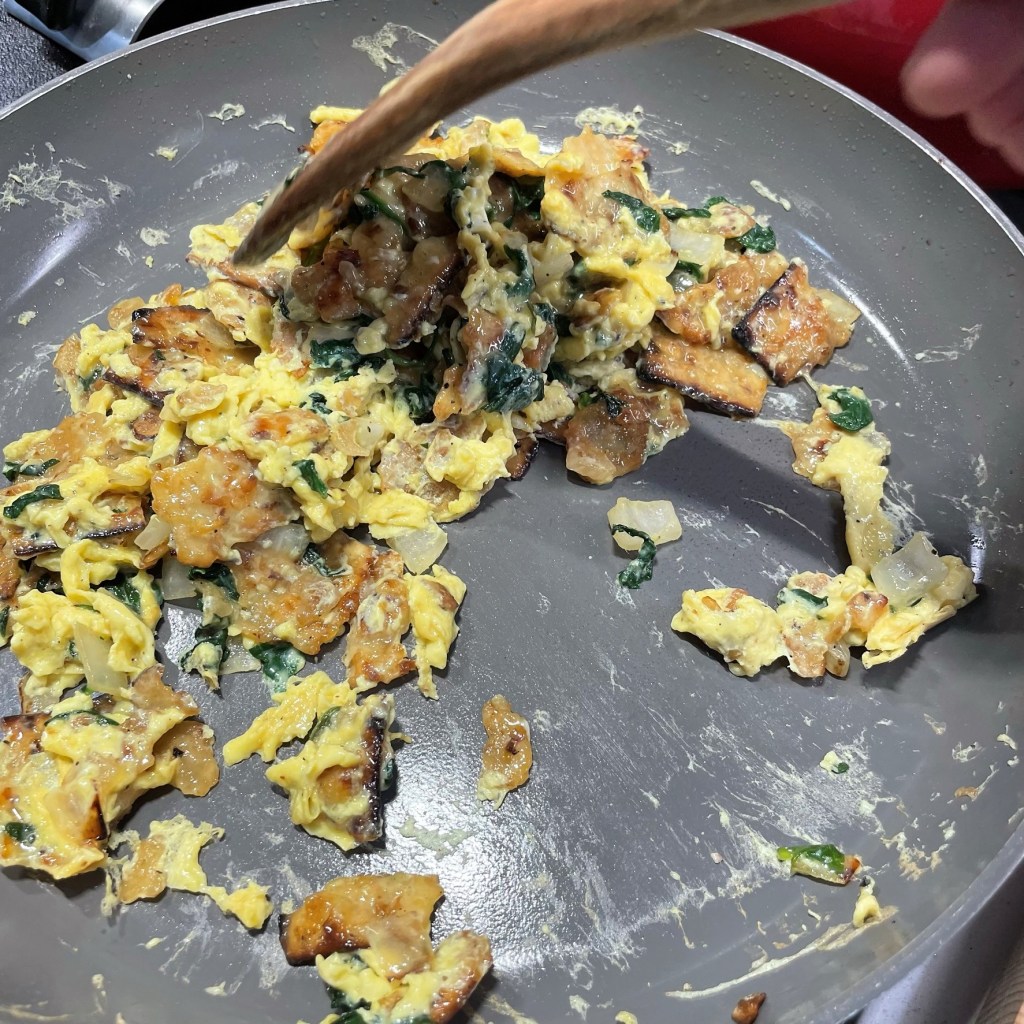
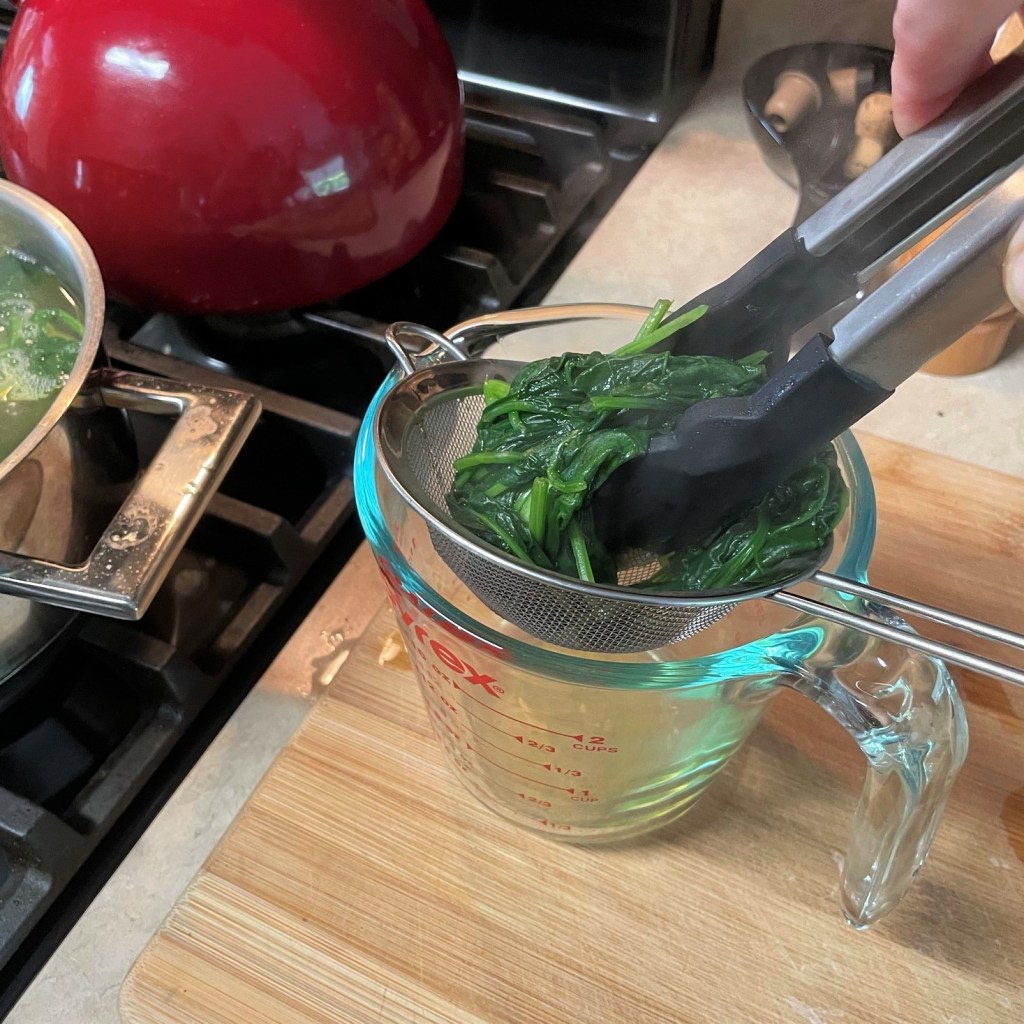
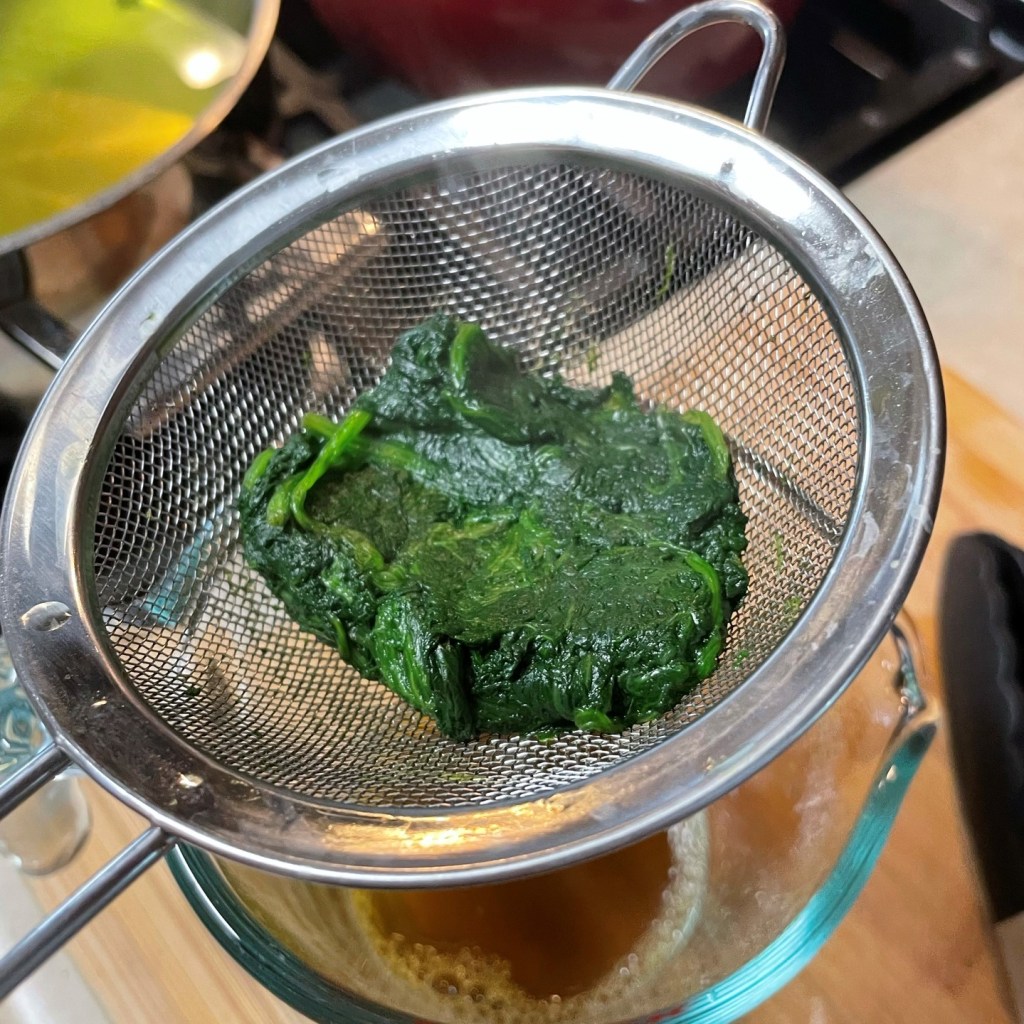
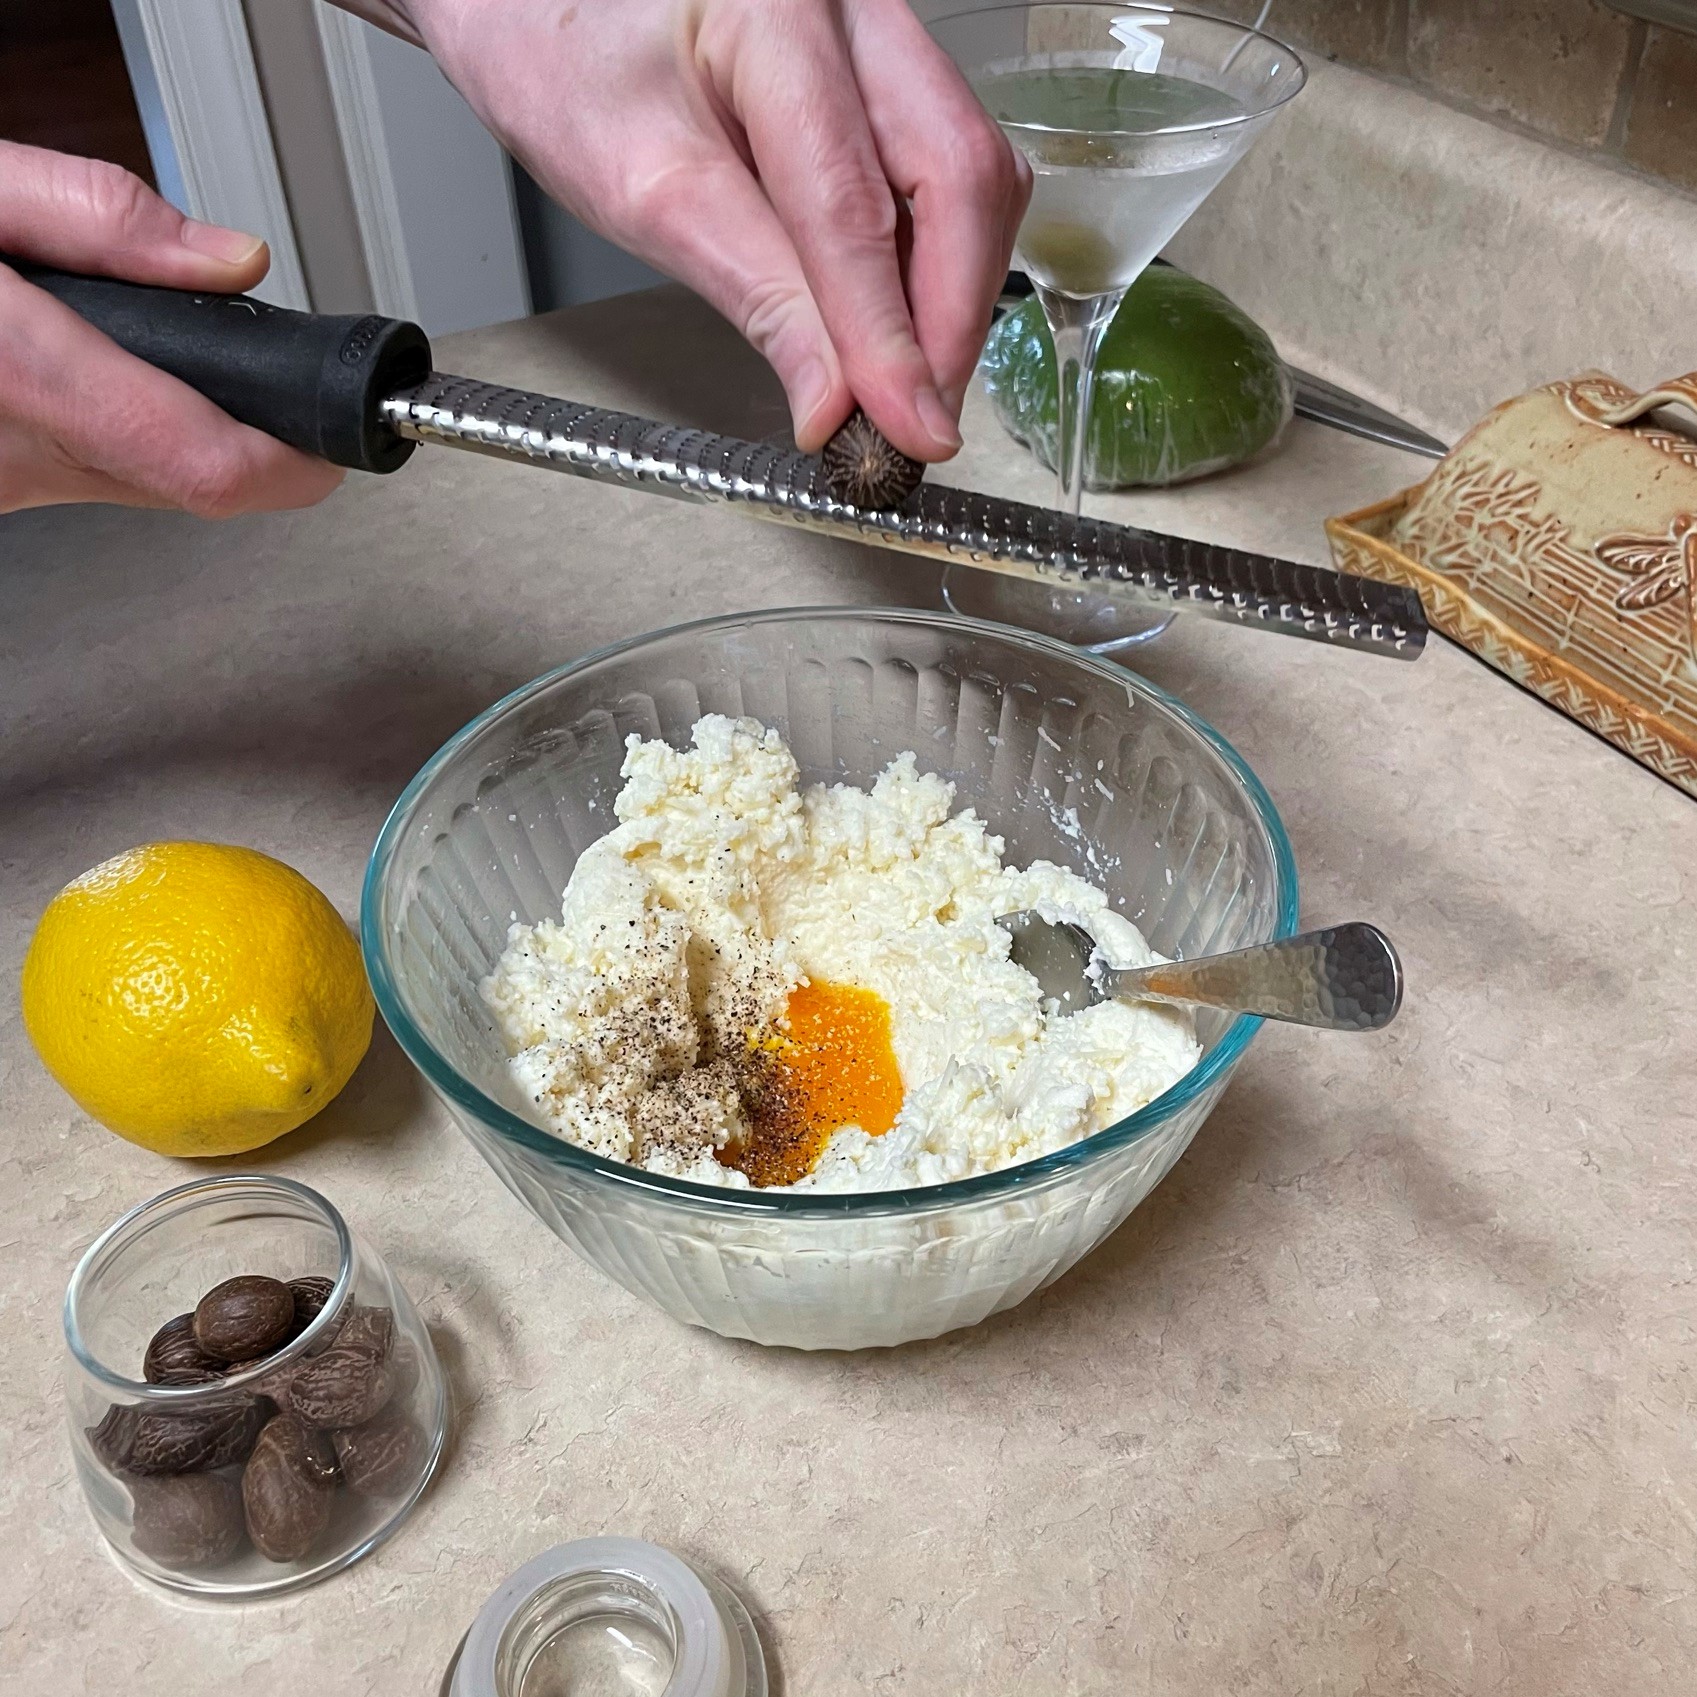
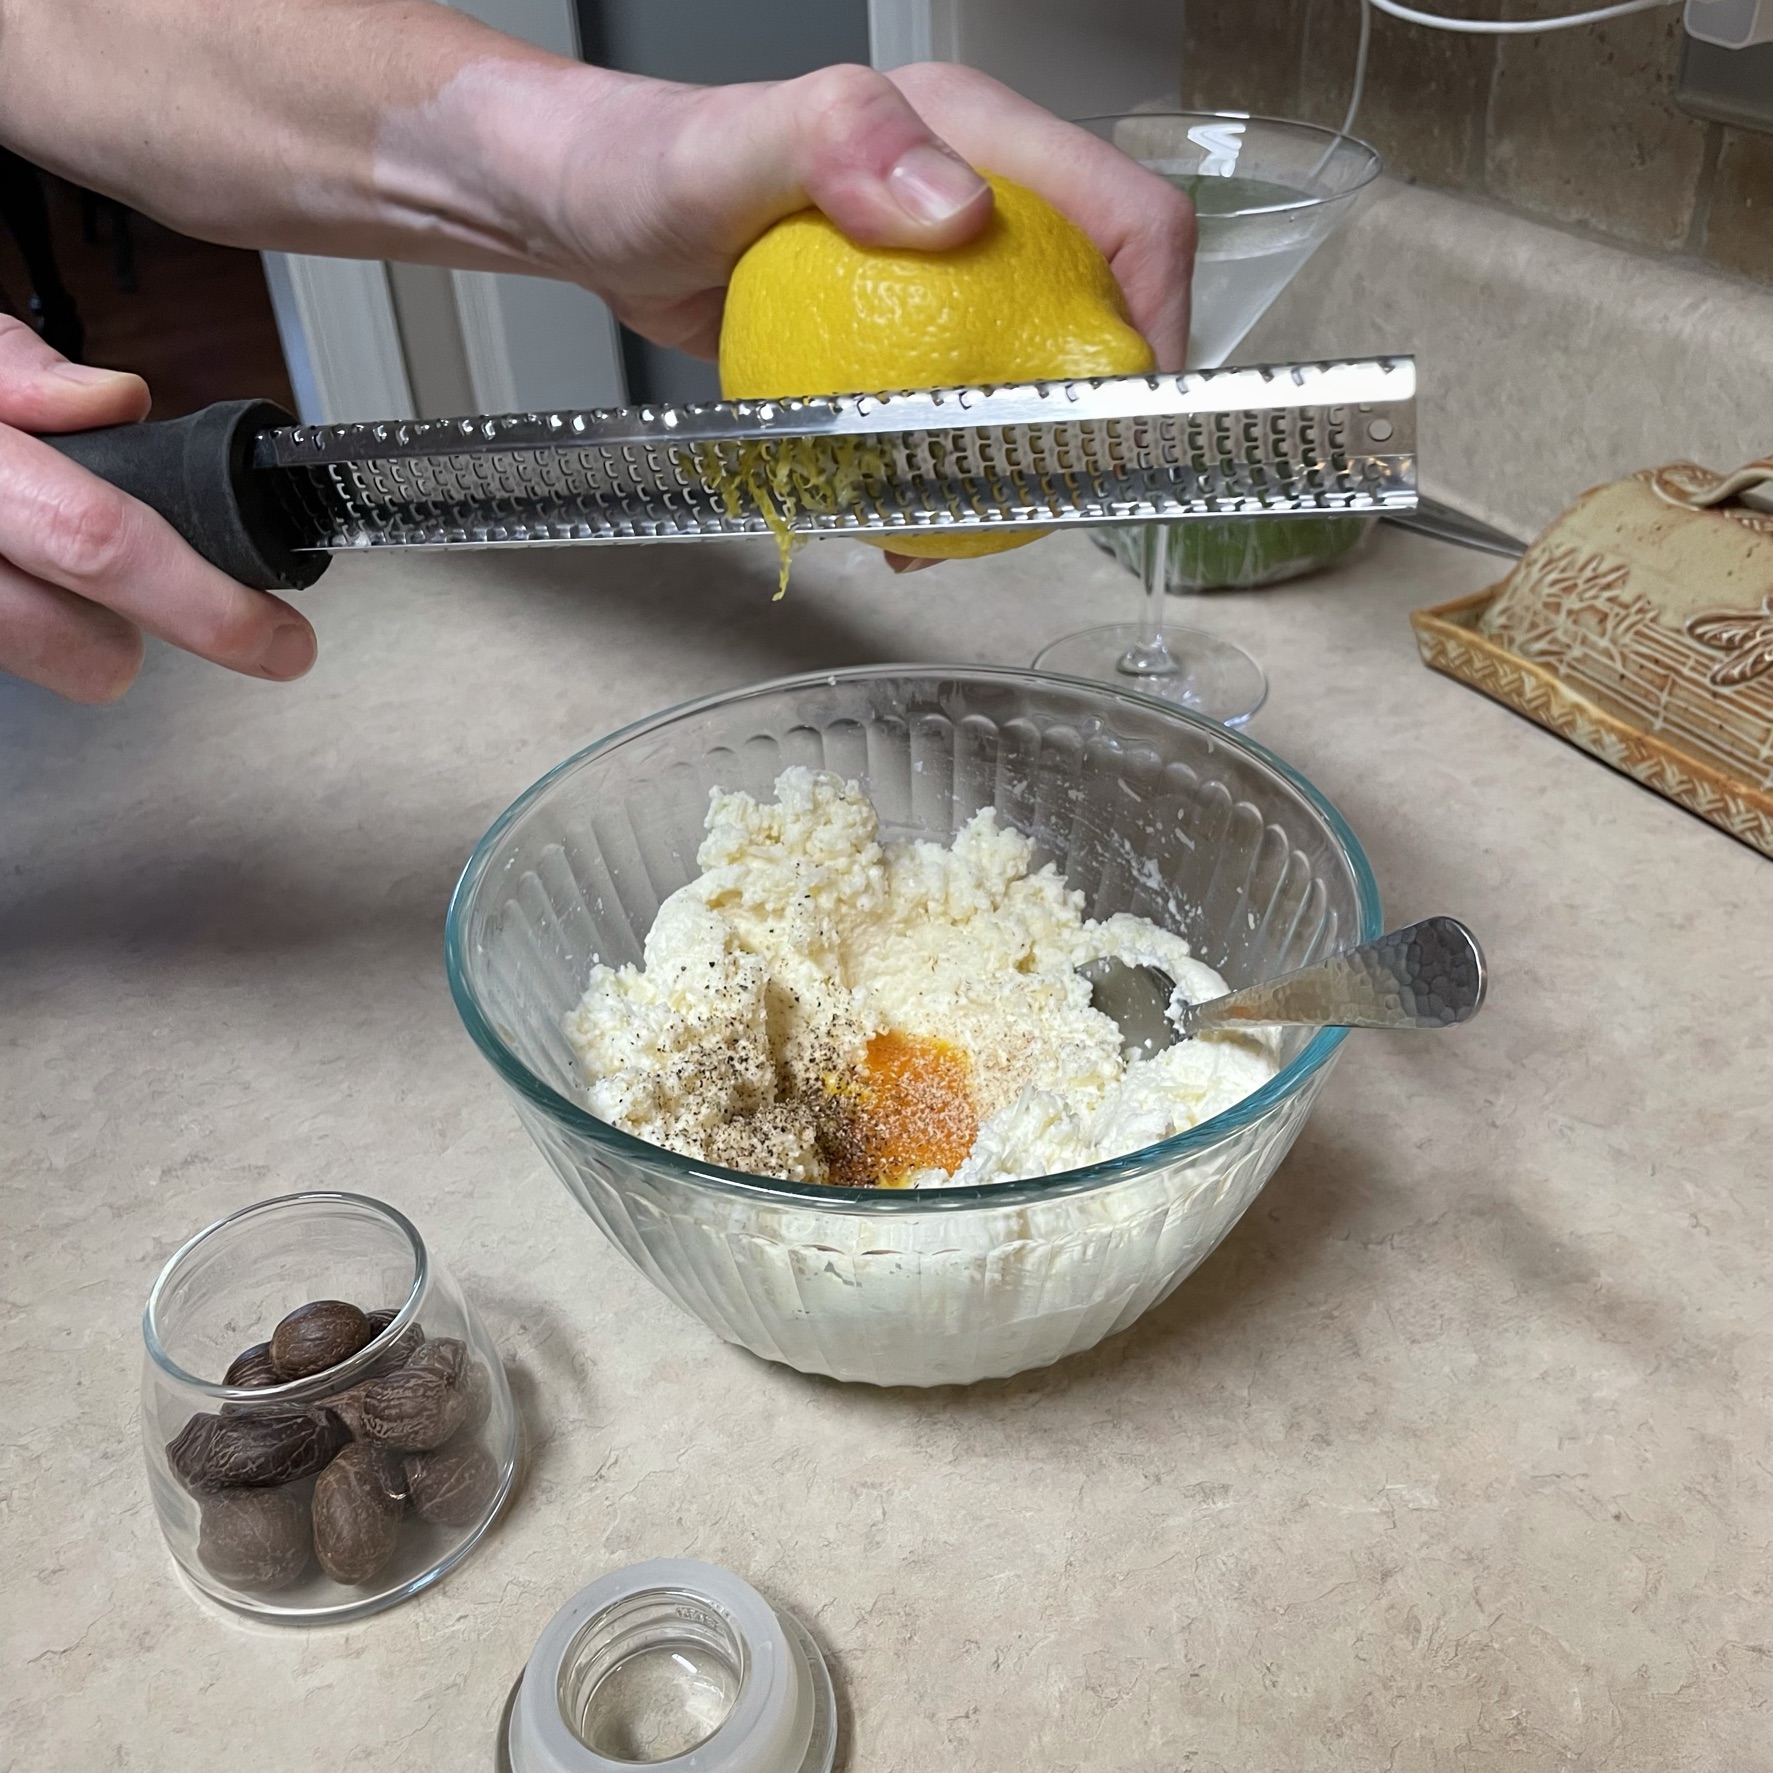
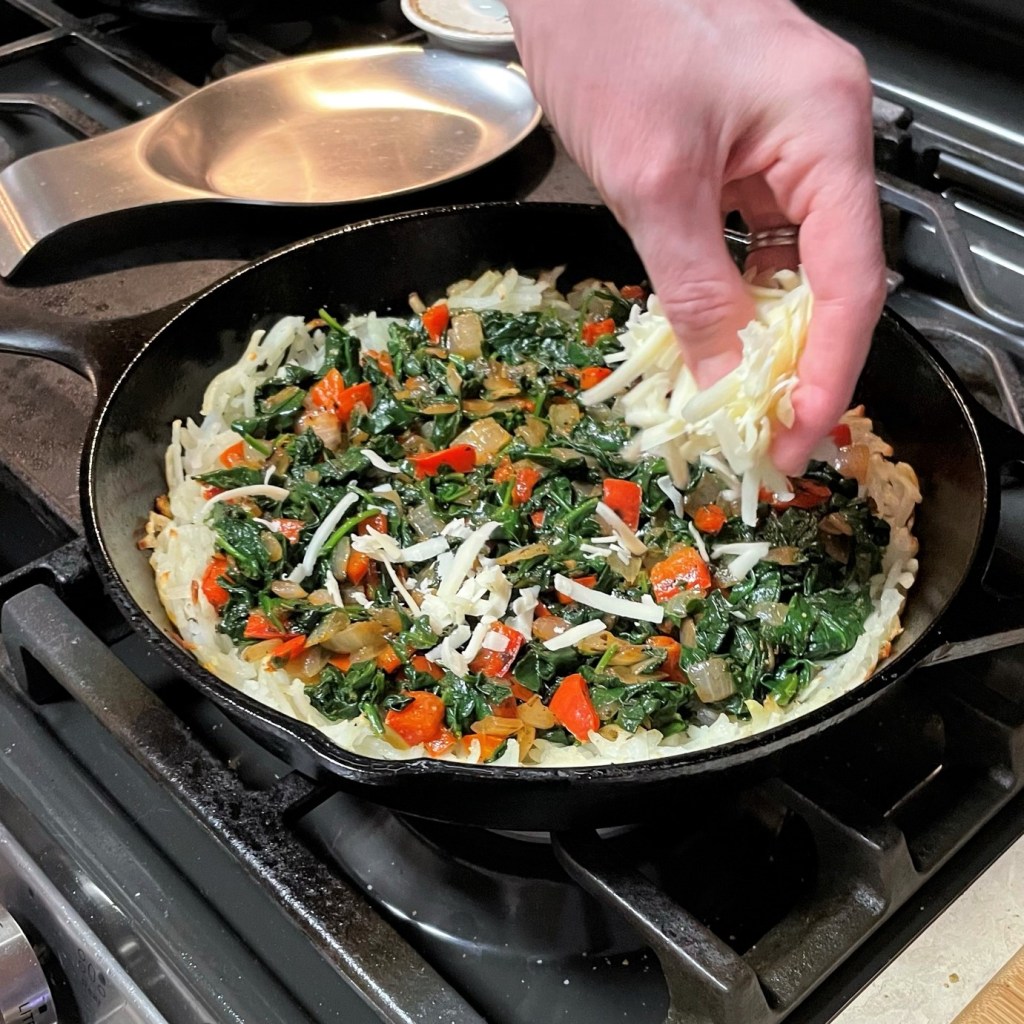
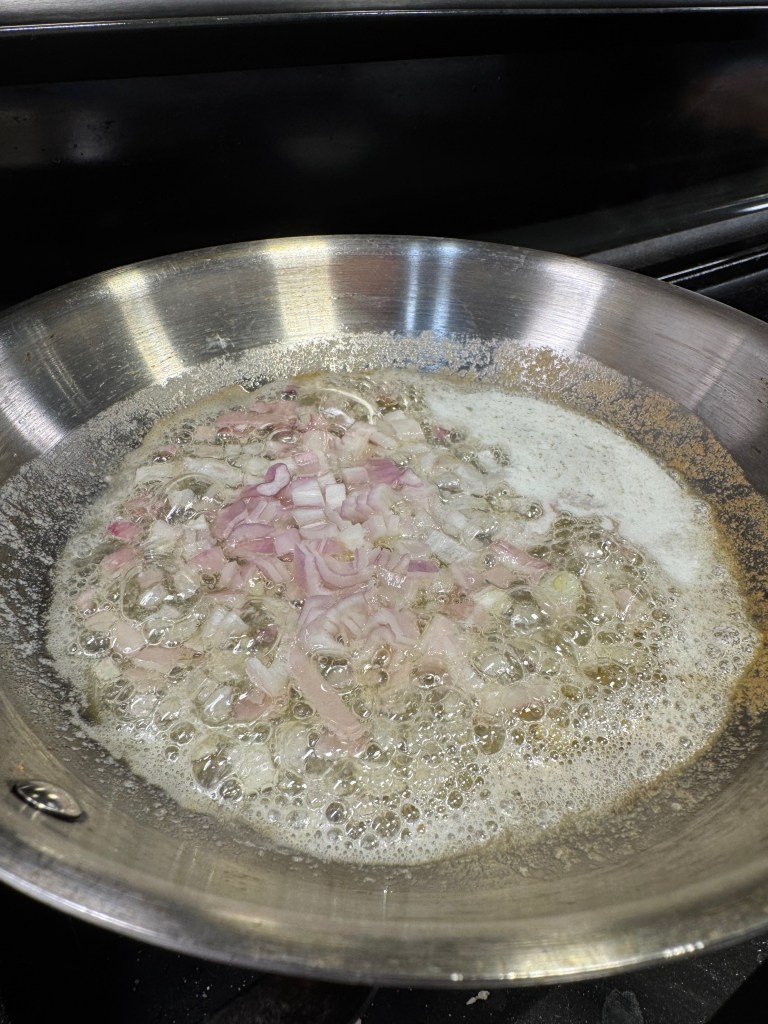
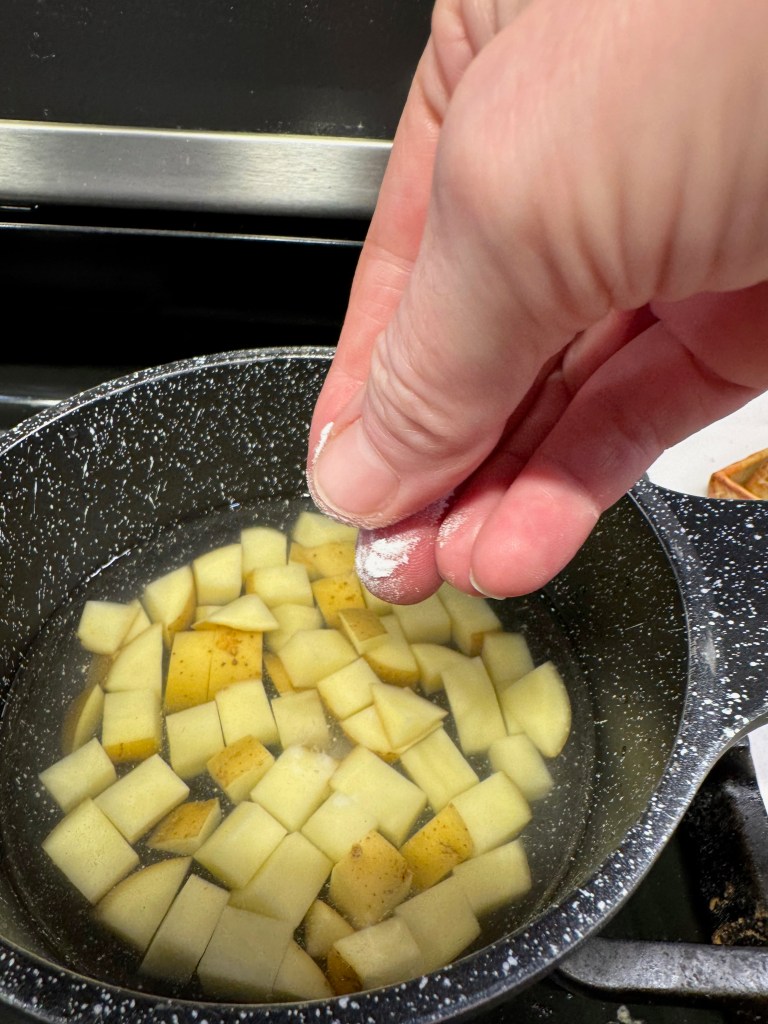
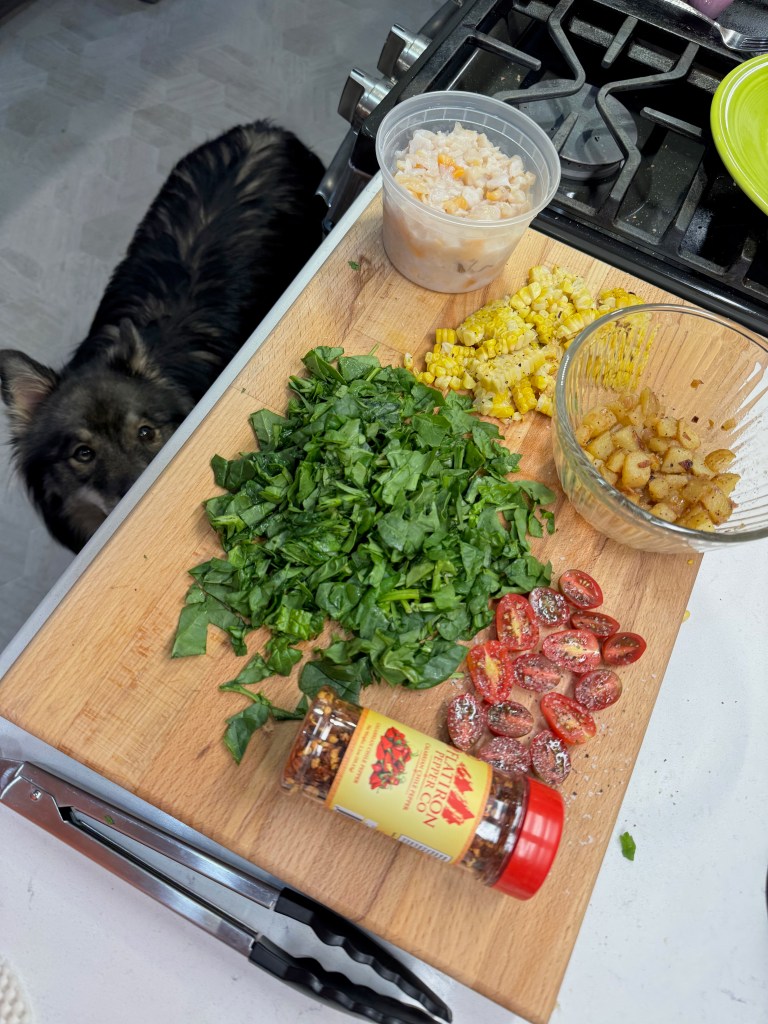
A typical clambake is outdoor cooking at its finest yet most humble. Simple ingredients, cooked over a smoldering fire until the natural flavors of ocean and earth reach their peak. Clams, corn, potatoes, onions, fresh herbs and lemon are the basic ingredients, and my list of “Leo-approved” foods was already overlapped quite a bit. Spinach would be great on this pizza, and baby tomatoes would add a nice pop of color and acidity to balance the richness of the clams. Potatoes may seem like an odd topping for pizza, but it worked really well on my steak and potato pizza a few years ago, so why not? I parboiled cubed Yukon golds and then fried them up in butter with the shallots. 


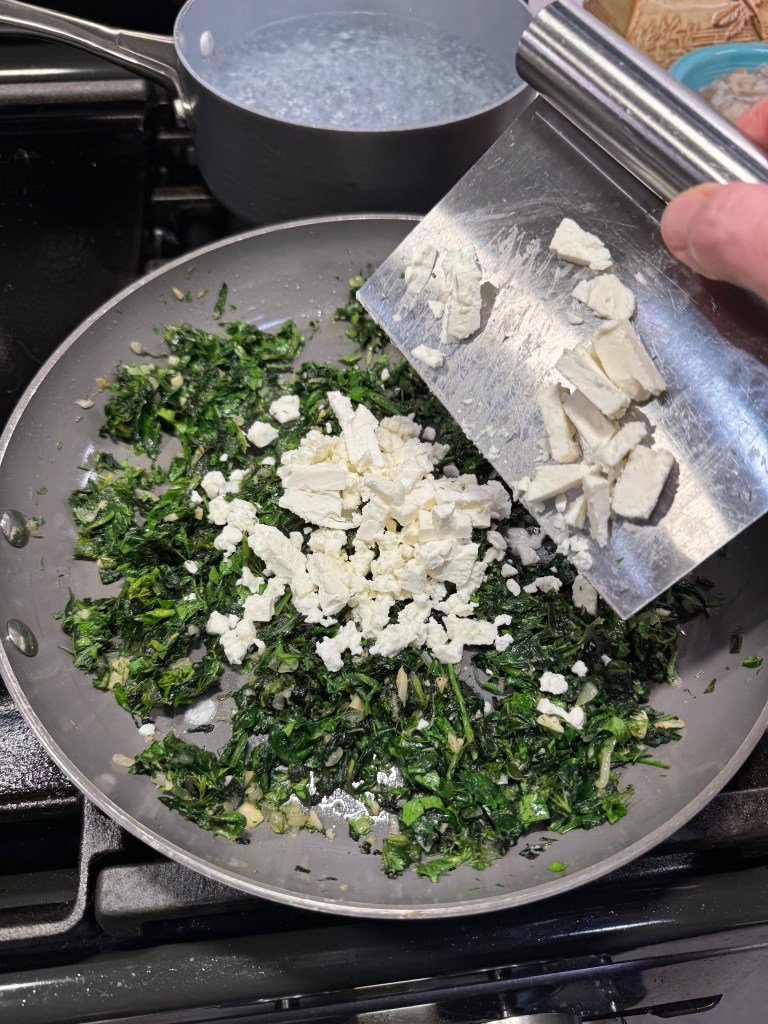
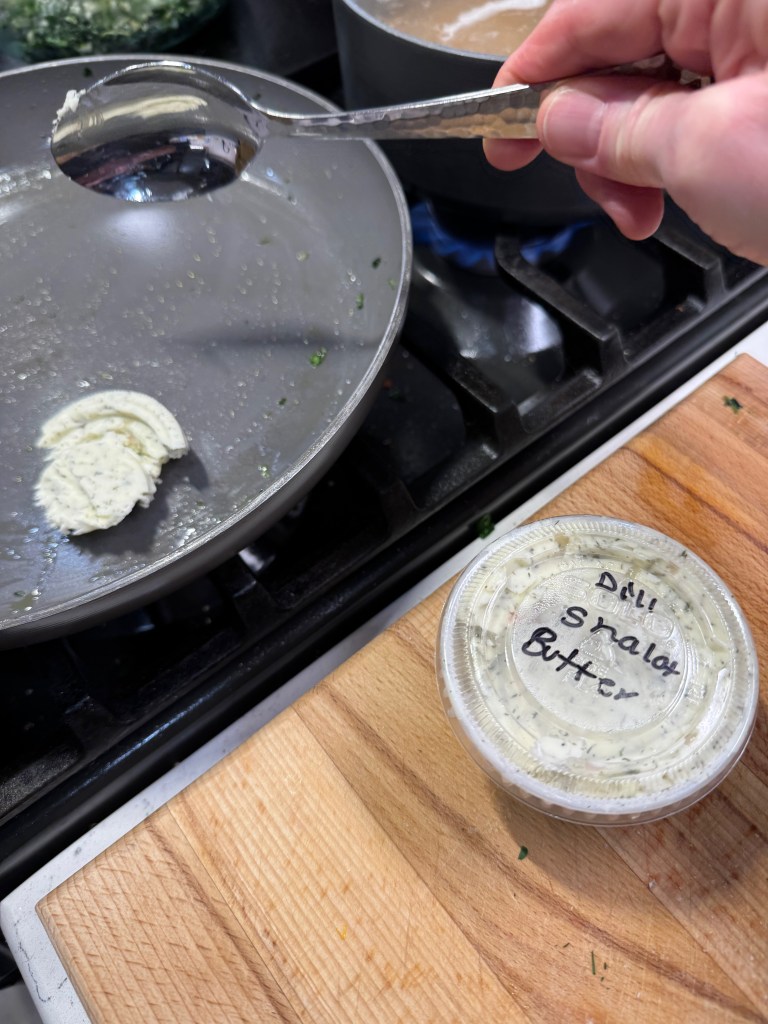
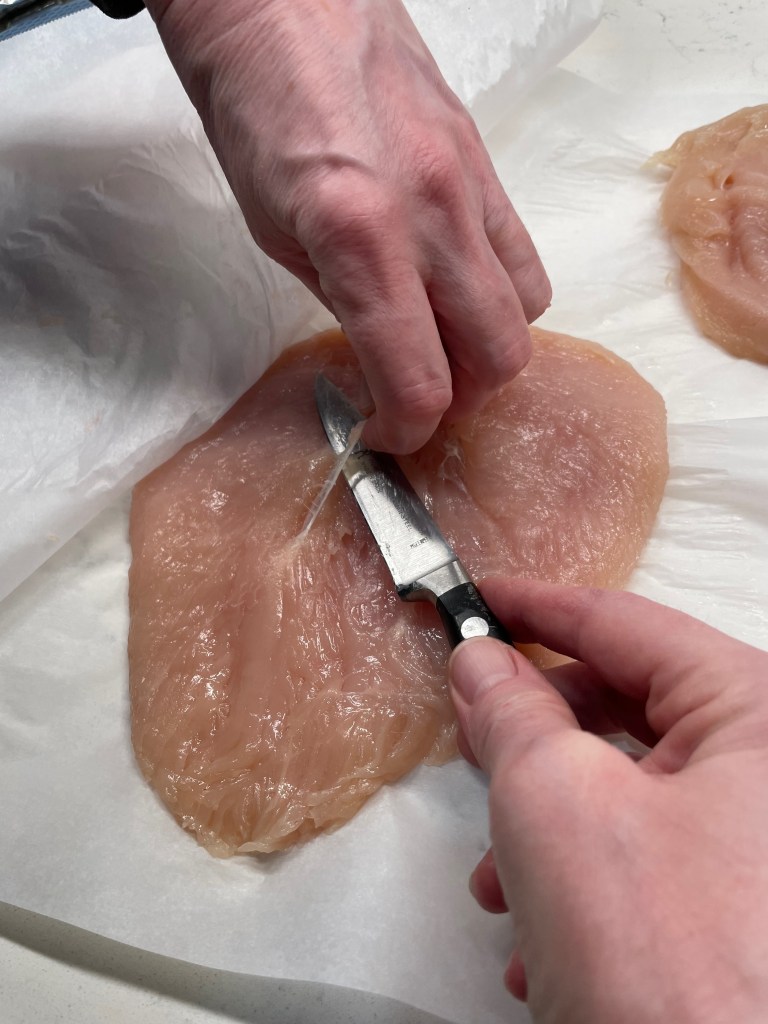
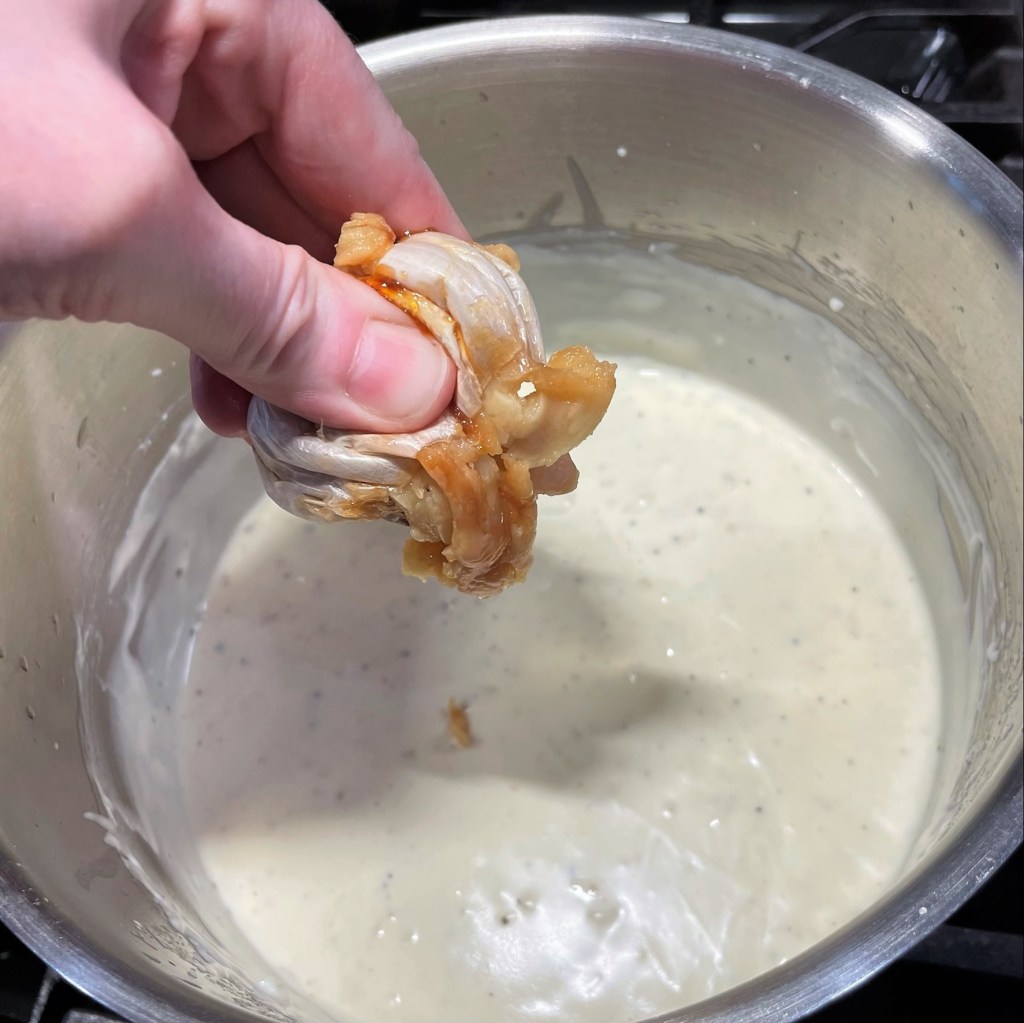
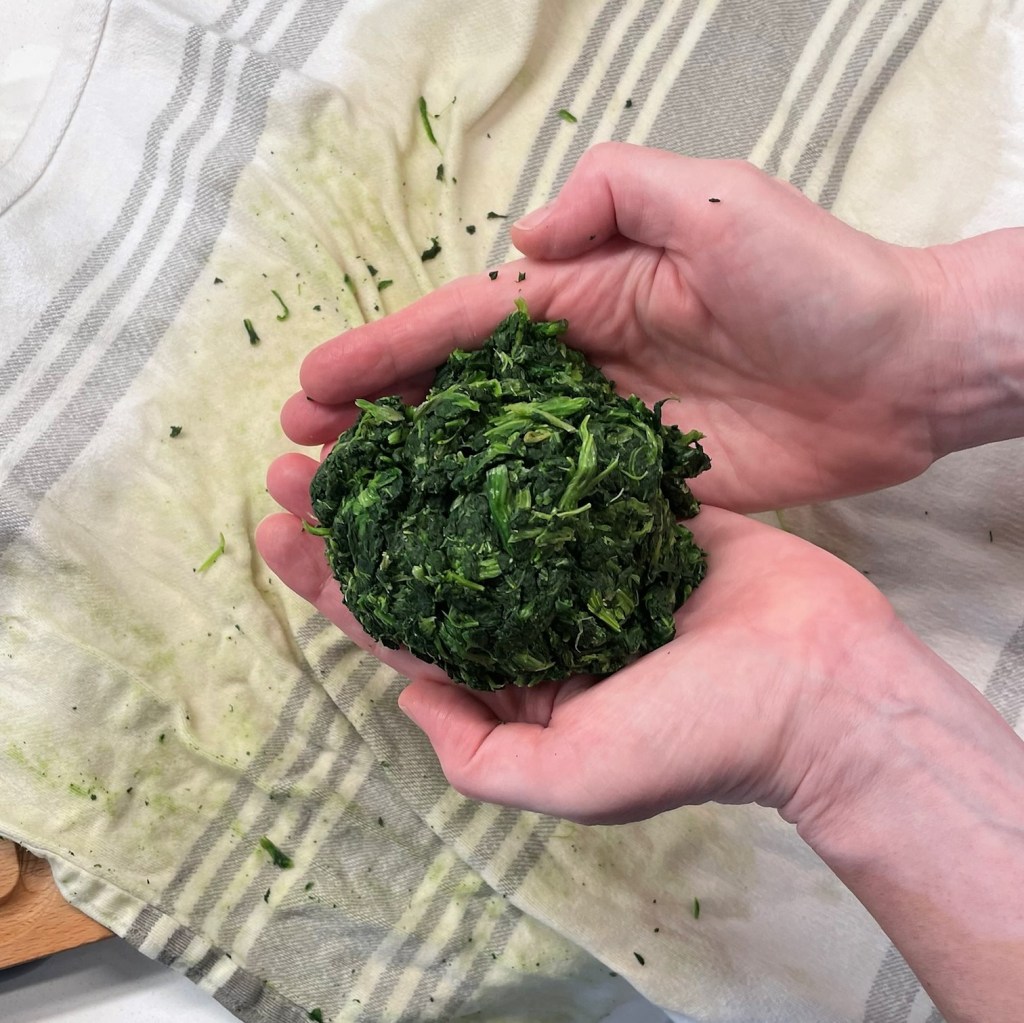
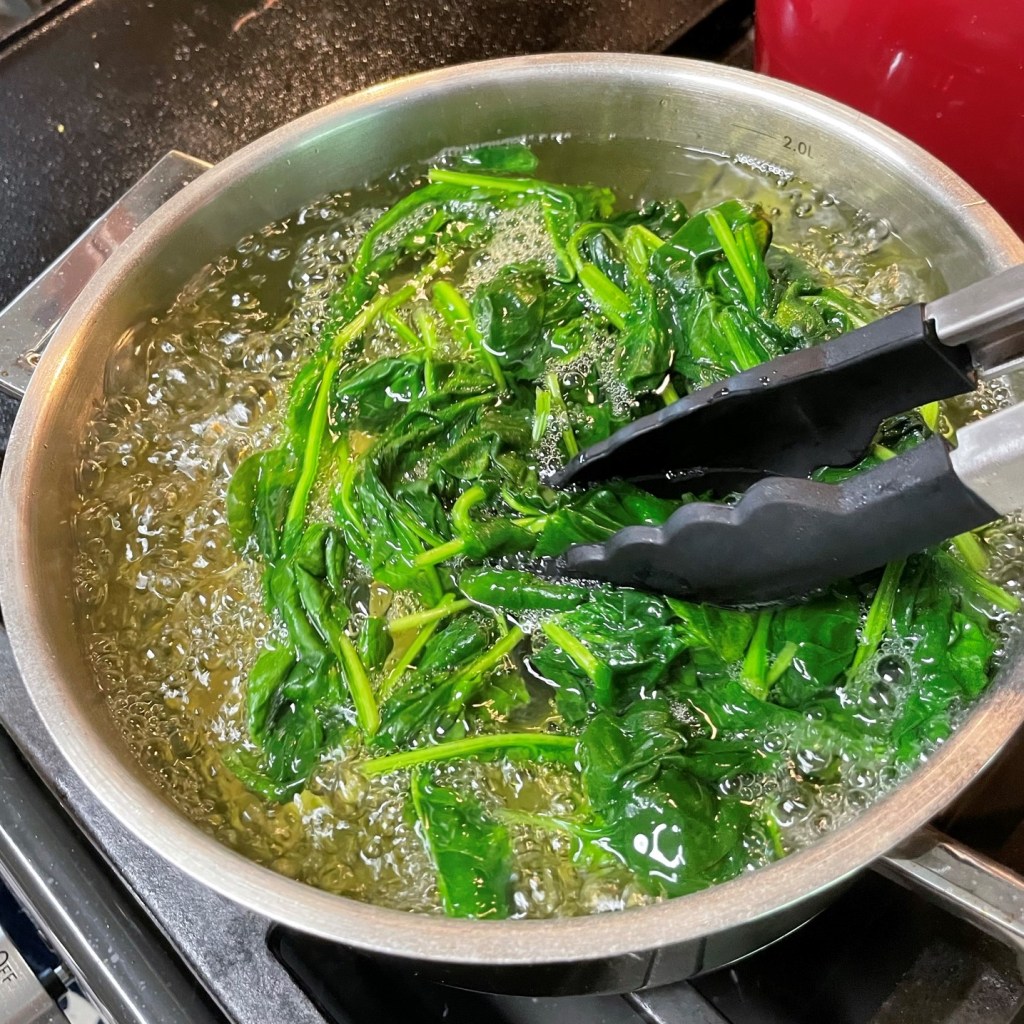
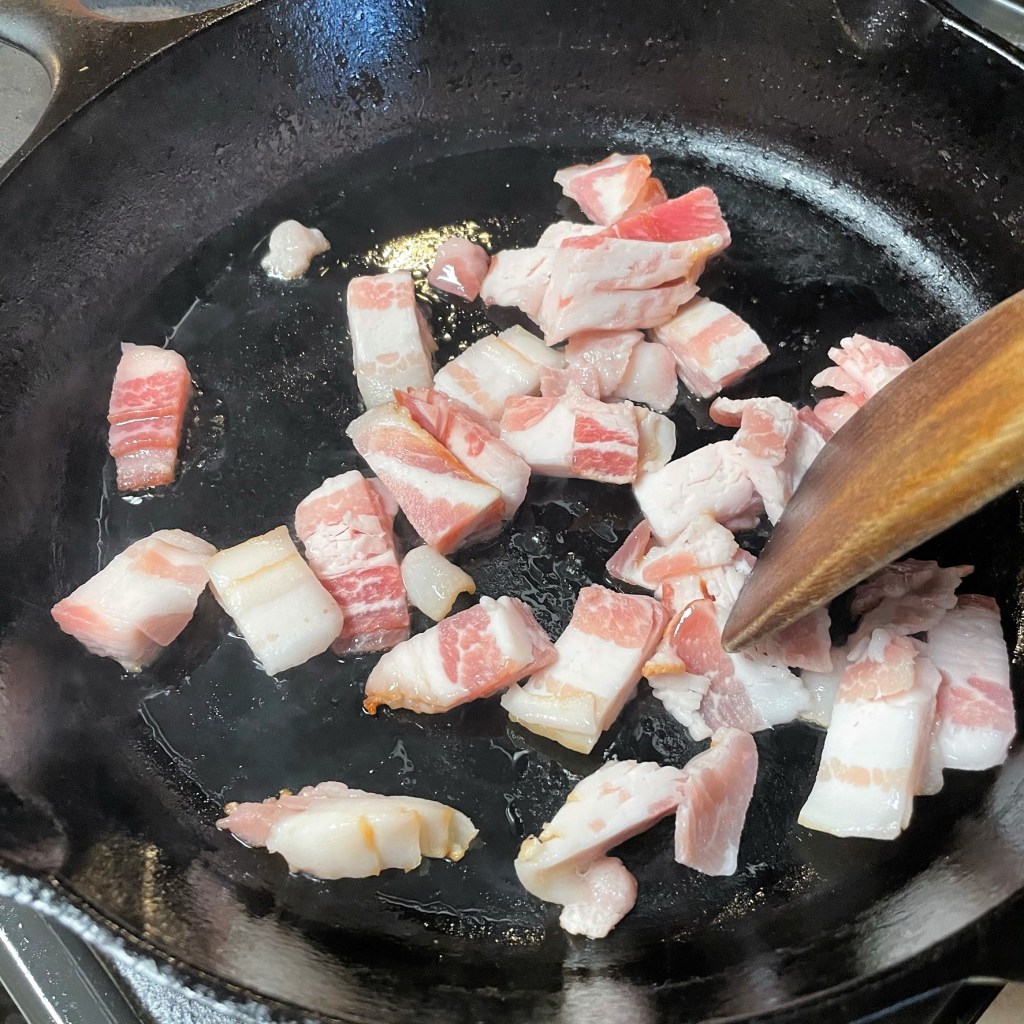
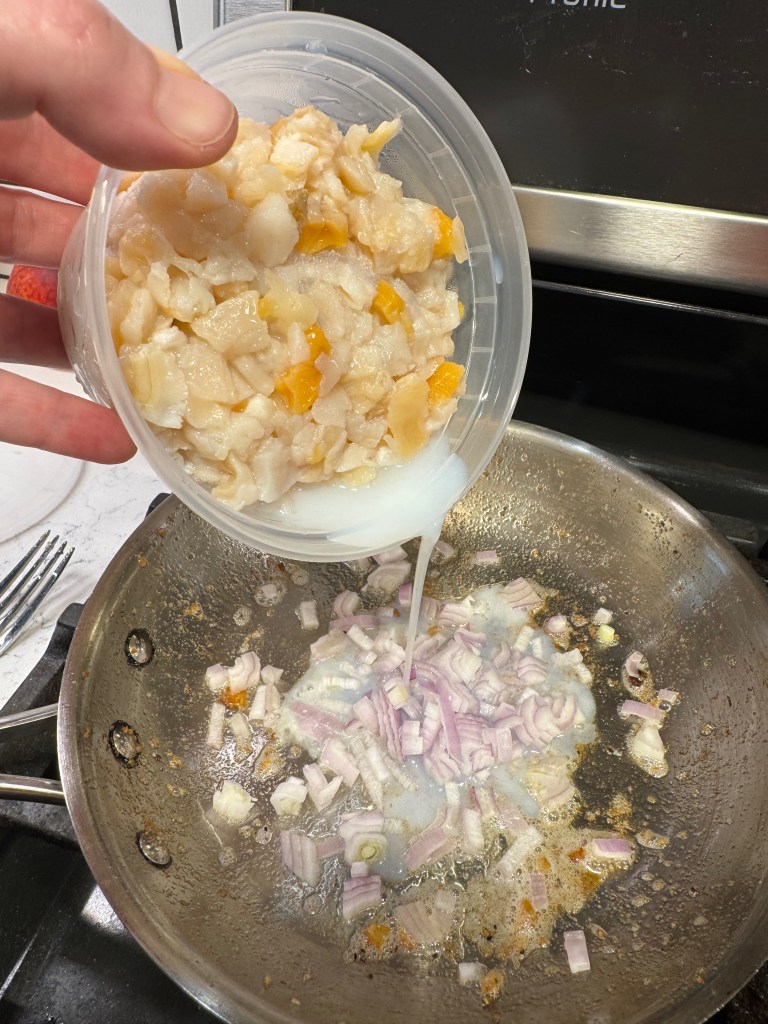
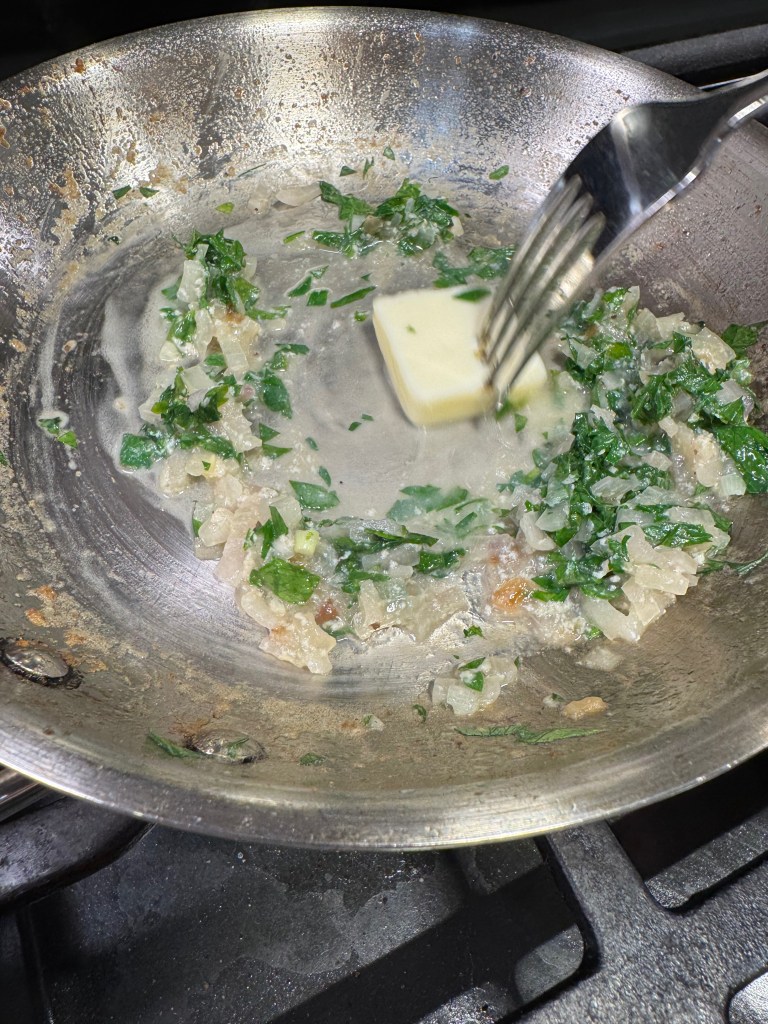
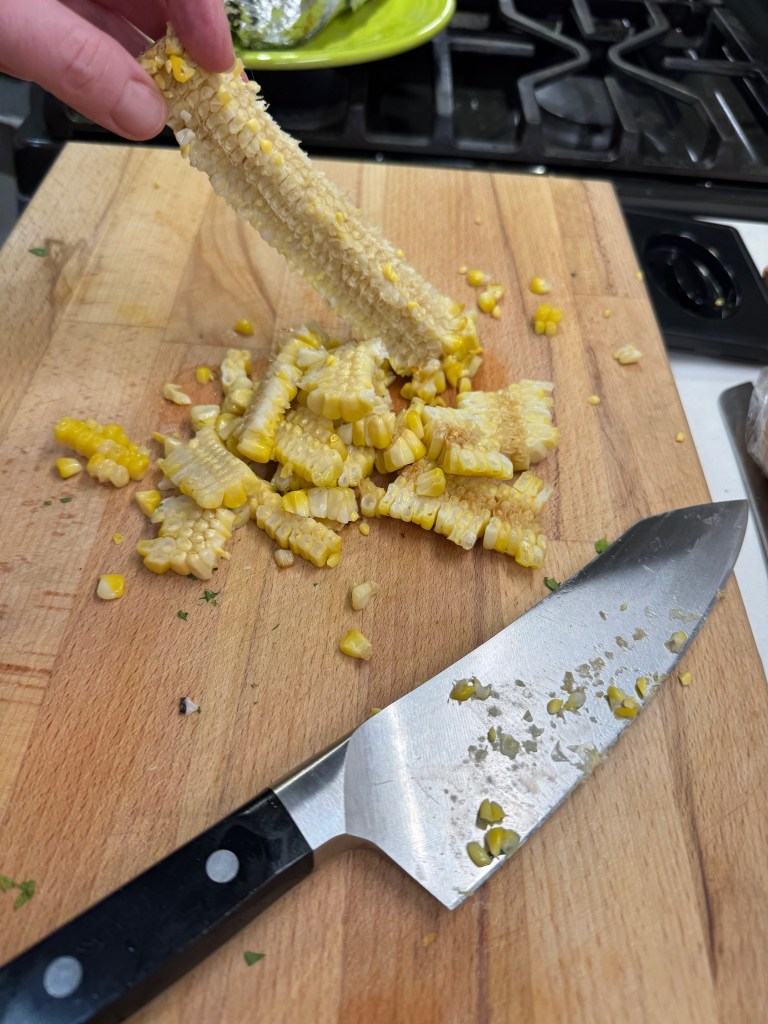
My littleneck clams came from my favorite local seafood shop— fresh from the Atlantic, already cleaned, shucked and chopped. For obvious reasons, they couldn’t go onto the pizza in their shells. After the potatoes were crisped up, I poured the flavorful clam “liquor” into the pan, and swirled in some butter with fresh parsley to dollop on the pizza before baking. I stripped an ear of grilled corn and chopped up the baby spinach, and we were ready to rock and roll.


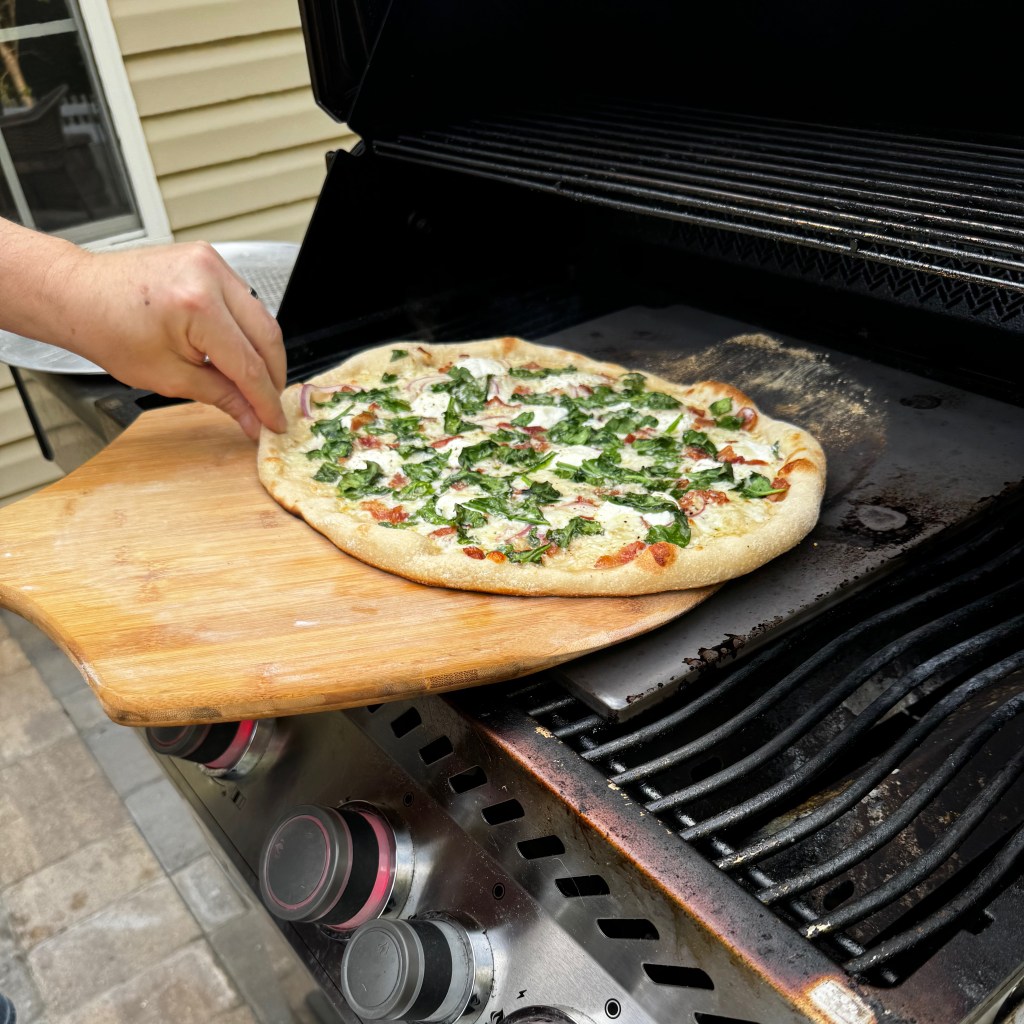
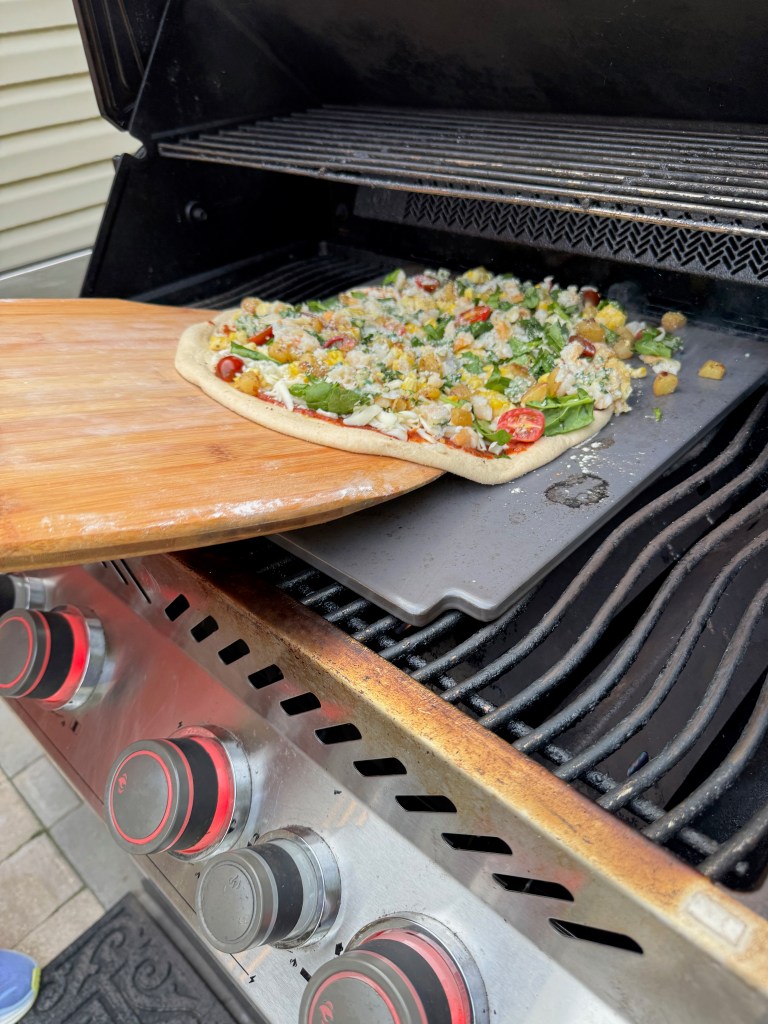
Cooking pizza on the grill

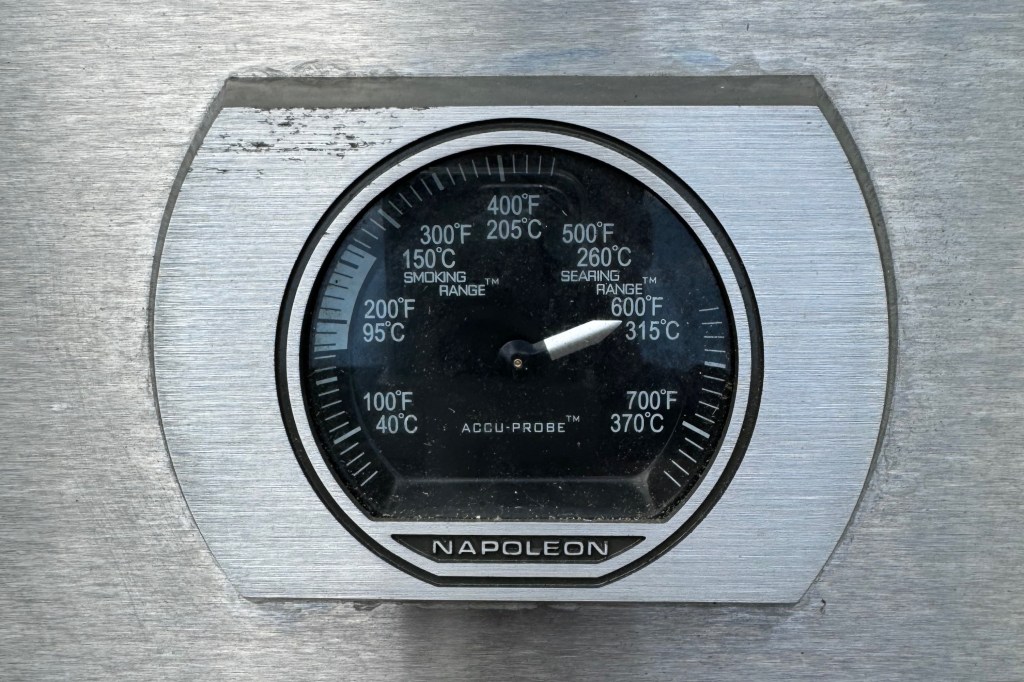
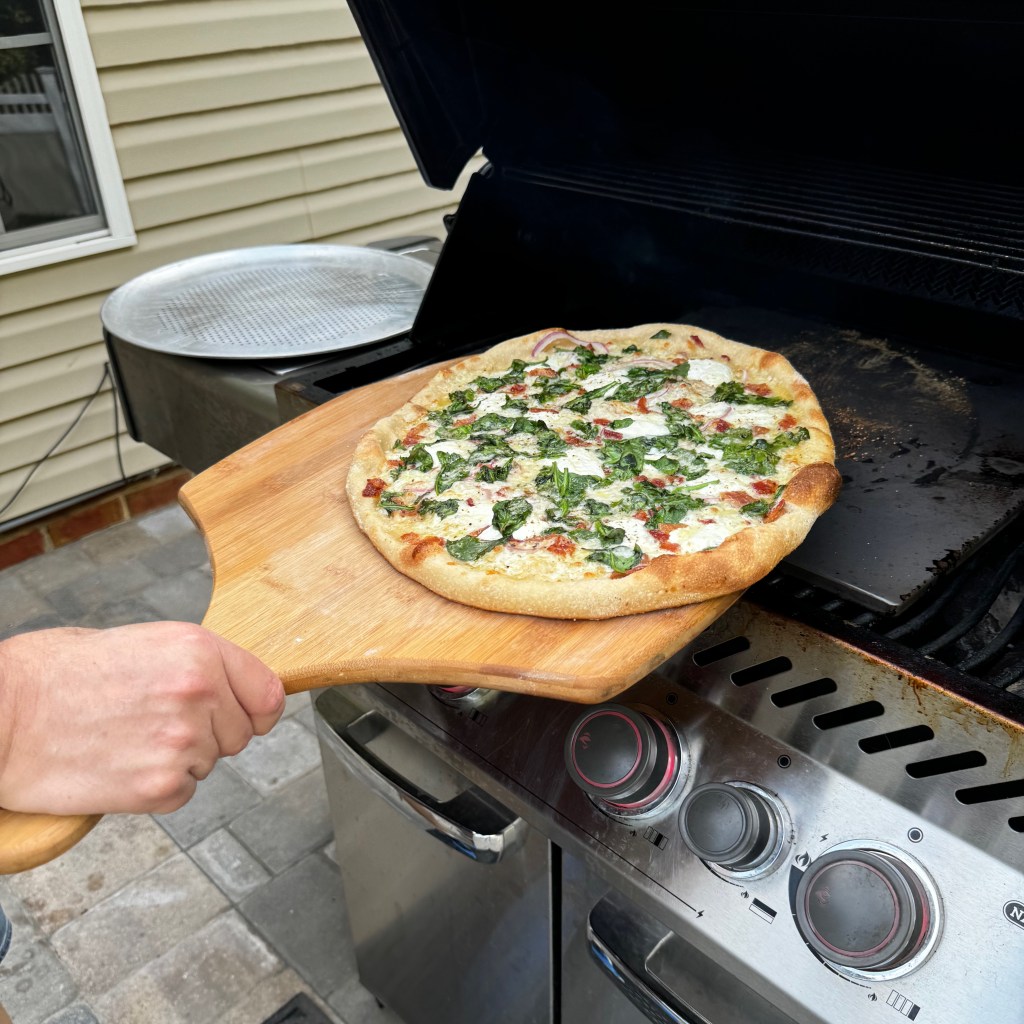
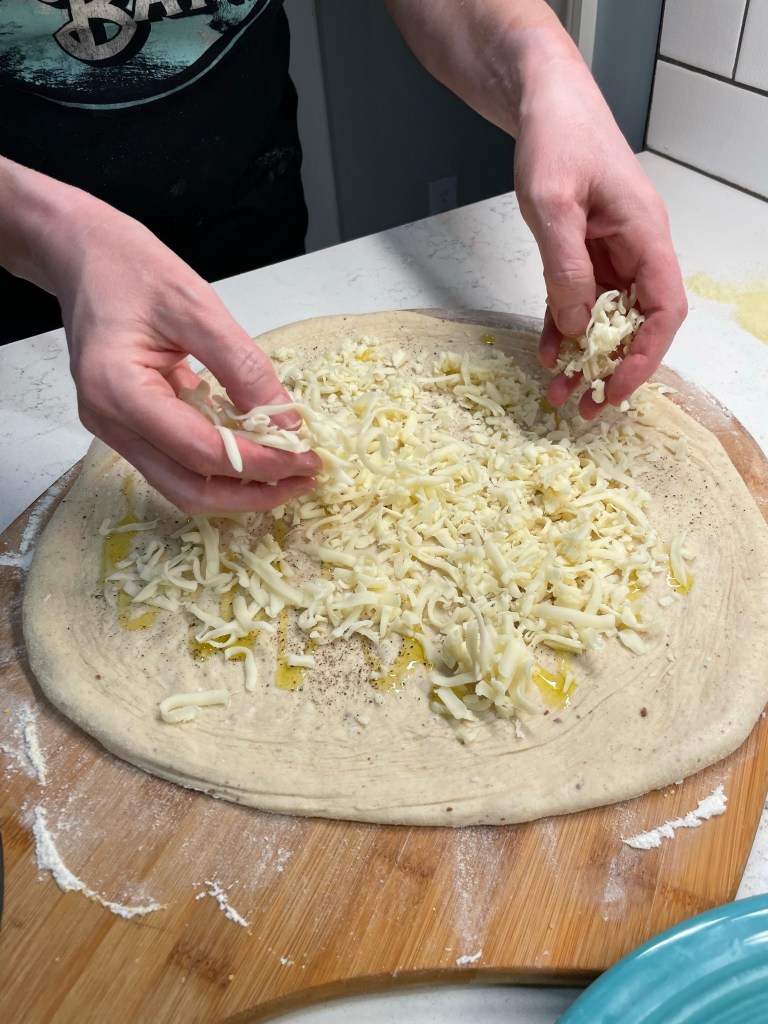
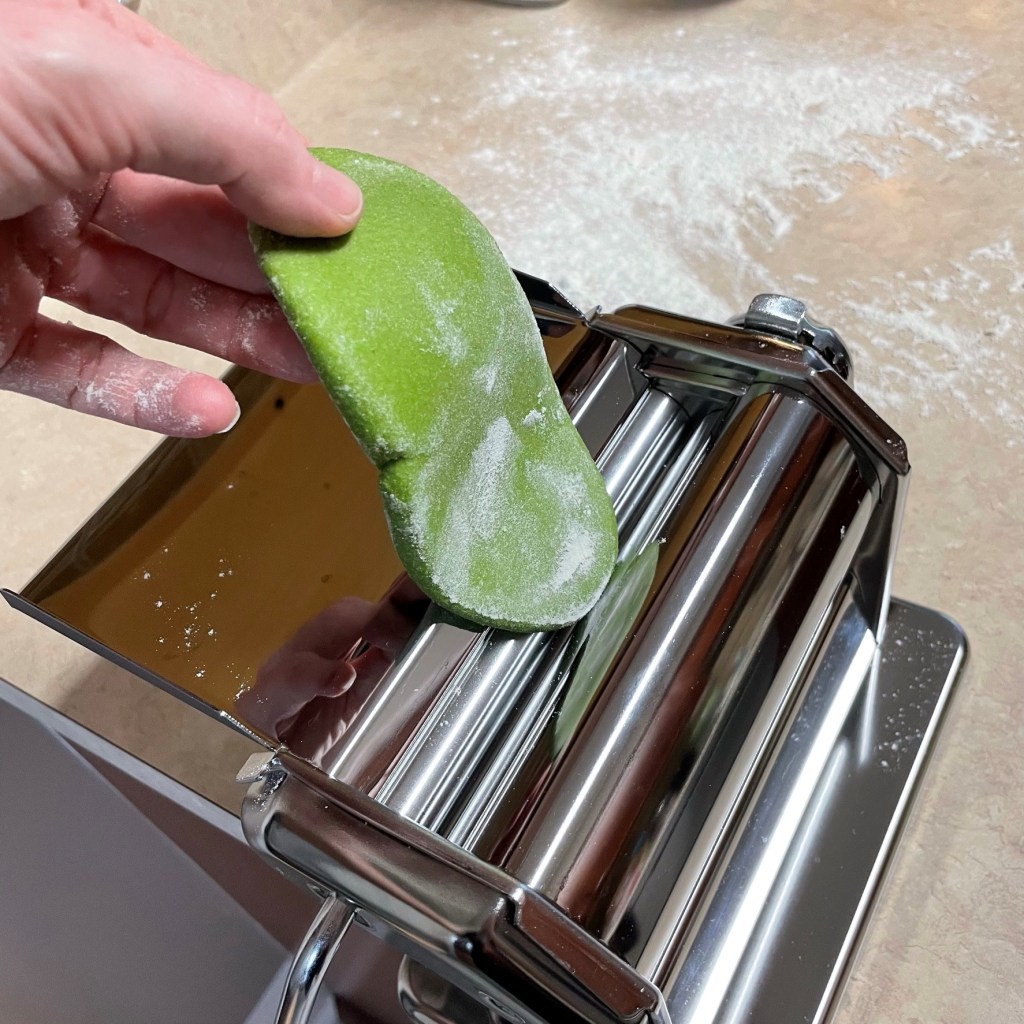
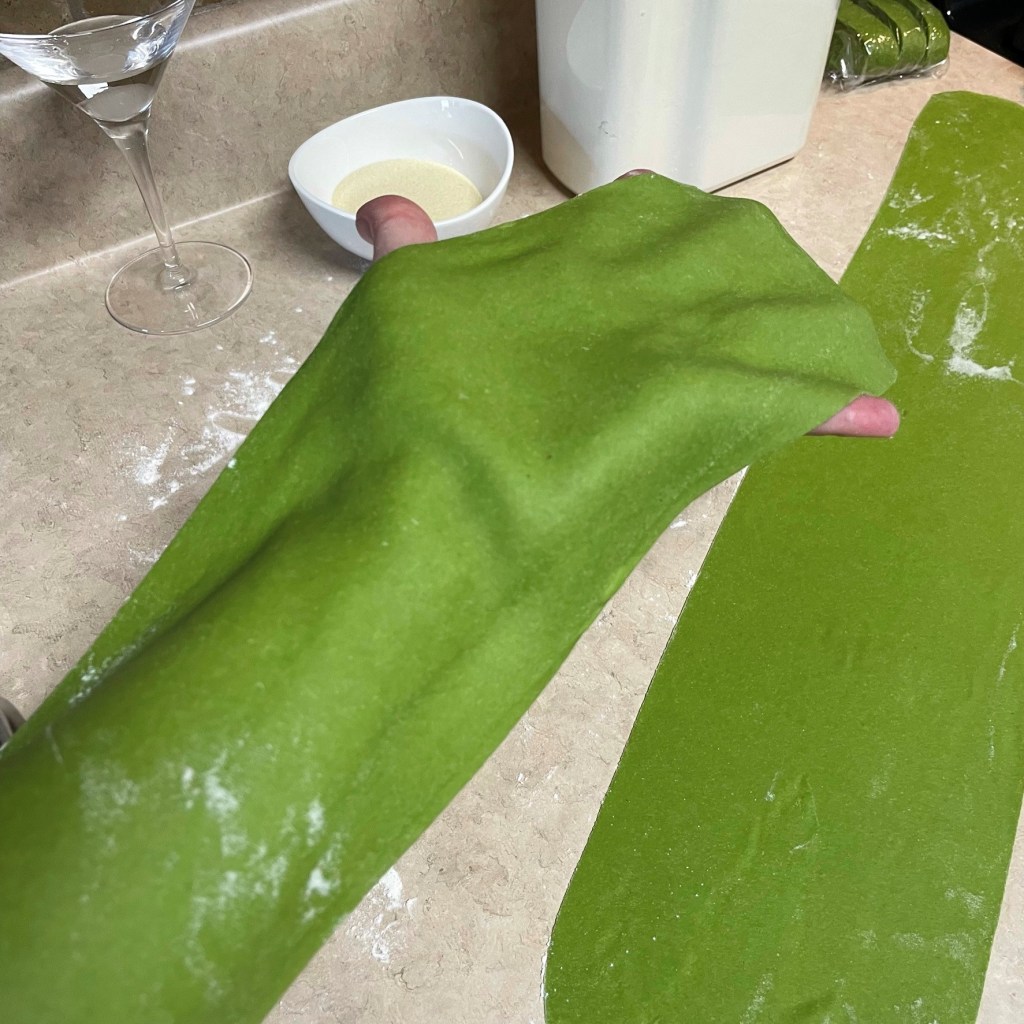
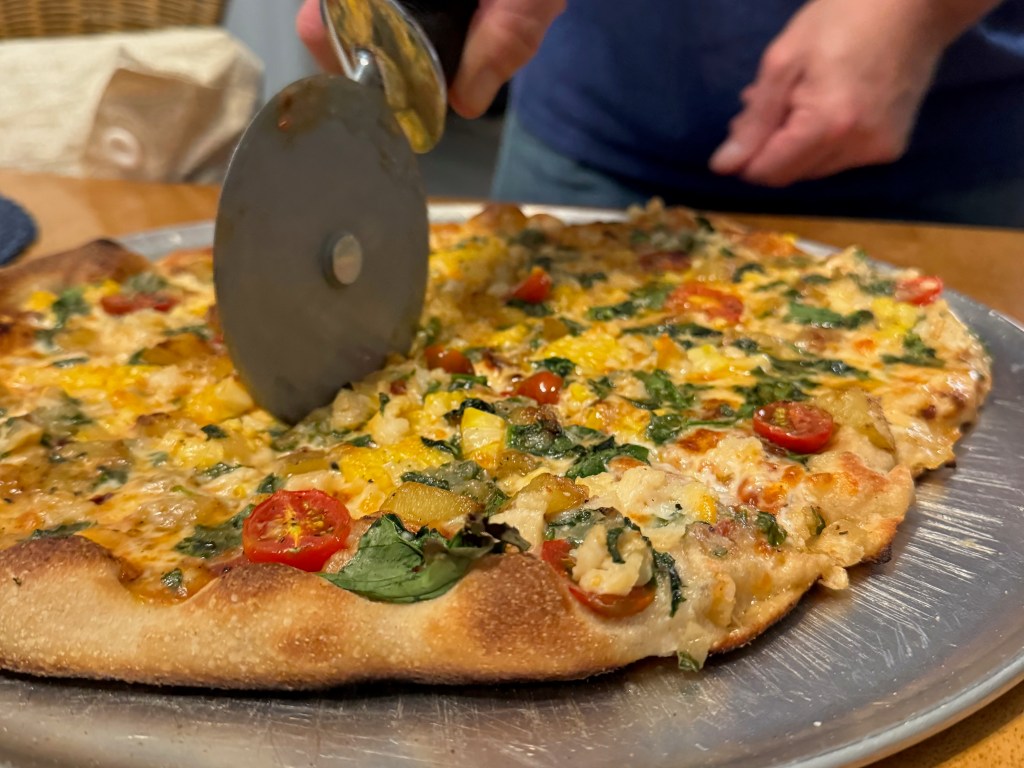
My pizzas are usually done in my home oven, outfitted with a 3/8”-thick slab of steel, preheated to 550° F for at least an hour. In other words, hot! For this one, though, my husband and I did the baking outdoors (clambake style!) on our Napoleon gas grill, which gets even hotter than the oven. We purchased a Weber pizza stone that works great for summer baking when we don’t care to heat up the house. Les handled all of that while I prepped inside, beginning with shaping my dough into a 14-inch round and laying it on a flour- and cornmeal-dusted bamboo peel.


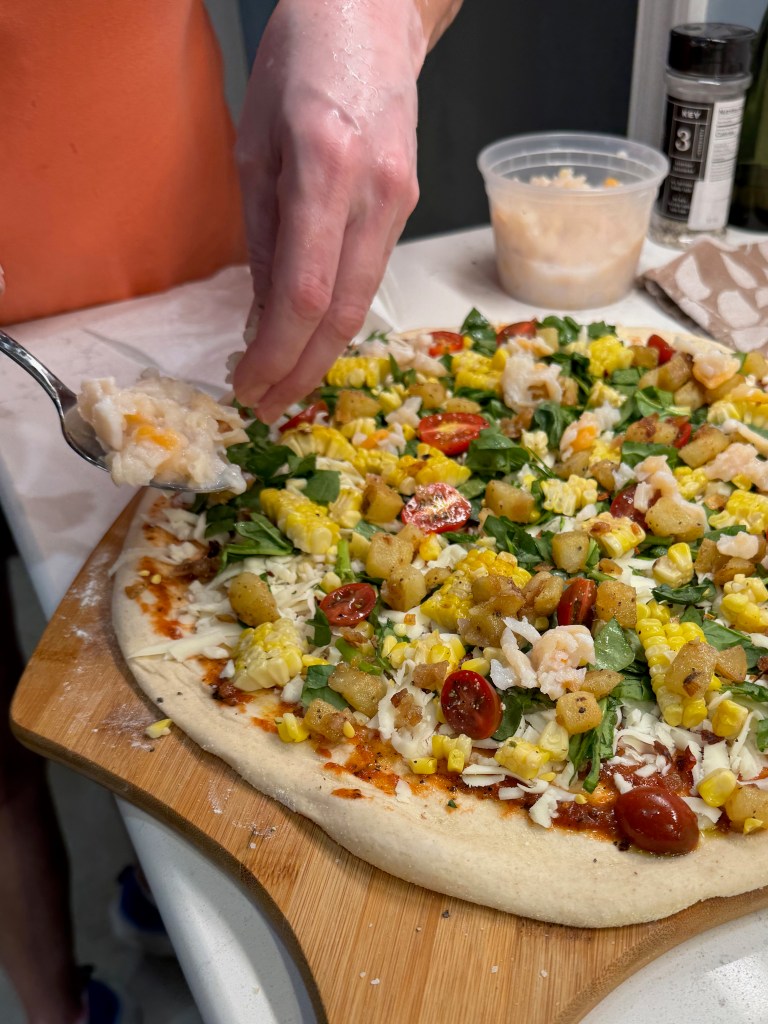
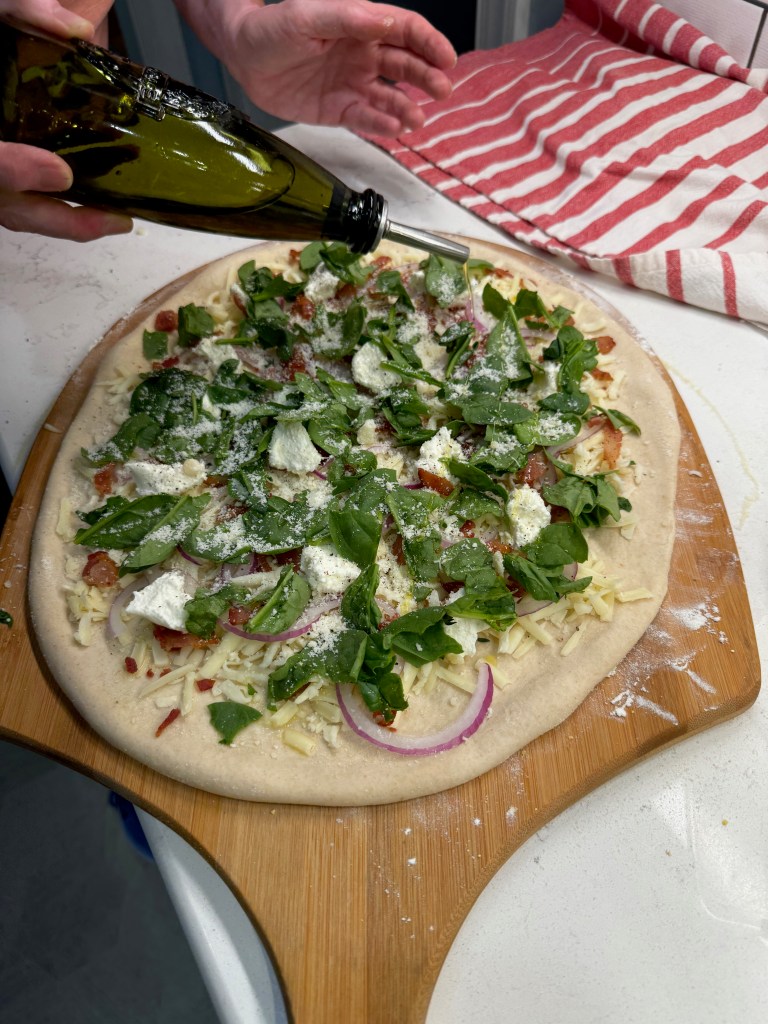
The toppings are straightforward, and I’ve put the wettest ingredients— the corn, tomatoes and clams— on top of the drier ingredients. I want them to get the benefit of the heat without creating too much steam underneath, which would wreck my crust. The clam liquor-butter mixture was laid on last in dollops and this was ready for the bake!


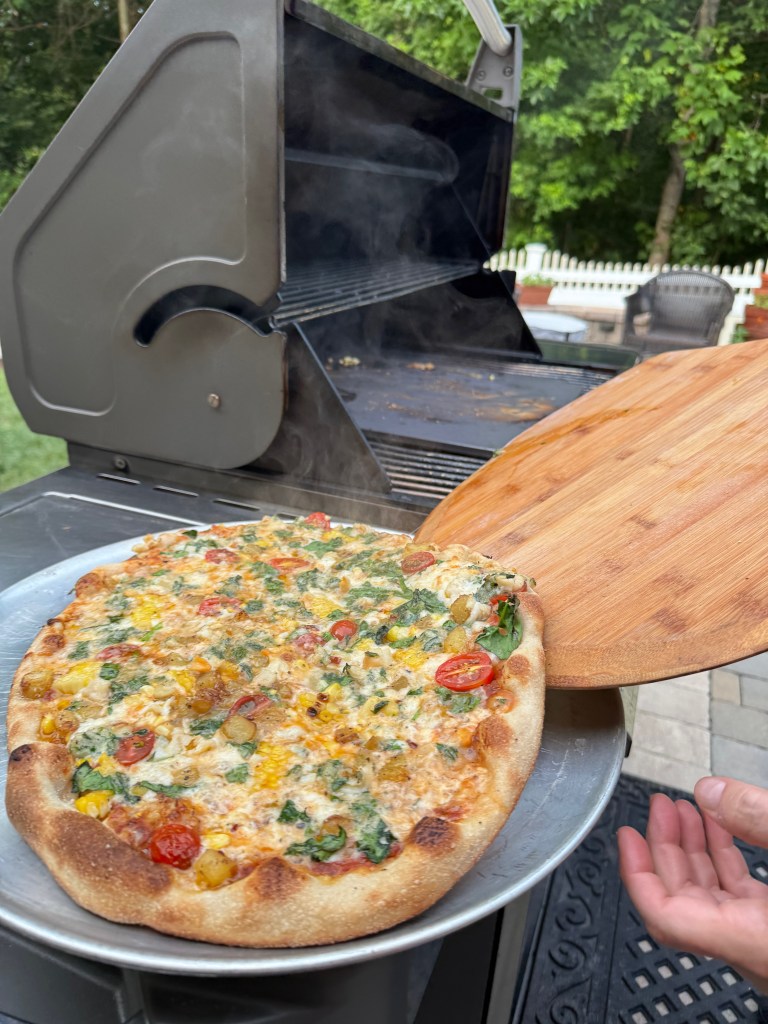
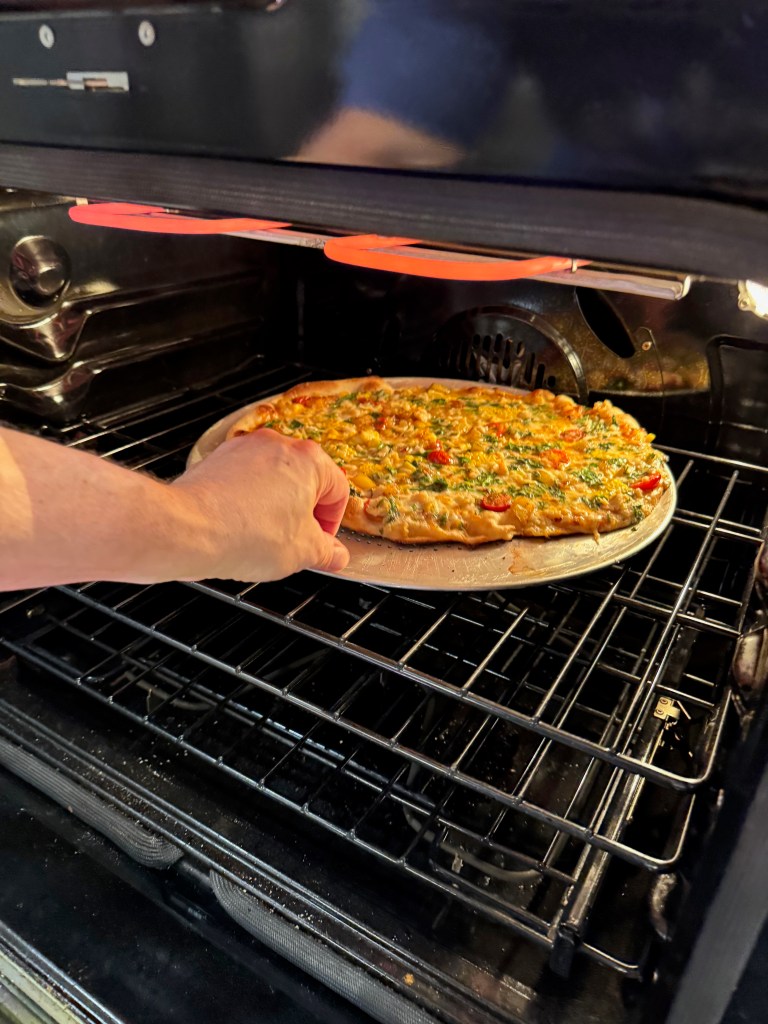
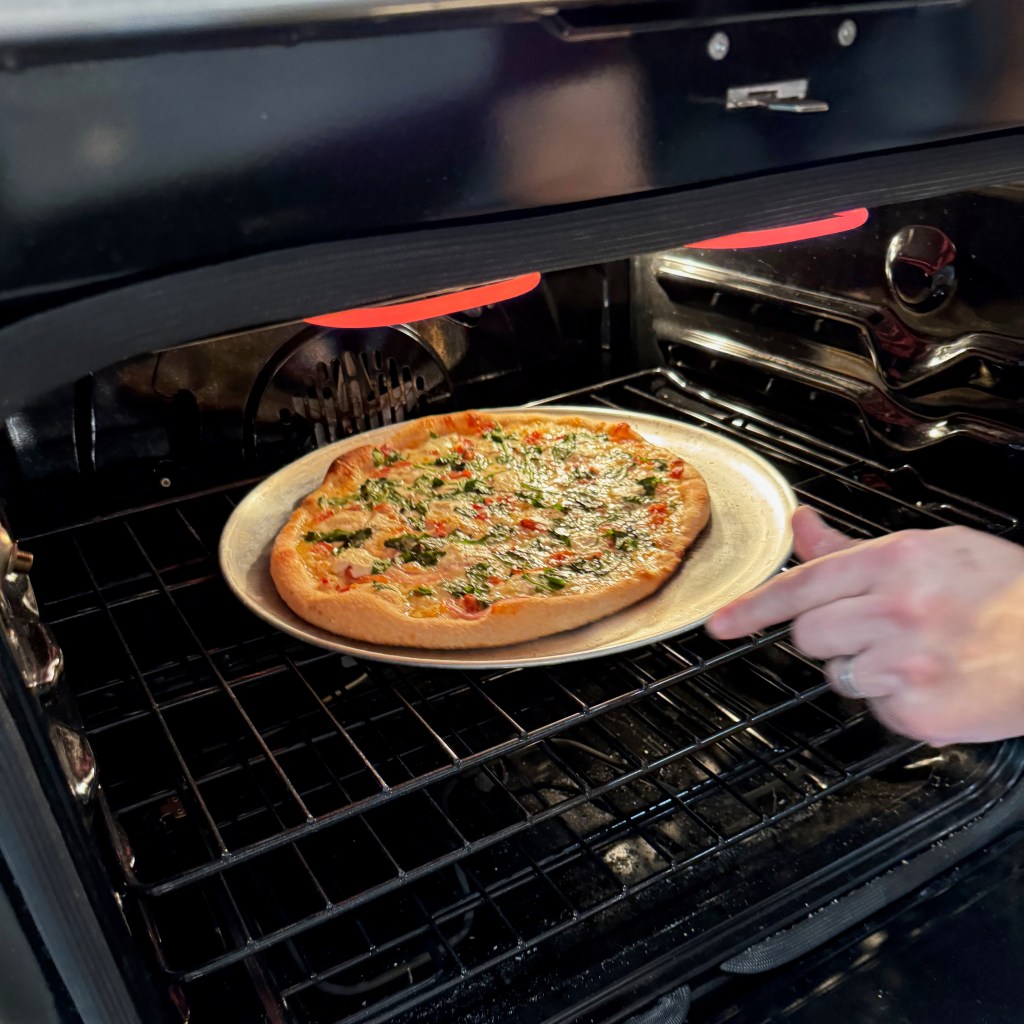
One minor shortcoming of our grill for pizza is that the top of the pizza doesn’t have a chance to brown as it would in the oven. Solution? Easy— we just slide the finished pie under the high broiler in the oven for 30 to 60 seconds. Voila! Blistered crust and perfectly browned toppings, but without heating up the whole house for hours in the dead heat of summer. 

It even smells like a clambake!

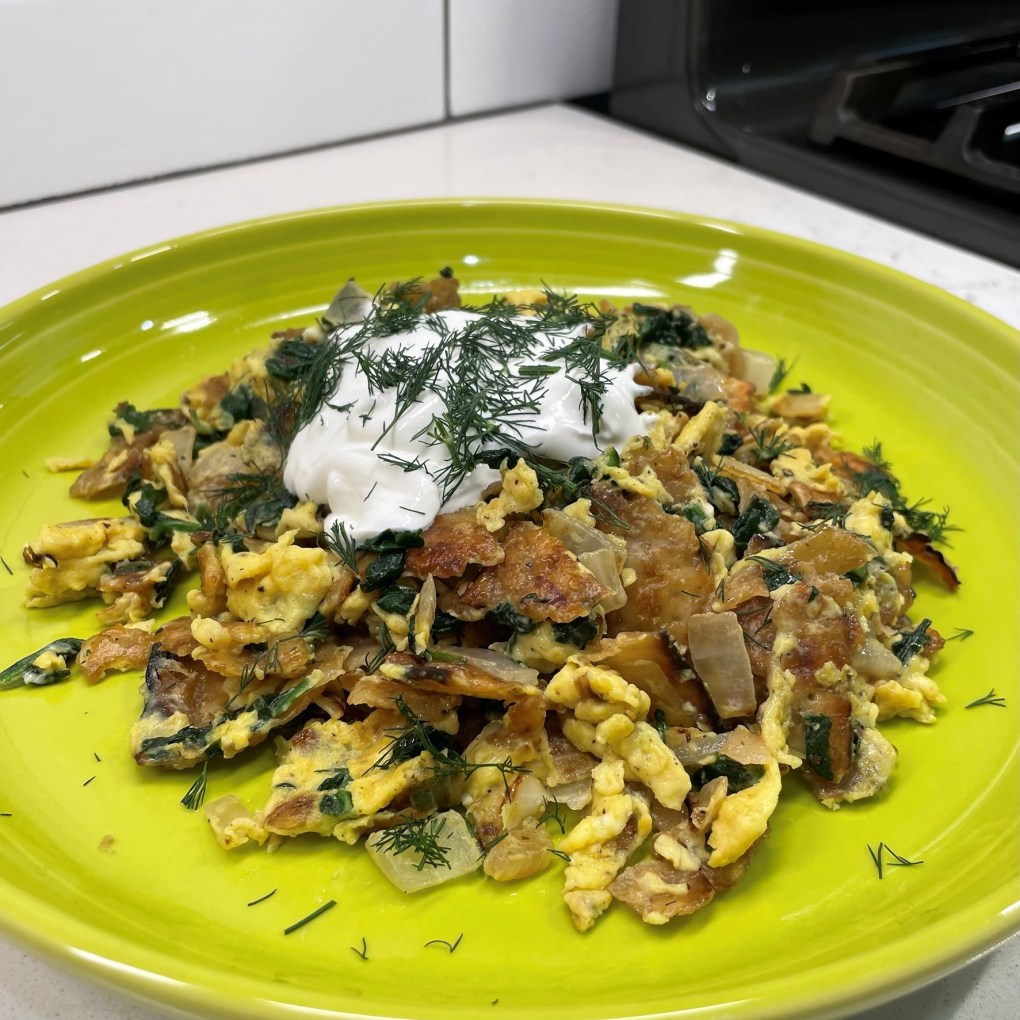
So how was this lovely creation, made of Leo-favored ingredients and served up on this last day of my zodiac sign? Delicious! My husband and I have both come to love clams on pizza, ever since our trip to New Haven and our own adventures with white clam pie, which I’m now Jonesing to do again soon. This fun interpretation brought plenty of other tasty ingredients into play, and we could taste each of them. The tomatoes were a good addition, and the trick of reducing the clam liquor with the buttered onions really added a great finishing note of ocean flavor. Would I make it again? Definitely! And I probably won’t wait until Leo season rolls back around. 

Tomorrow is the first day of Virgo. Now, I wonder what they like to eat? 😉

Clambake Pizza

  • Servings: 6 slices
  • Difficulty: Average
  • Print

Apparently, my zodiac sign (Leo) loves clams, corn, spinach and mozzarella. What else could I do with this information but make a clambake pizza?


Ingredients

  • 2 Tbsp. salted butter (half for cooking onions, half for clam-herb butter)
  • 1 small shallot, minced
  • 1 medium Yukon gold potato, cubed and boiled to al denté tenderness
  • A pinch of baking soda in the potato cooking water
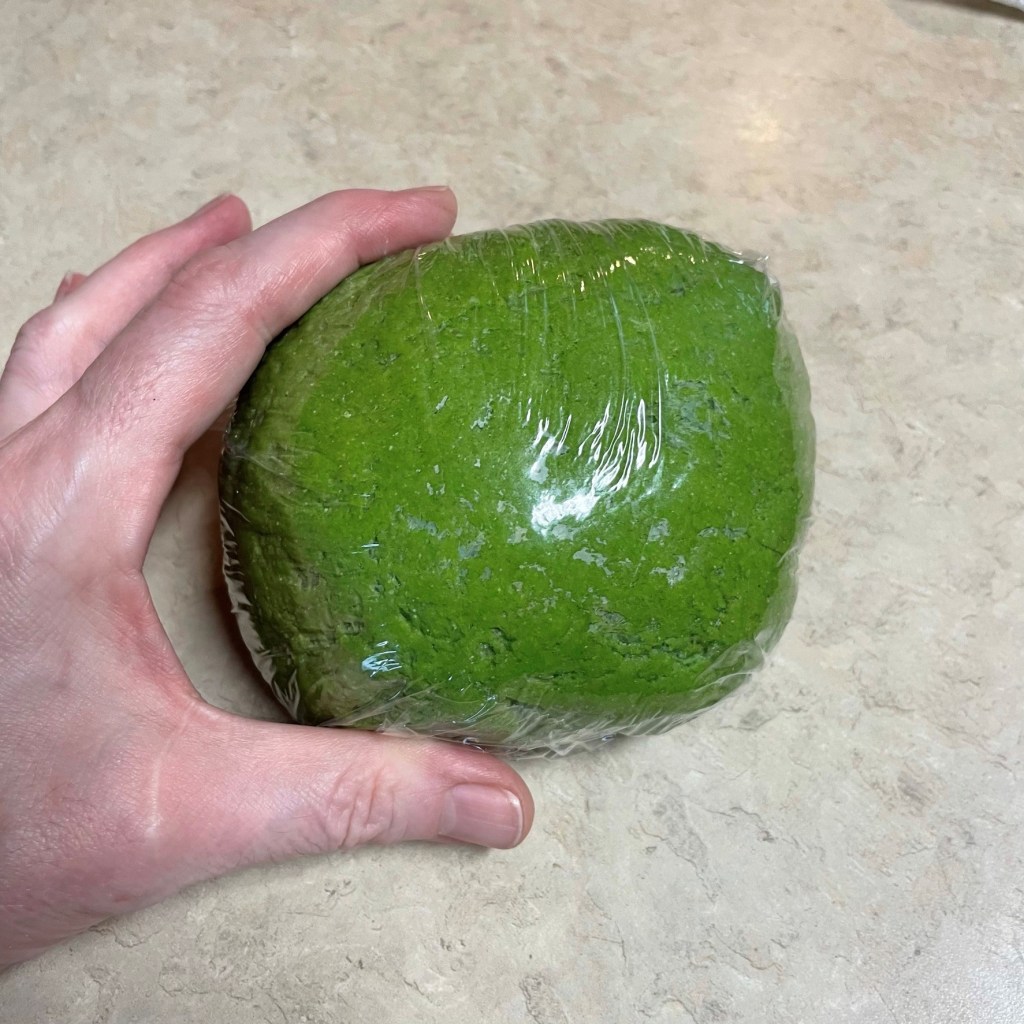
  • 11 oz. pizza dough ball, at room temperature
  • 1/3 cup favorite pizza sauce
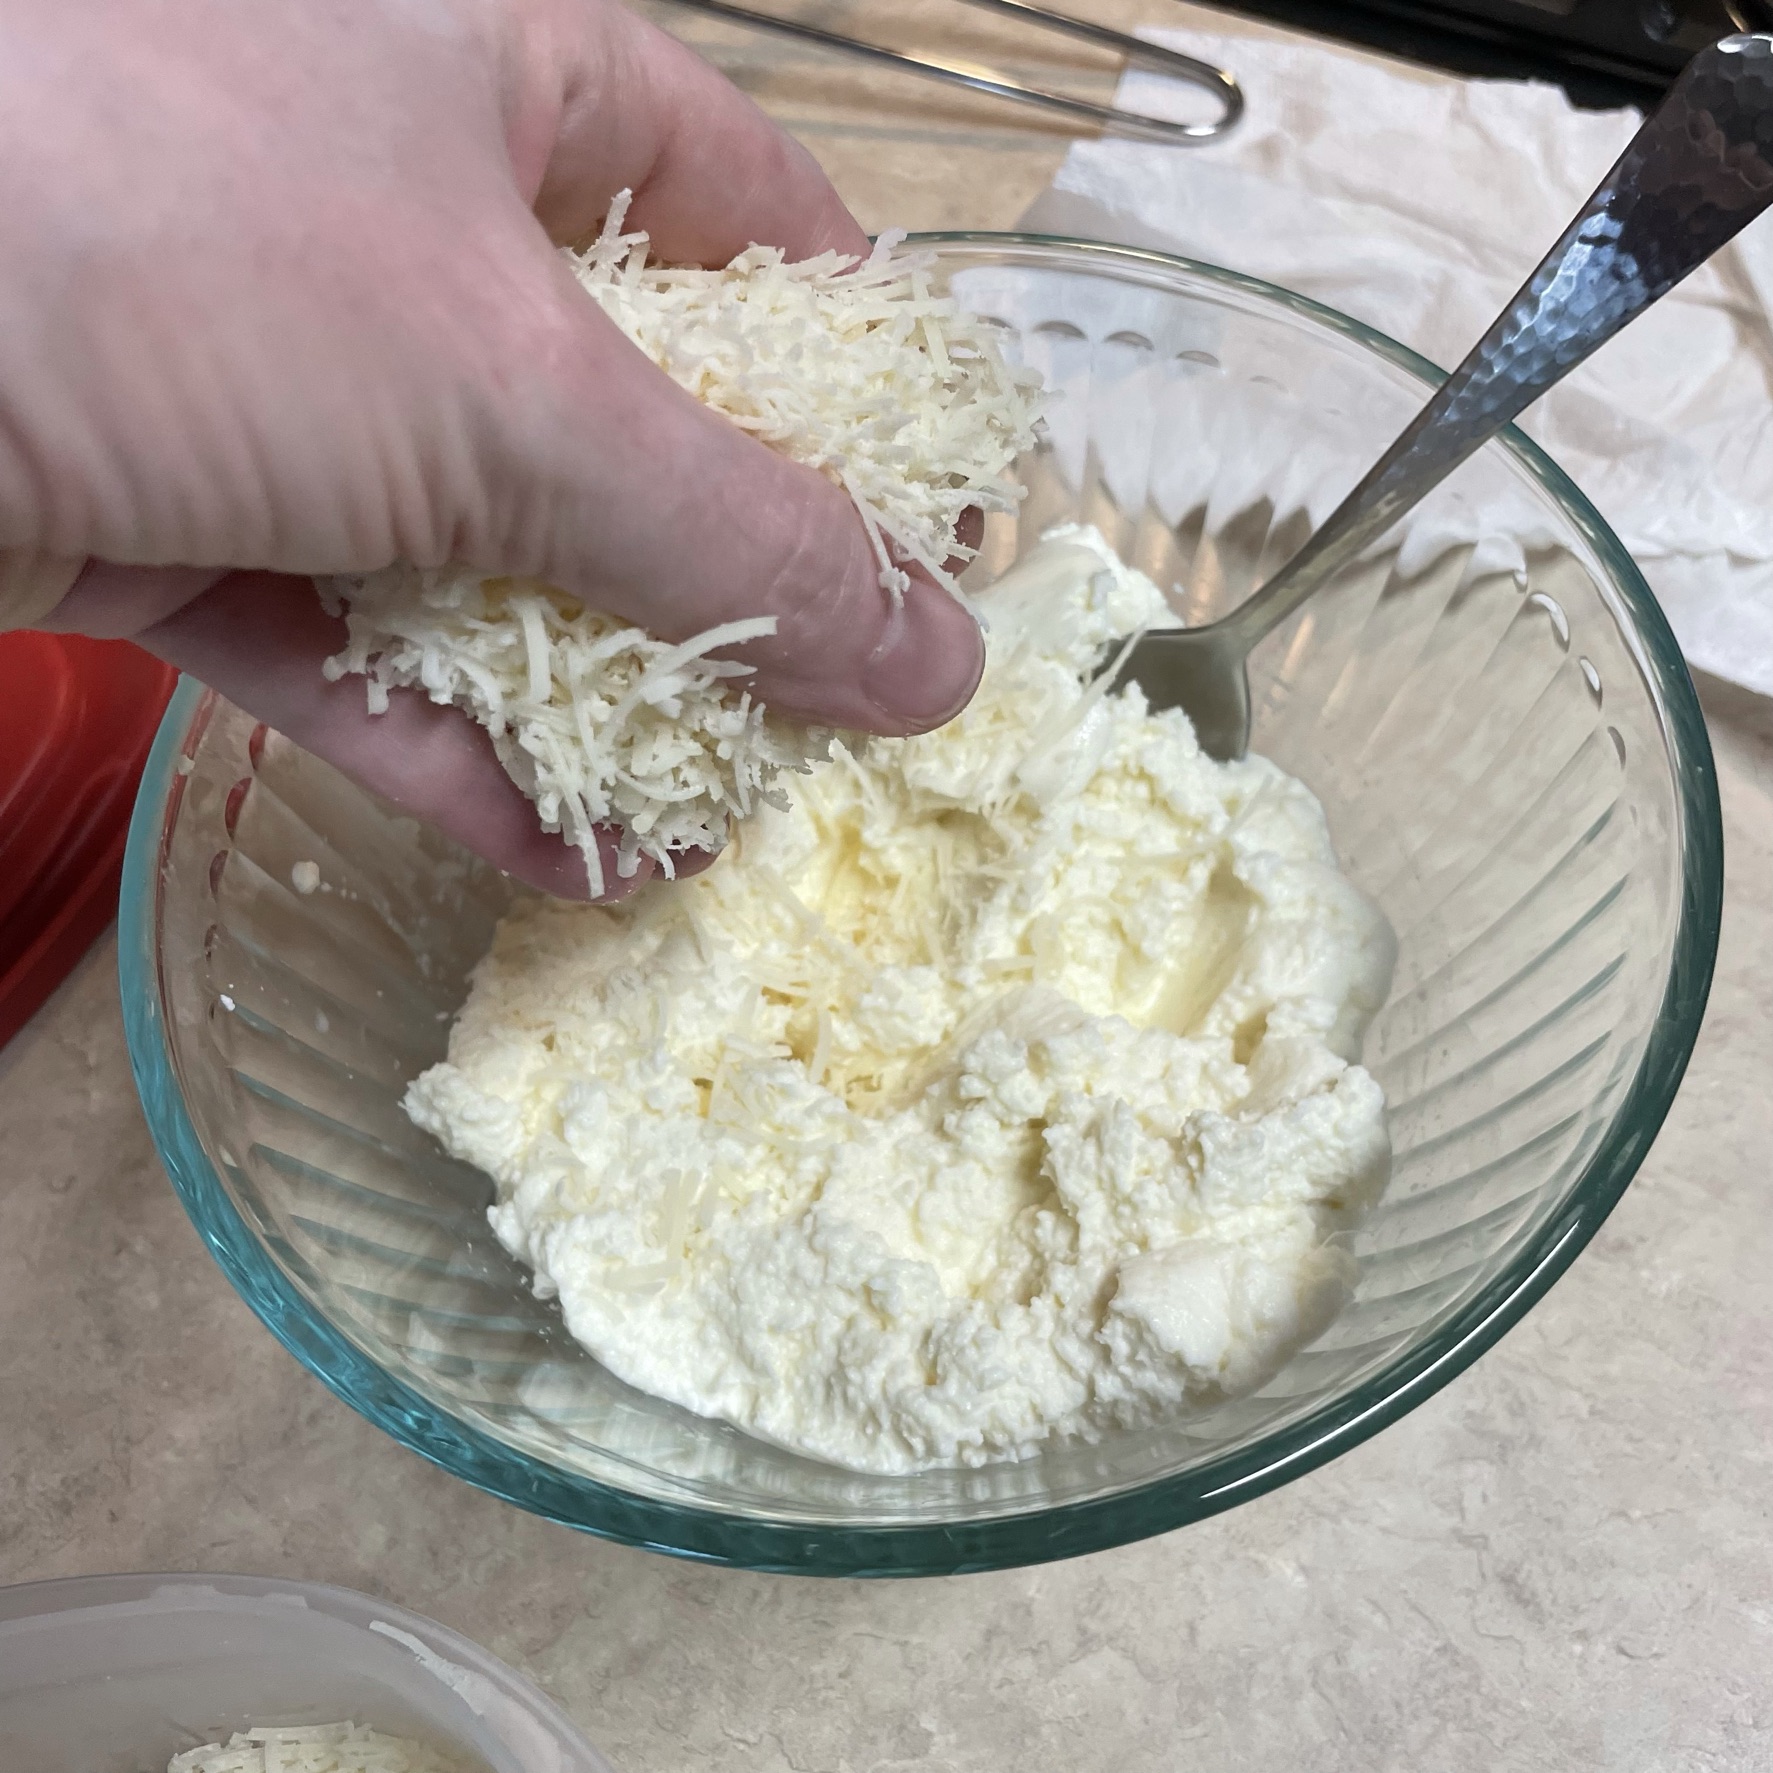
  • 3/4 cup freshly grated firm mozzarella
  • 1 ear of grilled corn, stripped from cob
  • A handful of cherry or grape tomatoes, halved and salted
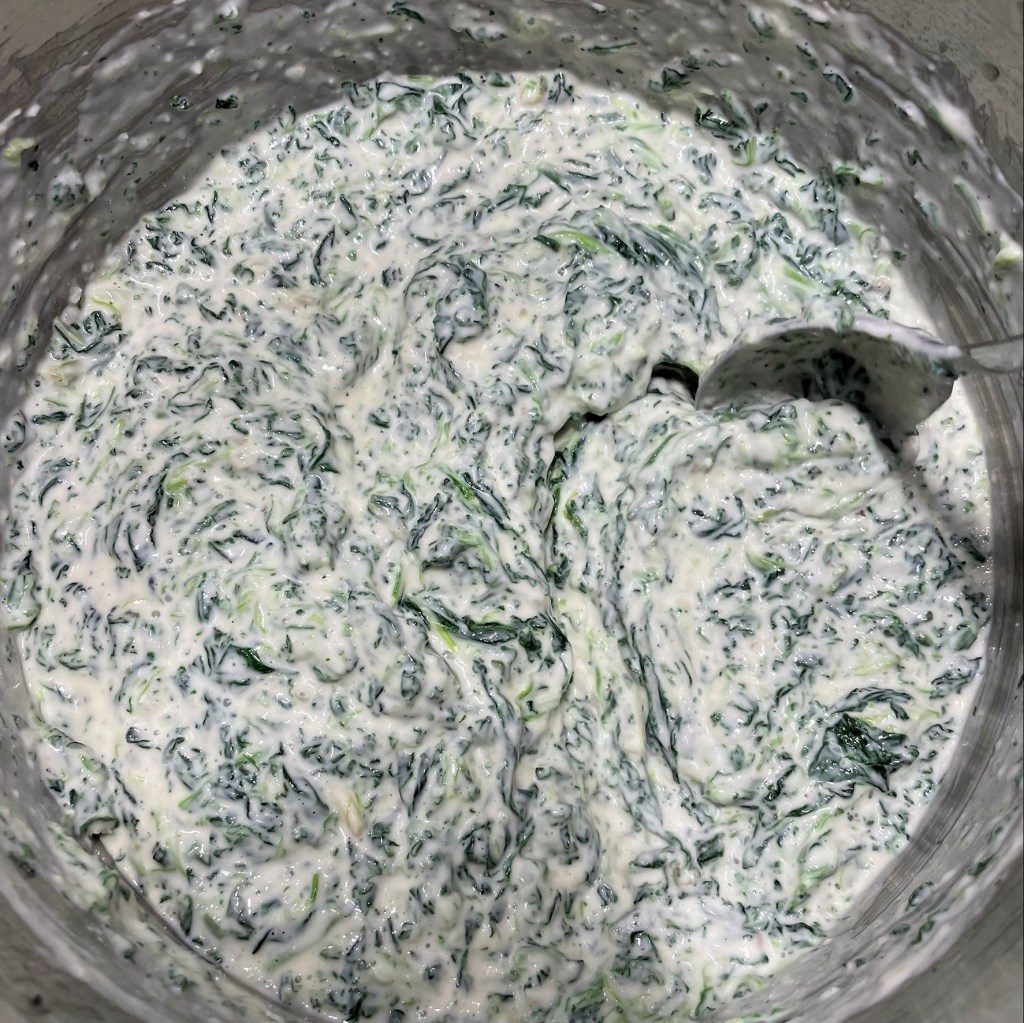
  • A fat handful (about 2 cups) fresh baby spinach, rough chopped
  • A few shakes of crushed red pepper, if you like heat
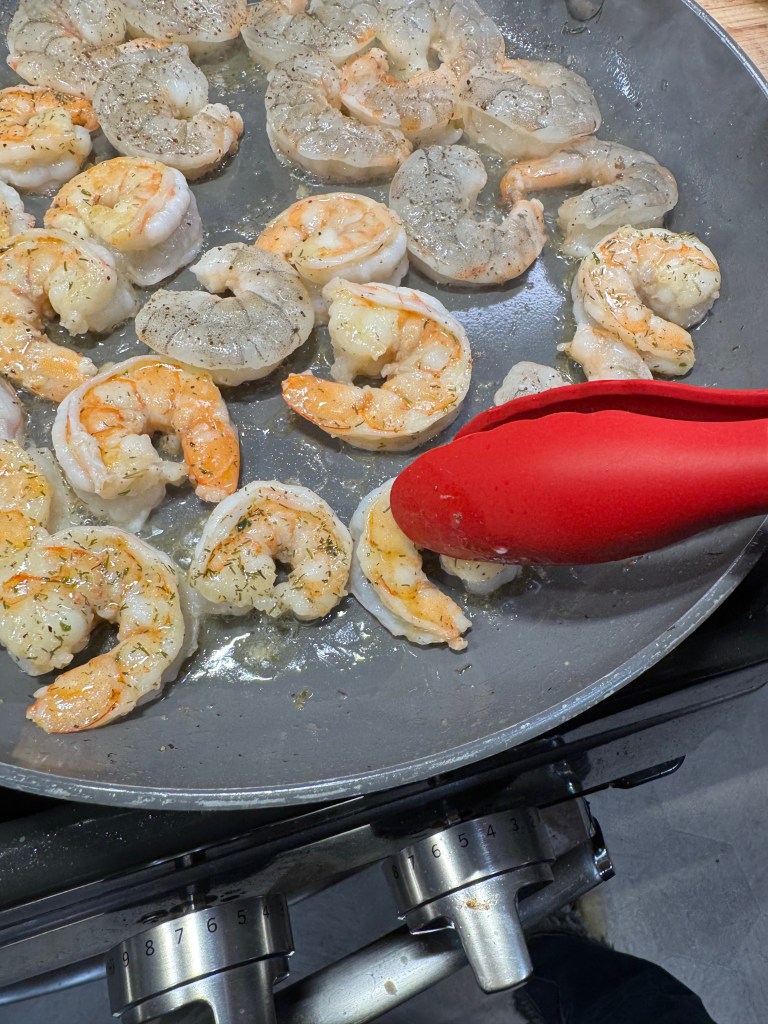
  • About 1 cup fresh chopped littleneck clam meats (reserve some of the liquor for the herb butter)

Notes: My pizzas are baked on an oven steel, preheated to 550° F for one hour. Alternatively, bake on a pizza stone designed for a gas grill, following temperature instructions for your stone and adjusting time as needed. Either setup will help you achieve a brick oven-style pizza at home.

Directions

  1. Heat a small sauté pan over medium heat with a tablespoon of butter. Sauté the shallots for a few minutes until slightly softened. Drain the potatoes and add to the pan, tossing to crisp up the sides.
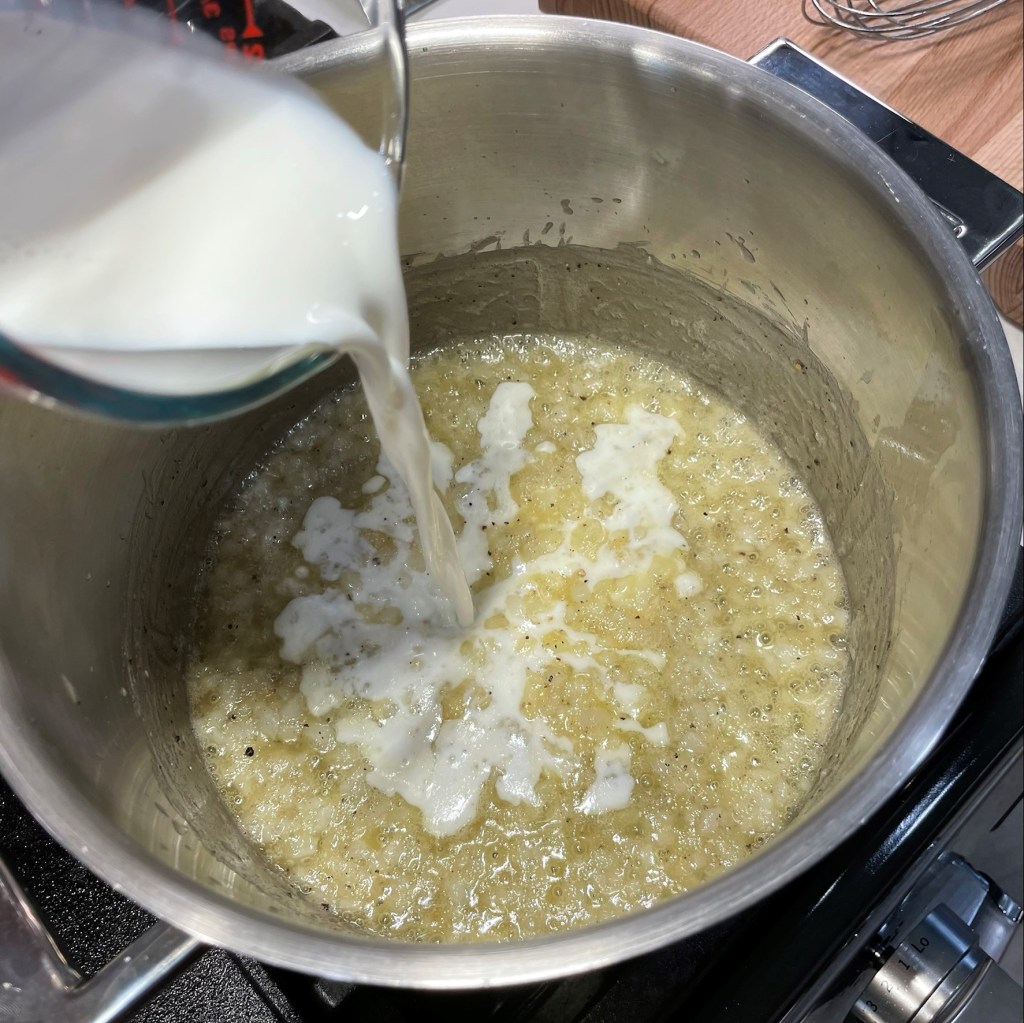
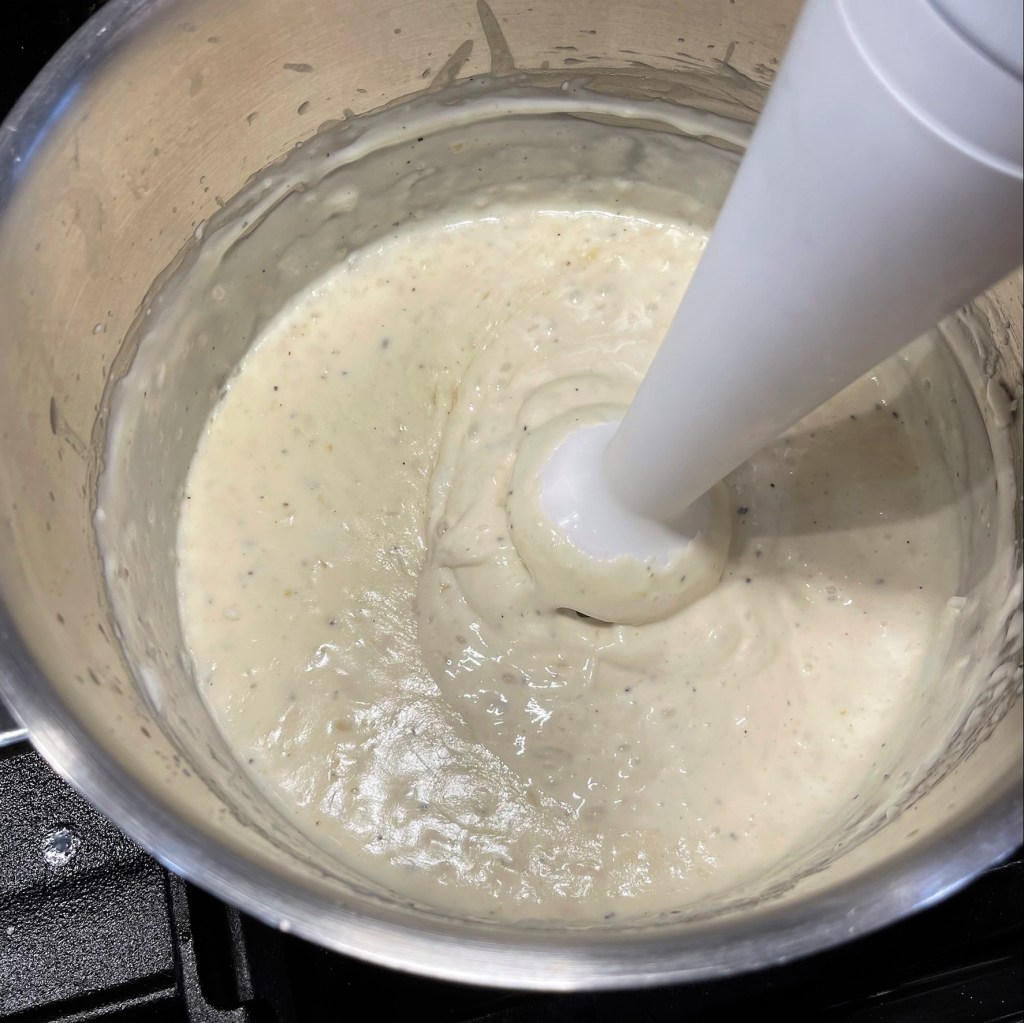
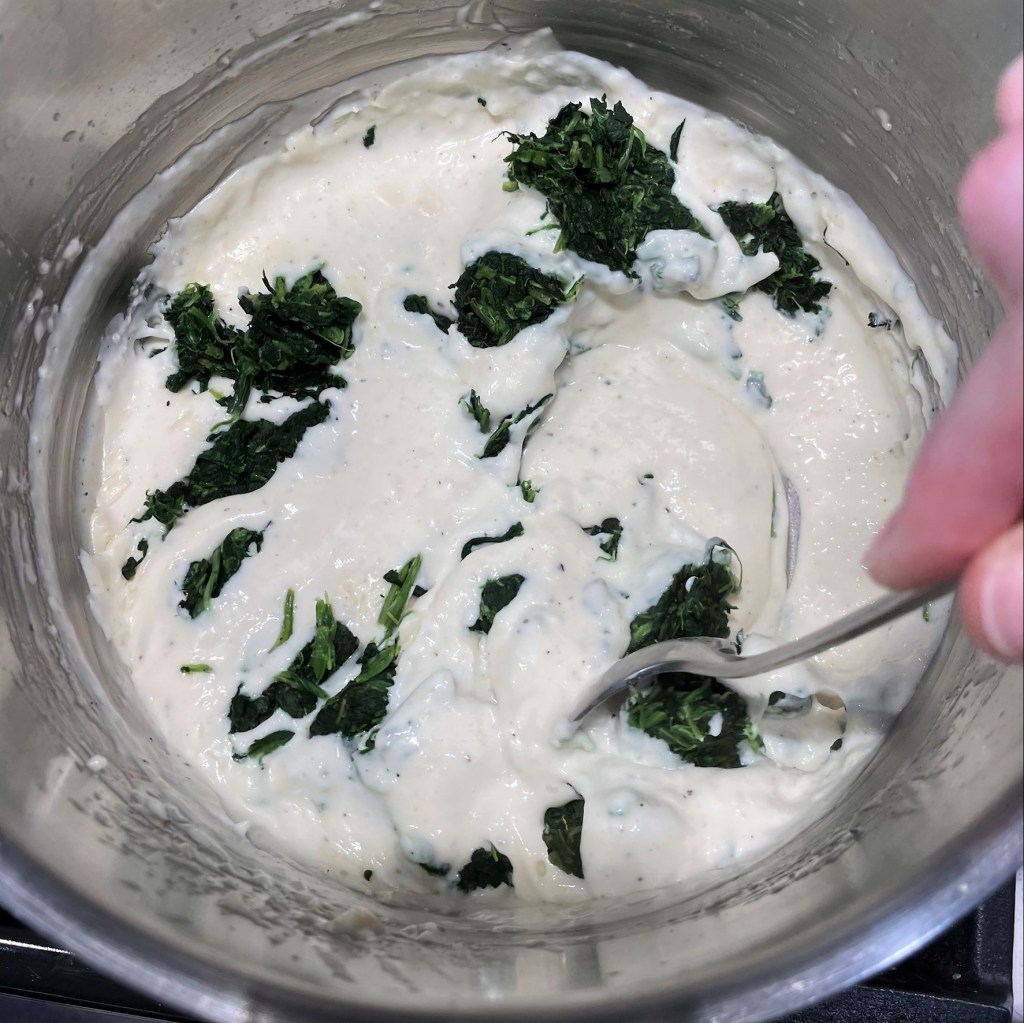
  2. Transfer the cooked potatoes to a small bowl. Pour some of the clam liquor into the sauté pan with the shallots and butter and simmer to reduce the liquid. Remove from heat and swirl in the other tablespoon of butter, along with the fresh parsley. Set this aside as a final topper to the pizza.
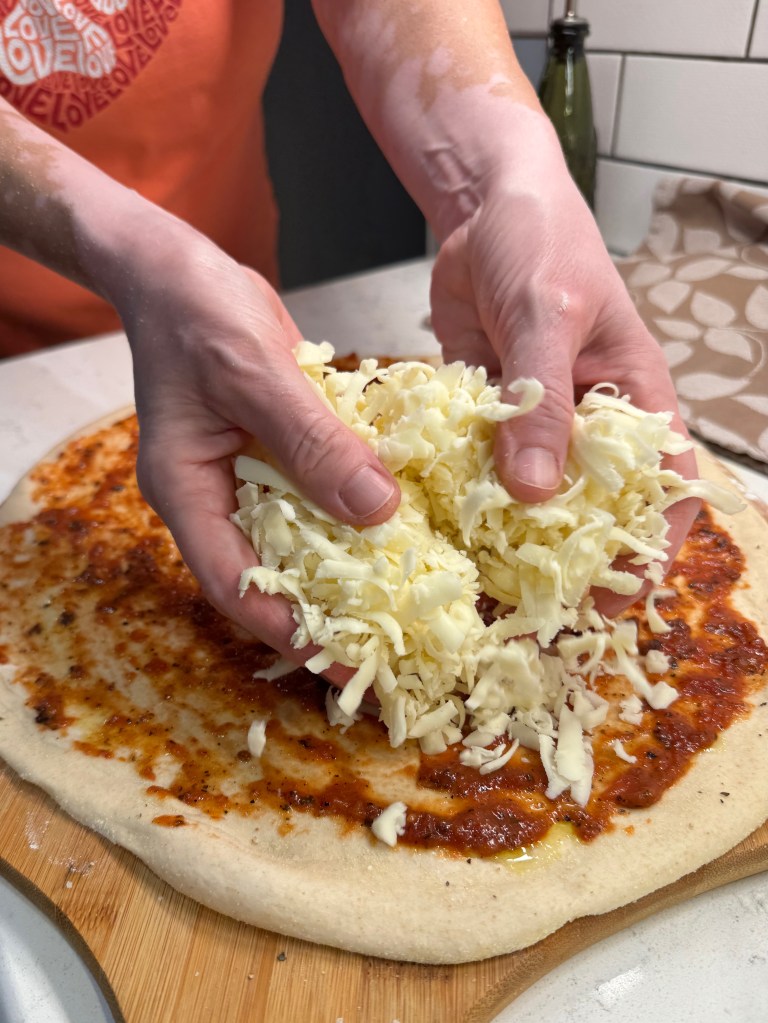
  3. Shape pizza dough into a 14-inch round and place it on a flour- and cornmeal-dusted peel. Swirl sauce over the pizza and scatter the mozzarella all over it.
  4. Layer toppings on, beginning with the spinach, pepper flakes and corn, then the tomatoes, potatoes and clams. Finally, arrange dollops of the clam liquor-infused herb butter all over the pizza, emphasizing the clams as much as possible.
  5. Transfer to the pizza to the preheated steel (or stone) and bake for 6 to 7 minutes, using peel to turn pizza at the 4-minute mark. If baking on the grill, transfer finished pizza to a heatproof pan and slide it under the high broiler of your oven for up to 60 seconds, to get the roasted appearance of an oven-baked pie.
  6. Wrap any leftover slices individually in aluminum foil. Reheat on a preheated griddle or skillet, loosely tented with foil. This preserves the crispy texture of the crust while allowing the cheesy topping to melt.

Just for fun…

A few famous Leos: 😎 Looks like I’m in excellent company!

Jennifer Lopez
Barack Obama
Mick Jagger
Helen Mirren
Antonio Banderas
Sandra Bullock

Charlize Theron

Steve Carell
Meghan Markle
Arnold Schwarzenegger
Halle Berry

Madonna
Steve Martin
Tony Bennett
Martha Stewart


Spanakopita Scampi

Thank goodness for frozen shrimp. I mean this sincerely, as there are many times when life is too busy and even the best-laid plans can’t be pulled together in time to feed the hungry faces in my house. 

We have a weekly ritual here that begins around Sunday morning, when my husband, Les, and I sit down with our respective calendars, the long-range forecast displayed on one of our phones, and we do our best to map out what we are going to do about dinner in the week ahead. This includes a quick inventory of what we already have in the fridge and freezer, consideration of what nights might be good for cooking outdoors, acknowledgement of whether one of us has a hellish workday that week, and— last but not least— how much time we can allot to said meals and which of us will be cooking them.  

It’s a lot of moving parts and sometimes, our meal game falls apart and we need to punt. 

On such an occasion recently, I postponed a more-involved food plan in favor of this ad hoc dish, which turned out so good that I wrote down the ingredients to share it here. It’s something of a mashup of Italian shrimp scampi and Greek spanakopita, and it met all the requirements for a busy weeknight: quick, easy, flavorful and relatively healthful. 

Not too shabby for a last minute improvisation.

What ingredients do you need for spanakopita scampi?

My dish features peeled shrimp (fresh or thawed), garlic and plenty of olive oil, onions, spinach, feta, lemon, parsley and dill. And though I had both angel hair and linguine pastas— two options I’d typically reach for when making scampi, I decided to use the whole wheat orzo that was feeling ignored in the pantry. Orzo is a staple pantry ingredient in Greek cuisine, so it seemed a logical stand in for the spanakopita element of the dish, but almost any small pasta shape you like would work fine.

The most time-consuming part of this meal was thawing and prepping the shrimp, a task that I almost always hand off to Les’s capable hands. If you’re in a hurry, purchase shrimp that is already peeled and deveined to save valuable time. 

How to make spanakopita scampi

Everything else comes together quickly, beginning with a patient poaching of minced garlic in a large sauté pan. This should be done at a very low temperature, with almost no bubbles evident, so that you don’t burn the garlic. After about 10 minutes, increase the heat and add the diced onions, tossing to soften them in the warm, garlicky oil. Add the chopped spinach (I didn’t have enough so I supplemented with some thawed and squeezed frozen spinach), and then the fresh herbs.


Get the orzo going and toss the feta into the spinach mixture, then transfer that to a bowl and keep it warm. Heat some more olive oil in the same pan, or a bit of butter (or both), and cook the shrimp until it’s just barely a pink/coral color. Always use a delicate touch when cooking shrimp, as it only takes one extra minute to overdo it. My method is to place the shrimp into the hot pan one at a time in concentric circles, and by the time the last shrimp goes in, the first is ready to turn. If you can see a bit of color on the inside curl of the shrimp, that’s your sign to turn it over and cook the other side. The smaller ones will usually cook faster, and if your burner has a hot spot (as mine does), then check the ones there first.


When all the shrimp have been turned over, squeeze fresh lemon over them and turn off the heat. Drain the orzo and toss it in a bit more of butter. Plate it up with the warm spinach-feta mixture and shrimp. Enjoy!

Spanakopita Scampi

  • Servings: 4
  • Difficulty: Average
  • Print

This is a quick and easy weeknight dinner that combines two of my all-time favorite Mediterranean classics. If you don't have orzo, use any kind of small pasta shape that you have on hand.


Ingredients

  • 2 Tbsp. extra virgin olive oil (possibly more for cooking shrimp)
  • 2 cloves garlic, minced
  • 1/3 cup diced sweet or yellow onion
  • Kosher salt and freshly ground black pepper
  • 4 fat handfuls baby spinach leaves, rough chopped* (see notes)
  • A handful each of fresh dill and flat-leaf parsley, chopped
  • 1/3 cup feta, drained and cubed or crumbled
  • 1 Tbsp. butter* (see notes)
  • 1 pound fresh wild-caught shrimp, peeled and deveined
  • Juice of 1/2 fresh lemon
  • Cooked orzo and fresh lemon slices, for serving

Note: Fresh spinach is best, but if you don’t have enough, you can supplement with some frozen chopped spinach. Microwave it in a glass dish until thawed, then press out as much water as possible and add it to the onions after they’re already softened. Proceed with the rest of the recipe as usual.

I was fortunate to have a bit of “dill and shallot” compound butter left over from another recipe, and it was perfect for cooking the shrimp! If using regular butter or oil, consider adding a few shakes of dried dill weed at this step, or reserve a bit of fresh dill for sprinkling over the top of the finished dish.

Directions

  1. Please a large skillet over low heat and add two generous swirls of olive oil with the garlic. Cook this very low and slow, with almost no bubbling action in the pan, so that the garlic become very soft and fragrant. It should take about 10 minutes, and this mellows the flavor of the garlic. Too much heat will give the garlic a burned and acrid taste.
  2. When the garlic is softened, increase the heat to medium and add the onions. Season with salt and pepper and toss to sauté until onions are translucent. Add spinach by the handful, tossing until each handful has wilted before adding the next. If supplementing with frozen spinach, wait until the fresh spinach has fully cooked.
  3. Add fresh herbs and toss for about 30 seconds, then add feta and remove the pan from heat. You may either transfer this mixture to a bowl (keep it warm) and use the same pan for the shrimp, or use a second pan for the shrimp.
  4. Add butter (or oil) to the skillet over medium heat. Place shrimp down in the hot butter and season with salt and pepper, and a quick shake of dried dill if you have it. Watch the shrimp closely, and turn them when you notice the color changing on the inside curl. Depending on the size of your shrimp, two to three minutes total should do it. After the shrimp has cooked on the second side, squeeze the fresh lemon juice into the pan and toss to coat.
  5. Toss cooked orzo with a bit of butter or oil, and serve it with the spinach mixture and shrimp piled on top. Add a lemon slice on the side for one last burst of freshness.


Festive Chicken Roulades

Special occasion food doesn’t have to be complicated. Sometimes, it’s the simplest flavors that have the most impact, and this is one of many lessons I learned during the few years that I pitched in at a catering kitchen back in the ’90s. But when an occasion calls for something “fancy,” there are a few tricks you can use to elevate your presentation of simple ingredients. Roulades are a great example of this concept, and it’s only a little bit of extra effort, but the impact is always great!

Despite the special appearance of roulades, they’re actually quite easy to make, using whatever fillings sound good to you. This time, mine are bearing festive hues of green and red (just like Christmas), with crowd-pleasing flavors of spinach, feta and sun-dried tomato. The filling is accented with sautéed shallots, garlic and Italian herb blend, and these pretty pinwheels are delicious alongside some roasted garlic mashed potatoes

Are you ready to get cookin’?

My flavors are Mediterranean, but there are so many possibilities!

Special tools

You’ll want to have a few items handy to successfully prep the chicken breasts, and the most important is a sharp, sturdy paring knife that you can use to open up a plump breast into a wider piece that can be pounded flat. A large chef’s knife is not recommended for safety reasons; using a smaller knife allows you to cut with more precision. Begin by holding the thick side of the breast toward you, and make several shallow slits lengthwise, opening the breast as you go, until it lays flat on the parchment. Take your time, and don’t use heavy pressure on the knife. Nobody wants to be at urgent care the week before Christmas.


Next, you’ll need parchment or waxed paper and a smooth meat mallet for pounding the chicken. Don’t rush this, and don’t use the textured side of the mallet or you may accidentally split the fibers of the meat. The goal is to gently pound out the breast between layers of paper until it is an even 1/4-inch thickness (or as close to it as you can get). This makes the chicken more flexible for rolling up around your chosen filling ingredients, but don’t go thinner than 1/4-inch, or your chicken will tear apart.


Filling for the roulades

Just about any ingredients you like can be layered into chicken roulades, though I don’t recommend “melty” cheeses because they will always ooze out and make a mess in the oven. If you want a cheesy accent, stick with small amounts of firm cheeses, such as feta, bleu or Parmesan. Whatever vegetables you choose, chop everything small so that the filling rolls up easily and doesn’t fall out of the roulades when you bake them.


Second, cook any vegetable fillings until they are soft and tender. Raw ingredients rolled up inside the chicken will give off extra moisture and throw off the cooking time, and you’re also likely to have some unpleasant textures. To make the colors of my filling stand out, so I cooked the sun-dried tomatoes and spinach separately, but there would be no harm in cooking it all together to save a little time.

Don’t miss a chance to add flavor!

A little Italian herb seasoning and a pinch of Calabrian chile flakes gave my sun-dried tomato mixture some pizazz, and then I simmered with a splash of chicken stock until all the liquid was cooked off. To add depth to the spinach and garlic filling, I braised it in a shot of dry vermouth, again cooking until the excess moisture was evaporated. Dry white wine would be fine here; I just never have one open anymore and the vermouth is more interesting.


My chicken was layered with the spinach mixture, then thin slices of salty feta, and finally the sun-dried tomato mixture. Begin rolling from the pointed end of each butterflied breast, so that the fillings stay secure inside. The great thing about roulades is that any part of this could be done in advance to save precious time when you’re ready to entertain. You could even roll and refrigerate them in advance and just pull the whole baking sheet out of the fridge an hour before you bake.


Secure the roulades with toothpicks, or stretch and wrap thin bacon slices all around before placing them (seams or bacon ends down) on a parchment-lined baking sheet. These go straight into the oven— no browning or searing is needed— and they’ll need about 40 minutes at 350° F. Let them cool a few minutes before slicing into one-inch thick rounds. Serve immediately.


These festive chicken roulades were moist, tender and so flavorful. It made a delicious entree with Les’s amazing roasted garlic mashed potatoes, but I could also imagine them with polenta or risotto with these Italian-themed ingredients. But there are lots of other flavorful possibilities. Now that you know how to make roulades, drop a note in the comments to let me know what filling flavors you would like to try!


Festive Chicken Roulades

  • Servings: 4 generous portions
  • Difficulty: Average
  • Print

With favorite flavors and a few easy techniques, you can transform simple ingredients into something special for holiday entertaining. These roulades are filled with spinach and sun-dried tomato, but as long as your filling ingredients are chopped small and pre-cooked, the possibilities are endless!


Ingredients

  • 1 1/2 pound package skinless, boneless chicken breasts (see notes)
  • 2 Tbsp. extra virgin olive oil, divided (you’ll use half each for sautéing the spinach and tomato mixtures)
  • 2 fat handfuls baby spinach leaves, chopped
  • 2 cloves garlic, finely minced
  • 2 Tbsp. dry white wine (or vermouth, which is my go-to)
  • 1/4 cup chopped sun-dried tomatoes (see notes)
  • 1 medium shallot, finely diced
  • 1/2 tsp. dried Italian herb blend
  • A pinch of red pepper flakes
  • 1/4 cup chicken broth or stock
  • Kosher salt and freshly ground black pepper
  • 4 oz. dry feta, cut into thin slices or crumbled
  • 2 slices thin-cut bacon for each chicken breast used

Notes: The chicken breasts can be any size, and you don’t need to have one breast for each person you’re serving. They will be sliced into rounds, so as long as you have the appropriate weight package, you’ll have enough.

The sun-dried tomatoes I use are soft and pliable, ready straight from the package. If using very dry ones, rehydrate them briefly in hot water or chicken broth and then pat them dry. If using sun-dried tomatoes packed in oil, there’s no need for additional oil for sautéing them with the shallots.

Directions

  1. Preheat oven to 350° F, with rack in center position. Line a baking sheet with parchment paper.
  2. Butterfly the chicken breasts; use a sharp paring knife to cut shallow slits along the fat edge of the breasts, opening as you go until the breasts lay flat on the counter. Place between layers of parchment or waxed paper and pound gently with the smooth side of a meat mallet until they are a uniform, 1/4-inch thickness. Season with salt and pepper and set aside.
  3. Heat one tablespoon of the oil over medium heat. Add the sun-dried tomatoes and shallots and sauté until tender. Season to taste with salt and pepper, plus Italian herb blend and red pepper flakes. Add chicken stock or broth, simmering until the liquid evaporates. Cool completely.
  4. Heat remaining olive oil over medium heat. Add the chopped spinach and garlic and sauté until spinach is fully wilted. Season with salt and pepper, and stir in dry white wine; continue cooking just until the liquid evaporates. Cool completely.
  5. Place the butterflied chicken breasts in front of you, with the pointed ends at the top. Divide spinach mixture evenly over the breasts, then arrange the feta and sun-dried tomato mixture. Roll each chicken breast tightly, starting at the narrow top so that you finish with a long edge. Use toothpicks to secure the edges of the chicken to the roulades, or gently stretch two slices of bacon to wrap around each breast, covering as much as possible.
  6. Bake the roulades (uncovered) 35 to 45 minutes, or until bacon is fully cooked and chicken is opaque but not dry. Internal temp should be ~165° F. Let roulades rest at least five minutes, then slice into one-inch thick rounds and serve immediately.


Bacon & Spinach Pizza— on the grill!

If you’ve been following my blog for any amount of time, you know that I love to make pizza at home. Beginning with my favorite sourdough crust, I mix and match ingredients to discover new favorites and I’ve also had a lot of fun transforming other classic dishes into pizza, as I did with jambalaya, queso fundido, spanakopita, ratatouille, shrimp scampi and even Thanksgiving (you can check them all out on my Pizza Party page). My husband, Les, and I truly love a good pizza, and it’s in pretty hot rotation at our house, even in the summer months. 

There’s only one problem now. This god-awful heat!

Most of my pizzas (excluding the deep dish versions) are baked on what I lovingly refer to as our “screaming hot pizza steel,” which is preheated at 550° F for one hour. This summer, with outdoor temperatures holding steady in the 90s, we had a choice to make, lest we face similar temps inside. And the solution turned out to be simple— pizza on the grill!

I think we can expect a lot more of these!

Two summers ago, Les and I invested in a Napoleon four-burner gas grill. Part of the reason we chose this grill (besides the fact it was made in Canada, not China) is that the model can support some amazing accessories, including a rotisserie basket and a charcoal smoker insert (both of which we bought but have yet to use). What it didn’t have was a great solution for pizza.

We considered getting an outdoor pizza oven— they’re all the rage now, after all— but having one would require having a place to set it and store it, and then there’s all the accessories for it. And have you seen the price tags? Having just dropped a hefty chunk of change on our fancy grill, we couldn’t justify spending another grand on a device that would only be used for pizza.

Fortunately, we are not easily deterred, and some quick research led us to a pizza stone made by Weber that is suitable for really high temperatures. The stone is coated with a glaze that gives it an easy-release finish, and although the Weber site says you must use it with their special frame kit on select Weber grills, I’m here to report that it also works great on our Napoleon— we just set it right on top of the grates, and crank up the heat!

This is even hotter than our oven!

The first couple of pizzas we tried on the grill last summer turned out good, with melty toppings and crispy crust. But we missed the usual top-of-pie blistering that we love from our oven-baked pies, so this year, we’ve figured out a compromise. After our pizza bakes for roughly six minutes on the grill, it hits a perforated pizza pan for a spin under the oven broiler for exactly one minute. Yes, the broiler gets hot, but only very briefly compared to multiple hours at 550° F. It’s a solution that ticks all the boxes for these two pizza snobs!

Hungry for something different?

My pizza dough recipe makes enough for two pies, so I have plenty of opportunity for experimenting. I usually do something classic for one pizza, and the other becomes a blank canvas for new ideas. I’ve been tuned into Les’s suggestions quite a bit lately, and he asked last week whether we’ve ever done a pizza with bacon as a topping. I had to search my own blog to discover that, yes, I did put bacon on the jalapeño popper pizza, the Kentucky hot brown pizza and the oysters Rockefeller pizza (they are also on the Pizza Party page). 

But Les wanted something a little different, using bacon as a salty accent, plus fresh spinach (his favorite), red onions and some gruyere cheese he thought he’d spotted in the fridge. I contributed a topping of my own, ricotta, and this new pizza was born. 

A very tasty experiment, if we do say so.

I cut up the bacon into pieces and cooked it until most of the fat was rendered and it was just shy of crispy, knowing that it would cook further in the heat of the grill. The cheese we thought was gruyere turned out to be white cheddar with “gruyere notes” (whatever that means), and we mixed it about 50-50 with freshly shredded hard mozzarella to be sure there was a good melt. This pizza would not have sauce, so it needed something else with a bit of moisture. Ricotta to the rescue, though next time I would spike it with some garlic to punch up the flavor a bit.


Our six minutes on the grill stone, plus one minute under the broiler method is a winner. This is very good news for us pizza lovers, especially with an entire hot summer ahead of us. The moral of this story? Where there’s a grill, there’s a way! 😉


Bacon & Spinach Pizza— on the grill!

  • Servings: One 14-inch pizza
  • Difficulty: Average
  • Print

This is a fun and different flavor combination for pizza, whether you bake it in the oven or (as we did with this one) on the grill!


Ingredients

  • Pizza dough ball, roughly 11 ounces
  • 1/3 cup freshly grated hard mozzarella
  • 1/3 cup white cheddar (or gruyere blend)
  • 3 thin slices red onion, separated
  • 4 slices uncured smoked bacon, cut up and cooked until shy of crispy
  • 3 sprigs fresh thyme leaves
  • 1/4 cup whole milk ricotta (seasoned with some garlic powder, if you like)
  • Medium handful fresh baby spinach leaves, torn into smaller pieces
  • 2 Tbsp. grated Parm-Romano blend cheese
  • Drizzle of extra virgin olive oil

Baking notes: If you are baking indoors, preheat a pizza steel at 550° F for one hour; for the grill method, heat to high temperature with a stone or steel pan, following manufacturer’s instructions.

Directions

  1. Shape pizza dough into 14-inch round; transfer to a flour- and cornmeal-rubbed pizza peel. Drizzle a bit of olive oil over the dough and season it with salt and pepper.
  2. Scatter both mozzarella and white cheddar/gruyere all over pizza dough, then arrange onion slices, par cooked bacon and thyme leaves over the cheese.
  3. Carefully spoon small dollops of ricotta on the pizza, keeping a bit of distance between.
  4. Scatter spinach leaves all over, then sprinkle with Parm-Romano blend cheese and give it one last drizzle of olive oil.
  5. Slide pizza onto preheated stone or steel; bake about six minutes. If grilling, transfer finished pizza to a perforated pan and slide it under a hot broiler for one minute to achieve a blistered, oven-like finish.


Mahi Florentine

The past few weeks have been a struggle for me as my husband and I have committed to making mindful changes to our eating plan. I don’t mind the challenge of eating better, so it isn’t that. My problem has been that I’ve tried too hard to develop original recipes worth sharing here on Comfort du Jour, but so much of what I have done has been with random leftovers that nobody else in their right mind is likely to have on hand. At the end of this post, I’ll show you a glimpse of some of those dishes, and perhaps you’ll draw inspiration for how to repurpose some of your own leftovers with a shift toward healthy.

Moving forward, one of the easiest ways I know to eat better is to choose lean meats and seafood and add a lot of vegetables. So in the weeks to come, you’ll likely see a lot more green on my plate, and I mean that quite literally with this dish, featuring a gorgeous, bright green bed of sautéed spinach, my husband’s all-time favorite vegetable.

What’s so great about spinach?

We all remember from the Popeye cartoons of childhood that spinach made Popeye strong— OK, that connection was overstated. But there is a hint of truth in it, as nutrition science shows the natural nitrates found in leafy greens support healthy muscle function. Spinach is also rich in Vitamins A, C and K, as well as iron, potassium and folate, a B vitamin that helps the body generate healthy cells.

Is it better to eat spinach raw or cooked?

There is no health consequence of eating raw spinach; one of my favorite salads is made from it, along with hard-boiled eggs, red onion slices and goat cheese. But we might miss more than we gain by eating it raw. In addition to all its benefits, raw spinach also contains oxalic acid, which is the stuff that makes your teeth feel squeaky. Oddly, the oxalic acid blocks absorption of some of the very nutrients spinach provides. The cooking process breaks that down, though, so a quick sauté or steaming helps you reap the most benefit of this versatile vegetable. I’ll be using spinach again and again in the coming weeks, so all of my leafy green lovers will want to stay tuned. 😀

So what about this dish?

Today’s recipe is a twist on Mahi Hemingway, a dish I posted a few years ago, and my copycat version of a pricey meal I had enjoyed many times at a local restaurant. This time, I’ve plated the fish and sauce atop fresh spinach rather than a pile of carb-y pasta. It’s colorful, easy to prepare and absolutely delicious!

Delicious, and pretty!

To make it, you’ll need a couple fillets of fresh mahi—season them with salt and lemon pepper— plus a fat handful of fresh baby spinach, a little garlic, diced tomato, capers, dry white wine, a squeeze of fresh lemon and a little swirl of butter at the end for a delicate but flavorful sauce. If mahi is unavailable (or not your favorite), try this dish with halibut, grouper or even a mild cut of salmon.

Parsley garnish is optional, but recommended, and you can make two servings of this meal for less than half the cost of a restaurant meal for one. It’s light, delicious, gluten-free and diet-friendly. It’s also easy to make (there’s a click-to-print recipe below), and my Instagram reel will show you in 60 seconds how to put it on your table tonight. Mise en place (having everything in place) is important here, because the dish moves quickly once the pan is hot. Enjoy!


Mahi Florentine

  • Servings: 2
  • Difficulty: Average
  • Print

There's plenty of flavor and nutrition in this light and easy seafood dish, and it comes together in under half an hour. Perfect for a busy weeknight!


Ingredients

  • 2 skinless mahi fillets, about 6 ounces each
  • Several shakes salt-free “lemon pepper” seasoning, such as Mrs. Dash
  • Kosher salt and freshly ground black pepper
  • 3 Tbsp. extra virgin olive oil, divided (1 for the spinach, 2 for the fish)
  • 2 fat handfuls fresh baby spinach, roughly chopped (this is approximately six ounces)
  • 2 cloves fresh garlic, minced
  • 1/3 cup dry white wine, divided (you’ll use some for the spinach, some for the fish; substitutions in the recipe notes)
  • Juice and zest of 1/2 large lemon
  • 1/3 cup petite diced tomatoes, drained
  • 1 Tbsp. nonpareil capers, drained but not rinsed
  • 1 Tbsp. cold butter, cut into teaspoon-size pieces, for swirling into sauce at the end
  • A sprinkle of fresh, chopped parsley to garnish

Notes: This recipe moves quickly, especially once you remove the fish from the skillet. Be sure to have all your ingredients lined up and ready before you begin cooking.

Any firm fish fillet may be substituted for the mahi; I think salmon, grouper, tilapia or halibut would all be terrific in this dish.

Dry vermouth may be used in place of the white wine. If you prefer to avoid alcohol, substitute a quarter cup of low-sodium vegetable broth for the wine and add an extra squeeze of lemon.

Use fresh tomatoes when they’re in season; otherwise, salt-free canned tomatoes work great. If you have trouble with the acidity in tomatoes, try neutralizing it with a pinch of baking soda. Stir the soda into the tomatoes before you begin, and give it a few minutes for any foaminess to subside before proceeding. This will help take the edge off the acid of the tomatoes.

Directions

  1. Pat the mahi fillets dry with a paper towel. Season with salt and pepper, plus a generous few shakes of the lemon pepper seasoning. Set aside to warm to room temp while you prepare the spinach.
  2. Place a non-stick skillet or pot over medium heat. Swirl in about a tablespoon of the olive oil, and then add the spinach a handful at a time. Give it a toss through the oil, then season lightly with salt and pepper. Use an easy touch here, so the spinach isn’t too salty after it wilts down.
  3. Add garlic to the pan and toss until spinach is fully wilted but still bright green. Add a splash of the white wine, plus the zest of the half-lemon. Continue to cook until the wine evaporates. Remove from heat and cover to keep warm.
  4. While the spinach is cooking, heat a second skillet (preferably not non-stick) over medium heat. Add remaining oil when the pan is hot. Place the fish fillets, “pretty” side-down, into the skillet. You should hear them sizzle instantly. Leave the fillets alone until you can see the fish is cooked through about 1/3 of its thickness, about three minutes. Use a metal spatula to carefully turn the fillets to cook the other side, about two additional minutes. They will be a little translucent in the center, but the residual heat will cook them through. Transfer the fillets to a warm plate and set aside while you prepare the sauce.
  5. Add the diced tomatoes and capers into the fish skillet. Add a generous splash of the white wine, and use a whisk or utensil to scrape up all the cooked-on bits in the pan. Turn down the heat to medium-low and cook until wine is reduced by half. Squeeze in the lemon juice and stir until the moisture is reduced by about half; this should happen within about a minute.
  6. Turn off the heat. Carefully swirl the cold butter, a teaspoon at a time, into the pan sauce. This will emulsify and thicken the sauce.
  7. Divide the spinach between serving plates. Place a mahi fillet on top of each and spoon the pan sauce over the fish. Garnish with fresh parsley and serve at once.


Here’s a snapshot of some of the other delicious foods I’ve made since we committed to healthier eating. Some were made from leftovers that you probably don’t have, but others are repeats of favorites, with previous recipes linked for your convenience.


Spanakopizza!

Today is National Spinach Day, and I would be remiss if I did not share this pizza that I pulled from the oven on Friday. It is absolutely packed with the nutritional powerhouse that is spinach, and a few other key ingredients like feta and dill that give it the signature flavor of Greek spanakopita.

In a roundabout way, this meatless, sauceless pizza brings me full circle to the launching of my blog back in 2020. I have been known at times to take inspiration from the idea of “national” food days, and on this date in that year, I surprised my husband with a batch of spanakopita— the real kind, made with layered phyllo— and served it alongside a Greek salad and easy chicken souvlaki. With spinach being Les’s favorite vegetable, he took a picture of that meal and posted it (along with my national day inspiration) on his Facebook page. 

That’s when it occurred to me that I should probably be doing that myself, not on Facebook but on my own platform. About 10 days later, I started Comfort du Jour.

Pizza, as many of my blog followers already know, is one of my favorite “blank canvas” foods,  and for this tasty pie, I took inspiration from a different kind of recipe made by another food blogger, Diane Kochilas. She is an amazing chef who shares her passion for Greek food not only through her blog (linked here), but also several award-winning cookbooks and her PBS-aired television show, “My Greek Table.” It just so happens that Diane also went to grade school with my hubby back in the day in Queens, N.Y., and the only reason I mention that is because Les follows Diane’s culinary adventures on Facebook and recreates some of her recipes when he takes his turn in our kitchen.

Diane’s “warm spanakopita dip” has become a big-time favorite at our house. When I scanned the ingredients list on the recipe Les had printed— mozzarella, feta, fresh spinach, onions, leeks, dill— I began to imagine them rearranged on a pizza, and I finally brought that idea to life this past Friday. It wasn’t until this morning, when that picture of my spanakopita popped up in Les’s Facebook memories, that we realized the significance of the date. I decided to hustle and get this post ready to mark the occasion. So that’s the story of this pizza— inspired by a dip that was inspired by a Greek specialty— and it was delicious. A delightful way indeed to recognize National Spinach Day, even if it was not intentional!

So. Much. Spinach!

As with most of my pizza creations, this one begins with my own sourdough pizza dough, but any pizza dough you like is probably fine because it’s the toppings that makes this one special. I bake in a very hot oven (550 F) on a pre-heated slab of steel, and the pie is done in only 6 minutes with that arrangement. On a pizza pan, it will take longer. If you have at least a pizza stone, I recommend using it for even baking of the crust. There is a fair amount of moisture in the toppings, and your crust will thank you for the extra bit of heat.

I like to shape the dough by hand, as it results in the light, airy crust we love. A little drizzle of olive oil, and then I layered on freshly grated mozzarella— no sauce is needed for this pie.


Next was a handful of fresh baby spinach, because I wanted to present the ingredient a couple of different ways. I crumbled up two ounces of feta (the kind packed in brine) and mixed it with chopped fresh dill. This was scattered over the spinach and then buried under a generous amount of spinach that had been sautéed with sweet onions and chopped leeks. A little more mozzarella, and I slid it into the oven!


Spanakopizza!

  • Servings: 6 slices
  • Difficulty: Average
  • Print

This pizza is packed with nutritious spinach and carries all the flavors of the Greek specialty, spanakopita.


Ingredients

  • 1 pizza dough ball (about 11 ounces), at room temperature
  • 3 fat handfuls (about 3/4 pound) fresh baby spinach, divided (you’ll cook most of it, and keep a small handful fresh)
  • 1/2 cup sweet onion, chopped
  • 1/2 cup chopped leeks, white and very light green parts only
  • 1 cup freshly shredded whole-milk mozzarella, divided
  • 1/3 cup brine-packed feta, patted dry and crumbled
  • 2 Tbsp. chopped fresh dill leaves
  • Extra virgin olive oil, salt and pepper

I bake all my pizzas at very high oven temperature (550 F) on a pizza steel that is preheated for one hour. If you have a baking stone or only a pizza pan, you may need to adjust temperature and baking time accordingly. Use a flour- and cornmeal-dusted pizza peel for easy transfer into and out of the oven.

Directions

  1. Preheat oven (and steel or stone) to 550 F, with rack placed about eight inches from the upper heating element.
  2. Heat a non-stick skillet over medium heat with a generous swirl of olive oil in the pan. When the oil begins to shimmer, add onions and leeks and sauté a few minutes until they are softened and translucent. Add two-thirds of the baby spinach (give it a rough-chop first if you’d like) and sauté until most of the moisture is evaporated and spinach is greatly wilted. Transfer the mixture to a bowl and cool to room temperature.
  3. In a small bowl, combine crumbled feta and fresh dill. Set this aside.
  4. Lightly dust a counter or board with flour. Shape dough into a 14-inch round, taking care to keep some airy bubbles in the outer edges of the dough. Transfer to the prepared peel.
  5. Drizzle olive oil onto the dough and sprinkle it with salt and pepper. Arrange most of the mozzarella evenly over the dough, reserving about 1/4 cup for the final layer. Scatter reserved handful of fresh spinach over the mozzarella.
  6. Sprinkle the feta-dill mixture over the spinach. Use a spoon to evenly distribute the sautéed spinach and onion mixture all over the pizza, and be careful not to leave large clumps of it near the pizza’s edges. Top with the remaining bit of mozzarella.
  7. Slide the pizza onto the preheated steel (or stone) and bake 6 minutes, or until cheese is bubbly and edges of crust are puffy and golden brown.


Matzo Brei Florentine

Make something off limits, and that’ll be exactly what you crave, right? We only started Passover on Friday evening, and I can’t stop thinking about wanting a big, fat sandwich. To be clear, my husband does not expect me to adhere strictly to this Jewish custom of his—heck, he’s the first to admit that he is not religious himself about this requirement when he is out and about—but he does not eat bread at home during the Passover week. His choice is not about strict religious mandates, but tradition that helps him feel connection with his ancestors, and especially his late father. I am not Jewish myself, but I respect the tradition and so I am making an effort to accommodate this food called matzo.

Iconic, yes. But matzo needs a whole lot of help to become flavorful or interesting.

If you have never had the anti-joy of eating matzo, allow me to describe it for you— try to remember the driest, most bland, and perhaps even stalest, saltine cracker you’ve ever eaten. It may have been a cellophane-wrapped packet that a diner waitress fished out of her apron pocket for your bowl of chili in 1974. Maybe you got stuck in traffic on the interstate during a blizzard and had to resort to eating whatever random things you found in the glove compartment. Or perhaps you found some old takeout crackers in the back of your desk drawer when you finally made it back to the office after two years of COVID shutdown. Whatever memory you conjured, hang onto that for a moment and try to remember the taste. Yep, matzo is like that. But not as good. And without salt.

You could search the entire world and not find a less interesting cracker. Or is it considered bread? The Jewish people developed matzo as a reference to the unleavened bread their ancestors were forced to eat when they fled Egypt in a hurry. There was no time for the bread to rise, so they baked the dough as it was and took it on the run. Whatever category you put matzo in (bread or crackers), this stuff is undeniably boring, but a common sight in my home now—at least during Passover. My goal, as the primary meal maker, is to find ways to make matzo more palatable because eating it from the box can only be described as “choking it down.” And I won’t even mention what it does to the digestive system (it ain’t pretty).

Thank goodness for the New York Times Cooking e-letter, which is always brimming with menu ideas, including a classic, basic version of this dish, called matzo brei. According to Melissa Clark, the author of the recipe, brei rhymes with “fry,” which is exactly what you do with the matzo before scrambling it into eggs. As written, the recipe sounded dull, but as I started working at the stove, I asked Les if there was any reason that I couldn’t jazz up this humble dish just a bit—maybe with addition of onions and some spinach? Sure, was his response, and this was the result.

My first attempt at matzo brei got my gears turning about other possible flavor twists. What do you think would be good?

I liked this dish! Spinach is nothing new with eggs at our house, as I incorporate it often into omelets. Onions were a no-brainer, and some matzo is even onion-flavored, though that variety is not usually considered kosher for Passover. And the matzo pieces, fried in butter and mingled throughout the scrambled egg mixture, reminded me a little bit of a baked pasta, especially for the crispy, buttered edges. I don’t know what prompted me to top the dish with sour cream, but it was a good call, and the fresh dill I had picked up at the market was a perfect finish for this savory, ready-in-15-minutes breakfast. As Les and I scarfed down our matzo brei with spinach (Florentine, if you will), we began brainstorming other flavor combinations— maybe peppers and mushrooms, or feta and asparagus. Wait, how many days of Passover do we have left?

The recipe was not without challenges, despite its simplicity. I messed up the beginning of the recipe by commencing to fry the matzo in butter straight from the box, and it wasn’t until my common sense began to question the technique that I noticed in the recipe’s steps that I was supposed to rinse and soak the matzo first. Why it was not listed as such in the ingredients, I’ll never know, but I’ll add the oversight to my list of what I call the problem with recipes. The ingredients of the NYT Cooking recipe did not include water, so it didn’t occur to me until it was (almost) too late.

All’s well that ends well, and I’ll describe in my recipe notes how I recovered from my mistake (it was easy). Regardless of whether I ever make matzo brei again, I discovered for sure that I always want to have sour cream and fresh dill on my scrambled eggs now. And with five days of Passover left to go, we are least down two more sheets of matzo.


Ingredients (serves 2)

2 sheets plain matzo, rinsed under warm water and set aside to soften* (see notes)

3 Tbsp. salted butter

1/4 cup chopped sweet onion

Good handful fresh baby spinach, rough-chopped

Kosher salt and ground black pepper (to taste)

3 eggs*, room temperature, beaten with a splash of water or milk

A hefty dollop of sour cream (for serving)

1 Tbsp. chopped fresh dill (for garnish)


*Notes

My mistake led me to an alternate method of softening the matzo. Since I had missed the step of rinsing and resting the matzo ahead of time, I simply poured about 1/4 cup warm water from my tea kettle right into the skillet with the butter and matzo pieces. The dry matzo soaked up the water and fried in the butter with no issues. This may truly be a better method than the original because I didn’t have to wash an extra “soaking” dish or clean up a soggy matzo mess from the counter. Do what works for you!

The original recipe that inspired me suggested using four eggs, but I followed my instinct and used three, as I always do for an omelet-for-two. If you have an extra hearty appetite, go with four eggs.


Instructions

I’ll walk you through it in pictures, and keep scrolling to find it ready to print or save for your recipe files!


Spinach Maria

“Trust me, you have to order the spinach Maria as your side,” was the instruction given to me, in no uncertain terms, by at least six of my now-husband’s family members, who had gathered from every corner of the world for his mom’s 90th birthday celebration in Boca Raton, Fla. On our second or third day of this visit, which I should mention was my first introduction to Les’s family, about 16 of us were seated at a very long table at the Ke’e Grill, an upscale Boca restaurant that specializes in exquisite seafood dishes. I watched and listened as the server moved along the table, taking order after order for spinach Maria. It didn’t seem to matter whether the desired entrée was lobster tail, shrimp or salmon—even steaks, chops or chicken—literally everyone at our table ordered the spinach Maria, and it appeared true for the tables around us as well.

What was this mystical side dish, I wondered, that was so delectable that it united all the personalities present at this table and beyond? Creamy, crumb-topped heaven in a ramekin, that’s what.

“Maria! I’ve just met a spinach named Maria!”

This was no ordinary creamed spinach, and on subsequent visits to Boca, I requested return trips to Ke’e Grill so that I could experience the flavors enough to deconstruct it in my mind and then recreate it at home. I have made it three times in recent history, and after a few tweaks here and there, I’m finally confident to share my version of this memorable side dish. The base of the sauce is a bechamel, but only barely thickened because the cream and cheese are weighty themselves, and the spinach adds quite a bit of body. The buttered panko crumb topping is a delightful textural contrast to the richness that bubbles underneath.

It is relatively easy to make, but it takes a bit of time, and the Ke’e Grill menu even reminds guests to be patient for spinach Maria, as it is made to order and baked to bubbly, crispy perfection just before serving. If you wish to make it ahead, perhaps for an elegant New Year’s Eve dinner, prepare the filling and portion it into ramekins, then refrigerate up to 24 hours. Bring the ramekins to near-room temperature before topping and baking.

Hot and bubbly from the oven, and a great crispy texture in the crumbs on top.

Ingredients (for 6 servings)

1 lb. frozen chopped spinach, thawed and squeezed very dry

6 Tbsp. unsalted butter

3 Tbsp. all-purpose flour (a 1:1 gluten-free alternative would be fine)

2 medium shallots, finely minced

Kosher salt and freshly cracked black pepper

3/4 cup whole milk

1 cup heavy cream

1/2 cup shredded fontina cheese

1/3 cup shredded gruyere cheese

1 whole bulb roasted garlic* (see notes)

Pinch of ground cayenne pepper

1/2 tsp. dry mustard

Topping:

3 Tbsp. salted butter

1/2 cup unseasoned panko breadcrumbs (or substitute gluten-free crumbs, if necessary)

3 Tbsp. grated parm-romano blend*


*Notes

It is important that you use roasted garlic, and not fresh, which would be much too sharp for spinach Maria. If you have never made your own roasted garlic, you can follow the recipe link for easy instructions, and you’ll want to make that ahead so it is ready for your spinach Maria.

We keep a large container of freshly grated parmesan and romano cheese blend on hand all the time, and you can follow that recipe link as well if you’d like to give it a try. Or simply use a good quality parmesan from the supermarket deli (please, for the love of good food, not the stuff in the shiny green can).


Instructions

Prepare the spinach by thawing, rinsing and draining. It must be squeezed very dry for this recipe, and I recommend spreading it out onto a clean, unscented kitchen towel and rolling and twisting to extract all the excess moisture.

In a medium, heavy-bottomed sauce pot, melt the unsalted butter. Stir in the flour and minced shallots. Season with salt and pepper and cook over medium-low heat a few minutes, until the mixture is bubbly and has a slight nutty fragrance.

Add the milk all at once and whisk until smooth and thickened. Stir in the heavy cream until blended. Add the fontina and gruyere cheeses and stir until melted through. Stir in cayenne and dry mustard. Squeeze the roasted garlic directly into the sauce and whisk to break up the pieces.

Optional: At this point, the cream-cheese sauce will appear chunky, with visible bits of softened onion and roasted garlic. If you have an immersion blender, I highly recommend using it to cream up the sauce further; 60 seconds should do it. This step is optional, but it amplifies the creamy texture of any bechamel-based sauce, so I do it even for simple mac and cheese recipes.

Break up the packed dry spinach into the sauce and stir to blend it. It may seem that there is not enough spinach to match the sauce, but as you stir and blend, the bits will separate and disperse more evenly. Give the mixture a taste and adjust seasonings (salt, pepper, cayenne) to your liking.

Divide the spinach Maria mixture evenly into six 1/2-cup ramekins and place them on a small baking sheet. If you are preparing it ahead, cover them with plastic wrap and refrigerate up to one day. Bring them to near-room temperature before baking.

In a small saucepan or skillet, melt salted butter and toss the panko crumbs in it until moistened. Stir in parm-romano blend just until evenly mixed. Divide the topping among the ramekins. Bake on the cookie sheet at 350° F for about 25 minutes, until the crumb topping is crispy and golden, and the spinach Maria is bubbly at the edges. Serve immediately.


Handmade Spinach Ricotta Ravioli

Of all the things to be excited about when our kitchen remodel is finished, I’m especially looking forward to having my pasta rolling machine closer at hand. We have what we call the “prime real estate” rule in our existing kitchen, which means that we must use a gadget or appliance more than a couple times each week to justify giving it counter space or base cabinet storage. Everything else is relegated to the baker’s rack in the attached garage, or atop the wall cabinets in our laundry room.

See it way up there? Next to the spiralizer, my grain mill and underneath the deadly mandoline.

My pasta machine, which I only use once every few months, lives way up there, mere inches from the ceiling. I can only reach it if I stand on tippy toes on the top step of our stepladder—it is inconvenient, to say the least. And I have not pressed very hard on the argument that if I could actually reach the thing, I might use it more often, thereby earning its spot in the better real estate. It’s a catch-22 kind of thing, and a real shame because I love to make handmade pasta.

But my deepest pasta prayers will be answered with the installation of a brand-new section of cabinetry in this unused corner of our kitchen, right next to the huge sunny window. It will be my own special space—a baking station—and the cabinets and drawers will give me all the space I need for my favorite gadgets, including the pasta machine, plus a lovely butcher block countertop where I will make pasta (and sourdough bread) to my heart’s content. I cannot wait!

Am I the only one who hears angels singing?

And in preparation for that time, I have been getting in some practice rounds with handmade pasta, due in part to my purchase of this amazing how-to book. The author of Pasta, Pretty Please, Linda Miller Nicholson, describes her recipes for brilliantly hued handmade pasta dough, flavored and colored with pure, natural ingredients, and then shaped with the most clever and creative techniques. Linda is all over Facebook, YouTube and Instragram with her craft, and you can count me among those who are utterly enthralled by her incredible, edible art. Feast your eyes!

Amazing, right??


The impatient side of me wants to dive head first into the most complex shapes, designs and colors, but I am restraining and pacing myself—partly so that I don’t get frustrated with techniques that I don’t yet understand, and partly because there is only so much pasta that my husband, Les, and I can consume in a week. If I made as much pasta as my heart desired, we’d be in major carb overload!

But I am practicing, both with the natural color ingredients and some of the special shaping. I’m happy to share a sneak peek of my progress, and then I’ll dive into the recipe that I promised at the beginning.


Stay tuned for more progress as I go. Until then, let’s talk about this handmade spinach pasta, lovingly wrapped around an easy ricotta and parm-romano filling. I will not be so smug as to imply that handmade pasta is a cinch (because it does take practice), but I will absolutely say that it is worth the effort, and if you have made pasta before, you can make a couple of simple changes to twist up the flavor and color, and you will impress even yourself with the outcome. I’ve made colored and flavored pasta many times before—with spinach, butternut squash, sun-dried tomato, lemon and dried mushrooms as ingredients—but I have already learned some new tricks from Linda Miller Nicholson, and I am excited to share them with you.

For starters, her instruction shifted me away from extensive kneading of the dough to a simpler means of laminating the dough to build gluten strength. Laminating means “layers.” After a brief kneading and a half-hour rest, you repeatedly fold the sheets of dough onto itself, layer upon layer, as you run it through the pasta machine. As you go, the dough becomes more and more supple and strong enough to withstand pressing into thin sheets for ravioli. This is good news for anyone who finds kneading tedious or painful.

Next, the color of the pasta can be intensified with a simple addition of baking soda in the blanching water for any vegetables you use to color up your dough; then, a quick straining through a mesh sieve weeds out the solids for a cleaner-looking dough. In the past, I have simply wilted spinach in a pan and pureed it into my dough. My previous results were good, but not this good.

I am astonished at how bright green the color remains, even after cooking. The baking soda trick when blanching the spinach really makes a difference.

And my filling is improved also, simply because I took a few extra minutes to drain excess moisture from the ricotta before mixing the filling. More advice from Linda, and it worked like a charm. Oh, it pays to stay curious!


The dough

2 1/4 cups unbleached all-purpose flour* (see notes)

2 large eggs, room temperature (plus water, as noted in the instructions)

A fat handful of fresh baby spinach leaves, washed

1 tsp. baking soda (in the blanching water, not the dough)

1 Tbsp. kosher salt (also for the blanching water)


The filling

15 oz. container of whole fat ricotta

1/3 cup parm-romano blend (or grated parmesan)

1 egg yolk

Zest of 1/2 lemon

A few grates of fresh nutmeg


*Notes

As always, be sure you measure the flour properly so that your dough is not dense. Use the fluff, sprinkle, level method if measuring by volume. For less fuss and greater precision, measure it by weight—270 grams.

The very best flour to use for pasta is Italian 00 milled flour or finely milled durum (semolina), which is my favorite. But both can be tricky to find. For the sake of practice, I have been using King Arthur all-purpose flour, and I have had excellent results so far. If you sub in any amount of whole wheat flour, increase the water a bit as well.


Instructions

Here, I will run through the instructions in pictures, as usual. At the end of the post, you’ll find a PDF available for download, so you can print it for your recipe files. 🙂

  1. Bring a pot of water to boil. Add the salt and baking soda and stir briefly to dissolve. Toss in the baby spinach and stir it around for 15 seconds. Use a slotted spoon or tongs to remove the spinach and place it in a mesh strainer to drain excess water.
  2. Transfer the spinach to a regular or bullet blender, together with the eggs. Pulse blend a few times, and then run the blender continuously until the mixture is evenly mixed.
  3. Pour the pureed mixture through a mesh strainer over a glass measuring cup. Press the puree through to strain out the solids, and then add enough water to the mixture in the glass to measure exactly 3/4 cup.
  4. In a large bowl, stir a generous pinch of salt into the flour and create a well in the center of the flour. Pour in the pureed spinach mixture and mix with a spoon until a clumpy mixture comes together. Knead with your hands in the bowl or turn the dough out onto a countertop and knead several times until all flour is incorporated and no dry spots remain.
  5. Wrap the dough tightly in plastic wrap and let it rest for at least 30 minutes before rolling. You may also refrigerate the dough for several hours or even a day. I’ve found this formula for pasta dough to be very forgiving.

Make the ricotta filling while you rest the pasta dough

Strain the ricotta in a mesh strainer (lined with cheesecloth if you have it) over a medium bowl. Let the ricotta drain for at least 30 minutes. Stir in parm-romano, egg yolk, lemon zest and nutmeg. Salt and pepper to taste. Spoon the mixture into a plastic bread bag for easy piping. Refrigerate mixture while you roll out the pasta dough.


Sheet the pasta and fill the ravioli

  1. Divide the dough into sections, keeping most of them wrapped as you work on one. Use a rolling pin or the heel of your hand to press the first section into a flat oval. Run it through the pasta machine on the thickest setting, folding it into thirds like an envelope and then run it through again. If it sticks, dust both sides with flour. When the dough reaches a very supple stage, adjust the setting knob one notch per run, until the dough reaches the desired thinness. For ravioli, I recommend using the thinnest or second-thinnest setting.
  2. Let the pasta sheet rest, uncovered, on the floured counter for about 10 minutes before filling with ricotta filling. This gives the pasta time to tighten up a bit for easier shaping.
  3. If you are making ravioli without a mold, squeeze 1 1/2 teaspoon-sized dollops of ricotta filling onto one long side of the pasta sheet. Space the dollops about 2 inches apart, allowing room to seal up the pillows on all sides. Dip a finger into a small bowl of water and slightly moisten the dough in between ricotta dollops and along the long edge.
  4. Fold the dough over the ricotta dollops, taking care to keep the edges aligned. Carefully press out any air pockets, starting from the folded edge, then in between dollops. Seal the open edge last to ensure no air bubbles are trapped.
  5. Use a pizza wheel or sharp knife to trim any ragged edges. Cut between the raviolis and transfer them to a semolina- or flour-dusted parchment paper. Allow the ravioli to dry for at least an hour before cooking.

To cook handmade ravioli, bring salted water to a gentle boil. Carefully transfer ravioli, taking care not to overcrowd the pot. Fresh pasta cooks much more quickly than dried or frozen, so keep an eye on it and prepare to rescue it from the pot after about four minutes.

Serve with any favorite sauce. I made the simplest marinara with sauteed onions and garlic, my own Italian spice blend and canned San Marzano tomatoes, plus a splash of cream.


Want to make it even easier?

A ravioli mold makes this work much simpler. I bought a set of three different shapes for about $20, also at TJMaxx.


For the record, I bought Linda Miller Nicholson’s book with my own hard-earned money. This is not a paid advertisement for Linda, but I cannot help sharing my discovery of her work because she is just awesome. You can pick up a copy of Pasta, Pretty Please at the bookstore or on Amazon, but I bought it directly from Linda’s website, called Salty Seattle. If you buy the book directly from Linda, she will even sign it for you. 🙂

Oh, Linda, I most definitely will!


Greek-inspired Frittata with Potato Crust

It’s that moment when you find that the package of chicken you were counting on for dinner is two days past its “best by” date. Or the panic that hits you when you suddenly realize at the end of a hectic work-from-home day that you completely forgot to go to the grocery store. Moments such as these demand improvisation, and when catastrophe occurs, I have one Plan B that I can always count on—breakfast for dinner.

Even if it’s slim pickings in the refrigerator, there’s a very good chance I have eggs and few random vegetables. There’s always some kind of cheese in the deli drawer, and that already sounds like an omelet in the making, which is our go-to dish when we are looking at breakfast for dinner. But this time, I went all in on a big-flavor frittata, pulling together a Greek theme with spinach, onions and red bell peppers I found in the fridge, along with some feta cheese, kalamata olives, oregano and dill. And though frittatas—which are basically quiche’s crustless cousins—usually only have eggs and fillings, this one takes advantage of that half-bag of shredded potatoes I found in the back of the cheese drawer. OK, who’s hungry?

Great Mediterranean flavors and plenty of nutrition in this filling “breakfast for dinner!”

Turning random leftovers into a flavorful breakfast for dinner on a busy weeknight? That’s Comfort du Jour.


Ingredients

3 or 4 slices bacon, chopped into one inch pieces

1/2 bag Simply Potatoes hash browns* (see notes)

1/2 onion, chopped

1/2 red bell pepper, chopped

1/2 tsp. dried oregano

2 fat handfuls fresh baby spinach leaves, rough chopped

1/4 tsp. dried dill leaves

6 eggs, at room temperature

1/2 cup half and half*

2 oz. block feta cheese, crumbled

Fresh parsley (for garnish)

Handful pitted kalamata olives, rough chopped (for garnish)


*Notes

Simply Potatoes is a brand of pre-shredded potatoes, usually found in the refrigerated breakfast section of the supermarket, or sometimes in dairy (though I don’t know why). I use this convenience product when I make our favorite Easy Hash Brown Waffles, so I frequently have them in my fridge. If you prefer, use about two cups finely shredded fresh potatoes, but wrap them first in a clean towel and squeeze out as much water as you can. Better yet, skip the potato crust and make it a more traditional frittata. May as well keep it simple. 😉

For readers abroad, “half and half” is a common dairy ingredient in the U.S. that is essentially equal parts cream and whole milk. If you are minimizing fat in your diet, you may also substitute with evaporated whole milk.


Instructions

This was simple to make, as you’ll see in the photos. If you’d like written instructions, or a downloadable PDF for your recipe files, keep scrolling.


  1. Preheat oven to 350° F with rack in center of oven.
  2. Place a cast-iron skillet over medium heat. Add chopped bacon and cook until crispy. Remove with a slotted spoon to a plate lined with paper towels. Drain off most of the bacon grease.
  3. Sauté onions and peppers until slightly soft and translucent. Season with salt, pepper and oregano.
  4. Add chopped spinach, one handful at a time, and cook until wilted. Transfer veggies to a separate bowl and set aside. Sprinkle with dried dill.
  5. Increase the skillet heat to medium-high and drizzle in about a tablespoon of olive oil. Add the shredded potatoes to the skillet, using a spoon or utensil to press it into the sides. Cook the potatoes in the skillet for about five minutes, then transfer the skillet to the oven for about 20 minutes (or additional 10 minutes for crispier crust).
  6. Combine eggs with half and half, whisking only until blended.
  7. When potatoes are golden at the edges, spread the veggies over the crust, and then scatter the crispy bacon pieces.
  8. Pour egg mixture evenly over the frittata filling. Crumble the feta evenly over the frittata.
  9. Transfer to the oven and bake for about 20 minutes, until eggs are set and edges are pulled away from the skillet.
  10. Cool about 5 minutes before cutting into wedges. Top portions with fresh chopped parsley and chopped kalamata olives.

Want to save this recipe?