Recently in my news feed wanderings, I spotted an article claiming to list the “7 Classic American Dishes No One Eats Anymore.” This type article always grabs my attention because I immediately assume I’m the exceptional person—the one who does actually still eat the foods that are supposedly yesterday’s news.
The list held a few surprises for me.
Chicken cordon bleu made a showing at #5, and I cannot get behind that. Soon, I’ll share my recipe for this classic dish and a story about the time I made chicken cordon bleu from memory at midnight—on a dare. Some of the other dishes listed in the article truly are better left in the past, such as turkey tetrazzini, which is just a hot mess of a dish that includes leftover turkey with spaghetti and canned peas (blech), and the dreaded creamed chipped beef on toast. Folks, there’s a reason everyone started calling that dish sh!t on a shingle. Let’s just leave it behind, shall we?
Today though, I’m showing due respect for the food item that ranked #1 on the list, the sloppy joe. What is the world coming to, if people are giving up on this fun and tasty handheld, with all its sweet, spicy, tangy sauce? Was it the SNL skit featuring Adam Sandler and the late Chris Farley? I thought that catchy tune was responsible for saving the sloppy joe, not burying it.
The only thing I can find to blame for sloppy joe’s ill-fated appearance on this list of “has-beens” is that people have grown bored with the mass-produced stuff that made sloppy joes so common in the first place, and that would be the canned sloppy joe sauce. Yep, good old Manwich. It exploded onto the convenience food scene in 1969, and everyone embraced this miracle in a can that turned a pound of ground meat into an easy, casual family dinner.
Fast forward 51 years. Palates have evolved (for better or worse), and at the same time, Manwich and other convenience foods went all in with the use of cheap, controversial ingredients—namely, high fructose corn syrup (boo, hiss). Despite mounting flak from savvy consumers, the fake sweetener is still listed as an ingredient on the Manwich label, so it won’t land in my grocery cart anytime soon. No matter, because it’s super easy to make sloppy joes at home without a pre-made commercial sauce. I’ll show you how to mix and match ingredients that are already in your refrigerator door to get the same fun, tangy flavor, but without weird additives (caramel color doesn’t add a thing to Manwich anyway). Use any kind of ground meat you like—I’m going to lighten mine up with ground turkey, and I’m also switching up the presentation by serving them on toasted hot dog buns. That makes them sloppy dogs! Who’s hungry?
2 Tbsp. chopped pickle chips (sweet, spicy or whatever you like)
4 toasted hot dog (or burger) buns, for serving
Instructions
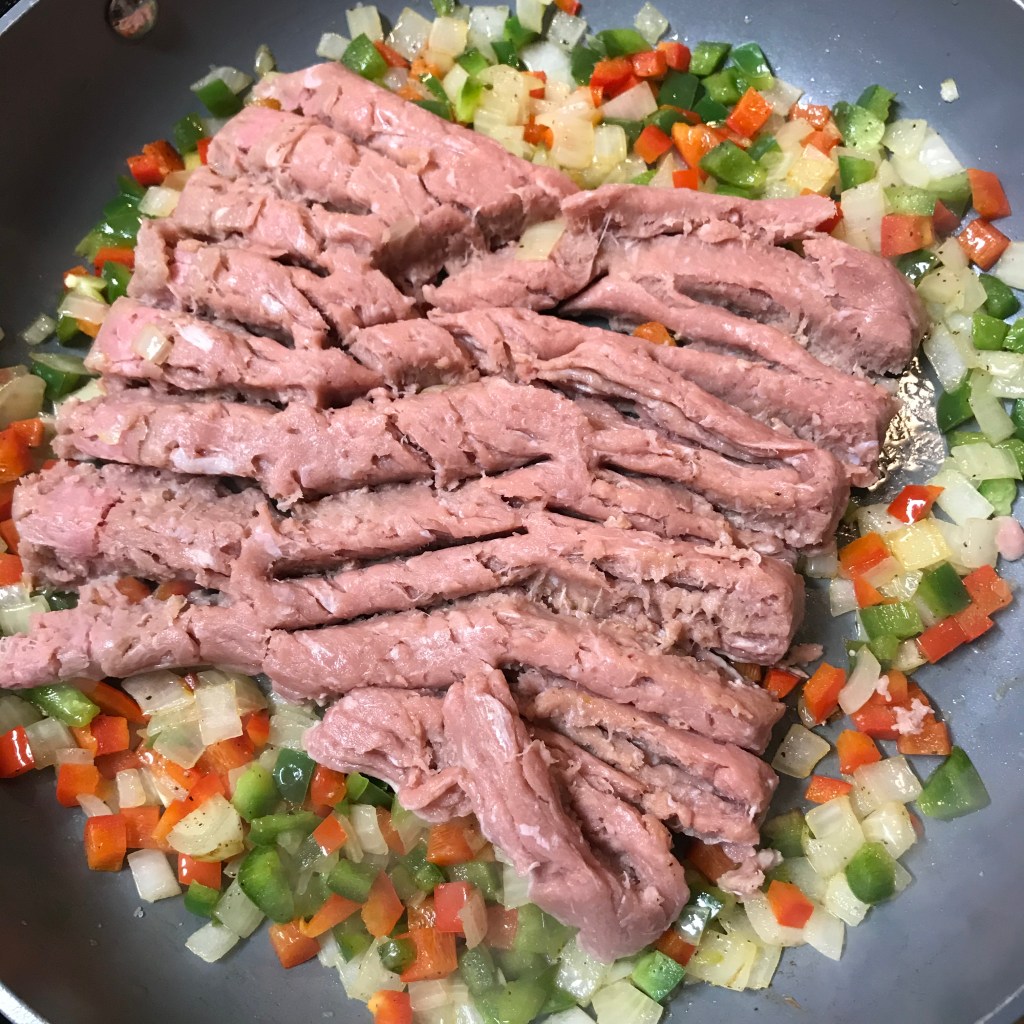
Saute the onions and peppers until soft, but don’t brown them.
Add the whole package of ground turkey, and just barely break up the meat. This will produce large chunks in the finished sauce.
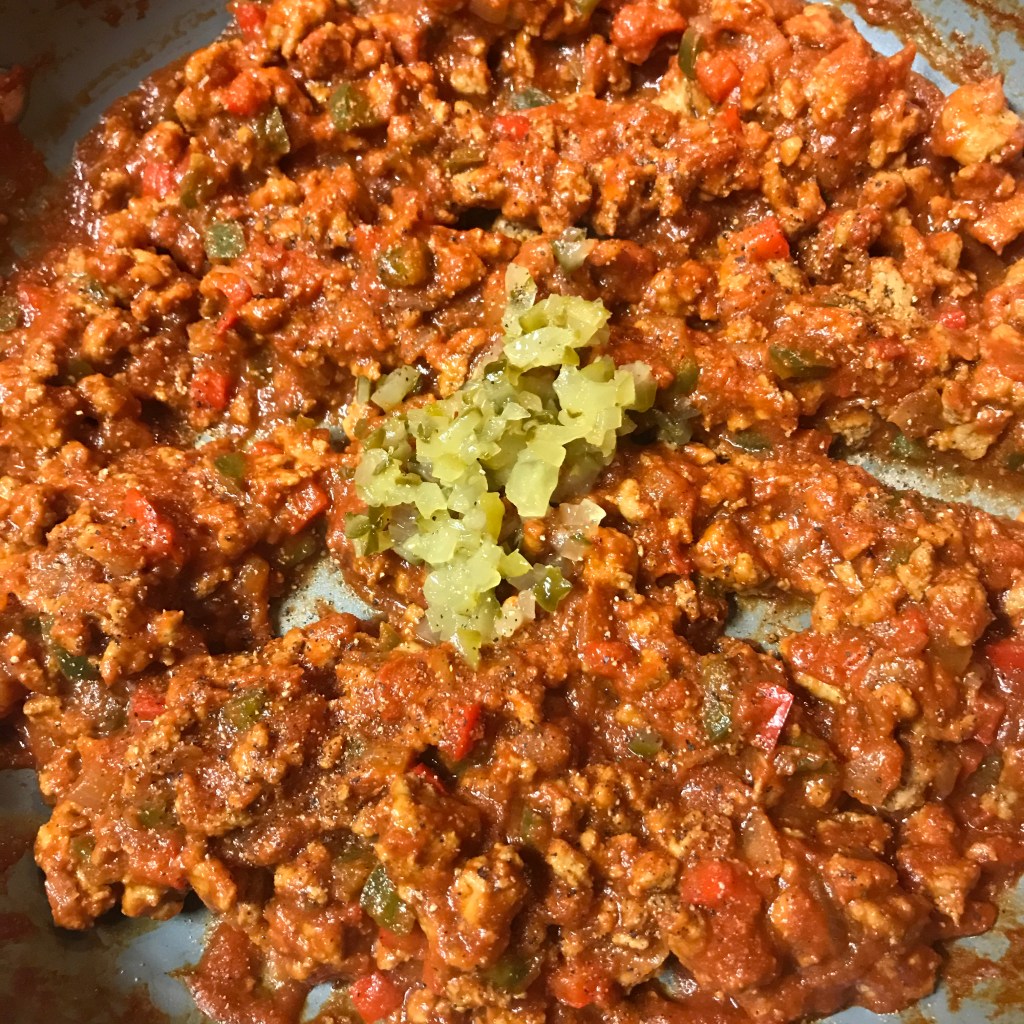
Add the tomato sauce and all other flavor ingredients and mix well.
At the end, add the chopped pickles. They can be dill, sweet, spicy or anywhere in between, to match your taste.
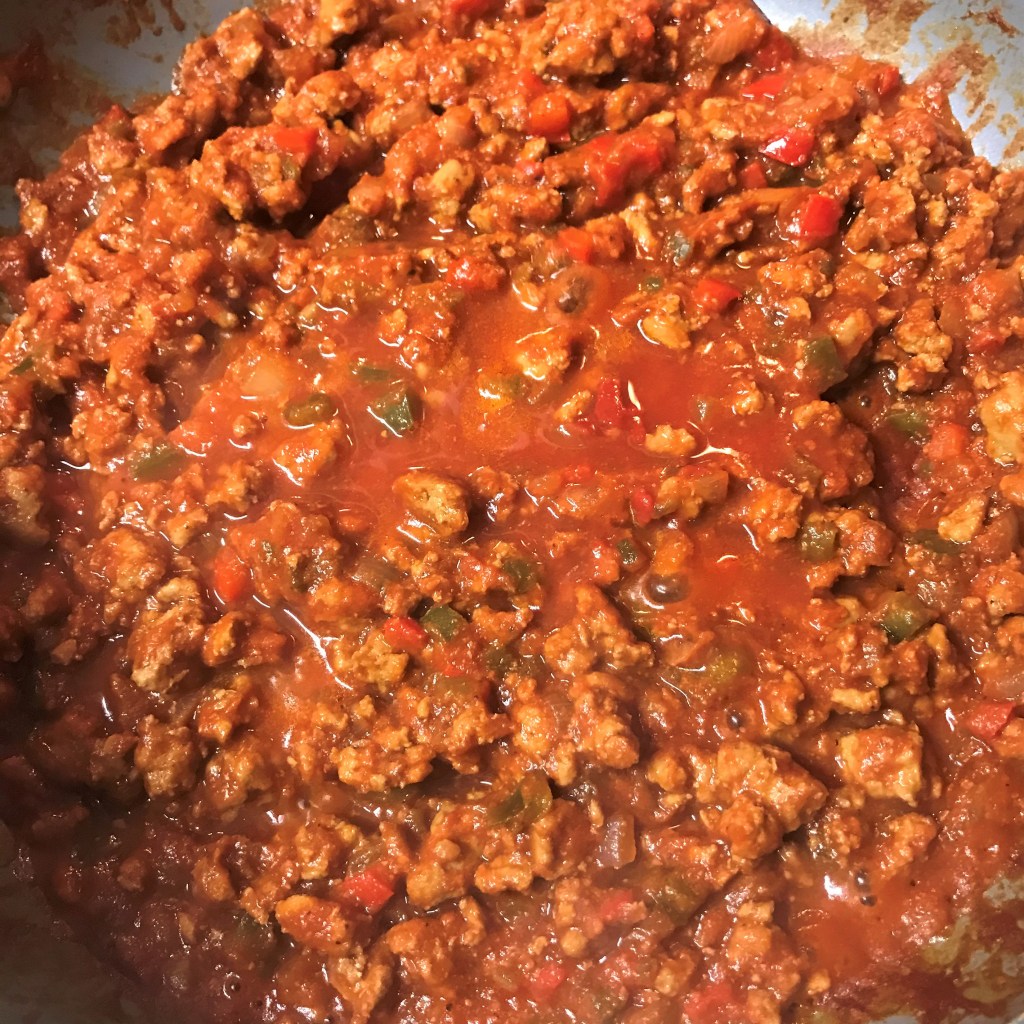
Adjust the thickness of sauce, if needed, by adding water or tomato paste. Let it simmer a few minutes until ready to serve.
This would be a fun, casual meal for Halloween night or a low key weeknight.
Heat a large non-stick skillet over medium heat. Add olive oil and saute onions and bell peppers until soft and translucent, but not browned.
Add ground meat in a large chunk, on top of the vegetables. Gradually break up the meat with a wooden spoon or spatula and aim to keep the meat chunky.
Combine tomato sauce, tomato paste, vinegar, mustard, molasses, Worcestershire and spices. Add to the meat mixture and stir gently to blend. If mixture looks is too thick, add a splash of water. If it’s too thin, add another spoon of tomato paste. It’s your kitchen, so take charge and don’t worry about my recipe. Let your taste buds tell you whether the mixture needs more salt, sweet or tang, and adjust accordingly.
Add the chopped pickles near the end of cooking time, for a zippy crunch.
Cover mixture and simmer a few minutes as needed to prepare the rest of your dinner.
Butter the cut insides of your dog (or burger) buns, and toast the buttered side on a griddle or hot skillet.
Pile the sloppy mixture onto the toasted buns and enjoy!
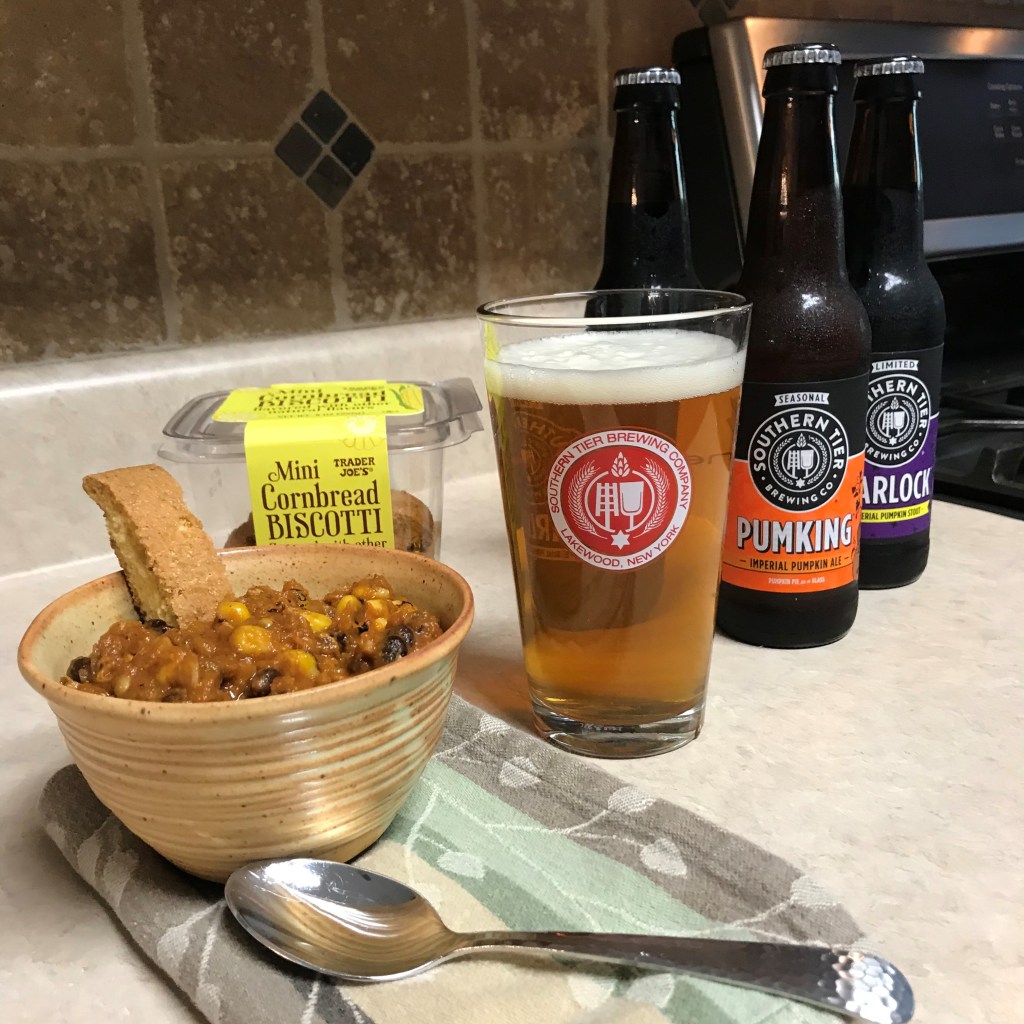
The arrival of fall gives me all kinds of warm fuzzies, not the least of which are the comfort foods I’ve been sharing for the past month. But there’s another thing I look forward to beginning in September each year, and that is the return of the Pumking. Thank goodness this seasonal brew will be around another month or so, because I do love it.
This pumpkin and spiced imperial ale has become, for me, synonymous with autumn. My first experience of it was nearly a decade ago, much sooner than it showed up in the cold beer aisle or on local tap menus. The brew is crafted in small batches by Southern Tier Brewing Company in Lakewood, New York. This is my old stomping ground, and though my visits to the area are few and far between these days, I have a deep sense of loyalty to certain businesses there, just as I have passion for “supporting local” in my current home of North Carolina.
I had occasion to visit Southern Tier’s flagship tasting room seven years ago, when I made the trek “home” for a family member’s memorial service. My beer connoisseur cousin and his wife were also in town, and our meeting place was Southern Tier. As with most local breweries, the tap offerings far exceeded the variety available for commercial distribution, and Southern Tier had some great seasonals, but we were all in love with the Pumking. The beer has an almost creamy texture, with warm spices, pumpkin (of course), and hints of caramel and vanilla, but without tasting too sweet.
The Pumking family also includes Warlock, a stout with the same great pumpkin and spice flavors. It’s a little sweeter and heavier, but would also be terrific in a chili!
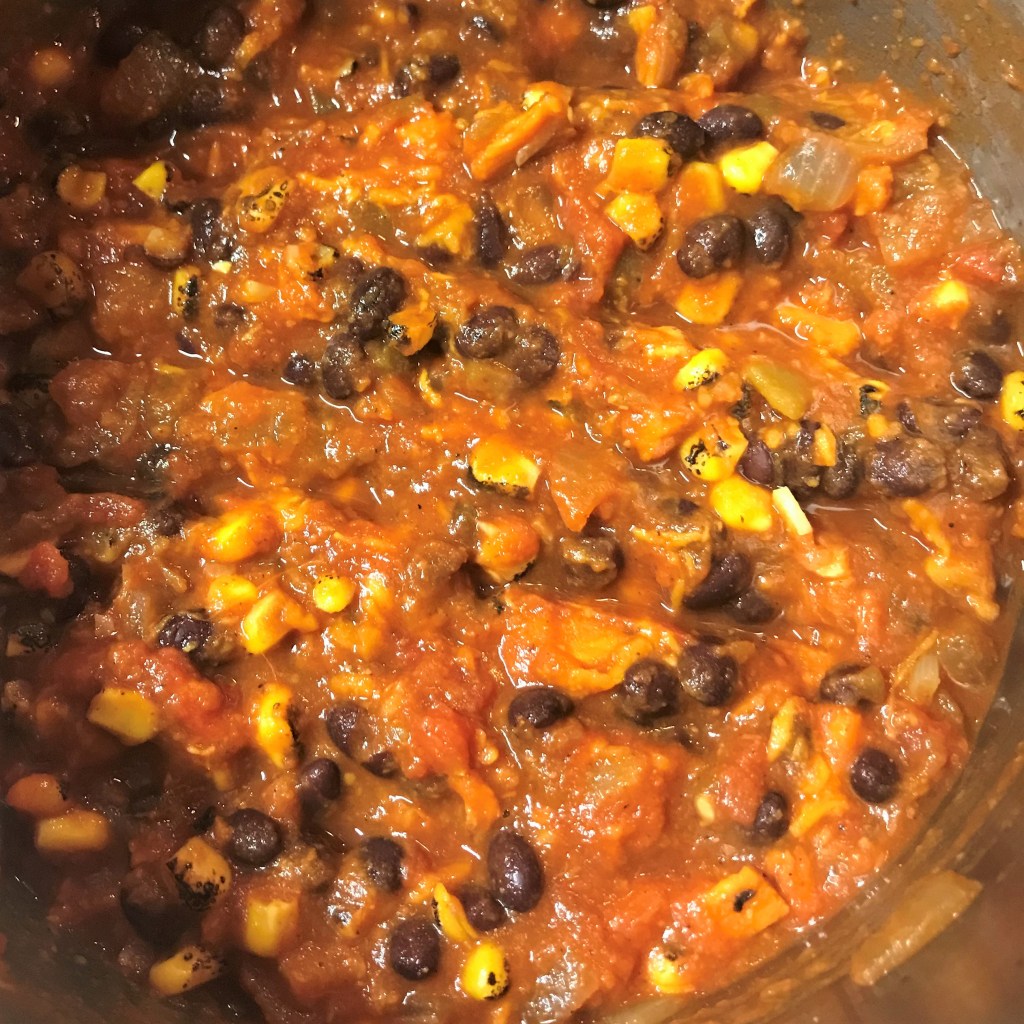
I will enjoy drinking it for its own sake, but I also plan to use it in other recipes, including bread—and you can bet I’ll find a way to slip it into an ice cream, too! To get things started, I’ve whipped up a fall-inspired chili that makes the most of savory roasted sweet potatoes and canned black beans, plus green chiles and fire roasted corn. Did I mention that it’s also vegan-friendly? Serve it up with your favorite cornbread and another bottle of Pumking—oh my, that’s tasty!
Pumking Black Bean Chili ingredients
1 lb. sweet potato, peeled and cut into chunks
1 medium onion, chopped
4 cloves garlic
1 can black beans, drained and rinsed
28 oz. can peeled tomatoes in puree (I used Cento brand)
1 small can green chiles, diced
1 cup fire roasted frozen corn
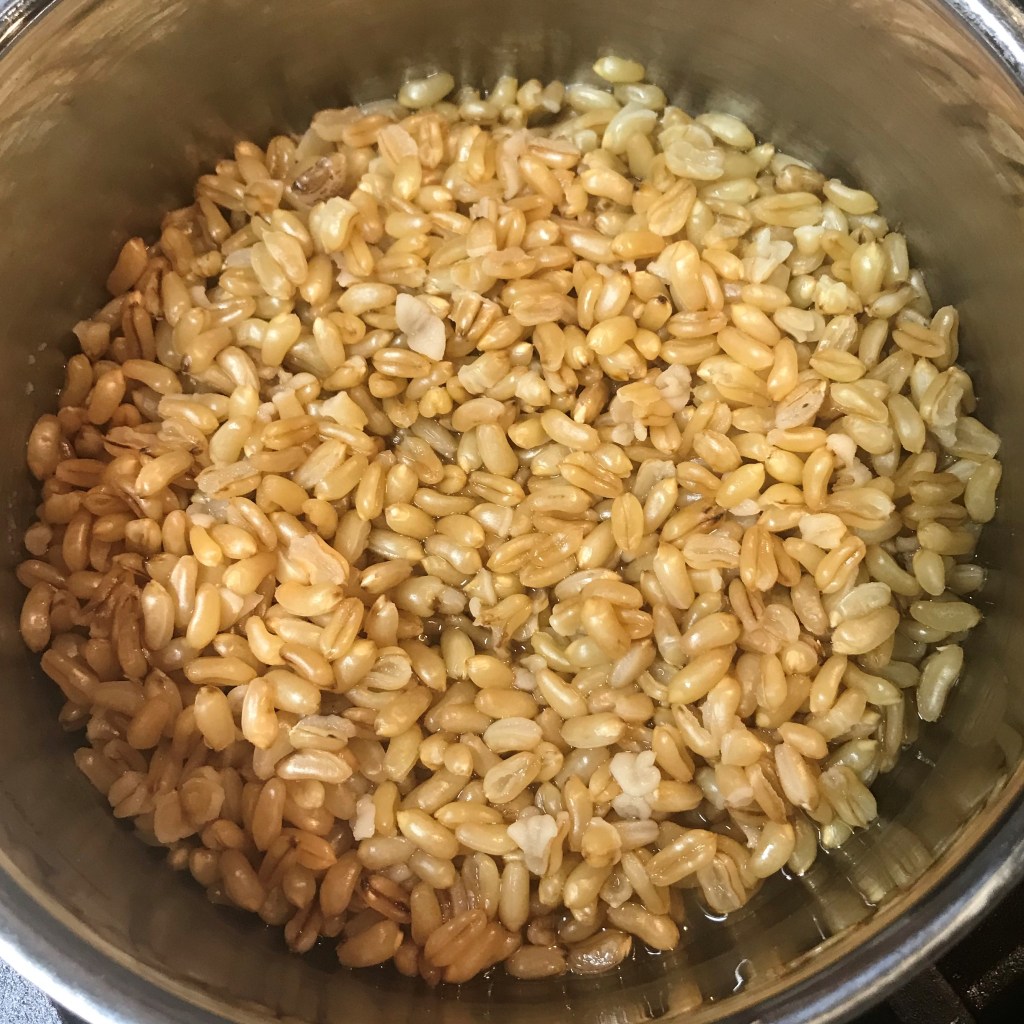
1/2 cup cooked wheat berries* (optional, see notes)
Half bottle Pumking imperial ale (enjoy the other half while you cook)
Chili spices* – chipotle powder, sweet Spanish paprika, cinnamon, smoked black pepper, cumin
*Notes
Wheat berries are the dried whole grain of wheat, and they add terrific texture and fiber to this chili. You can read more about them in my summer post for Healthy Wheat Berry Salad. If you cannot find wheat berries in your favorite food store, it’s fine to omit them. The other ingredients will provide plenty of body for the chili.
Combine your preferred spices into a bowl. Use whatever chili seasonings you like. If you aren’t sure how much to use of each, may I suggest: 1 tsp. chipotle powder, 1 tsp. sweet Spanish paprika, 1 tsp. kosher salt, 1/2 tsp. ground cumin, 1/2 tsp. smoked black pepper, 1/4 tsp. ground cinnamon.
Let’s make it!
Follow along with these slides, or scroll to the bottom of the post for a PDF version of the recipe you can download and print. Enjoy!
Wheat berries are easy to cook. Use at least 2:1 ratio of water (more is better and you can drain off the excess). Bring to a boil, then reduce heat and simmer about an hour.
The wheat berries are so plump and chewy when they’re finished. I love the texture and whole grain nutrients they add to a chili.
Preheat oven to 400° F, and line a large cookie sheet with parchment or foil. Toss sweet potato chunks with a drizzle of olive oil.
Season with salt, pepper and a few sprinkles of your chili spice blend to coat.
Roast sweet potatoes for about 30 minutes, until they can be pierced with a fork.
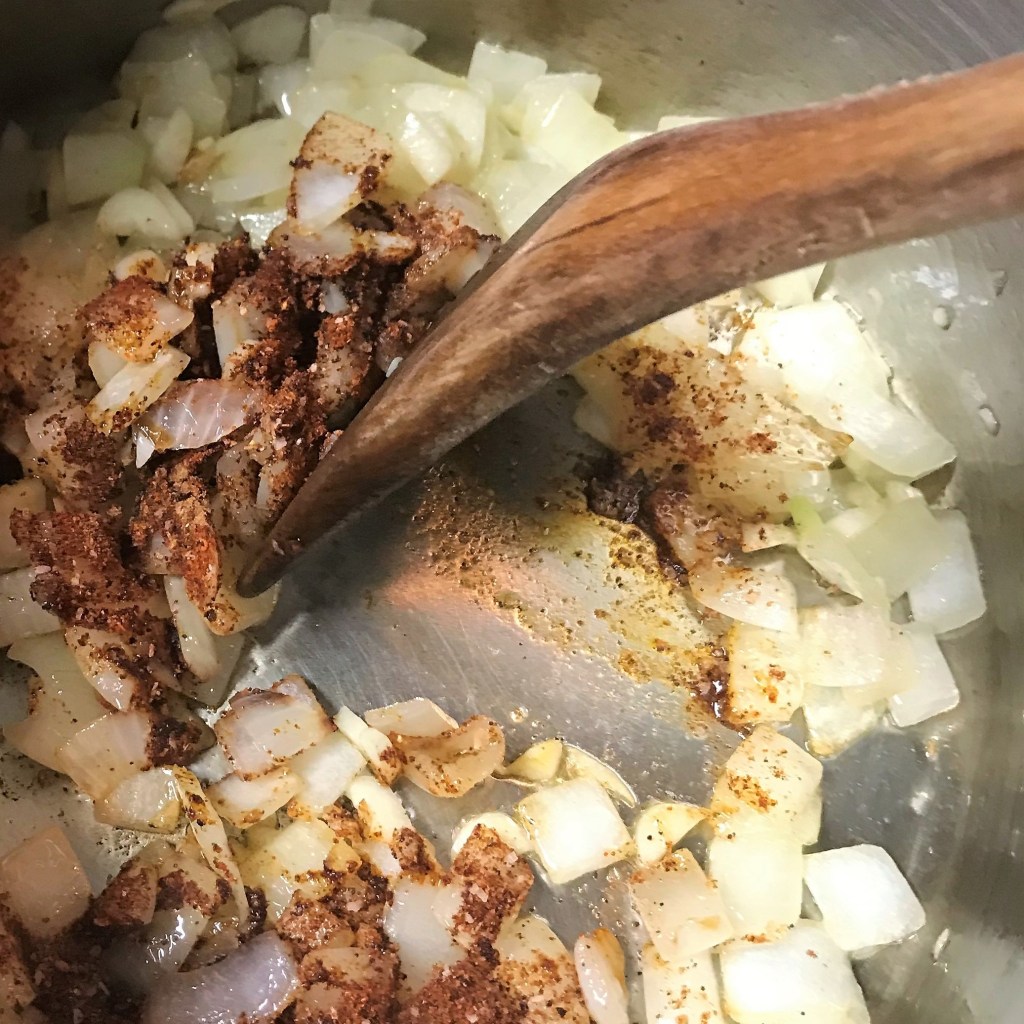
In a heavy-bottomed pot over medium heat, sauté onions in olive oil until soft and translucent. Add most of remaining spice blend (reserve a little for adjustment later).
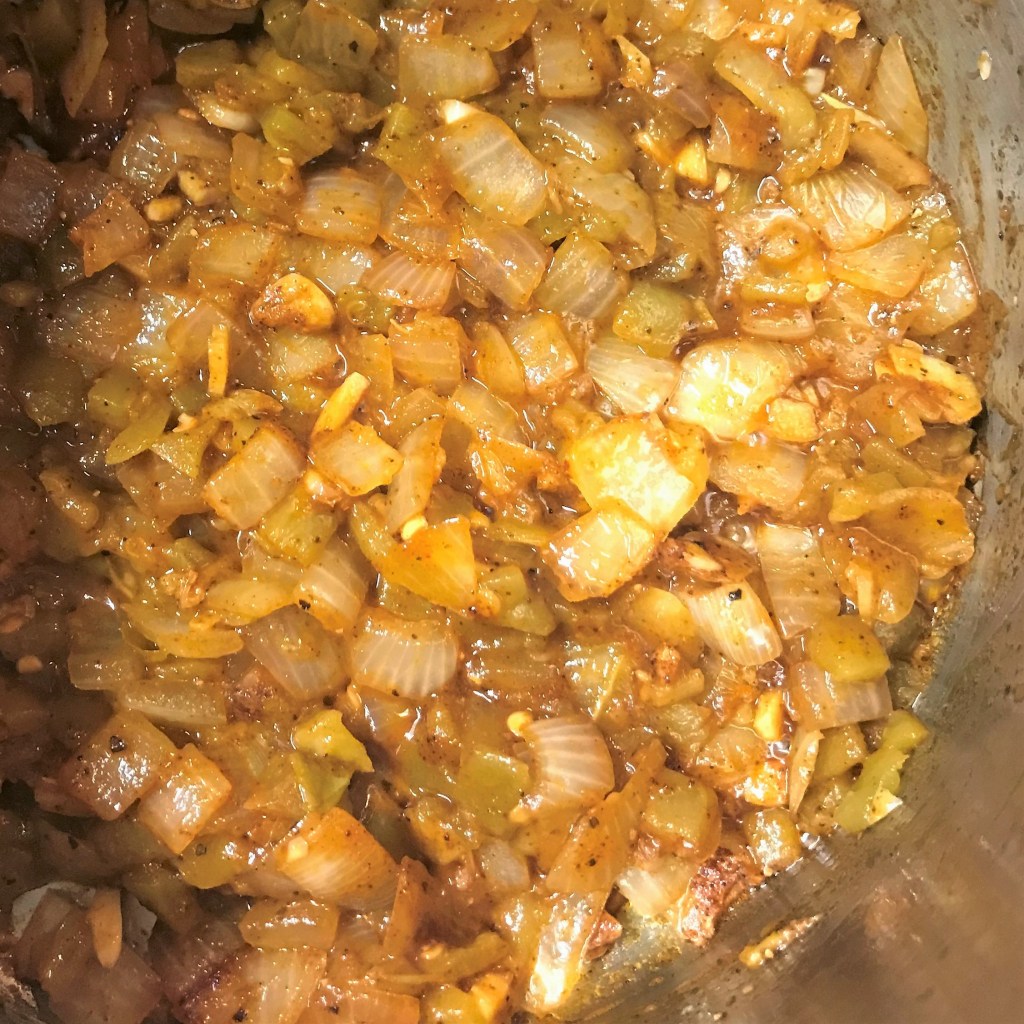
Add green chiles, and cook until mixture is fragrant.
Something about the warm autumn spices, combined with the green chiles and onions…so yum!
Pour in Pumking (or other pumpkin ale) and simmer until foam settles down.
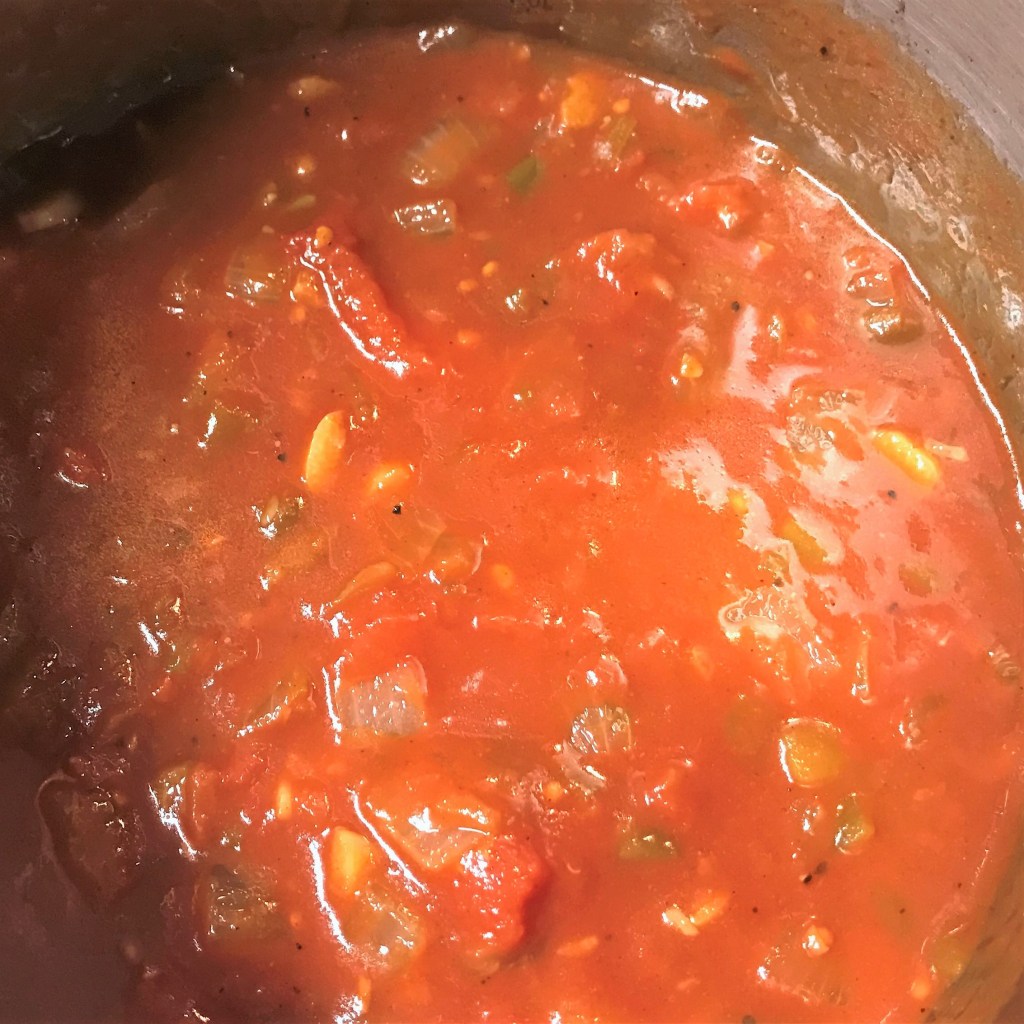
Add tomatoes, breaking them up into smaller pieces, then simmer until slightly reduced.
The sweet potatoes have a few roasted edges, but they were very soft. In hindsight, I definitely should have spread them onto a larger sheet pan.
Blend in the beans, corn and wheat berries. Taste and adjust for seasoning, and then simmer on low until ready to enjoy.
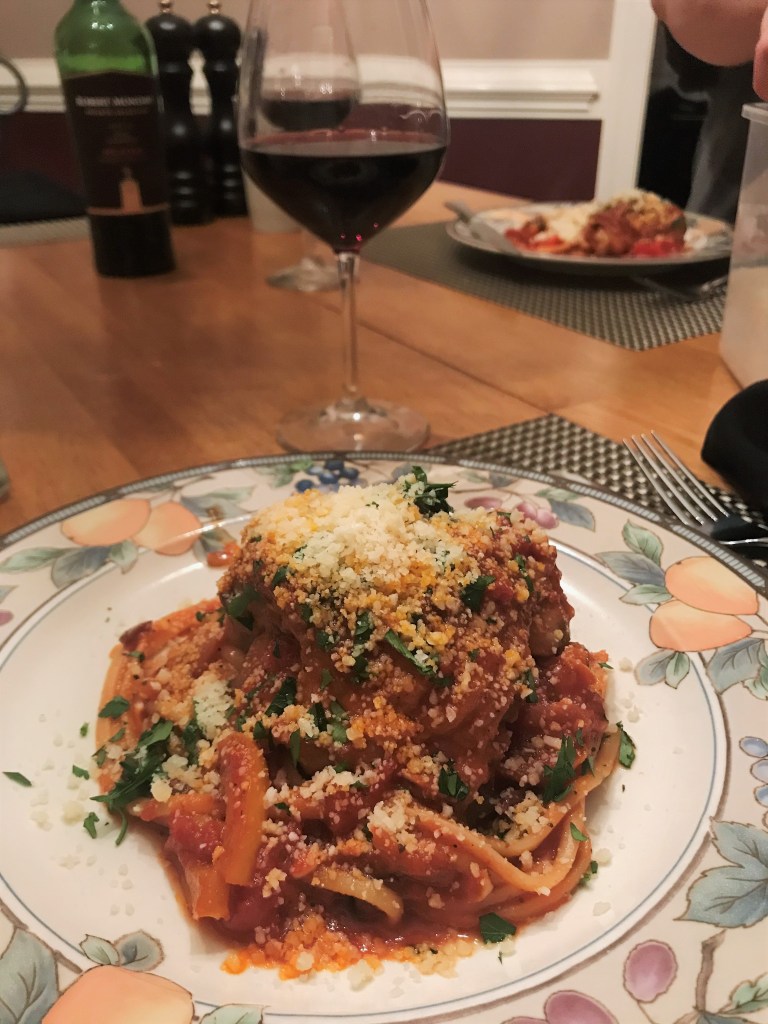
Genealogically speaking, I don’t believe I have a single Italian bone in my body. Nope—my people came from other parts of Europe and beyond. But I am so in love with Italian food, especially the southern regional dishes, such as layered baked pasta dishes and big red sauces (or “Sunday gravy,” as it would be called). My grandmother taught me some authentic Scandinavian dishes, but I had to do my own research to learn the real deal on Italian flavors, so I could ditch the bland and overly sweet jarred sauces. I’ve learned how to make my own pasta (that’ll be another post), and hopefully I’ll prove today that I can rock a red sauce that is molto buono!
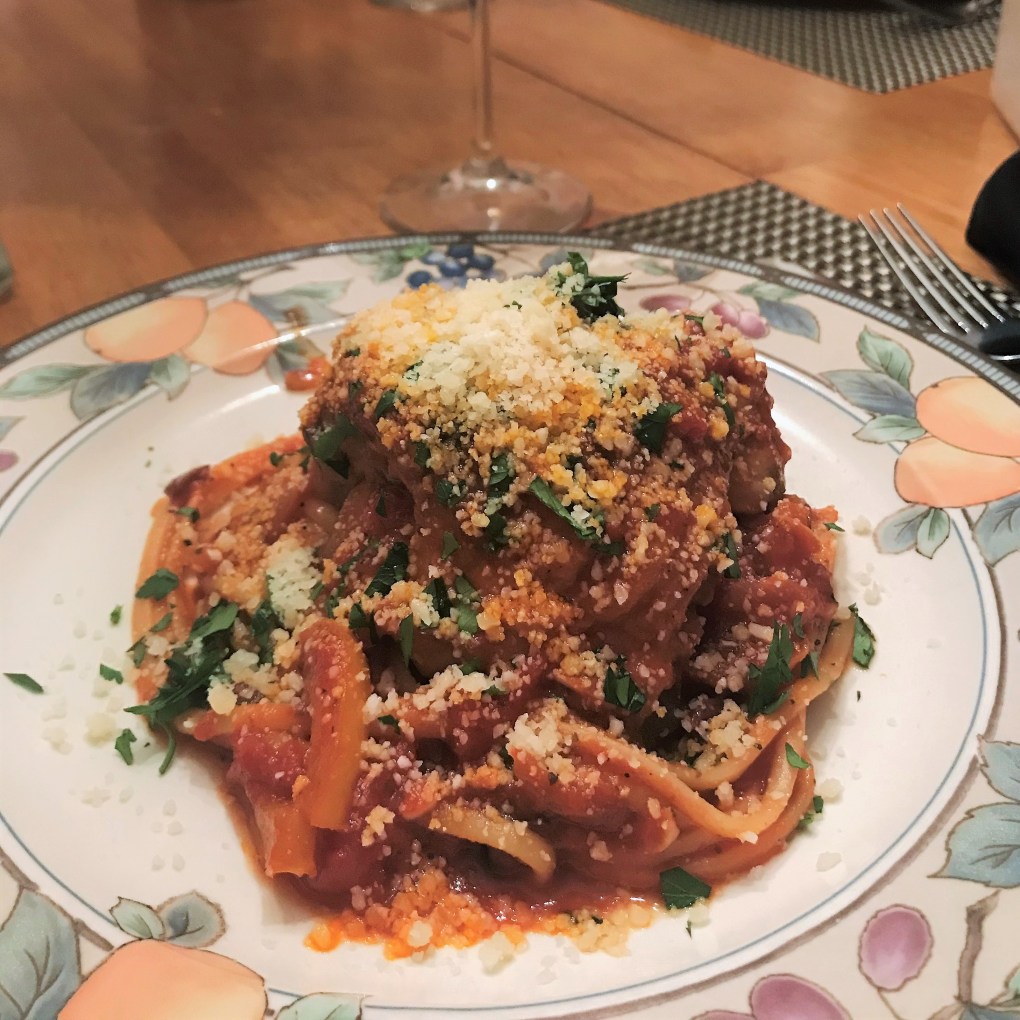
Chicken cacciatore is my “comfort du jour,” moist and oh-so-tender chicken, stewed slowly and thoughtfully with tomatoes and Italian herbs and spices. This is some serious, old-school Italian comfort food right here! I can’t say that I’ve added a twist to this recipe (maybe the bomba?), but if you’ve never made cacciatore before, I hope you’ll find my recipe approachable. You’ve got this—and here’s a quick rundown of what I learned before I made my own.
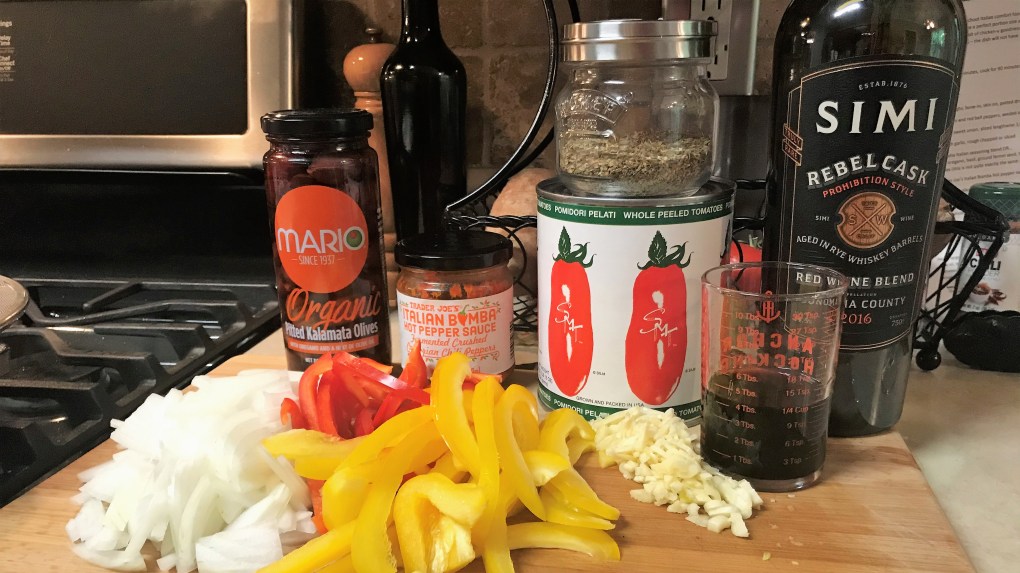
What’s the big deal about San Marzano tomatoes?
For Italian sauce recipes, there is really no substitute for San Marzano tomatoes. They are super meaty with a perfect acidic-to-sweet balance, and exceptional for the richest Italian sauces. In appearance, they are essentially plum tomatoes and they are the genetic ancestors of the common supermarket Roma, but to be legally called San Marzano, they must be cultivated in the southern region of Italy of the same name, where the climate and rich, volcanic soil work their magic. Are real San Marzano tomatoes worth the extra buck per can? You bet!
What is bomba sauce?
This bomba is the bomba!
Delicious, that’s what! Bomba sauce is typically a paste-like seasoning, centered around dried chile peppers from the southern regions of Italy, mixed with olive oil, spices and vinegar. It’s a pungent condiment that is meant to be used sparingly. Trader Joe’s has its version of the sauce that I absolutely love—it’s unique because the Calabrian chiles are fermented, which lends extraordinary depth and flavor. I’ve added a very small amount to my cacciatore, but it wouldn’t be the same without the bomba.
Can I substitute skinless chicken breast for the chicken thighs in this recipe?
Of course, you can always substitute white meat, skinless or boneless, but the dish will not have as much depth and richness, and you’d need to use extra oil to prevent the meat from sticking in the pan. I choose large, bone-in chicken thighs for this recipe because they’re a perfect portion size and the dark meat is so flavorful. Keeping the skin on allows you to draw every bit of chicken-y goodness into the meal. Also, I only select organic, free-range chicken because birds that have freedom to roam in the fresh air and sunshine are healthier, and you know what they say—we are what we eat.
What flavors are in Italian seasoning?
Italian cooks have always relied on the abundant flavors of fresh herbs. If you pick up any bottle of “Italian seasoning” at the supermarket, you can predictably find it contains the big three—oregano, basil and thyme, but there are many other flavors that play well with Italy’s flavorful sauces and roasted meats. In the north, you’d expect to see rosemary and sage. In the south, spicier flavors like red pepper are prominent. Two of my favorites are marjoram (cousin of mint and very similar to oregano) and fennel seed, which has a floral, slightly licorice flavor. It’s what makes Italian sausage taste special. I make my own “Mama Mia” seasoning blend without salt, and I use the big three, plus garlic, fennel seed and crushed red pepper. It’s good for a little punch of flavor in any Italian red sauce, sprinkled on pizza or mixed with olive oil as a bread dipping condiment. If you want to make mine, the recipe is at the end. Otherwise, substitute as noted in the ingredients.
Serves 4 – Prep in 20 minutes, cook for 90 minutes
Ingredients
Extra virgin olive oil
4 large chicken thighs (bone-in, skin on)
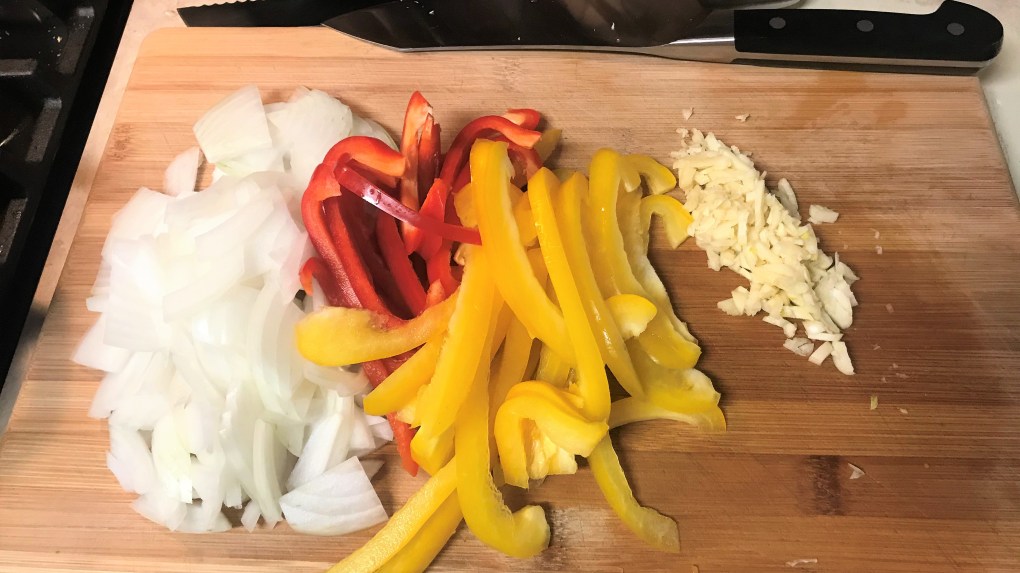
2 large bell peppers, seeded and sliced lengthwise, about 1/4” thin
4 or 5 cloves fresh garlic, rough chopped or sliced
2 tsp. Mama Mia Italian seasoning blend—or 1/4 tsp. each: oregano, basil, ground fennel seed, thyme leaves, garlic powder, onion powder, crushed red pepper flakes (this is not exactly the same as my Mama Mia blend, but close)
1 or 2 tsp. Trader Joe’s Italian Bomba hot pepper sauce
Handful Kalamata olives (pitted), rough-chopped into pieces
1/4 cup dry red wine (It doesn’t have to be Italian; I used a CA red blend that was already open)
1 28 oz. can whole plum tomatoes in puree (San Marzano, if possible)
1/2 package linguine (preferably “bronze-cut” for best texture)
Freshly grated parmesan or parm-romano blend, for serving
Small handful Italian flat leaf parsley, cleaned and chopped
A loaf of fresh Italian bread for sopping up every single drop of the sauce
Instructions
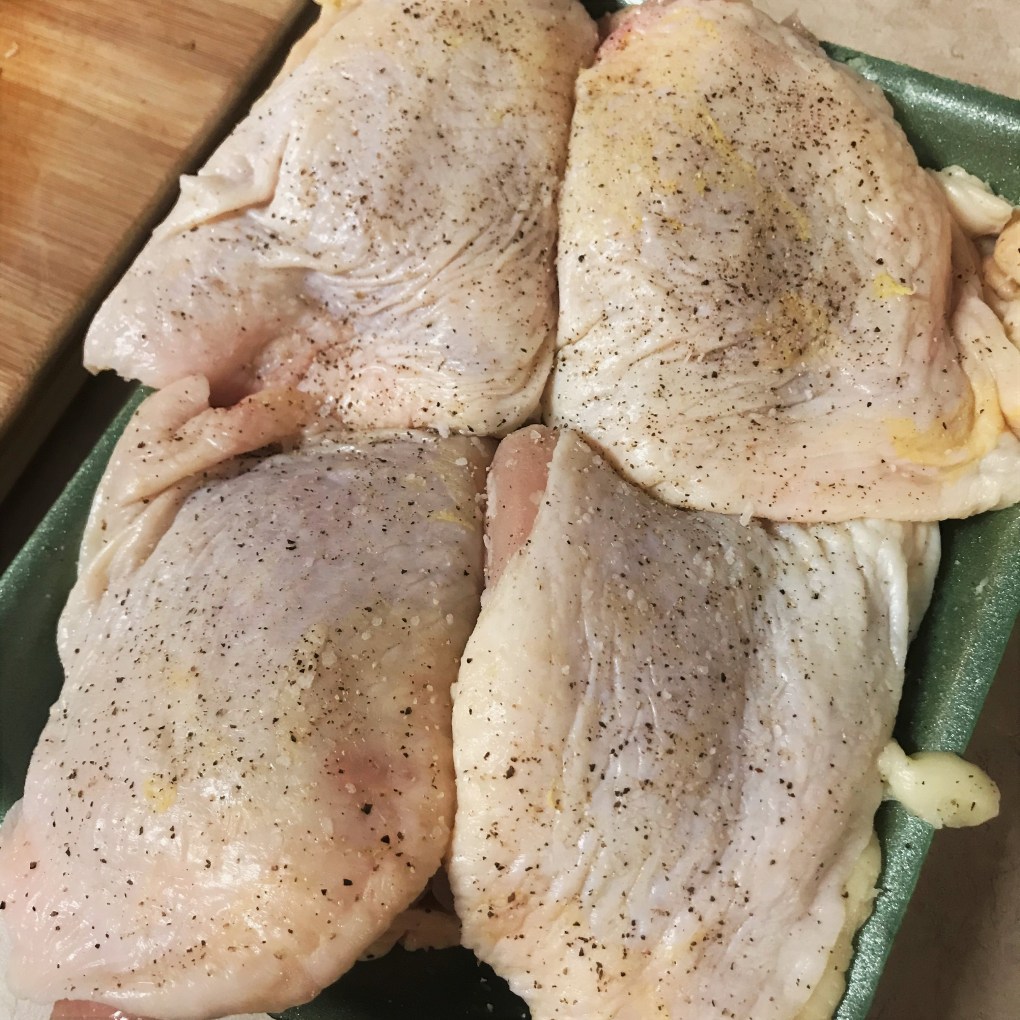
Always season meat before you begin cooking, or your flavor will be only on the outside.
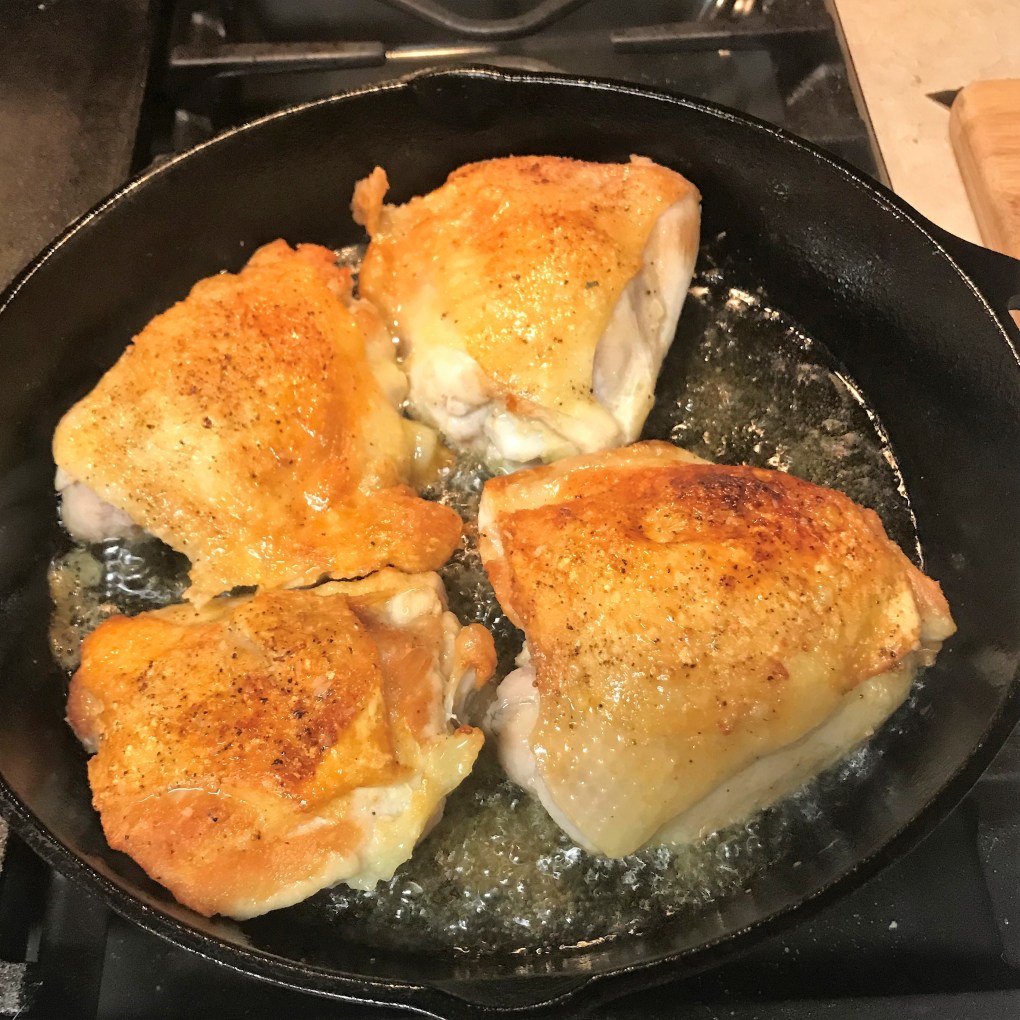
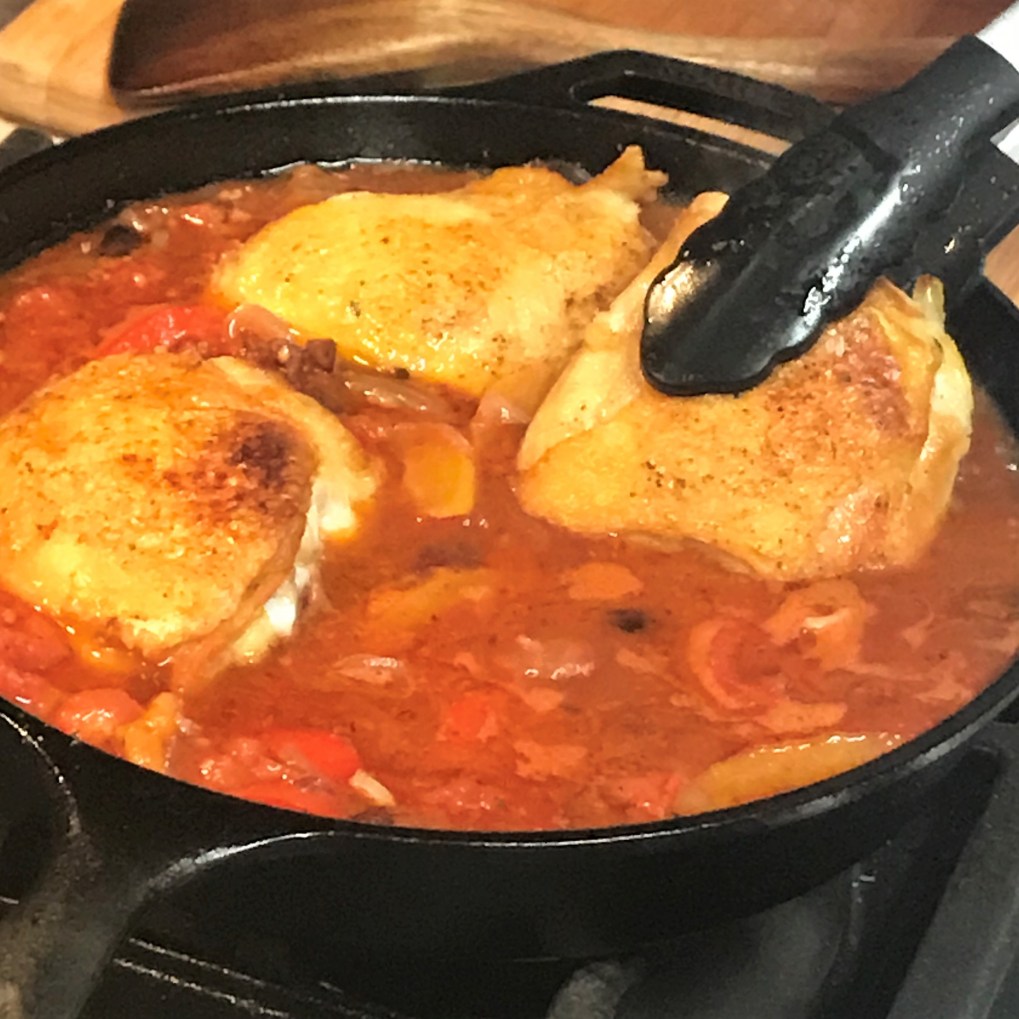
Skin side down at the beginning will render the natural fats of the chicken, which becomes the base for so much flavor in the dish.
Don’t turn the chicken pieces over until they have a golden crust. The large piece on the right still has some uncooked skin, so I’ll hold it with tongs to crust that area.
These ingredients are game changers for my cacciatore. The bomba sauce lends subtle heat and depth, and the kalamata olives are meaty and briny, terrific against the red sauce.
I like to see pieces of pepper, but you could chop them if you like. Any color bell pepper will work, but I prefer the sweeter ones rather than green for this dish.
When it comes down to it, this really is a pretty simple recipe.
If the sauce is thin, stir in a couple tablespoons of tomato paste with the bomba sauce.
Return the chicken thighs, skin side up, and gently spoon a bit of the sauce over them.
As it simmers, the sauce will thicken and the chicken will become fall-off-the-bone tender.
To make more room for finishing the pasta, I moved the chicken thighs to a covered plate. ALWAYS swish the pasta through the sauce before serving.
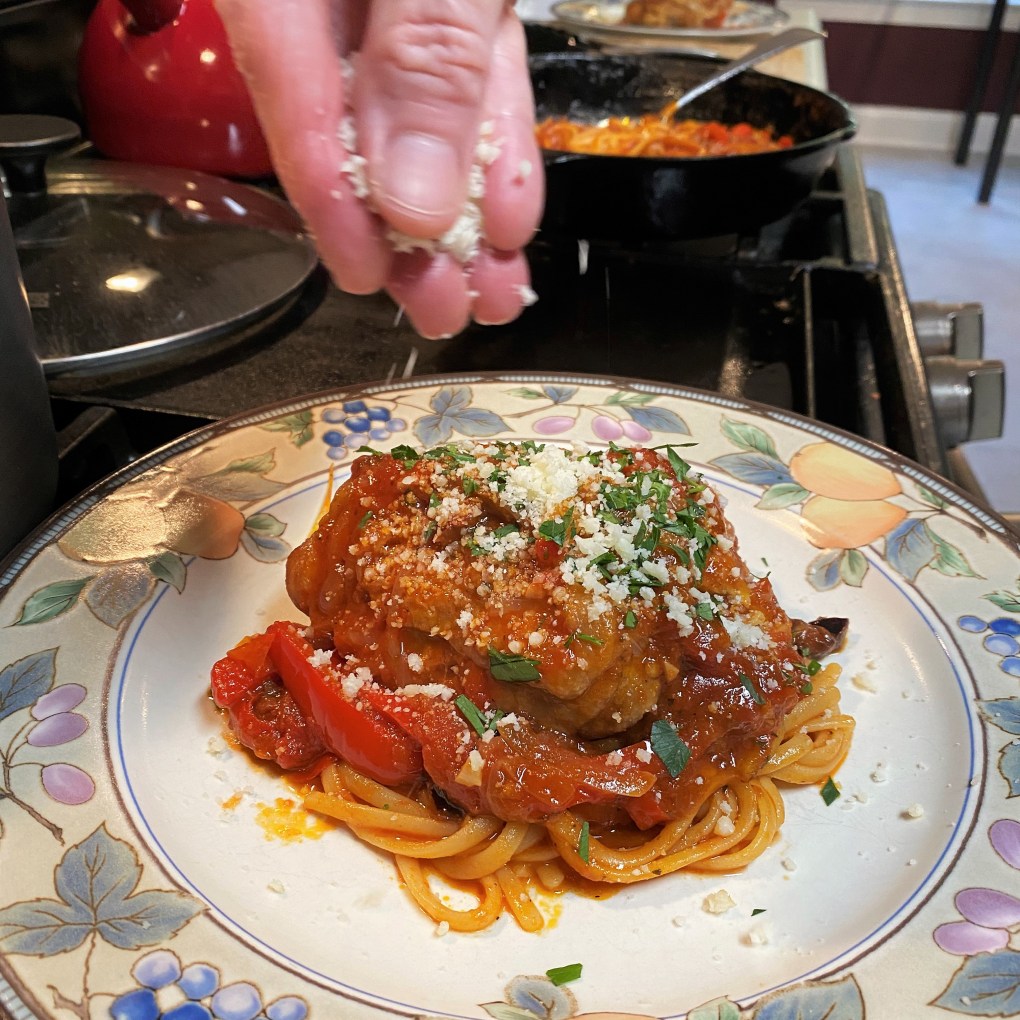
A little more freshly grated parm-romano blend? Yes, please!
Pat the chicken pieces dry with a paper towel and season both sides generously with kosher salt and black pepper.
Heat a large (12”) cast-iron skillet (or electric skillet) to medium-hot, and swirl in about 2 tablespoons of olive oil. When oil is just shimmering, place chicken thighs in pan, skin side down, leaving plenty of room between them. Cover the pan (I use a spatter screen) and leave them undisturbed about 7 minutes to allow a deep golden crust to form on the skin. Loosen and turn the thighs and cook until just lightly browned on the other side, about 2 minutes. The chicken will finish cooking later in the sauce. Remove the pieces to a plate and keep warm while you prep the sauce.
If the remaining oil is sputtering or popping in the pan, allow a few seconds for the moisture droplets to cook off. Reduce heat to medium. All at once, add your onions and bell peppers to the pan, and stir them around until they begin to soften. Add the Mama Mia seasoning, plus salt and pepper, over the entire mixture. Add the garlic and cook another 2 to 3 minutes, or until the onions are slightly translucent. Stir in the Kalamata olives, the Bomba sauce and the red wine.
Add the peeled tomatoes, using your hand to squeeze each one into the pan. This releases more of the juices quickly and gives the tomatoes a head start on breaking up. Pour all remaining juice from the tomatoes into the pan, but discard any large basil leaves that may have been included in the can (they’ve already done their job). Add a splash of water (or wine!) to the tomato can to swish out every last bit of flavor in there. Scrape up any browned bits that may be stuck to the pan and stir the mixture until it has a uniform appearance. Cover and allow the mixture to come up to a slight boil.
Add the chicken thighs back to the pan, skin side up, and spoon the tomato mixture lightly over the tops. They don’t need to be buried in it, but you want to moisten them with the flavorful sauce. Cover the pan and reduce heat to medium-low, turning the chicken only twice over the next 90 minutes.
When the sauce is a deep red color and the chicken shreds with a light twist of your fork, reduce heat to warm and prepare your pasta water. Remember to use plenty of water and plenty of salt.
When the salted water reaches a steady boil, add your pasta and stir at once to prevent sticking. Cook to just barely al dente, or a couple of minutes under what seems perfect. You’re going to finish it in the sauce. Before draining the pasta, ladle out 2 to 3 tablespoons of the water into the sauce. This adds the pasta starch to the sauce, which helps “marry” them to coat the pasta better.
Move the chicken pieces to the outer edges of the pan (or remove to a plate if the pan is crowded), making a well of sauce in the center. Drain the pasta and immediately add it to the center of the pot, stirring quickly to evenly coat it in the sauce. I use silicone tongs to do this because I can grab hold of the pasta while moving it. Cover the pan and turn off the heat while you pour another glass of wine and call everyone to the table.
Mangia!
Portion the pasta onto the serving plates, top with a spoonful of sauce, then a chicken thigh, and divvy out the rest of the flavorful sauce. Sprinkle some grated cheese and a bit of fresh chopped parsley on top and enjoy!
Mama Mia seasoning (makes about 1/3 cup seasoning blend)
I created my own blend of Italian spices, to customize the flavors we like best at our house. Most of my blends do not contain salt, and this allows more flexibility with different application and better control of the sodium in my dishes. Most of the time, I double the recipe so I always have a jar of the blend at the ready. The beauty of a blend like this one is that you can increase or decrease or even eliminate ingredients based on your taste preference. And every time, it’ll be perfect!
This blend is great for your own Italian red sauce, or add a teaspoon to a puddle of extra virgin olive oil and top with freshly grated parmesan for a flavorful bread dipping oil.
Heat a dry skillet (no oil!) over medium high heat and add fennel seeds, swirling the pan constantly for about one minute, until the seeds become fragrant. Remove immediately to a bowl to cool completely, then crush seeds with a mortar and pestle or pulse a few quick times in a spice grinder.
Add all other seasoning to the bowl and stir to combine. Transfer to a jar or empty spice bottle.
We are inching toward a special day—and time of year—in Jewish tradition. Rosh Hashanah, in the simplest of terms, is the onset of the “High Holidays,” a 10-day celebration that concludes with Yom Kippur. The whole event is a spiritual reset button of sorts, a time for personal introspection leading to atonement. When I became engaged to my husband, Les, in 2016, I joined him for High Holidays services, and though I likely will not ever convert to Judaism, I love learning about this sacred part of my husband’s heritage. Going through the Hebrew readings and stages of reflection is something Jesus would have done as a regular practice (he was Jewish, remember?), and I have found that it gives me richer insight into my own Christian faith.
The fact that I am not Jewish, regardless of my stance on Jesus, earns me the unenviable title of “shiksa,” a Yiddish word politely translated as “a non-Jewish woman.” Some other definitions are less diplomatic and even derogatory, meaning something along the line of “sketchy non-Jewish woman who has taken romantic interest in a good, upstanding Jewish guy.” Yep, I’m guilty of all that! I take no offense, and our religious differences have never presented a conflict for Les and me. On the contrary, we find that it makes our relationship more interesting.
During our preparation for marriage, Les and I met a few times with Rabbi Mark, whom we had asked to officiate our small and informal ceremony. Over lunch, I mentioned how much I was enjoying exploration of the traditions, especially the foods. I had already learned to make latkes, one of the most recognizable Jewish foods (which I’ll share more about when we get closer to Hanukkah). Rabbi Mark made a recommendation for a next recipe to try—shakshuka. It’s fun to say (shock-SHOO-ka), and not the same as shiksa. 😀
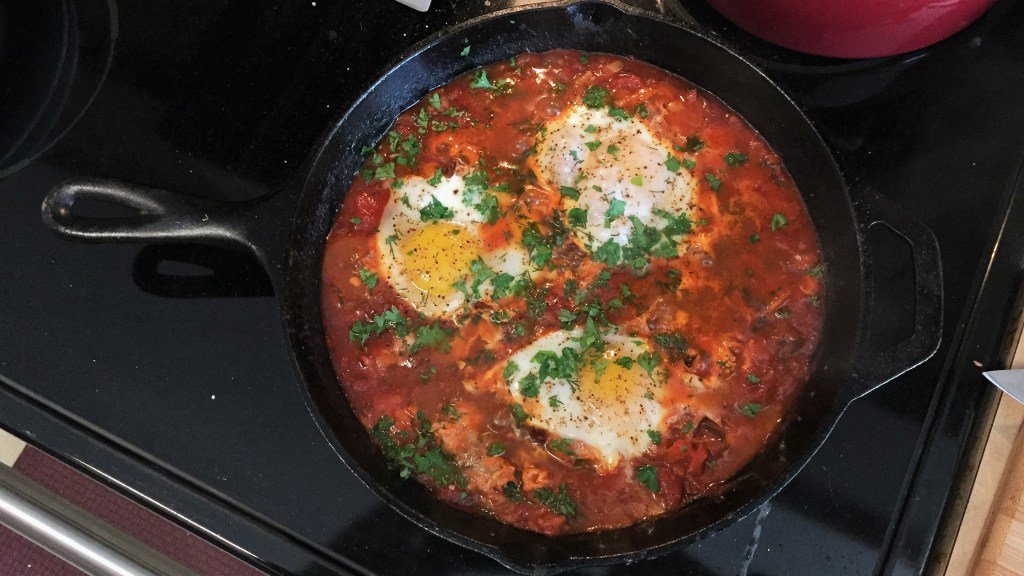
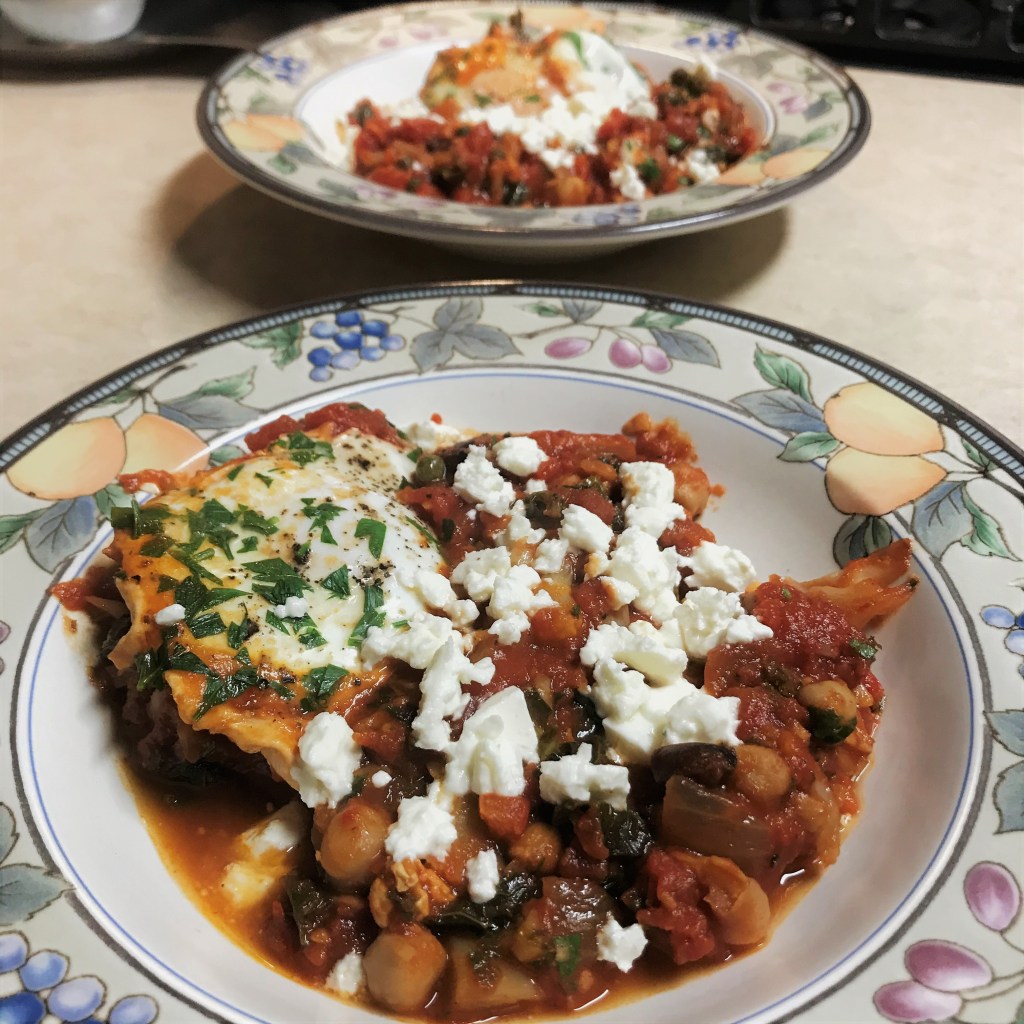
I’d never heard of this, and neither had Les, so it was immediately placed at the top of the bucket list. Our first shakshuka turned out terrific, and when Les posted this picture of it to his Facebook page, he got an immediate thumbs-up from Cousin Caryn in Israel—“that is SO Jewish!”
Not a bad first effort in 2017!
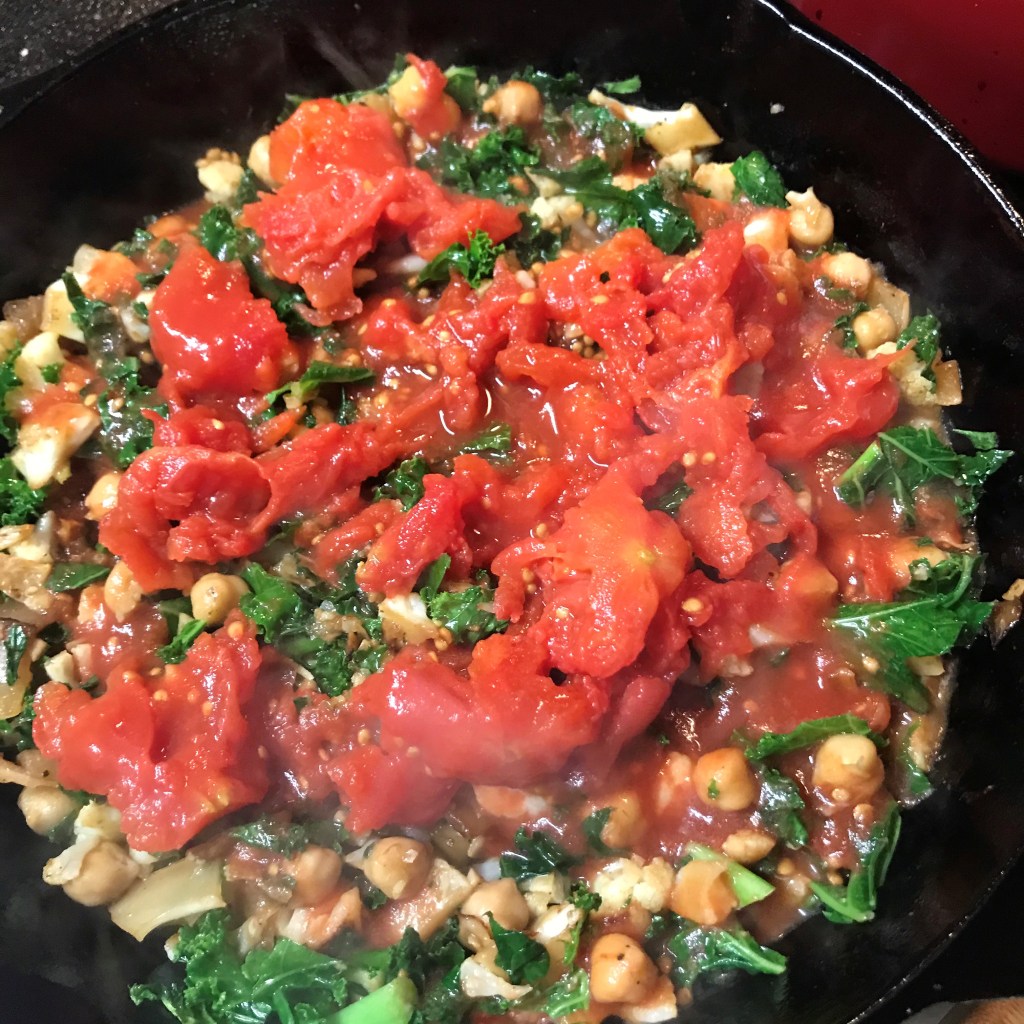
Shakshuka is typically served at breakfast, so I’m counting it as part of my “better breakfast month” series, and it’s remarkably simple to make and flexible to accommodate a variety of ingredients. It usually begins with a thick tomato sauce base, though I’ve seen some interesting “green” shakshuka recipes on Pinterest. Any other favorite vegetables or ingredients can be incorporated, including cauliflower, eggplant, spinach, kale, peppers, onions, squash, chickpeas, or nearly anything else you have on hand. You stew it all together with Mediterranean spices in a cast-iron skillet, then you crack raw eggs directly into the sauce and simmer until they’re cooked to your liking, or (as I often do) slide it into the oven to finish.
It’s great for breakfast, or breakfast for dinner!
The result is a savory blend of nutrition and flavor, hearty enough to satisfy your morning hunger, or for “breaking the fast,” because after the 24 hours of fasting and prayer at Yom Kippur, you’re gonna get pretty hungry!
The cool thing about shakshuka (as if the flavor and flexibility aren’t cool enough) is that you do not have to be Jewish to enjoy it! You may have seen a similar dish from Italy called “eggs in purgatory,” featuring the same stewed tomato foundation. Both dishes are likely drawn from nearby North Africa during the Ottoman Empire, and during that time, meat (not tomatoes) was the original main ingredient.
My produce and pantry inventory included everything I needed for a hearty shakshuka, and it landed on our table last night as breakfast for dinner on Meatless Monday. I couldn’t resist serving this with the soft pita breads that have become such a staple in our home.
The soft pita is perfect for sopping up this rich tomato stew.
Basic Ingredients
Extra virgin olive oil (how much depends on what you’re adding)
1/2 medium onion, chopped
3 cloves garlic, chopped
1 28 oz. can whole peeled tomatoes in puree*
4 eggs
Optional Ingredients
Depending on your taste, and your inventory, consider adding any of these ingredients. It’s your kitchen, and you can make your shakshuka as chunky or saucy as you’d like. For the most authentic experience of this dish, I’d recommend keeping with ingredients that are common to the Middle East, where shakshuka was born.
Up to 1 cup other vegetables, such as fresh cauliflower, fresh cubed eggplant, fresh chopped bell peppers
Up to 1 cup canned chickpeas or cooked lentils, or 1/2 cup in combination with your favorite vegetables (above)
Up to 2 cups fresh greens, chopped (they will cook down to small amount, so be generous)
Other flavor enhancers, such as olives, capers, spices, tomato paste, chile peppers
There’s so much tangy, rich sauce in this dish, you’ll want to have some kind of bread nearby for sopping. Pita is a great option, or any other kind of soft bread is just right.
*Notes
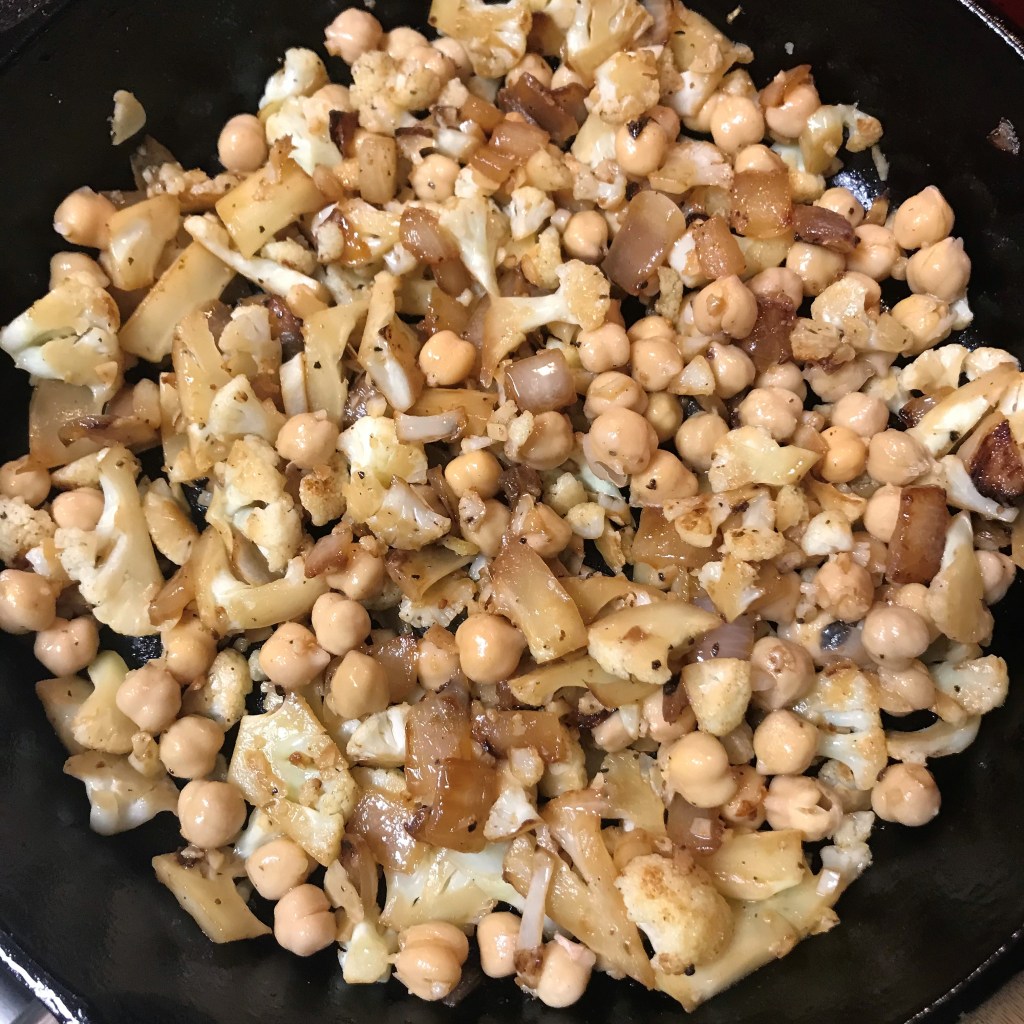
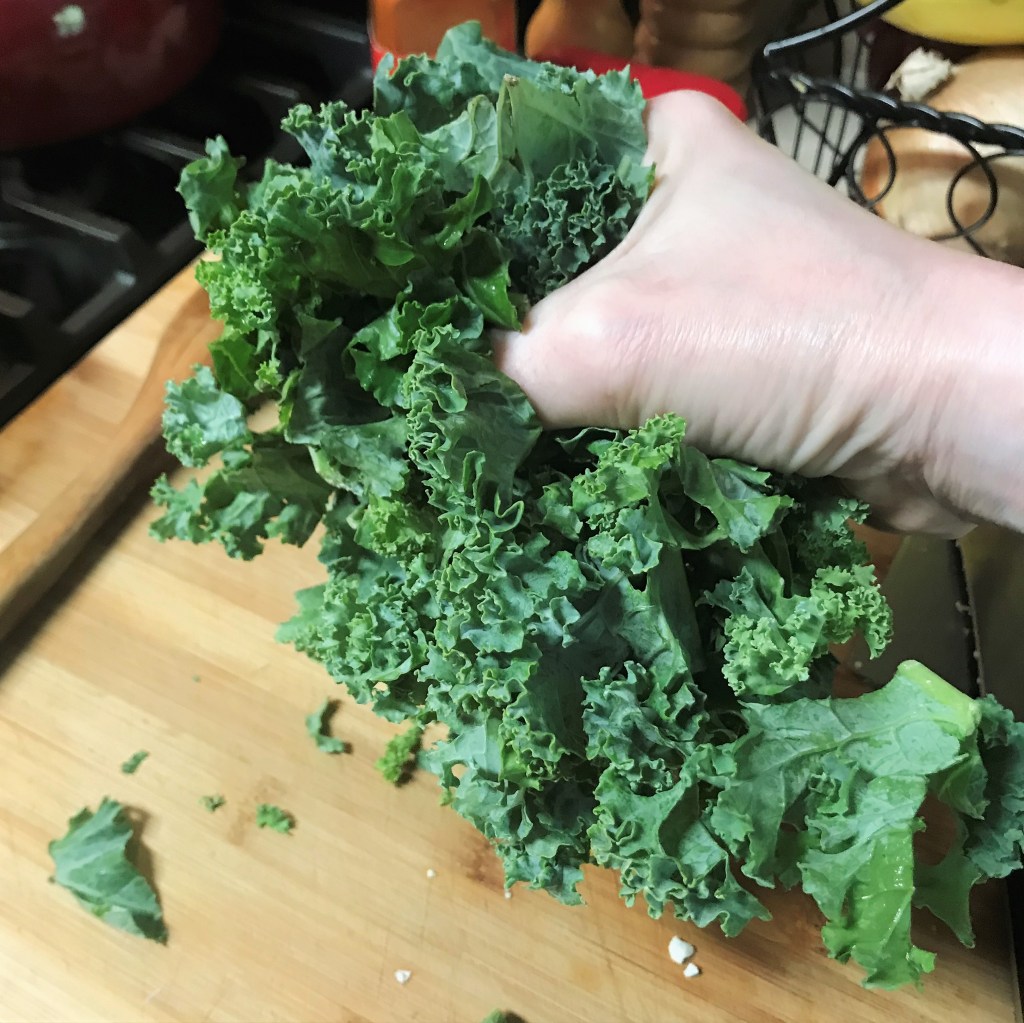
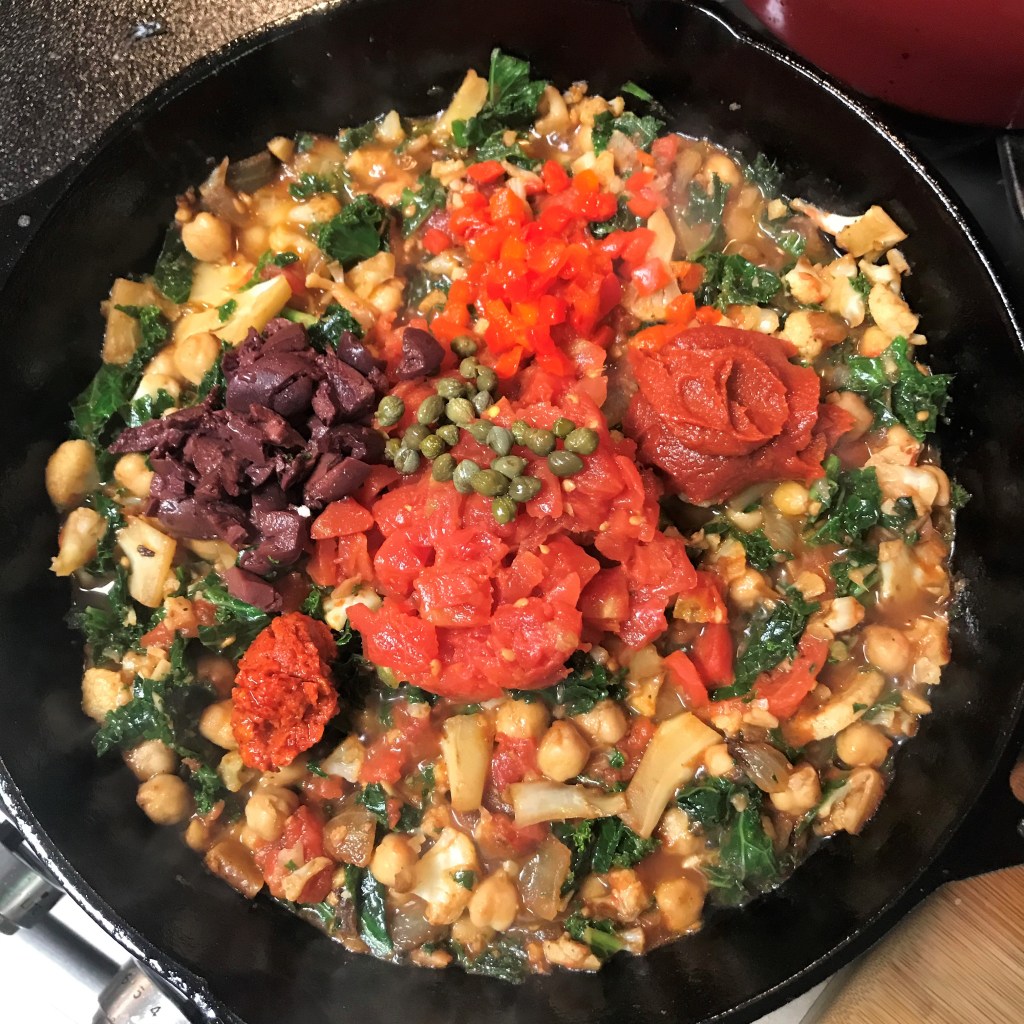
I’ve never made the same shakshuka combination twice, but I tend to steer toward more body and texture when we are having it for dinner. And it always depends on what I find in the fridge. For this post, I used the basic ingredients, then reached into the fridge for some add-ins. Les made his fabulous pimiento cheese last weekend, and a half can of spicy Rotel tomatoes and a half jar of pimientos were still in the fridge. In they went, along with about a cup of chopped fresh cauliflower, 1/2 can garbanzo beans, a fat handful of chopped kale leaves, some briny olives and capers, tomato paste to thicken and harissa to add flavor and heat.
Harissa is a spicy paste-like seasoning that has origin in Northern Africa. It has hot chiles and garlic, plus what I call the three “C spices”—cumin, coriander and caraway. Harissa is common to Moroccan cuisine, and lends wonderful depth of flavor to stewed dishes like shakshuka.
Hubby asks, “what’s for dinner?”
I answer, “beige stuff.”
But it’s about to get a lot more colorful!
This is what I mean by a “fat handful” of kale. It’s as much as I can grab from the bag with one hand.
As with many of my recipes, I use San Marzano tomatoes for their heft and flavor.
See how many add-ins you can spot here: Rotel tomatoes, Kalamata olives, capers, pimientos, tomato paste, harissa paste.
Instructions
Place a cast-iron skillet over medium heat. Swirl in olive oil and sauté onions, cauliflower and any other firm vegetables until lightly caramelized.
Add garlic, canned tomatoes, tomato paste, and any other add-ins that strike your fancy. Season to taste with salt and pepper. For my recipe, I also added a little smoked paprika and ground cumin. Stir to combine ingredients evenly and cook over medium low heat for about 20 minutes so that the tomatoes lose the “canned” flavor and mixture begins to thicken like a stew.
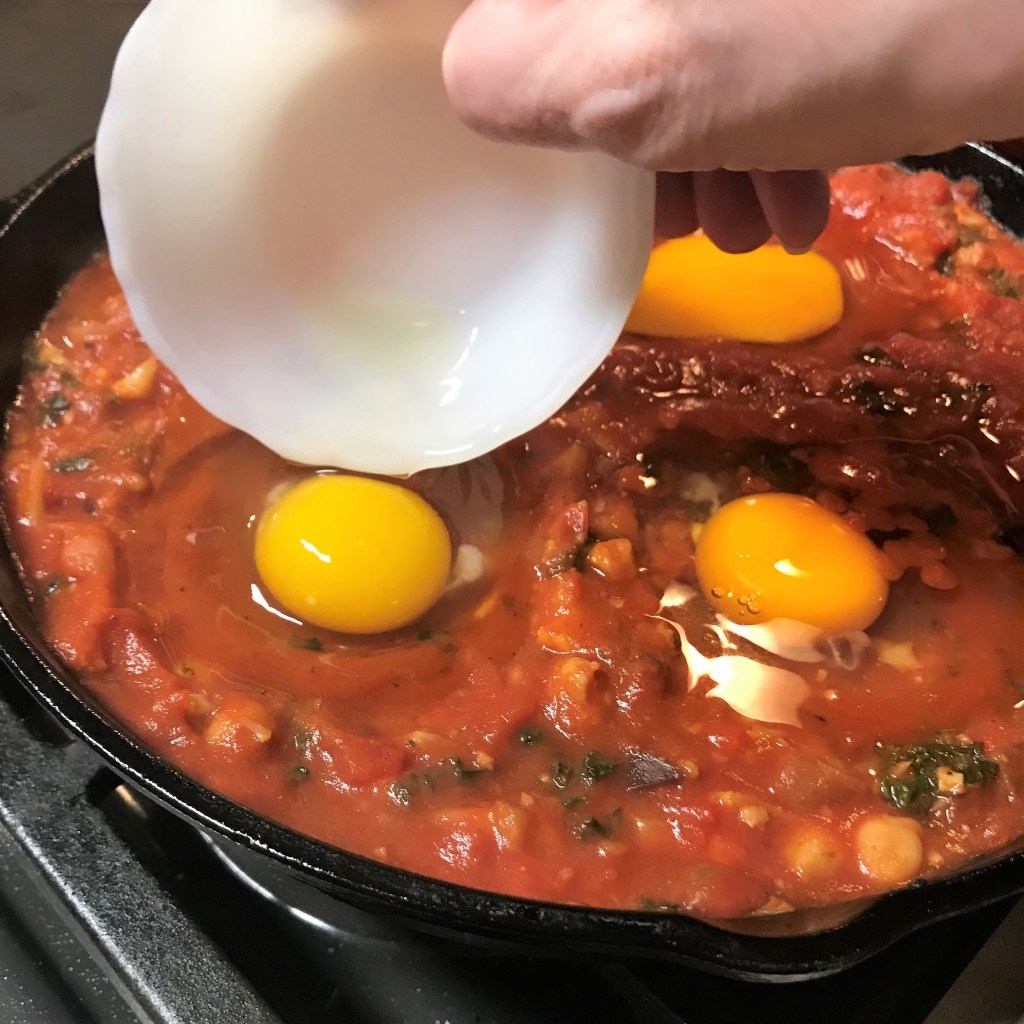
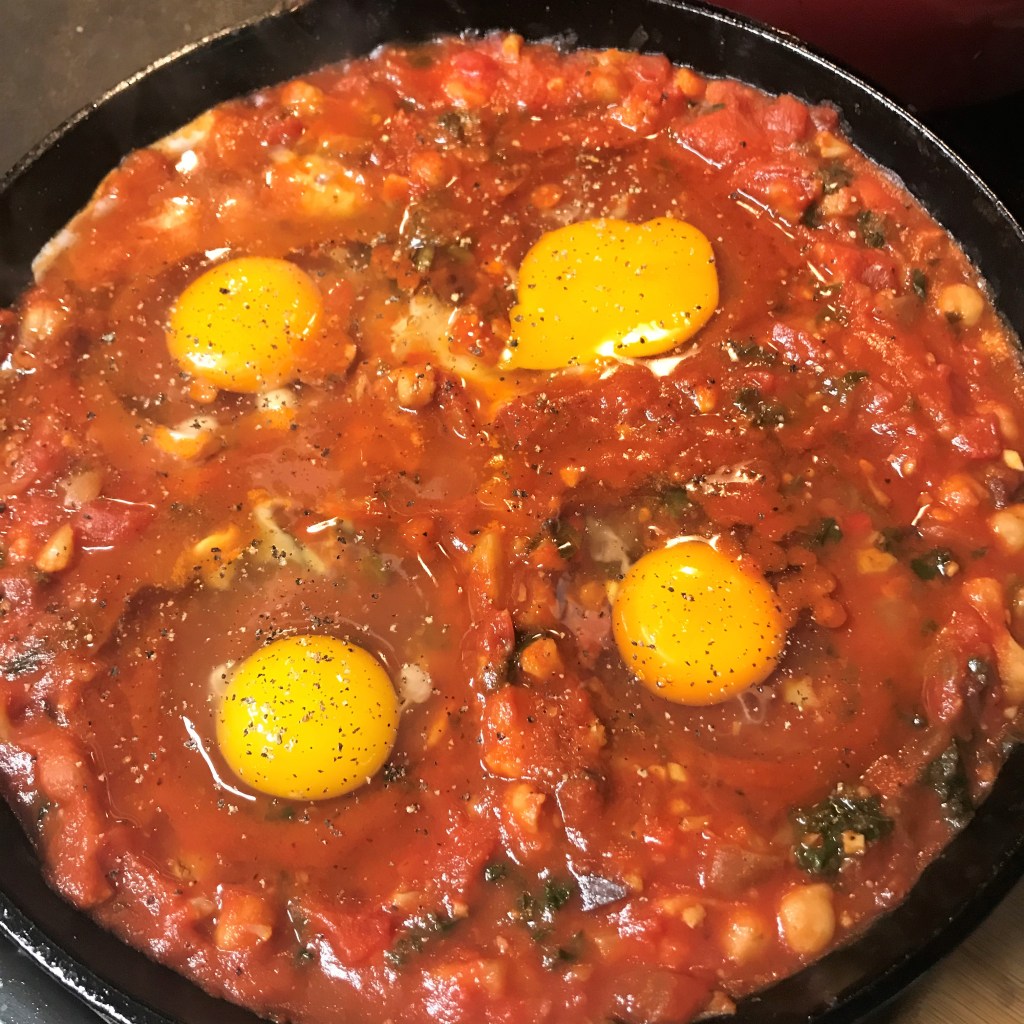
Use the back of a large spoon to create slight depressions to hold the eggs. Crack eggs, one at a time, into a custard cup and transfer them into the dents you’ve made, sprinkle them with salt and pepper, cover the skillet and simmer until eggs are set to your liking. Alternatively, you can slide the skillet into a 350° F oven and bake about 15 minutes, or until eggs reach your desired doneness.
Garnish with fresh chopped parsley or oregano and serve with soft pita breads or other bread for sopping all the shakshuka sauce.
To avoid broken shells in the dish, crack the eggs into a cup before slipping them into the shakshuka.
Always, at least one broken egg yolk in my kitchen. 😀
The eggs are set after a 12 minute, covered simmer.
Oh, yes, some crumbled feta on top!
So easy, even a shiksa can make it! Shakshuka is delicious, easy and economical. Serve it family style, and let everyone scoop out their own portion into a bowl.
A few hours before my 50th birthday, I had dinner by myself at a local restaurant where a friend of mine was a server. This was a very intentional decision I made because, as strange as it may sound, all I wanted for my birthday was to hear Guido describe the specials. The “u” in his name is silent, so it’s pronounced “GHEE-doe.” He is of Argentinian descent and a beautiful person (inside and out), but please don’t misunderstand—this was not any kind of romantic inclination. Guido knew that I was a full-fledged foodie, and he had a remarkable gift in his ability to describe food with exactly the right words to make me want that dish.
How often have I rolled my eyes in a restaurant when a perky server bounces up to the table with the trite declaration, “Hi, I’m Ashley (Bridget, Connor, Danielle, whatever) and I’ll be taking care of you.” Sweetie, please, you have no idea what it will mean to take care of me. I’m a high-maintenance guest, so brace yourself. And while you’re at it, please stop with this cliché.
But not Guido, an old soul who has always seemed to know instinctively what I’m craving, from wine to appetizers to dessert. He never promised to take care of me, he just did so. And he never asked whether I wished for freshly cracked pepper from his giant pepper mill—he knew me, like a culinary soulmate, and I followed him when he moved to work in a different restaurant. He used words like “exquisite” and “succulent,” and he looked me in the eye as he described the dishes from memory rather than reading off his order pad. Of course, I realize the possibility that he was merely very persuasive in his approach, and that he may not have known what I wanted as much as he made me want the dishes he was selling. And I’m OK with that.
Either way, on my birthday that year, he positively nailed it when he “suggested” that I should begin my birthday meal experience with one of the chef’s special starters—a refreshing bowl of the house-made grilled watermelon gazpacho.
OK, what?
I have no idea what else I ate and drank that evening, but I never forgot about that gazpacho. It was everything I imagined and expected—fresh, chilled, flavorful—but unlike any I had ever had before, courtesy of the summer-sweet watermelon. And grilled, at that. The level of cool, clean refreshment was off the charts, and I’m very excited to finally make my own version of it, so I can share it with you. I’ve followed the lead of Guido’s chef by grilling wedges of fresh watermelon. I’ll mix it up with additional fresh watermelon, ripe heirloom tomatoes, red onions, cucumber and jalapeno. Doesn’t it sound like summer?
Though gazpacho is most often served as a starter, I’ve turned mine into a cool summer meal, with addition of paprika-dusted grilled sweet shrimp and creamy cubes of avocado. When you’re ready to make this, use the ripest, freshest farmer’s market tomatoes you can get your hands on. Grocery store tomatoes will not cut it for this one. And it’ll be best to use watermelon at its peak sweetness as well.
In a blender or processor, the whole thing comes together quickly, then just chill it down in the fridge overnight so these flavors have plenty of time to mingle.
From start to finish, this dish reminds me of Guido, whom I have stayed in touch with, but have not seen since that night at dinner. I should call him up and invite him to taste this gazpacho. It also reminds me of turning 50, and for some, that might not be a positive. But, without question, it turned out to be the best year of my life. Can a soup change one’s life? Probably not, but like any other food, sometimes it can hold a special place in your story.
Ingredients
3 cups chopped heirloom tomatoes* (see slideshow for peeling tips)
2 cups chopped grilled watermelon*
1 cup fresh watermelon
1/2 large red onion, rough chopped
1 medium cucumber, peeled, seeded and rough chopped
1 good sized jalapeno, seeded and rough chopped
1 tsp. coarse sea salt
Freshly cracked black pepper
1/2 tsp. seasoned salt
1 tsp. sweet smoked paprika
2 Tbsp. apple cider vinegar
1 lb. fresh shrimp, peeled and deveined
1/2 tsp. sweet smoked paprika
Sea salt and freshly ground black pepper
6 scallions, washed and trimmed
Extra virgin olive oil
1 avocado, peeled and cubed
Juice of 1 lime
1/2 jalapeno, diced (optional to taste)
*Notes
I love heirloom tomatoes because they taste the way I remember tomatoes, rather than mealy and bland from the supermarket. If you can pick them from the vine yourself, even better! But if you don’t have a garden, no problem (after all, mine belongs to the deer). Head to the farmer’s market and don’t be shy about trying different varieties. It’s often the funky-looking tomatoes that have the very best flavor!
Grill the watermelon in large thick slices, as chunks are more likely to fall apart. We did them outside on the gas grill, but if you have an indoor grilll, that will work as well. The goal is to concentrate the flavors of the watermelon.
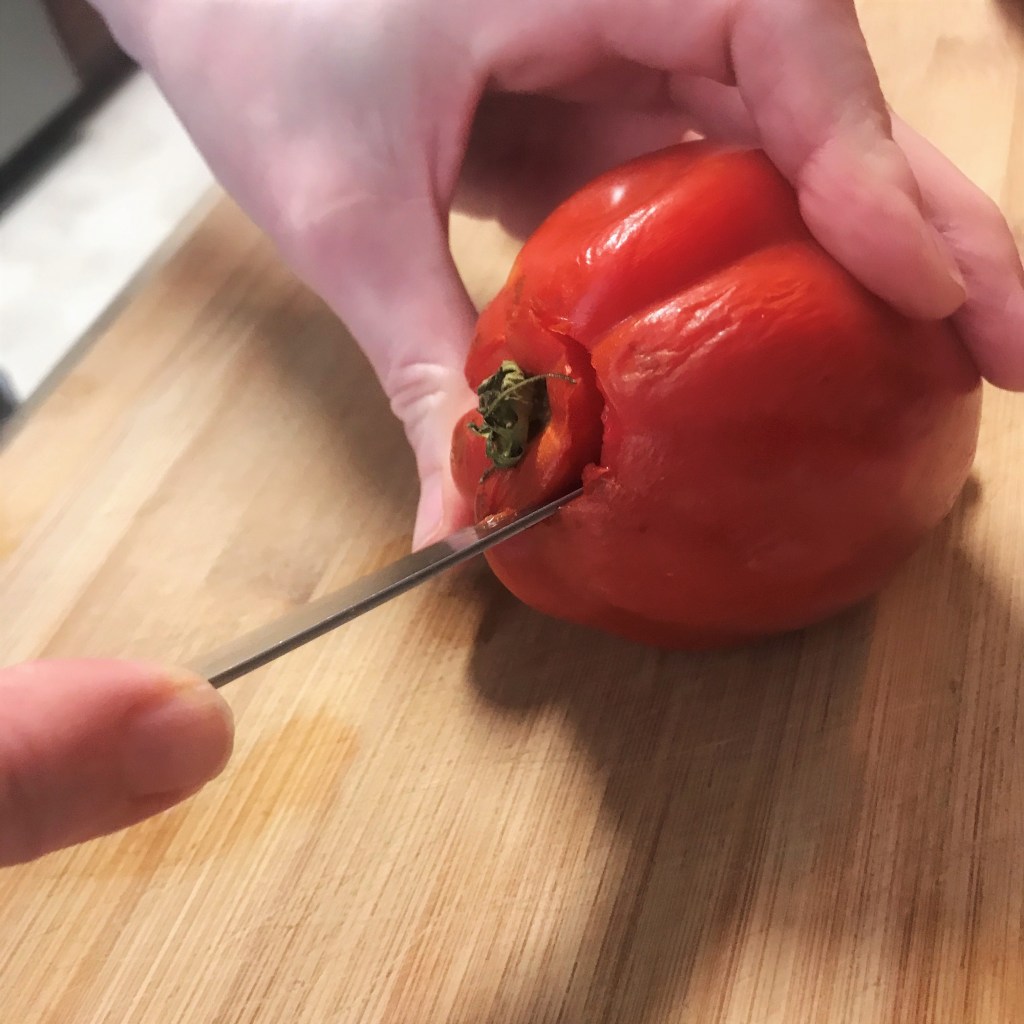
Here’s a quick visual tip for peeling tomatoes without boiling water and handling them when they’re all hot and slippery. My grandmother taught me this easy trick that works every time.
Use a sharp paring knife, and “drag” the edge at an angle over the skin of the tomato, almost like you’re giving it a close shave, but not cutting it. This will loosen the skin from the flesh.
Carve out the stem end.
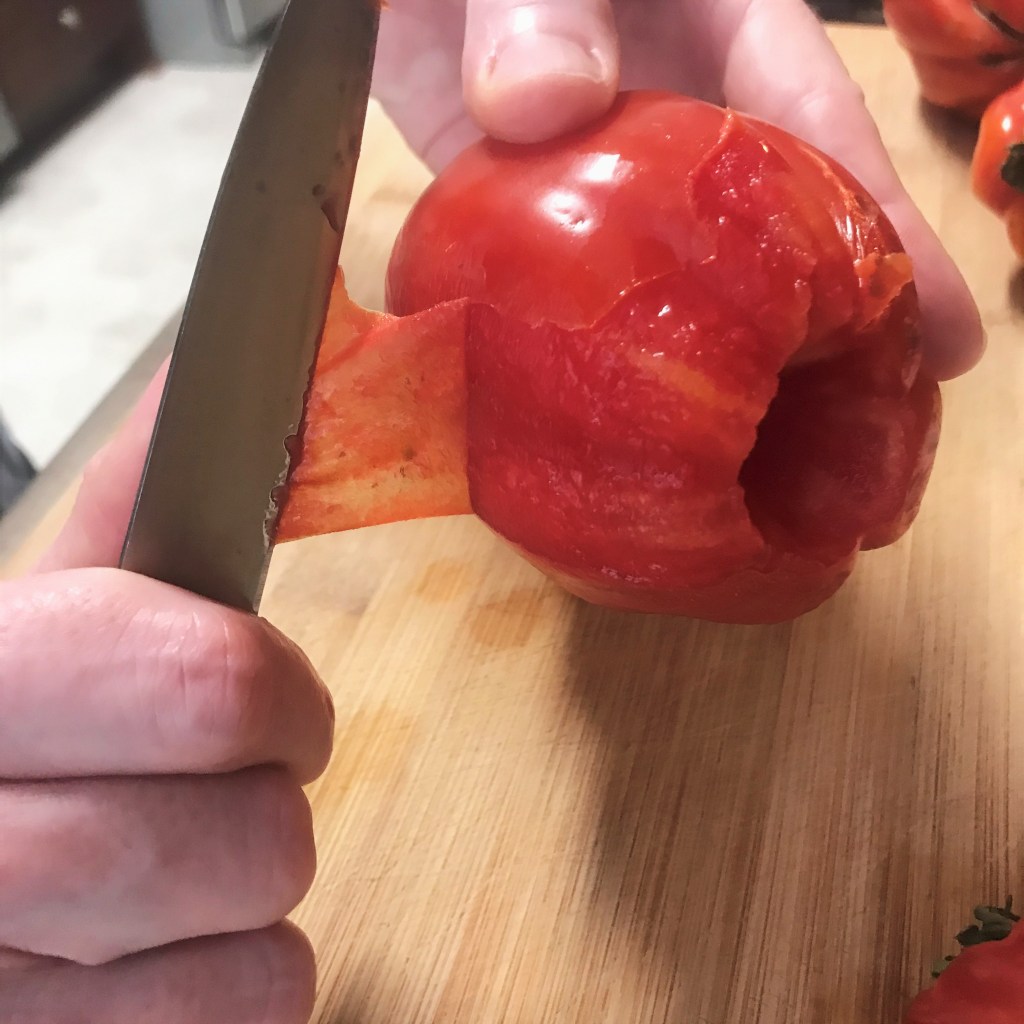
Slide your paring knife underneath an edge at the stem end, and gently peel the skin away.
Keep peeling toward the bottom of the tomato. If the lumpy part of the stem makes this task difficult, cut an “X” into the bottom and peel from the bottom instead.
Tomatoes still intact, and not a bit of peel to mess up my gazpacho’s texture.
Instructions for the gazpacho
Begin by grilling up several wedges of fresh, ripe watermelon. Cool them, and refrigerate until ready to proceed with the pureed soup.
Peel your heirloom tomatoes, and remove seeds if desired. Pluck out any obvious watermelon seeds.
Load up the bowl of your food processor or blender with the watermelon, grilled watermelon and peeled tomatoes. Work in batches if necessary. Pulse several times until mixture is evenly combined and “soupy.”
Remove half of the pureed mixture to a separate bowl, then add the onions, jalapeno and cucumber to the processor and pulse until smooth. Add salt and pepper, seasoned salt and vinegar and pulse again to combine.
Transfer the processor mixture to the bowl with the rest of the puree and adjust seasoning to taste. Refrigerate puree at least overnight to really blend the flavors.
Grilling the watermelon amplifies its sweetness, but don’t go too extreme. Enough to get grill marks and draw out some of the moisture is good.
All the tomatoes and both grilled and fresh watermelon get processed first. Work in batches to help avoid making a mess.
I removed half of the pureed mixture, then processed in the cucumber, red onion and jalapeno, plus sea salt and black pepper.
All together now. I stirred in vinegar and a little bit of smoked paprika to boost the natural flavors even more.
Instructions for shrimp and serving
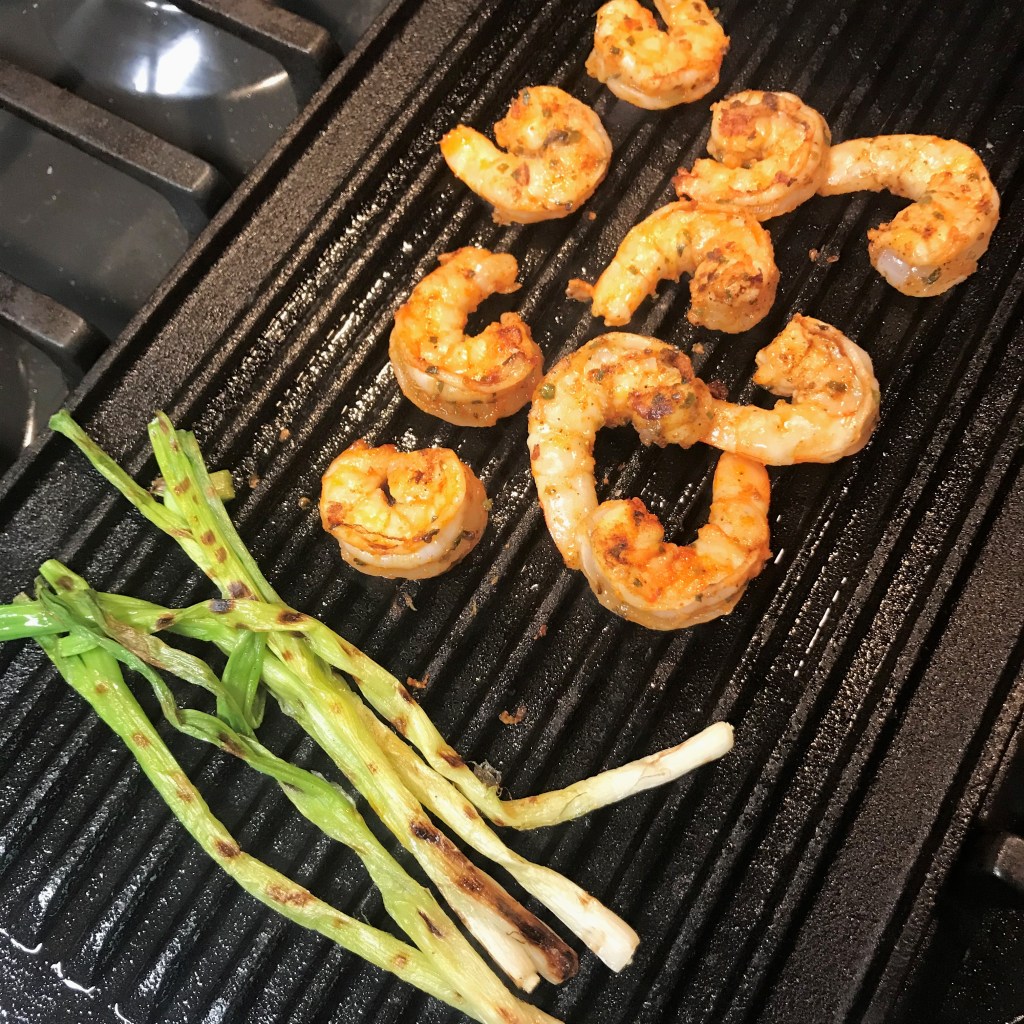
Shrimp cook quickly, so I grilled them indoors rather than waiting for the outdoor grill to heat up. Grilling scallions mellows out their flavor, which is exactly what I wanted for topping the gazpacho.
Toss the shrimp with just enough olive oil to coat it, then season with paprika, salt and pepper and toss so that the spices are evenly coating the shrimp. Spray or drizzle the scallions with olive oil.
Grill the scallions and shrimp (I used the integrated grill on our gas range) until they are desired doneness and scallions have sweet little grill marks. Allow both to cool slightly.
Peel and cube the avocado and squeeze fresh lemon or lime juice over them to prevent browning. Chop the scallions. Dice the jalapeno.
Ladle the gazpacho into serving bowls and top with the shrimp, avocado, jalapeno and scallions. Finally, a quick twist of freshly ground black pepper (did you know that black pepper has amazing health benefits?—Guido always said that when he brought the pepper mill to my table).
Light, fresh and delicious!
Here’s what I love about this soup—
It’s cool, and in the midst of intense heat of a Southern summer, a welcome relief.
It’s delicious, fresh and healthful. Just savoring these marvelous flavors in their natural state makes me want to take up yoga and change my name to “Sunshine.”
It’s very low in fat. I don’t know the specific count, but there’s none in the soup, a nominal amount in the shrimp, and only the good-for-you kind in the extra virgin olive oil and avocado.
A single serving satisfies a full daily requirement of nutrients, vitamins, fiber and antioxidants.
The most traditional food associated with the Kentucky Derby is a “hot brown sandwich,” classically prepared on toasted brioche, with roasted turkey, tomatoes, bacon and an elegant Mornay sauce. Like every recipe, there are thousands of versions out there. Mine is a little bit of a twist, in that I’ve transformed it into one of my favorite brunch options—a Benedict.
Here’s something else I want to share: last week, my aunt offered to send me some of the Depression glass and vintage dishes that my grandmother owned before she passed away last summer. The dishes arrived just in time for my Kentucky Derby preview party, and that makes this all the more special to me.
Let’s Get Cooking!
Straight up, I’ll admit this is kind of a fussy recipe, not for the faint of heart in the kitchen. But if you love the journey of delivering up a photo-worthy dish, I hope you’ll pour some champagne (or a Sparkly Britches Cucumber Lemonade) and give it a try. My egg poaching skills aren’t top-notch, but I’m going to teach you an easy way to “cheat” through it for an end result that’s every bit as pretty. And don’t let the “Mornay” scare you—honestly, it’s just a fancy way to say “cheese sauce,” and it’s very easy to make. Read through the instructions before you begin. This recipe makes two individual Benedicts.
Ingredients – The Mornay
1 Tbsp. butter 1 Tbsp. flour ½ cup milk 2 oz. grated or shredded Gruyere cheese (or substitute Swiss) Kosher or sea salt to taste Freshly grated nutmeg (or about 1/8 tsp. ground nutmeg)
Ingredients – The Benedict
1 English muffin, fork split* 2 slices bacon, cut in half 1 Roma tomato, cut crosswise into 6 slices (about 1/4” thick) 2 Tbsp. chopped sweet onion 2 oz. very thinly sliced deli turkey—about 1/3 cup packed, cut into shredded pieces 2 large free-range eggs Snipped fresh chives for garnish Mornay sauce
*not a fan of English muffins? Throw caution to the wind and serve this on a fluffy Southern biscuit!
Tools
Small saucepan Small whisk Microplane (optional, for grating nutmeg) Cheese grater (or use microplane) Skillet for cooking bacon Additional skillet (optional) Spatula or turner 2 custard cups (or small teacups) for separating eggs Small mesh strainer (optional) Tea kettle Small (7”) non-stick skillet with tight (preferably glass) lid Additional small lid for keeping eggs warm
Instructions – The Mornay
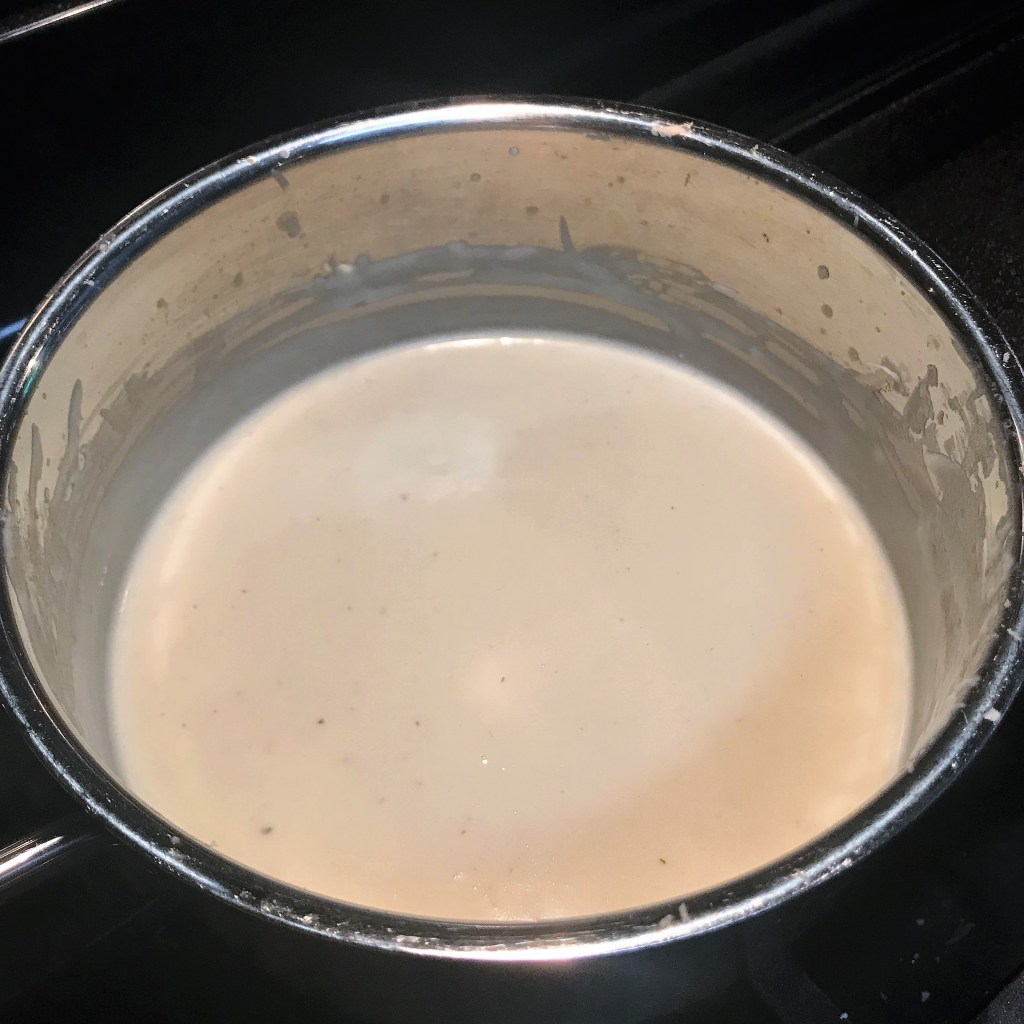
In a small saucepan, heat 1 Tbsp. salted butter until melted and bubbly at edges. Add 1 Tbsp. flour and whisk to combine. Cook until mixture changes appearance and bubbles throughout. Add milk and whisk until fully blended. Keep over medium heat until bubbling and thickened. Grate fresh nutmeg into the sauce, then add grated gruyere cheese and a pinch of salt, whisking until smooth. Turn heat to warm setting while you prepare the other items.
Whenever possible, use fresh nutmeg. It’s so fragrant and adds a really special touch to any cream sauce!
The market where I shop has specialty cheeses in small chunks in a “tasting” bin. Such a great opportunity to try something new or expensive. I used a cave-aged Gruyere for this Mornay, and it smells amazing!
Instructions – The Benedict
Cook the bacon strips to desired doneness and set aside on paper towels. Load your English muffin halves into the toaster so it’s ready to go at plating time.
Pour off bacon grease and wipe skillet clean to use for the next step. Or, heat a second cast-iron pan or griddle over medium heat for about 5 minutes. Add about 1 Tbsp. olive oil and add onions, tossing to caramelize. Pile the onions into the middle of the skillet, and place the tomato slices around the outside. Cook the tomatoes until both sides show signs of caramelization (those gorgeous little charred spots is what you’re going for here).
I grilled the Roma tomato slices just long enough to warm and caramelize them. My husband snapped the pictures, and caught me here in mid-flip. Nice camera work, Babe!
Move the tomatoes to a plate or cutting board to avoid burning them. Add the chopped deli turkey to the onions and toss to warm and caramelize the edges. Turn off the heat and set aside for plating. It’s about to get fussy in here.
If you already have a preferred way to cook poached eggs—well, you’re my new hero! Although I completely love poached eggs on any restaurant brunch menu, making them at home wears my patience pretty thin. I’m going to show you my “cheat” method of steam-poaching eggs, and it works great for me. Do what works for you.
First, turn on the heat under your tea kettle, or run some very hot tap water into a measuring cup with a pour spout. You’re going to need hot water for this process.
Crack one egg into a custard cup. Place a small mesh strainer over a second cup and gently roll the egg into the strainer, allowing some of the egg white to drain through to the extra cup. An egg white actually has two distinct parts—the firm white, which is the pretty part, and the loose and runny white, which leaves unappealing shaggy edges on a poached or fried egg. We’re getting rid of the runny white part so the egg steams more cleanly. If you don’t have a mesh strainer, or if you’re not a stickler for a pretty plate, you can skip this step. But this is a fancy-schmancy brunch dish we’re making, so I’m doing it. Besides, I can burn more calories later if I have a sink full of dirty dishes.
Discard the runny white, then do the same with the second egg, keeping each egg in its own cup.
Drop the English muffin to toast it. Whisk the Mornay. Sip champagne. Breathe.
Heat a small non-stick skillet over medium heat for about 1 minute. Carefully pour about 1/4 cup hot water directly into the empty skillet. It will sputter and perhaps even seem to boil, and this is good! Gently slip the first egg onto the boiling water and immediately cover with a tight fitting lid. Allow the egg to cook for about 1 minute, and watch for a light film to form over the yolk. With a rubber spatula or wide spoon, gently remove the egg to a plate lined with a paper towel. Cover with another lid to keep it warm while you prepare the second egg.
The slippery part of the egg white drains right through the mesh strainer, leaving only the pretty part for our Benedict.
Get that water really going, and your egg will steam-poach in no time without becoming rubbery.
See how the edges of the white are so smooth? That’s because we took time to strain the runny white out of the egg. I’m loving the bright orange yolks of these free-range, organic eggs. Totally worth the extra buck!
Plating:
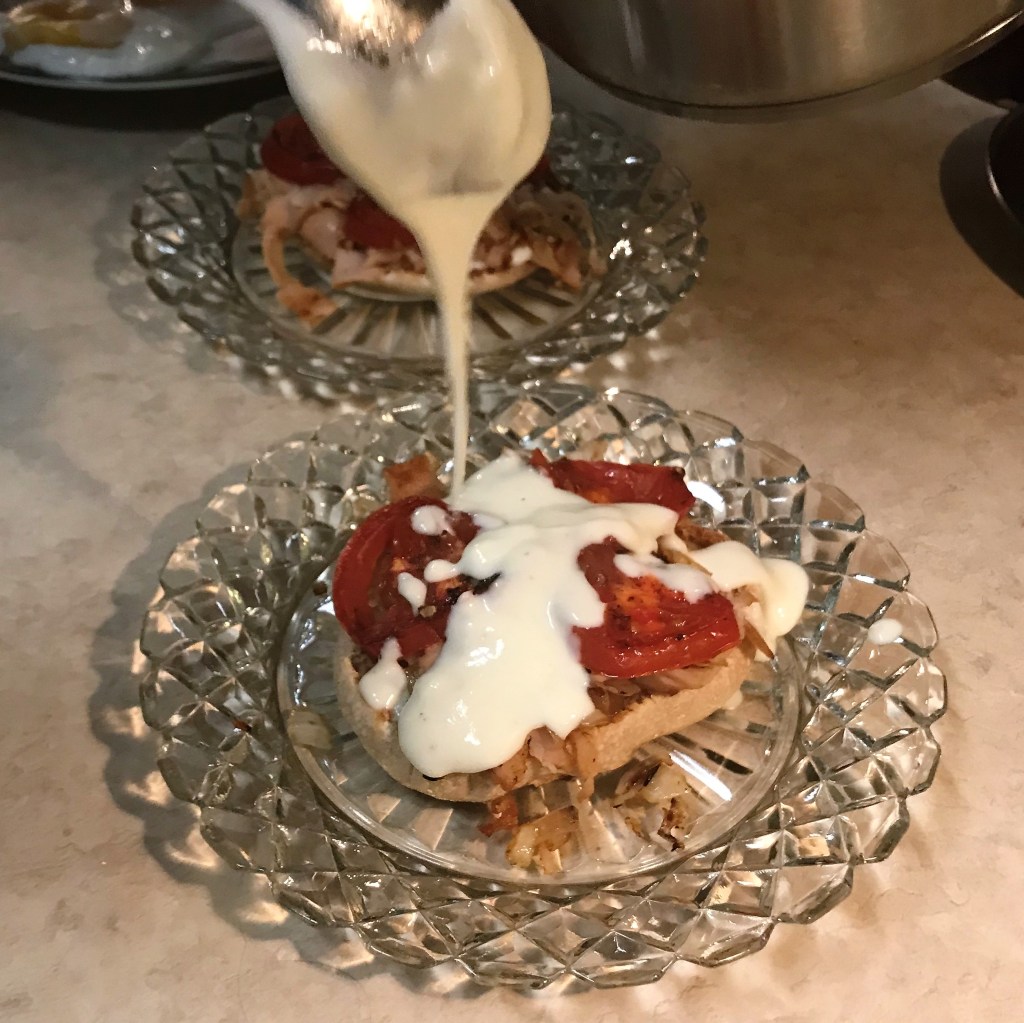
Place a small spoonful of the Mornay in the center of each serving plate, to help keep the muffins from sliding around. Next, smear about 1 Tbsp. of sauce over the top of each toasted muffin half, then top each with the turkey-onion mixture, the tomato slices, a generous drape of Mornay sauce and a poached egg. Sprinkle with snipped chives and top with the cooked bacon slices, placing them cross-wise for optimal image to impress your guest.
A little dab of the Mornay underneath the muffin half keeps it from sliding around on the plate.
Spread Mornay on the muffin half, then the turkey, onions and tomato slices, and then a generous drizzle of the Mornay. Don’t try to make it perfect. It actually looks better with the sauce dripping down the sides!
I love this on my grandmother’s beautiful vintage plates!
This Benedict looks fit for a millionaire! If you listen closely, you might be able to hear Gram say, “Well, isn’t that elegant?”
Not everyone has the time (or the patience) to make a fussy Kentucky Hot Brown Benedict, or the traditional open-faced brioche sandwich that served as inspiration for it. Here’s a super simple way to enjoy all the same flavors, but in a make-ahead dip version. You’ll notice that my recipe does not mention adding salt—this is not accidental. I’ve used deli sliced turkey to keep it simple. Between that and the bacon, the recipe doesn’t need more salt.
Ingredients
4 slices thin uncured bacon, cut into 1/2” pieces
About 1 Tbsp. extra virgin olive oil
1/2 cup sweet onion
3 oz. thinly sliced deli turkey, chopped into smaller pieces—about 1/2 cup packed
1 pkg. (8 oz.) Neufchatel cream cheese
1/4 cup light mayo
1/4 cup light sour cream
Small handful fresh Italian parsley, cleaned and chopped
1 small (10 oz.) can Rotel tomatoes (mild version), drained completely
3/4 cup Swiss-Gruyere cheese blend from Trader Joe’s
2 Tbsp. grated parmesan cheese (and extra to sprinkle on top)
Freshly ground black pepper
Tools
Cast-iron skillet Stand mixer or electric hand mixer Rubber spatula Cutting board and knife Small non-stick skillet Oven-safe baking dish (volume about 4 cups)*
Instructions
Place cast iron skillet over medium heat and cook bacon pieces until crispy. Set aside on paper towels to drain; when cool, chop the crispy pieces into smaller, basically uniform bits.
Place small skillet over medium heat and add olive oil. When it begins to shimmer, add chopped onions and sauté until caramelized. Add chopped turkey to the pan and continue to sauté until turkey pieces have browned edges. Set aside to cool.
In mixer bowl, whip cream cheese until smooth. Add mayonnaise and sour cream and whip again until blended, stopping once to scrape down the sides and bottom of the bowl. Add Swiss-Gruyere blend, parmesan, parsley and tomatoes and mix gently until blended (don’t whip too much or tomatoes will lose their shape and turn the cream cheese pink). Season with freshly ground black pepper.
Remove the bowl from the mixer and use a silicone spatula to gently fold the turkey and onions, plus half of the crispy bacon, into the cream cheese mixture. Transfer the dip mixture to an oven-safe baking dish*, and top with remaining crispy bacon and another sprinkle of parmesan.
* We are still doing physical distancing (which is really bumming me out, but still necessary), so I divided the dip mixture into separate ramekins to share with friends and neighbors for their own private Virtual Kentucky Derby gatherings (of two). These adorable dishes were handed down from my grandma, and I just love them! Each holds about 1 1/4 cups of dip mixture.
Proceed with baking, or cover and store in the fridge up to 3 days, until ready to bake and serve.
Baking and Serving
Preheat oven to 350° F. Bake, loosely covered with foil, for about 20 minutes. Remove foil and bake 10 minutes longer, or until hot and bubbly.
Don’t you love the bubbly edges when a hot dip emerges from the oven?
Serve piping hot, spread on crackers, baguette slices or these dainty little brioche toasts I found at Trader Joe’s.
These seem appropriate, in keeping with the traditional “Hot Brown” open face sandwich on brioche.