When the heat goes up, my appetite goes down. Like, waaaay down. And that means I’ve barely been hungry at all this week, as the afternoon highs got stuck around 97° F for five days in a row with 70% humidity as the norm. It has been too hot to weed my flower beds, too hot to walk the dog, and definitely too hot to cook. It’s brutal, and I know that much of the U.S. has been dealing with the same as climate change has altered what summer looks like— probably forever.
But at some point, we’ve gotta eat, right? I’ve put some new ideas into practice to ensure that we have something of substance, without me having to stand at a hot stove. Taking a cue from my blog buddy, Michelle, who endured the vicious summer heat of California’s Coachella Valley for too many years, I have found it helpful to do my cooking in the morning hours and then serve up the food as cool meals in the evenings. This has proven to be beneficial for more than one reason, as I often find myself less motivated at the end of the workday; my brain has run dry of decision-making ability. Getting meals done early has saved my sanity!
I love every single thing about this!
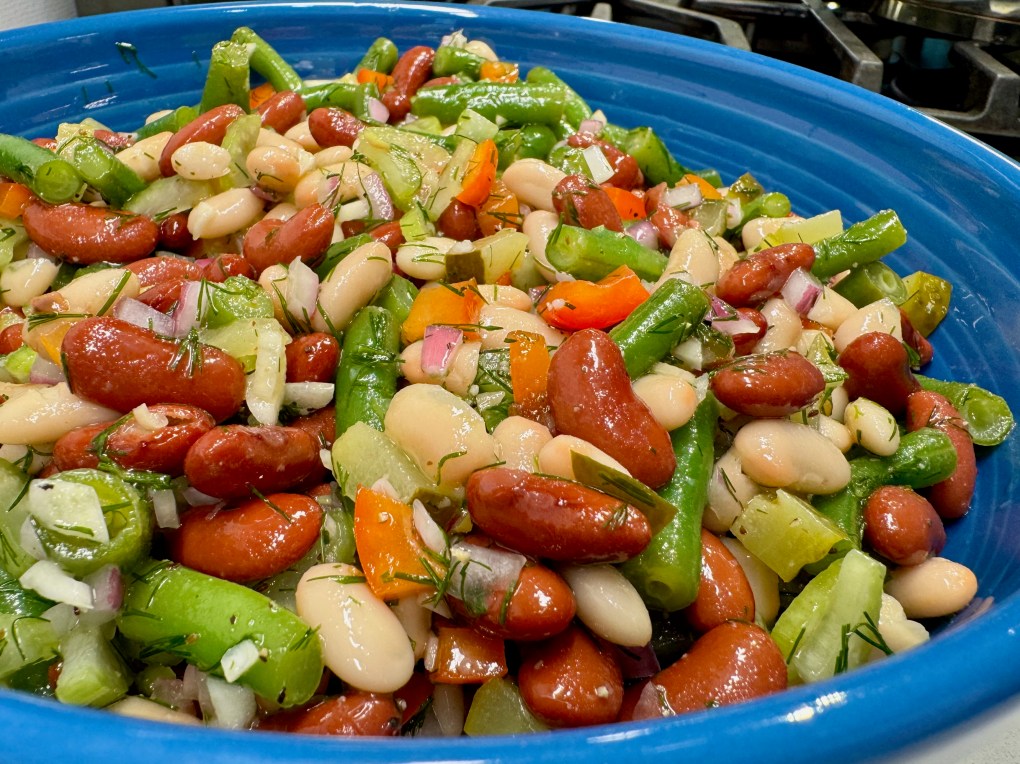
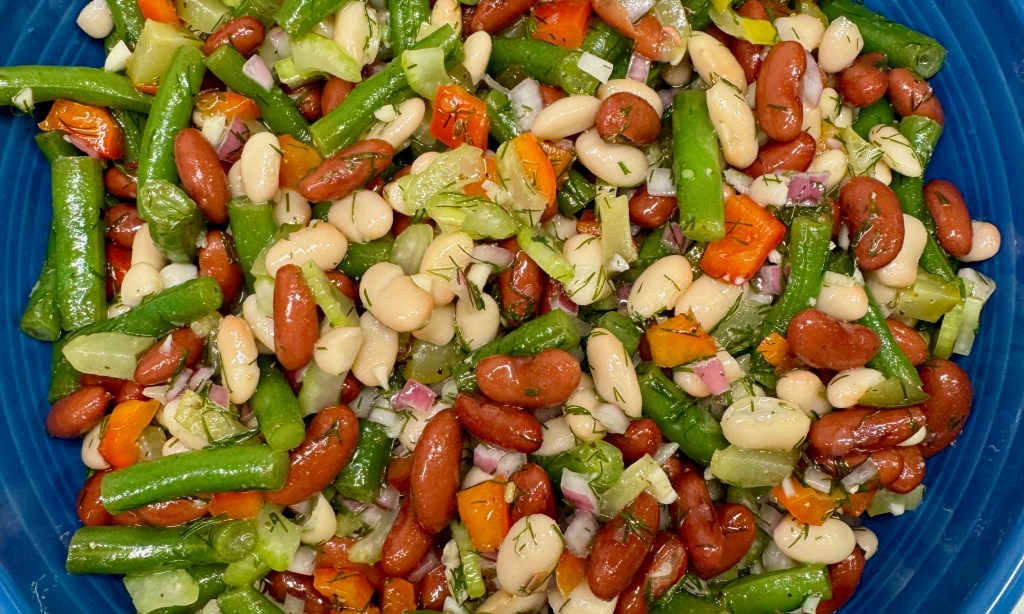
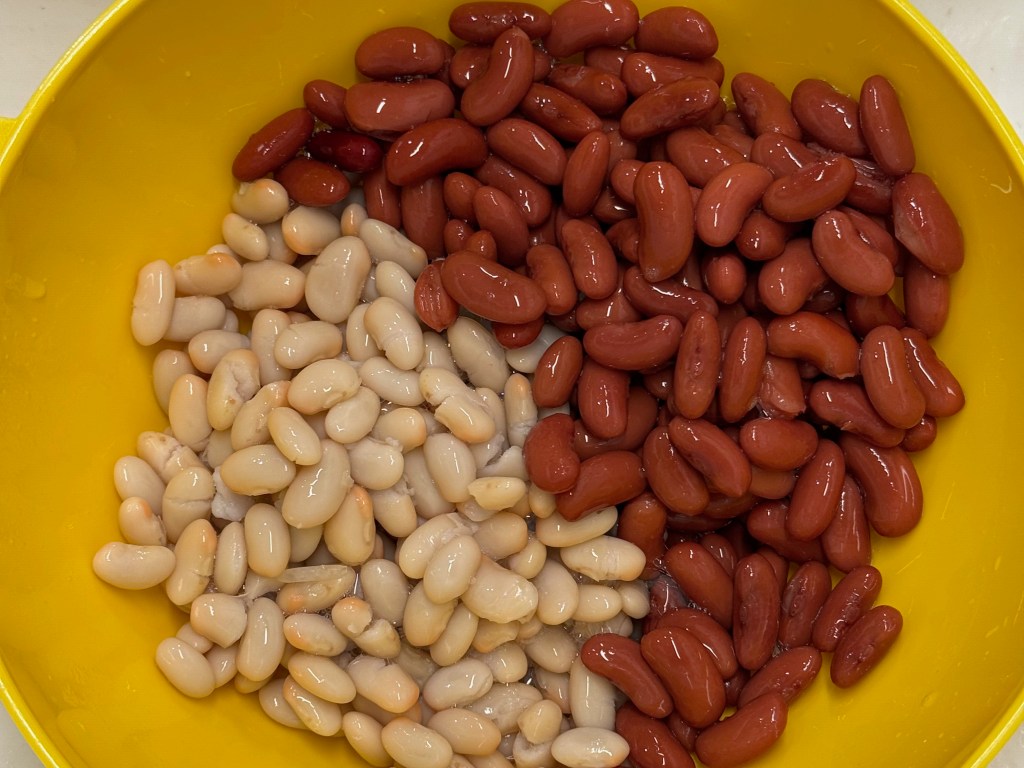
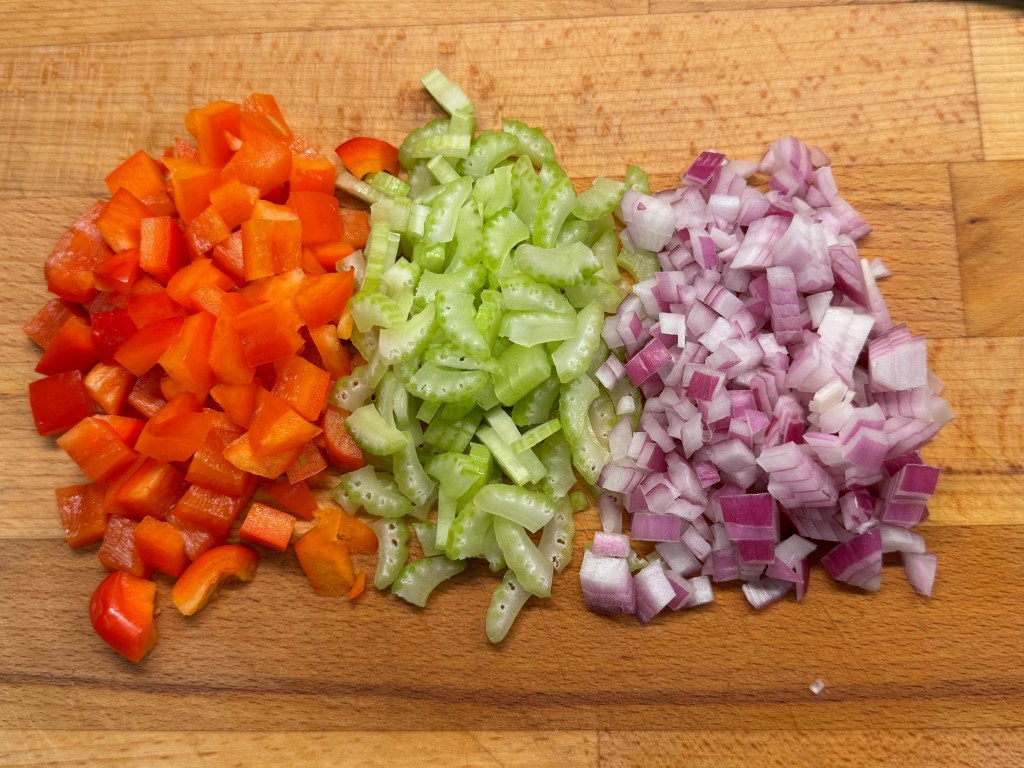
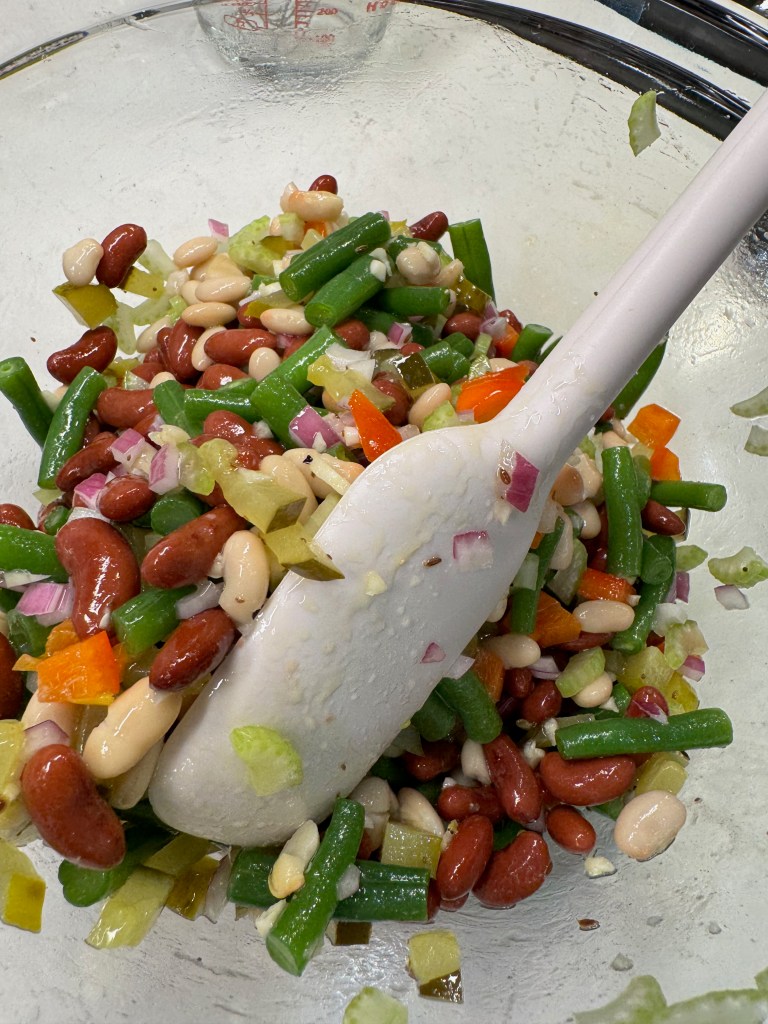
This variation on three-bean salad has even more texture than my usual, with crunchy bits of celery, bell pepper and red onion, the zesty bite of minced garlic, creamy kidney and cannellini beans, and a big punch of dilly-dilly flavor, courtesy of chopped spicy pickles and fresh summer dill. The fresh green beans have a nice “snap,” and the canned beans provide terrific fiber for a healthy gut, along with enough protein to carry me through this god-awful heat spell. Let’s get into it!
This recipe also happens to be easy on the grocery budget.
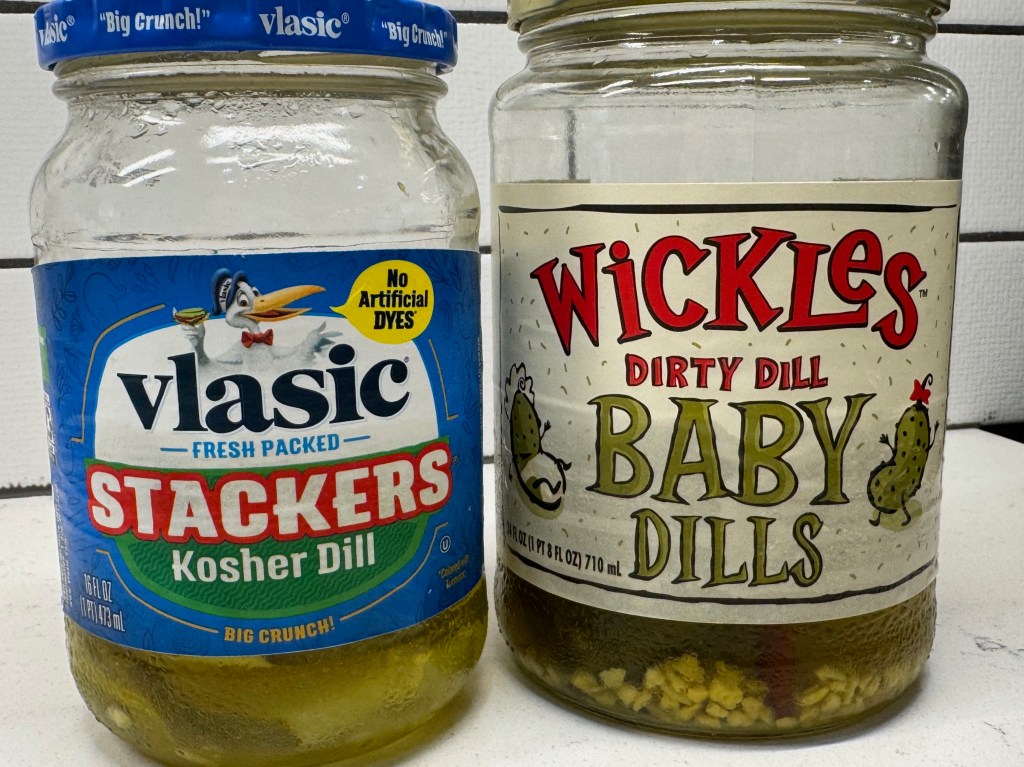
Par for the course, my inspiration for this recipe came from a desire to get rid of random jars in my refrigerator. We have had a bevy of leftover pickles taking up space after my husband’s son, Alex, visited a few months ago from Hungary. Alex loves dill pickles (especially spicy ones), and I always pick up a few options for easy snacking when he’s with us. Alex is very polite and doesn’t like to consume the whole contents of the jars, so he leaves them for us, which means that they get shoved to the back of the fridge until I get tired of moving them around. For this salad, I chopped up the remains of two kinds of pickles and I also used the kosher dill liquid in the dressing.
This dressing would be terrific on a greens-based salad, too.
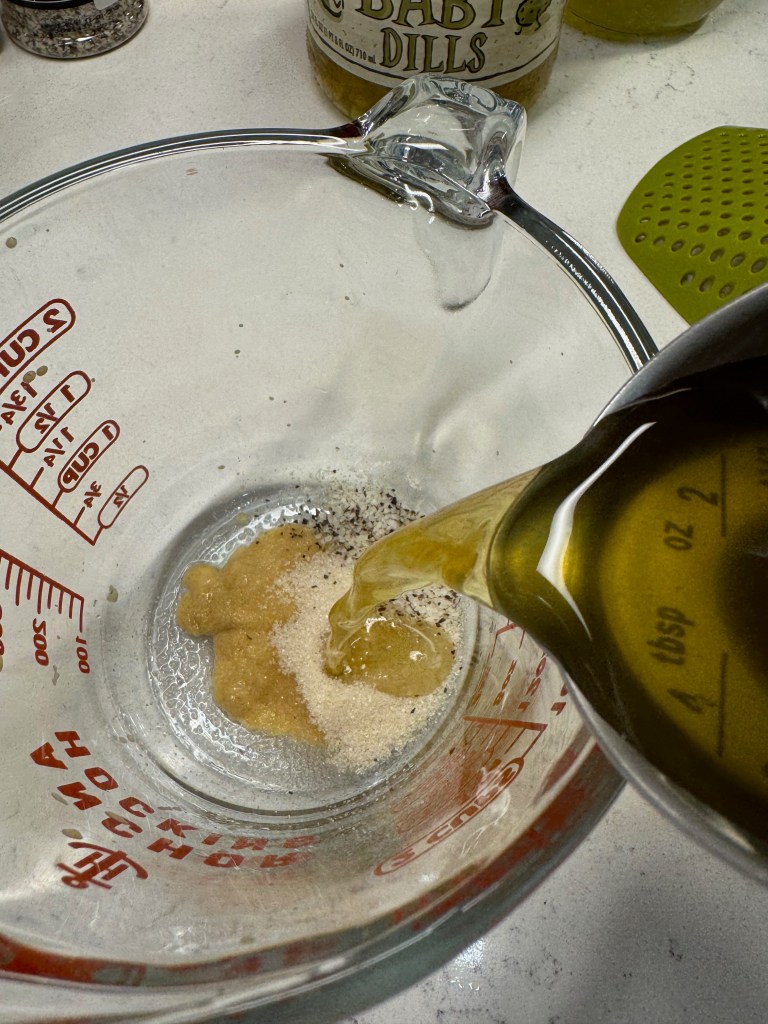
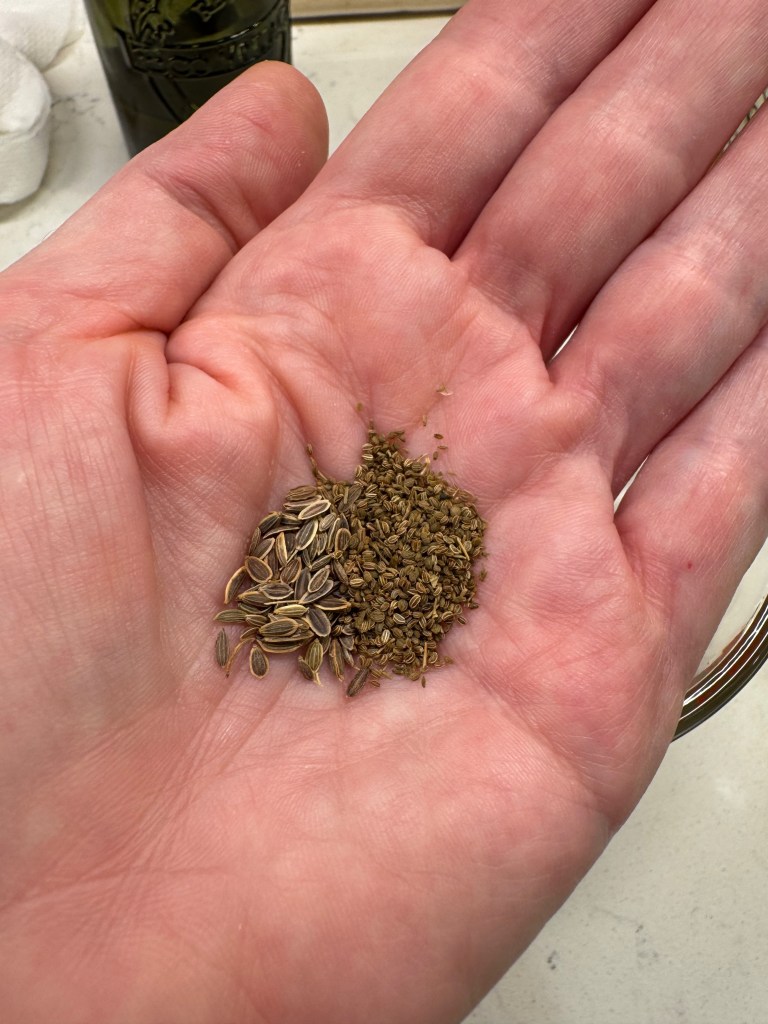
The balance of the dressing recipe is Dijon mustard, a spoonful of sugar, dill and celery seeds, and a healthy drizzle of extra virgin olive oil. Salt and pepper to taste, plus a splash of water, and that’s done.
The dill and celery seeds release more flavor after soaking in the dressing.
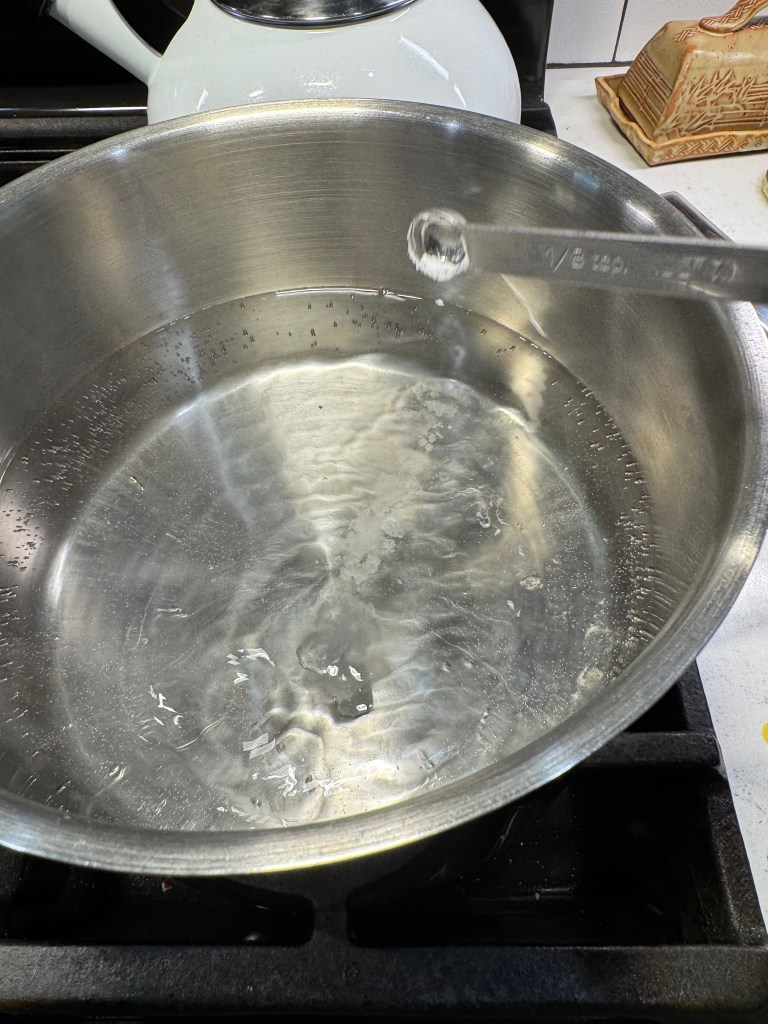
The green beans were the only ingredient in this salad that required cooking— thankfully, we only needed to have the stove on for about 10 minutes— so I got that going with a pinch of baking soda in a pot of barely-boiling water. The alkaline nature of the soda helps preserve the color of the green beans, and a shock of ice water at the end of cooking also helps with color retention.
Test a bean or two for doneness after about five minutes. They should be tender but still give a little resistance to the bite.
This process, called “blanching,” takes me back to my grandmother’s kitchen, where I learned so many basic lessons of cooking— including blanching vegetables for freezing and canning— when I was barely tall enough to reach the stove. Gram would have loved this three-bean salad, especially the use of the leftover pickle liquid. Like so many people who lived through the Great Depression, she used every scrap, drop, peeling, stem and leaf that could be used. These are still important lessons today, and I aim to make her proud every time I step into my own kitchen.
I’m not embarrassed to admit that I tasted this 13 times while making it. 😁
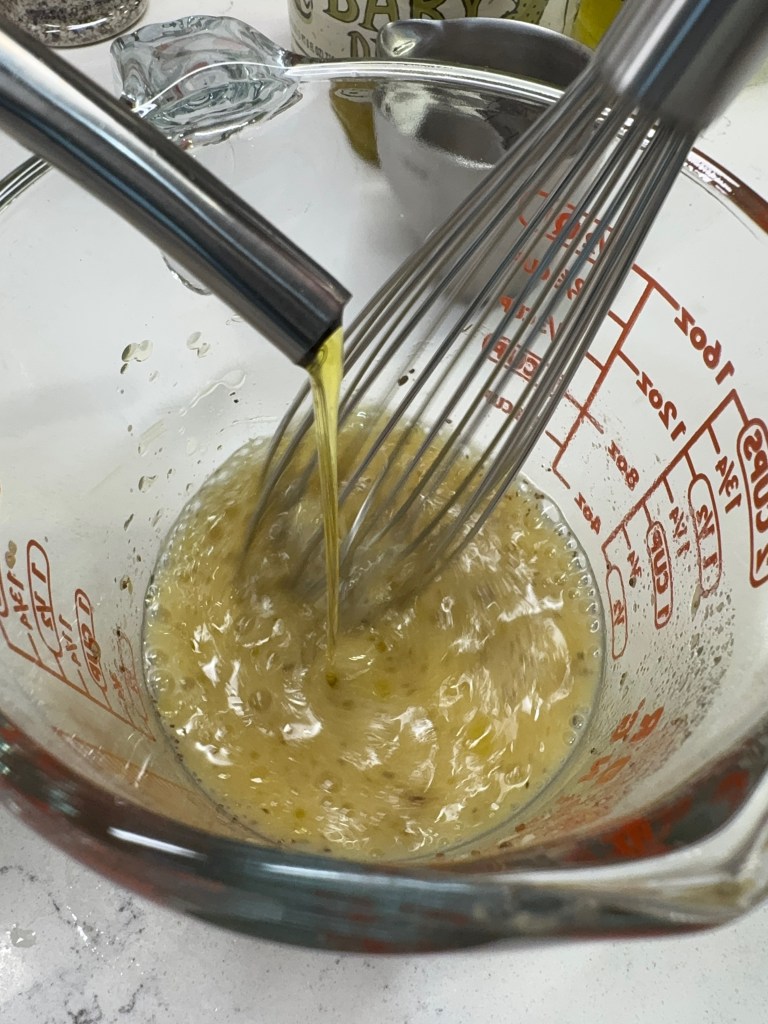
Assembling the salad is easy. Give the dressing another good whisking before you pour it over the main ingredients, and fold it gently to avoid breaking up the canned beans. Add more fresh dill than you think is necessary, as the fine fronds will disperse a great deal when you fold it in. This freshness adds something special to the salad, but if you cannot find it in your supermarket or farm stand, a teaspoon of dried dill leaves will work in a pinch; add them to the dressing ingredients instead.
So there you have it— a three-bean salad, inspired by Alex’s leftover pickles, bringing loads of flavor to the table with ingredients that will satisfy, even when it feels too damn hot to eat. Make this early in the day and let the salad chill in the fridge several hours before enjoying. It keeps well for about a week, and you’ll want to remove it from the fridge for about 20 minutes when you’re ready to serve so that the olive oil softens from its chilled state.
Spicy dill pickles and fresh dill lend a tangy twist to classic three bean salad. Use the pickle juice in the dressing, and make it early in the day so that the flavors have time to mingle in the fridge.
Ingredients
3/4 pound fresh green beans, trimmed and cut into uniform small pieces
1 tsp. kosher salt
1/4 tsp. baking soda (optional, for color retention)
1 can light red kidney beans, drained and rinsed
1 can cannellini beans, drained and rinsed
1/2 cup chopped red bell pepper
1/2 cup chopped celery
1/2 cup diced red onion
1/2 cup chopped dill pickles
2 cloves garlic, finely minced
3 Tbsp. dill pickle juice
1 Tbsp. apple cider vinegar
1 Tbsp. cold water
About 2 tsp. Dijon mustard
1 tsp. cane sugar
1/2 tsp. celery seed (or combo with dill seed, if you have it)
Salt and pepper to taste
1/4 cup extra virgin olive oil
1/4 cup fresh dill, chopped
Note: I used a combination of pickles in my salad. Be as creative as you dare, subbing in spicy pickles or even other pickled vegetables as the mood strikes! Take note of the sodium in your pickled ingredients so that you can adjust salt to taste without overdoing it.
Directions
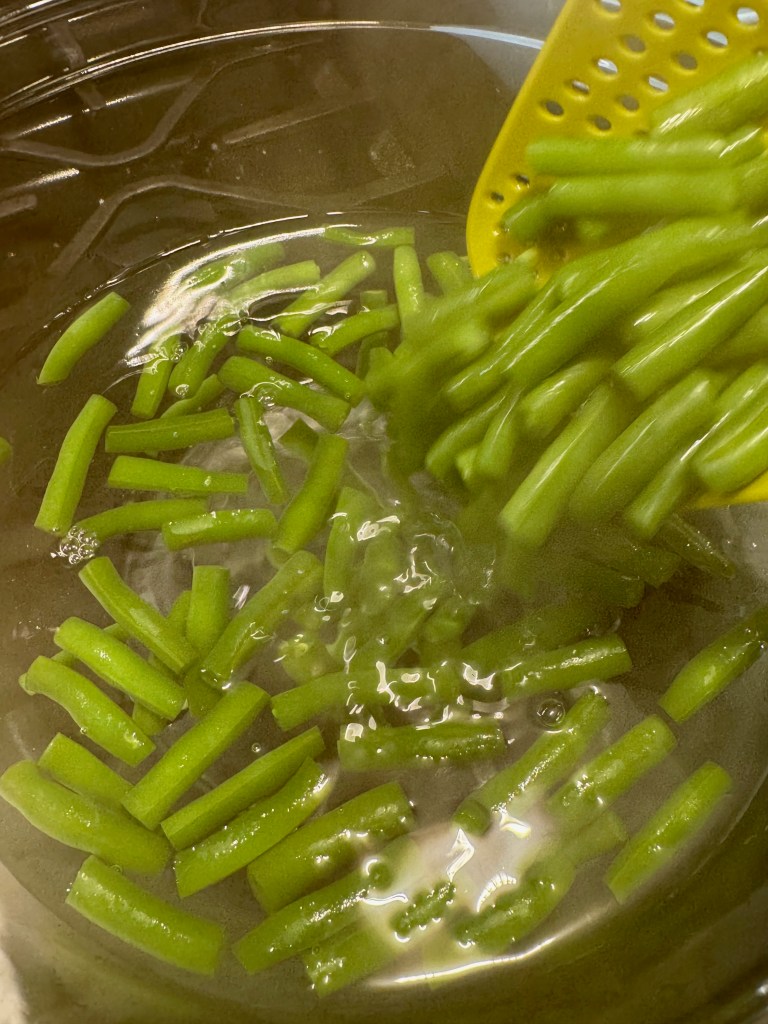
Prepare an ice bath in a large bowl. Bring a pot of water to low boil over medium-high heat. Stir in salt and baking soda, then add green beans. Simmer for 6 to 7 minutes, until beans are slightly tender but still bright green. Transfer beans to the ice bath and rest at least 5 minutes, then drain in a colander.
Make the dressing while the beans are blanching. Combine pickle juice, vinegar, cold water, Dijon, sugar and celery seed in a measuring glass. Whisk vigorously while drizzling olive oil into the glass, creating an emulsion. Season to taste with salt and pepper.
Blot the green beans with a towel to remove excess moisture. Combine in a large bowl with the drained canned beans, vegetables and chopped pickles.
Pour dressing over the salad ingredients, and fold gently with a spatula or wooden spoon to avoid breaking the tender canned beans. Add salt and pepper as needed. Fold in dill and refrigerate until ready to serve. This keeps well for up to a week.
This post is kind of a recipe within a recipe, and my inspiration for the soup was born from my effort to make pasta using sourdough discard. I know— who would imagine such a thing, right? When Les and I traveled to Nashville, Tenn. recently, we met some friends for dinner and got to talking about gluten issues that each of them suffer. Our friend, Dick, said he had found real sourdough bread more digestible and that a few gluten-free breads were helpful to satisfy his carb cravings, but that pasta had been another story; it always left him feeling bloated and uncomfortable, and he didn’t enjoy the texture of the gluten-free options on the market. He knew about my food blog, and he said, “if you could make a real pasta that I could eat and enjoy…”
And over here was me— just hating the thought of someone missing out on a favorite food. There has to be a way, and I’m on a mission to find a way to ease the uncomfortable symptoms that gluten brings to people with mild or moderate sensitivities. If I can figure this out, and then advance to making an egg-free version that is suitable to dry, I will send some to Dick for feedback. My version is not gluten-free, obviously (I use wheat flour), but the fermentation process changes the gluten structure and exhausts the anti-nutrients that mess with non-celiac individuals, and that just might be enough for Dick. We’ll see.
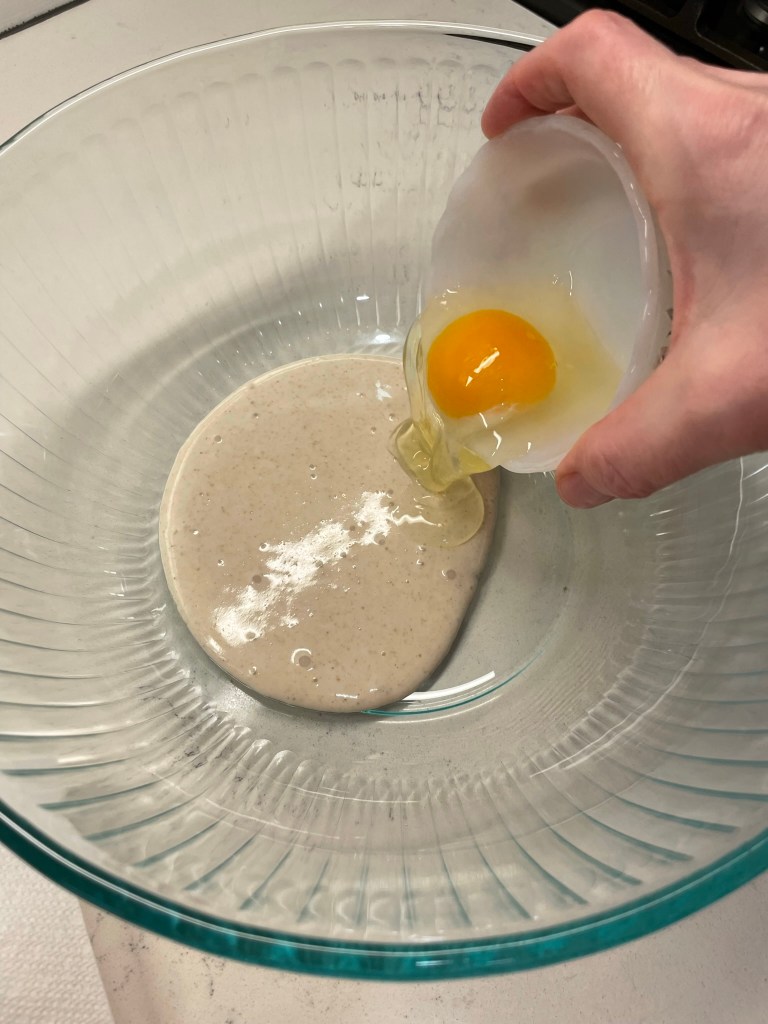
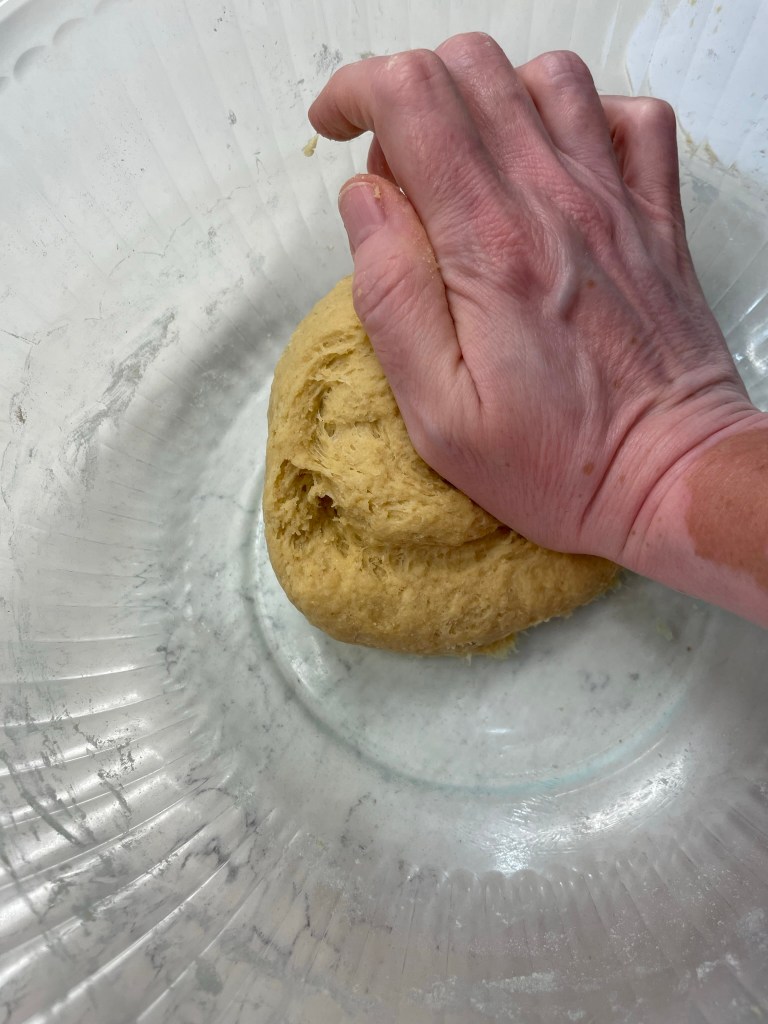
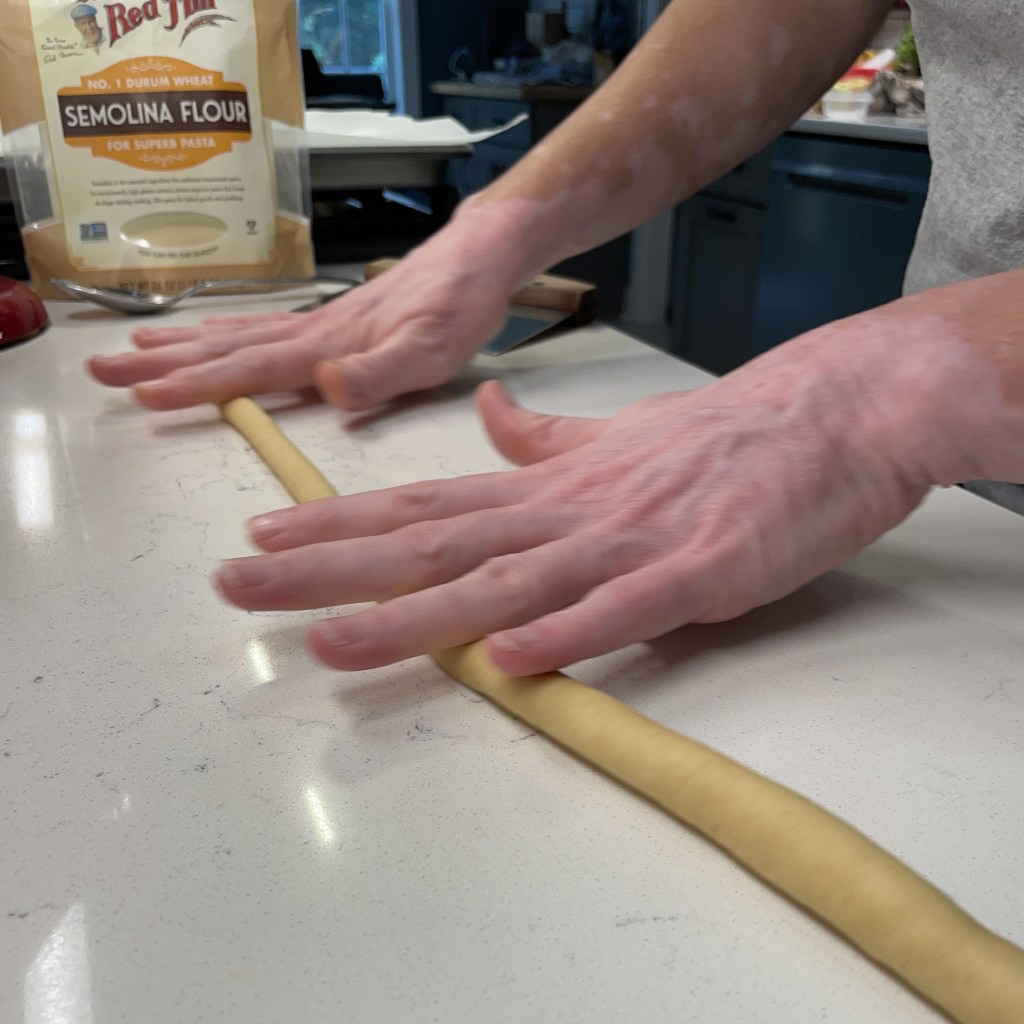
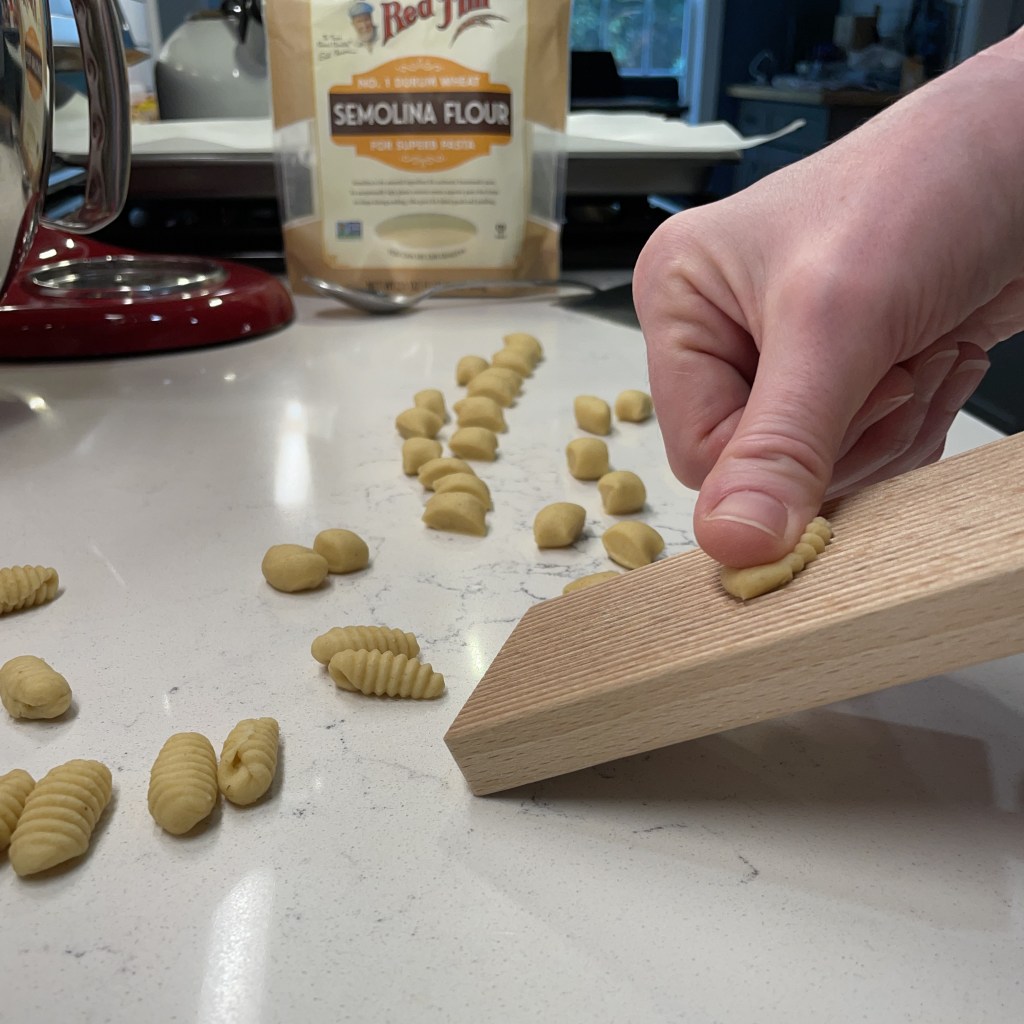
I’ll let you know how things progress with the sourdough pasta quest, but my immediate challenge was finding a good way to use my test batch. I used a combination of all-purpose, white whole wheat and semolina flours, plus sourdough discard and eggs, to make my pasta dough. It had been chilling in the fridge for a day, and I rolled it into ropes and shaped it into little gnocchi-meets-shell-shaped things. The first thing that came to mind for these little bites was soup, and here we are!
Mmmm, so good!
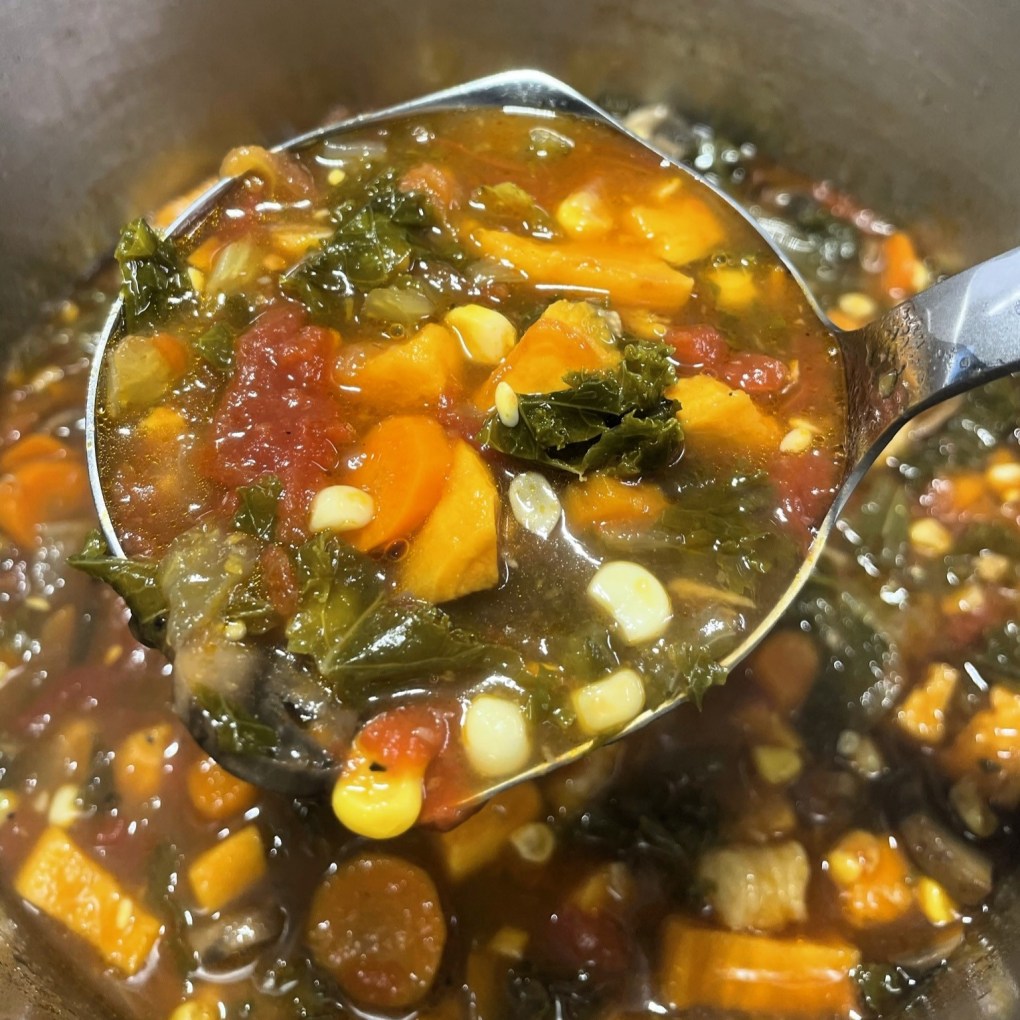
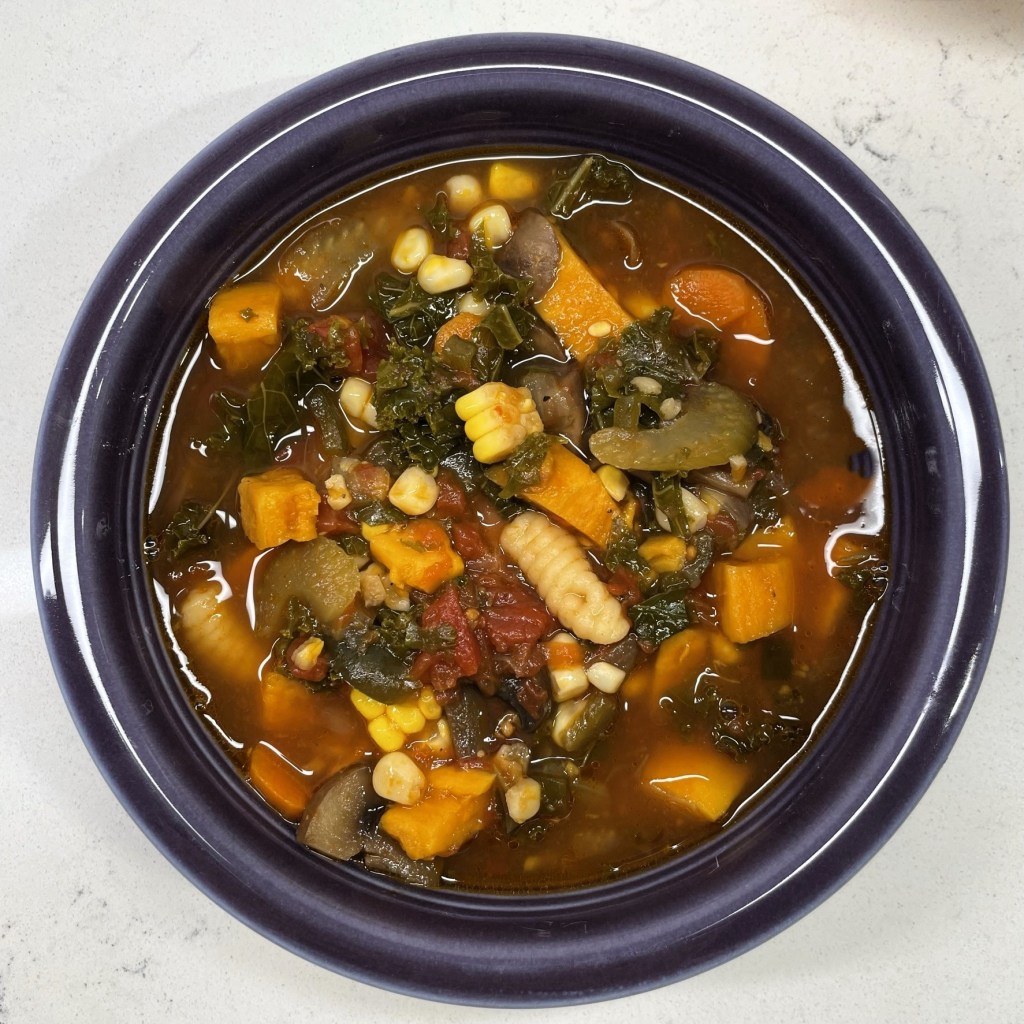
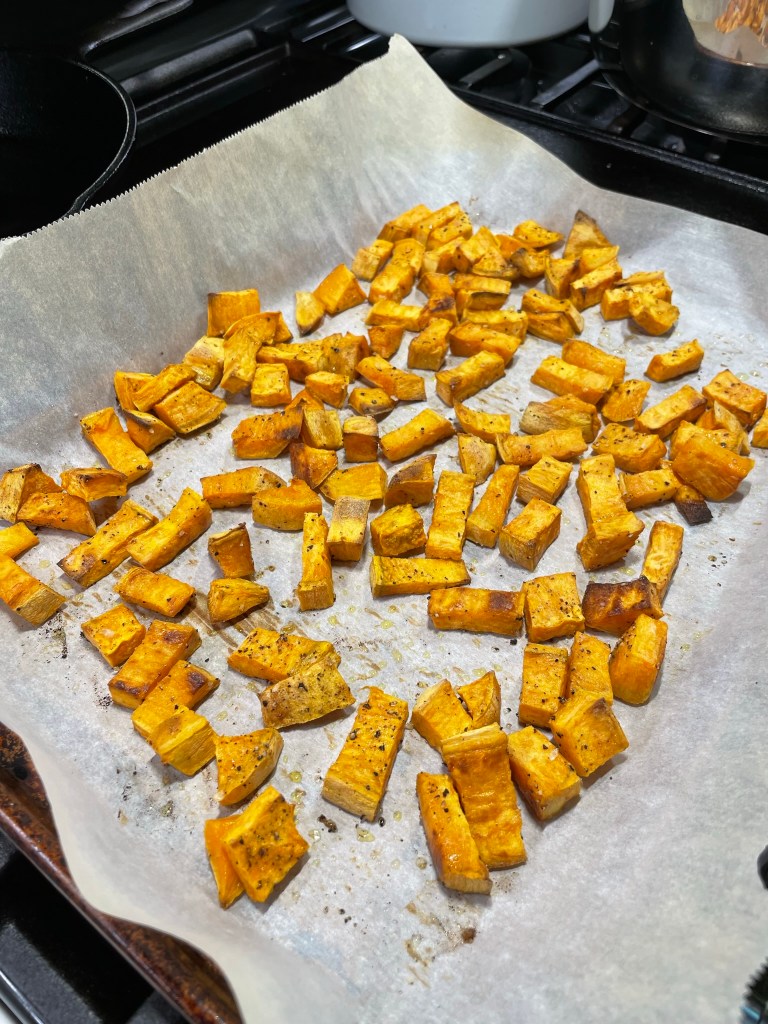
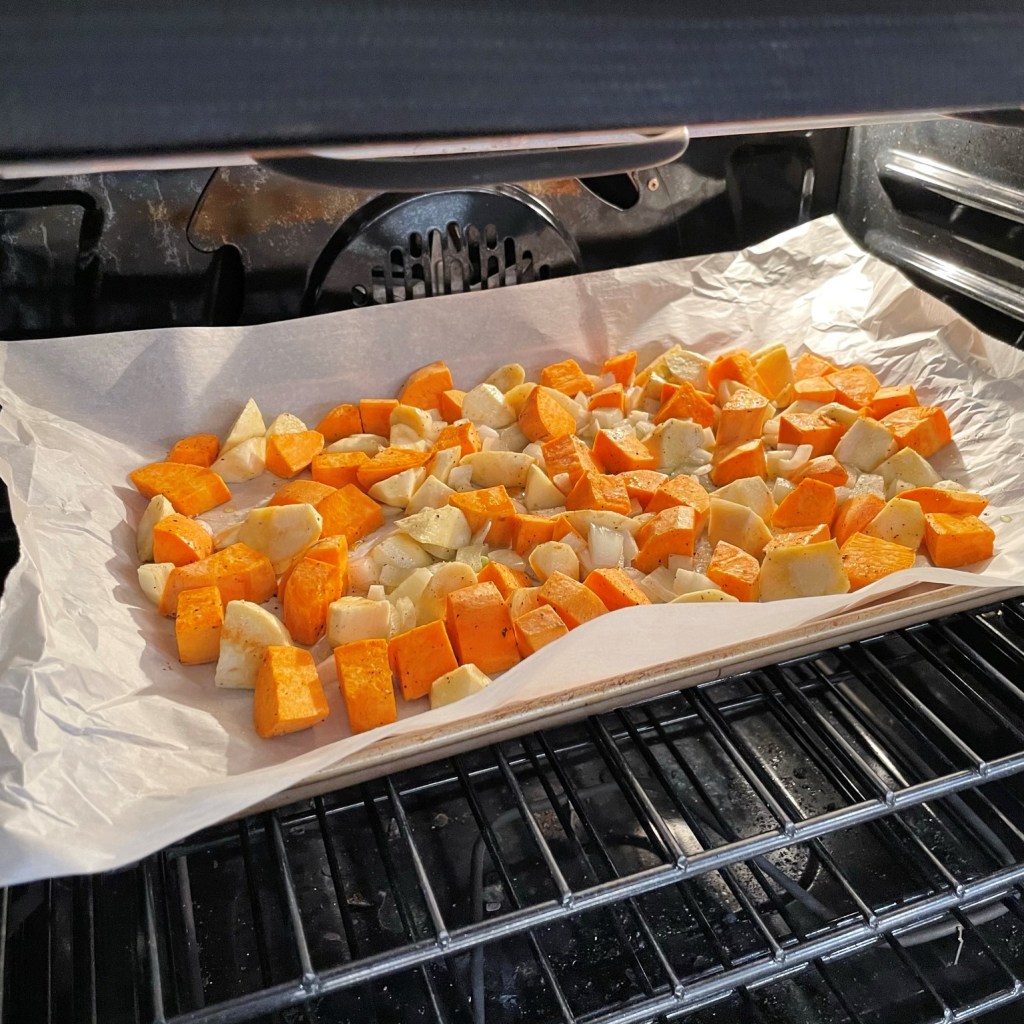
This soup brings together the best of two things for me— a whole bunch of terrific early fall ingredients and an all-day simmered vegetable soup. Sweet potatoes are abundant already this season, so I cut up a large one and roasted it with a touch of olive oil, salt and pepper. I could have put the cubes right into the soup, but I knew this would be a long simmer and I didn’t want them to turn to mush. Besides, roasting sweet potatoes caramelizes them and intensifies their autumn flavor. This turned out to be worth the extra step, for sure.
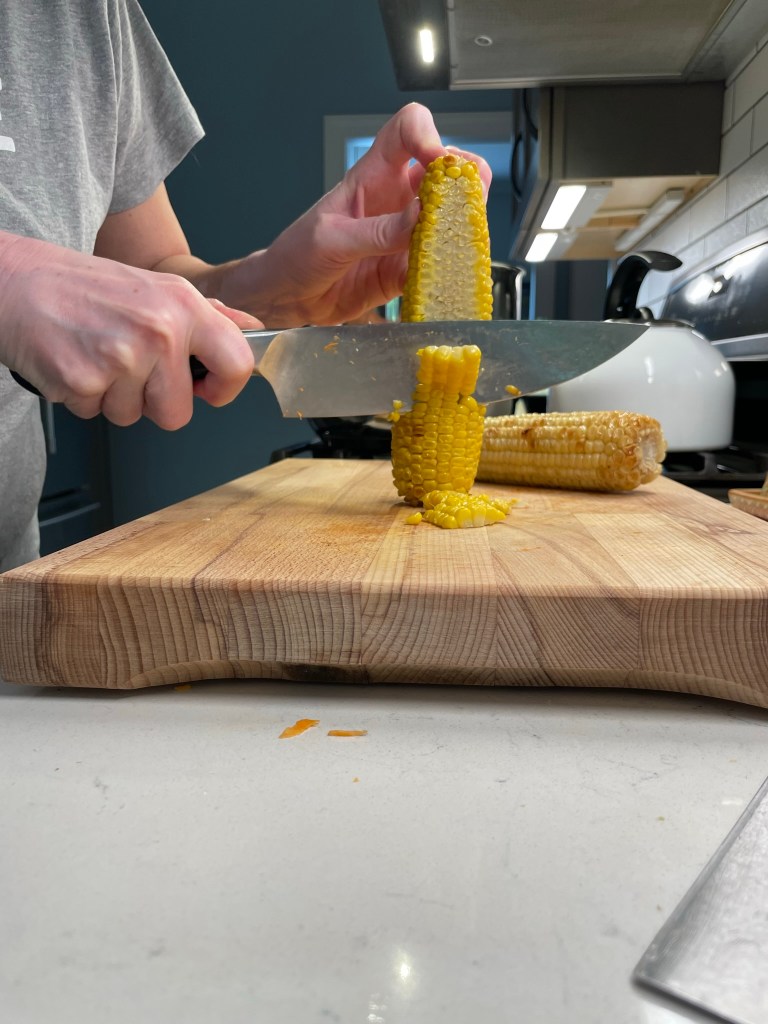
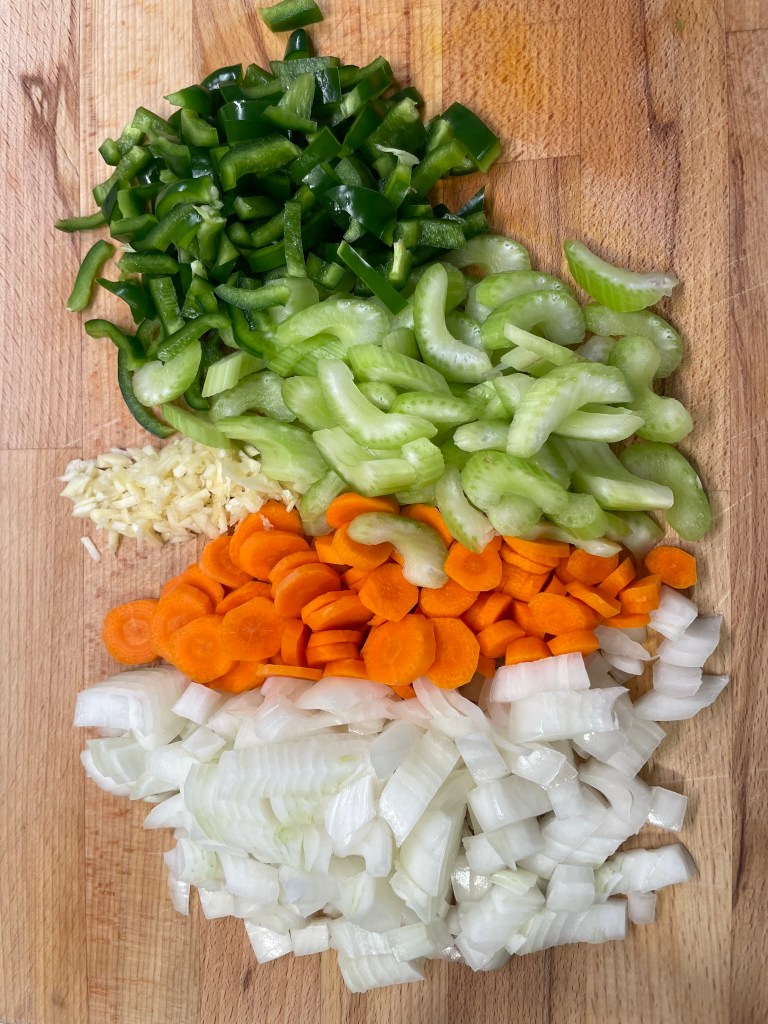
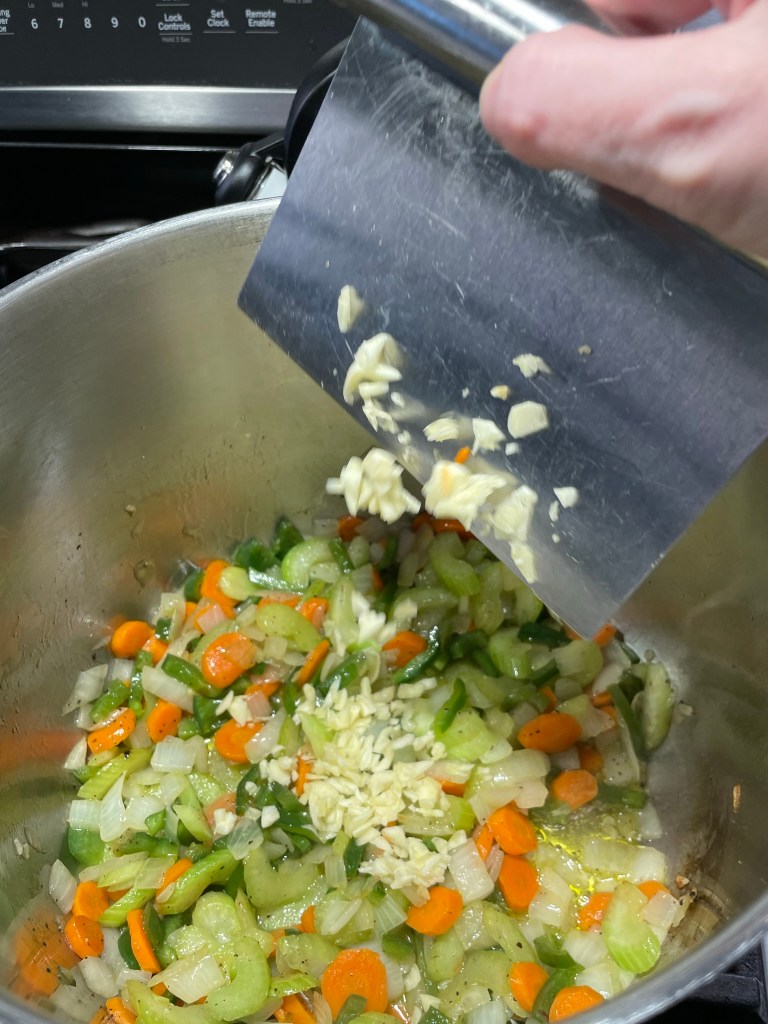
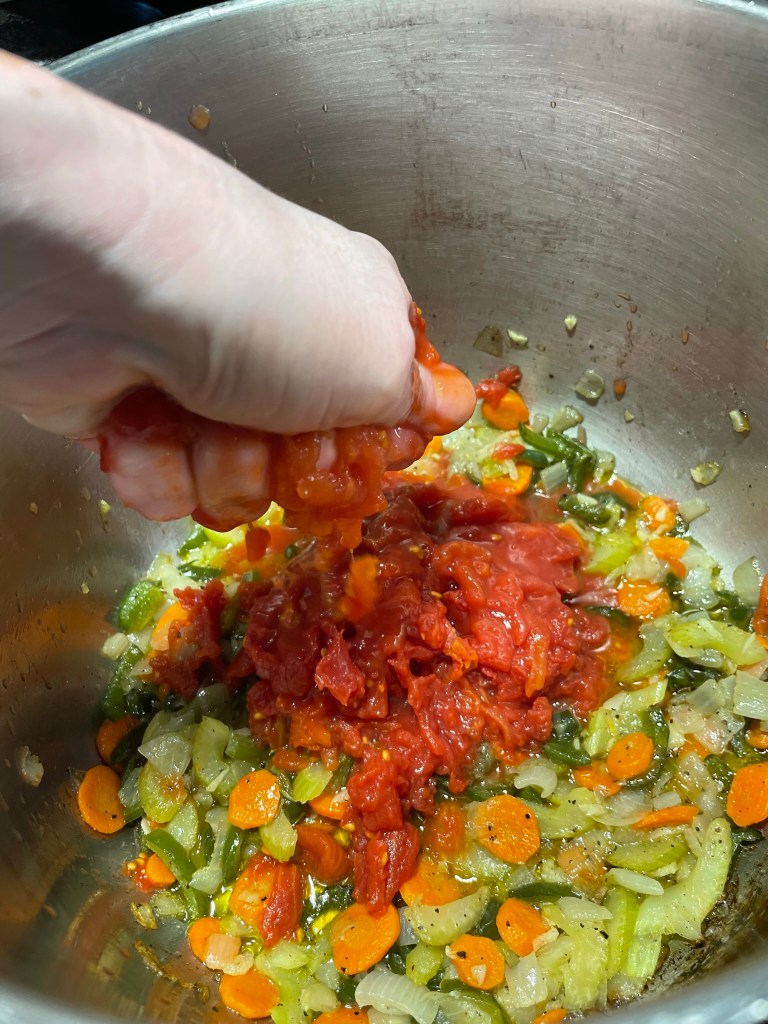
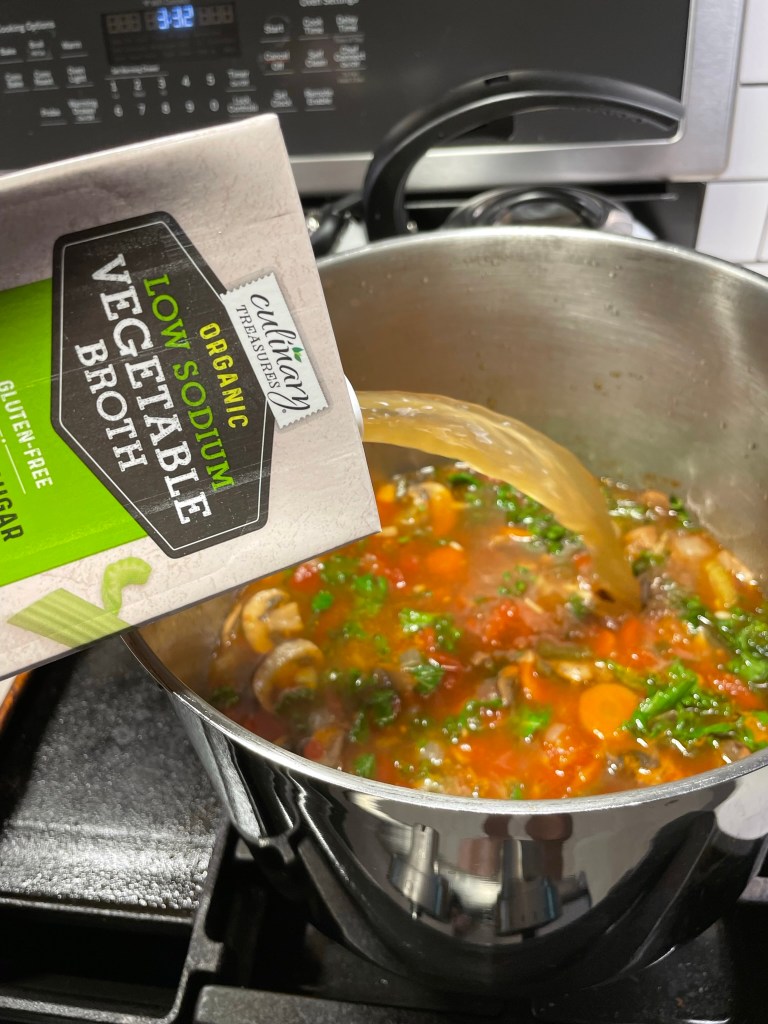
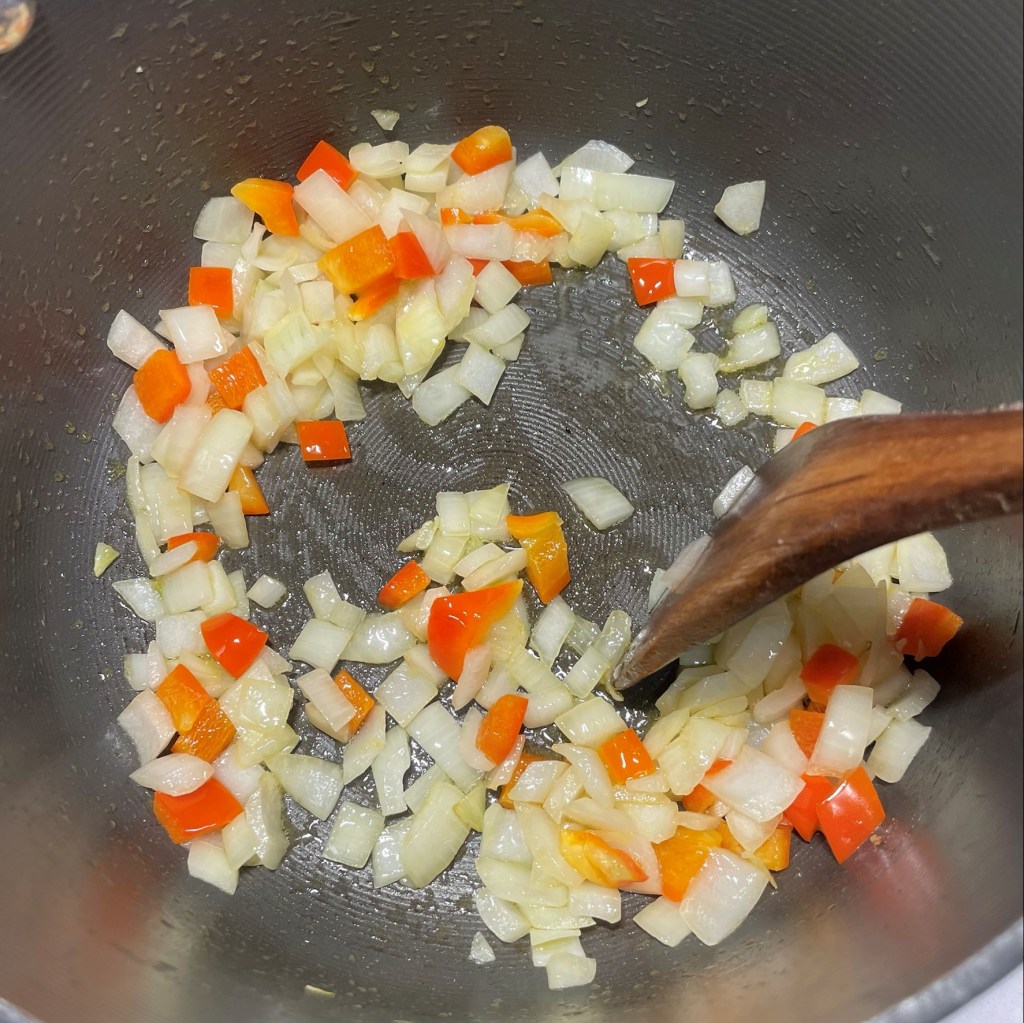
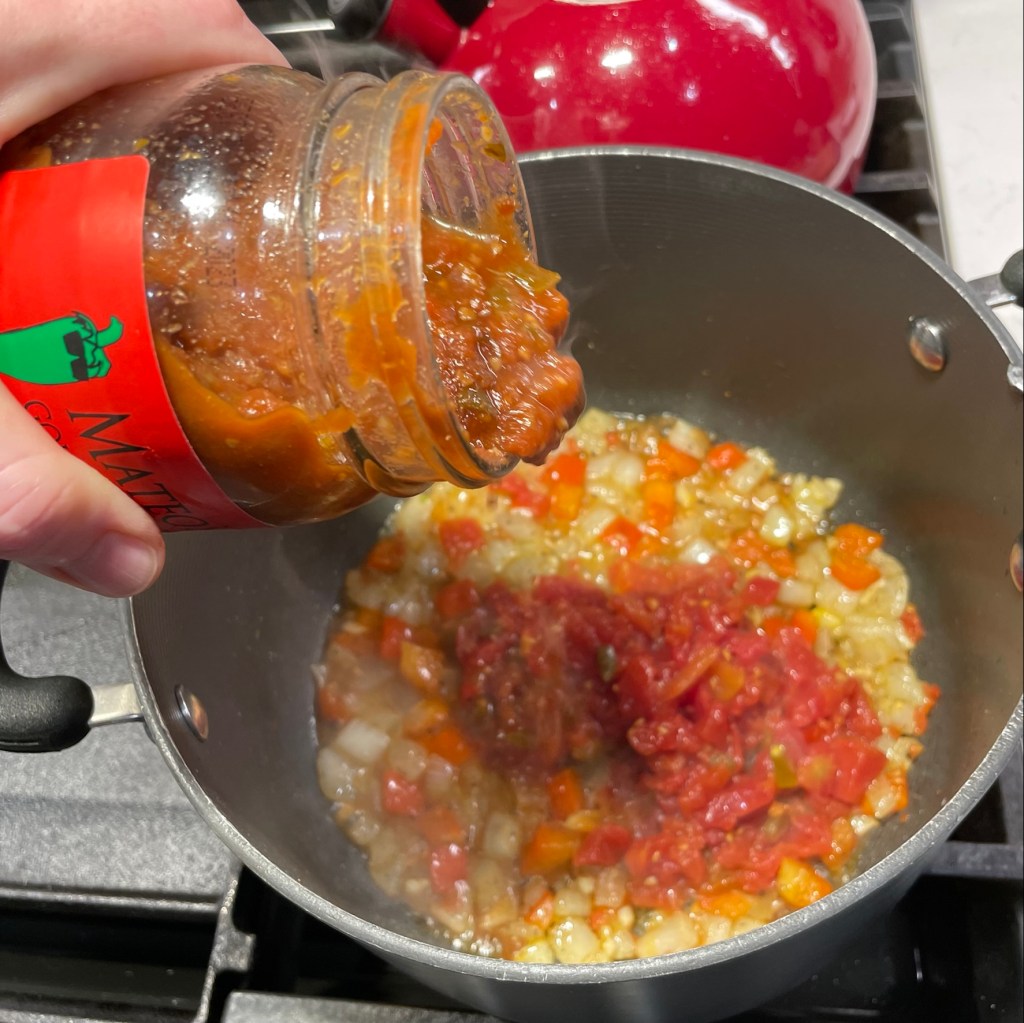
The corn season runs long around here, so I had Les grill up a couple extra ears when we had it for dinner recently. I stripped the kernels and set them aside while I prepared to build the soup base with carrots, celery and onion (otherwise known as mirepoix), plus poblano pepper and garlic. Whole canned tomatoes went in next, then mushrooms and veggie broth.
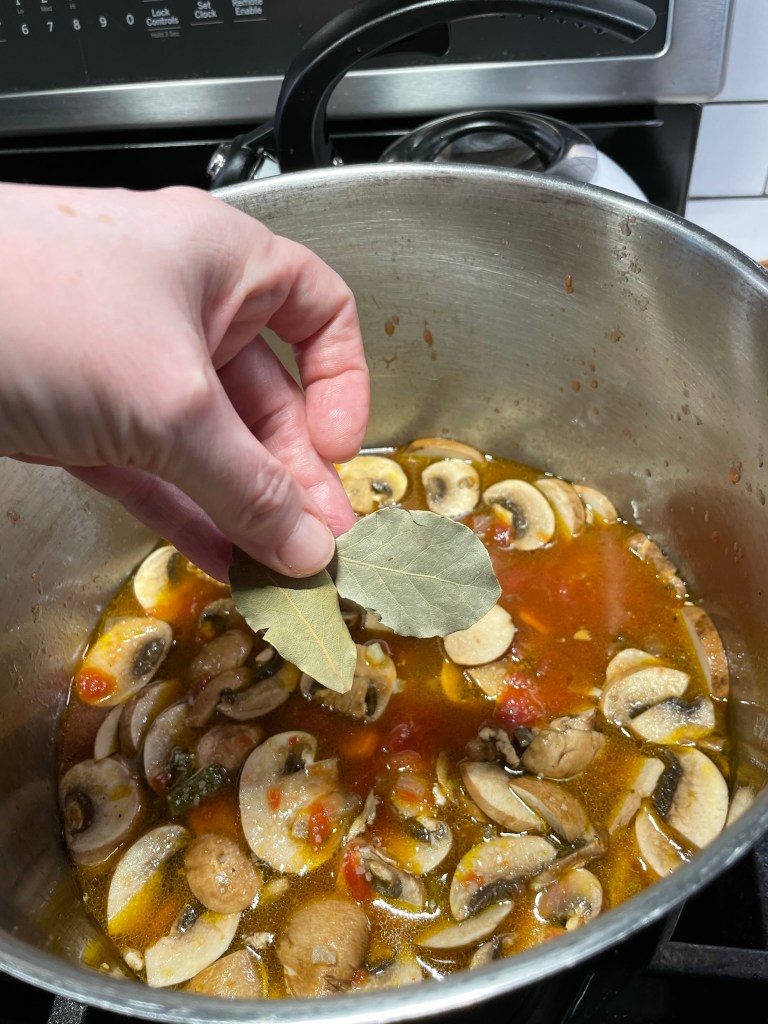
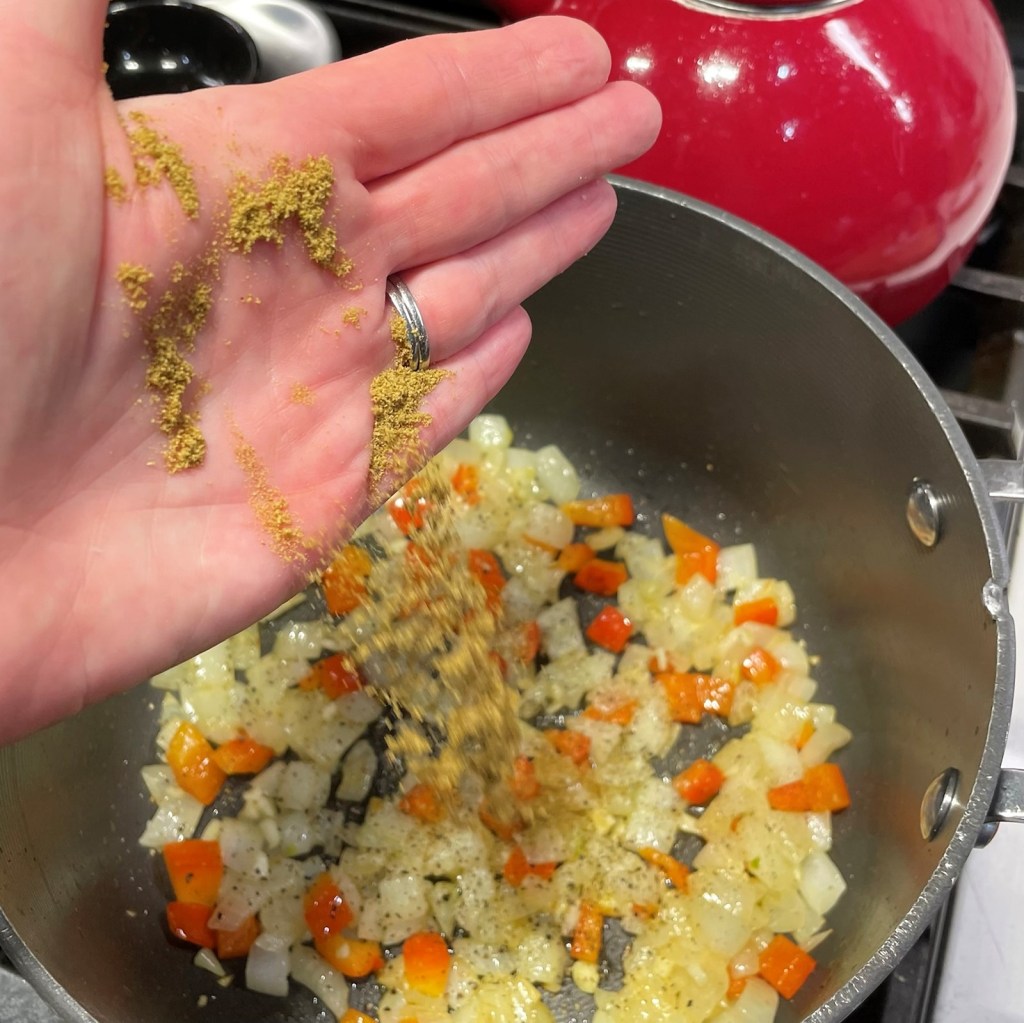
The only seasoning I added to this soup— other than the usual kosher salt and black pepper— was a couple of bay leaves. Anytime I make a simmered soup, stew or roast, bay leaf is like a magic ingredient that is not only flavorful but highly aromatic.
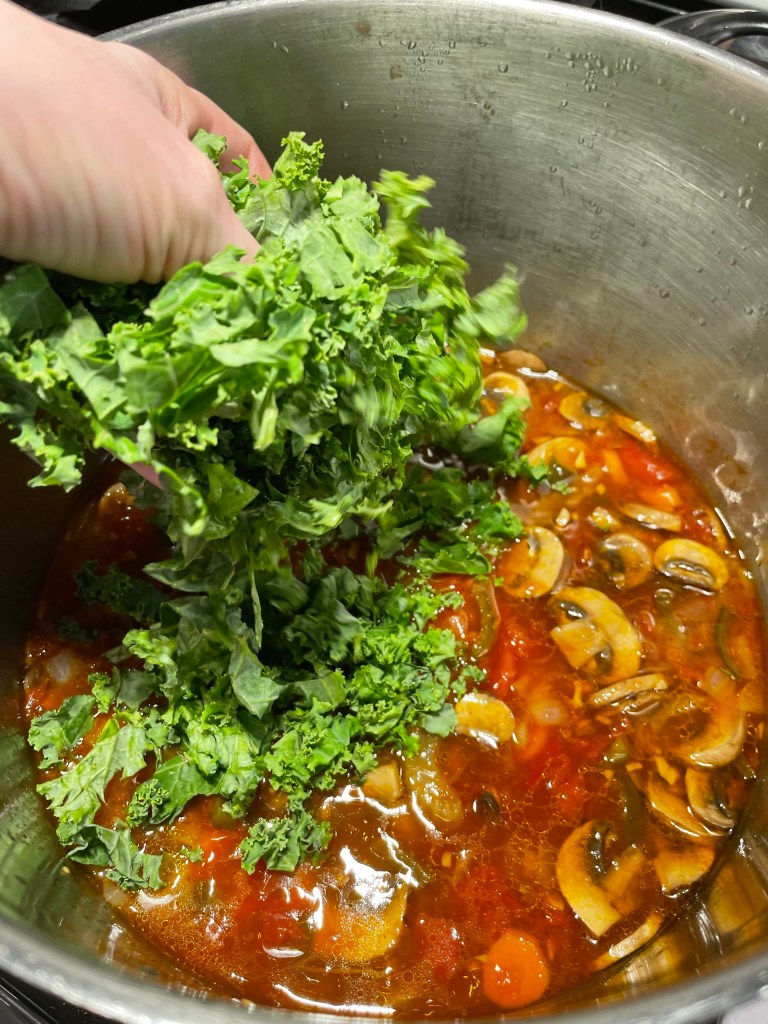
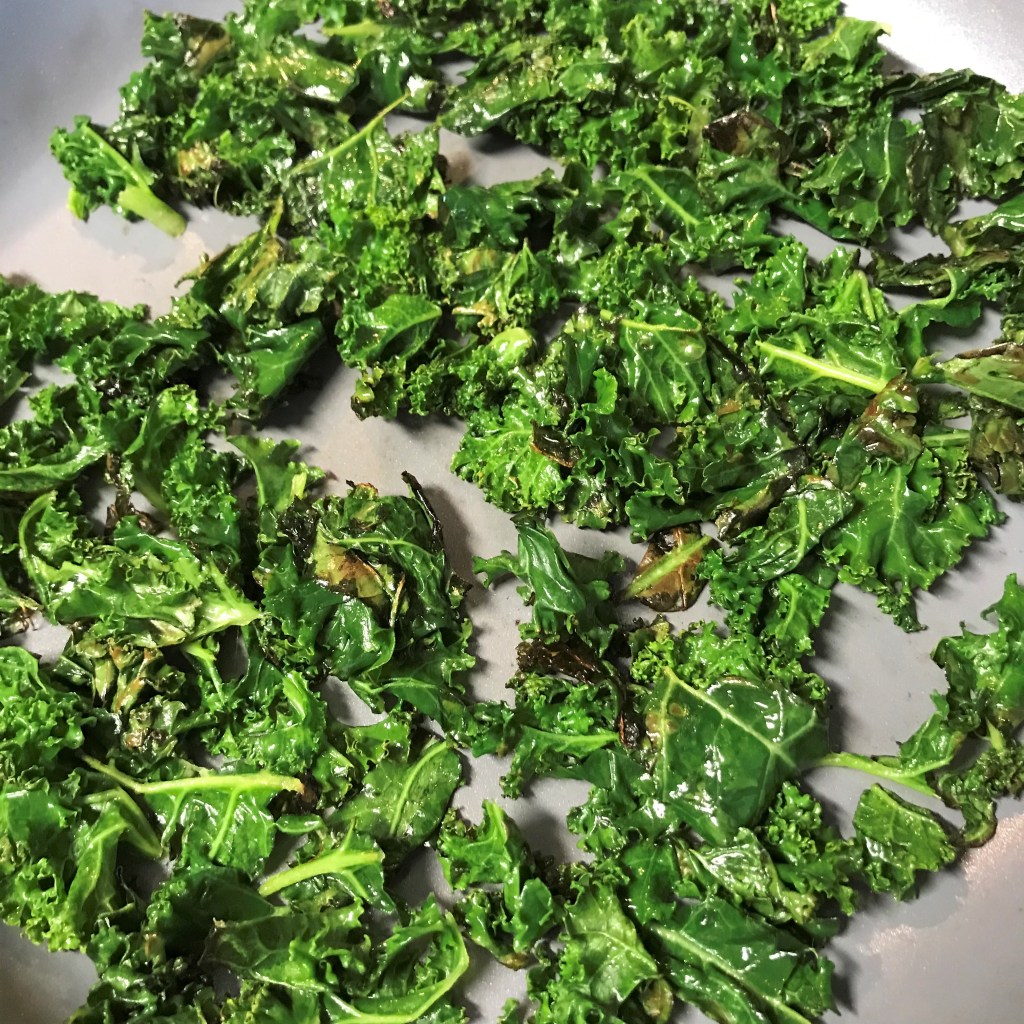
After a nice, long simmer—about an hour— I removed the bay leaves, added two “fat handfuls” of chopped kale, more broth and my homemade sourdough pasta (which went in straight from the freezer), and brought it up to a gentle simmer to cook the pasta through.
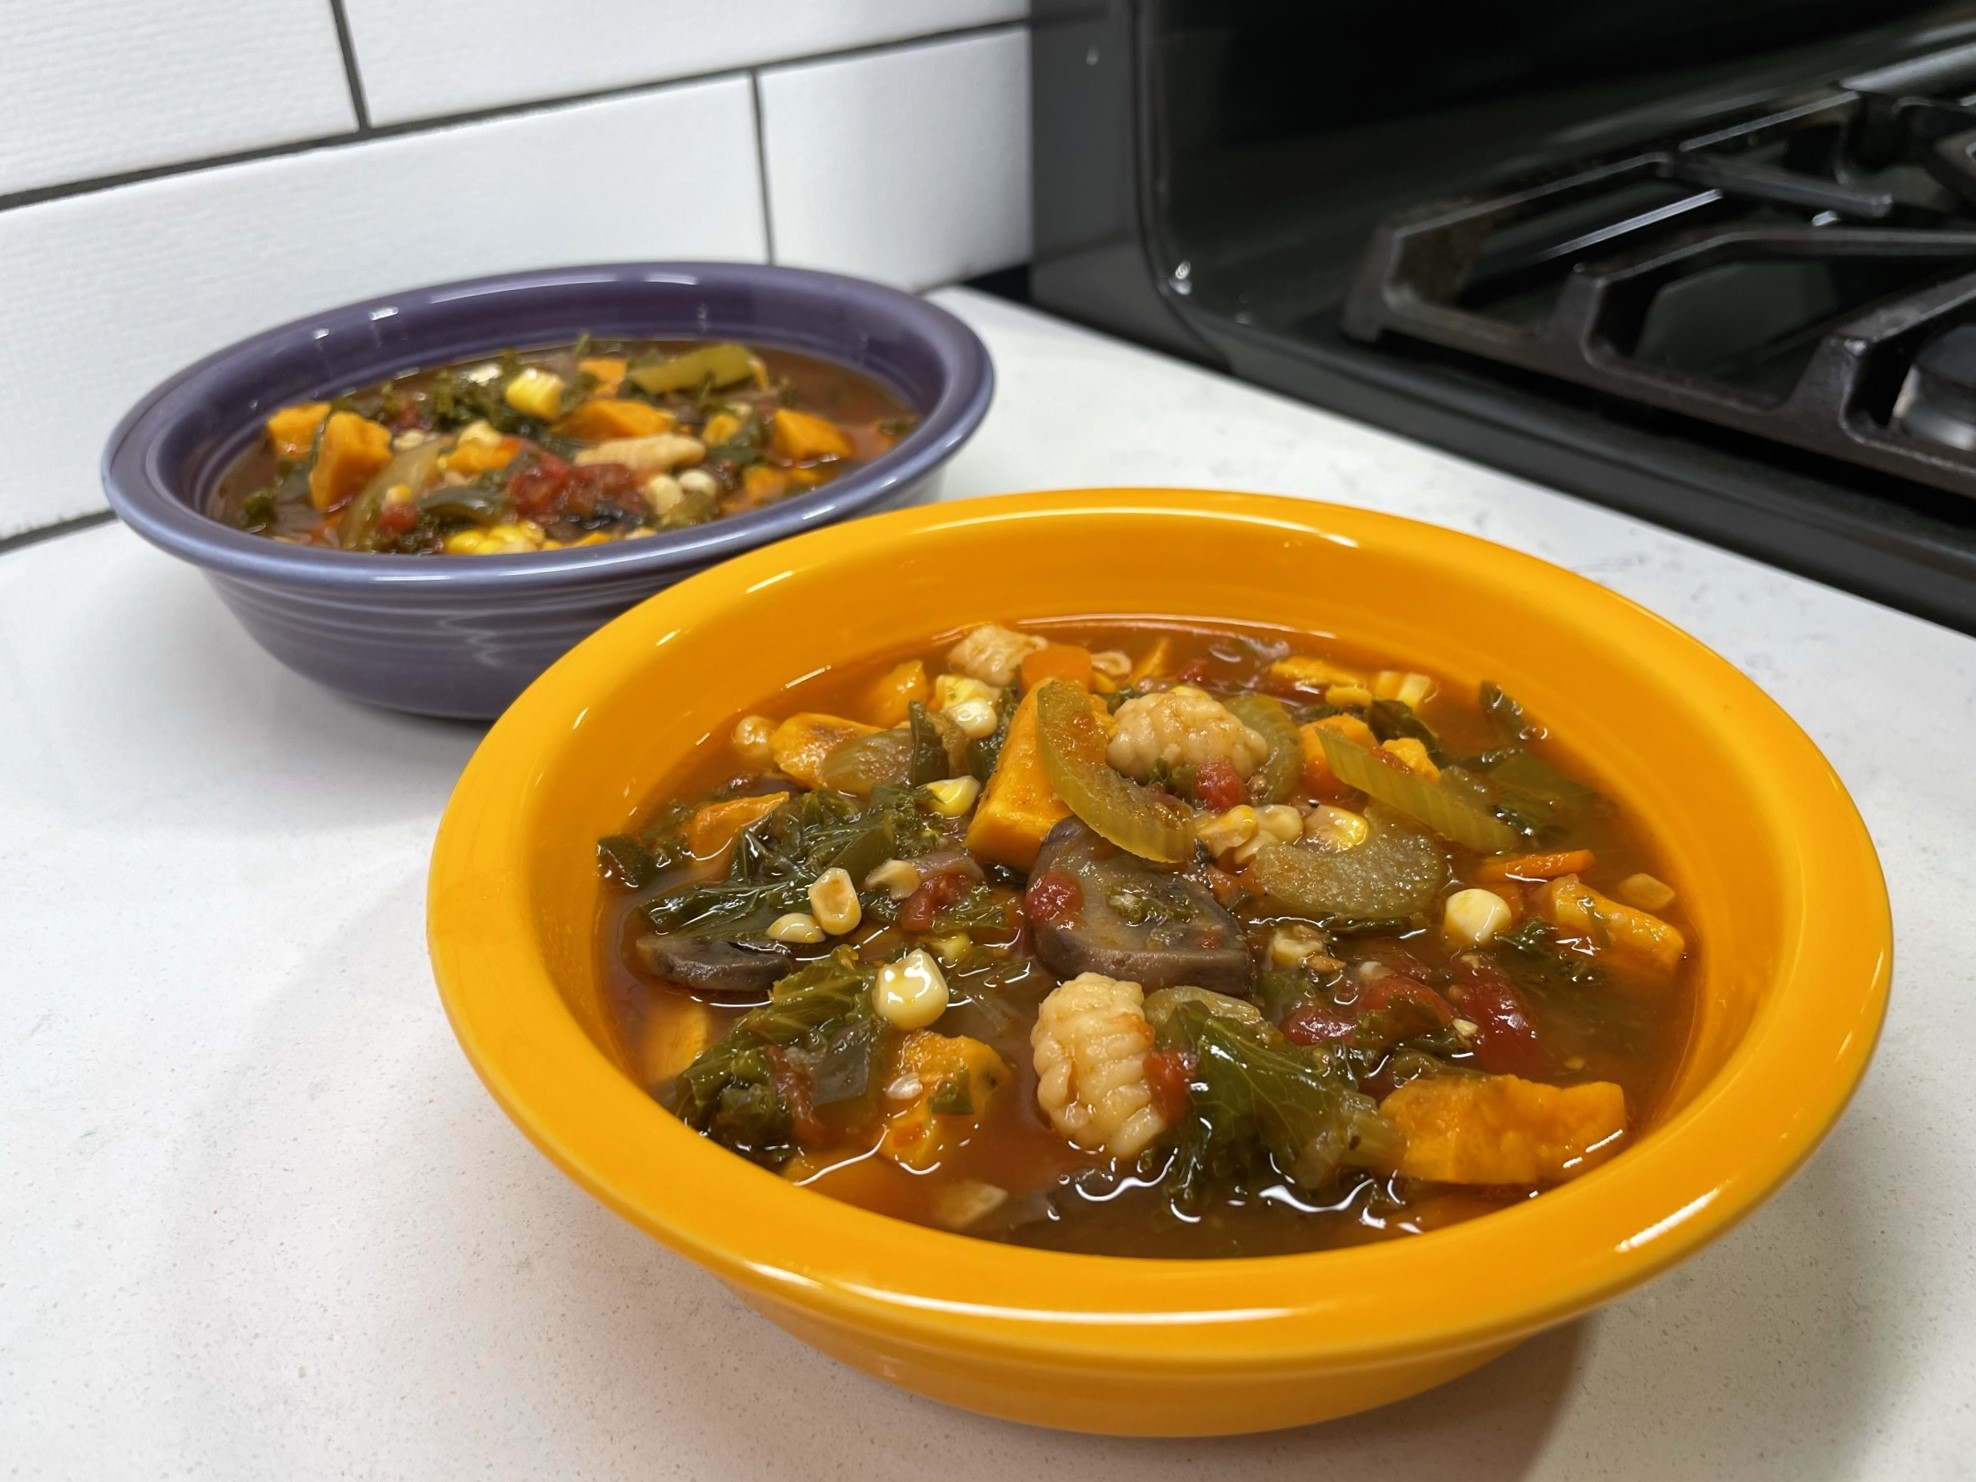
Finally, my soup was ready for the roasted add-ins I had prepared earlier, and dinner was served!
My friends, this autumn minestrone was far and away more delicious than any other vegetable soup I’ve ever made! All those flavors melded together wonderfully, and between the roasted, grilled and simmered vegetables, there was plenty of interesting texture, too.
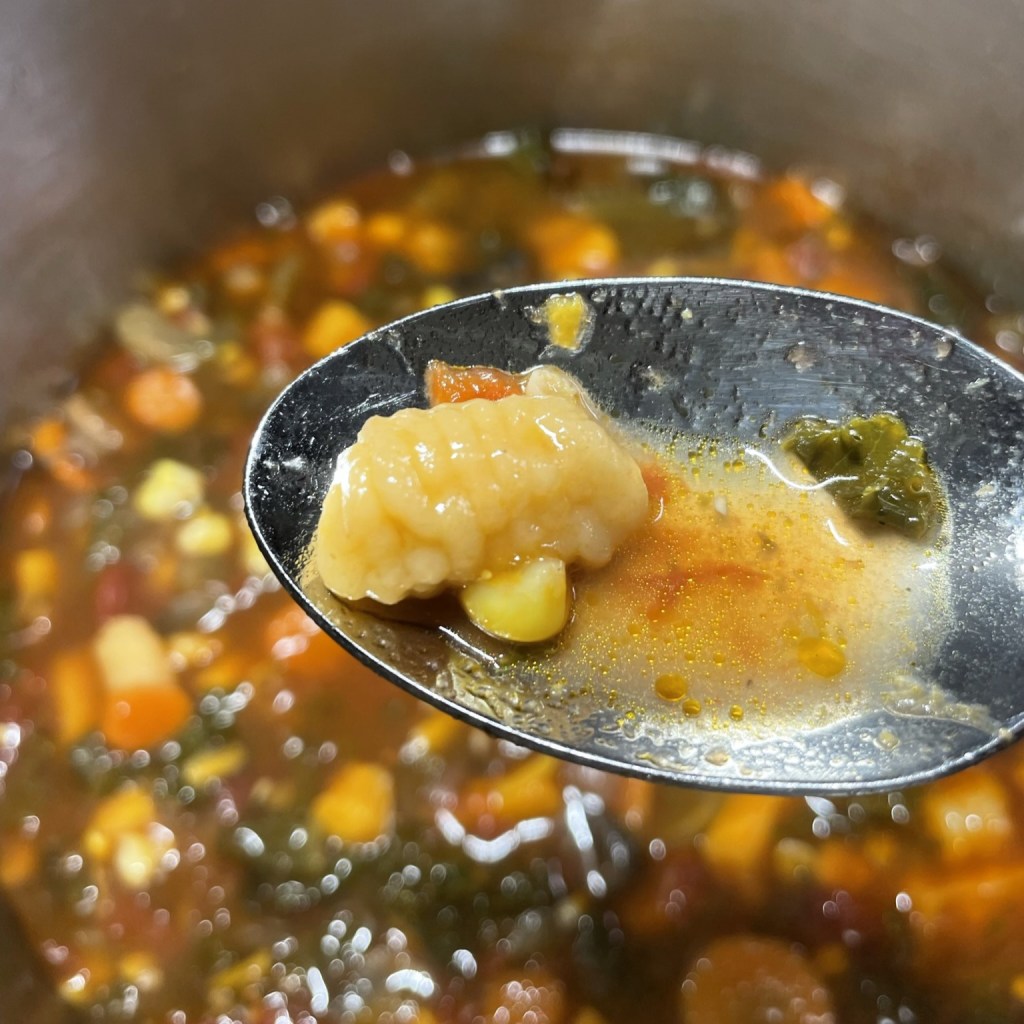
The pasta cooked up like pudgy, tender dumplings and the tangy earthiness of the sourdough was a really nice complement to some of the sweeter flavors in the soup. If I had not been experimenting with the homemade sourdough pasta, any box pasta with hefty texture would have been a good choice (think rotini, trumpets or those cute little wagon wheels). Using box pasta would also have kept my soup vegan; the eggs in the pasta dough disqualified it from that category.
Oh, this soup hit the spot on a dreary, rainy early autumn day. But you can bet I won’t wait for another one to make this soup again!
This soup brings together the best of two things for me— a whole bunch of terrific early fall ingredients and an all-day simmered vegetable soup.
Ingredients
1 large sweet potato, peeled and cubed (about
1/4 cup extra virgin olive oil, divided (you’ll use a tablespoon to roast the sweet potato and the rest to sauté vegetables in the pot)
Kosher salt and freshly ground black pepper
1 sweet onion, chopped
2 medium carrots, peeled and thinly sliced
2 ribs celery, strings removed and sliced
2 cloves garlic, finely minced
1 poblano pepper, chopped
28 oz. can whole peeled tomatoes, drained (reserve liquid for another recipe)
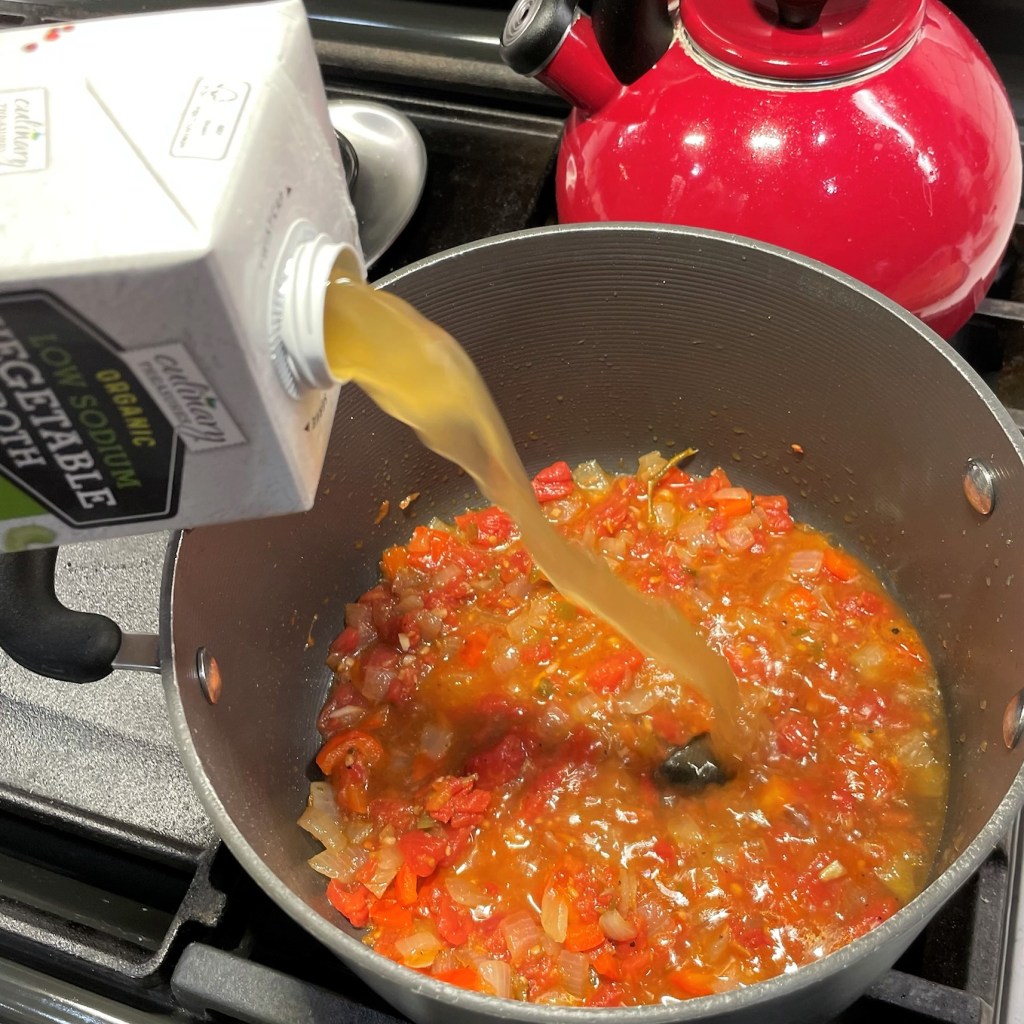
6 cups low-sodium vegetable broth, divided (see directions for breakdown)
2 bay leaves
8 oz. carton cremini mushrooms, cleaned and sliced
2 fat handfuls kale, washed and rough chopped
1/2 pound pasta shapes (homemade or otherwise)
2 ears roasted corn, kernels cut from cob
Notes: I roasted the sweet potatoes first so that their flavor could be concentrated, and to keep them from turning mushy in the soup. Butternut squash would be a great substitute. I used a fresh homemade pasta that was shaped like baby gnocchi. My pasta contained eggs and I added to the soup straight from the freezer. Dry pasta such as elbows or rotini would be a great substitute.
Directions
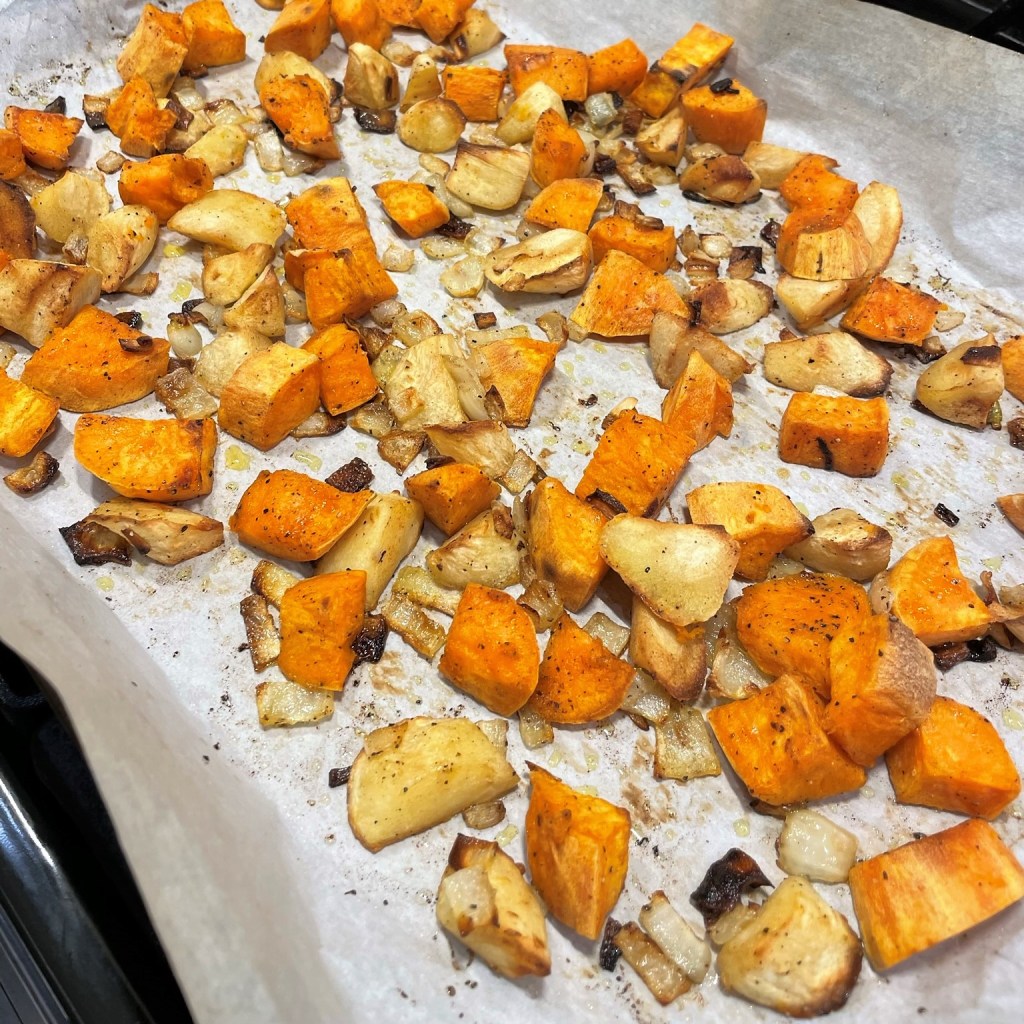
Preheat oven to 350° F, with rack in center position. Line a sheet pan with parchment and arrange sweet potato cubes in a single layer. Drizzle with olive oil and season with salt and pepper. Roast about 45 minutes, until sweet potatoes are reduced in size and golden on all the edges. Set aside.
While the sweet potatoes are roasting, place a deep, heavy-bottomed pot over medium heat. Swirl in remaining olive oil and sauté the onions, carrots, celery and poblano peppers. Season with salt and pepper and cook until translucent. Add the garlic and continue to cook until vegetables are very soft.
Use your hands to squeeze the whole tomatoes into the pot. Add 4 cups of the vegetable broth and bring to a slight boil. Adjust salt to taste. Reduce heat to simmer.
Add sliced mushrooms and bay leaves and simmer for about an hour. Stir in chopped kale leaves until wilted. Add remaining vegetable broth and bring to a gentle boil.
Add pasta straight from the box or freezer and cook it in the minestrone until tender.
Finally, stir in corn kernels and roasted sweet potatoes. Make a final adjustment to salt and pepper, and then cook on low until heated through.
It seems funny for me to look back 35-plus years to my early days of living in North Carolina and remember how novel so many of the foods seemed at the time. It isn’t that they were all unfamiliar, of course. Fried chicken, black-eyed peas, biscuits, even banana pudding are served in other places, but they are deeply woven into the fabric of southern U.S. culture. There are a few other southern staples that I quickly learned to love, including grits, pimento cheese and okra.
Of all the foods widely considered “southern,” collard greens are the only one I had never tried or even heard of before I moved here all those years ago. And even then, it took me some time to come around to enjoying collards because the first few times I had them, they were steeped in liquid (entirely too long, if you ask me) with something called “fatback.” I recall them being greasy, dull and overly salty, and I mostly paid them no mind. A few years later, right around the time the term “superfood” began making the rounds, I had collards prepared a better way—sturdy, spicy and actually still green. And I fell in love.
Collard greens are indeed a nutritional powerhouse, and they will be a featured item on many southern tables this long weekend, as families gather to celebrate Juneteenth. In honor of the joyous occasion, I thought perhaps my Comfort du Jour community might be willing to check out another version of this ubiquitous southern side dish.
Surprisingly, this is the first time I’ve made collard greens without some kind of meat in the base. I usually start with a few slices of smoky bacon, and occasionally I’ve browned up some Neese’s hot pork sausage— it’s a local brand that’s quite popular and very good. But this time, I wanted to keep my collards meat-free, and give some other ingredients a chance to strut their stuff. I wanted heat, smoke and (most importantly) something red.
The color red is a big deal to the Black community on this occasion, as it symbolizes courage and resilience as well as blood shed by enslaved ancestors. Red drinks are common at Juneteenth celebrations, as are red desserts such as strawberry pie and red velvet cake.
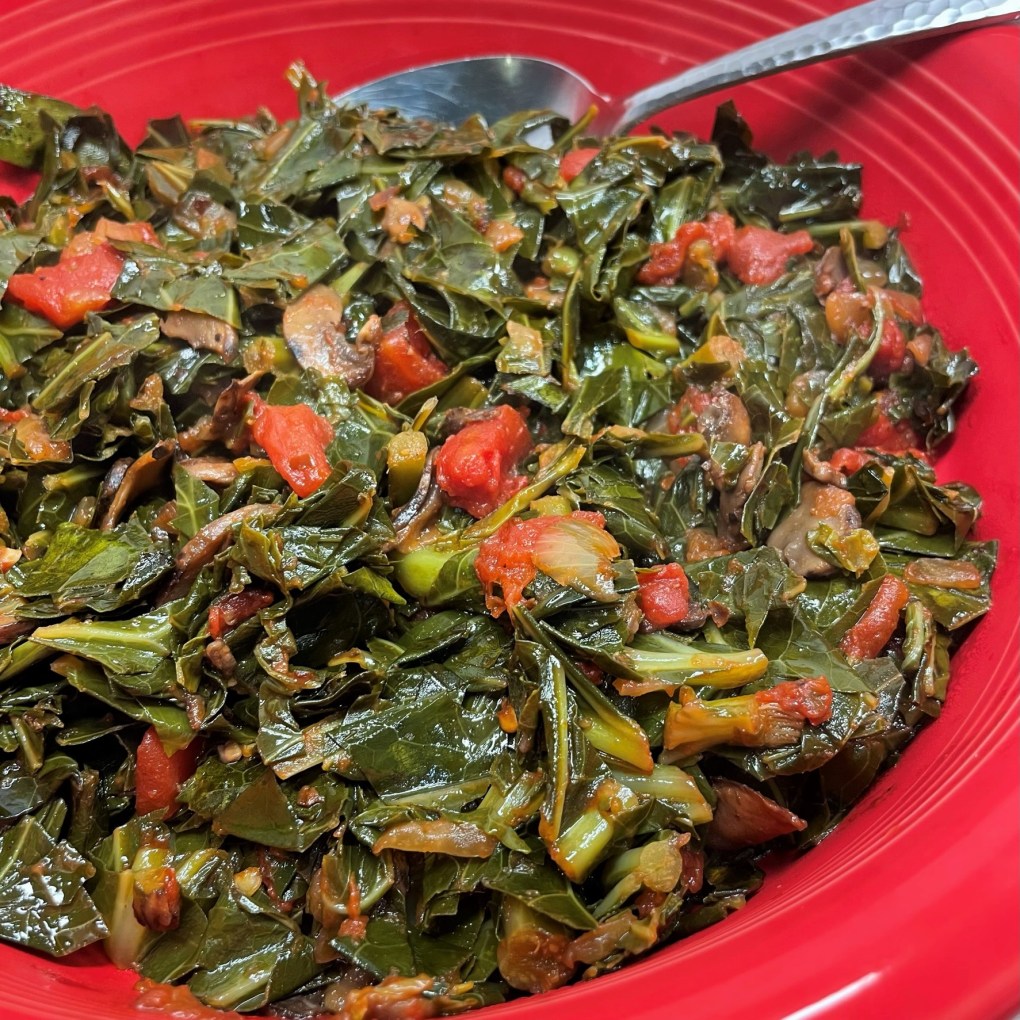
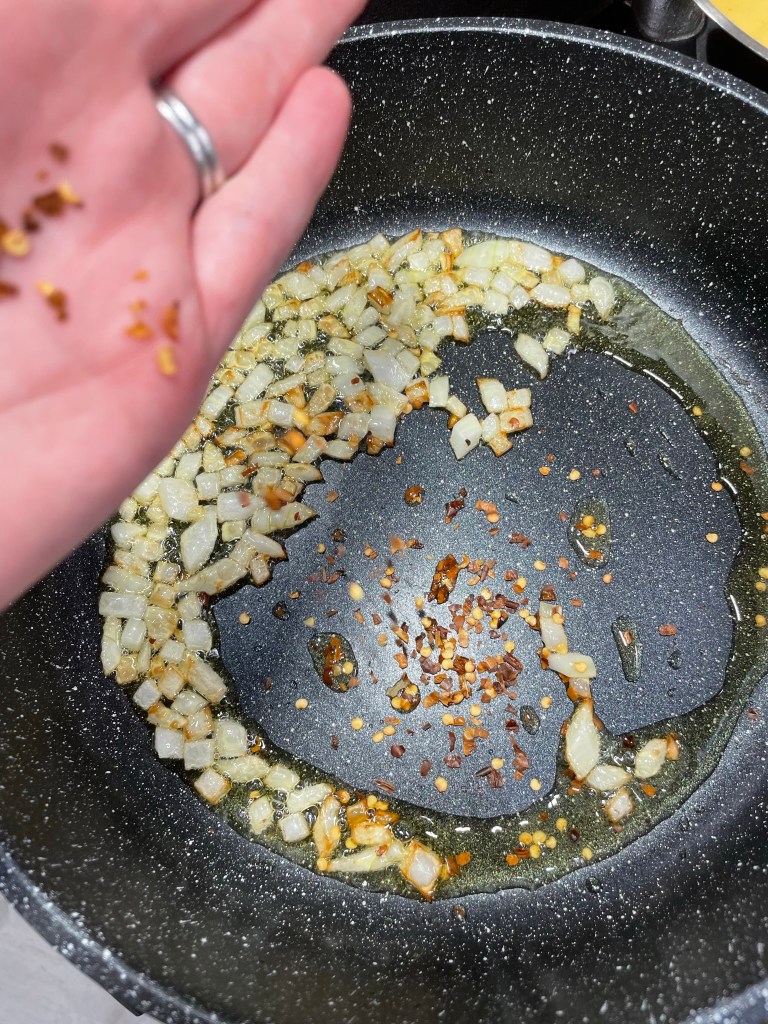
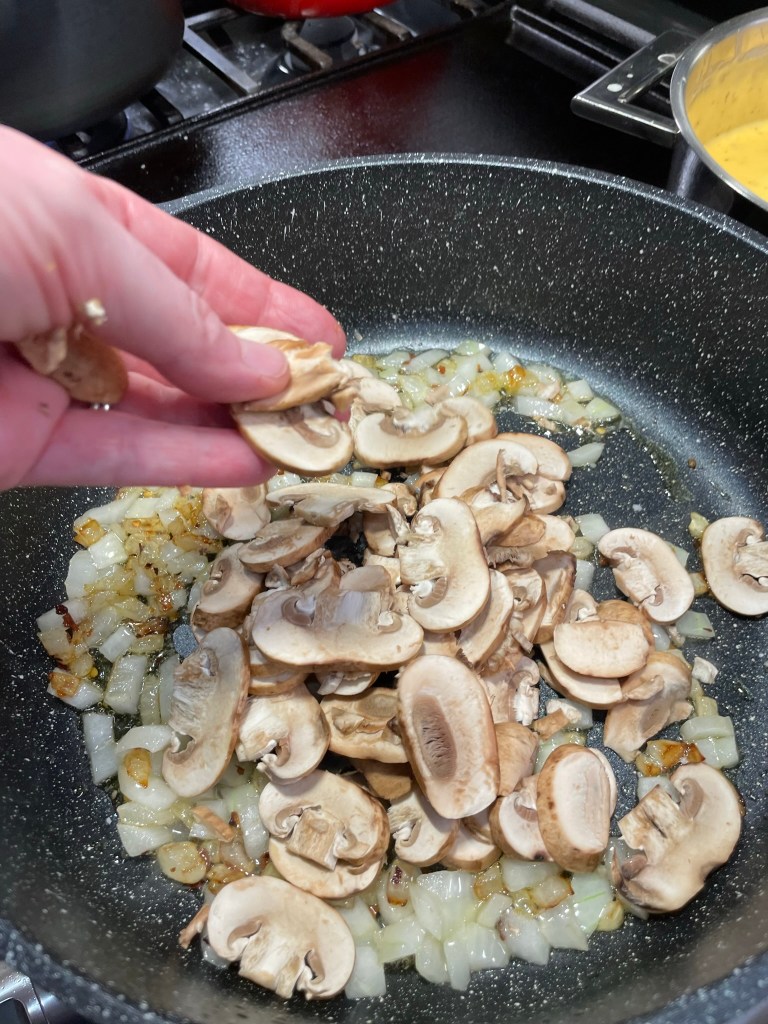
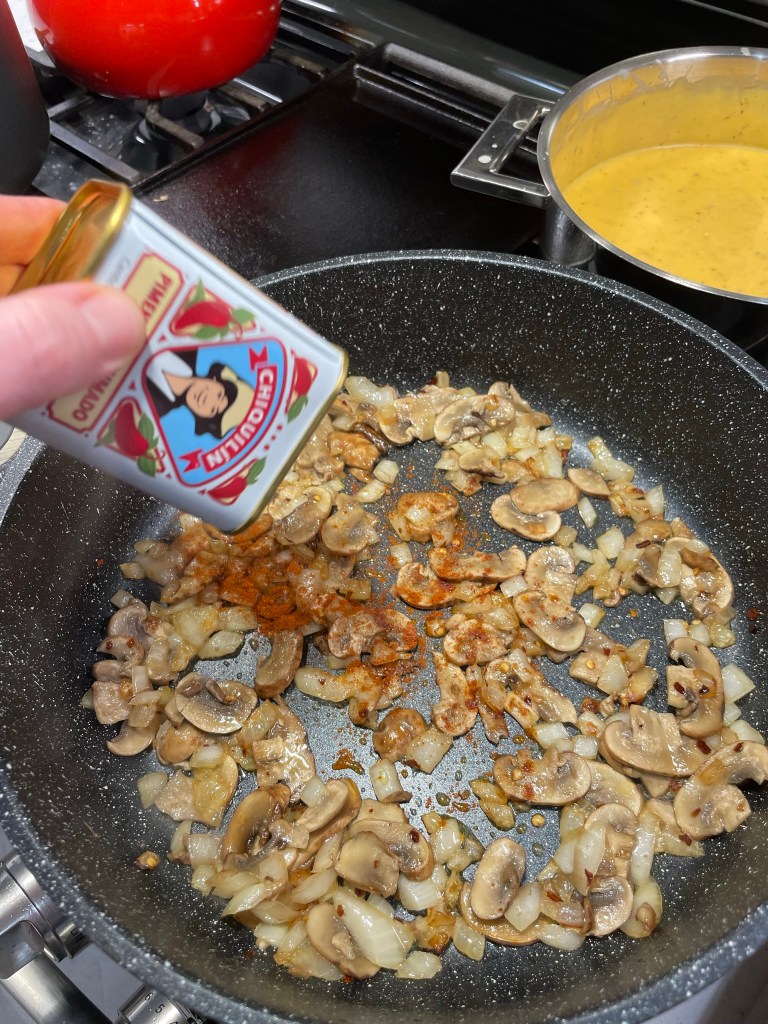
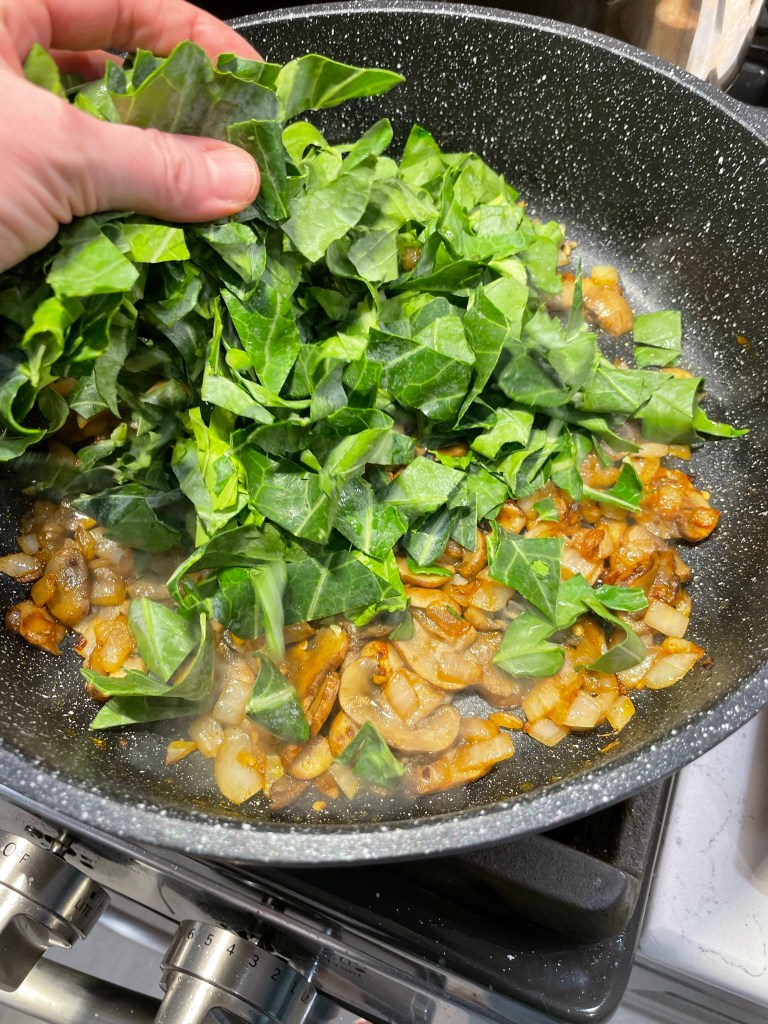
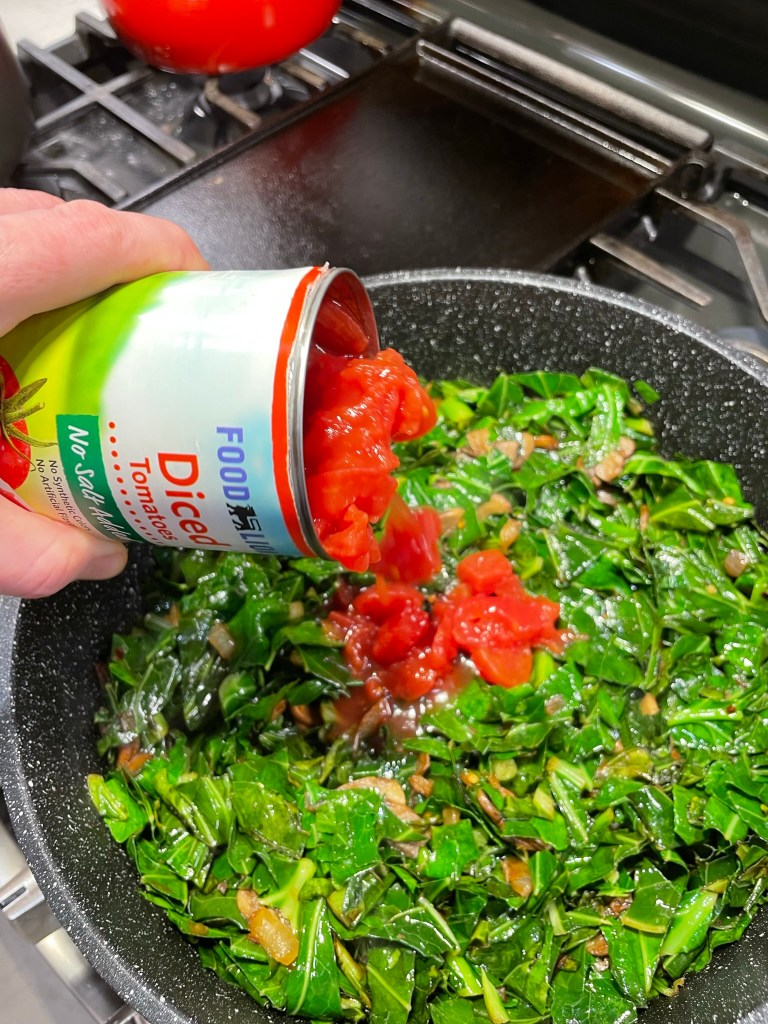
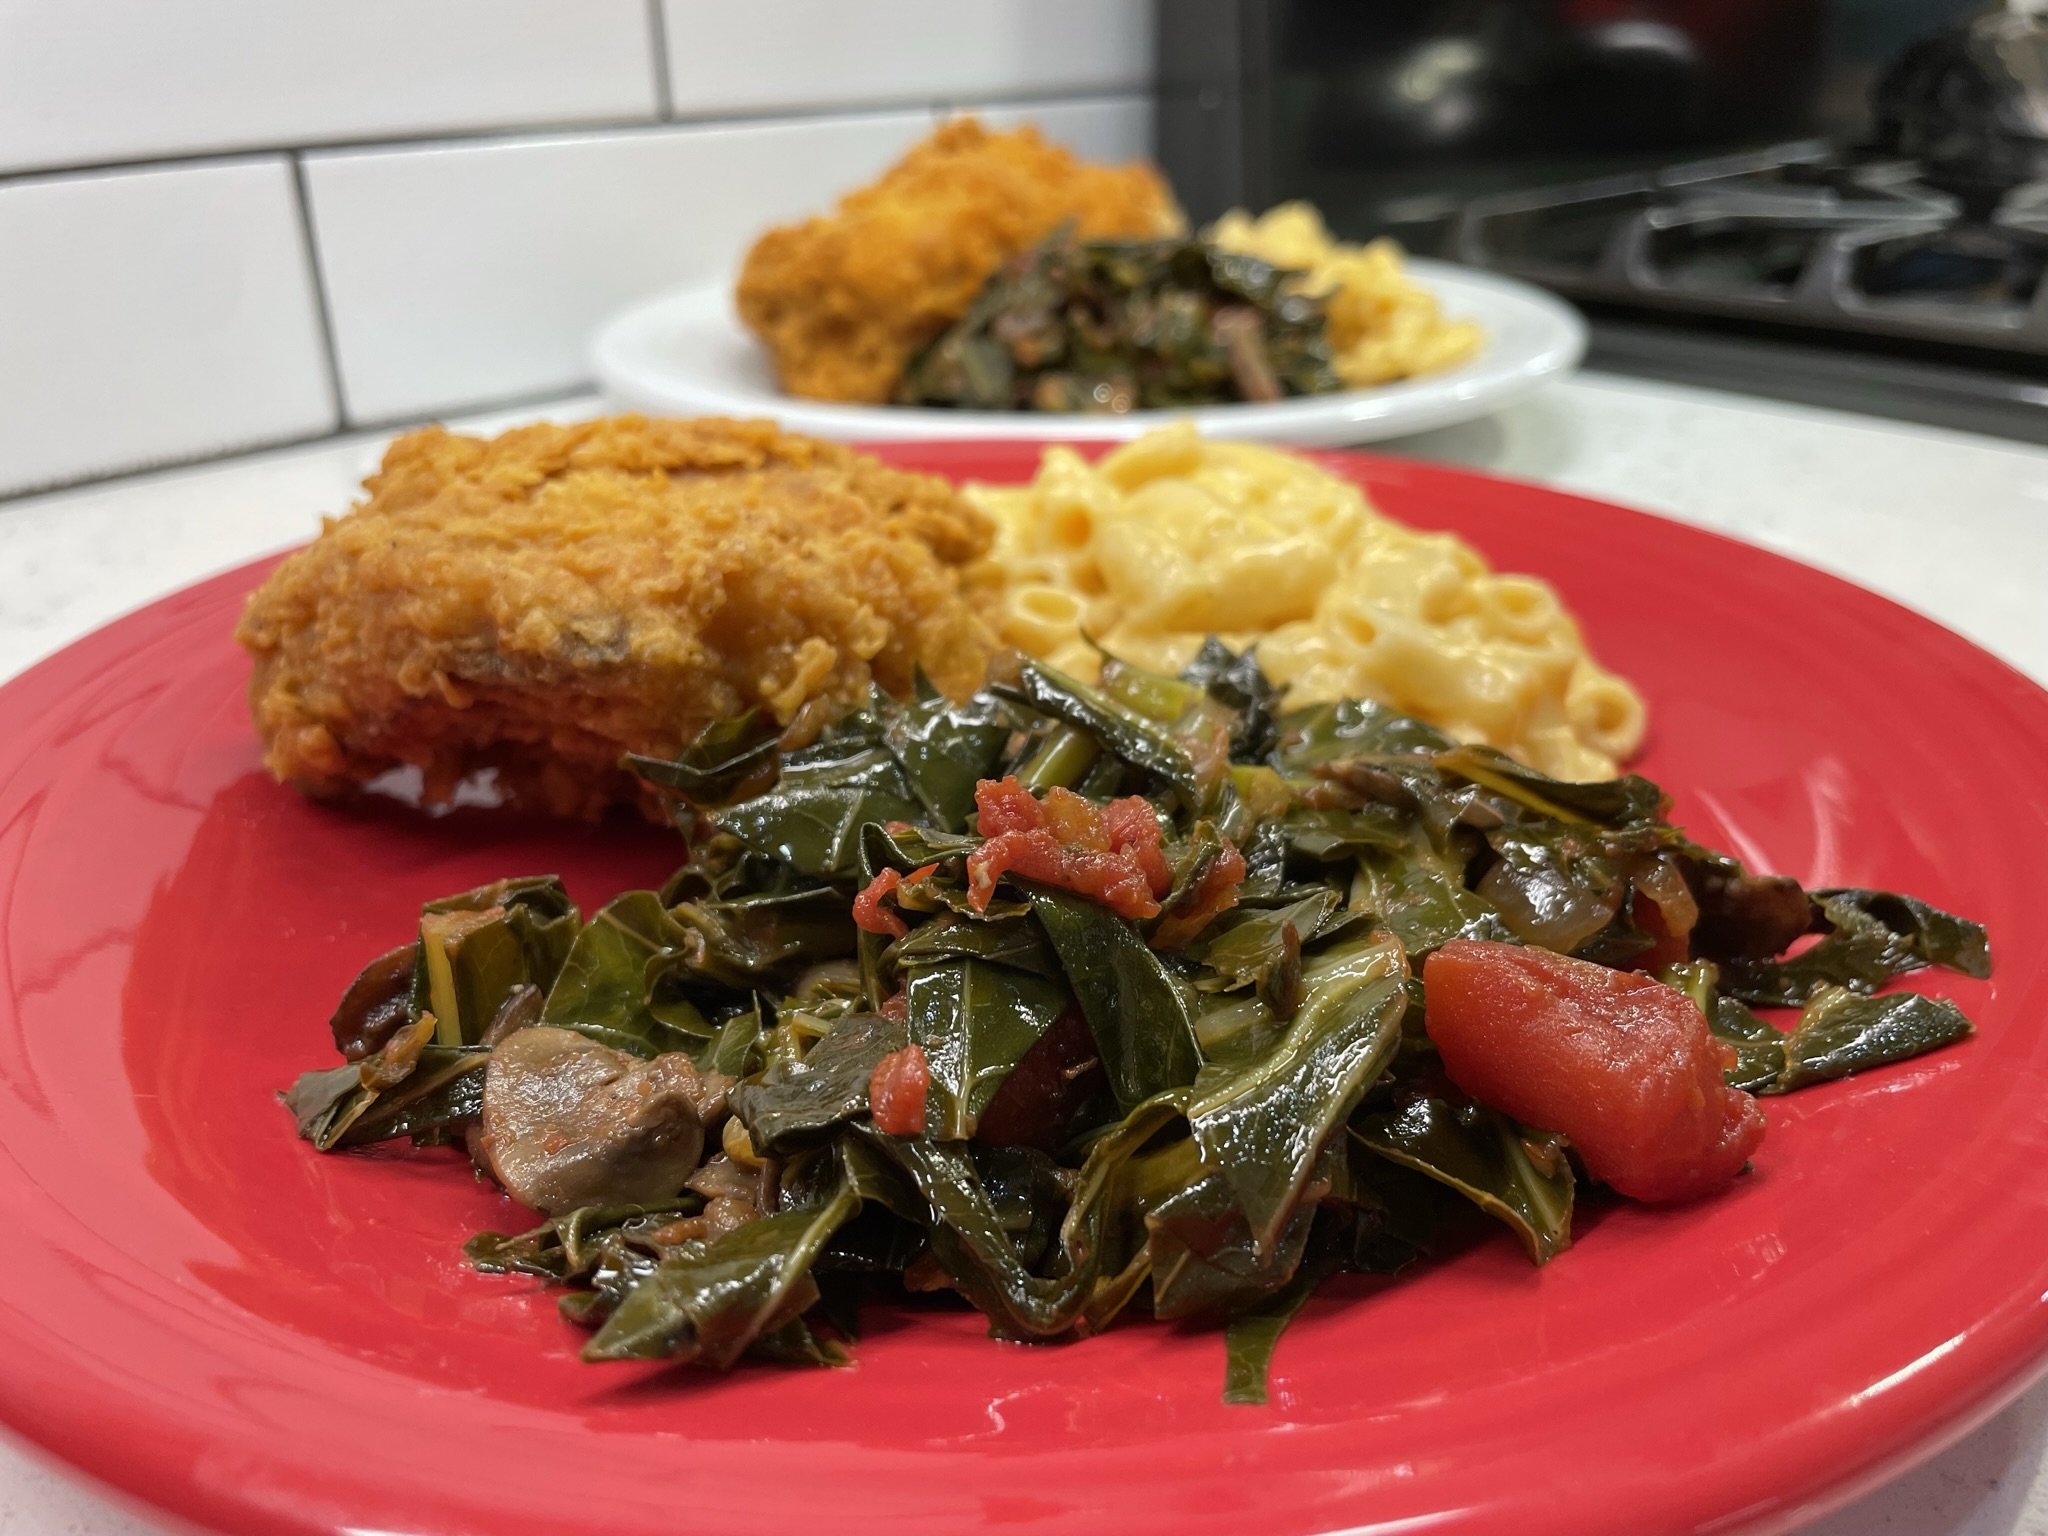
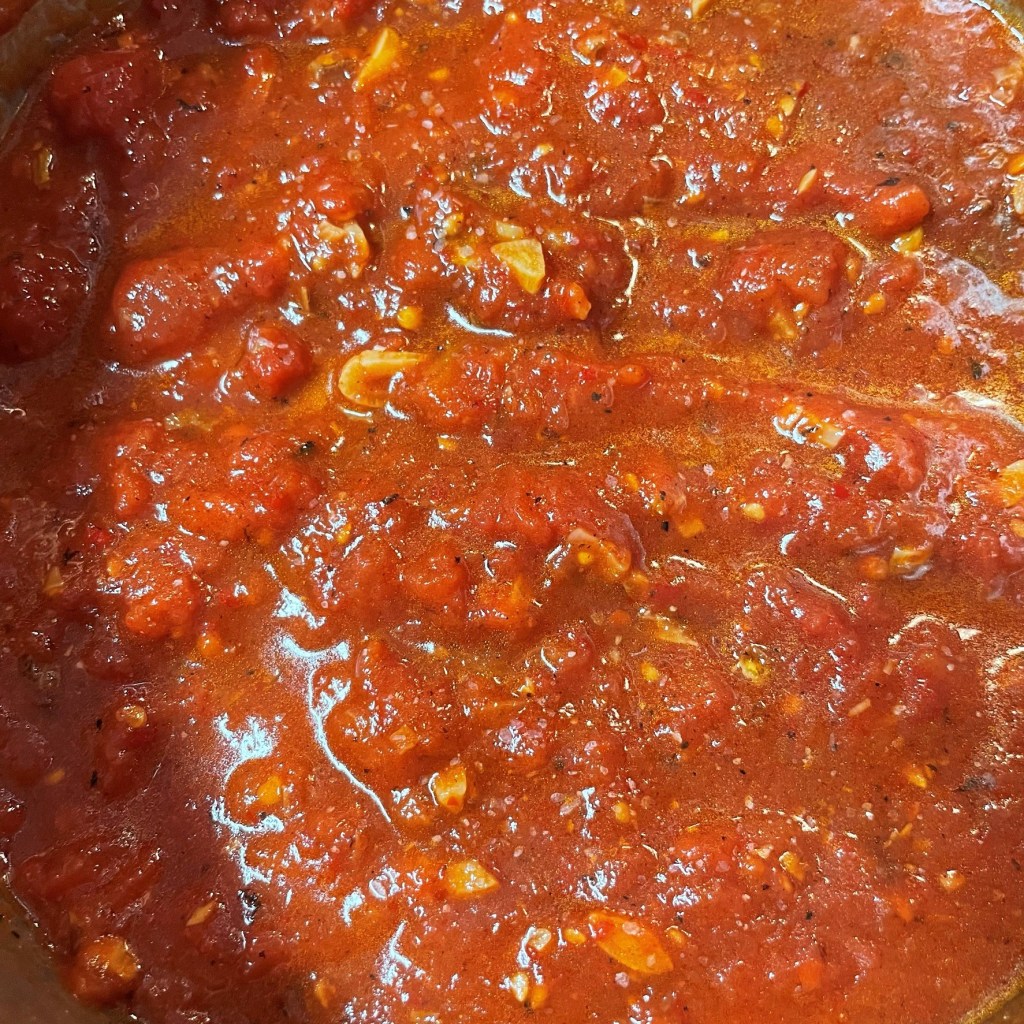
I started with onions sauteed in olive oil, then I seasoned it up with salt and pepper, a generous shake of crushed red pepper (as much as you want) for heat and sass, a fat handful of sliced cremini mushrooms for body, and about a teaspoon of smoked Spanish paprika for big earthy flavor. Next, I tossed the chopped collards into the pan in batches, adding oil as needed until the whole bagful was wilted and glossy. Finally, diced tomatoes at the end for sweetness and the pop of beautiful red color I wanted.
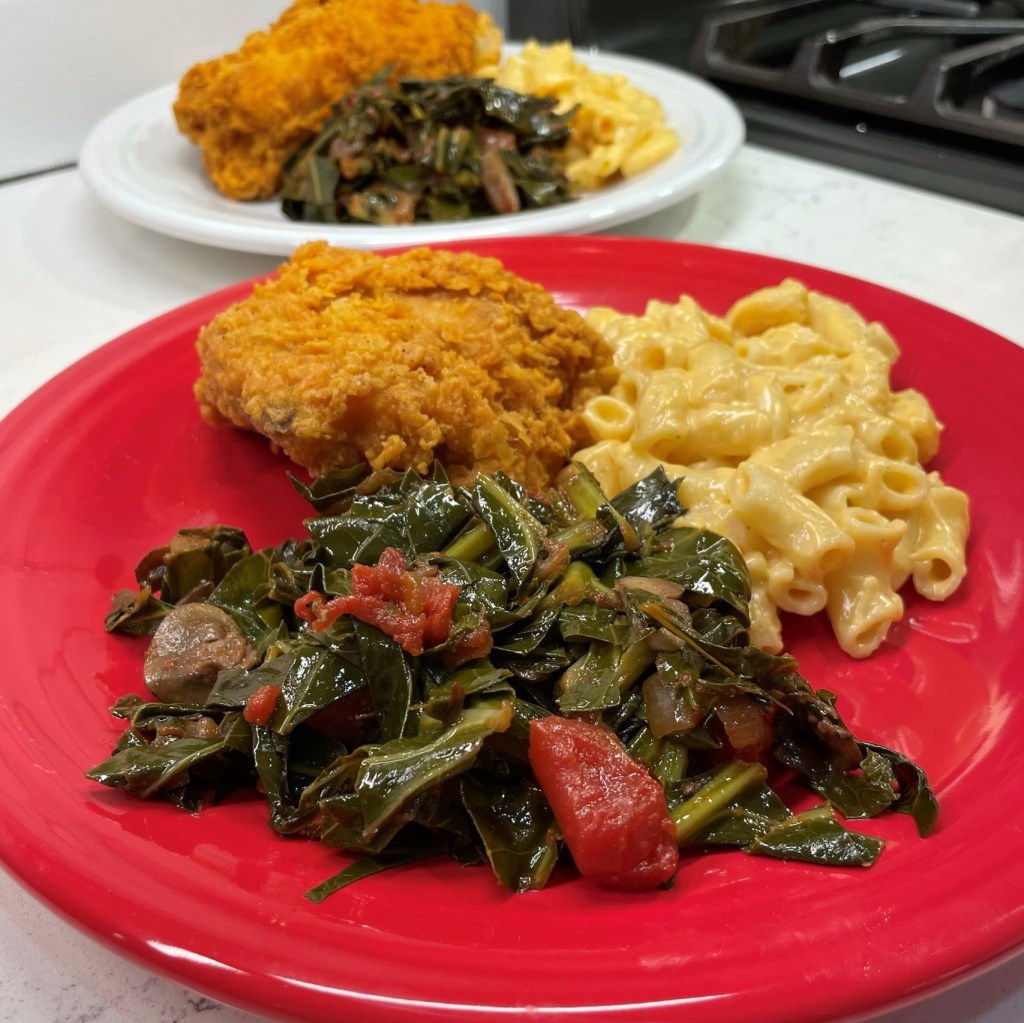
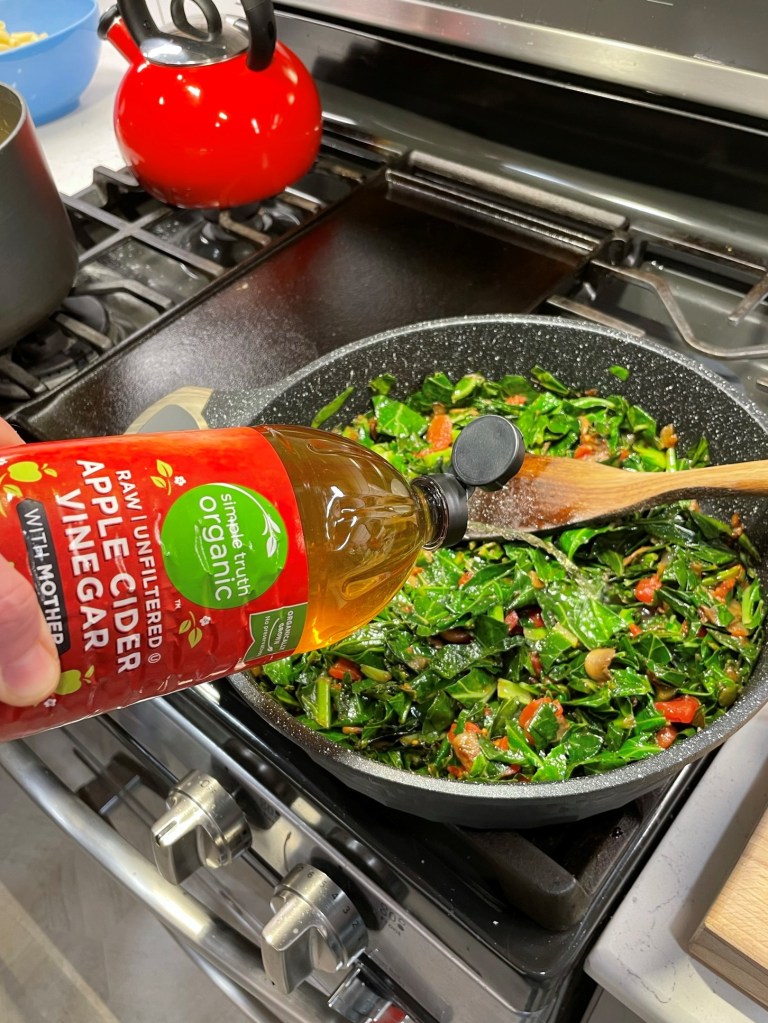
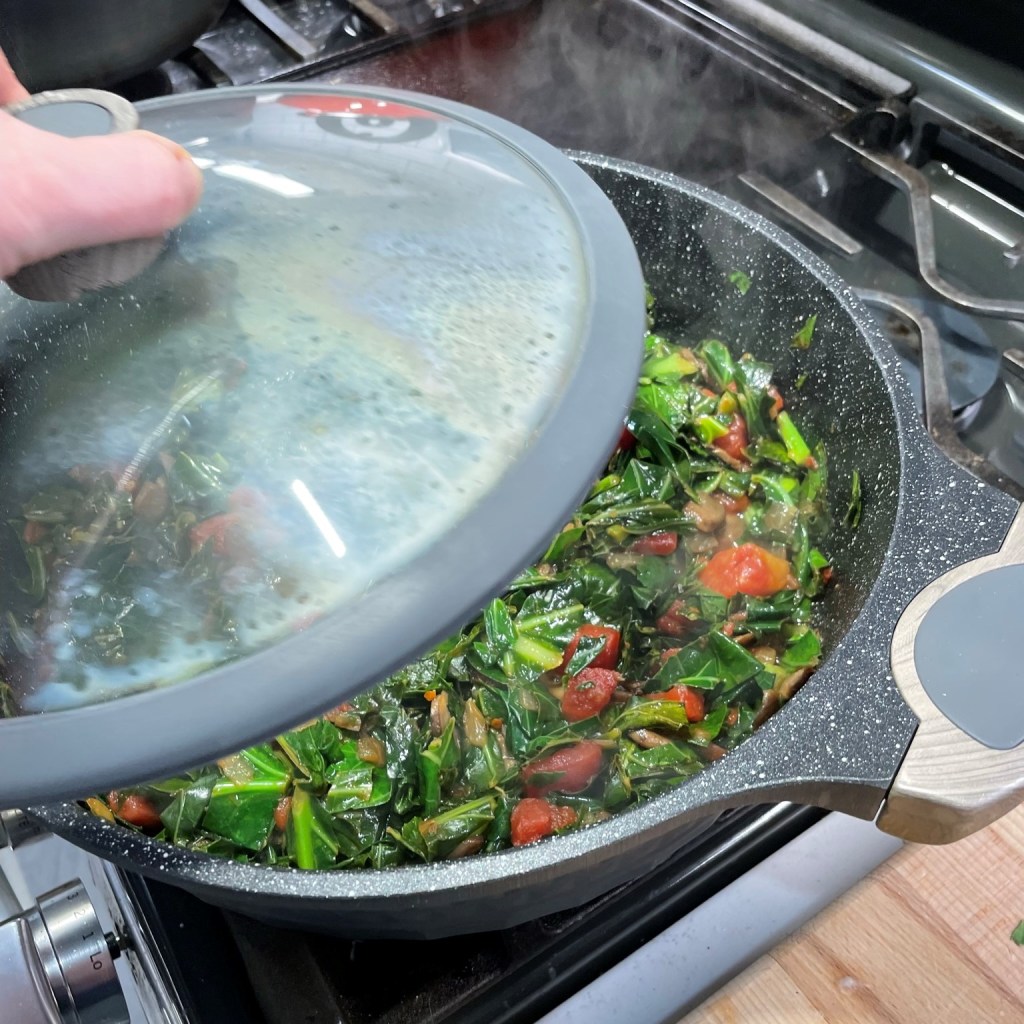
A splash of cider vinegar intensifies the flavors of the dish, which is covered and simmered for about half an hour until the collards are tender to your liking. The flavor is undeniably smoky, a perfect accompaniment to crispy southern fried chicken and easy, creamy mac and cheese. This is serious southern comfort, y’all!
Collard greens will be on many tables this weekend for Juneteenth celebrations. This version is entirely plant-based, with juicy mushrooms, smoky paprika for earthy flavor, and tomatoes for a pop of red!
Ingredients
Extra virgin olive oil
1 medium sweet onion, diced
Salt and black pepper
A few shakes crushed red pepper flakes (as hot as you want it)
About 8 large cremini mushrooms, cleaned and sliced
1 tsp. smoked Spanish paprika
1 pound fresh collard greens, cleaned, trimmed of heavy stems and chopped into bite size pieces
Half a 15 oz. can diced tomatoes, or about 1 cup fresh peeled, chopped tomato
2 to 3 Tablespoons apple cider vinegar
The trick for cooking the collards without taking all day is cooking them first in the oil. Don’t be stingy with it, and add more as needed with each handful of collards that you throw into the pot. The oil helps break down the fibrous leaves more quickly than if you simmered them in liquid alone.
Directions
Heat a large, wide pot over medium heat. Add 2 tablespoons olive oil and onions, season with salt and pepper and saute until slightly softened. Stir in crushed red pepper.
Add mushroom slices to the pot and cook until they are lightly browned on both sides. Add smoked paprika and continue to cook a minute or two to release the full flavor of the paprika. Add a handful of collard greens and toss until wilted. Season with salt. Repeat with remaining collards until all are in the pot.
Add tomatoes and cider vinegar. Stir until evenly combined and bubbling around the edges. Reduce heat to low, cover the pot with a lid and simmer until tender, about 20 minutes.
What in the world does a groundhog know about the weather, anyway? It fascinates me to realize how many people lay their meteorological hopes on a fat, furry rodent from western Pennsylvania—and I say this facetiously, fully aware that folks in the western part of my own North Carolina do the same every fall with woolly worms.
Do I care what the Punxsutawney rascal saw this morning, when he emerged from his hole? Not really, given that his predictions for early spring vs. six more weeks of winter only hold about 39% accuracy. My local weather peeps get it right far more often than that. Still, it doesn’t surprise me to know that Punxsutawney Phil has his own Instagram account with nearly 14k followers. I believe this is ultimately because people are bored half to death after being cooped up inside with cold, gray, dreary weather, and they are just looking for something to amuse themselves. You can count me among them in that regard (and we haven’t even had snow this year).
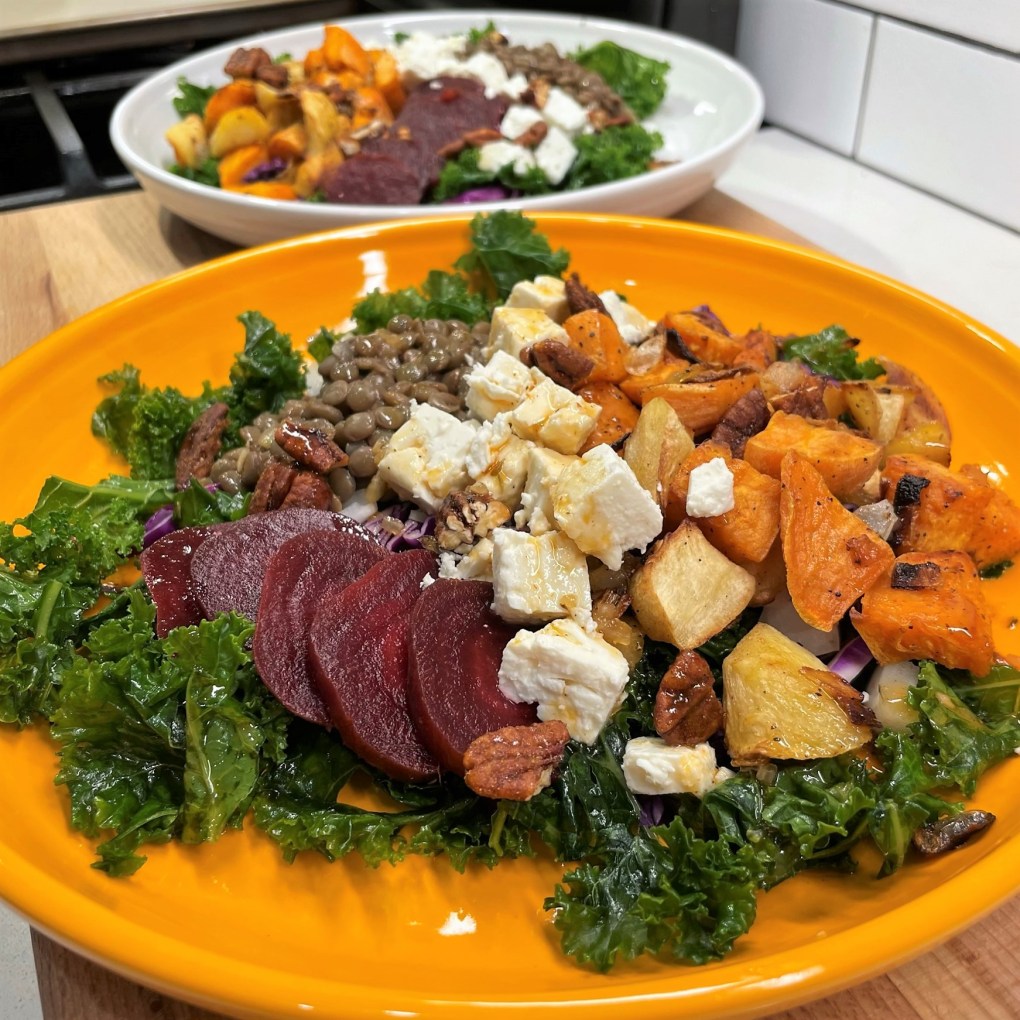
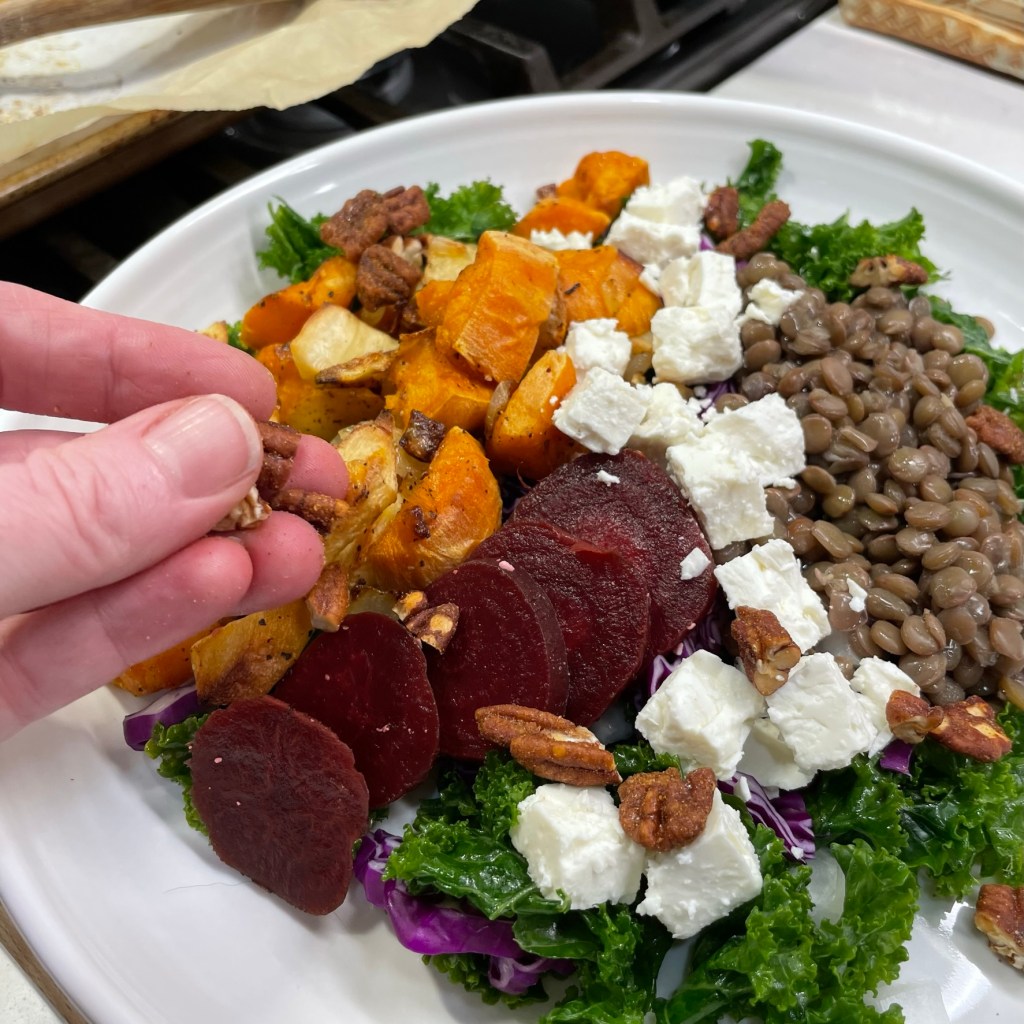
It’s why I’ve been dreaming of this salad, and I finally made it last night in my own attempt to shake off the midwinter blues and blahs. My original intent was to make it a few weeks ago, and I had purchased all the ingredients to make it happen, but then we got Covid in our house—as if January, on its own, wasn’t miserable enough—and all bets (and burners) were off. Luckily, most of my ingredients for this vibrant, flavorful salad are sturdy; the sweet potatoes, cabbage, parsnips and onions kept well, and the only thing I had to buy new was the kale. Beyond that, the salad has so many things I love—tender lentils, cooked beets (I used store bought), feta, toasted pecans and a spectacular smoked maple-sriracha vinaigrette that appeared to me in a dream not long ago.
This salad will wake up your taste buds!
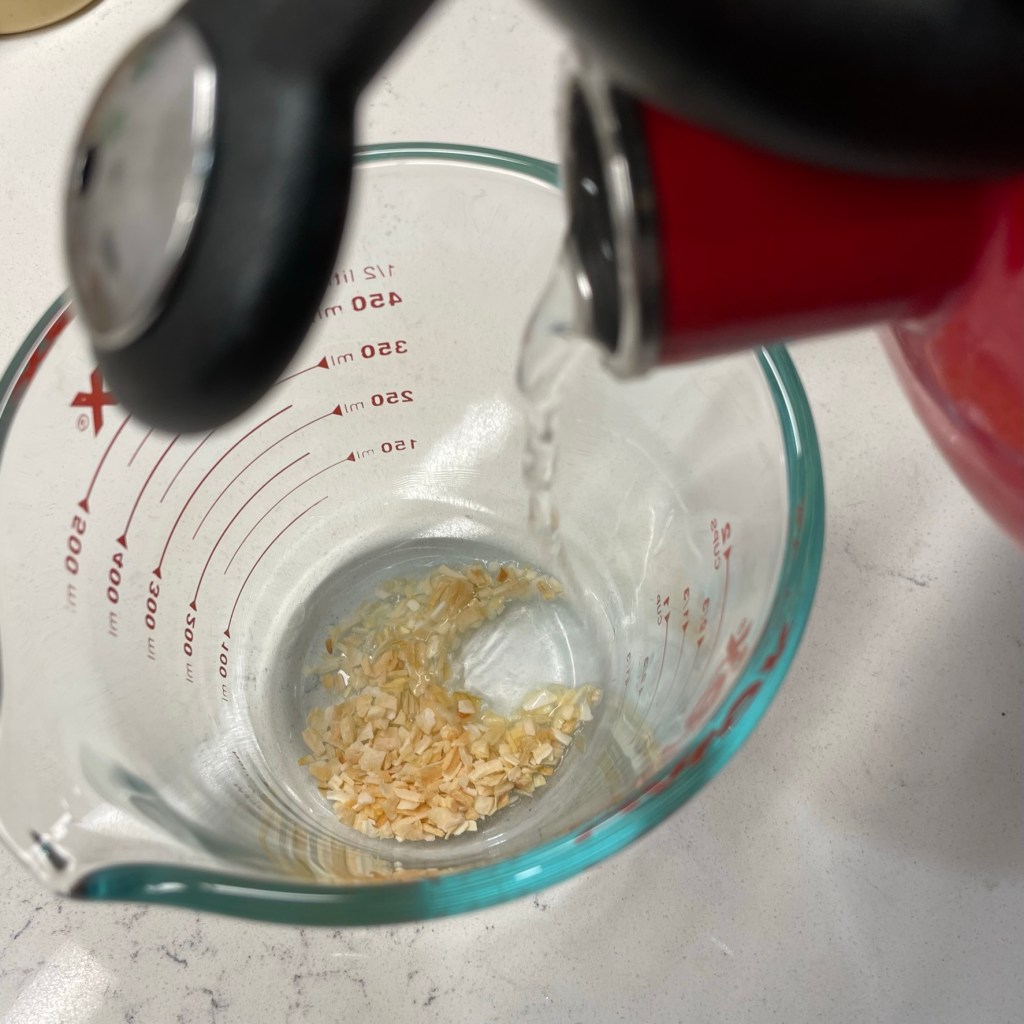
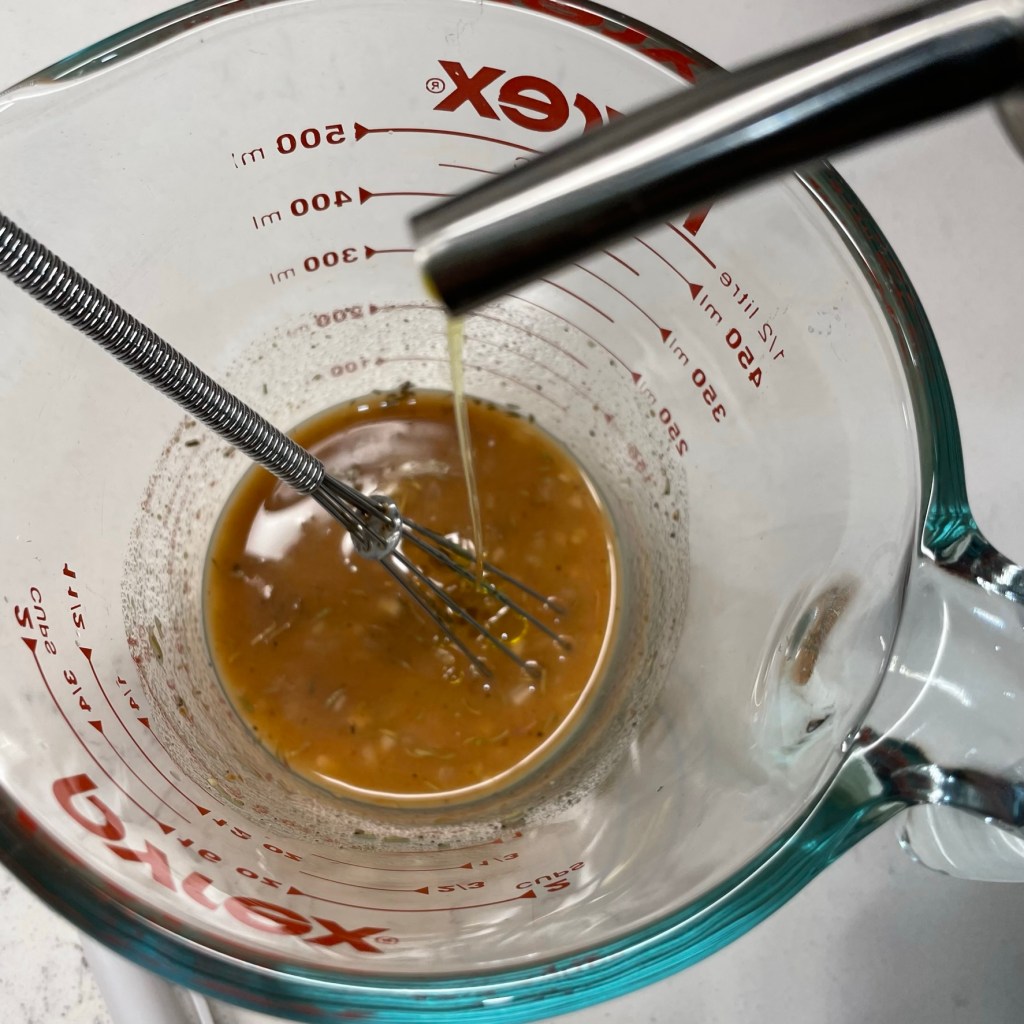
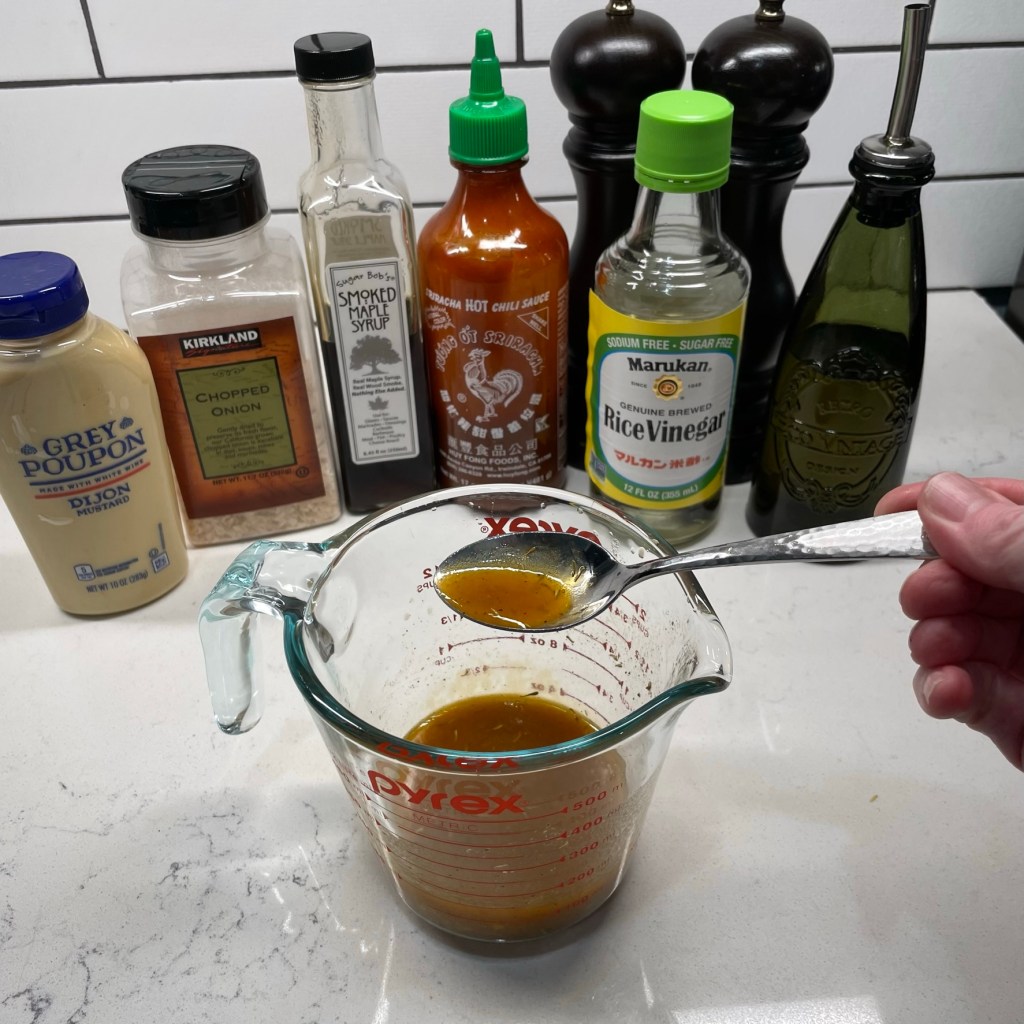
The dressing begins with a generous shake of dried minced onions, which you’ll rehydrate with some just-boiled water. Add Dijon, rice vinegar, salt and pepper, sriracha and smoked maple syrup (I love this stuff from Sugar Bob’s Finest Kind, and you’ll appreciate what it does for an old fashioned cocktail, too). Whisk in some extra virgin olive oil and set it aside until salad time. This vinaigrette brings such a huge flavor punch, I know I’ll be making it again soon, and probably roasting vegetables in it at some point before spring finally arrives in, you know, six weeks or whatever.
I love making my own salad dressings because I can completely customize the flavors to complement my meal.
Is the salad easy to make? Yes, and if you want to swap in different root vegetables, go for it. If you aren’t loving the lentils, I think canned or fresh-cooked cannellini beans would be a great swap-in, or even a hard-boiled egg for a bit of protein. For an entirely plant-based salad, skip the feta and add some cubes of tofu (marinated in the vinaigrette, of course).
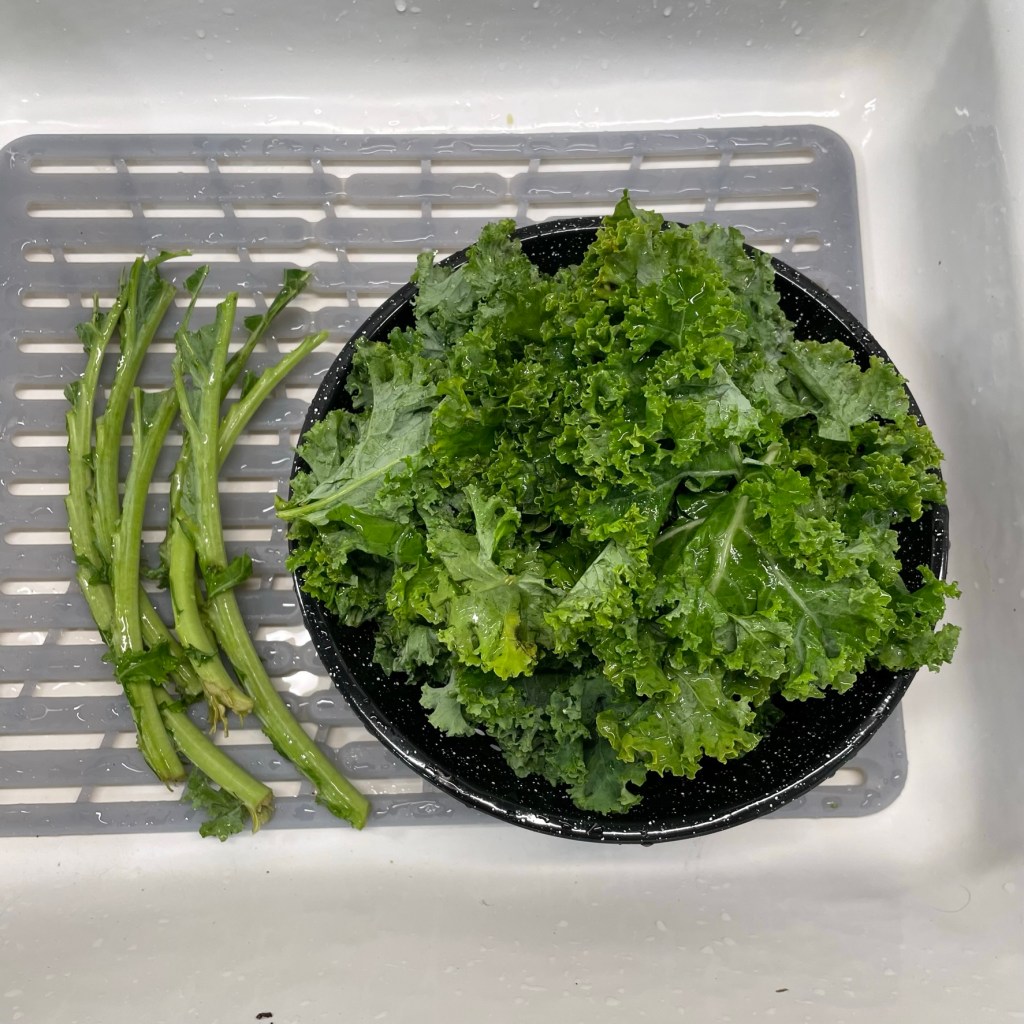
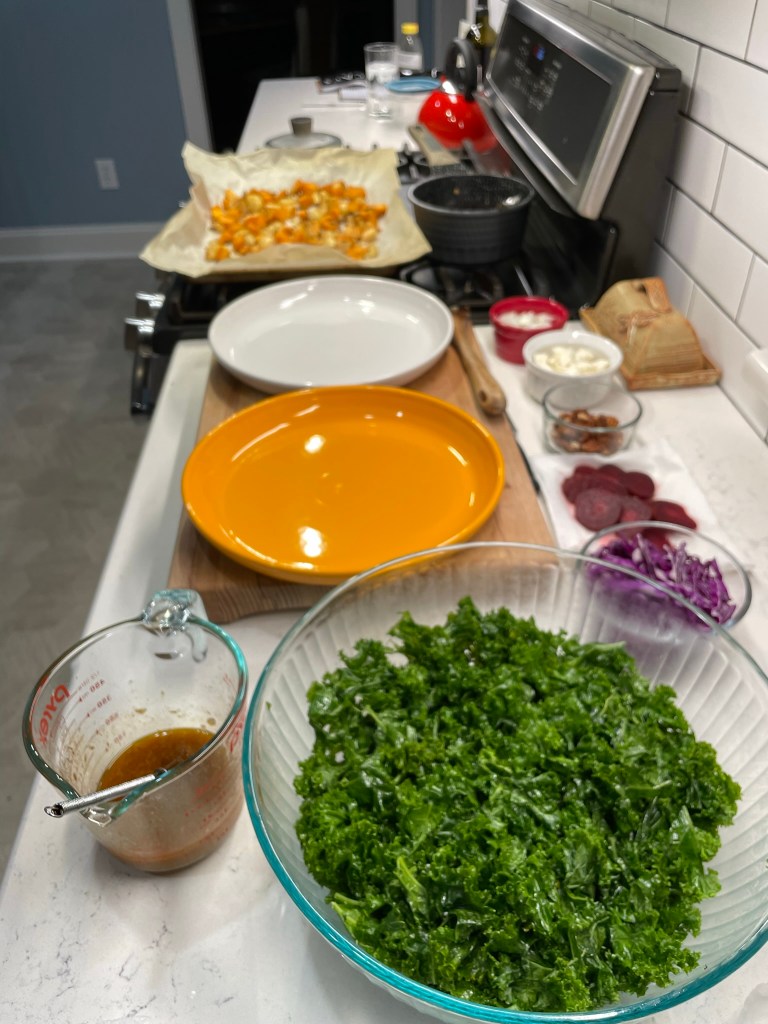
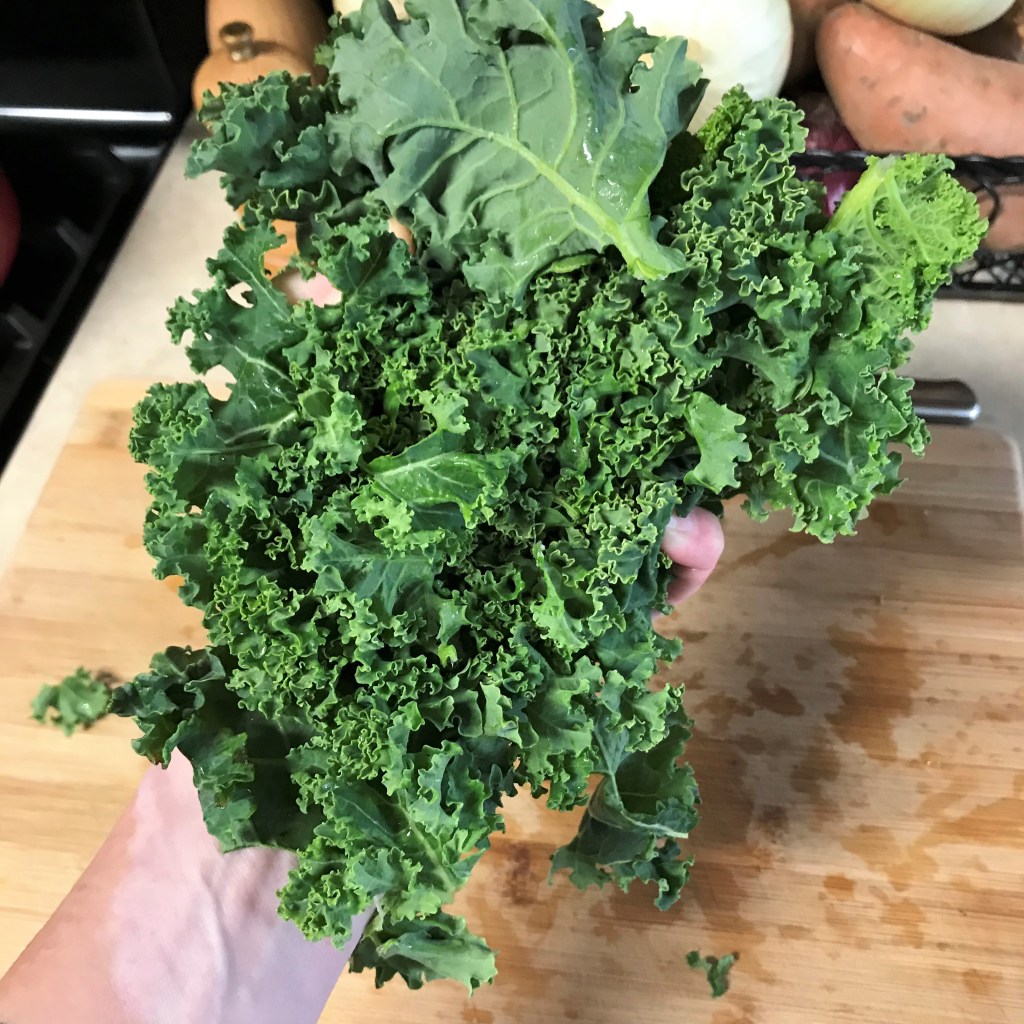
I can’t say for sure how long it takes to make this gorgeous plate, because I worked on bits and pieces of it while multi-tasking my day job and scrolling punxseyphil’s Instagram feed. I can assure that none of it is difficult. Make the dressing first so the flavors have time to mingle. The kale needs to be cleaned, dried and massaged with olive oil and kosher salt. I like a nice, peppery olive oil for this, and I absolutely love how tender the kale emerges after its spa treatment. What’s leftover will be great in another salad or tossed into an omelet or on top of a pizza.
I save money by buying the kale in bunches and cleaning it myself. And massaging it with oil and salt totally changes the texture.
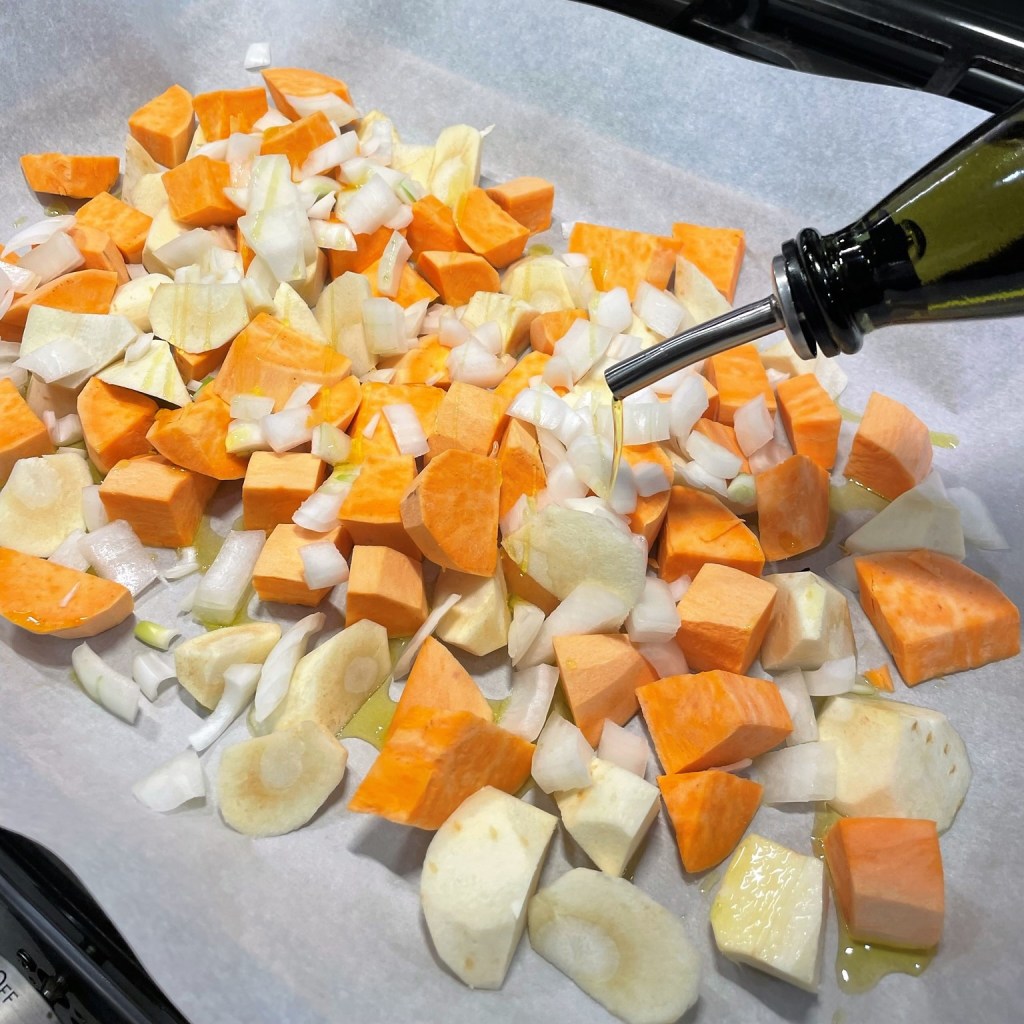
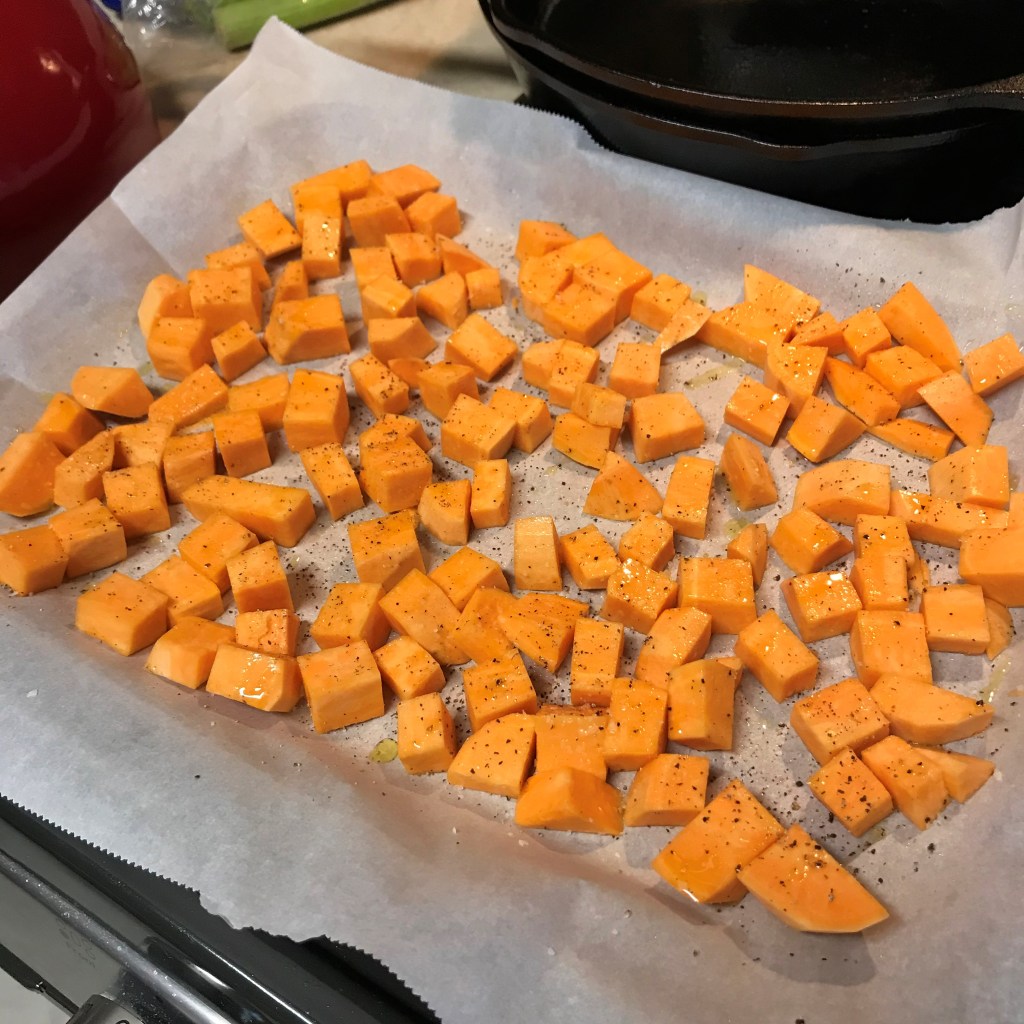
The sweet potatoes and parsnips are peeled (or scrubbed), cut into chunks, tossed with onions and oil, and then roasted at 400° F for about 40 minutes—toss ‘em once or twice midway so they roast evenly.
Most of my sweet onions were roasted with the root vegetables, and the rest went onto the salad raw.
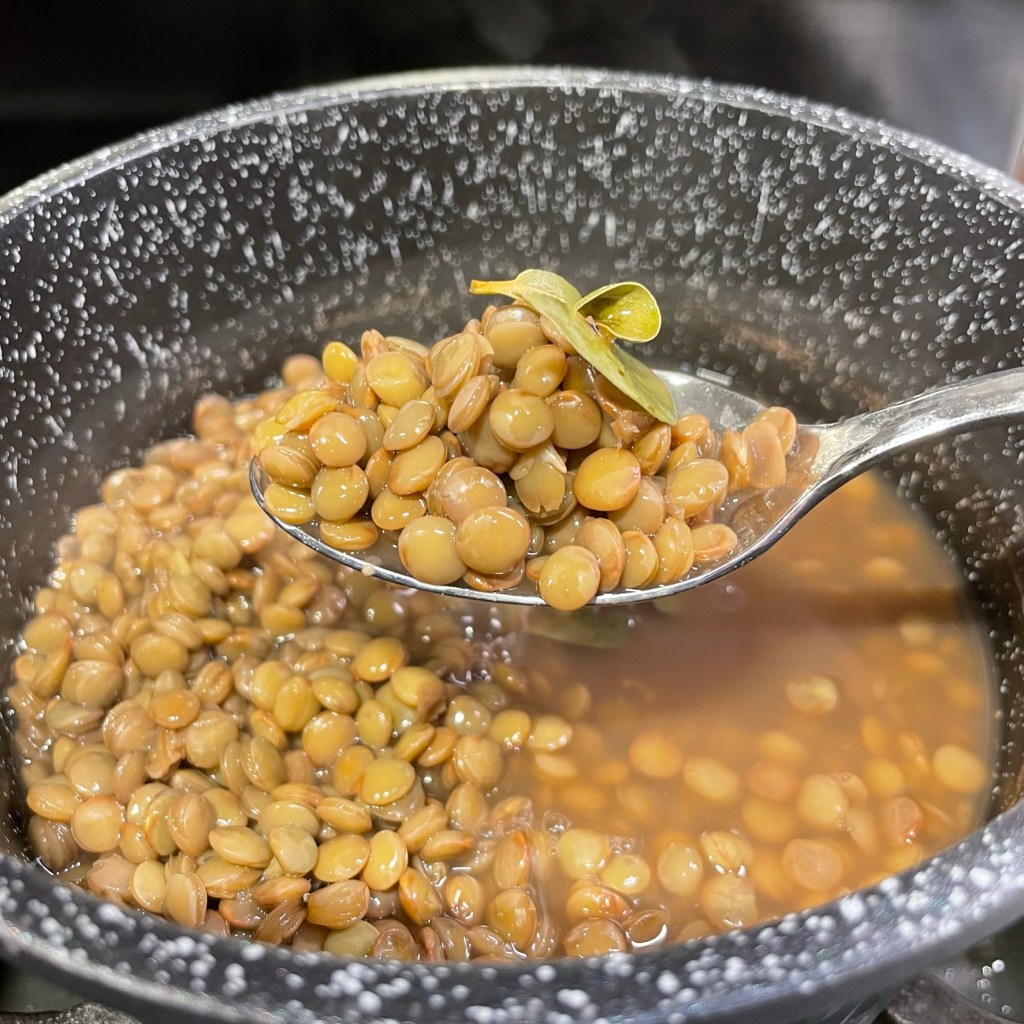
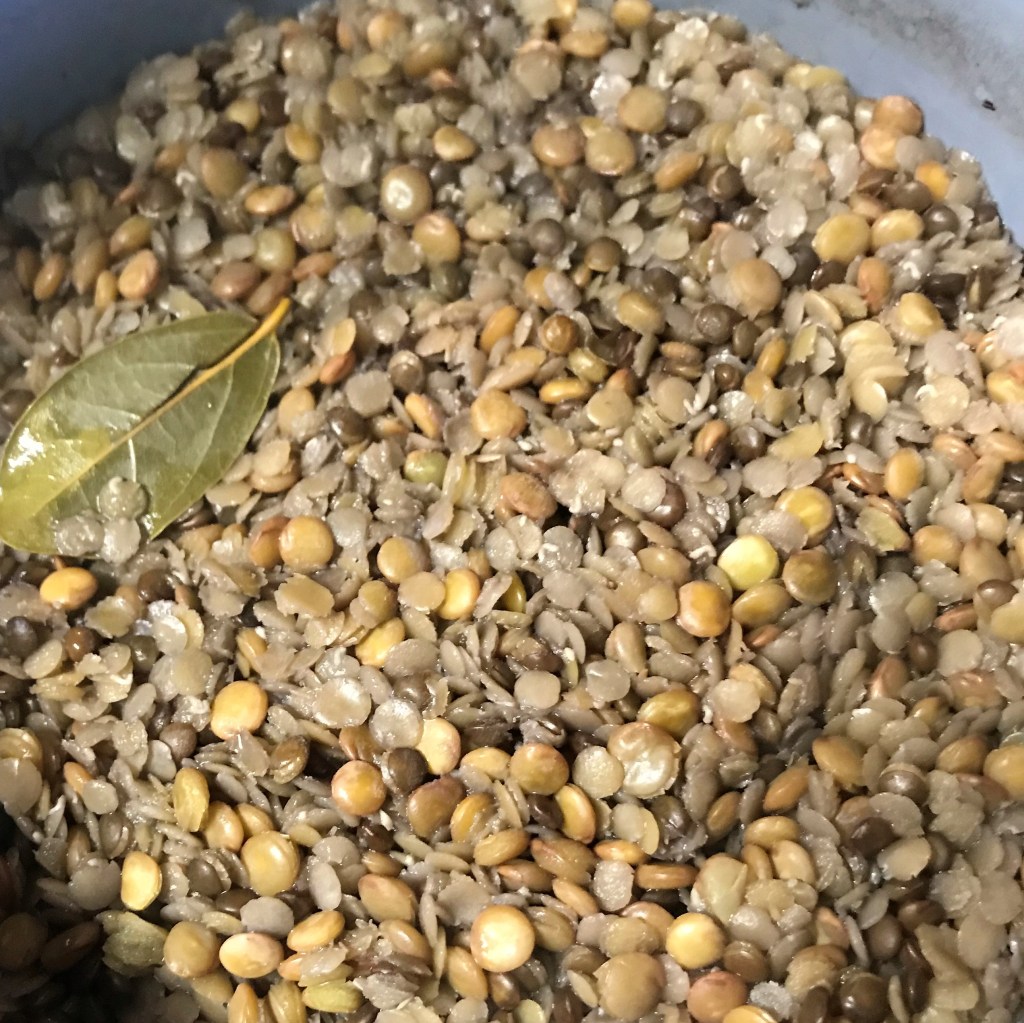
And I cooked my lentils from dried, which I know can be a challenge so here’s my advice: ditch the directions on the bag—they always turn to mush. Use a 3:1 ratio of water to lentils, but cook them over half the heat for two to three times longer than recommended in the directions. Add a bay leaf. It takes some time, yes, but for your patience you’ll be rewarded with perfectly tender, intact lentils. They are loaded with protein and I love the flavor of these little guys.
Perfect!
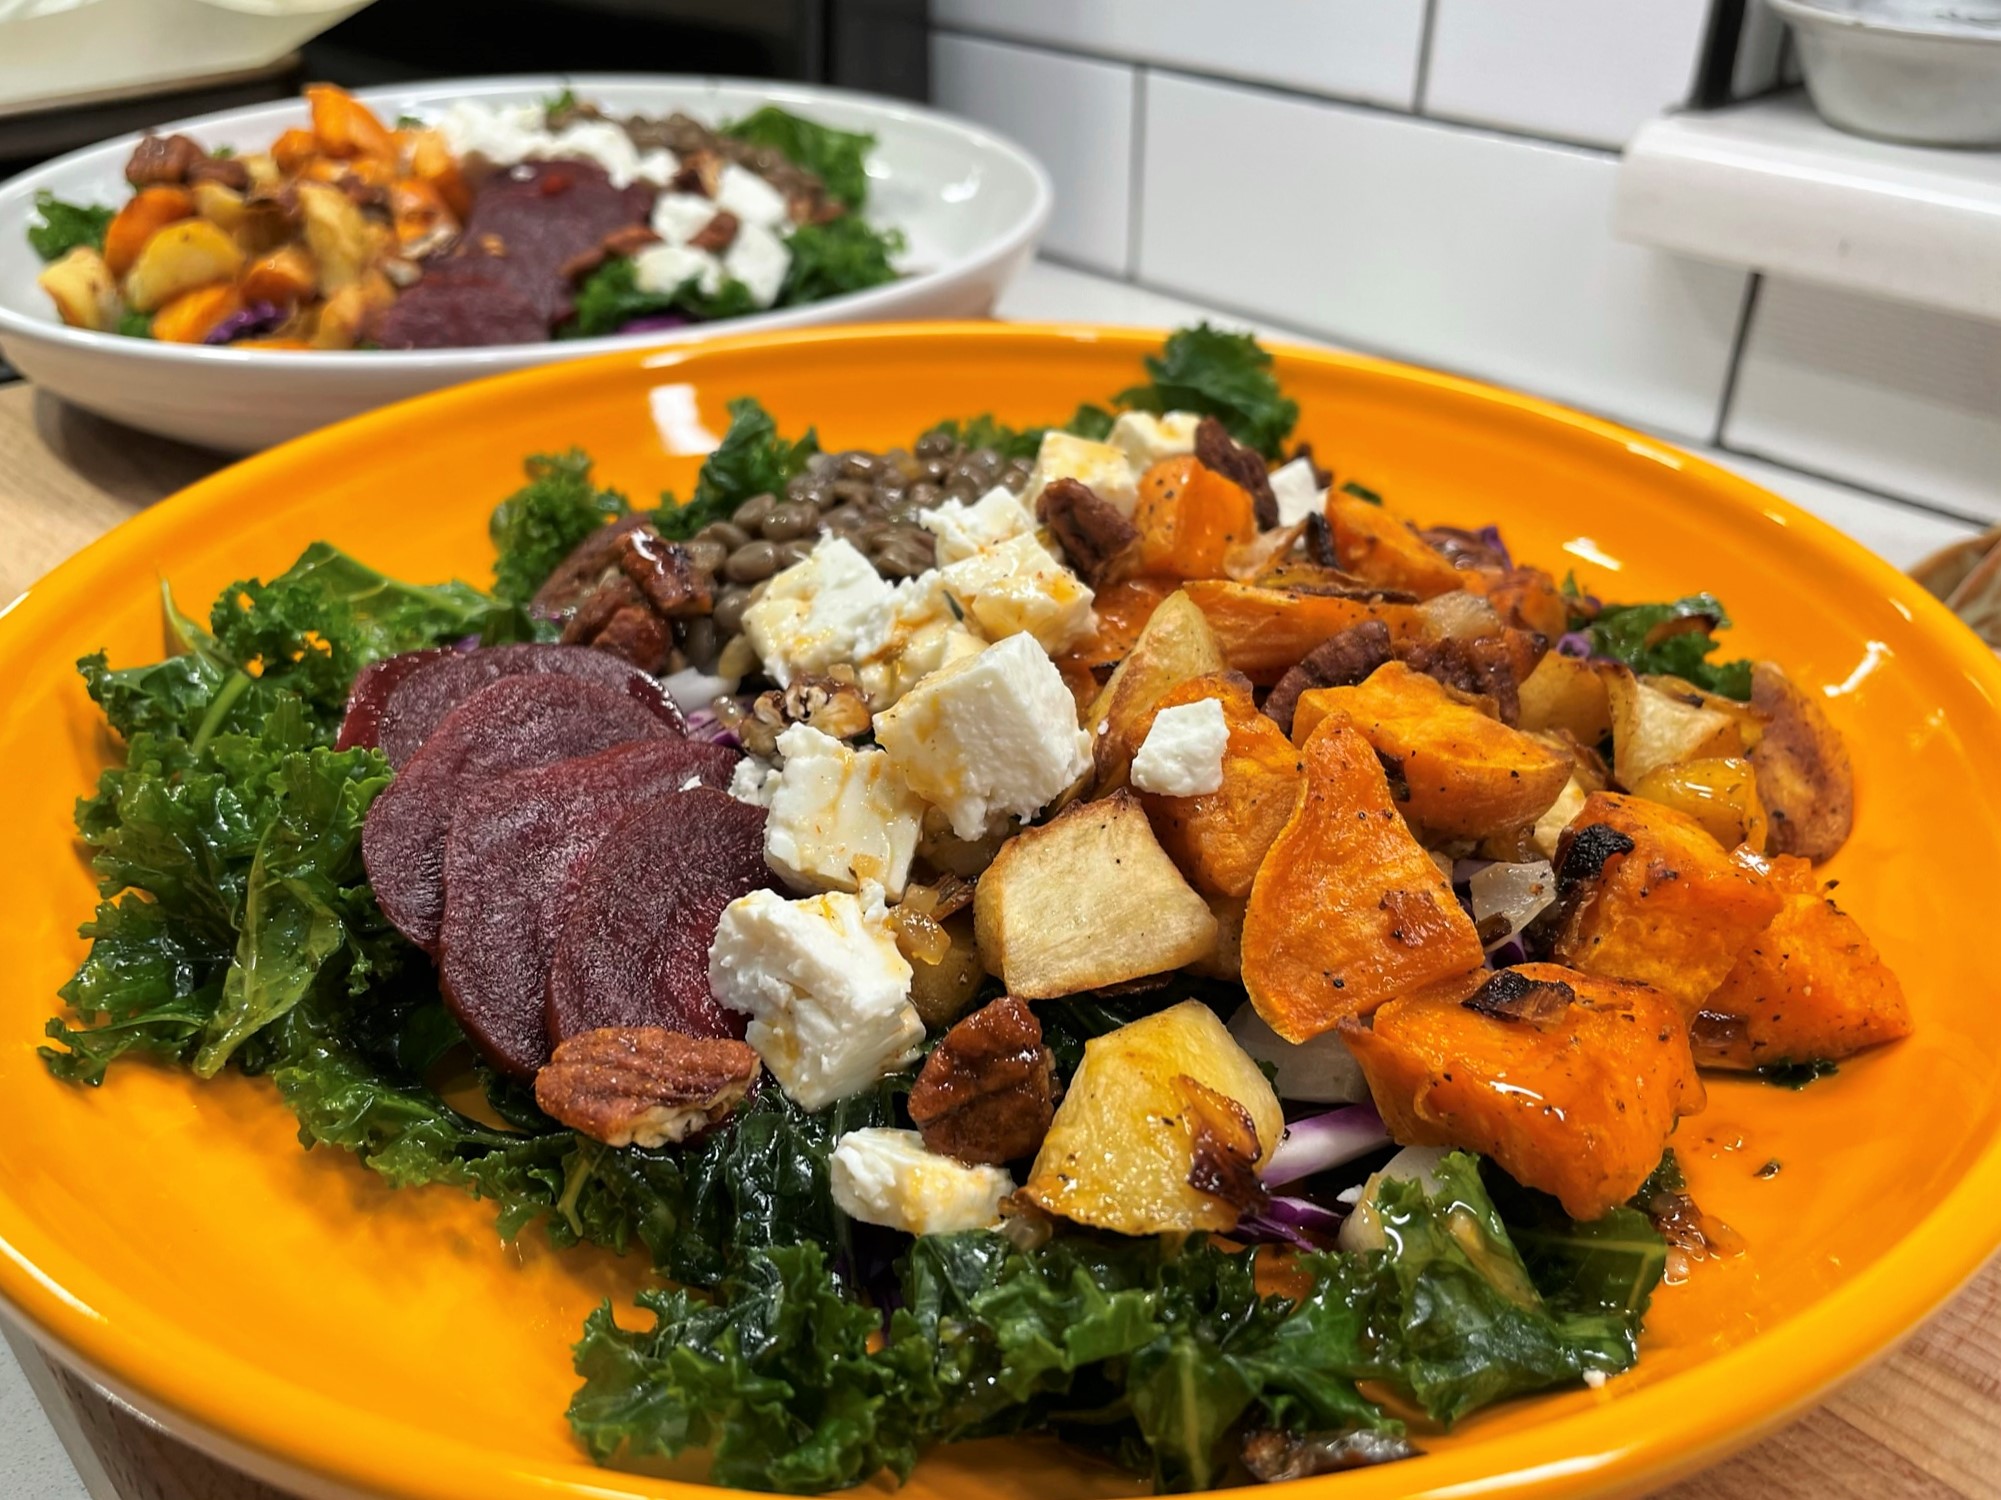
The only thing left is assembling the salad, and that’s the easiest part. You don’t have to be all artistic about it, but I find it satisfying to compose a plate that looks as terrific as it tastes. Kale goes on the bottom of course, topped with some of the shredded red cabbage. Then add a section of lentils, a pile of the warm, roasted root vegetables and a little row of beet slices. Run a winding trail of cubed feta down through the middle, let the toasted pecans fall where they may, and drizzle the dressing all over it, especially onto the feta and lentils.
So much color, flavor and texture going on here!
Midwinter Salad with Smoked Maple-Sriracha Vinaigrette
This salad is nutritious, colorful and bursting with flavor. Guaranteed to help you shake off the midwinter blahs!
Ingredients
1 large bunch fresh, organic kale
1 Tbsp. extra virgin olive oil (for massaging kale)
Kosher salt and freshly ground black pepper
1 cup thinly sliced red cabbage
1 small sweet onion, chopped
2 medium sweet potatoes, cut into large chunks
2 medium parsnips, cut into large chunks
2 Tbsp. extra virgin olive oil (for roasting root vegetables)
2 cups cooked green lentils
4 small, cooked beets, sliced
2/3 cup cubed feta (preferably brine-packed)
1/2 cup toasted pecans, broken into pieces
Smoked maple-sriracha vinaigrette (recipe below)
Directions
Prep kale by rinsing under cold running water. Strip leaves and discard tough stems. Roll kale leaves up in a clean dish towel to blot dry, then tear into bite-sized pieces and add to a large bowl. Drizzle kale leaves with olive oil and sprinkle with a pinch of kosher salt. Massage with your hands until kale is wilted, and then cover the bowl and refrigerate a couple of hours.
Preheat oven to 400 F and line a baking sheet with parchment paper. Drizzle a tablespoon of olive oil directly onto the parchment, add cut up sweet potatoes, parsnips and onions. Drizzle on remaining olive oil and season with salt and pepper. Toss the vegetables around to coat them with the oil. Roast for 40 minutes, until tender with roasted edges. Toss vegetables once or twice midway through roasting.
Plate the salad, beginning with chilled massage kale for the base, then scatter the shreds of red cabbage. Arrange the remaining elements of the salad in piles around the salad; a pile of lentils, a large pile of roasted root vegetables, a fan of sliced beets and a winding line of feta cubes. Sprinkle the toasted pecans randomly over the salad. Drizzle on the vinaigrette and serve.
The dressing is really the star of this salad, with its smoked maple sweetness and spicy sriracha. Look for the smoked maple syrup online from a company called “Sugar Bob’s Finest Kind,” or substitute regular maple syrup for a similar flavor. Use the unseasoned version of rice vinegar, which is not embellished with additional salt.
Combine the dried onion and hot water in a glass measuring cup, and let rest until onions are softened (they will not absorb all the water, but do not drain it).
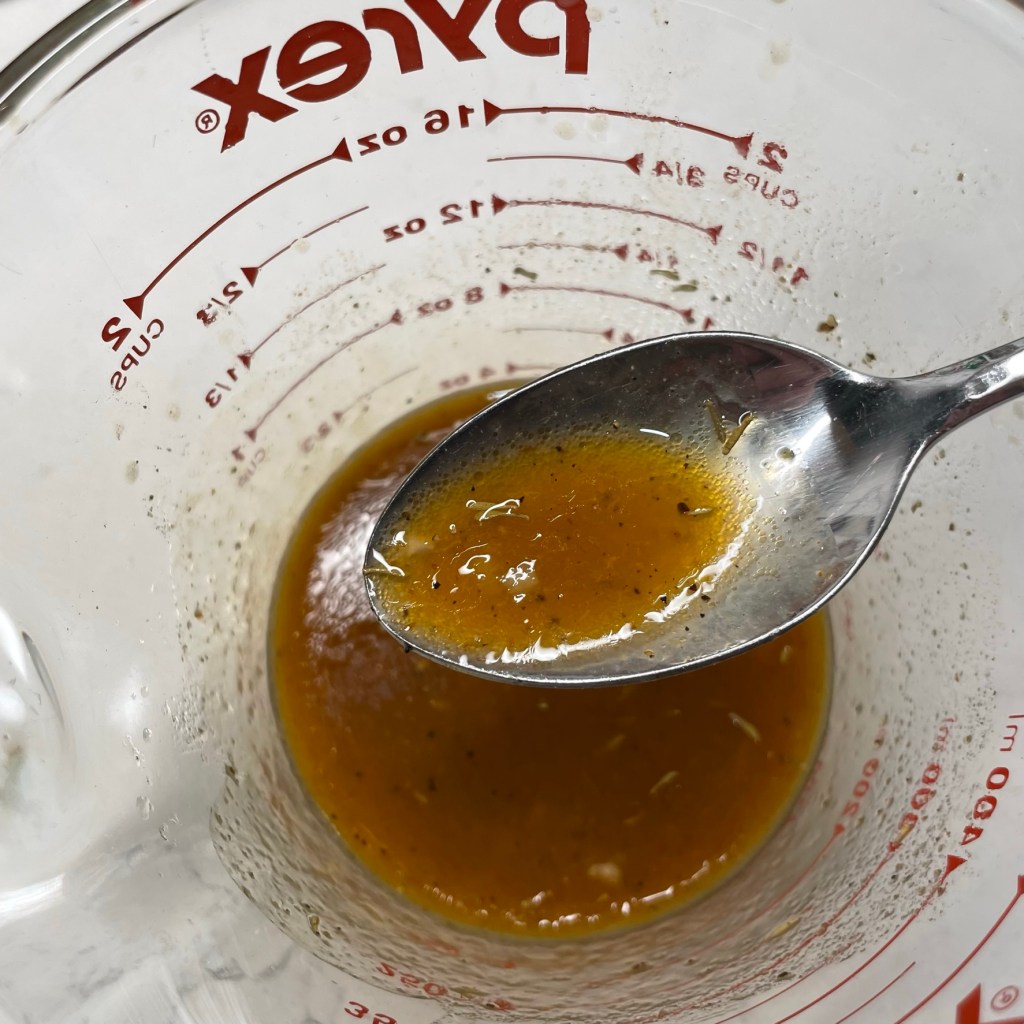
Add sriracha, syrup, mustard, vinegar, thyme, salt and pepper to the measuring cup and whisk to combine. Drizzle olive oil into the cup, whisking constantly to emulsify the mixture. Dressing will improve after it rests awhile; give it a good whisking right before serving.
One of my favorite condiments is tzatziki, the Greek yogurt-based topping that is perfect for anything you put on a pita, including gyro and souvlaki. The zesty zing of garlic and cooling notes of grated cucumber are an easy, refreshing way to pile on the flavor. But for a vegan dish, such as the falafel I made recently, tzatziki is off the table. We wanted a flavorful topping that still had a Middle Eastern vibe, and one that could play many roles, as a dipping sauce, topping or dressing.
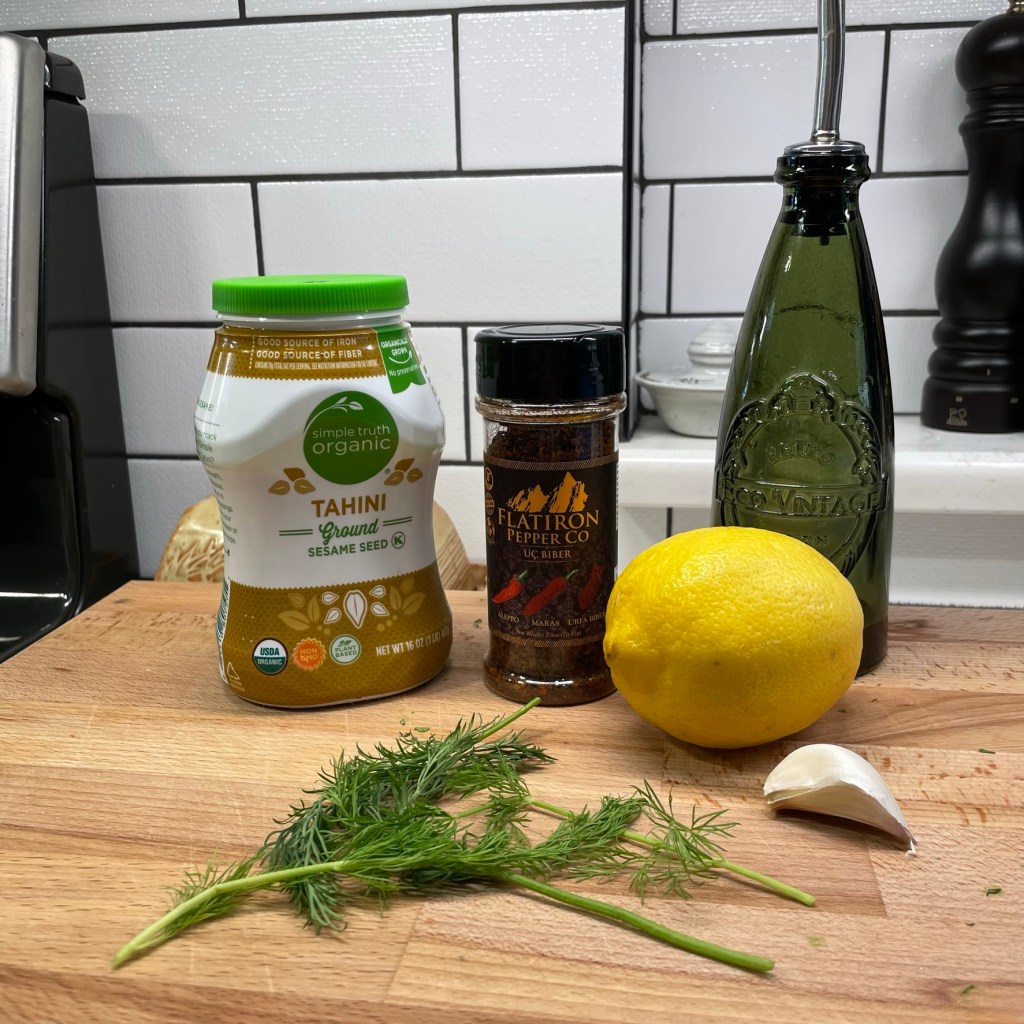
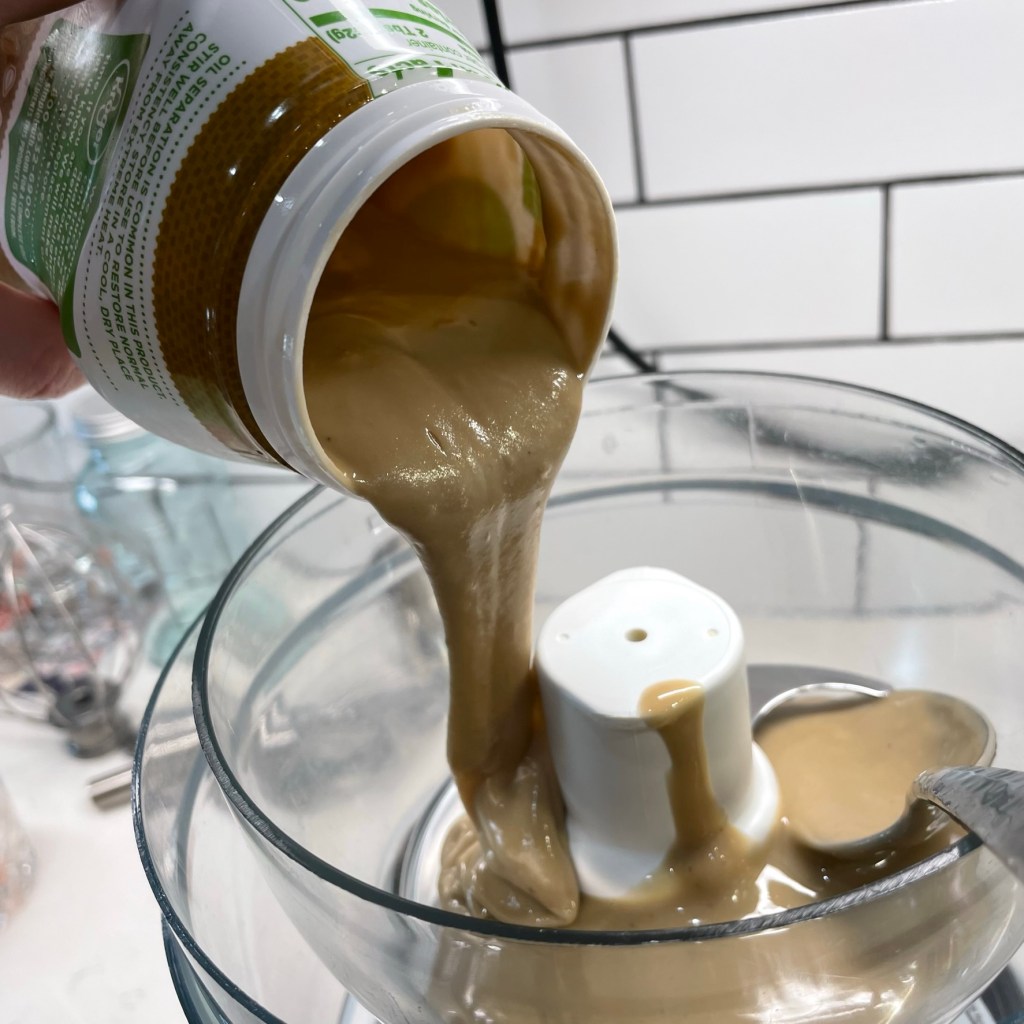
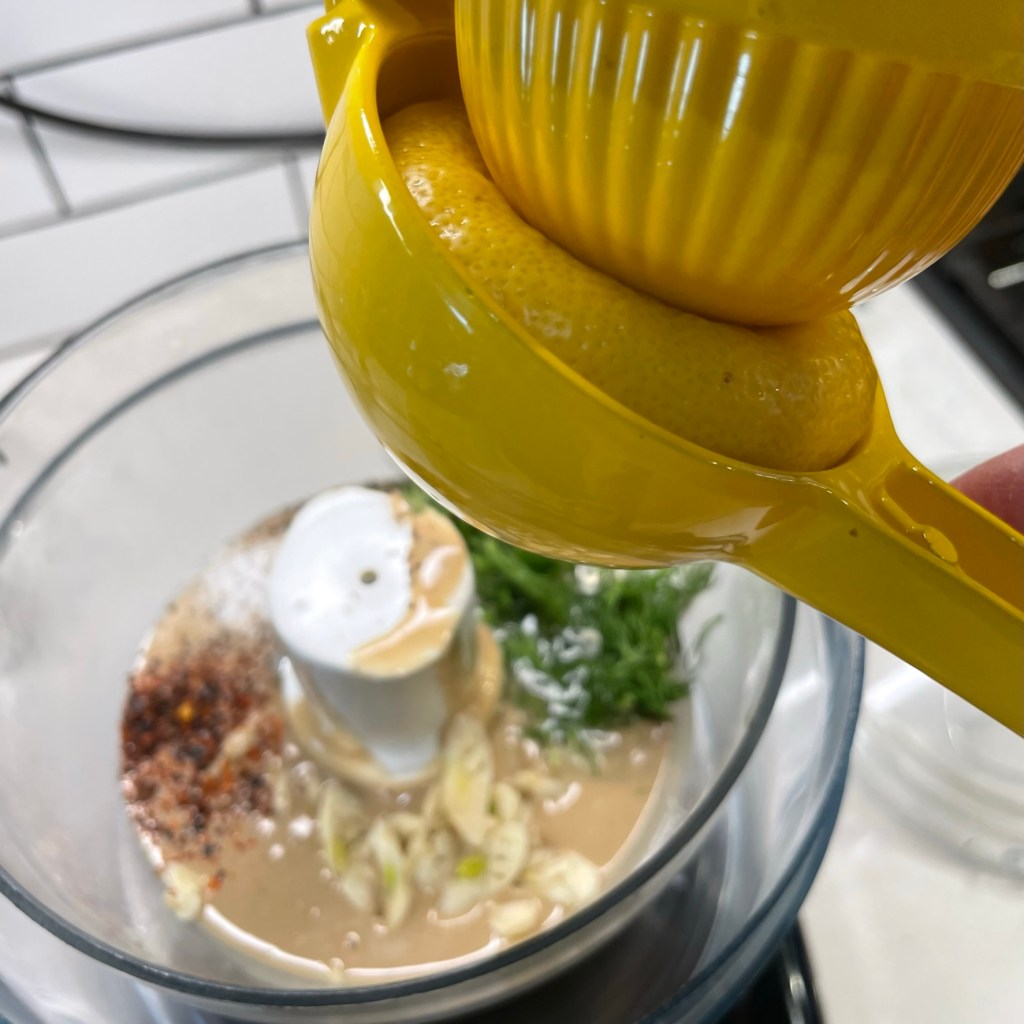
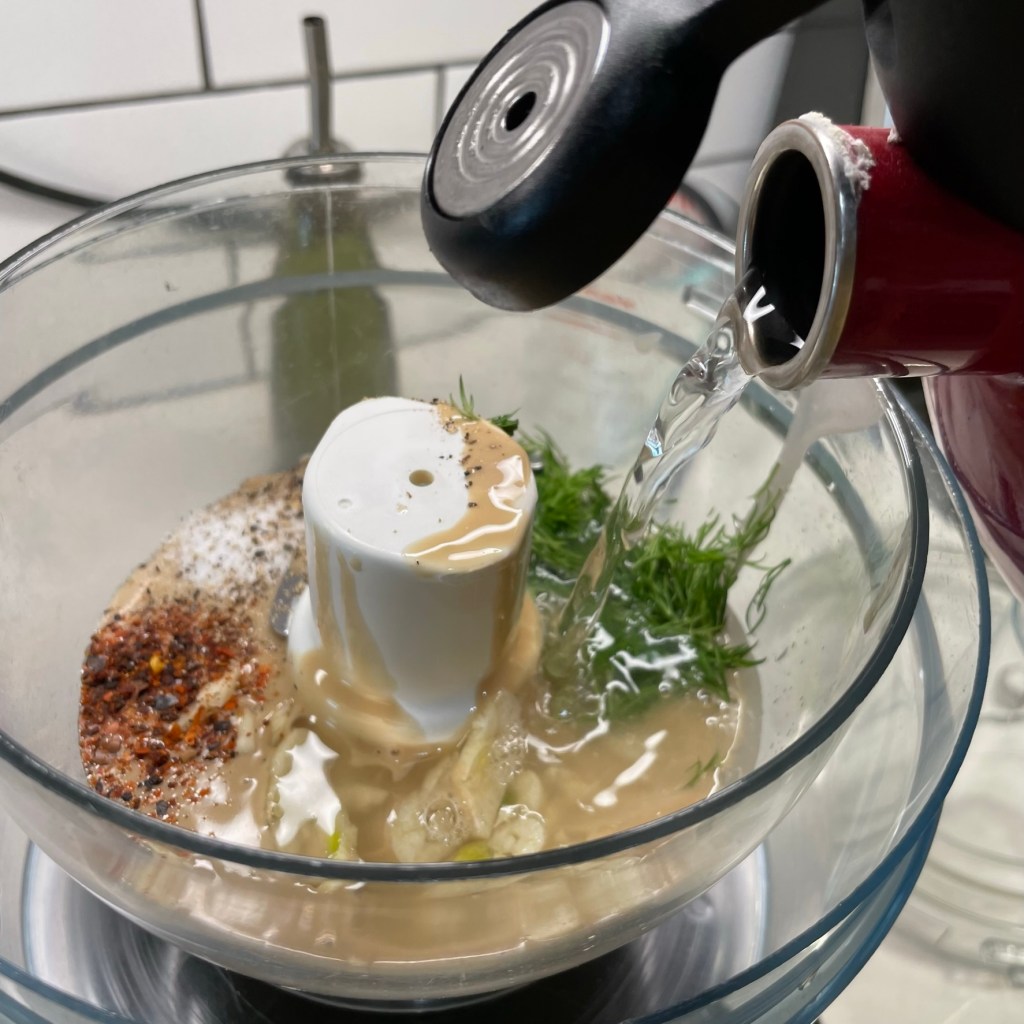
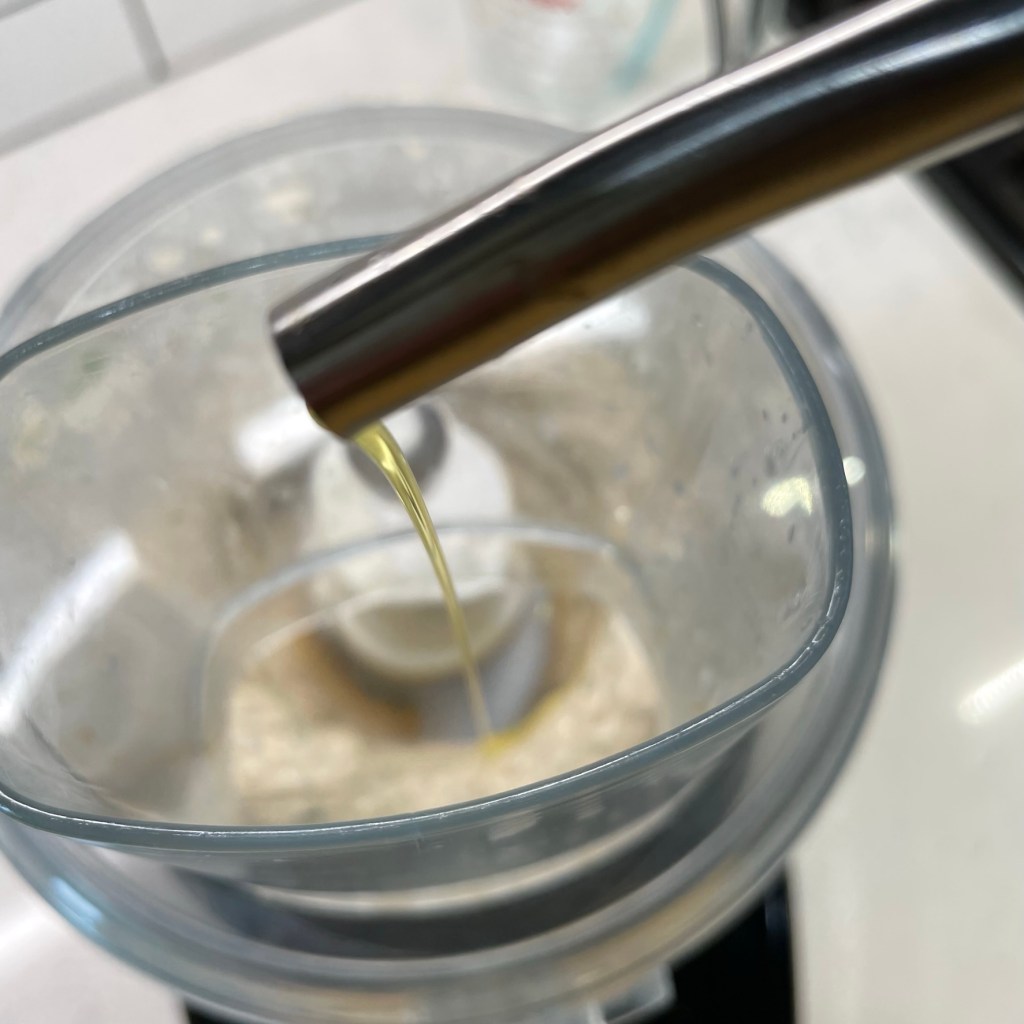
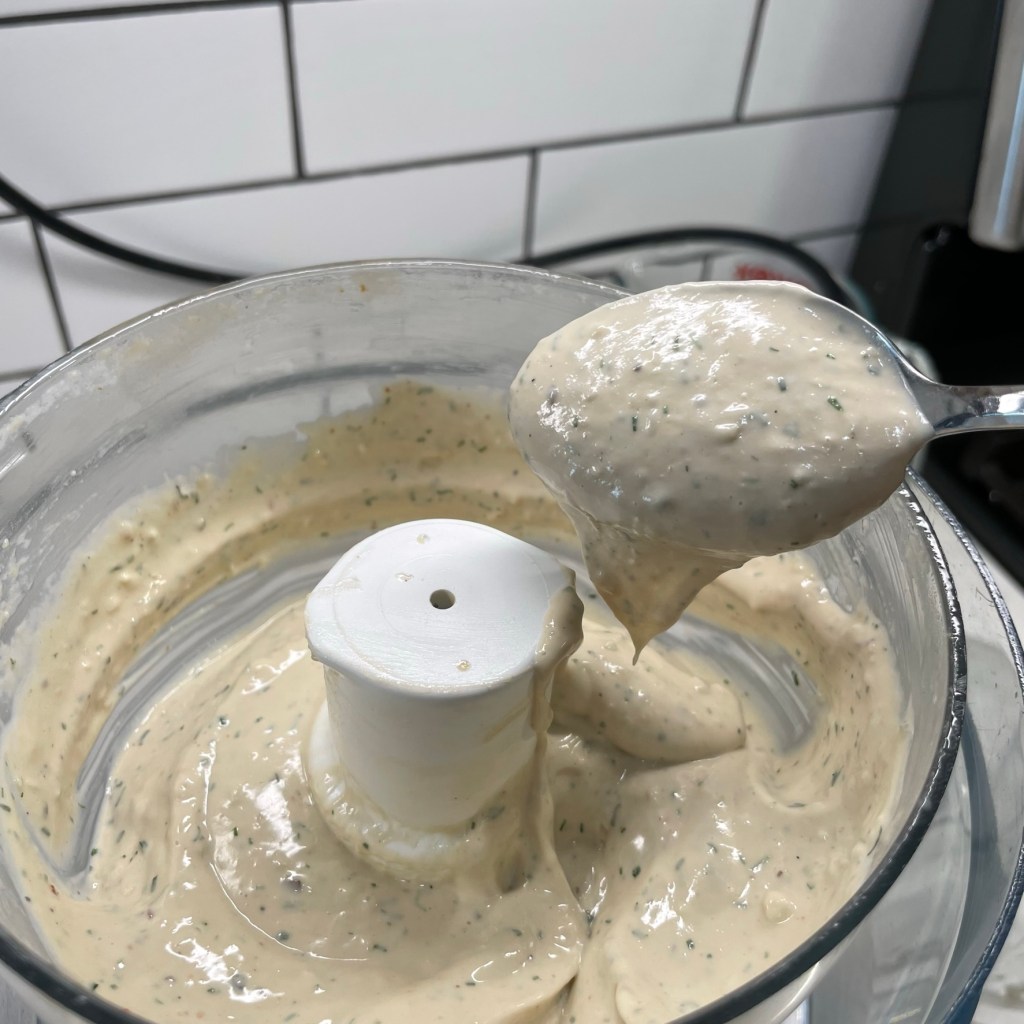
That’s how this tahini-lemon sauce came to be, and as I whizzed up the ingredients in my food processor, it occurred to me that this sauce is basically hummus, minus the chickpeas. All the other components of hummus are in there—the tahini, which is a sticky paste made from ground toasted sesame seeds, fresh garlic, fresh lemon juice, salt, spices and good olive oil. Processing these ingredients results in a smooth, completely emulsified mixture that can be thick or thin, depending on how much water your blend into it. For my purposes this time, I kept it on the thicker side as a perfect dipping agent for my falafel, but I can easily see the benefit of thinning it to pour onto a salad or Buddha bowl.
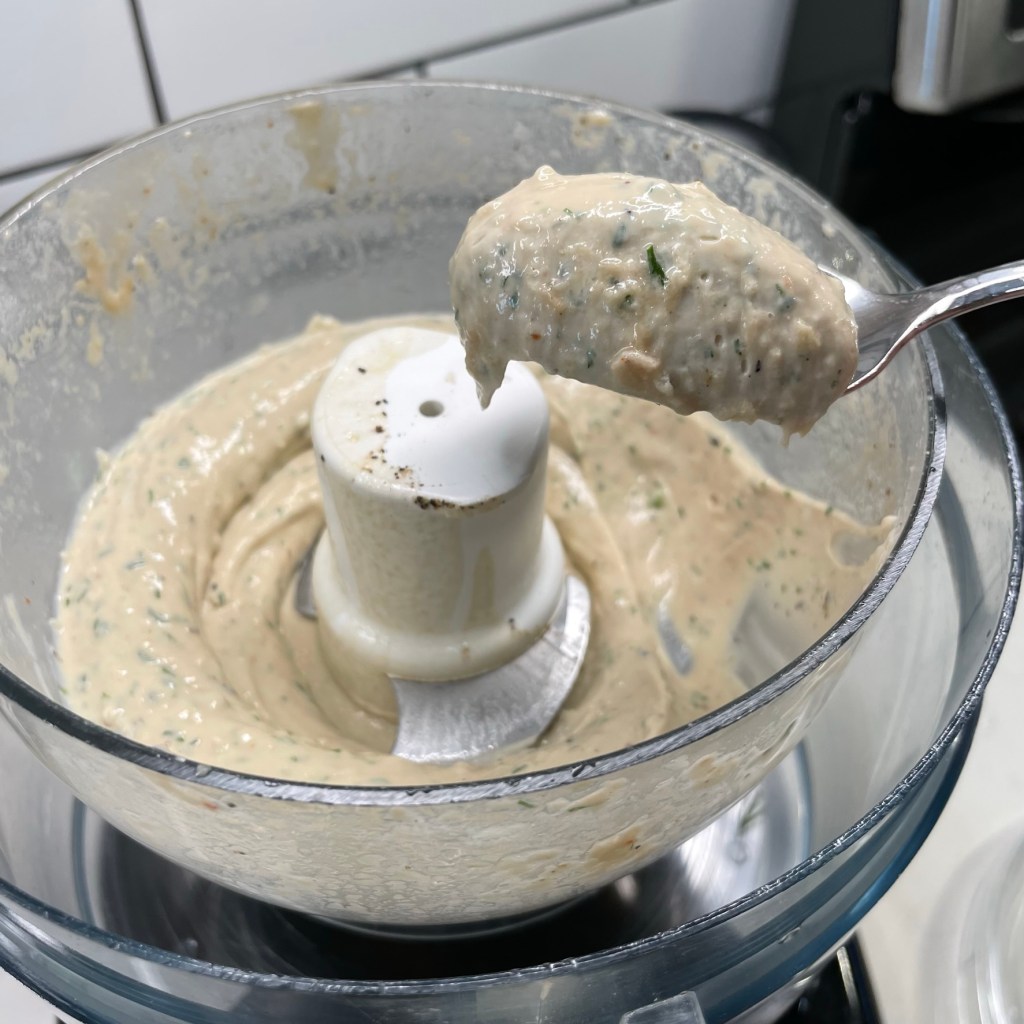
This tahini-lemon sauce is smooth, silky and creamy, but with no mayonnaise or dairy.
My husband’s adult daughter has adopted the vegan lifestyle, and I am always on the lookout for easy foods to make when she visits. This tahini-lemon sauce fits the bill, and it’s so tasty that we non-vegans won’t feel like we are missing out on anything.
Enjoy!
Ingredients
1/2 cup tahini paste
2 cloves garlic, chopped
Juice of 1 large lemon
A few shakes of crushed red pepper* (see notes)
2 Tbsp. fresh dill leaves
1/4 cup water (or more, for thinner sauce)
3 Tbsp. extra virgin olive oil
*Notes
The crushed red pepper flakes that you see in pizza restaurants would be fine here, but if you can get your hands on Aleppo pepper, that is even more in keeping with the Mediterranean flavor profile. We used a three-pepper blend (Aleppo, Maras and Urfa) from Flatiron Pepper Company, and their rep informed me that it will be back in stock in a few months. I’ll update this post at that time to include a link, in case you’d like to check it out.
This recipe was shared with me many years ago by a friend who had the craziest schedule I’d ever witnessed. When she wasn’t running full speed ahead with her two middle-schoolers—to dance classes, soccer practice, music lessons, birthday parties, etc.—she was leading a high school youth group, teaching aerobics classes, volunteering at church and befriending every newcomer to the neighborhood. Her door was always open to visitors, even during the hectic holidays, and she always seemed to have something tasty to nibble on when someone appeared unexpectedly.
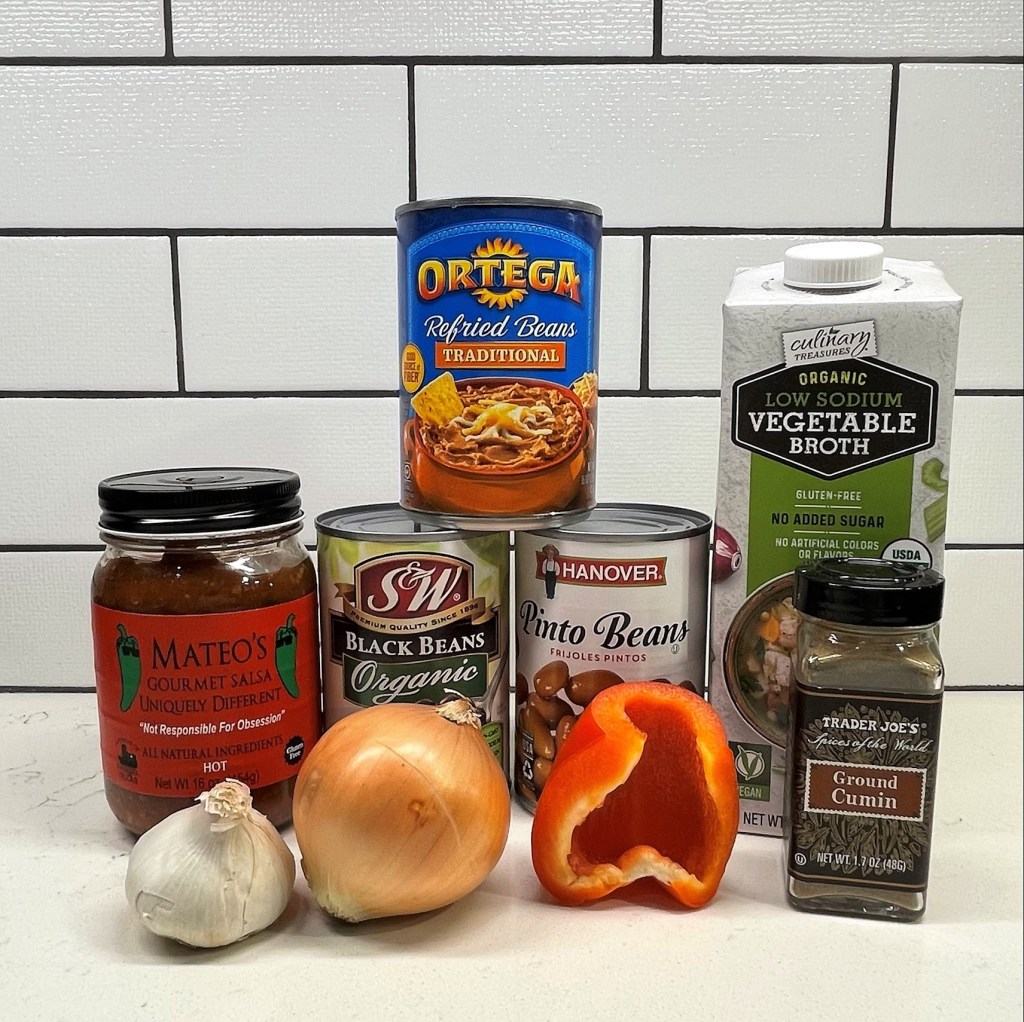
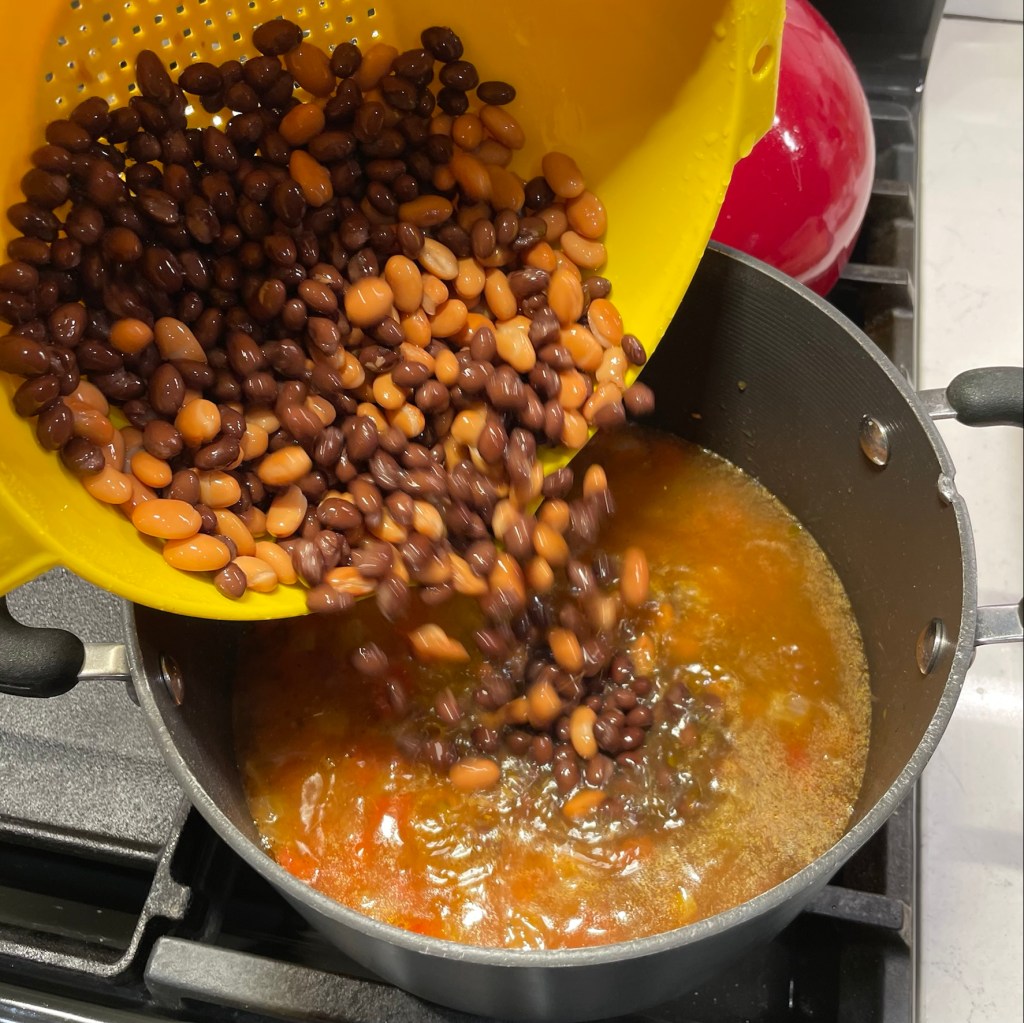
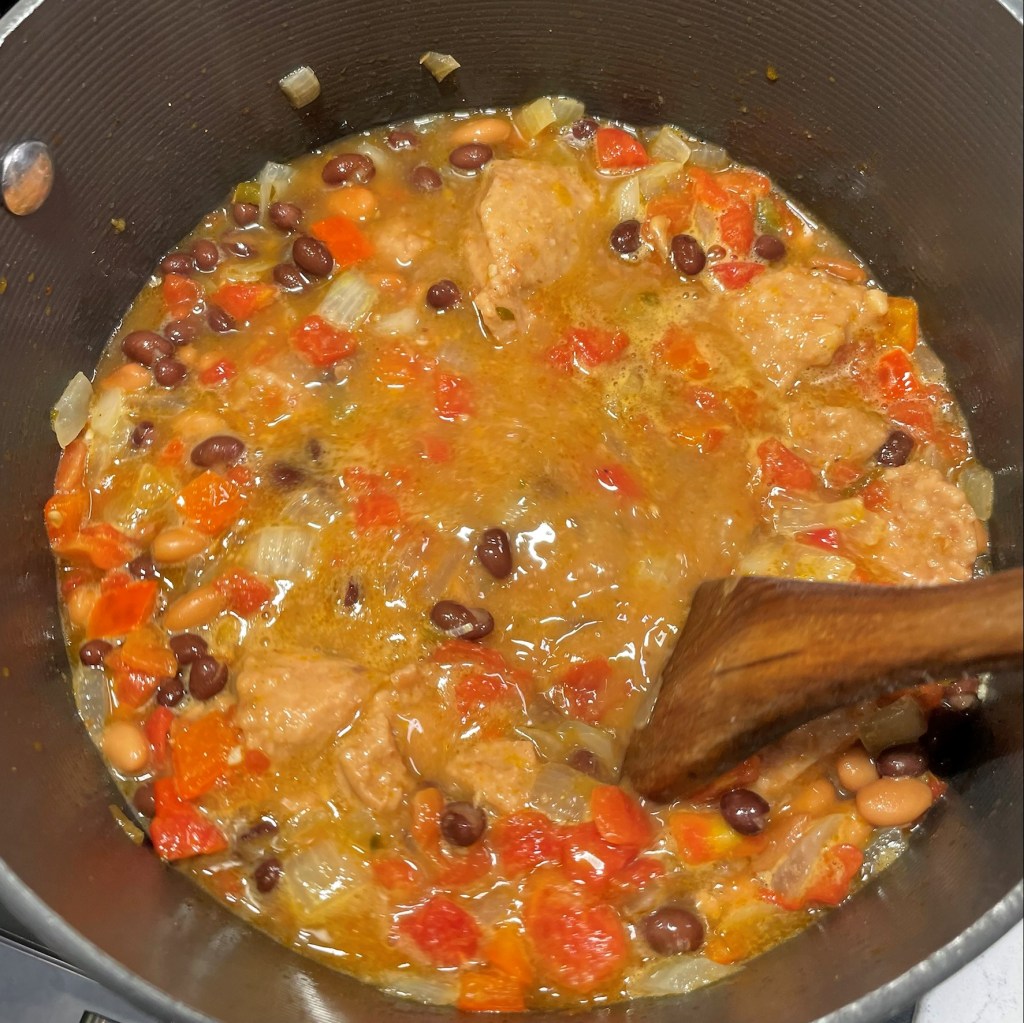
She didn’t have what I would call a passion for cooking, and certainly not much time, but she was incredibly skilled at getting a healthful and satisfying meal on the table in no time flat. This soup is one example, and when I pulled it out of my old recipe box the other day, I thought, “of course.” This is not an all-day-simmer kind of soup; rather, it leverages the already developed flavors of two key ingredients—jarred salsa and canned refried beans. Add some fresh onions and bell pepper, some veggie broth and your choice of chili beans and dinner is served.
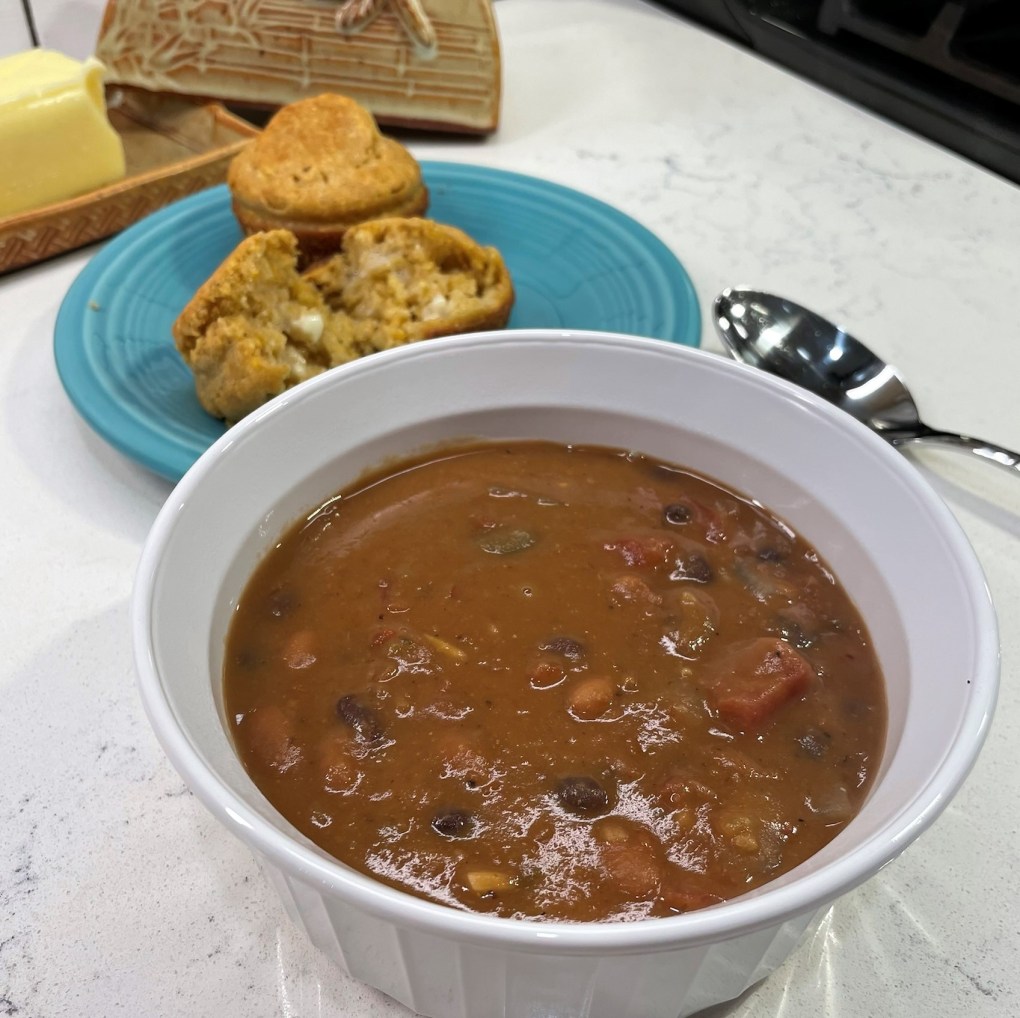
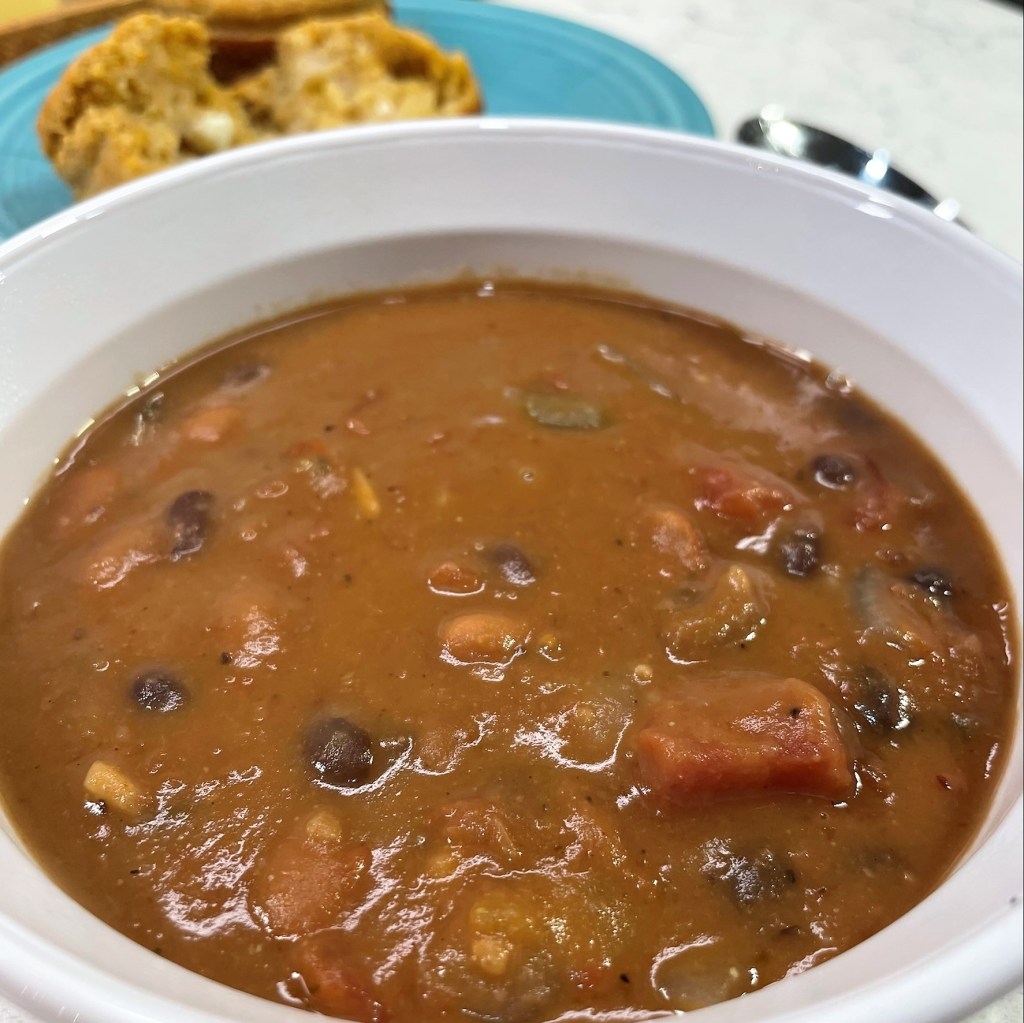
There’s plenty of hearty comfort in the bowl, with beans, onions and peppers. And your favorite salsa lends a flavor that defies the quickness of the recipe.
The soup is every bit as comforting as any other homemade soup, but only takes 20 minutes, start to finish, which just happens to be the exact amount of time you need to throw a batch of Jiffy corn muffins into the oven (they’re perfect on the side).
What could be easier after a hectic day of shopping and errands during the busy holiday season?
Simple pantry ingredients and a few easy things from the fridge.
Ingredients
1 Tbsp. extra virgin olive oil
1 medium onion, chopped
1/2 bell pepper (any color), chopped
2 cloves garlic, minced
Cumin, salt and pepper
1 cup prepared salsa from a jar* (see notes)
2 cans beans (mix and match; pinto, black, kidney, navy are all good here)
2 cups low-sodium vegetable (or chicken) broth
1 can refried beans
Corn muffins for serving (optional, but yummy)
*Notes
Any kind of savory salsa will work here. It can be mild or spicy, green or red, thick or runny. If you have a can of Rotel tomatoes on hand, you could also substitute with that.
Instructions
Give the fresh vegetables a quick saute, just long enough to soften them.
Get the beans ready by draining and rinsing them. This doesn’t have to be perfect, just aim to get most of the can goo removed.
Add your seasonings: salt, pepper and ground cumin.
Add the salsa, or use Rotel tomatoes if you have them.
Two cups of broth is half a carton. Did you notice I am not using measuring cups? It’s quicker to go by feel here.
Crank up the heat to get the soup mixture to a quick boil.
When a boil emerges, add the rinsed beans.
Let it come to boil again, and then stir in dollops of the canned refried beans.
Stir constantly until the clumps of refried beans break up and melt into the soup.
This time, when the soup begins to boil, reduce the heat to low and let it simmer.
It’s creamy, hearty and (best of all on a busy night) quick!
Get your corn muffins in the oven, if you’re making them. This soup can be made while they are baking.
Drain and rinse the canned beans.
Heat olive oil over medium heat in a soup pot. Saute onion and pepper until softened. Add garlic and saute another minute or two. Season with cumin, salt and pepper.
Increase heat to medium-high. Add canned beans, salsa and broth, and stir to combine. When mixture begins to boil, reduce heat to medium. Stir in the can of refried beans, taking time to swirl and blend it into the broth. Adjust seasonings to taste. Simmer until ready to serve.
With so much to do in advance of Thanksgiving, it may seem a little nuts to make the gravy ahead but hear me out on this. There are two big reasons I like to make this vegan mushroom gravy, and neither is related to having a vegan guest at the table.
First, the final minutes before dinner are hectic—the turkey has to be rested before carving, and the oven braces itself for round two, as I shove a baking sheet of vegetables in to roast or a casserole for final re-heating. The warmed dishes all need to be brought to the table and you can’t really make the turkey gravy until after the bird has emerged from the oven. If something goes wrong with the turkey gravy (been there, done that), I love having the savory, earthy flavors of this mushroom gravy as a backup.
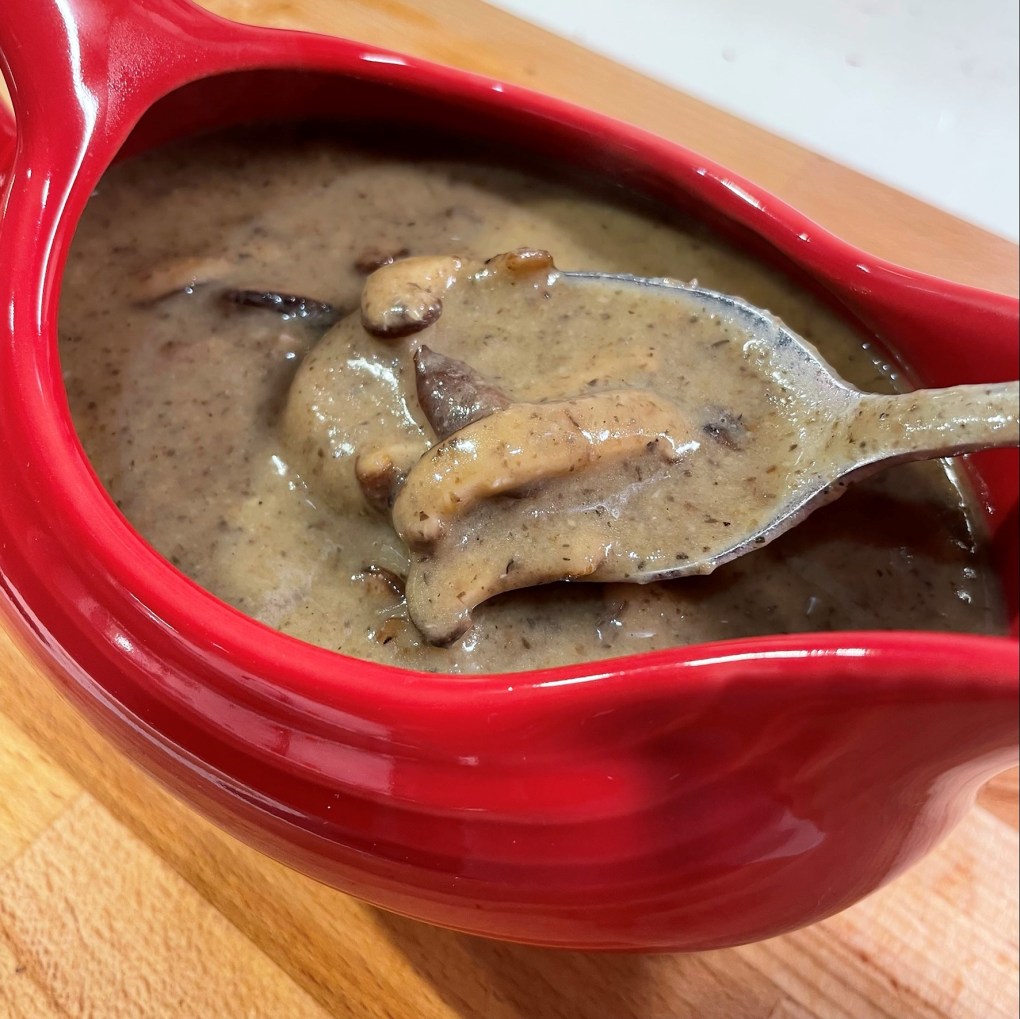
Mmmm, mushrooms!
Secondly, the mushroom gravy is less heavy—both in flavor and in calories—than a typical turkey gravy. It more than satisfies my craving for gravy without cranking up my cholesterol levels. Besides being completely delicious and easy to make several days ahead of the holiday commotion, this gravy can do double duty as a sauce for green bean casserole. And when we do have a vegan guest at the table, I like to do just one version of that dish for everyone to enjoy.
Rave reviews from all around the table, made from simple ingredients and easy to do ahead; this is a winner no matter how you slice, er, pour it. 😉
Ingredients
8 oz. carton of cremini mushrooms, cleaned and diced or pulsed in processor
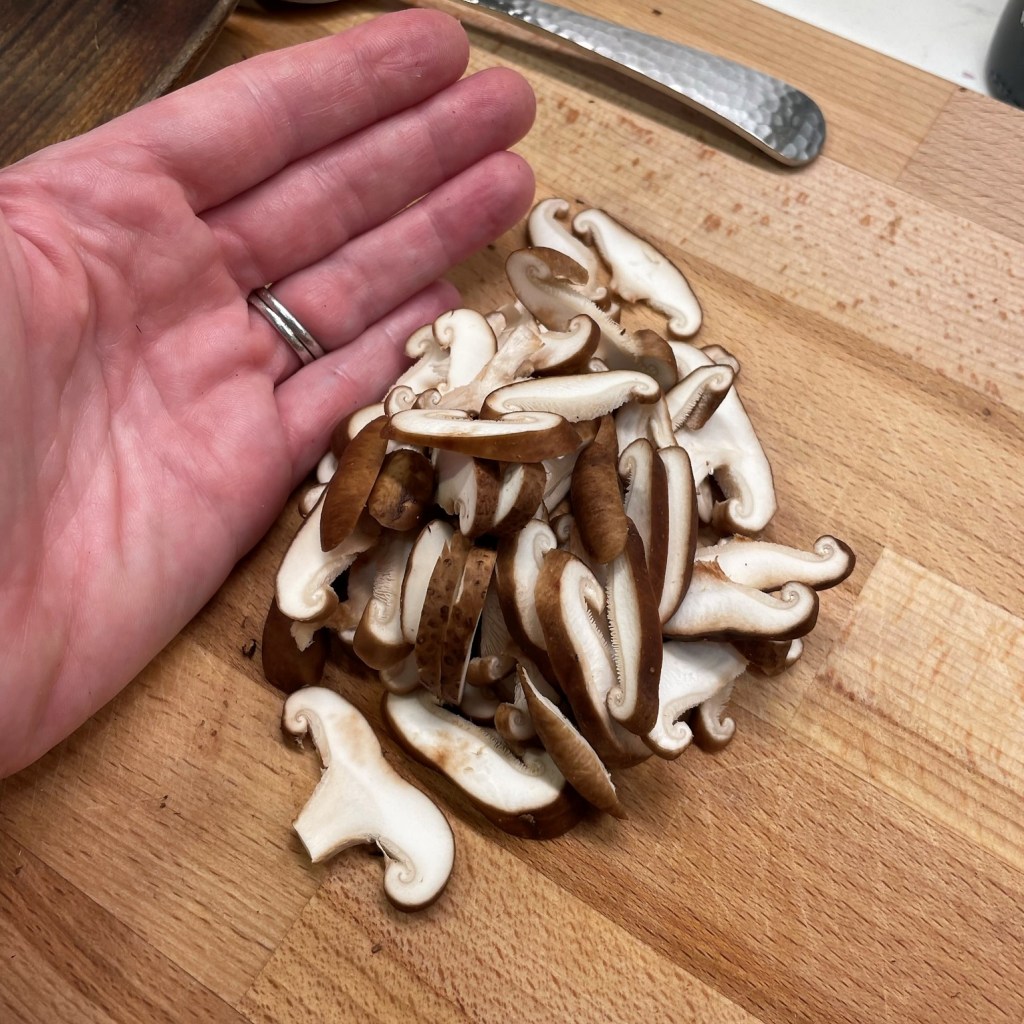
4 oz. shiitake mushrooms, thinly sliced
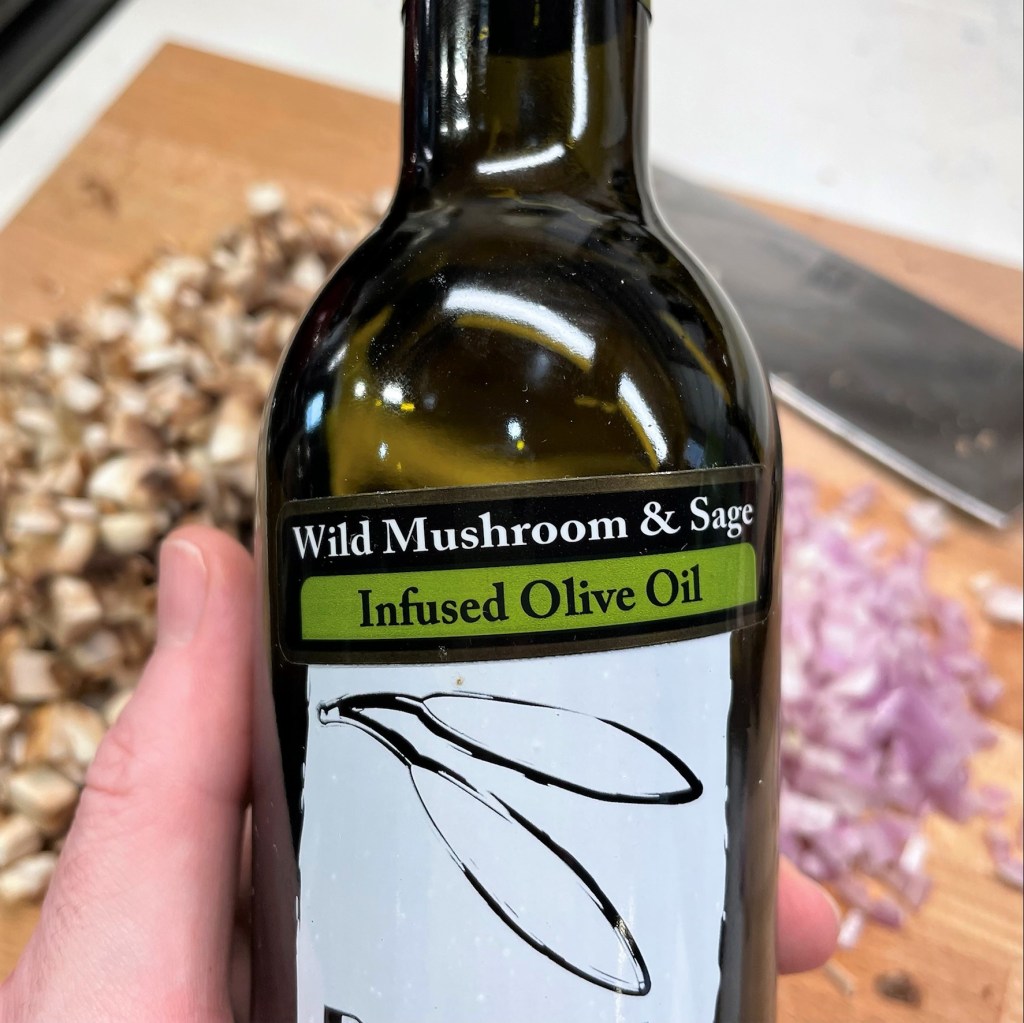
4 Tbsp. mushroom and sage-infused olive oil (+ 2 Tbsp. more later in the recipe)
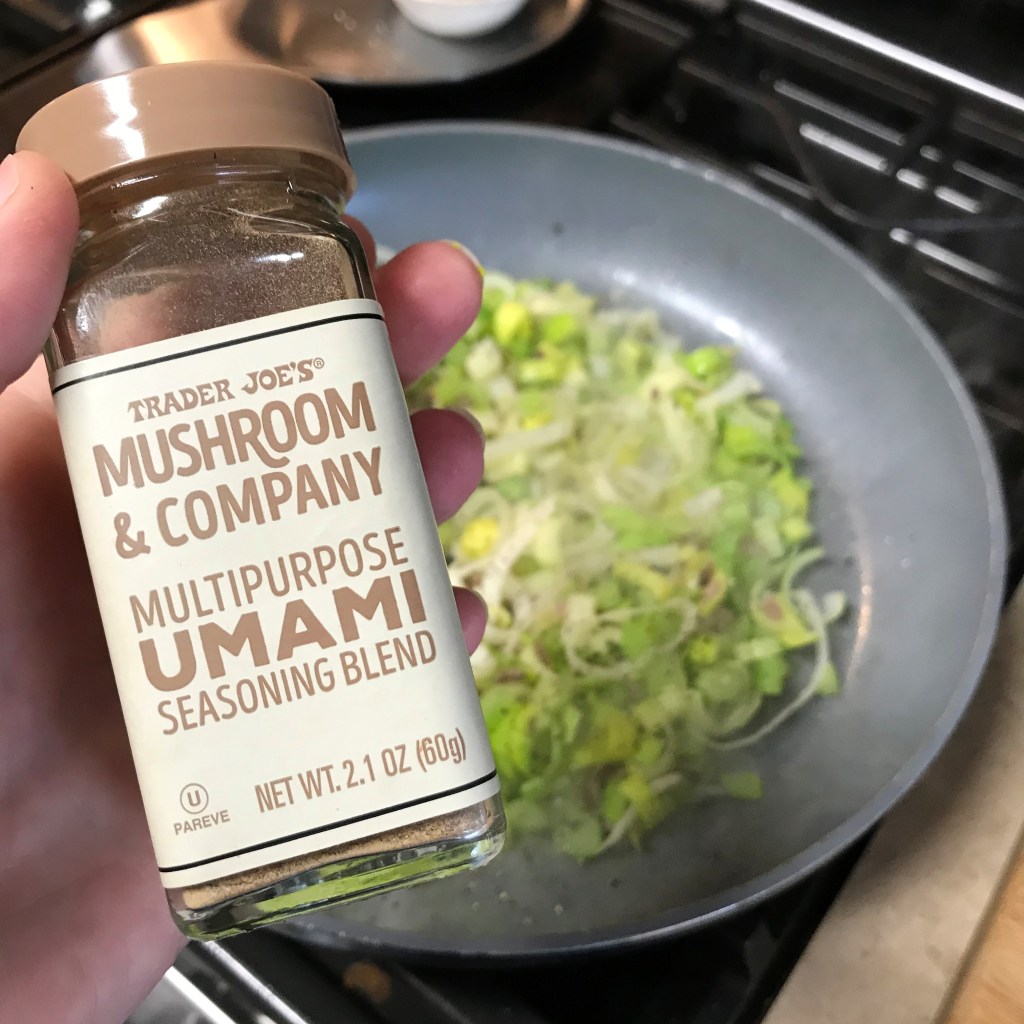
The umami seasoning is a Trader Joe’s product, and it gets plenty of use whenever I’m making a vegan dish. The ingredients are porcini and white mushroom powders, dried onions, ground mustard, crushed red pepper and dried thyme. It brings a depth of savory flavor to everything it touches, but if you cannot find it, I would recommend substituting with the flavors you do have and also use prepared mushroom broth in place of the vegetable broth. Look for mushroom broth in cartons in a well-stocked supermarket.
I always choose low sodium broths because it helps me control the overall sodium of a recipe. In this recipe, I specifically used a vegetable broth that does not contain tomatoes.
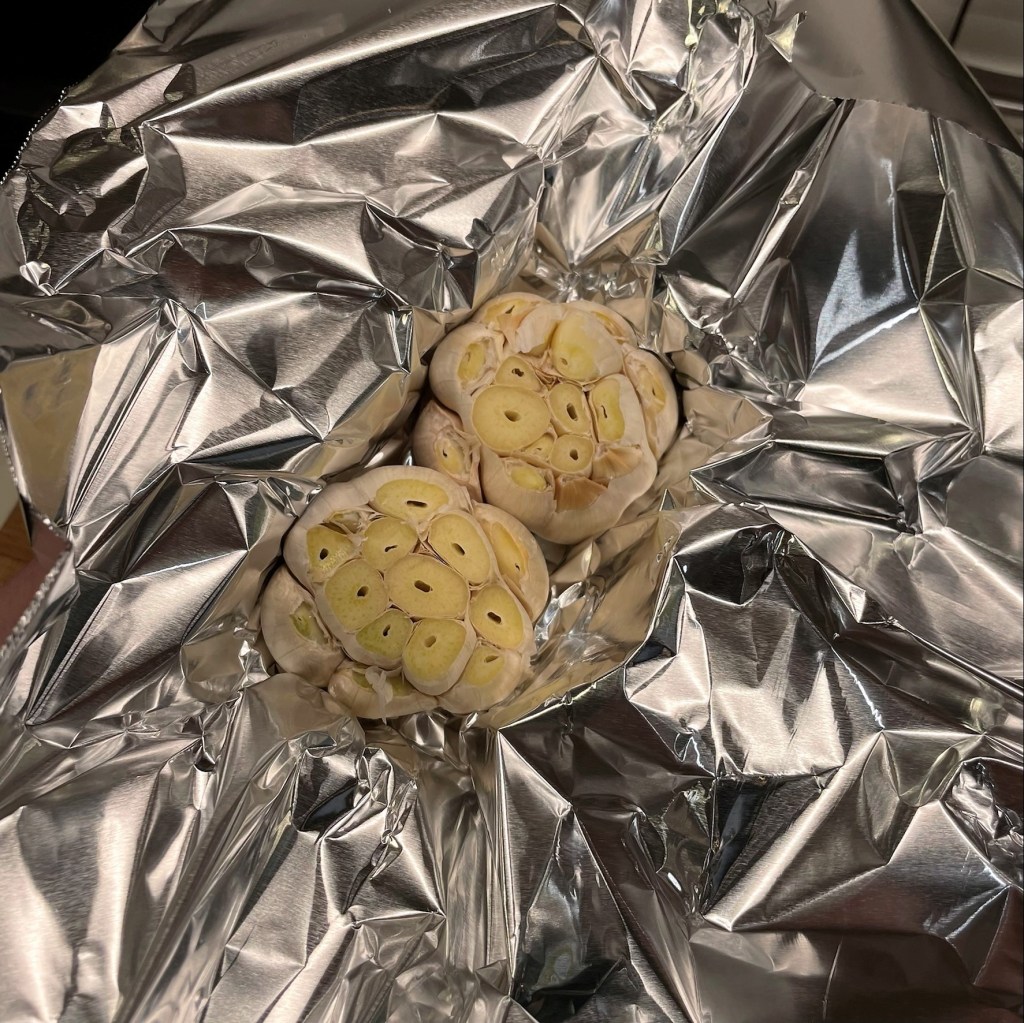
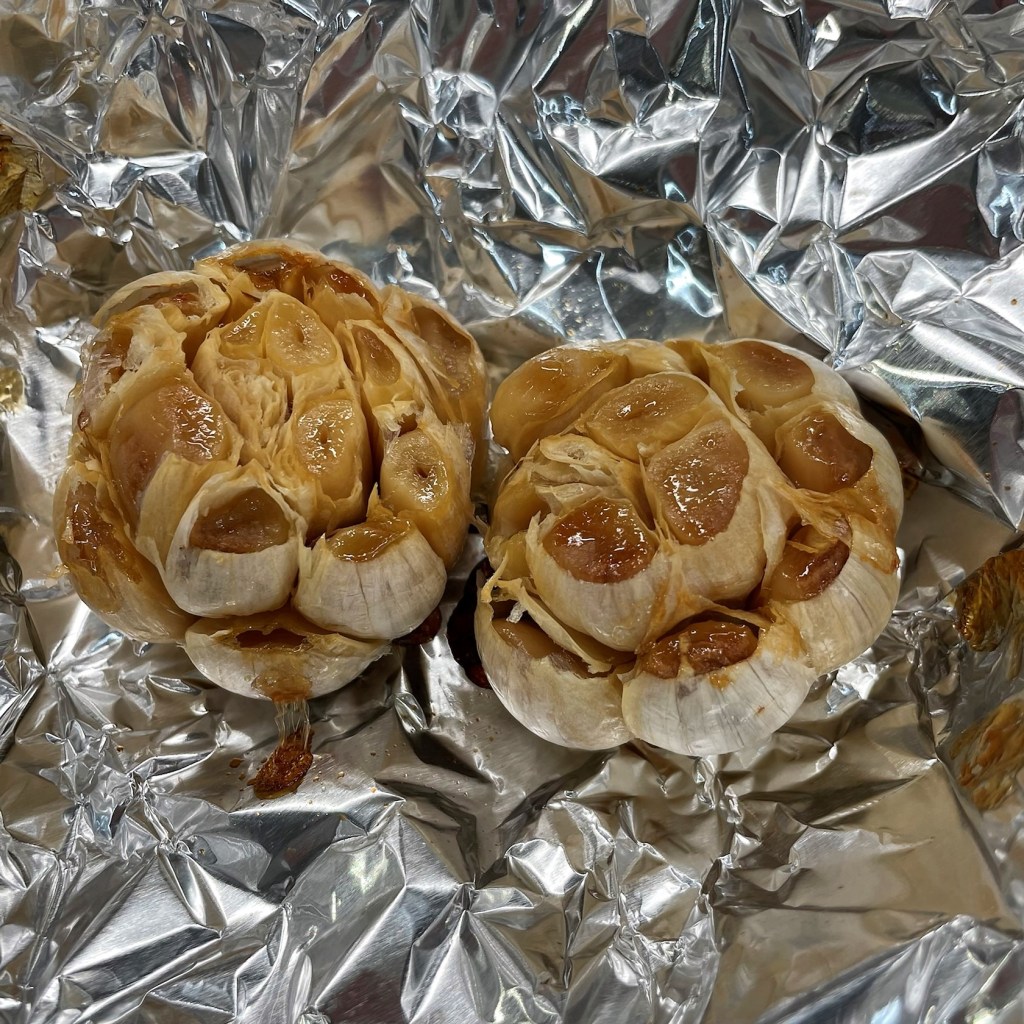
Roasted garlic is easy to make at home, and it gives a lot of depth and complexity to this mushroom gravy. If you have never made your own roasted garlic, please check out this post for step-by-step instructions.
Instructions
As usual, the photos tell the story better than written instructions. Please have a look at the slides and keep scrolling for a downloadable pdf for your recipe files.
First things first, make your roasted garlic, which is needed for this recipe. My instructions for this is linked in the ingredients list.
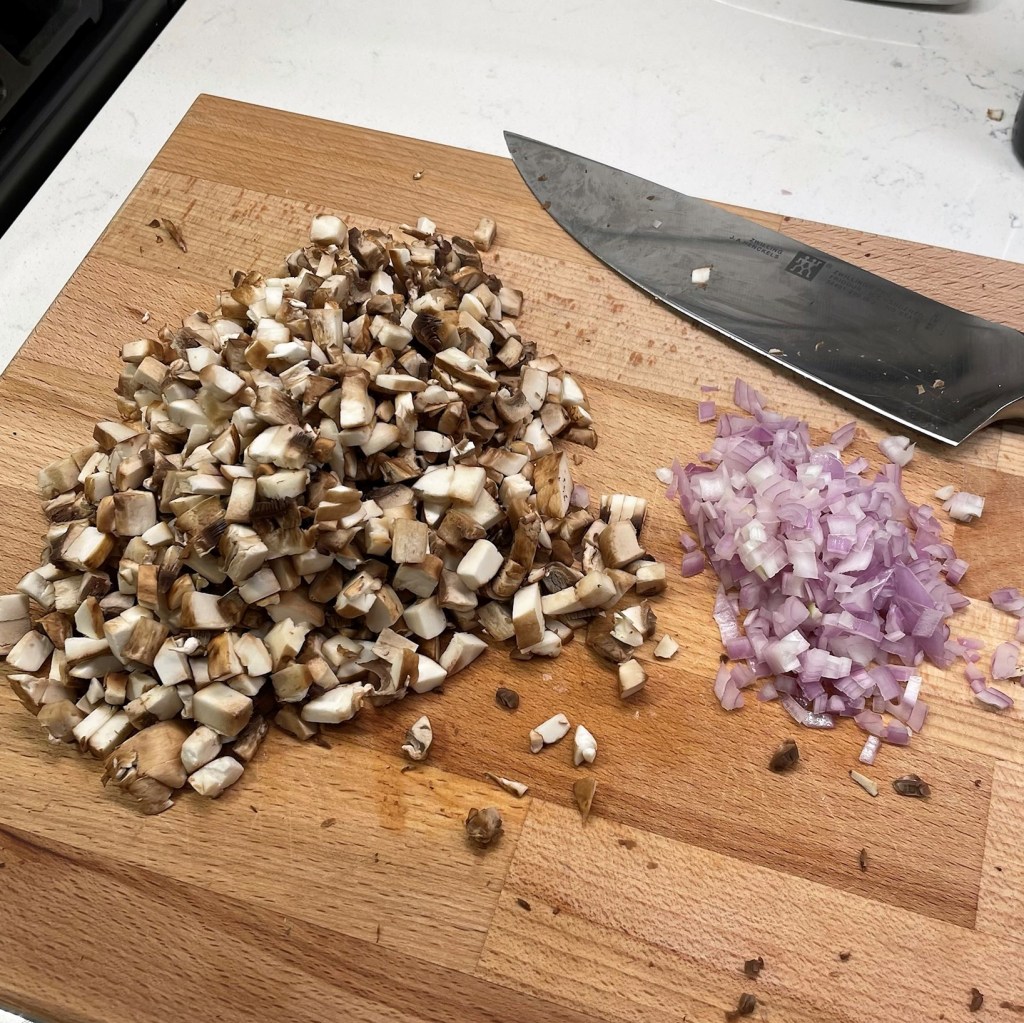
Cut the cremini mushrooms and shallots into a fine dice. If you prefer, use a food processor and pulse about six times.
I could not live without this stuff in the fall! If you don’t have a specialty olive oil store in your town, look for it online or swap in regular olive oil.
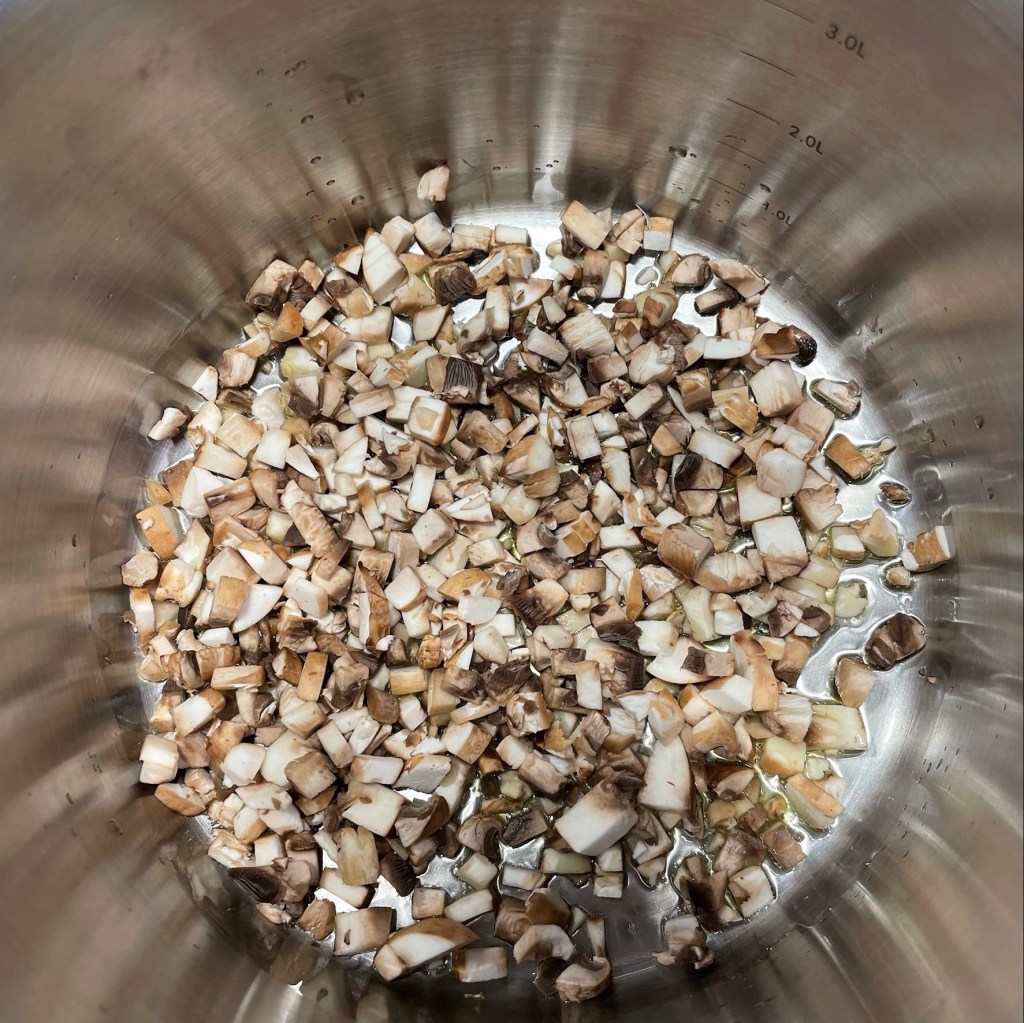
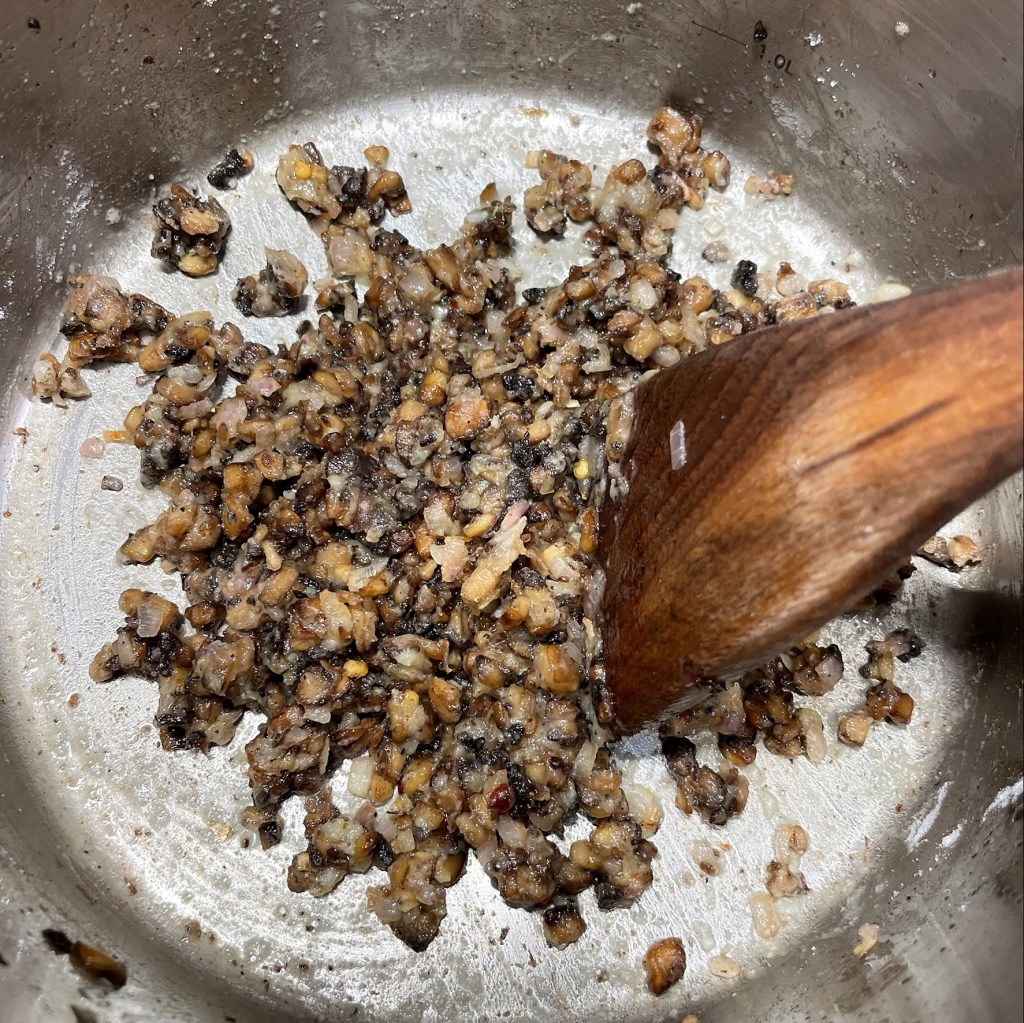
Cook half the mushrooms initially, so that they don’t overcrowd in the pan.
These two seasonings keep this gravy true to Thanksgiving, and still plant-based.
When the first mushrooms are softened, add the remaining mushrooms and continue to saute until golden.
Add an extra splash of oil to the center of the pot and then add the shallots.
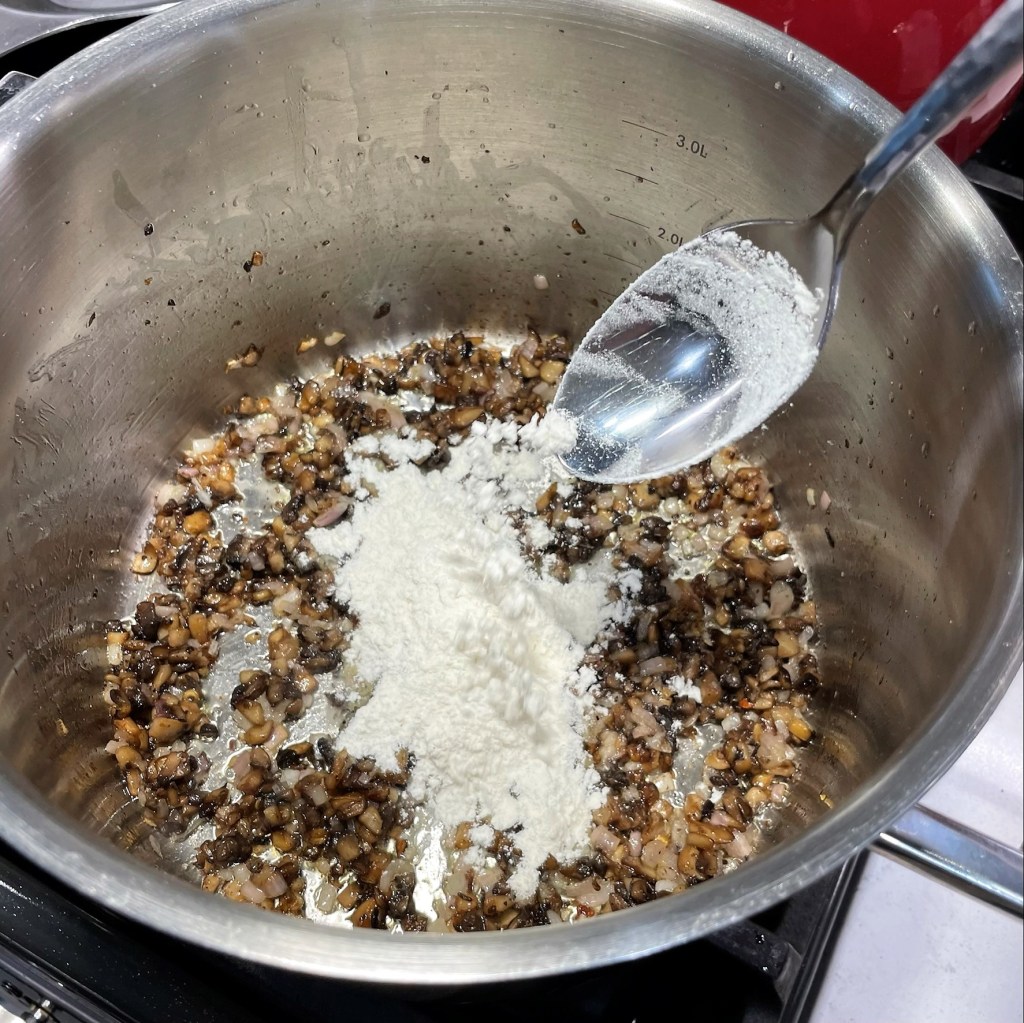
Measure about 3 tablespoons of flour into the mixture, and stir to coat evenly.
Cook this mix a few minutes so that the flour hydrates with the oil. If it seems dry or powdery, add a touch more oil.
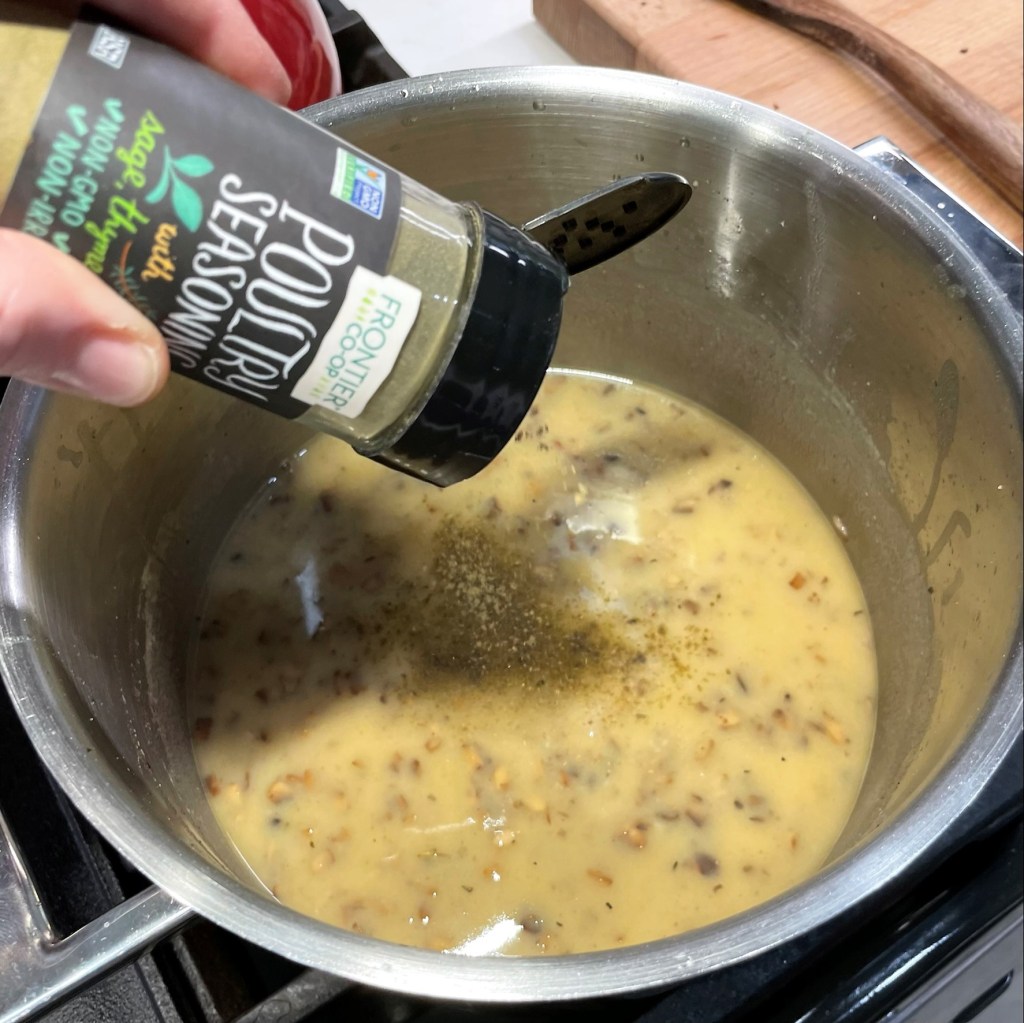
Low sodium vegetable broth adds extra layers of flavor. Mix it well until the gravy reaches a low boil, then simmer.
Despite its name, poultry seasoning has no poultry. It is usually a blend of sage, thyme and rosemary. Bell’s seasoning would be a terrific substitute.
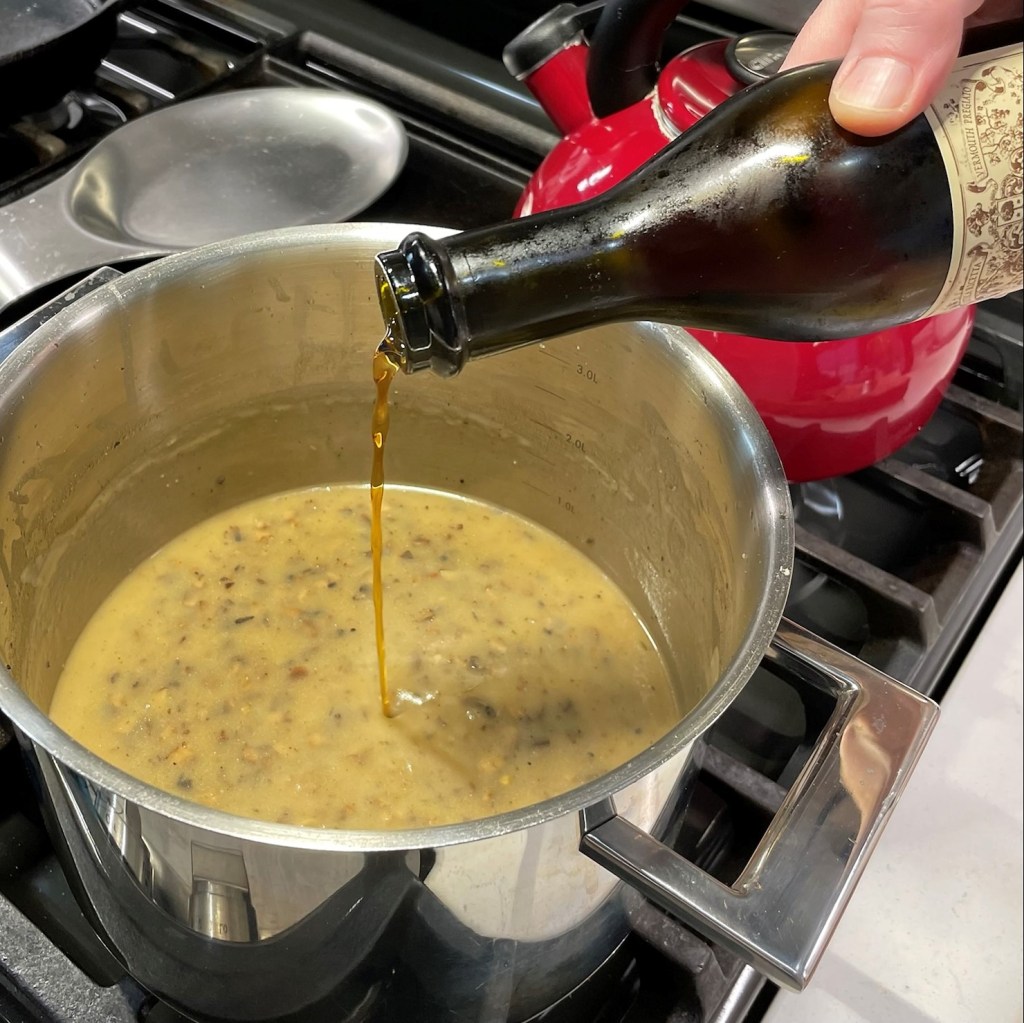
Add a splash of dry white wine. I went out on a limb this time and used a splash of red vermouth, but I like the white wine better.
Slice the shiitakes thin to add to the finished gravy. I love the texture and mellow flavor of shiitakes.
My garlic is ready! You want to roast it until it reaches this golden color. Only use one bulb in the gravy, and save the other for your mashed potatoes! 🙂
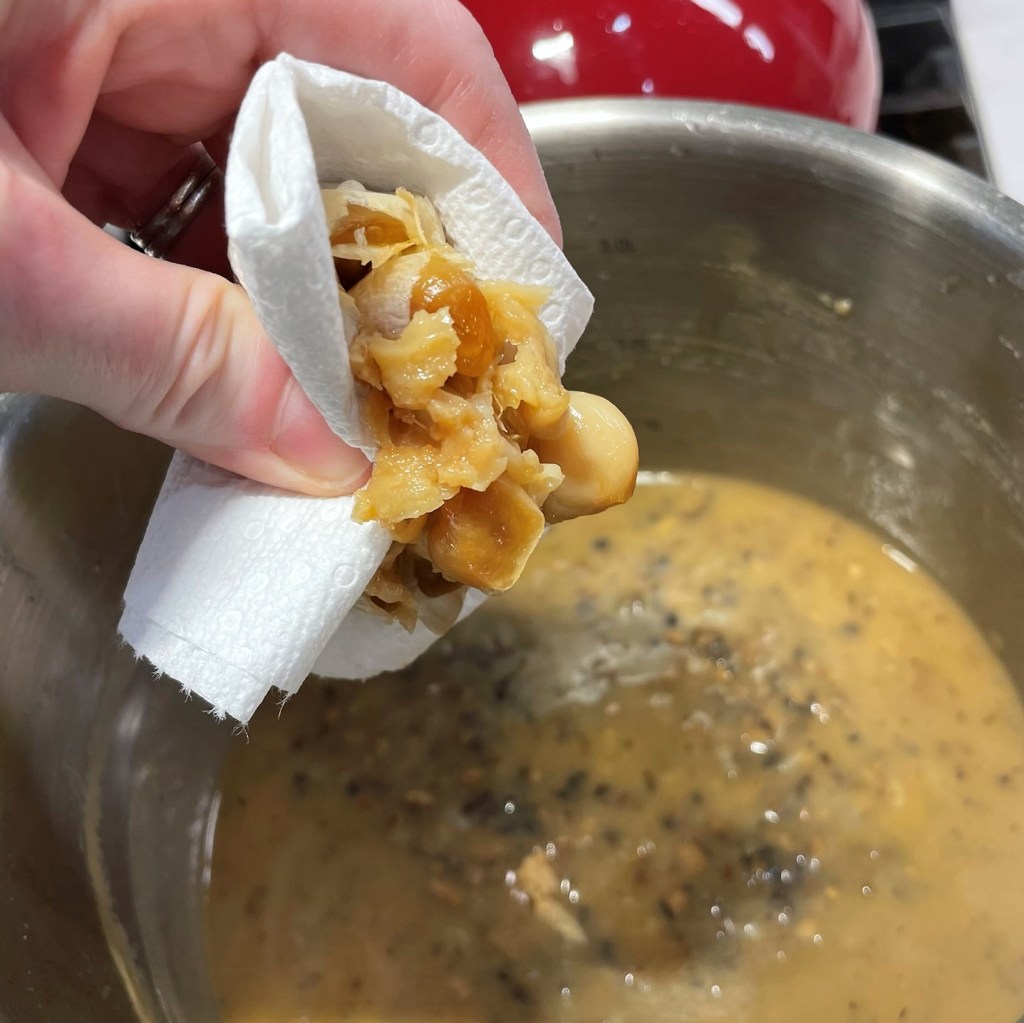
Grip the garlic bulb with a paper towel and gently squeeze the roasted cloves out, directly into the gravy pot.
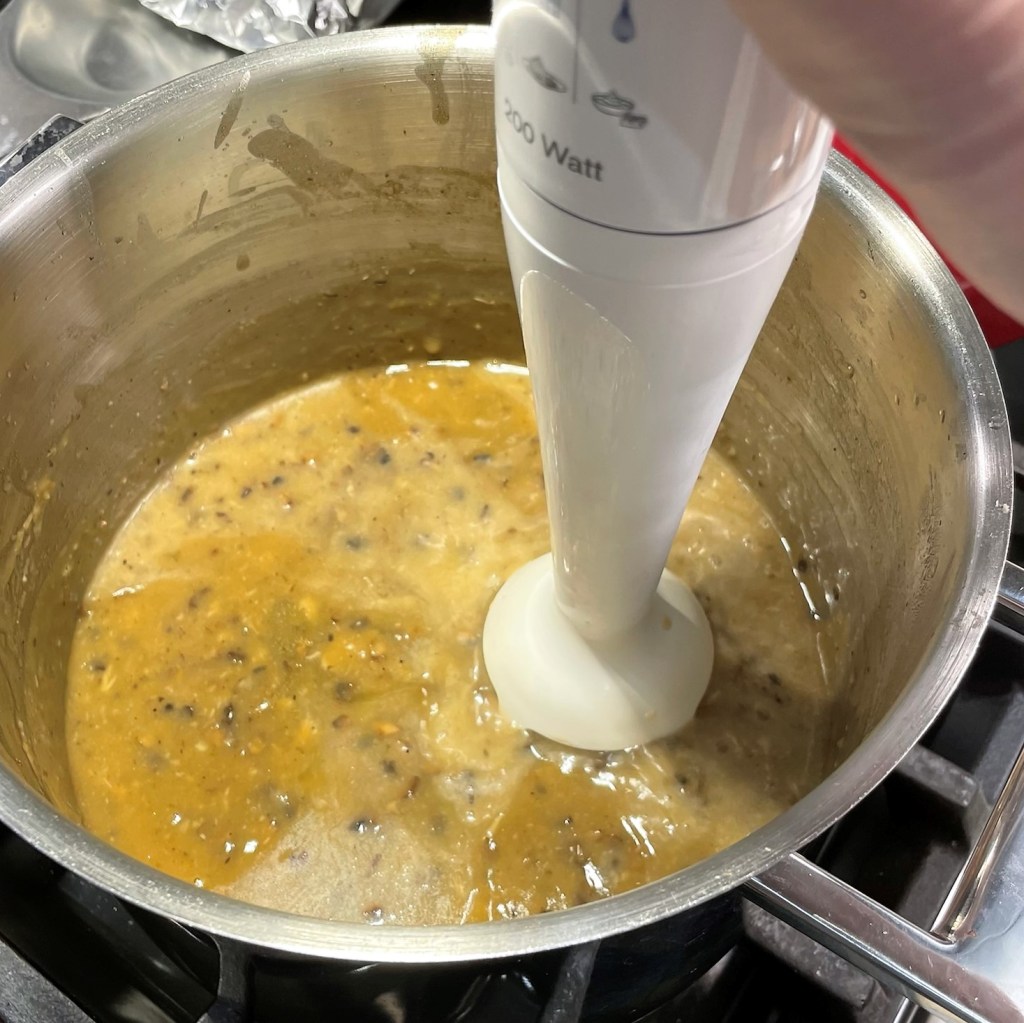
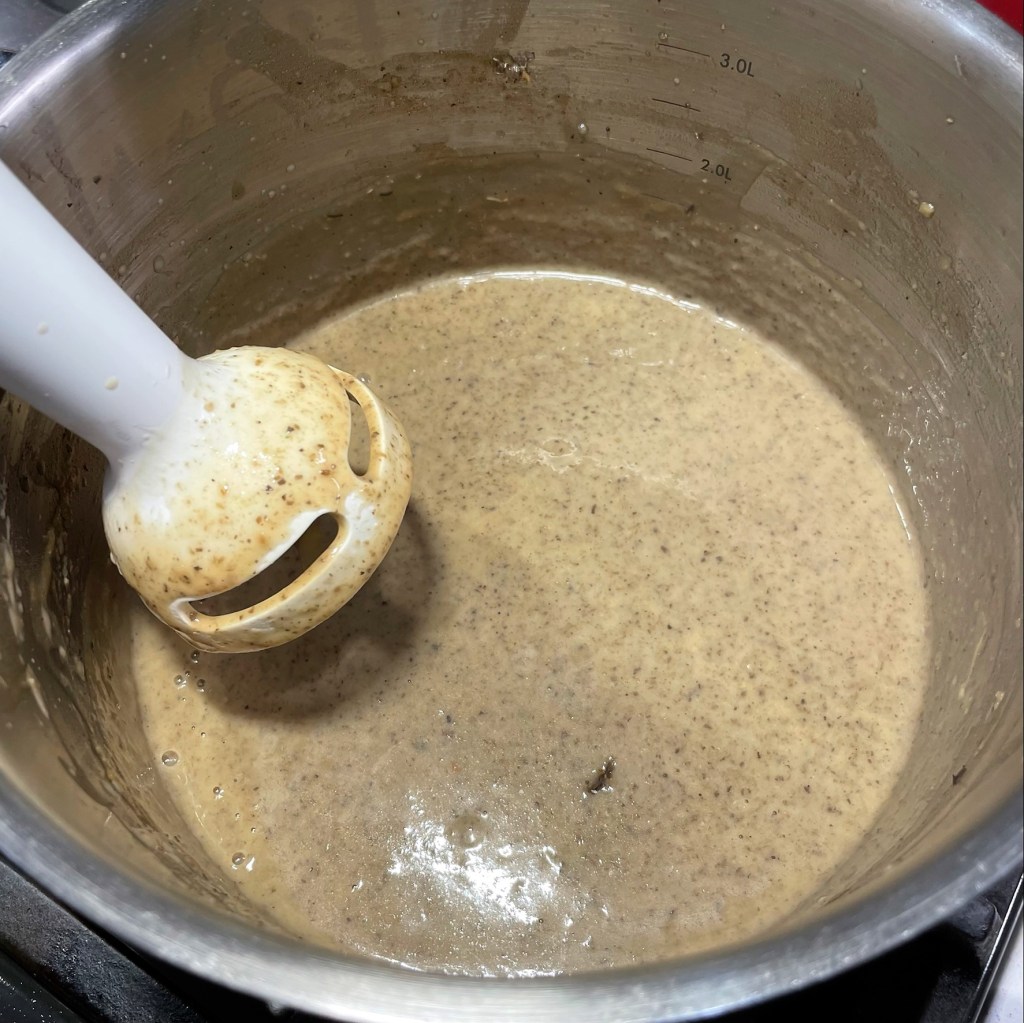
On a whim, I decided to use the immersion blender to puree the gravy. It is fine to keep the bits of mushroom as they are.
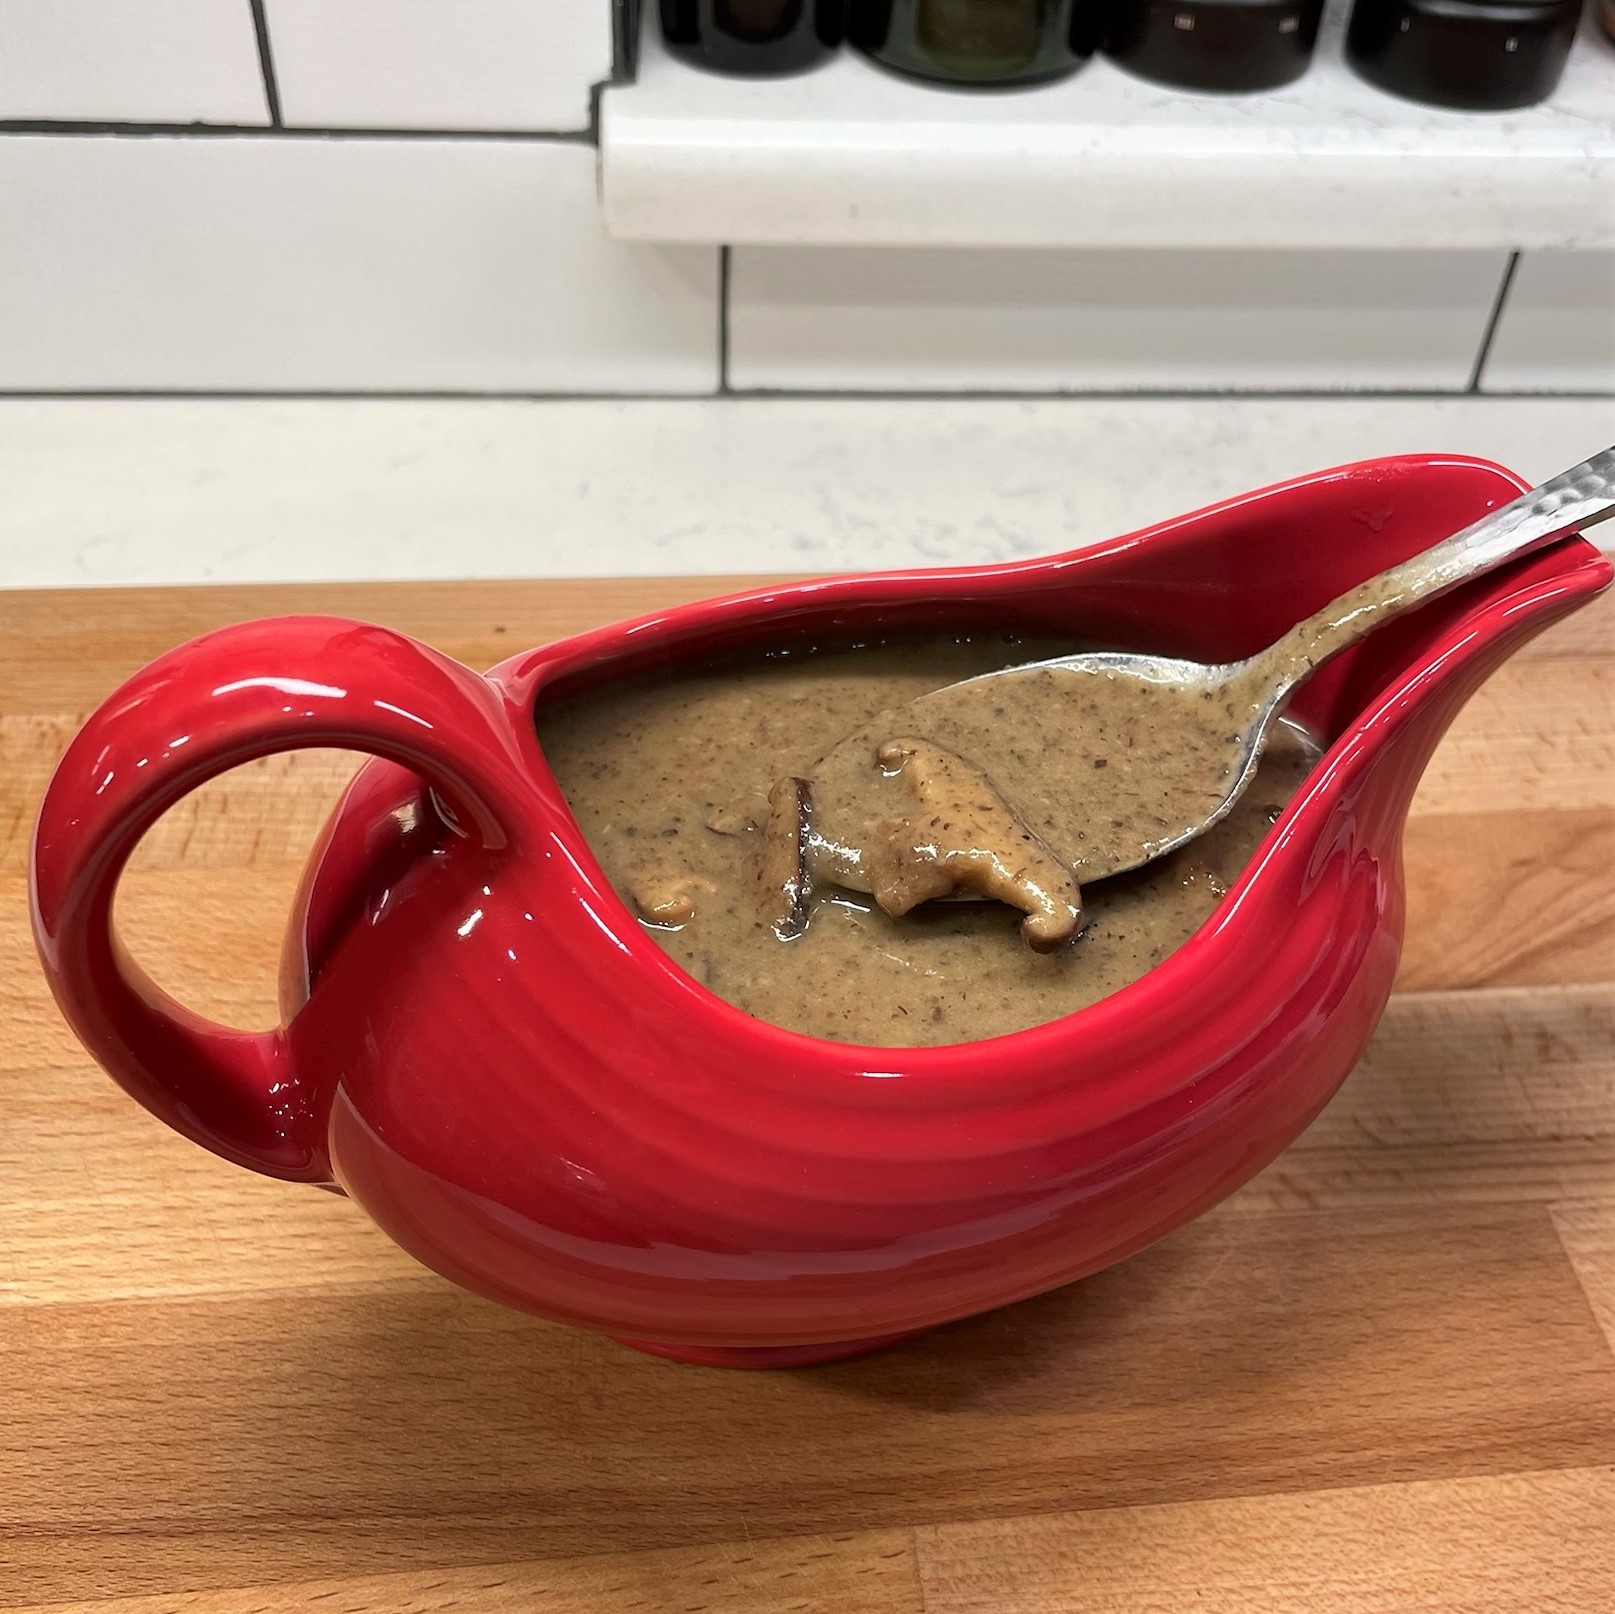
After blending, the gravy resembles a creamy mushroom soup.
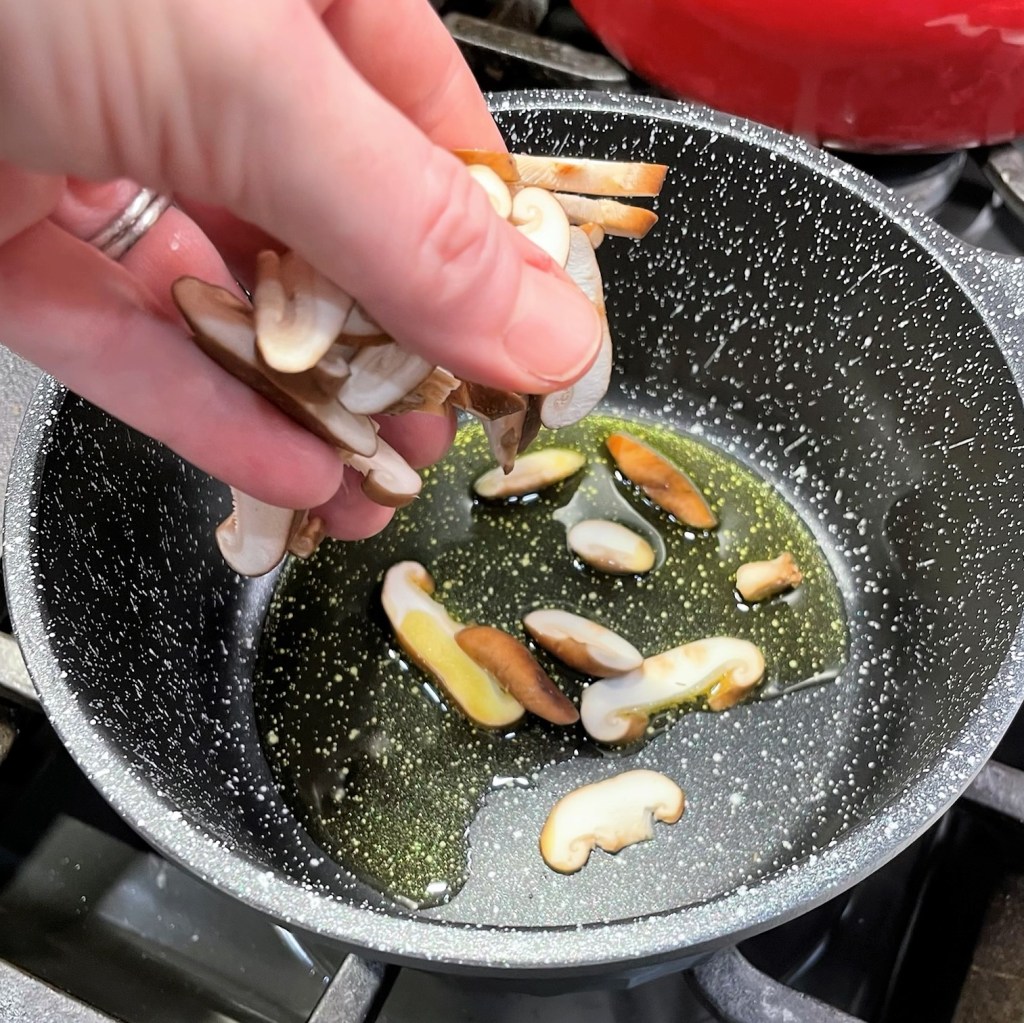
Brown the shiitake slices in a touch of olive oil, then add them to the gravy.
Call me to the table, already!
If you don’t already have your roasted garlic, go make that. Please don’t try to substitute with fresh sauteed garlic. The flavor will be too strong.
Heat 4 Tbsp. olive oil over medium heat. Sauté half of the mushrooms, tossing to coat them in the oil, until they give off their moisture and shrink in size. Repeat with remaining mushrooms. Season with salt, pepper and umami seasoning. Move the mushrooms to the sides of the pot.
Swirl another tablespoon of oil into the center of the pot and add the shallots. Saute until slightly softened. Add flour and toss until absorbed into the oil. The mixture should look somewhat pasty, but not dry. Add a final tablespoon of oil if needed to reach this consistency. Cook the mixture for a minute or two.
Add vegetable broth all at once and stir continuously for a minute or two to hydrate the roux. Bring to a slight boil, then reduce heat and simmer for 10 minutes until mixture is thickened. Stir in wine and simmer over very low heat for about an hour.
Squeeze in the entire bulb of roasted garlic, taking care to not drop the garlic paper into the pot. Use a whisk to ensure the garlic is fully blended, or use an immersion blender to whip the gravy into a smoother consistency.
In a small skillet, heat 1 Tbsp. olive oil and sauté the sliced shiitake mushrooms until softened and slightly browned, then stir them into the gravy. Serve immediately or refrigerate up to three days ahead.
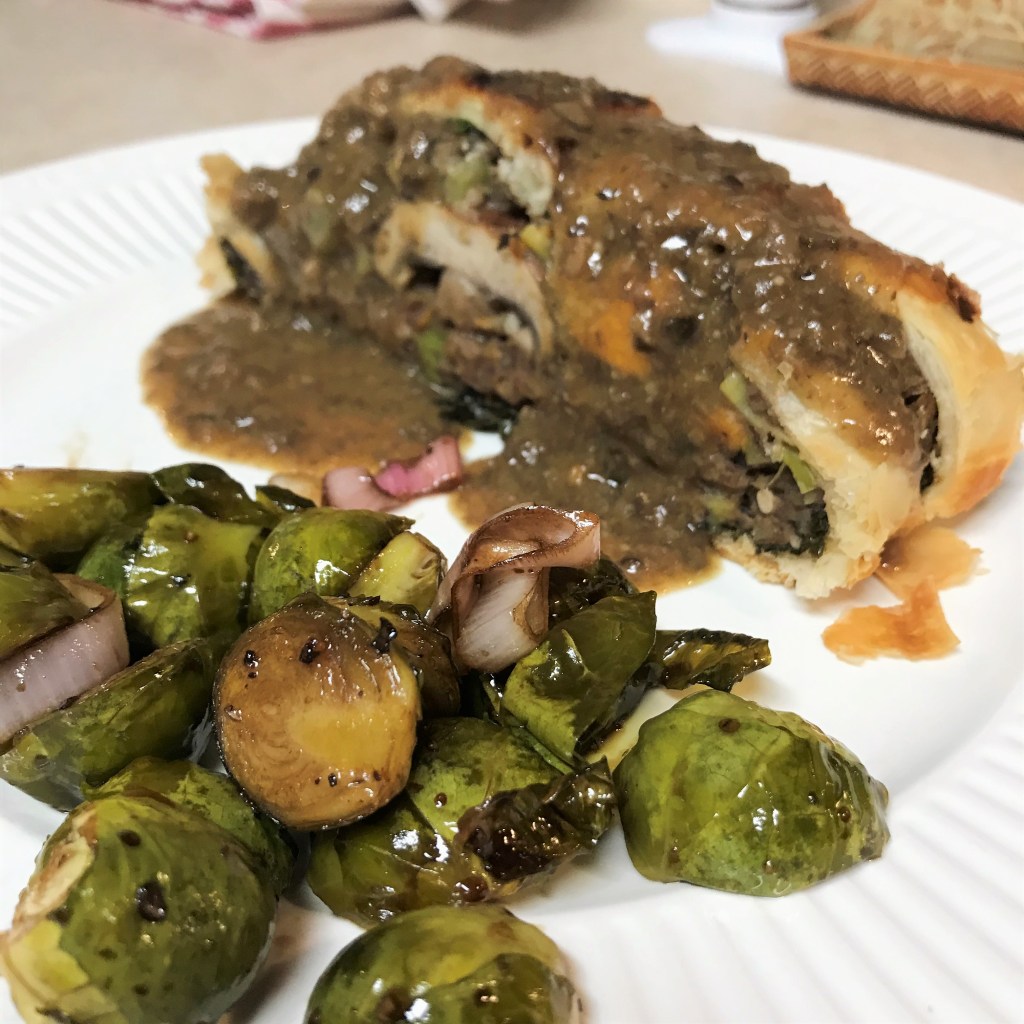
This gravy has so much rich, savory flavor, you’ll never miss the meat.
This gravy is delicious on a lentil mushroom wellington or use it as a substitute for cream of mushroom soup in any casserole you’d like to convert to vegan.
Thanksgiving is the favored holiday at our house. My husband, Les, and I both love preparing the traditional meal and we made an agreement early in our relationship to alternate responsibility for the turkey. We love having friends and family at the table and, more often than not, the friends outnumber the family members by at least two-to-one. I have no children, and Les’s two adult kids can’t always make it. His son, Alex, lives and works in Europe, and has only been here for one holiday season since I’ve known him. His daughter, Sydney, lives two hours away in the mountains of North Carolina, but she also sometimes has her own plans with her mother’s family or her friends. When she is able to join us, though, I have more than a few adjustments to make to the menu because Syd is vegan.
If the idea of having a vegan at the holiday table scares you, then I hope this recipe brings some relief. It most certainly will bring some big Thanksgiving flavor, and everyone at our table—vegan or otherwise—has asked for seconds. One of my friends, a regular guest at our Thanksgiving table, has been begging me for almost two years to share this recipe, so she is probably screaming right now to finally see it on my blog (you’re welcome, Linda). 😉
There’s so much texture and flavor, you will never miss the meat.
You might wonder, “why not just share it with your friend after the first request instead of making her wait?” Linda (who is not a vegan) has been asking the same, and the reason is simple—I didn’t actually have a recipe for it. As I have said many times about my way of cooking, I develop recipes by instinct (otherwise known as flying by the seat of my pants), and it has only been since I began blogging that I have bothered to write down how much of what goes into most of my dishes. The first time I made this lentil mushroom wellington, I couldn’t even quite remember all the ingredients so there was no possibility of describing it to someone else. But just after Christmas last year, I made the dish again when Syd came for a post-holiday visit—and on that occasion, I kept my notes—but I didn’t post it on the blog right away because the holidays were over at that point and I doubted that anyone would want to make a fuss over such a showstopper without a special occasion. It isn’t exactly a quick weeknight recipe.
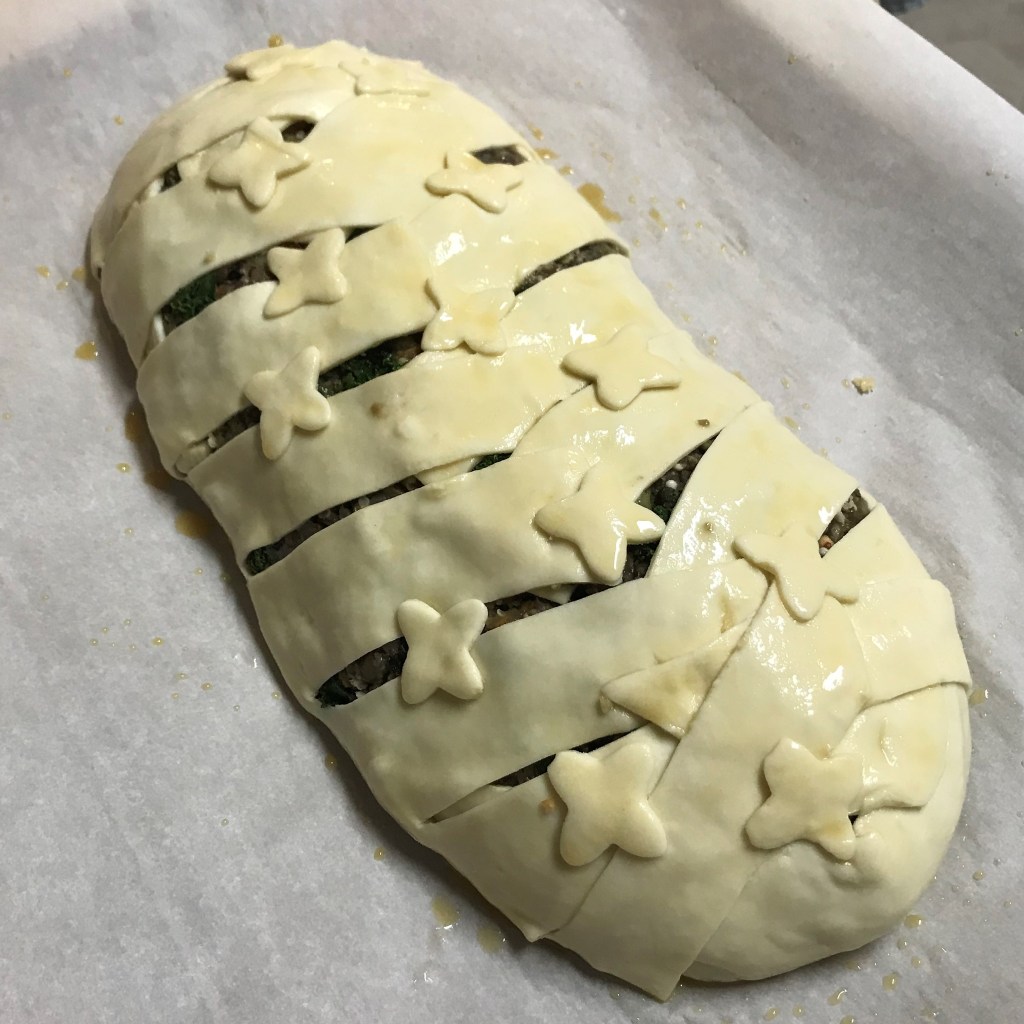
In the spirit of full disclosure, this dish does take time and effort, though none of it is difficult. If you wish to make it for Thanksgiving, perhaps for a vegan guest at your table, the good news is that almost all of it can be done in advance. You will find most of the ingredients familiar—cooked lentils, rice blend, cremini mushrooms, kale, sweet potatoes and (vegan) puff pastry—and I’ll describe in more detail how I put the whole thing together and even gave it a faux “egg wash” before baking, to give it a golden crust while keeping it plant-based.
Now, with the holidays upon us, the timing is right and I have a written-down recipe to share. So for Linda, and anyone else who wants to enjoy a pretty, entirely plant-based meal that still captures the essence of Thanksgiving, here is my recipe for the lentil mushroom wellington. Enjoy!
Arrange the whole mushrooms inside the wellington for a beautiful sliced presentation inside the flaky crust.
Ingredients
1 cup uncooked lentils, rinsed and picked over* (see notes)
3/4 cup uncooked brown rice or rice blend
32 oz. carton low-sodium vegetable broth
1 or 2 bay leaves
2 large sweet potatoes, peeled and cut into bite-size cubes
Extra virgin olive oil*
1 leek, cleaned and sliced (white and light green parts only)*
Liquid from a can of chickpeas (use low-sodium; reserve the chickpeas for another use)
1 Tbsp. milled flax seed*
1/4 cup pecan pieces, toasted
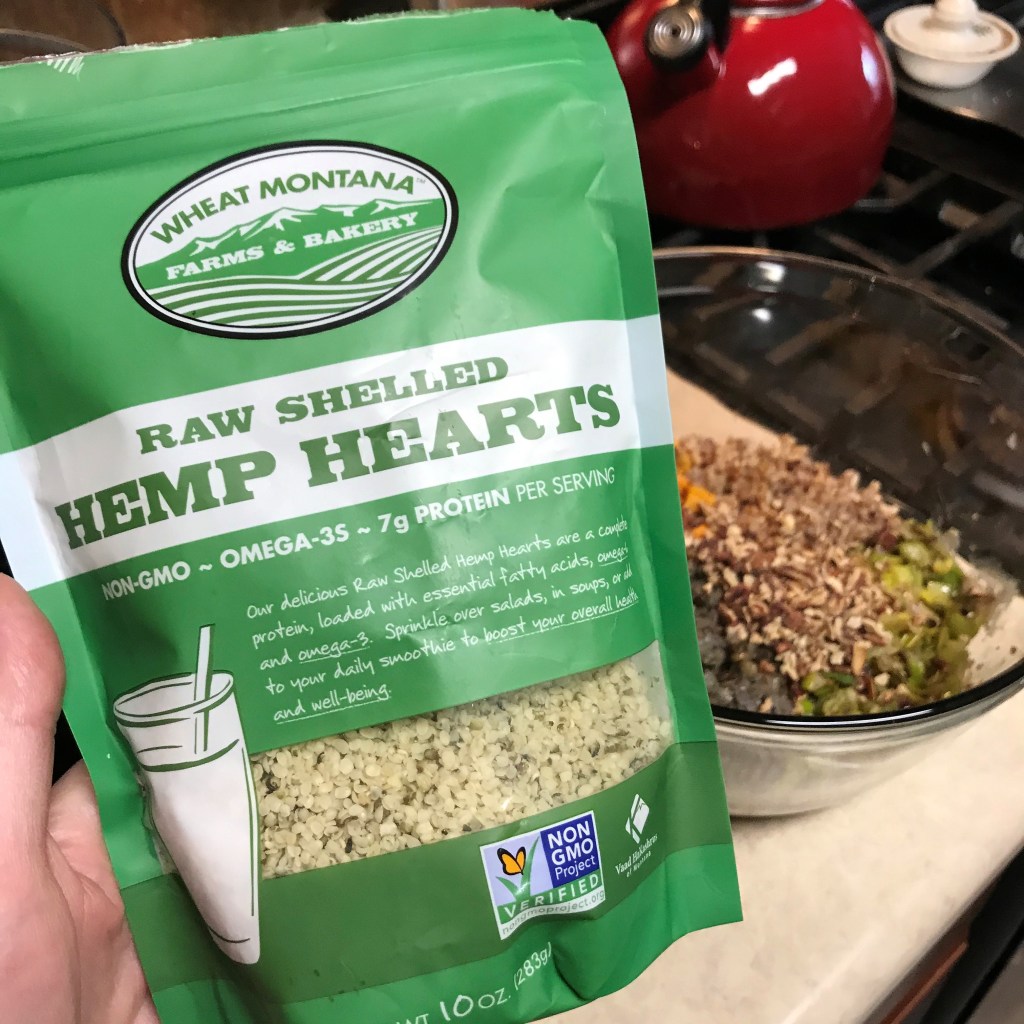
3 Tbsp. hemp hearts
A pinch (or two) of dried thyme leaves (or several sprigs of fresh thyme, if you have it)
Freshly ground black pepper to taste
1 sheet puff pastry (choose one with plant-based ingredients, such as Wewalka or Pepperidge Farm)
Flour to dust the countertop
Small handful (about 1/4 cup) of panko bread crumbs
For brushing, in place of egg wash:
1 Tbsp. plant milk, such as almond or soy
1 Tbsp. real maple syrup
1 Tbsp. canola or avocado oil
*Notes
I use a lentil blend, which includes green, red and black beluga lentils. If you choose a single type of lentil, I would recommend using the green ones. Cook the lentils in vegetable broth rather than plain water. Why miss a chance to add flavor?
My go-to olive oil this time of year is the wild mushroom and sage-infused oil found in specialty olive oil and balsamic vinegar stores. But any olive oil is fine, or substitute canola oil or a favorite plant-based butter, if you prefer.
If using leeks, be sure to clean them properly to remove all traces of grit between layers. Drain and pat completely dry on layers of paper towel before sautéing. If preferred, substitute 1 medium sweet or yellow onion.
The umami seasoning blend is a product sold at Trader Joe’s, and its flavors include dried mushroom, onion, garlic and red pepper flakes. If you can’t buy it, you can substitute with a combination of onion powder, garlic powder and a couple shakes of red pepper flakes, plus a pinch of salt. You might also want to mince up a couple of mushrooms to sauté with the kale or leeks to add earthy flavor to the lentil loaf.
Flax seeds are loaded with Omega-3 fats and very good for heart health, but you may not know that our bodies only reap that benefit when the seeds have been milled. You can buy flax seed already milled, but keep it fresh in a tightly sealed container in the fridge or freezer. I purchase bags of whole flax seeds and use my blade-style coffee grinder to mill it a little at a time as I need it. For this recipe, it’s essential for the flax to be milled because it will be used in place of an egg as a binding agent.
I chose a combination of cremini mushrooms and shiitake mushrooms for this recipe. Use the largest ones you can find; mine were each about the size of a silver dollar. Clean the mushrooms as suggested in the slideshow before sautéing them.
There are many components to this recipe, and I believe it is helpful to break it down into manageable tasks over two days, beginning with preparation of the lentils, rice, sweet potato and vegetable mixtures (steps 1-6). On the second day, you can relax and focus on assembling and baking the dish.
Helpful tools for this recipe: food processor or small blender, rolling pin, pastry brush.
Instructions
Cook the lentils in vegetable broth rather than water. In addition to the flavor they bring, lentils are an excellent source of protein.
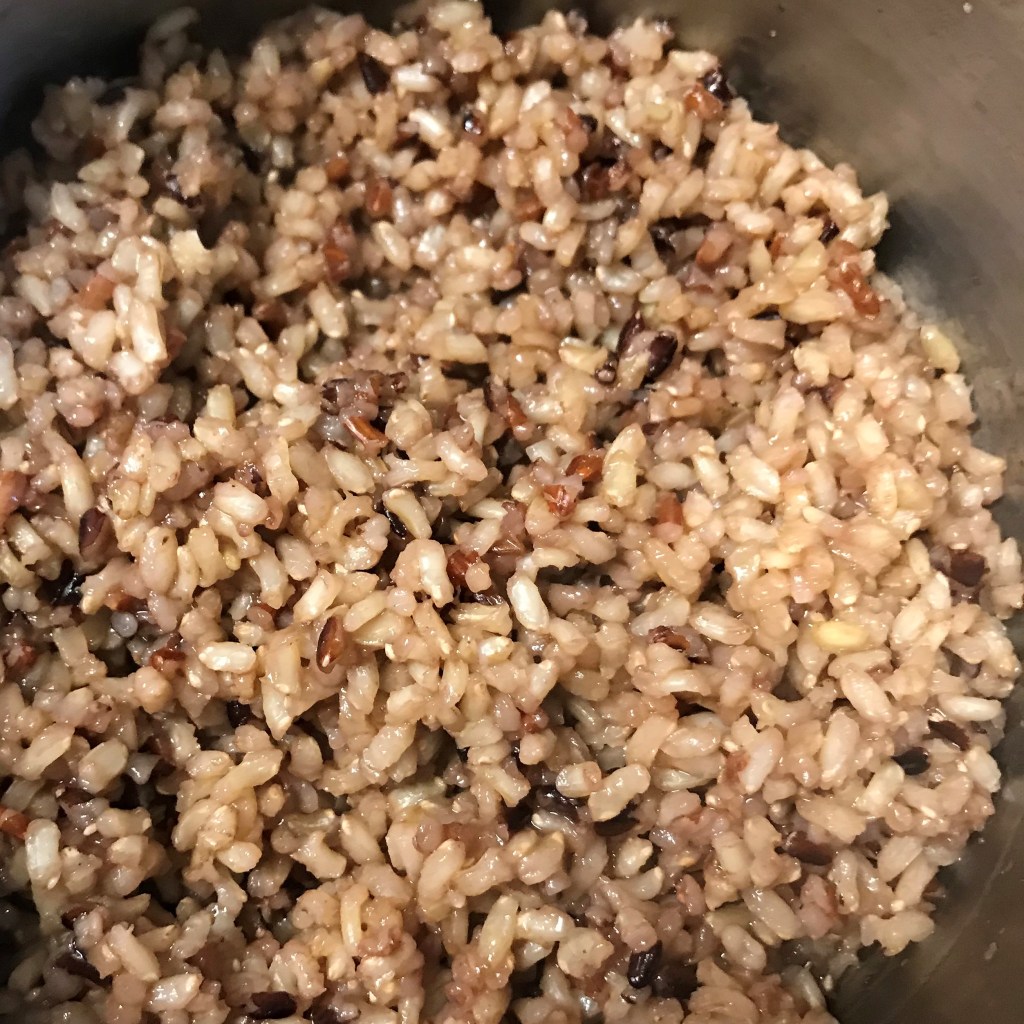
Likewise, cook the rice in vegetable broth. I like the extra flavors of a rice blend, but regular brown rice is fine.
Toss the sweet potato chunks in olive oil and season with salt and pepper. Roast until tender (but still holding shape) with browned edges.
Slice the leek lengthwise, then into half-moon slices. Rinse well to remove any grit trapped between layers.
This is what I call a “fat handful” of kale. Trim off tough stems and chop it into bite sized pieces.
Saute the kale until it is softened and lightly browned at the edges.
Add umami seasoning when you saute the leeks. This is one of the easiest ways to add a rich, meaty flavor to vegan dishes. See the recipe notes for substitution ideas.
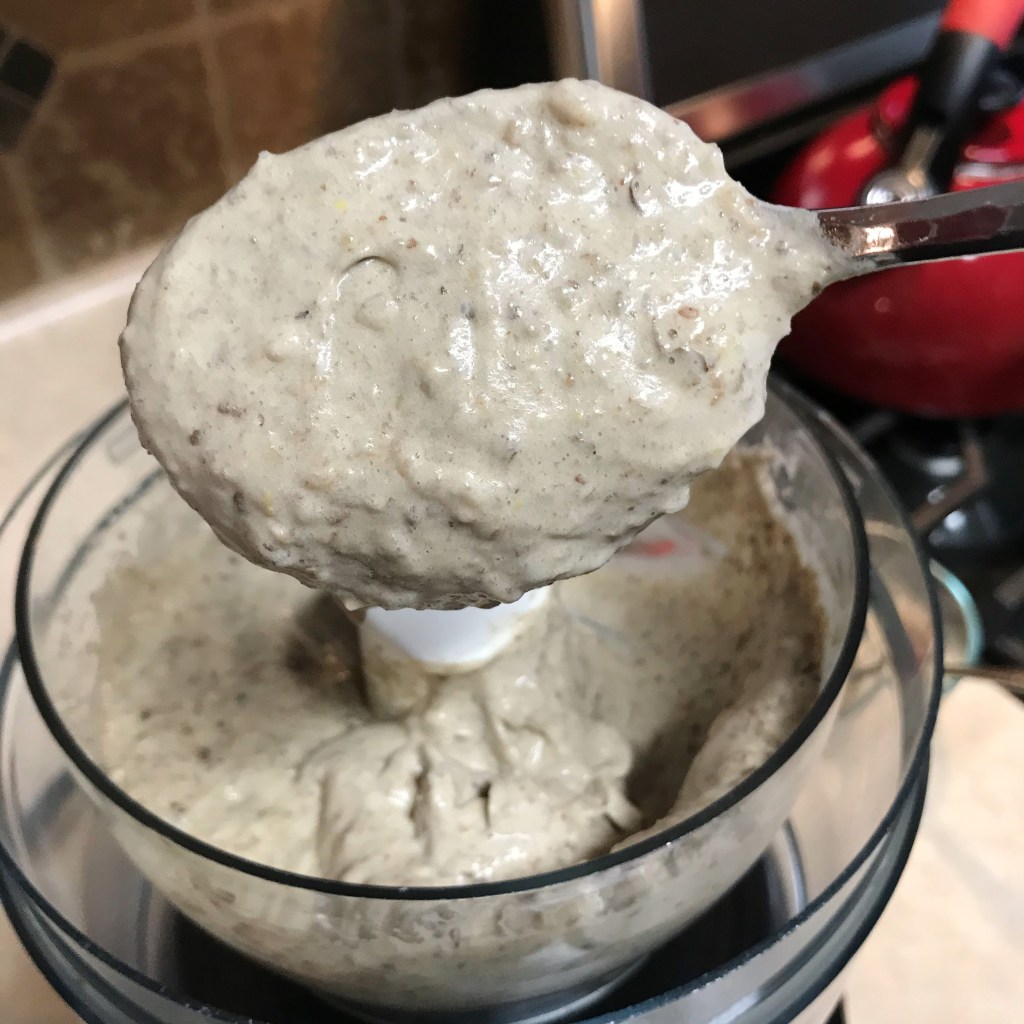
You can make a flax “egg” using milled flax seed and plain water, but for savory recipes, I prefer to use the reduced liquid from a can of chick peas, called aquafaba.
After several minutes, the flax will absorb the aquafaba and create a thickened, gel-like substance. This will be the binder that holds the lentil mixture together.
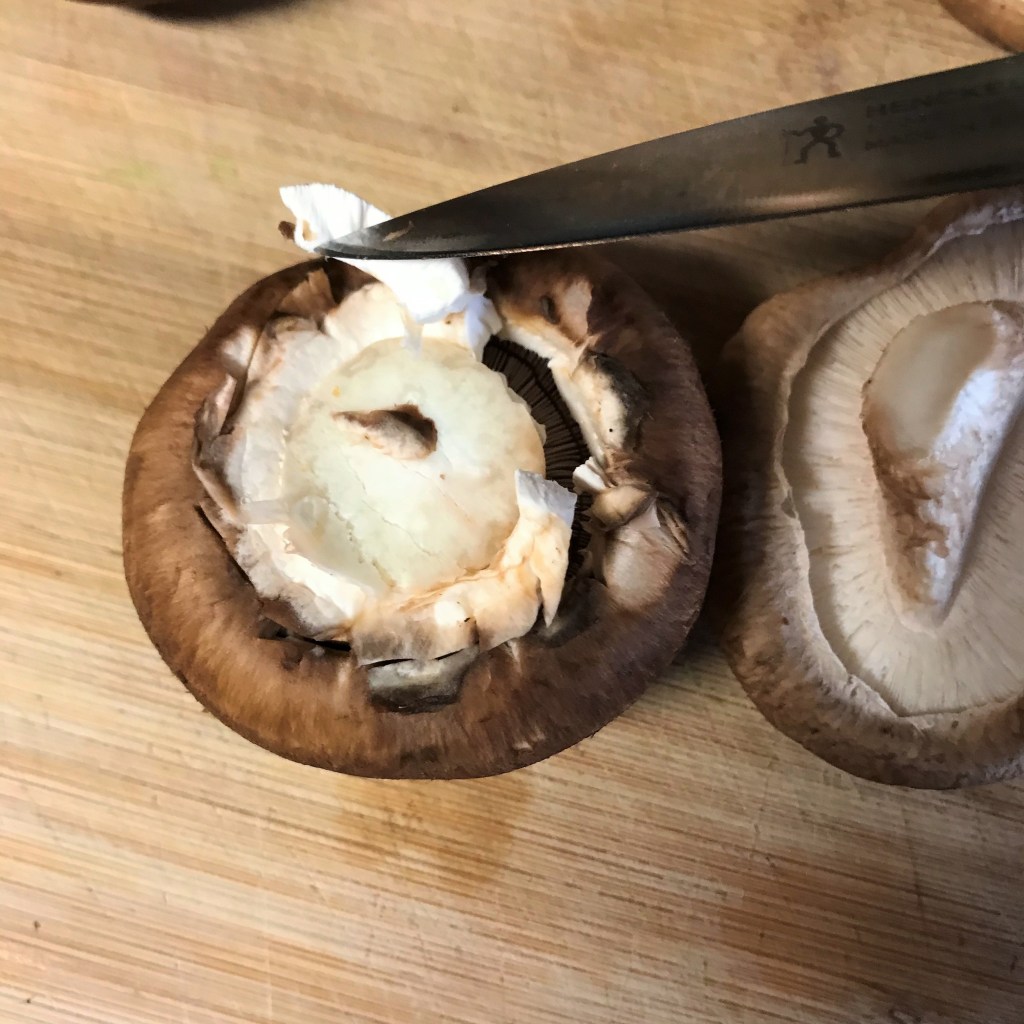
Use a paring knife to cut away the spongy, white edges around the stem of the cremini mushrooms, and pluck it away from the stem.
With the fluffy rim removed, moisture won’t get trapped under the mushroom cap.
Saute the mushrooms until browned, turning several times, to draw out excess moisture.
Lay the mushrooms on layers of paper toweling, to drain the excess moisture from the bottoms.
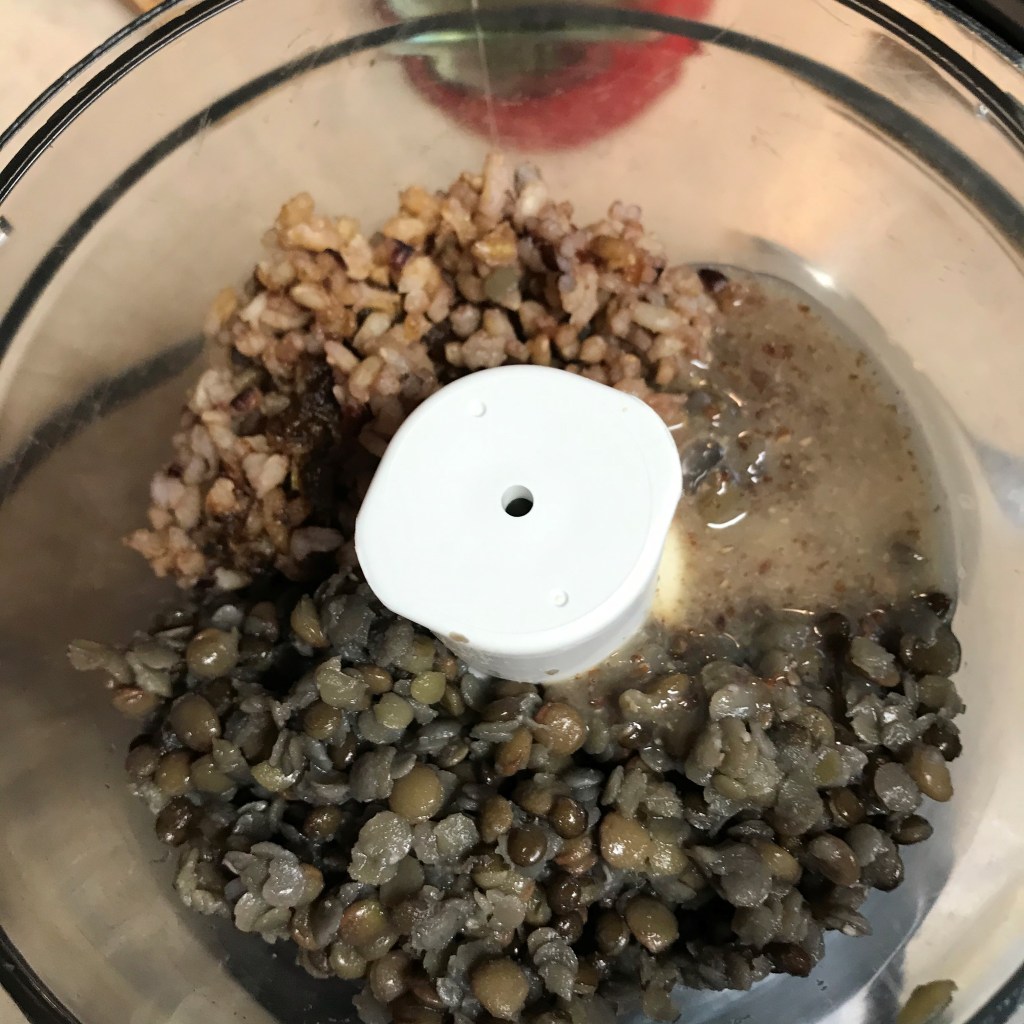
Add a scoop each of the cooked lentils and rice, plus all of the flax “egg” mixture, to the bowl of a food processor.
Pulse the mixture until it resembles a thick porridge. It won’t look very appealing, but don’t worry, it will disappear into the lentil loaf mixture.
Hemp hearts add another boost of protein to the lentil mixture, and they have an interesting, slightly nutty flavor.
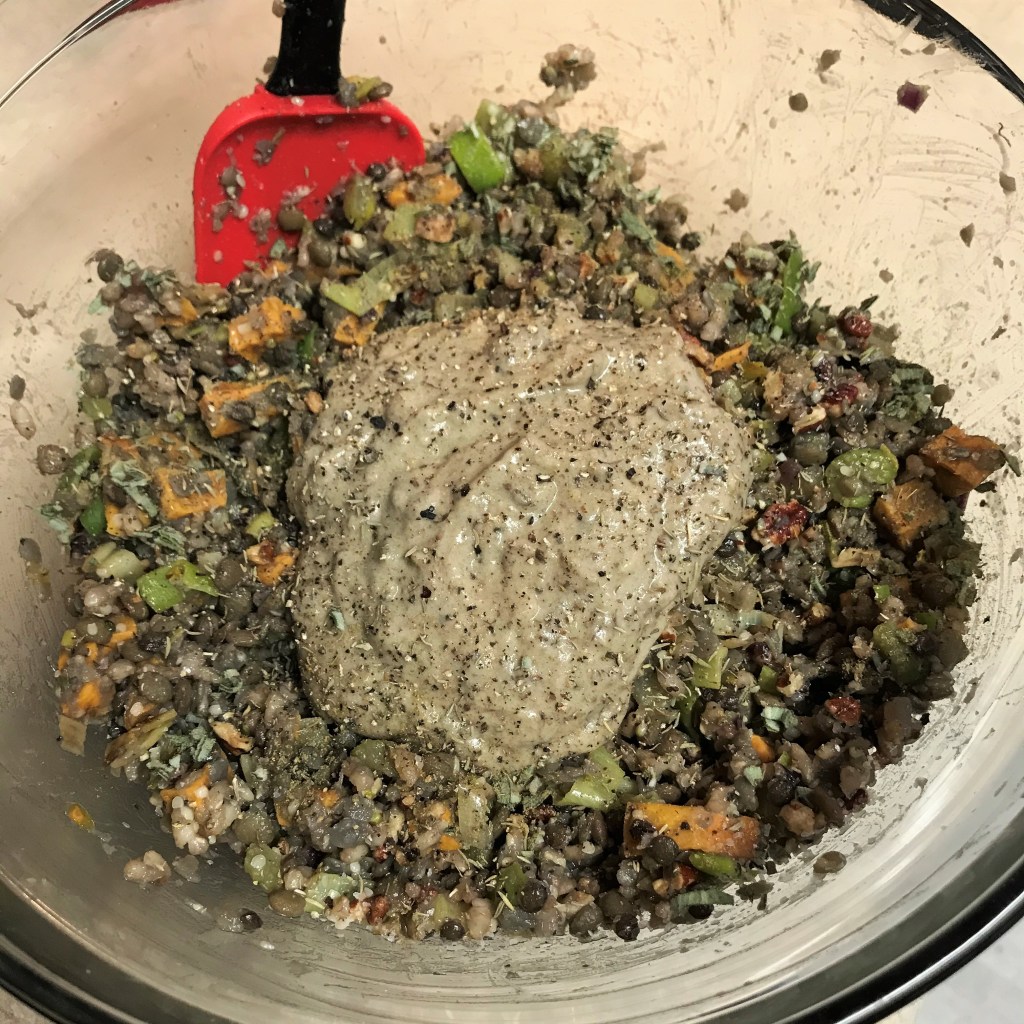
Time to mix up the lentil loaf! I added toasted pecans to the mix, but toasted walnuts or chopped pumpkin seeds would also be terrific.
Add the binding mixture to the lentil mix. Season with pepper and thyme leaves. Fold gently to combine.
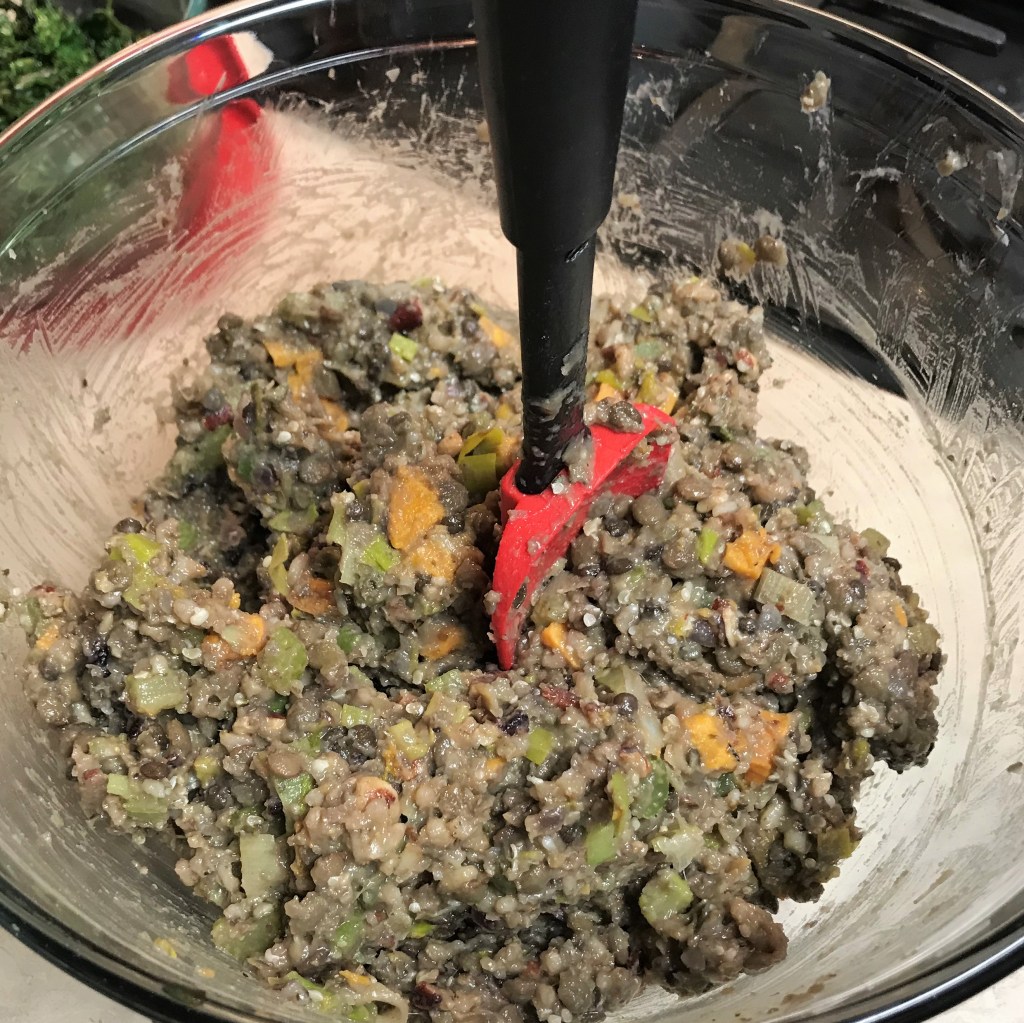
The lentil mixture should be thick. Adjust salt to taste and refrigerate the mixture for several hours before assembling the wellington.
Use a puff pastry with non-dairy ingredients. I like this brand, which is in the refrigerated section of the supermarket. Pepperidge Farm makes one also, found in the freezer case.
Dust your countertop with flour, and lightly flour the top of the dough. Use a rolling pin to smooth wrinkles and spread it slightly thinner.
A layer of panko crumbs will help absorb moisture from the lentil loaf, so the bottom of your wellington won’t get soggy.
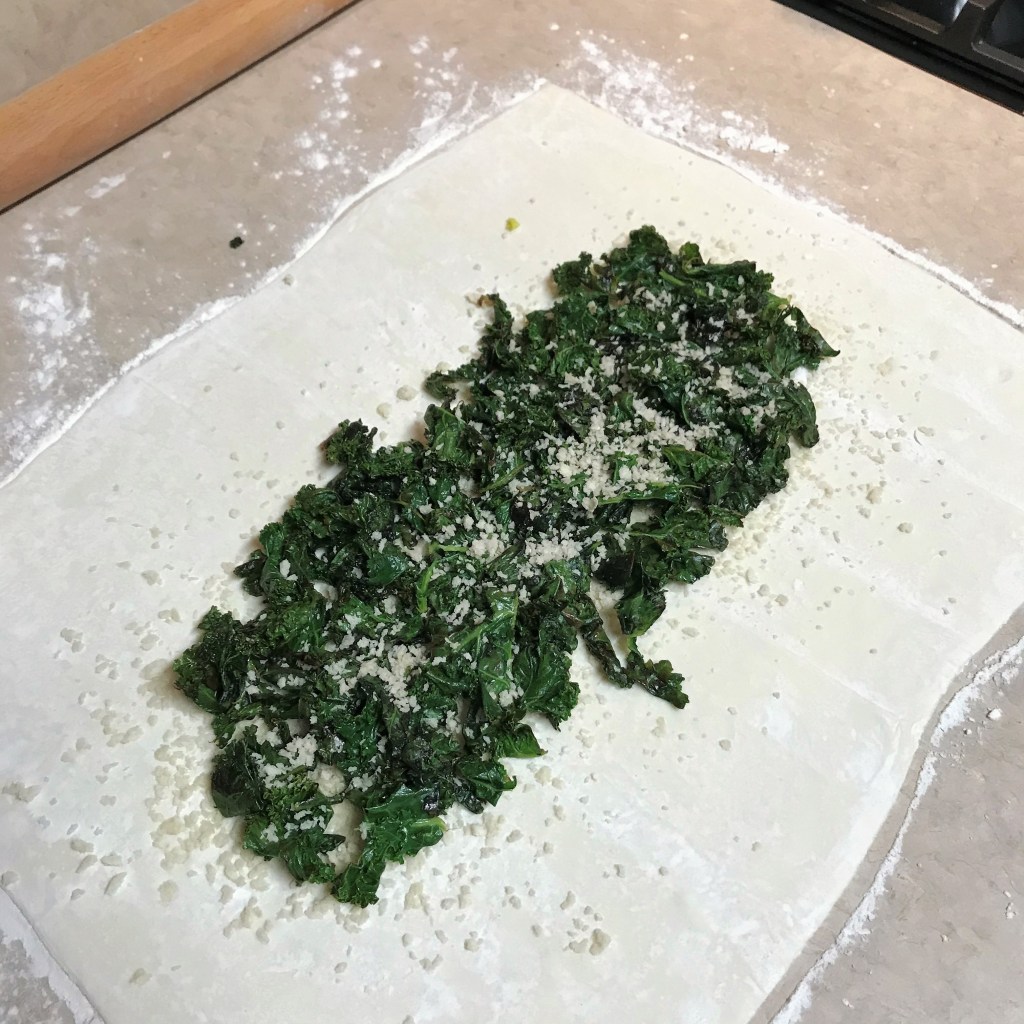
Lay the sauteed kale over the panko crumbs. I had just a shake of crumbs left in the carton, so I sprinkled more on top.
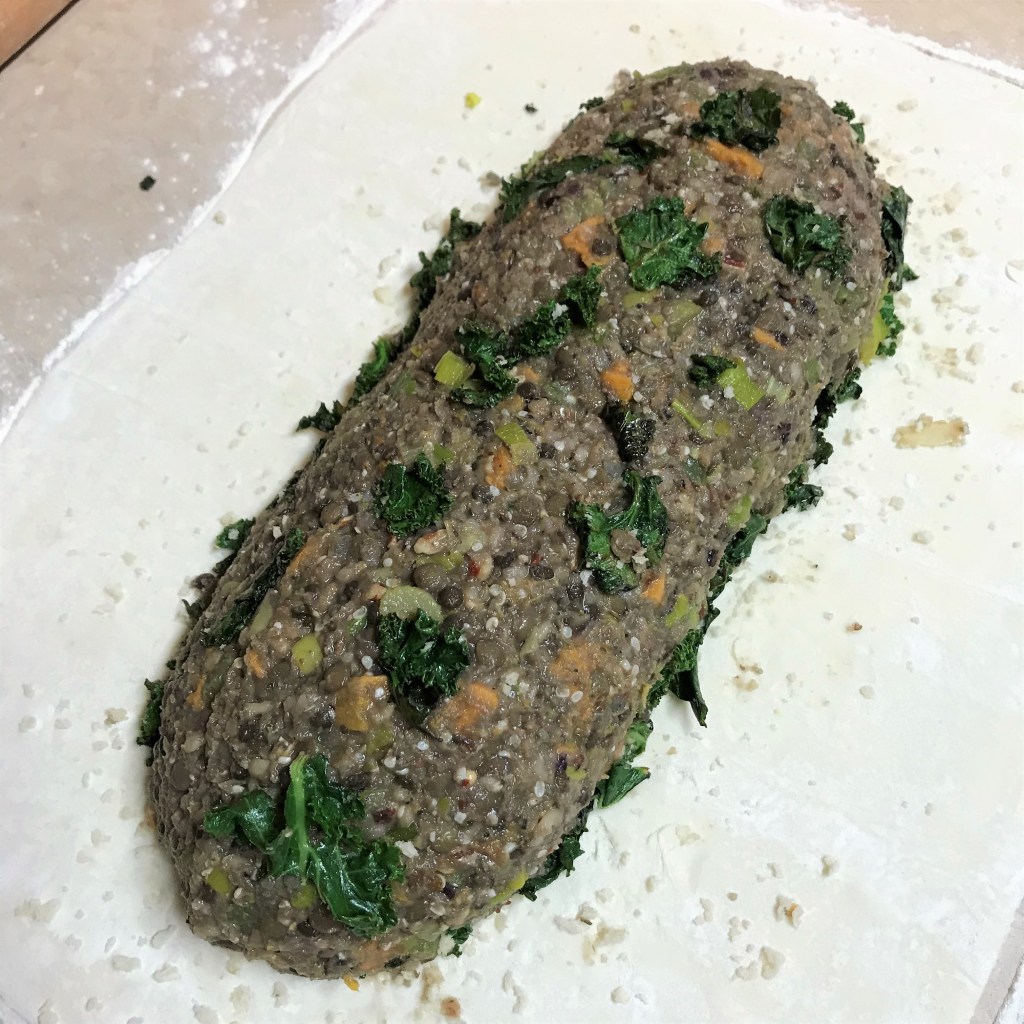
Mound half of the lentil mixture in a loaf shape with a slight indent down the center. Arrange the whole mushrooms in a tight line on top of the mixture, and press down slightly.
Shape the rest of the lentil mixture over the top, so that it resembles a meatloaf.
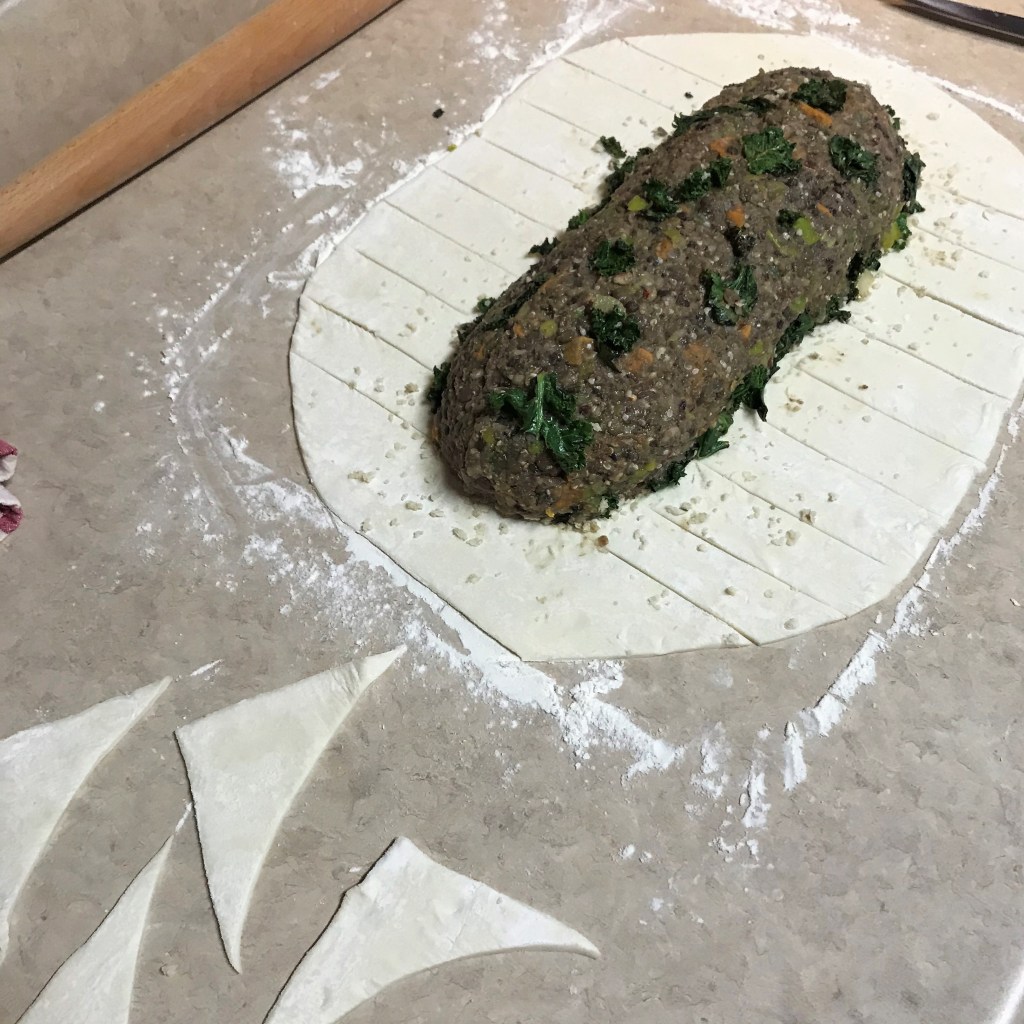
Trim off the corners of puff pastry in a rounded fashion. Reserve the excess pastry for patching or decorating. Cut strips along each side, about 1 1/2 inches apart.
Fold up both ends of the pastry, and shape them so they “hug” the ends of the lentil loaf.
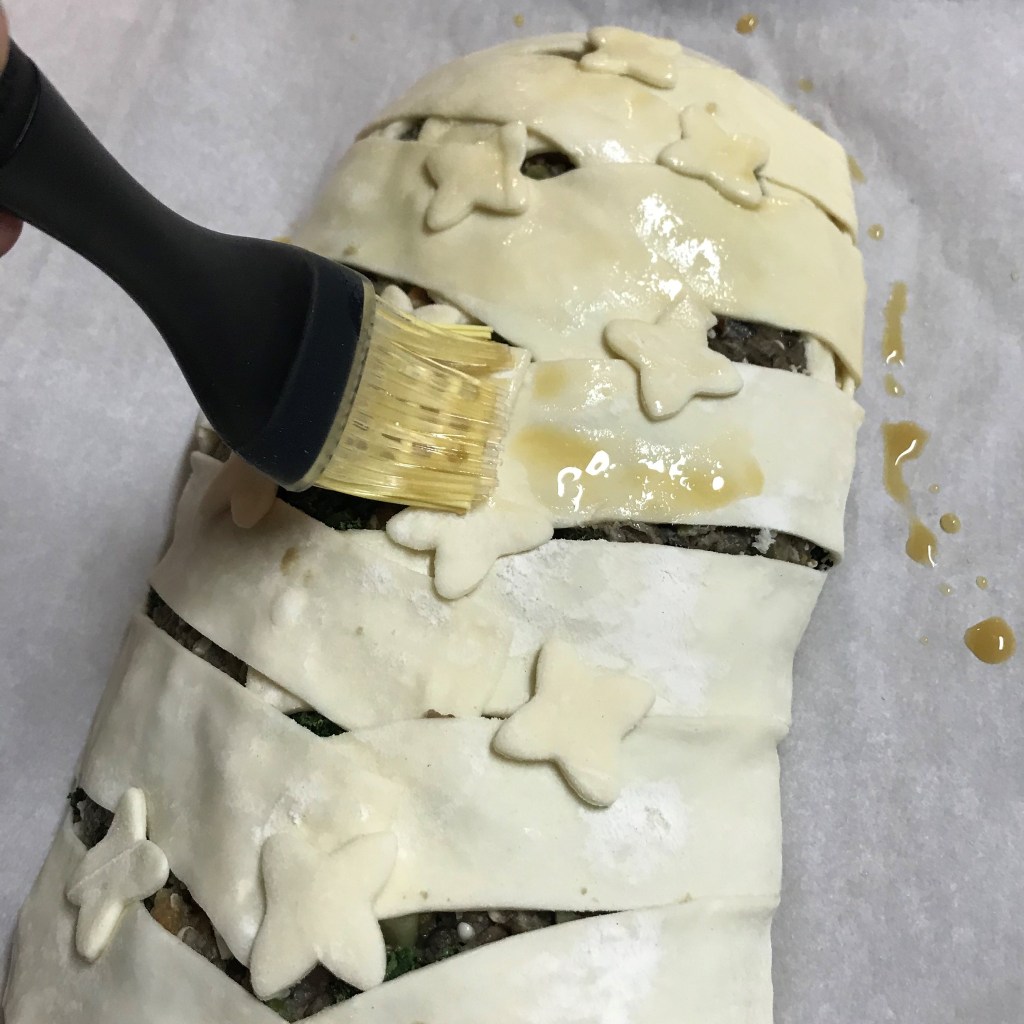
Fold the strips over the lentil loaf, alternating sides. It doesn’t have to be perfect, but aim for even coverage with just a bit of the lentil mixture peeking through.
For extra pizzazz, embellish the wellington with cut-out shapes of the excess puff pastry.
No egg wash for a vegan dish! But a mixture of plant milk, maple syrup and canola oil will help you achieve the same golden finish.
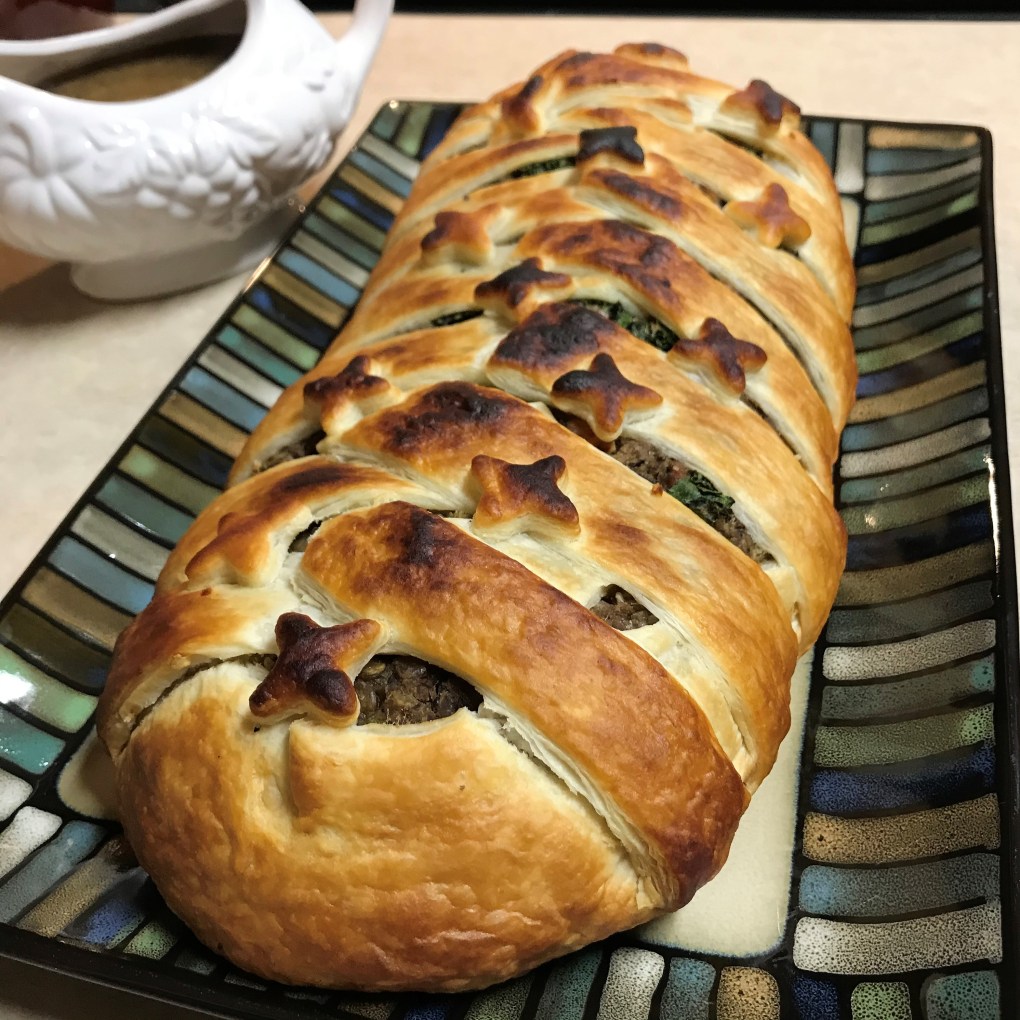
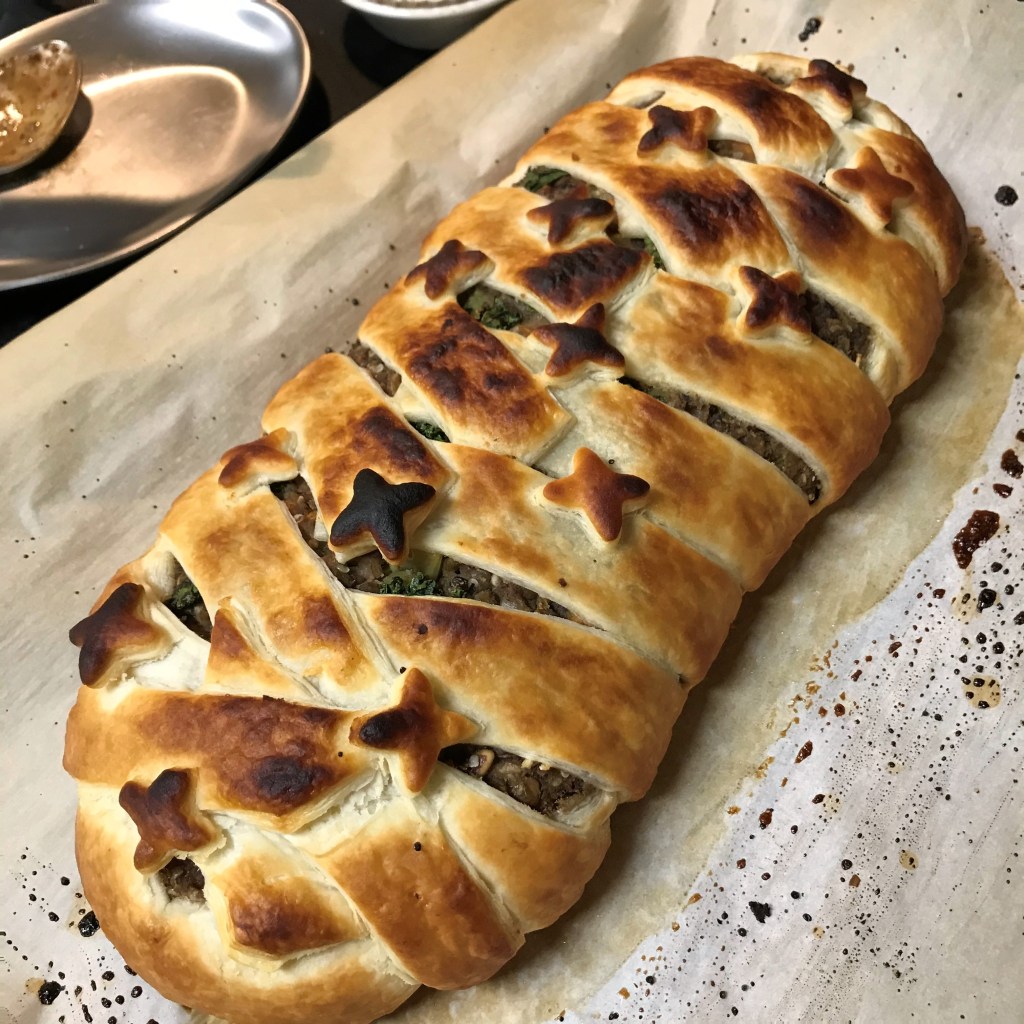
This wellington is ready for the oven. 400° F for about 45 minutes.
My oven rack was a couple of inches too high, but the wellington is lovely, even with a few dark spots.
Cook lentils according to package instructions, using low-sodium vegetable broth in place of some or all of the water. During simmer, add a bay leaf to the pot. Drain excess liquid when lentils reach desired tenderness. Transfer to a bowl and cool completely. Add salt to taste.
Cook rice according to package instructions, using low-sodium vegetable broth in place of some or all of the water. Transfer to a bowl and cool completely. Add salt to taste.
Toss the cubed sweet potatoes with enough olive oil to lightly coat all sides. Spread onto a parchment-lined baking sheet and season with salt and pepper. Roast at 400° F until they can be pierced with the tip of a paring knife and are only slightly firm to the bite. Cool completely.
Sauté leeks (or onions) and chopped celery in a tablespoon of olive oil. Season with umami seasoning (or recommended substitute) and black pepper. When vegetables are tender and have given up their moisture, transfer to a bowl and cool completely.
Swirl another teaspoon or so of oil into the skillet and sauté the chopped kale until it has softened and reduced somewhat in volume. Resist the urge to cook the kale together with the onions; it will be used as a bed for the lentil mixture, not as part of the filling.
Heat a non-stick skillet over medium heat with 1 tablespoon of olive oil. Arrange the mushrooms topside down, in the skillet, and then cook until the tops are browned and tender. Turn them over and sauté the underside. The mushrooms should give off a good bit of their moisture, but not to the point of shriveling. Lay them on layered paper towels to cool, allowing excess moisture to drain from the underside.
To assemble the mixture, gather up all the prepared components from steps 1 to 6. In a small saucepan, heat the liquid drained from the chickpeas over medium low heat. Simmer until it is reduced in volume to about 1/4 cup. Transfer the liquid to a bowl and stir in the milled flax seed. Let this mixture rest for at least 20 minutes. It will thicken up into a gel-like substance.
Transfer about 1/3 cup of the cooked lentils and about 1/4 cup of the cooked rice to the bowl of a food processor or blender. Add the flax mixture to the bowl and pulse a few times until the mixture has the consistency of a loose porridge.
In a large mixing bowl, combine the remaining lentils, rice, sweet potatoes, leek-celery mixture, toasted pecans and hemp hearts. Toss them all together. Give this mixture a final taste and adjust salt to your liking. Sprinkle thyme leaves and give the pepper mill a few twists over the mixture. Add the full amount of flax binder and fold to combine this mixture well. Cover and refrigerate for at least an hour.
Preheat oven to 400° F, with oven rack slightly lower than center, so that the wellington will rest squarely in the center of the heat.
Thaw puff pastry (if using frozen) according to package instructions. *Note: when working with puff pastry, do your best to work quickly to keep the pastry from getting warm.Sprinkle flour onto the counter and use a rolling pin to smooth out wrinkles and slightly enlarge the rectangle.
Spread panko crumbs over the center of the puff pastry, then layer the cooked kale on top of it. This will be a bed for the lentil mixture, and the crumbs will help absorb excess moisture so the puff pastry doesn’t become soggy on the bottom.
Scoop about half of the lentil mixture onto the kale, shaping it into an oblong mound like a meatloaf. Arrange the mushrooms in a tight line down the center, pressing them slightly into the lentil mixture. Shape the remaining lentil mixture over the mushrooms.
Use a paring knife to trim off the square corners of the puff pastry, leaving them rounded to match the shape of the lentil loaf. Use a cookie cutter on the scrap corners to make embellishments for the top of the wellington. Score the long sides of the puff pastry into strips, about 1 ½ inches apart. These will fold over the top of the lentil loaf, kind of like shoelaces over a sneaker. Turn up both ends of puff pastry to enclose the ends of the lentil loaf, then carefully fold the strips in alternating order across the top. Tuck in any loose edges.
Transfer the wellington to a parchment-lined, heavy cookie sheet. In a small bowl, whisk together plant milk, maple syrup and oil. Brush this mixture evenly over all exposed puff pastry, including down the sides. This will produce a beautiful golden color on the baked wellington.
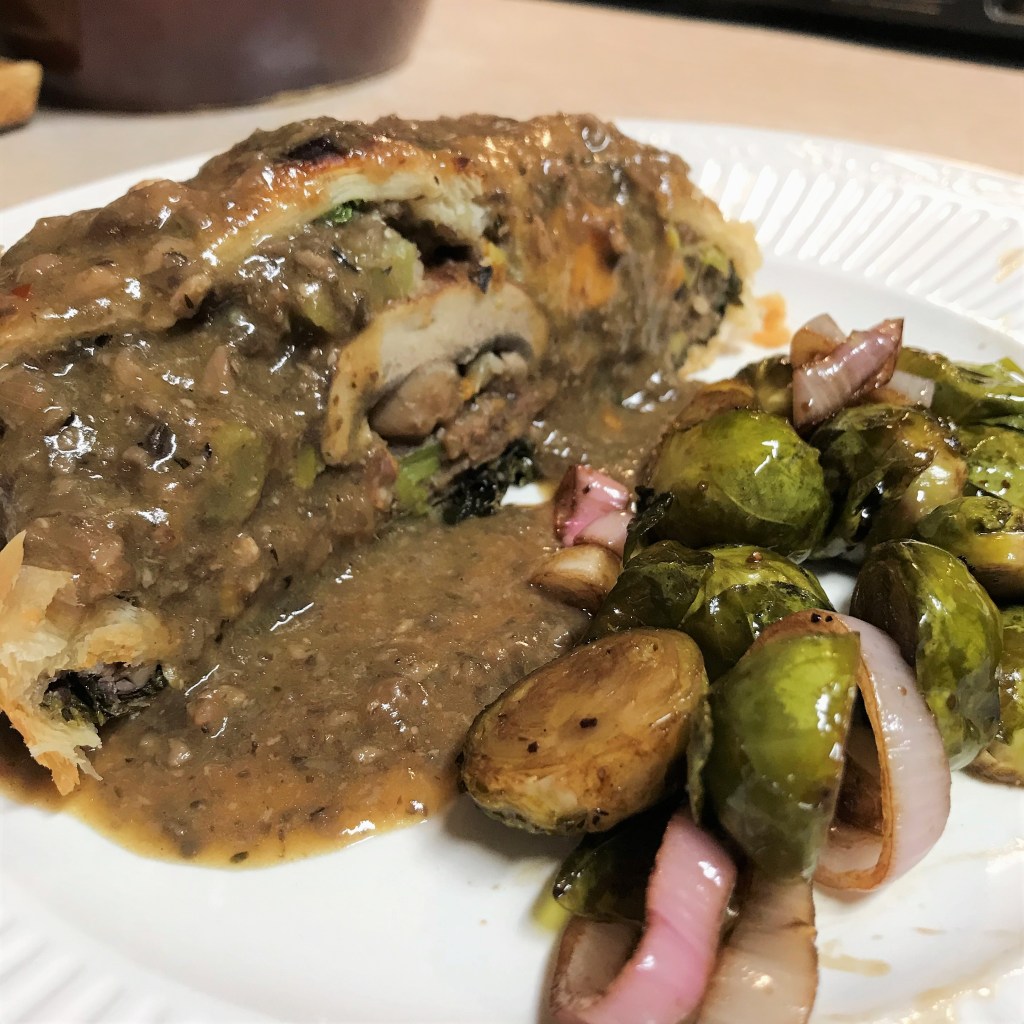
Bake for 45-50 minutes, rotating pan once after 25 minutes. Cool on the baking sheet for about 5 minutes before transferring to a serving platter. Cut into thick slices and serve on individual plates with vegan mushroom gravy and tangy lemon-pomegranate Brussels sprouts.
One clear advantage to growing your own garden vegetables is that you have a wider range of varieties and sizes of veggies to choose from. I can find zucchini, for example, at my local supermarket, but only smallish ones that can be fried, steamed or skewered. Because this year we gave in to the deer and decided to forego attempting our own garden, I had to go to the farmers’ market to get a large zucchini, like the ones everyone gave away for free this time of year in my hometown. I appreciate that unlike grocery store produce, whatever I bring home from the outdoor market was probably hanging on the vine mere hours before.
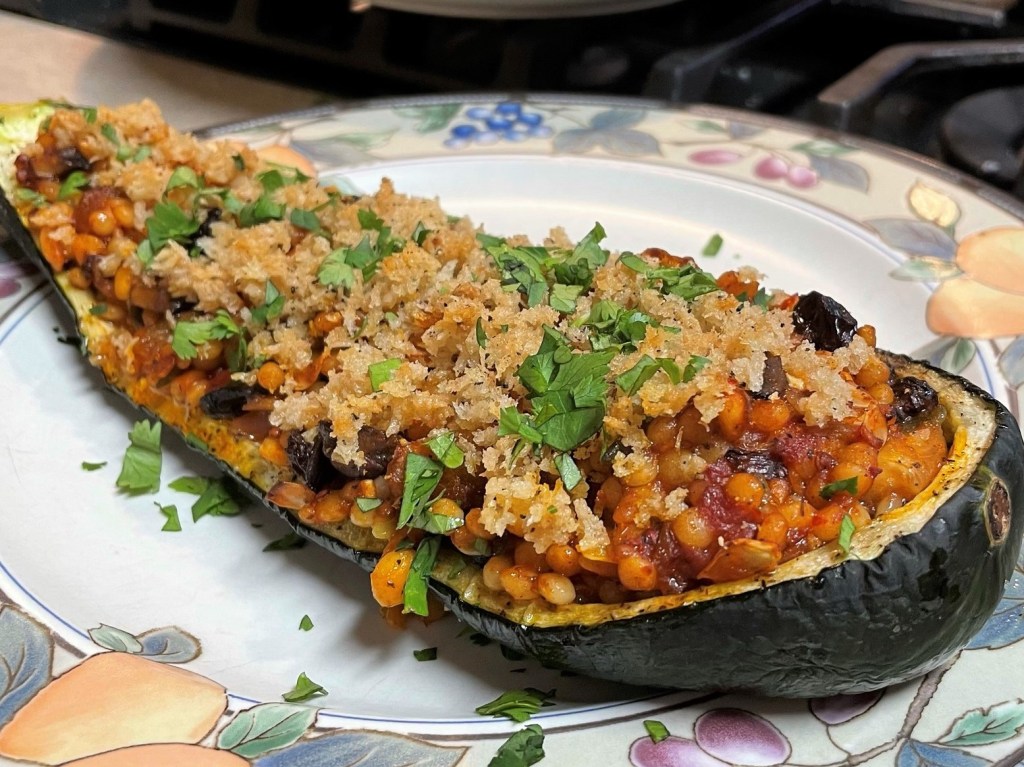
You can make a generous meal from a foot-long zucchini!
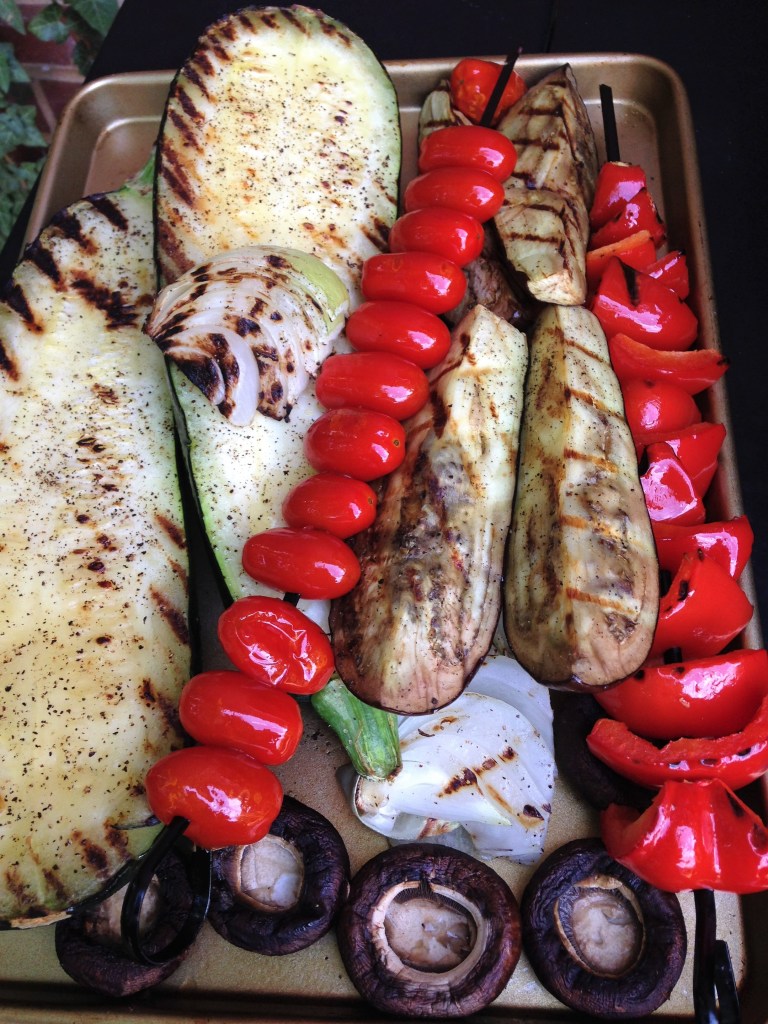
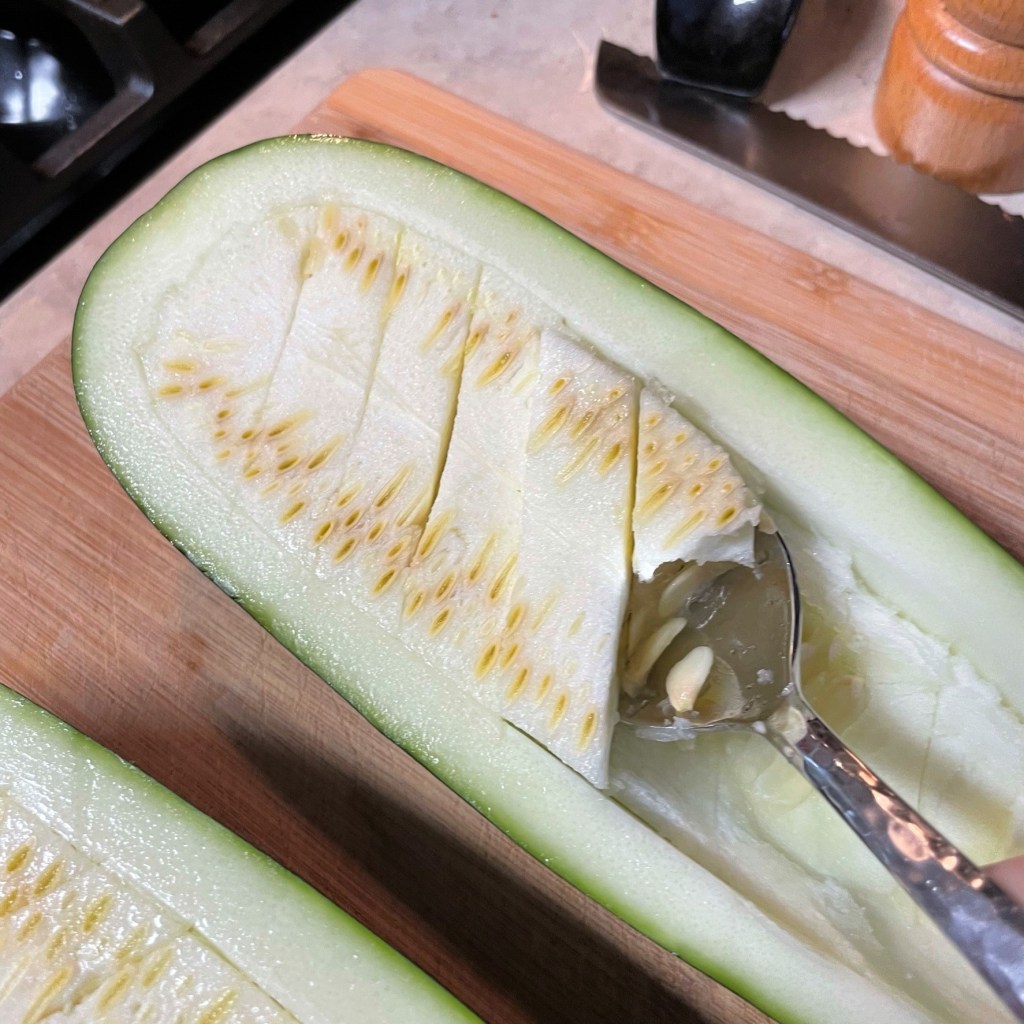
On our last visit to the market, I was specifically on the lookout for large zucchini because I wanted to make a “boat” out of it. I have enjoyed stuffed zucchini for years, dating back to my hometown days and first apartment meals. Through the years, I have made them with sausage stuffing, ratatouille flavors or Italian-themed ingredients, depending on what else I had in the fridge at the time.
A favorite grilled version was stuffed with ratatouille vegetables and quinoa. Yum!
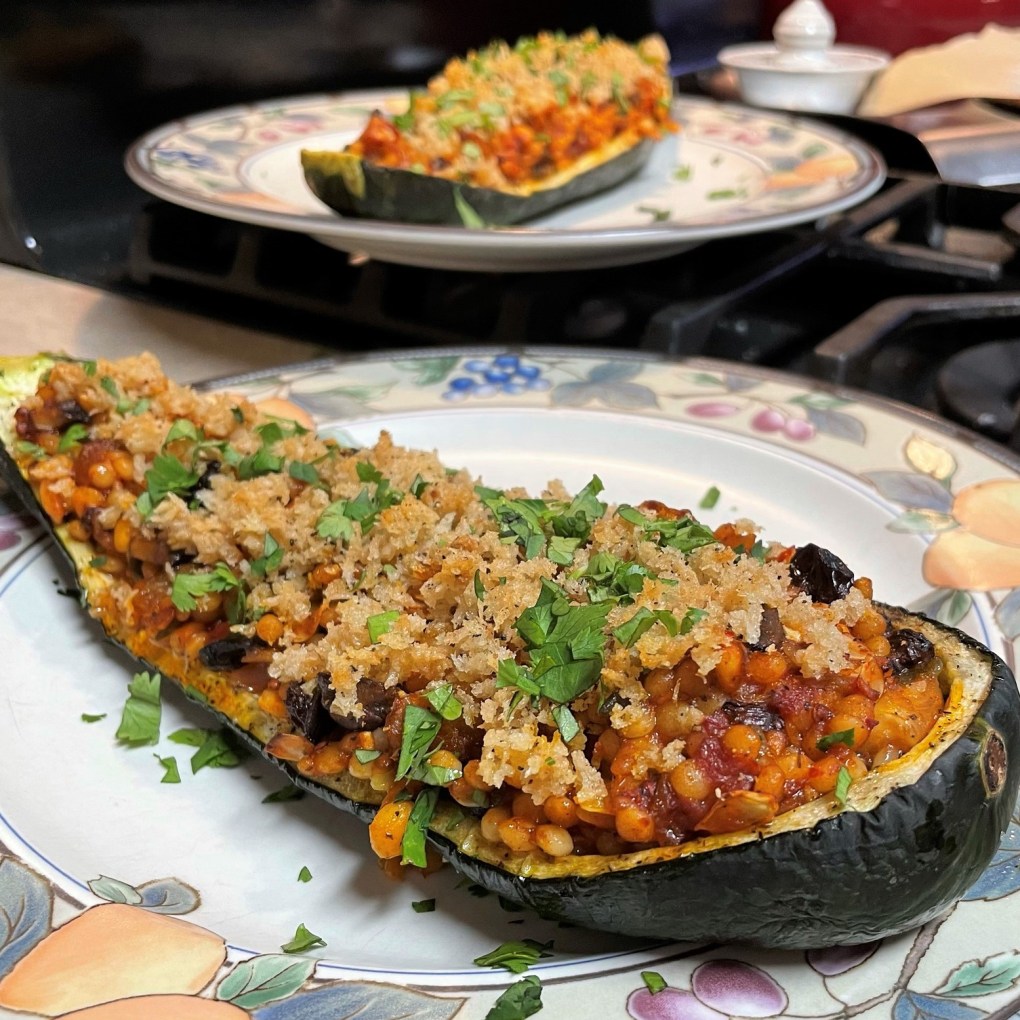
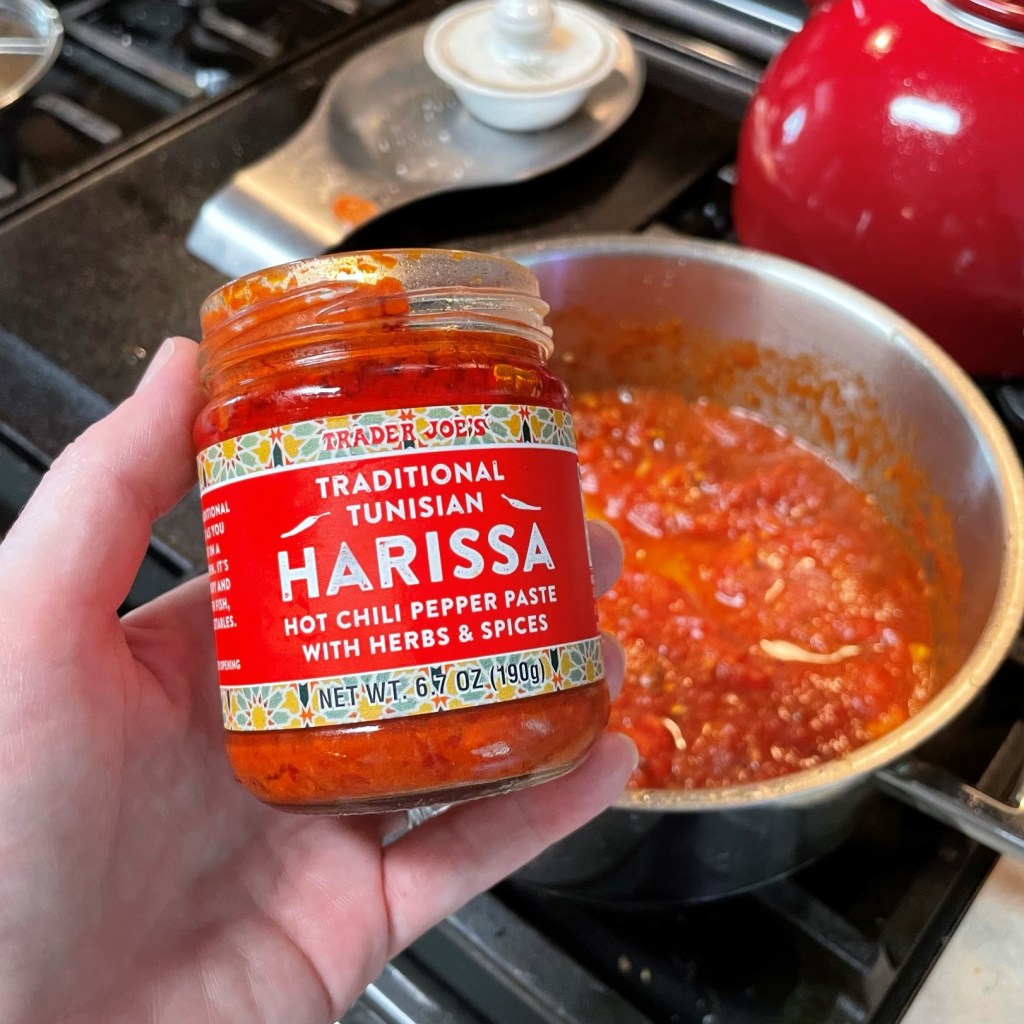
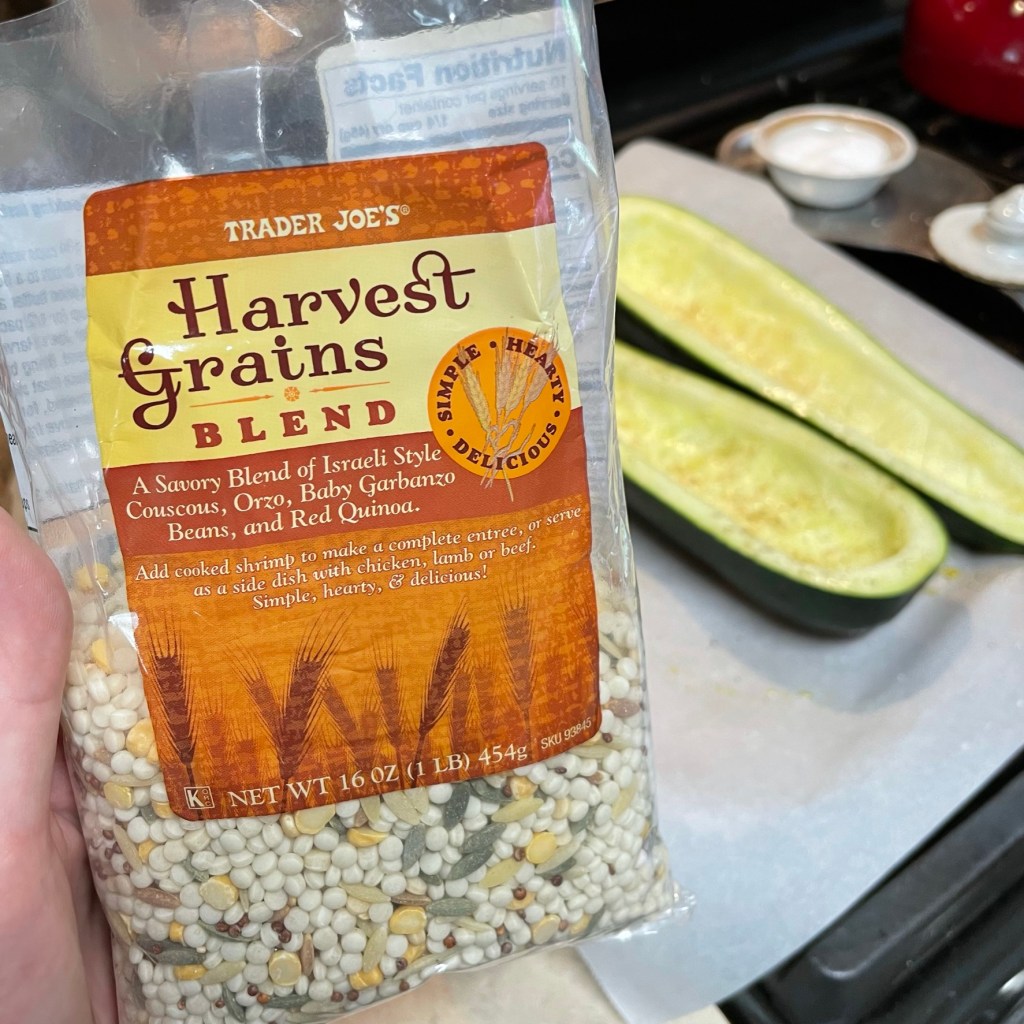
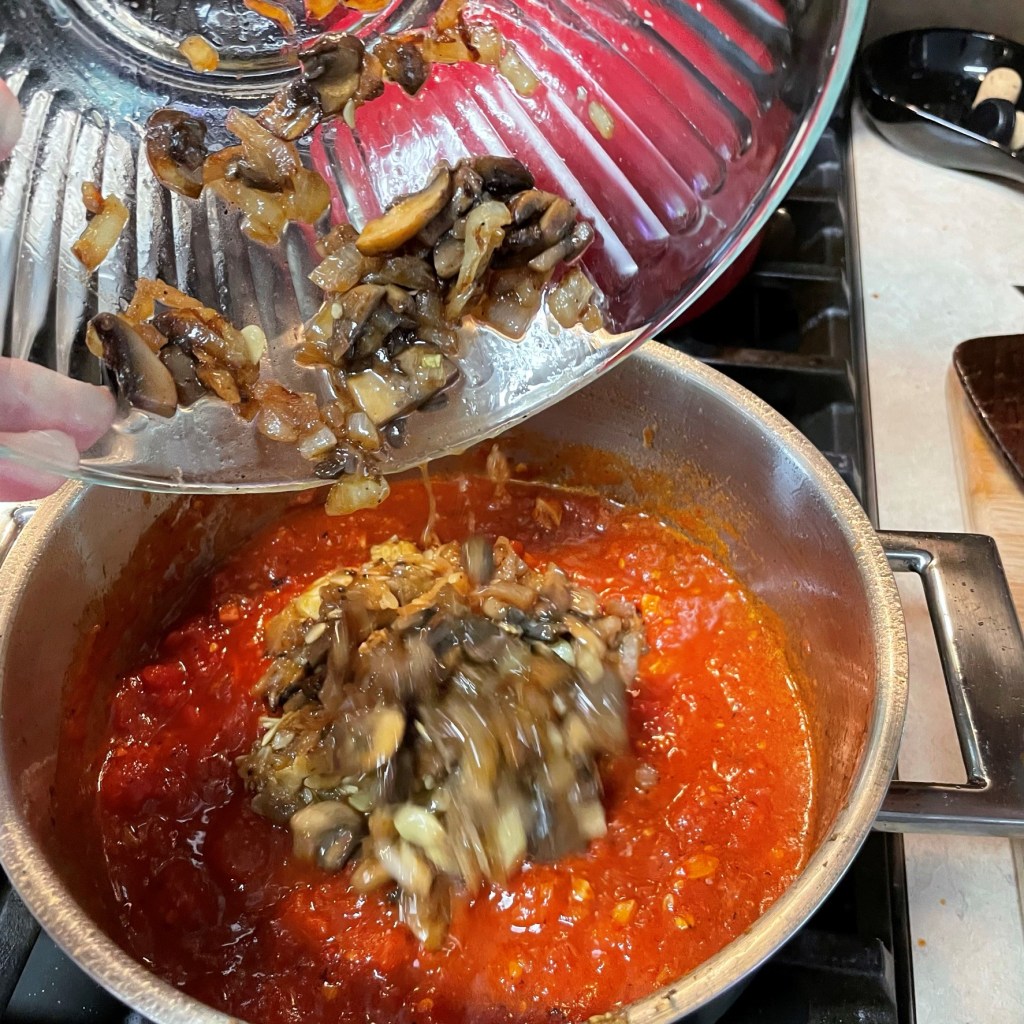
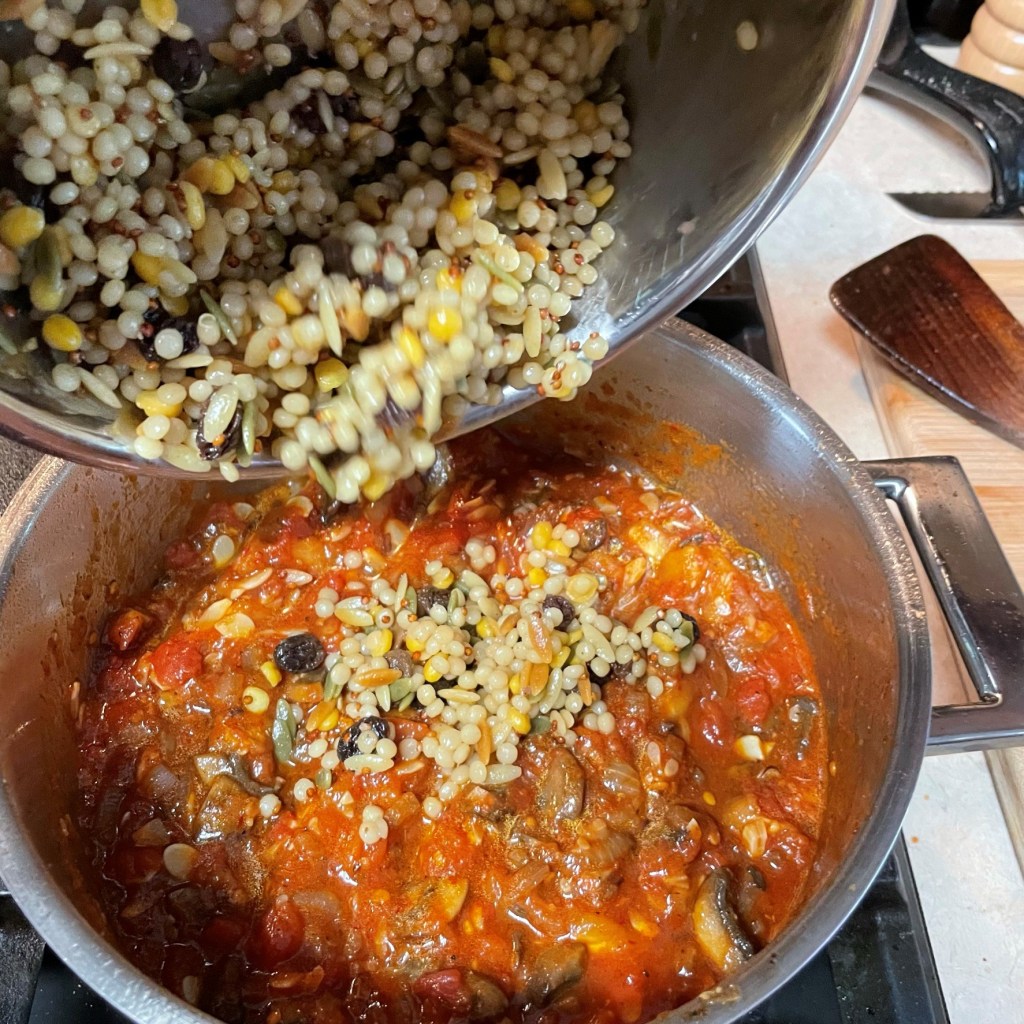
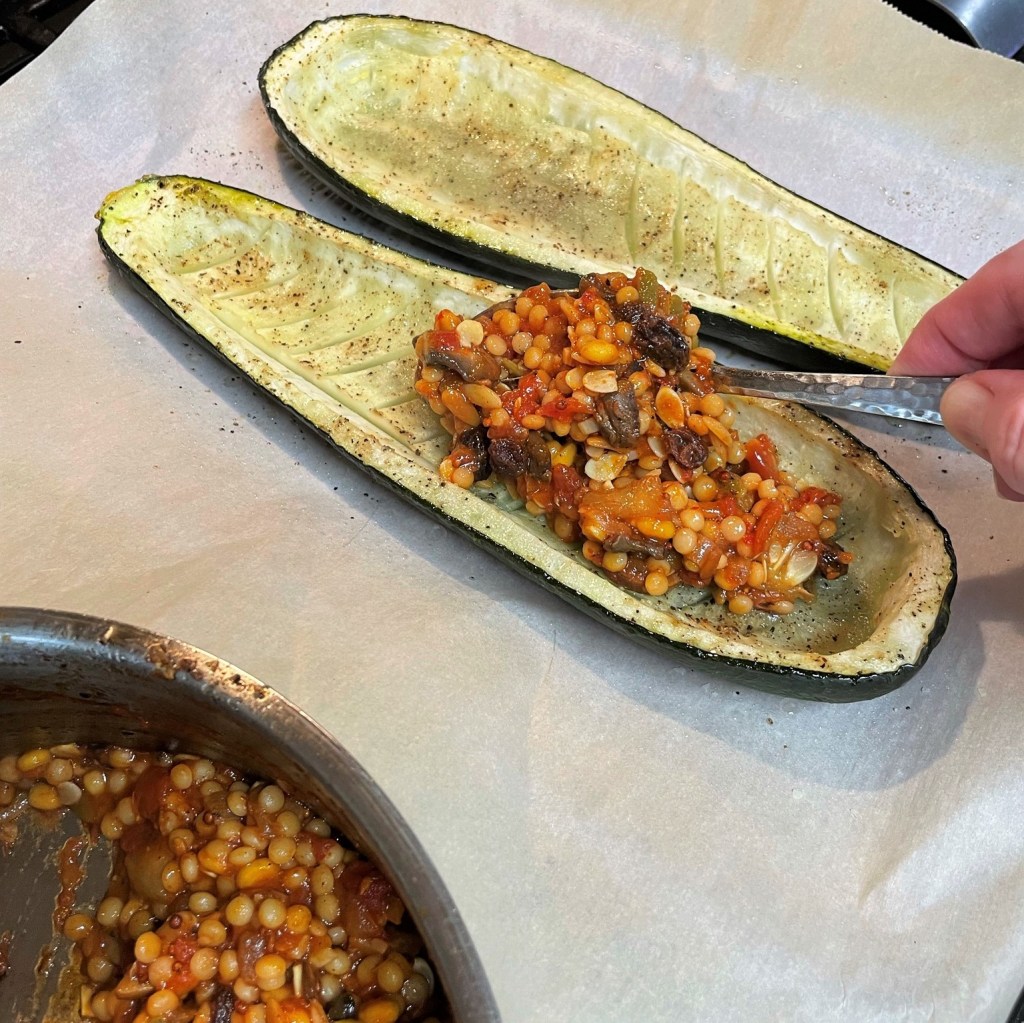
This time, I kept it entirely plant-based and gave it a spicy Moroccan twist. Israeli pearl couscous found its way into the mix, along with tomatoes, onions, mushrooms and garlic. I added a robust harissa paste for a big afterburn flavor. It was a double win for me—I got my wish for a hearty garden-based meal, and it was a fun flavor twist that my heat-loving hubby enjoyed, too.
Harissa is a staple seasoning of North African cuisine. It packs a spicy punch, so use it sparingly.
Ingredients
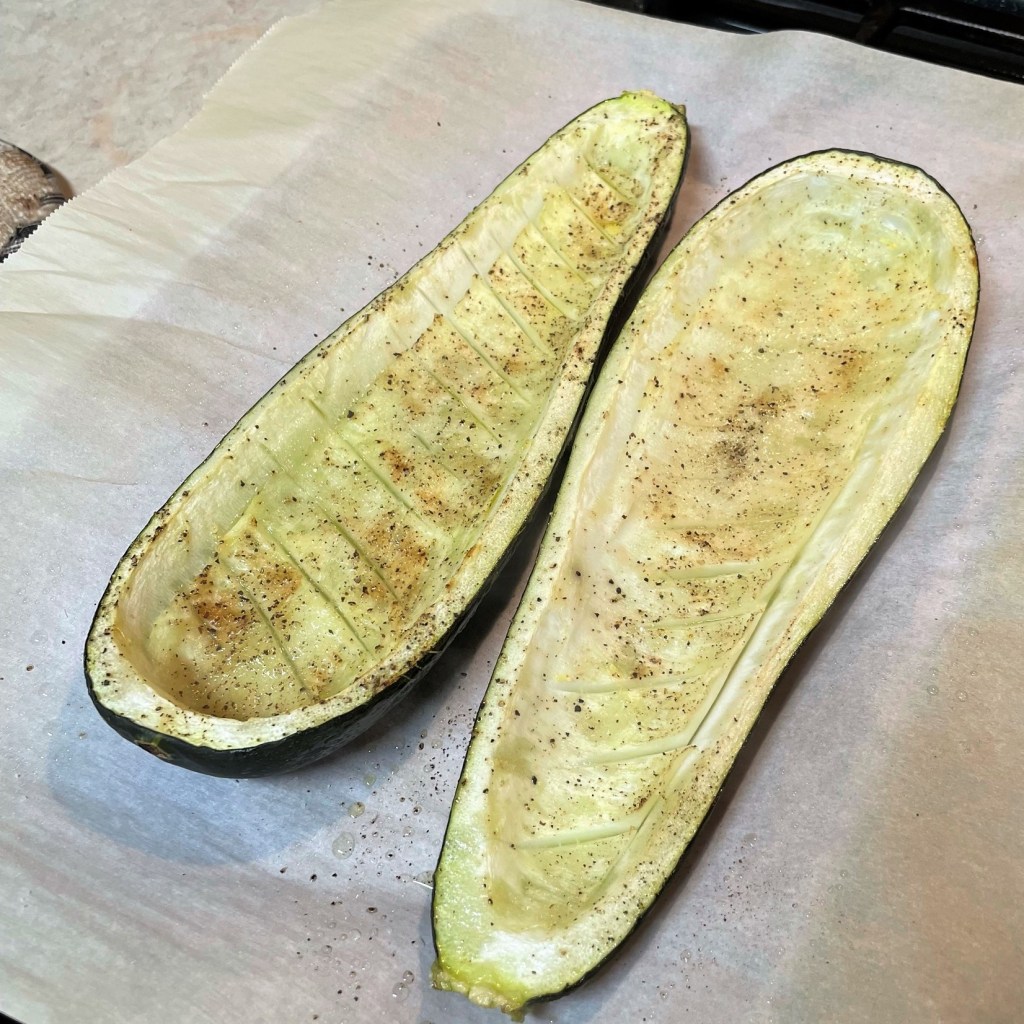
Large zucchini, halved lengthwise and insides scooped out
Olive oil spray
Kosher salt and freshly ground black pepper
1/2 cup Israeli couscous* (see notes)
1 cup vegetable broth
1/2 medium sweet onion, chopped
4 or 5 large cremini mushrooms, cleaned and sliced
2 cloves garlic, finely minced
Half of a large can of whole peeled tomatoes with puree*
1 tsp. harissa paste (more or less to taste)
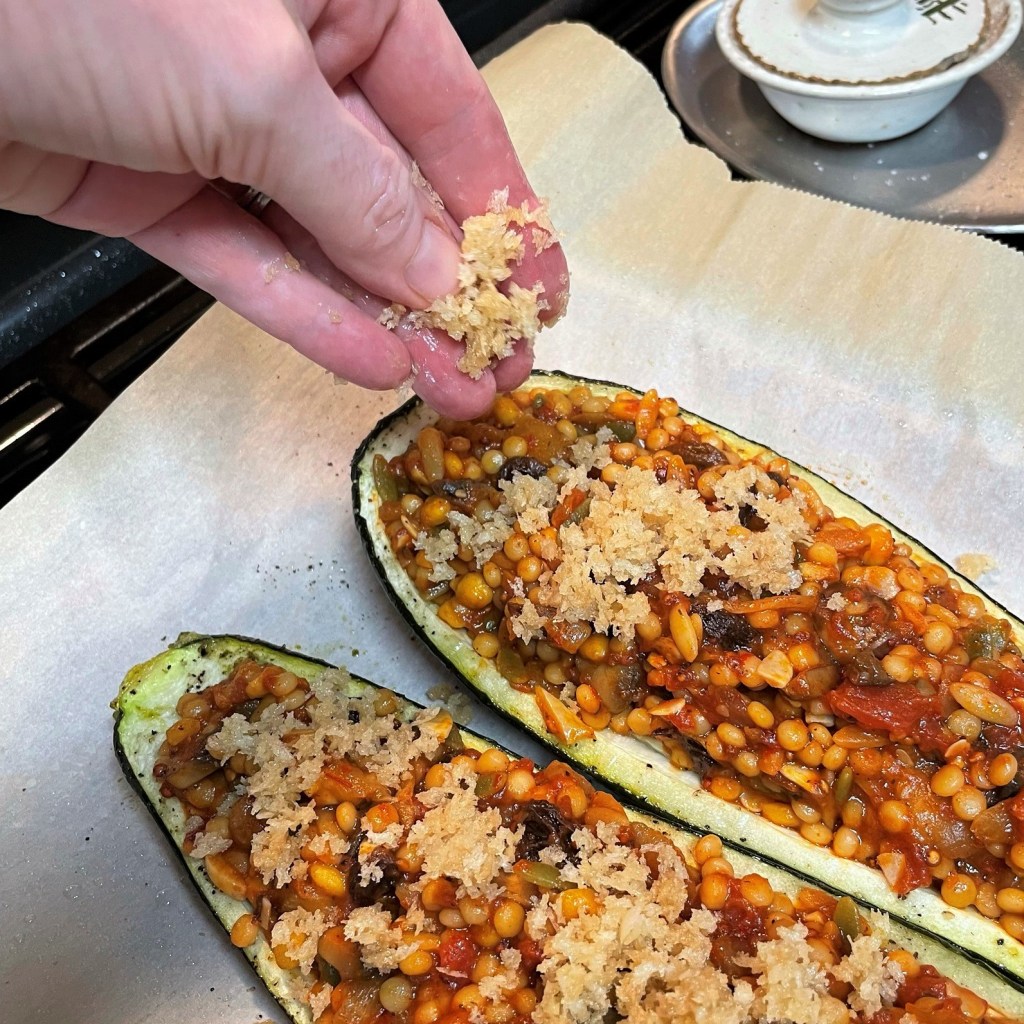
1/4 cup panko breadcrumbs
2 Tbsp. melted vegan butter*
Fresh chopped parsley for garnish
*Notes
Couscous is essentially really tiny pasta, and for this recipe, I used a blend from Trader Joe’s that combines Israeli (“pearl”) couscous, which is larger than regular couscous, with various other ingredients, including split baby garbanzos, orzo (another tiny pasta) and quinoa. Any type of cooked grain would work here, including bulgur, freekah, wheat berries or even brown rice. You need about 1 cup cooked.
I almost always have San Marzano tomatoes in play in my kitchen, and half of a 28 oz. can was about right for this recipe. Use a standard can of diced tomatoes or, obviously, go for fresh! 🙂
There are so many good options for non-dairy “butter.” I am fond of the olive oil version made by Country Crock. It looks, melts and spreads just like dairy butter.
As usual, Nilla is ready and waiting for a piece of vegetable to fall! ❤
Instructions
Here’s a quick visual walk-through for making this yummy, plant-based zucchini boat. Steps are listed below, along with a downloadable PDF for your recipe files. Enjoy!
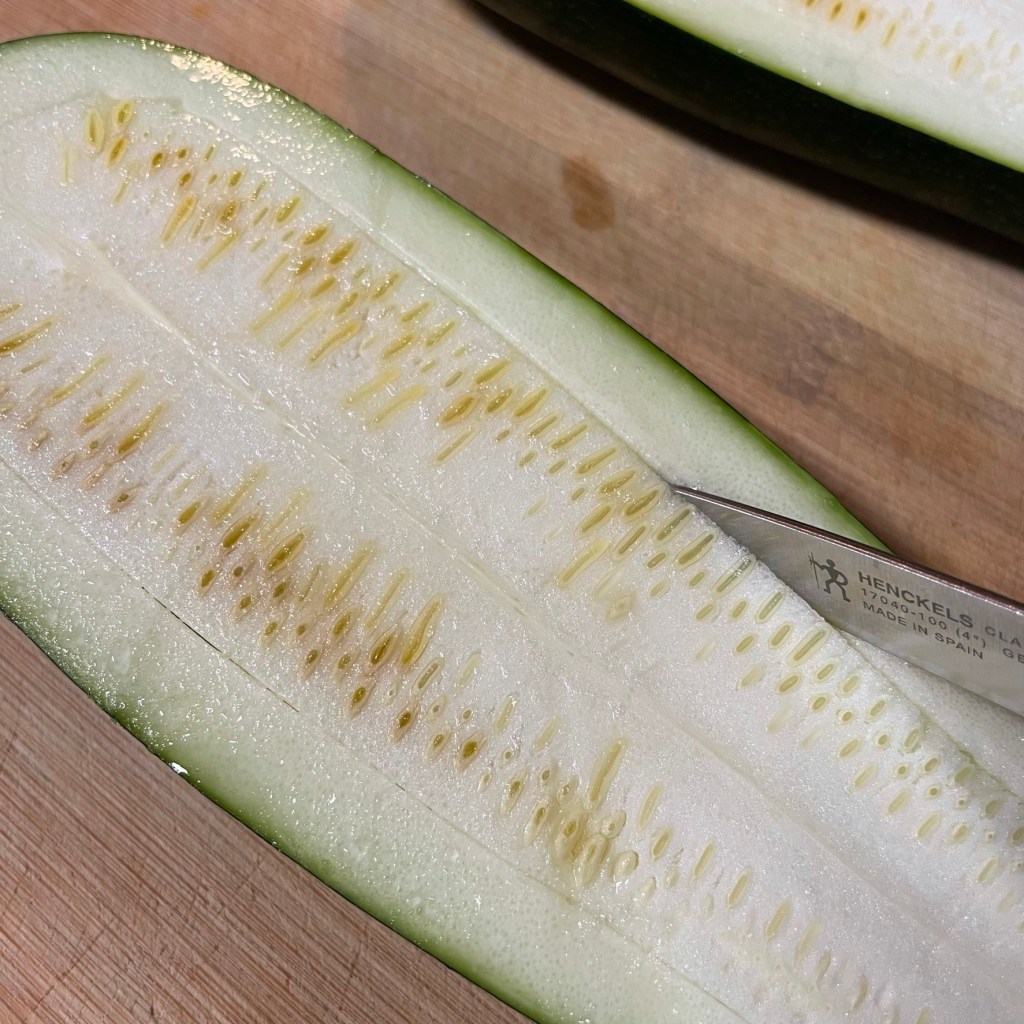
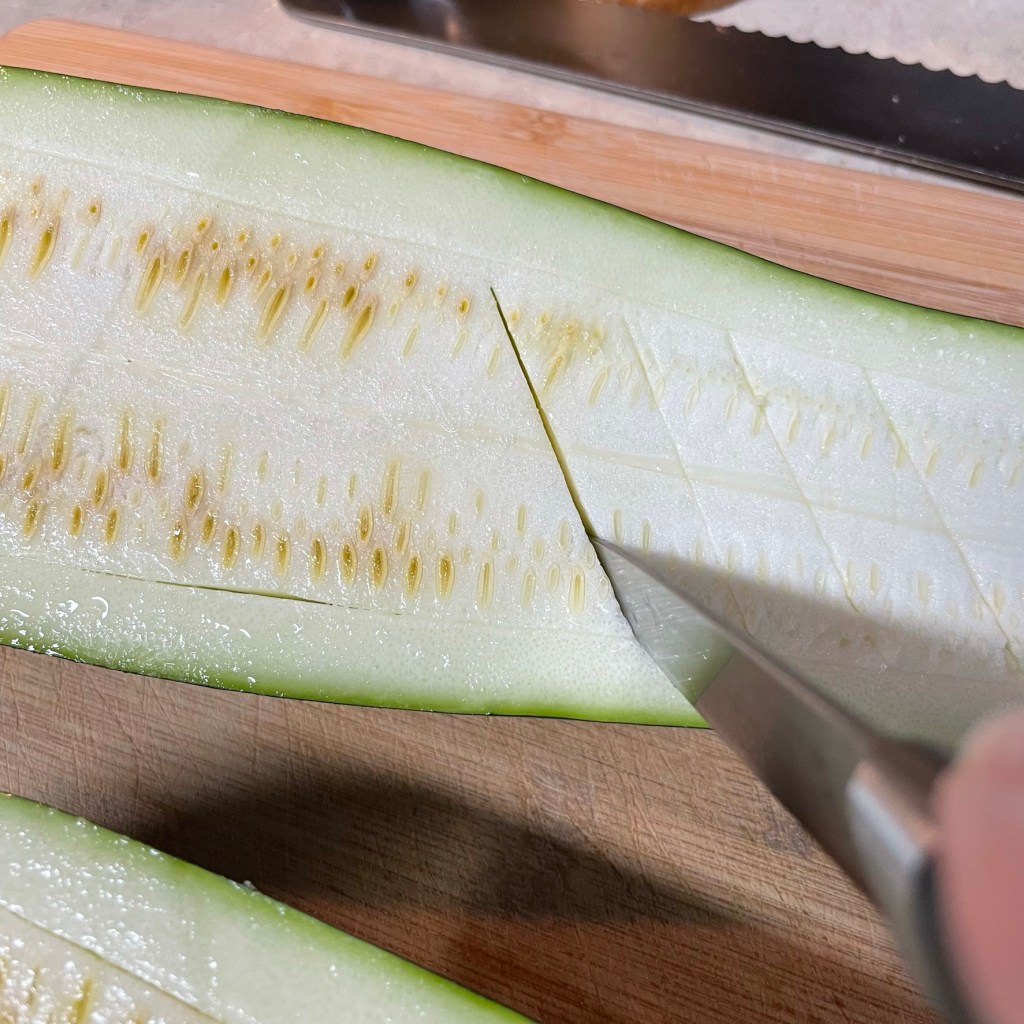
To remove the zucchini pulp neatly, use a paring knife to score around it, keeping 1/2 inch on all sides.
Make shallow cross-cuts through the flesh to section it.
And it scoops right out with a big spoon!
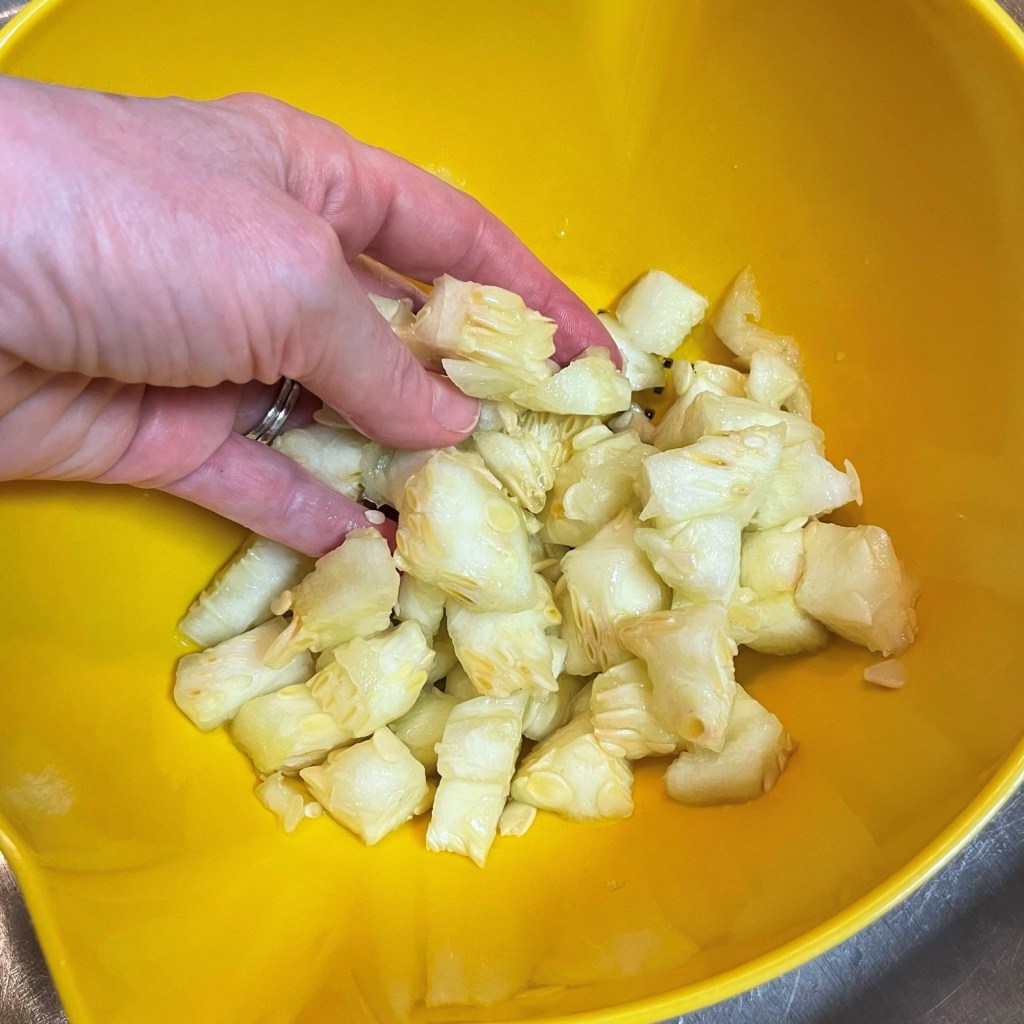
Chop the zucchini flesh into chunks and salt them generously to remove excess moisture. Saute these with the onions and mushrooms.
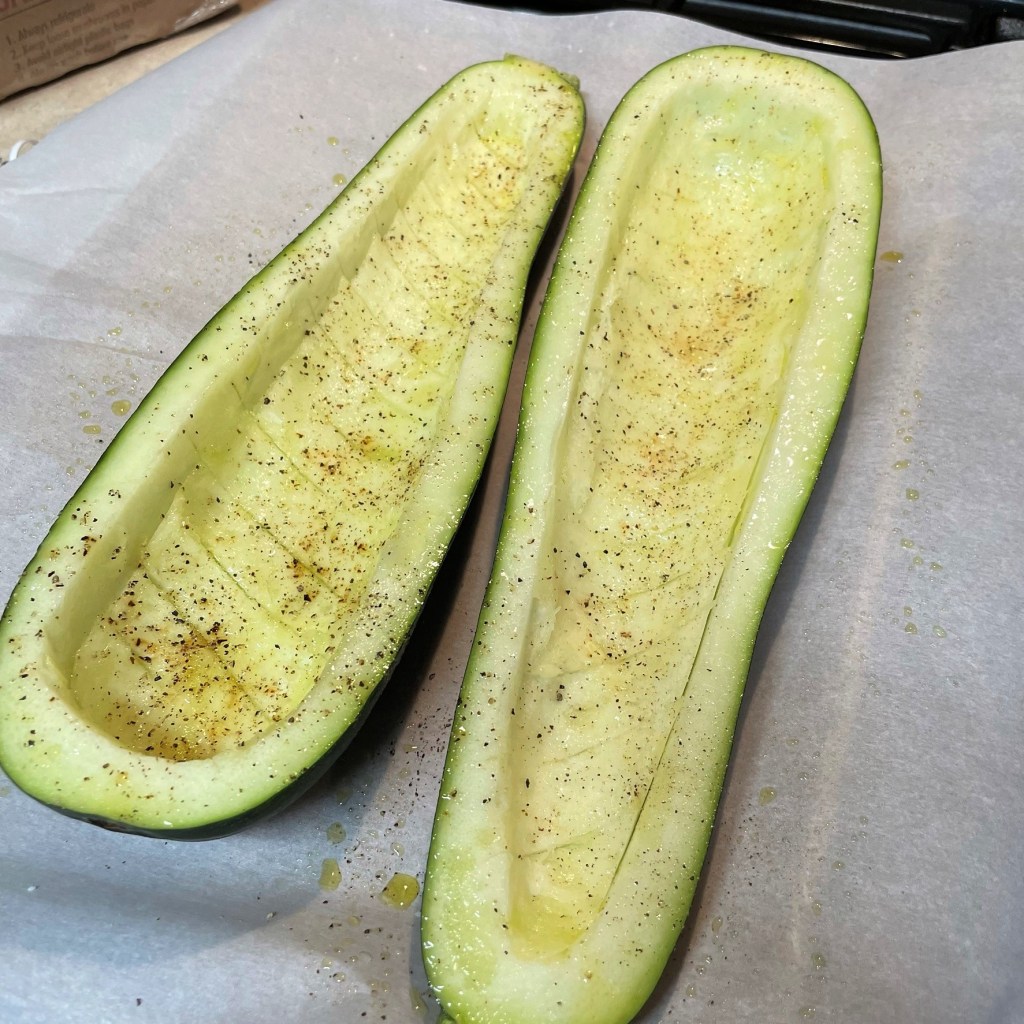
Prep the zucchini for roasting with a quick spray of olive oil, plus salt and pepper. Into the oven for about 40 minutes.
This couscous blend was already opened, and I used it to help clear out the pantry inventory. Any couscous, quinoa, bulgur or even rice would be great in this recipe.
My version was fully vegan, and I used low-sodium veggie broth to keep better tabs on the salt in the finished dish.
A nice long simmer ensures that the flavors are melded and the garlic is softened.
Harissa is a staple seasoning of North African cuisine. It packs a spicy punch, so use it sparingly.
Return the onions, mushrooms and cooked zucchini bits to the pot to blend with the sauce.
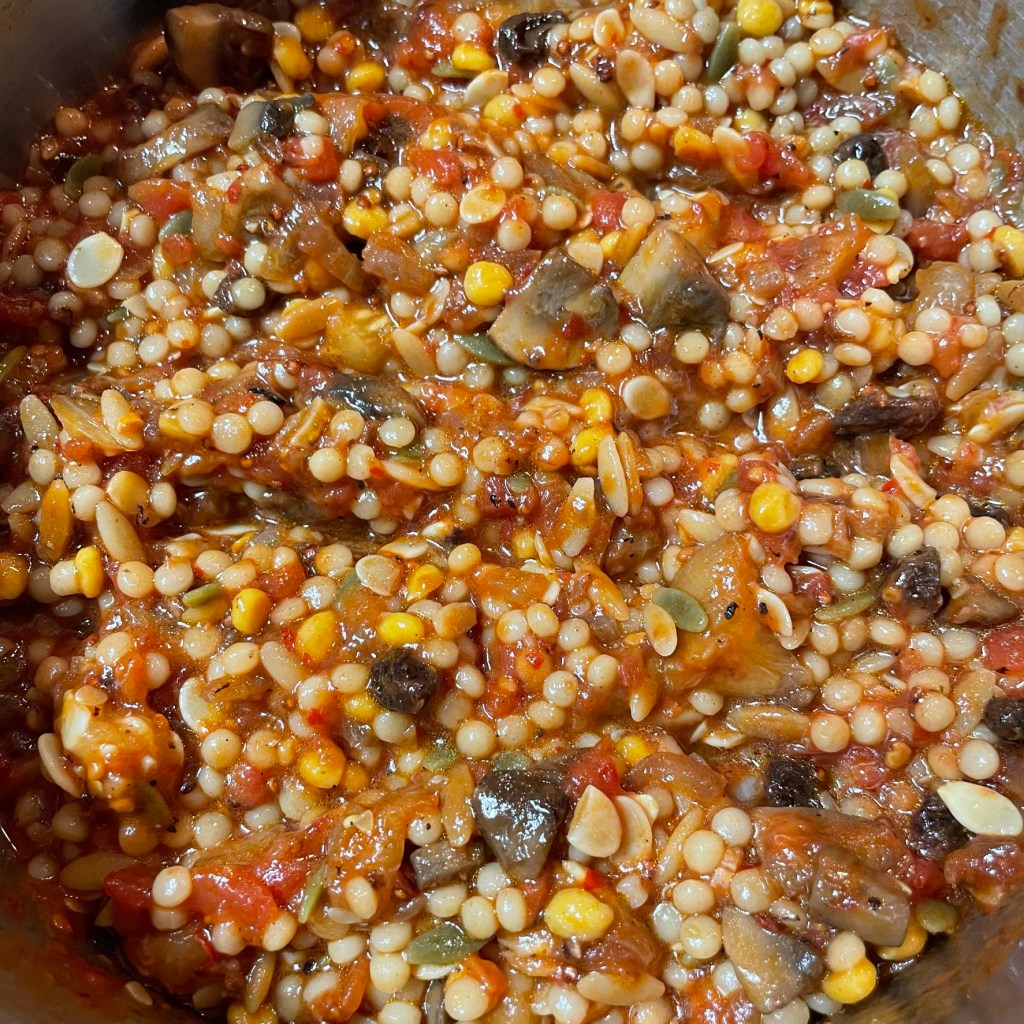
Stir in the cooked couscous just until combined.
Remove this mixture from heat and adjust salt and pepper to taste.
The roasted zucchini should be tender enough to scrape, but not falling apart.
Divide the filling mixture into the roasted zucchini halves.
Sprinkle the “buttered” panko crumbs on top of the filling, and send the boats back into the oven.
After baking the panko has a nice savory crunch, which is a great complement to the tender, stewed filling.
Preheat oven to 350° F, with rack in the center position. Line a baking sheet with parchment paper.
Cut the zucchini in half lengthwise, then score the inside to scoop out the seedy flesh. Cut the flesh up into chunks and toss with salt in a colander to remove excess moisture.
Drizzle, brush or spray olive oil onto the cut sides of the squash and season generously with salt and pepper. Lay the squash on the parchment and roast for 30 minutes, or until squash is tender.
Meanwhile, cook couscous according to package instructions, using vegetable broth in place of water to afford additional flavor to the dish.
Heat a medium sauce pot over medium heat. Add a generous swirl of olive oil and sauté the onions until softened and translucent. Add mushrooms and zucchini chunks to the pot and cook until tender. Transfer the mixture to a separate bowl.
Add another swirl of olive oil to the sauce pot and simmer the tomatoes and garlic over low heat until the tomatoes are soft enough to break when pressed. Stir in harissa paste and adjust seasonings to taste. Return the onions and mushrooms to the tomato mixture, along with the cooked couscous and the reserved salted zucchini pieces.
Melt the vegan butter and toss with the panko crumbs, salt and pepper.
Spoon the couscous filling into the zucchini shells. Top with buttered panko crumbs. Return the zucchini boats to the oven and bake until crumbs are browned and crispy. Serve with chopped parsley sprinkled on top.
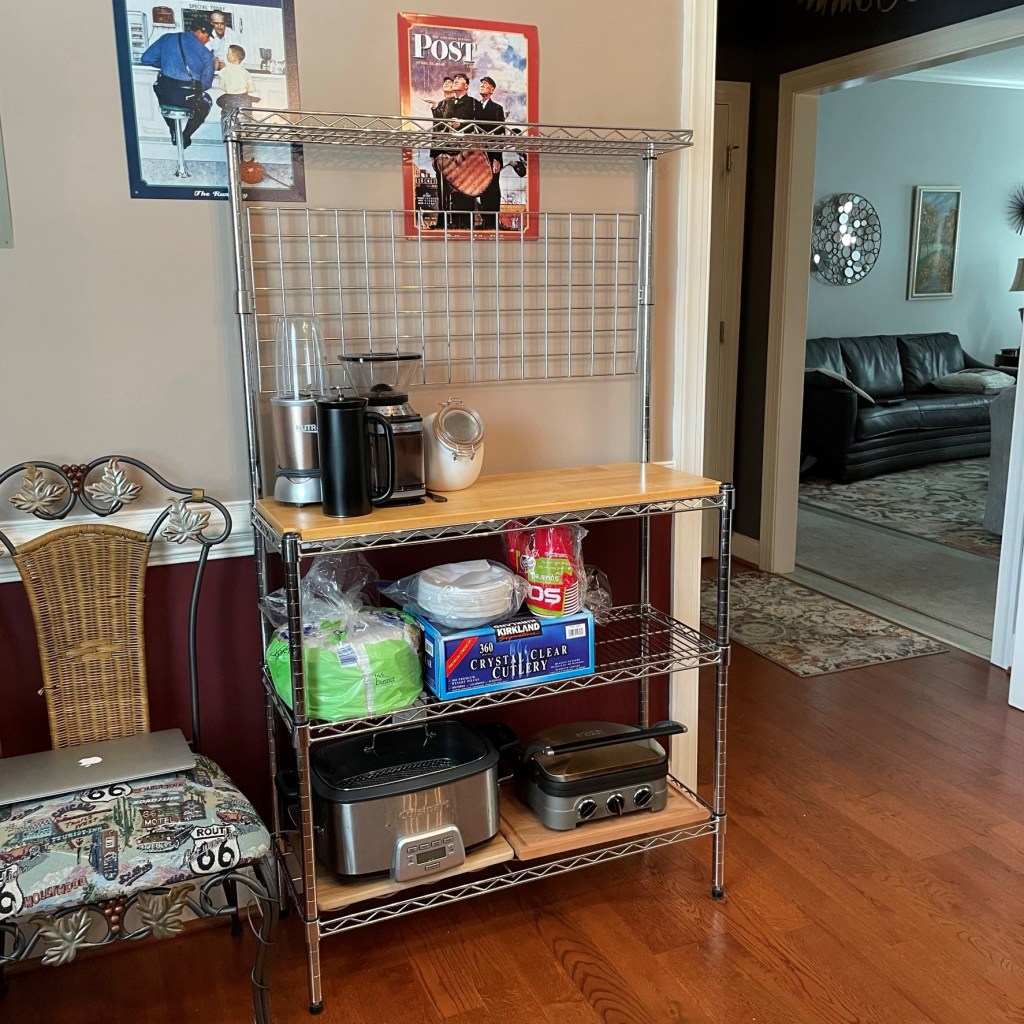
In six short weeks, life will be turned upside down for my husband, Les, and me. This is when our kitchen tear-out will begin, and we are beginning to shift our expectations as we prepare for the eight weeks or so that we will be “without” a kitchen. Welcome, friends, to our “in-between” kitchen!
How about that? A two-burner “stove” right on the dining table!
This rack is going to get a LOT more cluttered in the weeks ahead.
At least we will have the bar nearby… 🙂
We have rearranged our dining room space to accommodate a baker’s rack that will hold some of the appliances that will help us get through the chaos. A new two-burner induction cooktop will allow us to do simple stove-top cooking, including heating water for my daily dose of French press coffee. We will make good use of our slow cooker, toaster oven and the panini griddle that doubles as a waffle iron. We have the gas grill for outdoor cooking, and so far, the only thing I haven’t quite figured out is how I will make bread without our oven, though don’t be surprised if I use one or more of the above to make it happen!
As we are preparing for the load out of the old kitchen (not to mention a bevy of random pantry and freezer ingredients), I’m giving all of our other small electrics a chance to prove themselves worthy of a spot in our new space. One item that will be (sadly) getting the boot is our KitchenAid 11-cup food processor, but not because we don’t use it; on the contrary, this thing gets so much action, it is on its last legs. The protective film over the power buttons has become brittle and is completely worn away from the pulse button, the feed chute is cracked and the inside of the “S” blade stem has some dried-on crud that I have not been able to remove. I have had the appliance nearly 20 years, and KitchenAid no longer makes my model (or any of the parts), so my only choice will be to replace the machine.
I’m surprised this is the only button missing the cover.
This probably happened while I was make parm-romano blend.
I don’t even want to know what dangers lurk in those crevices…
My KitchenAid processor has had a good run!
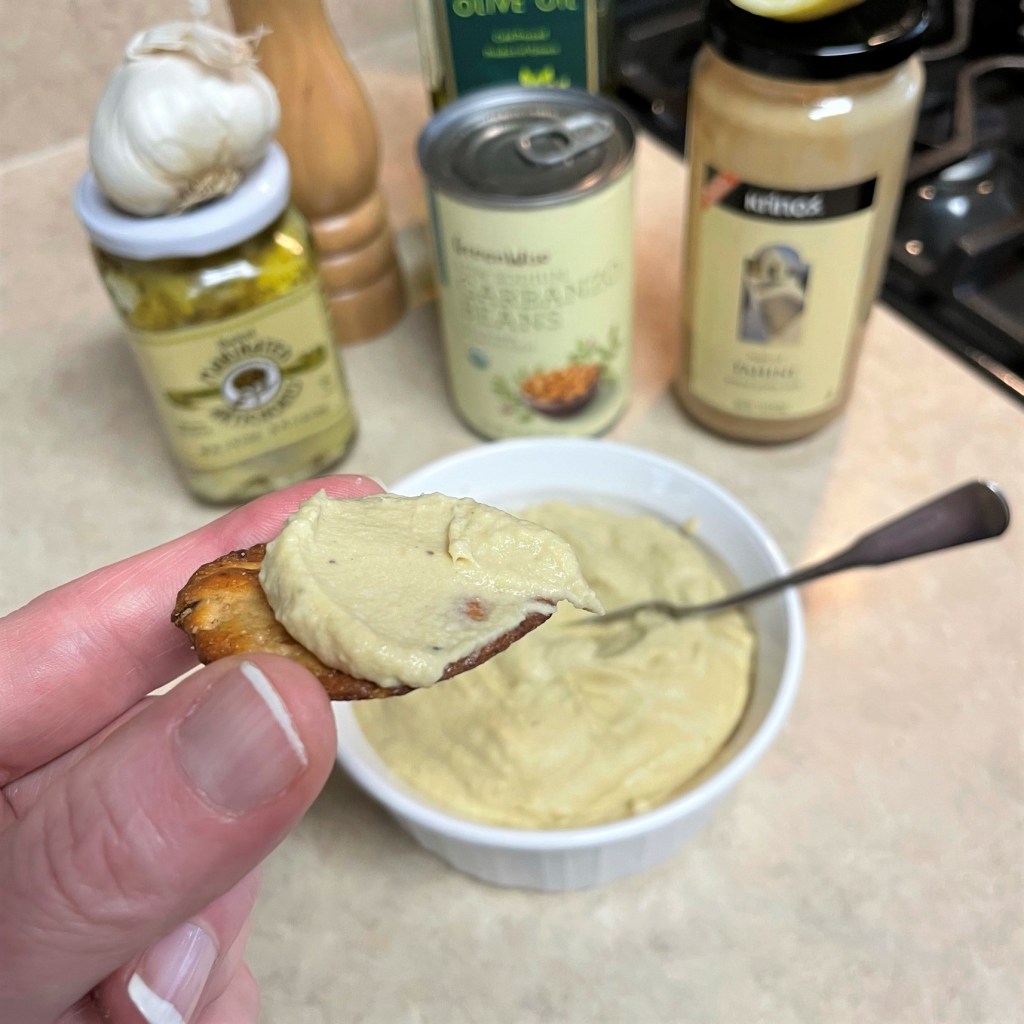
Until then, I’ll keep going with recipes like this one, for easy homemade hummus made with garbanzo beans, lemony artichoke hearts and lots of fresh garlic. Hummus is one of my favorite “blank canvas” foods, and it’s so simple at home, it makes no sense to buy it. The other key ingredients include tahini, olive oil and a squeeze of fresh lemon, which is a perfect highlight to the tangy artichoke.
Warm the garbanzo beans to soften them up before you begin and use a food processor or a good blender for best, smoothest results. Enjoy your hummus on crackers, chips, crostini or fresh veggie slices.
It’s so much tastier than store-bought!
Ingredients
15 oz. can garbanzo beans, with liquid
3 Tbsp. tahini* (see notes)
2 to 3 cloves garlic, finely chopped
About 1/2 cup marinated artichoke hearts*, drained and rough-chopped
Juice of 1/2 lemon
Kosher salt and pepper
3 Tbsp. extra virgin olive oil
*Notes
Tahini is a paste made of ground sesame seeds. It is available in most larger supermarkets, usually in the same section as olives, or perhaps in the international aisle.
The artichoke hearts I used were Trader Joe’s, marinated in sunflower oil, vinegar and spices. If you use plain hearts, consider adding a pinch or dried herbs (dill or oregano would be great), and either way, drain all the excess liquid from them.
Instructions
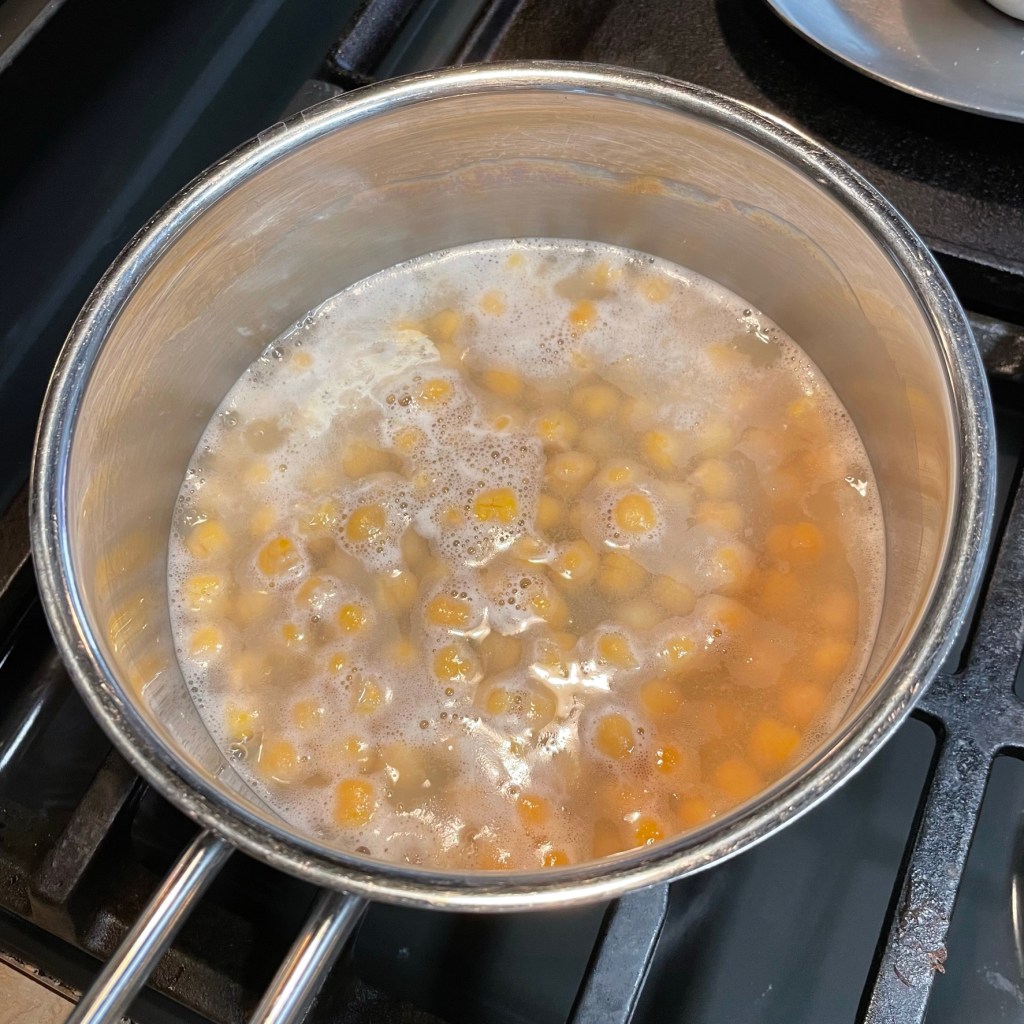
Simmering the garbanzos softens them, and helps achieve a silky texture in the hummus.
Drain off most of the liquid, and keep it nearby for the blending stage.
Transfer all the beans, still warm, into the processor (or blender) bowl. Keep the chute lid open while blending to allow steam to escape.
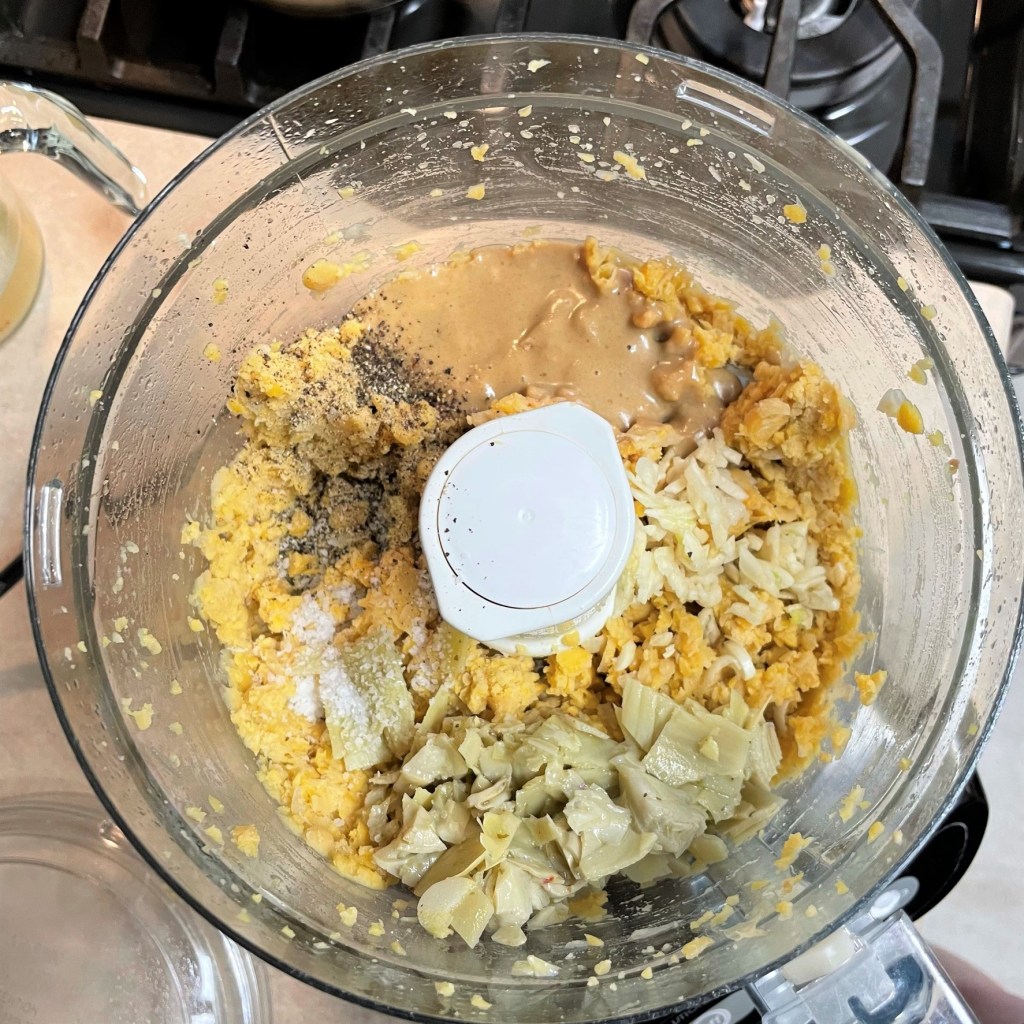
The add-ins, clockwise from top: tahini, fresh garlic, chopped artichoke hearts, salt and pepper.
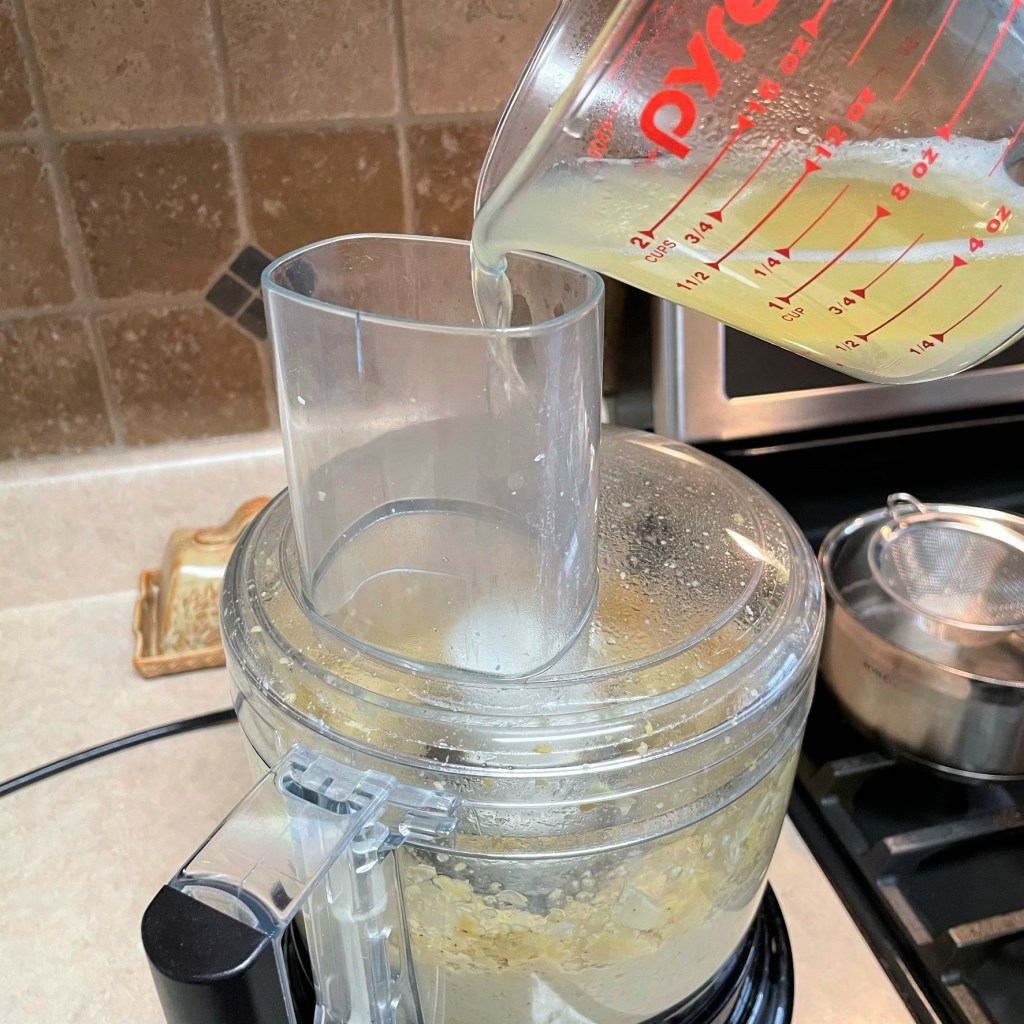
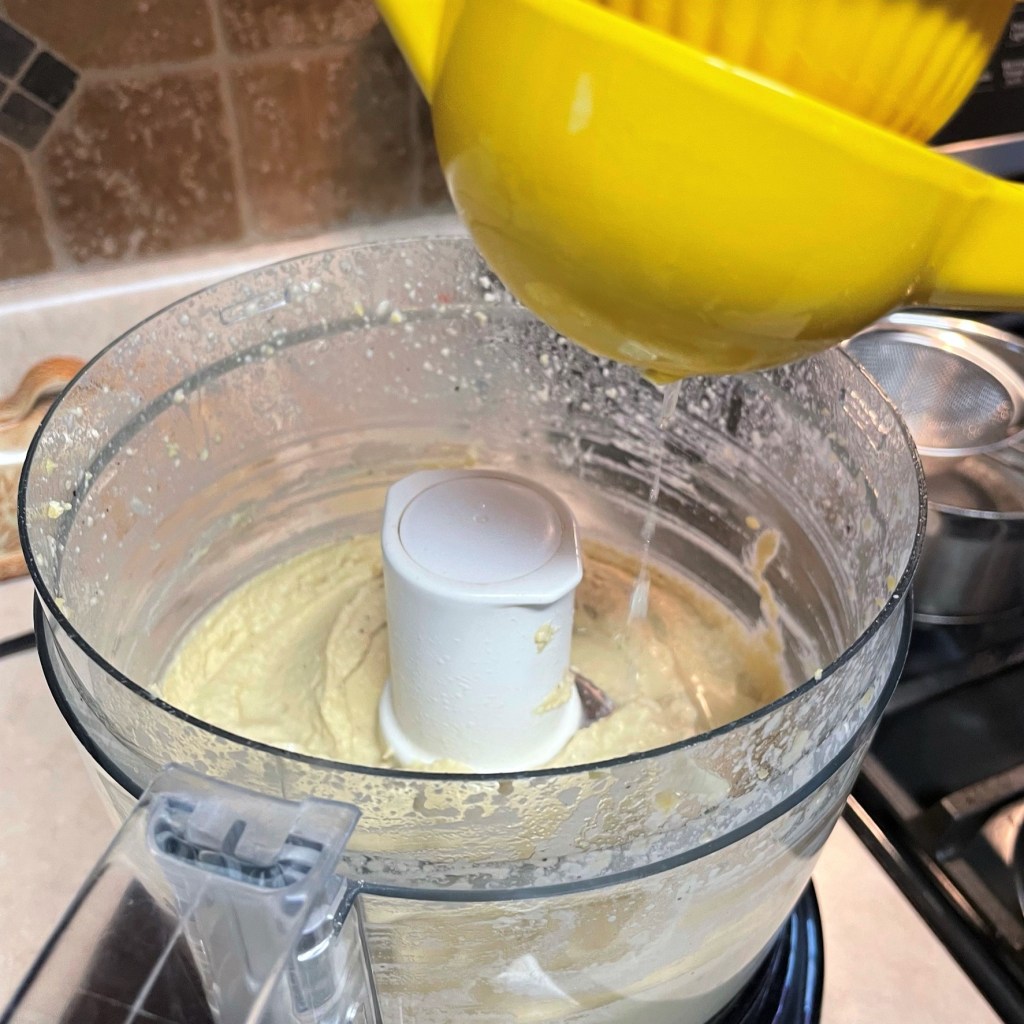
Pouring in the warm liquid keeps the mixture nice and smooth as it processes.
I love my citrus squeezer because I get all of the juice and none of the seeds!
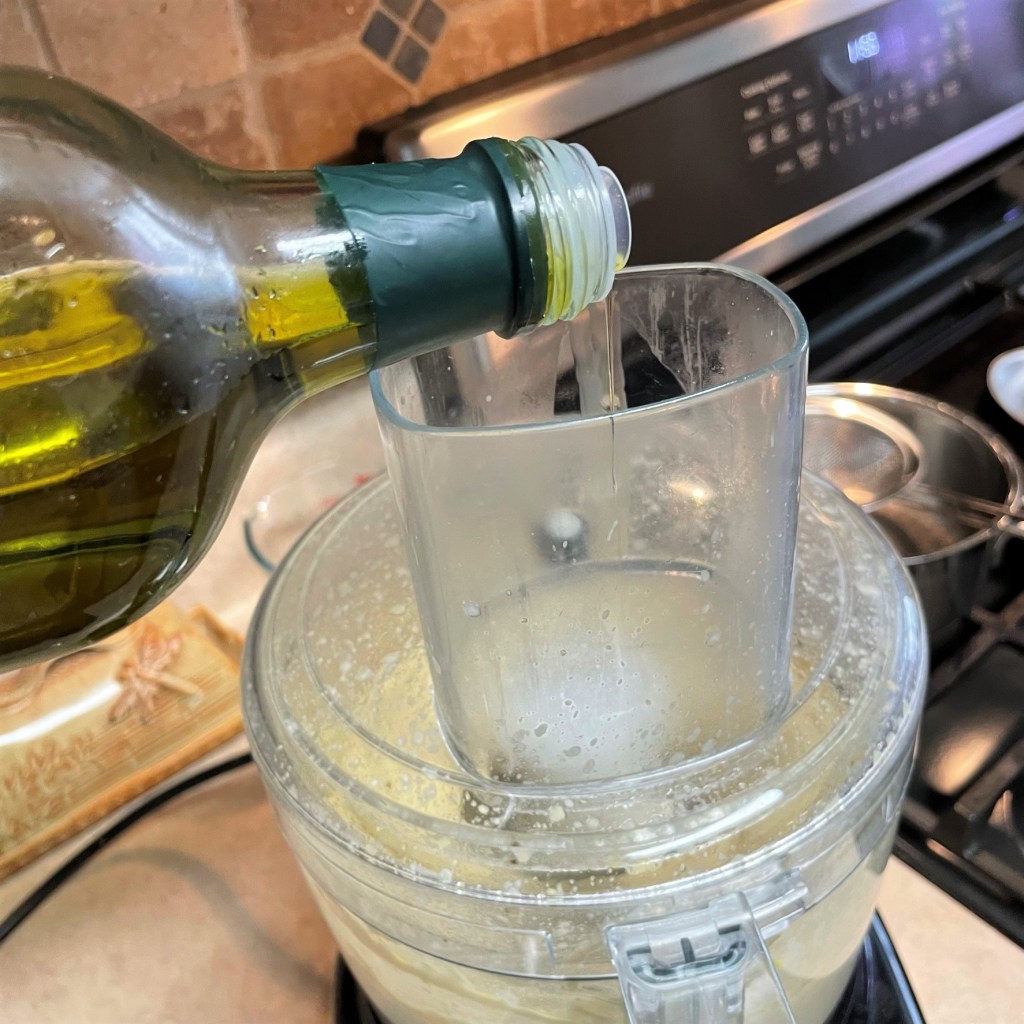
Drizzle the olive oil in slowly as the machine processes continuously.
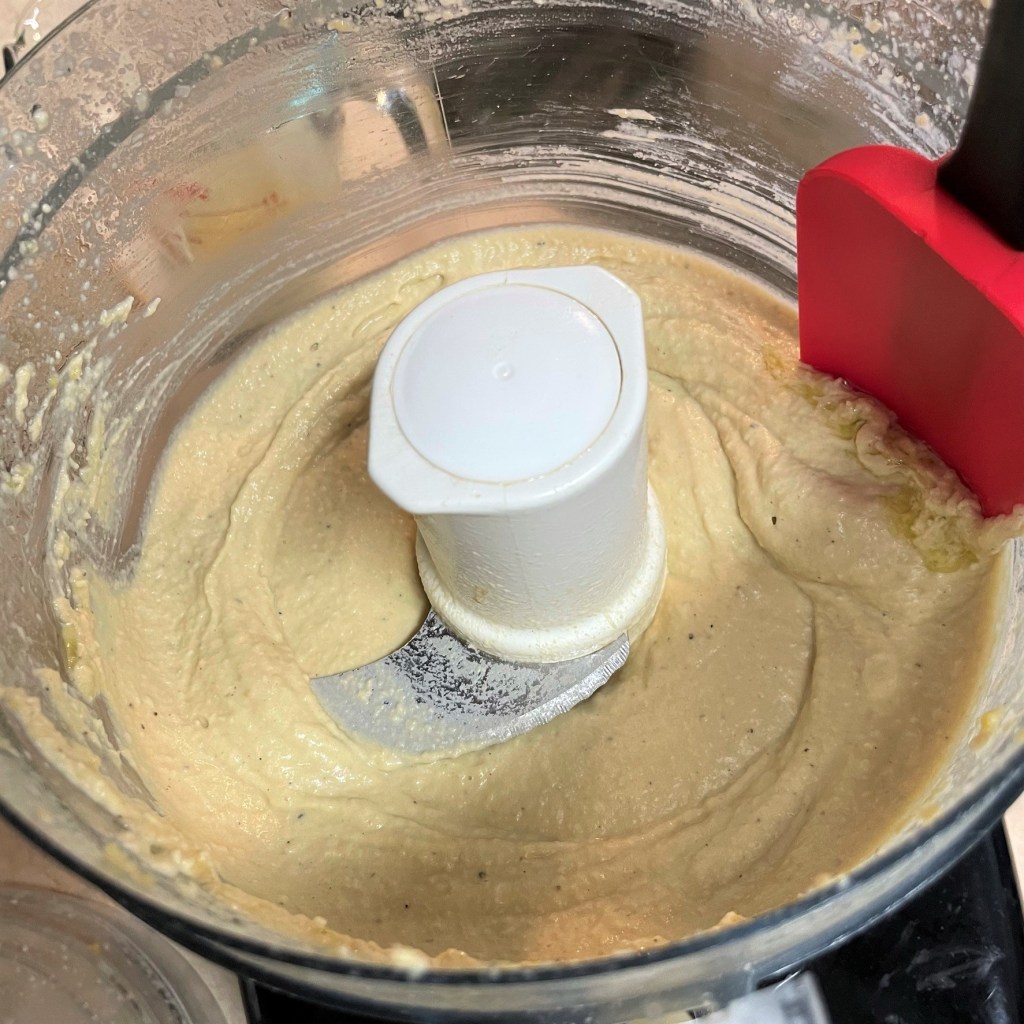
After each step or addition, stop and scrape the sides to ensure all bits of ingredients are evenly blended.
Pour the entire contents of the canned garbanzo beans into a small saucepan. Heat over medium-low heat until mixture just begins to boil. Remove from heat and drain liquid off beans, but do not discard it (you’ll use it for blending).
Transfer warm beans into a food processor or blender and pulse a few times to grind the beans into a meal-like texture. Scrape down sides of the processor bowl. Add tahini, garlic, artichoke hearts, salt and pepper. Pulse a few times to combine. Scrape down the sides again.
Turn processor on and run continuously while slowly pouring about 3 tablespoons of the warm liquid into the processor. Blending slowly will help to emulsify the ingredients into a smooth blend. Add more or less of the liquid, depending on your preference for hummus consistency. Remember that the mixture will become firmer after chilling. Scrape down sides once more.
Run processor continuously and slowly blend in about 3 tablespoons of extra virgin olive oil.
Transfer hummus to a bowl and refrigerate, covered, for up to a week.