Beef on Weck (another Western New York classic)

Saturday marks the fifth anniversary of Comfort du Jour. I am 448 blog entries into the story of my life through food, and that boggles my mind a bit. I cannot reflect on my culinary passions without thinking of my maternal grandmother, and thinking about her makes me long for the flavors of “home.” This simple yet iconic sandwich of my old neck of the woods has been pushed around on my culinary bucket list since 2020, and I am aware that my procrastination in making it has nothing to do with ingredients or complexity. It has everything to do with my own expectation and the same old, six-word worry: 

What if I mess it up? 

Fear is a weird phenomenon, isn’t it? And for people who’ve been raised by perfectionists and other hard-to-please grown-ups, it becomes a normal state of mind that lingers long after the initial disappointees have faded into the background. Fear has kept me from a million things in this life, culinary challenges among them. But I threw caution to the wind last week and tried my hand at beef on weck, figuring, seriously, what’s the worst that could happen?

Yes, it was as delish as it looks!

This experiment was not without lessons, mind you, but the outcome was so delicious and so well received at my house (I made it while my husband’s son, Alex, was visiting from his home in Hungary), that you can bet I’ll be making it again and again, with these notes as my template. 

Whattya mean, no sandwiches?!

I am always happy to see Alex arrive for a visit. He’s a cool millennial kid who, like his dad, never met a stranger. His knack for making friends quickly is a great asset for someone who co-owns and operates a hostel in Budapest. In the quiet breaks in my work-from-home schedule, Alex and I had some great conversations, including several around food. When I asked him what kind of sandwiches are popular in Budapest, he hesitated a few beats and then admitted, “none, really.” Despite the constant stream of international tourists, the Hungarian capital is oddly bereft of good sandwich shops amid all the Asian and Italian hot spots aimed at visitors.

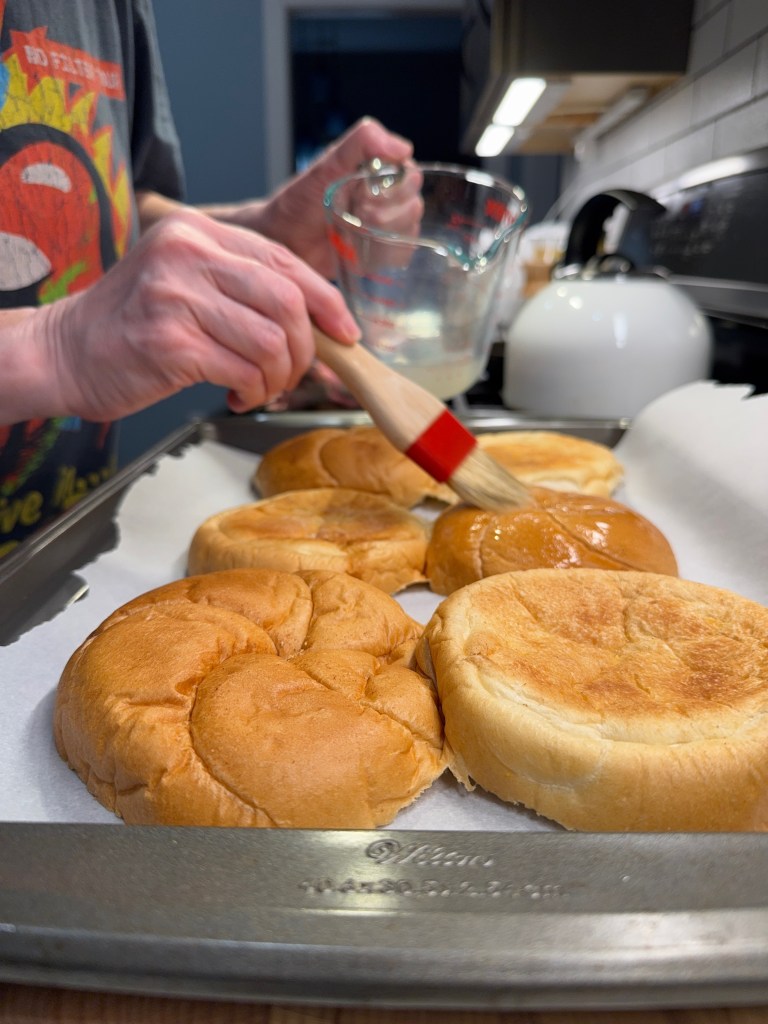
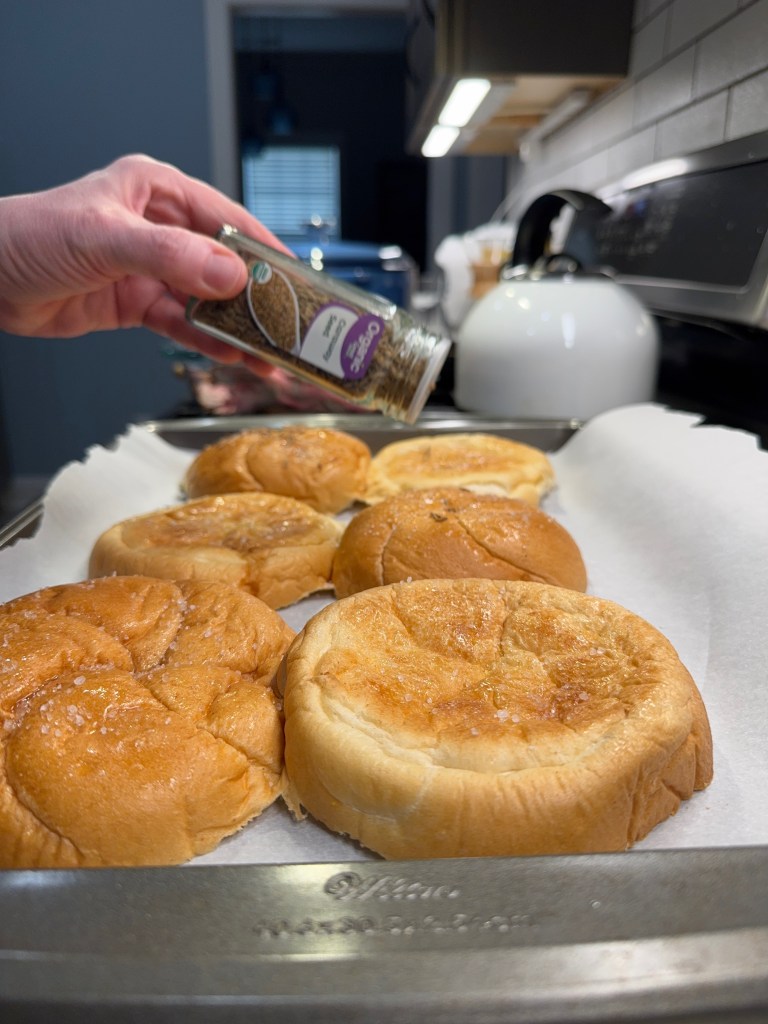
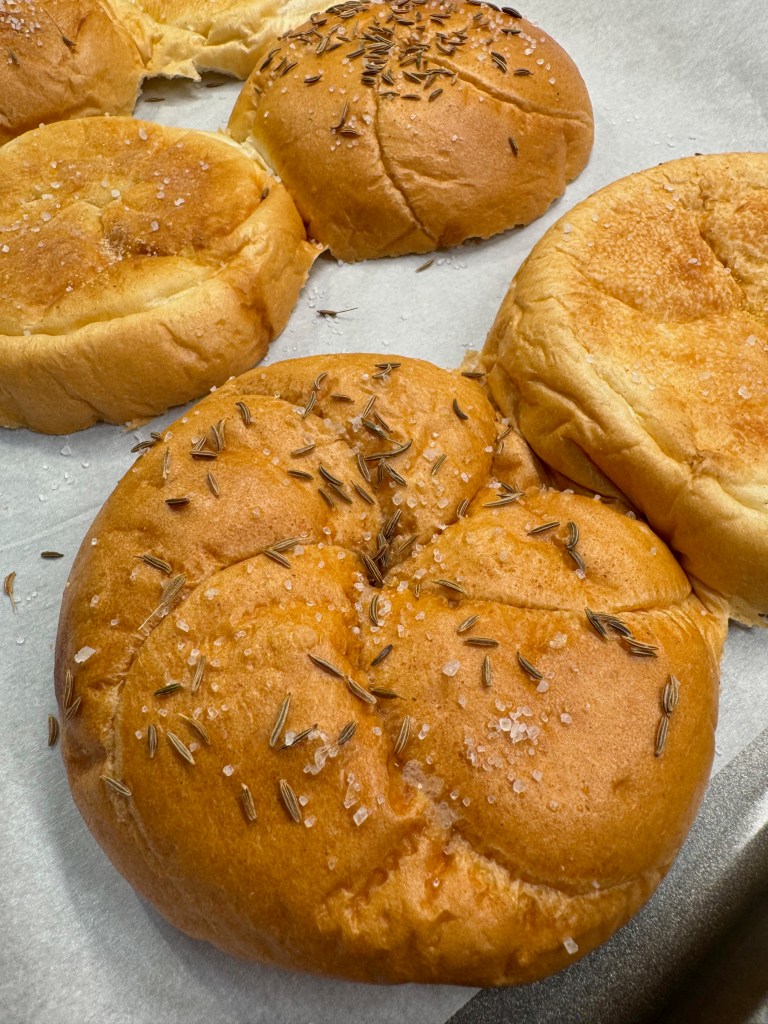
This, I thought, was a tragedy, and it was the final push I needed to get on top of making beef on weck. What American-born man doesn’t want a good, medium-rare roast beef on a bun? The bun, in this case, being a kummelweck roll (or kimmelweck, depending on who you ask), which is essentially a kaiser roll that has been adorned with aromatic caraway seeds and coarse salt. I wanted so much to make my own rolls for this, but I cheated a bit and gussied up plain kaiser rolls from my supermarket bakery. It worked perfectly.

The butcher always knows…

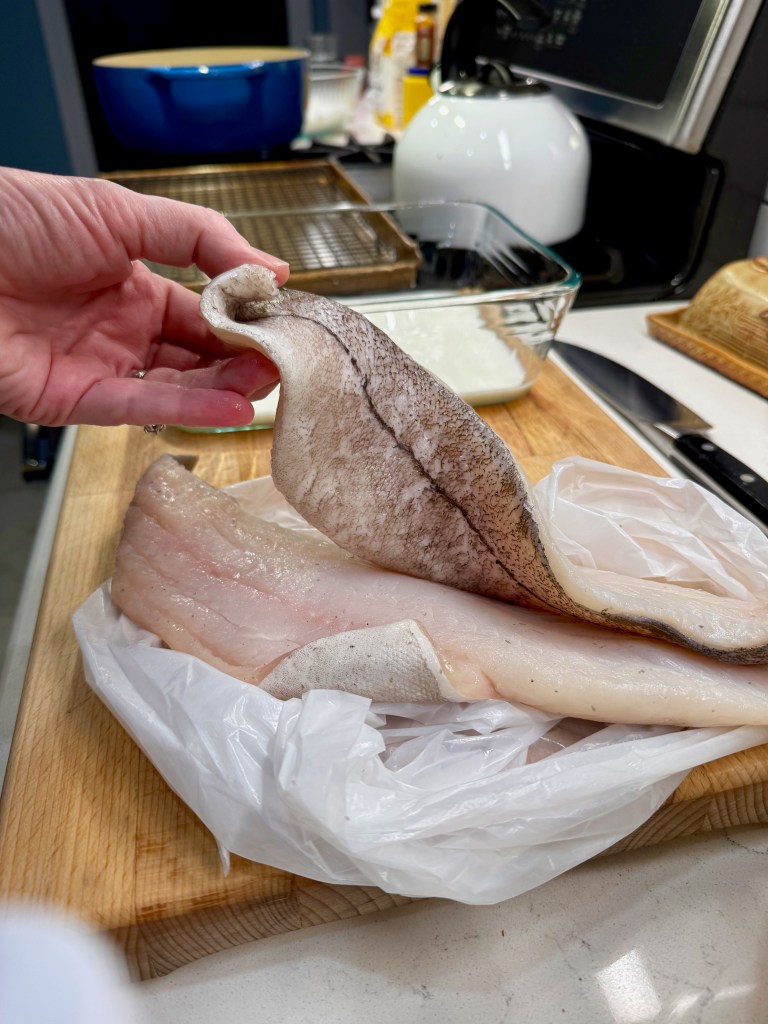
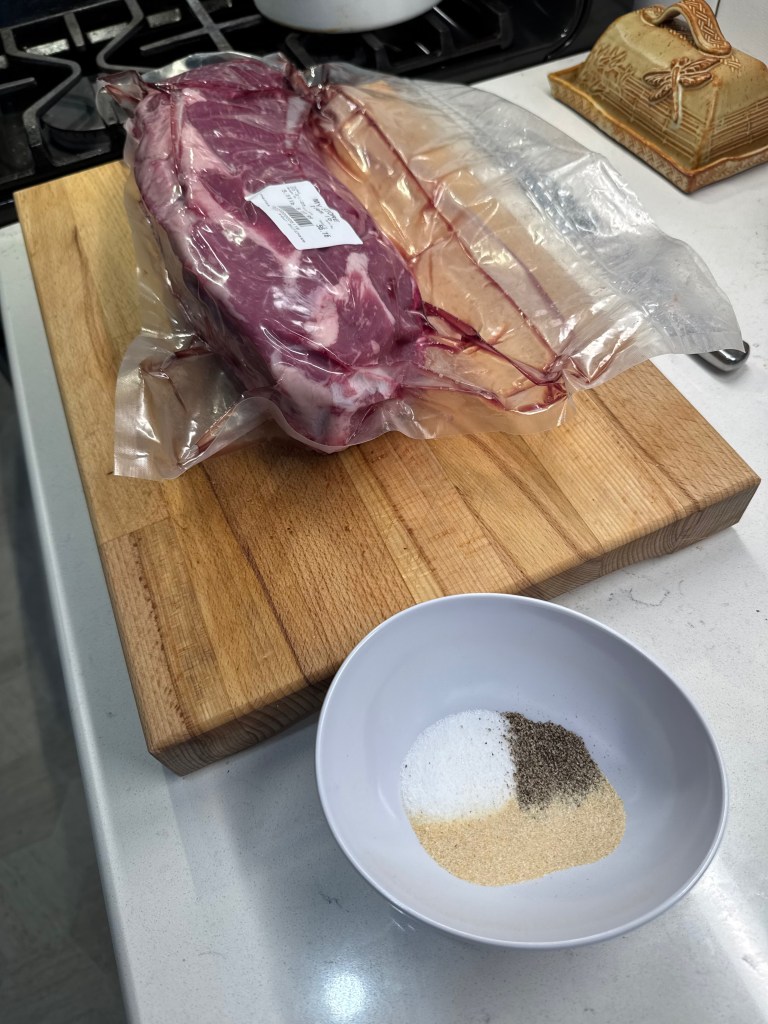
We are very fortunate to have a high quality, local-sourcing, independent butcher in our city. The guys at @SmokeCityMeats in Winston-Salem always set me up for success. When I asked Matt about getting an eye of round roast for beef on weck for three people with plenty of leftovers, Matt replied that he may as well set aside a whole one for me, and this cut was a little over five pounds. It seemed like A LOT, but it turned out to be exactly what we needed for our meal plan. This is why I trust my butchers, the same guys who hooked me up with the pork belly and tenderloin that became my fabulous porchetta, and the lamb for my tasty grilled lamb burgers and the duck breasts for my crispy five spice duck with cherry-pinot noir sauce, and the strip steaks I used in my reverse-sear experiment. They always know best, and I’m grateful for their expert suggestions.

I know it probably sounds like a commercial, but I swear that they are not paying me to promote their shop. I’m genuinely a happy customer who is proud to support local, and in return, we get to enjoy responsibly raised, incredibly flavorful local meats. It’s truly a win-win.

A method to my madness

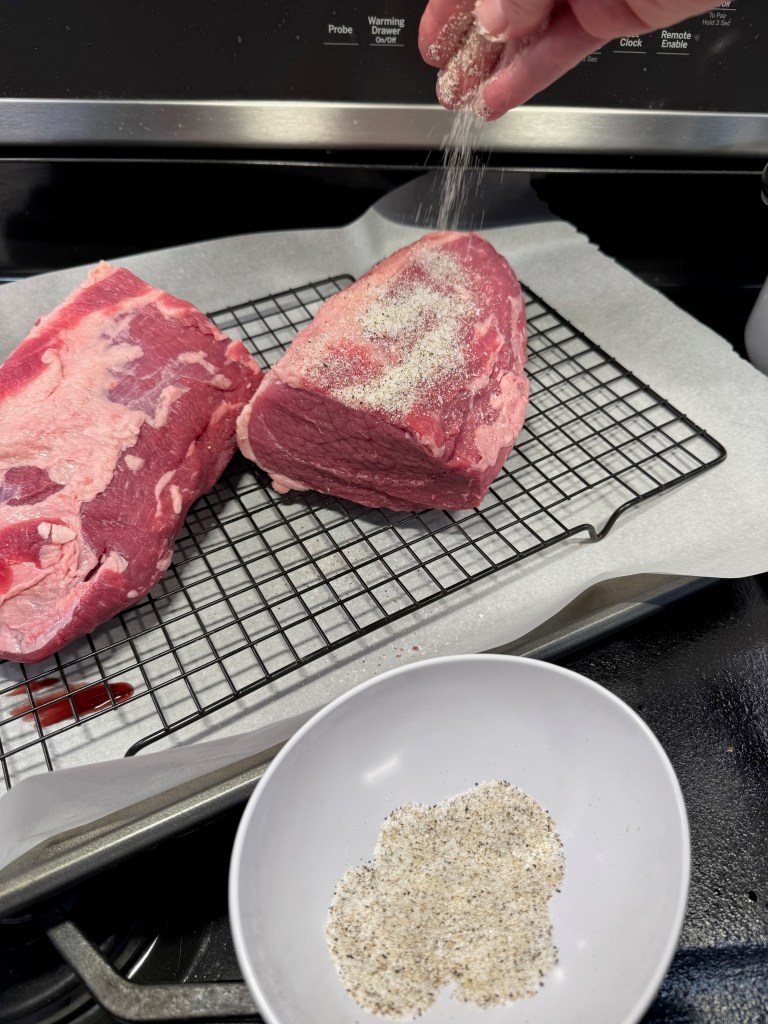
It isn’t enough to have an incredible cut of meat— one also needs to know the best technique for preparing it, and for that, I’m trusting J. Kenji Lopez-Alt, the science-y chef whose method for dry brining has become my standard. Whether I’m prepping duck breasts, a Thanksgiving turkey or a pulled pork shoulder, you can bet I’ll be sprinkling it with salt and stuffing it into the fridge overnight. I cannot overstate how much this technique has elevated my cooking. The key is to place the meat in the fridge uncovered, so that the salt draws out moisture, dissolves into a brine and then soaks back into the meat. For my beef on weck, my salt was also peppered and spiked with onion powder.


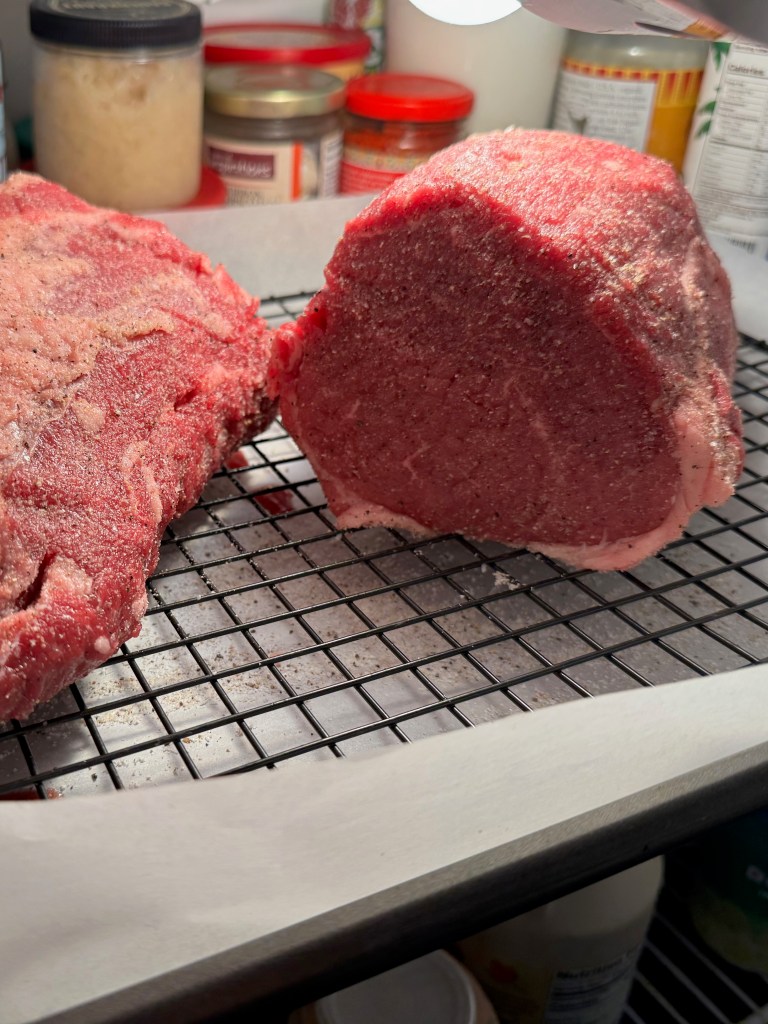
This is scary the first time, because when you open the fridge the next day, the meat will look dry, tight and somewhat shriveled. The level of panic you feel will be directly related to the price you paid for the meat in question. My first time dry brining was a heritage-breed Thanksgiving turkey, and the price tag was about $100, so it was a huge amount of faith placed in Kenji’s knowledge and experience. It was also one of the most delicious turkeys I’ve ever done. This time, it was a $56 eye of round roast, and I was confident as could be. Try it once, and I promise you won’t be disappointed.

Horseradish and kummelweck (the signature flavors)

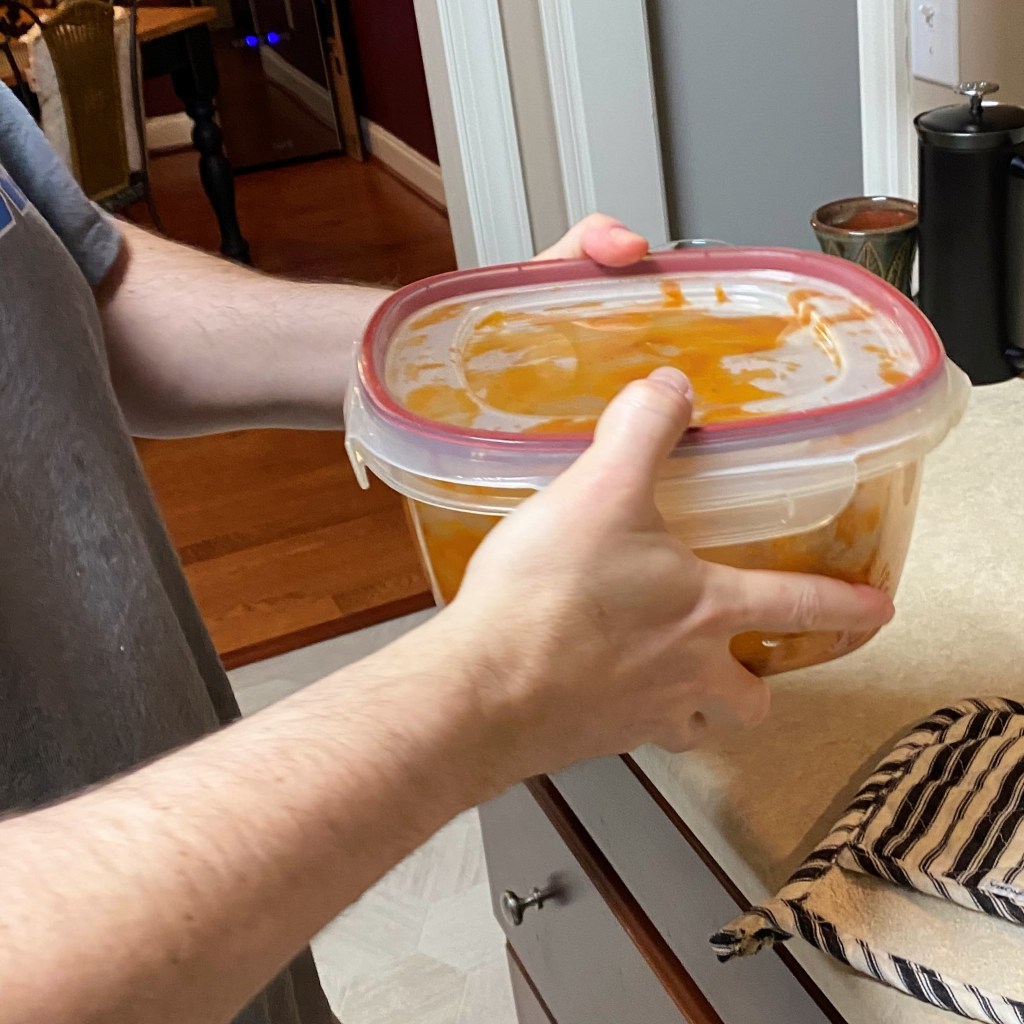
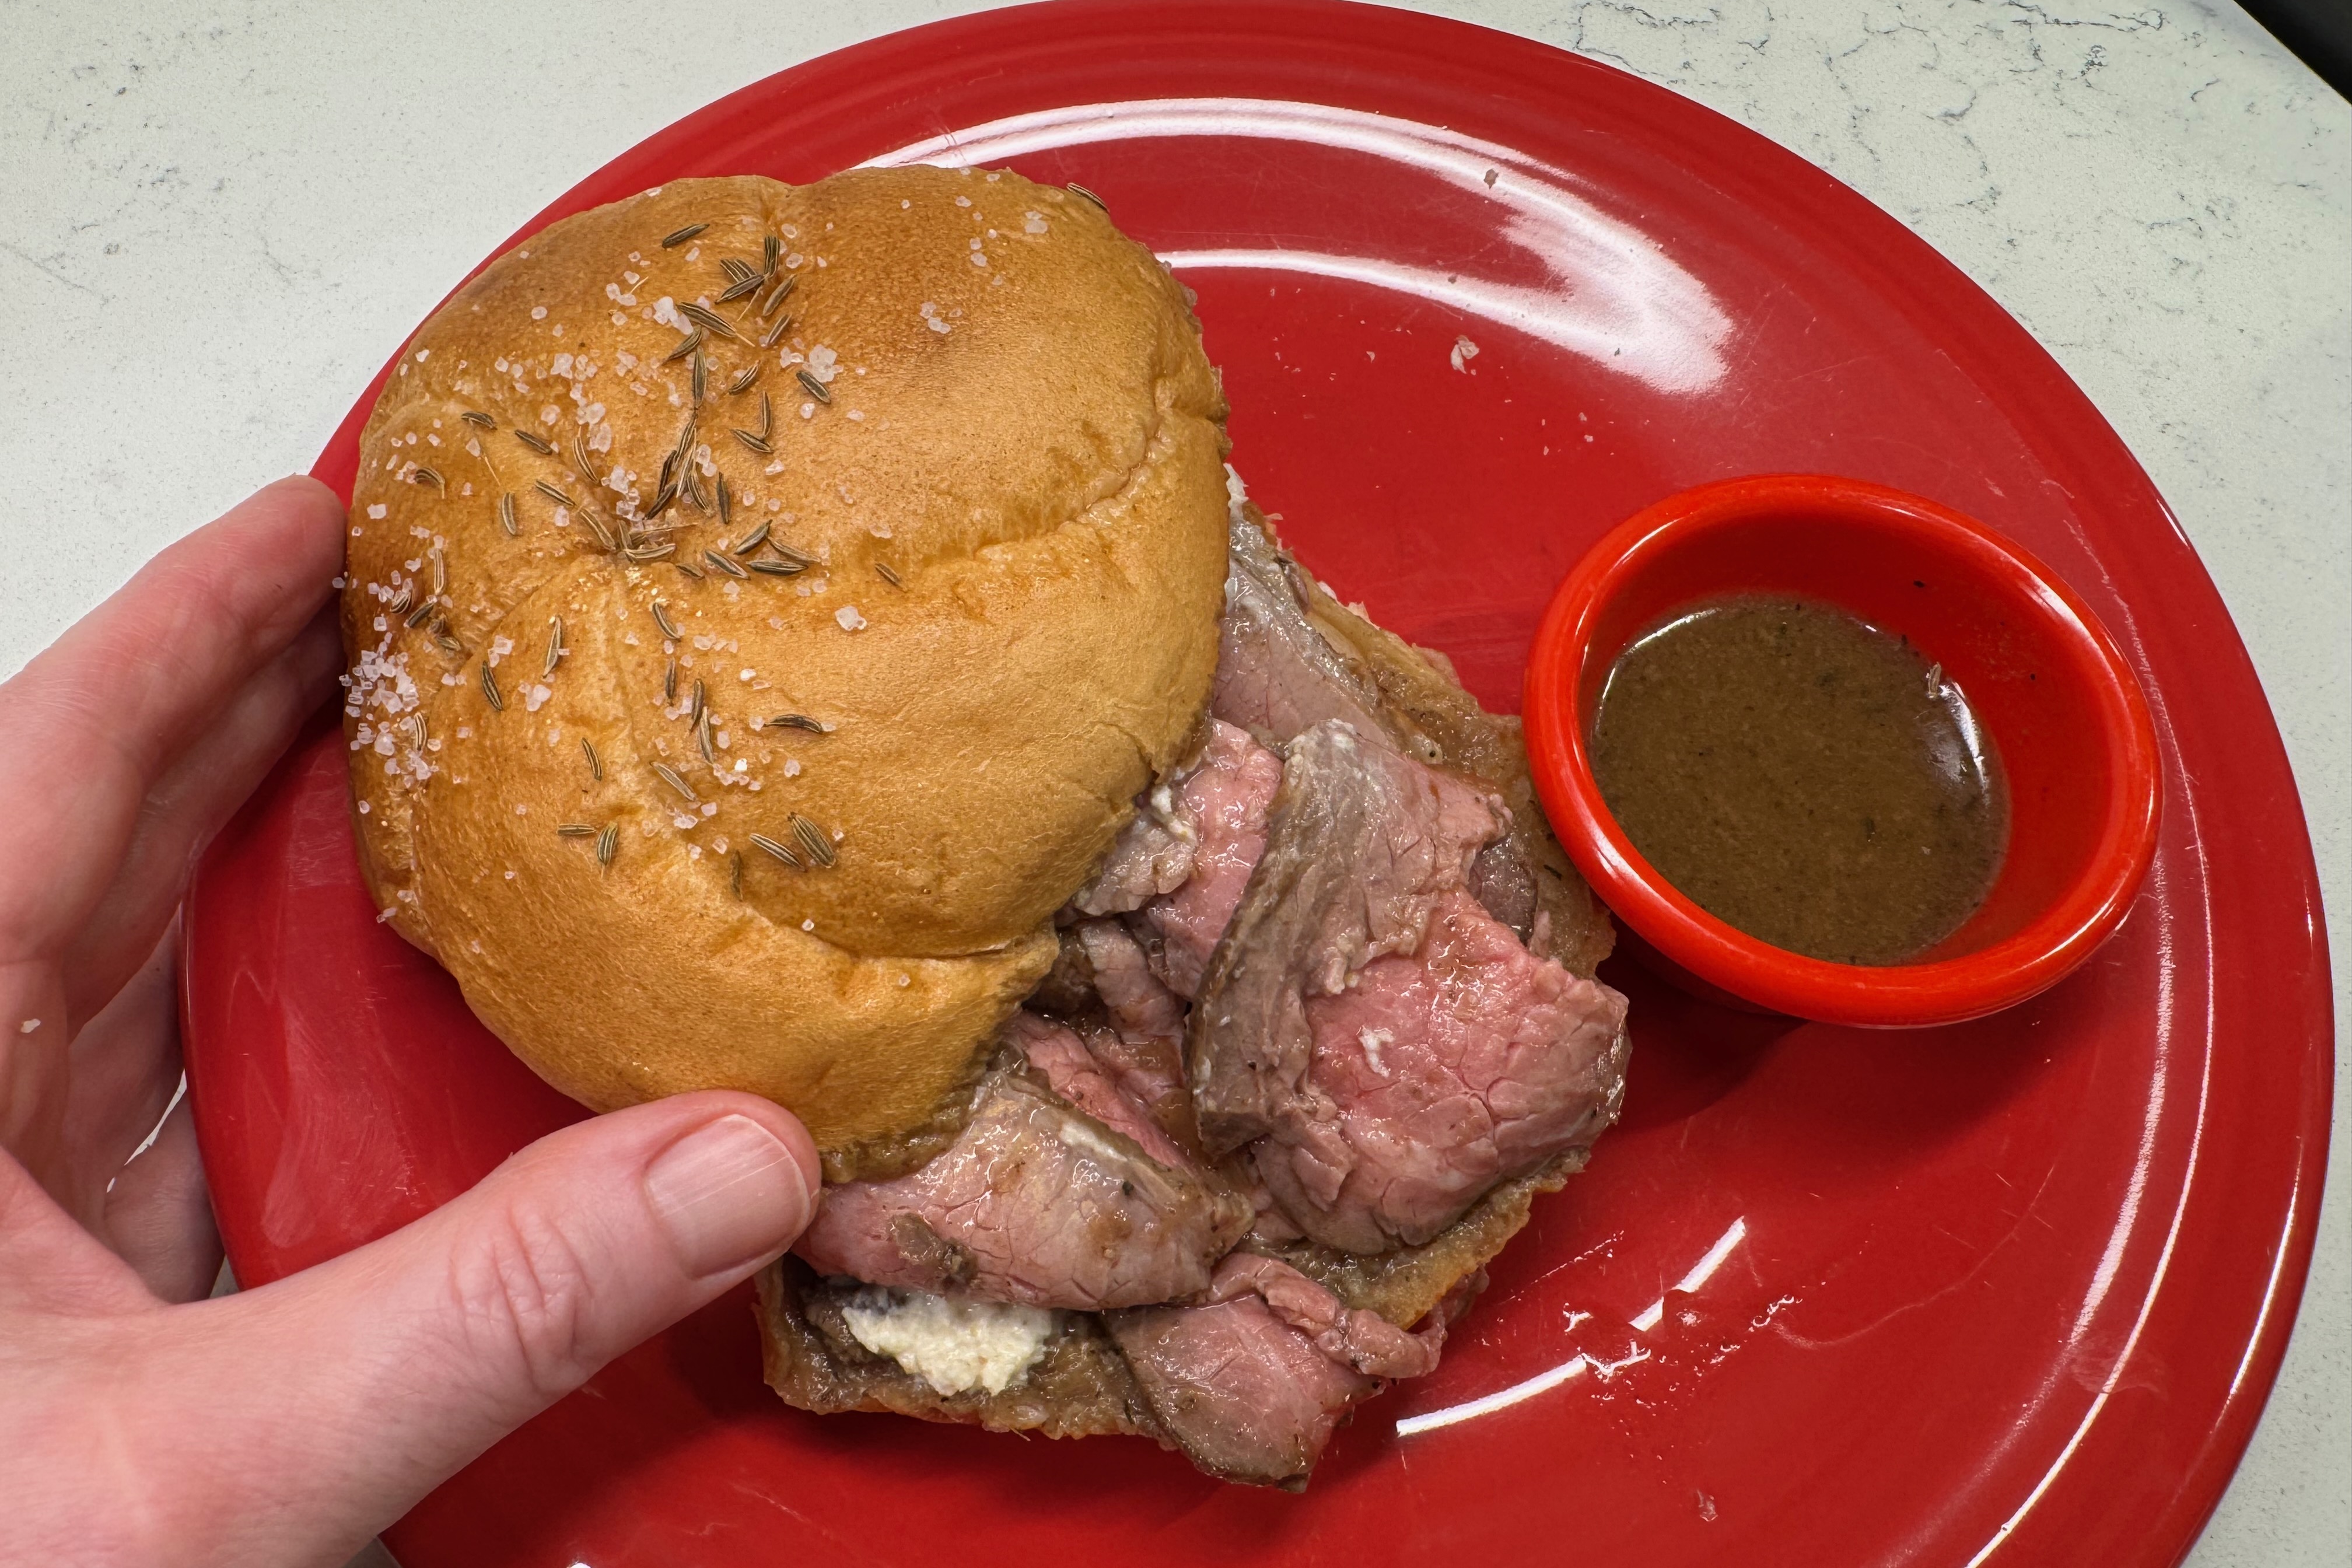
The horseradish sauce is merely a small bowlful of drained, prepared horseradish mixed with a spoonful each of sour cream and mayonnaise. It is quite pungent, and if you are not a fan of horseradish, you may want to skip this. But it is a key component in an authentic beef on weck. The important thing is keeping the horseradish flavor front and center, with only enough of the creamy ingredients to make it somewhat spreadable. You can make this ahead and keep it in the fridge until ready to serve.

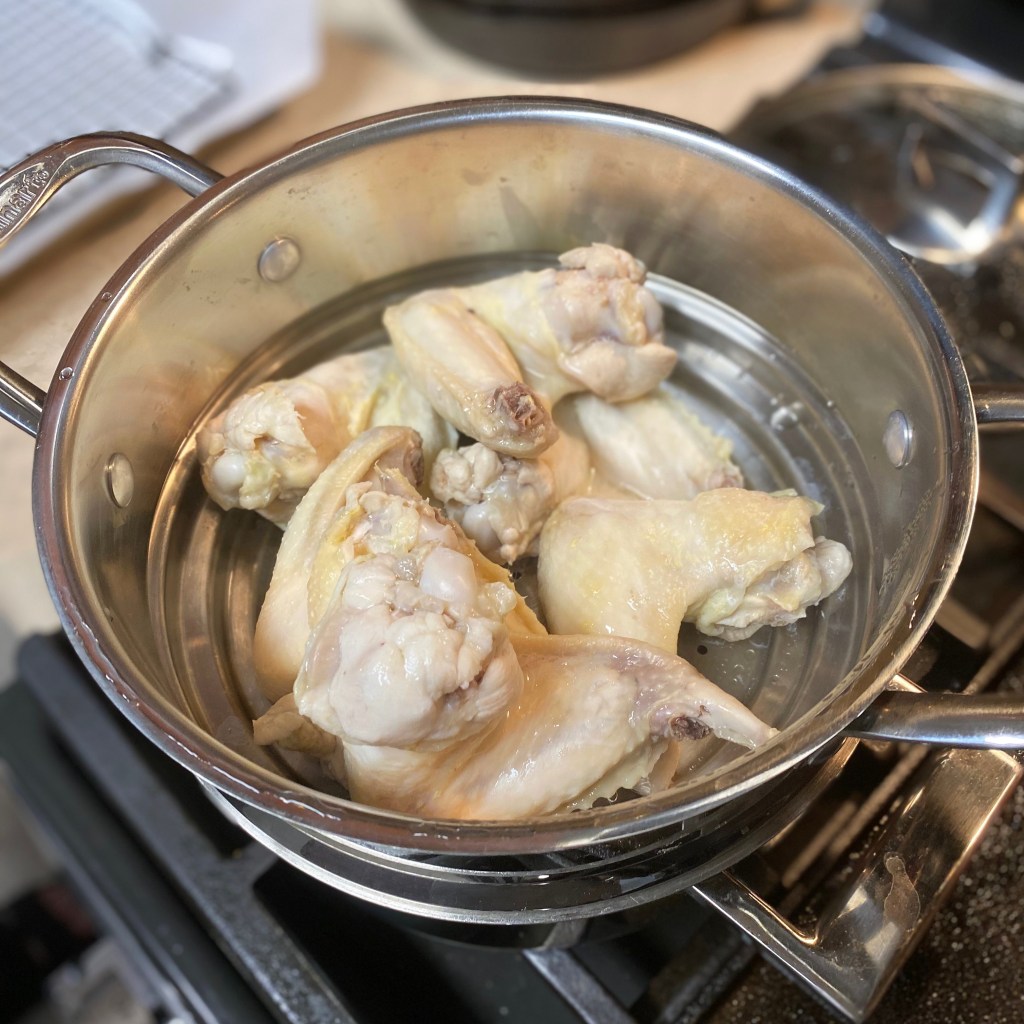
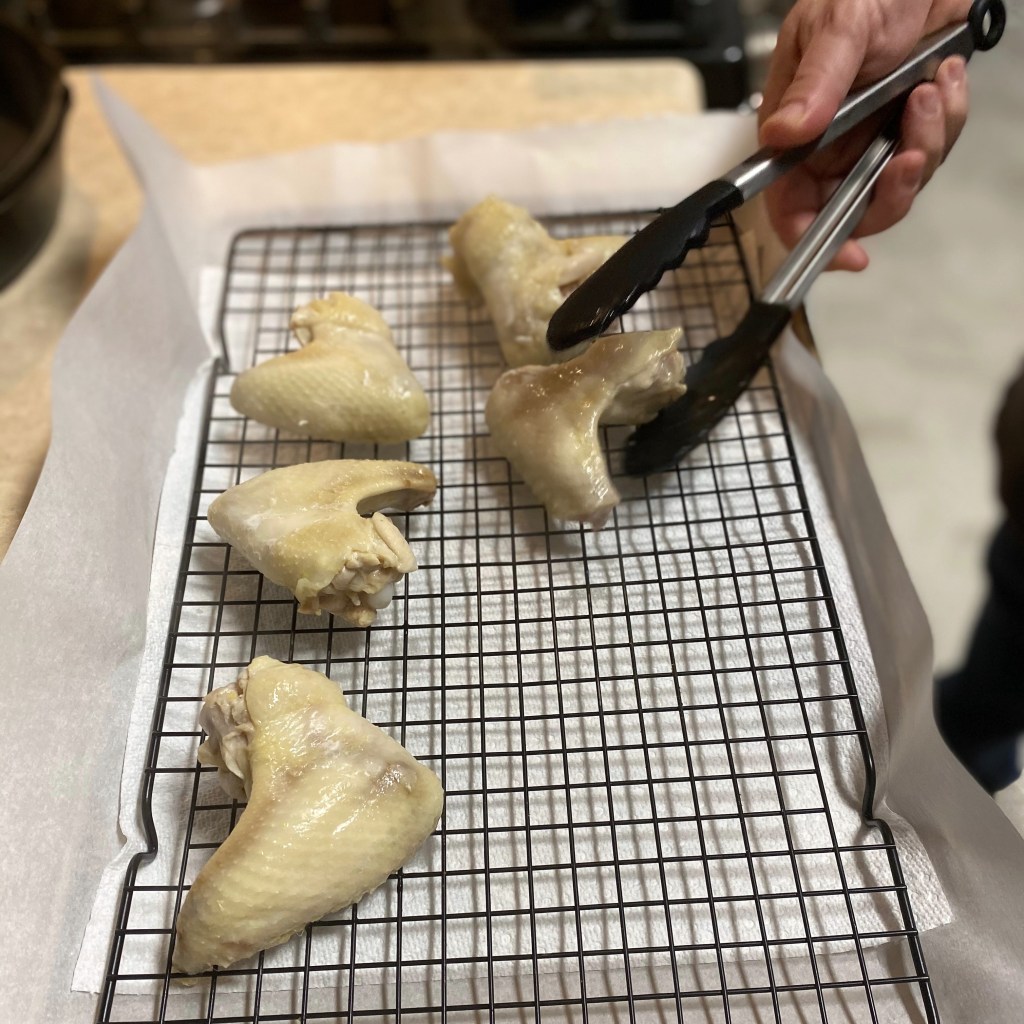
For the kummelweck rolls, you may not find them ready-made if you are outside the Western New York area. Fortunately, it is easy to transform more readily available kaiser rolls simply by brushing them with a cornstarch slurry, sprinkling with coarse salt and caraway seeds, and baking until the seeds are set and the rolls are crispy again. The caraway, like the horseradish, is also very traditional for this sandwich. If you don’t care for the flavor, go with a sesame-topped kaiser instead. But if you skip both the horseradish and the caraway bun, you’re basically just eating a roast beef sandwich.


Achieving the perfect roast beef

This is not in my wheelhouse (hence my hesitation making beef on weck in the first place), but as luck would have it, a book that I gave Les at Christmukkah happened to have instructions for roasting eye of round— for beef on weck— right there on page 134! 

I didn’t follow every part of this recipe, but the roasting instructions were very helpful!

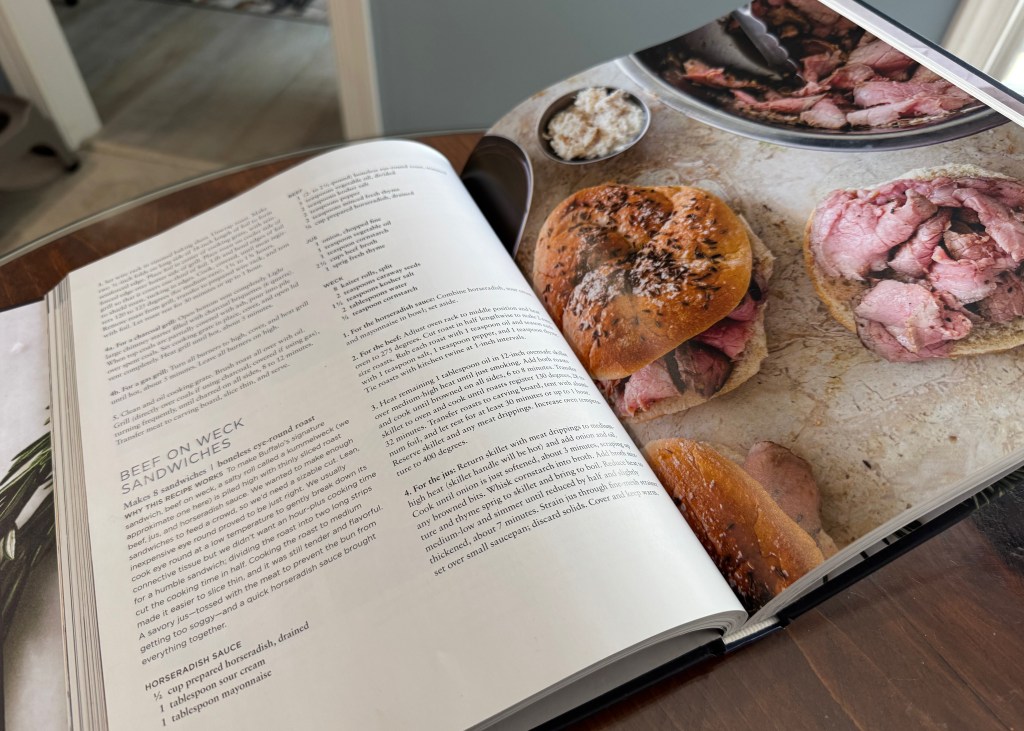
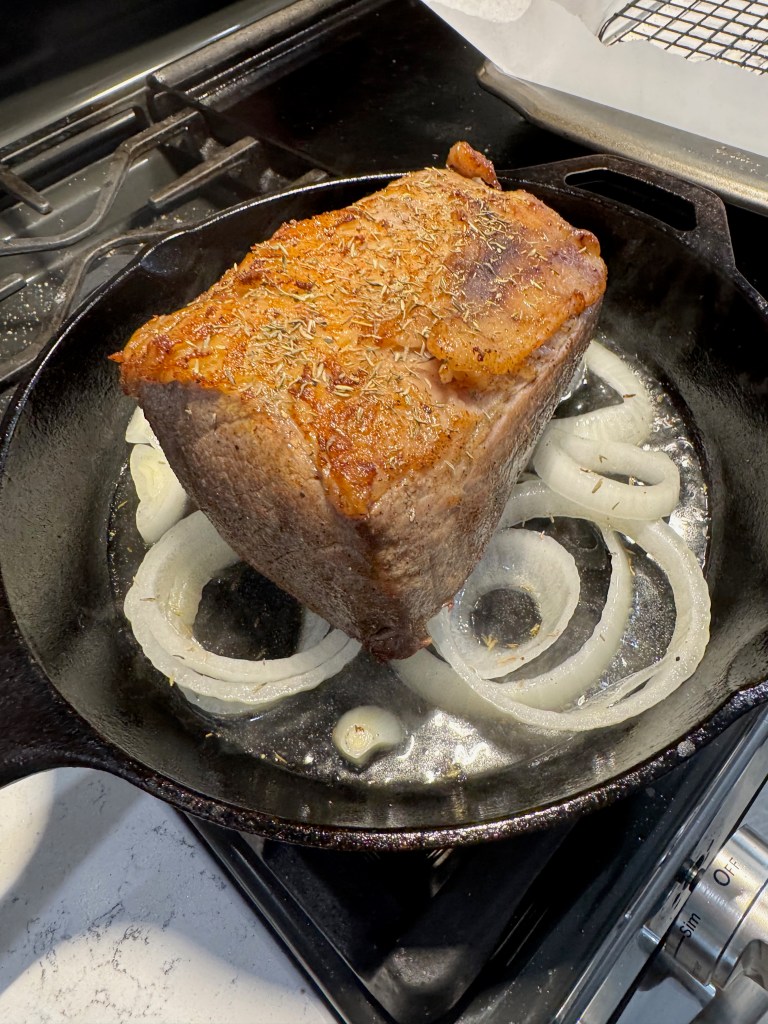
To this point, the only thing my recipe had in common with the one I found in Meat Illustrated was the specific cut, eye of round. Mine was twice the size called for, and I had already done the 20+ hour dry brine, which was not outlined in the book. But I needed a solid method for cooking said roast, and this one was perfect. It prescribed a low oven (275° F), a couple of heavy skillets (I went with a cast iron and my enameled Dutch oven) and a bit of oil for searing all the sides of the meat. My own instinct told me to placed the seared roasts onto beds of sliced onions, as I really wanted that flavor in the final mix. 


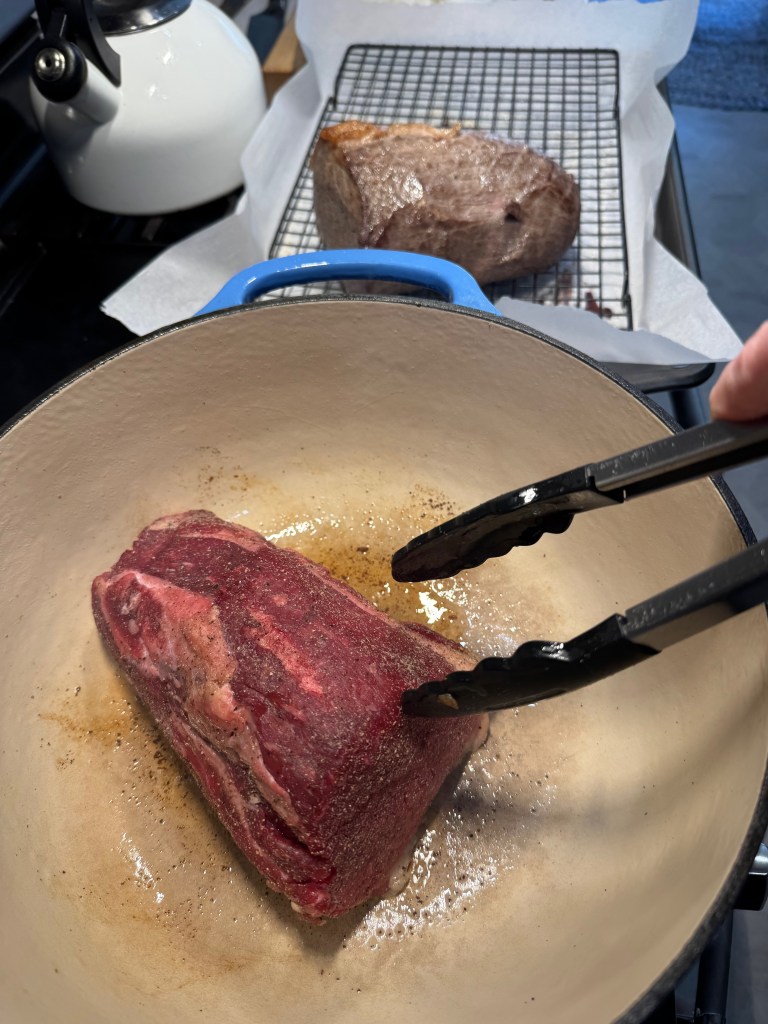
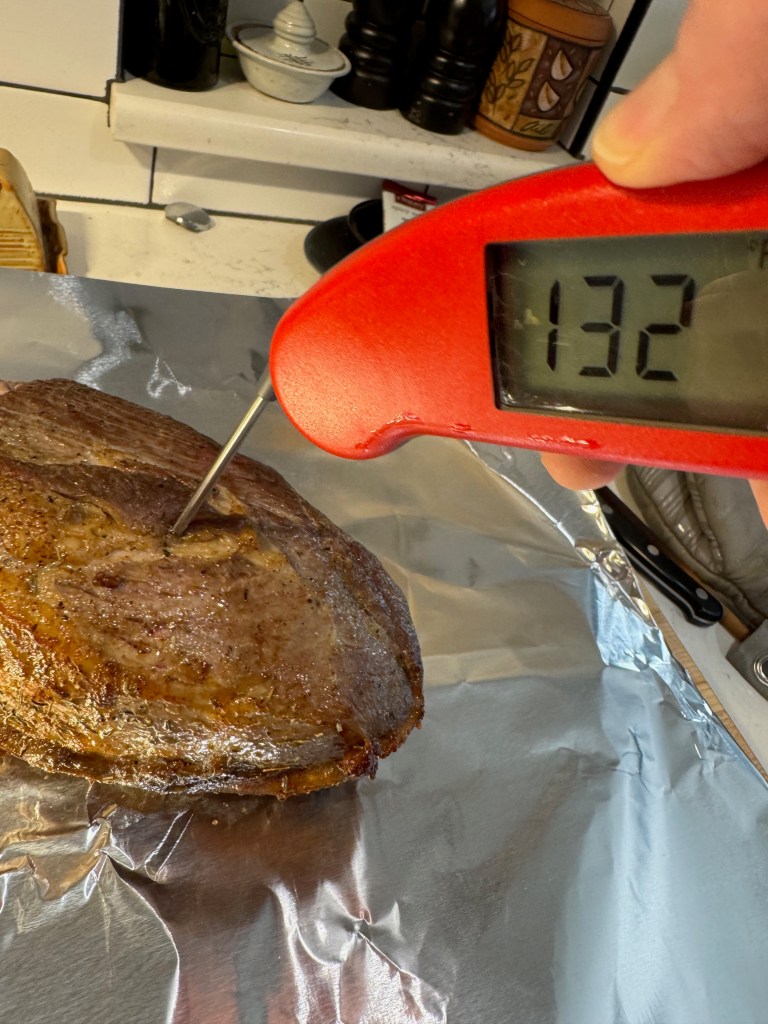
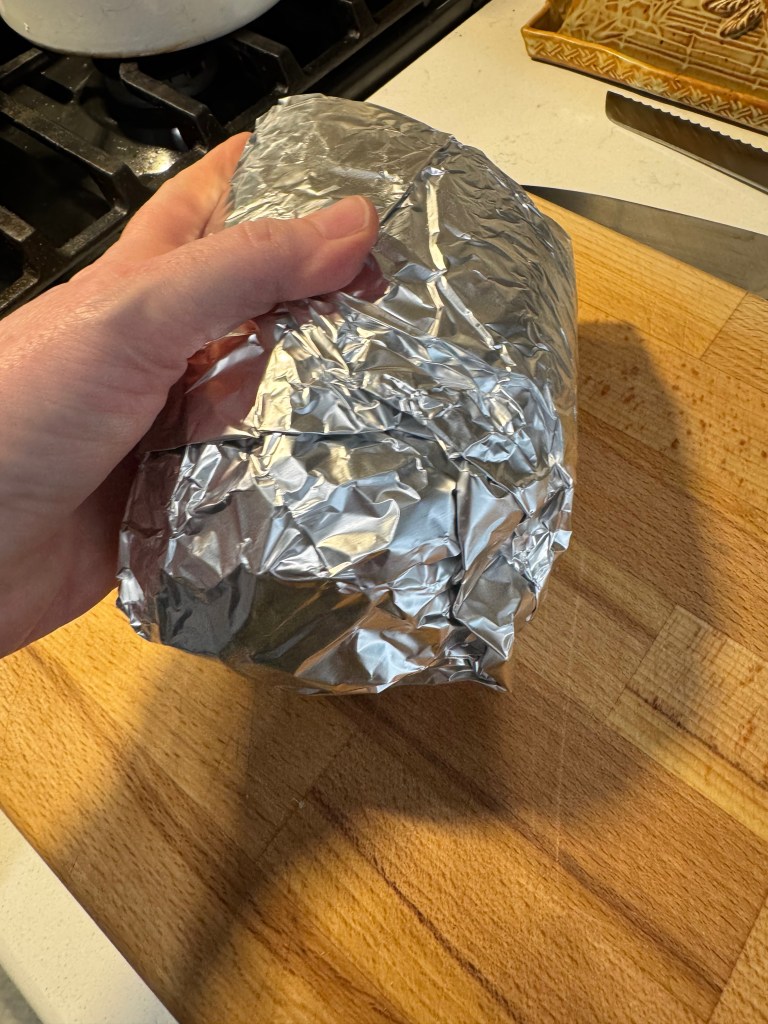
The first roast (in the Dutch oven) reached optimal temperature within 45 minutes, significantly less time than the second (in the skillet), which took an hour and 20 minutes. They were roughly the same size and went into the oven at the same time, so my best guess on this difference is that the ambient heat from the high sides of the Dutch oven get credit for the quicker result. Because the time cannot be trusted for consistency, I strongly recommend using an internal thermometer to gauge doneness. I followed instructions to wrap the finished roasts snugly in foil, which ensures that the juices redistribute evenly through the meat.

I could not resist carving the first roast as soon as it had finished resting, but my recommendation is to chill the meat overnight so that it can be sliced super thin for these iconic sandwiches.

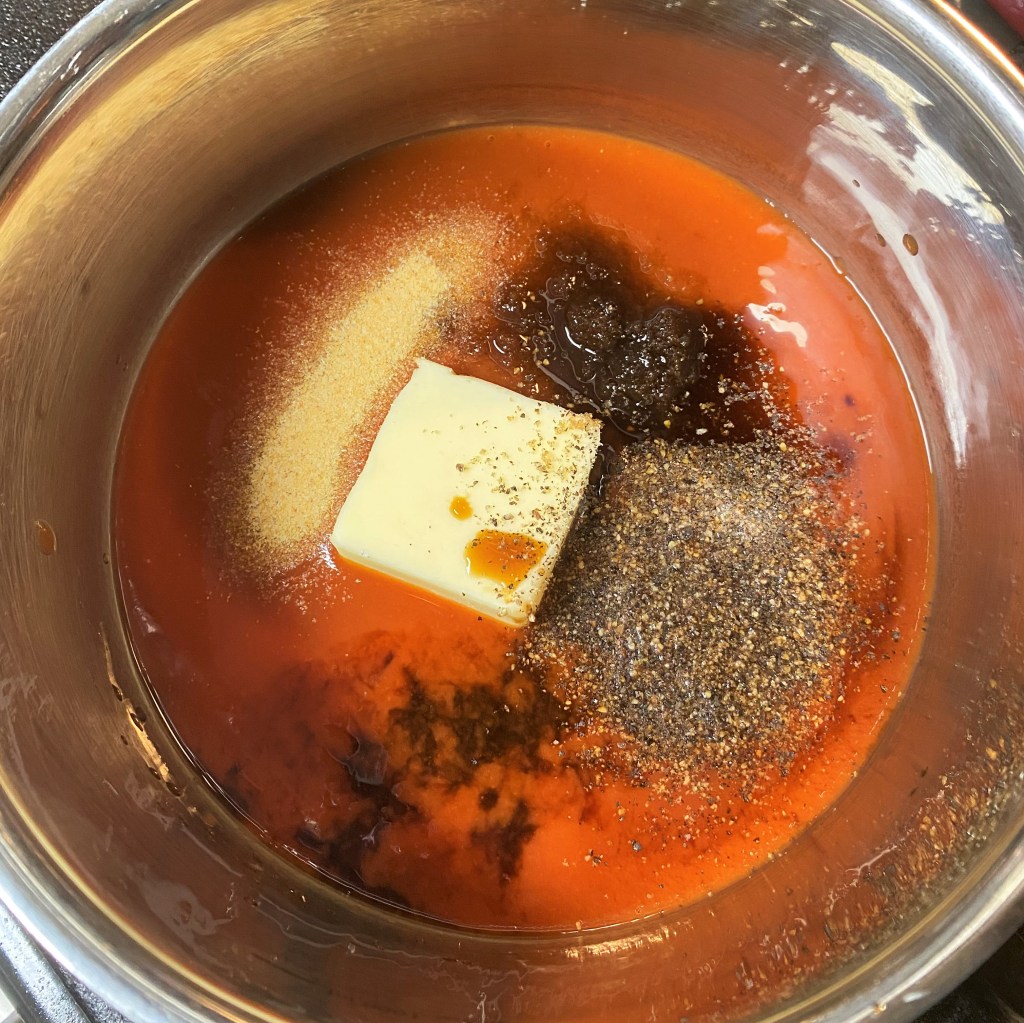
Last but not least, the jus!

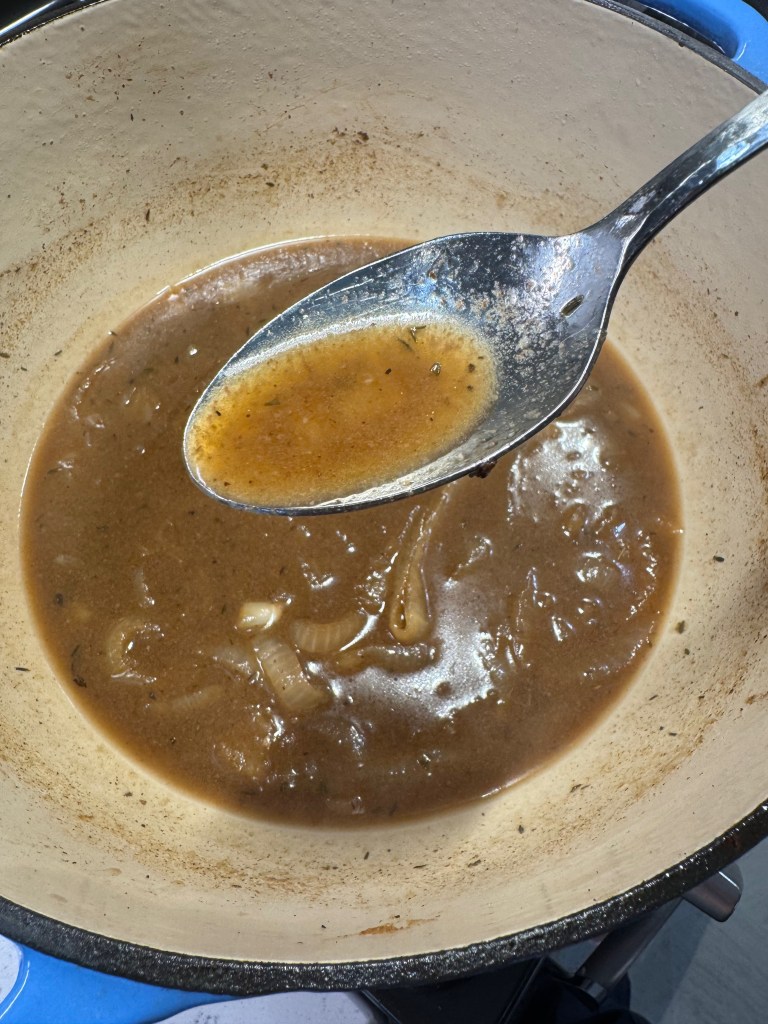
This part of the sandwich gave me the most pause, as I struggled to remember how the side sauce tasted. It was beefy, but not gravy-like. It was similar to au jus that one might find alongside a French Dip sandwich, but not as salty. I waffled quite a bit on how to achieve this traditional flavor, and of the three options I purchased, there was a very clear winner. 

This decision threw me for a loop, but the answer was so obvious in the end.

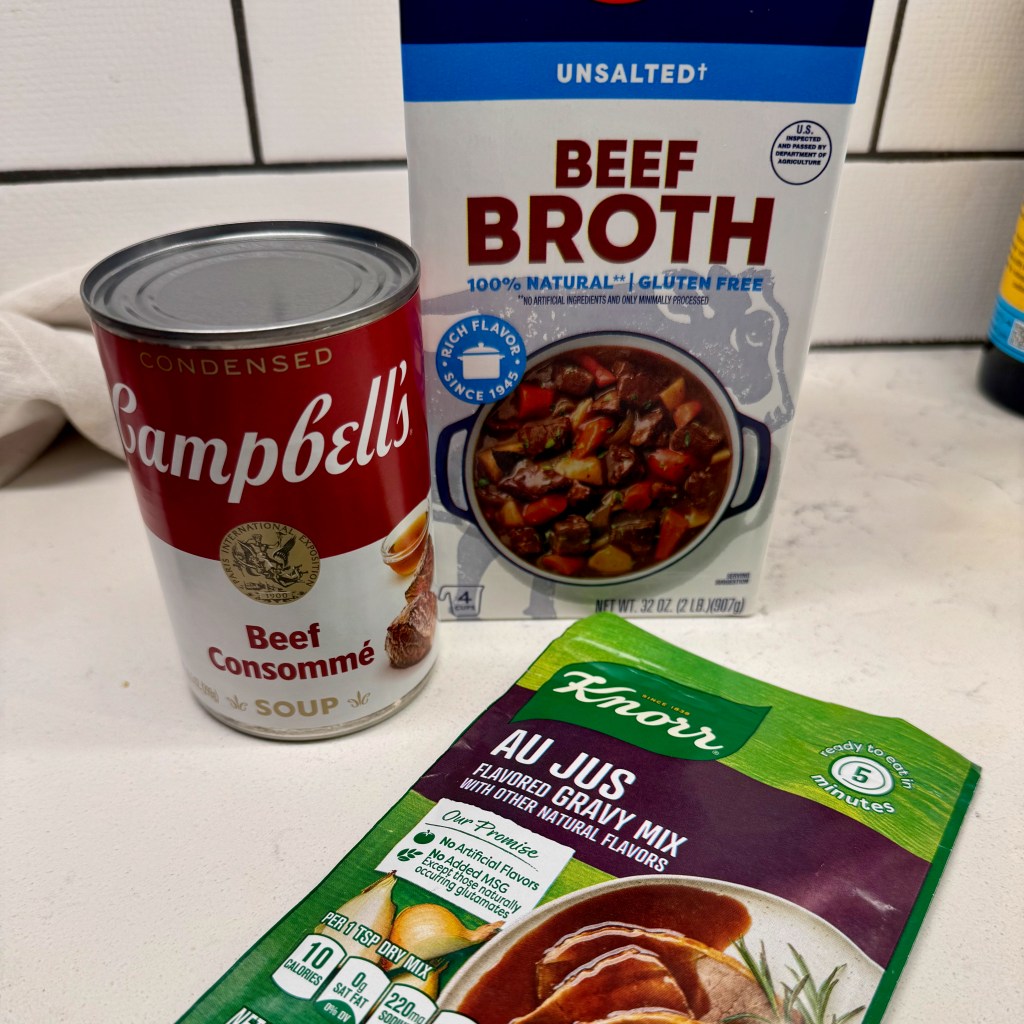
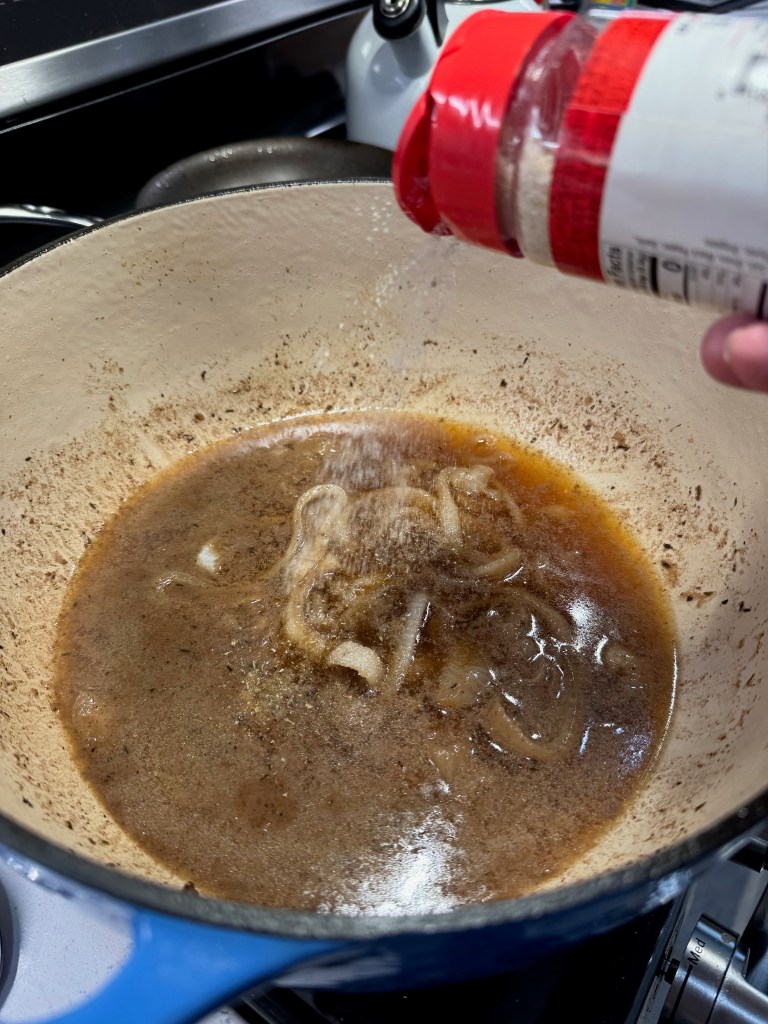
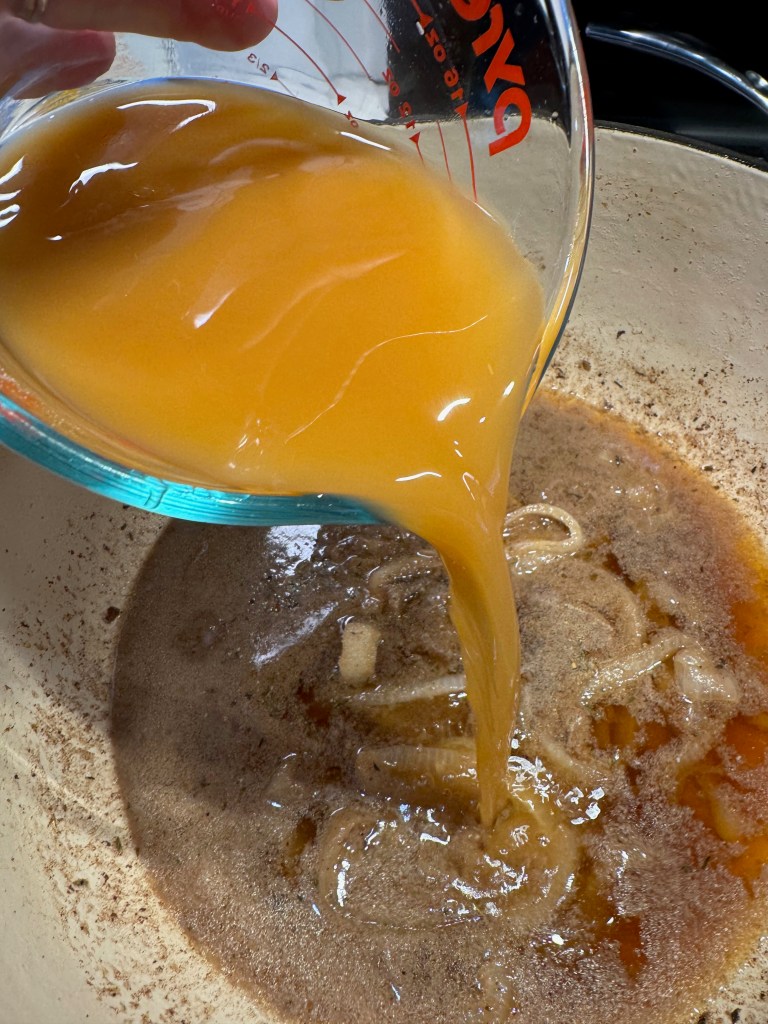
Let me cut to the chase and tell you that the beef broth won this battle. The consommé had a heavy soy flavor that was not working, and the dry jus packet (which I didn’t think to inspect until I was home with it) had exactly zero beef ingredients, so that was a hard no. My hungry husband, who had never had beef on weck in his life, made the winning suggestion to add a half packet of dry French onion soup mix to the sodium-free beef broth. It was perfect!


Assembling the beef on weck

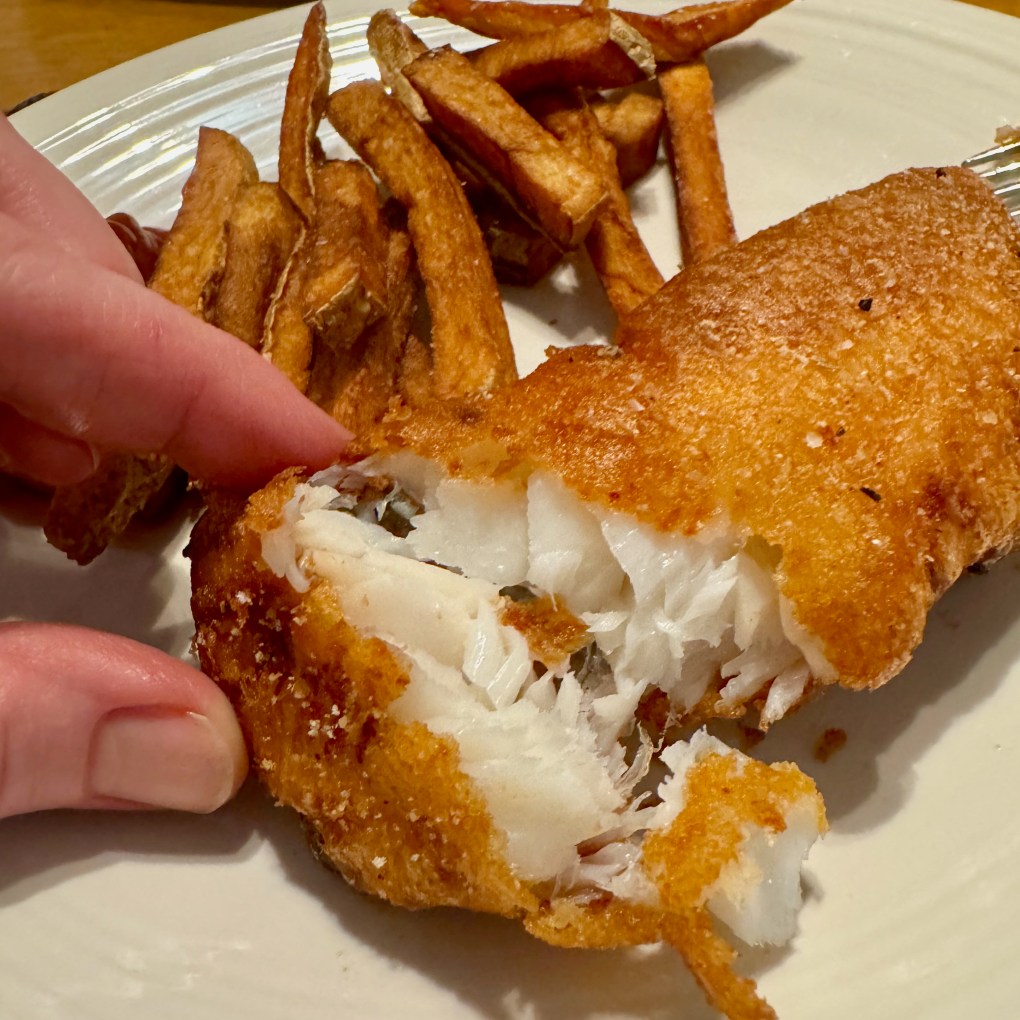
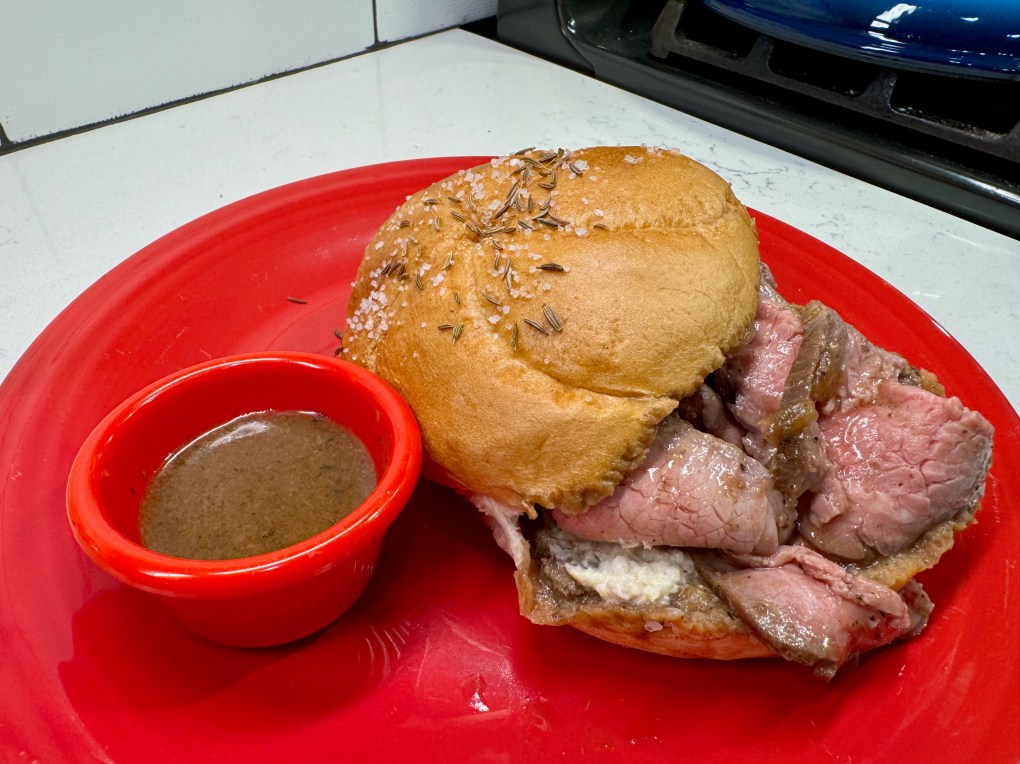
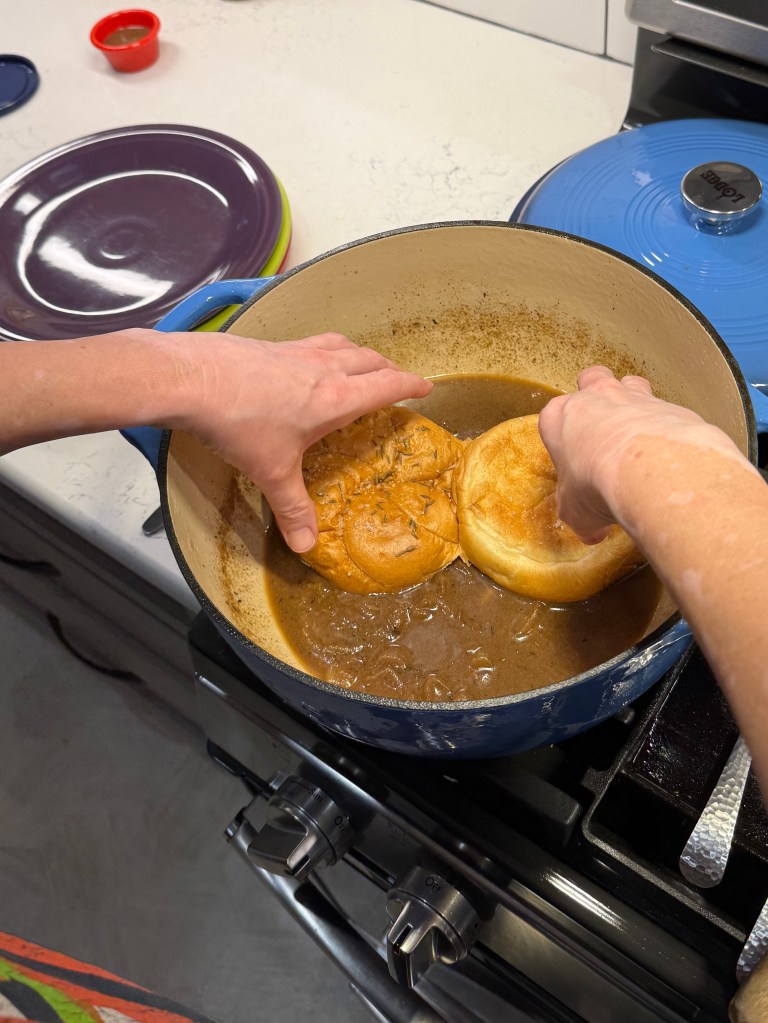
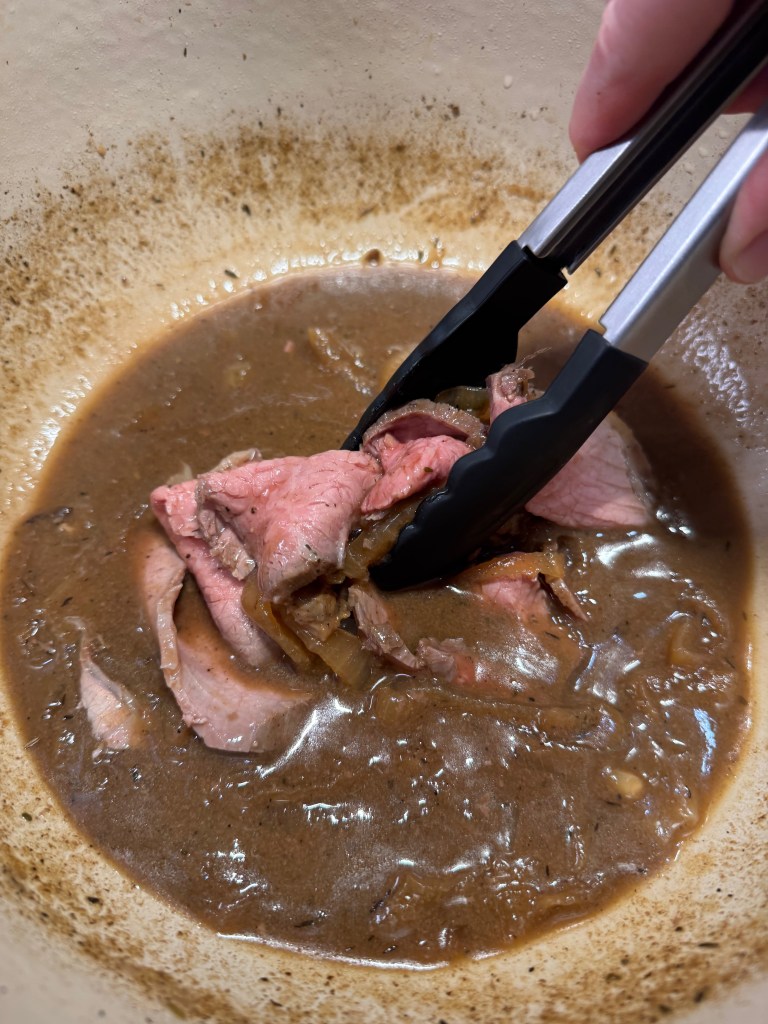
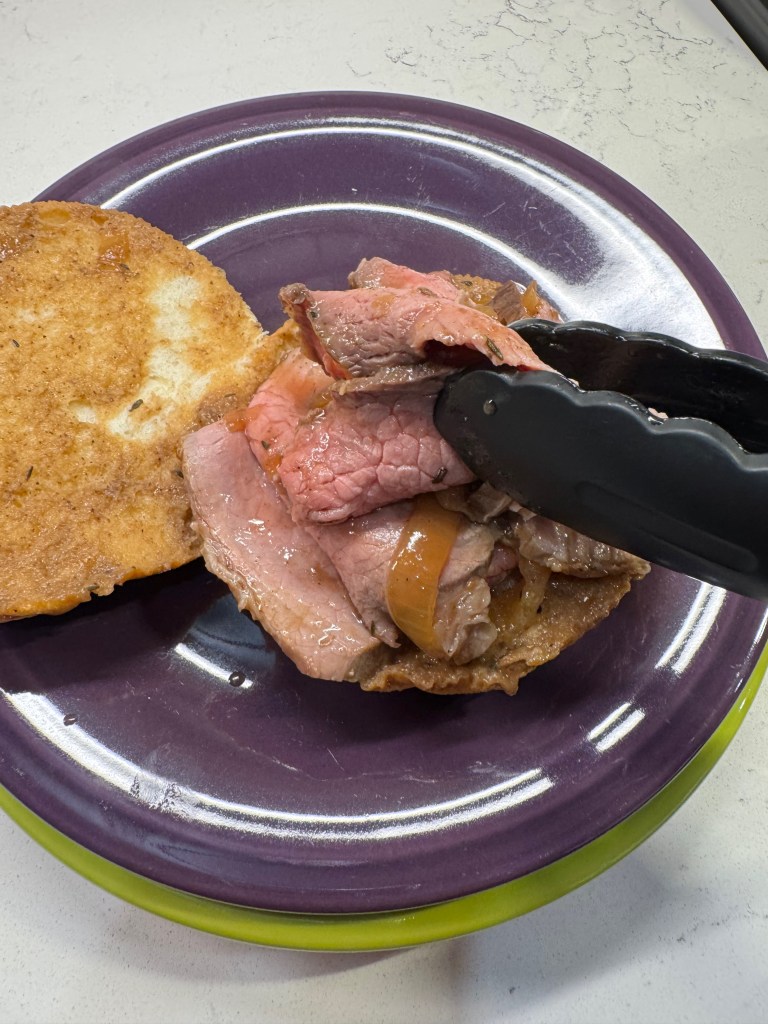
The traditional, Western New York way to serve this sandwich is to first dip the cut sides of the kummelweck roll into the jus, then smear on a little horseradish spread and pile on the meat. I warmed the thinly sliced beef in the hot jus, and so I grabbed a few of the soft onions in the process, and this was not a problem at all. Extra jus and/or horseradish may be served on the side. 


Beef on Weck (a Western New York classic)

  • Servings: About 12 sandwiches worth
  • Difficulty: Average
  • Print

I've been craving this taste of home for a very long time, and a few trusted tricks helped me move this into the done column of my culinary bucket list!


Ingredients

  • 5 lb. eye of round roast, locally sourced if possible
  • 4 tsp. kosher salt
  • 25 twists freshly ground black pepper
  • 1/2 tsp. onion powder
  • 2 Tbsp. extra virgin olive oil
  • 1 large sweet onion, cut into thick slices
  • 1/2 cup water
  • 2 1/2 cups no-salt beef broth, combined with a teaspoon of cornstarch
  • 1/2 packet French onion soup mix
  • Horseradish sauce (recipe in notes)
  • Kummelweck rolls (see notes for instruction)

Note: For most tender, flavorful results, apply the dry brine ingredients to the meat and refrigerate at least overnight (up to 24 hours) before roasting. This will allow the salt to dissolve into the meat, creating a brine that ultimately absorbs back into the meat. You will need either a very large Dutch oven or perhaps two cast iron skillets for the roasting. If you only have one vessel, consider roasting only one piece of meat at at time. Rest meat at room temperature for one hour before roasting!

This roast is best sliced when very cold. If time allows, roast it the day before you intend to serve so that it can chill completely in the refrigerator after roasting.

For horseradish sauce, combine 1/2 cup drained prepared horseradish with 1 tablespoon each sour cream and mayonnaise.

Plain kaiser rolls are easily transformed into kummelweck rolls with a few simple ingredients. Heat oven to 400° F. Combine 2 tablespoons cold water with 1/2 teaspoon corn starch. Microwave the mixture until it thickens slightly. Brush onto tops and bottoms of sliced kaiser rolls, then generously sprinkle kosher salt and caraway seeds onto the rolls. Bake for about six minutes until seeds are set and rolls are slightly crispy.

Directions

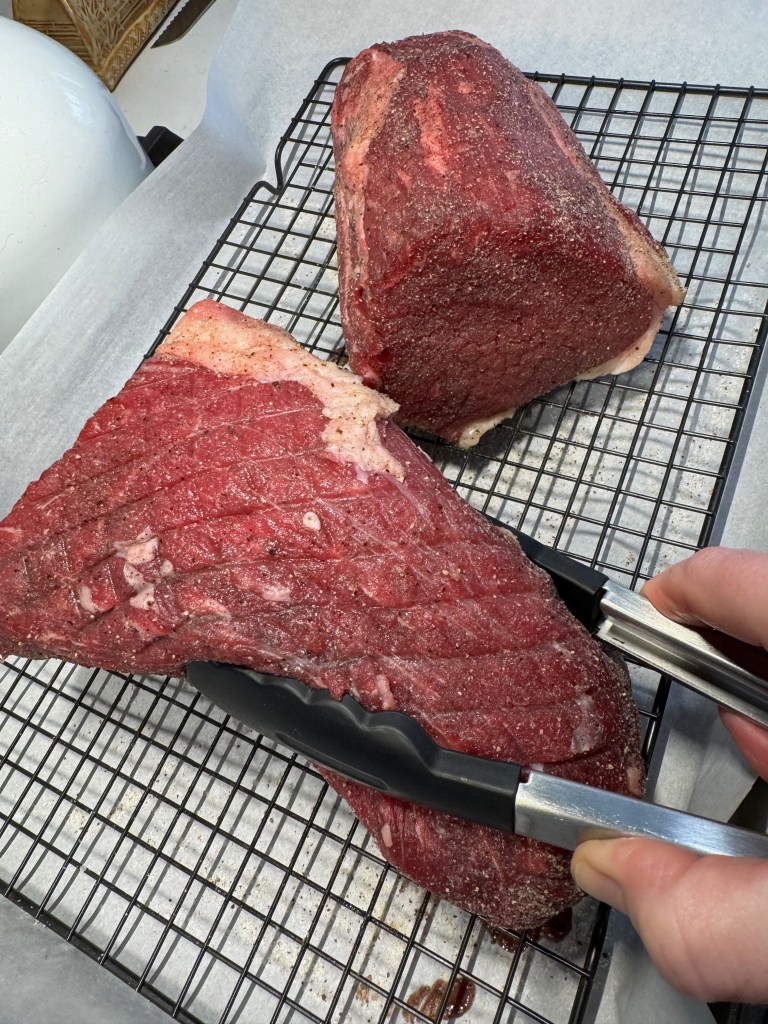
  1. Trim eye of round of excess fat and cut crosswise into two equal-ish chunks. Place meat on a rack over a parchment-lined baking sheet.
  2. Combine salt, pepper and onion powder in a small bowl. Sprinkle dry brine mixture generously over the entire surface of both roasts. Gently pat the mixture so that it adheres well. Place the sheet, uncovered, into the fridge for up to 24 hours.
  3. Preheat oven to 275° F, with oven rack in lower third of the oven. Place Dutch oven or oven-safe skillet over medium heat with olive oil. When oil is glistening, Use tongs to sear every side of the eye of round until browned. Set aside.
  4. Add onion slices to the pot and toss to cook for about one minute. Add 1/4 cup water and scrape up any browned bits stuck to the pot. Place browned roast on top of onions and transfer to oven, roasting until meat is 130 to 135° F internal temp for medium rare doneness. Remove from pot and wrap tightly in heavy duty foil, resting at room temperature for at least 30 minutes (longer is better, chilling is best) before slicing.
  5. Add French onion soup mix to the softened onions left in the roasting pan. Dissolve cornstarch into beef broth and add the liquid to the pot, stirring and cooking until bubbly and slightly thickened.
  6. To assemble sandwiches, dip cut sides of kummelweck rolls into the beef jus and then swirl a handful of sliced beef at a time in the hot jus. Pile the meat onto the buns and serve immediately with horseradish sauce and a cup of jus.


Real Deal, Western New York Fish Fry

This meal reminds me of my hometown in rural upstate New York, and it’s one of the things I couldn’t wait to share with my husband, Les, when we did a drive-by on our solar eclipse-chasing trip to Canada last year. I served up many a fish fry myself during the mid-1980s when I waited tables in a now-closed restaurant called The Cottage, just before I packed up my vinyl albums, Aqua Net hairspray and my cat to move to North Carolina. But my strongest memories of fish fry all happened in a nondescript white house on a side street in my hometown— the American Legion.

Doesn’t look like much, right?

Nearly everyone in my town of 1,200 was a member of the Legion, either by direct military experience or auxiliary membership from a relative’s service. Families gathered there for anniversary dinners and retirement parties and to celebrate the lives of loved ones passed. Technically, it was considered a private club; we had to hit a little doorbell button by the back door that triggered a buzzer for the bartender, and then you’d wait for the click that signaled the lock had been released and you were welcome to enter. Why it had to be such a fuss, I don’t know.

The Legion smelled as old as its furnishings looked. Not musty, but with the lingering aroma of spilled draft beer, frying oil and, in those days, cigarette smoke. It was a popular gathering spot for folks after work and on weekends. And the place was always jumping from open to close on Fridays and Saturdays, when everyone’s order was the same. Fish fry, please!

The same is true for Davidson’s Restaurant in nearby Lakewood, New York— except that they serve fish fry every day—  and that’s where Les was introduced to this culinary experience on our eclipse vacation last year. I had talked it up so much, and I was hoping that it would be all that I remembered. Well, Davidson’s did not disappoint. The deep-fried exterior was perfectly crunchy, and the fish inside was tender, flaky and moist. Believe it or not, this was the lunch portion.


Not the same as “fish and chips”

I’d dare say that if Buffalo wings had not come along, it would have been this beer-battered fish that Western New York would have become famous for. It’s a far cry different from the cornmeal-crusted fried fish we see throughout North Carolina, and not even quite the same as the beer-battered cod you’d find in a typical Irish pub. Haddock is the seafood of choice, a North Atlantic whitefish that is tender and flaky, a bit more “fishy” than cod. The fillets are long and slender, and I chose to cut them into smaller pieces so they were more portion-appropriate, and also so that they would fit in the Dutch oven I would be using for frying.


To minimize the fishy smell (and taste), follow my lead and soak the fillets in milk for 20 minutes. The odorous compounds in the fish will cling to the milk proteins, leaving the fillets mild and sweet. This is the first time I’ve done this step, and it will be the new standard, as it also reduced the smell of fried fish in the house after this meal. Take note, though, that this step is not meant to “save” any fish that is past its freshness range; this is an optional step for less fish smell in general.

What about this beer batter?

I’ve lost count of how many conversations I’ve had with my Aunt Joy, my fellow fish fry aficionado, about our trials and errors on the beer batter. Did the batter need egg? How thick should it be? Should it be a certain kind of beer or could you use other liquids? We had a lot of questions! 

Aunt Joy gets most of the credit for the testing, for all the experiments she set up trying to achieve that familiar, crispy texture we both remember so well. She discovered that egg made the batter too heavy, putting a dense, cake-like coating on the delicate fish, and she narrowed down that beer was indeed the right thing. She even tried a recipe that I forgot I had given her, which called for a shot of vodka in the batter. I suppose this might have the same effect as vodka in a pastry dough, though I truly can’t remember whether I’ve tried it myself.


All this testing resulted in the batter I used this time, and it was perfect! Self-rising flour, which already includes baking powder and salt, is the base for it. A couple of tablespoons of corn starch in the mix ensures a light, crispy finish, and a few shakes of sweet paprika lend a nice color and a hint of bright flavor. After whisking this together, I spooned out enough to dredge the haddock fillets, then returned the flour to the batter bowl. Keep the beer (light lager or pilsner-style) on ice until you’re ready to fry.

Time to fry the fish!

May I recommend, if you choose to make this fish fry, consider not trying to also do deep-fried french fries. Stick with oven fries or some other side, so that you can focus on getting the fish right. You won’t be sorry, and you’ll only have to wait for the oil to reach temperature once.


Keep the beer ice cold until go time, and whisk the batter only long enough to achieve a smooth consistency. Dip the flour-dredged haddock into the batter, lifting to allow the excess to drip off before gently placing it into the hot oil. Let it bubble and fry for about six minutes (it goes quick!), or until the batter is a deep golden color with frilly, crispy edges all over. 


Use a spider utensil to lift the fillets onto a paper-lined cookie sheet, and season immediately with salt. For a true, Western New York experience, serve with French fries, creamy coleslaw and an ice cold beer.

Western New York Fish Fry

  • Servings: 4
  • Difficulty: Intermediate
  • Print

A Western New York fish fry is made with haddock and a very distinctive batter. It's crispy and light, golden brown and utterly addictive. This is the closest I've ever gotten to perfect with it, and just in time for Friday!


Ingredients

  • 1 1/2 pounds fresh haddock fillets
  • 1/2 cup milk (skim, 2% or whole will work)
  • 1 cup self-rising flour
  • 1 1/2 Tbsp cornstarch
  • Few shakes paprika
  • Pinch salt
  • 10 oz. ice cold beer (drink the rest!)
  • High temperature oil for frying (canola, grapeseed or peanut oil will work well)


Directions

  1. Prep fish by soaking in the milk for about 20 minutes to remove excess fish smell.
  2. Add oil to a deep fryer or Dutch oven, about three inches deep. Bring oil to 375° F. Preheat oven to 200° F for keeping first batches of fish warm.
  3. While the oil heats, combine flour, cornstarch, paprika and salt in a shallow bowl. Measure out 1/4 cup of the seasoned flour. Pat haddock fillets with paper towels and dredge them in the measured out flour. Place fillets on a parchment-lined plate. Return excess dredging flour back to the bowl.
  4. When oil reaches temperature, whisk the cold beer into the flour mixture, blending only until no lumps appear.
  5. Dip fish fillets into the batter, allowing excess to drip off into the bowl. Carefully lay battered fillets into the hot oil. Use a spider utensil to gently turn the fillets over when the underside becomes golden and crispy, about four minutes. Fry second side until deep golden in color. Use a spider utensil to transfer fillets to a paper towel-lined rack and immediately season them with salt. Keep in the warm oven while the next batch is frying.


Just South of Buffalo Wings

It was circa 1977. I was just a kid in a small town south of Buffalo, New York, and I still remember my first bite of the mouthwatering spicy hot chicken wings my Uncle Mike made for me. Mike worked with nightclub sound and lighting systems during those days, which was a big freaking deal, given that we were hanging onto the tail end of the disco era. For his work, Mike traveled into the larger cities where the clubs were, and after an installation at a club in Buffalo, he brought home with him the recipe for these delectably crispy, tangy-hot treats.

And oh my God, did I love them! Clearly, I was not alone.

It didn’t take long for “Buffalo wings” to catch on across upstate New York, and eventually the entire country. Today, though restaurants everywhere have imagined new and unusual sauces for wings, I will forever favor the original flavor of Frank’s RedHot sauce with a side of celery and chunky bleu cheese dressing. Oh, and I can never, ever get behind the idea of breading them—not in flour or batter or crumbs or whatever, though plenty of sites suggest the original 1964 Anchor Bar recipe had them coated in flour and oven-roasted. That sounds suspicious to me, given that I’ve enjoyed them deep-fried for decades. The wings should be crispy, as they were on that hot summer night in ’77, and they should make my eyes water just from the smell of them. Just give me what I want.

Yep, this is exactly how I remember them! (photo from Wikipedia)

The only problem I have with Buffalo wings today is the whole deep-frying thing. I enjoy them, but I can’t indulge in them very often if I want to stay healthy. A few years ago, however, I came across a new technique for preparing wings that promised the same crispy exterior and juicy interior, but without deep frying or any amount of oil at all. Pinch me, I thought; I must be dreaming. And then I tried this simple little hack and it was as if angels were singing inside my head.

Friends, the non-fried wings are 100% as delicious as the crispy deep-fried Buffalo wings I tasted back in the day, and you don’t need an air fryer or any other special gadgets to make them. The big thanks goes to Alton Brown of Food Network. His technique involves steaming the wings to render some of the fat, and then oven roasting them to perfection before tossing them in your favorite sauce. I’ve named these “Just South of Buffalo Wings” because that’s where I’m from, and also because I’ve thrown a twist on the traditional wings, adding a generous blast of black pepper to the usual Frank’s RedHot sauce, and a little bit of brown sugar to balance that bite.

Serve these with fresh celery sticks and some homemade chunky bleu cheese dressing. And a cold beer, duh.


Ingredients

2 lbs. fresh chicken wings* (see notes)

1/2 cup Frank’s Original RedHot sauce*

1/4 stick salted butter

3 Tbsp. brown sugar

1 Tbsp. coconut aminos*

1 tsp. lemon juice

2 or 3 shakes garlic powder

1/2 tsp. black pepper


*Notes

For best results, use fresh (never frozen) wings for this recipe. If they are already split into drummettes and flat pieces, that’s fine. But it’s also OK if they are still whole pieces. I’ve done them both ways, and the only adjustment you may need to make is a bit more roasting time on the whole ones.

There are many newer versions of Frank’s RedHot sauce available today. Get the one that is labeled as the “original.”

Coconut aminos provide some depth of savory flavor to this sauce. It’s a dark-colored, liquid sauce, similar to soy sauce but sweeter and lower in sodium. It is made from the fermented sap of coconut trees, but doesn’t taste at all like coconut. You can find them in the same aisle, or substitute in this recipe with half as much lite soy sauce.


Instructions

I’ll walk you through it with pictures, or you can keep scrolling for more detailed description. There’s also a downloadable version you can print for your recipe files. Begin by setting a steam basket over a pot of gently boiling water.

  1. Bring a couple inches of water to a boil in a medium saucepan fitted with a steamer basket and tight-fitting lid. Line a rimmed baking sheet with paper towels and place a cooling rack over the towels.
  2. Add the chicken wings to the steamer basket, working in as many as will fit at a time. Steam the wings for 10 minutes, then arrange them on the cooling rack. Repeat with remaining wings and then cool a few minutes at room temperature, allowing most of the steam to dissipate. Cover the baking sheet with foil and transfer the wings to the refrigerator until they are fully chilled, about an hour. This step is important for crisping later.
  3. Preheat oven to 425° F. Remove the chilled wings from the fridge.
  4. Combine all the sauce ingredients in a small saucepan and heat over medium-low for several minutes, until the sauce is fully blended and slightly thickened. Turn off the burner and cover to keep the sauce warm.
  5. Roast the wings for 40 minutes, turning them once after half the time. The skin should be crispy and golden brown.
  6. Transfer the wings in batches to a large seal-able bowl. Pour enough sauce to coat the wings. Cover the bowl and gently shake to thoroughly coat the wings. Put the wings back into the oven for about 8 minutes to “seal the deal” and bake the sauce into the wings.
  7. Serve with crunchy celery sticks and chunky bleu cheese dressing.
Just South of Buffalo Wings

Want to print this recipe?