Simple Citrus-Soy Baked Salmon

My husband and I have a regular game we like to play, and it usually starts about 2 pm when I text to ask whether he has any particular cravings for that evening’s dinner. And then I cross my fingers in hope that he doesn’t give me the dreaded response.

“Something simple,” he’ll frequently say. 

And then I really don’t know what to feed him, because what does that even mean? My experimentation in the kitchen more often leads me into complex outcomes rather than simple ones. I would rather he ask for soup and salad or grilled cheese or takeout than the nebulous “something simple.” I don’t know why this throws me for a loop, but I usually stand befuddled, the same as when I ask him what Friday night cocktail he wants, and he says, “surprise me.”

I’m trying to get better about this, and occasionally I find inspiration amid the ingredients I already have in the fridge. And that’s what happened with this vibrant dish that turned out to be simple not only in ingredients but also preparation.


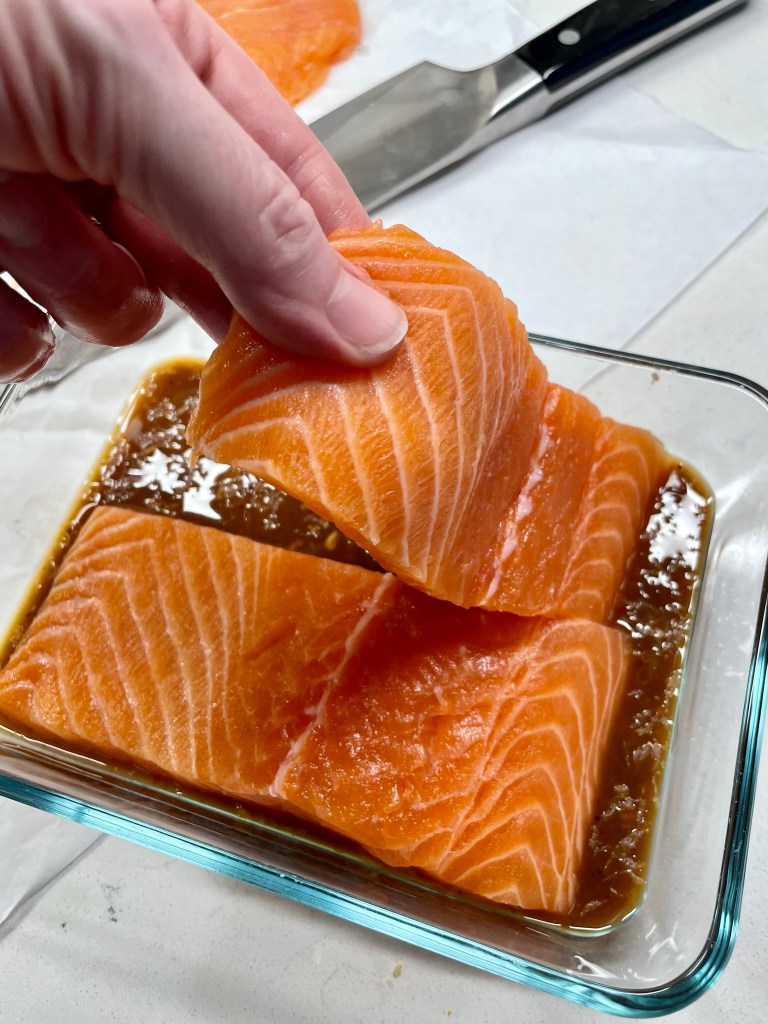
What makes this recipe simple is that the marinade— which ultimately becomes a glaze in the oven— is made from common ingredients that I found in the refrigerator: freshly squeezed orange juice (thanks to a navel I forgot was in there), a bit of marmalade, horseradish, soy sauce and honey. To add a little extra something without extra effort, I decided to add a spoonful of dried onion to the marinade. The bits plumped up quite a bit during the 45 minutes the salmon soaked in its flavor bath, and it added onion flavor without the bite of fresh onions.


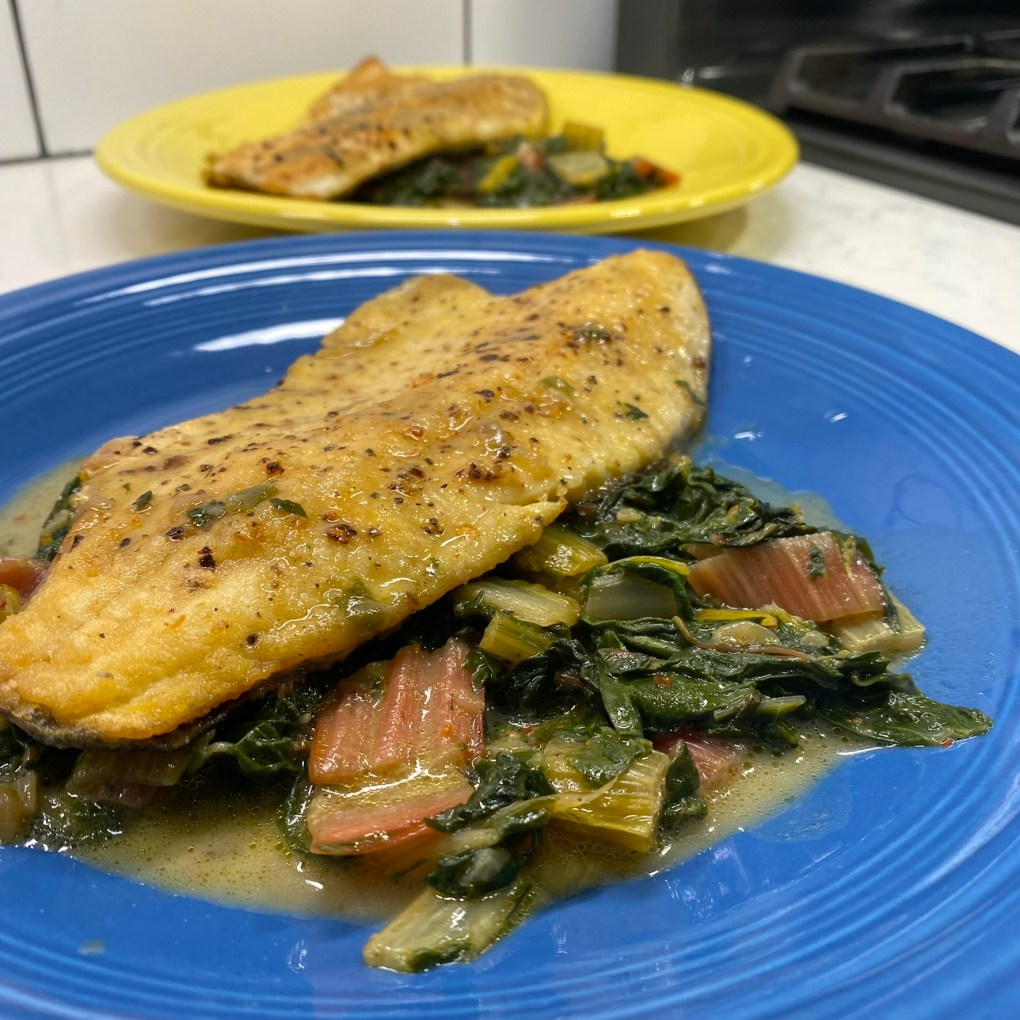
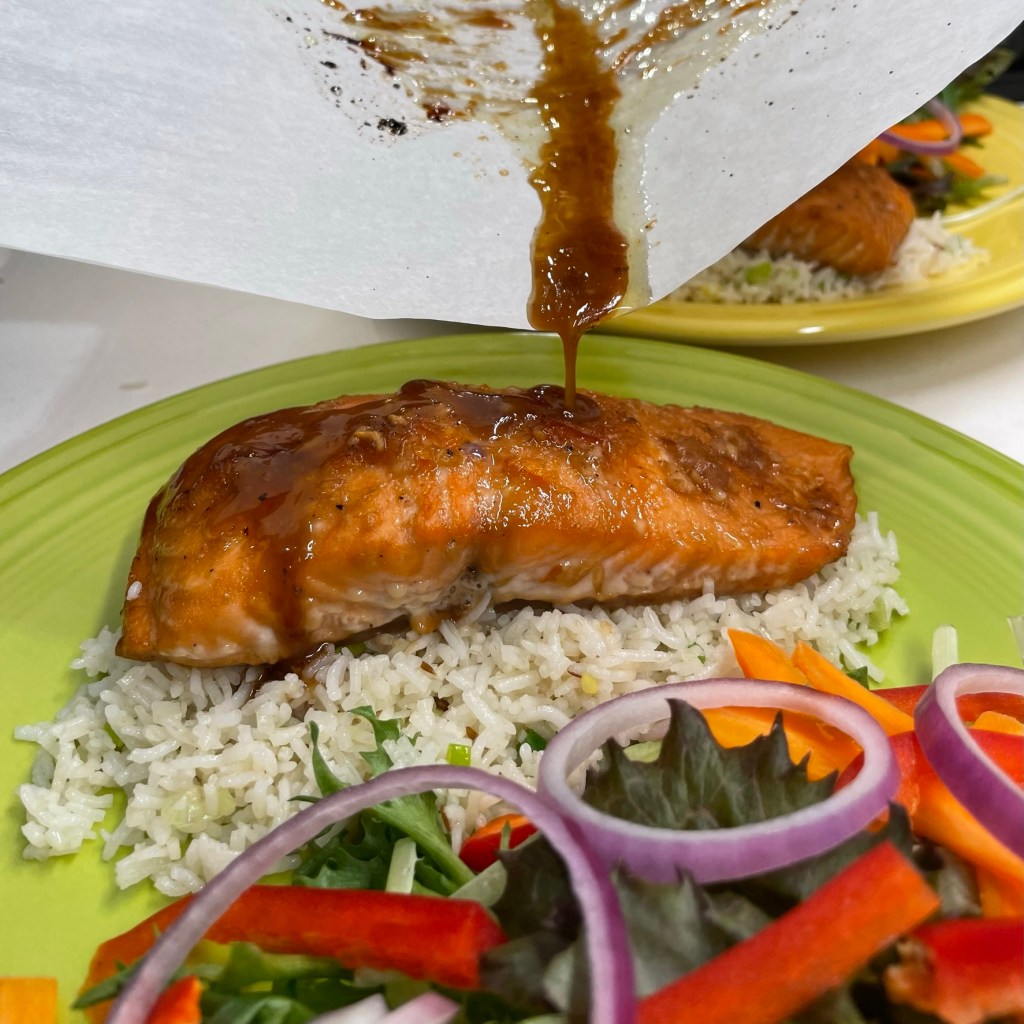
I’m struggling to find something else to explain about this dish, but that’s honestly it. Mix the marinade, soak it and then bake it. The oven takes care of the rest, turning the marinade into a somewhat sticky glaze that pairs well with just about anything. The flavors of the marinade do a balancing act between sweet, savory and salty. I served our salmon on a bed of basmati rice (leftovers from Indian takeout), with a sprinkling of sliced scallions and sesame seeds, plus a fresh and pretty side salad.


Hubby was right, as usual— simple is good!

Easy Citrus-Soy Baked Salmon

  • Servings: 2 or 4, depending on weight of salmon
  • Difficulty: So easy!
  • Print

From the prep to the ingredients to the cooking, everything about this dish is simple but the flavors are fantastic! The marinade is enough for a pound of fresh salmon, but please use the same amount even for a lesser weight of fish.


Ingredients

  • Up to 1 pound fresh salmon fillets, skin removed
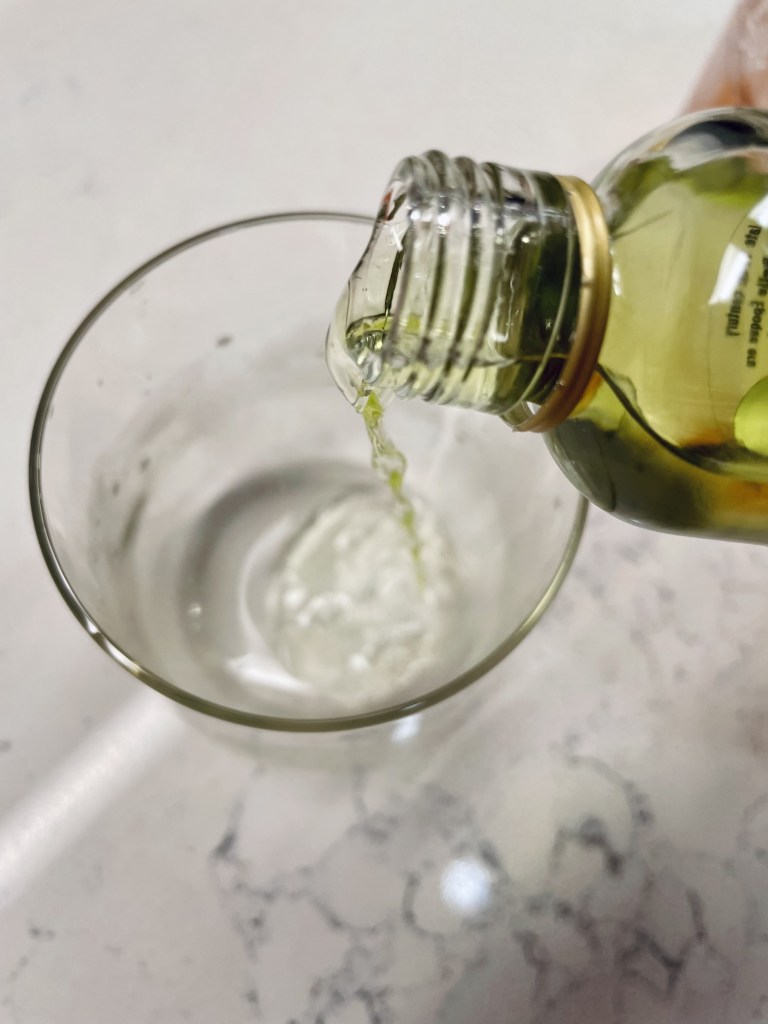
  • Juice and zest of navel orange
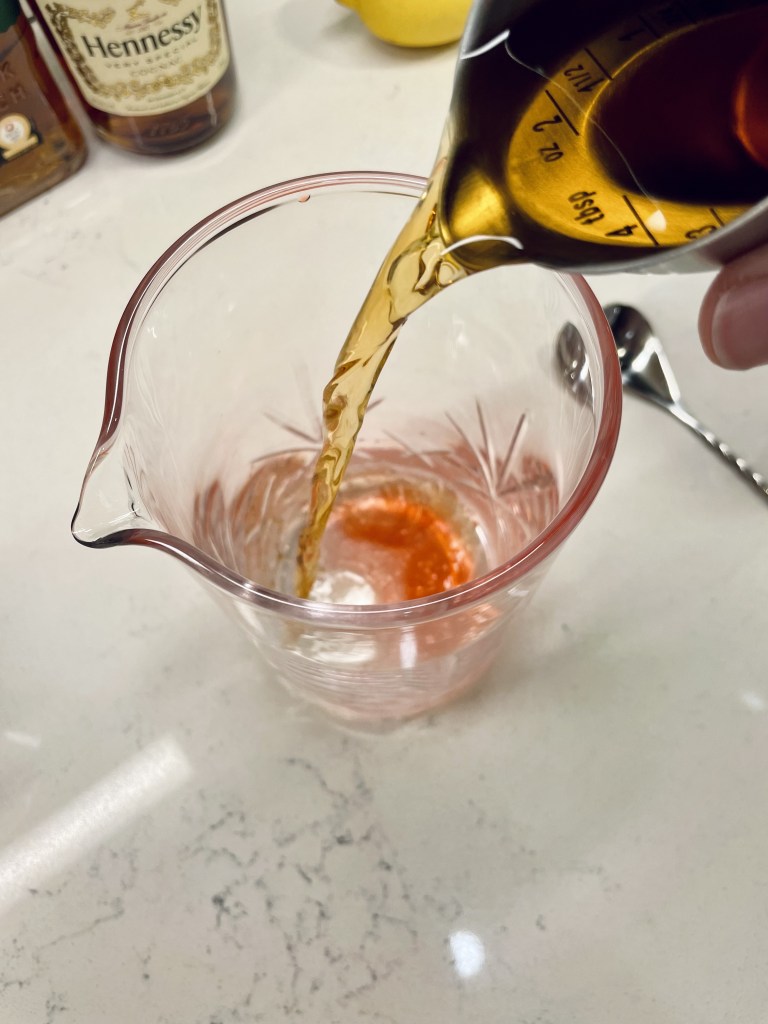
  • 1 Tbsp. low-sodium soy sauce (or tamari for gluten free)
  • 2 Tbsp. orange marmalade
  • 2 tsp. horseradish
  • 1 Tbsp. honey
  • 1/2 tsp. minced, dried onion
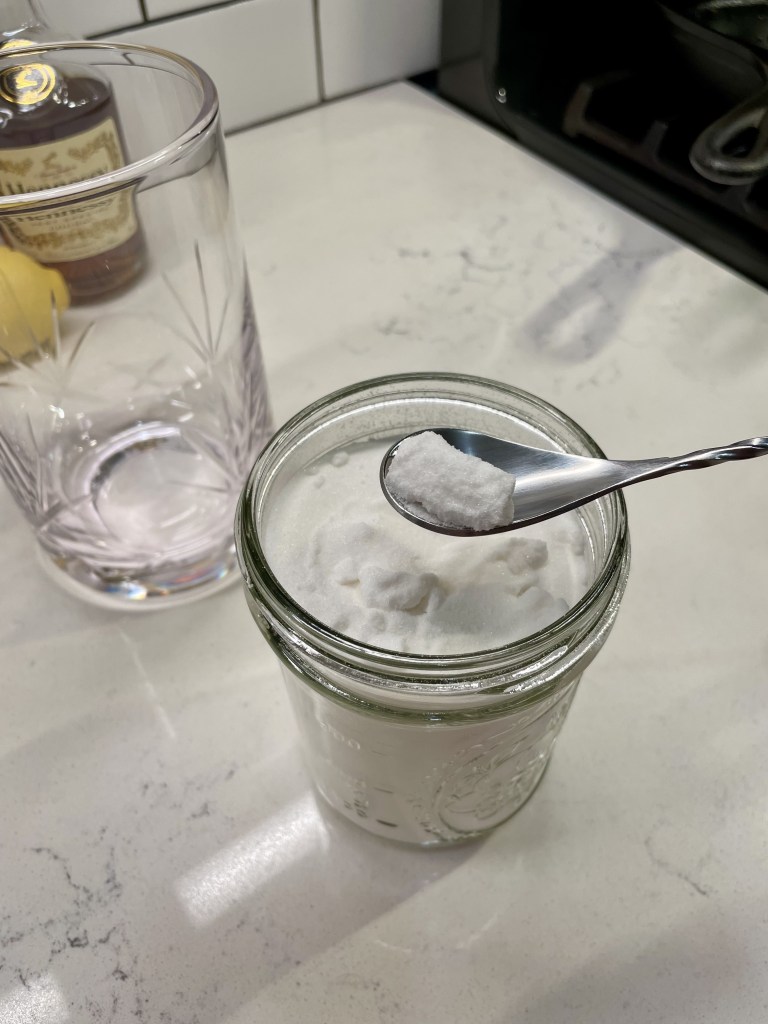
  • Kosher salt and black pepper
  • Cooked rice, for serving
  • 2 scallions (white and green parts), thinly sliced
  • Sesame seeds for serving

I removed the skin from our salmon before cooking, but this really was not necessary; it was just me trying to make it “not simple.” After baking, the fillets will easily pull away from the skin, so it’s cook’s choice.

Directions

  1. Whisk together all marinade ingredients. Pat salmon fillets dry with paper towels. Sprinkle them with salt and pepper.
  2. Pour marinade into a shallow dish that is large enough to hold the salmon fillets. Add salmon, turning a few times to ensure even coverage. If preferred, marinate in a plastic zip-top bag for easy turning. Allow salmon to marinate at least 30 minutes, or up to 45 minutes.
  3. Preheat oven to 350F, with oven rack in center position. Line a baking sheet with parchment.
  4. Transfer salmon fillets to parchment, spooning the marinade (especially marmalade peels and onions) over the top of the fish. Bake for 20 to 25 minutes, depending on thickness of salmon and preference for doneness.
  5. Arrange fillets on plates with desired sides and sprinkle with scallions and sesame seeds. Serve at once.


Spanakopizza!

Today is National Spinach Day, and I would be remiss if I did not share this pizza that I pulled from the oven on Friday. It is absolutely packed with the nutritional powerhouse that is spinach, and a few other key ingredients like feta and dill that give it the signature flavor of Greek spanakopita.

In a roundabout way, this meatless, sauceless pizza brings me full circle to the launching of my blog back in 2020. I have been known at times to take inspiration from the idea of “national” food days, and on this date in that year, I surprised my husband with a batch of spanakopita— the real kind, made with layered phyllo— and served it alongside a Greek salad and easy chicken souvlaki. With spinach being Les’s favorite vegetable, he took a picture of that meal and posted it (along with my national day inspiration) on his Facebook page. 

That’s when it occurred to me that I should probably be doing that myself, not on Facebook but on my own platform. About 10 days later, I started Comfort du Jour.

Pizza, as many of my blog followers already know, is one of my favorite “blank canvas” foods,  and for this tasty pie, I took inspiration from a different kind of recipe made by another food blogger, Diane Kochilas. She is an amazing chef who shares her passion for Greek food not only through her blog (linked here), but also several award-winning cookbooks and her PBS-aired television show, “My Greek Table.” It just so happens that Diane also went to grade school with my hubby back in the day in Queens, N.Y., and the only reason I mention that is because Les follows Diane’s culinary adventures on Facebook and recreates some of her recipes when he takes his turn in our kitchen.

Diane’s “warm spanakopita dip” has become a big-time favorite at our house. When I scanned the ingredients list on the recipe Les had printed— mozzarella, feta, fresh spinach, onions, leeks, dill— I began to imagine them rearranged on a pizza, and I finally brought that idea to life this past Friday. It wasn’t until this morning, when that picture of my spanakopita popped up in Les’s Facebook memories, that we realized the significance of the date. I decided to hustle and get this post ready to mark the occasion. So that’s the story of this pizza— inspired by a dip that was inspired by a Greek specialty— and it was delicious. A delightful way indeed to recognize National Spinach Day, even if it was not intentional!

So. Much. Spinach!

As with most of my pizza creations, this one begins with my own sourdough pizza dough, but any pizza dough you like is probably fine because it’s the toppings that makes this one special. I bake in a very hot oven (550 F) on a pre-heated slab of steel, and the pie is done in only 6 minutes with that arrangement. On a pizza pan, it will take longer. If you have at least a pizza stone, I recommend using it for even baking of the crust. There is a fair amount of moisture in the toppings, and your crust will thank you for the extra bit of heat.

I like to shape the dough by hand, as it results in the light, airy crust we love. A little drizzle of olive oil, and then I layered on freshly grated mozzarella— no sauce is needed for this pie.


Next was a handful of fresh baby spinach, because I wanted to present the ingredient a couple of different ways. I crumbled up two ounces of feta (the kind packed in brine) and mixed it with chopped fresh dill. This was scattered over the spinach and then buried under a generous amount of spinach that had been sautéed with sweet onions and chopped leeks. A little more mozzarella, and I slid it into the oven!


Spanakopizza!

  • Servings: 6 slices
  • Difficulty: Average
  • Print

This pizza is packed with nutritious spinach and carries all the flavors of the Greek specialty, spanakopita.


Ingredients

  • 1 pizza dough ball (about 11 ounces), at room temperature
  • 3 fat handfuls (about 3/4 pound) fresh baby spinach, divided (you’ll cook most of it, and keep a small handful fresh)
  • 1/2 cup sweet onion, chopped
  • 1/2 cup chopped leeks, white and very light green parts only
  • 1 cup freshly shredded whole-milk mozzarella, divided
  • 1/3 cup brine-packed feta, patted dry and crumbled
  • 2 Tbsp. chopped fresh dill leaves
  • Extra virgin olive oil, salt and pepper

I bake all my pizzas at very high oven temperature (550 F) on a pizza steel that is preheated for one hour. If you have a baking stone or only a pizza pan, you may need to adjust temperature and baking time accordingly. Use a flour- and cornmeal-dusted pizza peel for easy transfer into and out of the oven.

Directions

  1. Preheat oven (and steel or stone) to 550 F, with rack placed about eight inches from the upper heating element.
  2. Heat a non-stick skillet over medium heat with a generous swirl of olive oil in the pan. When the oil begins to shimmer, add onions and leeks and sauté a few minutes until they are softened and translucent. Add two-thirds of the baby spinach (give it a rough-chop first if you’d like) and sauté until most of the moisture is evaporated and spinach is greatly wilted. Transfer the mixture to a bowl and cool to room temperature.
  3. In a small bowl, combine crumbled feta and fresh dill. Set this aside.
  4. Lightly dust a counter or board with flour. Shape dough into a 14-inch round, taking care to keep some airy bubbles in the outer edges of the dough. Transfer to the prepared peel.
  5. Drizzle olive oil onto the dough and sprinkle it with salt and pepper. Arrange most of the mozzarella evenly over the dough, reserving about 1/4 cup for the final layer. Scatter reserved handful of fresh spinach over the mozzarella.
  6. Sprinkle the feta-dill mixture over the spinach. Use a spoon to evenly distribute the sautéed spinach and onion mixture all over the pizza, and be careful not to leave large clumps of it near the pizza’s edges. Top with the remaining bit of mozzarella.
  7. Slide the pizza onto the preheated steel (or stone) and bake 6 minutes, or until cheese is bubbly and edges of crust are puffy and golden brown.


Over the Rainbow Bridge

Did you hear a distant wailing last weekend? It may have been the sound of hearts breaking at our house as my husband, Les, and I whispered our final words to the sweetest dog God ever made.

And how does one say those words, exactly? It’s so hard to narrow down all the emotions, all the support, all the love, into words that a dog will understand. Or maybe it’s all easier for the dog than it is for us, I just don’t know. 

When Nilla was adopted into this family nearly 15 years ago, at the urging of Les’s then-adolescent daughter, she was meant to be “Sydney’s dog.” But this one had the sweetest heart and most engaging personality, and so she became everyone’s dog. And when I say everyone, I mean all the people in this family, plus all the neighbors and all our friends. Her trainer loved her, and so did the pet sitter, the vet and the groomer. Other guests (and dogs) at the downtown brewpub where she was a “regular,” perfect strangers who asked to speak to her when she led the parade of dogs at the ballpark on “Bark in the Park” nights or the streetside crowd at the Pride Parade— they loved her too. All of her daddy’s Facebook friends, even electricians and plumbers who came to the house.  

Everyone loved Nilla. 

For the past couple of years, Les and I have dreaded and delayed the pain that enveloped our home last Friday, and we had done all in our power to protect our sweet girl and make her as comfortable as possible through her unfortunate diagnosis of Cushing’s disease. On Friday, however, Nilla made it clear that she was ready to make her journey to the Rainbow Bridge, and she was not afraid.

We had been talking with her recently about the Rainbow Bridge, and she knew that her best furry friend, Zoe, was already waiting for her there. She knew there are no thunderstorms at the Rainbow Bridge, and no fireworks, but plenty of snowy days and lots of sunshine, free belly rubs and treats. Oh, and all the dogs get to run off-leash. All the time!

She was good with all of that. Just 12 days before she left us, she had a joyful reunion with Les’s kids— Sydney came from Asheville, N.C. and Alex was here from Budapest. It was the most wonderful day, and she was surrounded by her entire pack (well, except for Zoe, who I’m certain was here in spirit).

It’s crazy quiet here today. We are adjusting and learning to move forward in this space without our girl’s enormous personality. I have not had it in me to be creative in the kitchen, but have focused my energy instead on this video tribute to Nilla. She had but one consolation in times of trouble, stress and thunderstorms, and that was the music of Melody Gardot. There could have been no other song than this one to honor the memory of our beautiful dog.

This video is best viewed on a smartphone or tablet in portrait mode. Press play. 💕


Tequila & Lime Tuna Tacos

We are getting antsy for grilling season here in North Carolina. That’s not to say that it has been entirely too cold to grill. My husband and I have a 60°F cutoff—we are good to go with grilling as long as the temperature is in that range but so far this “spring,” it has been hit or miss. I put some burgers on the grill just last Wednesday but over the weekend, an unexpected blast of wintry mix left my already-in-bloom daffodils shivering in the beds out front, and a freeze warning last night forced me to lay blankets and towels over my emerging peony shoots. Just when we thought it was warm for good—go figure!

My blooms are sitting on ice!

Until we get some consistency in the weather department (feel free to yell “amen” if the skies are screwy at your house, too), we are stuck cooking indoors. Luckily, we have one of those “griddle in the middle” things on our gas range, which affords us an easy indoor option for light grilling. The heavy cast-iron griddle is removable (and reversible), intended as a swap-in for the grate that would normally cover a wide gas burner, but we use the griddle so frequently that it has become a permanent fixture. The flat side is perfect for making pancakes, reheating pizza slices or crisping up a grilled cheese sandwich. The flip side is great for quick grilling jobs, like the mouth-watering, marinated tuna we put on these tacos.


Though I grew up eating tacos and other Mexican cuisine, I had never heard of fish or shrimp tacos until I was an adult, and it was a marvelous epiphany! Unlike the greasy ground beef-and-cheese tacos of my childhood, these beauties are light and flavorful, and I love dressing them up with fresh veggies and a squeeze of citrus. For us this time, it was shredded cabbage tossed with bottled avocado ranch, pico de gallo, scallions, avocado and cilantro. It’s a whole new category of comfort food—easy and fresh, with lots of great texture! Les likes a little dollop of cool sour cream, too, and it sure makes for a pretty picture.

You only need a few minutes for perfectly grilled tuna!

The most important flavor component of this meal was, of course, the tequila-lime marinade. Besides the namesake ingredients, I whisked in fresh garlic, red wine vinegar, chili powder and agave for a bright, punchy flavor on the tuna, and another departure from the heavy flavors I had always associated with Mexican food.


The critical rule for marinating in citrus juice is simple: keep it short and sweet because the acids in the lime juice will turn seafood into ceviche if they mingle too long. I gave it 30 minutes in the marinade, which was just long enough to pour a Mexican lager, prep all my toppings and pre-heat the griddle.

Mix and match toppings to suit your own taste.

Fresh tuna is best (and most tender) when cooked to medium rare, and you should let it rest a couple of minutes before slicing or chopping it for tacos.

Yes, Nilla, we see you peeking! ❤

While the tuna is resting, toss your corn tortillas onto the hot grill long enough to warm them and apply some grill marks. Store-bought tortillas are fine, but if you have some time and a little bit of patience, it’s worth the effort to make them yourself. I shared a post for handmade corn tortillas a while back; feel free to check that out for some tips to make it a little easier (and in fun flavors).

If you don’t have an outdoor grill or in-range griddle, or if unexpected wintry mix shows up out of nowhere, cast-iron grilling can save the day. If your range doesn’t have this option, a grilling pan or range-top griddle are both good options. I don’t recommend using them indoors for very high-fat foods (unless you enjoy degreasing your entire kitchen after a meal), but for veggies, fruit, pancakes, eggs and light seafood, cast iron on the stovetop produces excellent results.


Tequila & Lime Tuna Tacos

  • Servings: Up to 4
  • Difficulty: Easy
  • Print

The marinade is the star of this recipe, which brings freshness and flavor to Taco Tuesday!


Ingredients

  • Up to 16 ounces fresh tuna steak (marinade will cover this much; plan for 4 ounces per person)
  • 2 Tbsp. silver or reposado tequila* (see notes below)
  • Juice of 1 small lime
  • 1 Tbsp. red wine vinegar
  • 2 large cloves garlic, minced
  • 1 tsp. chili powder blend
  • 1 tsp. kosher salt (less if your chili powder includes salt)
  • A few twists black pepper
  • 1 tsp. agave syrup* (or sugar)
  • 3 Tbsp. olive oil or avocado oil
  • White corn tortillas, for serving
  • Desired accoutrements (we used shredded cabbage, thin radish slices, cubes of avocado, bias-cut scallions, cilantro leaves, pico de gallo, sour cream and lime wedges)

Note: Silver tequila is clear and has a very clean, crisp flavor; reposado is golden in color and has a slightly smoky flavor. We used reposado tequila for our tacos, and it was delicious. Agave is my preferred sweetener for this marinade, as it is the same ingredient that powers the tequila. But in a pinch, sugar is an easy substitute.

Directions

  1. In a glass measuring cup, combine the tequila, lime juice, vinegar, garlic, seasonings and agave. Whisk in olive or avocado oil to create a cohesive marinade.
  2. Place tuna steak(s) into a shallow glass dish or plastic zip-top bag. Pour marinade over steaks, turning several times to ensure good coverage. Let the steaks marinate for 30 minutes while you prep your accoutrements.
  3. Pre-heat a grill pan to medium-high. Oil the grates, and then remove tuna from marinade, allowing excess liquid to drip off. Place the steak on the grill and cook about 2 minutes, until first side is seared and displays nice grill marks. Turn steaks over and cook the other side the same amount of time. Transfer to a warm plate to rest 5 minutes while you heat the corn tortillas on both sides on the same grill pan.
  4. Move tuna steaks to a cutting board and chop into bite-sized pieces. Assemble tacos and enjoy!


Honey-Mustard & Onion Pretzel Crusted Salmon

My husband, Les, and I love taking road trips, and since COVID began, that’s how we have done all of our travel. Our trips may be lengthy, like our 10-day tour of Jersey, Connecticut and New York back in 2021, or quick weekend getaways to one of our beautiful North Carolina beaches. Regardless of length and destination, our trips all have a few things in common; we always have good music and snacks for the drive.

And then, there’s the ritual of departure from our home, which for me always goes something like this:

  • Load our main bags into the car (Les does this part, and I do the rest) 
  • Do a walk-through of every single room of the house to be sure we aren’t forgetting something important
  • Set out instructions for the pet sitter
  • Give the dog a pat on the head and tell her she’s in charge of the house while we’re away
  • Wink at the cat, who knows she’s actually going to be in charge
  • Do another walk-through of the house to be sure nothing electric is plugged in
  • Make a quick trip to the bathroom
  • Confirm with husband that my bag is already in the car
  • Double check on pet supplies to be sure my notes for the sitter match what’s in the cabinet
  • Argue with husband, who keeps yelling from the garage to “COME ON!”
  • Confirm the front door is locked
  • Get in the car (finally)

My backpack goes behind Les’s seat (so I can reach it), and it usually includes a couple of food magazines, my iPad, laptop, charger cables, bottled water and whatever road snacks Les picked up at the convenience store when he stopped to gas up the car. All of this, even for a four-hour car ride!

When we make one of these road trips, we throw dietary caution to the wind and load up on some junky snack foods that we would never eat any other time. I mean, junk— like pizza-flavored Combos, cheap chocolate bars, bold and zesty Chex mix, or these honey-mustard and onion pretzel pieces (one of my faves). 

I’d never eat these at home, but they always taste so good in the car!

I have no good excuse for loving these things. It’s the kind of ultra-processed snack I avoid 99% of the time. But I was raised to waste nothing, so after we get home from wherever we went, I don’t want to just throw the remains away. The leftover candy might go into Les’s lunchbox during the work week, but in the case of pretzels, chips or crackers, I can almost always crush them up and use them to coat a piece of fish or chicken.

The pretzel bits got so crunchy in the oven, and these flavors worked great with salmon!

The balance of sweet honey, salty pretzel and savory mustard works really well on salmon fillets, and it’s easy to prep this and pop it into the oven while you steam or pan fry a side vegetable. In past times, I’d simply brush a little bit of mayonnaise onto the fish before pressing it into the pretzel crumbs, but I’ve invested some time this past year learning new culinary techniques. I’ve made no secret of my crush on Kenji López-Alt for the scientific approach he takes in the kitchen, and his technique that I call the “miraculous mayo marinade” has become one of my go-tos.


A tiny bit of baking soda added to a seasoned mayonnaise mixture creates a chemical reaction that delivers more flavor into the protein you coat with it, and also helps to keep the protein (in this case, salmon) super moist and juicy after cooking. I used this simple chemistry trick to infuse my skinless salmon fillets with fresh garlic and dill, then I pressed both sides of the salmon into the crushed remains of the honey-mustard and onion pretzels. 


About 20 minutes in the oven, and the salmon emerged with a golden, crunchy coating and moist, juicy interior. The fresh dill in the marinade was a perfect complement to the tangy mustard in the pretzels, and the flavor was so tantalizing, it may be tough for me to wait until our next road trip to make it again!


Honey-Mustard & Onion Pretzel Crusted Salmon

  • Servings: 2
  • Difficulty: Easy
  • Print

This recipe is very simple, and makes the best use of the crumbs at the bottom of a snack food bag. If you don't have these pretzels, try it with tortilla or potato chips!


Ingredients

  • 2 portioned fillets of salmon, skin removed
  • 1/4 cup mayonnaise
  • 2 cloves fresh garlic, grated on microplane
  • Salt and pepper
  • 1 tsp. fresh dill, chopped
  • 1/8 tsp. baking soda
  • 1/2 cup honey-mustard and onion pretzel pieces

Directions

  1. Preheat oven to 350 F, with oven rack in center position. Line a baking sheet with parchment or a silicone liner.
  2. Combine mayo, garlic, dill, salt and pepper in a small bowl. Add baking soda and stir for a few seconds to ensure it’s evenly distributed in the marinade.
  3. When the mayo mixture appears frothy and bubbly, spread it evenly over both sides of the salmon, and let the salmon rest for about 20 minutes.
  4. Place pretzel pieces inside a paper bag or between layers of parchment. Use a rolling pin to gently crush the pieces into smaller pieces, but not to the point of powder. Spread the crumbs out onto a plate or the parchment. Press the salmon into the crumbs on both sides.
  5. Arrange salmon fillets onto lined baking sheet. Scatter any leftover crumbs onto the salmon pieces and gently press to adhere.
  6. Bake for 20 to 25 minutes, depending on size and thickness of salmon fillets.


Queso Fundido Potato Skins

Ah, Spring! It’s difficult to narrow down what’s best about this time of year— is it the warming temperatures and longer days? The cheerful daffodils that are already in full bloom in the beds in front of our house? I am already envisioning donning my garden gloves and putting down soil for this year’s garden. Easter will be here before we know it, and that’s always a sign of a fresh start. It’s all so exhilarating!

But the thing that everyone around these parts is excited about has nothing to do with weather, flowers or new beginnings. Nope— this month, it’s all about March Madness, baby!

Photo by Markus Spiske on Pexels.com

Many years ago, in what seems like a different lifetime, I worked in the main branch of a large, North Carolina-based bank. The “madness” that I witnessed included executives from the bank clearing their calendars so that they could stand in the lobby of the bank, focused on portable TVs that someone had plugged in right there along the teller line (this was all before the internet and smartphones, of course). Customers who came in to do their routine banking would stop for a few minutes, enjoy snacks that the bank staff brought in for a potluck table, and watch some of the games. Someone kept up with the brackets, to report to visitors which teams had advanced to the next rounds. 

Weird, I thought, for all of this to occur in a business setting on a weekday— but I was the newcomer who had not yet learned that North Carolina has five key religions— Southern Baptist, Methodist, NASCAR, pulled pork barbecue and ACC hoops.

Thirty five years later, It no longer seems weird to me to see people interrupt business as usual to watch a basketball game in the middle of their workday. During my years in radio, I even sat courtside for a couple of those games and it is indeed a thrill. We have plenty of that excitement around here this week, too, as the rivalries intensify at the ACC Tournament, happening right now in nearby Greensboro.


If you need a hearty snack for your own March Madness viewing, consider it done with these zesty Mexican-inspired potato skins, with all the flavors of queso dip inside a split-and-scooped baby russet potato. These little guys can be prepped in advance for the most part, then popped into the oven at the last minute so the toppings— chorizo, fire-roasted corn, queso dip and jalapeño—all melt together in a melty, gooey self-contained snack that’s easy to eat while you’re watching the games. These skins would have really wowed the gang at the bank!


The first step in making them, of course, is prepping and baking the russet potatoes. I chose smallish ones for this recipe so the skins would be better suited to game day snacking. My secret trick with any baked potato recipe is the brine. Yes, I soak my scrubbed potatoes in heavily salted water before baking, and it ensures a crunchy, flavorful skin that is just as tasty as the fillings you put in them. The brining step only takes about half an hour, and the outcome is well worth it. I browned up the chorizo in cast iron while the potatoes soaked, and kept the drippings in the skillet.


When the spuds were cool enough to handle, I split them in half and scooped out some of the filling, keeping enough to hold the fillings without leaking. You can do whatever you like with the scooped out part; I added them to the current batch of homemade food for Nilla. To give the skins a bit of extra flavor, I fried them briefly (face-down) in the chorizo drippings, just long enough to get those edges crispy. From there, it was just a matter of filling them up with shredded cheese, queso, corn, chorizo and jalapeno.


A second trip through the oven melted all the tasty fillings together, and I finished them with a quick scatter of sliced scallions.


Queso Fundido Potato Skins

  • Servings: 16 skins
  • Difficulty: Average
  • Print

This is a fun game day snack that puts a Mexican queso dip twist on classic potato skins.


Ingredients

  • 8 smallish russet potatoes, scrubbed
  • Hot, but not necessarily boiling, water
  • 1 Tbsp. kosher salt (for brining the potatoes)
  • 6 oz. fresh Mexican chorizo sausage* (see notes)
  • 1 to 2 Tbsp. olive oil, if needed
  • 1/2 container Land o Lakes queso dip*, cold from fridge
  • 1/2 cup fire roasted sweet corn
  • 1/2 cup Monterey jack or pepper jack cheese, shredded
  • 16 pickled jalapeno slices
  • 2 scallions, thinly sliced (white and green parts)
  • 1/2 cup sour cream (optional), for serving

*Notes: This recipe uses the fresh, crumbly style of chorizo, not the hard Spanish variety. Our neighbor turned us on to the Land o Lakes queso dip, and we love it! If you don’t find it in your supermarket, substitute something similar from the fresh dairy case.

Directions

  1. Preheat oven to 400°F, with oven rack in center position. Line a large baking sheet with aluminum foil.
  2. Place scrubbed potatoes in a large, heatproof bowl. Sprinkle kosher salt over the potatoes, then fill with enough hot water to cover the potatoes. Swish the water a bit to dissolve the salt. Let them soak for 30 minutes.
  3. Brown the chorizo in a cast iron skillet over medium heat. Scoop the chorizo out into a separate bowl and keep the drippings in the pan.
  4. Dry potatoes with paper towels and arrange on the foil-lined baking sheet. Bake for about 35 minutes, until potatoes are easily pierced with the tip of a sharp knife. When potatoes are cool enough to handle, cut them in half lengthwise and scoop out some of the soft potato, leaving about 1/4-inch around the edges and bottom. Use the excess potato in another recipe.
  5. Place the chorizo skillet back onto medium heat. If the drippings are skimpy in the pan, swirl in a little olive oil. When hot, place the scooped potato skins face down in the pan, to crisp up the exposed edges. Arrange the skins on the foil-lined pan and prepare to fill them.
  6. Divide about half of the shredded cheese among the skins and top each with a teaspoonful of the roasted corn. Transfer the queso cheese into a glass measuring cup and microwave about 20 seconds to loosen it up. Pour the queso over the filling in the skins, up to the edges. Top with chorizo, jalapeno slices and the remaining shredded cheese.
  7. Place skins back into the 400°F oven for about 5 minutes, until cheese is melted and bubbly and skins are heated through. Sprinkle with sliced scallions and serve immediately.


Peanut Butter Banana Bread with Chocolate Chunks

Any child of the 70’s will likely remember the TV ad for Reese’s peanut butter cups, in which characters crashed into each other to accidentally merge their respective favorite treats. 


I could always relate to that kid eating his peanut butter straight from the jar, and I still do that today, though my preference for peanut butter has shifted toward the natural variety that contains only peanuts and salt. It’s true that chocolate and peanut butter are a natural pairing, but so are and peanut butter and banana— the King of Rock and Roll certainly knew this; word has it his favorite sandwich combined the two (and it is unexpectedly delicious).

So when I had to come up with a plan to use up the brown-speckled bananas that were taunting me from the counter, I figured there’d be no harm in putting all three flavors together, and wouldn’t you know, I came up with a winner!


This flavor combo was appreciated by my husband more than the last banana bread I made, with dark chocolate and ginger (Les is not a fan of the ginger), and we both found this one delicious for breakfast, dessert and afternoon snack. Les said it was especially tasty straight from the fridge, with a light smear of butter.

The only consideration I needed to make when adapting my usual banana bread recipe was how to adjust for the peanut butter. The sticky, dense texture of my natural-style peanut butter might make the batter heavy, I thought, so I inched forward just a bit on the Greek yogurt to compensate and add some moisture to the mix. A Jif or Skippy style would probably be easier, and would also make the bread sweeter. To ensure that my peanut butter blended evenly, I creamed it together with the sugar at the start of the recipe, then proceeded with beating in the eggs, mashed banana and yogurt. Finally, I blended in melted butter and then gently folded in the dry ingredients and the dark chocolate chunks.


I always hold back about a tablespoon of the sugar from the recipe to sprinkle over the top just before baking. I love the delicate, sparkly crunch it gives the finished loaf.


It’s two great tastes that taste great together— wait, it’s three! Every bite flaunts the peanut butter and banana flavors, and those pockets of chocolatey goodness make my taste buds very happy. Thank you, thank you very much.


Peanut Butter Banana Bread with Chocolate Chunks

  • Servings: About 10
  • Difficulty: Average
  • Print

If peanut butter and banana are good together, and peanut butter and chocolate, then why not combine all three? This banana bread is a winner!


Ingredients

  • 1 cup all-purpose flour
  • 1 cup whole wheat pastry flour (or white whole wheat)
  • 3/4 teaspoon baking soda
  • 1/2 teaspoon salt
  • 1/2 teaspoon ground cinnamon
  • 2/3 cup organic cane sugar, plus 1 Tablespoon for sprinkling before baking
  • 1/3 cup natural peanut butter (see ingredient notes)
  • 2 large eggs
  • 1 1/2 cups mashed very ripe banana
  • 6 Tablespoons unsalted butter, melted and cooled
  • 1/2 cup semi-sweet chocolate chunks (or large chips)

My natural peanut has only two ingredients, organic peanuts and salt. This type of peanut butter is stored in the fridge, very firm and not easily mixed with other ingredients. If your peanut butter contains palm oil and sugar, you may want to consider dialing back the amounts of butter and sugar ingredients to keep those flavors in check.

Directions

  1. Preheat oven to 350 F, with oven rack in center position. Prepare a loaf pan by buttering or oil-spraying the bottom and sides.
  2. In a medium bowl, whisk together the flours, baking soda, salt and cinnamon.
  3. Add sugar and peanut butter to a mixing bowl. Beat until evenly combined with no visible clumps of peanut butter. Beat in eggs.
  4. Smash the banana and blend it into the sugar-egg mixture. Take care not to obliterate the bananas; it’s nice to have a few visible chunks of it in the finished bread. Gently fold the melted butter into this mixture.
  5. Add the flour mixture, half at a time, and fold gently to incorporate the flour. Fold in the chocolate chunks, taking care not to overwork the batter.
  6. Pour the batter into the prepared loaf pan. Jiggle the pan slightly to even out the batter. Sprinkle the extra tablespoon of sugar all over the top.
  7. Bake for 55 to 60 minutes, until a toothpick inserted into the center comes out clean (you may have to poke in a few spots, because there’s so much chocolate in the recipe).
  8. Cool banana bread in the pan for about 15 minutes, then turn out onto a rack and let it cool completely before enjoying.


“Double Rainbow” Trout & Chard

Regardless of one’s religious bent, the season of Lent presents plenty of opportunity to try new seafood dishes. For those abstaining from meat, a fresh idea on the dinner table can help prevent boredom with the same fish dishes over and over for 40 days. For everyone else, it’s simply a healthier meal option—never a bad idea, and especially when we are headed into Spring.

This nutritious, colorful dish has lots of flavor (and heat, if you want it), but is easy on effort, calories and budget. You can have it on the table in under half an hour, too!


Rainbow chard is one of nature’s superfoods, a leafy green packed with vitamin K (good for our bones), iron (for healthy blood cell production), antioxidants (to reduce inflammation) and manganese (for brain and nerve support). On top of the health benefits, chard is very versatile in the kitchen. It can be eaten raw, steamed, boiled, sautéed or braised. You can add it to everything from soup to an omelet, or even use its leaves to wrap up other ingredients, the way you might use cabbage leaves. I braised it this time, and made it a bed for a crispy, pan-fried trout fillet.

I used the whole chard in this dish, but I separated and chopped the hard stems to give them a 5-minute head start in the pan. To save time chopping the leaves, I stacked and rolled them, and then sliced the roll like a giant chiffonade.


The stems were sautéed in a bit of extra virgin olive oil along with a couple scallions (the only onions I had in the house that day), and then I lined up three of my favorite complementary flavors—coconut milk, spicy Asian Reds pepper flakes and ginger. One of my favorite freezer-section discoveries has been these little cubes of crushed ginger. I can never use up a whole root (even a small one), and these come in very handy.


When the chard stems were tender, I added the leaves a handful at a time and cooked them until they wilted. My coconut milk had a ton of oil solids floating on top, so I scooped those out for another use* (see my note about this after the pictures)—and only the liquid went into the pot to braise the chard. After only a few minutes, the coconut milk softened up and absorbed some of the color from the chard stems. I love the way these ingredients merge together!


*You may as well know, when I say that I set aside some portion of an ingredient “for another use,” it often means I put it into the refrigerator and flat out forget about it. I cannot count the times I have dug around in there, looking for something else, and realized that I missed the freshness deadline on some ingredient I was sure I’d use. If I’d had a can of “light” coconut milk, this would not have been an issue. The full-fat version of coconut milk tends to add a stronger coconut flavor (not what I was going for). Anyway—

I sprinkled the trout fillets with salt and pepper, and then gave them a flip in flour sprinkled with more of the Asian Reds pepper flakes. I fried them in a little oil until crispy and browned, and then plated the fish on top of the chard and spooned the lingering coconut milk over the top. If you don’t mind a few carbs alongside, this would be great with steamed rice.


So, I’ve called my dish “double rainbow” because the fish counter at my supermarket had labeled this trout as “rainbow trout,” though I didn’t notice any signature rainbow stripes on these fillets. Sometimes, I get the feeling my supermarket is fibbing a little bit, or maybe they don’t know the difference, or they think we don’t. The bottom line is that any trout will be fine for this dish, and of course, another delicate flaky fish could also be substituted.

But I went with it because who doesn’t love a double rainbow?


Double Rainbow Trout & Chard

  • Servings: 2
  • Difficulty: Easy
  • Print

Rainbow trout + rainbow chard = A doubly delicious weeknight meal that is inexpensive, easy to prepare and packed with nutrition.


Ingredients

  • 1 small bunch rainbow chard
  • 2 Tbsp. extra virgin olive oil (one for cooking greens and the other for frying trout)
  • 1/4 cup chopped onion (sweet, yellow, leek, shallot or scallion would all work)
  • Salt and pepper
  • A shake or two of crushed red pepper, to taste (I love the Asian Red blend from Flatiron Pepper Co.)
  • 1 tsp. finely minced ginger (or a shortcut, like the frozen cubes of ginger)
  • 1 cup coconut milk (the canned culinary variety, preferably “light”)
  • 2 fresh trout fillets
  • 1/4 cup all-purpose flour (for dusting the trout fillets)

Directions

  1. Cut out stems of the chard and chop into small pieces. Stack the leaves and roll up tightly like a cigar, and then slice into strips.
  2. Add a tablespoon of olive oil to a small skillet over medium heat. Add the chard stems and onions, season with salt and pepper, and sauté for about five minutes, until slightly tender. Add chard leaves to the pan, along with red pepper and ginger. Cook a few minutes, until leaves are wilted.
  3. Add coconut milk, reduce heat and cover. Allow chard to braise about 15 minutes while you prepare the trout fillets.
  4. Pat fillets dry with paper towels and season with salt and pepper. Sprinkle flour onto a plate or paper towel, and add a few more shakes of red pepper flakes if you like spicy flavors. Press the flesh side of the fish down onto the flour to coat, and then shake off excess.
  5. Heat a large skillet over medium heat. When pan is hot, add the remaining oil and twirl the pan to coat. Place trout fillets, flesh side down, into the hot skillet and cook until fish is crispy and golden, about 4 minutes. Carefully turn fillets and cook the skin side for 2 to 3 minutes.
  6. Plate the braised greens and top with trout. Spoon extra coconut milk sauce over the top of fish and serve at once.


Sunflower & Honey Sandwich Bread 🌻

My heart has ached this week, at the approach of today’s one-year anniversary of Russia’s unprovoked attack on Ukraine. The people of that nation have stunned the world with their incredible resilience and dedication to their country. Many brave men, women and families have refused to leave in the wake of hostile invasion and are living under constant threat amid air raid sirens, bombings and widespread power outages. They are truly an inspiration.

The older I get, the more grateful I am to have never experienced true hardship or food insecurity, and when stories like the ones emerging from Ukraine are presented, I want to do something, anything, to help. It isn’t possible, of course, for me to make a huge meal to help people on the other side of the world, but I am proud to support an organization that puts itself on the front line to do exactly that.

In a few days, my husband and I will be in attendance for a lecture by Chef José Andrés, the founder of World Central Kitchen, a non-profit organization that has spent the last year bringing much needed food and comfort to war-torn Ukraine, as well as other regions stricken by climate disaster and other catastrophic situations— usually, it even juggles multiple relief efforts at once (see a sampling of their current work here). That’s how strong they are!

The decision to support a relief organization is personal, and if you’re like me, you do some homework to be sure your money is being used responsibly. I am extremely impressed by the integrity of World Central Kitchen, which has earned an A+ rating from charitywatch.org, and meets or exceeds all its requirements for governance and transparency. The organization is powered by thousands of volunteers, professional and amateur, and they are able to activate and mobilize very quickly when a crisis occurs. Yesterday, I also registered to be a volunteer; if a crisis occurs near me, I’m already signed up and ready to go. Giving and volunteering is easy to do on the WCK website.

I cannot make enough bread in my kitchen to feed the people of Ukraine, but I have great confidence in knowing that my tax-deductible contributions to World Central Kitchen are used wisely and effectively to care for the people whose hardships weigh heavily on me. If you also wish you could do something to help, I hope you’ll consider partnering with this exceptional effort. 


If I could make enough bread to make a difference, I’d make a million loaves of this one, mostly because it’s a hearty and nutritious whole grain loaf, but also because it is sweetened with honey and embellished inside and out with sunflower seeds. The beautiful sunflower is the national flower of Ukraine, and also happens to be a favorite of honeybees. To me, a bread like this is a reminder that we are all connected on this big blue ball we call home.


This bread is an adaptation of my favorite sourdough sandwich bread, and the substitutions I made were easy. 

Rather than repeat all the instruction I’ve already given for my basic bread, I’ll point to what I did differently for this one, and trust you’ll find your way back to my earlier post if you need more visual information. This bread, like the other, depends on a portion of fed, ripe sourdough starter. It uses a special technique of pre-cooking a portion of the flour in milk, then cooling it before adding to the recipe. 

I swapped in a generous amount of white whole wheat flour as well as a portion of an ancient grains blend flour from King Arthur, called Super 10. This super-nutritious flour includes quinoa,  buckwheat, amaranth and millet, among others. It gives my bread a flavor and texture boost without making it dense or heavy. I nearly doubled the amount of honey from my base recipe, and used the stretch-and-fold phase of the fermentation to fold in about a half cup of toasted sunflower seeds. This dough is very sticky, thanks to the ancient grains and high hydration, so use wet hands to complete the stretches. This is a gentle but effective way to knead the dough and incorporate the extra ingredient of seeds.


When the dough was ready for shaping, I used wet hands again to form a loaf, and then moistened the underside and rolled it lightly in additional sunflower seeds before placing it in my baking pan. Then, I baked the loaf as directed in my original post. Use a steam pan for the first 20 minutes, and a tent foil for the remainder of the baking time.


We love a good sandwich bread at our house. My husband filled two slices of this one with tuna salad for lunch, and I’ve already enjoyed it toasted with breakfast. Without a doubt, this bread will become a regular item in our rotation, and with every loaf I pull from the oven, I’ll hold the mighty people of Ukraine in my heart. 💙💛


Sazerac

I’ll admit it, I love a good, thoughtful cocktail. Back in the day— and I’m referring to the days I was barely old enough to drink, and then wasn’t, because legal age changed in New York State  during my young adult years— I would belly up to the bar and order something that my current self would recognize as disgusting. Something like an Alabama Slammer, which is a sickeningly sweet bar drink with one primary goal— getting you rip-roaring drunk in as short a time as possible. Bleh.

Today, my grown-up self wants a sipping drink, one that tells a story, and this story is set in New Orleans. The rest of the story’s details are, well, a little sketchy.

Meet the Sazerac. Official drink of New Orleans, and perfectly apropos for Mardi Gras!

Laissez les bons temps rouler!

Walk into any respectable cocktail bar in New Orleans, and you might learn that the Sazerac was originally crafted there in 1838 by an apothecary (old-fashioned term for pharmacist) named Antoine Peychaud. The tale might include reference to a concoction he stirred up for medicinal purposes (also my favorite excuse), using his favorite French cognac (Sazerac de Forge et fils) and his own tincture made from gentian bark and other botanicals. A bartender across town, however, might claim that the drink was created 20 years later in a New Orleans coffee house, and it included pre-rinsing the glass with absinthe, a French liqueur that was banned half a century later for being “hallucinogenic.” Yet another barkeep might tell you with great conviction that this drink is much older than both of those versions, with written recipes as far back as 1806.

The truth may lie somewhere in the middle— whatever that means— and if you want to get technical about it, the Sazerac only became the “official” cocktail of New Orleans on June 23, 2008. Thank God the internet was around by then, so we at least have record of that much! 

However the drink originated, the French-rooted Sazerac has been Americanized in several ways, and none of them bad. The cognac was eventually replaced with American rye whiskey, which brings a terrific spice to the cocktail. There is even a rye named Sazerac today, presumably so that it would be considered “official” for this cocktail. Peychaud’s bitters lend a vibrant red color and herbal flavors, and Herbsaint, an herbal liqueur that plays understudy to absinthe but actually is not as easy to find as modern-day absinthe, gives the drink an air of intoxicating mystery (as if it needs any more of that).

All these details make my head spin a little bit, and that brings me back to the Sazerac I’m sharing today for Mardi Gras. Having only been to New Orleans in my dreams (at least, so far), my experience of the Sazerac is limited to having enjoyed it in other places, and most recently in a swanky steakhouse bar in Virginia. I like that the Sazerac is strong, bold and definitely meant for sipping more than drinking. My only personal preference is for it to be a bit colder, given that it is typically not served on ice. For my version, I have chosen to marry the old Sazerac story with the new, by keeping a touch of French cognac in the background of spicy American rye whiskey. Peychaud’s bitters are easy to find wherever quality cocktail ingredients are sold, and I reverted back to absinthe for rinsing my glass. There’s a sugar cube involved, too, or you can sub in a bar spoon full of caster sugar or even simple syrup if you have it.

Whew. That’s a lot of information! Who’s ready for a cocktail??


The first step is chilling down the double rocks glass that you’ll serve the drink in. A Sazerac traditionally is not served on rocks, so getting the glass cold is a must. Fill it with ice while you gather up the rest of your ingredients— rye, cognac (if you wish), Peychaud’s, a bit of sugar and absinthe. Muddle the sugar with bitters in a cocktail mixing glass. Add the rye (and cognac, if using) and stir to blend with the sugar-Peychaud’s mixture.


I like my drinks nice and cold, so I tossed some ice into the mixing glass for a few spins, though this is not traditional. I considered (for about one second) using an absinthe that my husband’s son, Alex, brought home from his travels in Europe, but this stuff is 184 proof and I feared that it might melt my liver. Whew, I had no idea something this strong even existed!


Those yesteryear claims of absinthe having hallucinogenic properties probably had more to do with the crazy high alcohol content. Rather than risk it, I went with a lesser proof absinthe that I picked up at our state-run liquor store. Same flavor— very potent, medicinal and licorice-like, almost like Formula 44 cough syrup, if you remember that stuff. Now, before you get grossed out at that reference and vow to never try a Sazerac, please consider that it’s a miniscule amount of absinthe that ends up in the cocktail because it is only used to rinse the glass before the mixed drink is poured into it. Nobody would drink Worcestershire sauce either, but a touch of it in a recipe makes a world of difference. I’m just saying.

Here’s how to do the rinse: empty the ice from the rocks glass and swirl about a tablespoon of absinthe into it— tip the glass every which way to ensure that it touches up the sides, and then empty it out. Strain the drink into the glass and garnish.


The lemon strip that usually accompanies the Sazerac is meant to entice rather than flavor, so don’t squeeze or drop it into the cocktail glass. I used a peeler to strip two thin pieces of lemon peel— one is strictly for expressing over the glass (and nobody would mind if you swiped it around the rim), and the other is trimmed and slit so it can be perched like a flame on the edge of the glass.


Sazerac

  • Servings: 1 serious cocktail
  • Difficulty: Big Easy
  • Print

Though its exact origin is still the subject of heated debate, this strong drink is undisputedly the official cocktail of New Orleans. Enjoy one for Mardi Gras!


Ingredients

  • 2 oz. rye whiskey (or bourbon, if you prefer a softer drink)
  • 1/2 oz. French cognac
  • 1 sugar cube (or 1 tsp. superfine sugar or 2 tsp. simple syrup)
  • 3 generous dashes Peychaud’s bitters
  • 1/4 oz. absinthe (for glass rinse)
  • 1 wide strip lemon peel for garnish

Directions

  1. Chill double rocks glass with ice, or place in freezer.
  2. Drop sugar cube into mixing glass. Add bitters and use a muddler to crush and dissolve the sugar.
  3. Add rye whiskey and cognac to mixing glass and stir to combine.
  4. Empty ice from cocktail glass. Pour absinthe into glass and swirl it around to rinse the inside. Pour out excess absinthe.
  5. Pour cocktail into chilled, rinsed glass. Express lemon peel over the top of the drink, but do not drop it into the glass. Rest it on top edge of the glass, or create a “flame” by trimming the ragged sides of the peel and cutting a long slit into the middle of it. Position the lemon flame onto the edge of the glass.