Clams Casino Pizza

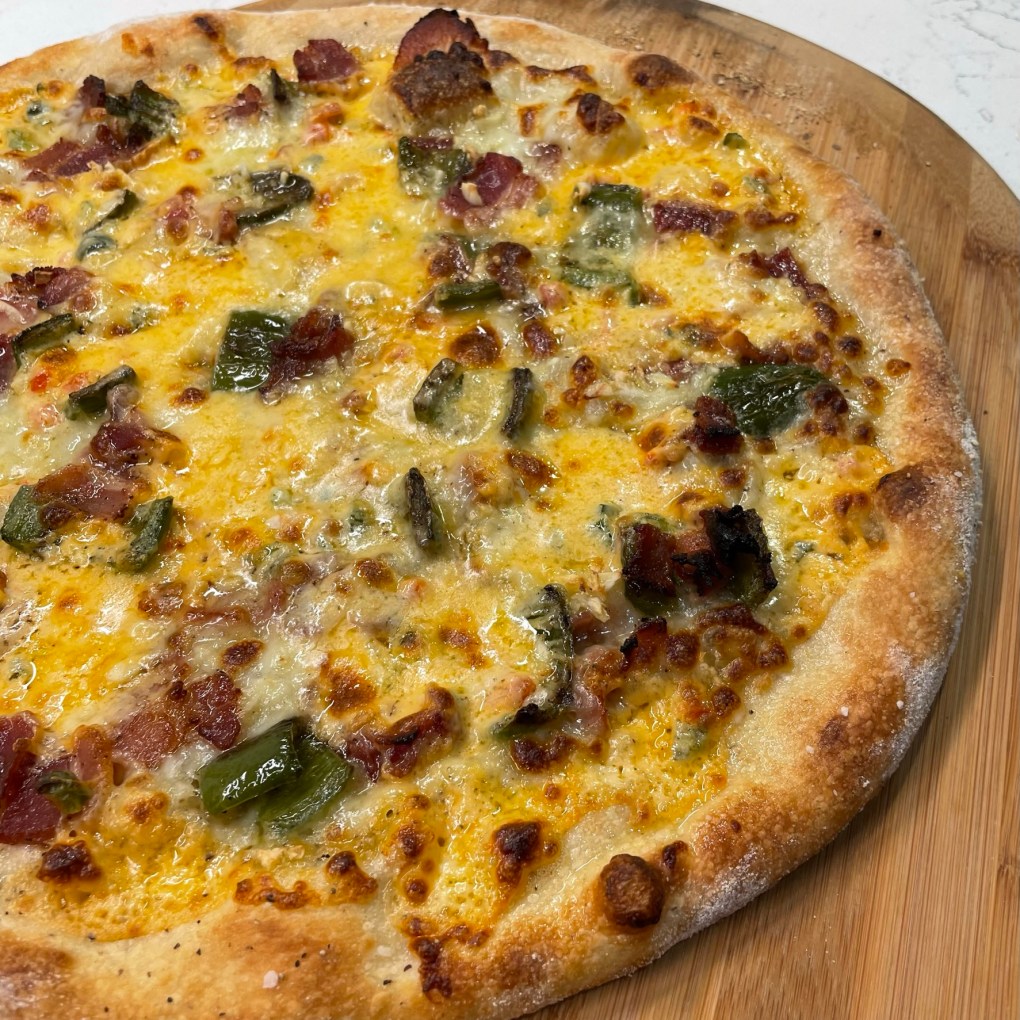
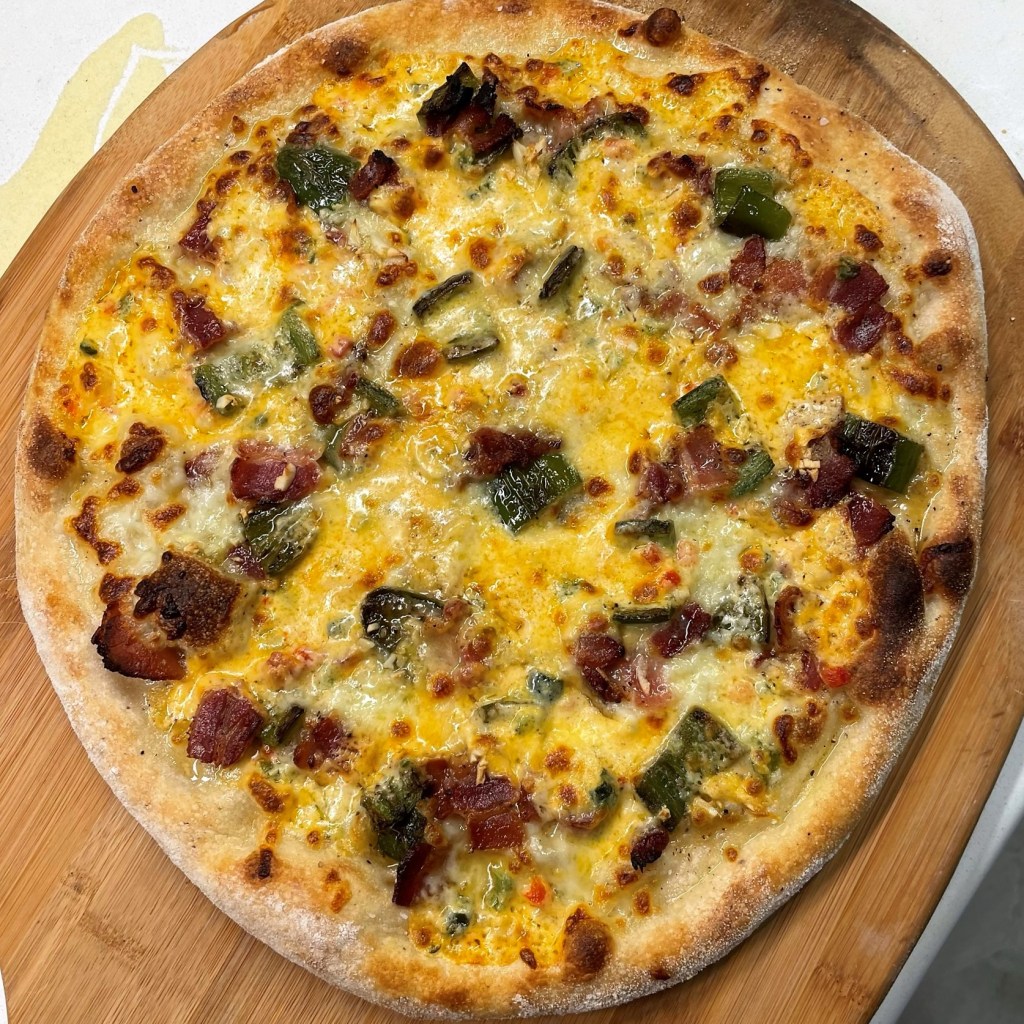
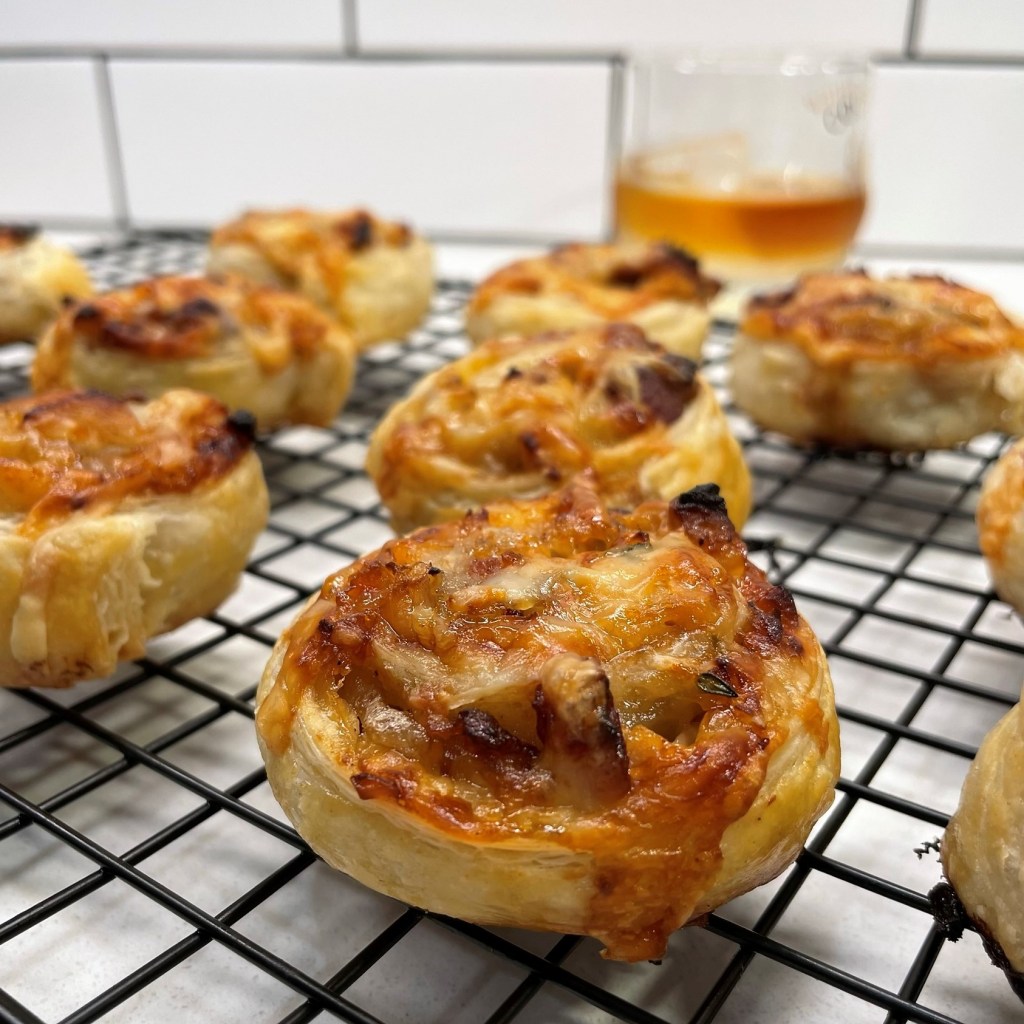
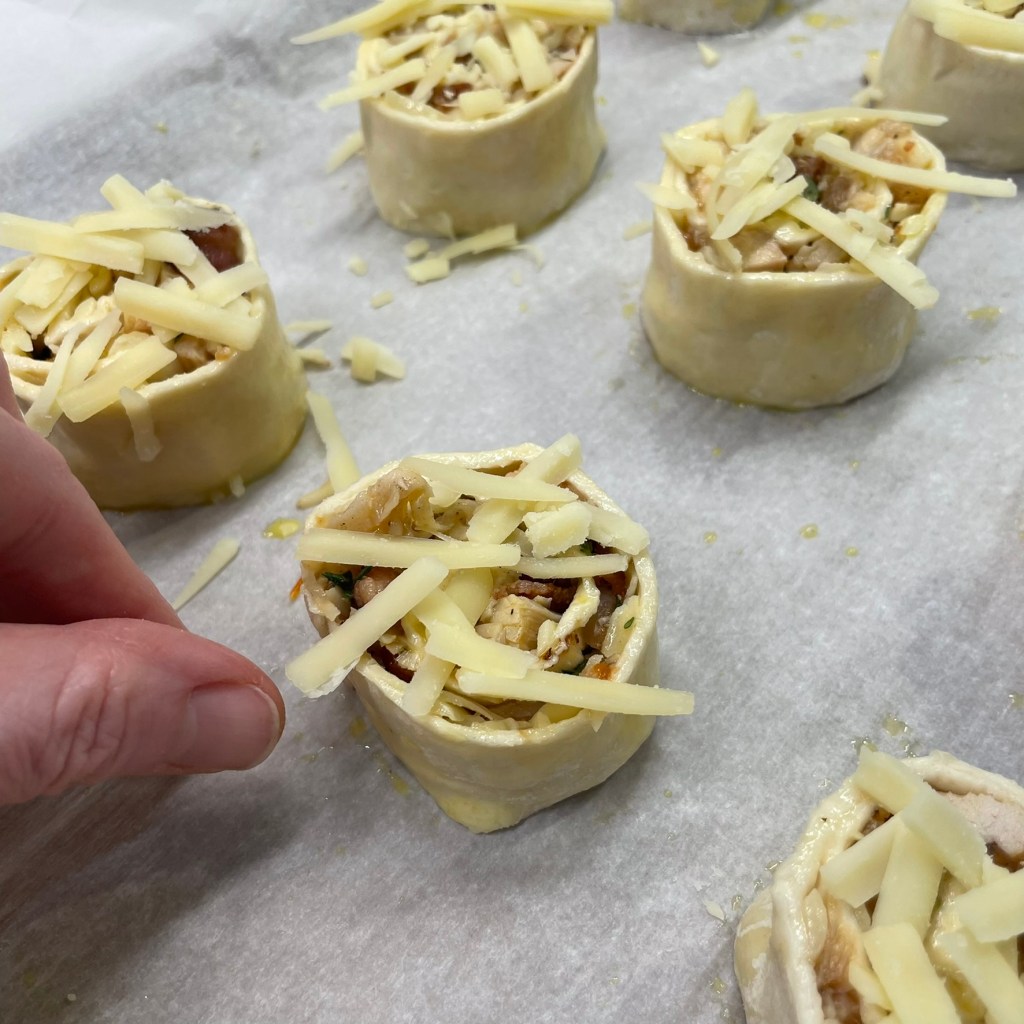
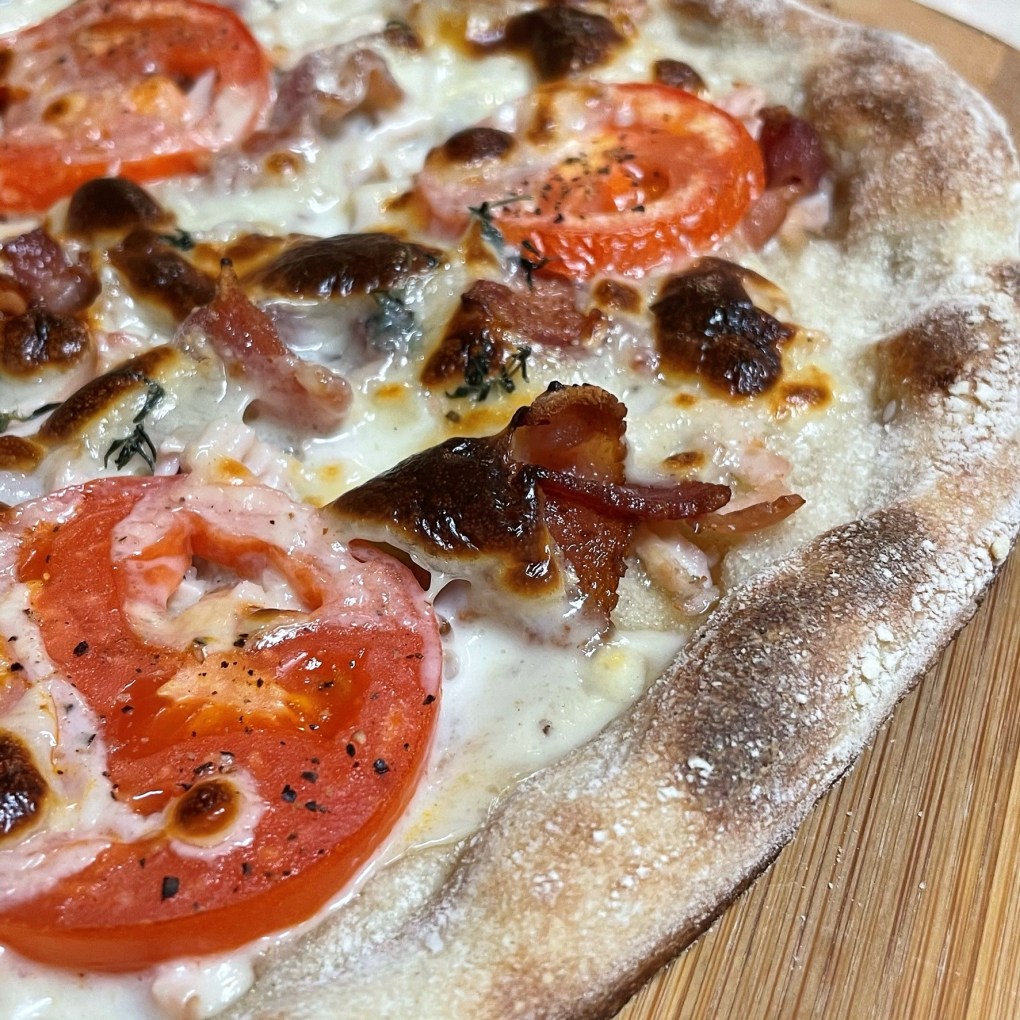
Call me sentimental, but I’ve been digging some of the retro standards lately. Nostalgia hits heavy during the holidays, and my recent tradition of reimagining some old-school favorites on top of a pizza for New Year’s continues with this combination of clams, bacon, pepper, shallots and garlic— it’s a clams casino pizza!

It even has crisp, bacon-y panko crumbs on top!

The literal translation of “casino” from Italian is “big mess,” and I find that more fitting of the dazzling Las Vegas strip than the flavors of the dish that that was first created in 1917 at  Narragansett Pier Casino in Rhode Island— or was it 1900 in New York’s Central Park Casino? As usual with recipe history, the details are murky, but with such a delectable combination of flavors, I can understand why people would fight to lay claim to it.

Transforming these flavors onto a pizza was actually pretty simple. As with my other fancy New Year’s Eve pies, there is no red sauce; only cheese as the base layer, followed by freshly shucked littleneck clams and then the casino flavors that go on by the spoonful. How did I pack all that flavor into one delicious pizza topping? Let’s get into it!

I’m always ready to make pizza!

Clam Prep 101

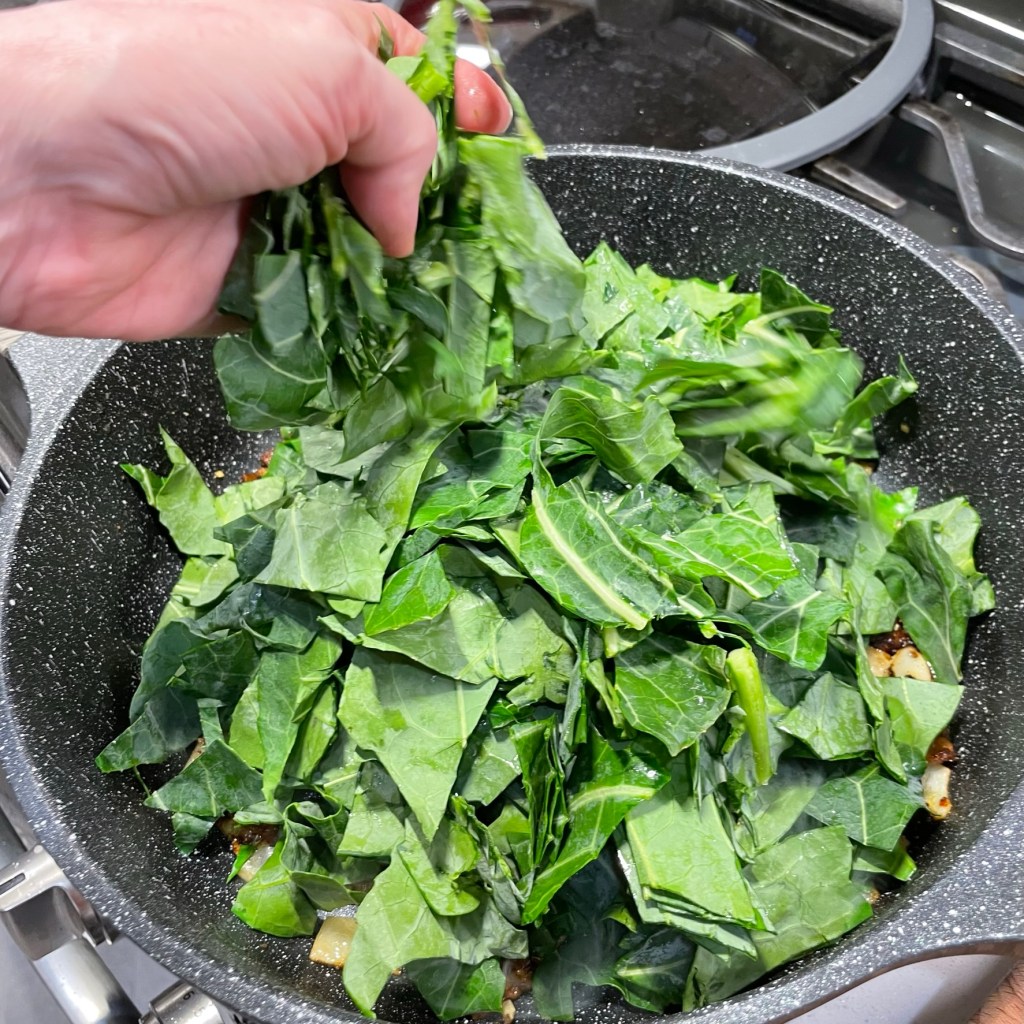
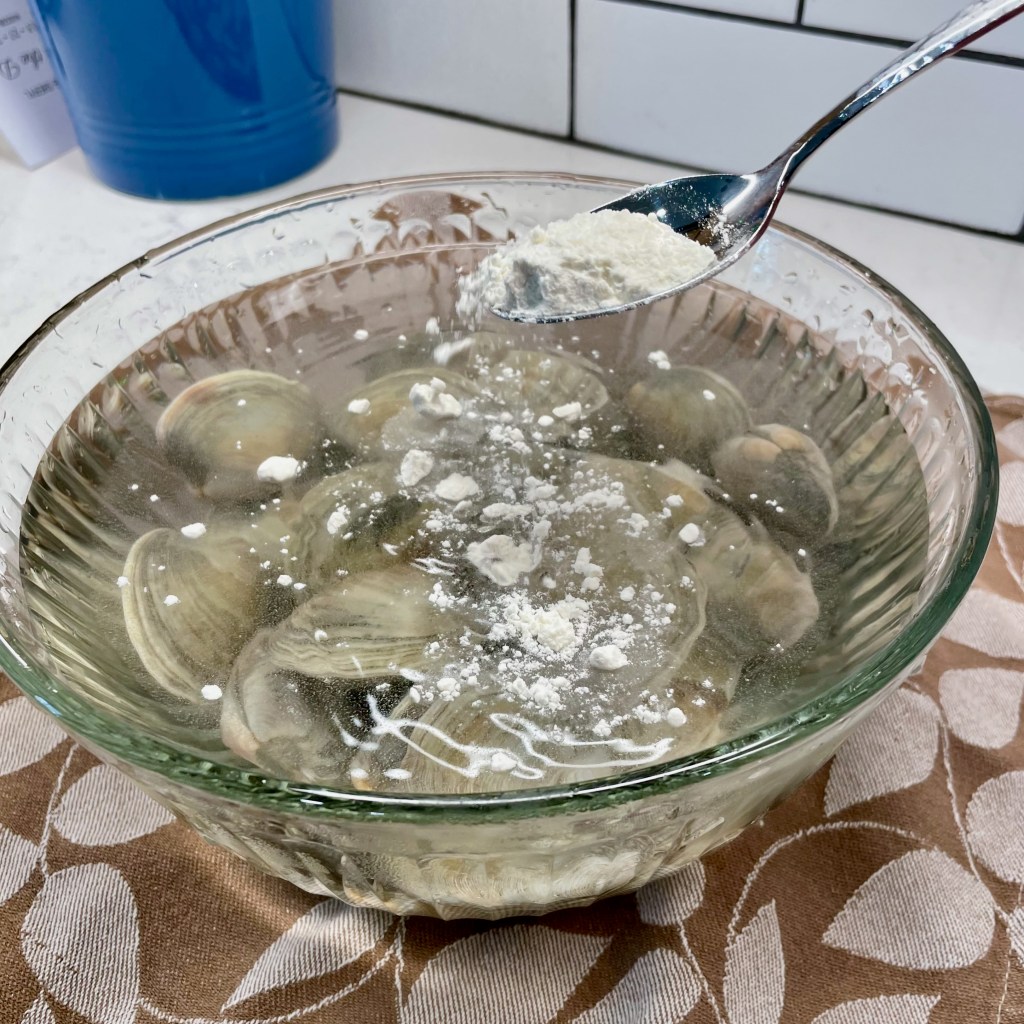
First, you want smallish clams for this recipe; littlenecks are ideal. To prep fresh clams for cooking, you want to clean them, inside and out. Cleaning the outside is straightforward, but how do you check the insides for grit and sand? This is called “purging.”

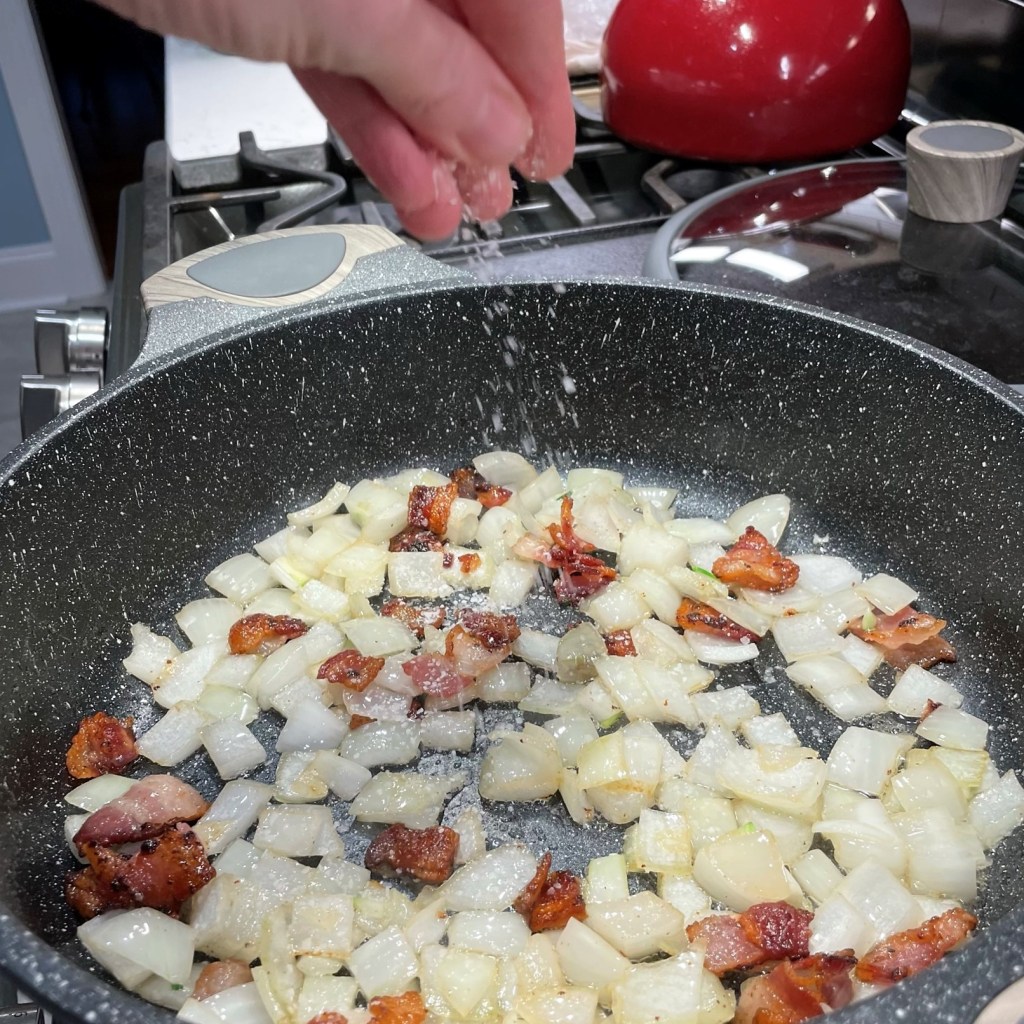
Place the clams in a bowl with cold water and a teaspoon of salt. Sprinkle a hefty spoonful of flour over the clams, to give them a reason to open and flush out the water they take in. After 30 minutes or so, lift the clams out into a colander and check the bowl for sand and grit. Repeat this process until water appears clear, and then empty the water and give each clam a quick scrub with a stiff-bristled brush, such as a potato brush. Do this purging process right before you plan to cook the clams, and keep them cold throughout.

This process can take more than an hour, so build in some time for this important step.

Clams casino butter

Moment of truth here, this stuff is where the magic happens. I was inspired to make my clams casino pizza when I was scrolling through my search results for “classic seafood appetizers,” and this article by Daniel Gritzer at Serious Eats caught my eye. I have loads of respect for Daniel’s approach to food, and I share his passion for finding better outcomes with less work. The moment I saw that he was making a compound butter for Clams Casino (the appetizer, not a pizza), I knew exactly what to do. 


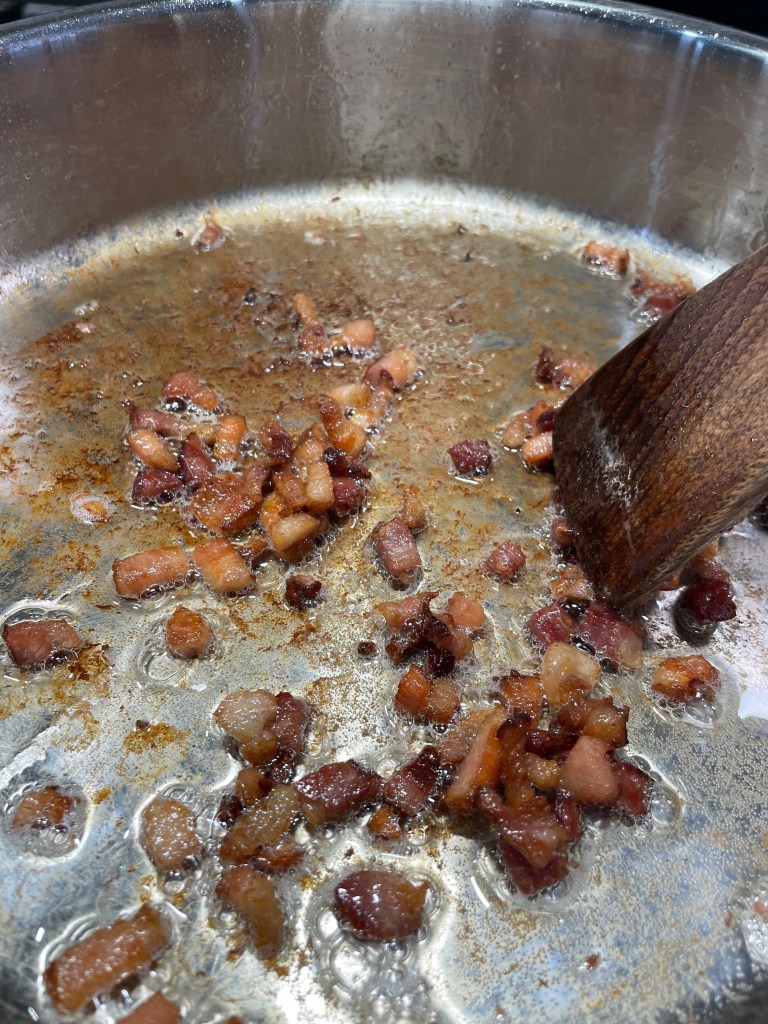
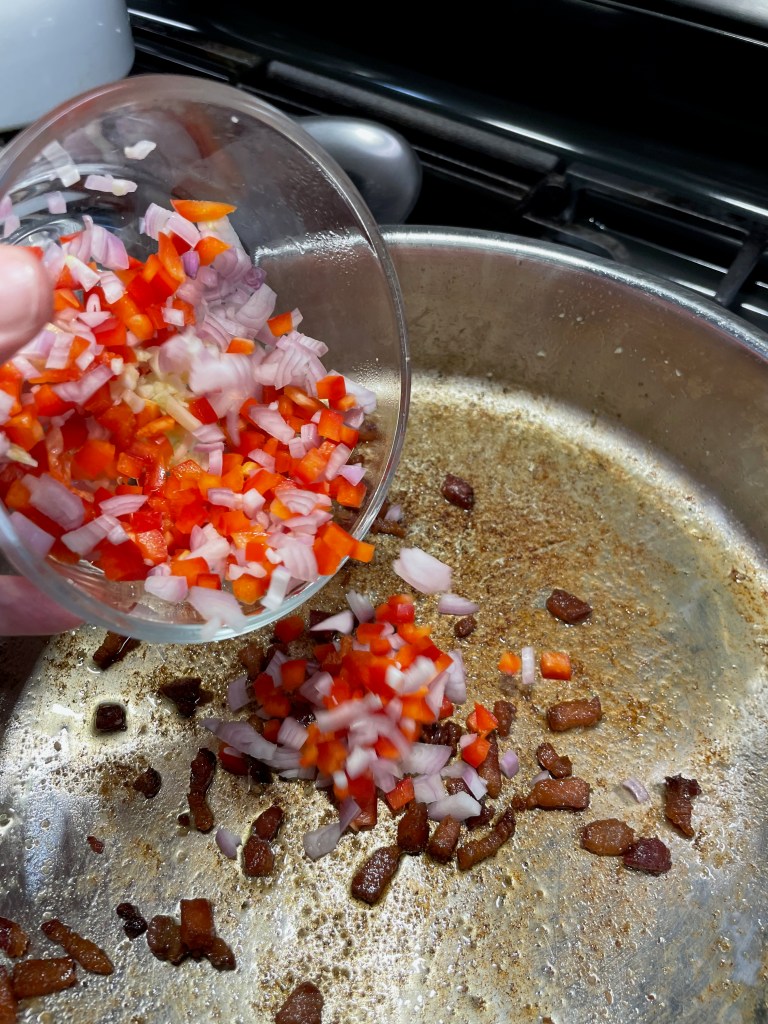
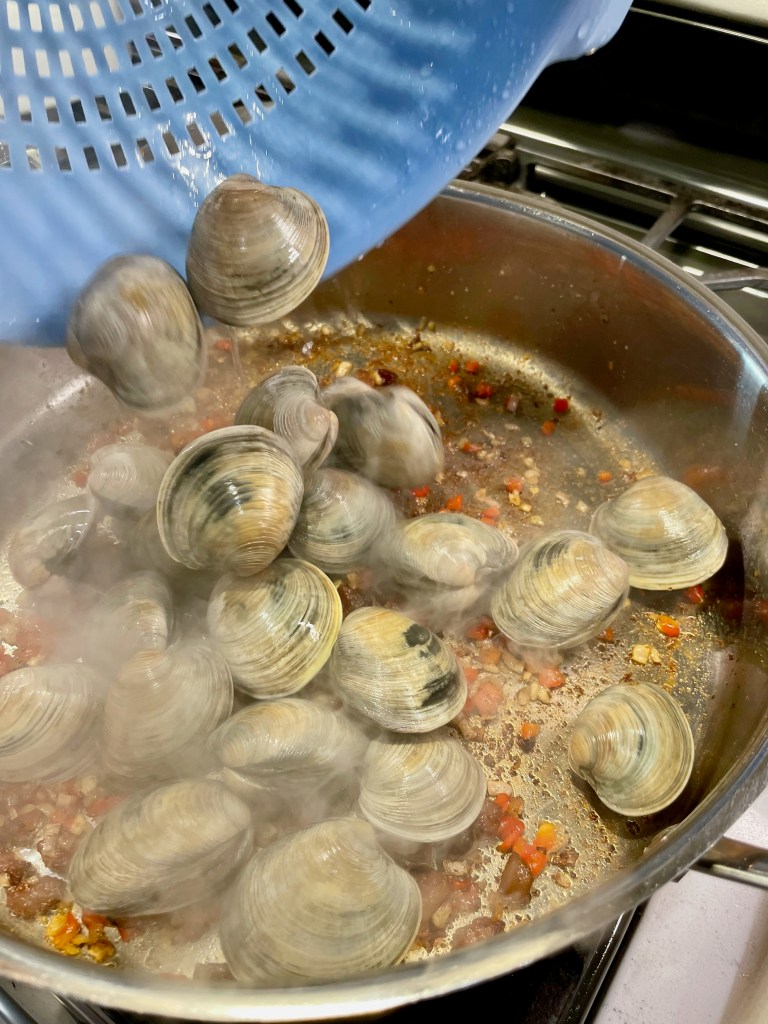
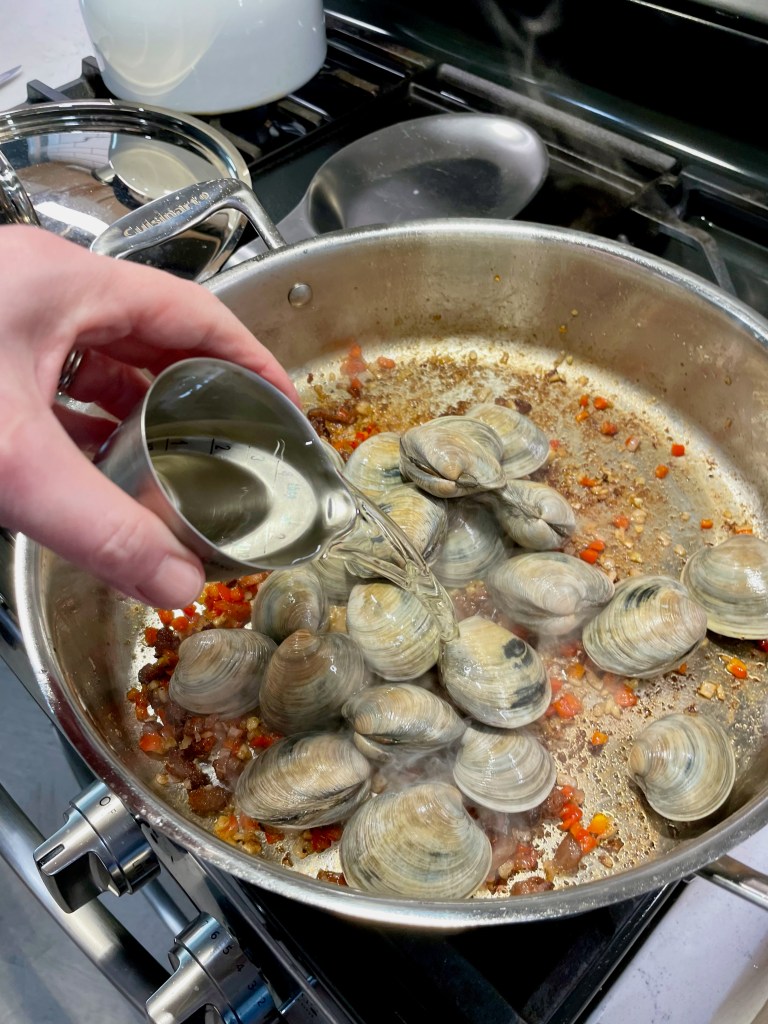
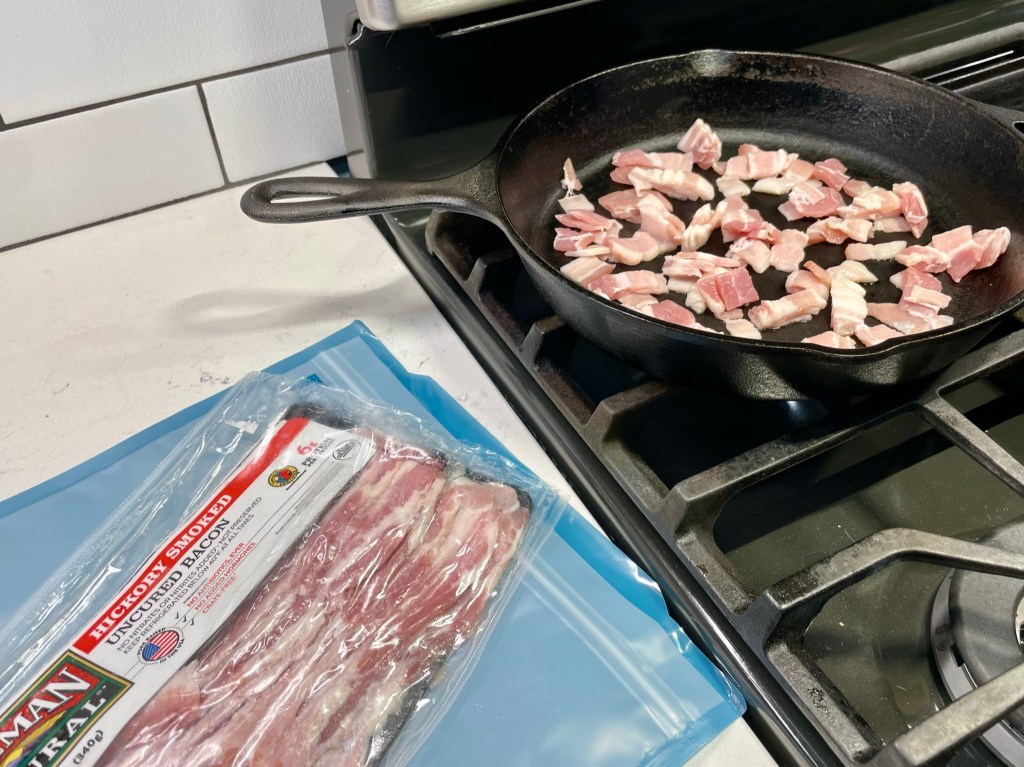
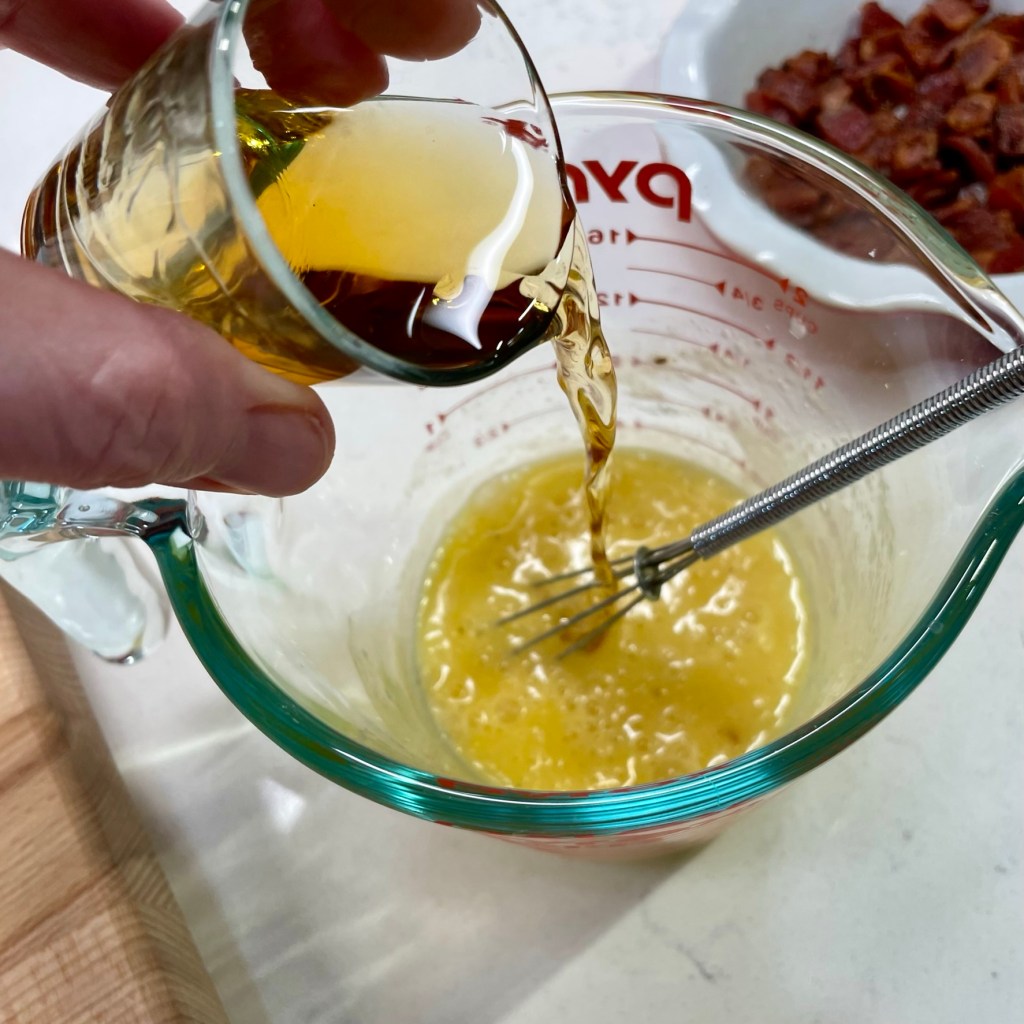
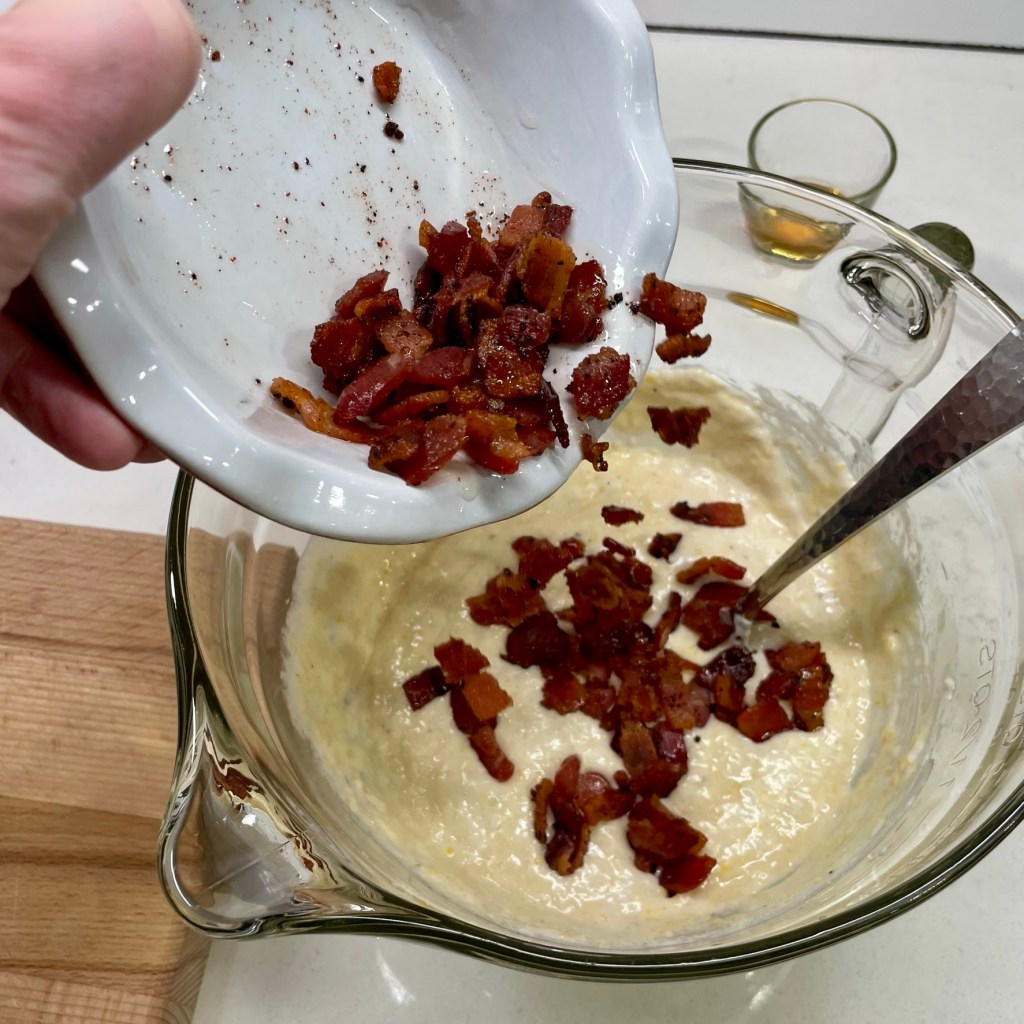
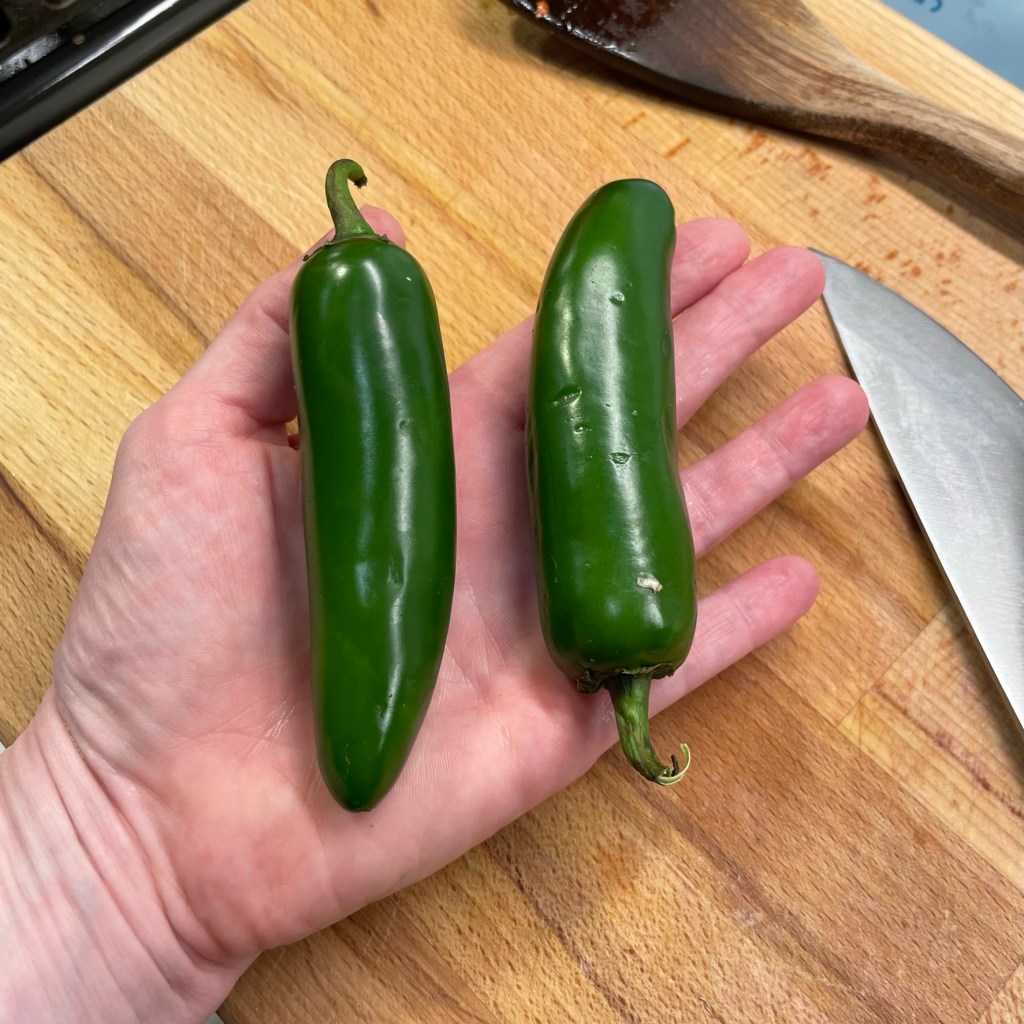
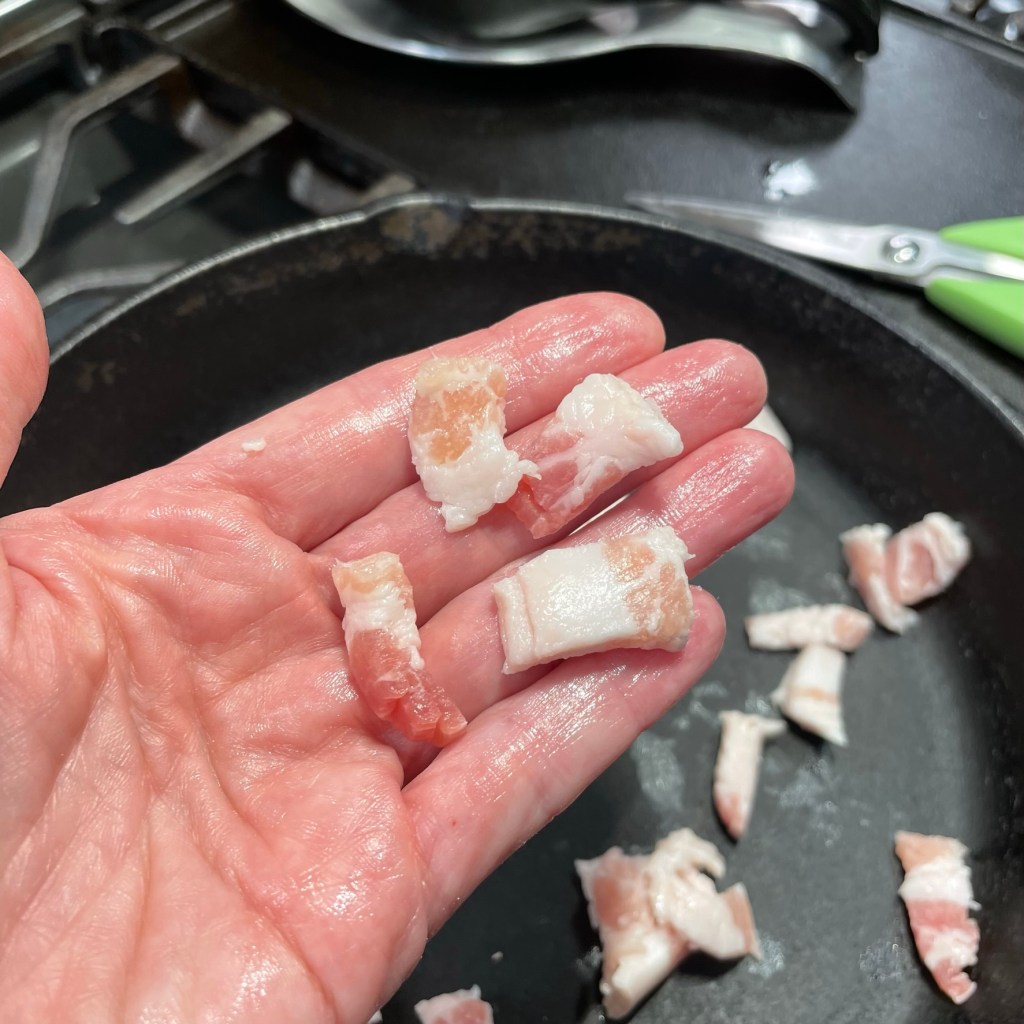
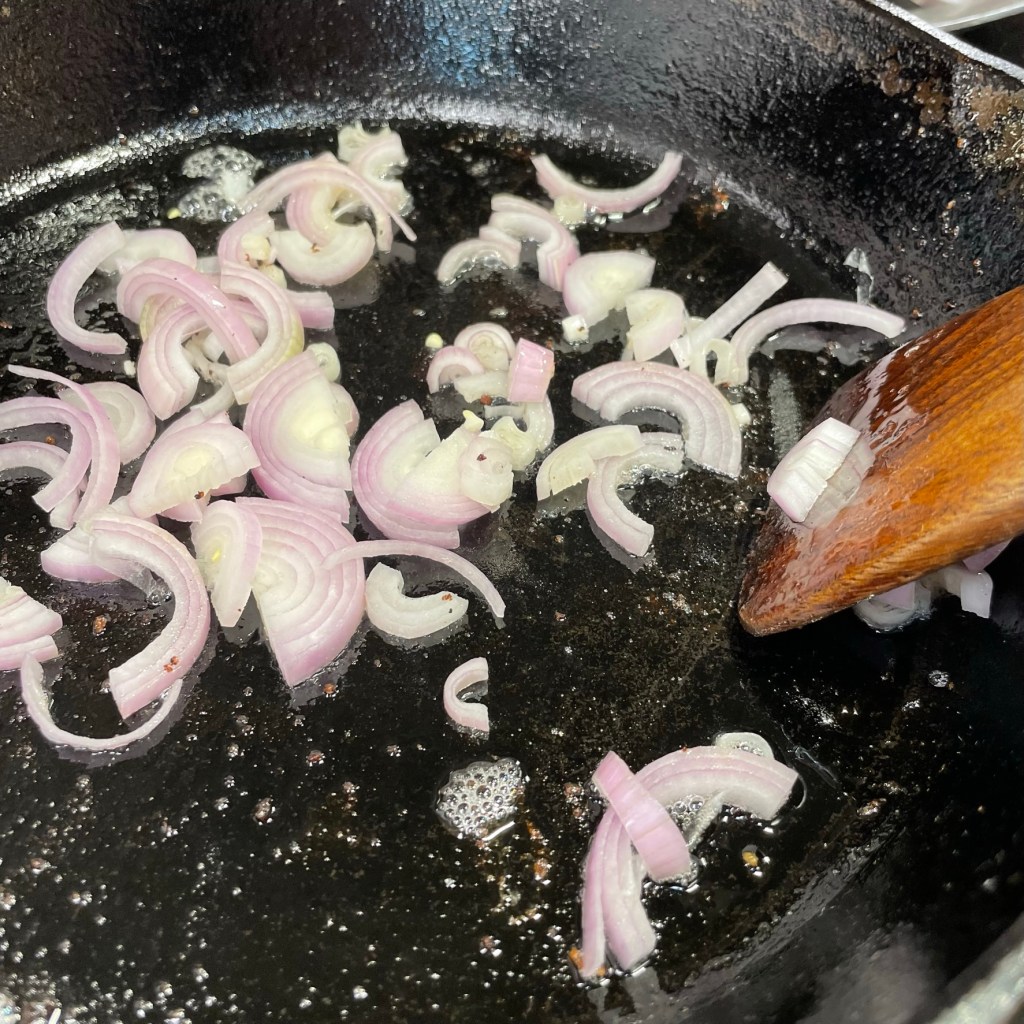
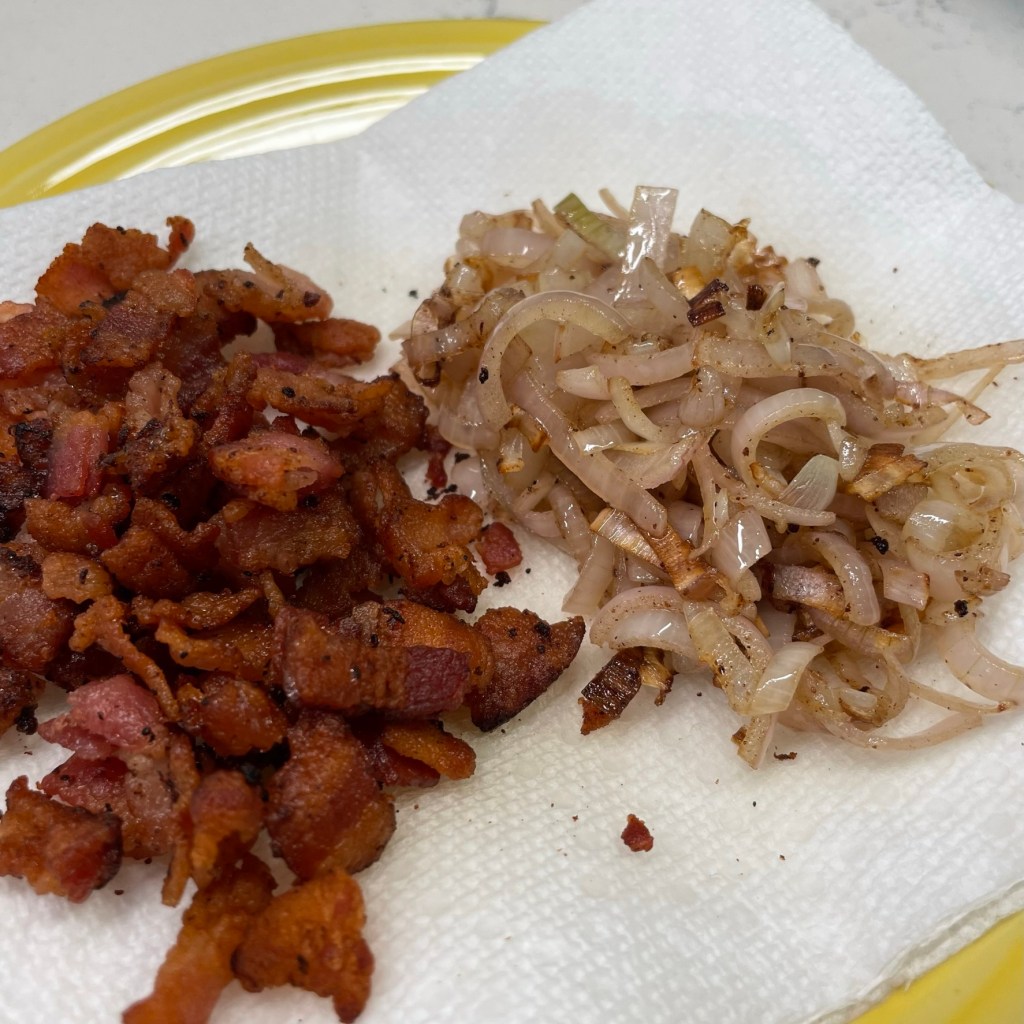
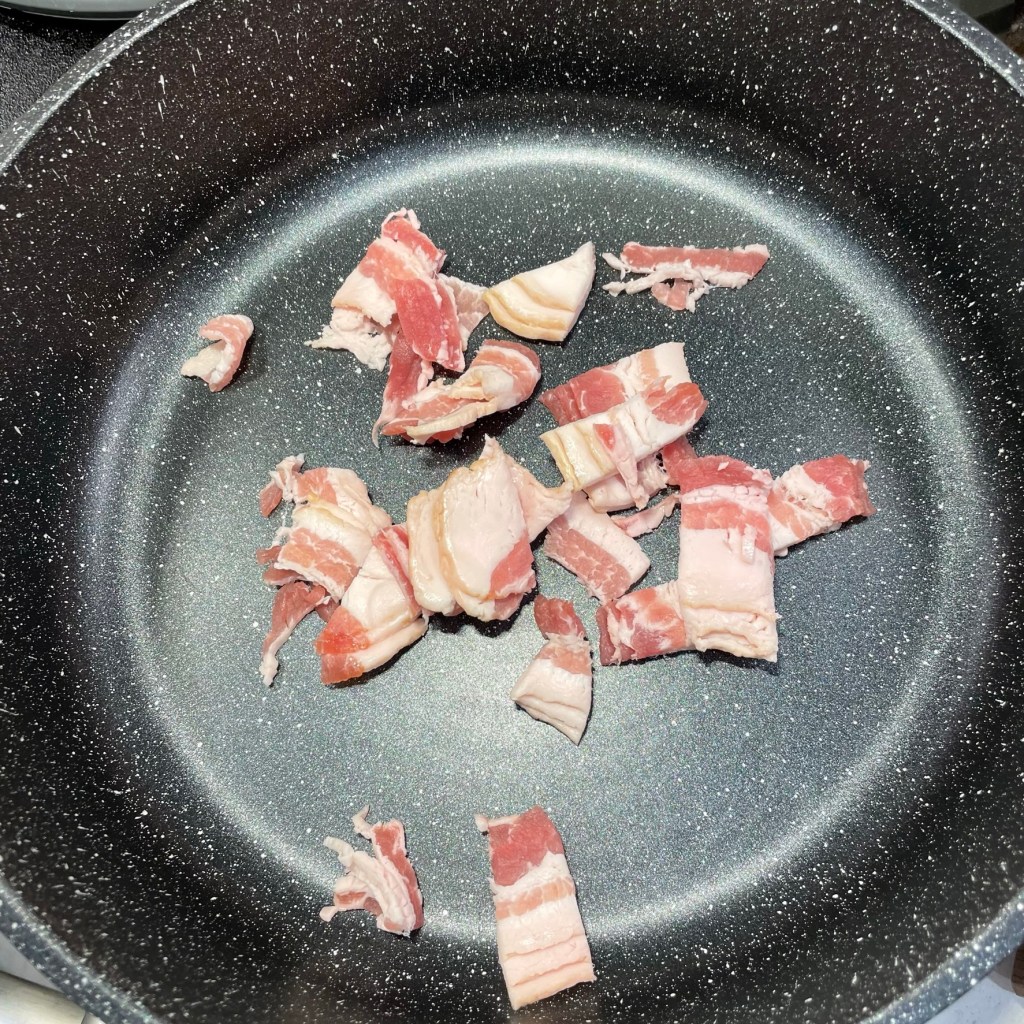
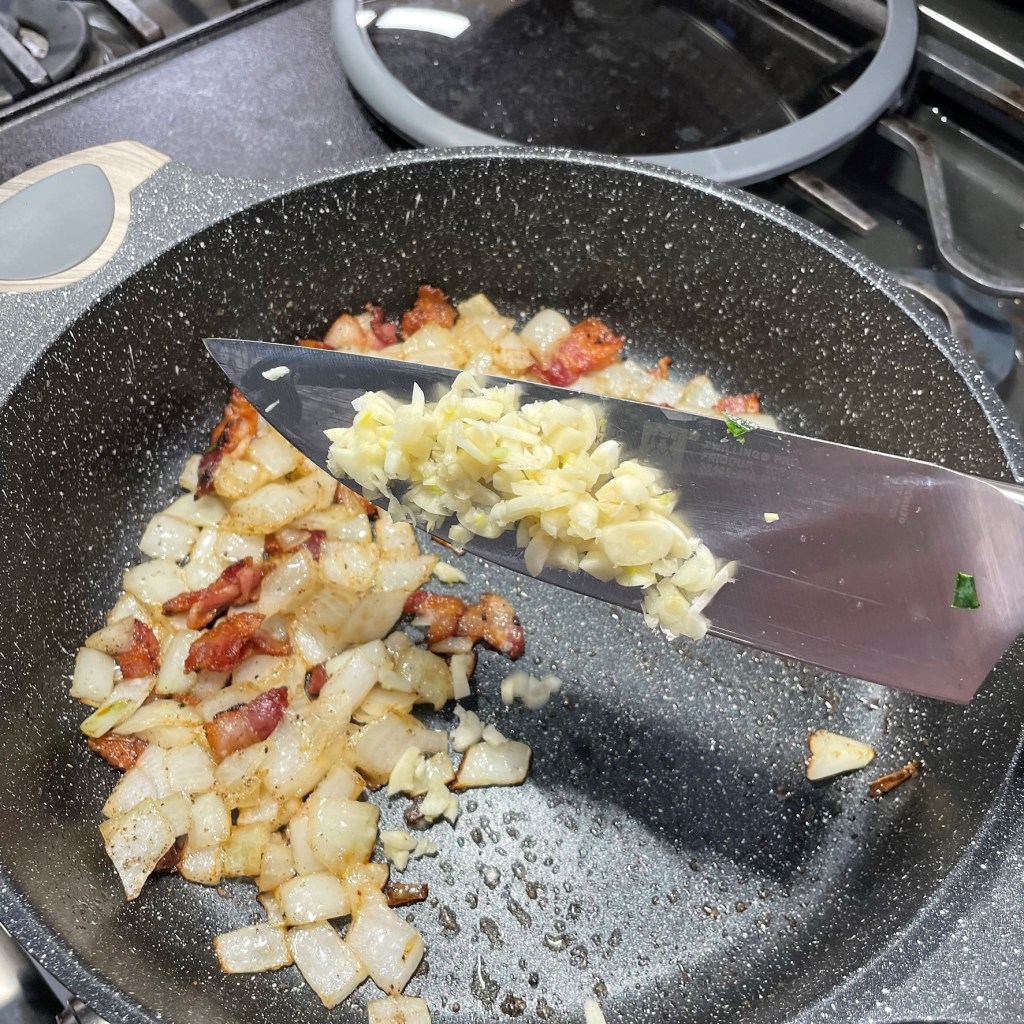
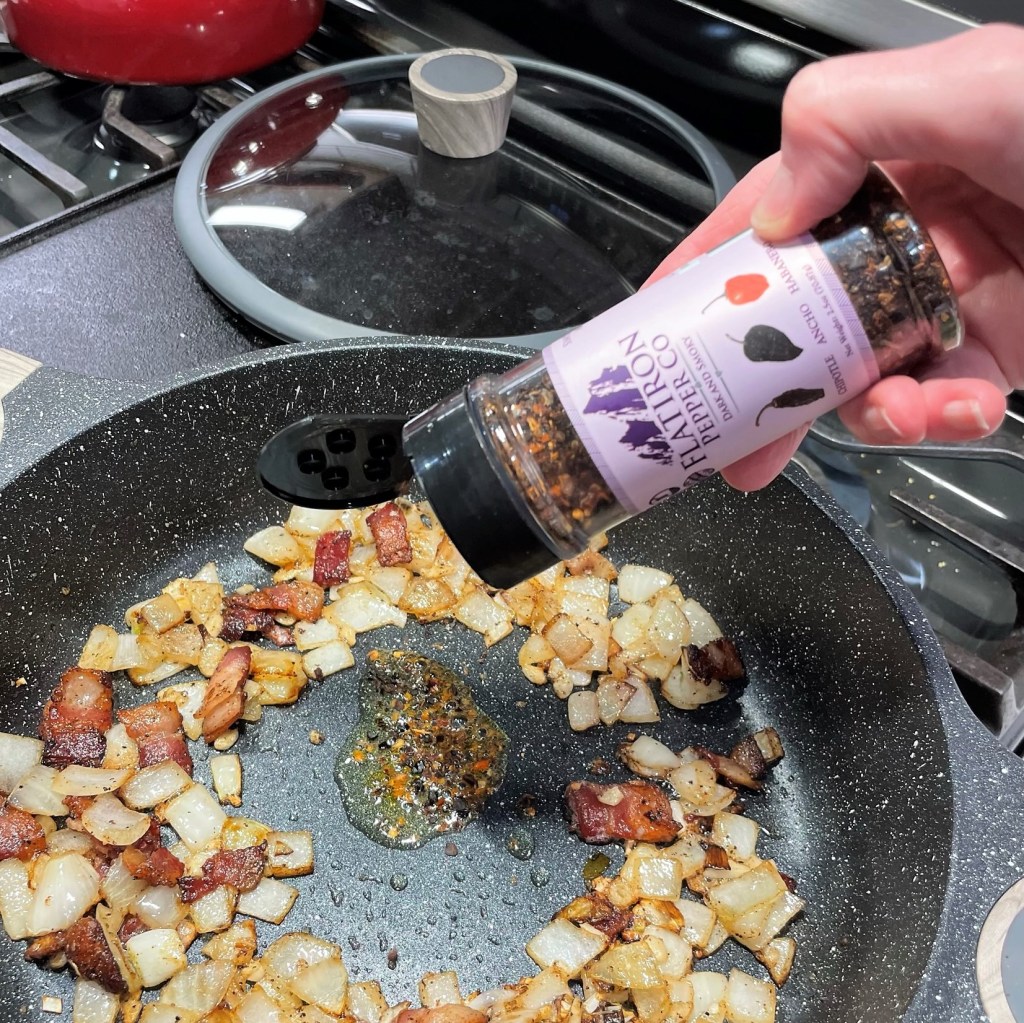
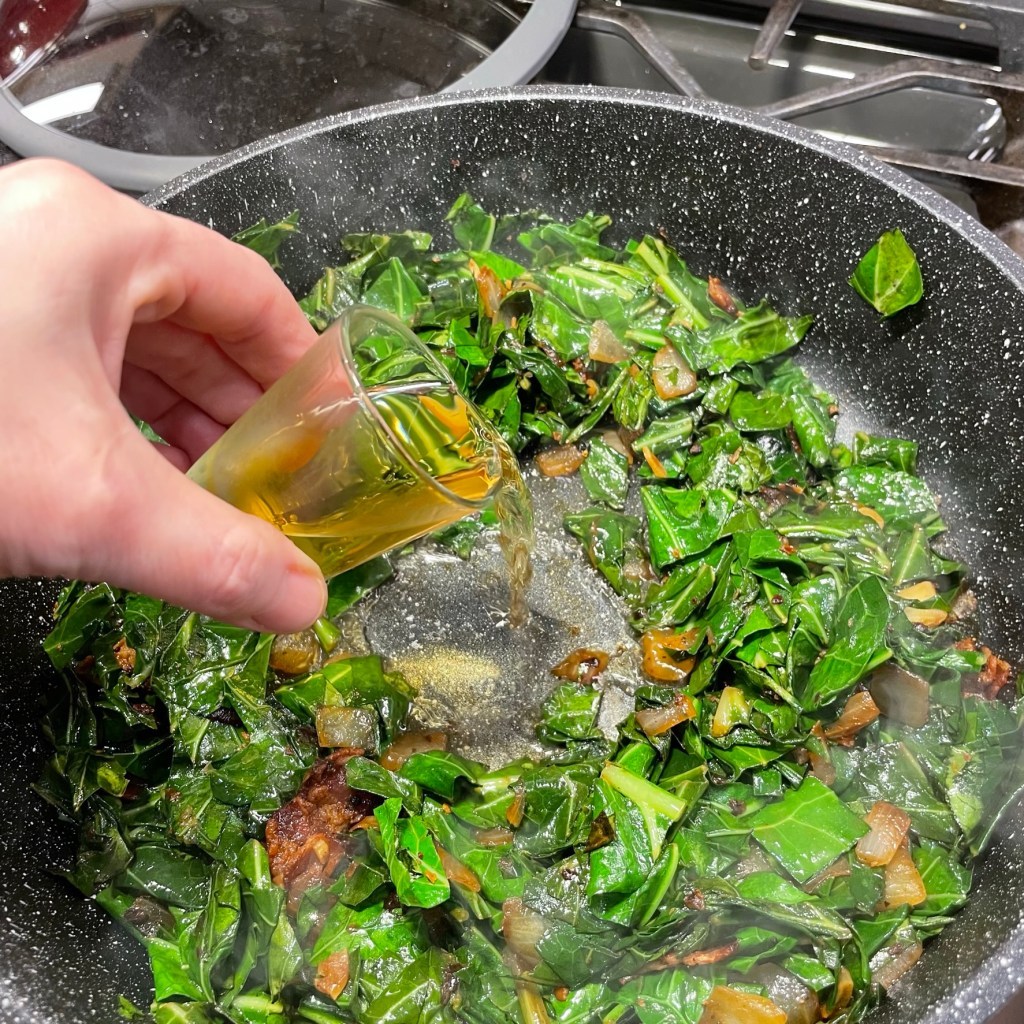
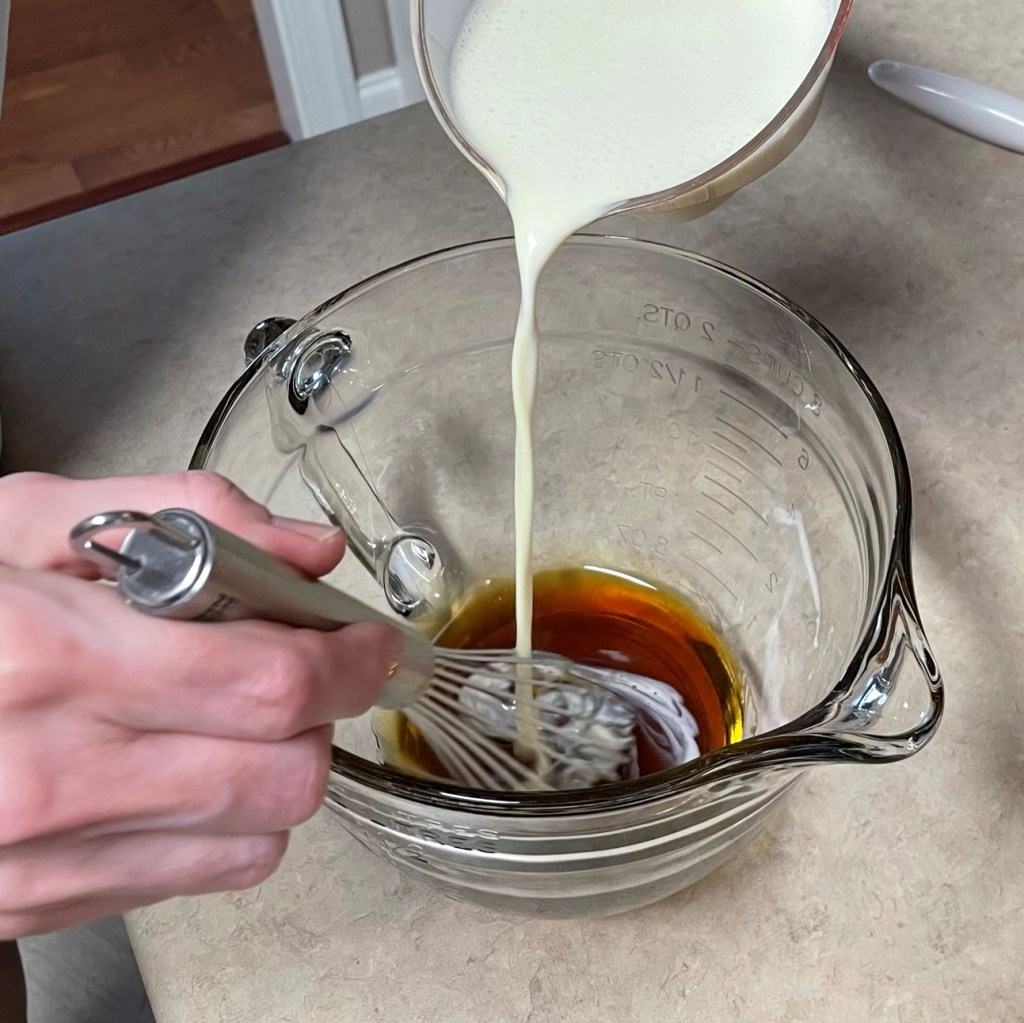
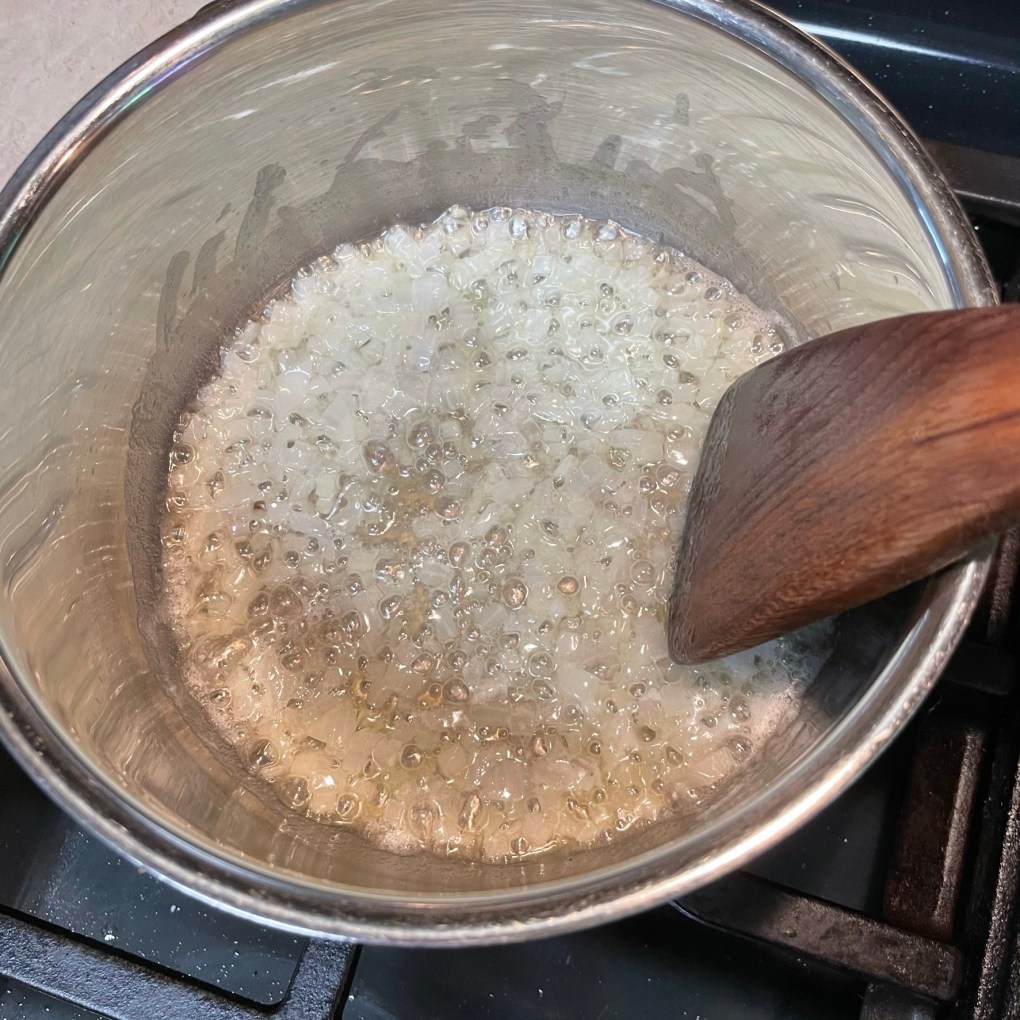
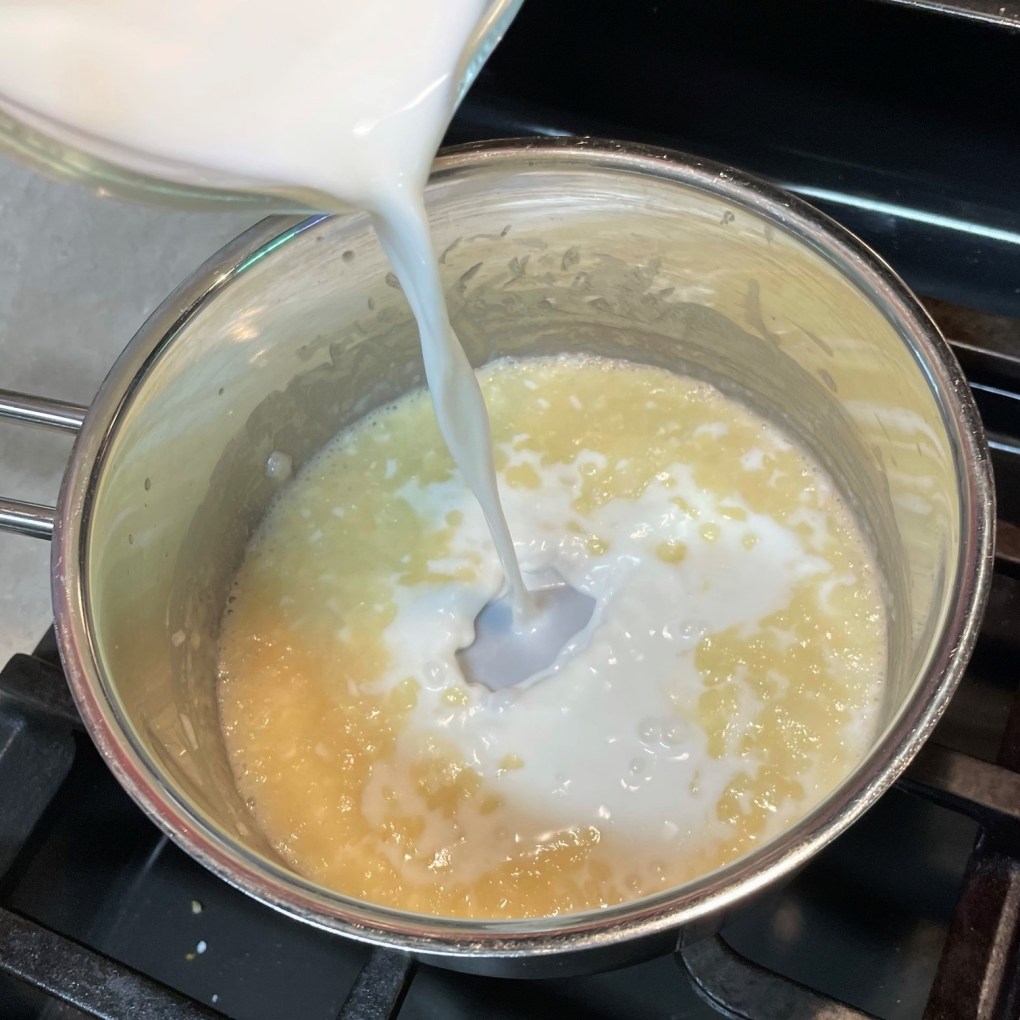
After crisping up some small cubes of really good bacon, I cooked panko crumbs in the grease (they get sprinkled on the pie after baking), and added finely minced red bell pepper, shallots and garlic and cooked them together until the bacon was crispy and the veggies were softened. Next came the clams, and I tossed the lot of them right into the pot with the bacon-veggie mixture and poured in about two ounces (a quarter cup) of dry vermouth— the same thing I use in my martinis. If you wish, you could use pinot grigio or any other dry white wine you like. I just happen to have vermouth open more often than wine, and I love the savory edge it adds when I cook with it.


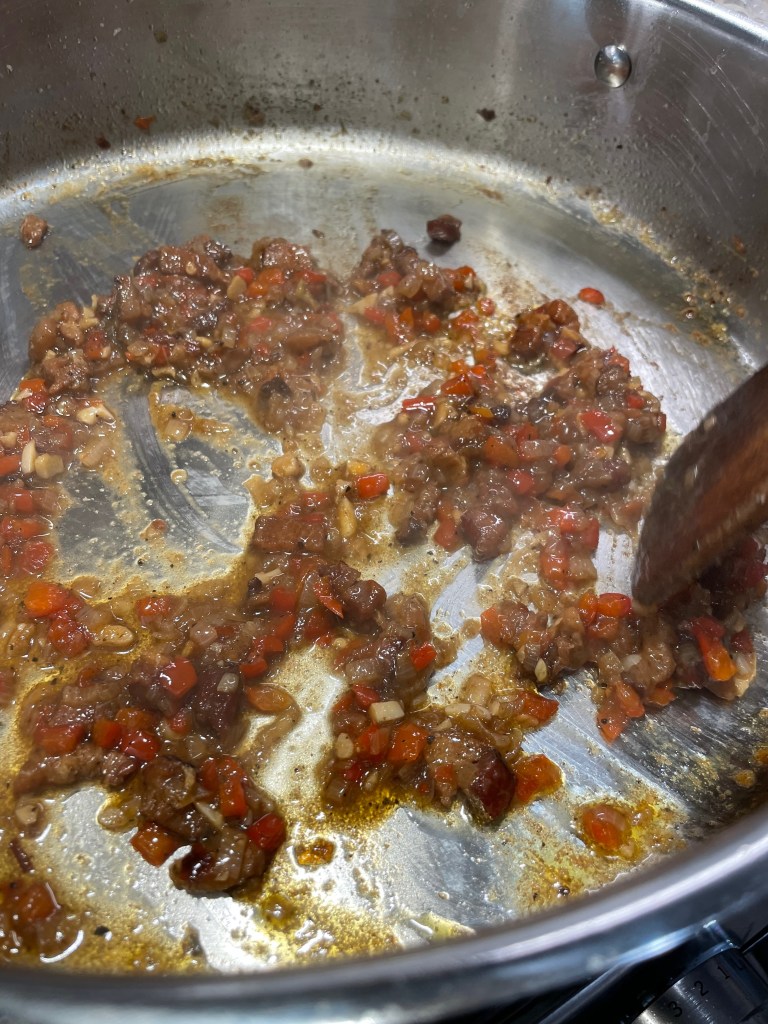
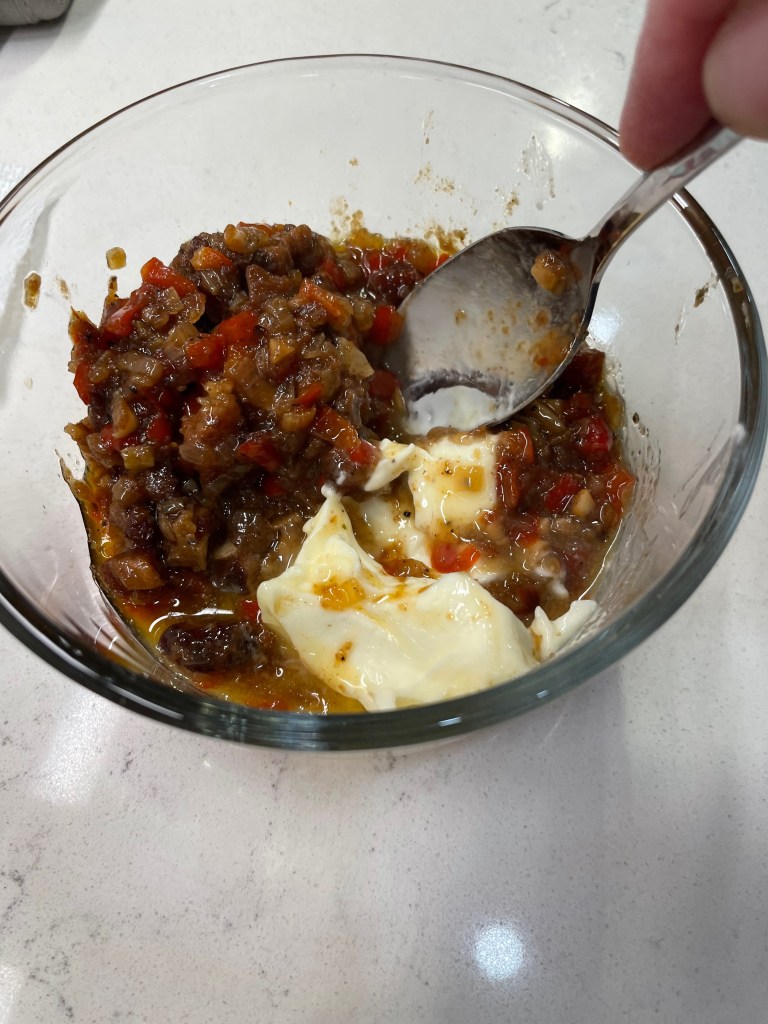
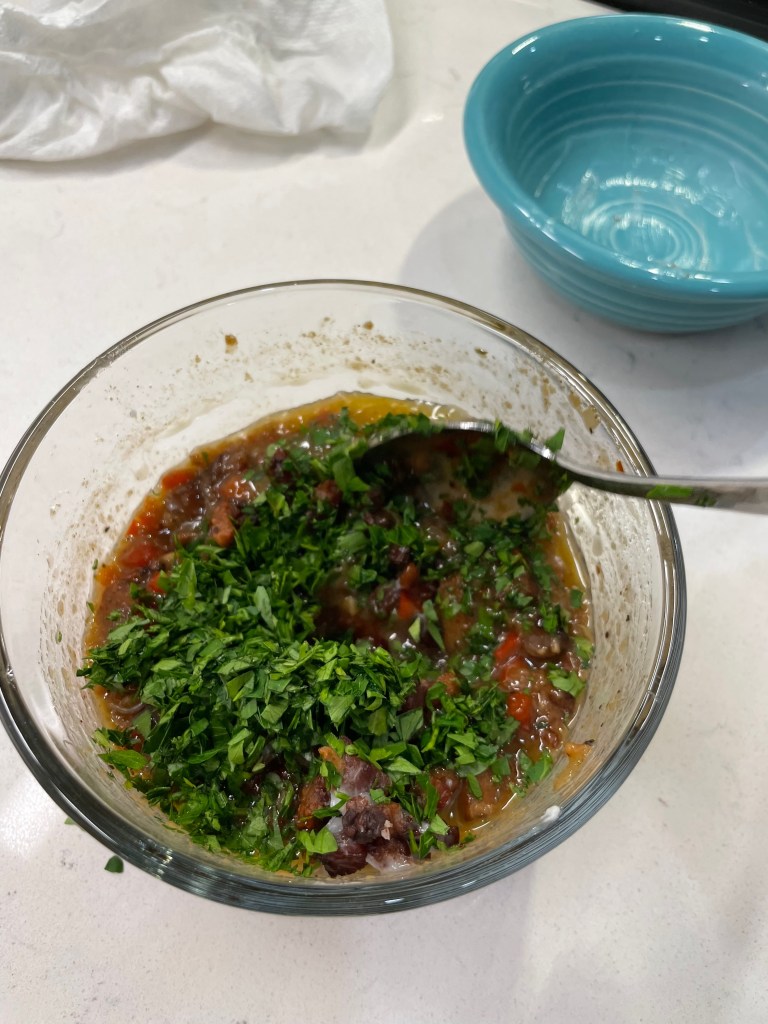
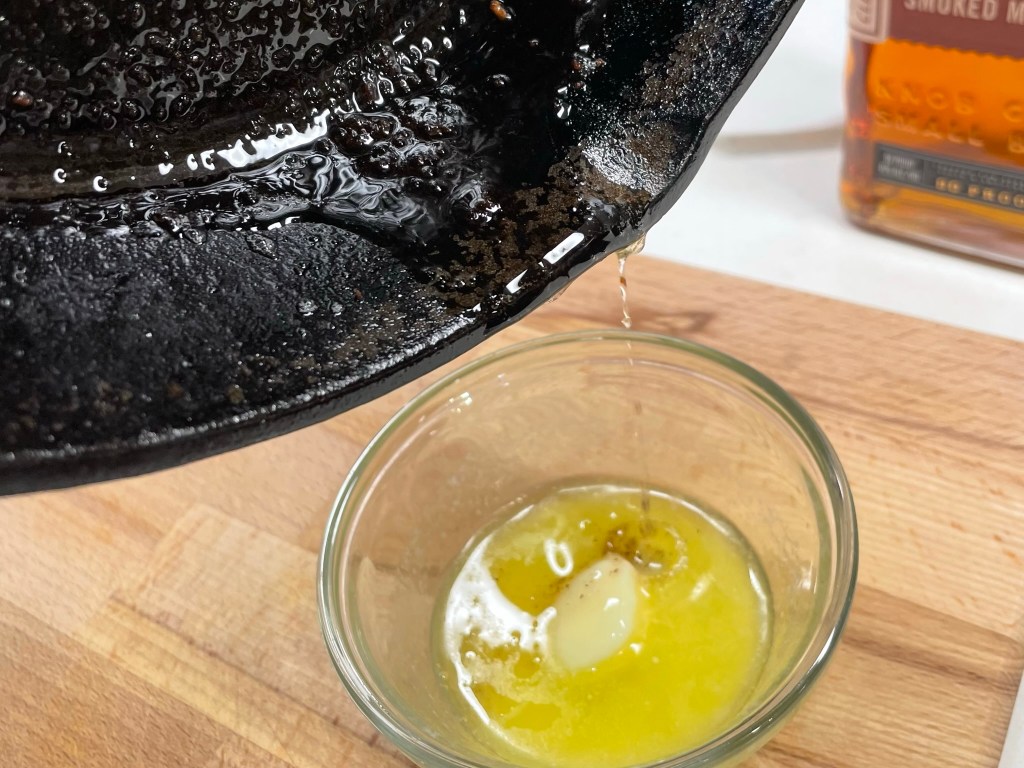
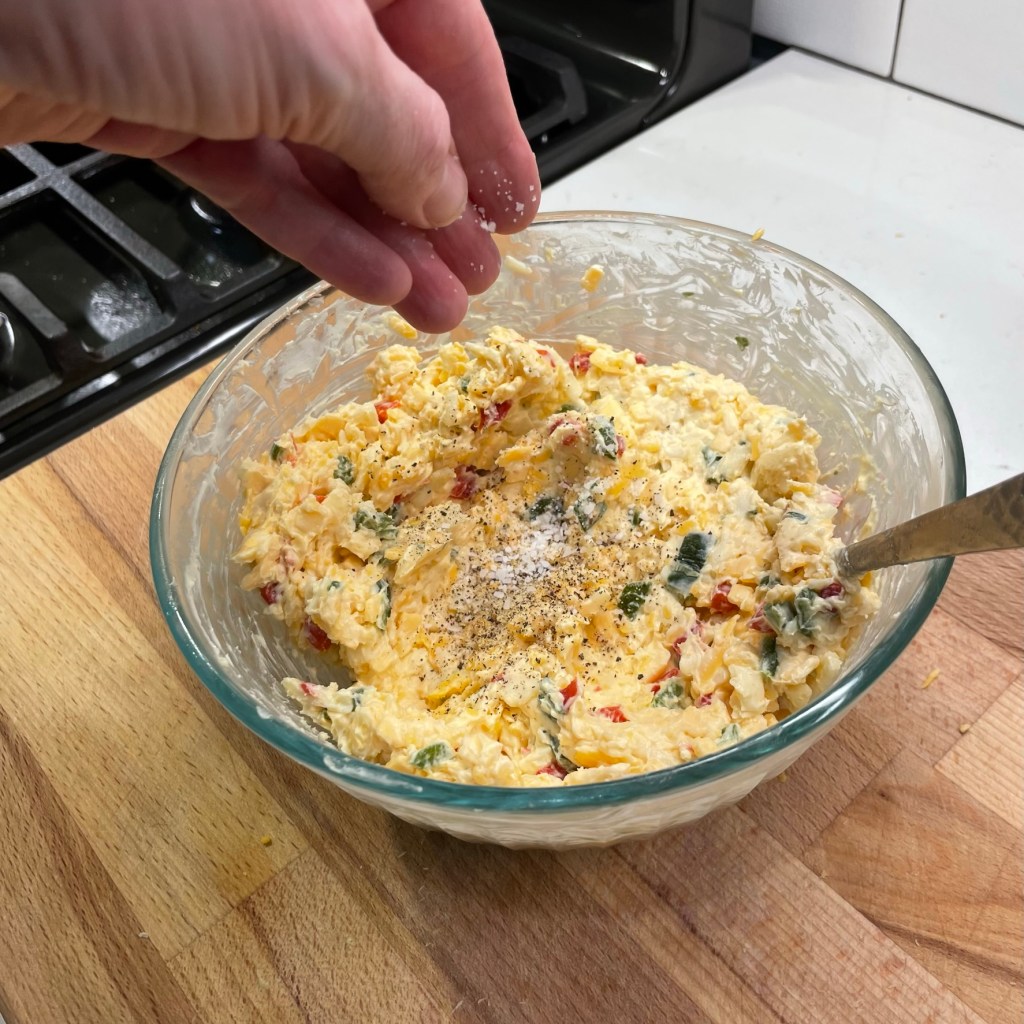
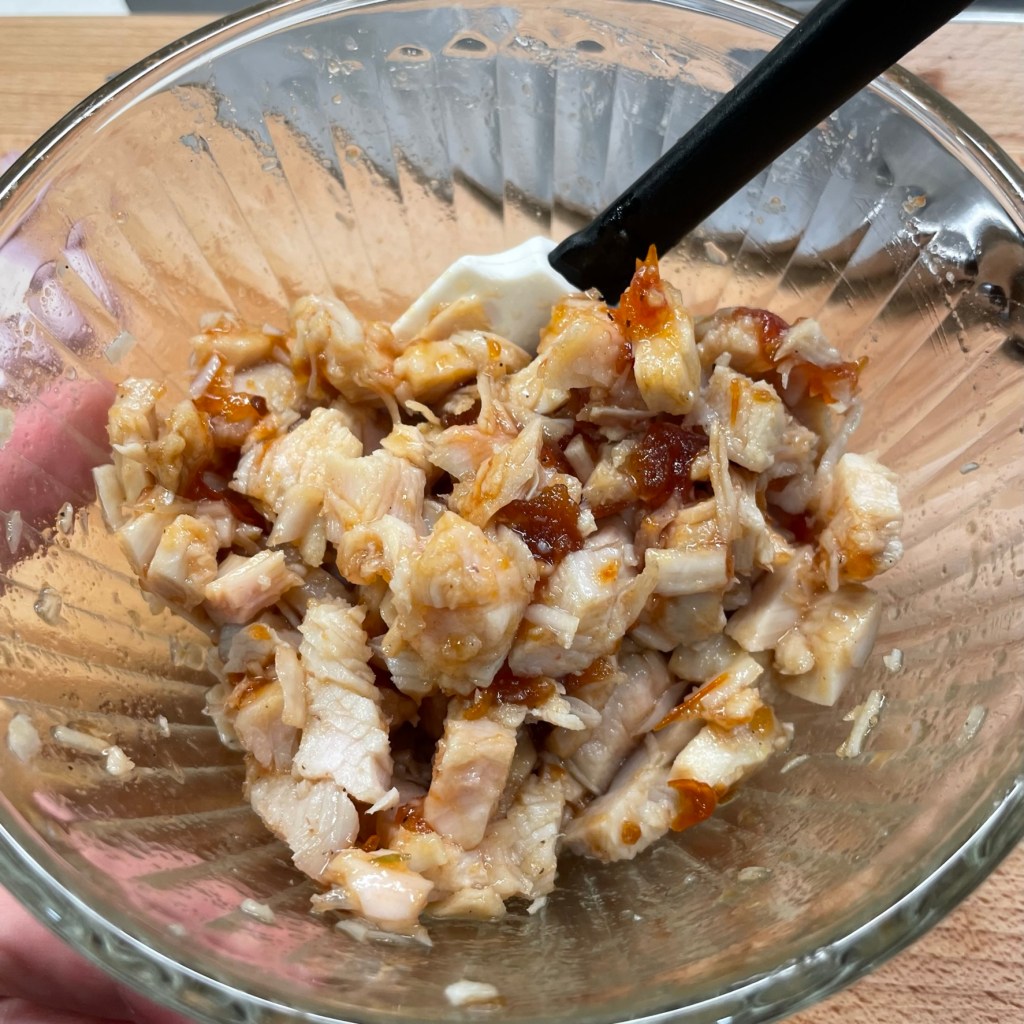
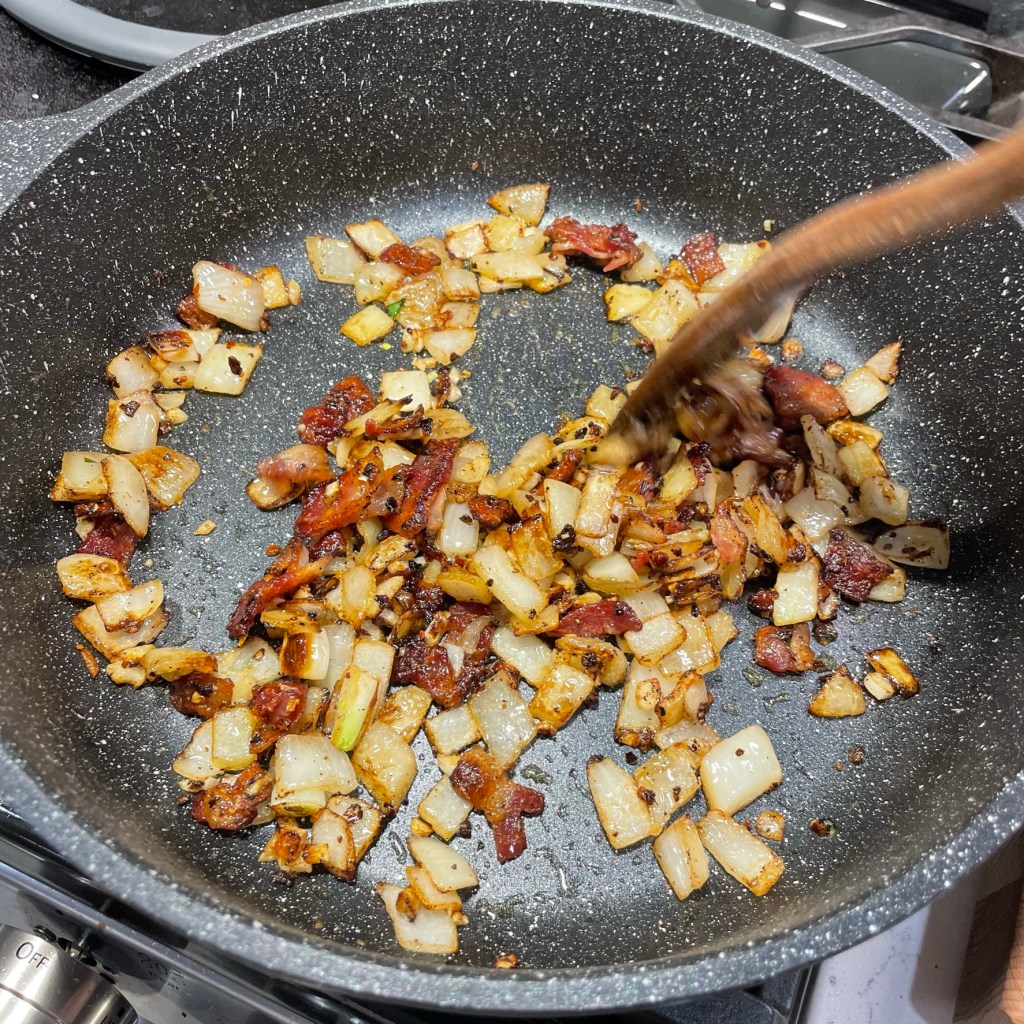
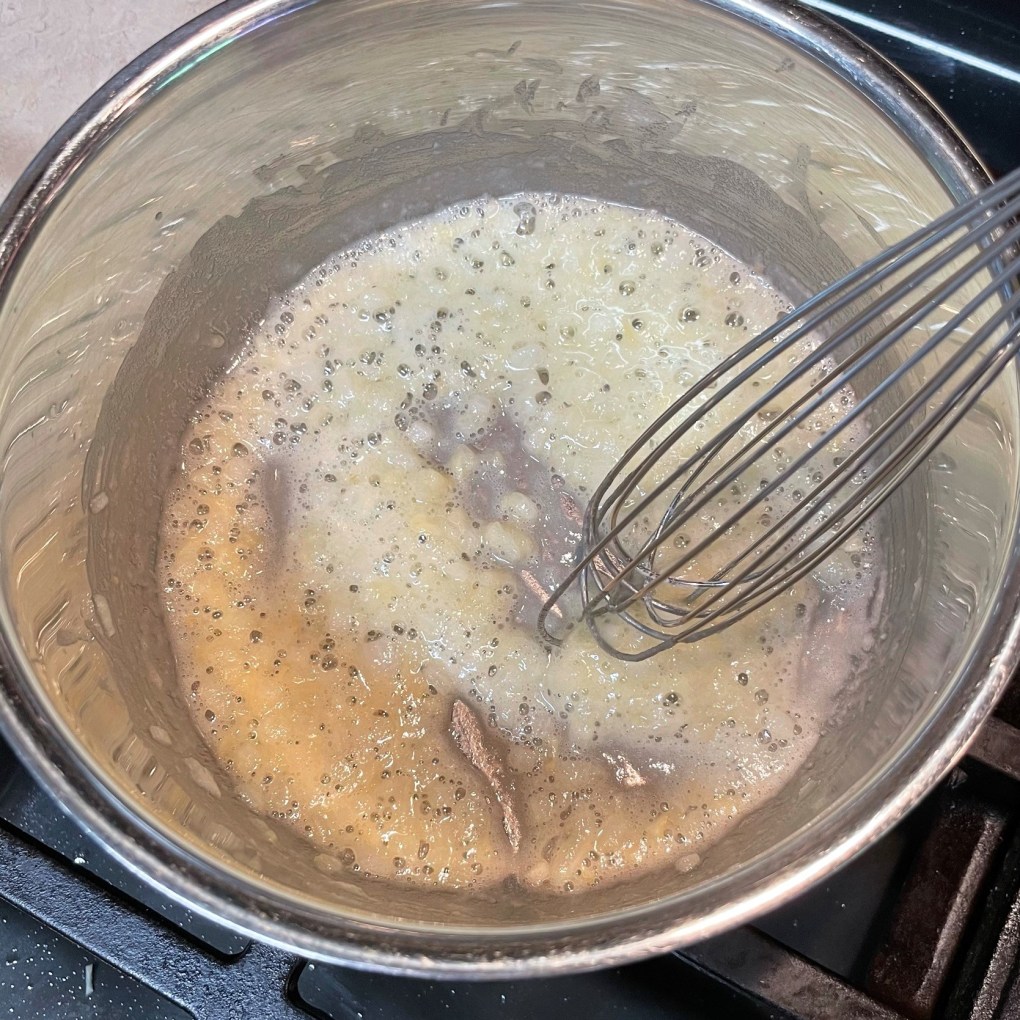
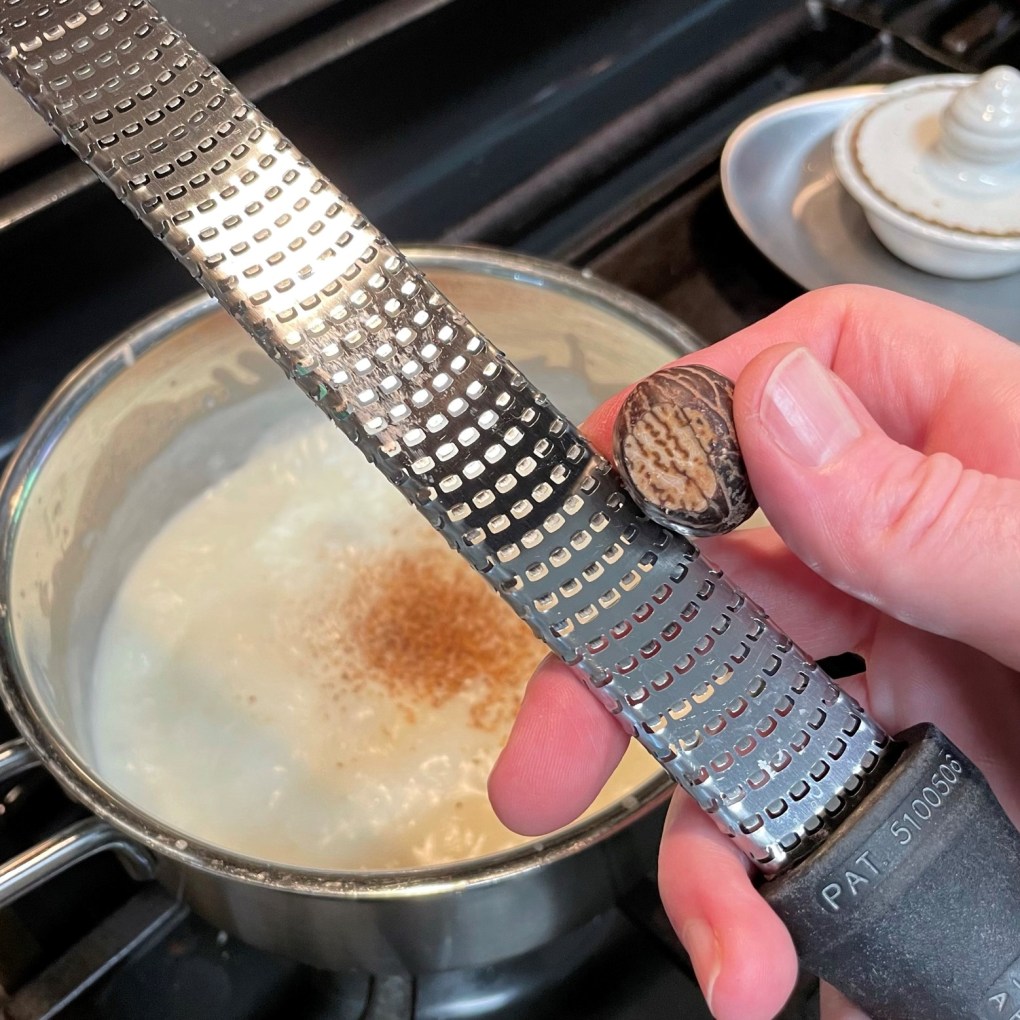
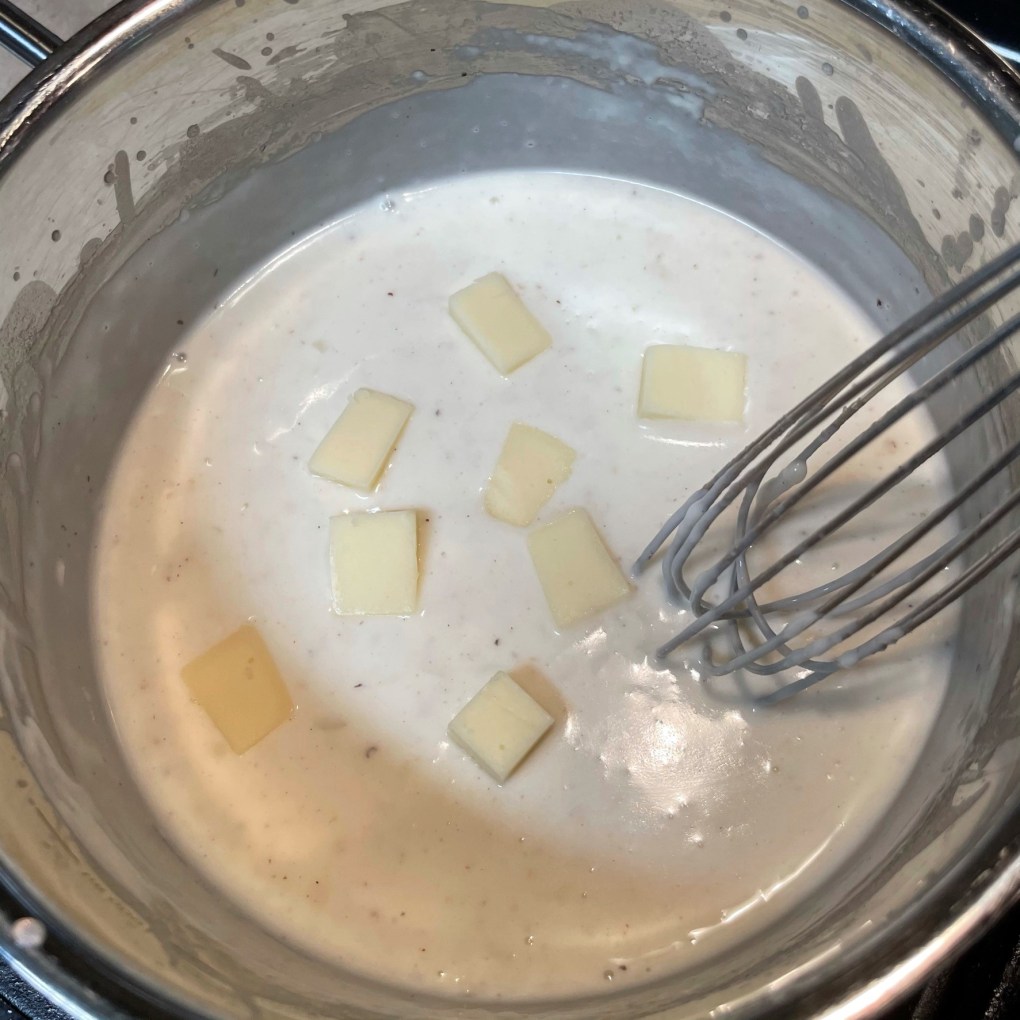
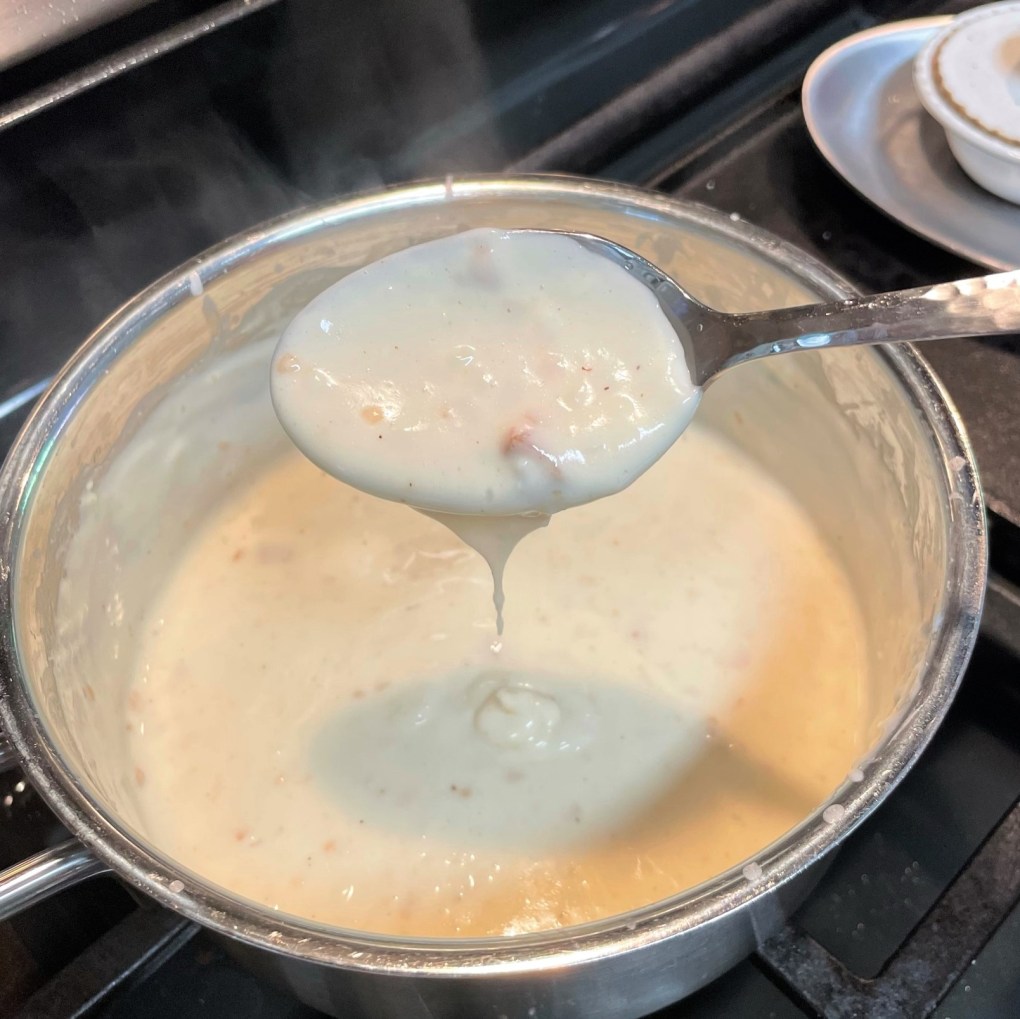
After just a couple minutes of steaming, the clams open up and spill out that glorious, briny liquid. Use tongs to lift them up, and empty that liquid right into the pan. As it reduces with the rest of the pan ingredients, it melds into an intensely flavored mixture that will turn my clams— and my pizza— into something really special. When this mixture cools, I stir in a bit of softened butter and fresh parsley, and chill it until it’s time to build the pizza. 

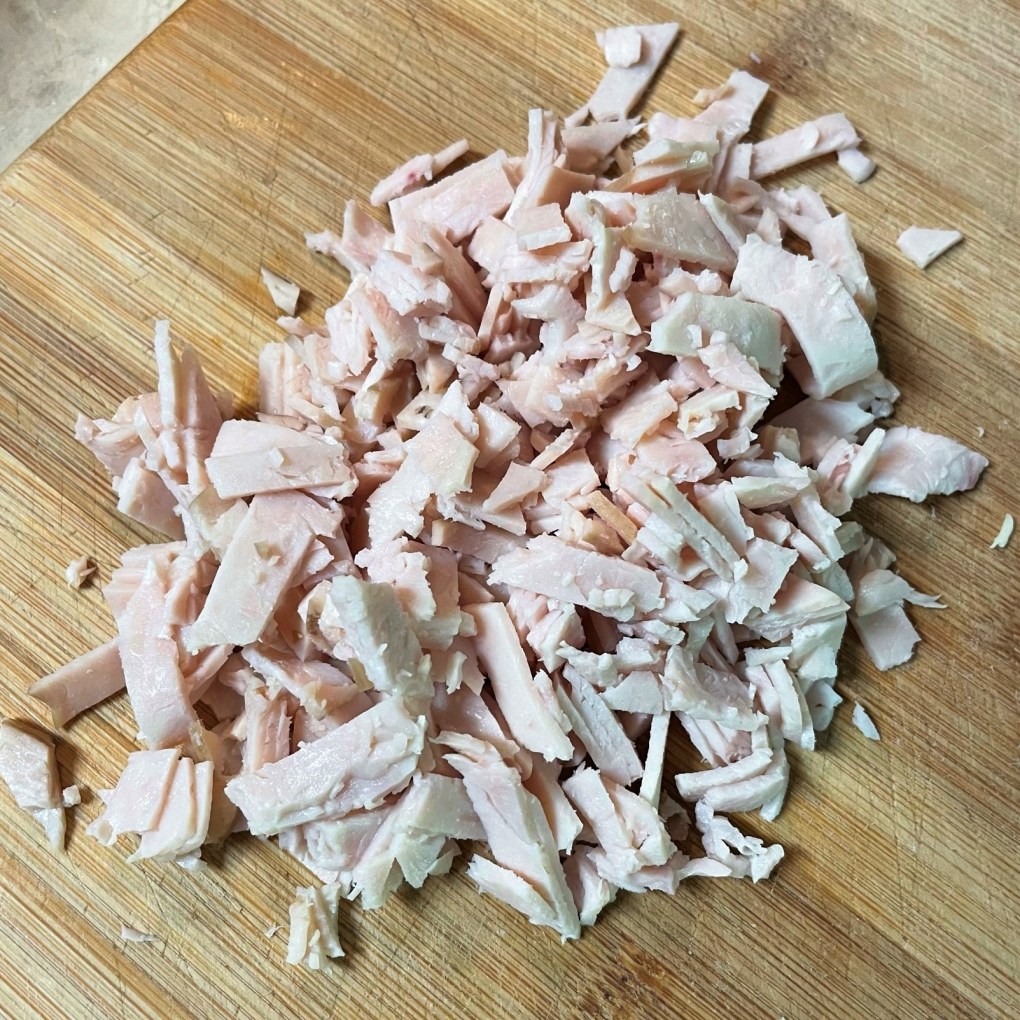
All of the above can be done ahead, but for sure, you want to take care of the clams so that they remain fresh and tasty, so I wouldn’t recommend working ahead more than one day. Get the clam meats removed from their shells and protect them with layers of damp paper towel or parchment paper so that they don’t dry out. 

What if you don’t eat bacon?

Substitutions are always possible! The main assets of bacon are the smokiness and the deep umami flavor, so a good understudy would be able to do both, but there’s no harm in making up those flavors with more than one addition. I brainstormed about this with my pal, Dorothy, from New Vintage Kitchen because she is mainly pescatarian and she knows all the tricks. We came up with a short list of suitable step-ins, including soy bacon or turkey bacon (both of which I’m sure have the smoke and umami), smoked paprika (never a bad idea in anything, as far as I’m concerned), or a dash of liquid smoke in the veggies, and some chopped up crisp mushrooms, which you can likely find in the snacks section of a larger supermarket. And I thought of one more, just in the last 10
seconds— one so obvious, I’m embarrassed that I didn’t think of it immediately. Anchovies! Bobby Flay even calls them “bacon of the sea.” They are potent, so use them sparingly, and for sure, include one in the toasted panko crumbs that will finish the pizza.

Time to build the clams casino pizza!

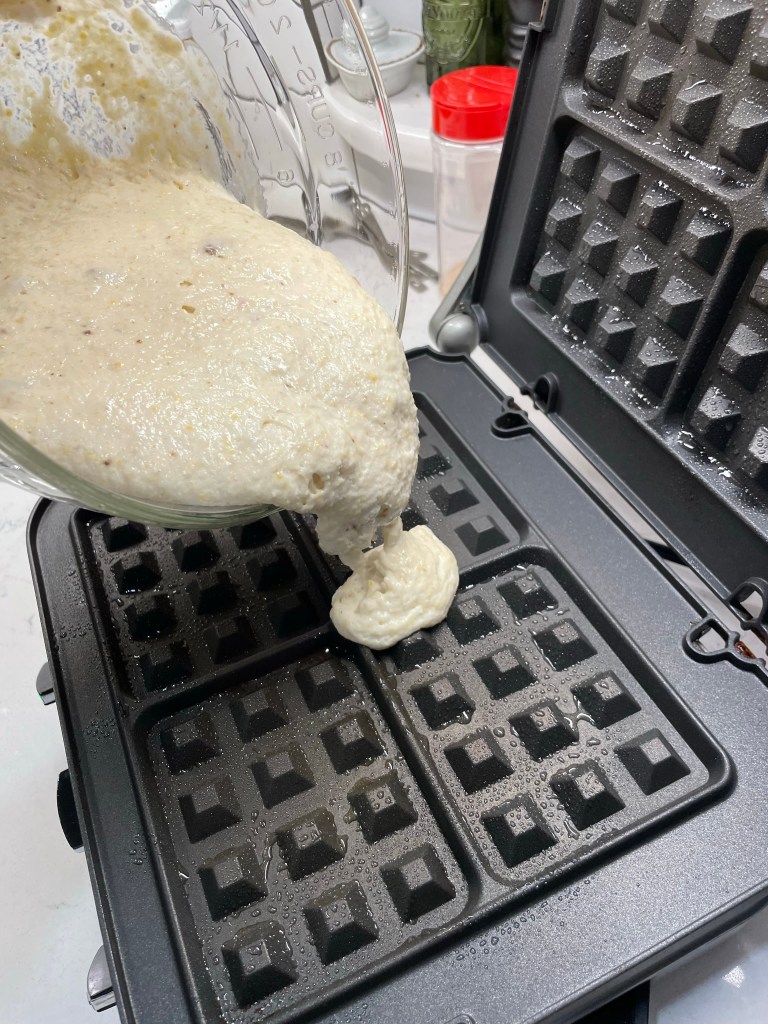
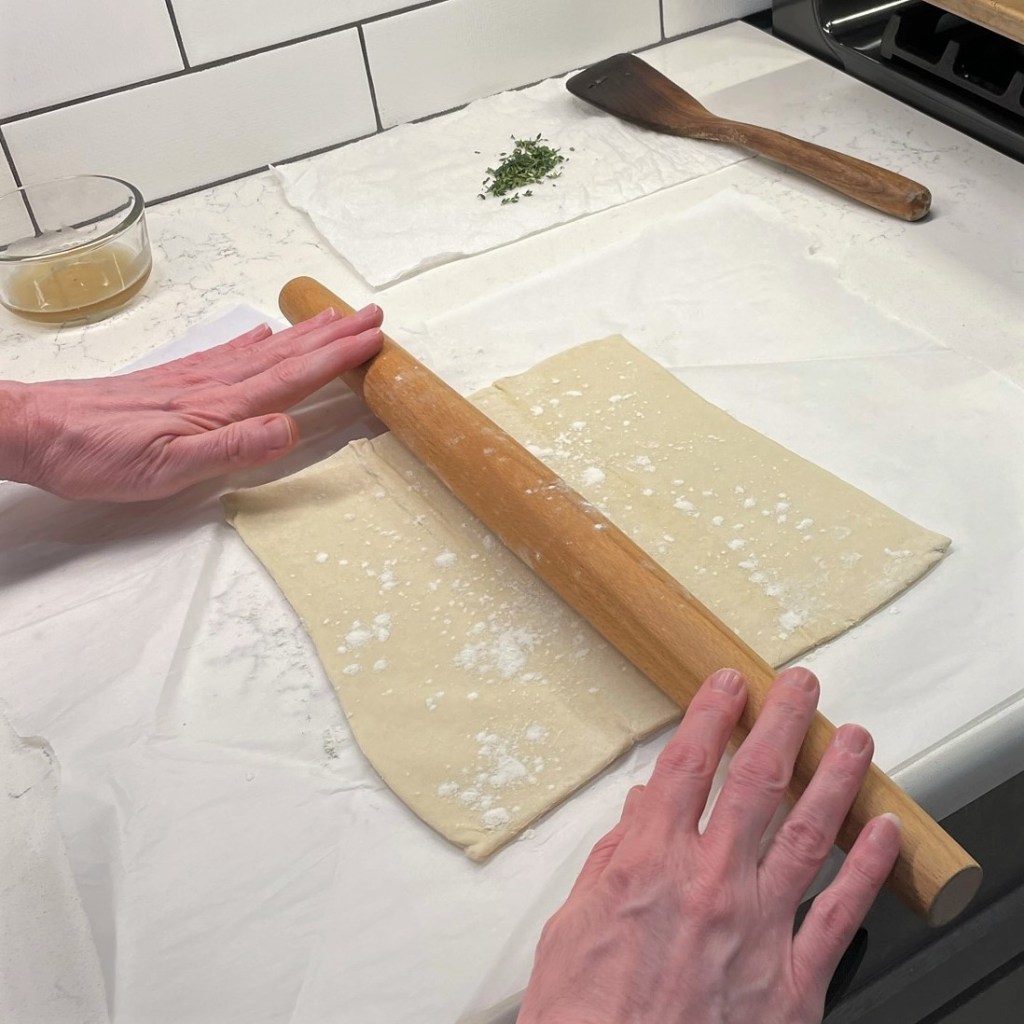
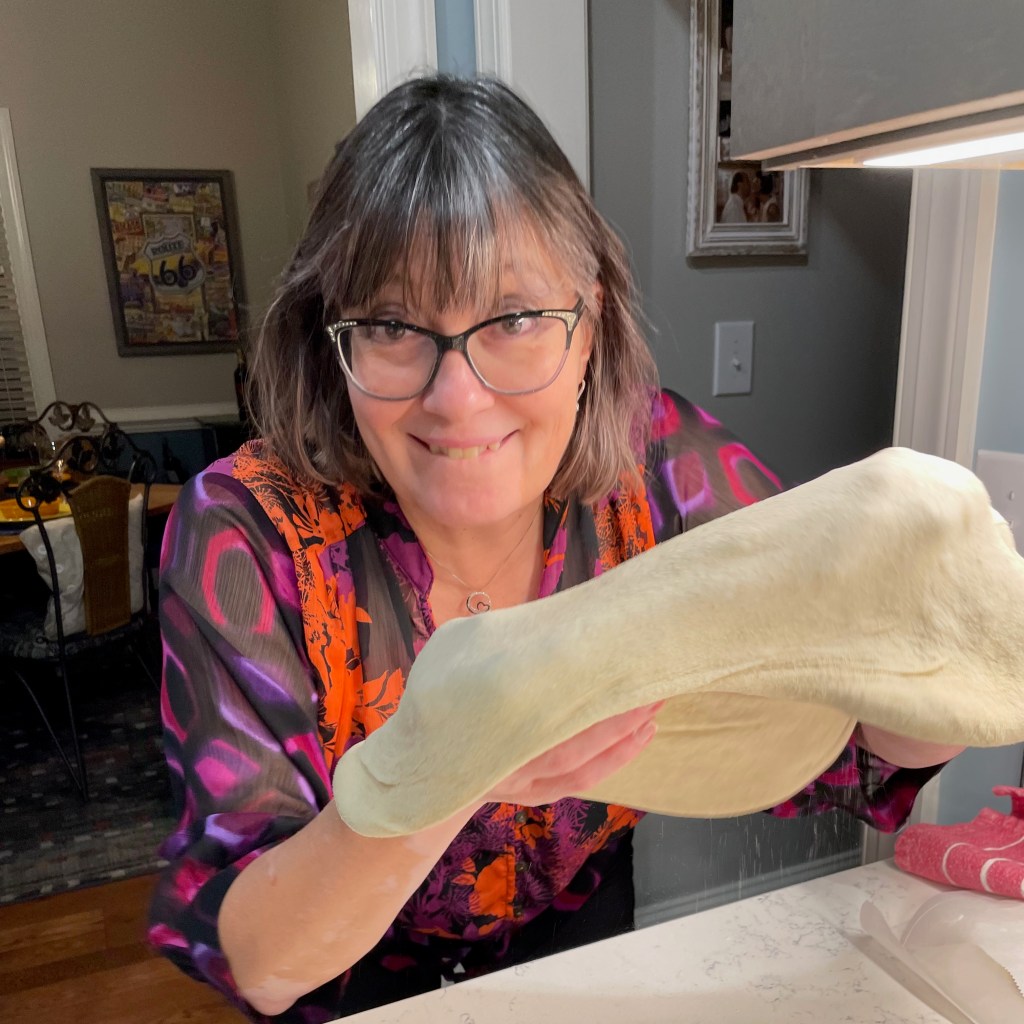
If you’ve followed me for any length of time, you know that I do a long preheat on a baking steel, and all my pizzas all begin with sourdough. The flavor imparted to pizza from the long, cold ferment is amazing, but if you already have a favorite dough recipe, or if you prefer the convenience of buying ready-made dough at your nearby deli or supermarket, have at it. These toppings will work, regardless. If you don’t have a steel, a sturdy baking stone will work, but you may need to dial back the temperature a bit and cook an extra few minutes.


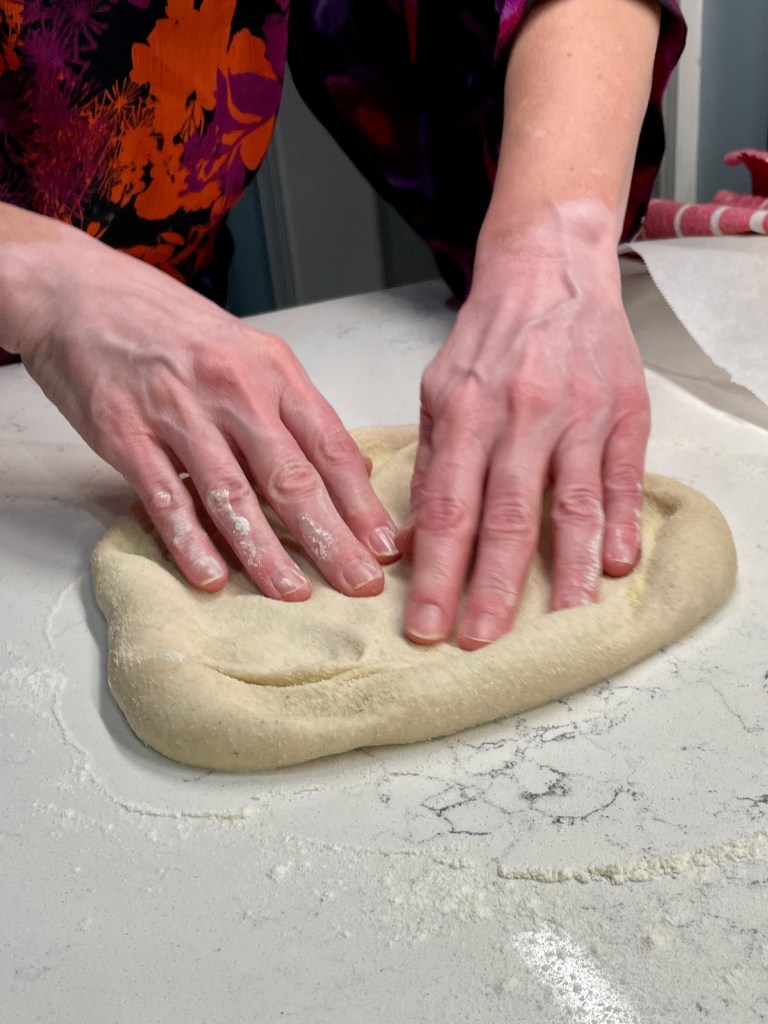
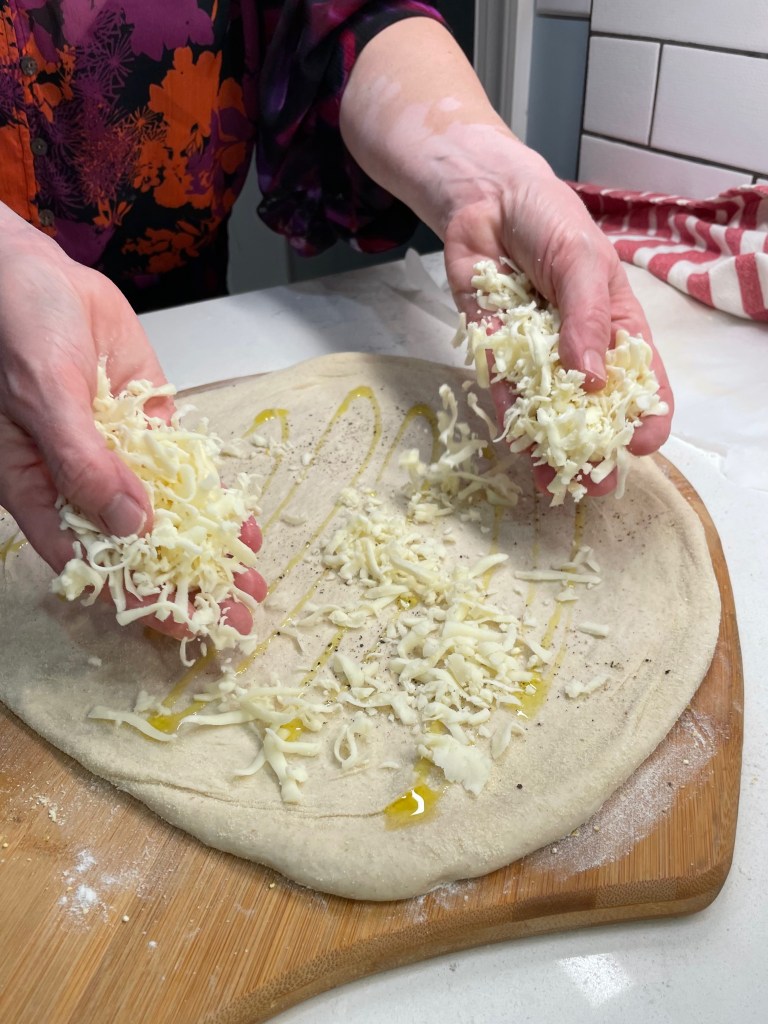
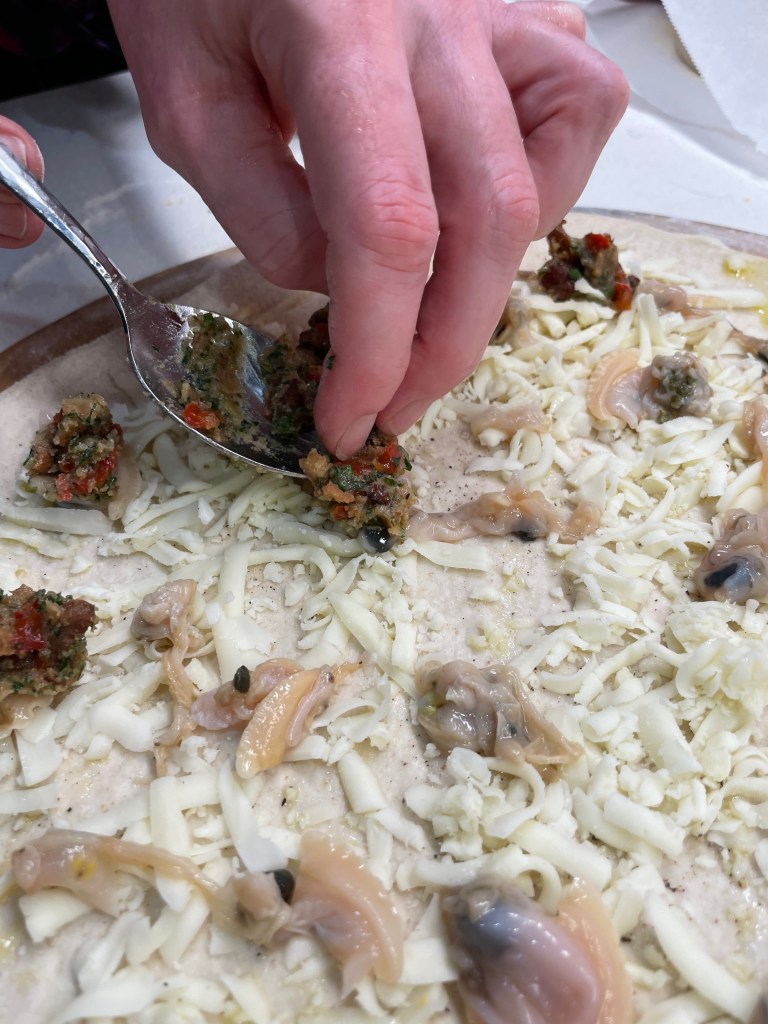
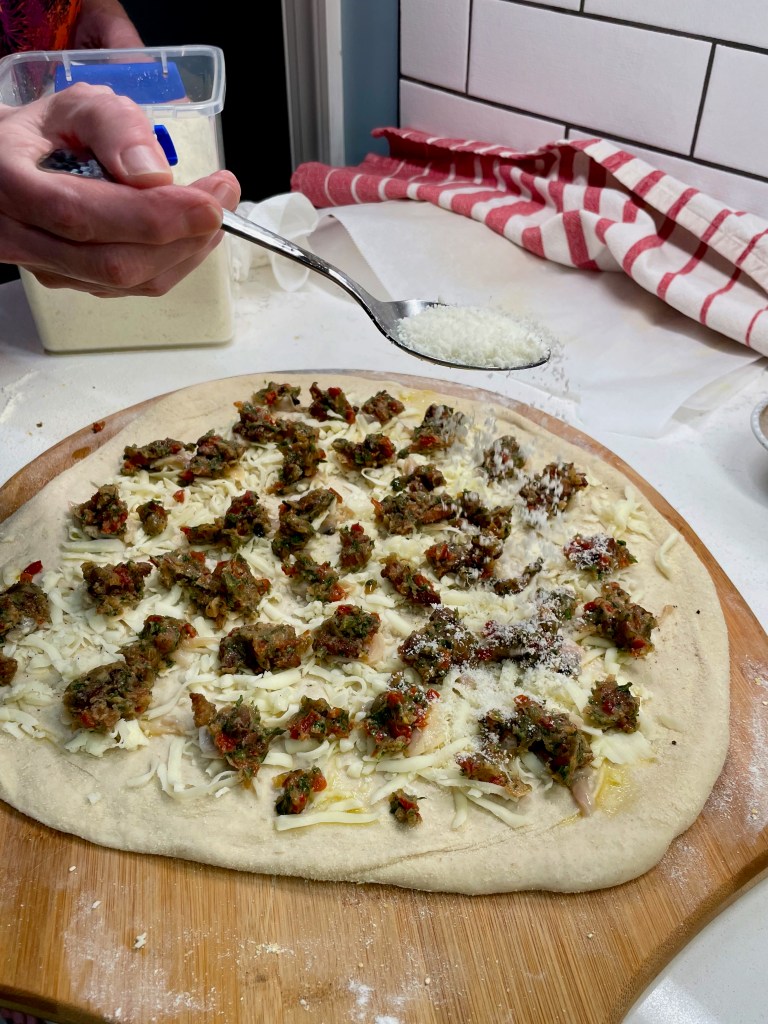
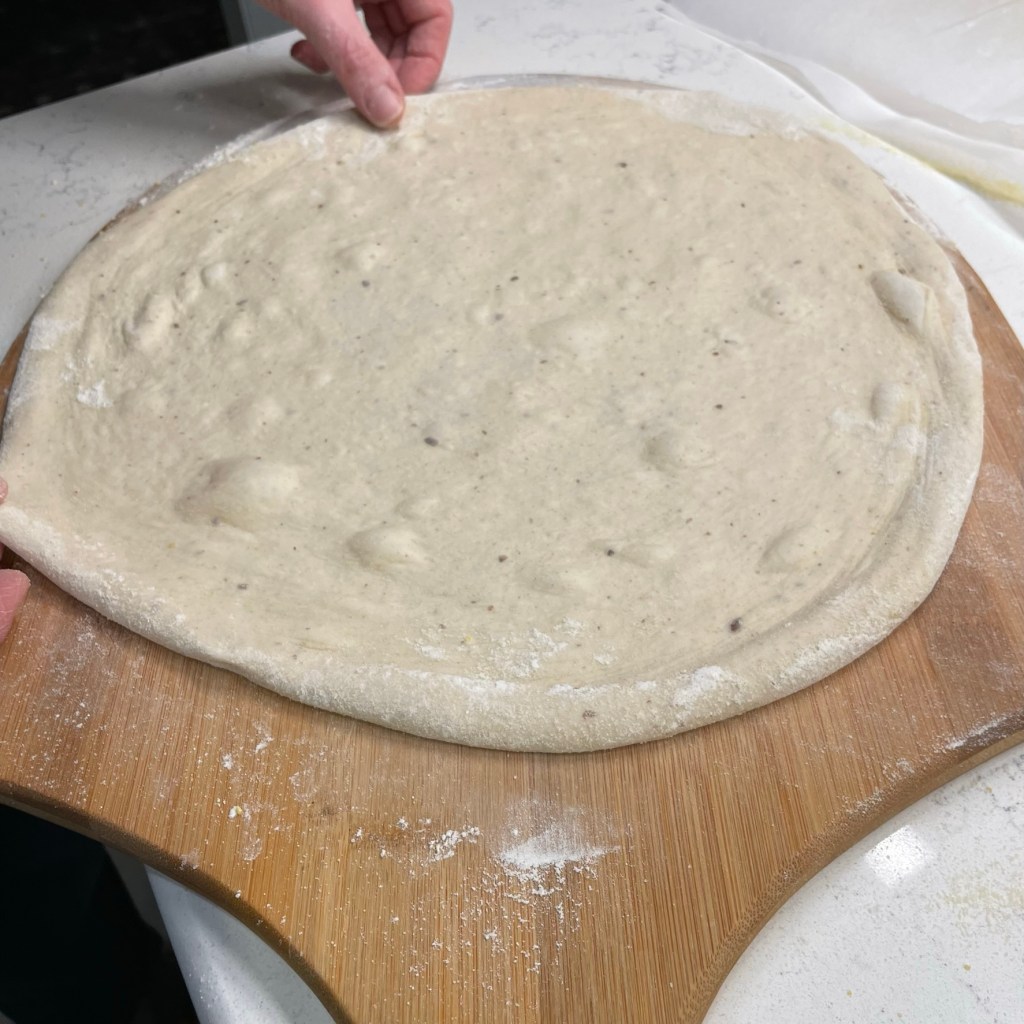
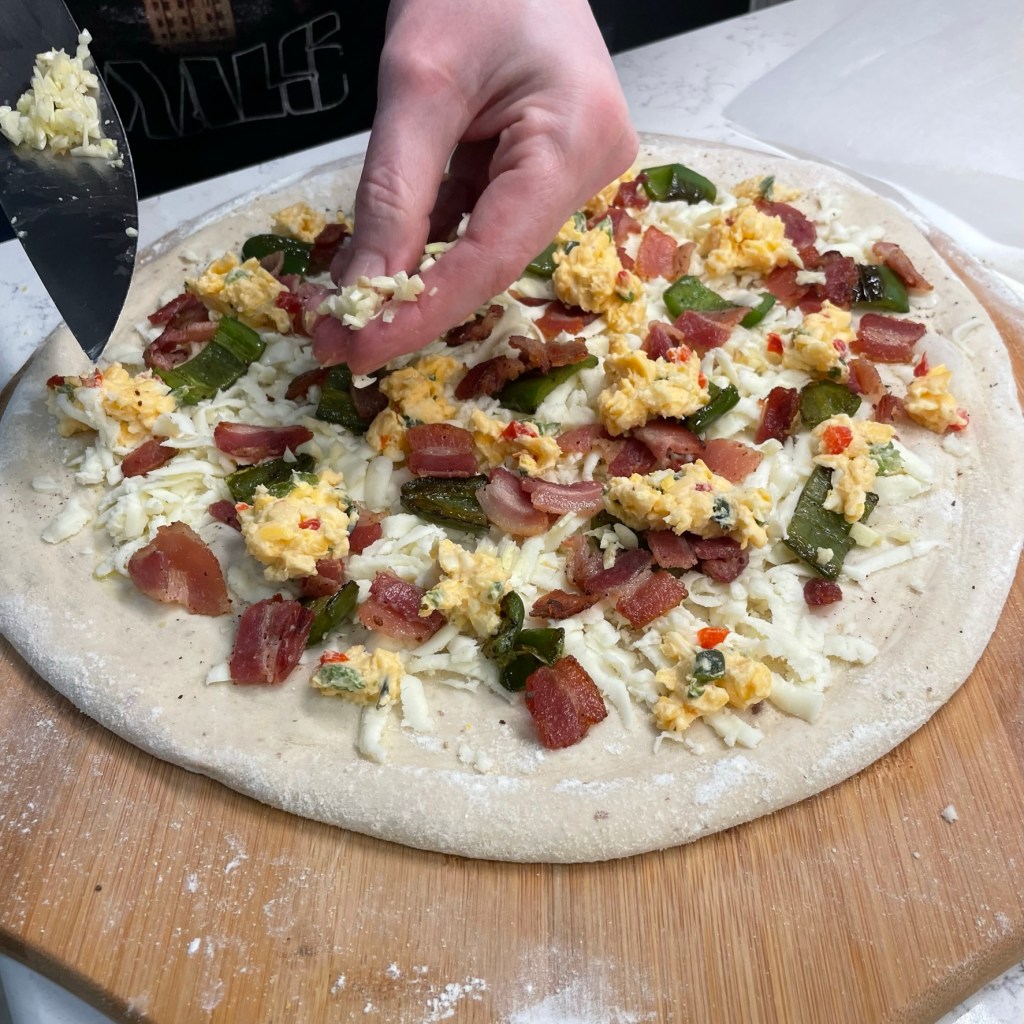
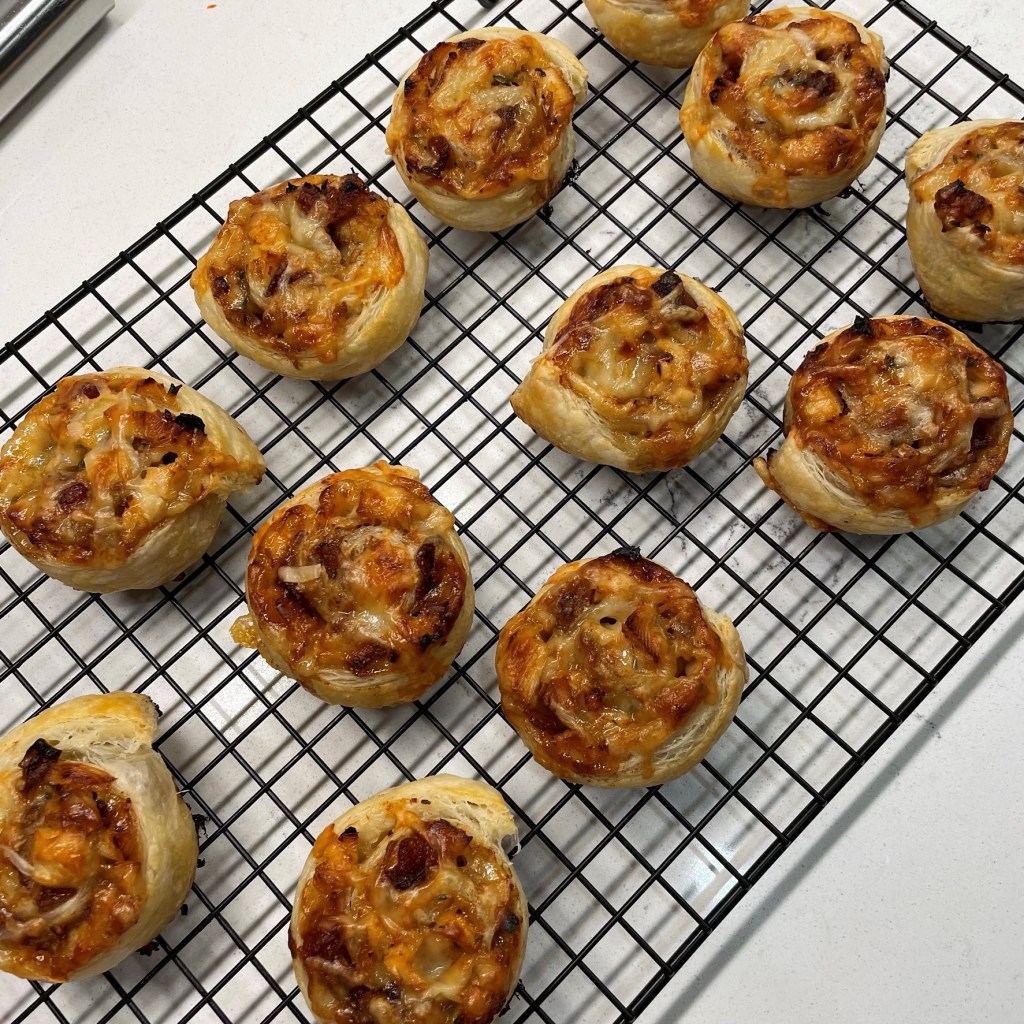
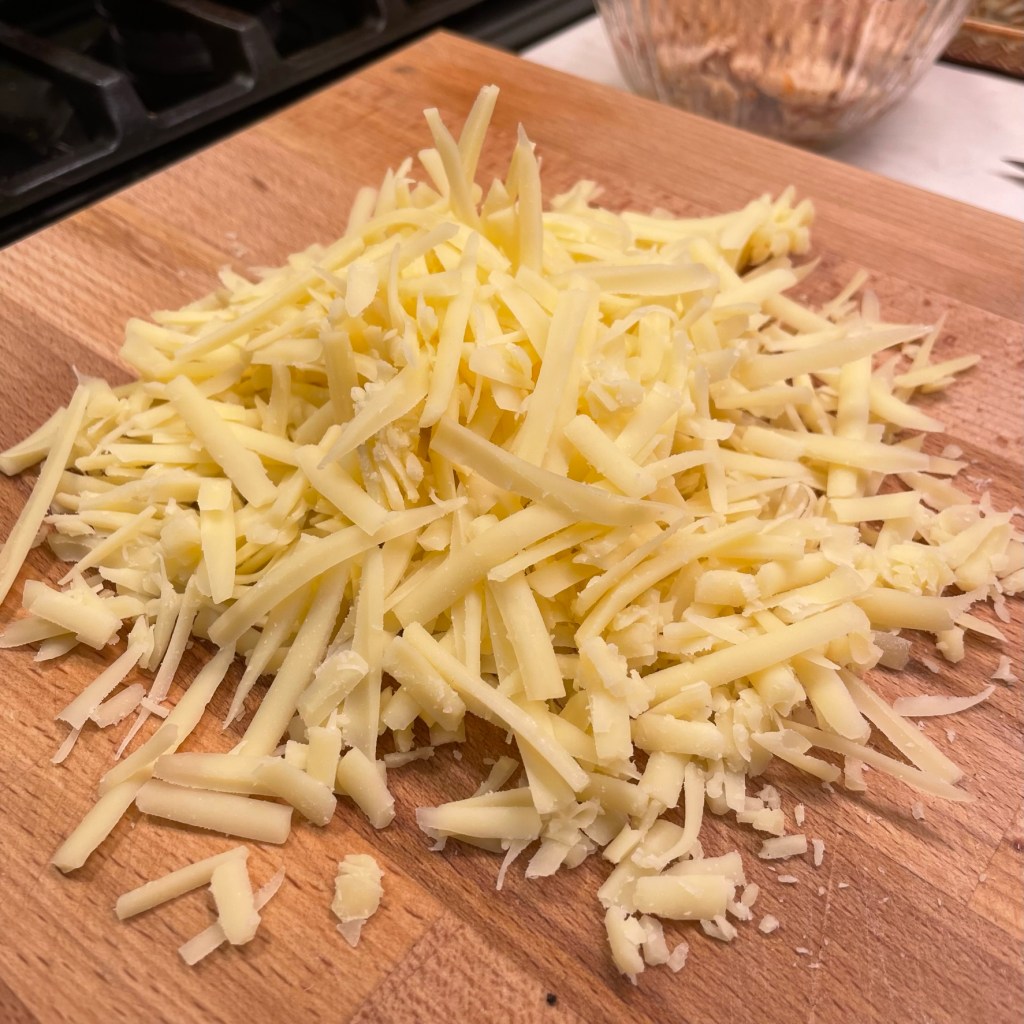
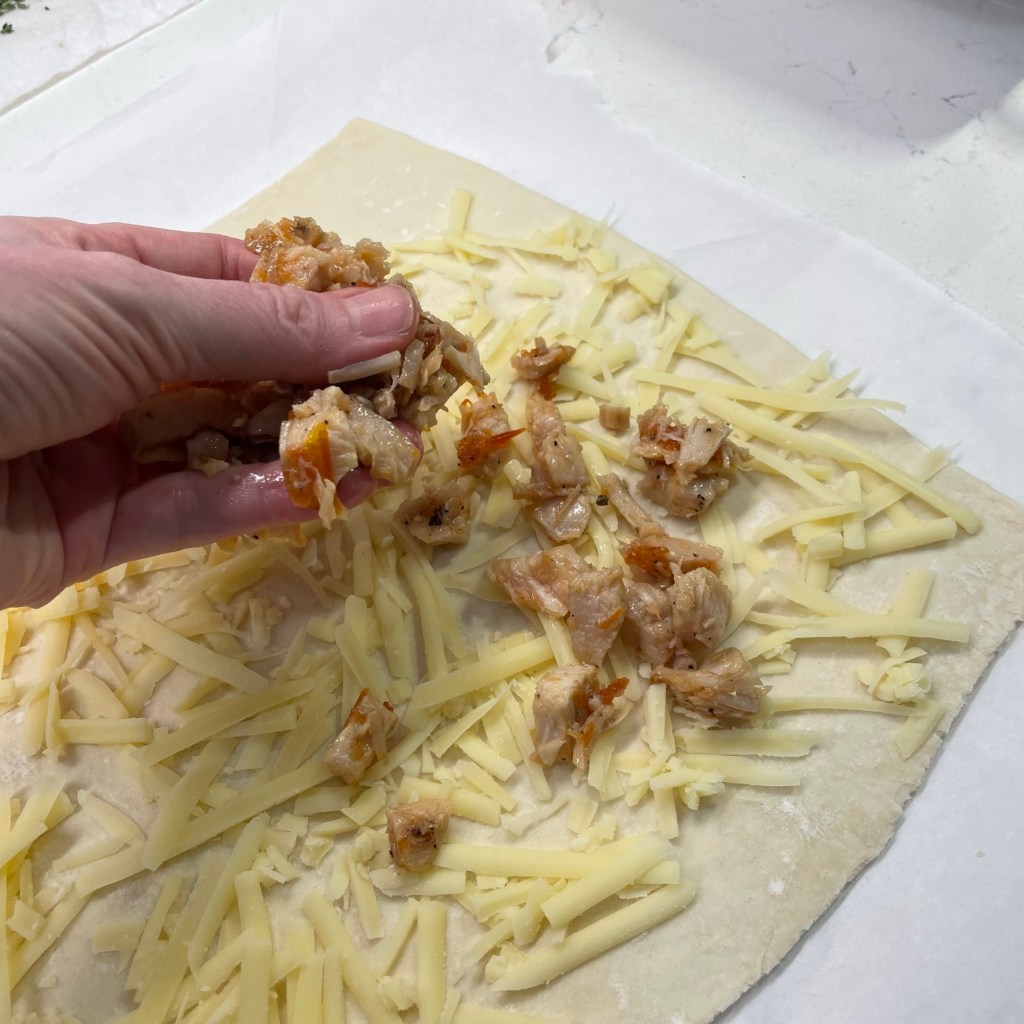
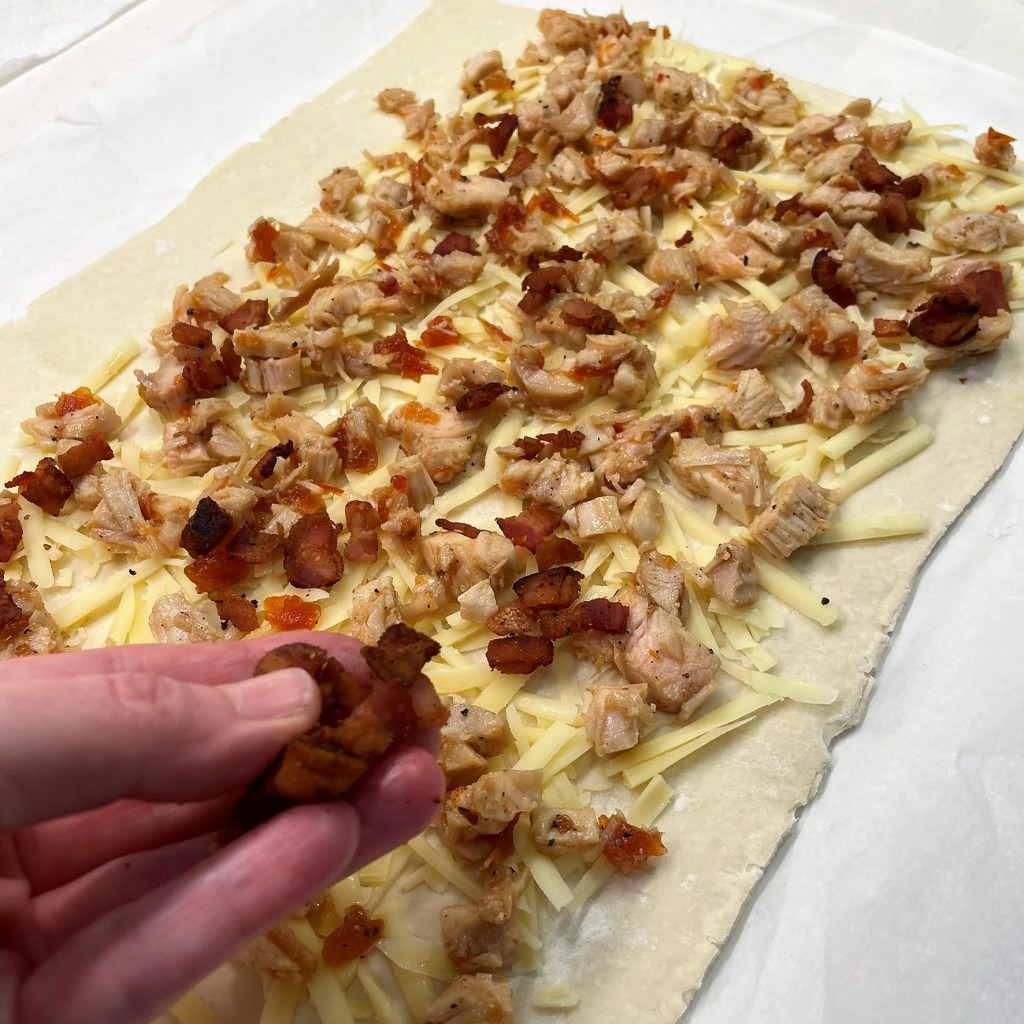
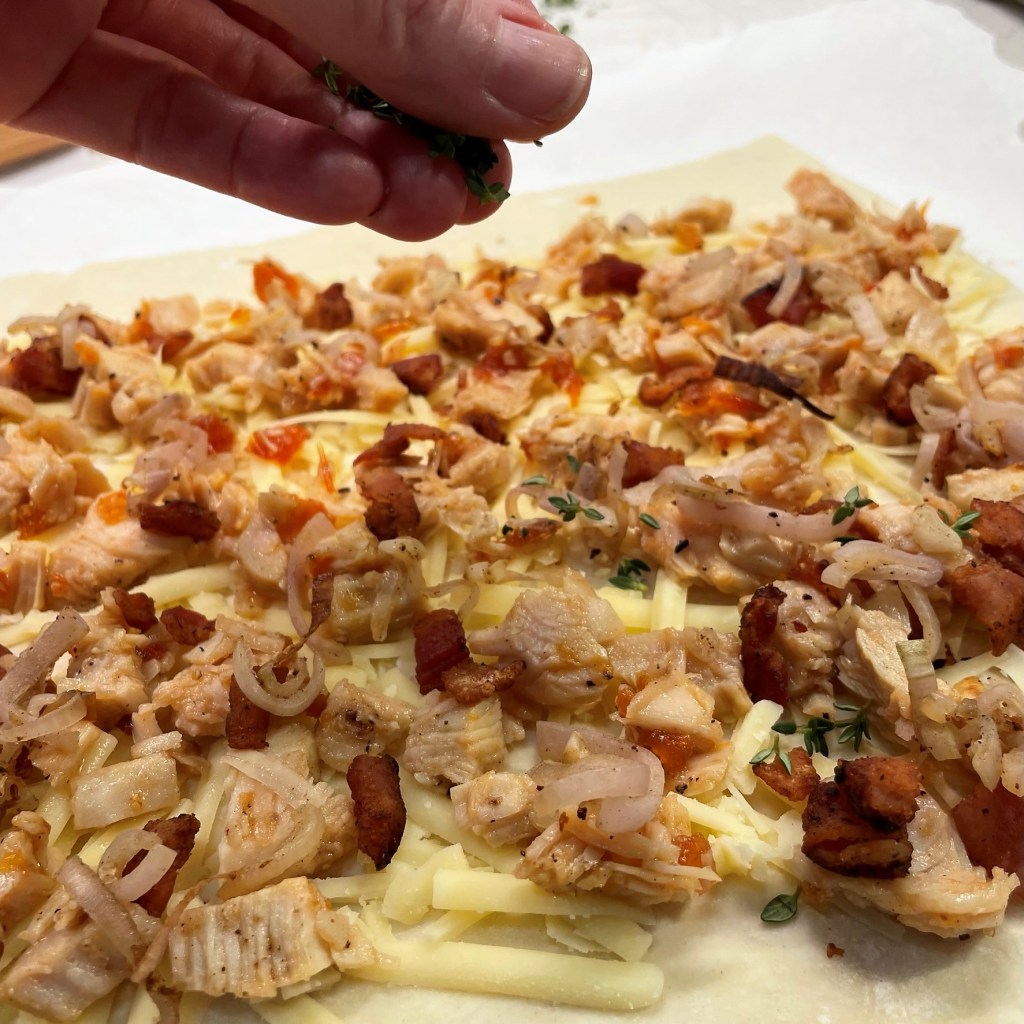
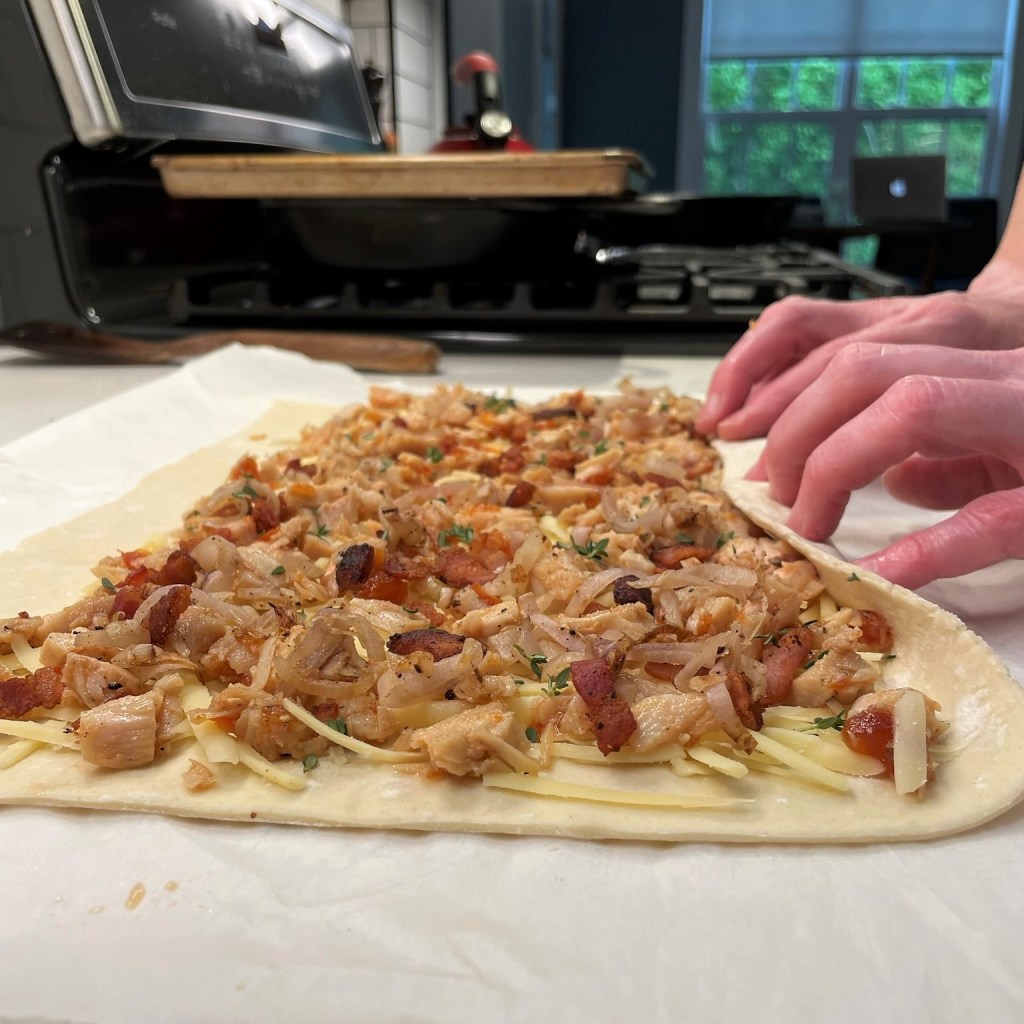
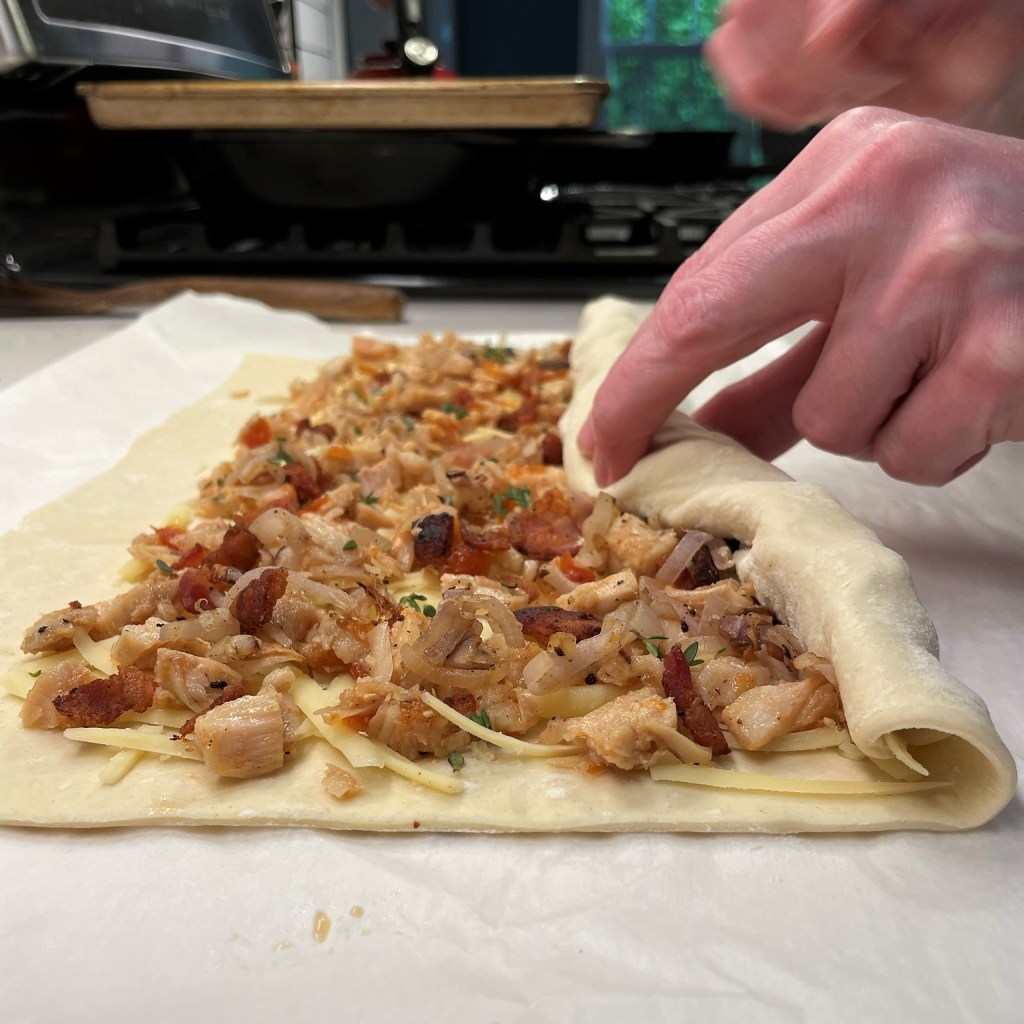
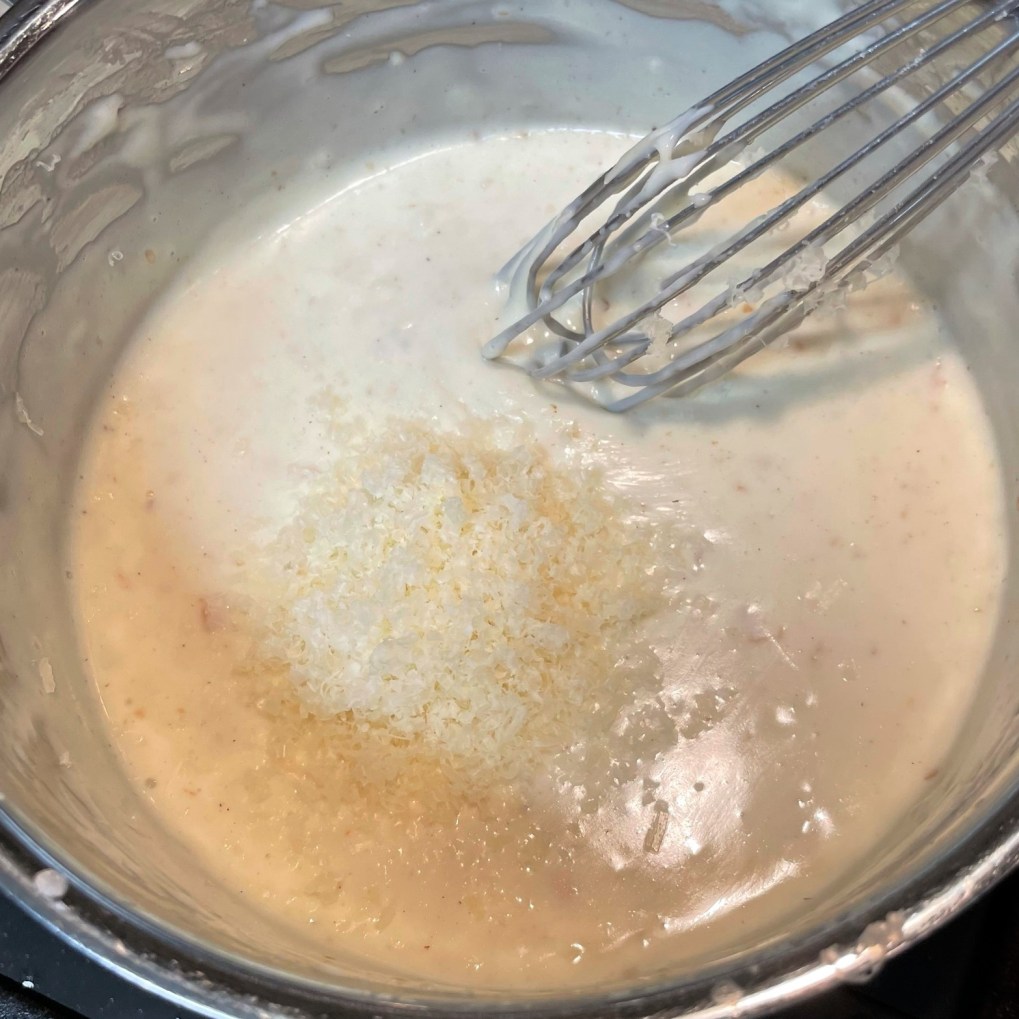
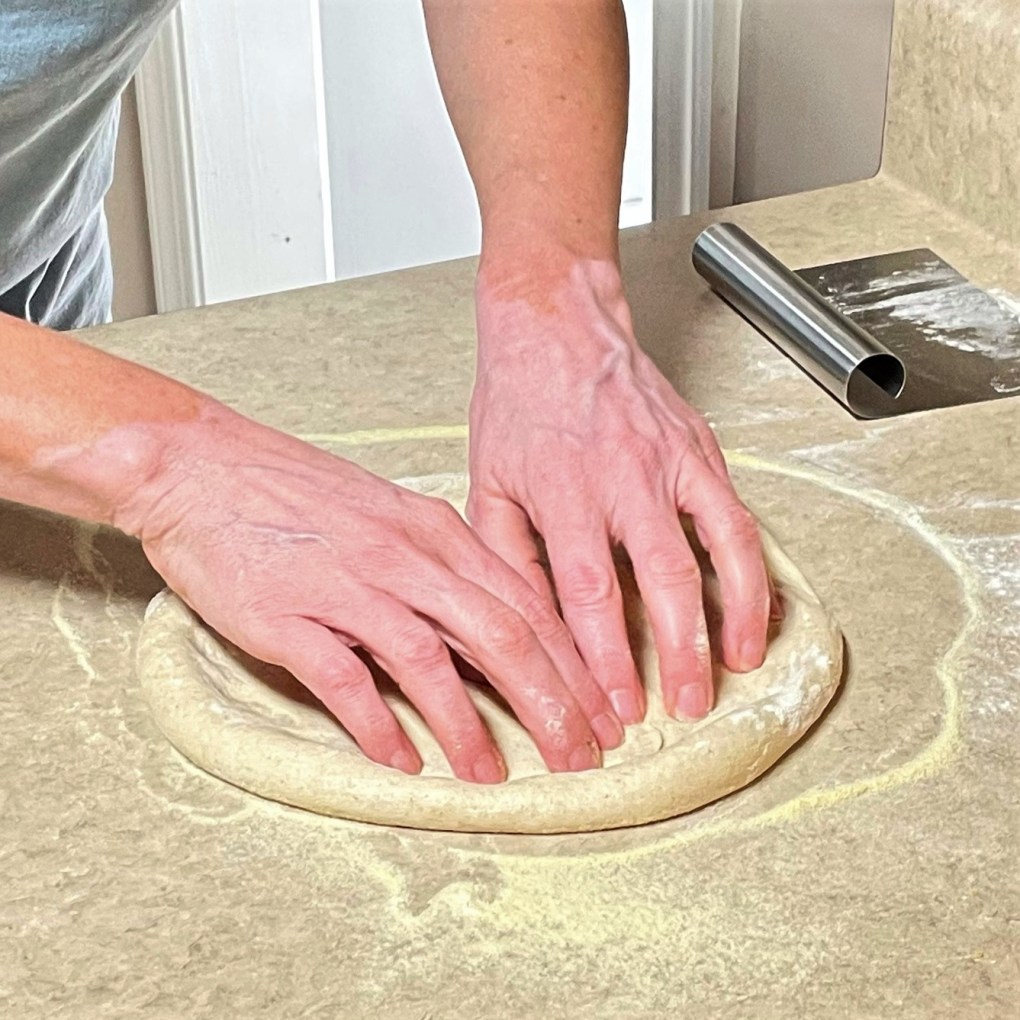
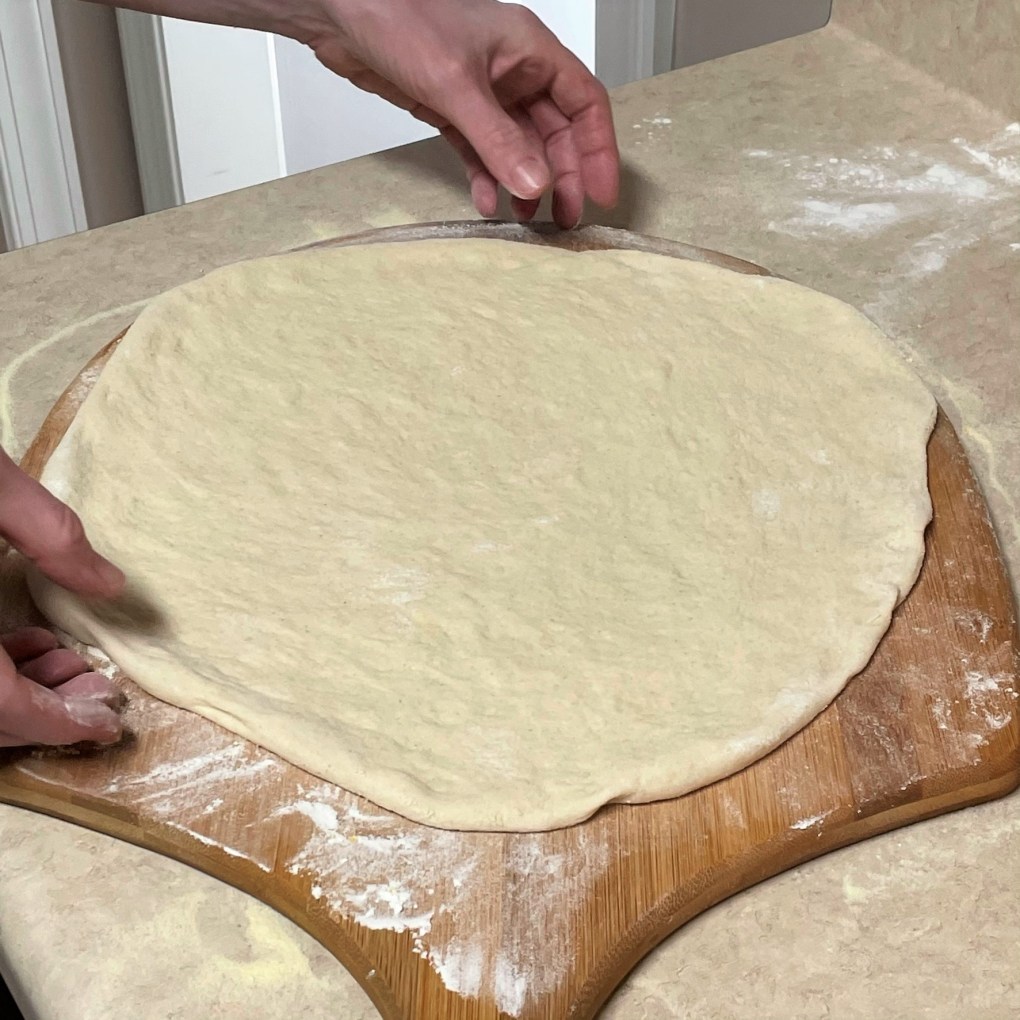
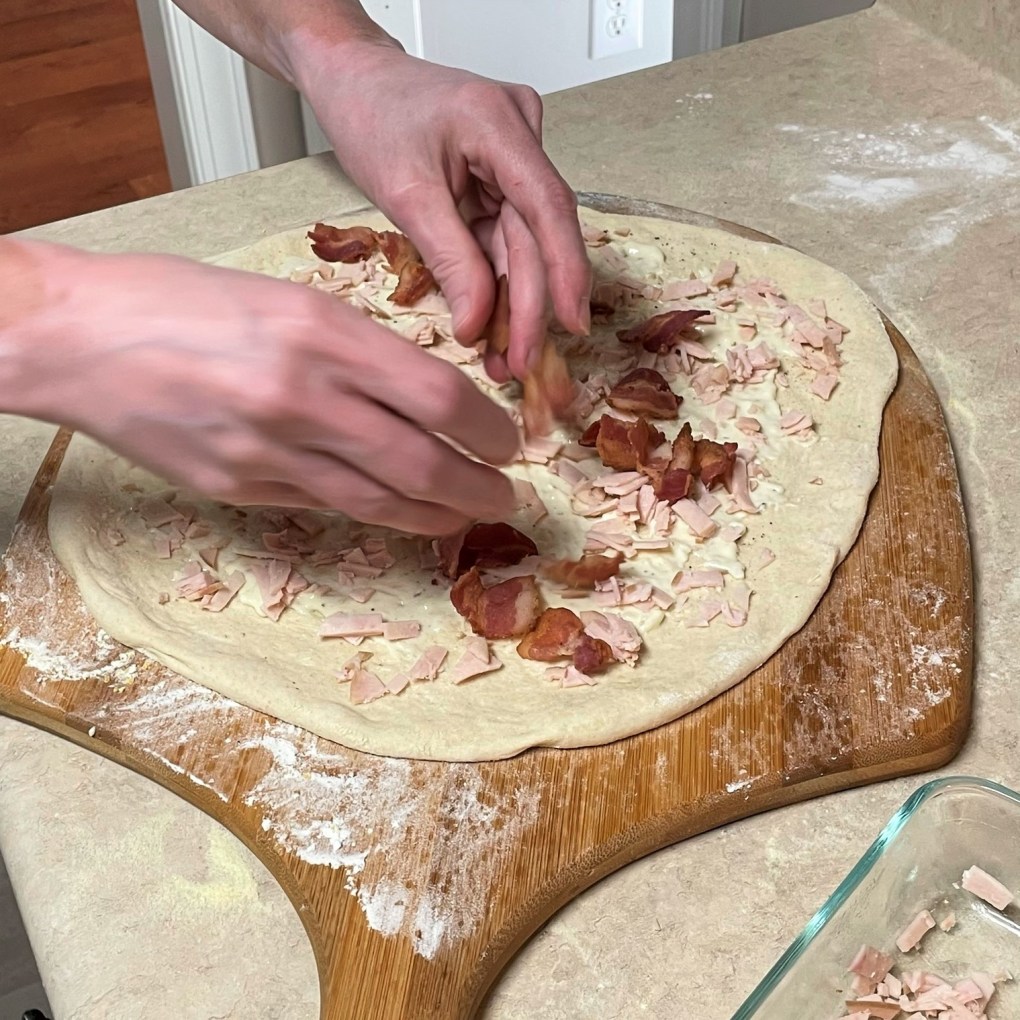
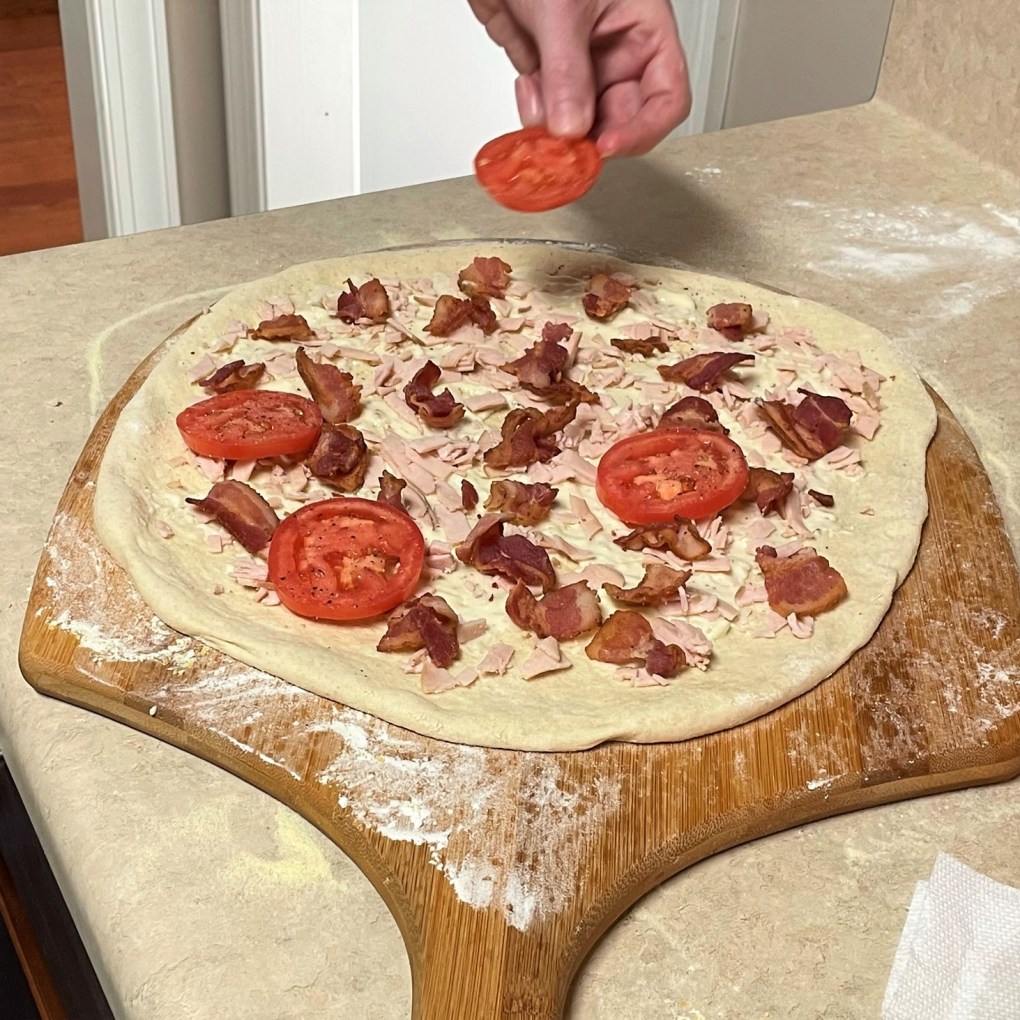
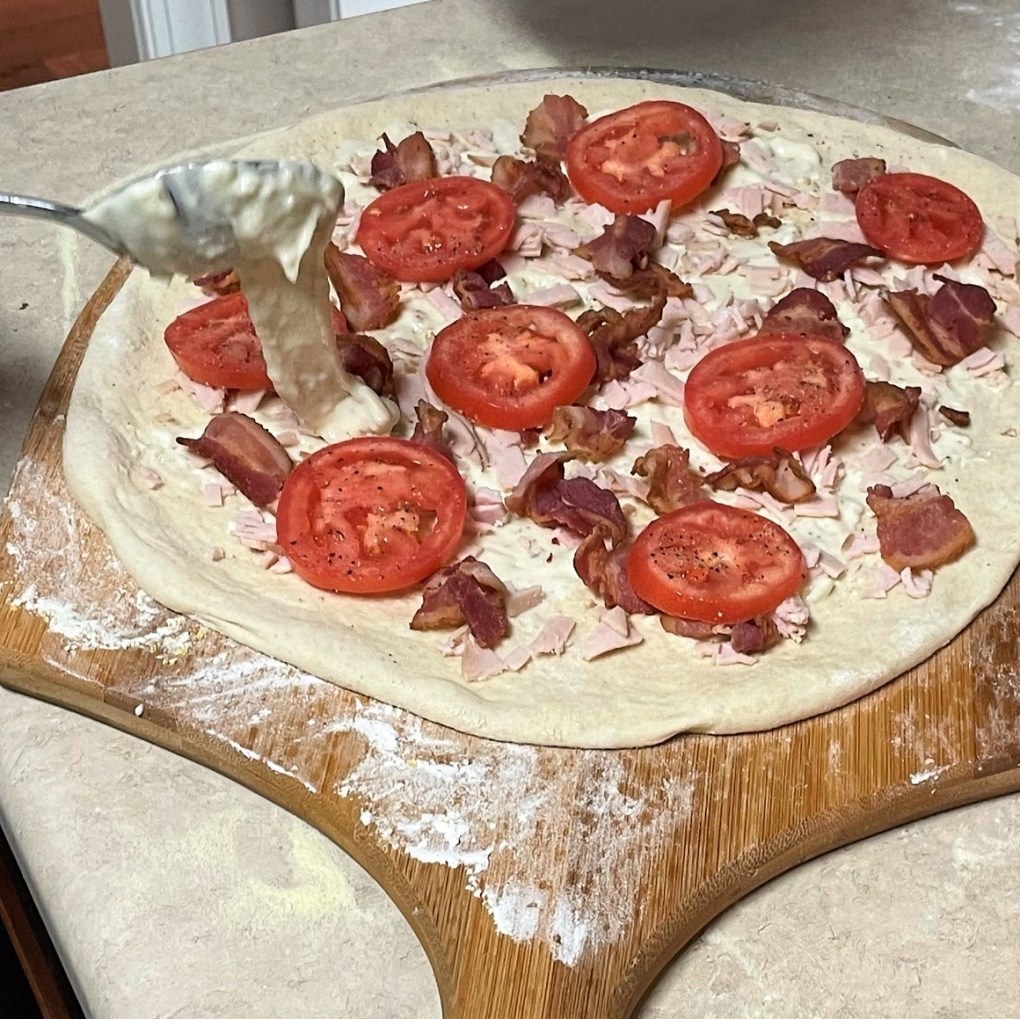
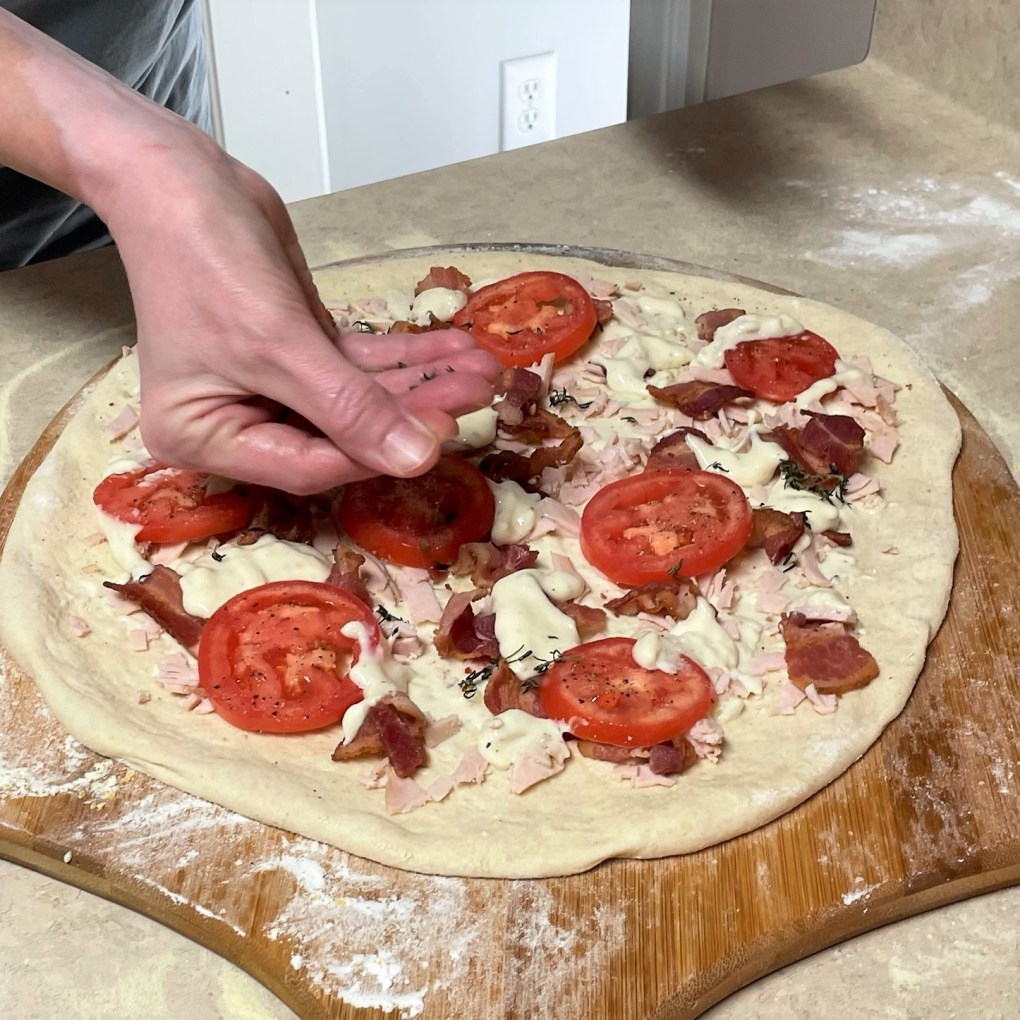
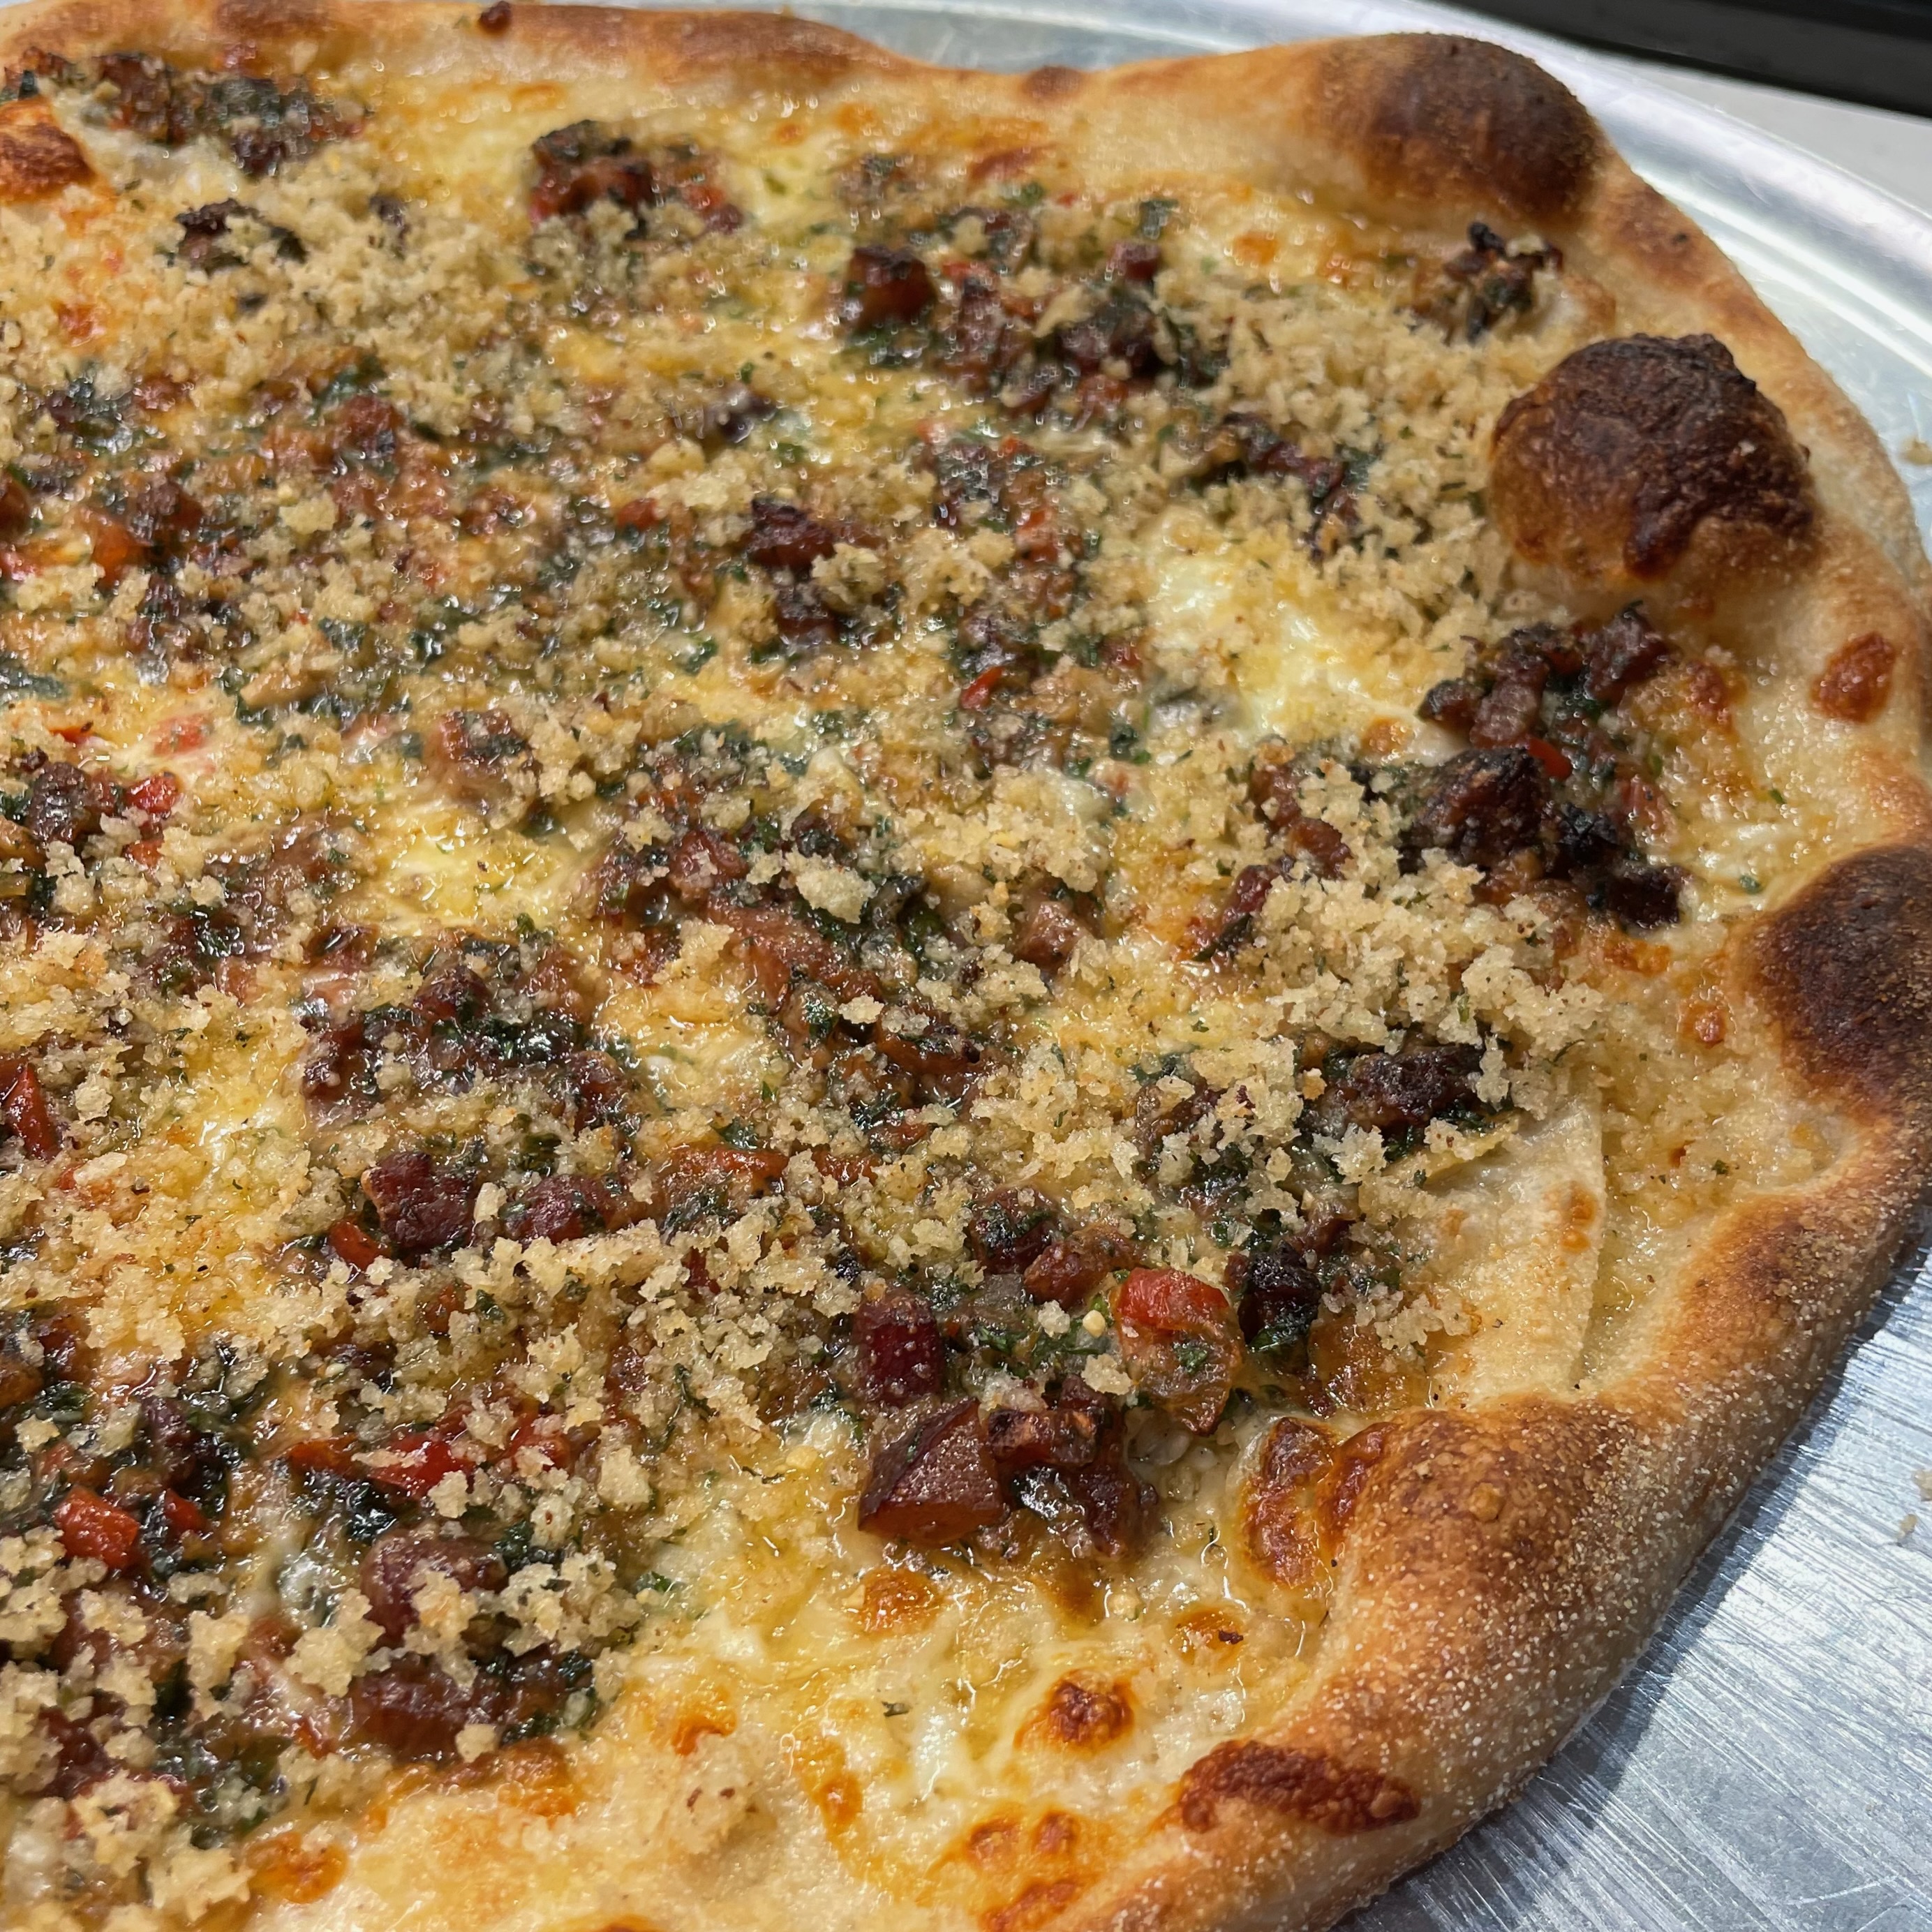
Shape the dough by hand, rather than rolling it out, as this ensures some of the air pockets will remain in the dough for an airy texture after baking. Scatter mozzarella all over the dough, then arrange the clams and top each one with a bit of the clams casino compound butter. Sprinkle a bit of Parm-Romano blend cheese over the top, and slide that gorgeous thing into the oven.


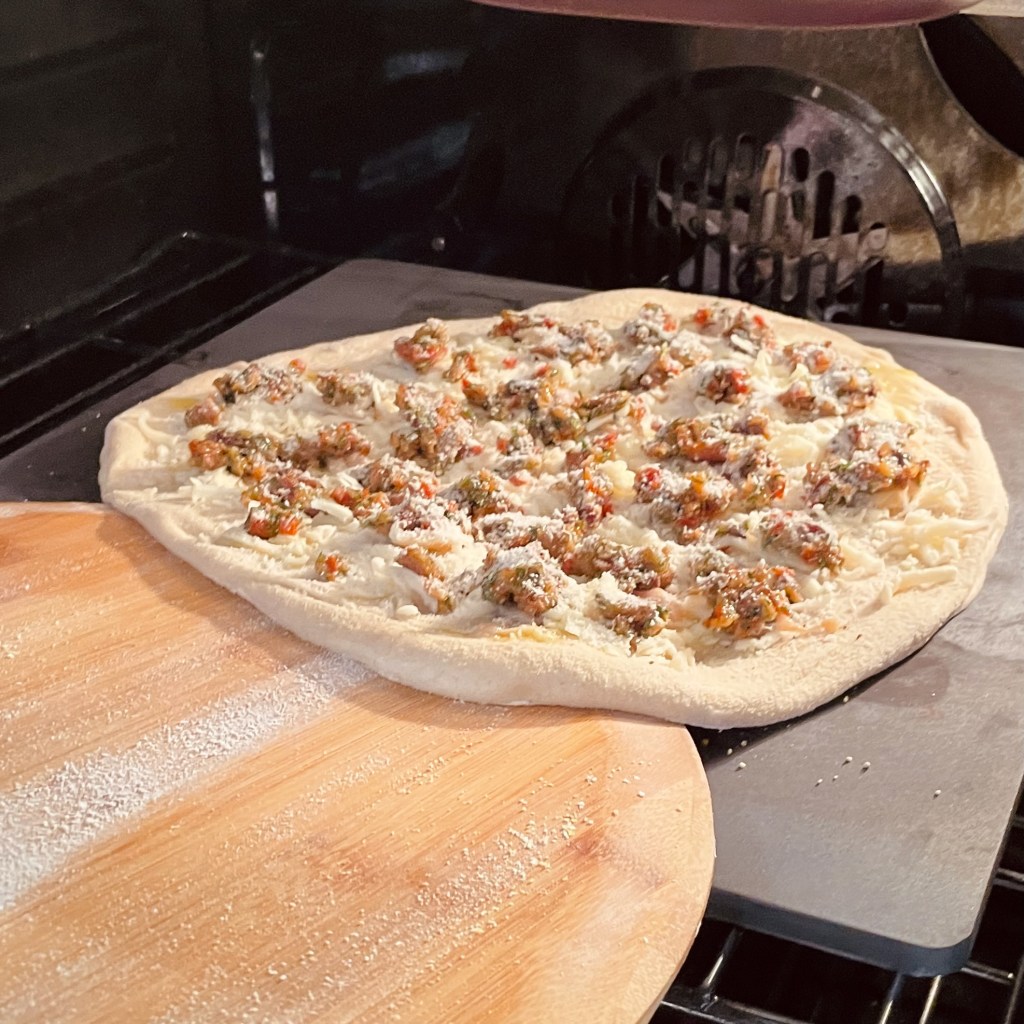
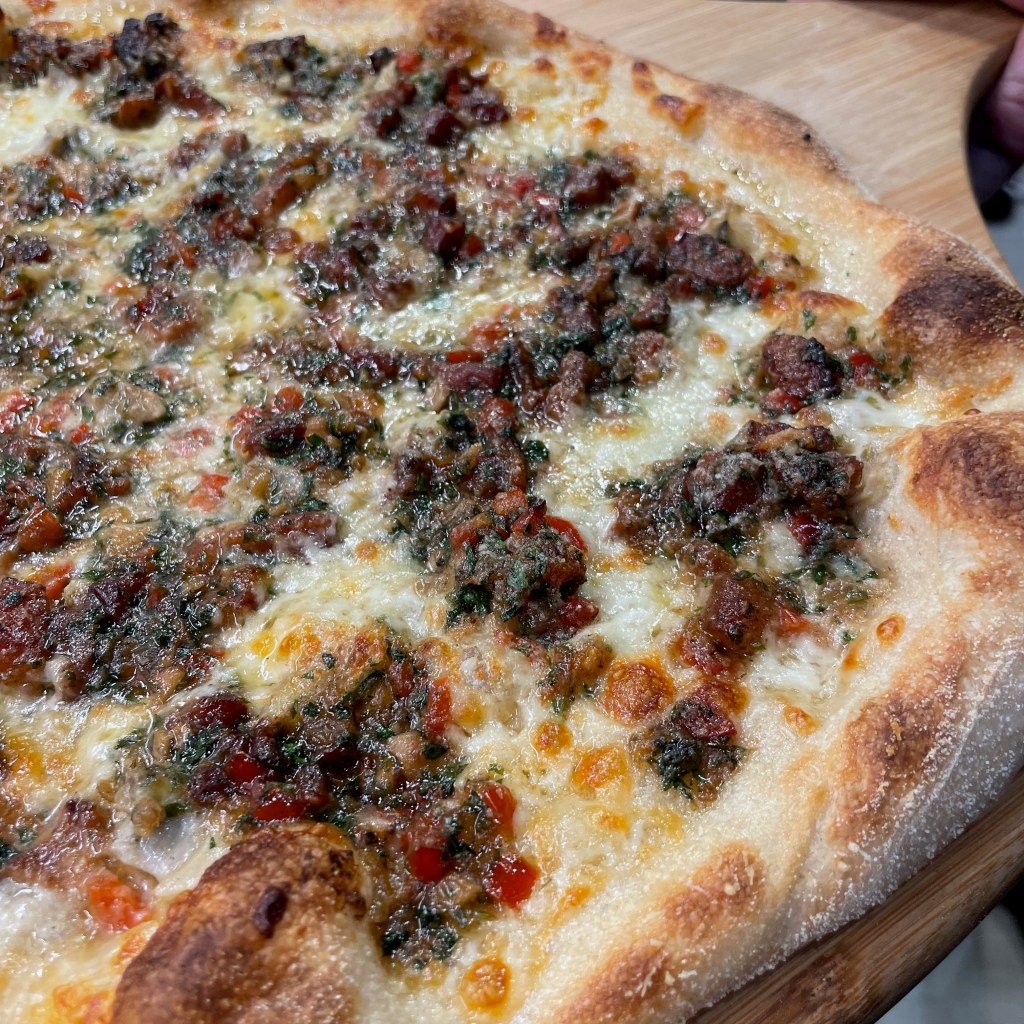
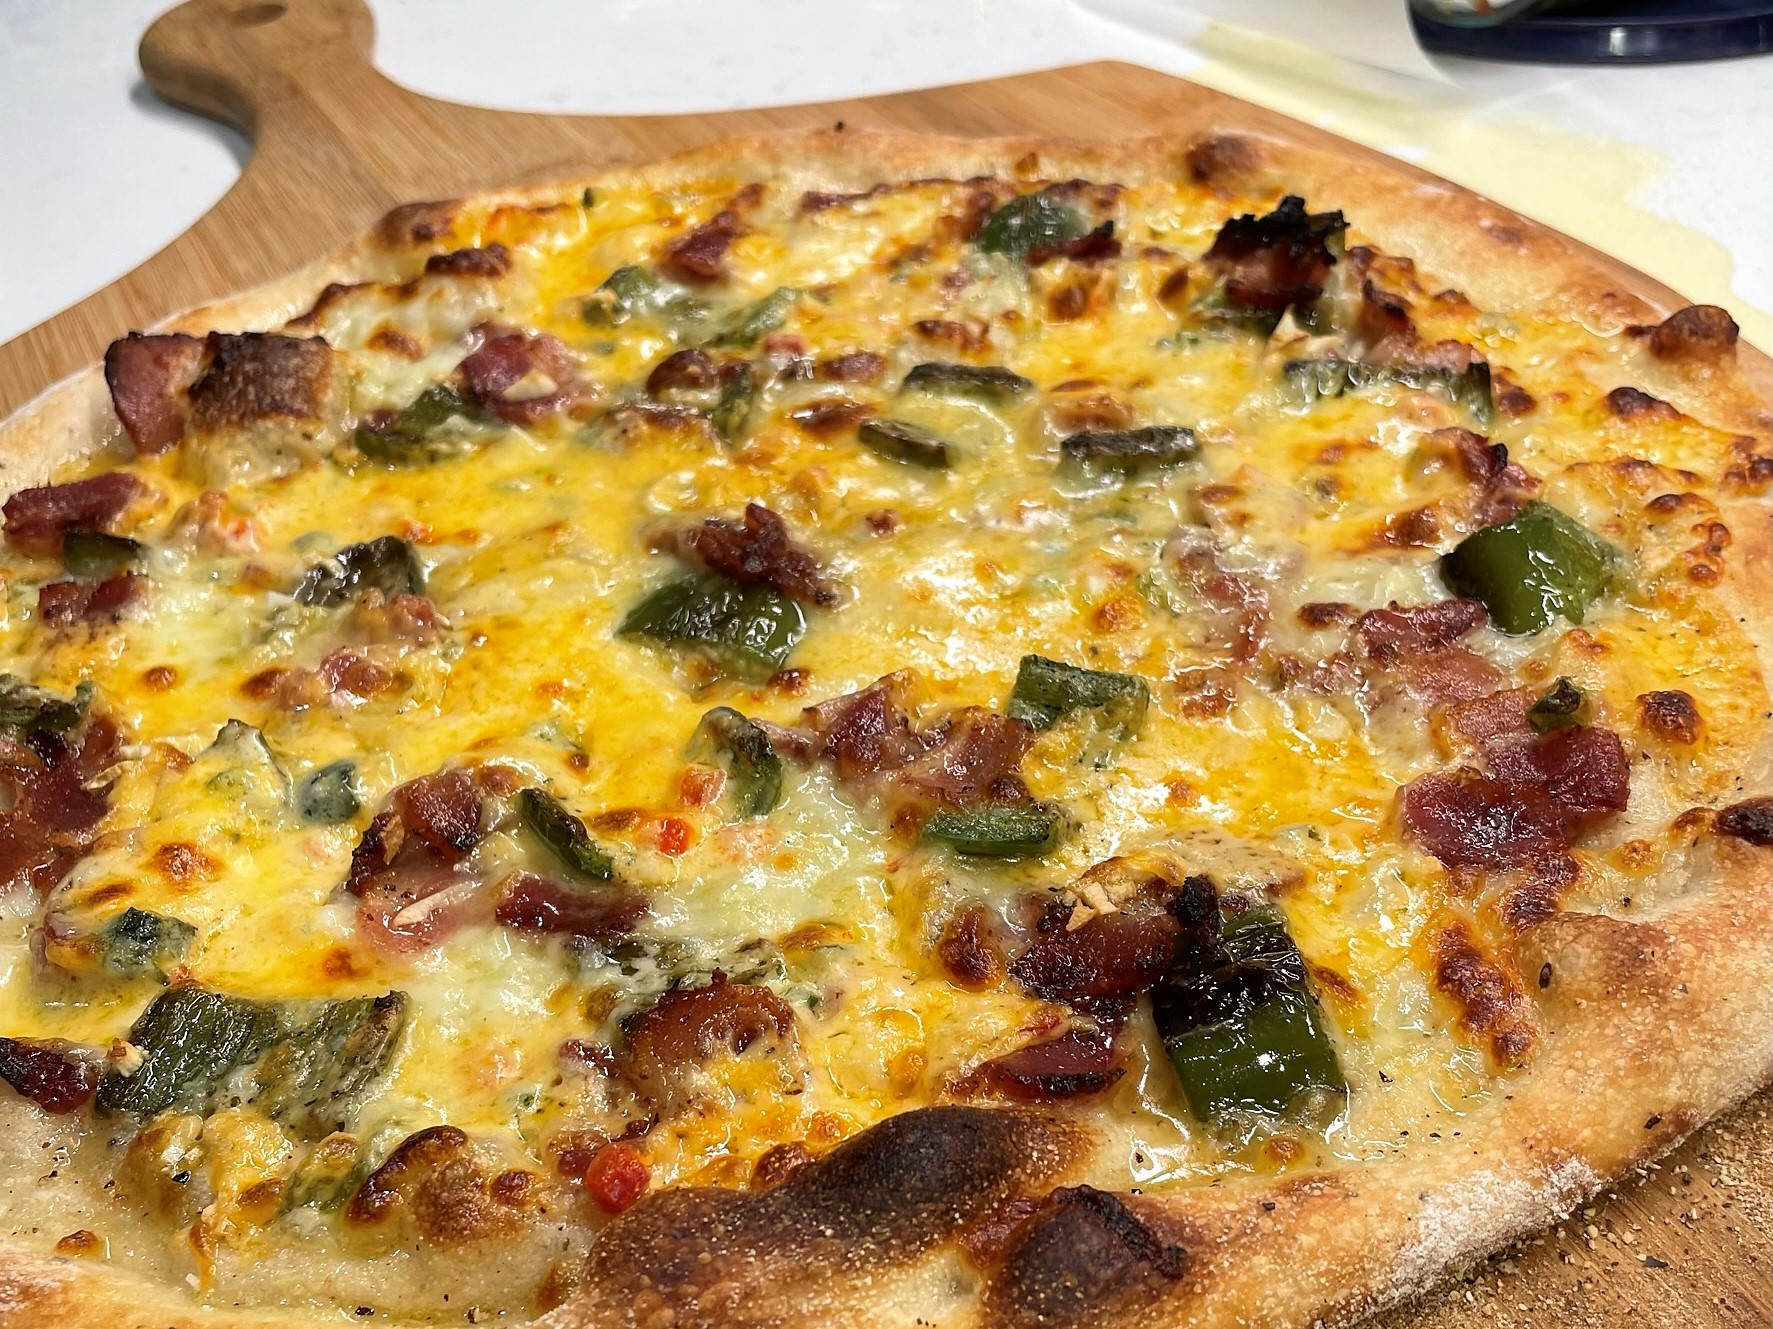
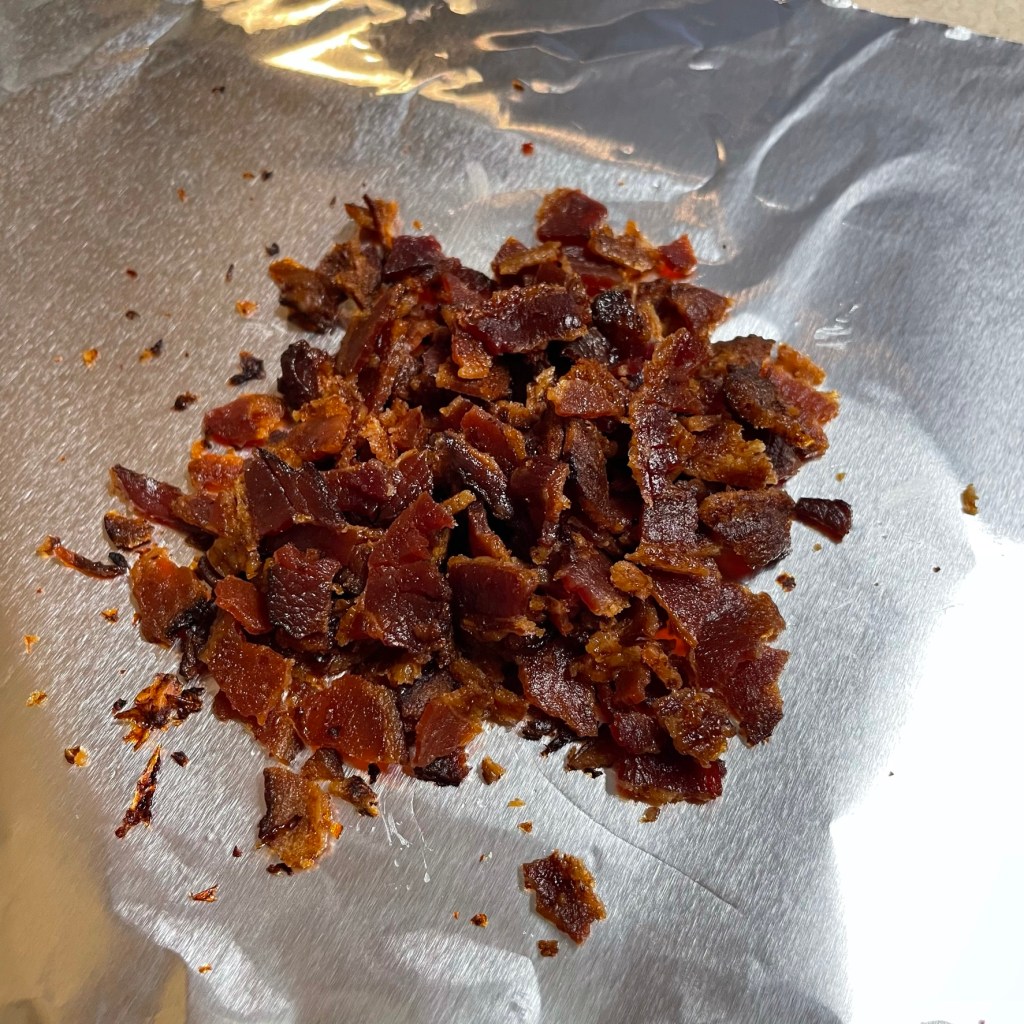
Six to seven minutes is all it takes on a 550° F preheated steel. When it comes out of the oven, scatter the bacon-scented panko crumbs over the top and serve at once. 


Clams Casino Pizza

  • Servings: 6 slices
  • Difficulty: Average
  • Print

An easy compound butter is what makes this classic appetizer-inspired pizza special enough for New Year's Eve. Use the freshest clams you can get, and don't skip the bacon-scented panko crumbs on top!


Prep for this pizza should happen earlier in the day, or perhaps even the day before, so that the clams casino compound butter only needs to be divvied out onto the clams when you build the pizza. Note that parsley appears twice in this list; there are different purposes for each amount. You will want to use a heavy-bottomed pan to cook the compound butter ingredients, preferably one that is more wide than high. This will make it easier to steam the clams in a single layer.

Ingredients

  • 1/2 cup cubed thick-cut smoked bacon
  • 1/3 cup Italian seasoned panko bread crumbs
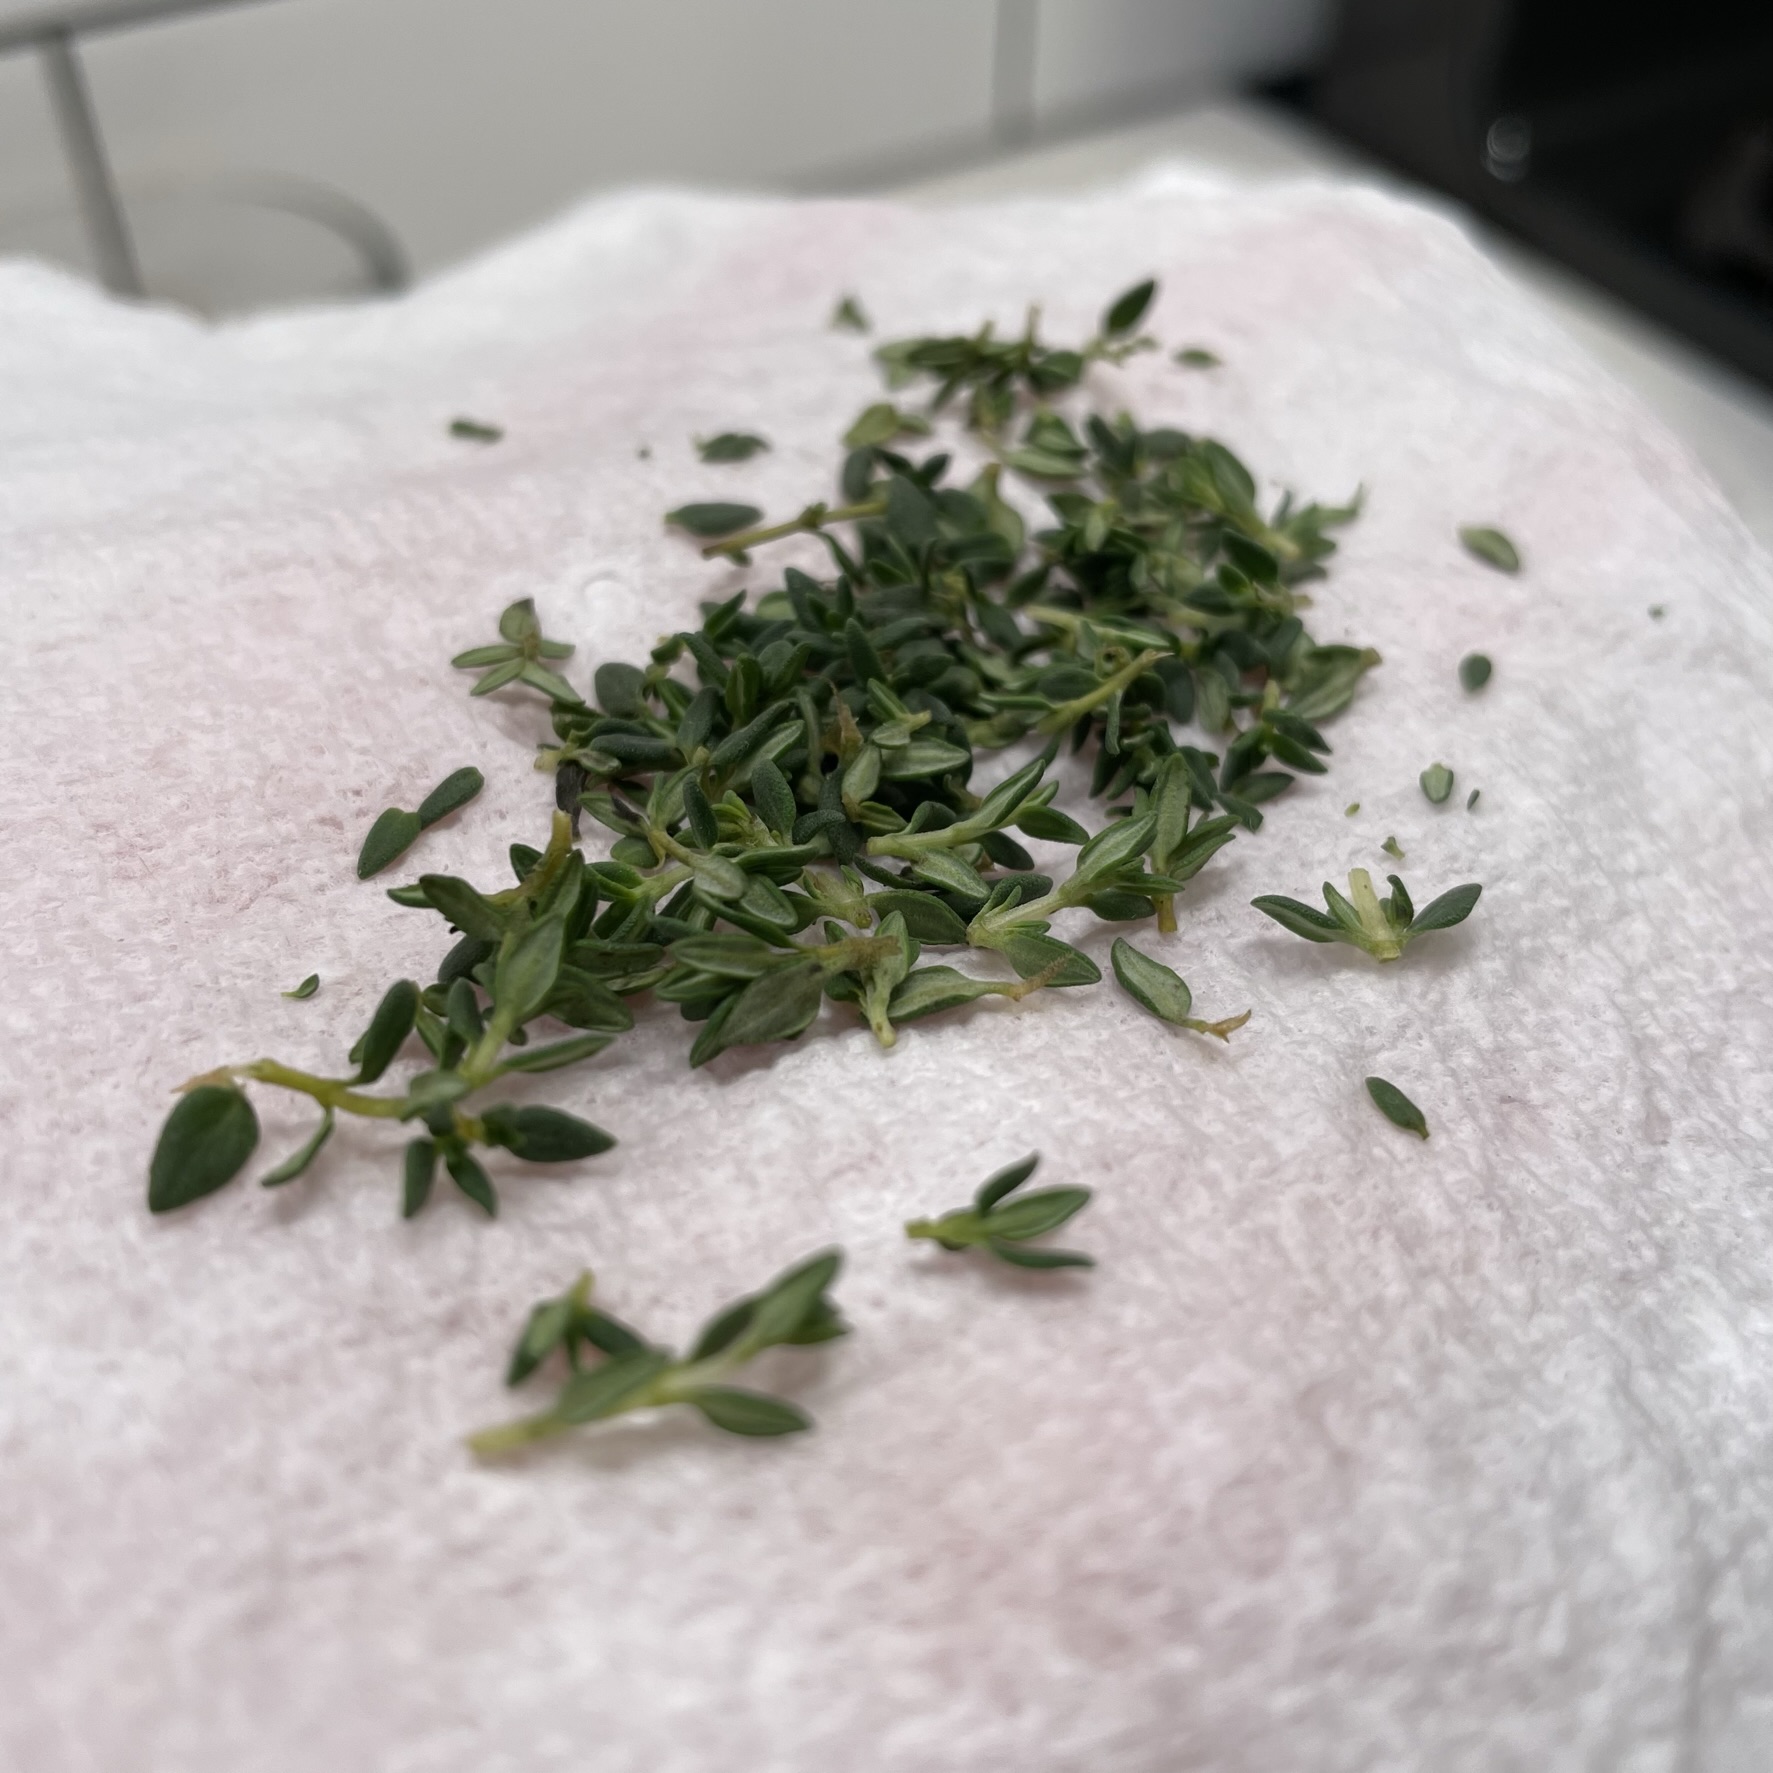
  • 1 Tbsp. finely chopped Italian parsley (for the panko topping)
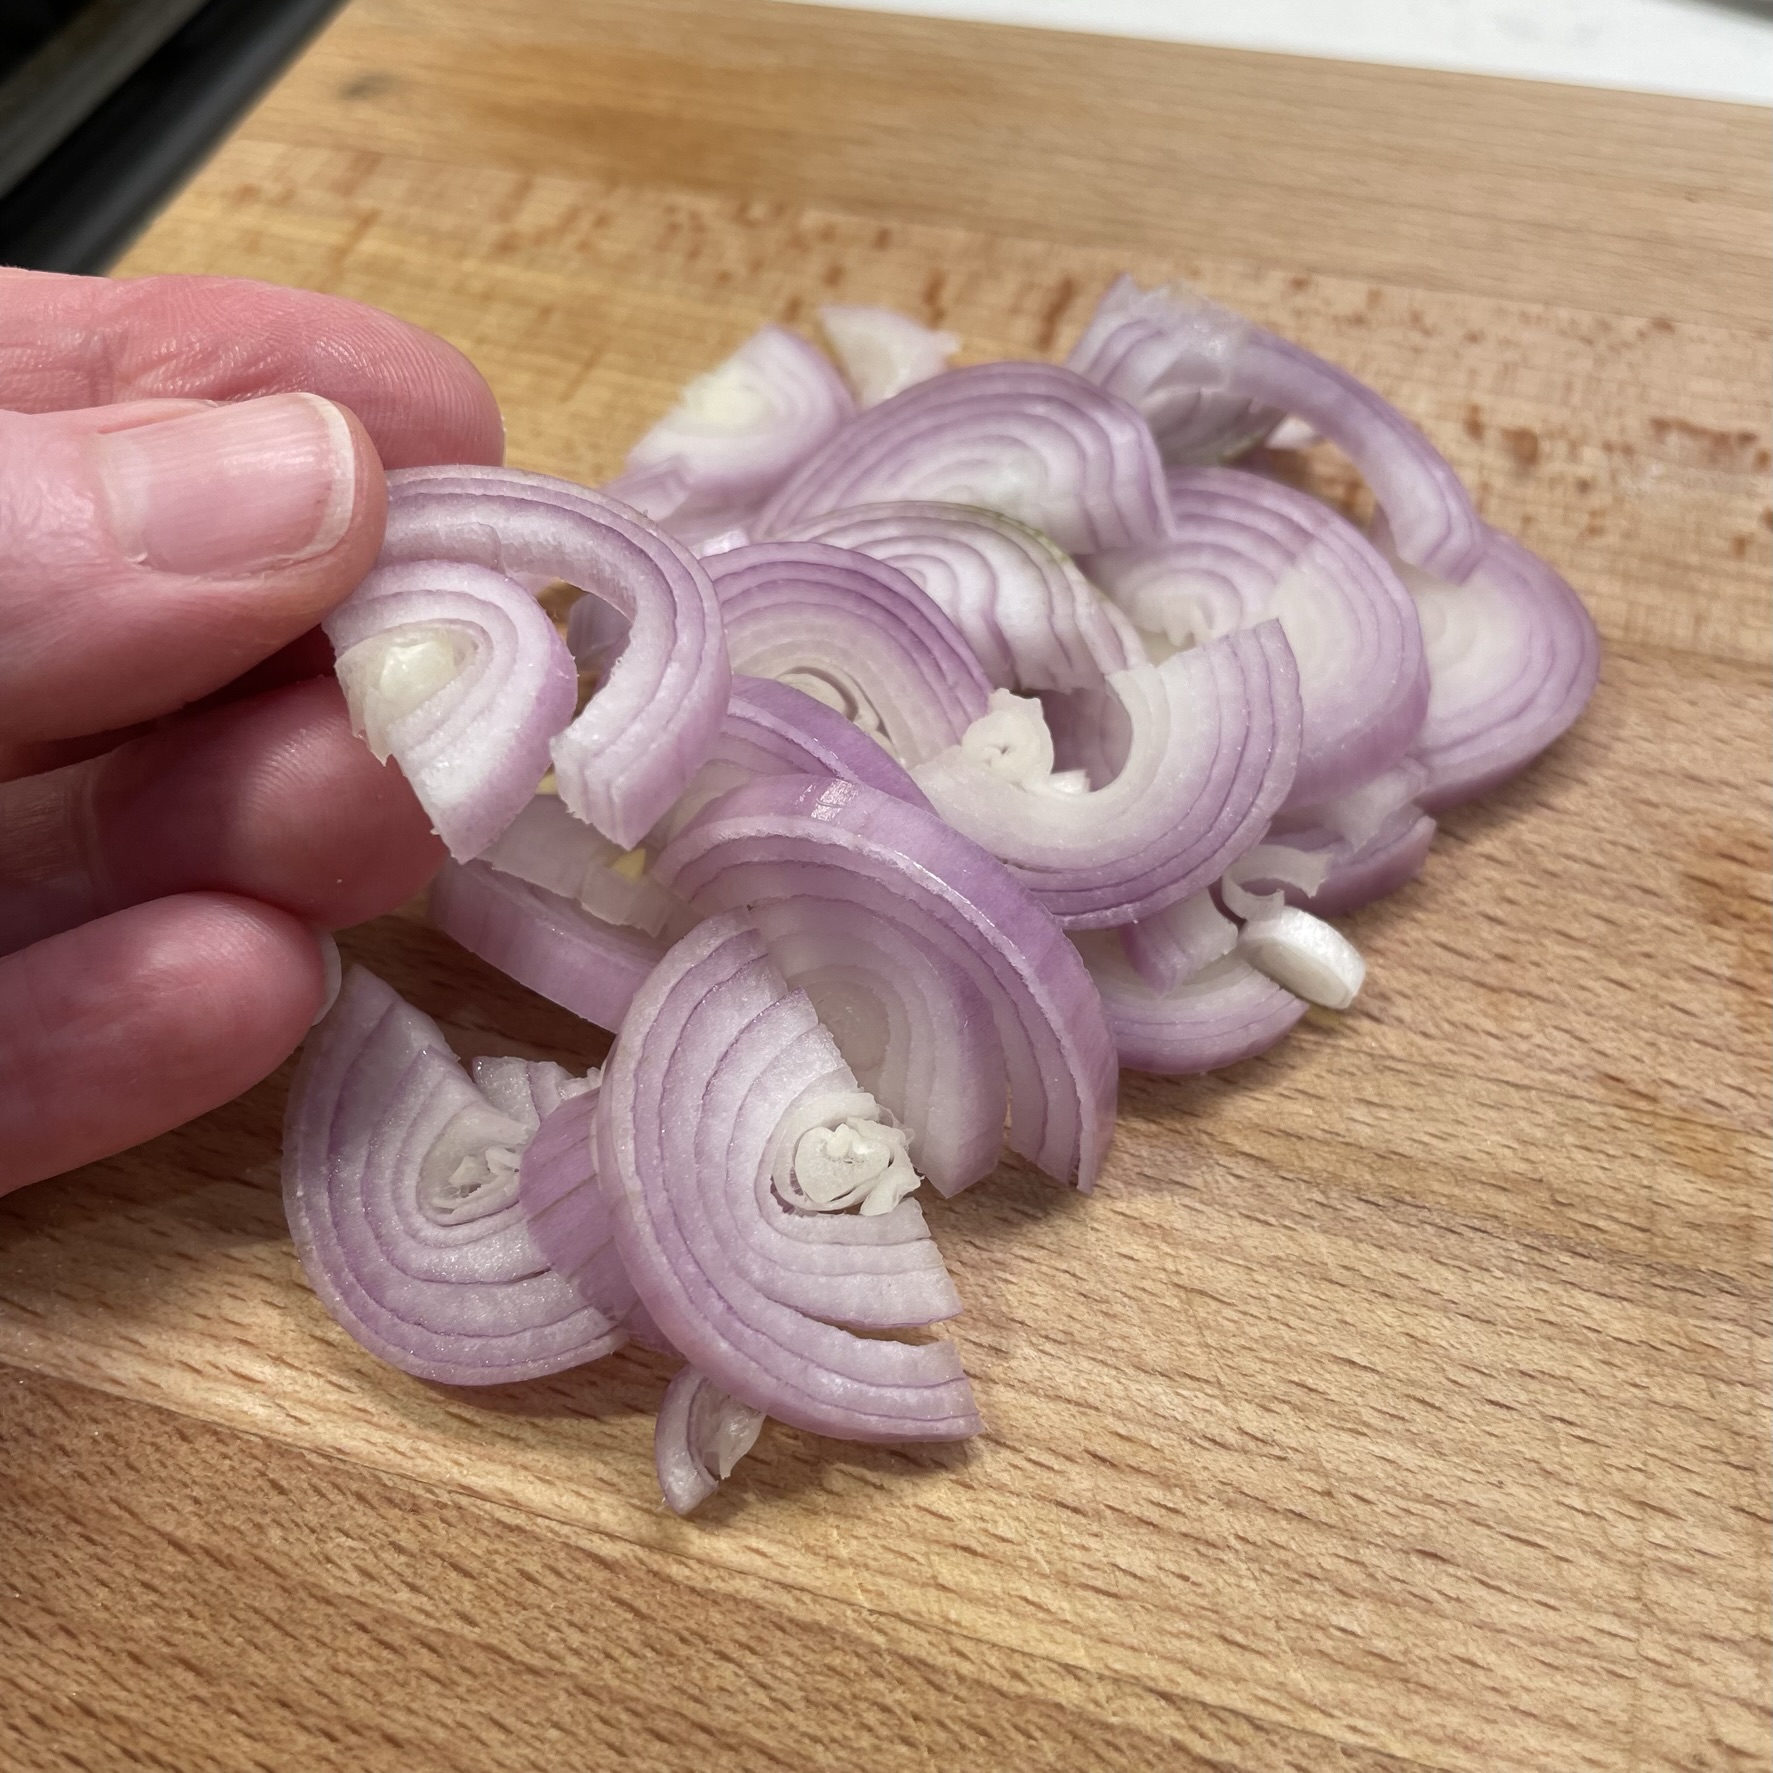
  • 1/3 cup minced shallot
  • 1/3 cup minced red bell pepper
  • 2 large cloves garlic, minced (about 1 Tbsp)
  • A few shakes red pepper flakes
  • 1/4 cup dry vermouth or white wine + 1/4 cup water
  • 24 littleneck clams, purged of sand and grit (see first step of directions)
  • 2 Tbsp. finely chopped Italian parsley (for the compound butter)
  • 2 Tbsp. unsalted butter, halfway softened

Directions

  1. Purge the clams by placing them in a large bowl of salted cold water. Sprinkle a generous spoonful of flour over the clams and swirl gently to mix it in. Allow to rest 30 minutes, and then scoop out the clams to a platter. Empty and rinse the bowl, inspecting the water for grit and/or sand. Repeat as many times as needed, until water is clear.
  2. Cook bacon to render the fat. Remove the crispy bacon bits with slotted spoon, reserving fat in skillet. Toss panko crumbs in bacon fat. Cook until crumbs are golden and crispy. Set aside to top pizza after baking.
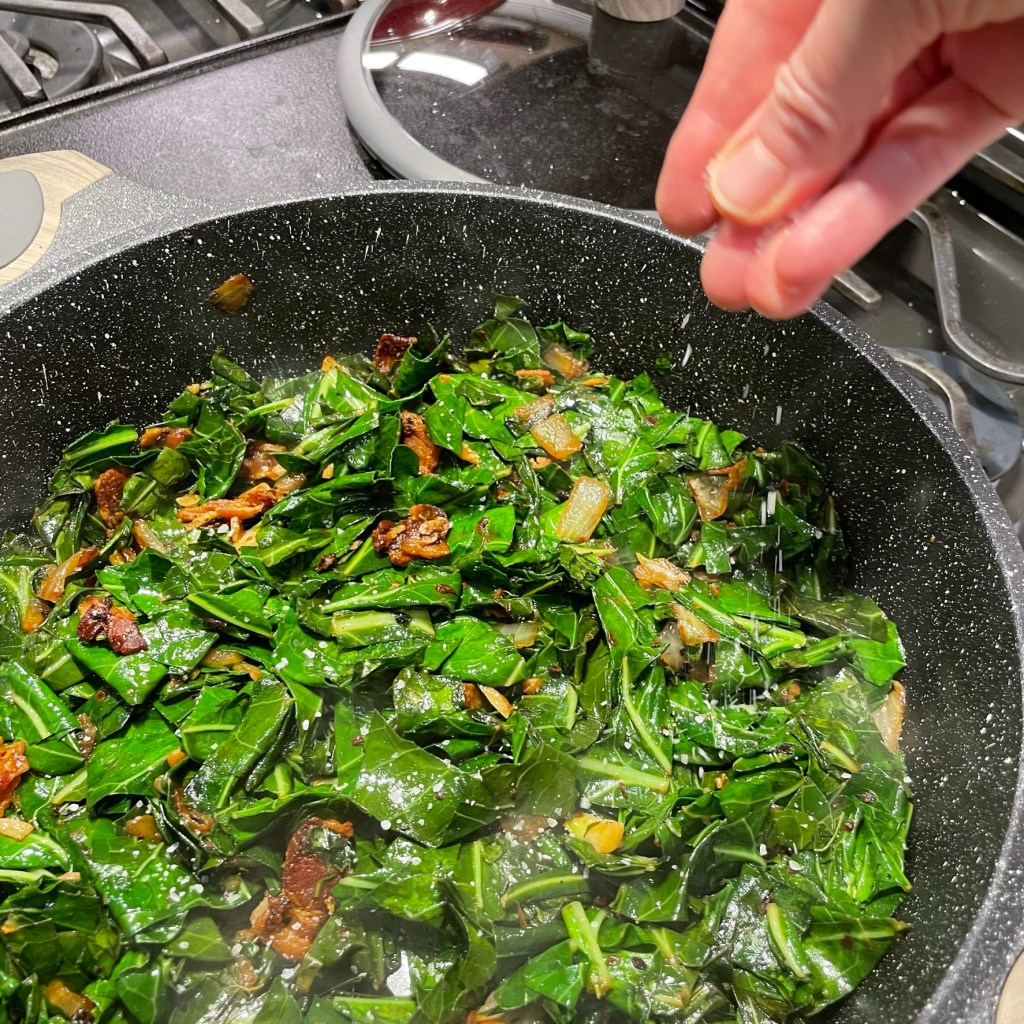
  3. Put half of the bacon bits back into the pot, along with shallots, bell peppers and garlic, and sauté until vegetables are translucent and tender. Shake in red pepper flakes.
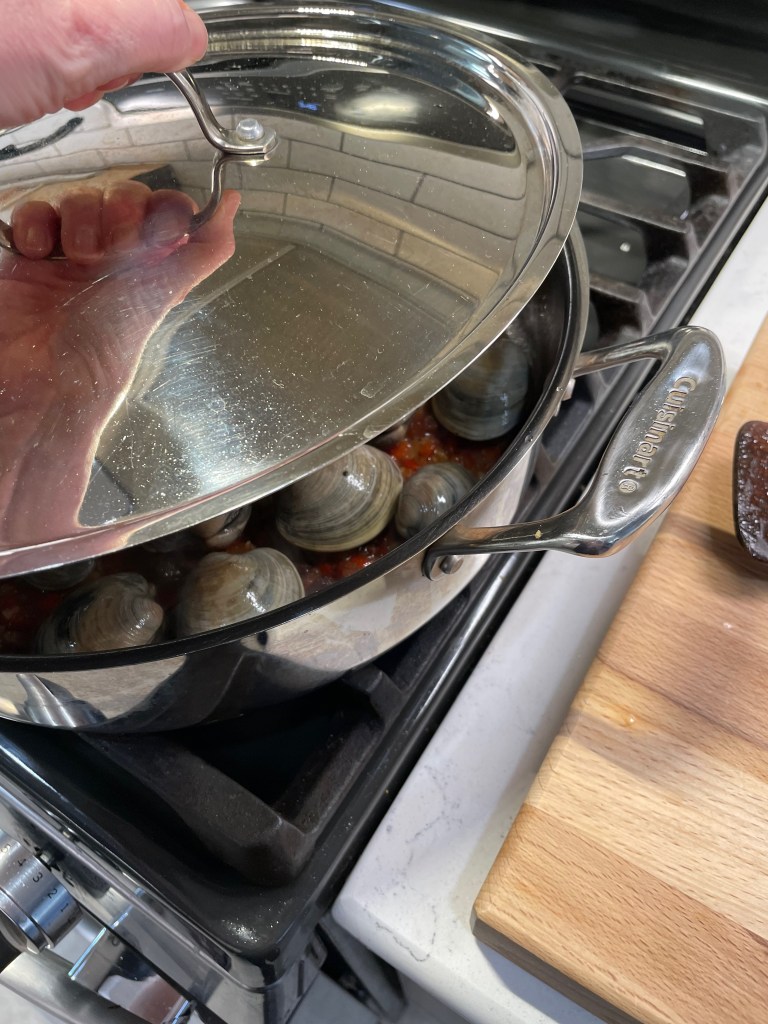
  4. Add clams to the pot and pour in the vermouth and water. Cover with a lid for about 90 seconds, then remove lid. Use tongs to remove clams as they open, and pour off clam liquid into the pot as you remove them. Set the clams in a bowl filled with crushed ice; this will abruptly stop the cooking so that they don’t get tough during baking.
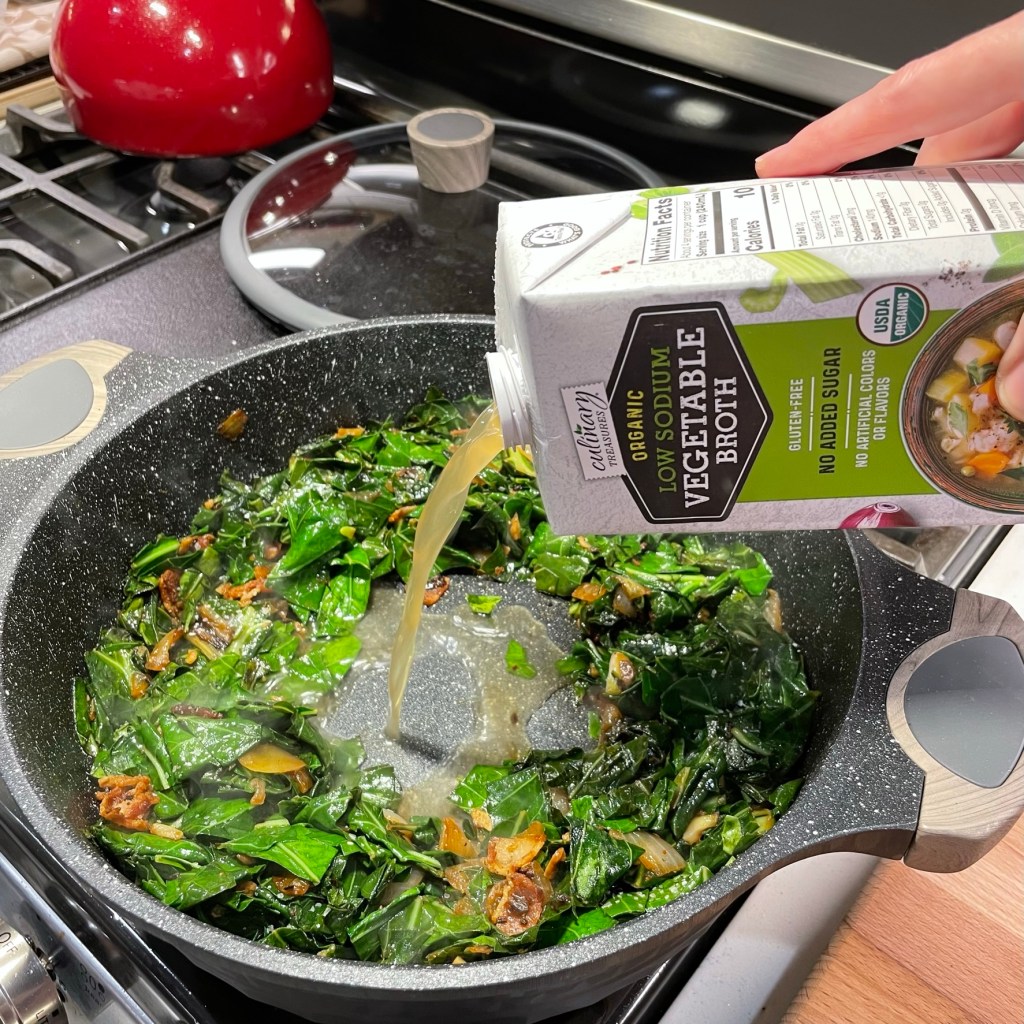
  5. When all clams have been removed from the pot, simmer until liquid is evaporated and only the soft vegetable-bacon mixture remains. Transfer mixture to a bowl to cool, then blend in the butter and chopped parsley. Refrigerate butter until you’re ready to build the pizza.
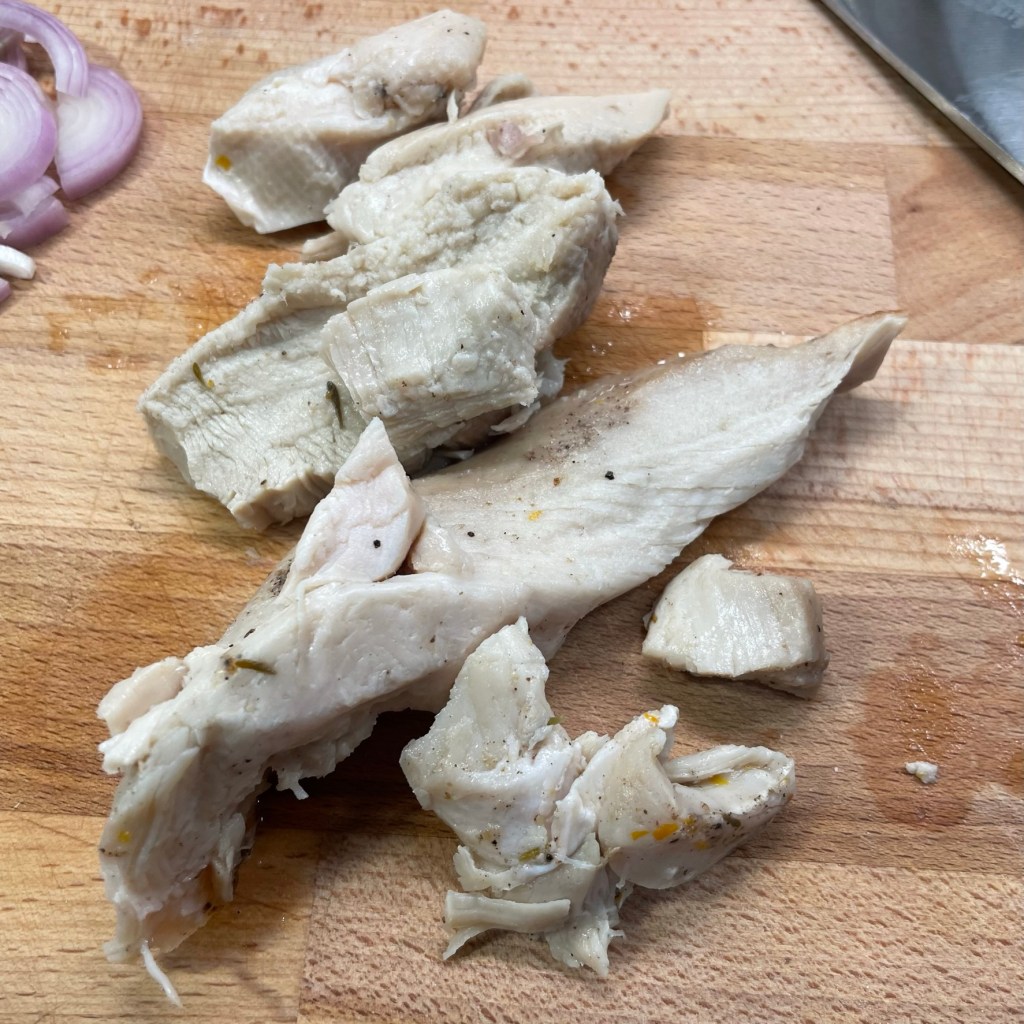
  6. Slide a knife under the clam meat to remove them from their shells. Refrigerate clam meats until you’re ready to make the pizza. Discard the shells.

Remove the compound butter and clam meats from the fridge a few minutes ahead so that the butter is manageable and can easily be spooned. I bake my pizzas on a steel, which is preheated for an hour at 550° F. If you are using a stone or regular pizza pan, reduce heat and adjust baking time accordingly.

Ingredients

  • 11 oz. pizza dough ball, at room temperature
  • Semolina flour for shaping dough
  • 1 Tbsp. extra virgin olive oil
  • Kosher salt and black pepper
  • 1/2 freshly shredded low-moisture mozzarella
  • Reserved clams
  • Clams casino compound butter
  • 2 Tbsp. grated Parm-Romano blend cheese
  • Reserved panko crumbs

Directions

  1. Shape pizza dough by hand (not by rolling), into a 14-inch round. Transfer round to a flour- and cornmeal-rubbed pizza peel for easy transfer into the oven.
  2. Drizzle olive oil all over dough, then season with salt and pepper. Scatter mozzarella evenly over dough.
  3. Arrange clam meats on dough, and then place a small dollop of the clams casino compound butter over each clam. If you have extra butter, place smaller dollops in between the clams.
  4. Slide onto pizza steel and bake for 6 minutes or until crust is blistered and browned and toppings are bubbly. Sprinkle with bacon panko crumbs and serve immediately.


Bacon & Spinach Pizza— on the grill!

If you’ve been following my blog for any amount of time, you know that I love to make pizza at home. Beginning with my favorite sourdough crust, I mix and match ingredients to discover new favorites and I’ve also had a lot of fun transforming other classic dishes into pizza, as I did with jambalaya, queso fundido, spanakopita, ratatouille, shrimp scampi and even Thanksgiving (you can check them all out on my Pizza Party page). My husband, Les, and I truly love a good pizza, and it’s in pretty hot rotation at our house, even in the summer months. 

There’s only one problem now. This god-awful heat!

Most of my pizzas (excluding the deep dish versions) are baked on what I lovingly refer to as our “screaming hot pizza steel,” which is preheated at 550° F for one hour. This summer, with outdoor temperatures holding steady in the 90s, we had a choice to make, lest we face similar temps inside. And the solution turned out to be simple— pizza on the grill!

I think we can expect a lot more of these!

Two summers ago, Les and I invested in a Napoleon four-burner gas grill. Part of the reason we chose this grill (besides the fact it was made in Canada, not China) is that the model can support some amazing accessories, including a rotisserie basket and a charcoal smoker insert (both of which we bought but have yet to use). What it didn’t have was a great solution for pizza.

We considered getting an outdoor pizza oven— they’re all the rage now, after all— but having one would require having a place to set it and store it, and then there’s all the accessories for it. And have you seen the price tags? Having just dropped a hefty chunk of change on our fancy grill, we couldn’t justify spending another grand on a device that would only be used for pizza.

Fortunately, we are not easily deterred, and some quick research led us to a pizza stone made by Weber that is suitable for really high temperatures. The stone is coated with a glaze that gives it an easy-release finish, and although the Weber site says you must use it with their special frame kit on select Weber grills, I’m here to report that it also works great on our Napoleon— we just set it right on top of the grates, and crank up the heat!

This is even hotter than our oven!

The first couple of pizzas we tried on the grill last summer turned out good, with melty toppings and crispy crust. But we missed the usual top-of-pie blistering that we love from our oven-baked pies, so this year, we’ve figured out a compromise. After our pizza bakes for roughly six minutes on the grill, it hits a perforated pizza pan for a spin under the oven broiler for exactly one minute. Yes, the broiler gets hot, but only very briefly compared to multiple hours at 550° F. It’s a solution that ticks all the boxes for these two pizza snobs!

Hungry for something different?

My pizza dough recipe makes enough for two pies, so I have plenty of opportunity for experimenting. I usually do something classic for one pizza, and the other becomes a blank canvas for new ideas. I’ve been tuned into Les’s suggestions quite a bit lately, and he asked last week whether we’ve ever done a pizza with bacon as a topping. I had to search my own blog to discover that, yes, I did put bacon on the jalapeño popper pizza, the Kentucky hot brown pizza and the oysters Rockefeller pizza (they are also on the Pizza Party page). 

But Les wanted something a little different, using bacon as a salty accent, plus fresh spinach (his favorite), red onions and some gruyere cheese he thought he’d spotted in the fridge. I contributed a topping of my own, ricotta, and this new pizza was born. 

A very tasty experiment, if we do say so.

I cut up the bacon into pieces and cooked it until most of the fat was rendered and it was just shy of crispy, knowing that it would cook further in the heat of the grill. The cheese we thought was gruyere turned out to be white cheddar with “gruyere notes” (whatever that means), and we mixed it about 50-50 with freshly shredded hard mozzarella to be sure there was a good melt. This pizza would not have sauce, so it needed something else with a bit of moisture. Ricotta to the rescue, though next time I would spike it with some garlic to punch up the flavor a bit.


Our six minutes on the grill stone, plus one minute under the broiler method is a winner. This is very good news for us pizza lovers, especially with an entire hot summer ahead of us. The moral of this story? Where there’s a grill, there’s a way! 😉


Bacon & Spinach Pizza— on the grill!

  • Servings: One 14-inch pizza
  • Difficulty: Average
  • Print

This is a fun and different flavor combination for pizza, whether you bake it in the oven or (as we did with this one) on the grill!


Ingredients

  • Pizza dough ball, roughly 11 ounces
  • 1/3 cup freshly grated hard mozzarella
  • 1/3 cup white cheddar (or gruyere blend)
  • 3 thin slices red onion, separated
  • 4 slices uncured smoked bacon, cut up and cooked until shy of crispy
  • 3 sprigs fresh thyme leaves
  • 1/4 cup whole milk ricotta (seasoned with some garlic powder, if you like)
  • Medium handful fresh baby spinach leaves, torn into smaller pieces
  • 2 Tbsp. grated Parm-Romano blend cheese
  • Drizzle of extra virgin olive oil

Baking notes: If you are baking indoors, preheat a pizza steel at 550° F for one hour; for the grill method, heat to high temperature with a stone or steel pan, following manufacturer’s instructions.

Directions

  1. Shape pizza dough into 14-inch round; transfer to a flour- and cornmeal-rubbed pizza peel. Drizzle a bit of olive oil over the dough and season it with salt and pepper.
  2. Scatter both mozzarella and white cheddar/gruyere all over pizza dough, then arrange onion slices, par cooked bacon and thyme leaves over the cheese.
  3. Carefully spoon small dollops of ricotta on the pizza, keeping a bit of distance between.
  4. Scatter spinach leaves all over, then sprinkle with Parm-Romano blend cheese and give it one last drizzle of olive oil.
  5. Slide pizza onto preheated stone or steel; bake about six minutes. If grilling, transfer finished pizza to a perforated pan and slide it under a hot broiler for one minute to achieve a blistered, oven-like finish.


Bacon & Bourbon Waffles

The countdown to Easter will begin next week, and for many people who follow religious tradition, that means giving things up for Lent. I don’t participate in the observance of Lent myself, but I always know that it’s coming because all the fast-food chains start advertising their fish sandwich options again. When Ash Wednesday arrives, those who do observe will “fast” until Easter from any number of things— whether food, habit or activity— to mirror the fasting and spiritual introspection that the Bible says Jesus modeled during the 40 days he wandered in the wilderness before his trial and crucifixion.

But before that period of fasting and self-restraint, we eat and we party! 

According to this article on Food52, the old-time religious faithful observing Lent would spend the day ahead (which they called Shrove Tuesday) ridding their homes of luxury ingredients such as eggs, sugar, butter and milk, so they wouldn’t give in to temptation during those 40 days of self-deprivation. It just so happens that pancakes are an easy way to use up all of those tempting ingredients, and the tradition of eating pancakes the night before Lent was born. 

This tradition of indulging the day before Ash Wednesday is also evident with the festivities of Mardi Gras, which translates literally from French to “Fat Tuesday.” Is there a better way to observe a day called Fat Tuesday than chowing down on thick, fluffy pancakes, drenched in butter and sweet syrup? Possibly. If you want to shake things up this year, either for Shrove Tuesday or Mardi Gras, ditch the plain old pancakes and whip up a batch of bacon and bourbon waffles instead.

These are darn near sinful!

My waffles have crispy bacon and smoky, maple-infused bourbon— on the inside and the outside. This meal feels perfectly appropriate for Mardi Gras, in the spirit of indulgence and with a whisper of New Orleans— bourbon whiskey, after all, was likely named after the same French ruling family that gave Bourbon Street its name. I put a tablespoon of my smoked maple bourbon right into the batter of my waffles, and kissed the syrup with a splash of it as well. If you can’t get your hands on this bourbon, any quality bourbon will work fine. But for the syrup, you owe it to yourself to use real maple. For waffles this indulgent, supermarket syrup just won’t do.

The smoked maple bourbon is exquisite, and does fine things for cocktails, too!

The waffles make use of my sourdough discard, and the batter includes a bit of cornmeal, for texture but also as a friendly nod to the corn in the mash bill of the bourbon. Start building the batter overnight if you’ll be enjoying the waffles for breakfast (hey, if you’re down with a splash of bourbon at breakfast, you are definitely my kinda people), or in the morning if you want them for Fat Tuesday dinner. Stir together the flour, cornmeal, buttermilk and sourdough starter, then cover it and leave it on the counter til you’re ready to waffle.


When it’s time to eat, cook up some bacon pieces until they’re crispy, and add the drippings to the melted butter that will be mixed into the batter. We use uncured bacon at our house, and I love the natural flavor. The smoky bacon emphasizes the smoked maple flavors in the bourbon as well, and it’s a nice offset to all the sweetness that hits you in the syrup.


Get the waffle iron going, and then mix the rest of the ingredients into the batter. Whisk the butter into the beaten egg, then half of the bourbon. Sprinkle the salt and baking soda over the bubbly overnight batter, then stir in the egg mixture and fold in about half of the crispy bacon bits. Within a couple of minutes, the batter will expand as the soda interacts with the acidic buttermilk. This chemical reaction is what gives the waffles their loft and fluff.


When the waffle iron is hot, add the batter and close the lid. Depending on your model and baking temperature, it may take 5 to 8 minutes for your waffles to be ready. Resist the urge to open the iron before the indicator light comes on, and feel free to give them an extra minute if you prefer your waffles more golden.


If you’re making a large batch of waffles, you can keep the first ones warm by placing them on a rack over a baking sheet, inside a 250 F oven. While mine were baking, I warmed up real maple syrup with the remaining tablespoon of bourbon and a pat of butter. Plate the waffles with a quick scatter of the remaining crispy bacon and the syrup.


Bacon & Bourbon Waffles

  • Servings: About 4
  • Difficulty: Average
  • Print

Ditch the boring pancakes and shake up Shrove Tuesday with these sourdough waffles, accented with bacon and bourbon from the inside out!


Ingredients

  • 2/3 cup + 1 Tbsp. all-purpose flour (85g)
  • 1/4 cup medium grind cornmeal (40g)
  • 1 cup cultured buttermilk (227g)
  • 1/3 cup sourdough starter (75g; discard is fine)
  • 2 tsp. maple (or granulated) sugar
  • 1/2 tsp. salt
  • 1/4 tsp. baking soda
  • 1 large egg, beaten
  • 3 Tbsp. salted butter, melted and cooled (or swap in some of the bacon drippings for extra bacon flavor)
  • 5 slices uncured smoked bacon, cut into pieces and cooked until crispy (use half in the batter and reserve the rest for topping the waffles)
  • 2/3 cup real maple syrup
  • 2 Tbsp. Knob Creek smoked maple bourbon, divided (use half in the batter and half in the syrup for serving)

I made these waffles using a standard, non-stick waffle maker and they were delicious. I expect that a Belgian waffle maker would produce a lighter, crispier waffle. Follow your manufacturer’s instructions regarding oiling the plates, temperature and baking time.

Directions

  1. The night before, combine flour, cornmeal, sourdough starter and sugar in a large bowl. Stir it well to ensure no pockets of dry ingredients. Cover and leave at room temperature overnight (about 8 hours).
  2. When you’re ready to make the waffles, prep the bacon and set up the waffle iron to preheat. Set oven to 250 F and place a rack inside a baking sheet for keeping waffles warm. Take the egg out of the fridge to bring to room temperature.
  3. Whisk the melted butter into the egg. Stir in 1 tablespoon of the bourbon.
  4. Sprinkle the salt and baking soda over the overnight starter, which should be nice and bubbly. Pour the egg mixture into the batter and stir vigorously but briefly to get the chemical reaction started. Fold in half of the crispy bacon pieces. Let the batter rest until the waffle maker is fully preheated.
  5. Pour batter into waffle iron and close the lid. Avoid the temptation to lift the lid until your waffle iron indicator says it’s time. Keep waffles warm in oven while you prepare the next batch.
  6. Combine maple syrup and remaining bourbon in a small saucepan and heat until warm. If desired, melt a teaspoon or two of salted butter into the syrup.
  7. Scatter remaining crispy bacon over finished waffles and drizzle maple bourbon syrup over for serving.


Jalapeño Popper Pizza

Most pizza lovers would agree that there’s never a bad day for pizza. But someone somewhere decided that February 9th should be “National Pizza Day,” and I am here for it with a pizza that is not only delicious, but also especially appropriate for snacking during Sunday’s Super Bowl, er, “Big Game!”

Everything you love about a jalapeno popper, on a pizza!

This pizza, which is built on my go-to homemade sourdough crust, is a fun interpretation of the classic jalapeño popper, which is usually a hot pepper, stuffed with cream cheese and cheddar, then wrapped in bacon and baked.


We focused on those same ingredients, spread them out onto a pizza crust and turned it into a delicious slice. Two game day favorites, one tasty bite!

Arrange the ingredients so that every slice has all the flavors!

If you aren’t into making your own pizza dough, choose a store-bought dough from the deli department, preferably one that is about 11 ounces, and shape it by hand into a 14-inch round. There’s no sauce on this pizza—it doesn’t need it. Only mozzarella on the base, but also multiple cheeses in a homemade pimento cheese mixture (don’t worry, I’ll share that recipe, too), thumb-size pieces of smoky, salty bacon and fat chunks of fresh jalapeño, which I blistered in the same skillet I used to par-cook the bacon. You know what else would’ve been great on this pizza? Sautéed onions. Next time!


The pizza is surprisingly not all that spicy, despite having those two enormous jalapeños scattered all over it. If you desire more heat, keep some of the seeds on the jalapeños or consider adding some crushed pepper flakes at the table. Personally, we thought the pizza was just right.

The pizza steel has been a total game changer for our home pizzas. I highly recommend it!

We bake all our pizzas on a thick pizza steel, preheated for an hour at 550°F, the hottest our home oven will go. At this temperature, and with the steel, the pizza takes only 6 minutes to achieve blistered, bubbly perfection. If you’re using a stone or a pan, adjust temperature and baking time accordingly.


Jalapeño Popper Pizza

  • Servings: 6 to 8 slices
  • Difficulty: Average
  • Print

All the flavors you love in a jalapeño popper, tossed onto a homemade pizza dough. It's two game day favorites in one delicious bite!


Ingredients

  • 1 ball pizza dough, at room temperature
  • 1 Tbsp. extra virgin olive oil
  • 1/2 cup low moisture mozzarella, shredded
  • 2 large jalapeño peppers, seeded and cut into 1-inch chunks
  • 4 slices thick smoked bacon, cut into 1-inch pieces
  • 1/2 cup pimento cheese (see recipe notes about this)
  • 3 cloves garlic, peeled and finely minced

Use a sturdy pimento cheese that does not have a lot of mayonnaise. If it drips or slides off a spoon, it is too runny for this recipe. Look for an artisan brand or make my Roasted Poblano Pimento Cheese for this recipe.

Directions

  1. Preheat oven to 550 F, with a pizza steel on the oven rack about 8 inches from top heat element. From the time the oven reaches 550, set a timer for one hour. If using a pizza stone or pan, adjust heat and baking time accordingly.
  2. Cook bacon over medium heat in a cast iron skillet, until most of the fat has rendered but the bacon is just shy of crispy. Transfer bacon to a plate lined with a paper towel. Drain off excess grease.
  3. In the same skillet, toss jalapeño chunks until they are slightly softened and the skins are somewhat blistered. Transfer to the same plate as the bacon.
  4. Shape pizza dough by hand into a 14-inch round and transfer it to a floured, cornmeal-dusted pizza peel. Drizzle or brush olive oil onto the crust, and season with kosher salt and freshly ground black pepper.
  5. Scatter mozzarella all over dough, then arrange the jalapeño and bacon pieces. Place small dollops of pimento cheese onto the pizza, so that every bite will have a little bit of every flavor. Sprinkle minced garlic onto the pizza.
  6. Slide the pizza from the peel onto the pizza steel and bake for about 6 minutes, until crust is blistered and golden and the cheeses are melted and bubbling. Serve at once.

Roasted Poblano Pimento Cheese

  • Servings: About 10
  • Difficulty: Average
  • Print

The joy of making your own pimento cheese is that you can spike it with any flavor you like! Here, I've used oven-roasted poblano chiles to complement the tangy pimentos.


Ingredients

  • 2 medium poblano peppers, cut in half and seeded
  • Olive oil spray (or 1 tsp. olive oil)
  • 3 oz. cream cheese or neufchâtel, softened to room temperature
  • 1/4 cup + 1 Tbsp. mayonnaise
  • A dash or two of hot sauce, to taste
  • A few quick shakes onion powder or garlic powder (about 1/2 tsp. total)
  • Salt and pepper
  • 2 Tbsp. drained jarred pimentos
  • 3 packed cups shredded or grated cheese (see recipe notes)

For best results, mix all the ingredients and adjust seasoning before blending in the cheese. Purchase whole blocks of cheese and shred it yourself, as the bagged varieties have a coating to prevent sticking and they won’t blend as well. Several varieties of cheese work great in pimento cheese, and I used a mix of Monterey Jack, American, Colby jack and extra sharp cheddar.

Directions

  1. Preheat oven on low broil setting. Line a baking sheet with aluminum foil (not parchment) and use the heel of your hand to press and break the poblano halves until they’re flat. Arrange them, skin side-up, on the foil. Brush or spray them with oil, and then broil until the skins are blistered and peppers are softened (about 10 minutes). Transfer peppers to a bowl and cover for 20 minutes until they’re cool enough to handle. Peel as much of the skin from the peppers as possible and then chop fine.
  2. In a fairly large bowl (you’ll need plenty of room to stir), blend together the cream cheese, mayonnaise, hot sauce, and onion powder. Mix until smooth. Stir in pimentos and chopped poblanos. Season to taste with salt and pepper, perhaps a bit saltier than you like because the cheese will dull those flavors somewhat.
  3. Stir in the shredded cheese, one cup at a time, blending really well each time until all cheese is mixed in. Cover and refrigerate a day for best flavor.


Kentucky Hot Brown Swirls

The funnest thing about doing a food blog is putting all the new spins on the old dishes. Wait, did I just write “funnest?” Well, a word like that fits the situation, given that I am feeling playful about twisting up a classic. If I’m taking all kinds of liberties with the flavors so beloved for Kentucky Derby, I may as well do it with my words, too.

My celebration of the Kentucky Derby—which is Saturday, by the way, in case time has gotten away from you—is purely vicarious. I’ve never been to the Derby and honestly don’t know how I feel about the way they pressure the horses to perform for profit, but I know that I like the pomp and circumstance, the food traditions, the fancy hats and especially the bourbon! The Kentucky Hot Brown is the most classic dish associated with the Kentucky Derby, and I have twisted it up in several ways already, including a Kentucky Hot Brown Benedict, a Kentucky Hot Brown Pizza and a super simple Kentucky Hot Brown Dip. When Derby time rolled around this year, I wanted to make a fun, crowd-ready food that’s easy to pick up and enjoy in just a few bites because, honestly, who wants to sit down in the middle of a party with a knife and fork and eat a messy, traditional Kentucky Hot Brown open-faced sandwich, with all its oozing Mornay sauce? Yeah, these are much easier!

It’s no coincidence that these Kentucky Hot Brown swirls are delicious with bourbon.

If you’re entertaining friends for the afternoon leading up to the “most exciting two minutes in sports,” may I suggest these adorable little puff pastry swirls? They have all the flavors of the beloved Kentucky Hot Brown, including roast turkey, bacon, tomatoes and gruyere, plus a touch of sauteed shallot and (in a nod to the catering kitchen where I worked so long ago) “A Pinch of Thyme.”

I expected a few obstacles along the way to these tasty rollups, mostly because puff pastry can be fussy to work with. It bakes up best if it goes into the oven cold, so the first thing I planned was to work quickly. Get all your filling ingredients ready first, and refrigerate the ones that are cooked, such as the bacon and shallots. Cook the bacon long enough to render as much fat as possible, so the lingering fat doesn’t make the pastry soggy, but not so much that hard edges will tear the pastry. Shred the cheese and keep that in the fridge until assembly time, too. Fresh roast turkey is probably better than deli turkey (mainly for keeping the sodium in check), and I confess that I used leftover turkey that we had stashed in the freezer after Thanksgiving. As for the tomato, I knew that my sweet and savory tomato jam would not spread neatly onto the puff pastry without tearing it, and I didn’t want to heat it (see the first point about baking puff pastry cold), so here’s how I overcame that challenge—I added a few tablespoons of tomato jam to the bowl with chopped turkey and stirred it together. Problem solved!

You can put these two-bite treats together in the morning or afternoon, even the night before, all the way up to slicing them into swirls, and then refrigerate them until about a half hour before your guests arrive. A quick egg wash and some extra sprinkles of gruyere just before they hit the oven, and, well—riders up!


This recipe makes 12 swirls, just about right as appetizers for 6 people.

Ingredients

3 slices smoked bacon, cut into pieces no larger than a postage stamp

1 smallish shallot, peeled, halved and cut into half-moons

1 cup chopped, cooked leftover roast turkey breast

3 Tbsp. tomato jam (store-bought or homemade, if you have it!)

1 heaping cup shredded gruyere cheese (or Swiss), divided

A few sprigs fresh thyme, leaves stripped

1 sheet store-bought puff pastry, thawed according to package instructions

1 egg, whisked with a teaspoon of water, for egg wash just before baking


Instructions

Ready to make them?


Kickass Whiskey-Braised Collards

After a mere 30 years living in the South, I finally learned how to make collard greens, one of the staple foods of the region. It happened quite serendipitously, as I described in my original recipe for “Just Collards.” Since that fateful day, and the quick walk-through given to me by a kind stranger, I have made collards many times, using the same basic recipe. My husband and I enjoy them with everything from fried chicken that I pick up at the deli counter, pulled pork that he makes on the smoker, and even occasionally just on the side with some homemade mac and cheese.

Collard greens, in case you don’t already know, are one of nature’s “superfoods,” and they can be eaten raw, but most often you’ll find them braised in liquid. Collards are so packed with nutrients (including vitamin C, calcium, immune-supportive B vitamins and magnesium), that even the resulting cooking juices are considered to be sustaining. They are a very hardy crop, easy to grow in nearly every climate, and they are widely revered here in the South.

Until now, I have followed the same basic recipe—cook up some chopped bacon with onions, add chopped collards to the grease, splash in vinegar and broth and let them simmer until tender. Easy enough, and always delicious. I can’t quite explain what happened last week that inspired me to put a hot and spicy, bold and boozy twist on them—maybe a burst of Black History Month energy—but, mercy, was it ever good!

The salty bacon, smoky pepper heat and the bite of whiskey have transformed my usual collards into something extra flavorful!

I amped up these collards with fresh garlic and a few extra shakes of a specialty pepper mix we love, which includes smoky chipotle, fruity ancho and fiery habanero. The combination of hot pepper flavors sent these collards over the top into kick-ass territory. The real kicker, though, was the shot of whiskey I splashed into them. And not just any whiskey, but the only brand I happened to have on hand when my imagination started running—Uncle Nearest 1856. If you have not yet heard of this whiskey, I hope you’ll take a few minutes to read about it. Uncle Nearest is a Black-owned brand, built on the legacy of Nathan “Nearest” Green, an enslaved man who taught Jack Daniel how to make whiskey. If you’re thinking, “how can that be?” well, this is why we have Black History Month, so we can fill in the gaps of what we thought we knew.

Braising in the whiskey turned out to be a great decision.

Uncle Nearest 1856 was the basis for the Long Time Coming red cocktail I created in honor of Juneteenth last year, and at 100 proof, it’s pretty sturdy. The charred oak barrel notes of the spirit imparted additional smokiness to these collards, which cooked up in about half the time as my regular, go-to recipe. That might have been the whiskey, or it could just be that I served them up earlier than usual, because they smelled so darn good.


Ingredients

3 slices uncured bacon, cut into 1/2″ pieces

1/2 large yellow or sweet onion, chopped

3 cloves fresh garlic, chopped or minced

Kosher salt and freshly ground black pepper

Several shakes Dark and Smoky red pepper blend (or any crushed red pepper you like)

1 large bunch fresh collard leaves, washed and trimmed of heavy stems

1 shot glass whiskey (about 3 tablespoons)

1 cup low-sodium vegetable broth


Instructions


In a large skillet or pot, cook the bacon and onion over medium heat until the bacon has crispy edges and the onion is softened. Add the garlic, season with a bit of salt and pepper, and cook another minute or two.

Clear a space in the center of the pan and add about a teaspoon of olive oil. Shake the red pepper flakes into the oil to activate the flavors, and then toss the bacon-onion mixture to spread it around. Add the collards, a handful at a time until wilted, and toss to cook. When the collards have softened and collapsed into the pan, add the whiskey and vegetable broth and bring to a boil. Reduce heat and simmer, covered, until collards are tender. This will take anywhere from 25-50 minutes, depending on your simmer level and preference. Adjust salt and pepper to taste before serving.


Les’s Atomic Buffalo Turds

The name alone demanded that I make this appetizer when I ran across the recipe sometime while preparing for my 2015 Super Bowl party. The fact that it was a heat-fueled bite made it even better. Not only did it pair well with my favorite chili, but it also helped get the guests to leave on time.

For some reason, I didn’t make these spicy bites for the 2020 Super Bowl bash at our house (the last time we actually had people over). And last year, when it was just me and Terrie for the Pandemic Bowl, no turds.

With this year’s Super Bowl coming up, Terrie asked me to make these and share the recipe, so here goes. I wish I could credit a specific source for these, but I cannot remember where I found the recipe. It’s just an awfully good one, and very conducive to substitutions of spices and topping sauce. So many different things can work. The key is the mix of sweet to offset the intense heat. The original recipe suggested cooking these on an outdoor smoker, but this adaptation is adjusted for baking in a home oven.

Behold, atomic buffalo turds!

My 2016 batch, enough for a houseful of hungry Super Bowl guests.

Ingredients (makes 12 pieces)

6 medium size jalapeno peppers, halved and trimmed*

12 li’l smoky sausages*

3/4 brick of cream cheese

1¼ tsp. smoked paprika*

3/4 tsp. cayenne pepper (or less, if you’re scared)

6 slices of bacon, cut in half crosswise*

12 toothpicks

2 Tbsp. sweet rub seasoning*

Sweet finishing sauce*


Notes

  • Scoop out the innards of the jalapenos, removing most of the membrane and the seeds. However, if you really want heat, feel free to leave some of that membrane intact.
  • There are different brands of li’l smokies. Ideally, we’d love to find some without nitrites, but if they are made, we can’t find them. You can, however, probably substitute other kinds of normal size sausage and simply cut them down to the bite-size smoky portion.
  • There are many different types of paprika. For this batch, we used a bourbon smoked paprika we’d found online at Bourbon Barrel Foods.
  • I usually wrap the bacon raw around the jalapenos, but there is something to be said for lightly starting to cook the bacon in a skillet to render some of the fat and help it be more crispy later. But don’t cook it too long, or it will either burn or crack and fall off in the oven. Thin slices of bacon work better than thick.
  • The sweet rub seasoning can be anything you find that suits the bill; it is used to offset the heat. You can also make some your own, as we did in this case, using 3 parts of brown sugar to one part of Flatiron Pepper Co.’s dark and smoky BBQ rub. Flatiron is a very good specialty pepper company and we have enjoyed many of their products, which tend to bring the heat!
  • The finishing sauce is usually a sweet/tart, often fruit-flavored BBQ-oriented sauce. It goes on after the turds have cooked and provide a beautiful cooling note. Or, if you’re like us, you can look for a fruit-flavored-but-still-has-a-kick sauce. One year, I used a cherry-ancho BBQ sauce. For this batch, we had a raspberry-habanero sauce I’d bought from a friend who sells Pampered Chef products.

Instructions

Preheat oven to 300° F.

The first thing to do is prep the jalapenos, which involves cutting off the stems, splitting them lengthwise and then taking out the seeds and membrane. The more of either you leave inside, the more the heat your turds will pack. Wash your hands thoroughly (unless you have kitchen gloves to work with, which I don’t) when you’re done. And don’t even think of getting that itch near your eye, even after you’ve washed your hands. Trust me. Been there, done that.

Prepare the cream cheese mix by adding the paprika and cayenne. The cream cheese will turn orange. Don’t be alarmed. It helps, by the way, to let the cream cheese get room temp for easier mixing. Scoop the cream cheese to fill the half jalapenos and be relatively generous. Then place one smoky right on top of the cream cheese, lining up your jalapenos on a parchment-lined cookie sheet.

Take one of the half slices of bacon and wrap around the jalapeno, covering the smoky and cream cheese mix and securing with a toothpick on top through the bacon. Push down through the smoky and keep going until you feel resistance from the bottom of the jalapeno. Do not pierce the jalapeno if you can avoid it, as that will cause the cream cheese mix to seep out.

Sprinkle a generous portion of whatever your sweet rub mix of choice is on each smoky and place the cookie sheet in the oven. Allow about 90 minutes. The long, slow baking time simulates the process of smoking them.

When the bacon looks done, remove the turds and brush or drip your finishing sauce on top of the turds. Then, enjoy the burn!

Good to the last scorching bite.


Salted Maple-Bacon Ice Cream

It wouldn’t be summer without ice cream, and it wouldn’t be Comfort du Jour without some unexpected flavor twists. One of the biggest reasons I love my ice cream machine is that I can choose my own flavors rather than relying on the same old varieties you find everywhere else. Using my easy formula for custard ice cream base, I’ve whipped two of my all-time favorite flavors into one frosty treat.

I’ve swapped out sugar in favor of maple syrup, and paired it with the delicious, smoky flavor of real bacon! These two flavors are like an old married couple, finishing each other’s sentences and picking up each other’s slack. When the maple syrup starts to feel too sweet, here comes the salty, savory bacon to keep it in check. And because we get a little crazy at our house about the sweet-salty combination of maple and bacon, I’ve garnished the ice cream with additional bacon, glazed with maple syrup. I’ll share that, too.

It’s National Ice Cream Day, smack in the middle of National Ice Cream Month, and I am on it!

I know you want some.

Ingredients

1 1/2 cups whole milk

1 1/2 cups heavy cream

1/3 cup maple sugar* (see notes)

3 egg yolks

1/2 cup dark maple syrup

1/2 tsp. kosher salt

4 thin slices uncured maple bacon, cooked until crispy, then broken into bits*

1 Tbsp. bourbon (optional but recommended for improved texture)


*Notes

Double maple means double tasty!

My maple sugar is sourced from the same place I order my syrup, Big Tree Maple in Lakewood, N.Y., which is just up the road from where I grew up. Maple sugar is not as easy to find in local stores as maple syrup, but you will be happy to know that Big Tree offers shipping on its products. You could also substitute with caster sugar (sometimes called “superfine” sugar) or simply increase the maple syrup to a total of 3/4 cup.

All 4 pieces of bacon are intended for mixing into the ice cream. Cook a few extra slices of bacon if you want to make the maple-glazed candied bacon garnish. And, trust me, you want to! 😉


Instructions


  1. In a stand mixer or bowl with hand mixer, whip egg yolks until they get frothy and increase in volume. Gradually add maple sugar, whipping constantly and stopping occasionally to scrape down the sides of the bowl.
  2. Heat milk and cream until hot and steaming but not boiling. Reduce the heat to very low (or turn it off) at this point, so that the milk mixture doesn’t curdle. Measure out about 1 cup of the hot milk mixture. Stream it slowly into the egg yolk mixture while running the mixer. Use a lower speed on the mixer to avoid whipping too much air into the cream mixture.
  3. Transfer the tempered yolk mixture back to the saucepan with the remaining milk-cream mixture and cook over medium-low heat, stirring constantly, until custard is smooth and coats the back of the spoon. Remove from heat. Stir in kosher salt until dissolved.
  4. Whisk in maple syrup, stirring thoroughly to combine. Lay plastic film directly onto the surface of the custard to prevent condensation. Cover the bowl with additional film or lid and refrigerate several hours to overnight.

Time to freeze the ice cream!

  1. Before freezing, remove plastic film and stir mixture to reincorporate any ingredients that may have settled to the bottom. Freeze in ice cream maker according to manufacturer’s instructions.
  2. In the last few minutes of churning, add bacon crumbles to the ice cream.
  3. Mix in a tablespoon of bourbon in the final minute. The alcohol will just barely flavor the ice cream, but the real benefit will be improved texture for scooping directly from the freezer.


Bonus recipe – Candied Maple Bacon

2 to 3 thin strips uncured maple bacon

2 Tbsp. maple syrup

Cook bacon in the 350°F oven on a parchment-lined baking sheet. When bacon is crisp, transfer to a paper towel and replace parchment paper. Lightly brush maple syrup onto each side of the bacon slices, and return it to the oven for a few minutes. Repeat two or three more times, until syrup is hardened and bacon looks like candy. Cool completely and wrap loosely in foil or parchment. Garnish ice cream portions with a piece of the bacon.


You may be wondering if I’m a paid endorser for the brands and products I spotlight on Comfort du Jour, and the answer is “no.” I do not receive money or merchandise for my recommendations, and what that means for you is that you can count on me to give an honest opinion. If something changes, I will update my disclosures. Either way, you can still count on me to be honest in my recommendations, as I will only stand behind services and products I believe in. Fair enough? 😀

Terrie


Fourth of July Baked Beans

The Fourth of July conjures very specific childhood memories for me, and baked beans has a major role in that nostalgia. Every year, members of my family on my maternal grandfather’s side gathered at the home of my great grandmother for a reunion-of-sorts picnic and, especially, for fireworks. Grandma Stoney, whose nickname was derived from her married last name, Stonehouse, lived across the street from the community baseball field, and we were lucky to have a front row seat for the excitement of what seemed to me at the time to be an enormous fireworks display. The tiny burg where Grandma Stoney lived put on quite a shindig for Independence Day, including a parade, complete with a marching band and people throwing candy to the kids from firetrucks. Back at Grandma’s house, we amused ourselves by playing croquet in the front yard and taking turns cranking the handle on an old timey ice cream maker. No doubt, my great grandmother felt great joy having everyone there.

What I remember most, besides playing with distant cousins I rarely saw, was the food. Inside the house, every available horizontal surface—and I mean tables, countertops, the stove, card tables and anything else that could be rigged up to hold dishes—was covered with potluck offerings, as everyone in attendance always brought a dish or two to share. It was unbelievable. For me, the best of all was the dining room table, which was always covered from corner to corner with every variety of baked beans you could imagine. Some of the dishes were very saucy, some looked as though they had been dumped directly from a can of Van Camp’s, and others were baked with that delightfully sticky sweet sauce pooled in the corners of the pan. And there were always several dishes of beans topped with slices of bacon. Oh man, how I loved that table!

Bacon is still one of my very favorite ingredients for baked beans, and I’ve paired it here with a favorite flavor of my Upstate New York home—maple. That combination of smoky-salty-sweet cannot be beat, and for me, it’s as much a part of Fourth of July celebration as parades and fireworks.

I don’t need fireworks on the Fourth of July. All I really want is these maple bacon baked beans! YUM.

This time, I made my baked beans from scratch, having soaked the beans overnight and then cooking them until tender before adding the flavorful sauce. But you could absolutely take a time-saving shortcut and use cans of beans. Just be sure you drain and rinse them thoroughly before you begin.


Ingredients

1 lb. dried beans, soaked and prepared for cooking* (see notes)

1 heaping cup thick-cut bacon, cut into cubes

1 sweet onion, sliced or chopped

Sauce:

6 oz. can no-salt tomato paste

1/2 cup real maple syrup

1/4 cup maple-infused balsamic vinegar*

About 20 grinds fresh black pepper

1/2 tsp. chipotle powder (optional)

3/4 tsp. kosher salt

1/4 tsp. dry mustard powder

3/4 cup cold water (added after flavor adjustment)


*Notes

My recipe was made with dried cranberry beans, rinsed and soaked overnight, then drained twice and cooked low and slow until tender. If you prefer, or if you are pressed for time, feel free to use 3 standard cans of cooked beans. Drain the beans and rinse under cold running water, to remove all the “goo” from the cans. Great Northern, navy or white kidney beans (cannellini) would be great.

The maple-infused balsamic is a specialty ingredient, purchased at one of the stores that sells flavored olive oils and balsamic vinegars. I love this product because it enhances the maple flavor without making it more sweet. If you do not find this maple balsamic, substitute an equal amount of regular dark balsamic vinegar or a couple of tablespoons of apple cider vinegar.


Instructions

  1. Cook beans as directed or rinse canned beans.
  2. Place a cast-iron skillet over medium heat. Add bacon cubes and cook, tossing occasionally, until fat is rendered and bacon cubes are just crisp. Transfer cubes to a paper towel-lined plate and drain off all but about 2 tablespoons of the bacon fat.
  3. In the same skillet, saute the chopped onion in the bacon fat until onions are tender and slightly golden.
  4. In a large bowl or measuring glass, combine sauce ingredients and stir to combine. Adjust seasonings to taste, then add water.
  5. Layer the cooked beans, bacon and onions in a glass 8 x 8-inch baking dish. Pour the sauce into the beans and give the baking dish a few gentle shakes to distribute the sauce throughout. The beans should be swimming in sauce, as much of it will absorb into the beans during baking.
  6. Bake at 350° F for about an hour, until sauce is reduced to a perfectly rich and sticky mess.
Happy Fourth of July!


Kentucky Hot Brown Pizza

“Riders up!” will be the exclamation this Saturday evening, when the jockeys rev up their adrenaline to compete in the Kentucky Derby, which has long been called “the greatest two minutes in sports.” I cannot claim to know much about the horses or the race, but I do enjoy the culinary traditions that accompany this annual event. The signature drink, of course, is the mint julep, which I have globalized this year by swapping in a mint relative to create a Thai Basil Julep. The signature dish of the Derby is an open-faced beauty of a sandwich known as the Kentucky Hot Brown, created in the 1920s by chefs in the Brown Hotel in Louisville, which is also home to the Derby. The Hot Brown is an all-American spin on a Welsh rarebit, served warm with slices of turkey breast and fresh tomato, draped in Mornay sauce and topped with criss-crossed slices of bacon—all of that lusciousness is piled high on a thick slice of buttery, toasted brioche points. It’s a tradition so beloved in Kentucky, the Brown Hotel’s website has a special page dedicated to the Hot Brown.

That’s the tradition, anyway. But in case you haven’t noticed, I’m not prone to follow tradition to the letter. I am all about twisting up the classics, and I’m doing it again, moving all the Kentucky Hot Brown ingredients off the thick brioche and onto a thin crust pizza. All the proper flavors are in attendance, but in a slightly different order and a more casual presentation. You’re welcome.

I have taken one major shortcut, using low-sodium, deli turkey breast slices. The turkey, in my opinion, is not the star of a Kentucky hot brown, so I don’t need to roast my own. The smoky bacon is par-cooked, but still soft, because I know that it will take on more crispiness under the intense heat of my oven. The tomatoes are simple—just thin slices of fresh Roma, a low-moisture variety that won’t make my pizza soggy, and it will provide some freshness to cut through the richness. That leaves only one component—the Mornay—and that is where I put most of my energy for this pizza interpretation of a Kentucky hot brown. Mornay is the special sauce that elevates all the other flavors, transforming a turkey and bacon sandwich into something rich and special. And it’s easy to make, beginning with a simple bechamel.

If the idea of bechamel seems intimidating, I suppose you can blame it on the French name. Thankfully, when my Gram taught me to make it so many years ago, she just called it “white sauce,” and she made it so often that it never occurred to me to be nervous about it. Take away the fancy name and bechamel is nothing more than small amounts of butter and flour, cooked until bubbly and whisked up with milk, then accented with freshly grated nutmeg. There’s nothing fancy about it, and it is terrifically versatile. A quick stir-in of gruyere cheese and a little white pepper makes it a Mornay and transforms this turkey and bacon pizza into a Kentucky hot brown pie.

Do yourself a favor and prep all the ingredients ahead of time. Once this pizza party begins, things move quickly. Kind of like the Kentucky Derby.

Ingredients

1 1/2 Tbsp. salted butter

2 Tbsp. finely diced onion

2 tsp. all-purpose flour

1 cup whole milk

About 1/8 tsp. freshly grated nutmeg

1 oz. white American cheese*

2 oz. cubed smoked Gruyere cheese*

2 Tbsp. shredded white cheddar*

A pinch of ground white pepper

4 slices thin-cut smoked bacon, stretched and cut into two-inch pieces

3 slices low-sodium turkey breast*

1 large Roma tomato, washed and thinly sliced

2 sprigs fresh thyme

1 ball of My Real N.Y. Pizza Dough* (or your own favorite), rested at room temperature

*Notes

American cheese is usually some form of cheddar, processed with a special enzyme and salts that make it ultra-melty. This is a go-to ingredient for any creamy cheese sauce I make. If you are skittish about using “processed” cheese, you can use regular block cheese, but the sauce will not be as creamy and is likely to separate and become oily during baking of the pizza.

The Boar’s Head brand of smoked Gruyere that I used here is also a processed cheese, but a regular Gruyere will work fine in combination with the white American cheese. In the original Brown Hotel recipe, a good Parmesan would be in order. I selected this cheese for the smoke flavor, to play up the smoky bacon.

I recommend using a low-sodium version of turkey breast, or fresh, home-roasted if you wish. Typical deli turkey is very salty, and it may be too much, given that the bacon and cheese sauce already have a fair amount of sodium.

For this pie, I did something a little different with my N.Y. pizza dough. I subbed in a small portion of corn flour, as a subtle nod to the bourbon in our accompanying Derby drinks. It was terrific! Never stop experimenting, friends. If you choose to use my pizza dough recipe, please note that it should be made a couple of days ahead, so plan accordingly.

I bake my N.Y.-style pizzas on a pizza steel at 550° F. If you use a stone, follow manufacturer’s instructions. If you use a pan, do yourself a big favor and buy a stone or a steel. 😉
We use a steel made by Dough-Joe, and it has been an absolute game changer for our pizzas at home.

Instructions

  1. Prepare the bechamel by melting butter in a small saucepan over medium-low heat. Add the diced onion. When butter begins to brown, add flour and whisk until smooth. Continue cooking, whisking occasionally, until flour begins to brown and is very bubbly.
  2. Add milk and whisk until blended and thickened. Continue to cook a few minutes to soften the flavor. Stir in the freshly grated nutmeg and the skinniest pinch of kosher salt.
  3. Add the cubes of American cheese and whisk until melted. Repeat with smoked Gruyere and then with cheddar. Stir in the white pepper. Remove from heat and cover the pan so that the sauce does not form a skin. If you work ahead and refrigerate this, warm it to smooth, spreadable consistency before making the pizza.
  4. In a cast-iron skillet, cook the bacon pieces over medium-low heat, long enough to render the fat and brown the meat, but not long enough to crisp it. Transfer bacon pieces to a paper towel to drain excess fat.
  5. Cut the deli turkey slices into thin strips, then chop cross-wise into bits.
  6. Spread the tomato slices onto a paper towel and season with kosher salt and freshly cracked black pepper. Rinse the thyme sprigs, then pat dry and strip the leaves from the tough stems.
  7. Shape the pizza dough into a 14-inch round and place it on a floured, cornmeal-dusted peel for easy transfer to the oven.
  8. Spoon small dollops of the cooled Mornay sauce onto the dough, and gently even it across the dough with the back of your spoon.
  9. Arrange the turkey all over the sauce, then the bacon and tomato slices.
  10. Add more small dollops of Mornay, between and around the other ingredients. It’s OK to overlap the other toppings, but try not to “bury” them, and keep the dollops away from the edges of the pie.
  11. Sprinkle all over with the fresh thyme leaves, and slide the pizza onto the hot steel. Bake for about 7 minutes, until crust is golden and crispy and Mornay is browned and bubbly.

Hungry for more Kentucky Derby watch party foods?