The newness of this season makes eating lighter feel more natural and easy, and I think I’m finally onto something in our recent quest to lighten up our meals. Up til now, my first thought for a new meal has been focused on the protein— deciding how to keep it “a smidge healthier,” as my blog pal, Bernadette from New Classic Recipe would say. 😉
It gets exhausting from a decision-making standpoint, though, and then by the end of my workday when I have figured out how to adapt the protein part of a meal, I’m fresh out of ideas for planning the sides. Here’s what happened when I stepped back and redirected my focus onto the vegetables.
This tackled all my flavor cravings. And won!
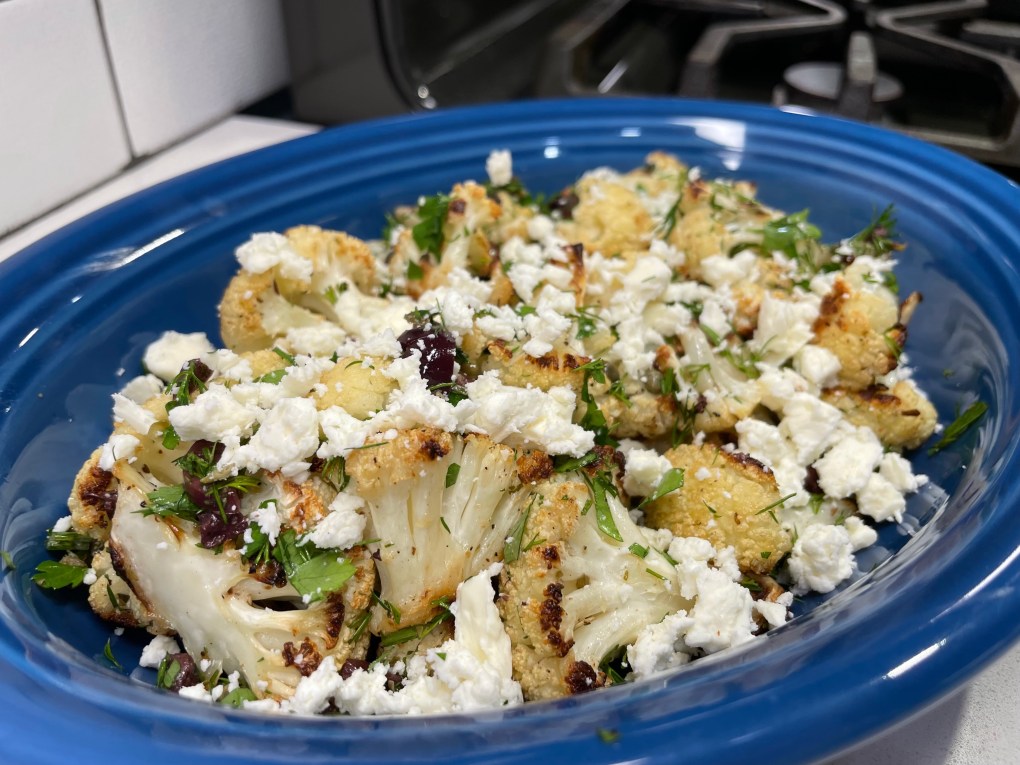
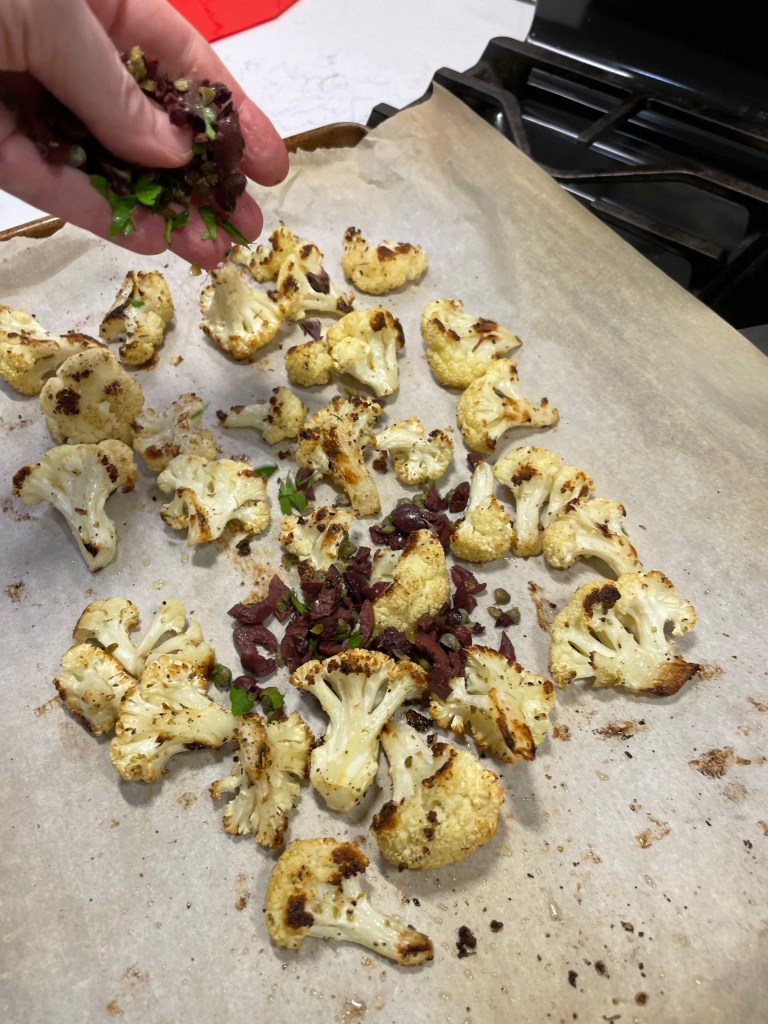
What grabs the eye in this photo isn’t the panko-crusted baked halibut, though it was truly delicious and satisfyingly easy to make. It’s the Greek-inspired roasted cauliflower stealing the show here, and no wonder. It’s embellished with tangy feta, kalamata olives, capers and herbs. Packed with flavor, and still very easy to make.
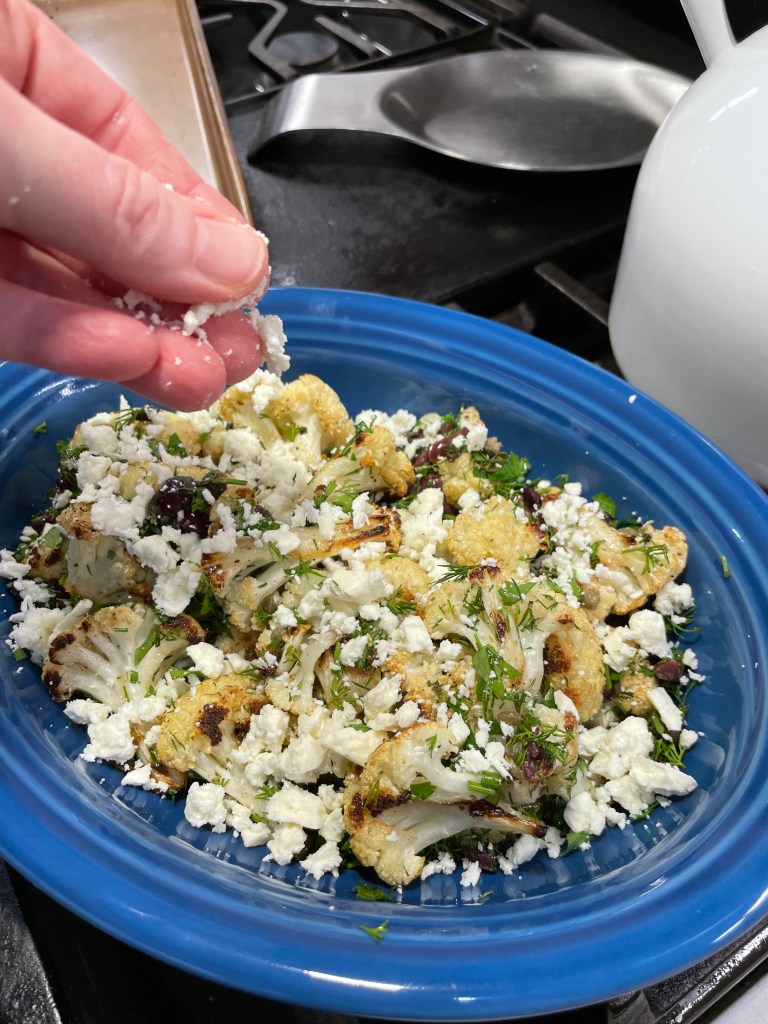
Only an ounce of feta per serving, and it brought more than enough flavor.
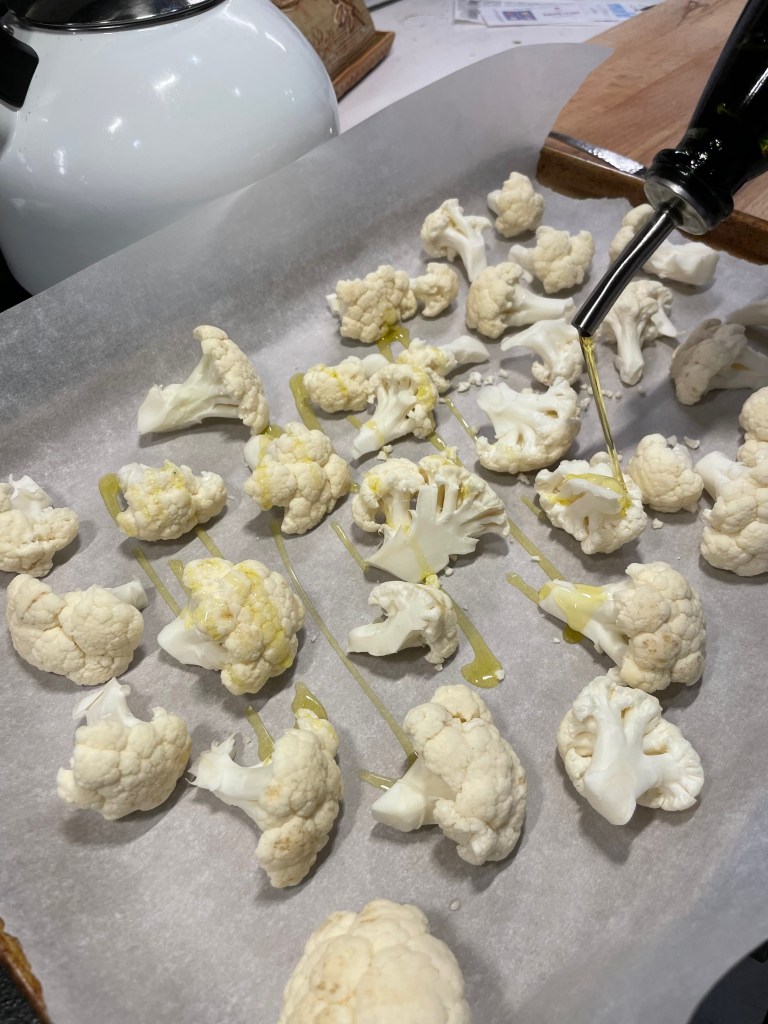
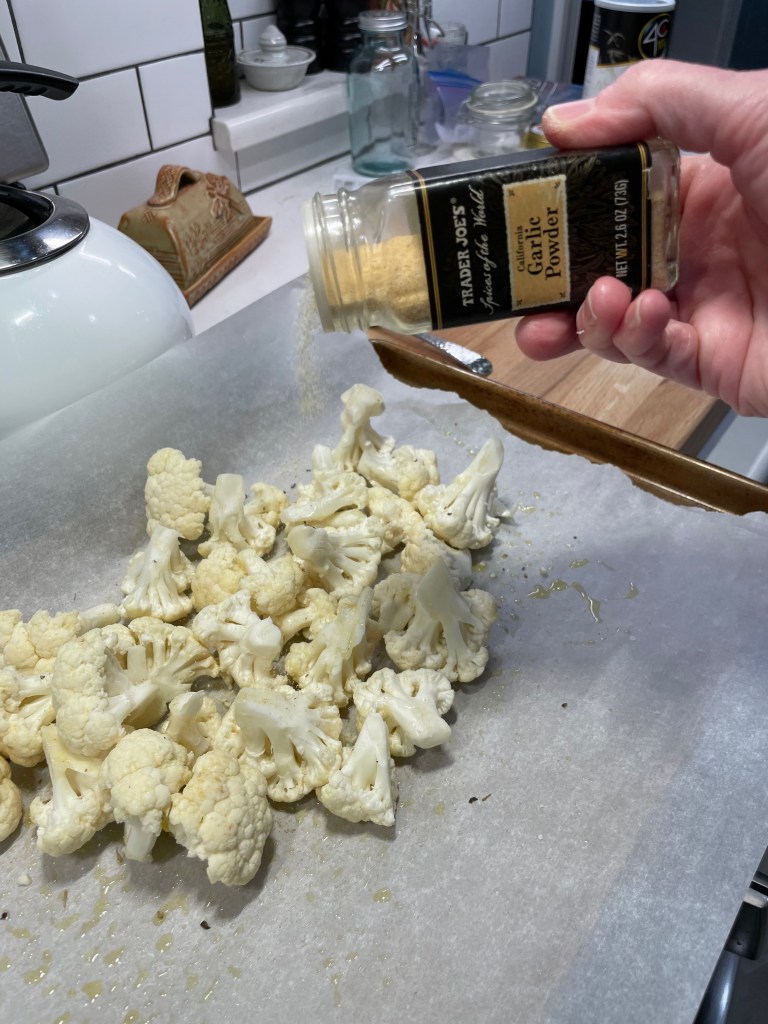
I chose cauliflower to carry these flavors because it is neutral on its own, suitable for just about any seasonings, and I kept the Greek flavors fresh by adding most of them after the cauliflower was roasted. My florets were drizzled with extra virgin olive oil and sprinkled with garlic powder, dried oregano, salt and pepper.
Drizzle extra virgin olive oil over the raw cauliflower, then toss and sprinkle with seasonings.
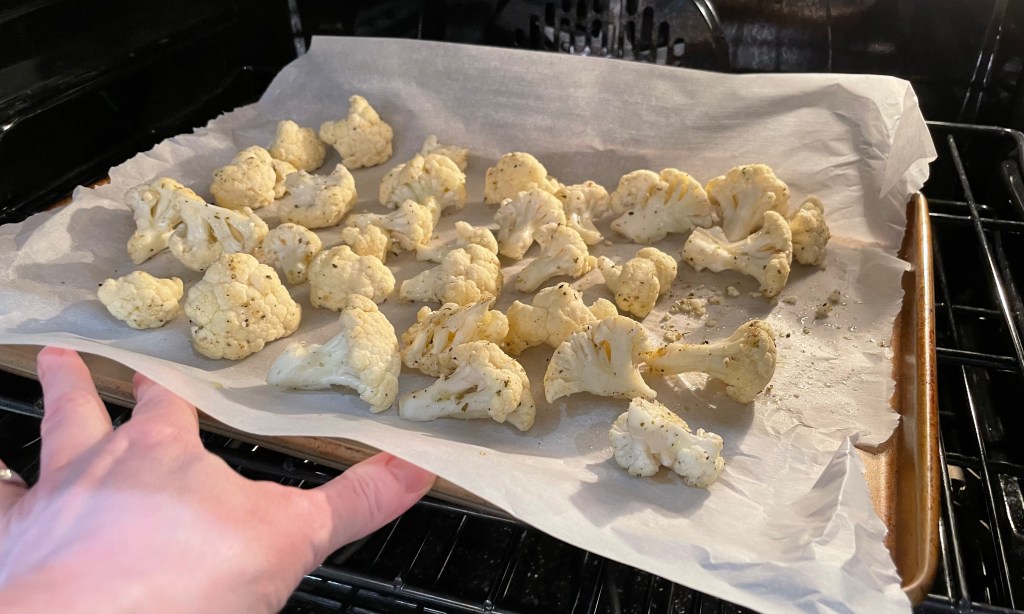
It’s best to roast vegetables at a higher heat, so that you get caramelization on the exterior before they have a chance to turn to mush on the inside. Mine went 25 minutes at 425° F, and the result was perfect for this recipe. The cauliflower held their texture and absorbed the flavors I tossed in at the end.
When the cauliflower emerged from the oven, browned on the edges and perfectly al denté, I simply tossed it with the chopped olives, capers and herbs and then gave it a good squeeze of fresh lemon, plus a final drizzle of the extra virgin olive oil. A scattering of crumbled feta finished the dish, and provided a sharp, tangy flavor that was great with my panko crusted halibut. Don’t worry, I’ll have that recipe for you in a few days!
Adding these flavors at the end keeps the colors and flavors bright.
I like this idea of putting the vegetables first, and I made a decision last week that sort of paints me into a corner so that I keep doing it. More on that soon. 😁
This dish features all the lovely flavors of the Mediterranean, and is an easy, impressive side to fish or chicken.
Ingredients
Small head cauliflower, cleaned and broken down into florets
3 Tbsp. extra virgin olive oil (use two for roasting, one for finishing)
Salt and pepper
A few shakes granulated garlic
A few shakes dried mediterranean oregano
3 Tbsp. chopped kalamata olives
1 Tbsp. capers, chopped but not rinsed
2 oz. feta cheese, crumbled
Handful each of fresh parsley and fresh dill, chopped
A squeeze of fresh lemon
Directions
Preheat oven to 425° F, with oven rack in center position. Line a baking sheet with parchment.
Drizzle cauliflower with olive oil and toss with garlic powder, oregano, salt and pepper. Toss to coat evenly, then spread out over parchment-lined sheet, keeping a bit of space between pieces for more even browning. Roast for 25 minutes, or until browned edges are visible on most of the pieces. Taste a piece to be sure it is done to your liking.
Add the olives, capers and fresh herbs to the roasted cauliflower and toss gently to distribute. Give the mix a light drizzle of olive oil and a squeeze of lemon to finish, and then transfer to a bowl and scatter feta over the entire bowl.
The official start of summer is still a couple of weeks off, but it seems safe to assume that, for most of us, Memorial Day has already ushered in the season. My husband, Les, and I were invited to join some of his old work friends for a backyard cookout that weekend, and our contribution was to be a side dish or dessert. We couldn’t choose, of course, so we made both! Les brought his nearly world famous chocolate chip cookies—one of these days I’ll convince him to share them here— and I picked this salad, which had arrived in my inbox from NYTimes Cooking just a few days before the cookout.
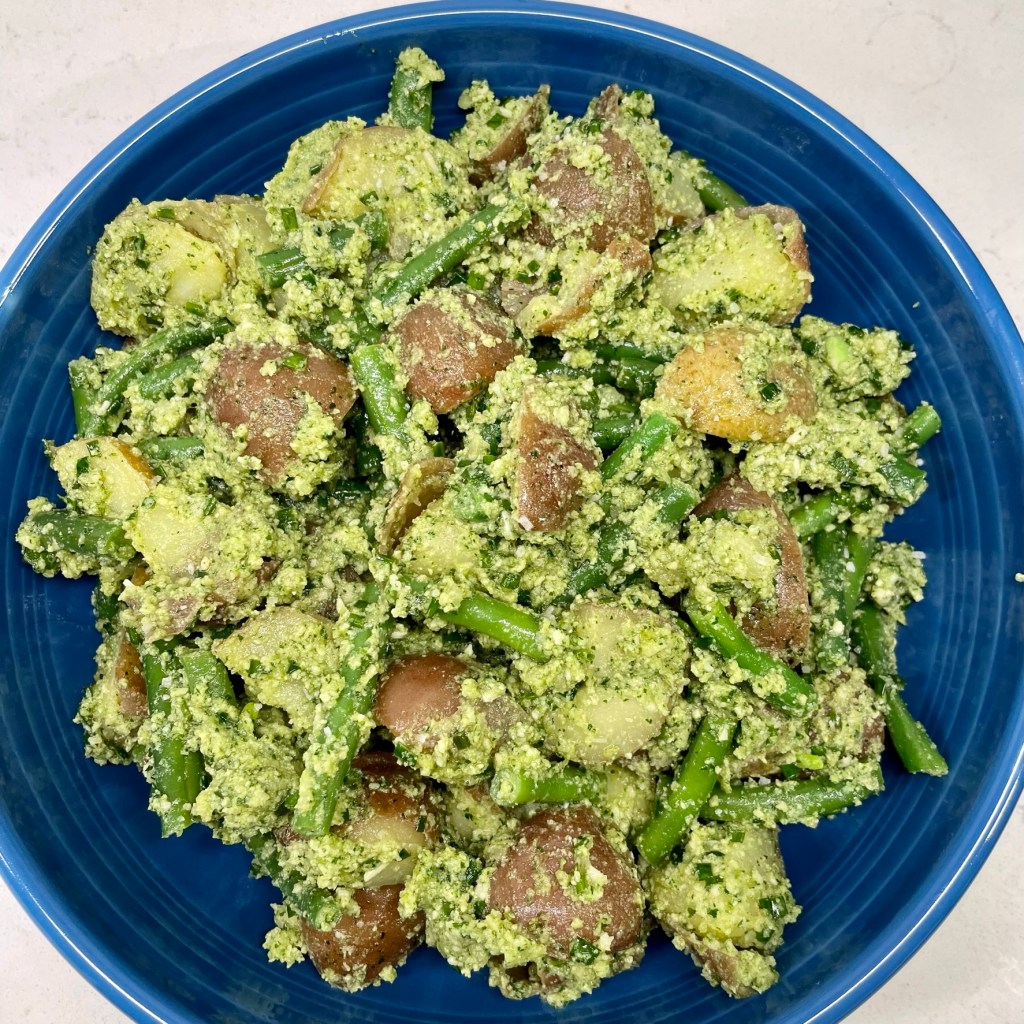
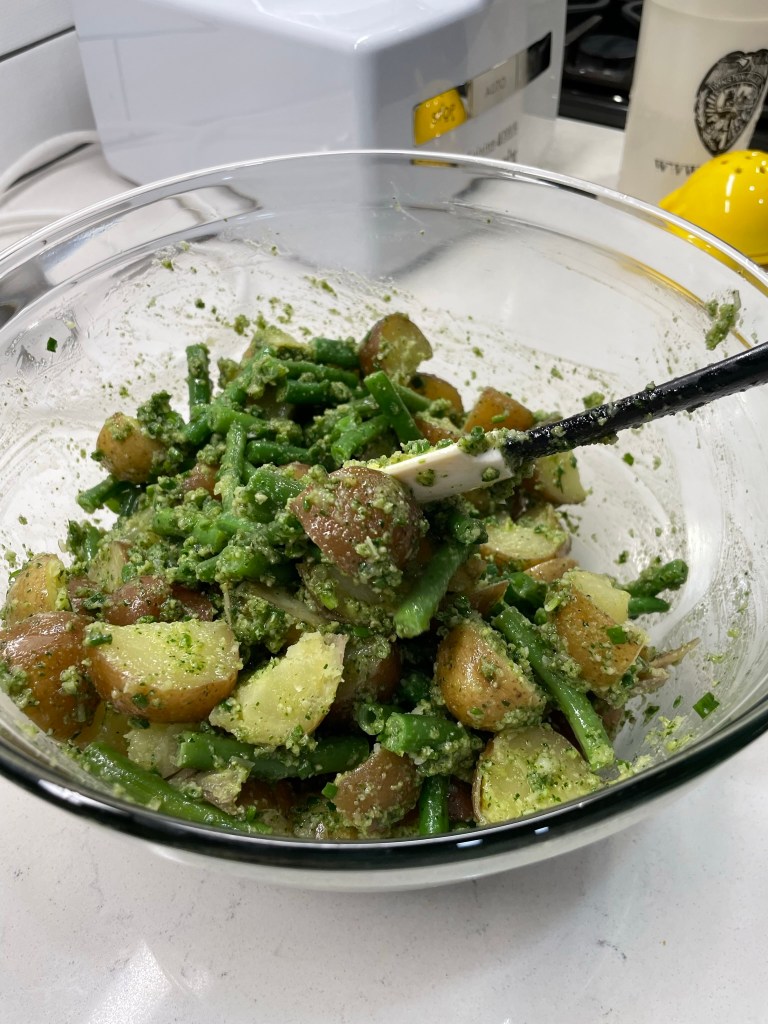
This was a flavorful twist on a typical summer potato salad!
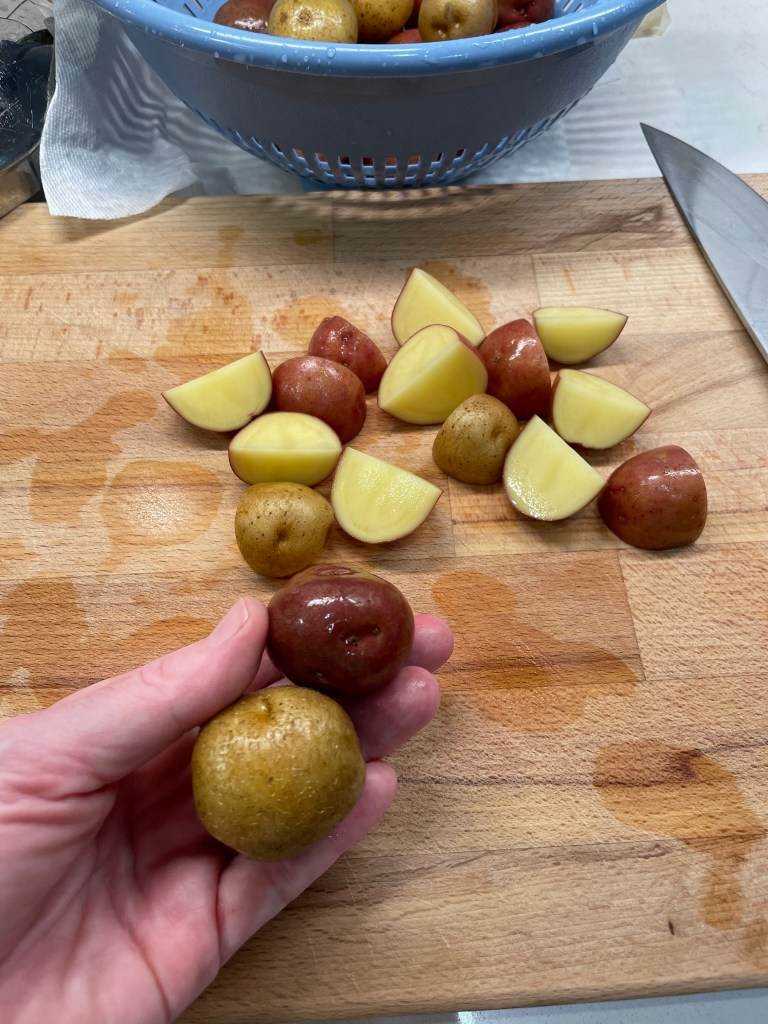
I picked this one for a few reasons. First, I knew that there would probably already be plenty of macaroni salads and mayonnaise-based potato salads, so this would be a change of pace. The dressing here is essentially a pesto, but made with parsley and chives rather than basil. It’s a bright, vibrant salad that looks great on the plate and it “ages” well at a potluck without that greasy, broken mayo coating. There was also the matter of the large bag of baby potatoes Les had picked up at Costco the week before, and we had almost exactly the 2 pounds I needed for this salad! Green beans added a little bit of crunch that was just right, though I can imagine cut spears of asparagus would have been tasty, too. I cut the potatoes into quarters to get more surface area to hold the pesto, and boiled them until fork tender, tossing in the green beans for the final two minutes. So easy, and all in one pot!
I love a recipe that can be mostly made in one pot.
The recipe sounded great as written, but I tweaked it just a bit to satisfy our love for extra garlic. I didn’t have pine nuts but found that toasted pepitas worked great in the pesto and added even more pretty green color. Our parm-romano blend provided a deep savory flavor, and I used a nice peppery olive oil for even more zing.
The parsley and chives were a brilliant stand-in to basil in this pesto, but if you love basil, I’m confident that would also be delicious.
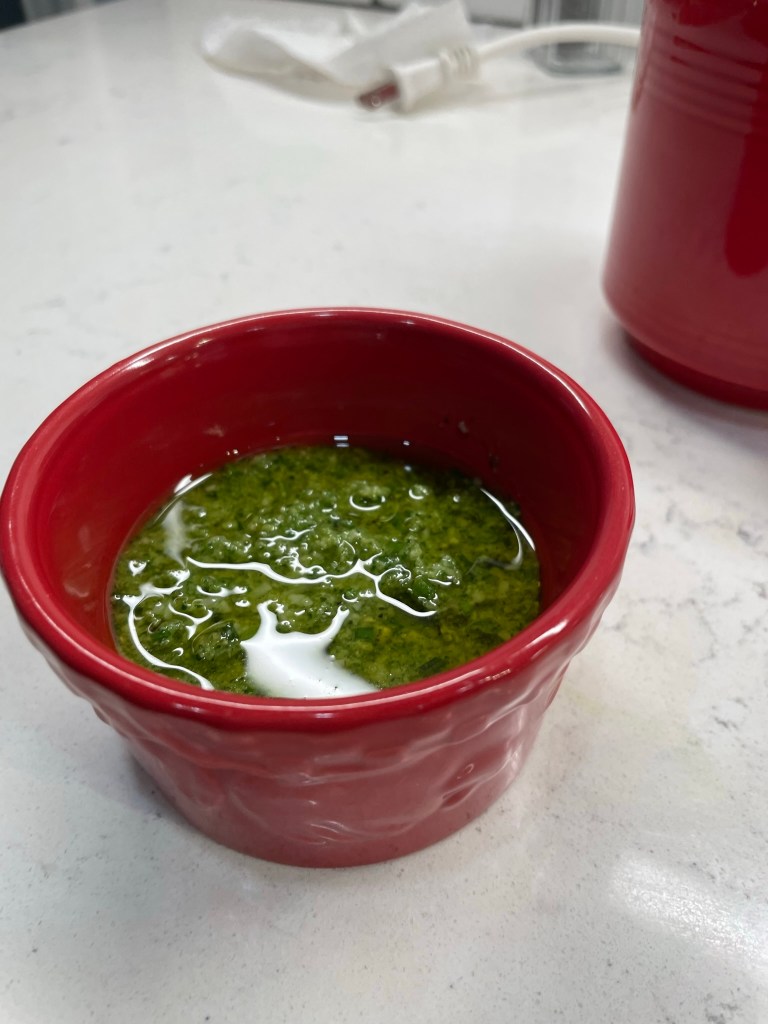
There was quite a lot of pesto dressing, and I’m glad that I added it gradually, as the potatoes and green beans didn’t need the whole amount. But who minds having a little leftover pesto on hand? It will be delicious on some grilled fish or maybe tossed with shrimp and hot cooked pasta. Oh wait, on grilled vegetables! Mmm.
Add half the pesto to the salad at first, then increase to taste. Any left over pesto can find a home in another simple summer meal!
Just one more thing I’d add about this salad— serve it right away, and make it on a day that you have plenty of people around to eat it. We had a bit left over and found that it fell kind of flat after a couple of days in the fridge.
I only made a few minor tweaks to this NYT Cooking recipe, and it has already won a coveted spot in my summer side rotation!
Ingredients
2 pounds baby potatoes, scrubbed and halved or quartered
1 Tbsp. kosher salt (for cooking water)
1/2 pound green beans, trimmed and cut into short pieces
1/4 cup roasted pepitas (hulled pumpkin seeds)
3 cloves garlic, rough chopped
1 cup packed Italian parsley leaves
1/2 to 3/4 cup extra virgin olive oil (a bright, peppery one is perfect here)
1/2 cup freshly grated Parmesan or Parm-Romano blend
1 small bunch chives, snipped
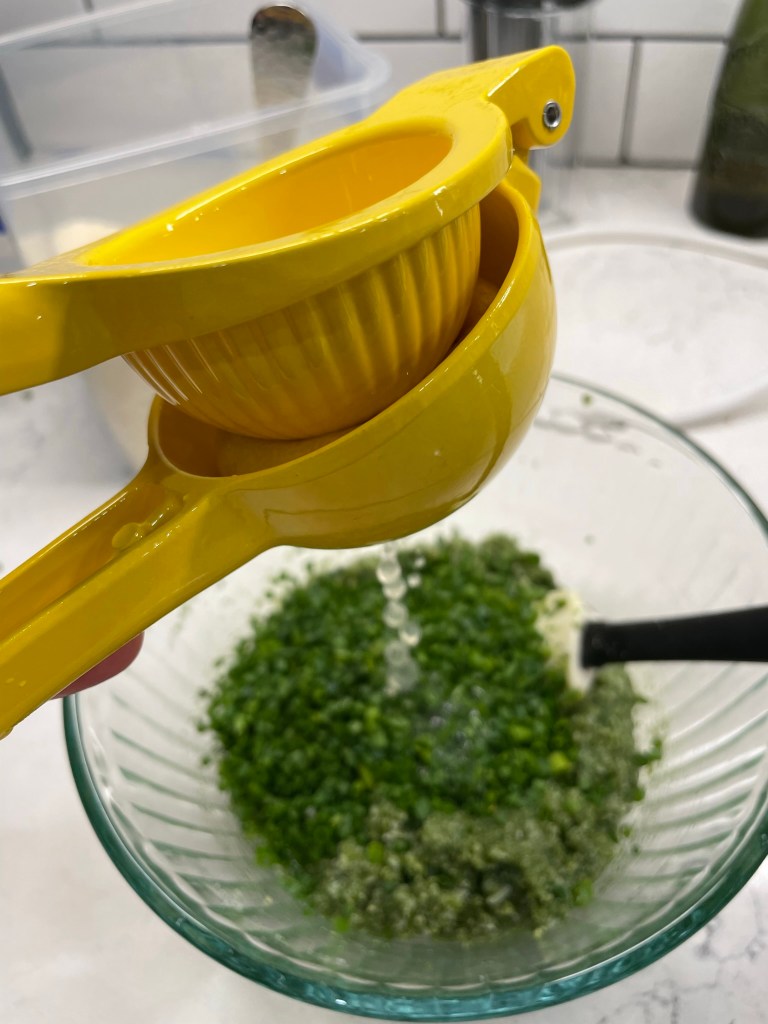
Juice of 1/2 large lemon
Salt and pepper to taste
Directions
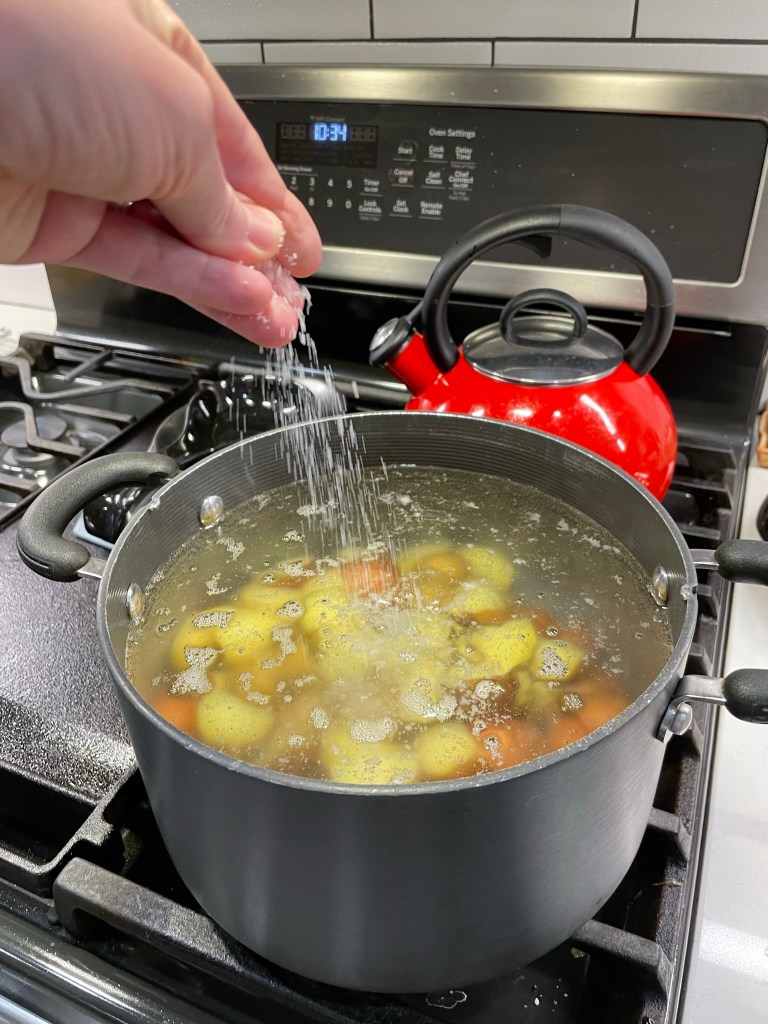
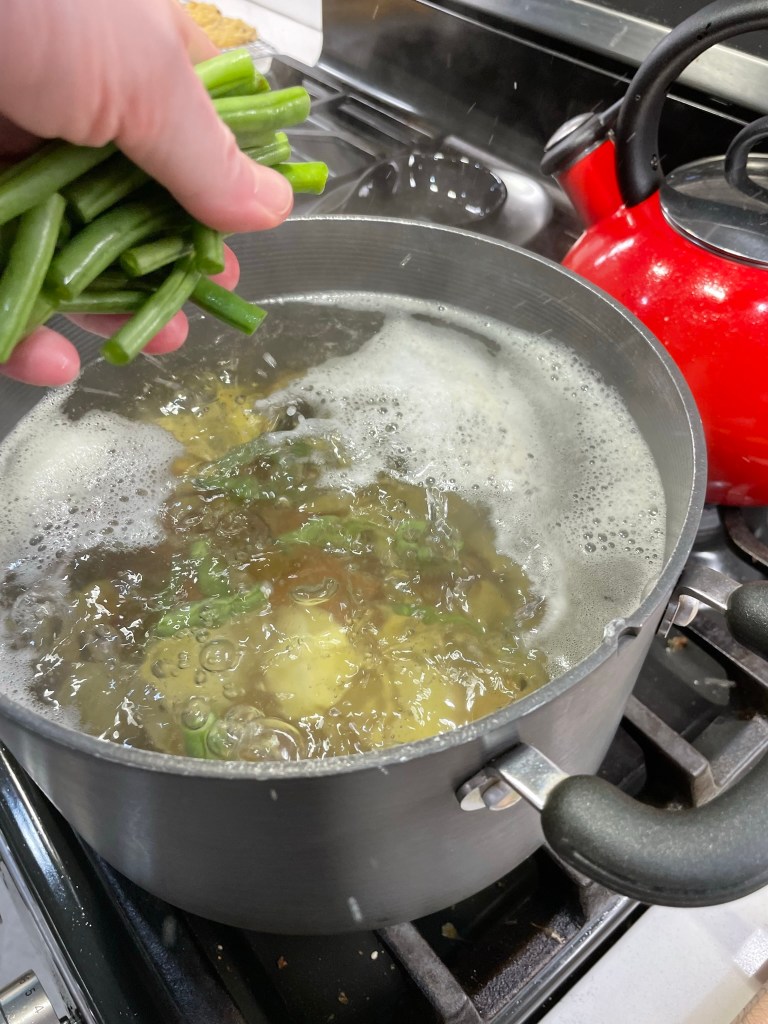
Add potatoes to a large pot and cover with cold water. Bring to a boil over high heat, then add salt and reduce heat to a constant simmer. Cook potatoes about 15 minutes, until they are easily pierced with a fork or knife tip. Add green beans only for the last minute or two, so they remain bright green and tender-crisp.
Drain potatoes and return them to the hot pot to allow excess moisture to evaporate.
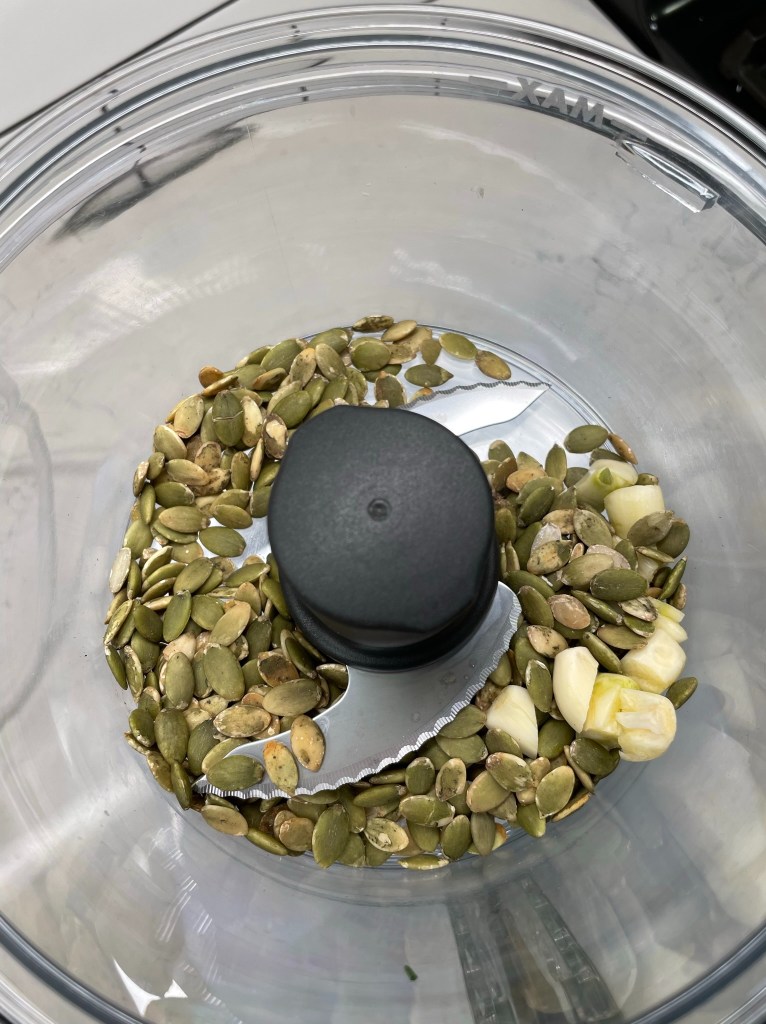
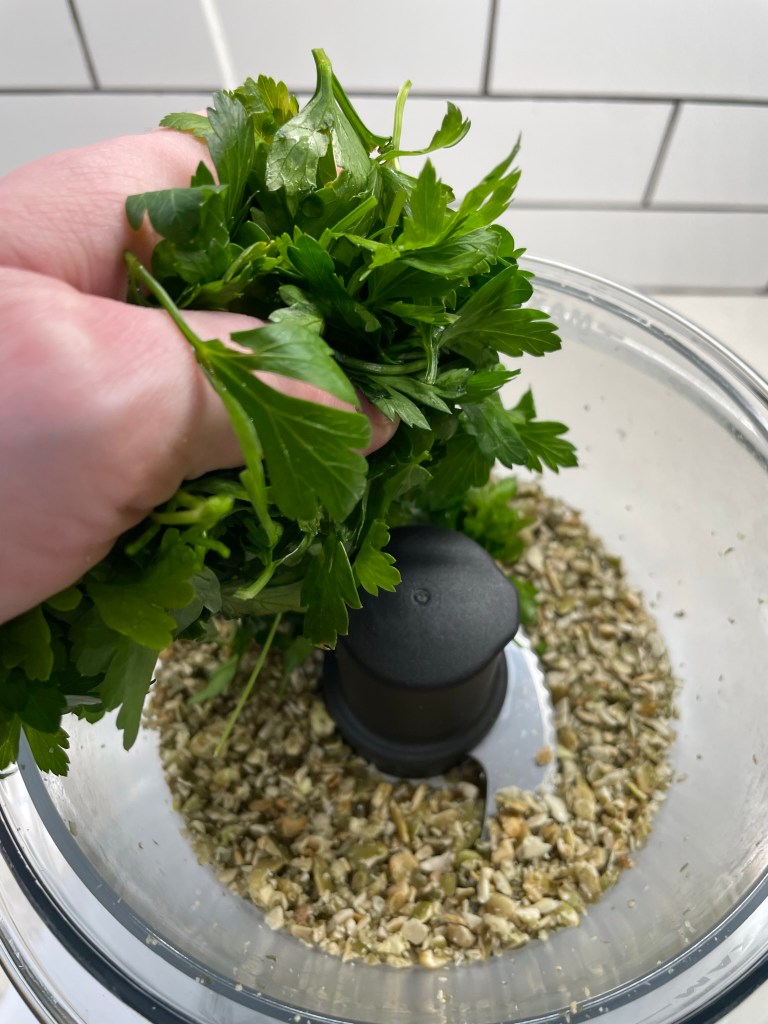
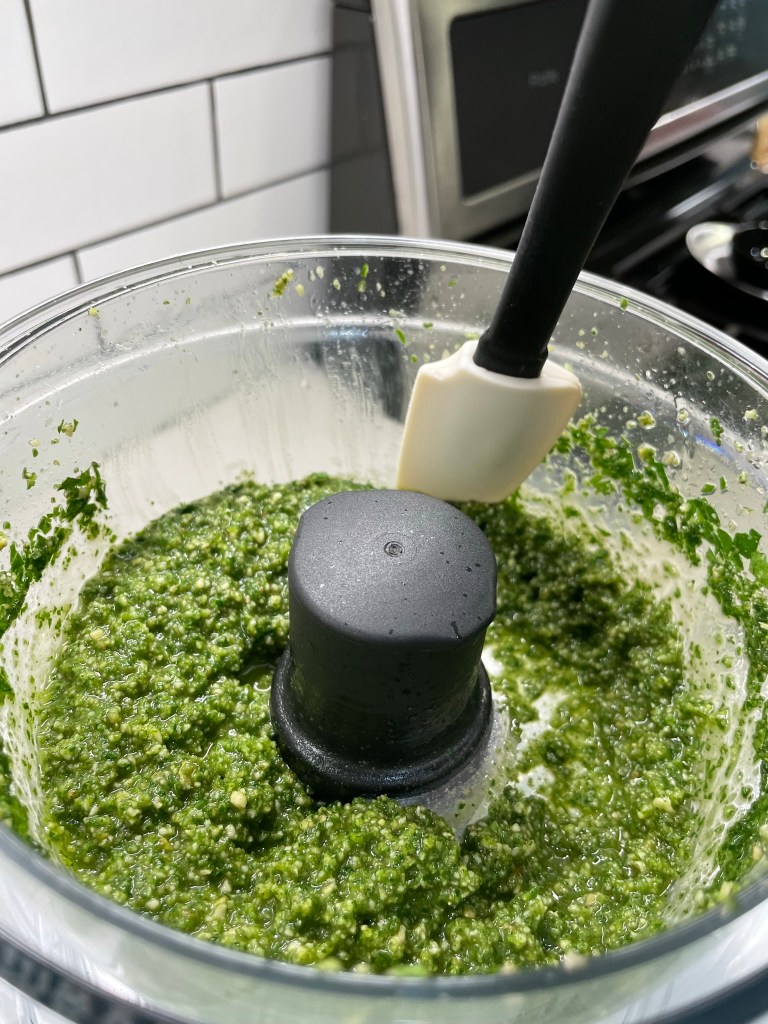
Make the pesto while the potatoes and beans cook. In the small bowl of a food processor, pulse together the pepitas and garlic. Add parsley and pulse several times. Use a small spatula to scrape down the sides of the bowl. Run the processor continuously while you drizzle in the olive oil, and puree until it is an even paste. Transfer the mixture to a large bowl and stir in the Parm-Romano, lemon juice, chives and salt/pepper to taste.
In a large bowl, combine the warm potatoes with about half of the pesto. Fold gently to coat and add more pesto to your liking. Season to taste with salt and pepper. Reserve any leftover pesto and enjoy tossed with pasta or roasted vegetables. It will keep better with a thin layer of extra virgin olive oil floated on top.
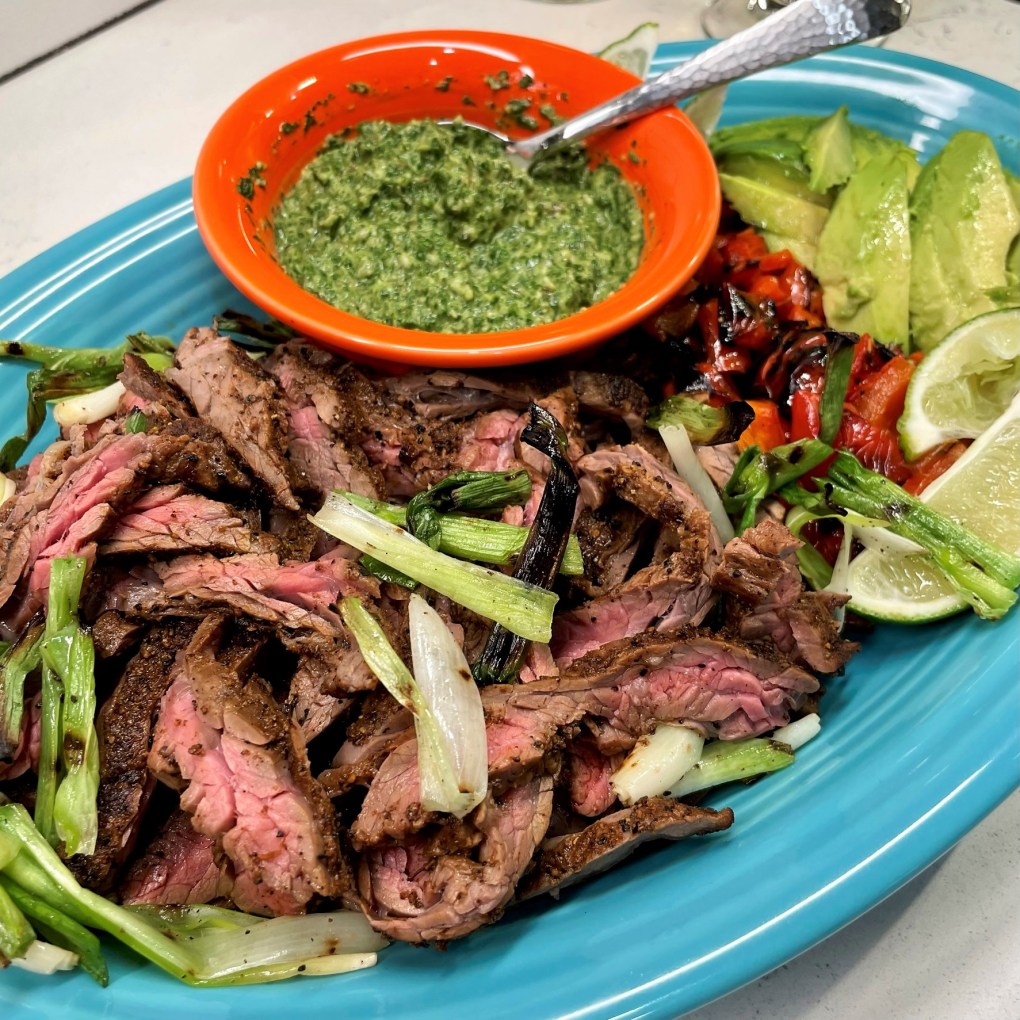
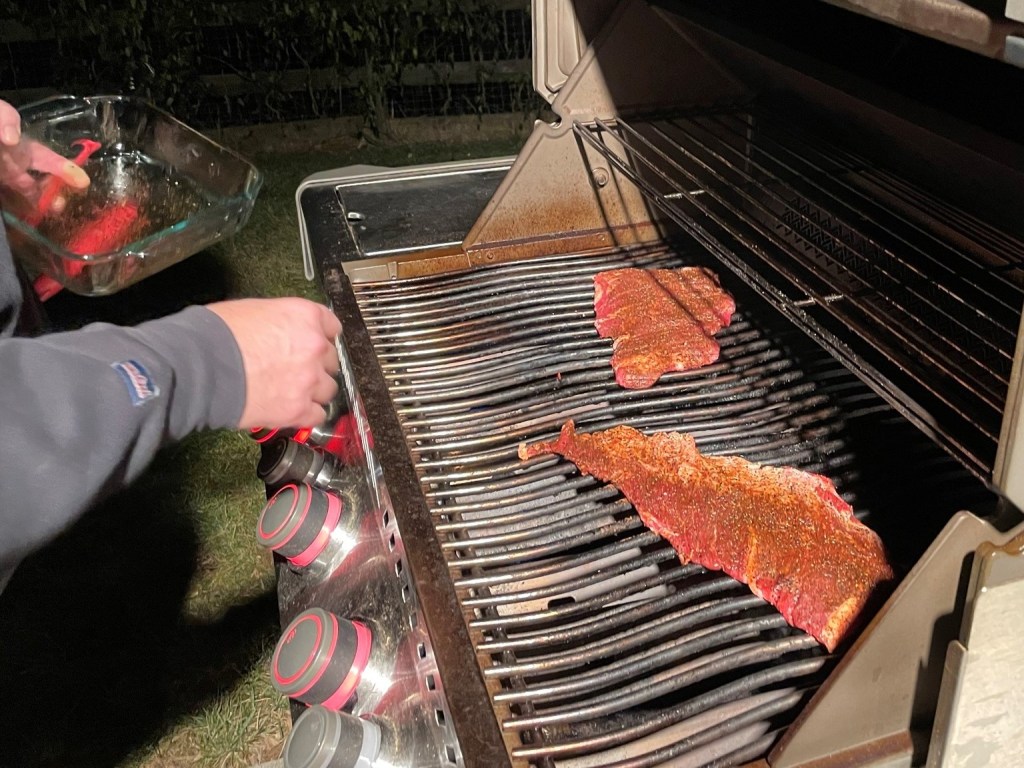
Too often, my hubby and I fall into a make-it-Mexican rut, and we neglect the other flavors that are hanging out in our pantry cabinet, just waiting to thrill our palates. When we discovered last week that our dinner rotation had an empty slot, I pulled a package of skirt steak from the freezer, figuring we could always give it a Mexican spin and fajitas or tacos with it. But with all the other flavorful things that could be applied to a cut as tender and succulent as skirt steak, isn’t plain ole usual fajitas just “phoning it in?”
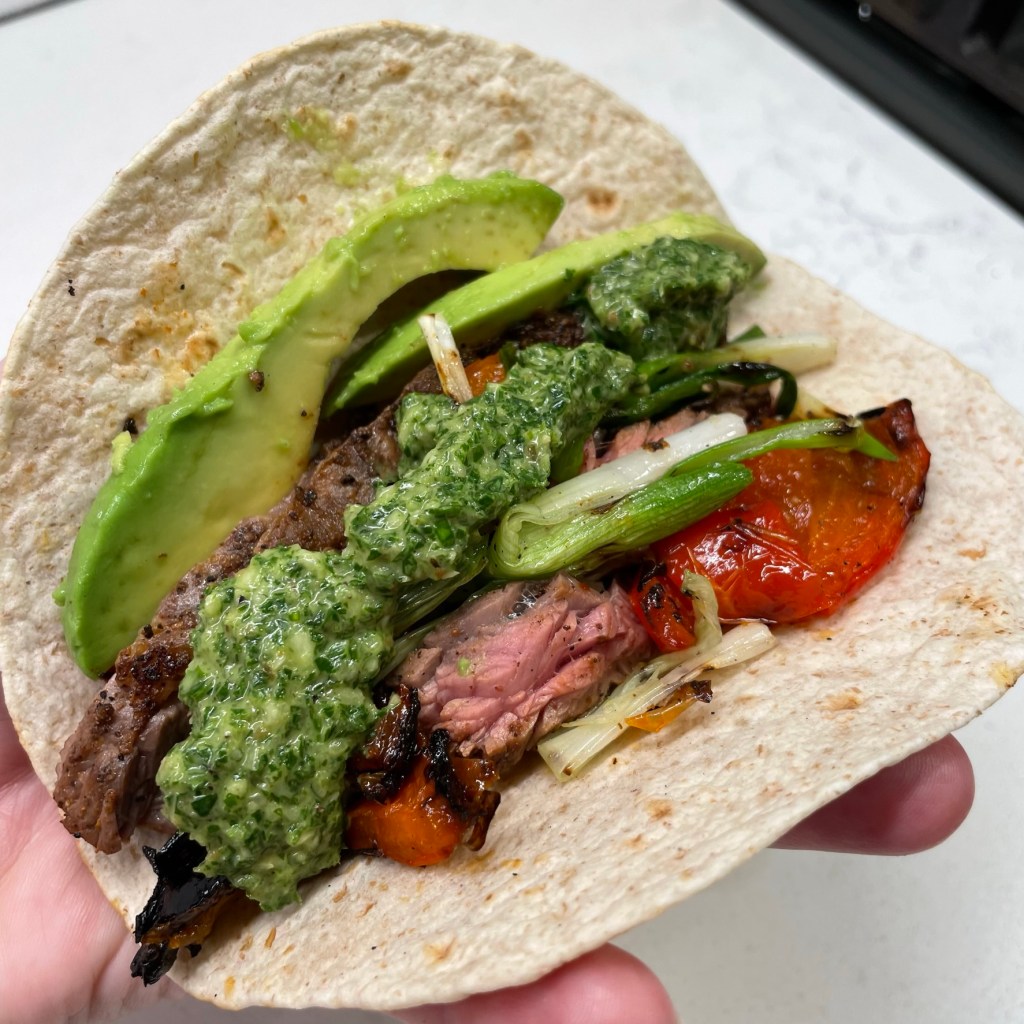
So I reconsidered, taking our steak in a different direction with my homemade spicy coffee rub and a zesty, garlicky chimichurri to accentuate and complement the smoky, earthy flavors of the rub. We did pile it all onto hearty tortillas and enjoyed it as fajitas, but this meal had a decidedly more interesting appeal!
Les couldn’t wait to sip his brew!
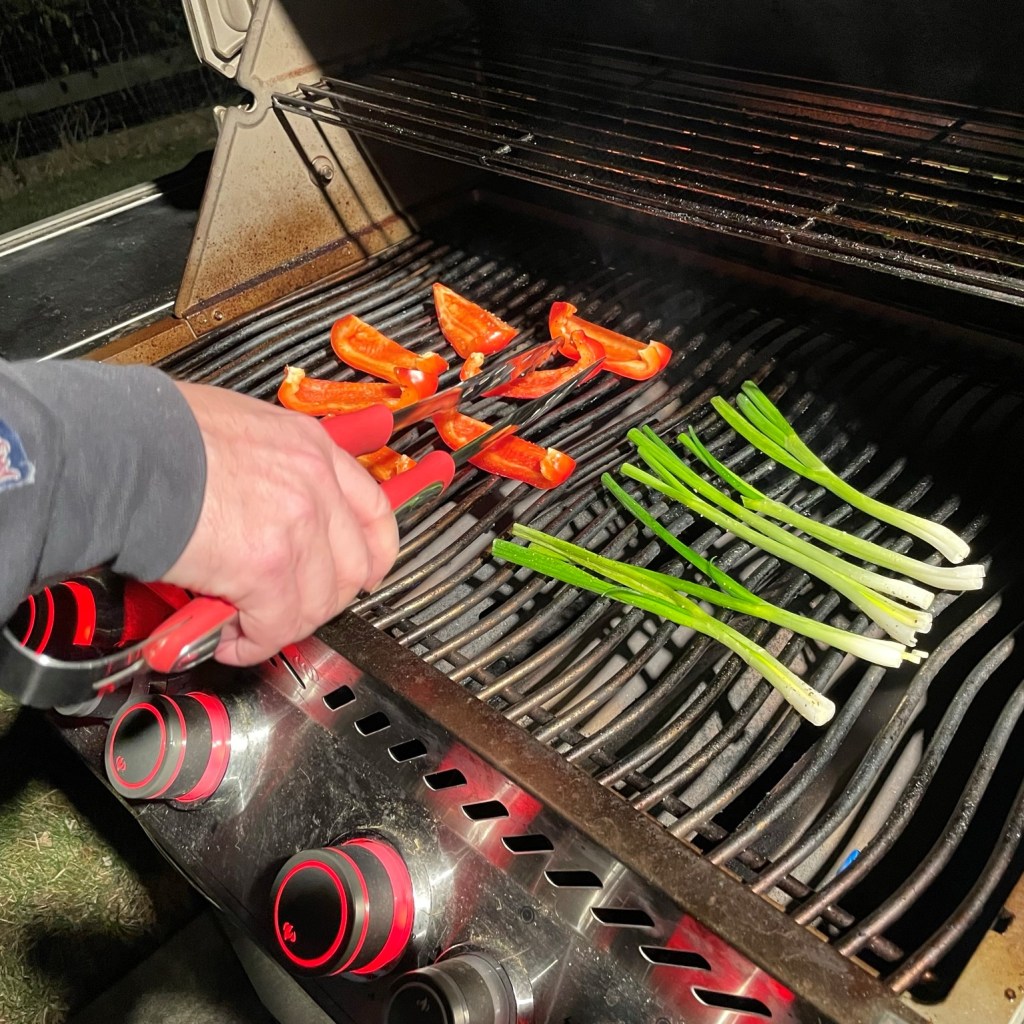
As long as we were trying new things, we swapped in scallions for the usual grilled onions, which was a nice change of pace texturally and flavor-wise. And we gave our red bell pepper only a few quick turns on the grill, keeping some of the firmness and amping up the sweetness with those blistered skins. No hot spices on them, only salt and pepper to preserve their natural flavors.
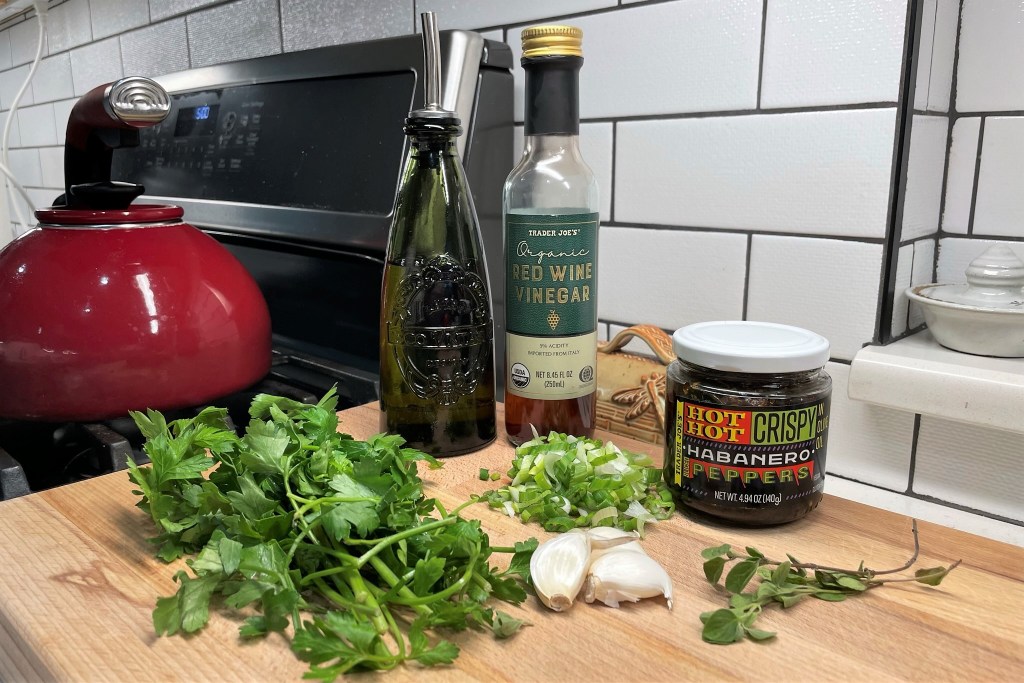
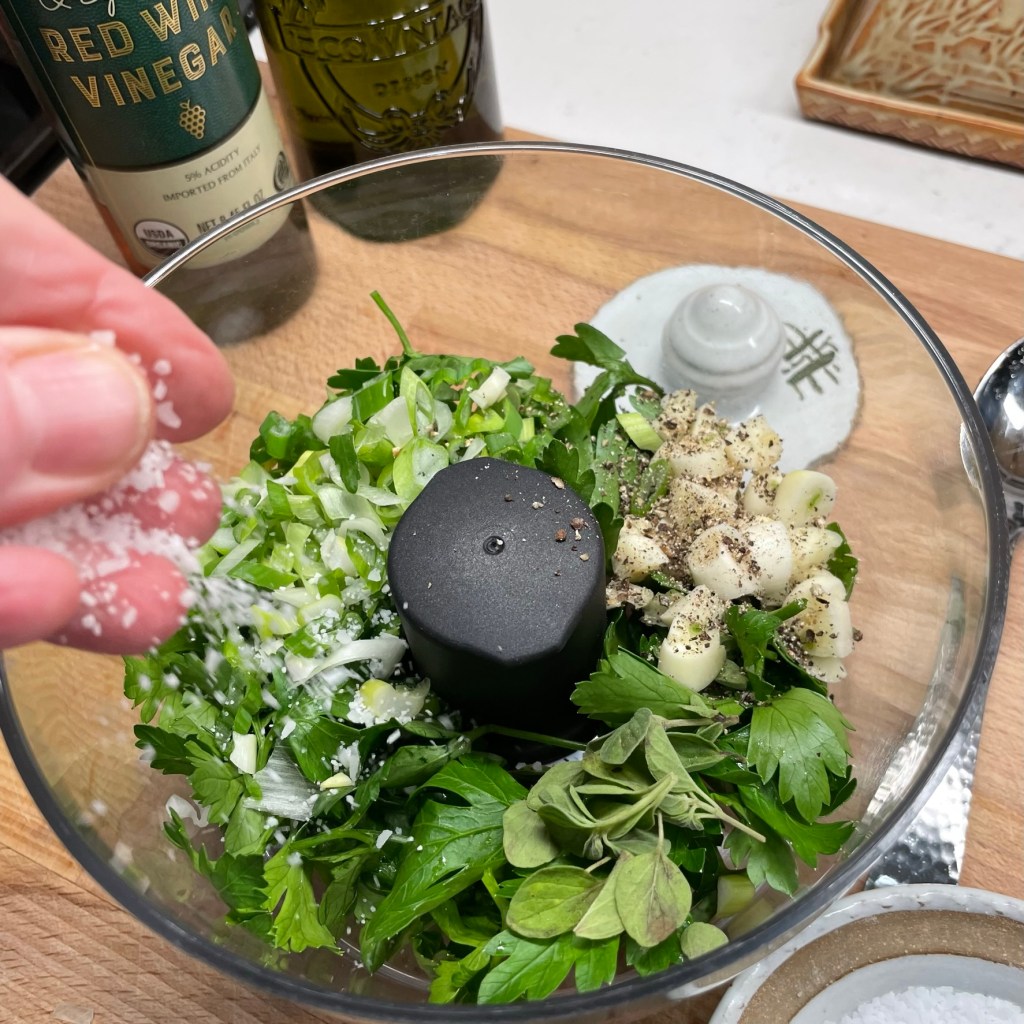
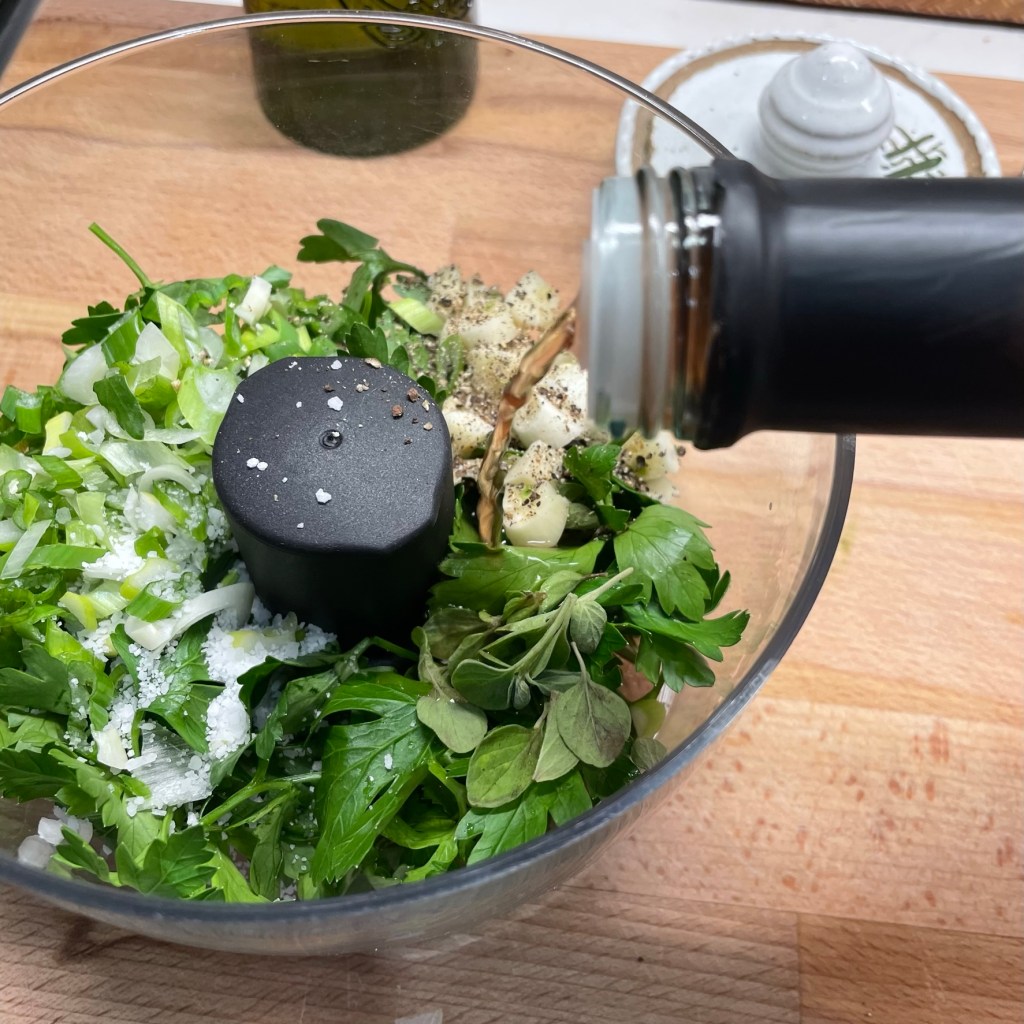
No salsa, cilantro or sour cream here either; rather, I set up my food processor and pulsed down a couple of big handfuls of fresh parsley with garlic, more scallions, fresh oregano and red wine vinegar. The grilling of this meal moves quickly, so it’s best to make the chimichurri a few hours or even a day ahead. Here’s how it goes.
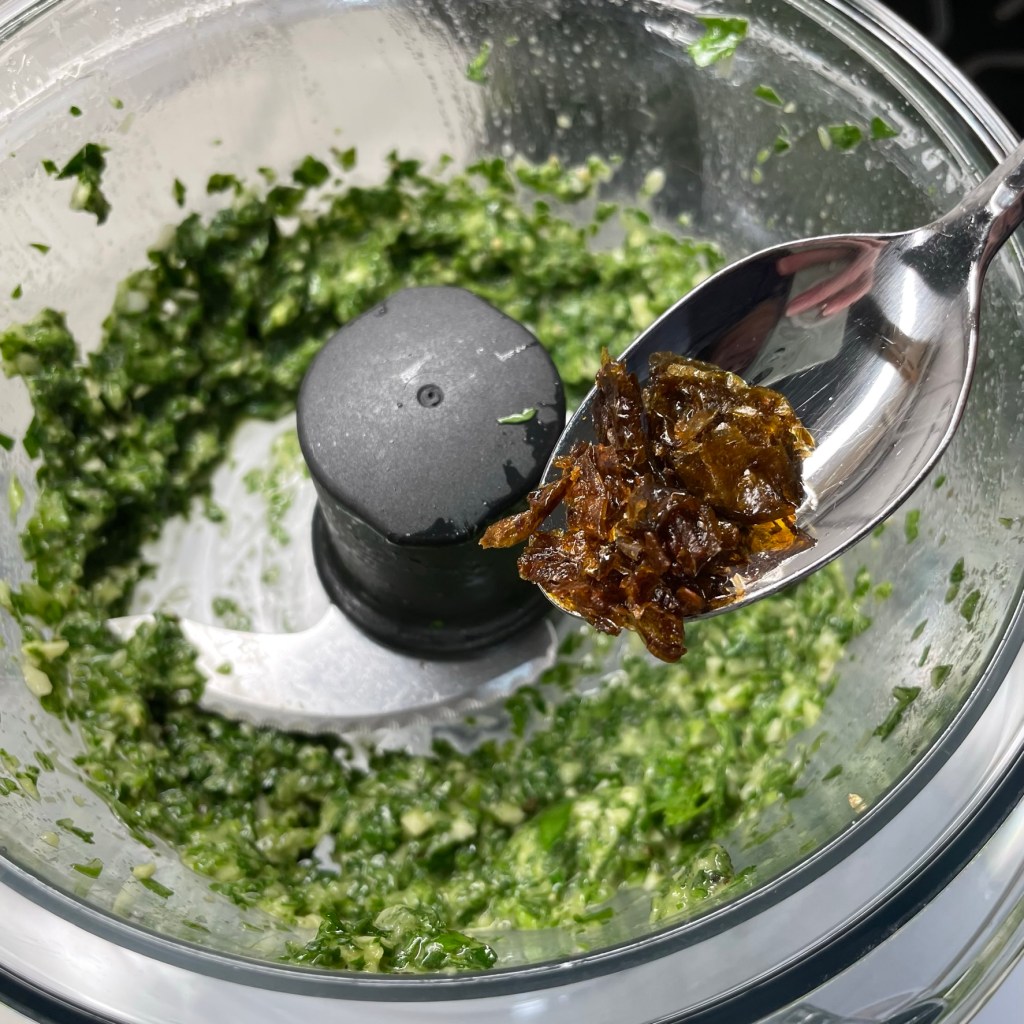
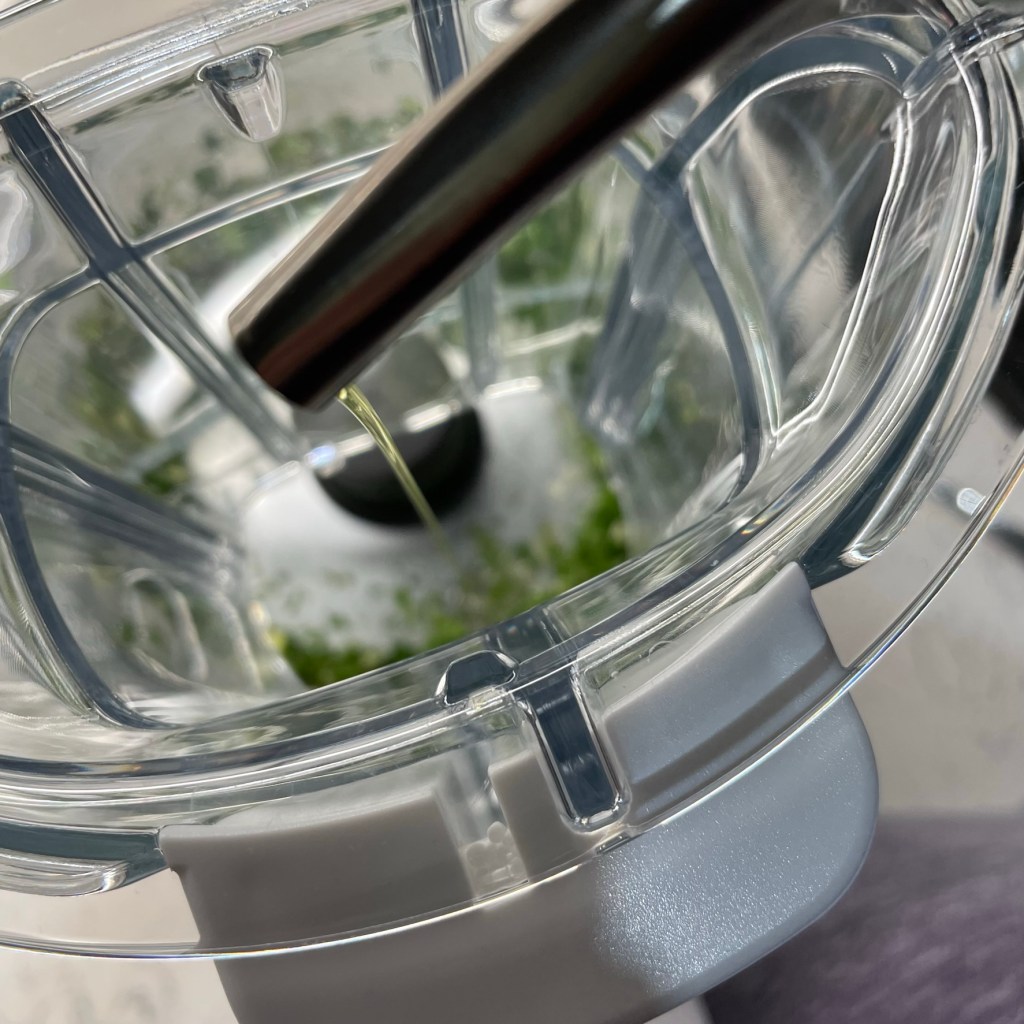
This is a classic formula for chimichurri, a condiment familiar to Argentina, and though it typically calls for a few shakes of crushed red pepper, I swapped in a scant spoonful of this wicked hot crispy habanero stuff that I picked up last year from Trader Joe’s. Drizzle in some olive oil while the processor runs, and it’s ready in a snap.
Now, if you’re thinking, “I need to get to Trader Joe’s right now for some of that crispy habanero!” well, don’t bother. As is par for the course, this spicy stuff has already been 86’d from TJ’s lineup— their abrupt dispatch of interesting products is, as you know, part of my love-hate relationship with the store— but you can easily go traditional with your chimichurri and just use crushed red pepper, or even a fresh jalapeno. But if you happen to be stuck with a jar of the habanero crisp already, at least now you have a fun way to use it. I intend to put it to work in my next batch of spicy homemade sausage, and I’ll let you know how that goes.
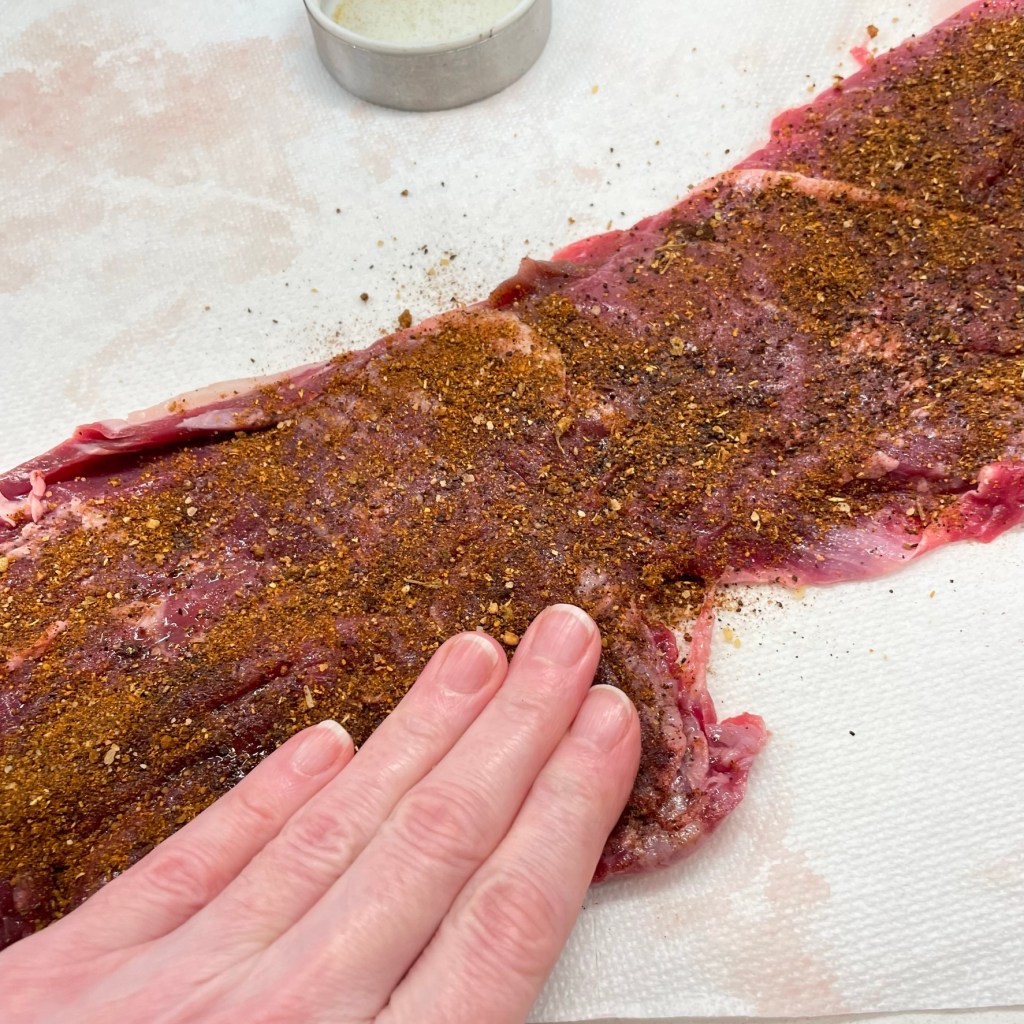
As for the skirt steak, I gave it a nice massage with my spicy coffee rub, which I introduced in 2021 with this coffee-rubbed grilledtri-tip steak. Link back to that post for the rub recipe and another great meat idea for the grill. This homemade rub has amazing flavors, including coriander, ancho, brown sugar, oregano and cayenne— altogether, a really nice change of pace for fajitas. The coffee rub does not impart a coffee flavor to the meat—if it did, my husband wouldn’t touch it—no, it’s more of a bold, earthy flavor, a little bit spicy and a touch smoky, depending on the roast level of the coffee you use.
Pat the steak dry, then spritz it with spray oil and generously apply the coffee rub on both sides. I left it in the fridge a full 24 hours before grilling, but a few hours will do.
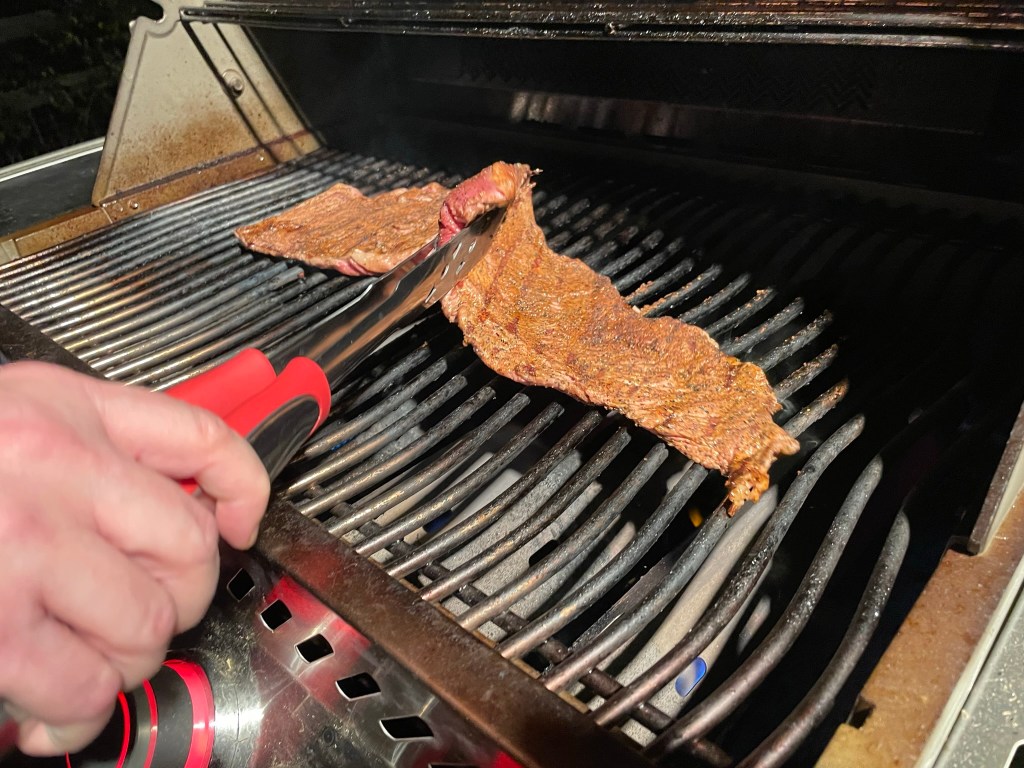
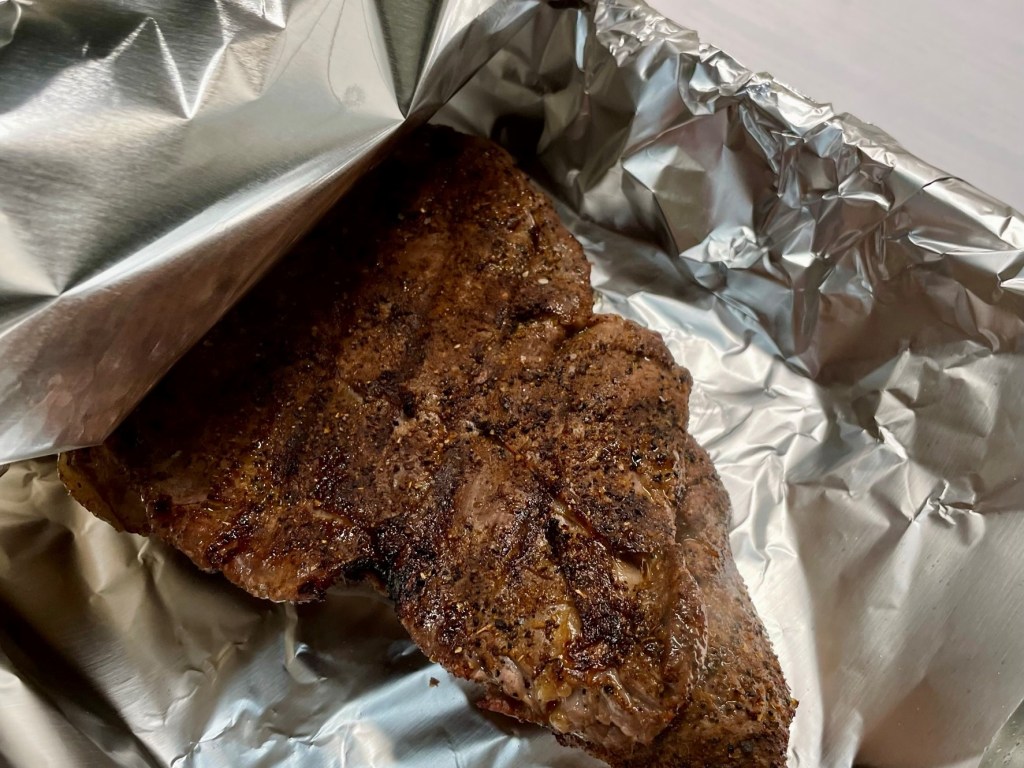
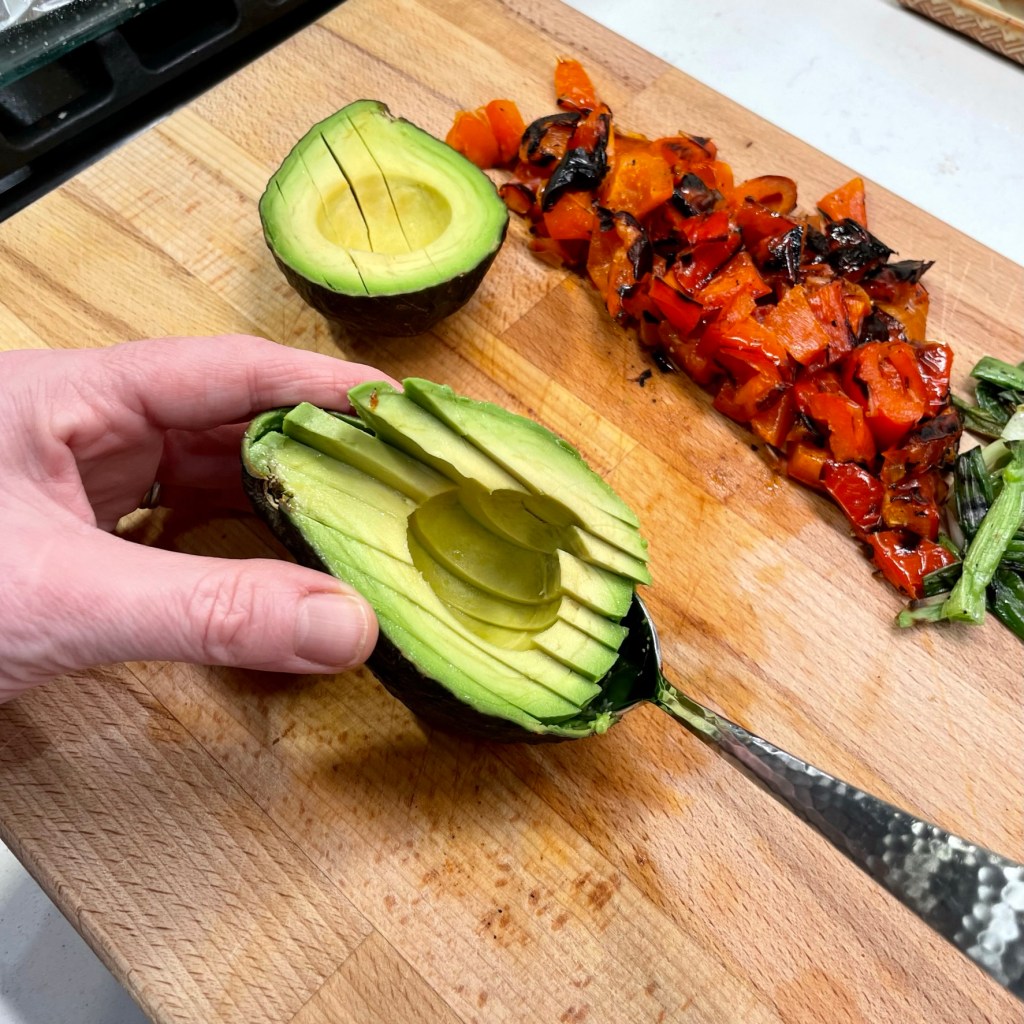
The secret to making skirt steak the best it can be is threefold— season it well ahead of time, grill it quickly and cut it against the grain. Les took care of the grilling part (and it happened fast!) while I prepped the fresh avocado and chopped the charred veggies. We wrapped the finished steak tightly in foil for about seven minutes before slicing, and dinner was served!
Don’t blink! This skirt steak hit the grill at 6:28, was turned at 6:30, and came back into the house for a nap in foil wrap at 6:32!I had to work as quickly inside to get the accoutrements ready.
The coffee rub turned out to be a terrific flavor for our skirt steak, and the chimichurri was like icing on a cake! OK, well, maybe green icing. 🙂
The earthy, smoky notes of my coffee rub, combined with a bold and zesty chimichurri was a flavor explosion for our taste buds! If you can't purchaset this flavorful cut, a flank steak or hangar steak would be a good substitute. Allow a few extra minutes on the grill to adjust for the thickness.
1 large red bell pepper, seeded and cut into large sections for easy grilling
1 bunch fresh scallions, divided (you’ll use them in the chimichurri and as an accompaniment to the steak)
1 ripe avocado, cut into slices or cubes
1 small lime, cut into wedges
Medium size flour tortillas for serving
Directions
Trim away any lingering membrane pieces from skirt steak. Pat dry, then rub or spray on a small amount of olive oil. Apply coffee rub evenly over the entire surface of the steak. Let it rest in the fridge a few (or up to 24) hours, bringing it back to near-room temperature about 45 minutes before grilling.
Preheat grill or grill pan to roughly 500 F. If working indoors, be ready to use your vent fan, as the high temperature will likely produce some smoke.
Prep the red bell peppers and remaining scallions by brushing or spraying with olive oil. Season with salt and pepper. Grill the veggies, turning frequently to ensure even charring. Transfer to a cutting board and chop into bite sized pieces.
Place the skirt steak over direct heat and grill only until the first side is seared (this will be 2 minutes or less). Turn the steak and repeat searing on the other side. The cooking should be very brief so the meat remains tender.
Transfer the steak immediately to a plate lined with a large, double layer of foil. Season immediately with kosher salt. Wrap the steak so it is fully enclosed in the foil and seal it tightly, resting for 5 to 8 minutes. The residual heat will finish cooking the meat as the juices are redistributed.
While the steak rests, flash-grill the tortillas just long enough to warm them. Transfer the steak to a cutting board and slice thinly against the grain of the meat. Serve with grilled veggies, avocado and chimicurri.
For best flavor, make the chimichurri a day ahead so the ingredients have plenty of time to mingle in the fridge. Bring to near-room temperature for serving.
Ingredients
About two handfuls fresh Italian parsley, rinsed and trimmed of heavy stems
3 or 4 scallions (green onions), trimmed and rough-chopped
3 or 4 cloves fresh garlic, peeled and rough-chopped
A few small sprigs fresh oregano leaves, rinsed and stripped from stems
1 1/2 Tbsp. red wine vinegar
A few shakes crushed red pepper (or some other spicy element), to taste
1/2 tsp. kosher salt
1/4 tsp. freshly ground black pepper
1/4 cup good quality extra virgin olive oil
Directions
Add one handful of the parsley to the small bowl of a food processor, along with scallions, garlic, oregano, vinegar, crushed pepper, salt and pepper. Drizzle in 1 tablespoon of the olive oil. Pulse a few times to combine.
Scrape down the sides of the bowl and add the remaining handful of parsley, pulsing again just to combine.
Turn the processor on to run continuously and stream in the rest of the olive oil while it’s running. Adjust to taste, then transfer to a bowl to rest in the fridge.
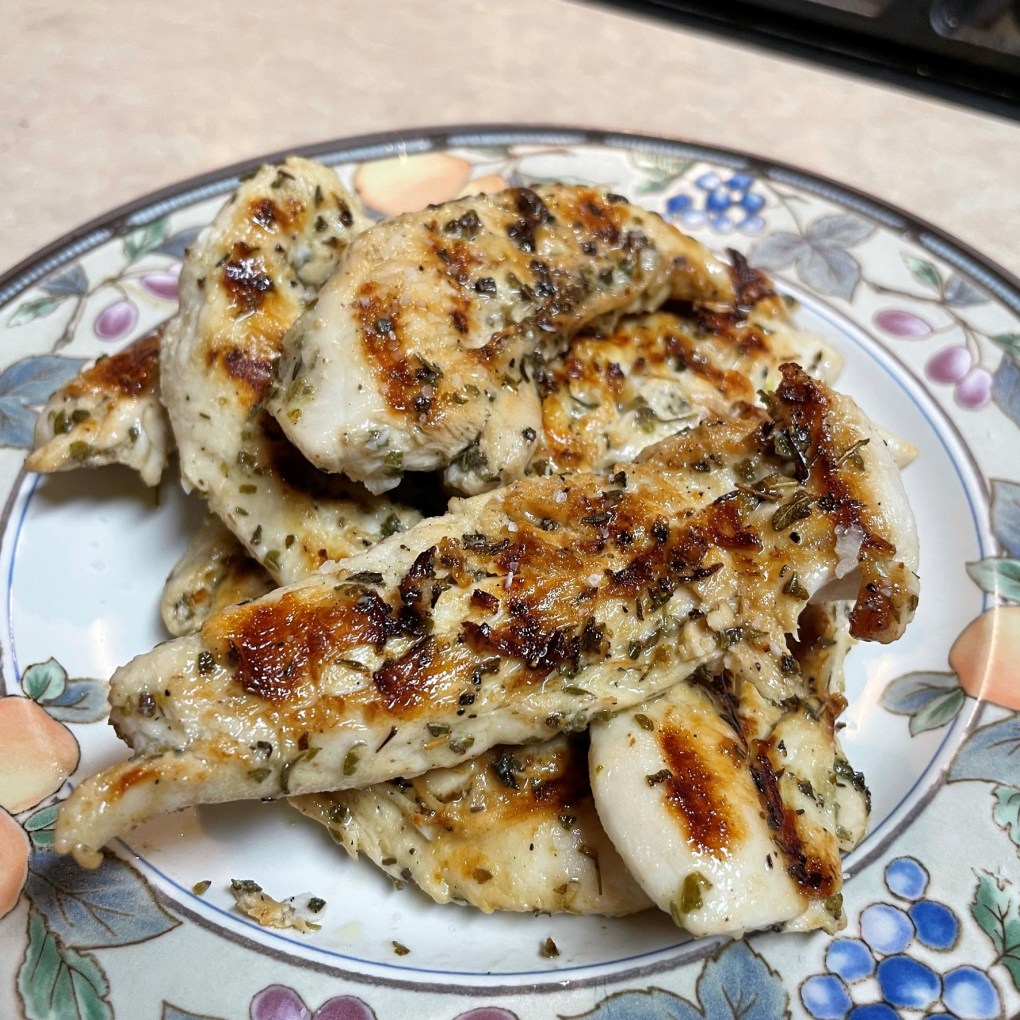
Remember that song from long ago—“Anything you can do, I can do better?” I believe it was from the musical, Annie, Get Your Gun, and I had it on repeat in my mind as I was putting shredded zucchini in the starring role for this popular Greek condiment. A typical tzatziki would be made with grated cucumber, but the sheer volume of zucchini coming from my garden has me changing up everything these days. I thought there was a good chance zucchini could stand in for the cucumber—alongside the Greek yogurt, minced garlic and fresh herbs—and it really worked!
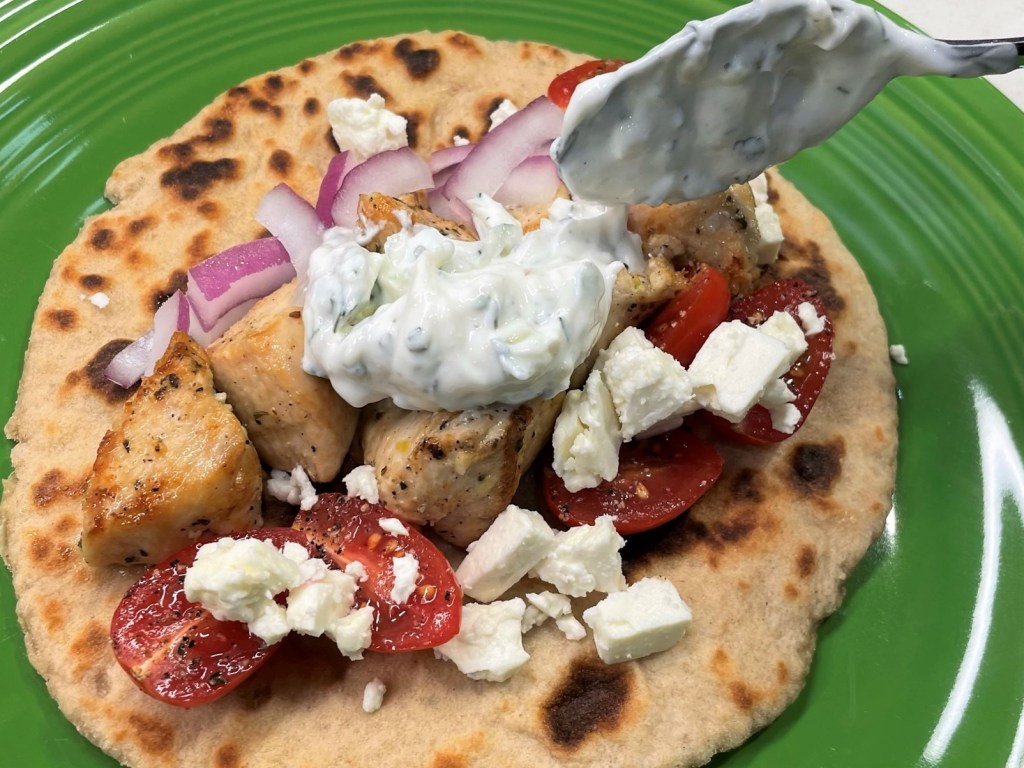
We enjoyed this zucchini tzatziki over July 4th weekend, with grilled chicken souvlaki and grilled shrimp. And it was just as delicious last night with the leftovers!
Zucchini was an excellent understudy to the usual cucumber in my tzatziki!
If you find yourself with an over-abundance of zucchini, as I expect is probably the case for everyone who has planted it, then give this a try.
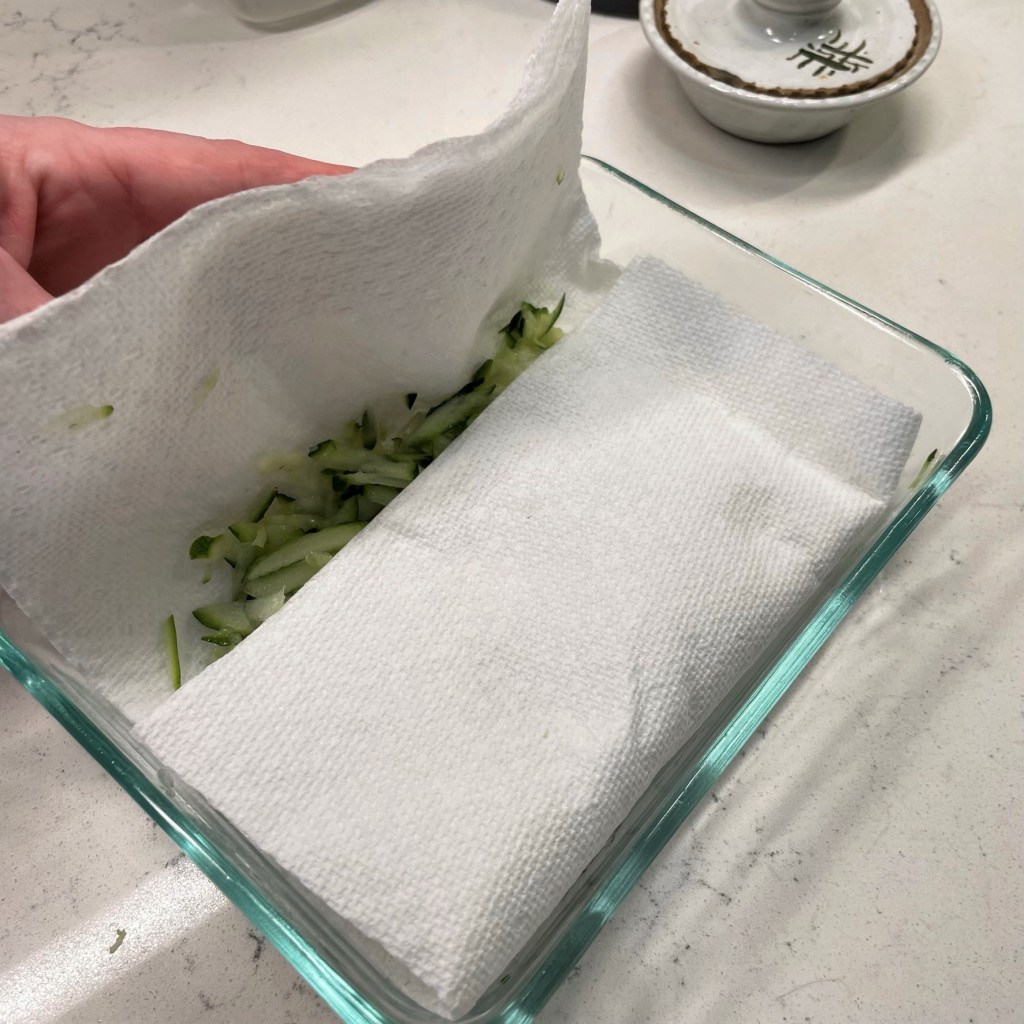
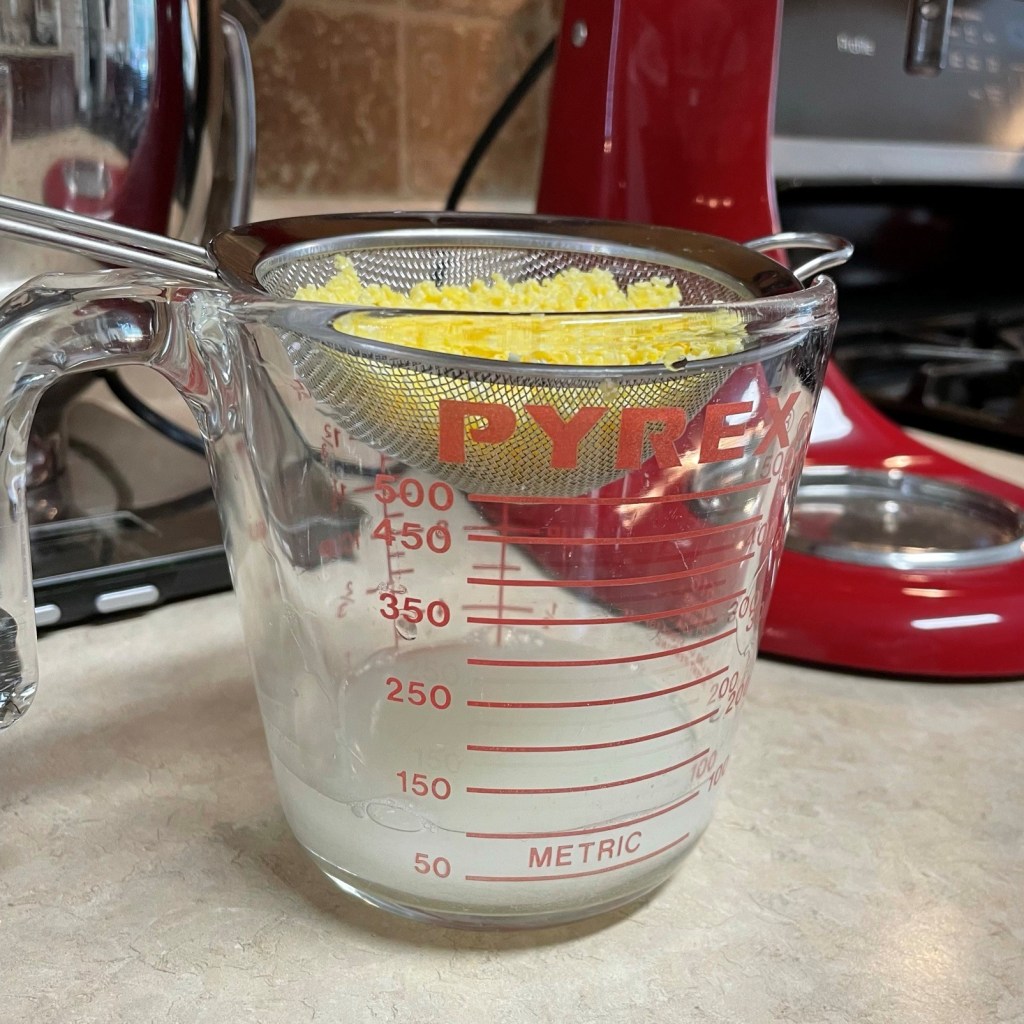
As with cucumber, the zucchini needs to be salted generously and rested in layered towels so that the excess moisture can be released. The amount of salt used to draw out the moisture is almost exactly the amount needed to season the dish, so it works out well.
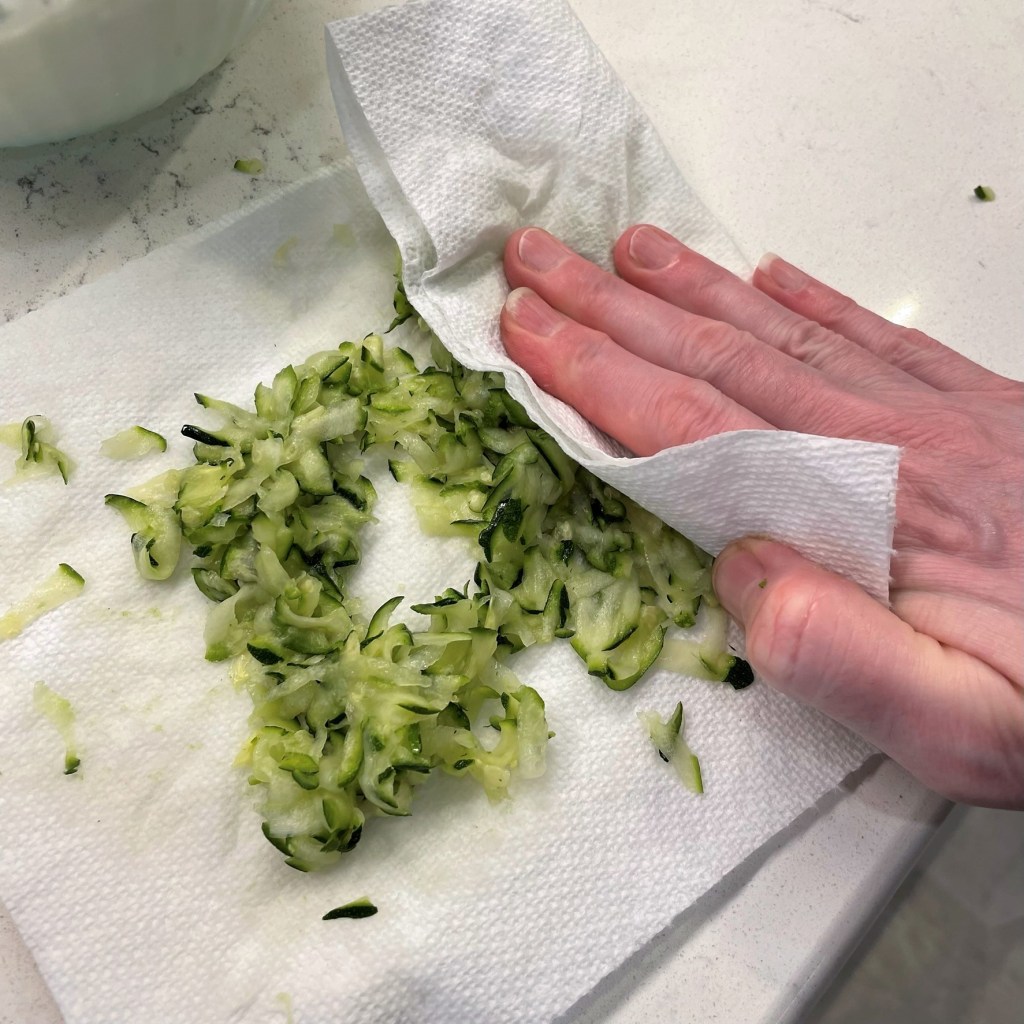
Sprinkle a generous teaspoon of salt on the zucchini shreds.Wrap it up in layers of paper towel and tuck it in the fridge for a couple hours.Press the salted zucchini with fresh towels to wick away as much moisture as possible.
Next, stir and measure out the Greek yogurt into a small bowl. Add the drained zucchini, finely chopped fresh garlic, black pepper and fresh herbs—dill and mint are traditional, so that’s what I used—and give the whole thing a big stir. Adjust the salt to your liking; it may not need any extra at all. Cover and refrigerate the tzatziki until you’re ready to use it. Stir it well just before serving.
Measure out a cup of plain Greek yogurt. Add the zucchini, garlic, herbs and pepper.Keeping the skin on the zucchini gave the tzatziki more visual appeal. This was delicious!
Tzatziki is so flavorful, with a garlic bite and the cooling nature of the mint and dill. I could eat it all summer, and now that I know how well zucchini works in this recipe, I’ll be doing it this way again. Below is a printable version of the recipe, and keep scrolling to find a few more delicious ways to enjoy tzatziki. 🙂
1 tsp. kosher salt (for drawing moisture from the squash)
1 cup plain Greek yogurt (I used 2% milkfat)
2 or 3 cloves fresh garlic, finely minced
1 Tbsp. fresh dill, chopped
1 Tbsp. fresh mint leaves, chopped
1/4 tsp. freshly ground black pepper
additional salt, to taste
Directions
Spread zucchini shreds evenly across a double layer of paper towels, or on a clean kitchen towel (choose one that is lint-free and not washed with fragrance or fabric softener). Sprinkle salt all over the shreds, tossing them a bit to ensure even coverage. Fold the towel up to contain the zucchini in a “packet,” and put it in the fridge for a couple of hours. I placed my zucchini packet in a shallow glass dish to prevent drips.
Transfer salted zucchini to fresh layers of paper towel and blot well to wick away lingering moisture. You may be surprised how wet the original paper towels are, and a great deal of the salt will be soaked into them as well.
Stir the Greek yogurt and measure it out into a small bowl. Add the zucchini shreds, garlic, herbs and black pepper. Stir to combine. Adjust salt to your liking.
Keep the tzatziki refrigerated until ready to serve. It will keep in the fridge for several days, but may separate over time. Give it a good stir just before serving.
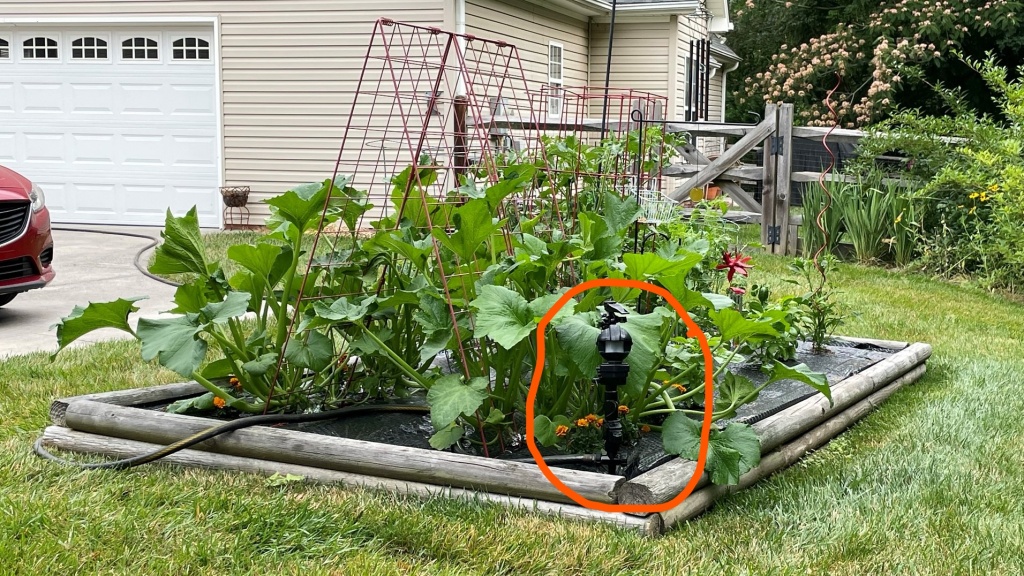
It has been an interesting week at our house, between the saga of our bathroom remodel, which included some high drama that nearly wrecked me (more on that another day), and an unfortunate, middle-of-the-night accident that occurred in the rear corner of our raised bed garden. It’s been going gangbusters, thanks to the vigilant security provided by this little fella:
The Yard Defender!!!
The “Yard Defender” has restored my hope for a vegetable garden, after several (literally) fruitless years of battle against the herd of deer that resides in the woods behind our cul-de-sac. We’ve tried all the home remedy stuff—Irish Spring soap, garlic hung on strings that spanned the tomato cages, human hair, commercial potions with a nasty rotten egg odor, ALL of it—and last year, well, I didn’t even bother. But with grocery prices soaring, I wanted to try again and so I splurged on this motion sensor device, advertised with the slogan, “don’t hurt ‘em, just squirt ‘em!”
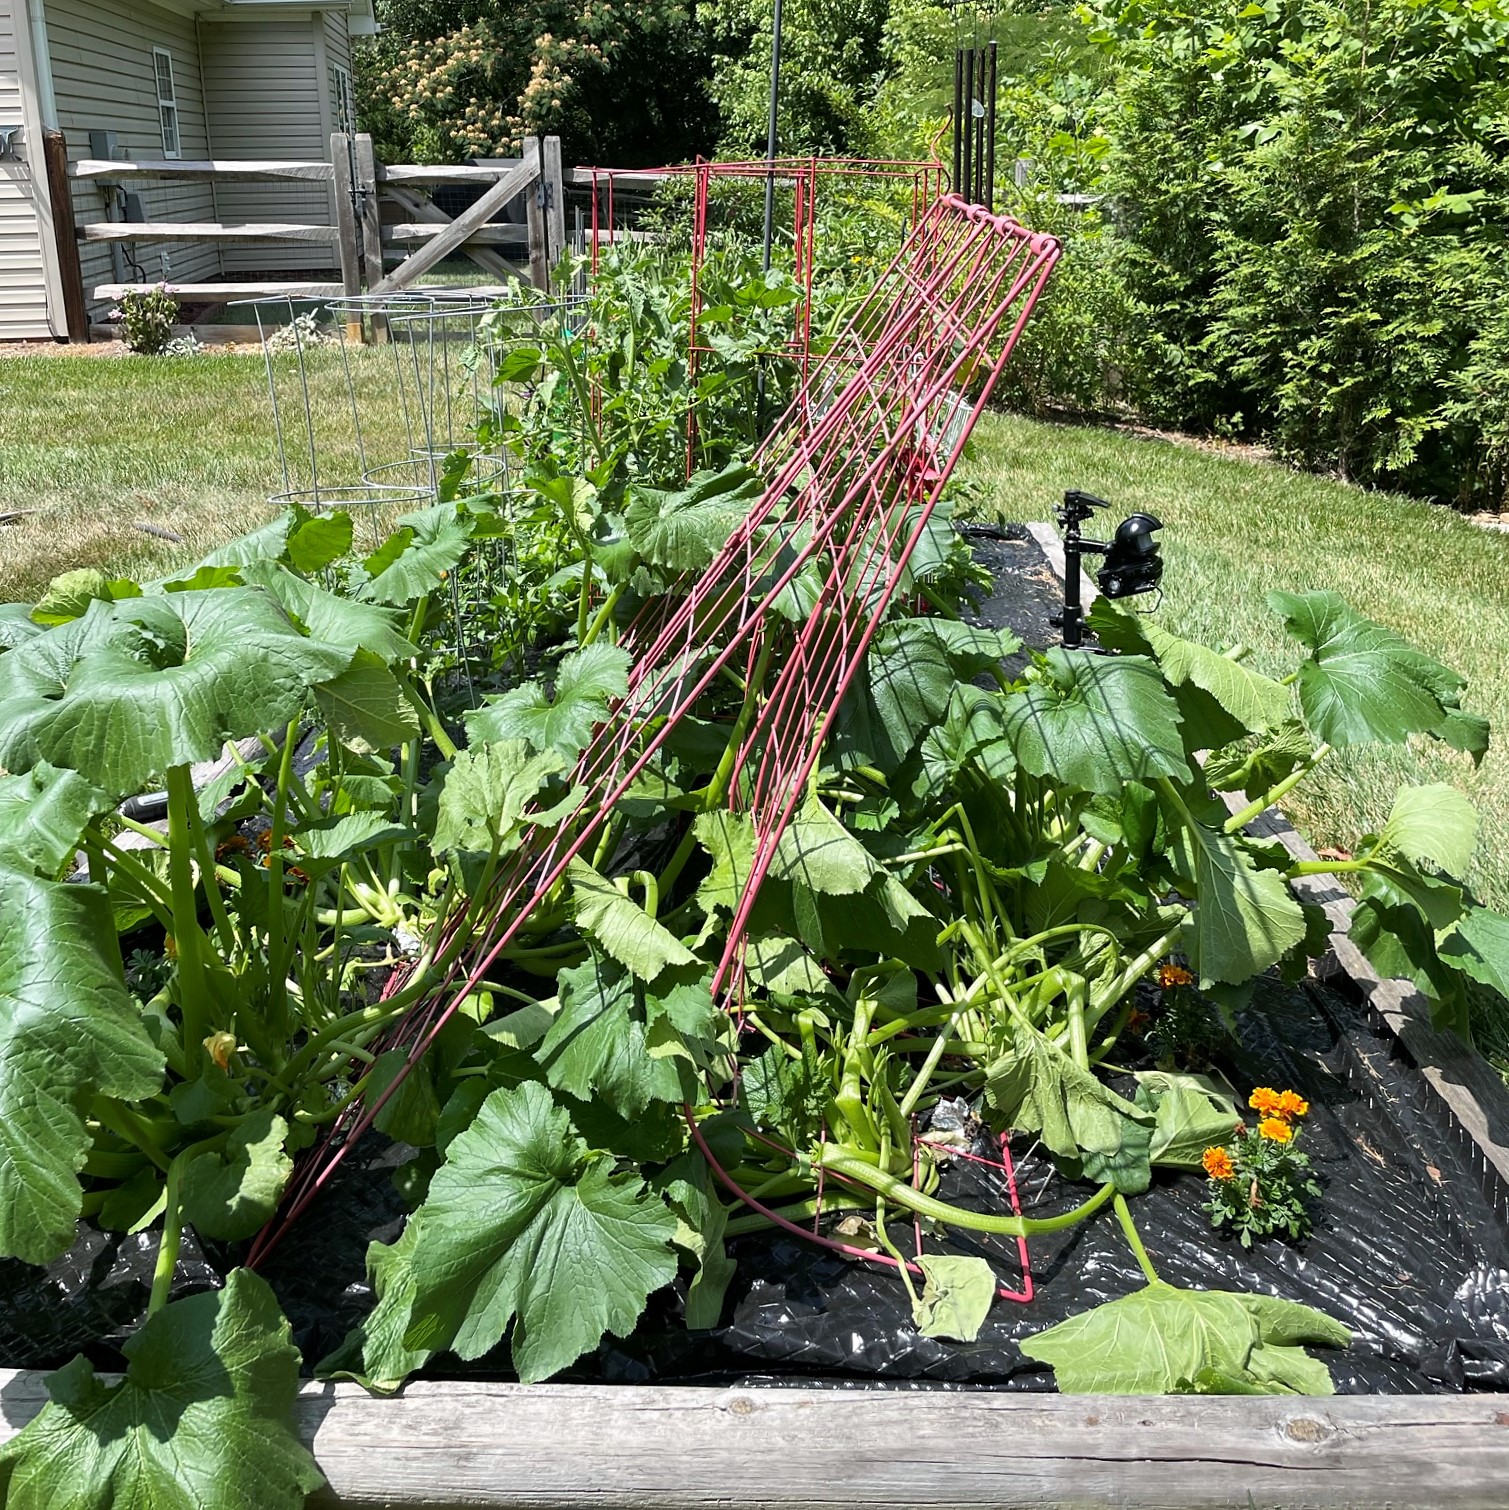
The thing has peripheral vision to spot deer (or other critters, or unsuspecting neighbors) when they approach the garden, and launches a hearty spray of water to chase them off. My garden looks better than ever! Yesterday morning, though, our neighbor texted to tell me that “something had happened” to one of my zucchini plants, and when I went out to investigate, I discovered what appears to be a hit-and-run.
YIKES!
First of all, this trellis is heavy duty, so this was a serious accident. I was trying to train my zucchini to grow upward on both sides of it, to make more space in the garden and encourage more fruit. It was looking so healthy and I’ve just begun to see blossoms forming. My assumption is that a good-sized deer was already standing in the garden when the sensor detected its movement, and the precious thing got so spooked by the abrupt noise and spray, it panicked and fell onto the trellis. I have since moved the Yard Defender to the rear of the garden, where the tomatoes grow (it’s what they are after anyway), and hopefully we can avoid another dangerous incident. For sure, at least one of my zucchini plants is doomed (it was crushed, along with the trellis), but I hope that the other three endure so I can join the chorus of those who are sick to death of zucchini recipes, come August. Until then, I will continue to harvest what is growing out of control on the inside of my house, in the Aerogarden.
Here we go again, with the Thai basil!
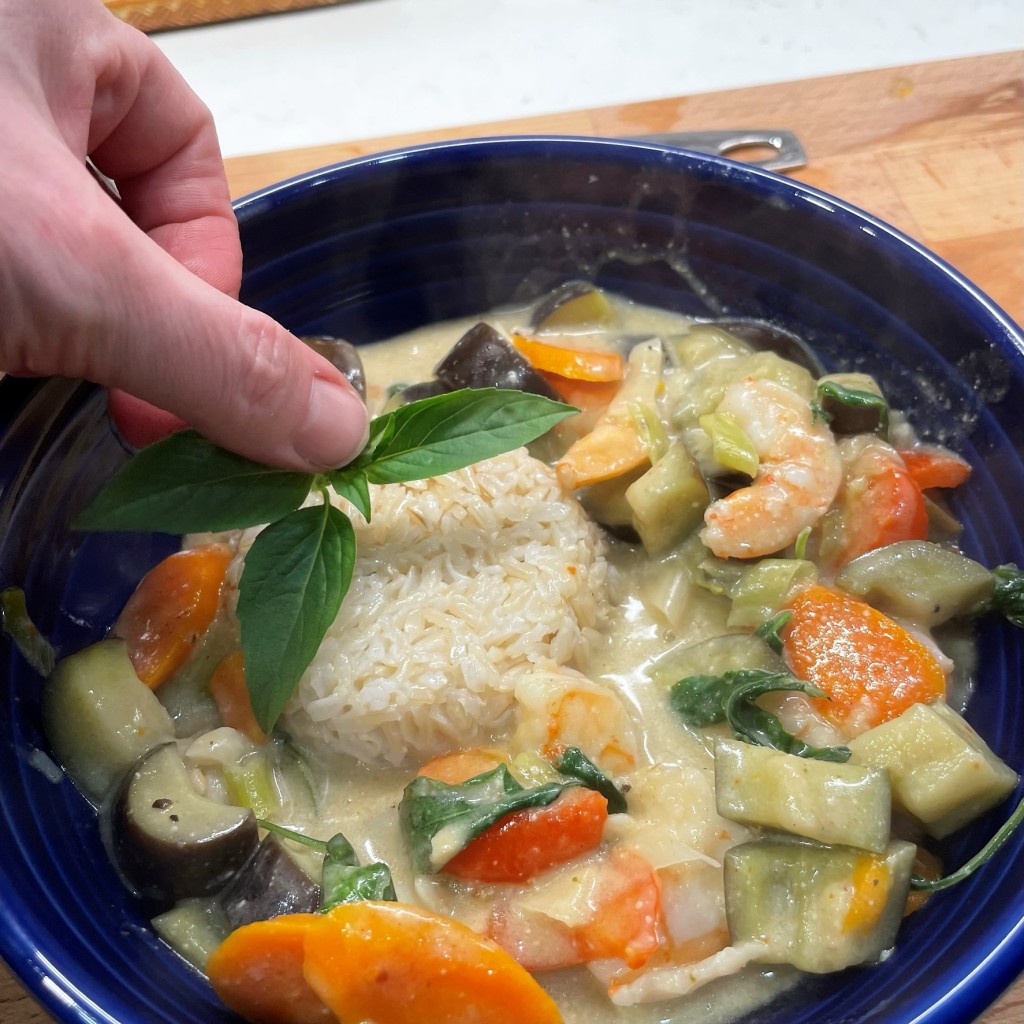
I’ve been scrambling to come up with interesting ways to work this herb into “the rotation,” which is an inside joke for me and my husband, who swears we have not eaten the same thing twice since 2016. This is his fault, I say, for marrying a woman who loves to experiment in the kitchen. But using what is local and plentiful is part of what I do, and it doesn’t get more “local” than the dining room. I have in mind to substitute it for mint in a Mojito this weekend, and I’ll let you know how that goes. For now, let’s talk about what went into this bowlful of goodness.
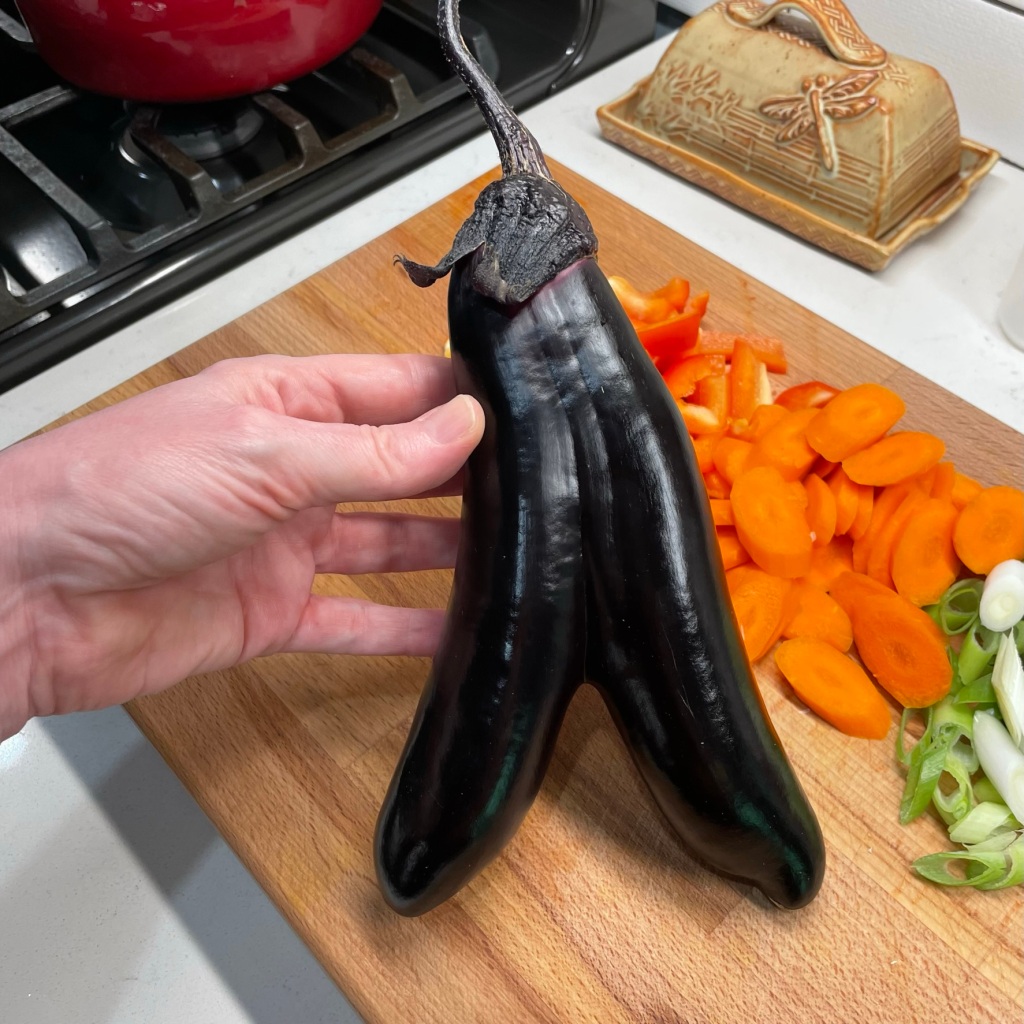
Some of the vegetables in this recipe were the same as in the Thai Basil Chicken I shared last week, but there were plenty of swaps that make this dish different. I used carrots and red bell pepper again, swapped in scallions for regular onions, and cut up the first fruit of my 2022 garden, a wonky eggplant!
My aunt said this twinsie eggplant looked like a pair of pants wearing a hat! 🙂It is coincidence that these are the same brand. The flavors are exquisite when combined!
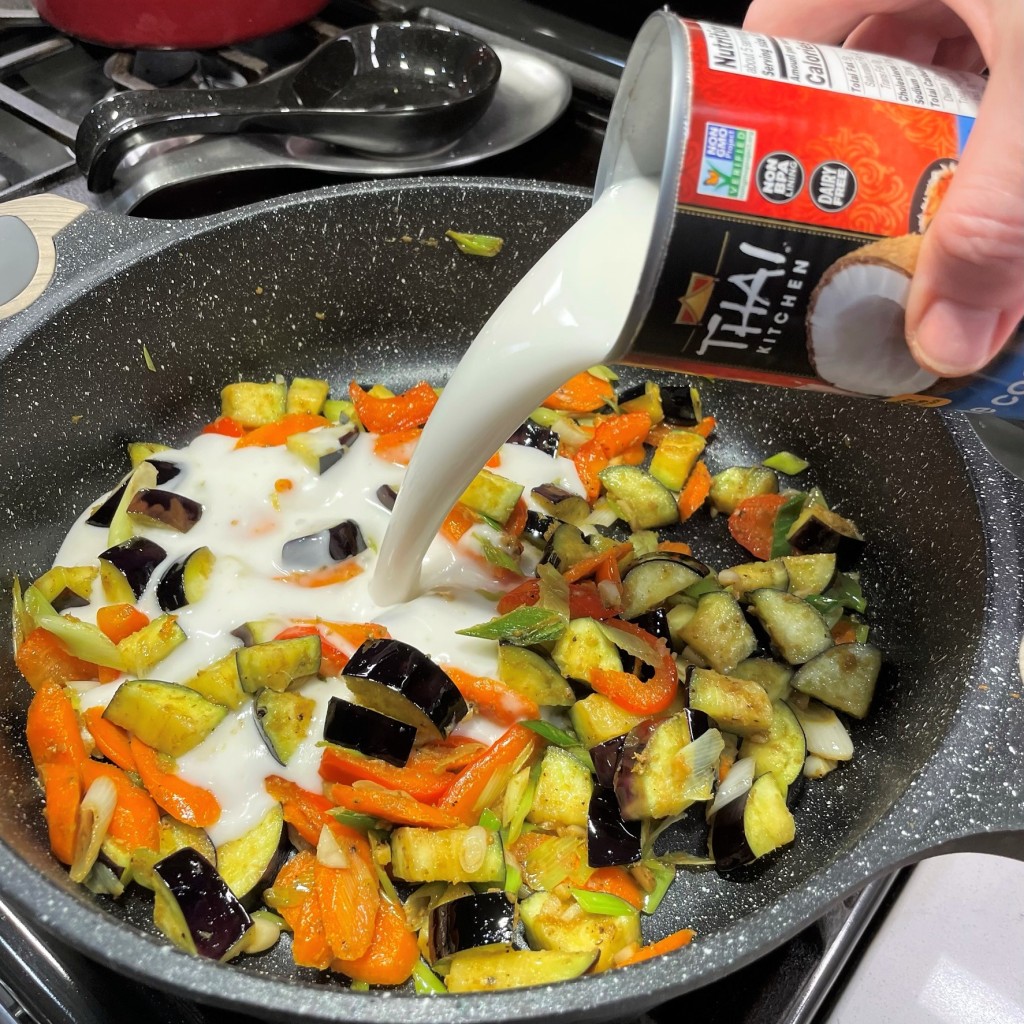
Shrimp was my protein and I shifted the sauce to a green curry-coconut vibe. Green curry is a vibrant blend of warm spices mixed with lemongrass, kaffir lime, green Thai chile and galangal, a rhizome that looks like ginger but tastes more herbal. It would be quite complex to make green curry from scratch, but a store-bought paste makes this recipe very simple. The aroma of the paste is pleasantly intoxicating, especially when it first hits the oil in your pan. Coconut milk is a natural companion for the flavor of any curry, and for this recipe, I used a “light” version to reduce the overall fat, but a full-fat coconut milk is fine and would lend more of the coconut flavor.
My first taste of green curry (circa 2005) was a pleasant surprise, and I was introduced to it by an unexpected culinary expert—my then-quite-young stepdaughter. She became a foodie at an early age, in part by my influence, but also that of her mother, who introduced her to Thai food when she was still in elementary school. Yes, when other kiddos were clamoring for fried chicken fingers at chain restaurants, our global flavor-savvy girl was scouting out the nearest sushi joint or Indian restaurant. When I had mentioned to her on a family dinner out in a Thai restaurant that I didn’t care for curry, she asked, incredulously, “not even green curry?” She offered me a taste of her favorite green curry chicken, and I was hooked. I’ve made it at home a few times in recent years, but this was my first time with shrimp. Delicious!
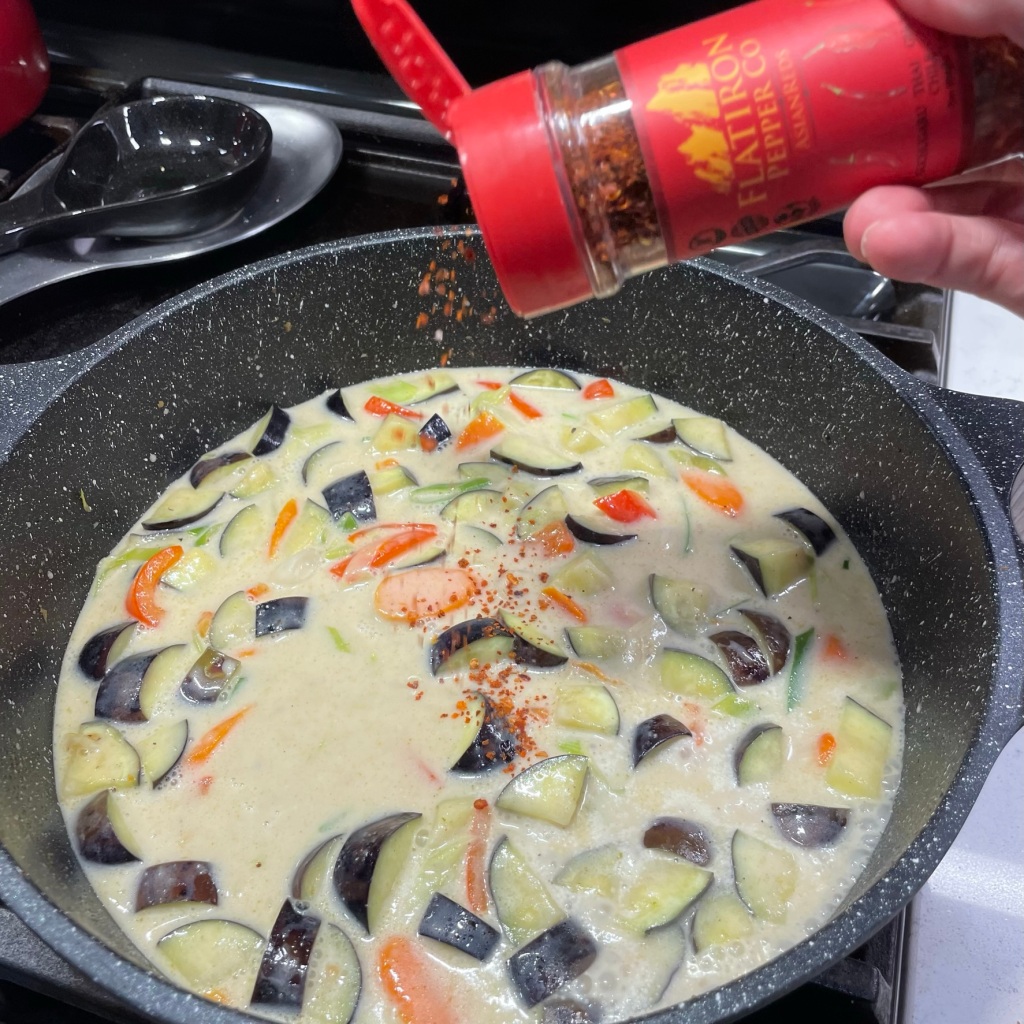
There is a bit of heat in my rendition of this dish, not only from the green curry paste, which leans spicier than red and yellow curries, but amped up by a few shakes of another fun ingredient in my pantry—Asian Reds hot chile blend, available online from the Flatiron Pepper Co. website. To be clear, I don’t get paid to brag about them, but I probably should, given that we own a bottle of darn-near every variety they make. What sets this company apart from others is that it offers region-specific blends of peppers that are otherwise hard to find. The Asian Reds includes Thai chile and ghost pepper, both of which are damn hot. I heartily recommend it for adding heat to any Asian-inspired dish, but a quick shake of the red pepper flakes you probably already have will work in a pinch for this recipe, or you could mince up half of a red jalapeno into the veggie mix for similar heat effect.
You won’t find these varieties of peppers just anywhere. Use it sparingly because it is HOT.
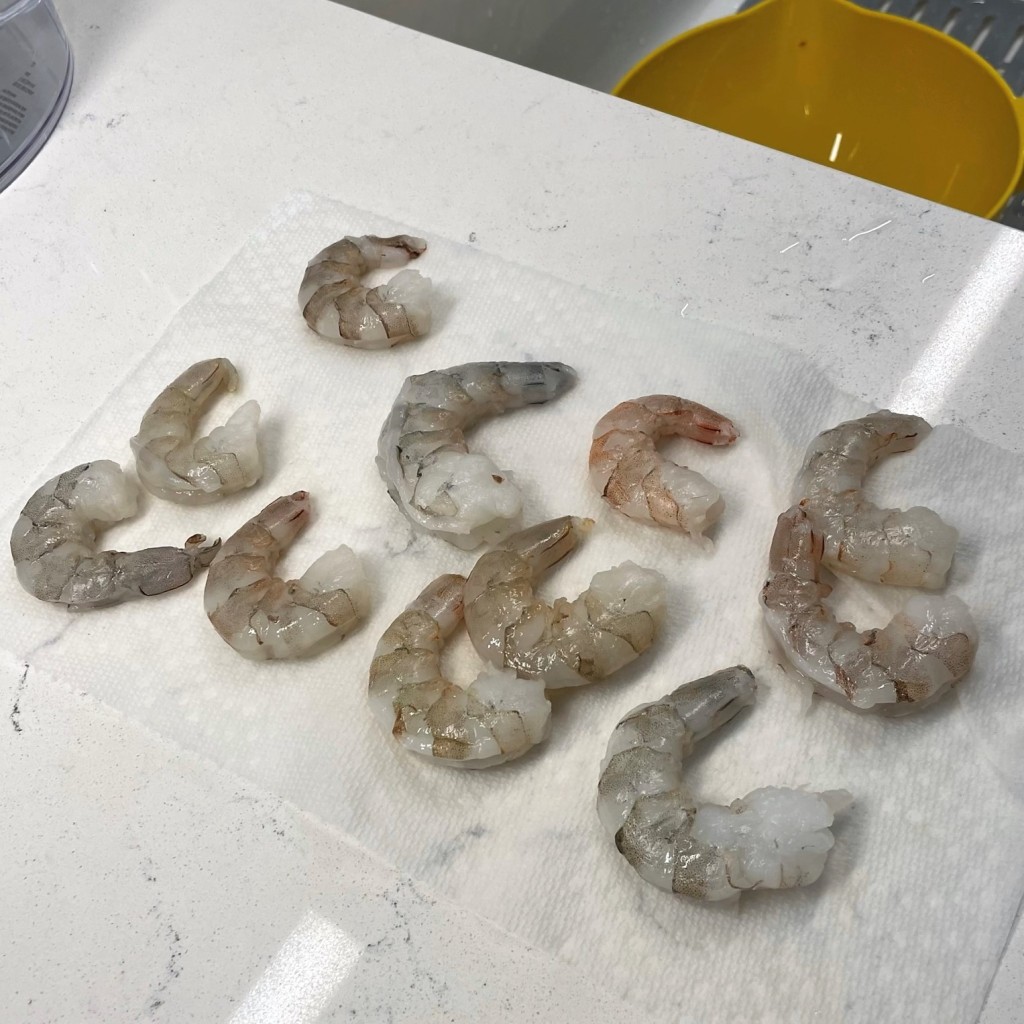
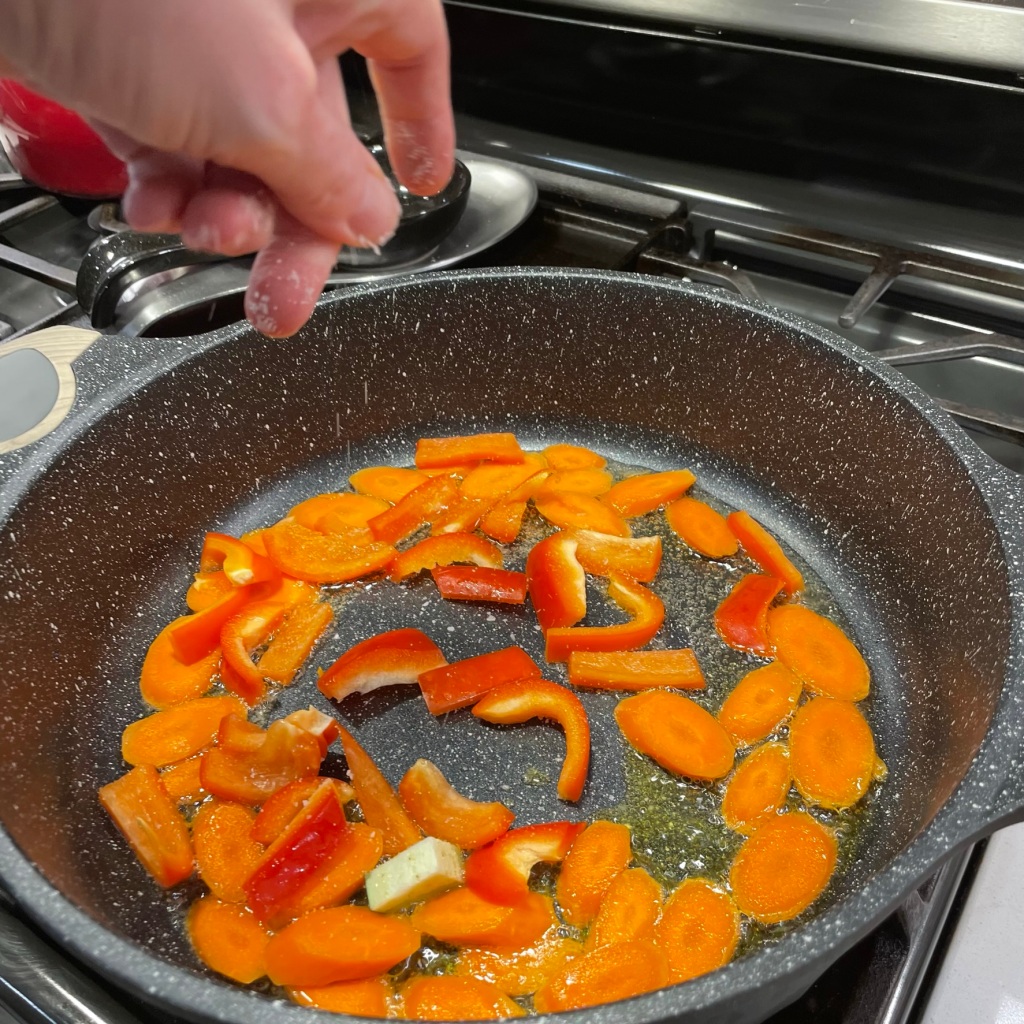
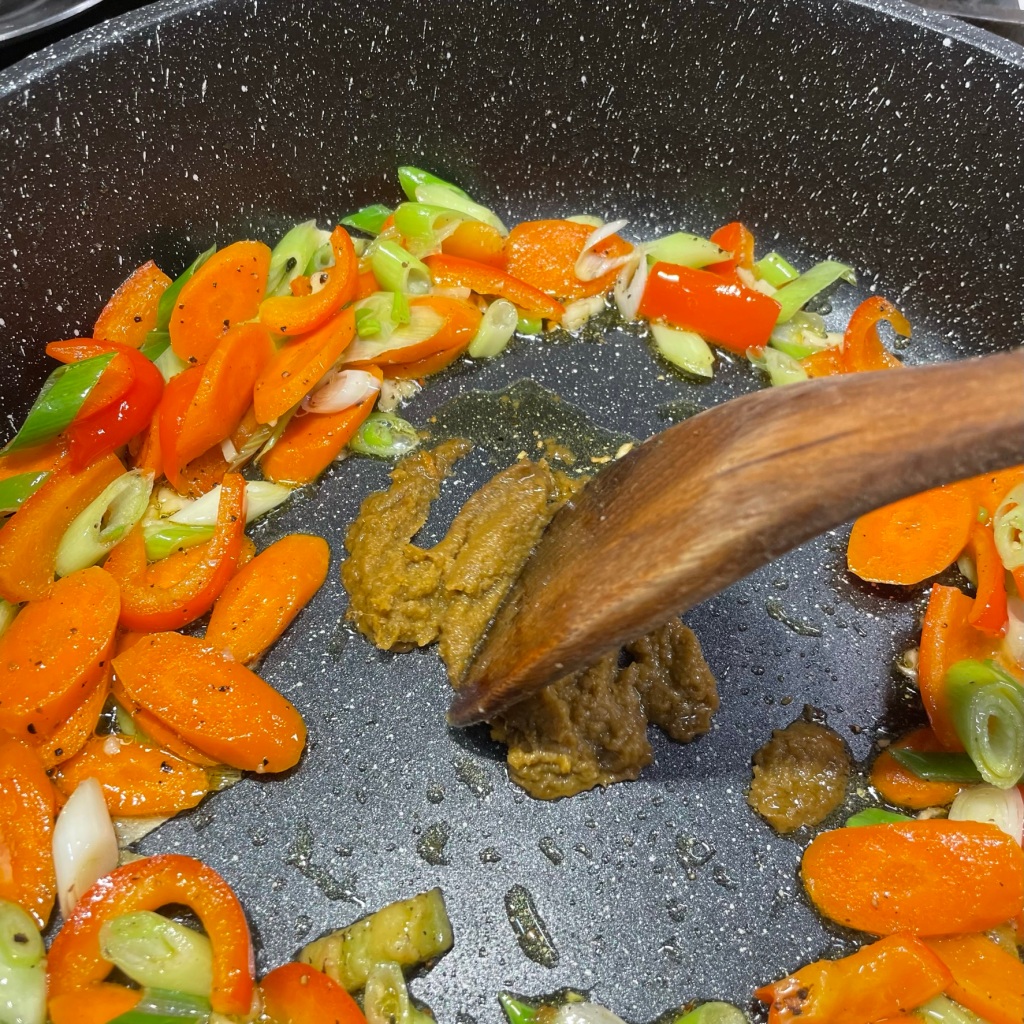
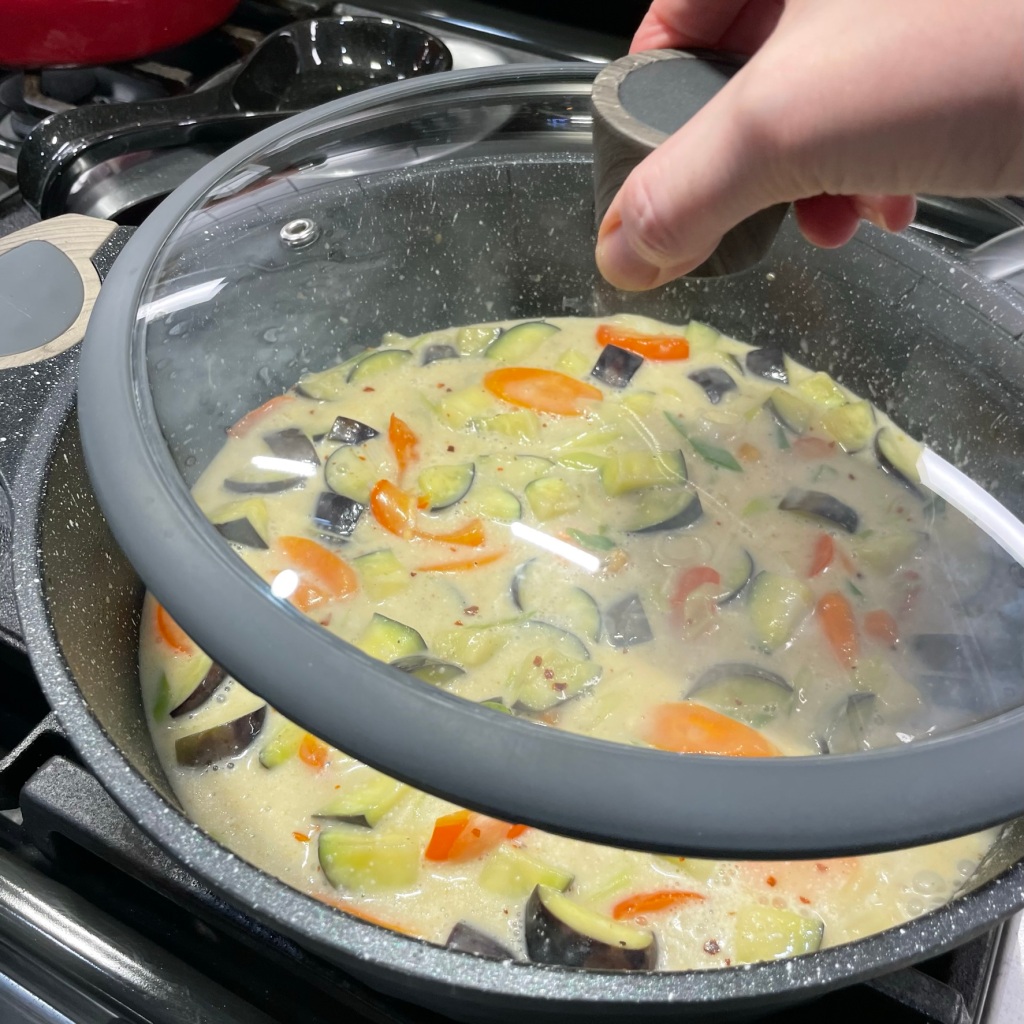
My advice for making this dish is the same as most every Asian-inspired recipe, and that is to get all your ingredients lined up and ready before you begin because things move quickly once the oil hits the pan. That means chop up your vegetables, clean and de-vein your shrimp and get your rice cooking (you’ll want that, for soaking up every last drop of the flavorful green curry sauce). Place a heavy bottomed pan over medium-high heat and add a couple of tablespoons of high-heat oil, such as canola, peanut or coconut. Give a quick stir-fry to the carrots and peppers first, because they take longer to cook. Then, add the scallions and garlic and toss long enough for the initial steam to dissipate. Move the vegetables to the outer edges the pan, drop another tablespoon of oil to the center and plop the green curry paste onto it. Prepare to be entranced by the aroma!
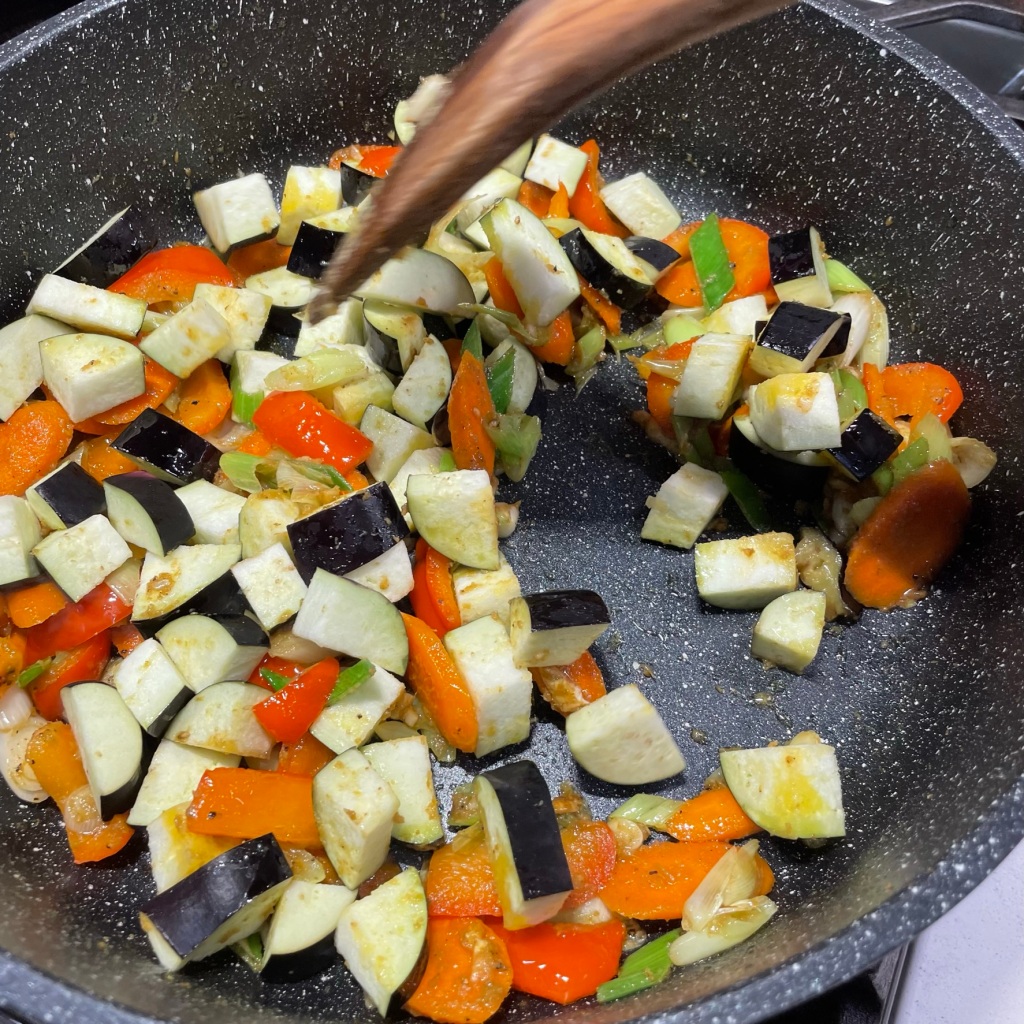
When the oil sizzles around the green curry paste, use a utensil to break it up and toss it with all the vegetable ingredients, so that everything is covered in a light film of the curry paste. The eggplant should go in last, given its tendency to instantly absorb oil. Toss everything just enough to coat the pieces, then add the entire can of coconut milk and stir to blend. Sprinkle in hot pepper flakes (if you want the extra heat), reduce the heat to low and cover the pan to simmer for 3 minutes. This gives the vegetables time to soften, and allows the green curry flavor to permeate everything.
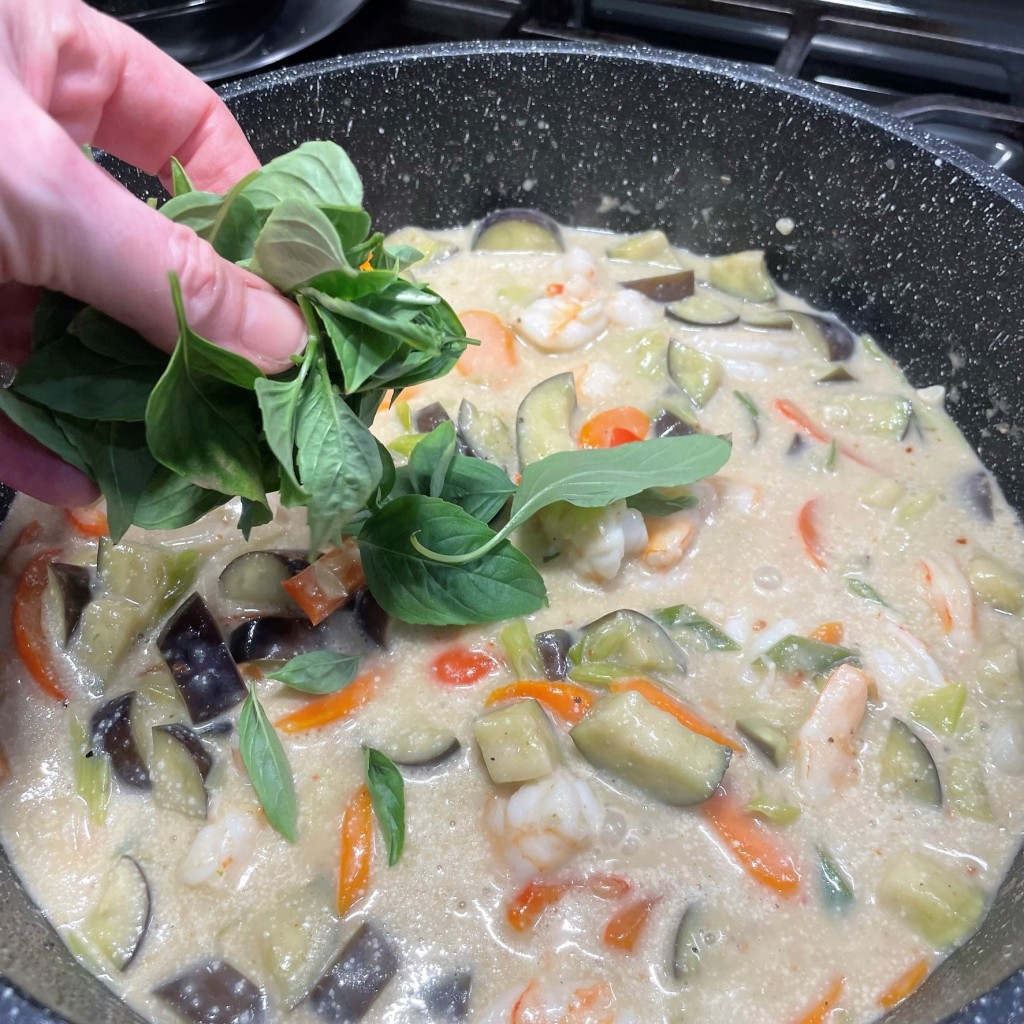
Add the shrimp to the pan and stir to submerge them beneath the simmering liquid. Depending on the size of your shrimp, it should only take 3 to 5 minutes for them to lose their pink color, so watch them closely. Add a handful of Thai basil and stir to wilt it into the dish. Serve immediately with a portion of jasmine rice.
Garnish with a pretty Thai basil leaf if you want to be fancy. 😉
This recipe comes together quickly and with ease, thanks to a store-bought paste that captures all the important flavors of Thai green curry. Substitute chicken or tofu if you wish. If you don’t have Thai basil, you could substitute regular basil or omit it altogether.
Ingredients
3 Tbsp. high-heat cooking oil, such as canola, peanut or coconut (you will divide this for cooking the vegetables and blooming the curry paste)
1 red bell pepper, sliced and halved
2 medium carrots, peeled and cut on a bias
3 scallions, cut on bias (white and green parts)
3 cloves garlic, chopped
1 medium Japanese eggplant, cut into bite sized chunks
2 Tbsp. prepared green curry paste
1 can light coconut milk (this is the culinary variety, not cartons for drinking)
a few shakes hot red pepper flakes, for extra heat
1/2 pound fresh shrimp, peeled and deveined
a handful of fresh Thai basil leaves (optional but delicious); substitute regular basil if desired
hot cooked jasmine rice, for serving (I used brown jasmine rice for extra flavor and nutrition)
Directions
Heat a large, heavy-bottomed pot over medium-high heat. Add 2 tablespoons of oil and stir-fry the carrots and red peppers for about two minutes to give them a head start. Season with salt and pepper to taste. Add scallions and garlic and toss to coat and wilt the scallions.
Move the vegetables to the outer edge of the pot. Add 1 tablespoon of oil to the center and spoon the green curry paste onto the oil. This will “bloom” all the flavors of the paste. Break it up a bit with your cooking utensil, then stir it together with the cooked vegetables. Add the eggplant and toss to coat.
Pour the entire can of light coconut milk into the pot and gently stir to blend. Sprinkle on hot pepper flakes (if using) and adjust salt and pepper to taste. Reduce heat to low and cover the pot, simmering for about three minutes, or until the mixture reaches a slight boil.
Add the shrimp pieces. tossing lightly to submerge them beneath the simmering liquid. Keep a close eye on them, as they will cook in as few as 3 minutes, depending on their size and original temperature.
Stir in Thai basil leaves until wilted. Serve immediately with hot cooked jasmine rice.
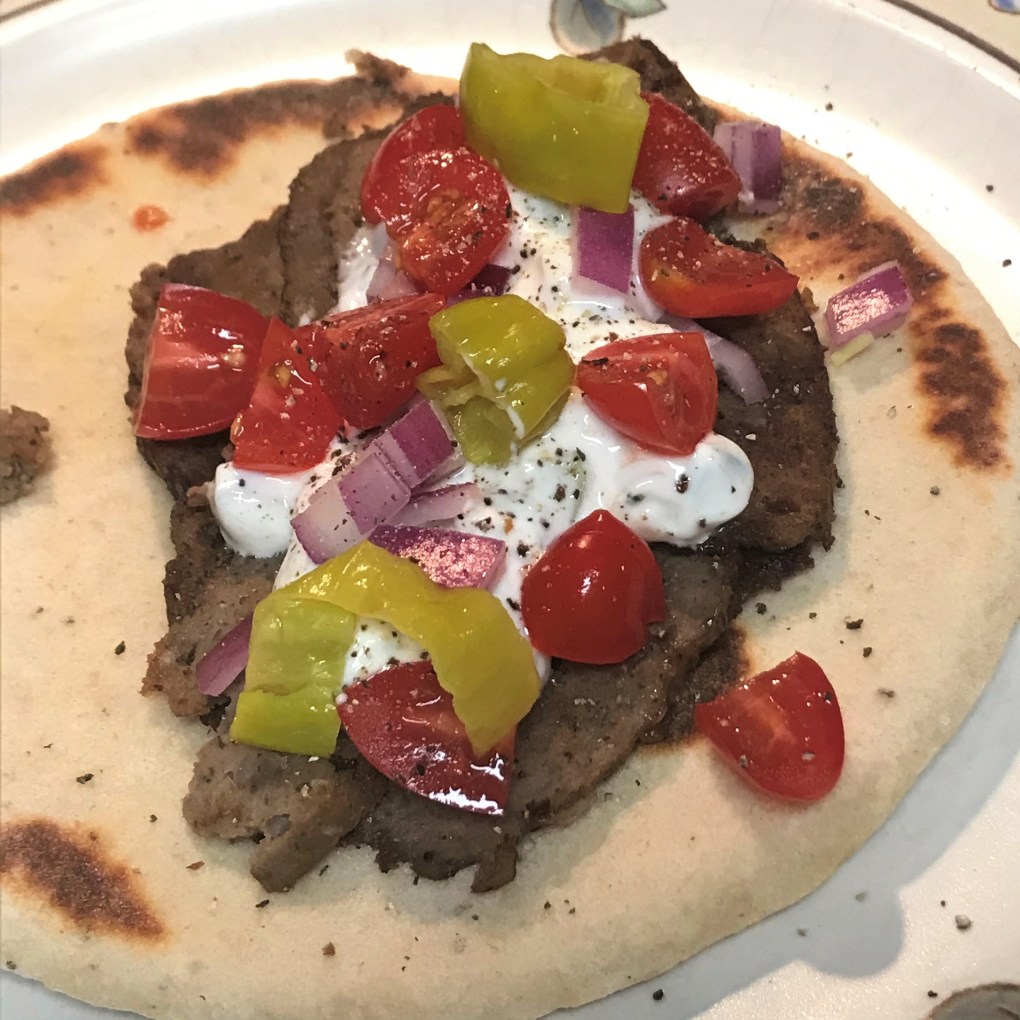
If at first you don’t succeed, wait a year and try again. Yes, I know that isn’t exactly how the adage goes, but it seems to be my M.O. when I get discouraged over failed recipes. Falafel has confounded me as much as it has enchanted me, from my first-ever taste of it at a now-closed corner diner near the campus of UNC-Greensboro to my most recent experience of it at Miznon in New York’s Chelsea Market. It was that most recent taste that inspired me to give falafel another go.
My hubby and I visited NYC at the end of last summer, and this was our first stop.We had lunch at Miznon, where they serve up Mediterranean “street food” like this incredible falafel wrap.
I love the texture of these crispy little gems and especially the vibrant flavor that is jam-packed into every delicious bite. Falafel is a Middle Eastern specialty, made from ground-up chickpeas and a ton of fresh herbs and spices. It is usually shaped into balls or disc shapes and fried until crispy, though I have also seen oven-baked falafel, which has a somewhat pale and less visually enticing appearance. Undoubtedly, it can be made in an air fryer—and perhaps someone reading this will chime in to share their results of that method. I have tried both fried and oven-baked falafel a few times but got increasingly frustrated with each fail, and then put off trying again for longer and longer stretches of time. How could this be so difficult, I wondered? The dish eventually moved to the top of my culinary “bucket list,” and I’m pleased to say that I finally won the falafel challenge.
As it turns out, falafel was only difficult to make because I was resisting the instructions that were right in front of me the whole time. I tried to make them from canned chickpeas (which doesn’t work) and then I tried making them with canned chickpeas that were subsequently roasted and dried out in the oven (which also doesn’t work). When I finally gave in and tried them the correct way, they turned out terrific! What is the correct way, you ask? Using chickpeas that have been soaked but not cooked.
My favorite thing about cooking—besides the obvious enjoyment of delicious food that’s made cheaper at home than you would buy somewhere out—is the science behind it, and it turns out there is a perfectly good reason that soaked, uncooked chickpeas are the best bet for perfect falafel. Thank goodness for J. Kenji Lopez-Alt, the culinary genius who runs “The Food Lab,” and a frequent contributor on the Serious Eats website. He is sort of an Alton Brown for the new generation, and his scientific explanation on falafel is the best I’ve read to date. Here’s the upshot: soaking rehydrates the chickpeas so you can work with them, and it keeps the sticky starches trapped inside. Those starches get released when the chickpeas are cooked during frying (or baking), and that starch release is what helps the falafel rounds hold together. If the chickpeas are already cooked (as in canned), the starch is spent, and you end up with a mess. My ridiculous attempts to return canned chickpeas to a firmer, drier texture by roasting them in the oven didn’t work because they were still already cooked. This time around, I followed the science offered by J. Kenji, and guess what I ended up with? Near-perfect falafel.
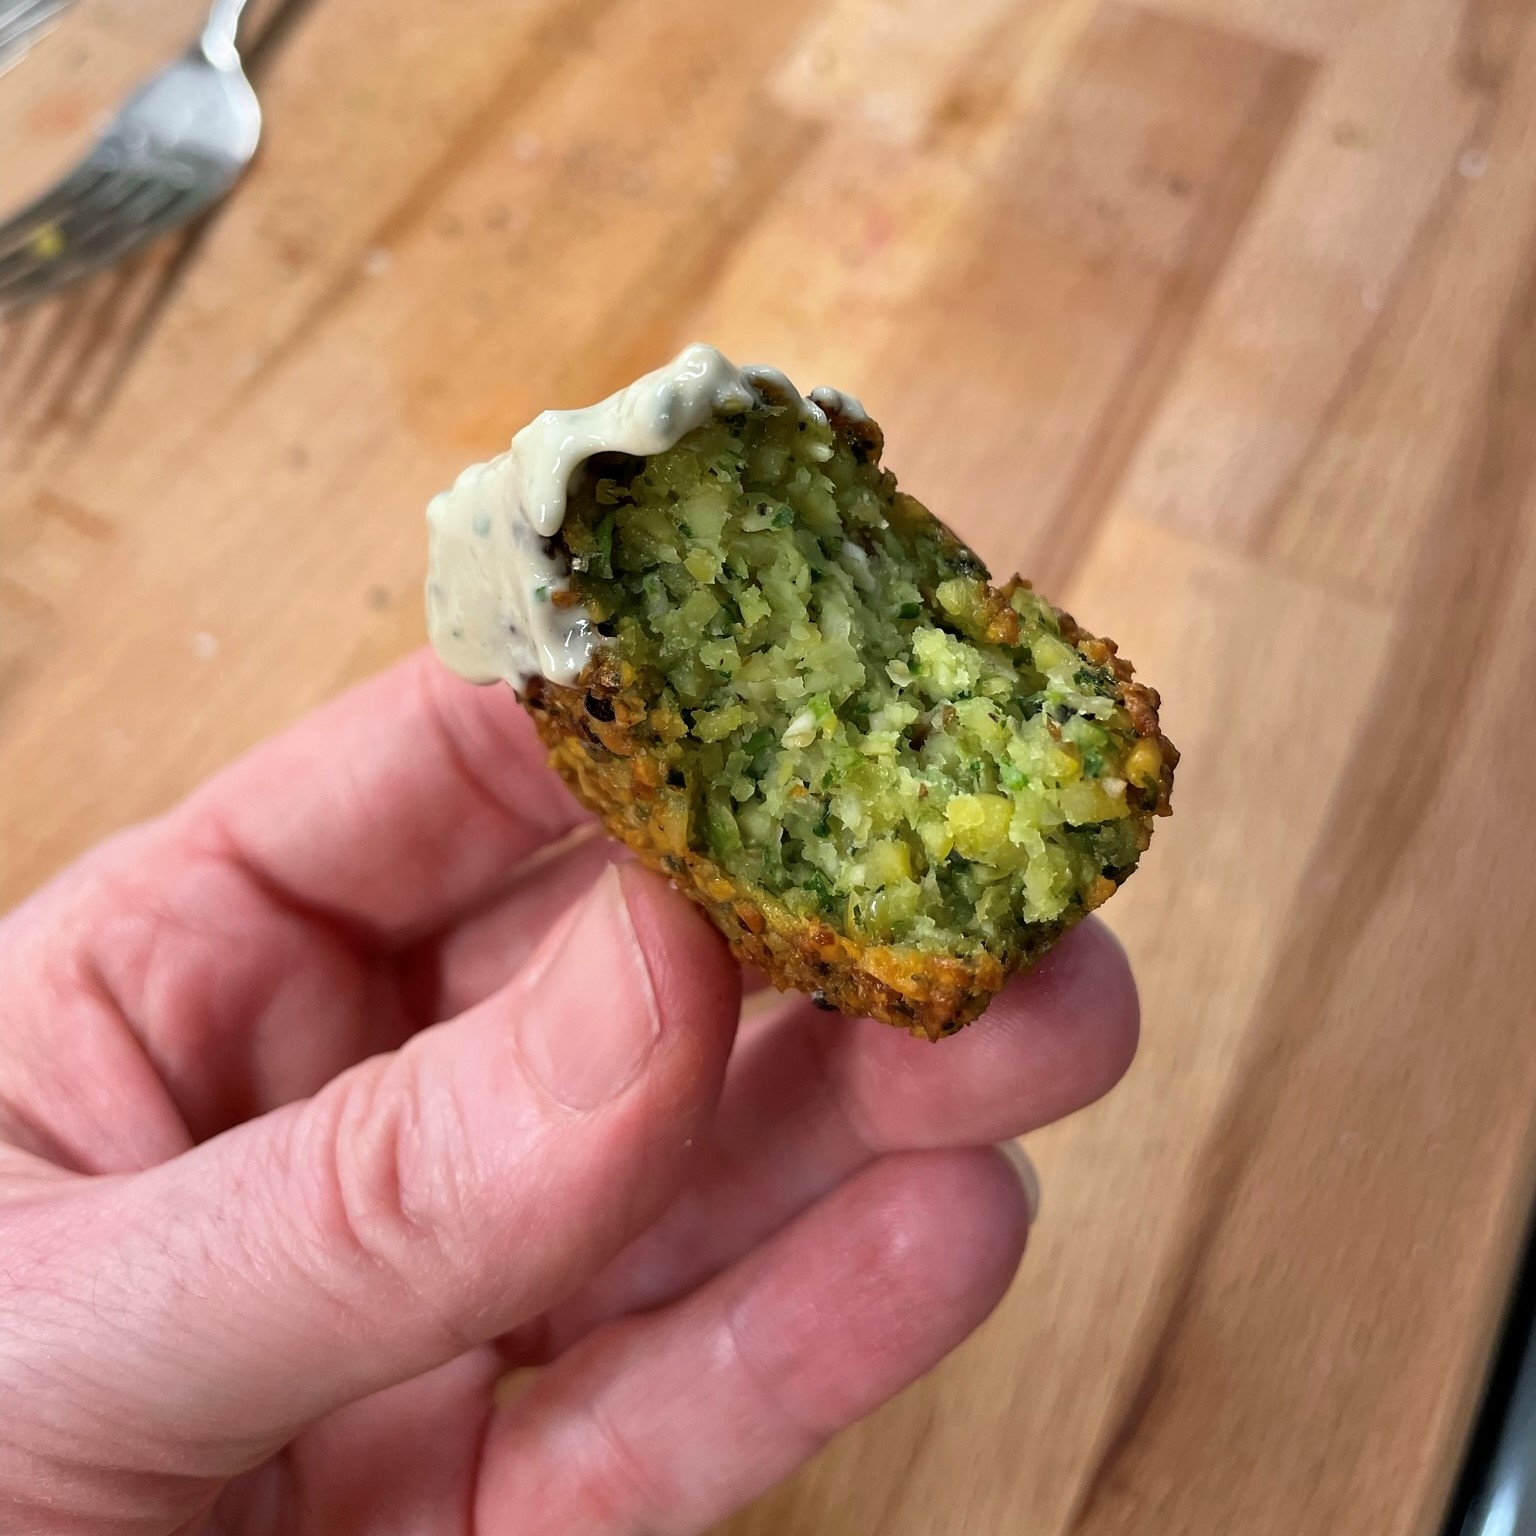
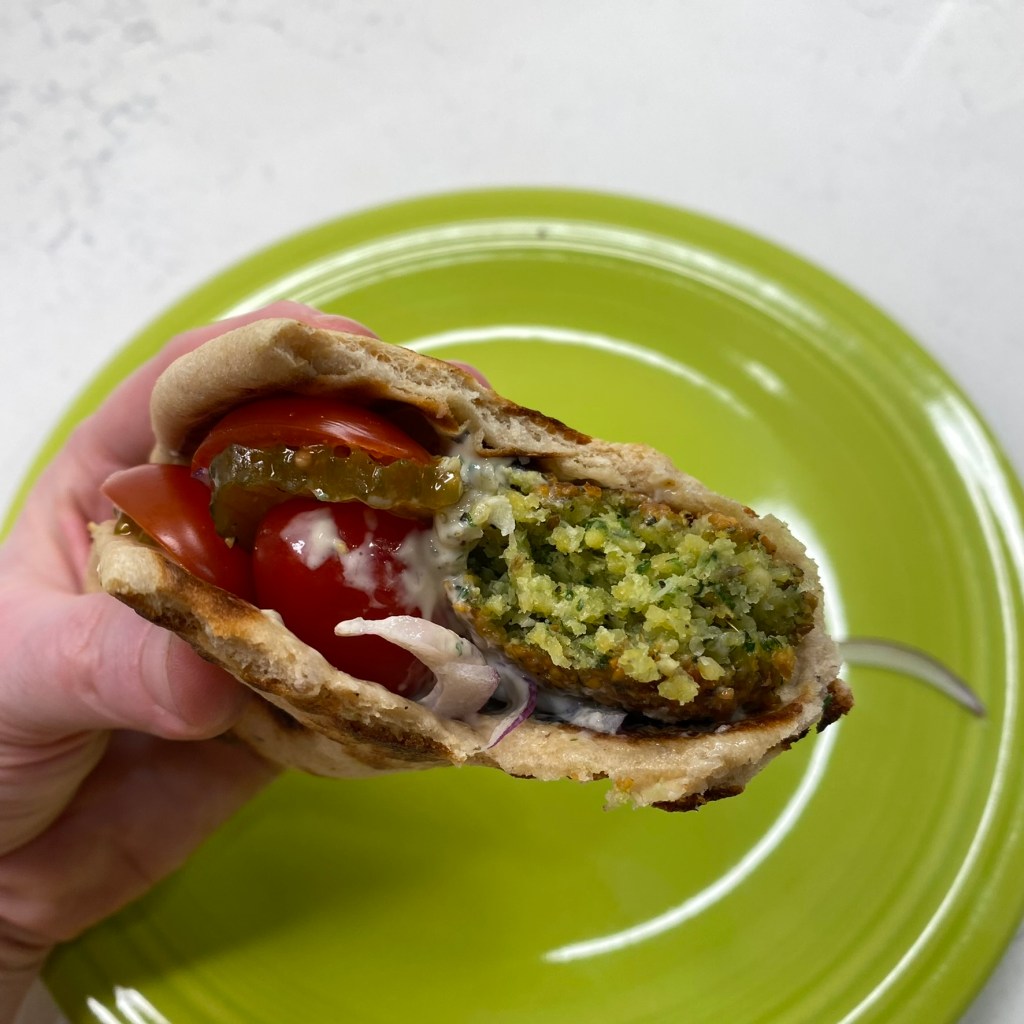
Crispy on the outside, moist and soft on the inside, and sooo much flavor!
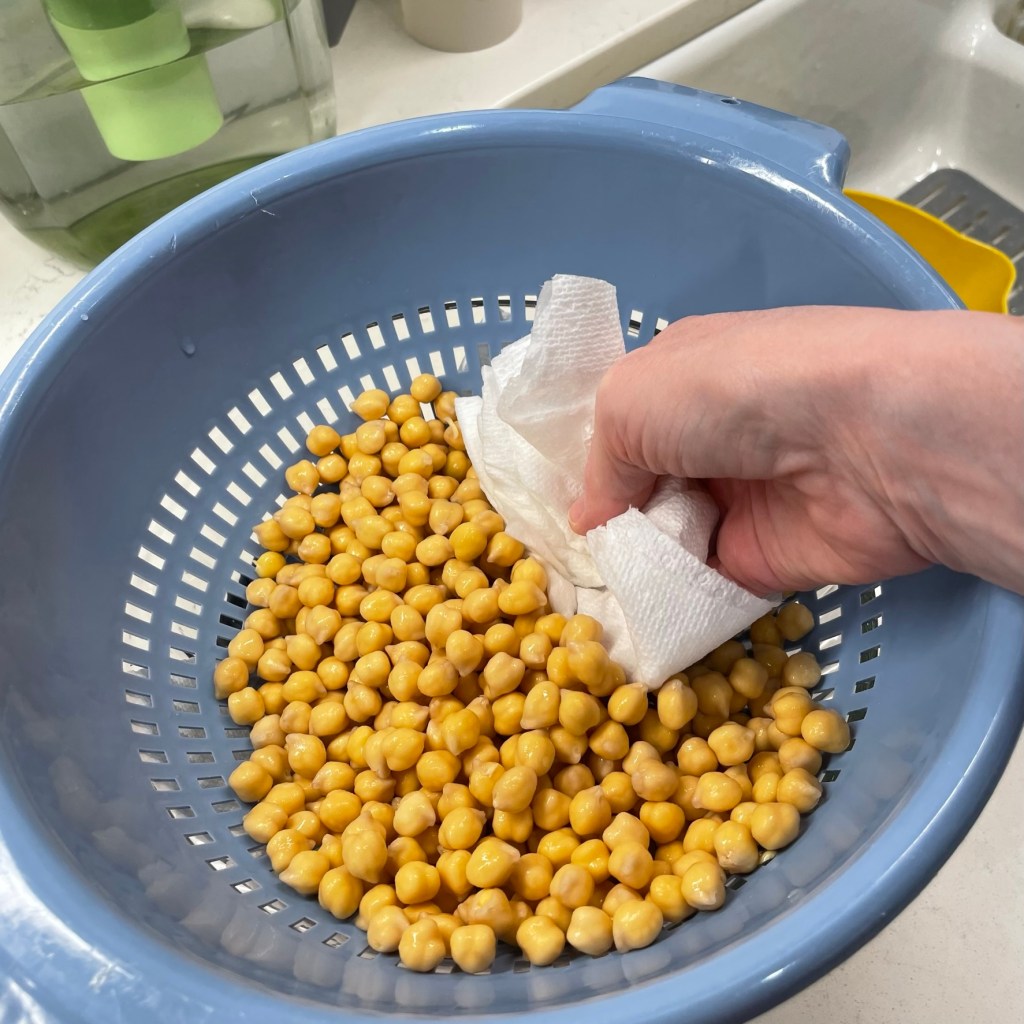
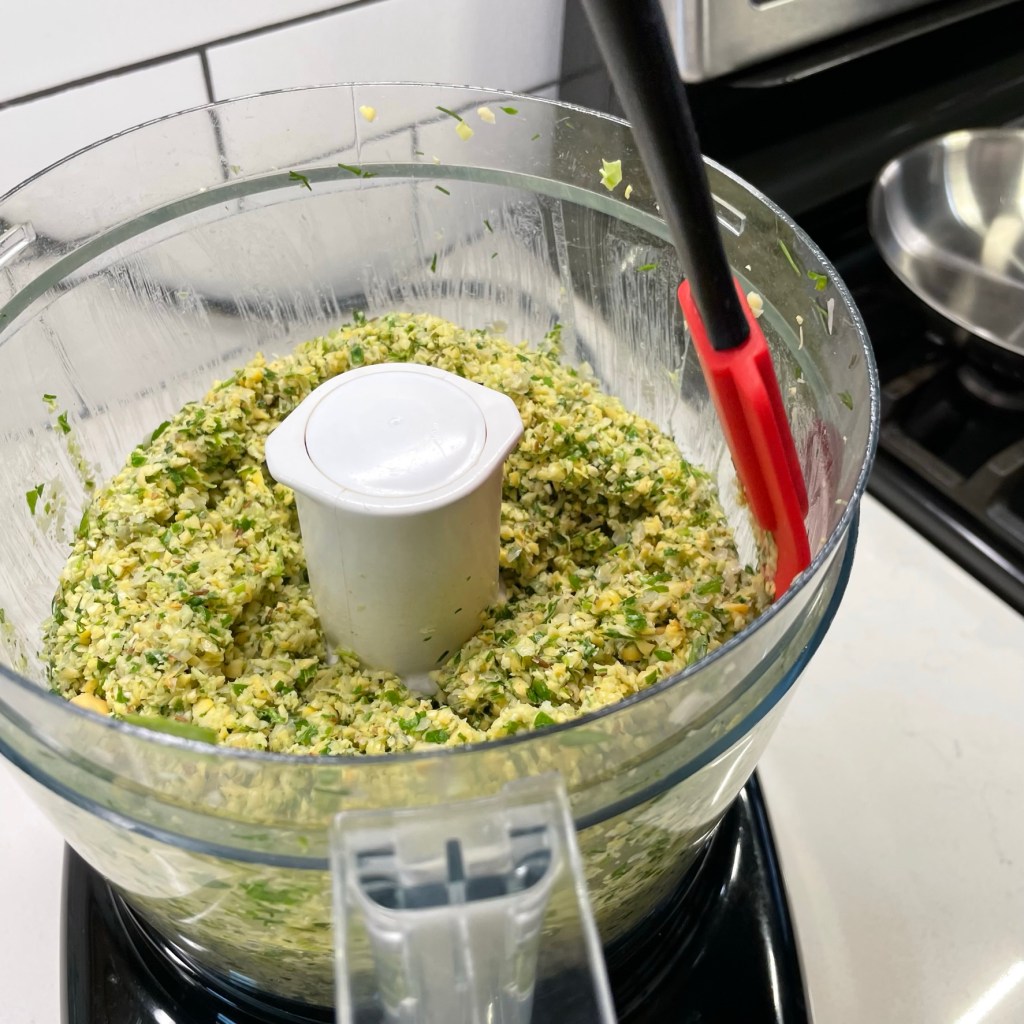
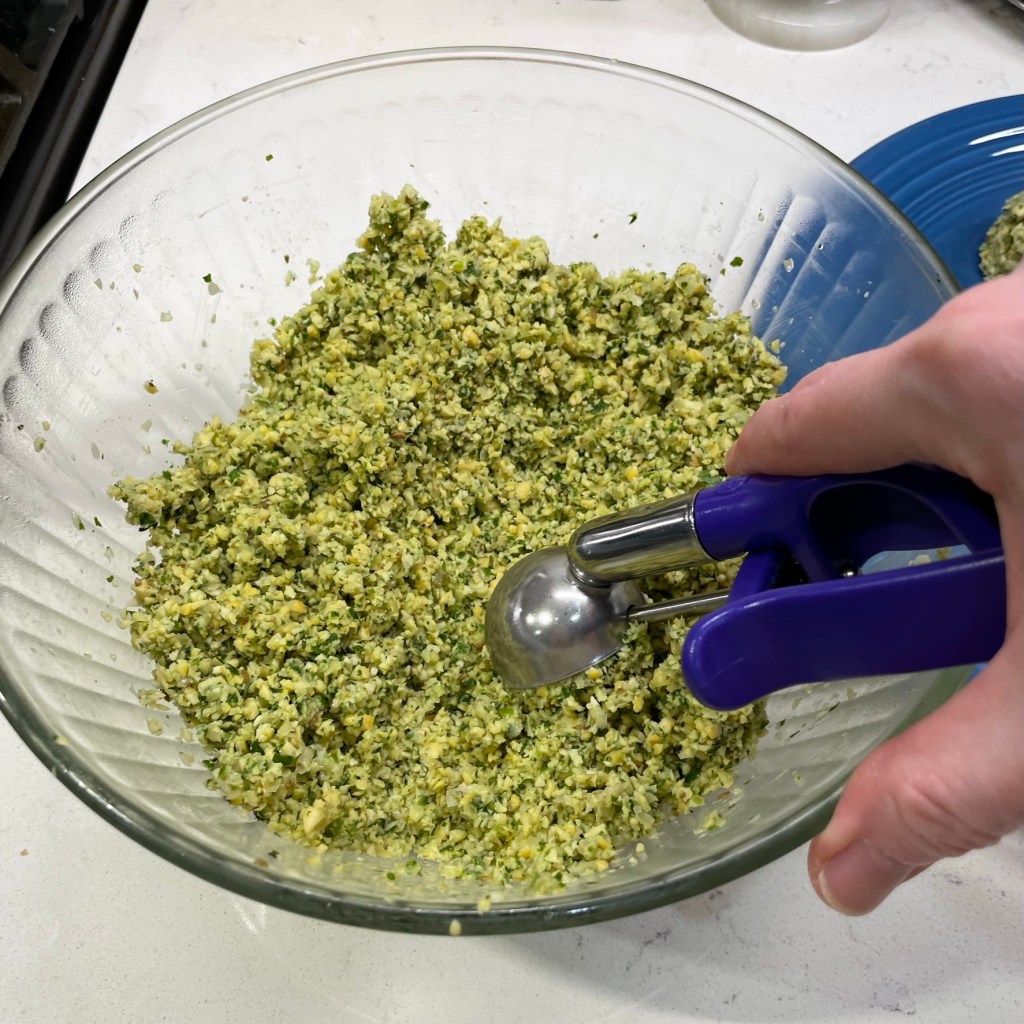
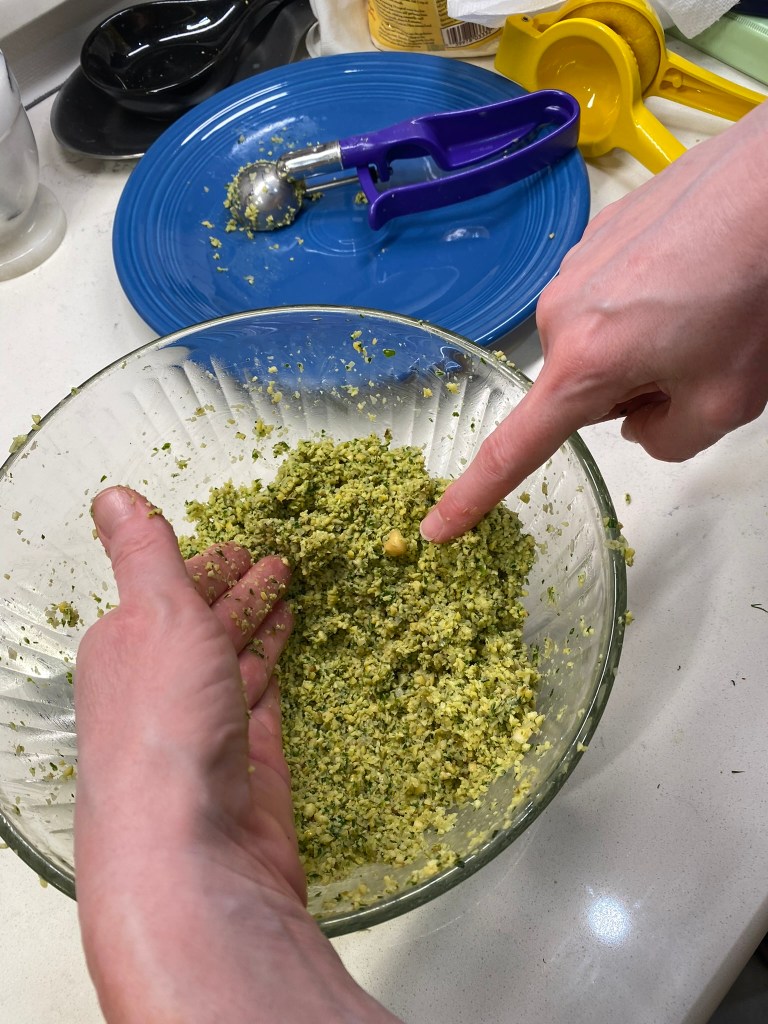
In a weird twist of fate, the best way also happened to be the easiest of the methods I had previously tried. Soaking the chickpeas took almost no effort, then I drained and rinsed them in a colander, rolled them around on paper towels to wick away excess moisture, and then pulsed them in my food processor with a fat handful of fresh herbs and generous amounts of Mediterranean spices. Further following J. Kenji’s advice, I kept my falafel small, using my large cookie dough scoop to compact them into rounds, which I fried up nicely in a shallow skillet. For the love of flavor, why did I wait so long to follow the rules?
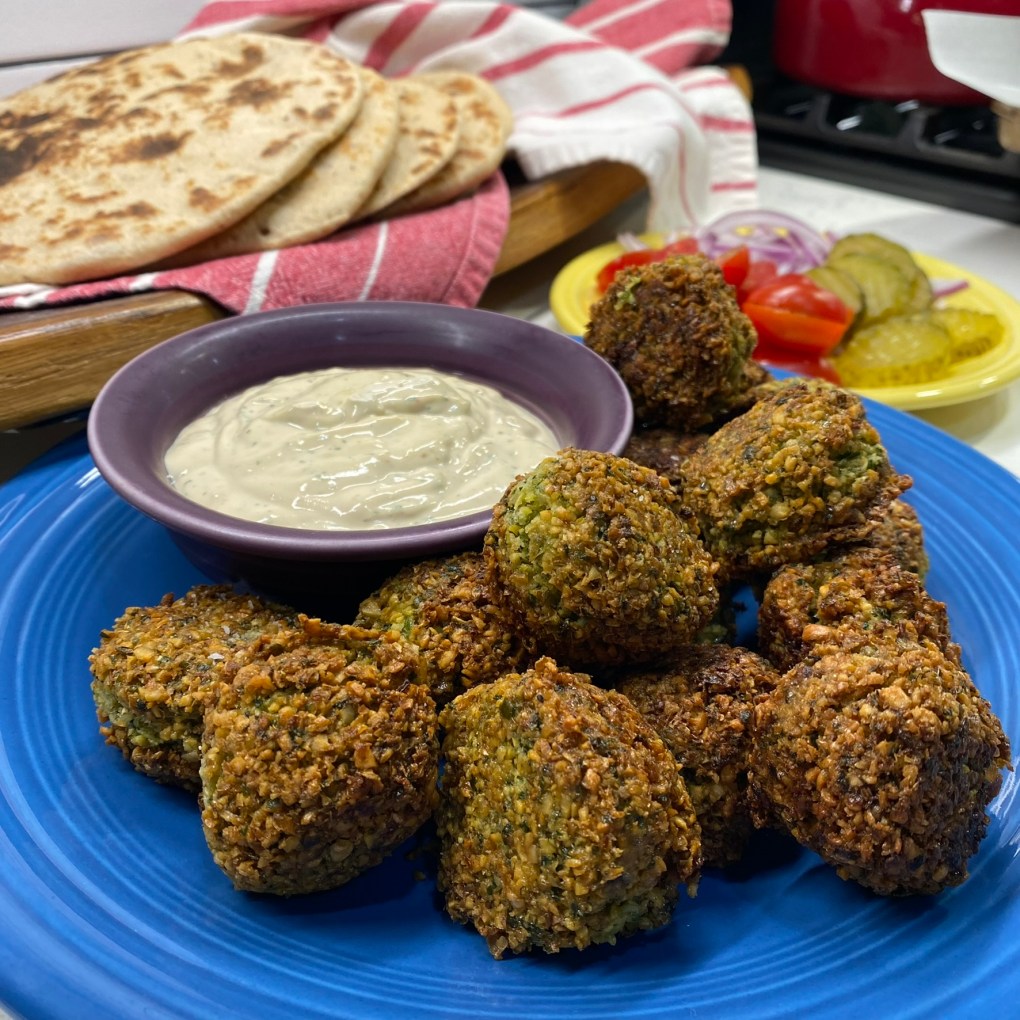
As much as I love falafel in a wrap sandwich, I also love just dipping and snacking on them.
Falafel is great as a pick-up snack, dipped in tahini-lemon sauce. We enjoyed it as a sandwich filler, nestled with lettuce, tomatoes and pickles into a warm, whole grain soft pita. My husband and I agreed that the flavors in this revelatory batch of falafel could stand to be a little bolder, and maybe even a bit more garlicky. I will play with the seasonings a bit on my next go, and you can bet that I won’t be waiting a year.
Ingredients
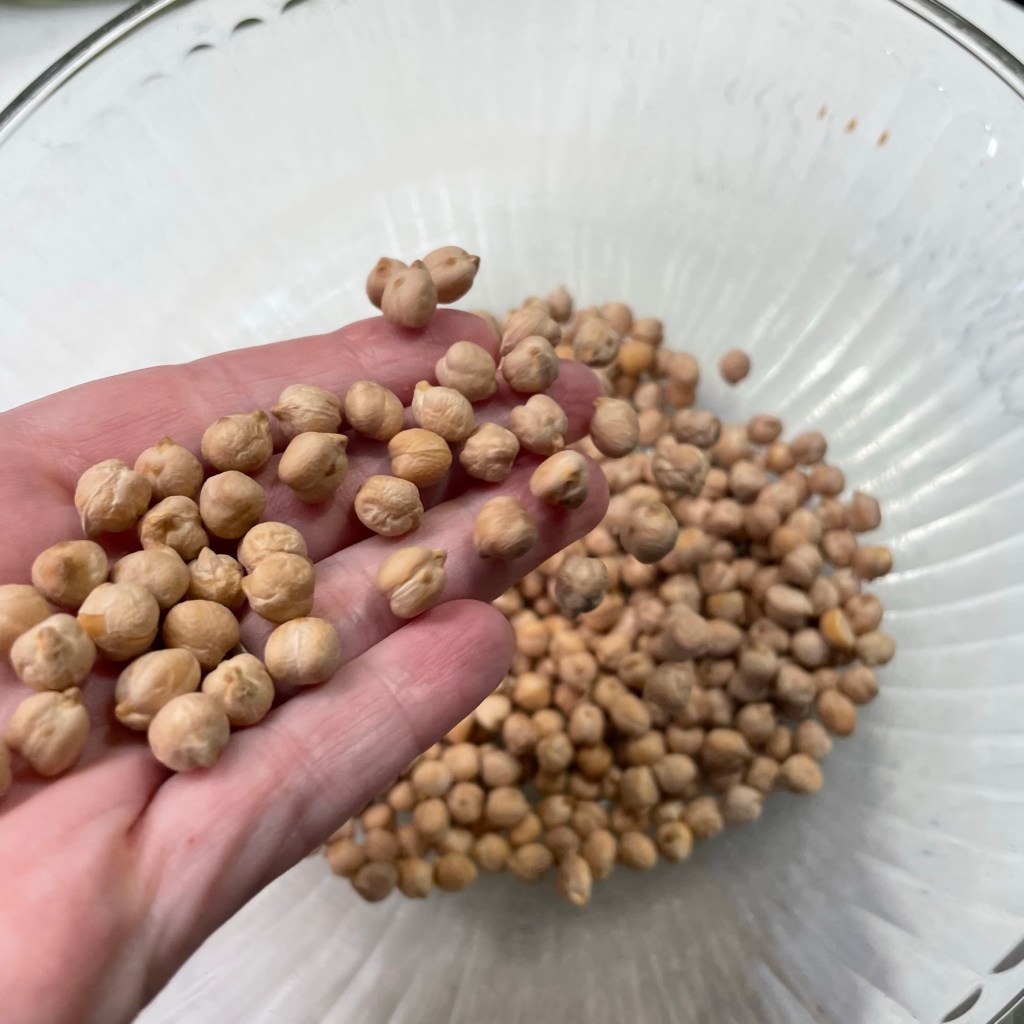
1 cup dried chickpeas, sorted and rinsed
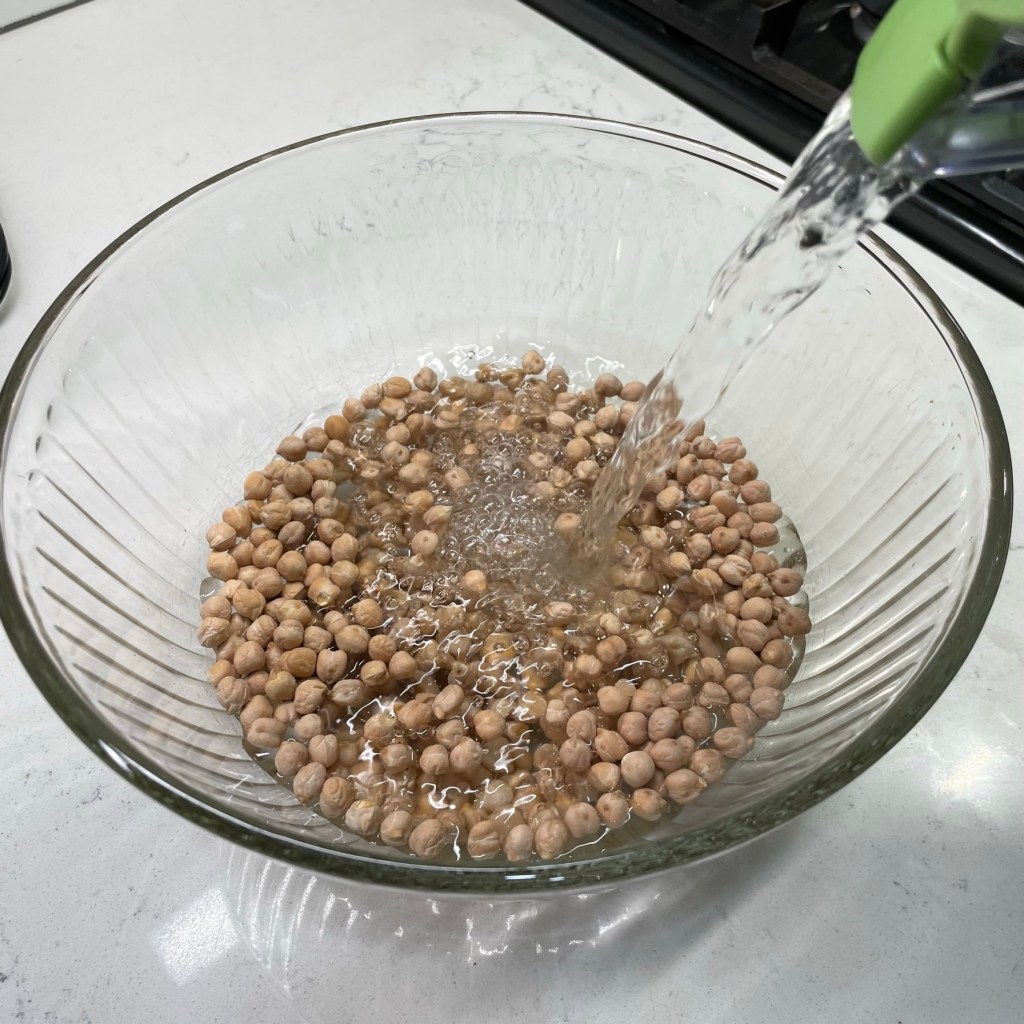
4 cups cold or room temperature water
Several scallions (white and green parts)
About 2 cups loosely packed fresh Mediterranean herbs* (see notes)
2 large garlic cloves, peeled and rough-chopped
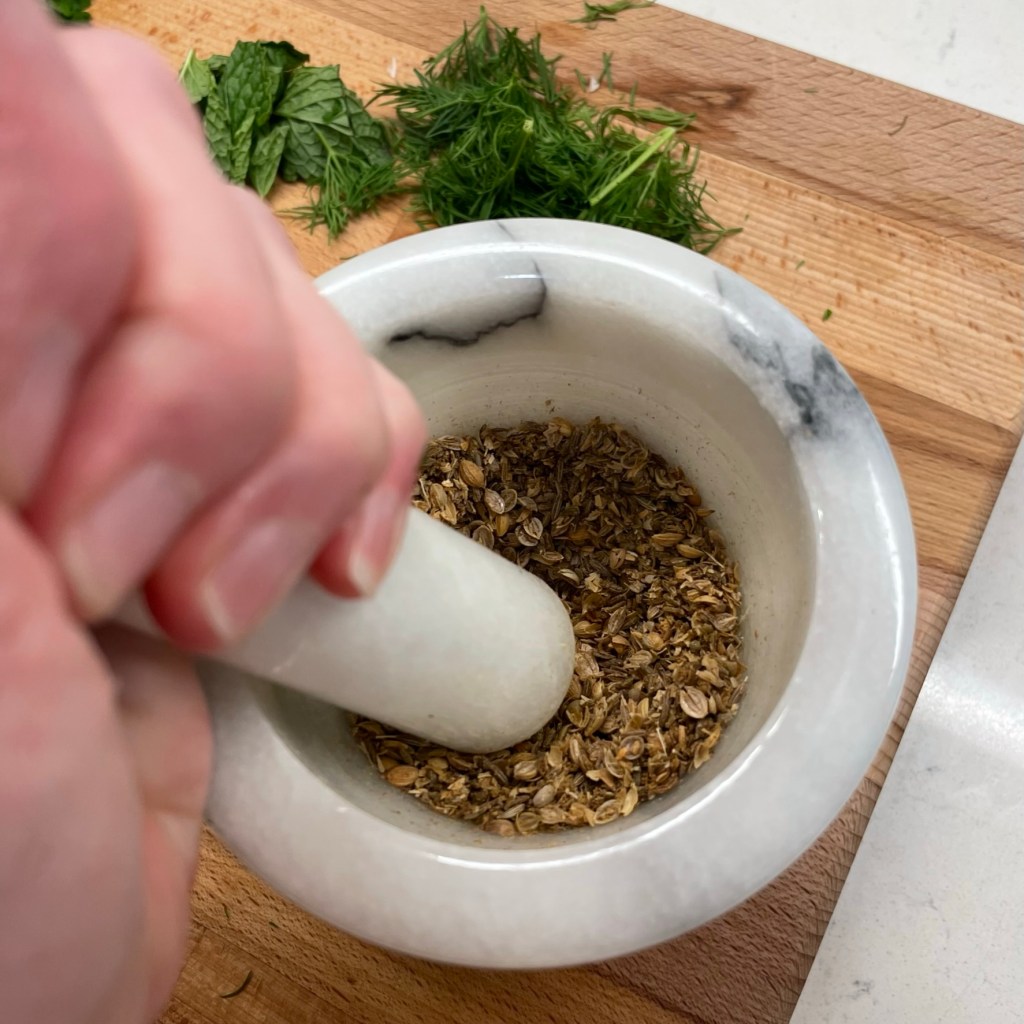
1 tsp. each cumin and coriander seeds*
1/4 tsp. ground cayenne (optional)
1 1/2 tsp. kosher salt
Several grinds black pepper
A few teaspoons flour (if needed), as a binder for overly wet falafel mixture*
*Notes
Falafel is of Middle East origin, so the Mediterranean herbs work best here. Parsley (curly or flat), mint, dill and cilantro (also called “fresh coriander”) all work great in this recipe, but I would not recommend basil, thyme or rosemary. It is essential that you use fresh herbs for this recipe, as they contribute texture in addition to flavor. After rinsing the fresh herbs, take time to also dry them on a clean kitchen towel or layers of paper towel, so that you don’t add unwanted moisture to the falafel mixture.
I prefer the intensity of freshly ground seed spices, but if you only have pre-ground cumin and coriander, it’s no problem. Use slightly less, perhaps 3/4 tsp. of each.
Ideally, the chickpea mixture will hold together without the flour binder. But I found that a few sprinkles of flour were necessary to pick up lingering moisture. I used a tablespoon of garbanzo bean flour, but all-purpose or rice flour would probably work also.
Instructions
Sorting the chickpeas is careful work because they all look a little bit like stones. After sorting, give them a good rinse.
Soak the chickpeas in about four cups of cold or room temp water. Soak at least overnight, or up to 24 hours.
Drain and rinse the chickpeas in a colander, then spread them out on a kitchen towel or layered paper towels to dry them. Kenji uses a salad spinner, and I may try that next time.
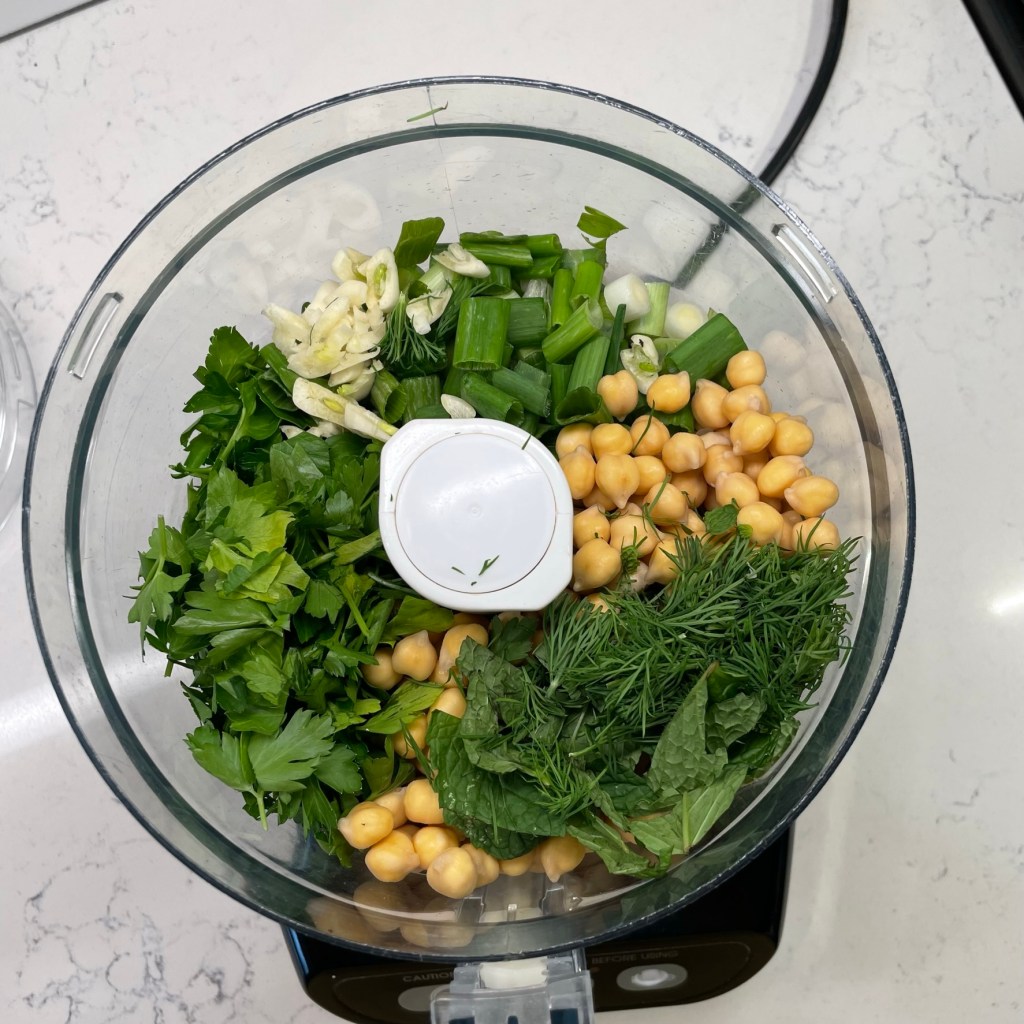
I used a combination of herbs in my falafel; scallions, dill, mint and a ton of parsley, plus garlic, cumin and coriander.
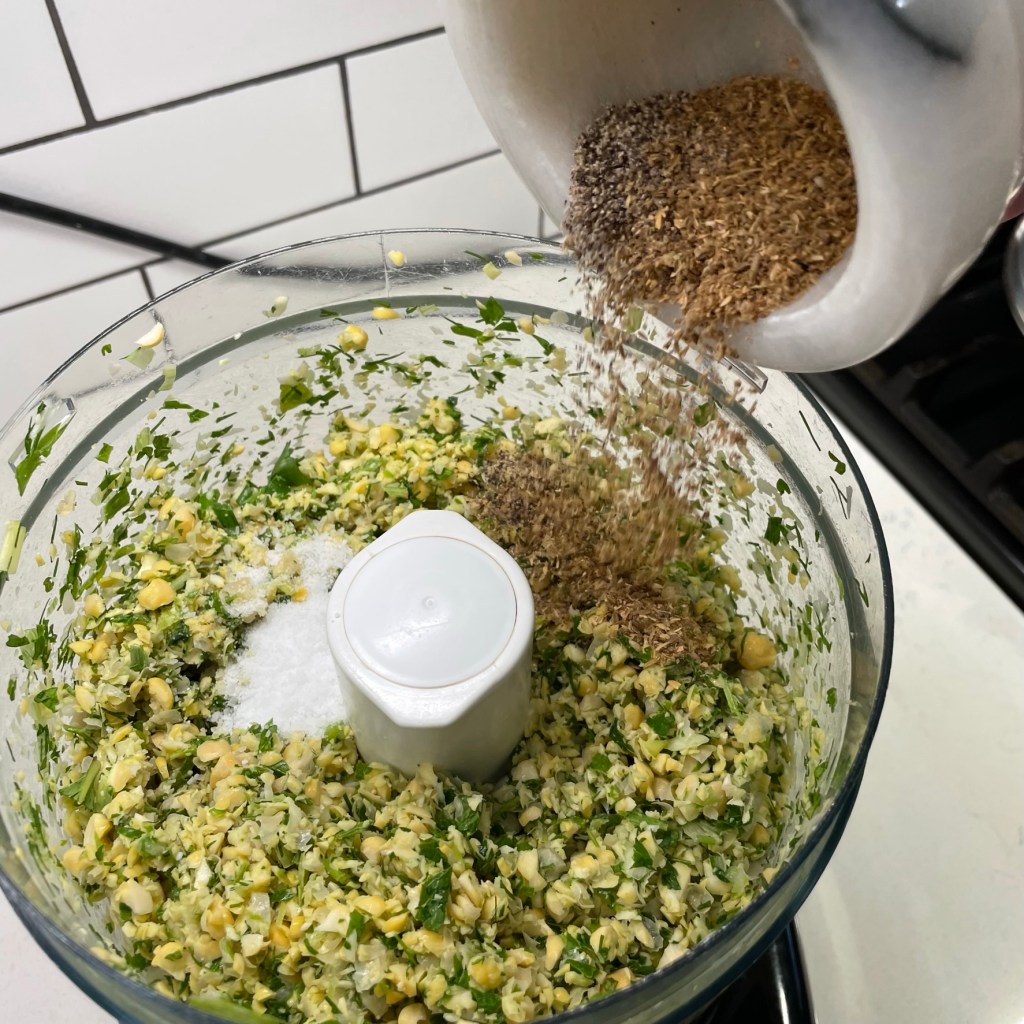
Fresh herbs are a must, and I love the pungency of freshly ground seed spices. I used my mortar and pestle to crush the cumin and coriander.
Pile all the fresh ingredients into the food processor, or work in batches if your processor is small.
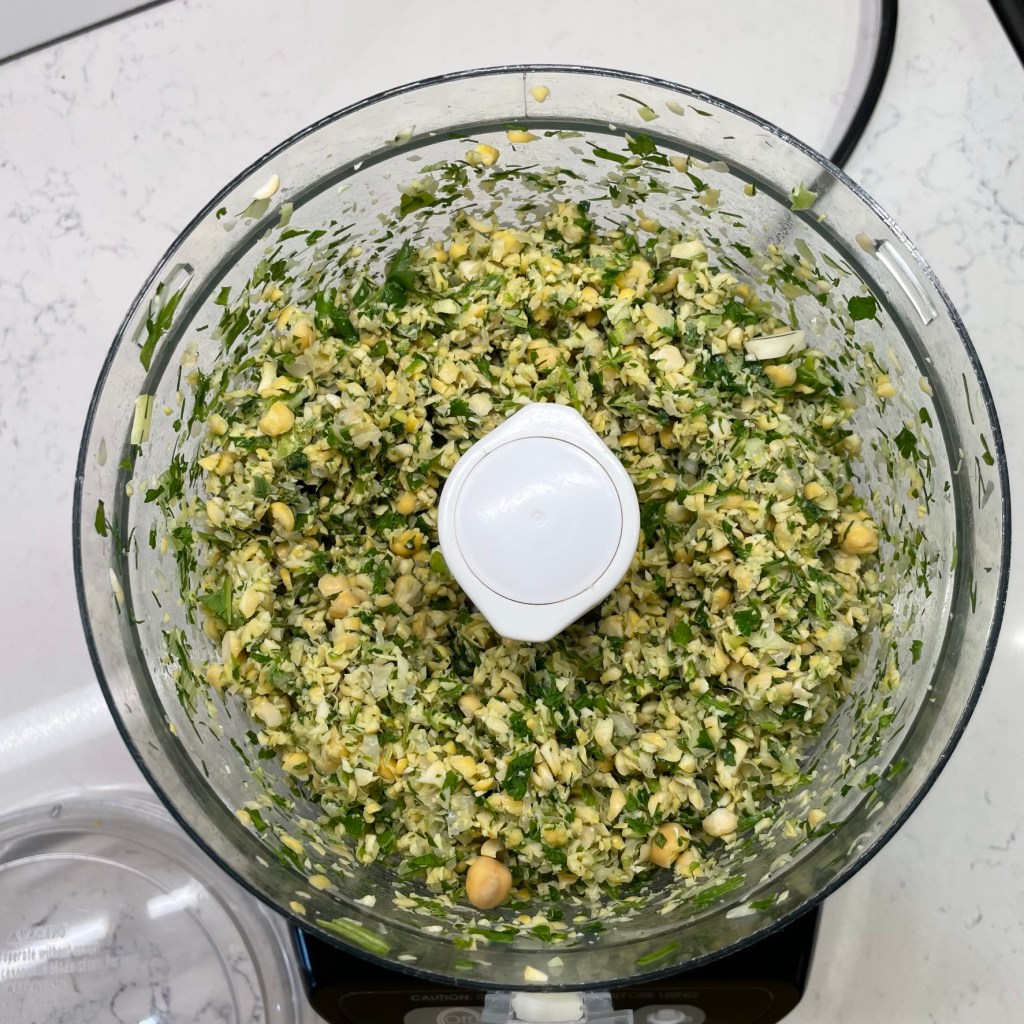
This is what my mixture looked like after 14 quick pulses. Do you see that lone chickpea on the front edge?
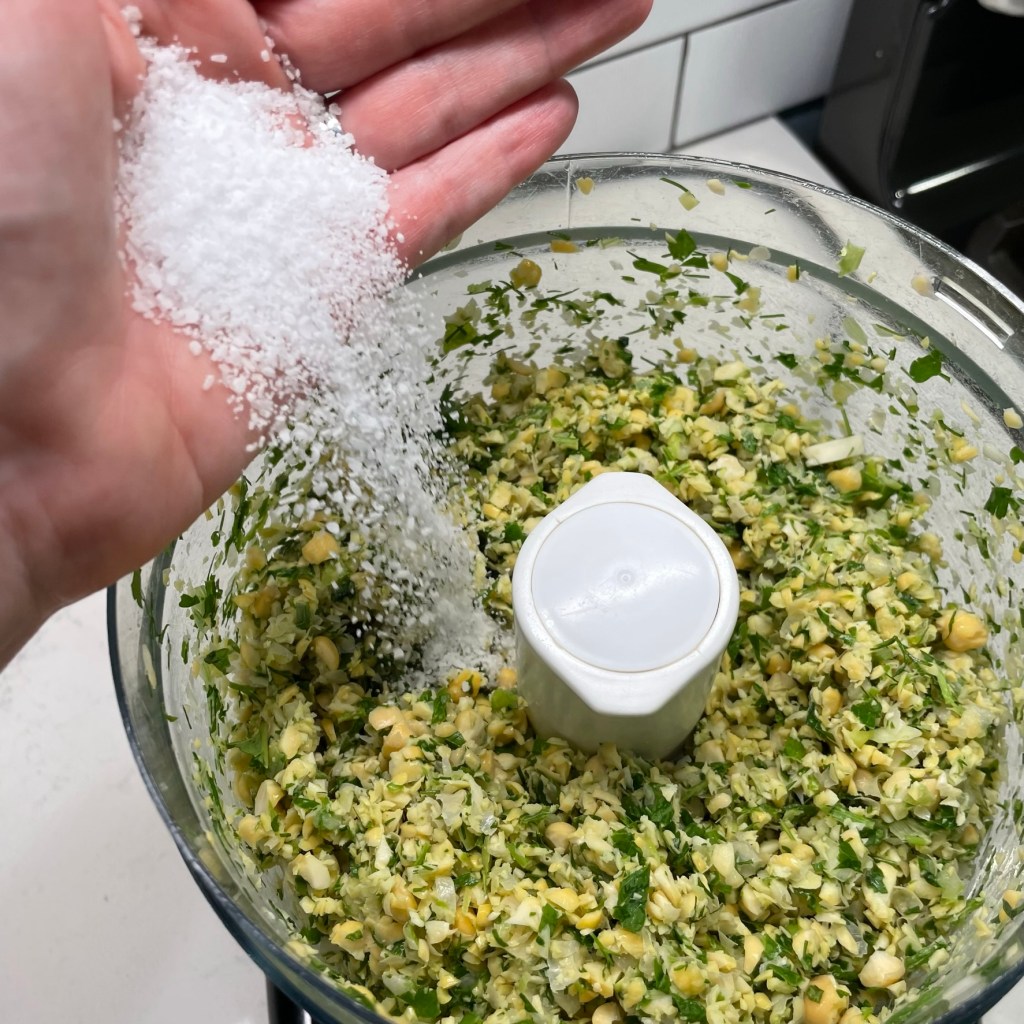
Be generous with the salt, because the chickpeas will take up a lot of it.
And add the dry spices. Next time, I’ll add some crushed red pepper or cayenne for a bit more zip.
After 14 more pulses, the mixture looks finer and more composed. And that one stray chickpea is still hanging on! 🙂
Scrape down the sides to ensure all the herbs get incorporated (and hopefully every chickpea). Pulse a couple more times.
The mixture should clump when you squeeze it. I wasn’t sure yet whether the moisture on my hands was a sign of trouble.
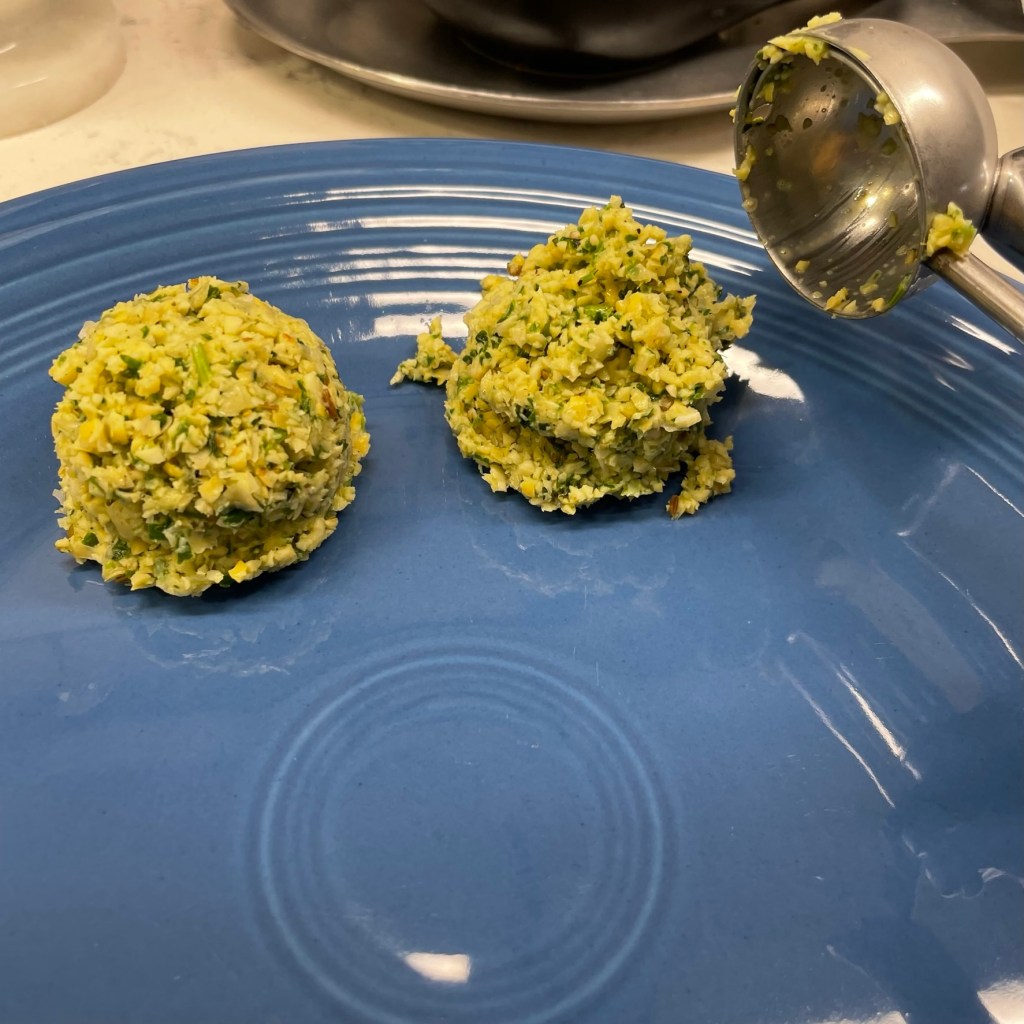
My cookie dough scoop made small falafel, but Kenji advised they would be easier to handle during frying than larger mounds.
If the mixture isn’t quite holding together, it needs a binder. Eggs are out of the question because they’re wet, so I headed to the pantry for a dry ingredient.
Garbanzo bean flour did the trick. All-purpose or rice flour would also work well. I only used about a tablespoon.
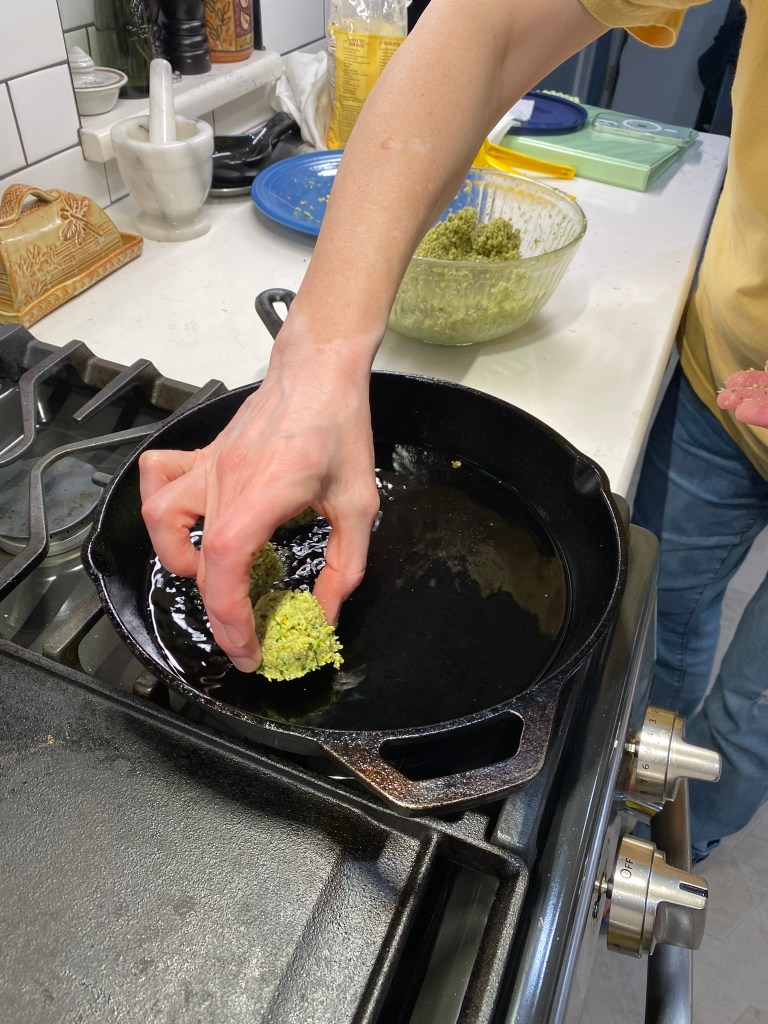
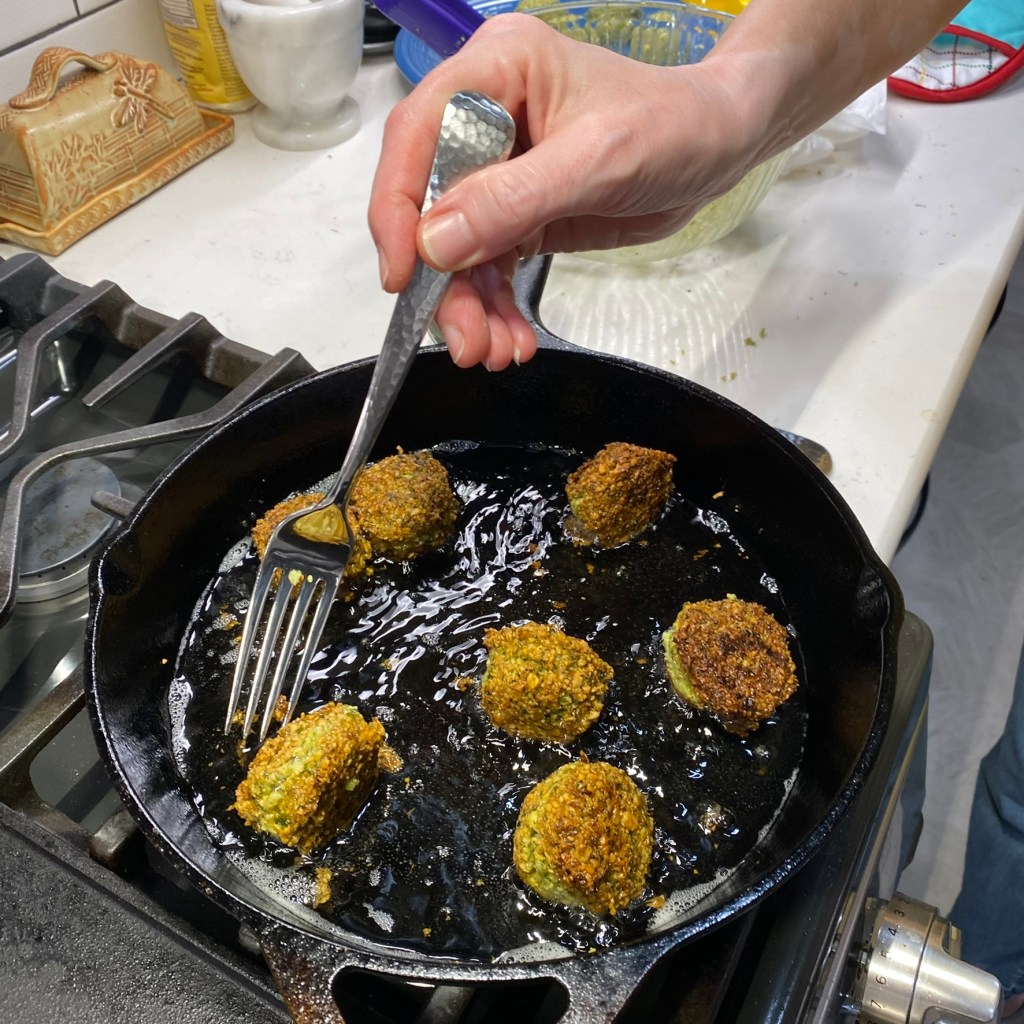
Heat about 3/4″ inch oil in a cast iron skillet. When it’s hot, carefully place the falafel into the oil. Give them room to breathe.
OK, ya’ll, this is kind of unbelievable, but as I was scooping the falafel, I found that single chickpea still floating around in the bowl. What a survivor!
Turn the falafel with a fork or slotted spoon. I tried tongs first and almost broke them. This was more a “rolling” than a turning.
Transfer the crispy falafel to a rack or a paper-towel lined plate. Sprinkle them with salt right away, while they are good and hot.
Not exactly the same as my Chelsea Market falafel, but this was a VERY good start!
There was a time (in the not-so-distant past) that we didn’t rely on overly processed food from the supermarket for every little thing. Before the grocery aisles were jam-packed with 173 kinds of salad dressing, there was oil and vinegar, and people spiced those up by whisking in a handful of other common items to create dressings far tastier than the pre-made stuff. Vinaigrette is one of the simplest dressings to make from scratch, and creamy dressings are equally simple with a few basic ingredients.
You might be amazed at how much flavor you will be able to create at home with nothing more than simple fridge items, a few spices and a whisk (or, as I’ll show you today, a food processor). On the economic side, it costs pennies on the dollar to make your own dips and dressings, and it only takes a few minutes to pull them together.
The other benefit of making your own dressing—besides the savings and the flavor factor—is that you will know exactly what is in it. Commercial dressings contain so many stabilizing and preservative ingredients that aren’t necessary. And if it seems a healthier bet to buy the packets of ranch dressing mix and “make it yourself” with fresh buttermilk, all I can suggest is to take a closer look:
As soon as I see maltodextrin and monosodium glutamate (MSG), I’m gone!
I suppose these ingredients might be perfectly harmless (remember when they said that about partially hydrogenated vegetable oil?), but it’s a fair assumption that the fresh herbs and minimal spices you add to a real homemade dressing will present a lesser concern. And your dressing will taste better, which might even lead you to enjoying more salads and vegetables.
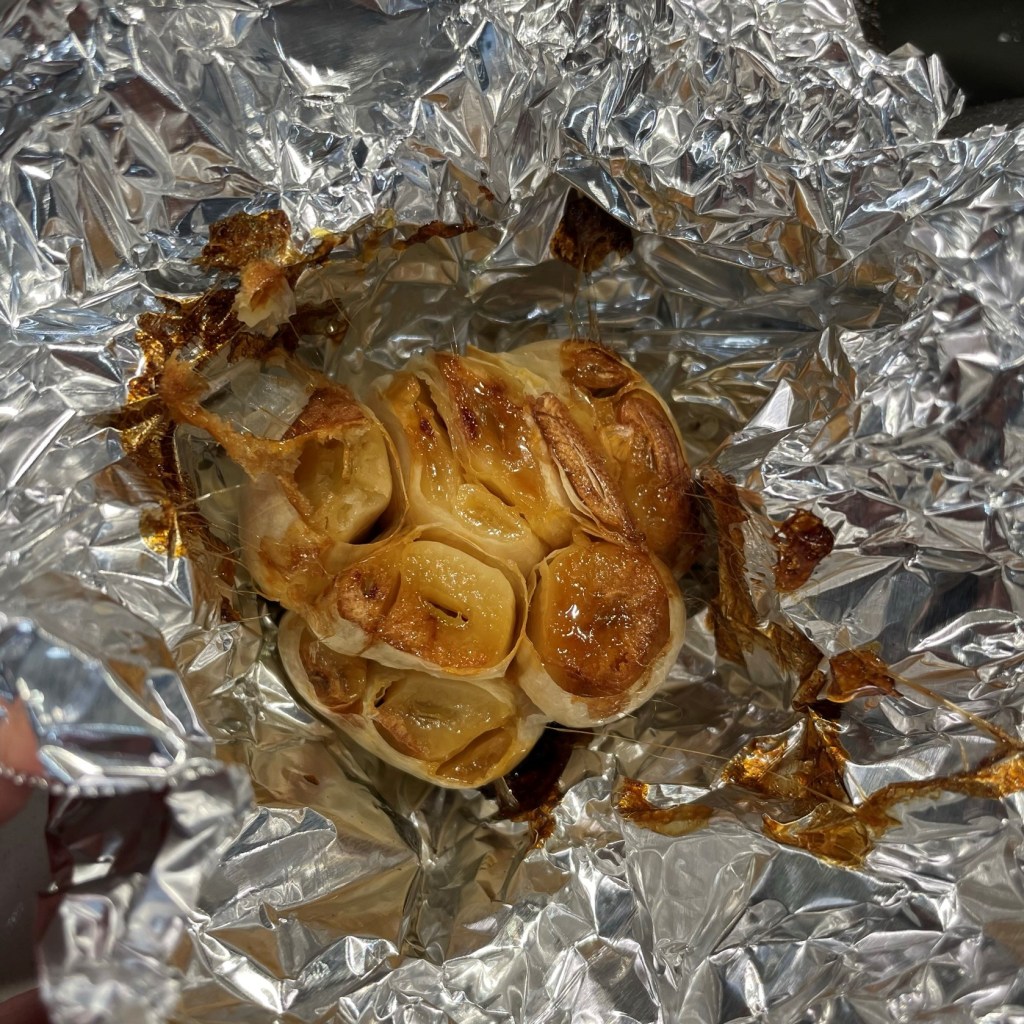
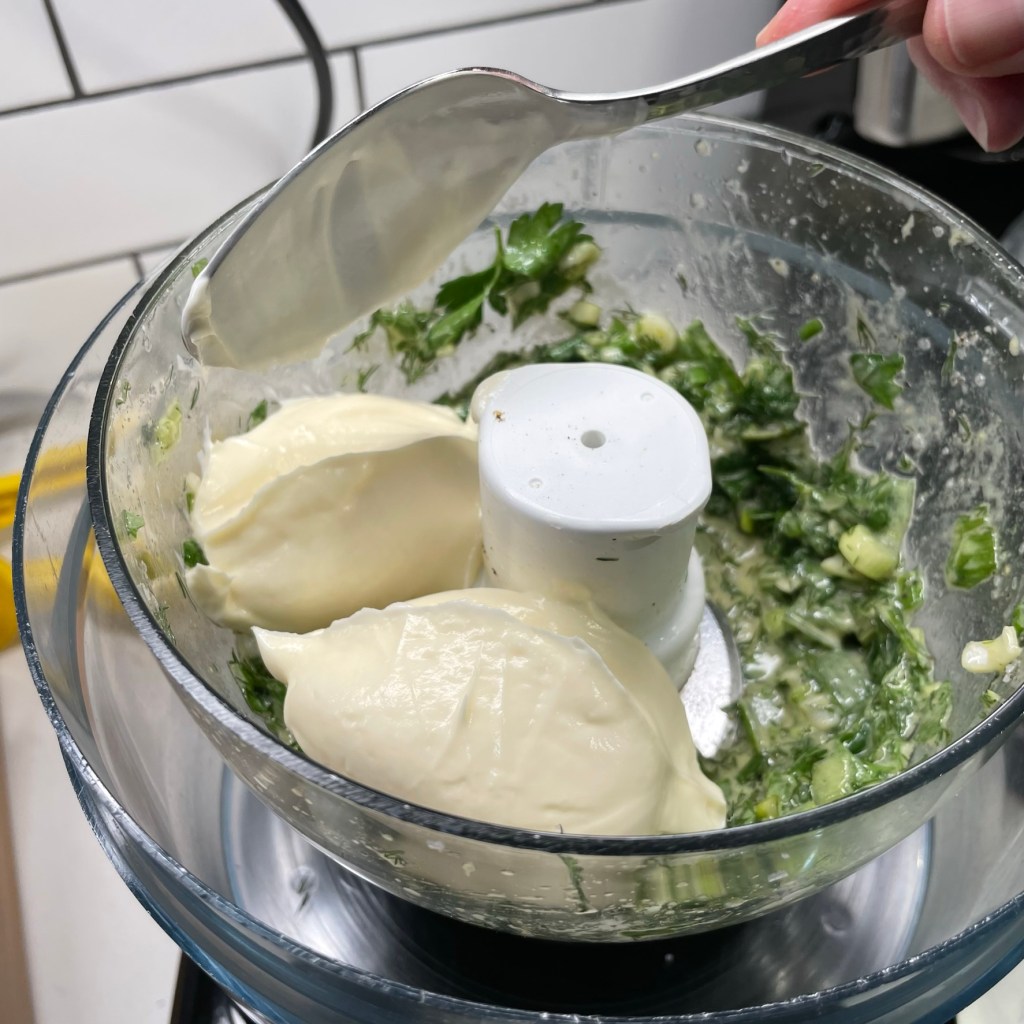
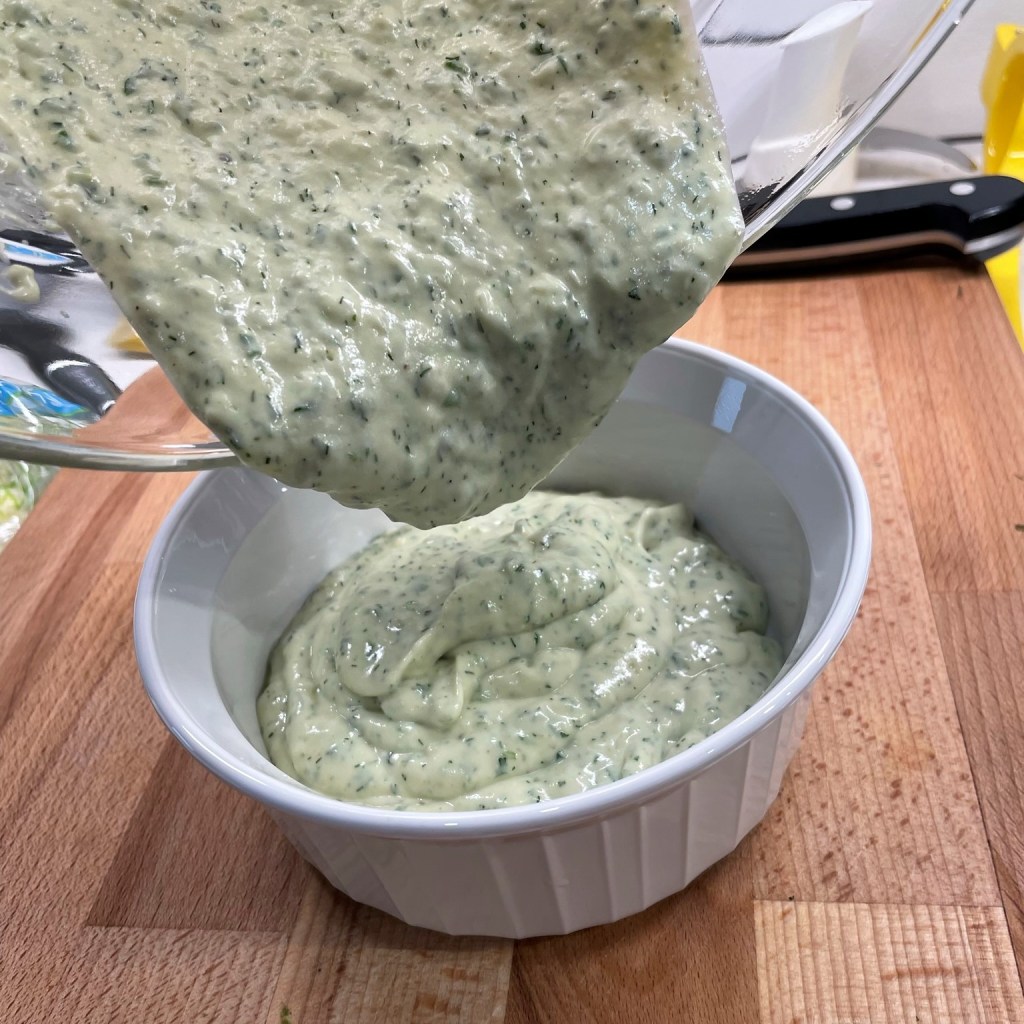
For this creamy ranch dressing dip, I have used a whole bulb of roasted garlic to add a mellow flavor to plain Greek yogurt, buttermilk, olive oil-based mayo and a bunch of fresh herbs. A little salt and pepper, a squeeze of lemon, and that’s all there was to it. If you prefer a bit more zing, use fresh garlic, but only a fraction of what is called for here. If you don’t have the same fresh herbs, substitute what you have or what you like. If you want to add half of a ripe avocado in place of some of the mayonnaise, go for it.
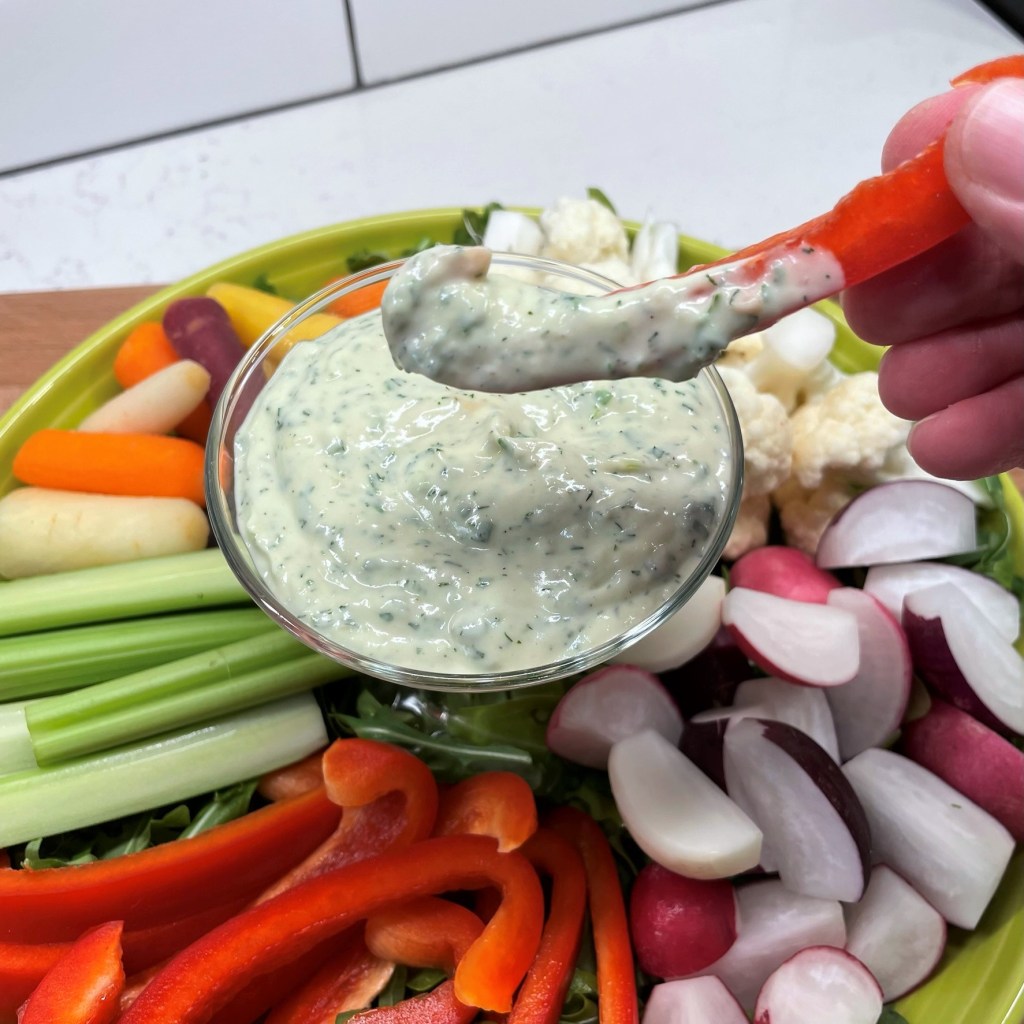
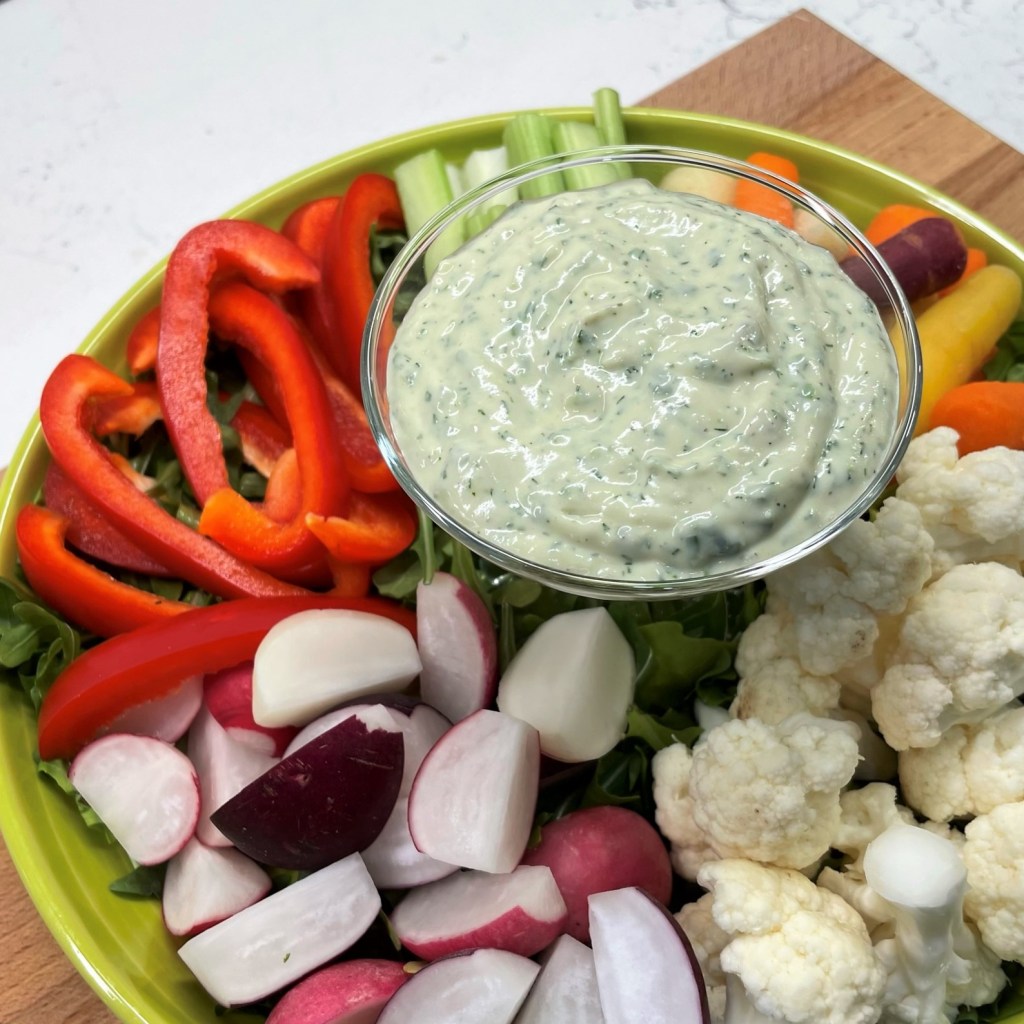
Nice to have something a little healthy for a game day snack!
My homemade roasted garlic ranch dip was intended for dipping fresh veggies as a game day snack, but if you prefer a more pourable dressing for salads, simply ease up on the mayo and use more buttermilk.
This recipe makes about 1 1/4 cups.
Ingredients
2 scallions, white and green parts
1 small handful fresh parsley
1 small handful fresh dill
1 tsp. Dijon mustard
2 Tbsp. freshly squeezed lemon juice (about 1/2 an average-sized fruit)
1/4 cup stirred Greek yogurt (whole fat or 2% recommended)
1/4 tsp. onion powder
1/4 tsp. carboxymethylcellulose (just kidding—I’ve never heard of this, but it’s in the store-bought ranch mix!)
*Notes
Choose a mayonnaise that you trust, bearing in mind that labels can be misleading. The front of the jar may suggest that your mayo is made with olive oil, but on further inspection, soybean oil could be listed as the first (most prominent) ingredient, with the healthier oil listed much later. Learning what your food is made of can be an eye-opener, and when you do find a product that meets your health standards, you will be able to build on it to make a lot of other foods serve you better.
Thick buttermilk works especially well for dip-style dressings. Look for a brand that doesn’t have a lot of “gum” ingredients, which are unnecessary stabilizers. Bacterial cultures should be present in good buttermilk as well. And for this dip, I do not recommend making a buttermilk substitute using regular milk and lemon juice or vinegar. That works for some baking recipes, but not in this instance, as you will miss the smooth textural element that buttermilk lends to your dip or dressing.
I love roasting garlic for use in many things, and it is easy to do. If you have never made your own, you may find some helpful tips in my previous post for making your own roasted garlic. When roasted, the garlic takes on a mellow, somewhat nutty flavor that lends a lot of depth to foods. If you prefer fresh, or simply don’t have the time or patience to roast it, I would recommend only using one or two segments of the garlic rather than a whole bulb (unless you’re battling vampires, obviously).
Instructions
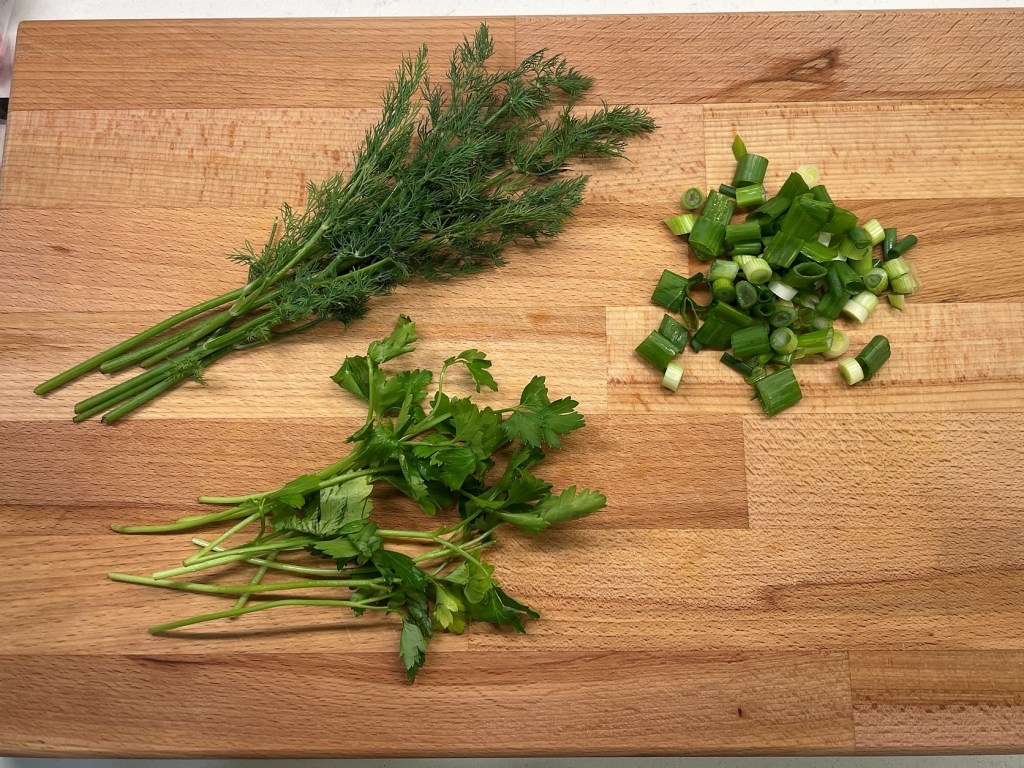
Mix and match your herbs as desired. I used two scallions, flat-leaf parsley and fresh dill.
Roasted garlic has a mellow flavor and I love the depth of it in a dressing. Use only a clove or two if you’re using fresh!
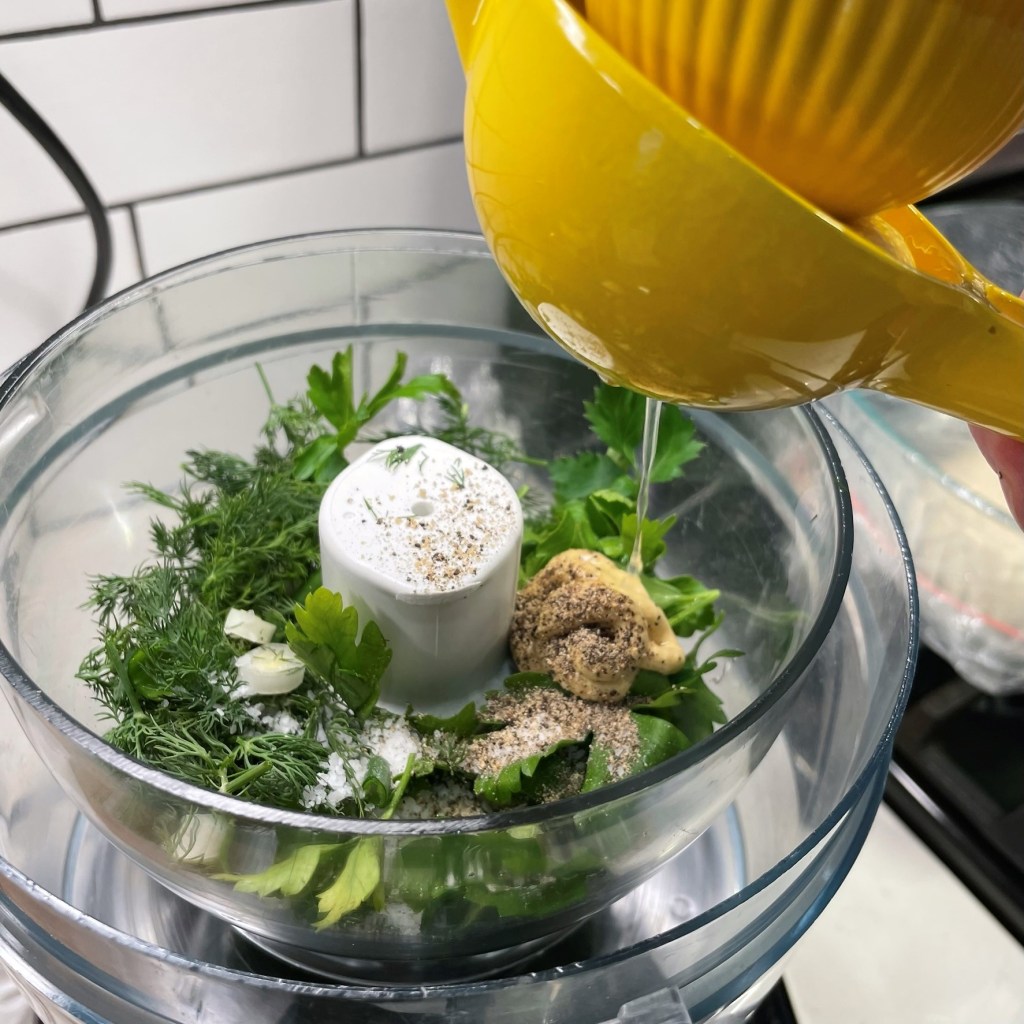
Combine the herbs, Dijon, salt and pepper in the small bowl of a food processor. Squeeze in the fresh lemon juice.
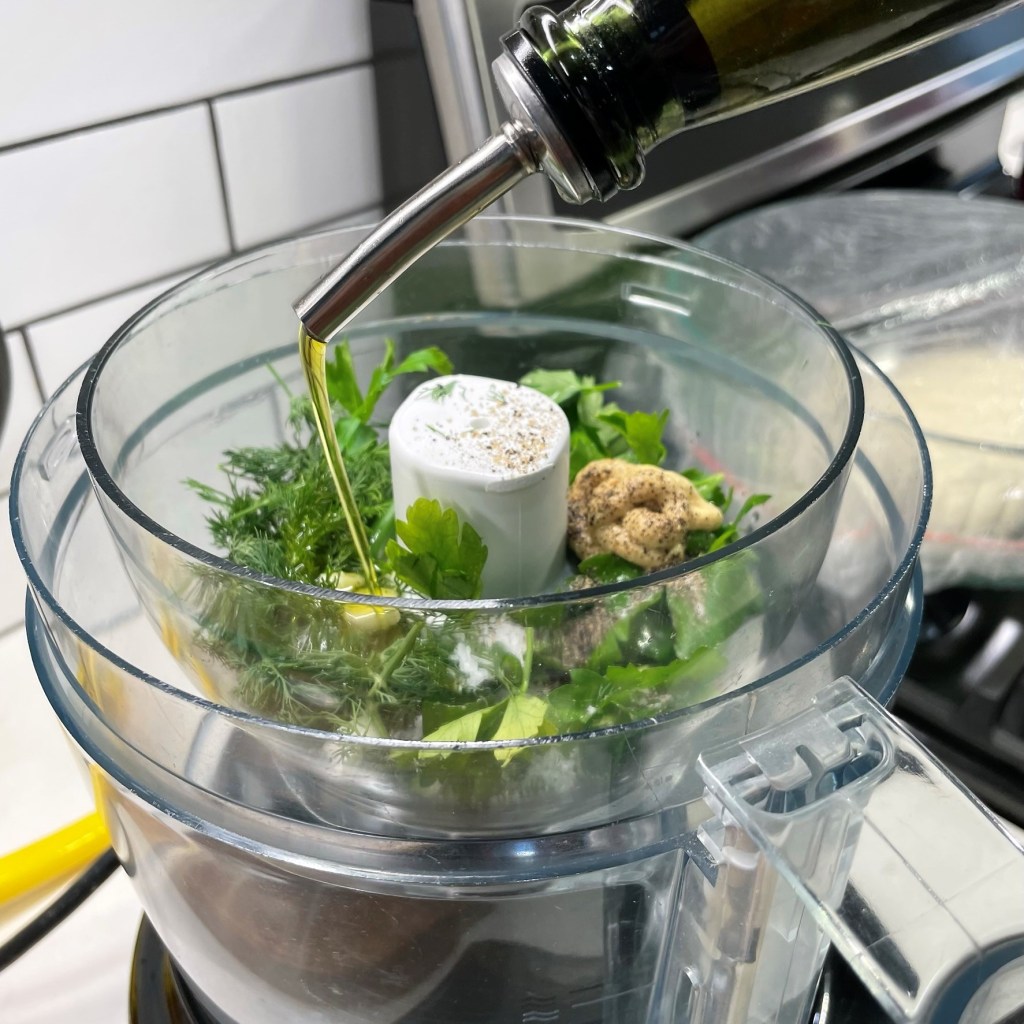
Drizzle about a tablespoon of olive oil into the mixture to assist with blending. Pulse a few times, just to knock down the bulk of the herbs.
Add mayo to the pulsed herb mixture and pulse again, then process continuously until the mixture is smooth and even.
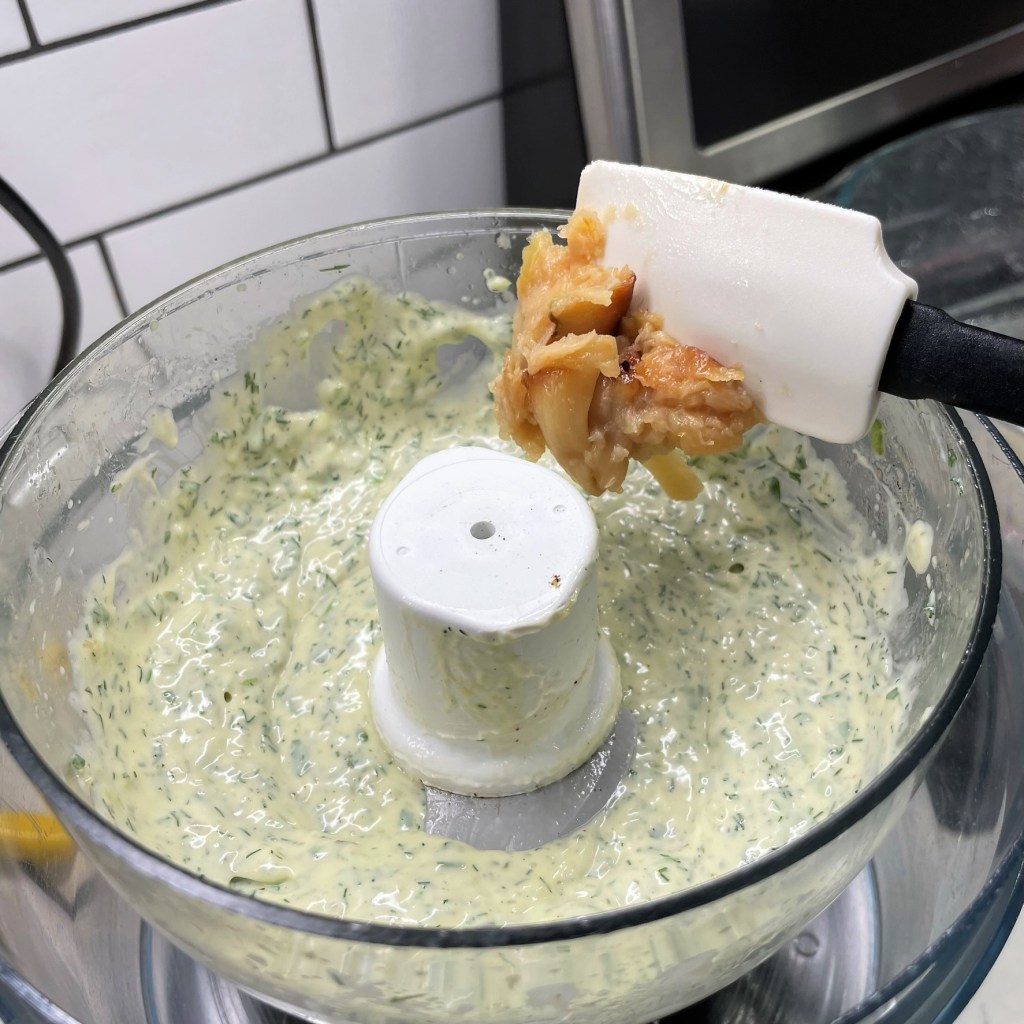
Add roasted garlic and pulse again. If you are leery about so much garlic, start with half and give it a taste before adding more. I used a whole bulb!
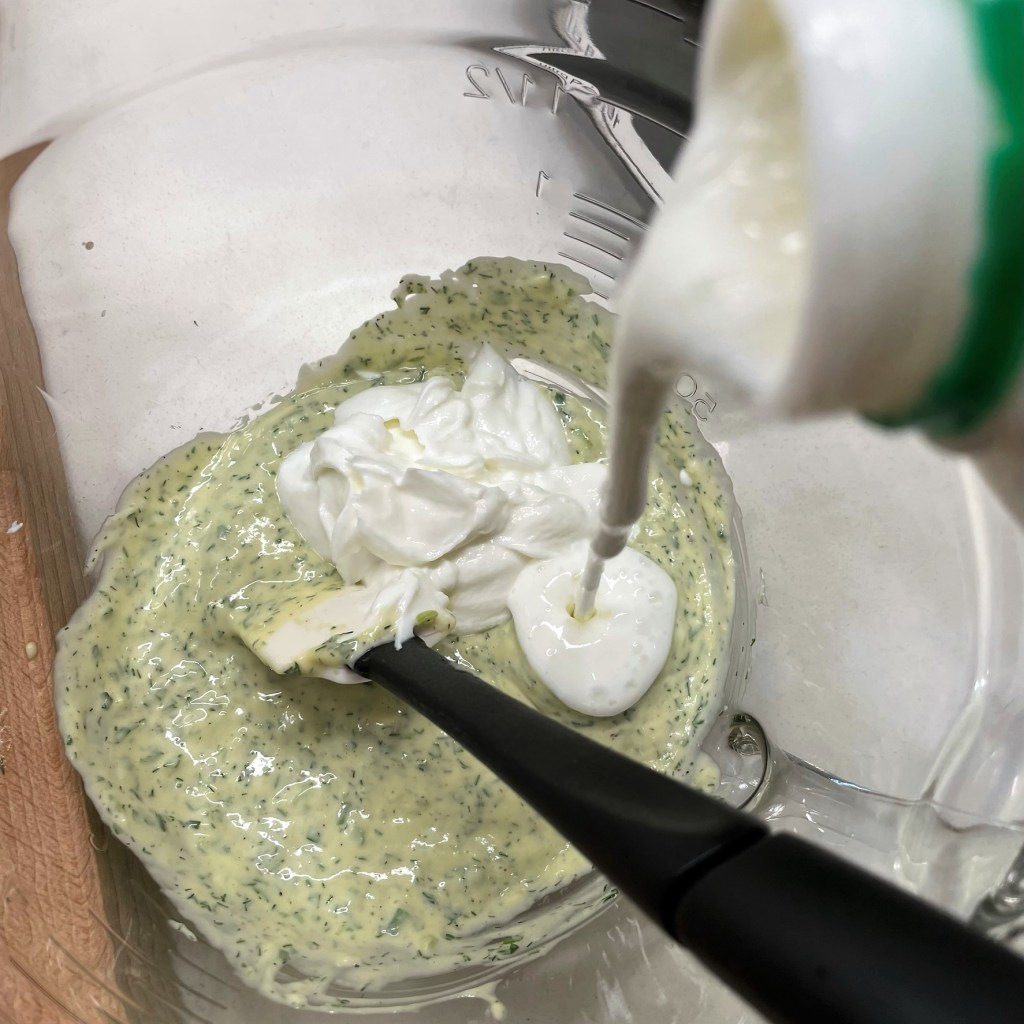
Transfer the mixture to a bowl and add the yogurt and buttermilk.
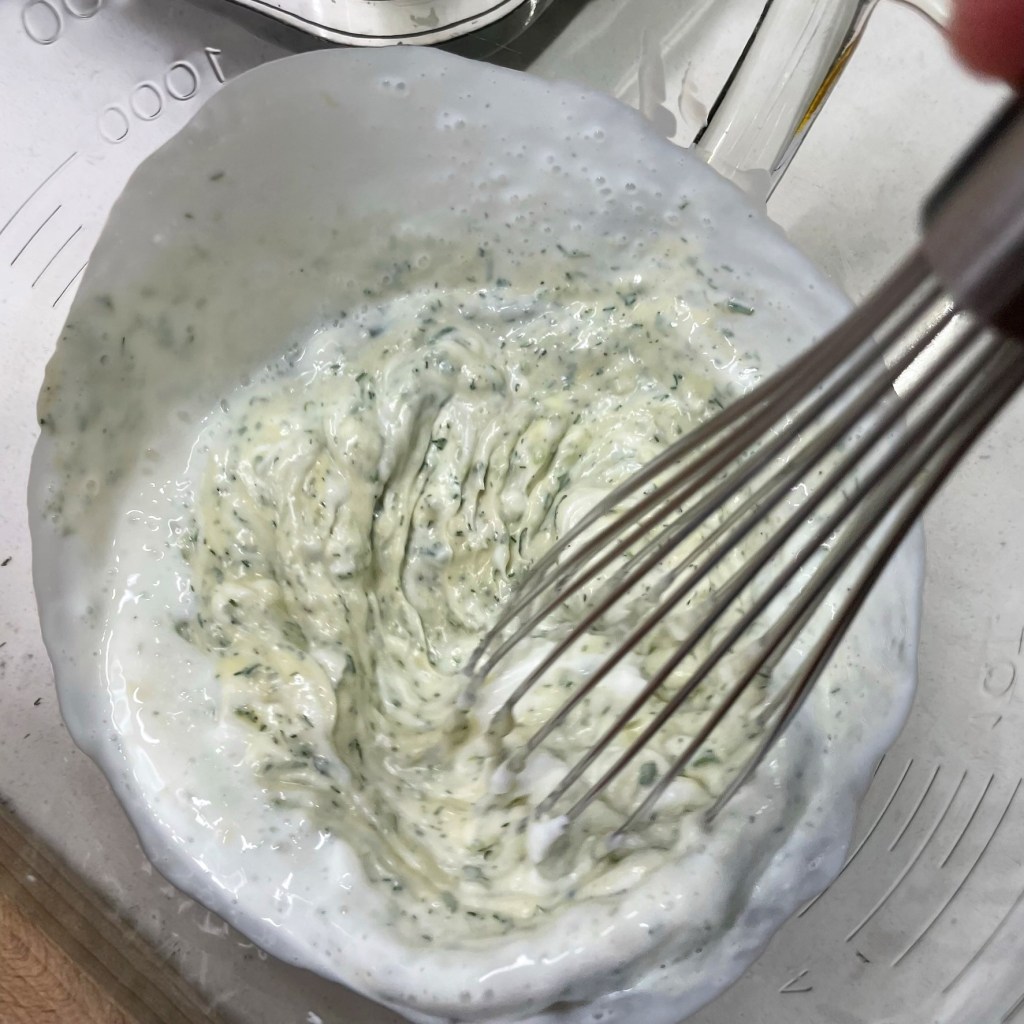
Whisk to blend the dairy ingredients into the dip. Adjust seasonings to taste.
This is a thick mixture, perfect for a veggie tray. If you prefer a more pourable dressing for salads, use less mayo and more buttermilk.
It’s fresh, creamy and full of flavor.
Begin by chopping up your fresh herbs, together with the Dijon, salt, pepper, lemon juice and olive oil. I made a small batch this time, and my processor only rough-chopped these ingredients, even in the small insert bowl. As long as the volume reduces to make room for the other ingredients, it’s fine.
Add the mayo and pulse to combine. Add the roasted garlic and process until you no longer see visible bits of the garlic.
Transfer the mixture to a bowl. Add yogurt, buttermilk and onion powder, and whisk until smooth. Adjust seasoning to taste (remember that additional salt will need time to dissolve, so you may want to let it rest a few minutes before final taste adjustments).
Chill the dip at least one hour before serving. Enjoy within a few days for best freshness and give it a good stir when you take it out of the fridge.
With the arrival of fall comes the joy of having the house filled with the addictive aromas of meaty stews, roasted vegetables, and every variety of freshly baked breads and desserts. A few days before we dismantled the kitchen for our remodel, I pulled this favorite sourdough recipe out of my arsenal and baked it to accompany the roasted butternut squash lasagna that I shared last month.
The recipe I share today is a mashup of several bread recipes I have tried from an amazing blog called “The Fresh Loaf.” The site is a virtual community and message board for sourdough lovers—from novice to expert—and over the years, I have gained invaluable wisdom by eavesdropping on the conversations of those I consider to be far advanced of my own skills. I was barely beginning my own sourdough journey when I discovered TFL, but the pictures and formulas I found there inspired me to attempt new techniques, and I now proudly consider myself to be an “intermediate” bread maker.
One of the methods I learned is baking with steam, a simple technique that results in a perfectly crusty yet chewy exterior and lovely crumb texture that the aficionados would call “gelatinized.” Breads made with this steam-baked method make fantastic toast and sandwiches (especially grilled cheese).
The extra hydration of the dough creates the big, open crumb inside the bread. The steam makes the crust perfectly chewy.
The generous amounts of onion and sage I’ve added to this loaf also make it perfect for Thanksgiving stuffing or dressing, or you can follow my lead with any stale leftovers and turn it into savory croutons for hearty salads and all the soups you’ll be simmering during the autumn and winter months ahead.
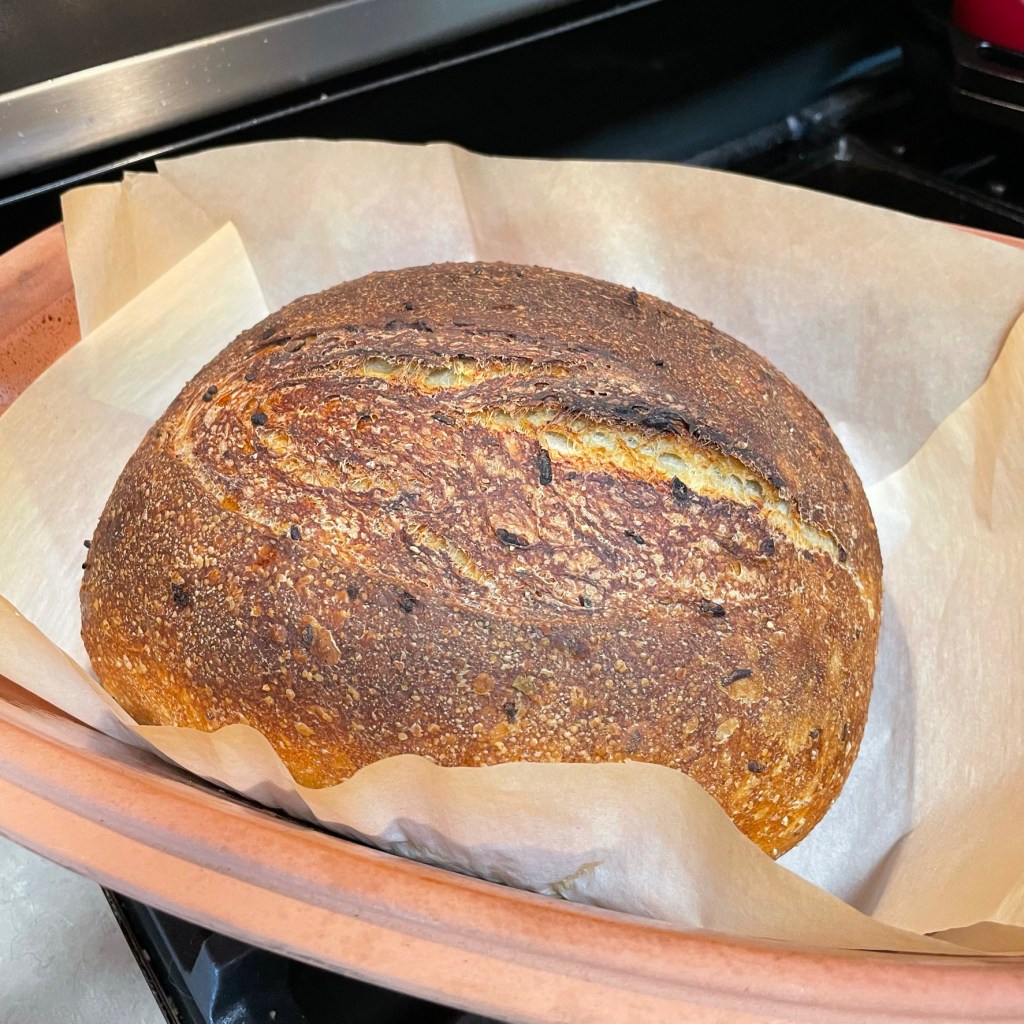
Up close, you can see the golden polenta, the bits of onion and flecks of sage. This bread is perfect for fall!
Besides the intoxicating fall-scented flavors, this loaf also uses a pre-ferment, which is a fancy way of describing a pumped-up sourdough starter, and a soaker, which is nothing more than grains (in this instance, corn) that have been soaked overnight in water—a technique that coaxes the deepest flavors out of the grain and into the bread.
The pre-ferment is a next-level feeding of my ripe starter.Polenta is soaked overnight, then drained. But keep the soaking water!
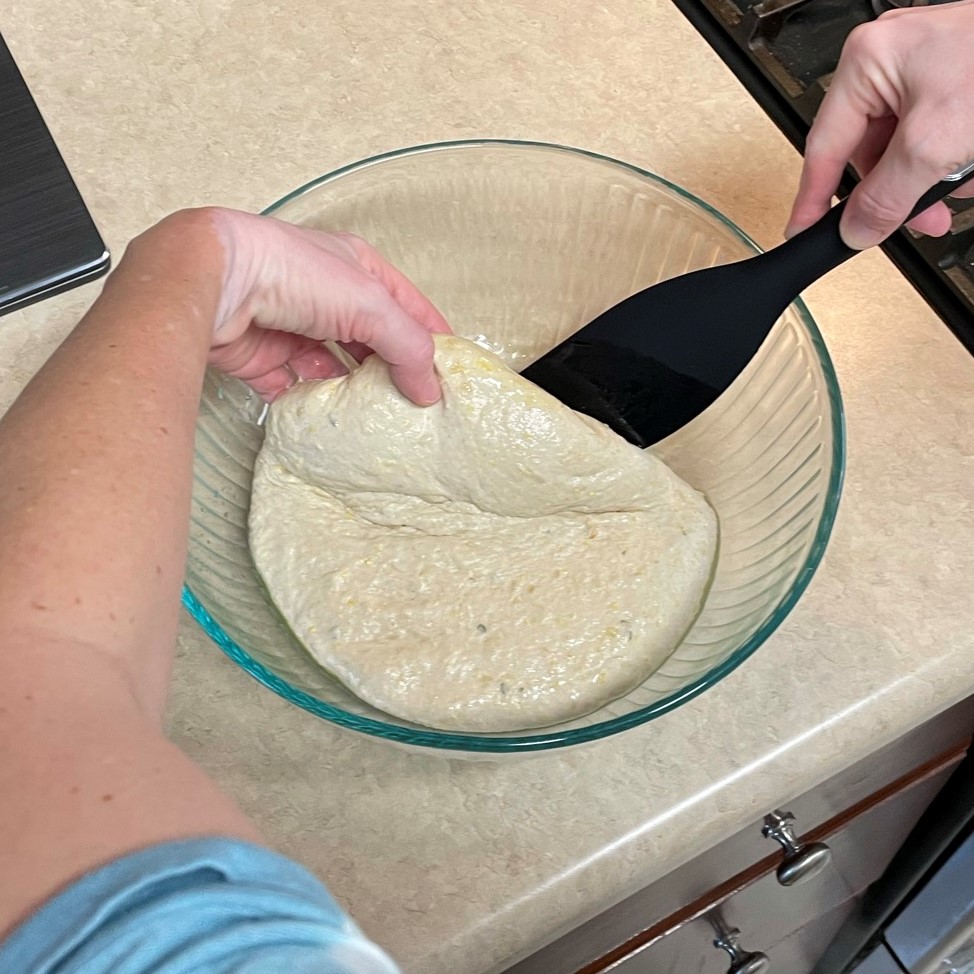
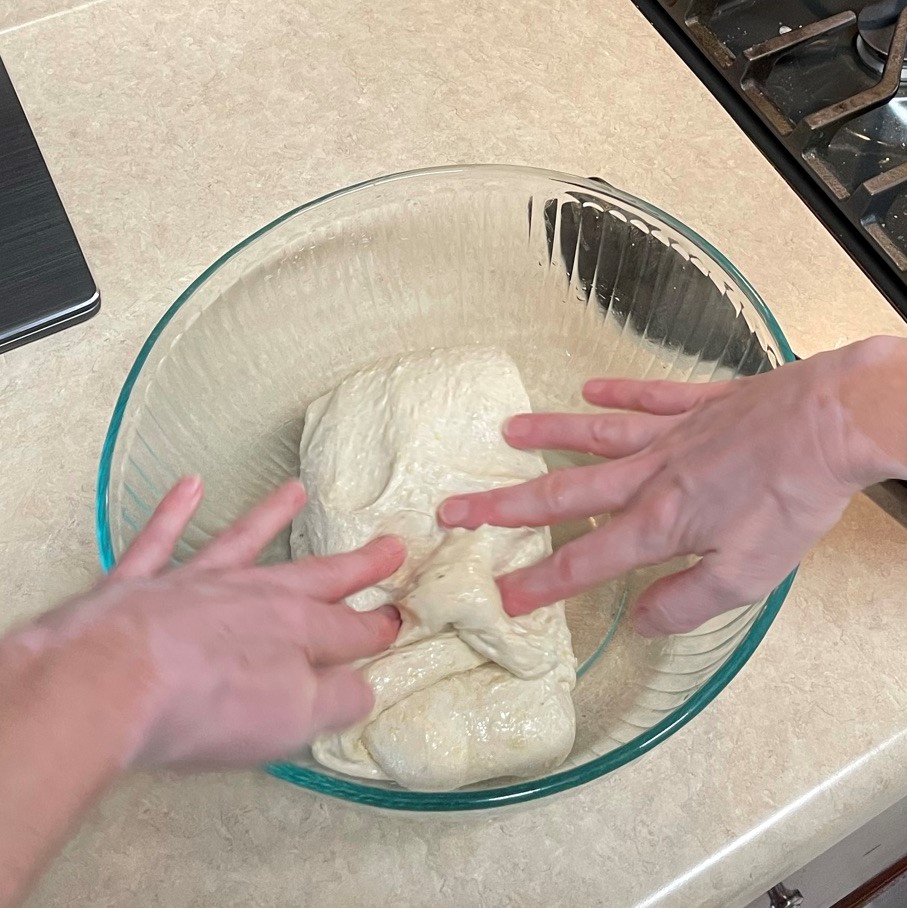
The kneading method used for this bread is also a bit different. It’s called “stretch and fold,” and it is an easy way to build strength in dough with a high volume of water, without so much messy, sticky kneading. Try this a few times, and you will be astonished at the elastic texture and volume achieved in the bread dough.
Wet hands and a silicone spatula help me get started with my first round of stretch and folds.Stretch upward until the dough resists, then fold it toward the front edge of the bowl. Press down when you fold, to push out trapped gas.
If this all seems confusing, trust me, it isn’t. I have found sourdough baking to be joyfully simple once you get the hang of it. As I mentioned last fall when I made the sourdough pumpkin challah, this kind of baking—naturally leavened and slow-fermented—is like a good relationship; the more you open yourself up to it, the more it comes back to you until you finally reach a point of familiarity that you can’t imagine ever buying a loaf of bread at the grocery store.
One more note: I strongly recommend measuring ingredients by weight when baking any kind of bread, but especially sourdough. Weight measuring takes the guesswork out of your ingredient ratios, and you can find an inexpensive, easy-to-use kitchen scale just about anywhere, including Walmart (where I bought mine).
That’s my story, and this is my favorite sourdough for autumn. I hope the pictures entice my fellow sourdough bakers to give it a go, and if you scroll to the bottom of the post, you’ll find a downloadable PDF for your recipe files. My ingredients are listed in grams (sorry, no volume measurements), so go on and get your kitchen scale and get baking.
Enjoy!
Add water to the soaking water until you have the total amount. No sense wasting that flavor!
Re-hydrate the dried onions with just enough water to cover them.
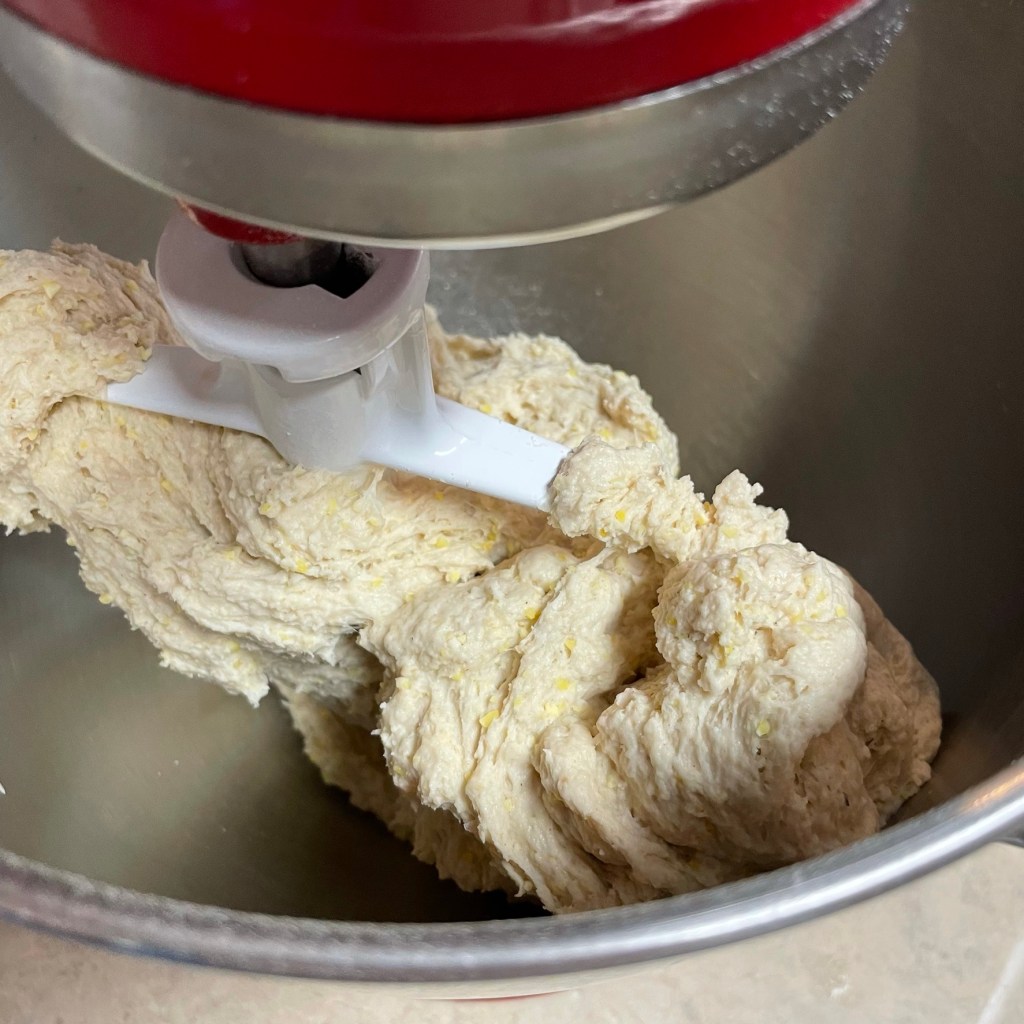
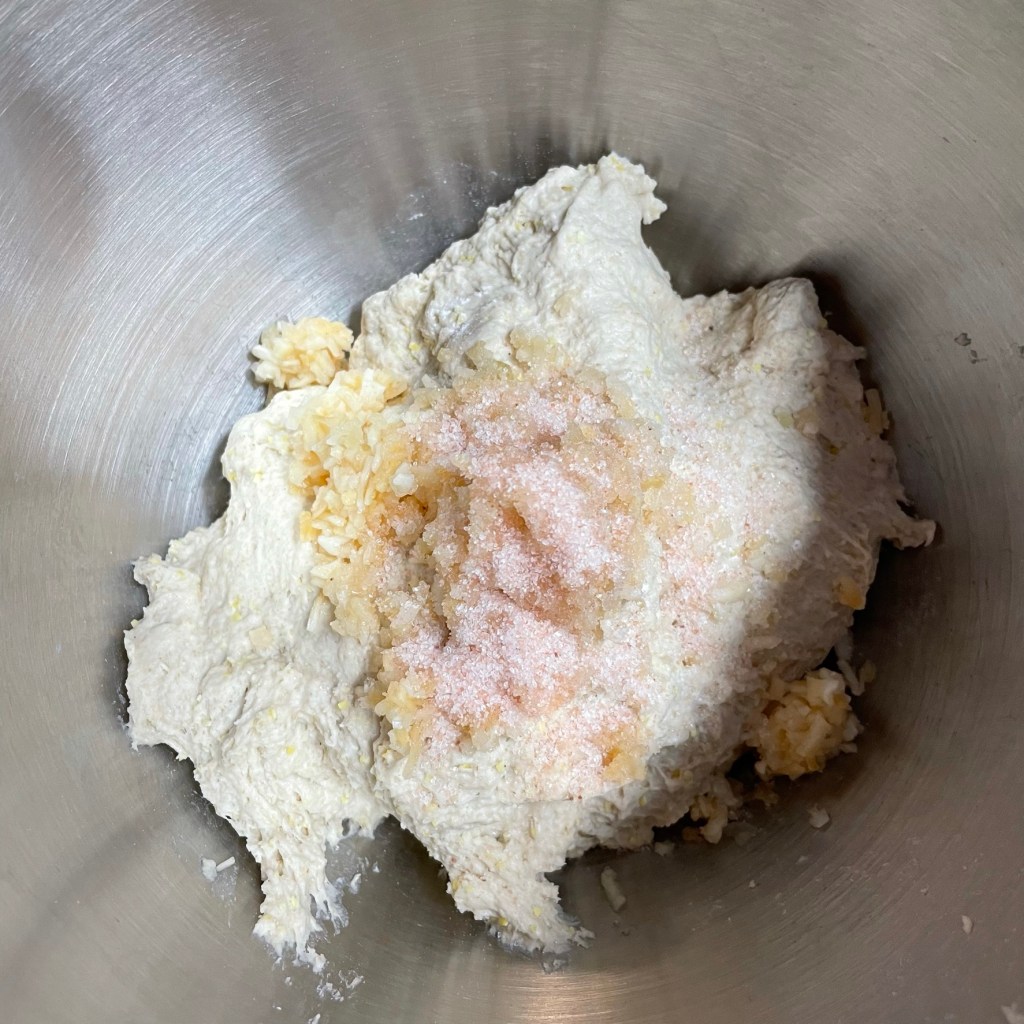
Combine the pre-ferment, soaker and water in a stand mixer bowl.
Add poultry seasoning to the flour blend for extra savory fall flavor!
The dough will ball up on the beater blade. Scrape it off the beater, then let it rest.
Dump the hydrated onions onto the dough, followed by the salt. I used Himalayan pink salt so you can see it! 😉
After a 45 minute rest, use the dough hook to knead in the onions and salt.
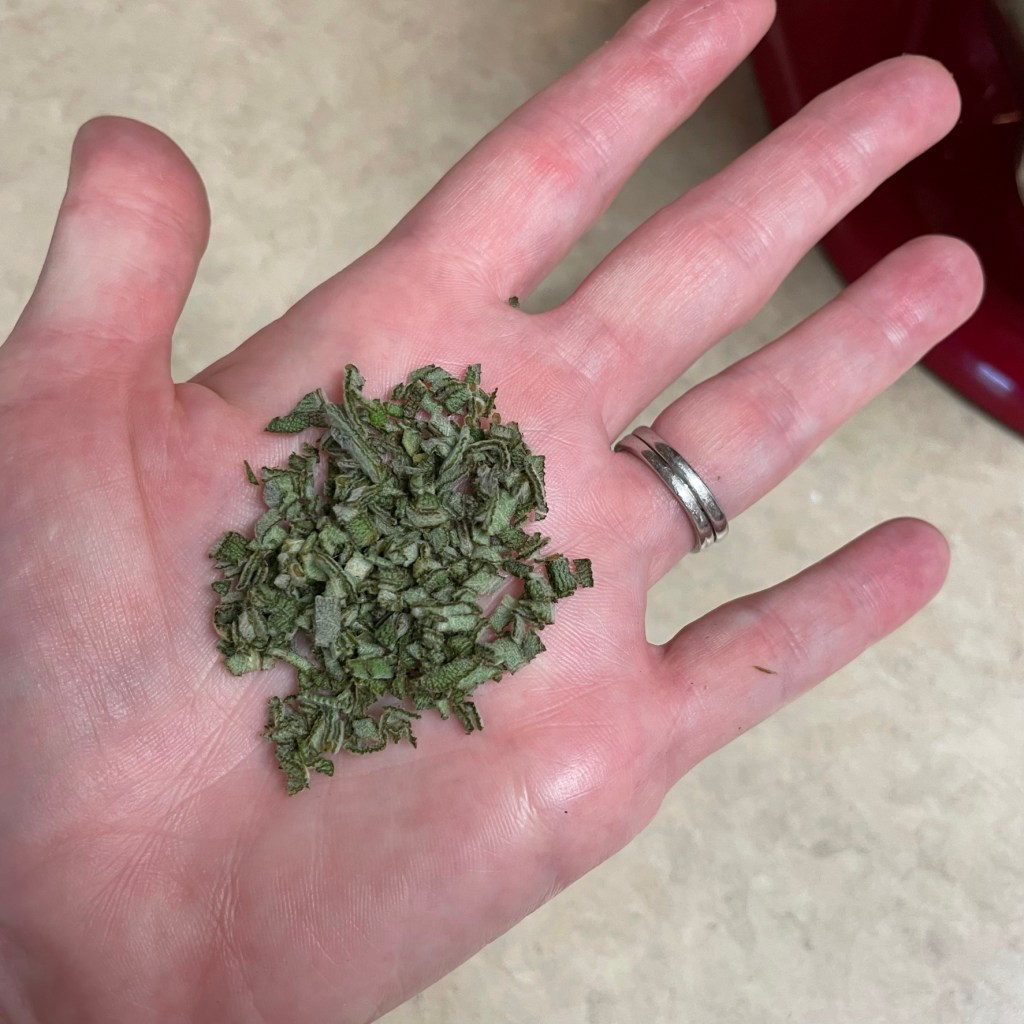
Rinse and dry the fresh sage leaves, about this much.
It measures approximately 1 tablespoon when finely chopped.
Knead the sage into the dough. Cover and rest 30 minutes before the first set of stretch and folds.
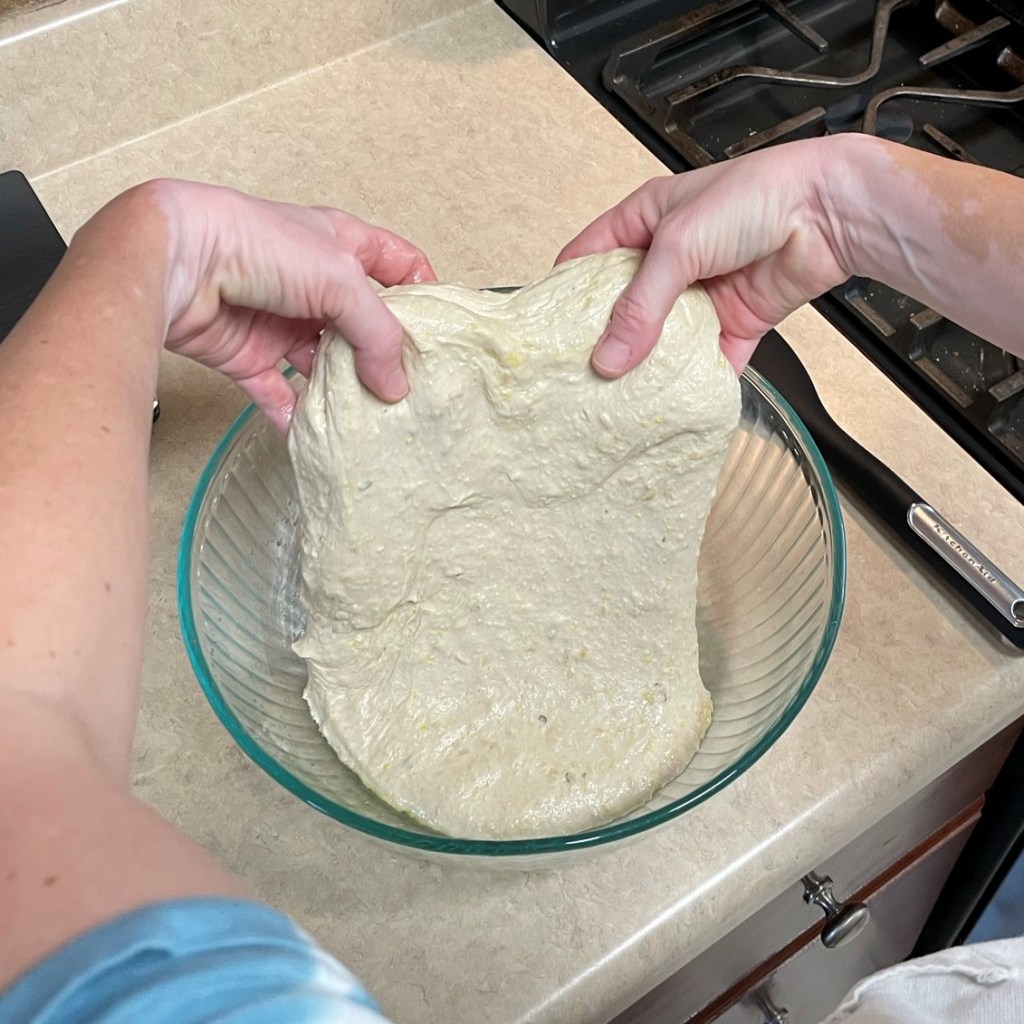
Stretch upward until the dough resists, then fold it toward the front edge of the bowl. Wet your hands to prevent sticking.
Press down when you fold, to push out trapped gas.
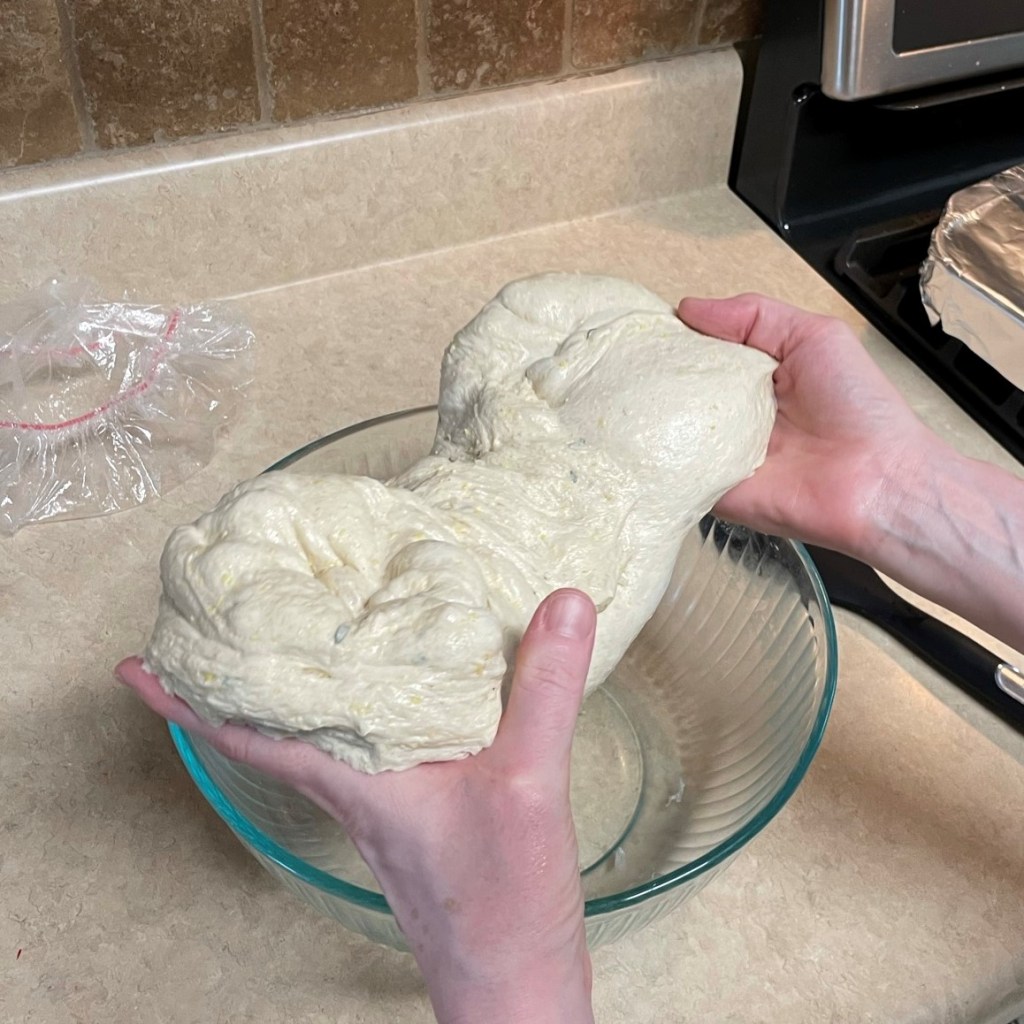
Rotate the bowl and fold the opposite sides of the dough, so that all four sides have been folded onto each other. Repeat this twice at 20 minute intervals.
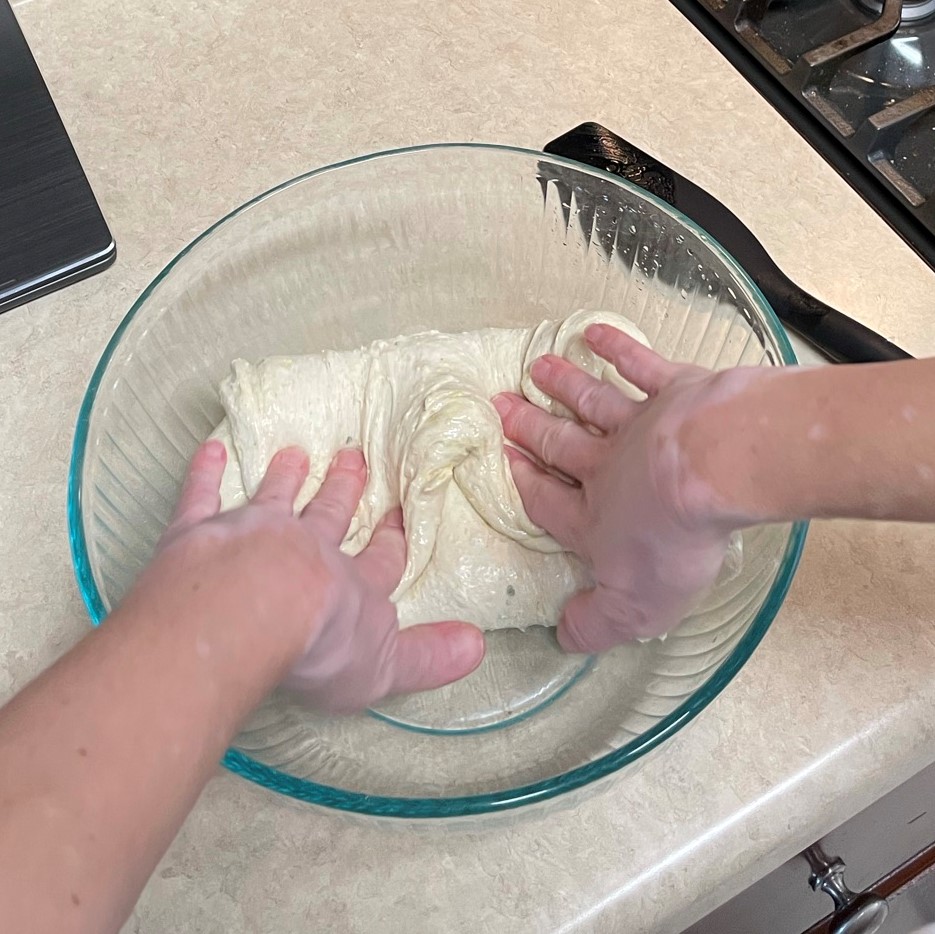
By the third stretch and fold, the dough is noticeably stronger and puffier.
You can do the final stretch and fold by lifting it out of the bowl. Be sure to squeeze the fat air bubbles out.
Shape the dough into a ball by folding the edges to the center, and continue this while rotating the dough around.
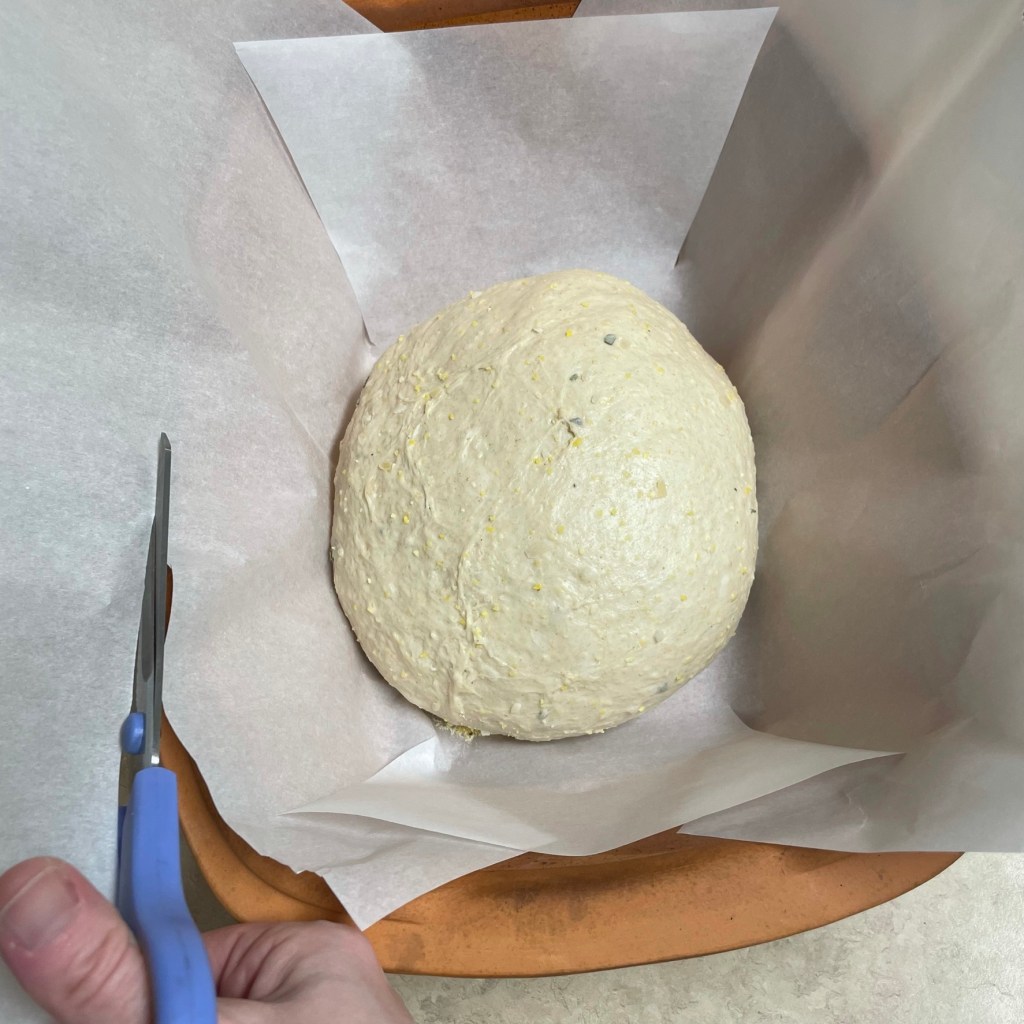
Tuck and pinch the bottom of the dough to seal it and place it on parchment paper. Cut darts in the paper so that it doesn’t wrinkle in the lidded baker.
I usually trim the excess parchment so the lid fits better without folding it onto the bread.
When dough is puffy and fully proofed, score it with a lame tool or a sharp knife, but make it quick and decisive!
The score should be about 1/2″ deep into the dough, and this will give steam inside the dough an easy escape.
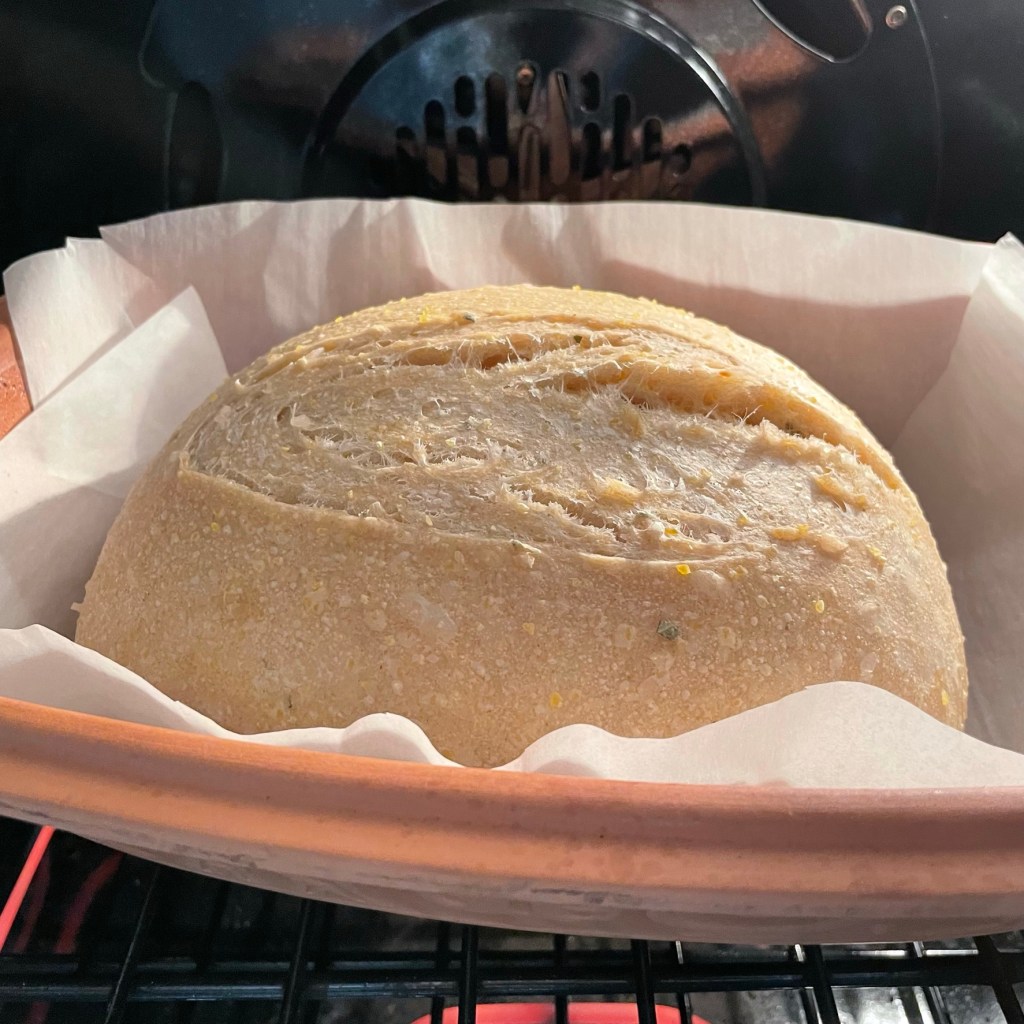
Bake at 450° F for 20 minutes with the lid on, then remove the lid and bake for 25 more minutes.
Be still, my heart! This smells amazing.
Internal temperature should be 205° F. This one is done!
If this were a normal year, the Greek Orthodox church in our city would not have had a long line of cars snaking around it this past weekend, with drivers waiting to purchase prepared food in white Styrofoam take-out boxes. It would not have been nearly so quiet, and it would not have been the impersonal experience my husband, Les, had when he picked up our Saturday night meal. The string of taillights ahead of him and the line of vehicles in his rear-view mirror were a stark contrast to a “normal” mid-May visit to the church’s annual fundraiser.
The Greek Festival should have been a noisy, three-day celebration for all ages, packed with singing, music, dancing, eating, drinking and intermittent yells of, “Opa!!!!” There would be authentic heritage costumes and colorful art for sale and scheduled history lessons inside the Orthodox Church sanctuary. But this has not been a normal year, nor was it last year, when the Greek Festival was cancelled altogether for safety reasons. This year, at least, the church gave it a go by offering drive-through pickup of its most popular food items—some prepared and some frozen. Sadly, the take-out box did not do my hot meal any favors, but I have higher hopes for the spanakopita we tossed into the freezer.
The food is one of the things I usually love most about the Greek Festival, and you can bet I will be there next year when things (hopefully) look more normal. The flavors of the Greek culture are so bold and fresh, and I cannot resist applying them to foods that don’t necessarily speak Greek, including this inspired pizza.
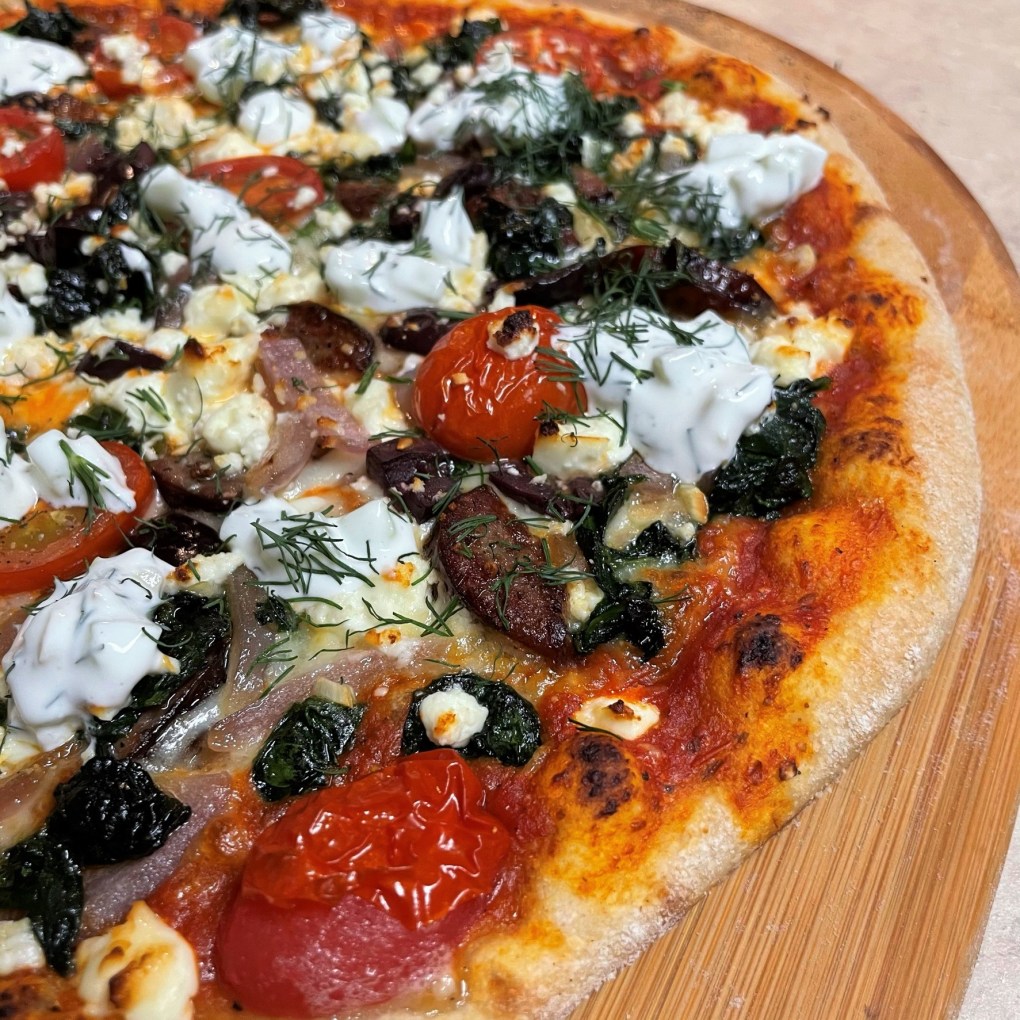
This pie has all my favorite Greek flavors in one bite!
Les and I enjoyed this one a couple of months ago, and I am finally sharing it here on Comfort du Jour. We have a regular tradition of Friday night pizza at our house, and though we do enjoy a classic Italian sausage or pepperoni pie, you know I also love to twist them up with other flavors. Visit the Pizza Party page for a quick review if you are looking for some new topping ideas.
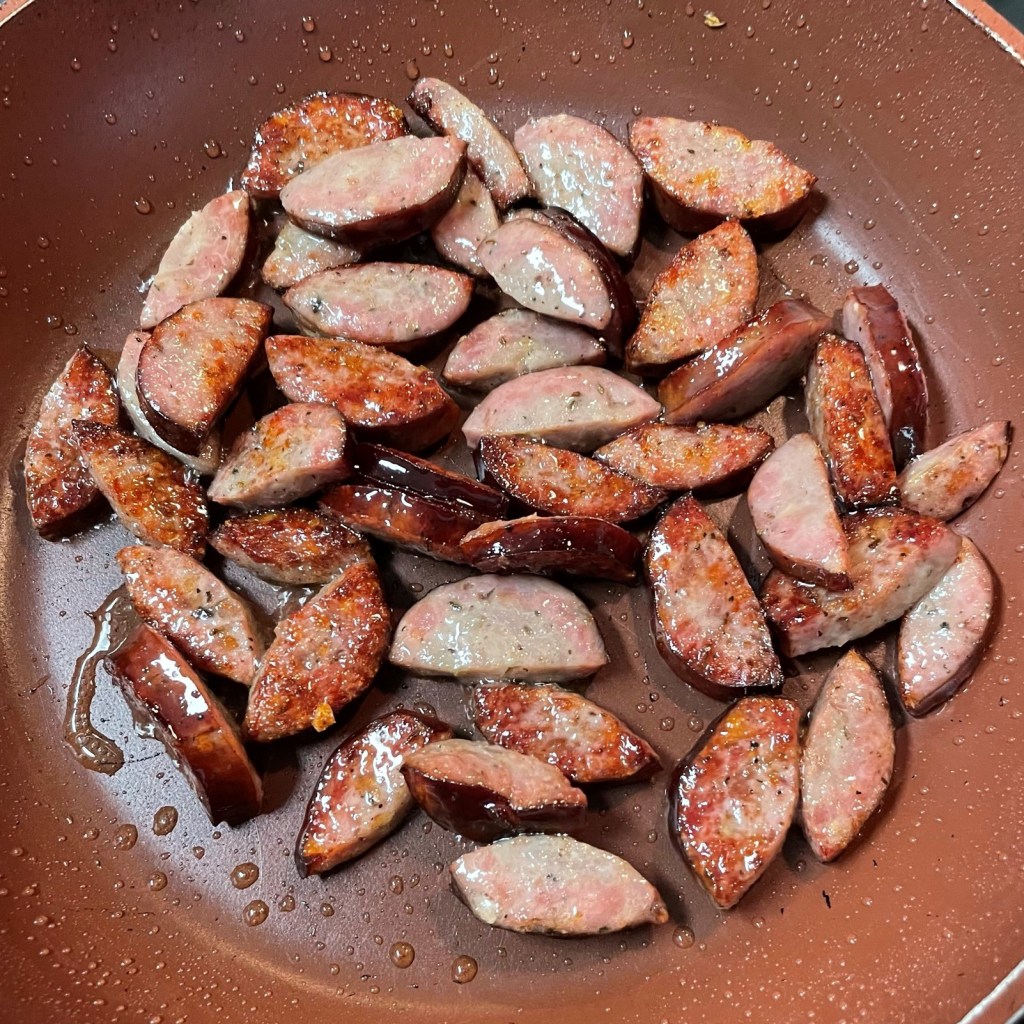
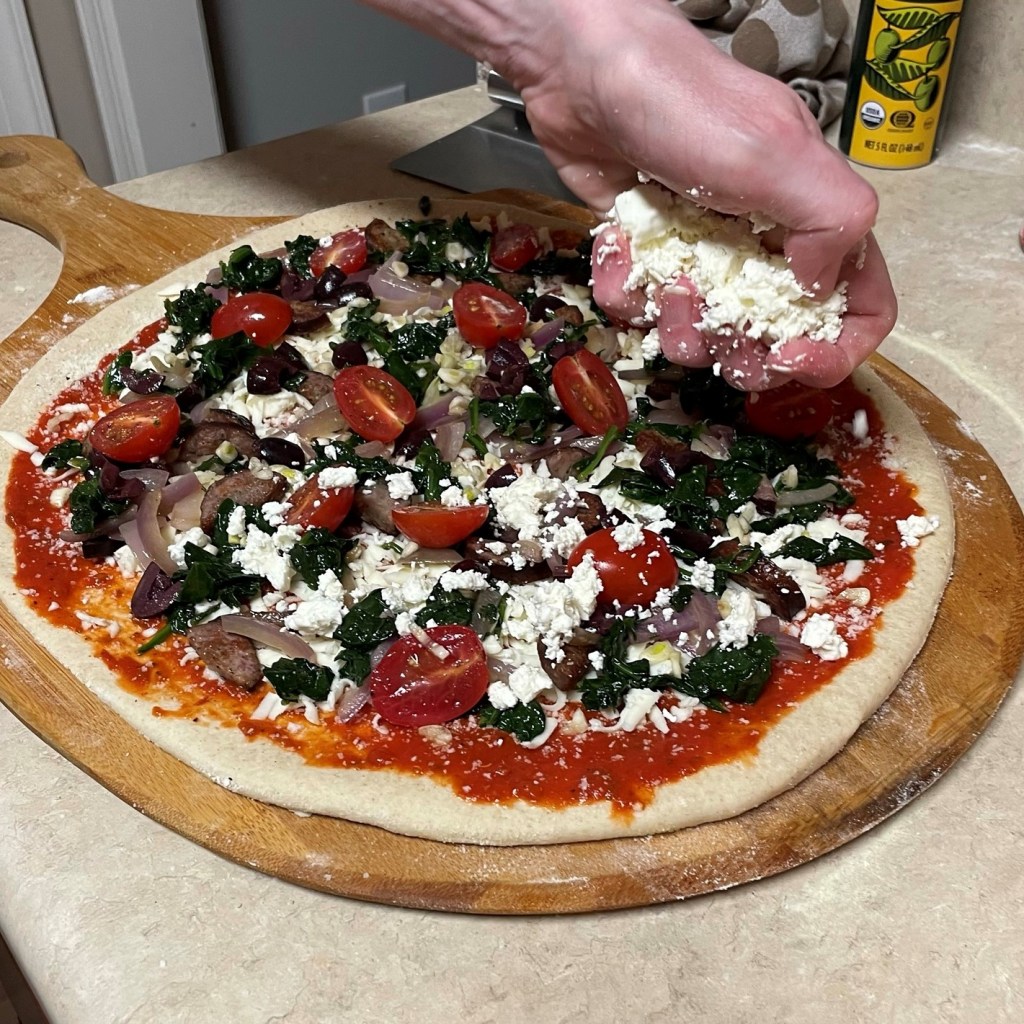
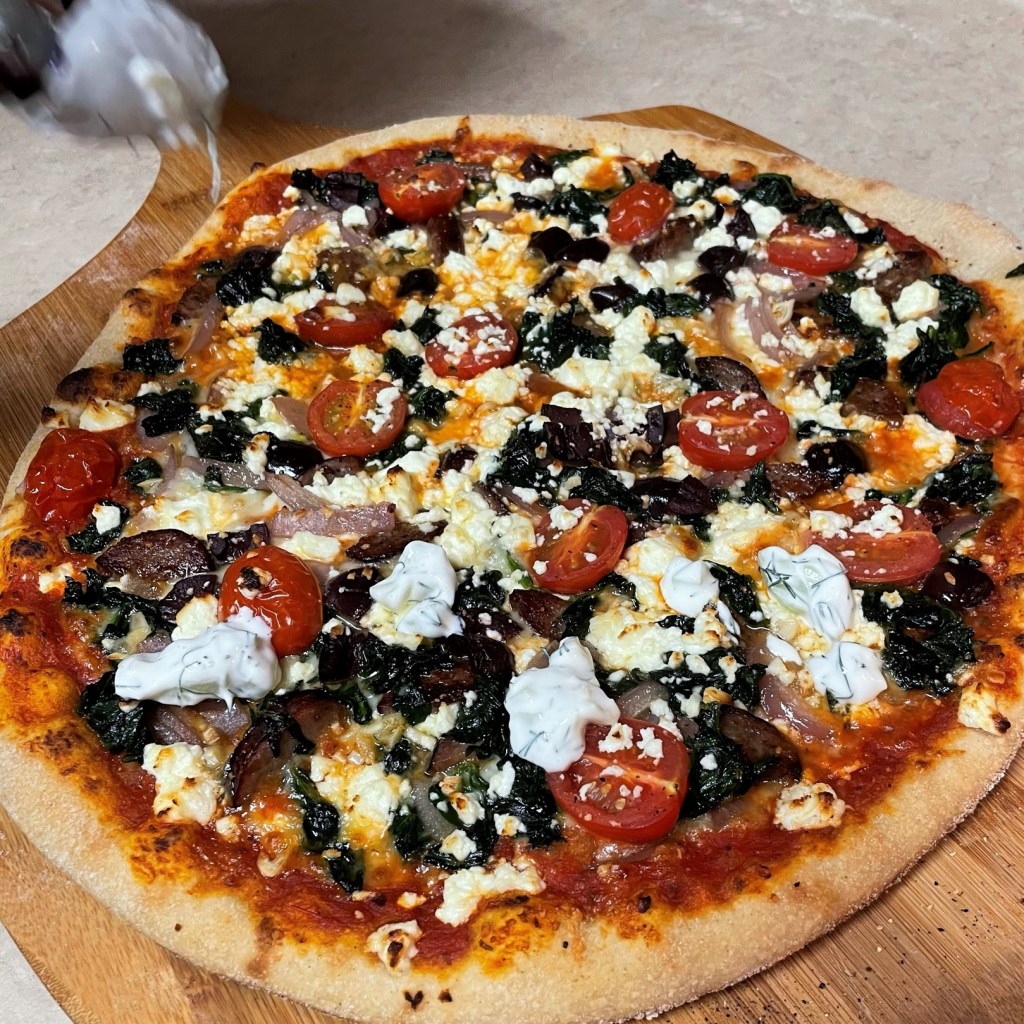
For this tantalizing “Big Fat Greek Pizza,” I started with my own N.Y.-style pizza dough and a simple tomato sauce base, the same as I would use on a traditional Italian pie. Next, I crisped-up bits of “Greek God” sausage, an offering of one of our local butcher counters. The sausage is full of bright herbal flavors—oregano, basil, garlic and rosemary—and I had been imagining it on a pizza for quite some time, though I’m quite sure this pizza would be just as good with no meat. I piled on spinach, red onions, Kalamatas, fresh cherry tomatoes and a whole bunch of feta, and that should have been “Greek” enough. But my favorite part was the dollops of cool cucumber-garlic tzatziki that went into place after the pizza emerged from the oven. The combination of all these ingredients was like a flavor explosion, giving me my very own Greek festival, all in one delicious bite.
Opa!!!
Ingredients
Tzatziki:
1/3 cup plain Greek yogurt, stirred
2 Tbsp. half and half
1/4 cup diced cucumber, seeded and patted dry
1 or 2 cloves garlic, finely minced
1 Tbsp. fresh dill leaves, chopped (chop some extra for sprinkling over the finished pizza)
Combine ingredients and keep refrigerated until ready to serve pizza.
I usually do not add half and half or cream to my tzatziki, but I wanted it a bit thinner for this recipe.
A little chopped dill adds another layer of flavor to the tzatziki. Fresh is always best, but dried will be fine in a pinch.
1 link cooked and sliced Greek God sausage* or similar product (see notes)
1/2 medium red onion, sliced
1 fat handful baby spinach leaves
Handful of pitted Kalamata olives*, roughly chopped
6 or 7 cherry or grape tomatoes, washed and halved
3/4 cup fresh feta, crumbled*
Additional chopped fresh dill, for serving
*Notes
If you decide to try my version of N.Y. pizza dough, note that it takes a few days’ time in the fridge, so plan accordingly. This recipe is intended for a thin-crust pizza, and my heating and bake time instructions are specific to baking on a pizza steel or stone. If you prefer to bake on a pan or at lower temperature, adjust your baking time to your preferred method.
The “Greek God” sausage I used for this pizza is a specialty product from a specific local grocery. It is a fresh pork sausage, seasoned with basil, oregano, garlic and rosemary, and we cooked (actually, smoked) it prior to using it. Any mild pork, chicken or turkey sausage would make a fine substitute, or you could easily omit the sausage altogether. The other flavors on this pizza are more than enough to elevate your happy.
Kalamata olives are specifically grown in the Kalamata region of Greece, and they are not the same as inexpensive, canned “black” olives. They are more oblong than round, and they are usually packed in a briny liquid with wine or olive oil. It’s easy to find them in jars or on specialty olive bars, if your supermarket has one. They can be a little pricey, but as far as I’m concerned, they are worth their weight in gold. Be sure to select pitted olives for this recipe, unless you find it exciting to crack a tooth.
I prefer to use fresh blocks of feta, as it has better flavor and texture than most crumbled feta. If the feta block is packed in brine, be sure to pat it dry with paper towels before crumbling, to minimize excess moisture.
Instructions
We had a couple of links of this Greek-seasoned sausage leftover from a recent batch we had smoked. I sliced and crisped it for texture.
Saute the onion just until it begins to soften.
Saute the baby spinach just until leaves are wilted.
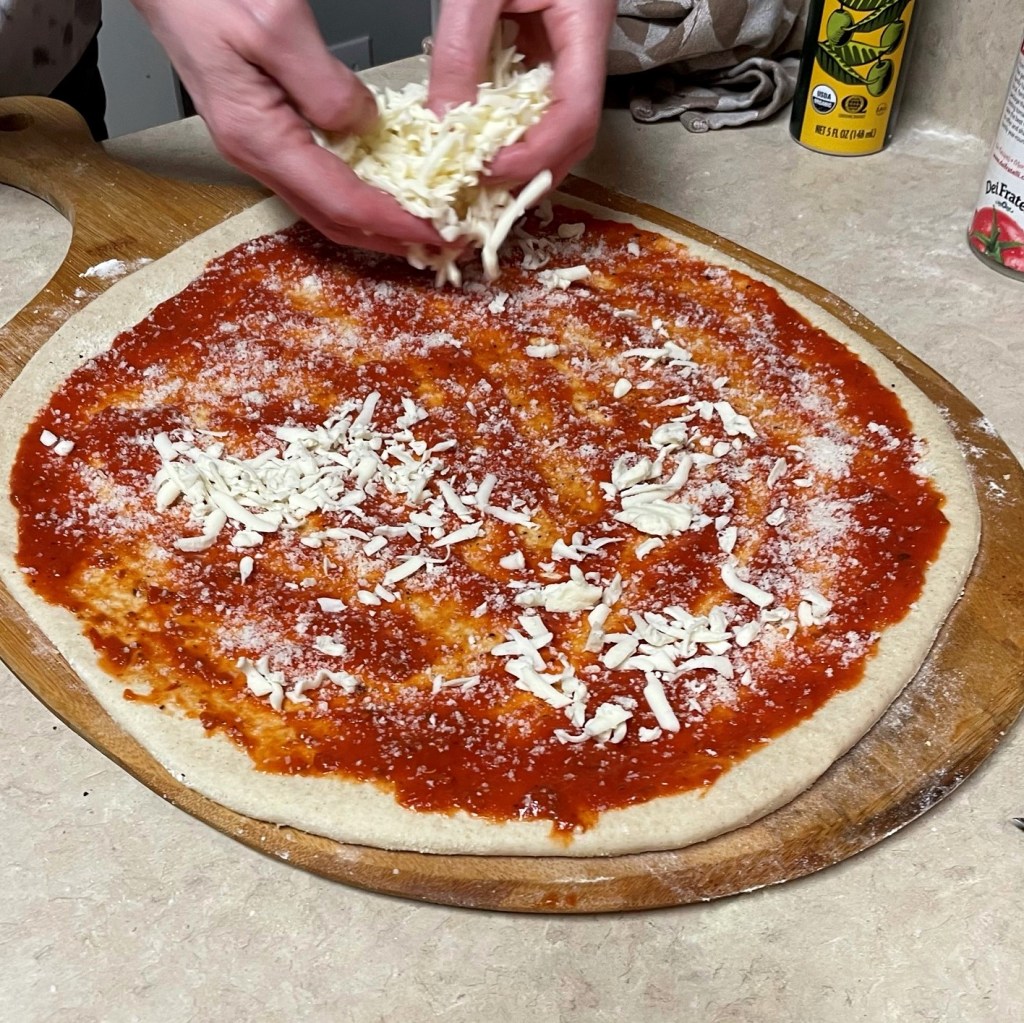
Use sauce sparingly for best results. For a standard 14-inch pizza, about 4 tablespoons will do it. You should be able to see the dough through the sauce.
Sprinkle on a few shakes of grated parm-romano, then scatter the shredded mozzarella evenly over the sauce base.
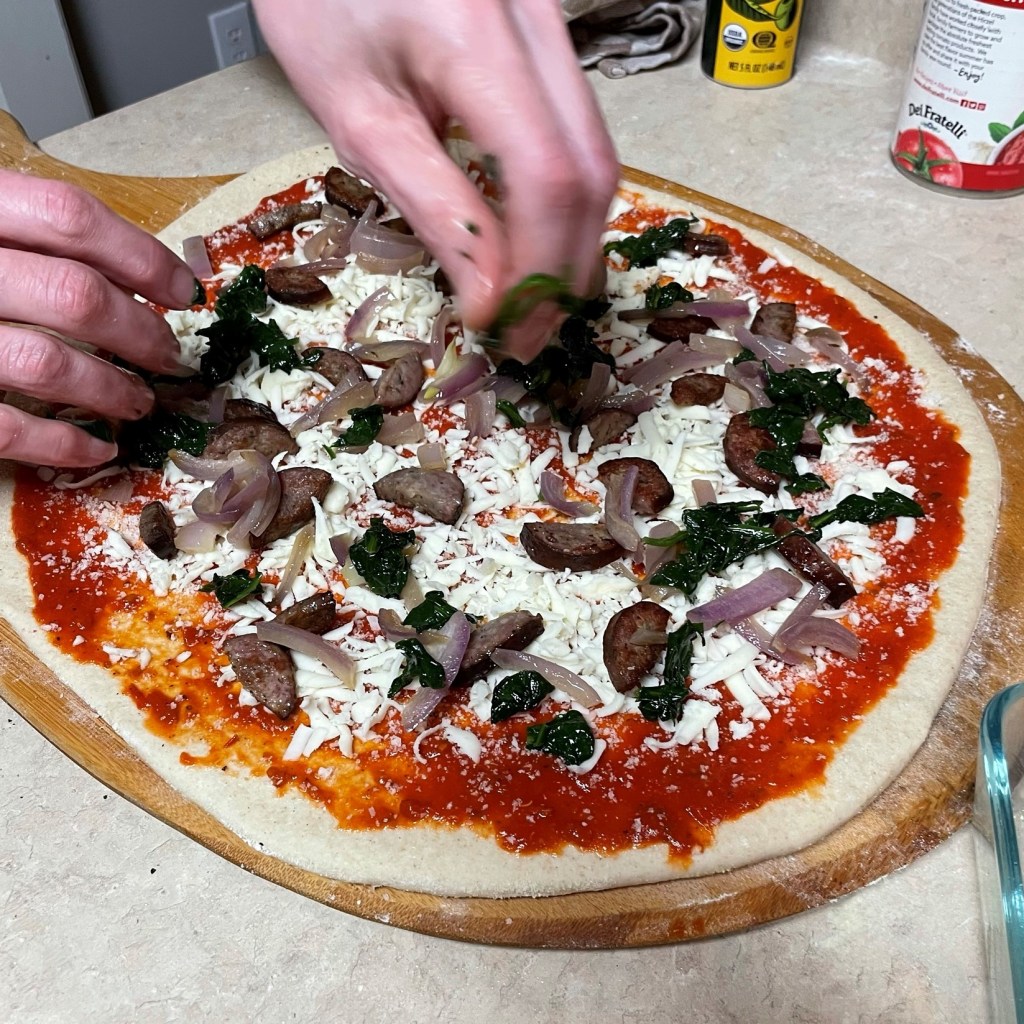
Layer on the cooked ingredients first.
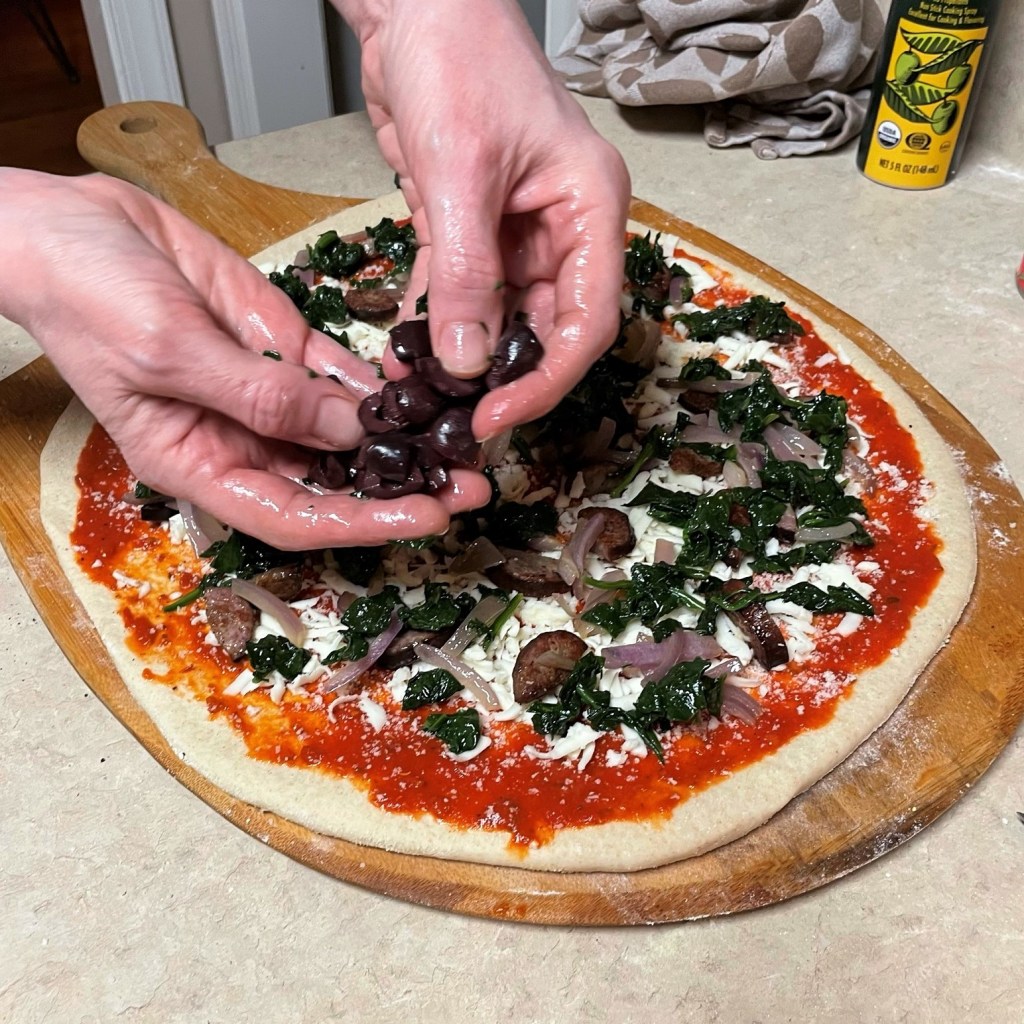
Next comes the briny, juicy Kalamata olives. I could eat these things for breakfast, I like them so much!
Arrange the cherry tomatoes face-up, so they don’t lose their moisture into the pizza. Then scatter the crumbled feta over the whole pie. Slide it into the oven until the crust is golden brown.
Looks darn delicious, right? But I’m about to elevate these Greek flavors one more time.
Distribute dollops of the cool, fresh tzatziki over the pie. Make sure each slice will have its fair share.
Finally, a sprinkling of more fresh dill. This flavor livens up a dish in a hurry!
Cue the bouzouki player! Time to get this personal Greek Festival started!
Preheat pizza steel for one hour at 550° F, or the recommended temperature for your pizza stone, with oven rack about 8 inches from the top heat element. If using a metal pan, place rack in lower third of oven.
Prepare toppings: sauté red onion just until softened, then sauté spinach until wilted. Transfer both to a dish to cool.
Shape pizza dough into a 14-inch round and transfer to a floured pizza peel that is dusted with cornmeal (or place on a greased pizza pan). Brush or spray dough with olive oil, and season with kosher salt and a few twists of black pepper.
Spread tomato sauce evenly over the dough, all but 1 inch around edge.
Distribute the shredded mozzarella, then the cut-up, cooked sausage pieces (if using), onions and spinach, Kalamatas, tomatoes and feta cheese.
Transfer pizza to preheated steel or stone, and bake for about 7 minutes, until crust is golden brown and toppings are bubbling.
Arrange small dollops of tzatziki sauce over pizza, sprinkle with remaining dill leaves.
March was National Flour Month, and I’m finally catching up on paying respect to the many ways flour feeds us, beyond the obvious (bread). My first attempts at making handmade pasta 10 years ago were outright disastrous, mostly because I had assumed the method of stirring eggs by fork into a mountain-like peak of all-purpose flour was going to be easy. In my defense, the shows I had watched on Food Network made it seem easy, but in real life, it was a humongous freaking mess that left me cussing up a storm and vowing that I’d “never make that again.” Truth is, it is those really frustrating failures that inspire me the most to give it another go, and I’m so glad I did!
In my later efforts, I enjoyed more success, letting my KitchenAid do the mixing, but there was always something about the handmade pasta that didn’t sit right with me, even after I had invested in a “Made in Italy” hand-crank pasta roller. The dough always seemed heavy or thick, even on the thin roller setting. It fell apart or crumbled, or stuck to the roller or cutting blades. But a few years ago, I found the perfect, James Beard Foundation-approved recipe that fixed all the problems I had encountered. My issue was not only how I was making the dough or rolling the pasta, but also the ratio of ingredients I was using. To that point, I had been using only all-purpose flour and whole eggs (yolks and whites). I had no idea what temperature was best for my ingredients, nor did I fully understand how long to knead the dough or whether it needed to be rested.
I cringe when I see this old photo. Besides all the background junk in my tiny, post-divorce apartment kitchen, the ragged edges on my pasta sheet reveal how much I had yet to learn! 🙂
The better recipe, and the one I use to this day, takes advantage of a special variety of wheat called durum, which is used to make semolina flour, the gold standard in authentic Italian pasta recipes. Semolina lends a warm, slightly nutty flavor, a light yellowish color and a firmer, more toothsome texture. It has been a game changer in my journey to making handmade pasta.
The other big difference was a shift in liquid ingredients in my formula. Rather than using whole eggs, the recipe that has become my standard requires separation of the eggs, using only the yolks, plus an amount of water. Once I found this easy formula, the flavor possibilities became near-endless. And that’s where the real fun of making handmade pasta begins! Being creative with the colors, flavors and shapes of handmade pasta is one of the things that gives me—a home cook—a very satisfying sense of accomplishment.
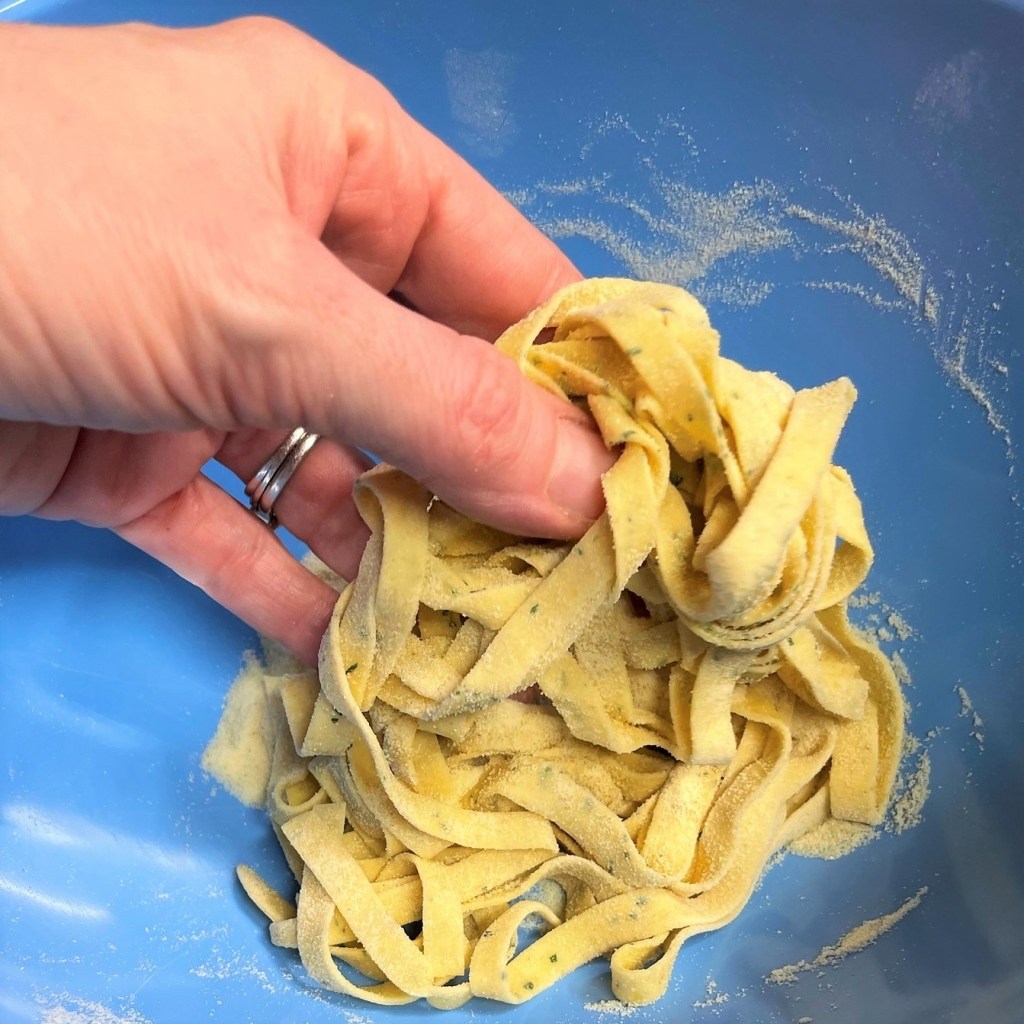
I won’t claim that handmade pasta is “easy,” because I still feel the ego bruises from my early attempts, but I will say that if you are already making handmade pasta, go on and experiment with the flavors until you find something amazing. New flavors make their way into the mix either in the liquid, perhaps by using finely pureed vegetables as part of the water measurement, or by way of dry add-ins, as I am sharing in today’s post. And if you’re still on the fence about trying handmade pasta, I hope my adventure inspires you!
This recipe has helped me use some of the abundance of fresh herbs I’ve had since my husband, Les, gifted me the countertop hydroponic herb garden that keeps throwing parsley at me. The lemon, parsley and basil combination is terrific and perfect for spring, but you could just as easily flavor your pasta with sun-dried tomatoes, dried mushrooms, roasted red peppers or—well, you can imagine your own (and I do hope you’ll share those fabulous ideas).
Making your own pasta is so much fun. I hope you’ll try it!
8 oz. semolina flour (plus extra for rolling pasta dough)
4 oz. unbleached, all-purpose flour* (see notes)
2 oz. white whole wheat flour*
1/2 tsp. kosher salt
1/2 cup filtered water, room temperature*
2 egg yolks, room temperature*
1 Tbsp. extra virgin olive oil (mine is whole lemon-fused for bright lemon flavor)
Zest of one organic lemon* (only the bright yellow peel)
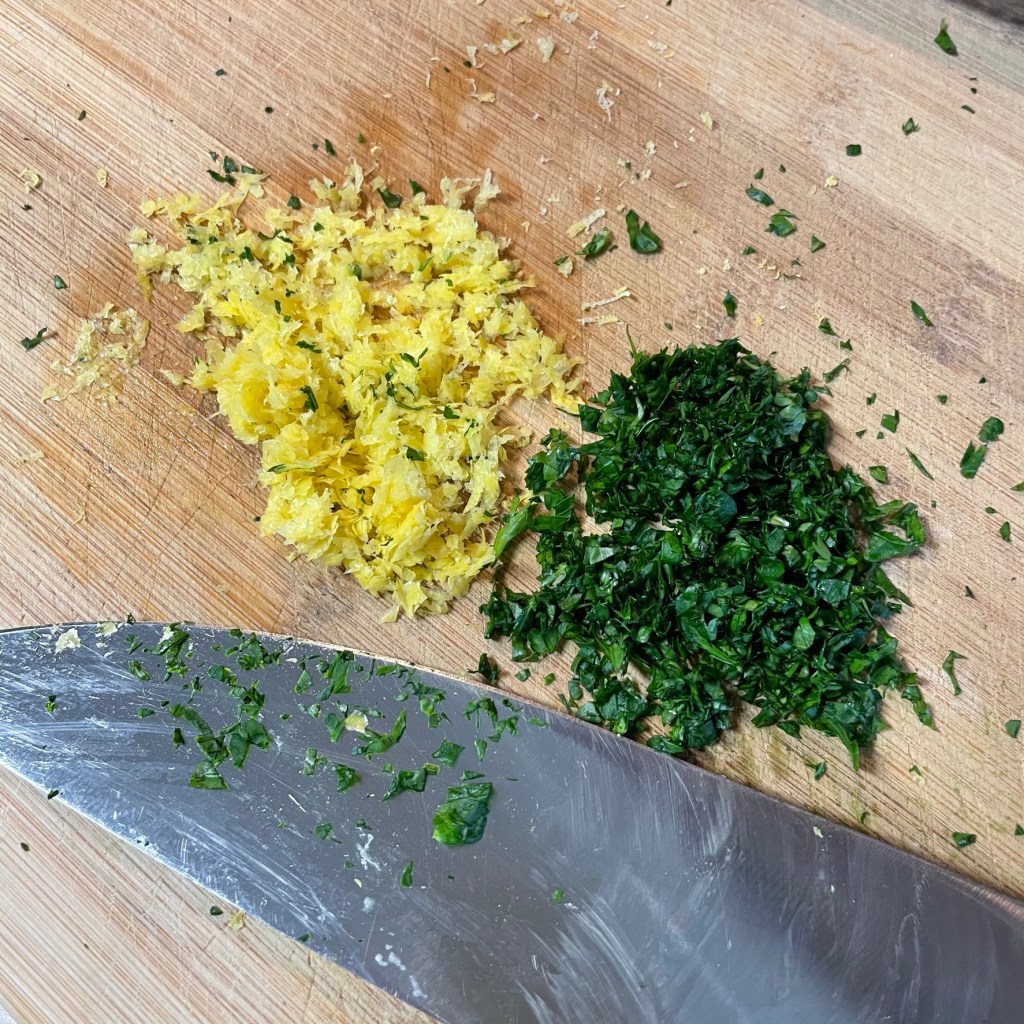
2 Tbsp. very finely minced fresh herbs (I used a combination of Italian parsley and Genovese basil)
*Notes
All-purpose flour is easy to find, but “00” flour is better if you can get your hands on it. The double-zero flour is milled to a very fine texture, and its use results in tender, silky pasta. I have seen it in well-stocked larger supermarkets, gourmet shops and online. I also use some portion of whole grain flour in my pasta dough, but if you prefer, skip the white whole wheat and make up the difference with equal amount of additional all-purpose or 00 flour.
As with bread dough, I have found that hydration of flour for pasta dough is much improved with room temperature or slightly warm water. Cold water makes for very stiff dough that is tougher to knead.
Eggs are more easily separated when cold, but once this is done, cover the bowl of yolks and let it rest at room temperature for at least 30 minutes before you begin mixing the pasta dough.
Most of the time, conventionally-grown citrus is fine. But when you intend to eat any part of the peel, it’s best to choose organic to avoid chemical pesticides.
Instructions – making the dough
I used a microplane on the lemon, and left the zest and the finely chopped herbs to dry a bit on the cutting board.
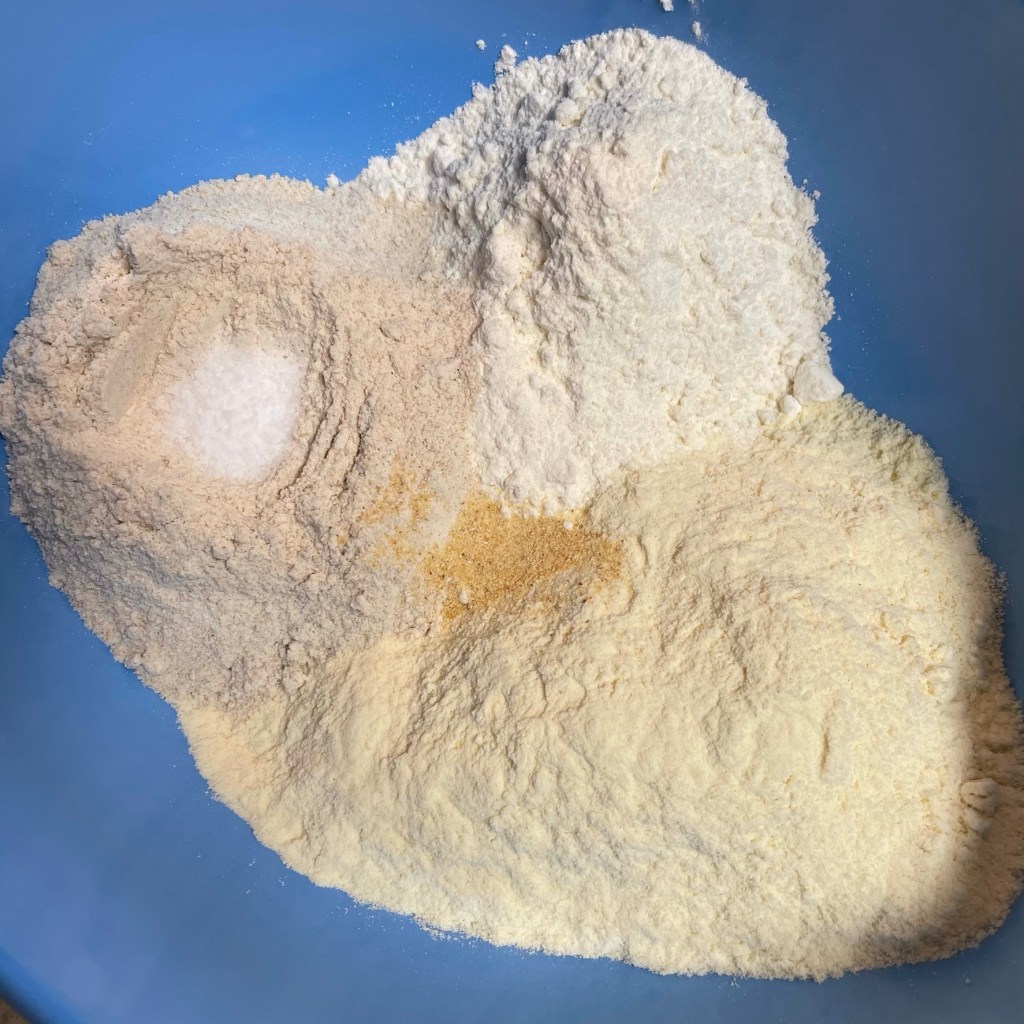
Clockwise from the top: all-purpose flour, semolina, white whole wheat (with salt in the center) and a last minute addition of garlic powder right in the middle of it all.
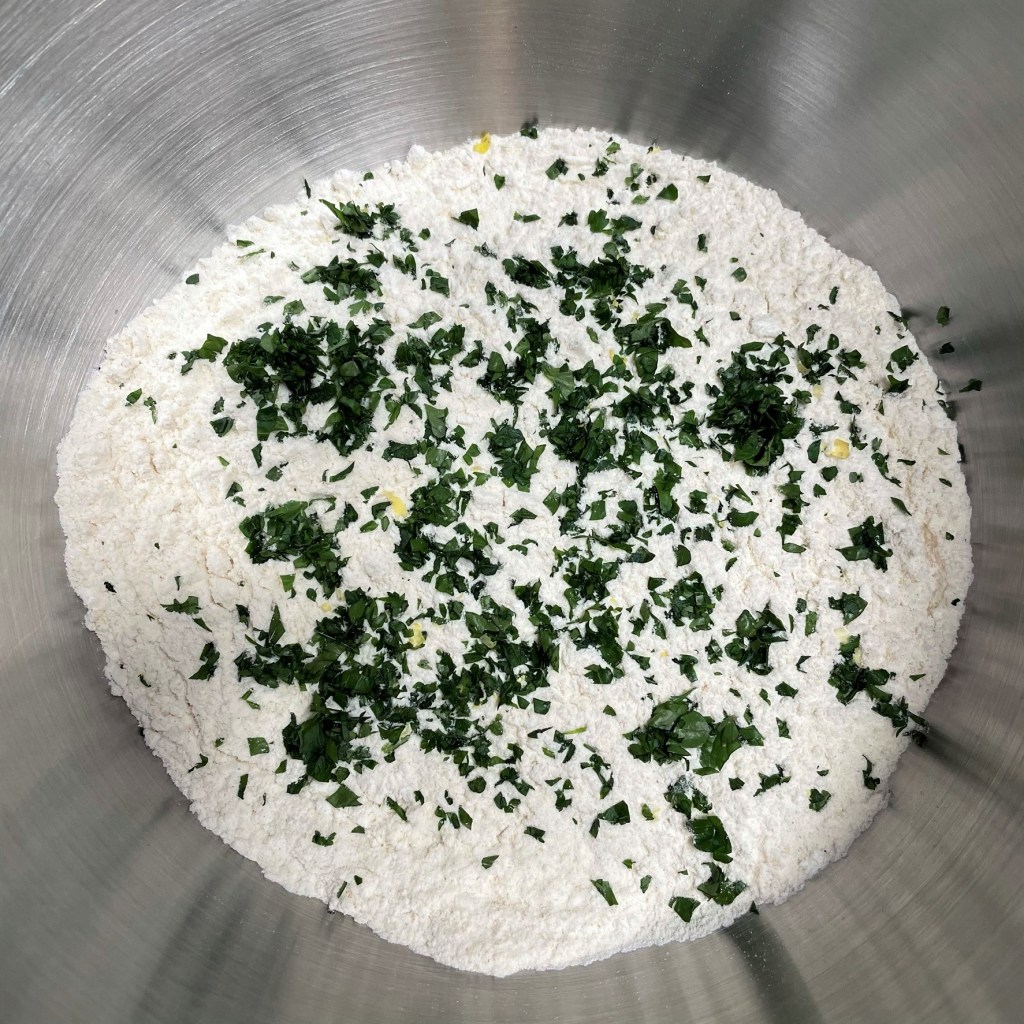
Use a whisk to blend the slightly dried herbs into the dry ingredients.
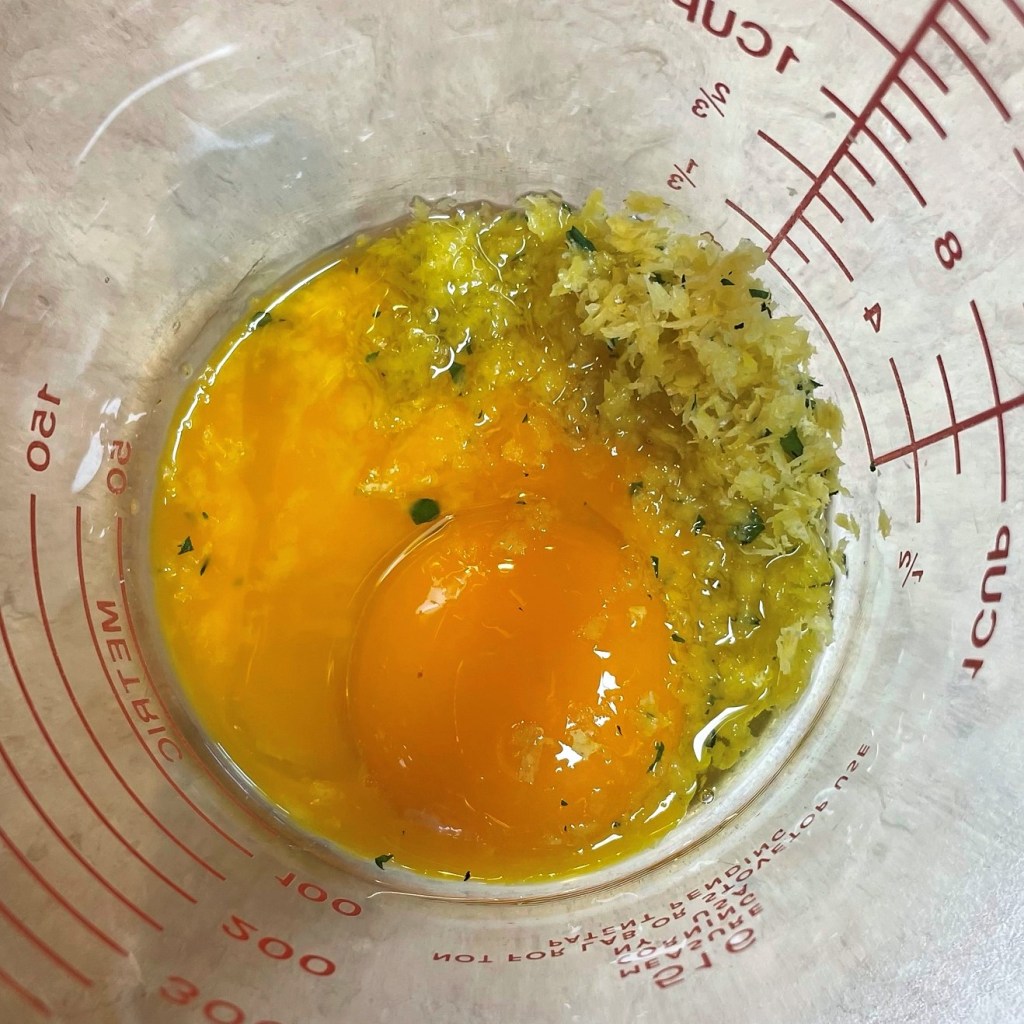
Combine the egg yolks, olive oil and lemon zest in a glass measuring cup.
Pour in room temperature water and whisk until evenly combined.
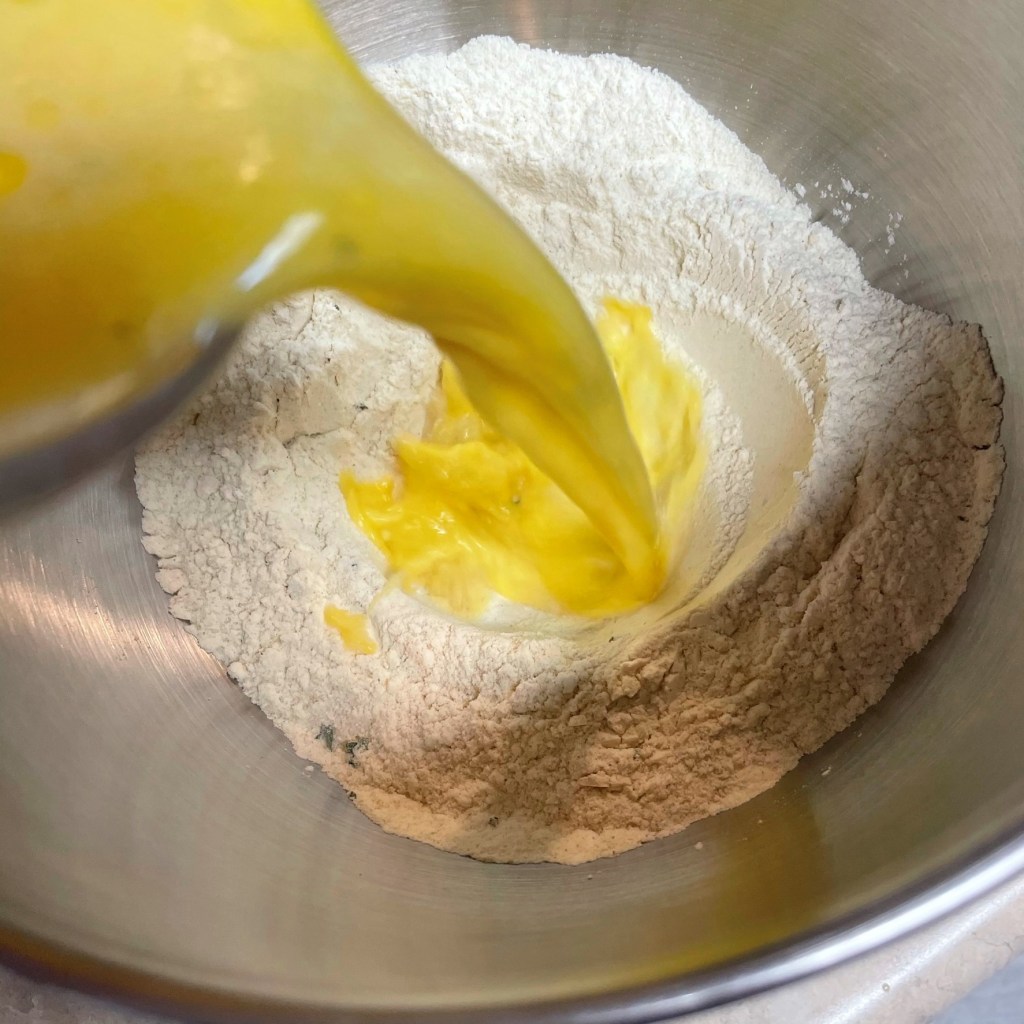
Make a well in the center of the dry ingredients, and pour the egg-water mixture into the center of it.
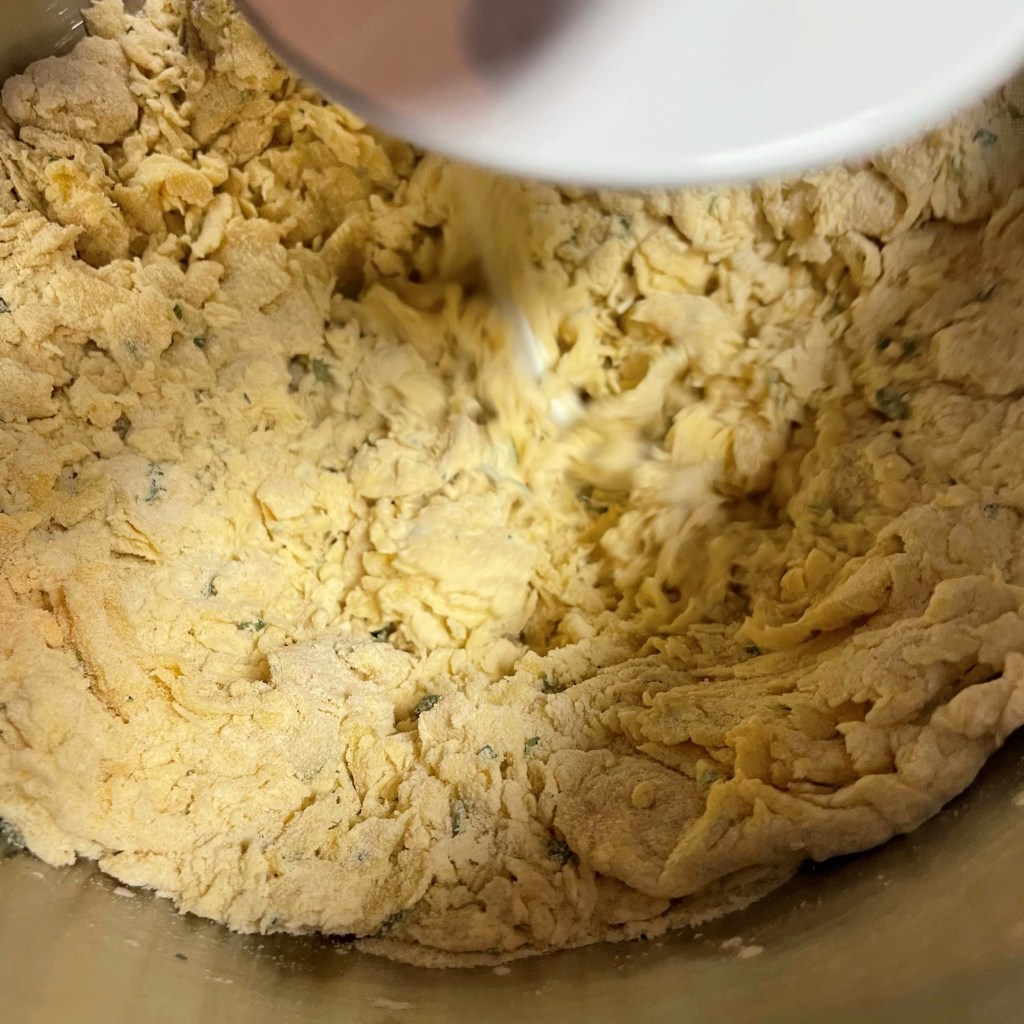
Use the dough hook of the stand mixer, which mimics the action of mixing with a fork. This will take a while, and you’ll want to avoid the temptation to add more water at this point.
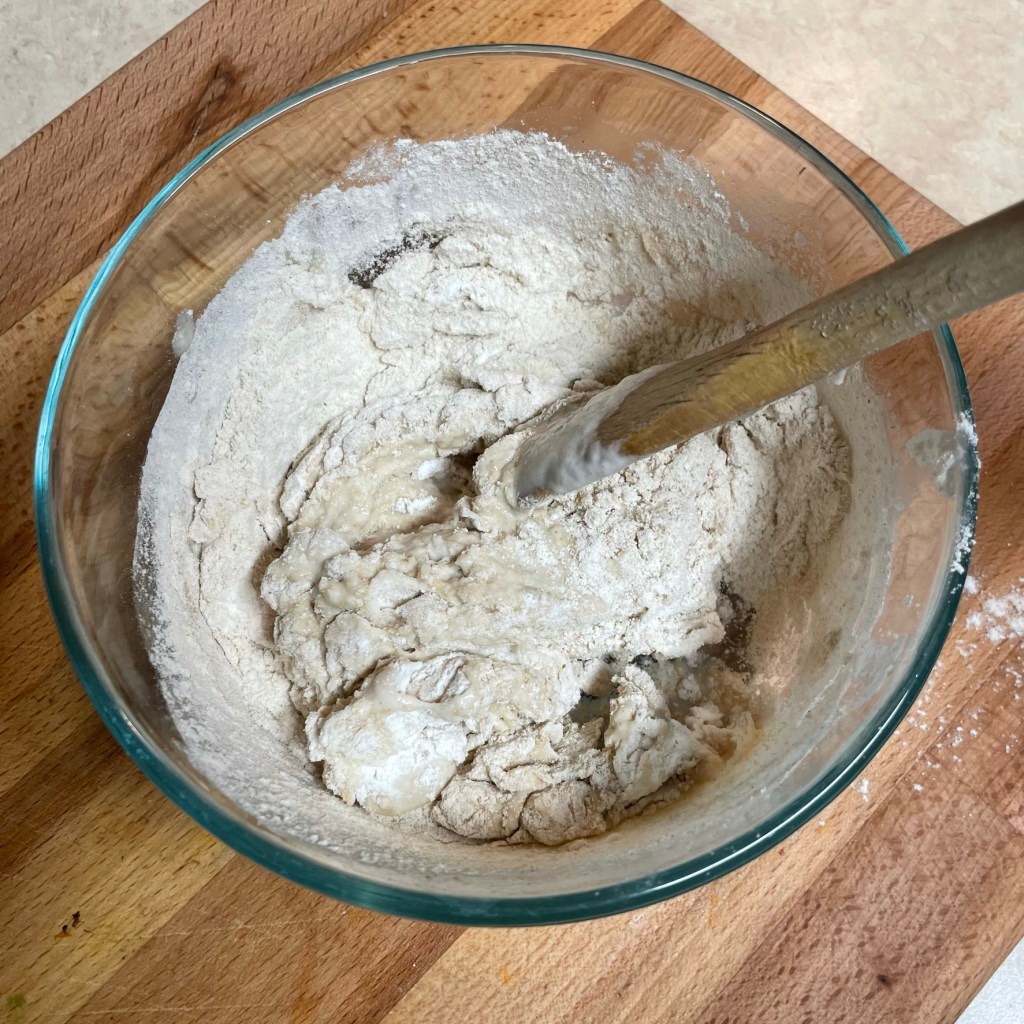
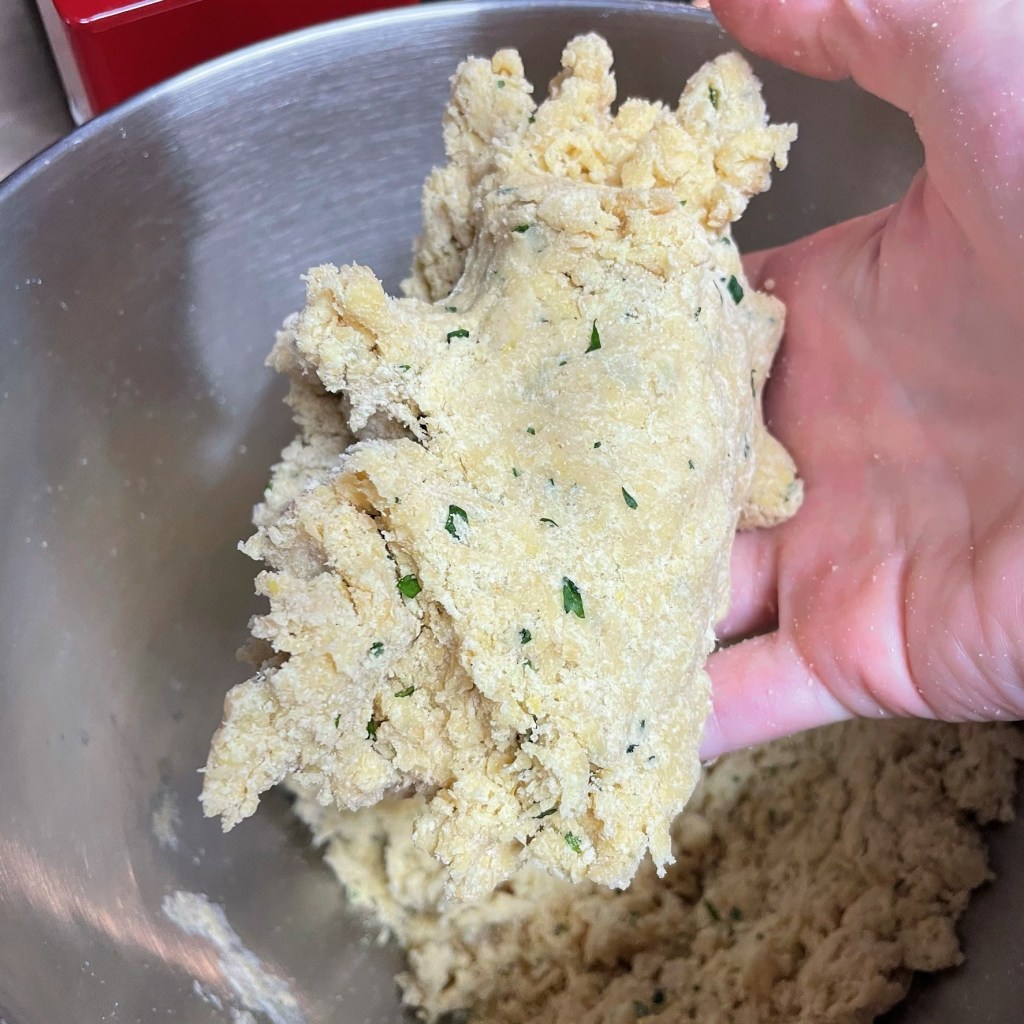
At my first squeeze of the pasta dough, it is evident that my mixture is too dry. It should come together in a shaggy but cohesive mass. This is dry and grainy, so I’ll add a tablespoon of water and mix again.
Much better! You can see the difference in hydration already, and it feels more smooth on the surface.
If I can use the mass of dough to pick up all the crumbs from inside the bowl, it’s ready to knead. If too many crumbs stay behind, I would add another small splash of water. This is just right.
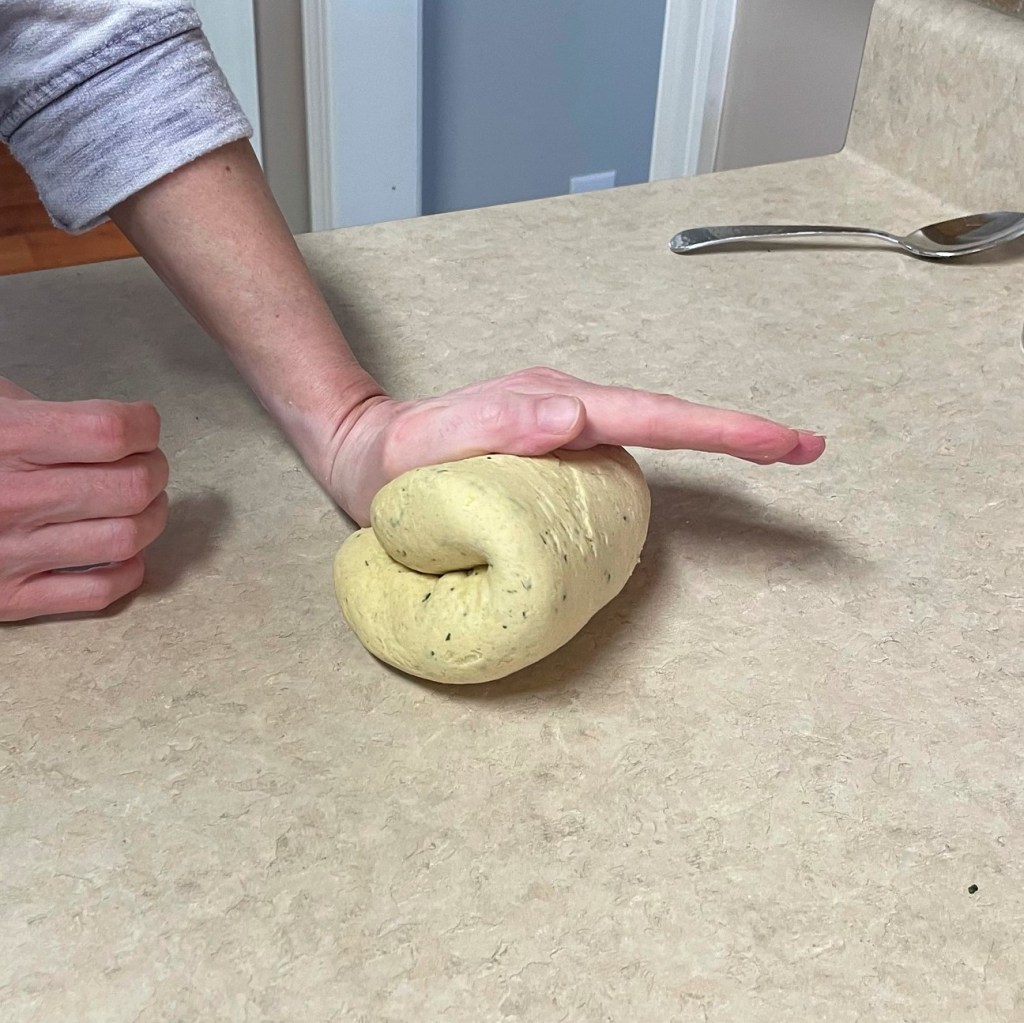
Get ready for a workout in this phase. I don’t like the knead that my KitchenAid mixer does here, so I move the dough to the counter and start rolling the dough over itself, rotating it a quarter turn with each knead.
My dough is very firm, and I see lots of “breaking” in the surface as I continue kneading. This is a sign that the dough is still too dry.
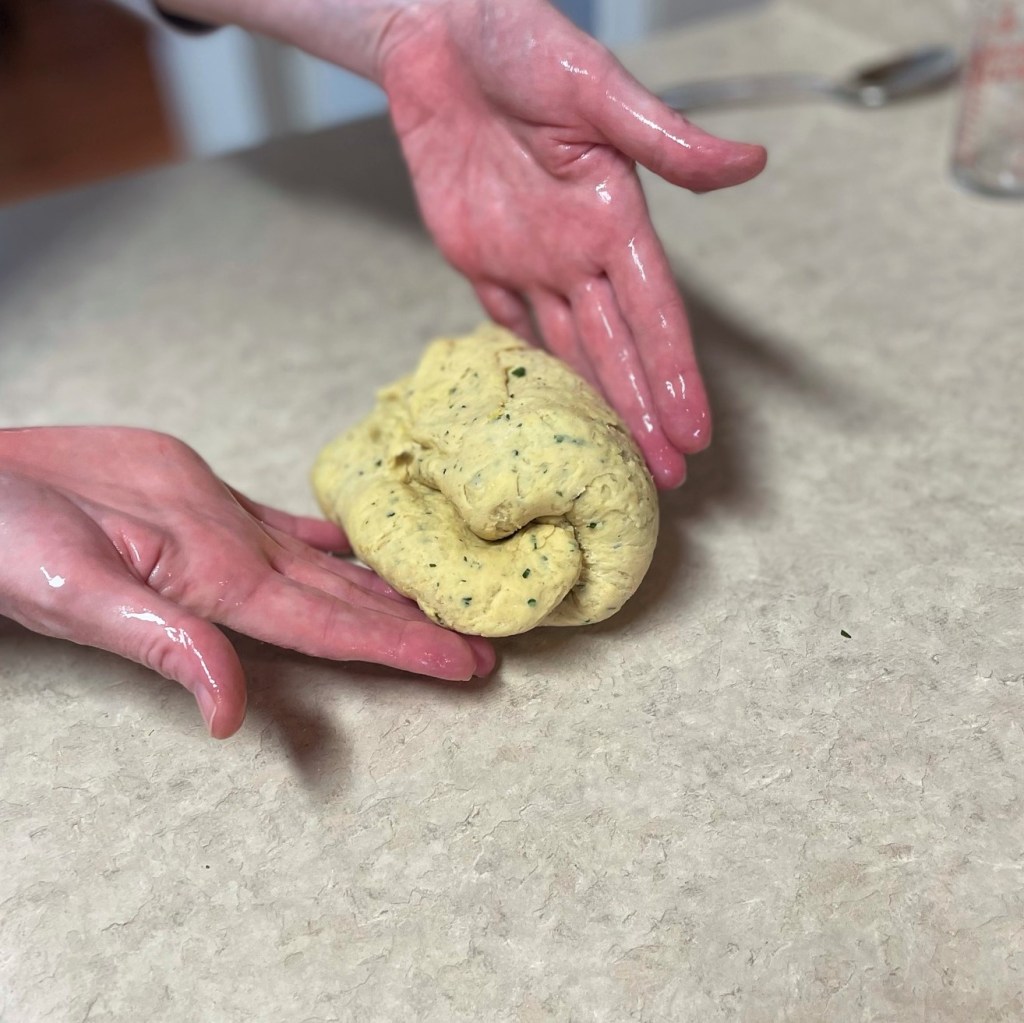
I wet my hands and continue to knead. If the dough continues to crack and break a lot, I’ll repeat this as many times as necessary.
Kneading develops the gluten, which allows the pasta to take and hold shape. Some of my early handmade pasta attempts were unsuccessful because I didn’t knead the dough long enough. Go at least 10 minutes, or 15 if you can.
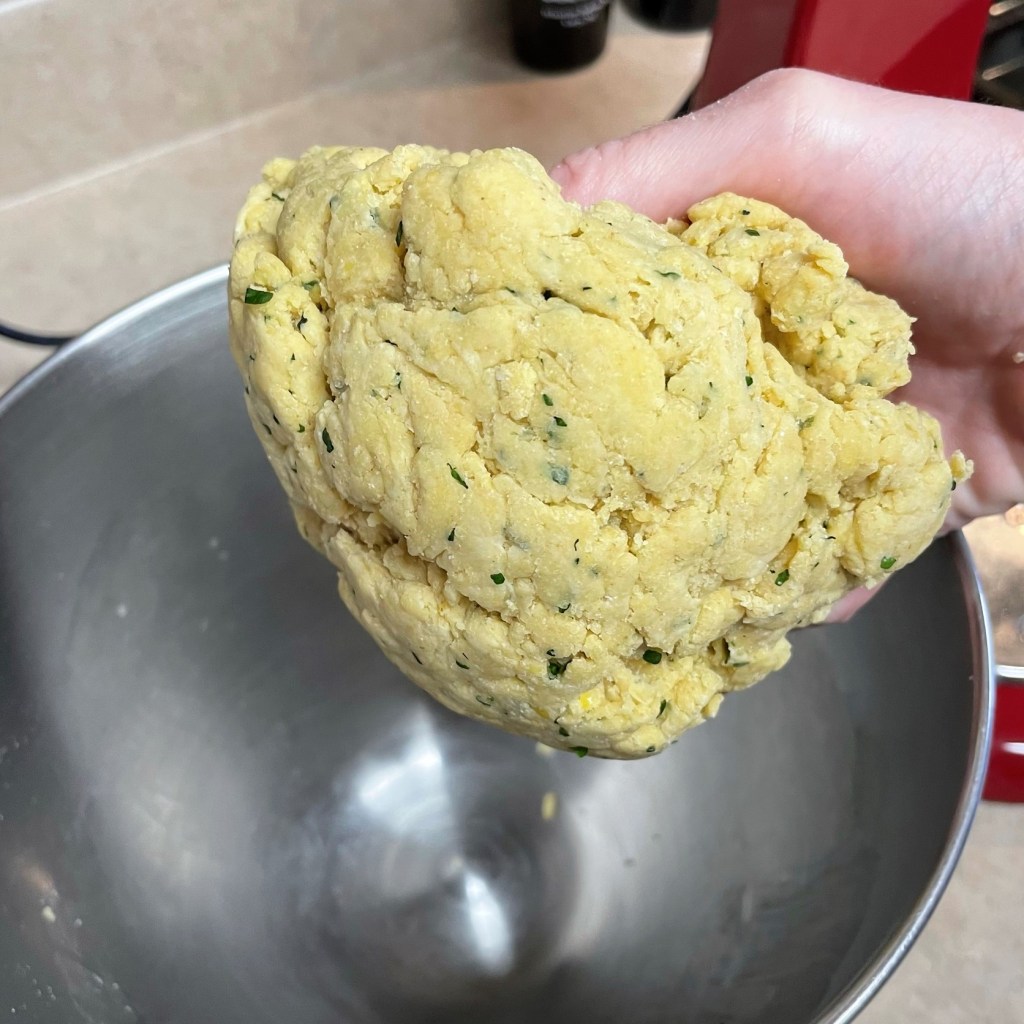
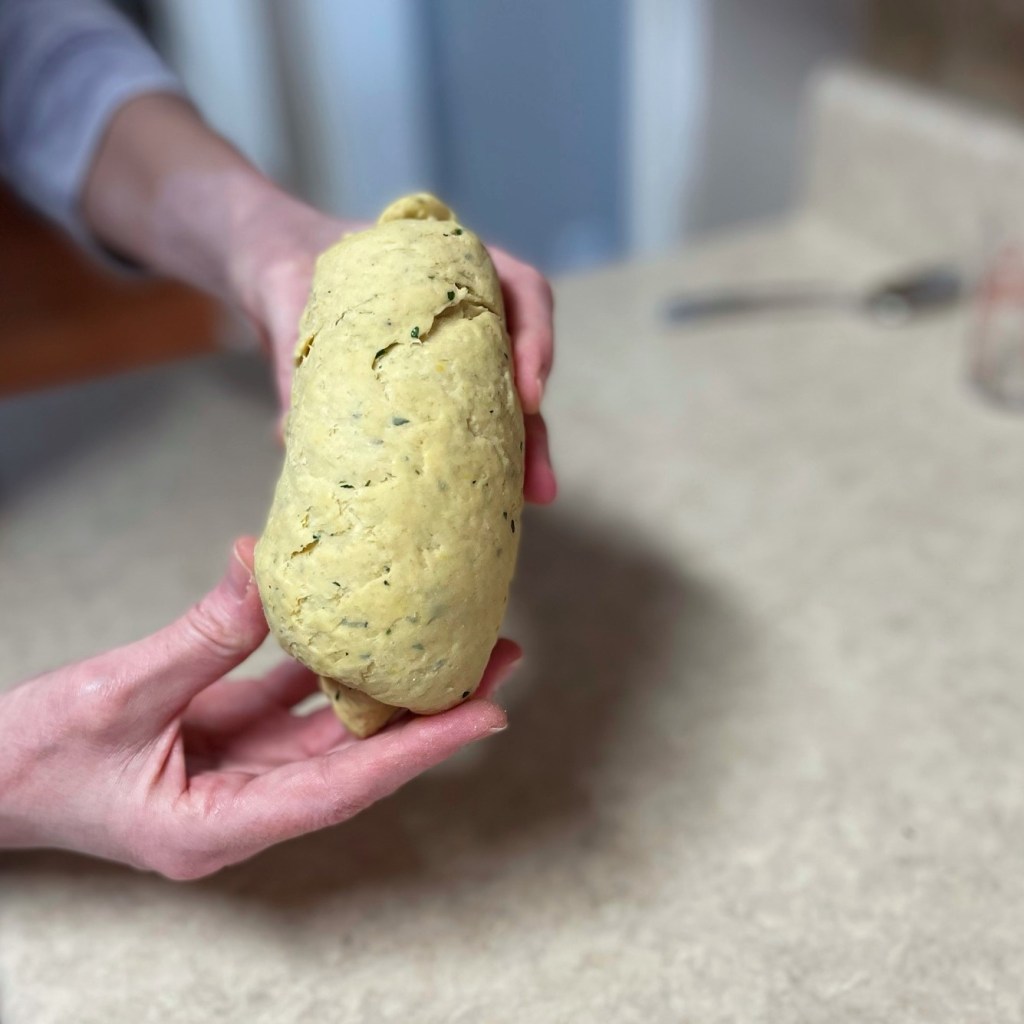
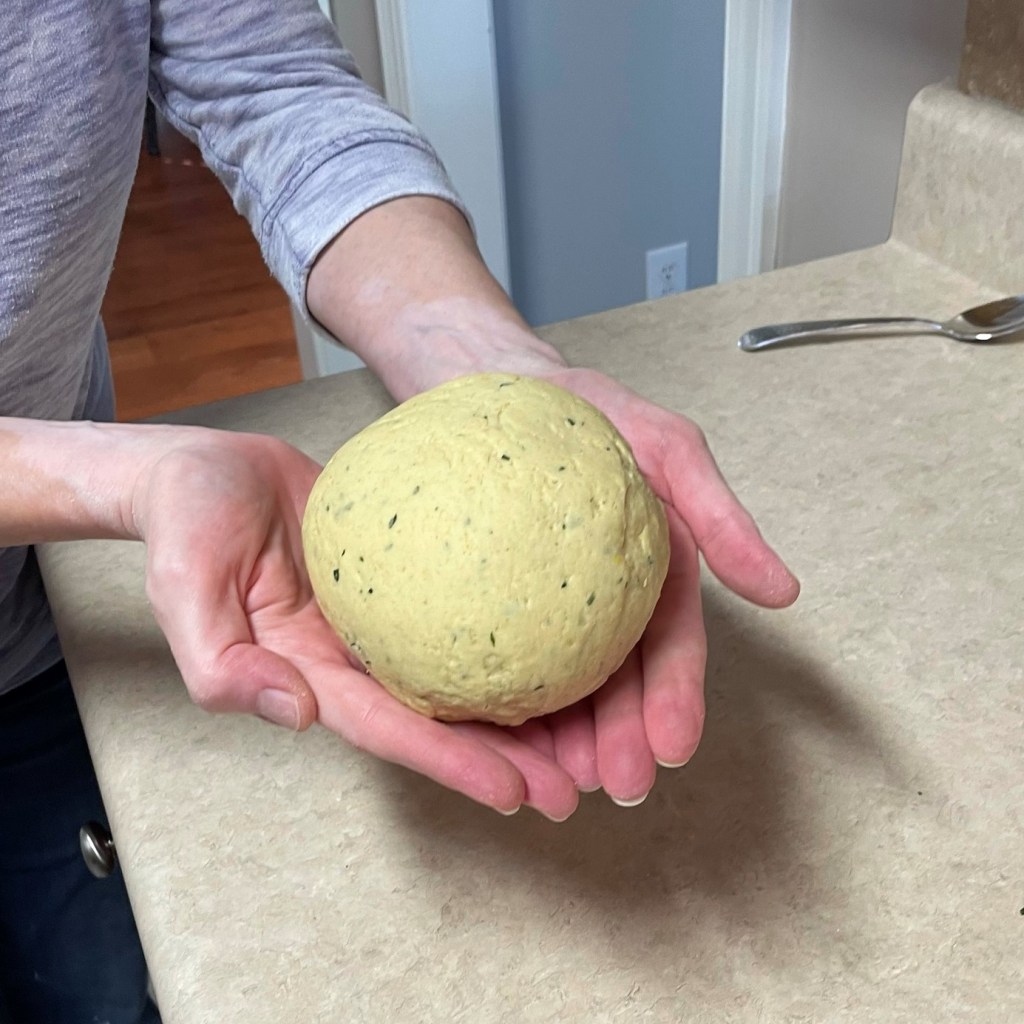
When finished, the kneaded dough should be firm, smooth and supple. A few stretch marks on the surface will be fine, but it should not appear broken. Wrap it tightly in plastic, and send it to the fridge.
Zest the lemon and mince the herbs first, and spread them out on a cutting board so that the add-in ingredients dry out a bit.
Combine flours, salt, lemon zest and lightly dried herbs in the bowl of a stand mixer.
Combine egg yolks and water in a separate bowl and whisk them together until the mixture is light and frothy.
Make a well in the center of the dry ingredients, pour the wet ingredients into the center and use the dough hook to do the blending. Though it might seem logical to mix with the beater blade, using the dough hook completes the blending from the center-out, in the same way as the chefs using only a fork to gradually mix the eggs into the flour. Allow the mixer to do this work for you, until the dough mixture is combined but crumbly, and no dry flour remains in the bowl. Add more water, one tablespoon at a time, if needed to achieve this stage.
Empty the dough onto your work surface, and knead by hand for at least 10 minutes, probably more like 15 minutes. The dough should be smooth and elastic, with no creases or cracks or lumps. If the dough shows any sign of cracking or breaking, wet your hands and continue to knead, repeating as many times as necessary until the smooth texture is achieved.
Wrap the dough tightly in plastic wrap and refrigerate the dough ball at least one hour, or up to overnight. Do not refrigerate more than a day.
Time to make the pasta!
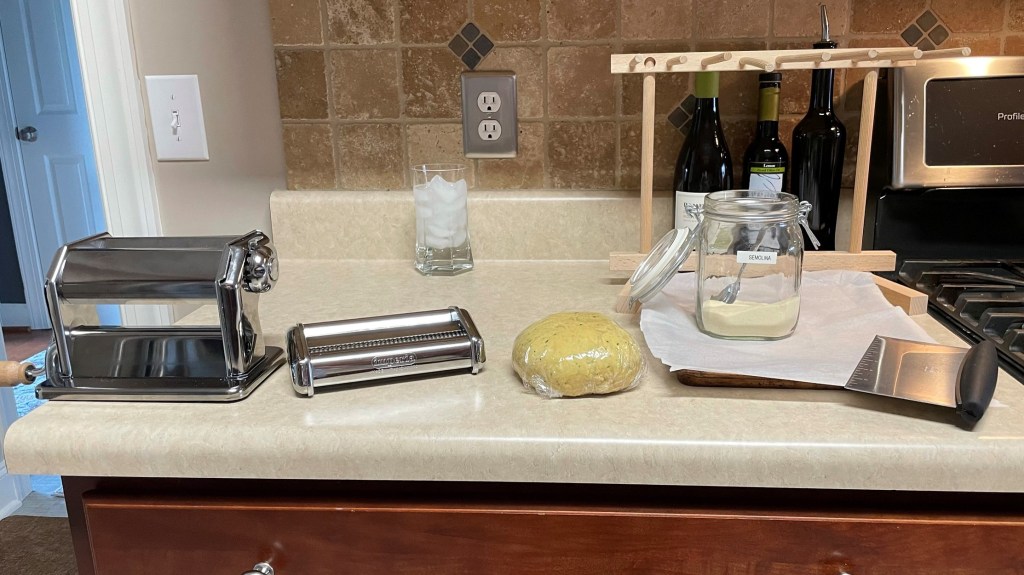
Here’s my work station for rolling pasta dough. My machine is clamped onto the edge of the counter, my cookie sheet and drying rack are ready, and my chilled dough is resting at room temperature.
Remove the pasta dough from the fridge (still wrapped) about 30 minutes before you plan to roll it, to remove some of the chill. Set up your pasta rolling machine, and keep fresh semolina out to aid in rolling and to prevent the dough from sticking. Have a parchment-lined cookie sheet within reach, and set up your drying rack if you’re using one.
Instructions – rolling the pasta
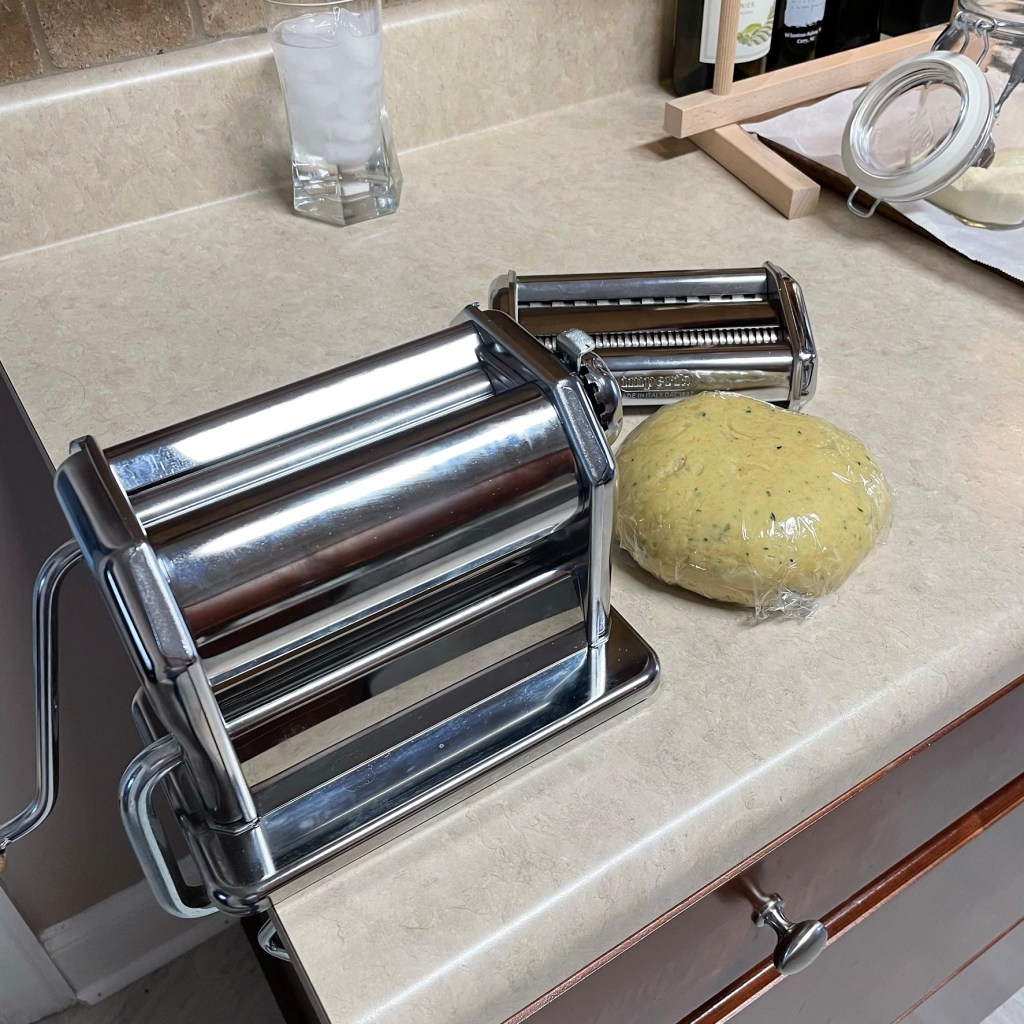
I love my hand-crank pasta machine. ❤ It’s made in Italy, and is very easy to use. The nearby attachment lets me cut my pasta sheets into fettuccine or linguine.
Unwrap the dough and use a bench scraper tool to slice off thick disks of dough. Roll out one disk at a time, and keep the rest tightly wrapped to prevent drying.
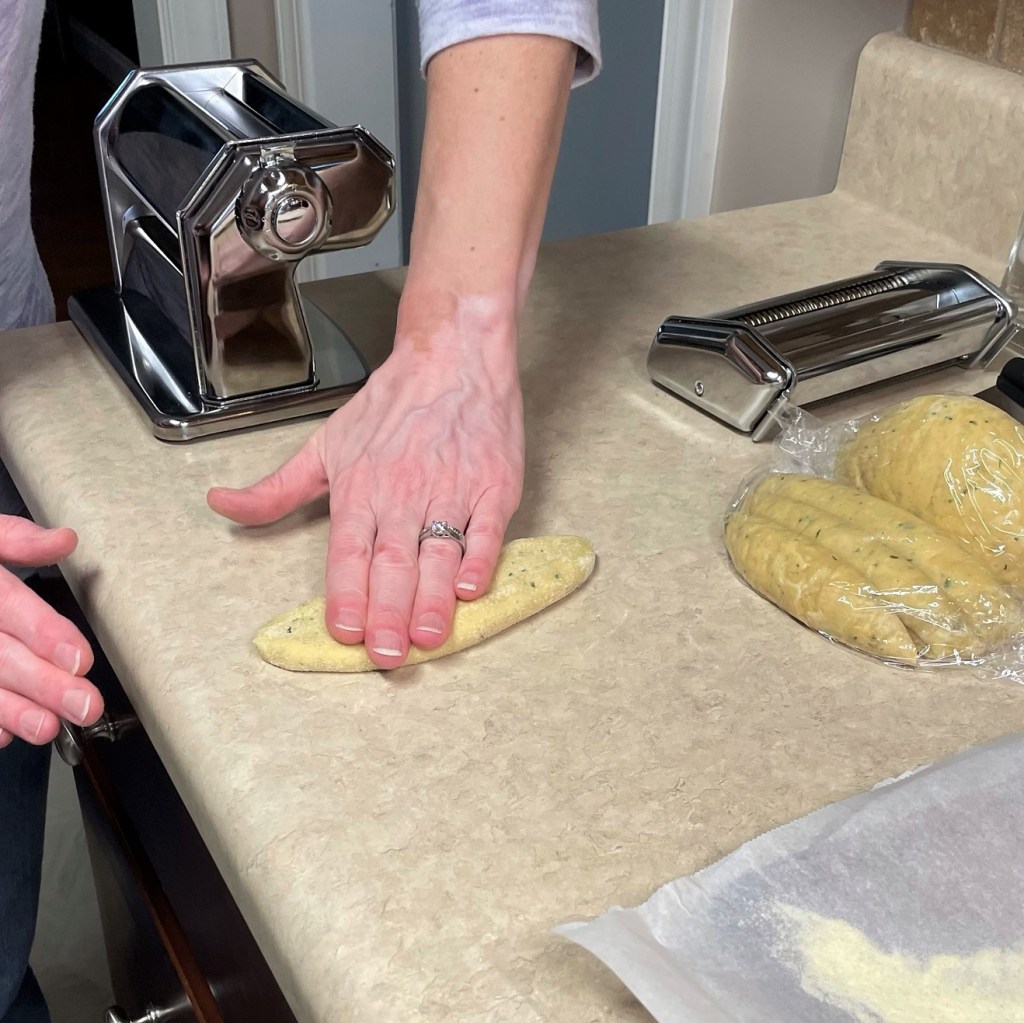
Begin by flattening a disk into a long oval shape. You can use a rolling pin to do this, but I usually flatten it by hand. Keep a small pile of semolina handy to dust each side before rolling it through the machine.
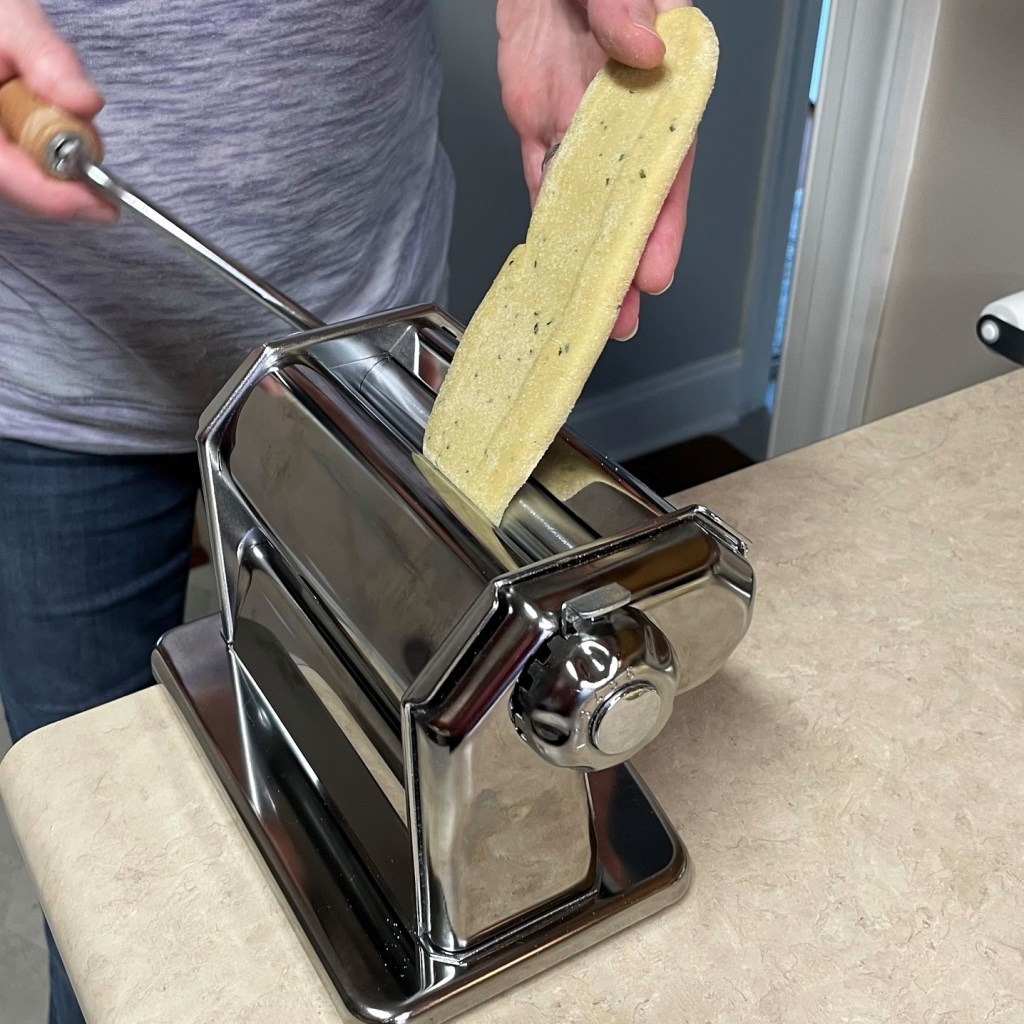
With the dial set on the thickest setting, turn the crank to run the dough through the pasta machine. Be ready to receive it on the underside as you go.
The first run-through makes a significant difference in thickness, but don’t rush through the next steps.
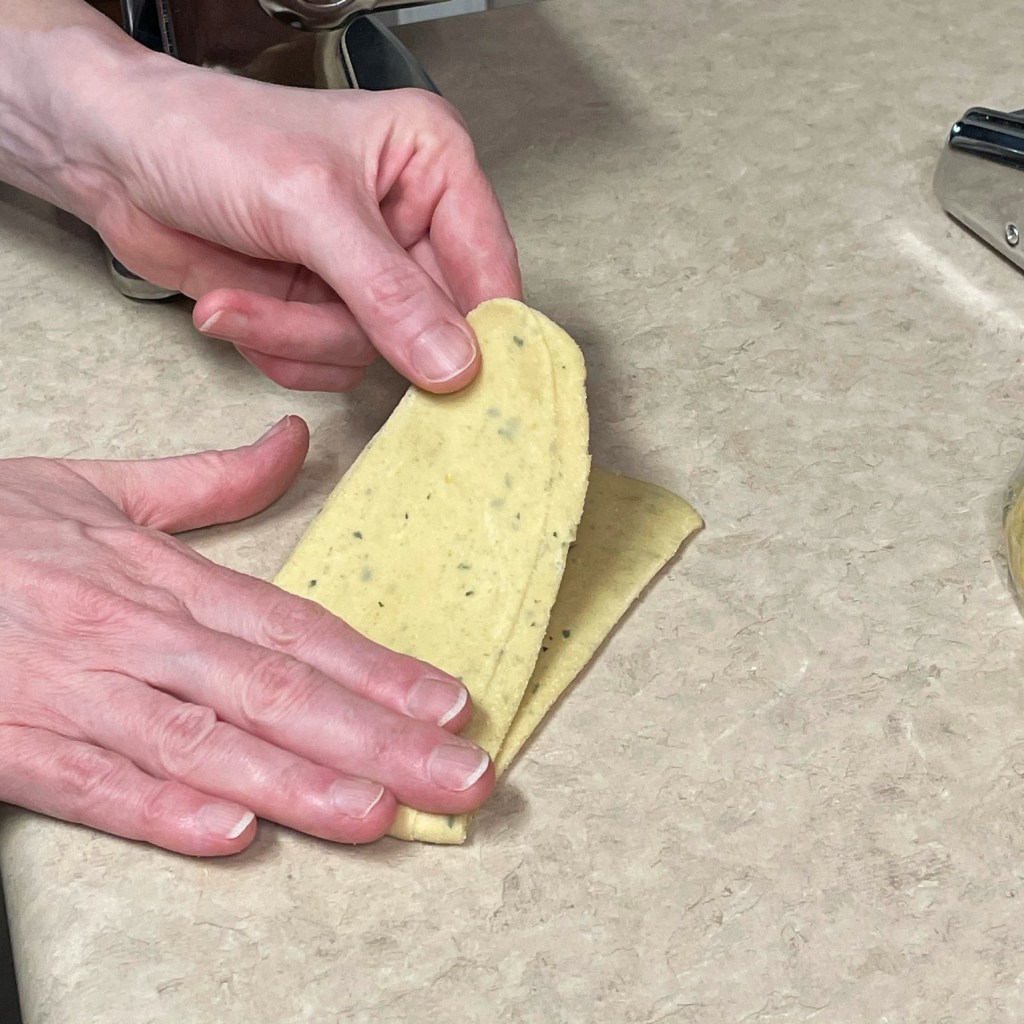
After the first pass, fold the rolled dough in half and roll it through again. Repeat this a couple of times.
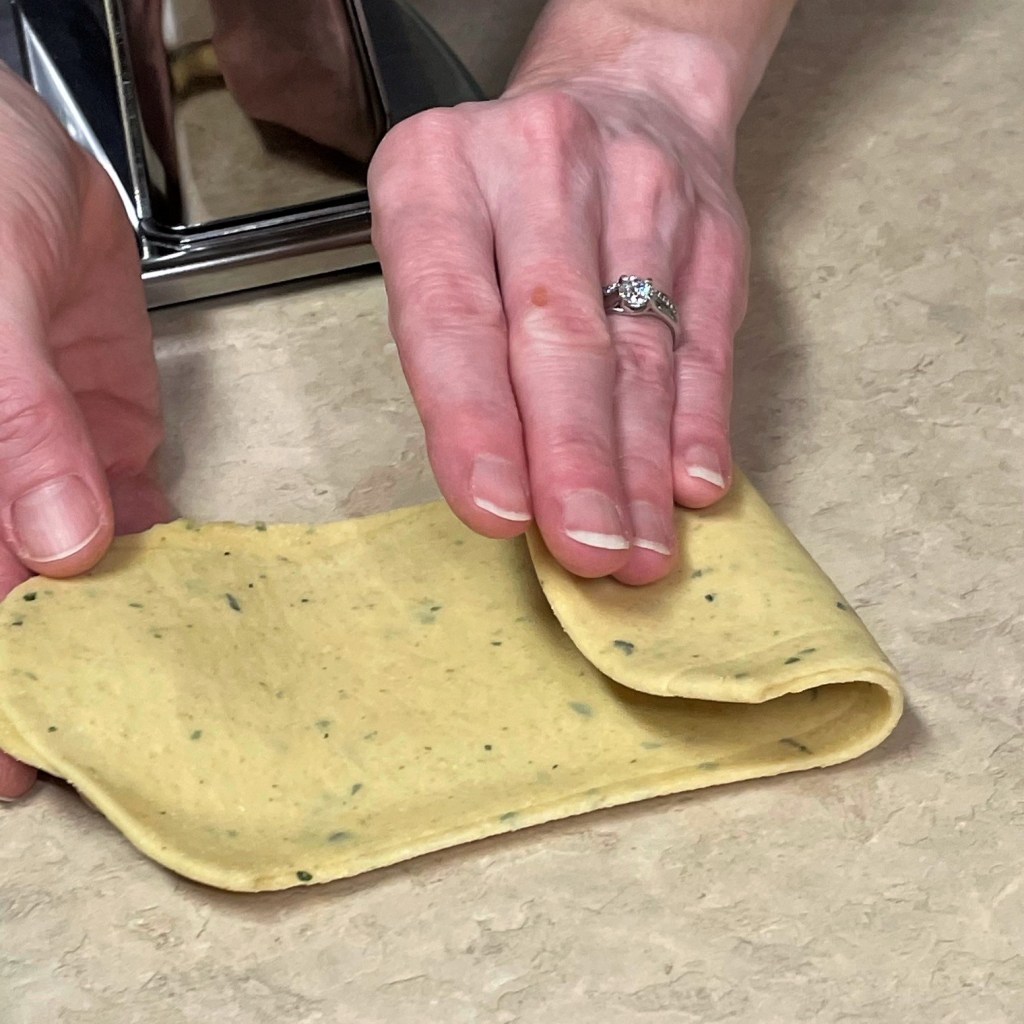
When the dough passes through the machine easily, Fold it into thirds, as if folding a letter, and then run it through the pasta machine the other direction. This helps build strength in the dough, and also helps prevent curling of the fettuccine later when it is drying.
When the dough is passing evenly, reduce the thickness by one notch and repeat passing it through. On these thinner passes, you do not need to fold and turn the dough as before.
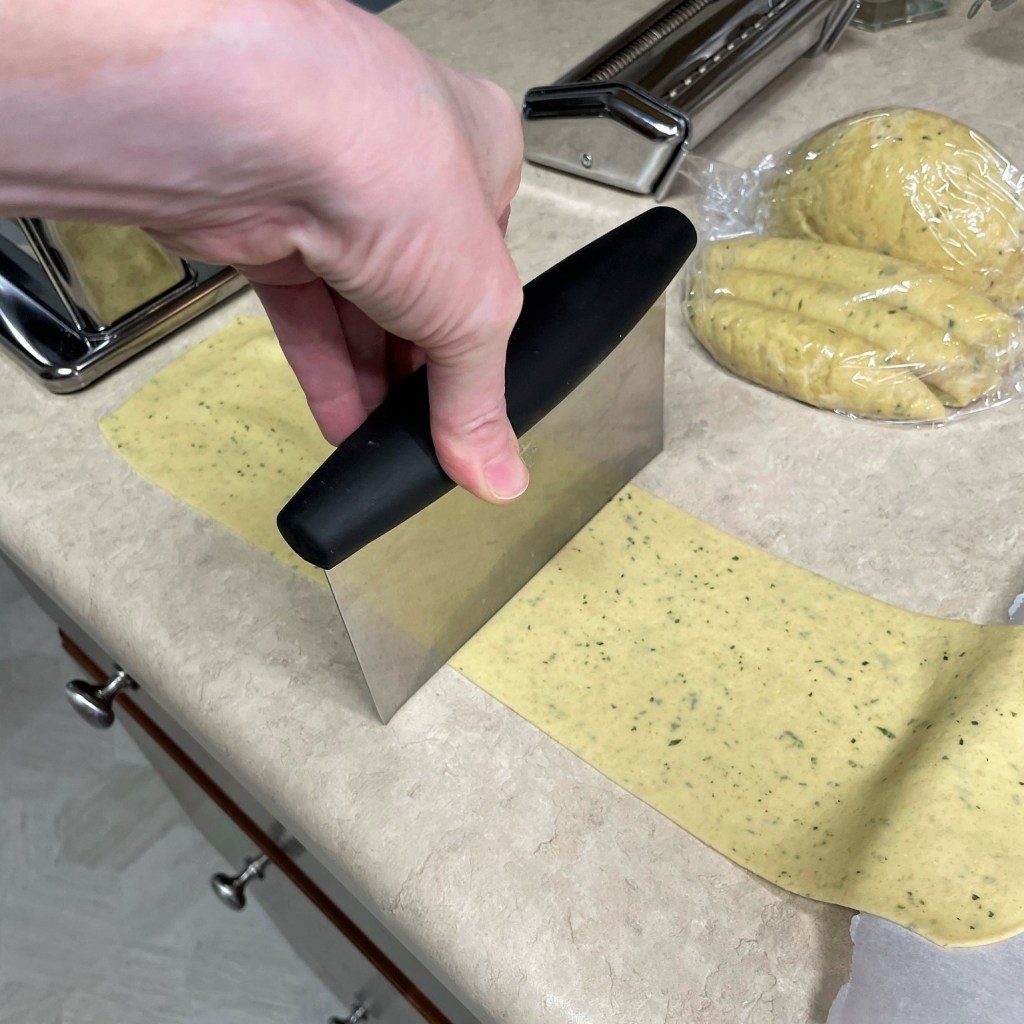
When I get several notches into the process, I find that the dough sheets are too long for me to easily manage. I use the bench scraper to cut the sheet into two pieces, then I continue rolling the sheets individually.
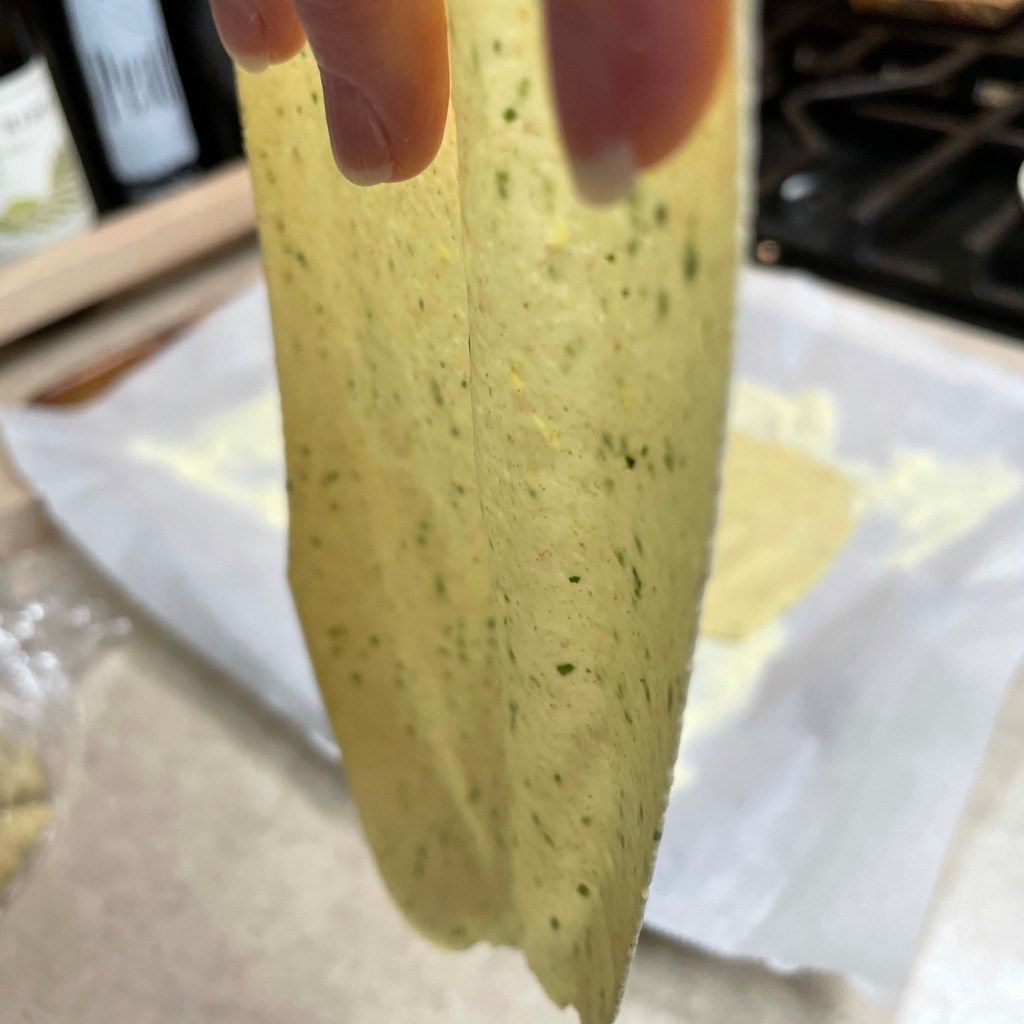
On the thinnest setting, the pasta will be very thin, which is great for a delicate ravioli, but this is too thin for fettuccine. I’ll fold it onto itself and run it through the machine again at the next thicker setting.
How about those beautiful flecks of herb and lemon?! Rest the sheets on a semolina-dusted tray for a few minutes before cutting.
I’ve attached the cutter to my pasta machine, and begin passing the sheets of pasta dough through the fettuccine blades. It helps to have a friend to assist with catching the pasta. I found myself in very awkward positions this time because I was making room for my Les to take pictures. 🙂
To keep the pasta from sticking to itself, toss gently in flour before placing it on a drying rack. I use semolina for this because it is not easily absorbed into the finished dough, and it falls into the pot during cooking.
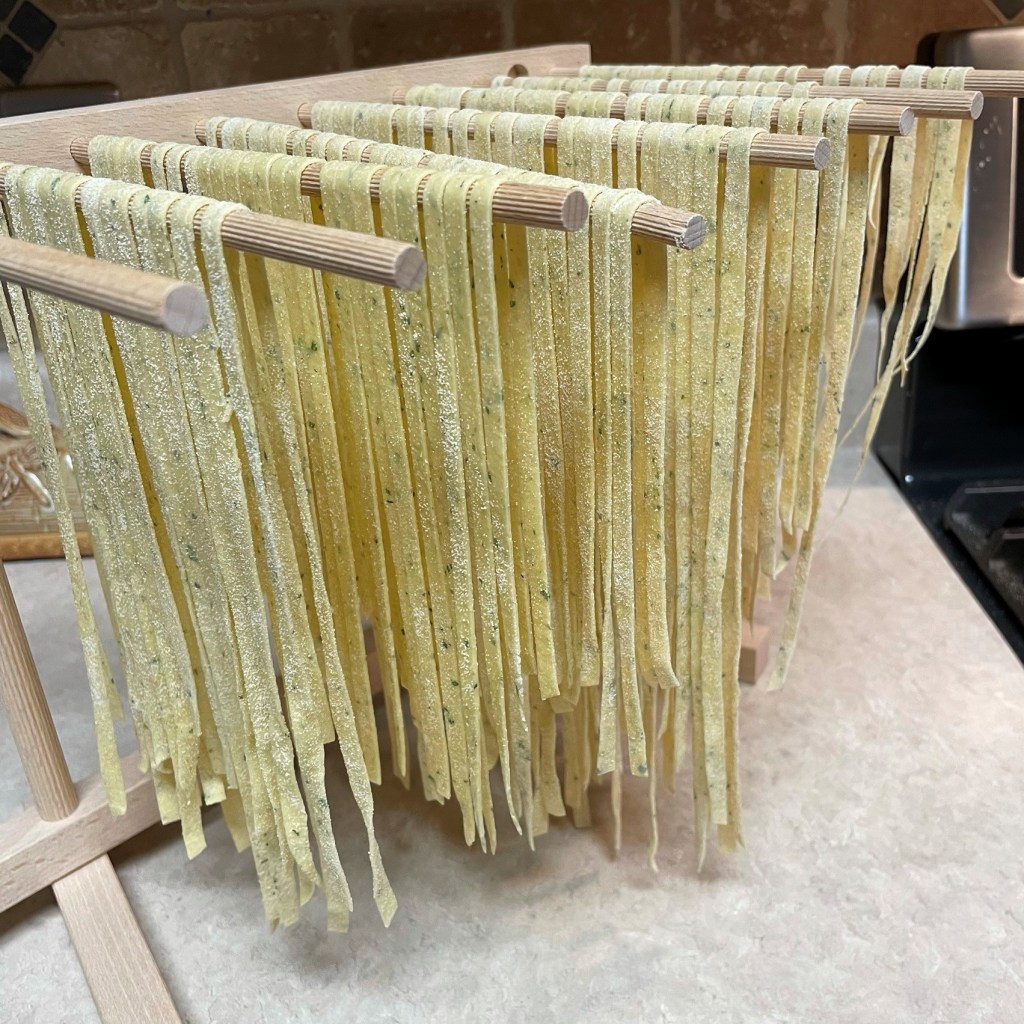
Separate the pasta strands a bit as you place them on the drying rack. If they stick together, it makes cooking them more challenging. No rack? No problem. Toss the strands in semolina and arrange in small piles on a parchment sheet.
The amount of dough in this recipe will just about fill up a standard drying rack. If you are using the dough to make ravioli, it will make about 30 pillows.
Unwrap the pasta dough and use a bench scraper or sharp knife to slice off sections of dough about one inch thick. Keep remaining dough tightly wrapped until ready to roll, so it doesn’t dry out.
Flatten a piece of dough into an oval-shaped disk, then roll it through the pasta machine on the thickest setting. For the first few passes, fold the pressed dough in half and run it through again on the same setting. Fold it in thirds, as you would fold up a letter, and turn the dough 90° so that it runs through the machine at a different angle. This helps to reduce curling or bending when the pasta dries later. When the dough feels supple after running through the press several times, begin reducing to thinner setting with each pass.
When the dough reaches the desired thickness (either the thinnest or next-to-thinnest setting, allow the sheet to dry slightly before cutting into strips or using as ravioli. In my experience with pasta, the cutting and shaping stage seems to work better when the pasta is not super-soft. If you rush directly to cutting it, at least with a machine, the dough tends to stick in the rollers, and it will definitely stick to a ravioli mold.
After pasta sheets are complete, allow them to rest for a couple of minutes before cutting, either with the pasta machine or by hand with a fluted pasta trimmer, pizza slicer or sharp knife. If cutting by hand, the simplest way is to fold the pasta sheet crosswise multiple times, and slice through the layers with a pizza wheel or sharp knife. Dust the pasta really well with extra semolina flour before cutting to minimize sticking.
This time, I’ve opted to use the cutter attachment for my pasta roller to fashion my lemon-herb pasta into fettucine strips, but this lemony pasta would also be terrific for making sweet crab-stuffed ravioli, or ricotta-filled tortellini. I will save those for another day. 🙂
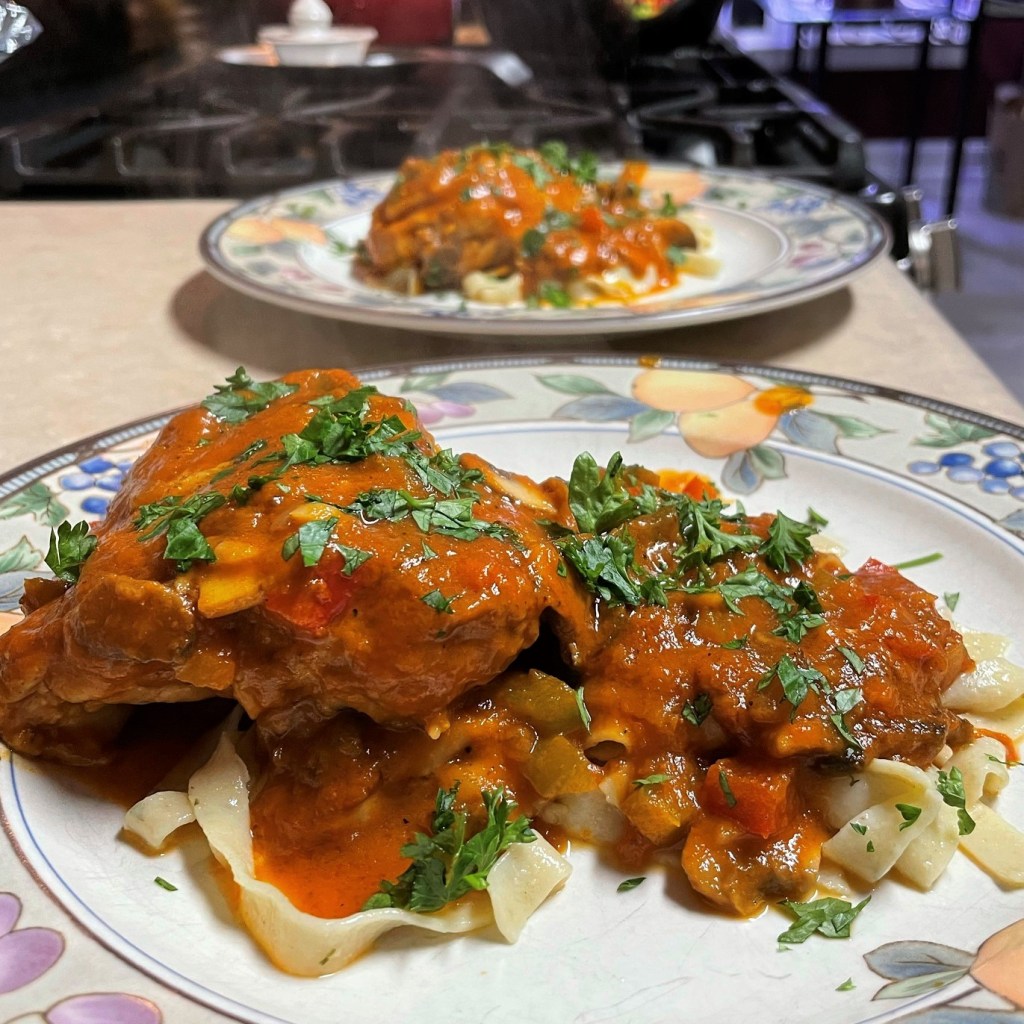
We used the lemon-herb pasta in a couple of ways—first, with littleneck clams in white wine broth, and again as a base for an amazing dish of chicken thighs in vodka sauce that Les made for us.