Make Your Own Sriracha! 🌶️

Before I explain how I made this small batch version of sriracha, I have a confession. I made it last summer— you know, the first time the grocery stores ran out of it. It seemed like a smart thing to do, given the enormous popularity of sriracha (the one with the green cap and the rooster) and the panic that ensued when the word got out it was depleted. But time got the better of me, and when I circled back months later to share my experience on my blog, the crisis was over and sriracha was restocked in the stores. I crossed it off my blog schedule and even deleted the photos from my iPhone. Why bother, I figured, when sriracha was easy to buy again?

What I didn’t expect was that this condiment crisis would repeat itself. Yet, earlier this week, I found my news feed riddled with articles about this year’s shortage, and I thought, here we go again. It must be related to the scorching temperatures and the fact that absolutely nothing wants to grow in this God-awful heat. That seemed to be the gist of the problem last year, anyway, but how true was it?

One of the articles I read, in The New York Times, throws shade on the notion that the sriracha shortage is entirely related to our changing climate. The Times piece is a good read for anyone who enjoys falling down rabbit holes of journalistic information (guilty over here). For the rest of you, I’ll summarize what I learned.

First, sriracha is not a pepper, but a concoction based on a traditional Vietnamese recipe, and Huy Fong, the California company that makes the most popular version of sriracha, a.k.a. “rooster” sauce, has been blaming its snowballing supply chain issues on environmental decline. Interestingly, other hot pepper sauce-making companies are shrugging it off; they haven’t experienced the same disruptions, and they aren’t hearing sob stories from their suppliers, either. In short, this sounds like it could be more a business problem than a climate problem. Either way, it’s bad news for sriracha lovers because the shelves are bare— again. And if that doesn’t sit right with your craving for a little shot of spicy, then you might want to have a backup plan. I’m talking, of course, about making your own. 

It’s not as difficult as you might imagine. And, as luck would have it, I discovered that the pictures I had taken last year were waiting patiently in a folder on my desktop computer— I had edited, titled and saved them before deleting them from my phone— it’s like they knew they’d have their moment. Let’s do this!

What do we do when the stores run out of something we love? We make our own!

The Ingredients

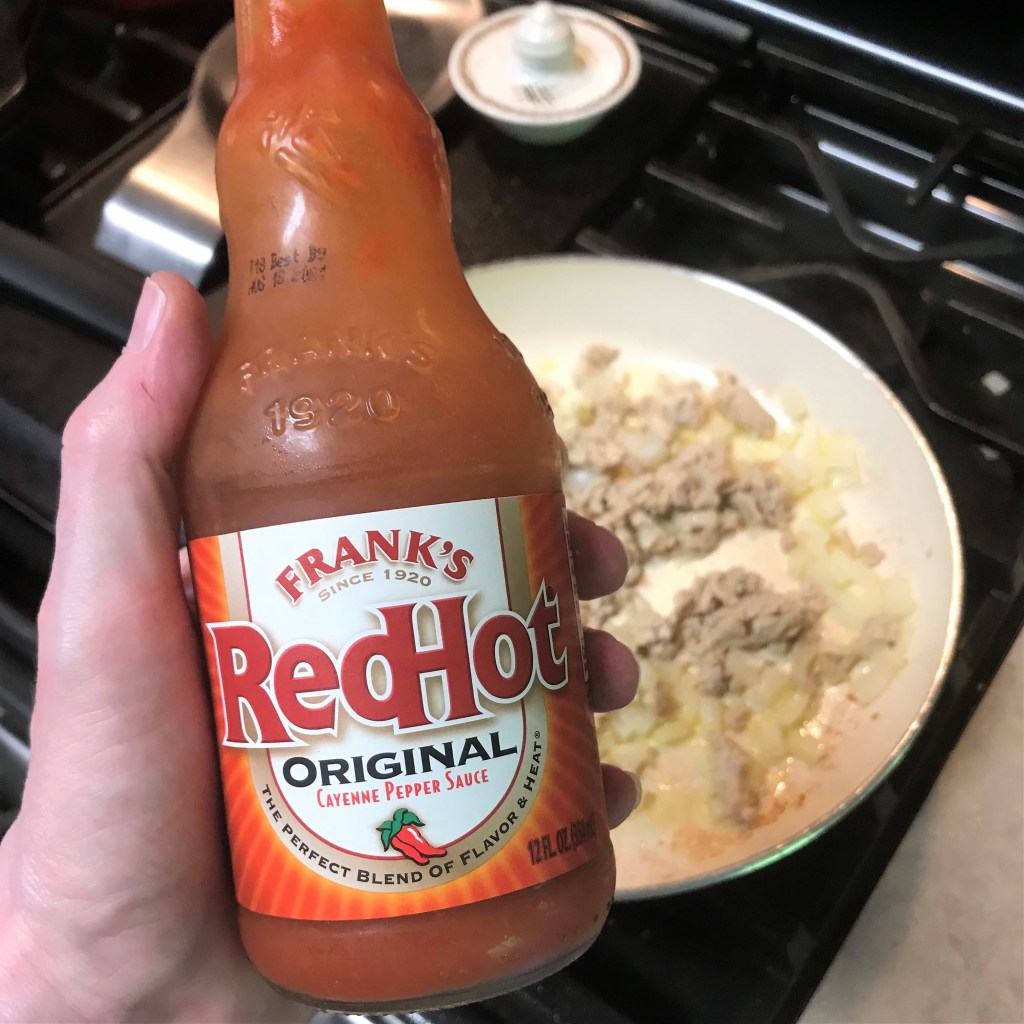
I’ll begin with the simple list of ingredients. On the back of a bottle of the “rooster sauce,” we find chili (don’t ding me, that’s how it’s spelled on the bottle), sugar, salt and garlic, plus a whole bunch of preservatives that allow you to keep it at room temperature after opening, something I never do— condiments other than vinegar belong in the fridge, as far as I’m concerned. I’ll share more of what I learned about the preservatives in a bit, but let’s skip ahead to the pictures and the fun part. 

Look at that gorgeous pop of color!

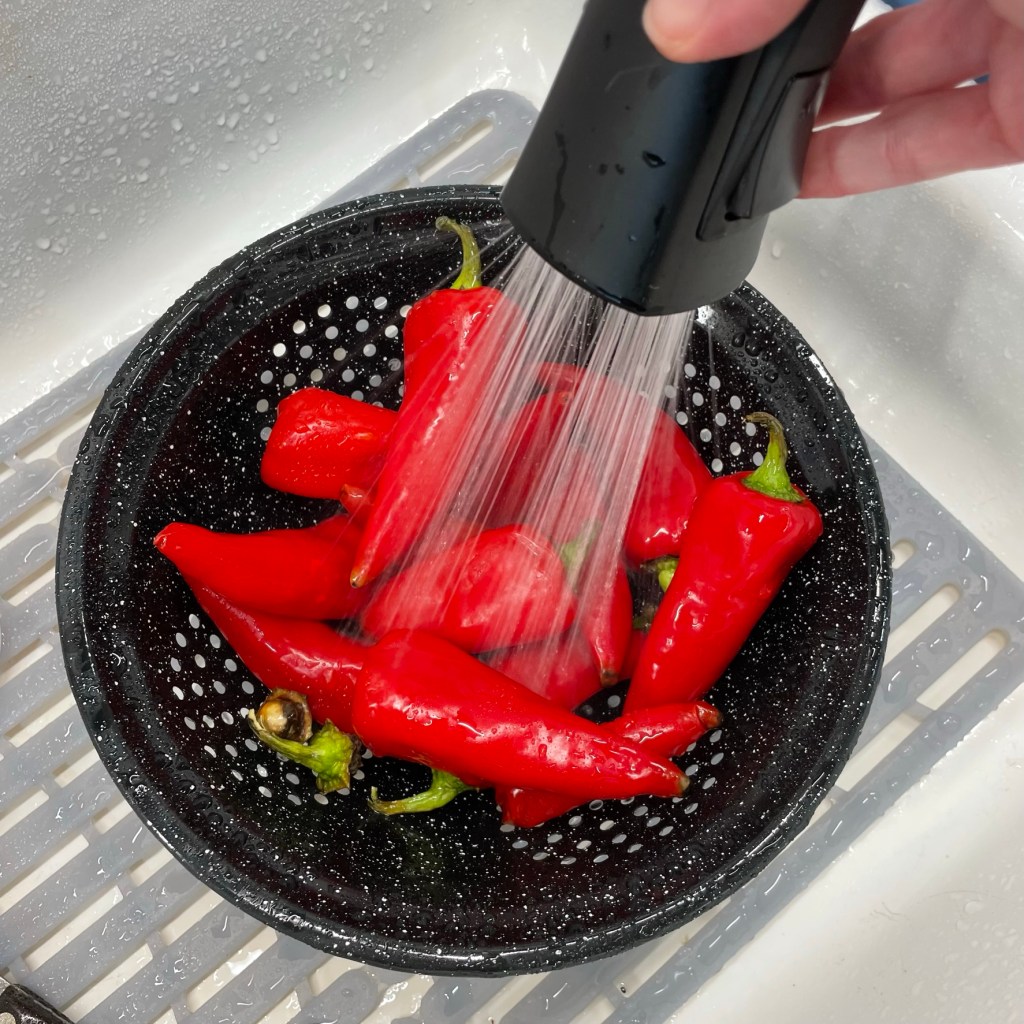
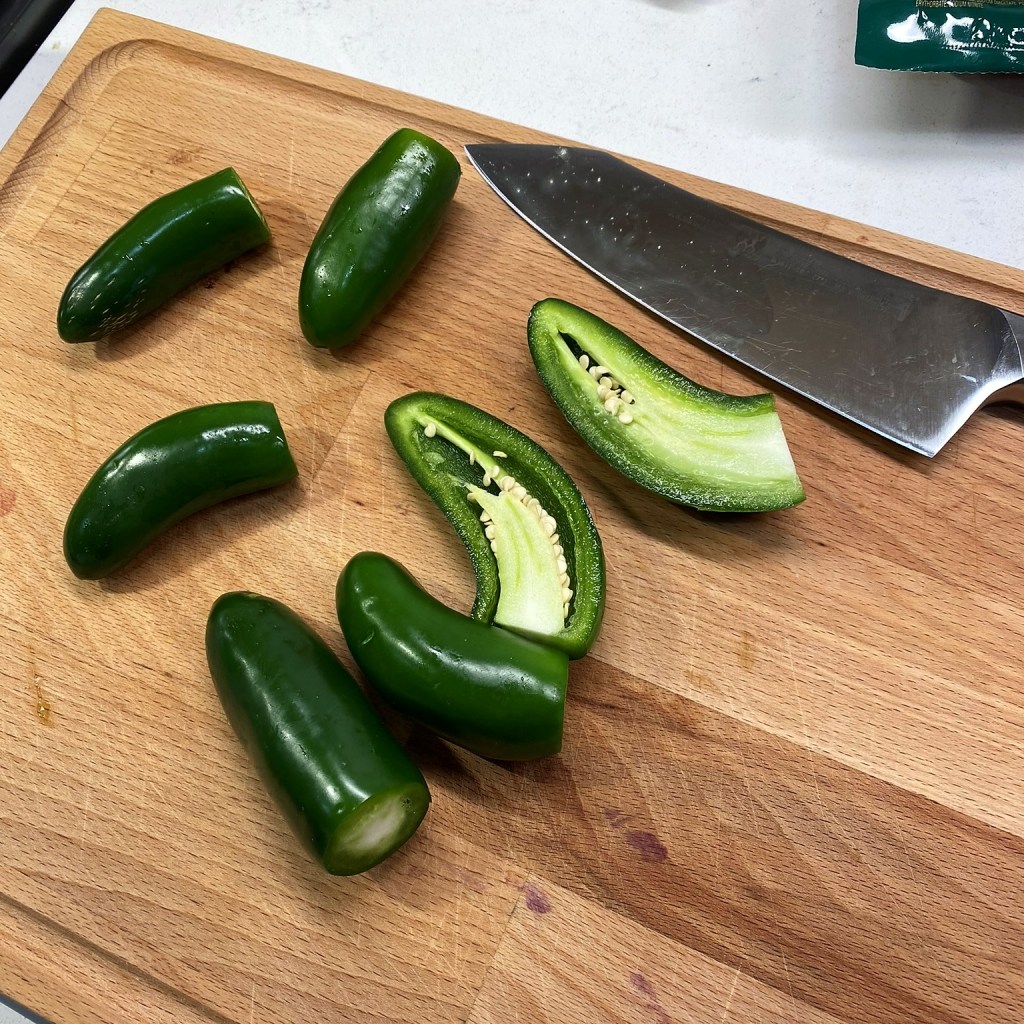
You can use either red jalapeños or Fresno chiles, depending on availability and flavor preference. I used a combination, but mostly Fresno, which offers a slightly more feisty flavor and happened to be plentiful at my supermarket that day. We love spicy foods at our house, so the extra heat was not a concern for us. If you happen to be growing jalapeños in your home garden, leaving them on the vine an extra couple of weeks will turn them red and intensify the heat.

Keep the seeds and, yes, the green caps.

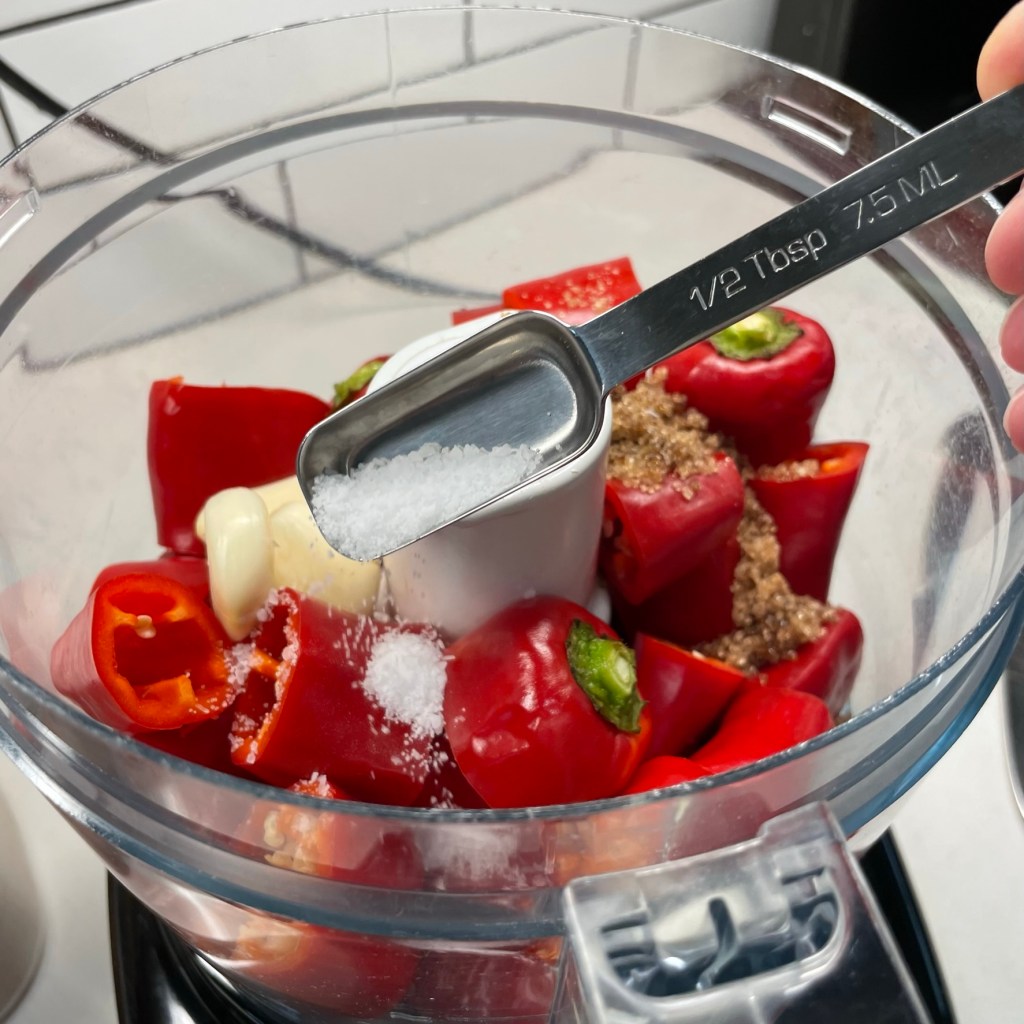
I used light brown sugar, kosher salt and fresh garlic, peeled and smashed. Though the ingredients are simple, the sriracha label doesn’t describe how to transform them into an addictive, put-it-on-anything sauce. For that, I found this article on Serious Eats which gave me helpful insight, plus a road map to launch my own sriracha journey.


The Process

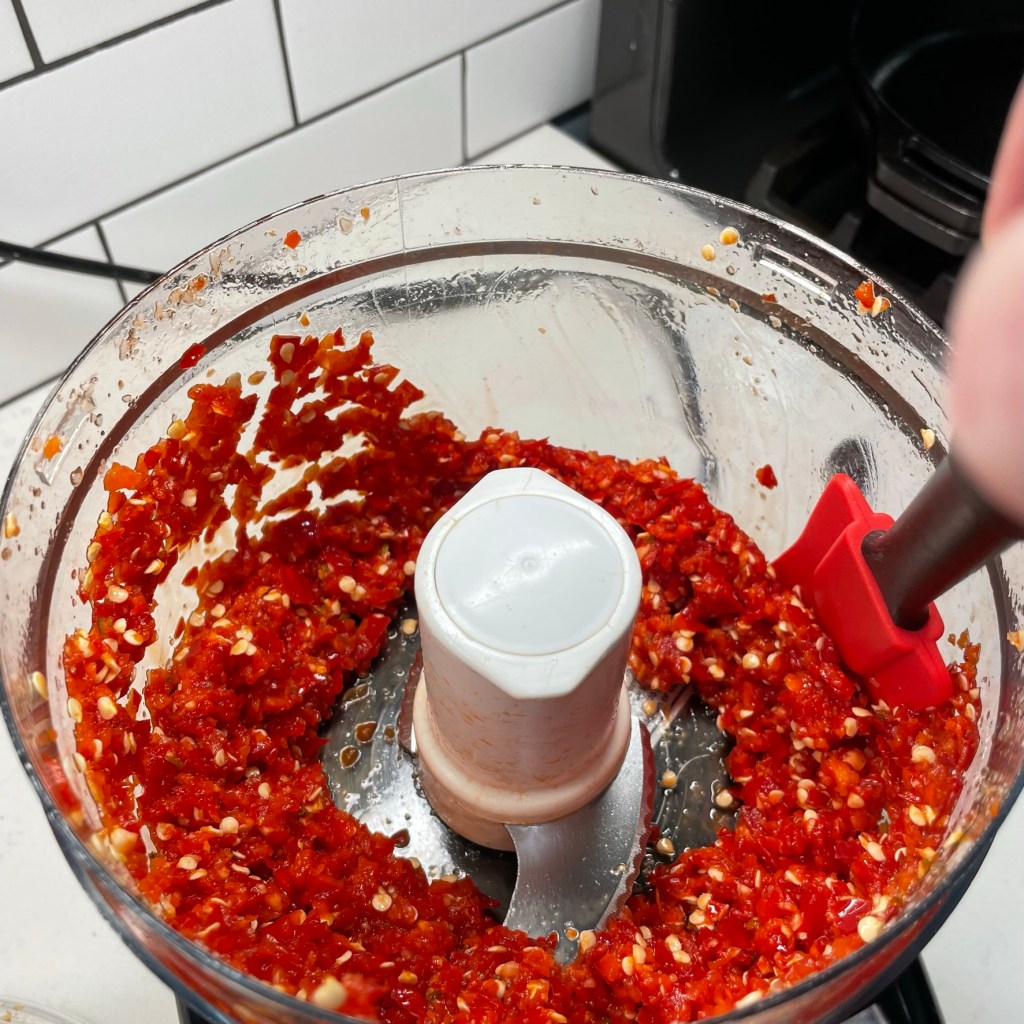
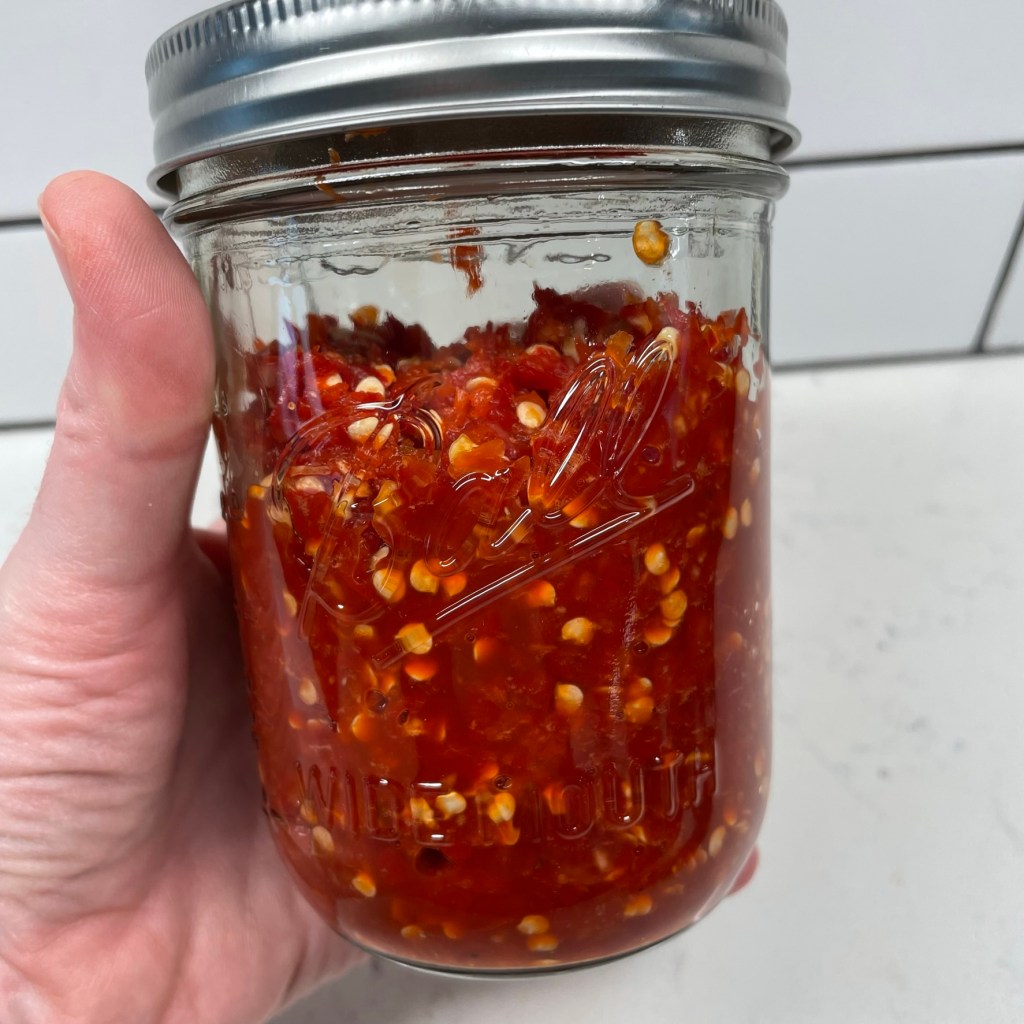
The first step is fermentation, a roughly week-long process that builds the deep, funky, earthy flavor that we know and love in sriracha. Clean the peppers well, and cut off the stems but keep the dark green “caps” that connect to the top of the pepper. Give the peppers a rough chop and add them (seeds and all) to the bowl of a food processor with brown sugar, fresh garlic and kosher salt. Pulse several times until the mixture is coarse and chunky but well blended. Transfer it to a mason jar, cover it and set it aside on the counter for 5 to 7 days. The Serious Eats article suggested stirring the pulp every day, but I’ll admit that I missed this when I was in the thick of things, and mine managed to ferment without assistance.


The Additives (for better or worse)

While the sriracha mixture ferments, let’s chat about the “other” ingredients listed on the store-bought bottle. One big advantage of making your own sriracha— besides the obvious one of overcoming the shortage— is avoiding chemicals such as sodium benzoate, an all-too common food additive that serves as a preservative. You might read that there is no harm in sodium benzoate, and that may be true. But apparently, if it’s combined with ascorbic acid (better known as Vitamin C), then studies show sodium benzoate morphs into a known carcinogen called benzene. This information alarmed me quite a bit because I know that red bell peppers are higher in Vitamin C than even citrus fruit. Aren’t red jalapeños related? It makes me uneasy just reading about it.

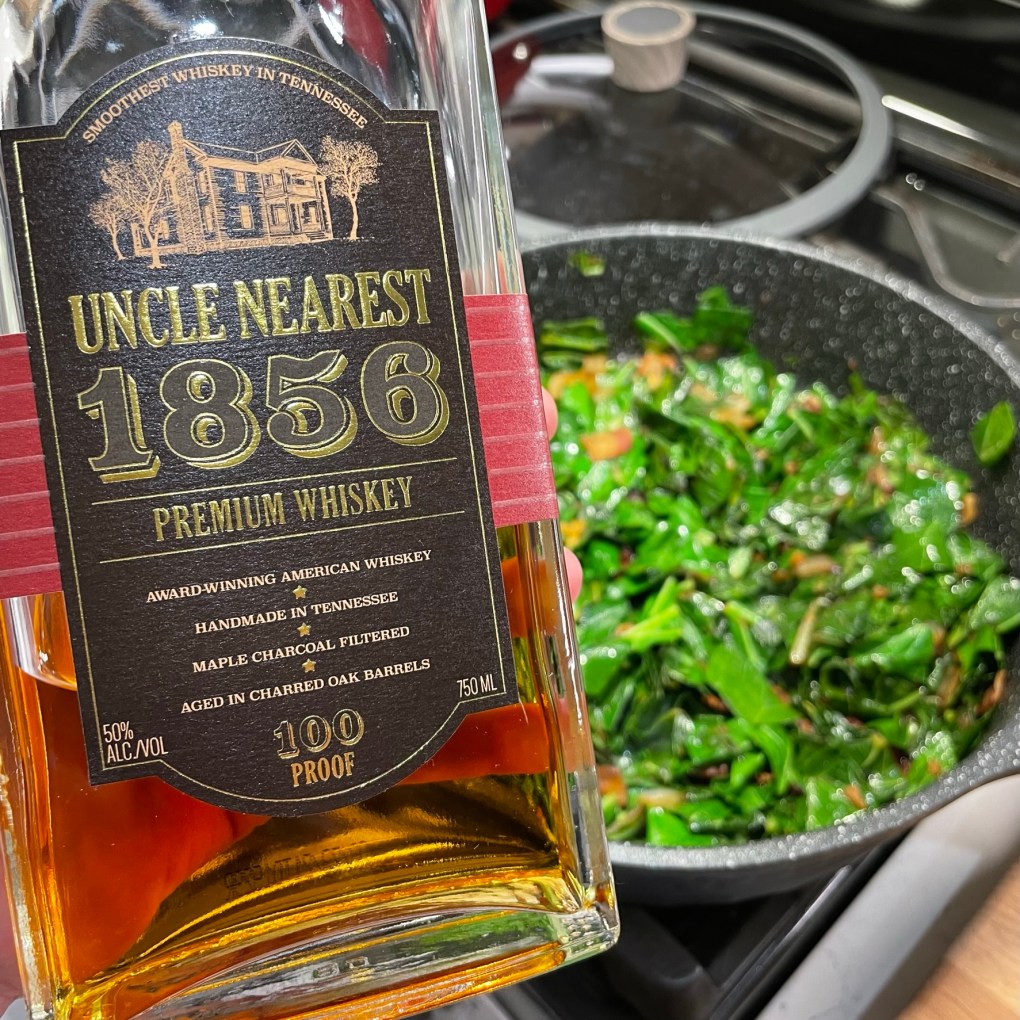
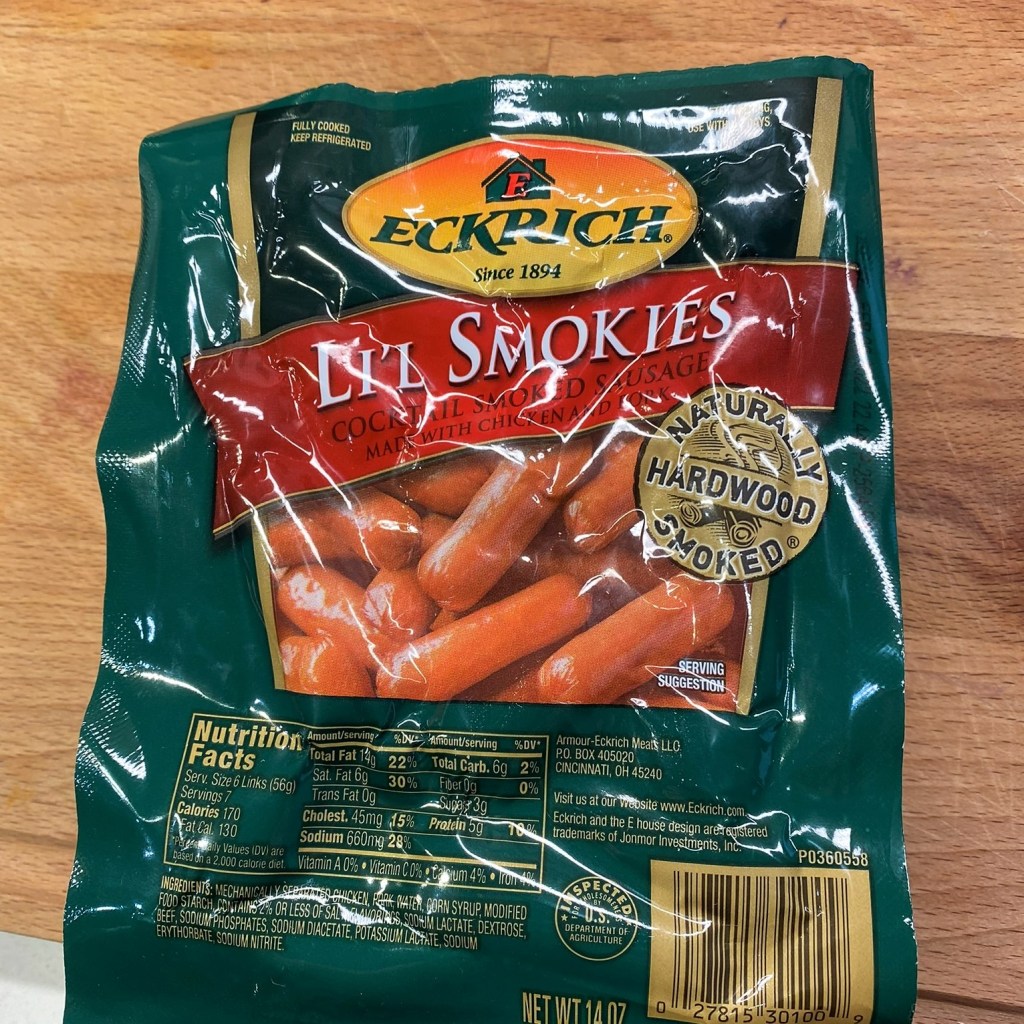
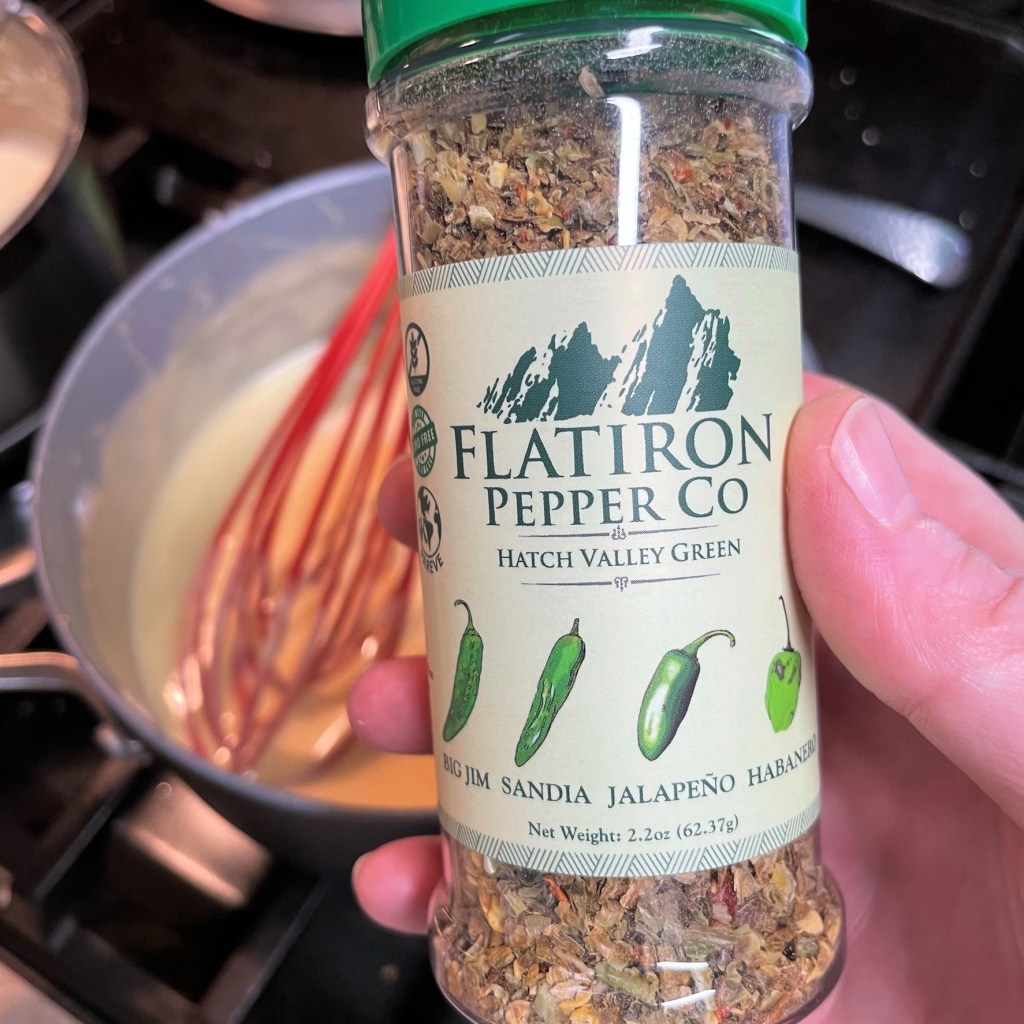
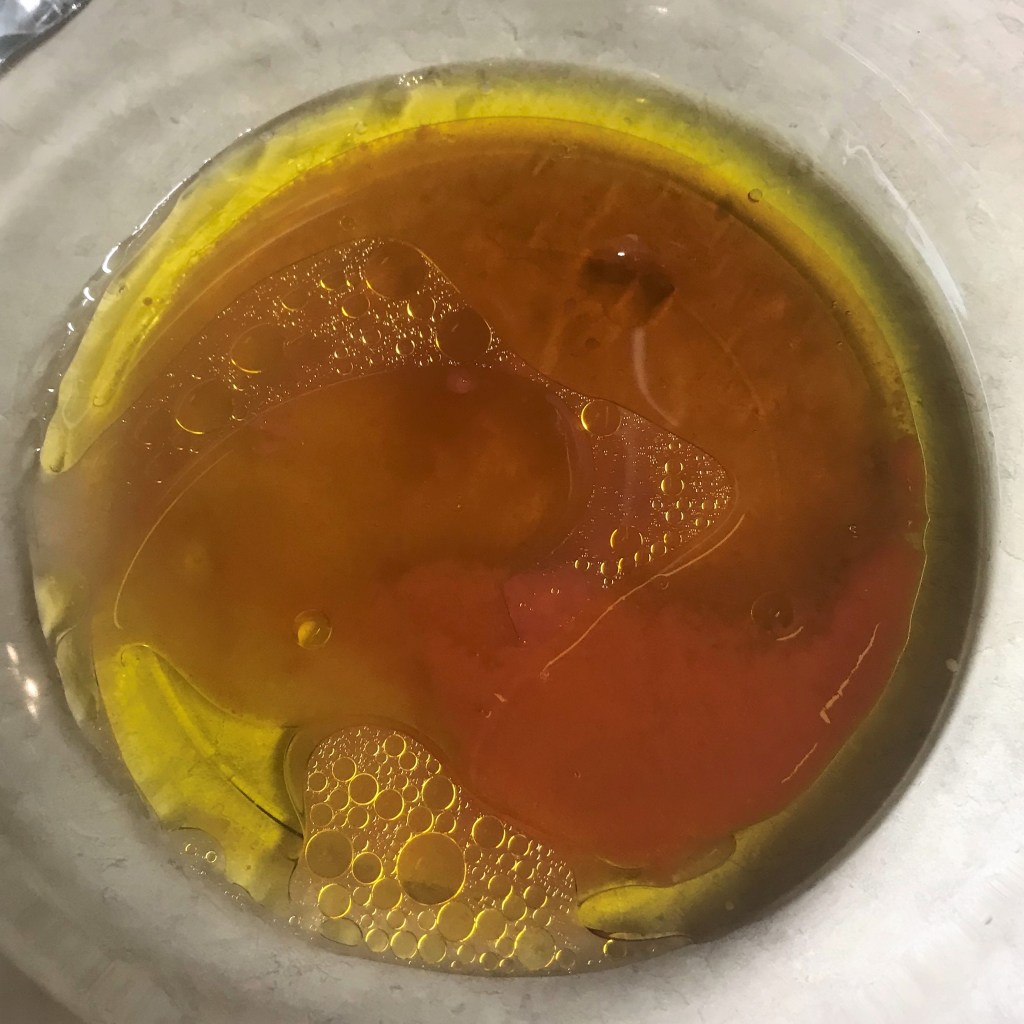
The disadvantage of making your own sriracha is, well, the same. Without heavy preservatives, homemade sriracha must be stored in the fridge and even then, it will not keep as long as store-bought. This recipe only yields about a cup, so that shouldn’t be a problem if you love sriracha because you’ll likely use it up pretty quickly. There is one preservative ingredient, however, that will be making its way into my homemade version of sriracha, and that is acetic acid. I just happen to have some in my pantry cabinet— and you likely do as well. Take a look:


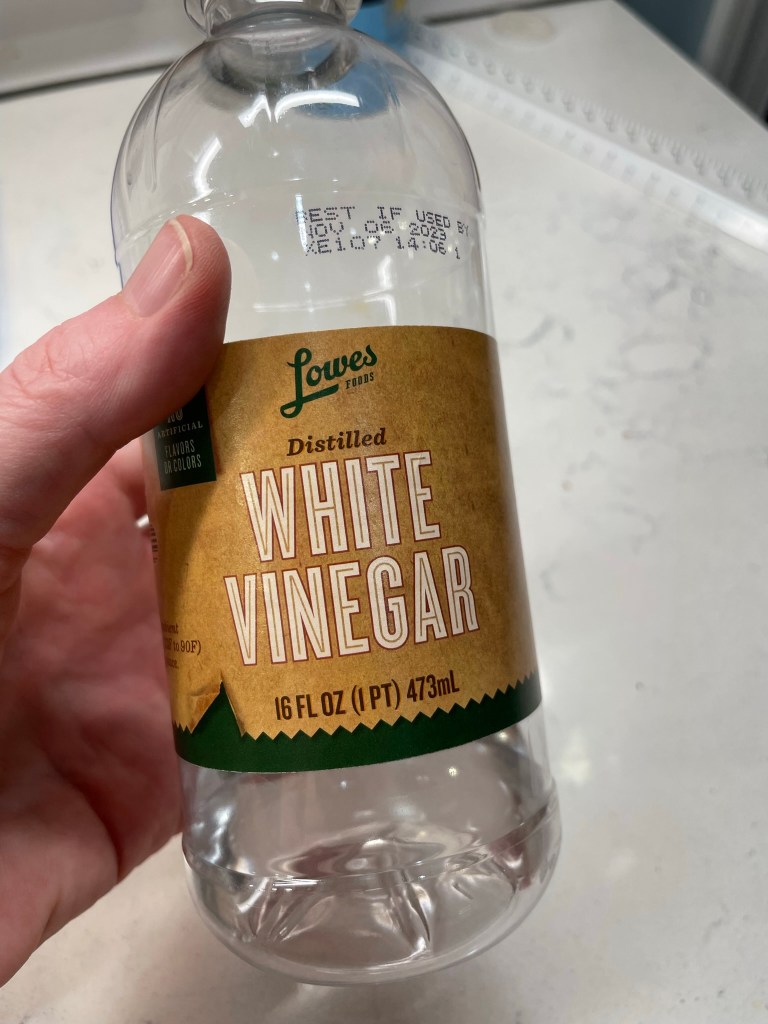
All vinegars have some level of acetic acid, but white distilled vinegar checks in with about 5%, higher than other culinary vinegars. It will help preserve both the color and freshness of my homemade sriracha, while also brightening up the flavor notes, and it comes into play in the next step— pureeing the fermented Fresno paste. Ready to finish this?


The Home Stretch

According to the roadmap article in Serious Eats, the pepper pulp is ready when large bubbles are visible in the jar, and mine definitely was. It also had a pleasantly funky, fruity-meets-spicy aroma. It smelled like, well, sriracha!


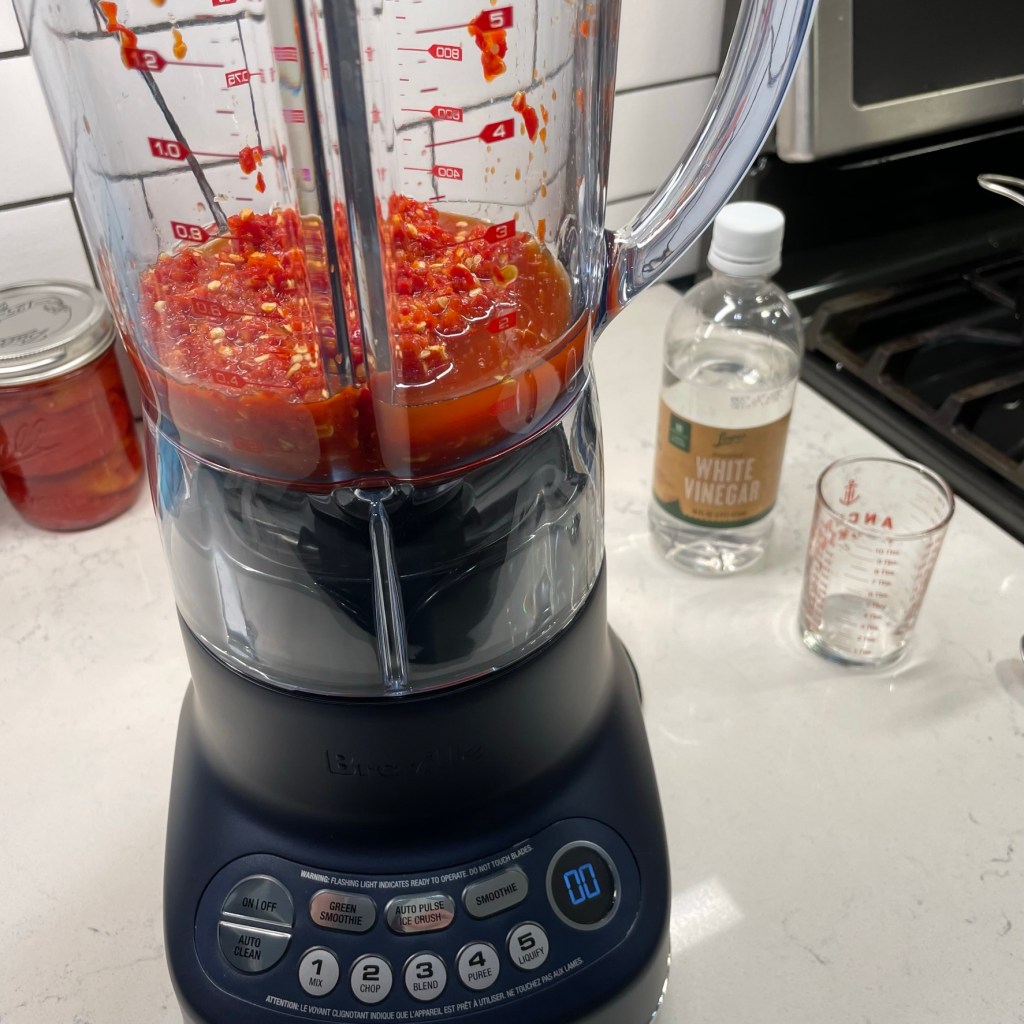
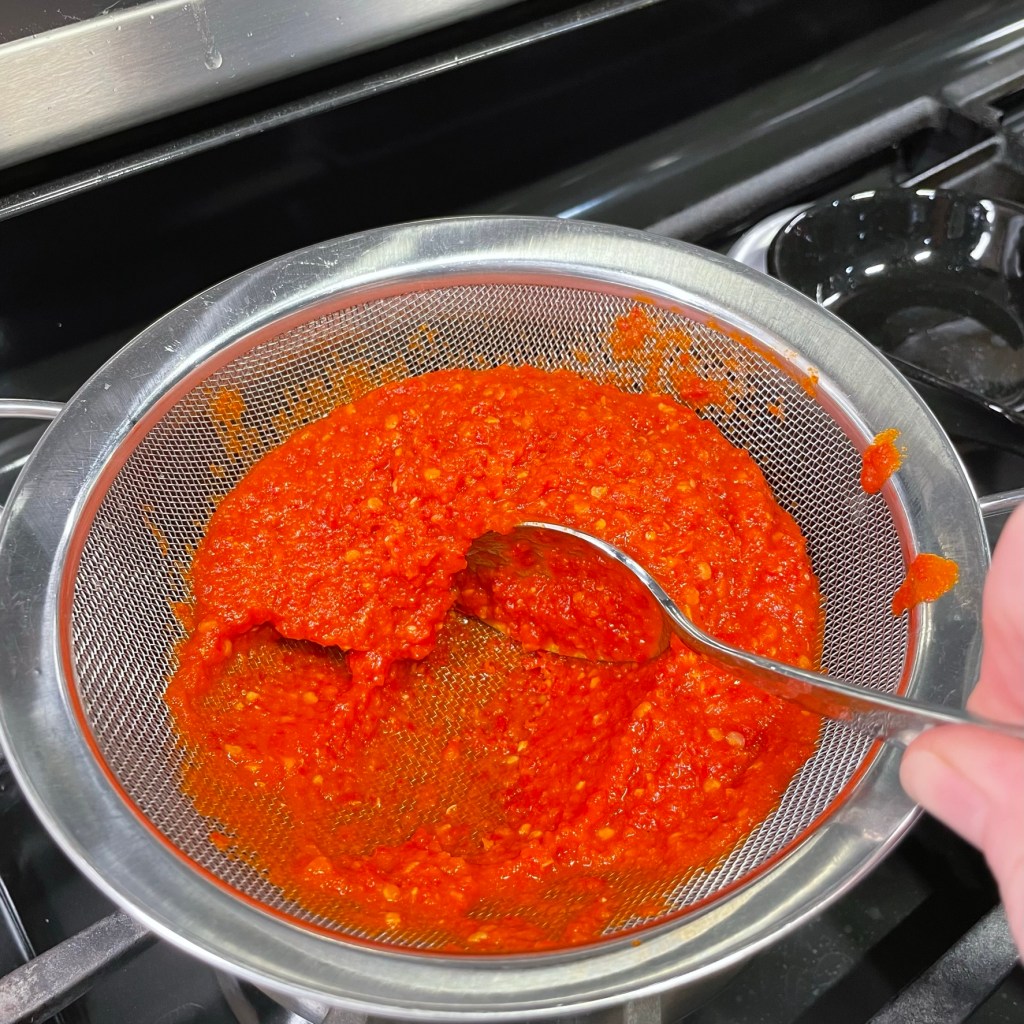
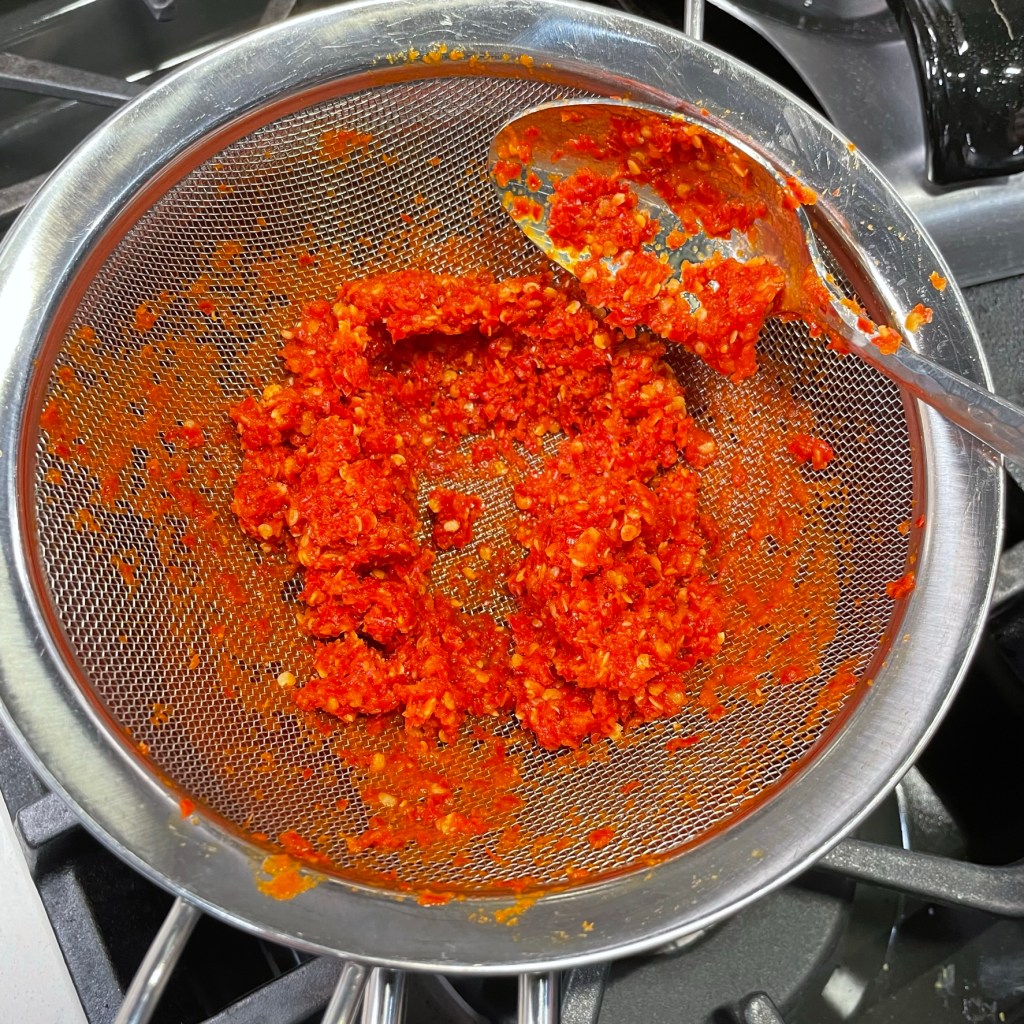
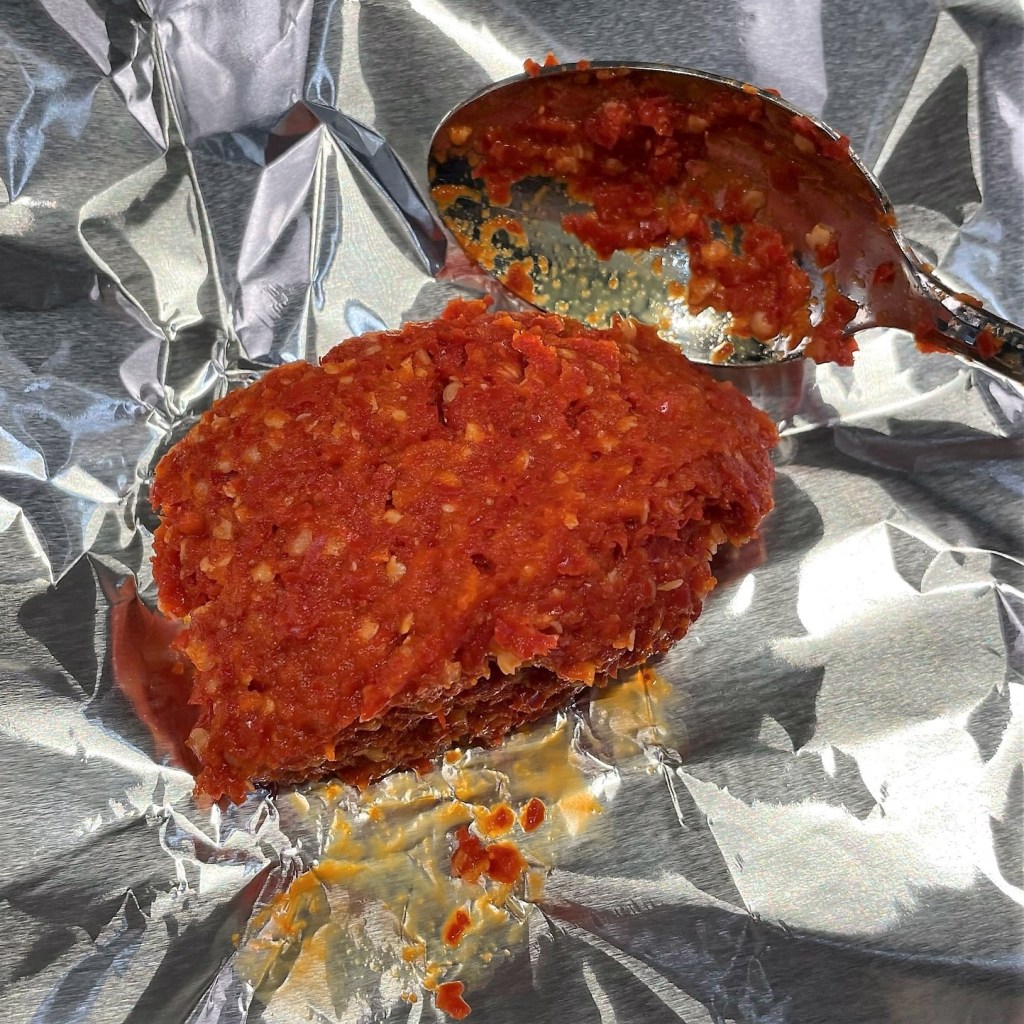
The whole jar’s worth of pulp goes into the blender with a splash of white vinegar, and this time, you’ll puree it until the mixture is as smooth as you can get it. Then, press it through a mesh strainer to separate the solids. Last year when I made this, I spread that nasty lump of hot pepper solids on the ground around the tomatoes in my garden. Probably another reason that I had a decent harvest for the first time in ages, as I can’t imagine any critter wanted to be near that stuff!


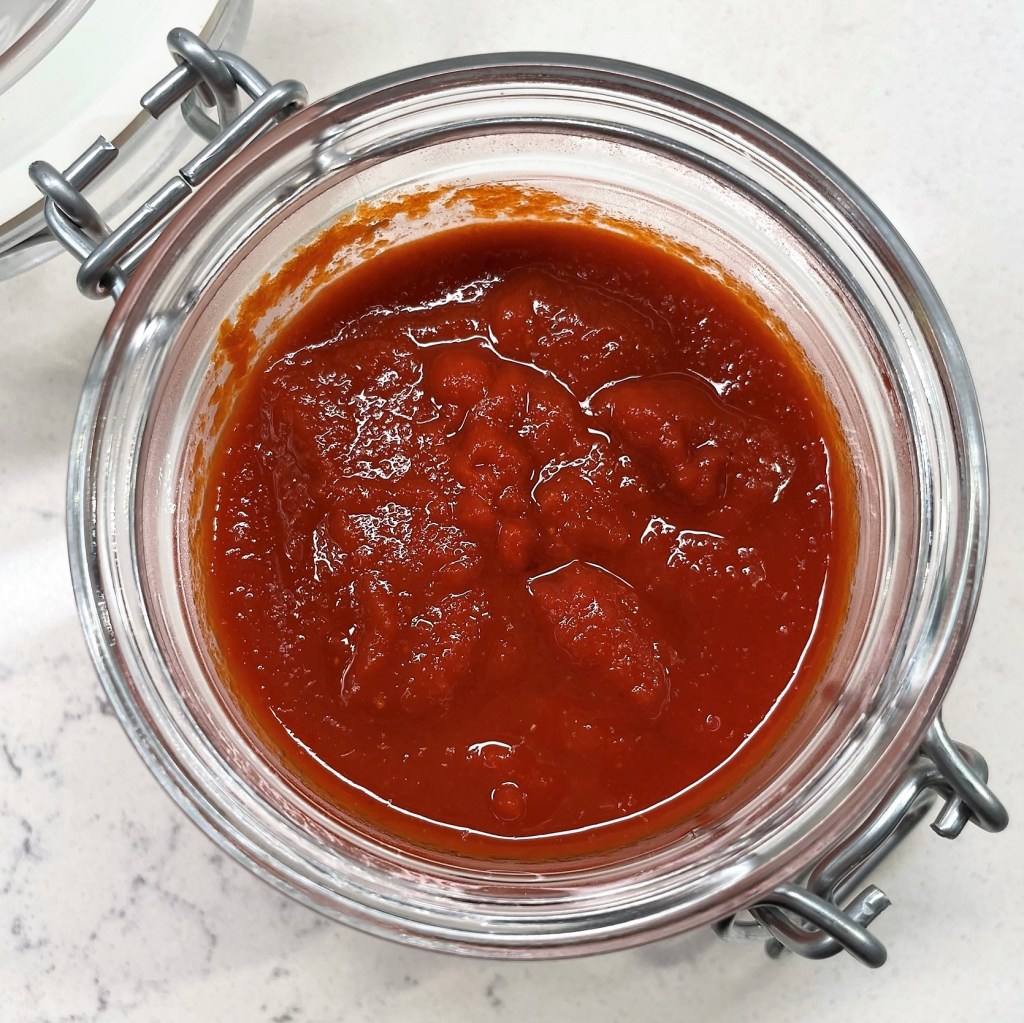
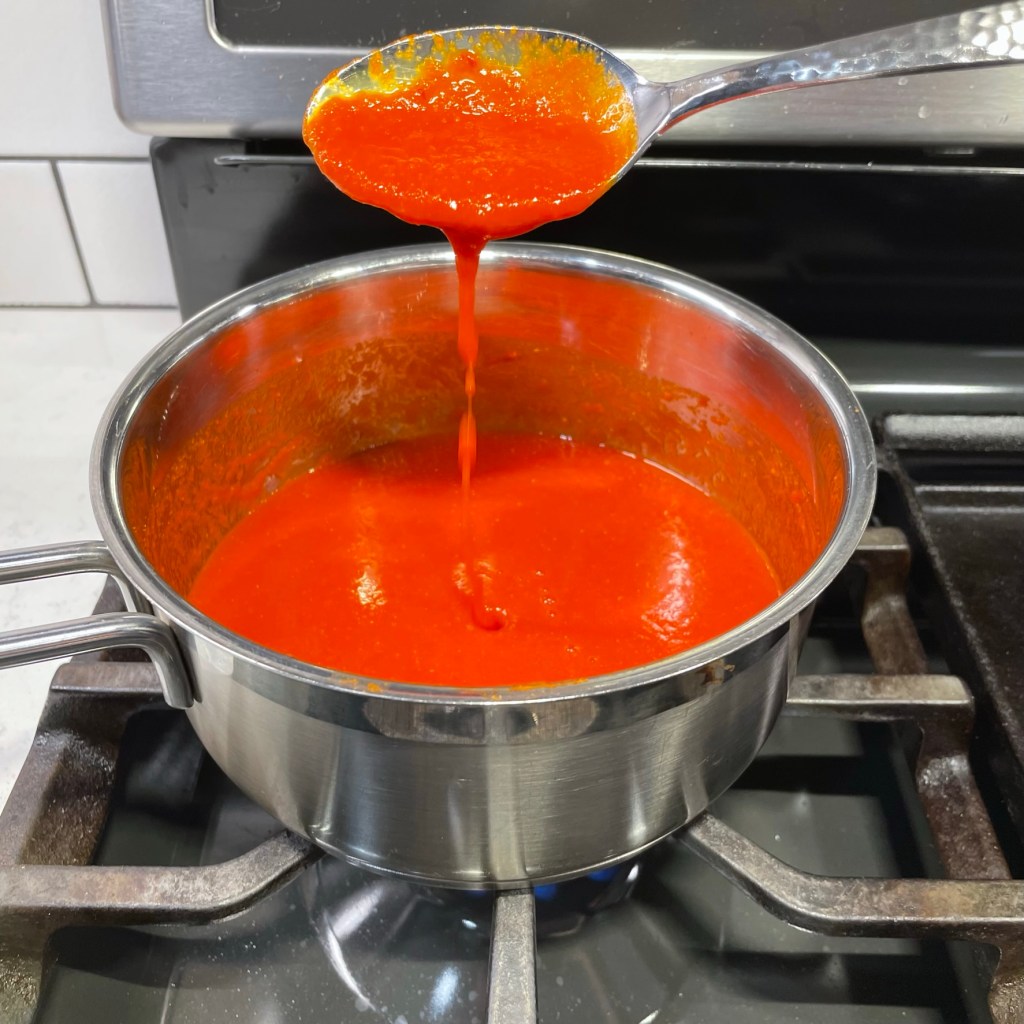
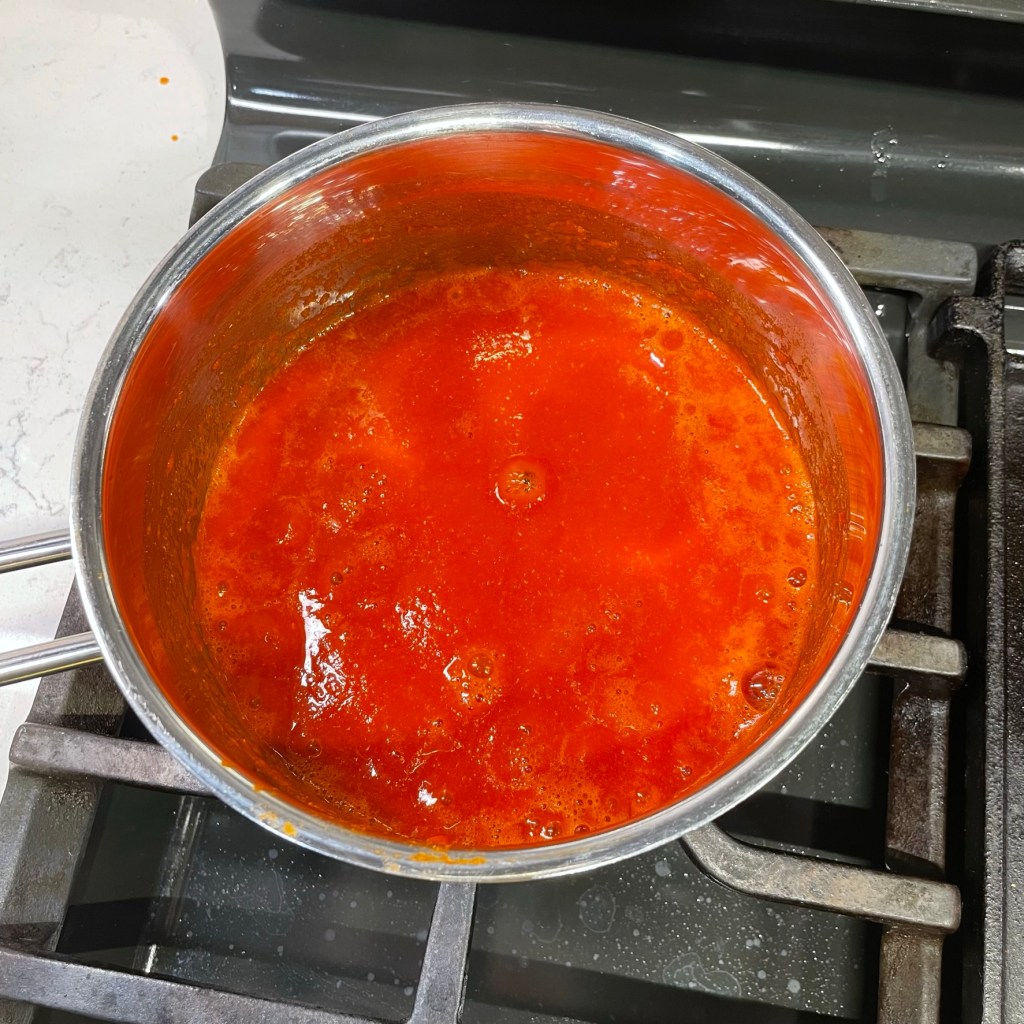
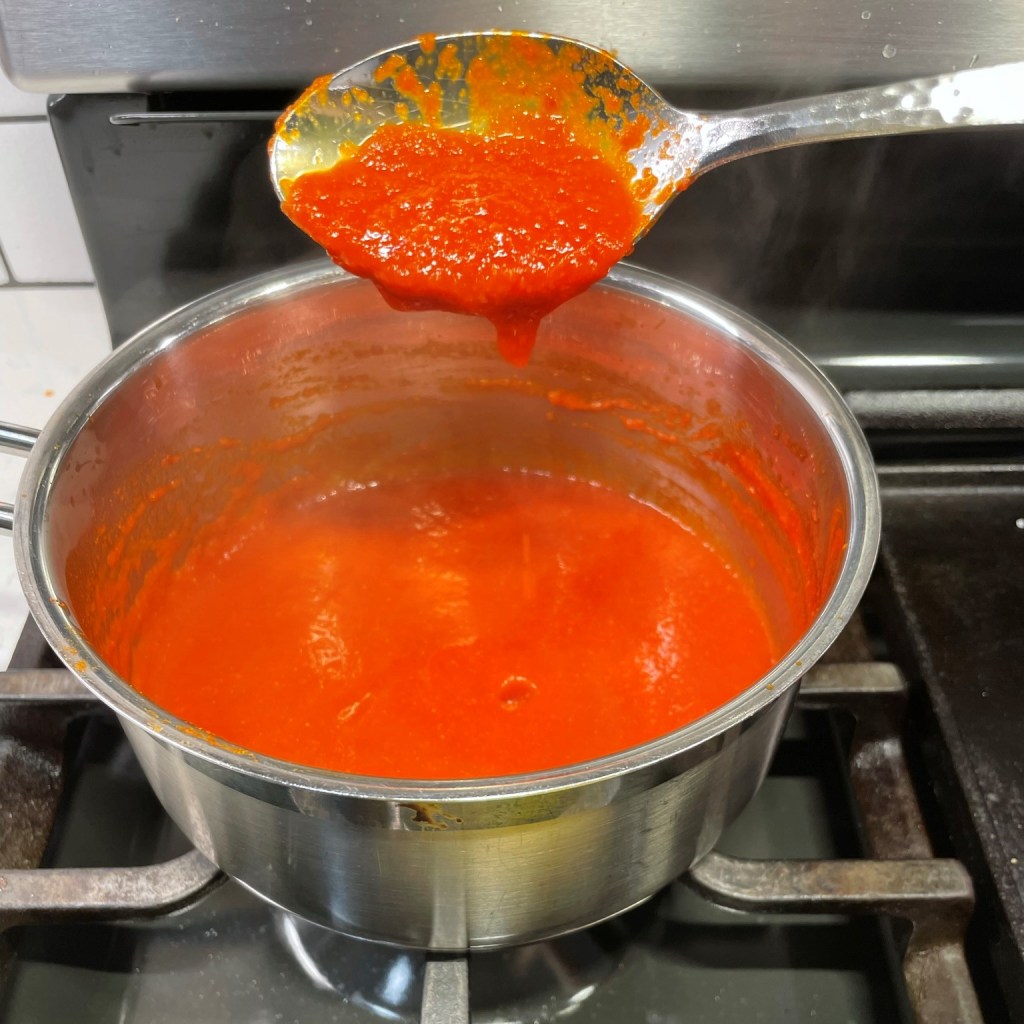
The strained puree simmered for about 30 minutes until it reached the consistency one would expect for sriracha, and then I transferred it to a jar for longer storage—in the fridge!


The Verdict

This adventure surprised me! I’ve always imagined that condiments are not DIY projects because of their complexity, but there was nothing difficult about making my own sriracha, and it was really very good. As the Serious Eats author noted, the flavor registered brighter and more fresh than the bottled stuff, but that shouldn’t come as a shocker. I’m already eyeing my jalapeño plants, and thinking I may try something similar when they start going gangbusters. And though I will admit that I currently have a bottle of the Huy Fong sriracha in my refrigerator door at this moment, I feel empowered just knowing that if the manufacturer doesn’t get its act together next year, I’ll be just fine. 🌶️


Make Your Own Sriracha

  • Servings: Makes about one cup
  • Difficulty: Average
  • Print

When life gives you lemons, make lemonade. But when life takes away your beloved sriracha, don't despair. Just make your own!


Ingredients

  • About 3/4 pound fresh red hot peppers (jalapenos or Fresno work great)
  • 2 Tbsp. light brown sugar (white sugar would likely be fine, too)
  • 1 1/2 tsp. kosher salt
  • 3 cloves garlic, peeled and smashed
  • 1/4 cup distilled white vinegar (added during step 3)

My recipe is based on this one from Serious Eats: https://www.seriouseats.com/sriracha-recipe-from-scratch. Note that this homemade sauce must be refrigerated, and it should be used up within a few weeks. Without the excessive preservatives that are included in the store-bought variety, you should expect a much shorter shelf life.

Directions

  1. Thoroughly rinse peppers, wiping away any debris, and then dry them. Give the peppers a rough chop, discarding stems but keeping the green caps.
  2. Add pepper chunks (seeds and all) to the small bowl of a food processor. Add sugar, salt and garlic. Pulse several times to break up the pepper into smaller chunks, then run the processor continually for about 10 seconds. Transfer pepper pulp to a clean mason jar. Cover with a lid and set the jar aside to ferment at room temperature for 5 to 7 days.
  3. When the pepper pulp has a significant amount of bubbles throughout, and a slightly funky aroma, it’s ready. Transfer it to a blender container. Add white vinegar and puree for a solid couple of minutes until the mixture is nearly liquified. Stop and scrape down the container as needed.
  4. Pour pepper puree through a large mesh strainer into a saucepan. Use a spatula to gently press and scrape the puree through the strainer. Discard the solids.
  5. Heat puree to a boil, then reduce heat and simmer until it reduces to desired thickness; for me, this was almost 20 minutes. Allow sauce to cool to room temperature, then transfer to a clean jar and store in the refrigerator.


Heat & Sweet Baked Beans

As far as I’m concerned, baked beans should be right up there with baseball, hot dogs, apple pie and Chevrolet— a true American classic. And as demonstrated by my relatives at every Fourth of July gathering during my childhood, there are many, many ways to prepare them. You can make them sweet, bacon-y, onion-y, molasses-y or pretty much whatever you want. I happen to want them all, and I’m on a mission to keep pushing the flavor boundaries until I run out of ideas.


For this version, I went rogue with both sweet and spicy additions to a can of prepared baked beans that my husband’s son, Alex, had left behind following his visit here from Hungary back in March. There are only so many things one can pack in a checked bag before you reach the weight limit imposed by the airline, and Alex had to choose between the bottle of Wild Turkey 101 or this can of beans. You guessed it, he took the bourbon back to Europe! Seriously, anyone could have called that one.

Alex’s choice left me with the enviable task of elevating the canned beans, which had a label touting “extra brown sugar.” I wanted something a little different, but not too crazy, so I started with onions and bacon— the two ingredients that always push baked beans into the savory zone. The canned beans had enough sweetness already, so I set my sights on texture and contrast. I tossed in some roasted corn (I used frozen from Trader Joe’s, but fresh would have been awesome) and about half a can of hot Rotel tomatoes, left over from a batch of Les’s amazing pimento cheese from a recent gathering of friends. For a huge kick of heat, I added a fat handful of sweet pickled jalapeño slices— also from Trader Joe’s— and I didn’t bother to drain or chop them. The only other seasoning I added was salt and pepper. Sooo easy!


I mixed them up in the same cast-iron skillet I used to cook the bacon and onions, and then slid the skillet into a 350 F oven for about half an hour. The beans emerged hot and bubbly, but could have benefitted from a bit more oven time, so I would recommend 45 to 50 minutes if you like the sticky, candy-like sauce around the edges as much as I do.


Wow, this was one addictive batch of baked beans! There was more than enough kick, thanks to the Rotel and the jalapeños, and interesting texture from the corn and pickled jalapeños. Every bite was sweet at the start, and then the slow burn kicked in, making you desperate for another sweet bite, and so on. The leftovers were also delicious cold from the fridge. For sure, Alex would approve of what I did to his left-behind can of beans. 

Good thing I wrote it down for his next visit. 🙂


Heat & Sweet Baked Beans

  • Servings: 6 to 8
  • Difficulty: Average
  • Print

These baked beans are hot, sticky and sweet, with plenty of savory flavor and interesting texture. My latest homage to the Fourth of July gatherings of my childhood.


Ingredients

  • 1 large can Bush’s baked beans with extra brown sugar
  • 1/2 medium sweet onion, cut into slivers from top to bottom
  • 3 slices uncured bacon, cut into 1-inch pieces
  • 1/2 cup fire roasted corn (frozen is fine, or fresh if you have it)
  • 1/2 can Rotel tomatoes (habanero variety)
  • 1/4 cup hot and sweet pickled jalapeños
  • Salt and pepper to taste

Directions

  1. Preheat oven to 350 F, with rack in center position.
  2. Place a 10-inch cast-iron skillet over medium heat. Add bacon pieces and cook until some of the fat renders and bacon begins to curl. Add onions and cook until bacon is slightly crispy. Season with a little bit of salt and as much black pepper as you’d like.
  3. Add the entire can of baked beans. Swirl the can with a couple of tablespoons of water to rinse out every drop of sauce into the skillet.
  4. Add corn, tomatoes and jalapeños and stir until evenly blended.
  5. Transfer skillet to preheated oven and bake 45 to 50 minutes, until beans are bubbling around all the edges of the skillet. Allow the beans to cool about 10 minutes before serving.


Kickass Whiskey-Braised Collards

After a mere 30 years living in the South, I finally learned how to make collard greens, one of the staple foods of the region. It happened quite serendipitously, as I described in my original recipe for “Just Collards.” Since that fateful day, and the quick walk-through given to me by a kind stranger, I have made collards many times, using the same basic recipe. My husband and I enjoy them with everything from fried chicken that I pick up at the deli counter, pulled pork that he makes on the smoker, and even occasionally just on the side with some homemade mac and cheese.

Collard greens, in case you don’t already know, are one of nature’s “superfoods,” and they can be eaten raw, but most often you’ll find them braised in liquid. Collards are so packed with nutrients (including vitamin C, calcium, immune-supportive B vitamins and magnesium), that even the resulting cooking juices are considered to be sustaining. They are a very hardy crop, easy to grow in nearly every climate, and they are widely revered here in the South.

Until now, I have followed the same basic recipe—cook up some chopped bacon with onions, add chopped collards to the grease, splash in vinegar and broth and let them simmer until tender. Easy enough, and always delicious. I can’t quite explain what happened last week that inspired me to put a hot and spicy, bold and boozy twist on them—maybe a burst of Black History Month energy—but, mercy, was it ever good!

The salty bacon, smoky pepper heat and the bite of whiskey have transformed my usual collards into something extra flavorful!

I amped up these collards with fresh garlic and a few extra shakes of a specialty pepper mix we love, which includes smoky chipotle, fruity ancho and fiery habanero. The combination of hot pepper flavors sent these collards over the top into kick-ass territory. The real kicker, though, was the shot of whiskey I splashed into them. And not just any whiskey, but the only brand I happened to have on hand when my imagination started running—Uncle Nearest 1856. If you have not yet heard of this whiskey, I hope you’ll take a few minutes to read about it. Uncle Nearest is a Black-owned brand, built on the legacy of Nathan “Nearest” Green, an enslaved man who taught Jack Daniel how to make whiskey. If you’re thinking, “how can that be?” well, this is why we have Black History Month, so we can fill in the gaps of what we thought we knew.

Braising in the whiskey turned out to be a great decision.

Uncle Nearest 1856 was the basis for the Long Time Coming red cocktail I created in honor of Juneteenth last year, and at 100 proof, it’s pretty sturdy. The charred oak barrel notes of the spirit imparted additional smokiness to these collards, which cooked up in about half the time as my regular, go-to recipe. That might have been the whiskey, or it could just be that I served them up earlier than usual, because they smelled so darn good.


Ingredients

3 slices uncured bacon, cut into 1/2″ pieces

1/2 large yellow or sweet onion, chopped

3 cloves fresh garlic, chopped or minced

Kosher salt and freshly ground black pepper

Several shakes Dark and Smoky red pepper blend (or any crushed red pepper you like)

1 large bunch fresh collard leaves, washed and trimmed of heavy stems

1 shot glass whiskey (about 3 tablespoons)

1 cup low-sodium vegetable broth


Instructions


In a large skillet or pot, cook the bacon and onion over medium heat until the bacon has crispy edges and the onion is softened. Add the garlic, season with a bit of salt and pepper, and cook another minute or two.

Clear a space in the center of the pan and add about a teaspoon of olive oil. Shake the red pepper flakes into the oil to activate the flavors, and then toss the bacon-onion mixture to spread it around. Add the collards, a handful at a time until wilted, and toss to cook. When the collards have softened and collapsed into the pan, add the whiskey and vegetable broth and bring to a boil. Reduce heat and simmer, covered, until collards are tender. This will take anywhere from 25-50 minutes, depending on your simmer level and preference. Adjust salt and pepper to taste before serving.


Les’s Atomic Buffalo Turds

The name alone demanded that I make this appetizer when I ran across the recipe sometime while preparing for my 2015 Super Bowl party. The fact that it was a heat-fueled bite made it even better. Not only did it pair well with my favorite chili, but it also helped get the guests to leave on time.

For some reason, I didn’t make these spicy bites for the 2020 Super Bowl bash at our house (the last time we actually had people over). And last year, when it was just me and Terrie for the Pandemic Bowl, no turds.

With this year’s Super Bowl coming up, Terrie asked me to make these and share the recipe, so here goes. I wish I could credit a specific source for these, but I cannot remember where I found the recipe. It’s just an awfully good one, and very conducive to substitutions of spices and topping sauce. So many different things can work. The key is the mix of sweet to offset the intense heat. The original recipe suggested cooking these on an outdoor smoker, but this adaptation is adjusted for baking in a home oven.

Behold, atomic buffalo turds!

My 2016 batch, enough for a houseful of hungry Super Bowl guests.

Ingredients (makes 12 pieces)

6 medium size jalapeno peppers, halved and trimmed*

12 li’l smoky sausages*

3/4 brick of cream cheese

1¼ tsp. smoked paprika*

3/4 tsp. cayenne pepper (or less, if you’re scared)

6 slices of bacon, cut in half crosswise*

12 toothpicks

2 Tbsp. sweet rub seasoning*

Sweet finishing sauce*


Notes

  • Scoop out the innards of the jalapenos, removing most of the membrane and the seeds. However, if you really want heat, feel free to leave some of that membrane intact.
  • There are different brands of li’l smokies. Ideally, we’d love to find some without nitrites, but if they are made, we can’t find them. You can, however, probably substitute other kinds of normal size sausage and simply cut them down to the bite-size smoky portion.
  • There are many different types of paprika. For this batch, we used a bourbon smoked paprika we’d found online at Bourbon Barrel Foods.
  • I usually wrap the bacon raw around the jalapenos, but there is something to be said for lightly starting to cook the bacon in a skillet to render some of the fat and help it be more crispy later. But don’t cook it too long, or it will either burn or crack and fall off in the oven. Thin slices of bacon work better than thick.
  • The sweet rub seasoning can be anything you find that suits the bill; it is used to offset the heat. You can also make some your own, as we did in this case, using 3 parts of brown sugar to one part of Flatiron Pepper Co.’s dark and smoky BBQ rub. Flatiron is a very good specialty pepper company and we have enjoyed many of their products, which tend to bring the heat!
  • The finishing sauce is usually a sweet/tart, often fruit-flavored BBQ-oriented sauce. It goes on after the turds have cooked and provide a beautiful cooling note. Or, if you’re like us, you can look for a fruit-flavored-but-still-has-a-kick sauce. One year, I used a cherry-ancho BBQ sauce. For this batch, we had a raspberry-habanero sauce I’d bought from a friend who sells Pampered Chef products.

Instructions

Preheat oven to 300° F.

The first thing to do is prep the jalapenos, which involves cutting off the stems, splitting them lengthwise and then taking out the seeds and membrane. The more of either you leave inside, the more the heat your turds will pack. Wash your hands thoroughly (unless you have kitchen gloves to work with, which I don’t) when you’re done. And don’t even think of getting that itch near your eye, even after you’ve washed your hands. Trust me. Been there, done that.

Prepare the cream cheese mix by adding the paprika and cayenne. The cream cheese will turn orange. Don’t be alarmed. It helps, by the way, to let the cream cheese get room temp for easier mixing. Scoop the cream cheese to fill the half jalapenos and be relatively generous. Then place one smoky right on top of the cream cheese, lining up your jalapenos on a parchment-lined cookie sheet.

Take one of the half slices of bacon and wrap around the jalapeno, covering the smoky and cream cheese mix and securing with a toothpick on top through the bacon. Push down through the smoky and keep going until you feel resistance from the bottom of the jalapeno. Do not pierce the jalapeno if you can avoid it, as that will cause the cream cheese mix to seep out.

Sprinkle a generous portion of whatever your sweet rub mix of choice is on each smoky and place the cookie sheet in the oven. Allow about 90 minutes. The long, slow baking time simulates the process of smoking them.

When the bacon looks done, remove the turds and brush or drip your finishing sauce on top of the turds. Then, enjoy the burn!

Good to the last scorching bite.


Queso Fundido Pizza

In our early months of getting to know each as slightly more than “just friends,” my husband, Les, and I took a road trip into southern Virginia for an afternoon of antiquing. He had been working on redecorating his living room and was on the search for an interesting accent table or other cool décor item. And mostly, we were both looking for new ways to hang out together.

Along the way, we found this funky table with an adjustable wooden top that screwed down into the base. It was not very practical, given that the three legs are not properly spaced out and it tipped over if you set something on it. But it was fun and different, and with a fresh coat of paint, it livened up his living space. We also stopped at a few roadside stands, browsing through fresh peaches, honey, jams and preserves, along with all varieties of handmade crafts.

The most fun thing about that day, though, was our visit to a Mexican restaurant called Chile Rojo, just inside the N.C. state line. The music and décor were lively, the food was delish and the company of this guy who once seemed so serious to me was just about the best thing going. Les and I met in a pool hall, where we both played in a 9-ball league, and our first impressions of each other (as is often the case with married couples) were not particularly positive. He thought I was flirty (for sure, I was) and a bit on the flighty side. I thought he was intense and without much sense of humor. I couldn’t have been more wrong about that second part, and it was interactions such as this road trip that really helped me see the relaxed, authentic side of this man who would, nearly two years later, become my husband.

It didn’t hurt that we both have a passion for great food and adventurous palates that make us open to trying each other’s favorite things. On this visit to Chile Rojo, his eyes scanned the menu, landing on their choriqueso dip, which he called “queso fundido.” It was a typical Mexican queso dip—creamy, melty and salty—but this one had spicy, crispy bits of chorizo sausage floating around in it, causing a flavor explosion in every bite. Truth be told, I had probably experienced this stuff at some point in my past, and maybe I had just never heard the name of it. But in the heat of that July evening, as Les and I sipped our Mexican lagers and enjoyed dragging our crispy warm tortilla chips through this queso fundido dip, everything seemed new and delicious.

Inspired by the best choriqueso dip ever, we created a pizza that displays all the fiesta-fresh flavors of queso fundido!

That first of many road trips for us as a couple is still on my mind whenever we order queso fundido, and in honor of Cinco de Mayo this week, Les and I decided to put those fabulous flavors onto a pizza. My Real N.Y. Pizza Dough went south of the border for the occasion, as I subbed in a portion of corn flour for the usual amount of whole wheat flour, a subtle nod to the tortilla chips we like so much. Shredded pepperjack cheese provided a base for the toppings. The chorizo sausage was browned up with chopped onions, and accompanied by fire-roasted corn, pickled jalapeno and fresh slices of fresno chiles. The hot oven transformed the dollops of melty queso dip into blistered patches of ooey-gooey deliciousness, and when we pulled the pizza from the hot steel, we topped it with cool cubes of avocado and fresh cilantro leaves. Like all of our adventures, this pizza was awesome.

Oh, and it turns out Les isn’t always so serious. Thank goodness, because neither am I. ❤

Me, being loco in love at Chile Rojo, 2015.

Ingredients

2 chorizo sausage links, casings removed

1/2 medium onion, chopped

1 cup cream, half and half or whole milk* (see notes)

3 oz. white American cheese, cubed*

2 oz. cheddar and pepperjack cheese combination

A few shakes Flatiron Pepper Co. hatch valley green chiles (optional, but wow)

1/2 cup fire-roasted corn (fresh or frozen)

Small handful pickled jalapenos, patted dry on paper towels

1 small Fresno chile pepper, thinly sliced

1 ball My Real N.Y. Pizza Dough (or your favorite dough)*

1 cup shredded pepper jack cheese (or Monterey Jack for less heat)

For serving:

1/2 avocado, cubed

Handful fresh cilantro, washed and chopped

Fresh squeeze of lime

*Notes

Depending on the type of dairy you use (cream, half and half or milk), you may need to adjust the ratio a bit. Cream, of course, has the highest fat content and whole milk has the lowest. I do not recommend 2% or skim milk for queso, as they don’t have the fat content to support the melted cheese. For readers abroad, “half and half” is a popular product in the U.S. that is essentially a 50/50 mix of cream and milk, and it amounts to about 12% milkfat.

I always use American cheese for its incredible meltability. I’m not sure if that is a word, but I think you understand my point! Regular cheddar has great flavor on its own, but without the special enzymes that exist in American cheese, a sauce made with only cheddar will break in the heat of the oven. I purchase American cheese in chunks at the deli counter of my supermarket, rather than the dairy aisle.

Our pizzas are baked on a steel, preheated at 550°F for an hour before baking. If you bake at a lower temperature, you will need to adjust baking time, and consider turning on the broiler for a brief minute at the end, to put a nice blister on the queso topping.

Note also that this pizza is par-baked before the queso dip is added, then returned to the oven for final browning. Do not add the queso at the start of the baking time, as it will burn and may prevent even cooking of the dough.

The queso is beautifully browned and creamy, and the chorizo crisped up a bit in the oven.

Instructions

First, the queso dip, which we love on its own, so we made more than we needed for this pizza. Without question, we will enjoy the rest on homemade nachos or just snacking with tortilla chips. If you make the queso ahead of time, note that it will become solid in the fridge. No worries, just warm on low heat to creamy consistency again, and cool to room temp for topping the pizza.

When you are ready to make the pizza, preheat the oven to 550°F if using a steel, or the recommended temperature for your pizza stone. Your oven rack should be about 8 inches from the top of the oven. If you are using a pizza pan, place the rack in the lower third of the oven to ensure thorough baking of the crust, and plan to adjust your baking time.

And now, the rest of the pizza!

Muy bueno!


Just South of Buffalo Wings

It was circa 1977. I was just a kid in a small town south of Buffalo, New York, and I still remember my first bite of the mouthwatering spicy hot chicken wings my Uncle Mike made for me. Mike worked with nightclub sound and lighting systems during those days, which was a big freaking deal, given that we were hanging onto the tail end of the disco era. For his work, Mike traveled into the larger cities where the clubs were, and after an installation at a club in Buffalo, he brought home with him the recipe for these delectably crispy, tangy-hot treats.

And oh my God, did I love them! Clearly, I was not alone.

It didn’t take long for “Buffalo wings” to catch on across upstate New York, and eventually the entire country. Today, though restaurants everywhere have imagined new and unusual sauces for wings, I will forever favor the original flavor of Frank’s RedHot sauce with a side of celery and chunky bleu cheese dressing. Oh, and I can never, ever get behind the idea of breading them—not in flour or batter or crumbs or whatever, though plenty of sites suggest the original 1964 Anchor Bar recipe had them coated in flour and oven-roasted. That sounds suspicious to me, given that I’ve enjoyed them deep-fried for decades. The wings should be crispy, as they were on that hot summer night in ’77, and they should make my eyes water just from the smell of them. Just give me what I want.

Yep, this is exactly how I remember them! (photo from Wikipedia)

The only problem I have with Buffalo wings today is the whole deep-frying thing. I enjoy them, but I can’t indulge in them very often if I want to stay healthy. A few years ago, however, I came across a new technique for preparing wings that promised the same crispy exterior and juicy interior, but without deep frying or any amount of oil at all. Pinch me, I thought; I must be dreaming. And then I tried this simple little hack and it was as if angels were singing inside my head.

Friends, the non-fried wings are 100% as delicious as the crispy deep-fried Buffalo wings I tasted back in the day, and you don’t need an air fryer or any other special gadgets to make them. The big thanks goes to Alton Brown of Food Network. His technique involves steaming the wings to render some of the fat, and then oven roasting them to perfection before tossing them in your favorite sauce. I’ve named these “Just South of Buffalo Wings” because that’s where I’m from, and also because I’ve thrown a twist on the traditional wings, adding a generous blast of black pepper to the usual Frank’s RedHot sauce, and a little bit of brown sugar to balance that bite.

Serve these with fresh celery sticks and some homemade chunky bleu cheese dressing. And a cold beer, duh.


Ingredients

2 lbs. fresh chicken wings* (see notes)

1/2 cup Frank’s Original RedHot sauce*

1/4 stick salted butter

3 Tbsp. brown sugar

1 Tbsp. coconut aminos*

1 tsp. lemon juice

2 or 3 shakes garlic powder

1/2 tsp. black pepper


*Notes

For best results, use fresh (never frozen) wings for this recipe. If they are already split into drummettes and flat pieces, that’s fine. But it’s also OK if they are still whole pieces. I’ve done them both ways, and the only adjustment you may need to make is a bit more roasting time on the whole ones.

There are many newer versions of Frank’s RedHot sauce available today. Get the one that is labeled as the “original.”

Coconut aminos provide some depth of savory flavor to this sauce. It’s a dark-colored, liquid sauce, similar to soy sauce but sweeter and lower in sodium. It is made from the fermented sap of coconut trees, but doesn’t taste at all like coconut. You can find them in the same aisle, or substitute in this recipe with half as much lite soy sauce.


Instructions

I’ll walk you through it with pictures, or you can keep scrolling for more detailed description. There’s also a downloadable version you can print for your recipe files. Begin by setting a steam basket over a pot of gently boiling water.

  1. Bring a couple inches of water to a boil in a medium saucepan fitted with a steamer basket and tight-fitting lid. Line a rimmed baking sheet with paper towels and place a cooling rack over the towels.
  2. Add the chicken wings to the steamer basket, working in as many as will fit at a time. Steam the wings for 10 minutes, then arrange them on the cooling rack. Repeat with remaining wings and then cool a few minutes at room temperature, allowing most of the steam to dissipate. Cover the baking sheet with foil and transfer the wings to the refrigerator until they are fully chilled, about an hour. This step is important for crisping later.
  3. Preheat oven to 425° F. Remove the chilled wings from the fridge.
  4. Combine all the sauce ingredients in a small saucepan and heat over medium-low for several minutes, until the sauce is fully blended and slightly thickened. Turn off the burner and cover to keep the sauce warm.
  5. Roast the wings for 40 minutes, turning them once after half the time. The skin should be crispy and golden brown.
  6. Transfer the wings in batches to a large seal-able bowl. Pour enough sauce to coat the wings. Cover the bowl and gently shake to thoroughly coat the wings. Put the wings back into the oven for about 8 minutes to “seal the deal” and bake the sauce into the wings.
  7. Serve with crunchy celery sticks and chunky bleu cheese dressing.
Just South of Buffalo Wings

Want to print this recipe?


Maple-Cayenne Roasted Brussels Sprouts

For the past several years at our home, some version of this side dish has appeared on the Thanksgiving table. The first couple of years, it was a popular recipe I had seen online at purewow.com, and I made it exactly as written, using honey and sriracha. The next year, I doubled the sriracha because my husband, Les, loves spicy so much. The year after that, I swapped out the honey in favor of maple syrup to keep it friendly to Les’s daughter, who adheres to the vegan lifestyle. What I love most about this recipe (besides the fact that Brussels sprouts are awesome and so good for you) is that it’s easily adaptable and it flies in the face of so many things people believe about their own tastes. This dish has been a winner with guests who don’t like Brussels sprouts, and also with people who don’t like the spicy nature of sriracha.

This year, in advance of Thanksgiving, I’ve been testing a few favorite recipes so that I can jot down the amounts and times that are appropriate for sharing. This has been one of the important challenges of doing a food blog—because I cook by instinct and memory, I don’t always know offhand how much of different ingredients I use or how long I cook them at whatever temperature. But a surprise popped up when I started working on my spicy Brussels sprouts for this post: our sriracha gave an odd aroma, and we realized it was almost a year out of date! Oops.

The saying goes that necessity is the mother of invention, and it’s certainly true in the kitchen, isn’t it? If I had a nickel for every time I made an emergency substitute, we could finally take the plunge on some new granite counters! But in this instance, the substitute was obvious to both of us—cayenne sauce would be the perfect stand-in for the sriracha. It’s mouthwatering, spicy and marries perfectly with maple syrup. If you’re looking to try something a little different this year, I hope you enjoy these.

You can see the caramelization on the cut sides of the sprouts, and the outer leaves are crispy and delicious!

Ingredients

Up to 2 lbs. fresh Brussels sprouts, rinsed, drained and patted dry

4 Tbsp. maple syrup

3 Tbsp. cayenne pepper sauce (we used Frank’s RedHot, of course!)

1/4 cup rice vinegar

Kosher salt and freshly ground black pepper

1/2 cup extra virgin olive oil


Instructions

  1. Preheat oven to 400° F. Line a rimmed baking sheet with parchment paper or foil.
  2. Trim the sprouts by using a sharp knife to make a thin slice off the bottoms. This will loosen the outer leaves, which you may discard. When all sprouts are trimmed, cut them into halves, lengthwise (top to bottom).
  3. In a large bowl, combine syrup, cayenne sauce, rice vinegar, salt and pepper. Stream in the olive oil gradually, whisking quickly to create an emulsion. Alternatively, add all the ingredients together in a jar with a tight lid and shake the dickens out of it.
  4. Immediately transfer the Brussels sprouts to the bowl with the marinade and gently fold to toss them, taking care to coat every side of the sprouts.
  5. Arrange the sprouts, cut side down, onto the prepared baking sheet. Keep a little room between the sprouts to ensure even roasting. Do not discard the marinade.
  6. Roast for 20 minutes, then remove the baking sheet and toss the sprouts once again in the marinade. Return them to the baking sheet (direction does not matter) and back into the oven for 5 additional minutes.

The sprouts emerge from the oven with fragrant, crispy edges and tender, caramelized interior from all the marinade that weeps into the creases between leaves. These are best served right away, but for the sake of sanity on Thanksgiving, you may also make them ahead and warm them up in time for dinner. The sprouts will lose the crispiness, of course, but you will still love the flavor.

Want to print this recipe?


Rosemary’s Baby (a scary Halloween cocktail)

Around the time of Kentucky Derby 2.0 (the actual running of the horses in September), my husband, Les, challenged me to create a Halloween cocktail and call it Rosemary’s Baby, after the 1968 Roman Polanski film that is, frankly, the most terrifying psychological thriller I’ve ever seen. Les’s suggestion was inspired by the rosemary old-fashioned I’d made for the Derby, and this weirdly addictive mezcal-based cocktail, infused and decorated with rosemary, is my response.

Mezcal (which I incorrectly assumed was just cheap tequila) is produced from agave hearts that have been roasted and fermented underground in clay ovens. Most mezcal is produced in Oaxaca, in the far southern region of Mexico and some brands are quite sophisticated (and pricey). By local tradition, mezcal would be consumed straight and savored for its unique smoky funk and flavor. But in the U.S., it has seen resurgence in craft cocktails, especially as a substitute for other more “common” spirits, replacing bourbon in old fashioned drinks and gin in negronis.

My spooky libation is a version of the latter, and it is not for the faint of heart. A classic negroni is already an “acquired” taste, with the standard equal parts gin, Campari and sweet vermouth. Here, I’ve subbed in mezcal for the gin to replicate the fiery, smoky depths of hell that poor Rosemary must have gone through when her selfish husband sacrificed his soul—and her womb—to the devil. Worst husband ever.

Smoky, spicy, bitter and sweet. With spirits from Mexican to Italy to France, this is a complex cocktail situation.

Predictably, the mezcal is smoking up the glass, big time, and the Campari is lending its usual herbal bitterness. Sweet vermouth is keeping it in the Negroni family, and spicy chile syrup surprises you with just enough heat. With a habanero sugar rim, this drink (like that poor little demon baby) is trying to be sweet, but can’t quite linger there because of the intensity of what lurks underneath.

Remember the chilling scene at the end of the movie where Mia Farrow’s character is assured by the creepy devil-worshipping neighbors that her newborn son “has his father’s eyes?” I’m betting he had smoke in them.

That smokiness lingered in the air for a while.

Ingredients

1 oz. mezcal

1 oz. sweet (red) vermouth

1 oz. Campari

a few rosemary leaves for muddling

1 Tbsp. three chiles syrup (available online, but I found it in the mixers section at Total Wine)

Garnish with habanero sugar rim* and smoked rosemary sprig


Feeling brave?

To rim the glass, wet the outer edge of the rim with a lime slice, then roll the outside of the glass into habanero sugar sprinkled on a paper towel. Do this a few minutes ahead to allow time for the sugar rim to harden and set. This embellishment brought quite a bit of additional heat to the drink. If you prefer, skip it or substitute a fine sea salt rim as a tribute to Rosemary’s salty tears.

In a cocktail shaker or mixing glass, muddle the rosemary leaves with a small amount of the campari. Add remaining campari, mezcal, vermouth and simple syrup. Add ice and shake or stir vigorously until the outside of the container is frosty. Strain over a large ice cube into the prepared sugar-rimmed glass. Scorch the rosemary sprig until leaves begin to burn, then drop the sprig into the glass. The smoke will linger as the flame dies away.


A Couple of Jerks (pizzas, that is)

Summer has a way of flipping mealtime upside-down at our house. My husband, Les, does a lot more of our cooking during the summer because the weather and extra daylight make it easier to use the grill or smoker, and the simple fact that he’s handling a larger part of our meals gives me more time to expand our library of recipes. With him in charge of cooking outside, it also means that I have a wider array of flavorful meats, cooked and ready to use in whatever dishes capture my imagination.

Something about the summer heat also makes me crave spicy foods in particular. It could be that my body is trying to calibrate to the external temperature or perhaps there’s simply a greater tendency toward adventure and new-ness while the sun is blazing. In either case, it’s hot in our neck of the woods and I’m cooking up some spice today in the form of pizza—not one, but two pies with all the flavors and vibrant colors of the Caribbean!

These pizzas put a spotlight on colorful bell peppers once again, wrapping up a short series of recipes that started with these veggie skewers and these stuffed peppers.

If you’ve ever grown a successful garden (meaning you actually harvested vegetables rather than merely feeding the neighborhood deer, as I have), you likely know that peppers love hot, sunny weather. Even if pepper plants seem to lag behind tomatoes and zucchini at the start of summer, they always catch up when the temperatures rise. That said, these brilliant bell peppers—which I picked from the produce department, not my pitiful garden—have earned a spot on my pizzas, just by being heat lovers themselves.

Onions are a no-brainer for pizza, and for these Caribbean-inspired versions, I’ve put a little caramelization on sliced red onions to heighten their sweetness and balance the jerk-fired flavors of the sauce and other toppings.

And of course, I couldn’t label these pizzas “Jamaican jerk” without the signature notes of allspice, hot peppers, ginger, thyme and scallion. I’ve incorporated all of the above, either in whole ingredient form or in sauce and seasoning, but gave each pie its own personality. The first is decidedly spicy and savory, featuring smoked pork shoulder, jerk rub, sweet and hot peppers and two kinds of onions. The other leans to the sweet-fruity-spicy side, with plump, juicy shrimp cooked in garlic butter, lime and cilantro—plus sweet and hot peppers, onions and a generous smattering of tropical grilled pineapple.


Put on some steel drum music, pour yourself a Red Stripe and join me for a taste of the Caribbean, Comfort du Jour style!


Ingredients – Jerk Pork Pizza

1 ball of my NY Pizza Dough, or dough of your choice*

About 10 oz. smoked pulled pork (cook it yourself or get some good take-out)

Extra virgin olive oil

1 Tbsp. Jamaican jerk wet rub seasoning*

1/2 red bell pepper, chopped in chunks

1/2 red onion, sliced into crescent moon shape

1/2 jalapeño, diced

3 scallions, cleaned and sliced

1/2 brick pepper jack cheese, shredded*

Hot BBQ sauce for brushing pizza dough*


Ingredients – Jerk Shrimp Pizza

1 ball of my NY Pizza Dough, or dough of your choice*

8 oz. fresh shrimp, peeled and deveined

2 cloves garlic, minced

1 Tbsp. salted butter

Squeeze of fresh lime

Sprinkle of fresh or dried cilantro leaves* (optional)

1 red bell pepper, cut into lengthwise slices

1/2 yellow bell pepper, cut into lengthwise slices

1 small red onion, sliced into rings

1 large jalapeno pepper (seeded), some diced and the rest sliced into rings

3/4 cup grilled pineapple chunks*

1/2 brick pepper jack cheese, freshly shredded*

Hot BBQ sauce for brushing pizza dough*


*Notes

Dough of your choice – I recommend fresh dough rather than one of the pre-baked crusts. Some pizza restaurants will even sell you some of their pizza dough, so it’s worth asking!

Jerk seasoning – My go-to jerk seasoning is technically a wet rub that seasons the meat but also moistens it. If you have a dry or powdered seasoning, use less of it and mix it with a bit of canola or coconut oil before applying it to the meat.

Pepper jack cheese – For these pies, I used an 8 oz. brick of pepper jack, divided between the two pizzas, and I shredded it myself (not the bagged stuff). If you’re already having hot flashes over the other ingredients, you could cut out the pepper and use Monterey jack instead. You could also omit the cheese entirely, but I like the way it holds together the other toppings.

Cilantro – If you’re among the roughly 20% of people born with the “I can’t stand cilantro” gene, simply leave it out or substitute thyme or parsley. Here’s why you hate it, by the way.

Grilled pineapple – I grilled a whole cut-up pineapple because I had plans for multiple dishes. If you’re only making this pizza, I’d recommend getting a small container of pre-sliced fruit from the prepped-for-you section of the supermarket. 2 or 3 slices is all you’ll need. Used canned as a last resort.

BBQ hot sauce – Choose what you like, but consider the ingredients to complement the other stuff on the pizza. For example, there’s probably a better recipe than this one for a hickory-maple-chipotle-mustard BBQ sauce.

We found this one, which contains vinegar, onion, brown sugar and habanero (all of which are also in jerk seasoning), plus tomato paste, whiskey and ghost pepper. It echoed the topping flavors and was a perfect base for both pizzas, and another layer of wicked-good heat, which always makes Les happy.


Instructions – Jerk Pork Pizza

Preheat oven and steel to 550° F (see notes below for stone or pan baking)

Pull the pork apart into bite-size strips, and sauté them in a hot skillet with some olive oil, until edges are crispy. Then, toss them in jerk seasoning to coat thoroughly. Transfer the pork to a bowl.

Heat olive oil in the same skillet, and sauté onions and bell peppers until soft and lightly caramelized. Season with salt and pepper.

Shape pizza dough into 14-inch circle and place it on a greased pizza pan or flour and cornmeal-dusted peel, then brush on a very thin coating of BBQ hot sauce and season with more black pepper.

Sprinkle half of the pepper jack cheese over the dough, then top with pork, jalapeno, onions and peppers. Scatter the remaining cheese and sprinkle with all the scallions. Slide the pizza onto a hot steel or stone, about 8” from the top of the oven. Bake at 550° F for about 7 minutes, or until cheese is bubbly and crust is nicely browned. If using a pizza stone, follow temperature instructions from the manufacturer. Some pizza stones may crack at this temperature.

If using a pizza pan, place the oven in the middle to lower third and allow more time.


Instructions – Jerk Shrimp Pizza

Preheat oven and steel to 550° F (see notes below for stone or pan baking)

Sauté the prepared shrimp in butter with the fresh garlic and cilantro, but only for about a minute, as the shrimp will cook further in the oven. Remove from heat, cut each shrimp in half if they are larger than a quarter, and squeeze a section of lime over them. Transfer to a bowl.

In the same pan, heat olive oil over medium heat and sauté the bell peppers and onions until soft and lightly caramelized.

Shape pizza dough into 14’ circle and transfer to greased pizza pan or flour and cornmeal-dusted peel. Brush a light coating of BBQ hot sauce onto the dough, then sprinkle on half the cheese, followed by the onions and peppers, jalapeno, shrimp and pineapple bits. Scatter the remaining cheese over all toppings and slide the pizza onto a preheated steel, about 8” from the top of the oven.

Bake at 550° F for about 7 minutes, or until cheese is bubbly and crust is nicely browned. If using a pizza stone, follow temperature instructions from the manufacturer. Some pizza stones may crack at this temperature.

If using a pizza pan, place the oven in the middle to lower third and allow more time.


Want to print this recipe?


Even as leftovers, this jerk pork pizza rocked my world!

Buffalo Chicken Pizza

For this western New York girl, Buffalo chicken pizza is a favorite non-traditional pie, for those times when you just can’t quite decide between pizza and Buffalo wings. From the authentic Frank’s “Red Hot” sauce to the funky bleu cheese crumbles, and right down to the crunchy bits of celery, this pie delivers. All. The. Flavors.

These pizzas move very quickly once the dough is shaped, so do yourself a favor and prep all the ingredients as much as a day ahead. You’ll appreciate having more space in the kitchen, and I’ve recently discovered that placing cold toppings on your freshly shaped pizza dough seems to make it easier to slide the pie off the peel into the screaming hot oven.

We bake all our pizzas on a steel, which has quite literally been a game changer in our quest for the perfect slice. If you use a pizza stone or metal pan, please follow the alternate baking instructions.

Ingredients

1/2 lb. lean ground chicken

1/2 small onion, chopped

1/3 cup Frank’s original red hot sauce* (see notes)

1 Tbsp. fresh garlic, chopped

1 stalk celery, ribbed and sliced thin on diagonal

1 Tbsp. finely chopped jalapeno

1/3 cup whole milk ricotta cheese

1/2 cup shredded pepper jack cheese

1/2 cup crumbled bleu cheese*

1 ball real New York pizza dough (link to dough recipe)

Extra virgin olive oil

Salt and pepper (as you like it)

Notes

Not a fan of bleu cheese? Try feta instead, to mimic the texture and saltiness, but without the funk.

Don’t get confused when you see the selection of Frank’s sauces. They used to make only one (now labeled “Original”), and this is the one you want. Trust me, I’ve been eating it on wings since the 1970’s.

Frank’s has developed several new flavors since they began, but the “Original” red hot sauce is exactly what you want. True Buffalo sauce flavor.

Instructions

Heat a skillet over medium heat. Add a swirl of extra virgin olive oil and cook chicken with onions until browned. Remove from heat, stir in Frank’s Red Hot sauce and chopped garlic.

Shape pizza dough into 12- to 14-inch disk. If you missed the tutorial, here’s a quick recap for shaping your pizza dough.

Brush or spray with olive oil and season with salt and pepper. Spread ricotta evenly over dough, keeping about 1/2 inch border on dough. As with any other sauce or base, you want to spread it thinly enough that you can see glimpses of dough through it.

Scatter chicken mixture evenly over ricotta base, then top with celery slices, jalapeno and pepper jack. Sprinkle bleu cheese crumbles over the top of the pizza and bake on a preheated steel at 550° F for about 7 minutes, until crust is golden brown and cheese is bubbly.

See what I mean? ALL the flavors!
You might even go crazy and drizzle a bit of bleu cheese dressing right on top before you slice it.

For baking on a pizza stone, follow manufacturer’s instructions regarding maximum temperature. Some stones will crack or break at higher temperatures. For baking on a pizza pan, lightly grease the pan before placing dough on it, and bake in the lower third section of your oven for a few minutes longer than recommended in the above recipe.

Want to print this recipe?

If you’re lucky enough to have leftovers, do you know the best way to reheat them? If you just said, “the microwave,” you’re excused from my blog. Just kidding! You can enjoy the leftovers as much as the original pizza, by placing the slices in a skillet or on a griddle, over very low heat. Place a vented cover over the slices, or lay a loose tent of foil over the top. This helps the cheese return to a glorious melty state, while the constant gentle heat on the crust surface brings back the crunch.

If you look at the spot right exactly in the center of this image, you’ll see the cheese getting bubbly again.