Here’s another grown-up beverage offering for Halloween week, and my series of “spooky” cocktails. I realize that not everyone enjoys the taste of bourbon or other liquors, and I’m just beginning to explore the wide array of cocktails that are made with wine and beer. One that comes up frequently in my Pinterest feed is a “snakebite,” which is a layered cocktail made of hard cider and lager or stout beer.
The color of a “snakebite” drink depends on whether you layer a lager beer or a stout over the hard cider.
(image from brooklynbrewshop.com)
It looks cool, like a classic black and tan (or a tan and tan, depending on the type of beer), but the fermented apple base gives it a distinctly tart seasonal flavor, and that’s what I wanted to emphasize for my Halloween drink series. I thought, “what if I take that seasonal aspect to the nth degree by mixing it with my favorite seasonal beer?”
If you missed my earlier post about this brew (Hello, Pumking!) you can revisit that for proper introduction to what is, in my opinion, the BEST pumpkin ale ever, and I’m not just saying that because we were born in the same part of upstate New York. My opinion is shared by enough other people that Pumking’s maker, Southern Tier Brewing, has expanded the brand to include a nitro version, a cold brew version and even a small batch whiskey. The newer offerings aren’t readily available in my part of North Carolina, but I’ll keep loving original Pumking until the shelves go bare. Then I’ll wait patiently until next autumn, the same way Linus stood guard in the pumpkin patch, waiting for the arrival of the Great Pumpkin.
For my Halloween version of a snakebite, I’ve layered the Pumking over a hard cider, but I wasn’t satisfied with any old hard cider. Nope, I tripped down the craft aisle until I found one that is also enhanced with pumpkin and spice. I found it, of course, in the pumpkin spice capital of everywhere, Trader Joe’s.
Doc’s Cider hails from another part of upstate New York, and this pumpkin spiced version is delightfully bright and crisp. My beloved Pumking, of course, is from Southern Tier Brewing Co.
Ingredients
6 oz. pumpkin spice hard cider
6 oz. Pumking (or other pumpkin ale, if you must)
Layering a beer drink is easy to do, but it only works if the two ingredients have different specific gravity weight. In the classic drink, it works because Guinness ale is dry and light so it hovers neatly over the sweeter cider. Layering is not really necessary for my version of this drink, given that the cider and Pumking are virtually the same color anyway. Give it a try if you’d like (I’ll show you how in the slideshow), or just pour them in together. Either way, the resulting blend of tart, crisp cider and creamy, spicy ale is something quite special and it goes down very easy, but watch your step—as the name implies, these guys will definitely sneak up on you!
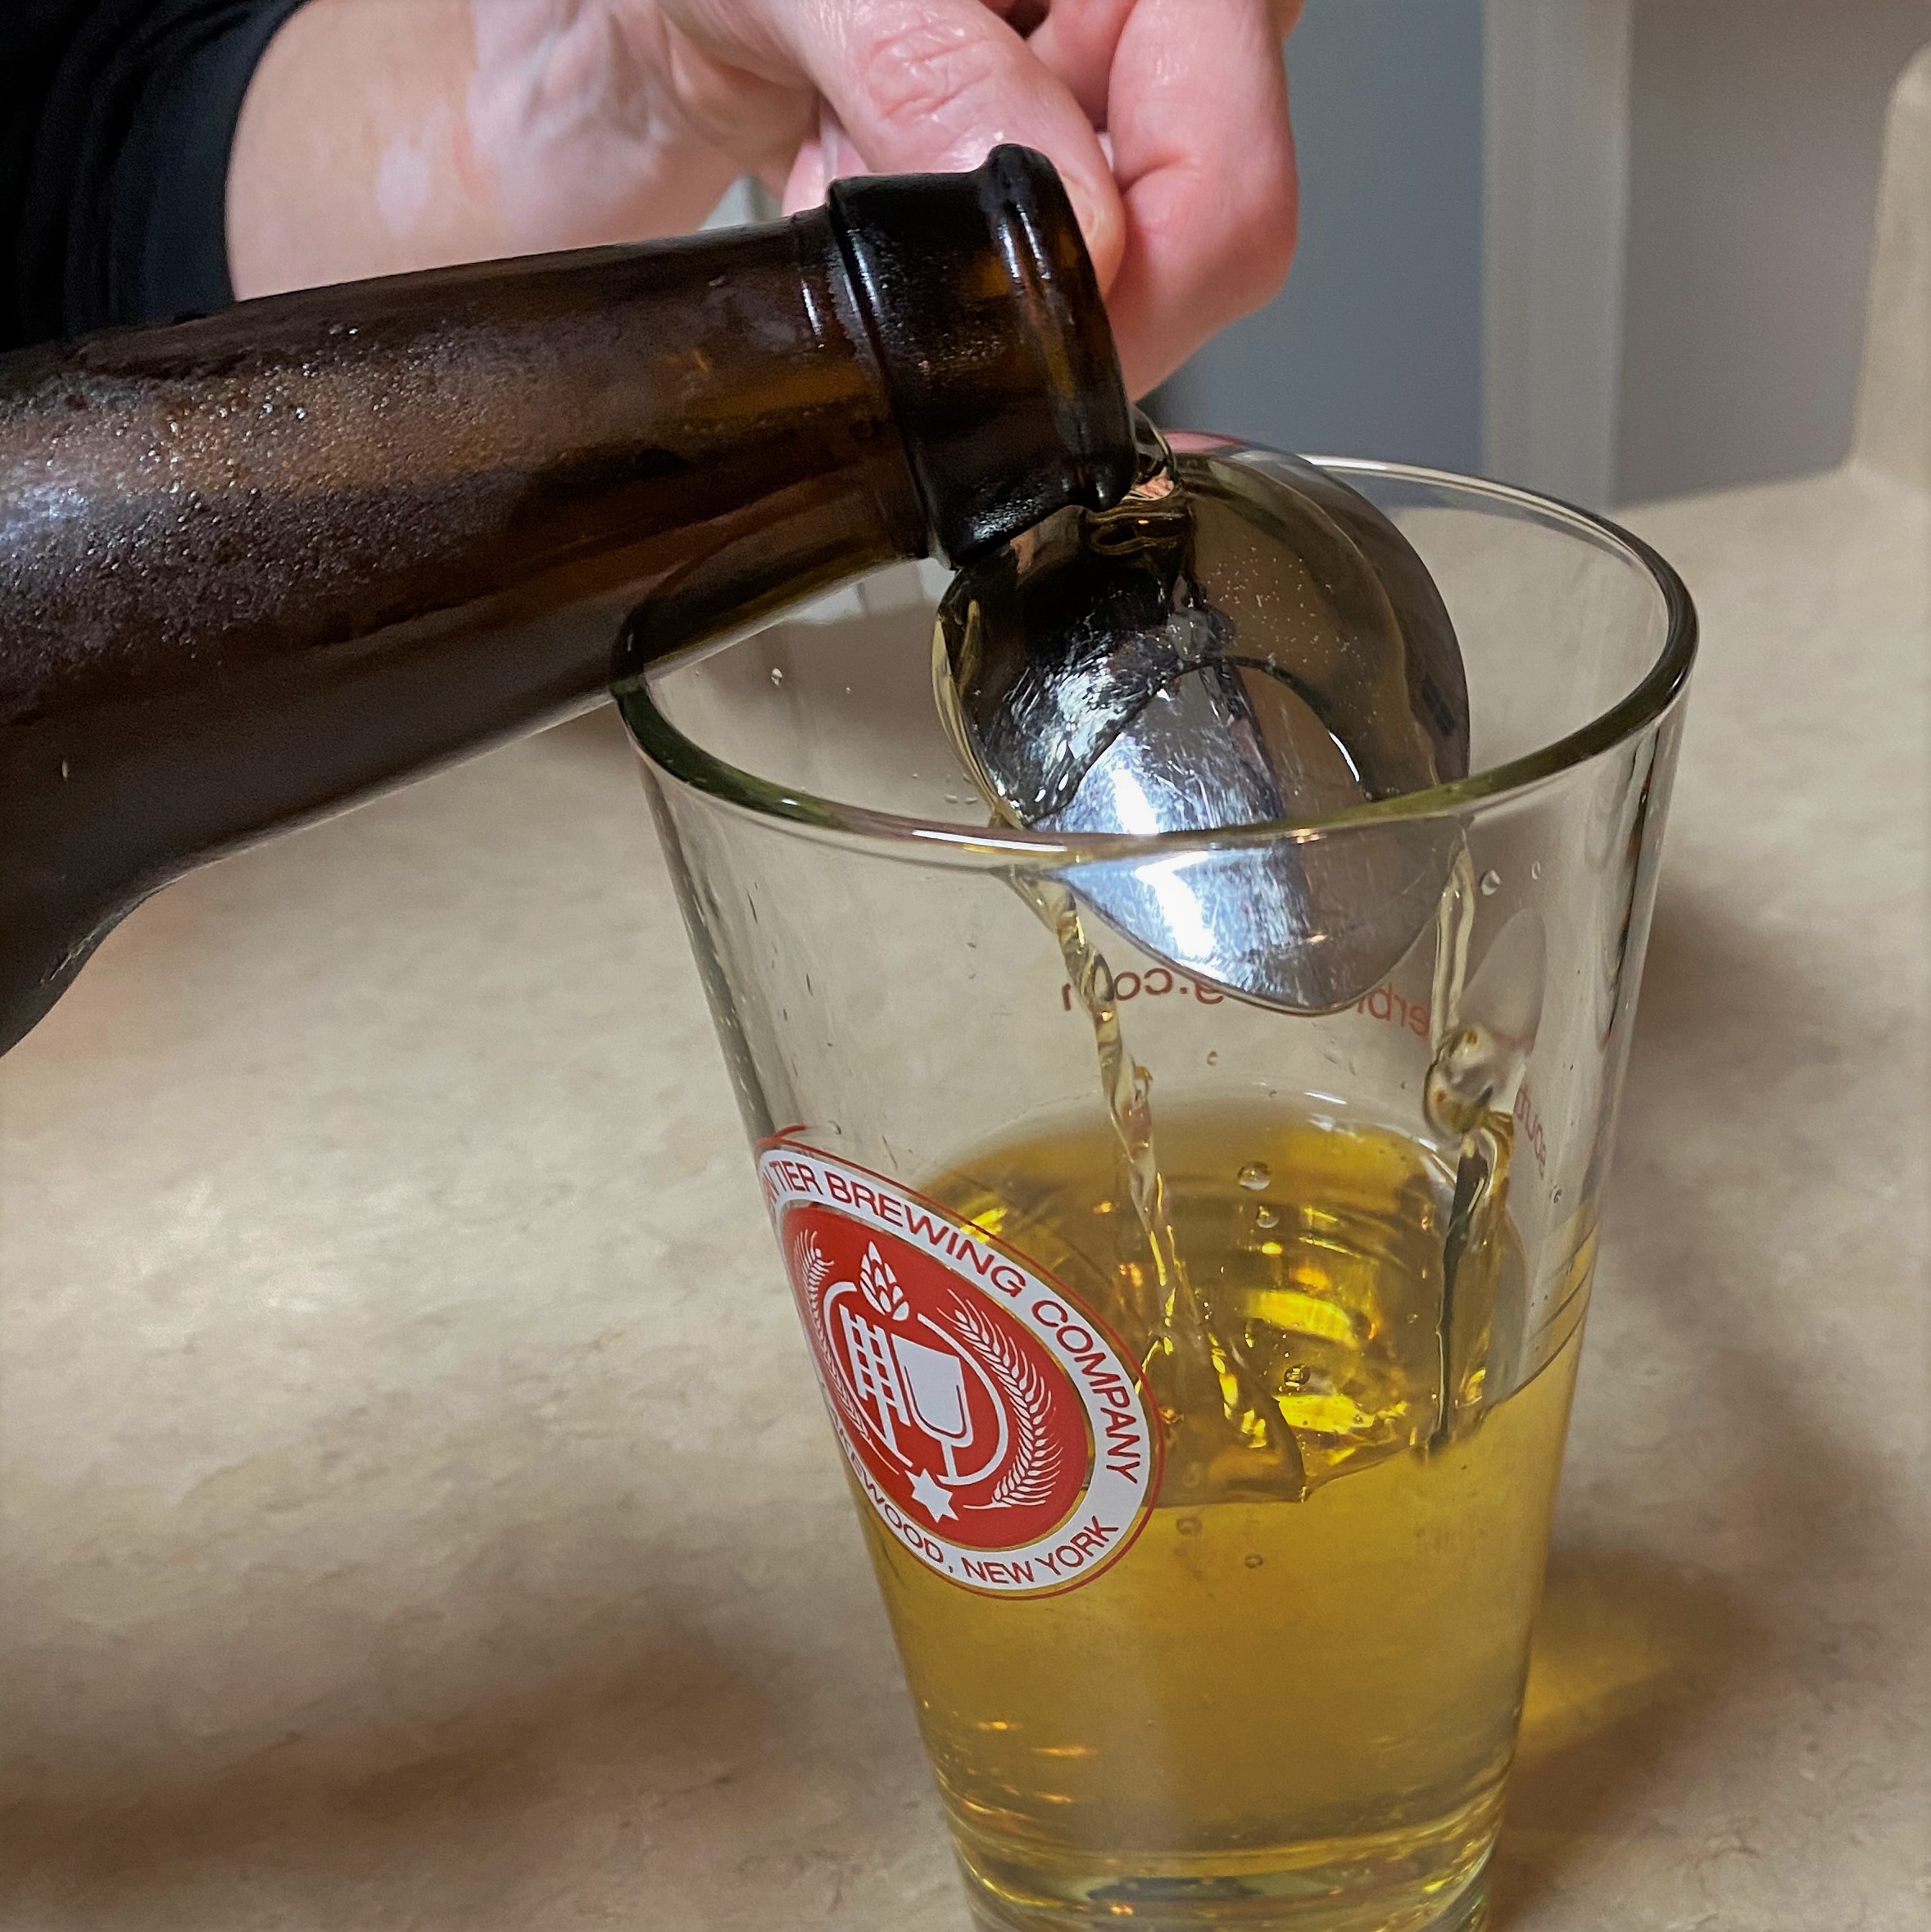
Fill half the pint glass with the hard cider. So far, so good.
Pour the Pumking ale slowly over the back of the spoon to layer over the cider and to keep it from foaming too much.
If you prefer a drink that’s more mixed, just pour the Pumking right into the cider. They taste great together!
Here you have it, Snakes in the Pumking Patch. Better watch your step! 🙂
Agreed, especially in these times. Thank you, good sir!
This Halloween-themed beer cocktail is super easy to make in about 30 seconds, and it was a great way to wash down our Sloppy Dogs! Recipe for these yummy treats coming Friday!
You may be wondering if I’m a paid endorser for the products I spotlight on Comfort du Jour, and the answer is “no.” I do not receive money or products for my recommendations, and what that means for you is that you can count on me to give an honest opinion. If something changes, I will update my disclosures. Either way, you can still count on me to be honest in my recommendations, as I will only stand behind products I believe in. Fair enough? 😀
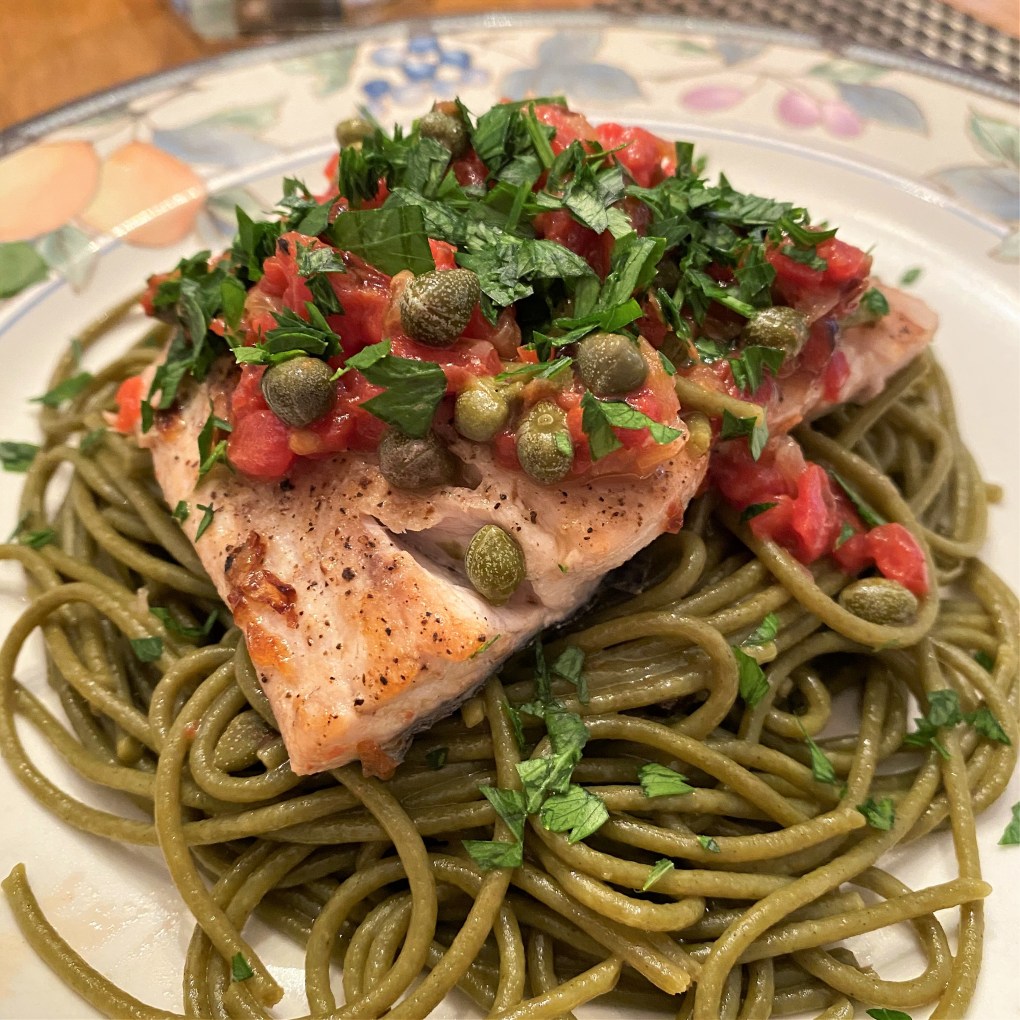
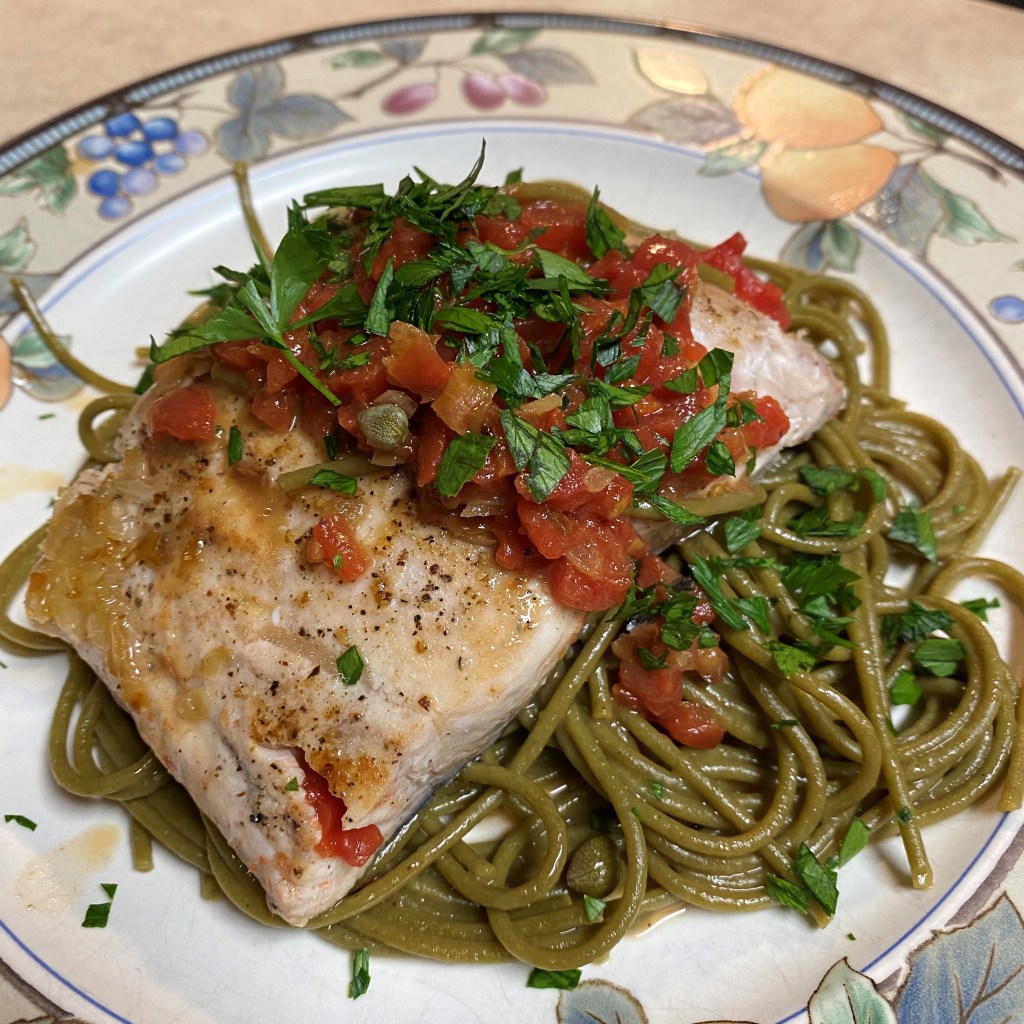
Friends frequently ask my husband and me how it’s possible we aren’t gaining 10 pounds a week, given all the “rich foods” they see on my blog or his Facebook page. It’s a fair question after you’ve seen the Waffled Mac & Cheese or some of the unconventional creations on my Pizza Party page. But we don’t always eat heavy foods, and sometimes our meals just look more decadent than they really are thanks to presentation. That’s important to remember: If a food looks beautiful, it may be more appetizing, but that doesn’t mean it’s decadent. This Mahi Hemingway—a recipe I’ve adapted from a local restaurant—is a good example.
This dish is deceptively easy to make, and its flavor and presentation both rival the restaurant I “borrowed” it from. The restaurant version has a light and elegant white wine, lemon, tomato and caper sauce, served over delicate angel hair pasta and topped with a pan-seared fillet of fresh grouper. I first tasted it more than 15 years ago, and it’s still on the menu for $30. I’m not going to say it isn’t worth it, but I do know you can make it at home (with exactly the same flavors) for a fraction of that price, and it’s easy.
If you have never tasted capers (first of all, where’ve you been?), expect a briny, pickled flavor—kind of like a tangy green olive, but about the size of a green pea. I don’t use much in any recipe because capers pack a lot of flavor. You’ll see capers in Mediterranean cuisine, especially paired with seafood. I also love to chop and add them to condiments for seafood, such as tartar sauce.
The lemon is straightforward citrus, and it’s crucial (as I declare in most of my recipes) that you choose fresh. Bottled lemon juice is full of weird preservatives and has no place in my kitchen, as long as lemon trees are still alive somewhere on the planet.
The remaining ingredients are petite diced tomatoes (fresh is great, but canned works fine), a splash of white wine, about half a medium onion, your favorite long pasta and a couple of pats of butter. I’ll assume you already have extra virgin olive oil, salt and pepper.
Lots of great flavor, and all perfectly good for you.
The Prep
I love a recipe that comes together quickly, especially on a busy weeknight, and this one takes only about five minutes to prep. First, cut thin slices of onion, and then dice them small. Cut the lemon in half. Measure out a heaping teaspoon of capers (no need to rinse them). Cut up a roma tomato into small diced bits or use a slotted spoon to scoop about 1/3 cup from a can of petite diced (it’s OK if you also get some of the juice). Put on a pot to boil for your pasta, and salt and pepper the fish.
This is a very simple recipe, including these items plus a splash of white wine. You’ve got this!
About the fish
The restaurant version I mentioned is made with grouper, which isn’t always easy to find. I substituted mahi the first time I made it myself and liked it so much I never looked back. Mahi is a firm fish—stronger in flavor than grouper or tilapia, but not as “fishy” as a sea bass or mackerel. Choose any firm-fleshed fish you like. I keep the skin on during cooking because much of the healthy omega-3 fats are very close to the skin. I’ve found that with most fish, the skin is super easy to remove once that side has been cooked, but this is strictly a matter of preference. If you don’t like the skin, ask the fishmonger (I love that word) to remove it for you.
Mahi is an oily fish, with loads of good omega-3 fats. It’s concentrated in that red line down the middle.
Choosing your pasta
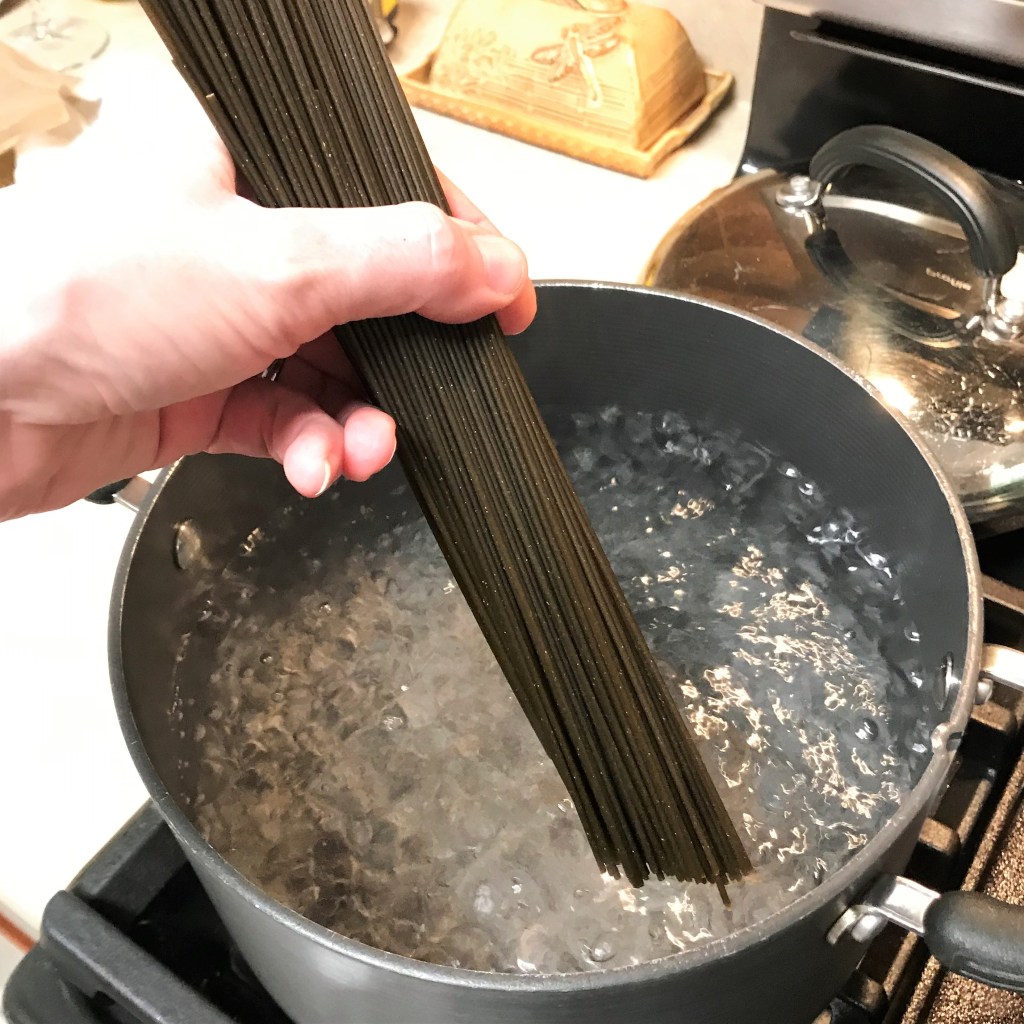
For pretty presentation, choose a “long” pasta—something delicate like spaghetti or angel hair works nicely. Whole grain is an excellent choice, and today, I’m using a new thin spaghetti Les picked up for us. It’s durum wheat (ideal for pasta), and made with spinach, zucchini, broccoli, parsley and kale. We are adding a whole serving of vegetable to our dish, but without extra effort. I’m good with that!
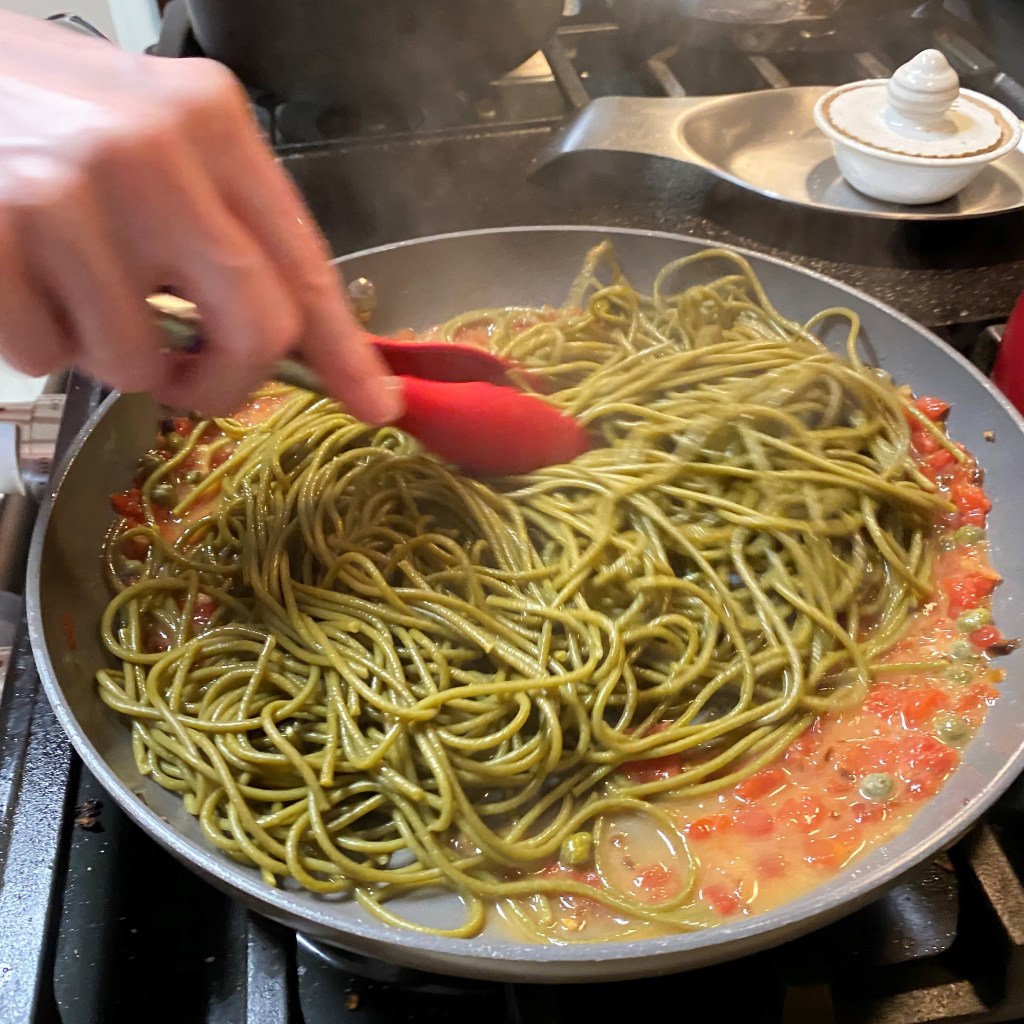
This “super greens” pasta is such a dark green, it almost resembles seaweed!
So far, this recipe is ticking all the boxes—healthful, quick, easy. I’m loving it.
Putting it all together
The fish and sauce will cook quickly, so get going with the pasta first. Remember to use plenty of water and salt it generously.
I use the same skillet for the fish and the sauce. Begin over medium heat, sautéing the onion with a little olive oil until it begins to soften. Move the onion to the edges of the pan, and add the mahi fillets, flesh side down. For the best sear, resist the urge to move it around much. After about seven minutes, it will release freely so you can turn the fish and cook the skin side.
Add the tomatoes, capers, lemon juice and white wine to the skillet, give it a gentle shake to mix the ingredients, then cover and allow it to simmer on low heat until the pasta is cooked al dente. Remove from heat. Transfer the fish fillets to a plate and cover to keep them warm. Add a pat of cold butter to the sauce and use a fork to swirl and melt it. This technique creates a silky richness without a lot of extra fat. Immediately drain the pasta and use tongs to give it a quick swish through the sauce to coat it before plating. Spoon some of the sauce over the pasta, then top with the mahi fillet and the remaining sauce. Sprinkle a little fresh, chopped parsley on top and enjoy!
The slides will give you a visual walk-through of how easy this is to make. If you want to save the recipe for later, there’s a button at the end of the post to download and print for your recipe book.
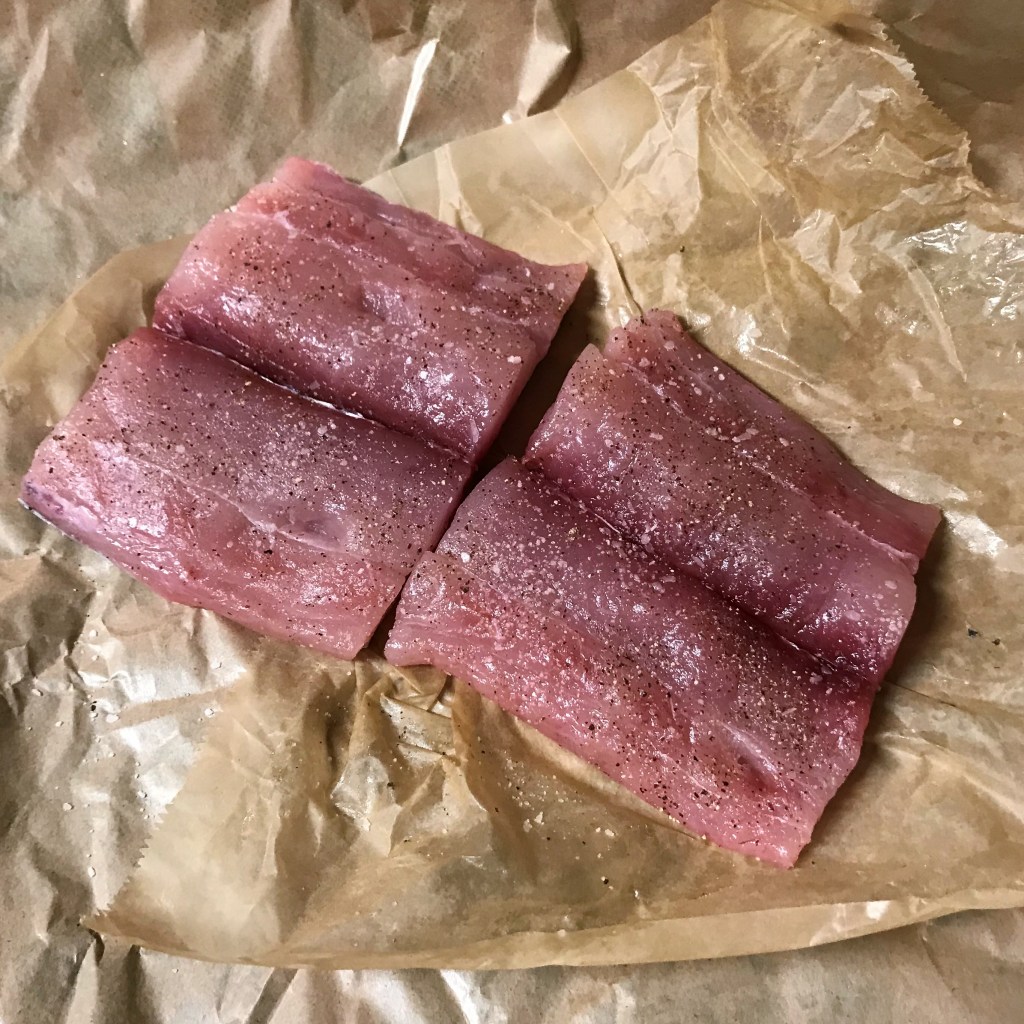
Nothing fancy going on here, just a quick sprinkle with salt and pepper.
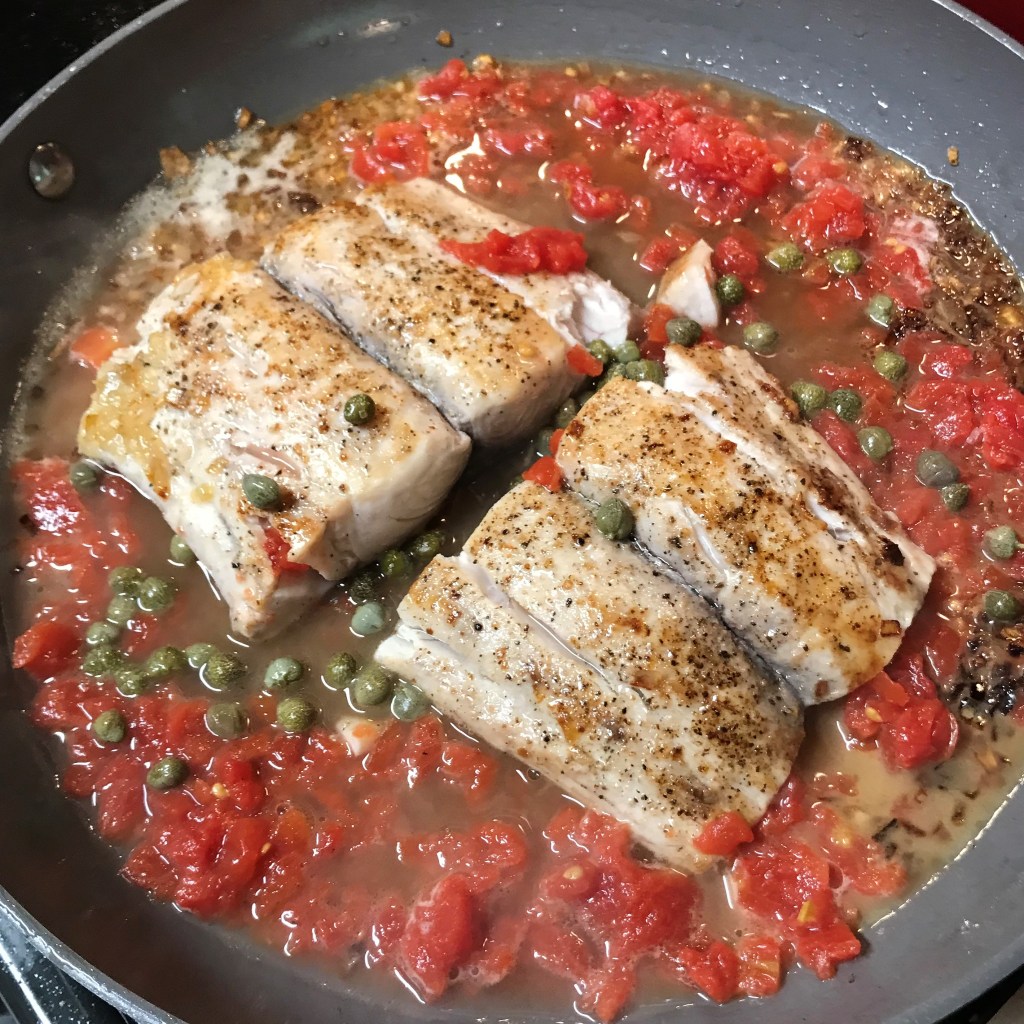
The mahi fillets go into the pan, flesh side down at first, to get a good sear. I’ve moved the onions to the edges to minimize burning.
The fish will finish cooking while the sauce components simmer together.
Take a pat of cold butter for a twirl through the sauce at the very end to add silky richness without a ton of fat.
Always give the cooked pasta a quick swim through the sauce before plating, so every bite has equal flavor.
Heart healthy and delicious!
Ingredients
Makes two servings (easy to double; choose a large enough pan)
2 6 oz. fillets fresh mahi or other firm fish
2 servings thin spaghetti or angel hair pasta
1/2 medium sweet or yellow onion, thinly sliced and diced
1/3 cup petite diced tomatoes, strained from can or chopped fresh
The warmth of summer is fading, and I’m not complaining. My favorite things to cook are autumn and winter foods, and I’m scheming to bring exciting new flavors into the new season.
But we still have to eat between now and then, and the grill has been our BFF this summer, especially as we have challenged ourselves to elevate our home-cooked meals while so many restaurants were closed. Here’s a quick look back at some of the fun grilled foods I’ve put on my plate since I launched Comfort du Jour:
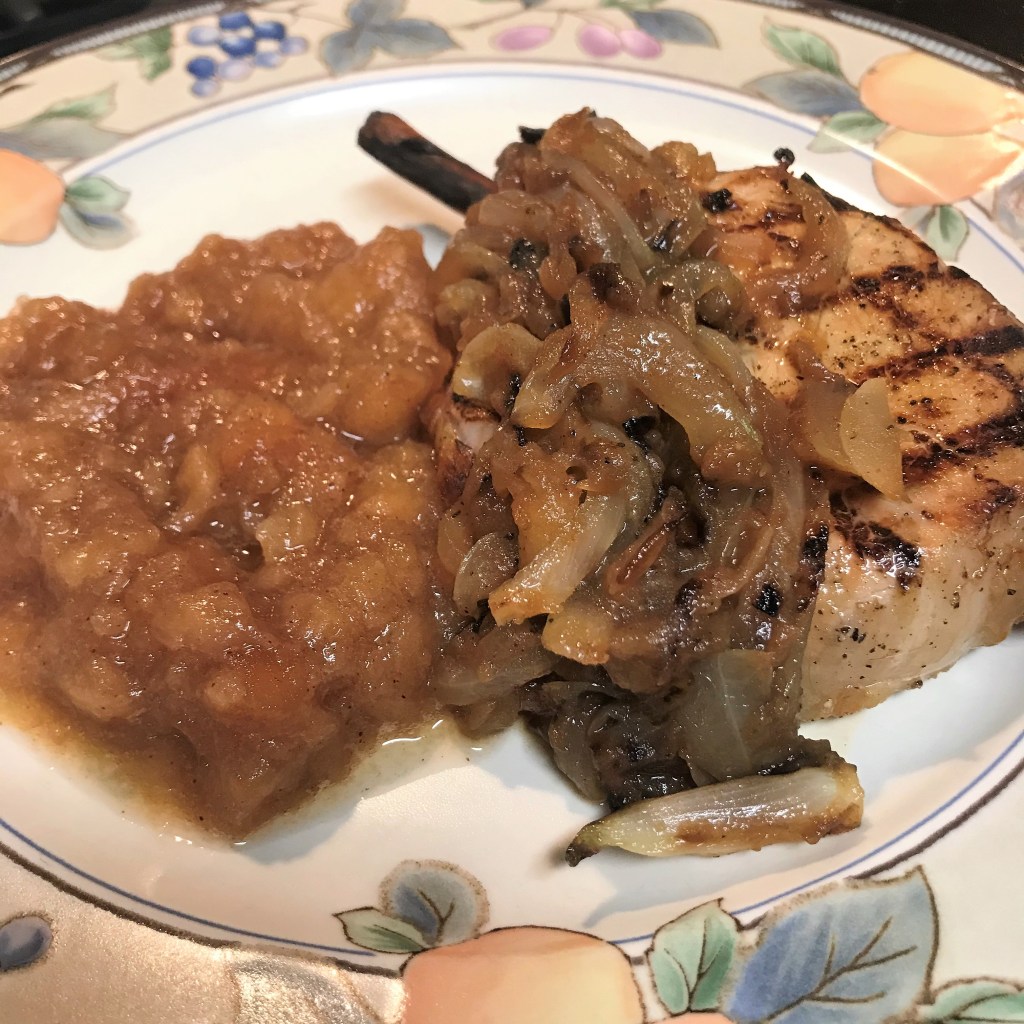
Before the sun sets on summer 2020, I’m throwing down a Mediterranean twist on simple grilled pork chops. I love the flavors of souvlaki, the Greek specialty that highlights the brightness of lemon and pungency of garlic, and is often applied to chicken or pork on skewers, so why not just skip chopping the chops into chunks and just marinate them as they are?
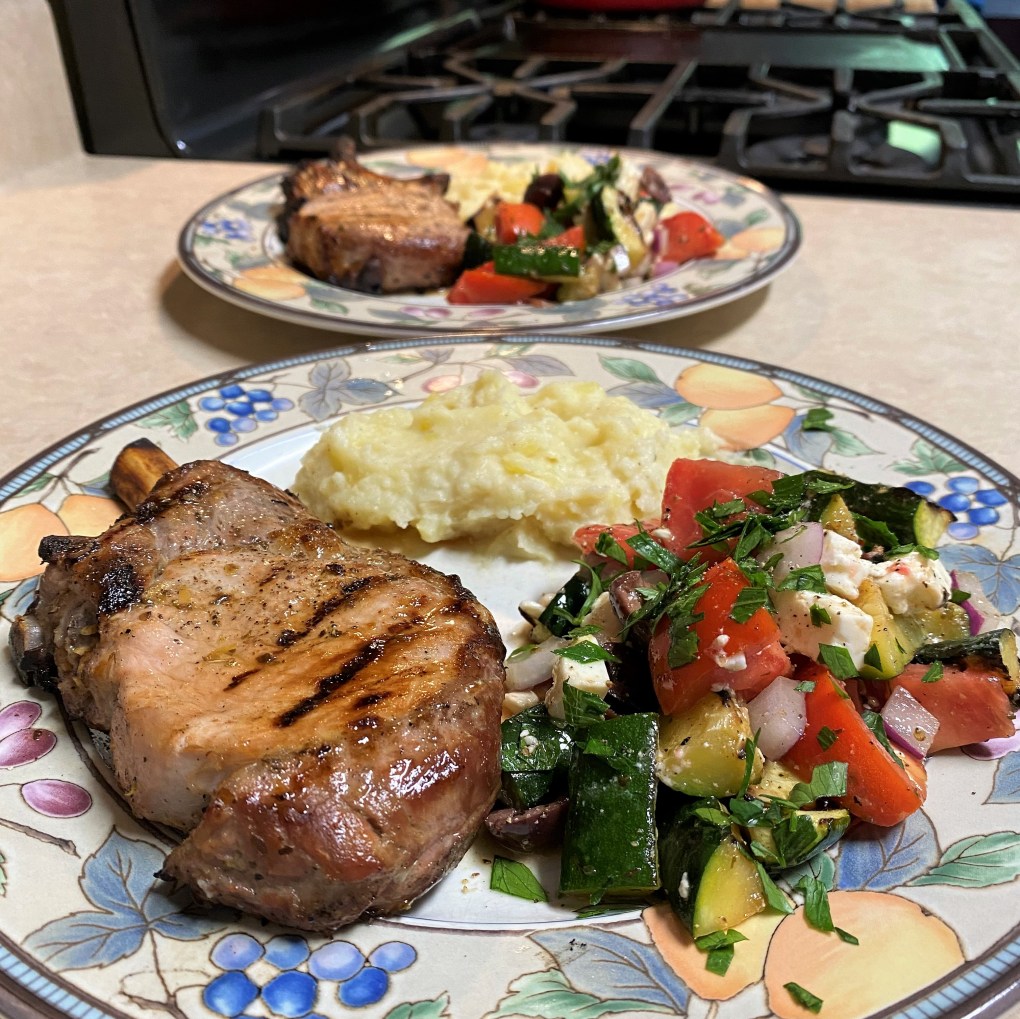
Does this look healthy and delicious, or what?
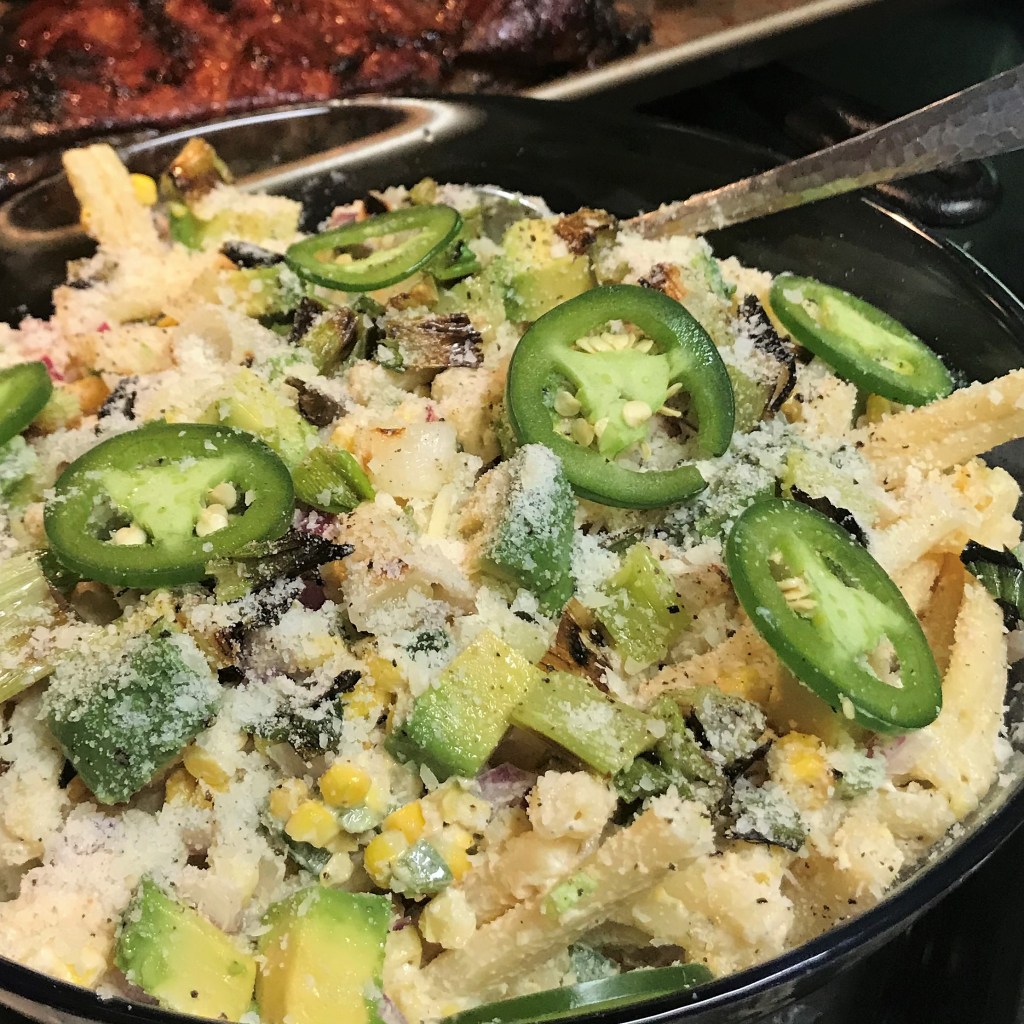
And tasty grilled meat deserves a fresh grilled side, so I have also whipped up a flavorful, healthy salad made with fresh summer tomato, crunchy red onion and marinated grilled zucchini squash. Here we go!
Ingredients
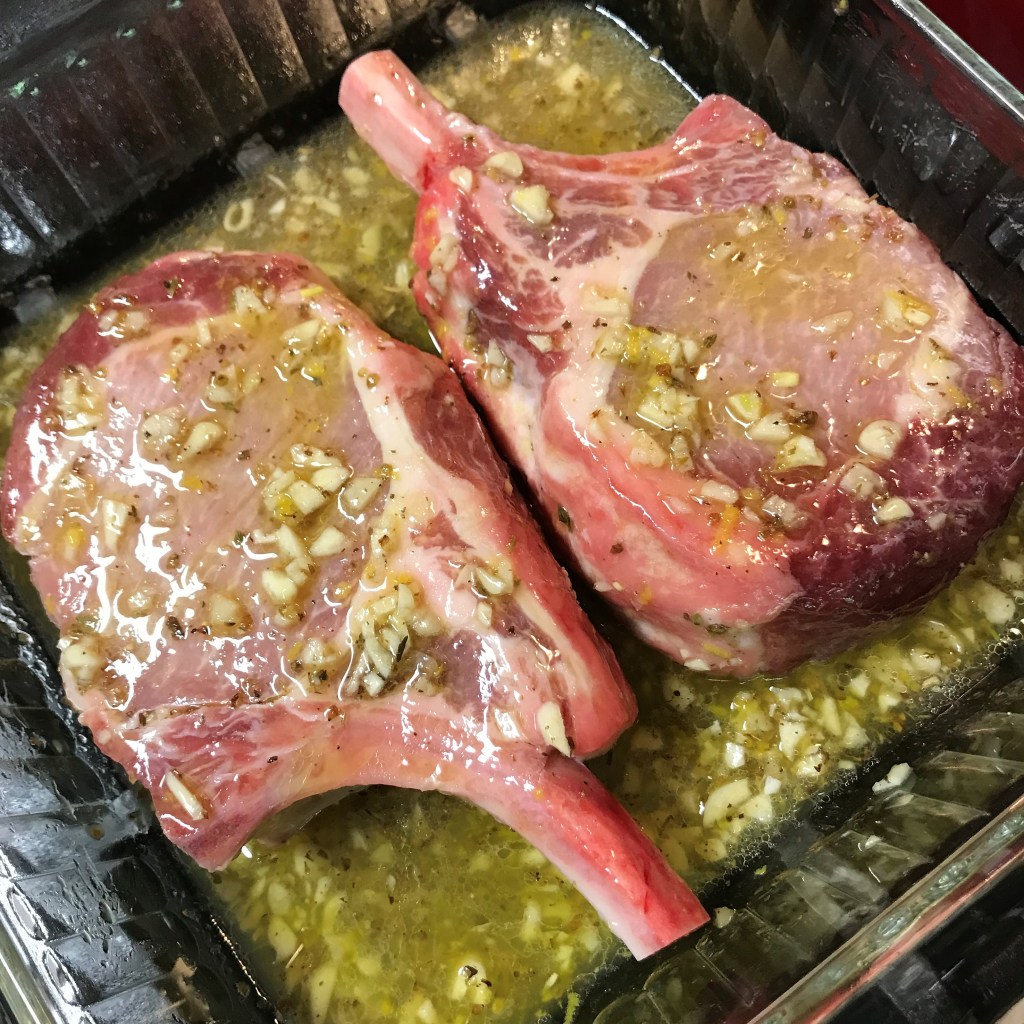
2 thick sliced, bone-in pork chops
4 cloves garlic, minced
Juice of one lemon
1 Tbsp. white balsamic vinegar (or any white wine vinegar + pinch of sugar)
2 Tbsp. red wine vinegar
1/2 tsp. dried oregano leaves
1/4 cup extra virgin olive oil (I used Greek Kalamata)
Sea salt and freshly ground black pepper
For the salad:
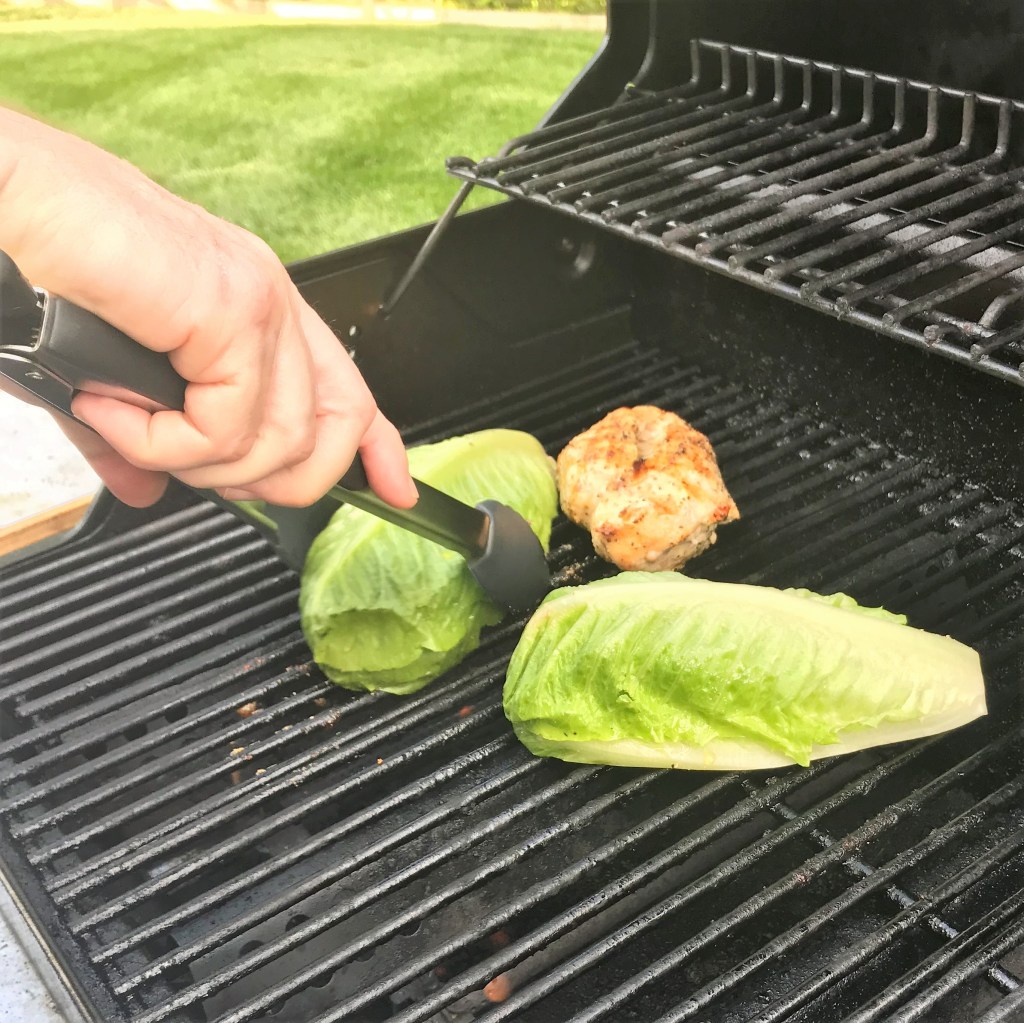
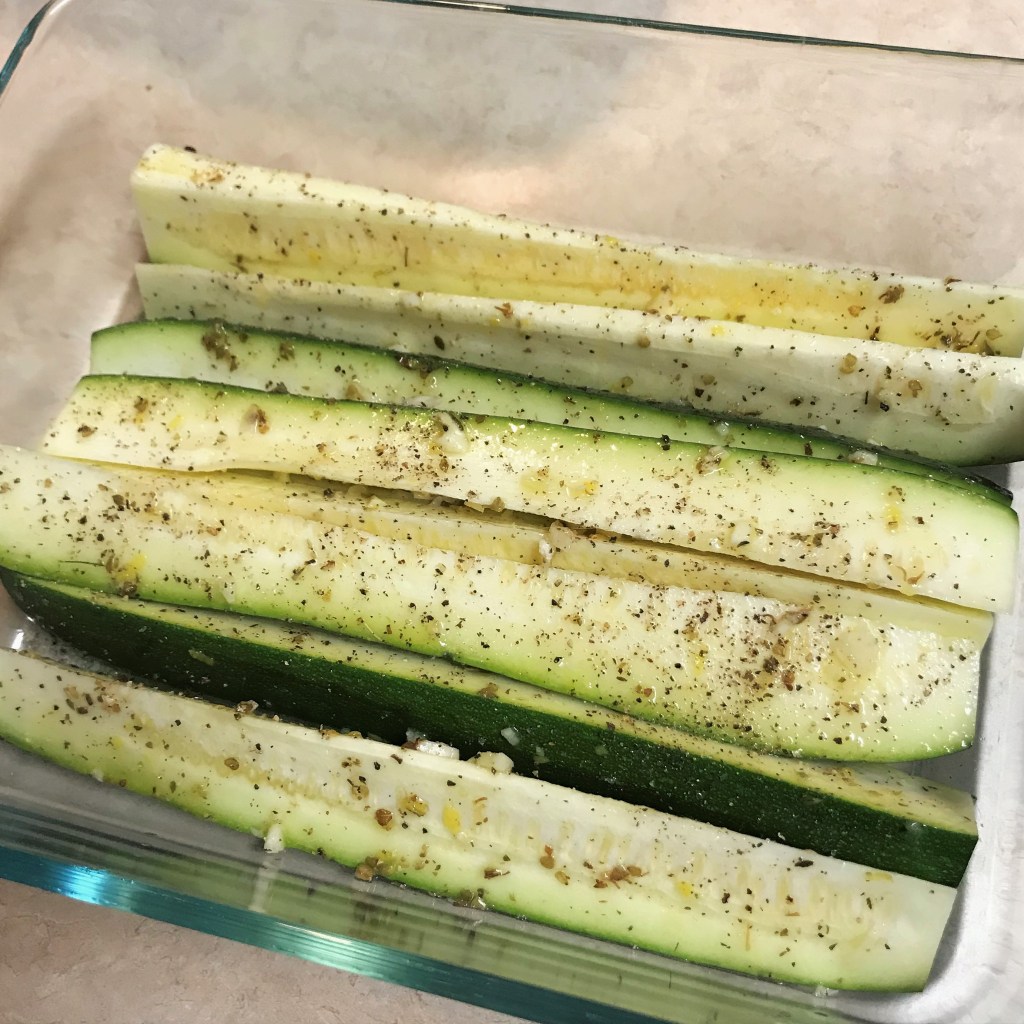
1 medium zucchini, trimmed and cut lengthwise into wedges
1 medium firm tomato, cut into chunks
2 thick slices red onion, cut into chunks
6 Kalamata olives, drained and chopped
Dressing: 1 Tbsp. red wine vinegar, 1 Tbsp. white balsamic, a few shakes of garlic-pepper seasoning, 1/4 tsp. dried oregano, whisk in 2 Tbsp. olive oil.
Feta cheese, cut into cubes
Fresh parsley, chopped, for garnish
Instructions
Take a walk through the slideshow for visual instruction, and refer to the notes below if you need them. Remember, you can download the recipe in PDF format to try it yourself, and please let me know how it comes out for you!
Look at all that garlic! 🙂
Turn the chops a few times during the marinade time.
Reserve a small amount of the souvlaki marinade for the zucchini, just enough to coat the spears.
Add the other salad ingredients right on top of the warm grilled zucchini, and toss with the dressing.
I’m loving these bright summer colors!
The zucchini develops a creamy texture when it’s grilled, and it’s a terrific contrast to the freshness and crunch of the other ingredients.
Season pork chops with salt and pepper.
In a glass measuring cup, combine lemon juice, vinegars, oregano, salt and pepper. Drizzle olive oil into the blend, whisking constantly, until mixture is emulsified. Stir in minced garlic.
Pour most of the marinate over the pork chops in a glass dish and set aside for 30 minutes. Turn once or twice during marinating time to ensure even distribution of flavor.
Pour the remaining marinade over the zucchini strips in another dish. Salt and pepper the zucchini and set those aside while you chop and prep the remaining salad ingredients.
Mix together the dressing ingredients and set that aside, giving the dried oregano time to hydrate.
Prepare grill and pre-heat to about 450° F (medium). Carefully place the pork chops over direct heat and sear each side about 1 minute to seal in juices. Then reduce the heat to about 350° F. The olive oil may cause flare-ups, so keep that cold beer in your hand to splash if necessary. Just kidding; either keep a squirt bottle nearby or use a grill tool to try to put out the flare or move the chops.
Continue to cook for about 10 minutes each side, or until juices start to run clear when pierced with a knife tip.
When you turn the chops, pile the zucchini onto the grill also, and turn them frequently to cook evenly and to get those beautiful grill marks.
Allow the finished chops to rest and chop the zucchini spears into bite-sized chunks. Immediately toss the grilled zucchini with the rest of the salad ingredients. Whisk the dressing briefly, then pour over salad and toss gently to combine. Scatter cubes of feta and fresh parsley over salad and serve alongside the pork chops.
Three favorite key ingredients, plus onions, garlic, butter and a splash of white wine—it sounds simple, because it is. This is a delicious entrée I like to call a “Sunday Supper” because there are a few extra steps that make it special without making it complicated. A recipe that takes a little more time is what I love, in part because it feels relaxing to prepare food slowly with more intention, but mostly because as the meal develops and the house becomes increasingly filled with savory aromas, it creates a tension and anticipation that isn’t often present with a quickly cooked weeknight meal.
The result of the extra care and patience required for this dish is well worth the time and effort—tender, juicy bites of chicken with a rich, onion-y mushroom gravy-like coating. It’s satisfying and comforting, in a way that only a home-cooked meal can be. You can taste the love in this kind of food. The mushrooms contribute an earthiness that is not overwhelming, and the freshly squeezed lemon, thyme and white wine give the impression of something far more gourmet than the simple instructions I’m about to describe.
I prefer to make this recipe on the stove in a skillet because it’s usually just me and my husband at the dinner table, and I like to keep my counter space open. But if you are doubling the recipe and happen to have a large electric skillet, that would be a terrific option—provided it has a cover, which is an important part of finishing the recipe. I’ll walk you through preparation of the dish, but if you’re ready to dive straight into it, you can scroll to the bottom to download a printed copy of the recipe. But then, of course, you’d miss the pictures. 🙂
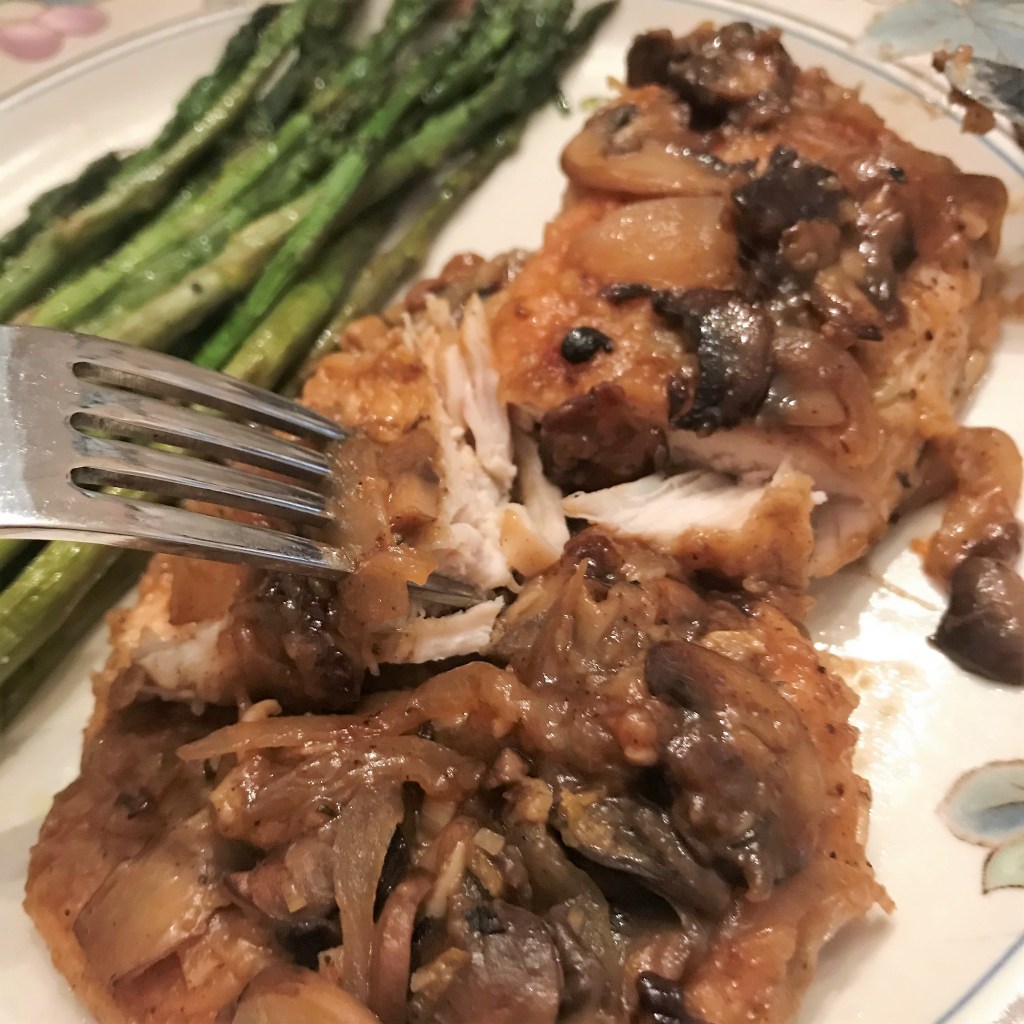
A quick twist of the fork is enough to grab a bite of this lemon mushroom chicken. How scrumptious and tender is that?
Here’s how to make it.
First, the chicken breasts are sliced and pounded thin to ensure tender, uniform pieces. I do this myself at home because it’s an easy way to save the extra cost of pre-sliced cutlets. It’s OK if you don’t have a meat tenderizer; you can use the bottom of a small pot to do the same. Next, season the pieces with salt and pepper and a couple of pinches of dried thyme. It’s important to do this first, because you want the seasoning in the chicken—not just on the coating. Then drag the cutlets through some seasoned flour and let them rest while chopping a sweet onion and a couple cloves of garlic.
My tenderizer mallet has two sides, and I’m using the smooth side to flatten the chicken slices between parchment sheets. Take your time with this step so the chicken stays intact.
Thin slices ensures that there will be plenty of flour in the pan to thicken the broth later. Dredge again just before browning.
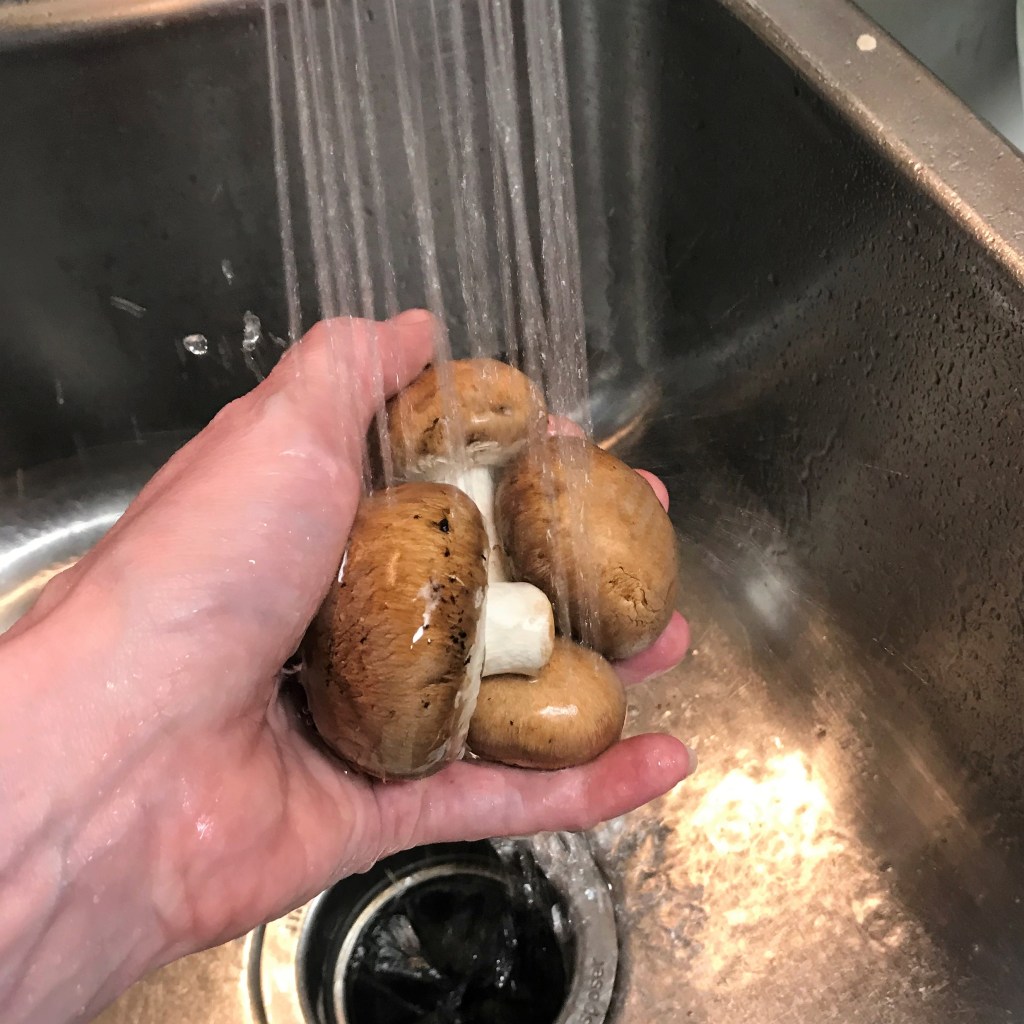
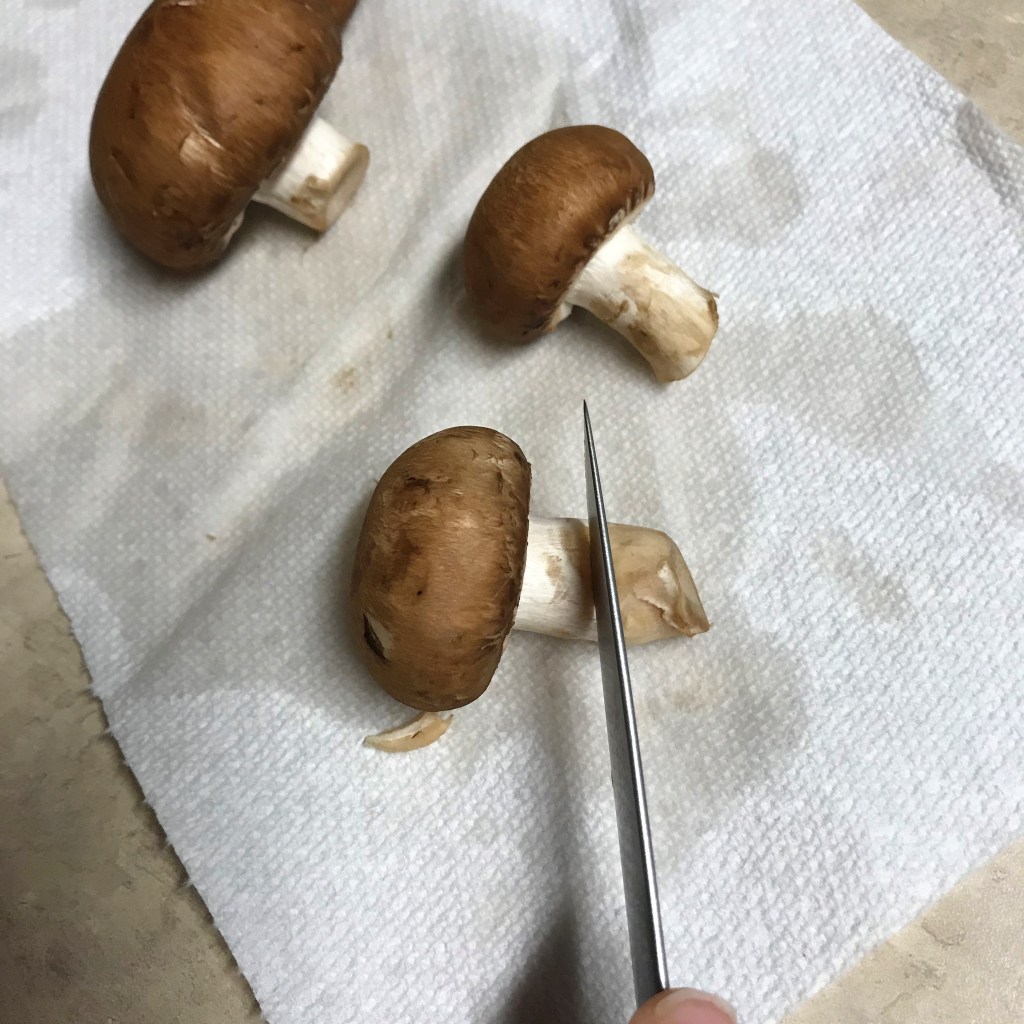
Clean and slice a full package of fresh mushrooms. It may seem overkill for a four-serving recipe, but they cook down considerably and they are a key component of the dish. My favorite type is cremini (sometimes called baby portabella, though technically they are not), but white button mushrooms or shiitake would work fine as well. Are you on the fence about the right way to clean mushrooms? I used to be afraid that rinsing them would make them soggy, but I learned a few years ago that mushrooms don’t absorb much water unless you soak them (thank you for that, Alton Brown!), so go ahead with a thorough cold water rinse then use a clean paper towel to dry them and wipe away any remaining debris. Finish the prep by trimming the stems and slicing them into 3/8” thick, perfectly uniform slices. Say what? Here’s how to do the slicing part in less than one minute:
A quick rinse under cold water is all it takes to loosen the crud from fresh mushrooms. Don’t skip this step.
Use a clean paper towel to gently wipe away moisture and debris. Work from the top of the crown, outward.
Trim off the ends of the stems, as they tend to hold onto debris.
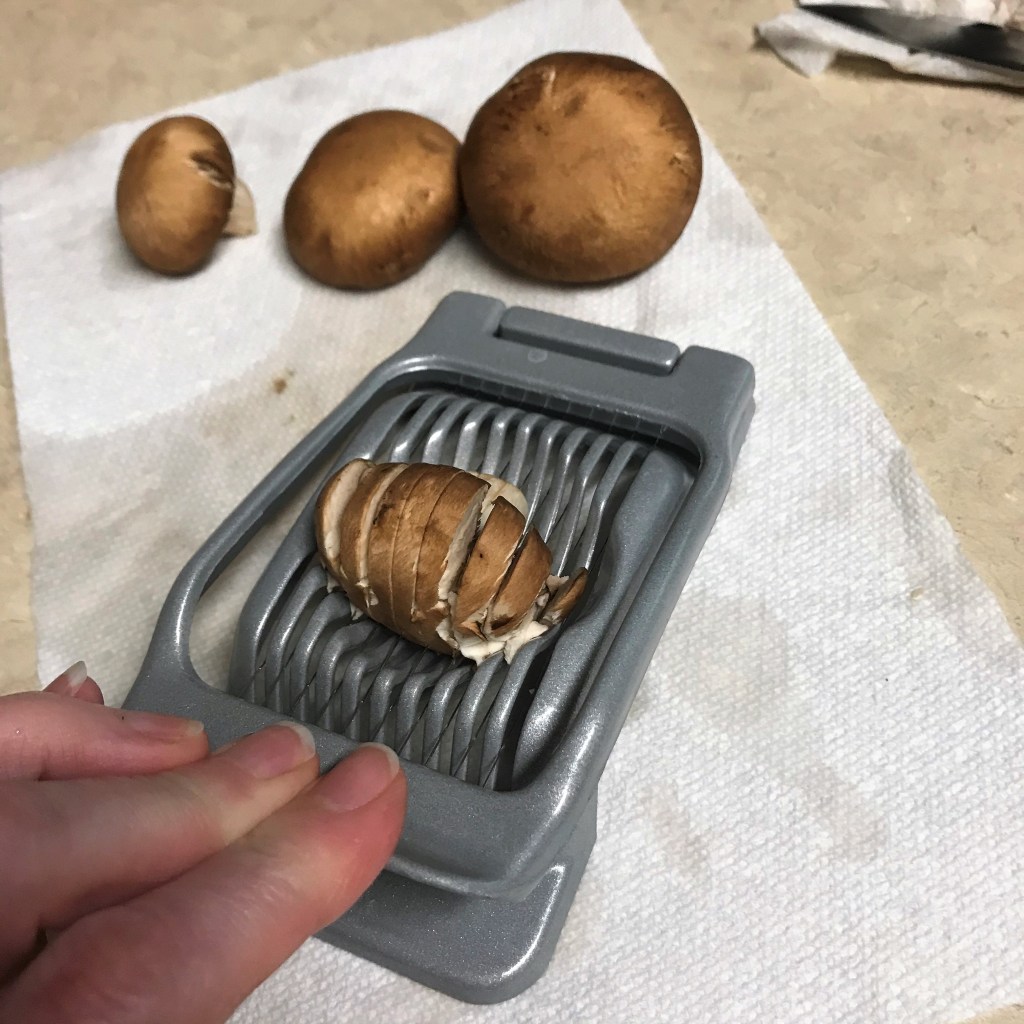
A sturdy egg slicer gets this job done in record time!
My egg slicer is made of metal, with cutting wires that are sturdy enough to tackle slicing mushrooms and strawberries, and I love that I get clean, uniform slices with minimal effort. Maybe someday I’ll use this thing to slice eggs. If you don’t have an egg slicer, use your best sharp knife, and don’t sweat over the thickness—just slice them as evenly as you can, but not paper thin.
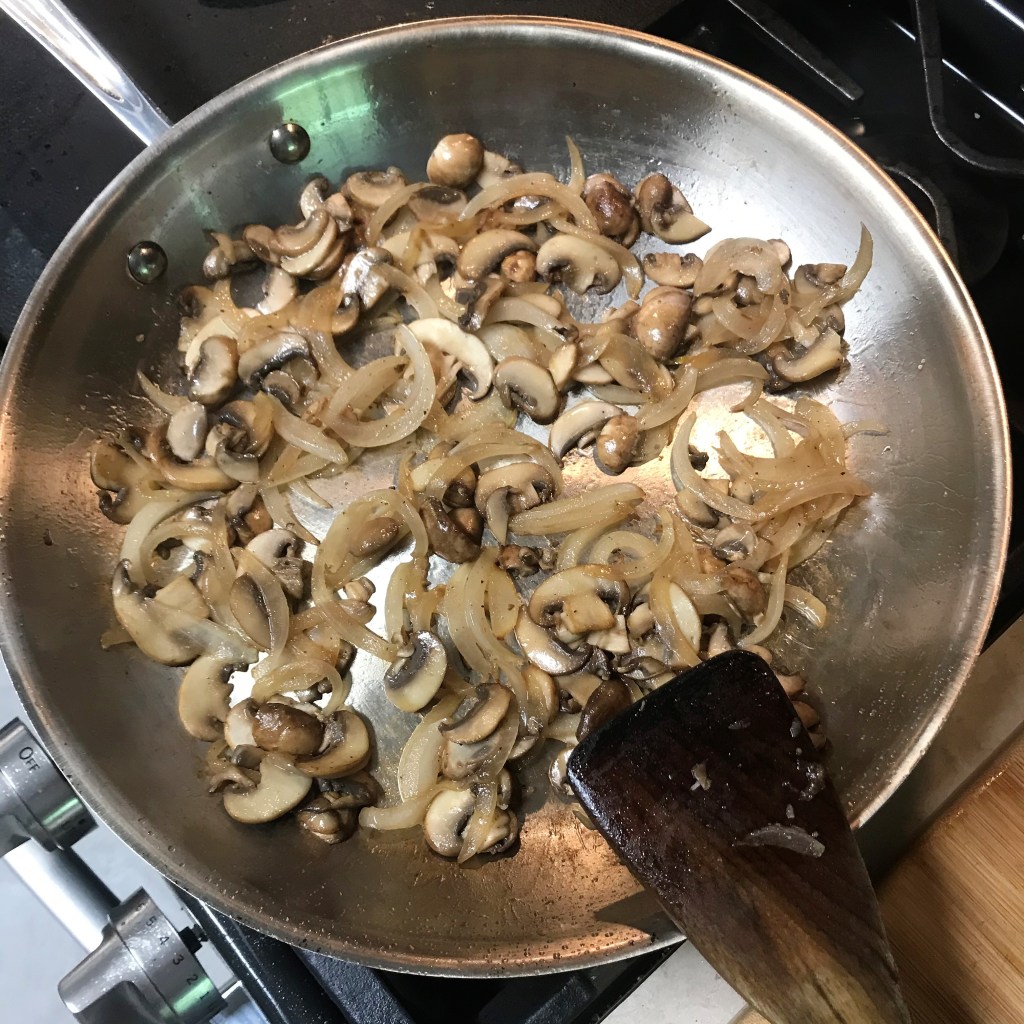
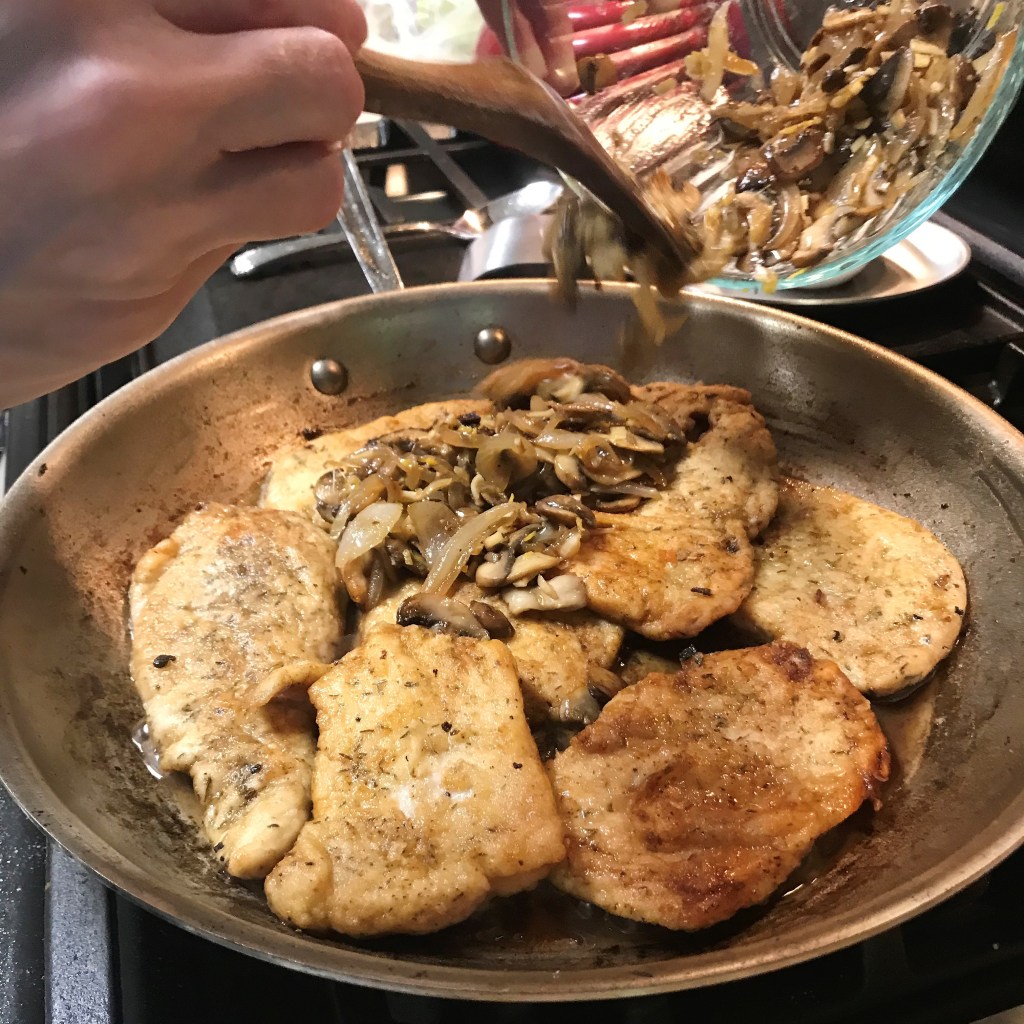
The onions go into a heated skillet with olive oil, but you’ll notice in the photos that I don’t take them very far toward caramelization. You want them to be nice and soft, so keep the heat in the medium-low range and cook just until they soften and begin to look translucent. Add the mushrooms in batches and cook them without crowding the pan. These guys give off a lot of moisture when they cook, and if you have too many at once, they will steam rather than brown. Take your time, and when the first handful of mushrooms reaches that “lightly browned” stage, move them aside and add another handful. When the whole batch is finished, add the chopped garlic and sauté briefly, then transfer the mixture to a bowl.
Everything is “mise en place,” a French term chefs use to explain that their ingredients are prepped and in place for the recipe.
I usually caramelize onions, but I want them to remain soft for this recipe. By the time I’m done, they will seem nearly melted.
Give the cutlets another quick dip through the seasoned flour while you melt butter in the same skillet. It’s not unusual for the flour to absorb moisture from the chicken during the initial rest, and they should be completely (but lightly) coated before they hit the hot butter. This will create a roux-like coating on the chicken, and the broth you add later will break that down into delicious gravy as it simmers.
When the butter is melted and bubbly, carefully arrange the cutlets into the pan in a single layer, again taking care not to crowd the pan. Depending on how many pieces you have, this may need to be done in batches as well. Turn the cutlets over when they are a nice golden brown on the underside, and stack them on top of each other when both sides are done, to make room in the pan for any remaining cutlets.
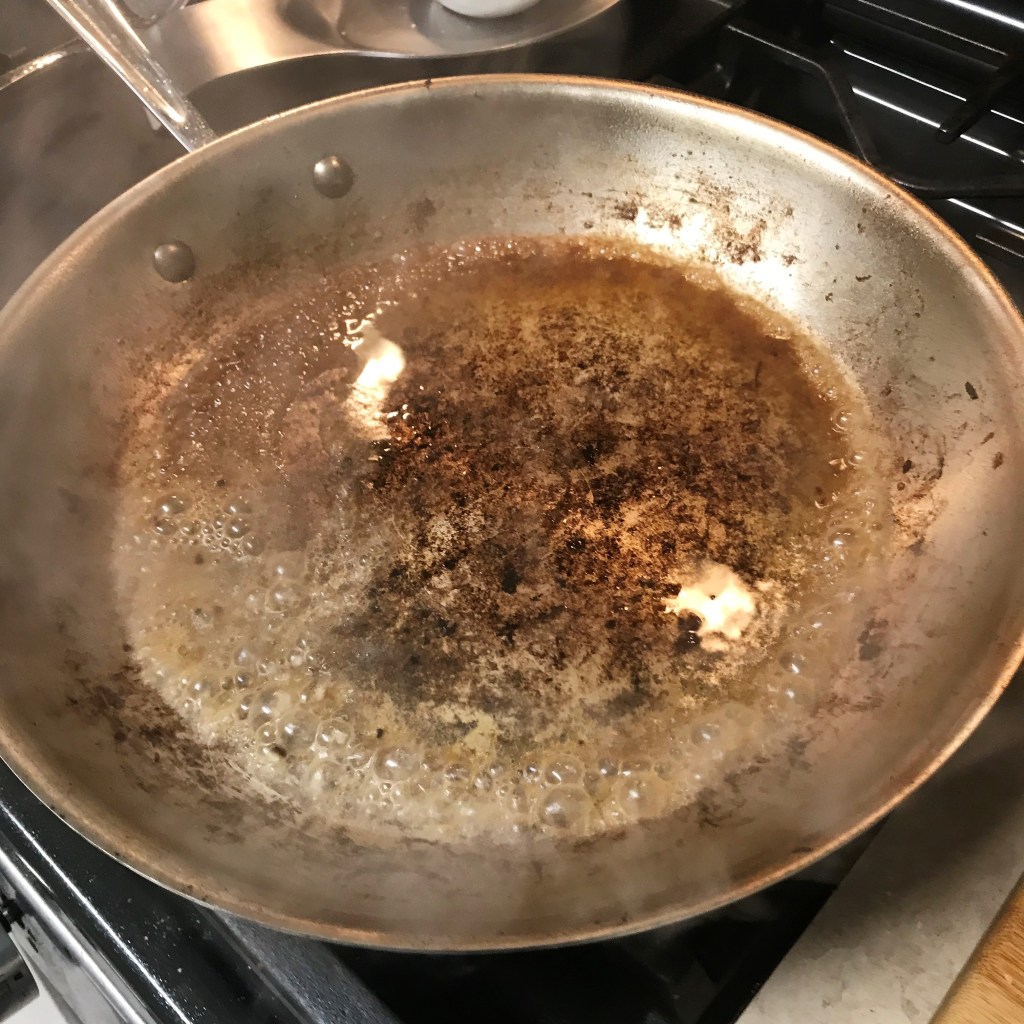
Remove the browned cutlets and rest them on top of the reserved mushroom-onion mixture. This will make room for you to de-glaze the skillet, bringing all the beautiful browned bits back into the dish. Reduce the heat to low, then working quickly, pour in the white wine and use a whisk or other utensil to scrape up those flavorful remnants. Squeeze in the lemon juice and swirl the pan to combine. Place the chicken cutlets back into the skillet and pile the mushrooms and onions on top. Carefully pour in chicken broth, but only enough to slightly cover the chicken. Give the skillet a gentle shake to help the broth get under and around the chicken, then cover the skillet and walk away.
Butter is best for attaining the perfect golden brown color. If you avoid dairy, substitute olive, canola or avocado oil.
Add another tablespoon of butter if you need it for the remaining cutlets.
The acid in the wine and lemon juice begins loosening all the browned bits from the pan. We want those flavors back in the dish!
Pile the onions and mushrooms all over the top of your chicken cutlets. They’ll help keep the cutlets moist while the pan simmers.
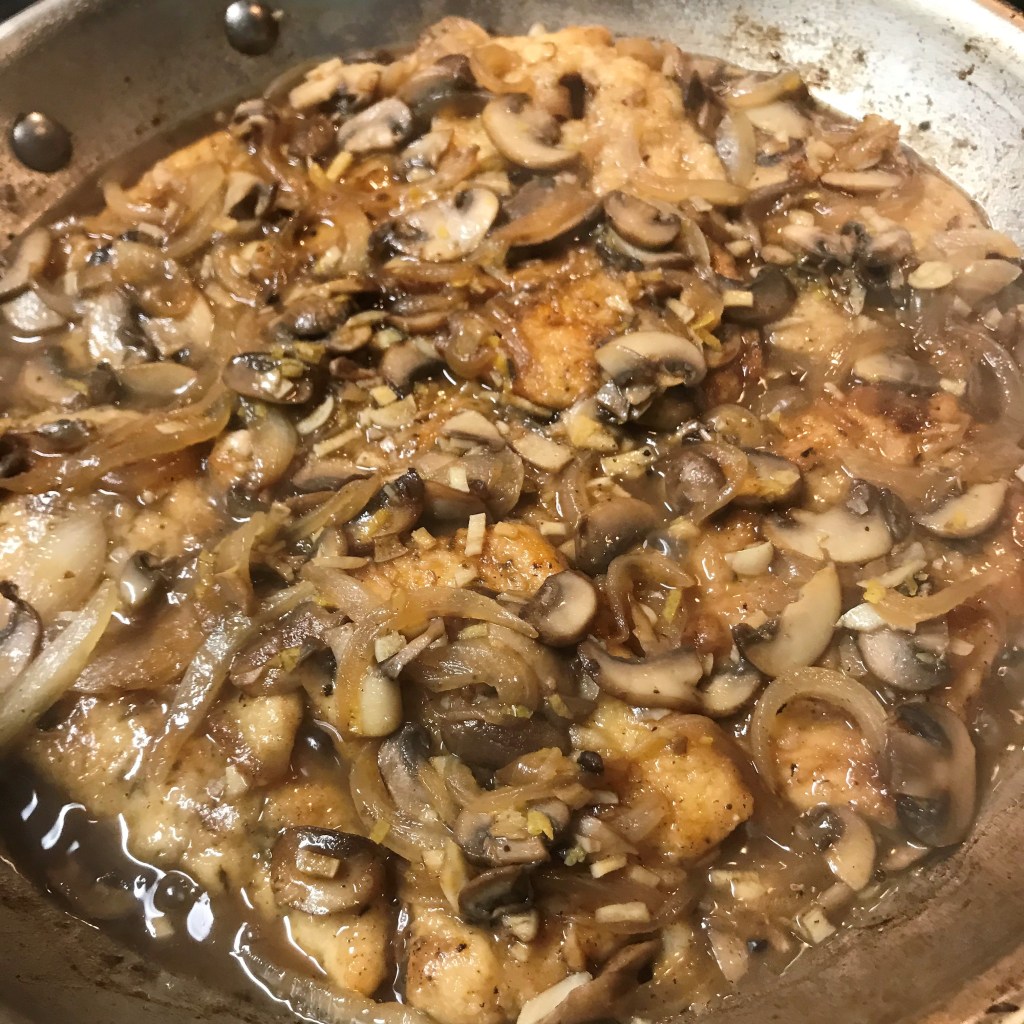
Add the broth and give the pan a gentle shake. Time to put a lid on it and relax a bit before supper.
The chicken will simmer at this low temperature for 35 to 40 minutes. It will be fully cooked well before this time, but the long simmer will result in the tenderness and richness I described at the beginning. What’s great about a recipe like this is that while the magic is quietly happening in the skillet, I have time to tidy up the prep dishes, set the table and enjoy a glass of wine with my husband. This is also a good time to prep whatever vegetable or salad I plan to serve. When the main dish is more involved, as this one is, I usually opt for a simple vegetable side. The lemon mushroom chicken deserves center stage.
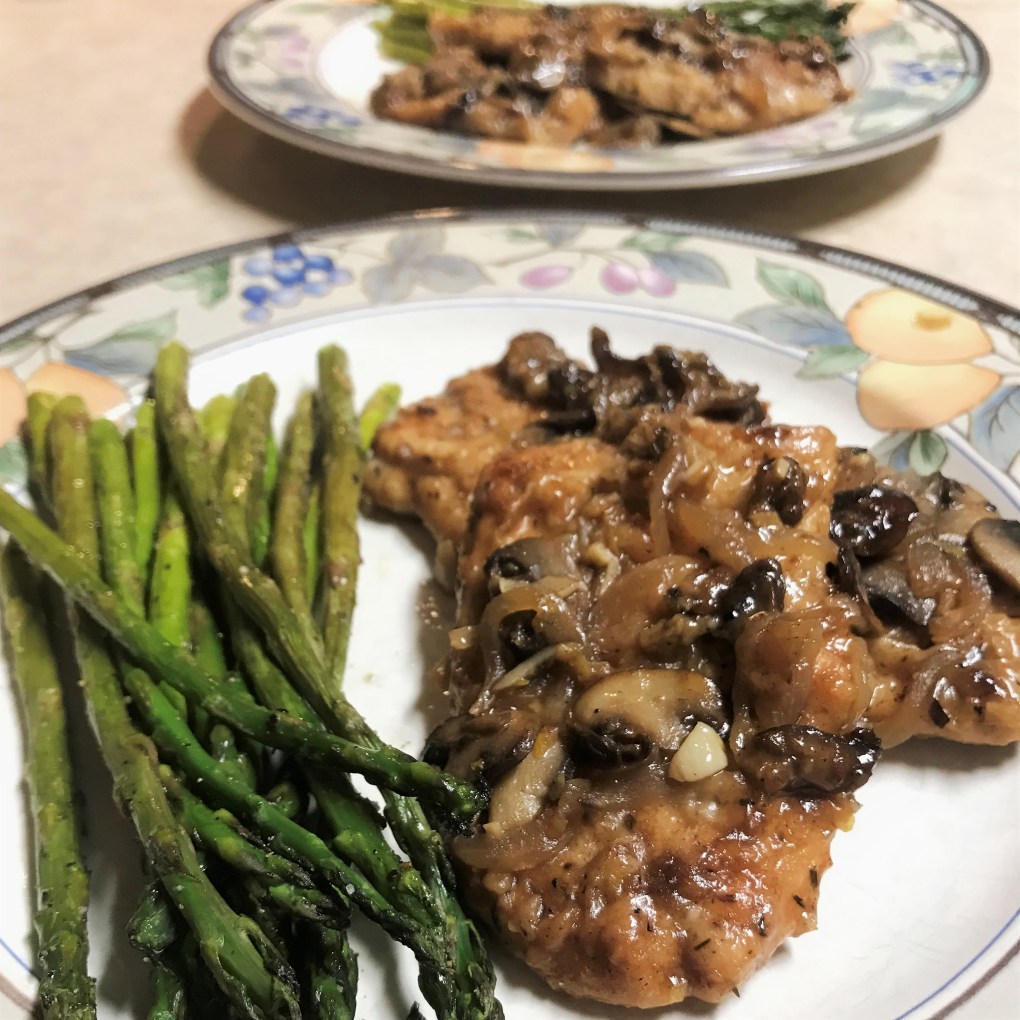
I love how the sauce becomes part of the chicken, rather than being poured over it. This dinner will melt in your mouth.
For this meal, I roasted fresh asparagus. If you are cooking asparagus some other way, I will be so bold as to declare you have been missing out! Try roasting once and you’ll see what I mean. Rinse and trim the stalks, arrange them on a parchment lined baking sheet, drizzle with olive oil and roll them around to coat. Give them a little salt and pepper to taste, and pop them into a 400° F oven for 15 minutes. They should be slightly tender and retain a bright green color. Easy, yet so elegant.
And there you have it—this “Sunday Supper” dish takes a little more time than an average weeknight meal, but the payoff for your patience is a tender portion of delicate chicken, covered in savory mushrooms and fully enveloped in a rich, gravy-like coating. We like this on its own with a fresh roasted vegetable or salad, but it would also be beautiful on top of your favorite mashed potatoes, rice or linguine.
Ingredients
1.5 lb. package skinless, boneless chicken breast (or same weight of prepared thin cutlets, if you prefer)
Salt, pepper and 1/2 tsp. dried thyme leaves
1/2 cup all-purpose flour
Extra virgin olive oil
1 medium sweet onion, sliced into crescent shapes
8 oz. package fresh cremini mushrooms, cleaned and sliced
2 or 3 cloves of fresh garlic, finely chopped
4 Tbsp. unsalted butter (cold from the fridge is fine)
1/3 cup dry white wine (I use pinot grigio, or sometimes dry vermouth as substitute)
1 fresh lemon
1/2 to 3/4 cup low-sodium chicken broth (use enough to just cover the browned cutlets)
As with art, music and just about everything else in life, appreciation of food is subjective. When I learned recently that September is “Better Breakfast Month,” I wasn’t sure what to make of it. “Better” can mean any number of things—qualitative and quantitative. At our house, we are always aiming for our version of a better breakfast in that we actually sit down and eat the meal. Together. At the table. It’s a terrific concept, and we’re committed to keeping that going!
We have a few favorite breakfasts in regular rotation, the most common of them being what we lovingly refer to as “Jewish Boy Breakfast,” or JBB, as I like to call it on my menu planning spreadsheet (yes, I’m really that nerdy). This morning meal is the namesake of my darling husband, Les, who is Jewish and raised in New York, the best city in the world for Jewish food. A typical JBB at our house looks like this:
You can’t take the NYC out of the boy. Les loves his bagels!
It’s a whole wheat everything bagel, topped with spreadable scallion cream cheese, thin slices of red onion, capers (on mine, anyway) and lox. We are lucky to have a reliable source of fresh-daily bagels in our city, otherwise I would have to bake them myself (which I’ve done exactly twice, and wow, what a project). The cream cheese is a homemade schmear that’s super easy to make yourself (check out that link above), and we are forever on the lookout for a sale on lox, because this salty cold-smoked salmon can get pricey.
In case you’re wondering, there is in fact a side of bacon on the plate—which clearly is not part of a balanced Jewish breakfast. I never said he was devout.
JBB has a special role in our love story as well. During our courtship, I straddled the fence about getting serious with Les, following too much drama and heartbreak in my own past. About eight months in, we had a huge snowstorm (in North Carolina, that means more than two inches of snow at once), and though he had been willing to run a bunch of random errands in such conditions, he declined my invitation to dinner. Better to “play it safe,” he said, given the weather and all. In response, I decided to play it safe by being hurt, and I went to bed feeling sorry for myself. Next morning, I was awakened by a text from Les—“why aren’t you answering your door?” I hadn’t heard him knocking, but there he stood—in the middle of a blizzard, people!—sporting a hat with flaps that covered his ears, and holding a bag of fresh bagels plus all the proper accoutrements. The man had risked his very life to be with me. OK, not exactly—but he had shown me (again) that he was different and dependable, so I married him. ❤ And I do love a JBB.
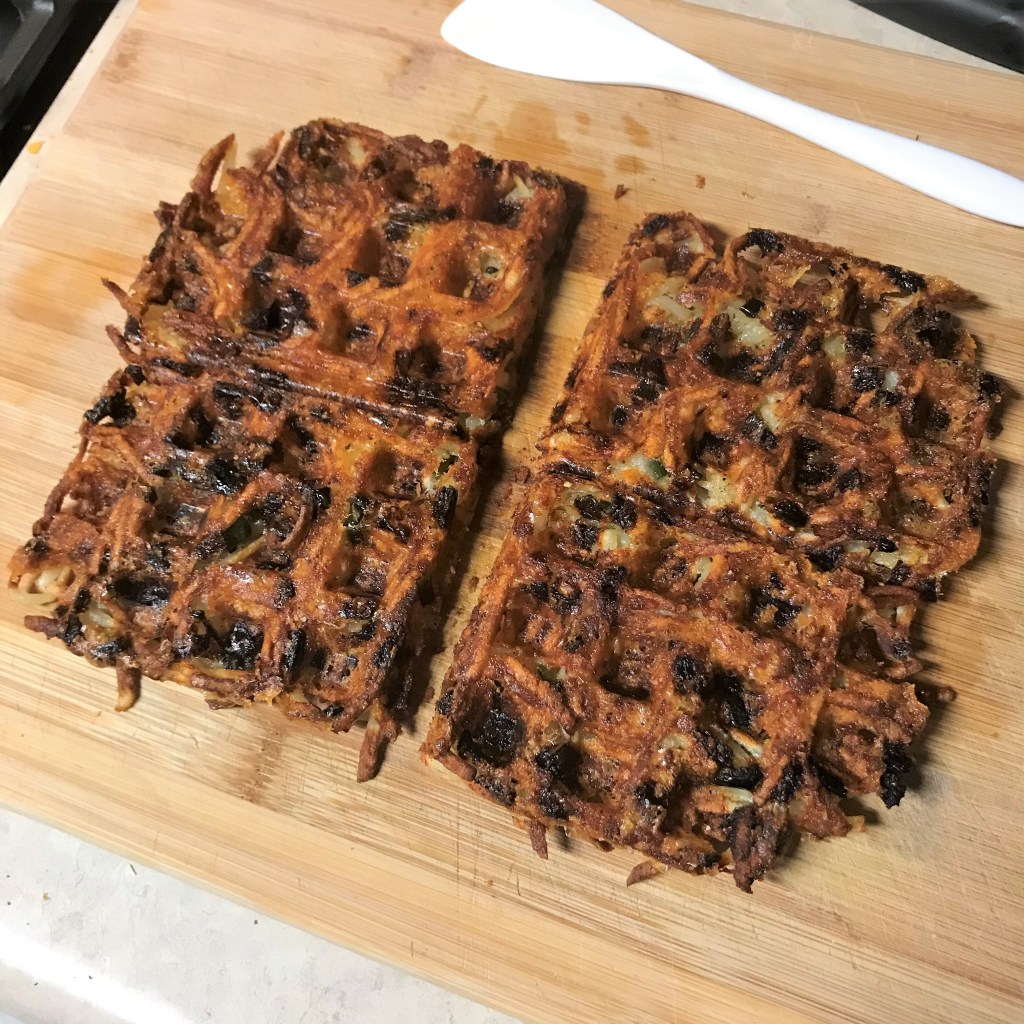
Anyway, when the weekend comes, we like to go big on breakfast. And by big, I mean with preparation of things that are too fussy for a busy out-the-door weekday morning. One of our go-to “better breakfast” menu items? These ultra-crispy, fun and flavorful hash brown waffles. Let’s just savor this image for a moment. Lean in to your screen and try to smell them.
I love those little bits of pepper and onion glistening under the crispy, cheesy potato shreds.
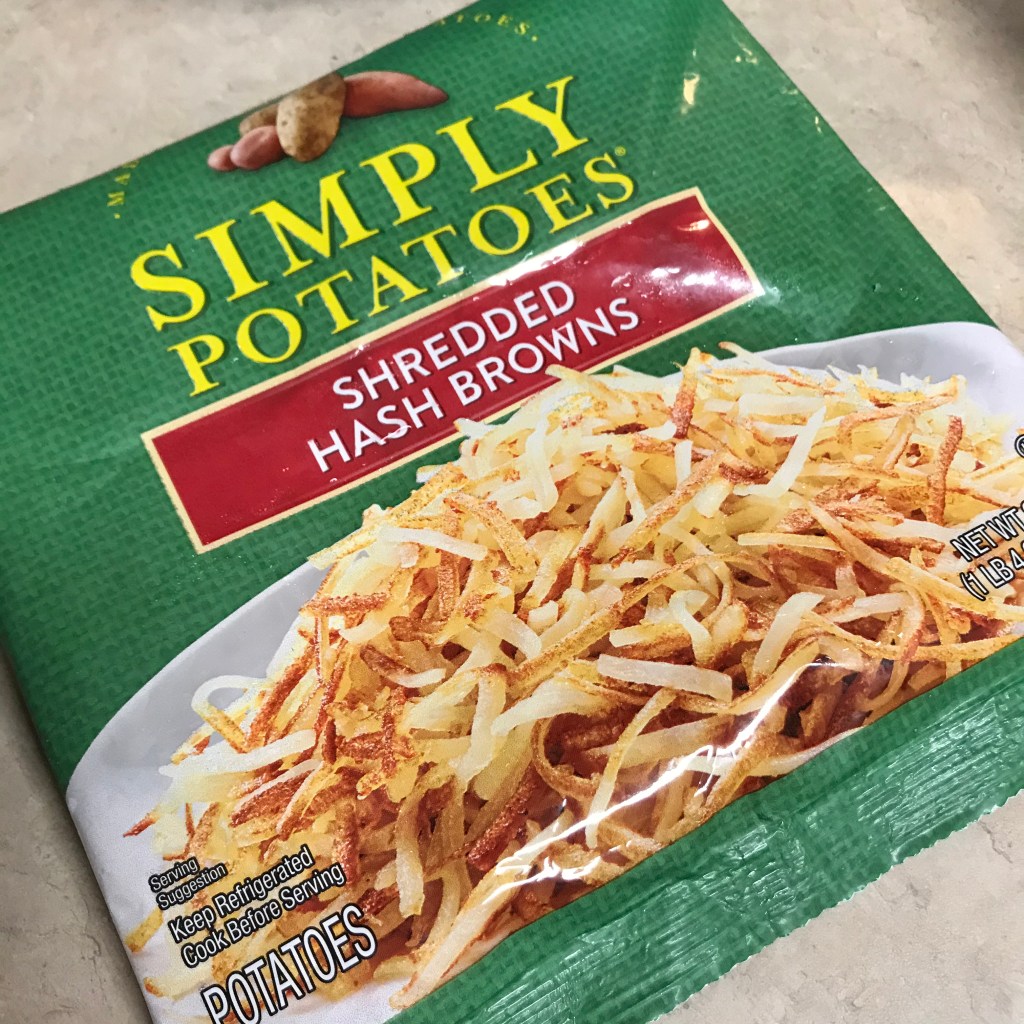
They emerge from the waffle iron crackling crisp on the outside, hot and soft on the inside, and they’re perfectly customizable, based on our craving du jour. This is how we use up all assortments of leftover cheese, onion and pepper scraps, and they come together in short order because I take a rare shortcut in the form of this:
You won’t often see me tout a ready-made grocery product like this one, but these are such a time saver, I can’t help myself.
I hope you aren’t disappointed to learn that I don’t actually make every single thing from scratch. Though I’ve considered shredding fresh potatoes myself for these, I’ve learned that once in a while is often enough to make an exception. These pre-shredded potatoes are such a worthy exception, and they can be found in any well-stocked supermarket. I only wish someone would explain to me why they are always in the dairy section. (hmm)
Here’s how they happen, and obviously, you will need a waffle iron to try them at home. I recommend a standard square or round waffle maker rather than Belgian style, but if you try it in a Belgian maker, please do let me know how it comes out for you, OK?
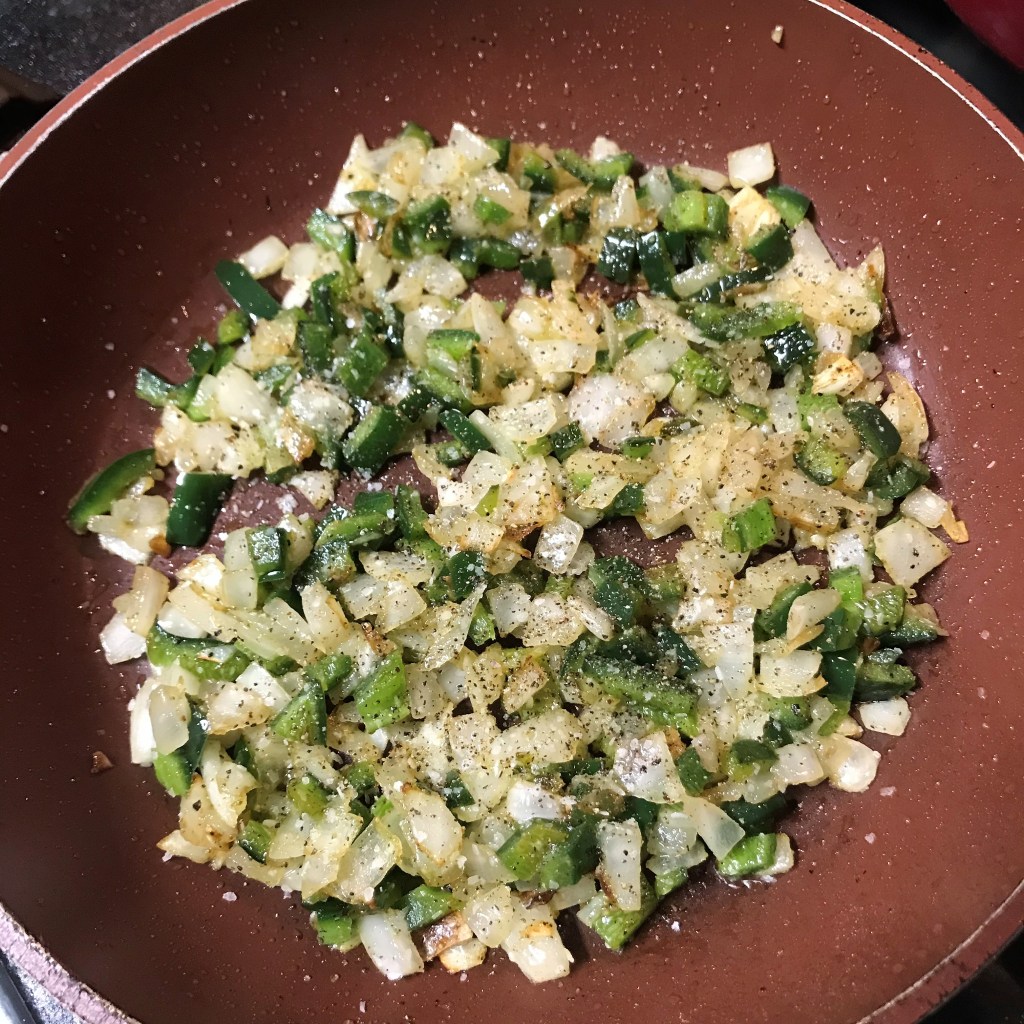
This recipe is a guaranteed way for us to use up whatever bits of onion and pepper are hanging around the fridge. Today, it was poblano pepper and vidalia onion.
Here’s my secret to extra crunch–a drizzle of olive oil mixed throughout the hash brown blend.
Pile the mixture onto the preheated waffle iron, and press down the lid.
The golden crust is formed after 10 minutes, but I’m crazy about the crunch so I will let them go another minute.
The bottom of the finished waffles is extra crispy-crunchy, our favorite!
As the photo conveys, we lean toward the crispy side of things at our house, but you could certainly cut the time a bit shorter and remove them when they are just golden and lightly crisp. You’re the boss of your own kitchen. I’m enjoying the heck out of them in this crunchy state because we’ve recently decided to give up potato chips, our latest bad habit that was wrecking our waistlines. Enjoy them any way you’d normally serve breakfast potatoes, or make them the main dish as we do, topped with a runny egg!
I love the contrast of crispy edges with the soft potato inside. Now, THIS is a better breakfast!
I know what you’re thinking. Yes, they are also a terrific menu option the next time you’re in the mood for “breakfast for dinner.”
Go on, make them. 🙂
Ingredients
Extra virgin olive oil
1/2 bag Simply Potatoes shredded hash browns
1/2 cup (give or take) diced onion
1/2 bell pepper (or poblano or jalapeno, you decide)
1/4 cup diced and cooked leftover ham, sausage, bacon (optional)
Approximately 3/4 cup shredded melting cheese (cheddar, swiss, Monterey jack, gouda, etc.)
Salt and pepper to taste
1/2 tsp. ground cumin (this is excellent with any fried potatoes)
Instructions
Preheat waffle iron to 400° F.
Place a small skillet over medium heat. Add a generous swirl of olive oil to the pan, and sauté the onions and peppers until they are softened and lightly browned. If you are adding breakfast meat that is not yet cooked, go ahead and toss that into the pan as well. Season to taste, stir in cumin and remove from heat.
Combine shredded hash browns, onion mixture and shredded cheese and stir well to evenly blend the ingredients.
Drizzle in about 1 tablespoon of additional olive oil and stir to combine. I’ve learned from all my experimentation with this recipe that the extra oil goes above and beyond to deliver my hash brown waffles with the crispiest possible exterior. Thank goodness olive oil is a “healthy” fat!
When waffle maker is preheated, pile the hash brown mixture evenly over the plate and press to close the iron lid. Leave it alone for about 10 minutes, and carefully raise the lid to check their doneness. I’ve learned that if the waffle iron doesn’t release right away, whatever I’m waffling needs more time. The food will release when it’s ready, and for my Cuisinart waffle maker, 13 is the lucky number.
Carefully remove the waffle sheet, in one piece, to a platter or cutting board and cut into serving pieces.
Serve as desired, but may I recommend again the runny egg? It’s so, so good. 🙂
A little Frank’s red hot sauce for kick. And I might have broken off a crispy piece for dipping into the egg yolk. Yes, I believe I did.
This recipe will make five waffles, each about 4 x 6 inches. We make four at once for breakfast, then we fight over the fifth during kitchen cleanup. I love our life!
As summer winds down, I am finding myself eager to put behind me the near-disaster that was “Garden 2020.” I described in mid-May my reluctant optimism in planting anything, given the history I’ve had with the neighborhood deer (bless their hearts). Then, in early July, a glimmer of hope when I discovered all those lovely squash blooms. Little did I know (and I didn’t even bother to report to you) that it would be my final harvest of the season, as only days after the post about the ricotta stuffed squash blossoms, I was shocked back to reality with the total decimation of my raised bed plot. The deer ate everything—the blossoms, the growing fruit, the leaves, and even the tops of the hot pepper plants.
CAUTION: Graphic images ahead may be disturbing to some readers.
The remaining blossoms don’t have a chance without the protection of the leaves.
In every garden book I own, it says “deer don’t eat jalapenos.”
Don’t even try to blame the rabbits, OK? I know deer hooves when I see them.
It’s hard to stay mad at such beautiful, majestic creatures.
All of it, gone. Except, of course, the basil. Lord have mercy, do I have basil.
All that pruning was worth it for this amazing basil harvest.
The saying goes that if life gives you lemons, you should make lemonade. In keeping with such age-old wisdom, I shall make basil cocktails! I’m still on my kick of inventing infused simple syrups for martinis, Manhattans and other libations. Might as well make the best of this excessive herbal situation—and as luck would have it, these petite little drinks are flat-out yummy.
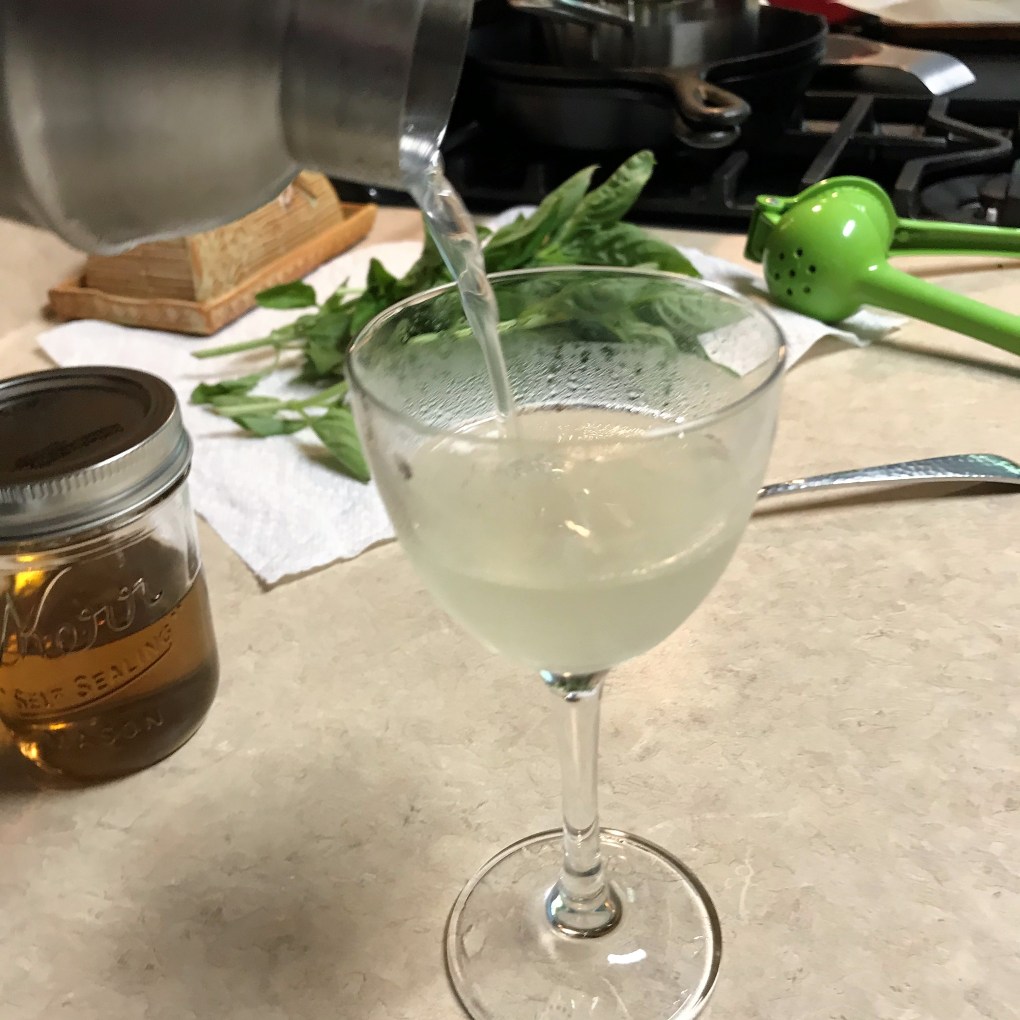
It’s cold and refreshing, and tastes like summer!
I had opportunity to share them this week with my friend, Tina, who lives at the top of our neighborhood and is just about the biggest arts and crafts fanatic I’ve met (it takes one to know one). She had casually mentioned recently that she had entered several projects in a local art competition, which perked up my ears, big time. Kind of the way our dog, Nilla, perks up when we mention “cookies.”
Did you say cookies??
“Oh? What kind of art?” I asked.
Turns out, Tina has quite a number of art techniques in her repertoire, including mixed media composition and acrylic pour painting (which absolutely mesmerizes me), and jewelry design. And then she quipped that she believes she is more creative while enjoying an adult beverage. What a coincidence—me too! Naturally, I made a motion for a neighborly get-together, during which we might accomplish both. Tina seconded the motion, and it turned out to be quite an afternoon. She provided the craft supplies (and expert guidance) to make these sweet snowflake earrings.
“We’re going to make these,” she said casually. Say WHAT?
And I provided the craft cocktail supplies to make these basil gin gimlets. If you also have a late harvest of basil coming out your ears, I hope you’ll give them a try.
Gin comes in several different types, and I’ve made this cocktail with a few brands, my favorite being Hendrick’s from Scotland, which is distilled with cucumber and rose—so botanically speaking, it’s a friendly playmate for the basil from my garden.
To make the cocktail, you’ll first need to create the simple syrup from equal parts filtered water and cane sugar, plus a good handful of cleaned fresh basil leaves. Do this at least a few hours in advance, to allow time for chilling the syrup.
Chill your cocktail glasses, either by filling with ice or placing in the freezer.
Measure the gin and basil syrup, add a squeeze of lime and shake it with ice. Some cocktail purists would argue that you should only stir a cocktail in a mixing glass, and that shaking serves to bruise the gin. I say phooey—shake the shake out of it, because I prefer my cocktails to be icy and refreshing. Choose as you wish, as long as you give it plenty of time to mingle with the ice to be cold and refreshing.
Strain the cocktail into your chilled glasses and savor the sweet flavor of late summer, with or without a jewelry party.
Oh sure, the cocktail made it easier to pick up these microscopic seed beads!
Hooray, I did it! Tina is a great teacher.
Ingredients & Instructions
Makes 2 cocktails
3 oz. Hendrick’s (or gin of your choice)
1 oz. basil simple syrup (details below)
Juice of 1/2 fresh lime
Combine ingredients in a cocktail shaker. Add ice and shake 20 seconds until the outside of the shaker is frosty. Strain into small, chilled cocktail glasses.
I’ve started measuring my ingredients on my kitchen scale. No shot glasses to wash!
My “Nick & Nora” cocktail glasses hold a perfect 4 oz. drink.
Basil Simple Syrup
In a small saucepan, combine equal parts filtered water and cane sugar (I used 1/2 cup each). Heat over medium only until sugar is dissolved and syrup begins to bubble at the edges. Add in a handful of fresh basil leaves (rinse, shake off excess water, and trim thick stems first). Stir and simmer 1 minute, then turn off heat and allow mixture to cool completely. Use a slotted spoon to remove the basil leaves, and transfer to a jar. Syrup will keep in the fridge for up to a month.
Dear followers, as of this morning, I have discovered that my remaining basil (all those bushy leaves) is completely covered in black spots. For the love of summer, I’m so over it. 🙂
One of my favorite things about summer is backyard grilling. The food is always great, of course, but there’s also something sweetly nostalgic about the experience—the aroma of searing meat, the feel and taste of the cold beer in hand, the far-off sound of a neighbor’s lawn mower, trees swaying in gentle breezes, mosquitoes ravaging my ankles—oh, wait, let’s scratch that last one (so to speak).
But I don’t need to explain the joy of the barbecue to you. Everyone with a backyard or patio looks forward to the same for the fleeting months we have to enjoy it, and we all have our favorite foods to grill, even if it’s as simple as burgers and franks. One thing that has changed at our house is the range of things we cook on the grill. In the past, it was always the meat on the grill, but pretty much everything else was prepared and cooked inside. Why is that? So many other things are possible on the grill, including the chicken romaine Caesar I mentioned at the start of summer, and the grilled vegetables we did for the ratatouille pizza last month. I want to keep knocking down the boundaries of grilling and see what other comfort foods can be twisted up, Comfort du Jour style.
And today, meatloaf, I’m looking at you!
No, not you, Meat Loaf. Whew, what a hot, sweaty mess. But thanks for all the memories, especially “Paradise by the Dashboard Light,” because that was freaking awesome. I’m still singing along with that one.
What I’m talking about is the classic comfort food, the blue-plate special, the all-time best example of a home-cooked meal. And I want to make it on the grill.
Just as we don’t need to wait until summer to enjoy ice cream, I believe it’s time to pull meatloaf to center stage outside of winter months. I’m a big fan of this shaped meat classic, and I’ll be excited in the cooler months to show you some of my favorite ways to stuff it with other great flavors. But how in the world does one grill a meatloaf, without burning it or drying it out or having it fall apart and down into the grill? And wouldn’t it take forever? For answers to all my “what-ifs,” I went straight to the highest authority on all things—the internet. And according to grill manufacturer Weber, meatloaf is not only possible on the grill, it’s fantastic. Check out Chef Larry Donahue’s recipe for yourself if you’d like, or stick with me to see how things went with our grilled (not once, but twice!) meatloaf.
I followed Chef Larry’s recipe nearly to the letter, except that we added more garlic, adjusted ratio on the sausage (equal amount felt like too much for our taste) and came up with our own creative solution for draining the cooking grease.
This recipe will cook over indirect heat, and you’ll need a rectangular foil pan to use as a drip pan below the meatloaf. These foil pans are inexpensive and usually available next to foil and plastic wraps in any supermarket.
Ingredients
1 medium onion, diced (about the size of a tennis ball)
3 cloves garlic, minced
Extra virgin olive oil
12 saltine crackers, crumbled
1/4 cup whole milk
1 lb. lean ground beef (90/10)
1/2 lb. seasoned pork sausage* (we used a bulk breakfast type)
2 large eggs
2 tsp. Dijon mustard
2 tsp. Worcestershire sauce
1/2 tsp. dried thyme
1 Tbsp. dried parsley flakes (or 1/3 cup fresh chopped, if you have it)
Kosher salt and black pepper
For the glaze
1/2 cup organic ketchup
3 Tbsp. packed brown sugar
2 Tbsp. apple cider vinegar
Several shakes hot sauce (to taste)
Instructions
Chef Larry’s recipe included instructions for preparing a charcoal grill, but we did ours on the gas grill so our setup was simple. Here’s a quick visual run-through of our adventure, with detailed steps below:
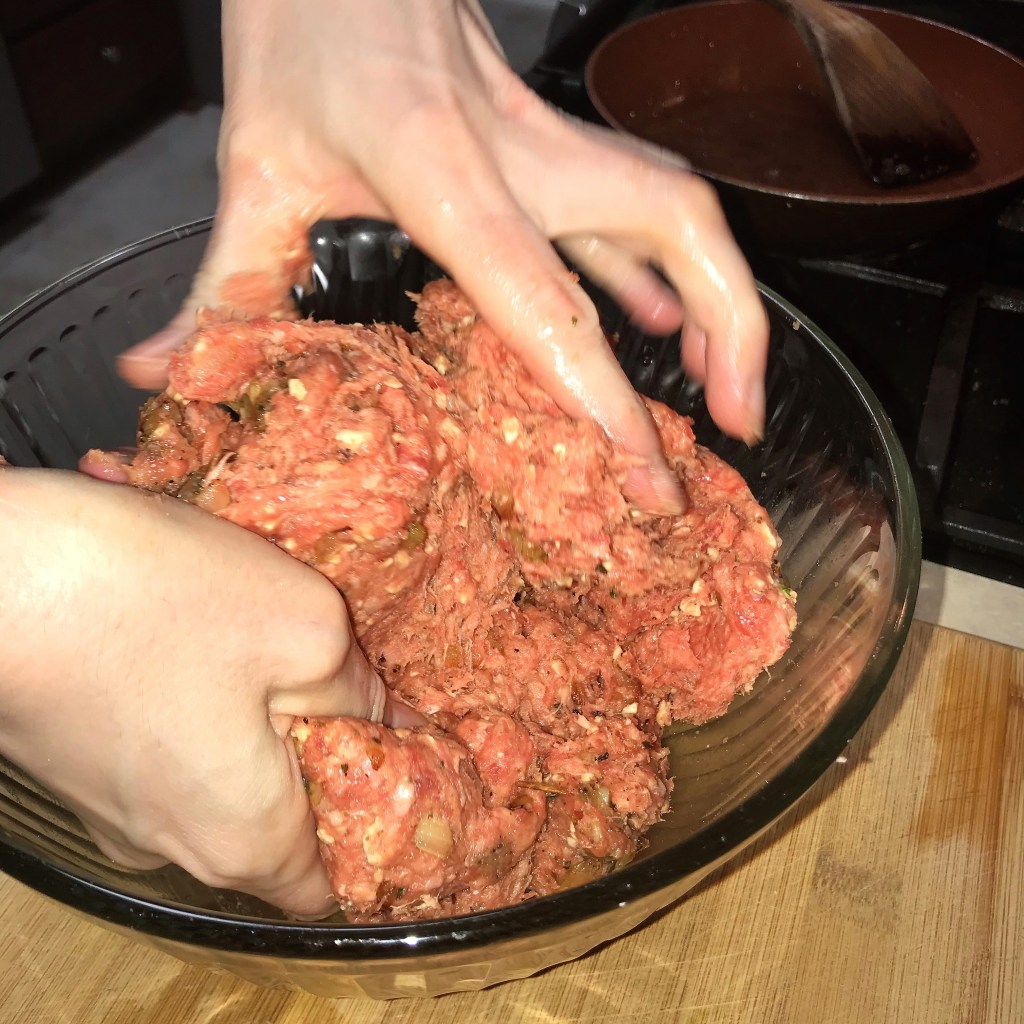
The meat was pulsed in the food processor, but I still need to mix in the egg, crumbs, onions and seasonings. Work it good!
Our creative solution for draining off the cooking grease was this handy roasting insert, borrowed from our slow cooker. If you have something heat-safe, use it!
The crust on the meatloaf was so perfect. Chef Larry added smoking chips to his recipe, and I think that’s on point for our next one.
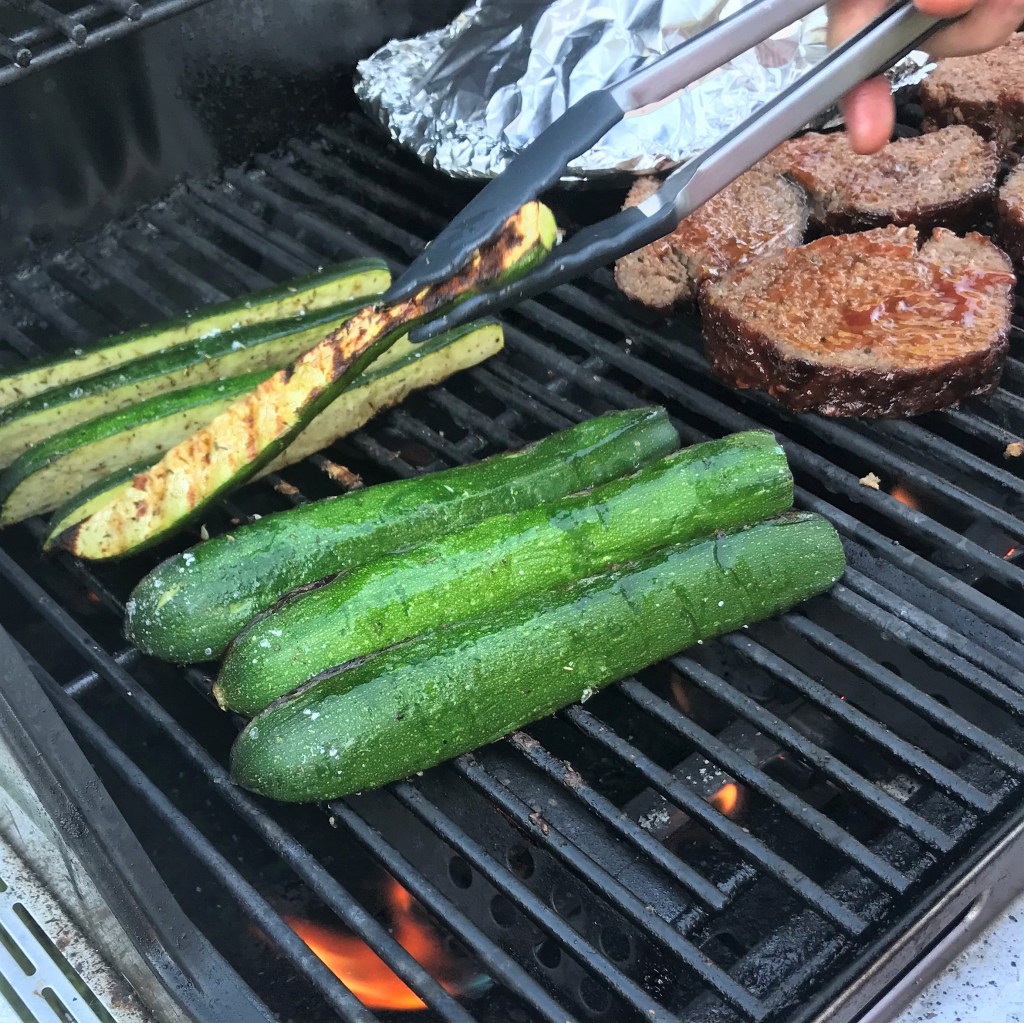
The thick slices went back on the grill with more of the tangy-spicy glaze. It smelled so, so good.
Simple grilled zucchini – drizzled with olive oil, seasoned with salt and pepper.
This was perfection. Classic comfort foods, with a Comfort du Jour twist that will become a summer go-to for us.
Heat a small skillet over medium heat. Swirl in olive oil and sauté onions until softened. Add garlic and sauté several more minutes until the onions are tender and translucent. Season with salt and pepper. Transfer to a large bowl.
In a food processor, combine the cracker crumbs and milk, and process into a paste.
Add the ground meats to the processor bowl and pulse until combined. This goes against my usual rule of “don’t overwork the meat,” and it reminds me of the technique I used a few months ago with the gyros at home recipe. Processing helps make the meat a cohesive mass and this will help it hold its shape on the grill. Transfer the meat mixture to the bowl, along with all remaining meatloaf ingredients and mix with your hands until it’s evenly blended.
Shape meat mixture into a rectangular loaf shape, about 9 by 5 inches. Mixture should be tight and compact so it will keep its shape. The meatloaf may be covered and refrigerated at this point if you wish to work ahead. Otherwise, proceed to step 5.
If you’re using a gas grill, preheat it to 400° F. Turn off the burners under the meatloaf side, but keep them going on the other side. If you have a suitable heat-safe rack, use it inside the foil pan. Otherwise, place the loaf on a pile of scattered thick-sliced onion rings inside the foil pan to aid in draining the grease. For charcoal grill, prepare the grill for indirect cooking, and heat the coals until they are glowing like the metal on the edge of a knife (about 400° F). Place the foil drip pan below the top grill grate, next to the coals. Lay the meatloaf on a double thickness of heavy aluminum foil on the rack above the foil pan, and carefully press on the aluminum foil in several places between grates to create “drip channels” for excess grease.
Grill with cover closed for about 45 minutes.
Combine the glaze ingredients in a saucepan and cook over medium heat until sugar is dissolved and mixture is slightly thickened.
Check meatloaf at 45 minutes. If it has formed a crust (oh, how beautiful is that??), brush a layer of glaze over the loaf and cook 10 more minutes. Repeat glazing two more times, then remove meatloaf from the grill and let it rest a few minutes on a cutting board.
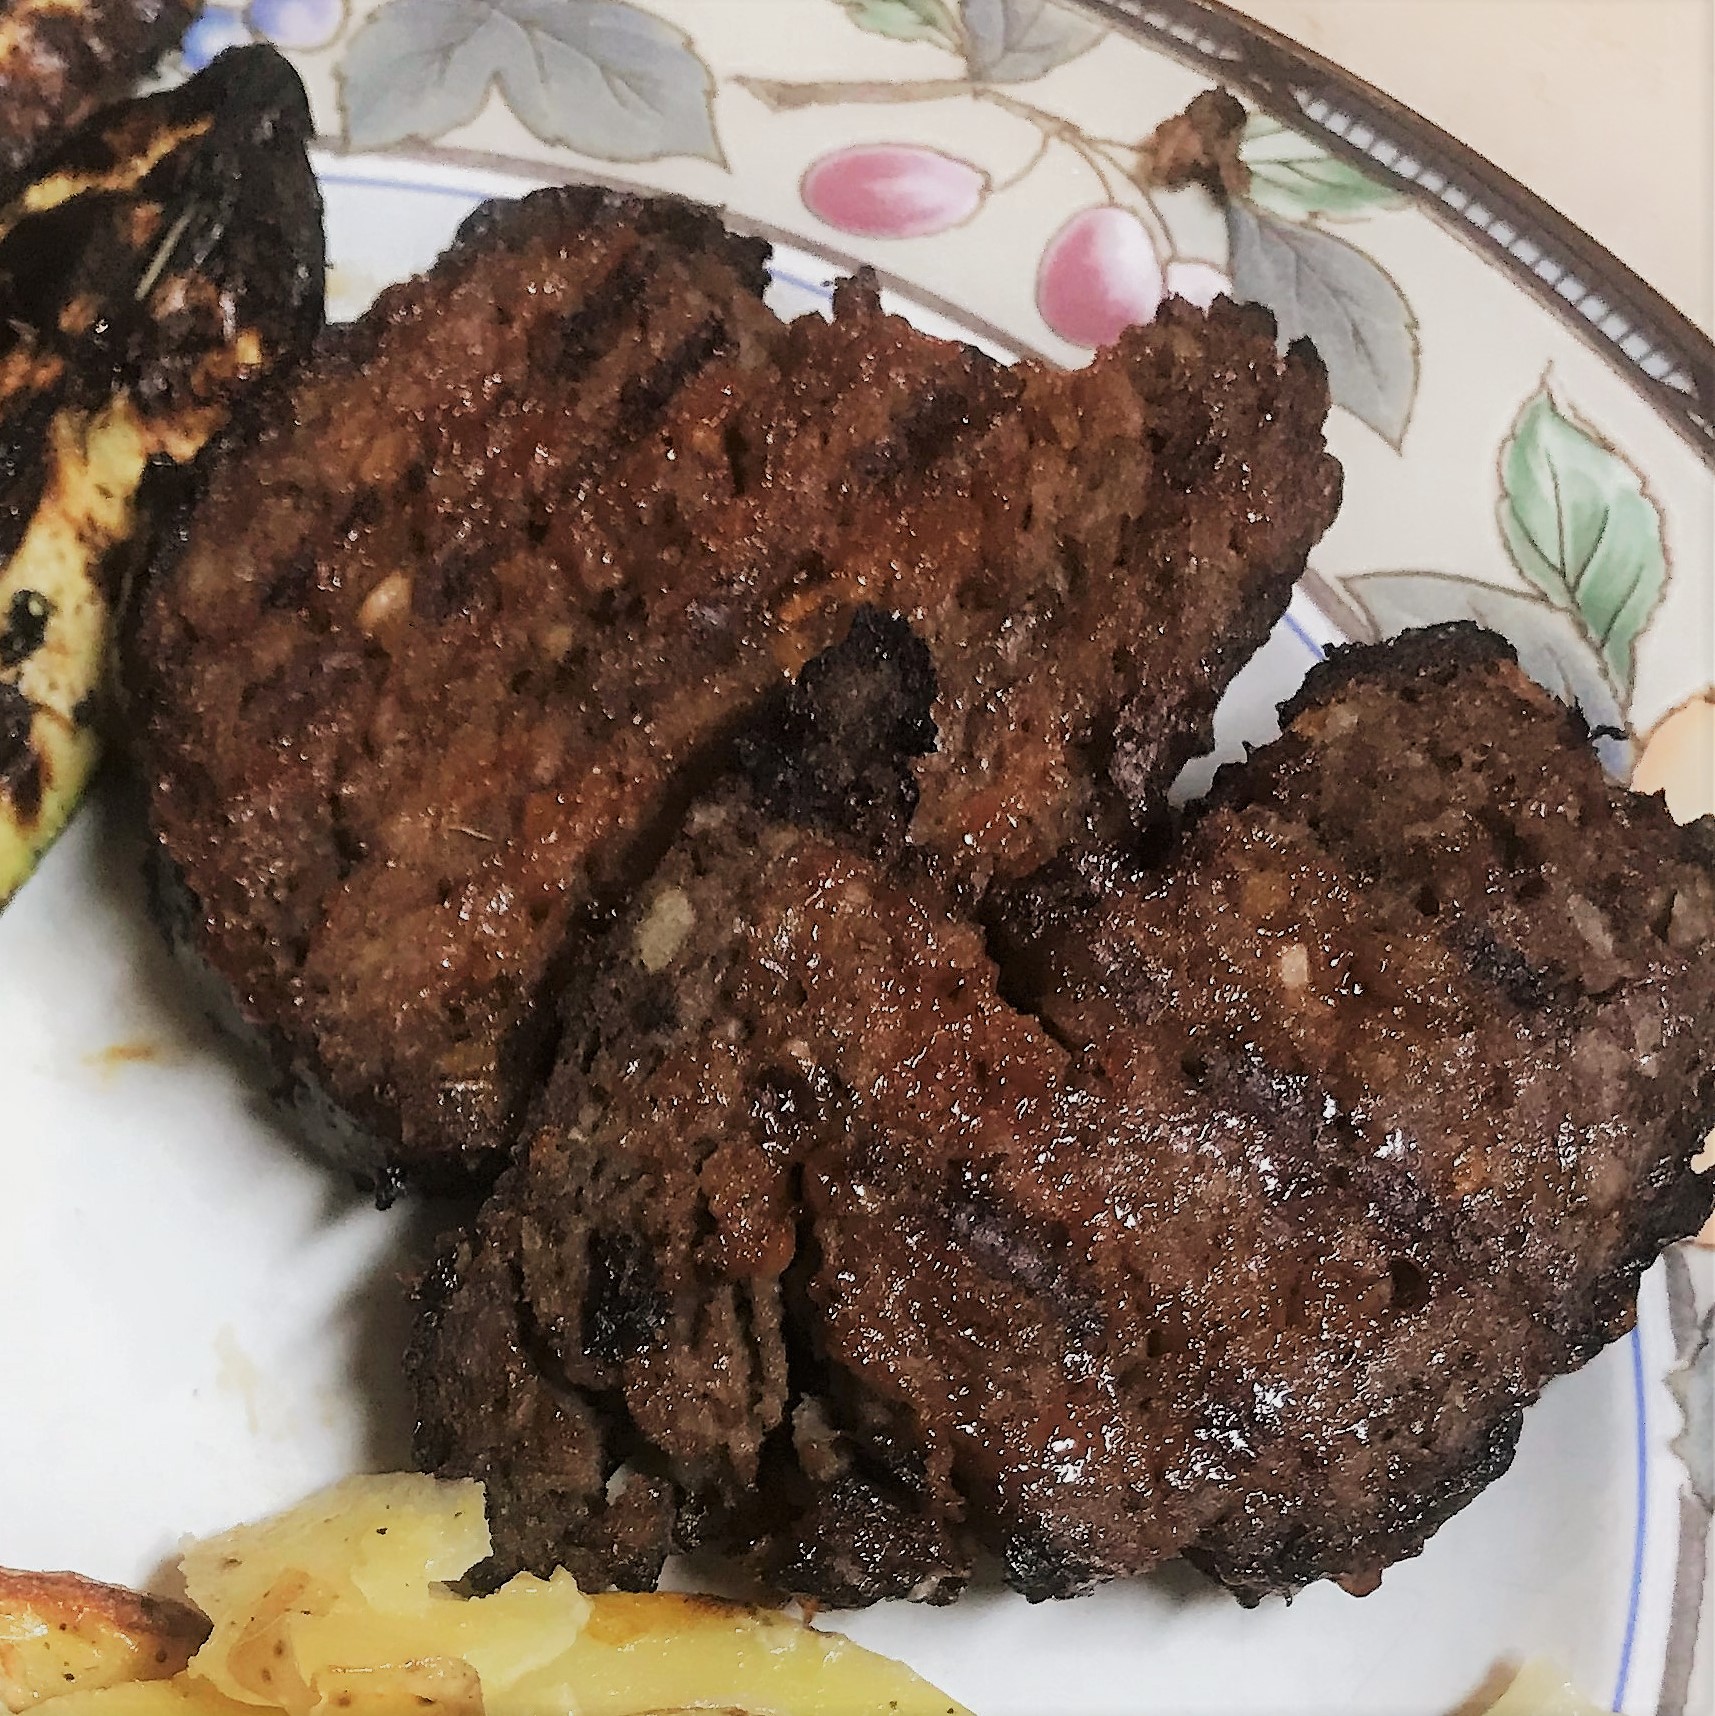
Here comes the fun part. You noticed the name of this recipe is “twice-grilled,” right? Cut the meatloaf into thick slices and put them back on the grill, this time directly over the heat until they develop grill marks. Move them to the indirect side, glaze them again, and cook until the glaze is to your liking. Ain’t no doubt about it, we are doubly blessed.
Yes, dear meatloaf, I swear I will love you ’til the end of time.
All my worries and “what-ifs” were put to bed with this easy recipe. The meatloaf had a terrific moist texture, the grilled-in glaze flavor was out of this world, and the whole thing was on the table in the same amount of time as if I’d baked it in the oven. It was delicious, didn’t heat up the house, and you can bet I’ll do it again—next time with a flavor twist!
Comfort food perfection.
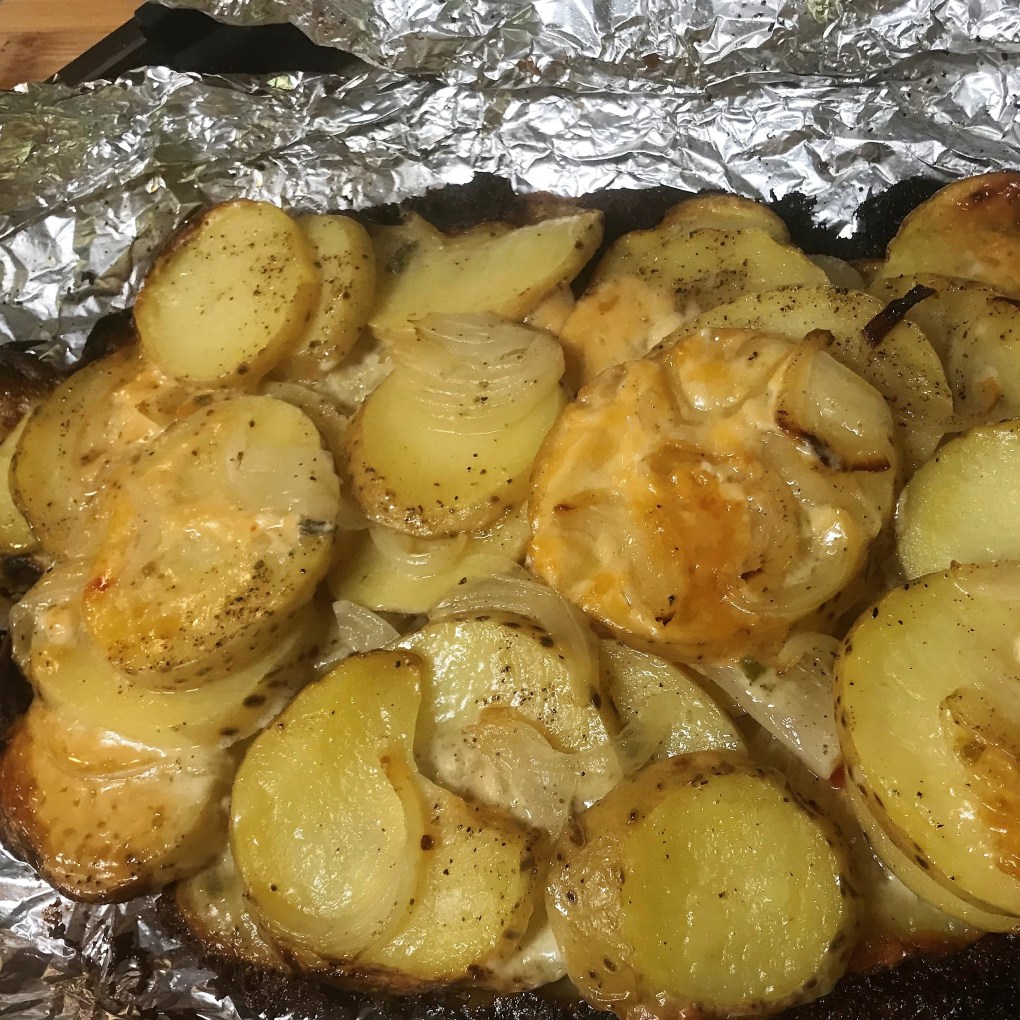
We served our twice-grilled meatloaf with these Easy-Cheesy Grilled Scalloped Potatoes. Go get that recipe, too, and start cooking up some comfort in your own back yard.
I’m breaking all the cooking rules on some all-time classic comfort foods, as I’m determined to find new ways to prepare foods that have too long depended on the oven. It’s hot enough this time of year, so I’m turning off the oven and moving dinner prep outside.
We won this battle at our house recently with a twice-grilled meatloaf, which we served up with these cheesy-good, grilled scalloped potatoes. This Comfort du Jour twist was simple to whip up because it doesn’t involve a cream sauce (that would be a disaster on the grill), but it was every bit as delicious, with tender potatoes, thin slices of onion and two kinds of cheese—pepper jack for a little kick, and crumbled bleu cheese for an interesting touch of funk. The potatoes were great just like this, but I’m certain they’d also be good with cheddar, smoked gouda or any other favorite cheese.
I used non-stick aluminum foil as the cooking vessel, so cleanup was—well, nothing! Seriously, is there anything to not love about this?
This was perfection. Classic comfort foods, with a Comfort du Jour twist that will become a summer go-to for us.
Ingredients
5 medium Yukon gold potatoes, scrubbed clean and sliced 1/4″ thick* (see picture tip, below)
1 small sweet onion, thinly sliced
Extra virgin olive oil
3 oz. sliced or shredded pepper jack cheese
1/4 cup bleu cheese crumbles
Sea salt and freshly cracked black pepper
*Tip
Whole potatoes can slip really easily when you’re trying to slice them thin. Either use a mandoline (be careful there, too), or try this easy trick. Slice a very thin section off one side of the potato, so it will lay flat on your cutting board, making it easier to safely cut it into slices.
Instructions
In a large bowl, drizzle olive oil over the potato slices and give them a good tossing to coat them.
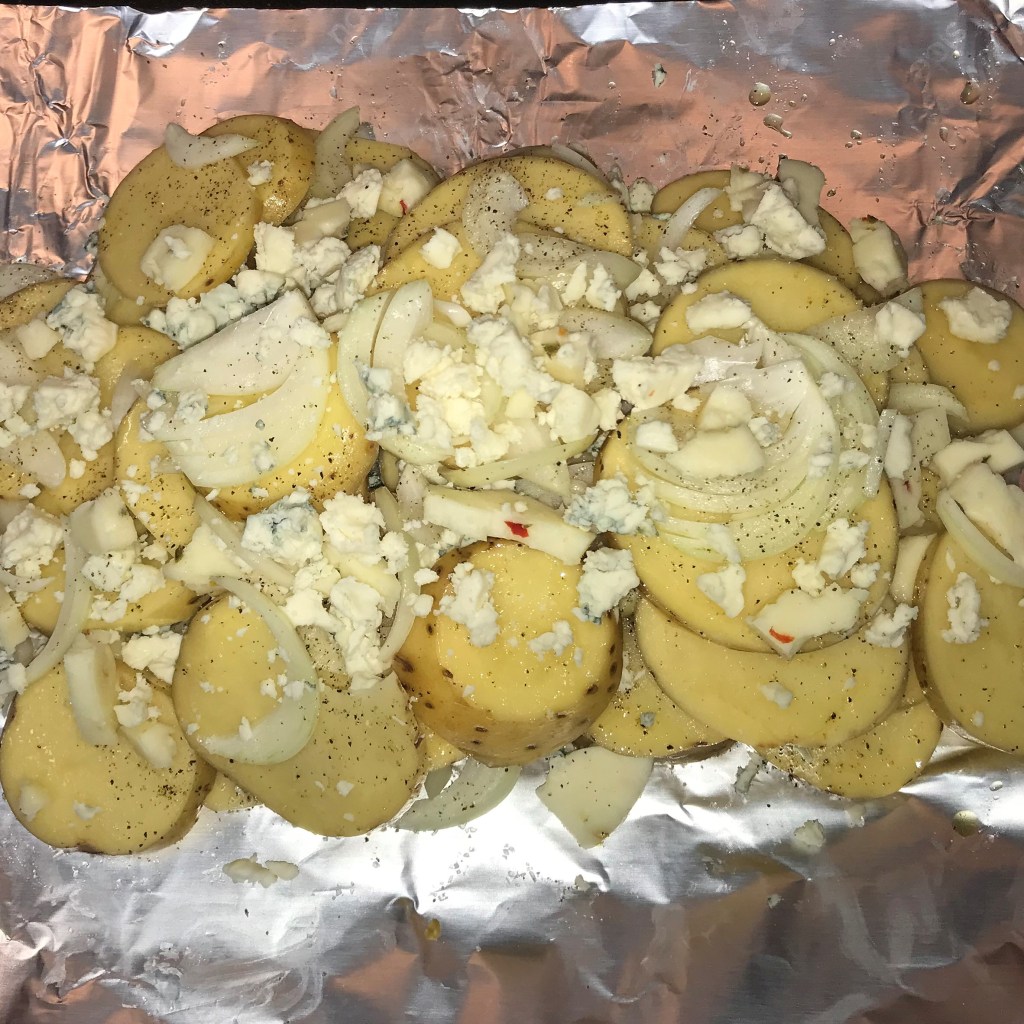
Arrange a single layer of potatoes on a large rectangle of heavy aluminum foil (I recommend the non-stick type).
Add a layer of onion slices, season with salt and pepper and distribute half amounts of each cheese.
Repeat with another layer of each ingredient.
Place a second sheet of foil over the “casserole” and crimp the foil all the way around to seal the edges.
Grill over indirect heat (we placed them on the upper rack of our gas grill) for about 30 minutes.
Open the packet very carefully, as escaping steam will be very hot. Serve directly from the foil pack for easy-and-done cleanup!
The word “salad” can mean a lot of things, depending on the generation during which the recipe was introduced. For example, in the 1960s or ’70s, a “salad” could have been anything from an iceberg lettuce-based dish served ahead of dinner to a molded concoction of sweetened gelatin, cottage cheese, marshmallow or who knows what.
Didn’t every mom have the Tupperware mold?
Blame our parents, if you need to, for those atrocities. But this salad is a real salad—vegetables, fruit, dressing—everything you want to complement what you’re serving for dinner in these modern times, especially if what you’re serving is coming off the grill.
Broccoli comes to us from the brassica family of vegetables, kin to brussels sprouts, cabbage and kale, to name a few. Some of these veggies carry a slightly bitter flavor, but here’s a tip to knock it down: give it a quick swim in boiling water (only for a few seconds), then shock it cold again in an ice water bath. Not only will you strip away some of that bitter flavor, you’ll also see the broccoli transform to a much brighter green color. Be sure to drain it well before proceeding with the salad, so the dressing doesn’t get watery.
We love salads at our house, but my husband, Les, isn’t wild about broccoli by itself. A salad that features broccoli along with other flavors and textures is a great compromise, and he liked it. His son, Alex, has been with us for meals at least once a week since his return home from Europe at the start of the pandemic, and he announced at dinner that this dish has “all my favorite things in it.” I’m counting that a double success!
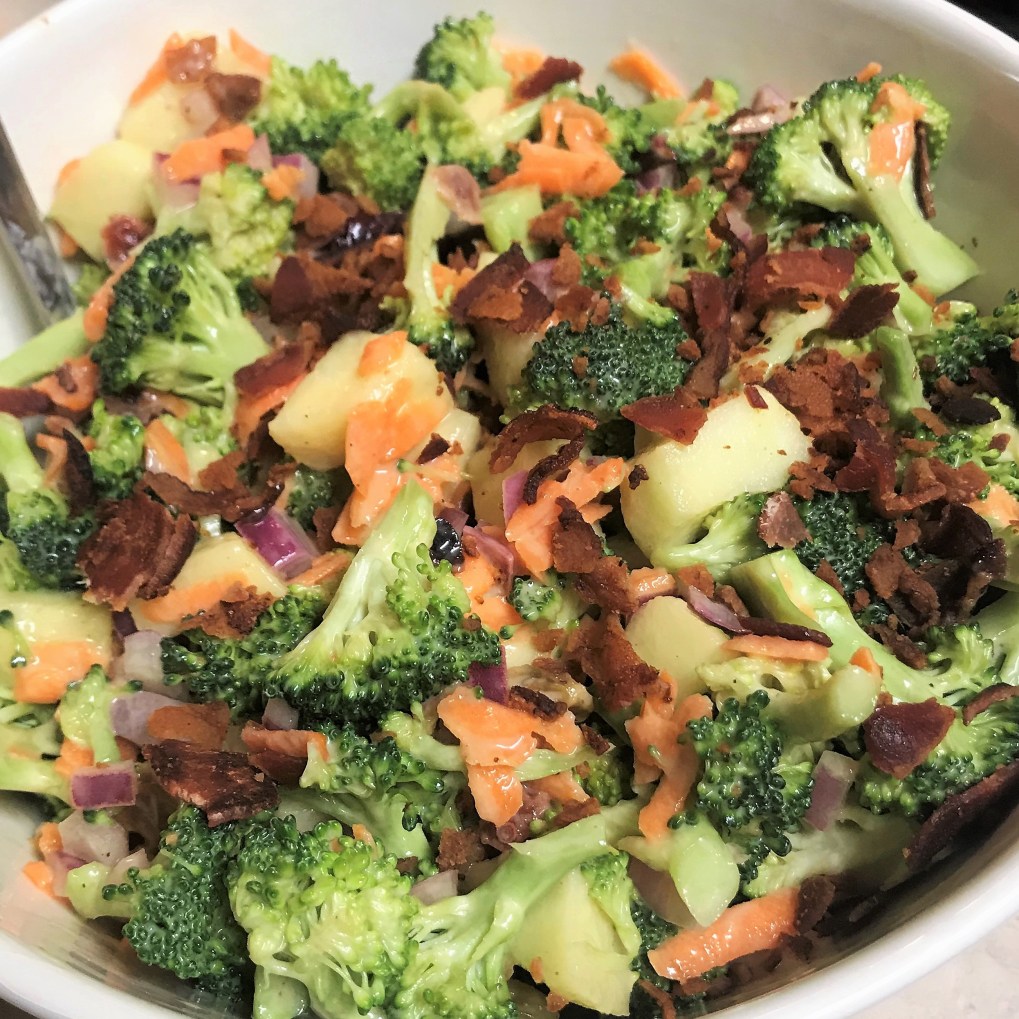
This dish is crunchy, cold, fresh and—despite the slight sweetness—still packed with nutrition. Approximately 6 servings.
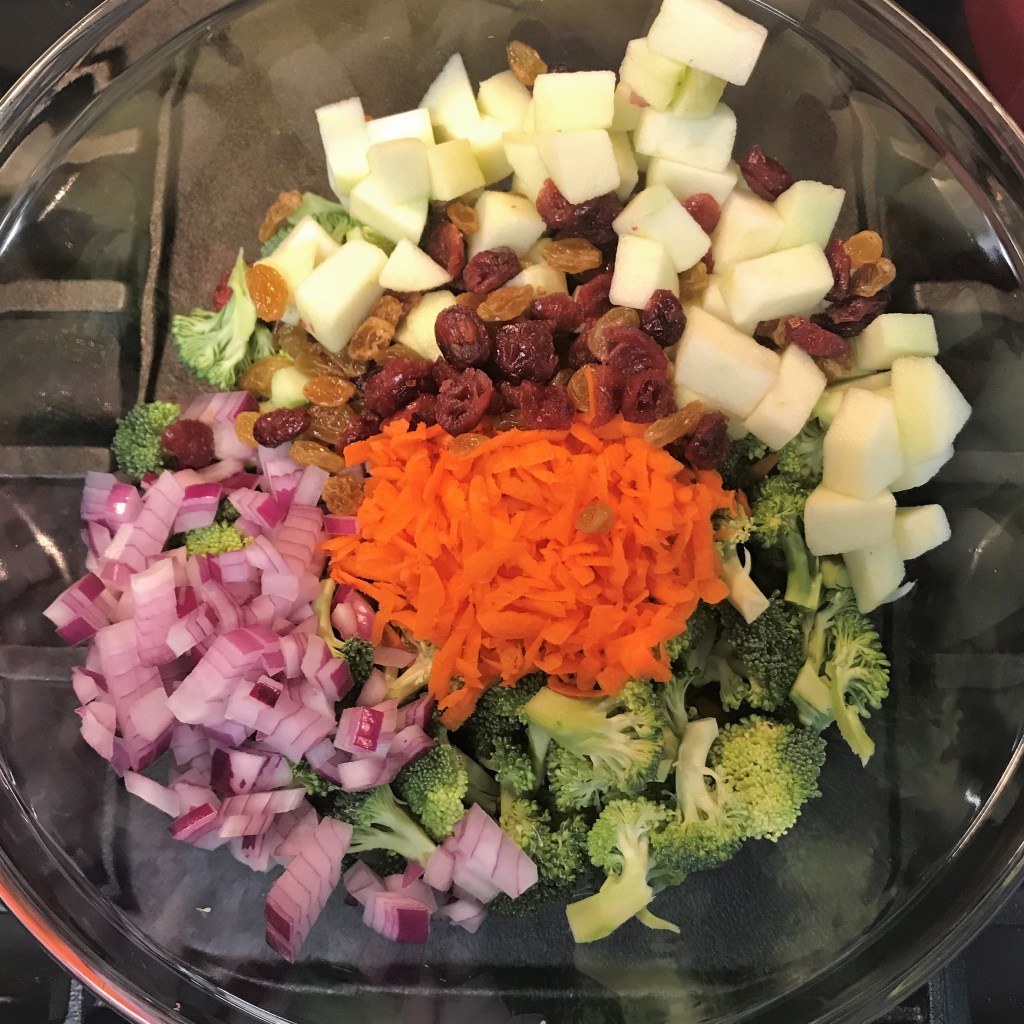
Ingredients
2 broccoli crowns, washed (about 4 cups worth)
2 medium carrots, peeled and shredded
1/2 cup red onion, chopped
1/2 cup golden raisin-dried cranberry blend, soaked briefly in hot water to plump
1 granny smith apple, peeled, cored and chopped
Juice of 1/2 lemon
3 slices thin bacon, cooked crisp and crumbled (this is optional)
If the dressing seems familiar, you might be remembering my creamy cole slaw a few months ago. It’s pretty much the same, repurposed for a different type of salad.
This dressing works for all kinds of summer salads!
Dressing Ingredients
1/4 cup light mayo
2 Tbsp. whole milk
2 Tbsp. buttermilk
2 Tbsp. lemon white balsamic* (or white wine vinegar or lemon juice, but double the sugar)
1 Tbsp. cane sugar
1 tsp. kosher salt
1/8 tsp. white pepper
Freshly ground black pepper
Instructions
Technically, the piece on the left is bite-sized, but there wouldn’t be room for much else in the bite.
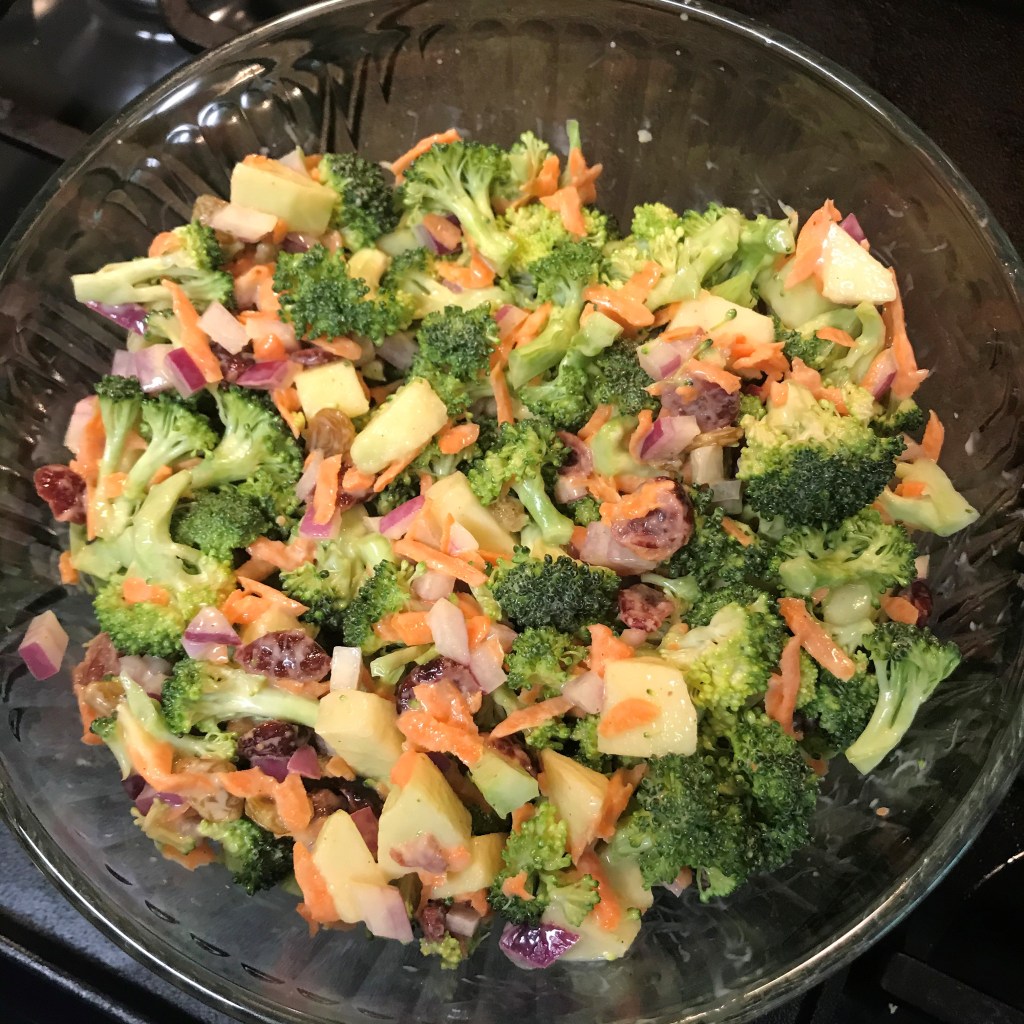
There’s so much nutrition in here, and a terrific range of textures. It makes the salad very satisfying.
Toss in the dressing, then give it time in the fridge so the flavors can mingle.
Dip the broccoli crowns very briefly into gently boiling water, then shock them in ice water and drain. This helps remove any bitter taste, and also brightens the color. You can skip this step if you don’t mind the slight bitterness of broccoli.
Trim leaves from broccoli crowns and cut up into small bites. You can chop the broccoli if you’re in a hurry, but I like to have cut off whole pieces rather than “crumbs” of broccoli. My general rule of thumb for bite size is this: If a piece is large enough to completely cover a quarter, it’s too big, so I’ll cut it in half.
Combine broccoli pieces with onions, plumped raisins, carrot shreds. Toss the apple pieces in the lemon juice to prevent browning. Add them to the salad.
Combine all dressing ingredients and whisk until smooth. Pour over salad and toss to evenly coat. Refrigerate a few hours to allow flavors to mingle.
Scatter crispy bacon (if using) over salad just before serving.
The crispy bacon adds a nice touch of salty and smoky on this hearty summer side.
As much as I love vegetables and know that dark, leafy greens are incredibly rich in nutrients, I’d actually been mystified and intimidated by collards for decades. They seemed foreign to me, even off-limits to a degree because of their cultural origin. So I kept to myself and didn’t bother with them until one day two years ago, when I worked up enough gumption to put a fresh bunch of collards into my cart at Food Lion. At checkout, I humbly confessed that I was nervous because I’d never cooked them before. From behind me in the line a friendly Black woman spoke up: “What are you planning to do with them?” I shrugged and said I figured I’d be boiling them or maybe putting them in the slow cooker because I assumed they took a very long time to cook.
She quickly gave me an alternative. —
“No, honey, fry them!” And right there at register 3, she gave me a crash course in her way of making collards, the food that so many take for granted is a native “southern thing,” though food historians say they came to this country for the first time in the 1600s—from Africa. And in Africa, cooks have learned from their grandmothers for generations that frying collards in oil, then simmering them is the best cooking method.
Ever since, I’ve prepared them precisely as she instructed, because it wasn’t just a recipe that kind woman shared with me that day—it was part of her culture, her tradition, her story, her life. She was happy to share it with me, and I’m honored to share it with you.
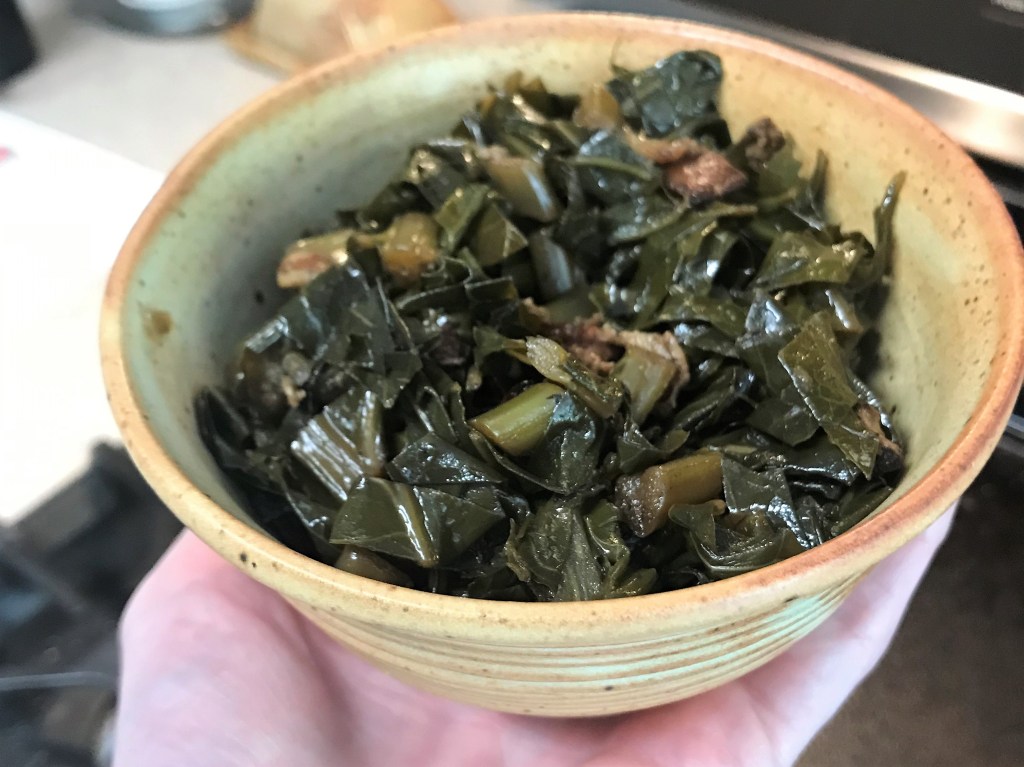
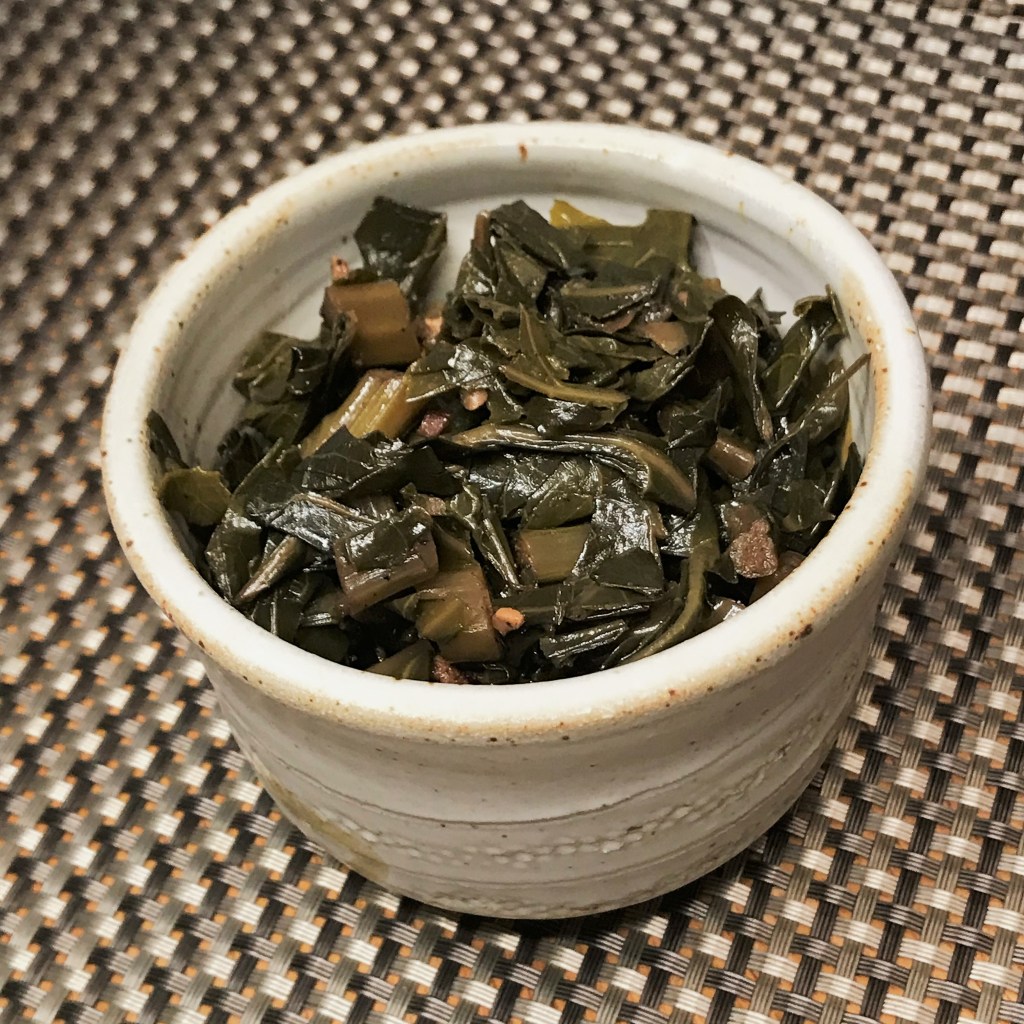
These have a terrific flavor and have become a staple in our meal rotation. I don’t know why I wasted so much time feeling intimidated by this simple food. After all, as the woman told me—”they’re just collards.”
The humble collard, in all its beautiful green glory.
Ingredients
2 slices bacon, cut into one-inch pieces
1 medium onion, chopped
Cooking oil (I use extra virgin olive oil)
2 lbs. fresh collard greens, cleaned and chopped
A few shakes crushed red pepper
1/4 cup apple cider vinegar
1 cup water or broth (I used vegetable broth)
Instructions
If you’re a visual learner like me, you won’t need to read the instructions below. That’s how easy it is.
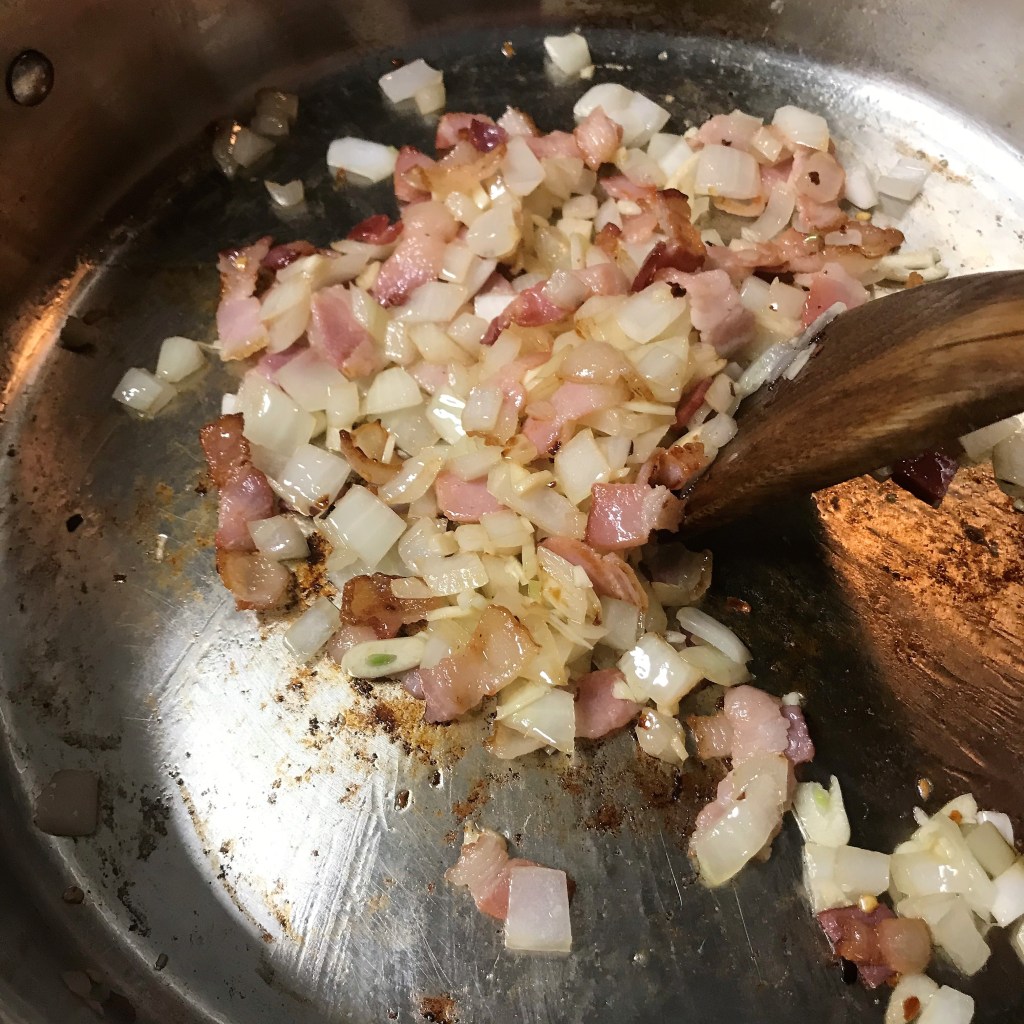
You could cook the bacon first, but I put the onions in the pan at the same time and cook them together.
To save a bunch of time, I usually buy the giant “pillow” bags of collards, pre-washed and ready for cooking.
Once the edges of bacon are crisp and the onions are soft, I season the mix with salt, pepper and red pepper flakes.
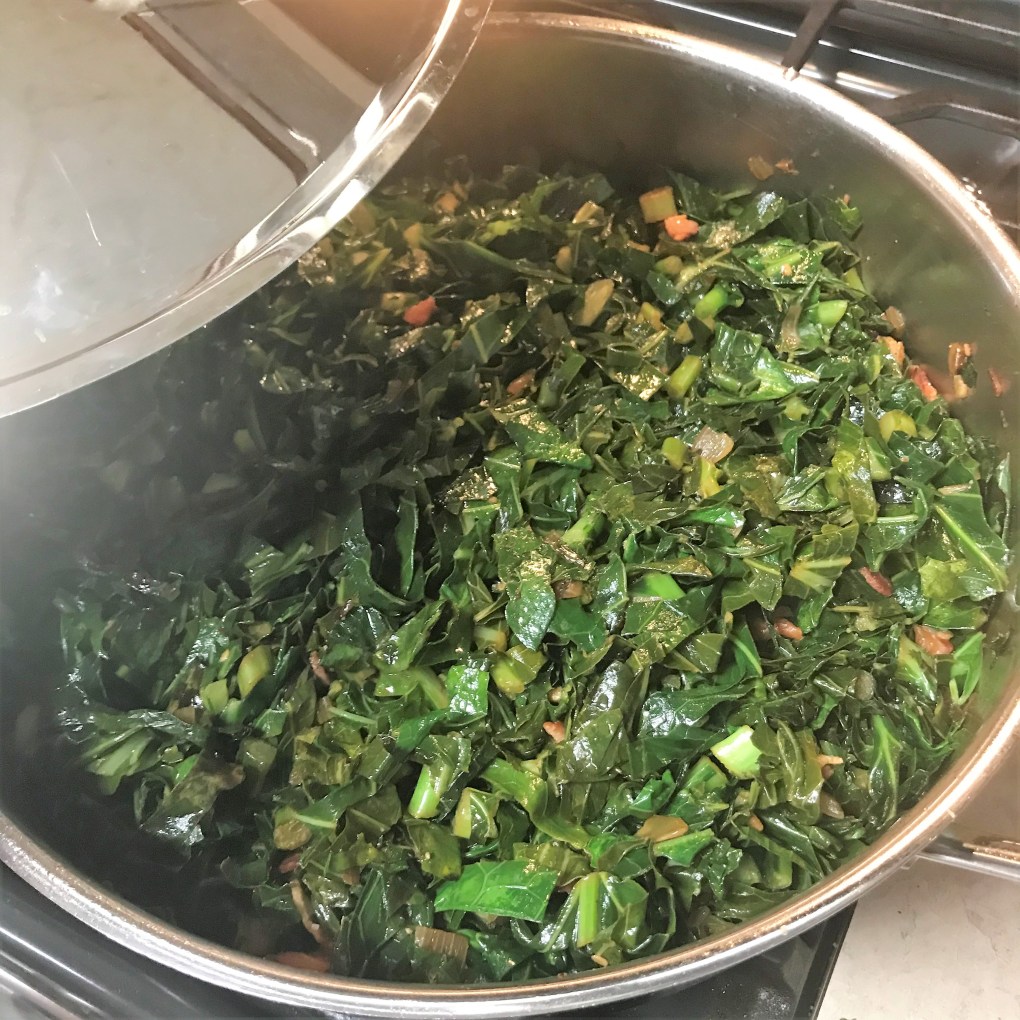
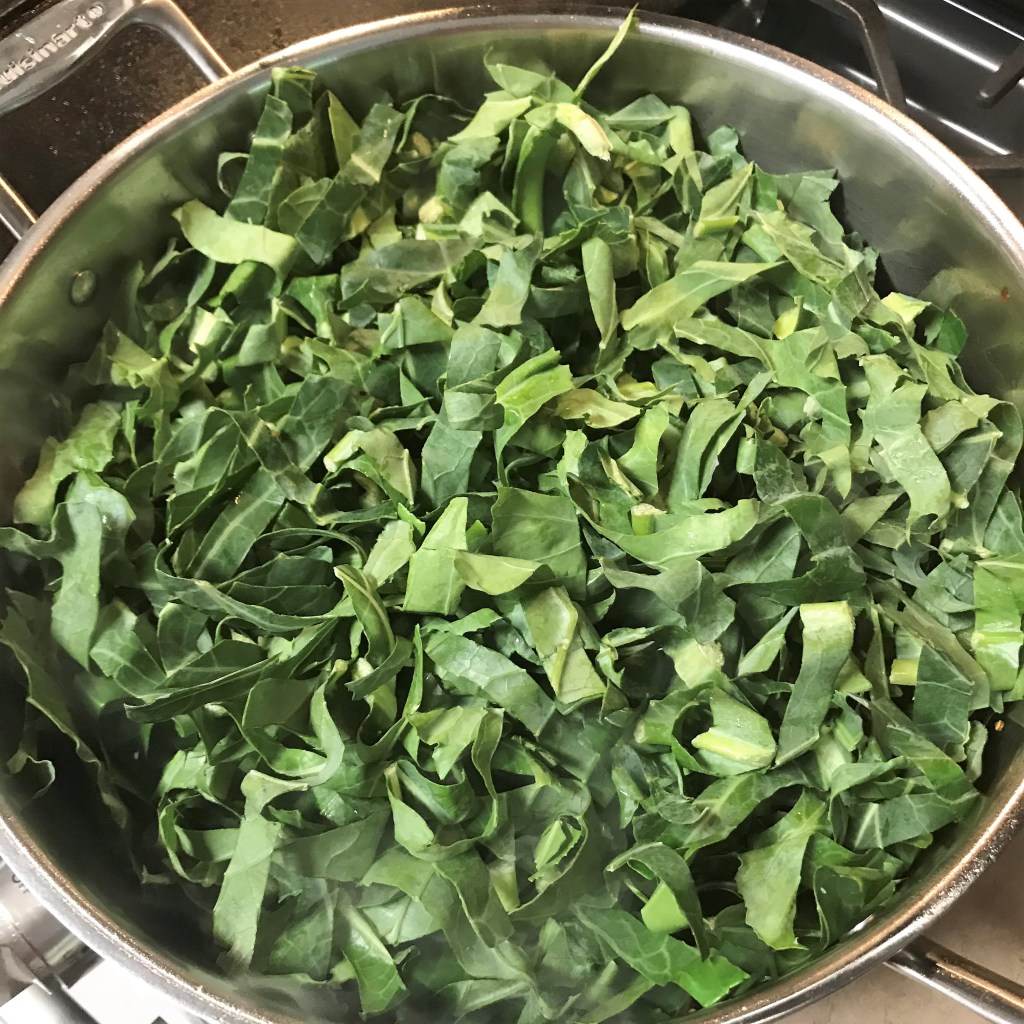
I started with several fat handfuls of collards, as much as I could fit in the pot, but leaving enough room to stir and toss them.
The greens will soften and wilt after a few minutes, then it’s time to add a few more handfuls. Add more oil to the pan when it gets dry.
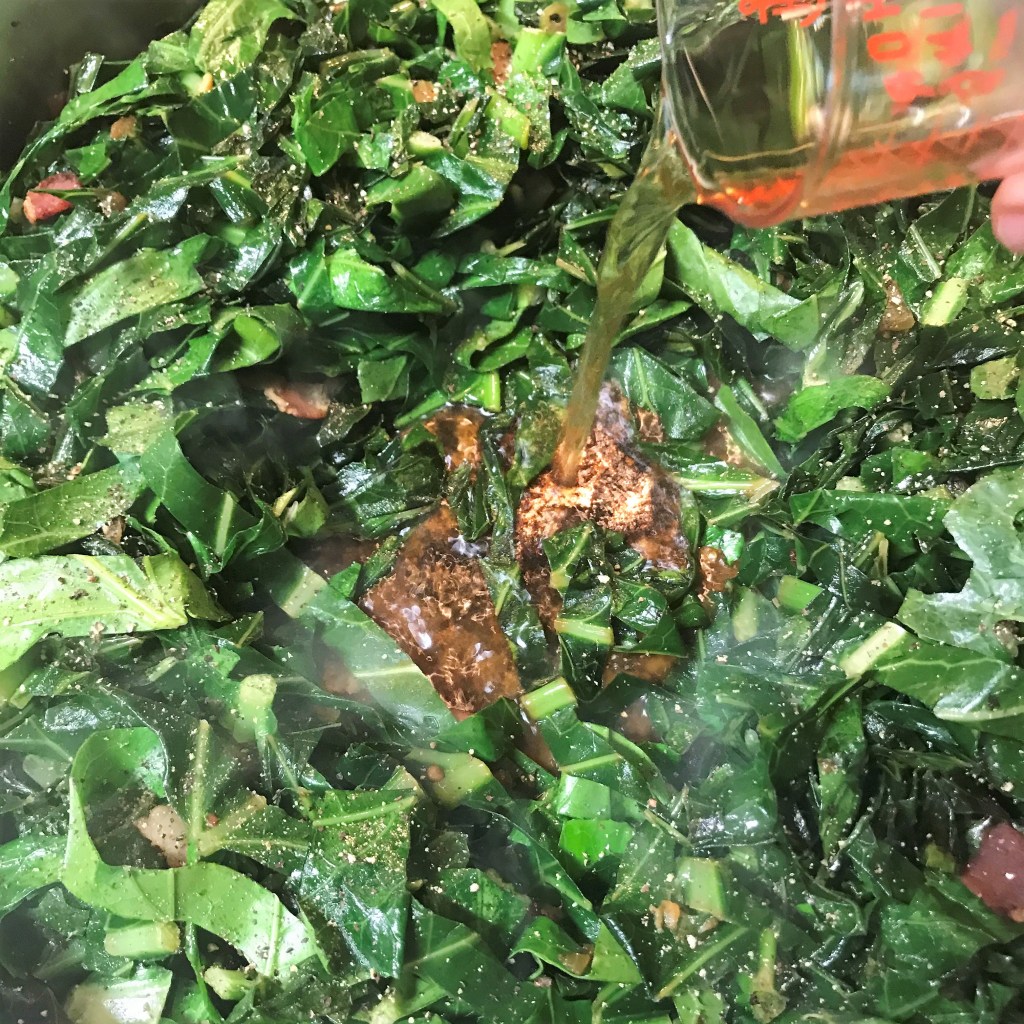
Pour the vinegar right onto the browned surface of the pot to begin the deglazing. All that flavor will loosen and come back into the greens.
Chicken broth would work fine as well, but I like the subtle flavors of vegetable broth. Choosing low sodium gives me better control of the overall saltiness in my recipes.
Give them a good stir, then reduce heat and cover to simmer. All they need now is a little time.
After only 30 minutes, the collards have softened and changed color. In another 30, they’ll be ready to serve.
In a large, heavy-bottomed pan, cook bacon pieces and chopped onions together until the fat renders and bacon begins to crisp. Sprinkle with crushed red pepper and season with salt and pepper.
Add collard greens, a few handfuls at a time, and stir them around so they soften and wilt. When there’s room in the pan for more, add more. Add cooking oil to the middle of the pan as needed for cooking the remaining collards.
When all the greens are wilted, move them to the outside edges of the pan. Pour vinegar into the center of the pan, and stir with a wooden utensil to de-glaze any burned bits from the bottom of the pan.
Add water or broth and reduce heat to low, then cover and simmer the greens for about an hour until tender.
Collards are packed with nutrients and antioxidants. They are considered by nutrition experts to be a “superfood.”