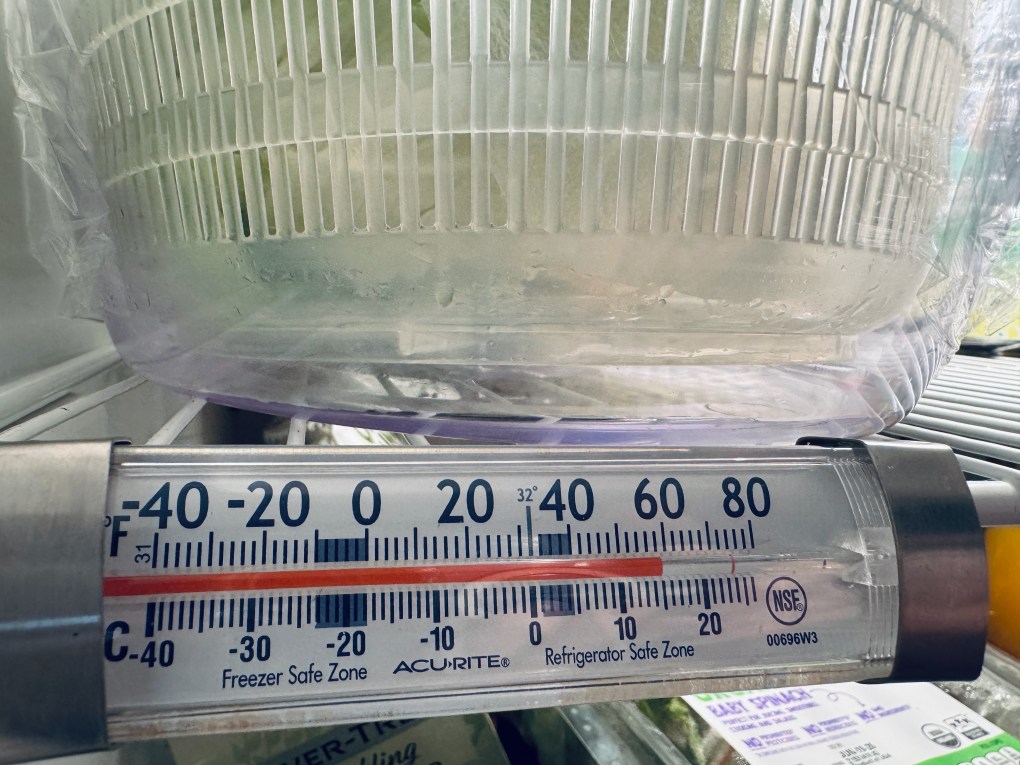
My heart sank yesterday when I stepped out into our enclosed garage and noticed a stream of light running the full length of the refrigerator door. Had we retrieved something from the extra fridge earlier that morning and just missed closing it tight? Unfortunately, it quickly became apparent that this was not a recent mistake, as a large block of cheese on the top shelf was warm to the touch. The door had been open all night, at least ten hours, and the small thermometer clipped onto the top shelf registered nearly 70° F. Ugh.
In that moment, I became the father in A Christmas Story in the scene where he wailed about all the favorite foods that he wouldn’t be able to enjoy after the neighbor dogs attacked the roast turkey. You see, I had just gone to Costco a few days prior to this debacle to restock on our favorite expensive cheeses, and I had placed them on the top shelf of the fridge. My plan was to grate the one-and-a-half pound wedge of Parmagiano-Reggiano together with the one-pound wedge of Pecorino Romano, and we would have a hefty bucket of our beloved “Parm-Romano Blend” to get us through all the pizzas, grilled caesar salads and quick pasta dishes that I would make during summer. I had been fantasizing ways to use the huge double block of feta before its early November expiration, and I’d finally make one of my culinary bucket list items, a whipped feta dip. And there was a mellow cheddar aged in pale ale that had caught my eye. That would be a winner on an appetizer platter, and wouldn’t it also rock a macaroni and cheese? Sigh, I’ll never know.
Not only were the specialty cheeses no longer cold, they had virtually cooked under the constant heat of the incandescent light bulb, and smelly, oily liquid dripped from the corners of all the packages. If I could have salvaged any of it, I would have. It was easily $70 worth of cheese. For someone who searches out volume bargains and plans so carefully with food, this was a gut punch.
On the bright side, the rest of the refrigerator’s residents seem to be mostly OK. A jug of buttermilk in the door was a loss, but it was almost gone anyway. My vermouths would be fine. On lower shelves, an array of drinks and cocktail mixers that don’t technically need cold storage. A few fruits and veggies that I picked up Saturday at the farmers’ market would be used quickly enough that they would not be a loss. Even my sourdough starter, Pete, is expected to make a full recovery.
But, the cheeeeese. 😩
I imagined what my frugal grandmother would do in such a situation. She’d probably cuss, as I did (one of these days, I’ll share her favorite “bad” word, which she used with bold intention when circumstances warranted), and then she’d put on a pick-up-the-pieces attitude, scan the pantry and pull something together for dinner. She would not let the mistake define her.
Ah, Spring! It’s difficult to narrow down what’s best about this time of year— is it the warming temperatures and longer days? The cheerful daffodils that are already in full bloom in the beds in front of our house? I am already envisioning donning my garden gloves and putting down soil for this year’s garden. Easter will be here before we know it, and that’s always a sign of a fresh start. It’s all so exhilarating!
But the thing that everyone around these parts is excited about has nothing to do with weather, flowers or new beginnings. Nope— this month, it’s all about March Madness, baby!
Many years ago, in what seems like a different lifetime, I worked in the main branch of a large, North Carolina-based bank. The “madness” that I witnessed included executives from the bank clearing their calendars so that they could stand in the lobby of the bank, focused on portable TVs that someone had plugged in right there along the teller line (this was all before the internet and smartphones, of course). Customers who came in to do their routine banking would stop for a few minutes, enjoy snacks that the bank staff brought in for a potluck table, and watch some of the games. Someone kept up with the brackets, to report to visitors which teams had advanced to the next rounds.
Weird, I thought, for all of this to occur in a business setting on a weekday— but I was the newcomer who had not yet learned that North Carolina has five key religions— Southern Baptist, Methodist, NASCAR, pulled pork barbecue and ACC hoops.
Thirty five years later, It no longer seems weird to me to see people interrupt business as usual to watch a basketball game in the middle of their workday. During my years in radio, I even sat courtside for a couple of those games and it is indeed a thrill. We have plenty of that excitement around here this week, too, as the rivalries intensify at the ACC Tournament, happening right now in nearby Greensboro.
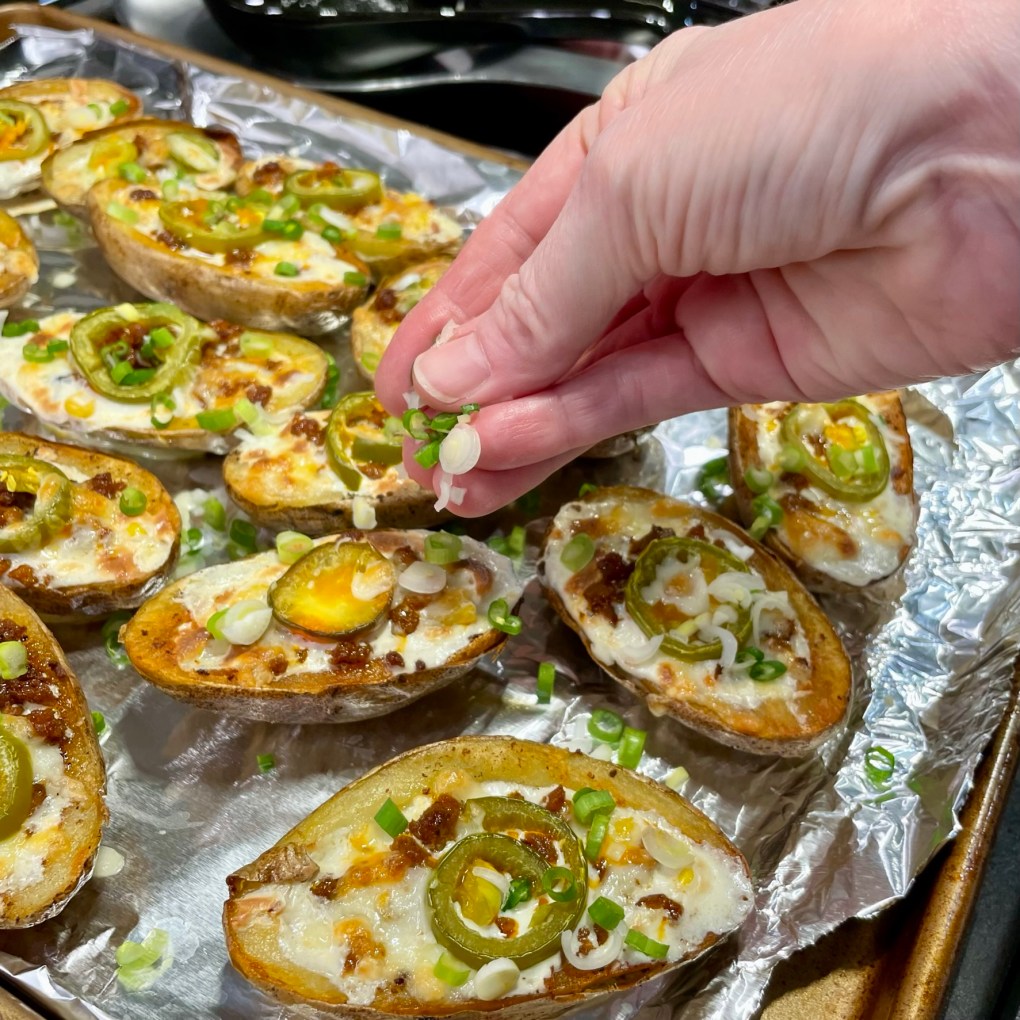
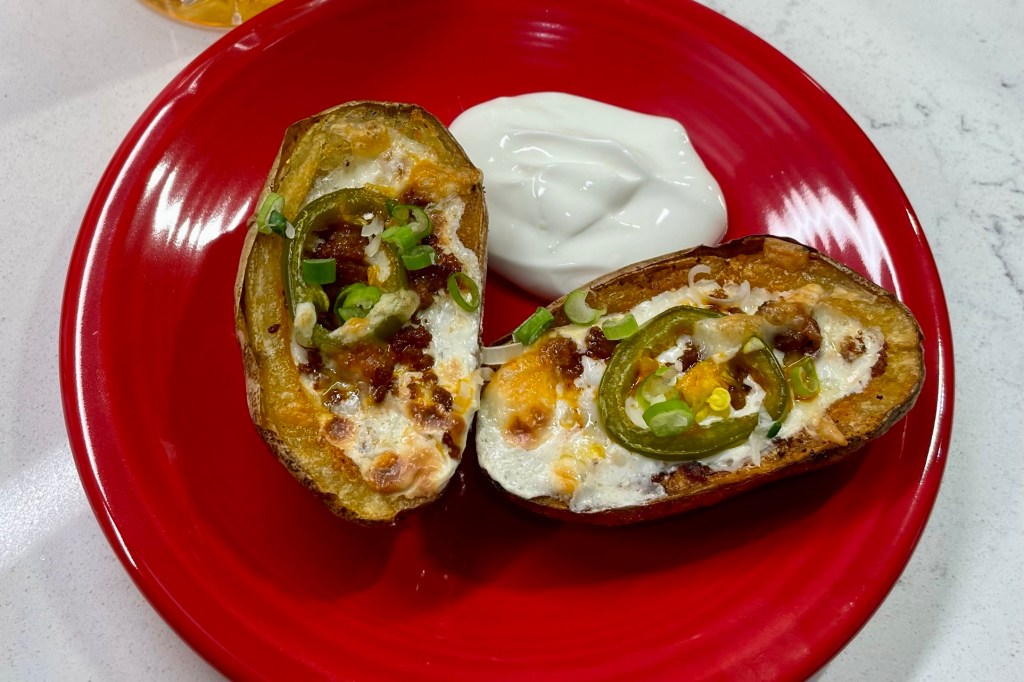
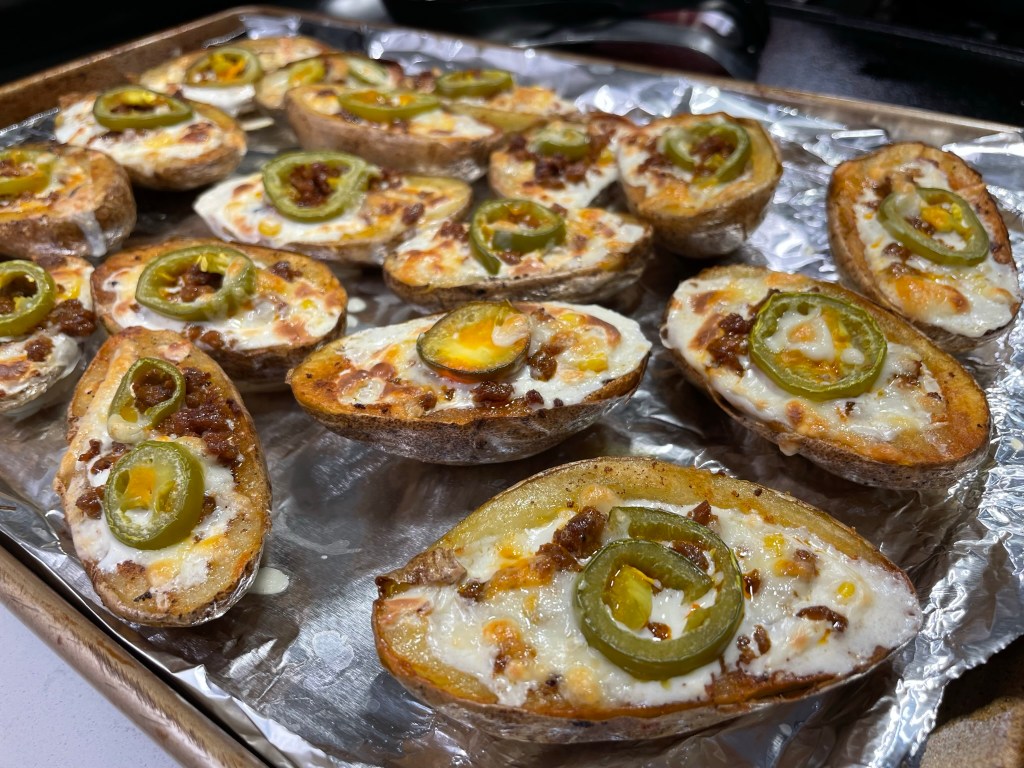
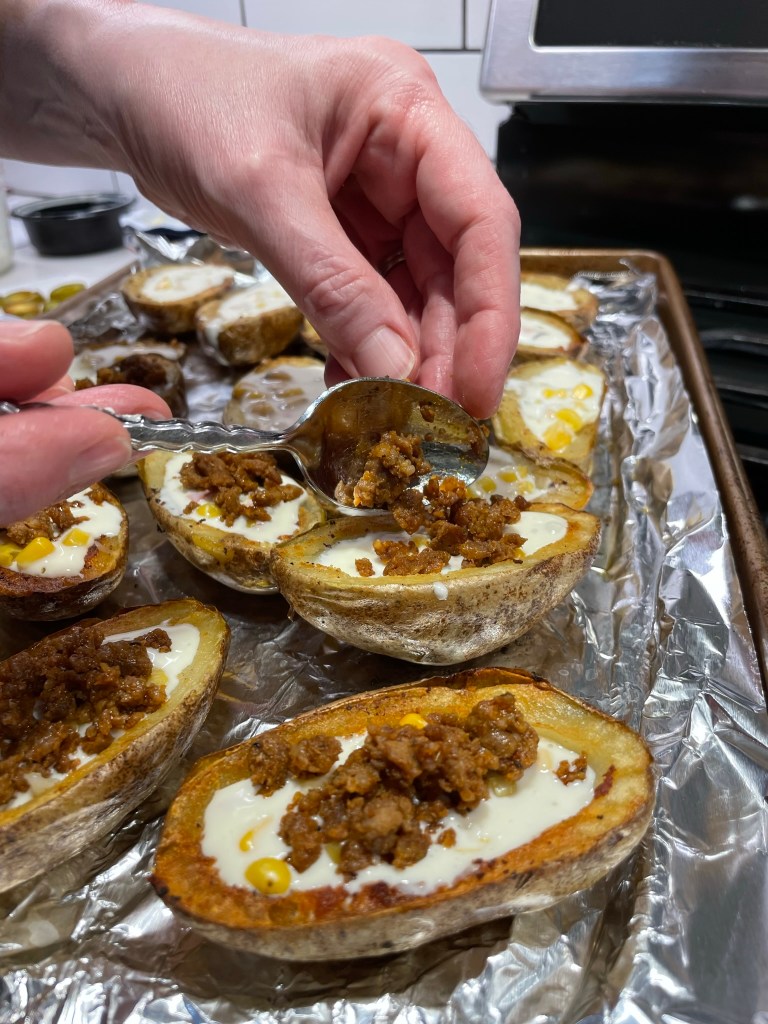
If you need a hearty snack for your own March Madness viewing, consider it done with these zesty Mexican-inspired potato skins, with all the flavors of queso dip inside a split-and-scooped baby russet potato. These little guys can be prepped in advance for the most part, then popped into the oven at the last minute so the toppings— chorizo, fire-roasted corn, queso dip and jalapeño—all melt together in a melty, gooey self-contained snack that’s easy to eat while you’re watching the games. These skins would have really wowed the gang at the bank!
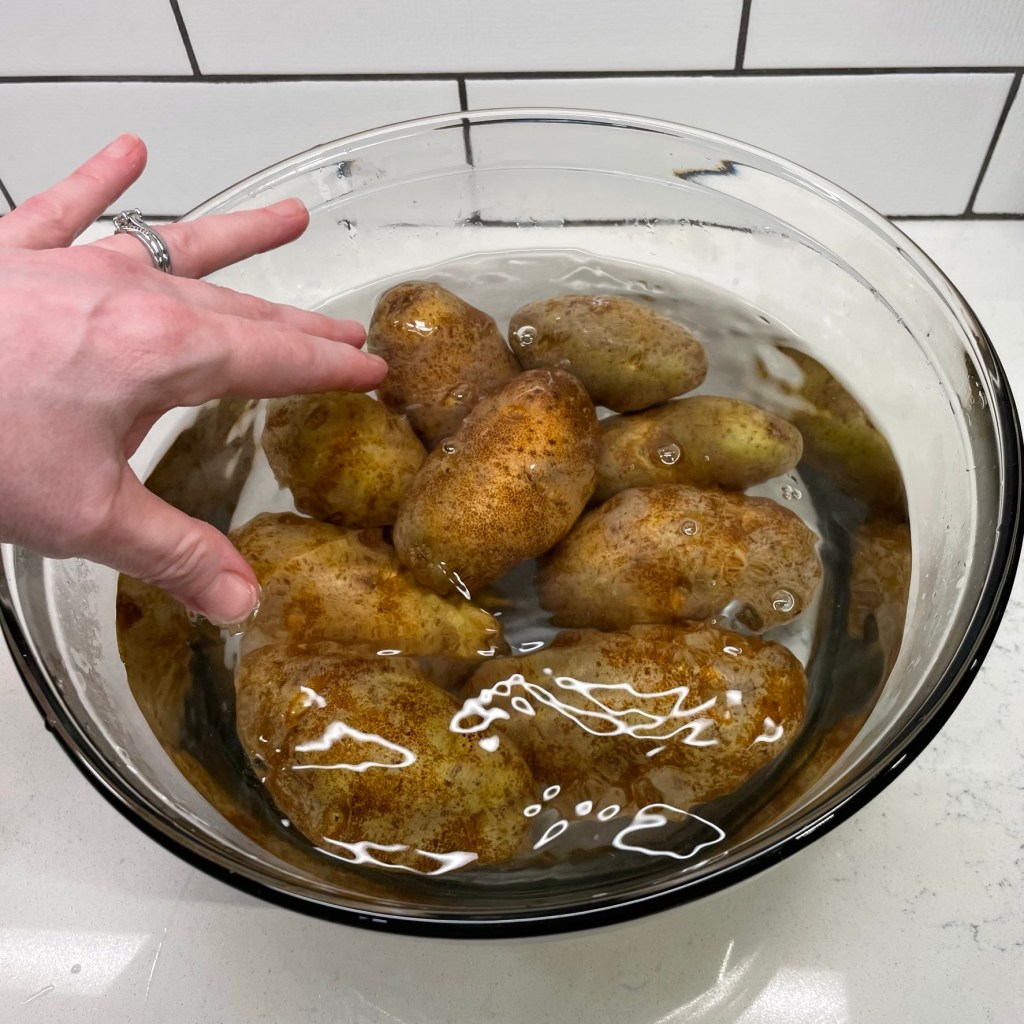
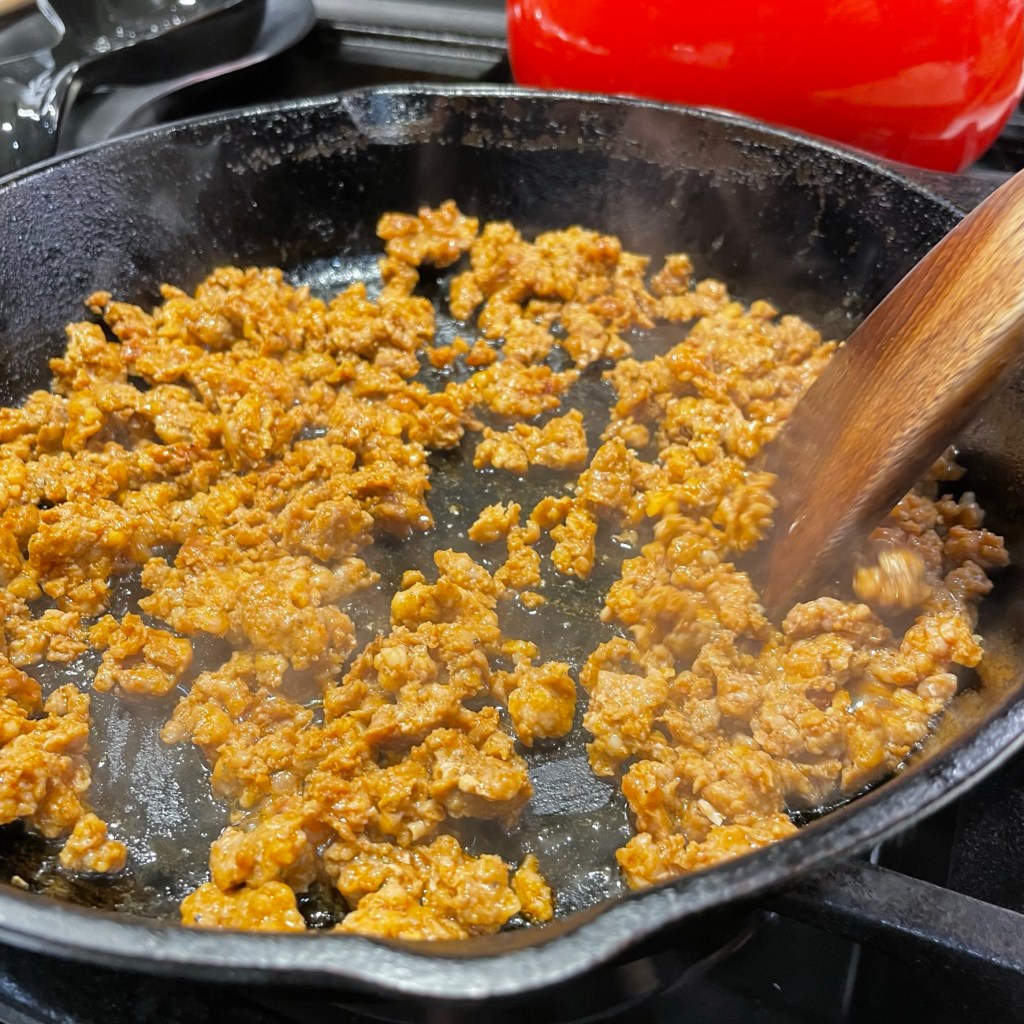
The first step in making them, of course, is prepping and baking the russet potatoes. I chose smallish ones for this recipe so the skins would be better suited to game day snacking. My secret trick with any baked potato recipe is the brine. Yes, I soak my scrubbed potatoes in heavily salted water before baking, and it ensures a crunchy, flavorful skin that is just as tasty as the fillings you put in them. The brining step only takes about half an hour, and the outcome is well worth it. I browned up the chorizo in cast iron while the potatoes soaked, and kept the drippings in the skillet.
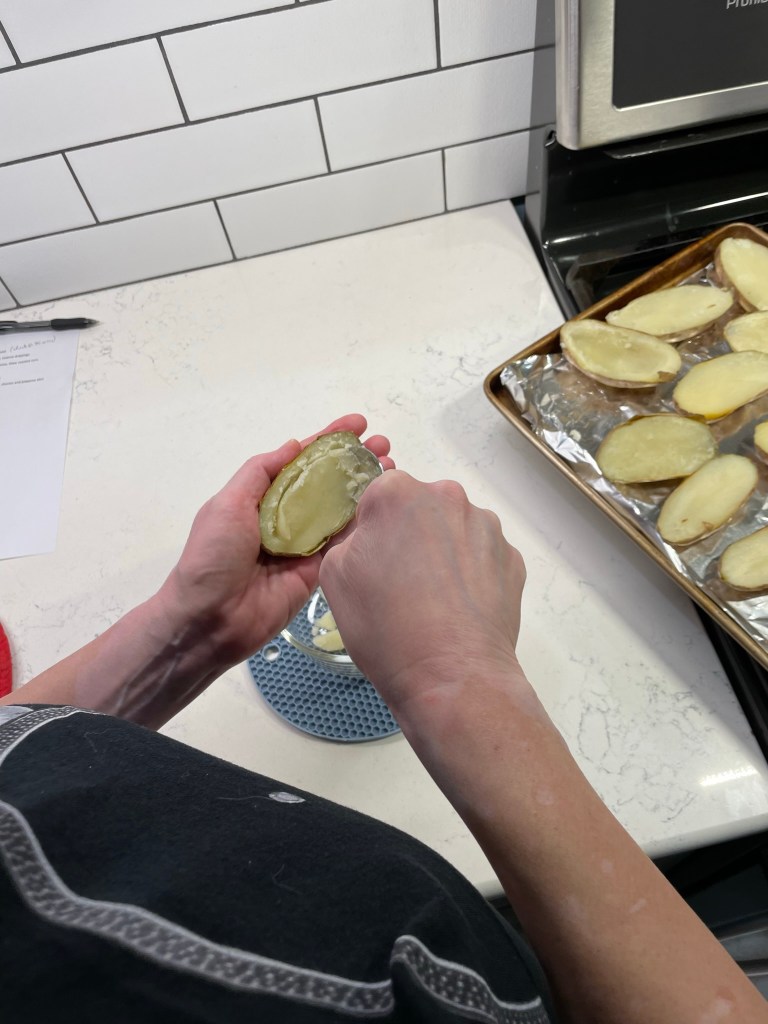
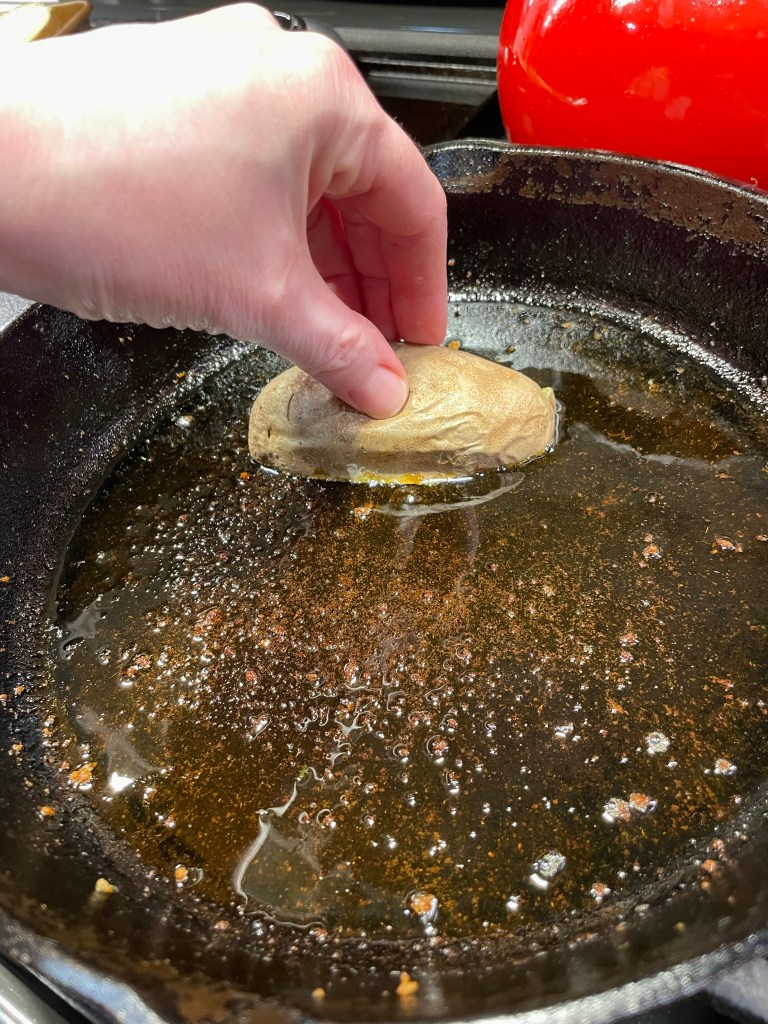
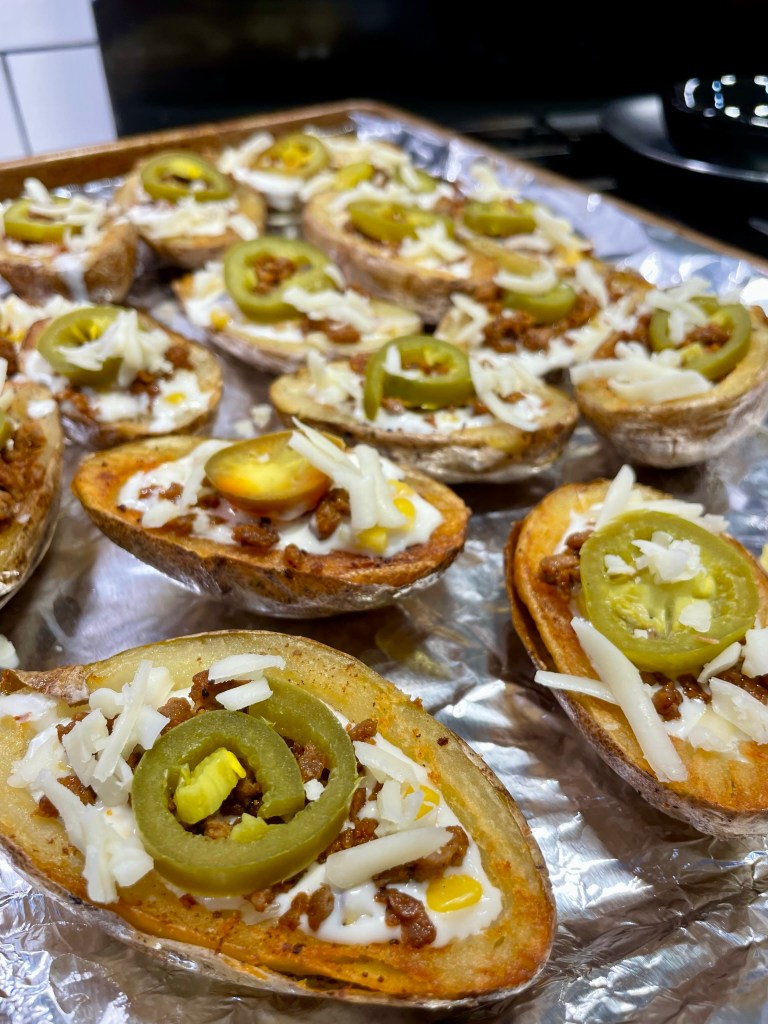
When the spuds were cool enough to handle, I split them in half and scooped out some of the filling, keeping enough to hold the fillings without leaking. You can do whatever you like with the scooped out part; I added them to the current batch of homemade food for Nilla. To give the skins a bit of extra flavor, I fried them briefly (face-down) in the chorizo drippings, just long enough to get those edges crispy. From there, it was just a matter of filling them up with shredded cheese, queso, corn, chorizo and jalapeno.
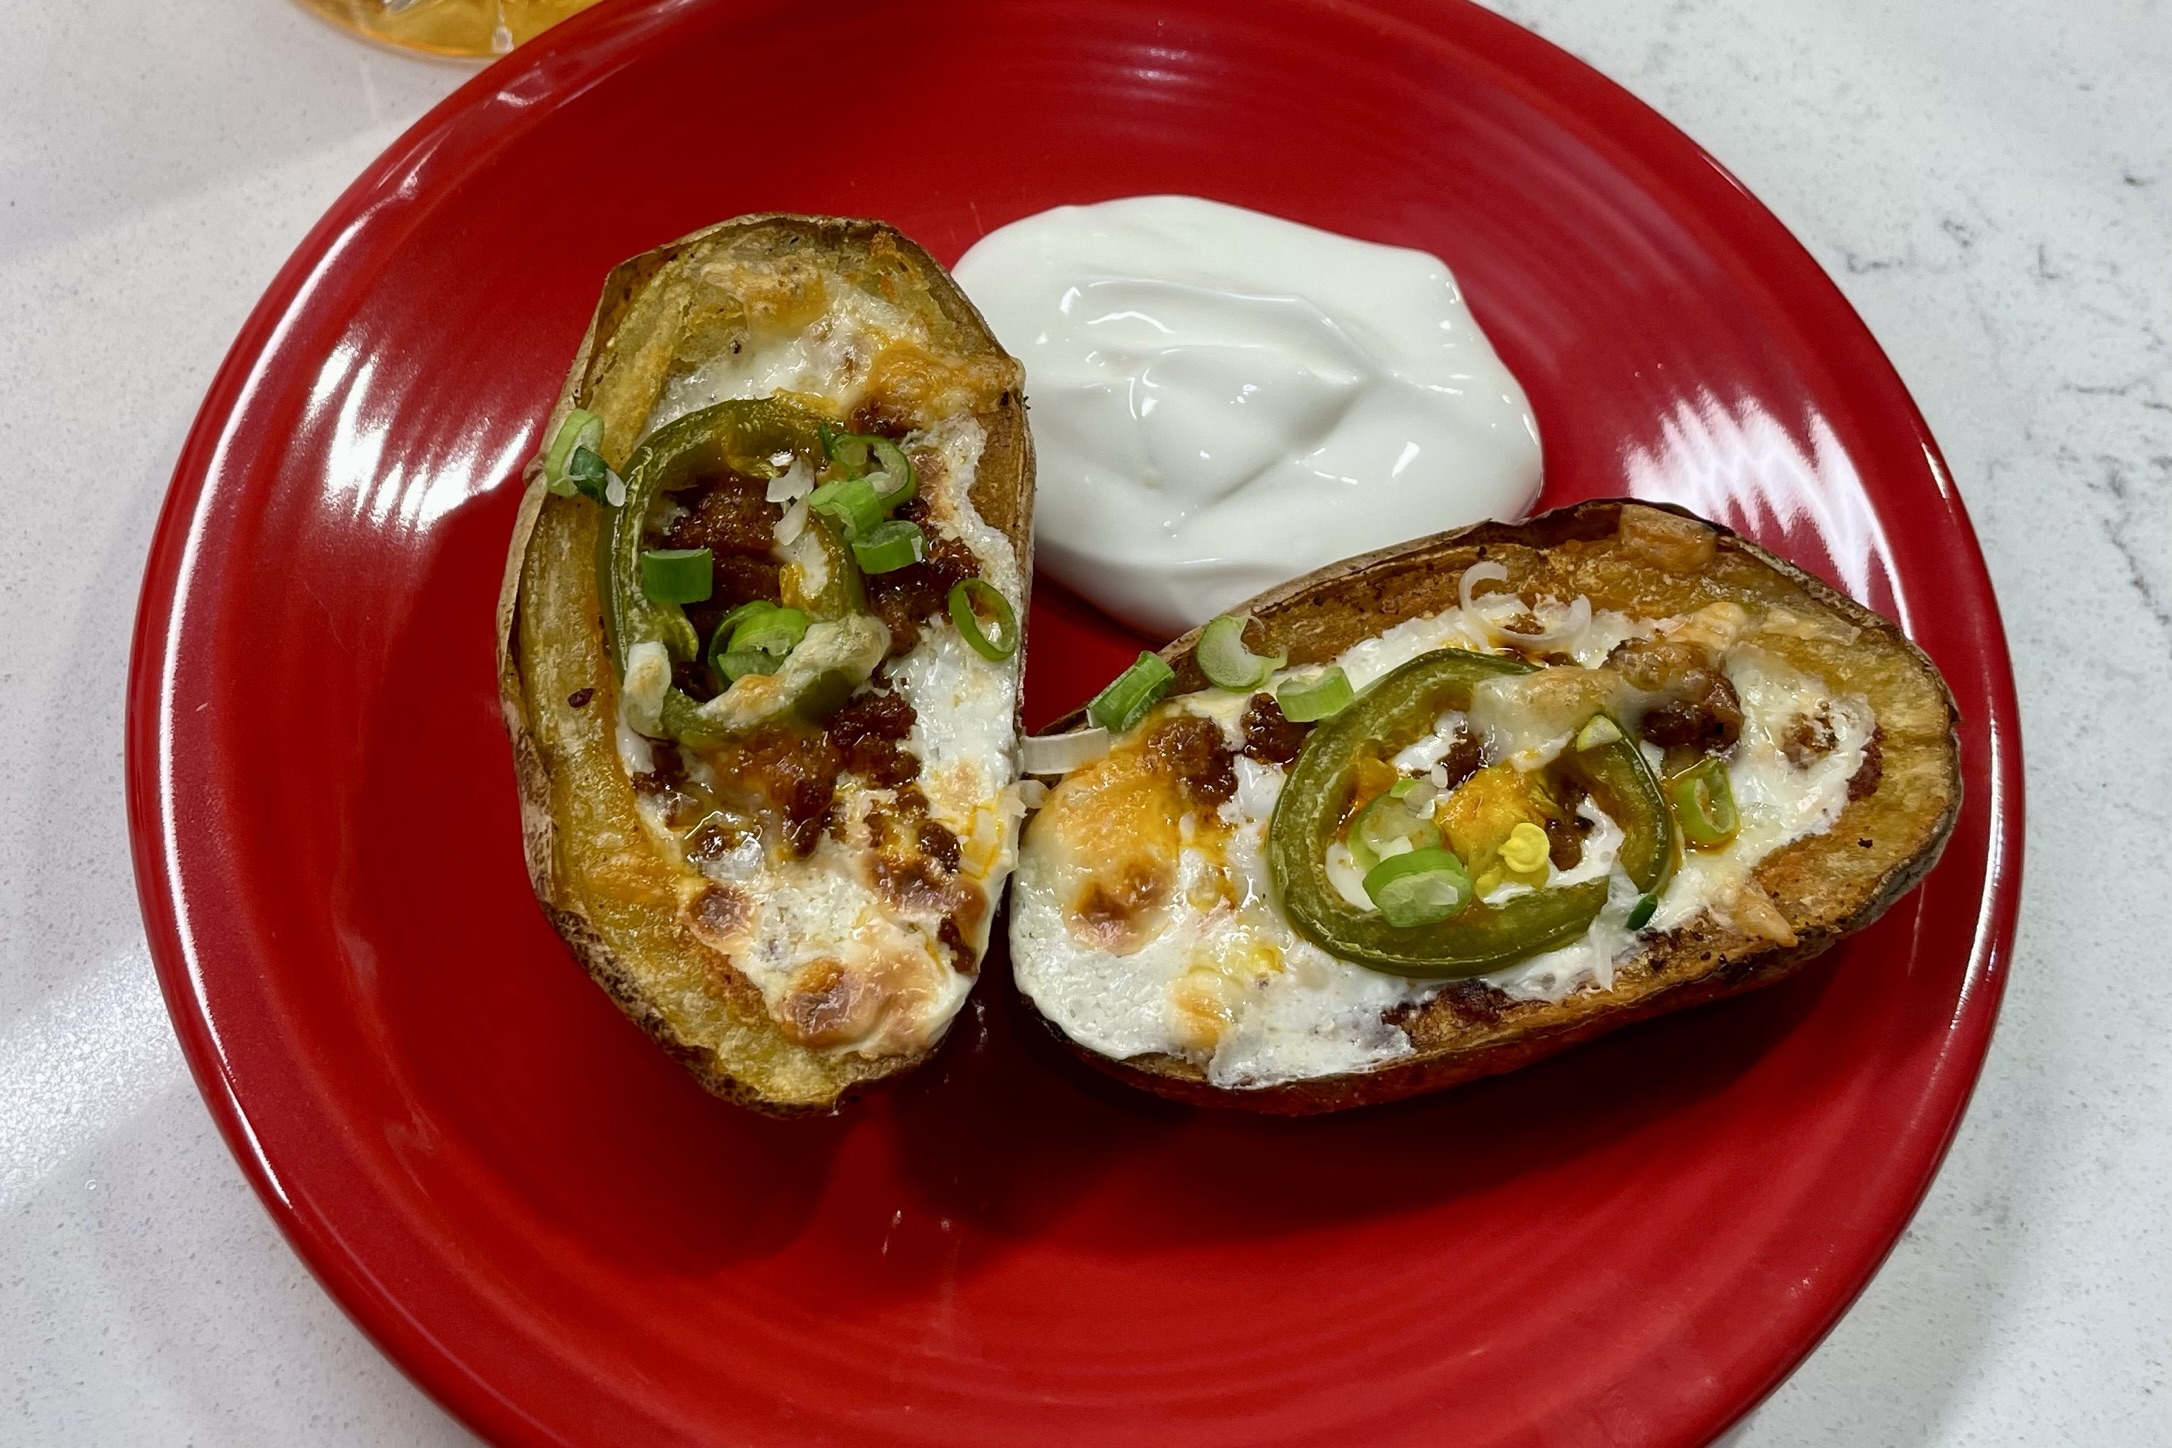
A second trip through the oven melted all the tasty fillings together, and I finished them with a quick scatter of sliced scallions.
This is a fun game day snack that puts a Mexican queso dip twist on classic potato skins.
Ingredients
8 smallish russet potatoes, scrubbed
Hot, but not necessarily boiling, water
1 Tbsp. kosher salt (for brining the potatoes)
6 oz. fresh Mexican chorizo sausage* (see notes)
1 to 2 Tbsp. olive oil, if needed
1/2 container Land o Lakes queso dip*, cold from fridge
1/2 cup fire roasted sweet corn
1/2 cup Monterey jack or pepper jack cheese, shredded
16 pickled jalapeno slices
2 scallions, thinly sliced (white and green parts)
1/2 cup sour cream (optional), for serving
*Notes: This recipe uses the fresh, crumbly style of chorizo, not the hard Spanish variety. Our neighbor turned us on to the Land o Lakes queso dip, and we love it! If you don’t find it in your supermarket, substitute something similar from the fresh dairy case.
Directions
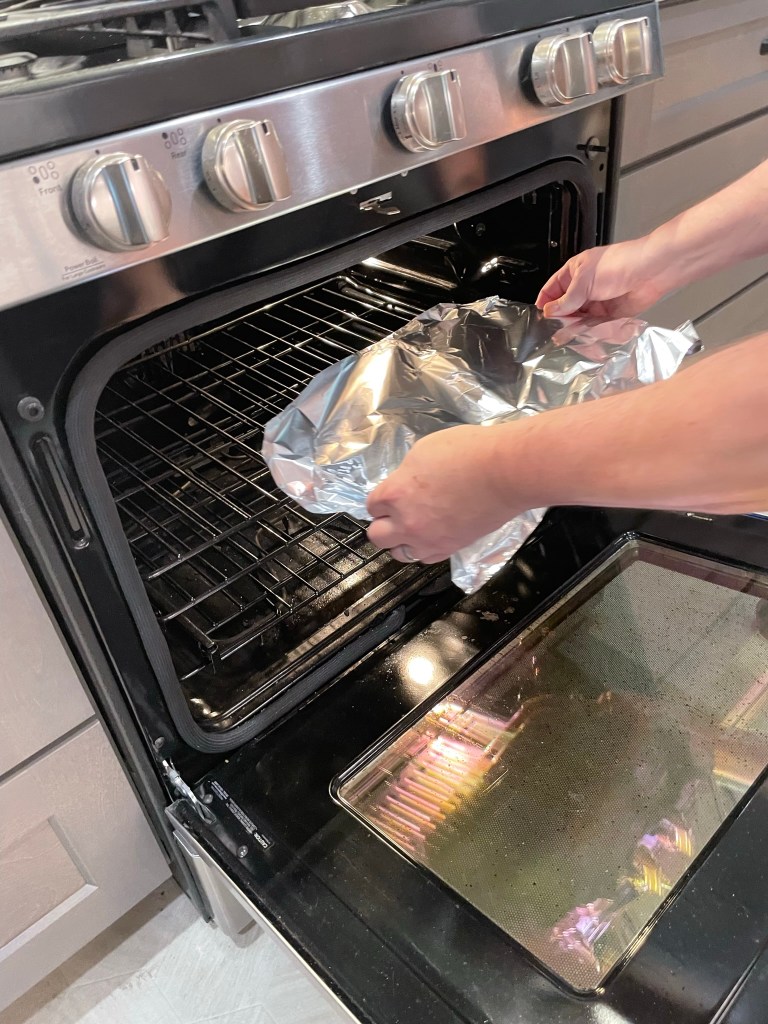
Preheat oven to 400°F, with oven rack in center position. Line a large baking sheet with aluminum foil.
Place scrubbed potatoes in a large, heatproof bowl. Sprinkle kosher salt over the potatoes, then fill with enough hot water to cover the potatoes. Swish the water a bit to dissolve the salt. Let them soak for 30 minutes.
Brown the chorizo in a cast iron skillet over medium heat. Scoop the chorizo out into a separate bowl and keep the drippings in the pan.
Dry potatoes with paper towels and arrange on the foil-lined baking sheet. Bake for about 35 minutes, until potatoes are easily pierced with the tip of a sharp knife. When potatoes are cool enough to handle, cut them in half lengthwise and scoop out some of the soft potato, leaving about 1/4-inch around the edges and bottom. Use the excess potato in another recipe.
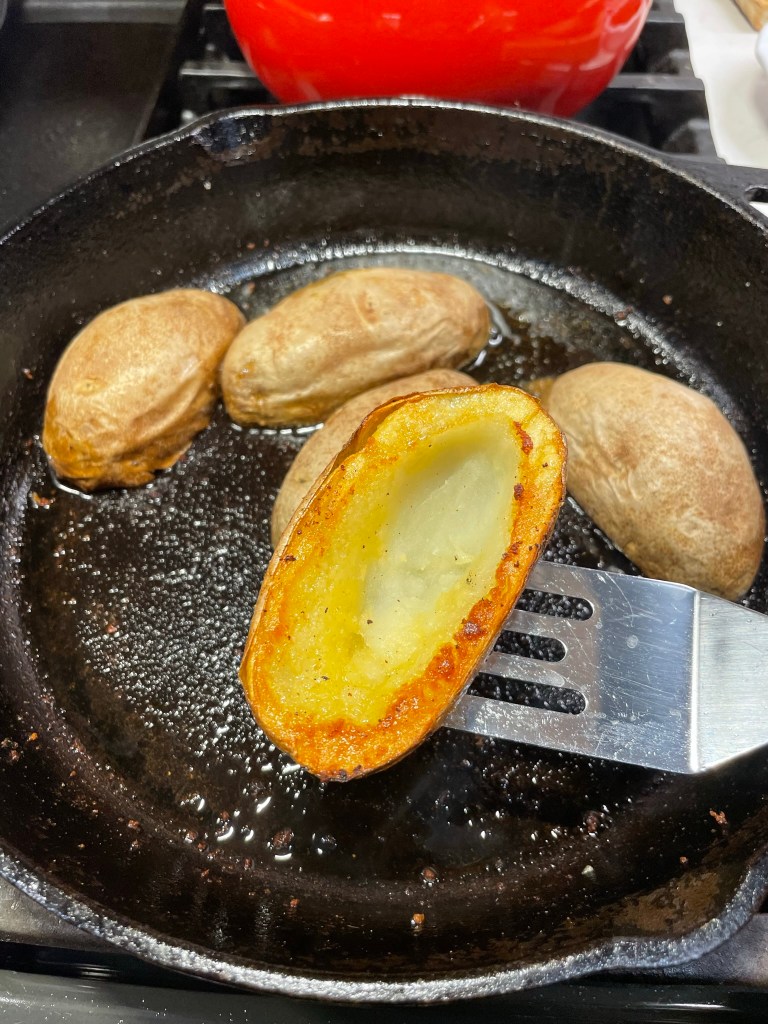
Place the chorizo skillet back onto medium heat. If the drippings are skimpy in the pan, swirl in a little olive oil. When hot, place the scooped potato skins face down in the pan, to crisp up the exposed edges. Arrange the skins on the foil-lined pan and prepare to fill them.
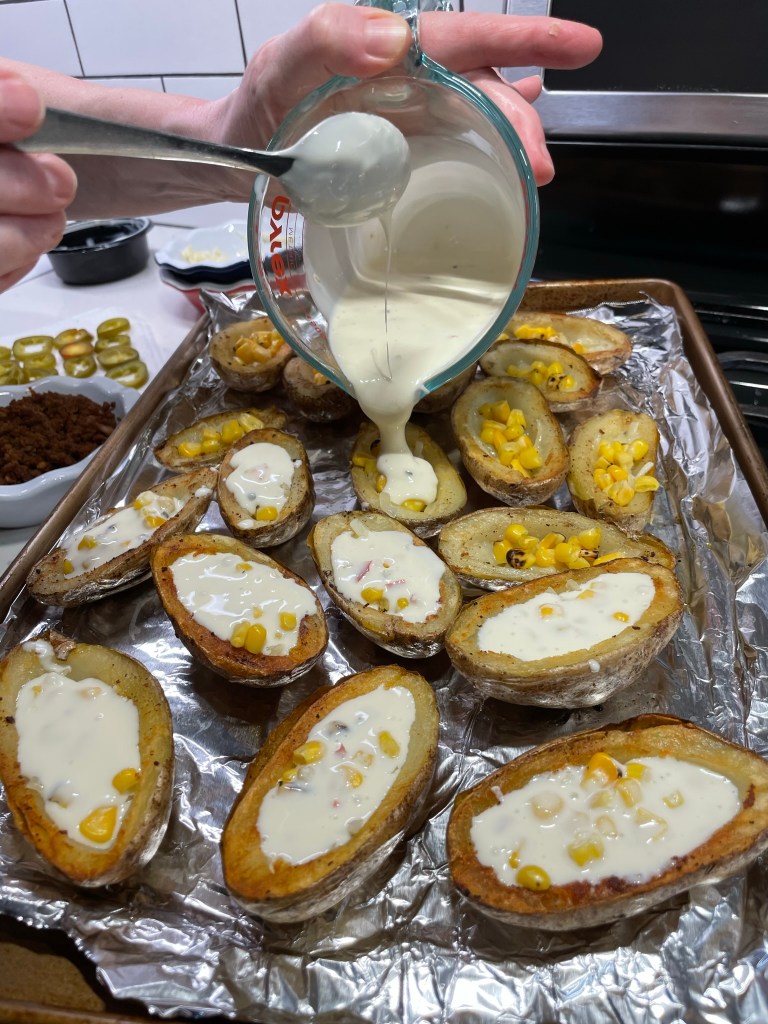
Divide about half of the shredded cheese among the skins and top each with a teaspoonful of the roasted corn. Transfer the queso cheese into a glass measuring cup and microwave about 20 seconds to loosen it up. Pour the queso over the filling in the skins, up to the edges. Top with chorizo, jalapeno slices and the remaining shredded cheese.
Place skins back into the 400°F oven for about 5 minutes, until cheese is melted and bubbly and skins are heated through. Sprinkle with sliced scallions and serve immediately.
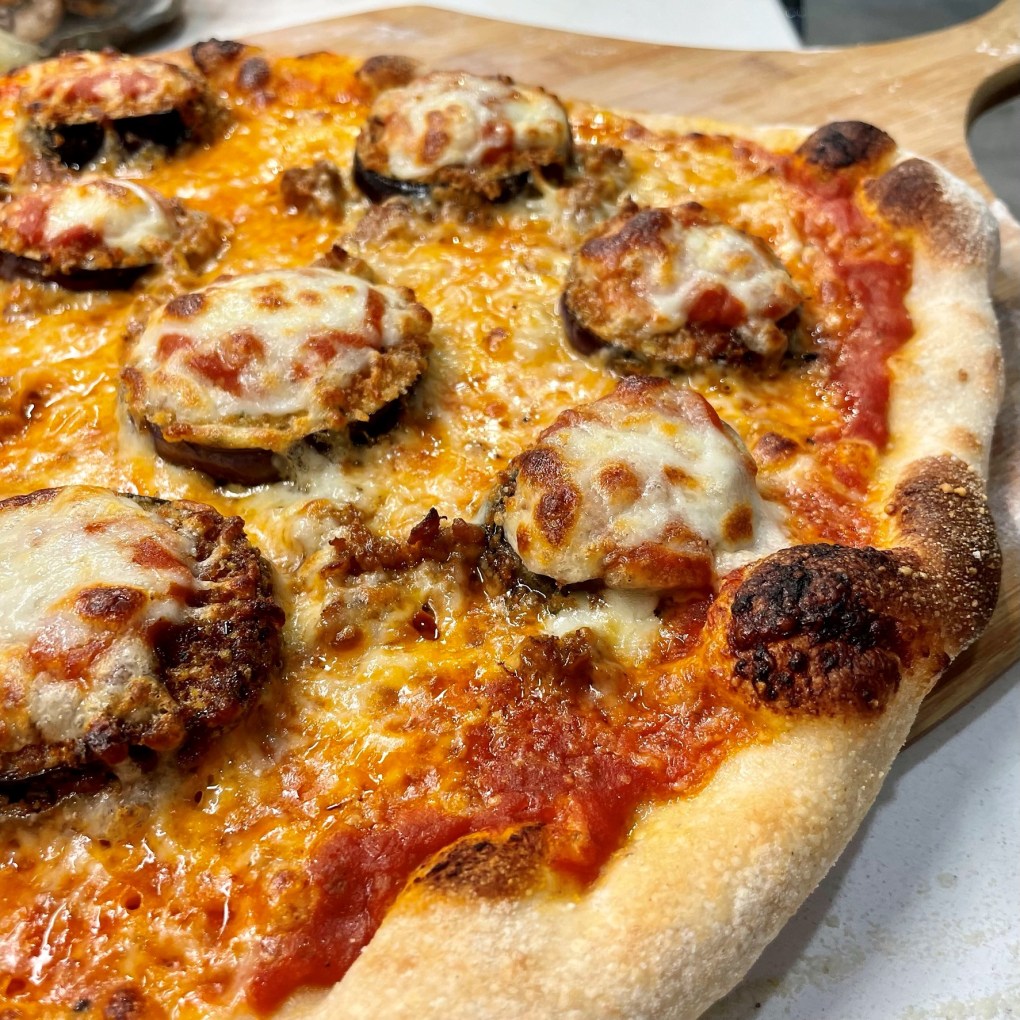
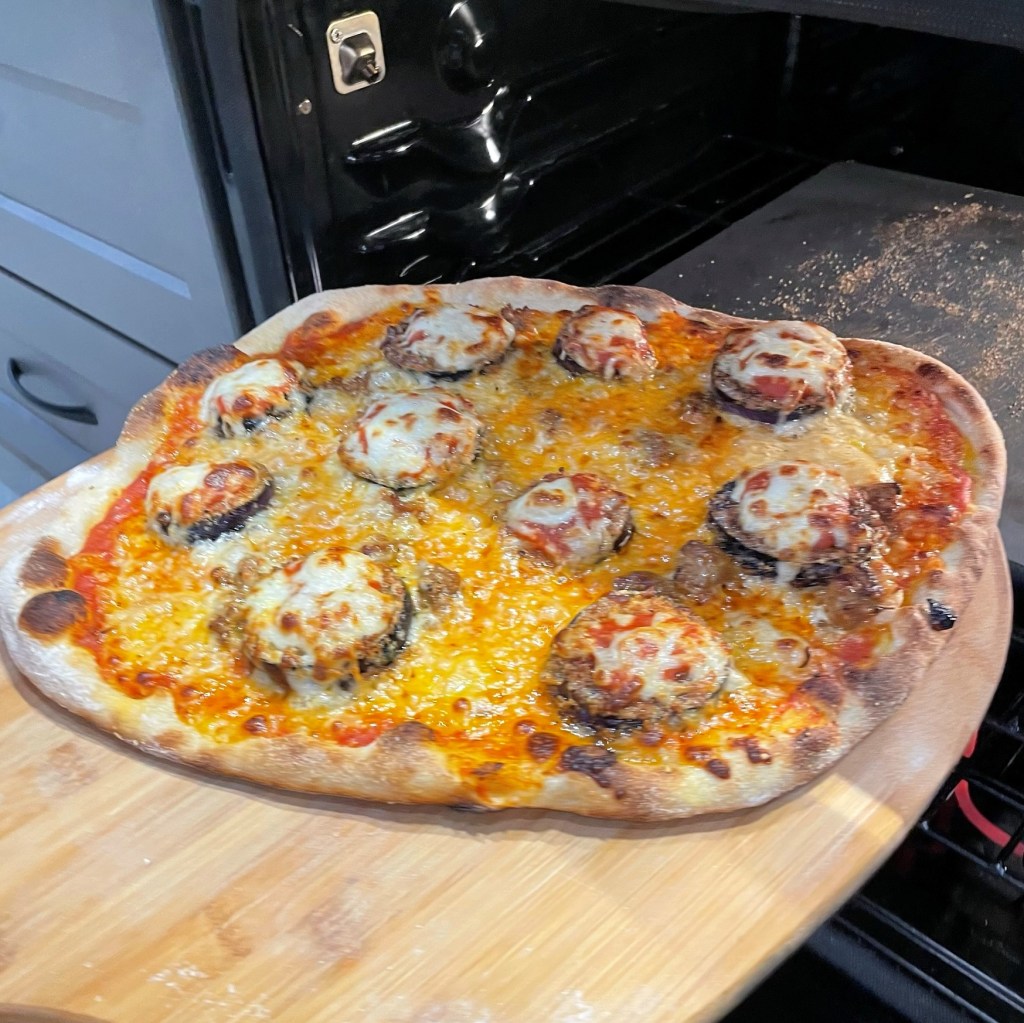
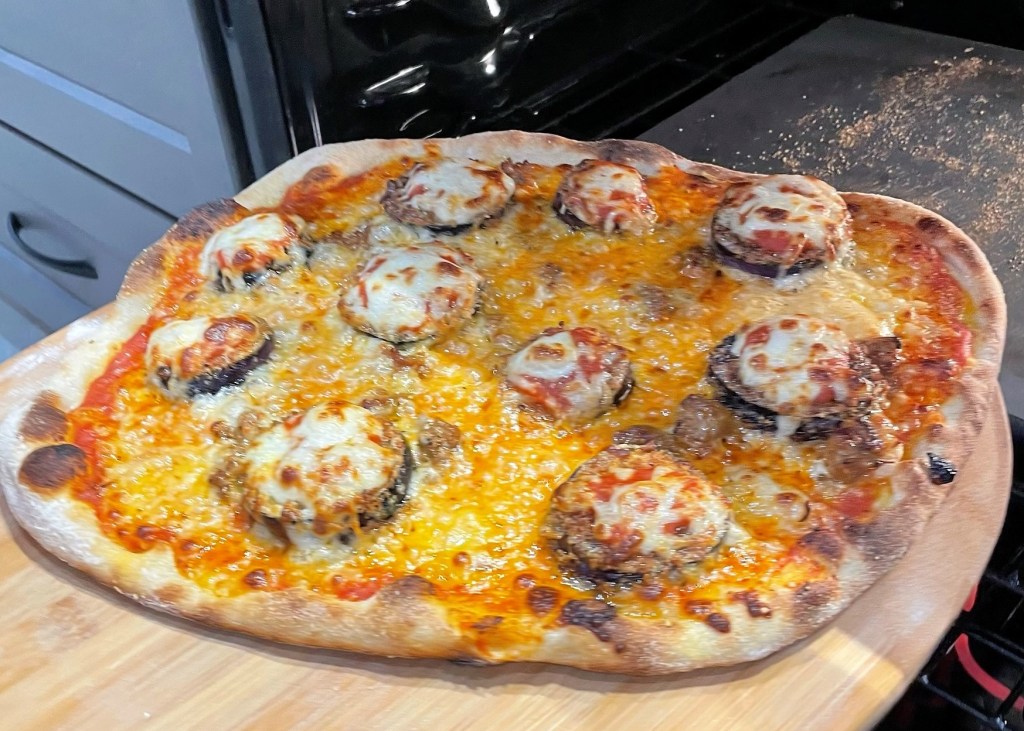
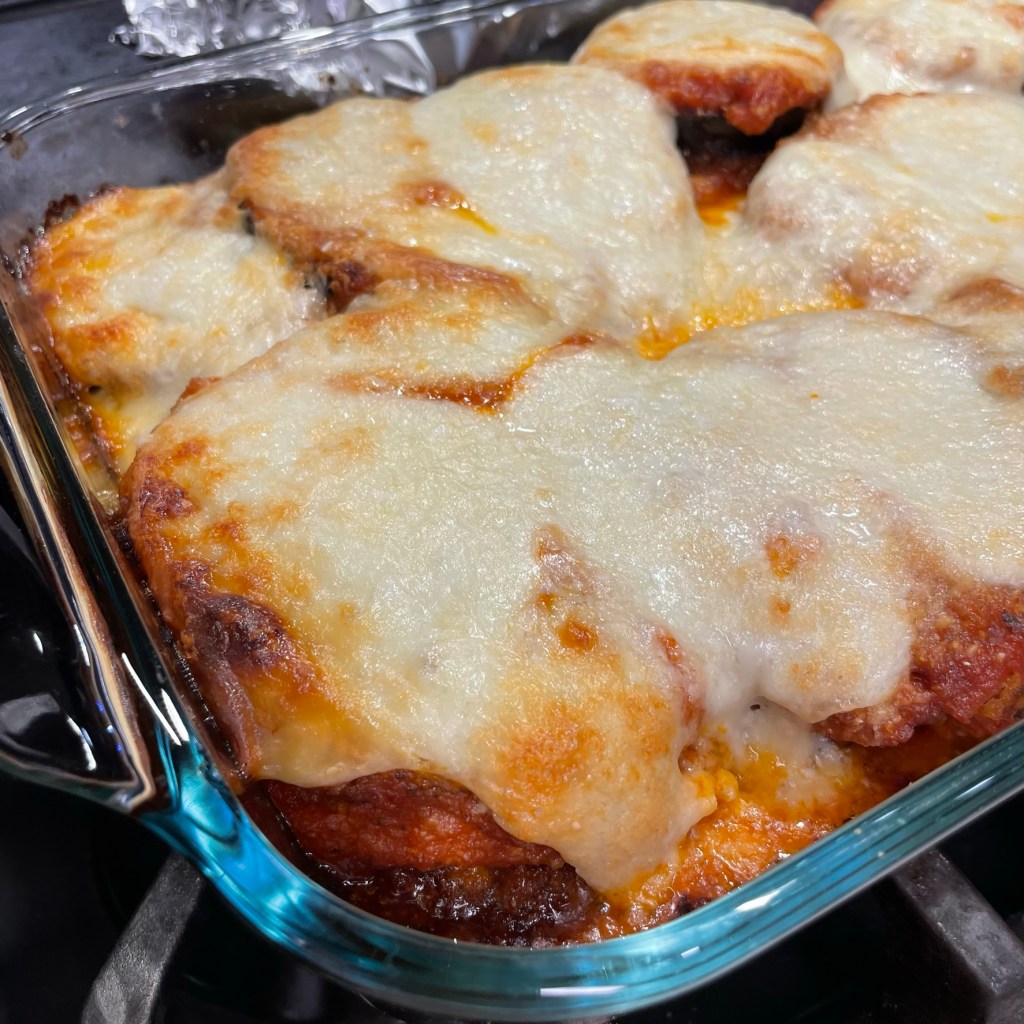
It’s been a long time since we’ve talked about pizza here on Comfort du Jour, but this one deserves a mention because it is a beautiful marriage of two classic Italian foods we love in this house. Every bite had a little bit of everything we love about eggplant parm—the crispy coating, meaty eggplant and gooey cheese—and a little bit of everything we love about pizza, especially the blistery crust and tangy tomato sauce.
This mouthwatering pie also deserves a mention because its star ingredient was grown in the first genuinely successful garden we have had in several summers. I shared a lot of tomato recipes this year but didn’t get in as many raves about the beautiful Japanese eggplant we enjoyed.
Homegrown produce rarely looks perfect. This one had a funny shape because it grew against the trellis that supported the plant! 🙂
Japanese eggplant tastes virtually the same as a typical “Italian” eggplant you’d see in the supermarket or farm stands, but its long, slender shape is distinctive and makes it suitable for smaller versions of things. My husband, Les, and I nibbled on miniature eggplant parm bites as an appetizer at least twice over the summer until he finally said, “hey, why don’t we put these on a pizza?”
Well, heck, yeah!
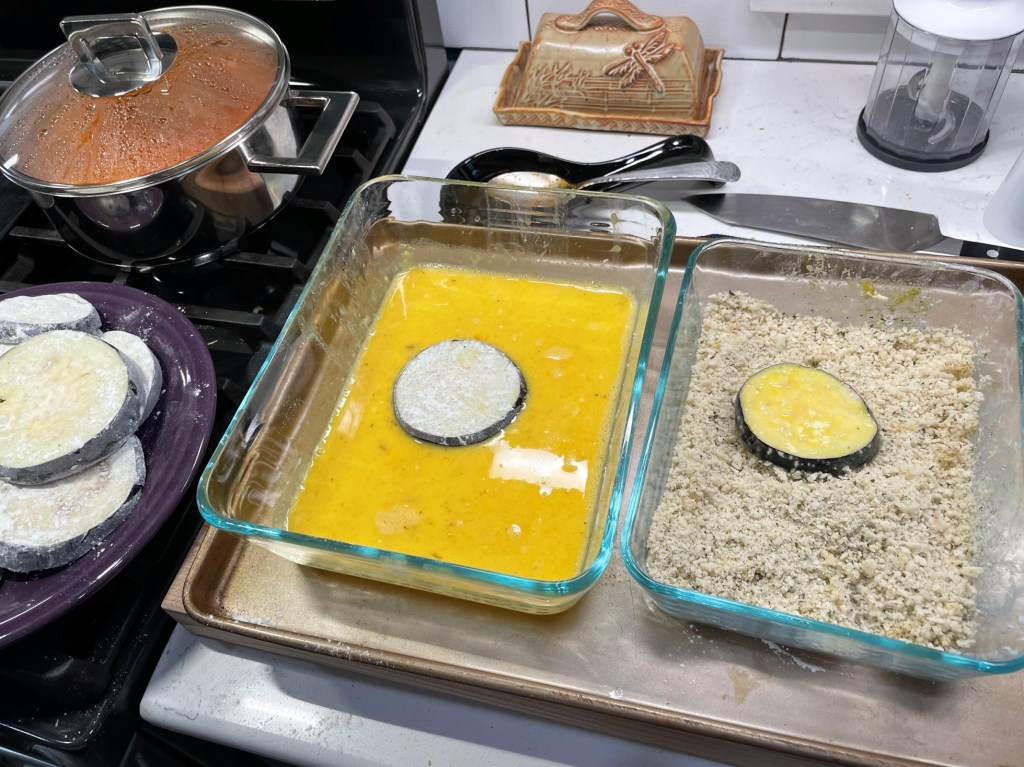
If you saw Les’s Veal & Eggplant Parm post a couple of weeks ago, you know that we achieved the perfectly crispy, cheesy exterior on the eggplant rounds with a careful breading—first flour, then egg wash and finally a seasoned panko crumb and Parm-Romano mixture before a dunk in hot oil. We did exactly the same with these mini eggplant slices, beginning with a 20 minute salt-and-rest time.
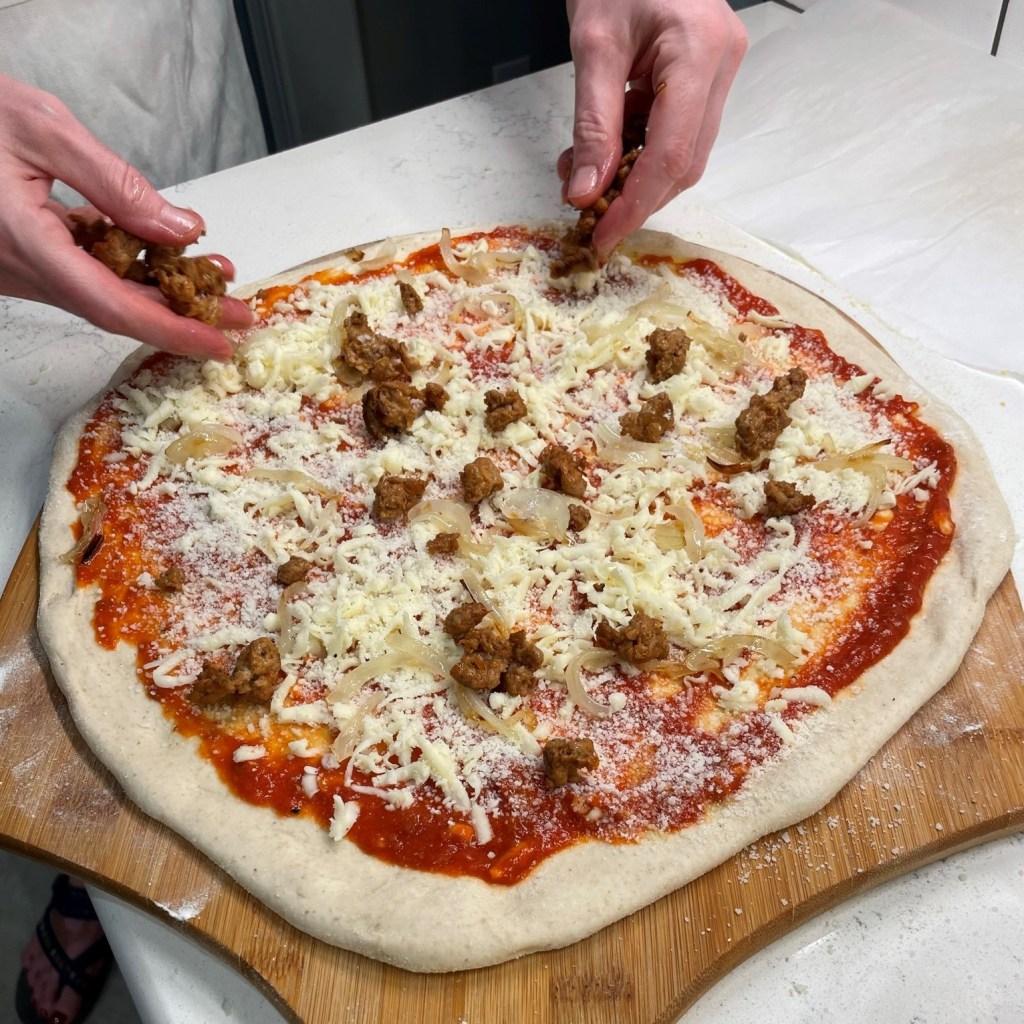
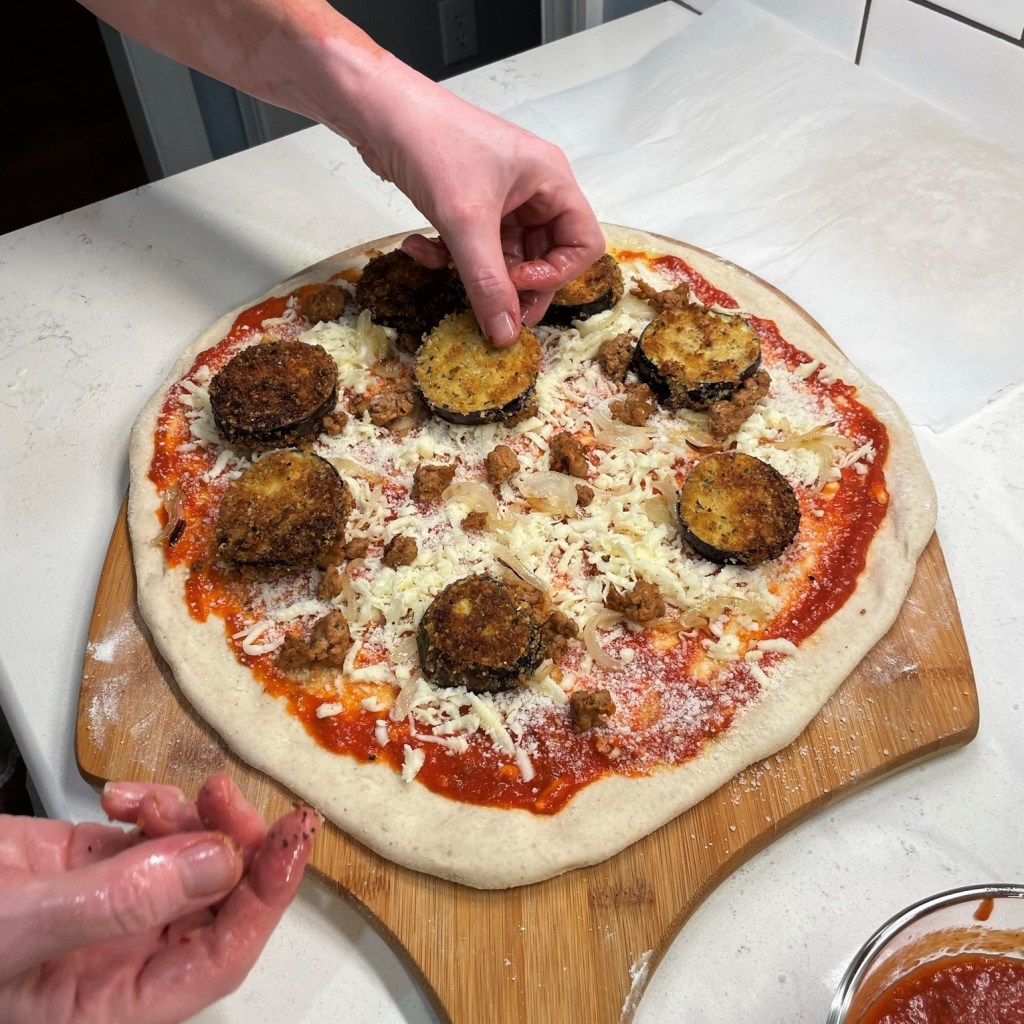
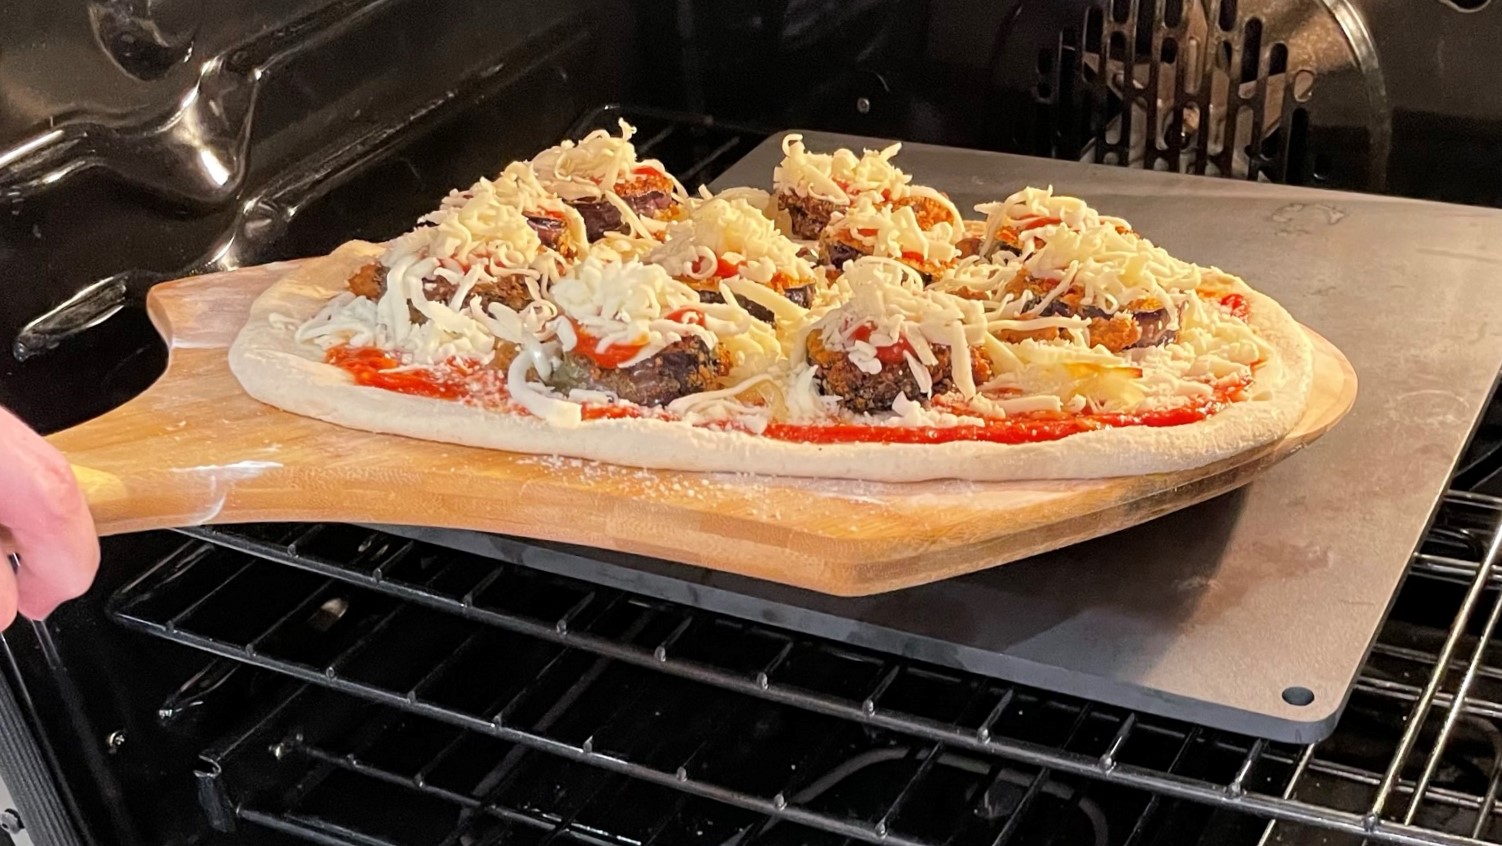
The crispy eggplant had plenty of flavor on its own, but we wanted to pair it with some complementary flavors, including soft, sauteed onions and a little bit of spicy sausage that I had left over from another recipe. I laid those down on a layer of shredded mozzarella, over our usual pizza sauce, with a few sprinkles of our Parm-Romano blend.
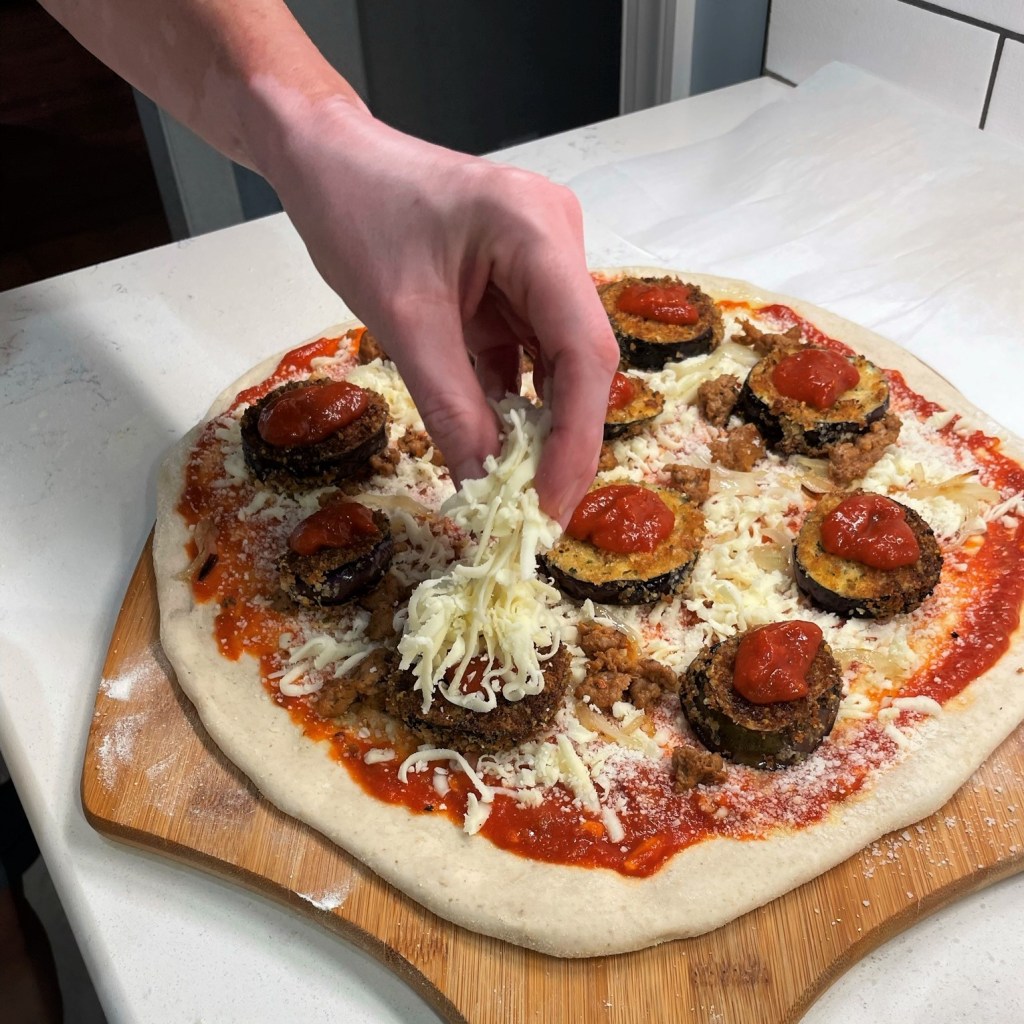
Then, the eggplant parm layer, and I spooned a bit more sauce right on top of each little medallion, then another good pinch of mozzarella to keep it nice and cheesy.
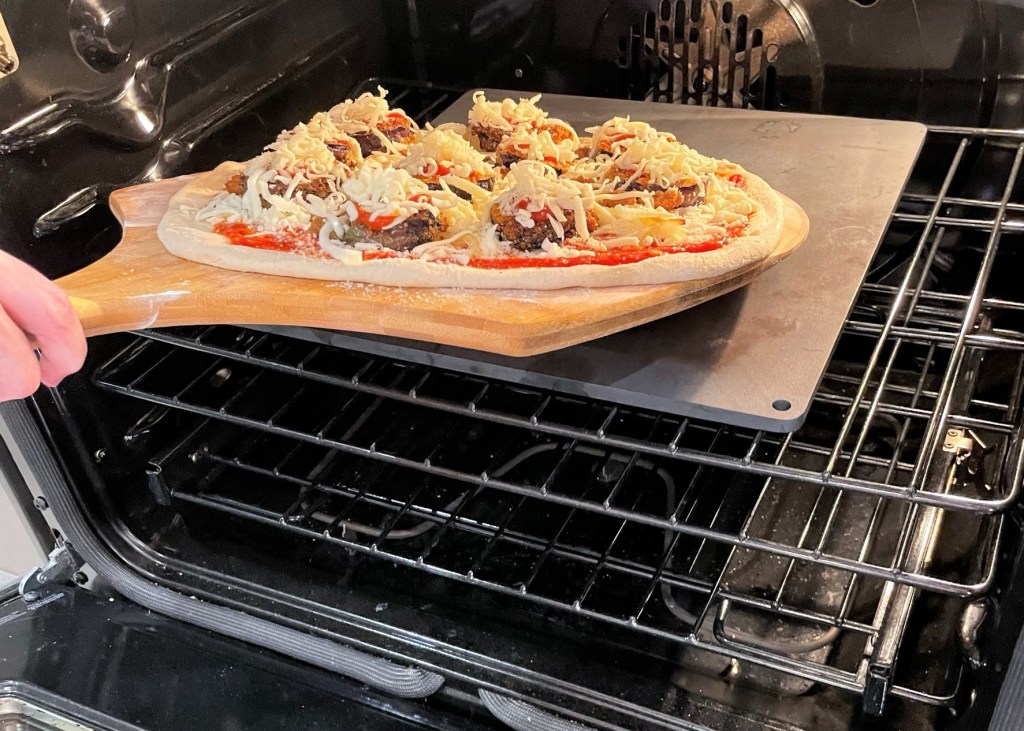
Into the 550° F oven on our beloved pizza steel, and six minutes later, we had this delicious Italian hybrid masterpiece!
This week, the temperatures in our area finally dipped below the frost point, and what was left of my summer garden is now history. I went out yesterday and plucked all the remaining green tomatoes (yep, we still had them coming in) and a whole bunch of jalapenos. This was a banner year for us in the garden department.
This pizza was very fun to make, and a delicious marriage of two of our favorite classic Italian comfort foods.
Ingredients
1 Japanese-style “millionaire” eggplant, sliced into 1/2-inch rounds
Kosher salt (for sweating excess moisture from the eggplant)
1/2 cup all-purpose flour, seasoned with black pepper and garlic powder
2 large eggs, beaten with a pinch of salt
1/2 cup Italian seasoned panko bread crumbs
1/4 cup Parm-Romano blend cheese (or regular, grated Parmesan)
Neutral vegetable oil, such as canola (for frying eggplant)
1 ball pizza dough, at room temperature
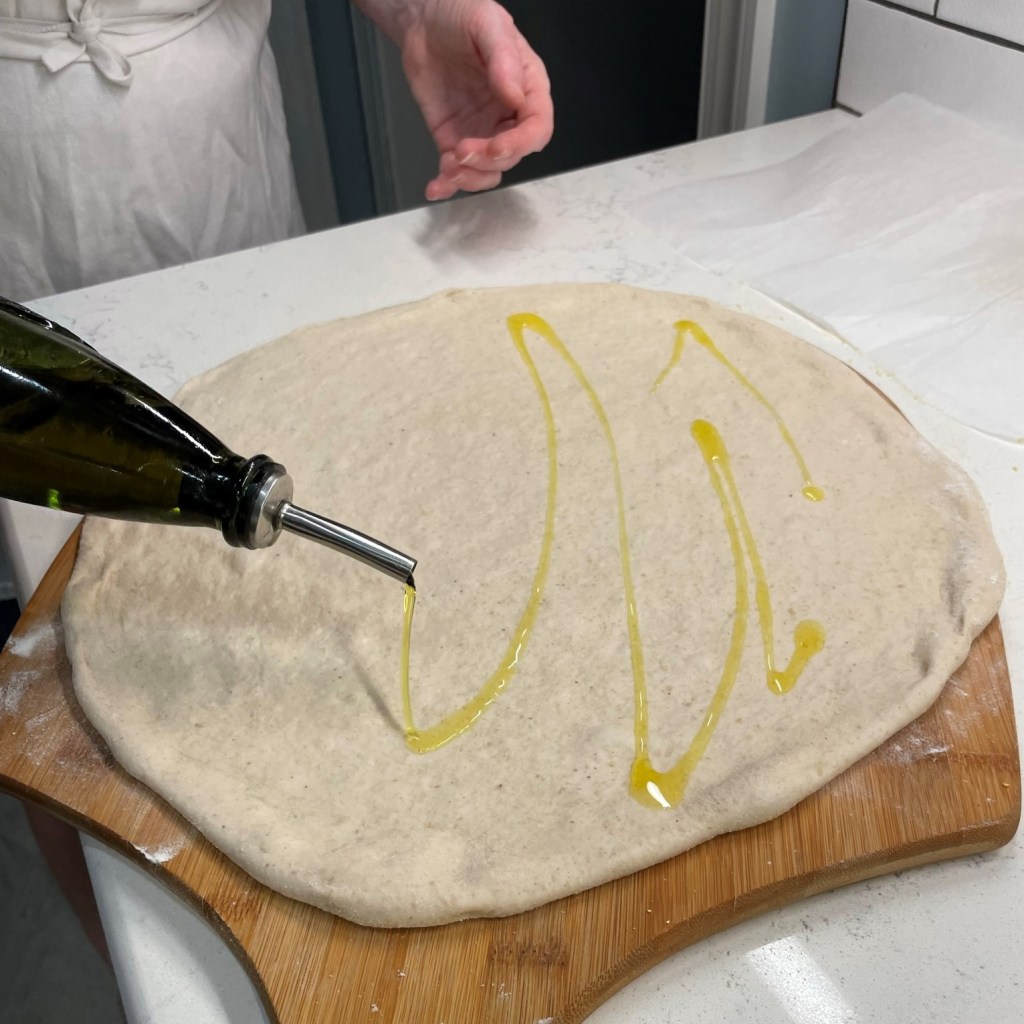
Extra virgin olive oil, for drizzling on dough
2/3 cup favorite pizza sauce, divided
1/2 small onion, sliced and sauteed until soft
1/2 cup cooked, crumbled Italian sausage
1 cup shredded mozzarella, divided
We bake all of our pizzas on a heavy pizza steel, pre-heated in a 550° F oven for one hour. If you bake on a pizza stone, use the highest temperature recommended for your stone, and adjust baking time accordingly.
Directions
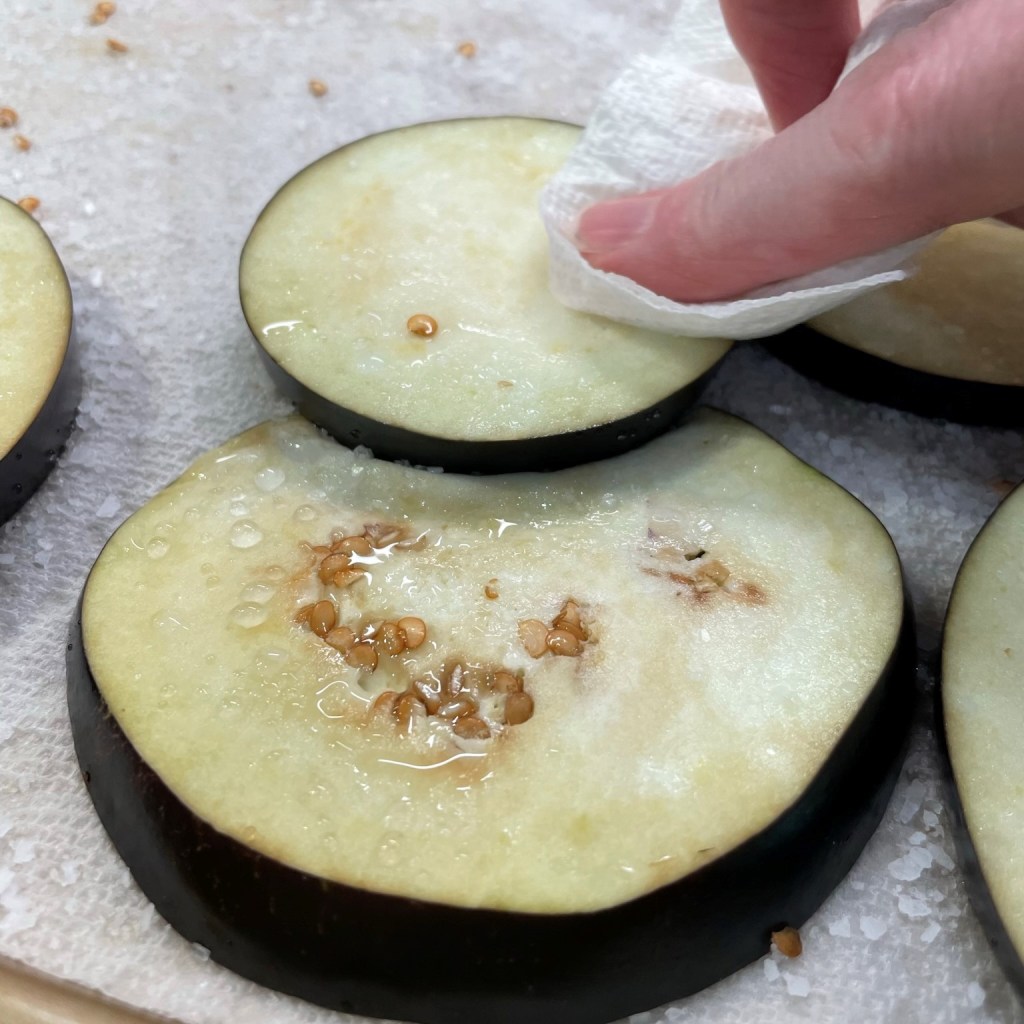
Arrange the eggplant slices on layers of paper towel. Sprinkle with salt and let them rest for 20 minutes, then use clean paper towels to wipe off the salt.
Heat oil in a cast iron skillet over medium heat. Set up breading station, with one container of seasoned flour, a second with beaten eggs and a third with the panko crumbs, mixed with Parm-Romano.
Dip each eggplant slice into the flour, then shake off excess and dip into the egg. Let excess egg drip from the slices and lay them into the panko crumb mixture, pressing panko onto each side for full coverage.
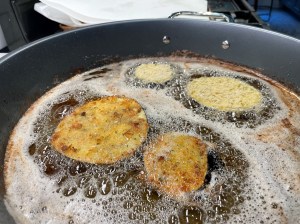
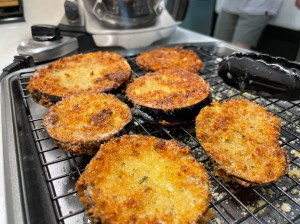
Carefully place the breaded eggplant slices into the hot oil, taking care not to crowd the pan. Turn the eggplant when the first side is golden and crispy. When both sides are done, transfer the eggplant to a paper towel-lined plate to absorb excess oil.
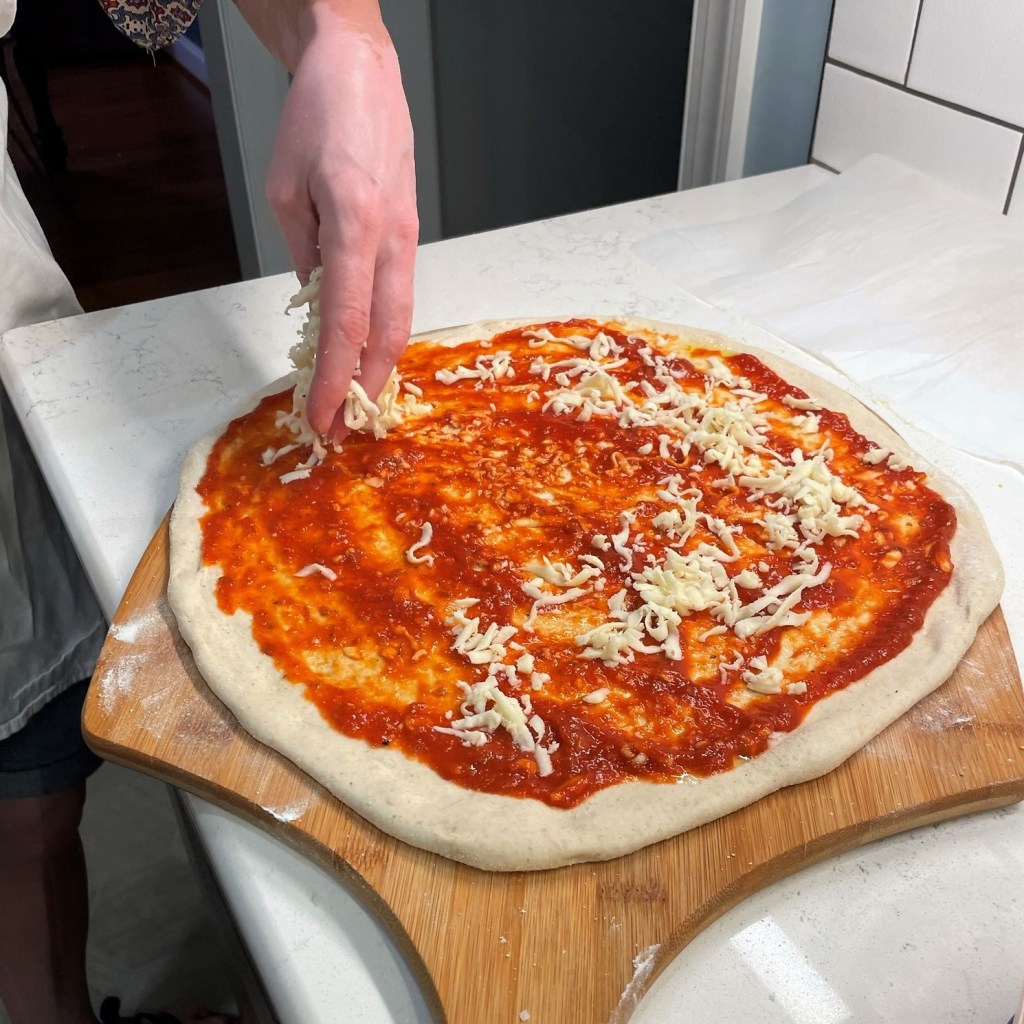
Shape pizza dough into a 14-inch round. Drizzle with olive oil, then swirl half of the pizza sauce onto the dough. Top with 1/2 cup of the shredded mozzarella, reserving the rest for the top of the eggplant rounds. Scatter the sauteed onions and cooked sausage crumbles over the cheese layer.
Arrange the crispy eggplant rounds onto the pizza, then divide the remaining pizza sauce and mozzarella over each round.
Bake on pre-heated pizza steel for about 6 minutes, until crust edges are golden and blistered and cheese is melted and bubbling.
When Terrie asked me a couple of months ago what I wanted for my birthday meal this year, I initially asked her for some kind of lobster, a dish she’s made before that I devoured. But the more I thought about it, the more a different idea bubbled in my head.
Five years ago, on Aug. 27, 2017, my mother died at age 91. It was two days before my birthday, and we chose to have her funeral on Aug. 29, largely at my request because it could be a sort of celebration for relatives who had arrived when she took ill.
With my mom on my mind, I told Terrie I wanted to play chef on my birthday weekend as a tribute to one of the few meals Mom made that I actually loved.
Once or twice a year, Mom would make veal parmigiana in an electric skillet (you know the one, square cast aluminum with the little pinwheel vent thing on top of the lid), and from the moment you walked into the apartment after school, the aroma was so distinct you instantly knew what was happening—a respite from the usual overcooked meat, baked potato and canned vegetables. What we smelled was veal parm, which she served with spaghetti with marinara (Ragu) and Parmesan cheese (Kraft, the familiar green container). Still, for me and my sisters, it was sublime.
When I first began cooking, veal parm seemed like a giant challenge, and I stuck to ordering it in restaurants. Around the same time, as an adult, I discovered the joy of eggplant. Then, one night in an Italian restaurant, I chose a dish called “Veal Sorrentino,” which added a slice of prosciutto between a veal cutlet and eggplant slices, and it was cooked in a pan with white wine sauce and a touch of tomato. Henceforth and forevermore, I knew what I was gastronomically bound to do whenever I wanted veal parm. Combine veal and eggplant.
Now as much as I enjoy veal Sorrentino, I don’t make that at home. Rather, I prefer veal and eggplant as a red sauce parmigiana meal, and, being as we still had lots of fresh tomatoes from our first successful garden in years, I spent a few hours cooking up a marinara on Saturday to go with Sunday dinner. This sauce was similar to the Not Quite Pizza Sauce I shared here a few weeks ago, but without the red bell pepper, and with the onions sautéed and blended right into the sauce. I married this sauce with veal and eggplant, and it was excellent.
Layer upon layer of Italian comfort food.
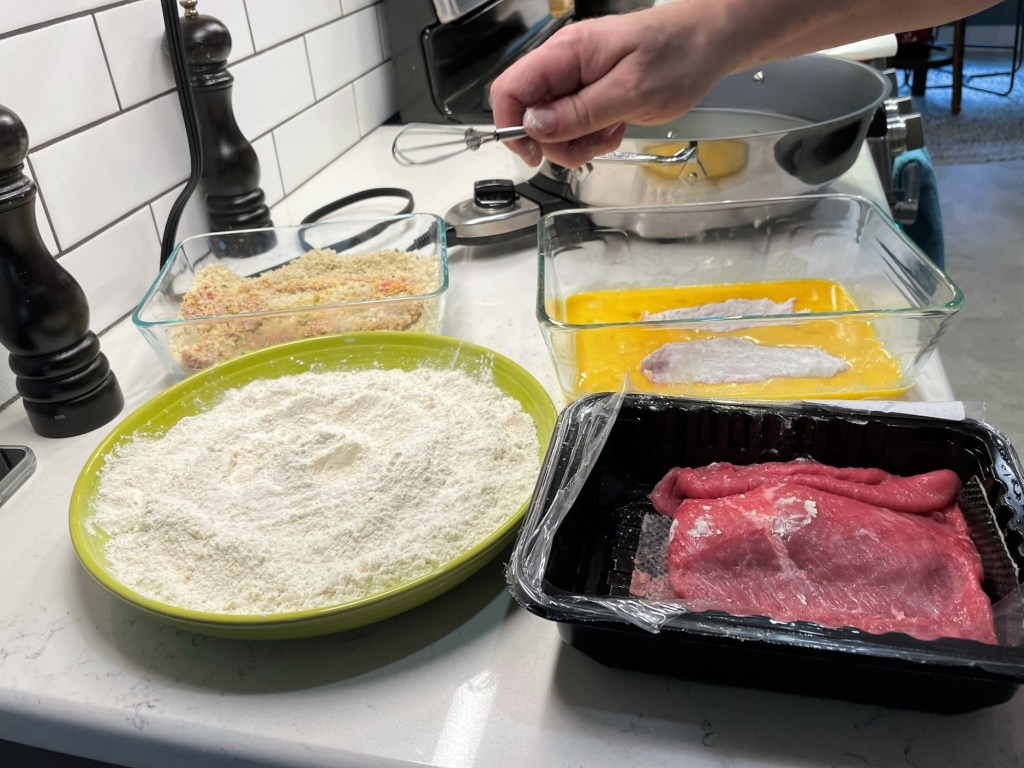
It helps to have the meal and kitchen counter space planned for this dish, because you need room for all the breading and frying. The first step is slicing a good Italian eggplant into 1/2-inch rounds, salting them on paper towels and letting them sweat for 30 minutes or more. Arrange the plates or containers to be used for preparing the eggplant and veal. My first plate held seasoned flour for dredging the eggplant and cutlets; salt and pepper the latter on both sides. The eggplant, of course, after its salting, won’t need more seasoning.
I used a rectangular Pyrex dish to hold four eggs, beaten. A second Pyrex contained a mix of Italian-seasoned bread crumbs (we actually used seasoned panko crumbs, then used an attachment on our immersion blender to grind them finely) and if you’re bold like we are, add some cheese to it; I used our Parm-Romano blend.
After consulting with Terrie, I decided to use our electric skillet (another nod to Mom, though this stainless All-Clad skillet is nothing like Mom’s old cast aluminum), and got that filled with about 1/2-inch deep canola oil, set to 375° F; the temperature may vary, depending on the vessel you use for frying, but whatever you put into the oil should sizzle and bubble as soon as it makes contact. Keep a roll of paper towels nearby; we used a ton of them catching the cutlets and eggplant as they came out.
During the frying phase, I put the marinara on a back burner at low to warm it and preheated the oven to 350° F. We bought fresh, pre-sliced mozzarella (the kind you’d use for Caprese), so I didn’t need to worry about prepping the cheese.
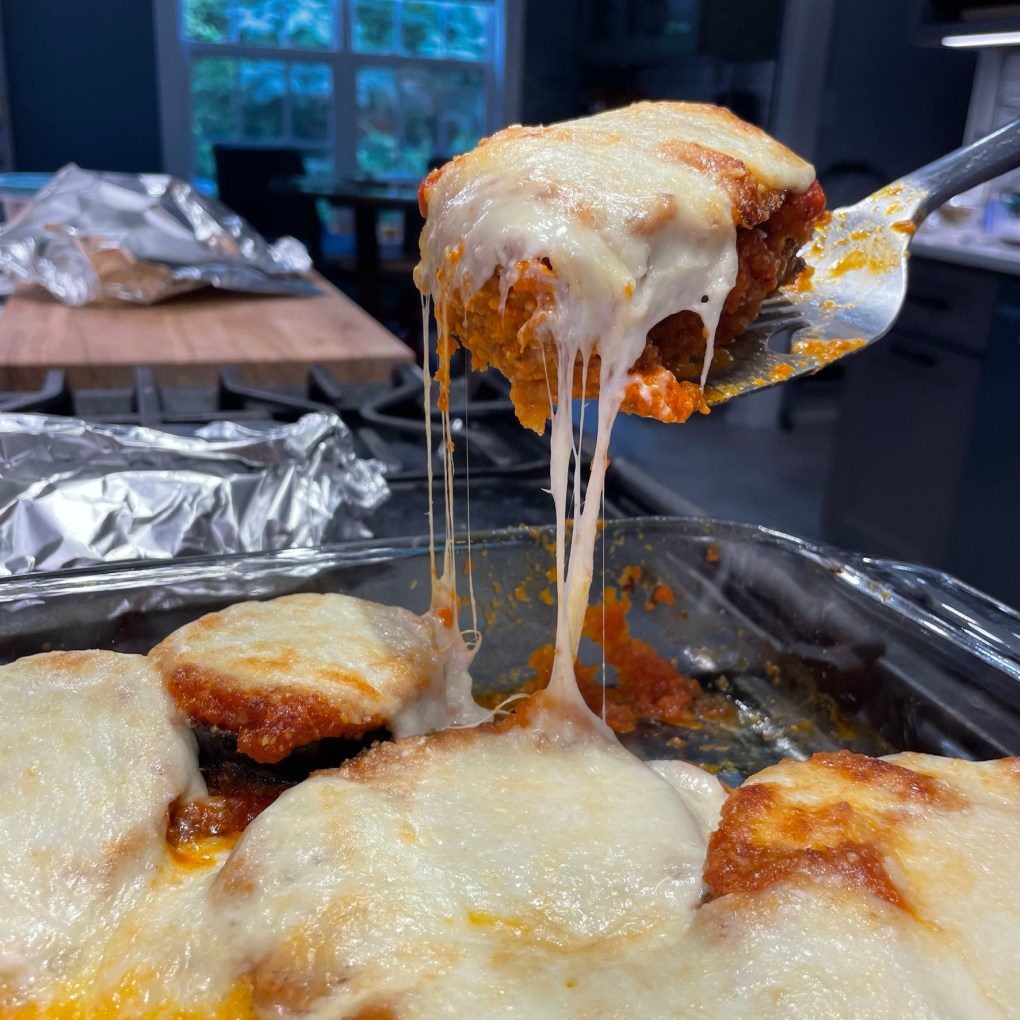
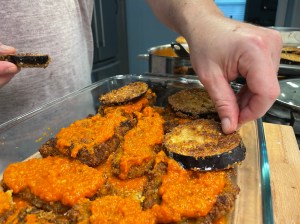
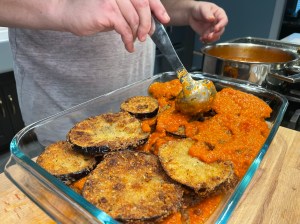
Once the eggplant and cutlets were fried, it was time to assemble. In a 9-by-13 Pyrex, I ladled healthy spoonfuls of marinara on the bottom, then lay down the cutlets. On top of that went marinara, followed by eggplant, followed by more marinara, followed by mozzarella, with a healthy sprinkling of our Parm-Romano Blend as a final touch.
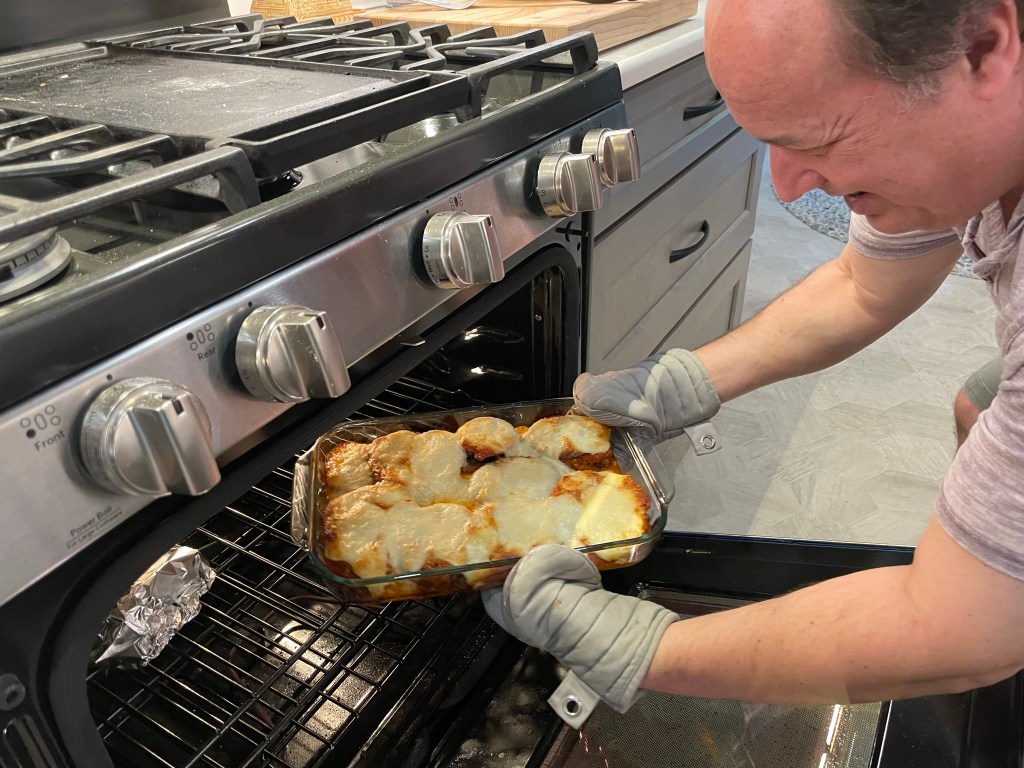
It baked (under foil for half the time) for about 45 minutes (ovens may vary by a few minutes) and what came out was pretty awesome. Homemade sauce on tender veal and fresh eggplant with a crunch of breading and those savory cheeses—oh yes, the cheeses are my favorite part!
This dish is the ultimate comfort to me.
For hours during and after this birthday meal, the kitchen smelled like my old apartment on 80th Street in Jackson Heights, N.Y., on those rare, but wonderful nights when Mom was making veal parm. The leftovers were pretty damn good, too.
When it came to dinner growing up, my sisters and I got a lot of the basics: meat, baked potato, canned vegetable. But oh for the once or twice a year when Mom decided to cook one of her specialty dishes—veal parmigiana. That’s the aroma I tried to re-create with my kicked-up version of it, with eggplant and garden-fresh, homemade marinara.
Ingredients
1 medium Italian eggplant. cut into 1/2-inch rounds
Kosher salt, for sweating the eggplant slices
1 1/2 lbs. veal cutlets
4 large eggs, beaten (for breading)
About 1 cup all-purpose flour, seasoned with salt and pepper (for dredging)
1 cup Italian seasoned bread crumbs (for breading)
1/2 cup Parm-Romano blend or Parmesan (for breading)
Vegetable or canola oil, for frying (enough to measure 1/2-inch deep in frying skillet)
About 4 cups favorite marinara sauce (see ingredient notes, below)
Arrange the eggplant slices in a single layer on paper towels sprinkled with kosher salt. Sprinkle salt over the top of the slices as well, and let them stand for 30 minutes to remove excess moisture from the eggplant. Wipe them dry with clean paper towels and set aside for breading.
Heat oil in an electric skillet or over medium heat to approximately 375° F.
While the oil comes up to temperature, set up a breading station with three dishes: one containing seasoned flour, a second containing beaten eggs and a third with a mixture of the Italian breadcrumbs and Parm-Romano blend.
Dredge the veal cutlets lightly in flour, shaking off the excess. Dip in the beaten egg, allowing excess to drip off. Coat both sides in the breadcrumb-cheese mixture. Arrange breaded cutlets on a parchment-lined plate.
Repeat the same dredging steps with the sweated eggplant slices.
Fry the cutlets and eggplant until golden on both sides, and set aside on paper towel-lined baking sheet until all are finished. The paper towels will absorb excess oil.
Preheat oven to 350° F, with rack in center position.
Spoon about one cup of the marinara sauce into a 9 by 13-inch glass baking dish, and spread it evenly across the bottom. Arrange a single layer of fried veal cutlets over the sauce, and then ladle a generous spoonful of sauce over each cutlet. Arrange the fried eggplant slices over the sauced cutlets, and repeat with another layer of sauce. You should still be able to see the veal and eggplant; don’t try to bury it in sauce. If you have extra marinara, use it to dress some spaghetti or linguine to serve on the side.
Arrange the fresh mozzarella slices evenly over the top of the sauced eggplant. Cover loosely with foil and bake 20 minutes. Remove foil and bake 20 more minutes, until cheese is golden, bubbly and oozing.
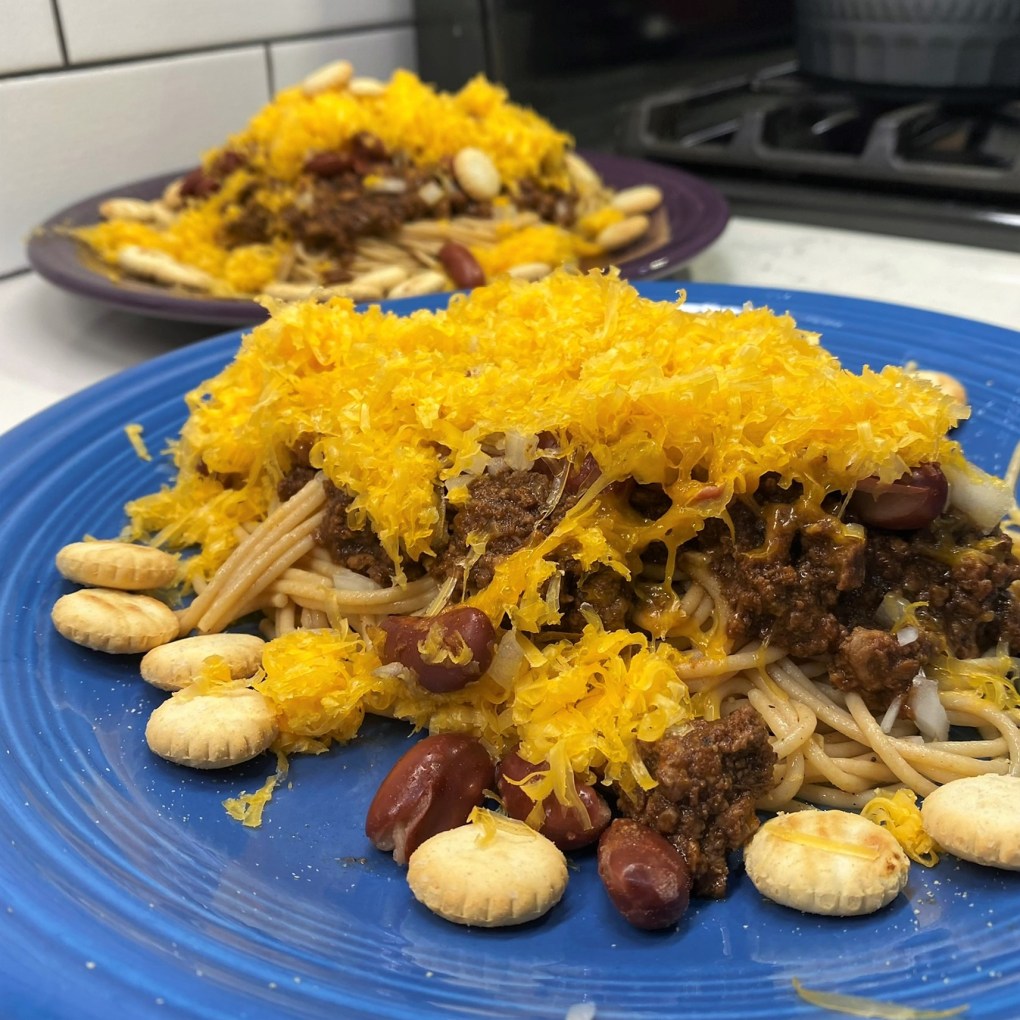
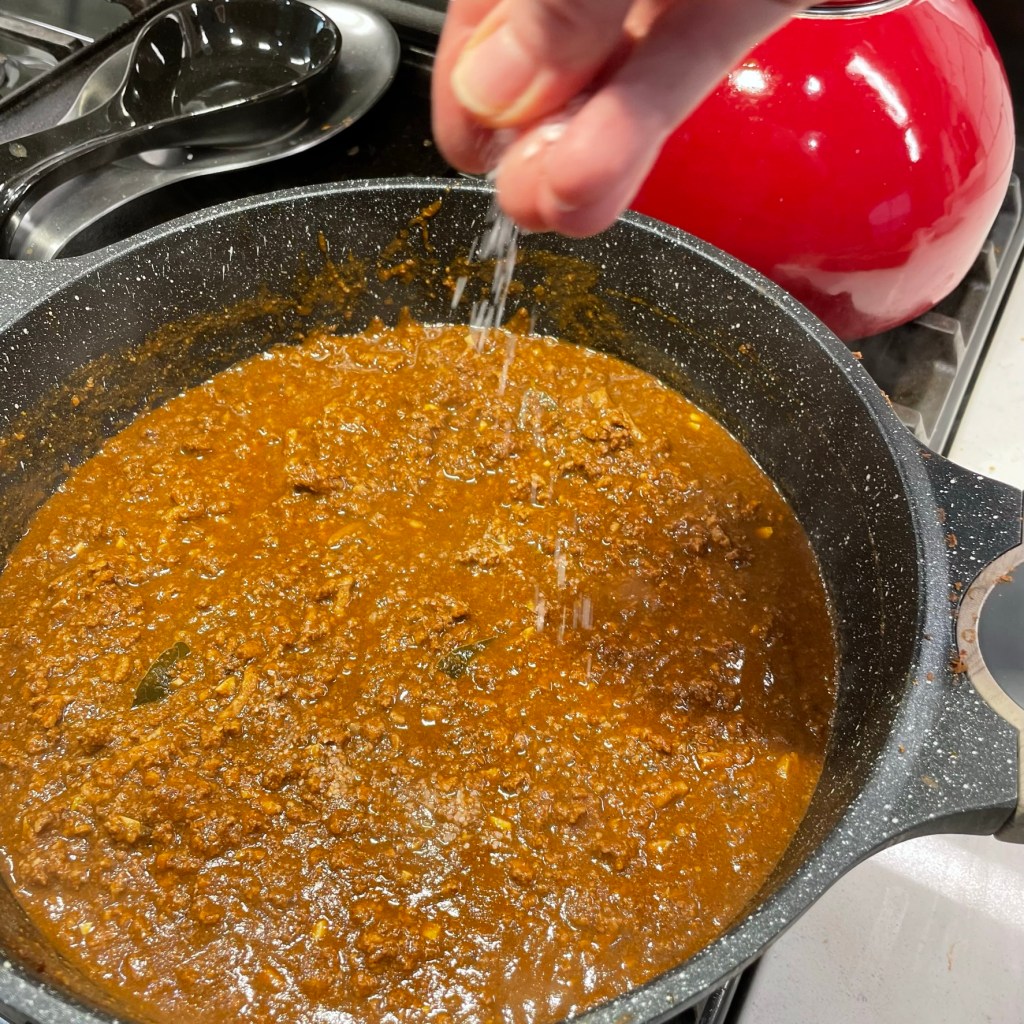
Everything about this recipe is upside-down for me. It defies almost every cooking instinct I live by, except the most important one—it’s delicious! Cincinnati Chili is unlike any other chili you’ve tried. It does not have spicy Mexican or even smoky Tex-Mex flavors, and that’s because its roots are Mediterranean. The cooking begins not with browning meat and onions, but with water and a small amount of tomato juice in the pan. The spices come next, and they are not the ones you would ordinarily associate with chili—including cinnamon, cloves, allspice and bay leaf. The raw meat is simmered directly in the liquid, so it stays very fine-textured (much like my recipe for hot dog chili). And the most noticeable difference is in the presentation—this “chili” is served on a bed of spaghetti and buried under shredded cheddar cheese, and any “way” you like it. Honestly, it doesn’t seem like chili at all.
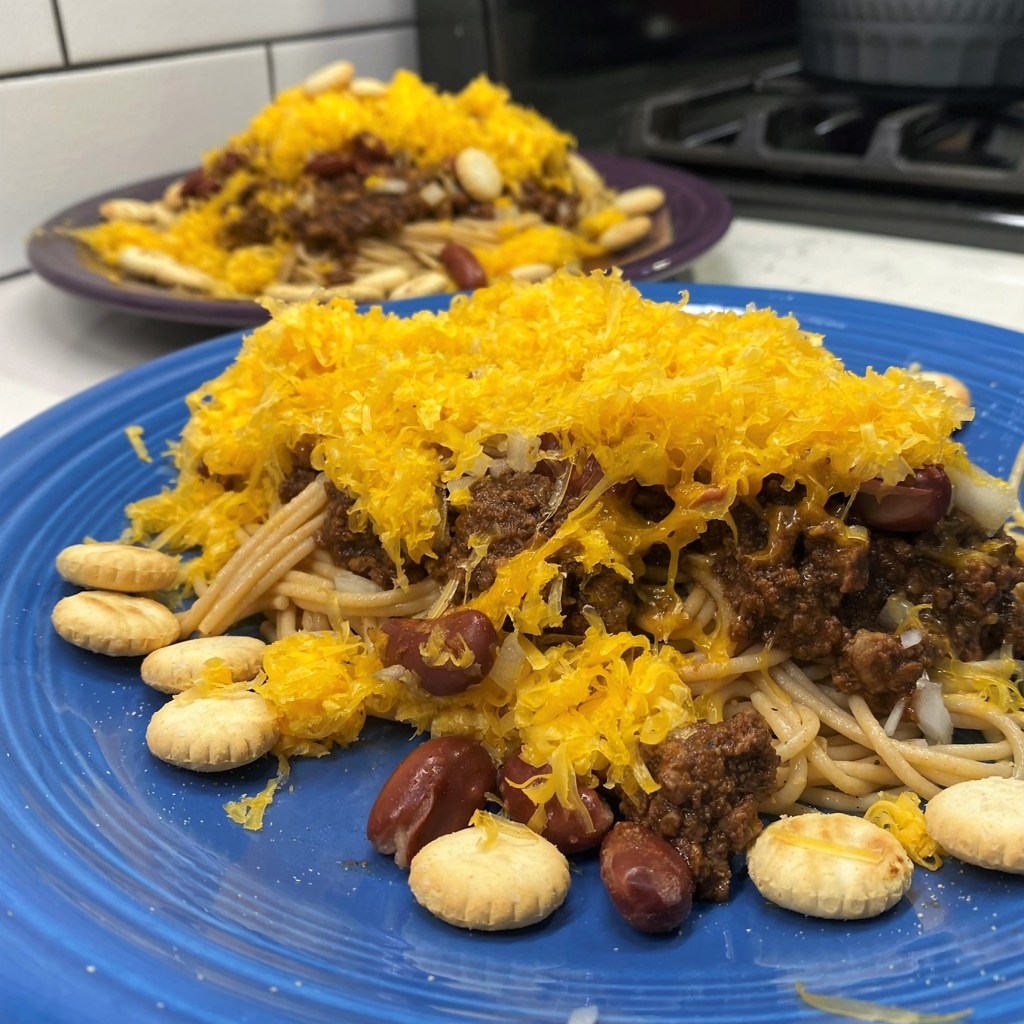
Top with any of the traditional ingredients. Make it “all the way” with heated kidney beans, onions and fine shredded cheddar cheese.
This tasty dish was born when two brothers settled in Cincinnati, Ohio from their native Greece and opened a restaurant. Their recipe for a hot dog chili topping was seasoned with all the flavors of the Mediterranean, and it was such a hit with the locals, they eventually began serving it as a signature entrée, and “Cincinnati chili” earned its title as the most iconic food of the city.
My first taste of Cincinnati chili did not happen in southwestern Ohio, but in Greensboro, N.C., in a hidden little downtown gem called Cincy’s. It’s a woman-owned business with bragging rights of being the city’s oldest downtown eatery. This out-of-the-way place is only open three hours a day for lunch, and it happens to be a short walk from the radio station where I used to work. Despite the limited hours, Cincy’s was usually jumping, and though it offers a wide variety of sandwiches, wraps and burgers, the restaurant is best known for its namesake, Cincinnati-style chili.
I looked at several “authentic” online recipes for this dish, and especially at the reviews, to see what natives of Cincy—the experts, if you will—had to say in feedback, and that became the basis for my version. This final composition is based on my taste buds’ memory of those downtown lunches from yesteryear.
What I have plated up here is every bit as good as I remember, though I’m sure I’ll have to visit Cincy’s again soon, just to be sure!
Ingredients
2 3/4 cups water
1 cup tomato sauce or strained puree (no chunks!)
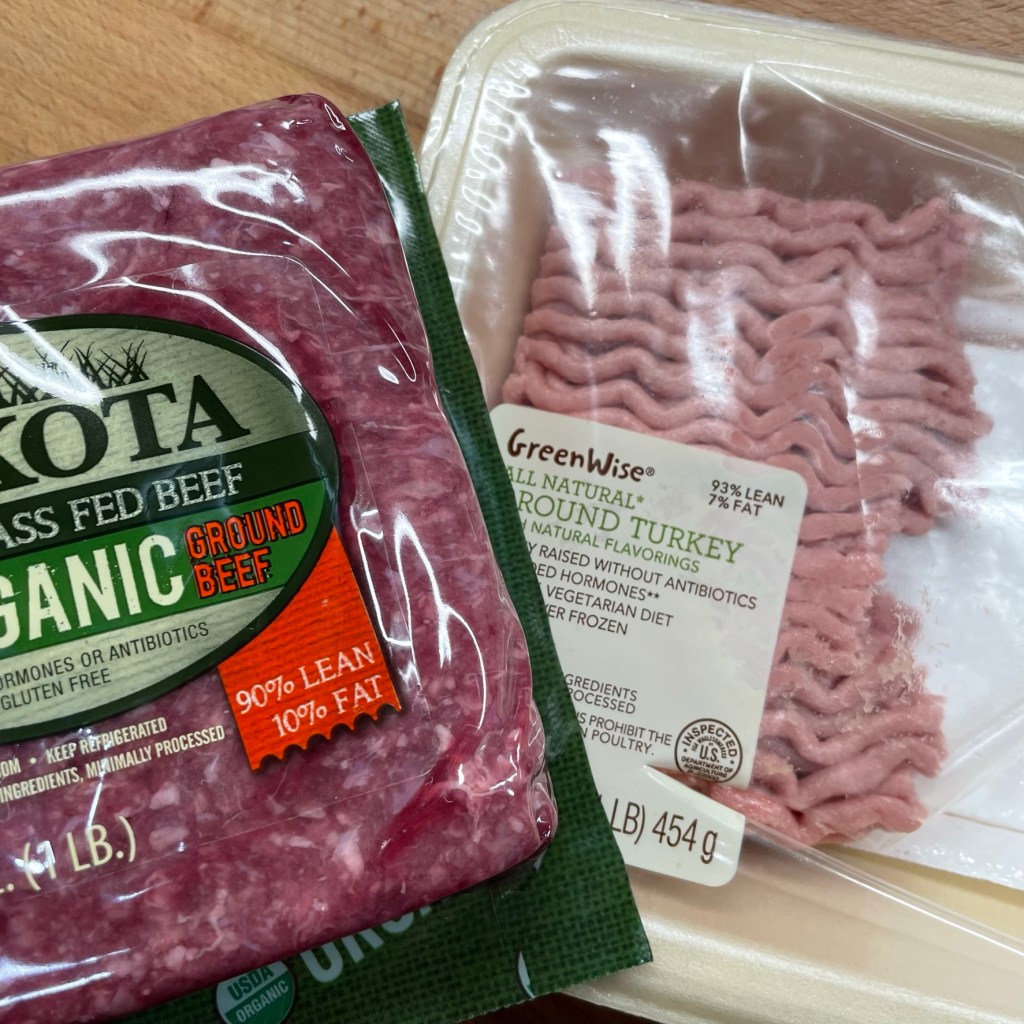
1 lb. lean ground meat* (see ingredient notes)
4 cloves fresh garlic, minced
¼ cup red wine vinegar*
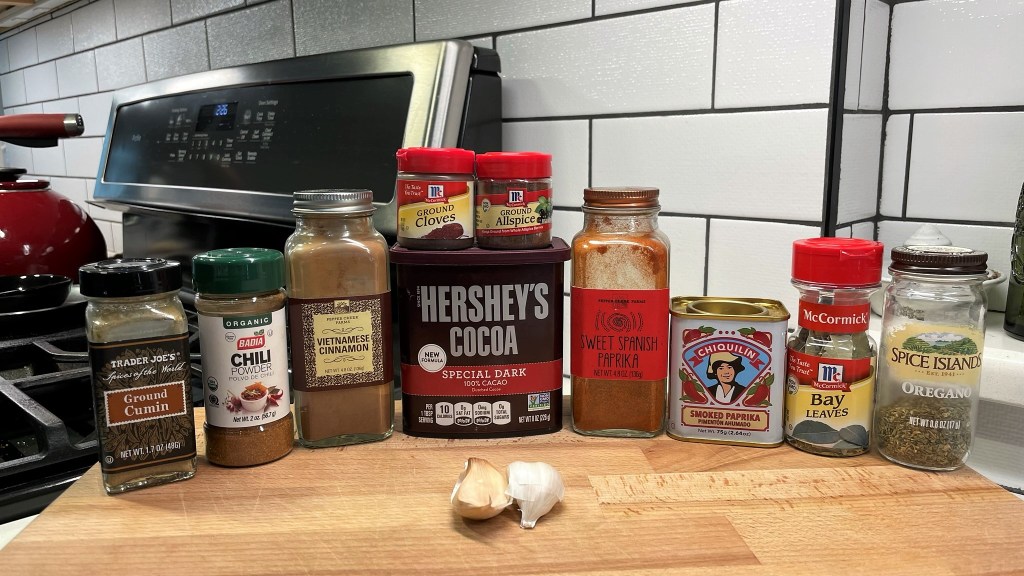
Dry Seasonings:
Is there anything from my spice cabinet that ISN’T in this so-called chili?
1 Tbsp. chili powder*
1 ½ tsp. cocoa powder
1 tsp. ground cinnamon
1 tsp. sweet Spanish paprika
1 tsp. smoked paprika*
½ tsp. ground cumin
½ tsp. dried oregano
¼ tsp. ground cloves
¼ tsp. ground allspice
1 tsp. kosher salt (or 3/4 tsp. regular table salt)
Several twists freshly ground black pepper
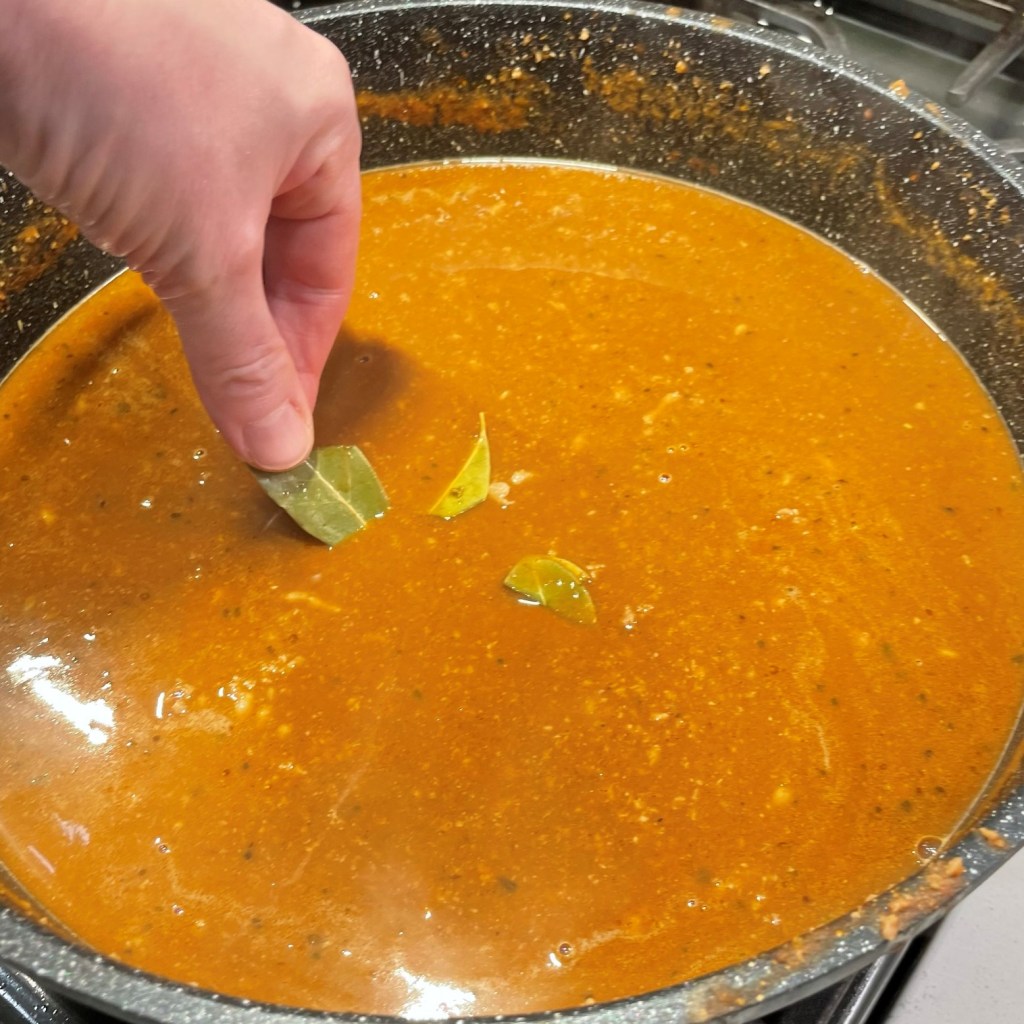
2 dried bay leaves
For serving:
½ lb. spaghetti (I used whole wheat)
1 can light red kidney beans, rinsed and warmed
½ cup finely minced onion
4 oz. finely shredded cheddar (I used medium sharpness)
Oyster crackers, if desired
*Notes
Any combination of lean (90%) ground beef or turkey works well in this recipe, but for a vegetarian version you could substitute with a combination of cooked lentils and cracked bulgur wheat, as they do at the restaurant where I first enjoyed this dish. Follow the package recommendations for cooking time of those products and add them to the pot at the appropriate time to avoid overcooking them.
Apple cider vinegar would probably work in this recipe as well, but given that the recipe has Mediterranean roots, I used red wine vinegar, which is typical in Greek cuisine.
Chili powder is one of those spice ingredients that is different from one brand to the next. Peek at the label to see whether your chili powder contains salt or any other ingredients you may want to adjust in the overall recipe.
My smoked paprika is a sweet (not hot) variety. The slight smokiness was nice in this dish, but if you don’t have this, you could simply double the amount of regular sweet paprika.
Instructions
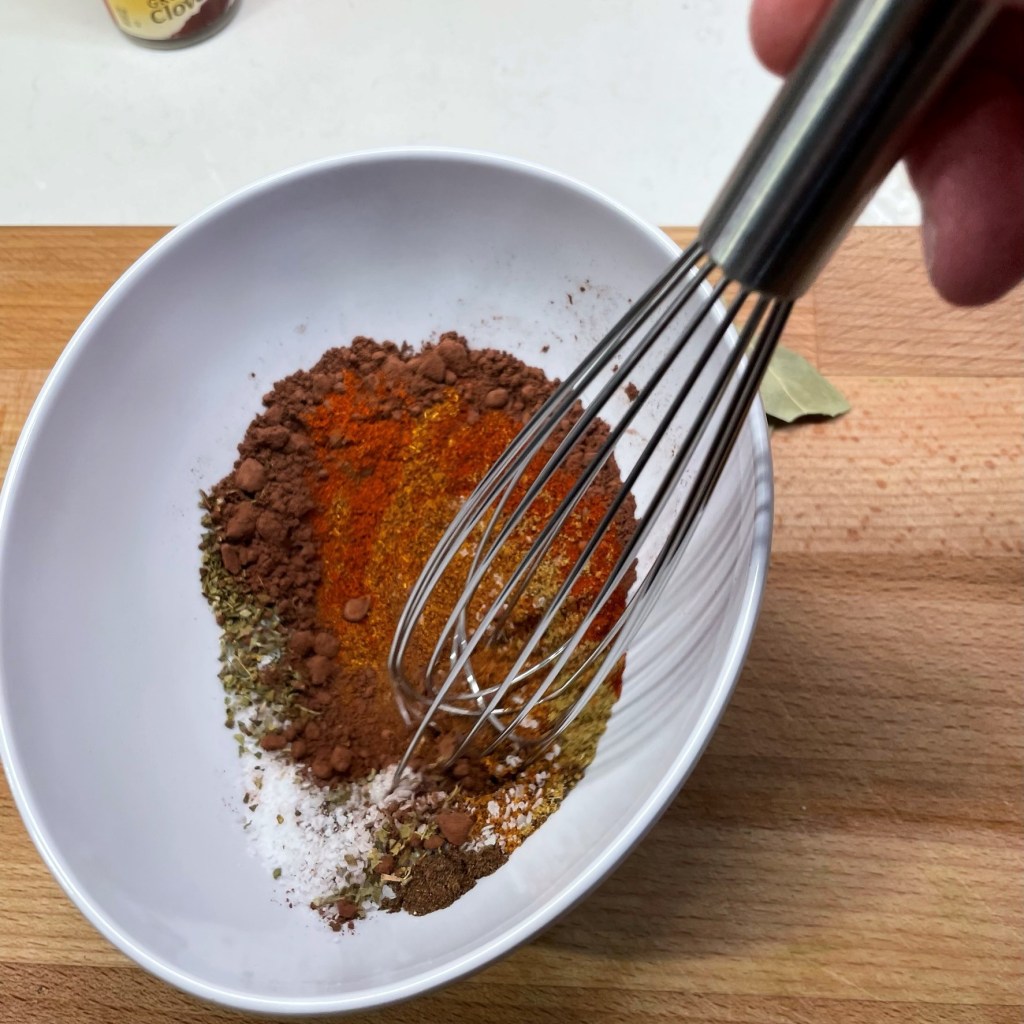
My suggestion is to measure out the dry spice ingredients into a bowl before you begin with the rest of the recipe. Mmm, this mix smells amazing!
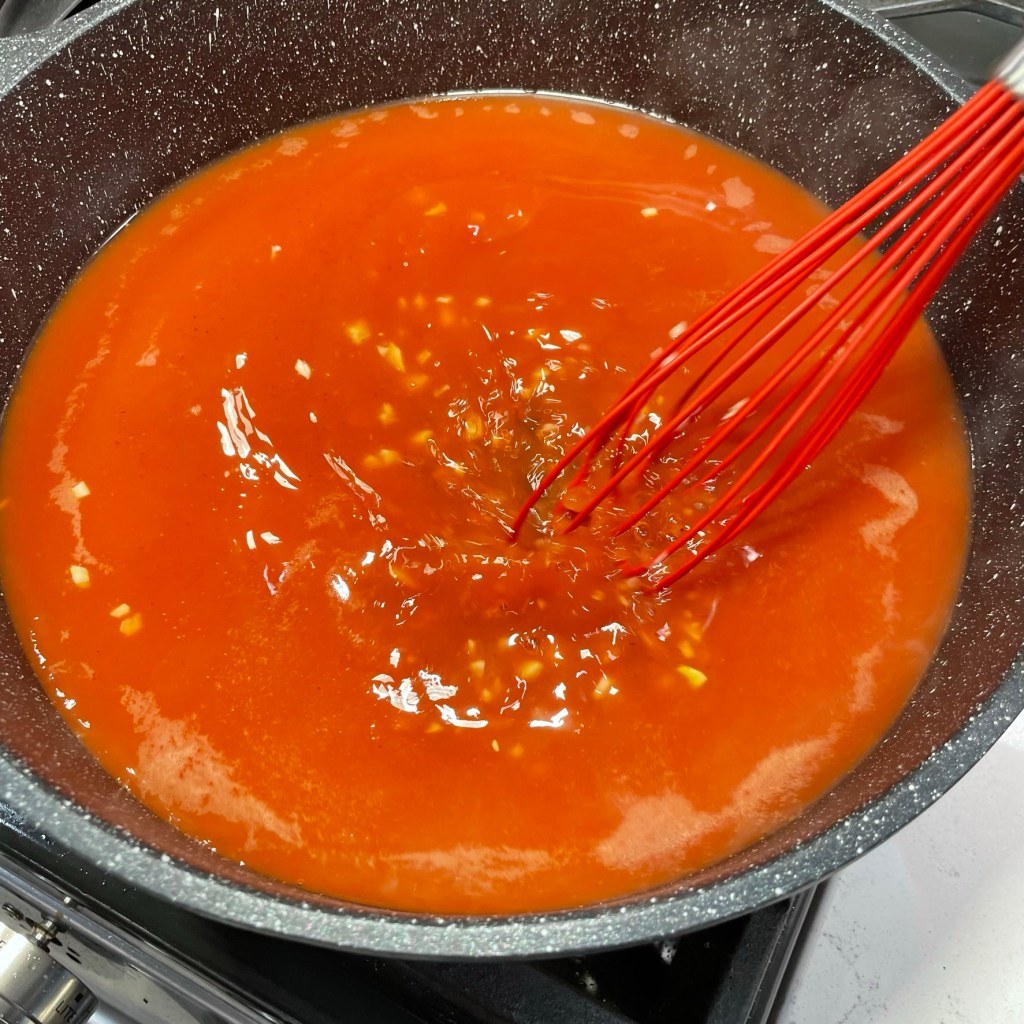
What a strange recipe, that it begins with the water and tomato sauce. But this is how it goes, and the meat cooks IN the water.
A splash of red wine vinegar (or cider vinegar) sets the tone.
I whisked in the garlic next, and it feels so strange to skip sauteing it.
Blending the dry spices together before adding them helps keep them from clumping when they hit the water.
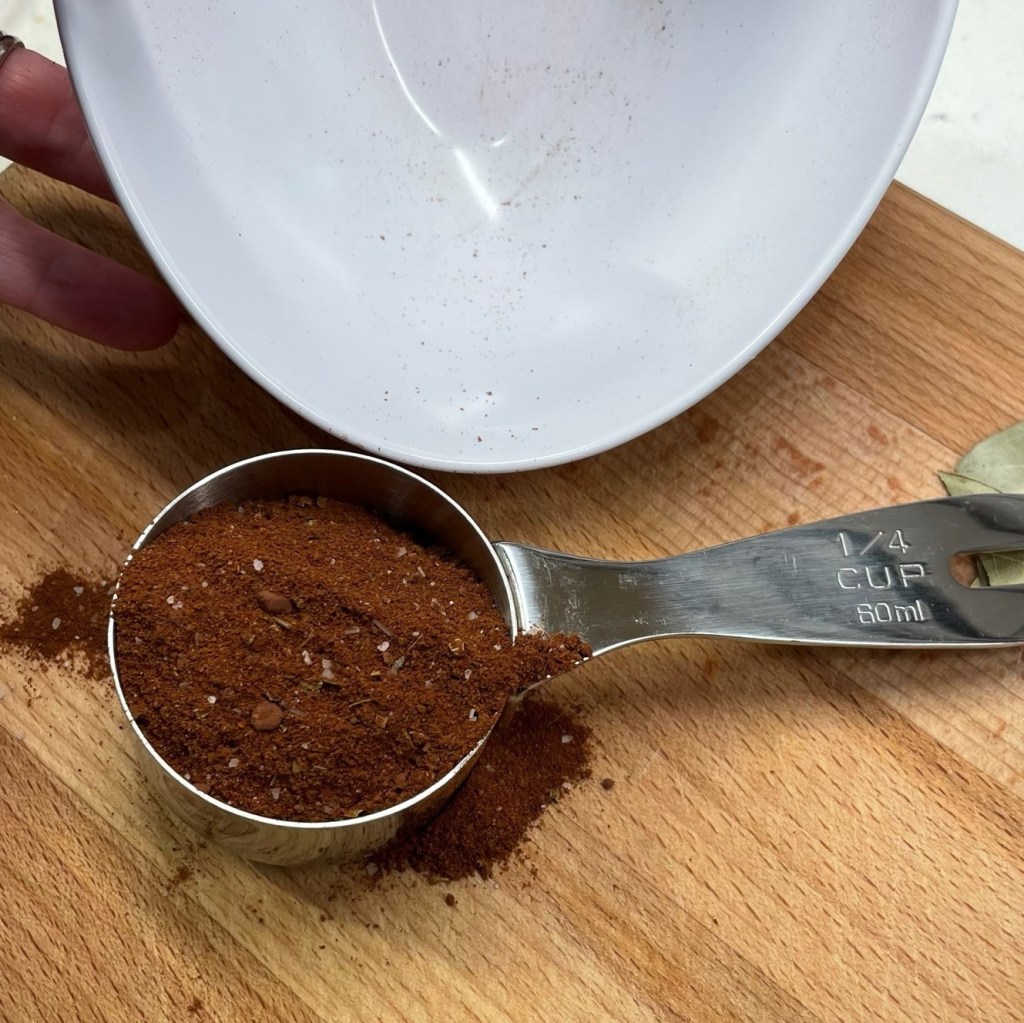
This is almost exactly 1/4 cup total spices for my batch of chili. The flavor will be complex and delicious!
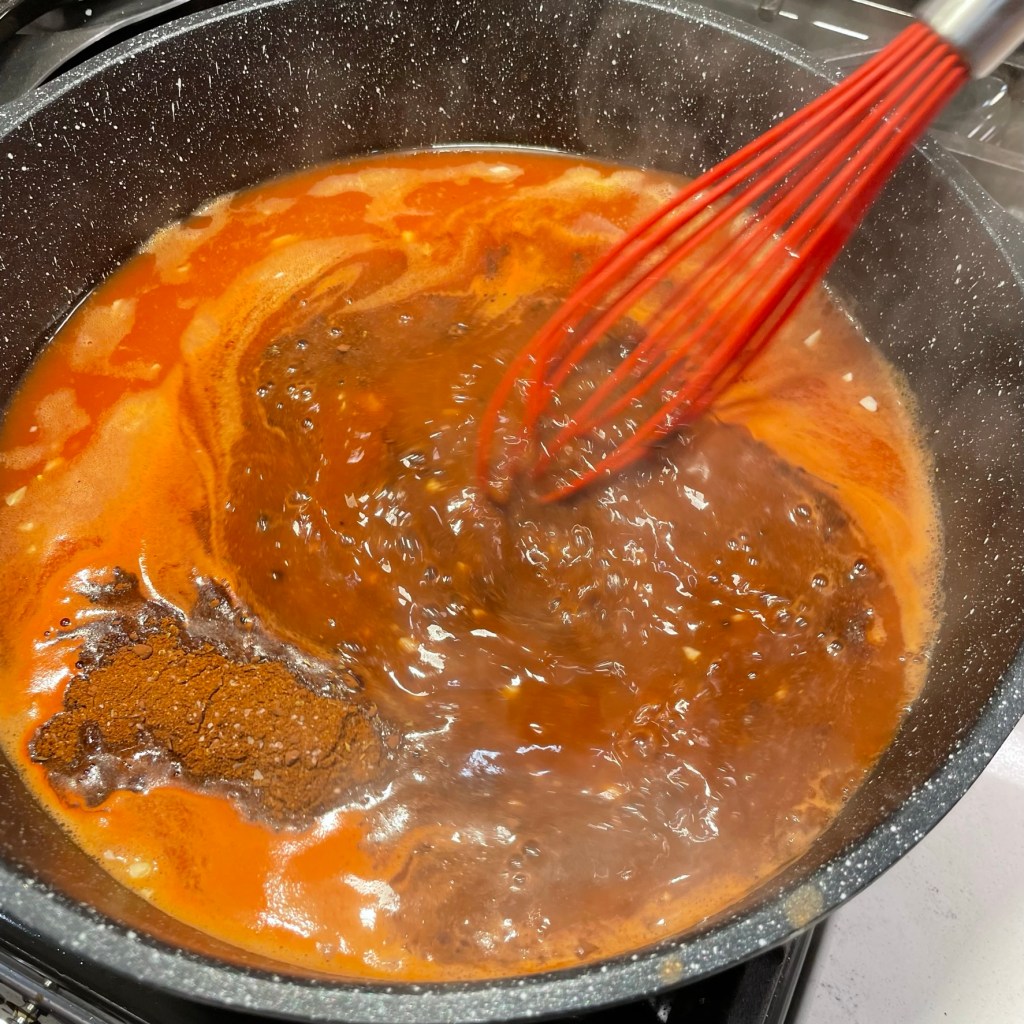
Whisk in the spices as the water begins to heat.
I had a small amount of ground turkey left over from another recipe, so I mixed it with enough ground beef to equal one pound. Whatever meat you choose, stick with at least 90% lean.
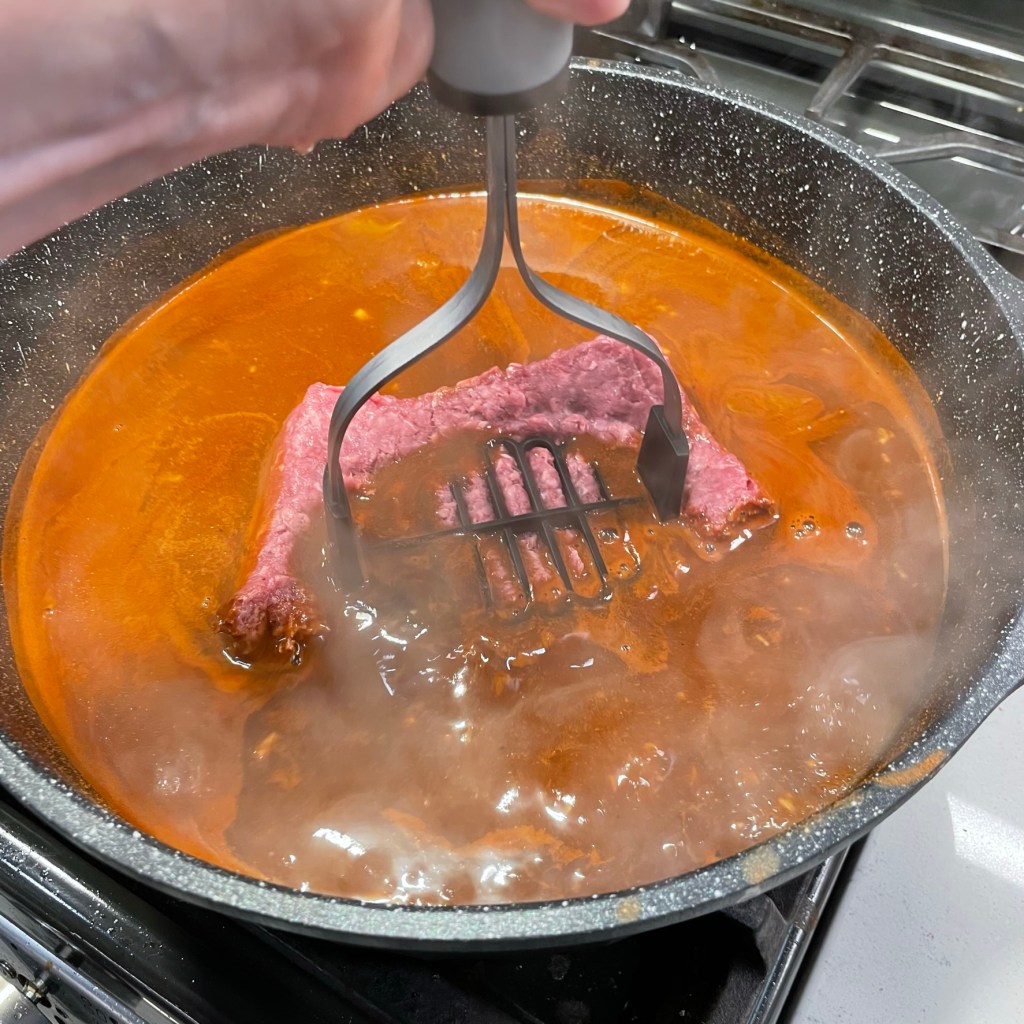
Ideally, the ground meat should be added while the water is still warming up, but I spent too much time taking pictures. I had to use a masher to blend this more quickly.
The meat should have a very fine texture as it cooks in the thin, spiced sauce.
Bay leaf adds lovely flavor to any kind of braise.
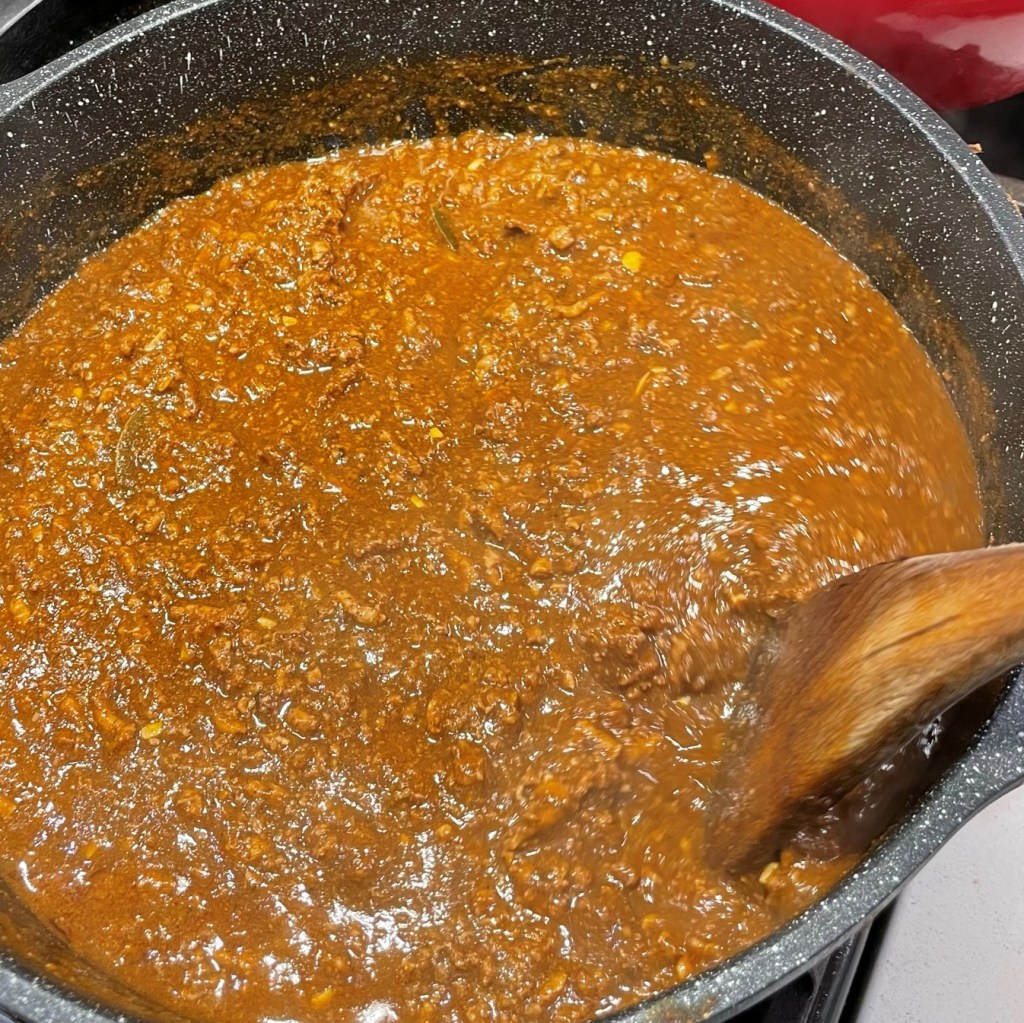
Finally, after about one hour, the liquid is reduced enough to allow me to see the meat.
When it reaches this “meat sauce” stage, adjust the salt to your liking.
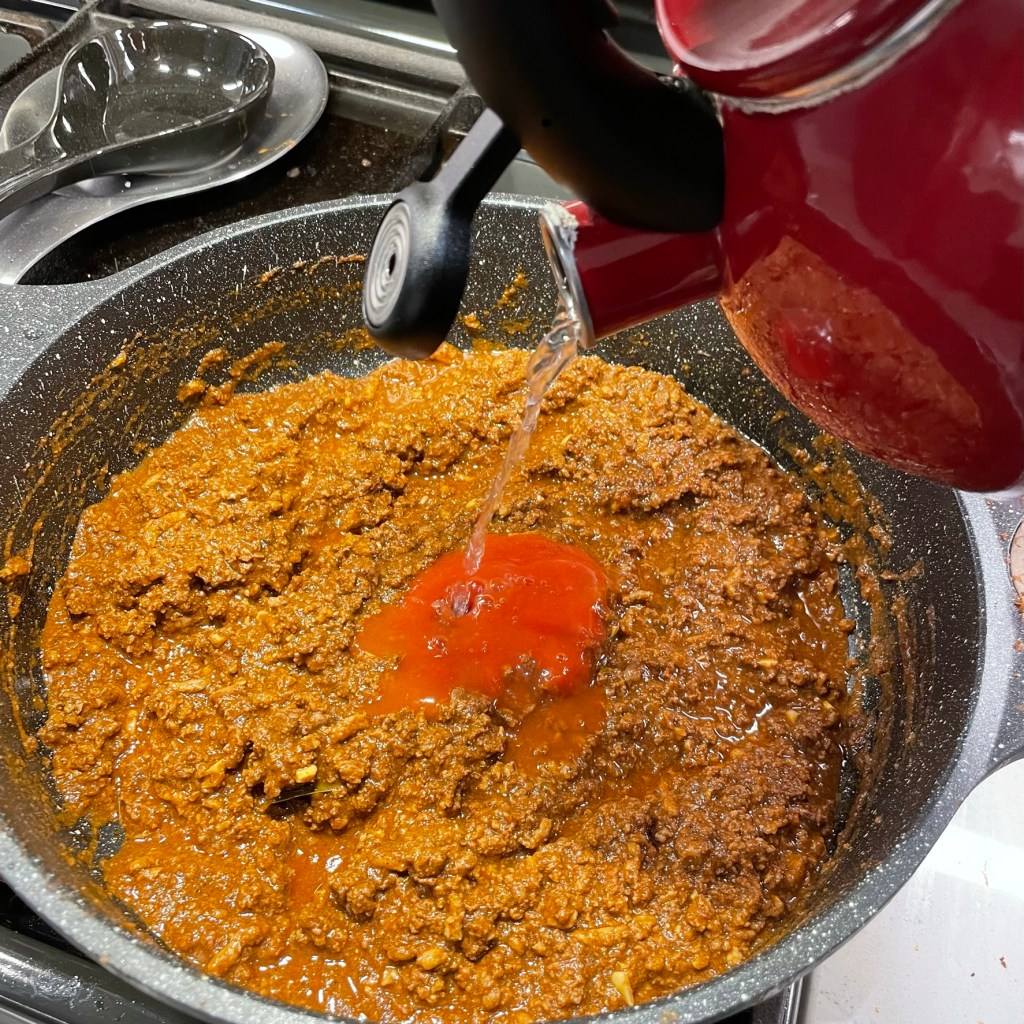
I continued to simmer, which resulted in a drier sauce than I wanted.
No big deal; add a little more tomato sauce and water and heat it through.
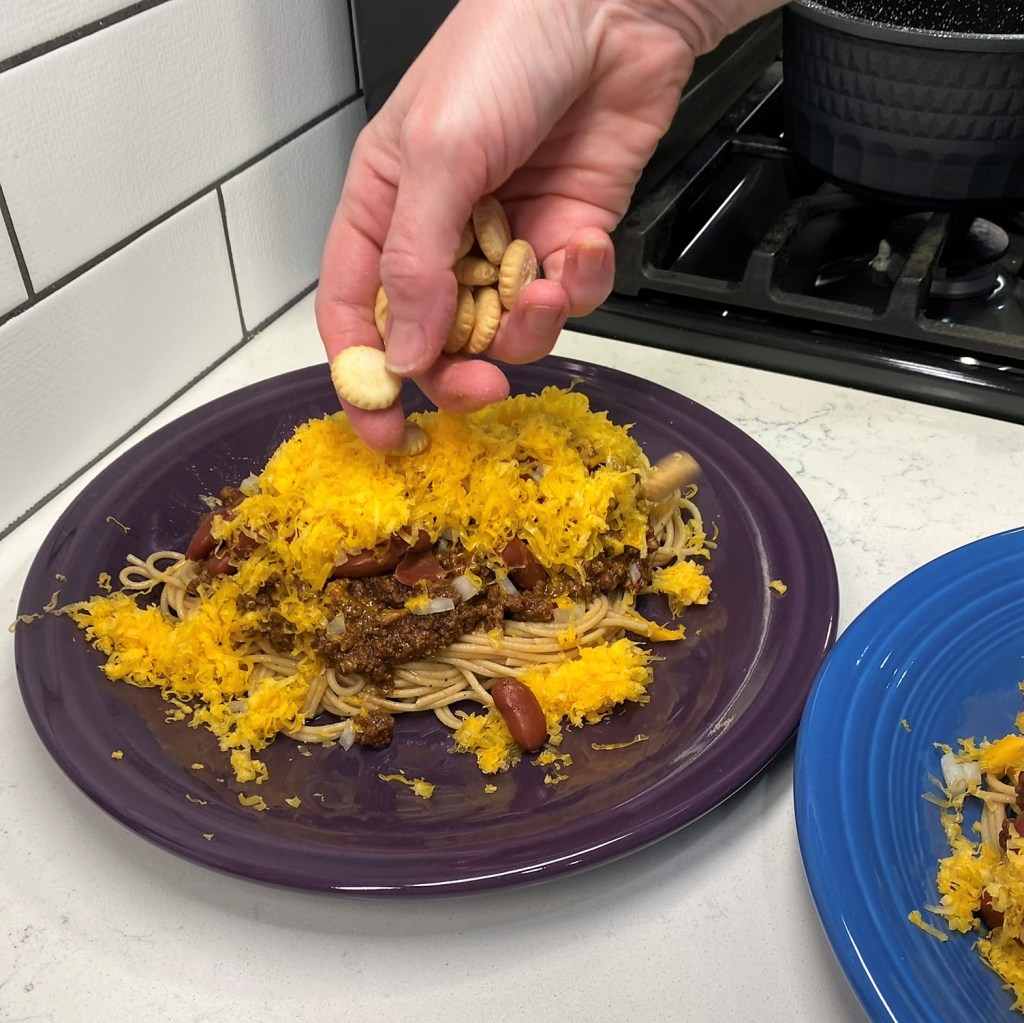
Despite my rule to NEVER put oil on your pasta, for this recipe, I am recommending that you drizzle a dab of oil on your spaghetti. This will help prevent sticking.
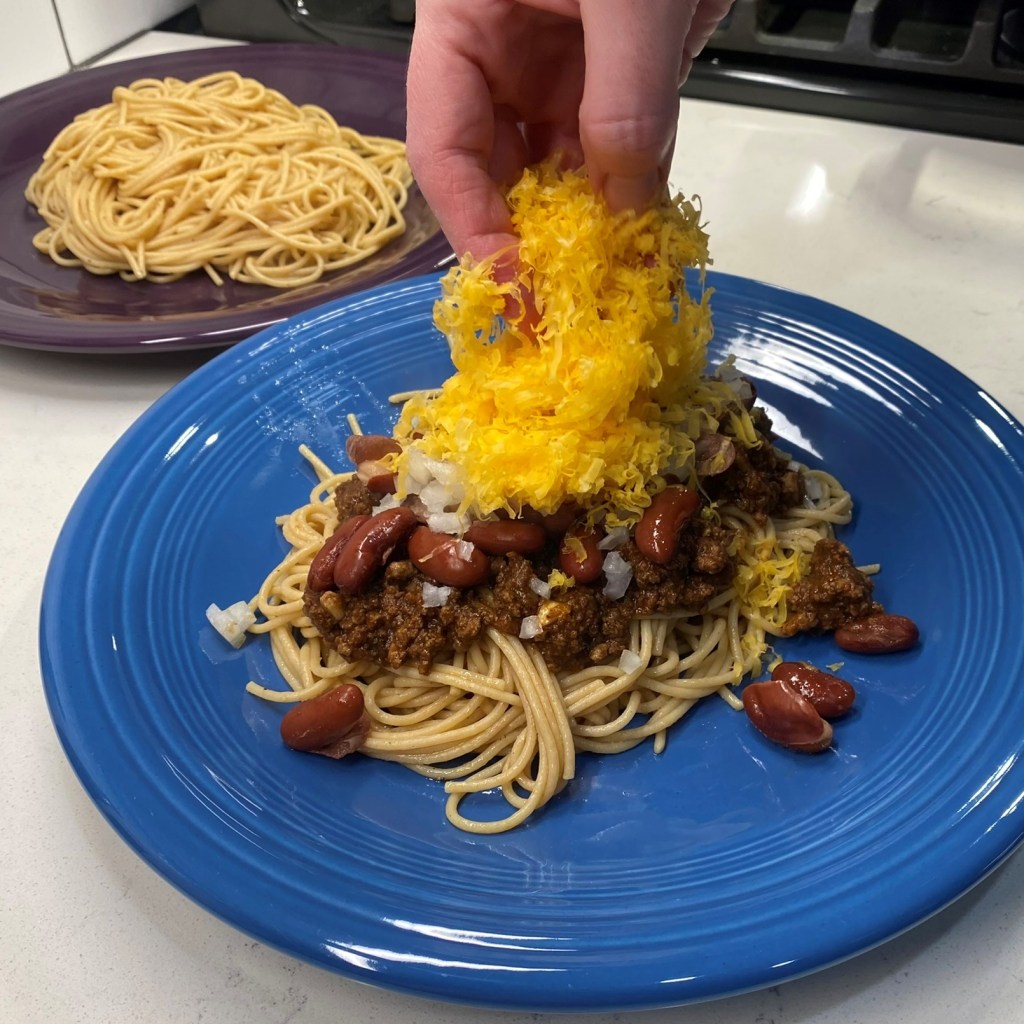
Top with any of the traditional ingredients. Make it “all the way” with warmed kidney beans, onions and fine shredded cheddar cheese.
At Cincy’s in Greensboro, they serve their Cincinnati chili with oyster crackers. Call me sentimental! 🙂
Combine all the dry seasonings (except bay leaves) in a bowl and set aside.
Combine the water and tomato sauce in a large saucepot, over medium-low heat. Stir in the dry seasonings, garlic and red wine.
Crumble the raw ground meat into the pot and use a utensil or potato masher to break it up as much as possible into a fine texture. Add the bay leaves. Bring the mixture to a low boil, then reduce heat and cover the pot. Simmer, stirring occasionally, until liquid is reduced, and sauce is thick but not dry. Give it at least an hour. Add a bit more tomato sauce and water, as needed, if the sauce has cooked down too much. It should be more meaty than “saucy.”
Cook spaghetti noodles to al dente stage, then drain and immediately toss with a bit of oil or butter to keep the noodles from sticking.
Plate spaghetti and top with meat sauce, plus any of the other toppings you like. Here’s how they break it down, Cincy style:
“2-way” = spaghetti with chili only
“3-way” = with chili and cheese
“4-way” = with chili, cheese and beans OR chili, cheese and onions
“5-way” = with chili, cheese, beans AND onions (the best)!
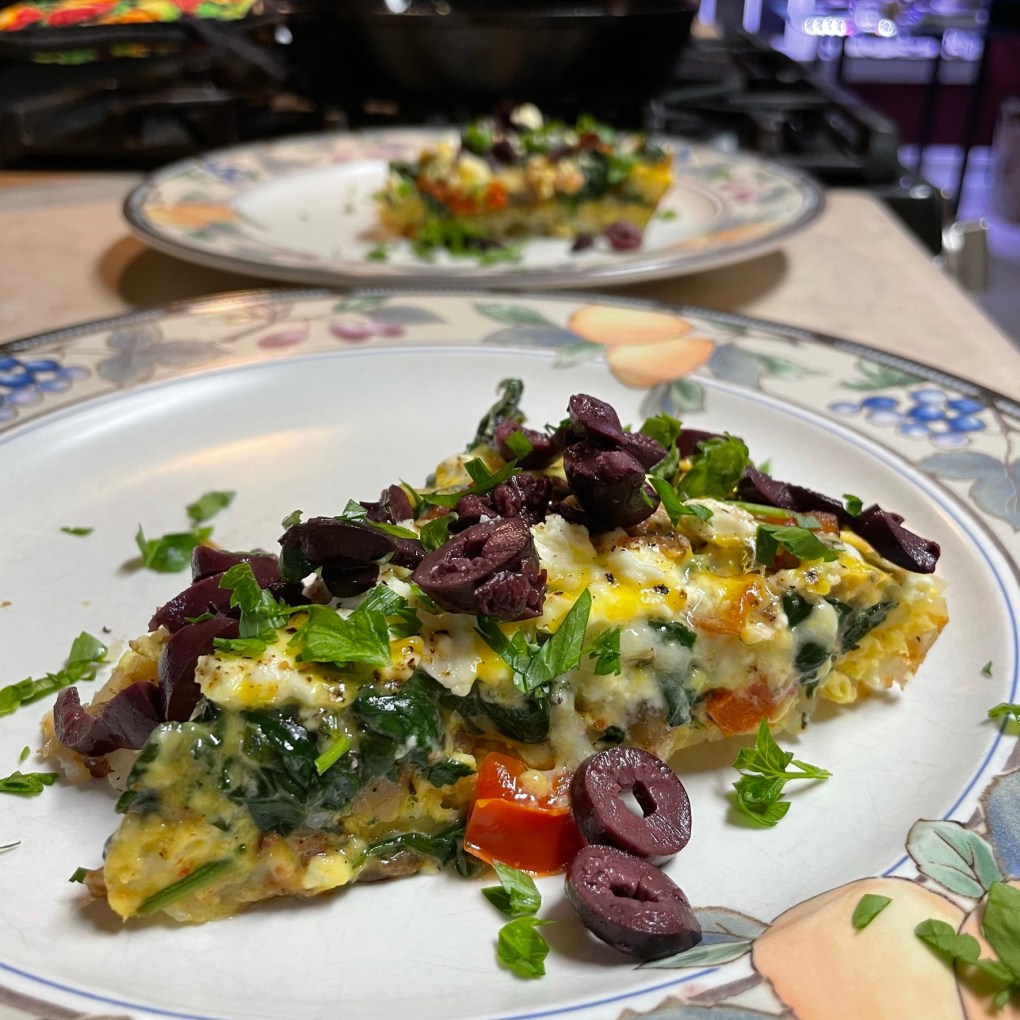
“Trust me, you have to order the spinach Maria as your side,” was the instruction given to me, in no uncertain terms, by at least six of my now-husband’s family members, who had gathered from every corner of the world for his mom’s 90th birthday celebration in Boca Raton, Fla. On our second or third day of this visit, which I should mention was my first introduction to Les’s family, about 16 of us were seated at a very long table at the Ke’e Grill, an upscale Boca restaurant that specializes in exquisite seafood dishes. I watched and listened as the server moved along the table, taking order after order for spinach Maria. It didn’t seem to matter whether the desired entrée was lobster tail, shrimp or salmon—even steaks, chops or chicken—literally everyone at our table ordered the spinach Maria, and it appeared true for the tables around us as well.
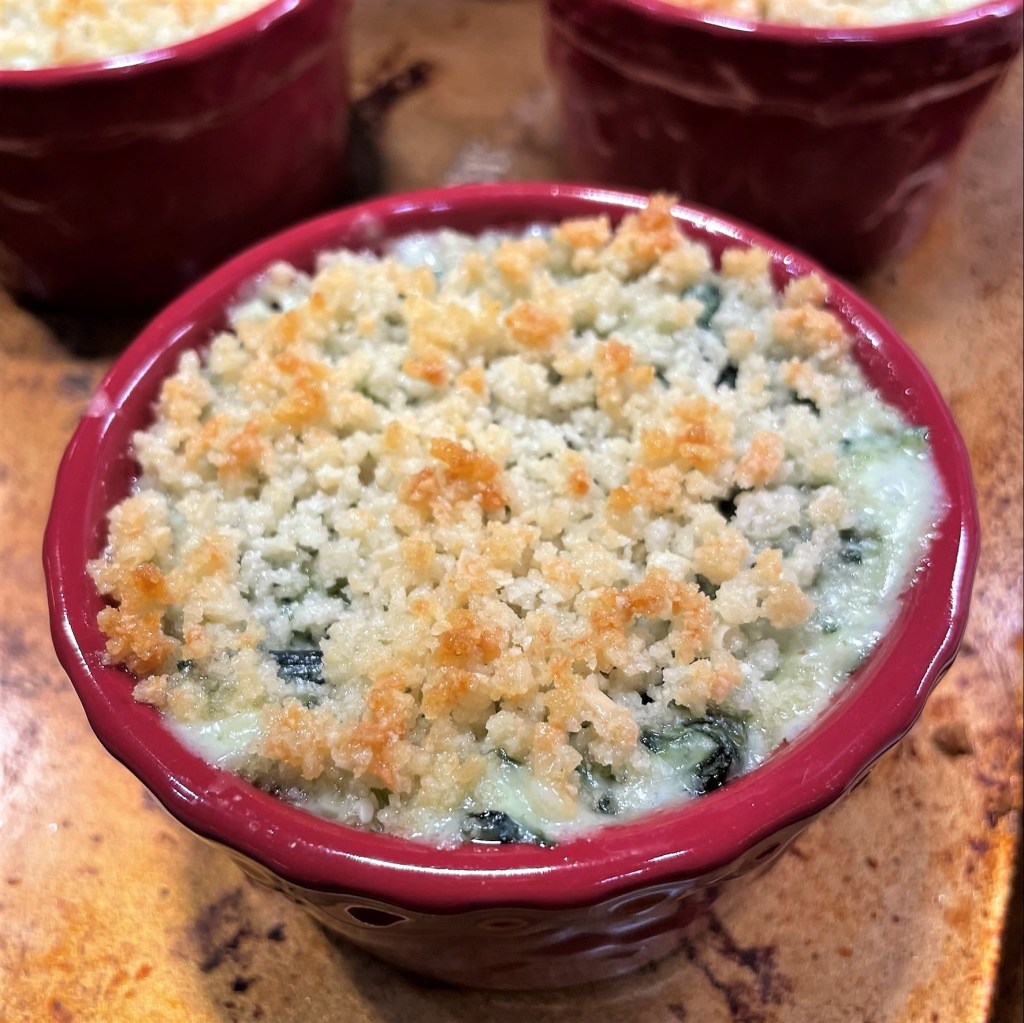
What was this mystical side dish, I wondered, that was so delectable that it united all the personalities present at this table and beyond? Creamy, crumb-topped heaven in a ramekin, that’s what.
“Maria! I’ve just met a spinach named Maria!”
This was no ordinary creamed spinach, and on subsequent visits to Boca, I requested return trips to Ke’e Grill so that I could experience the flavors enough to deconstruct it in my mind and then recreate it at home. I have made it three times in recent history, and after a few tweaks here and there, I’m finally confident to share my version of this memorable side dish. The base of the sauce is a bechamel, but only barely thickened because the cream and cheese are weighty themselves, and the spinach adds quite a bit of body. The buttered panko crumb topping is a delightful textural contrast to the richness that bubbles underneath.
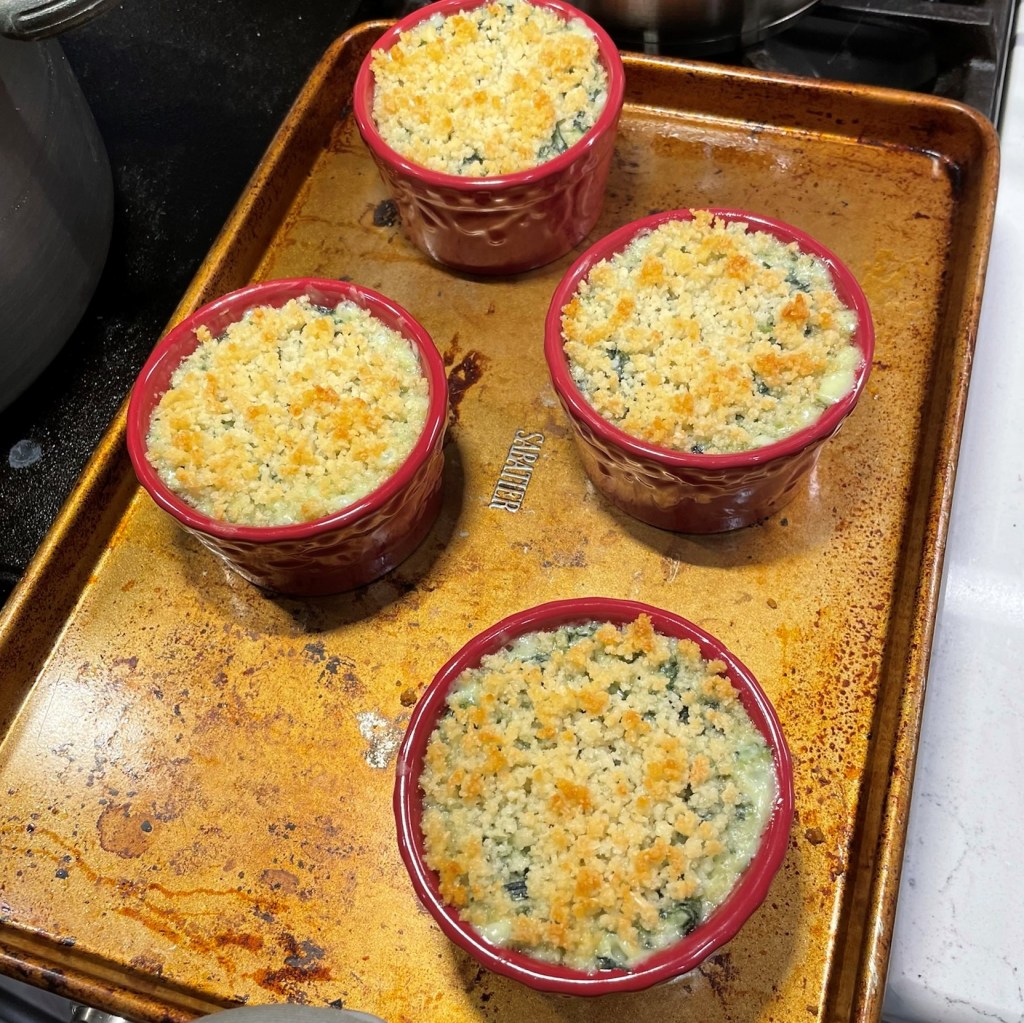
It is relatively easy to make, but it takes a bit of time, and the Ke’e Grill menu even reminds guests to be patient for spinach Maria, as it is made to order and baked to bubbly, crispy perfection just before serving. If you wish to make it ahead, perhaps for an elegant New Year’s Eve dinner, prepare the filling and portion it into ramekins, then refrigerate up to 24 hours. Bring the ramekins to near-room temperature before topping and baking.
Hot and bubbly from the oven, and a great crispy texture in the crumbs on top.
Ingredients (for 6 servings)
1 lb. frozen chopped spinach, thawed and squeezed very dry
6 Tbsp. unsalted butter
3 Tbsp. all-purpose flour (a 1:1 gluten-free alternative would be fine)
It is important that you use roasted garlic, and not fresh, which would be much too sharp for spinach Maria. If you have never made your own roasted garlic, you can follow the recipe link for easy instructions, and you’ll want to make that ahead so it is ready for your spinach Maria.
We keep a large container of freshly grated parmesan and romano cheese blend on hand all the time, and you can follow that recipe link as well if you’d like to give it a try. Or simply use a good quality parmesan from the supermarket deli (please, for the love of good food, not the stuff in the shiny green can).
Instructions
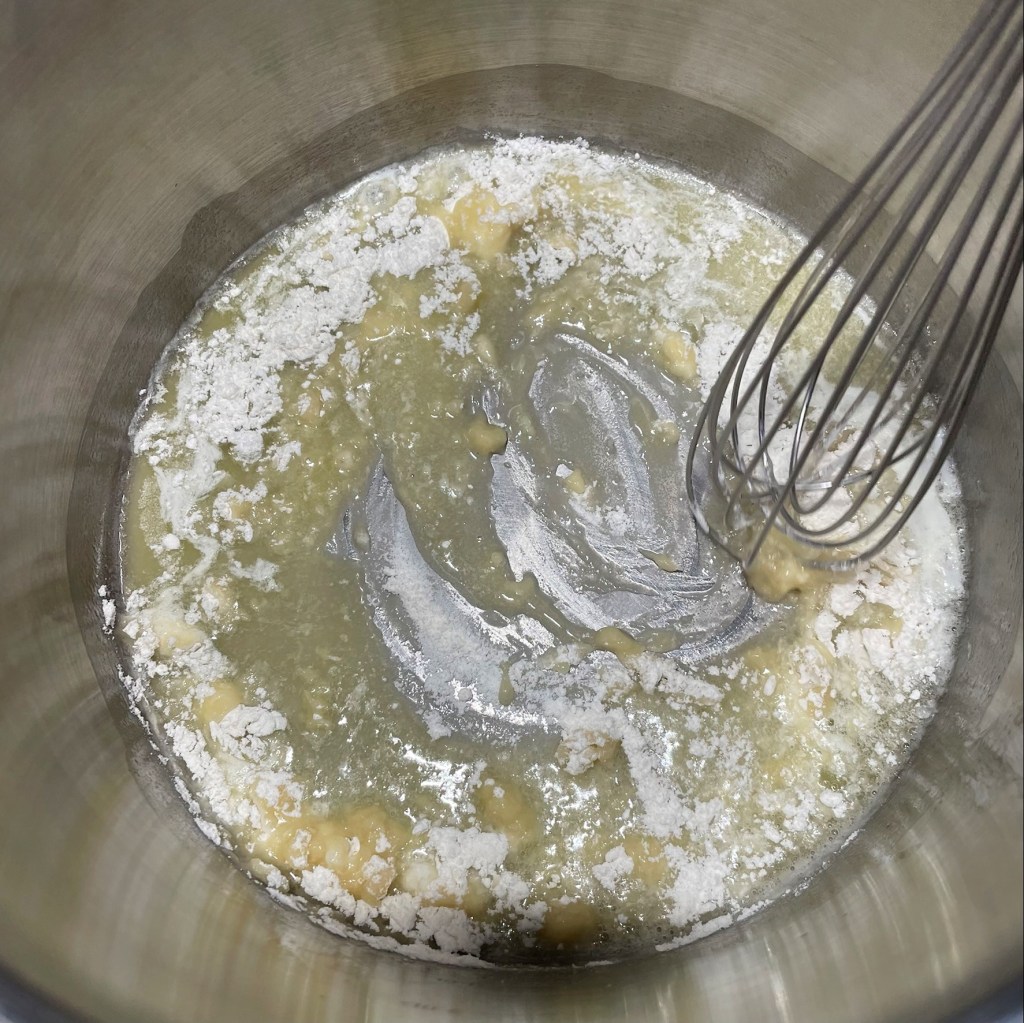
Spinach Maria begins with a simple roux, but half the usual flour.
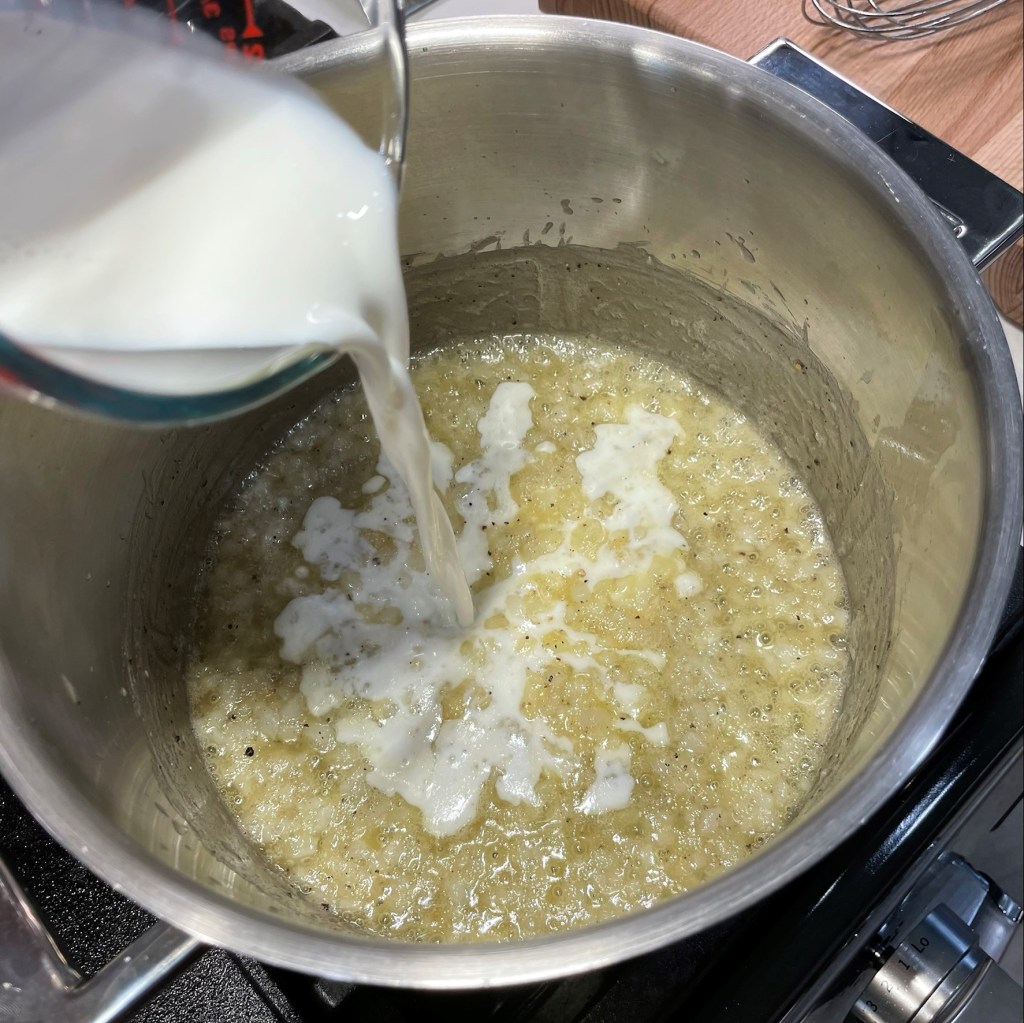
Simmer the roux a few minutes with minced shallots, then whisk in the milk and cream.
Blend in both kinds of cheese, and stir in cayenne and dry mustard.
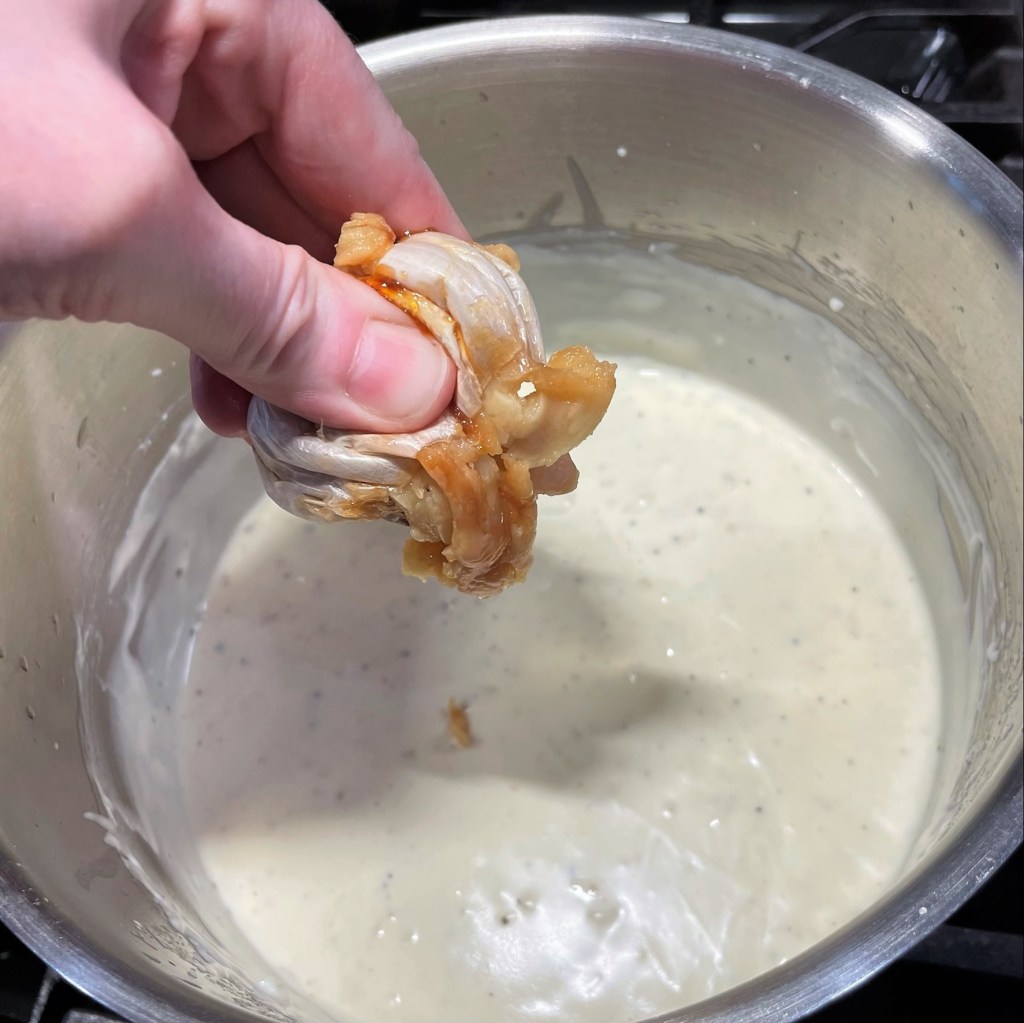
A whole bulb of roasted garlic lends a lot of depth to the sauce.
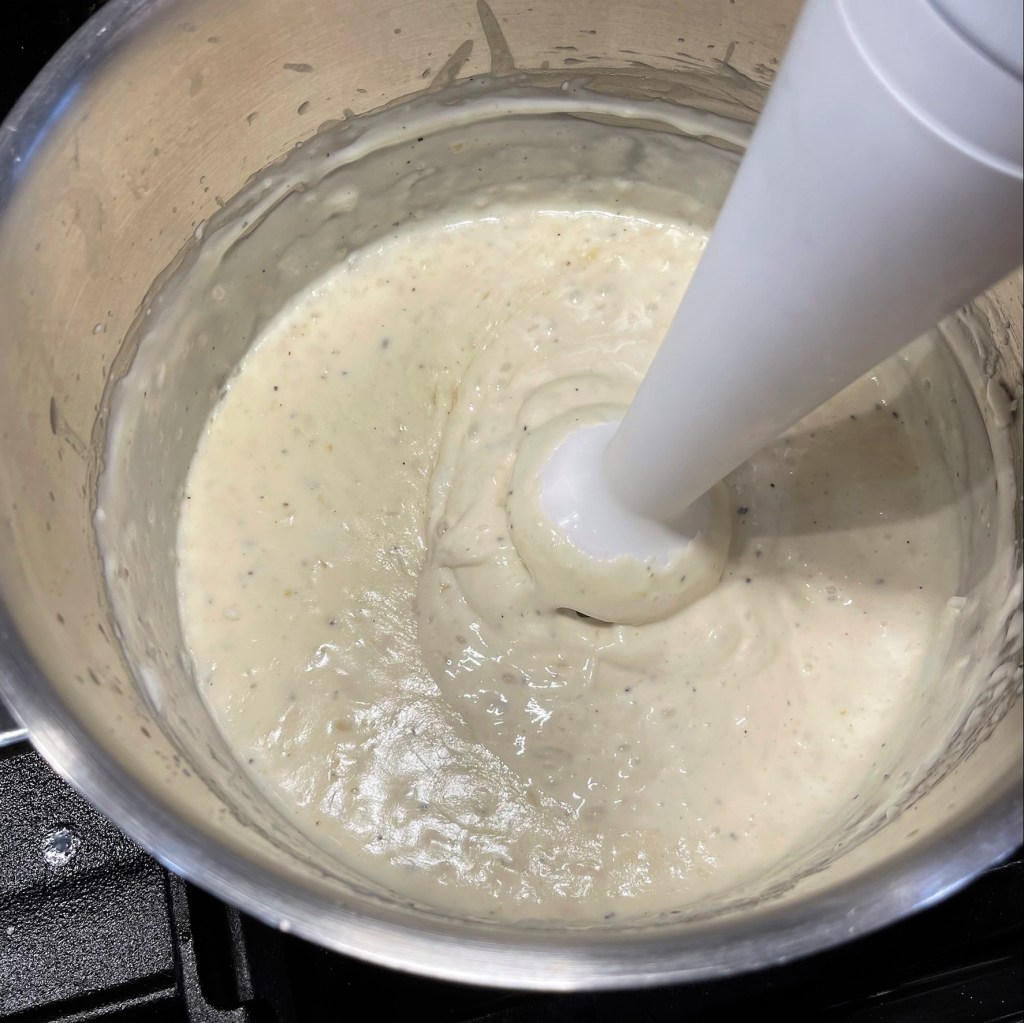
If you have an immersion blender, take it for a 60-second spin through the finished sauce to make it ethereally creamy.
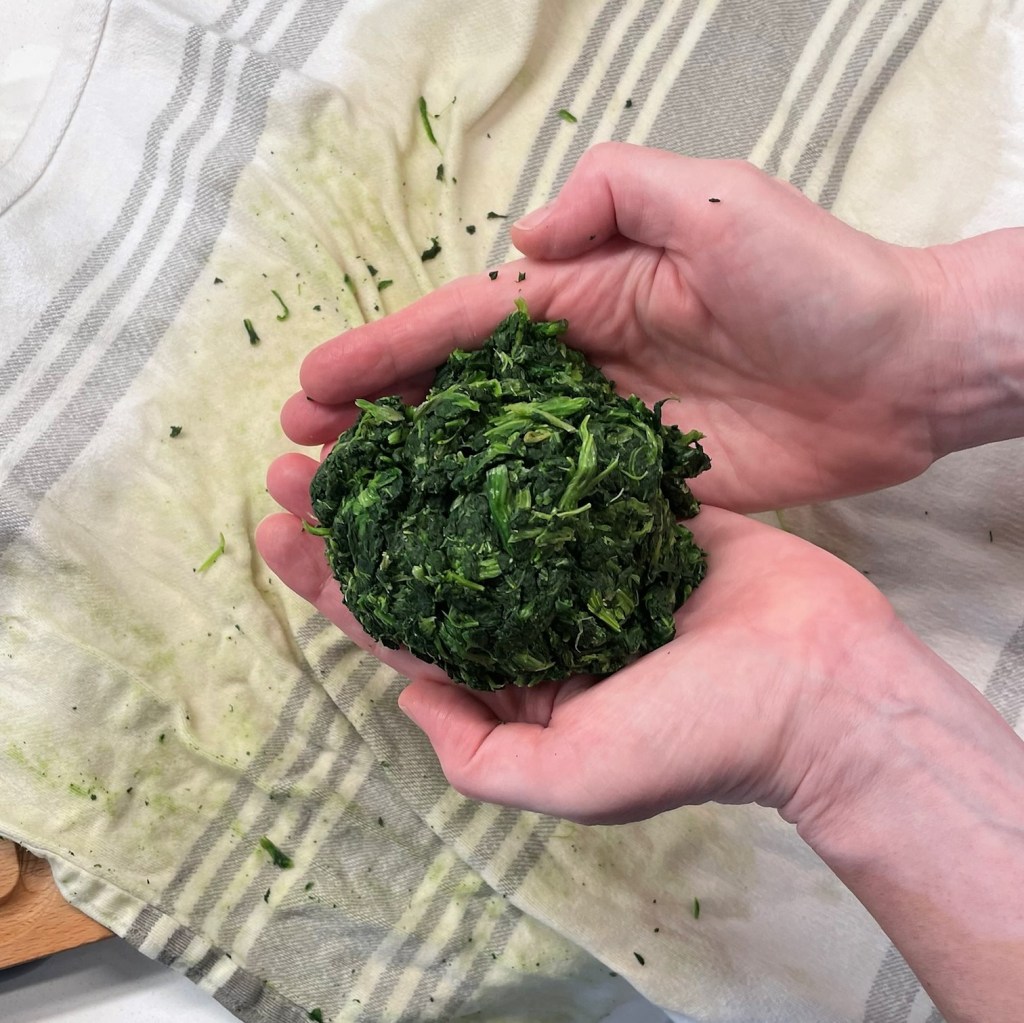
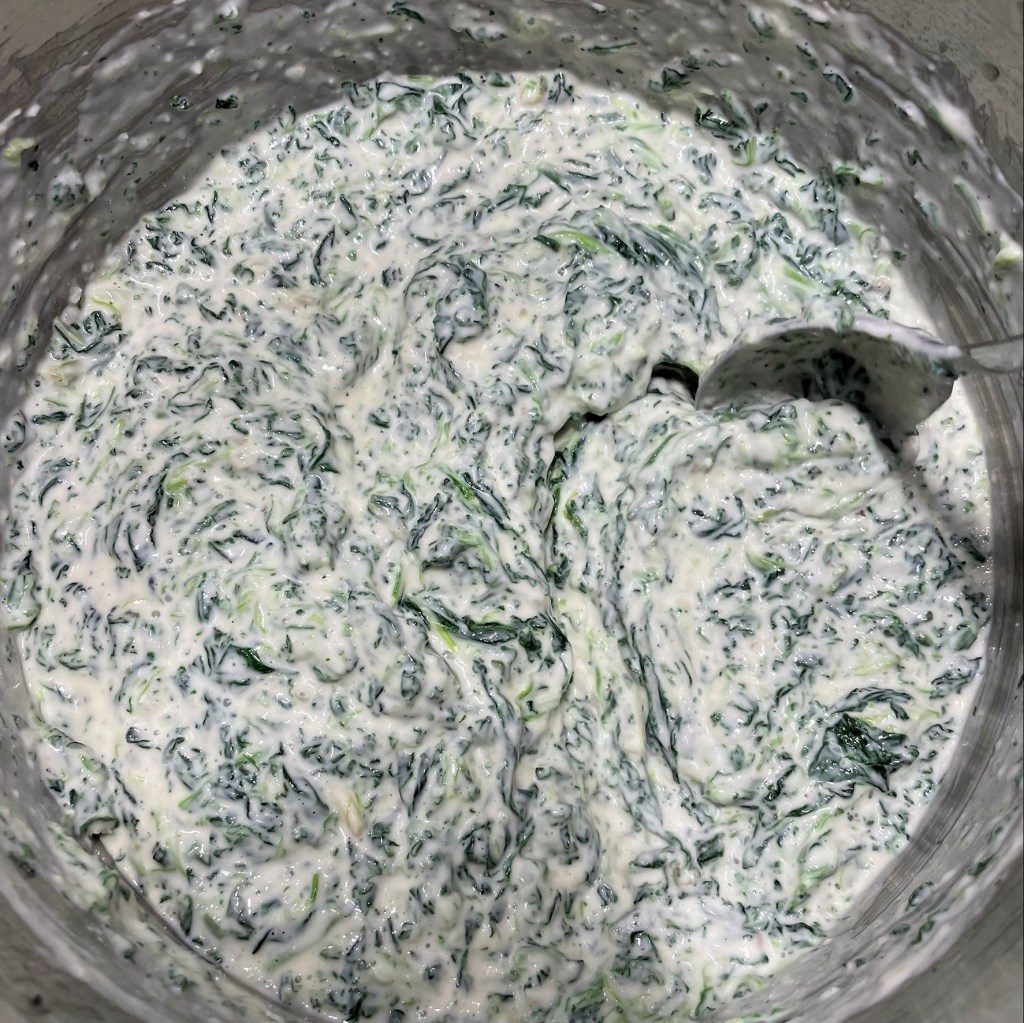
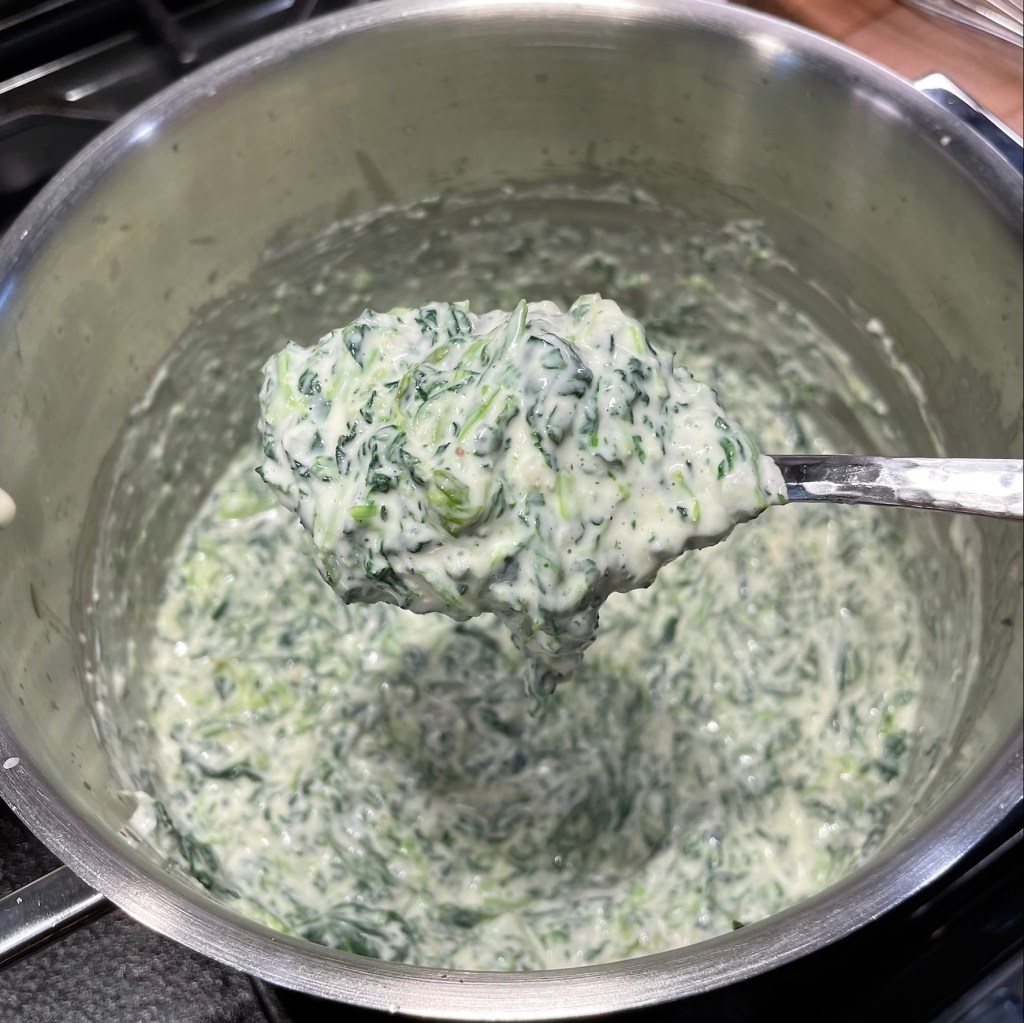
The spinach should be squeezed as dry as possible. Compacted like this, it measures about a heaping cup.
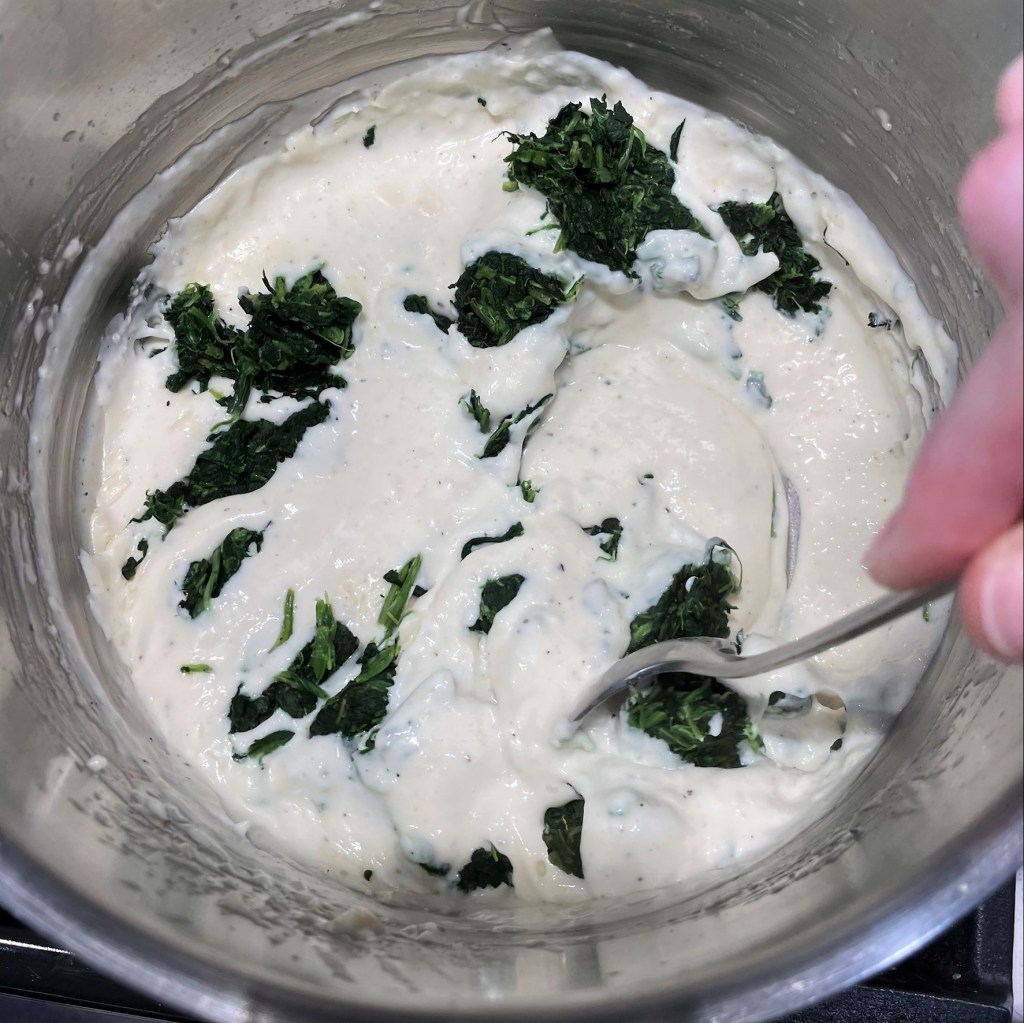
At first, it will seem there isn’t enough spinach, but trust the process and keep stirring.
Eventually, the compacted spinach will break apart into individual shreds and it will be perfect.
I love how the spinach gives off its green color to the cream sauce. Divide the mixture into 6 ramekins.
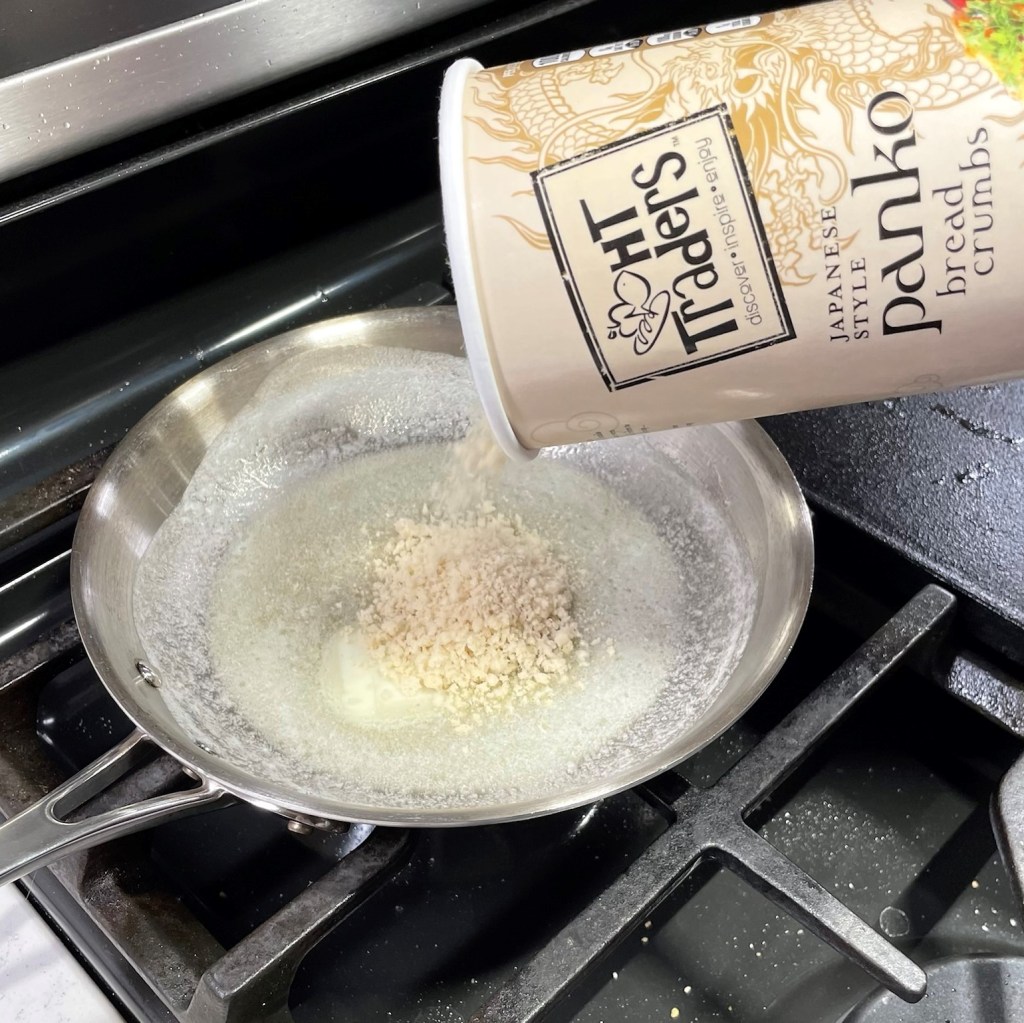
Melt butter to moisten the panko crumbs for the topping. Regular bread crumbs would be fine, too.
Sprinkle a little parm-romano or parmesan into the crumbs.
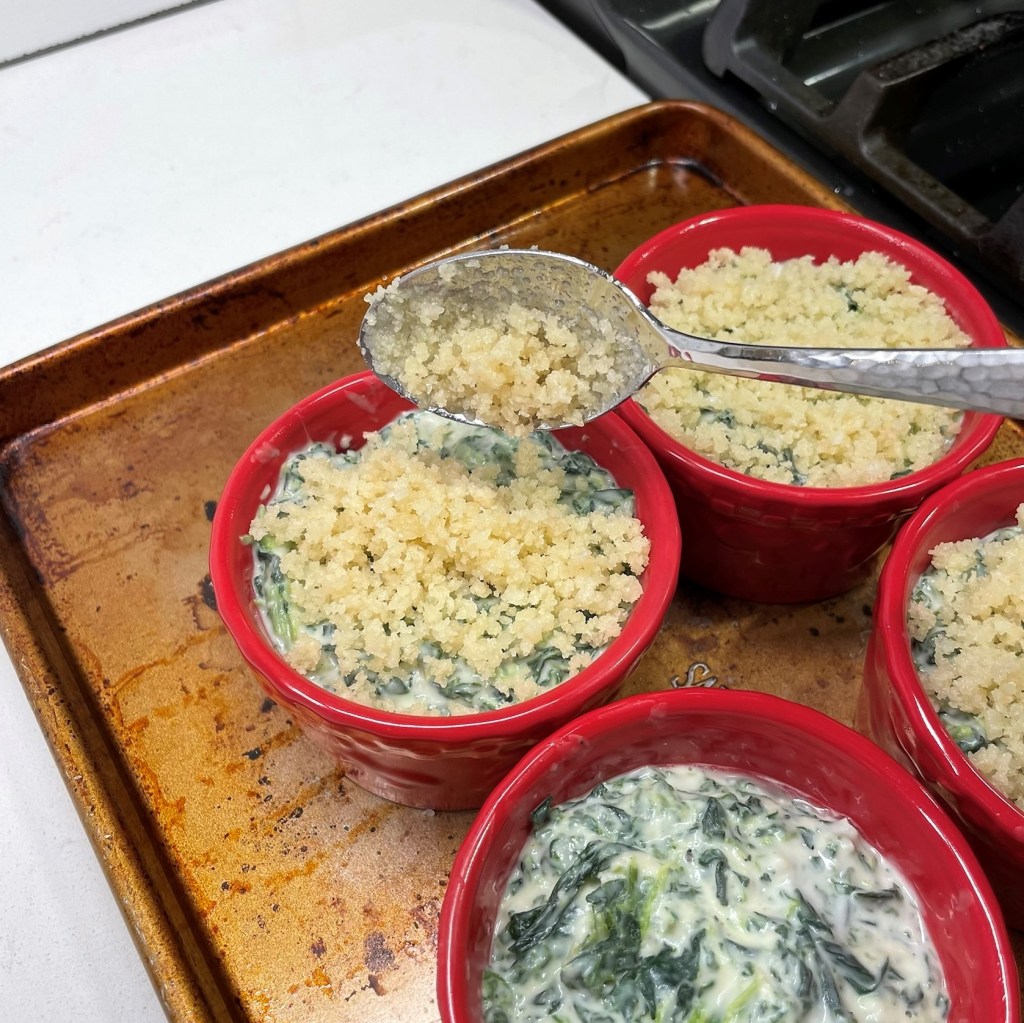
Divide the crumb topping among the ramekins just before baking. If you do this too early, the crumbs will not crisp as well in the oven.
Hot and bubbly from the oven, and a great crispy texture in the crumbs on top.
Prepare the spinach by thawing, rinsing and draining. It must be squeezed very dry for this recipe, and I recommend spreading it out onto a clean, unscented kitchen towel and rolling and twisting to extract all the excess moisture.
In a medium, heavy-bottomed sauce pot, melt the unsalted butter. Stir in the flour and minced shallots. Season with salt and pepper and cook over medium-low heat a few minutes, until the mixture is bubbly and has a slight nutty fragrance.
Add the milk all at once and whisk until smooth and thickened. Stir in the heavy cream until blended. Add the fontina and gruyere cheeses and stir until melted through. Stir in cayenne and dry mustard. Squeeze the roasted garlic directly into the sauce and whisk to break up the pieces.
Optional: At this point, the cream-cheese sauce will appear chunky, with visible bits of softened onion and roasted garlic. If you have an immersion blender, I highly recommend using it to cream up the sauce further; 60 seconds should do it. This step is optional, but it amplifies the creamy texture of any bechamel-based sauce, so I do it even for simple mac and cheese recipes.
Break up the packed dry spinach into the sauce and stir to blend it. It may seem that there is not enough spinach to match the sauce, but as you stir and blend, the bits will separate and disperse more evenly. Give the mixture a taste and adjust seasonings (salt, pepper, cayenne) to your liking.
Divide the spinach Maria mixture evenly into six 1/2-cup ramekins and place them on a small baking sheet. If you are preparing it ahead, cover them with plastic wrap and refrigerate up to one day. Bring them to near-room temperature before baking.
In a small saucepan or skillet, melt salted butter and toss the panko crumbs in it until moistened. Stir in parm-romano blend just until evenly mixed. Divide the topping among the ramekins. Bake on the cookie sheet at 350° F for about 25 minutes, until the crumb topping is crispy and golden, and the spinach Maria is bubbly at the edges. Serve immediately.
I used to be a sucker for interesting cookbooks. When my kids were young (and I was always looking for fun things to make that might somehow appeal to them), I bought a collection of recipes bound in a half book, half loose-leaf from a church, featuring members’ faves.
One day, I decided, based on the name and ingredients, that one of those recipes looked safe to try for the kids. It was called “crunchy cheesy beefaroni,” and basically was a home version of hamburger helper. As I recall, the recipe included ground beef, a can of tomato soup, a can of cream of mushroom soup, elbow macaroni, and lots and lots of cheese. In fact, the recipe called for two full 8-ounce blocks of cheddar, one sharp and one medium sharp. The casserole was topped by French-fried onion rings. Hence, the crunchy.
Now my kids loved this concoction, but it had an unfortunate side effect on some in the household. And the kids, who do speak their truth, did some intentional mangling of the name when they asked for it again. They asked for “crunchy cheesy fartaroni.” It was a big laugh at the time.
Time marches on. My son now lives in Budapest. My daughter is a vegan and wouldn’t touch this stuff with a ten-foot pole.
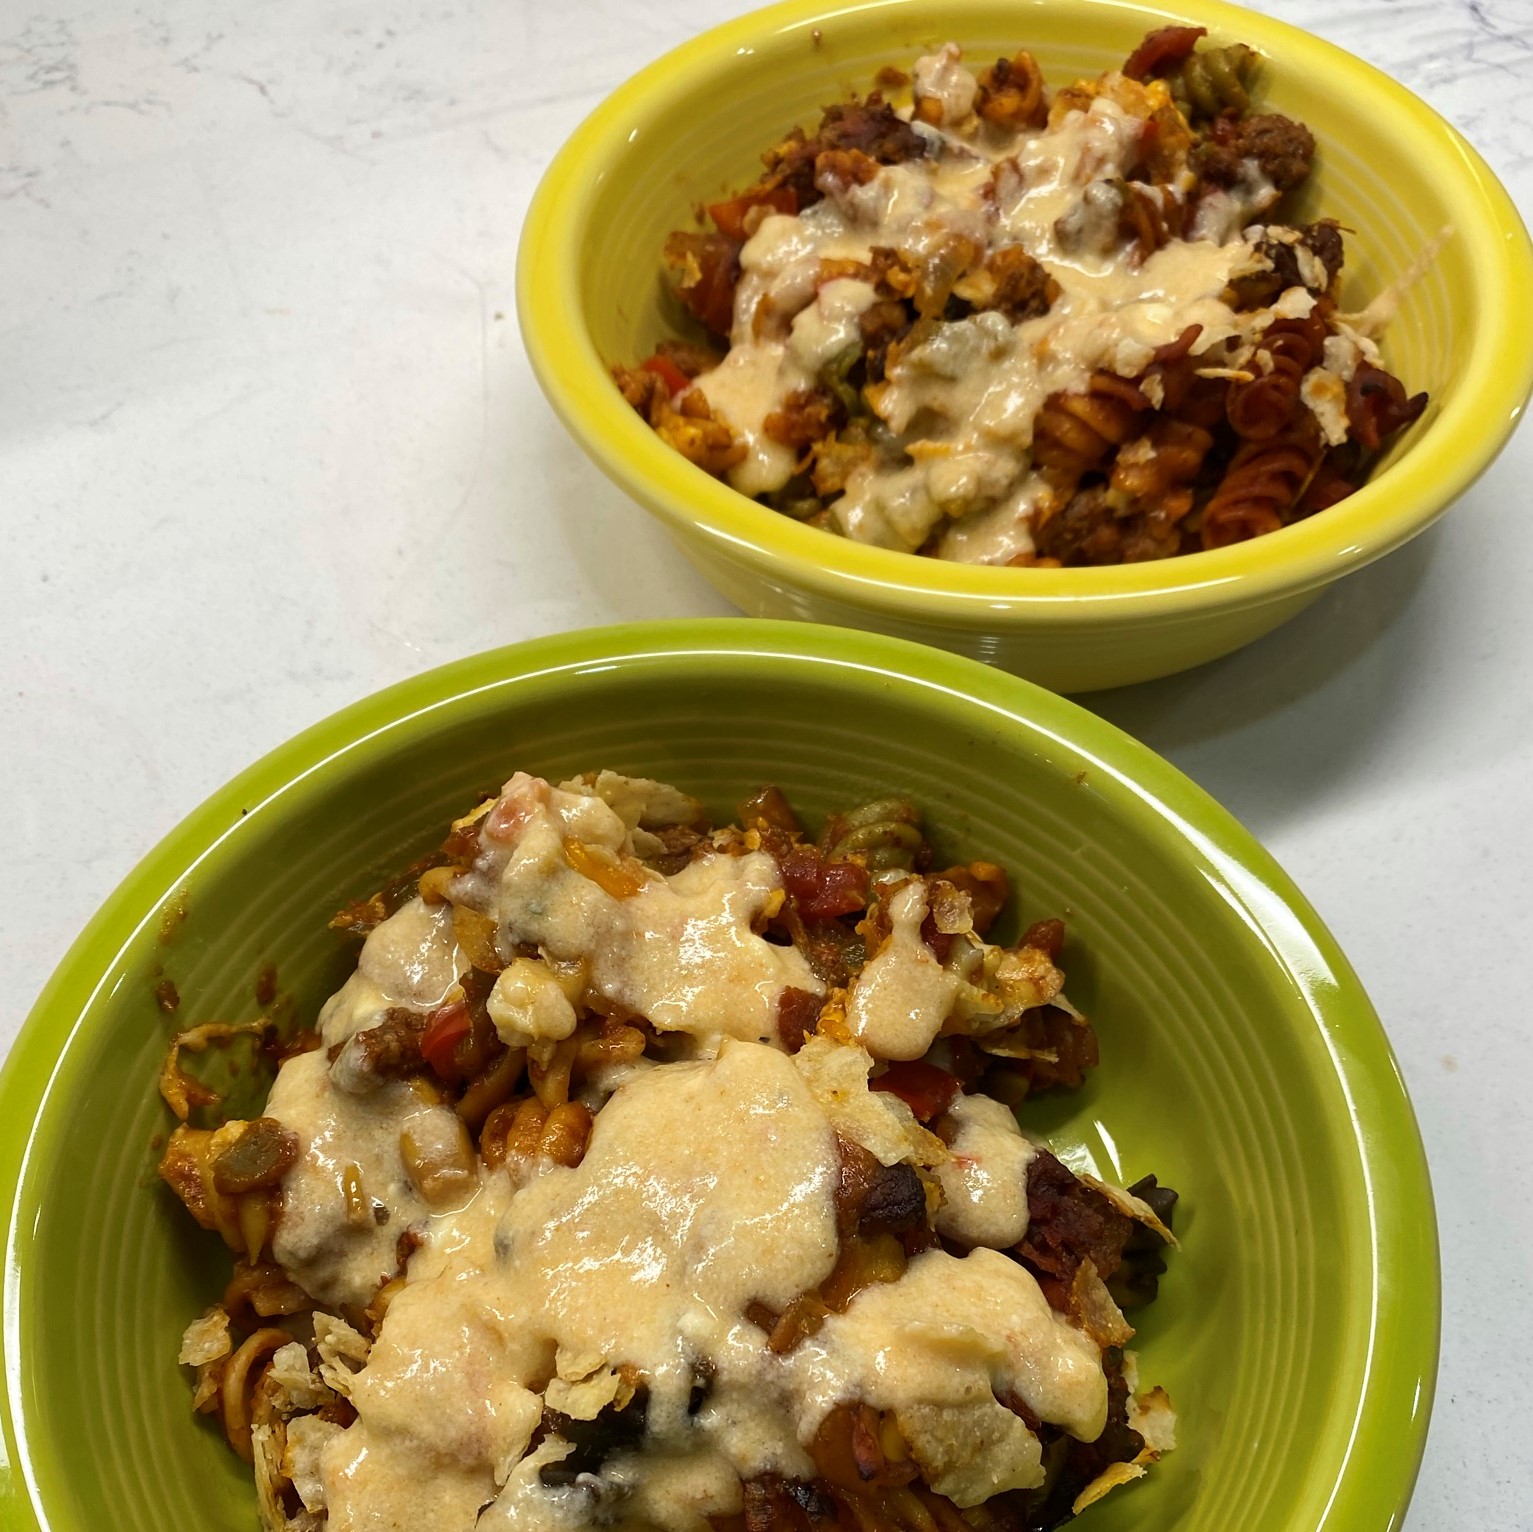
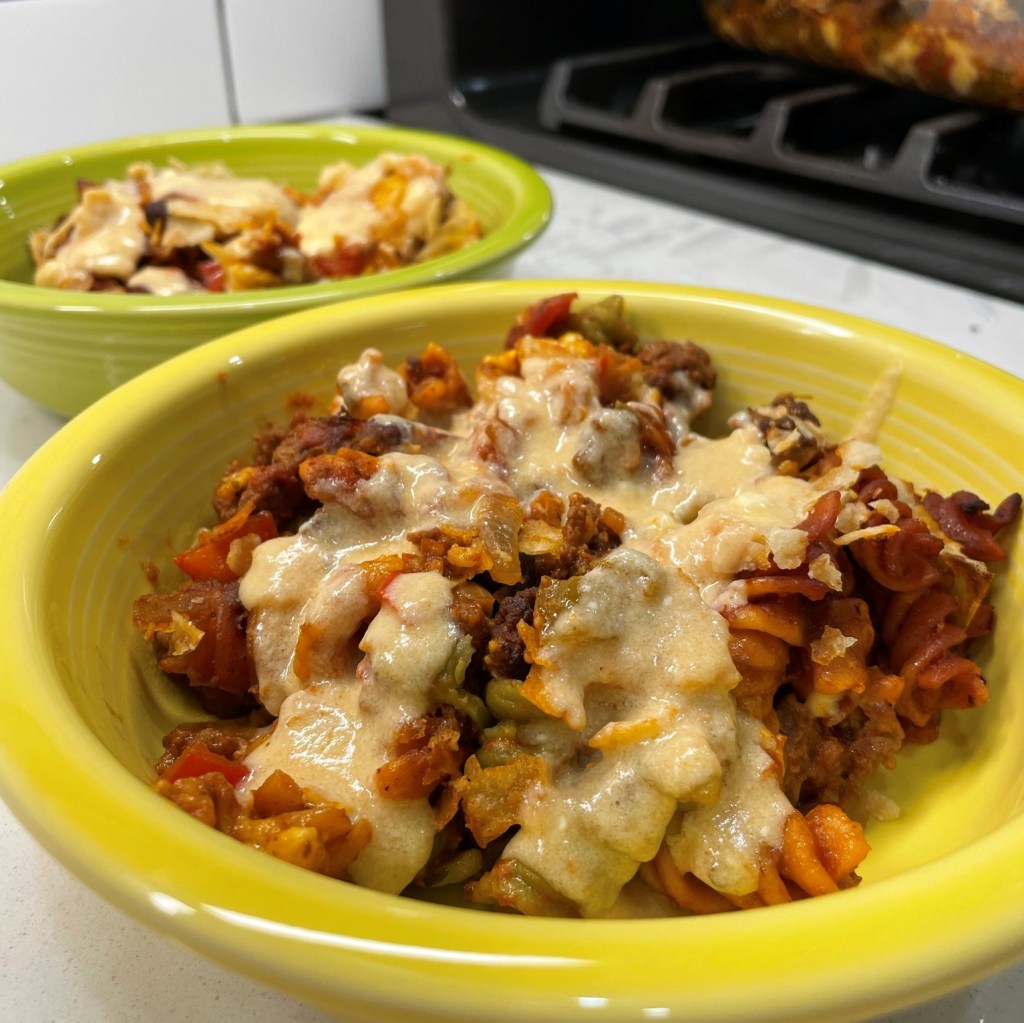
A meaty, cheesy casserole never disappoints.
I hadn’t made it in many years, but from the time I shared the story of this legendary dish with Terrie, she wanted me to go for it. This even though Terrie typically recoils at the mention of Campbell’s condensed soups, and any of the other ingredients with decidedly “GMO” and other non-organic leanings. However, in our household, I have learned that everything has a substitute, and this dish can, indeed, be made in a “clean” fashion. More than a year ago, I made it for Terrie for the first time, using some leftover shaved steak meat from another dish, as well as incorporating previously made mac and cheese. I threw in some organic mushroom soup and some organic diced tomatoes, and the 2020s version tasted great and met Terrie’s environmental and food-quality standards.
With the kitchen renovation still rendering our kitchen in a largely “not-ready-for prime time” state, we’ve been looking for some filler meals. On a recent weekend while Terrie was under the weather, I decided to take on the cooking duties and try the beefaroni again, this time with a southwest spin.
I’m pleased to say that southwest crunchy cheesy “fartaroni” worked out great. A bowl of protein, veggies and carbs with flavor, kick and comfort.
Ingredients
1 pound ground beef, 85% lean* (see notes)
1 12-ounce box of Barilla veggie pasta rotini*
Half a medium yellow onion, diced
Half a red and half a green bell pepper, diced
1 small can of chopped green chilis
1 can of Rotel diced tomatoes*
1 6-ounce can of tomato paste
½ packet Frontera skillet sauce with chipotle and lime*
8 ounces colby-jack cheese, cubed or shredded
2 ounces habanero cheddar*
Tortilla chips
Salt
Pepper
Onion powder
Ingredients for Cheese Sauce
Terrie suggested the cheese sauce, with a thin bechamel base, as a topping for the casserole because it seemed dry after its 45 minutes in the oven. This version had no soup! And who am I to argue against more cheese? Or against anything Terrie suggests in the kitchen (OK, Terrie, I can see the look on your face already).
2 Tbsp. unsalted butter
2 Tbsp. all-purpose flour
1 cup of milk*
8 ounces of sharp cheddar, cubed or shredded*
1 ounce habanero cheddar*
3 ounces cream cheese*
3 to 4 Tbsp. salsa*
Notes
One of Terrie’s standards is that in our household, we eat only grass-fed beef, and that’s what I used for this. Any ground meat with similar fat content would work.
We like the veggie pasta for a healthier option, so I used rotini, as I couldn’t find a veggie version of elbow macaroni, which was part of the original recipe. Rotini worked great and offered plenty of texture.
I used Rotel’s Mexican-style version with lime juice and cilantro. If you want to seriously kick up the heat in the dish, try the hot diced tomatoes or the diced tomatoes with serrano peppers.
The Frontera skillet sauce was the same thing I used to flavor the ground meat in my thick and hearty chili recipe. Look for it in the grocery section where you’d find packets of seasonings.
The habanero cheddar is a Trader Joe’s product, and it packs some major heat. You can use other cheeses to add variety to the cheese sauce; notice I only used 10 ounces total cheese, well below what the original recipe called for. The dish is plenty cheesy, even before the cheese sauce.
You might use a little more or a little less milk depending on your preferred thickness of cheese sauce.
Terrie also noted that, especially for queso-style sauces, American cheese provides a smooth base, but I had no American on hand for this meal, so I settled for what was left in the fridge, plus a little cream cheese (another Terrie suggestion). And I supplemented with another small dose of the habanero cheddar for heat.
Any salsa will do, but pick what you like for your heat preference, keeping in mind everything else you’ve put in the dish.
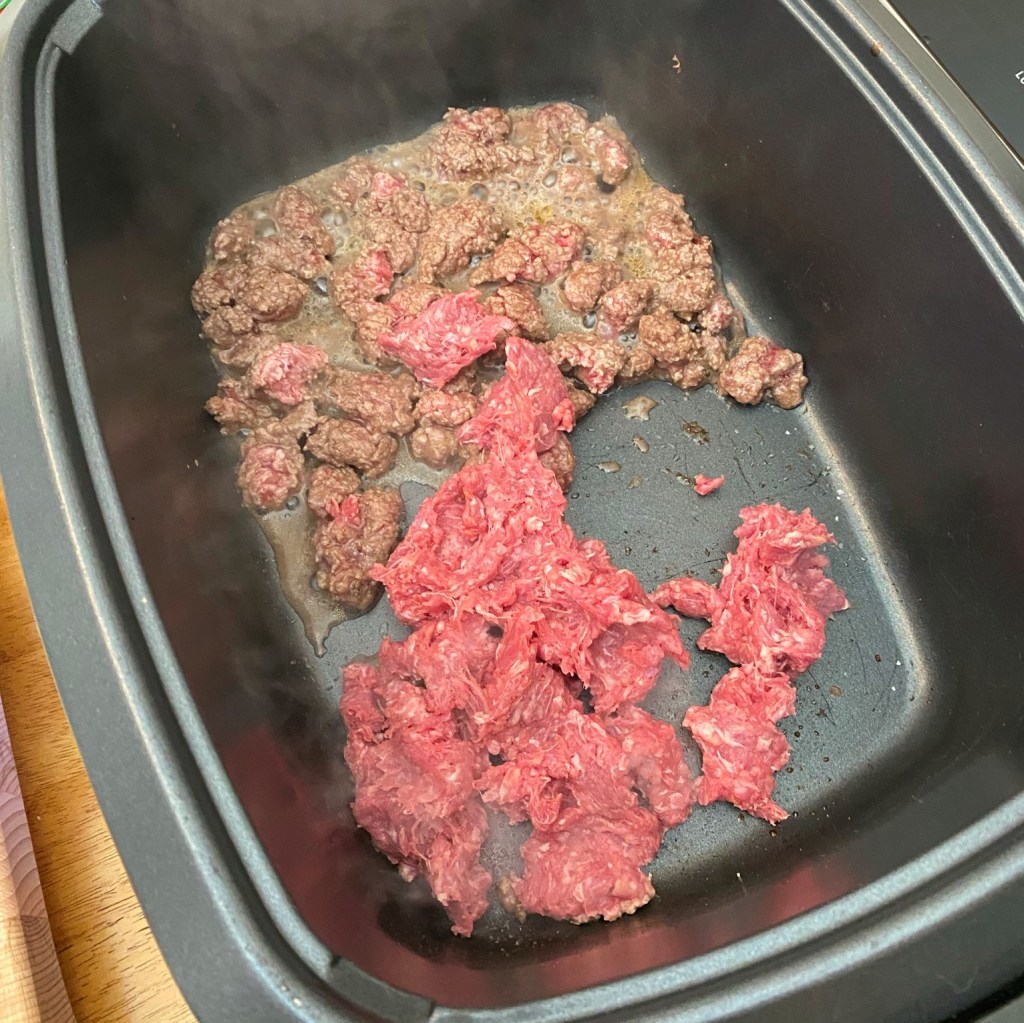
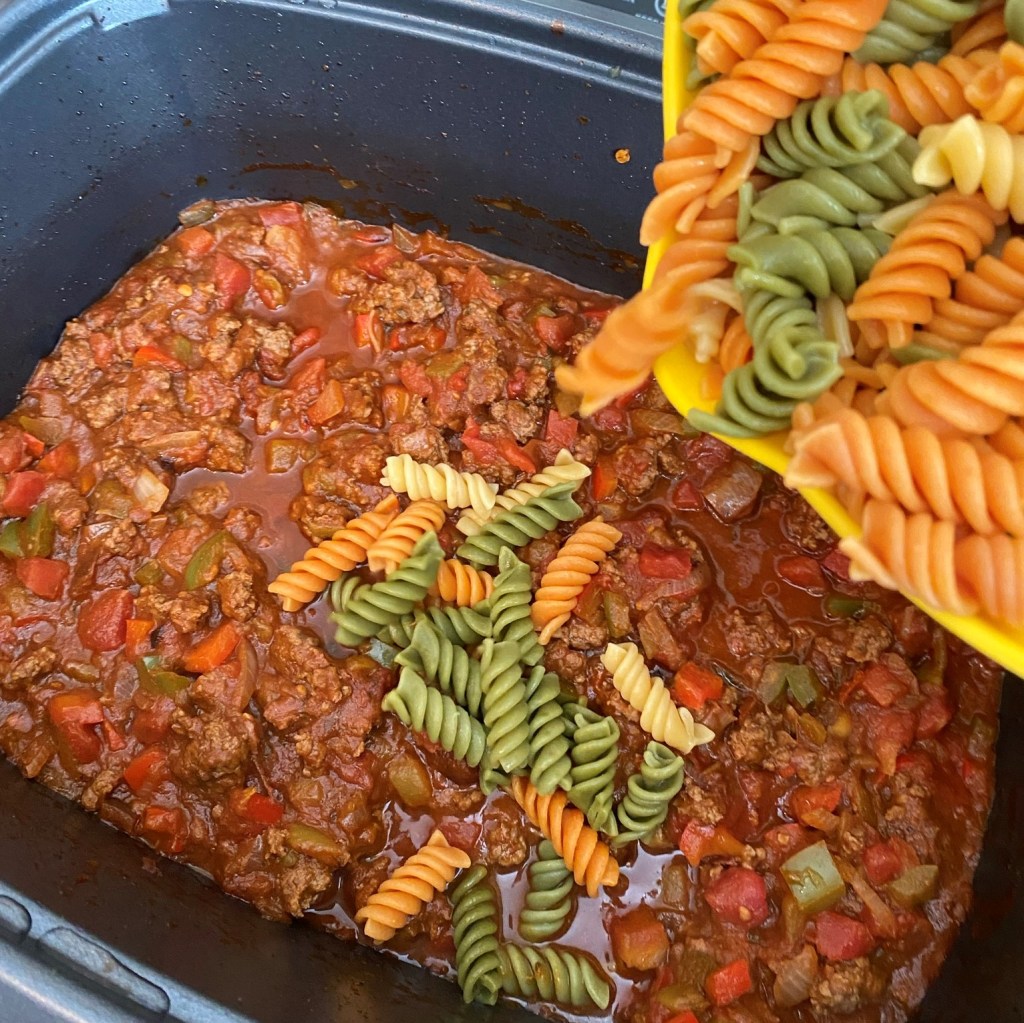
Brown the ground beef in batches, then transfer it to a separate bowl.
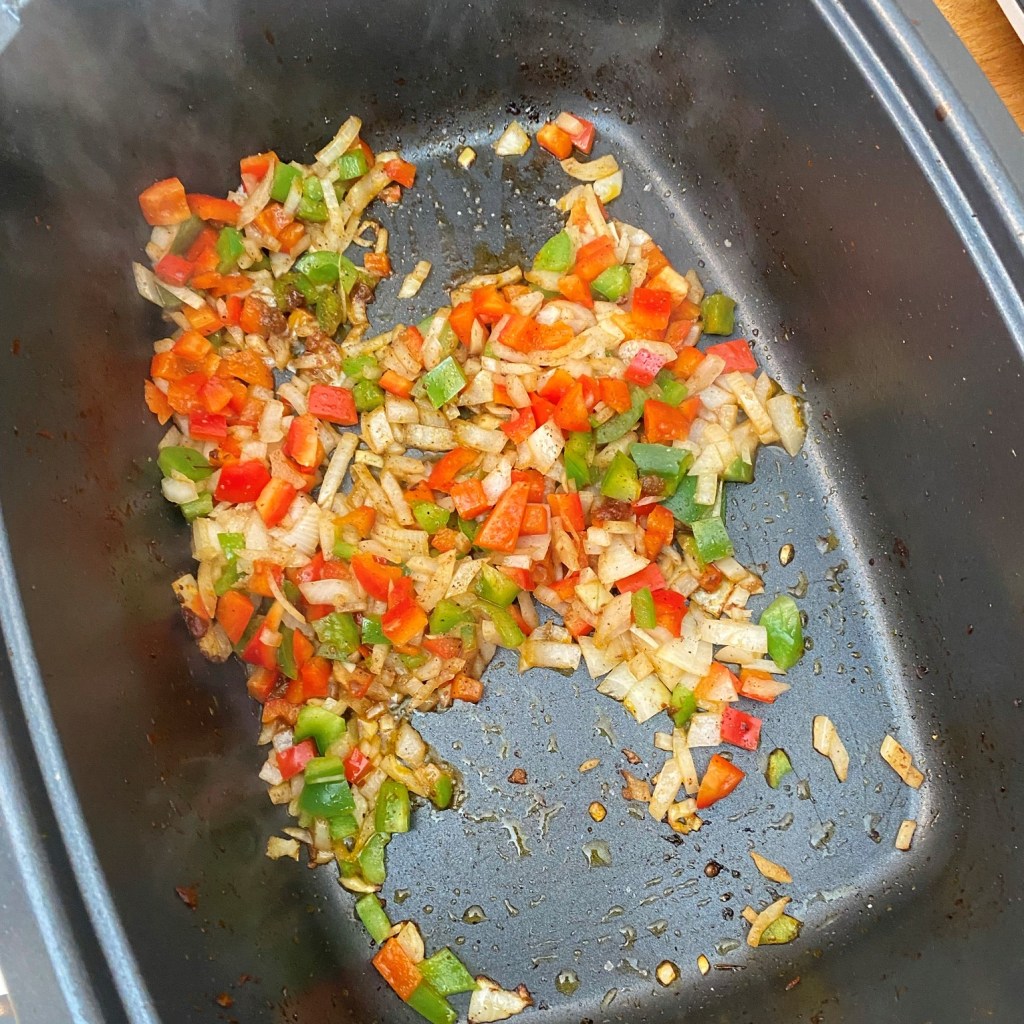
Saute the vegetables in the cooker until they are slightly softened. Return the beef to the cooker before adding the other ingredients.
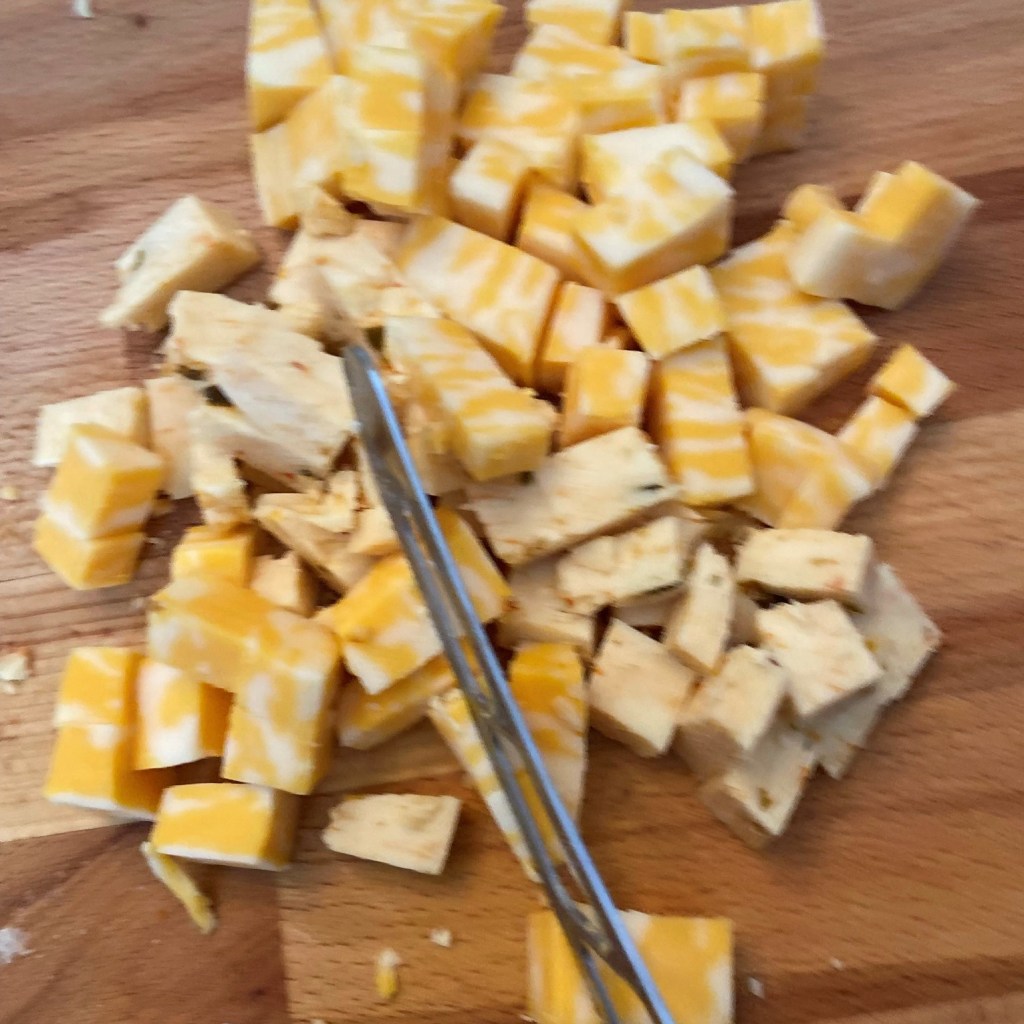
Cheese, glorious cheese! You could use shredded cheese, but I like the chunky cubes.
Cook the pasta to al dente stage, then add it to the meat mixture.
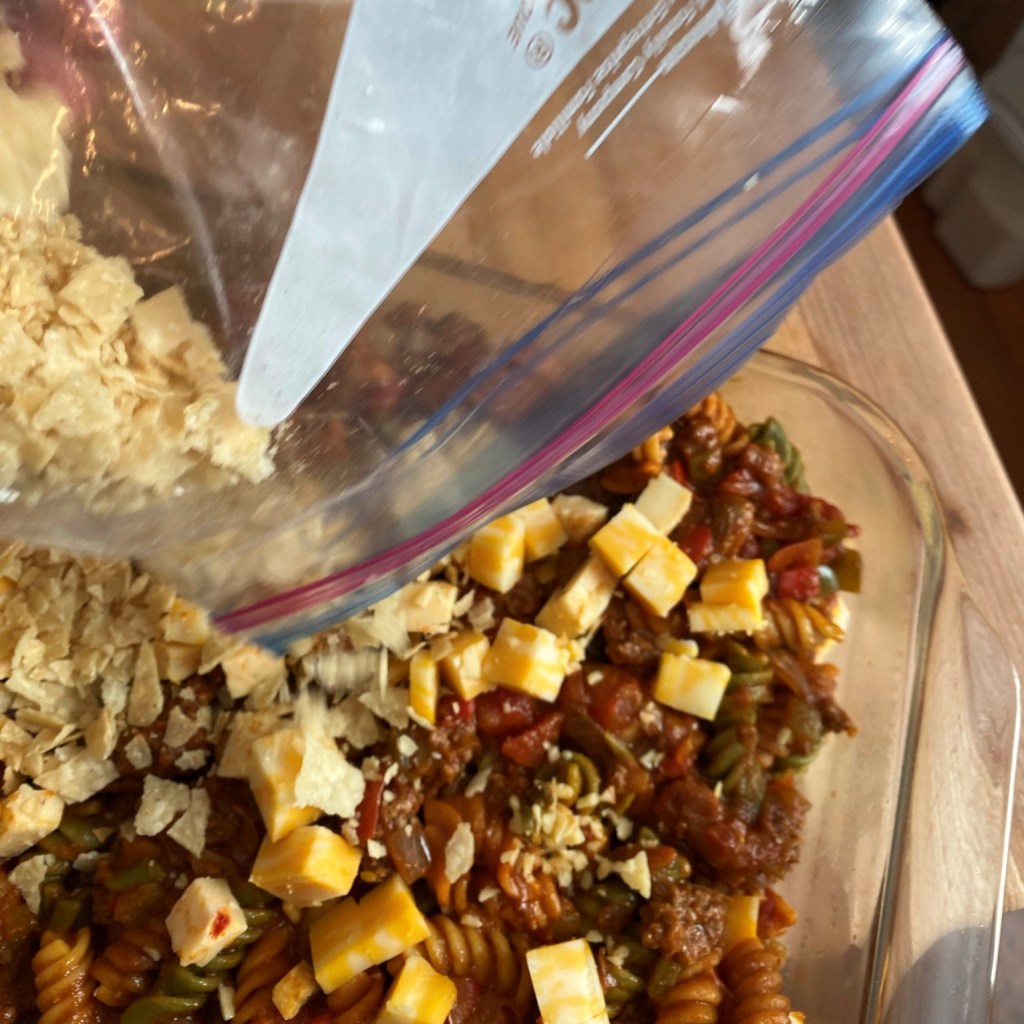
Layer the meat mixture with the cubes of cheese, then top it with the crushed tortilla chips.
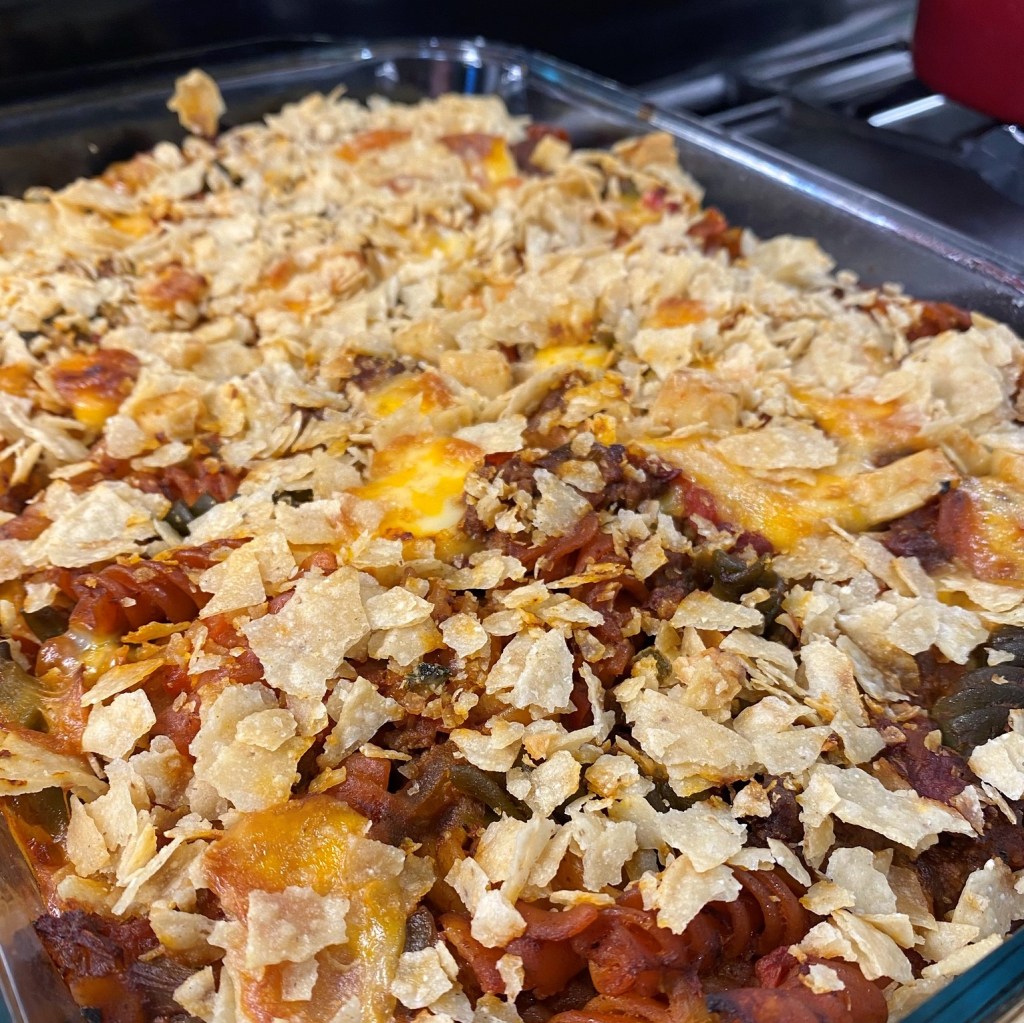
Baking the casserole leaves the cheese very melty and the tortilla chips on top nice and crunchy.
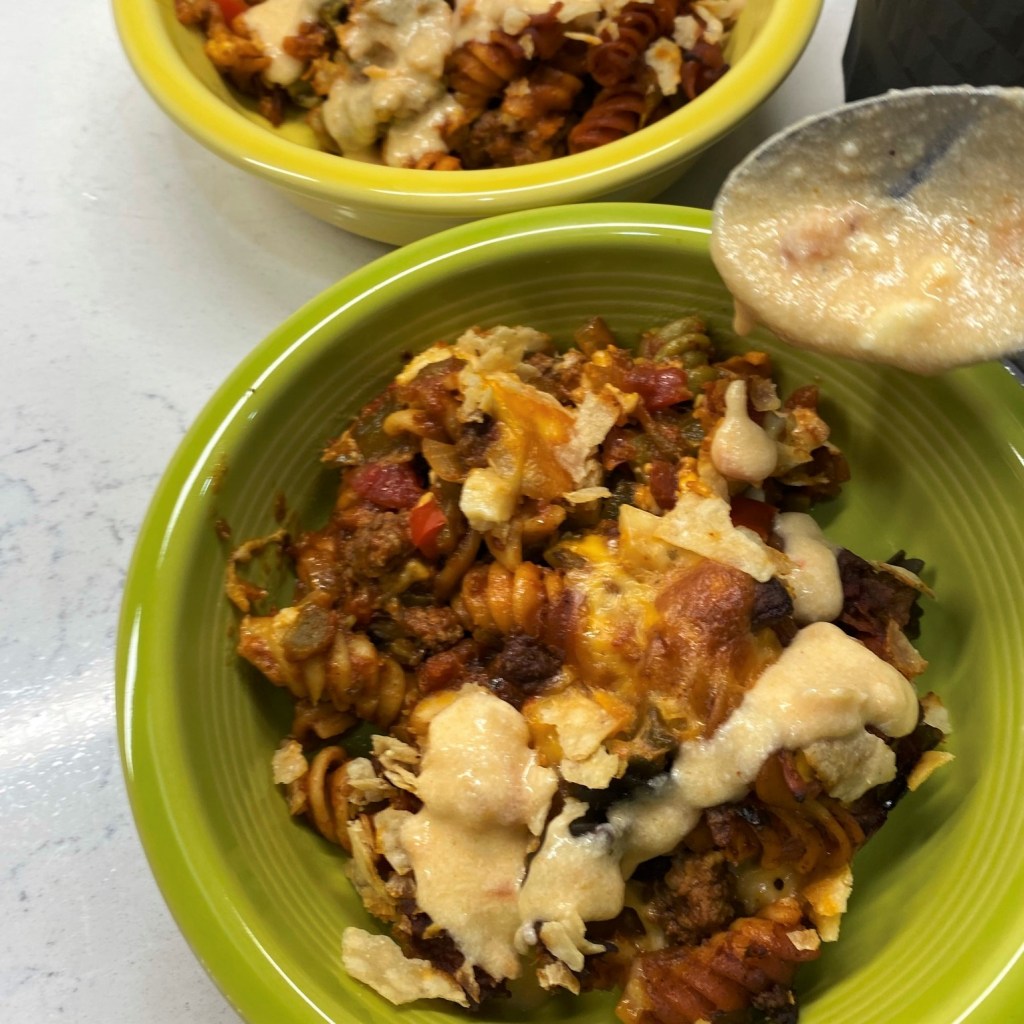
A simple cheese sauce brings a slightly dry casserole back to life. Plus, it’s more cheese!
I used our multi-function slow cooker for the heavy lifting in putting together this casserole. I browned the ground beef in it, seasoning with salt and pepper and then mixing in the Frontera skillet sauce. I removed the ground beef and sauteed the onions and peppers, then returned the beef to the slow cooker, which I set to slow cook. I then added the diced tomatoes and chopped green chiles, as well as the tomato paste, using a little less than 2 chile cans of water (10 ounces) to thin the mixture.
I’d already had salted water boiling and added the rotini, draining it when it reached al dente state. I also used this period to cube up the cheese. I added the drained rotini to the slow cooker and mixed it all up.
I pre-heated our oven (which we could finally access, though the kitchen was not completely ready) to 350° F and sprayed a 9-by-13 casserole dish. Then, I doled out about half of the pasta/beef/vegetable mixture into the casserole and topped it with about half the cheese. Repeat with the rest of the mixture and cheese. Then crush up some tortilla chips until they are small and sprinkle over the entire casserole and place into the oven for 40 to 45 minutes, depending on how your oven heats.
While the casserole is baking, prepare the cheese sauce. I did this using our induction burner by creating a roux with the butter and flour. Once the roux is yellow or golden, add the milk and keep stirring. Once it thickens and appears creamier, begin blending in the cheese, stirring until smooth and adding the onion powder to offer a little seasoning. Finally, add the salsa, which should give the mixture a more orange-reddish look.
The casserole is ready when you can see the cheese bubbling; you may need to cover the casserole with foil about halfway through cooking if it appears to be dry on top. Serve in a bowl and spoon the cheese sauce over the top.
A simple cheese sauce brings a slightly dry casserole back to life. Plus, it’s more cheese!
Today marks the beginning of something I’ve been looking forward to, and I don’t mean that my kitchen renovation is underway—we are still waiting, but we do at least have good news today. After a few false starts related to the delivery of our new cabinets, we finally got word from Matt, our contractor: “We have the cabinets!!” So that hurdle is cleared and now the real chaos (the tearing out of the existing kitchen) is slated to begin on Friday (Yay)!
The delay gave me enough time to whip up a few dishes that I would have otherwise missed, including this one, which is a flavorful shout out to the significance of this day.
What I’m referring to is Autumn Equinox, otherwise known as the first full day of fall, but affectionately known at my house as the start of soup and stew season, the unpacking of my favorite sweaters, the countdown to the first flick of the switch on the gas fireplace, and the return of the hot toddy, and I am loving all of the above.
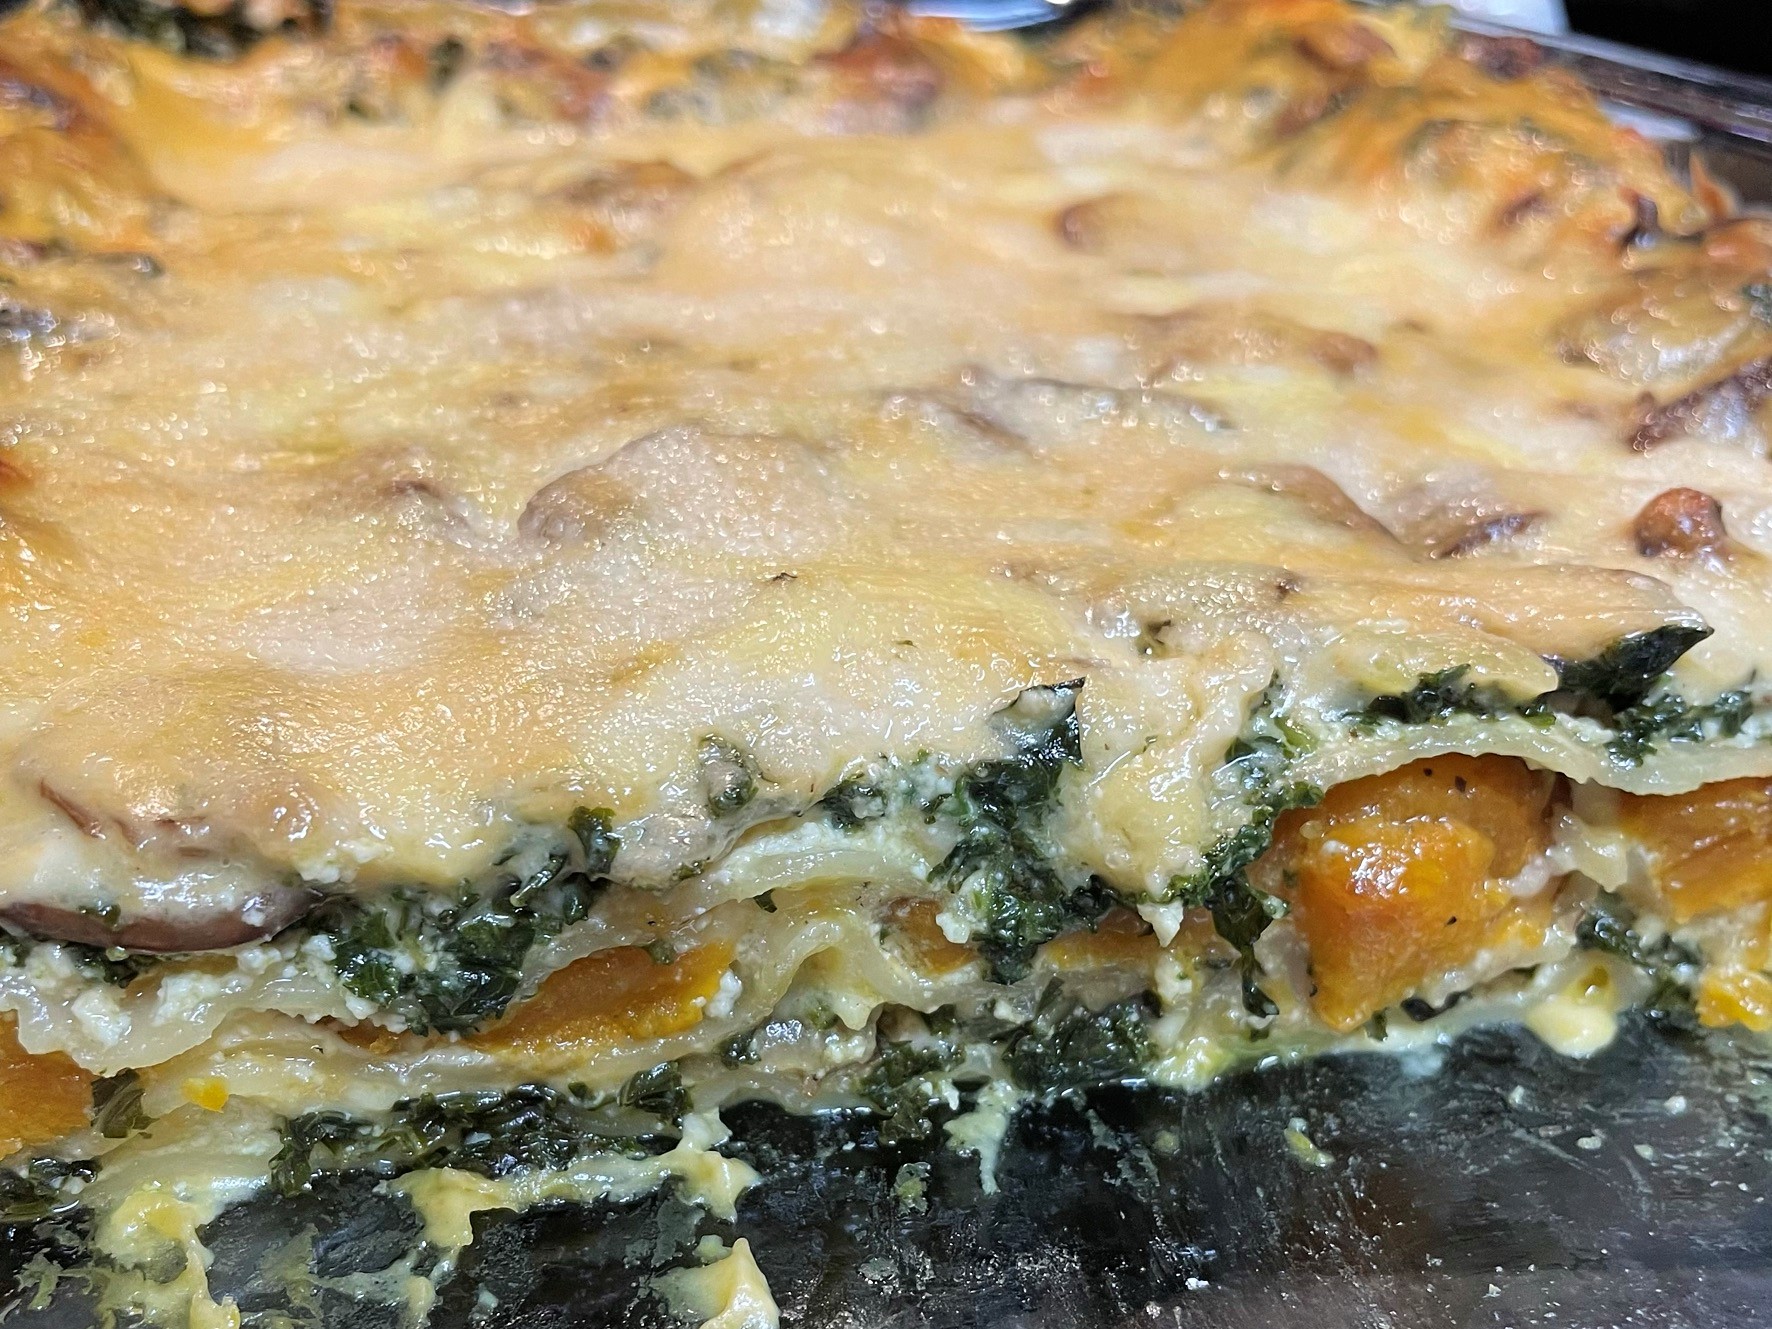
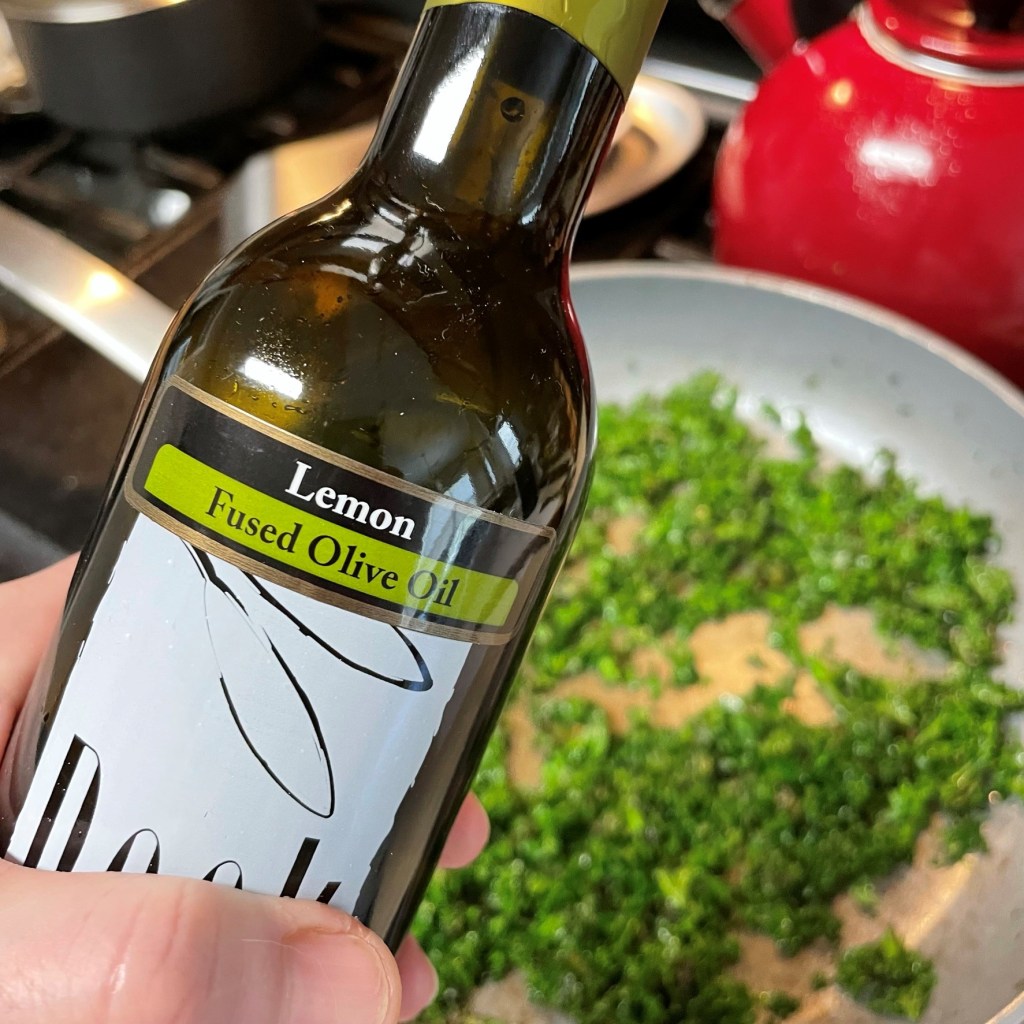
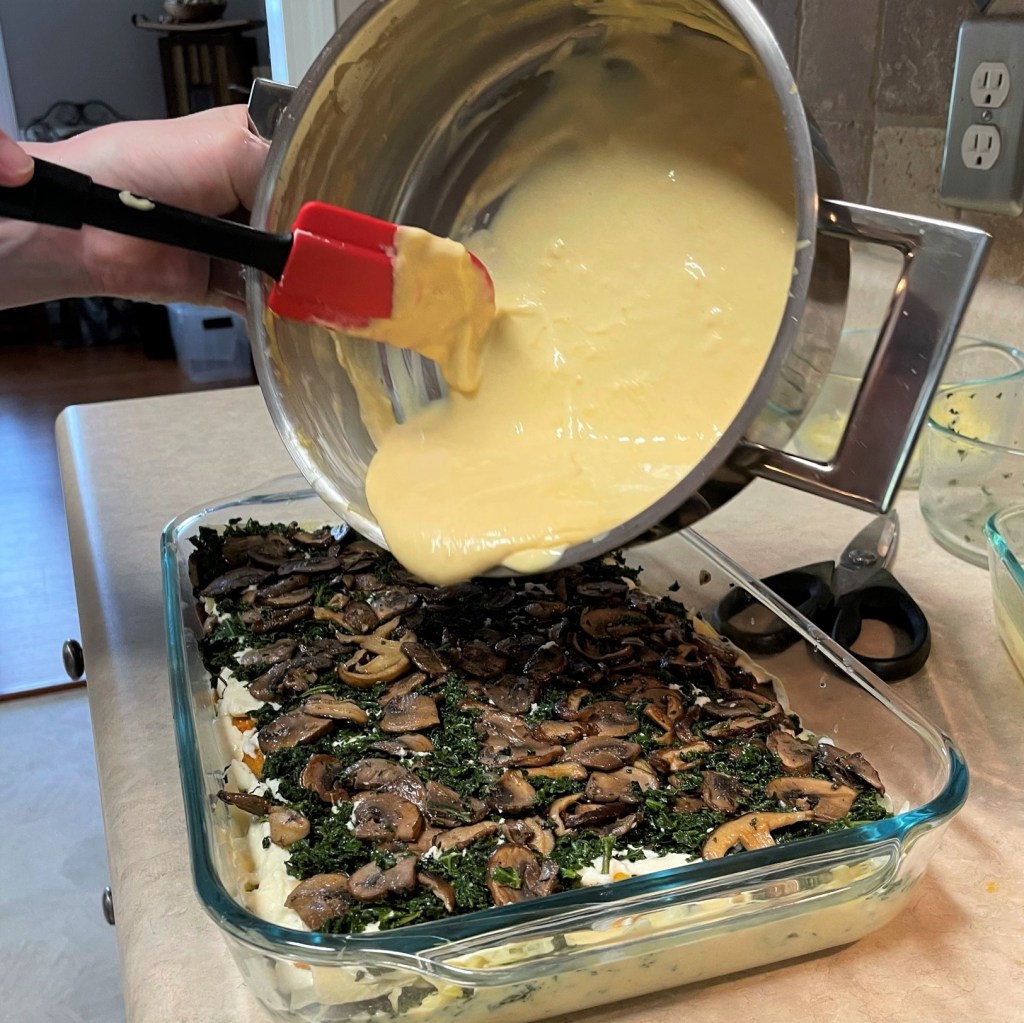
In fact, it feels like the perfect time to introduce you to one of my favorite homemade autumn-themed dishes, this butternut squash lasagna, which I first started making almost 10 years ago. This comforting casserole is layered, not with Italian seasonings or tomatoes or mozzarella, but with flavorful, seasonal vegetables, including onions and kale, two kinds of mushrooms and oven-roasted butternut squash. Nestled between the vegetable layers you’ll find a lemon-scented ricotta, shredded fontina and a creamy, cheesy bechamel that is spiked with even more butternut squash. It is rich and satisfying, even without meat, and makes my taste buds very happy.
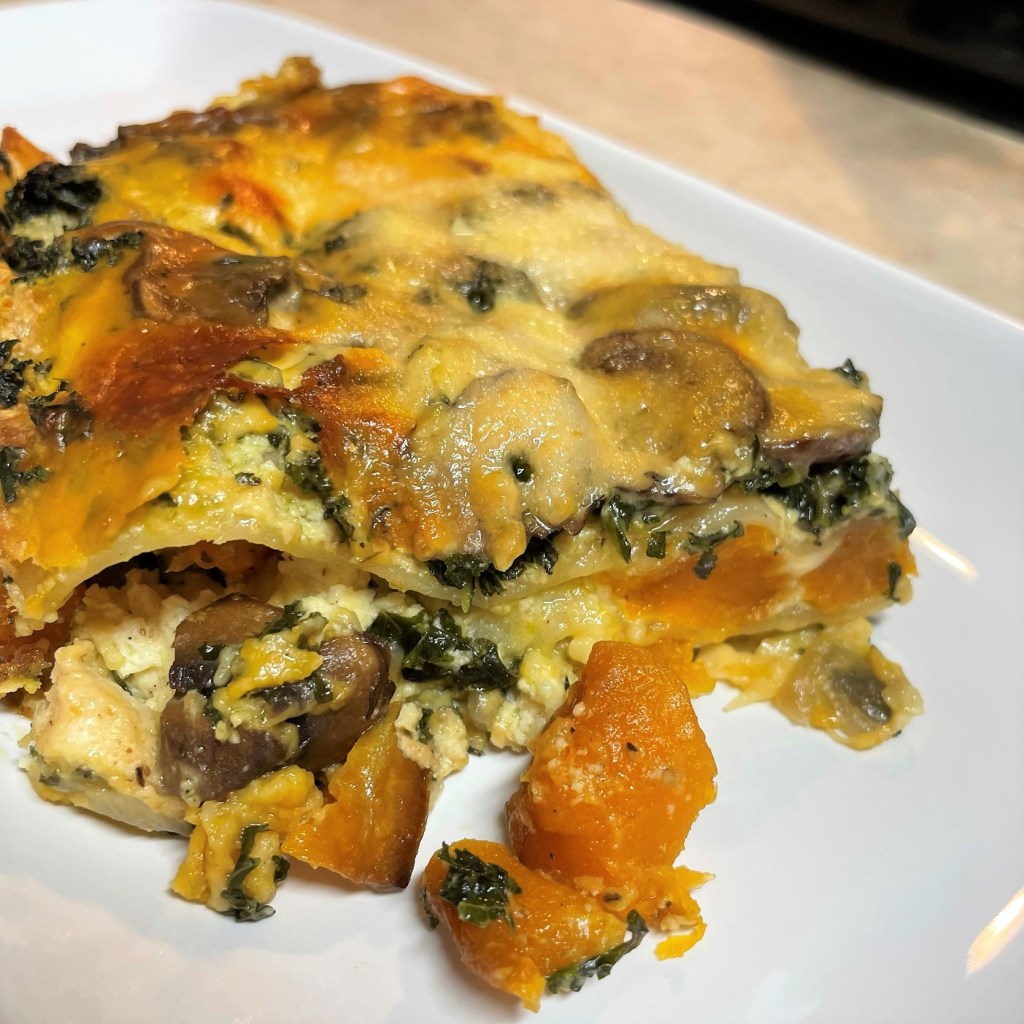
Layer upon layer of comforting fall flavor!
There is nothing complicated about this meal but, like any lasagna, it does take some time to pull together. My suggestion is to break it up into two days; prep the separate components ahead of time, so assembly and baking will be a snap on the second day. The other thing that is great about this dish is that you can customize it to increase the amounts of favorite ingredients and reduce any of the others that are not favorites. If you prefer more squash and less kale, just swap the amounts and change up the layering.
Ingredients
1 medium or large butternut squash, peeled and cubed* (see notes)
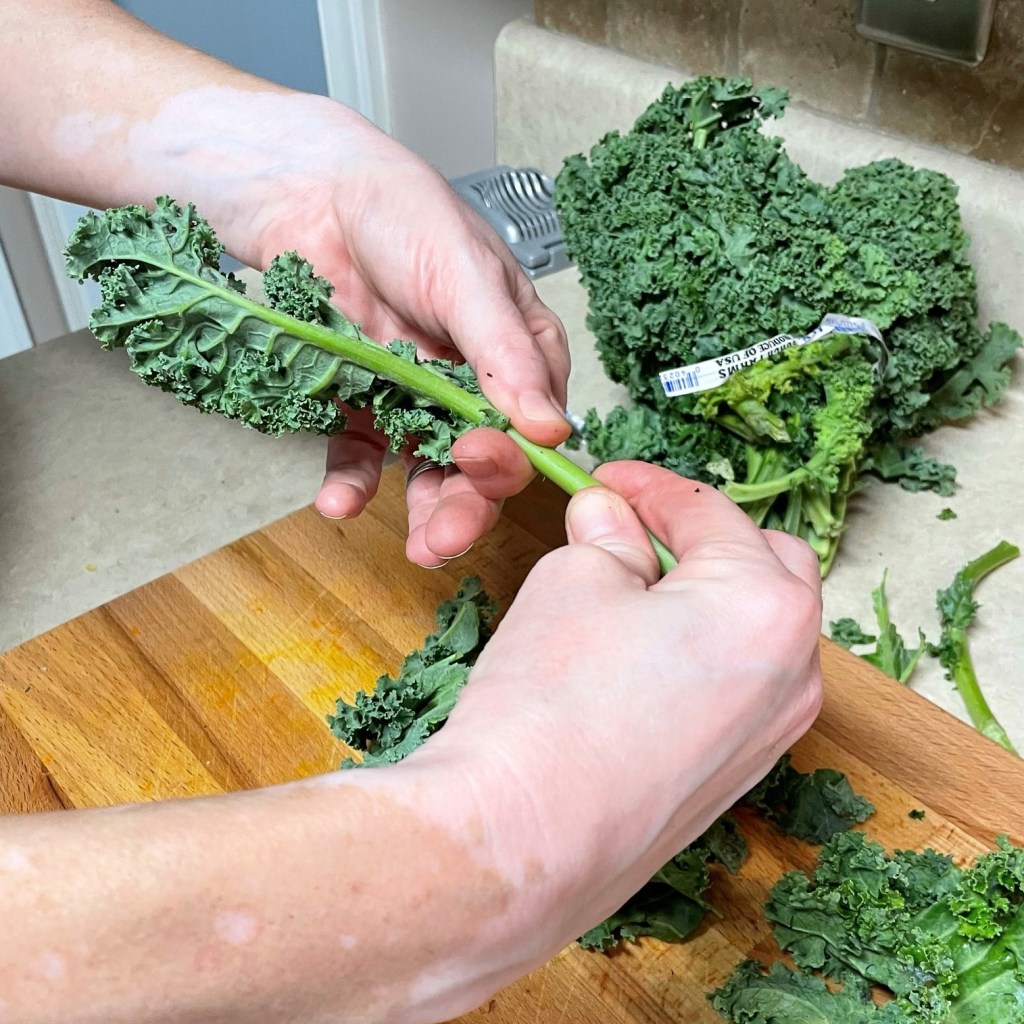
1 large bunch curly kale, washed and stripped of heavy stems*
12 oz. fresh mushrooms (I used a combination of cremini and shiitake)
1 medium onion, chopped
14 oz. whole milk ricotta, strained of excess liquid
2 cloves fresh garlic, minced
Zest of one lemon (organic is best)
1 large egg
4 Tbsp. butter (either salted or unsalted is fine)
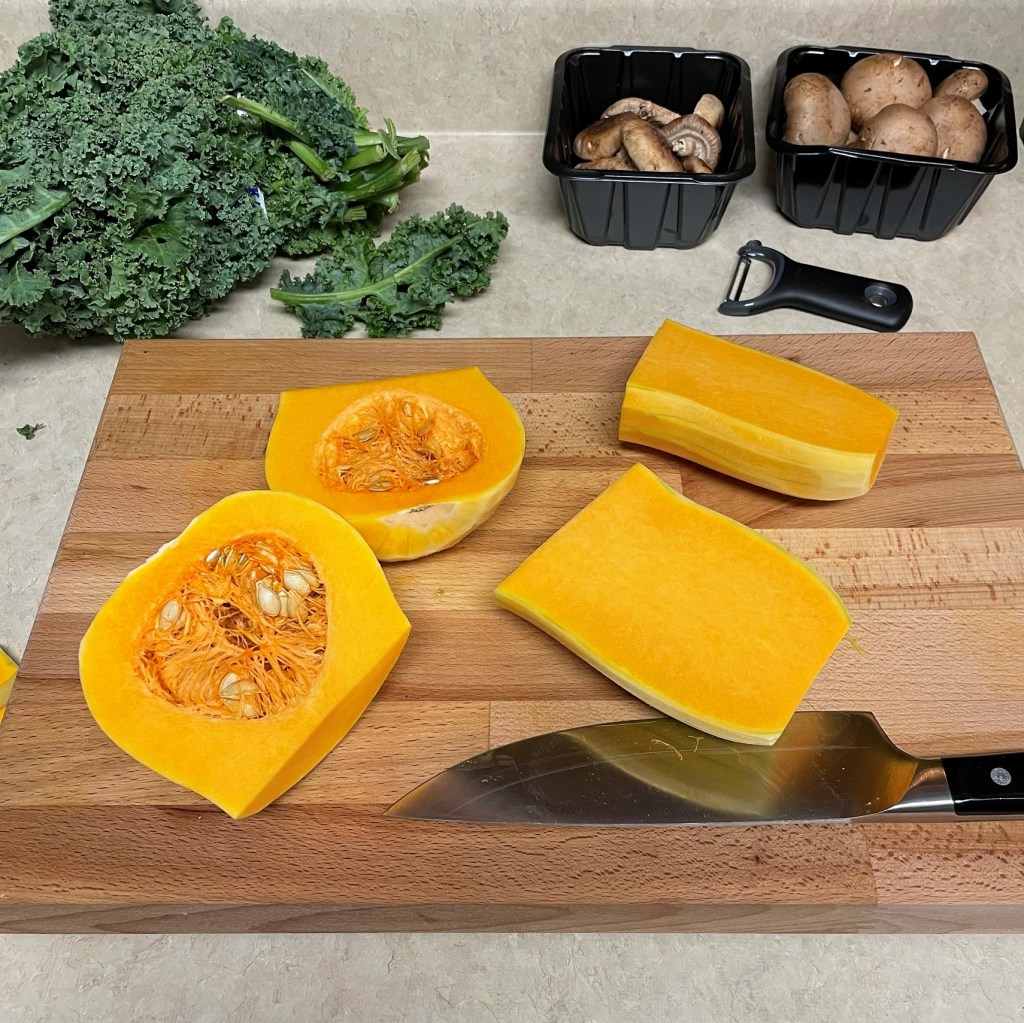
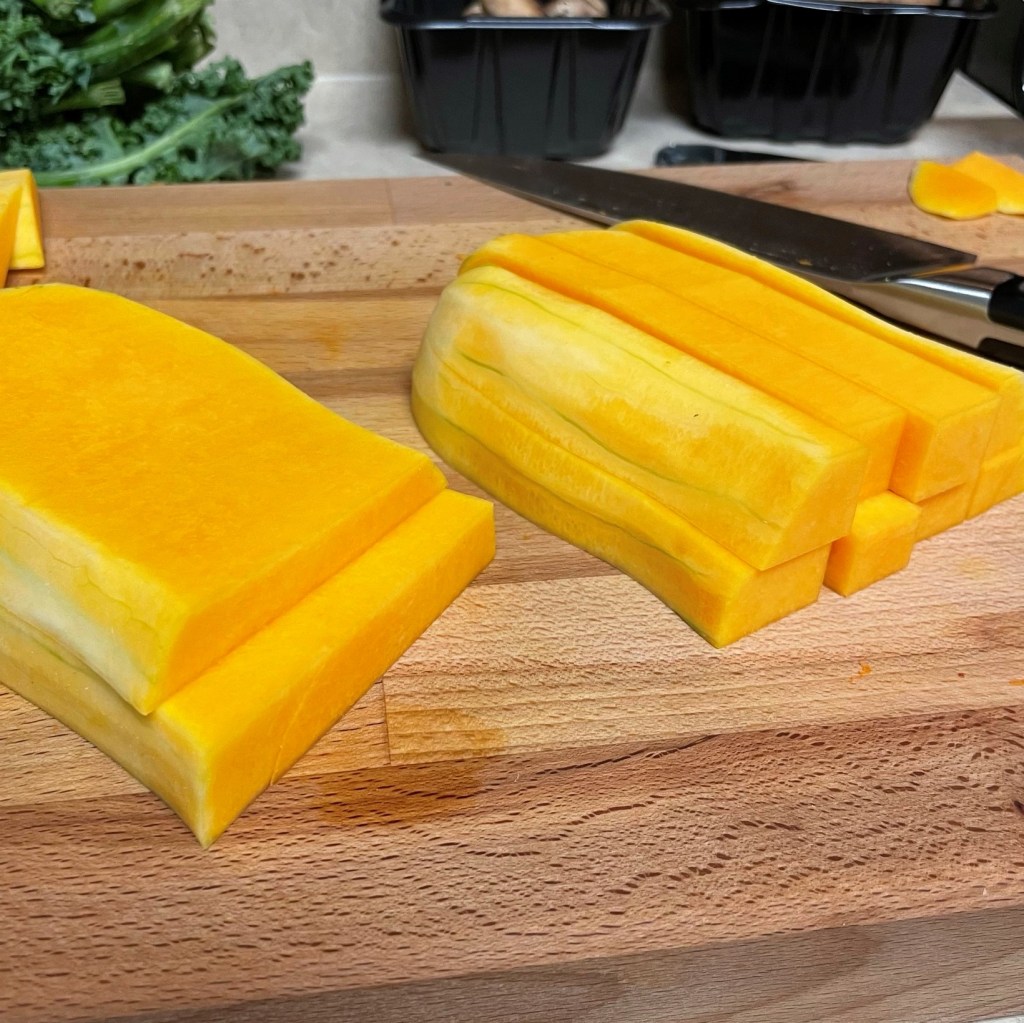
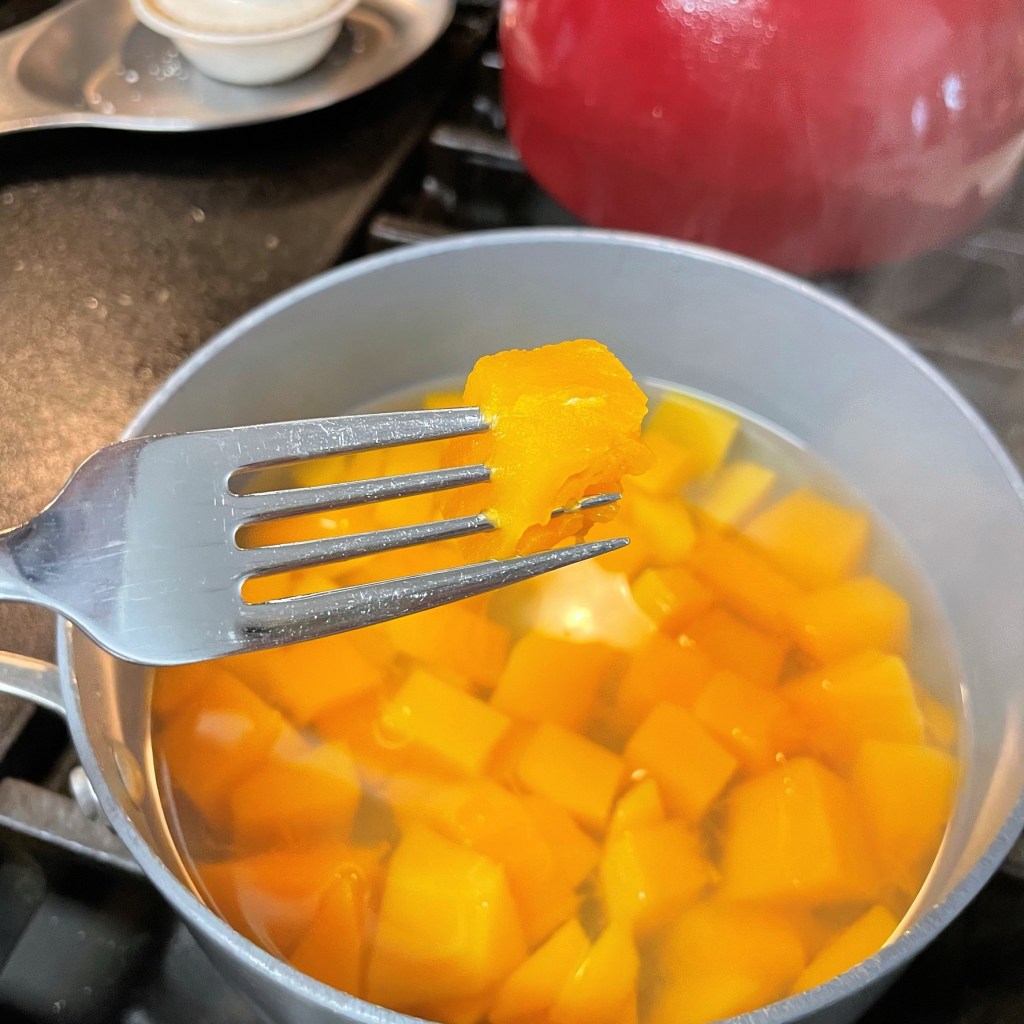
Part of the squash will be cubed and roasted, and the rest will be simmered and mashed to be blended into the bechamel. I usually use the smooth neck part of the gourd for roasting, and the round part, which usually appears stringy after cleaning out the seeds, gets boiled and mashed to be added to the bechamel sauce. Keep this in mind as you prep the squash.
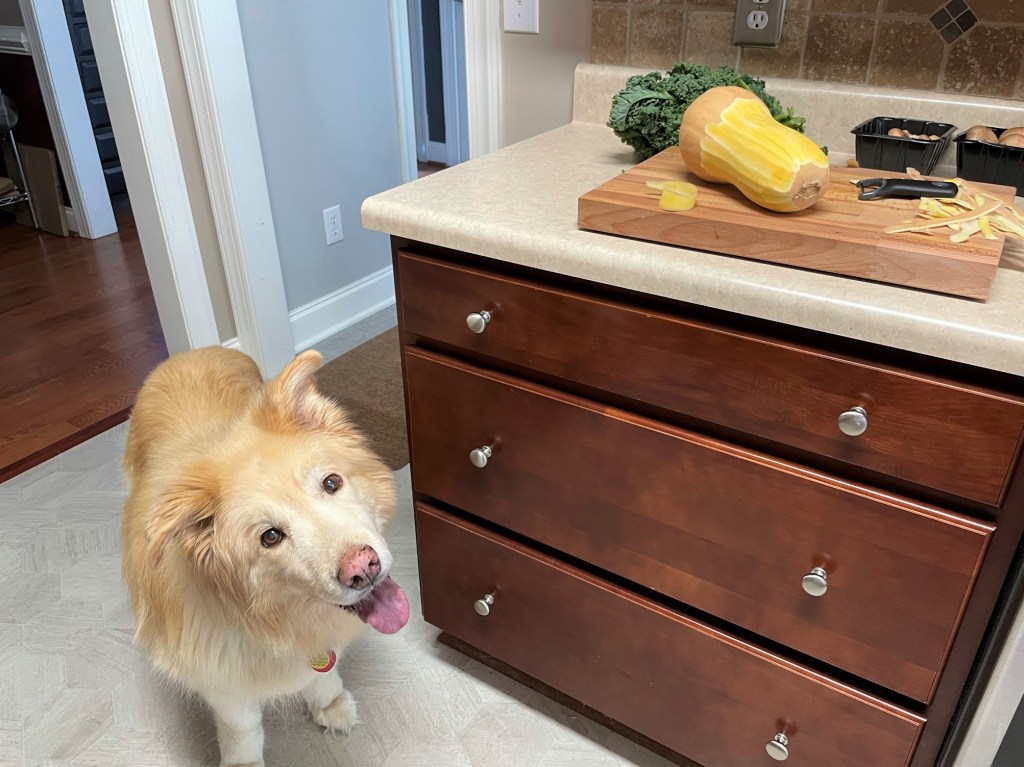
Nilla can smell butternut squash from miles away.
Cube and roast the “pretty” part of the squash, and cook and mash the rest.
Good catch! I cannot refuse this dog! ❤
For this year’s version of my recipe, I went heavier on the kale than usual. It would be perfectly fine to use half as much, and perhaps double the mushrooms or increase the butternut squash to make up some of the volume. You could also substitute swiss chard or spinach; it all depends on your palate.
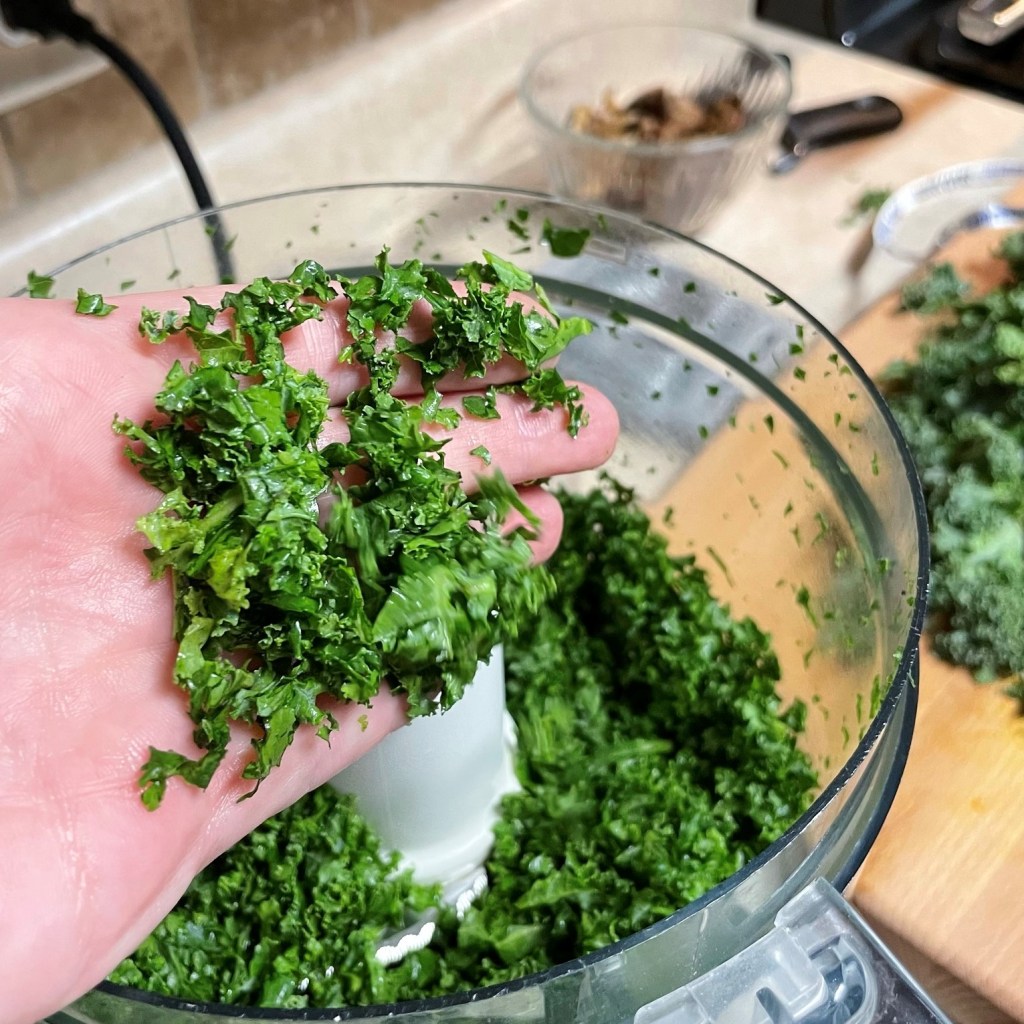
I know this seems like a ton of kale…
But that whole pile cooks down to fit in this one bowl.
I chose Gouda and fontina cheeses for this dish because of their creamy, meltable texture and rich, nutty flavors. Some other cheeses would work well in this dish, including Havarti, Gruyere, raclette, mild white cheddar or Monterey jack. I do not recommend mozzarella, which has too much “pull.”
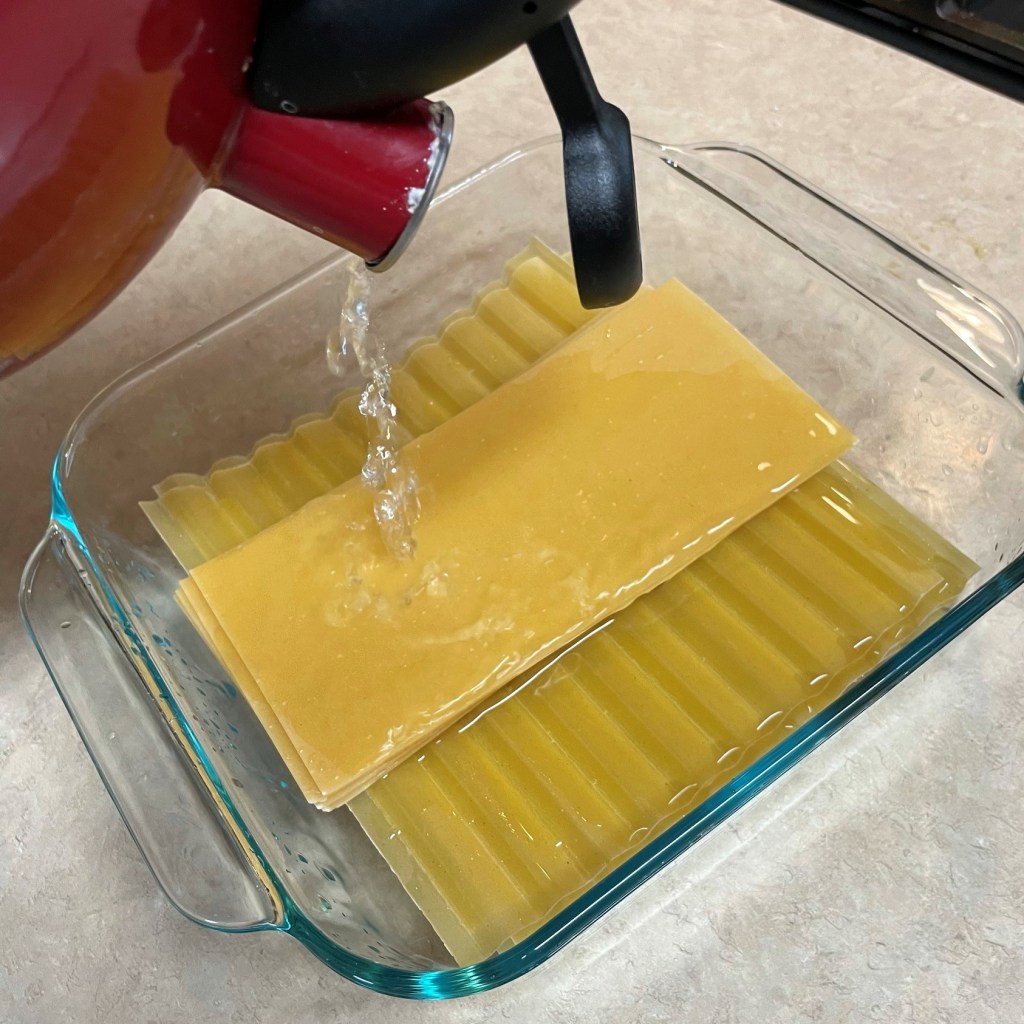
Normally, I use a special square lasagna baking dish, but we are in the middle of planning for this remodel, and darned if I can find it! No worries, I pulled out a glass 9 x 13 and it worked great. The noodles do not have to be boiled first; I usually just moisten them for several minutes in hot water while I get everything else into place. If the noodles are layered next to ingredients with plenty of moisture, they will cook just fine.
We are still trying to trim down the pantry, so I used the random lasagna noodles we already had!
Prep the Squash
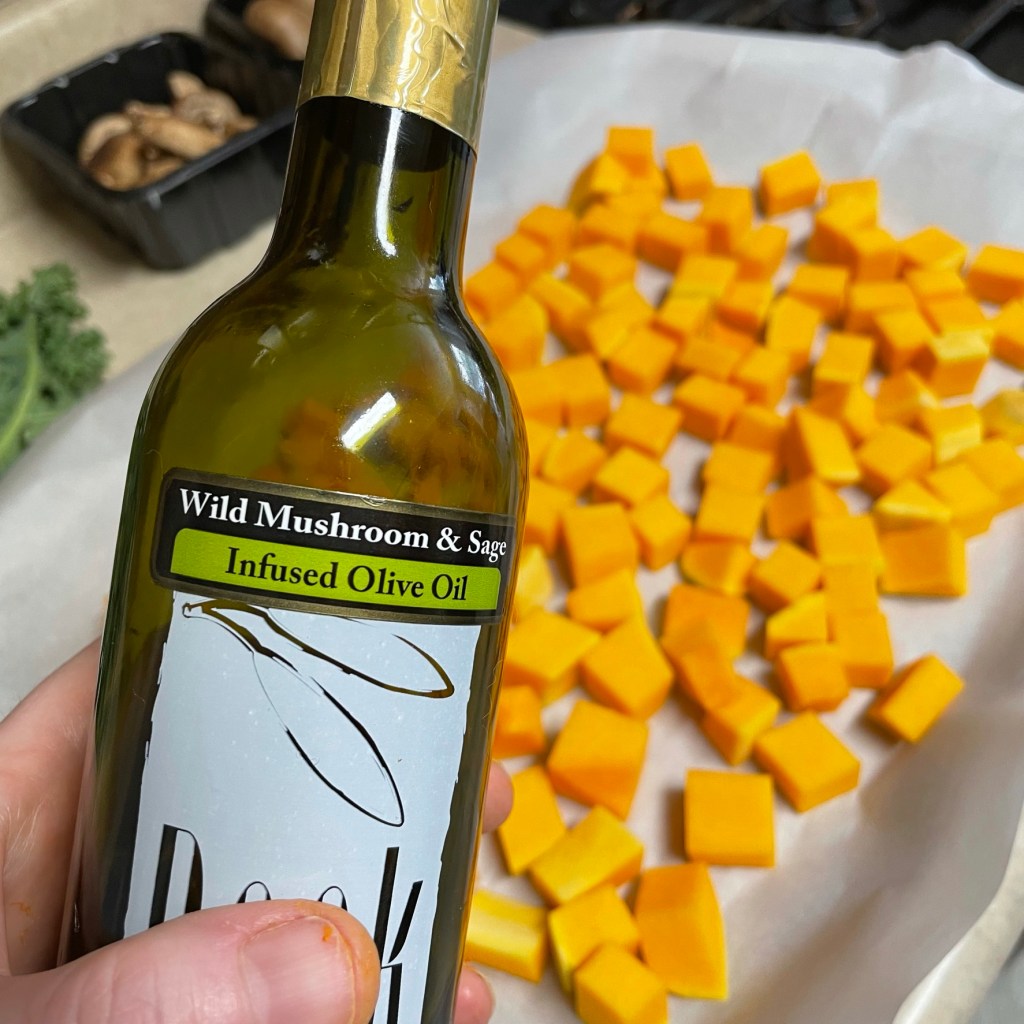
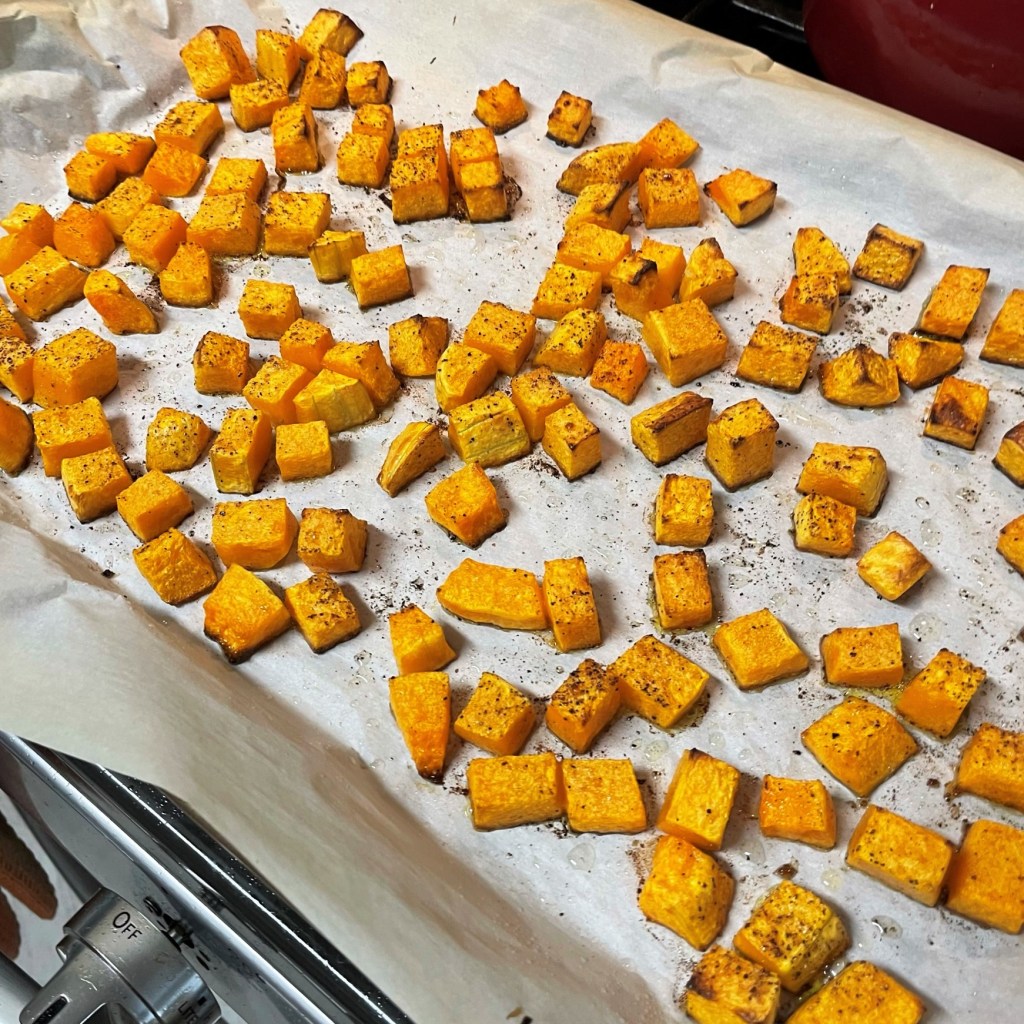
Divide the squash so that you have uniform cubes from the neck of the squash, which you will toss in olive oil, salt and pepper, and then roast at 350°F until evenly browned, about 40 minutes. Allow it to cool on the pan before transferring to a separate bowl. Set aside until you’re ready to assemble the lasagna.
Add the remaining squash (from the bulb end) to a saucepan and cover with water. Bring to a boil, reduce heat and simmer until fork tender, about 30 minutes. Drain and set aside.
The solid neck of the squash is easily cubed.
Go for extra flavor with mushroom and sage olive oil!
Roast the cubes until they are nicely browned.
Simmer the rest, then drain and mash.
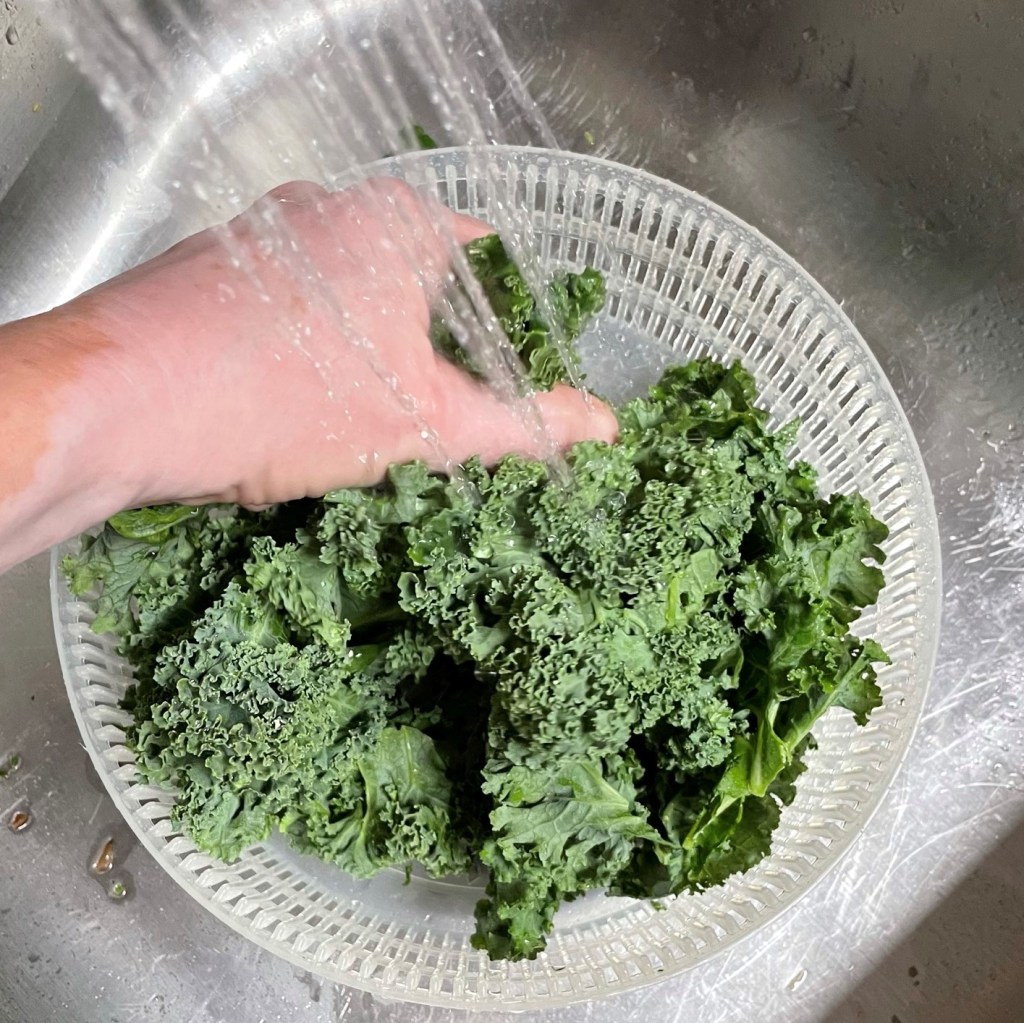
Prep the Kale
Strip the heavy stems and wash the kale leaves. Working in batches, pulse handfuls of the kale about six times in a food processor, until kale is a fine texture. Sauté in olive oil until wilted and lightly browned on some of the edges. Just before cooking the last batch, sauté the chopped onion in the skillet first, then add kale. Season this final batch with salt and pepper and combine with previously cooked kale. Set aside.
This is actually easier than buying kale in bags. Just zip the leaves right off the stems.
Give the kale a thorough rinse under running water.
Pulse in a processor until the leaves are small bits.
Lemon-fused olive oil brightens the flavor!
Prep the Mushrooms
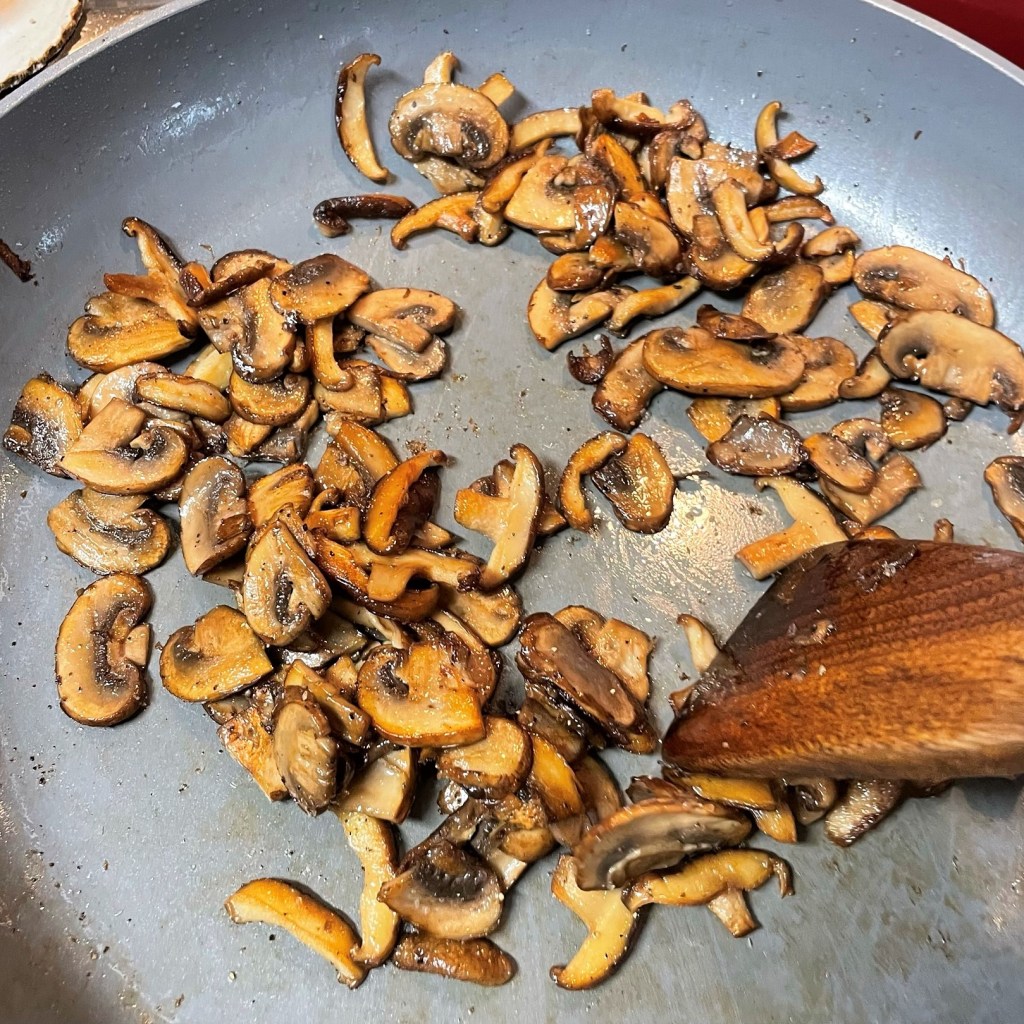
Clean and dry the mushrooms, then trim the stems and slice evenly. Brown the mushrooms, about one-third at a time, in olive oil. Season the last batch with salt, pepper and a few sprinkles of dried thyme leaves. Combine all mushrooms in a separate bowl and set aside.
I use my trusty egg slicer to make easy, uniform slices.
This is 8 oz. cremini and 4 oz. shiitake. Use your favorites!
Cook them in batches for even browning.
Prep the Ricotta Mixture
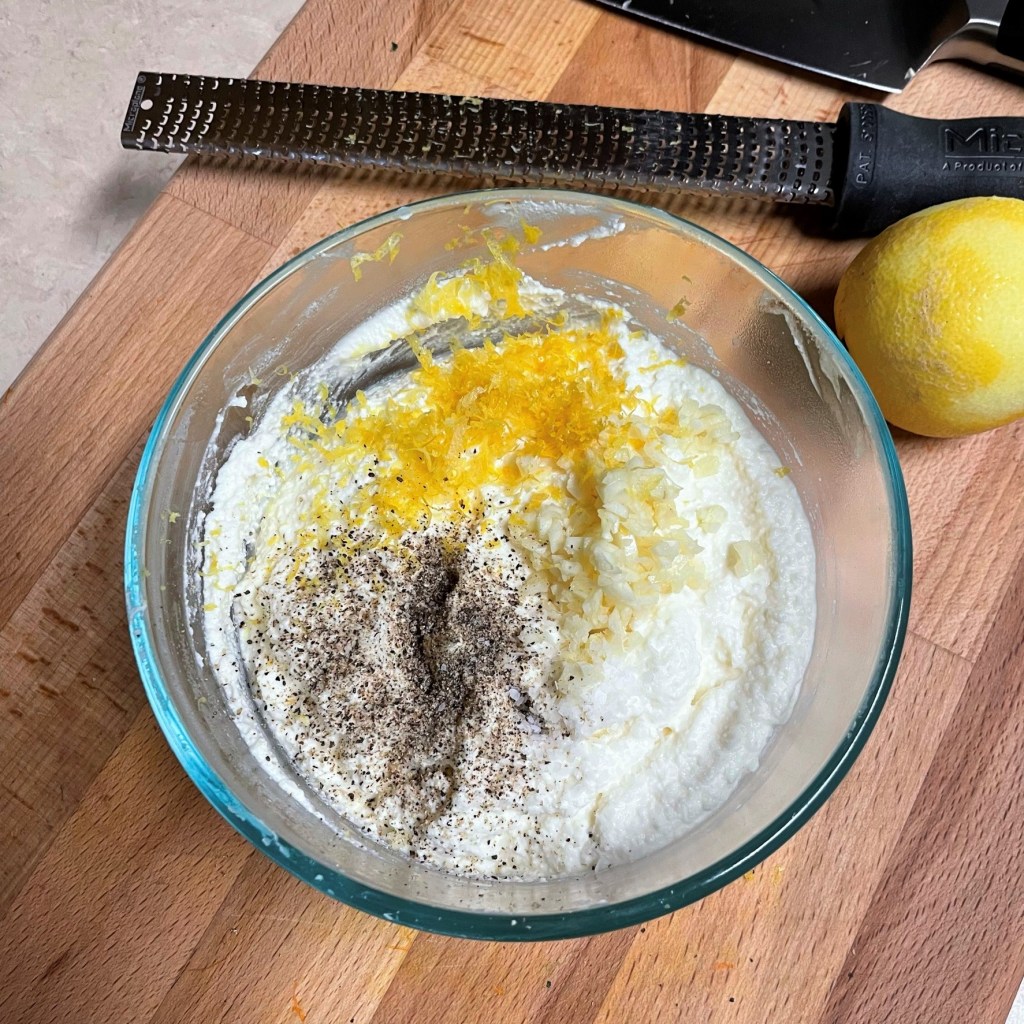
Drain the ricotta in a mesh strainer over a bowl. Stir occasionally to evenly strain the excess liquid from the cheese. Different brands will release varying amounts of liquid, but 30 minutes should do it. Discard the drained liquid. Add lemon zest, fresh garlic and black pepper to the ricotta. Stir in egg. Set aside for now if you’re working ahead.
Depending on the brand, draining will release a little moisture, or a lot.
Lemon zest, fresh garlic and black pepper are my add-ins.
And stir one egg into the mixture for extra protein and even baking.
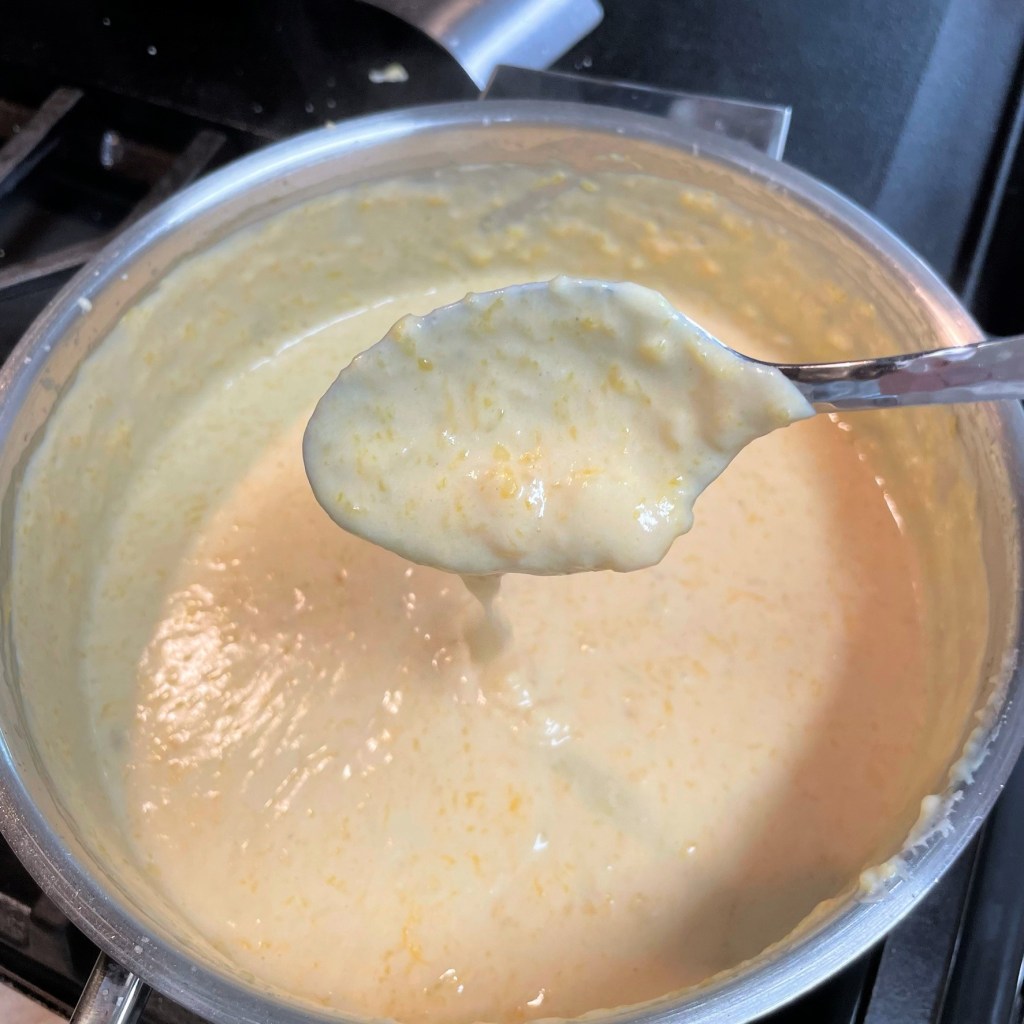
Make the Bechamel
Remember, this is just a fancy French word that means “thickened cream sauce.” It’s easy to make! I prefer to make the bechamel just before assembling the lasagna, but if you are pressed for time, it’s fine to make it ahead and then re-heat in a pot until it is a smooth, pourable consistency. There are several steps for this component, and several flavorful add-ins, so I’ll describe it in pictures.
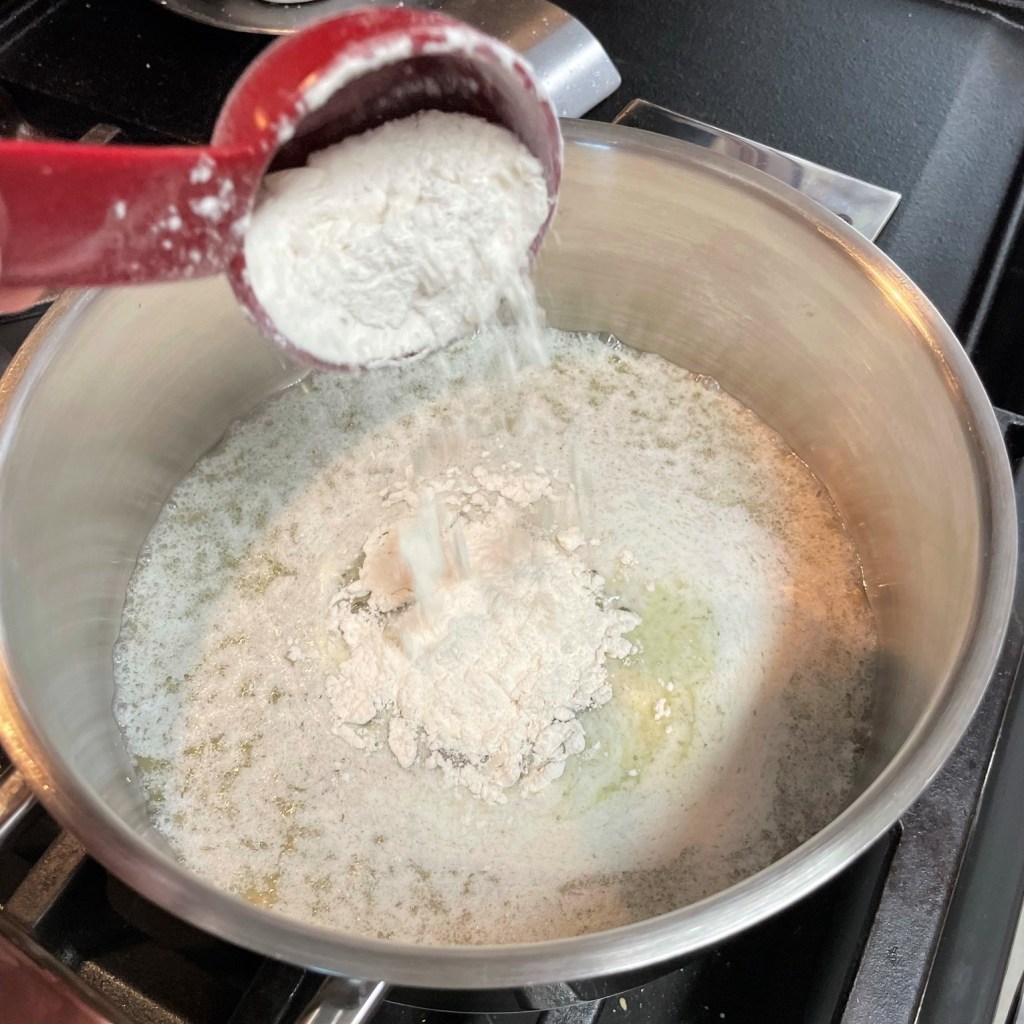
This is a typical bechamel, with equal parts melted butter and all-purpose flour.
When the mixture is blended and bubbly, you may add the milk.
This time, I let it cook a few minutes longer until the butter was browned and very fragrant.
Add the milk, half at a time, and whisk after each addition until mixture is blended and thickened.
For layers of flavor, there are several add-ins to this bechamel. First, nutmeg, and freshly grated is best.
A whole head of roasted garlic also gets whisked in. Mine went straight to the bottom before I could snap a photo!
About 2/3 cup of the boiled and mashed butternut squash also gets mixed in.
Finally, one cup of the shredded cheese.
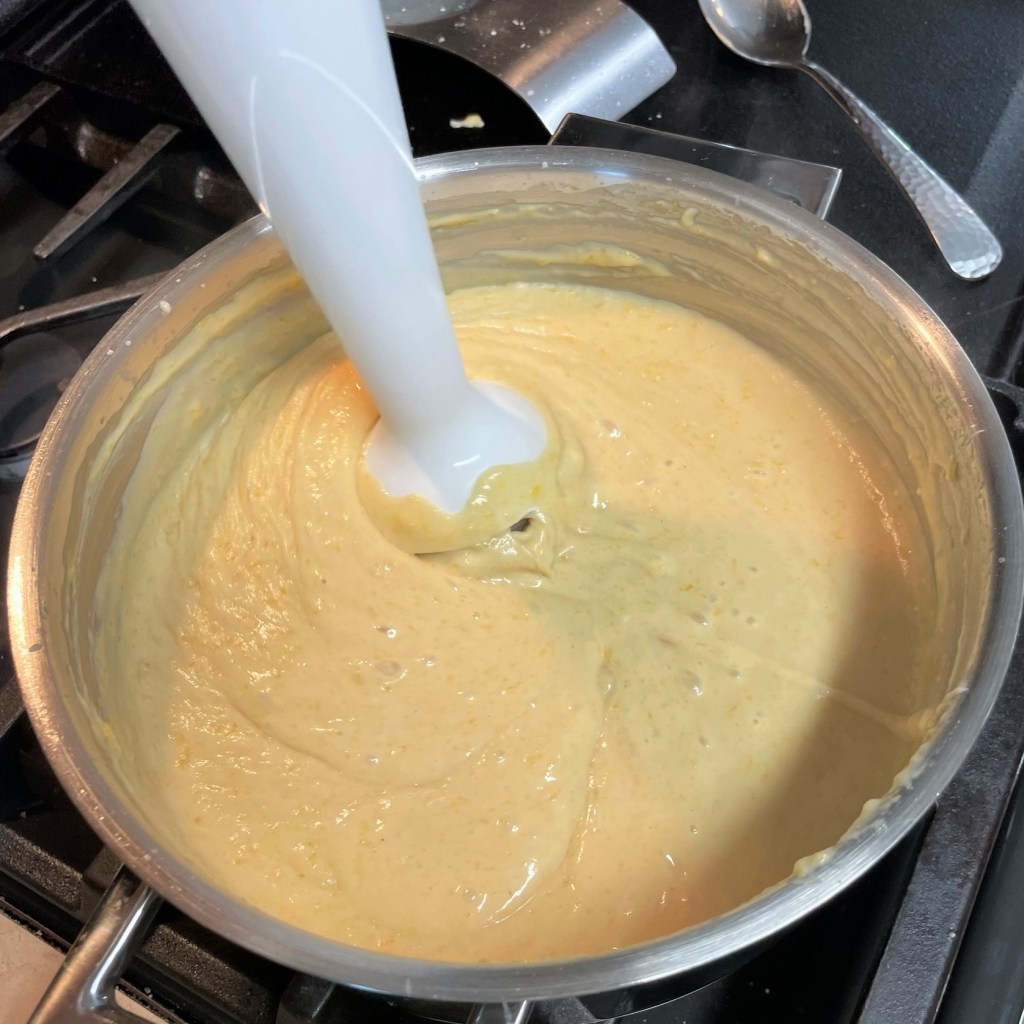
There is nothing wrong with proceeding directly from this point, because the lumps in this sauce will never be seen inside the lasagna.
But I love hitting my bechamel with the immersion blender. About 60 seconds will do it.
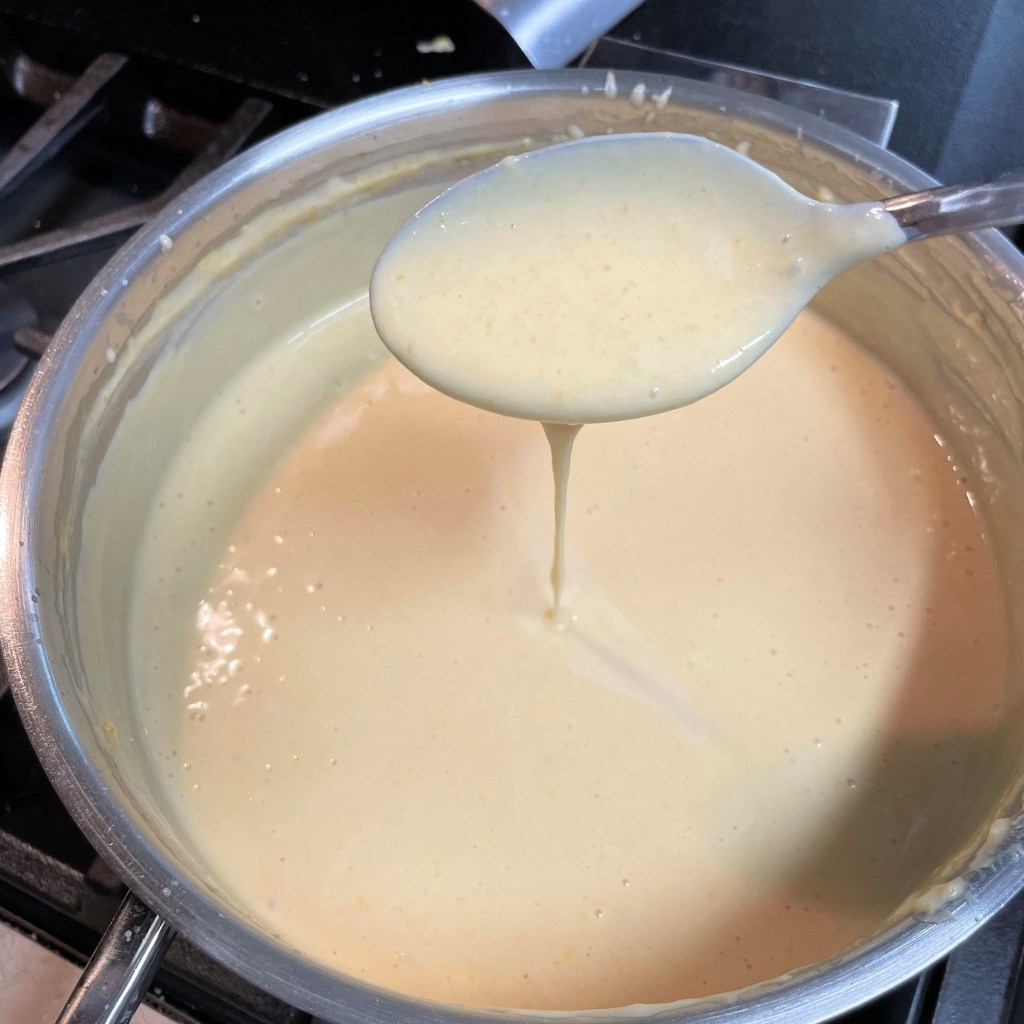
There, much smoother and so creamy!
White pepper will give the sauce some undernotes of heat.
Heat a large sauce pot over medium heat. Add butter until melted. Whisk in flour and cook until it is bubbly, lightly browned and fragrantly nutty. Add the milk, about half at a time, whisking the first amount until smooth before adding the rest. Continue to cook, stirring frequently, until the sauce is thickened and bubbly. Whisk in about 2/3 cup of the mashed butternut squash and cook until heated through. Stir in shredded gouda, whisking until melted. Use an immersion blender, if you have one, to blend the bechamel sauce to a super-smooth consistency. This is not an essential step, but I love the silky texture that is achieved with the blender. Keep the sauce warm enough to be pourable and spreadable for assembling the lasagna.
Assemble and Bake
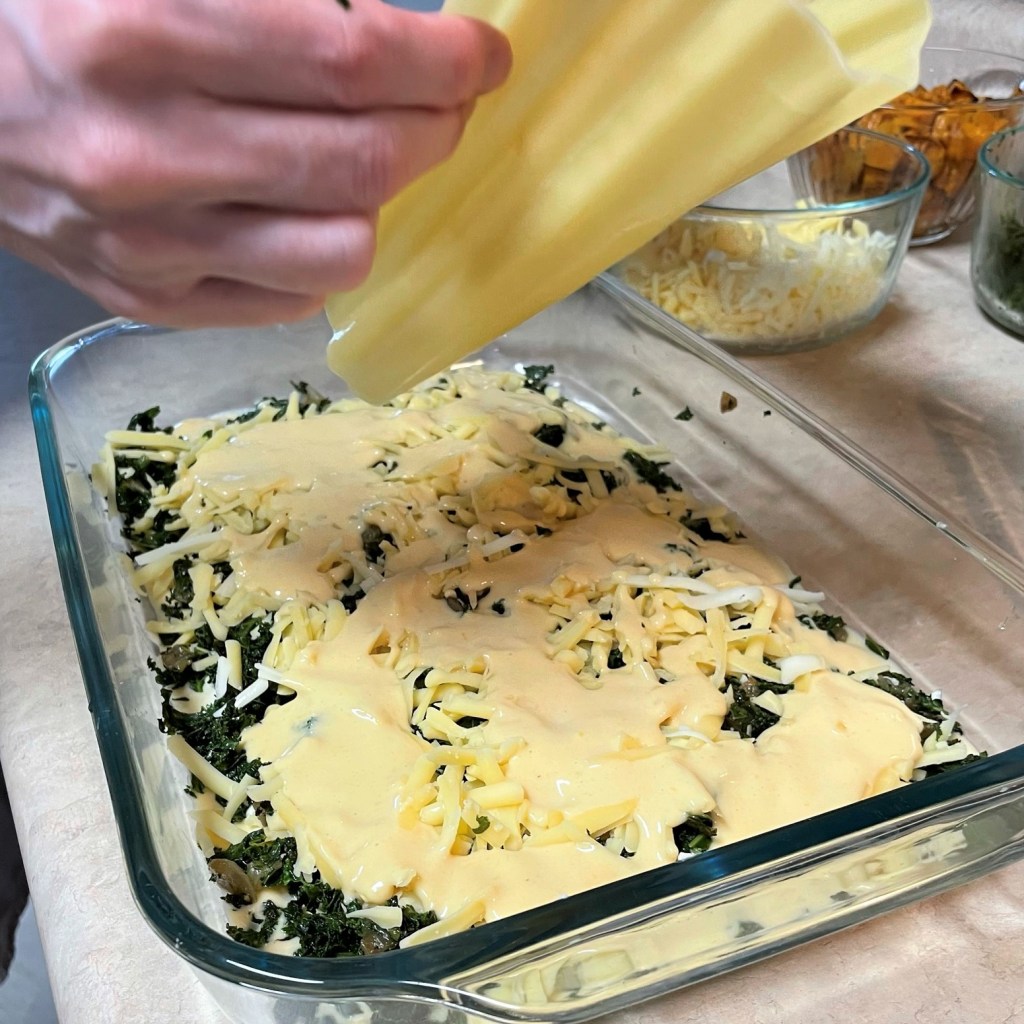
Ladle about 1/2 cup of the butternut-bechamel sauce into the bottom of a 9 x 13 glass baking dish. Then, layer the individual components as follows:
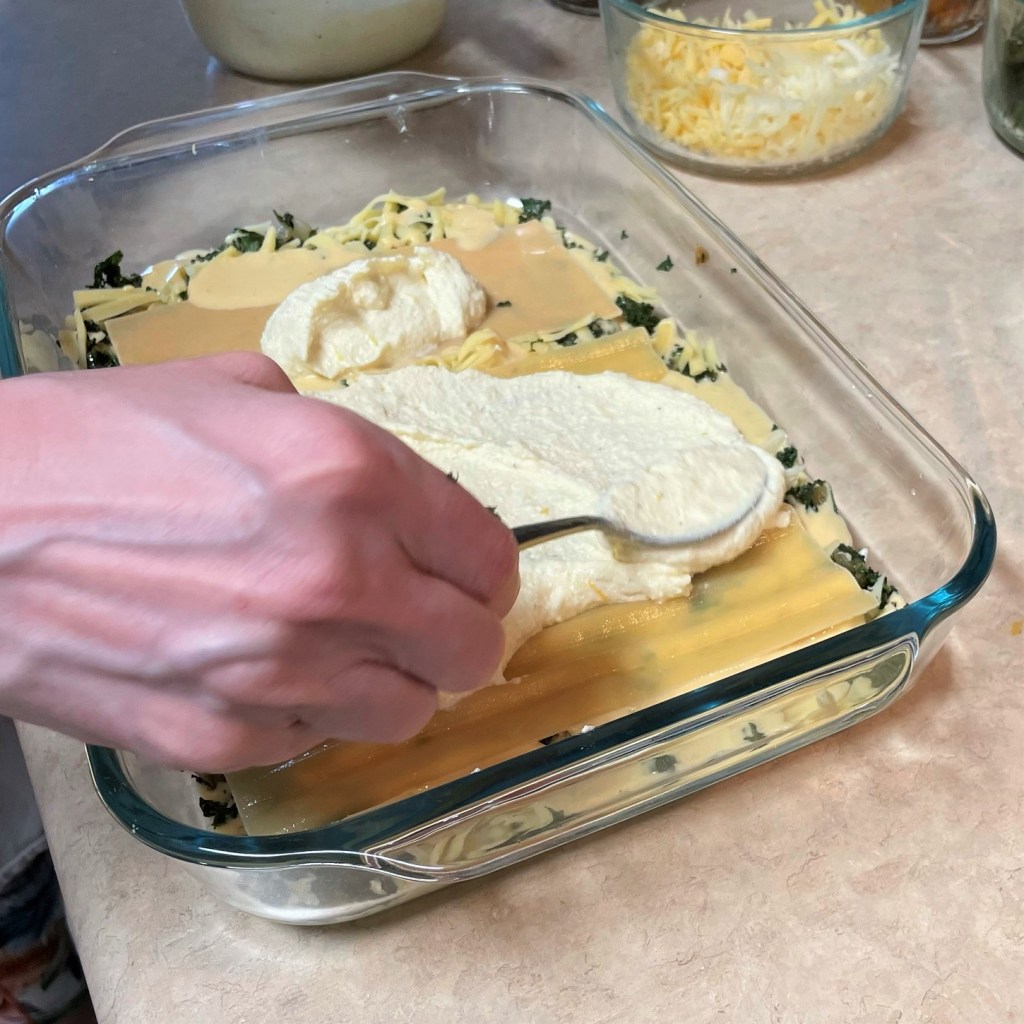
Begin with a thin layer of bechamel, then noodles, and ricotta mixture spread on top. This first layer is always a little tricky because everything is slippery, but it gets easier.
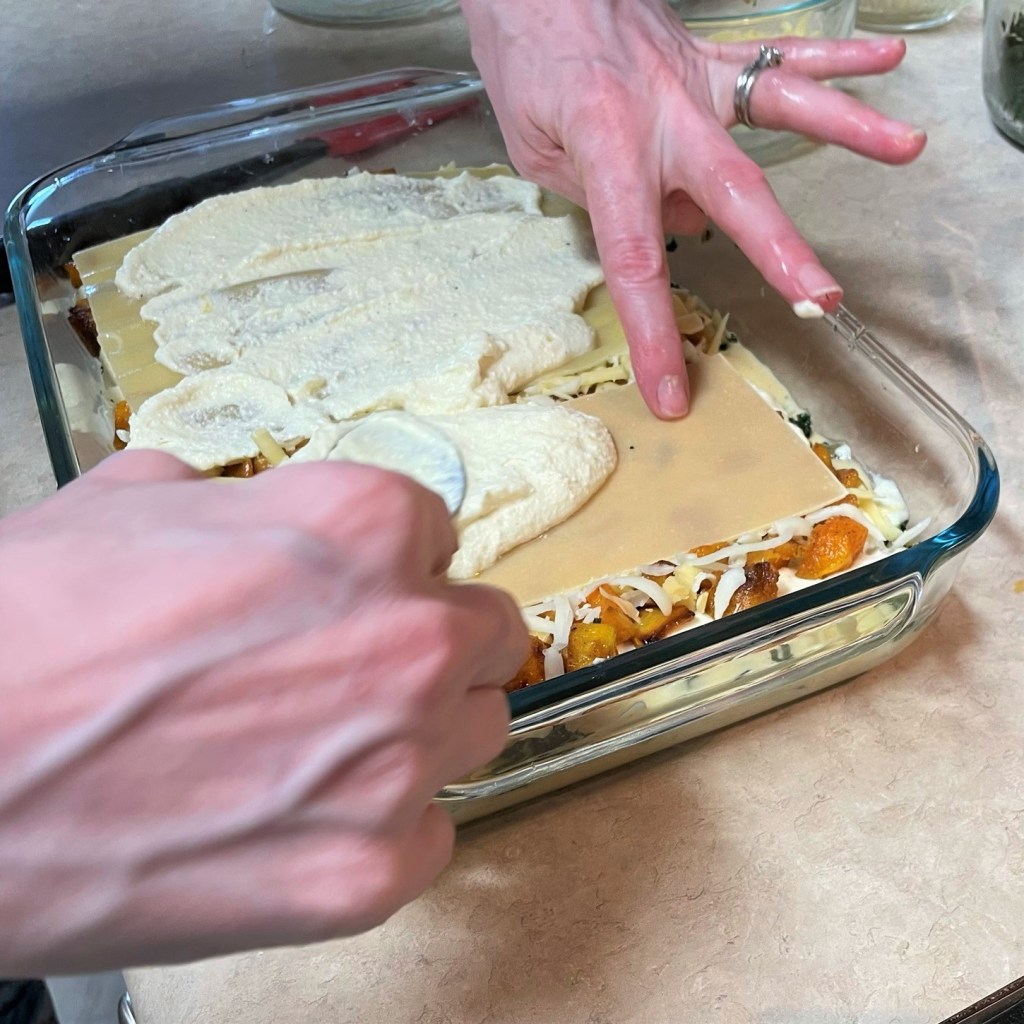
Layer half of the kale-onion mixture, then some of the shredded cheese and a few spoons of the bechamel. Time for a second layer of noodles.
Gently press down each new layer of noodles, to squish the bechamel sauce into the crevices of the other ingredients.
Ricotta goes on top, and the moisture in it will help ensure even cooking of the noodles.
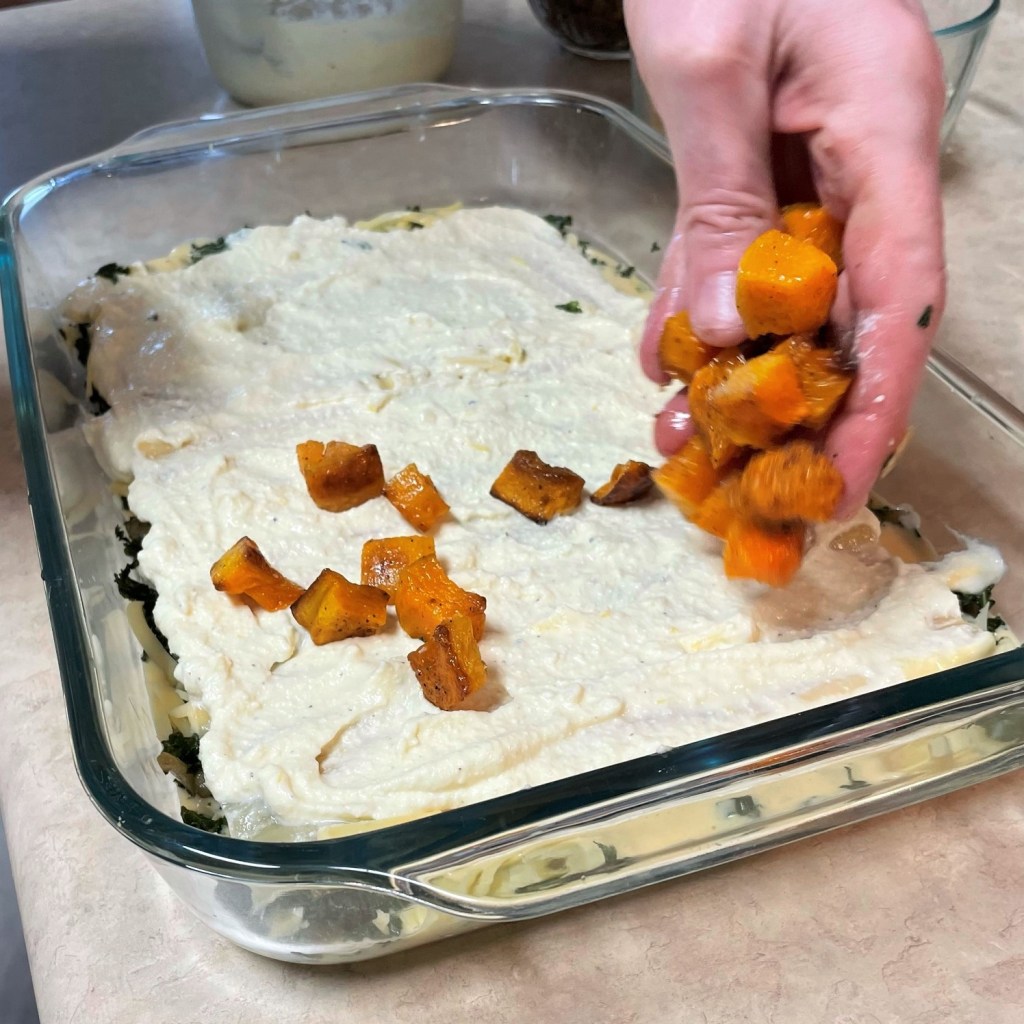
I am crazy about roasted butternut squash, and it is very high in beta carotene. There’s no harm in using lots of it in this layer.
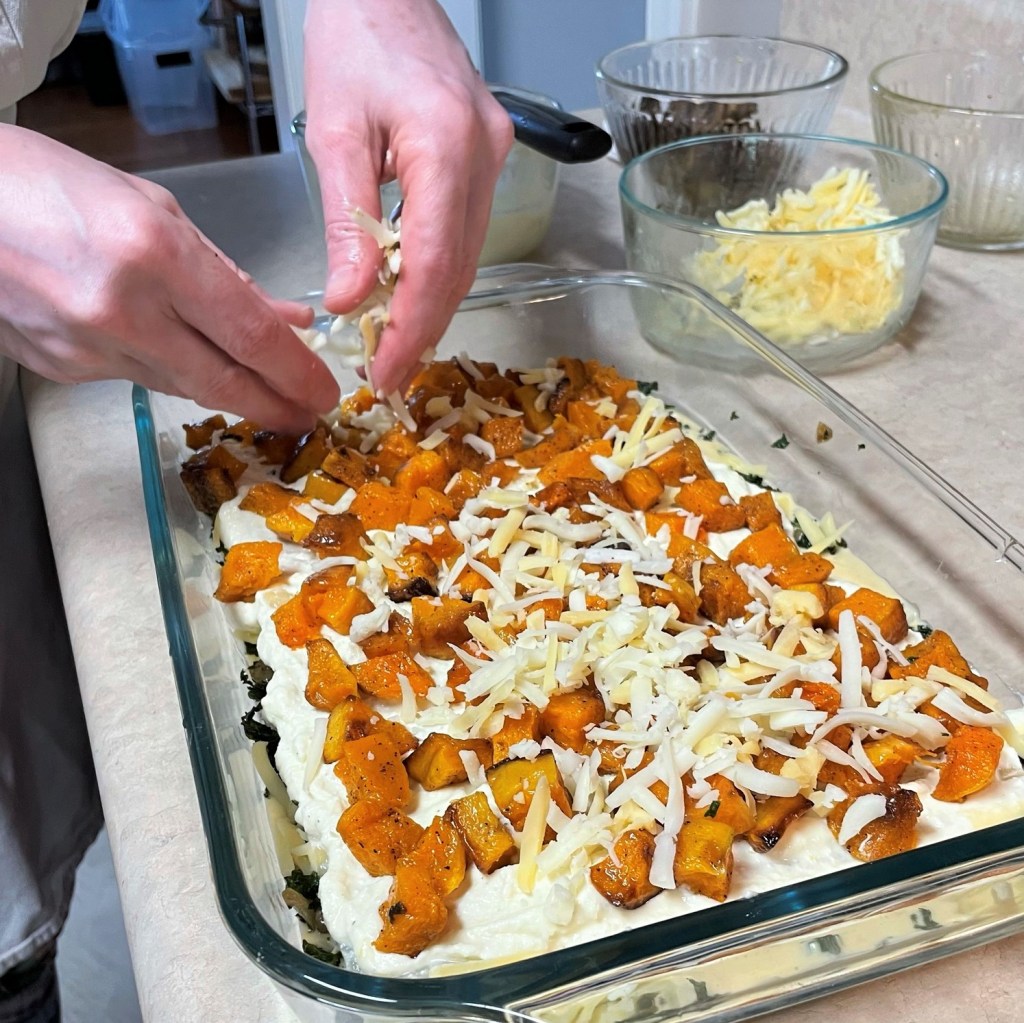
More shredded cheese, and a little more bechamel if you have enough. I reserved mine for the top layer this time.
The last of the ricotta goes on next.
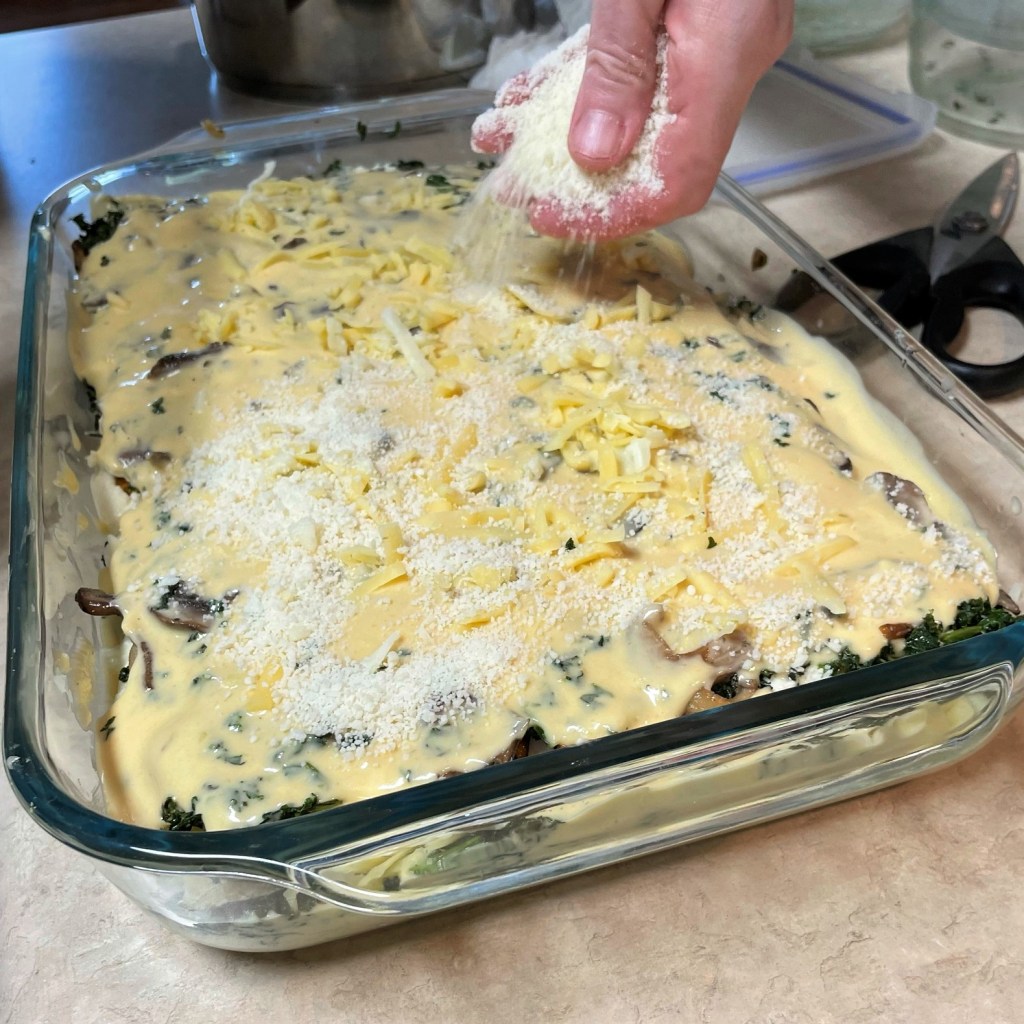
The final layer has the remaining kale-onion mixture and the browned mushroom slices. And, of course, the rest of the bechamel.
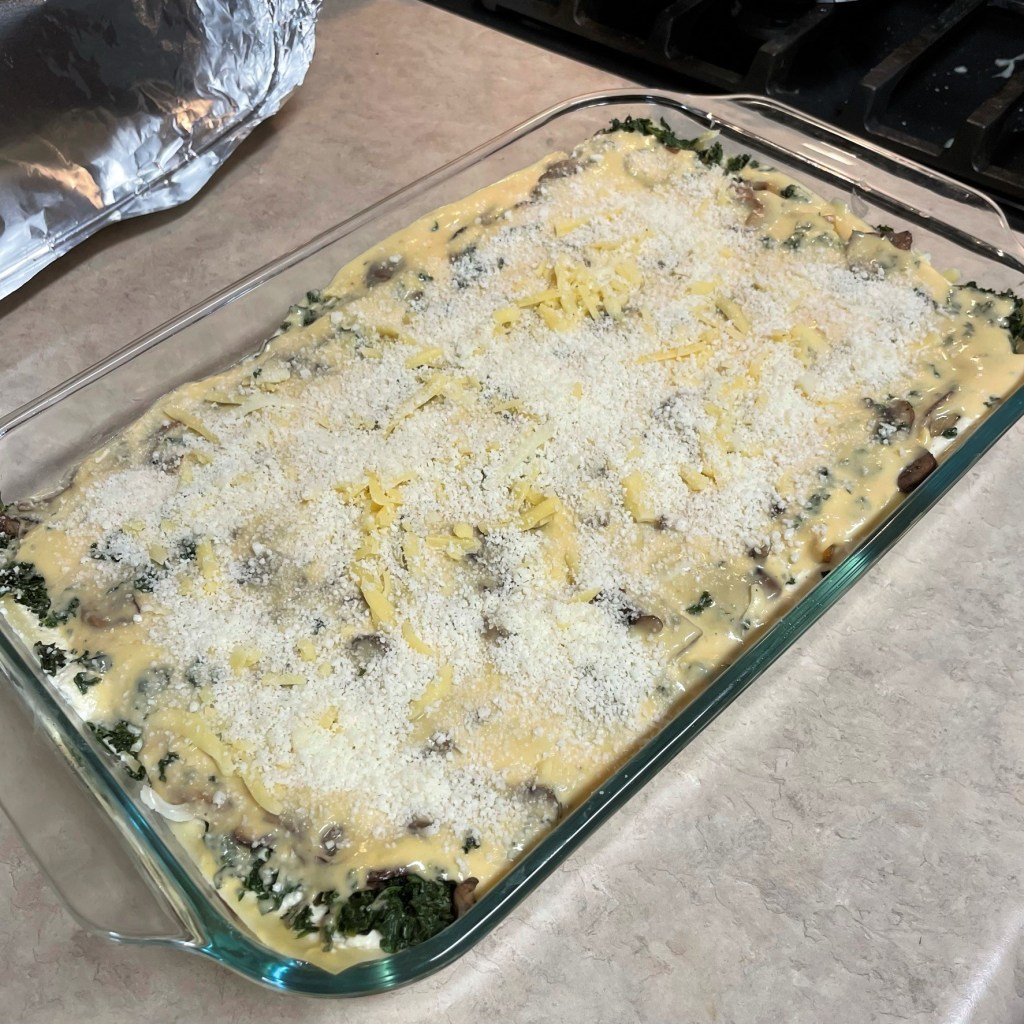
Scatter on the remaining shredded cheese, then a handful or two of parm-romano blend. Cover the dish with foil and let it rest for at least 30 minutes to help the noodles soften.
Remove the foil and bake the casserole at 350° F for about 45 minutes, until the filling is bubbling around the edges and the cheese is beautifully browned.
Happy fall, y’all! 🙂
Cover casserole with plastic wrap or foil and allow it to rest for at least 30 minutes, to give the noodles time to absorb some of the moisture from the other ingredients. Preheat oven to 350°F, with rack in center position.
Remove wrap or foil and bake about 45 minutes, or until layers are bubbly throughout and cheese on top is browned in several places.
Let the lasagna rest about 10 minutes before cutting and serving.
It does not seem possible that we are already heading into Labor Day weekend, the U.S. holiday that was established in 1894 to honor all the hard-working people whose efforts built social and economic strength for our country. But here we are, days away from the first Monday in September, and for most of us, that means an end-of-summer cookout, or at least some time in the great (hot) outdoors.
I promised a couple of weeks ago to present a few new ideas for easy salads that are perfect for backyard gatherings—I shared the tangy apple cole slaw, which brings a bit of tart fruit to the usual cabbage-and-carrots mix, and the tzatziki potato salad, leaning on the zesty flavors of a popular Greek condiment to bring some zip into one of our favorite summer sides.
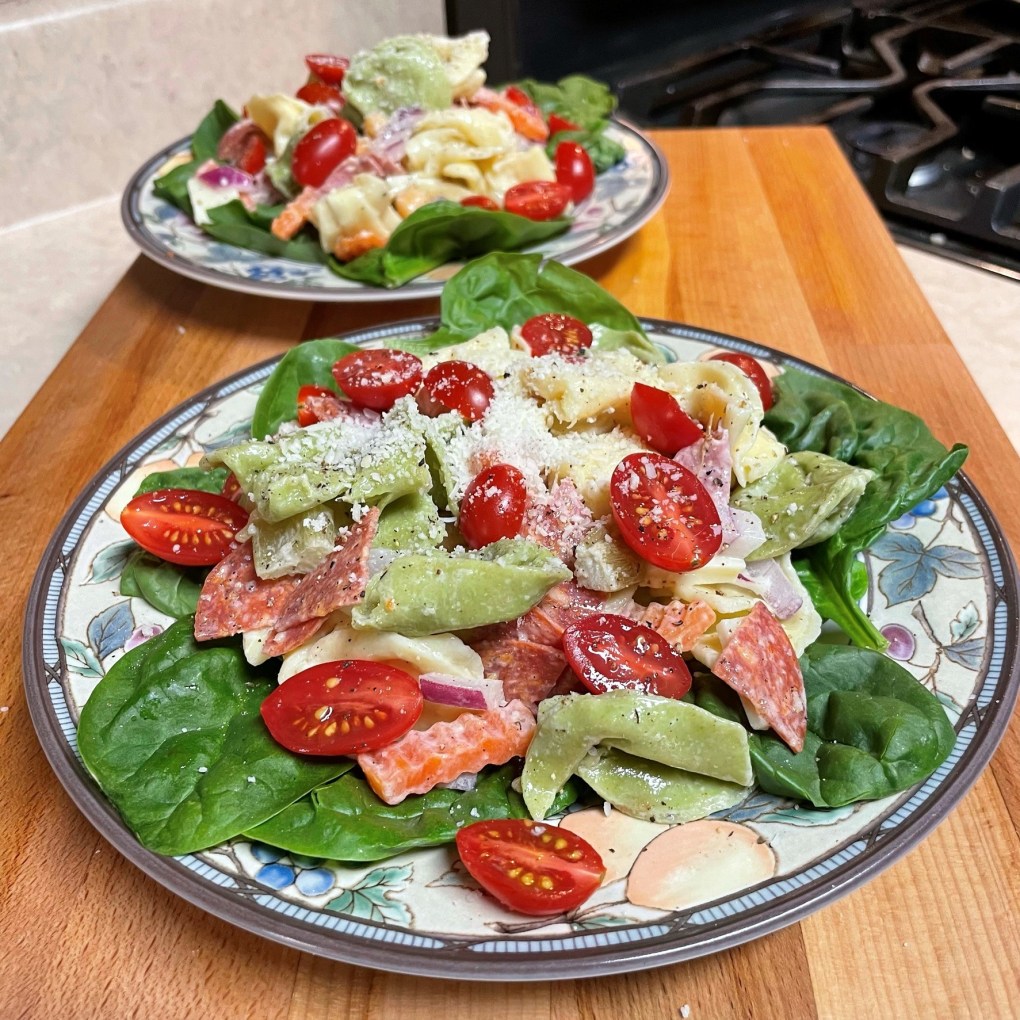
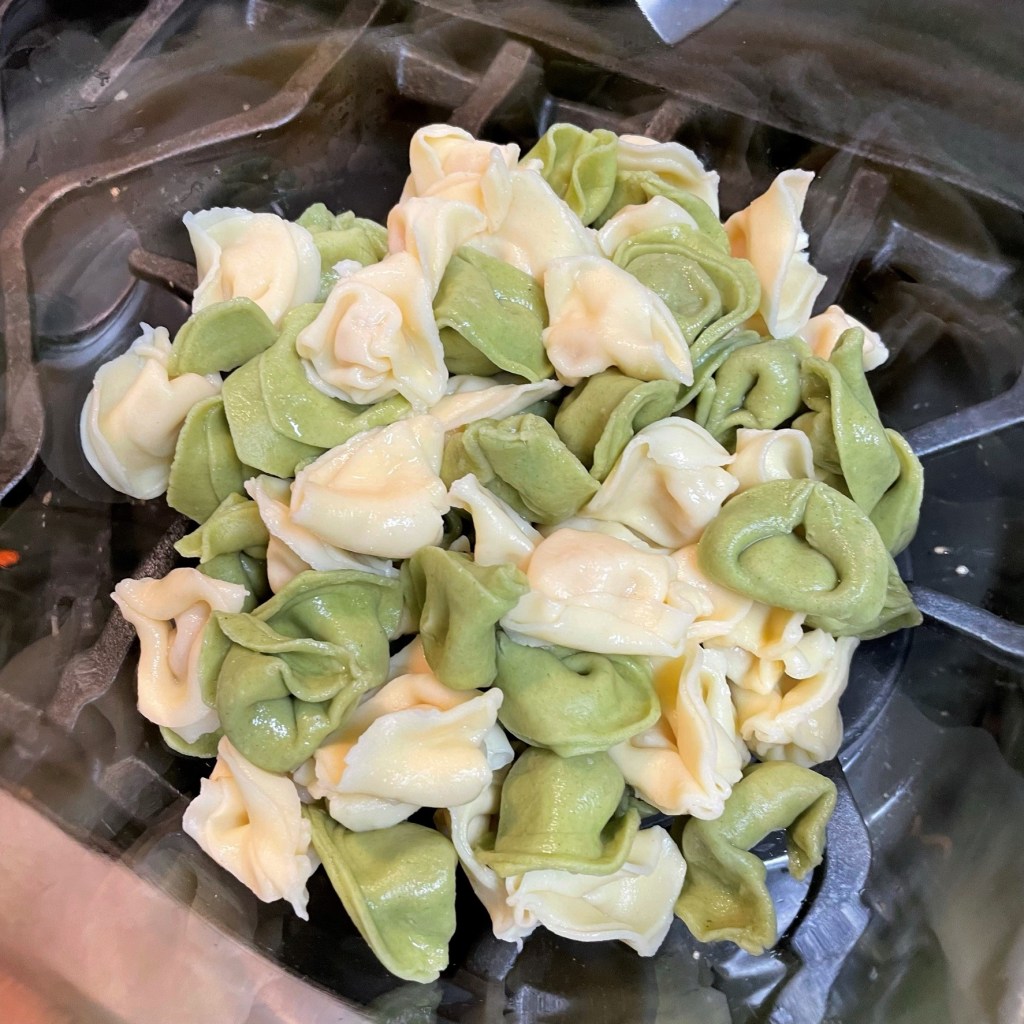
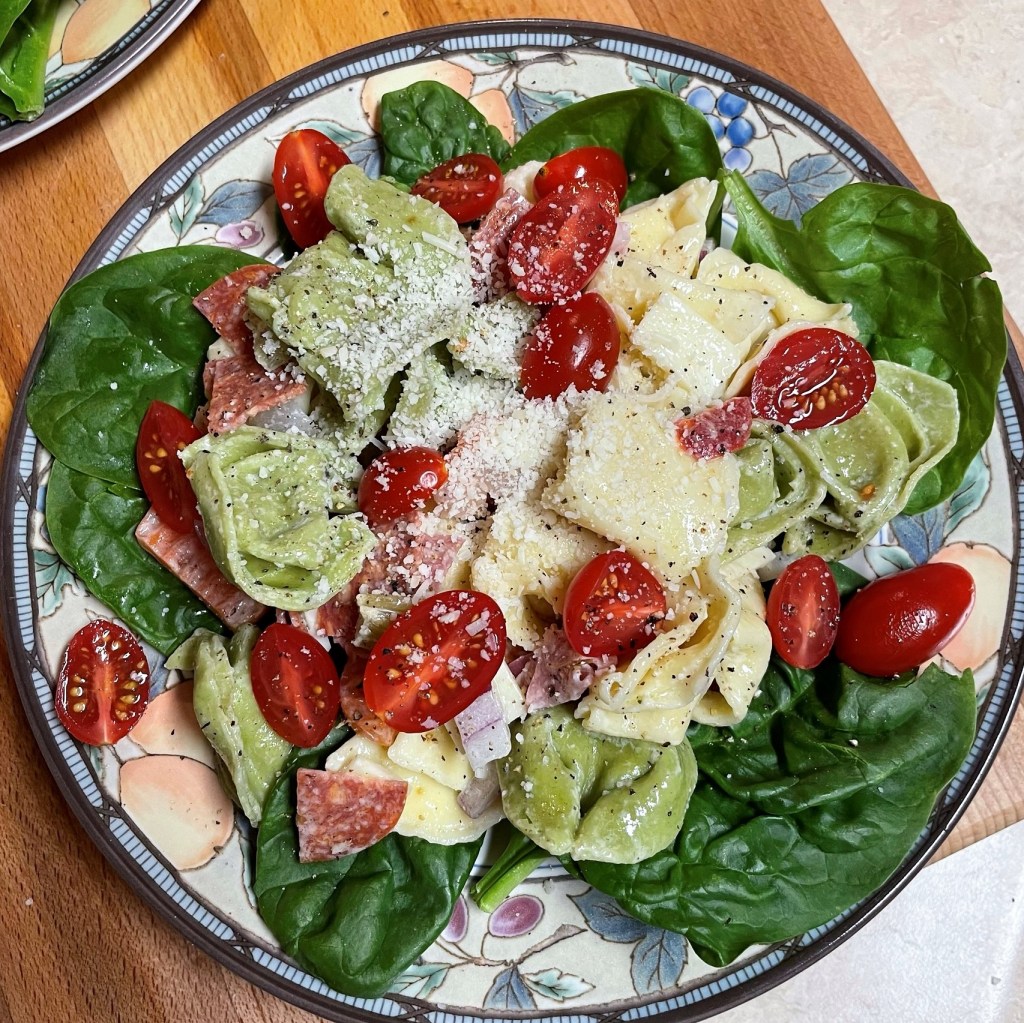
To make good on my promise for a twist on pasta salad, I let my imagination run wild through an Italian deli case and all the salty, meaty, cheesy flavors one might find there. Initially, I had planned to use a basic pasta shape, such as penne or rotini, but I stepped it up and used cheese-stuffed tortellini instead. The result is this hearty, satisfying salad that could be a side dish (if you have the discipline to only scoop out a little bit of it), but we found it perfectly filling as a cool dinner salad, served up on a bed of fresh baby spinach and topped with halved grape tomatoes.
Since the time that I made this hearty salad, I have had the pleasure of visiting a real Italian deli, so I expect that my next version of this salad might hold a few additional flavors, but this was a good, flavorful start. 🙂
Mangia!
A small scoop of this salad would be a good side, but a large scoop on a bed of baby spinach was hearty enough for dinner!
Ingredients
1/2 package fresh cheese-filled tortellini* (see notes)
2 Tbsp. mayonnaise (optional, see notes)
4 Tbsp. prepared Italian vinegar-and-oil dressing (I used Good Seasons)
Several slices provolone cheese, cut into bite-sized pieces
Several slices uncured Italian salami, cut into bite-sized pieces
Several slices uncured pepperoni, cut into bite-sized pieces
About 1 cup giardiniera vegetables*, drained well and chopped
1/2 can garbanzo (ceci) beans, drained
Handful of fresh grape tomatoes, halved
Fresh baby spinach, for plating
*Notes
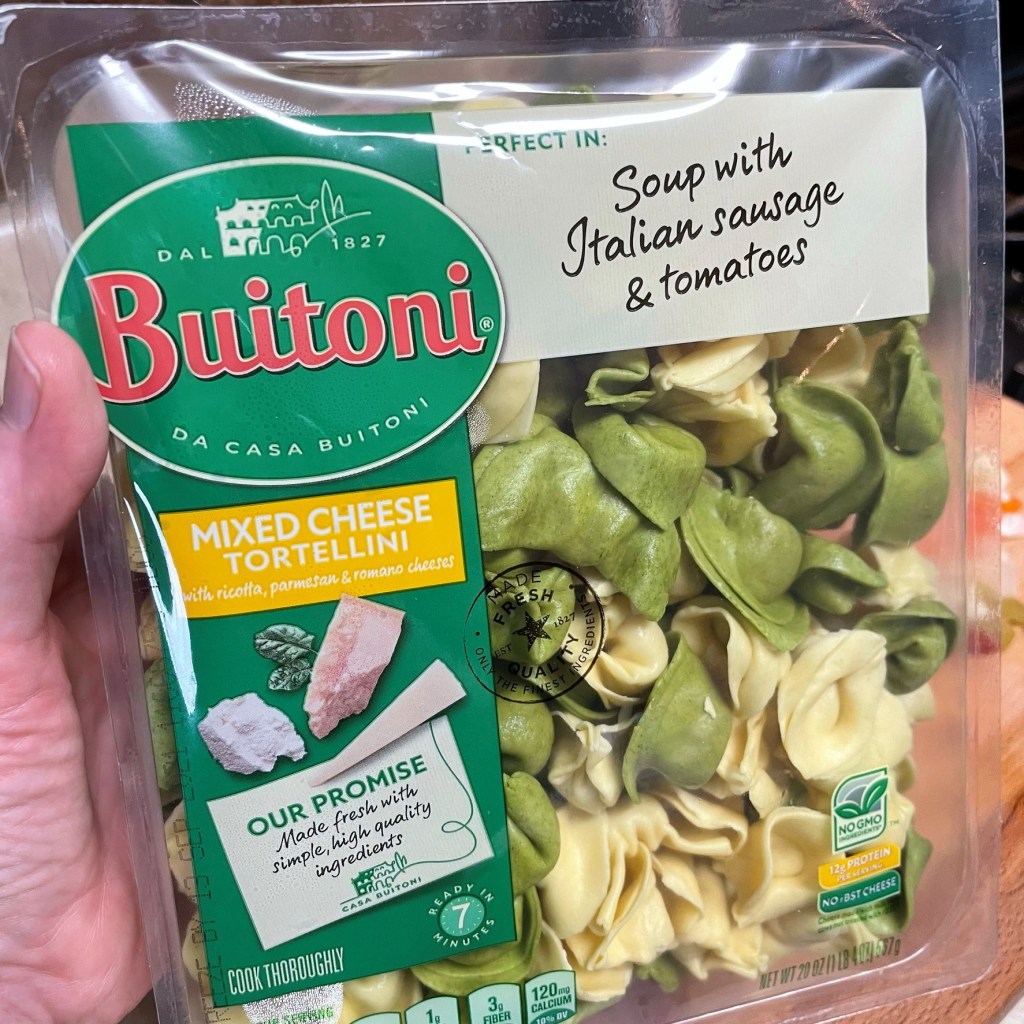
I used Buitoni fresh pasta, the kind you find in the refrigerated case near the ricotta cheese. Frozen tortellini would probably work well, too. Or you could go crazy and make it from scratch! If you want a lighter salad, substitute about half a box of penne or rotini pasta.
If you prefer a dressing that is not creamy, skip the mayonnaise and increase the Italian dressing by a tablespoon or two.
This was one of those times that I thought a store-bought ingredient would be “just as good” as a homemade one, but this giardiniera does not hold a candle to the one I make myself. Before fall officially begins, I promise I will share that recipe!
I used half of this 20 oz. package of tortellini. The rest will be wonderful in a soup.
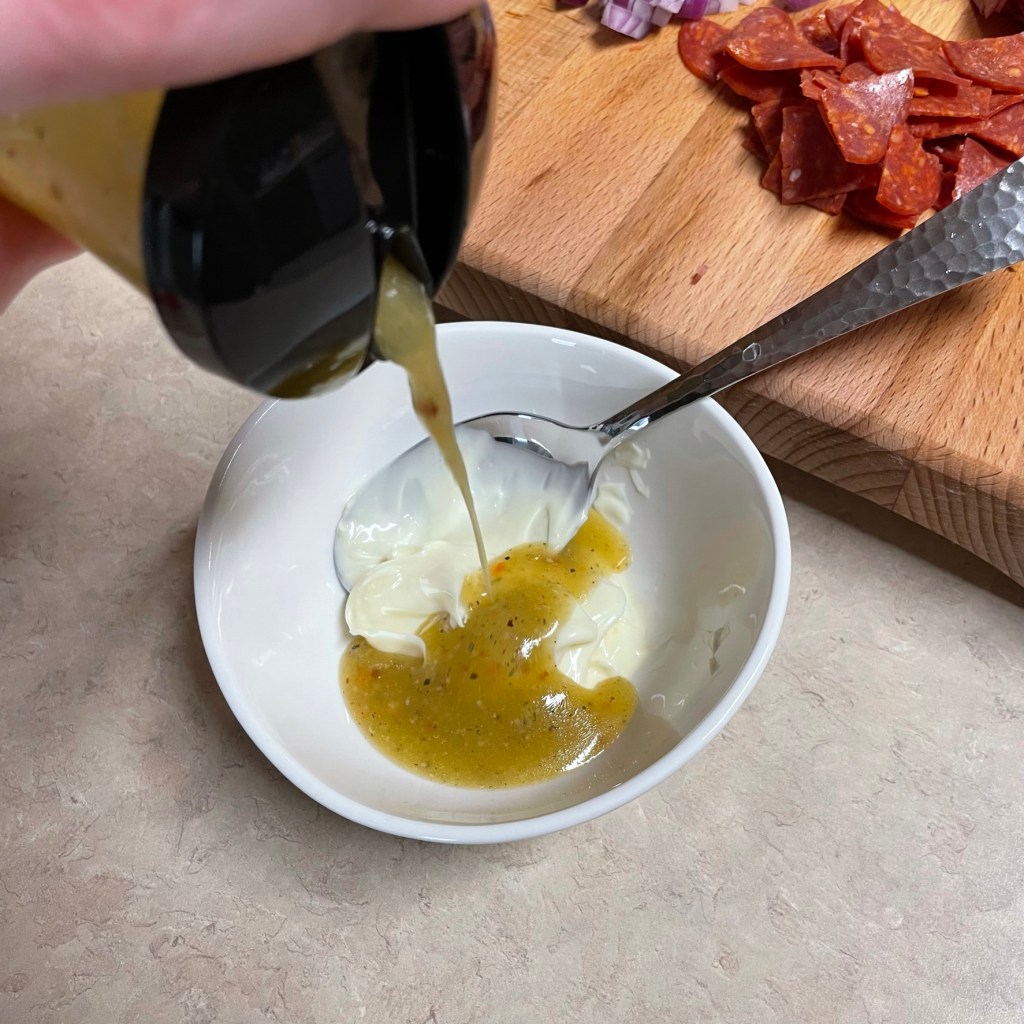
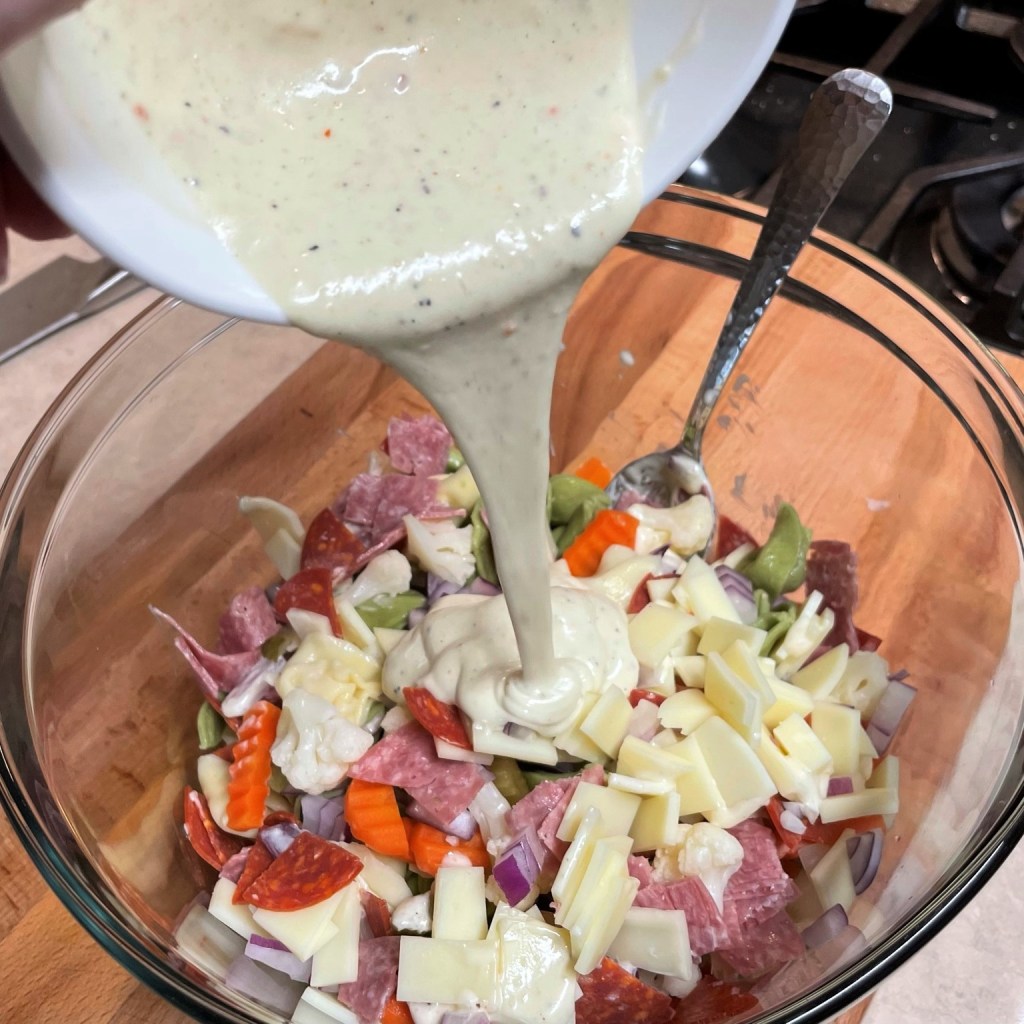
This salad would work with Italian dressing on its own, but I wanted a creamier version, so I mixed it with a couple of tablespoons of mayonnaise.
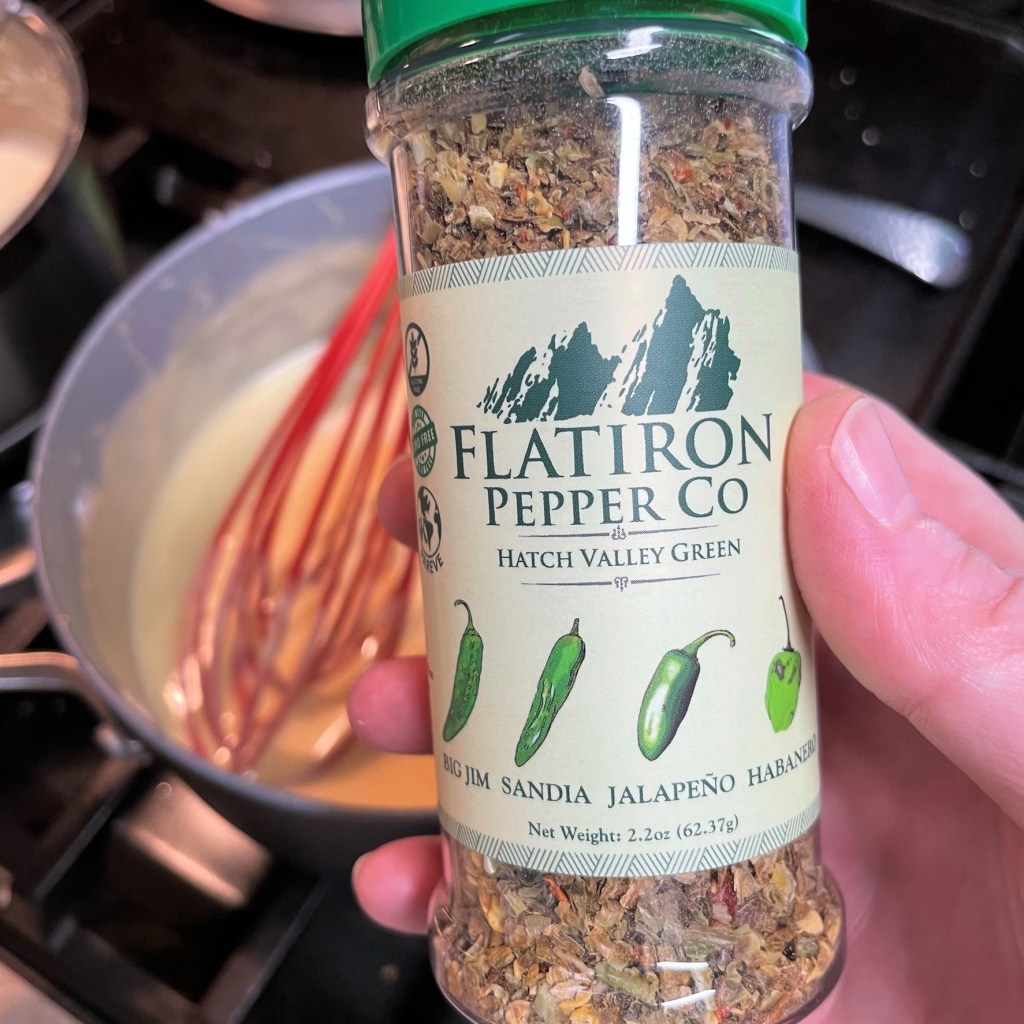
My supermarket only had a mild version of these Italian pickled vegetables, but spicy would be delicious.
Instructions
Cook the tortellini until just tender, then plunge them into ice water to abruptly stop the cooking. Drain it really well.
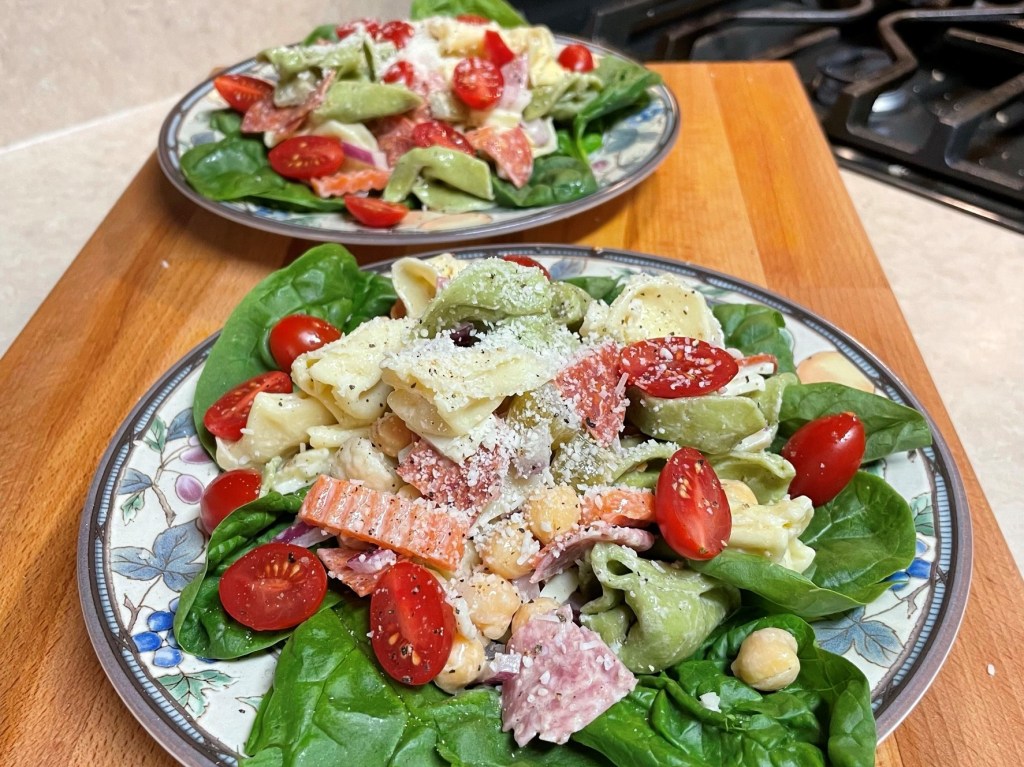
It’s easy to see why this salad was so hearty, with provolone cheese, giardiniera, salami, pepperoni and red onions.
Pour the Italian dressing over the salad ingredients and use a rubber spatula to gently fold the mix together.
I thought at first that I’d made the dressing too creamy, but the mayonnaise was absorbed pretty quickly into the tortellini.
Cook the fresh tortellini according to package instructions, stopping just shy of tender. Drain it, and then immediately transfer the cooked pillows to a bowl filled with ice water to halt the cooking. Drain completely, and if you have enough time, chill the pasta by itself for an hour or two before adding the other salad ingredients.
Prep all the other ingredients, along with anything else you think belongs in an Italian deli pasta salad. Be sure to drain any ingredients that are packed in water.
Combine mayonnaise and Italian dressing until smooth.
Toss the add-ins into the bowl with the cooked, chilled tortellini. Pour the dressing over the mix and gently fold with a spatula to combine and coat all the ingredients.
Chill for at least one hour before serving. I found that this salad was better the second day, because the cooked tortellini tightened up a bit.
Serve on a bed of baby spinach leaves, topped with halved grape tomatoes and a sprinkling of grated parm-romano cheese.
I tried to include all the great flavors of an Italian deli. Did I miss anything? 🙂
In our early months of getting to know each as slightly more than “just friends,” my husband, Les, and I took a road trip into southern Virginia for an afternoon of antiquing. He had been working on redecorating his living room and was on the search for an interesting accent table or other cool décor item. And mostly, we were both looking for new ways to hang out together.
Along the way, we found this funky table with an adjustable wooden top that screwed down into the base. It was not very practical, given that the three legs are not properly spaced out and it tipped over if you set something on it. But it was fun and different, and with a fresh coat of paint, it livened up his living space. We also stopped at a few roadside stands, browsing through fresh peaches, honey, jams and preserves, along with all varieties of handmade crafts.
The most fun thing about that day, though, was our visit to a Mexican restaurant called Chile Rojo, just inside the N.C. state line. The music and décor were lively, the food was delish and the company of this guy who once seemed so serious to me was just about the best thing going. Les and I met in a pool hall, where we both played in a 9-ball league, and our first impressions of each other (as is often the case with married couples) were not particularly positive. He thought I was flirty (for sure, I was) and a bit on the flighty side. I thought he was intense and without much sense of humor. I couldn’t have been more wrong about that second part, and it was interactions such as this road trip that really helped me see the relaxed, authentic side of this man who would, nearly two years later, become my husband.
It didn’t hurt that we both have a passion for great food and adventurous palates that make us open to trying each other’s favorite things. On this visit to Chile Rojo, his eyes scanned the menu, landing on their choriqueso dip, which he called “queso fundido.” It was a typical Mexican queso dip—creamy, melty and salty—but this one had spicy, crispy bits of chorizo sausage floating around in it, causing a flavor explosion in every bite. Truth be told, I had probably experienced this stuff at some point in my past, and maybe I had just never heard the name of it. But in the heat of that July evening, as Les and I sipped our Mexican lagers and enjoyed dragging our crispy warm tortilla chips through this queso fundido dip, everything seemed new and delicious.
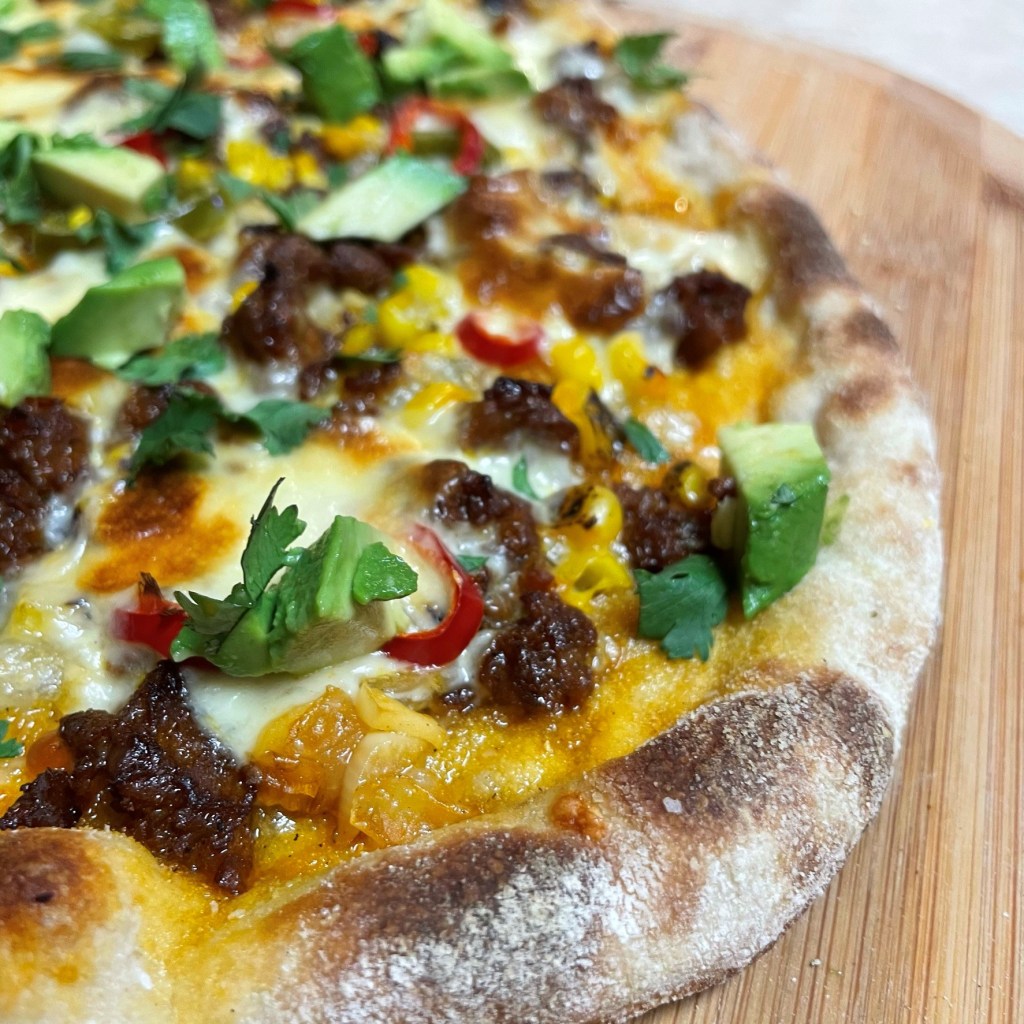
Inspired by the best choriqueso dip ever, we created a pizza that displays all the fiesta-fresh flavors of queso fundido!
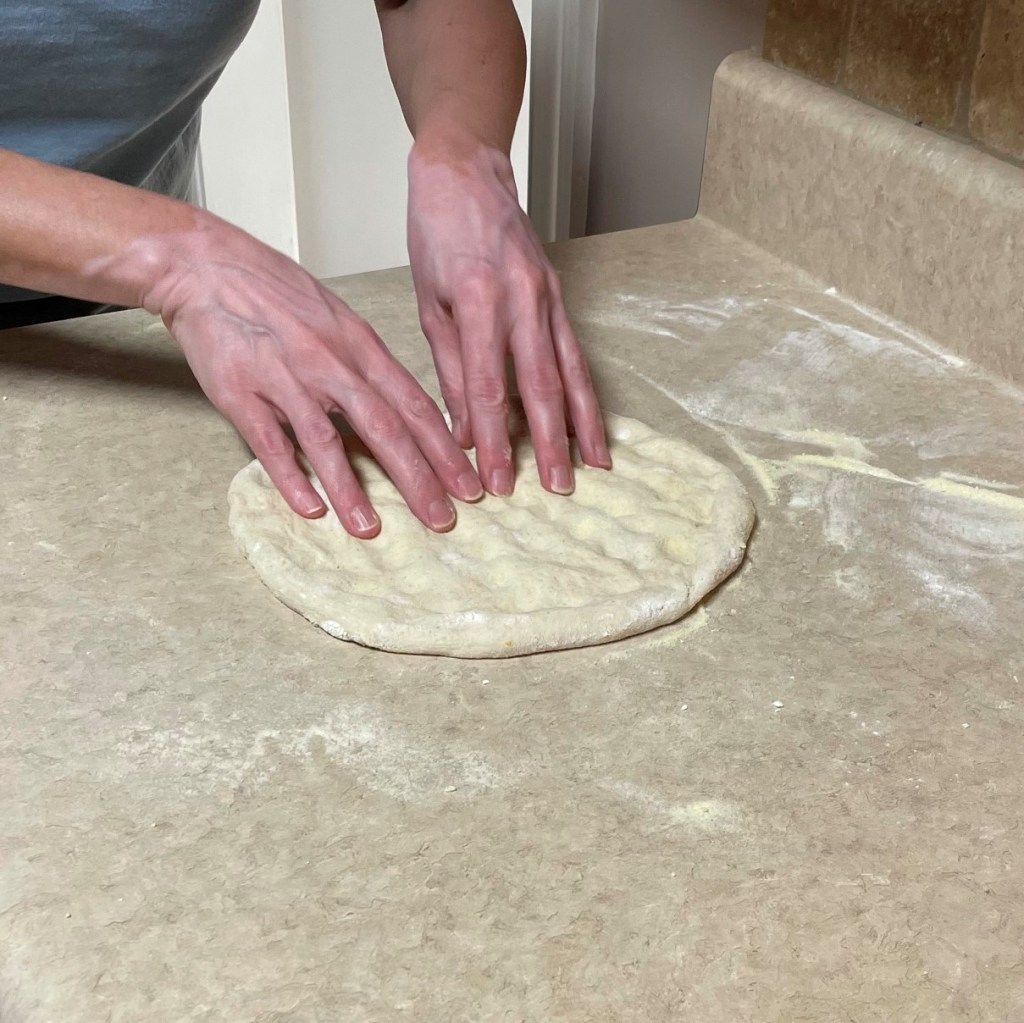
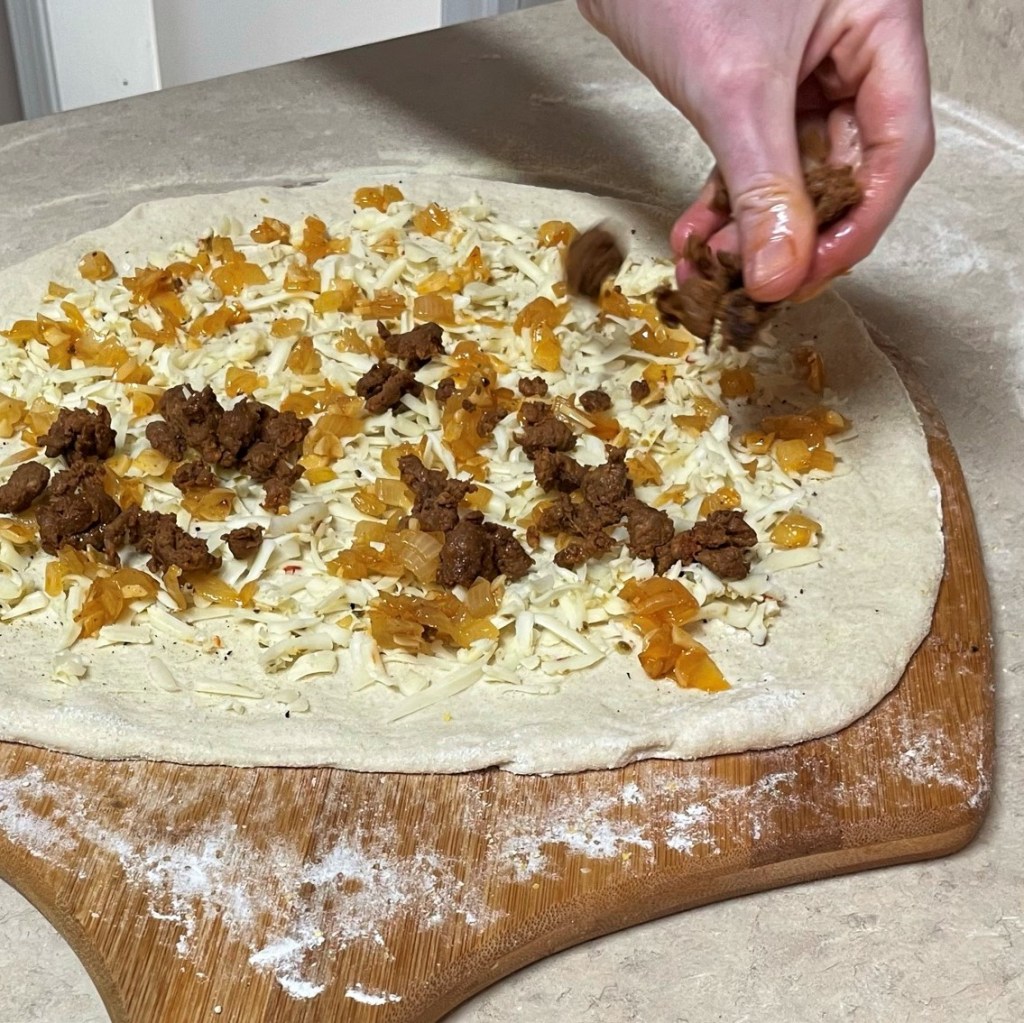
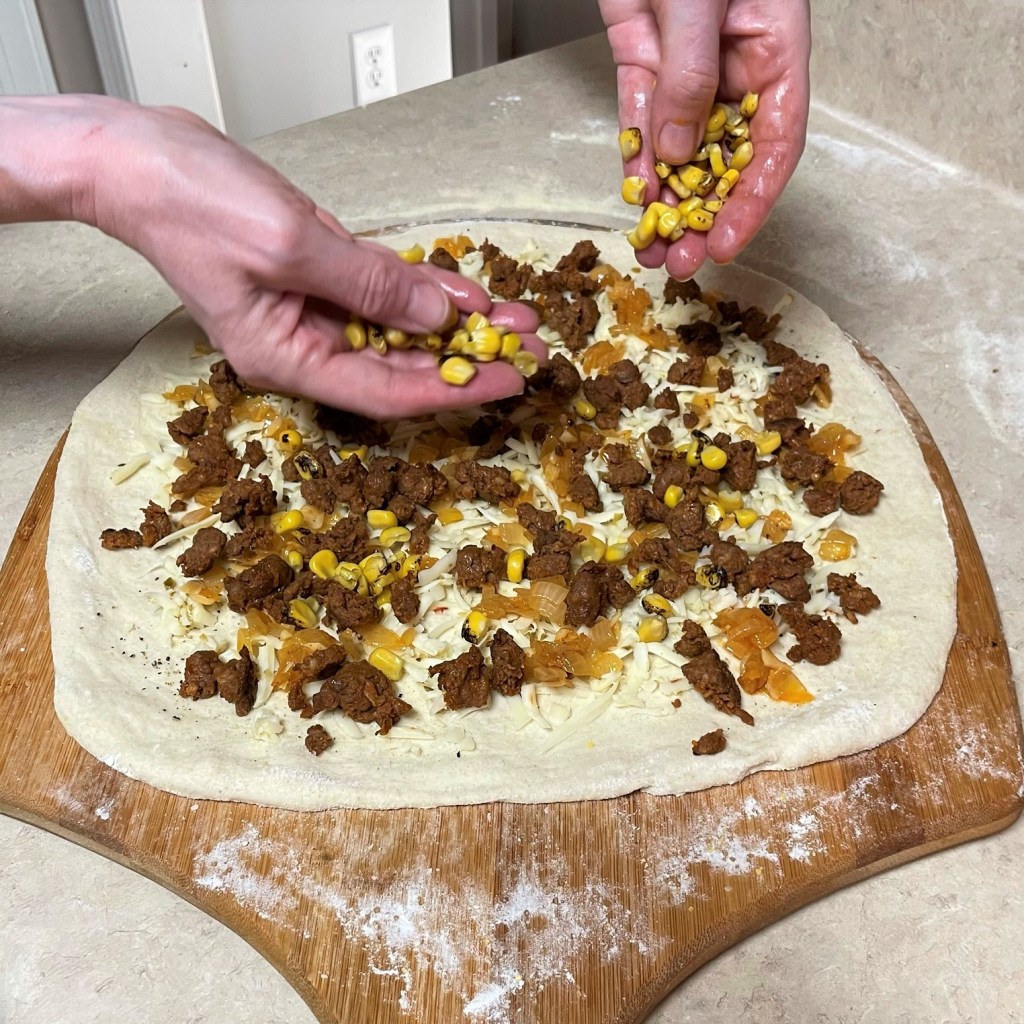
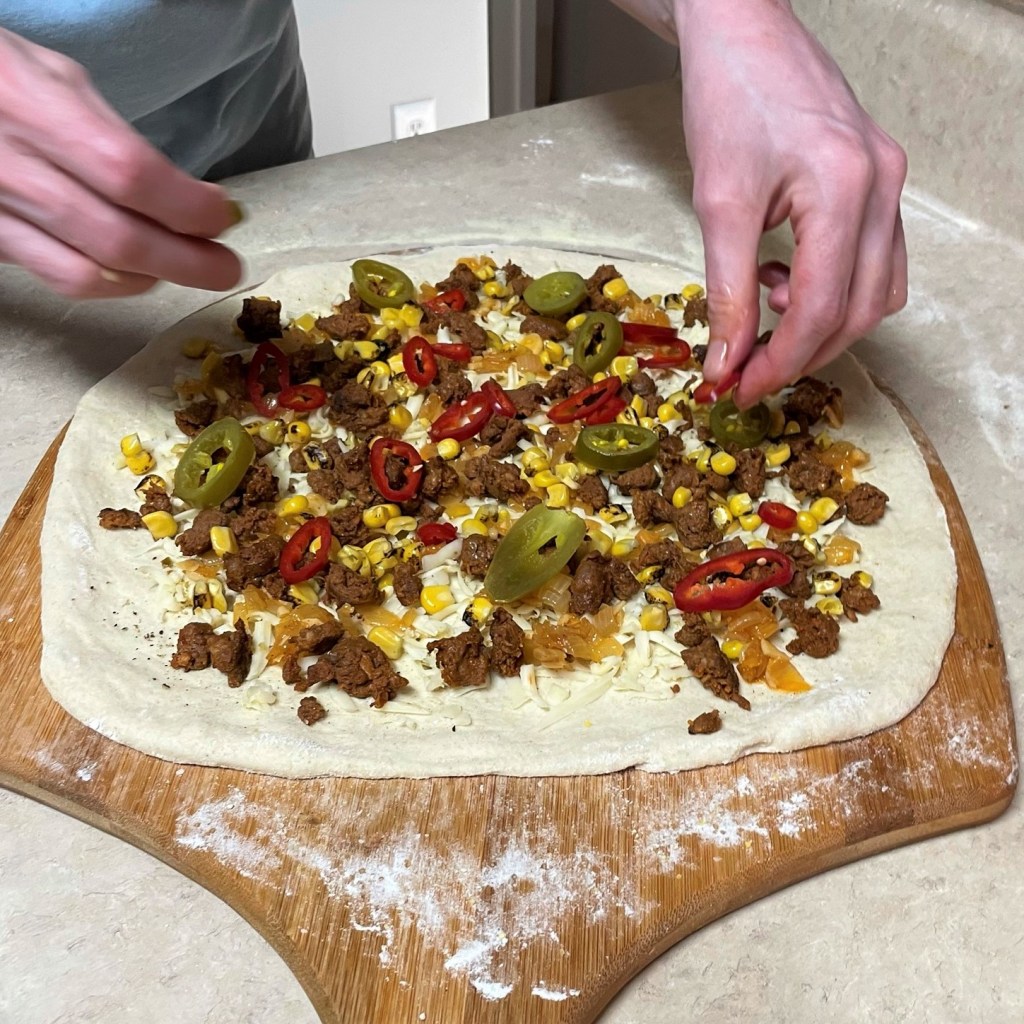
That first of many road trips for us as a couple is still on my mind whenever we order queso fundido, and in honor of Cinco de Mayo this week, Les and I decided to put those fabulous flavors onto a pizza. My Real N.Y. Pizza Dough went south of the border for the occasion, as I subbed in a portion of corn flour for the usual amount of whole wheat flour, a subtle nod to the tortilla chips we like so much. Shredded pepperjack cheese provided a base for the toppings. The chorizo sausage was browned up with chopped onions, and accompanied by fire-roasted corn, pickled jalapeno and fresh slices of fresno chiles. The hot oven transformed the dollops of melty queso dip into blistered patches of ooey-gooey deliciousness, and when we pulled the pizza from the hot steel, we topped it with cool cubes of avocado and fresh cilantro leaves. Like all of our adventures, this pizza was awesome.
Oh, and it turns out Les isn’t always so serious. Thank goodness, because neither am I. ❤
Me, being loco in love at Chile Rojo, 2015.
Ingredients
2 chorizo sausage links, casings removed
1/2 medium onion, chopped
1 cup cream, half and half or whole milk* (see notes)
3 oz. white American cheese, cubed*
2 oz. cheddar and pepperjack cheese combination
A few shakes Flatiron Pepper Co. hatch valley green chiles (optional, but wow)
1/2 cup fire-roasted corn (fresh or frozen)
Small handful pickled jalapenos, patted dry on paper towels
1 cup shredded pepper jack cheese (or Monterey Jack for less heat)
For serving:
1/2 avocado, cubed
Handful fresh cilantro, washed and chopped
Fresh squeeze of lime
*Notes
Depending on the type of dairy you use (cream, half and half or milk), you may need to adjust the ratio a bit. Cream, of course, has the highest fat content and whole milk has the lowest. I do not recommend 2% or skim milk for queso, as they don’t have the fat content to support the melted cheese. For readers abroad, “half and half” is a popular product in the U.S. that is essentially a 50/50 mix of cream and milk, and it amounts to about 12% milkfat.
I always use American cheese for its incredible meltability. I’m not sure if that is a word, but I think you understand my point! Regular cheddar has great flavor on its own, but without the special enzymes that exist in American cheese, a sauce made with only cheddar will break in the heat of the oven. I purchase American cheese in chunks at the deli counter of my supermarket, rather than the dairy aisle.
Our pizzas are baked on a steel, preheated at 550°F for an hour before baking. If you bake at a lower temperature, you will need to adjust baking time, and consider turning on the broiler for a brief minute at the end, to put a nice blister on the queso topping.
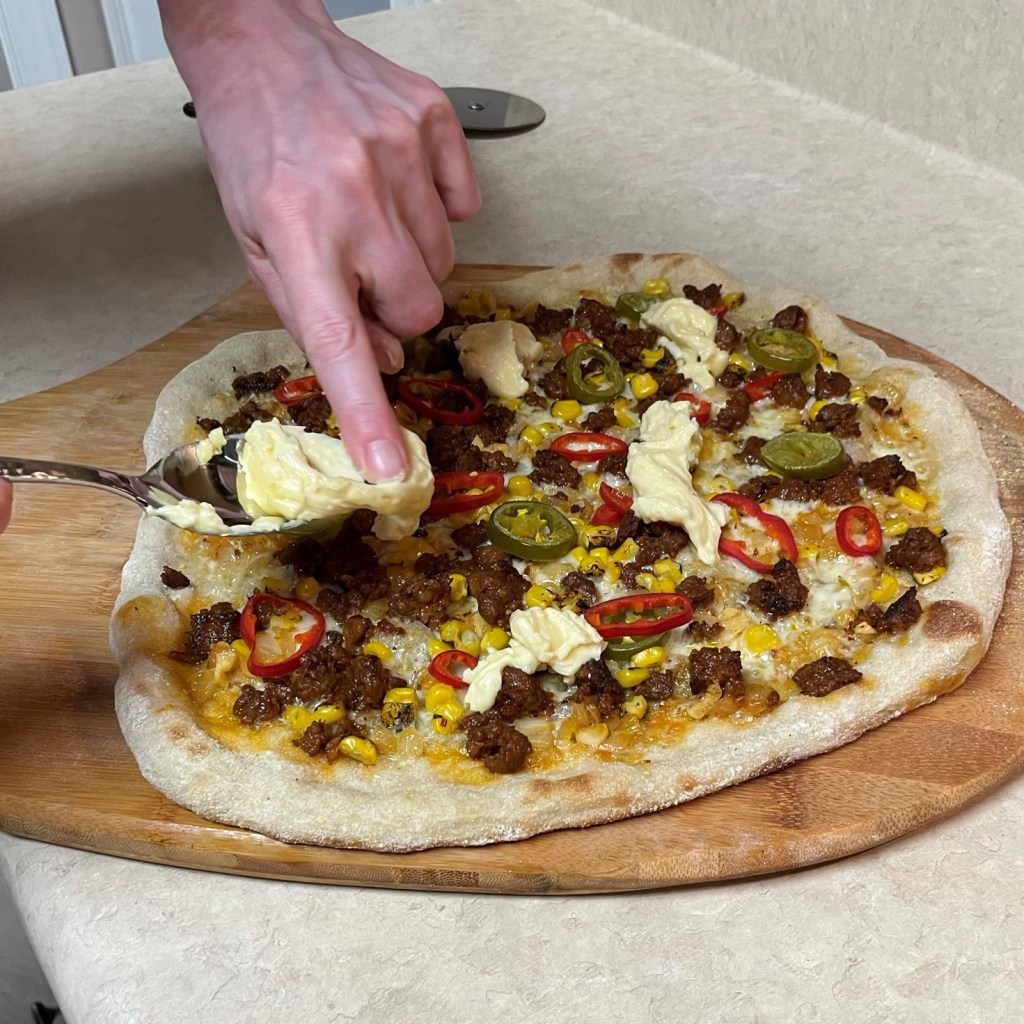
Note also that this pizza is par-baked before the queso dip is added, then returned to the oven for final browning. Do not add the queso at the start of the baking time, as it will burn and may prevent even cooking of the dough.
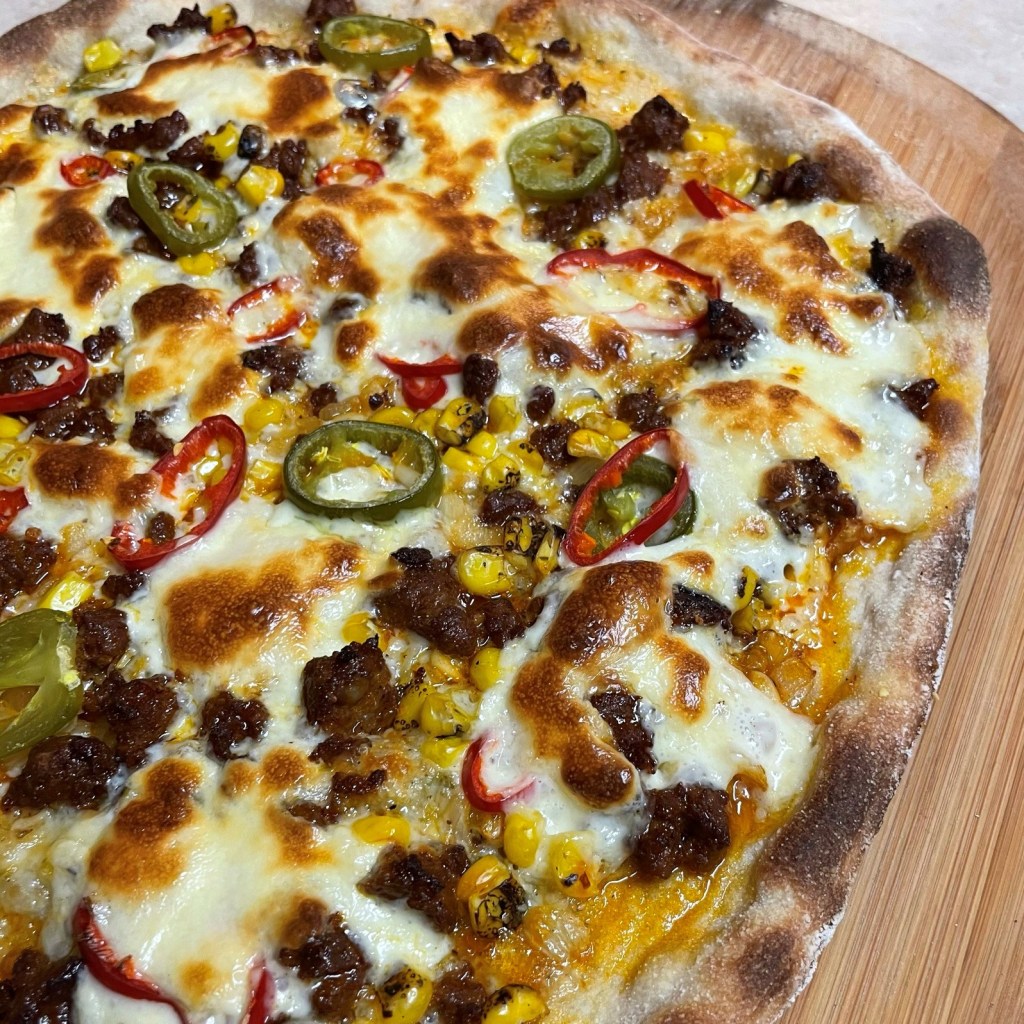
The queso is beautifully browned and creamy, and the chorizo crisped up a bit in the oven.
Instructions
First, the queso dip, which we love on its own, so we made more than we needed for this pizza. Without question, we will enjoy the rest on homemade nachos or just snacking with tortilla chips. If you make the queso ahead of time, note that it will become solid in the fridge. No worries, just warm on low heat to creamy consistency again, and cool to room temp for topping the pizza.
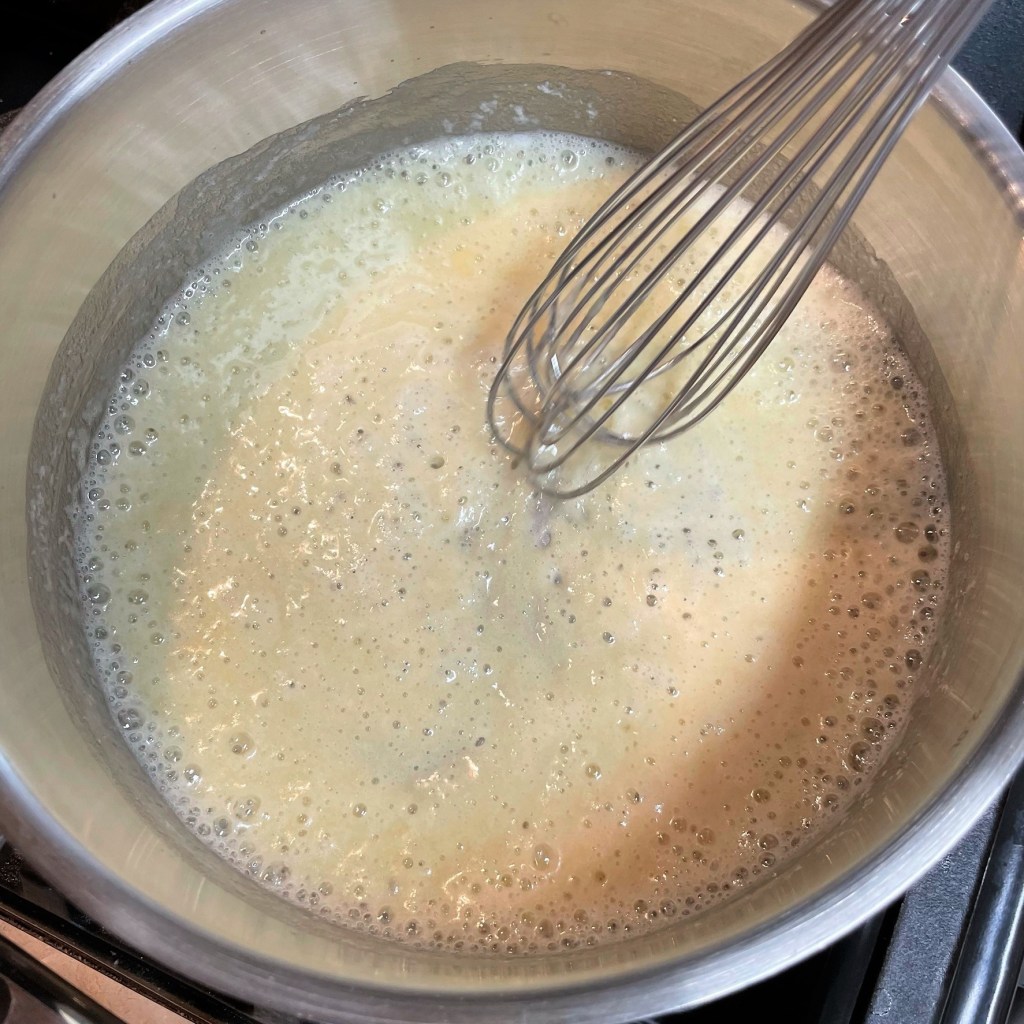
I usually use some amount of American cheese when I make a cheese sauce, because the special enzymes and salts make it super melty.
Whisk the American cheese and cream together until it is smooth and silky.
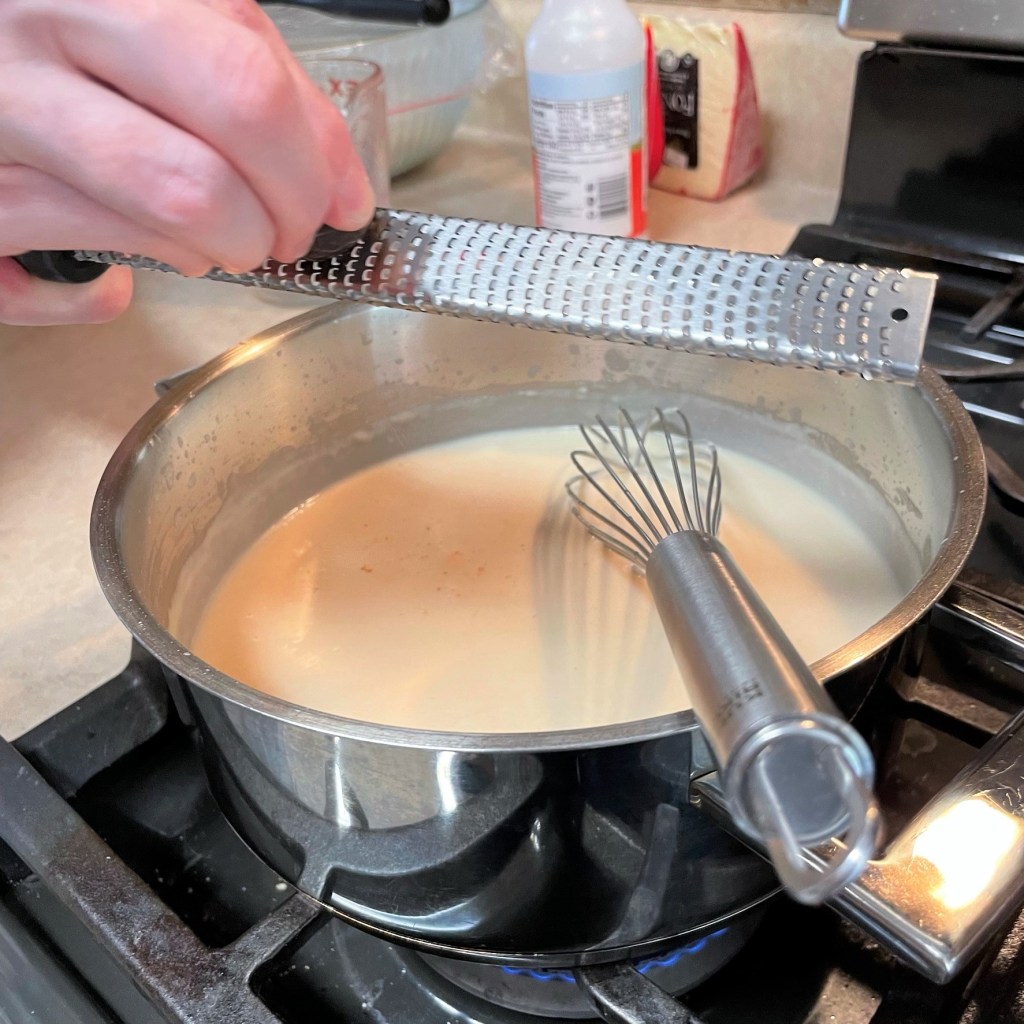
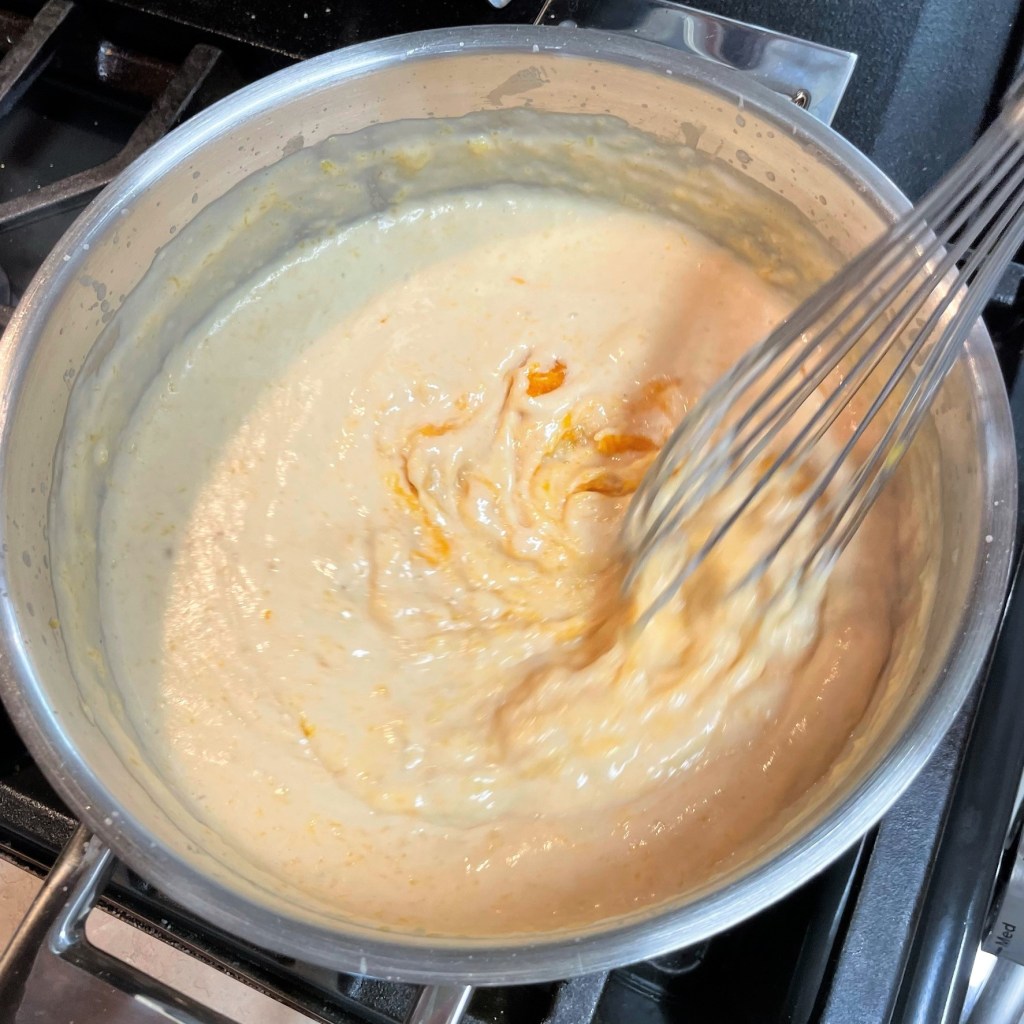
For color and added flavor, I tossed in a broken up slice of cheddar and a few chunks of spicy pepperjack, and whisked until this was smooth and melted.
And just for kicks, I sprinkled in a few quick shakes of this hatch valley green chile pepper. This company does not compensate me for my recommendation, but as much as we love and use their products, they should!
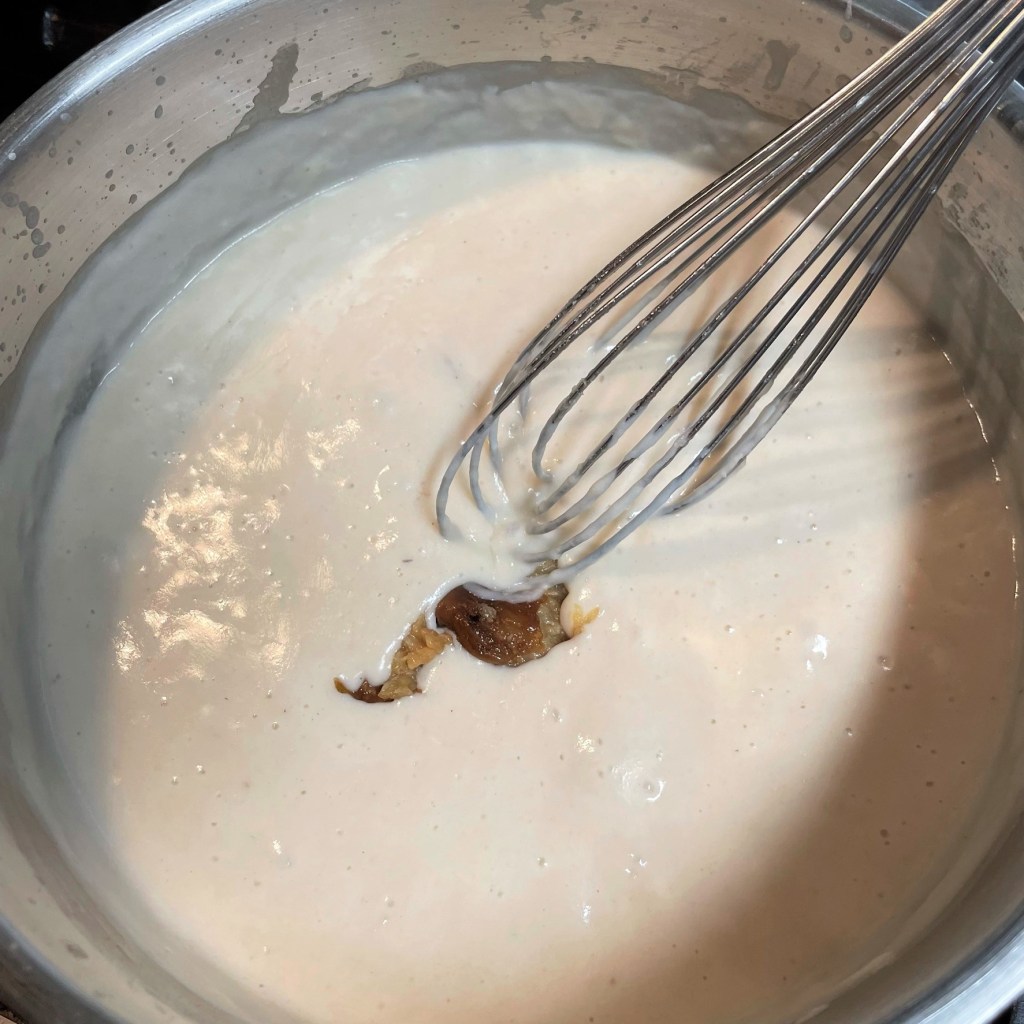
This is the right consistency; thick and creamy, but also smooth enough to ooze off my whisk. It will chill up solid in the fridge, so if you are working ahead, warm it up again before making the pizza.
When you are ready to make the pizza, preheat the oven to 550°F if using a steel, or the recommended temperature for your pizza stone. Your oven rack should be about 8 inches from the top of the oven. If you are using a pizza pan, place the rack in the lower third of the oven to ensure thorough baking of the crust, and plan to adjust your baking time.
And now, the rest of the pizza!
Never use a rolling pin on your pizza dough. Try to keep some of the air bubbles in the dough for a lighter, crispier crust texture. See my previous post for N.Y. Pizza Dough for more shaping tips.
Spray or brush the crust with oil, then season with salt and pepper before adding a layer of pepperjack down as the base for other toppings.
The onions and chorizo are next. You can see how much of the chorizo flavor was cooked into those onions!
Add roasted corn, if you wish. Mine was frozen but thawed first.
We love spicy stuff at our house, but if you prefer, top the pizza with sliced sweet peppers. We used fresh Fresno chiles and pickled hot jalapenos.
Par-bake the pizza for about four minutes, then pull it out to apply dollops of the queso dip. When cooled to room temp, you should expect it to be somewhat clumpy. Then, back into the oven for three more minutes!
Queso fundido, indeed-o!
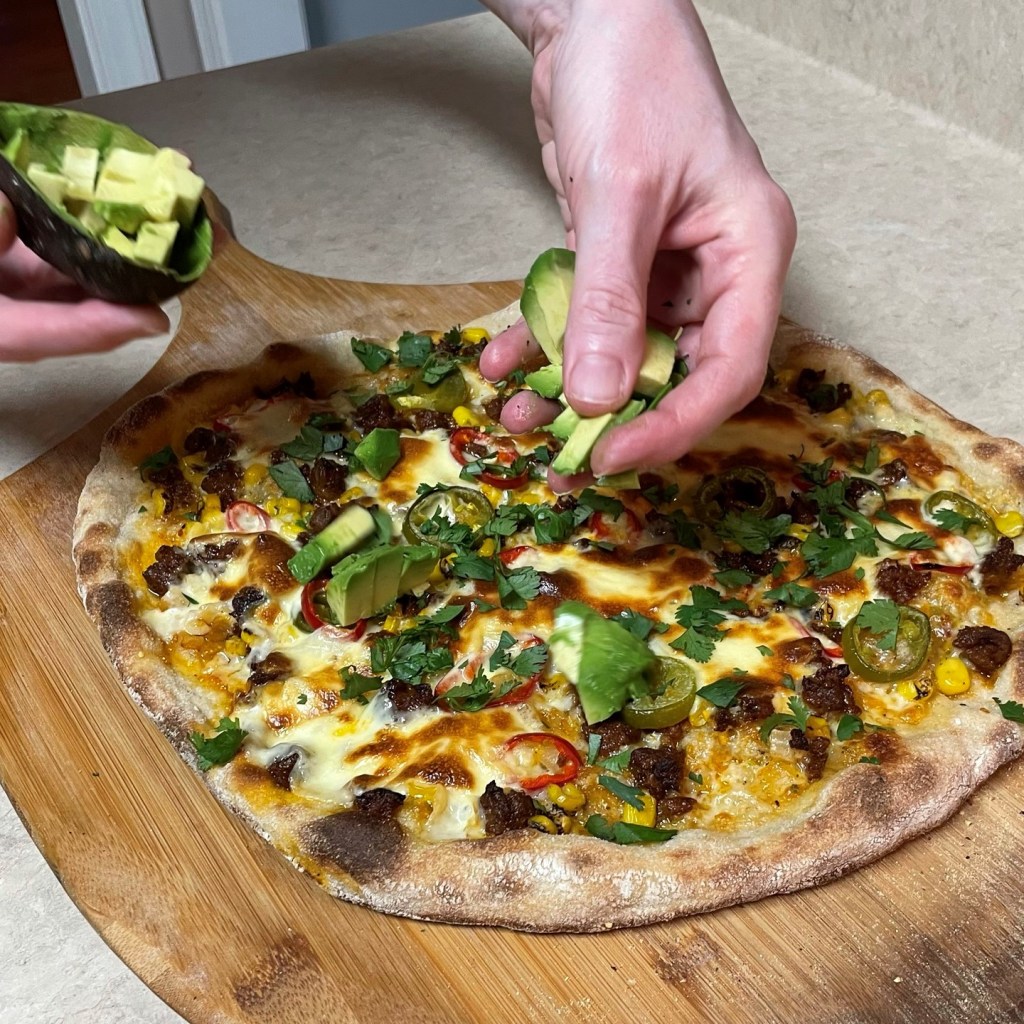
The pizza would have been delicious as it was, but we could not resist adding a sprinkle of fresh chopped cilantro and cool cubes of avocado for serving.
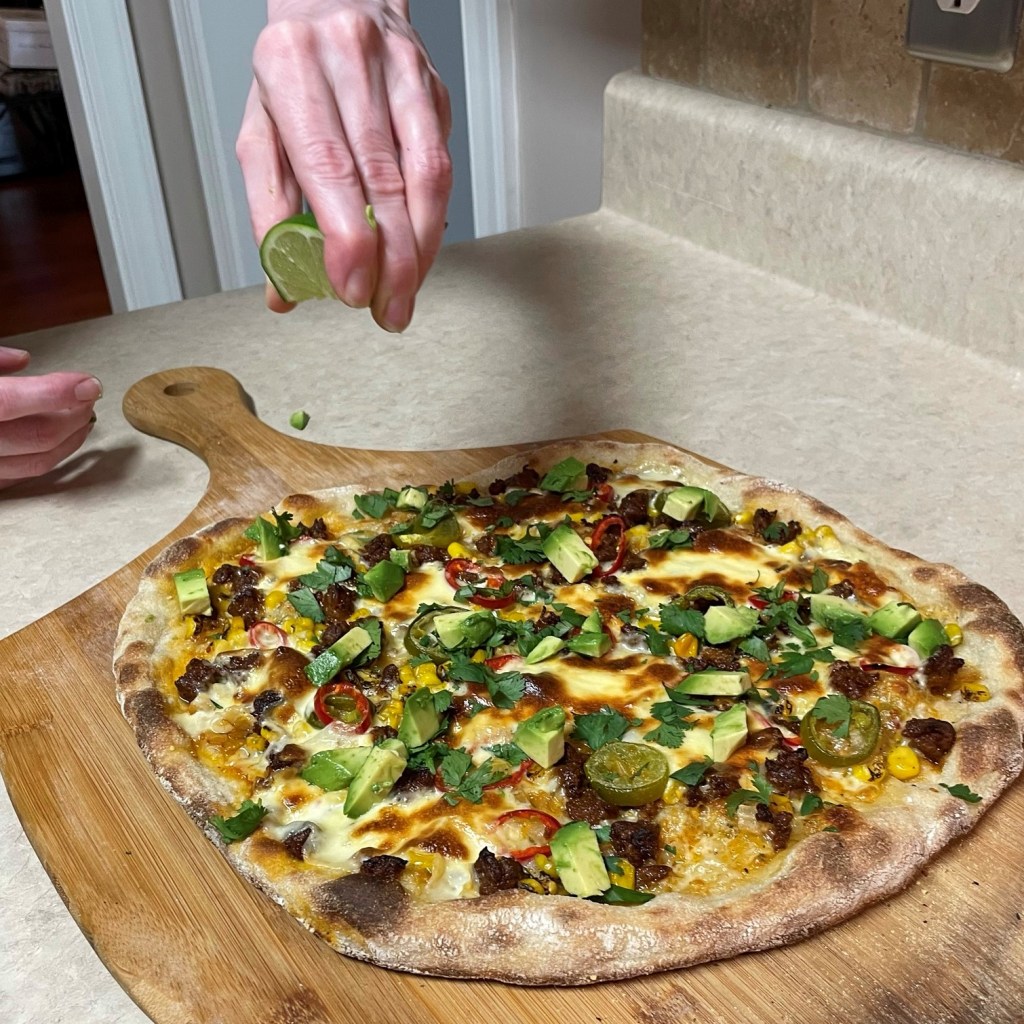
And a quick squeeze of fresh lime makes this pizza a fiesta on a plate!
This was one of our best-ever unconventional pizzas!